
Here is the 4th installment of the guest blog post series by my talented friend Wendy Hill on the awesome quilt she made during quarantine with the four rambunctious boys next door (aka “The Boys”) ages 2 – 8. Wendy has a background in teaching (and quilt book writing) and in this post she provides details on her process of basting, quilting and binding one GIGANTIC Quarantine Quilt!
If you are just joining us, see these posts for Parts I, II and III of the story by Wendy:
- Quarantine Quilt Project: Life in the Time of Coronavirus, Part I (Guest Blog Post)
- Quarantine Quilt Project: Life in the Time of Coronavirus, Part II (Guest Blog Post)
- Quarantine Quilt Project: Life in the Time of Coronavirus, Part III (Guest Blog Post)
Quarantine Quilt Project: Life in the Time of Coronavirus
Part IV: Basting, Quilting & Binding The Gigantic Quilt
If you’ve been following along, you know that my collaboration with The Boys next door led to a gigantic quilt top measuring 82” by 104”, and a quilt back 84” by 106”. Time to baste and quilt this monster-sized quilt!!
Basting
Basting is a two-step process for me: spray baste first with Odif 505 Temporary Adhesive followed by stitching a large grid with water soluble thread by Superior (Vanish Lite). This foolproof method lets me quilt without any problems.
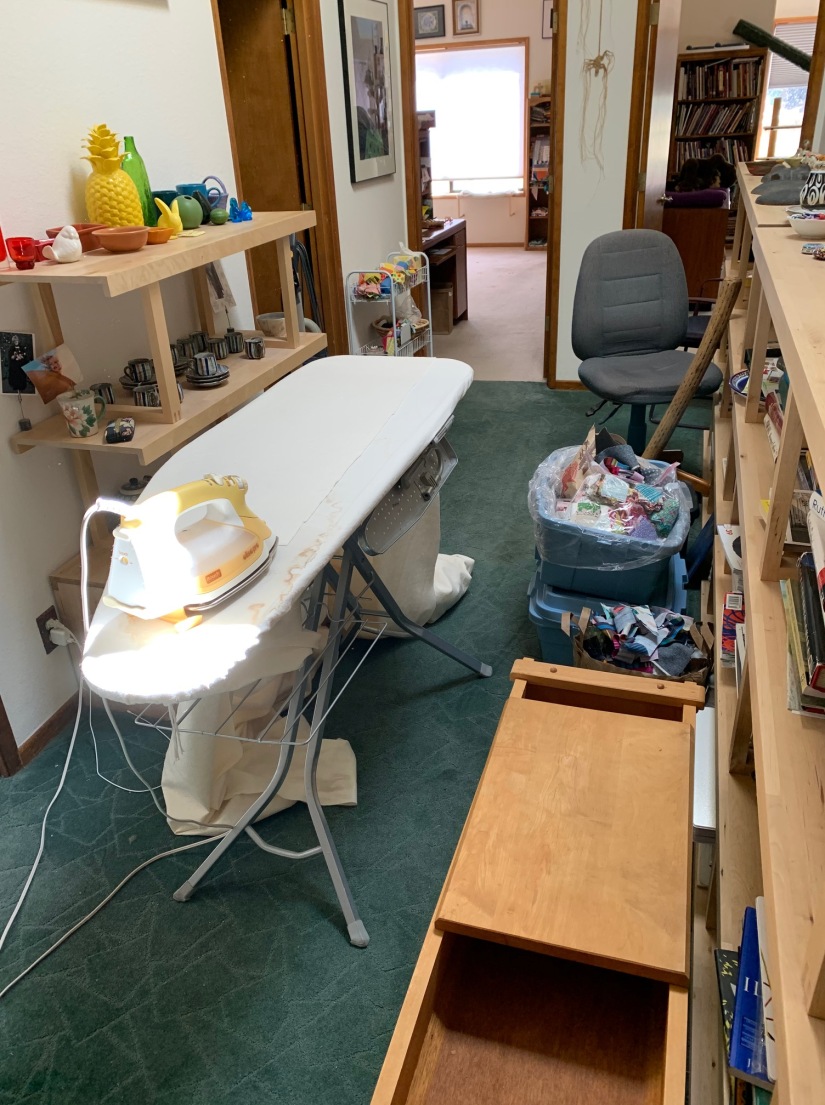
But first, I have to clear the sewing room. After ironing the batting to smooth out any creases, I tape the batting to the floor to hold it in place.

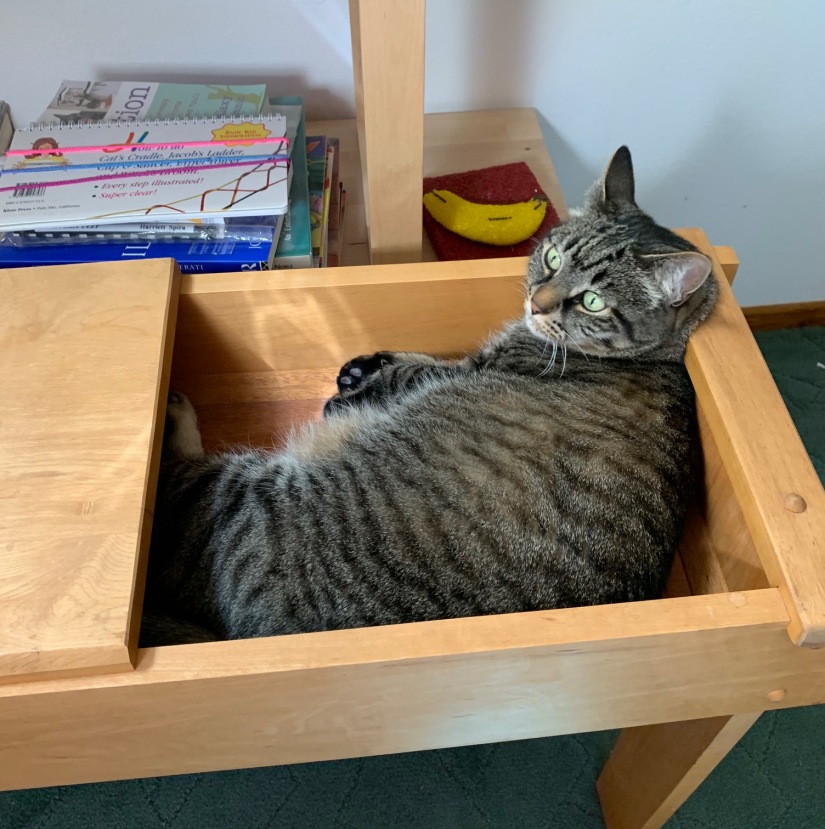
 We had to navigate the crowded hallway for a day or two, but the cats loved exploring this new-to-them space.
 With the quilt back centered on the batting, the window open, the ceiling fan on low, and paper around the edge to catch any over spray, I’m ready to baste.
 I can baste any size quilt with my “assistant”: a swim noodle. (My assistant never complains but getting up off the floor is another story!)
Roll up half the quilt onto the swim noodle. Spray a light coat from side to side, covering about 15” from the rolled up quilt towards you. Unroll the quilt over the sprayed area, smoothing as you go. Here is a photo of a different quilt ready to spray, unroll, and smooth.
 Repeat to spray baste both halves of the quilt. Trim the excess batting along the fabric edge. Allow to dry for a few hours or overnight before turning over and taping the quilt to the floor.
With the quilt front centered on the batting, repeat the steps above to spray baste. Allow to dry.
 With both ends of the quilt rolled up to the middle, I stitched lines about 3”-4” apart with the water soluble thread, from the middle to the edge. Repeat with the other half. Re-roll the quilt in the other direction, stitching perpendicular lines about 3”-4” apart.
A bonus benefit is the way these stitching lines change how the quilt handles, making it easier to do the actual quilting lines.


Tips for Using Any Spray Baste
- Ventilate the room.
- Cover up to prevent overspray on unwanted places.
- Hold the can at least 12” away from the surface.
- Keep the can moving from side to side- do not soak the batting.
- After the layers are basted, allow time for the spray baste to dry & set.
- It will evaporate out, especially in dry climates. Another reason for stitching a water soluble thread grid is to buy time before you start quilting.
Quilting
I like using roughly parallel quilting lines, but with a quilt this size, this will be the easiest thing for me to do on my home sewing machine.
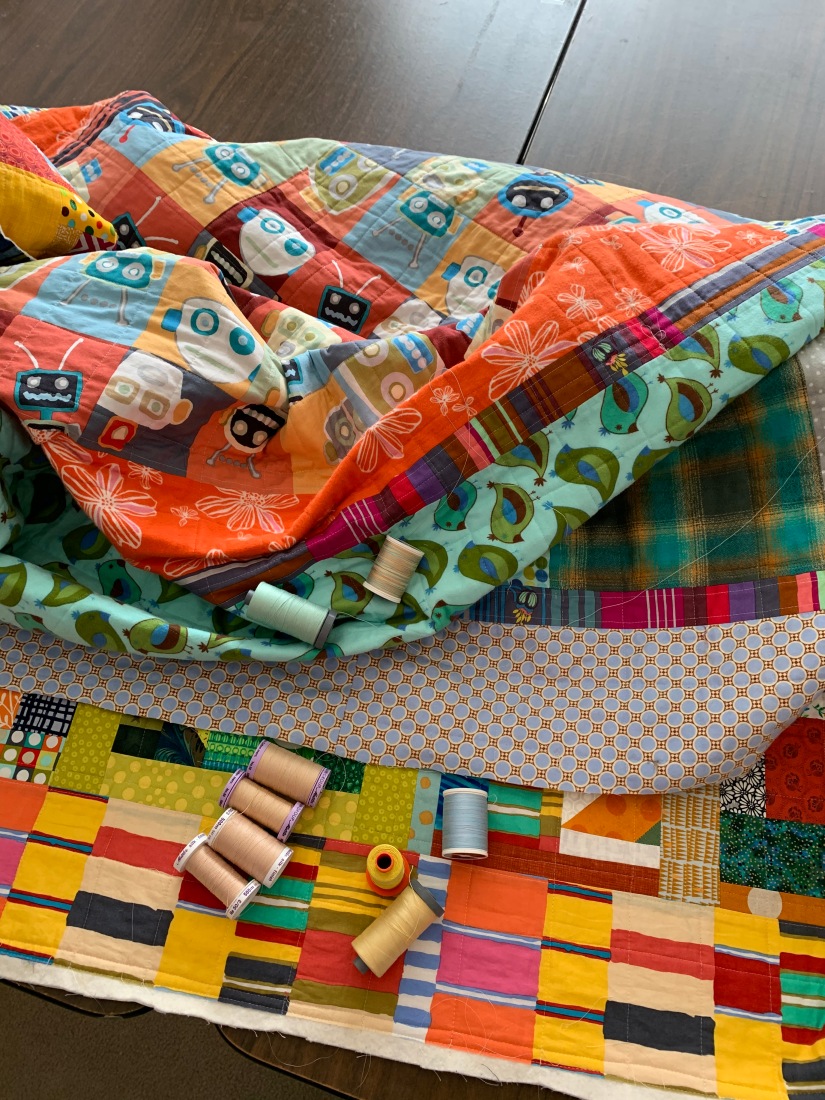
But first, thread choices. I selected Aurifil 50 wt cotton for the front (yellow) and back (blue).
 With the quilt rolled up from both ends to the middle, I started stitching the roughly parallel lines, using the pressor foot as a guide. Ignore the water soluble thread lines.
I accordion folded the quilt in my lap, but with big quilts, you can get some drag from the rolled up quilt coming out behind the sewing machine. When you start to feel some drag, accordion fold the quilt behind the sewing machine, which will reduce or eliminate the dead weight.

 Keep quilting! The lines are actually unequal distances apart and not perfectly straight, but I like this look on a scrappy quilt.

 I used the seam lines between the rows to “square up” my parallel lines.
In the last couple of inches before the seam line, I start my course correction strategy. I start stitching parallel to the seam line, so that the next row/section starts over with an accurate straight line. The stitching lines can get way off line without some kind of course correction fix.
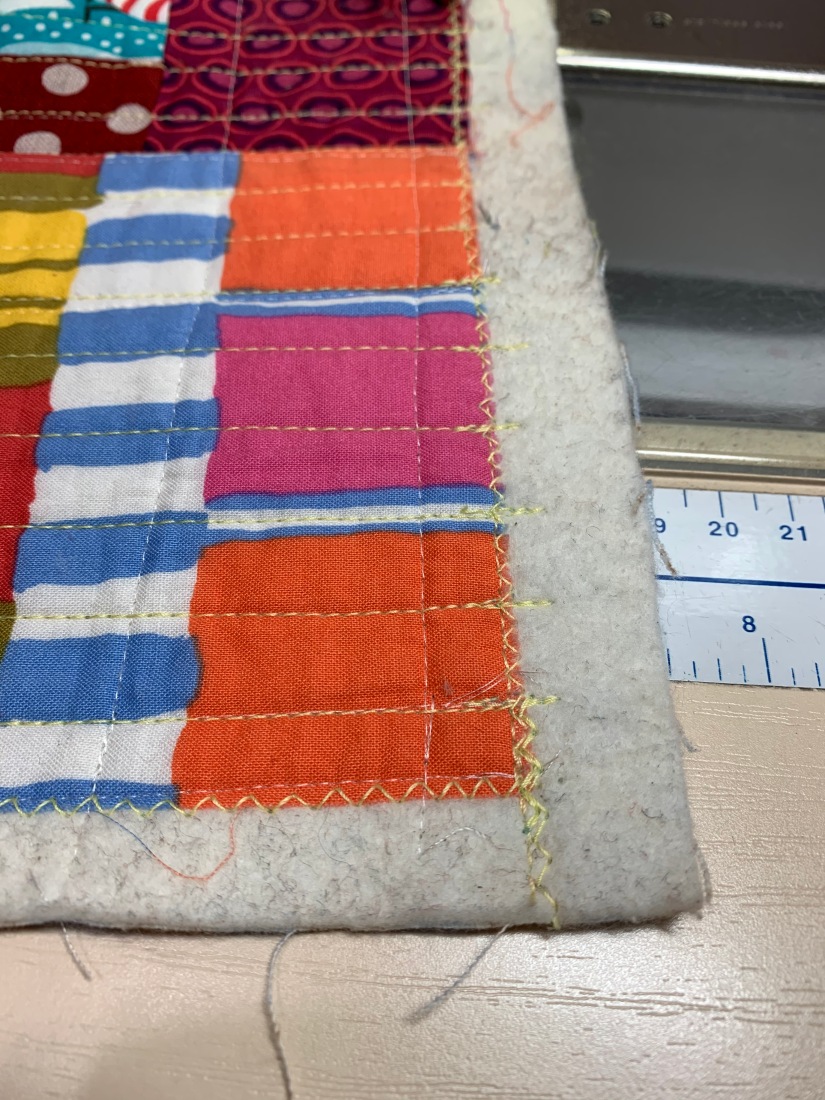
 Celebration! The very last line of stitching!! I zigzagged the edges and trimmed the batting before tossing the quilt into the washer and dryer. I like to let the quilt shrink at this stage, before sewing on the binding.

 Remove the quilt from the dryer while still slightly damp and allow to air dry the rest of the way.


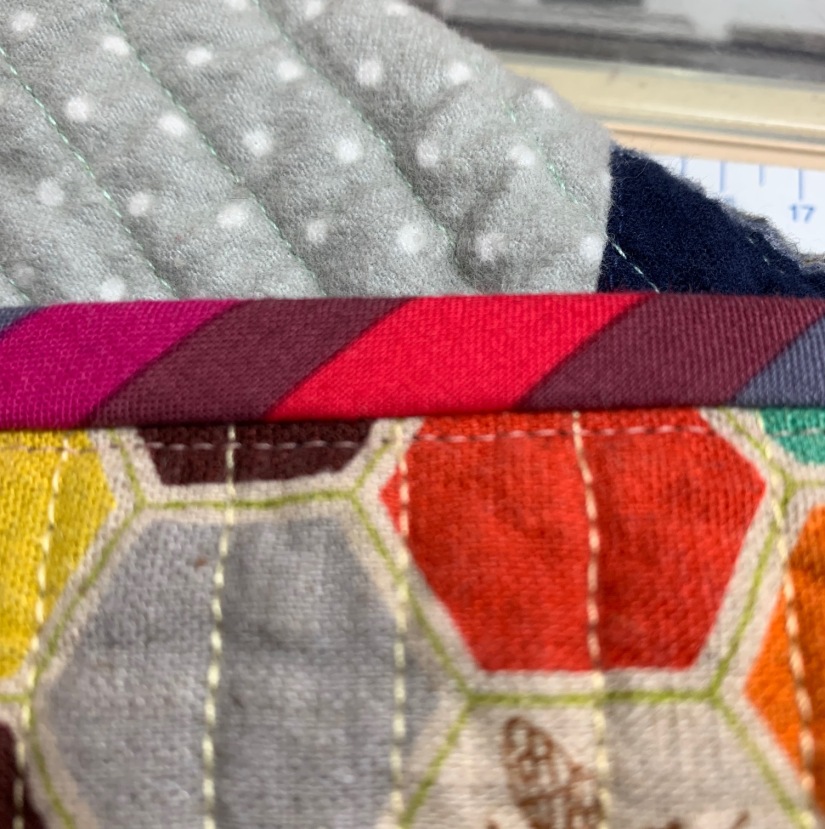
Binding
I’m always searching for alternative techniques. I invented a way to machine topstitch binding that is easy and looks great. For quilts that will be loved, used, and washed & dried, this method is also makes for a sturdy binding.
I started with a double French fold binding. A 3/8” seam allowance gives me the wide binding I like so much. I flattened the seam allowance with my faux serge stitch (or zigzag works too) to get a flatter looking binding.


 After folding over and pinning (or clipping) the binding in place, I hand sewed the mitered corners, about 1” in each direction from the corner.
Next, I basted along the very edge of the binding, from the back of the quilt. This big stitch goes fast.
 Flip over. From the front, you can see the basting thread: this shows you exactly where the fold is on the other side.
 I machine topstitched the binding from the front, by stitching just to the right of the basting line. (You can stitch anywhere between the basting line and the ditch of the binding seam.)

 I removed the basting thread and checked the back to make sure the stitching line is along the edge of the binding. Finished!!!

Next Week: The Big Giveaway!


Wendy – this is fantastic! I learned so much and new techniques just getting your text and photos into this post! I did not know to launder the quilt before binding!!! Love the sneak peek of the completed quilt at the end of the post 🙂
LikeLiked by 1 person
I have never tested my theory scientifically with two identical quilts, so I can’t be certain that the quilt shrinks more evenly without the binding holding the outside edges in place. I have a reputation for flat quilts, and this practice might be part of the explanation.
I’m glad you enjoyed the “step outs” for how I do things.
LikeLiked by 2 people
This project continues to bring me joy!
LikeLiked by 2 people
I’m so glad that Wendy is sharing it and that you are enjoying it 🙂
LikeLiked by 1 person
Thank you! Fascinating! So much to think about… (ironing the batting, how to use the pool noodles, water soluble thread, washing the quilt before binding…)
Wonderful quilt!
Thank you, again, for sharing your process!
🤗
LikeLiked by 2 people
This quilt project is dear to my heart, especially during this difficult time. Thanks to Tierney, we are sharing this joy with others. Our smiles are contagious!
LikeLiked by 2 people
Dayummmm! I don’t even know where to start! I love this quilt. The fabrics are so happy! I am reading this post and realizing there are so many tools for quilters than *back in the day* when I was quilting. The pool noodle is BRILLIANT!!! I am impressed with the space management here. Really. This is a huge quilt and the space is very modest. Is the batting wool or cotton? I loved the way cotton would get on a well-loved quilt. This was such a fun post. Thanks Wendy and Tierney!
LikeLiked by 2 people
I don’t know where to start either! The Boys genuine enjoyment of arranging fabrics shines through in their blocks. My sewing room, even with a walk in closet, is definitely crowded. The pool noodle works better than trying to tell someone else how to help, that’s for sure. I use Quilters’ Dream Request Loft batting for most of my quilts. It washes well, and if you are making a wall quilt, it hangs well too.
LikeLiked by 2 people
Another thumbs up for the binding and washing before tips! I absolutely will not hand bind anything bigger than a placemat, because the tingling starts almost immediately in my fingers. This method will improve my machine binding by leaps and bounds. And the quilt. There are sock monkeys in this quilt. Sock monkeys rock and this quilt is epic.
LikeLiked by 1 person
Darling project!…
LikeLiked by 2 people
Thank you!
LikeLiked by 2 people
I’m with you, Carolyn, hand sewing really aggravates the arthritis in my hands. As with all new methods, give yourself time to practice and adapt the technique to suit you. Sock monkeys are pretty great! Thank you! PS: My theory is that the quilt can shrink evenly without binding holding the outside edge in place.
LikeLiked by 1 person
This turned out to be a fantastic project! It’s so nice to see all the parts come together and reach such an amazing result! The final steps are much more complex than I imagined as an outsider, with 0 experience in quilts 🙂
LikeLiked by 1 person
I agree, thanks for stopping by and reading Wendy’s next amazing installment 🙂
LikeLiked by 1 person
I’m so happy with this project too! It’s almost always more complicated to explain what to do than to just do it. Thanks for reading along….
LikeLiked by 2 people
I am so impressed that I am speechless. To baste such a big quilt on the floor and then machine quilt it on your domestic sewing machine is an enormous feat. C O N G R A T U L A T I O N S !! Thank you also for sharing some very useful tips
LikeLiked by 1 person
I agree – Wendy is pretty fantastic! I loved the tips too – never thought of laundering a quilt before binding it!
LikeLike
Especially not such a big one!
LikeLiked by 1 person
Doing the basting on the floor isn’t so bad, it’s the getting up and down to walk around it that gets to me. I keep saying no more big quilts then another big quilt comes into my life. Thank you for reading along– one more post is comeing to show The Boys getting their quilt.
LikeLiked by 2 people
Terrific!!
LikeLiked by 1 person
It is 🙂
LikeLiked by 1 person
Thank you!
LikeLiked by 2 people
Really interesting look at the techniques and tricks for making such a big quilt! I am not a quilter myself, but my Mom is. So the “behind the scenes” is neat to see 🙂
LikeLiked by 2 people
I’m glad you enjoyed it 🙂
LikeLiked by 1 person
I love seeing “behind the scenes” too. I like having a variety of methods and techniques and I’m always happy to share.
LikeLiked by 2 people
What an amazing adventure!
LikeLiked by 1 person
It really has been an amazing adventure! I’m so happy to be a part of The Boys’ pandemic memories.
LikeLiked by 2 people
Sweet!
LikeLiked by 1 person
It turned out fantastic! They must have been thrilled to see the end result. I admire you for tackling such big quilts on a domestic machine! For me that would be way too heavy to handle during quilting.
LikeLiked by 1 person
I am so impressed also, that Wendy can do anything! Thanks for your comments Emmely 🙂
LikeLike
I have a tall person’s lap and I’ve been quilting a long time, so I’m both experienced and stuck in my ways. I have one more big quilt in the line up, but I mean it this time, no more big quilts!!! The final blog post is coming- you’ll be able to see the quilt and The Boys and the adults, all with big smiles.
LikeLiked by 1 person
Whew! I am exhausted just reading about such a large quilt! Good for you!
LikeLiked by 1 person
I am amazed that she quilted it herself!
LikeLiked by 1 person
I know, right? But it’s all worth it…Thanks for following along.
LikeLiked by 1 person
Wow, the quilt is beautiful. This story has filled my heart with joy between mom, the boys and Tierney. Wendy, I loved all the details with the construction and batting, quilting and binding tips.
Creativity at its best<3
LikeLiked by 1 person
Glad you enjoyed the post 🙂
LikeLike
Thanks! I always enjoy seeing behind the scenes of other quilts, so I’m always happy to share. Please you enjoyed the post.
LikeLiked by 1 person
Wow this is truly amazing. I also learned a few tips and tricks.
LikeLike
Thank you for following along. I love adding tips to my bag of tricks– pleased you enjoyed reading how I do things.
LikeLiked by 2 people
This is such a wonderful project, and I am glad I went back to read the whole story because I learned so much in this post! The water soluble thread and the binding method look like they take a little extra time but they do look like they save time and aggravation too.
LikeLiked by 1 person
I agree! Yes I got a lot of new tips from reading Wendy’s guest post!
LikeLike