
This blog post is for those of you maintaining your blog on the WordPress platform, and are challenged with, or have overcome challenges with, having a WordPress plan with limited image/photo storage.
Several of my fellow WordPress bloggers have expressed frustration over the limited amount of photo storage allotment and having to either delete older posts or delete posted photos to manage their storage. So I thought I would share my experience and tips and ask for other experienced WordPress platform bloggers to comment with their tips for managing image storage limits on WordPress.
The Free Plan
When I started blogging in October 2013, I started with the free plan. This plan gave me 3 GB (gigabytes) of storage for photos I wanted to post and within a year I noticed I was quickly using up my allotted free storage.
Here is what no one told me when I started blogging (that I so wish someone had told me): you need to reduce the size of your images you post in a blog post.

I was able to stay on the free plan for another year or so by reducing the size of my photos. Eventually after 2 – 3 years on the free plan, I decided I wanted to double my available storage (especially since I now knew how to stretch it out) to 6 GB; I wanted to remove advertising by WordPress; and I wanted to move my domain name from “tierneycreates.wordpress.com” to “tierneycreates.com”.
Managing the size of every image I add to a blog post, here is what my Photo Storage looks like after nearly 5 years of blogging (and if you’ve followed my blog for a while you know I post a lot of photos!):

I think I can make this last another 5 years. If I had known how to do image management from the beginning I know I could have made it 5 years of blogging with my original 3GB storage allotment. Since I upgraded my plan, I’ve never had the incentive to go back to my early posts and resize their images – too much work!
How Do I Manage My Image File Size?
First a disclaimer: I figured out what worked for me and I am not even remotely an expert in photo editing and image management.
You may find my process cumbersome and I bet there are more efficient methods but here are my steps from taking a photo to posting it onto my blog:
- I use an iPhone for my images and use the regular image settings (I do not use HDR or Live photo settings as I assume that would be a larger photo).
- I have an Amazon Prime account which comes with unlimited photo storage. I have the Amazon Prime Photo app on my phone. I review images on my phone, delete the ones I do not keep and then open Prime Photo and it automatically uploads all photos not already uploaded to Prime Photo. I then delete the images from my camera to manage photo storage on my iPhone.
- I blog from a MacBook, and go to the online Prime Photo website and download to my desktop or to a folder all the photos I want to use in a blog post. (Note once I am done with the blog post I delete all the photos I downloaded from my laptop as I do not want to take up a bunch of space with photos that are stored online).
- Most photos taken on my iPhone are in the range of 3000 x 4000 pixels. There are a 1000 pixels in a MB so each photo is about 4.5 MB. 4.5 MB does not sound like a lot but there are 1024MB in one GB and you could see before you know it, especially if you put 5 – 10+ images in each post, you could quickly work your way through your 3GB allotment (if you are on the free plan). So I reduce each photo by 50% using the Preview feature on my Mac.
- I select all the photos I’ve downloaded from Prime Photos and open them up at the same time using Preview. Within Preview I do any needed photocropping and then I go to the Tools menu and select “Adjust Size” and reduce the size from 100% to 50%:
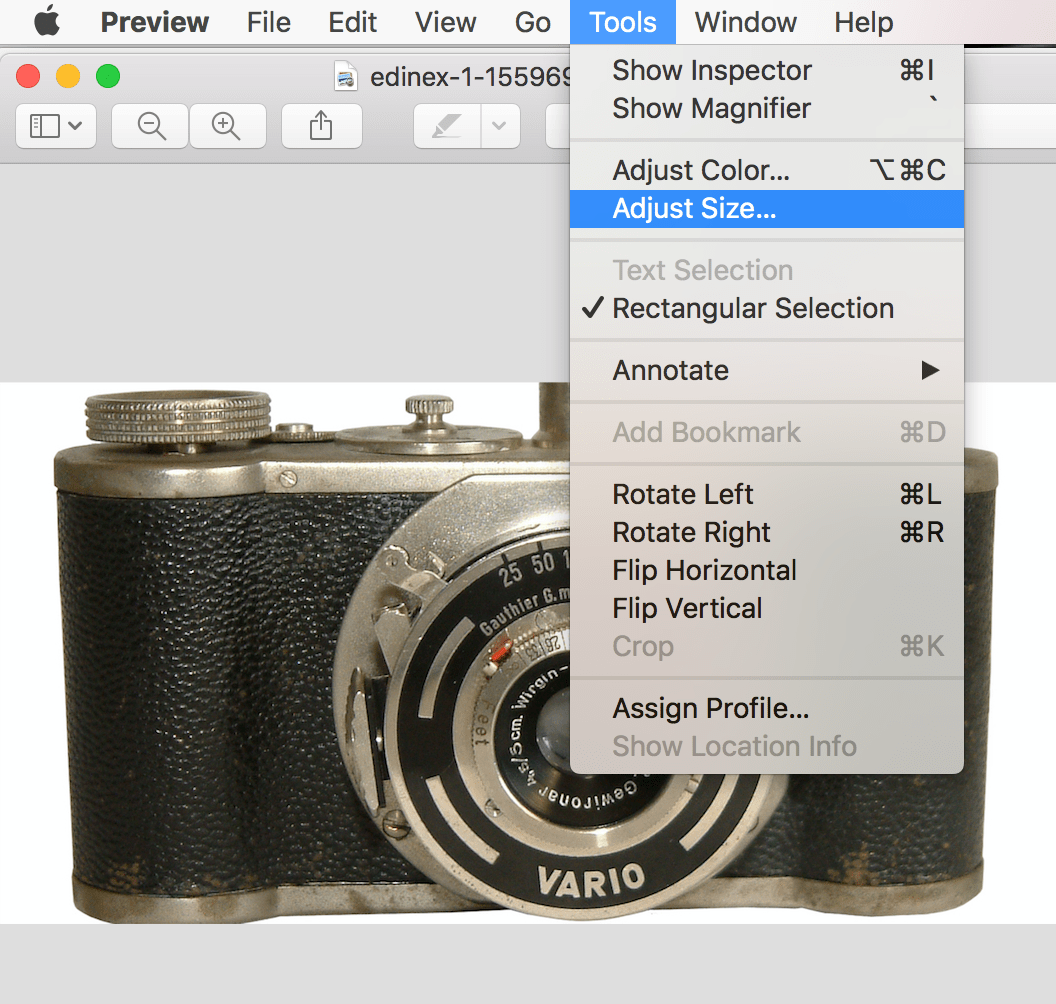


As you can see in the above screenshot, the size of my image went from 4.5 MB to 1.4 MB (look at the “Resulting Size” section in the screenshot). So my reducing the image size by 50%, I have gained the ability to store 3 photos instead of 1.
Even if you do not have a Mac and use a Windows based PC or laptop, you can see the general concept: you need to reduce the size of your photos to manage your storage.
If I do not care as much about the resolution/quality of an image on a post, then I might resize the image to even smaller like 45% or even 40%.
Other Photo Management Tips
In addition to learning how to resize my photos before posting, the most important thing I figured out as a blogger was to be judicious in the amount of photos I share on a post.
At first I just shared any photo I wanted to share that I felt went with a blog post. Now I carefully think through how many photos and what specific photos I want to share to enhance the text of a blog post and tell a story. I am a visual person and I appreciate looking at photos myself when reading others blog posts. However I realized I do not need to try to do an extensive photo essay of an experience I want to share.
A few carefully selected photos can tell a story just as well as 10 photos can.
If you want more and likely more efficient ideas on WordPress photo management and storage (and ideas for those on blogging from Windows based devices), you can check out websites such as this one: The Ultimate Guide to WordPress Image Management
This website uses fancy phrases such as “image optimization”.
You can also Google (or whatever search engine you use) and find articles on plug ins for WordPress image management and “digital assessment management” (see – they are using more fancy phrases).
I am completely self-taught on WordPress (lots of online help and YouTube videos) and I have so much more to learn but I wanted to share what I do, which seems to be working…
Okay experienced WordPress Bloggers – please share your tips and ideas in the Comments/Thoughts Section 🙂
Feature image credit: Shelia Rosamond, free images.com
