Books, Music, Podcasts, Fabric Scraps Obsession, Studio

When all else fails, reorganize your fabric scraps

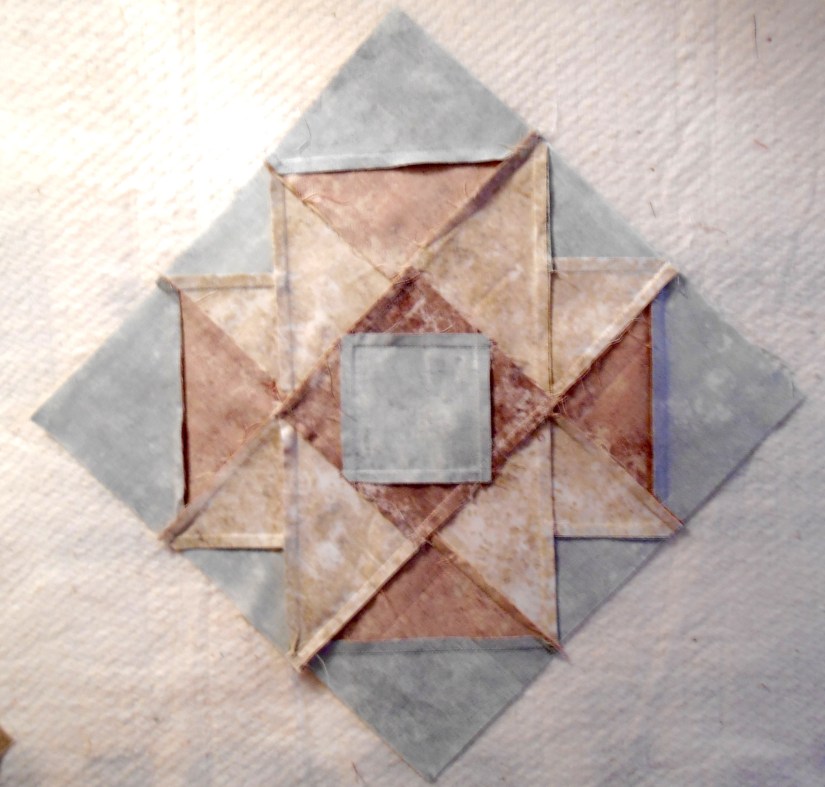
As I shared in previous posts, a month or so ago I was in the midst of a creative block. I first picked up English Paper Piecing and then revisited traditional quilt piecing to get myself creating again.

Before I got to this point however, I was trying to figure out a way, short of forcing myself to sew something, that I could “get my creative energies flowing”. On a whim I decided to reorganize my fabric scraps.

I first shared my fabric scrap organization in the 01/01/2016 post Inside the StudioMy fabric scraps were organized by individual color – Red, Blue, Green, Orange, Cream, Black/Gray/Black & White, Brown, and Yellow. Each color had its own bucket.

Reorganizing my fabric scraps I decided to group colors together that sometimes I have trouble telling apart and to make it easier to work with by having less individual buckets.

IMG_2937.jpg

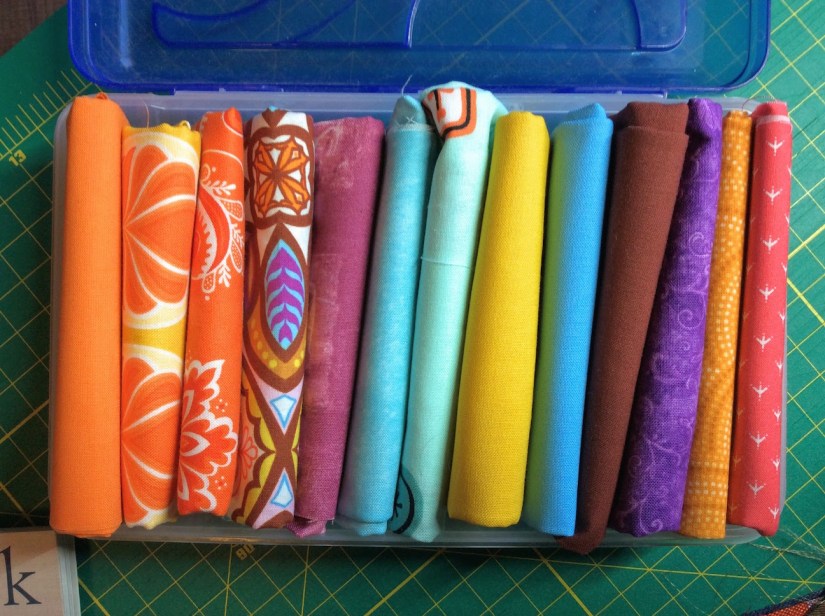
As you can see by the photo above, the new groupings are:

  • Orange & Brown
  • Black, Gray, and Black & White
  • Red & Purple
  • Blue & Green (interestingly this was my largest group of scraps)
  • White, Cream and Yellow

While I was regrouping the scraps, I got to revisit my fabric scraps and I could feel creative energies start to percolate!

Interestingly, one of the books from my latest library stack (The Library (Mega) Stack) – Living the Creative Life by Rice Freeman-Zachary – addresses creative block. The author interviewed a group of artists for this book and their wisdom and experiences are peppered throughout this inspiring read.

One of the artists  the author interviewed, Bean Gilsdorf, an art quilter out of Portland, Oregon (www.beangildorf.com), shares the following tip for dealing with creative block:

When it starts to stress me out that I’m not doing anything in my studio, I try to make myself do something to get my hands busy again. The ideas will come back eventually…Clean out your files, rearrange your paints,  or clean everything so that when you’re ready, everything is in order. – Bean Gilsdorf

I read this book after I reorganized my scraps, but this book reinforced that I was headed in the right direction!


Postscript

I am currently listening to a wonderful nonfiction audiobook – Designing Your Life: How to Build a Well-Lived, Joyful Life by Bill Burnett and Dave Evans. In this book the authors discuss “Gravity Problems” and how we get mired in “Gravity Problems”.

What are “gravity problems”? They are problems that are not actionable to resolve.

The authors share a great example (paraphrased):

A friend asks you what is wrong. You reply “I am having a hard time in life, I just cannot make it up hills as easily as I want to due to this thing called gravity. If I just did not have gravity in my life pulling me down, I would be fine and I could run up any hill I want”.

The authors humorously share that unless you are able to change how the earth spins on its axis and its rotation around the sun, you are not going to be able to resolve your “gravity problem”.

Now perhaps the real problem is you are not at your ideal fitness level and/or you need to improve your cardiovascular health, so you can more easily climb up a hill. That is an actionable problem.

Here is a wonderful quote from the book that I will leave you to ponder:

If it’s not actionable, it’s not a problem. It’s a situation, a circumstance, a fact of life. It may be a drag (so to speak), but, like gravity, it’s not a problem that can be solved. – Bill Burnett and Dave Evans

earth-1581554-640x640.jpg
That pesky thing called gravity…

Photo credit – Michael Lorenzo, free images.com

Studio

Revisiting Traditional Piecing: The Blocks Part II

Sharing a quick follow up to the post – Revisiting Traditional Piecing: The Blocks Part I in which I shared the first 8 blocks I made for a traditional block sampler, made with non traditional fabrics (a collection of fat quarters from Northcott’s Stonehenge fabric line) for a wedding gift.

Here are the next 8 blocks I have pieced – four (4) different blocks from the Ladies’ Art Company Block Tool by Connie Chunn, each in two versions:

This weekend I got to play with different layouts now that I have 16 blocks completed. I tried out a traditional sampler layout with sashing and corner stones; and a layout setting the blocks “on-point. I liked the “on-point” version (diamond) instead of square next to square layout.

McCalls’ Quilting has a nice online pdf on Setting Blocks “On-Point”

I also came across this cool article on Blossom Heart Quilts web page with wonderful examples of block layouts – FINISHING A SAMPLER QUILT: USE YOUR QUILT BLOCKS

My plan is to make a queen-sized bed quilt, so I determined I need at least 4 more blocks for a total of 20- 12 inch (finished size) blocks. I tentatively plan to do a 4 by 5 block layout and borders.

Today I completed 2 additional blocks (for a total of 18) and I will post them on the next update. I am also now looking through my quilt book collection and the web for innovative “on-point” sampler quilt settings (and of course going to make the remaining 2 blocks so the blocks can be finished).

More to come but wanted to get this update out there. Happy Stitching!


Fabric Scraps Obsession, My Minimalism Journey, Thrift Shop Adventures

A “Humane” Way to Eliminate Fabric Scraps (re-post)

Every so often I like to re-post something from the tierneycreates archives. Here is a post from October 2015. As an update to this post – it appears the fabrics scraps I bagged up for donation sold immediately at the Humane Society thrift shop. It seems my part of the country is infested with fabric scrap obsessed crafters!


If you have followed my blog for awhile, then you know about my addiction to fabric scraps. This addiction seems to be incompatible with my desire to downsize and minimize my possessions.

The fabric scrap addiction began innocently enough – friends would give me their fabric scraps at quilting retreats. I would go for a “sew day” at a fellow quilter’s house and leave with some of her fabric scraps. As if that was not enough, I began to actually BUY scraps.

Yes, BUY FABRIC SCRAPS, you read correctly. There is a wonderful quilt shop in Central Oregon called The Stitchin’ Post and occasionally they would sell scraps bags of their beautiful high-end quilting fabrics.  I bought numerous bags from them.

Beautiful scraps or not, still I was buying fabric scraps.

In my post “Creative Inspiration: Organization???” I shared my new organization of my favorite fabric scraps by color. Although I had organized scraps by color I still had a GIANT box of remaining fabric scraps.

I knew I had to do something. I needed to let go of the fabric scraps I did not completely and absolutely love. However, I did not want to throw them away or try to convince another quilter to adopt them.

So I packaged them up into 30 bags and organized them into two baskets and DONATED them to our local Humane Society Thrift Store to sell! (How do I know that the Humane Society Thrift Store sells fabric scraps? Do you want to take a guess? Yes, because I have bought fabric scraps also from several thrift stores include the Humane Society Thrift Store in the past).

The Humane Society Thrift Store Volunteer accepting my donation seemed pleased that I had packaged them up for sale. I like to imagine if they sell each bag for a couple dollars or more each that could be over $90 – $150+ profit for a wonderful local animal shelter! Some of the bags are packaged by color and some are random – so many options for the Humane Society Thrift Shops’ customers!

A
A “Humane” way to let go of excess fabric scraps!

When I buy fabric from quilt shops in the future, it will be actual whole fabric (fat quarters or yardage). I still have plenty of fabric scraps and my fabric scrap collection contains only scraps I truly love and plan to use…eventually.

POSTSCRIPT

I am still working through the lessons from the book The Life-Changing Magic of Tidying Up: The Japanese Art of Decluttering and Organizing by Marie Kondo that I discussed in the post “The Space in Which We Live“. 

Books, Music, Podcasts

Buttons

I just wanted to randomly post about one of my guilty pleasures in life – buttons!

I did not to intend to collect buttons, my button collection just sort of crept up on me…

img_2967
Trying to be organized with my button collection

I am not sure how it began but I remember as a little girl playing with my grandmother’s button jar and being fascinated.

Then, many years later, my love of buttons was rekindled when I started making miniature kimono wallhangings and wanted to embellish them with interesting buttons.

Screen Shot 2016-10-25 at 11.01.55 PM.png
Miniature Kimono with an antique button

I began picking up interesting buttons here and there – from craft shows, from shift shops, antique shops, and from a bookstore.

IMG_2298
Card of antique buttons picked up at a used bookstore

I was even lucky enough to have a friend who let me raid her old button collection in search of cool buttons for miniature kimonos.

img_2972
A couple of these buttons were raided from my friend’s antique button collection

This past May, my friend Dana, who was my “secret quilt sister” at our annual quilting retreat, surprised me with an “Vintage Button Jar” as part of my gift.

img_2974

The jar contained lots of fun buttons such as the ones below:

img_2978
Some cool large buttons courtesy of my friend Dana

Upon returning home from the retreat I attempted to cram my entire button collection into my new “Vintage Button Jar” but my collection was overflowing from the jar.

So now I keep the jar in my sewing studio to hold small packages and cards of special buttons.

img_2975
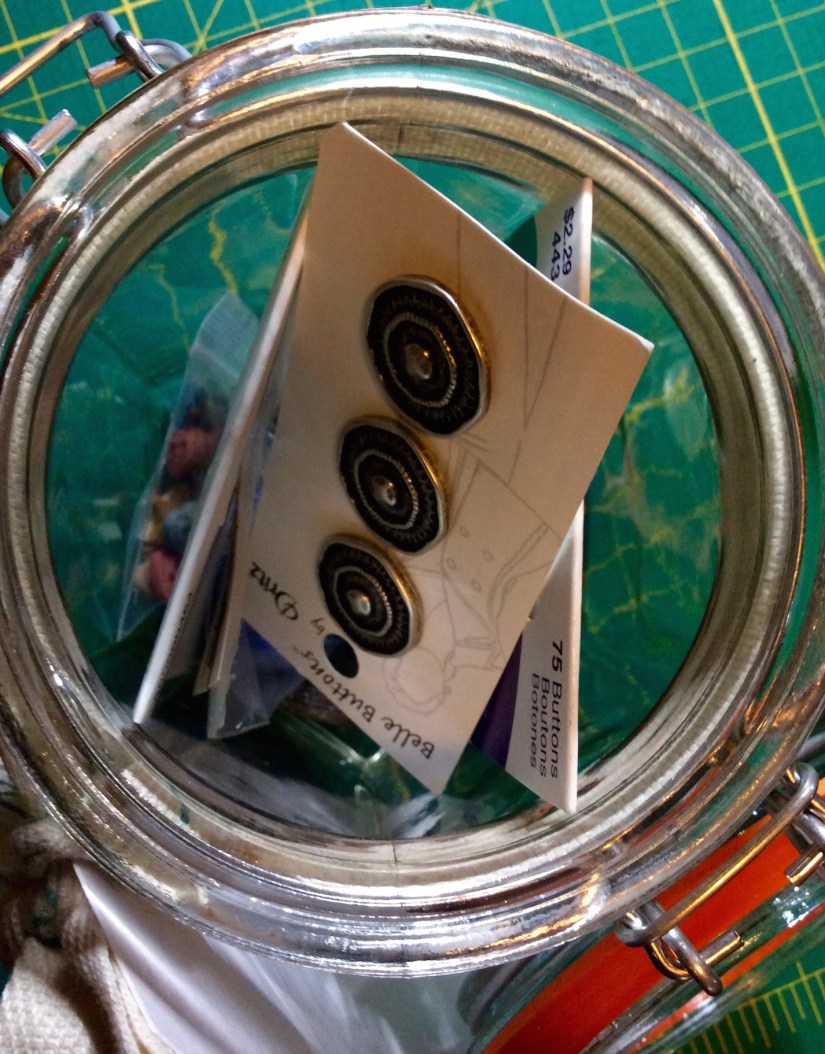
Anyone else have an issue with buttons? Any secret (or not so secret) collectors?


Postscript

In an earlier post this week, Revisiting Traditional Piecing: The Blocks Part I, I shared I recently listened to The Four Agreements: A Practical Guide to Personal Freedom by Don Miguel Ruiz.

Well I am working on incorporating first of the four agreements into my life:

  1. Be impeccable with your word

I am not challenged in general of keeping my word to other and keeping my commitments to other people; but I do struggle with being on time to appointments with other people. So in essence I am not being impeccable with my word (that I will arrive at a specific time).

I am easily distracted and I struggle with getting out of the house and to appointments on time. I was very pleased with myself when on Monday I was early to meeting my friend at the coffee shop. I am tired an embarrassed that I appear to be “chronically late”.

Another area I struggle in regards to being impeccable with my word is is in keeping my word to myself! Keep my “self” commitments.

So  I am starting small (like going to bed on time, being sure to get out each day and go on a walk, making healthy food choices) to work on becoming impeccable with my word to myself. I plan to build up to the bigger commitments to myself which I hope include to do some sewing each day!

Books, Music, Podcasts, Library Adventures

The Library (Mega) Stack

I may have gone overboard this time on the number of books I borrowed today from our public library.

I am continuing my series on sharing a photo of the books I borrow from my public library – The Library Stack.

There is something very exciting to me about a new stack of freshly borrowed books awaiting my reading and browsing while I sip my tea and/or have a snack in my favorite cozy reading spot.

Here is the latest stack of 17 books:

img_2931

I am not sure which book to start with – I have them arranged by size for the photo but that is not necessarily the order in which I will start reading the books. Maybe I am weird but I am filled with bubbling happy anticipation on working through this stack! (Yes, if you have followed my blog of awhile, you have figured out I am weird.)

Several of the books – Tiny Homes on the Move, Cabin Porn, and Dresden Carnival are books I have borrowed previously but I want to look at again.

I do not work on Mondays and I met a friend for coffee this morning (I had tea of course!). After a hour chatting over hot beverages, it was time for a leisurely wander of the aisles of our downtown public library!

I will share in a future post if I gain any earth shattering revelations from this stack!

(If you would like to see the previous stacks, check out the Category – The Library Stack for the other posts.)


Books, Music, Podcasts, Studio

Revisiting Traditional Piecing: The Blocks Part I

This is a continuation to yesterday’s post – Revisiting Traditional Piecing.

In my previous post I mentioned the first set of blocks I made with the Ladies’ Art Company Block Tool by Connie Chunn (while participating in a Block-a-Month Quilt Club) were turned into a sampler quilt, Block Filmstrip, around 2008.

What I forgot to mention was that details of four (4) of the blocks in this quilt ended up in the book 1000 Quilting Inspirations by Sandra  Sider, Quarry Books (2015). It is funny that a a sampler quilt that I was not sure if I even wanted to finish around 2008 ended up as the opening series of “Quilting Inspiration” images in the book – images #0001 – 0004 of the 1000 inspirations!

Filmstrip and Book
Filmstrip quilt – four images 0001-0004 are featured in the book 1000 Quilt Inspirations
1000 Quilt Inspirations
Photo Credit: Quarry Books

In addition to four (4) images from Block Filmstrip, the book also contains images from four (4) of my recycled silk art quilts and are part of The Wardrobe Meets the Wall Collection.


Making Blocks

Using the Ladies’ Art Company Block Tool by (2007), I have made eight (8) 12 inch blocks (finished size) using a fat quarter packet, scraps and yardage of Northcott’s Stonehenge fabric line, so far as I created a queen-sized sampler quilt to be given as a wedding gift to a young couple.

I made two (2) of four (4) different blocks from the Block Tool:

AIR CASTLE

AUNT ELIZA’S STAR

BIG DIPPER (I made 2 of the same color way)

dscn3631

CHURN DASH


Thinking About Settings and Borders

In case you have not figure this out yet, I plan to set the blocks “on point” that is why they are all turned on point. I originally meant to photograph them in their traditional square orientation instead of this “diamond” orientation. Also I took the photos on the design wall in the hallway where the light is not the best. Life has been busy and I figure if I took time re-doing the photos then I will never get this post up, ha!

Next set of blocks, I will take better photos (smile).

In addition to wanting to set the blocks “on point” I have already started looking at different options for settings. I am currently looking through a book I recently borrowed from the library – The Quilt Block Cookbook by Amy Gibson (2016). There is a wonderful block setting option in this book called “Point Taken”. I am leaning towards that setting.

61zdagirjql-_sx471_bo1204203200_
Photo credit: Amazon.com

I am also thinking about what type of border I want and I have decided to make a pieced border. I want the quilt to be special and I think a pieced border will add a nice touch.

Looking through my collection of quilt books I came across an old book in my craft book library called The Border Workbook by Janet Kime (2006). This book has great ideas for creating lovely pieced borders.

61jveflv2fl-_sx381_bo1204203200_
Photo credit:Amazon.com

More blocks to come (and better photos next time)!


Postscript

Traditional piecing seems to be what I need right now. My mind feels overloaded from my non-crafting life, especially related to my job in the healthcare industry. At the end of the workday and the end of the workweek I am feeling “all thought out” and was not inspired to create any art quilts.

Creating these blocks from patterns feels mediative, centering and peaceful. All I have to do is follow the instructions, cutting the fabric to the dimensions indicated and sew the pieces together.

I am also enjoying carefully pressing the different components of each block as I assemble them and trying to ensure the back of the block is nearly as neatly pressed as the front.

dscn3633
The back of a carefully pieced block

While piecing the first couple of blocks I listened to a wonderful and engaging audiobook read by the actor Peter Coyote – The Four Agreements: A Practical Guide to Personal Freedom by Don Miguel Ruiz (1997).

51MfVDOlEkL._SX338_BO1,204,203,200_.jpg
Photo credit: Amazon.com

The Four Agreements are as follows:

  1. Be impeccable with your word
  2. Don’t take anything personally
  3. Don’t make assumptions
  4. Always do your best

These seem logical and on the surface very simple. What makes the audiobook so engaging is the author’s discussion and exploration of each of The Four Agreements. Powerful and centering stuff to listen to and ponder while peacefully piecing my blocks!

Studio

Revisiting Traditional Piecing

Check out Sassy the Highly Opinionated Miniature Schnauzer’s page Schnauzer Snips for her latest musings and recent experience with the “ongoing herd”!


Creative Roadblock Stops with Returning to Traditional Piecing

A couple weeks ago I discussed an art quilt I was working on as part of the recycled materials “Make Do” challenge (Sherri Lynn Wood, The Improv Handbook for Modern Quilters) in the post What’s on the Design Wall.

Well I gave up on that piece for now, bundled it up and put it away for now. I was feeling burned out on creating improvisational quilts.

Around this same time I went over my friend Susan’s house who was working on the Sisters Outdoor Quilt Show 2017 raffle quilt which has some lovely traditional block piecing in it. I found the piecing so pleasing.

I also thought about a blog I follow, Texas Quilting, in which the talented blogger does a lot of traditional block piecing including an incredible sampler she is working on.

Finally, as if the universe was telling me to take a break from improvisational quilting and return to traditional piecing for a while, I was invited to attend a trunk show and talk by Jen Kingwell, Australian quilt designer. She used traditional blocks and piecing in innovative and colorful ways – and she uses lots and lots of scraps in her work. If you would like to see highlights of her talk you can check out the post on the Woolie Mammoth blog – Jen Kingwell Australian Quilt Designer.

Here is the one bad photo I took of one of Jen Kingwell’s awesome quilts from her trunk show (look at the sweet little traditional “Churn Dash” blocks in her quilt, she uses a lot of traditional pieced and appliqué blocks in unique colors and combinations in her work):

IMG_5244.jpg

To see more of her beautiful work, I recommend checking out the Woolie Mammoth post mentioned above or check out Jen Kingwell Designs website – Amitié Textiles; or her Facebook page Jen Kingwell Designs.

I realized I need to starting working on quilt to be a Wedding gift and wouldn’t a traditional block sampler be a timeless gift? I checked with the bride to be and found out she liked earth tones and then I found a beautiful collection of Northcott’s Stonehenge fabric line.

Now what pattern to use? Should I pull out the old quilting books filled with traditional designs? After pouring over patterns in 10 – 15 books as well as patterns I had clipped from magazines, etc. I came across my old Ladies’ Art Company Block Tool by Connie Chunn (2007).

31iKzga4P+L._BO1,204,203,200_.jpg
Photo credit: Amazon.com

I first learned of this tool around 2007. I had recently moved to Central Oregon and joined the Block-a-Month Quilt Club at the Stitchin’ Post quilt shop in Sisters, OR. The goal was to make a block a month from one of the patterns in this tool and then create a sampler quilt from the blocks.

Here is are sections of the quilt I made from those traditional blocks in the Ladies’ Art Company Block Tool:

DSCN1200

DSCN1198
Block Filmstrip (2008?) – pieced and quilted by Tierney Davis Hogan

After making this quilt I shoved away this block tool/block pattern collection. Now, 8 – 9 years later, this tool would be my solution to my creative block! I would make traditional blocks selected from the 160 rotary-cut block patterns in this tool!


Getting Started on My Traditional Piecing Project

Here is my Block Tool and the fabrics I will be using.  I only had a little of the blue you see on the right and I later decided to remove it and make the palette oranges, rusts, browns, greens, and creams. I only had one small strip of the blue in the Stonehenge line and although it would had many an interesting accent, I would need to purchase more to make it work and I am trying to work with what I have in my stash.

IMG_2822.jpg

I also think the blue was too dark, if it had been a lighter blue that would have worked even better.

As of today, I have made 8 blocks and next post I will share my progress so far!

tierneycreates

From the Archives: “Getting Ready to Etsy”

Currently I am working on a traditionally-pieced quilt (a sampler) for a wedding gift, in a less traditional palette. I will share my “adventures in traditional quilt making” on my next post. 

Today, I am doing some clean up on my Textile Adventures page of my blog and wanted to remove this series of updates from 2013 on starting my tierneycreates Etsy shop (GETTING READ TO ETSY PART I AND PART II) and move then instead into a blog post.

I am considering making my tierneycreates Etsy shop inactive as I have not put a lot of energy into it and not sure if I want to keep renewing my listings (I have stopped renewing any currently expiring listings). I will share more about this in a future post, I am finding my heart is not completely into retail (especially since I work a busy and intense full-time job in the healthcare industry). 


Getting Ready to Etsy: Part I – October 2013

My journey on my “Textile Adventure” takes me closer to my dream – a tierneycreates store on Etsy, the online handmade marketplace.  This part of my journey feels scary as I have never sold my creations before. I have done a couple commission quilts but I have never sold to strangers. Of course those I sell to will no longer be “strangers”, the will be people who have a little bit of Tierney in their life or their friends life through owning one of my creations.  This is very exciting. I have made quilts and other textile gifts for close friends and family over the years, and the thought of the opportunity to share what I love with an extended group is exciting. Of course I have to charge them to support the cost of materials and continued creations!

As a road map to my journey’s destination, I am reading a wonderful book: How to Sell Your Crafts Online by Derrick Sutton, St.. Martin’s Press, 2011.

I am going to start with offering two category of items: 1) my handmade mini kimonos; and 2) my international Barbie collection (which I can sell under the Vintage category of Etsy). Below are some photos of the kimonos which measure approximately 6 inches x 7 inches, are made from my cotton Asian fabric collection, and will come with a chopsticks and string for hanging.


Getting Ready to Etsy: Part II – November 2013

Here an update on my tierneycreates Etsy shop adventure:

My sister encouraged me to have my Etsy store up by Thanksgiving weekend. I was very excited about the original logo I designed until I tried to make it work as my Etsy store – “tierneycreates” logo. It did not work, like not at all! I have redesigned my logo in a “late-night-logo-session” (see below) and I have uploaded it to Etsy for my store banner – yah!

Now if I could just get my items posted onto the shop. What has been holding me back is PHOTOGRAPHY. I am coming to grips with the fact I suspect I am the world’s worse photographer. Even with the assistance of a guide on digital photography, I am still struggling. I want potential buyers to have a clear, true to life image of my store items. I have already re-photographed the kimonos twice. If I were to try to make my living off photography, I would starve to death.

The tierneycreates logo has been created

I needed a logo for my upcoming Etsy Store and for my tierneycreates business cards. It looks a while but I finally came up with a logo that I like.

new-logo-2.jpg

 Recovering from a “business card disaster”

A couple of months ago I tried to design tierneycreates business cards. I thought they looked awesome online as I ordered them from Vistaprint. I anxiously awaited my shipment in the mail. When they arrived, my excitement was quickly deflated – I had made a bad decision in regards to text color and backgound and except for the “tierneycreates” part, they were unreadable.  So I was stuck with a box of 250 useless cards. I did give some to friends as a joke, asking them “now what’s wrong with this business card?”  (Answer: you cannot read my name or any of the contact information!)

I am an avid recycler and I recently found a way to reuse my disaster – turn them into tags for products I sell at my Etsy store! They have been cropped, holes added, and turned into tags!

from business card disaster to handy tag!
From business card disaster to handy tags!


A Crafter's Life

Laundering Quilts

Quilters and quilt-owners – I welcome your feedback and input on this post. This is not my area of expertise, I only know what has worked for me over the years. Your thoughts and comments will be greatly appreciated!


What is the best way to care for quilts (cleaning and preserving)? 

I received this question from a reader:

I have a dear friend who has been generous enough to give me several of her beautiful quilts as gifts over time.  I actively use them in my home — on beds or couches as I Iove showing them off.   I also have a 6 y.o. boy who I love almost as much as the quilts and who is, typically, all boy, and sometimes sickness or accidents do happen.  I want to take special care of these cherished gifts (both the quilts and the boy) but do occasionally need to wash the quilts (the boy I can handle).  Can you advise as to how best to care for quilts so as to best preserve them as well as ensure they stay clean?

No worries, the reader was most likely joking about loving her son nearly as much as the quilts, ha! (I do know this to be true as the reader is also a dear friend of mine, and is a very wonderful Mom. Also it is possible the quilts she is referring to are ones I have made her and her son over the years!)


Care & Cleaning of Quilts

As I mentioned at the start of this post, I would greatly welcome any additional thoughts on this subject.

First, here is a website, Stitch This!, with lovely general instructions on washing quilts: How to wash a quilt: dust, dirt, spills, worse.

Now, I am going to break my thoughts on care and cleaning of quilts it into three sections: 1) Utility Quilts; 2) Decorative Wall Quilts; and 3) Antique Quilts.

1)  UTILITY QUILTS

I consider “utility quilts” the quilts made to cover beds or laps (bed or lap size quilts). These quilts are meant to be used and since they are meant to be washed.

The quilts I have made for laps or for beds, have pre-washed fabric, meaning I washed the fabric used to make the quilt before it became a quilt and it should be pre-shrunk. Some times I also lauder a completed quilt before I give it as a gift.

Newly quilted completely quilts are lovely but I love the look of a freshly laundered new quilt and the softness it adds to the quilt.

I have many utility quilts around the house and I wash them as follows: alone in the washing machine, regular wash/normal cycle, cold water, using whatever detergent I have on hand (I use one of those eco brands).  Then I dry the quilt on medium high heat regular dying cycle.

img_2892
A quilt fresh out of my dryer (why yes my laundry area is decorated with images of schnauzers…)

The quilts in the photo above is about 9 years old and I have washed it at least 10 times over the years. I usually drape it over the sofa so it does not get that dirty. Most of my utility quilts I launder at least 1 – 4 times per year.

If I get a stain on a quilt, I pre-treat it by rubbing some detergent into it and letting it sit. So far in the approximately 18 years I have been quilting, I have not had a stain in a quilt I could not remove.

I think a utility quilt could hold up to once a month laundering. I think the more you launder it, just like clothing, the more over time it will wear out, just the fact of cotton fabric.  But utility quilts are meant to be used and loved!  (See my post Love Wears it Out…)

Now we do treat with special care some of our utility quilts especially with having dogs. I made a T-shirt quilt for Terry the Quilting Husband with 49 of his t-shirts for a special birthday event a couple years ago. It is a very warm and cozy quilt with flannel shirt fabric backing. When I put it on the bed, I do cover it with a light blanket as one of our dogs like to do the “spin around and scratch the surface” until he settles into a spot, and I did not want him scratching at the t-shirts.

If you search on the web you will see advice to use special laundry detergent and gentle wash when washing quilts. This would work also, but I have always washed the utility quilts I have made the same as I wash most my clothes.

2) DECORATIVE WALL QUILTS/WALL HANGINGS

Unless the person who made it tells you otherwise, I would only professional dry clean wall hangings or decorative/art quilts. Especially if they are made with materials other than cotton. For example, I would never launder the recycled silk art quilts I have made.

Even if the wall hanging is cotton and it might be safe to lauder, keep in mind that once you launder it, you may change the texture and the look of the piece. The maker may not have pre-washed the fabric if they were using it for a decorative wall hanging type of quilt.

xmas08 014
Appliquéd Sheltie wallhanging I made as a gift for a friend – this should never be laundered!

Instead of dry cleaning wall hangings, I have just shaken out the dust on a wall hanging in my backyard and let it sit in the fresh air and sun for a short period of time (do not leave quilts out in the sun for long period the colors can fade) to freshen it up.

3) ANTIQUE QUILTS

If I needed to wash an antique or heirloom quilt, the first thing I would do is find someone with expertise on what to do. Luckily I have a quilting colleague who is an expert in the cleaning and preservation of antique quilts.

If you do not have a friend who is an expert/resource on cleaning antique quilts, then researching on the internet is your second best option.

The Michigan State University Museum has a nice article on Cleaning Antique QuiltsInterestingly in this online article they recommend only vacuuming antique quilts. If you do insist on washing the quilt, they provide some general instructions on safely washing an old quilt.

Antique quilts make me anxious so I have no photos to share (as I do not know own one). To be honest I prefer either quilts I can launder at will or art quilts/wall hanging that just stay on the wall.


Thoughts?

Perhaps your eyes were rolling right out of your head as you read this post. Or maybe your head was nodding in agreement with my sage advice as you read this post.

Either way, now is time for you to help my reader out (and me if I am giving bad advice) and share your thoughts in the Comment section below on the best way to clean and care for quilts!  Thank you!

A Crafter's Life

The Tao of Quilting (re-post)

More new posts in the near future, but for now here is a re-posting of a November 2013 post – sharing  a page discovered in a quilting magazine long ago. The page is hung in my studio and each time I read it, it brings a smile to my face.


Are you familiar with the Tao Te Ching?

This ancient Chinese text, was according to legend, was written by Lao Tzu in the 6th century BC. It it a philosophical text which provides instructions on the way to live a virtuous life of harmony. There have been many versions of this text written and reinterpreted over the years to include The Tao of Pooh by Benjamin Hoff which shares practical life lessons from the perspective of Winnie the Pooh.

Many years ago, in a special publication quilting magazine Quilts with Style, I came across “The Tao of Quilting” by Stephen Seifert – a one page take on the Tao Te Ching. I have kept this page in the front of my binder of patterns-clipped-from-quilting-magazines to continually inspire me.

THE TAO OF QUILTING by Stephen Seifert

Our lives are full of obstacles causing stress and discontent.

But a quilt can be a bridge to overcome diversions and chaos.

Water ripples in the wind, never considering who is in control.

Yet its fluid nature gives it strength to serve as a foundation to life.

Soft fabric stitched together in a quilt fills the hardest heart with love and beauty.

The simplicity of love can penetrate all, including the the most cynical mind.

Rigid stone shores appear impenetrable, but their yielding surface gives rise to life.

Evergreens soar triumphantly above the lake shore, reflecting the paradox of life.

Problems emerge and seem pressing

But over time our thoughts evolve into understanding.

Nature’s silent teachings are taught without words

Instilling integrity into every quilt.

IMG_1115
Section from Tree Outside My Window (2015)


Feature photo credit: jhraskson, pixabay.com

A Crafter's Life

Tea Time!

I am an obsessive tea drinker. I cannot start my day until I have had a pot of strong green tea. I also love tea shops, tea rooms and the rare special treat of going to “High Tea”.

We used to have a lovely tea room in Sisters, Oregon and I went to several wonderful High Teas there. I love the whole English High Tea concept – a delicious pot of tea, finger sandwiches, scones with Devonshire cream and lemon curd, etc. I never had Devonshire cream until I moved to Central Oregon and went to my first high tea. I tried to stay calm after my first taste (I would have embarrassed my dining companions had I started licking the plate!)

The tea room in Sisters, Oregon used to serve soup or salad and scones for their high tea. I was quite sad when it closed (I did buy way too many tea related items at their going out of business sale, but many of them I still use – like my beloved tea pot warmer).

So you can imagine what a treat it was this past Saturday when a friend took me for tea at AK’s Tea Room in Redmond, Oregon. The tea room is located in downtown Redmond among a nest of antique shops, a bookstore, little eateries, and various boutiques. It is a fun area to wander. I had stopped there once before for a pot of tea and cupcake but had never have their full “Hampton Court Afternoon Tea for Two”.

The proprietor, Karen George, is a delightful woman who is originally from London and she spent time chatting with us. After she moved to Central Oregon, she and the fellow Brits she discovered also living here noted there was no place in Central Oregon to “get a proper cup of tea”. Through a series of fated and magical-seeming occurrences she and her spouse opened a tea room in downtown Redmond. There is an article from 2014 on her shop in the Bend Bulletin called High Tea in  the High Desert.

Here are photos from her tea room and our tea (it was not proper “high tea” as it was not in the afternoon but it was our “tea lunch” done in the style of an afternoon tea):

img_5201
Outside one of the many antique shops in downtown Redmond
img_5228
AK’s Tea Room
img_5211
Many goodies await
img_5212
Behind the counter lots of British paraphernalia
img_5213
Tea books and gifts
2016-10-08_12-21-13_493
The tea room is decorated with unusual tea themed items
img_5225
There was even a Union Jack quilt
img_5226
Our delicious treat to accompany our pot of tea!
Knit and Crochet Away!, tierneycreates

Knitting!

And now for something completely different…  – Monty Python’s Flying Circus

Let’s take a break from quilting and sewing and talk about KNITTING!

I have always wanted to learn to knit, I thought it was magical. My grandmother taught me how to crochet and crocheting is cool but there was something more austere and glamorous about knitting, not quite sure how to put it into words. Maybe it was because I did not know how to do it and it seemed so difficult that made it so ethereal…

15 years ago a I learned how to knit but I only learned how to make knitted scarves, I was scared to try anything beyond a scarf. After learning how to knit I became completely enamored with wool yarns. As a crocheter I had made numerous afghans with inexpensive acrylic blend yarns. I could not imagine buying expensive yarn for crocheting.

One of my first exposures to “high-end” yarns was at a yarn shop in British Columbia on a trip to Victoria. When we lived in Seattle, WA, Canada was not that far away and we would frequently go to Vancouver, BC. Every couple of years we would take the ferry from Northern Washington State to Victoria, BC for the weekend.

One trip to Victoria, we stopped at the Beehive Wool Shop. My first time to a yarn speciality shop, I was overwhelmed – so many colors and textures, and yarn options, and patterns, and, and, and (I nearly get short of breath and dizzy just thinking of that first experience).

They were so friendly and welcoming at the Beehive Wool Shop, especially when I told them I was a new knitter. It was as if I had joined a new family – The Knitting Family.

Displayed at the shop I saw the most beautiful scarf – a ribbed knit scarf made with this beautiful burnt orange yarn (I seem to have always had a thing for orange, see my posts Embracing Orange and Orange). I figured this scarf was way too advanced for me – I had only mastered straight knitting and straight purling, no combinations!

The kind and very encouraging shopkeeper at the Beehive Wool Shop told me that I could do it, found me the yarn, then gave me an impromptu lesson on how to create ribbing. She also wrote down the simple pattern for me.

2016-10-06_13-59-41_110.jpeg

Here is the completed scarf – it is my most favorite scarf of all time (and I made it – yay)!

2016-10-06_13-59-25_116.jpeg

Having conquered a semi difficult scarf, I set my dreams on someday knitting my own cap/hat.

Then 9 years later, while living in Central Oregon, my friend who is a very experienced knitter, knitted me my first handmade cap! Oh my goodness – I was so in love with this hat that his hat became my “security blanket” (remember when you were young and you had a “bankie” that you took everywhere with you?) and once the weather got slightly cold enough it was time to wear my hat!

Dec 2014 me
Me in my “security blanket”
My love for my hat grew to the point that I had to learn how to make such a hat, even if this sounded scary and beyond my reach. My friend Pam agreed to teach me how to knit a hat and she was very patient (very patient) as I made it through my first hat.

There are no photos to share of my first hat. It was wonderful to make a hat but it was rather small for my head, not sure what I was thinking.

I did not give up, the best thing after learning to do something is to try again, especially on your own, to cement your learning. I have made two more knitted hats since that time (same pattern) and I am currently working on a third. Eventually I would like one in every color of my wardrobe!

2016-10-06_13-57-05_917-2016-10-07t00_39_35-253
My knitted hat collection (from the top): I made the olive green hat, my friend Pam made the purple variegated one, I made the blue one, the maroon one is in progress.
I may not work on it all the time but my knitting is very special to me. I like to take it on trips or to events where I will just be sitting around. I carry my knitting in a special bag – one that I picked up when I went on a trip with my father (who is no longer with us) to Williamsburg, VA. This bag reminds of the fun day I had, about 18 years ago, wandering around Colonial Williamsburg with my Dad.

2016-10-06_14-00-24_321.jpeg

Every time I go to knit it reconnects me with that special trip.

Happy Crafting!


Adventures in Paper Piecing, Studio, tierneycreates

Adventures in English Paper Piecing (Part I)

Check out Sassy the Highly Opinionated Miniature Schnauzer’s latest musings in her Schnauzer Snips page.


In my 09/23/16 post The Library Stack (and a little EPP) I mentioned that I was learning English Paper Piecing (EPP) using the book All Points Patchwork by Diane Gilleland.

So here is an update:

After purchasing a hexagon paper punch, I punched our a huge stack of hexagons using old cardstock from my handmade card making days.

img_2790

This past Spring, Terry the Quilting Husband and I went to the Central Oregon Quilt Shop Hop. During the Shop Hop we each received a “fat 1/8th quarter” of coordinated fabric. I stuck this fabric away for a future project and it seems perfect for my EPP experimentation!

IMG_2793.JPG

I put together a plastic tote for my EPP supplies:

IMG_2840.JPG

And here is my beginning stack of EPP hexagons:

IMG_2841.JPG

So why EPP?

Well I had become addicted to playing games on my iPad in the evening as we watch evening TV shows (like NCIS on Tuesdays).

Playing these games were actually making me kind of frustrated and anxious as I moved into higher and higher levels. I had lost the sense of initial enjoyment that I experience when I first played. It became as if I had to keep playing and get to higher and higher levels  (but why, for what purpose?).

Although the games were a complete meaningless waste of time and no longer fun, I did not seem to be able to stop. I even tried deleting them from my iPad but in a moment of weakness the following evening, I would reinstall the app for evening TV watching.

I do not seem to be able to just sit and watch TV, I have to be doing something else. It was clear that I needed a productive alternative to playing these games and EPP seemed like the perfect solution.

So now I can do something productive with my hands in the evening while watching TV instead of playing iPad game apps! I am starting to find EPP kind of addicting – I like to keep cranking out EPP completed hexagons and it is becoming a game of how many hexagons I can rack up in an evening! (Oh no soon I will be strung out on hexagons!)

Next time I update you on my Adventures in EPP, hopefully I will have enough hexagons to start planning a small piece. Perhaps I will have even started assembling the hexagons into a piece!


POSTSCRIPT

If you are not familiar with English Paper Piecing (EPP), the online craft class site Craftsy has a nice little overview called Exploring English Paper Piecing.

Oh (random info) I recent reorganized my Gallery page into Art Quilts, Quilts, and Small Projects. I have a lot of old photos on this page and there are many old quilts I do not have digital photos on. Going forward I hope to only have high quality images of my work (but then I am taking the photos, so I am not promising – ha!)