Here is the second part of my two post series on the mini quilt retreat I attended on Saturday with my community quilting group to group make Project Linusquilts. Please see Part I of the story on this post – Project Linus Mini Quilt Retreat, Part I.
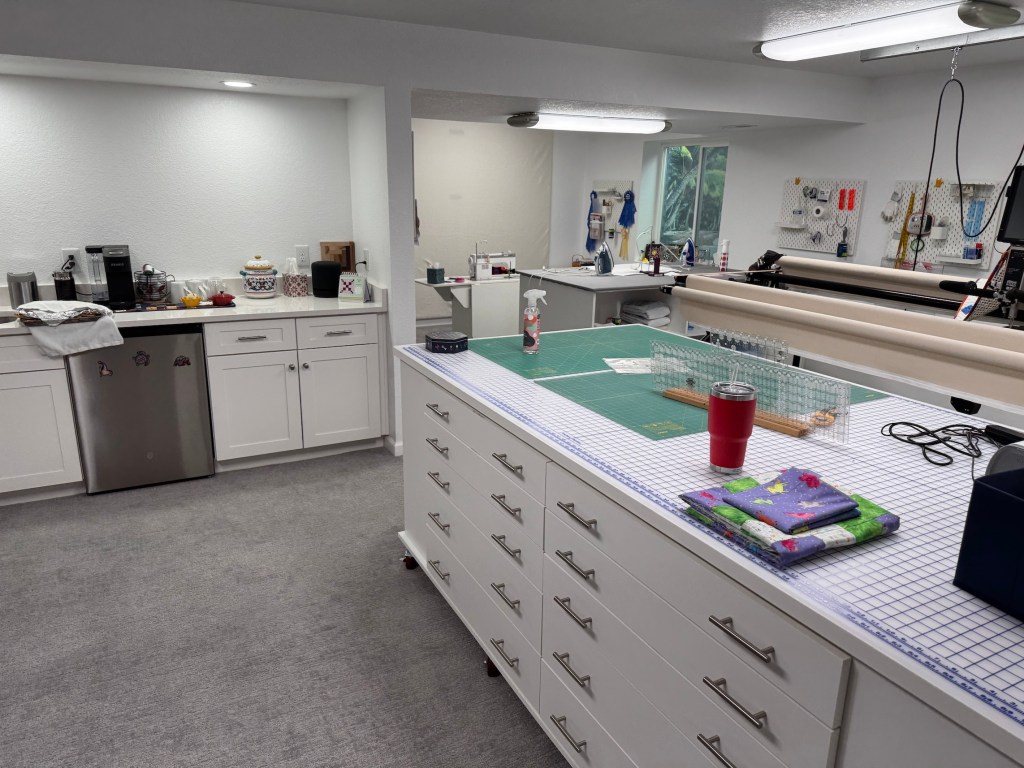
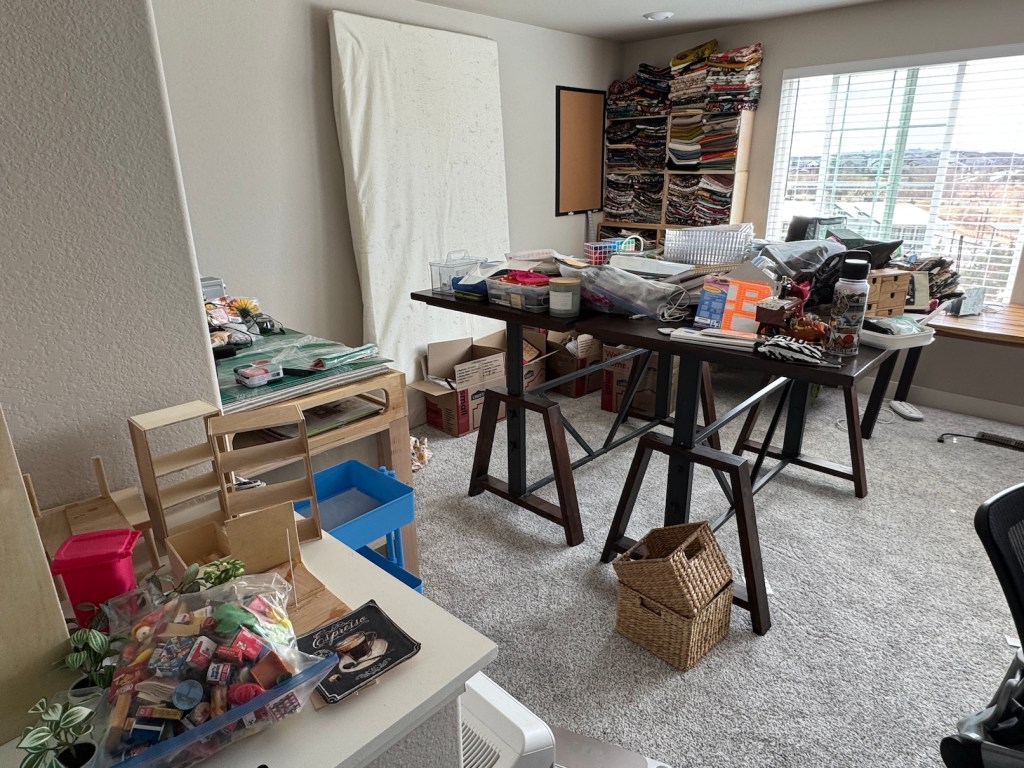
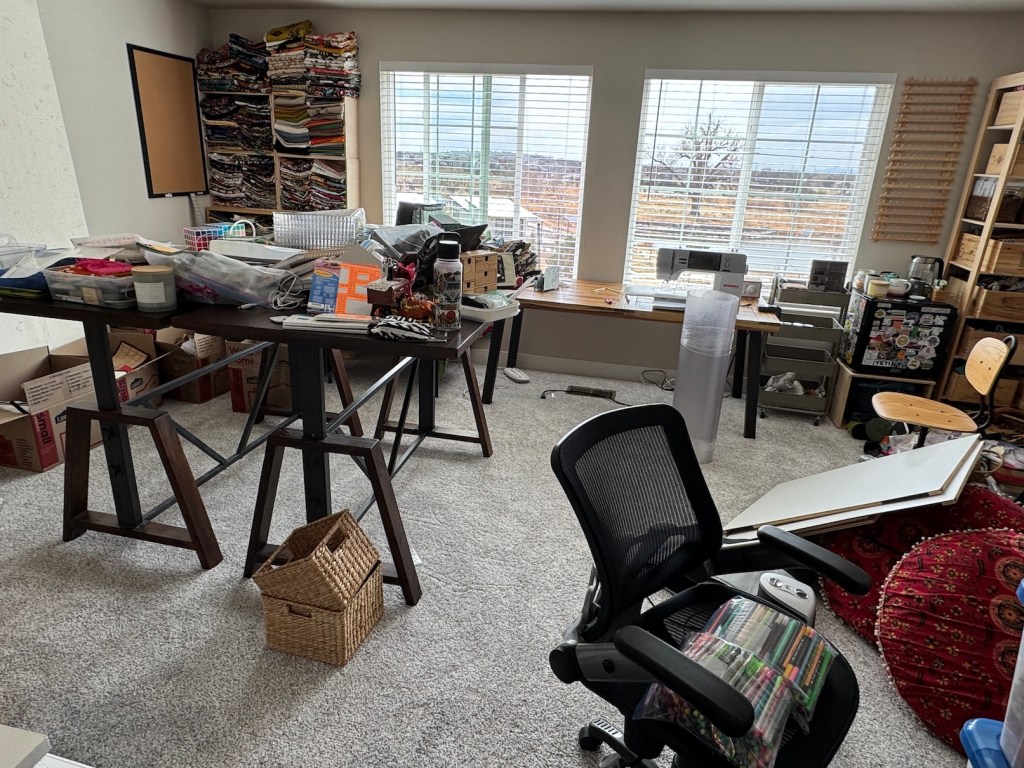
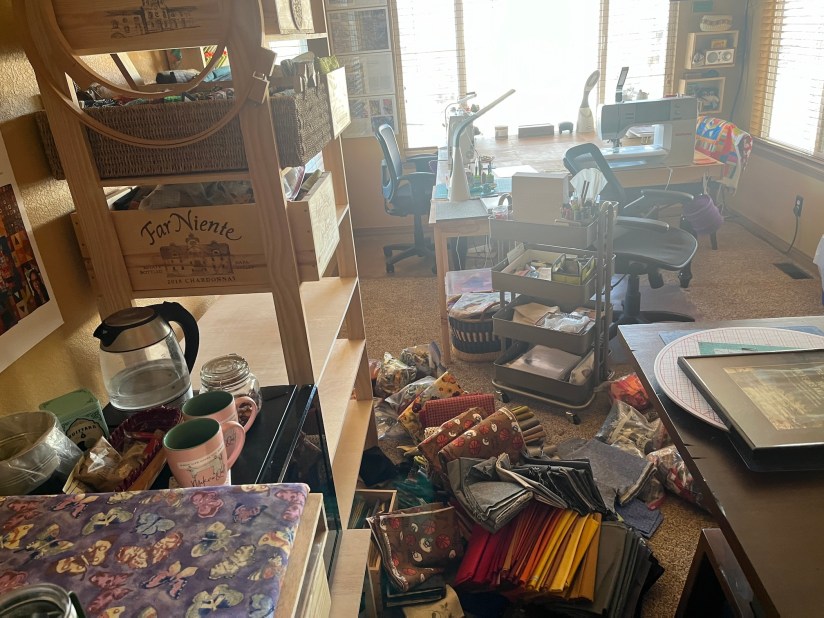
As mentioned in the Part I post, one of the quilt group members hosted the day retreat at her house in her basement that she had turned into an AMAZING quilt studio. In this post I thought I’d give you a little tour of her studio.
Here is a video I took at uploaded to YouTube (I was so proud of myself that I finally learned how to add music to replace the random snippets of conversation that were originally peppered throughout the video):
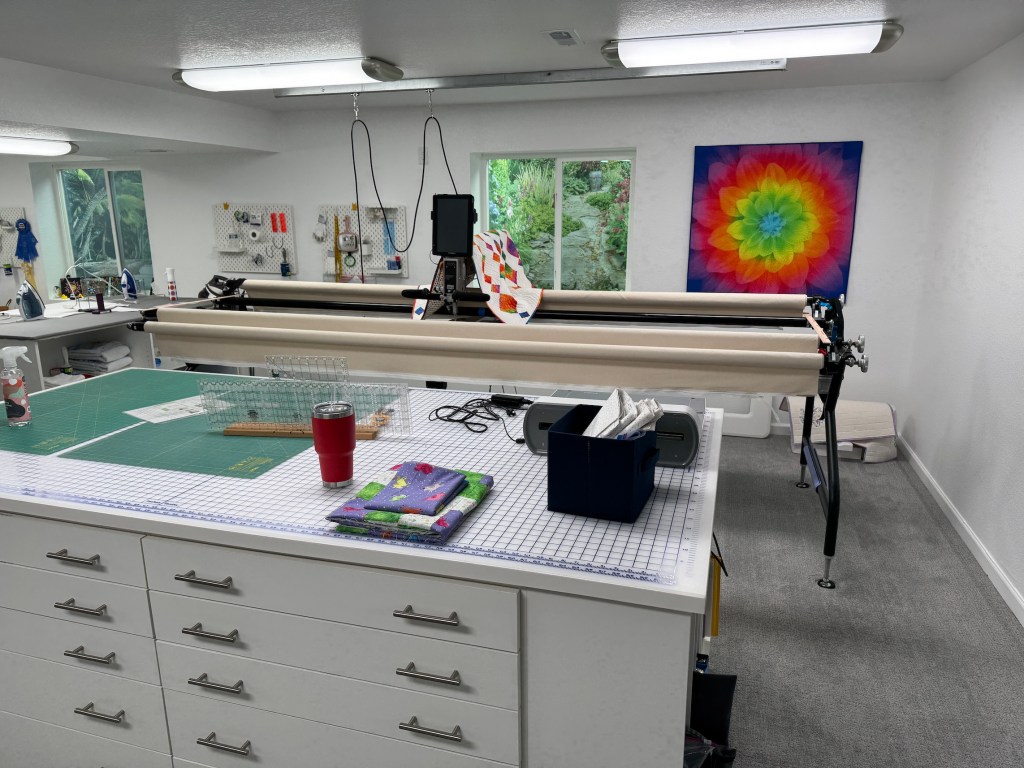
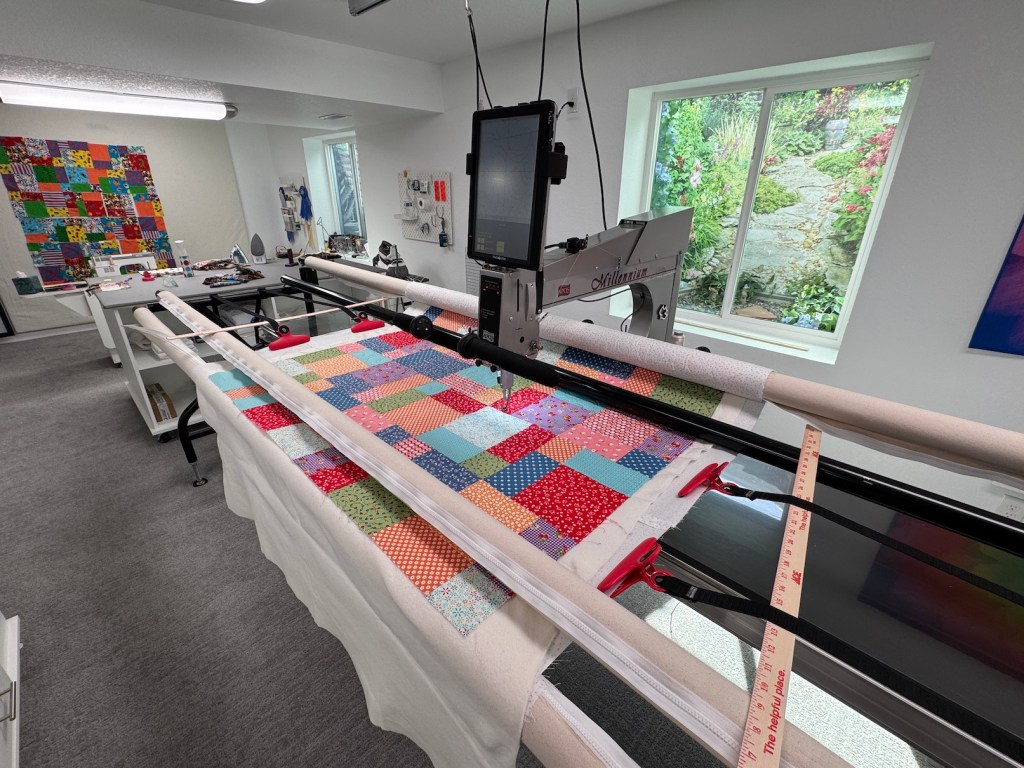
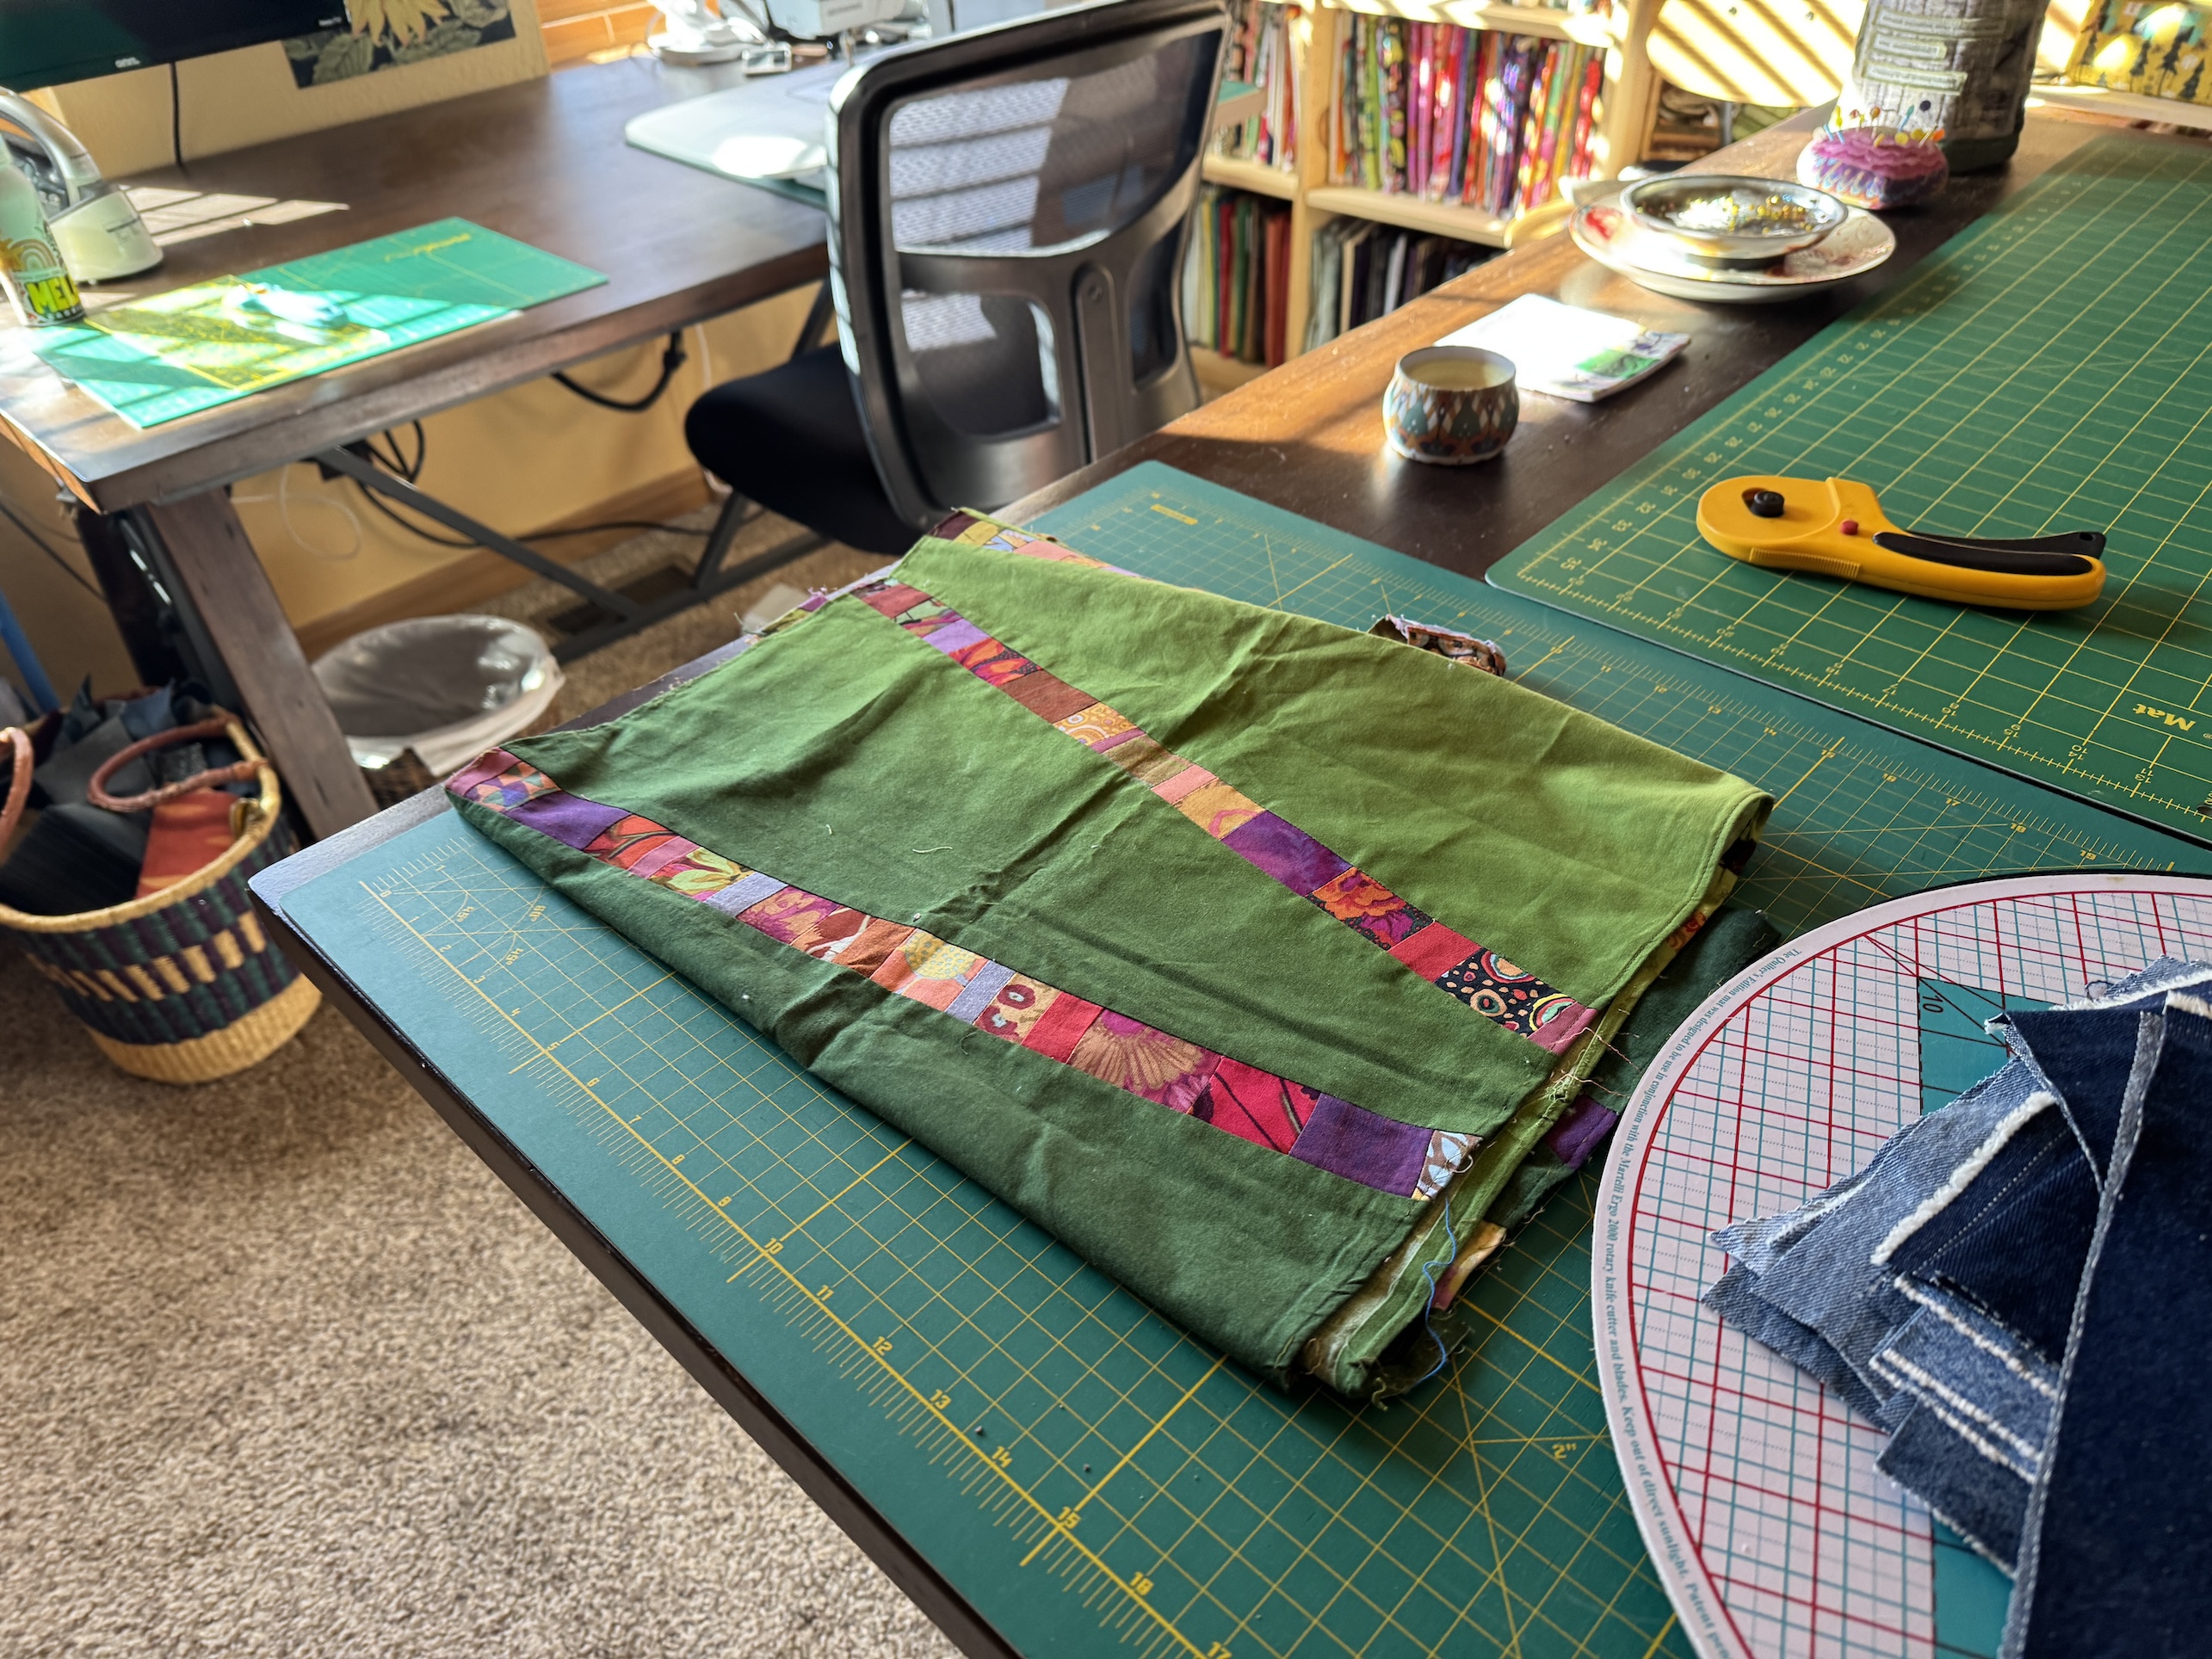
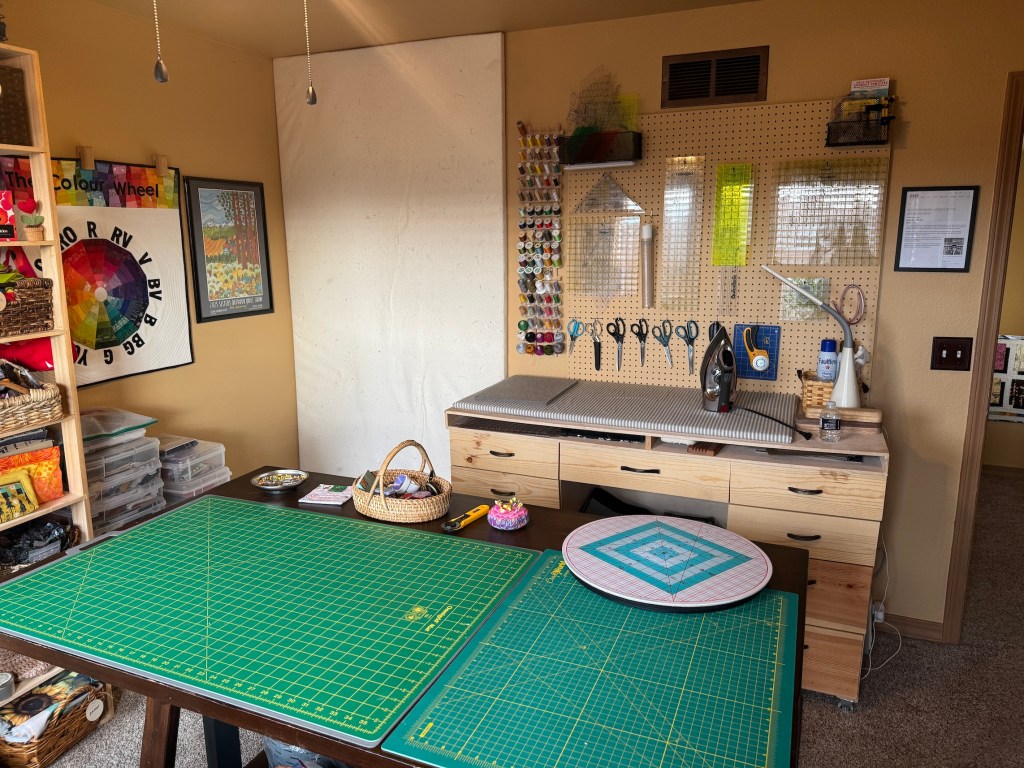
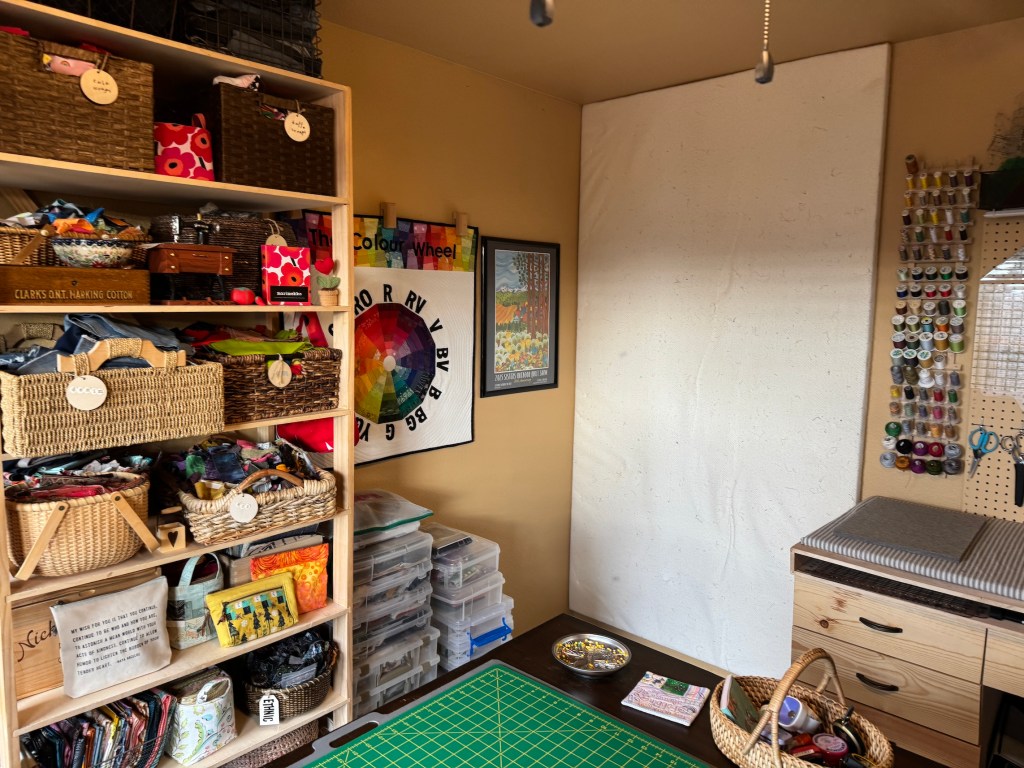
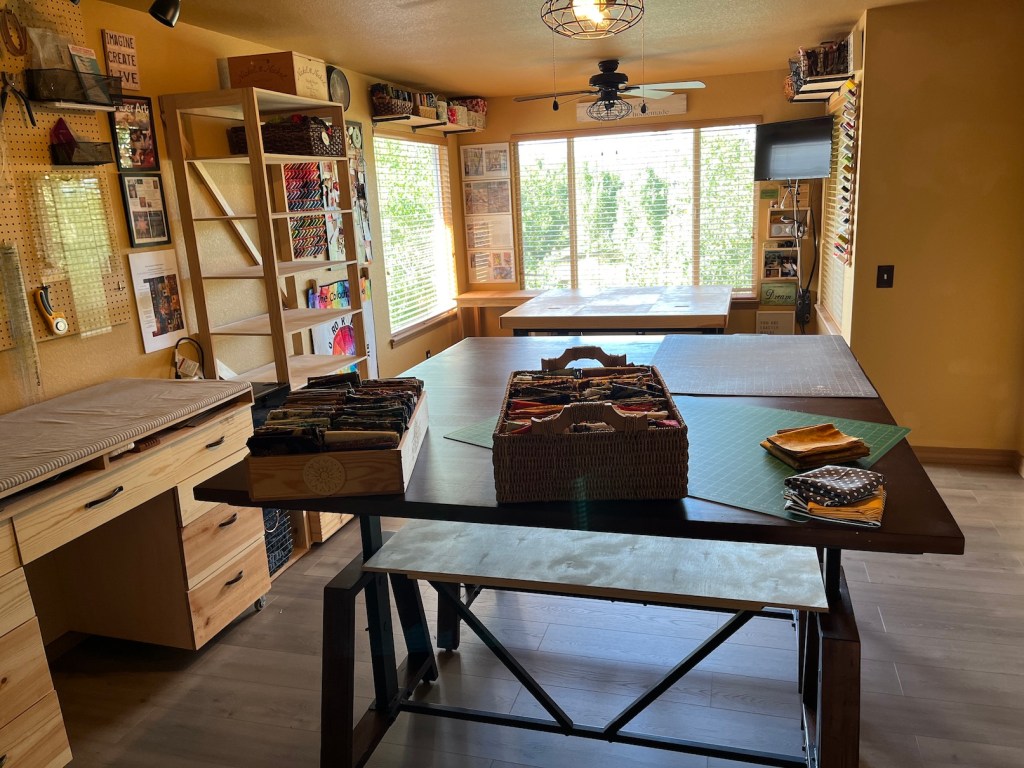
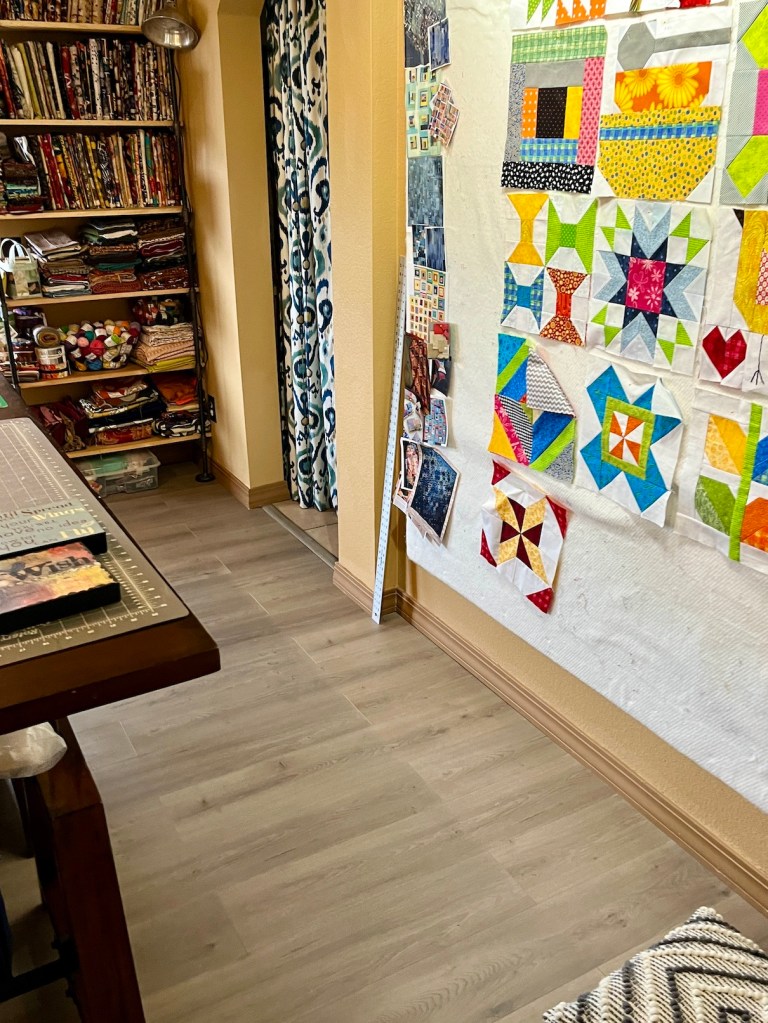
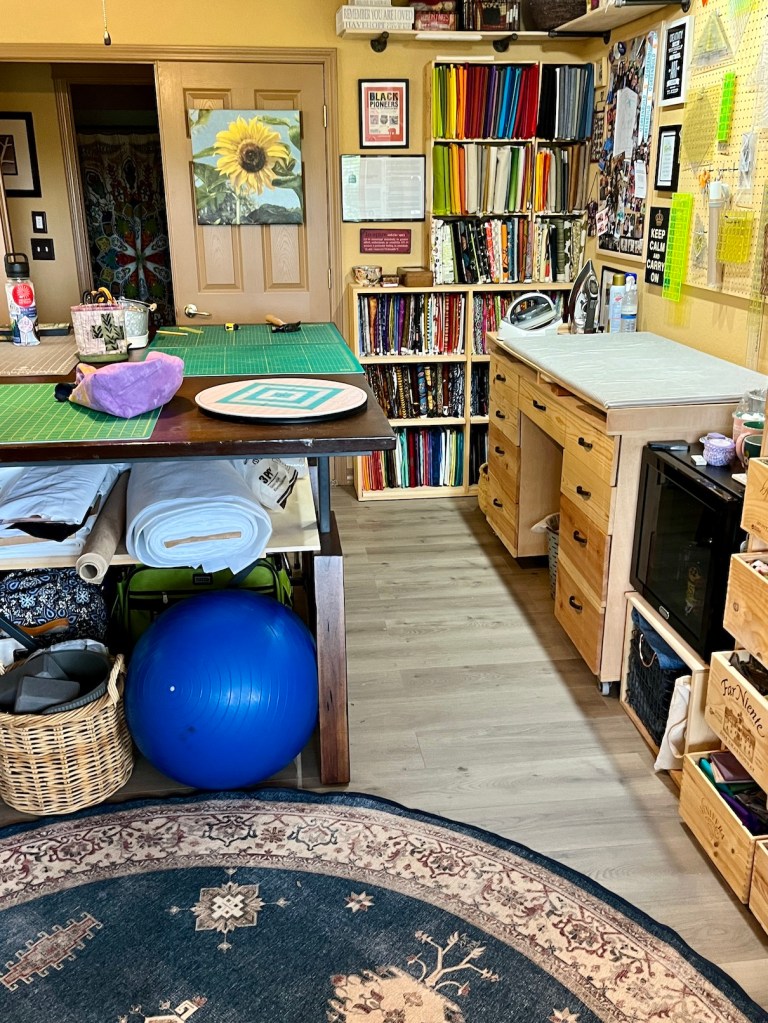
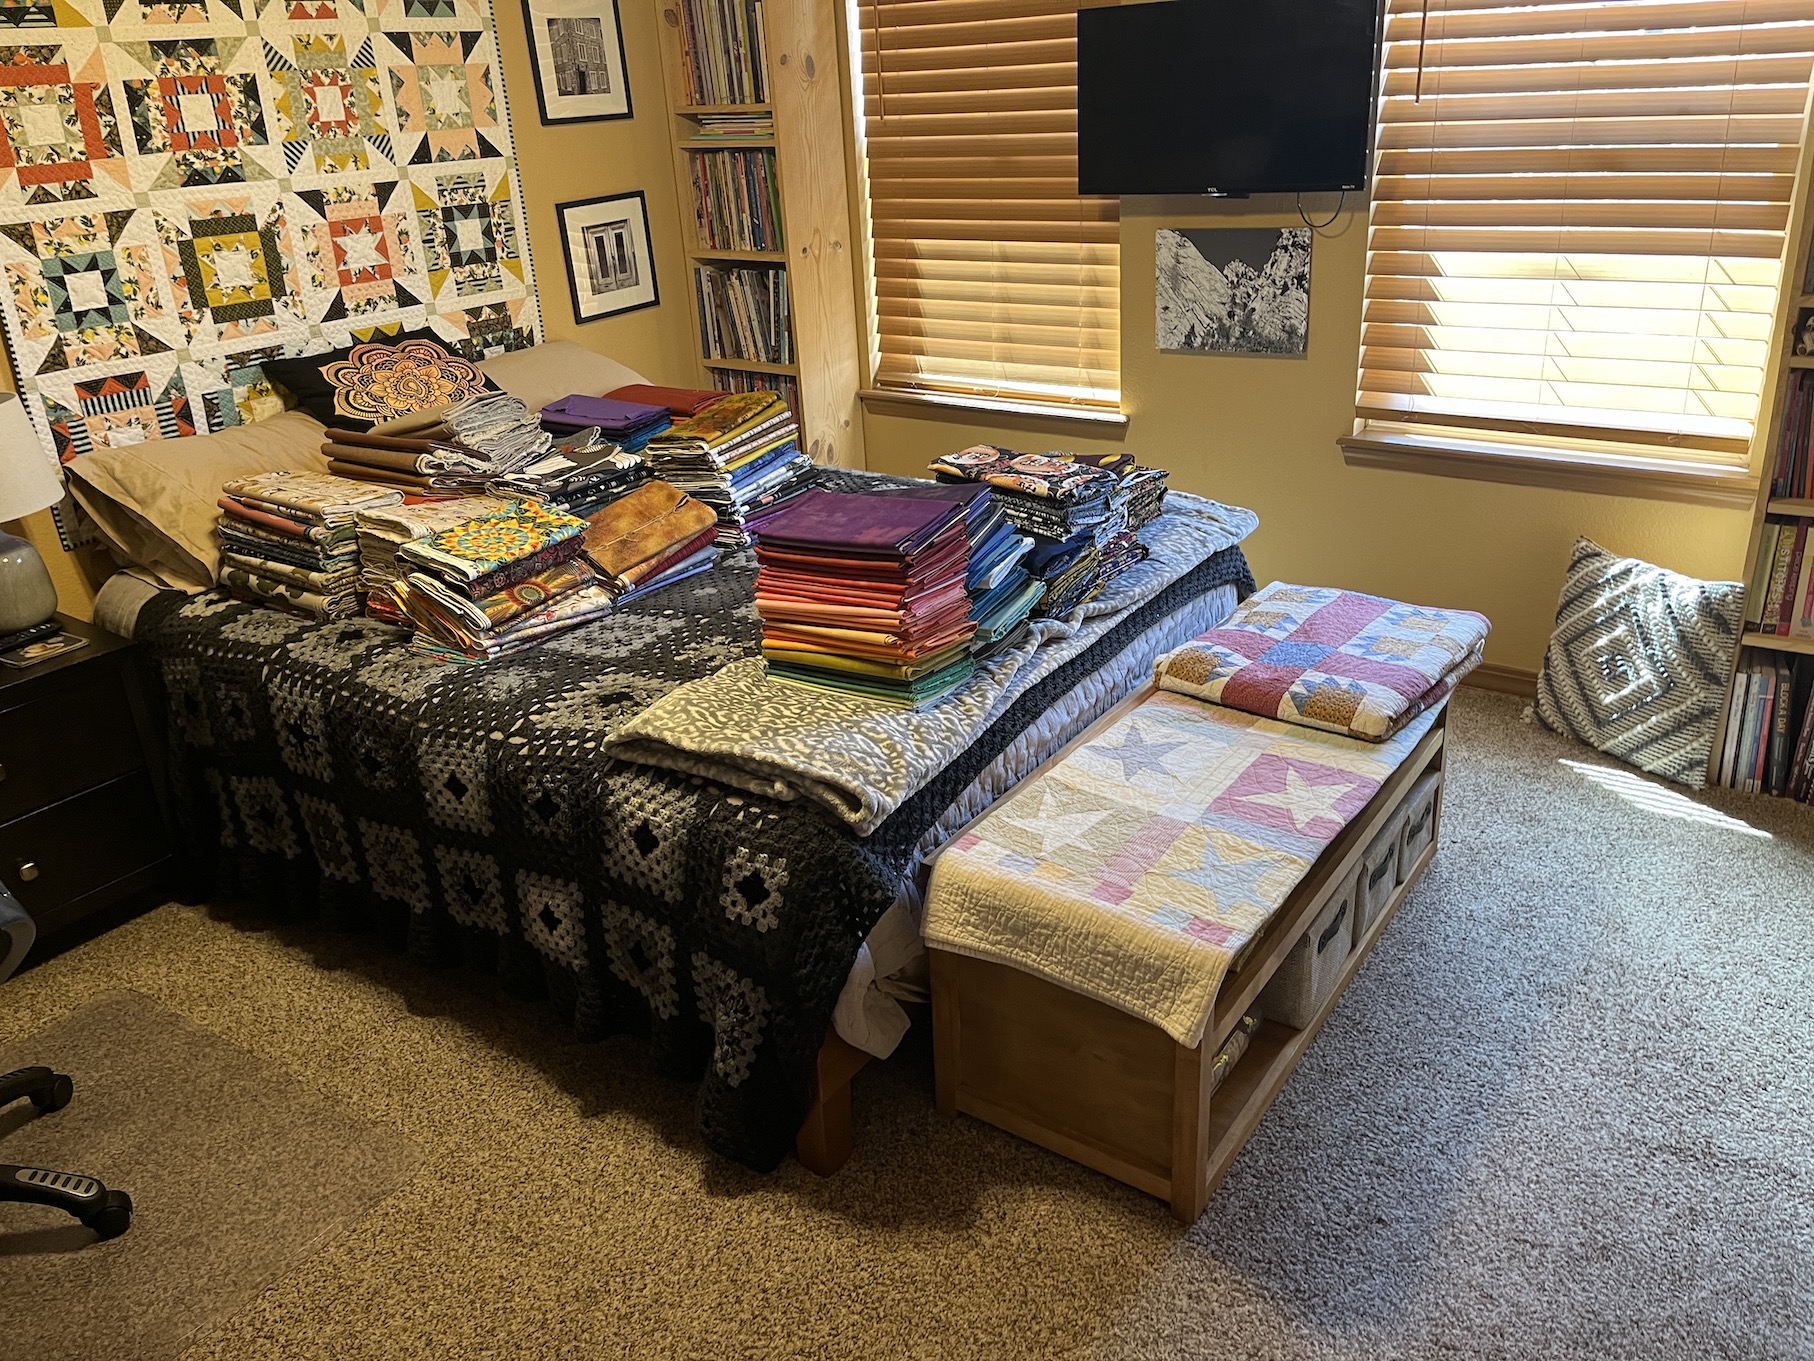
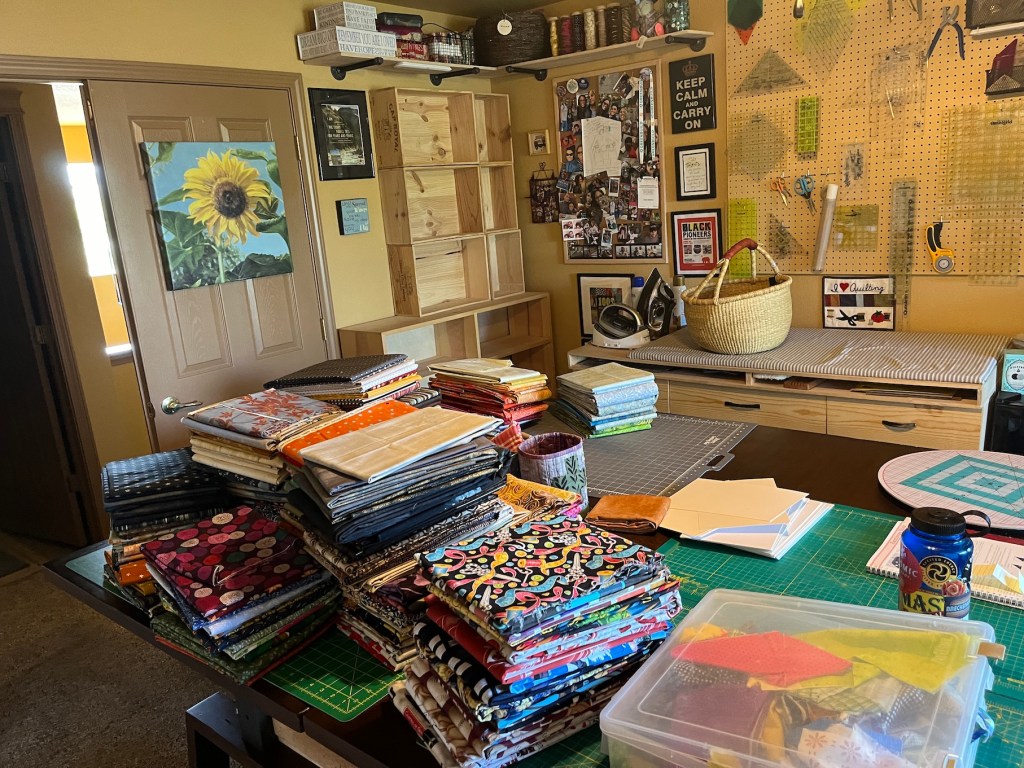
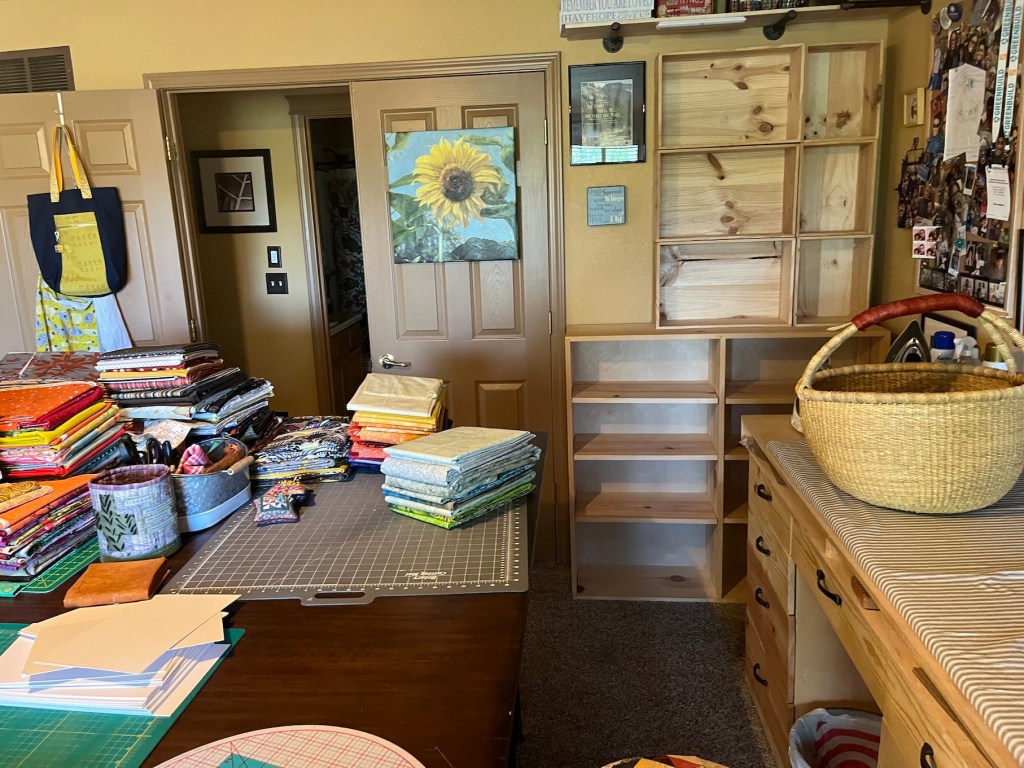
Here are some photos of the main section of the basement studio:
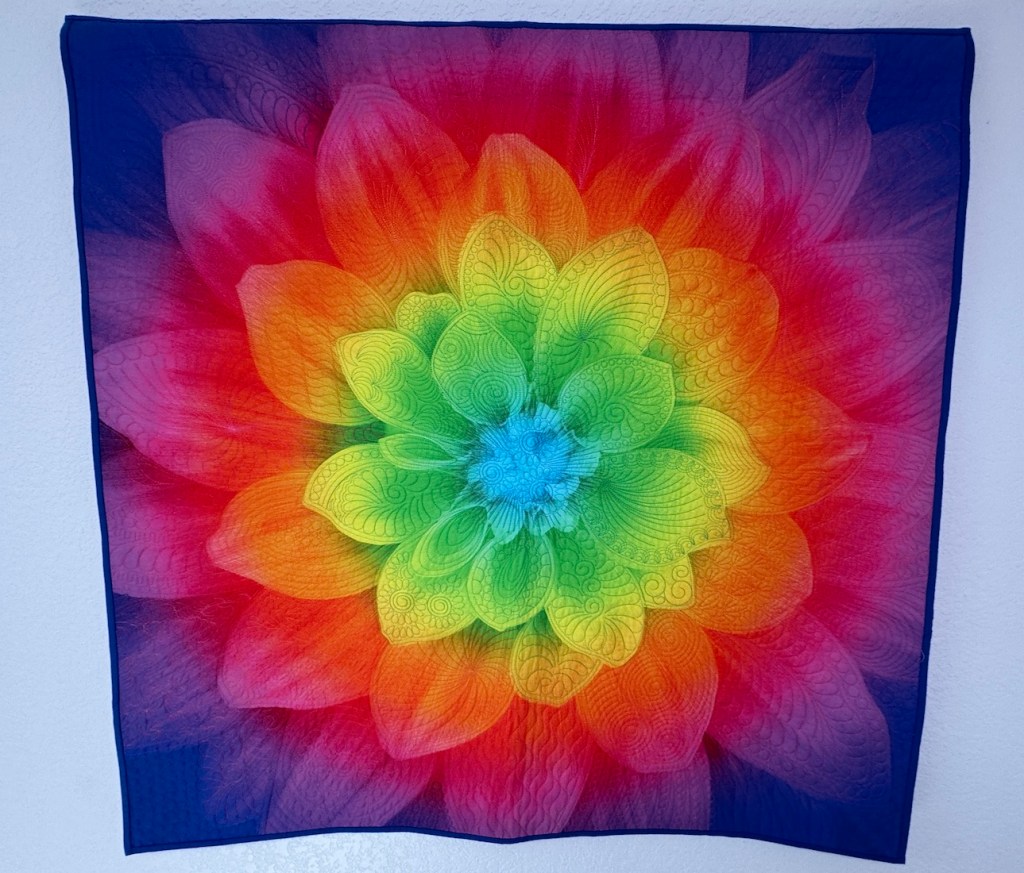
She is amazing quilter (making many of those complicated Judy Niemeyer patterns) and an amazing long arm machine quilter. Here is an example on a floral panel of some of her spectacular long arm quilting:
She did a little trunk show of some of her Judy Niemeyer pattern elaborate bed sized quilts she had quilted and I didn’t even think to take photos, darn it! (I was just too busy gasping!)
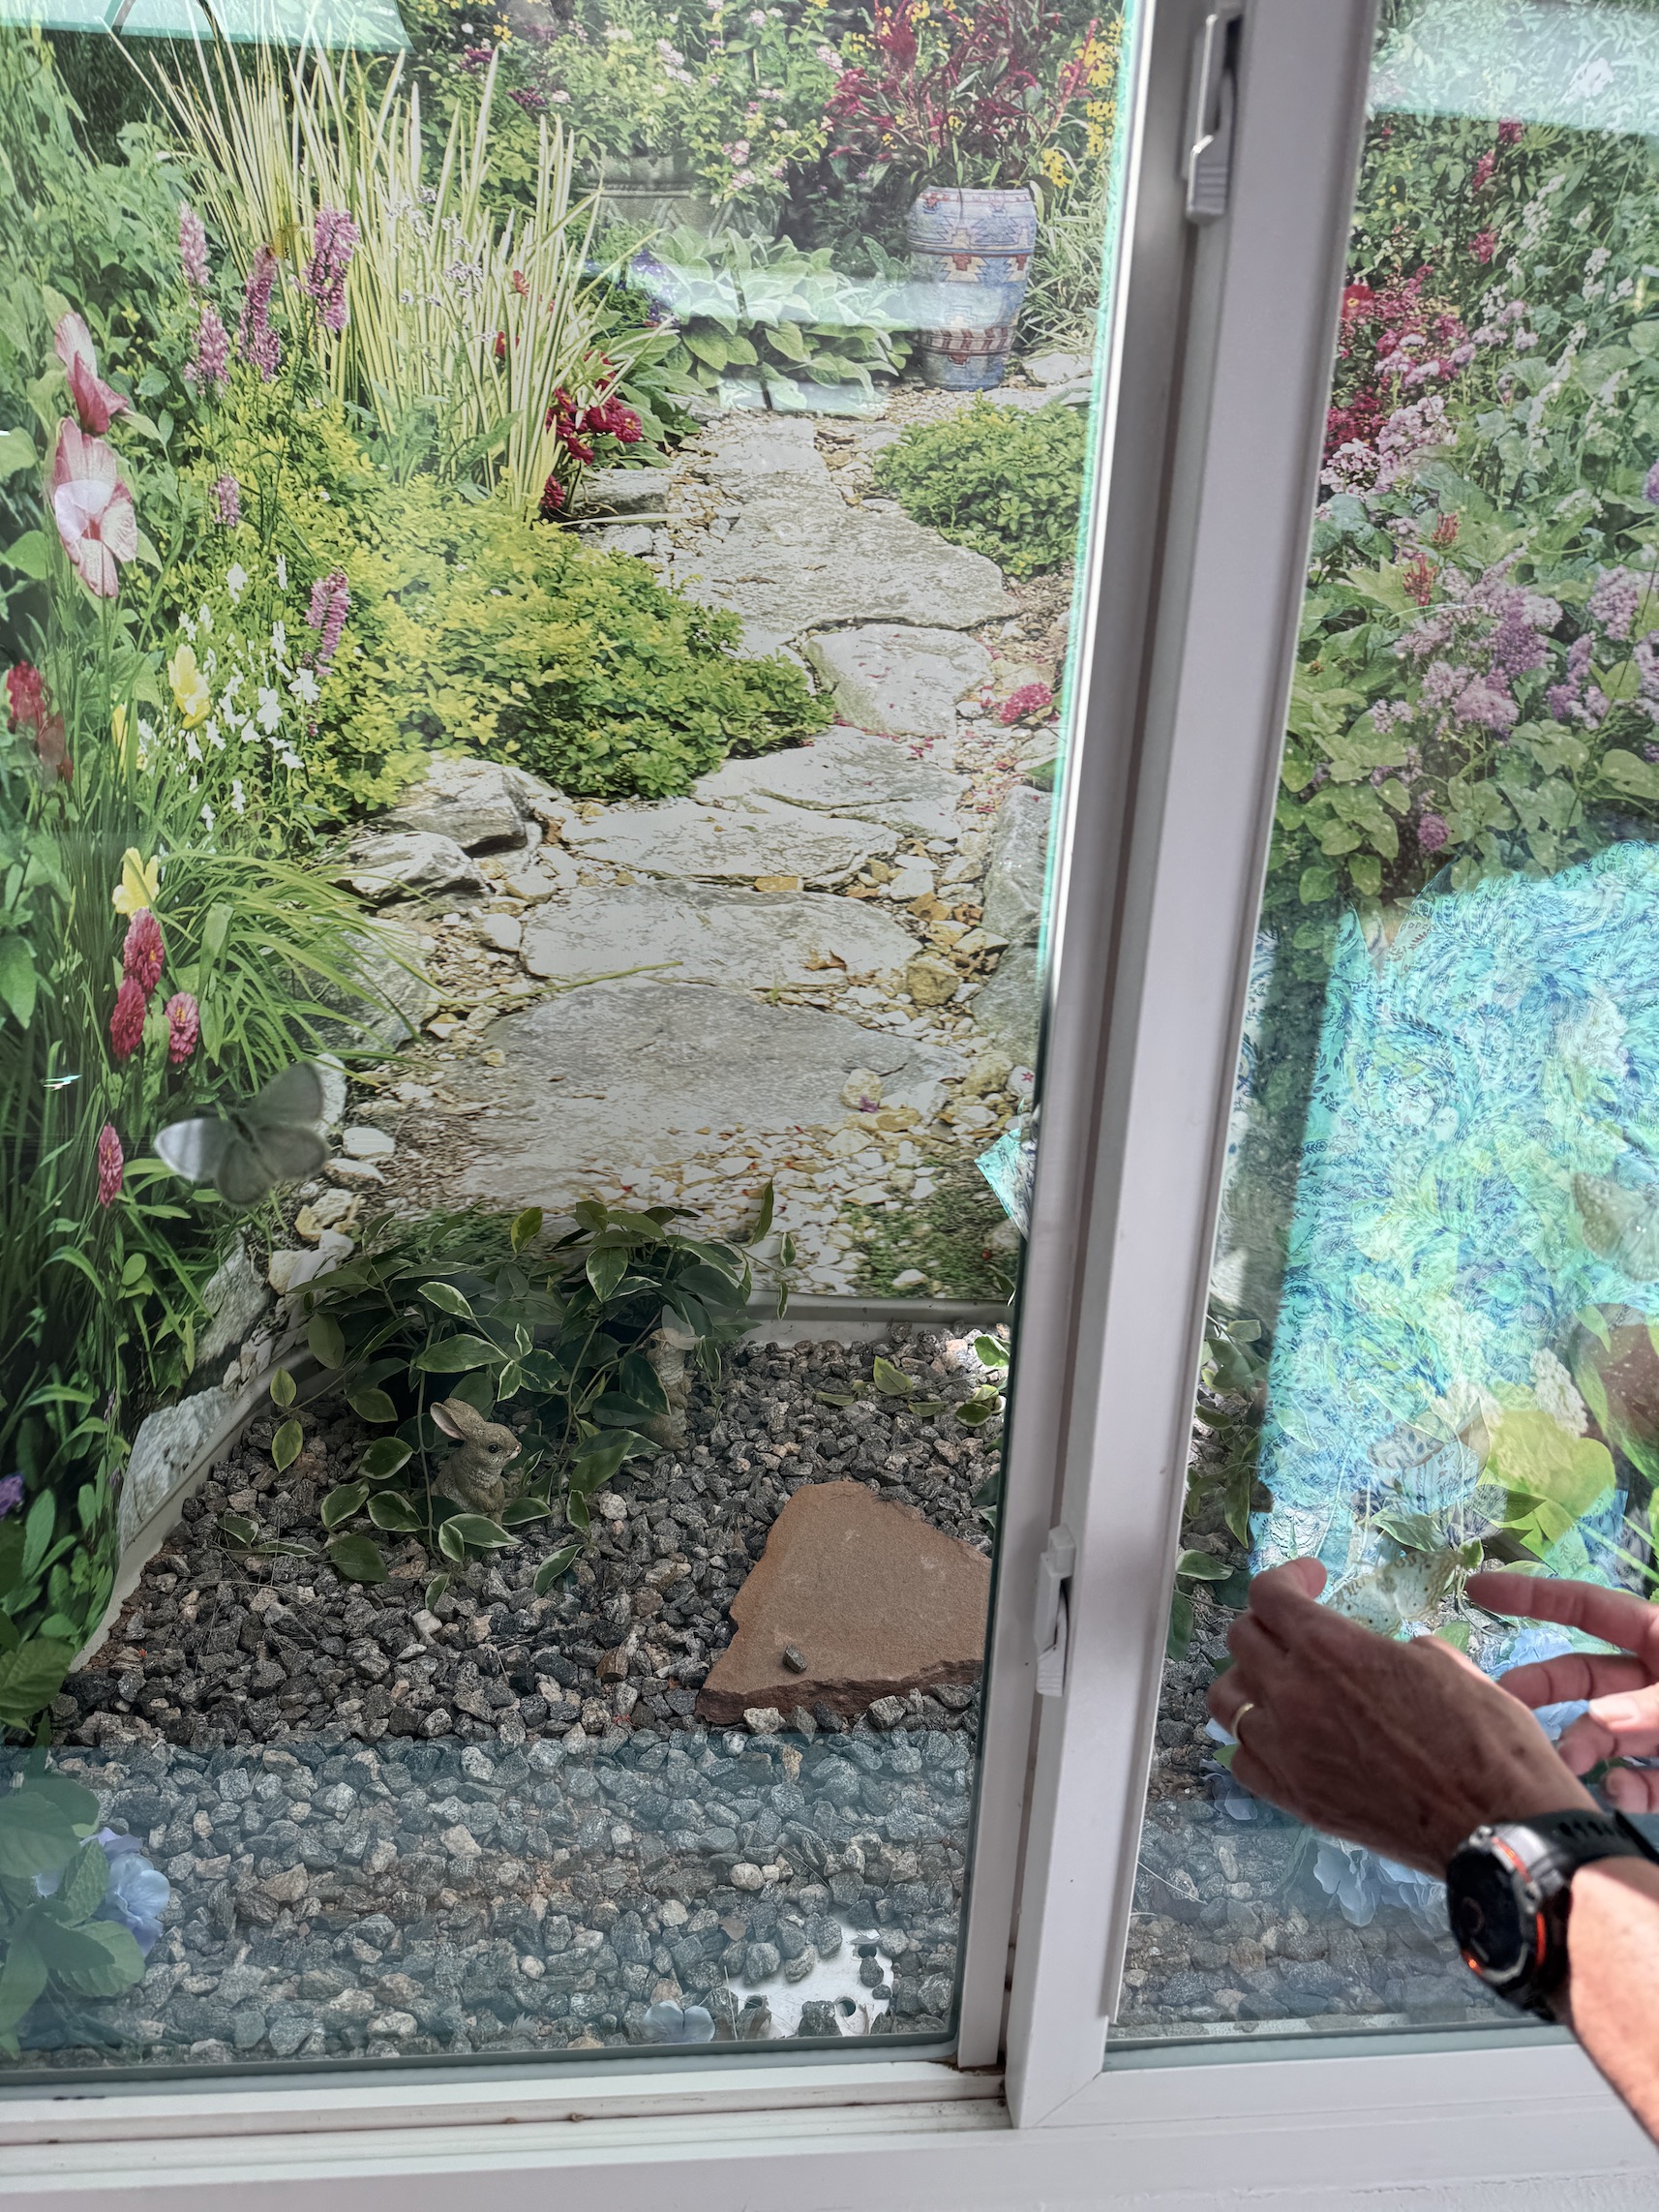
Since the studio is in a basement, it had window wells. Creatively she lined in cool landscape scenes her window wells!
I showed John and I’d like to do something like that someday in our window wells!
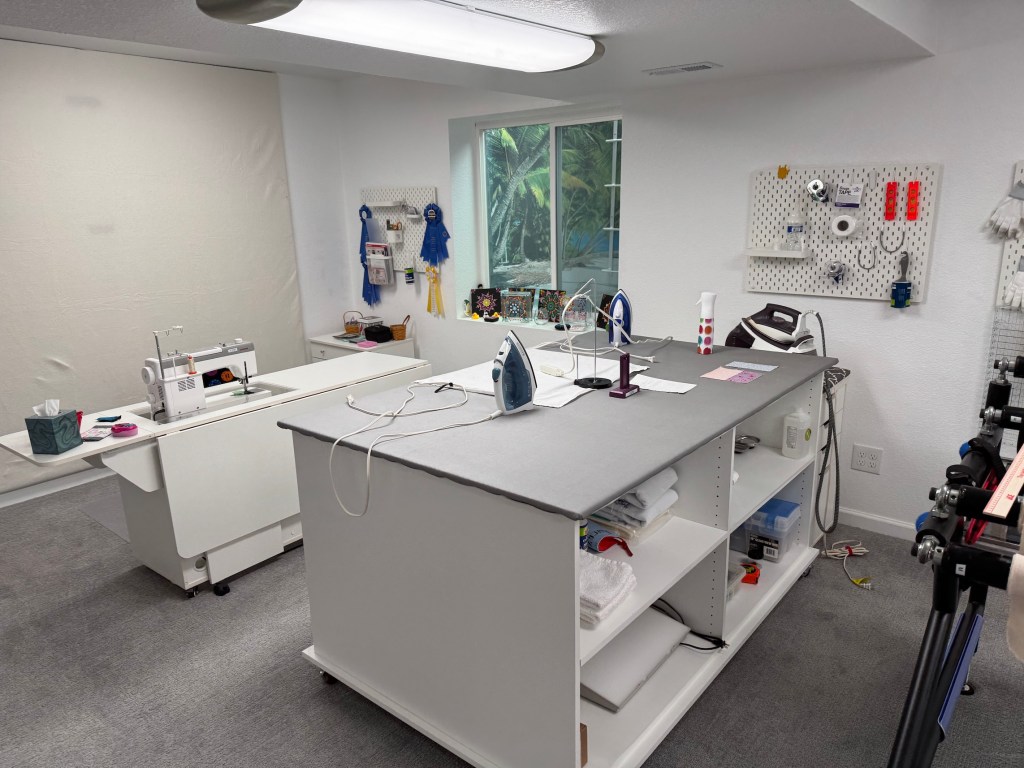
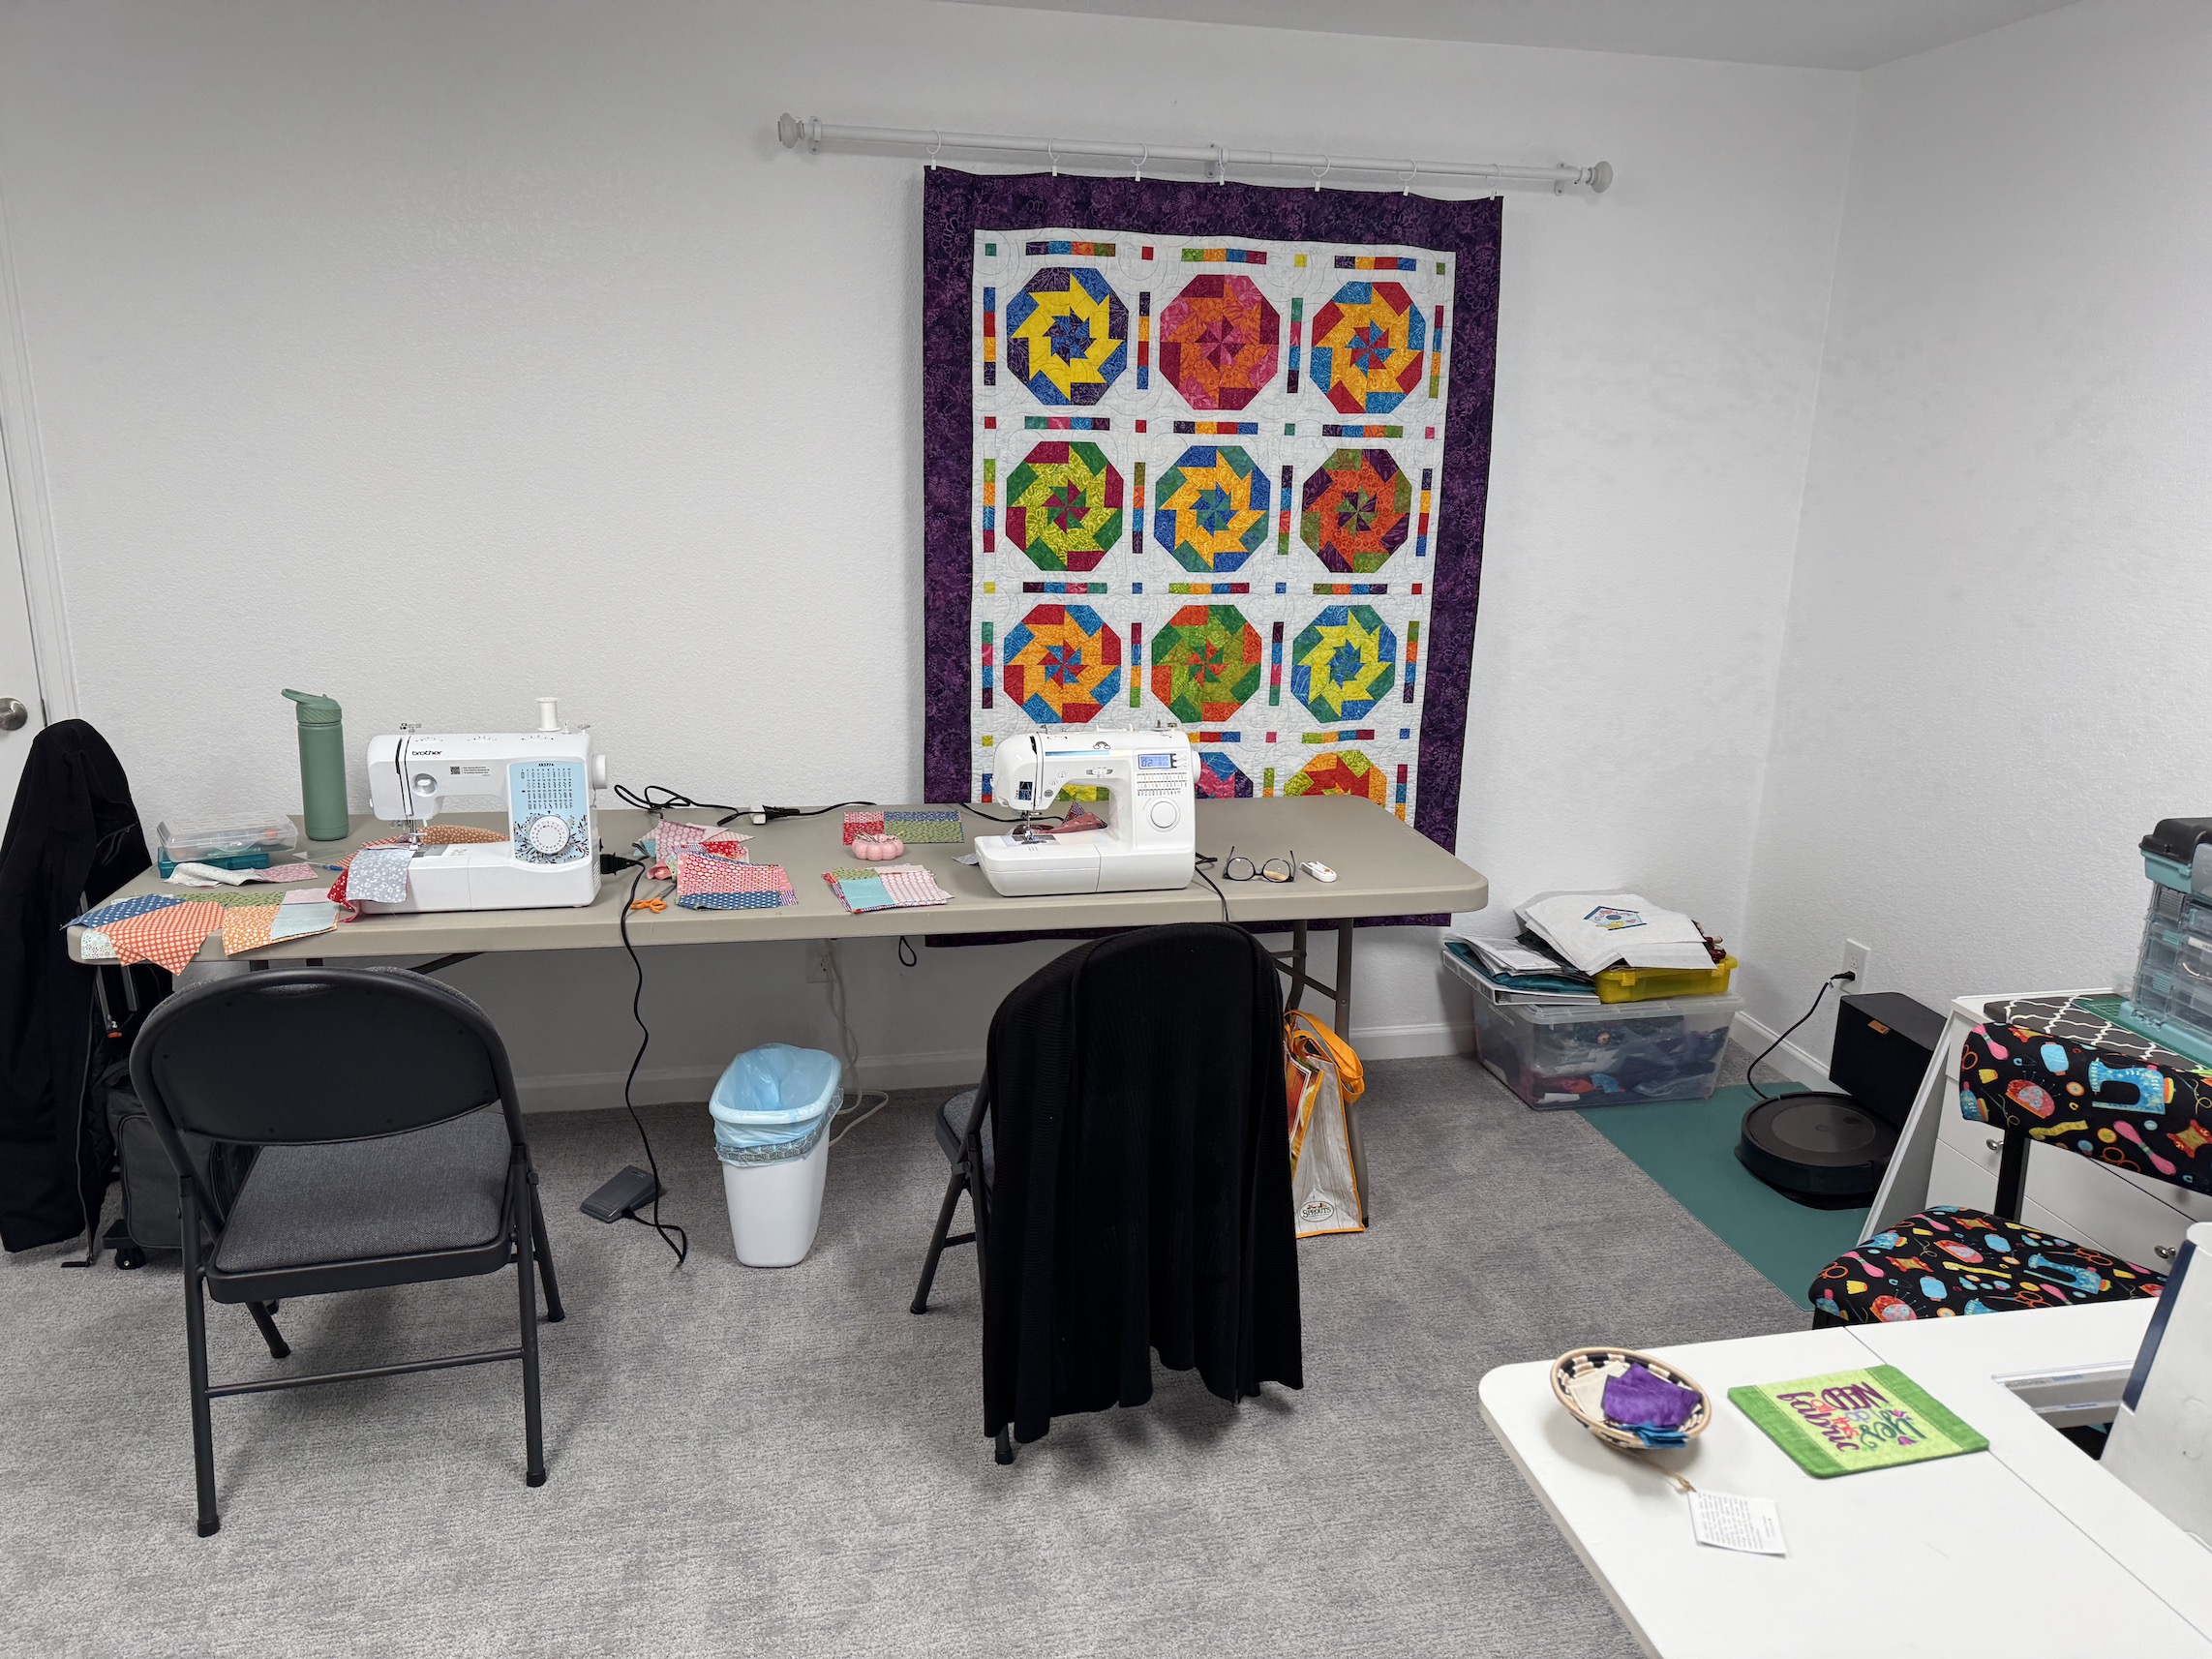
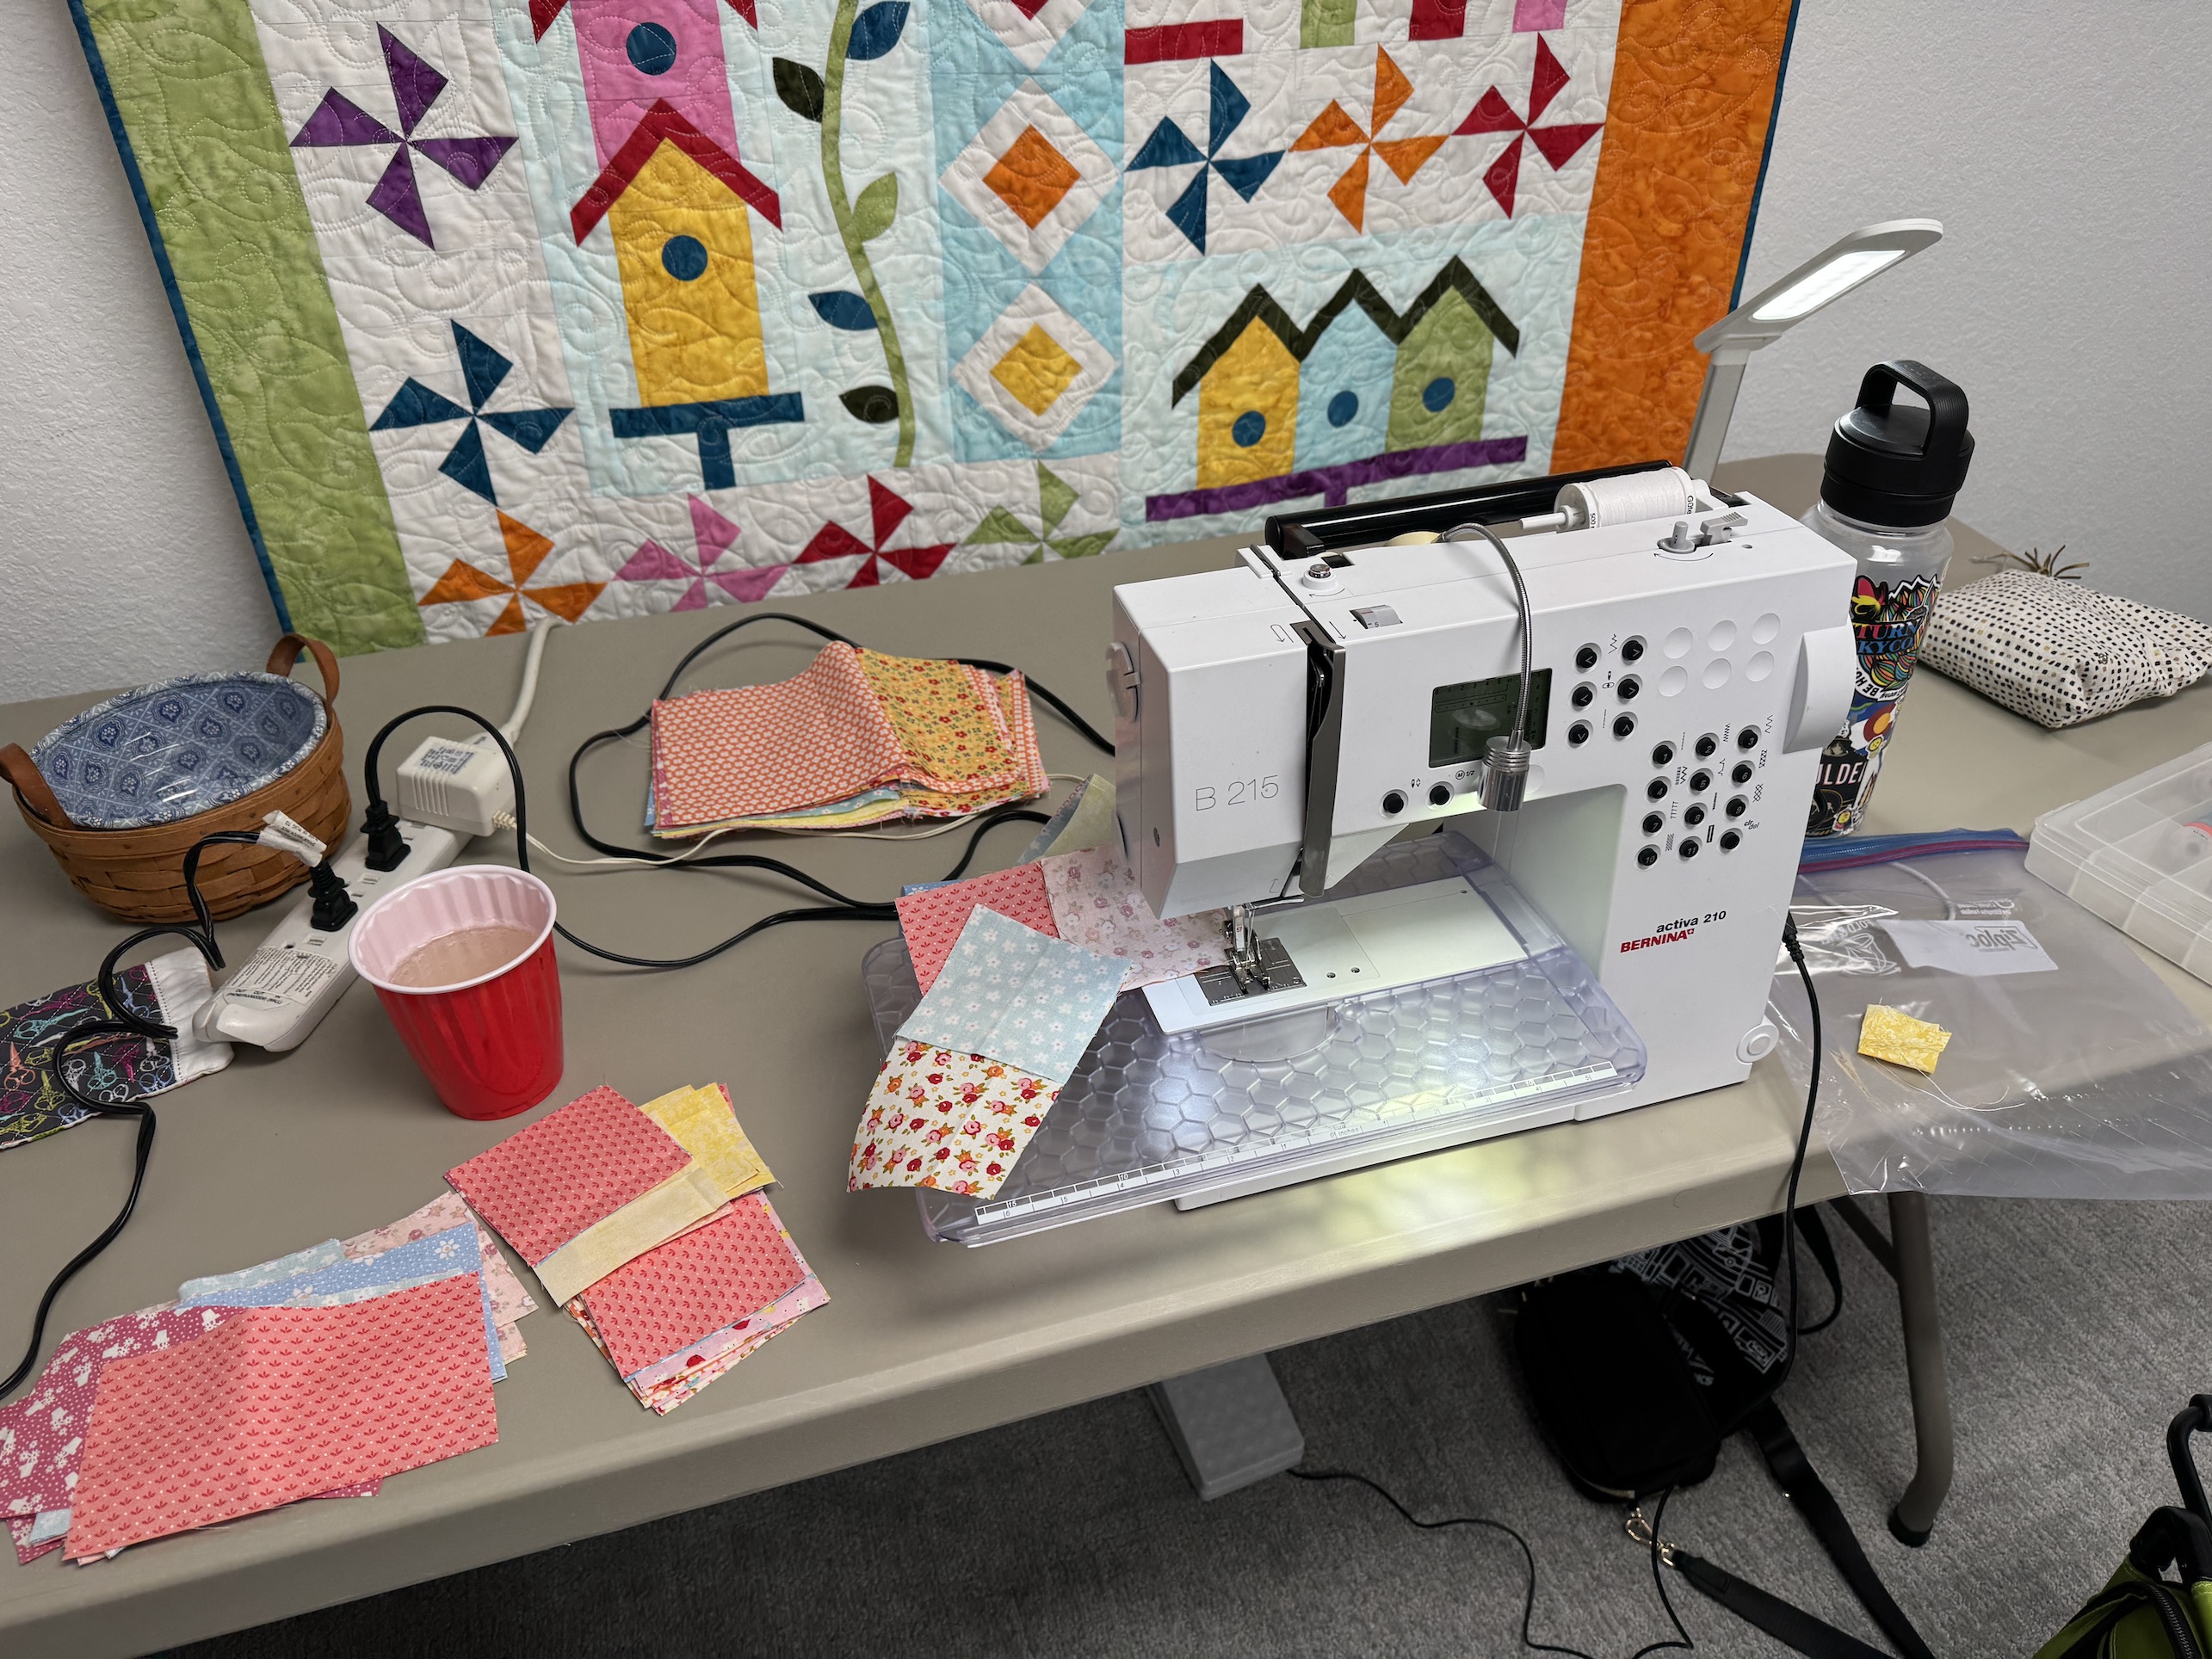
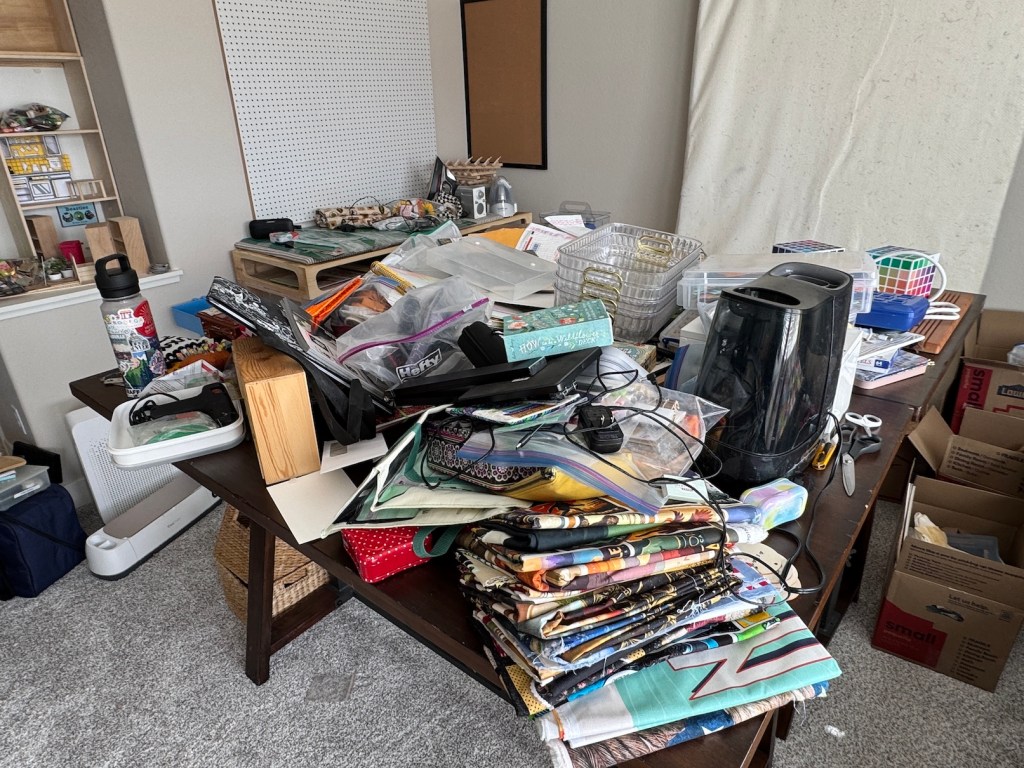
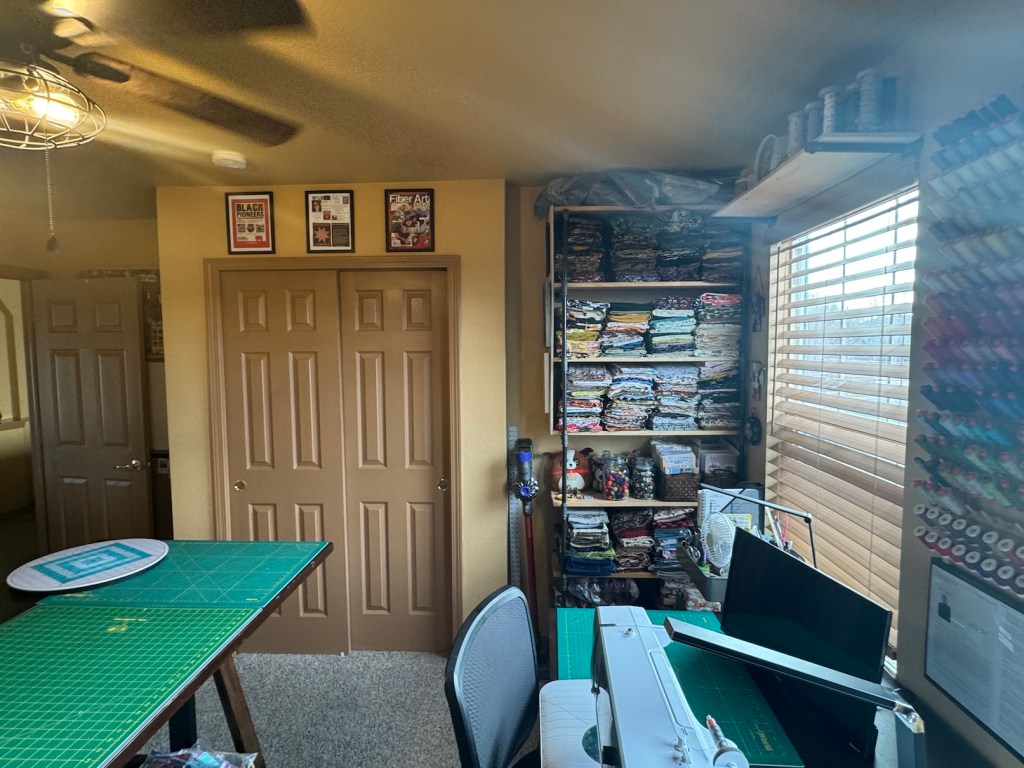
Oh and here is room attached to her studio which is set up little a quilting classroom/workshop area, in which I worked on my assigned Project Linus quilt during the retreat. I didn’t do the best job photographing the space as I was distracted visiting my new quilting buddies, but there are tables with power strips set up all around the room.
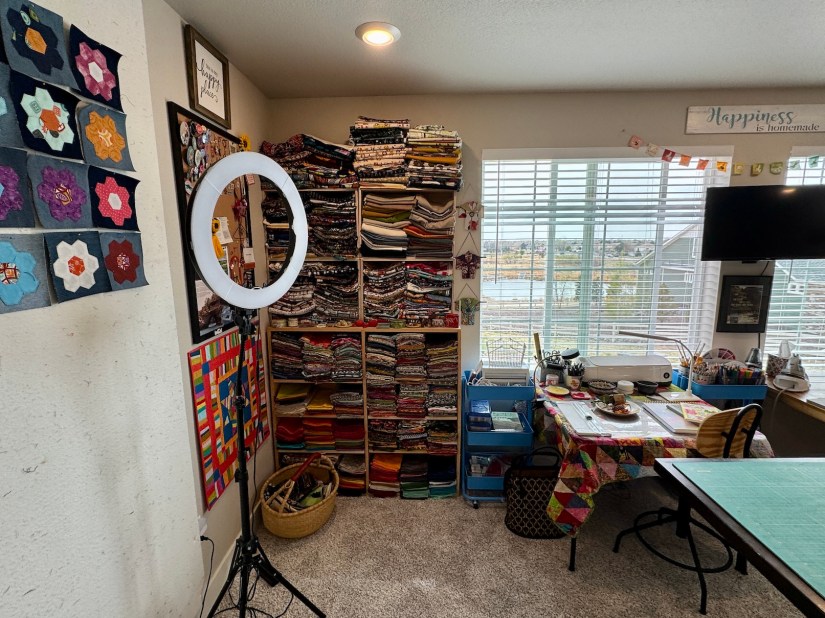
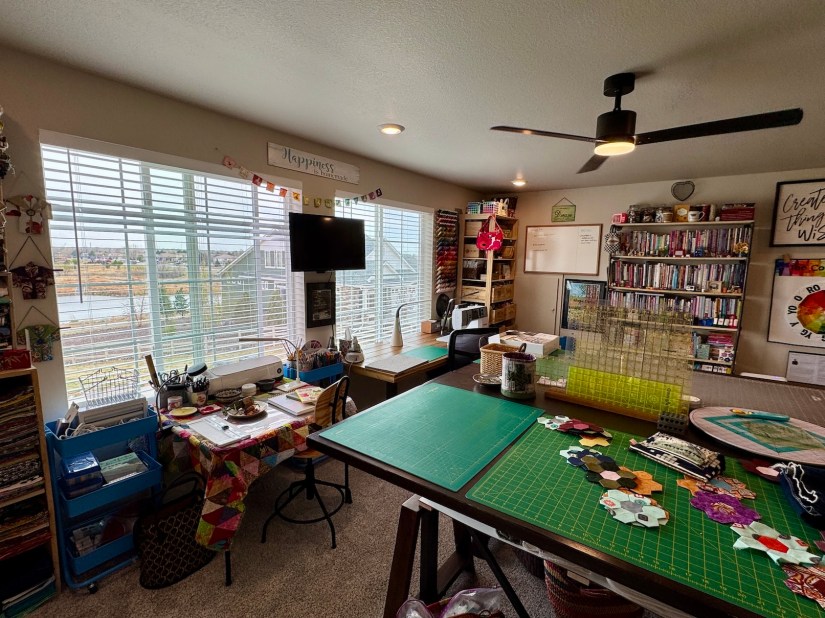
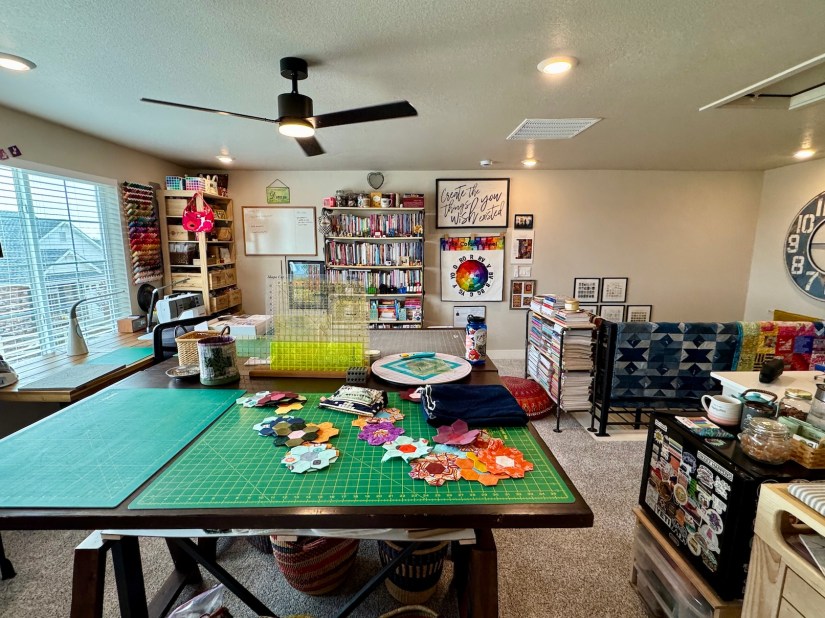
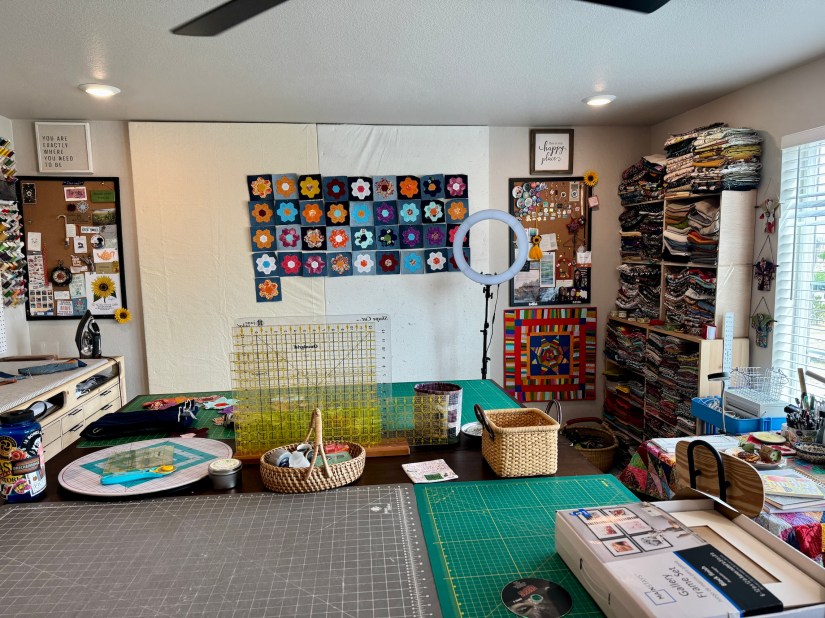
Well we’ve come to the end of my series of posts on my new studio in the upstairs loft of my new home. The previous related posts can be found in these links:
Thanks for reading this series of posts on my journey to put together my new studio and here is the full tour.
Full Studio Tour
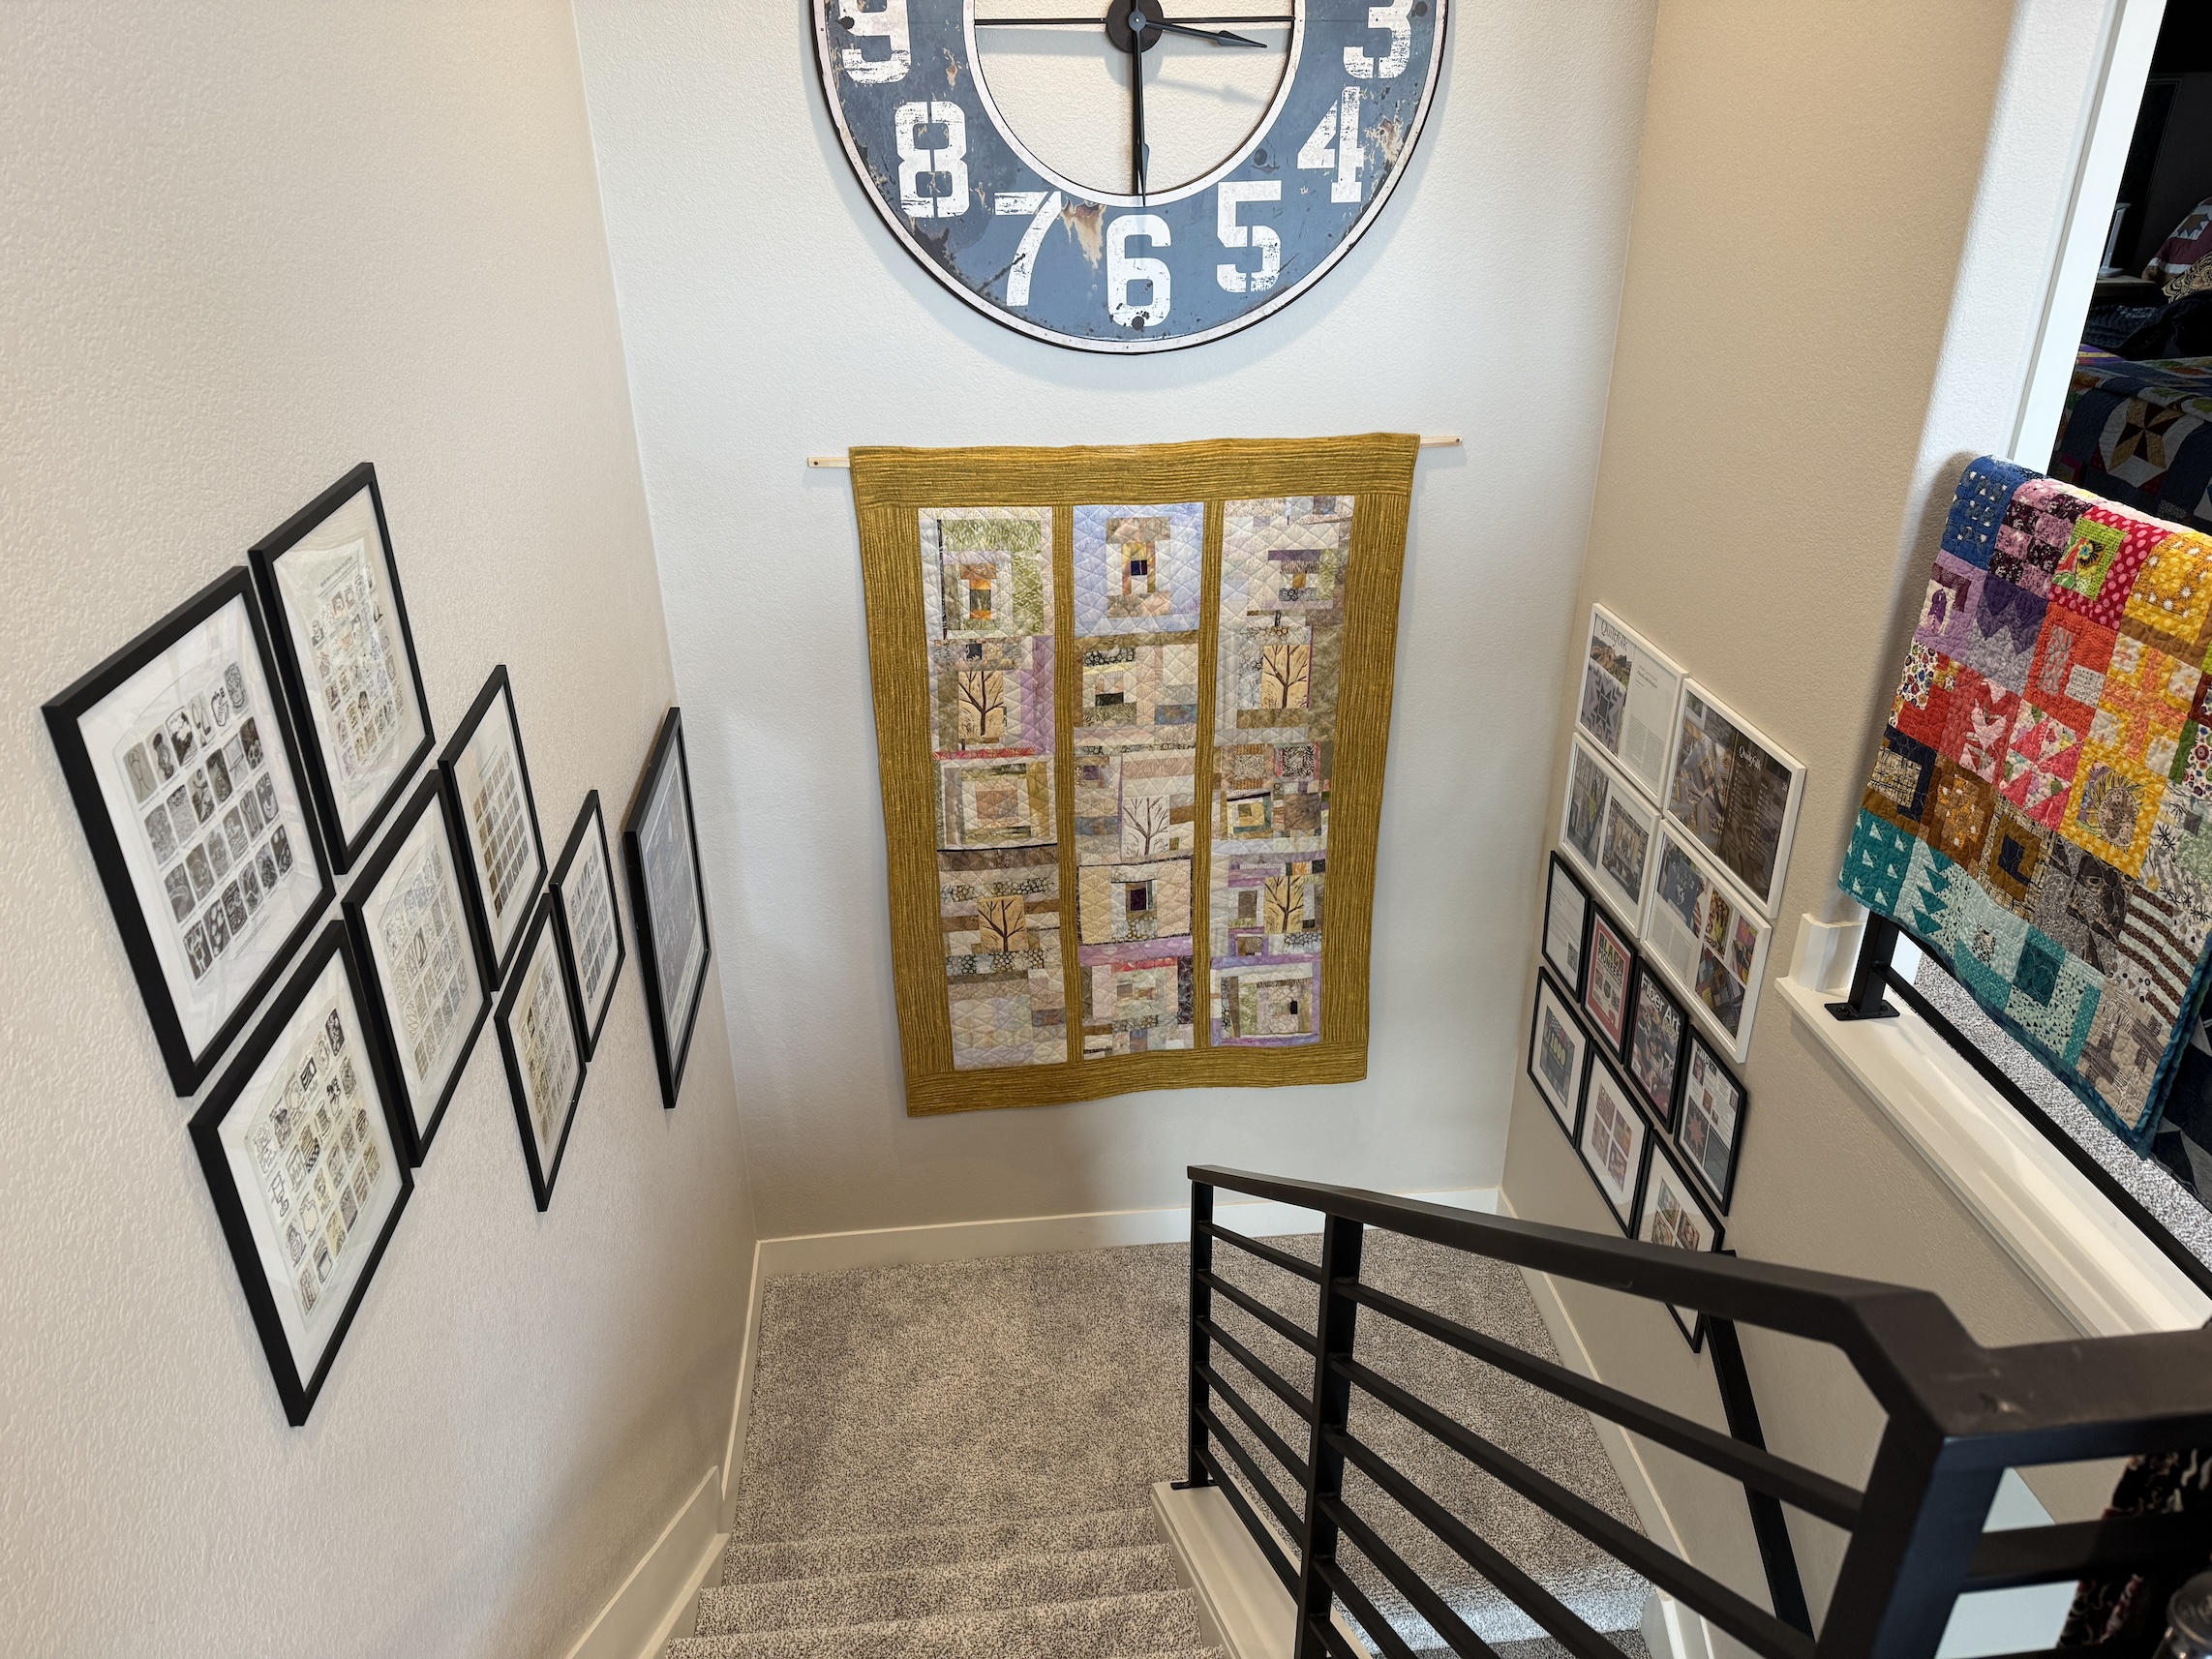
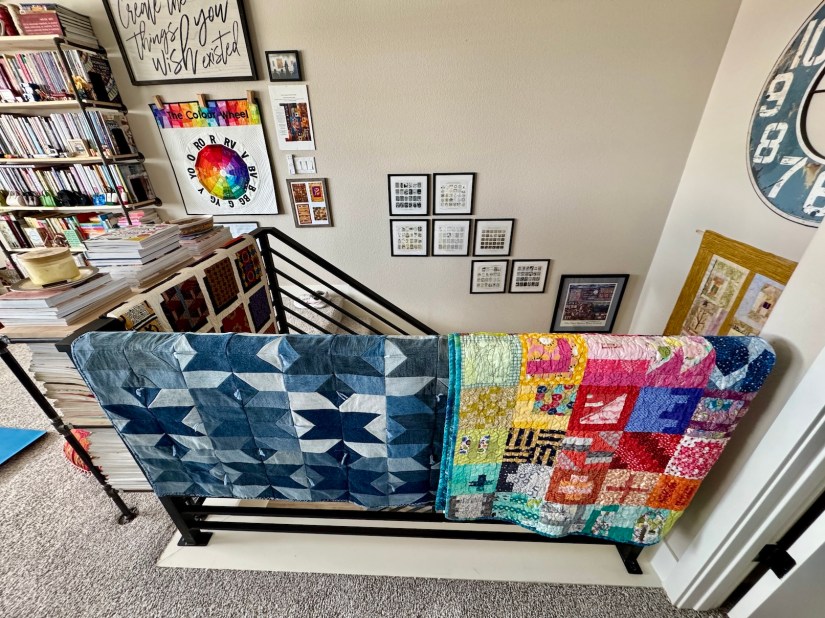
The stairs up to the loft (photographed looking down from the loft):
Entering the loft:
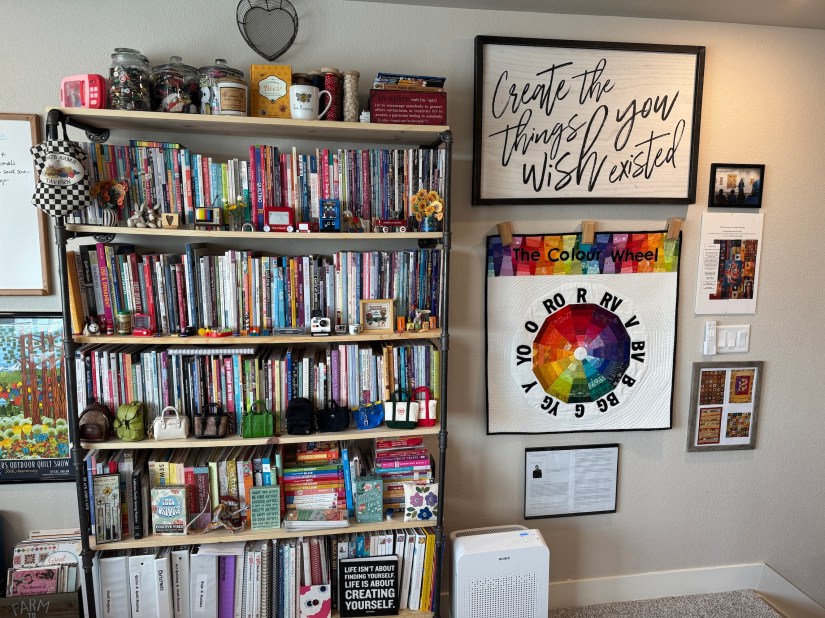
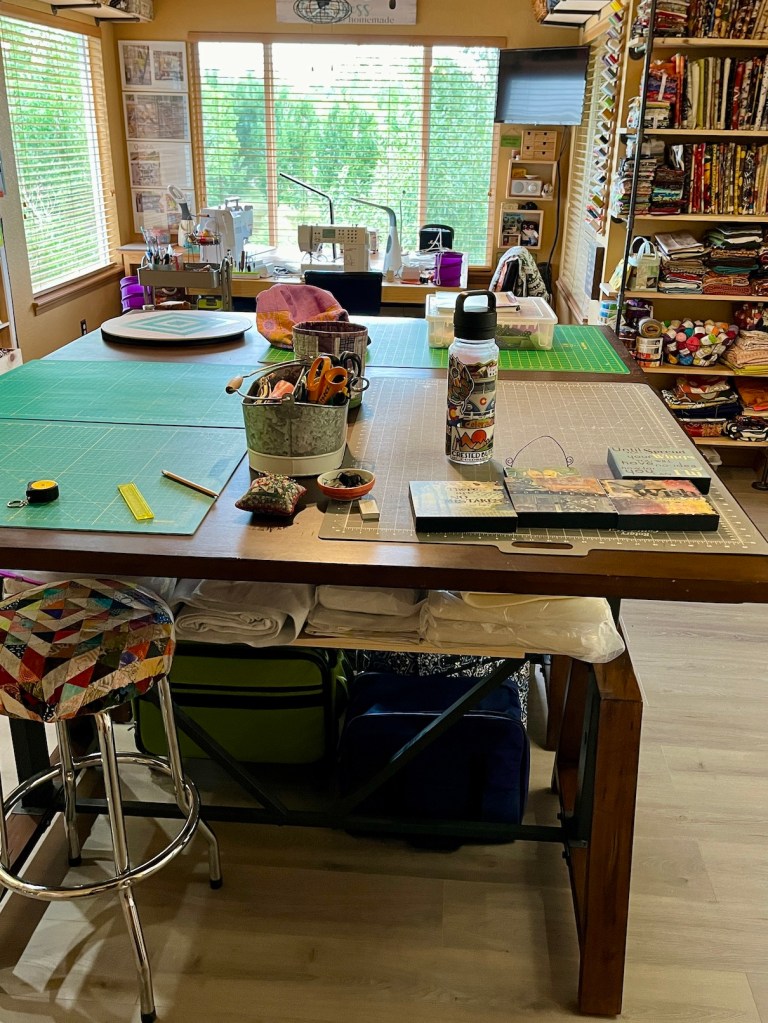
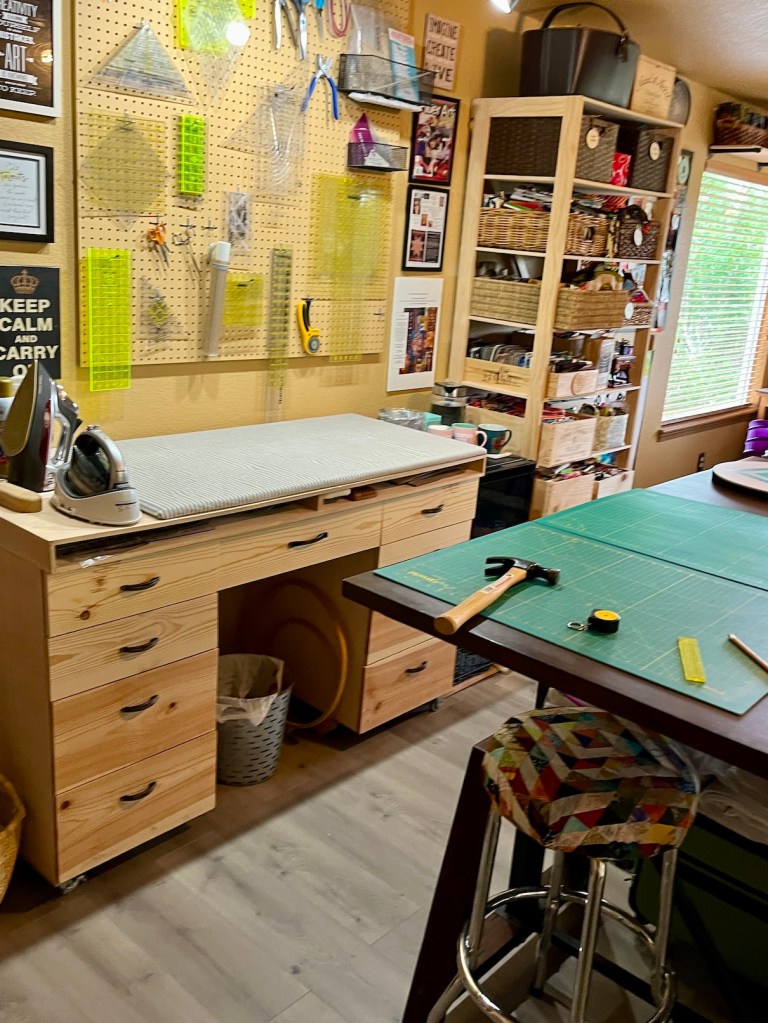
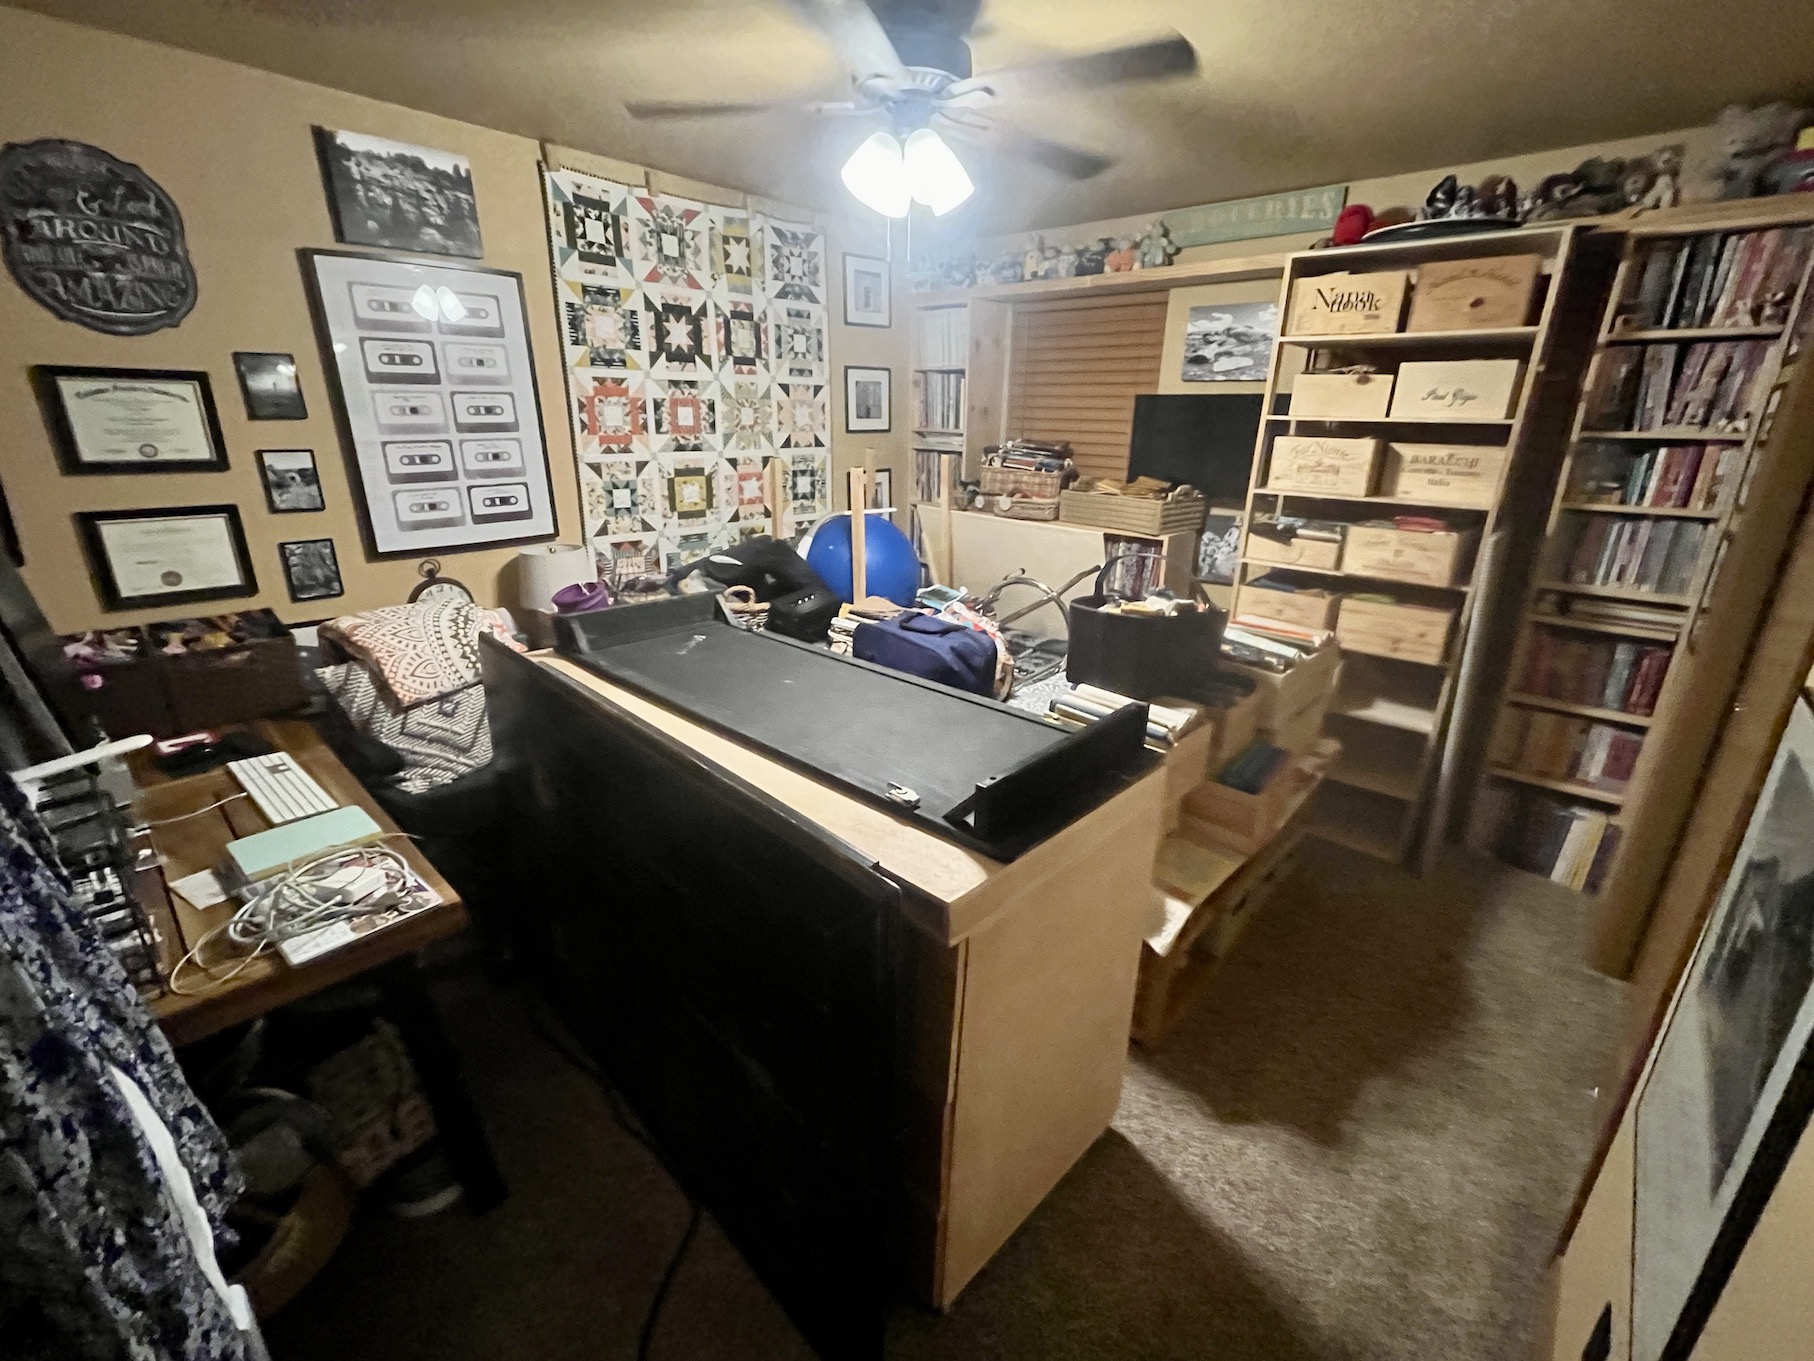
Around the room:
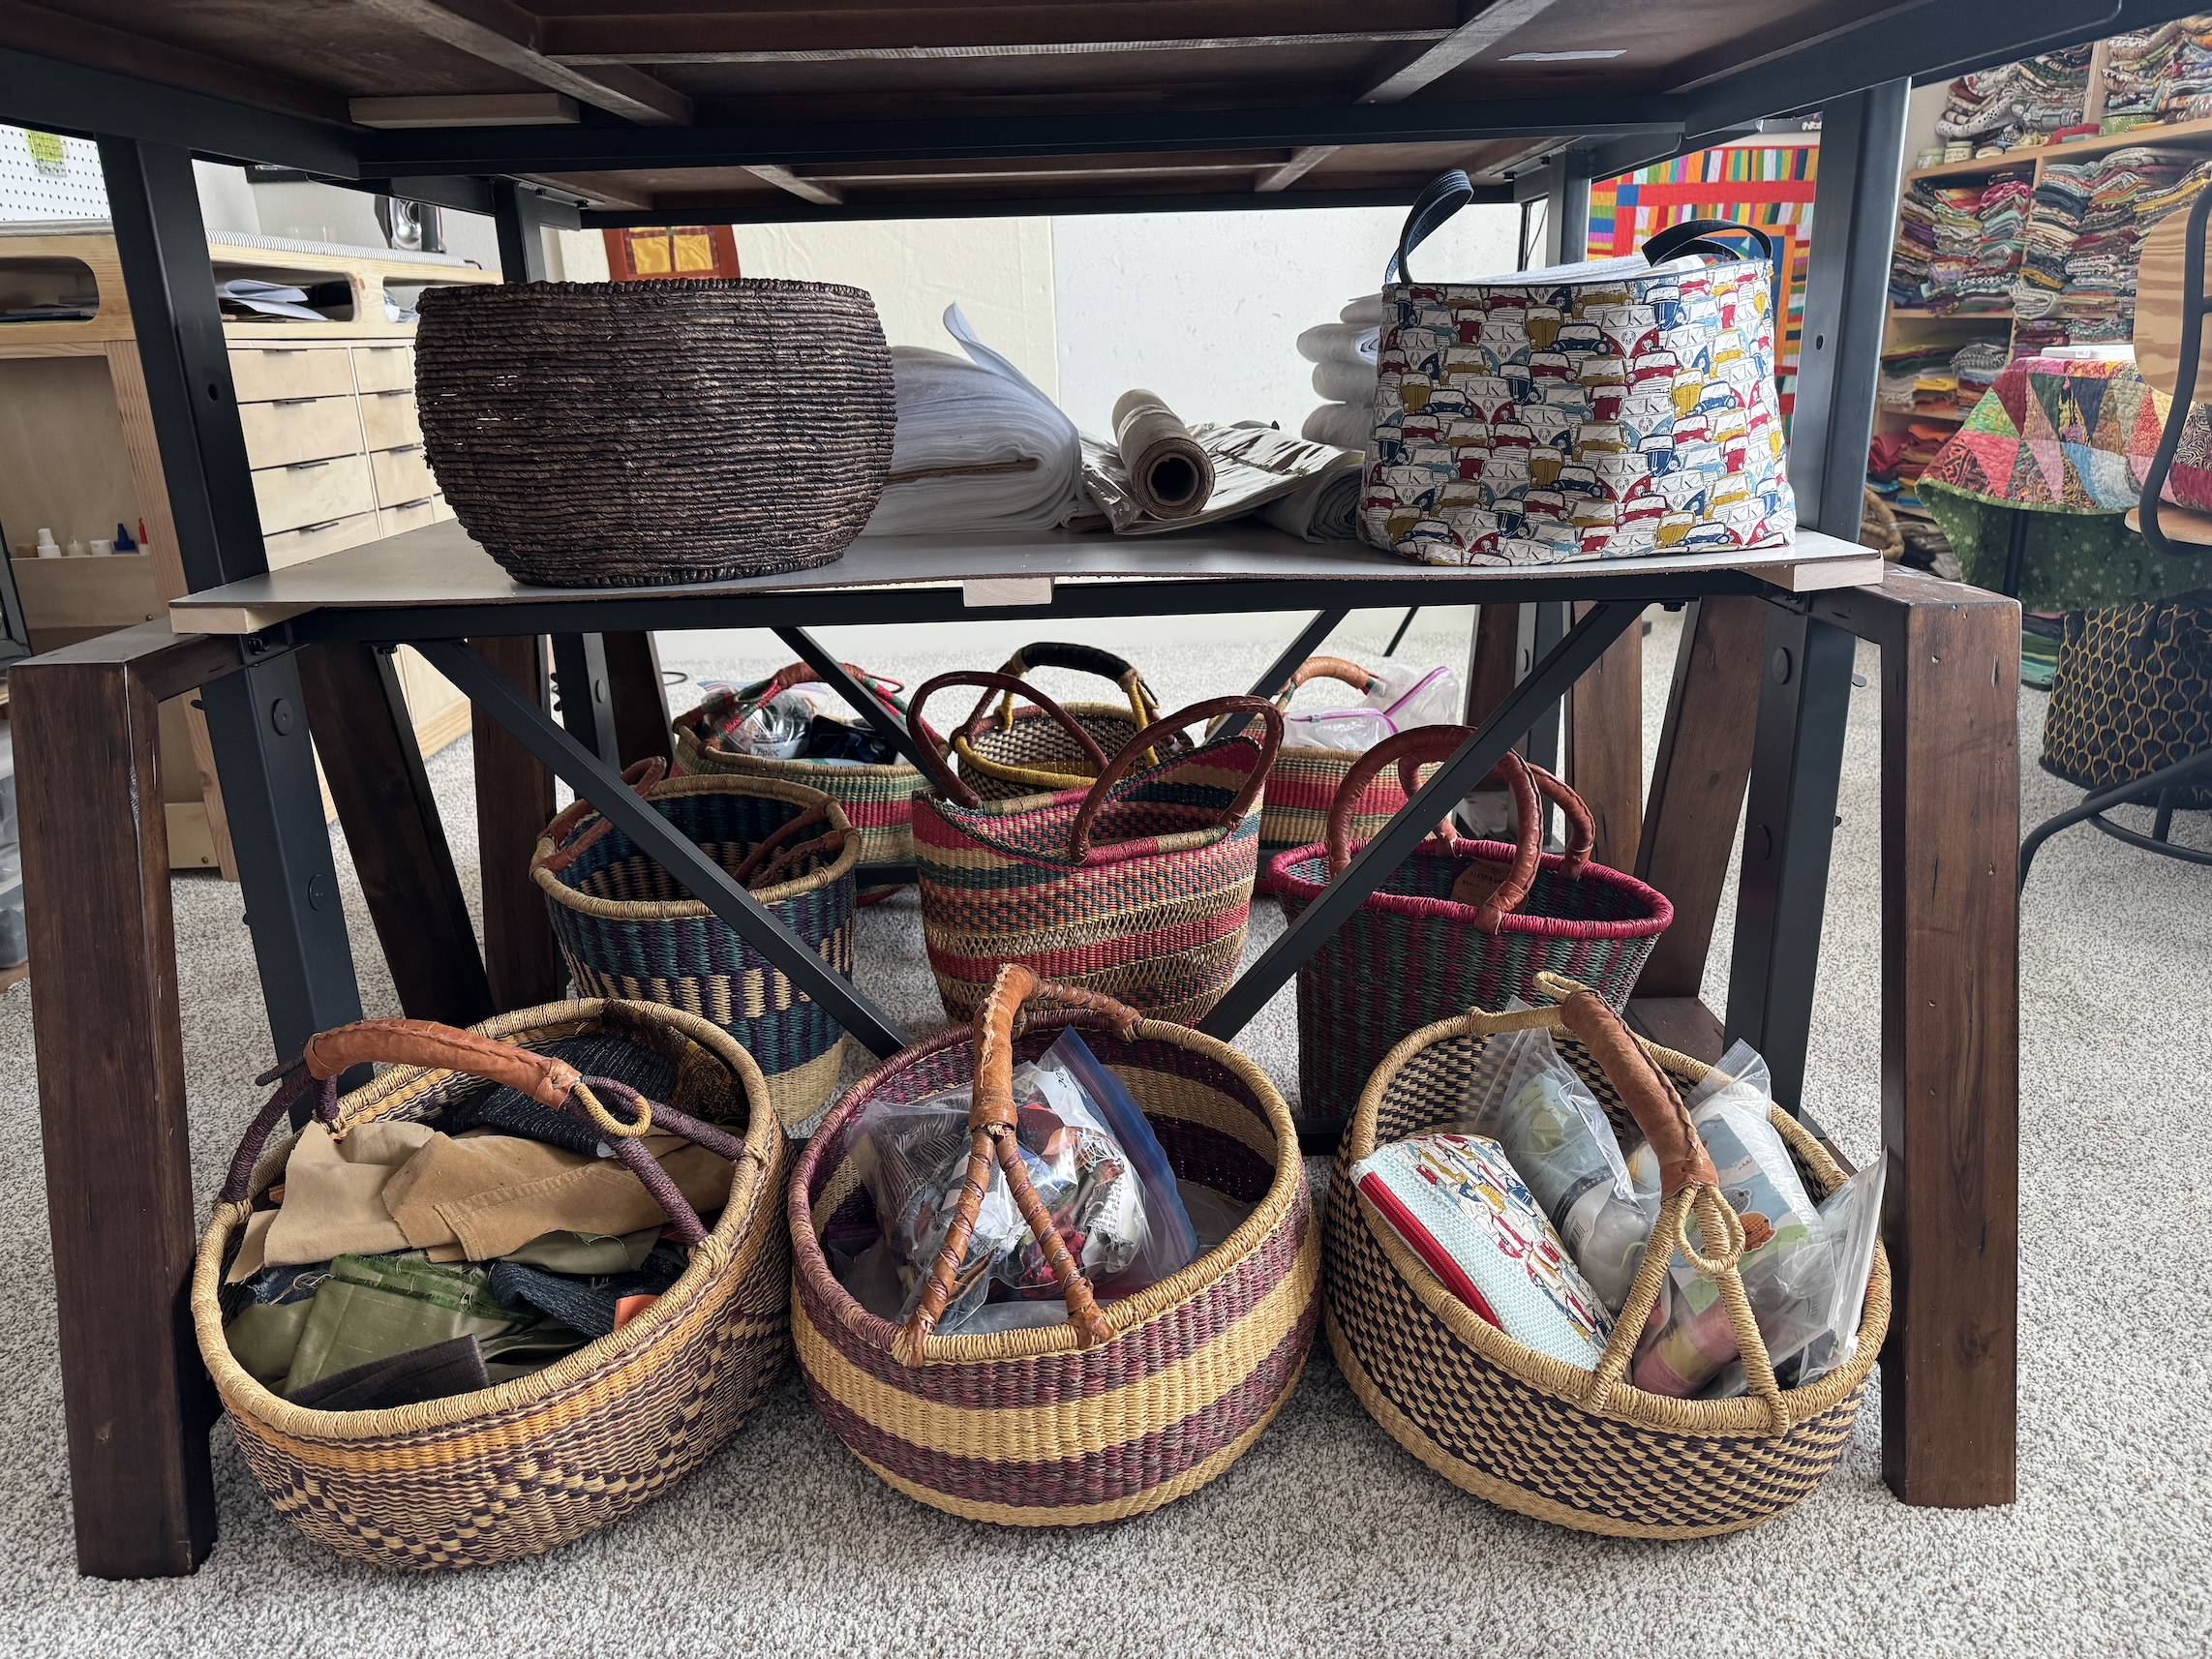
Projects stored in baskets under studio table:
One of my favorite signs:
So the journey is complete and that is enough about where I create, it’s time for me to get back to creating! This will be my focus for my future posts 🙂
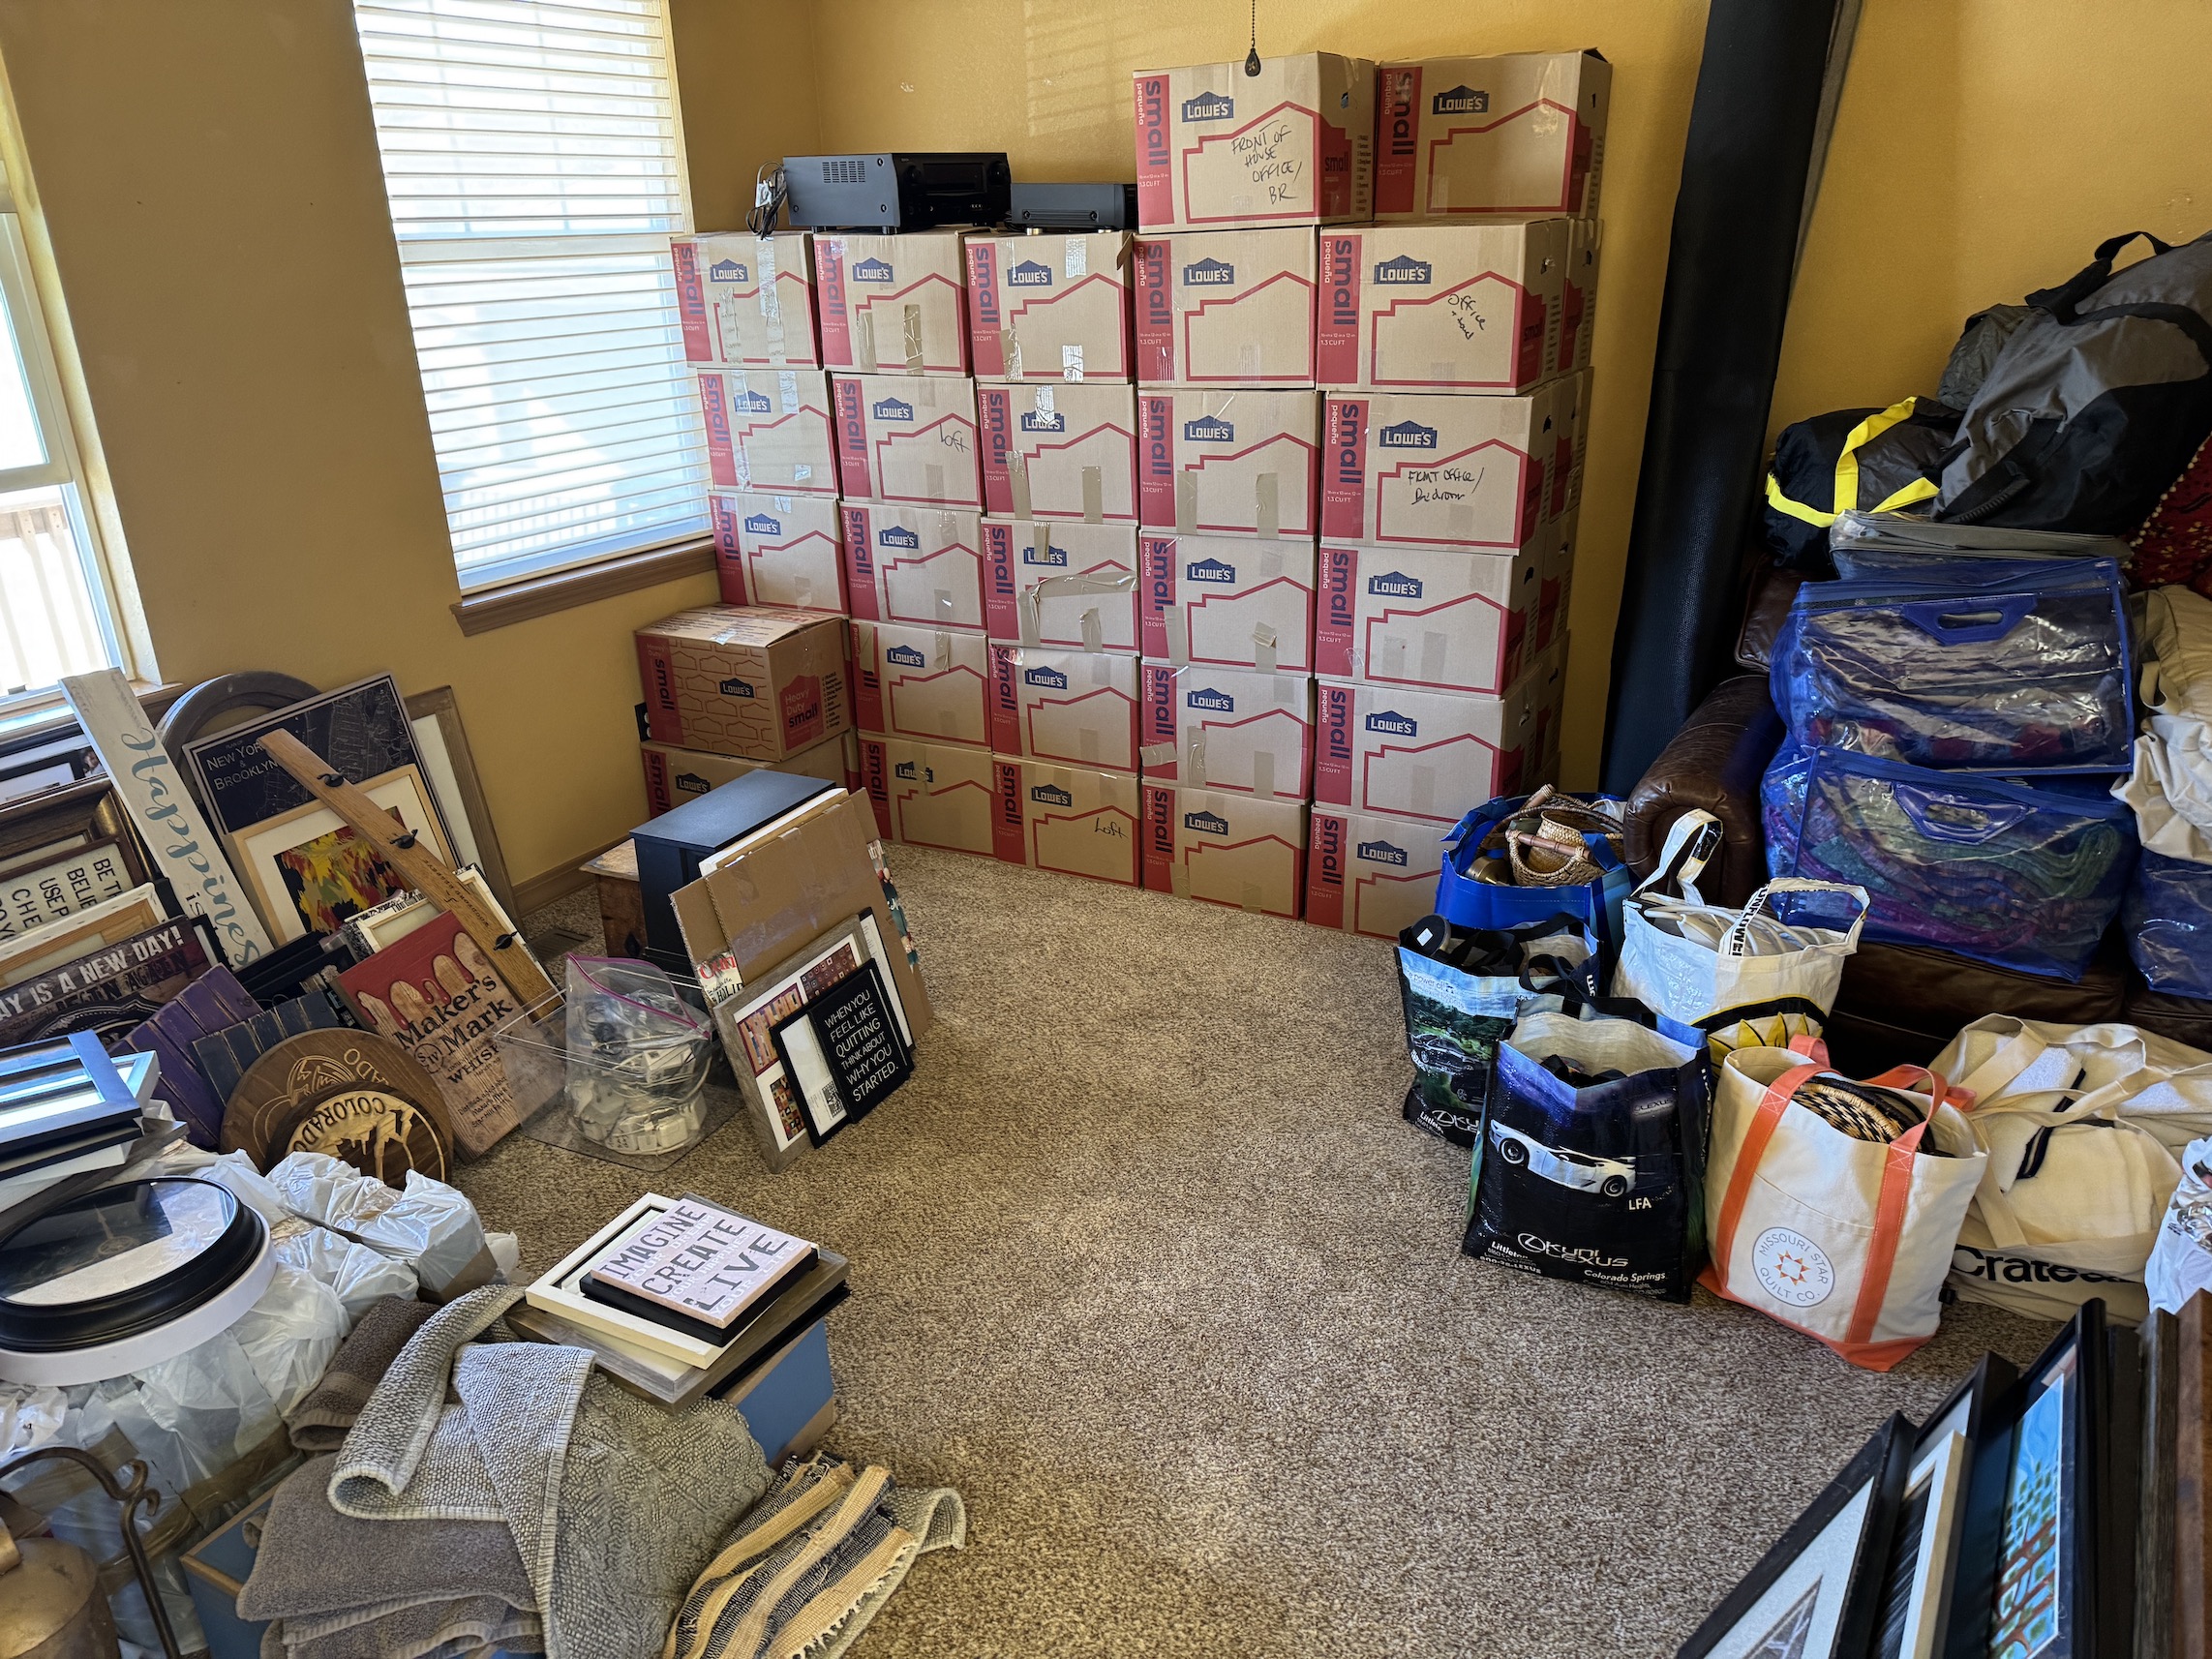
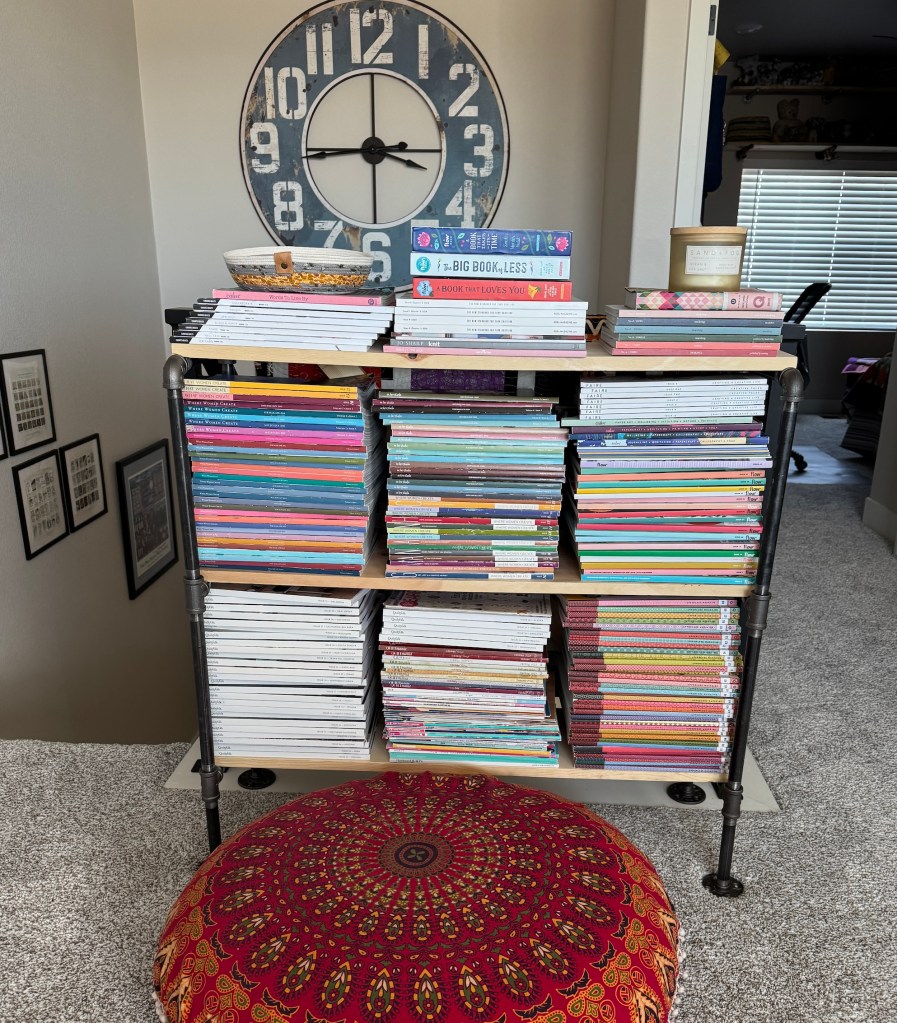
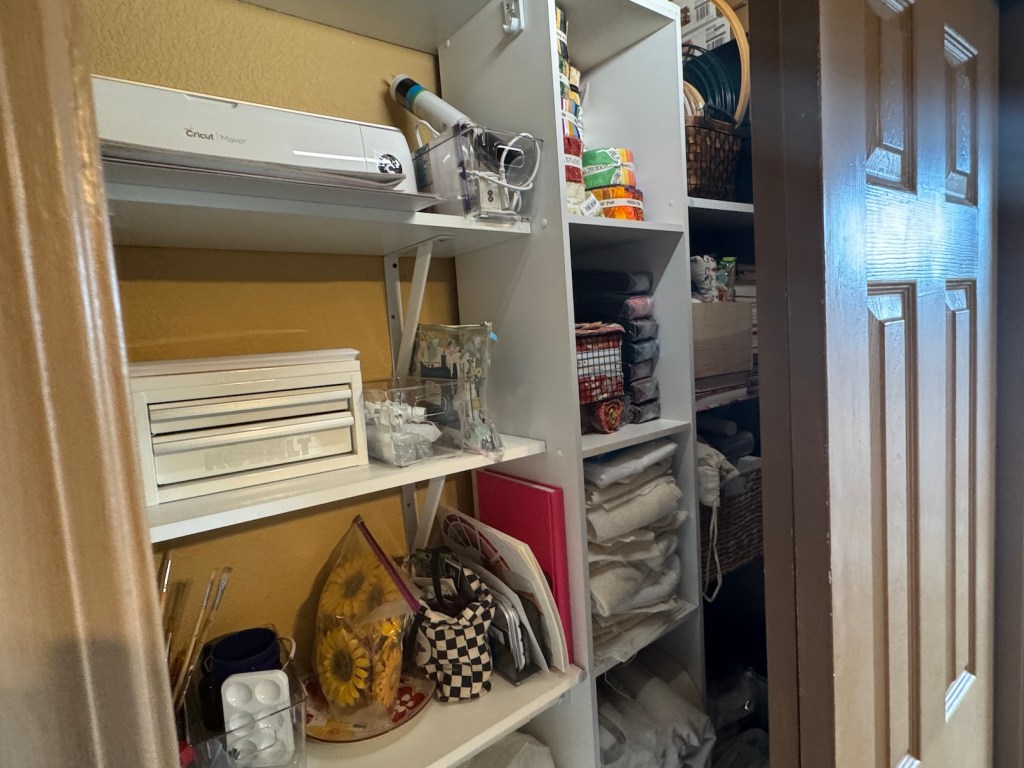
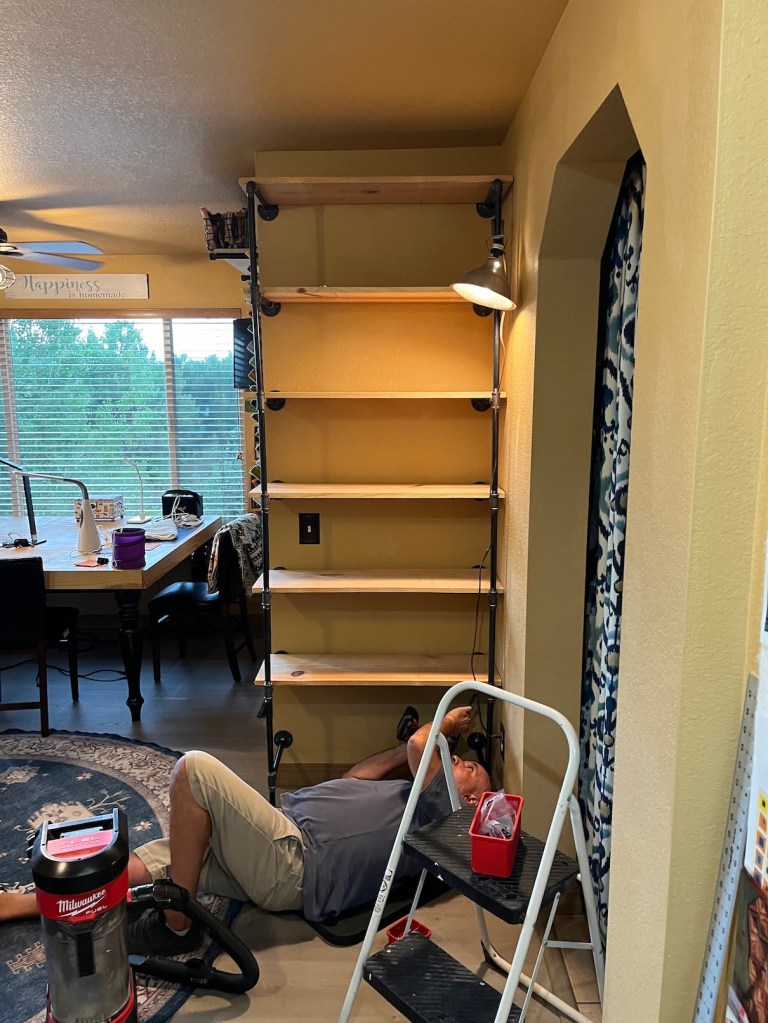
One of the big things I had to deal with was to get all the boxes of craft books I had in boxes into some type of storage/holder/wrangler (ha!) at my new home.
First before we moved I did a lot of purging and then while unpacking at the new house I did a lot of purging.
Then John built me two bookcases from plumbing pipe and scrap wood – one for my books and one for my magazines.
It took me several days but I got them all organized!
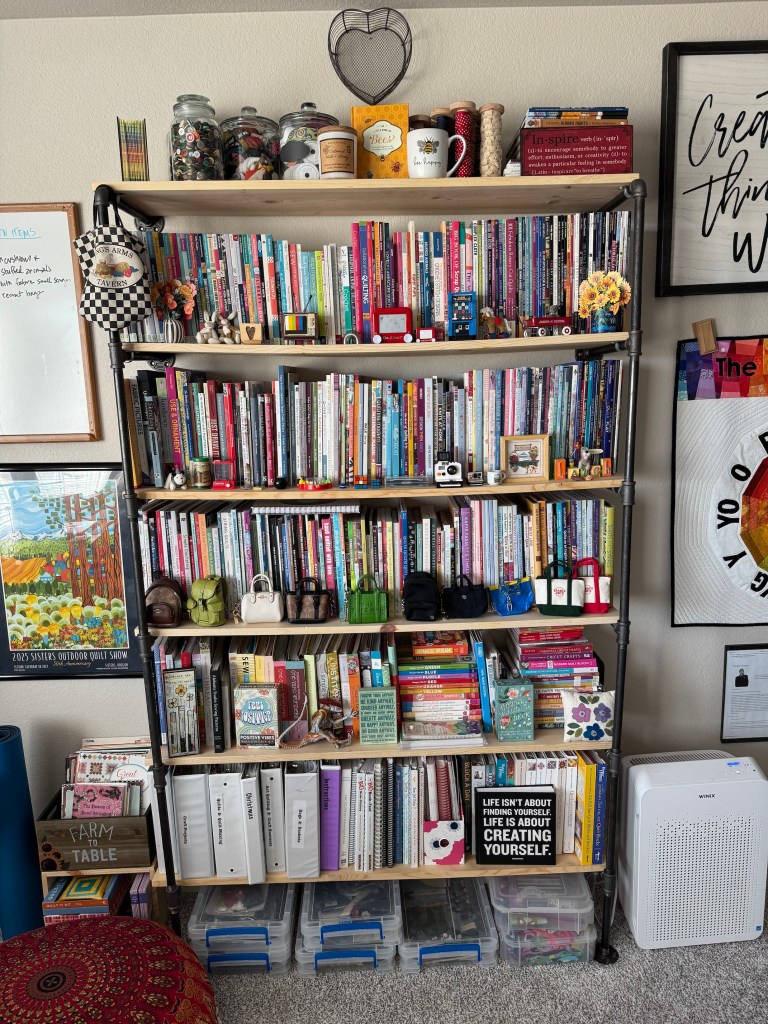
The books are organized by publisher instead of topic this time (it was the mood I was in as I liked how publishers, like Stash Books and C&T Publishing have books of similar sizes. The magazines are just organized by magazine title and I did purge many while packing. Only kept the ones I really love (which unfortunately are a lot, ha!)
Next to each bookcase I have thrifted cushions that I used to have in the living room of my previous house, for sitting on while looking through books 🙂
Postscript
Oh recently I tried to return to Instagram and it was a disaster and I gave up.
I first reinstated my account, made a post, and tried to refollow anyone whose Instagram name I could remember that I followed before.
The next day I received notification from Instagram that they had closed my account for violation of their policy. It appears they did not believe I was a real human.
I followed the appeal process and uploaded a live video of me. That was not enough, they wanted a copy of my scanned passport or Drivers License.
I decided that the Universe was telling me not to return to Instagram, ha, so I just gave up!
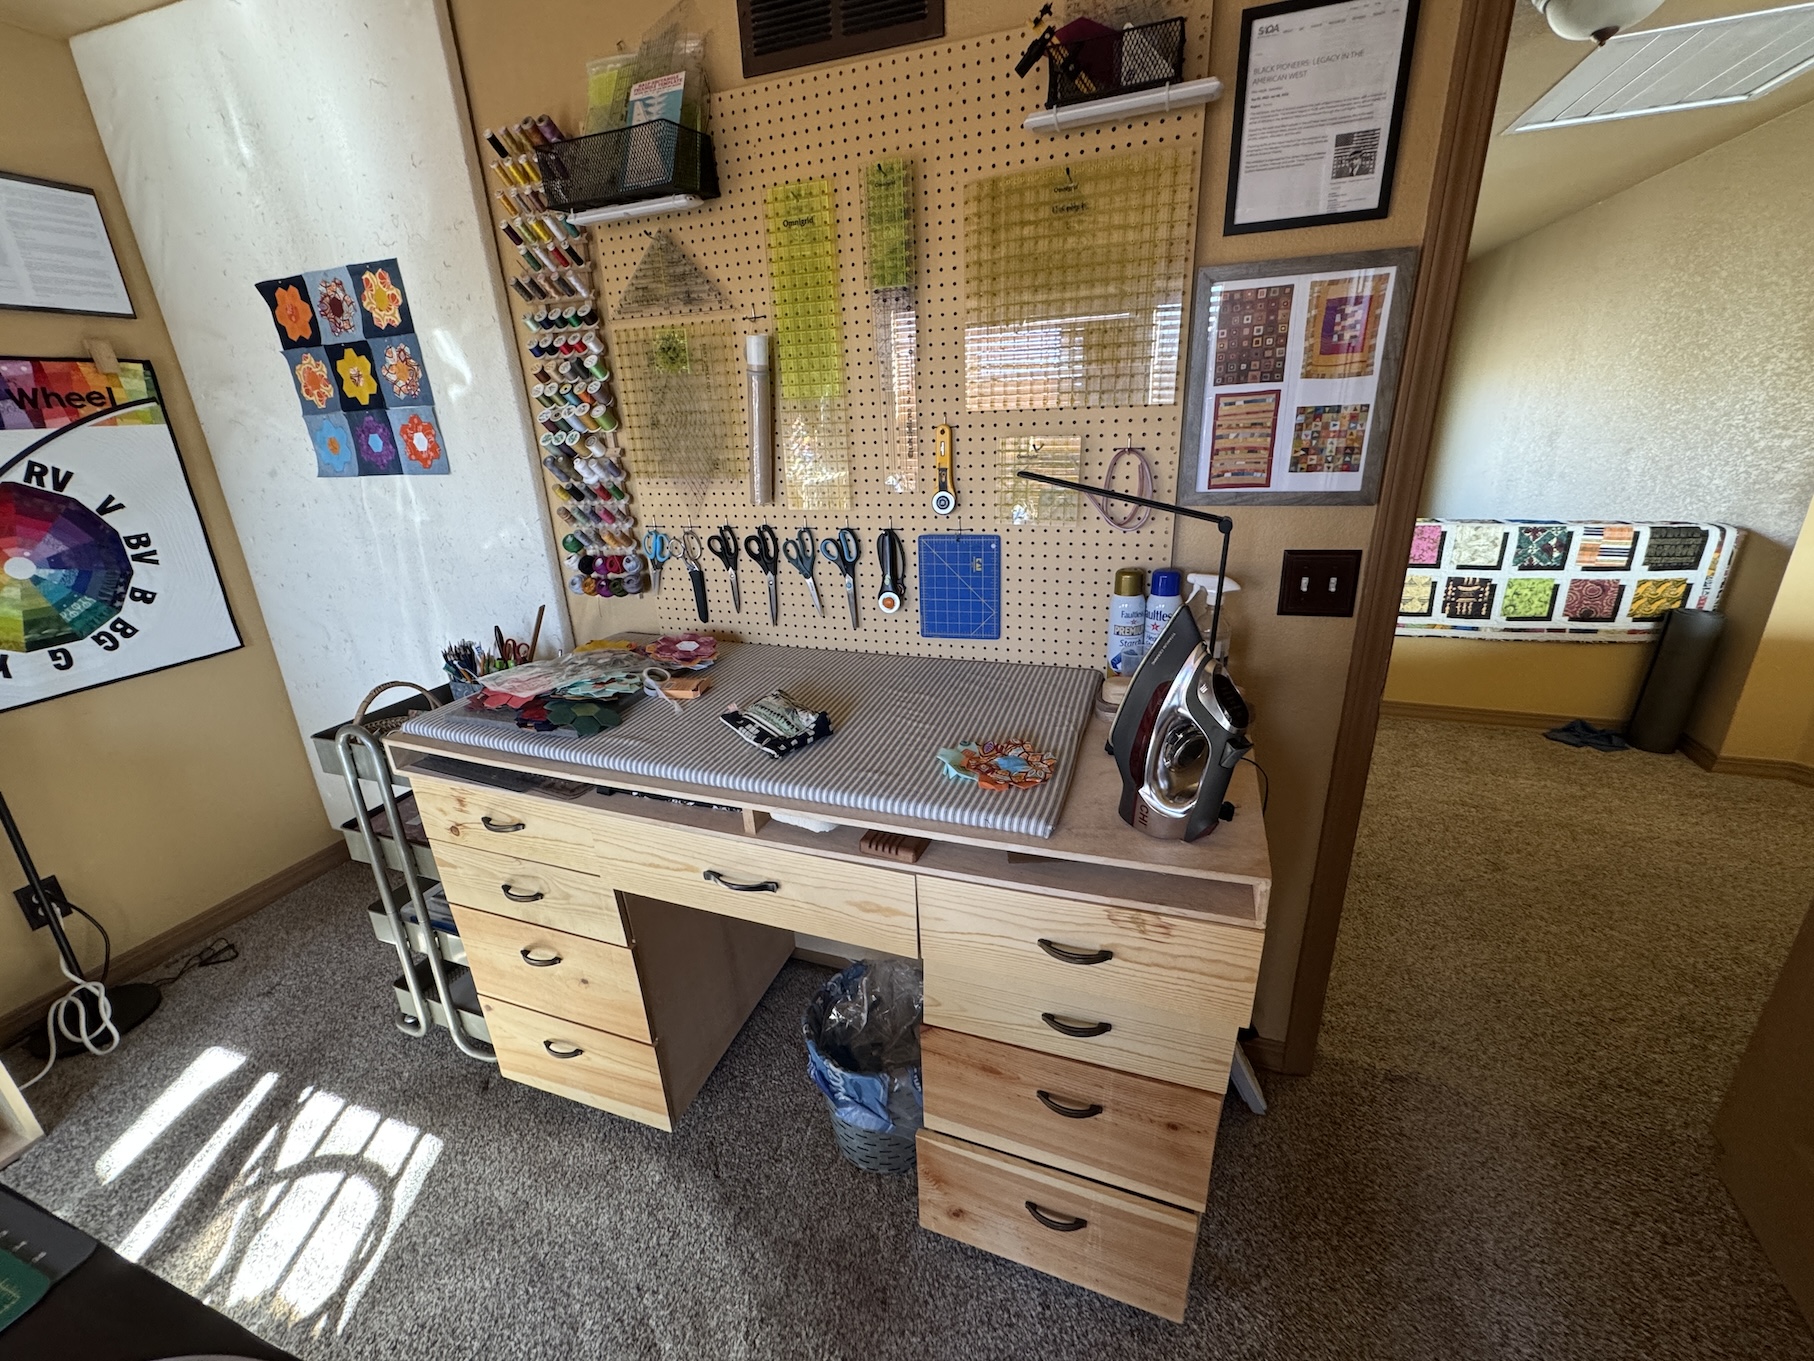
I have a new piece of storage furniture in my studio – a new Ironing Table/Storage Organization Unit.
For years I had this piece in studio that John made me that I used as an ironing table and storage:
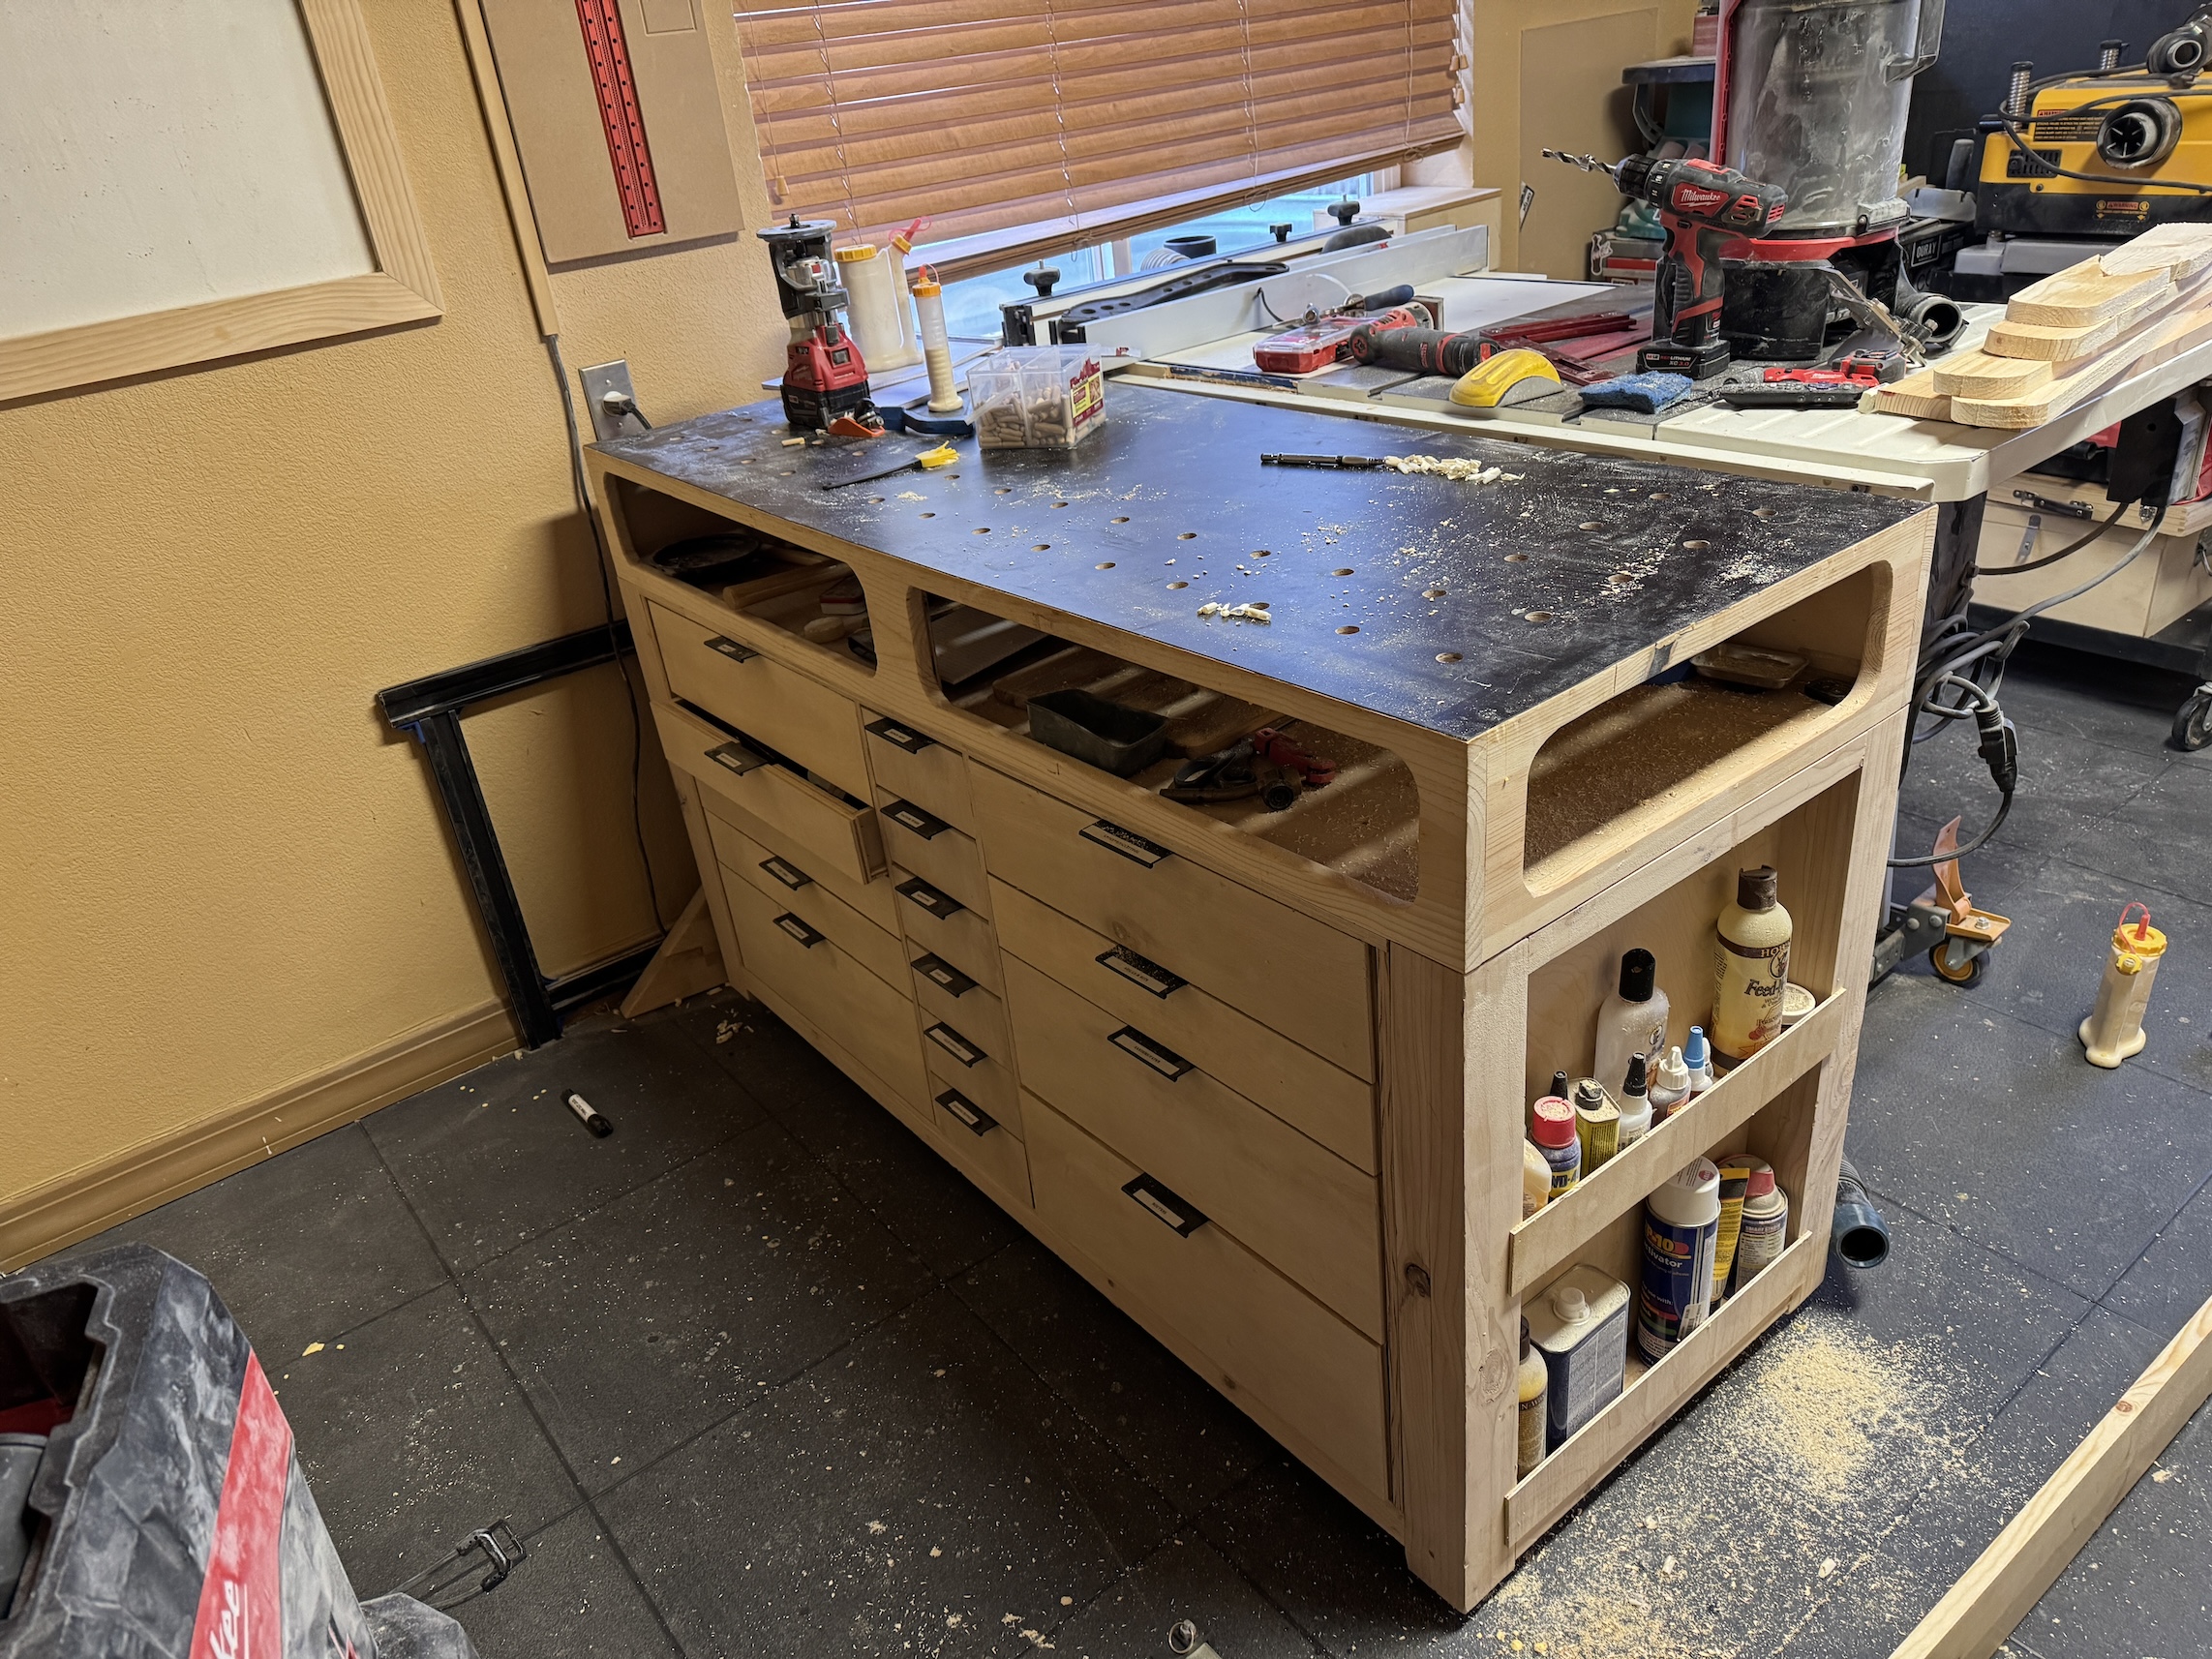
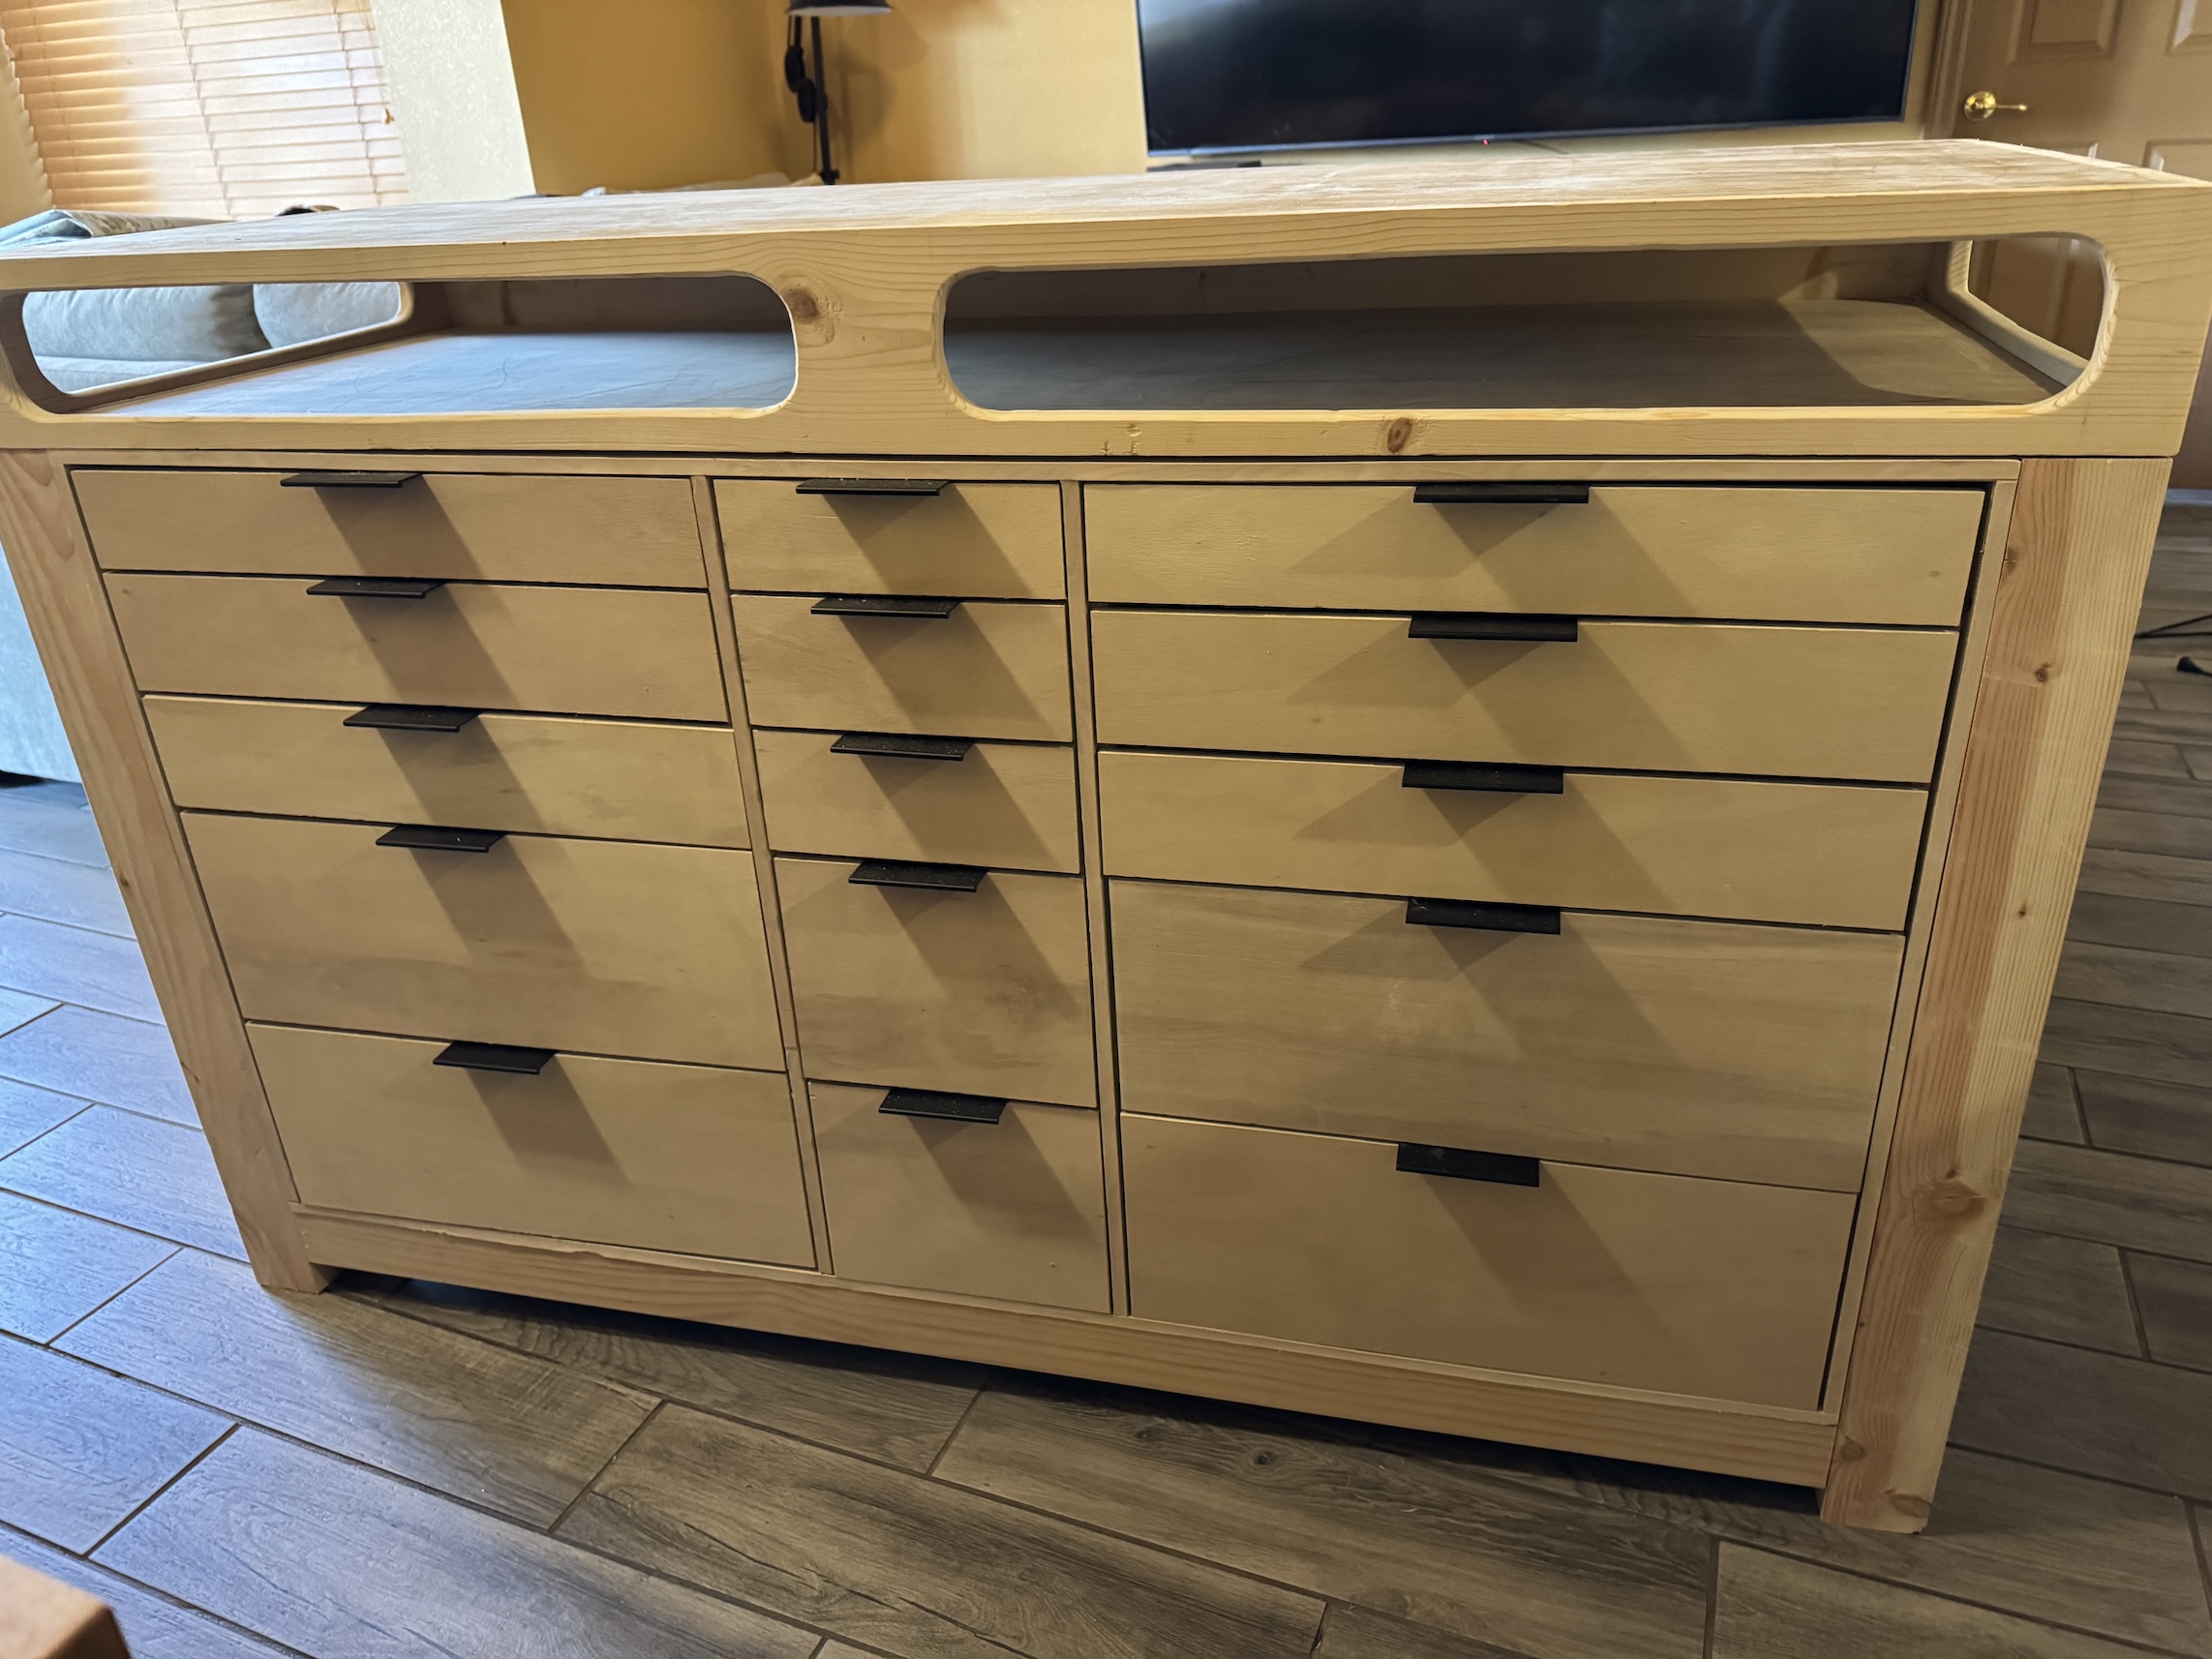
John was unhappy with the quality of the piece (he made it in his earlier days of woodworking) and he wanted to make me a table/storage unit like the Outfeed Table he made for his woodworking studio:
So back in January he started my replacement table:
He finished right before we decided to buy the new house, and we decided to wait until we moved to thenew house to get it set up in my studio.
It is now set up in the new studio and it awesome!
I really enjoyed organizing my stuff in the drawers and labeling them:
It’s a very sturdy, well built table/storage unit and I love the area to keep extra cutting rulers, Cricut supplies and papers, and small cutting mats, etc.
It’s been a while since I blogged and I’ve missed reading the adventures of the bloggers I follow. I did recently attempt a full catch up and if you know I follow you and I missed your old posts I will catch them next time you post. I plan to return to regular blogging again 🙂
We moved to a new house on March 5th and then a little over a week later we had our first out of town visitors to the new house and they stayed for 5 days. Their visit was planned long before we knew we would suddenly be buying a new house and preparing our old house for sale.
John did so much work on the old house getting it ready for sale (goes on the market next week) and I did most of the unpacking. We completely exhausted ourselves and forgot we were “old” and shouldn’t try to be doing all that at once. John hurt his knees and back (but has since recovered) and I twisted my knee (which is getting better). We really abused our bodies for over a month!
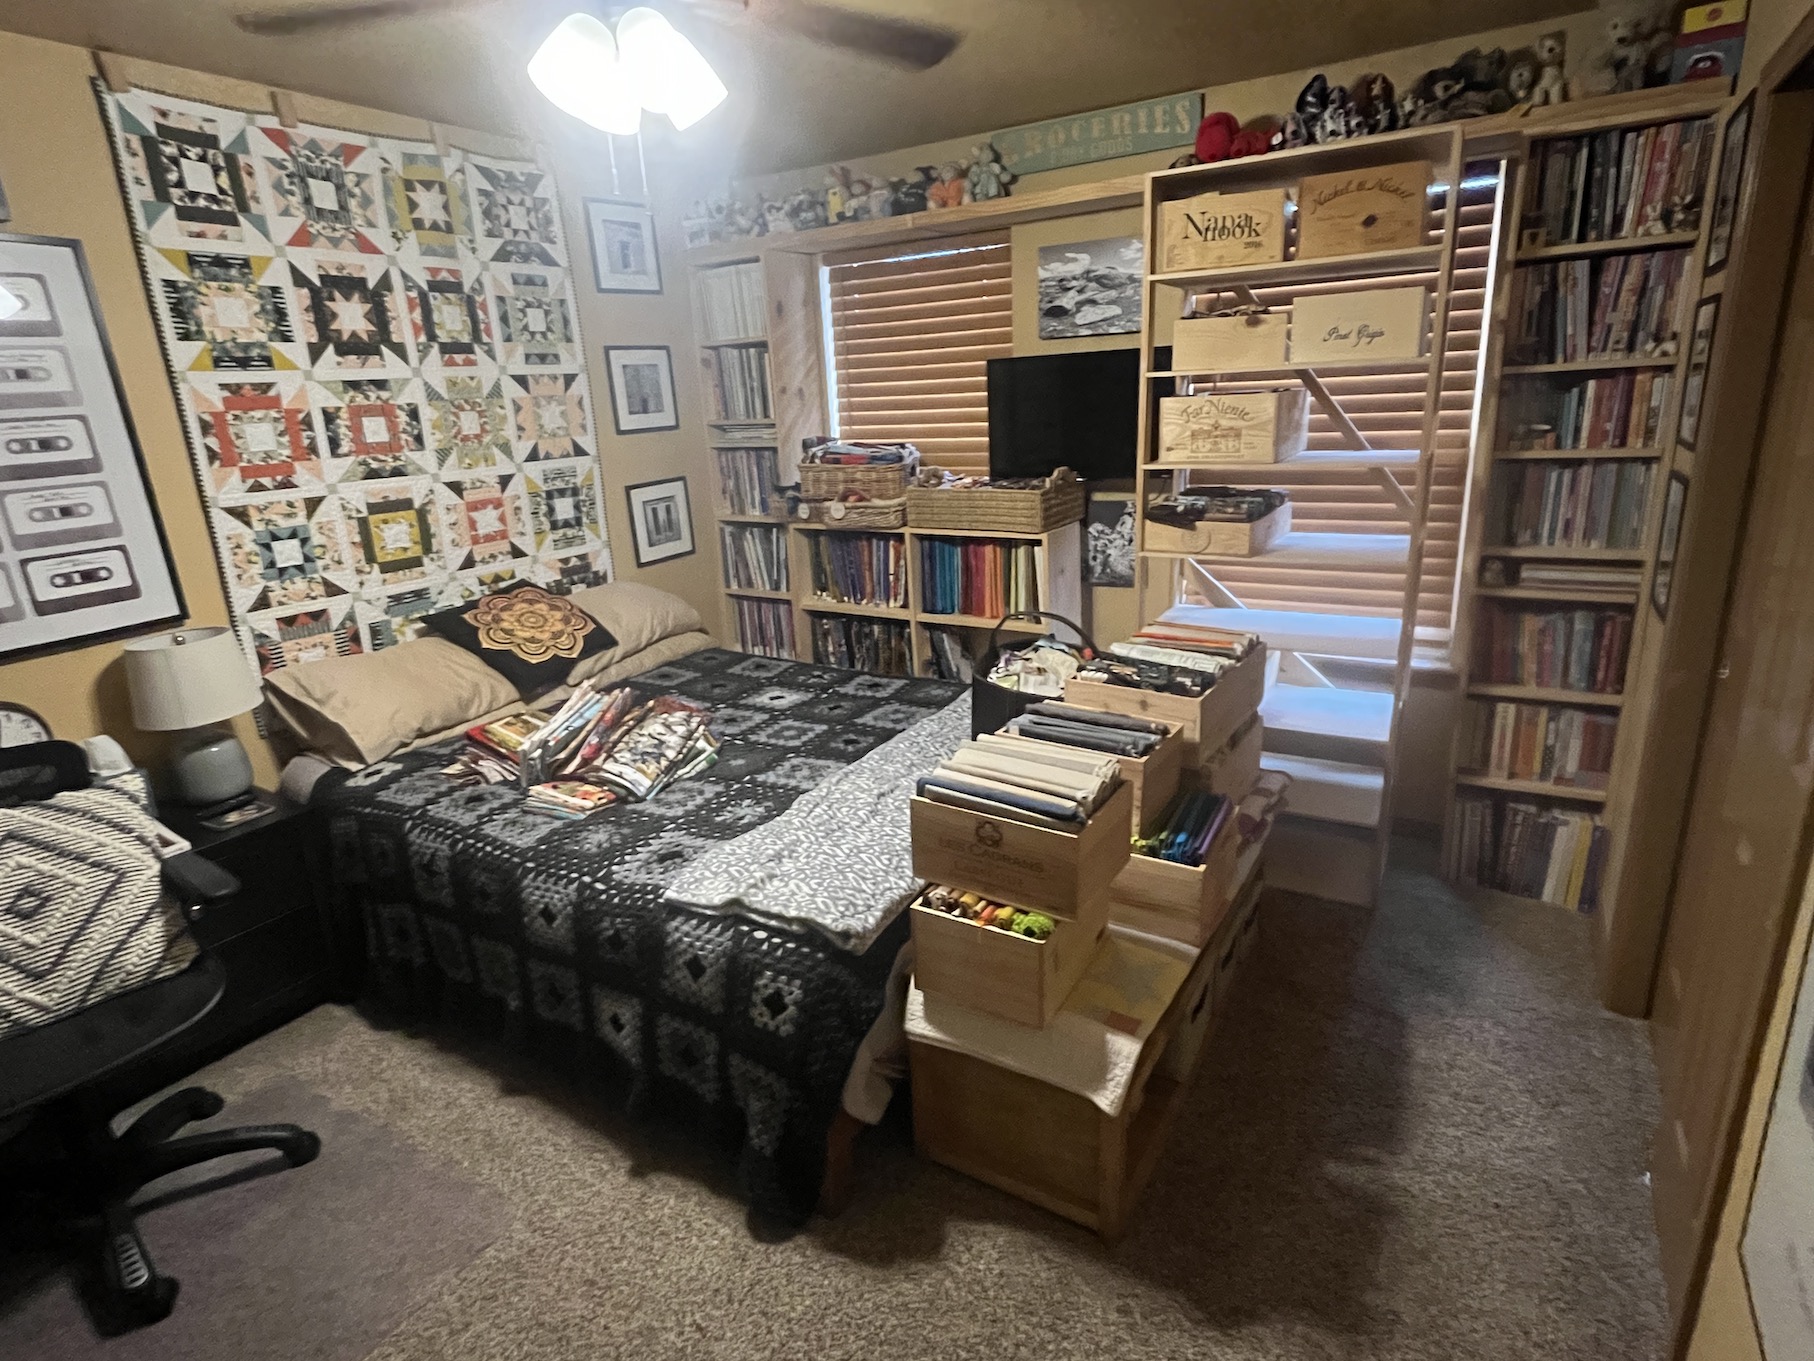
I am taking the upstairs loft as my new studio in the new house and here is what it looked like after we moved in:
Before our visitors arrived we put our all energies into unpacking and setting up the main floor of the house and the guest room.
After our visitors left on March 22, I got to work on sorting out my studio. I began the “Journey to My New Studio” which I will share in a series of blog posts.
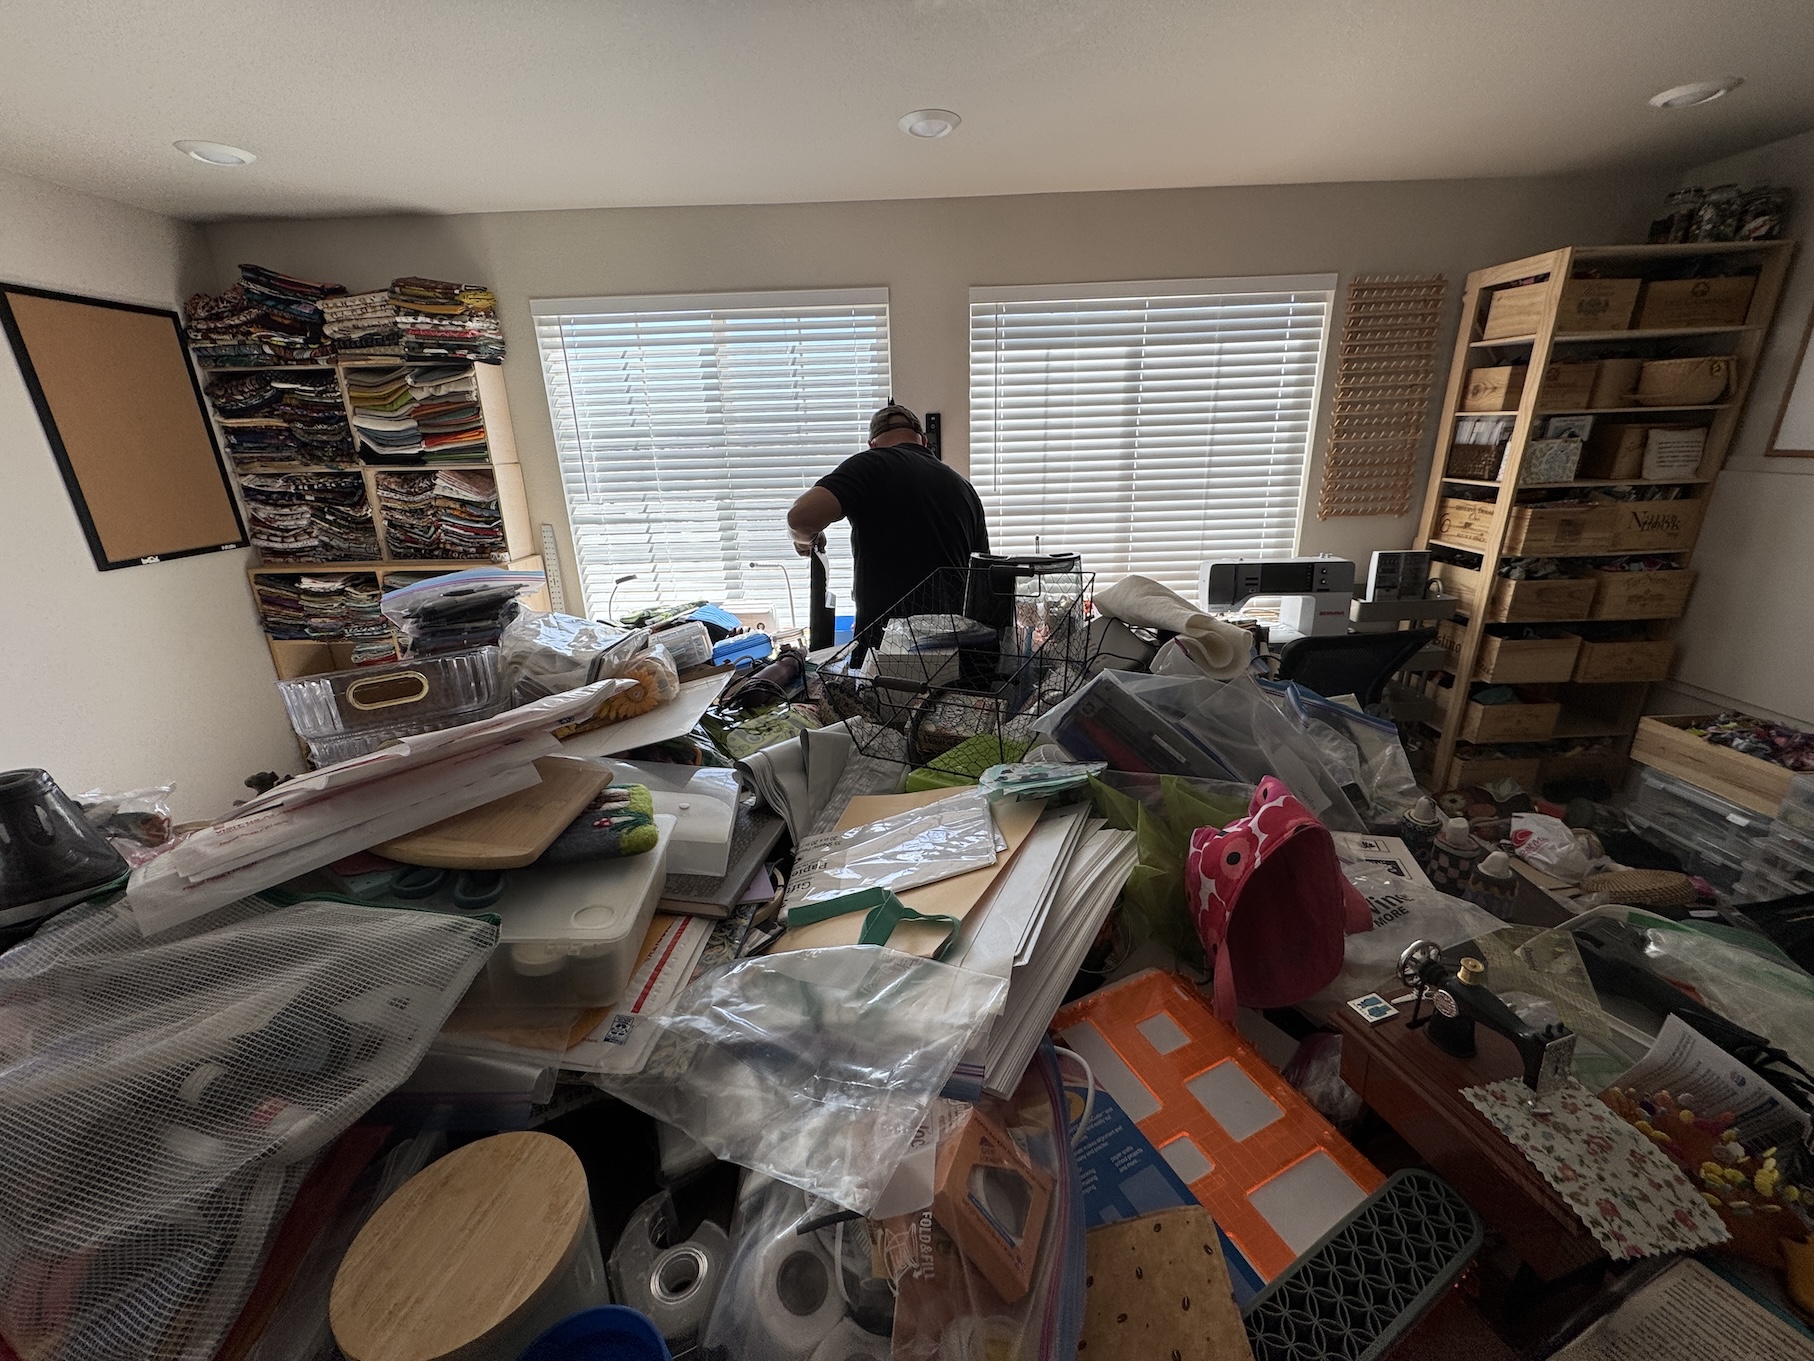
Here is what it looked a couple days after working on sorting it out – very scary but lots of progress:
You can see John trying to help me set up something on the desk I will be sewing at.
I absolutely hate clutter, and there were times I just sat on the floor and cried in frustration! I moved from a perfectly cozy little studio I had just recently moved into (when I changed rooms) and here I was setting up everything again!
Back in mid-December 2025 I shared in the post Chaos in the Craft Room! that we had moved my quilting/crafting studio from the large Primary Bedroom to a small bedroom in preparation for putting our house on the market and moving to a smaller home.
Since then I’ve been playing/sewing/crafting in my new studio and doing some re-arranging to make it work best for me.
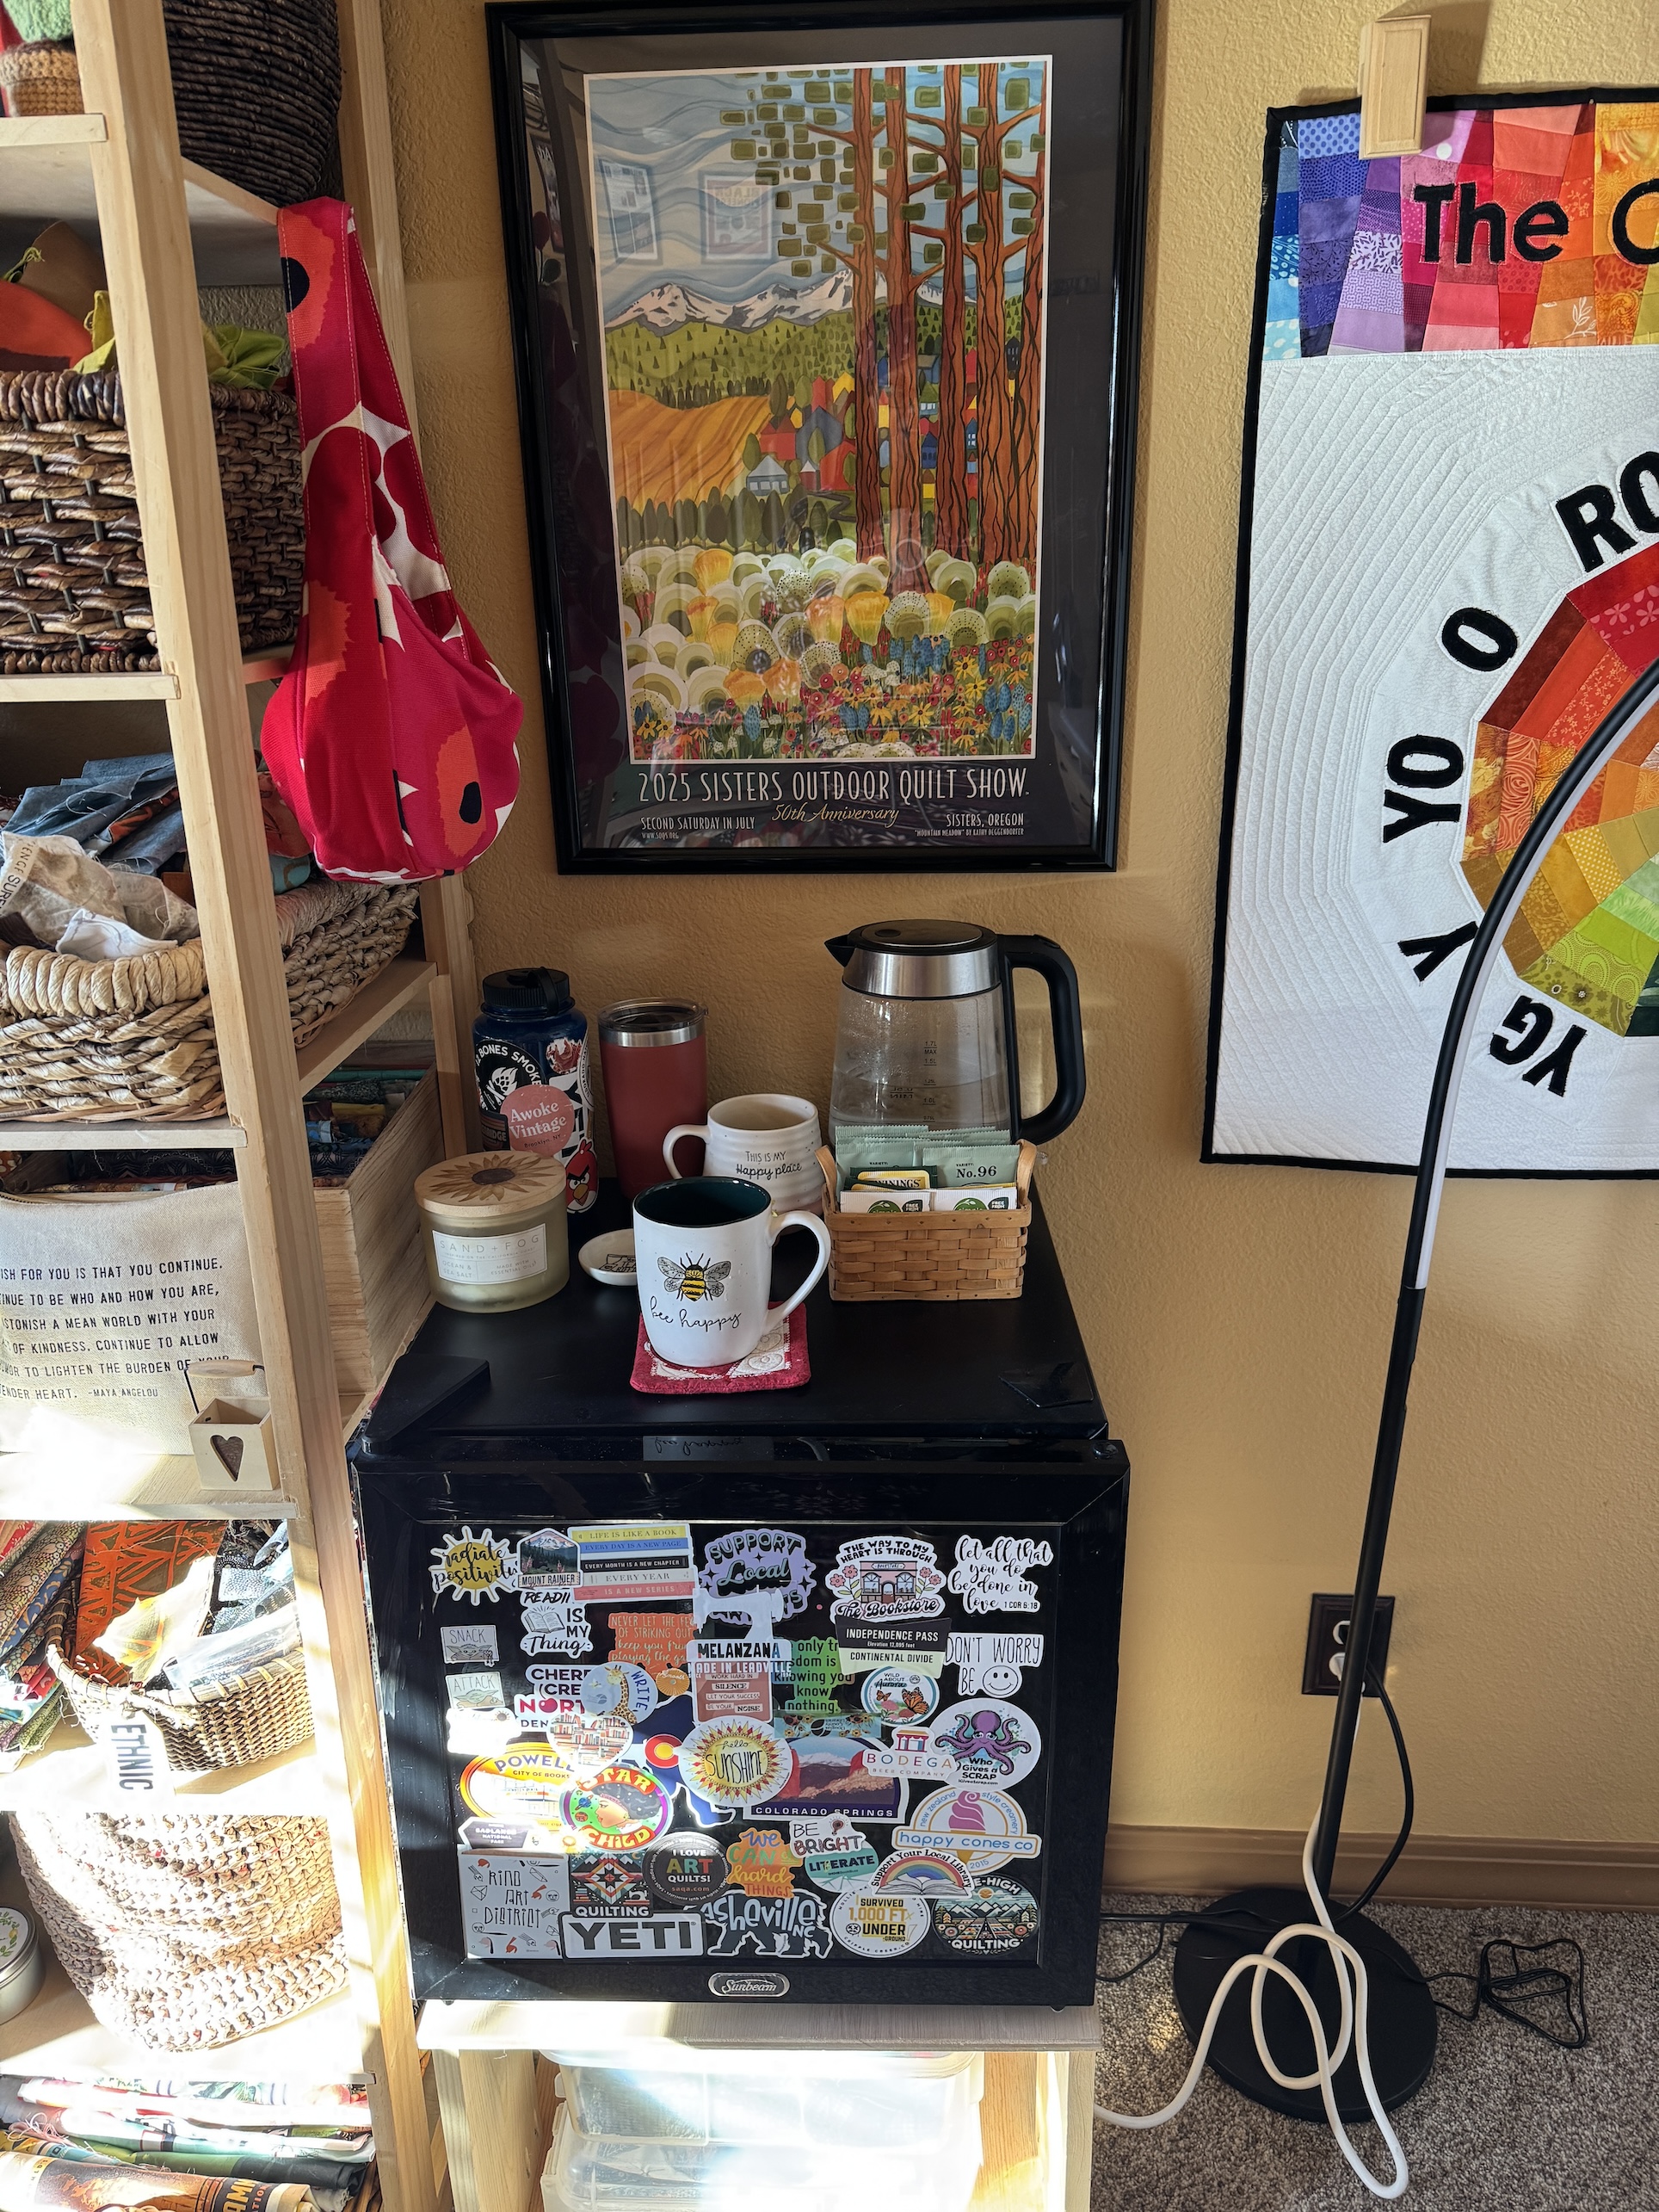
I added back in my tea station and little refrigerator (we tried to make it work in our Primary Bedroom but I didn’t like the low volume noise the refrigerator made when I was trying to sleep at night; and I missed easy access to tea as I need a couple cups a day to keep me happy, ha!):
Thanks to my friend K who attended the 50th anniversary 2025 Sisters Outdoor Quilt Show and got me a poster! (I used to attend it every year when I lived in Oregon for 14 years and had exhibited quilts in it along with my quilter late husband several times…and sold quilts)
I had to rearrange where I kept my projects in queue because this is what the area looked like previously:
Now the projects in queue are stored under my cutting table (I forgot to take a photo).
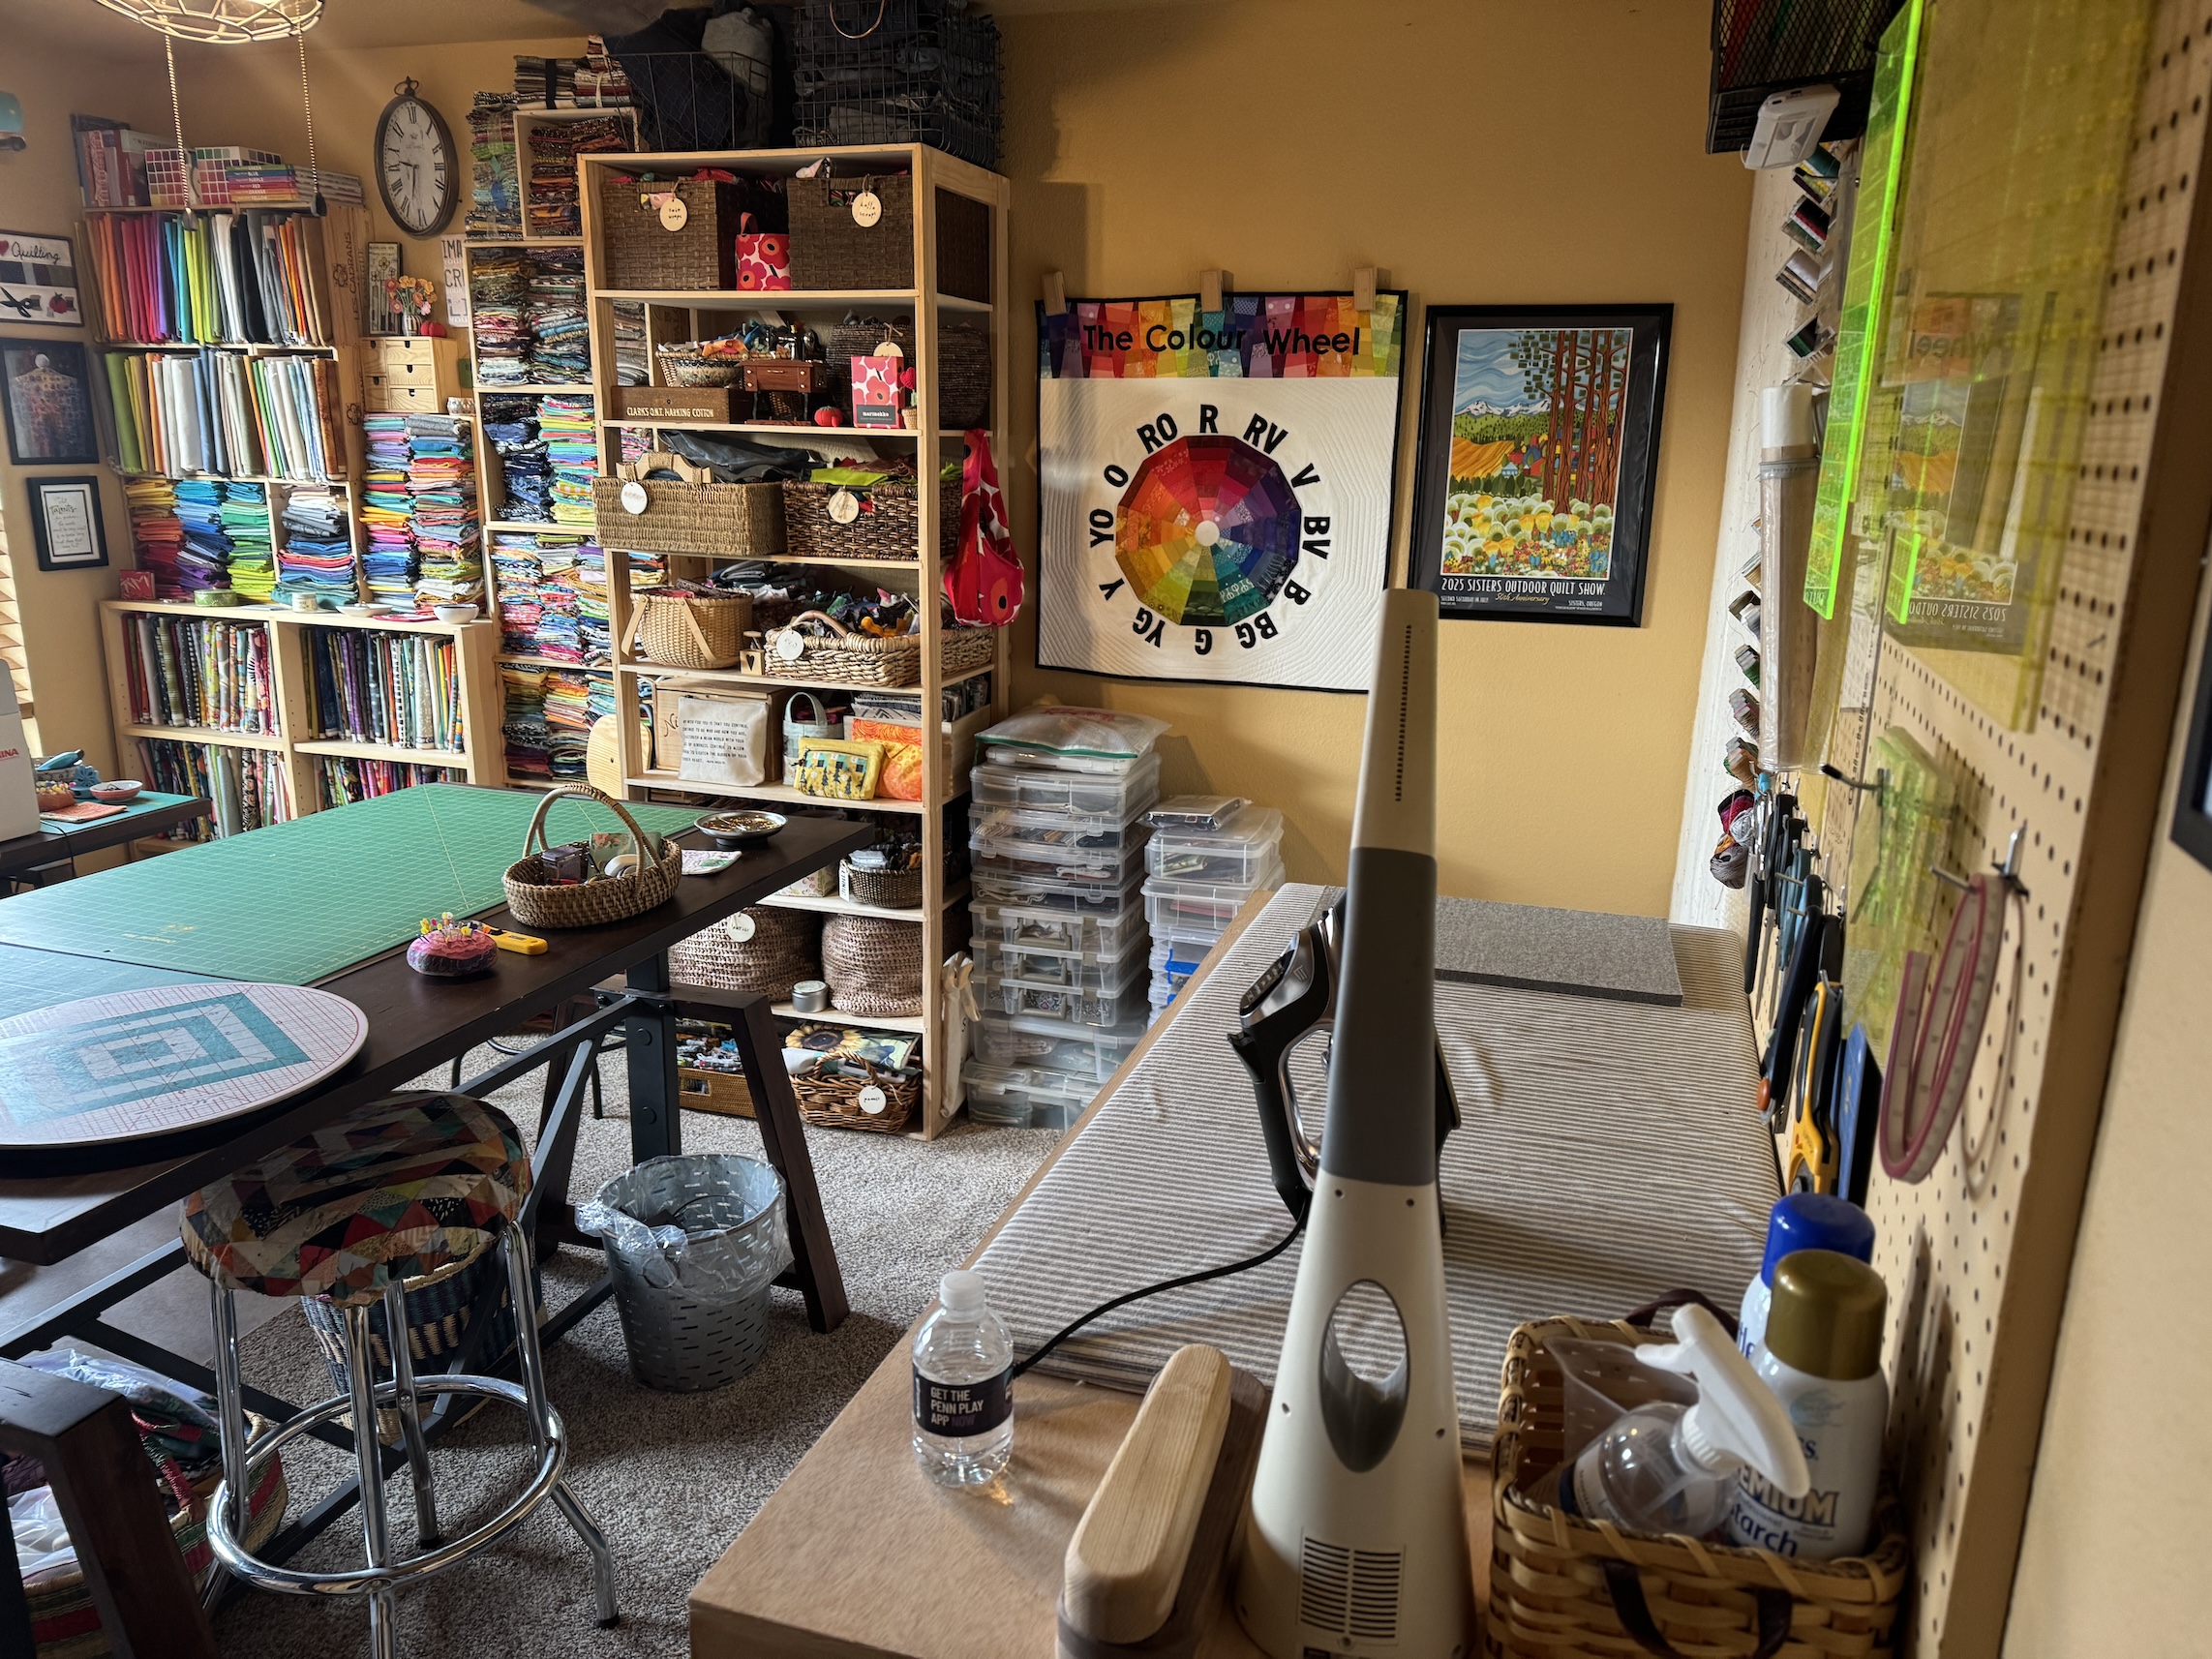
I added a floor lamp (left side of image below) to my half design wall area (we had to break up my former design wall to make it fit in the room). As we plan to sell the house and move next year to a smaller house, John didn’t want to install track lighting in this room like he did in my previous mega-studio that was in our converted Primary Bedroom (which has now returned to being a Primary Bedroom):
I am pleased with the floor lamp and it illuminates the design wall nicely.
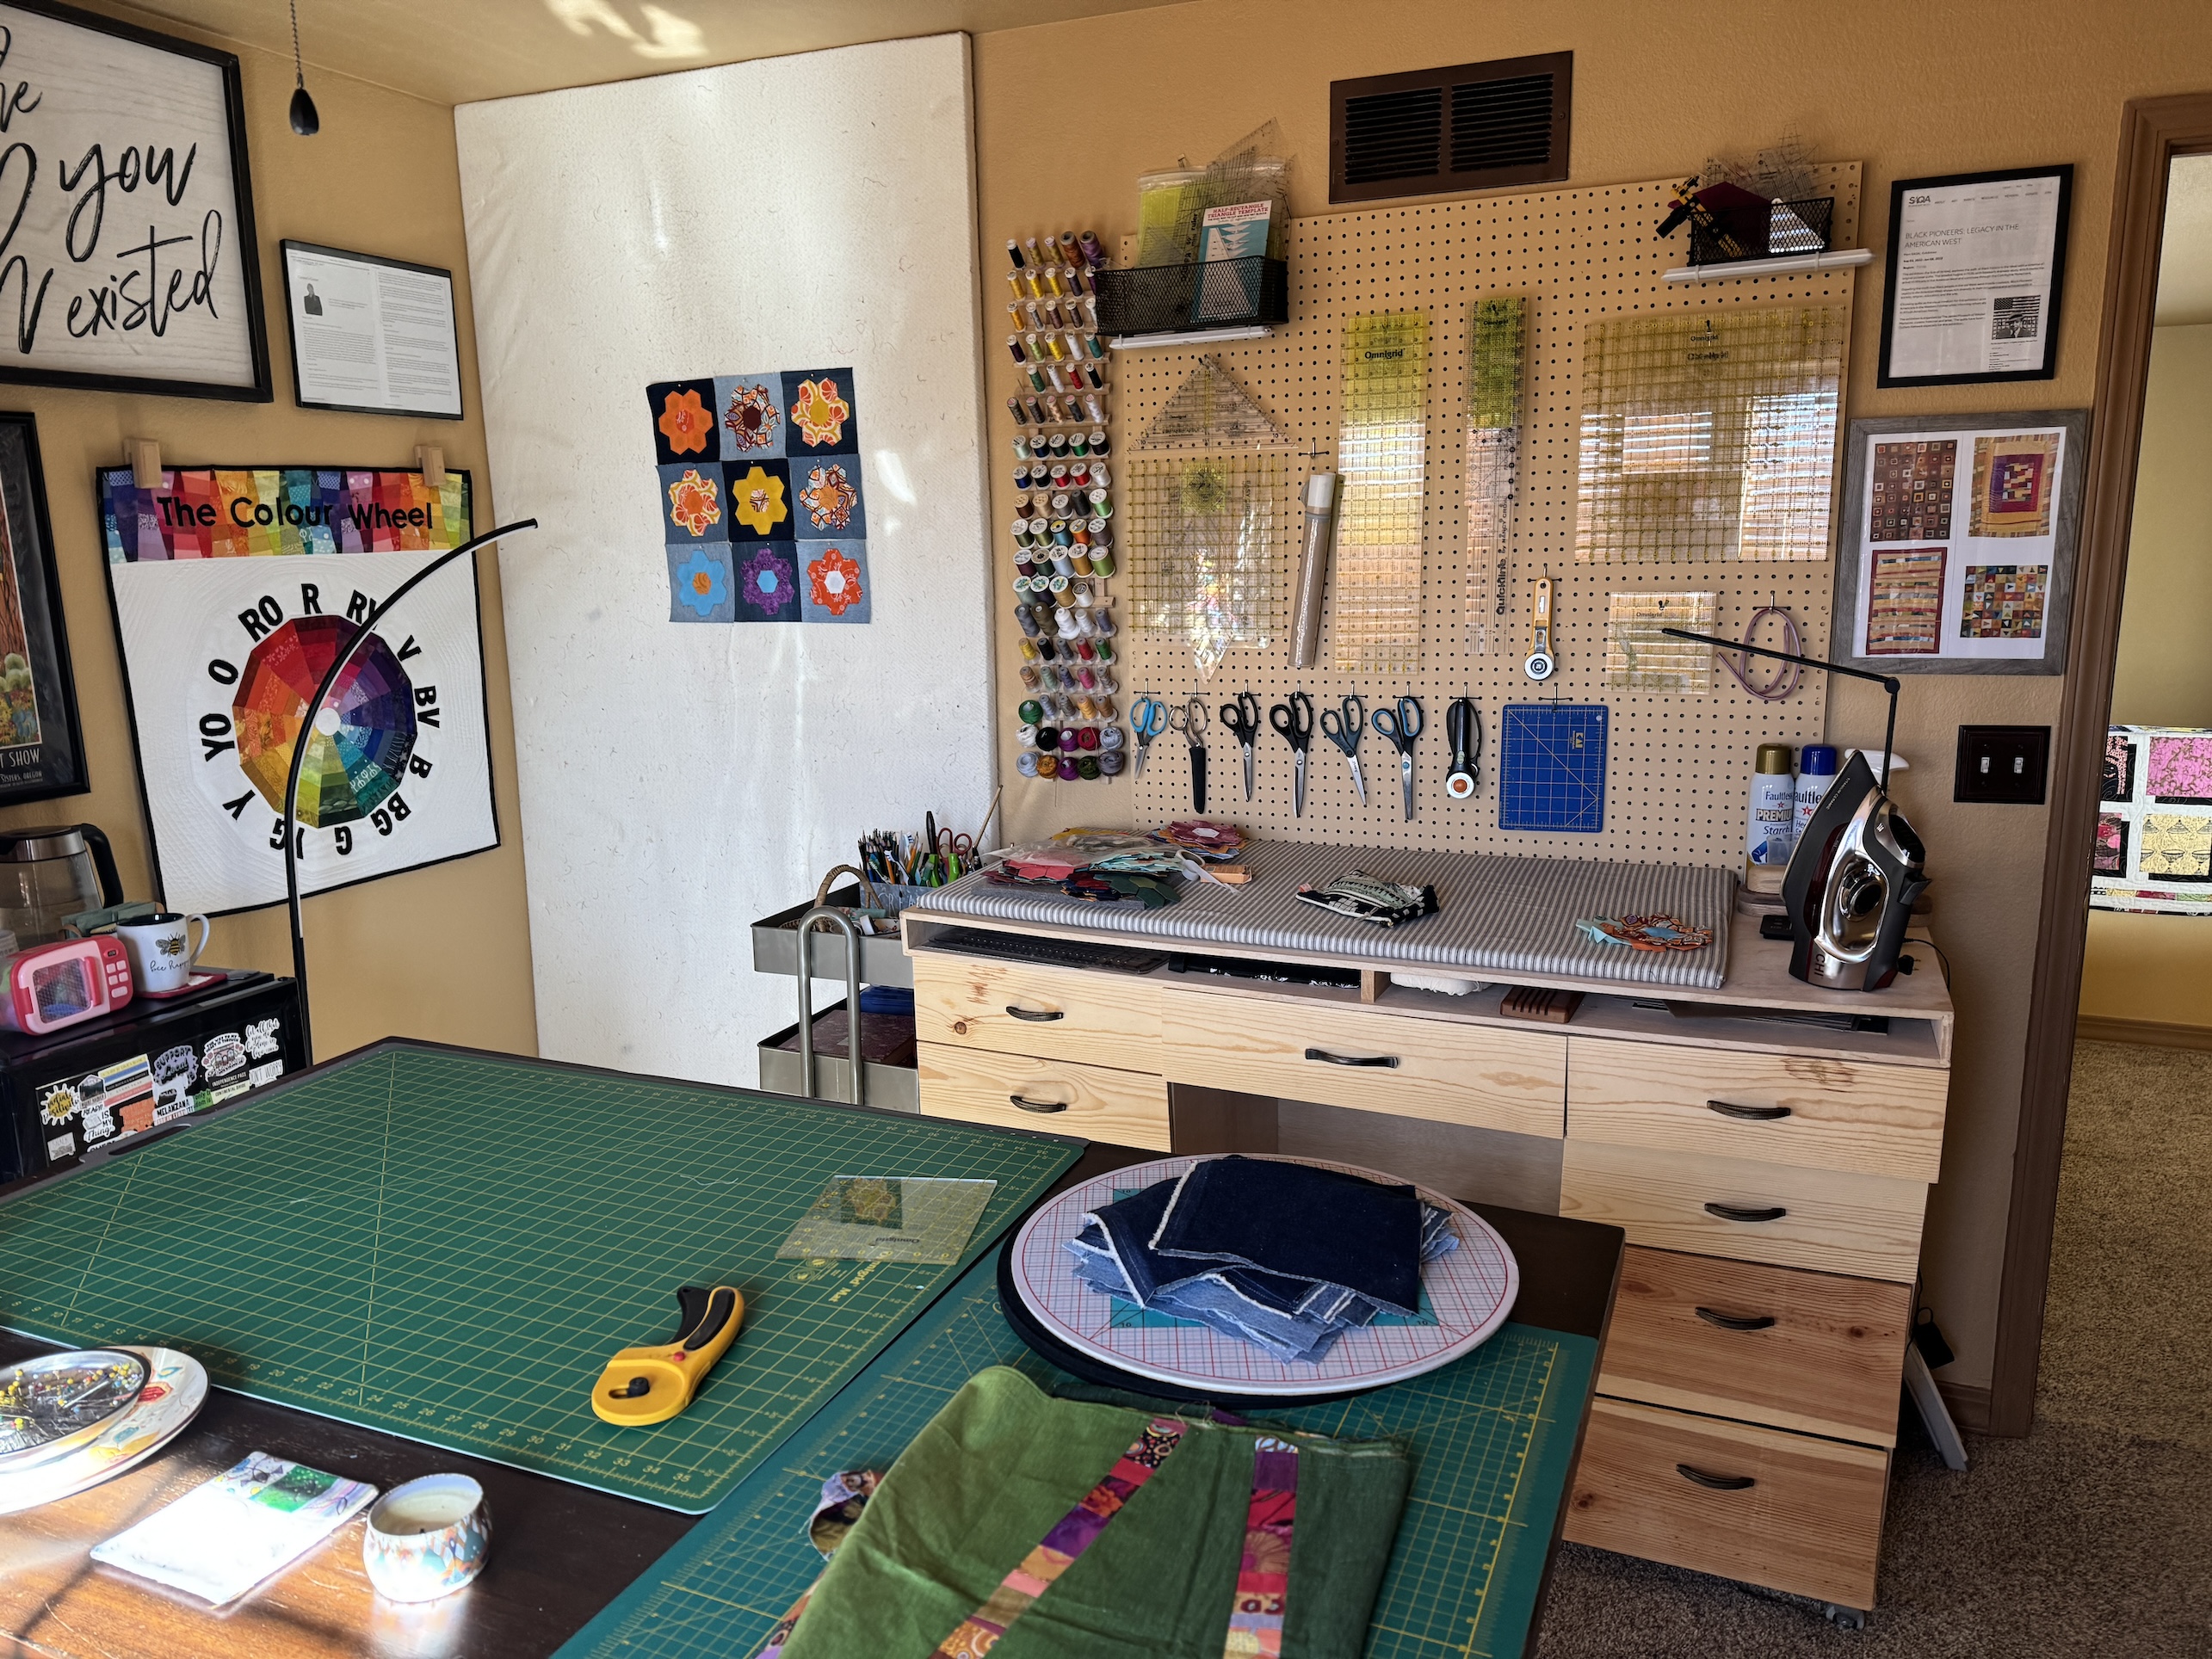
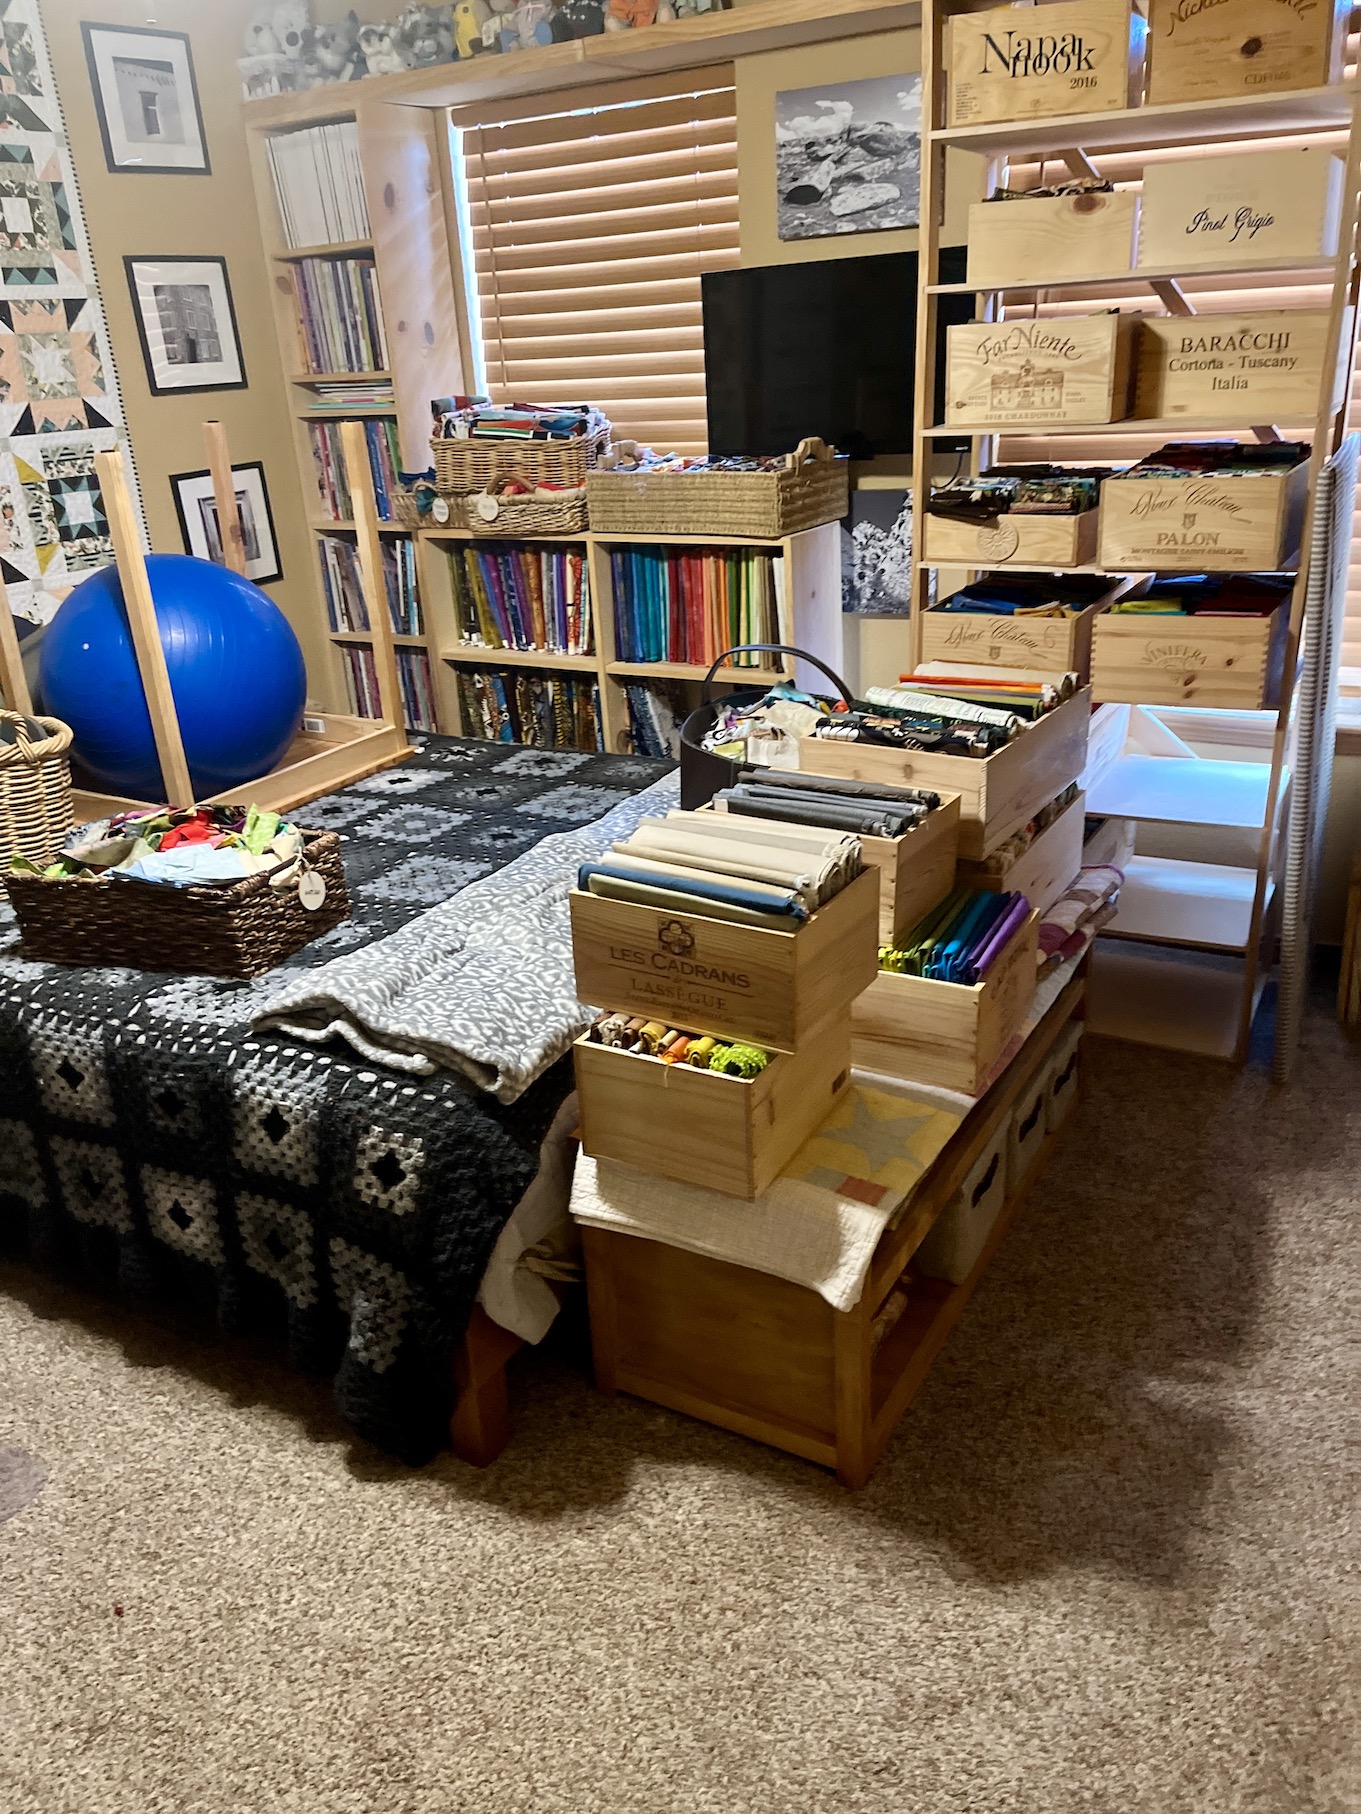
I’ve done additional rearranging and here is what the rest of the room currently looks like:
You might think it would feel very cluttered moving from a large studio (see the post Thrifting for the Studio if you’ve recently joined us and haven’t seen my previous studio) but it feels COZY and like a HUG of CREATIVE INSPIRATION whenever I go into the room.
In addition to being visually “warm and cozy” it’s also physically/temperature-wise warm and cozy because there is less space to heat compared to my big studio. In my post Magnetic Poetry to Ease My Soul I discussed, in the Postscript section, “Creative Restraints”/”Creative Limitations”/”Creative Limits”; and it appears that a smaller space to create in is really fueling/stimulating my creativity!
During the studio move and reorganization I’ve had an “archeological dig” of unearthing old projects in progress (or “UFOs”/Unfinished Objects as quilters like to call them). For example I discovered this partially finished table runner that would be wonderful on the table in our entryway:
I actually sold a couple of these when I had my Etsy shop going (see my post from 2017 – What’s on the Design…Ironing Board?) and I guess this one another one from 2017 that I was going to finish and list in my Etsy shop.
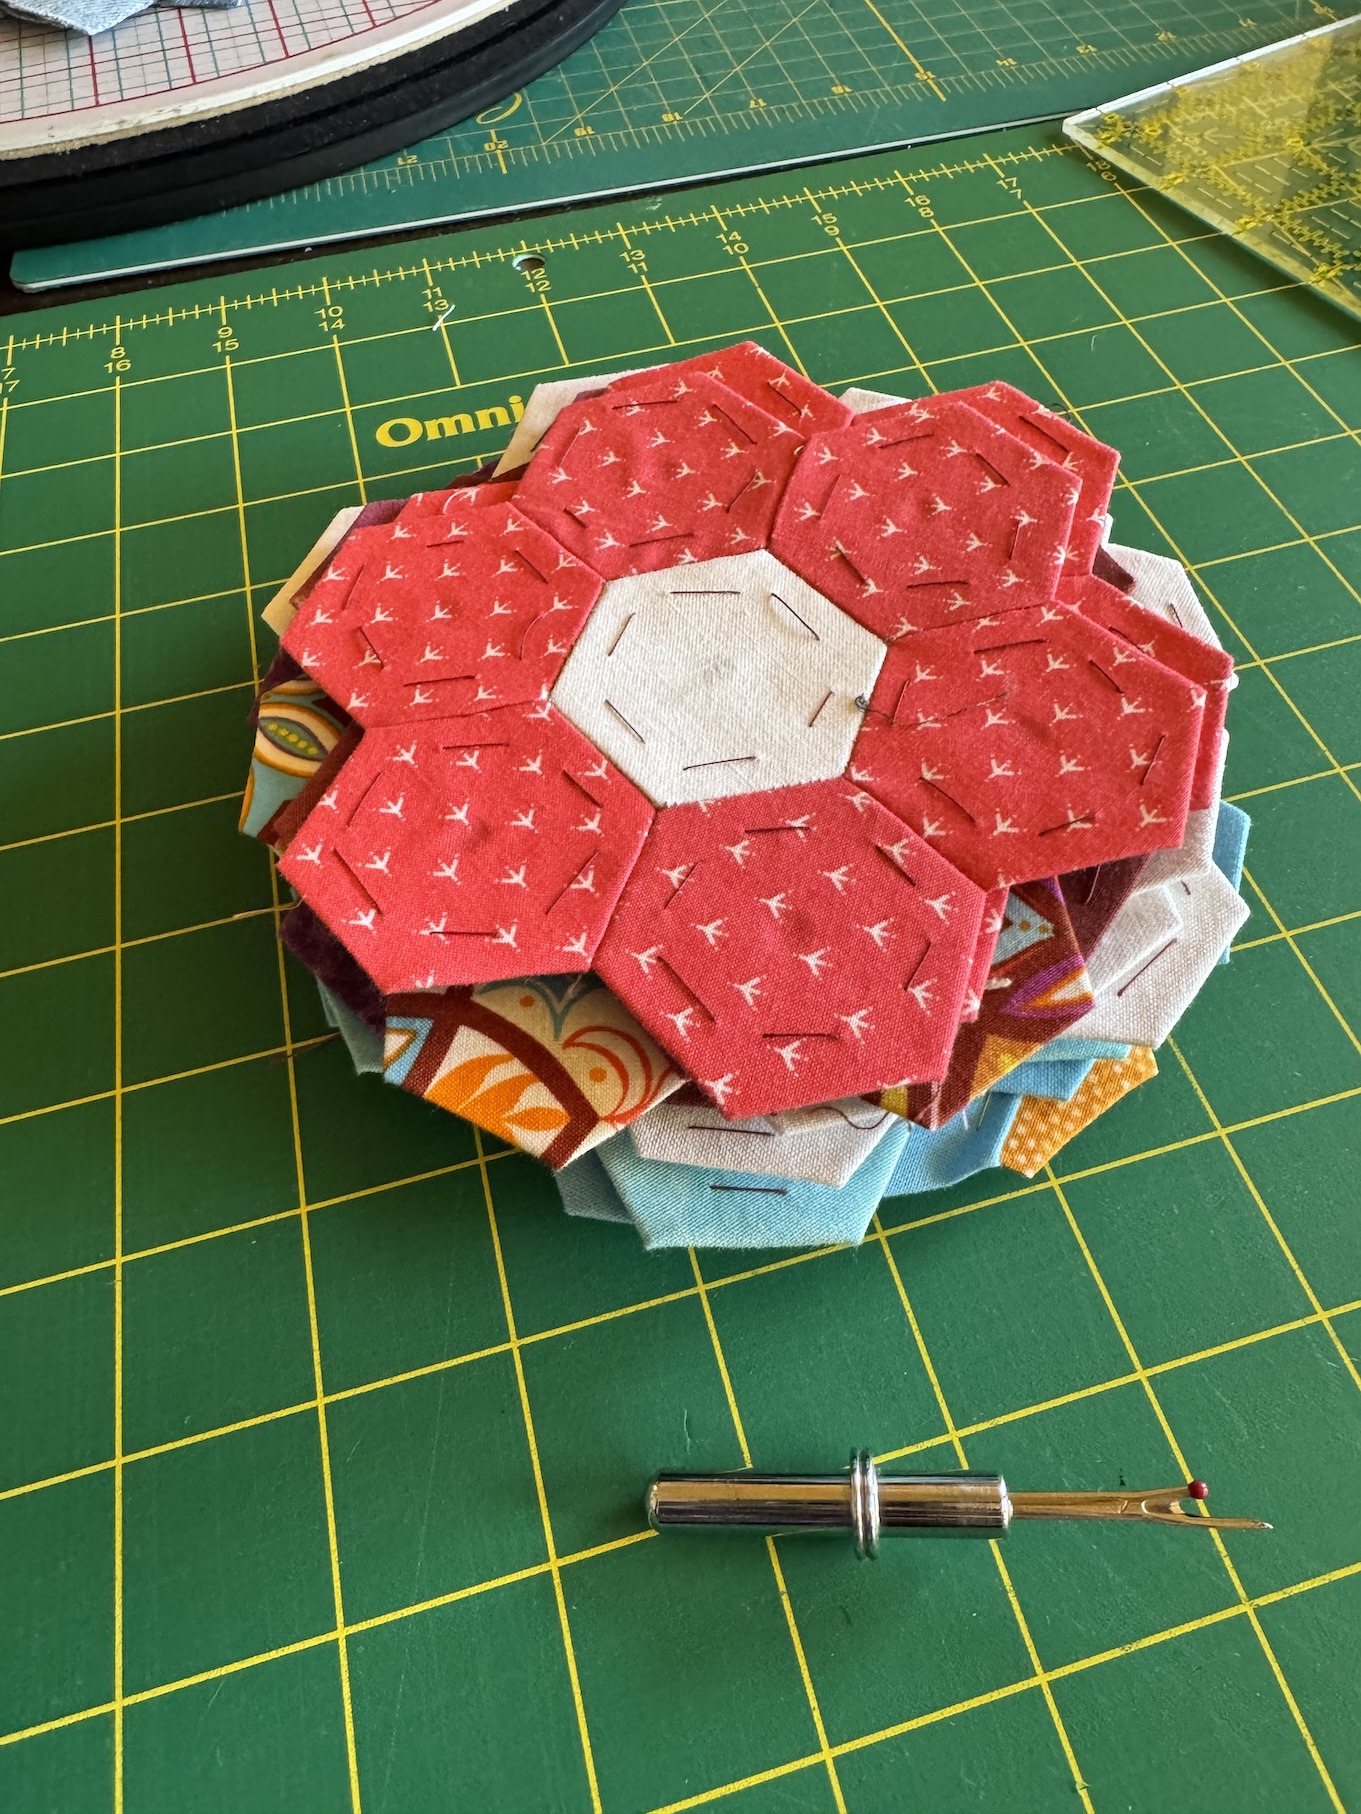
I continue to work on the English Paper Piecing hexie flowers quilt that I shared in my post ScrapHappy January 2026: Moving Forward on the Hexie Project ; and I love sitting my little studio and working on removing the hexie papers from the back of the flowers (so so so many to go…):
(I’ll share an update on the hexie quilt progress during February’s monthly ScrapHappy post.)
So a couple days ago John and I decided to switch back my studio to another room and our bedroom back to the primary bedroom.
In case you have no idea what I am talking about, see this post from June 2025 – Thrifting for the Studio.
My studio is located in the former Primary Bedroom of the house. A couple years ago my husband John and I decided we didn’t need that much room for our main bedroom and moved to a smaller bedroom. Originally it was a carpeted room but in summer 2024 John put in a floor.
I’ve always had a small space to sew and craft until I met John and then a couple years ago we turned our primary bedroom (which is fairly large) into my studio.
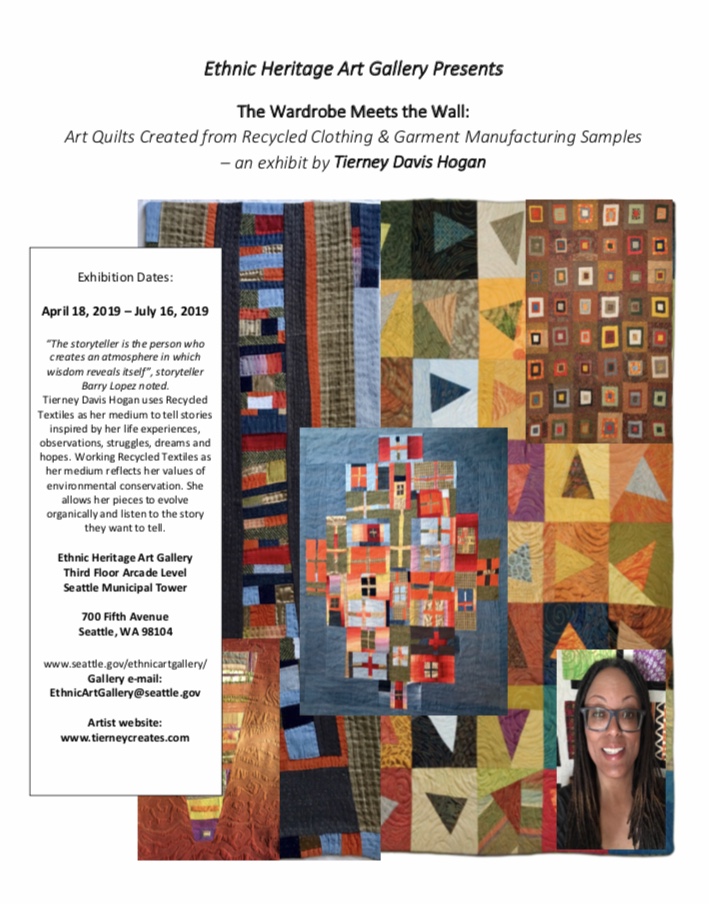
However In my small crafting spaces I created entire bodies of work such as those I exhibited in my solo show (see 2019 post Solo Show Seattle Municipal Tower, Part III) The Wardrobe Meets the Wall.(And no new body of work has occurred in my large studio!)
I made that entire TheWardrobe Meets the Wall collection of 12+ quilts in a tiny little back bedroom of my house in Oregon where I had to use part of my hallway as my design wall.
I know of course I traveled a lot in 2025 but this has been an ongoing problem – I don’t seem to be as “creatively inspired” in a large space. I just had a gut feeling that I needed a cozy little space of creativity again.
So we switched the rooms back and Chaos in the Craft Room ensued:
Moving the contents of my large studio and walk in closet into a much smaller space was quite the undertaking!
The good thing of this move is I spent a couple days preparing for it and purging what I didn’t really need. It seems that I thrifted stuff to fill the space – I expanded to fill the space…
It took a couple days after we switched rooms to settle into my new room, which is less than half the size of the space I had in the primary bedroom, and here is what it looks like now:
Yes my design wall had to be split into half as it wouldn’t work in the room in it’s full size.
Besides giving me a small cozy space to work in to stimulate my creativity, John and I also made this switch because we are considering selling the house someday and moving to a smaller Ranch-style house. We recently toured houses in a cool new development in another section of the Denver Metropolitan area and fell in love with a one story house with a basement that could be finished however we liked.
We aren’t ready to sell/move just yet, but we were going to have to switch the rooms back anyway someday in order to put our house on the market.
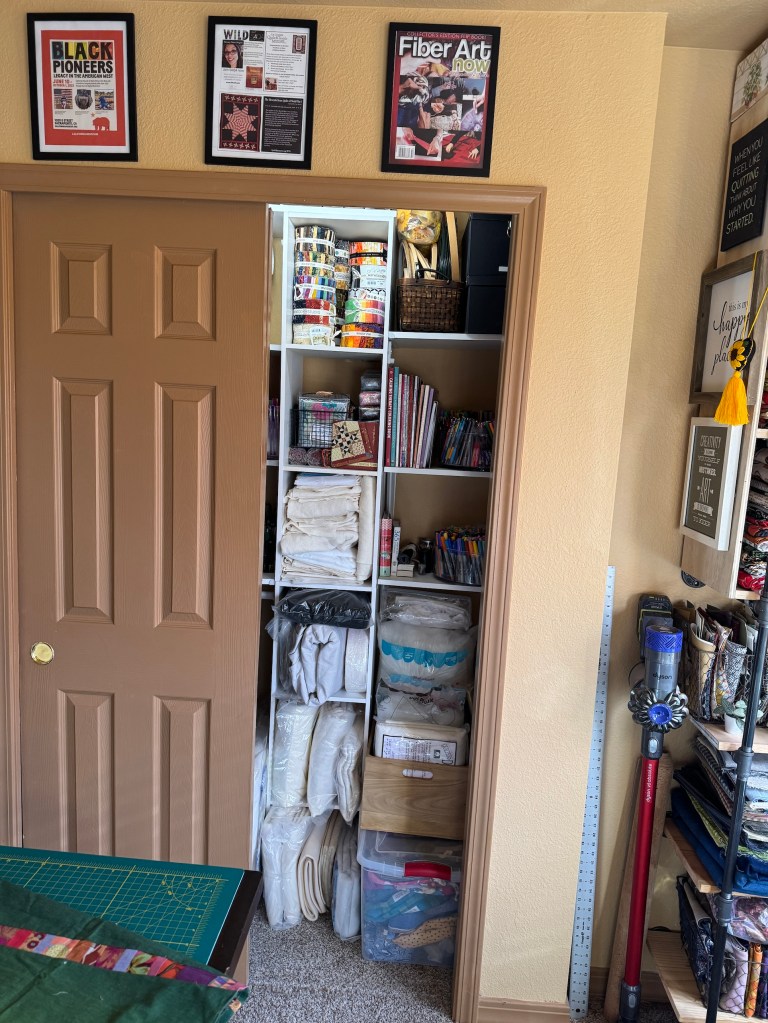
So what became of my huge stash of craft supplies (most of them thrifted)? Well I moved all the sewing related supplies that didn’t fit in the studio shelves into the closet in my new studio:
The non sewing supplies got moved to the closet in the upstairs guest room which had previous housed my clothes, which are now moved into the walk in closet off the primary bedroom.
And…
As far as the Primary Bedroom, John and I took a couple days and turned it into a relaxing bedroom sanctuary. I want it to be our private sanctuary so I am not sharing any photos.(I recently saw on YouTube a tour of a Hollywood actor’s home on the Architectural Digest channel and she wouldn’t show her bedroom because she said that was her private sanctuary. That inspired me!)
Well here’s to getting into my cozy new studio and creating!
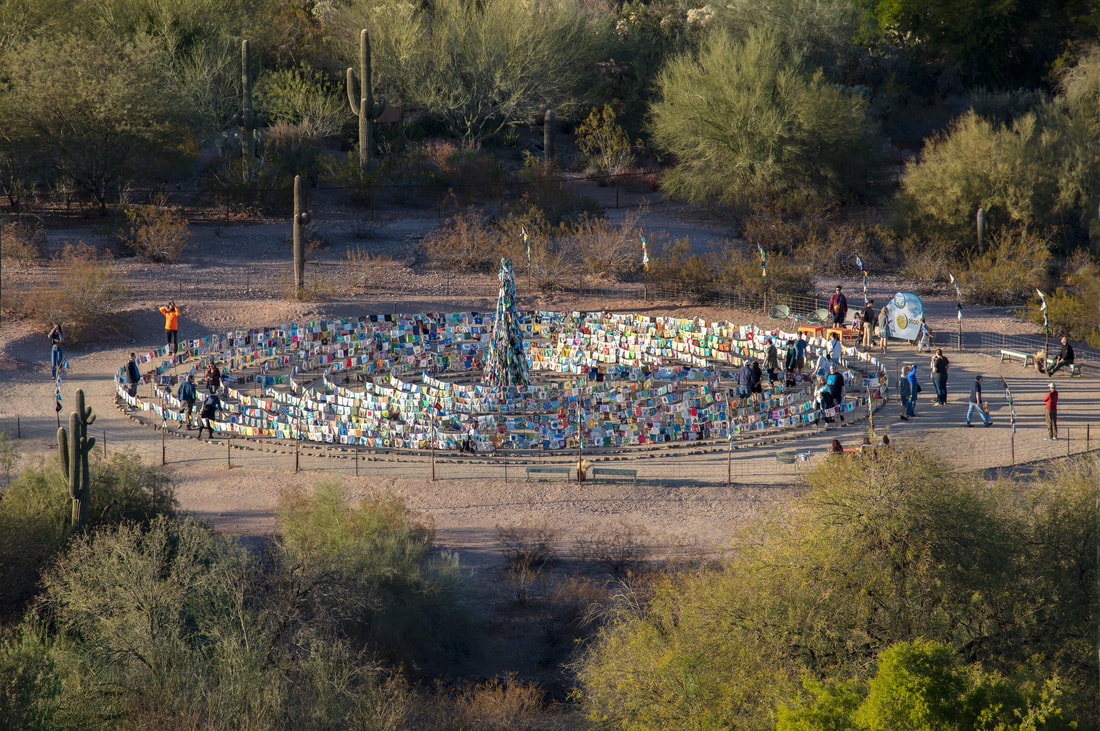
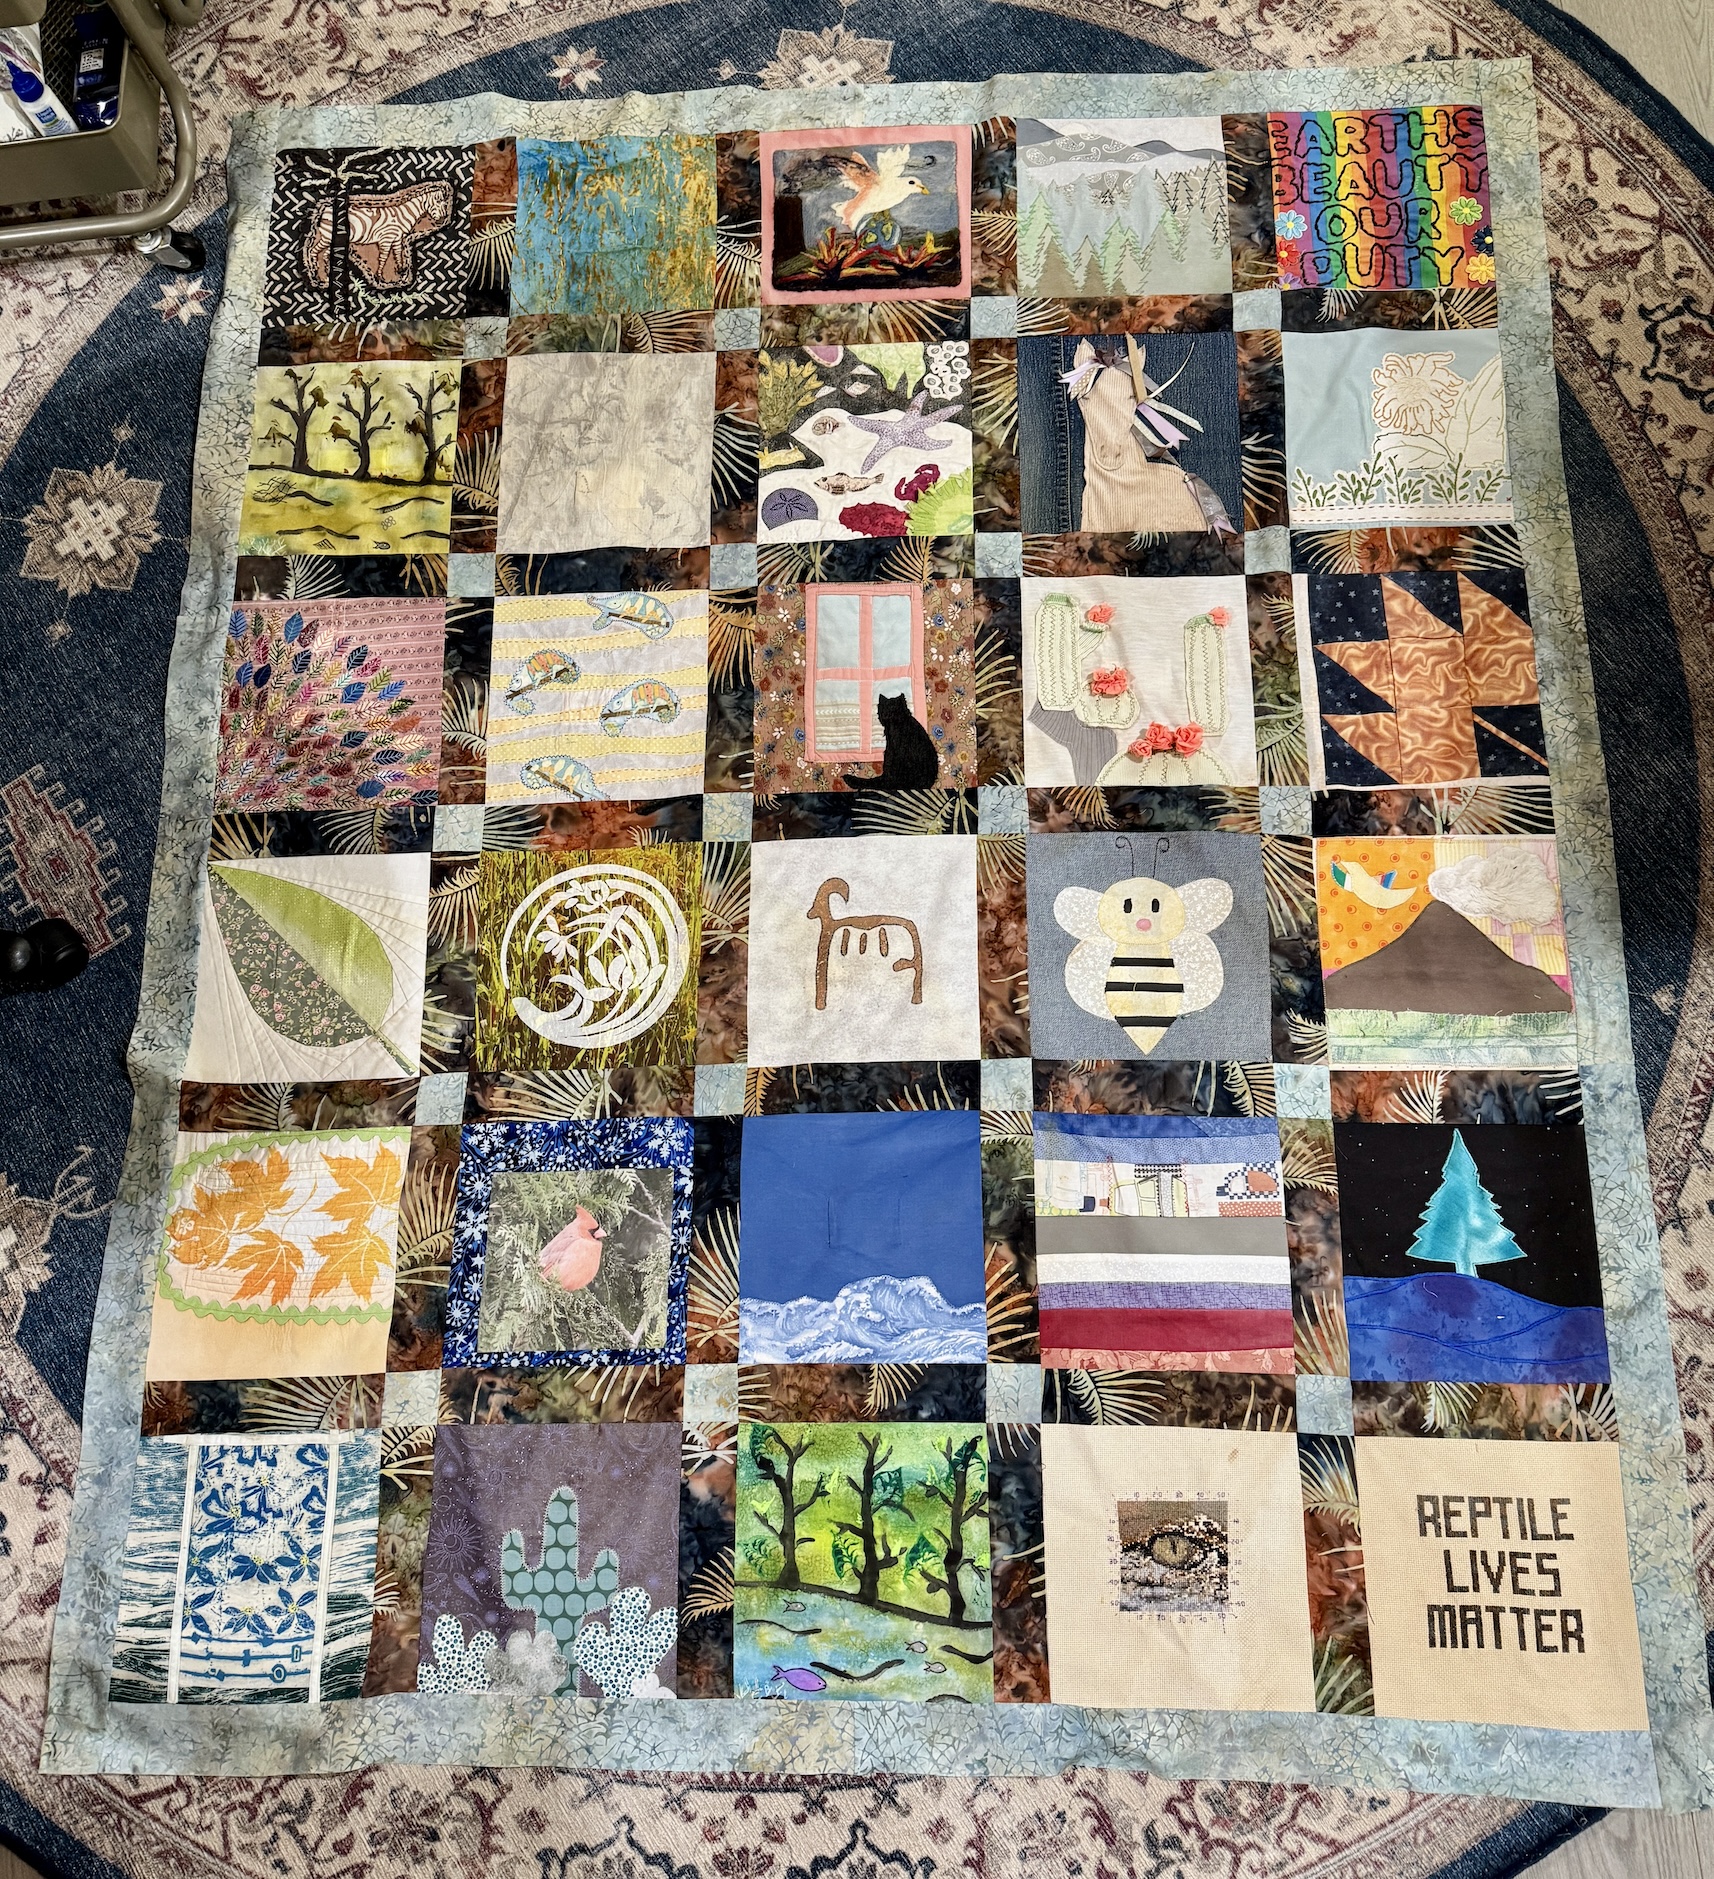
After seeing the Toward 2050 exhibit and walking the labyrinth at the Desert Botanical Garden in Phoenix, Arizona in February, I knew I wanted to contribute to the project in someway and ended up volunteering to sew one of the “blankets” (what they were calling the quilts, ouch) to be made from 30 of the flags that people around the world created inspired by their feelings on Climate Change.
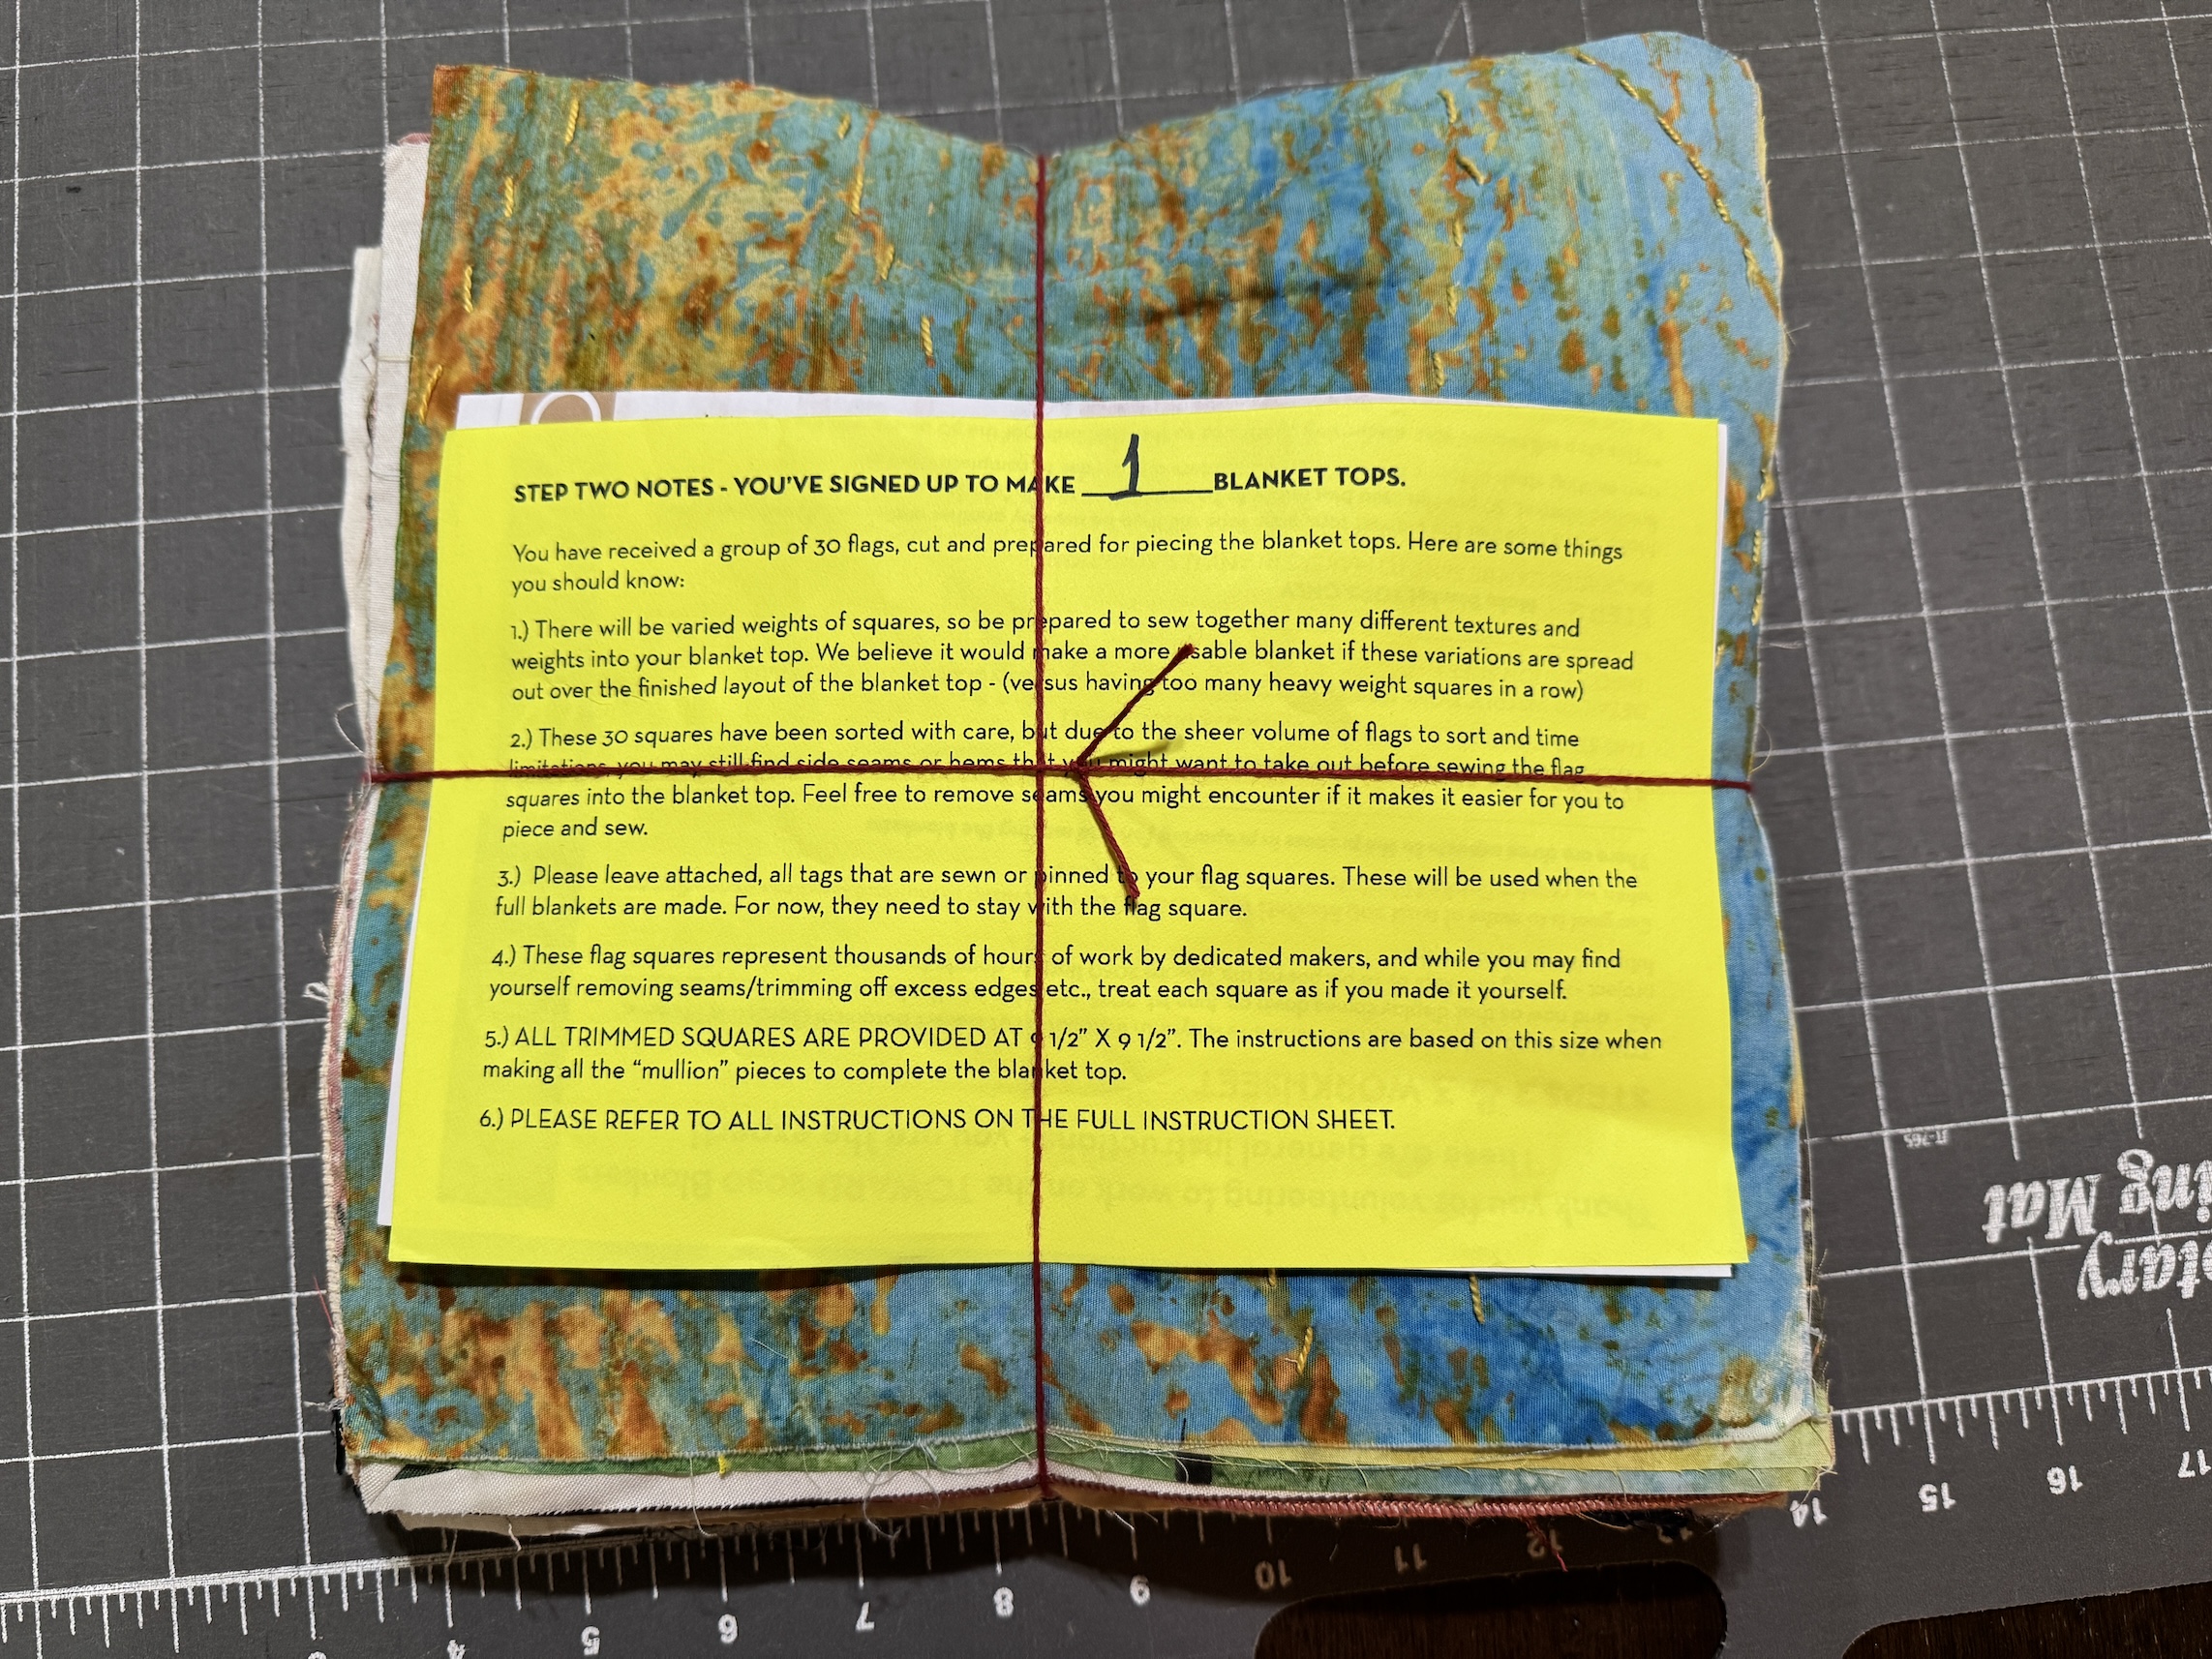
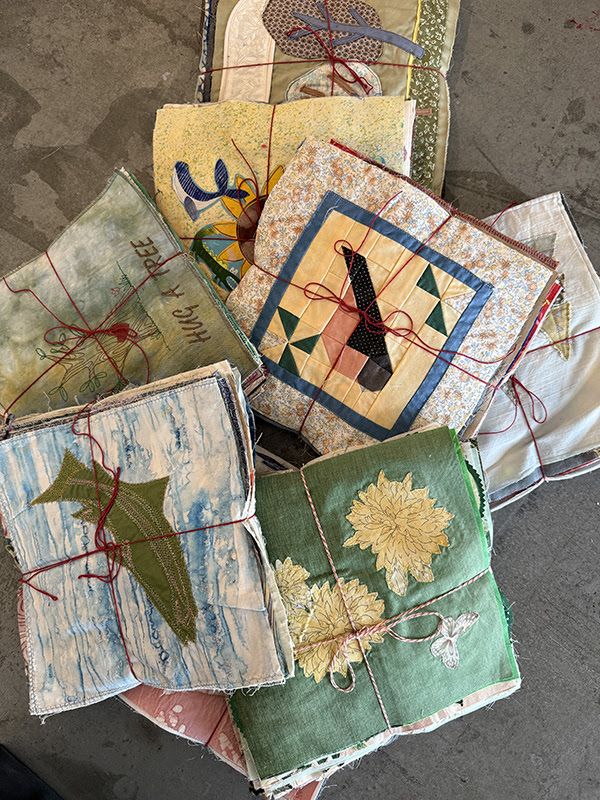
So I turned this pile of 30 – 9 1/2″ by 9 1/2″ flags:
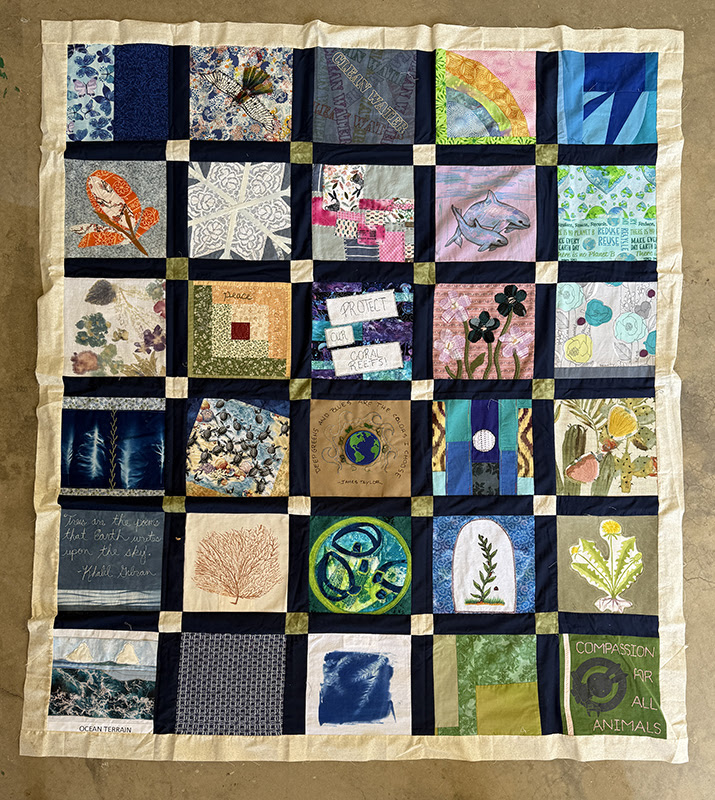
Into this quilt top per the detailed instructions provided:
It was challenging as the flags were really more individual art pieces and likely not originally created to be incorporated together into one piece*.
I ran into issues of trying to sew through very thick materials; and dealing with flag original construction and design issues such as sections within a flag not fully stitched together.
*I am not sure if the original participants knew their flags would become “quilt blocks”:
But I got it done(and so appreciated sharing my challenges with my friend W who was also working on piecing a different set of 30 flags) and will mail to the Toward 2050 project team tomorrow for them to send it on to their volunteer longarm machine quilters to finish.
“According to the Intergovernmental Panel on Climate Change (IPCC), the United Nations body for assessing the science related to climate change, global climate is on track to increase by 1.5° C by 2040, and with that, irreparable damage will likely be done to earth’s ecosystems if our course is not changed decisively and with haste. In the IPCC’s Climate Change 2023: Synthesis Report, clear goals and pathways have been defined to reverse our emissions of green house gases – 50% by 2030, and to arrive at net zero emissions by 2050, keeping the global rise in temperature to under 1.5° C in perpetuity. Hence, 2050 marks a very important point in our human history…
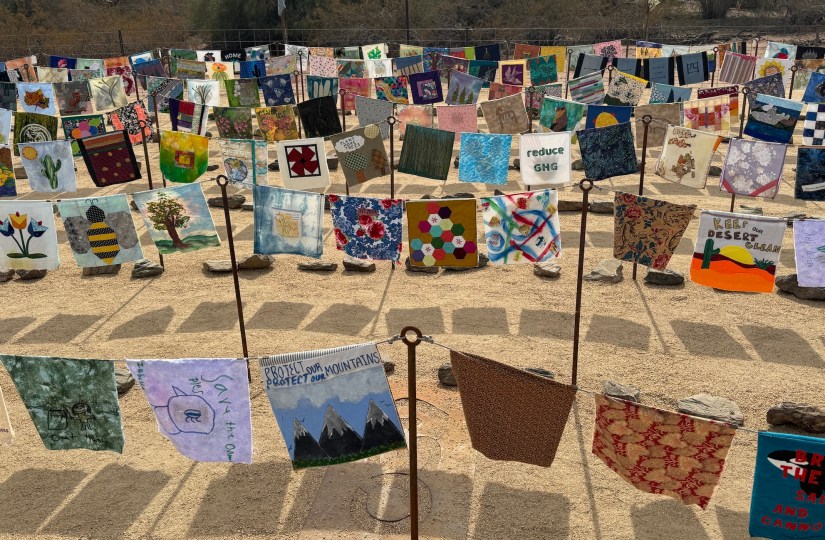
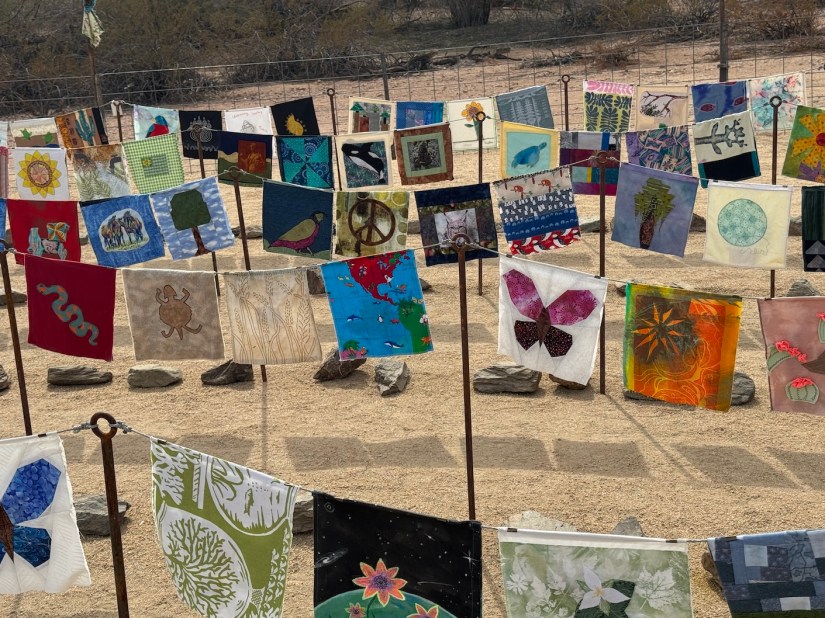
Textile work from makers from 45 U.S. states and 9 countries have become important parts of TOWARD 2050, which has culminated in this immersive installation at Desert Botanical Garden in Phoenix, Arizona – February 8th through June 1st of 2025. Makers were called to create environmentally themed, textile panels in the style of “prayer flags”. Our goal was to collect enough double sided flags to define the pathways of this interactive labyrinth experience. That goal was met thanks to the generousity and commitment of all the makers participating in this project.”
Here are some images from the TOWARD 2050 textile flags labyrinth (which took over a half hour to the center and back) I walked during my visit to the Desert Botanical Garden.
I recently found this video on YouTube of the labyrinth I walked back in February 2025:
NEXT STEP: MAKING BLANKETS (QUILTS)
As you can see from the Toward 2025 website screen shot above, after the exhibit (and raising awareness), the next step is to make “blankets” (to me they would be quilts) to donate to communities that will “suffer future climate catastrophe).
From the Toward 2050 website here are the packets that will be sent out to volunteers and what they want the “blankets” to look like:
Images credits: Toward 2050 website
VOLUNTEERING TO MAKE A QUILT/BLANKET TOP
So I signed up and a couple weeks ago (while I was traveling) a package of 30 flags arrived in the mail:
Here are the 30 blocks laid out quickly on my design wall:
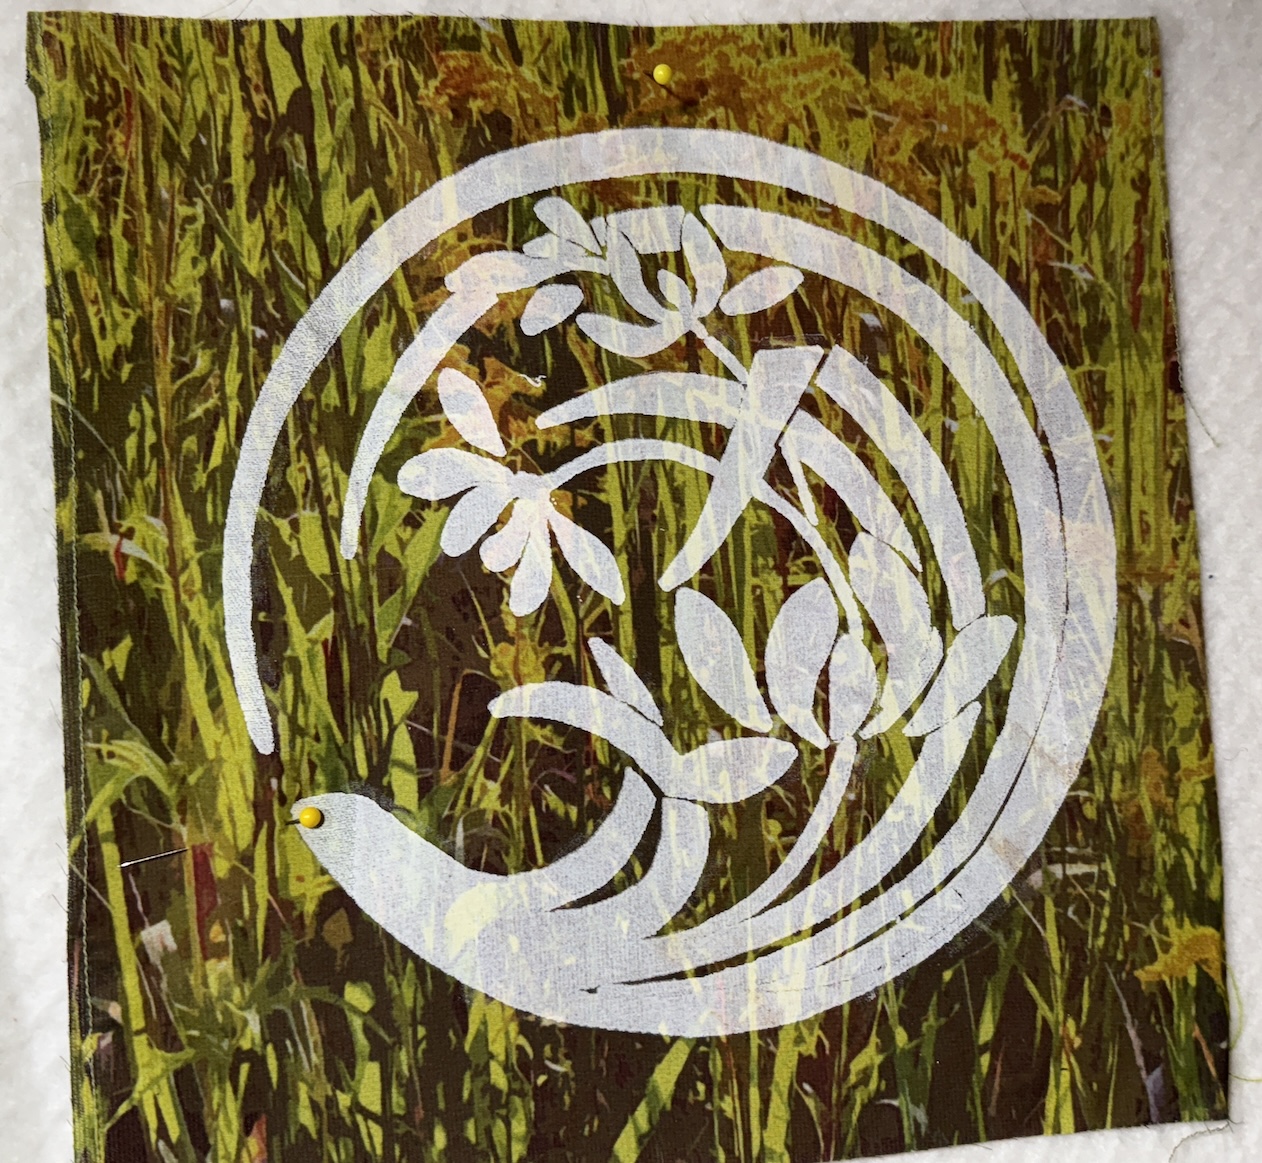
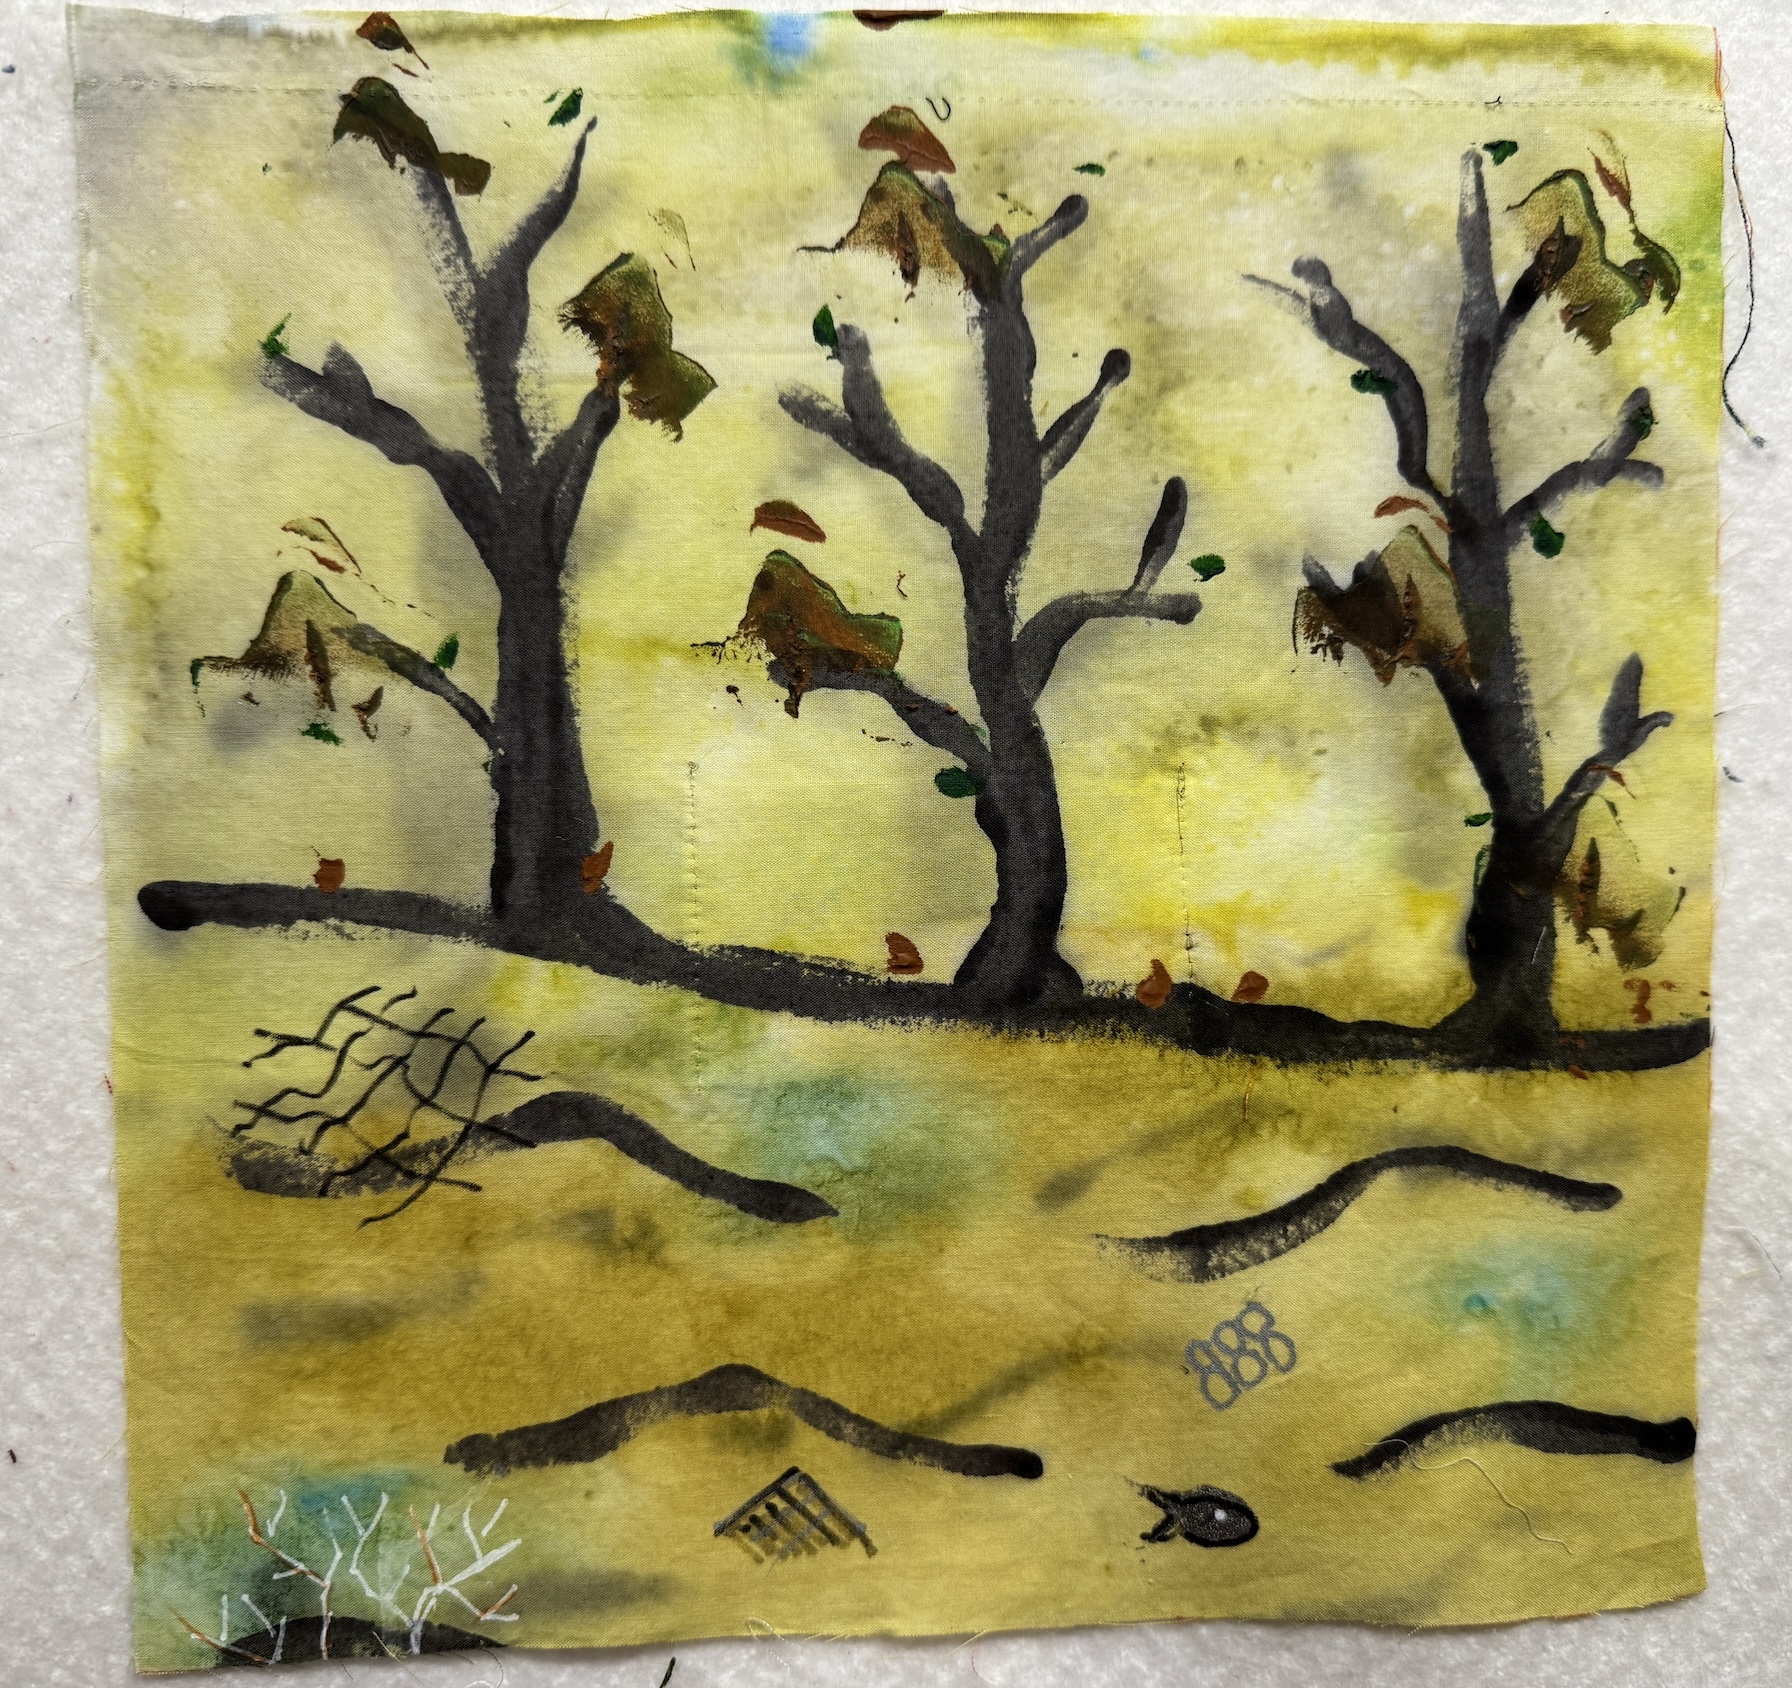
And here is a sampling of some of the blocks I was sent to piece together made from participants all over the world:
Volunteers are required to provide the fabric for the lattice and borders for the “blanket top” they are piecing from the Toward 2050 blocks (the “blanket” will then be longarm quilted by other volunteers).
I was planning to search through my fabric stash to find something that would work with all the different colors in the blocks when I received a gifted piece of fabric in the mail from one of my awesome penpals! (You know who you are and you ROCK! Impeccable timing!)
Turns out this fabric would work well with the blocks and I tested it out in the image above.
Talk about a serendipitous surprise!
I will of course share the pieced blanket/quilt top with you all in a future post once I get it put together.
Postscript
If by chance you are interested in participating, they are still looking for volunteers to piece tops using 30 of the textile flags the they will send you.
As part of my birthday gift, my sister sent me a collection of upholstery fabric samples.
My sister is the Sr. Construction Project Manager for a university and the Interior Design team she works with had a collection of upholstery samples that they were going to put in the trash. My sister knows I love working with upcycled fabrics so she rescued them and sent them to me.
The collection of samples were beautiful and I decided to experiment and frame four that really caught my eye to hang on the wall across from my studio.
They look even better in person, the hallway is a little dark even with the light on so it was challenging to photograph.
I haven’t decided what I am going to do with the rest of the samples butI’ve been collecting ideas on one of my Pinterest boards.
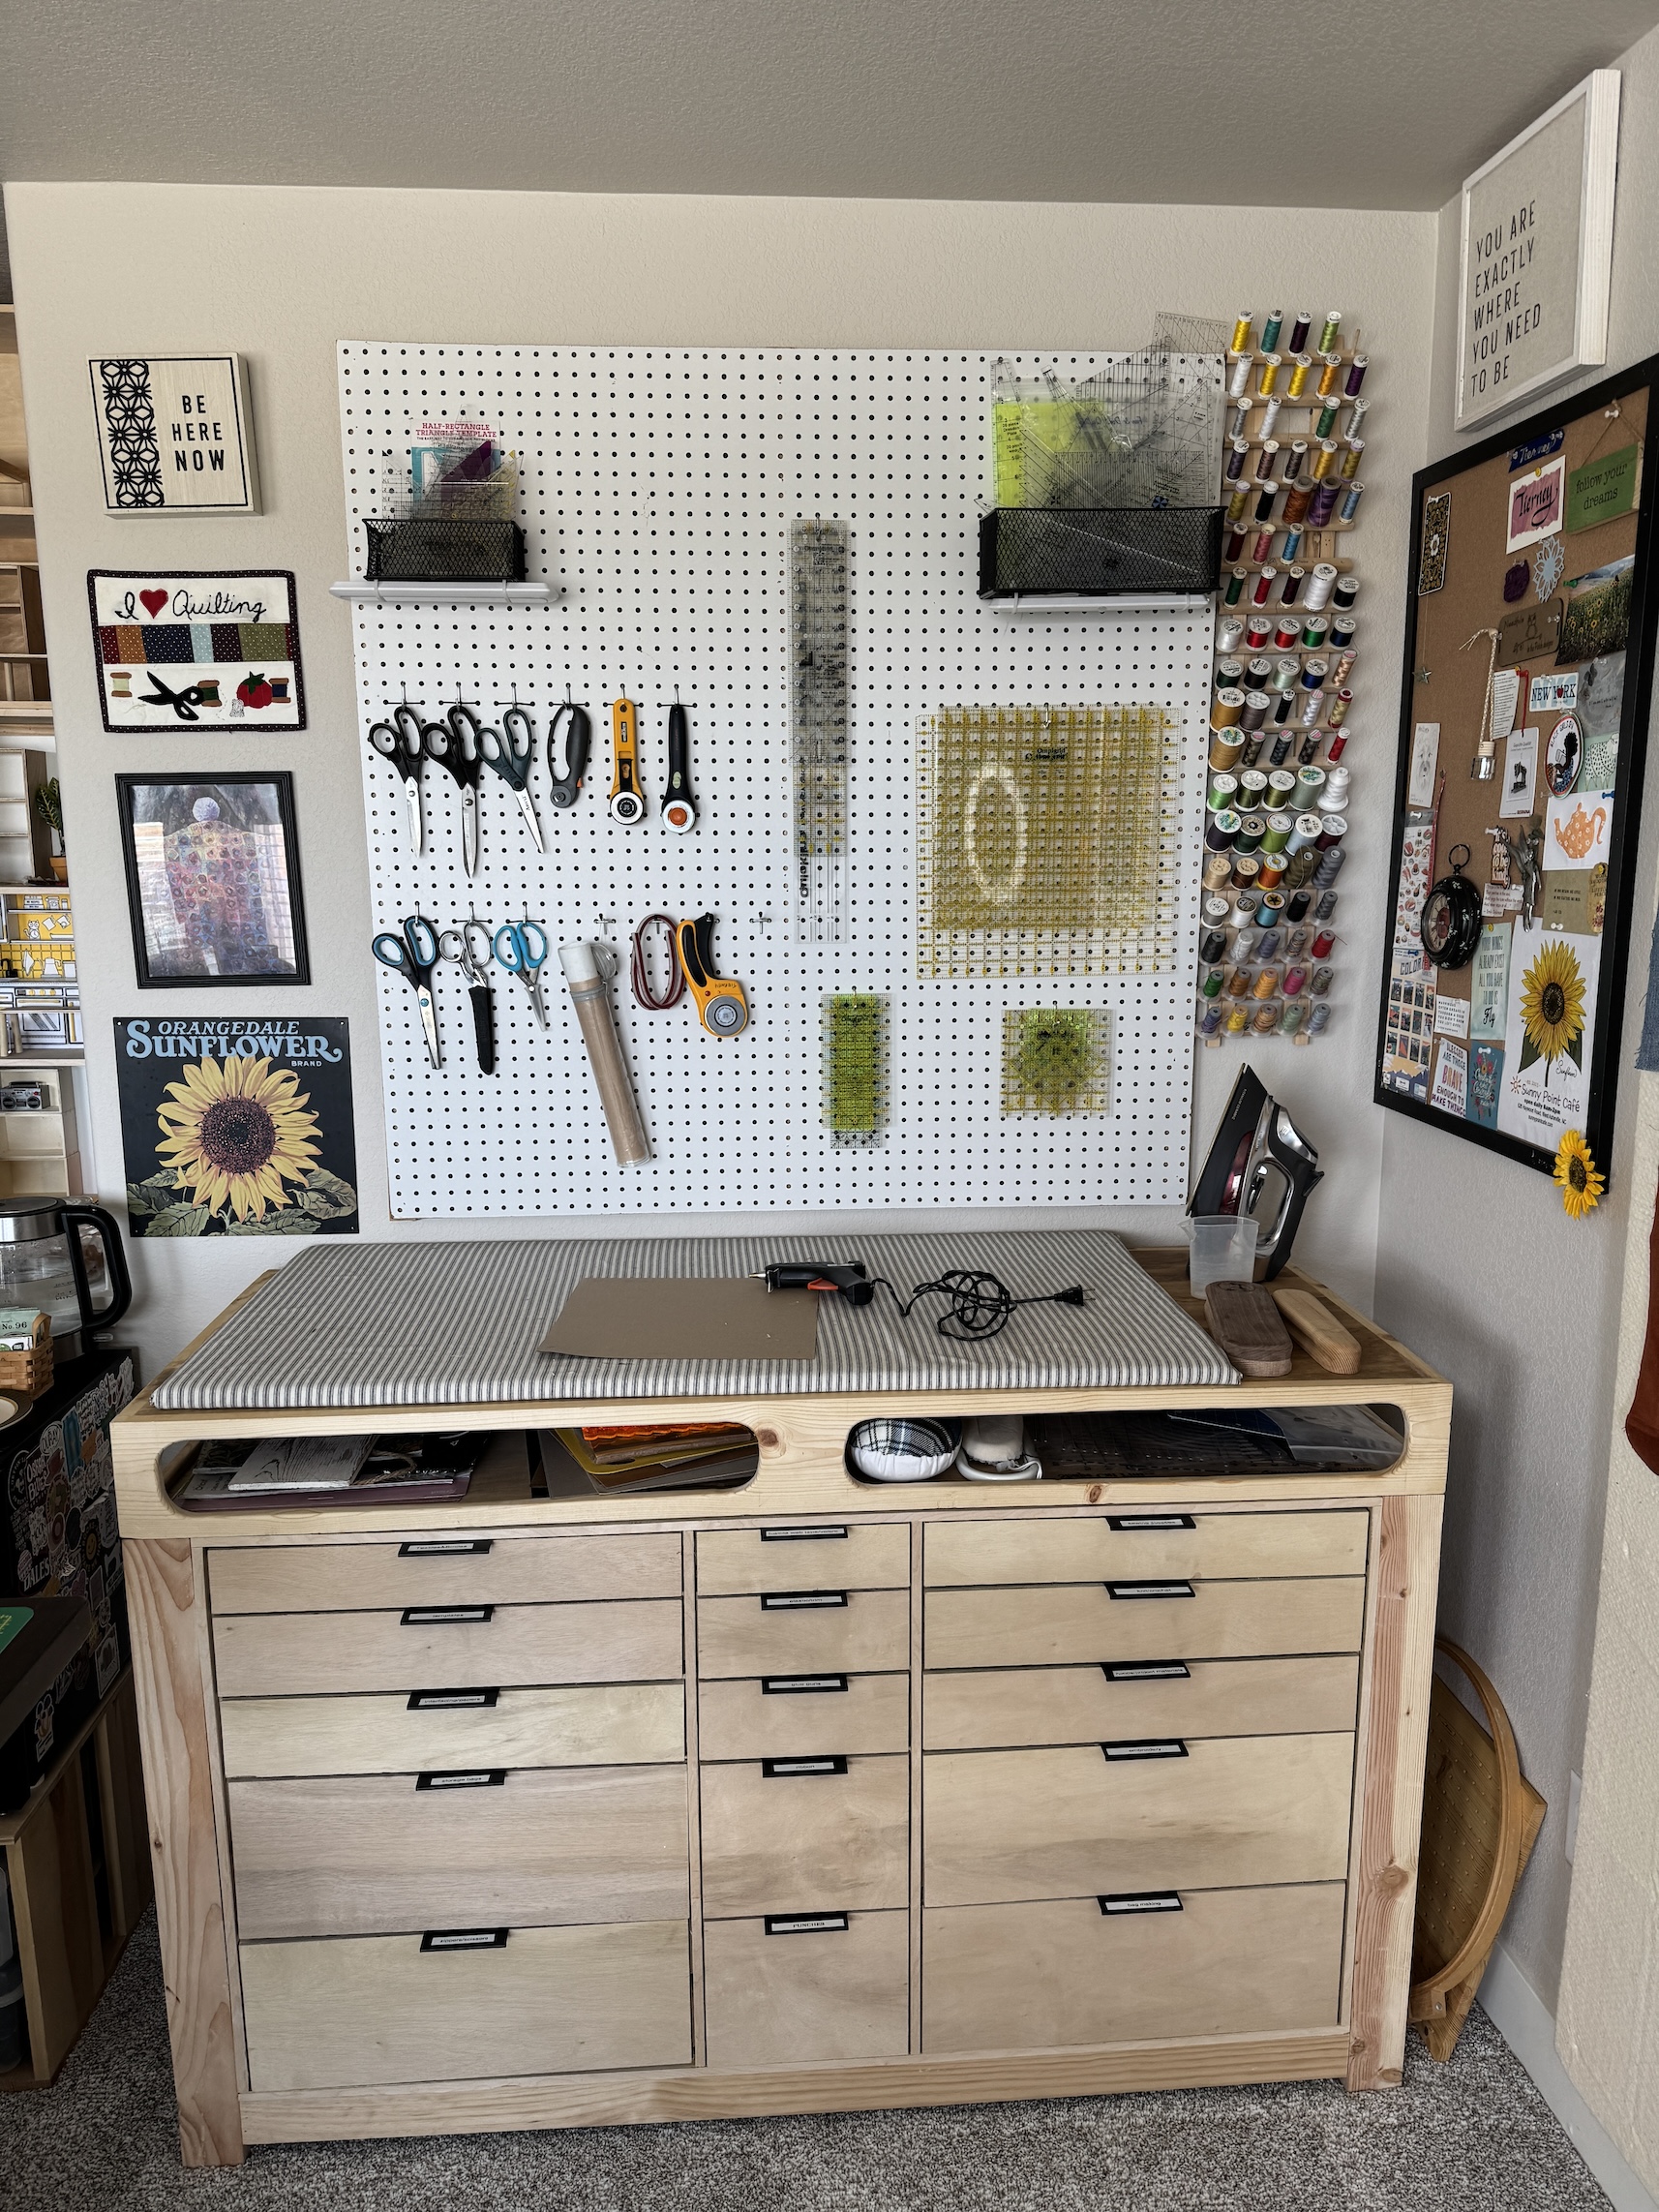
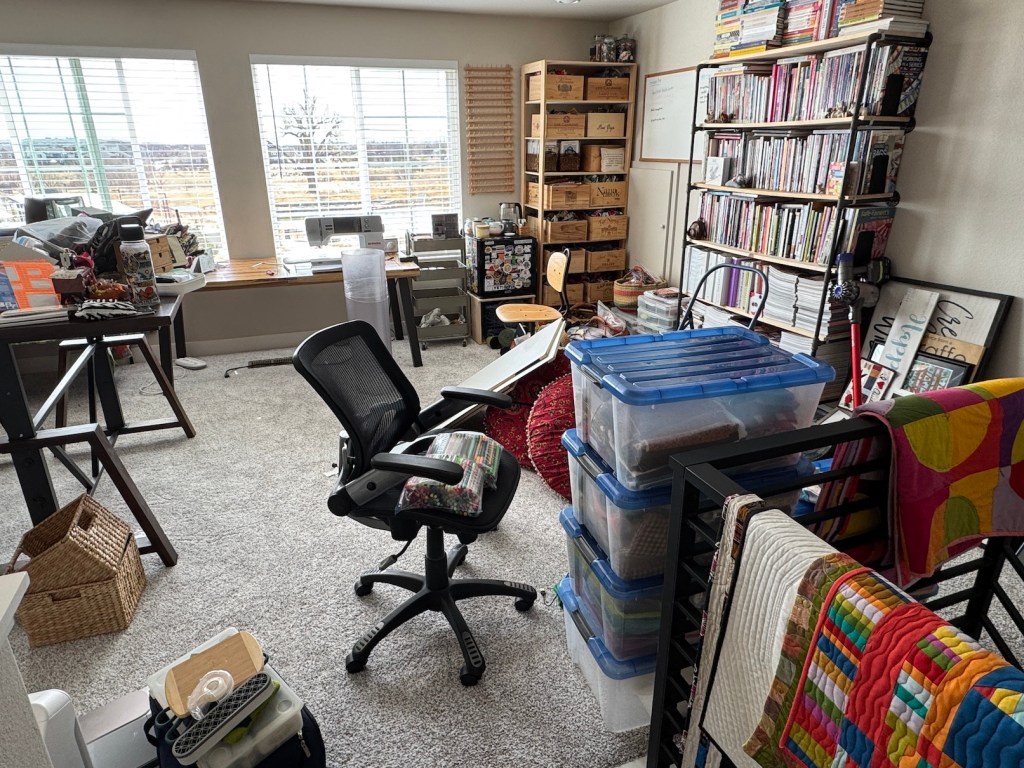
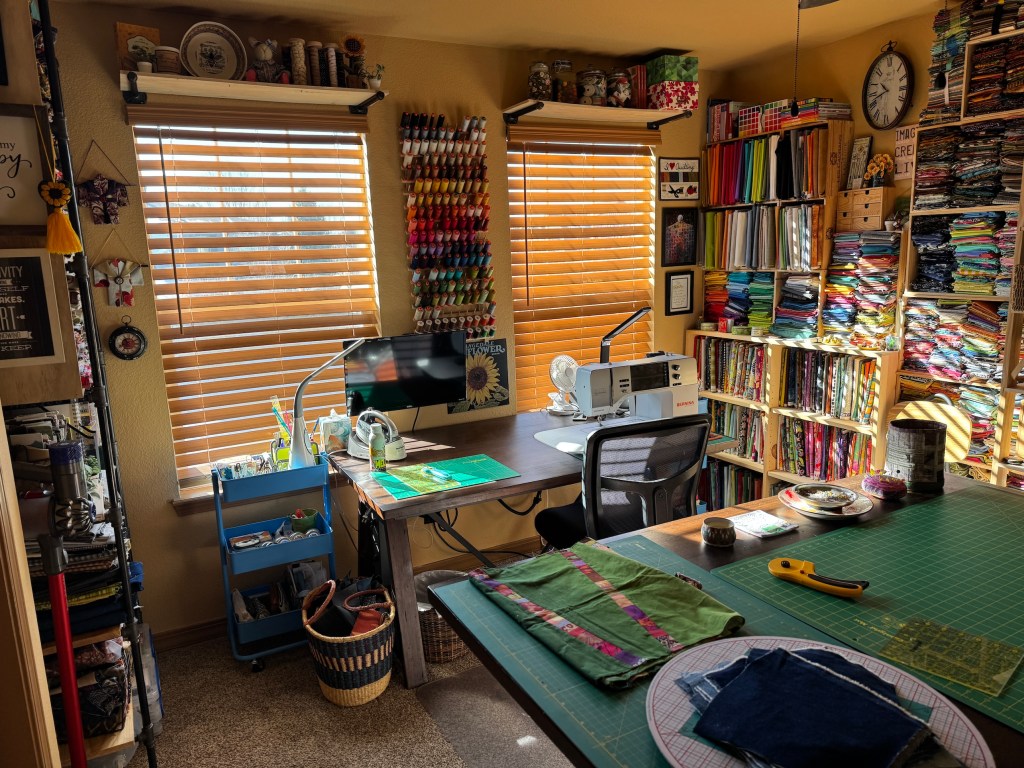
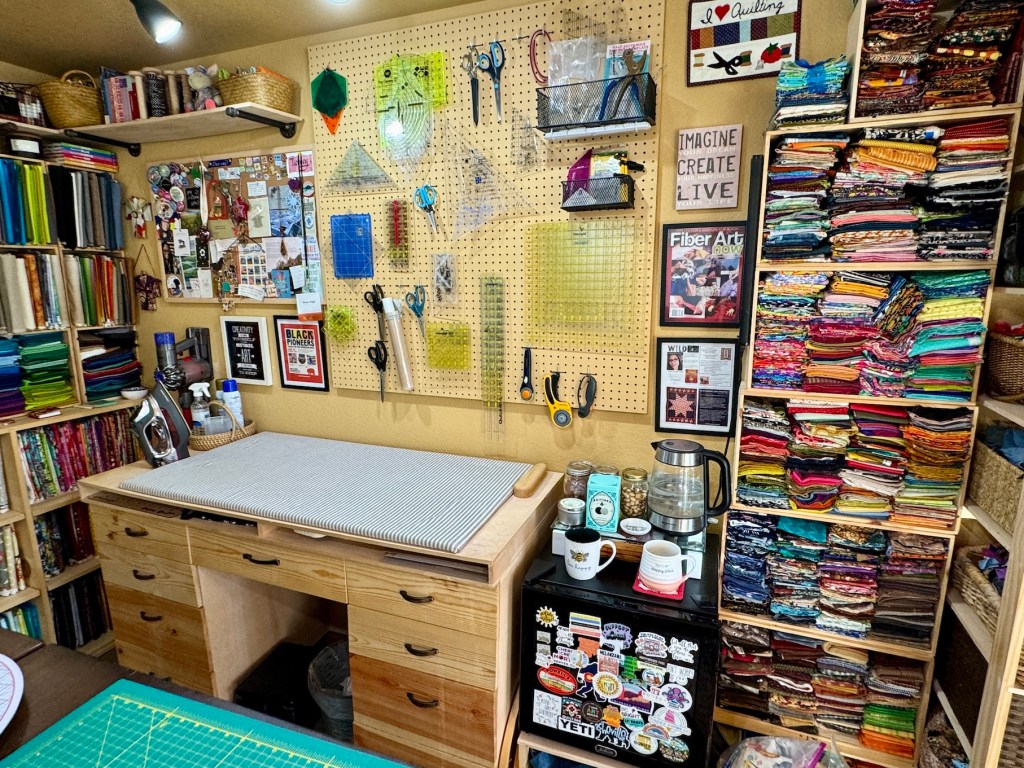
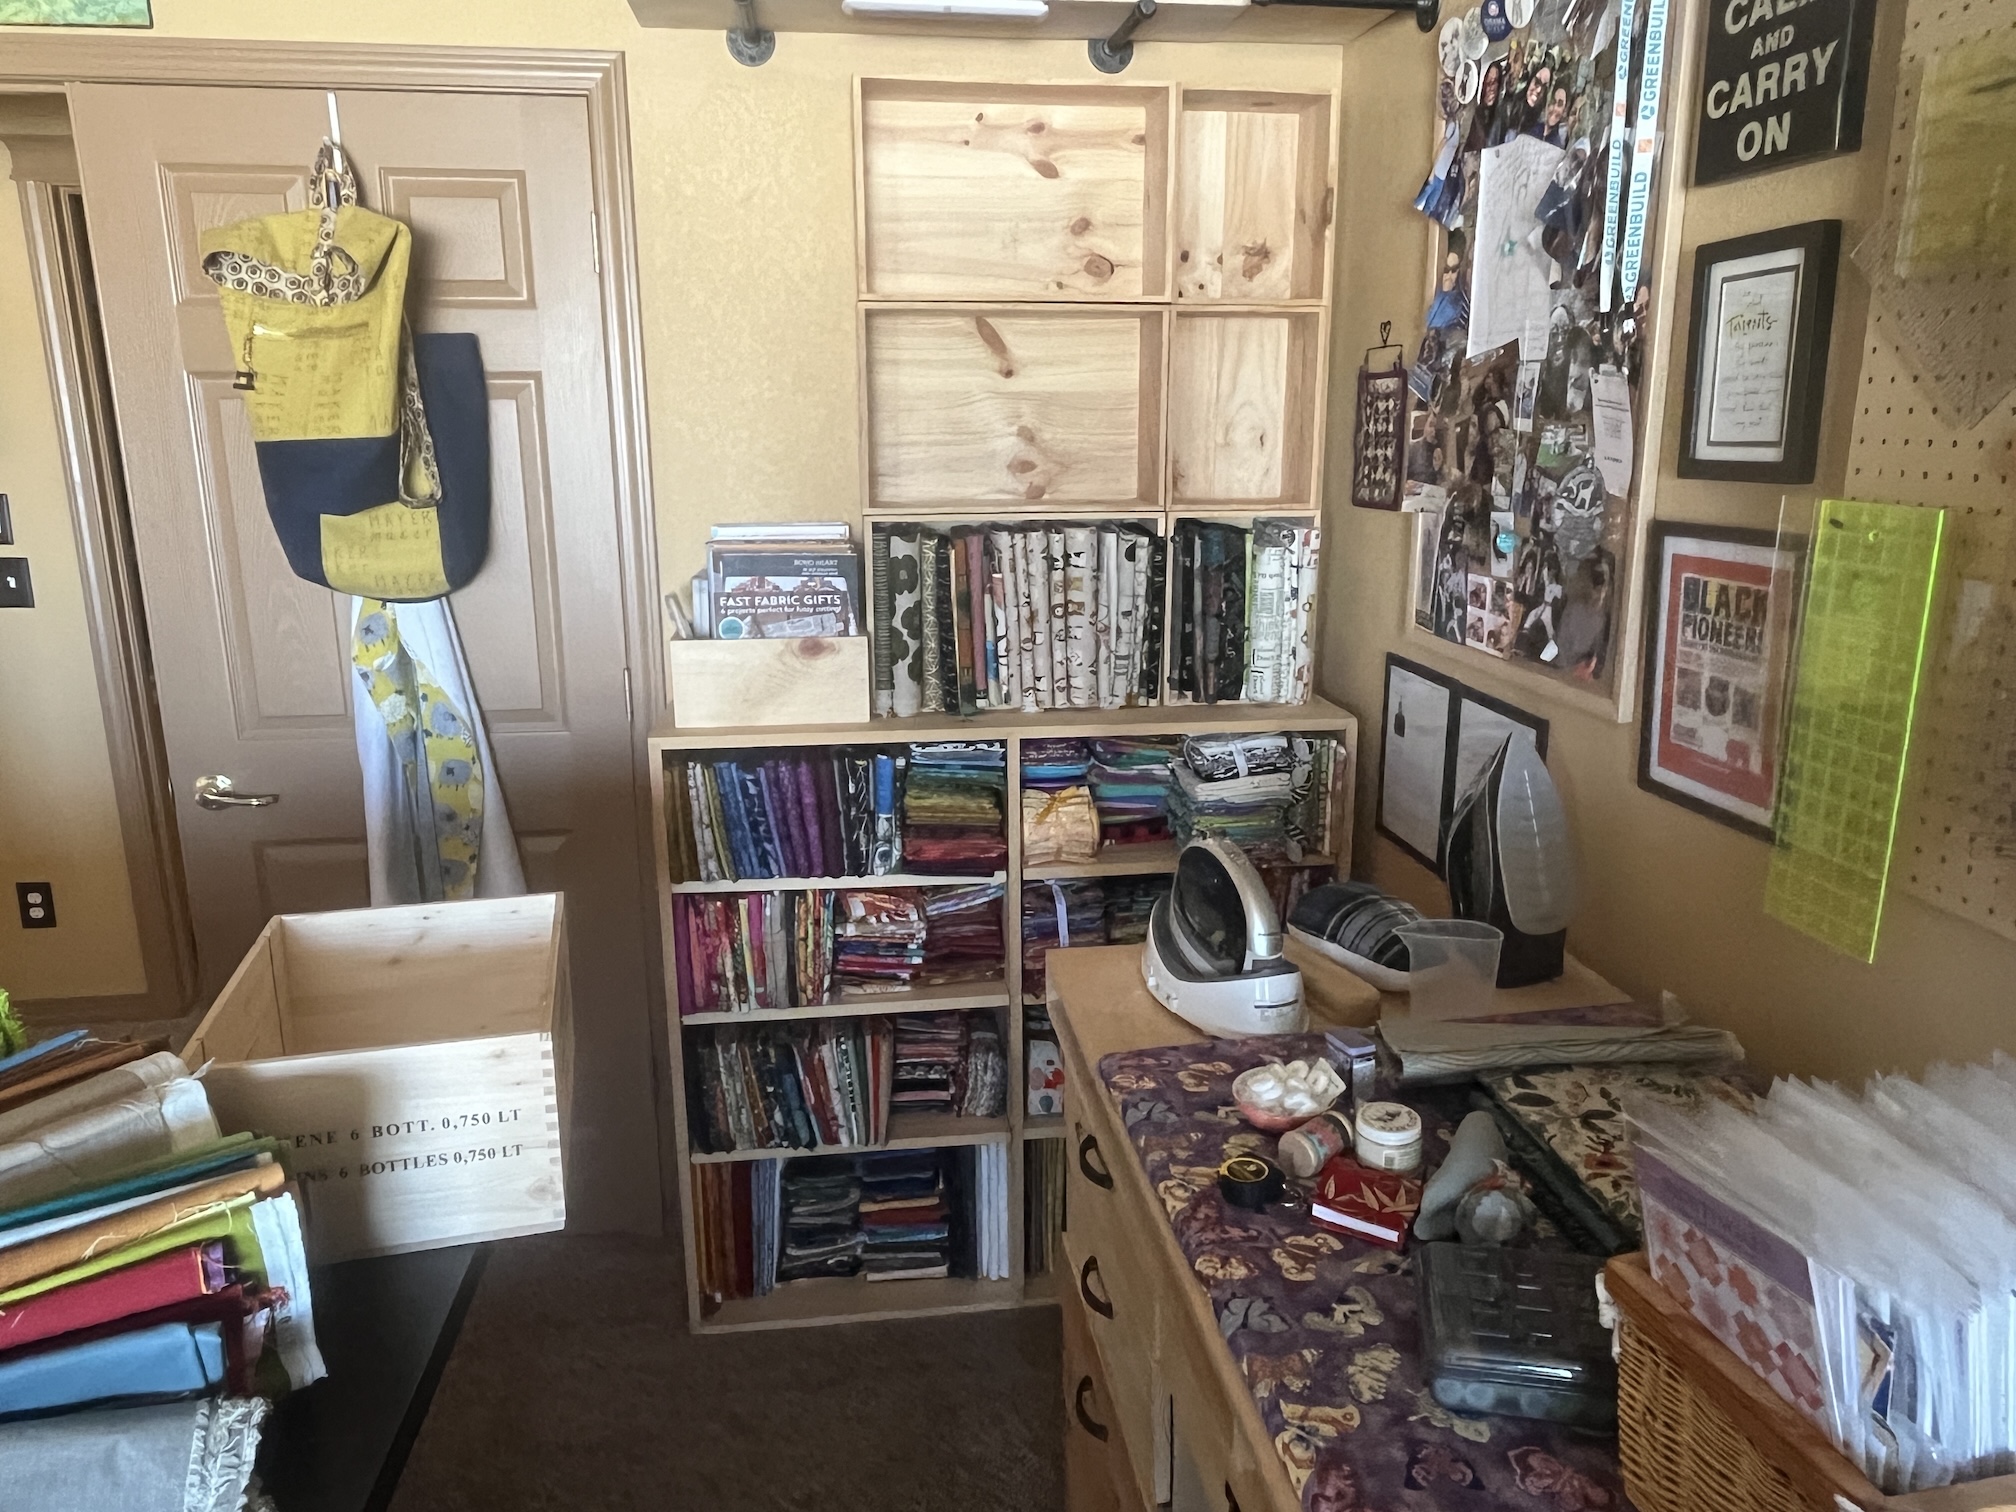
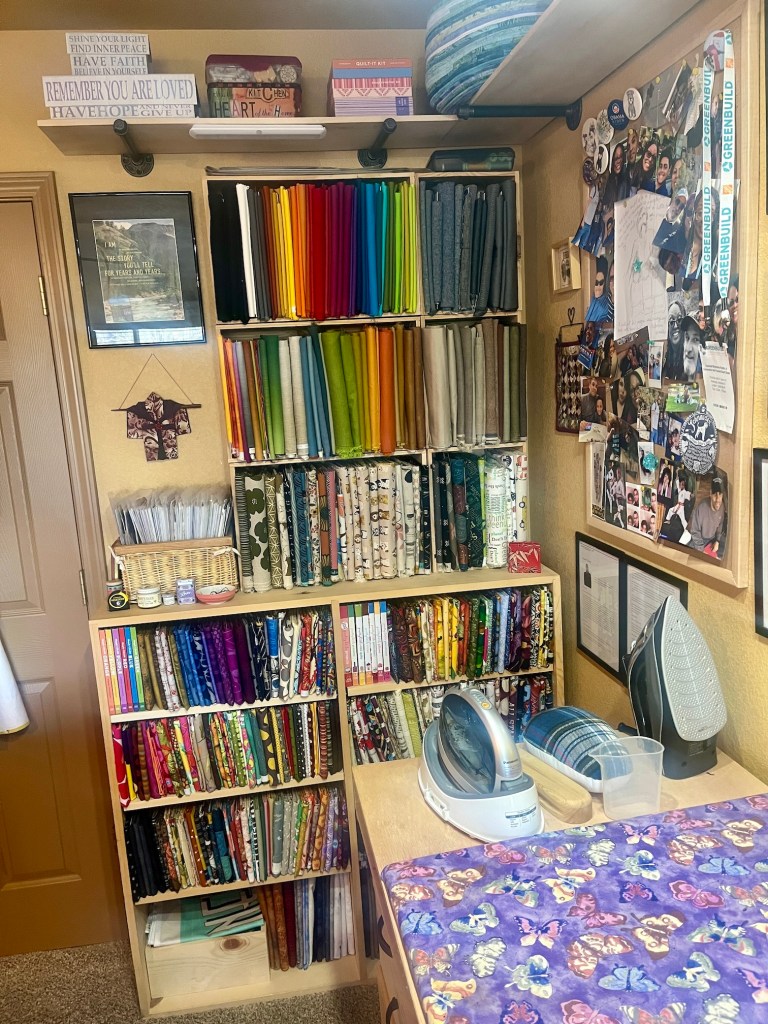
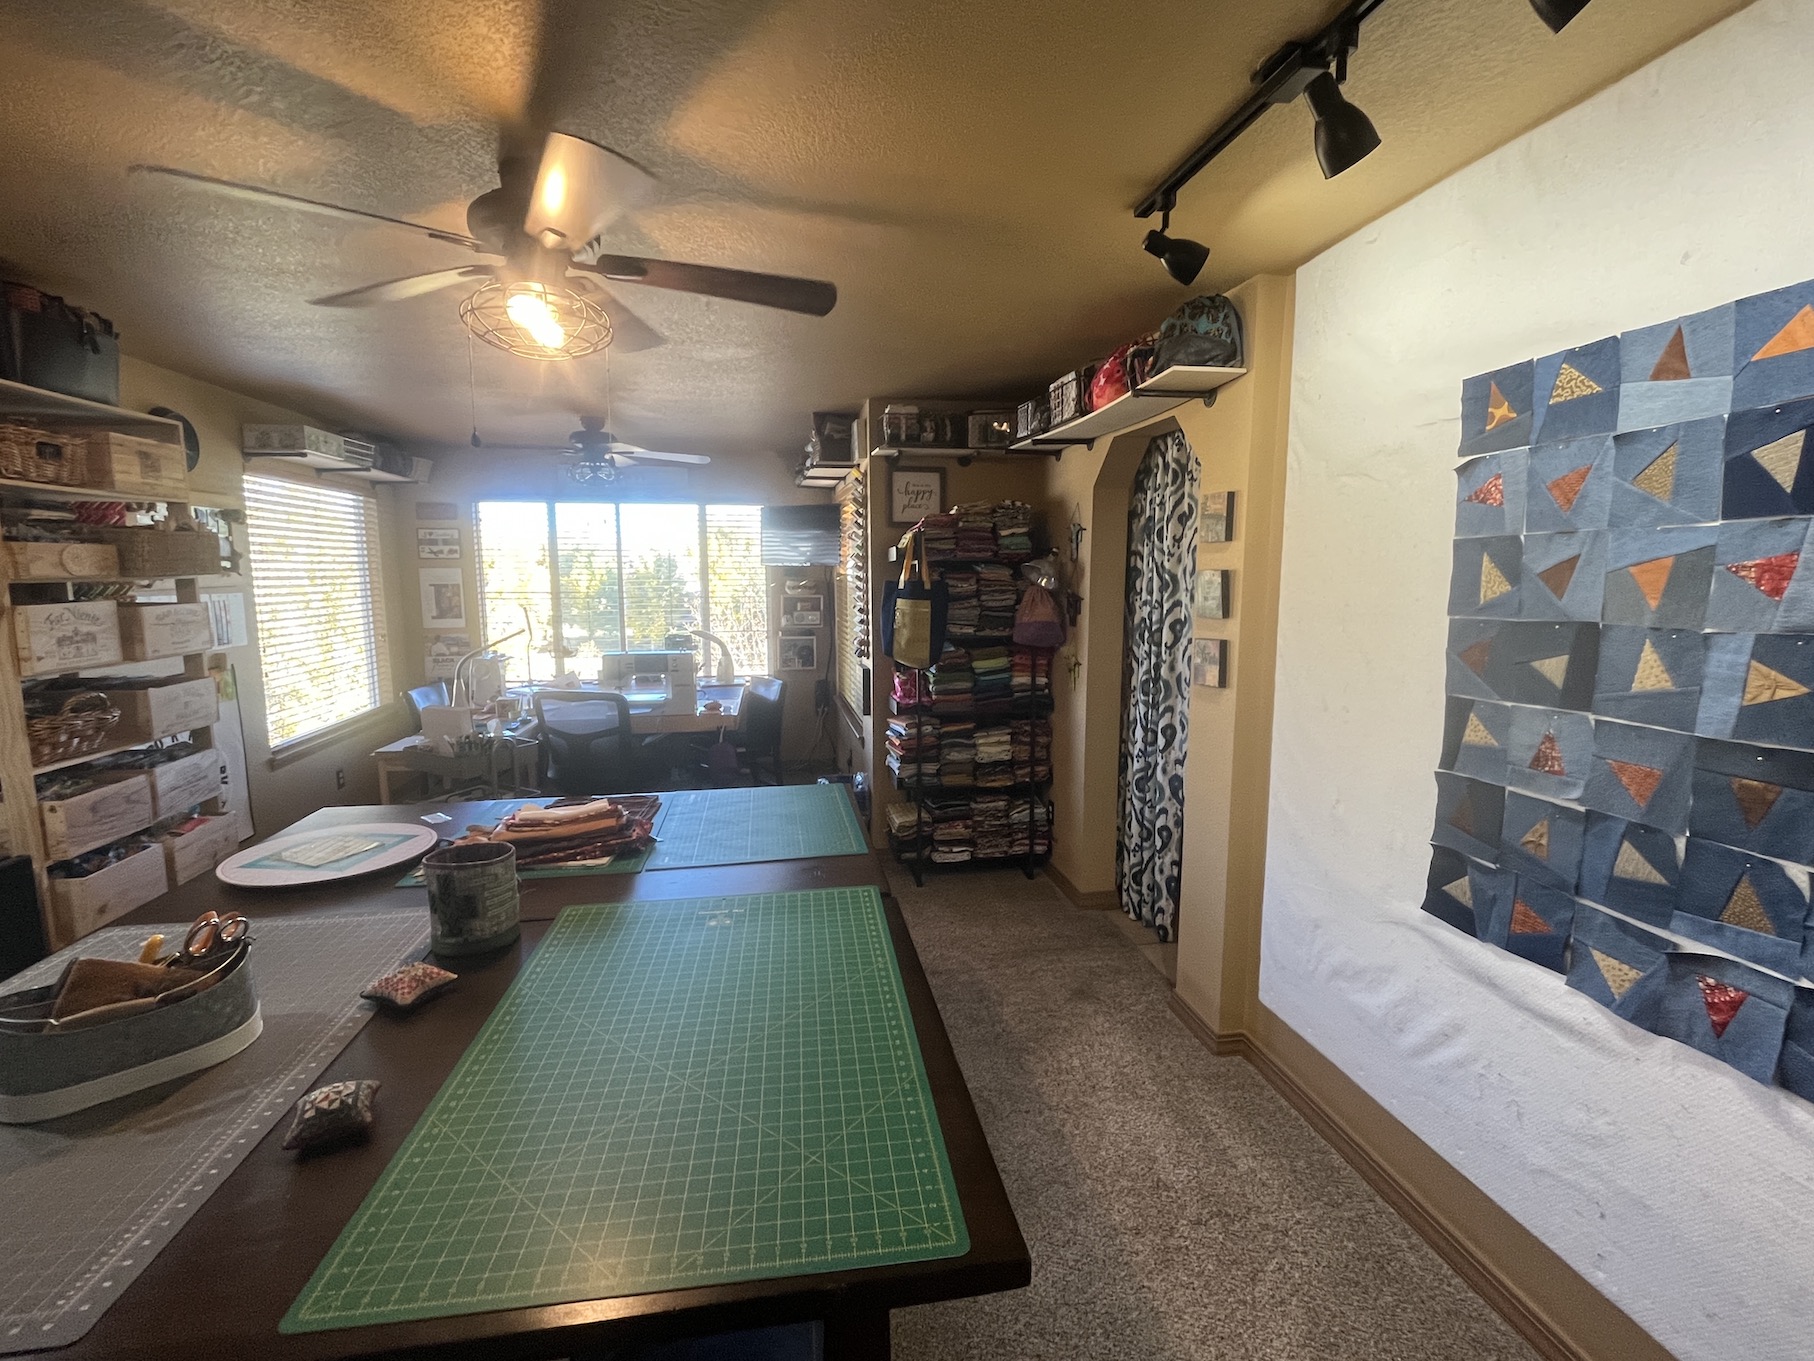
I haven’t shared an updated tour of my quilting/crafting studio in quite a while. I thought I’d share a current studio tour and share how I’ve decorated and equipped it with many thrifted items bought second hand from charity thrift shops (local and found during my travels).
My studio is located in the former Primary Bedroom of the house. A couple years ago my husband John and I decided we didn’t need that much room for our main bedroom and moved to a smaller bedroom. Originally it was a carpeted room but in summer 2024 John put in a floor.
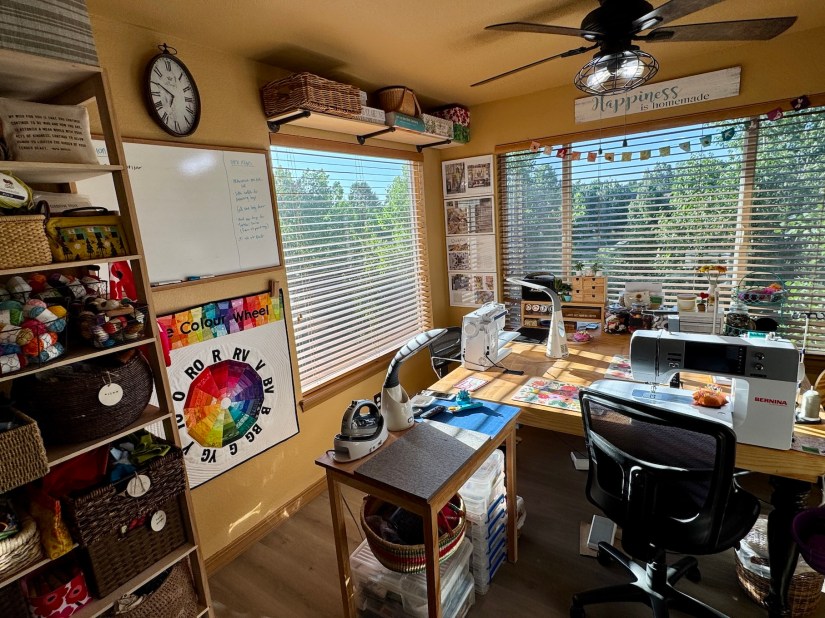
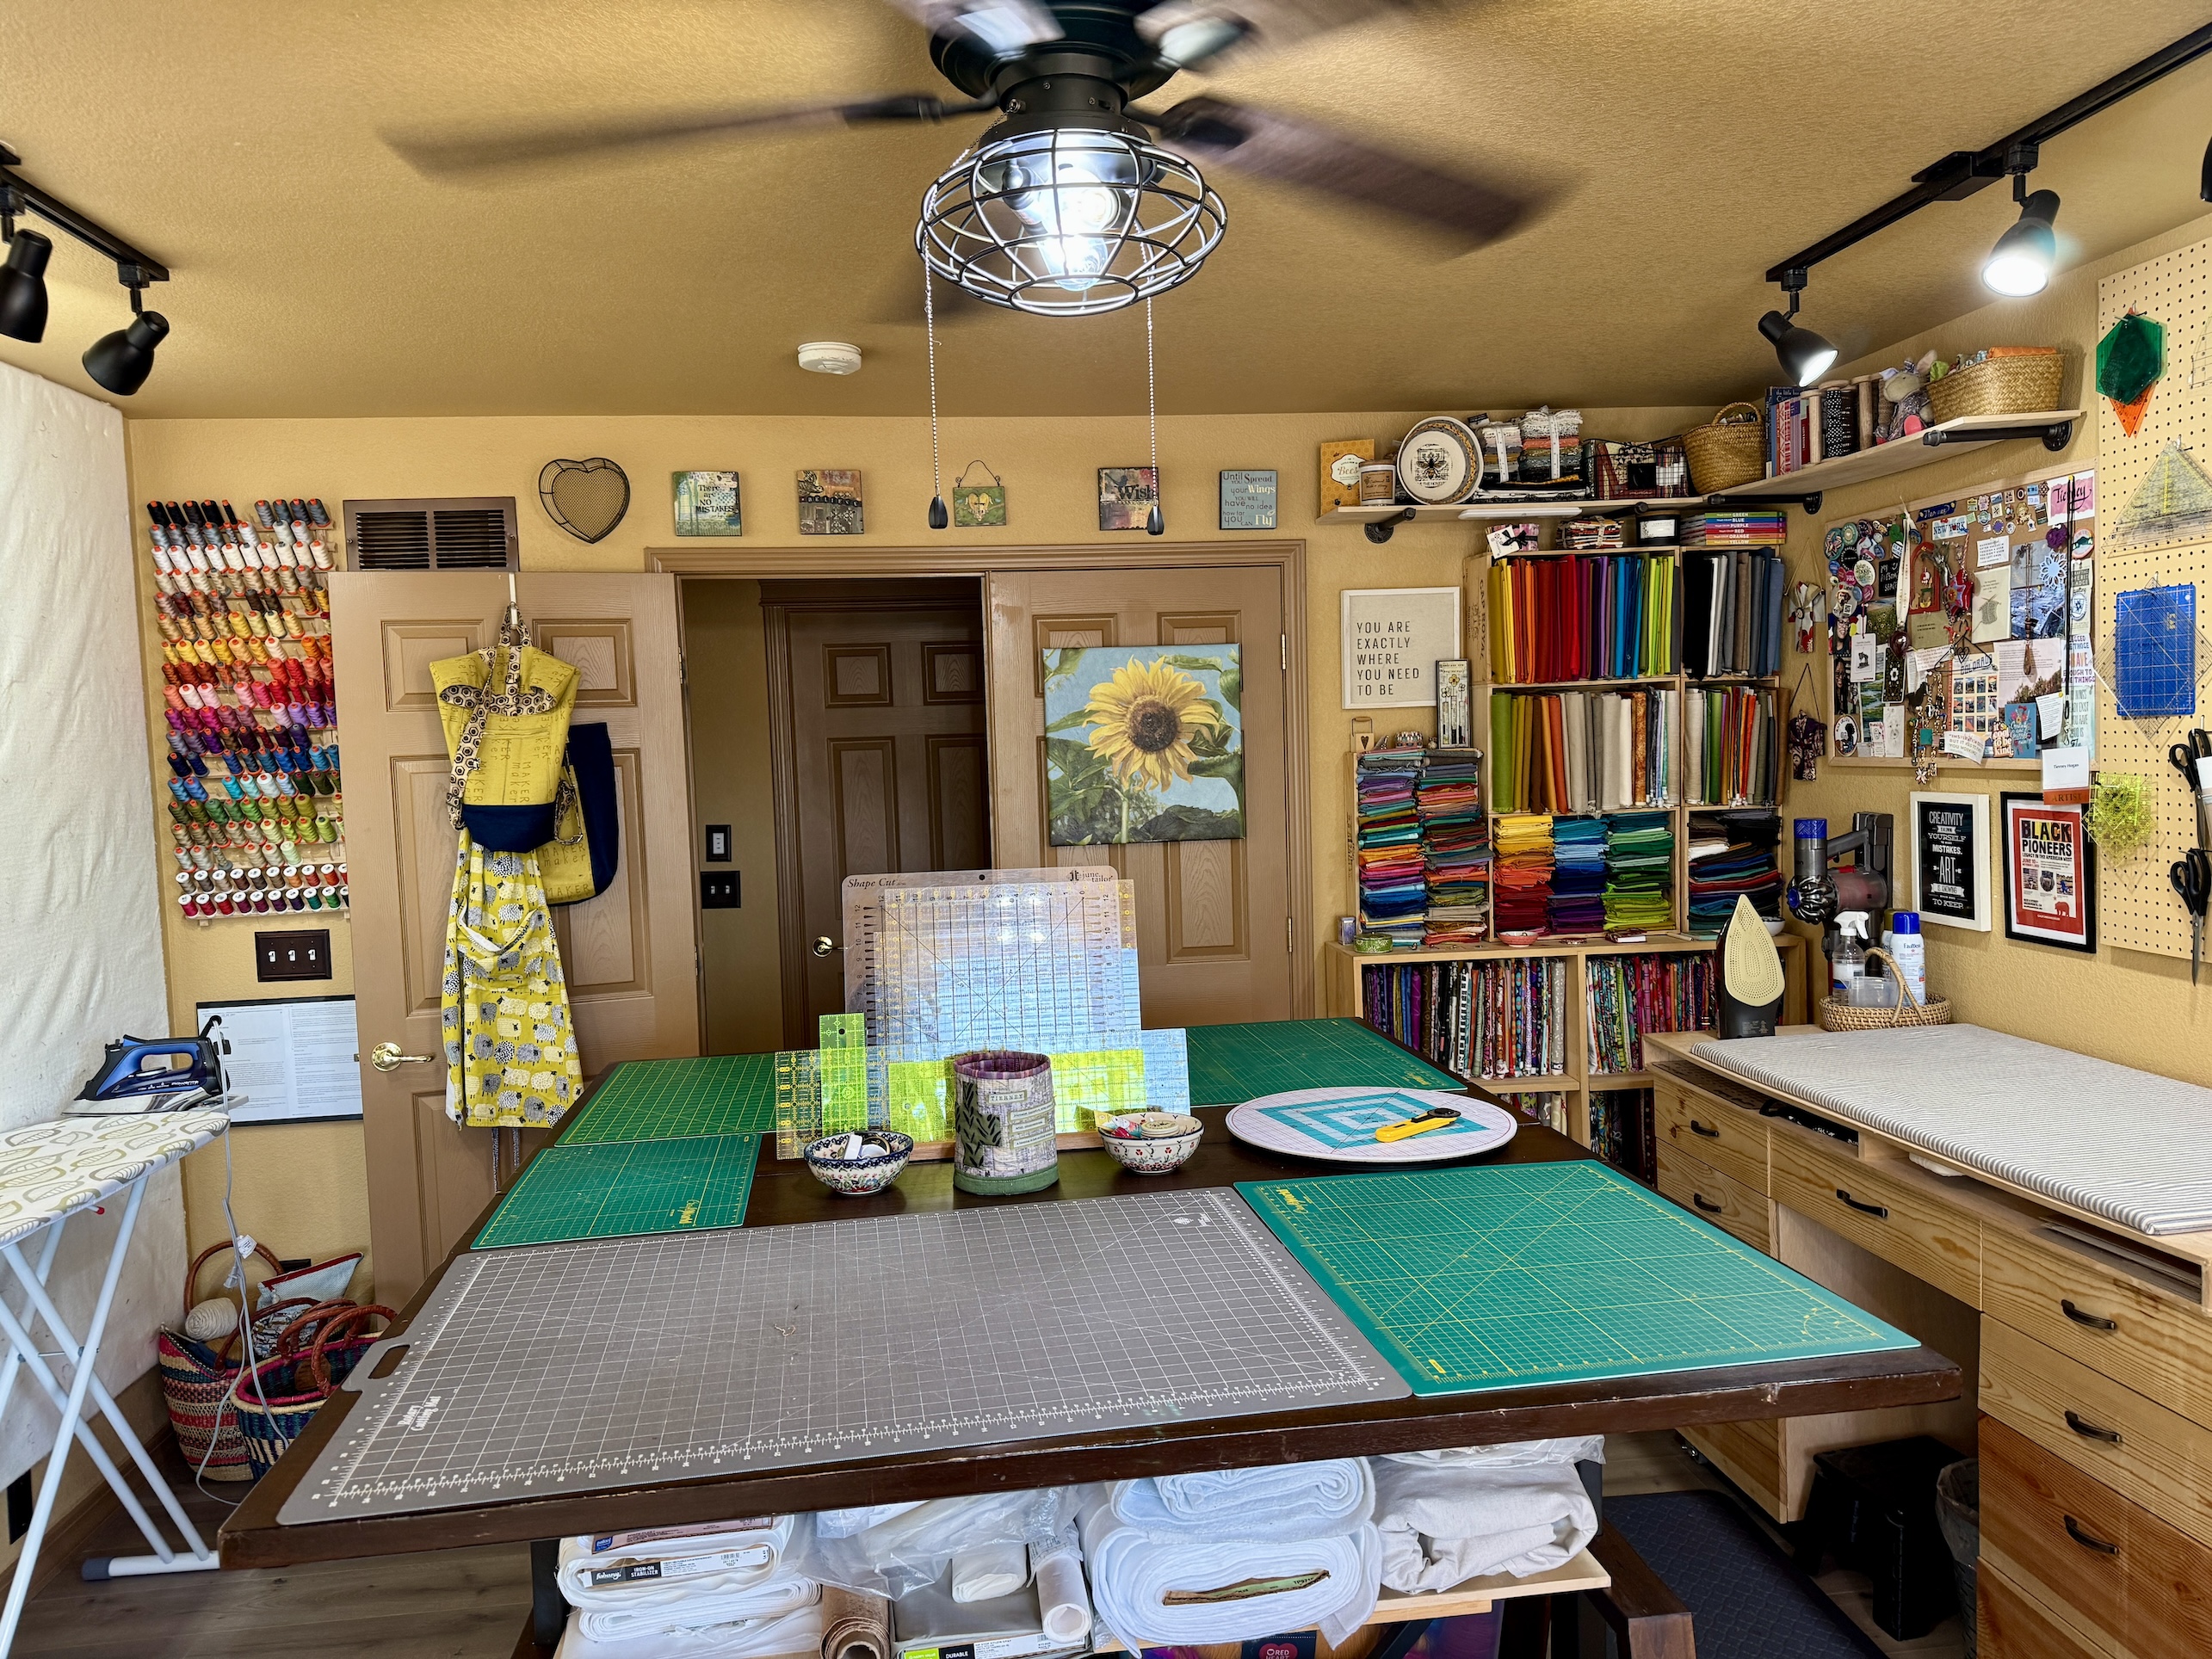
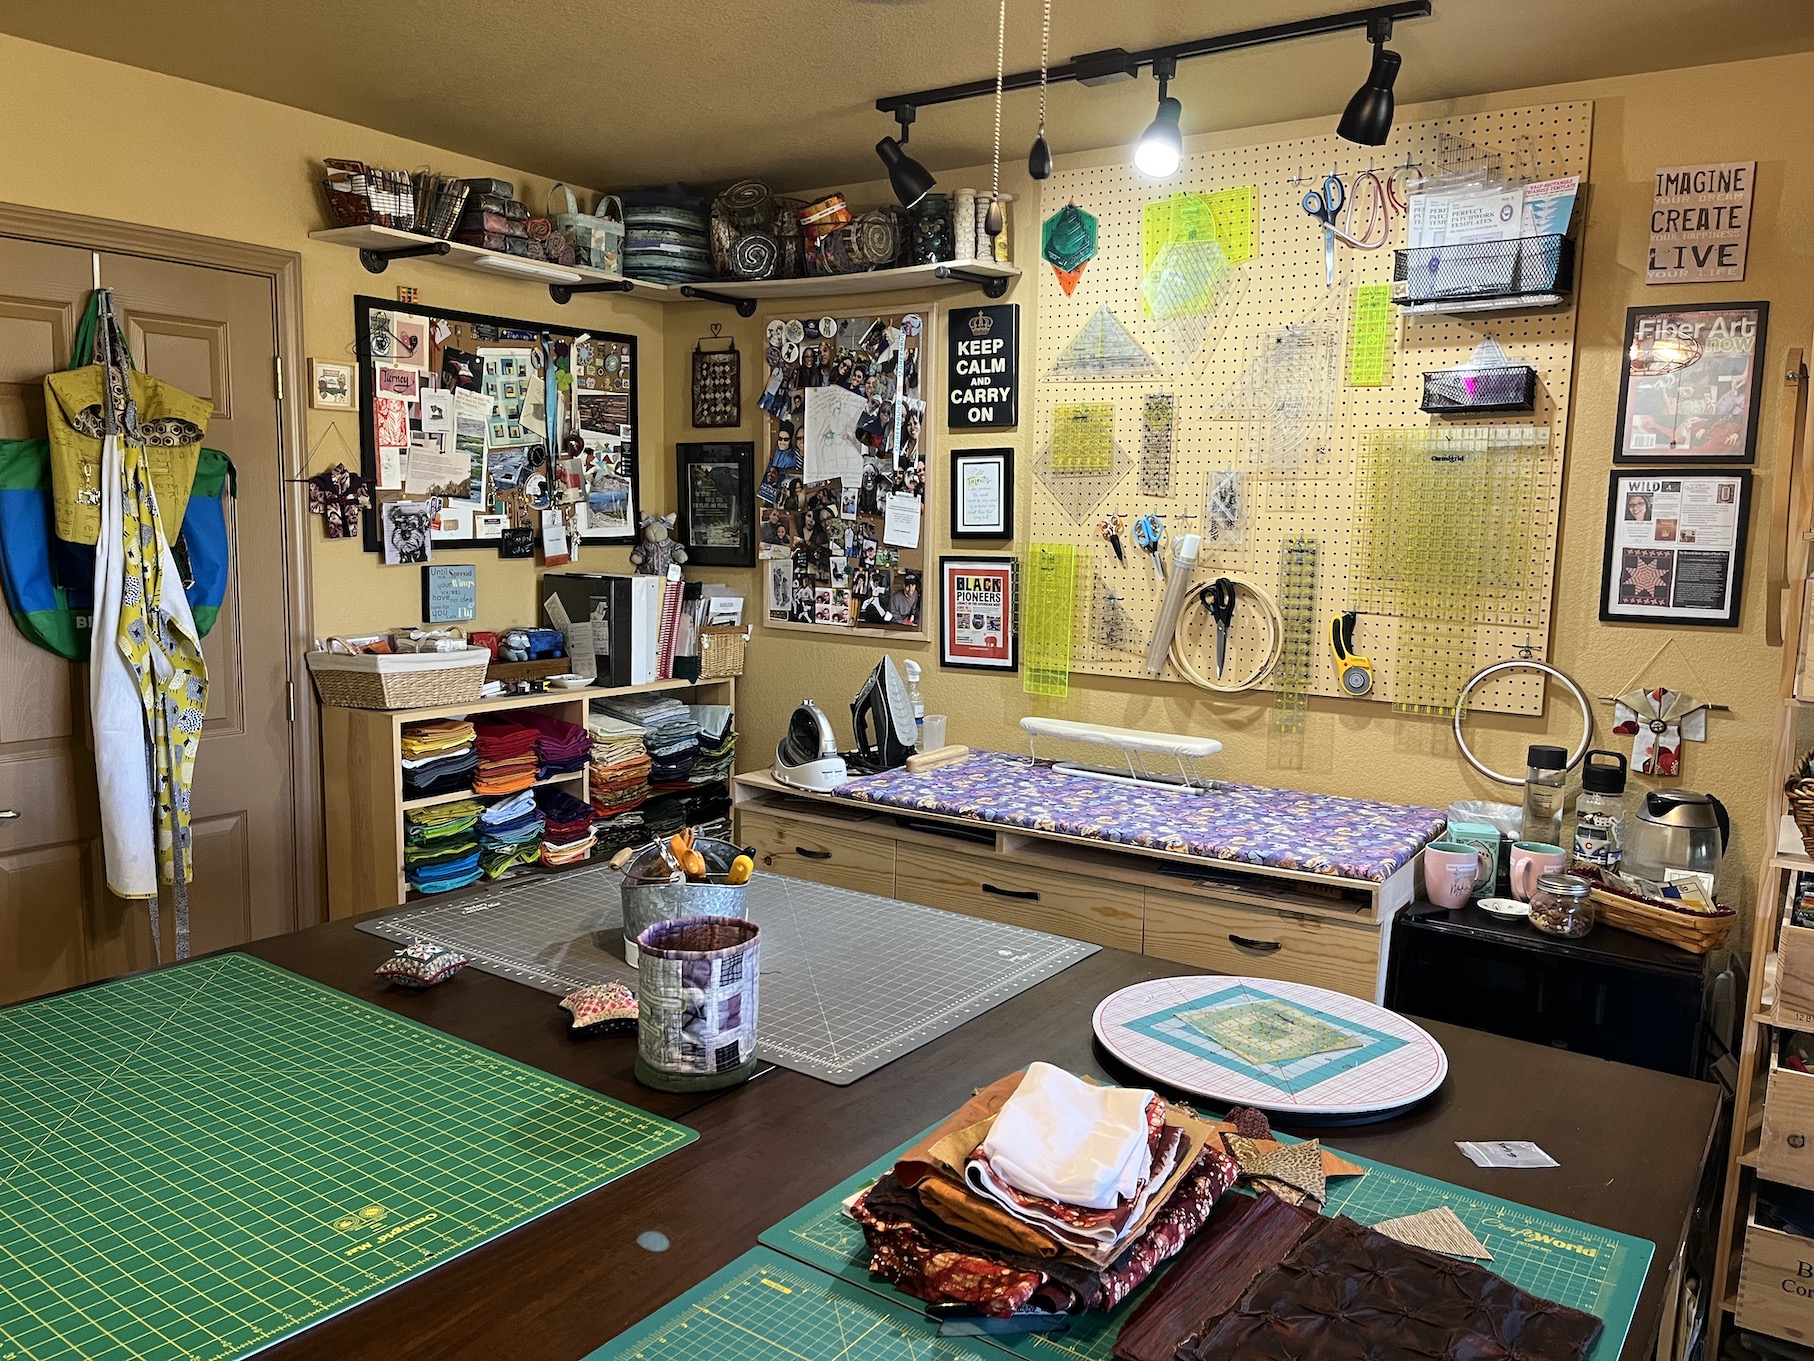
Here is the current view of the studio when you walk in the double doors:
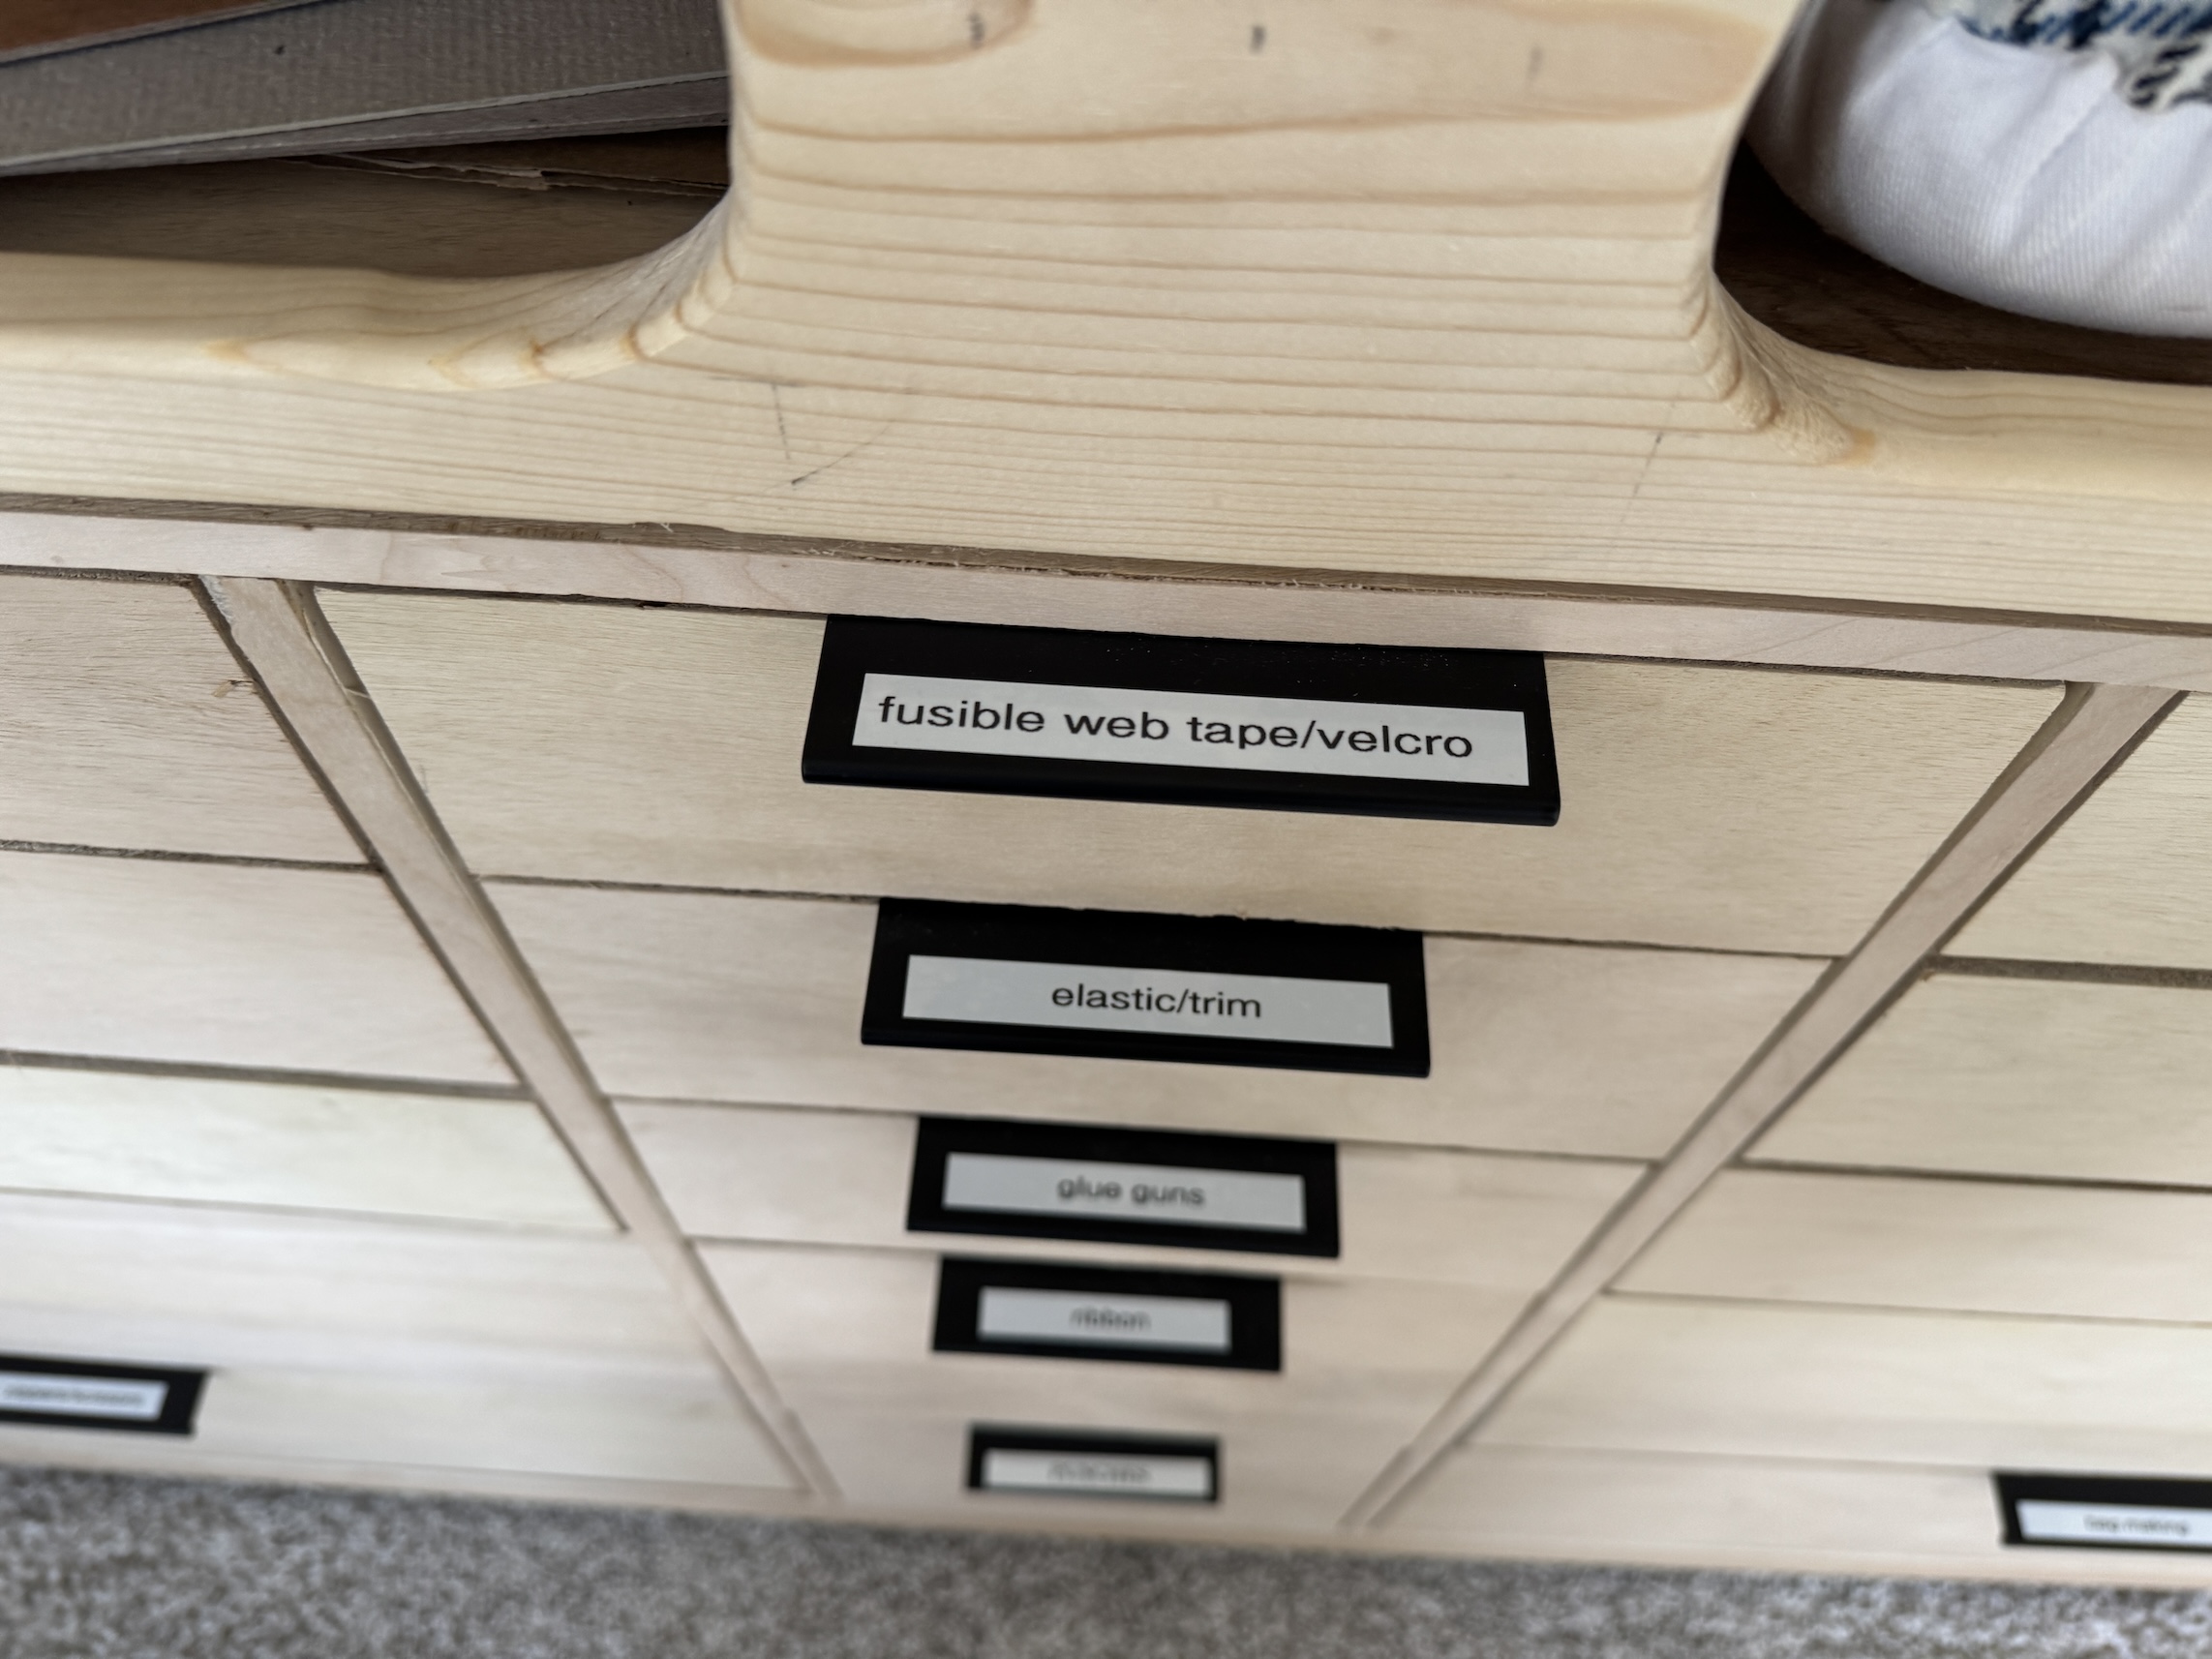
The cutting table is comprised of two adjustable desks from World Market set at their highest position. John built a shelf that connects the two desks to provide additional storage.
Underneath I store the bulk of my yarn collection which includes a lot of thrifted yarn(last year I came across cheap collection of gorgeous and usually pricey fingerling weight sock yarn in brand new condition at a thrift store that I couldn’t leave the shop without for the imaginary day I start knitting socks…):
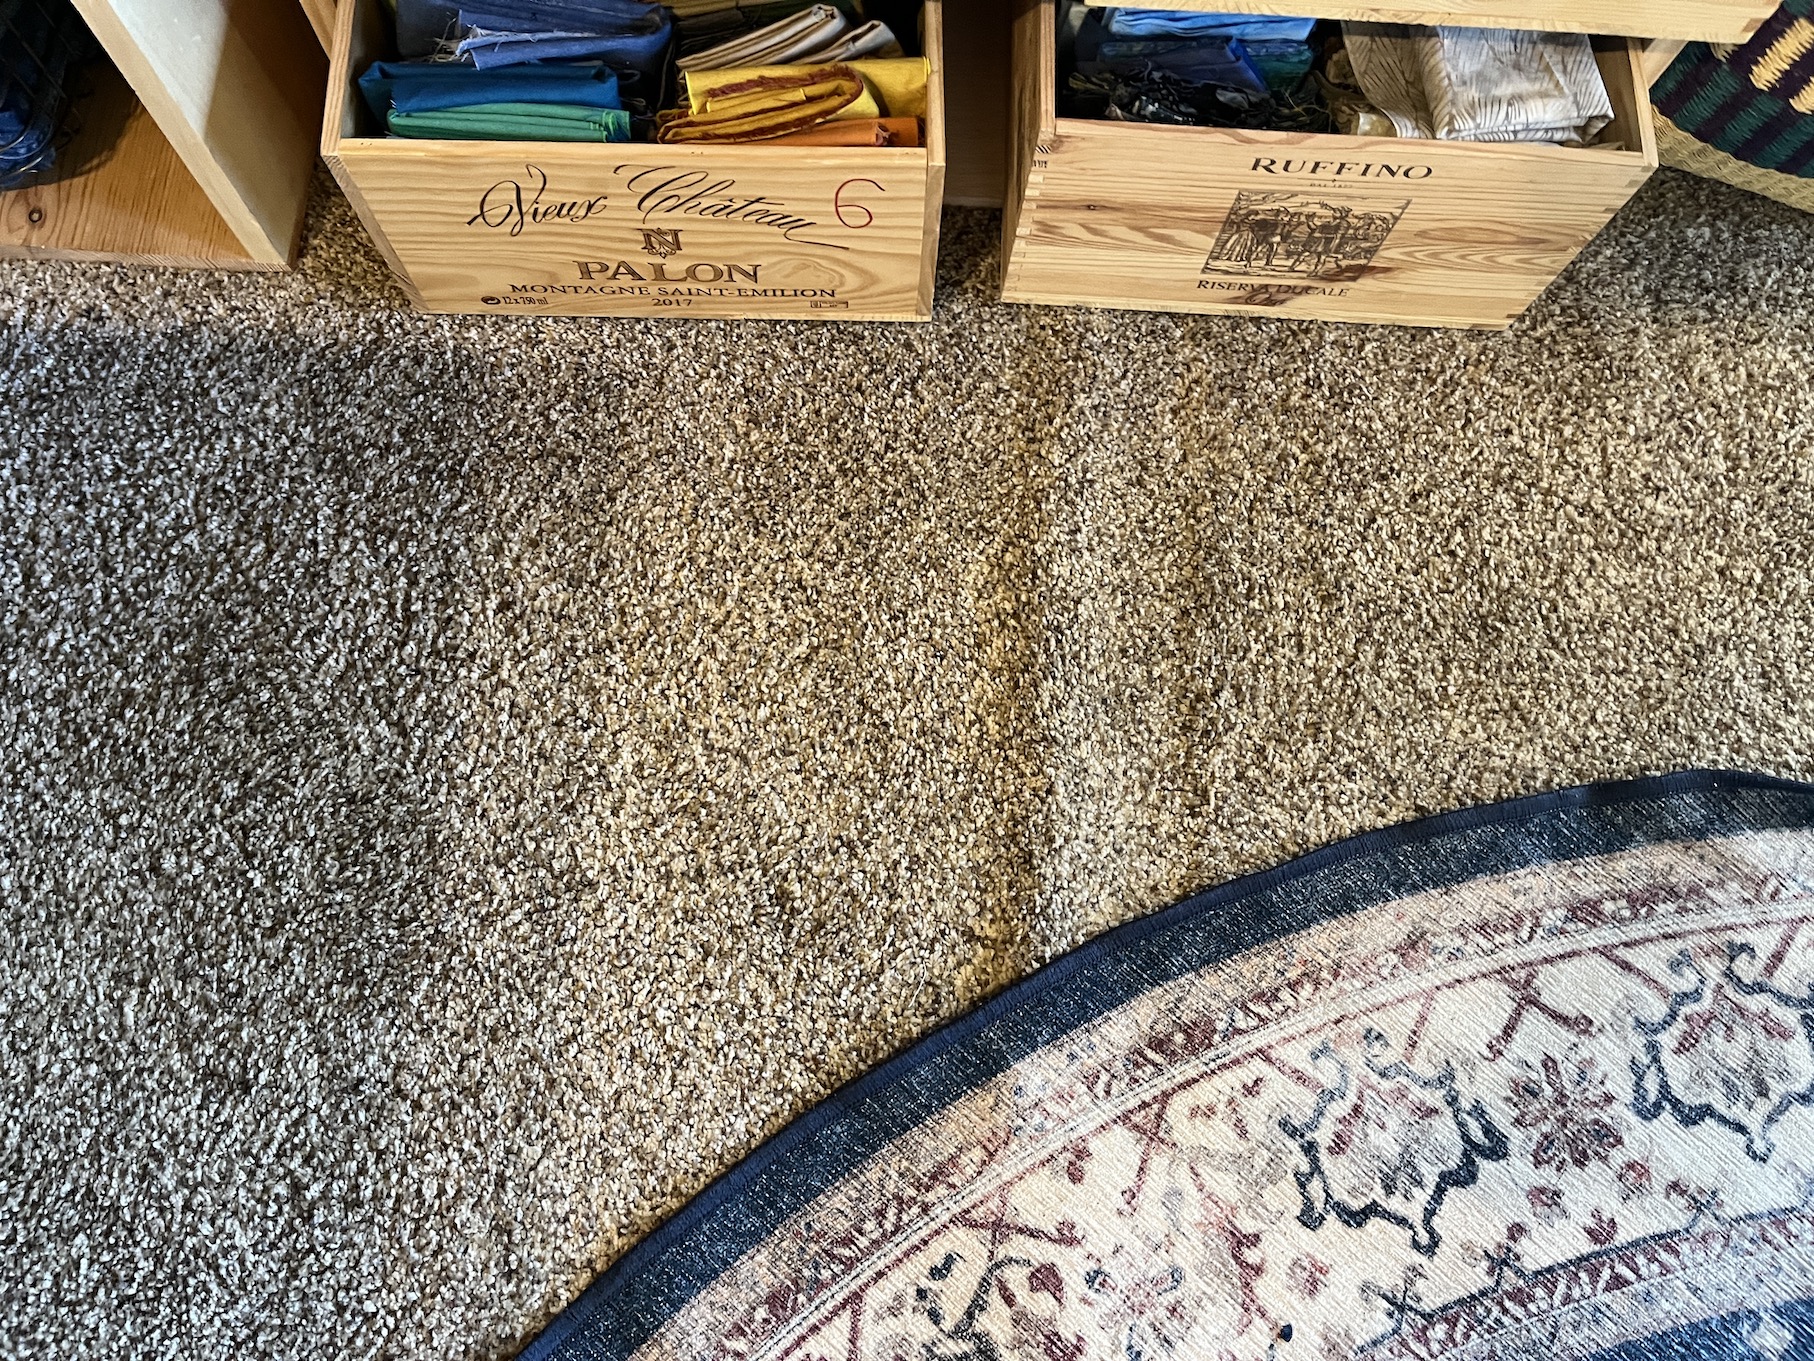
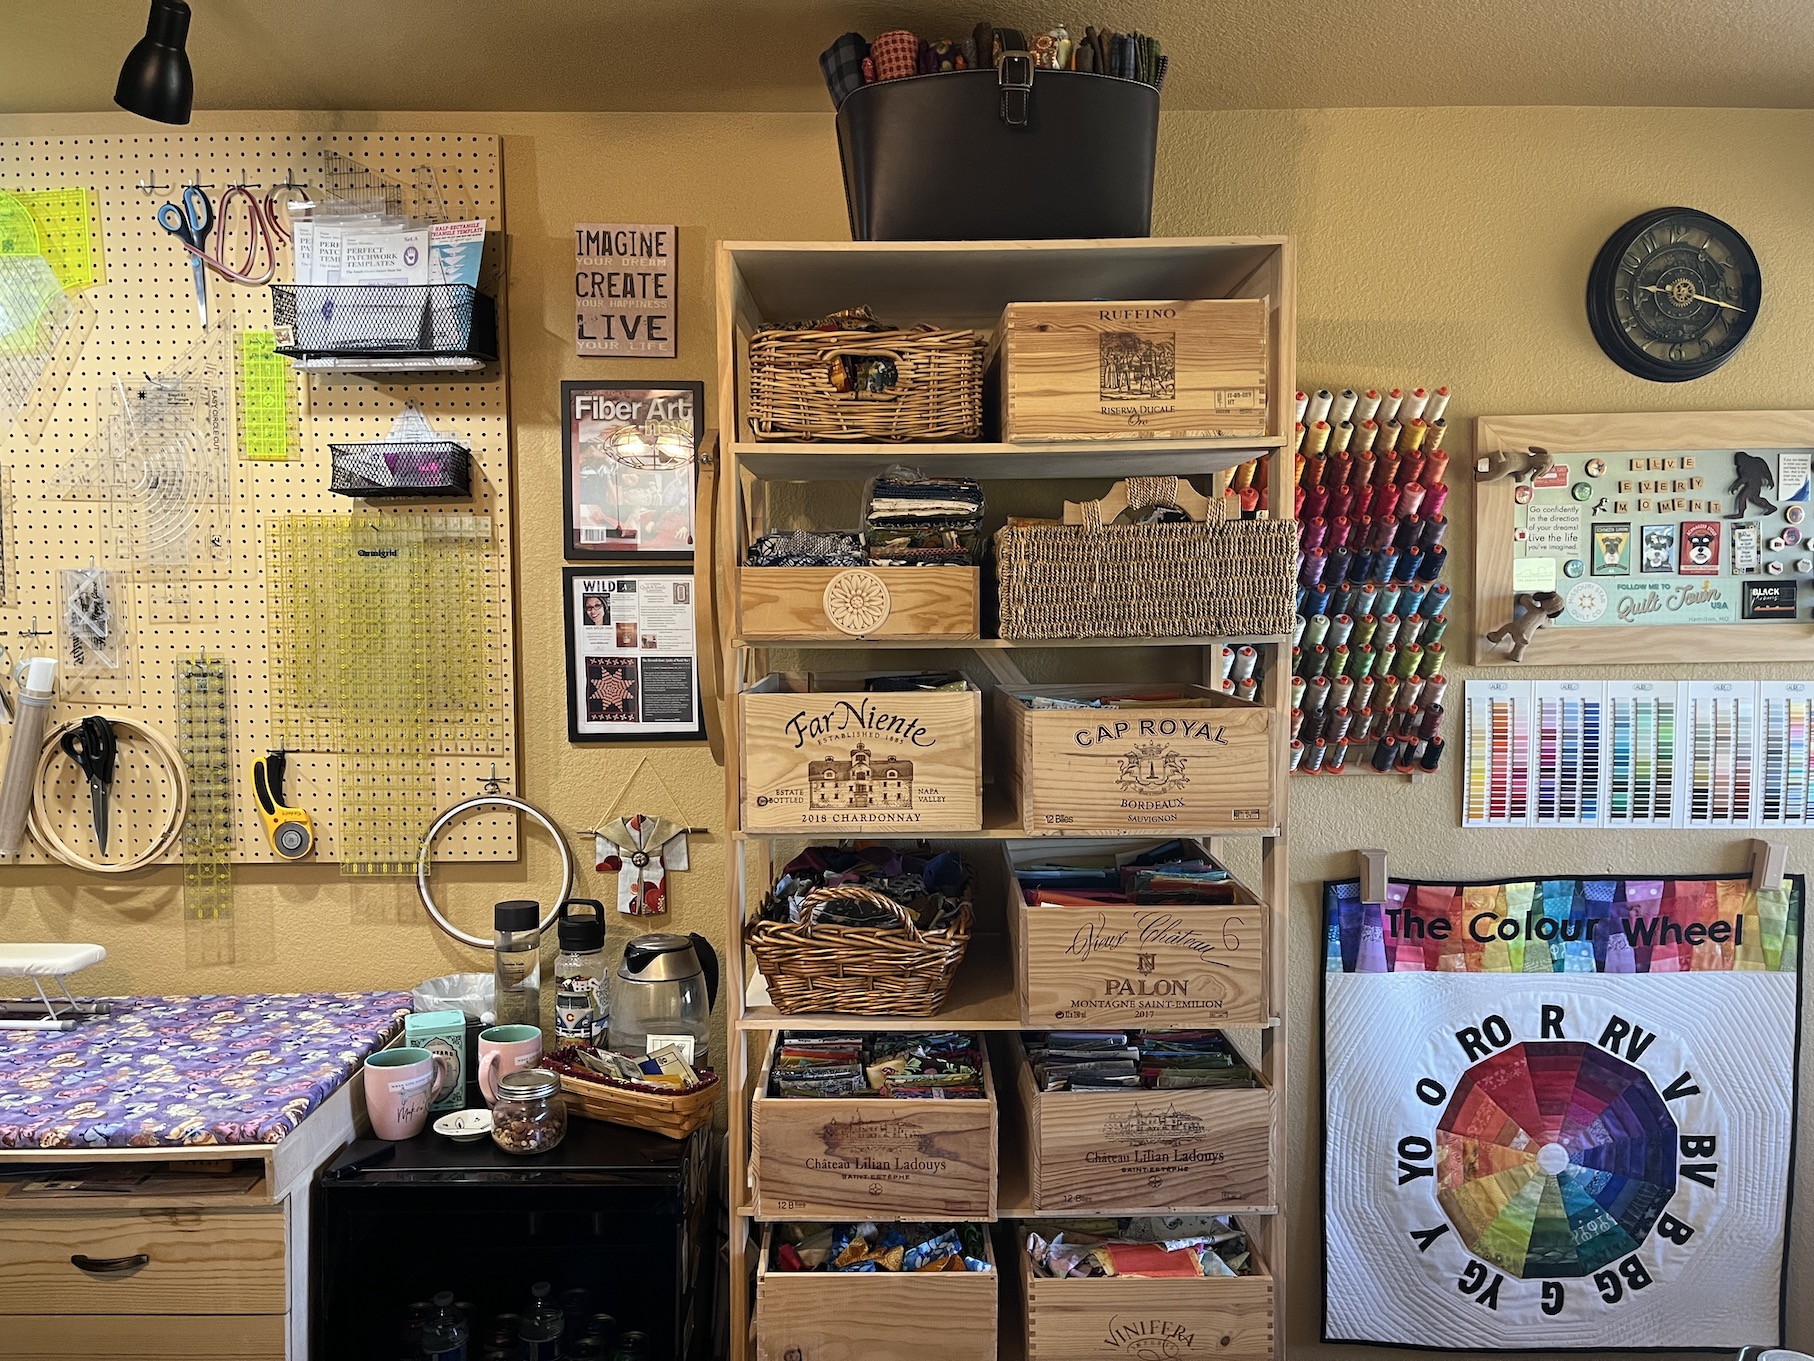
I use wine crates from liquor stores (which I either got for free or for a couple dollars) to store my fat quarter fabric collection (which I admit is a bit obscene…). And no I did not drink the wine formerly in the crates in order to obtain empty crates, ha!
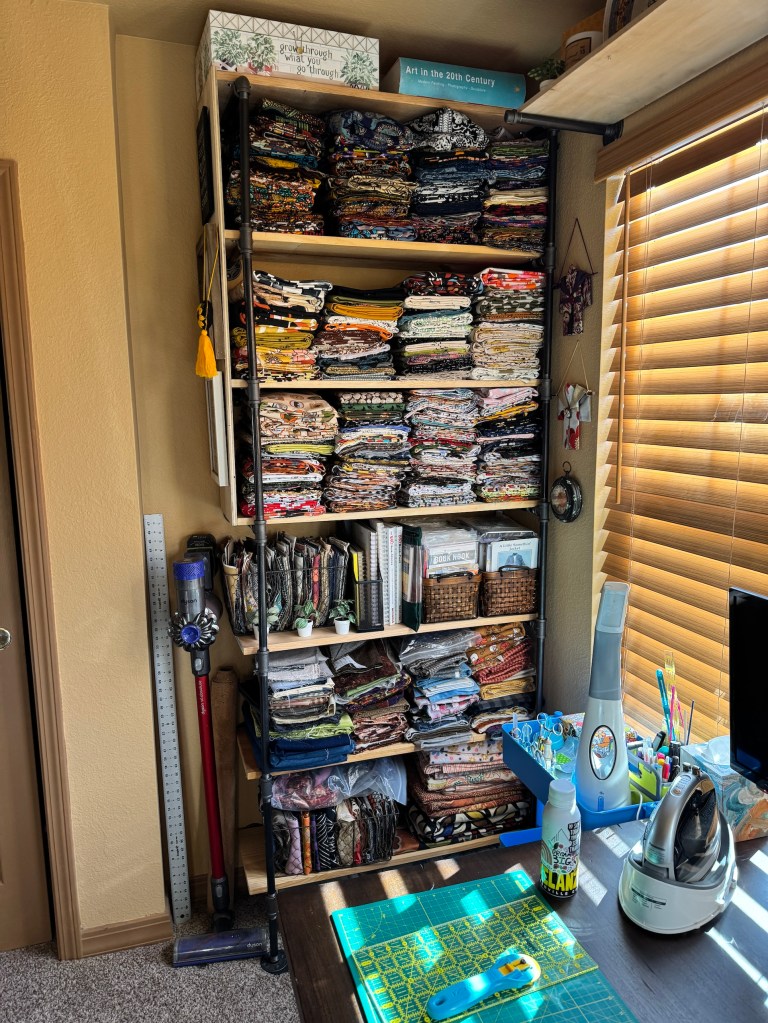
John built the shelving unit below the wine crates in the first image above where I store some of my cotton fabric yardage; as well as the ironing station in the second photo.
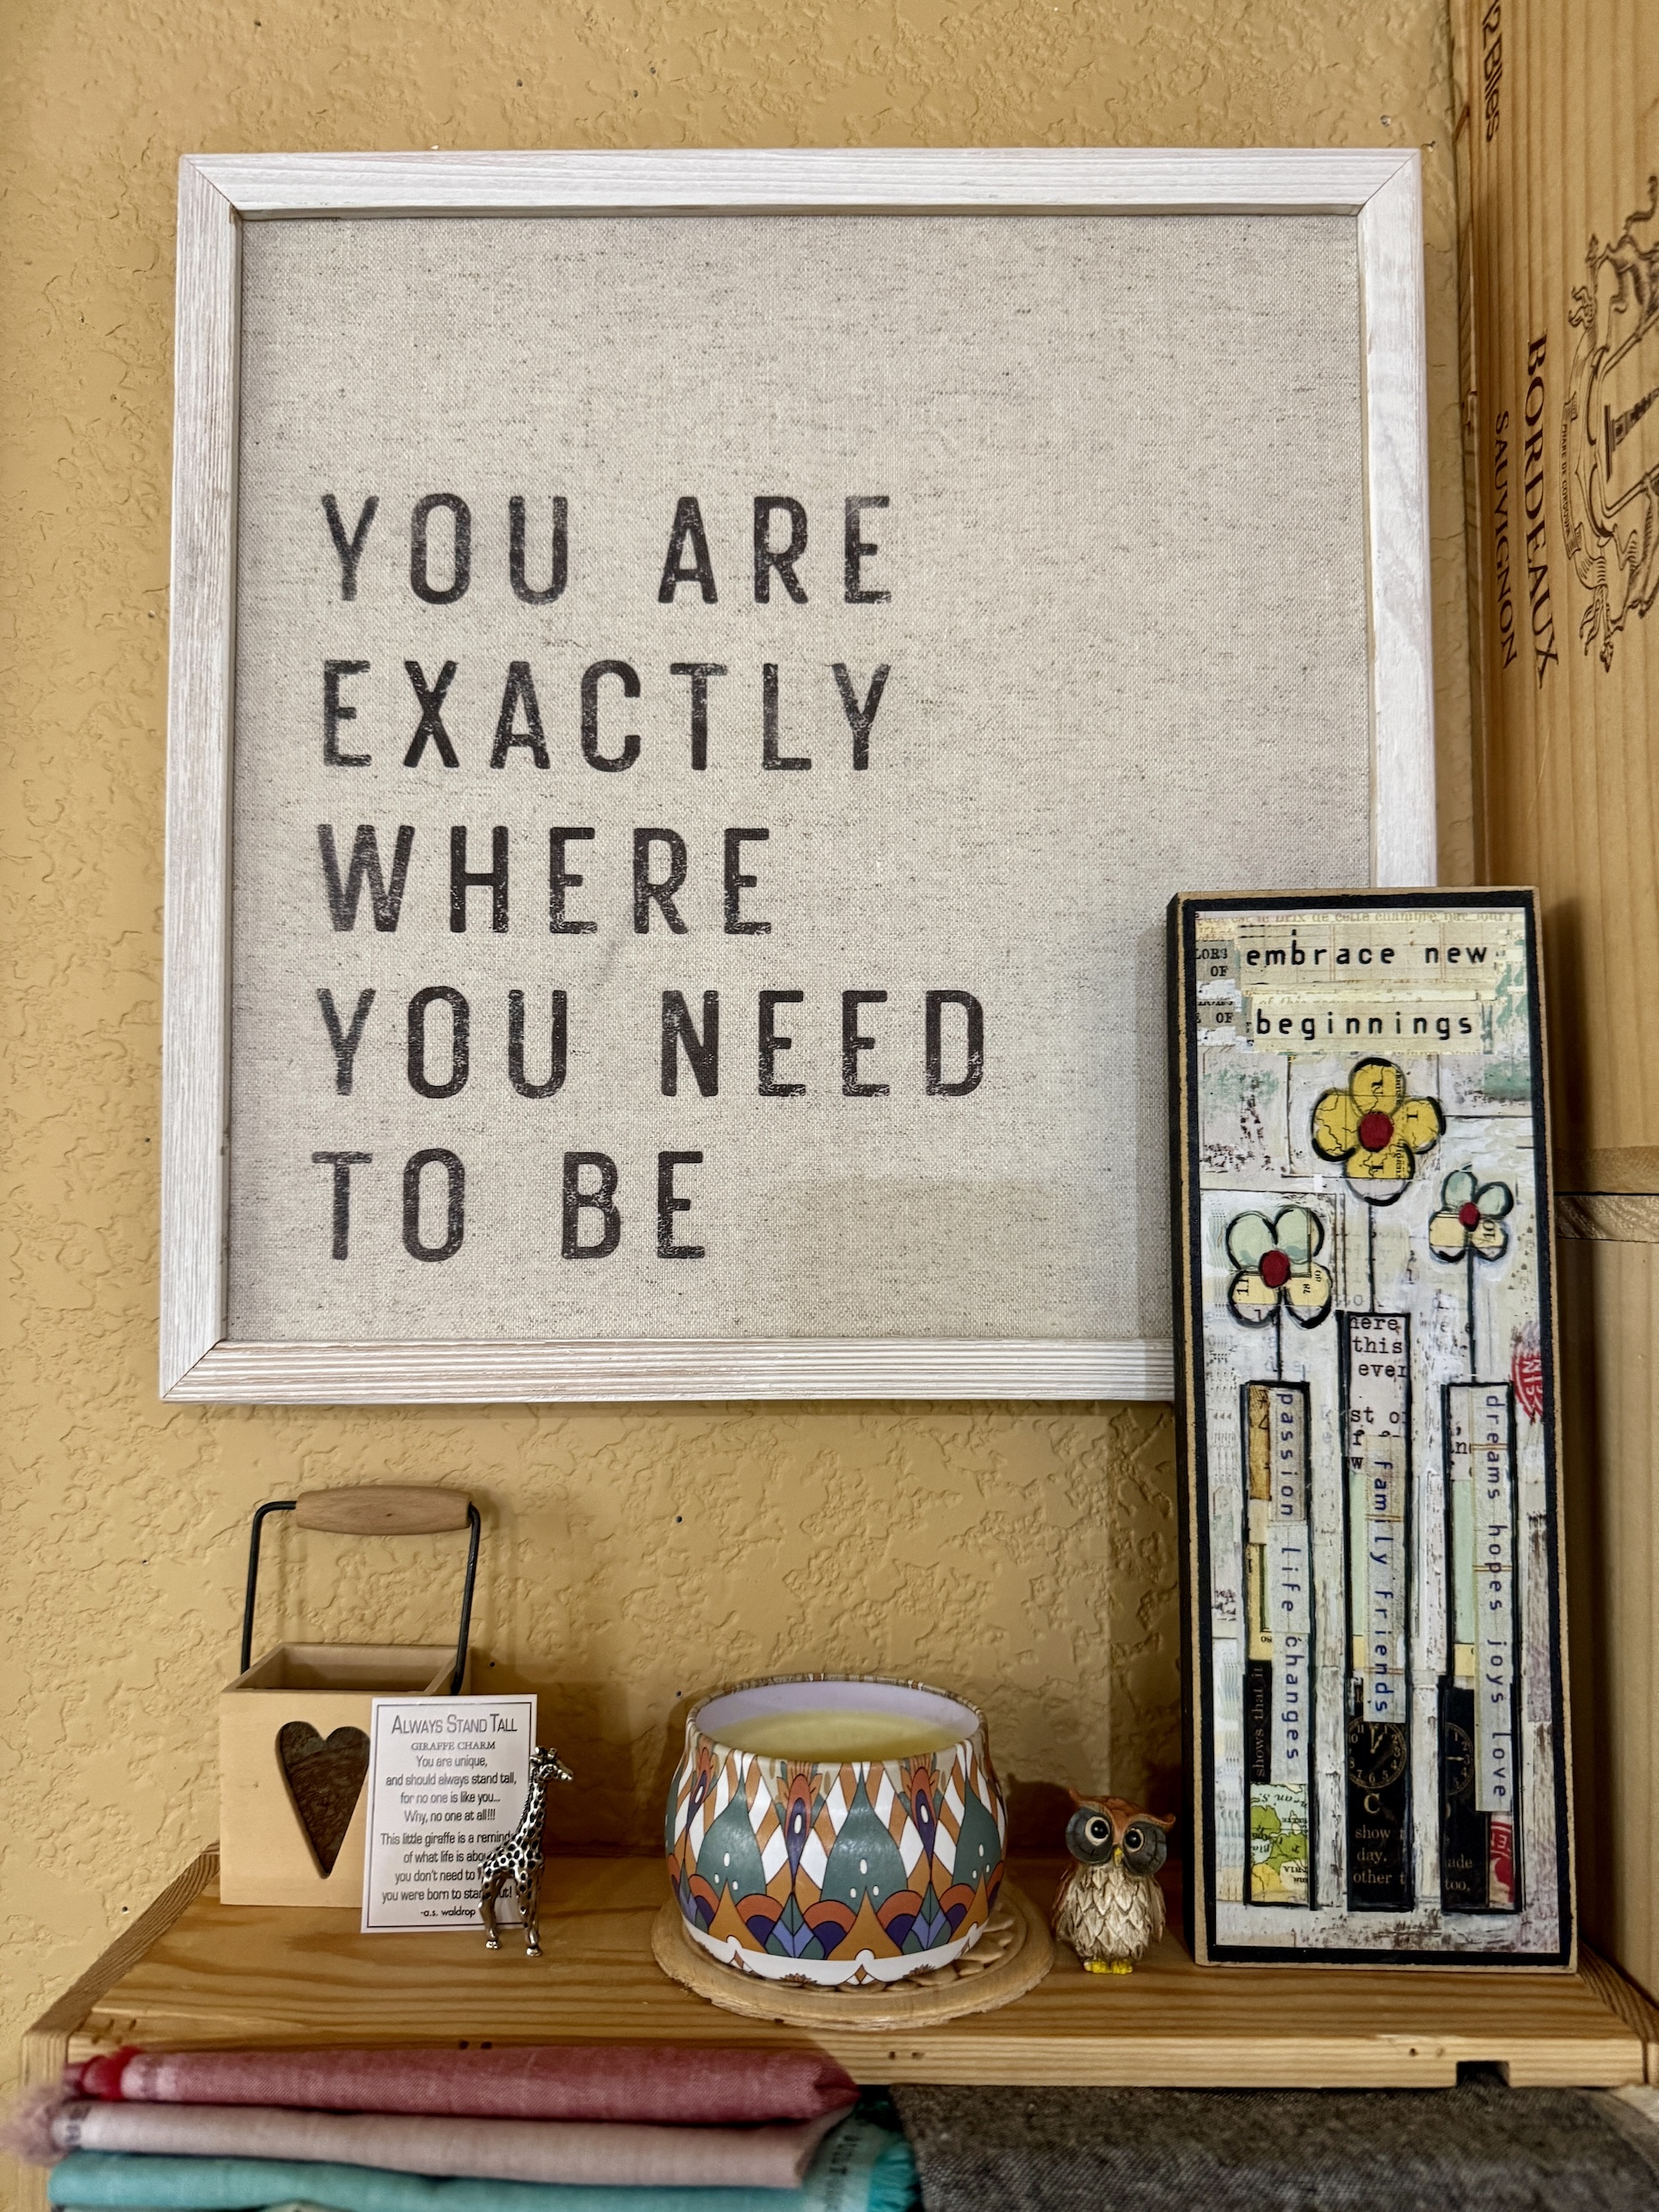
Most of the art in my studio is thrifted including these two pieces that I love:
If you aren’t familiar with my story I am a widow who moved from my awesome life in Oregon to Colorado in 2019 to begin anew and reinvent my life (which included meeting John, a widower, and starting a new journey). Early on I had doubts about my big life move but signs like this remind me that I am where I need to be; and to “embrace new beginnings”.
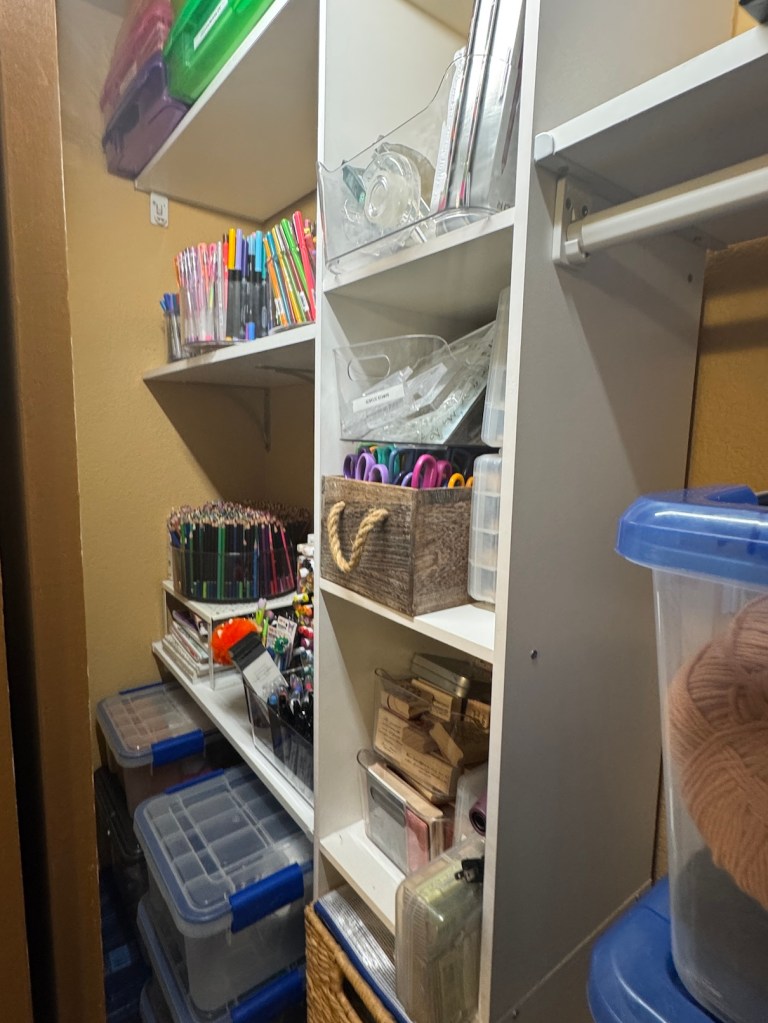
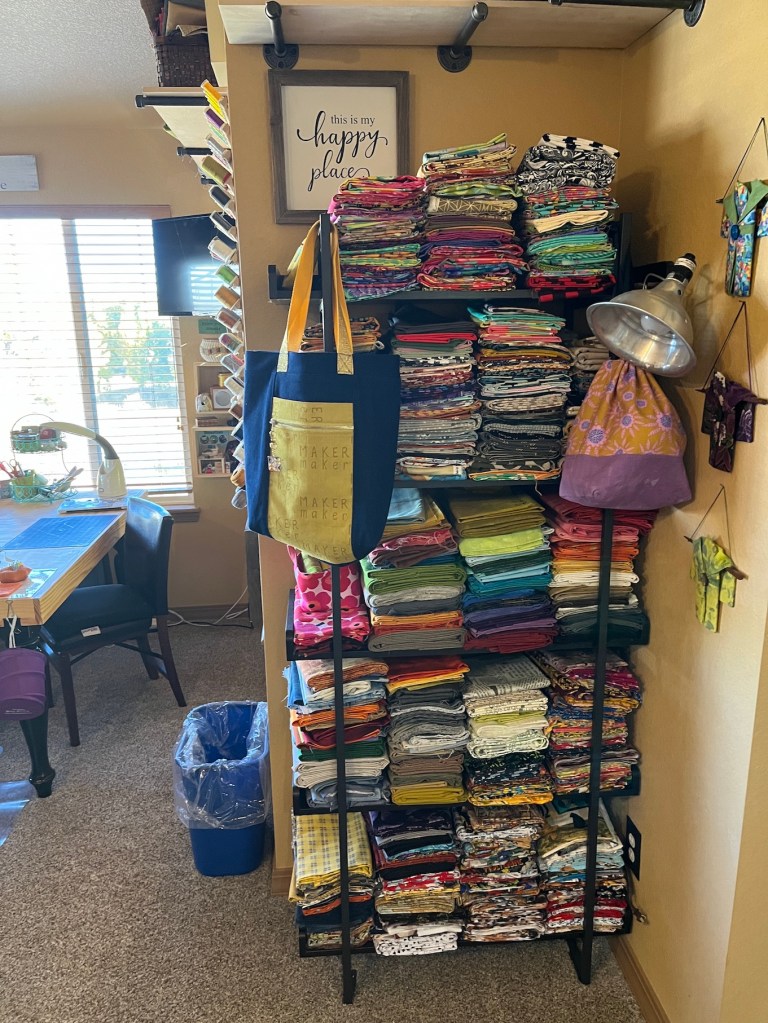
I have a thing for fabric scraps (though I’ve culled my ridiculous collection of fabric scraps over the years and donated many bags of scraps to charity thrift shops) and I store my fabric scraps by theme in thrifted baskets in a shelving unit that John built me a couple years ago.
I have most of the baskets labeled with wooden tags and thrifted adhesive letters. In addition to fabric scraps I have some specialty fat quarters and my collection of fabric panels. The two baskets on the second to last shelf are gifts from an Oregon based friend who had her friend crochet me these baskets/bags from recycled plastic shopping bags!
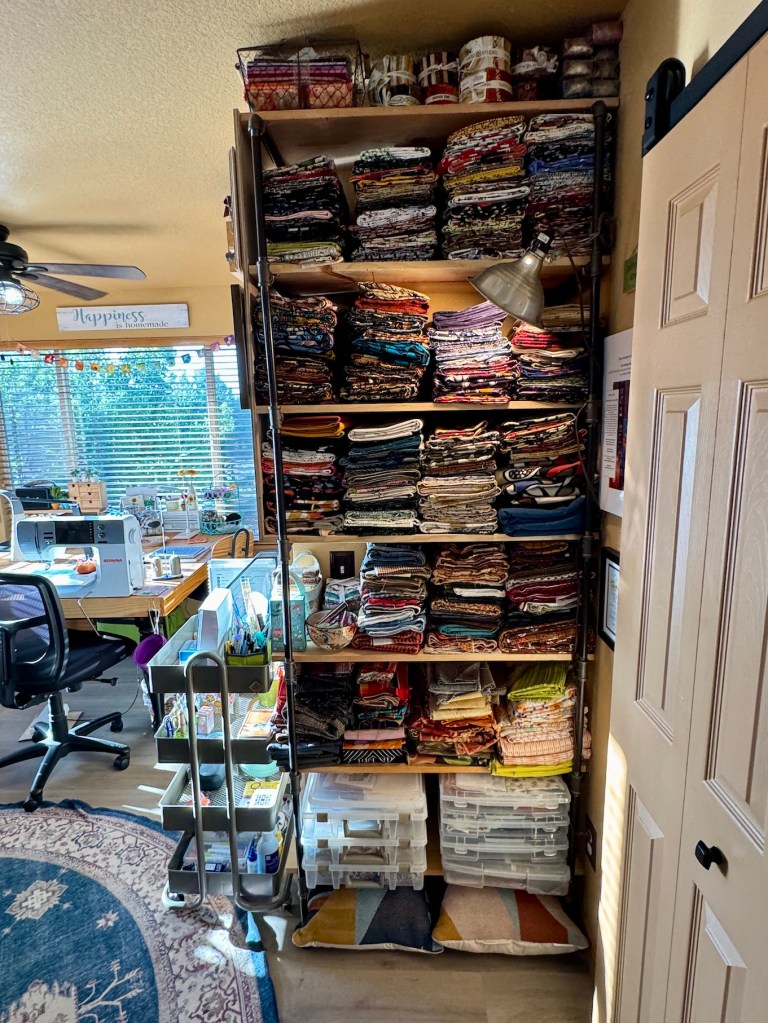
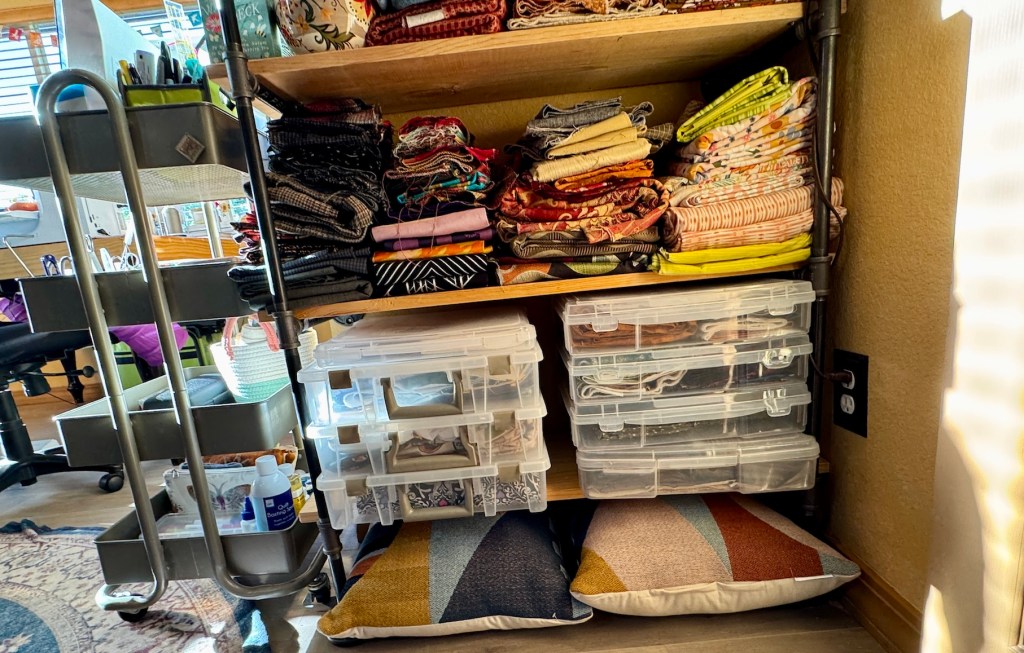
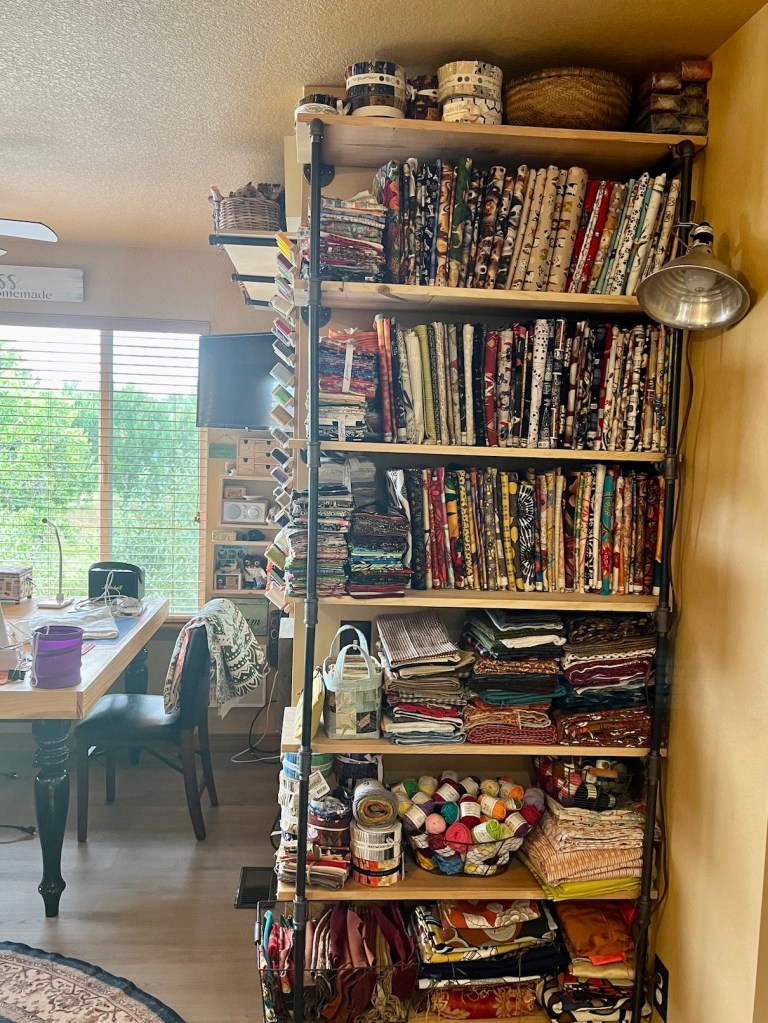
Here is another shelf unit that John made using plumbing pipes and wood. It houses more of my cotton fabric yardage as well as thrifted various thrifted fabrics to include silks, wools and synthetic home decorating fabrics. On the bottom shelf are containers filled with projects waiting to be made.
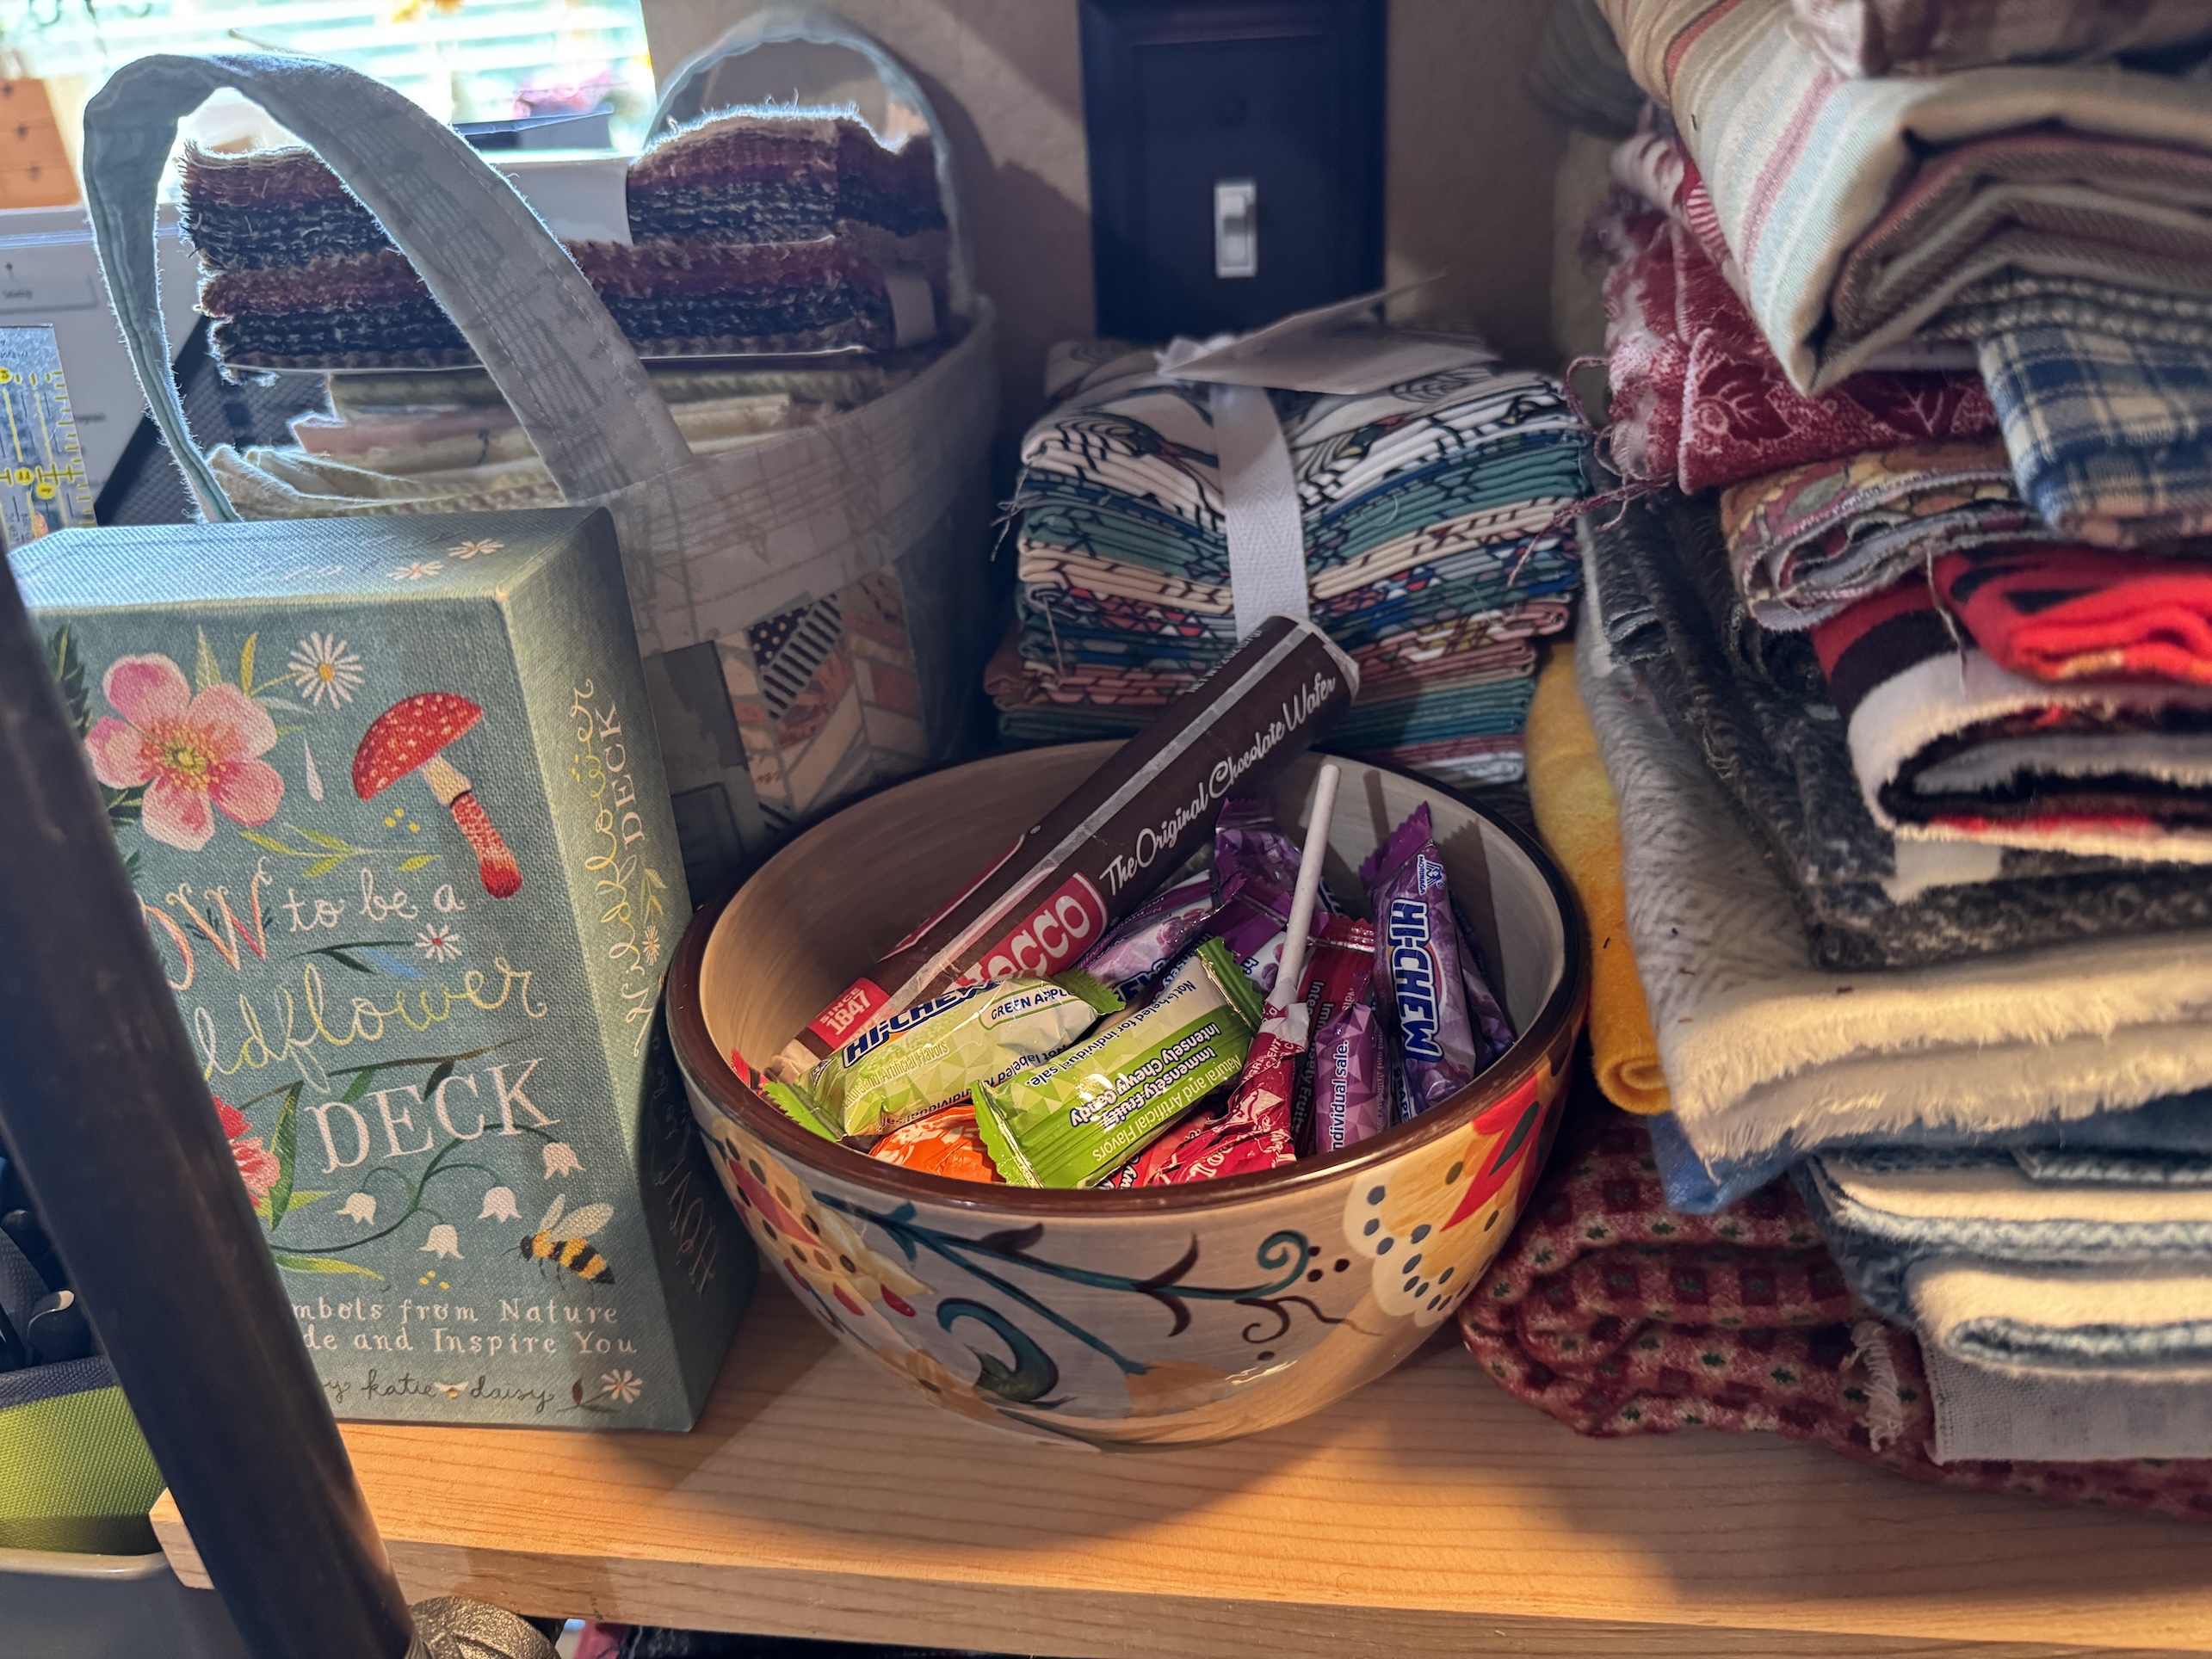
The shelving unit contains a very important item in my studio: the candy bowl which I found at a thrift store:
Occasionally you need a sweet treat while you are creating!
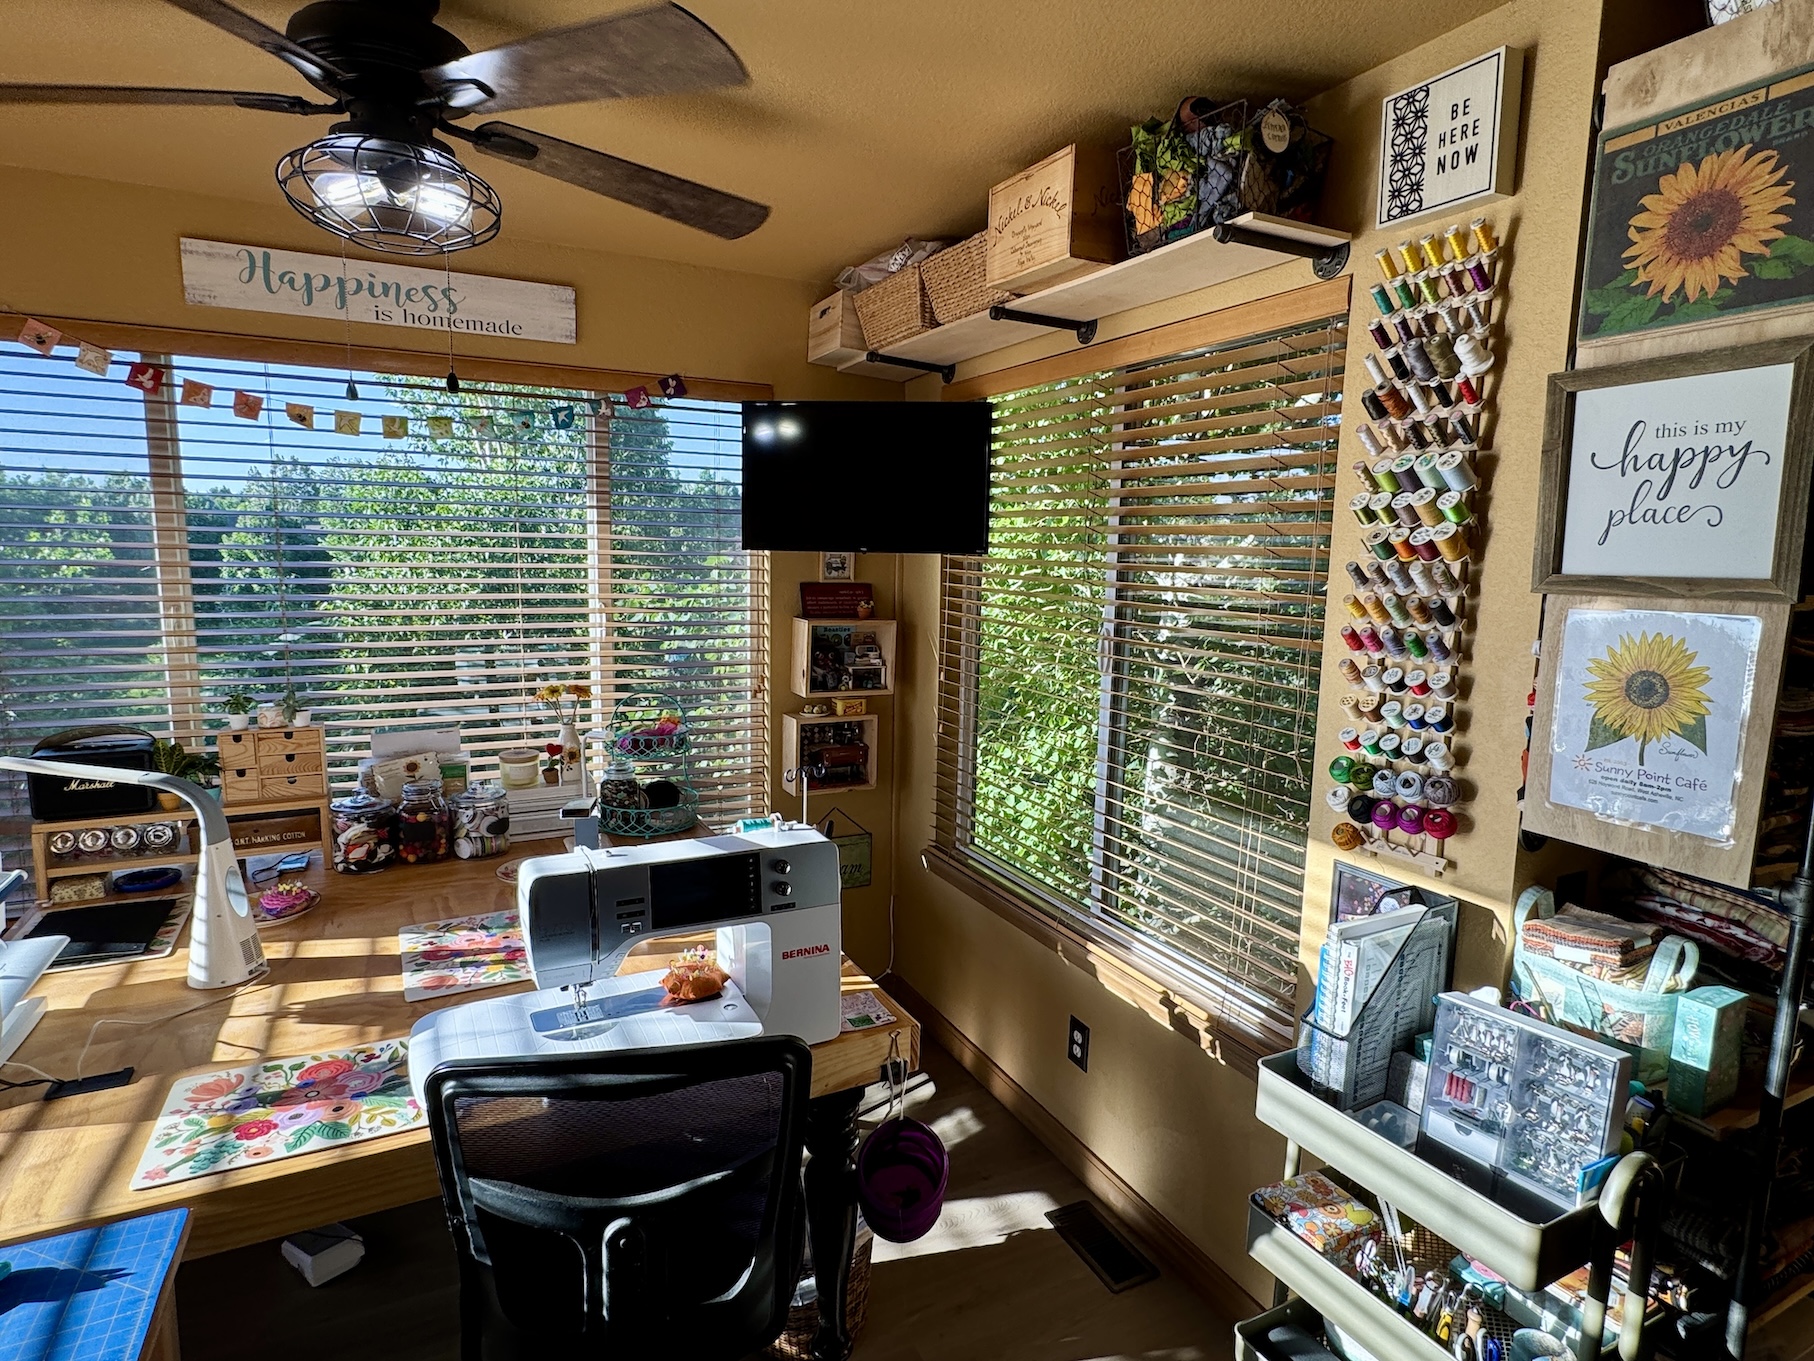
My sewing table was a free table I got from neighborhood online forum offering used items for free or for sale. John made a topper for it to expand the surface area and put openings in the table to run cords through.
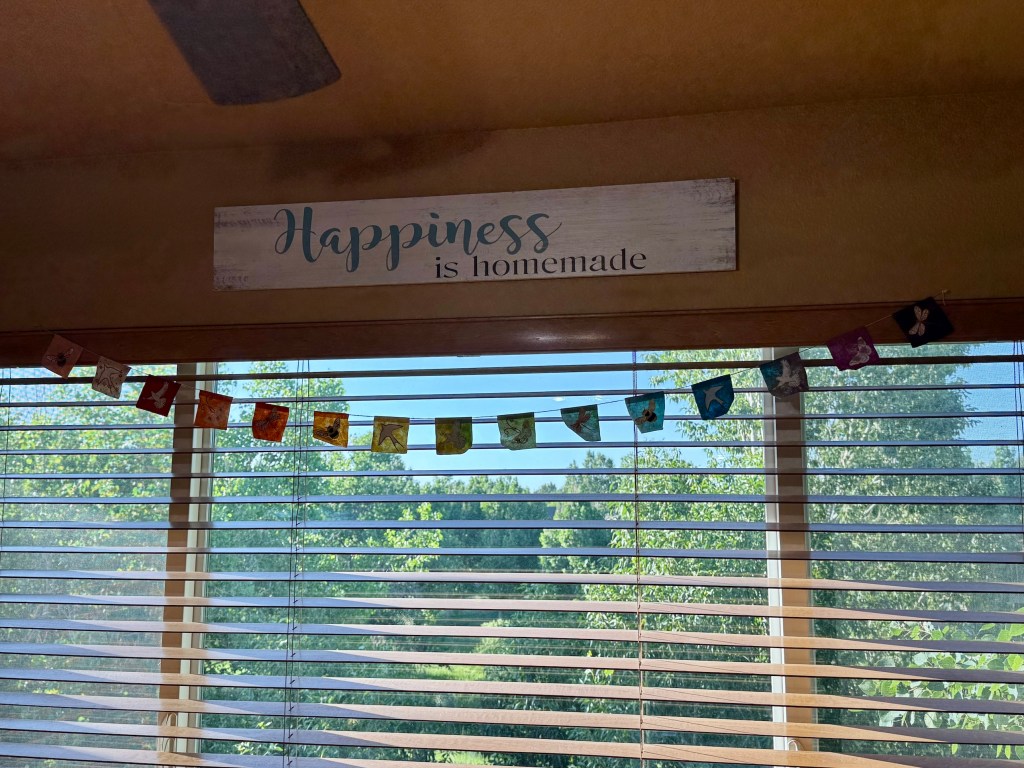
Above the table is the sign: “Happiness is homemade” that I found at a thrift store a couple years ago. It always makes me smile.
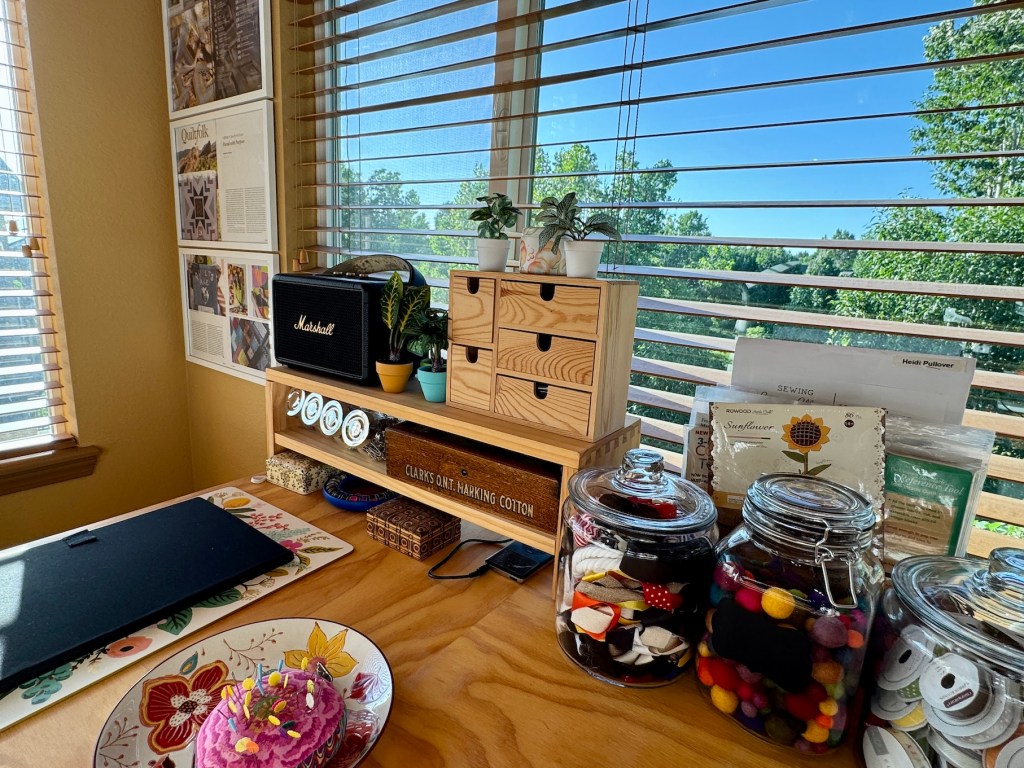
In addition to several of my sewing machines, I have various supplies, goodies, a radio and a bluetooth speaker for crafting music, on my sewing table;
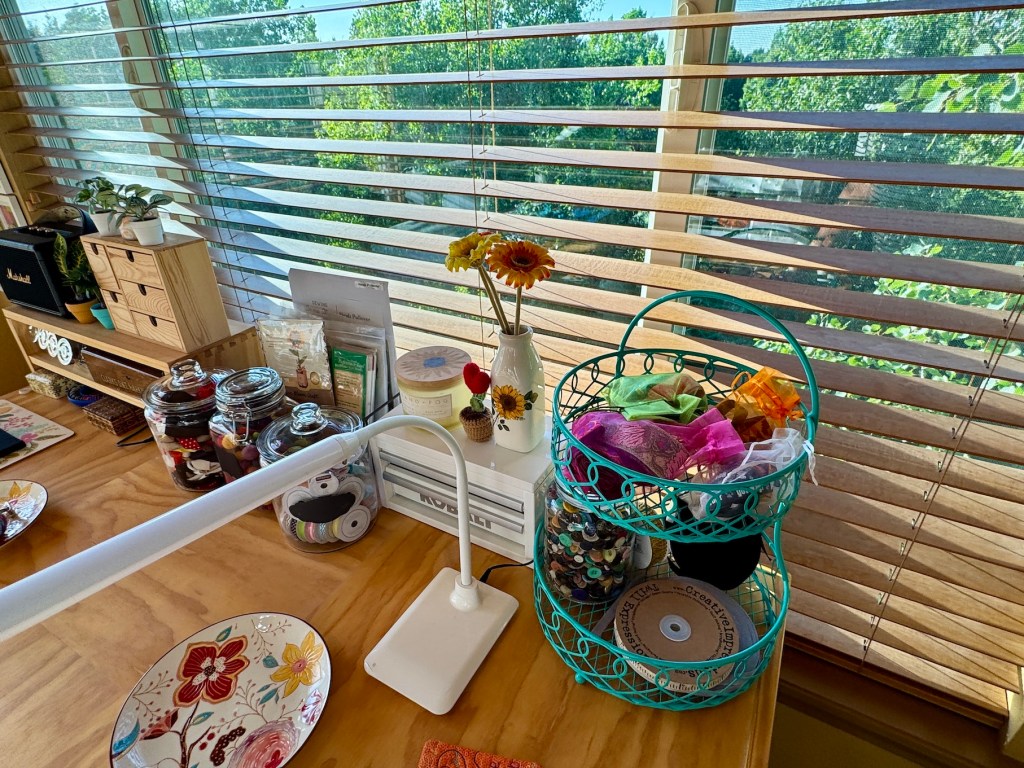
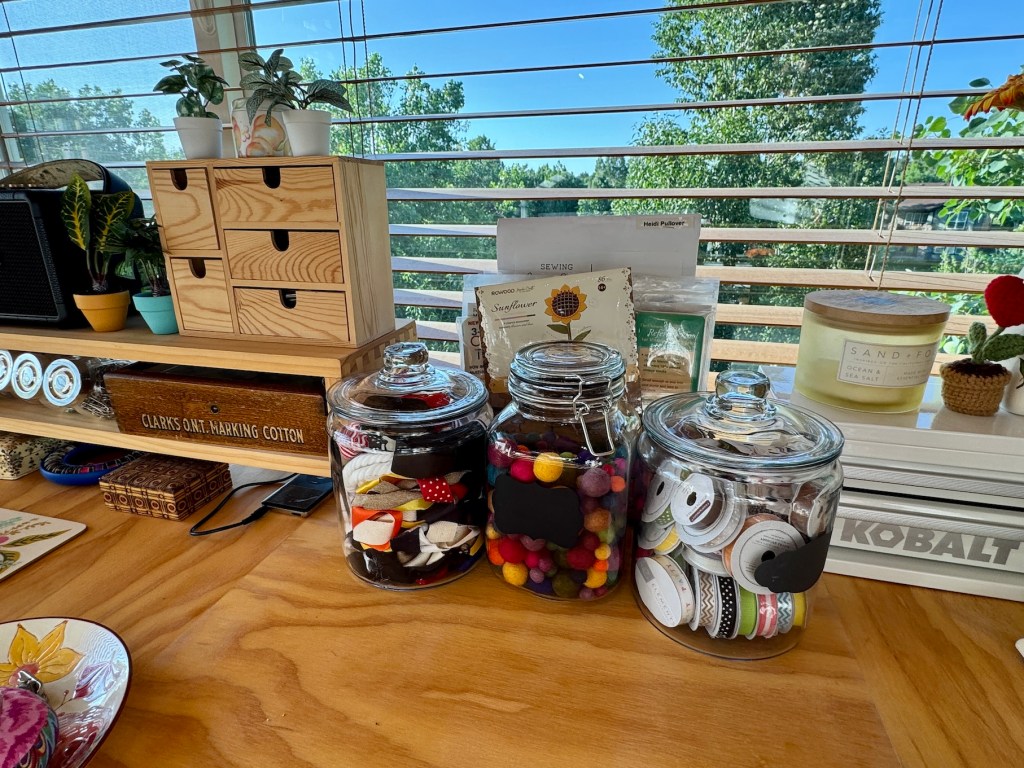
All the jars and containers on the desk as well as the decorative plates holding pincushions, etc. are thrifted. Many of the buttons in the jar of buttons and the little spools of ribbon in a jar are thrifted. The wooden sewing box that says “Clarks…Making Cotton” is from John’s beloved grandmother. I am honored to have it my sewing space and I store larger buttons in it.
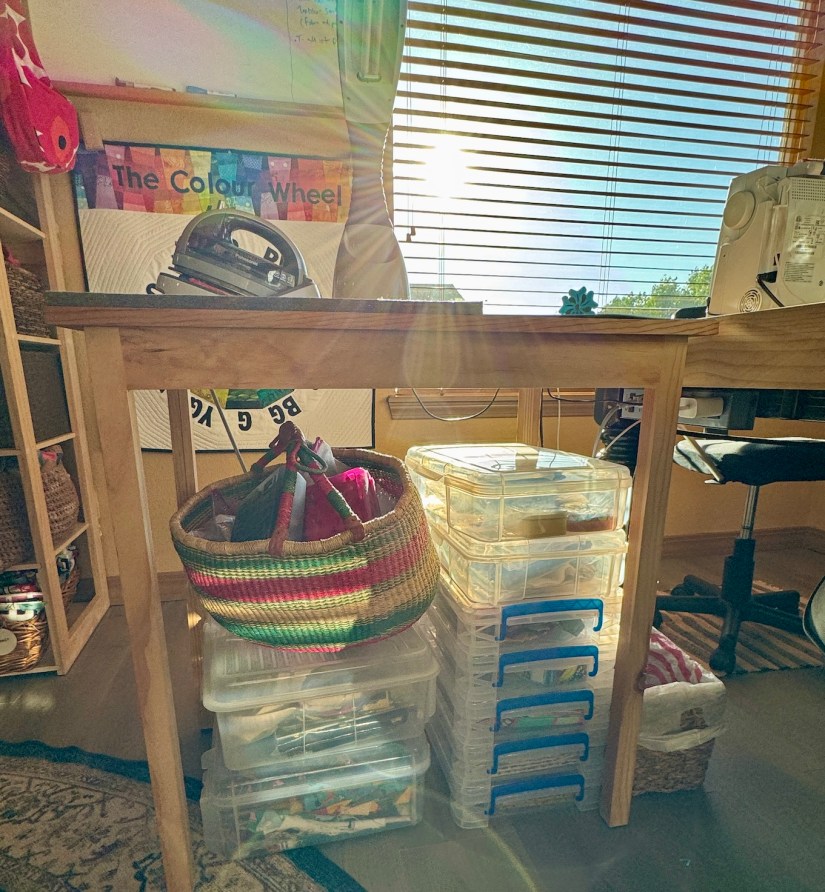
John built a little extension table for my sewing table and under that table I store MORE containers with projects waiting to be made; and projects in a thrifted basket.
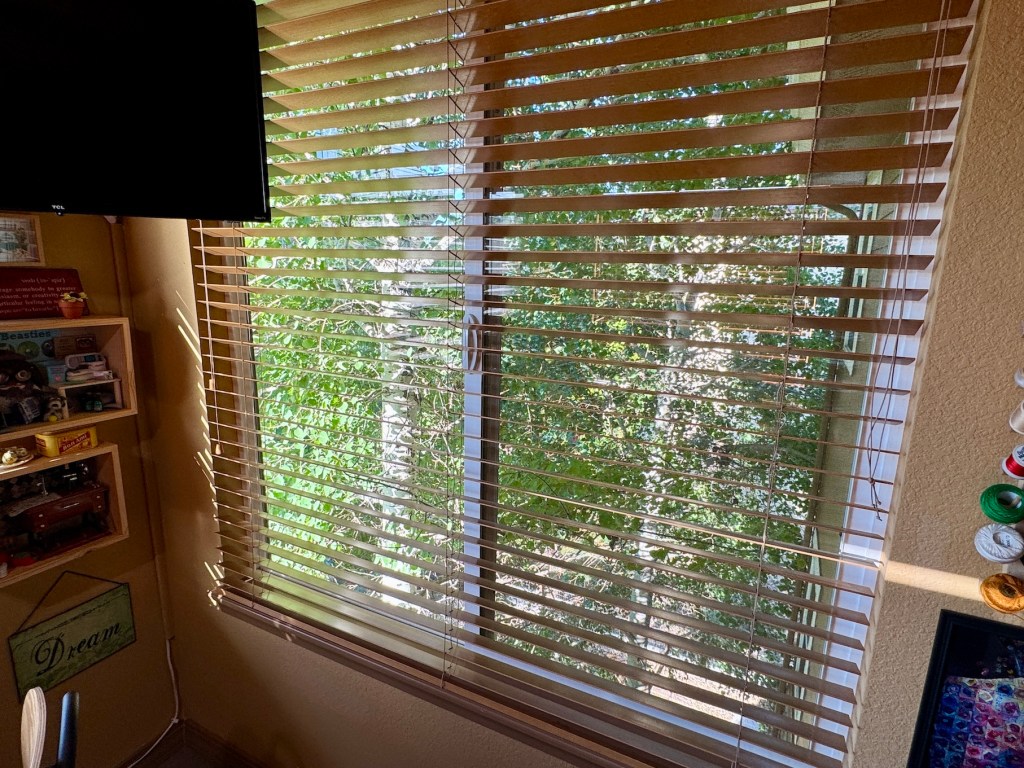
I love the view out my studio windows next to the sewing table. I am surrounded by Aspen trees and it feels like I am in a treehouse.
The little art flags that hang on the window were discovered for $1 all bunched up at a thrift shop. They appear to be images painted on colored kraft paper and using a low heat iron I was able to smooth all the little flags out and hang them at the window.
Above the windows on each side of the sewing table are shelves that John built filled with more thrifted baskets and various decorative boxes storing supplies and fabric scraps:
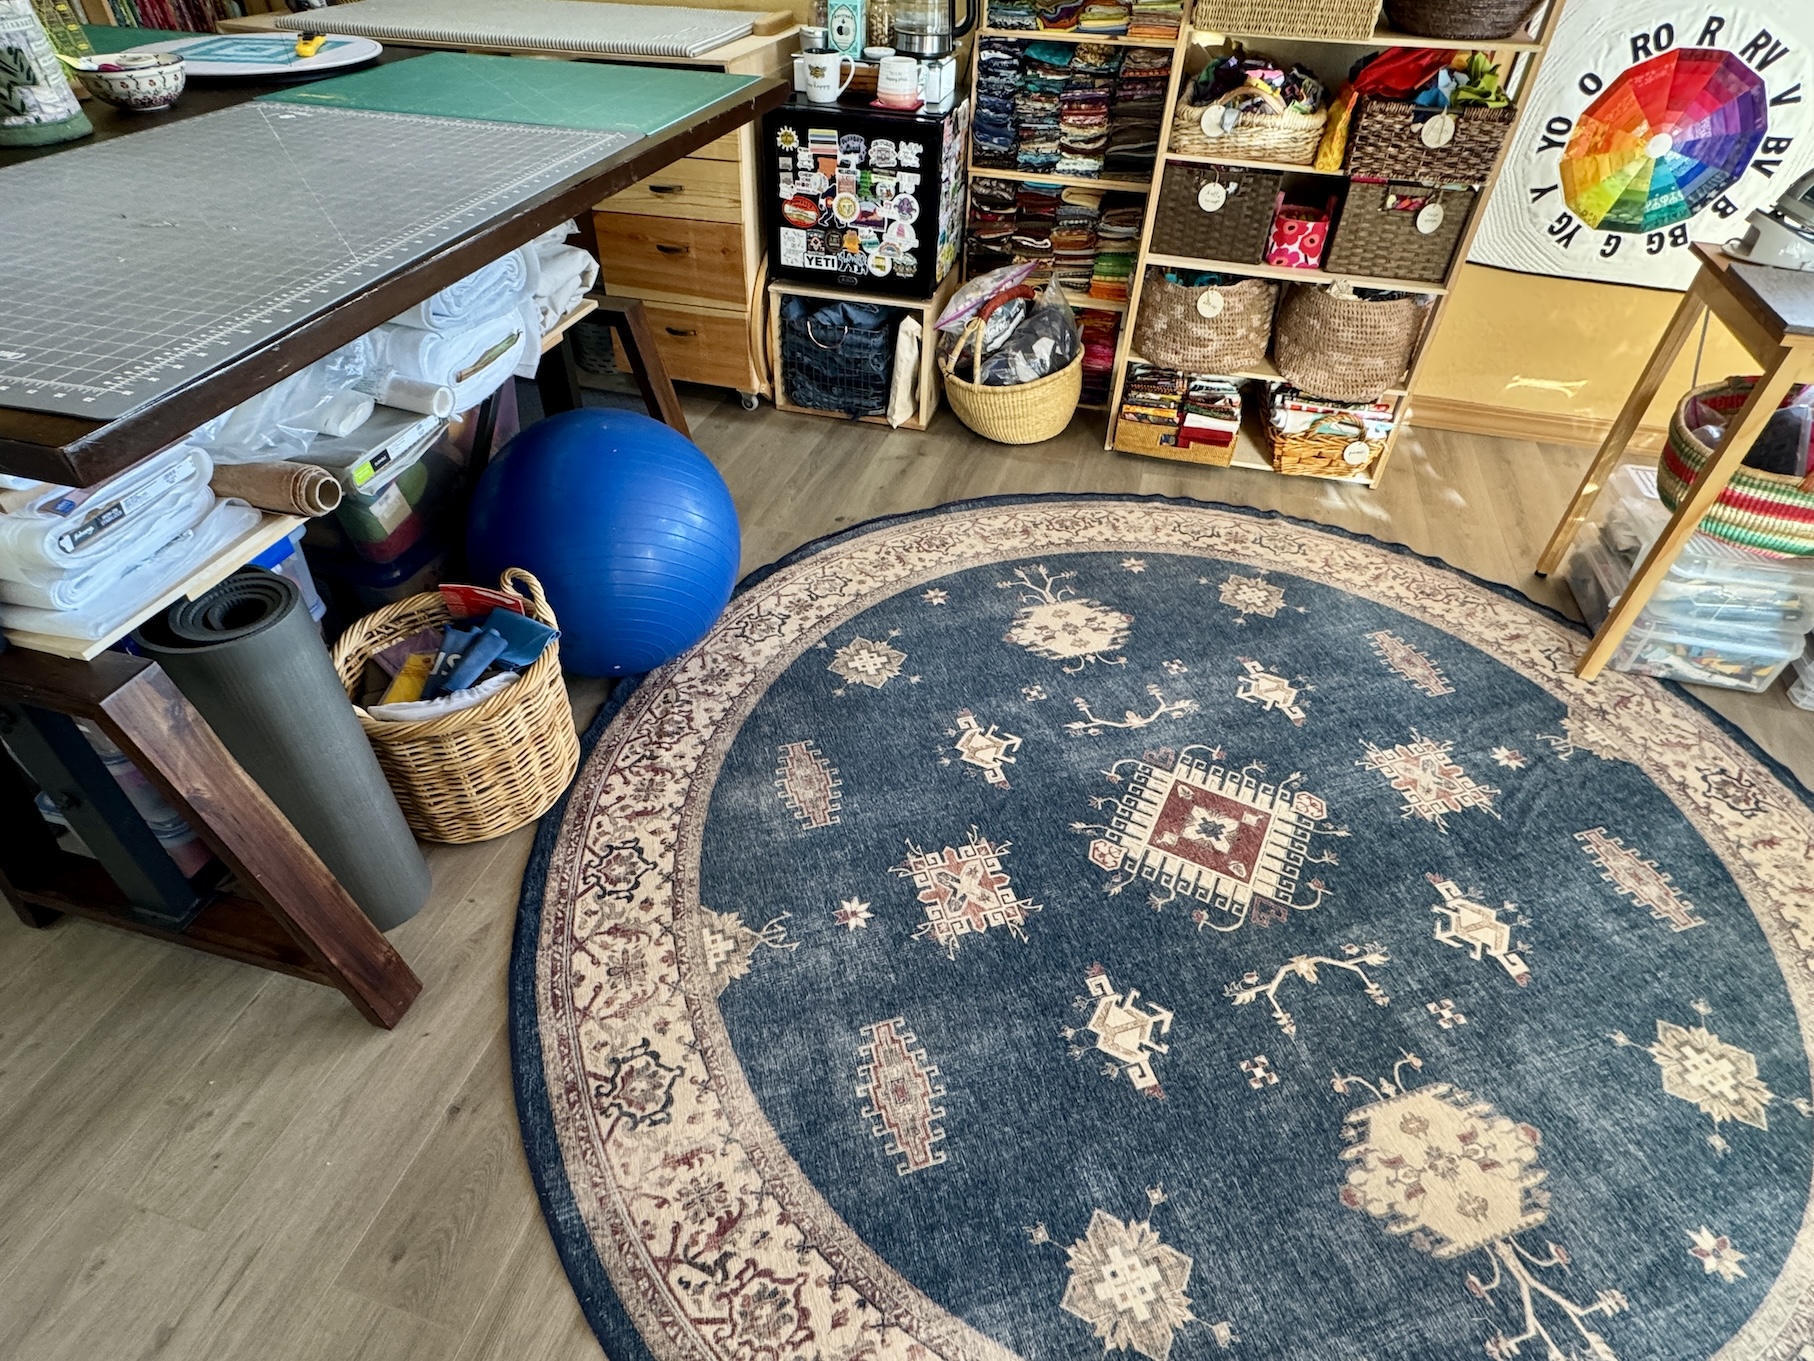
The area rug in the studio is a Ruggable washable rug that I found for $5 at a thrift store. These rugs retail for over $300! I laundered the rug and purchased the special rug pad for the rug from Ruggable so it would lay properly.
Do you see the exercise ball and thrifted basket to the left of the rug? In addition to a sewing studio, I also use this space as my morning stretching/yoga studio, layout out a yoga mat.
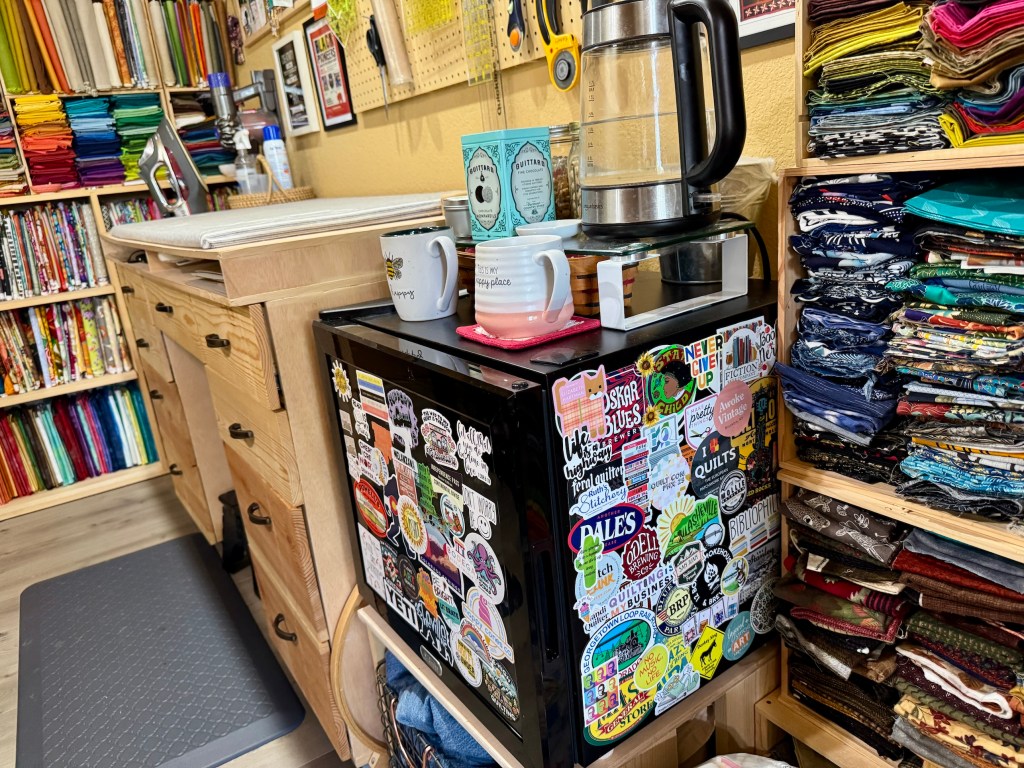
John gave me his old bar mini fridge (which I’ve liberally covered with stickers from my travels) and I added in a tea station to the top of it which includes thrifted containers and baskets for tea and biscuits; and thrifted mugs for tea:
Must have tea and biscuits while crafting!
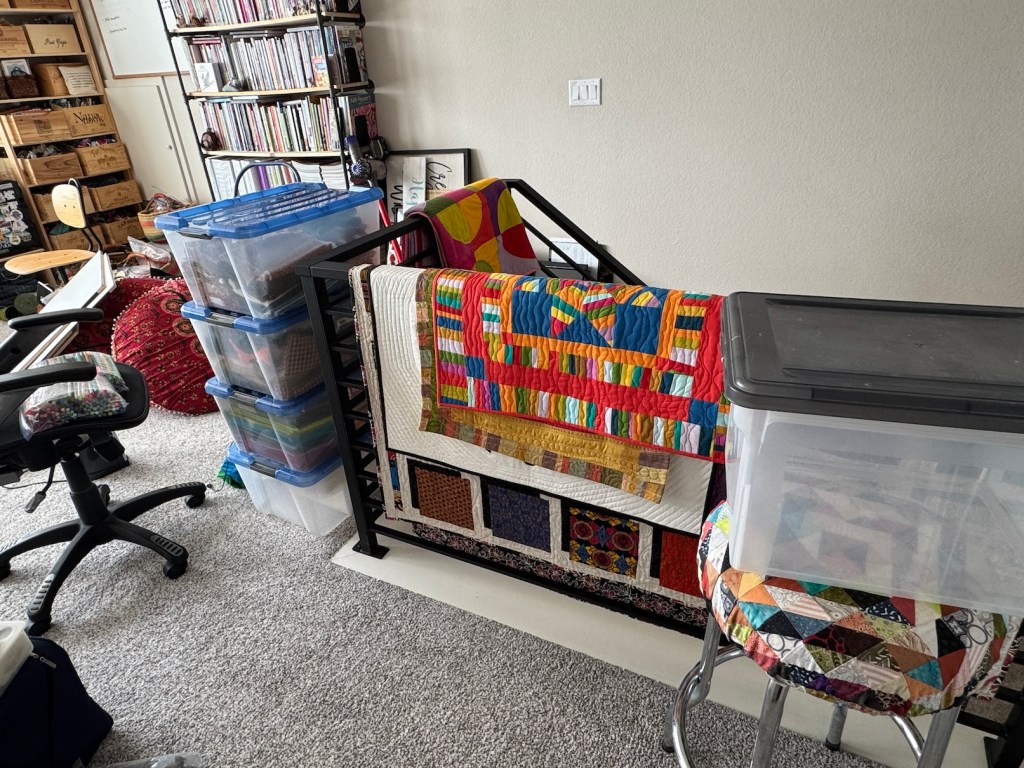
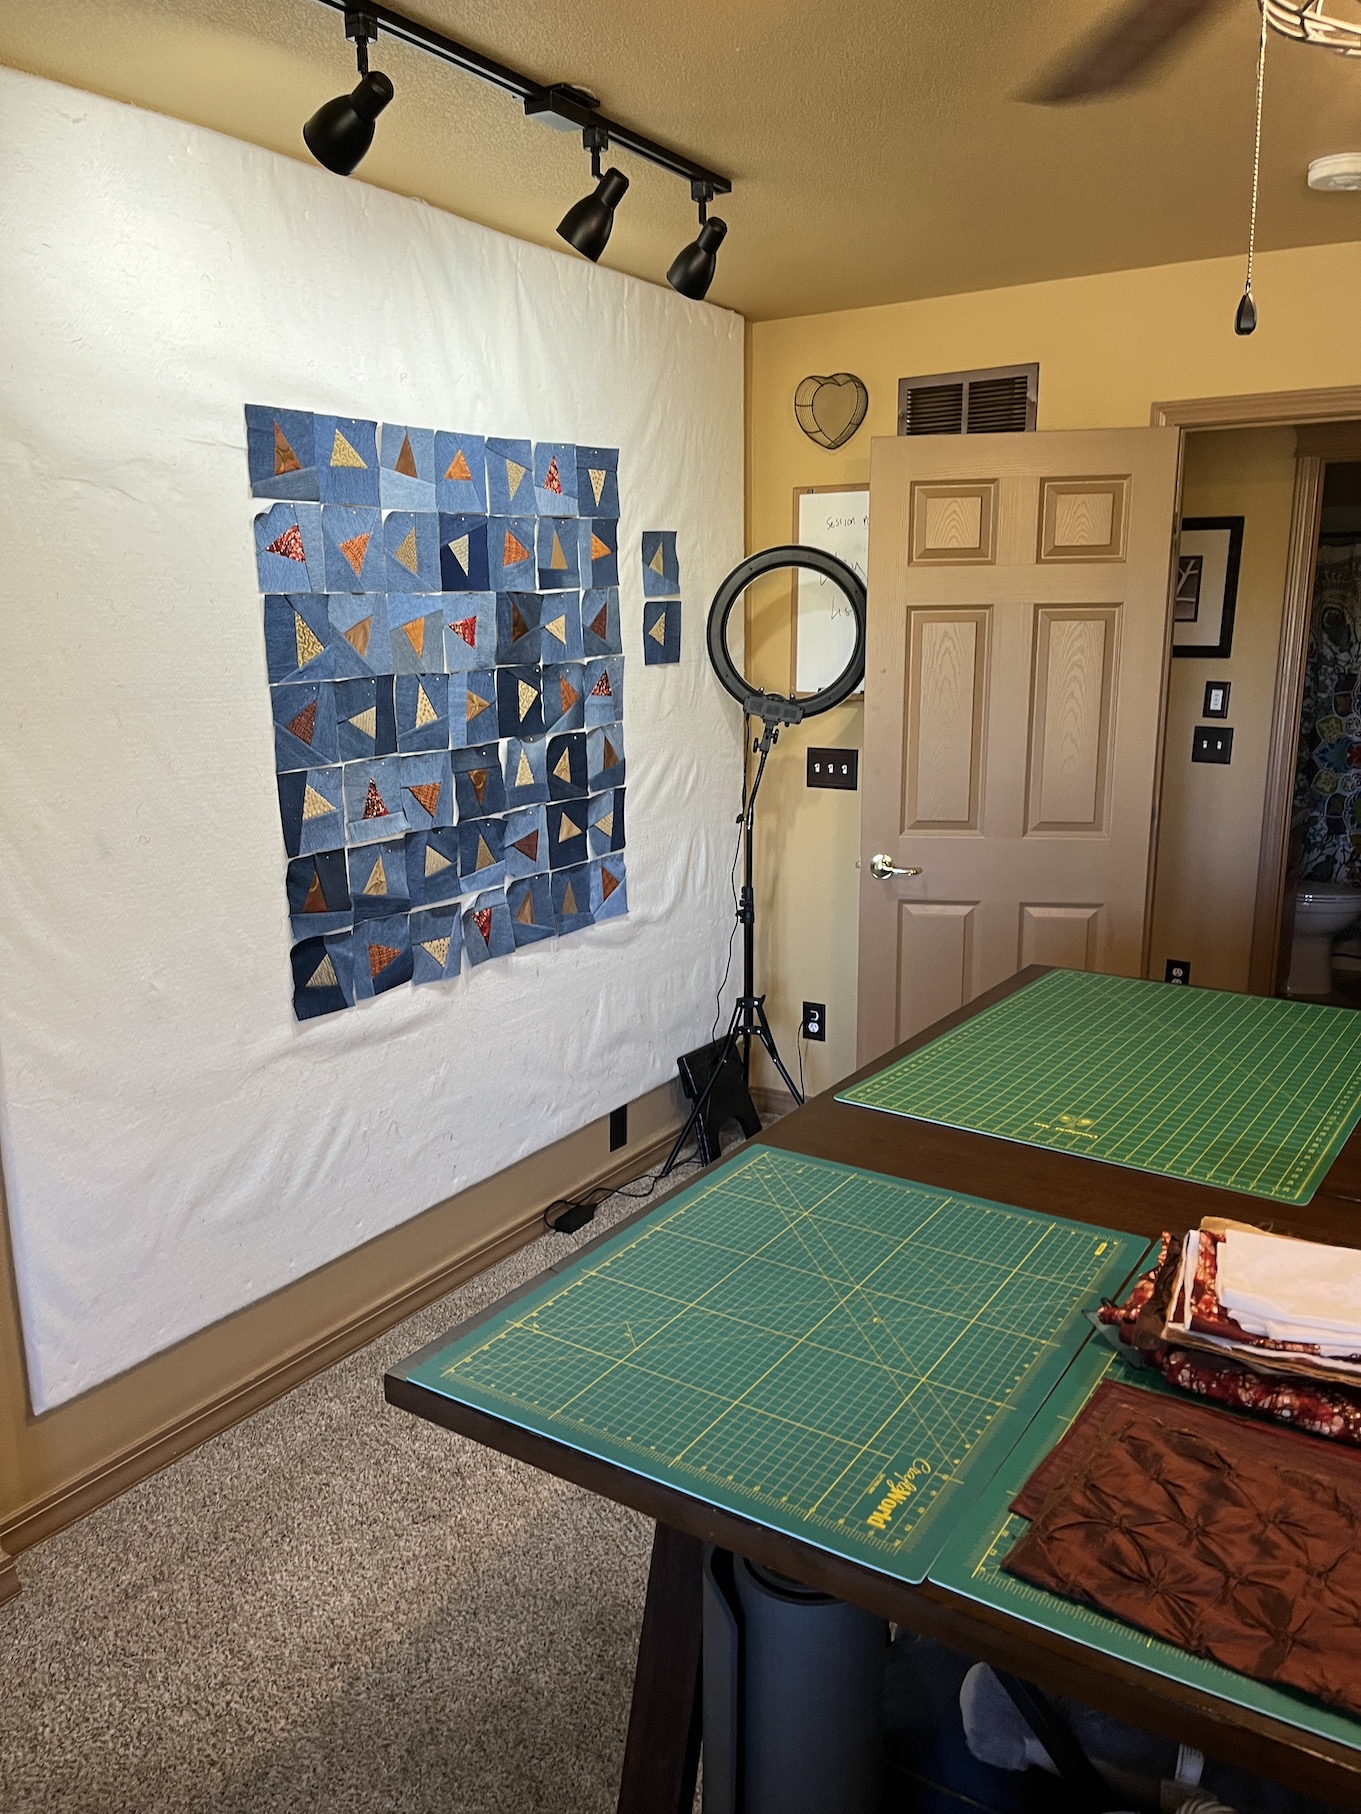
Maybe I need more tea and biscuits as here is the design wall in my studio that John built which is EMPTY right now as I finish up sewing the binding down on the Pieces of Colorado quilt (see the post Quilt in Progress: “Pieces of Colorado” Update #2):
And finally, the tierneycreates Beastie (made by Helen @ Crawcraft Beasties) hangs out in my studio in her “apartment” box made by John.
The antique sewing machine music box in the “apartment” below was a thrift store find gifted to me by my stepson and his wife a couple years ago.
Thanks for stopping by for an updated studio tour and to see what I’ve collected from thrift shops for my studio!
It’s the 15th of the month and time for my monthly “ScrapHappy” post as part of the ScrapHappy group I belong run by Kate and Gun. At the end of this post I have a link to the other blogs participating in this monthly event in case you’d like to check out their ScrapHappy posts.
Update on the Denim Quilt
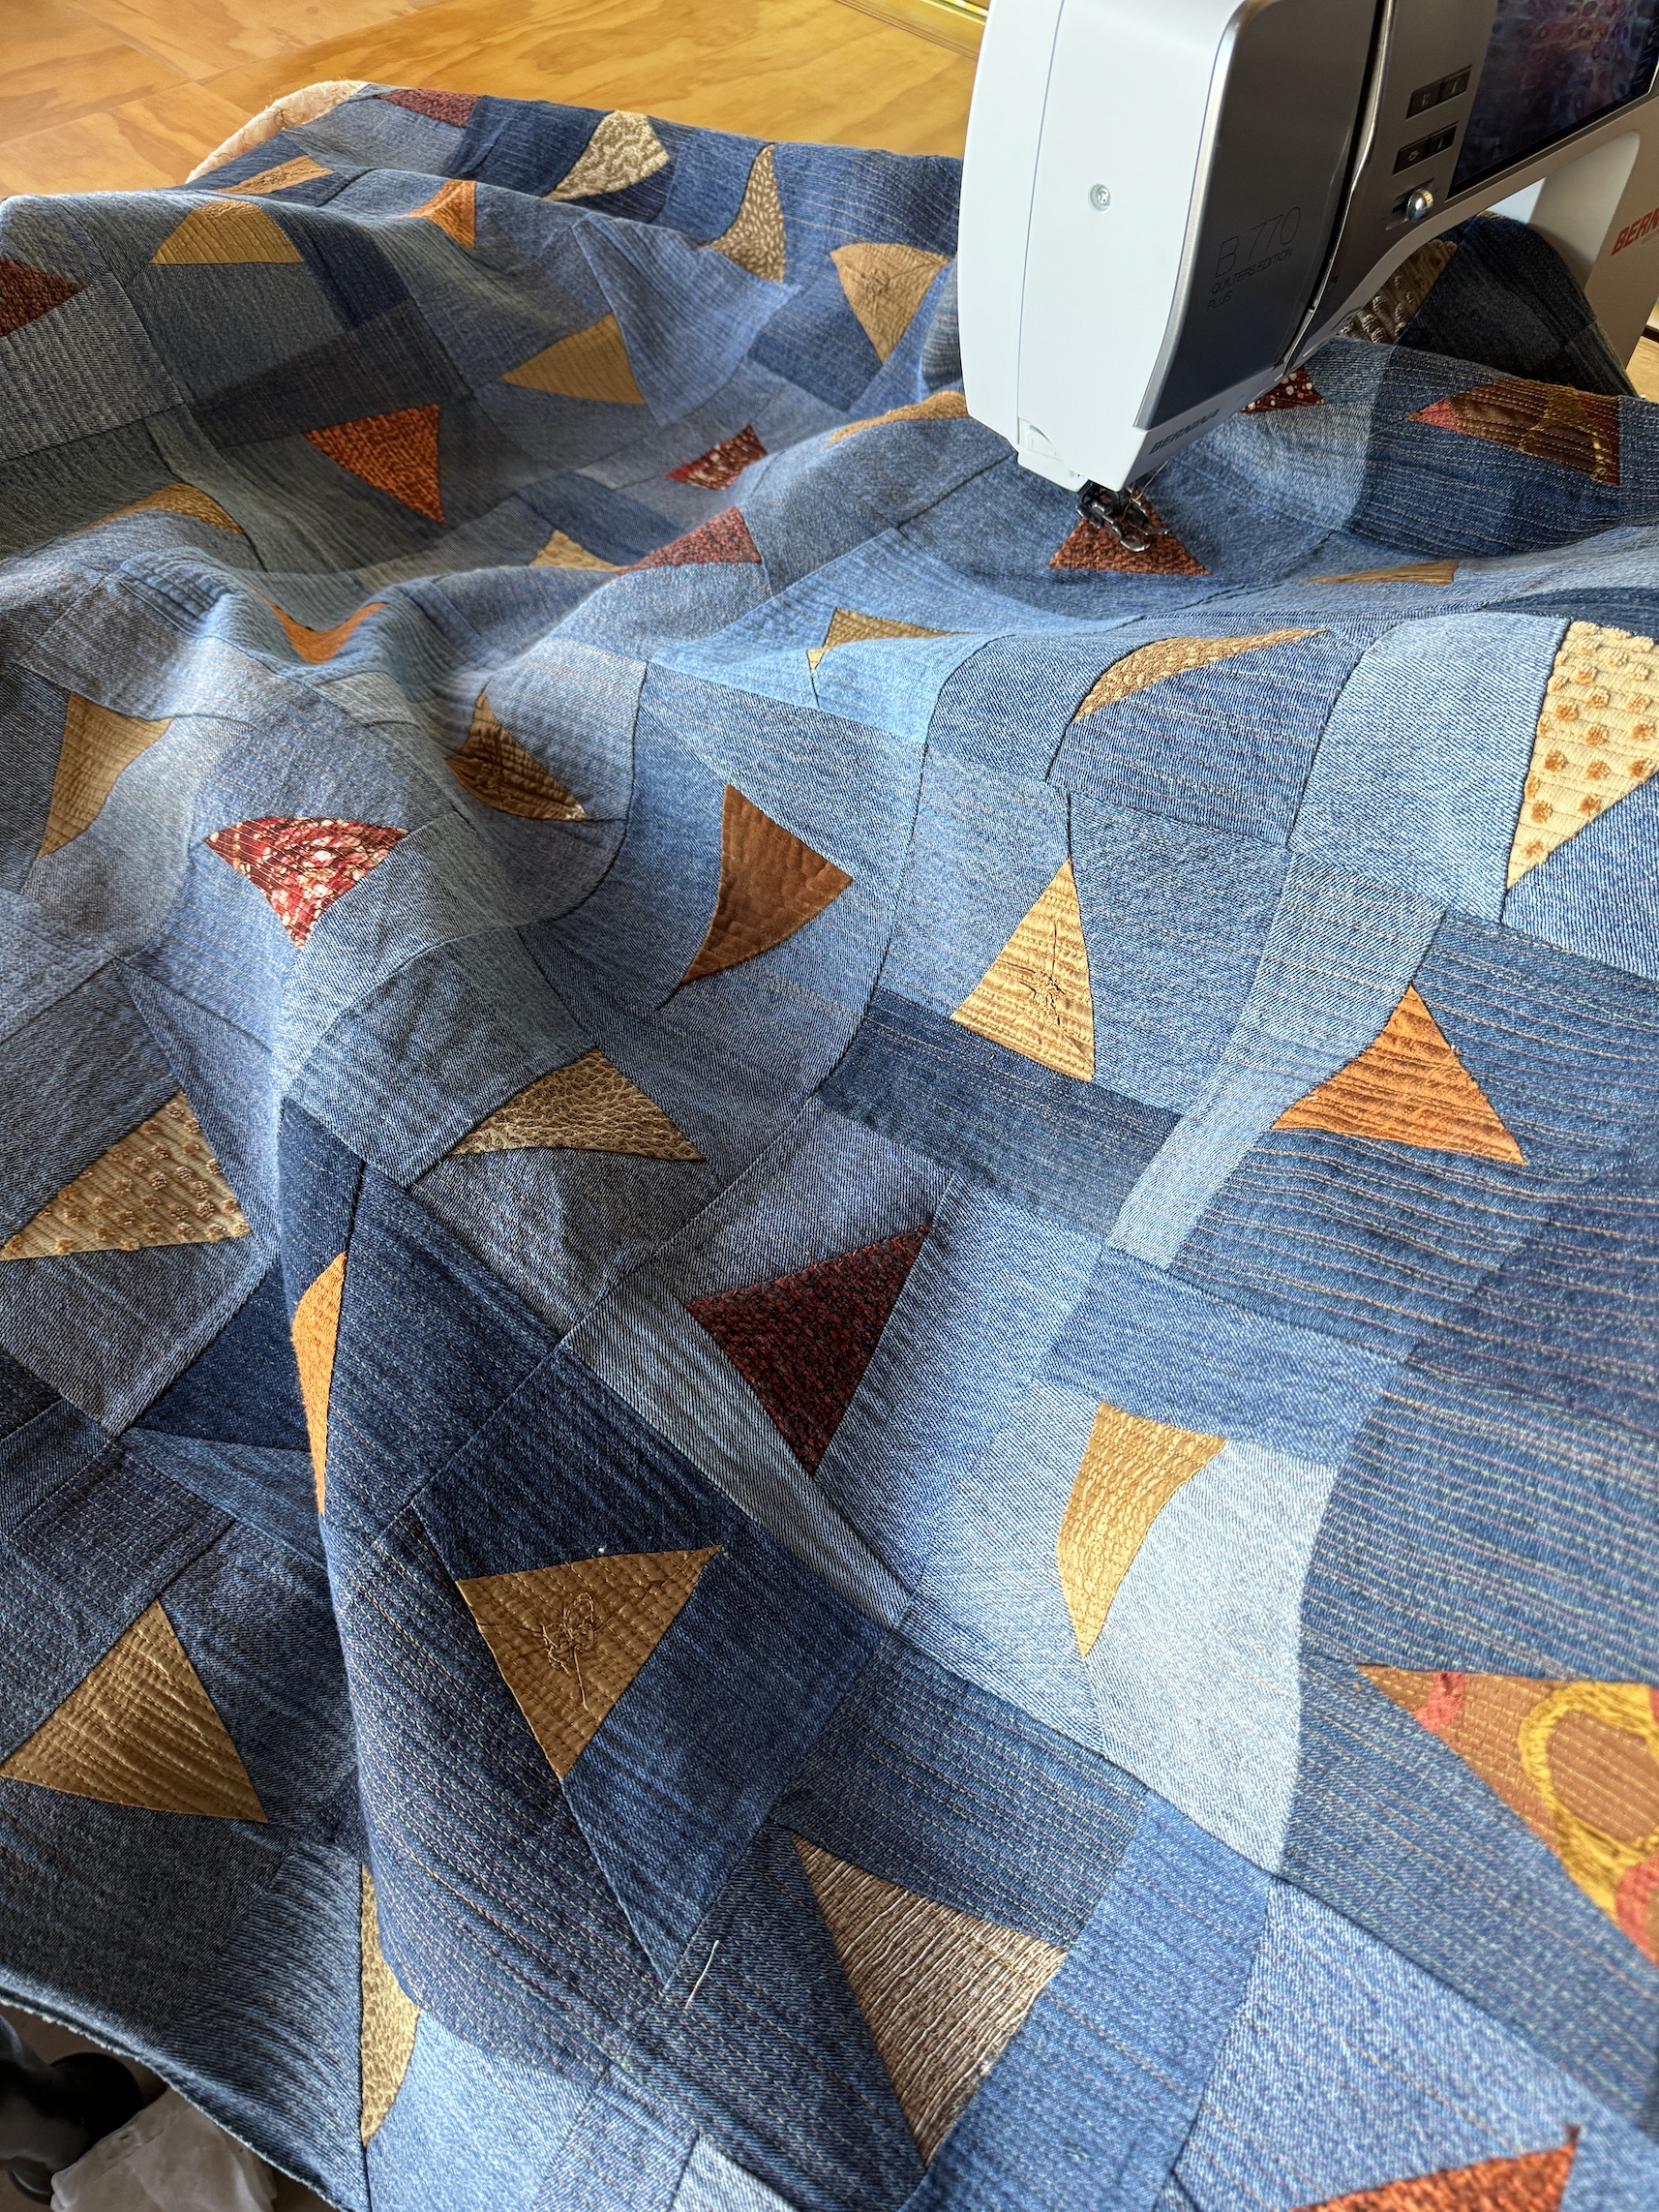
For this month’s ScrapHappy post, I am updating you on my post Now Quilting the Denim Quilt! on beginning the quilting the denim quilt I pieced from denim scraps (recycled old jeans) and home decorating/upholstery fabric samples scraps.
I finished quilting the quilt using an “organic matchstick” pattern and two different threads.
I decided to put a “facing” on/”face” the quilt instead of adding a binding on the edges. If you are unfamiliar with the concept of “facing” a quilt, here is the handy YouTube video I used to remind myself on how to do a facing as it seems like years since I added one!
Here is the newly faced quilt on the ironing table in my studio getting a good press:
Here is the back of the quilt showing the thrifted cotton tablecloth I used as the backing:
And finally, here is the quilt (still needing the facing edges sewn down) nearly completed:
Thanks to my friend Rick G. on photographing this quilt using his equipment.
So what name did I finally decide on for the quilt and what is my Artist Statement? The answer is below:
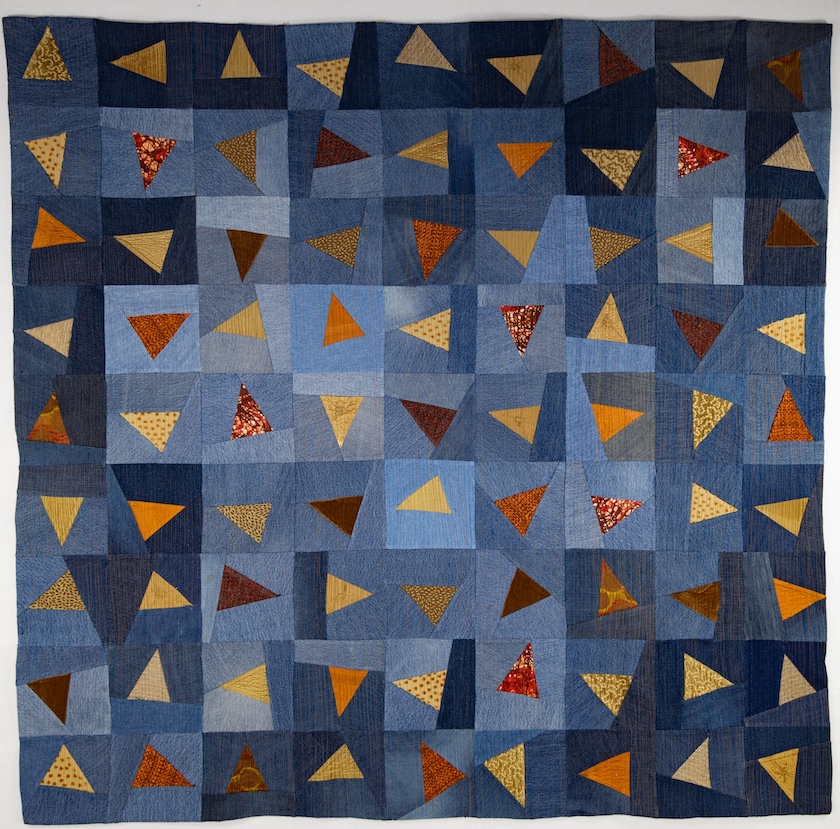
What Direction Do I Go?
54 inches by 53 inches
In my early 50s the direction of my life radically changed with the sudden passing of my husband who’d been part of my life since I was 20 years old. Part of my identity and all the direction of my life evaporated and I was left with the following life question: What Direction Do I Go? Made entirely with recycled fabrics including the batting, this quilt reflects my struggle to find a new direction.
I decided to stick with my original concept for the quilt that I discussed in an earlier post when I was piecing this quilt.
Here are the other bloggers that participate in the ScrapHappy monthly posting event, check out their blogs linked below for their ScrapHappy posts:
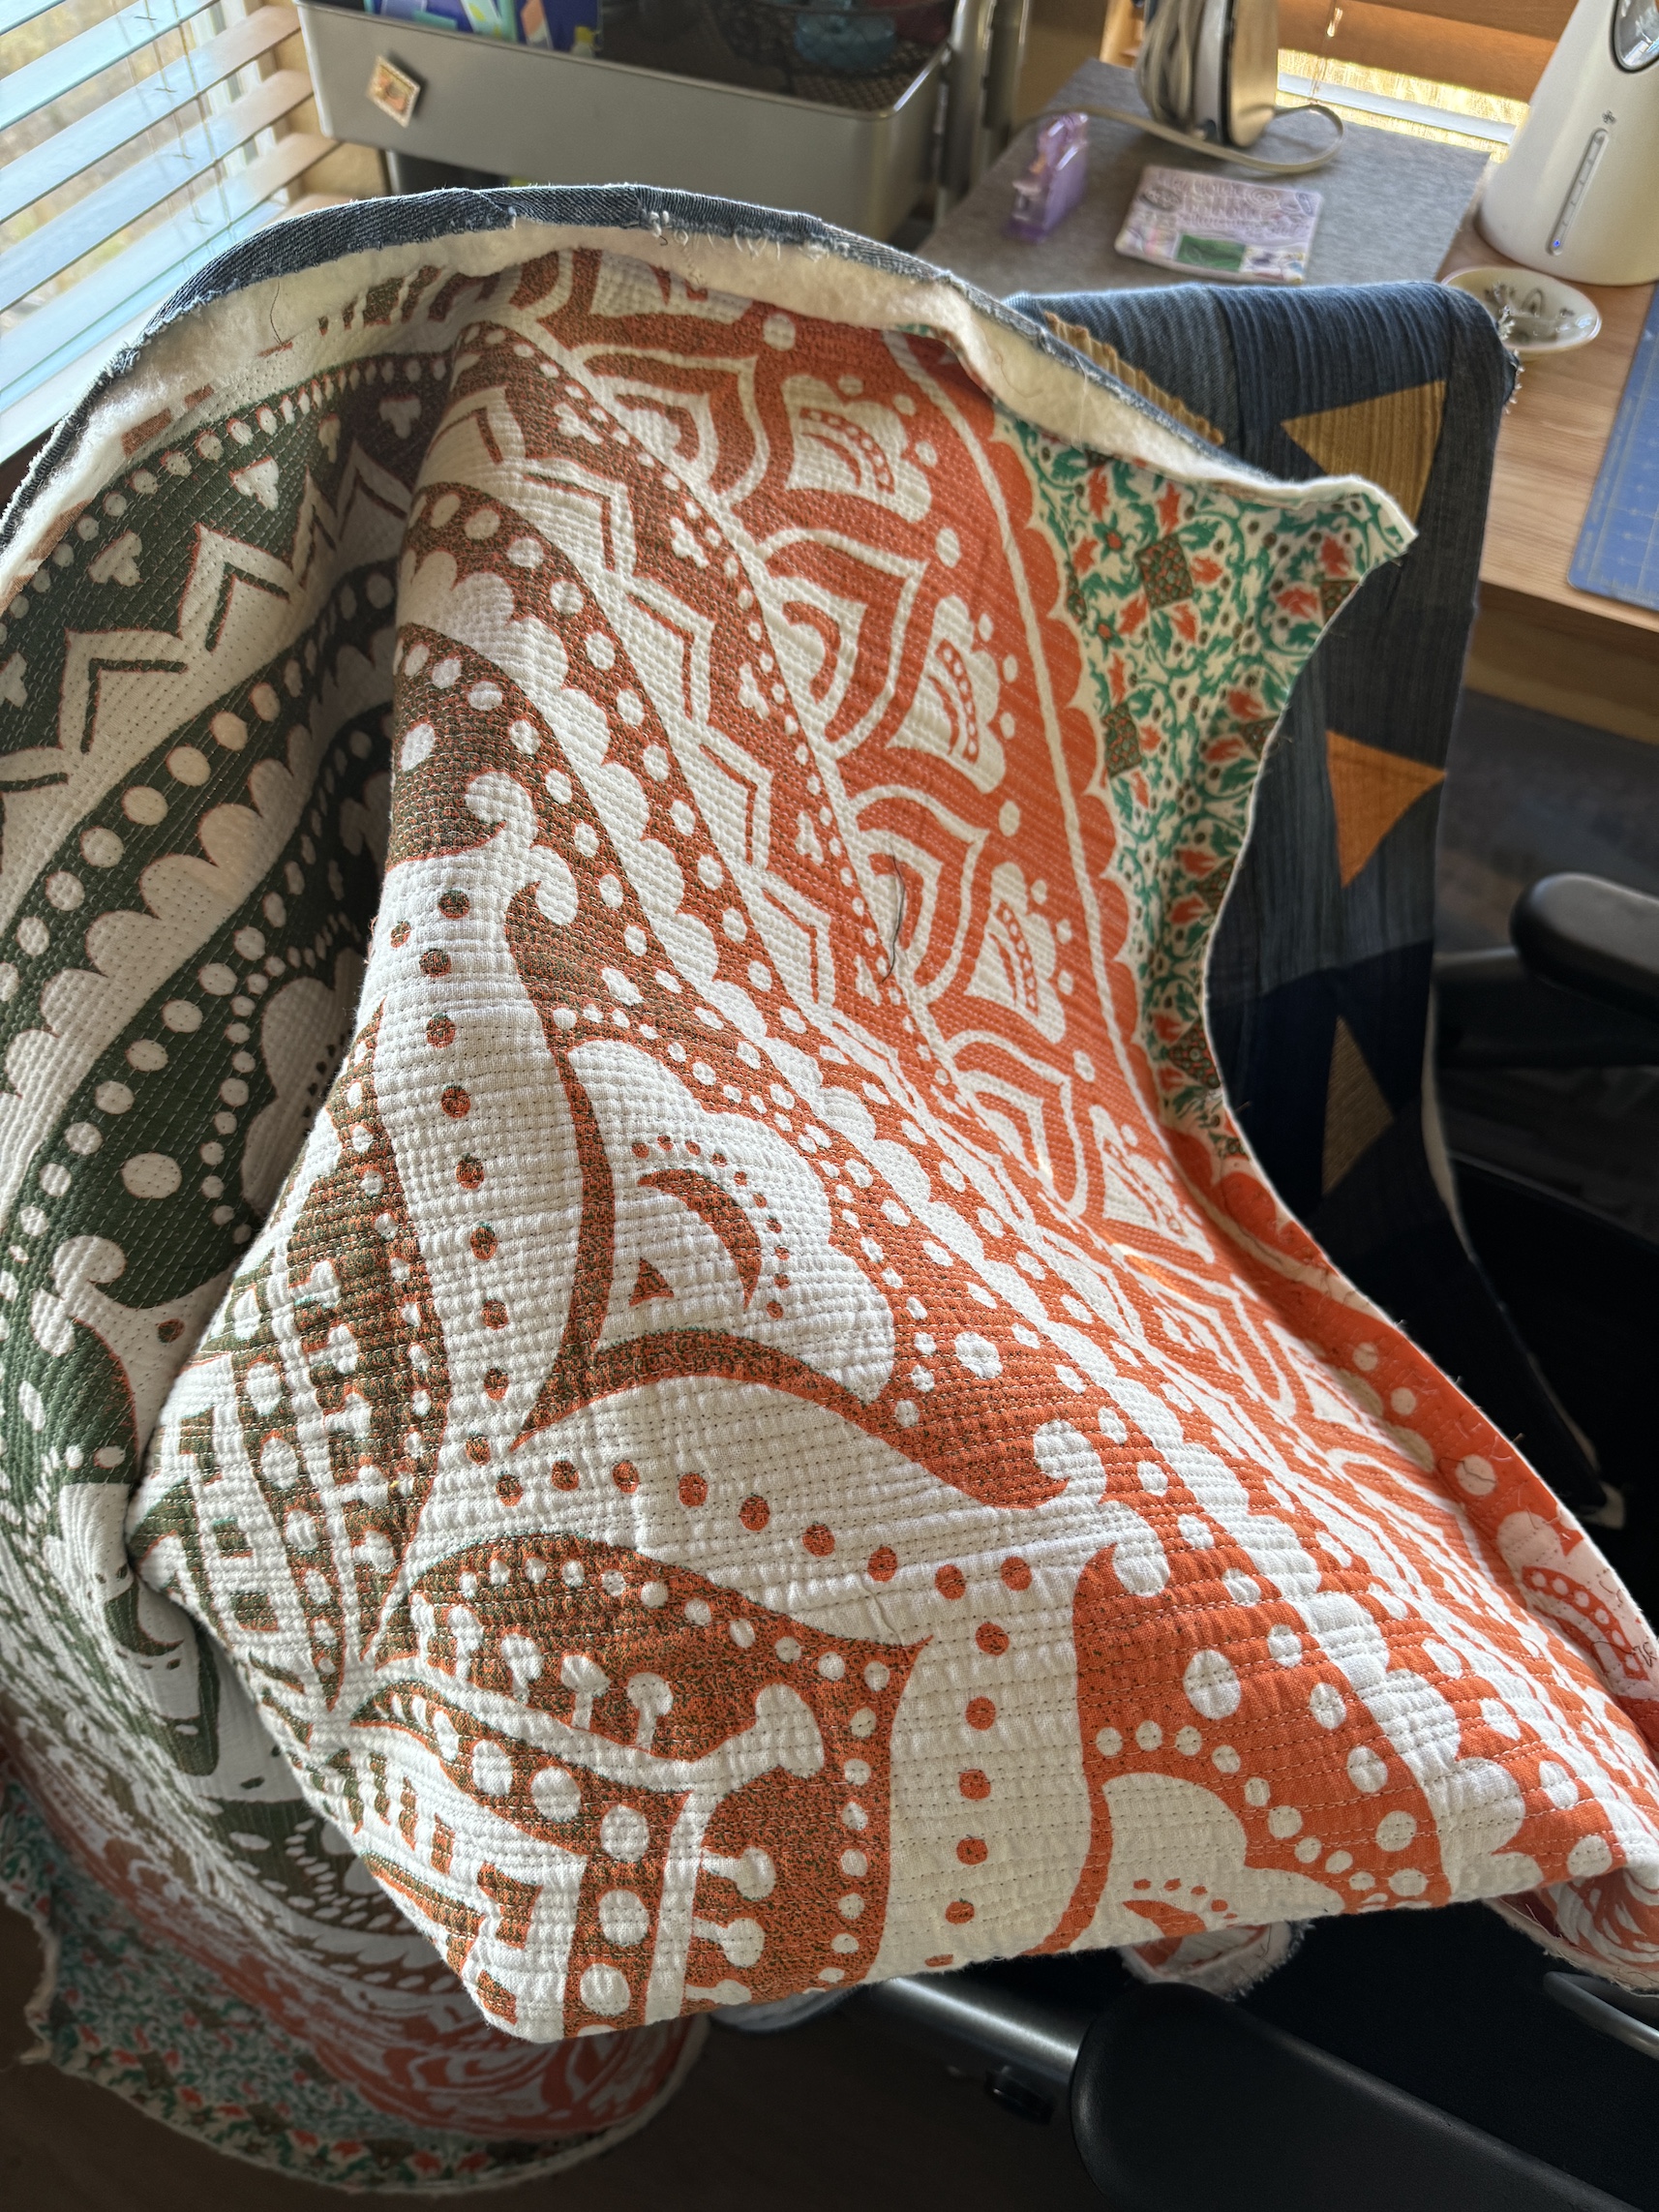
Pausing my series of posts about my September trip to the California Coast to share my conversion of a journal cover to a pillow.
I made this journal cover from fabric scraps in the first Journey to Art Quilting class I took with Jean Wells at the Stitchin’ Post in Sisters, Oregon, likely around 2013 or 2014.
We were working on improvisational quilting exercises; and I remember I added the turquoise in because Jean said your piece needs a “surprise”, something unexpected, and she called it “a poison”.
For some reason I just just feeling tired of this journal cover and no longer wanted to use the journal it covered, I wanted to fresh start for creative journaling. However I didn’t want to get rid of the piece.
So I decided to make it into a pillow!
The class with Jean was very memorable, it was actually a workshop series where we met monthly (or it might have been bi-weekly). The piece which eventually because Abandoned Water Structure and was sold to the City of Seattle’s Portable Works Collection was started in this workshop:
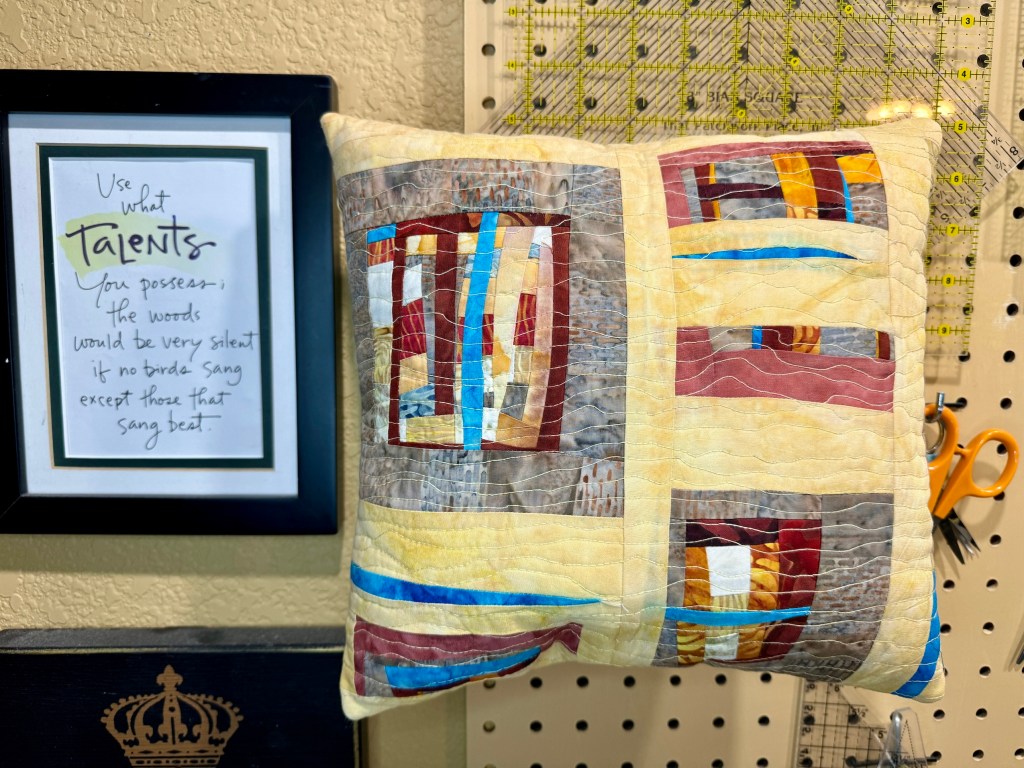
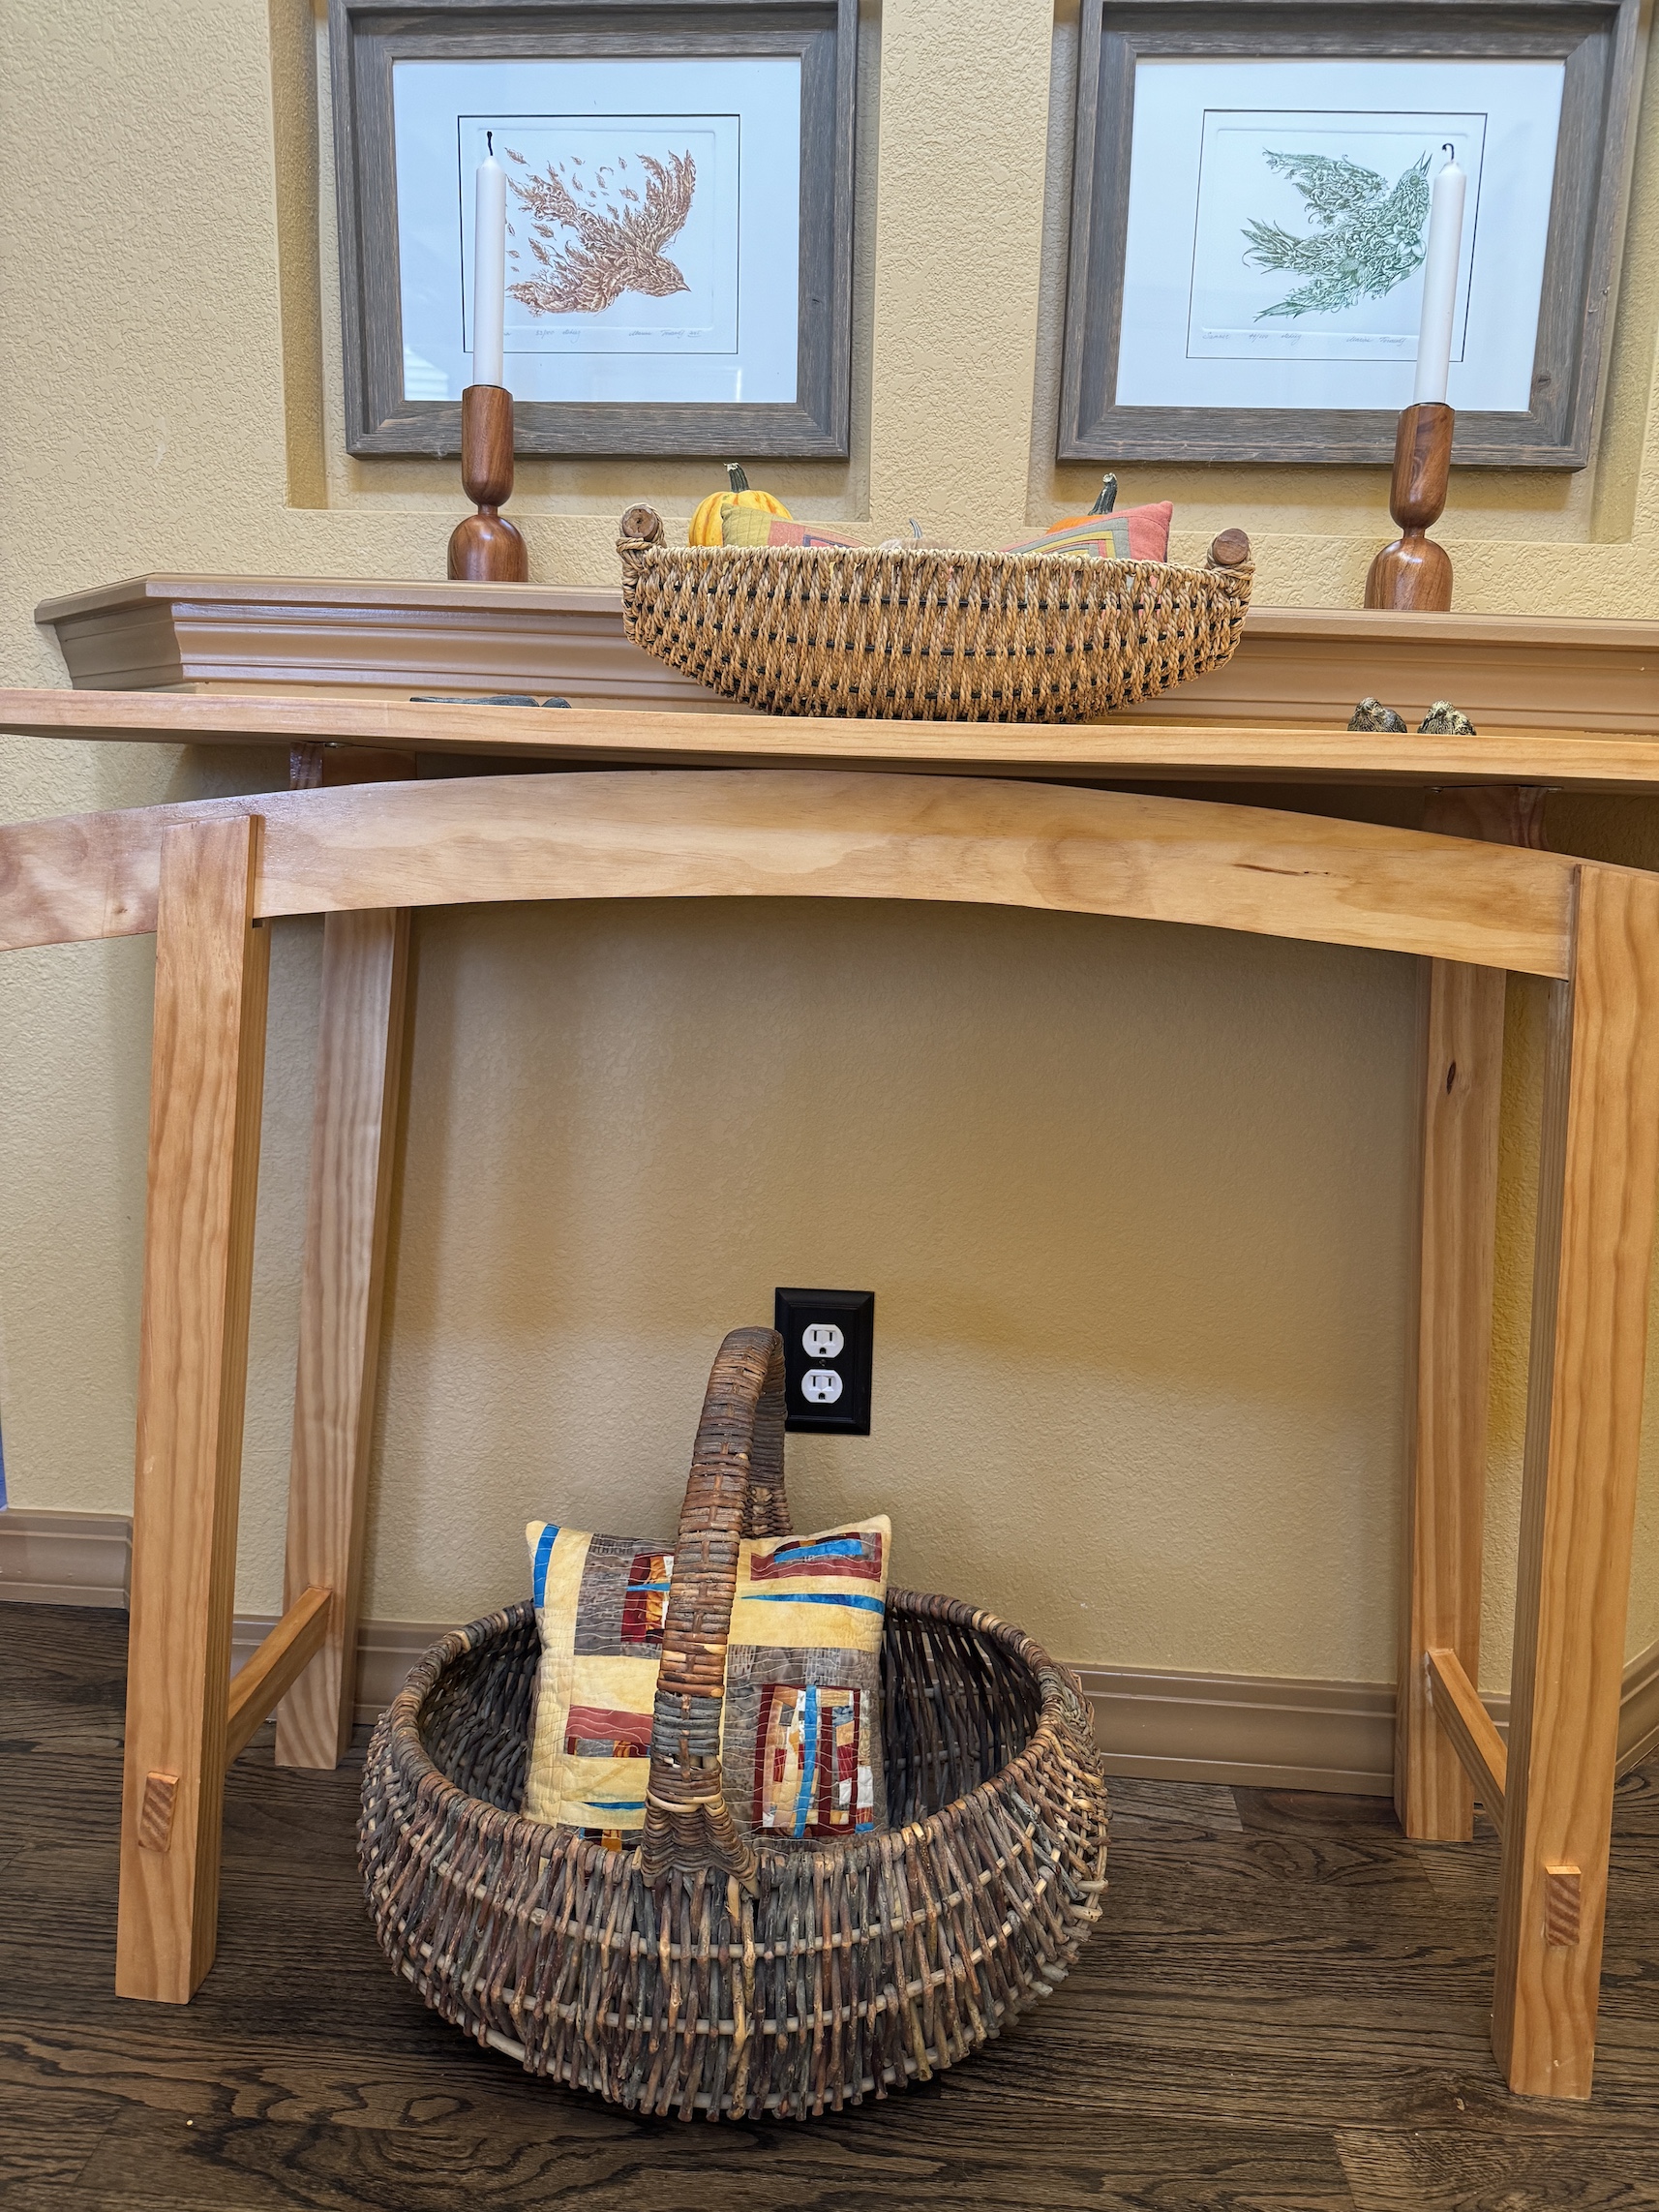
Oh and back to the pillow – for now I am keeping the pillow in the basket in the entry to our home in a basket under a table John built (see post From the Woodshop: Floating Top Hall Table).
Postscript
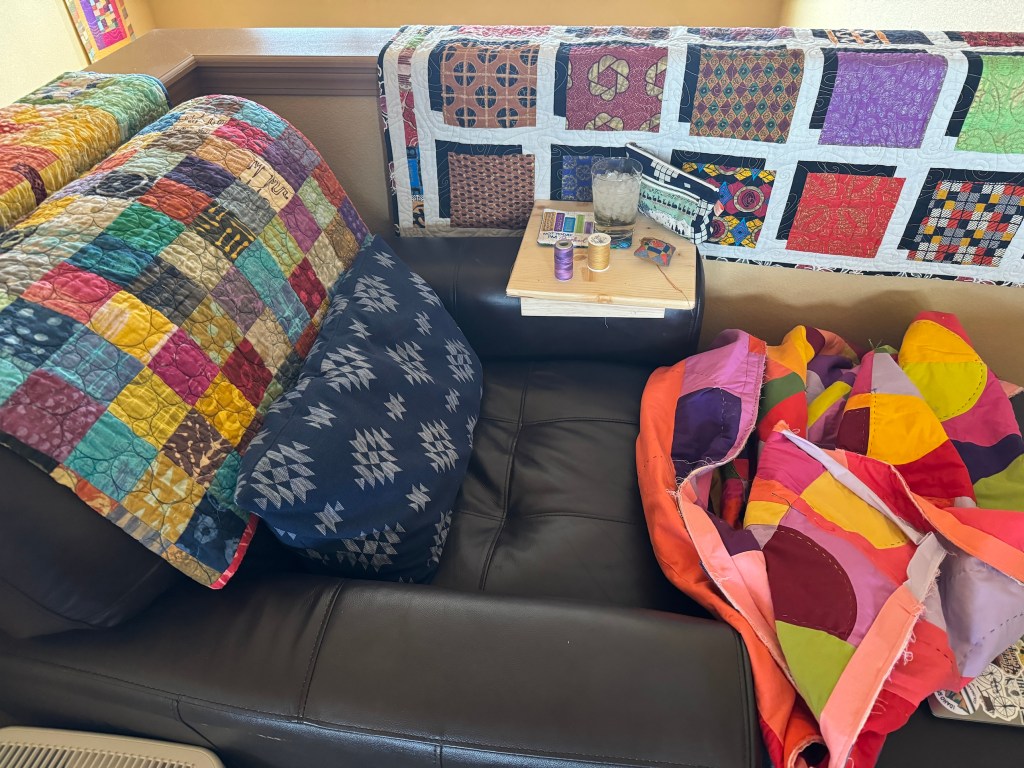
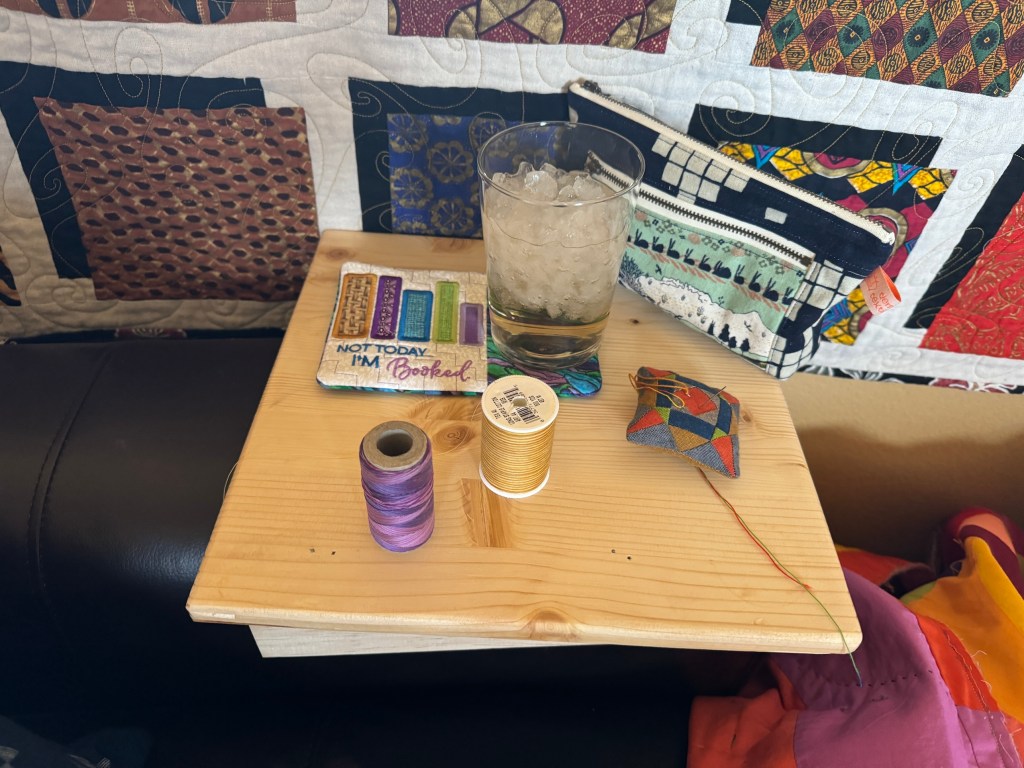
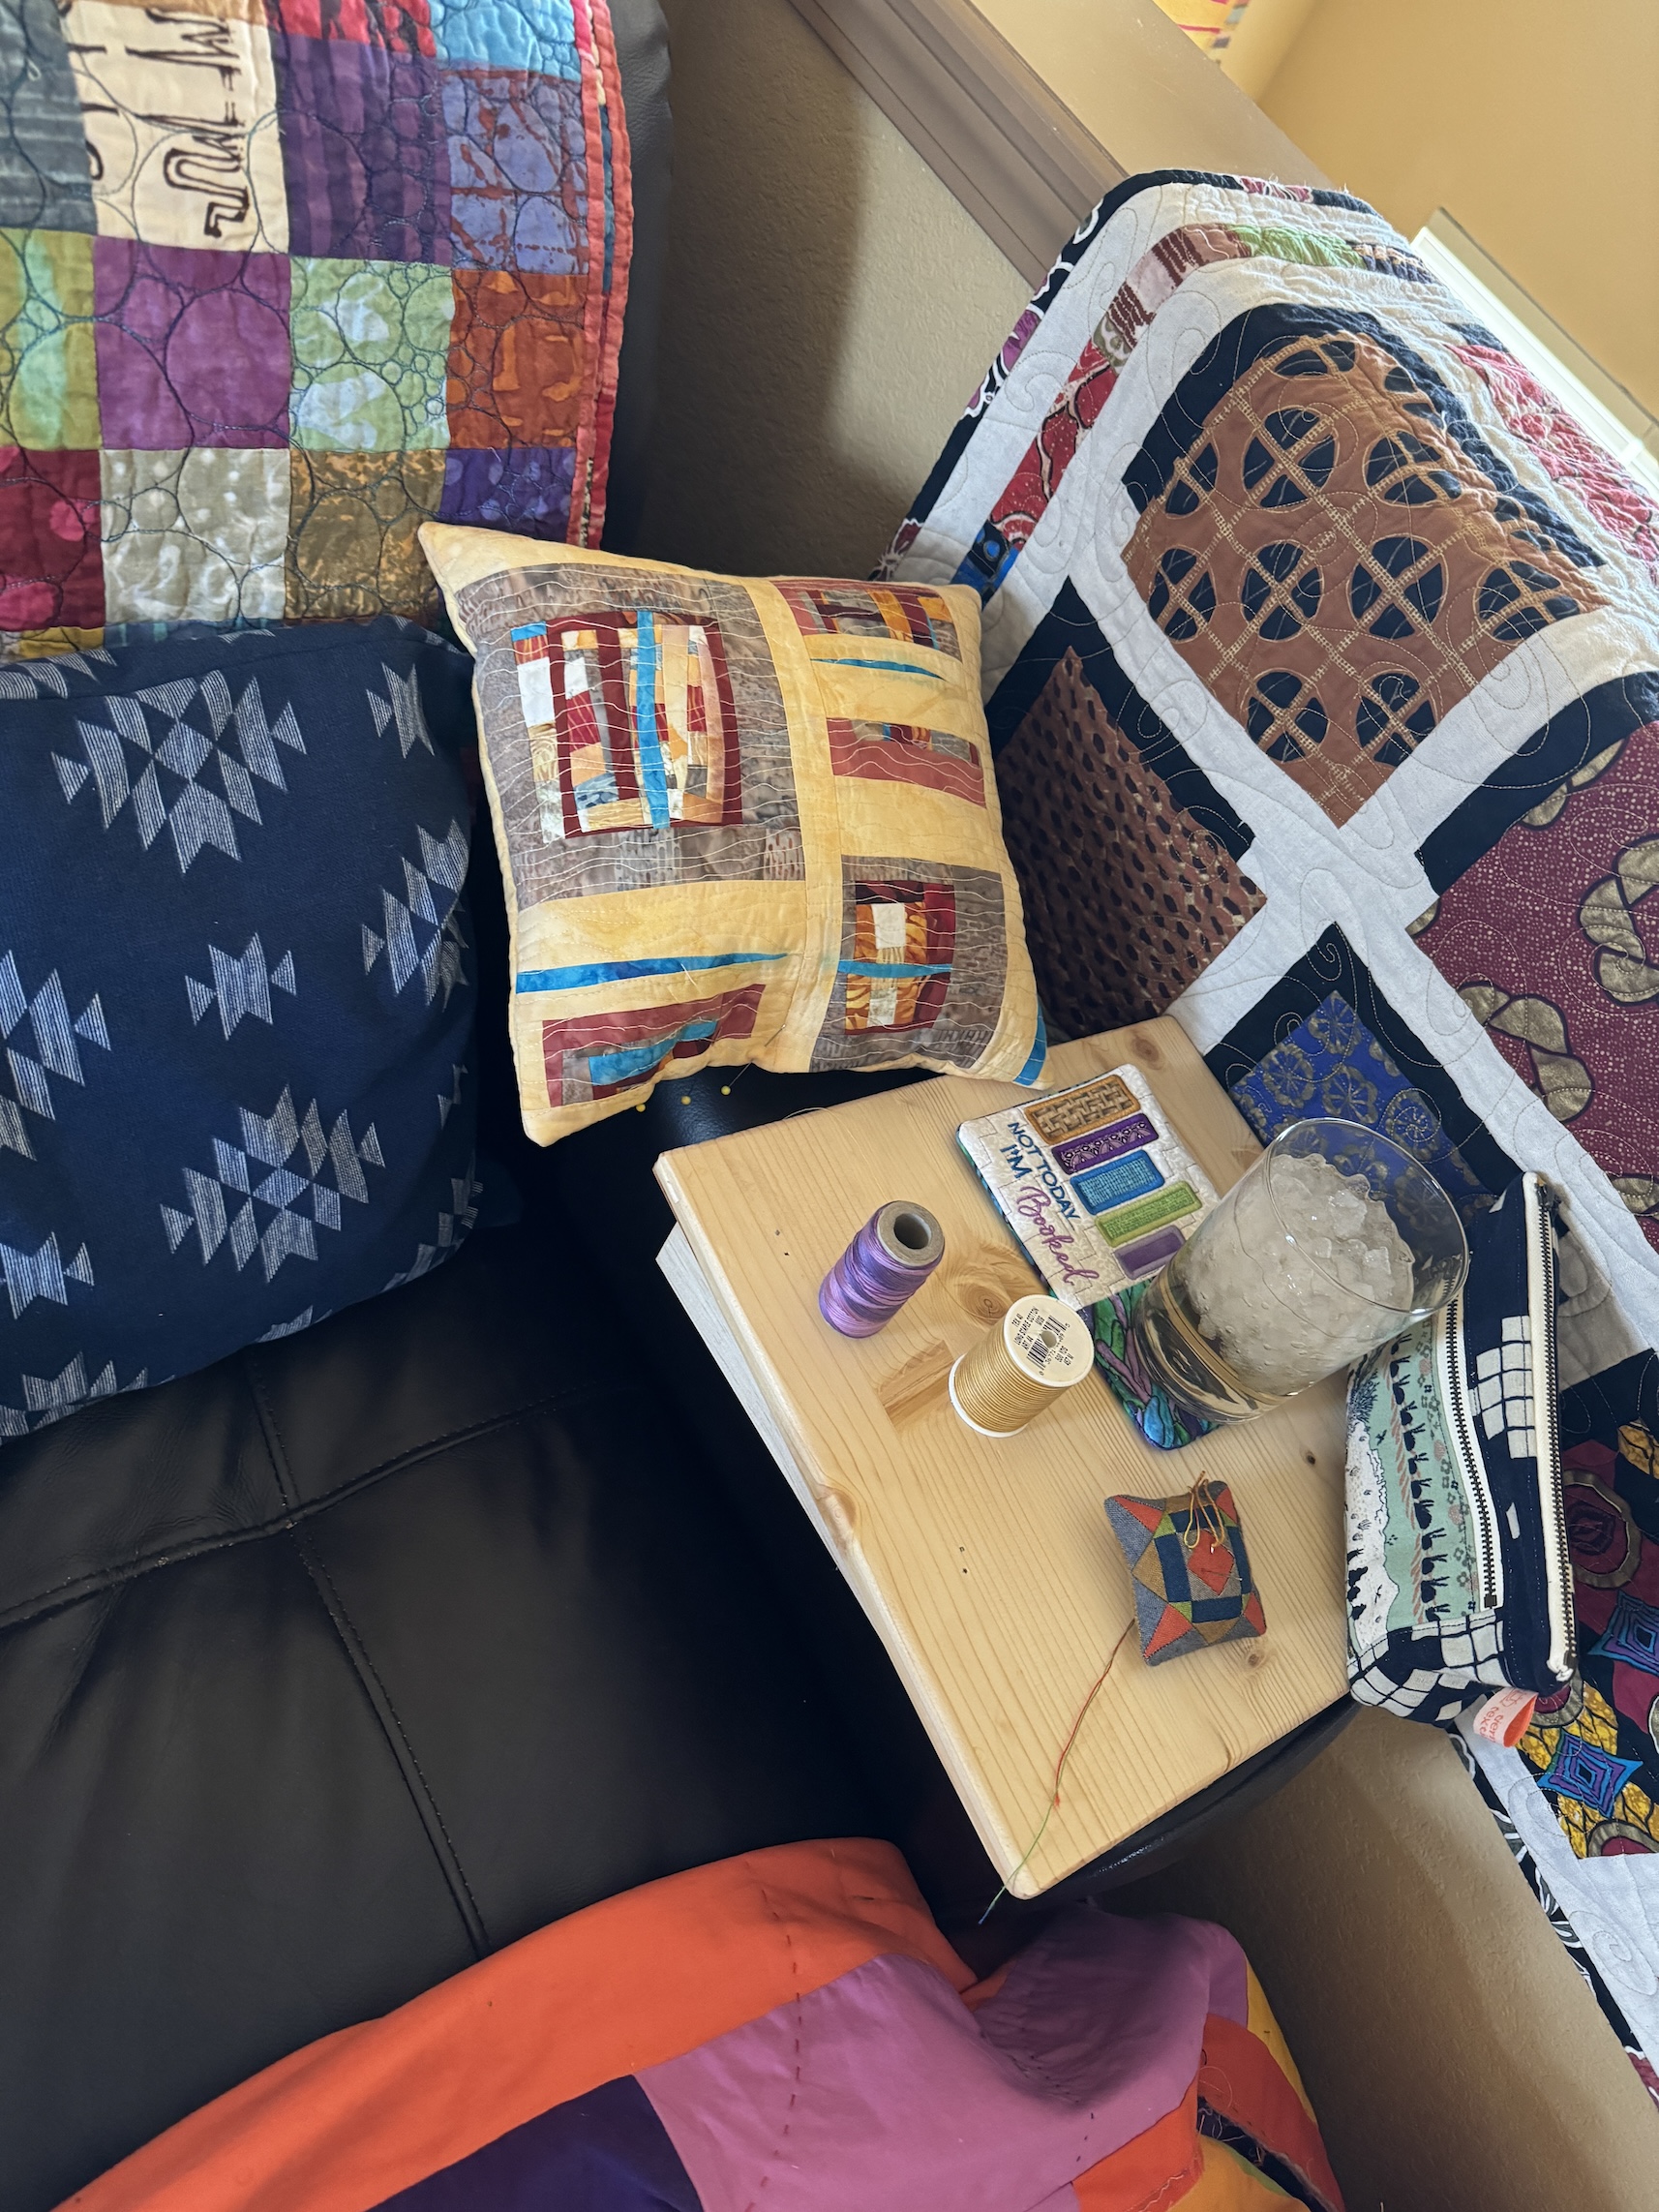
We had a chair at the top of the top floor stairs landing that I like to sit in and stitch. The other day John the Woodworker made me a little table to hang over on of the chair arms so I would have a table there.
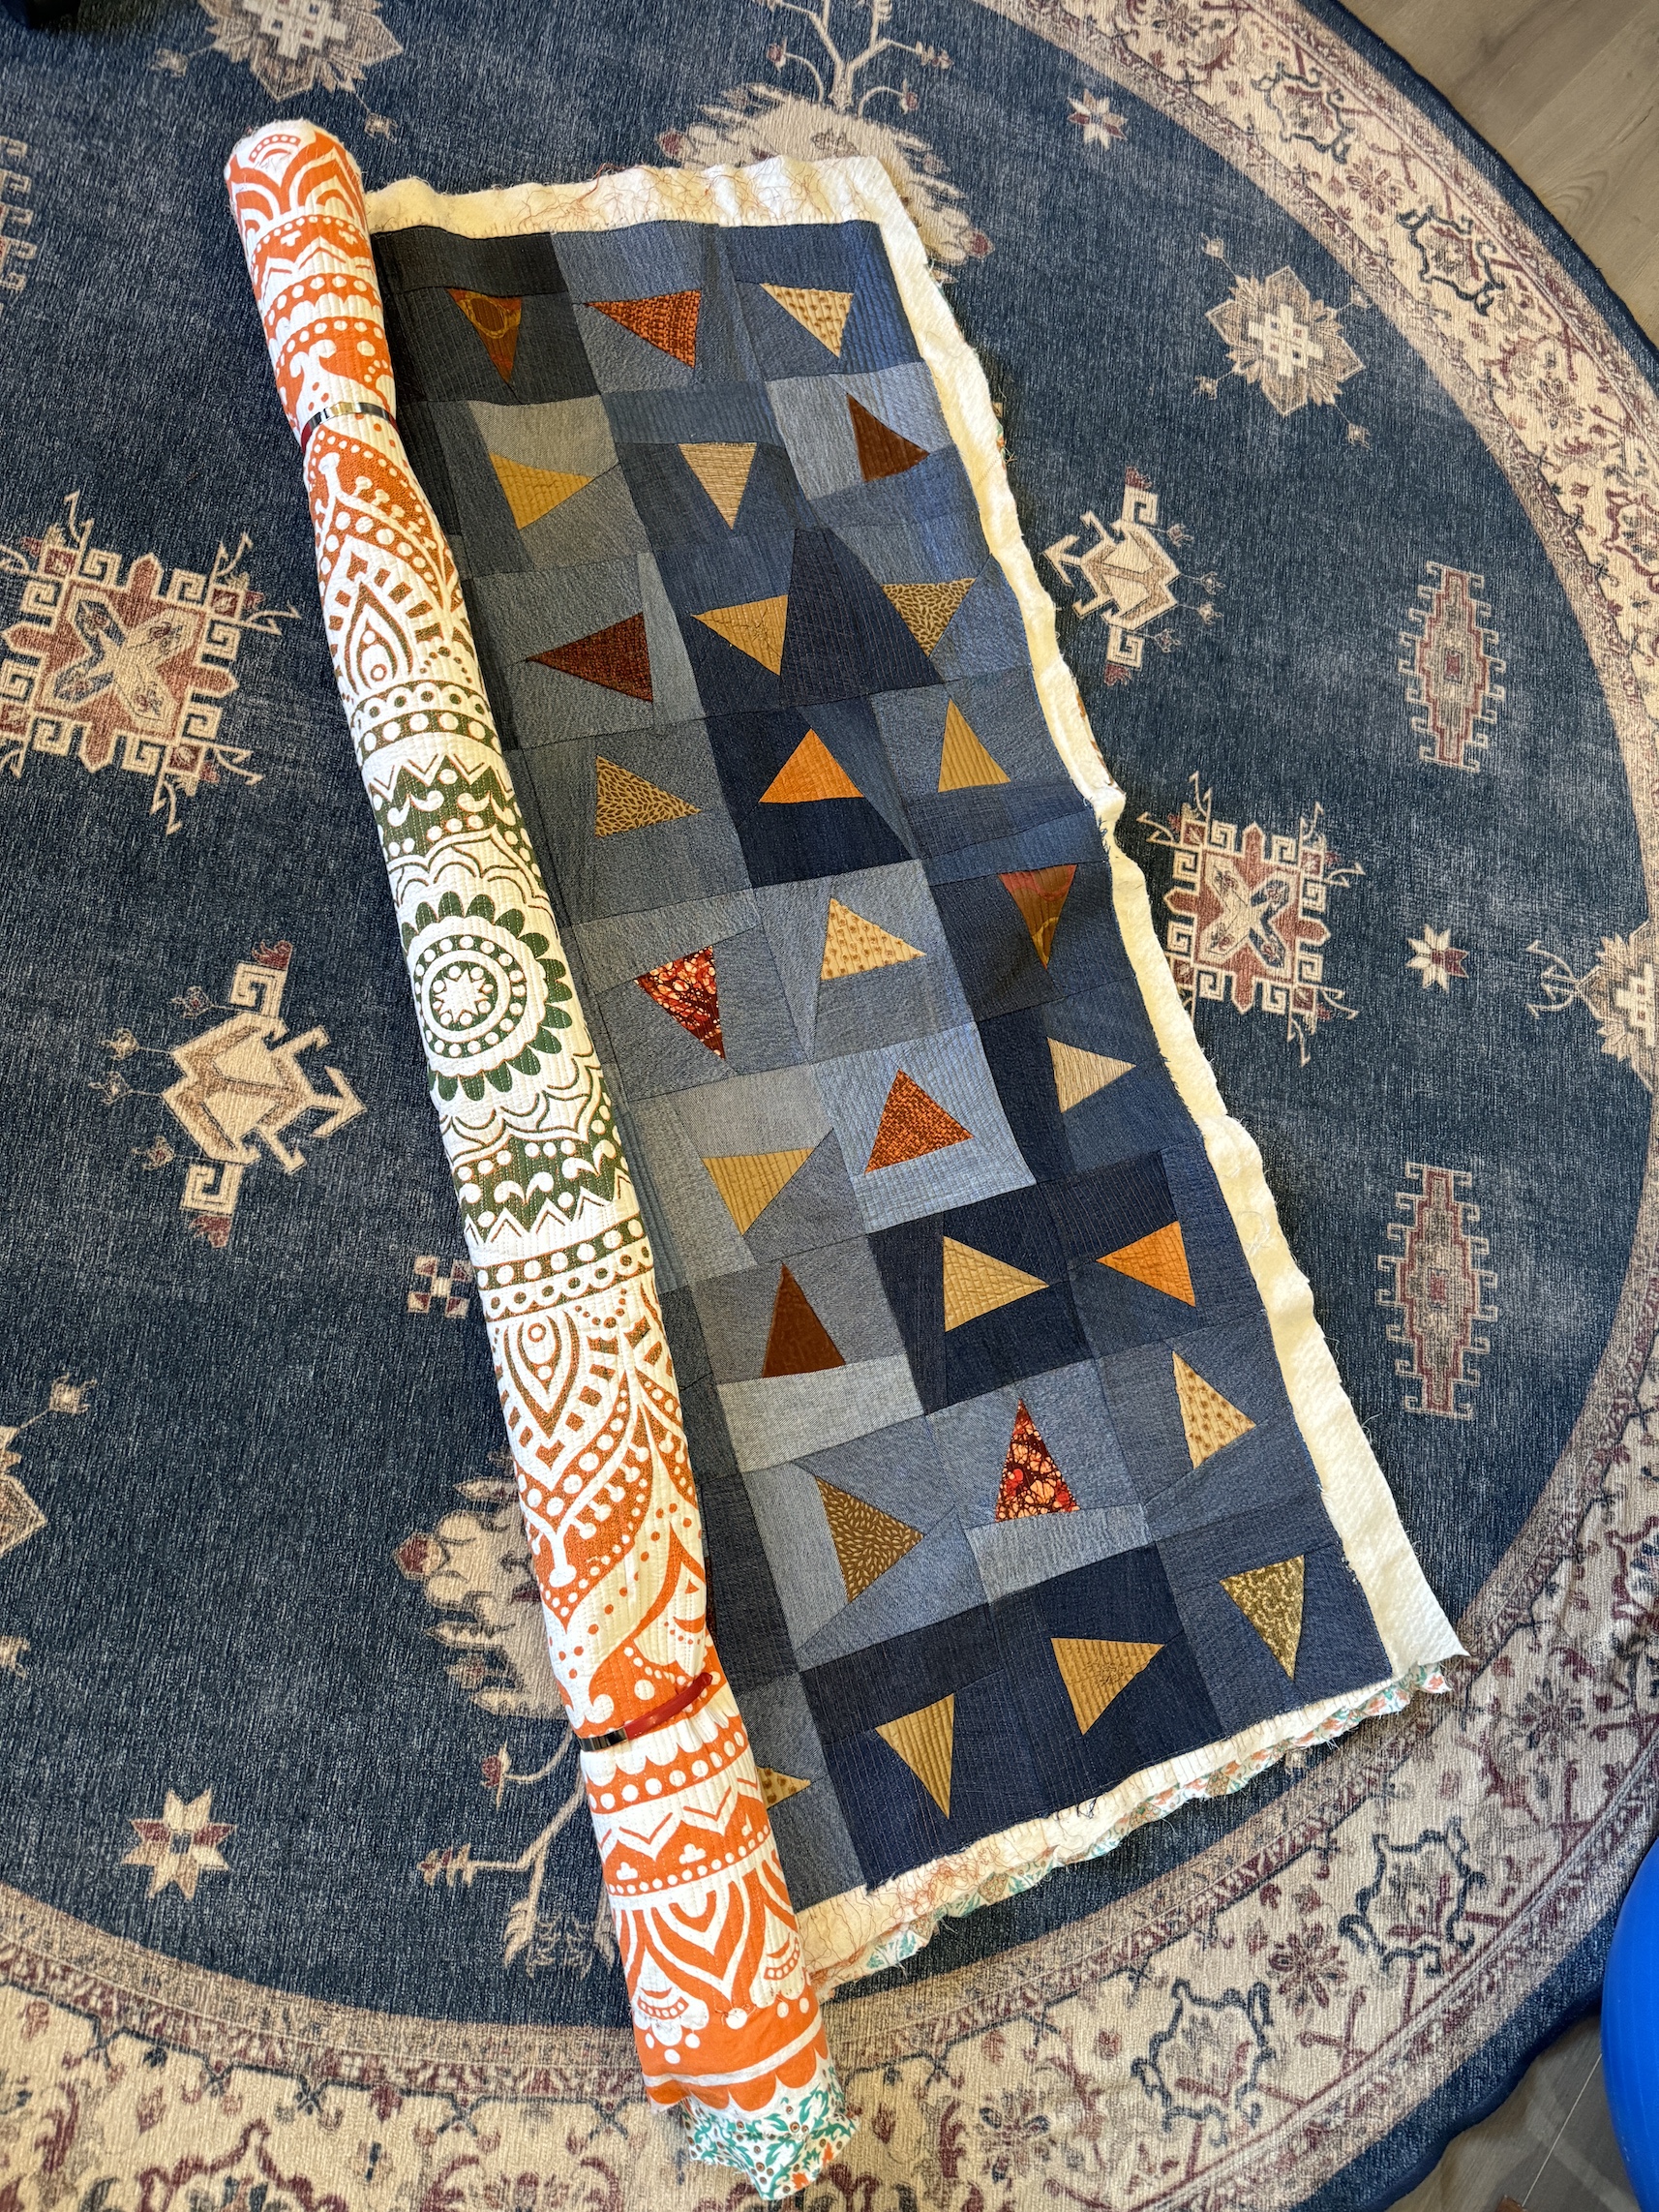
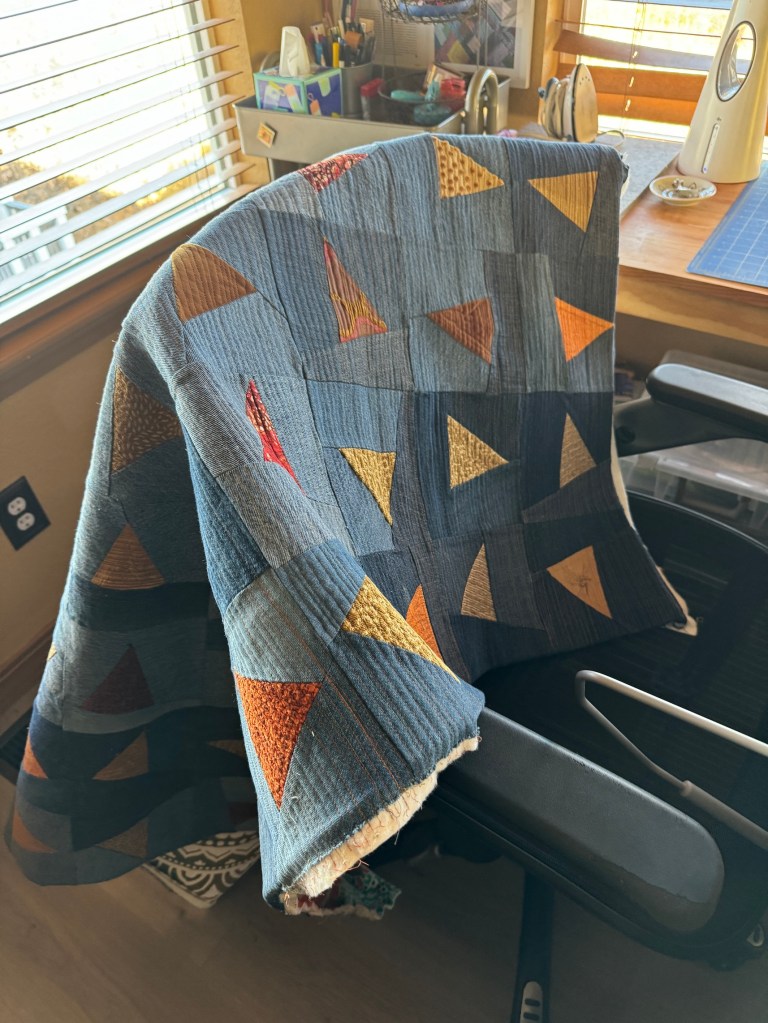
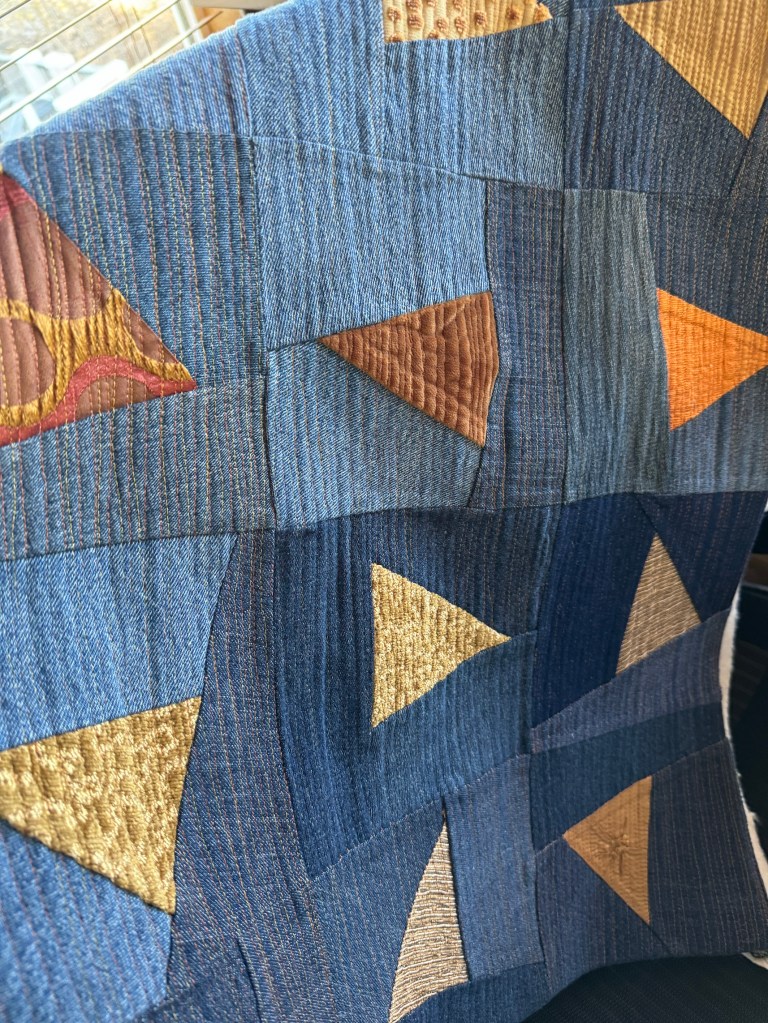
My quilting is a bit more “organic” with an occasional line touching or a little wiggle (why yes I of course planned that – ha!)
Here is the back of the quilt, I love the feel/texture of the quilting:
I cannot wait to finish it. I plan to do a “facing” instead of binding the quilt. Okay well back to work for me!
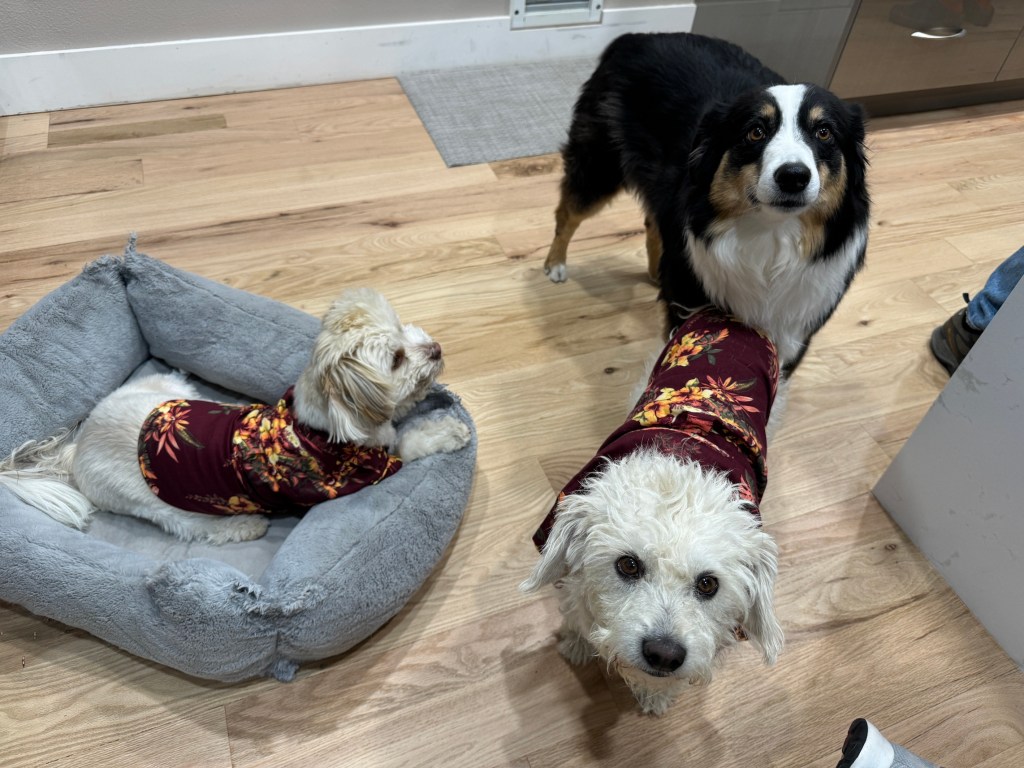
Postscript: Halloween Cuteness
Oh and here is some Halloween cuteness (yesterday was Halloween). We stopped over a friend’s house last night and they had two of their dogs in Hawaiian shirts dressed up as “Magnum. P.I.“ (if you remember that that 1980s show starring Tom Selleck):
Here are Pepi and Lewis doing their best Magnum, P.I. impersonations. Dolly the Aussie Shepherd was having no part in it!
Bet you can’t tell the dogs apart from Tom Selleck, right? Ha!
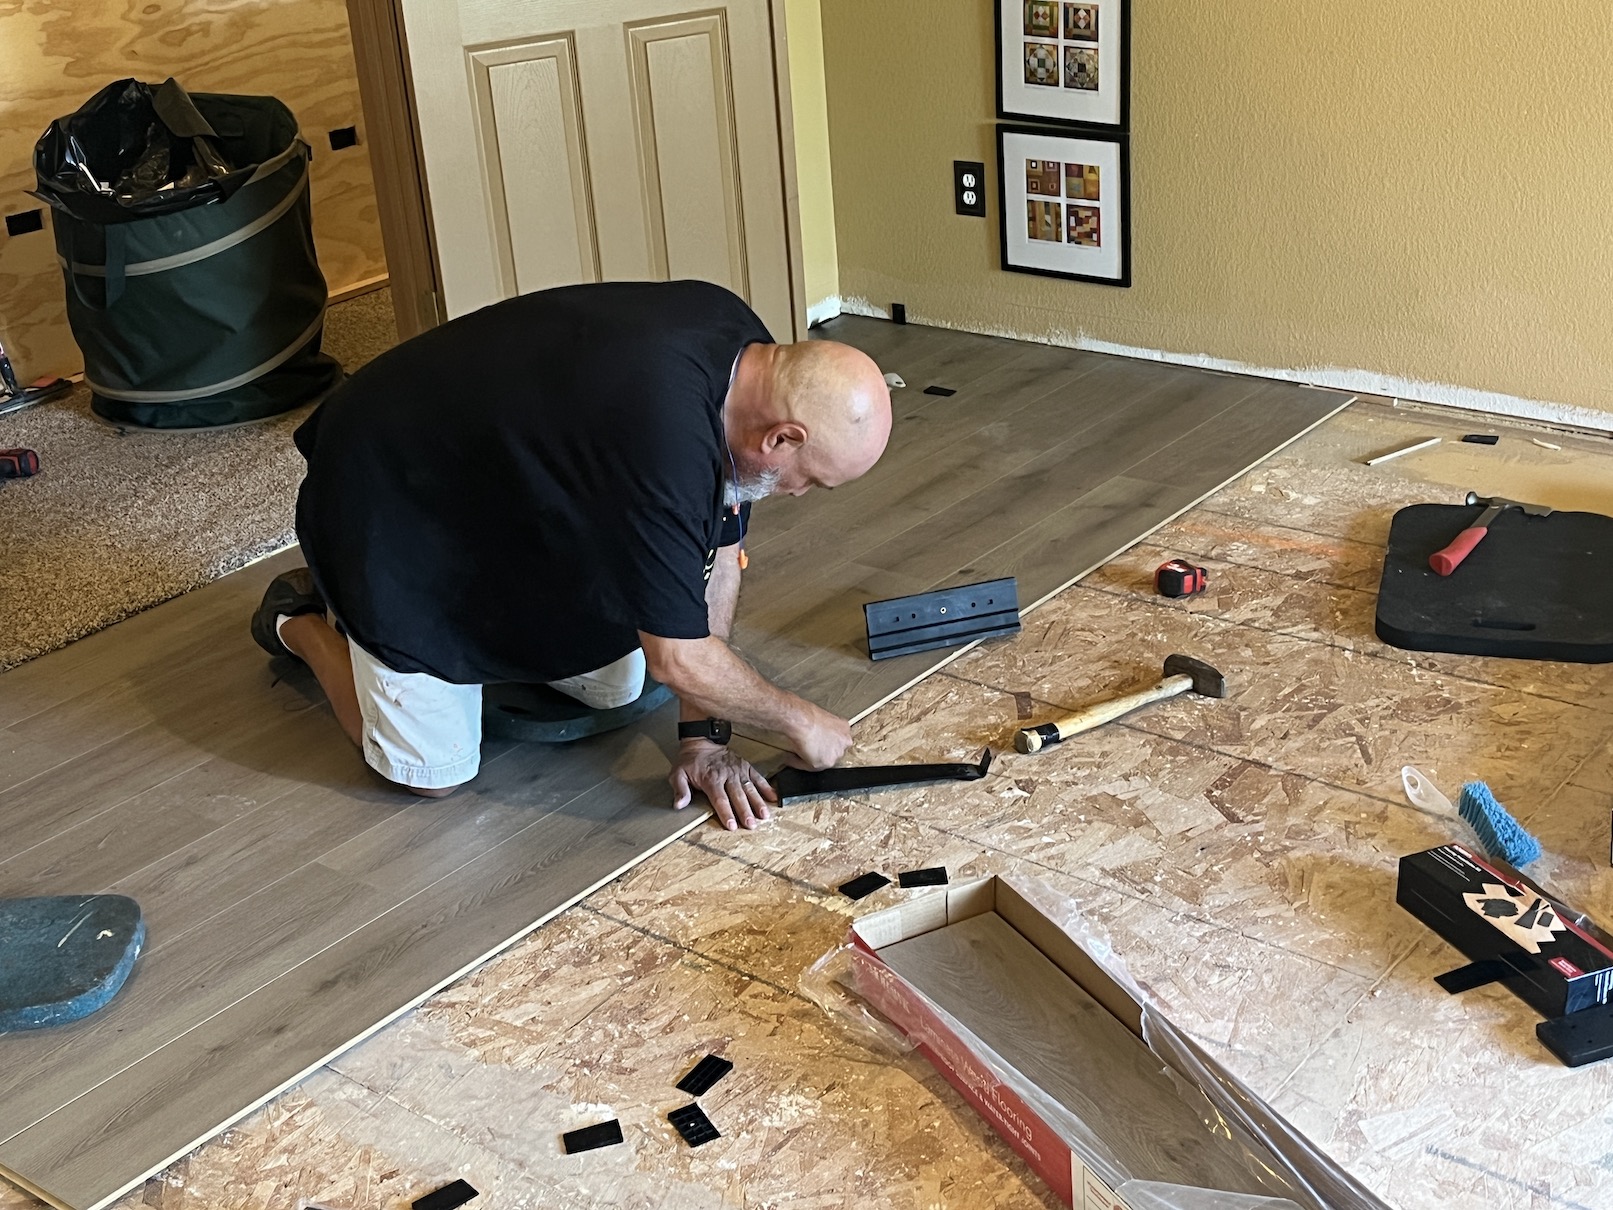
John finished installing the new floor in my studio on Sunday and then installed a new built-in shelving unit using industrial pipe on Monday.
Here is John working on the floor installation (and yes he watched a lot of YouTube videos as he likes to do with most projects he’s never done before):
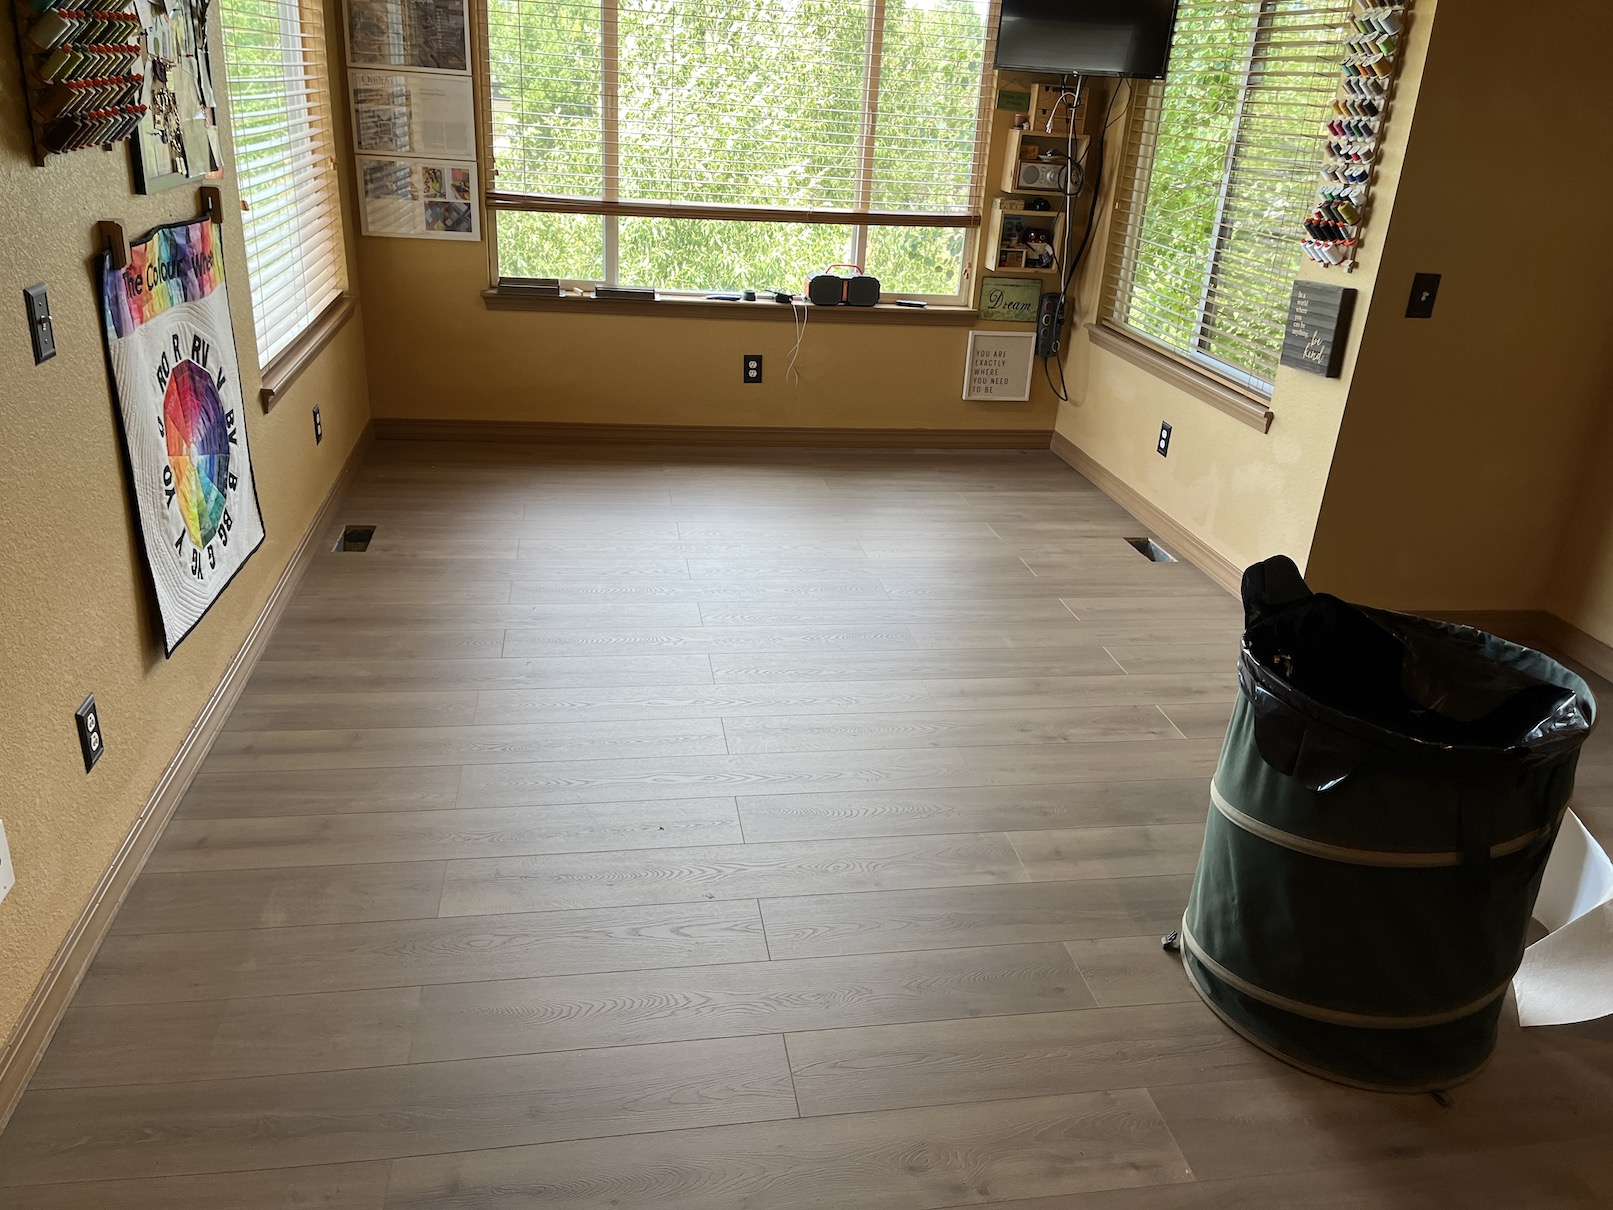
I took lots of installation photos but I will spare you and skip right to the finished floor photo:
I have no words to describe how excited and pleased I am to have the carpeting gone and have a floor in my studio.
Then I began the process of putting the studio back together (which took a couple days to finish up):
While I was working on putting the studio back together, John built a new shelving unit for my studio using industrial piping and recycled wood from another project:
And here is the reveal of the mostly put together room with it’s new floor (I am still refining my organization):
It feels so light and airy now with the carpeting gone.
I showed the progress on my @tierneycreates Instagram and someone comment: “Awesome, now back to work”.
Yup, with the new studio floor I need to get myself in gear to start making things again!
My studio is located on the second floor of the house and is located in the former “Primary Bedroom” (I discovered there is a shift from using the term “Master Bedroom” to “Primary Bedroom” in the world of real estate) – see post A “New” Studio about the change to the Primary Bedroom for my studio in Spring 2022.
The studio has a carpet which is not in the best condition and for a couple years I’ve dreamed of getting rid of the carpet and putting in some type of hard flooring.
See the ripples in the carpet
We found a great deal on high quality wood laminate flooring and John plans to start working on removing the carpeting and then laying the new floor down this weekend, so it was time to clear out my studio.
Oh my. There was more stuff in my studio than I realized and we had to scatter the stuff all around the 2nd floor to include the primary bathroom closet, the upstairs guest bedroom/office, our bedroom, and the upstairs hallway.
It took me 2+ days to get the stuff moved out of the studio. It started slowly with moving in some fabric to the guest bedroom:
But then more and more stuff went into the guest bedroom…
Then it grew to this…
Until it finally ended up like this:
Here is the evolution of cleaning out the studio in photos:
The last image above shows how icky the carpeting is and why it needs to go!
The hallway is filled with stuff and it looks like chaos upstairs!
I’ll share photos again when the project is done and I will surprise you on what the flooring looks like as I forgot to take a photo of the large stacks of flooring currently in the Primary Bathroom closet.
Two Sundays ago, right before the Super Bowl game, I decided that I needed a studio refresh after I had completed my year long purge of my fabric stash.
It began in Winter 2023 while I was recovering from a broken ankle where I realized that 1/2 my fabric stash was fabric that other quilters had generously given me over the years. This happened with my fabric scrap stash and my UFO pile and I purged and donated what I didn’t want any longer.
It was now time to get really honest with my fabric yardage stash (again, as I’ve had other purges); and a couple Sundays ago I finished what I began in early 2023.
In addition to the fabric purge, I did some reorganization in my studio.
Here is my studio the morning of Super Bowl Sunday:
I realized I needed more vertical storage so I repurposed some of the wine crates I was storing scraps or fat quarters in and had John mount them to the wall:
And here is the “refreshed” studio right before it was time to sit down and watch the game:
Someone (or someones) are going to have a very happy surprise at the charity thrift store as I donated bags and bags of fabric. I now mainly have fabrics that I have selected/purchased or those others have given me that I REALLY LOVE.
I mentioned in my previous post What’s Going on in the Studio, that I was planning on enlarging the small lap quilt/wall hanging size quilt I made Go Boldly (quilt pattern by Elisa’s Back Porch Designs) which was 56 inches by 56 inches (142 x 142 cm), since I had a lot of extra blocks:
Well, here is the expanded quilt after I laid out additional blocks on my design wall (I still need to sew them together to the existing quilt):
As part of what’s up on the design wall is a sewn together quilt and the other part are individual blocks, I can’t tell you exactly how big the expanded version will be (without doing a lot of pesky math subtracting seam allowances, etc.). However what is currently up on the design wall measures approximately 86 inches x 86 inches (218.5 cm x 218.5 cm).
Believe or not I still have 48 sections leftover and I plan to make them into 12 blocks (each block has 4 sections) that I will piece together as part of the back of the quilt.
I’ll sew it all together after I finish machine quilting Strings Attached:
I thought I’d do a quick share of what is currently going on in my studio…
1) Sewing Machine Cleaning – it was time for a deep clean after I finished quilting SuperSymmetry Table Runner (see post SuperSymmetry Table Runner is Finished!):
2) Expanding Go Boldly – I decided to make Go Boldly bigger as I had more pieced blocks. Originally I was going to make two quilts with the block but now I think I will make one big one and then use any left over blocks for a pieced quilt back. I now have it up on the design wall to work on enlarging it:
Right now the quilt is 56 inches by 56 inches (142 x 142 cm) which is wallhanging or small lap size, but I should be able to bring it to large lap size or perhaps a bed size (perhaps…) with the expansion.
3) Strings Attached– I decided to go ahead and get it ready for machine quilting. I made the quilt sandwich with batting and backing fabric and I plan to just go ahead and machine quilt it with coordinating red thread and just get it done!
4) What Direction Do I Go – just waiting to start hand quilting in the evening in front of the TV. First I have to finish the gray granny square blanket I am working on in the evenings in front of the TV (see posts Guest Blog Post: Progress on “My Blanket” and Update on Some W.I.P.s on the crochet project). I received some awesome hand quilting advice from one of my blogging buddies and I cannot wait to start on it, I even put together my little hand quilting bag of supplies which is lying on top of the quilt in the image below:
I feel like I am really moving forward on my projects (because there are new ones I want to start but not allowing myself to until I finish these!) 🙂
All quilted and on the dining room/library table now!
After I finished quilting it and putting on the binding, I decided to launder it (and then try and iron out wrinkles) so it was ready for any future laundering after spills. I want it to be a “working” table runner that will stay on the table during a meal.
(Before company comes for dinner I will give it a better pressing, I was just so excited to put it on the table!)
I am plugging along with this great-to-work-on-while-watching-TV in the evening project. I’m working on attaching the 7th row of blocks. It will be an 8 by 10 blanket when done as I made 80 granny squares. I will add an extra border or two of the same yarn I am using as the lattice (to attach the granny squares).
As I mentioned in that previous post, I decided to use a collection of traditionally pieced “orphan blocks” that my friend Wendy gave me as the backing for this table runner.
I figured that if I got a stain on the front of the runner while entertaining, I could flip it over and use the other side!
I’ve completed the machine quilting of the table runner and just need to sew the binding strips together, sew on the binding, and sew down the binding.
For the quilting I just went with a simple double crosshatch pattern (no that is not a real pattern name, I just made it up on the spot), following the lines of the pieced blocks.
I plan to press it, ha! It just came off the machine and I just finished trimming off the excess batting and backing so it is pretty wrinkly!
I am so looking forward to hand quilting this quilt (yes I decided to hand quilt it)!
I got the batting and backing put together with the quilt top to make the “quilt sandwich”. I’ve also auditioned some threads (I plan to use multiple and to use pearl cotton weight) for the hand quilting.
Other WIPs Growing Inpatient As They Sit in Queue…
I have two more quilt tops awaiting quilting by me:
I haven’t decided on machine vs. hand quilting but if I do hand quilt it I have some cool threads I collected many years ago I want to use.
I will get to these two quilt tops eventually – ha!
I’ve been trying not to start any additional MAJOR projects before finishing my existing WIPs…but then some small projects might sneak in…you know how us crafters are!
Oh Mike wants me to tell you that he’s happy he doesn’t have to fill in for me with blogging since I seem to be back at it again (see his recent post Guest Blog Post: Humans Traveling and Dog Camp).
This leaves him more time for napping in the sun, on fleece blankets, in the upstairs bedroom (with the occasional waking up to intensely bark at people walking by and delivery trucks coming into the neighborhood).
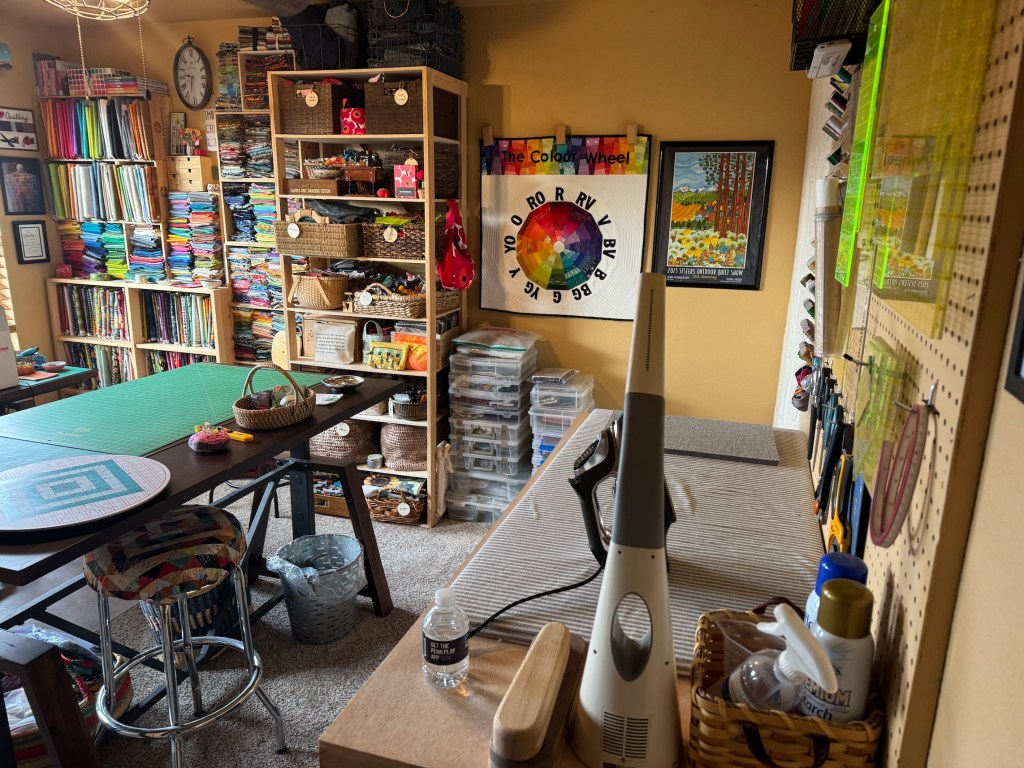
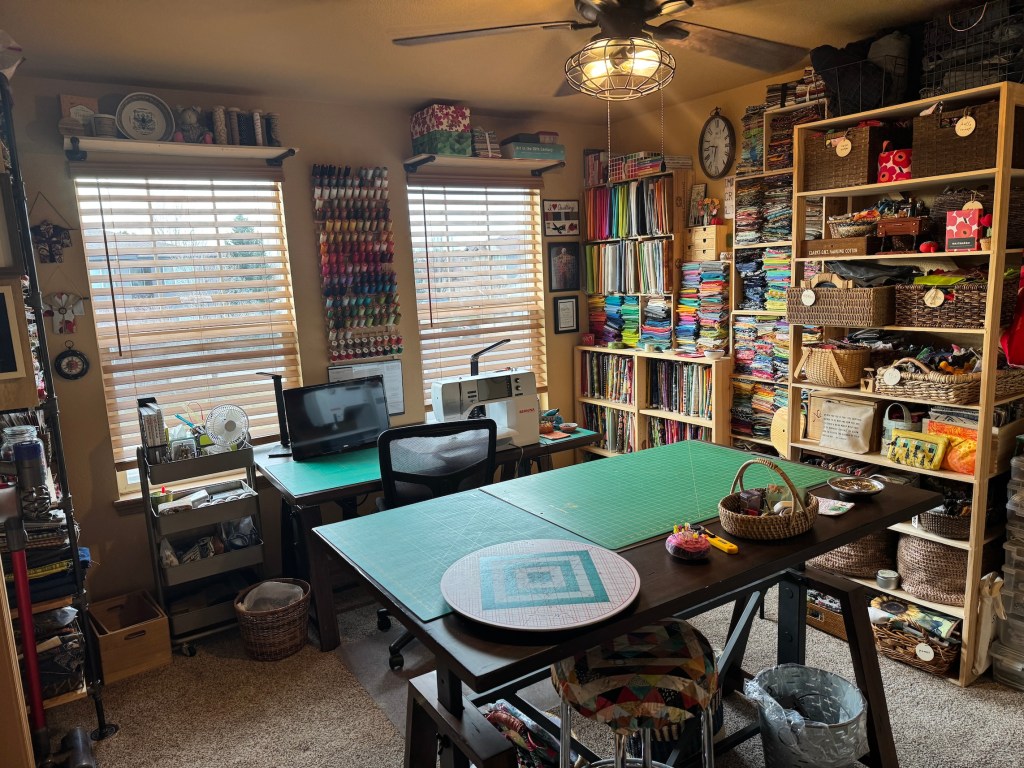
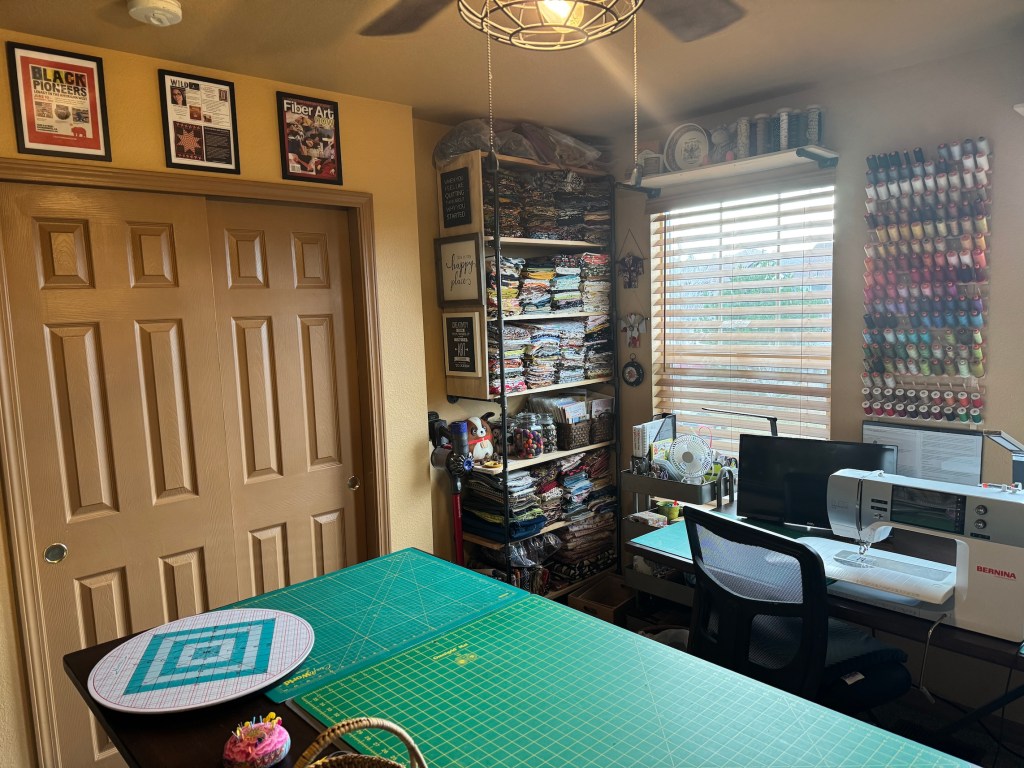
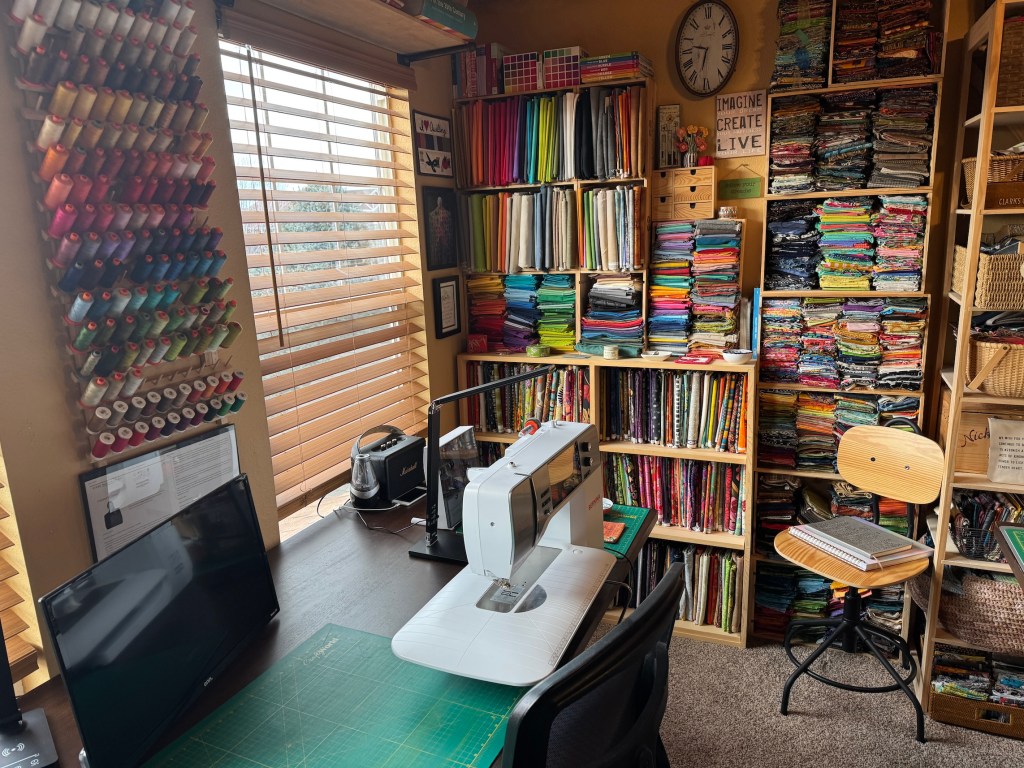
Recently I mentioned in the postNew Use for the “Big Closet” , that I moved my fabric storage out of a closet and into my studio (so I could easily see what I have in my fabric stash and “shop at home”!). I thought I’d share the latest set up of my tierneycreates studio which is our former Master Bedroom that we turned into my studio in 2022 (see postA “New” Studio).
Here is the view when you first walk into the studio:
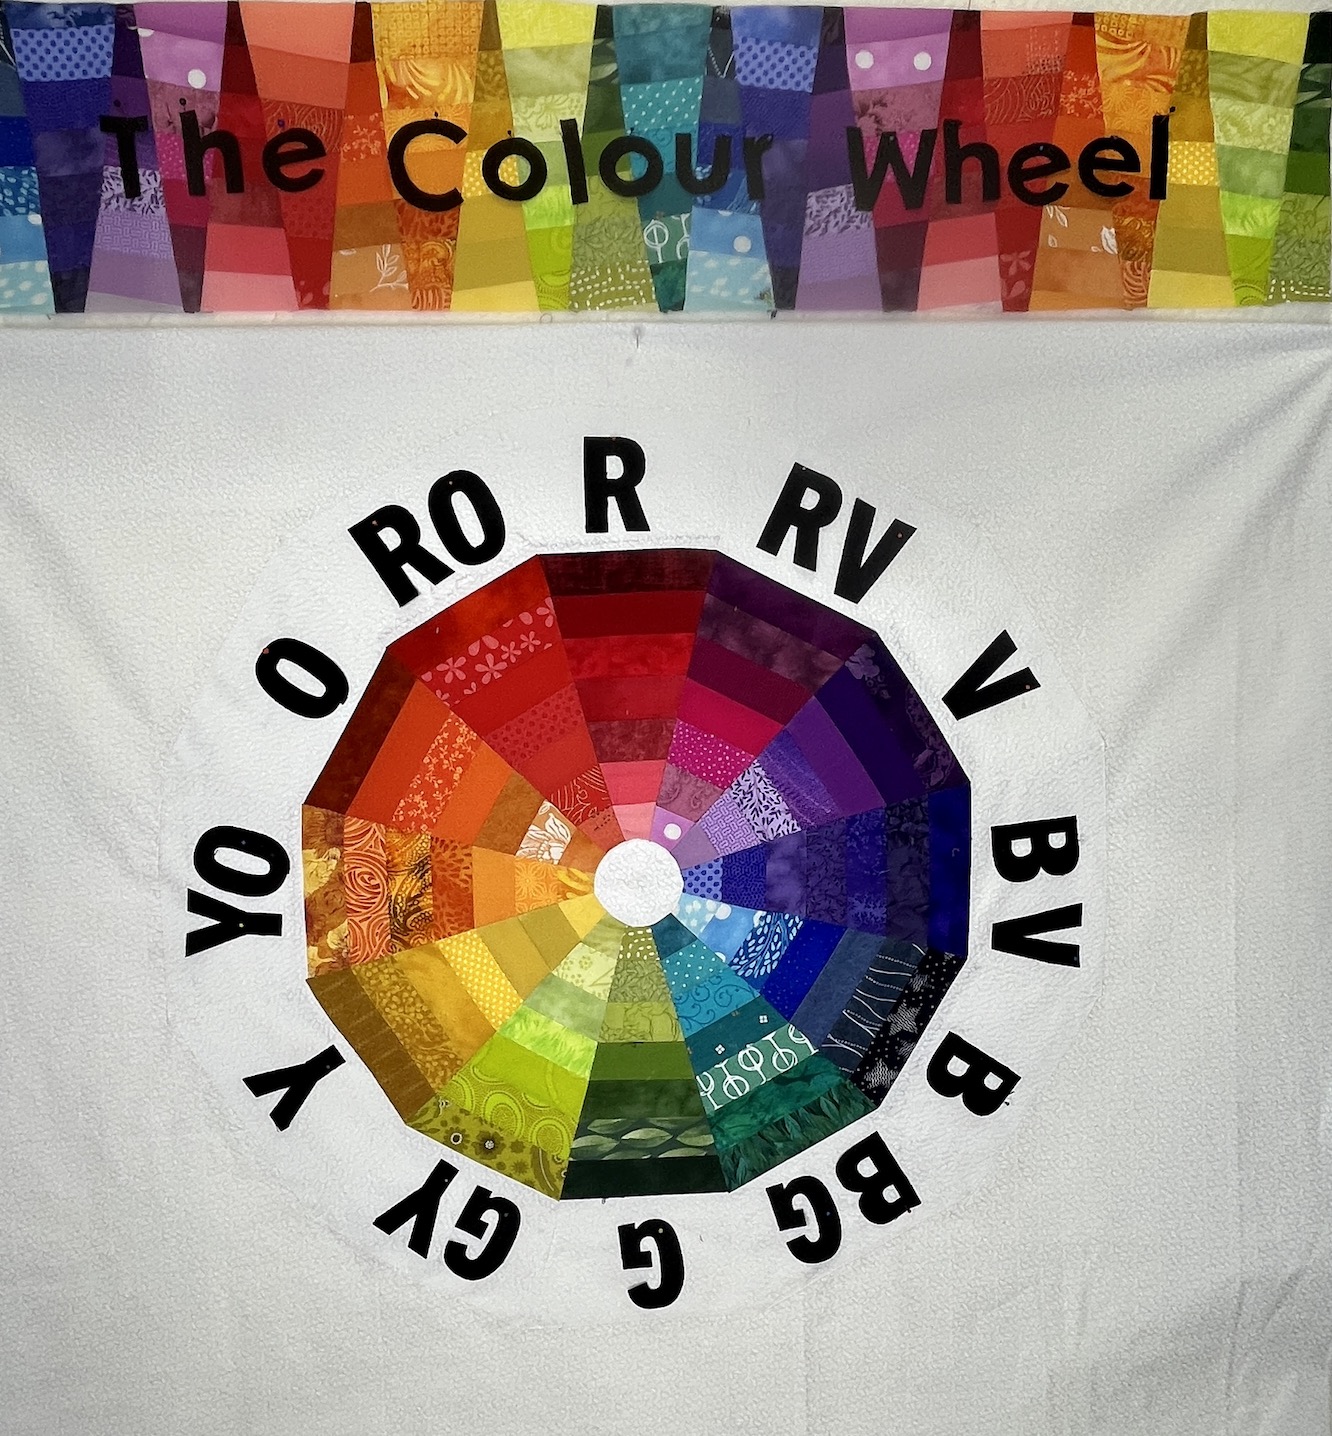
Here you can see my obsession with color and Aurifil thread (the color chart mounted on the wall is the Aurifil palette/catalogue):
If you are new to this blog and curious about that color wheel quilt I made, here is a blog post on it – The Colour Wheel Quilt is Done.
Here is my fat quarter and fabric scrap storage area:
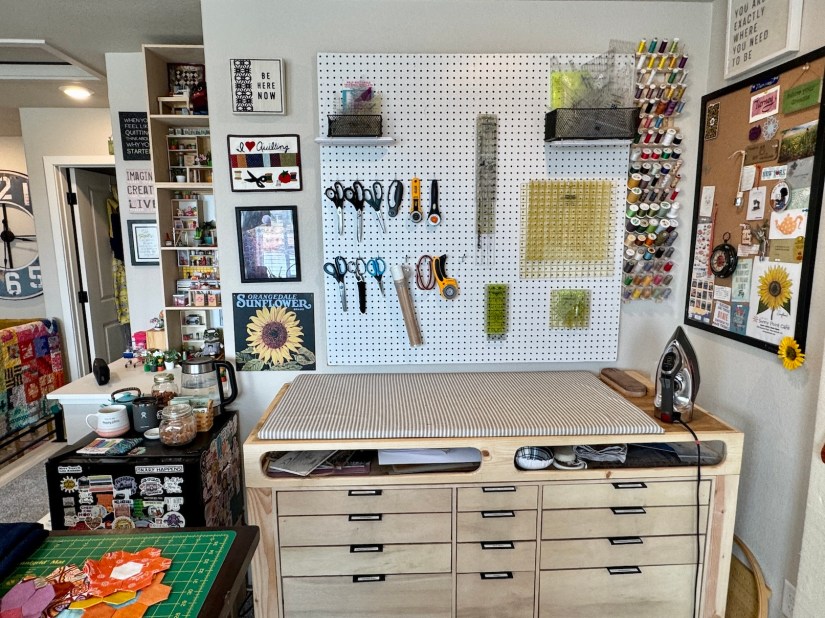
Ironing station, cutting table and pegboard storage area:
Here is where I am storing my fabric, sorted by either designer or type (including solid colors, batik, etc.):
Here is my sewing table:
I probably should have turned on the light above for better lighting of the image but you get the general idea.
And here is the design wall:
Right now the room is carpeted, because it used to be a bedroom, and the plan in 2024 is to remove the carpet and install hardwood floors. I am also thinking of painting it a white or cream to brighten/improve light reflection.
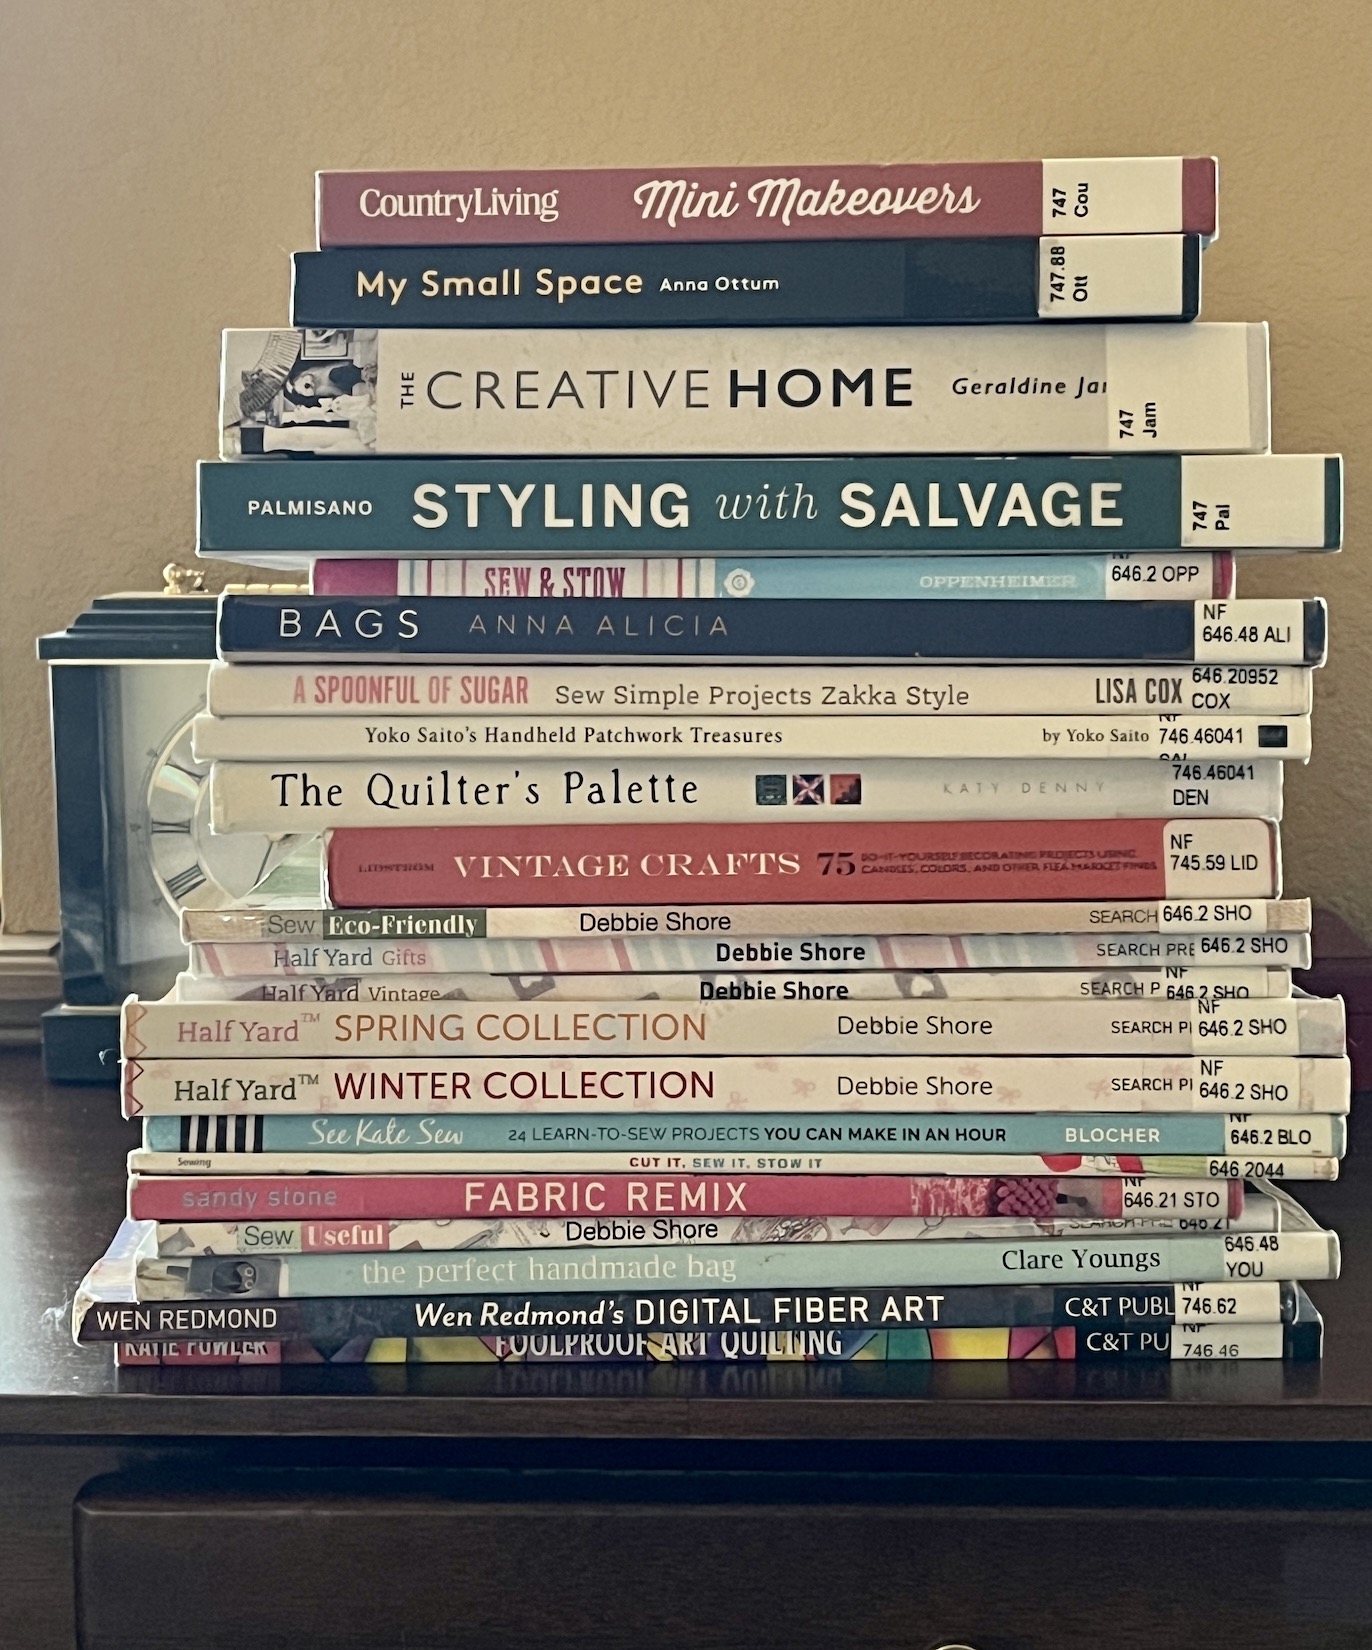
Again, it’s been a while since I’ve written any posts for my blogging topic category – The Library Stackwhere I share my latest stack of local library books I’ve borrowed.
In this quick post I thought I would share my latest stack, recently acquired when I browsed the library “unrestrained” (by common sense and no longer being hindered by hobbling around in a walking book):
Yes it’s a bit ridiculous and I am not sure what happened to me while browsing (I guess I had an “out of body” experience) the library. It was the first time I was able to drive myself to the library and browse independently since I broke my ankle in January 2023.
Surprisingly I was able to haul all these books to the library’s check out station using a tote bag (and taking the elevator, there was no way my ankle was going to get me all the way down the library stairs!).
My plan is to flip through these books while I have breakfast each morning.
I think that is all the time I should allow this stack as I need to keep working on finishing my Colour Wheel Quilt that I most recently blogged about in this post Update on the “Colour Wheel” Quilt.
I just finished wrangling the quilt, with just the batting attached (to act as interfacing), under the sewing machine to machine applique down all those letters. So I am moving forward despite distraction from my latest (and unrestrained) “Library Stack”!
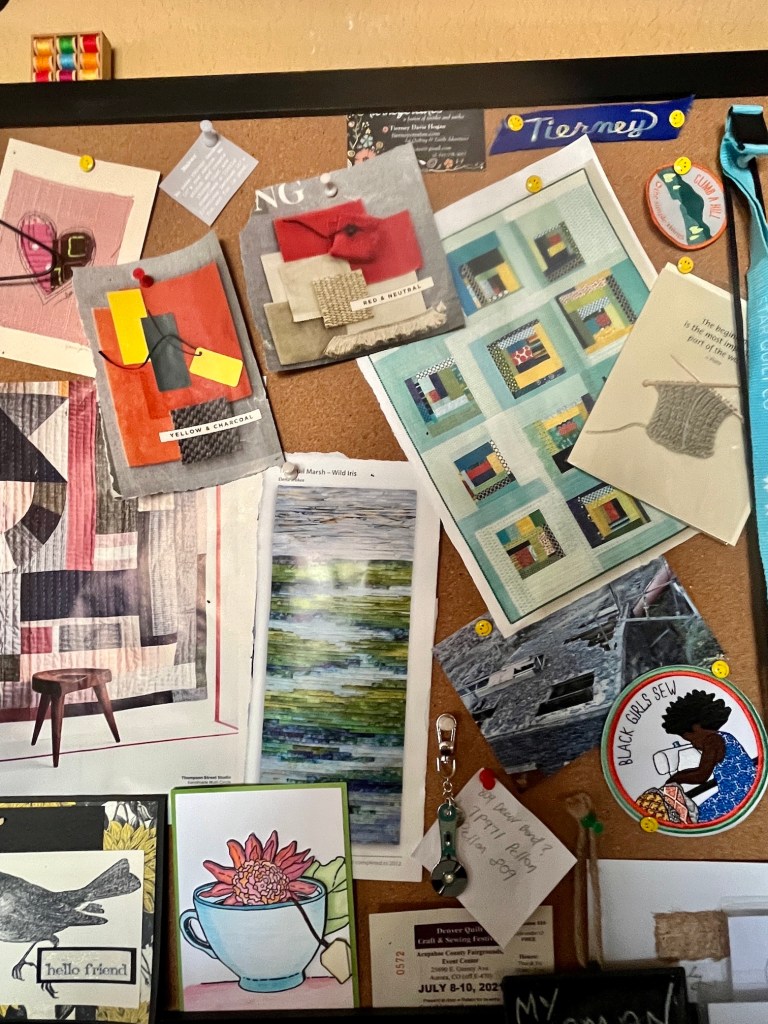
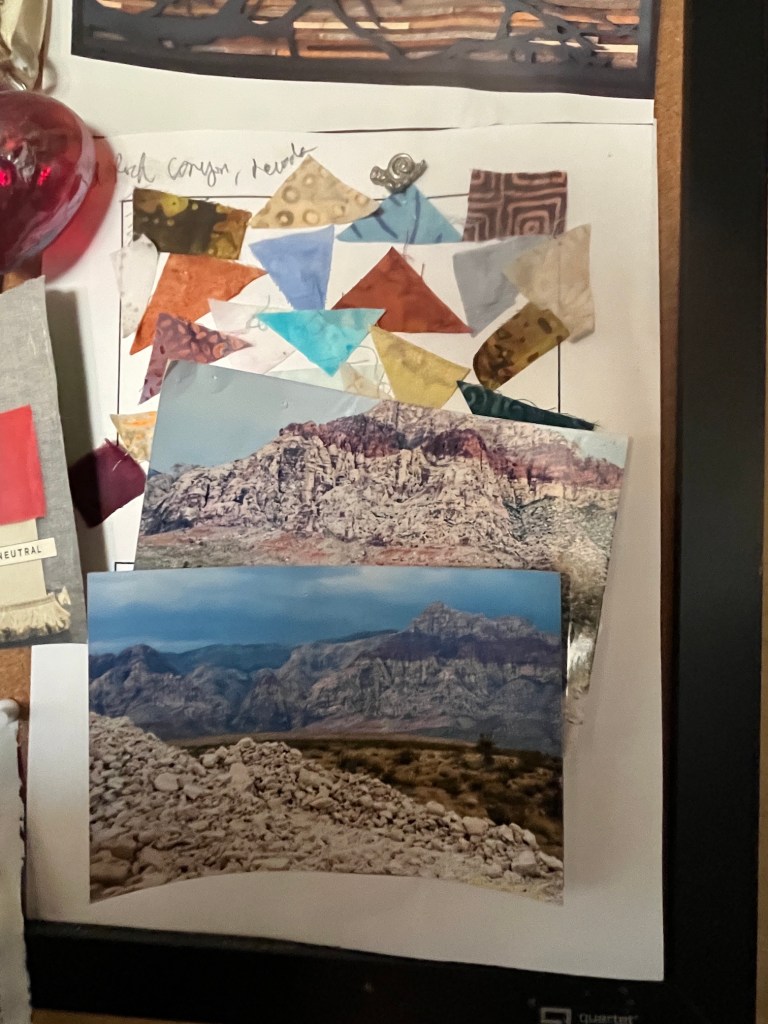
I use color in art quilts intuitively: selecting “what feels right” for a piece. I am inspired by combinations found in nature, color combinations that I see in publications, and colors that I enjoy seeing together.
Below are a couple photos from my inspiration board in my studio:
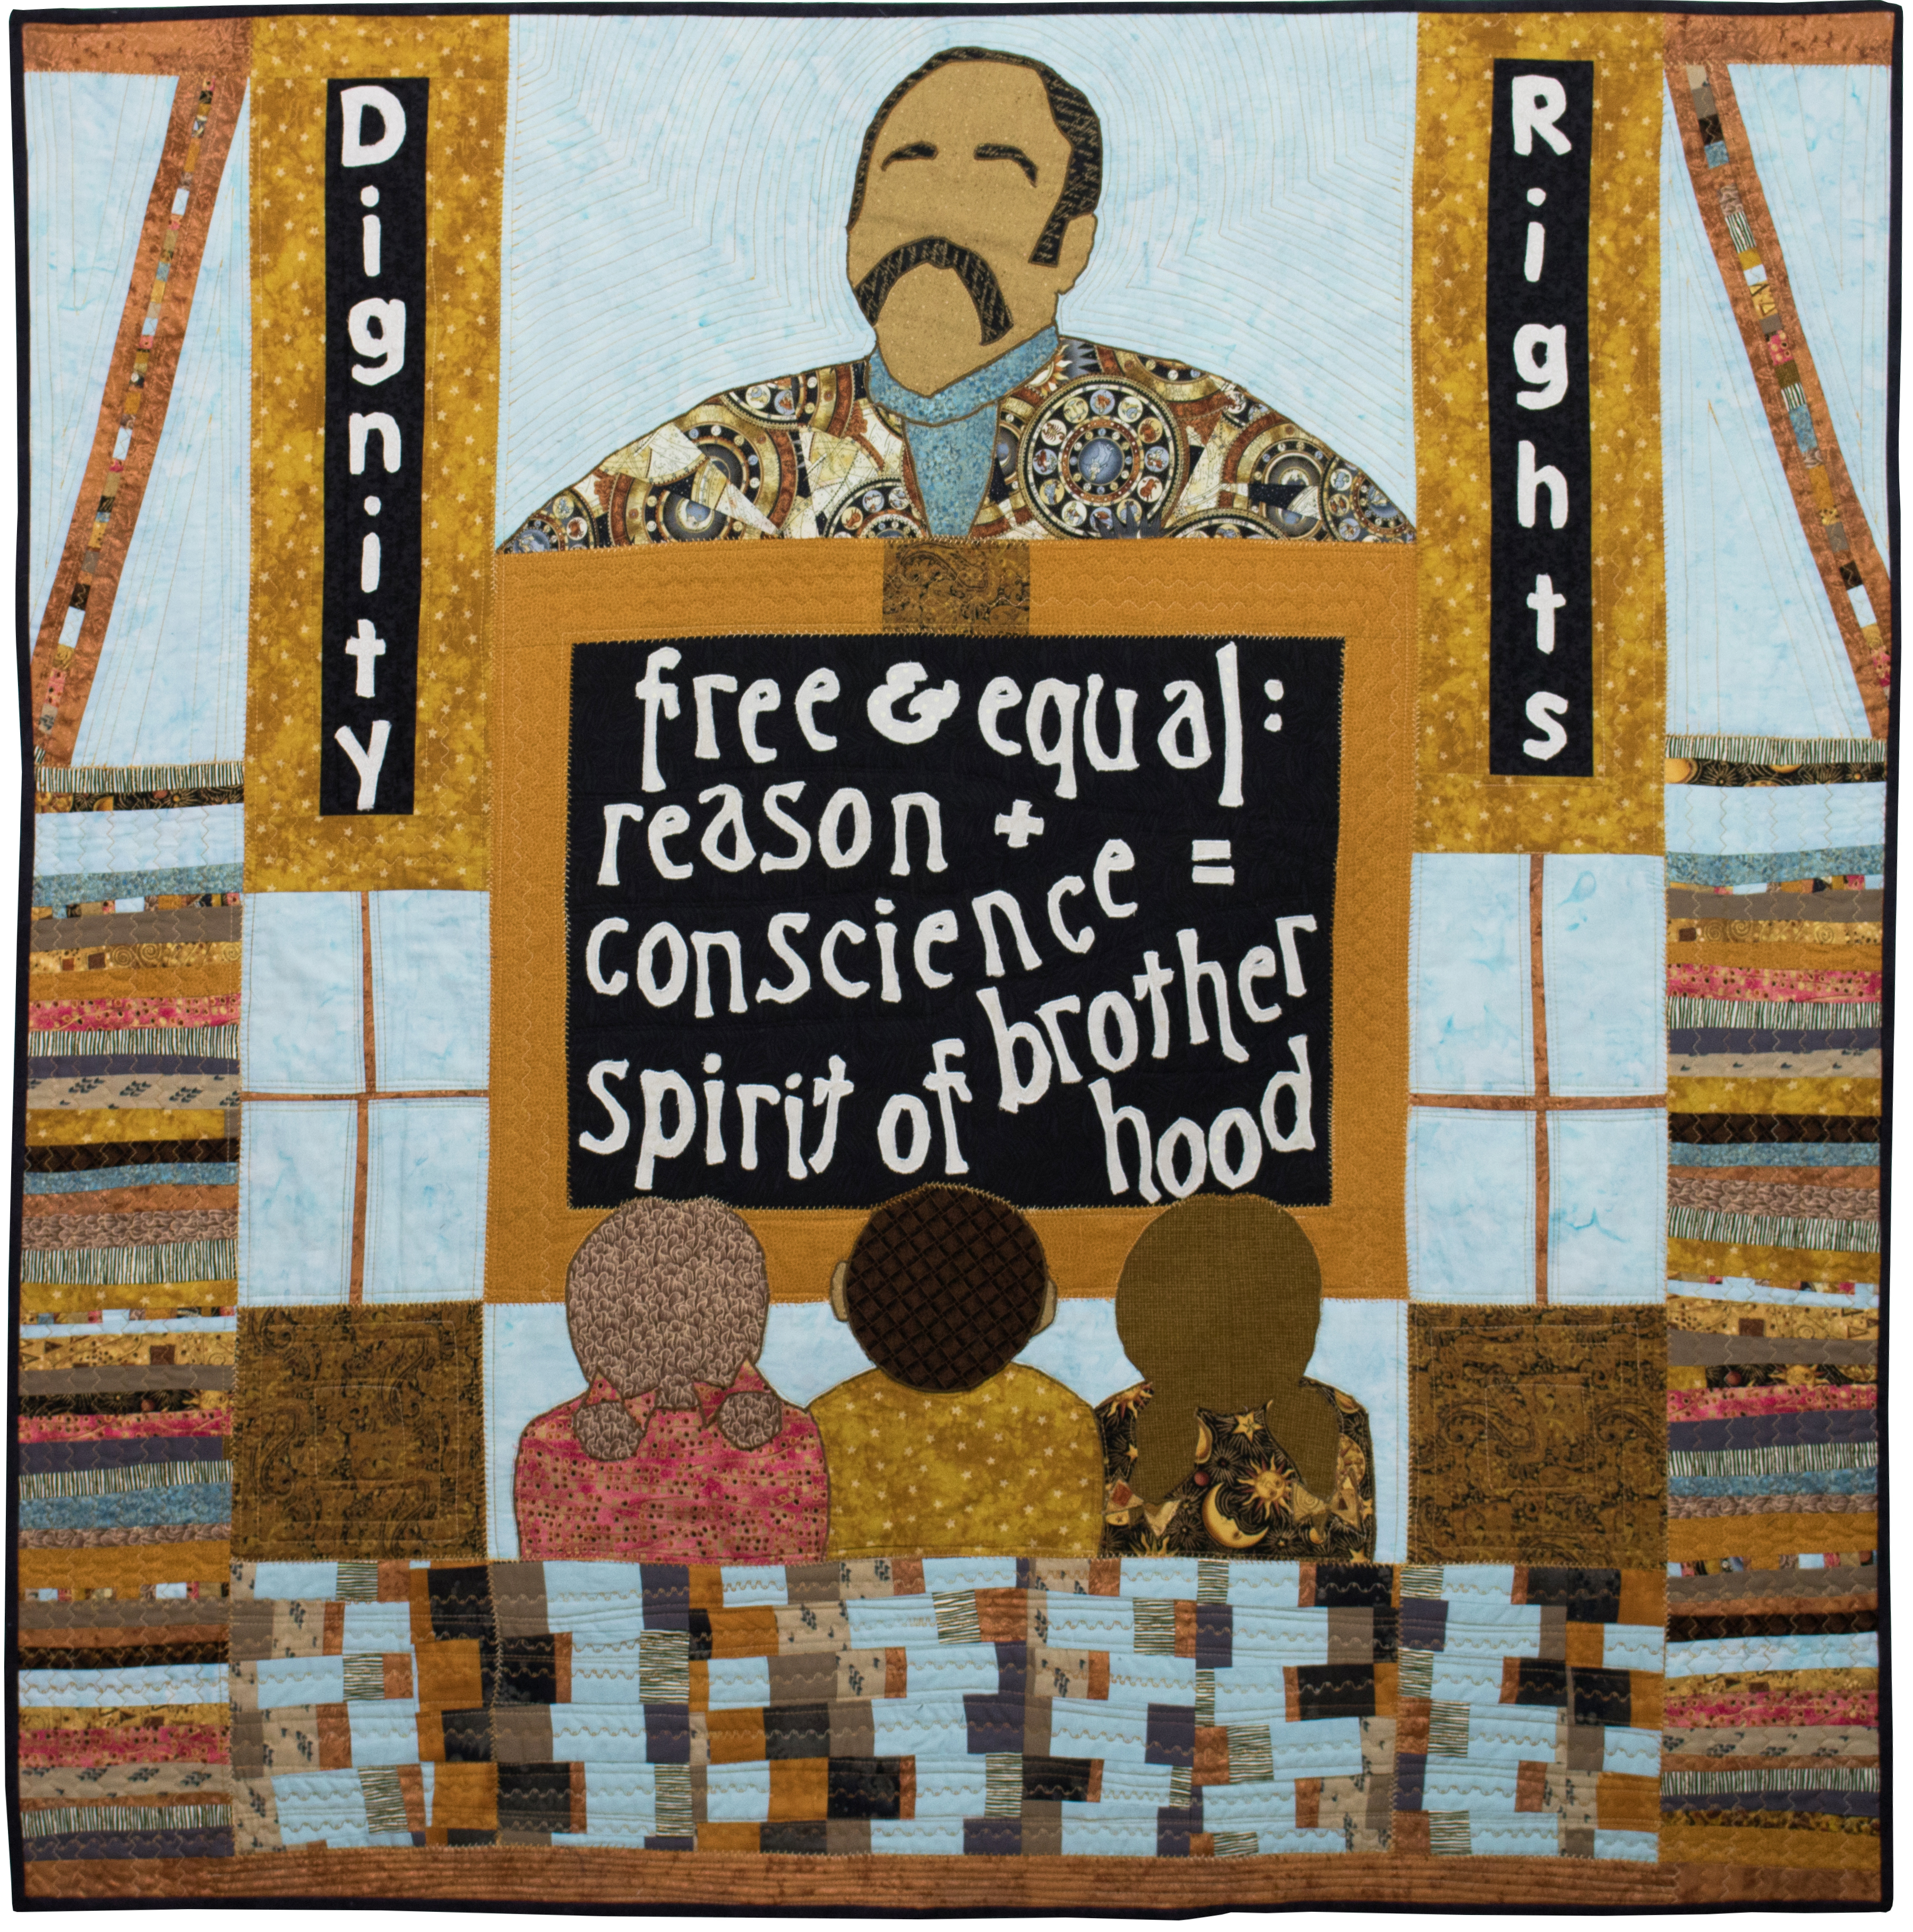
I also have a palette that I love to use, an example is in my quilt below The Lesson & The Equation:
You can also see my palette repeated in this poster from first solo show in April 2019:
(It’s funny but it took a while for me to realize that I actually have a palette that I repeat!)
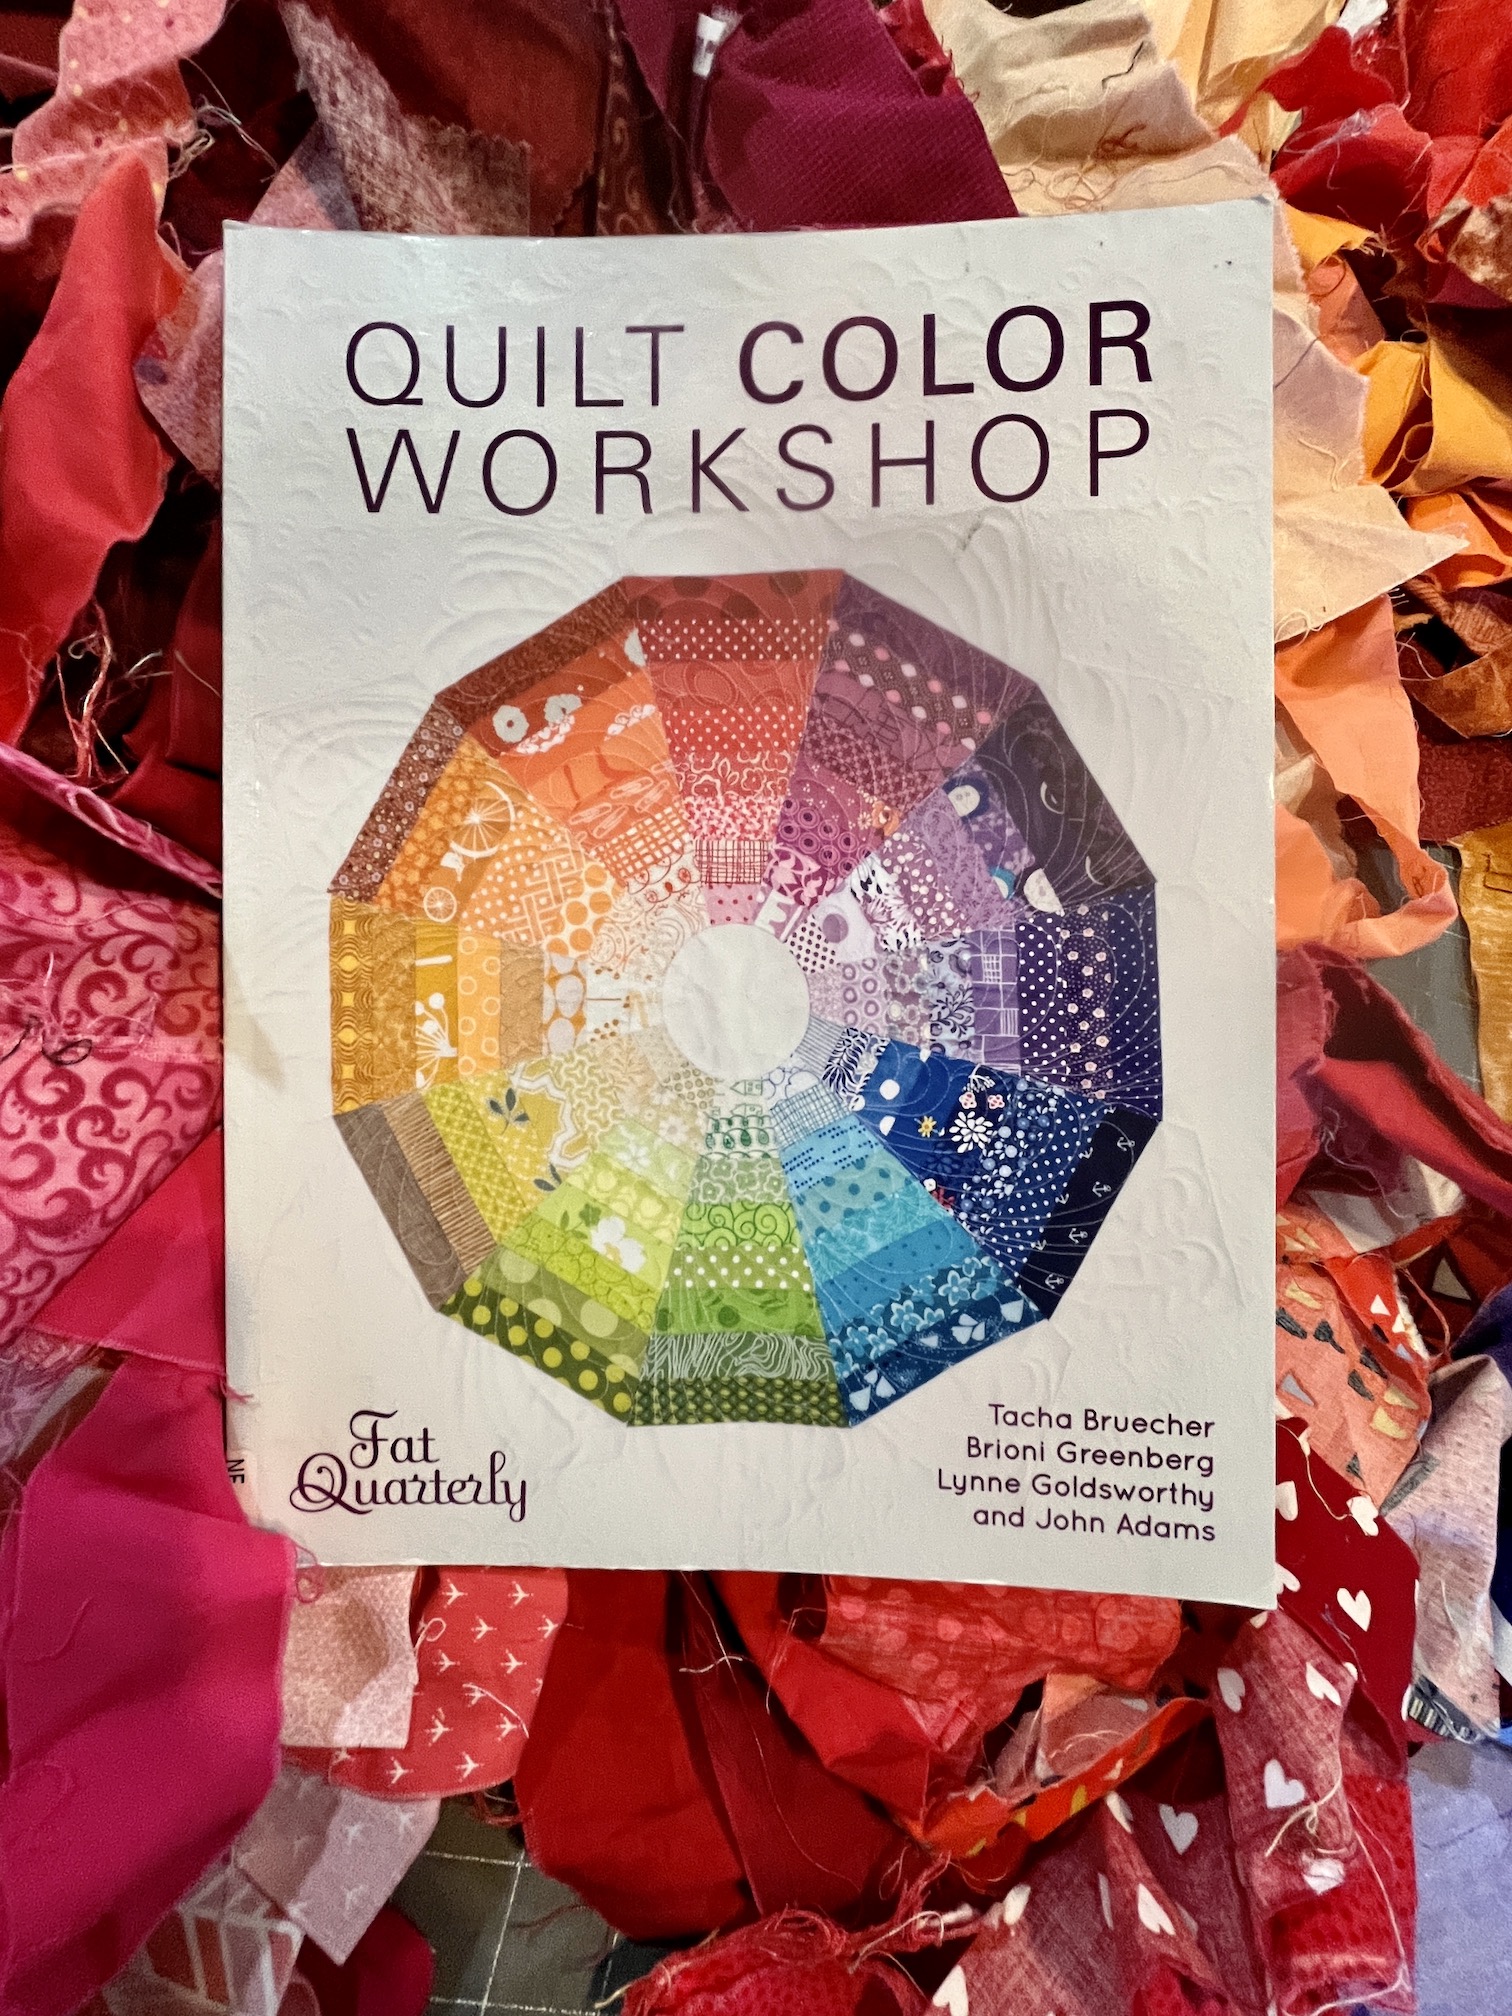
That being said, I have studied “color theory” in both formal art quilting classes as well as by reading many books. For example I love Joen Wolfrom’s book Color Play: Easy Steps to Imaginative Color in Quilts (2000), the first book I ever read on color theory.
In order to challenge and “break the rules” when creating innovative art quilts, first you have to understand the rules! Although it might be disinteresting to some of the students in my workshop, it is a foundation of artistic creation and one I should cover during my workshop.
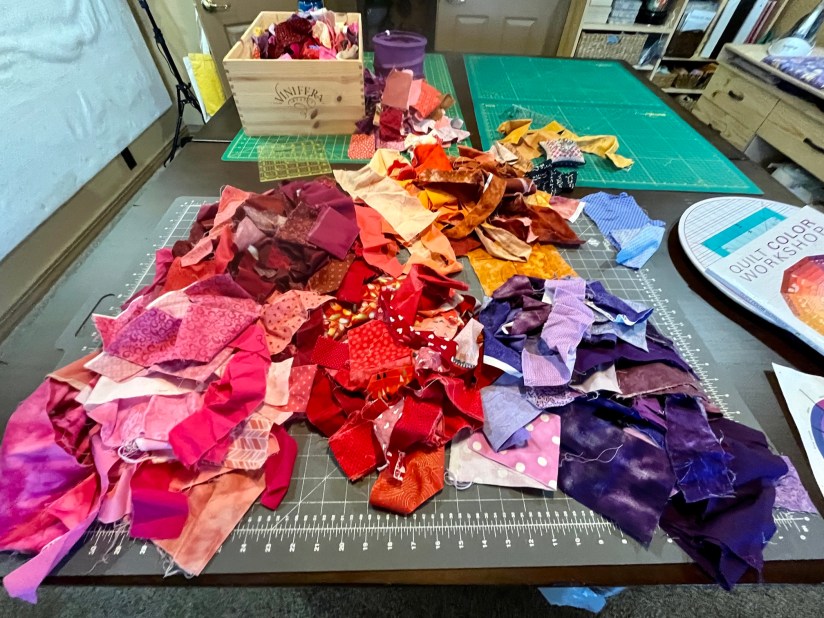
I realized that if I am going to teach an art quilting class next year (see post A Year of Finishes: The Pivot) I need to brush up on color theory. I thought the best way to do this was to create a project I found in the book Quilt Color Workshop by T. Bruecher, B. Greenberg, L. Goldsworthy, and J. Adams (2014), that I borrowed from the library.
I am making the Colour Wheel Quilt on the front cover, which will serve as a class visual for my workshop as well as refresh my understanding of Primary, Secondary, and Tertiary Colors; and Pure Color, Tints, Tones, and Shades.
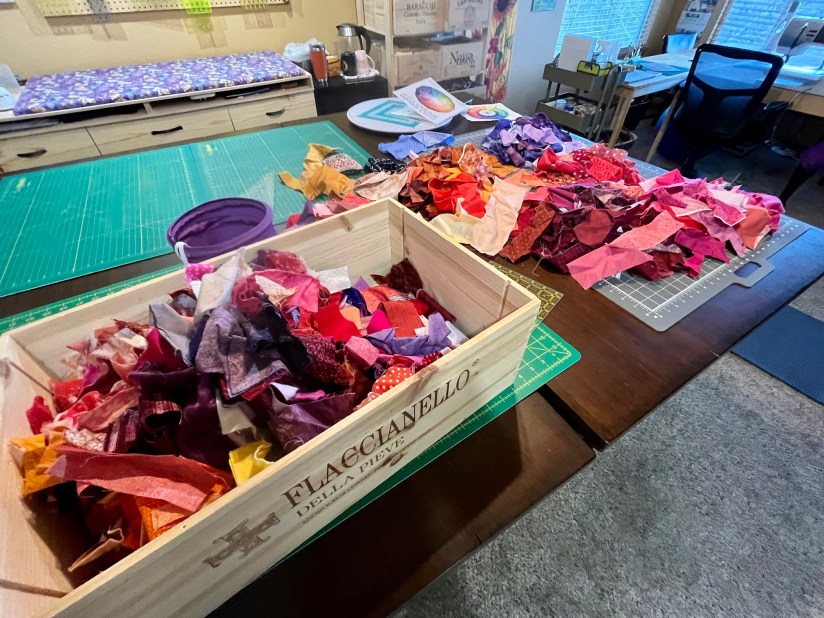
I have a lot of sorting to do to find the strips from my large collection of fabric scraps for the piece.
Currently I am sorting through my box of Reds, Purples, and Oranges to begin the project (I’ve organized many of my fabric scraps into wine crates that liquor stores have my kind enough to gift me or sell to me cheaply).
At first it was tedious, but then it became fun. It is a productive way to revisit my fabric scraps.
I am having fun mapping out the 6-day workshop I will give next year. I am planning to ship to the venue a large amount of my fabric scrap collection for the students to use if they like during the workshop. I am ready to move on from my crazy fabric scrap collection* and start digging into my crazy fat quarter collection (and create more scraps – ha!)
*75% of my fabric scrap collection is from fabric scraps others have given to me. So it is from others’ fabric choices. I am ready to primarily work from my fabric choices in the future…