Guest Blogger, Quarantine Quilts

Quarantine Quilt Project: Life in the Time of Coronavirus, Part V (Guest Blog Post)

All good things must come to an end as they say, and here is the 5th and final installment of the guest blog post series by my talented friend Wendy Hill on the awesome quilt she made during quarantine with the four rambunctious boys next door (aka “The Boys”) ages 2 – 8.

Thanks for reading this series along with me (I was so excited to receive each installment via e-mail and read it myself for the first time while posting it!)

And if you are just joining us, see these posts for Parts I, II, III and IV of the story by Wendy Hill:

You can follow Wendy Hill on Instagram @wendyquilter


Quarantine Quilt Project: Life in the Time of Coronavirus

Part V: The Big Giveaway

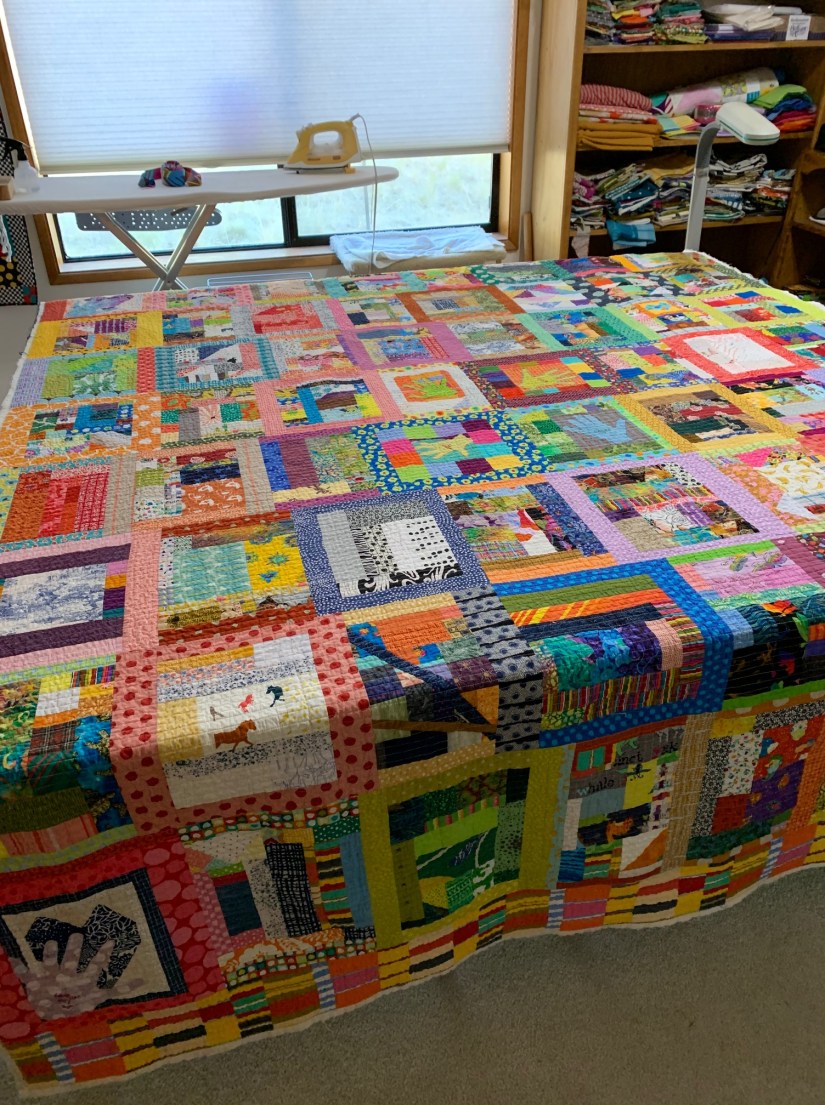
I’m eager to show off the Quarantine Quilt and The Big Giveaway where “The Boys” and their parents see the quilt for the first time.

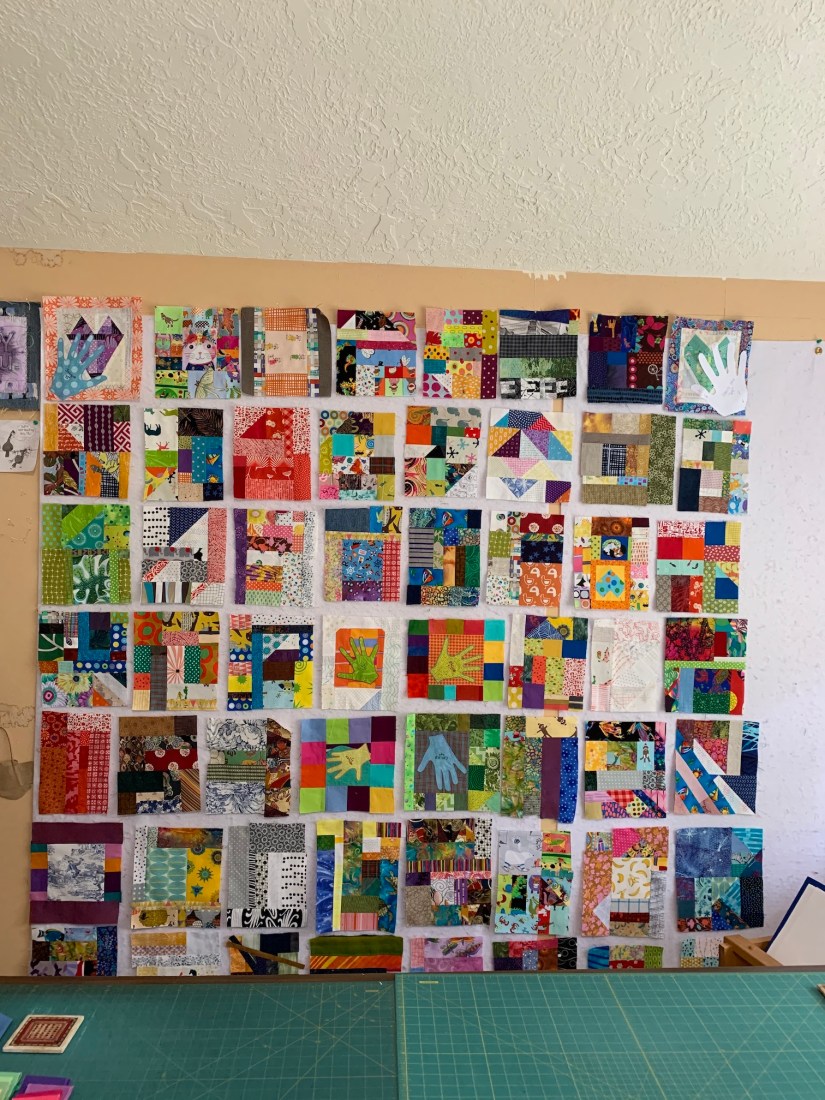
Here are the full view photographs of the front and the back. (The quilt, with no sleeve, wiggled a bit being clamped to a bar for the photos.)

#1- FV front#2- FV back
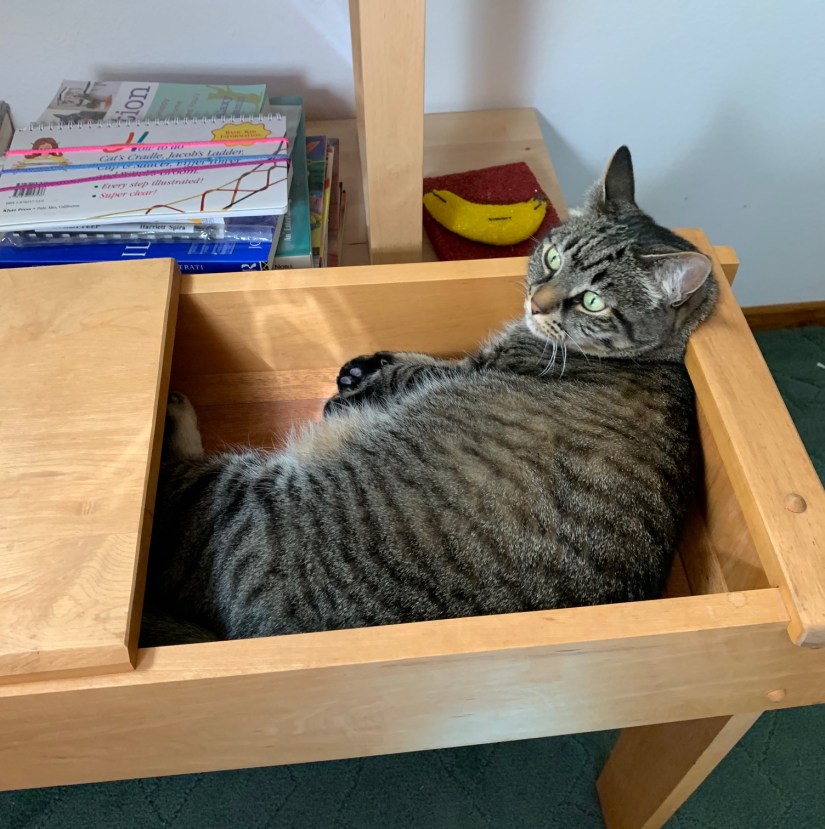
At home, I took some detail photographs. Of course, the cats found the quilt in no time….The Quarantine Quilt is officially cat approved!!

#3- Cooper on quilt#4- Izzy on quilt
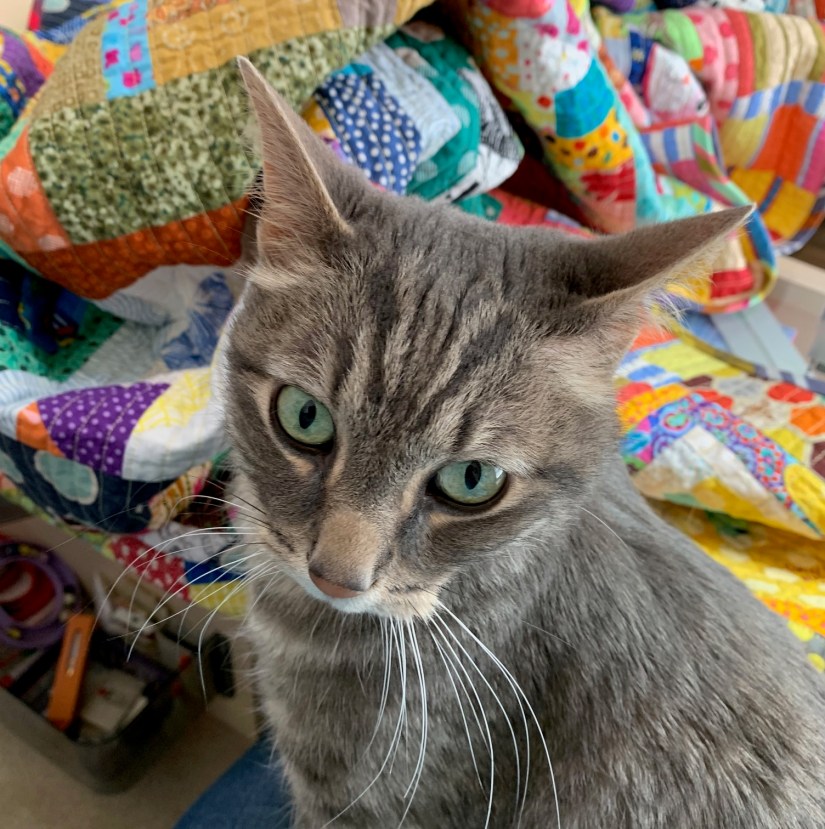
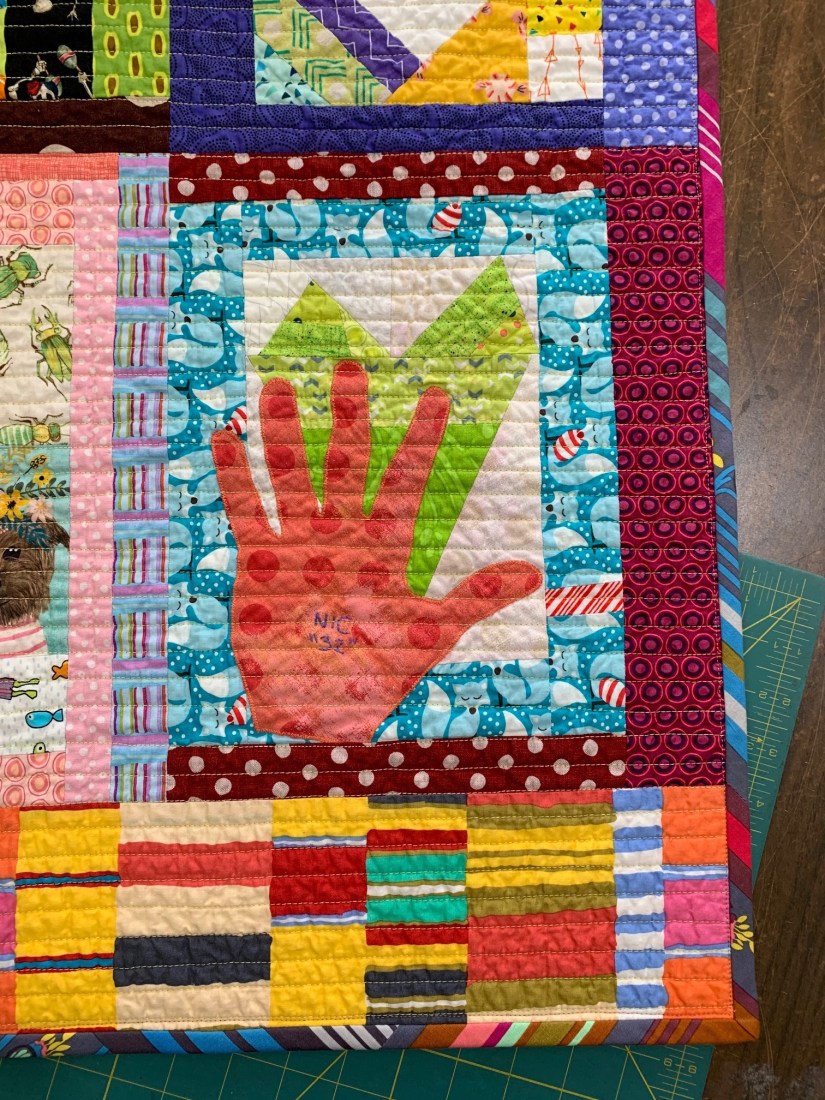
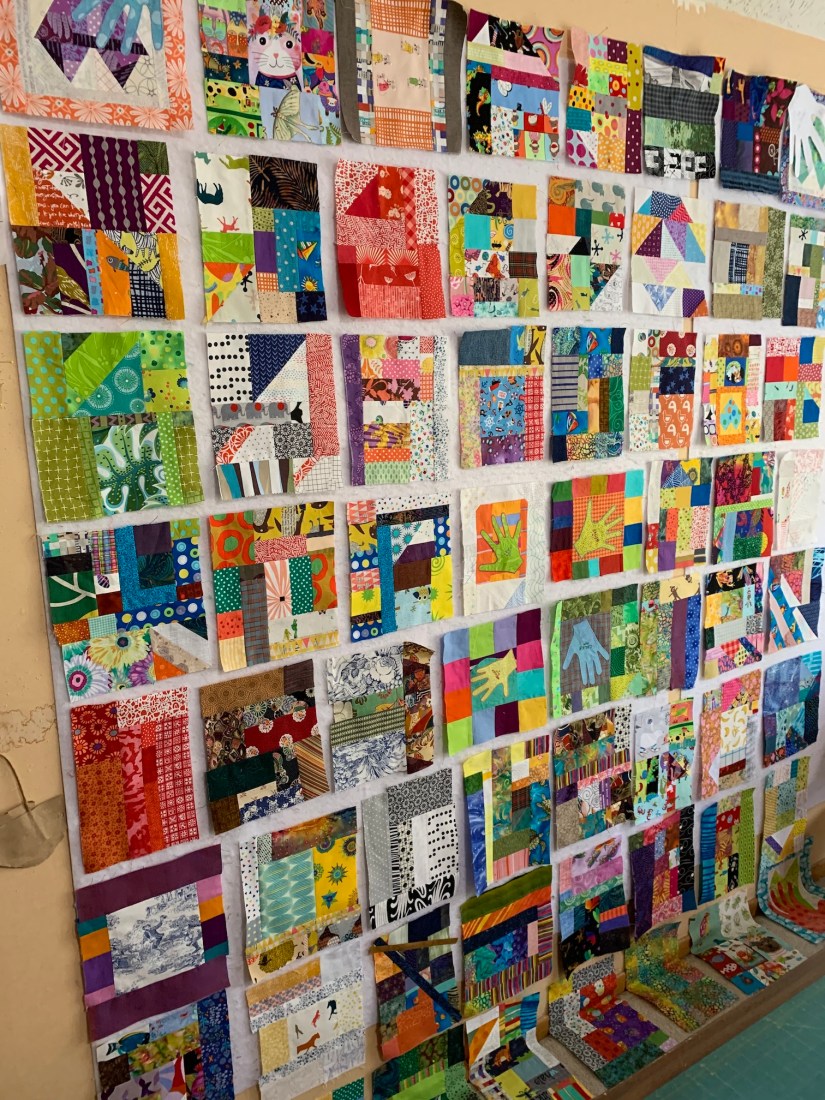
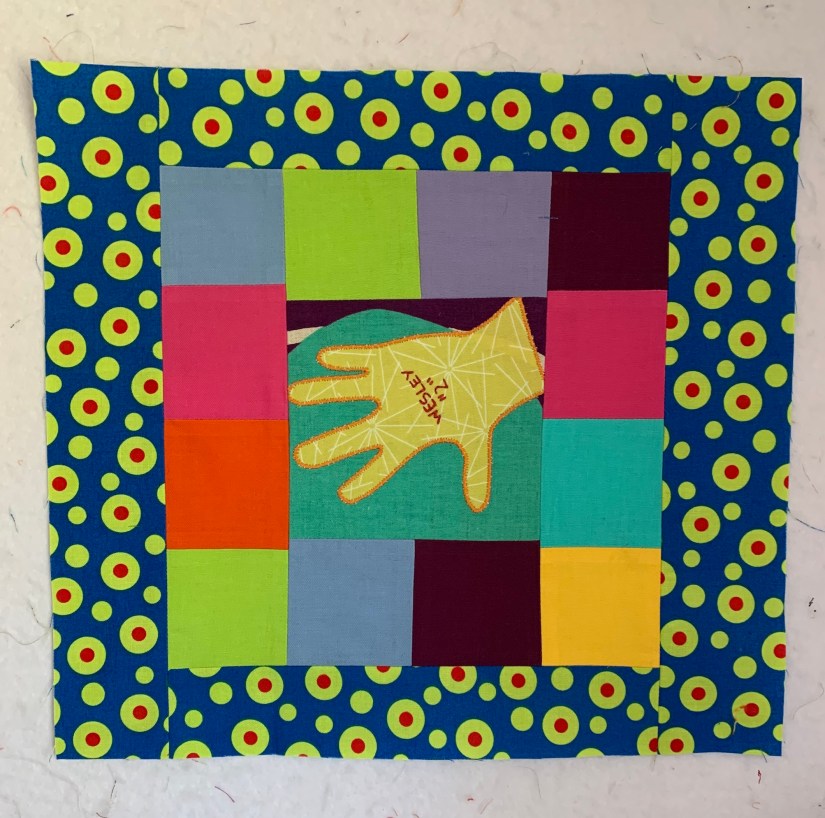
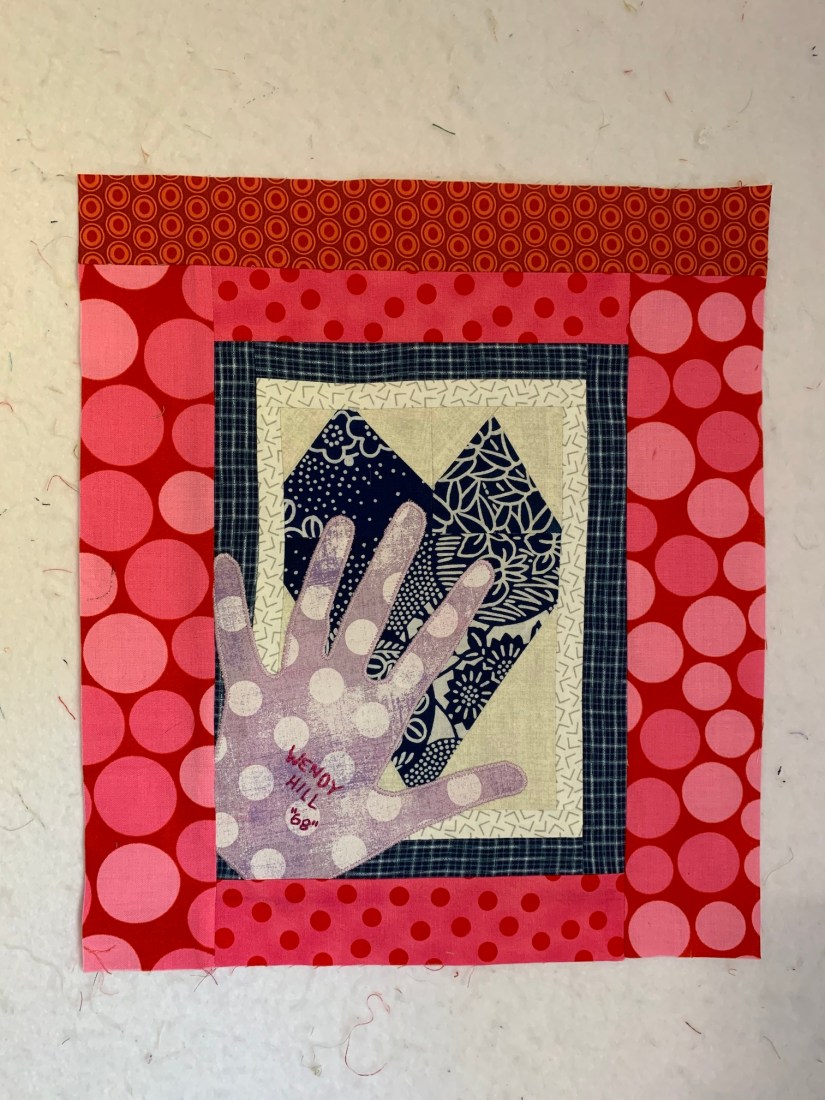
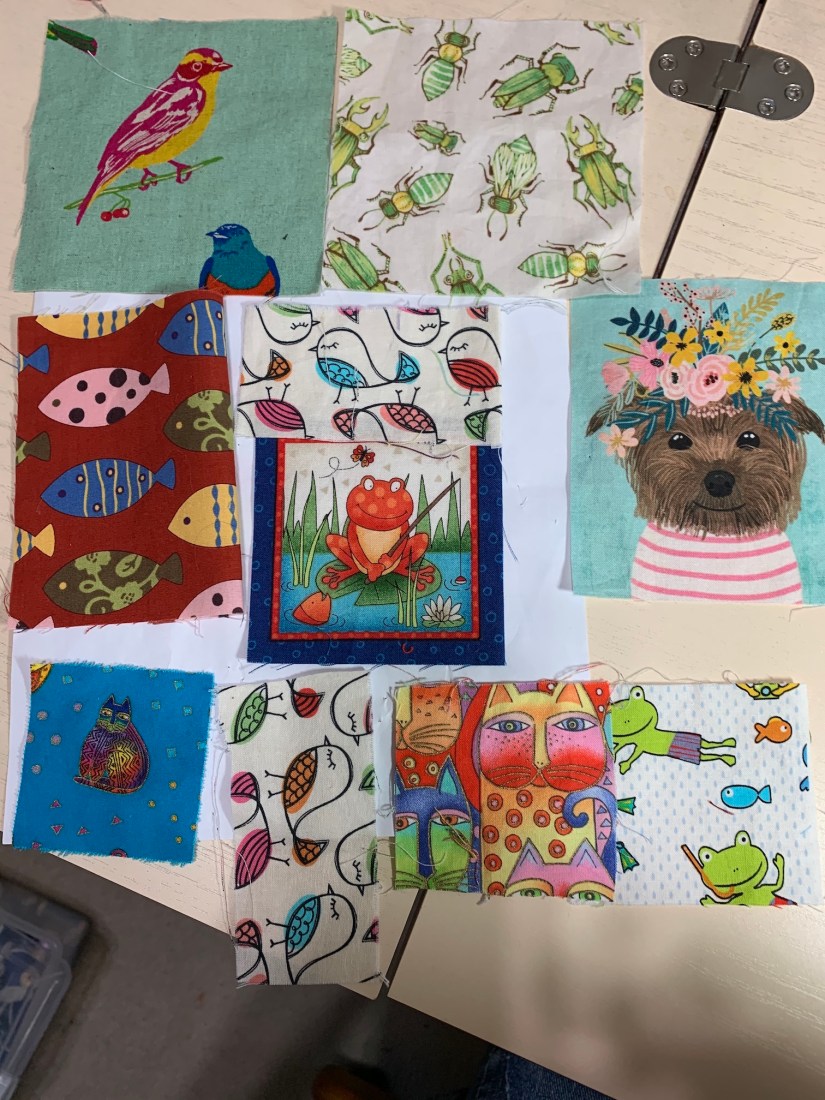
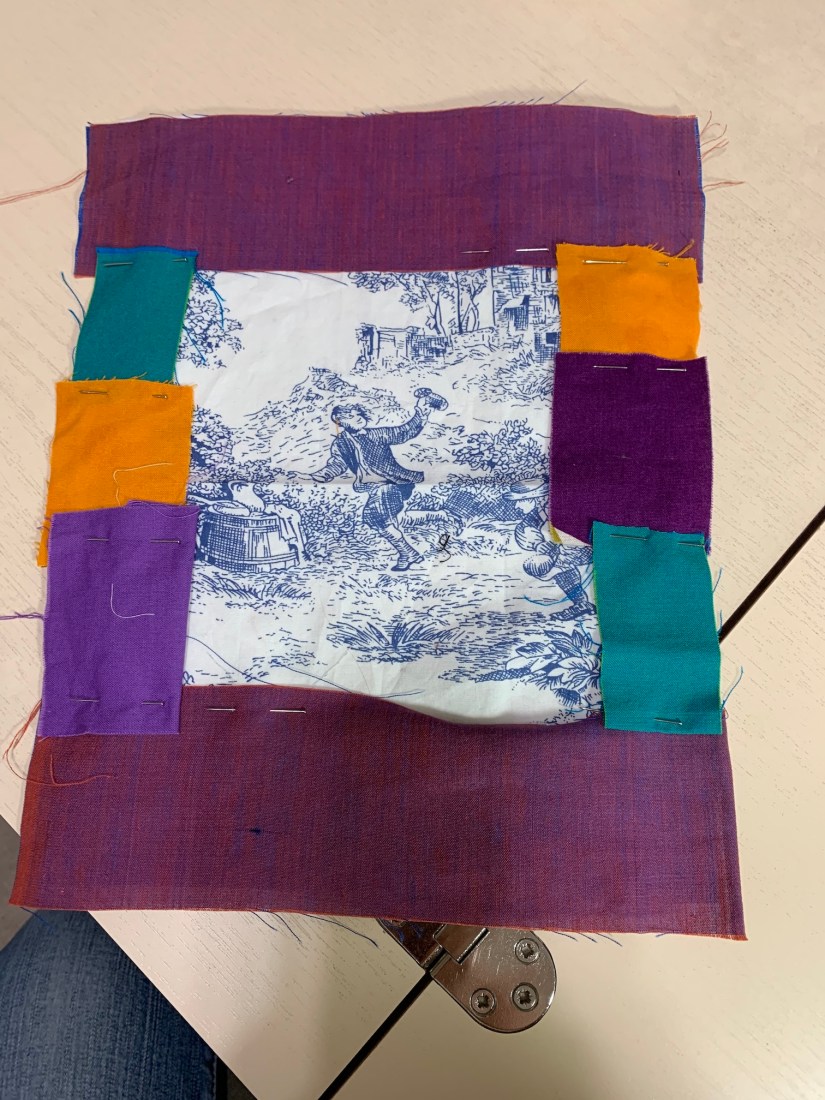
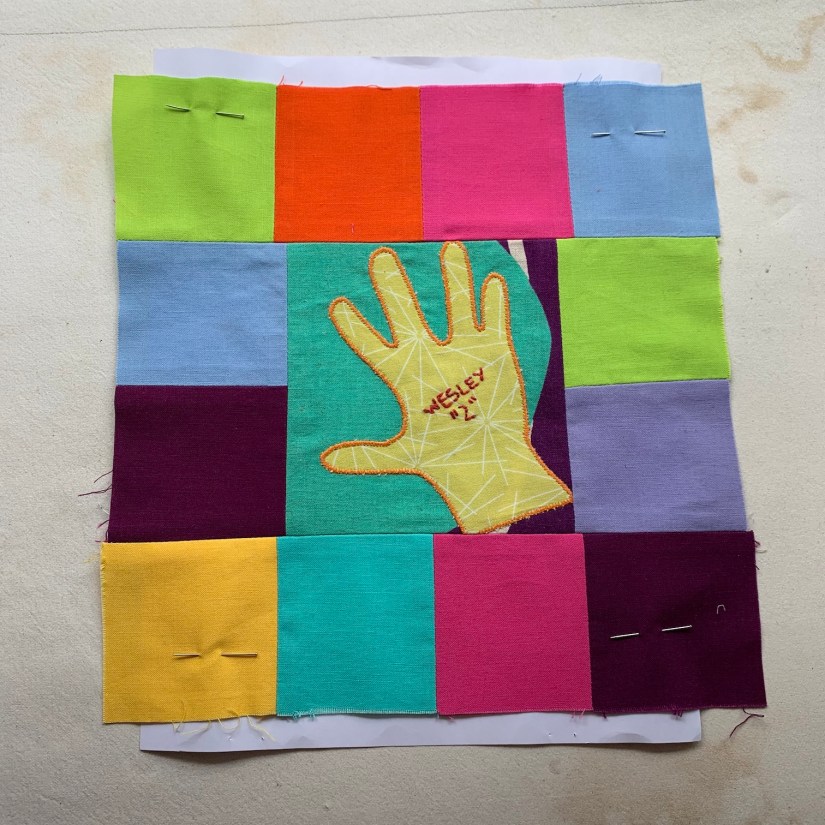
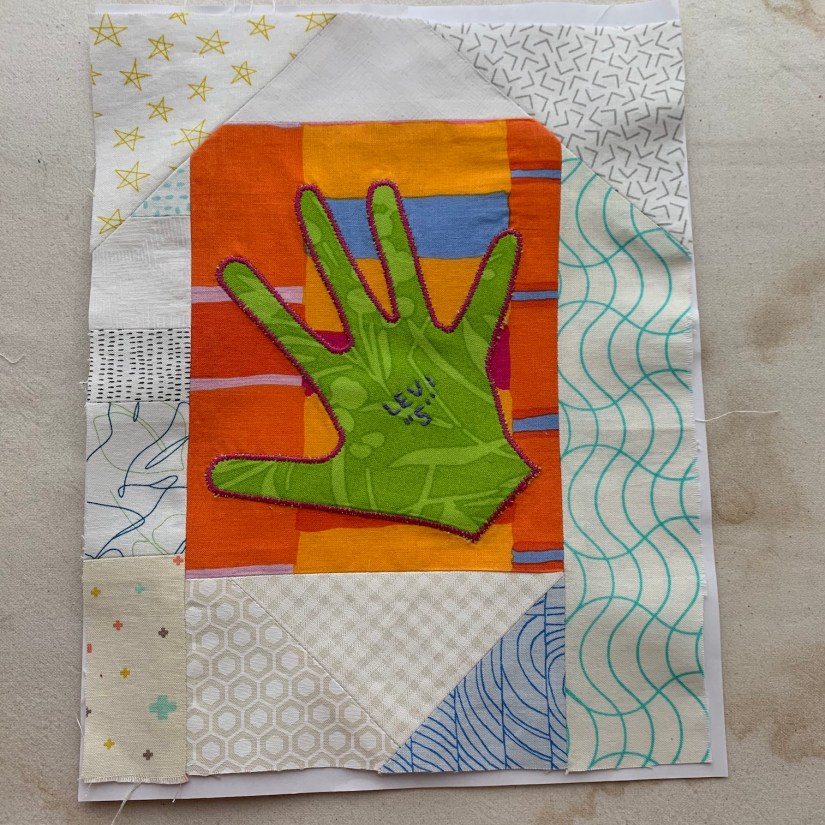
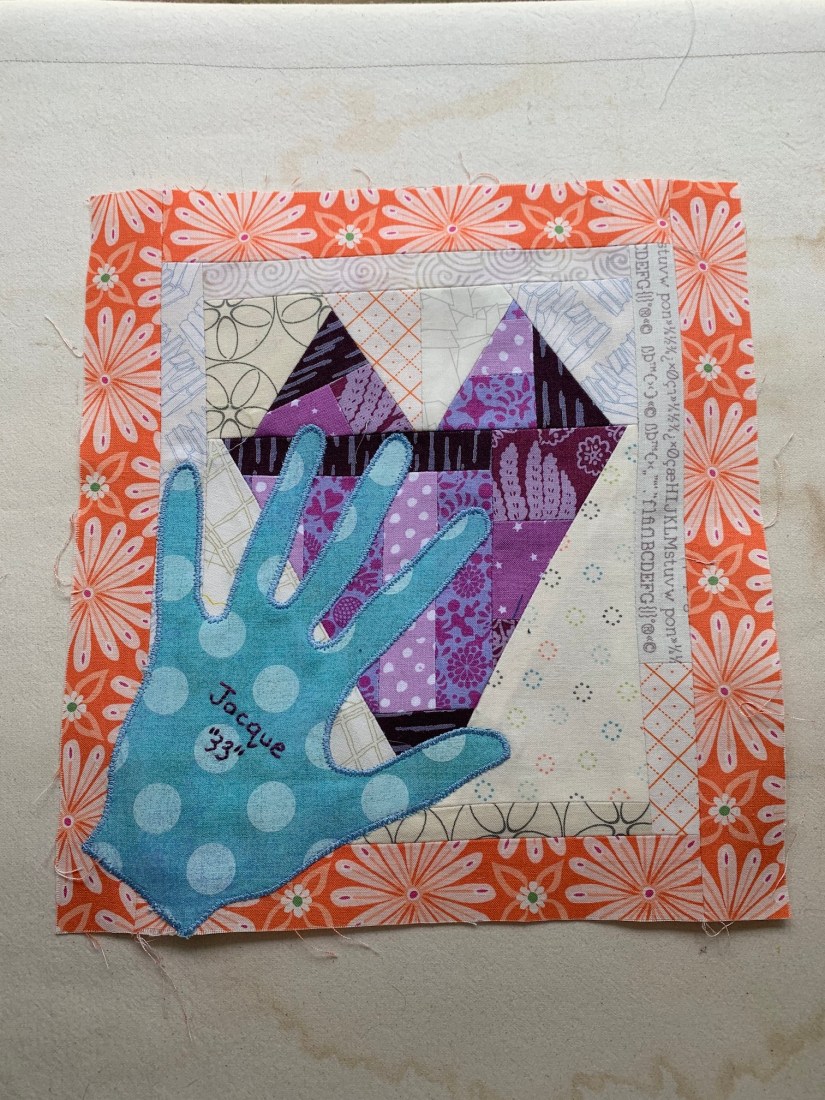
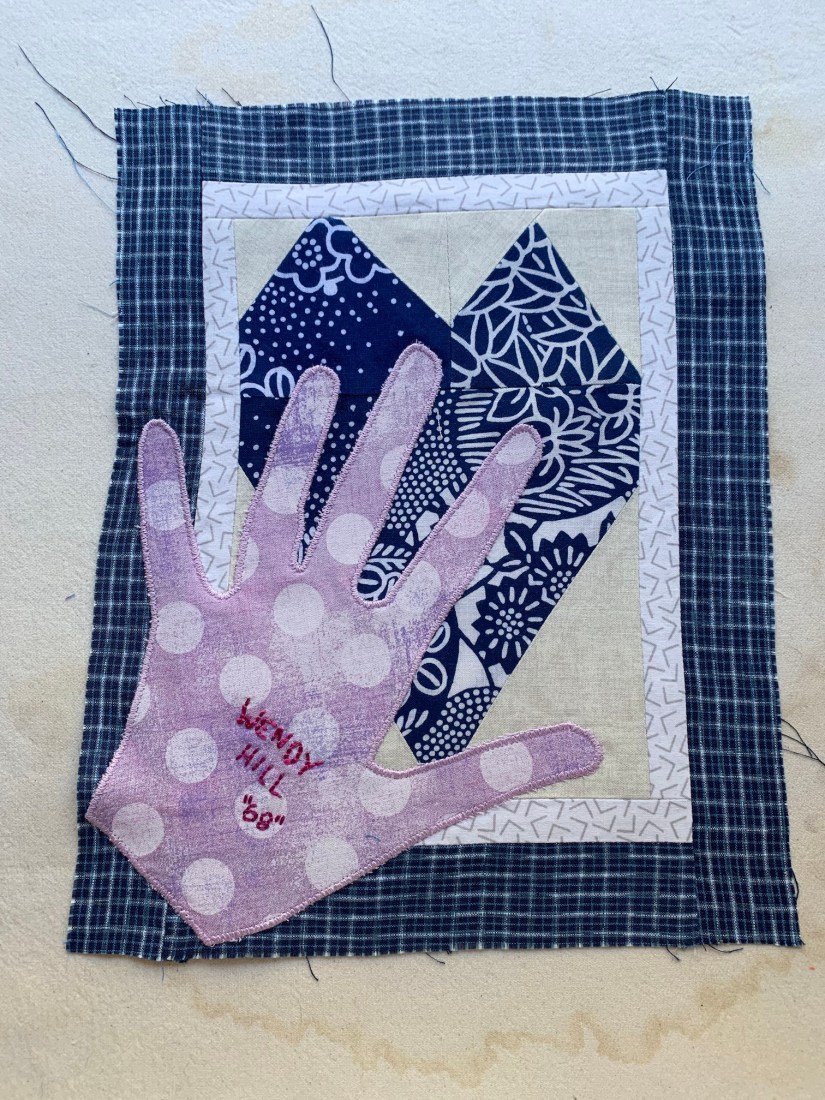
Let’s start with the appliquéd hand blocks. I put The Boys’ hands in the middle, with the adults’ hands on the four corners. It’s symbolic on purpose: the adults are looking after the kids.

#5- kids hands#6- Dad#7- Mom#8- David#9- Wendy
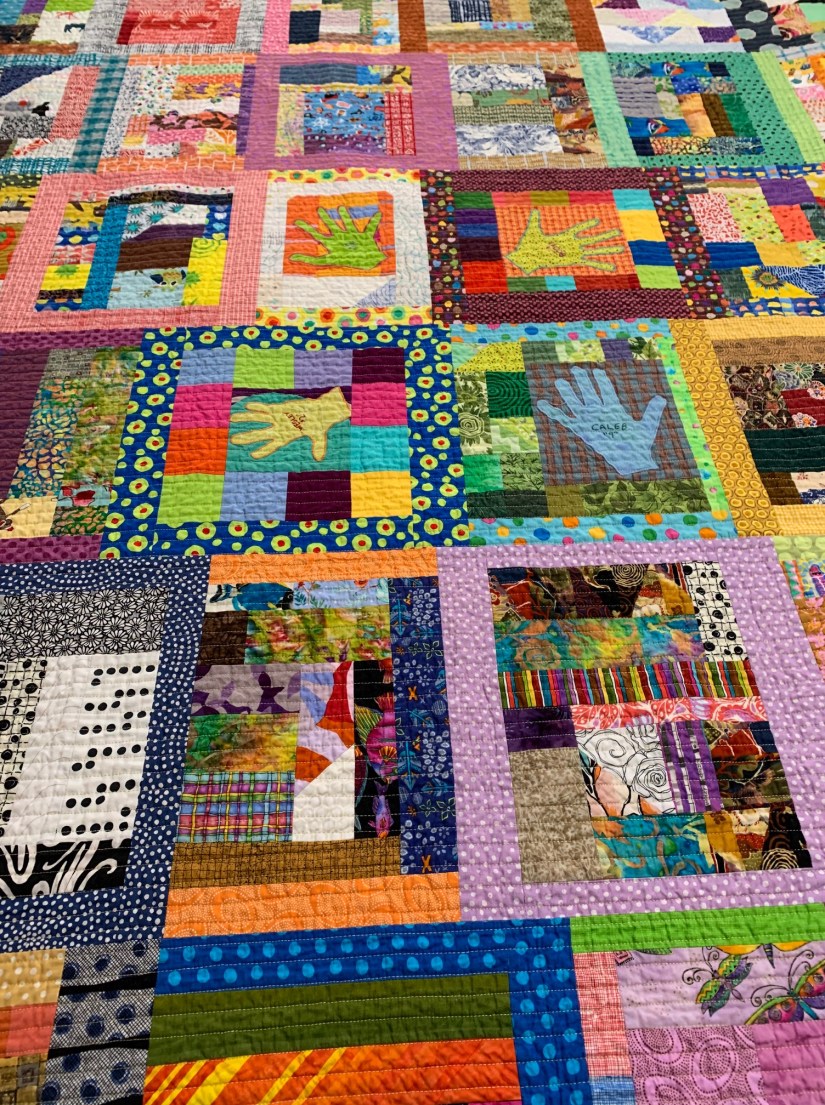
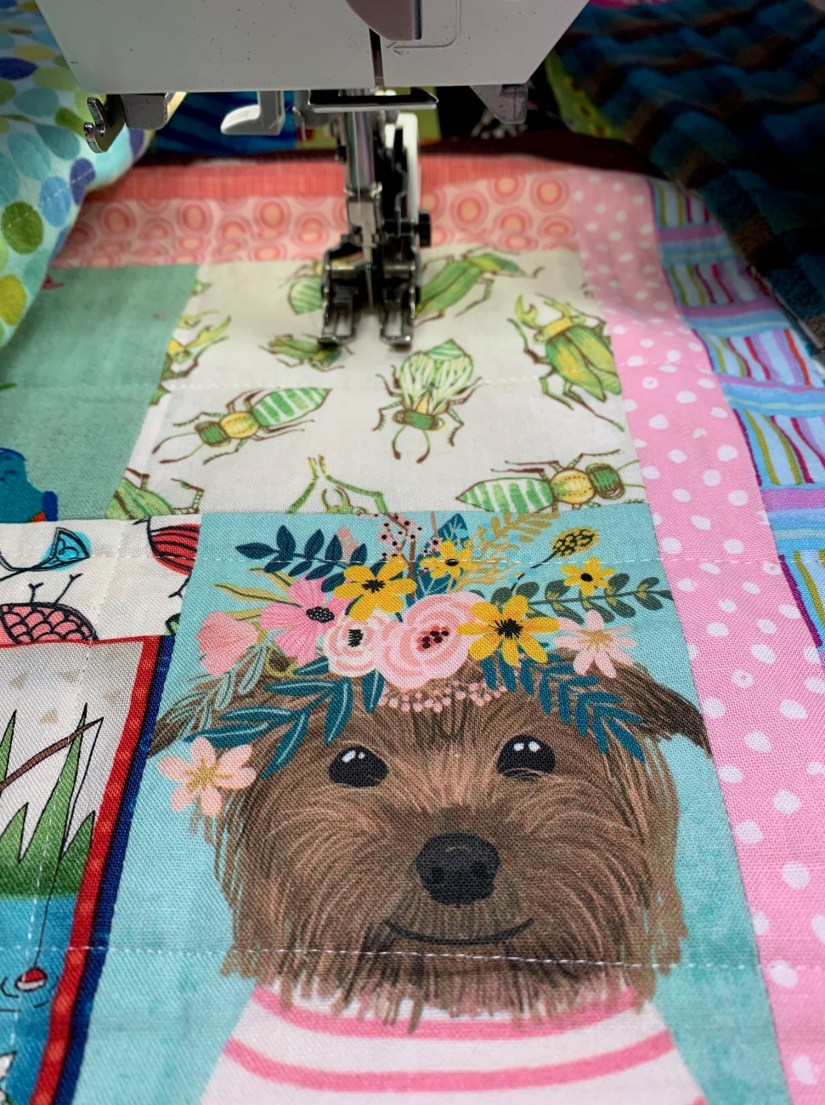
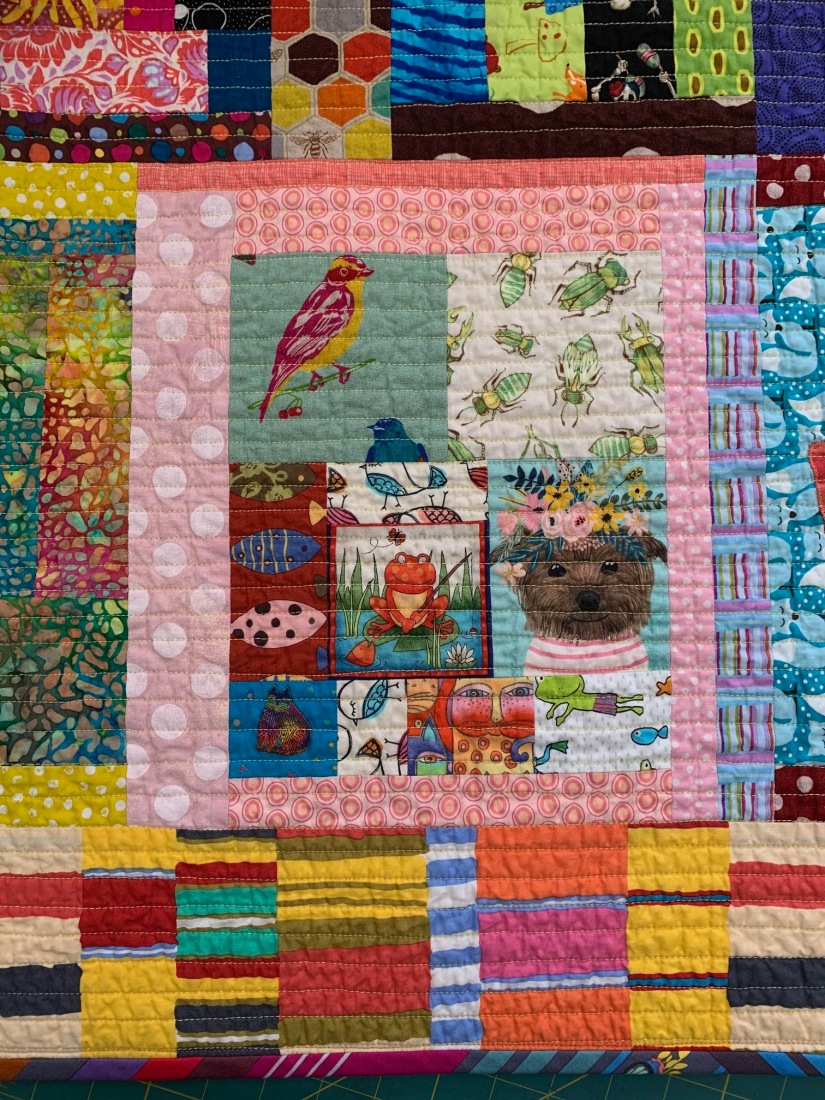
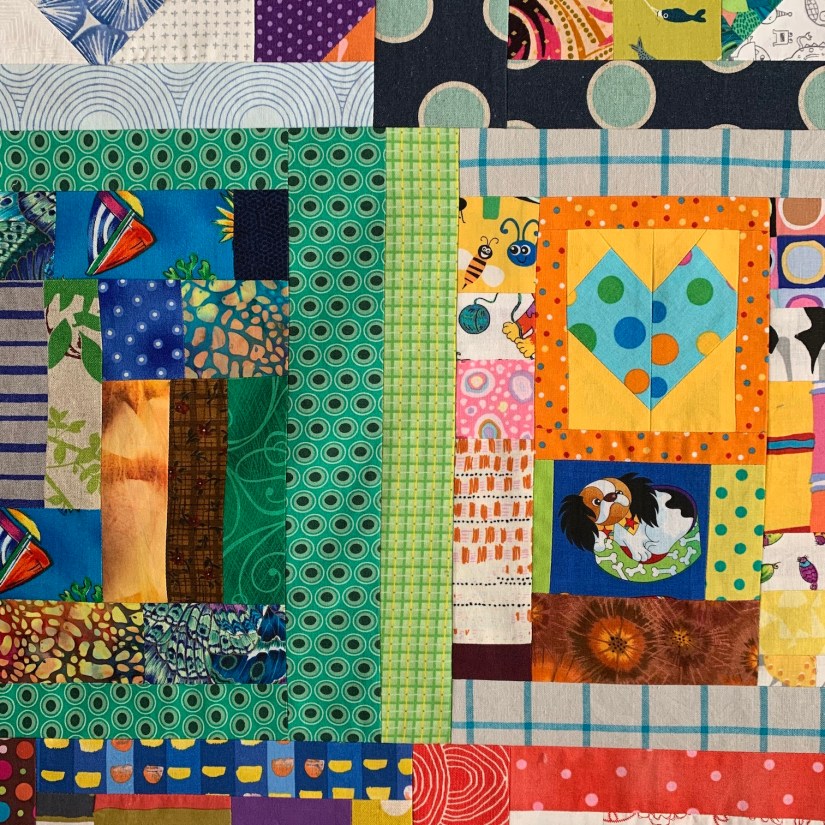
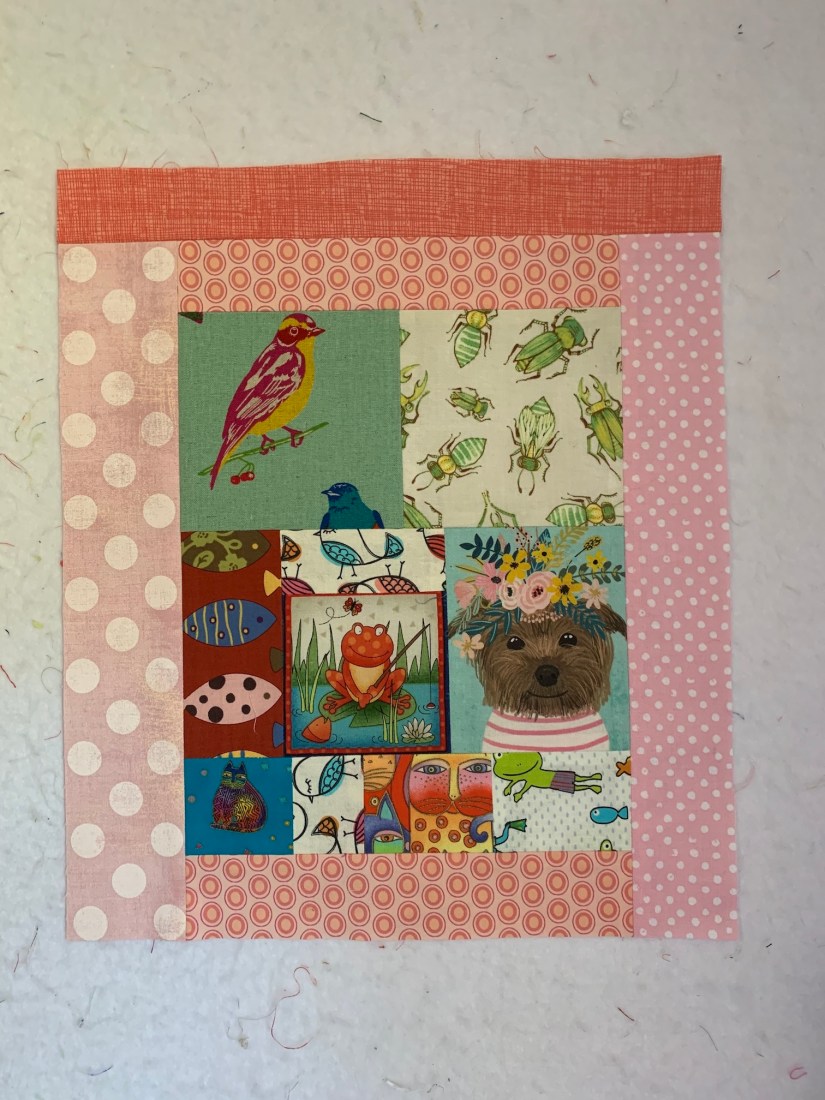
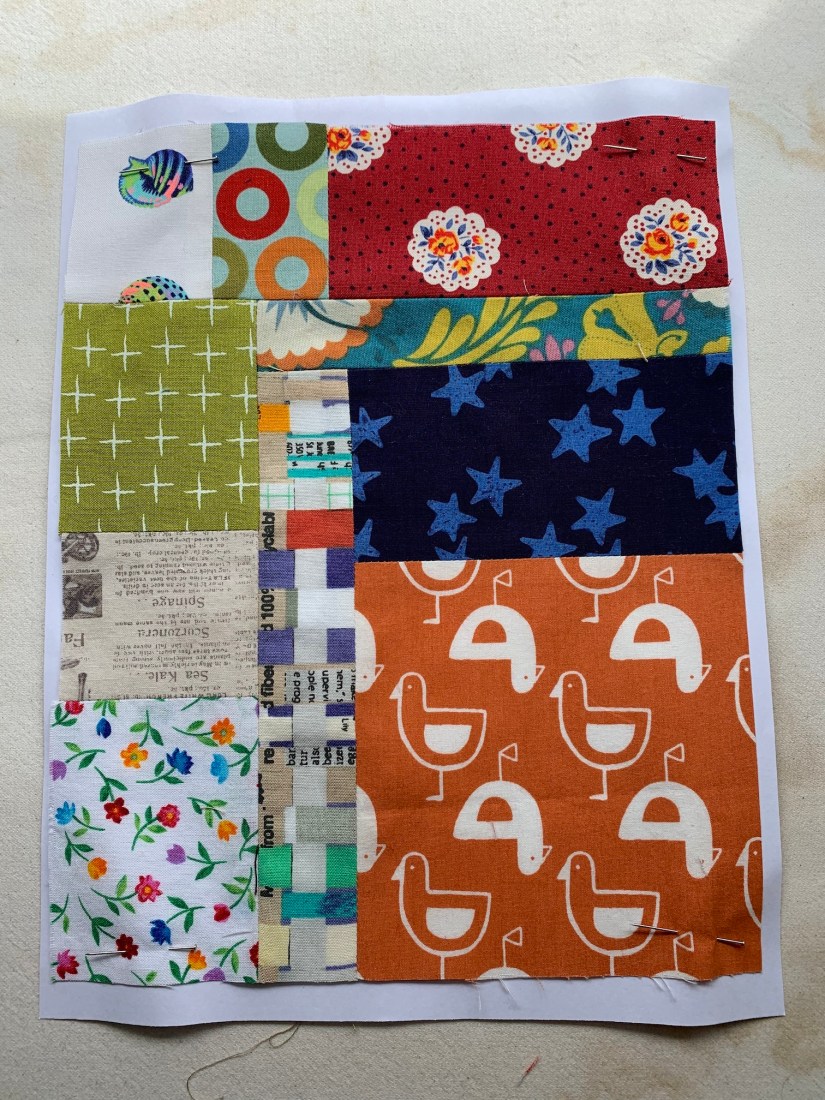
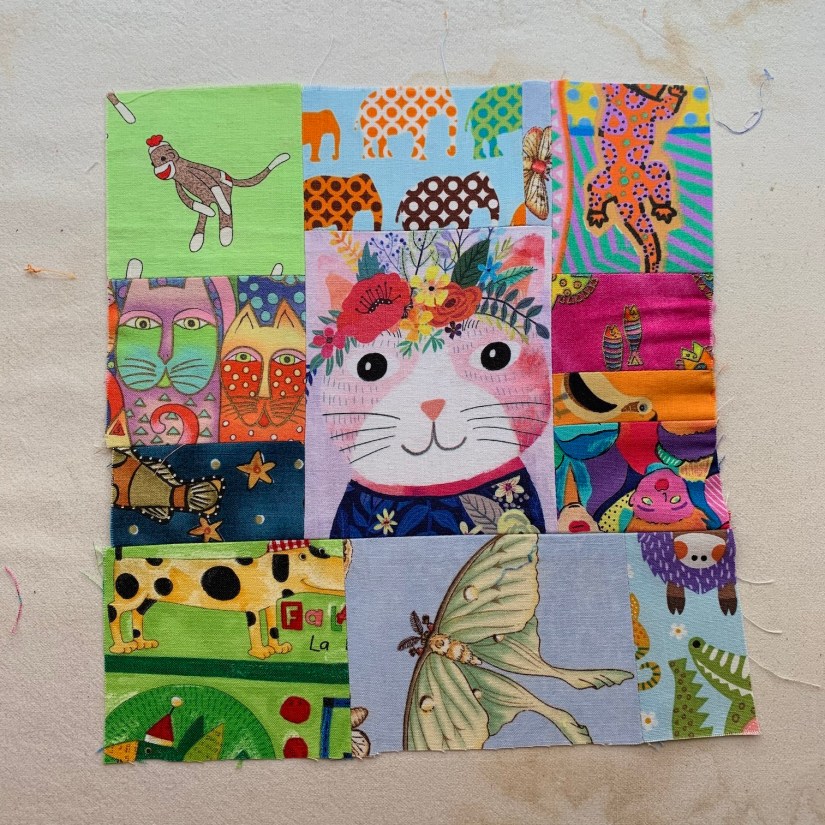
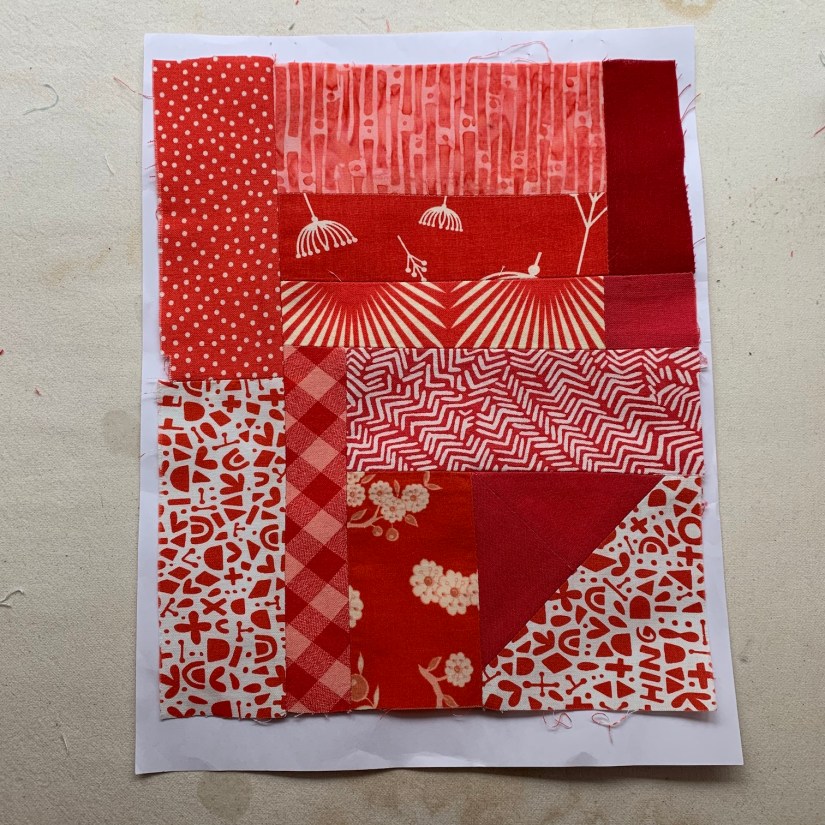
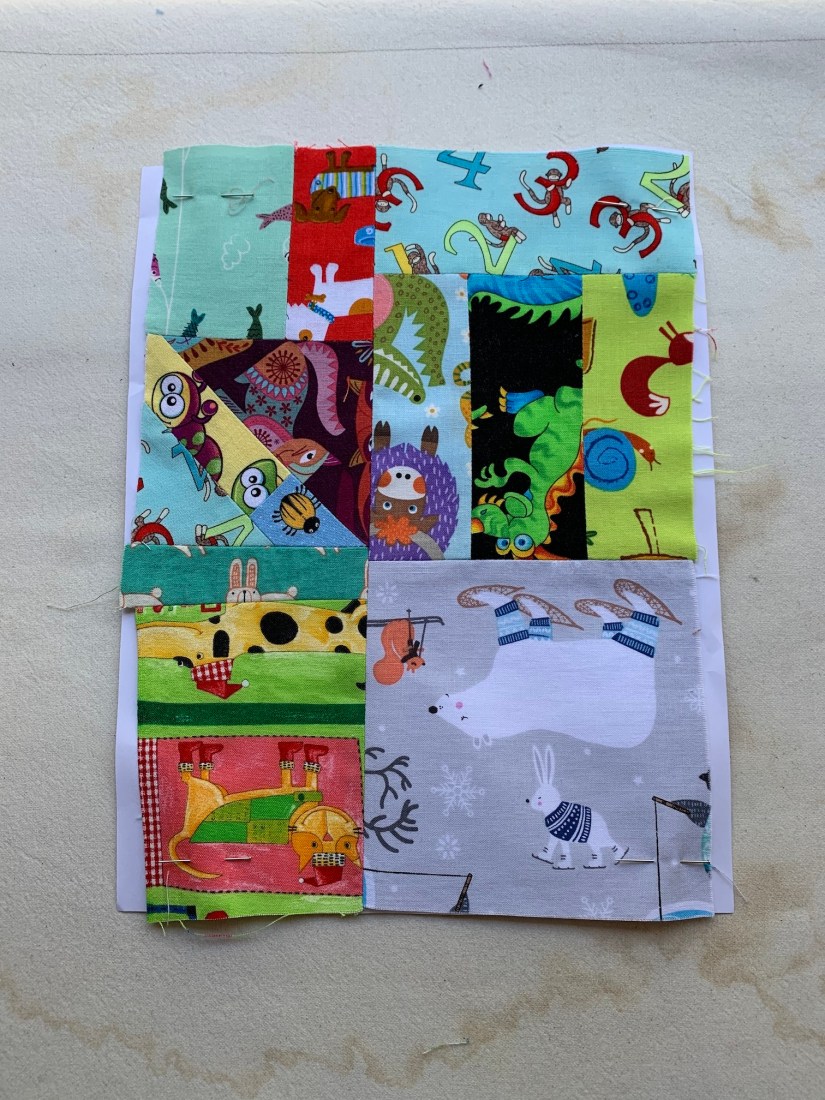
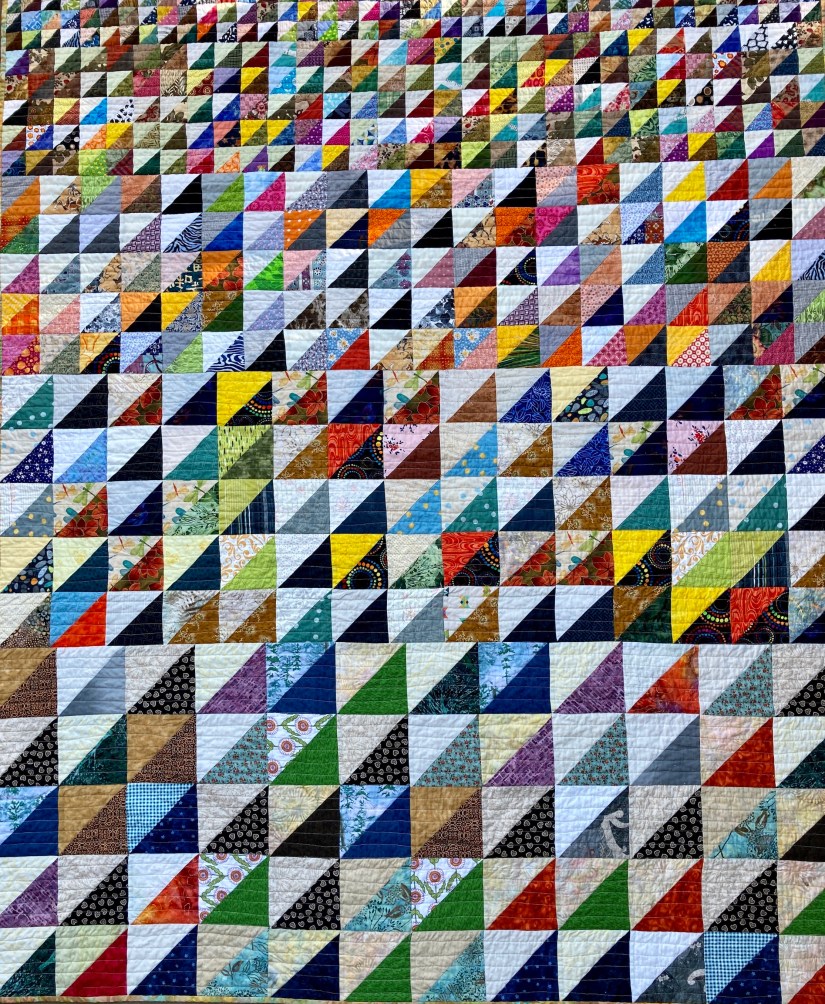
Here are a few more detail photographs of the quilt front:

#10-front#11- front#12- front
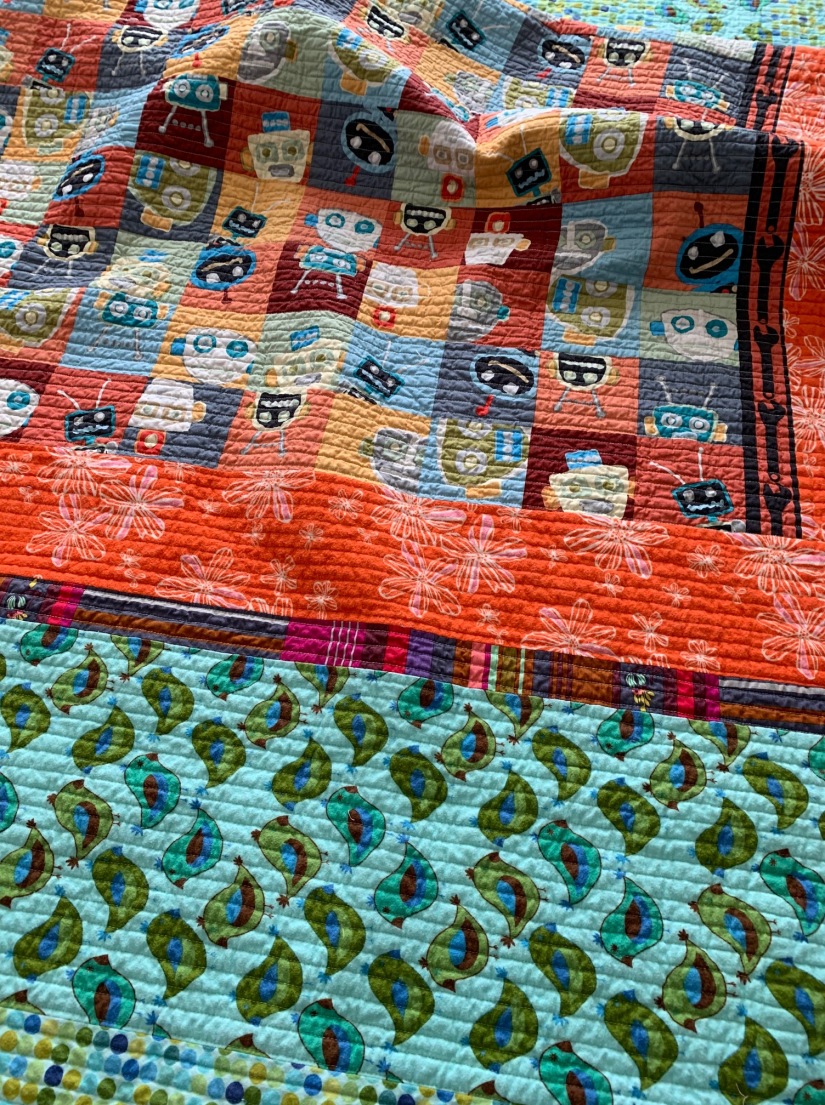
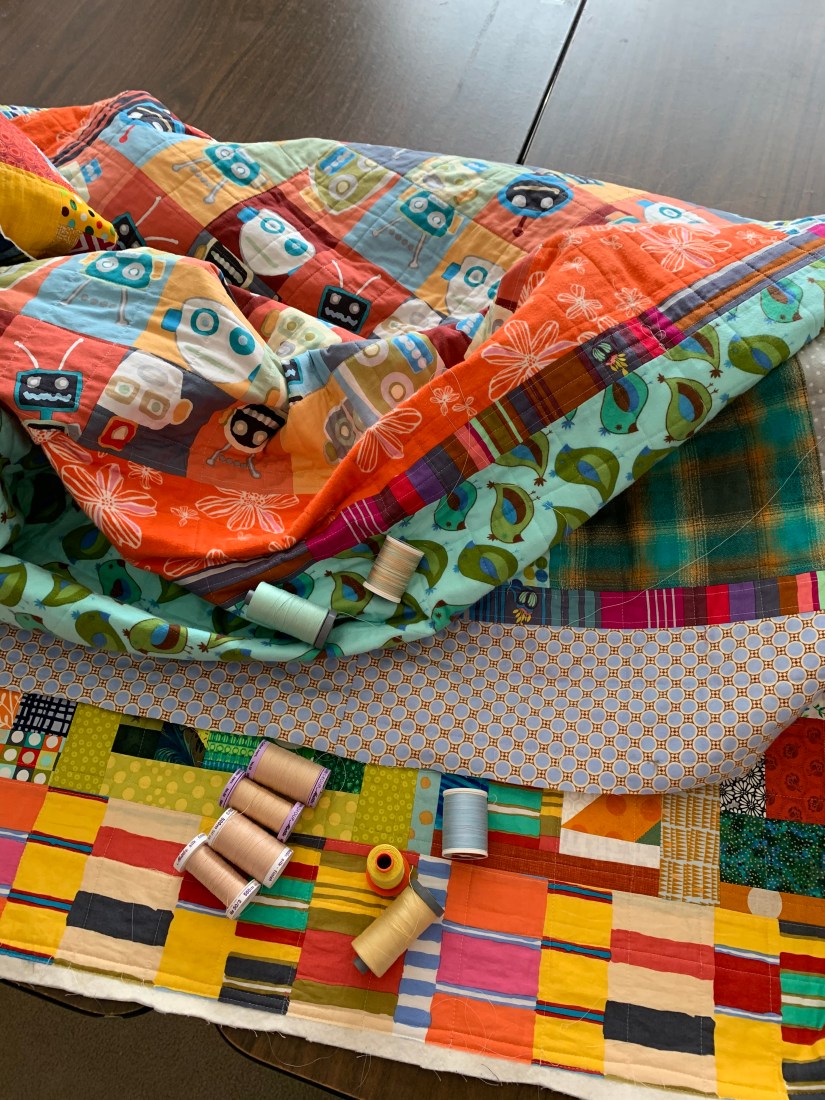
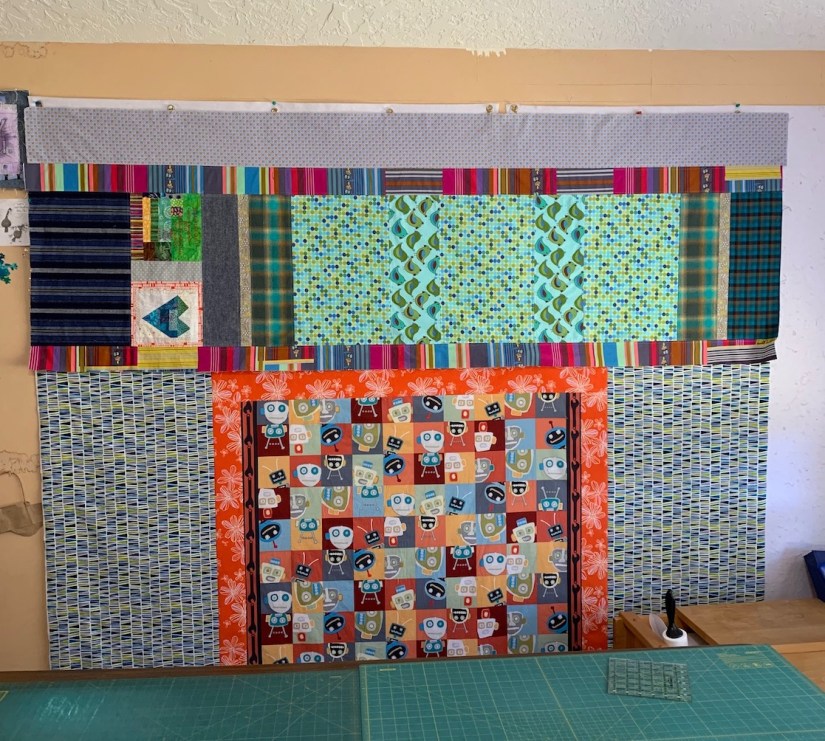
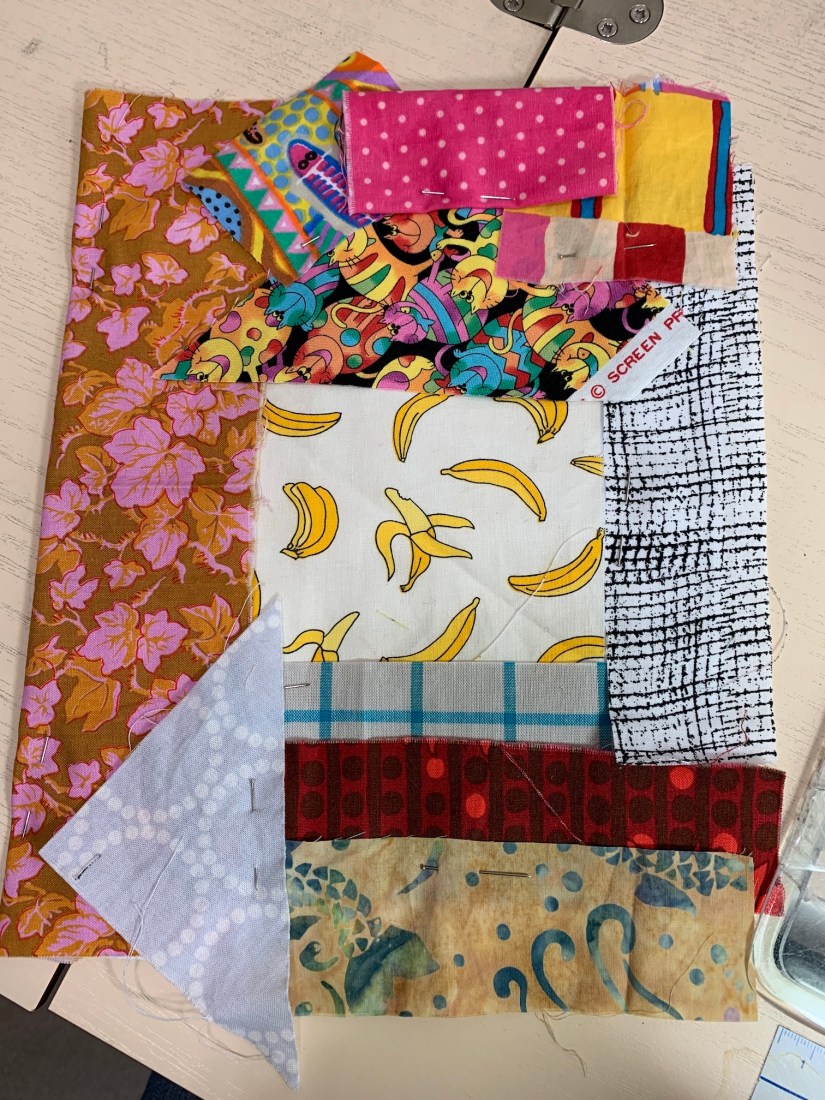
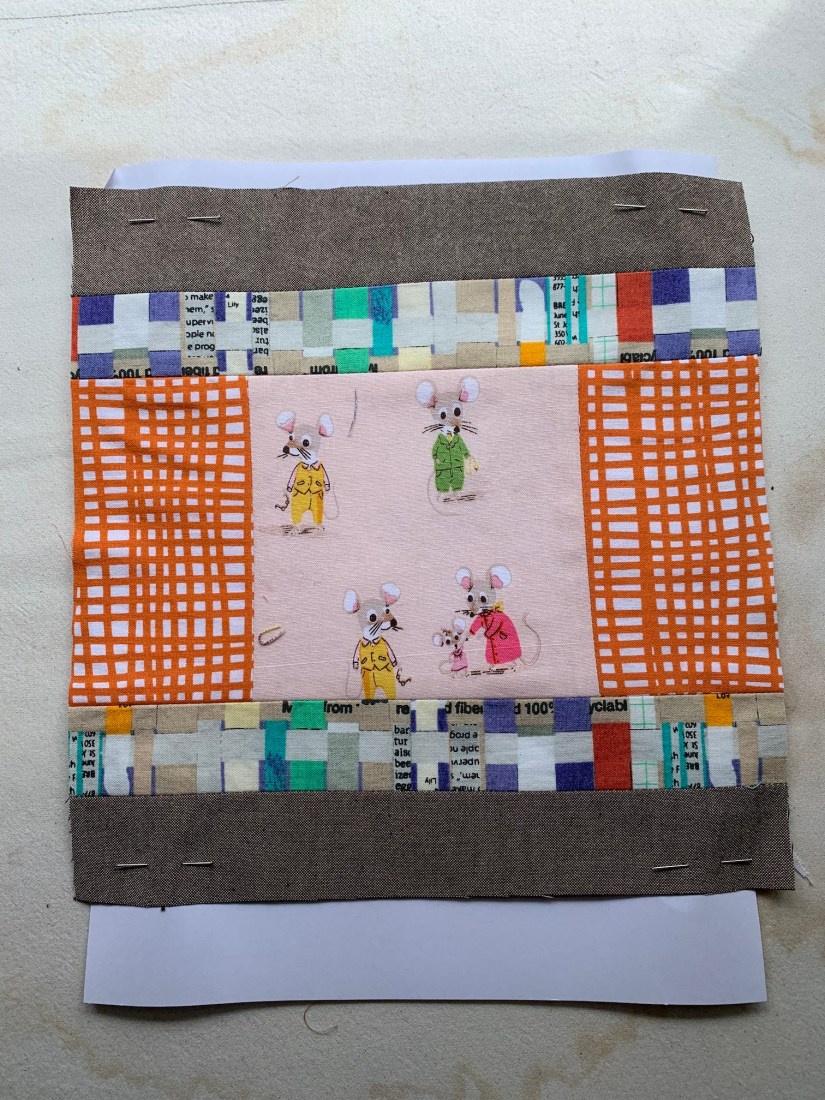
The quilt back is fun too, with the assortment of found fabrics and leftovers. A friend sent me her found robot boy yardage for the center; she thought it perfect for The Boys.

#13- back#14- back#15- back
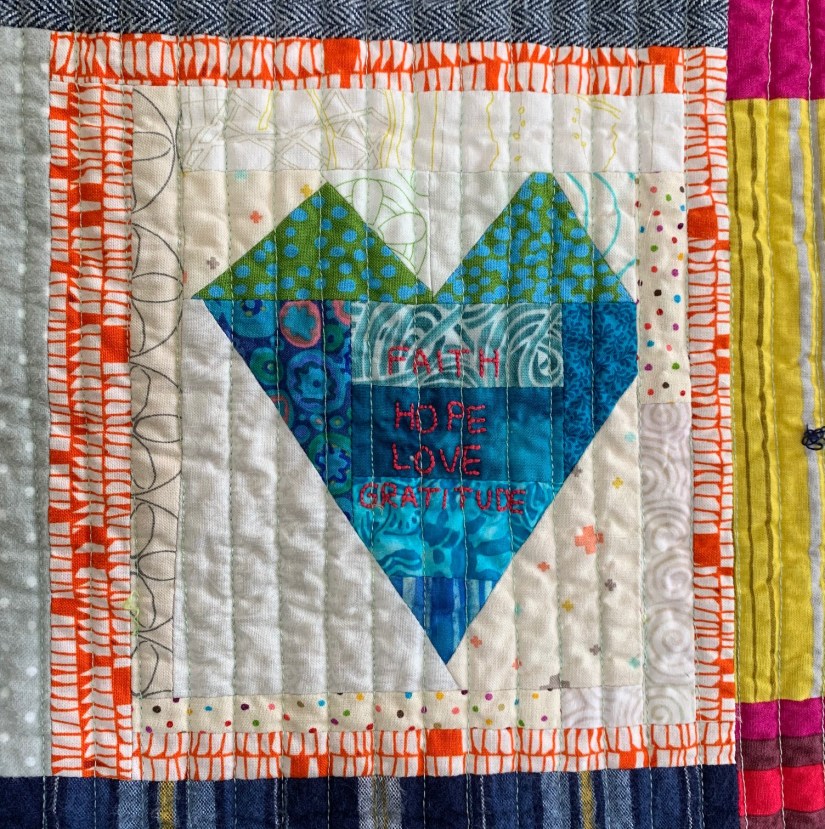
I’m so pleased I took the time to embroider the labels. These labels will last as long as the quilt.

#16 both labels#17 heart label#18 main label
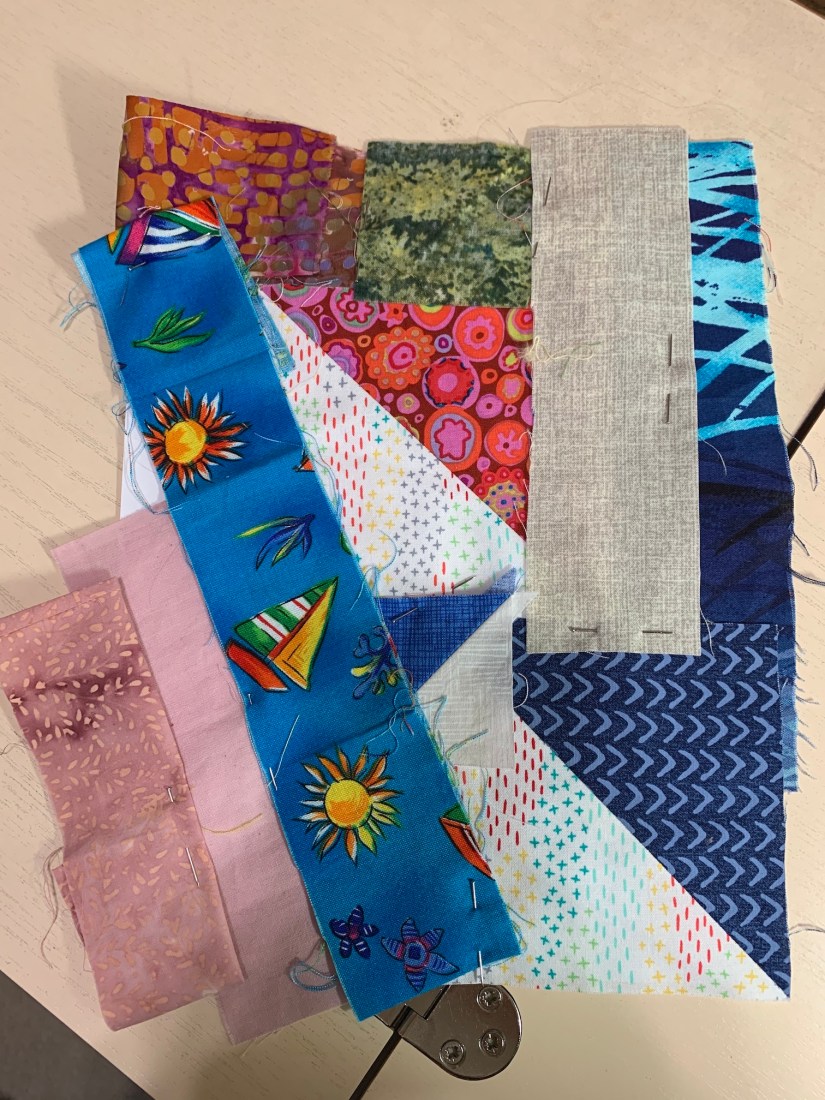
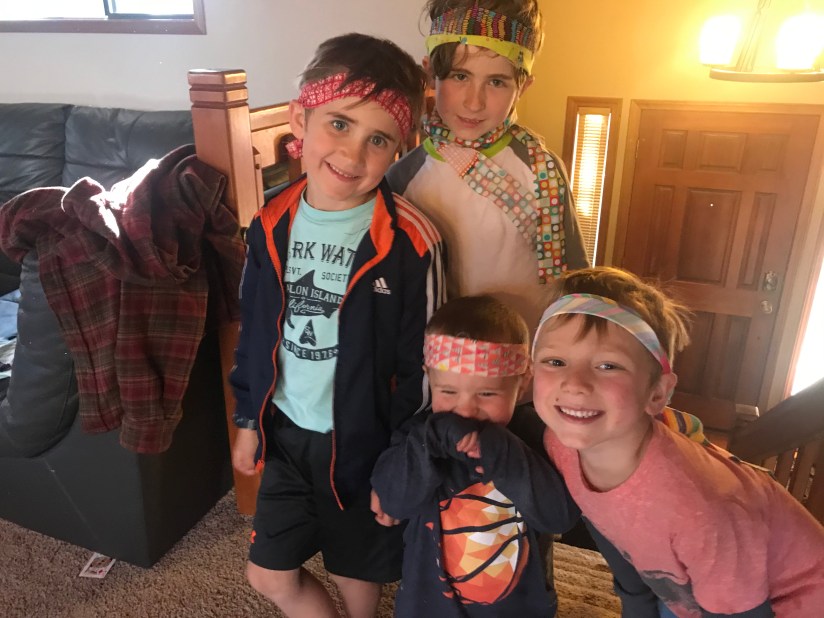
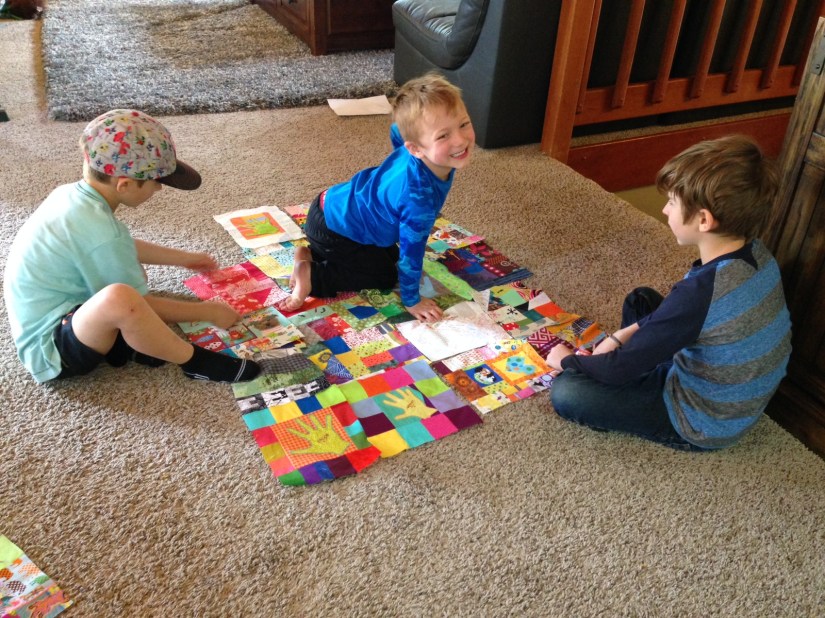
It had been a long time since “The Boys” had seen the blocks, and I wondered what they would remember about their creations. But the 3 older boys wasted no time in finding their hand and favorite blocks.

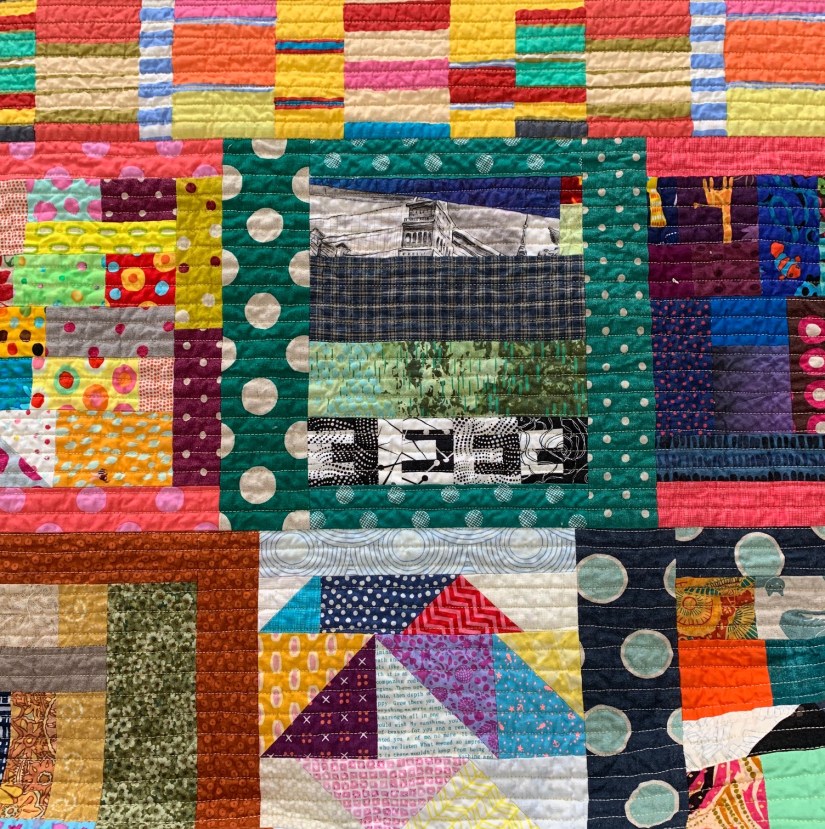
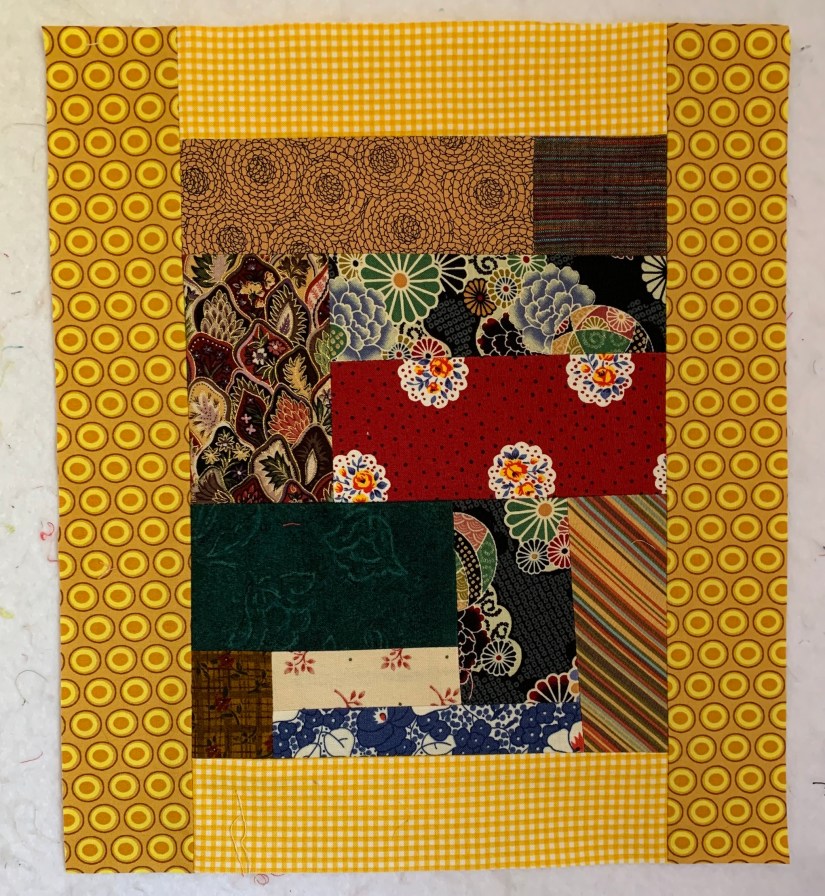
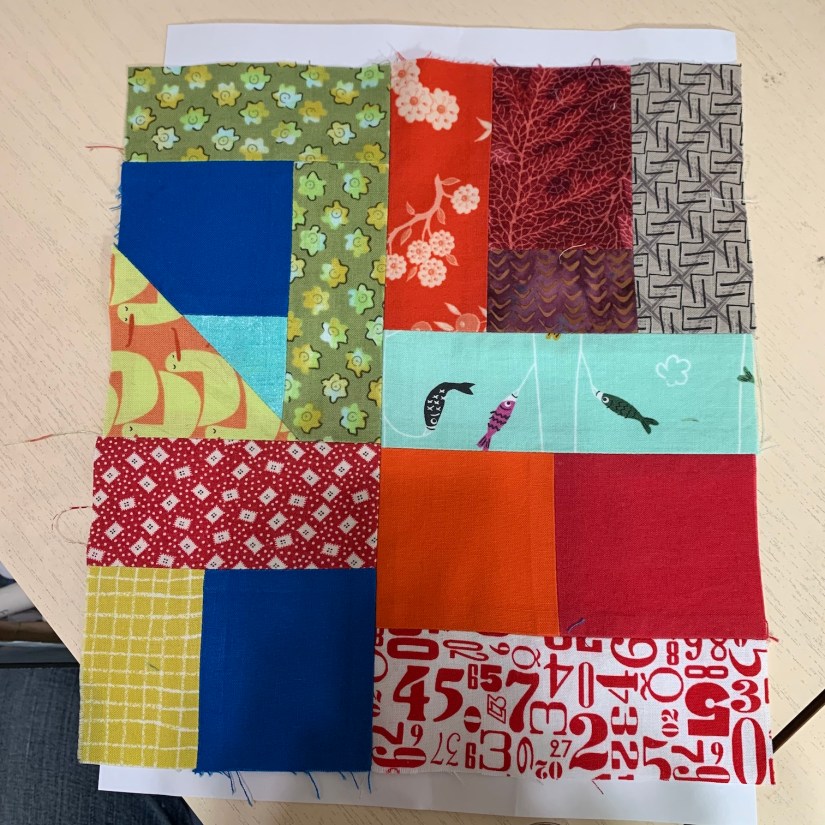
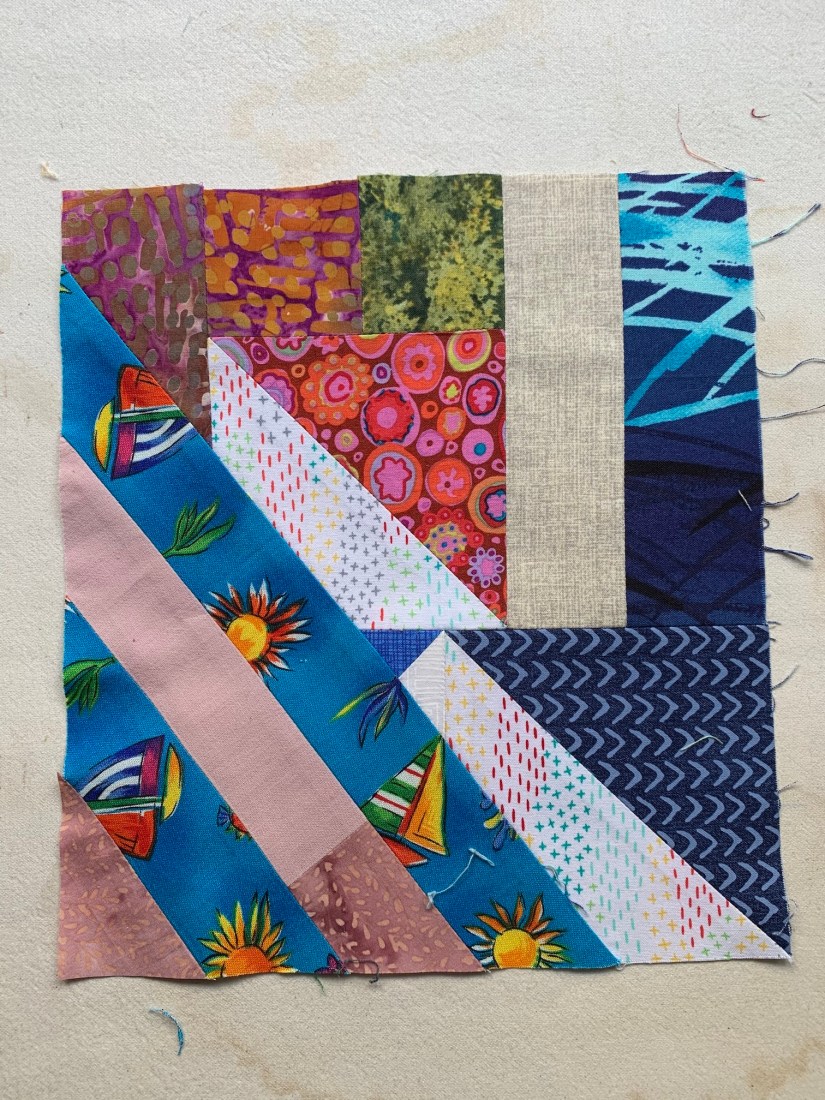
One of “The Boys” found his favorite block, saying it was the weirdest block ever. I told him I’d never seen anything like it and in fact, it was ‘genius’. He had a big grin.

#19
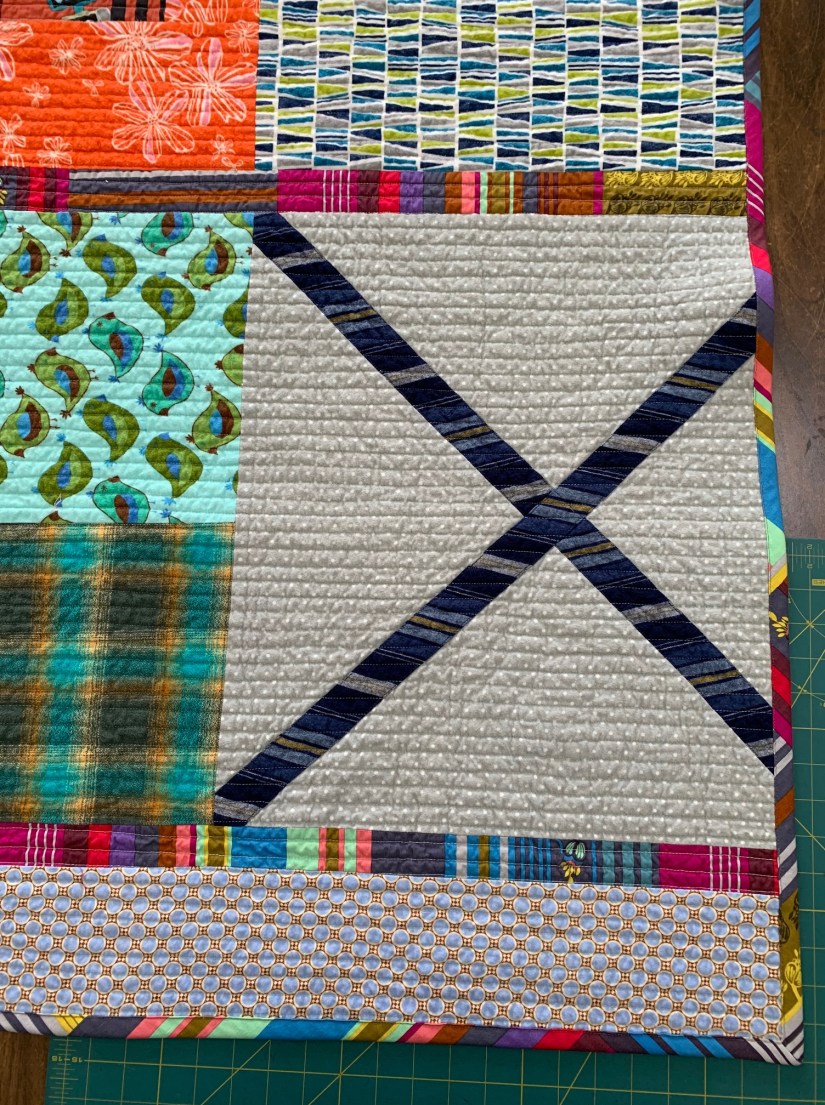
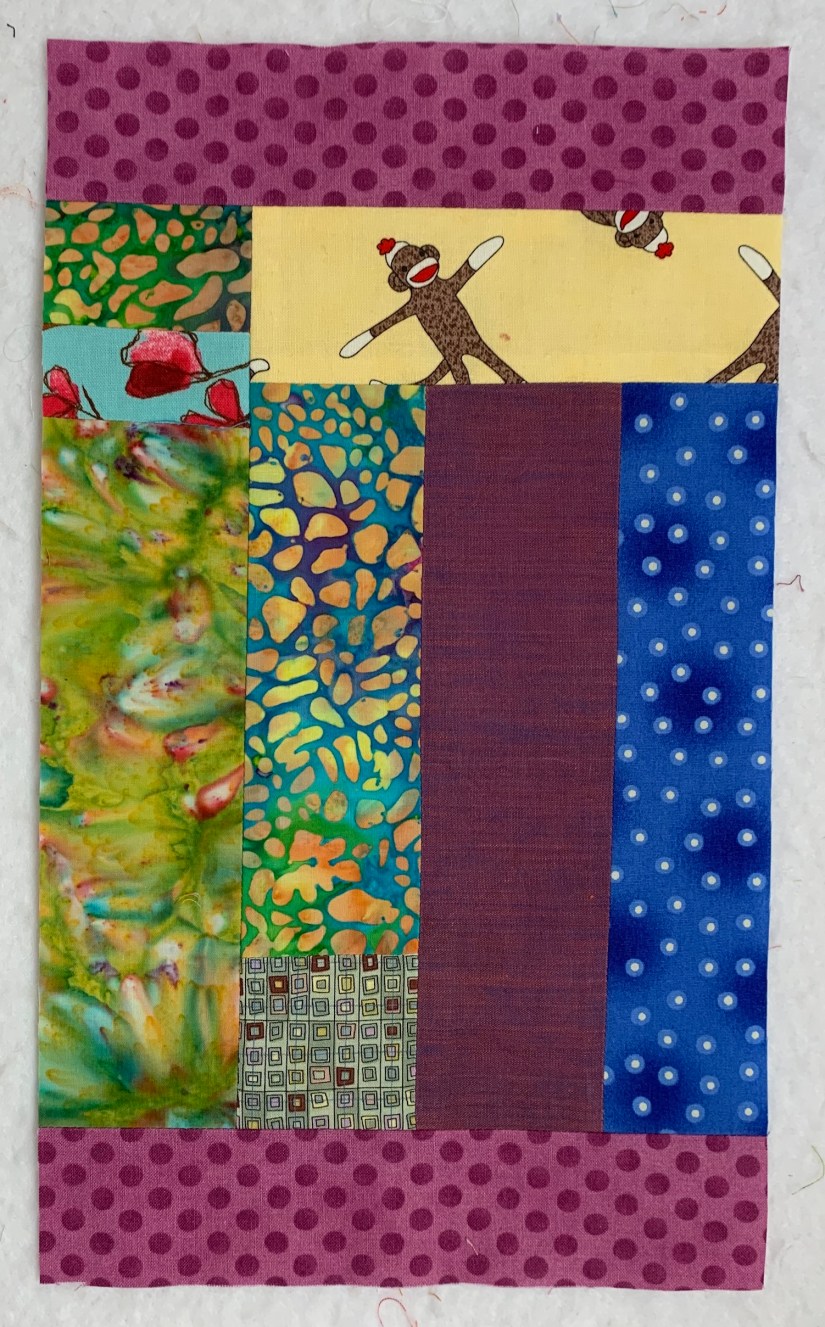
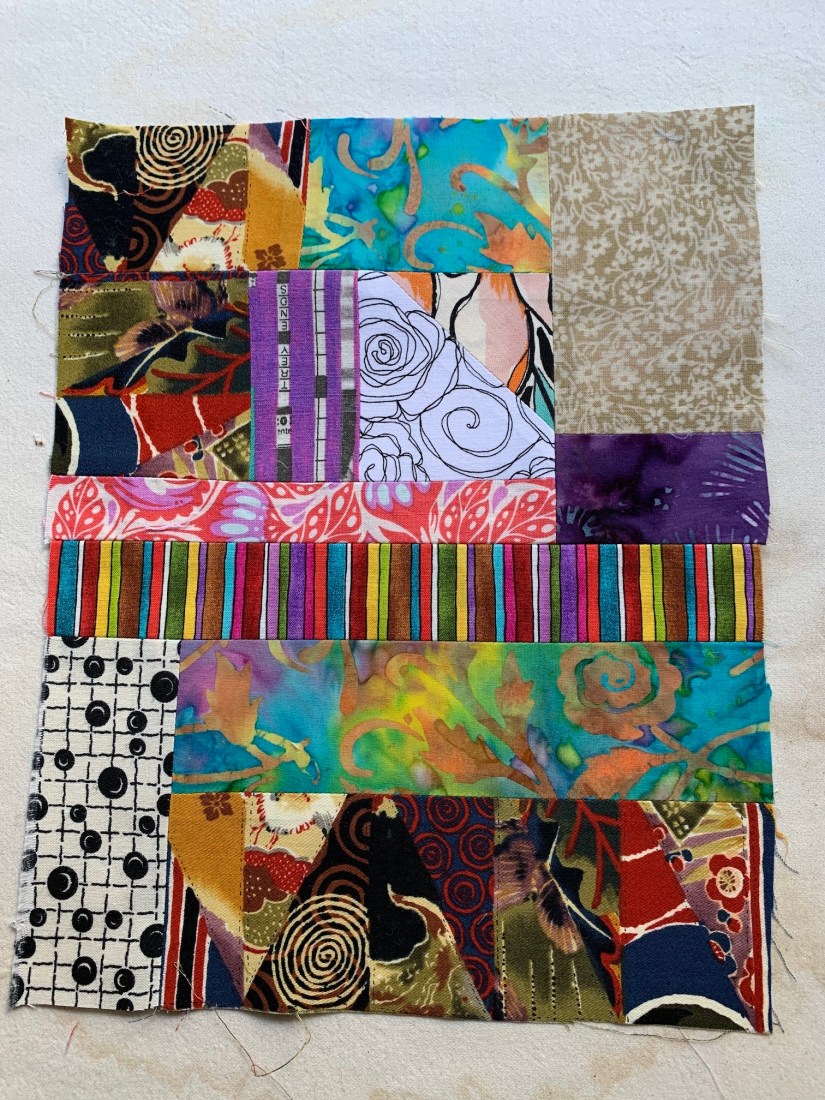
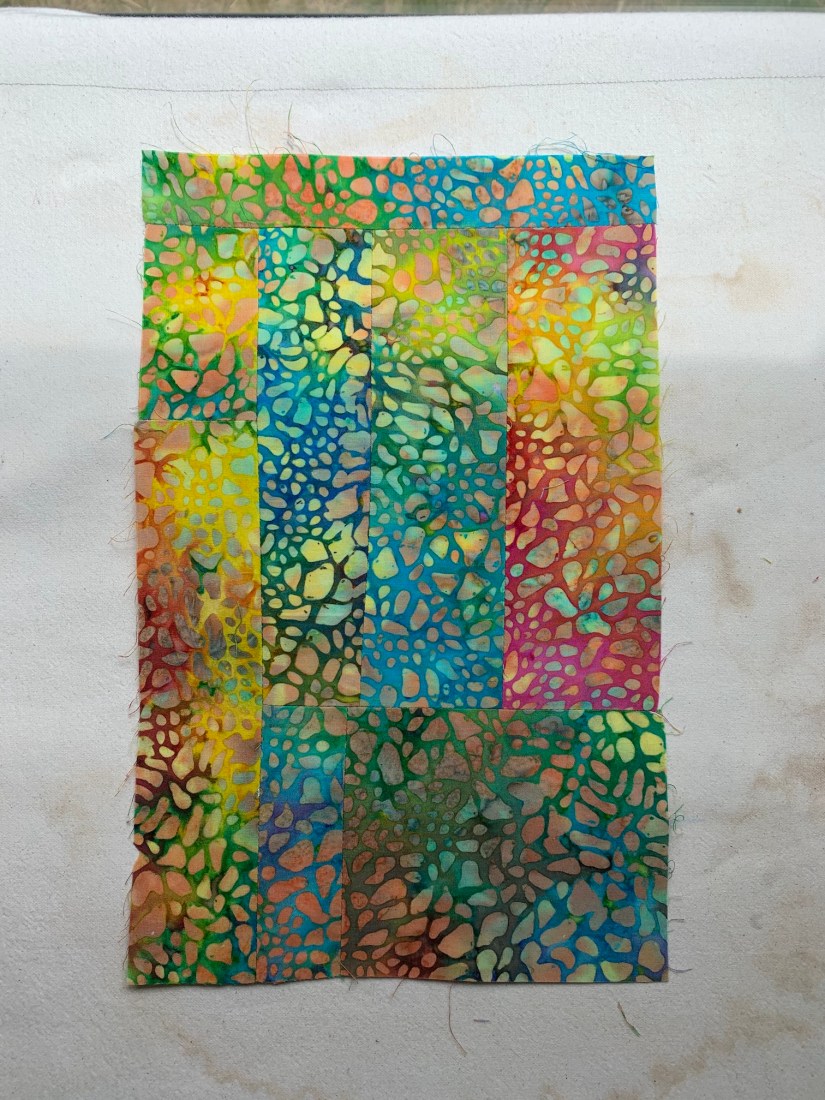
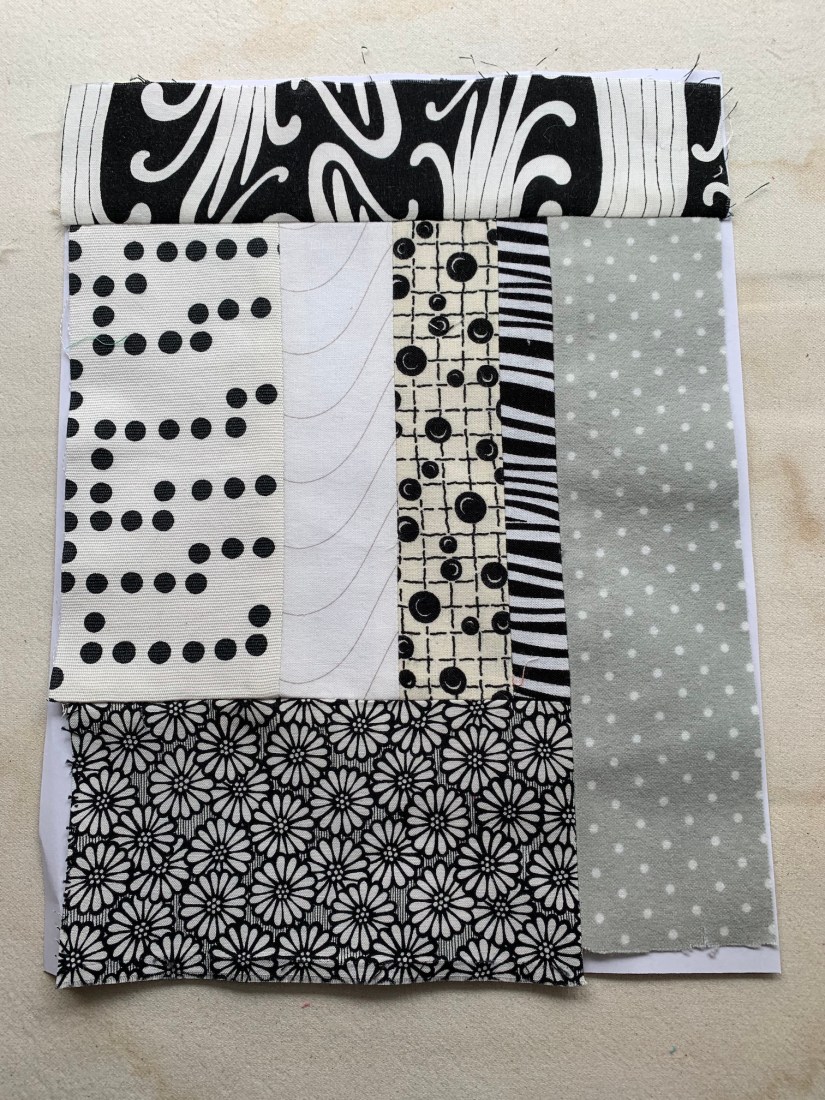
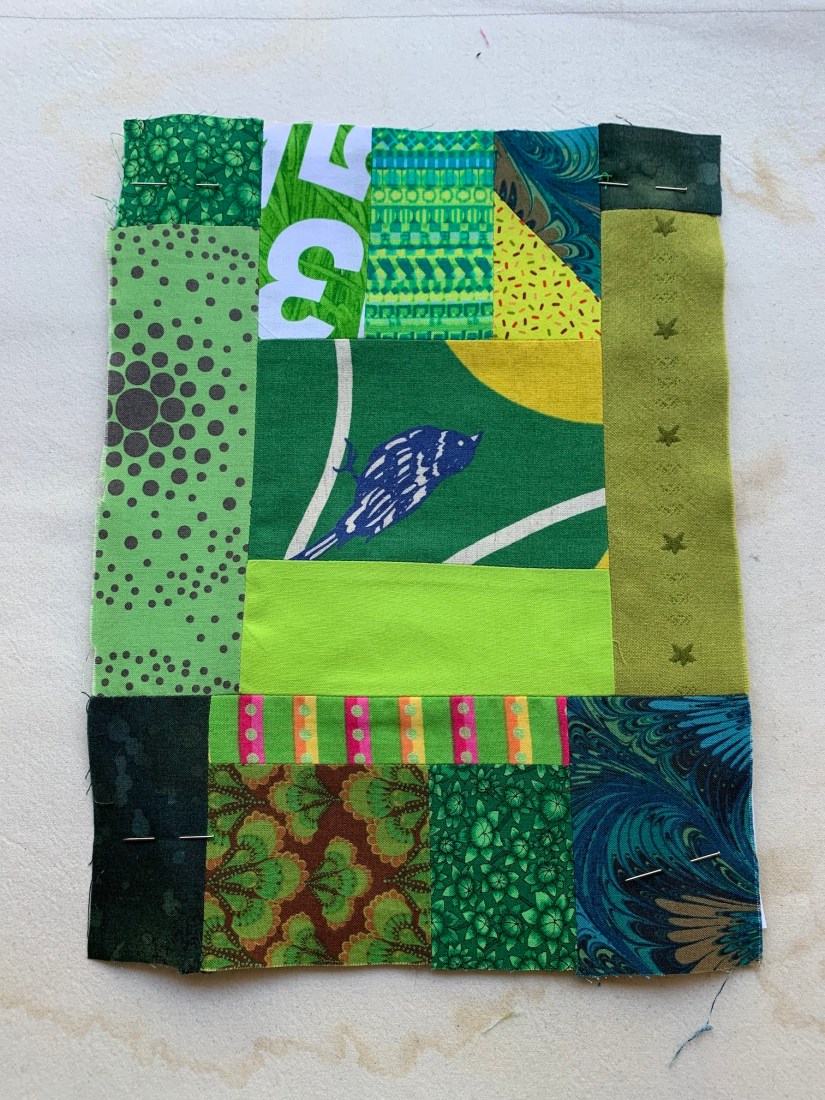
Another favorite of The Boys was this block. I think it’s graphic and moody, in a good way.

#20
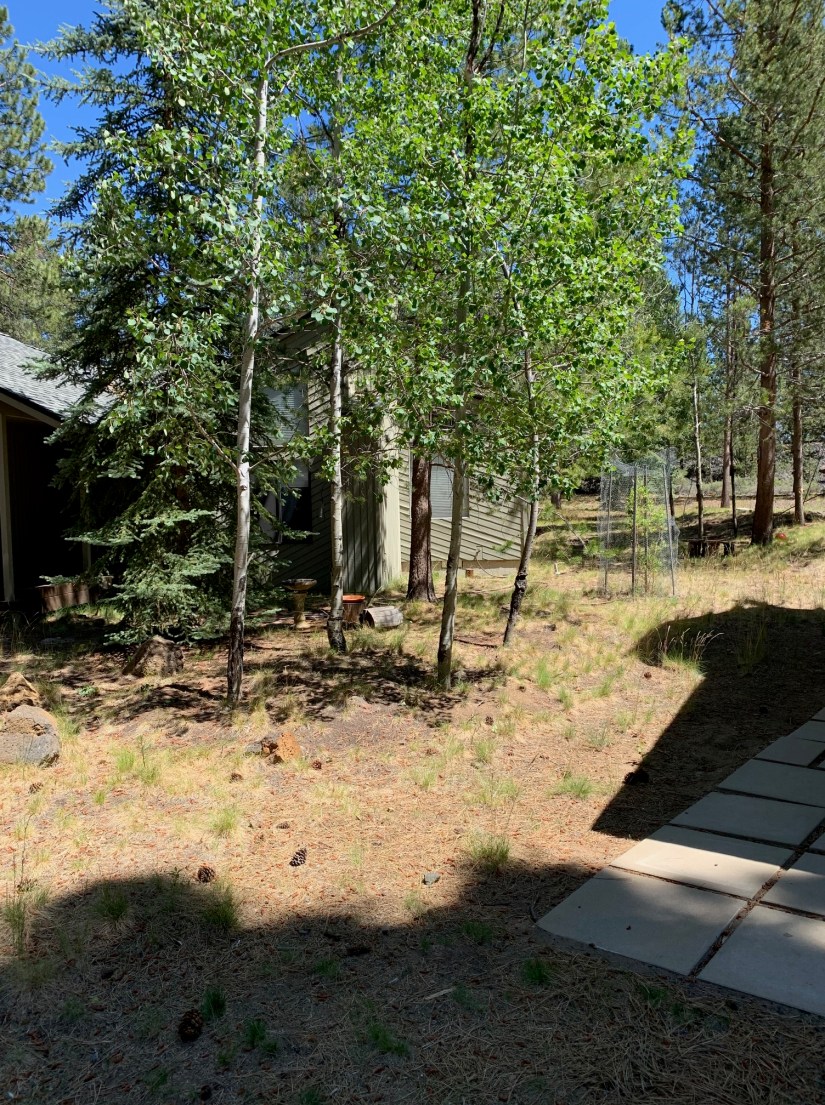
Finally the day for the Big Giveaway came. David and I spread out several sheets on our back deck. As we watched the kids scramble around the quilt (while staying 10’ apart), some of us burst into tears while the rest became teary. This project was definitely a good thing.

#21- giveaway the quiltIn the beginning, we were two neighbors who banded together when the state government ordered a month-long lockdown. At first, we joined forces to add something special to the daily life of “The Boys”, whose routines had changed suddenly with the Pandemic.

Then we started helping each other out. We even celebrated shared birthdays in the open yard between our houses. “The Boys” were growing up in front of our eyes, going from ages 2-8 to ages 2-9. We became closer while we had to live separately.

I can’t help but feel there is a larger story here during this Pandemic. There must be a patchwork of stories unfolding all over the United States and the World, as we find ways to connect and help each other out.

Guest Blogger, Quarantine Quilts

Quarantine Quilt Project: Life in the Time of Coronavirus, Part IV (Guest Blog Post)

Here is the 4th installment of the guest blog post series by my talented friend Wendy Hill on the awesome quilt she made during quarantine with the four rambunctious boys next door (aka “The Boys”) ages 2 – 8. Wendy has a background in teaching (and quilt book writing) and in this post she provides details on her process of basting, quilting and binding one GIGANTIC Quarantine Quilt!

If you are just joining us, see these posts for Parts I, II and III of the story by Wendy:


Quarantine Quilt Project: Life in the Time of Coronavirus

Part IV: Basting, Quilting & Binding The Gigantic Quilt

If you’ve been following along, you know that my collaboration with The Boys next door led to a gigantic quilt top measuring 82” by 104”, and a quilt back 84” by 106”. Time to baste and quilt this monster-sized quilt!!

Basting

Basting is a two-step process for me: spray baste first with Odif 505 Temporary Adhesive followed by stitching a large grid with water soluble thread by Superior (Vanish Lite). This foolproof method lets me quilt without any problems.

But first, I have to clear the sewing room. After ironing the batting to smooth out any creases, I tape the batting to the floor to hold it in place.

#1- basting prep#2-batting smoothedWe had to navigate the crowded hallway for a day or two, but the cats loved exploring this new-to-them space.

#3- stuff in hallway#4 cat in stuff in hallway
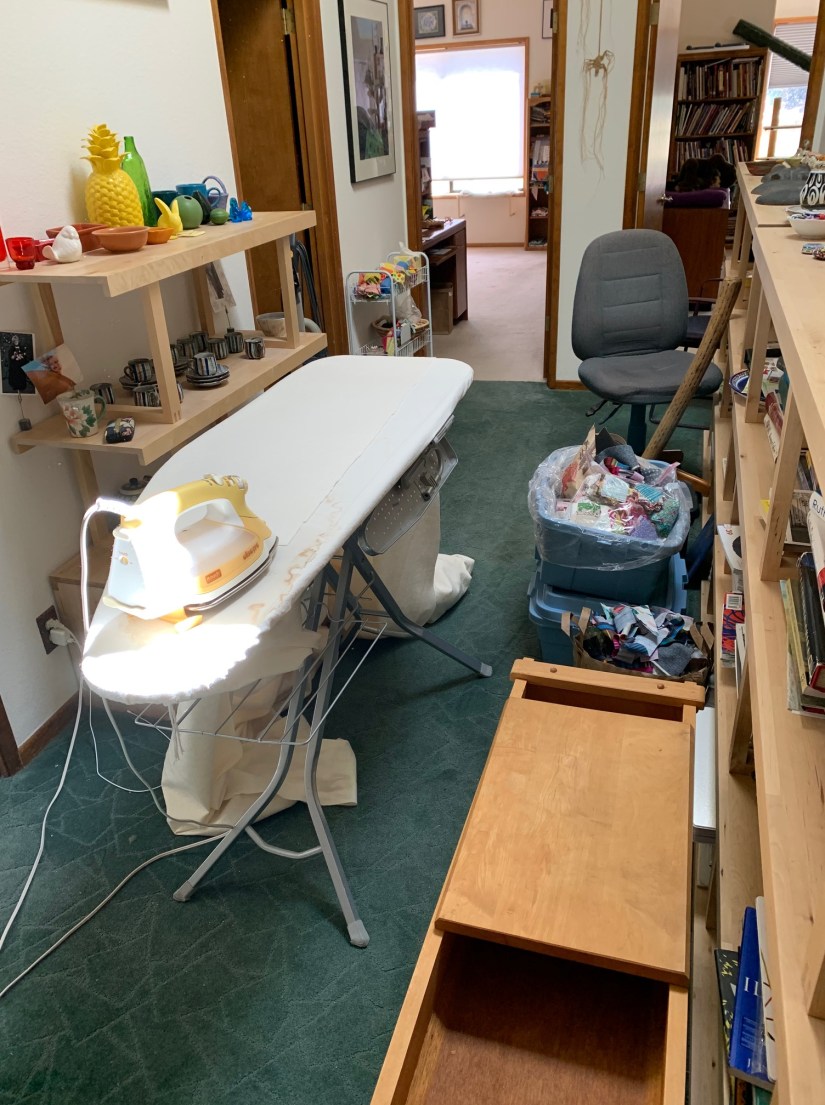
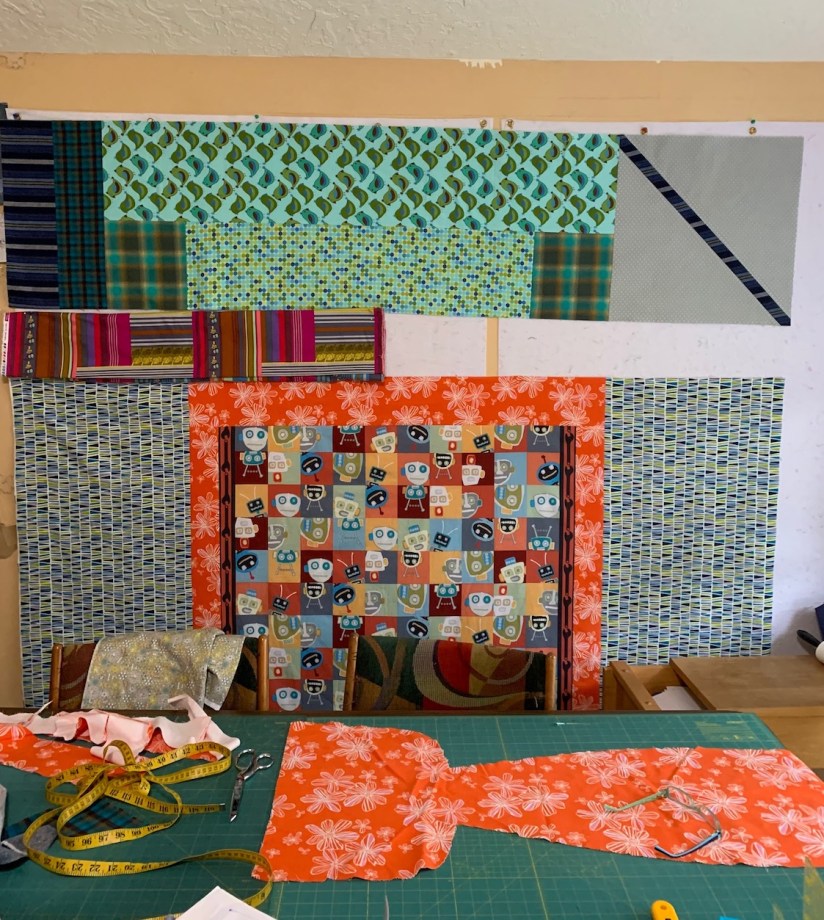
With the quilt back centered on the batting, the window open, the ceiling fan on low, and paper around the edge to catch any over spray, I’m ready to baste.

#5- ready to basteI can baste any size quilt with my “assistant”: a swim noodle. (My assistant never complains but getting up off the floor is another story!)

Roll up half the quilt onto the swim noodle. Spray a light coat from side to side, covering about 15” from the rolled up quilt towards you. Unroll the quilt over the sprayed area, smoothing as you go. Here is a photo of a different quilt ready to spray, unroll, and smooth.

#6- diff quilt, swim noodleRepeat to spray baste both halves of the quilt. Trim the excess batting along the fabric edge. Allow to dry for a few hours or overnight before turning over and taping the quilt to the floor.

With the quilt front centered on the batting, repeat the steps above to spray baste. Allow to dry.

#7- quilt topWith both ends of the quilt rolled up to the middle, I stitched lines about 3”-4” apart with the water soluble thread, from the middle to the edge. Repeat with the other half. Re-roll the quilt in the other direction, stitching perpendicular lines about 3”-4” apart.

A bonus benefit is the way these stitching lines change how the quilt handles, making it easier to do the actual quilting lines.

#8-sewing room#9- water soluble grid#10- water soluble grid#11, water soluble grid

Tips for Using Any Spray Baste

  1. Ventilate the room.
  2. Cover up to prevent overspray on unwanted places.
  3. Hold the can at least 12” away from the surface.
  4. Keep the can moving from side to side- do not soak the batting.
  5. After the layers are basted, allow time for the spray baste to dry & set.
  6. It will evaporate out, especially in dry climates. Another reason for stitching a water soluble thread grid is to buy time before you start quilting.

Quilting

I like using roughly parallel quilting lines, but with a quilt this size, this will be the easiest thing for me to do on my home sewing machine.

But first, thread choices. I selected Aurifil 50 wt cotton for the front (yellow) and back (blue).

#12- thread choices
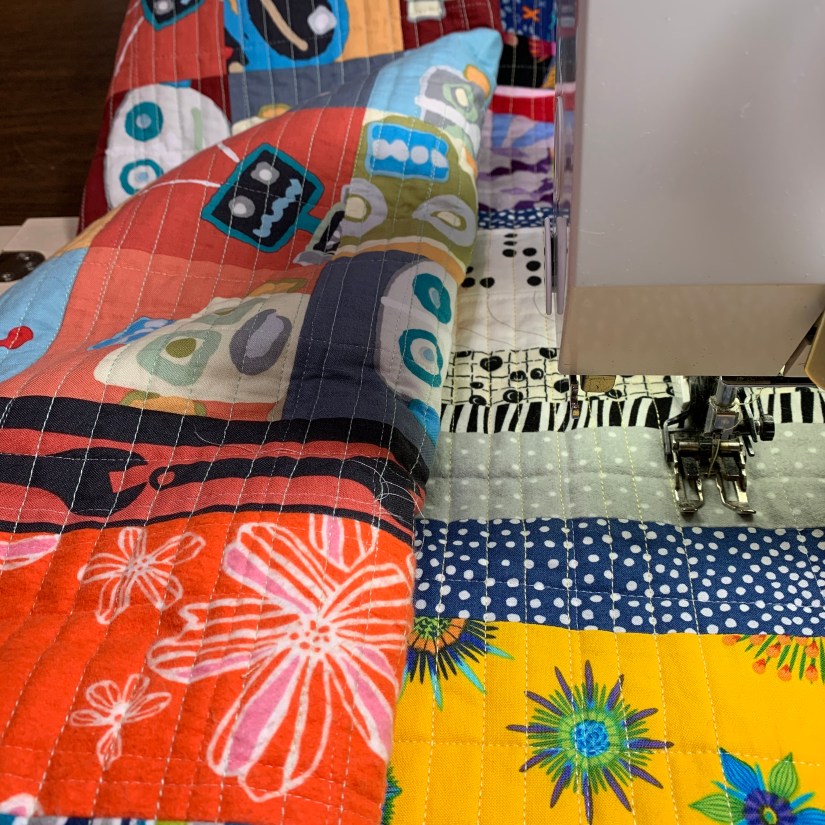
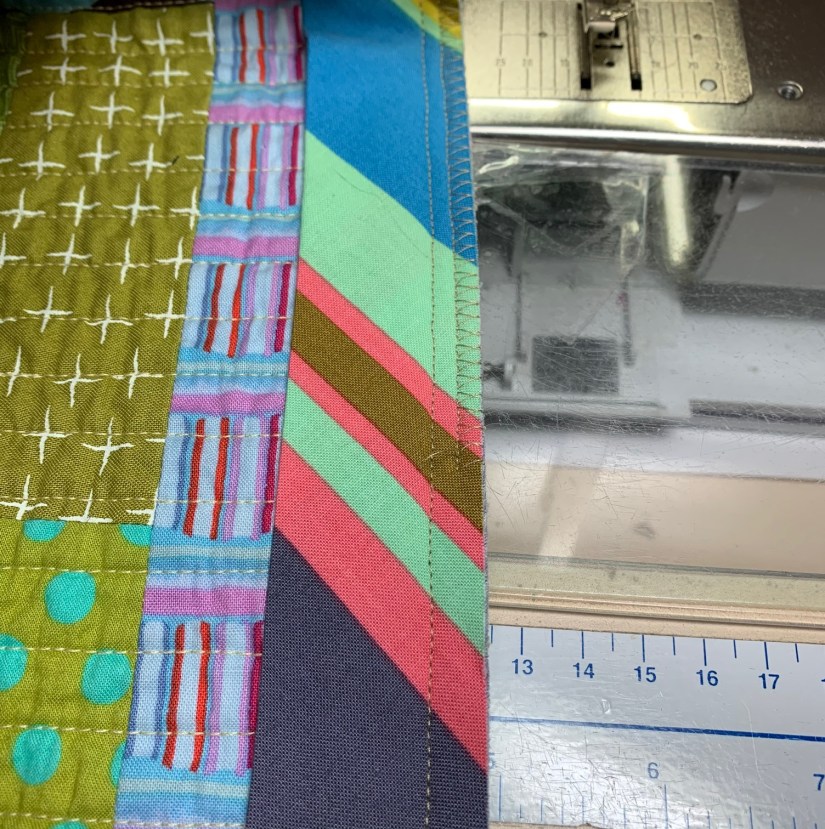
With the quilt rolled up from both ends to the middle, I started stitching the roughly parallel lines, using the pressor foot as a guide. Ignore the water soluble thread lines.

I accordion folded the quilt in my lap, but with big quilts, you can get some drag from the rolled up quilt coming out behind the sewing machine. When you start to feel some drag, accordion fold the quilt behind the sewing machine, which will reduce or eliminate the dead weight.

#13- first stitching lines#14- stitch side to side
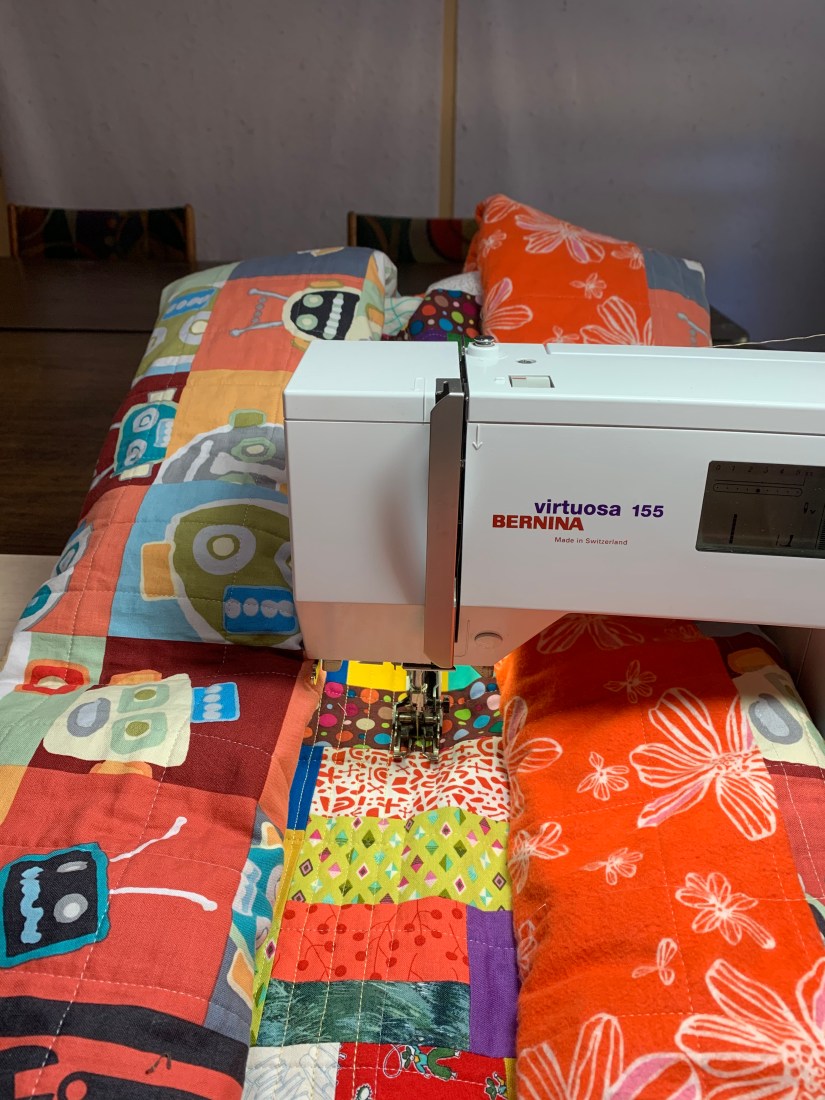
Keep quilting! The lines are actually unequal distances apart and not perfectly straight, but I like this look on a scrappy quilt.

#15- stitching#16 still stitching
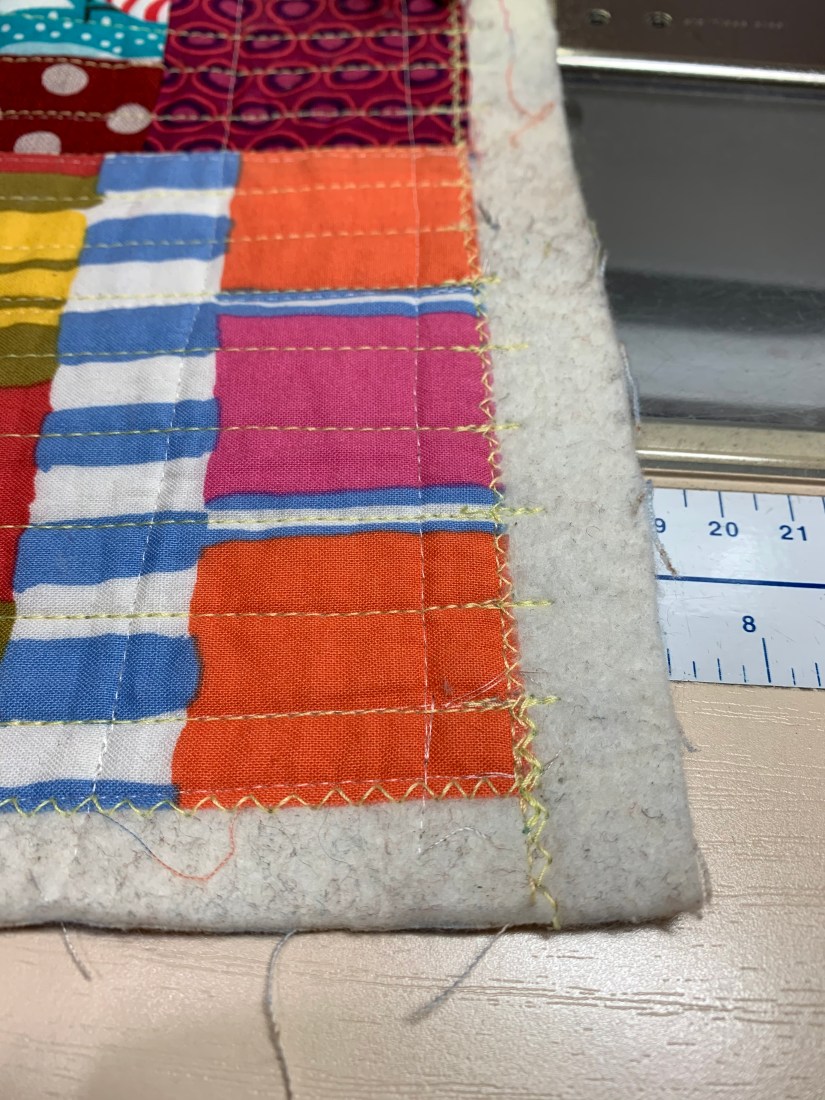
I used the seam lines between the rows to “square up” my parallel lines.

In the last couple of inches before the seam line, I start my course correction strategy. I start stitching parallel to the seam line, so that the next row/section starts over with an accurate straight line. The stitching lines can get way off line without some kind of course correction fix.

#17- squaring upCelebration! The very last line of stitching!! I zigzagged the edges and trimmed the batting before tossing the quilt into the washer and dryer. I like to let the quilt shrink at this stage, before sewing on the binding.

#18- last stitching line#19- zigzag edge#20- before washingRemove the quilt from the dryer while still slightly damp and allow to air dry the rest of the way.

#21- air drying#22- air drying

Binding

I’m always searching for alternative techniques. I invented a way to machine topstitch binding that is easy and looks great. For quilts that will be loved, used, and washed & dried, this method is also makes for a sturdy binding.

I started with a double French fold binding. A 3/8” seam allowance gives me the wide binding I like so much. I flattened the seam allowance with my faux serge stitch (or zigzag works too) to get a flatter looking binding.

#23- dble fold binding#24-wide seam allowance#25- flattening teh seam allowance#26- flattened
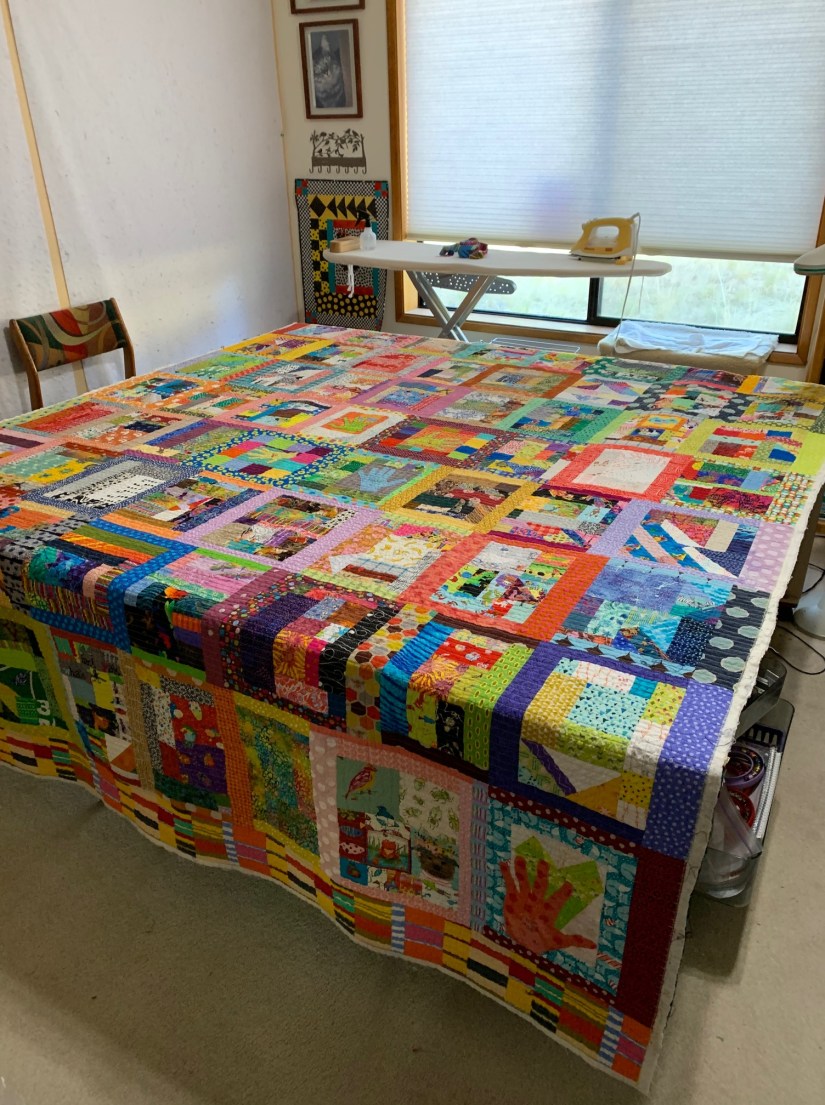
After folding over and pinning (or clipping) the binding in place, I hand sewed the mitered corners, about 1” in each direction from the corner.

Next, I basted along the very edge of the binding, from the back of the quilt. This big stitch goes fast.

#27- big stitch baste along edgeFlip over. From the front, you can see the basting thread: this shows you exactly where the fold is on the other side.

#28 basting line on frontI machine topstitched the binding from the front, by stitching just to the right of the basting line. (You can stitch anywhere between the basting line and the ditch of the binding seam.)

#29-stitch from the front#30- stitching from the backI removed the basting thread and checked the back to make sure the stitching line is along the edge of the binding. Finished!!!

#31 finished from the front#32- finished from the back

Next Week: The Big Giveaway!

#33 sneak peek front#34 sneak peek back


Guest Blogger, Quarantine Quilts

Quarantine Quilt Project: Life in the Time of Coronavirus, Part III (Guest Blog Post)

Perhaps your enthusiastic comments encouraged Wendy Hill to immediately put together the third installment of her guest blog post series about the awesome quilt she made during quarantine with the four rambunctious boys next door (aka “The Boys”) ages 2 – 8. 

I am so happy to now share her third installment! (And now you get to see the quilt laid out with all the blocks created by “The Boys”.)

If you are just joining us, see these posts for Part I and Part II of the story:


Quarantine Quilt Project: Life in the Time of Coronavirus

Part III: Magic! Turning 65 Blocks of All Sizes Into a Quilt Top! And Leftovers Into a Quilt Back!

On a lark, my neighbors and I added playing with fabric to make quilt blocks. We had no idea where this project would take us or how our families would connect over time. 

Please consider launching your own “quarantine quilt” project with kids or adults who would enjoy such a project. Collaborate through “snail mail” if your people are not in the neighborhood. I believe everyone can capture the free spirit seen in The Boys’ quilt blocks. 

Quilt Top

Since I refused to do anything more than trim (or square-up) the precious blocks, I had to find another way to unify 65 blocks of all sizes. I sorted the blocks by height, the first bit of “magic”, to layout 8 rows of 8 blocks, saving the extra block for the quilt back. 

#1A 8 blocks, 8 rows#1B 8 blocks, 8 rowsWith the row height consistent, I planned to frame the blocks, adding “filler” fabrics if needed, to adjust the row width. I looked to my assortment of “dots” and “cross hatched” fabrics, many of which had already been cut into.

#2A- assorted dots#2B- assorted cross hatchI started with the widest row as the standard width, which happened to be Row #4. Next I assembled Row #3, working my way up to Row #1. Of course, the quilt needed a border at the top (and bottom), because the quilt can’t be too big, right? 

#3A Rows 3&4#3B Rows 2,3,4I alternated “A” and “B” blocks in each row as part of my plan to frame the blocks, add fillers, and create a border on the two long sides. A plan helps me keep my sanity but also gives me freedom to go off the path. It’s a paradox!

“A” blocks are framed on all four sides. I used the same fabrics or similar color scheme: 

#4A- _A_ block#4B- _A_ block#4C- _A_ block“B” blocks are only framed top and bottom. 

#5A- _B_ block#5B- _B_ block#5C- _B_ blockThe border on the long sides is created block-by-block, using a 2 3/4” width of fabric on the outside edges of the first and last blocks in each row. This creates a visual border without using one long strip of fabric. (The width of this border strip could be anything to make the border wider or narrower.) 

#6- built in border on rightFor “A” blocks, the outside edge/border strip (one of four strips framing the block) is cut to this specific width. 

#7, end border strip for _A_ blocksFor “B” blocks, the outside edge/border strip is also cut to this specific width, making a total of 3 strips framing the block (instead of only top & bottom). 

#8, end border strip for B blockAt this point, you might wonder how the rows come out the same width? This second bit of magic is in way to adjust the row width. Assemble the row in two sections. Layout the two pieces on a design wall or other surface. 

If the sections are too wide, overlap the raw edges between the two sections, until the width is correct. Sew the seam, trimming excess fabric to account for the seam allowance. 

If the two sections are too short and leave a gap, add a “filler” strip to one of the two sections, and continue as described above. 

For these two rows, I chose bright filler fabrics: look for the bright green plaid in the first photo, and bright red plaid in the second photo. The “fillers” just add to the fun (chaos)!

#9A- green plaid filler9B- red plaid fillerEveryone encounters surprises, obstacles or let’s be honest, mistakes. How a quilter deals with these events are what counts and as quilters know, these are often “opportunities” to do something unexpectedly great. 

I accidentally trimmed or “squared-up” two blocks, making them the wrong height. “Fillers” to the rescue once again, as I just added another strip to the top edges. 

#10A- extra strip fix#10B- extra strip fixWhen I cut a fabric on the bias, I often reinforce the edge with a narrow strip of fusible interfacing. This way, there are no worries about the edge stretching. 

#11- reinforce bias edge

Before assembling Rows 5-8 and the border, I stood back and saw the two orange fabrics screaming at me. I couldn’t shut out the visual noise (ha ha) so I swapped one of the oranges out for another color. Peace was restored.

#12A, orange screams#12B, replaced orange, peace restored

Quilt Back

While “The Boys” used my saved scraps to create fun, exciting, weird and wonderful blocks, I did my best to put together a quilt back also using leftovers, larger scraps, and found fabrics in the closet. 

As the back evolved, I took a few photos, showing how the fabrics shifted around, got deleted, or sometimes, added back in. Not shown in the photos is a late stage addition; look for it in the finished quilt photos in the final guest post. 

#16- trials#15- trials#14- trials#13- trials

Labels

I used the extra block made by “The Boys”, and another leftover pieced heart block, to create two labels. When I searched the internet for the best fabric pen, my first reference said “don’t use a pen, embroider the label”. I agreed. 

#17, made by label#18 HeartAs I came closer to finishing the quilt, I had the growing feeling that this quilt was so much bigger then me or my neighbors or The Boys. 

We’ve known in theory that we could have another global pandemic, but the reality is so — well— real. The enormity of the pandemic is hard to grasp, even now. 

Yet in the face of adversity, we find many examples of people, all over the world, reaching out to help and support each other. The Quarantine Quilt is one of these examples. 

Wendy’s next guest blog post: Quilting and Binding The Gigantic Quilt


Guest Blogger, Quarantine Quilts

Quarantine Quilt Project: Life in the Time of Coronavirus, Part II (Guest Blog Post)

Well the tierneycreates Beastie would tease me that I am just using Guest Bloggers to keep up on new posts but I am very excited to share Wendy Hill’s second guest blog post on the awesome quilt she made during quarantine with the four rambunctious boys next door (aka “The Boys”) ages 2 – 8.

If you are just joining us, see this post for Part I of the story as well for some background on the super talented Wendy Hill: Quarantine Quilt Project: Life in the Time of Coronavirus, Part I (Guest Blog Post) .


Quarantine Quilt Project: Life in the Time of Coronavirus

Part II: “The Boys” Make 61 Blocks!

My story about two neighbors who band together (during the pandemic lockdown) left off with “The Boys” arranging fabric scraps on printer paper. We agreed to two blocks per day and soon we had a routine. “The Boys” dropped off their fabric arrangements in the morning, and I dropped off their finished blocks before dinner. 

I gave simple instructions: fill a piece of 8 1/2” by 11” paper with fabric scraps. Overlaps of fabric were okay but no gaps.

One day the mother of “The Boys” tucked a note inside the bag:

This is such a fun thing for our family and it’s always a race to the door when they hear your knock.

#1A, Kid Layout#1B, finished block#2A, Kid Layout#2B, finished blockSome arrangements were easy to sew together. I could sew pieces into smaller units, then assemble the units into a block. 

#3A kid layout#3B finished block#4A kid layout#4B finished blockOther arrangements required me to be inventive. Sometimes the seam allowances created gaps, so I had to add fabrics. I added a solid pink to this block. I looked for fabrics that would “go” with fabrics in the arrangement. 

#5A kid layout#5B finished blockOther times I did my best to duplicate the block, always trying to keep the original intent of “The Boys” who arranged the fabrics. 

#6A kid layout#6B finished block#7A kid layout#7B finished block#8A kid layout#8B finished blockI kept adding more scraps of all sorts to their Big Bag of Fabrics.  “The Boys” took time to create just the right assortment of fabrics on their page. 

#9 kid contemplation#10A kid layout#10B more kid layout#10C finished block“The Boys” sampled everything! Just like with “quilters” everywhere, their fabric choices reflected their explorations and mood. I was always excited to see what The Boys would drop off next. 

#11#12#13#14#15#16#17#18Then this happened: The Hand Blocks! I surprised “The Boys” with machine appliquéd fabric hands (from outlines of their hands taken by their parents). I embroidered their name and age on each hand. 

“The Boys” filled the page around their hands with their fabric choices, which I sewed into blocks. I received another written note:

These hands were such a fun idea! The kids were amazed you could do that!

#19 Wesley#20 Levi#21 Jacob#22 CalebYou know how it is. One thing leads to another, and now I thought the adults had to have appliquéd and embroidered fabric hand blocks too. I placed the hands on 4 pieced heart blocks leftover from 2018, which somehow seemed perfect!

#23, Mom#24, Dad#25, Wendy#26, DavidThe funny thing is that we became closer while we had to live separately during the lockdown. We helped each other out and we even celebrated birthdays out in the yard. 

Caleb turned 9 years old around the time my husband David turned 64. We shared chocolate almond cake and sang a joyous round of Happy Birthday together! Yes, we kept our physical distance for safety, but we remained socially connected. 

#27, almond chocolate torte

Wendy’s Next Blog Post: Magic! Turning 65 Blocks of All Sizes Into a Quilt Top!

Guest Blogger, Quarantine Quilts

Quarantine Quilt Project: Life in the Time of Coronavirus, Part I (Guest Blog Post)

I am so excited! My tremendously talented friend Wendy Hill has agreed to do a series of guest blog posts about a wonderful quilt project she’s been working on with children in her neighborhood during the quarantine/”COVID-times”. Over the past several months, she’s shared with me updates on this amazing project and I invited her to share with my tierneycreates blog readers. I hope the story of this project makes you smile as much as it made me smile.

Wendy Hill is a fiber artist and teacher who has written several art quilting books to include most recently Creative Quilt Challenges, cowritten with Pat Pease.   She has a website Wendy Hill Quilt Artist and you can follow her current work and musings on Instagram @wendyquilter.


Quarantine Quilt Project: Life in the Time of Coronavirus

Part I: Once Upon A Time

This is the story of two neighbors who banded together when the state government ordered a lock down because of the first Global Pandemic in over 100 years.

The big wide world was suddenly narrowed down to one house each for the four young boys next door and for us, a retired couple.

We live on a quiet cul-de-sac of a street, in a woodsy area, and now our respective worlds are turned upside down. 

#1 Yards#2 Yards#3 Yard SM“The Boys”, ages 2-8 years, explored the area around their house after finishing ‘school’.

With no fences and the houses close together, “The Boys” inevitably spilled over into our yard.

One day, it seemed, to them, a good idea to fill our birdbaths with dirt and make mud. “The Boys” cleaned up the mess and later dropped off an apology.

“Can you ever forgive us?” the note read. 

#4 BirdbathThere was nothing to forgive! “The Boys” were going stir crazy.

I sent an invitation to participate in “An Exchange”. I started with a drawing of a mouse, which looked a lot like a rat, and invited “The Boys” to add to the drawing. This drawing, plus two others, went back & forth until we had finished artworks. 

#5, first drawing#6, first drawing#7, collage#8, 3rd drawingLife during the pandemic meant one day blending into to the next, without much definition. But now, we waited to hear the patter of footsteps followed by the chime of the doorbell.

Likewise, I could hear “The Boys” squeal with delight when I rang their doorbell. It was exciting to open the door and see what The Boys left on the porch. 

One day, I sent over a note which read “I have a bit of a crazy idea….”. I sent over a Big Bag of Fabric Scraps with instructions to fill up blank 8 1/2” by 11” pages with fabric pieces. Overlaps of fabric were okay but no gaps. I explained I’d sew the fabrics together to make “quilt blocks”.

If “The Boys” had fun, we could keep it up until we had enough to make something.

#9, Bag of ScrapsThe mom replied “This sounds like a great idea!” and we were off.

The Boys had fun playing with color & texture, and they enjoyed seeing their fabric arrangements get transformed into blocks. As the number of blocks grew, they played with layouts on their floor. We agreed to make enough blocks for a quilt.

We were all building new pandemic memories and they would have a cuddly family quilt. Win-Win-Win! 

#10, The Boys#11, making arrangements#12, more arrangements#13, trial layouts

Wendy’s Next Guest Blog Post: The Boys Make 61 Blocks!

Fabric Scraps Obsession, Quarantine Quilts, What's on the Design Wall

“All the Trimmings” is all done

Good Morning, here is a quick update on the quilt I shared in the post Update on “All the Trimmings”.

I finished machine quilting my quilt created from a zillion half square triangles (HSTs), most of which were from scrap triangles collected over 15 years, most of which were triangles from the trimming of blocks by other quilters. Hence the name: All the Trimmings.

THogan_All the Trimmings
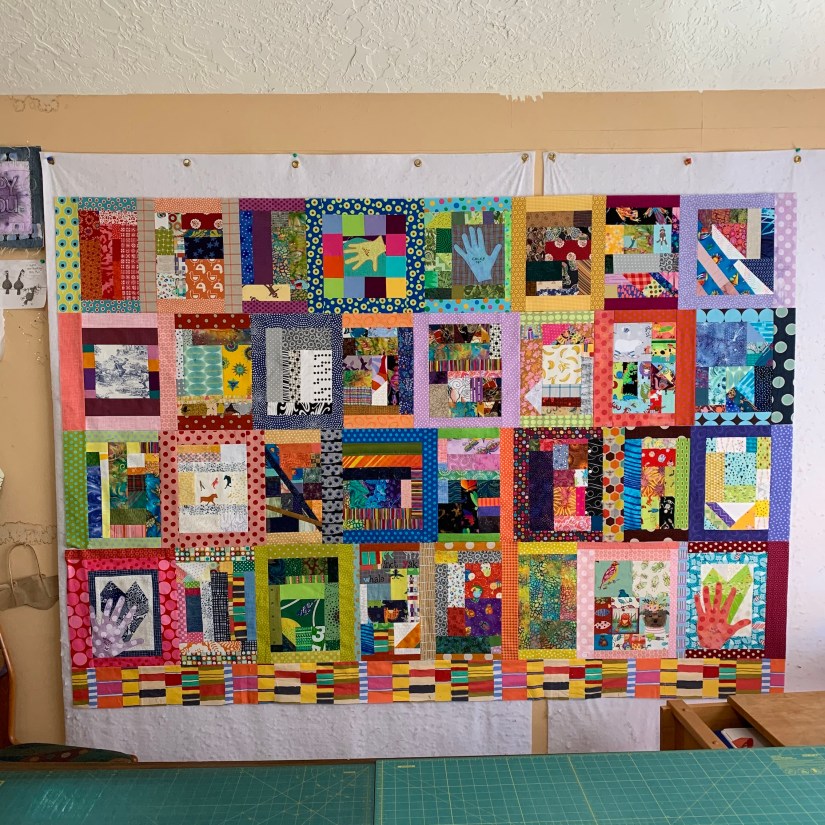
The quilt measures 57.5 inches by 72.5 inches (146 cm x 184 cm).

Here’s another photo with my partner John holding up All the Trimmings:

2020-06-15_17-50-13_665

As I created it during the Quarantine times, I went ahead and entered it into the call for entry I linked in this post – Quarantine Quilts (call for entry).

I was limited to 50 words, but here is the Artist Statement for the quilt I submitted:

Missing my Quilting Community during Quarantine and inspired by Amanda Jean Nyberg’s pattern “All Sizes”, I created a quilt from 15 years of scrap triangles collected from my quilting friends at quilt retreats and “sew dates”. Most of the scraps in this quilt are from the trimmings of blocks by many quilters as they made their quilts. Instead of going into the trash, scrap triangles compose this cozy quilt.

I am fairly sure some pretty spectacular quilts (and art quilts) have been submitted for this international call for entry and some of the quilts will go to the Houston International Quilt Show, one of the biggest quilt shows in the world.

I have doubts my little HST quilt will be selected but as they say: “You got to be in it to win it” – ha! (and it was free to enter).

The rules say the makers of the quilts selected will be notified no later than July 10th.  I will let you know the outcome.

For now, the quilt is keeping me company on my favorite chair in the living room.

2020-06-19_08-33-49_366

You might notice that the quilt Seattle Scrappy (see post Update on Seattle Scrappy) is sitting in the chair also – I am still working on hand quilting it (and wow hand quilting a lap size quilt takes MUCH LONGER than machine quilting it!).


Postscript

Speaking of “Quarantine Quilts”, a friend of mine has been working on an incredible quilting collaboration project with some children in her neighborhood and I hope she will share with us this project in a future guest post. Every time I look at images of this quilt in progress I get a huge smile!

Fabric Scraps Obsession, Quarantine Quilts, What's on the Design Wall

Update on “All the Trimmings”

Hello everyone, I wanted to share an update on the quilt I last discussed in this post What’s on the Design Wall: “All the Trimmings”.

I completed all five sections of the quilt top made from fabric scrap triangles and scrap squares to create nearly 600 half square triangles (HSTs) in the following sizes:

  • 2 inch x 2 inch
  • 2.5 inch x 2.5 inch
  • 3.5 inch x 3.5 inch
  • 4.5 inch x 4.5 inch
  • 5.5 inch x 5.5 inch

2020-05-23_20-04-48_040
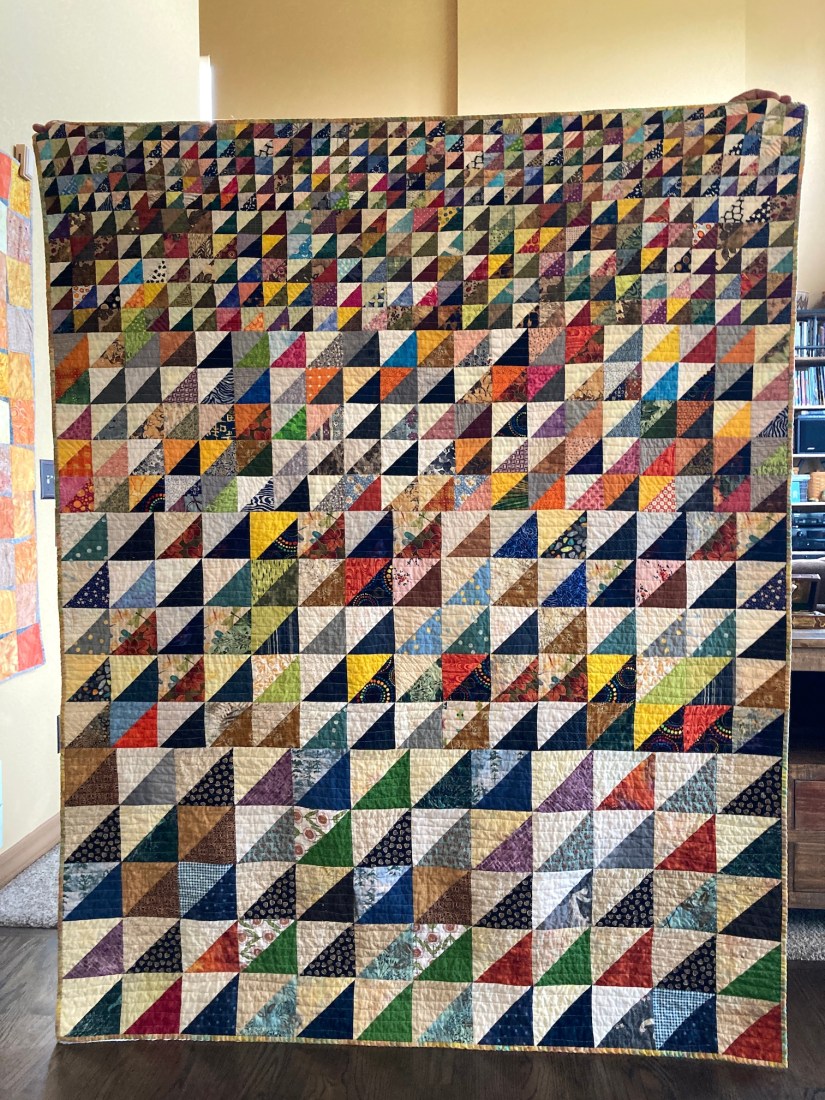
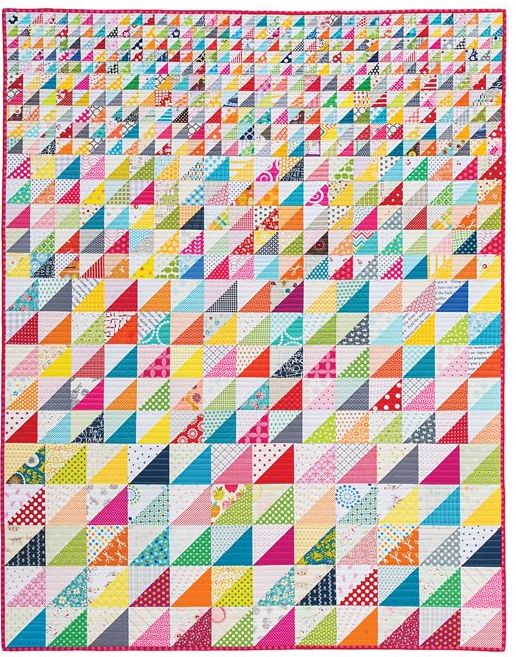
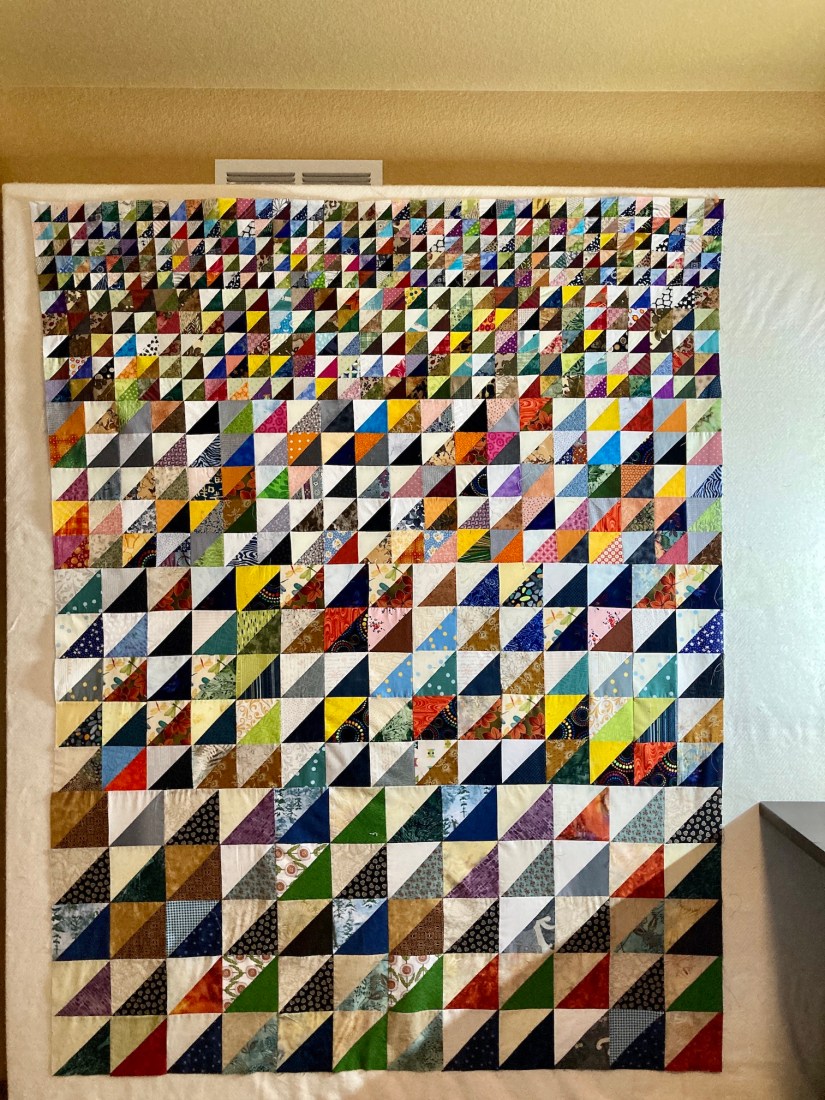
It was inspired by the pattern  All Sizes by Amanda Jean Nyberg from her book, No Scrap Left Behind.

Here it is on the ironing board after I pinned it for quilting:

2020-06-02_11-22-07_211
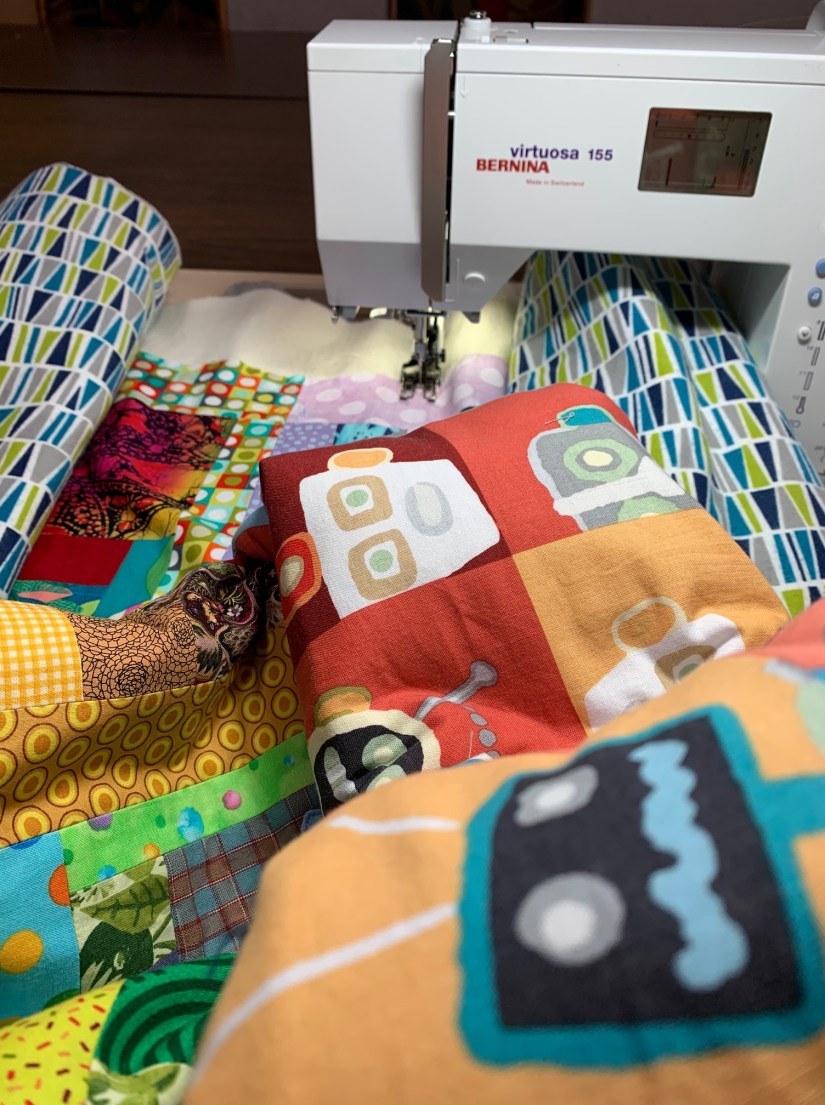
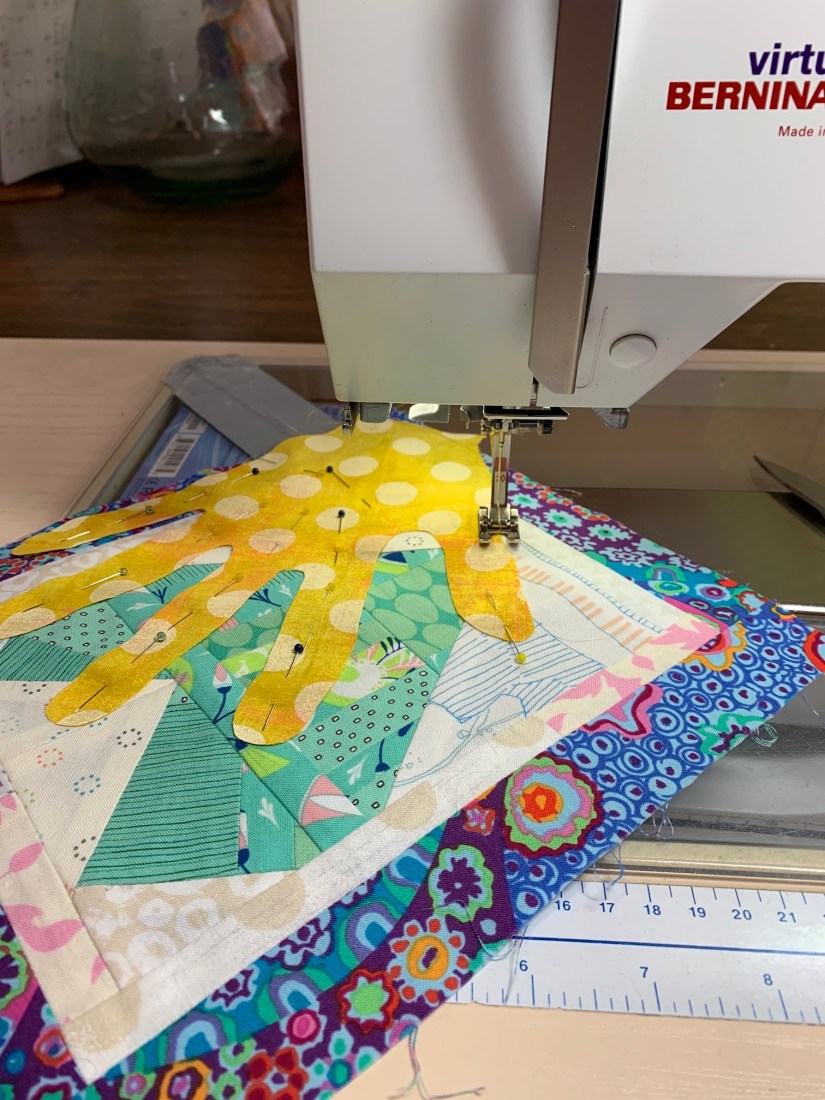
And here is it currently being machine quilted on my sewing machine:

2020-06-03_17-22-24_962I decided to machine quilt it myself rather than send it out to be professional long-arm machine quilted. Slowly I am making progress, I try to work on a section each day.

(You might notice some curious brightly colored half-circle blocks on my design wall behind my sewing area. I’ll talk about those in a future post. They are blocks a quilting friend gave me when she decided not to finish a piece. More to come.)

And of course when I finish machine quilting All the Trimmings I will share another update.

I am going to do an Artist Statement for this piece since there is a story behind it. Here is a very rough draft of that statement:

It’s more than just a half square triangle quilt. I miss going to Quilting Retreats and hanging out with Quilting friends so I made this quilt, based on Amanda Jean Nyberg’s pattern “All Sizes”, from scraps collected from my quilting friends during 15 years of quilting retreats and “Sew Dates”. Most of the scraps are triangle trimmings from their block piecing. Hundreds of scrap triangles went into this quilt top!


Postscript

A friend of mine recently said that she was looking forward to hearing my thoughts on the tragic events and strife currently going on in the United States in a blog post.

For me it is just too deeply personal and sad issue to discuss in this forum, so I am going to just focus my blog posts on my creative projects and other lighter topics.

I will however share with you that I am currently taking a break from watching or reading the news as this was wearing down my soul.

Recently came across this quote by Fred (Mister) Rogers that made me feel some peace and I will close out this post with this quote:

helpers

Fabric Scraps Obsession, Quarantine Quilts, What's on the Design Wall

What’s on the Design Wall: “All the Trimmings”

It is time to follow up on my post No Scrap Left Behind (half square triangle craziness), as I’ve made significant progress on this scrap triangle quilt inspired by the pattern All Sizes in Amanda Jean Nyberg lovely book, No Scrap Left Behind.

I found this images on Pinterest, which I shared in that post, of what the quilt looks like finished:

2020-04-13_18-55-18_876
Image credit: Pinterest

I decided to name my version of this quilt “All the Trimmings” since most of the scrap triangles were donated by other quilters from their block trimmings. Most of the triangles I am using in my version of this quilt were once headed to the landfill (and now they get to be in a quilt!).

The quilt consist of sections of 2 inch x 2 inch half square triangles (HSTs); 2.5″ x 2.4″ HSTs, 3.5″ x 3.5″ HSTs, 4.5″ x 4’5″ HSTs, and finally 5.5″ x 5.5″ HSTs.

2020-04-23_18-59-06_7662020-04-23_18-59-18_5902020-04-30_08-49-08_927

HSTs are usually made by some quick method such as placing two squares of fabric together, making a line down the middle, sewing a 1/4 on each side of the line and then cutting apart two completed HSTs.

However I made most of the HSTs the manual hard way by sewing two scrap triangles together and then trimming the block to the required size. But I used up hundreds and hundreds (nearly all of them) of my scrap triangle collection.

I’ve completed three sections of the quilt: 2″x2″, 2.5″x2.5″ and 3.5″x3.5″ and they are up on my design wall.

2020-04-30_08-48-58_848As I mentioned in the post No Scrap Left Behind (half square triangle craziness), I had very few white or super light colored scrap triangles, so I loosely interpreted the HST standard of a light triangle with a dark triangle for contrast.

Towards the end of making enough 3.5″ x 3.5″ HSTs required for the pattern, I ran out of scrap triangles and had to dip into my scrap squares collection (someday to be made into a scrappy quilt):

2020-04-20_15-19-32_899

Then when I got to the point of making 4.5″ x 4.5″ HSTs, I ran out of larger scrap squares, so I had to dip into my Charm Square collection to finish the number of 4.5″ HSTs I needed for the pattern.

2020-04-20_15-19-40_771Just two more sections to go on this quilt; and I will update you again after I get the other two sections completed.


Postscript

A little follow up the the Postscript from my previous post The Positive People (Surprise Gift).

I discovered a whole display of inspirational rocks painted by kids on my dog walk yesterday that made me smile, thought I would share them with you to close out this post.

2020-04-29_14-09-12_767

Fabric Scraps Obsession, Quarantine Quilts, What's on the Design Wall

No Scrap Left Behind (half square triangle craziness)

I closed out my previous post (Home Office Tips and Tour) with this image below to give you a tease about what I am working on next:

2020-04-09_19-13-55_051

Now that I’ve settled into my re-configured studio (see post Guest Blogger: tierneycreates’ “New” Studio Tour) I have no excuse but to start making things in the studio (besides masks).

I thought I would start with my fabric scrap collection for my first non-mask project in my “new” studio.

I have long history of fabric scrap addiction (yes I am that person at a quilt retreat who stops people from throwing out their larger scraps in the trash and offers to “adopt” them) and so I have quite the collection of fabric scraps.

I keep them organized in bins at the bottom of the IKEA bookcases in my studio:

2020-04-01_08-21-41_752
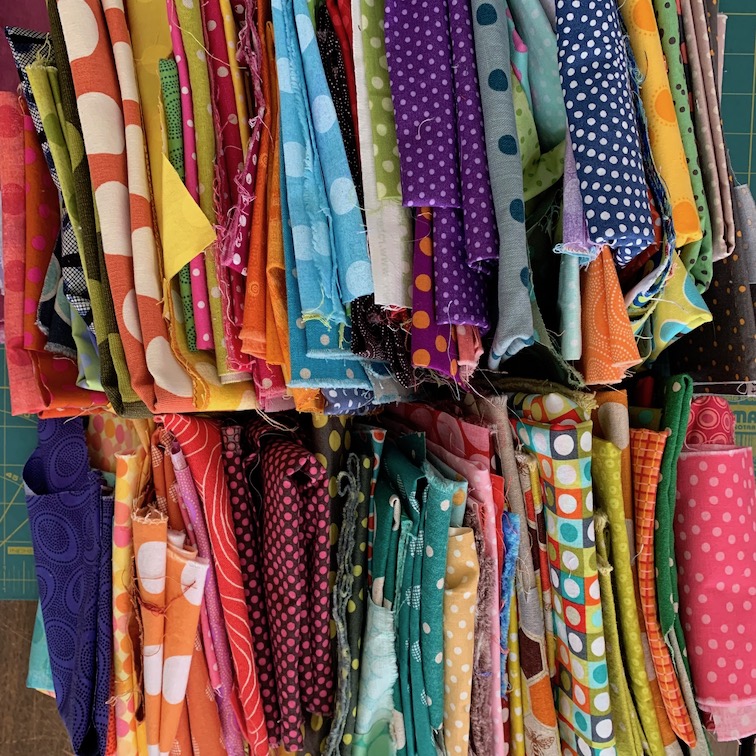
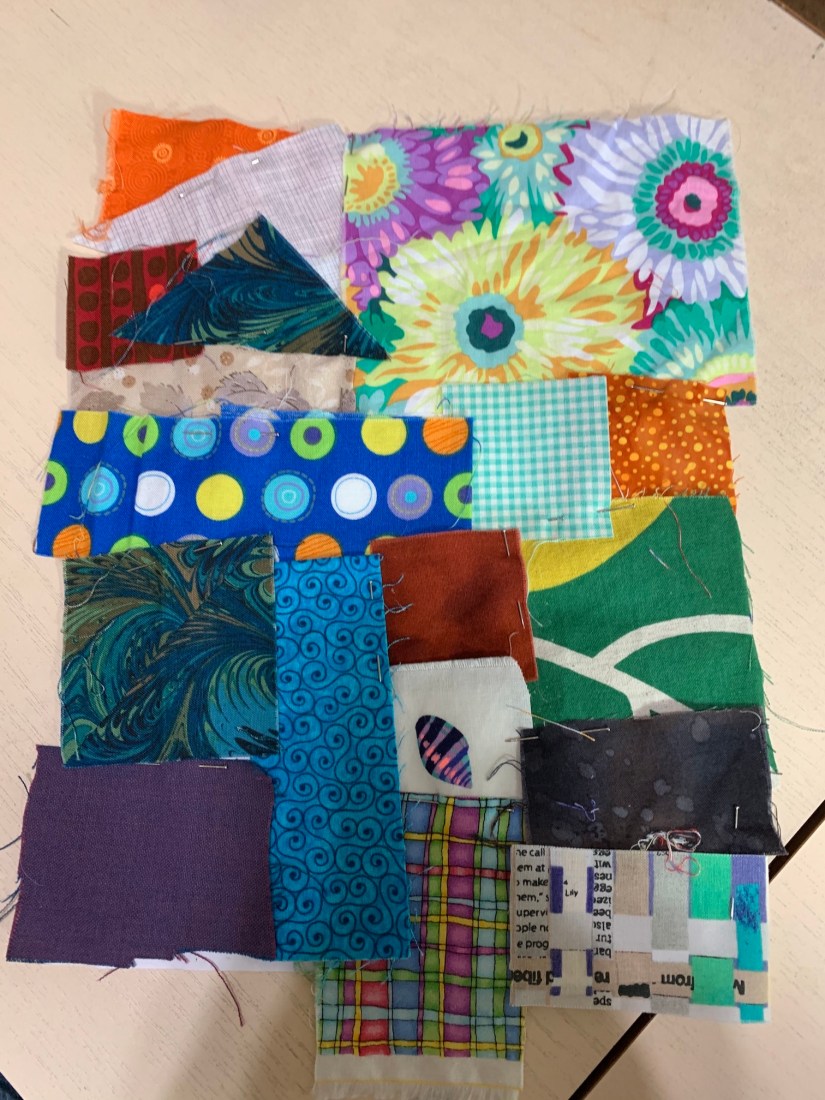
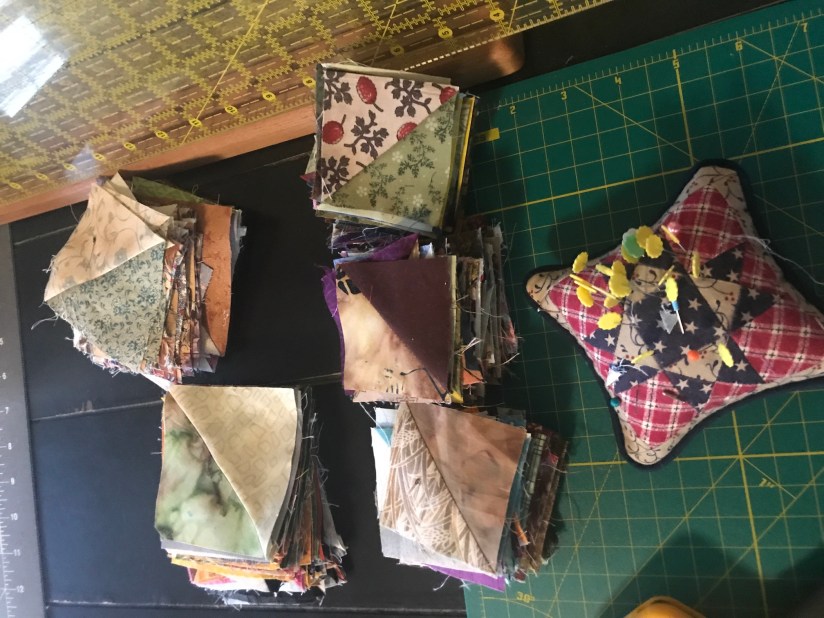
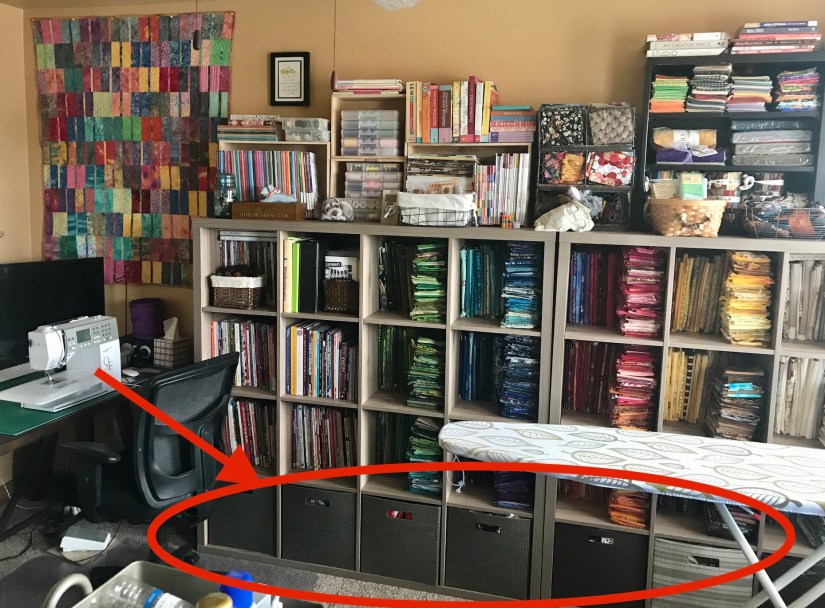
These bins contains scraps organized by color.

I also have them organized by themed collections of scraps in bags stored under my cutting table:

2020-04-08_15-37-07_529
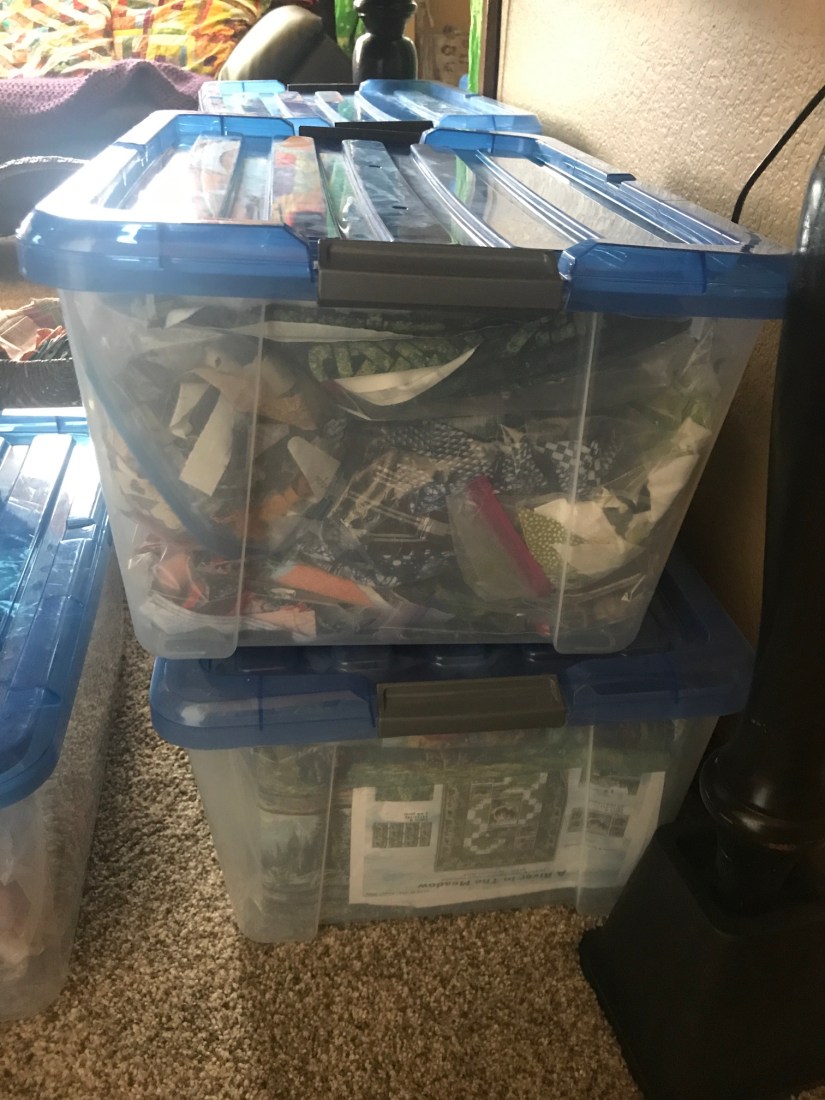
One of these collections, is a collection of scrap triangles, most given to me by other quilters when they trimmed these triangle when piecing blocks for their quilts. The triangles are in various sizes.

By sewing two scrap triangles together, I can created a scrappy “half square triangle” (HST) which provides many design opportunities. This is what I did with a bunch of scrappy fabric squares which I turned into HSTs back in Spring 2018 (see post Pillow Popping with the Untethered Soul), and created a pillow top:

img_3758

I do have a basket of fabric scrap squares that I could have used to make HSTs for the project I am about to tell you about:

2020-04-13_19-01-44_210
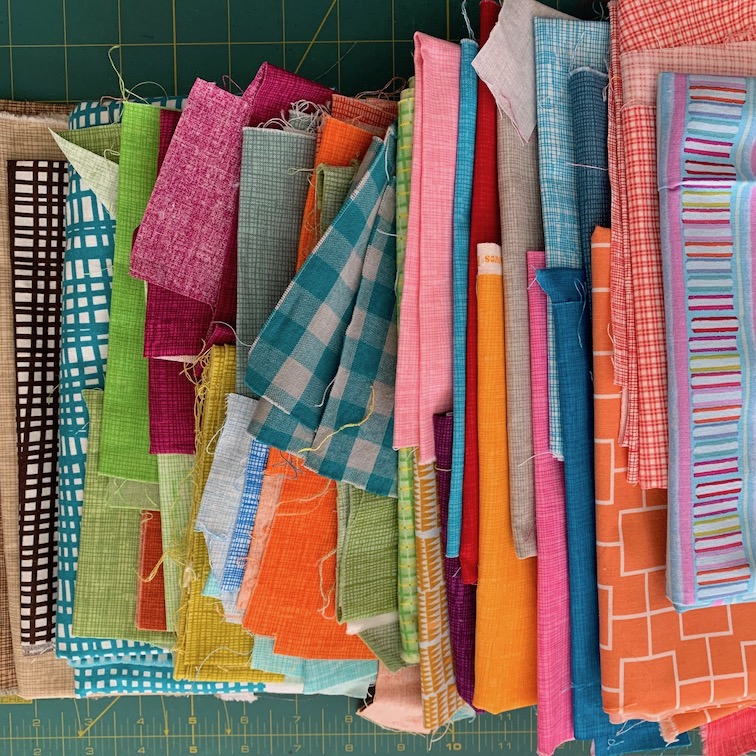
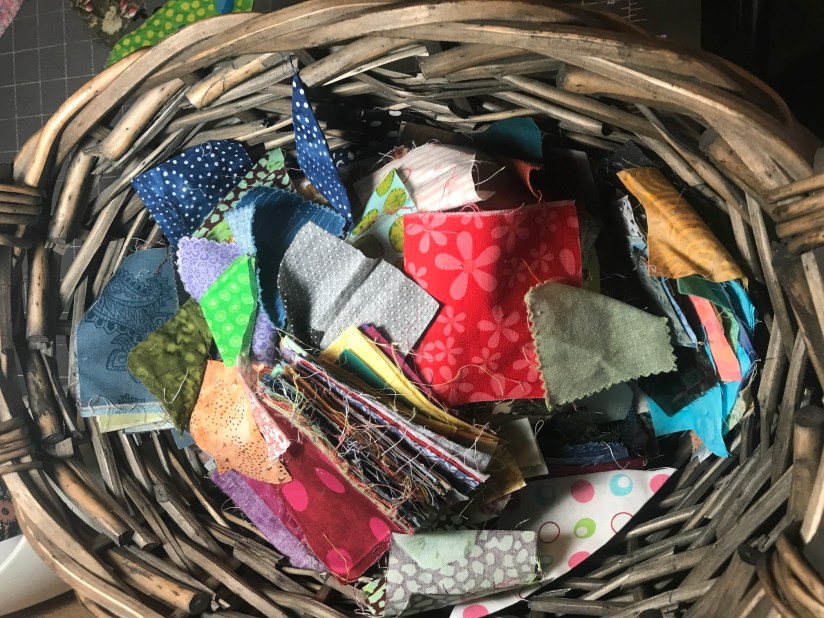
But I’ve decided I want to start using (and cleaning out) my ridiculous collection of themed bags of scraps (mainly given to me by other quilters) and my scrap triangle collection had gotten out of control.

So I dumped the entire collection of fabric scrap triangles onto my cutting table:

2020-04-09_19-03-43_244
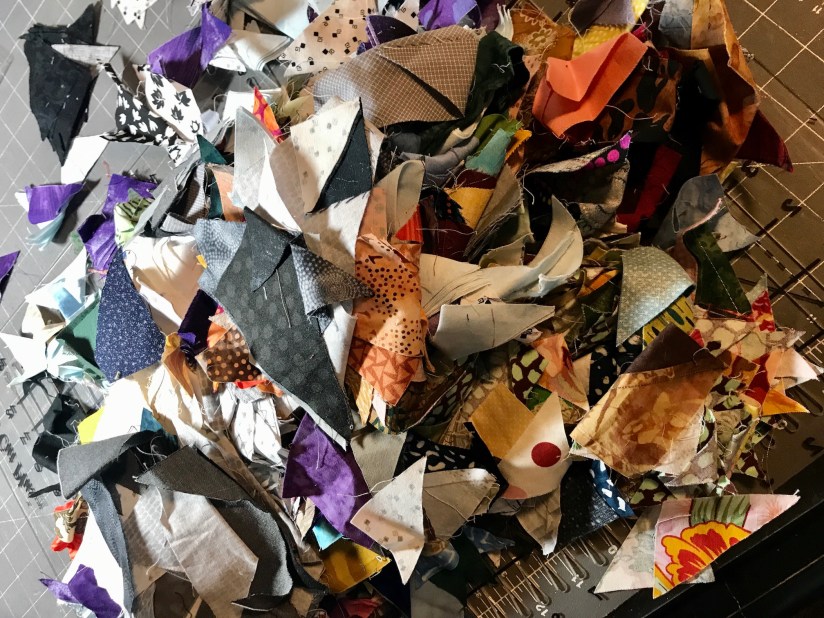
And pulled out this awesome book by Amanda Jean Nyberg, No Scrap Left Behind, for ideas.

2020-02-25_08-07-59_262

I found a pattern in the book called All Sizes which uses several different sizes of HSTs to create a scrap quilt with smaller HSTs progressing to larger HSTs.

I did not want to violate copyright laws by photographing the quilt pattern inside the book but I did find an image of the quilt on Pinterest:

2020-04-13_18-55-18_876
Image credit: Pinterest

The pattern instructs you to create HSTs the standard way from two contrasting squares (if you’ve never made HSTs or are not quilter, here is a link by Blossom Heart Quilts explaining how HSTs are commonly made – HST Tutorial).  However I decided to manually make HSTs by sewing two scrappy triangles together.

So to make this happen I had to sort my giant pile of scrap triangles into light and dark in order to manual create the HSTs (to get a nice contrast with a HST you use a light fabric and a darker fabric). The process was tedious but fun (I listened to great music while sorting, sewing, pressing/ironing. and trimming).

2020-04-13_07-46-58_5802020-04-13_18-49-57_5092020-04-11_19-57-59_7212020-04-13_14-27-35_0182020-04-13_18-49-14_566 
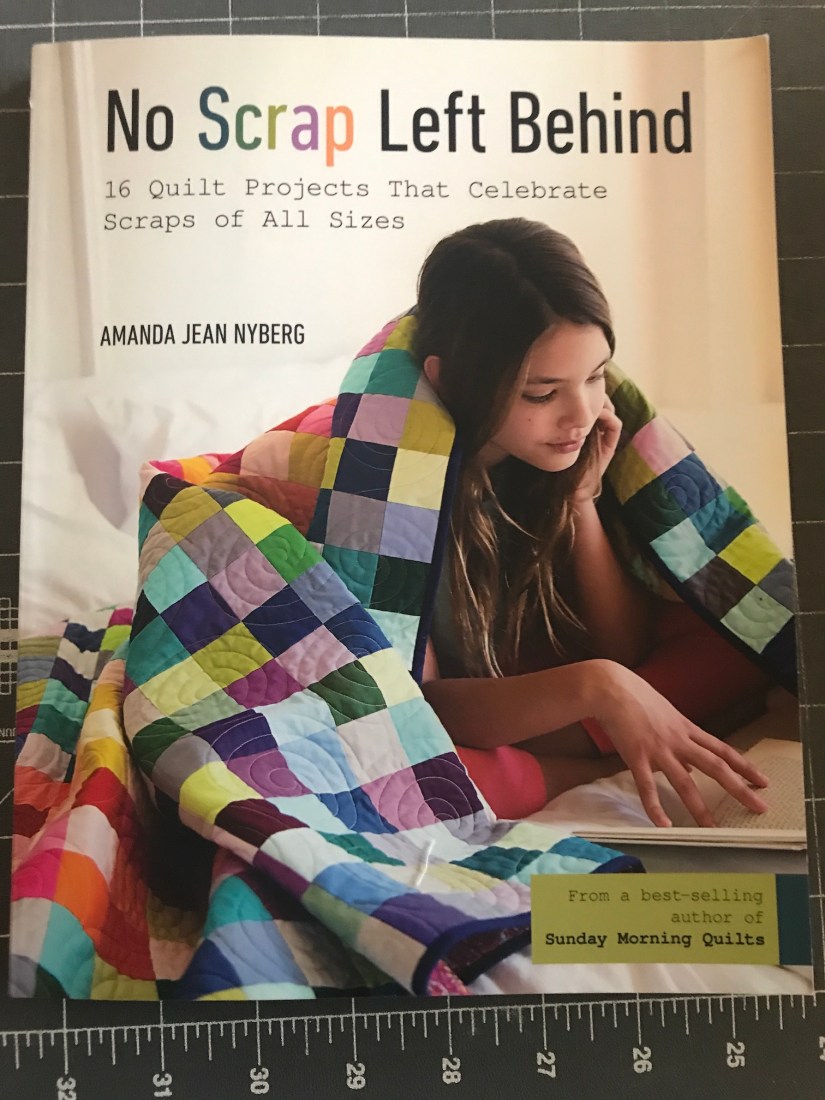
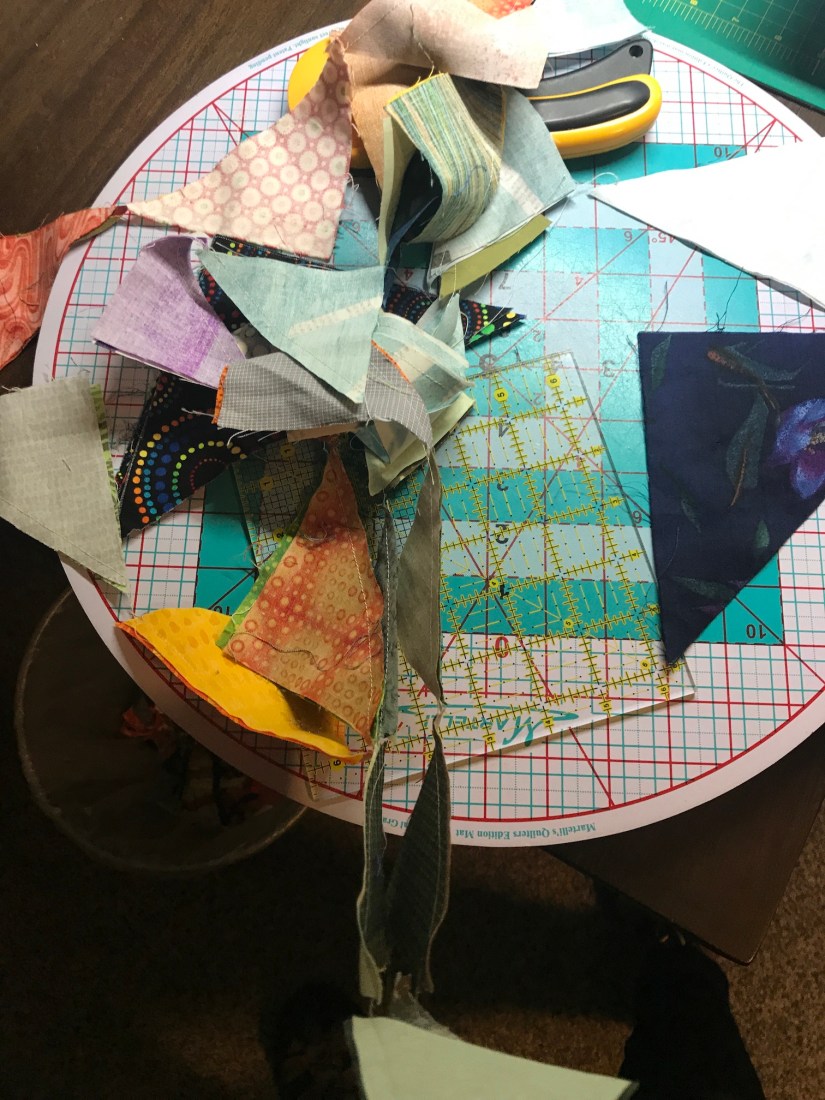
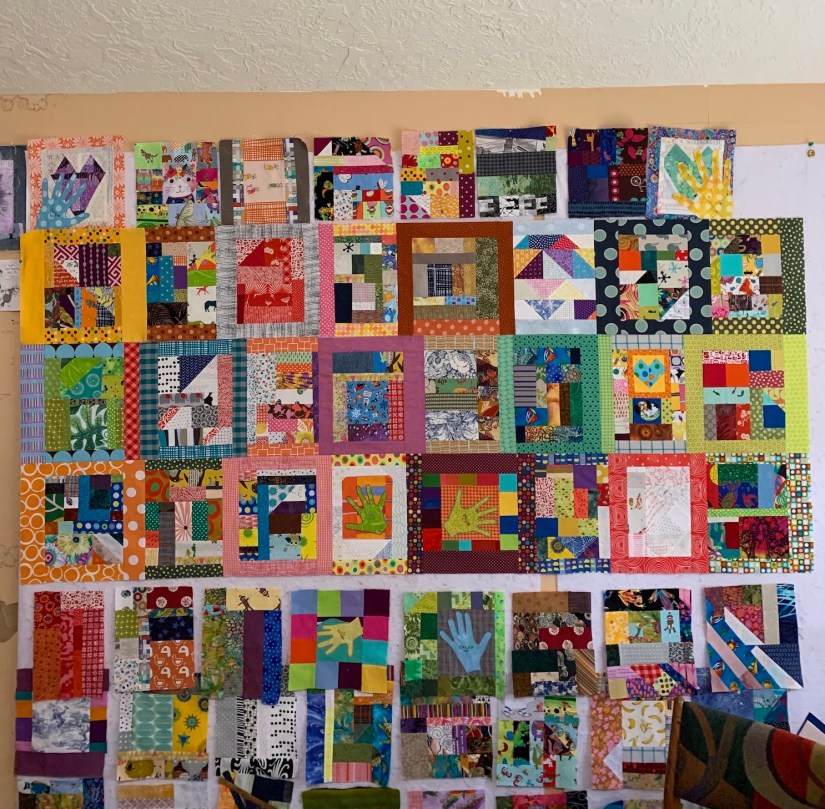
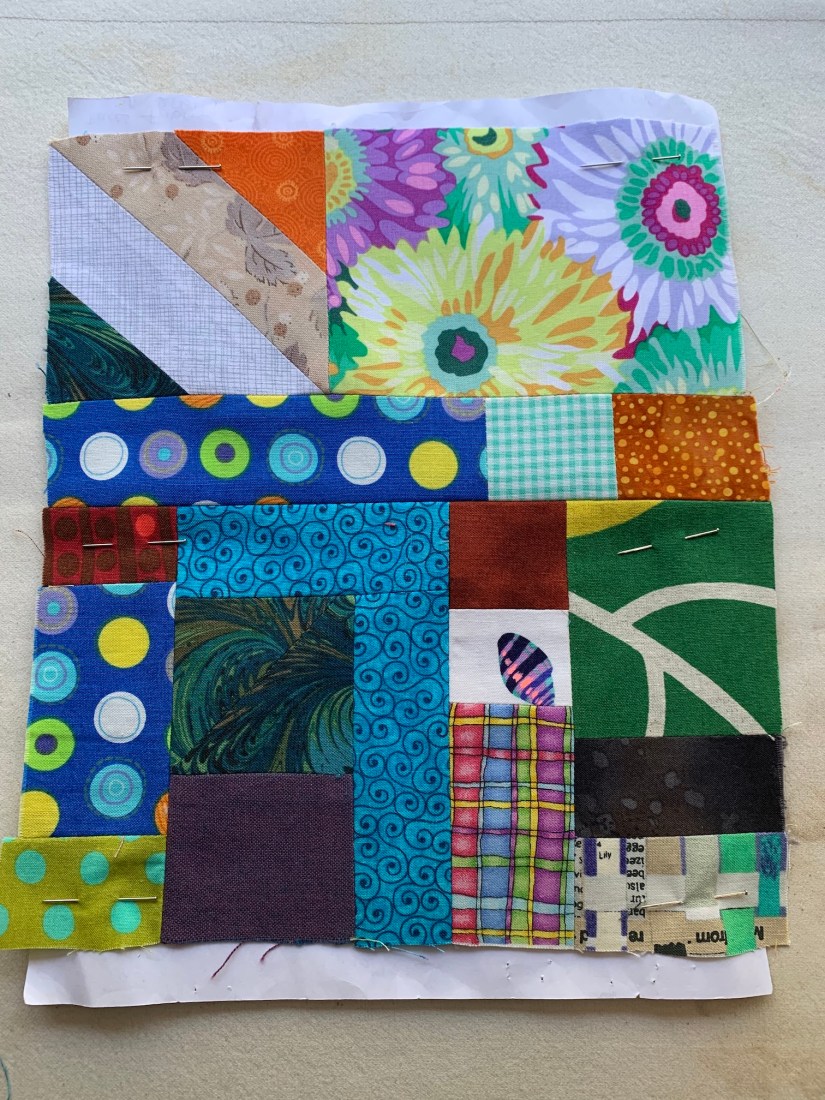
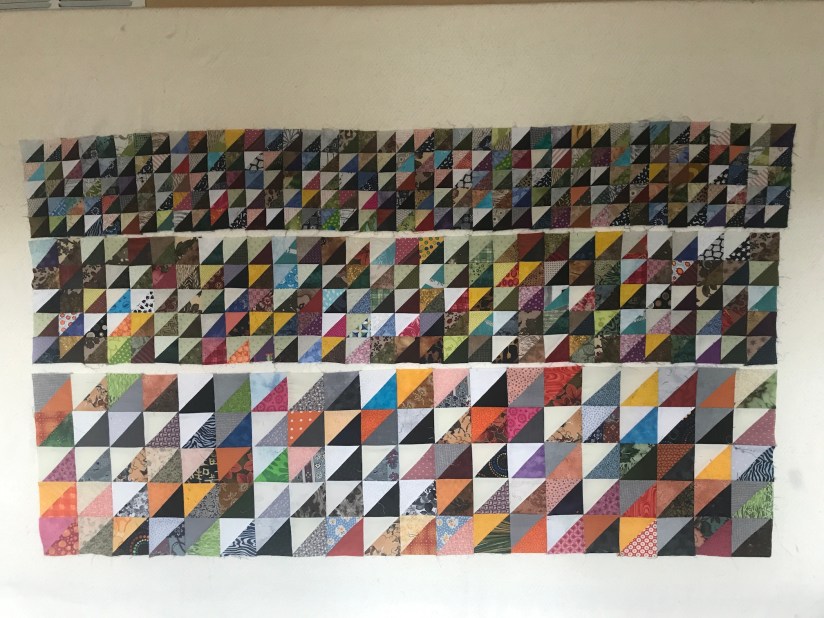
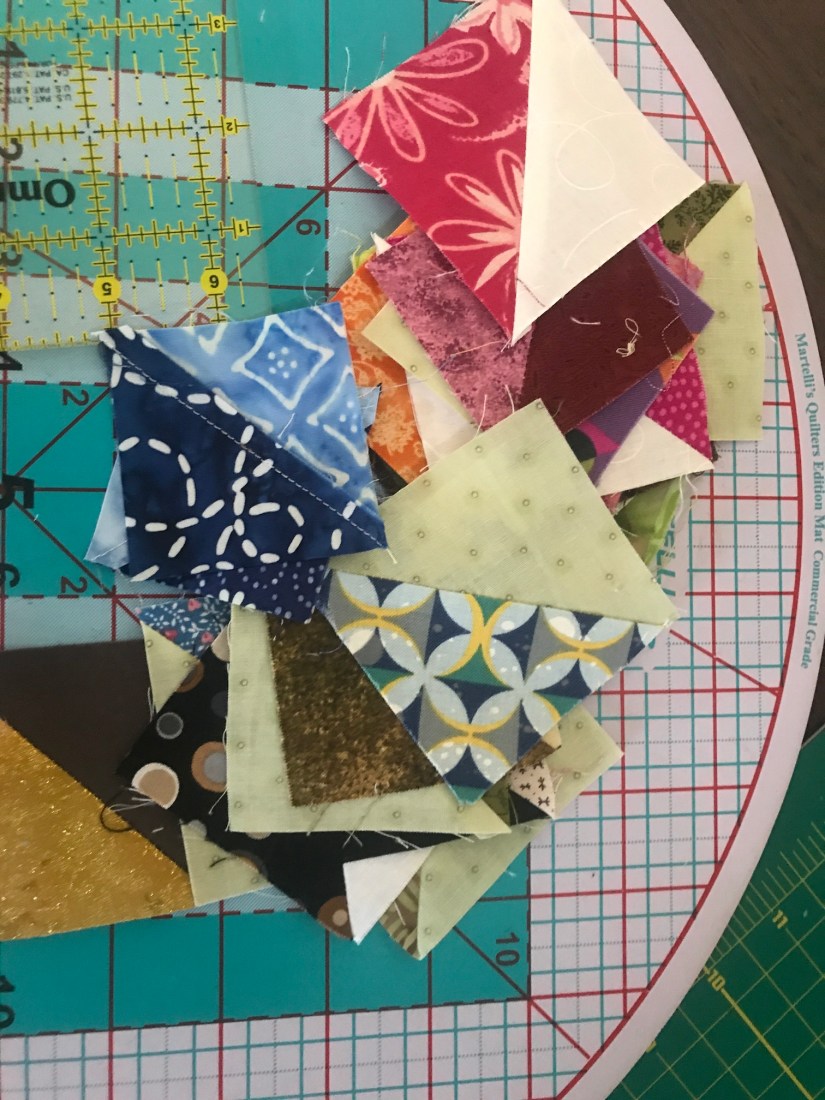
Eventually my “hot mess” of scrap triangles, turned into this on my design wall:

2020-04-13_18-49-31_482

No it doesn’t look anything like the pattern of the Pinterest finished quilt image I shared above but it is in progress. Initially I placed the HSTs in size order on the design wall but my organization fell apart after a while of trying to just randomly get all the HSTs I’ve made onto the design wall (to get a sense of how many I’ve made so far).

Also, you might have noticed that the Pinterest finished quilt image has white as the light on the HSTs. I’ve was very loose in my interpretation of “light” to contrast with my darker triangles. I did not have many white/cream or other light colored scrap triangles. So I had to use medium fabrics often as “lights” and you will see some bold fabrics in the mix (like deep/strong yellows, etc.) as “lights”.

2020-04-13_07-47-06_160
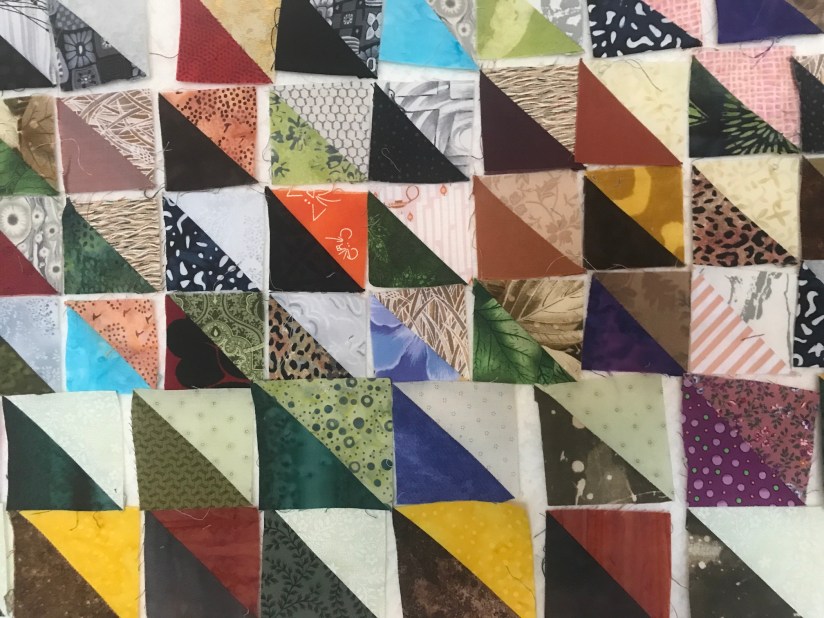
But hey – it’s going to be a very scrappy quilt!

When the quilt top is complete, I am going to toss any remaining scrappy triangles. They were originally headed to the trash bin before I rescued them. It is okay if some now make it to the trash.

I think there will be very few scrap triangles remaining when I am done; and I think this is a one time scrap quilt experiment with scrap triangles. (Next time I make HSTs it will be using contrasting squares)

And I plan to say “no thank you” when other quilters offer me their scrap triangles in the future!


Postscript

I am still hand quilting Seattle Scrappy (see post Seattle Scrappy (What’s on the Design Wall)) in case you wondered what became of that piece. I keep it on the stairs railing next to the recliner I sit in when watching television in the living room, so it is always handy to work on:

2020-04-12_09-25-53_726Someday it will be done…