Update on the Scrappy English Paper Piecing (EPP) Project
So here is my update on the scrappy English Paper Piecing (EPP) hexie rosette project I’ve been working on since 2016 that I previously posted about in this post – ScrapHappy April 2026: Update on the EPP Quilt
I made a bit of progress from April’s update and completed 16 more blocks.
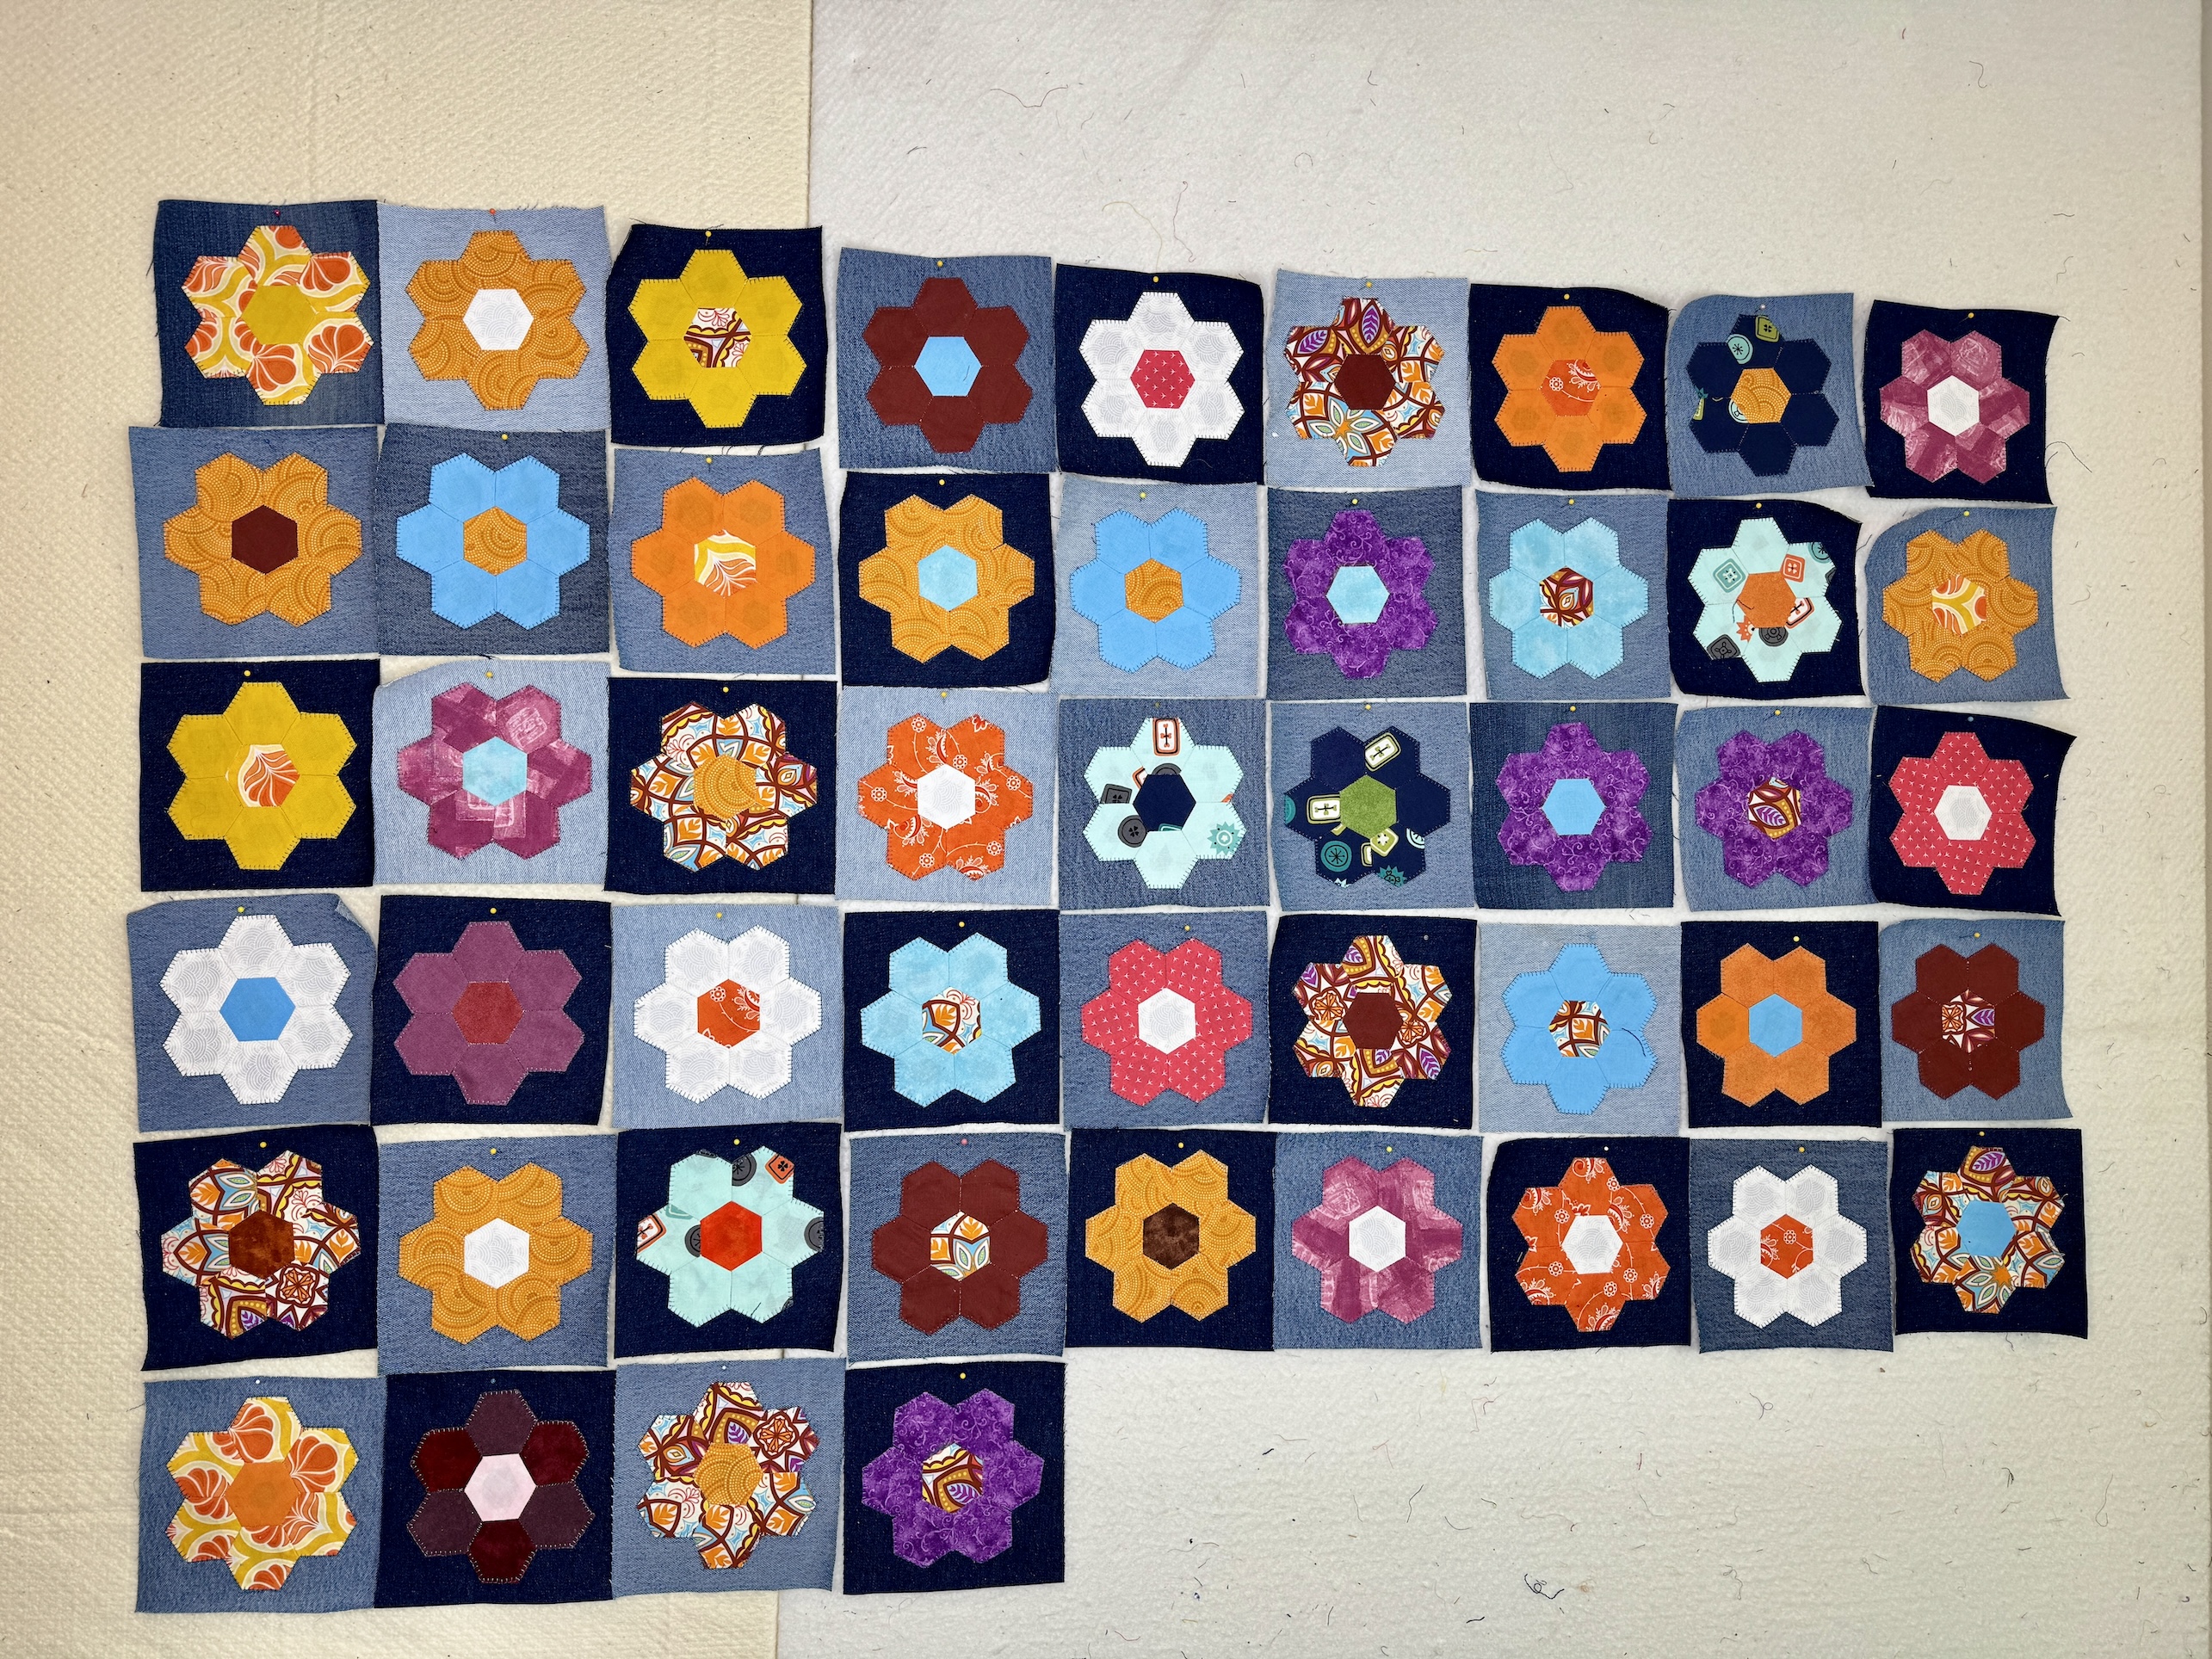
Here is what the quilt in progress looked like in April 2026 with 49 blocks completed:
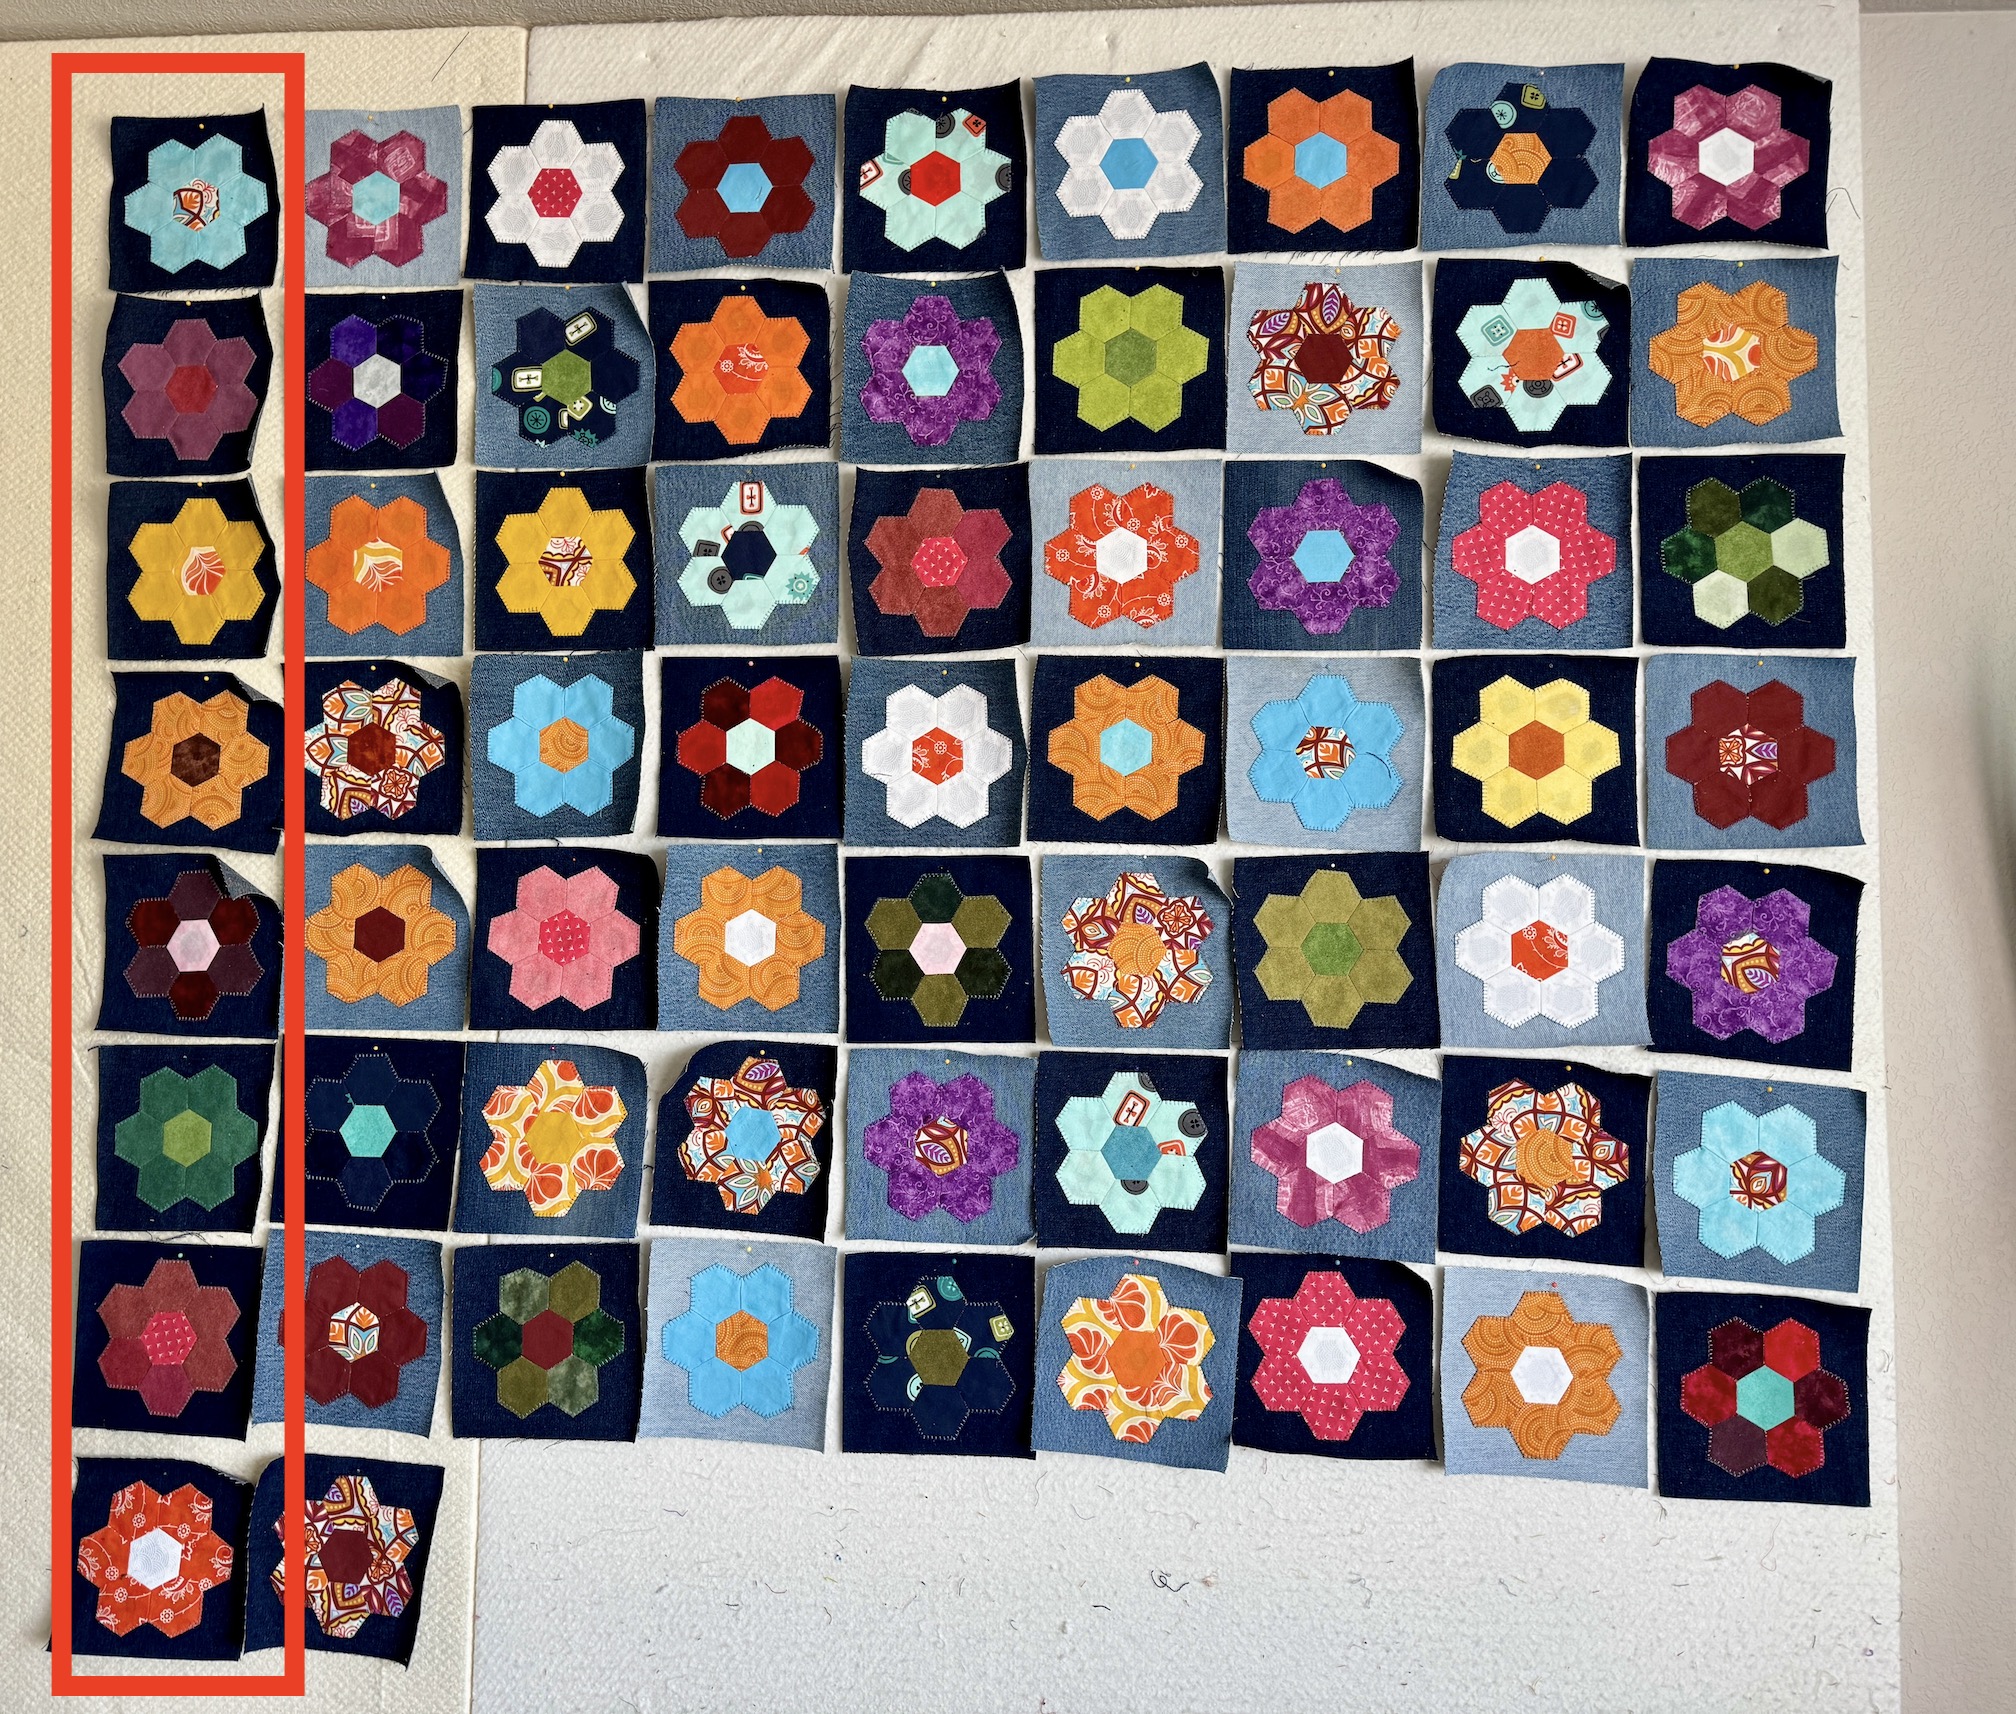
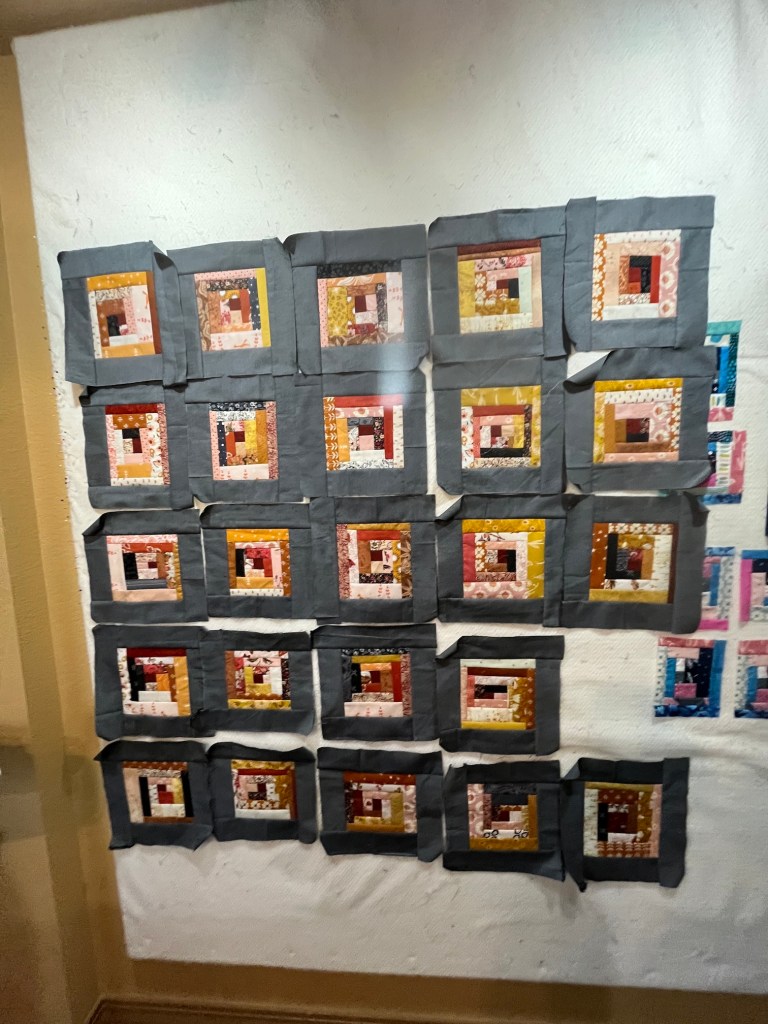
And here is what the quilt looks like in May 2026 with 65 blocks completed (yay!):
The quilt will be 9 by 11 for a total of 99 blocks. So I have 34 more blocks to go!
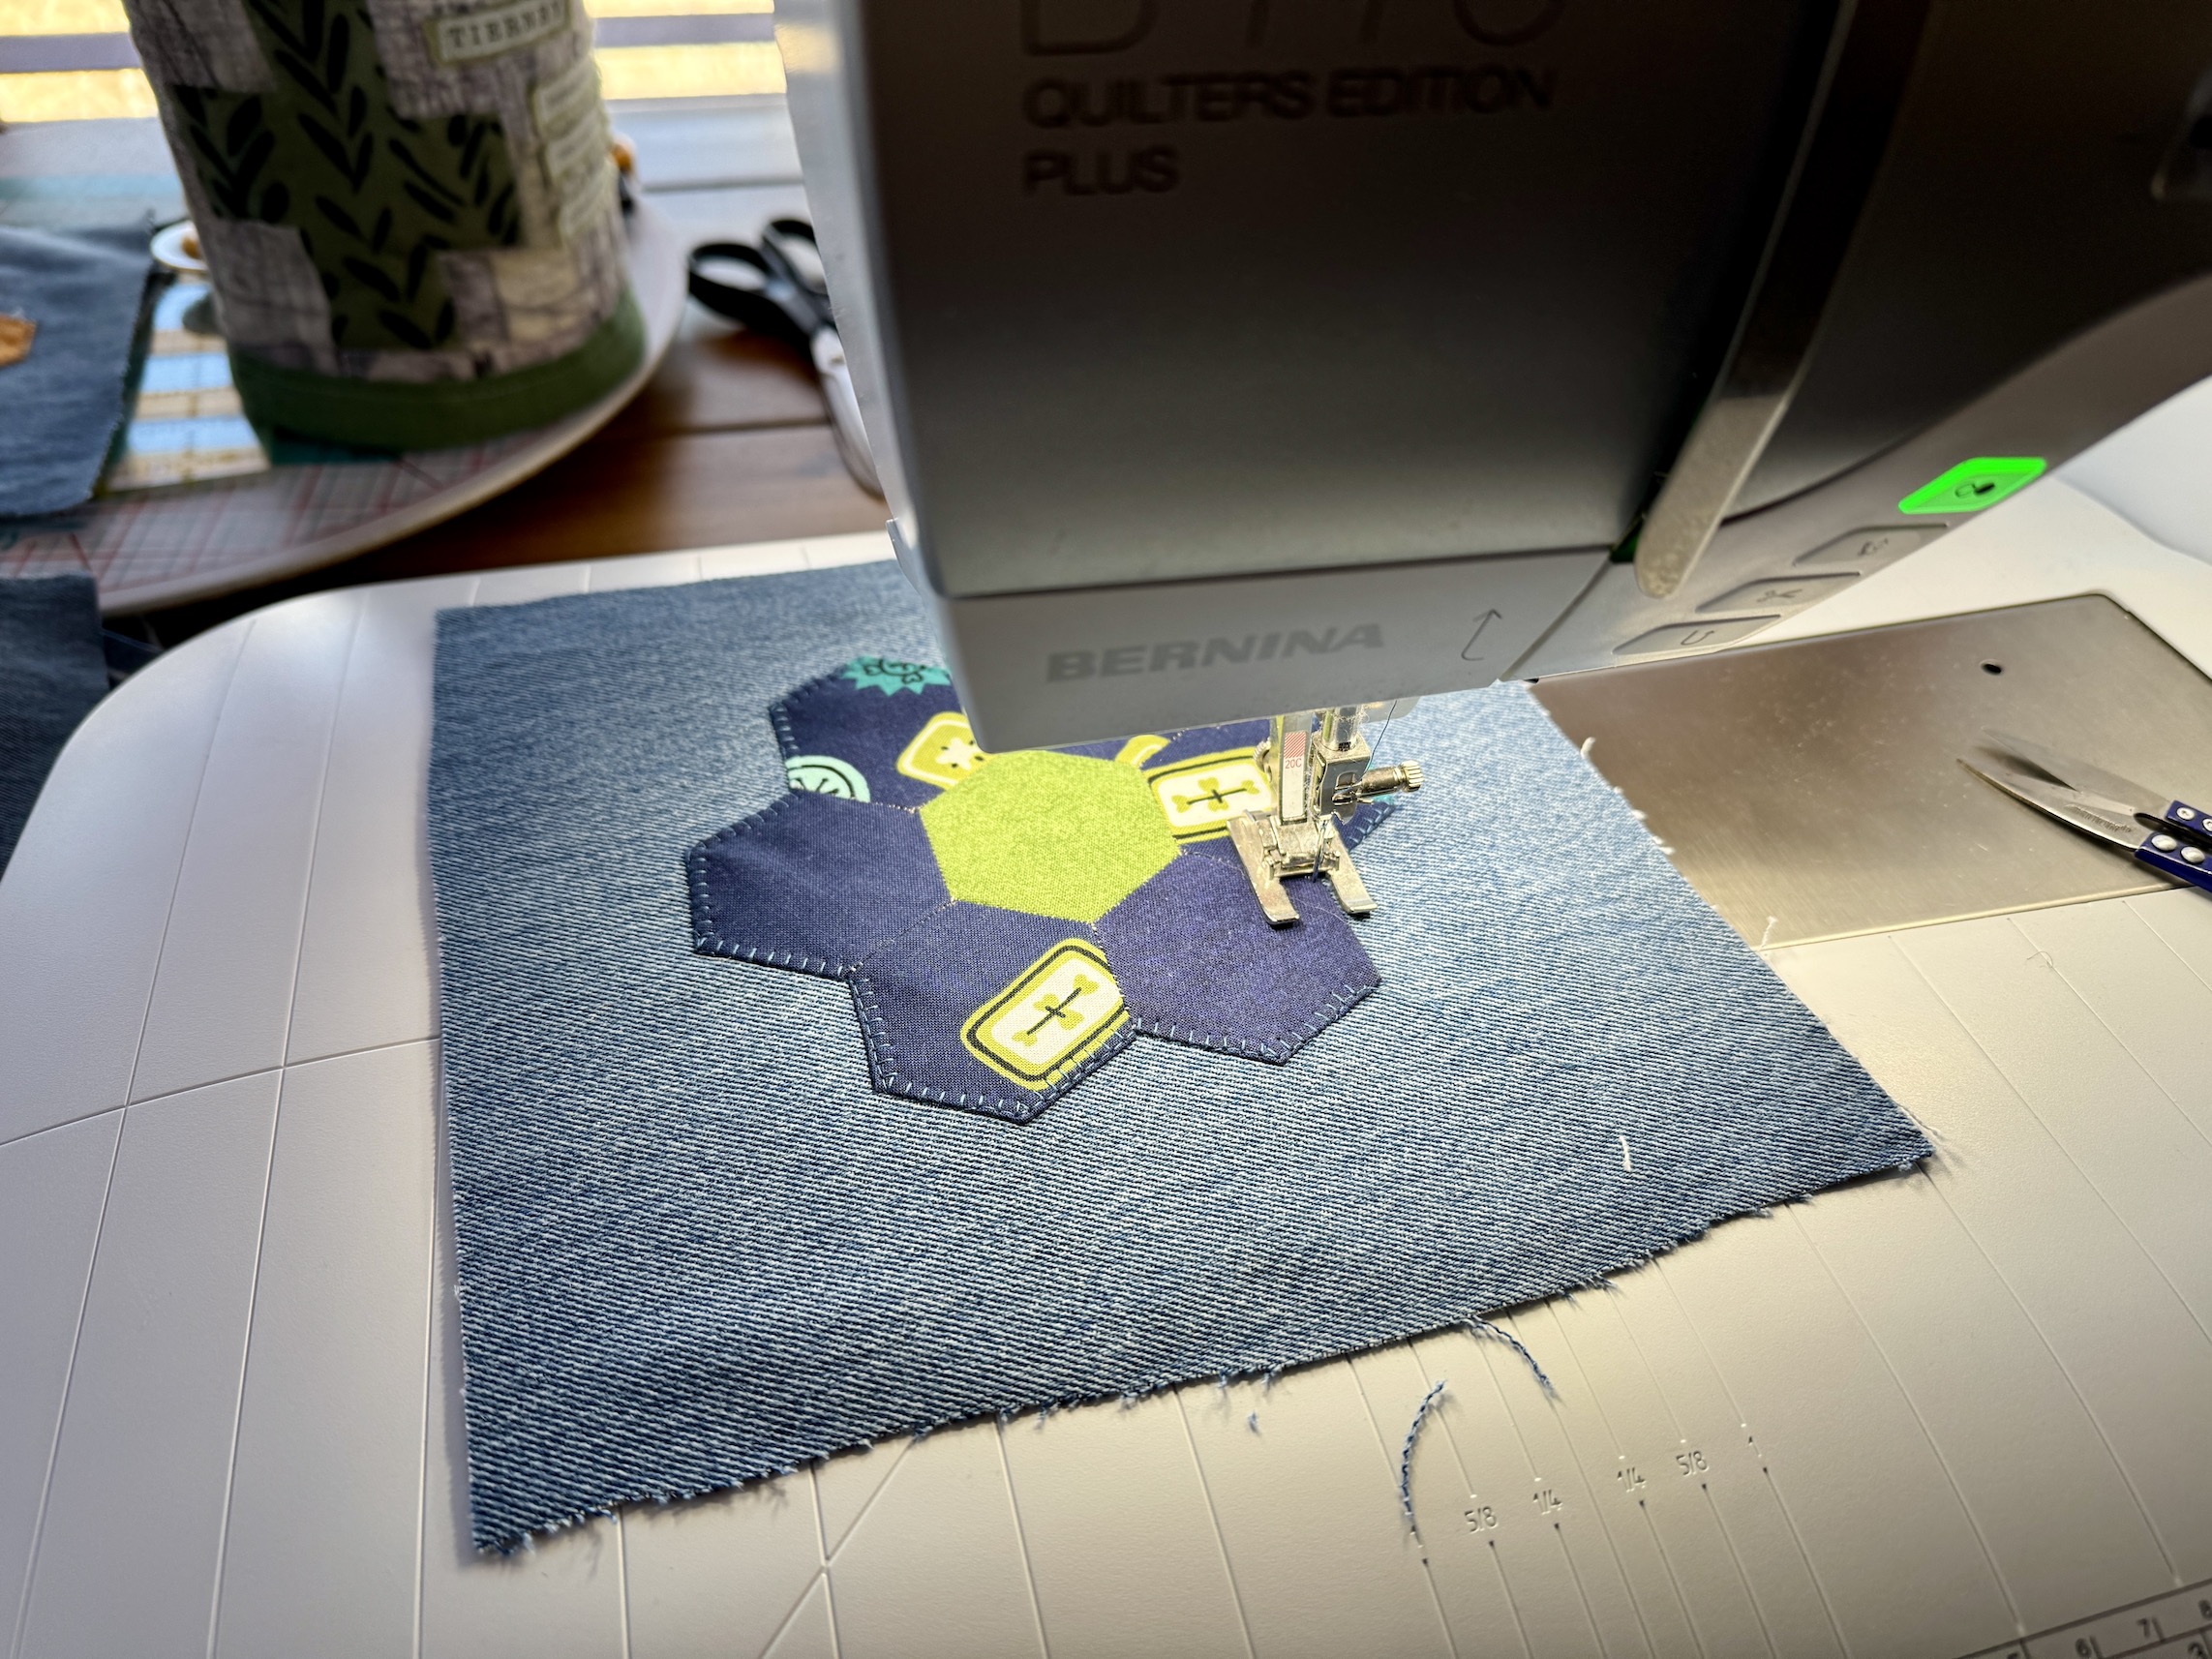
As I mentioned in a previous post, I have to finish sewing all the little paper pieced hexagons to each other for each rosette (and remove the EPP foundation paper) before I can applique the rosette to the recycled denim background. That is why I only got 16 blocks completed in the past month. Very tedious work!
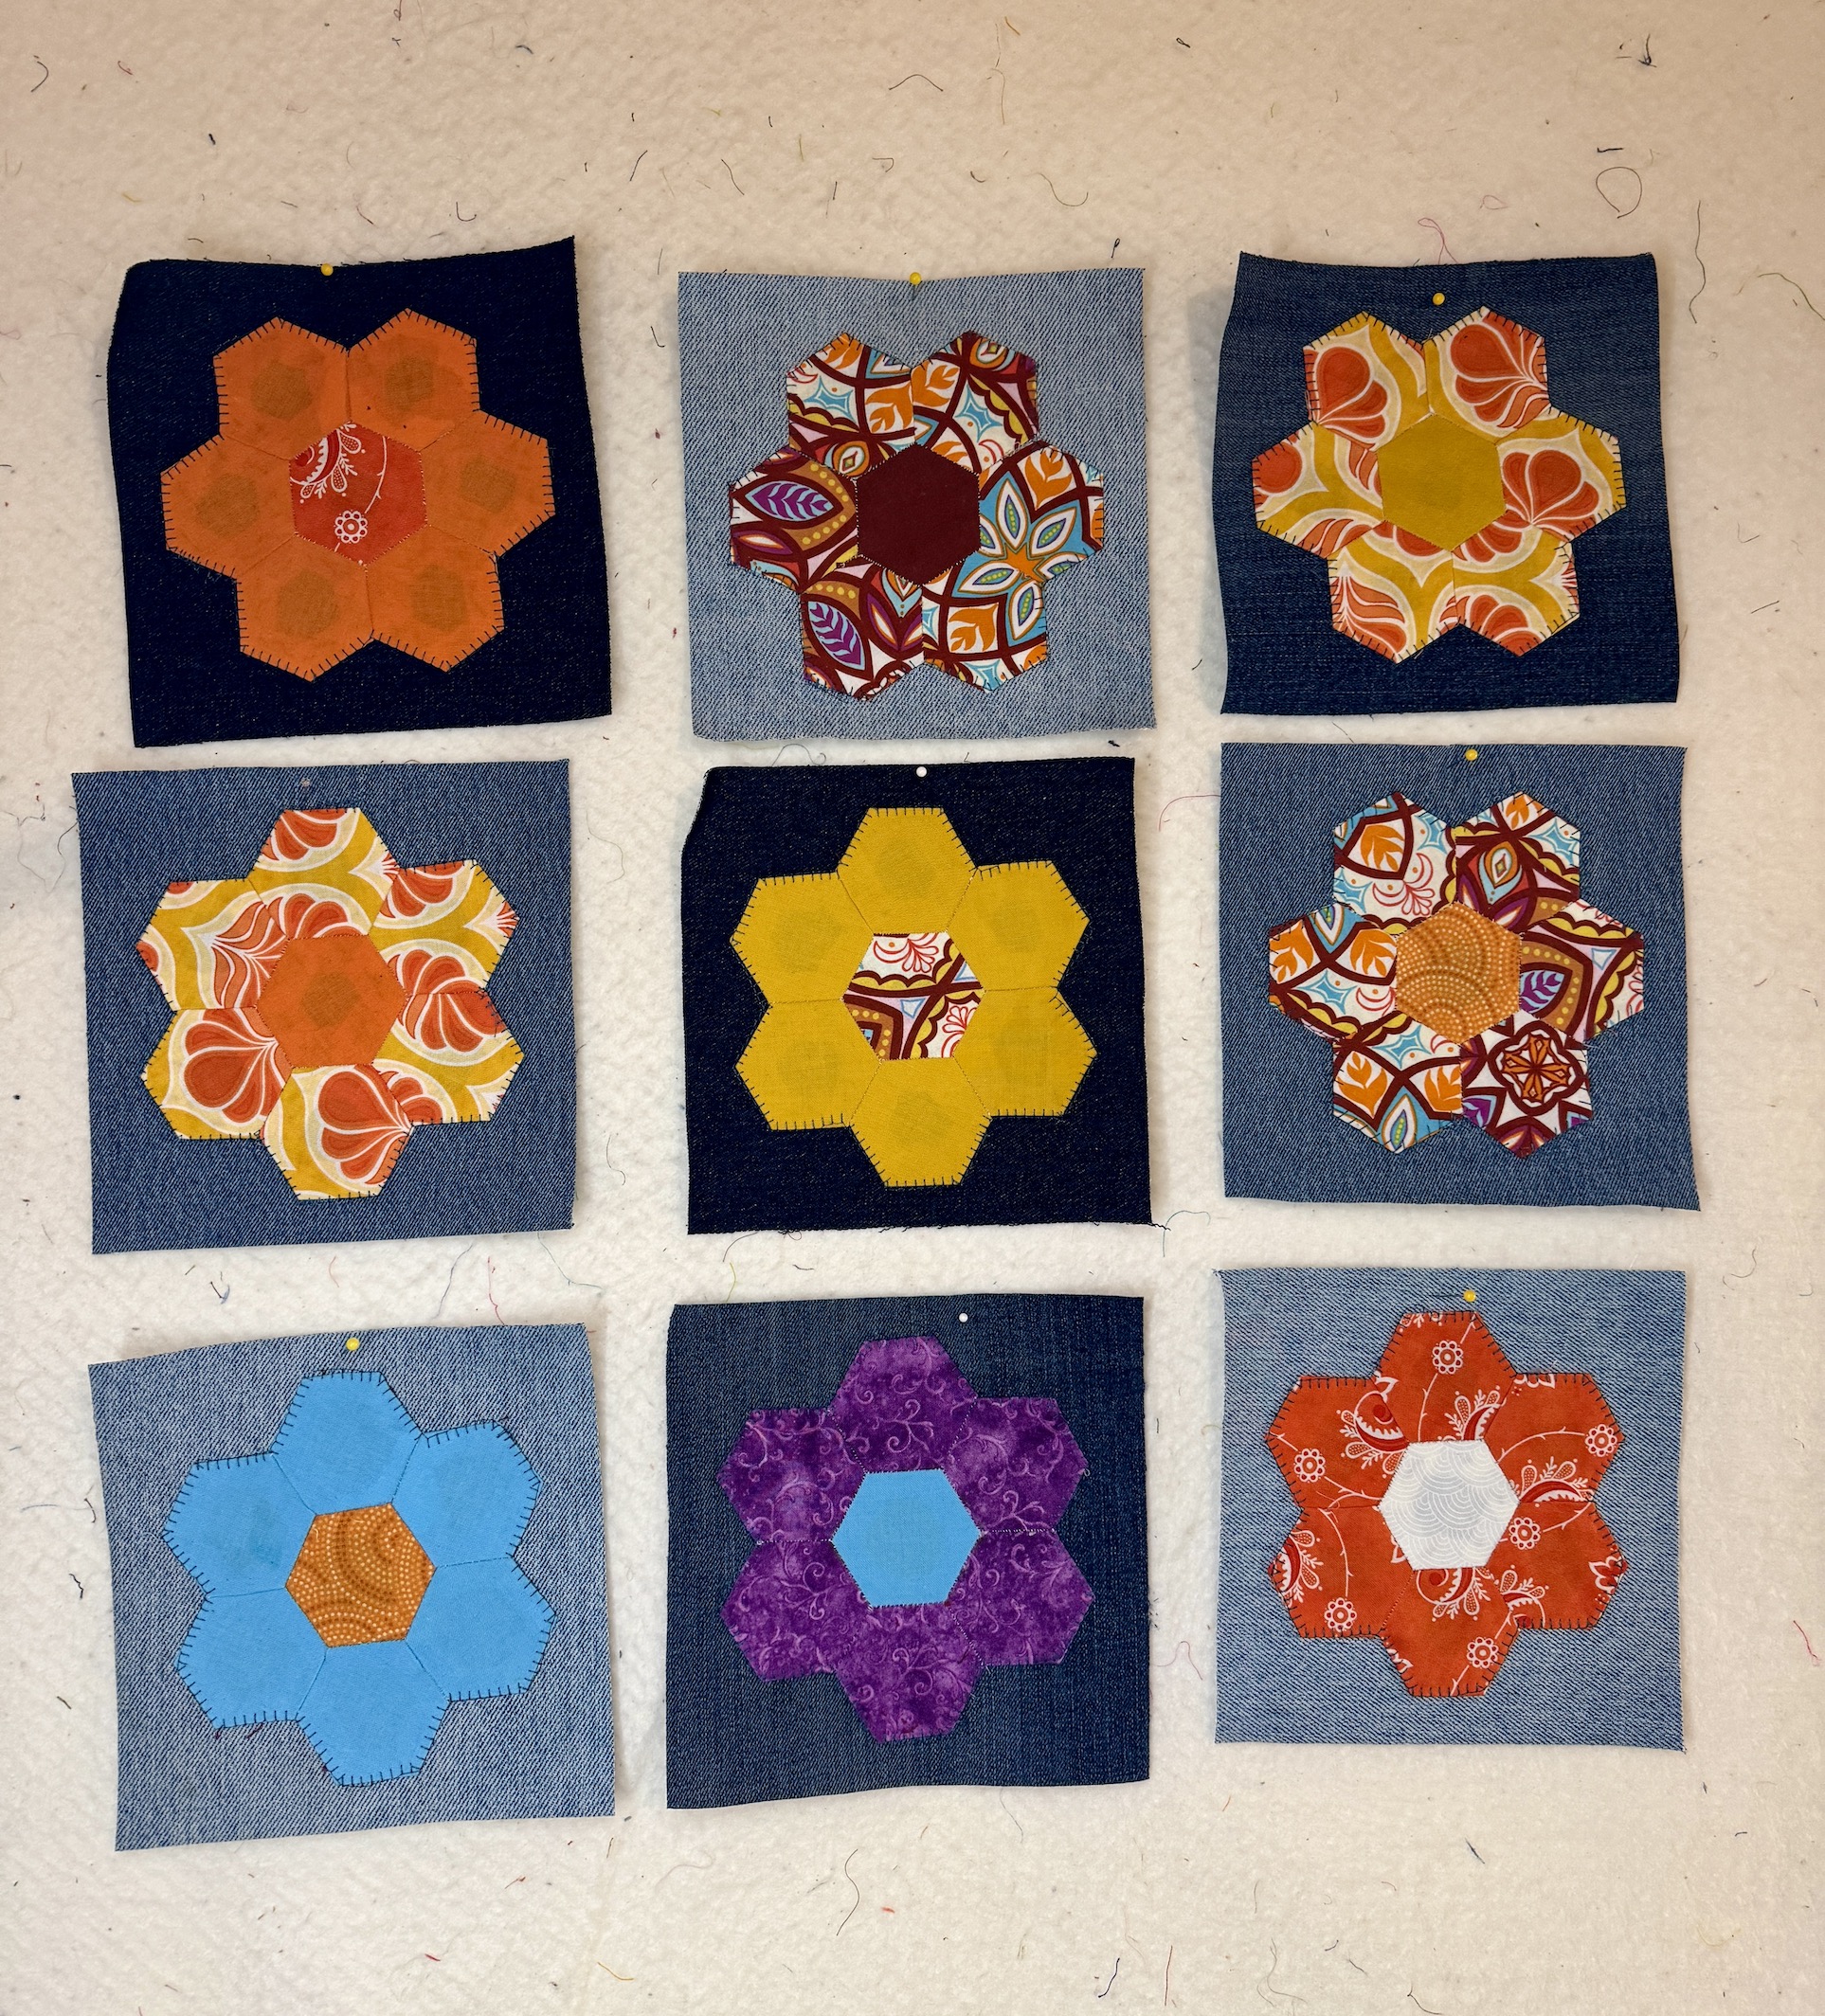
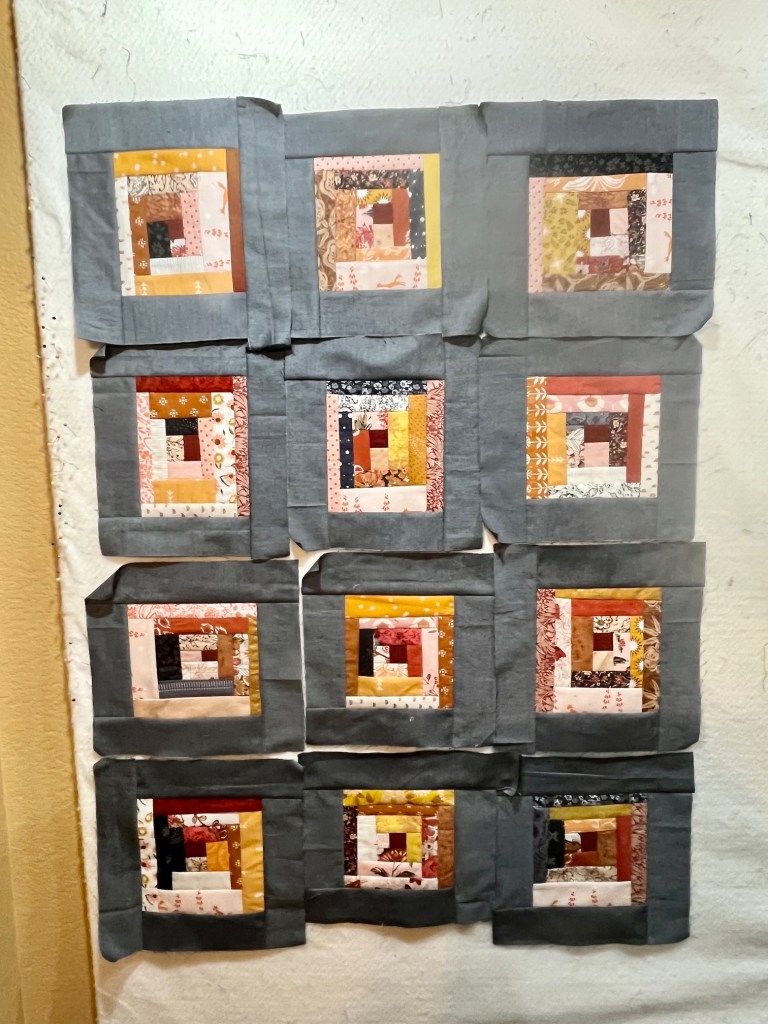
Oh, you might notice that on the left side of the quilt arrangement on my design wall I have all dark background blocks:
That is because I am cutting scrap denim as I need it and I cut too much dark so now I have to make a bunch of lighter background blocks to mix in. But progress is progress and I bet before I know it I will have all 99 blocks done and sewn together!
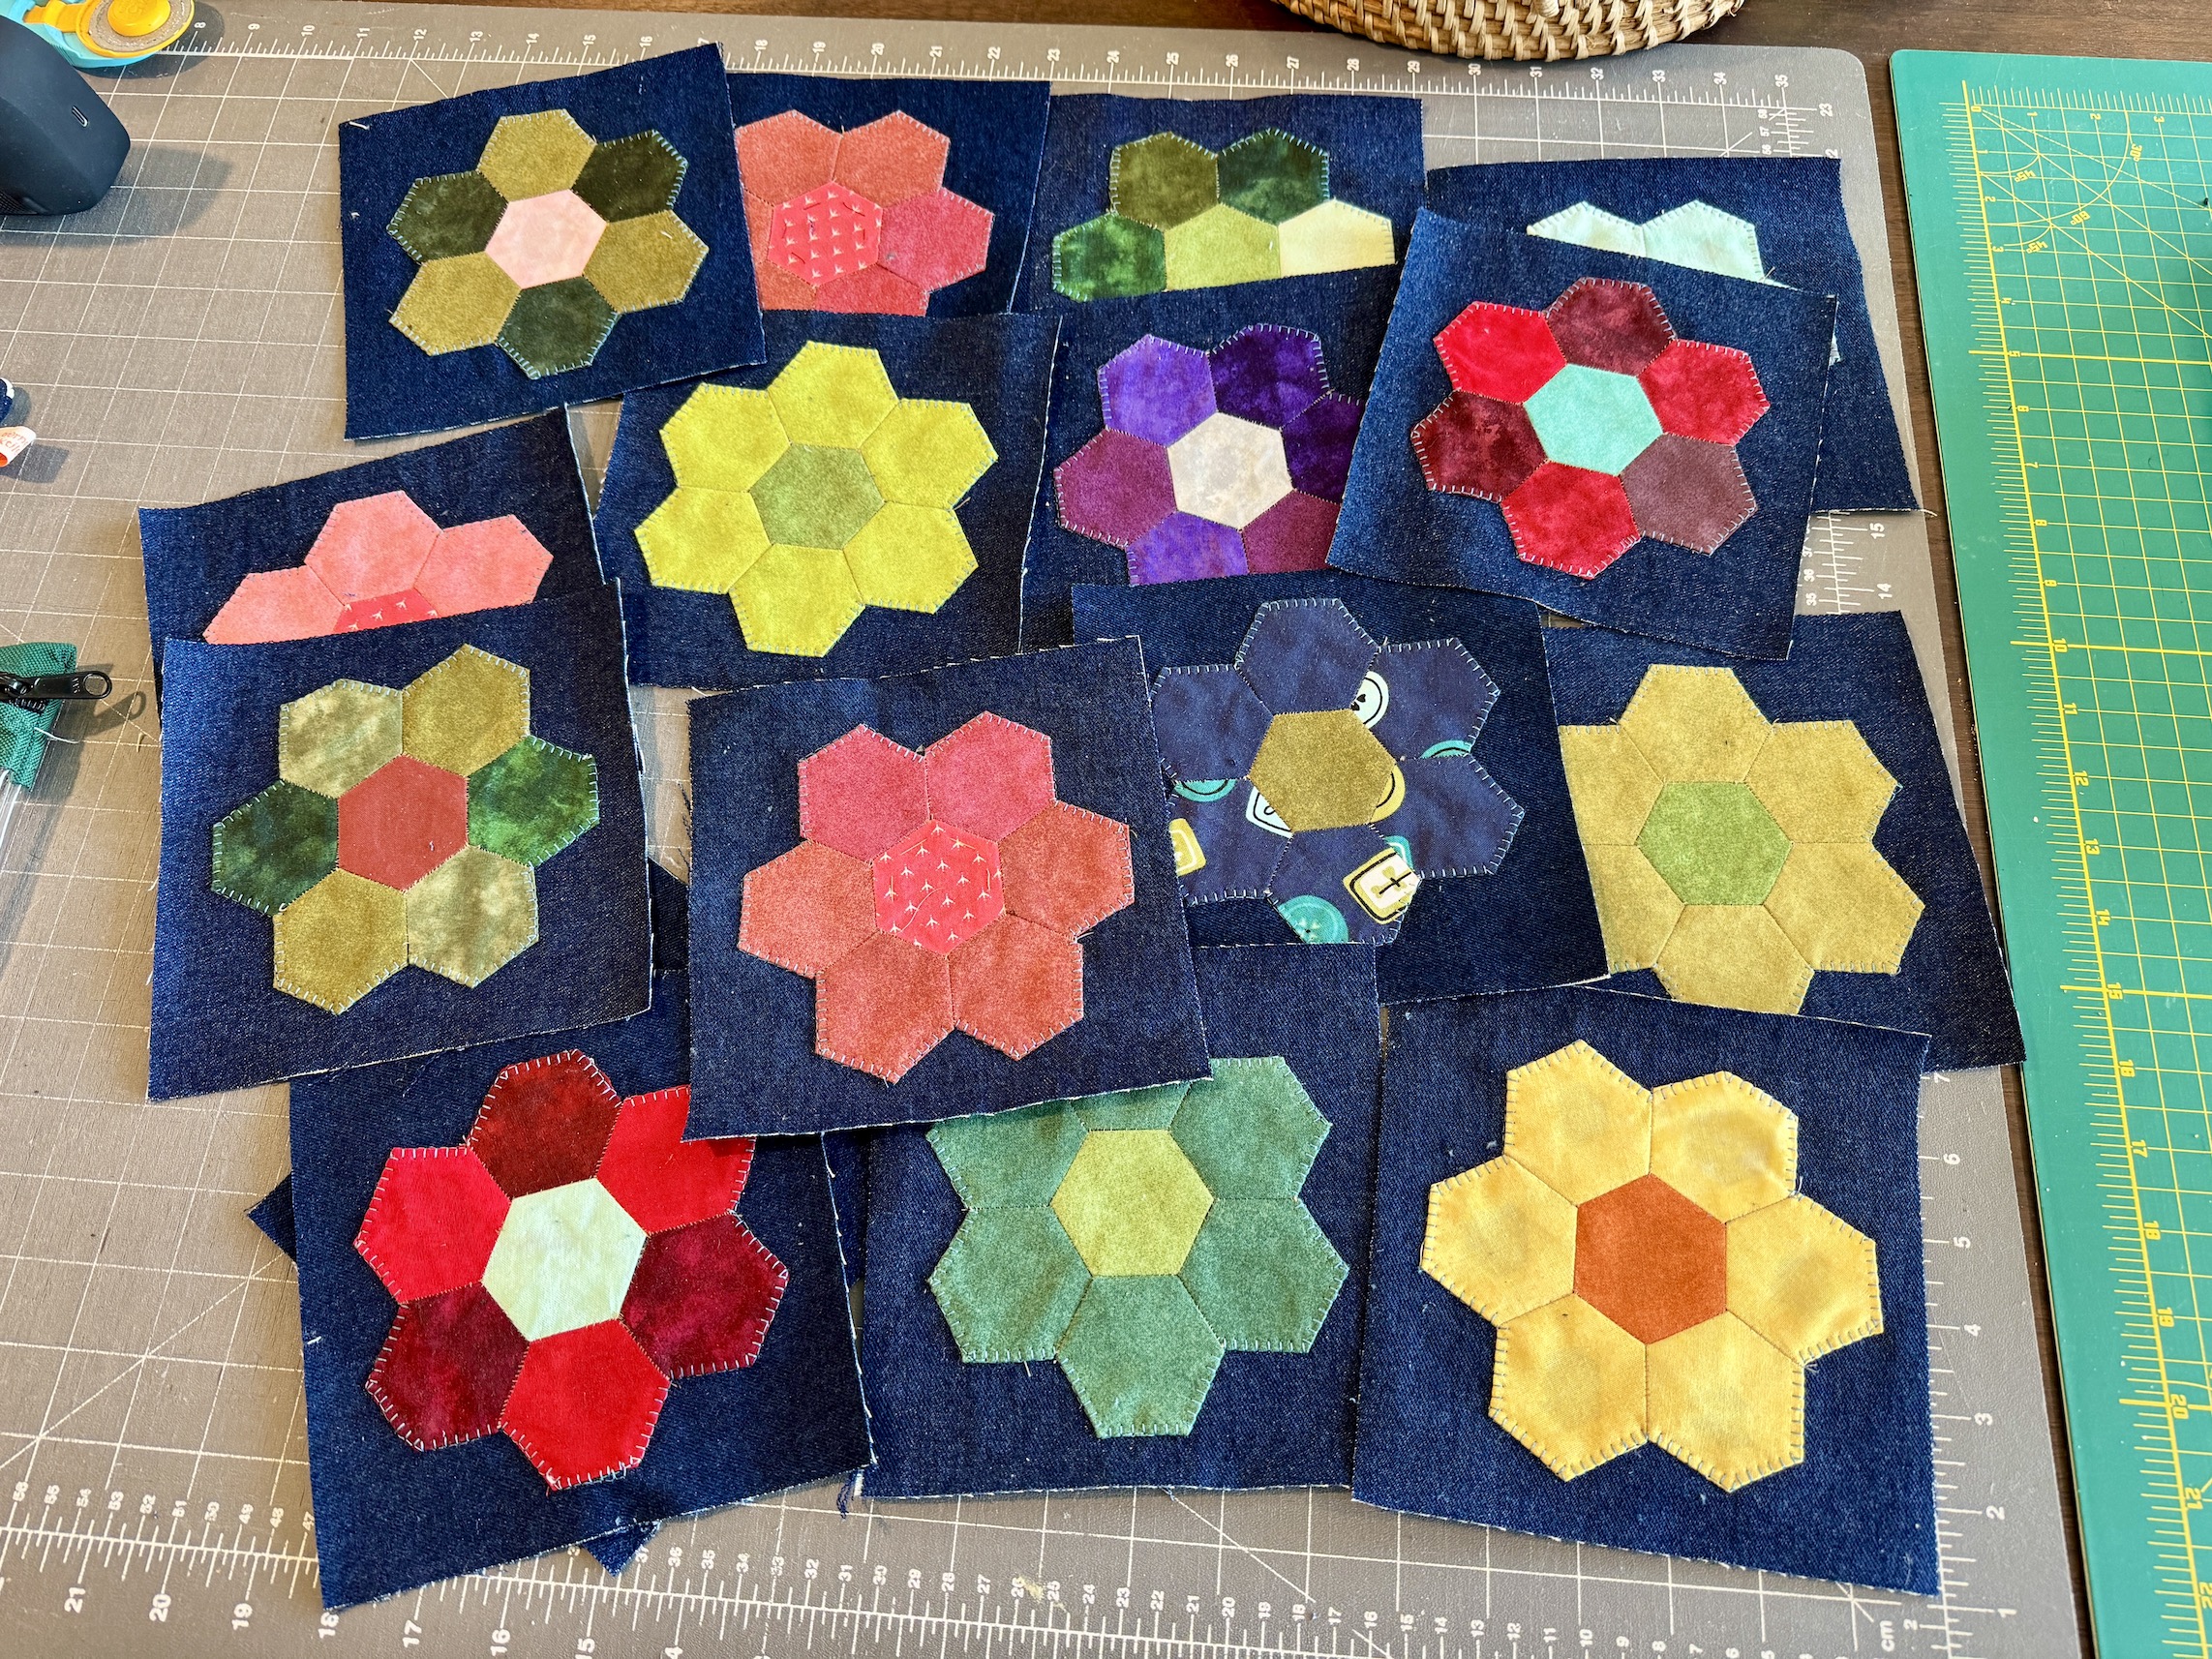
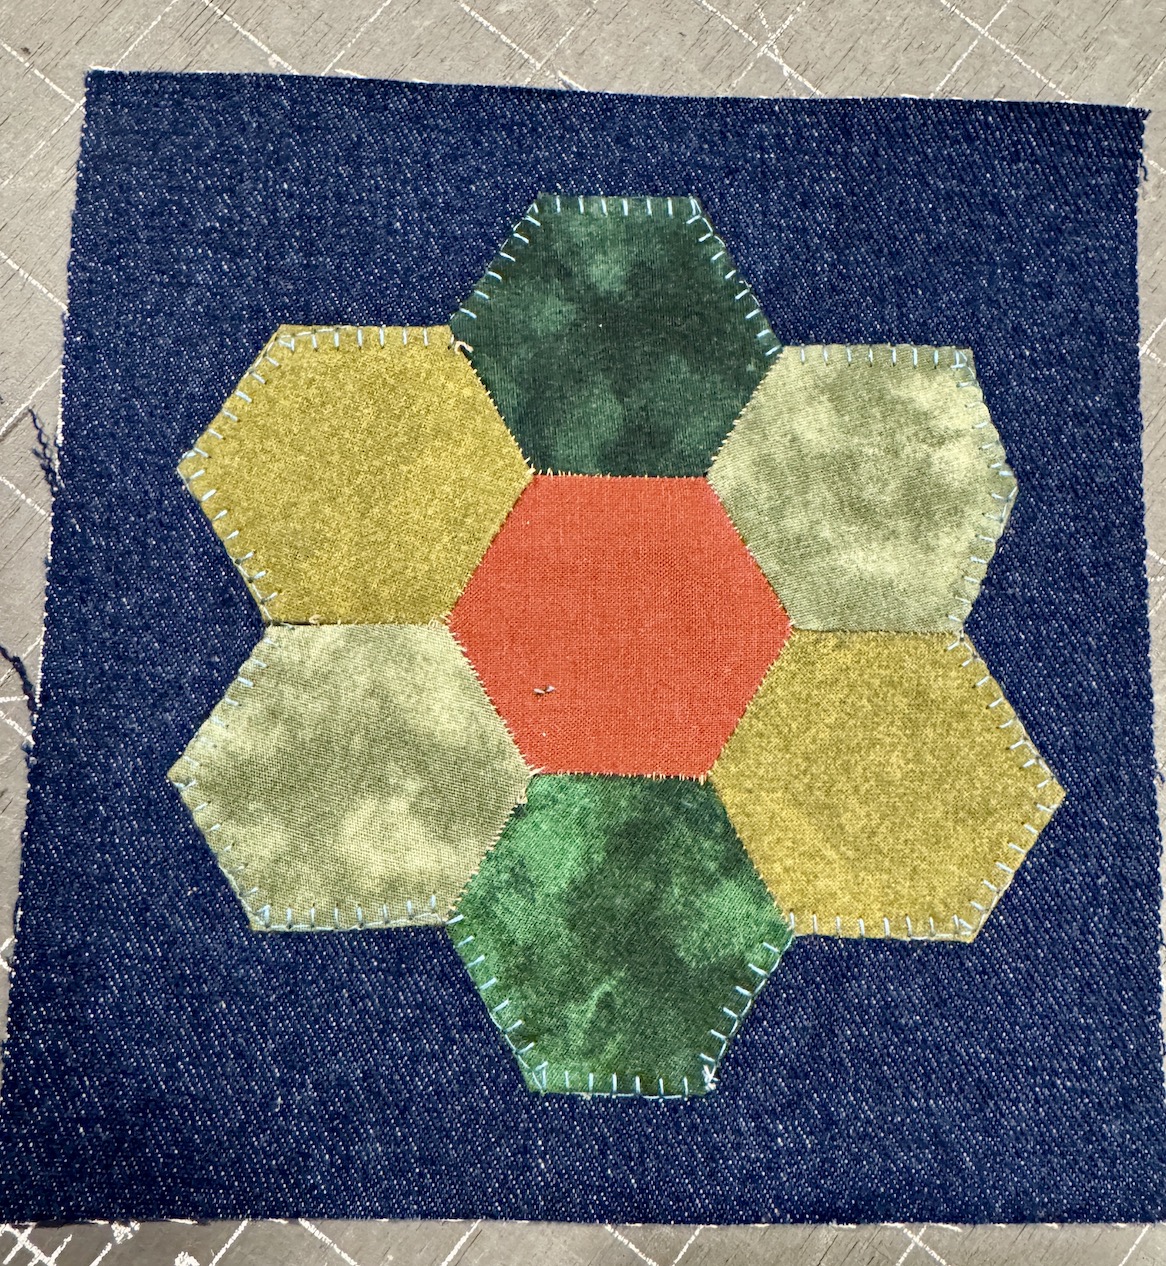
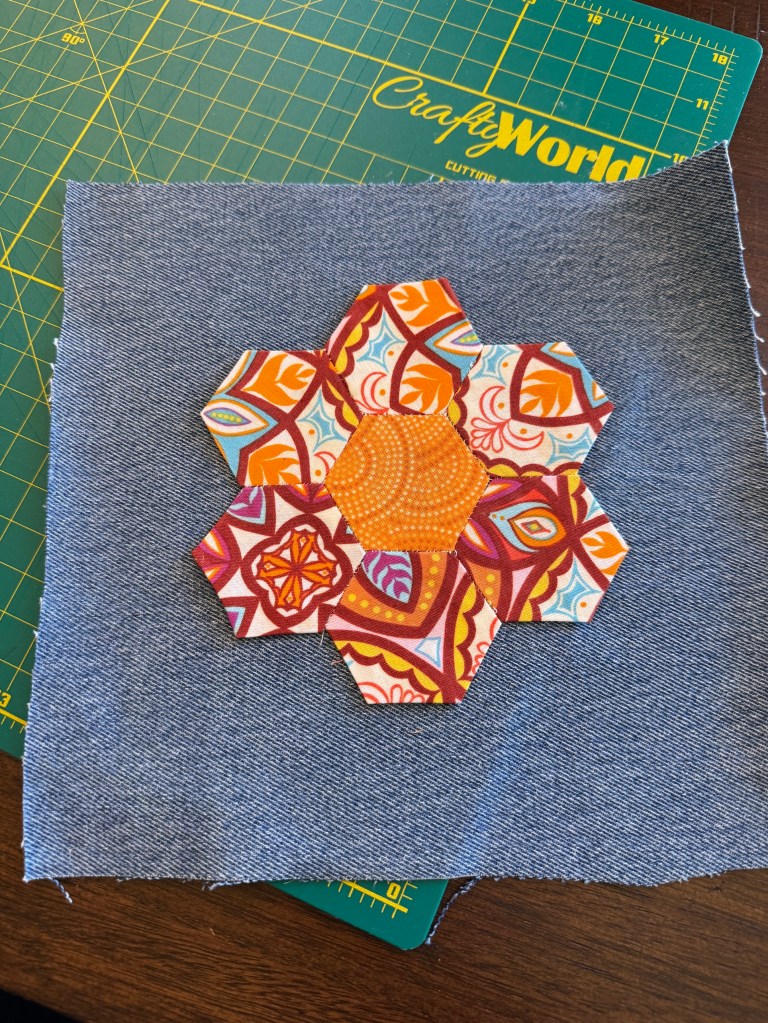
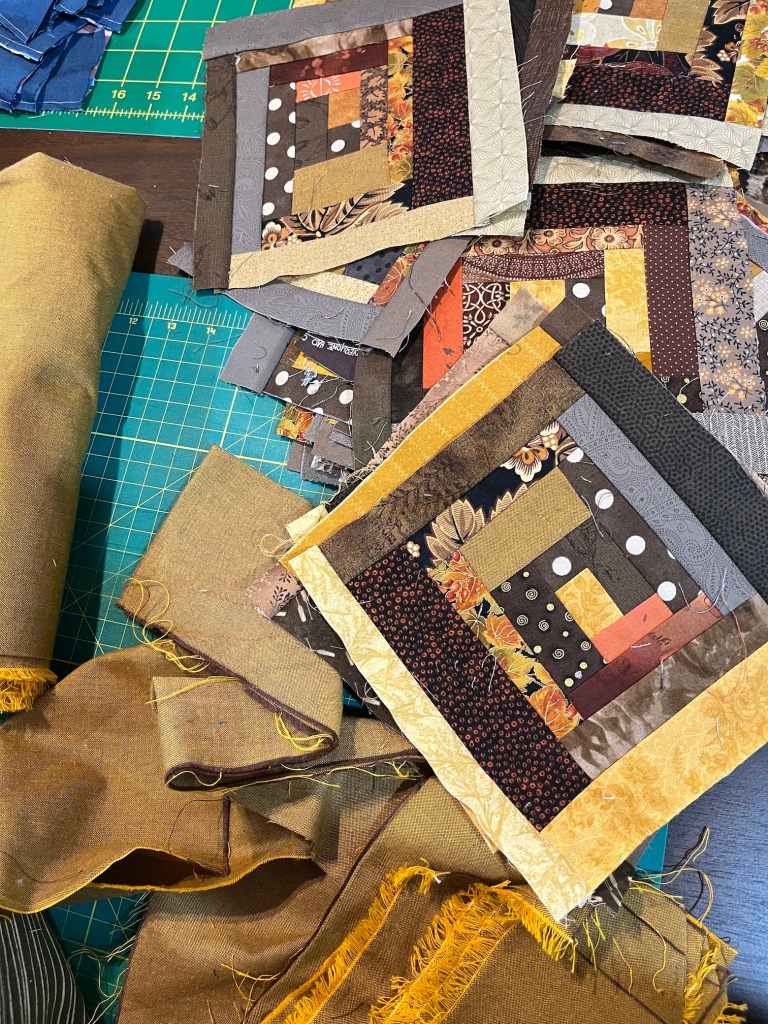
In closing this post I thought I would share that these types of blocks, like the image below, make me smile because they remind me of just how “scrappy” this project is!
I ran out of some of the scrap fabrics and couldn’t make 6 hexagons in the same fabric to surround the center hexagon so I had to mix similar colors (I am using the word “similar” very loosely, ha!):
Update on the Scrappy English Paper Piecing (EPP) Project
So here is my update on the scrappy English Paper Piecing (EPP) hexie rosette project I’ve been working on since 2016 that I previously posted about in this post –ScrapHappy February 2026.
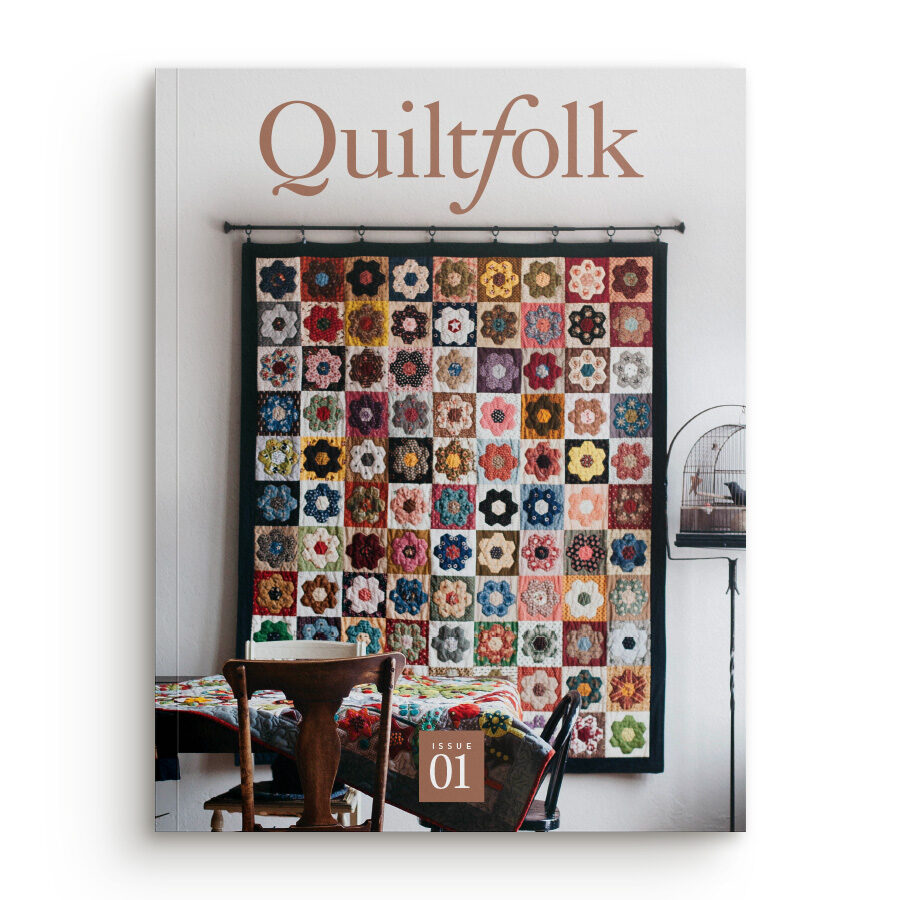
If you are just joining us, it was inspired by this quilt on the cover of the premiere issue of Quiltfolk Magazine, Issue 1: Oregon:
Image credit: quiltfolk.com
This was my progress back in February 2026 when I had 37 EPP flowers machine appliquéd to scrap denim:
I’ve machine appliquéd 12 more blocks since then:
I’ve would have done more but there was this little thing going on in my life called moving house…
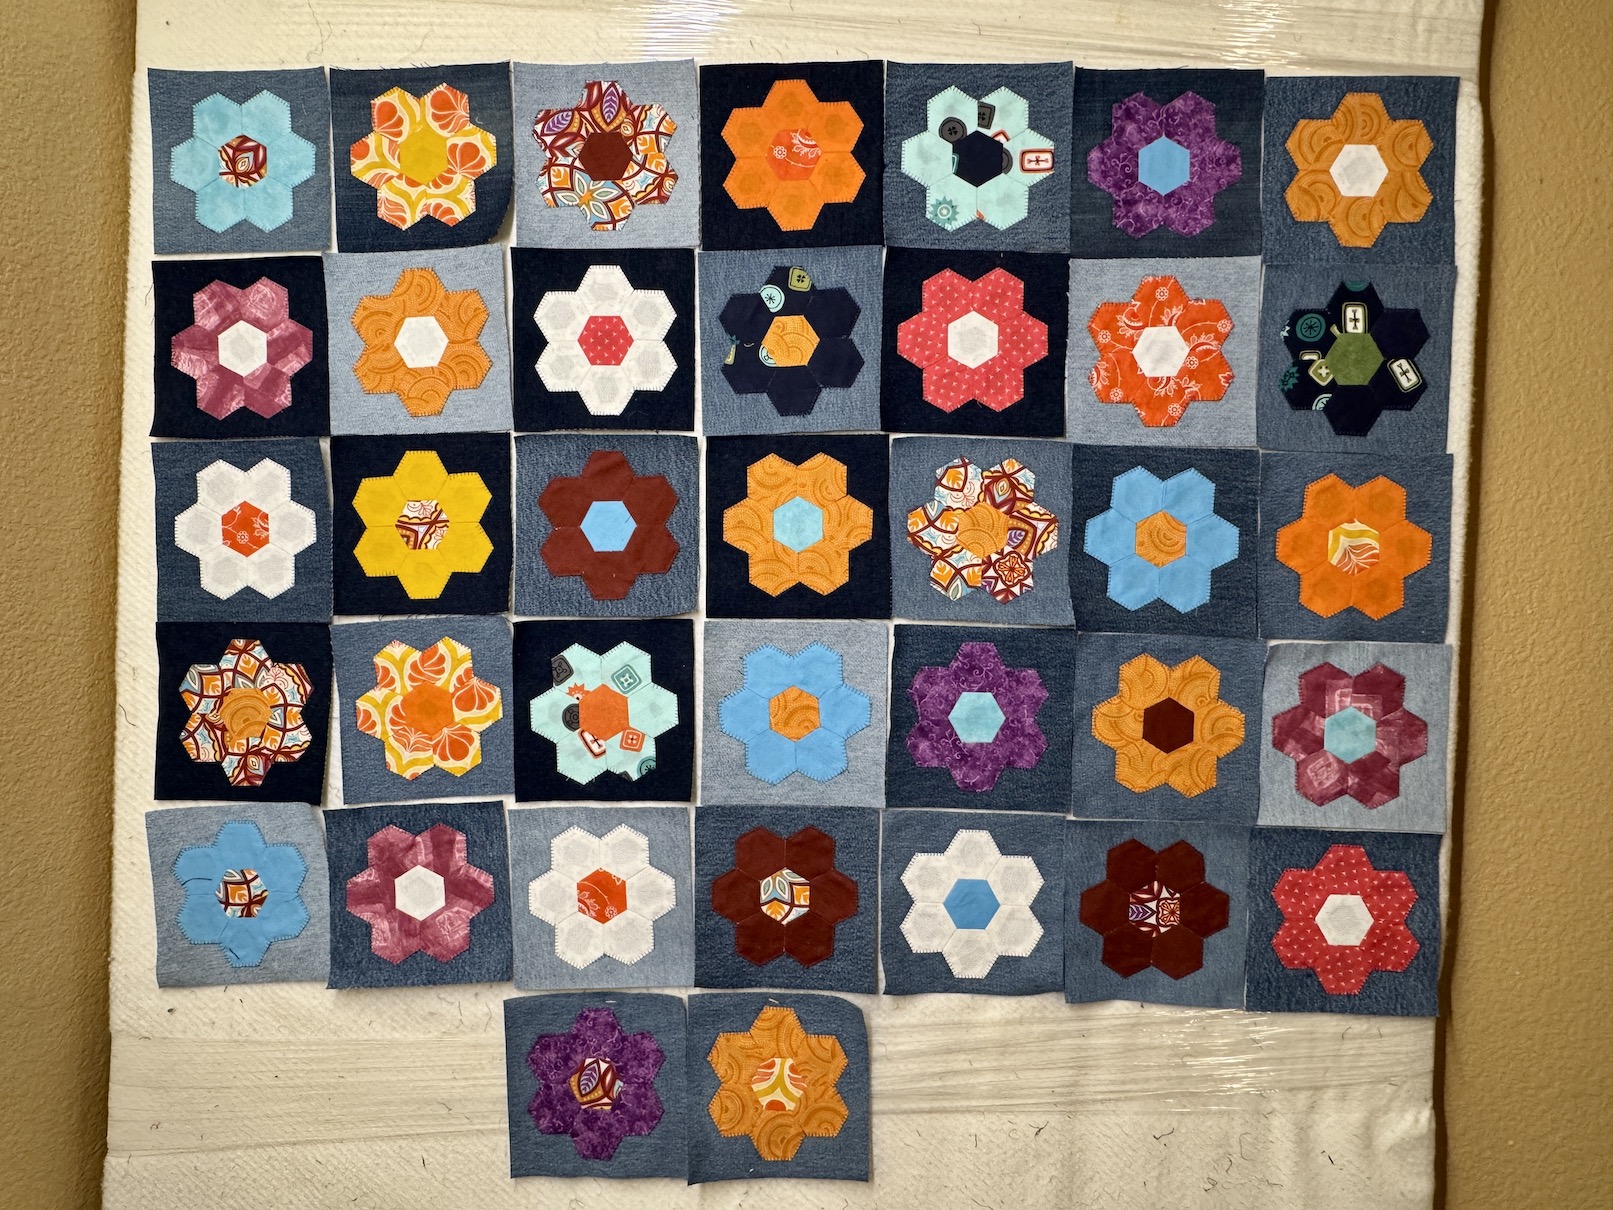
Here are the 49 blocks now completed:
I have 50 more blocks to make for a 9 by 11 (99 blocks) setting.
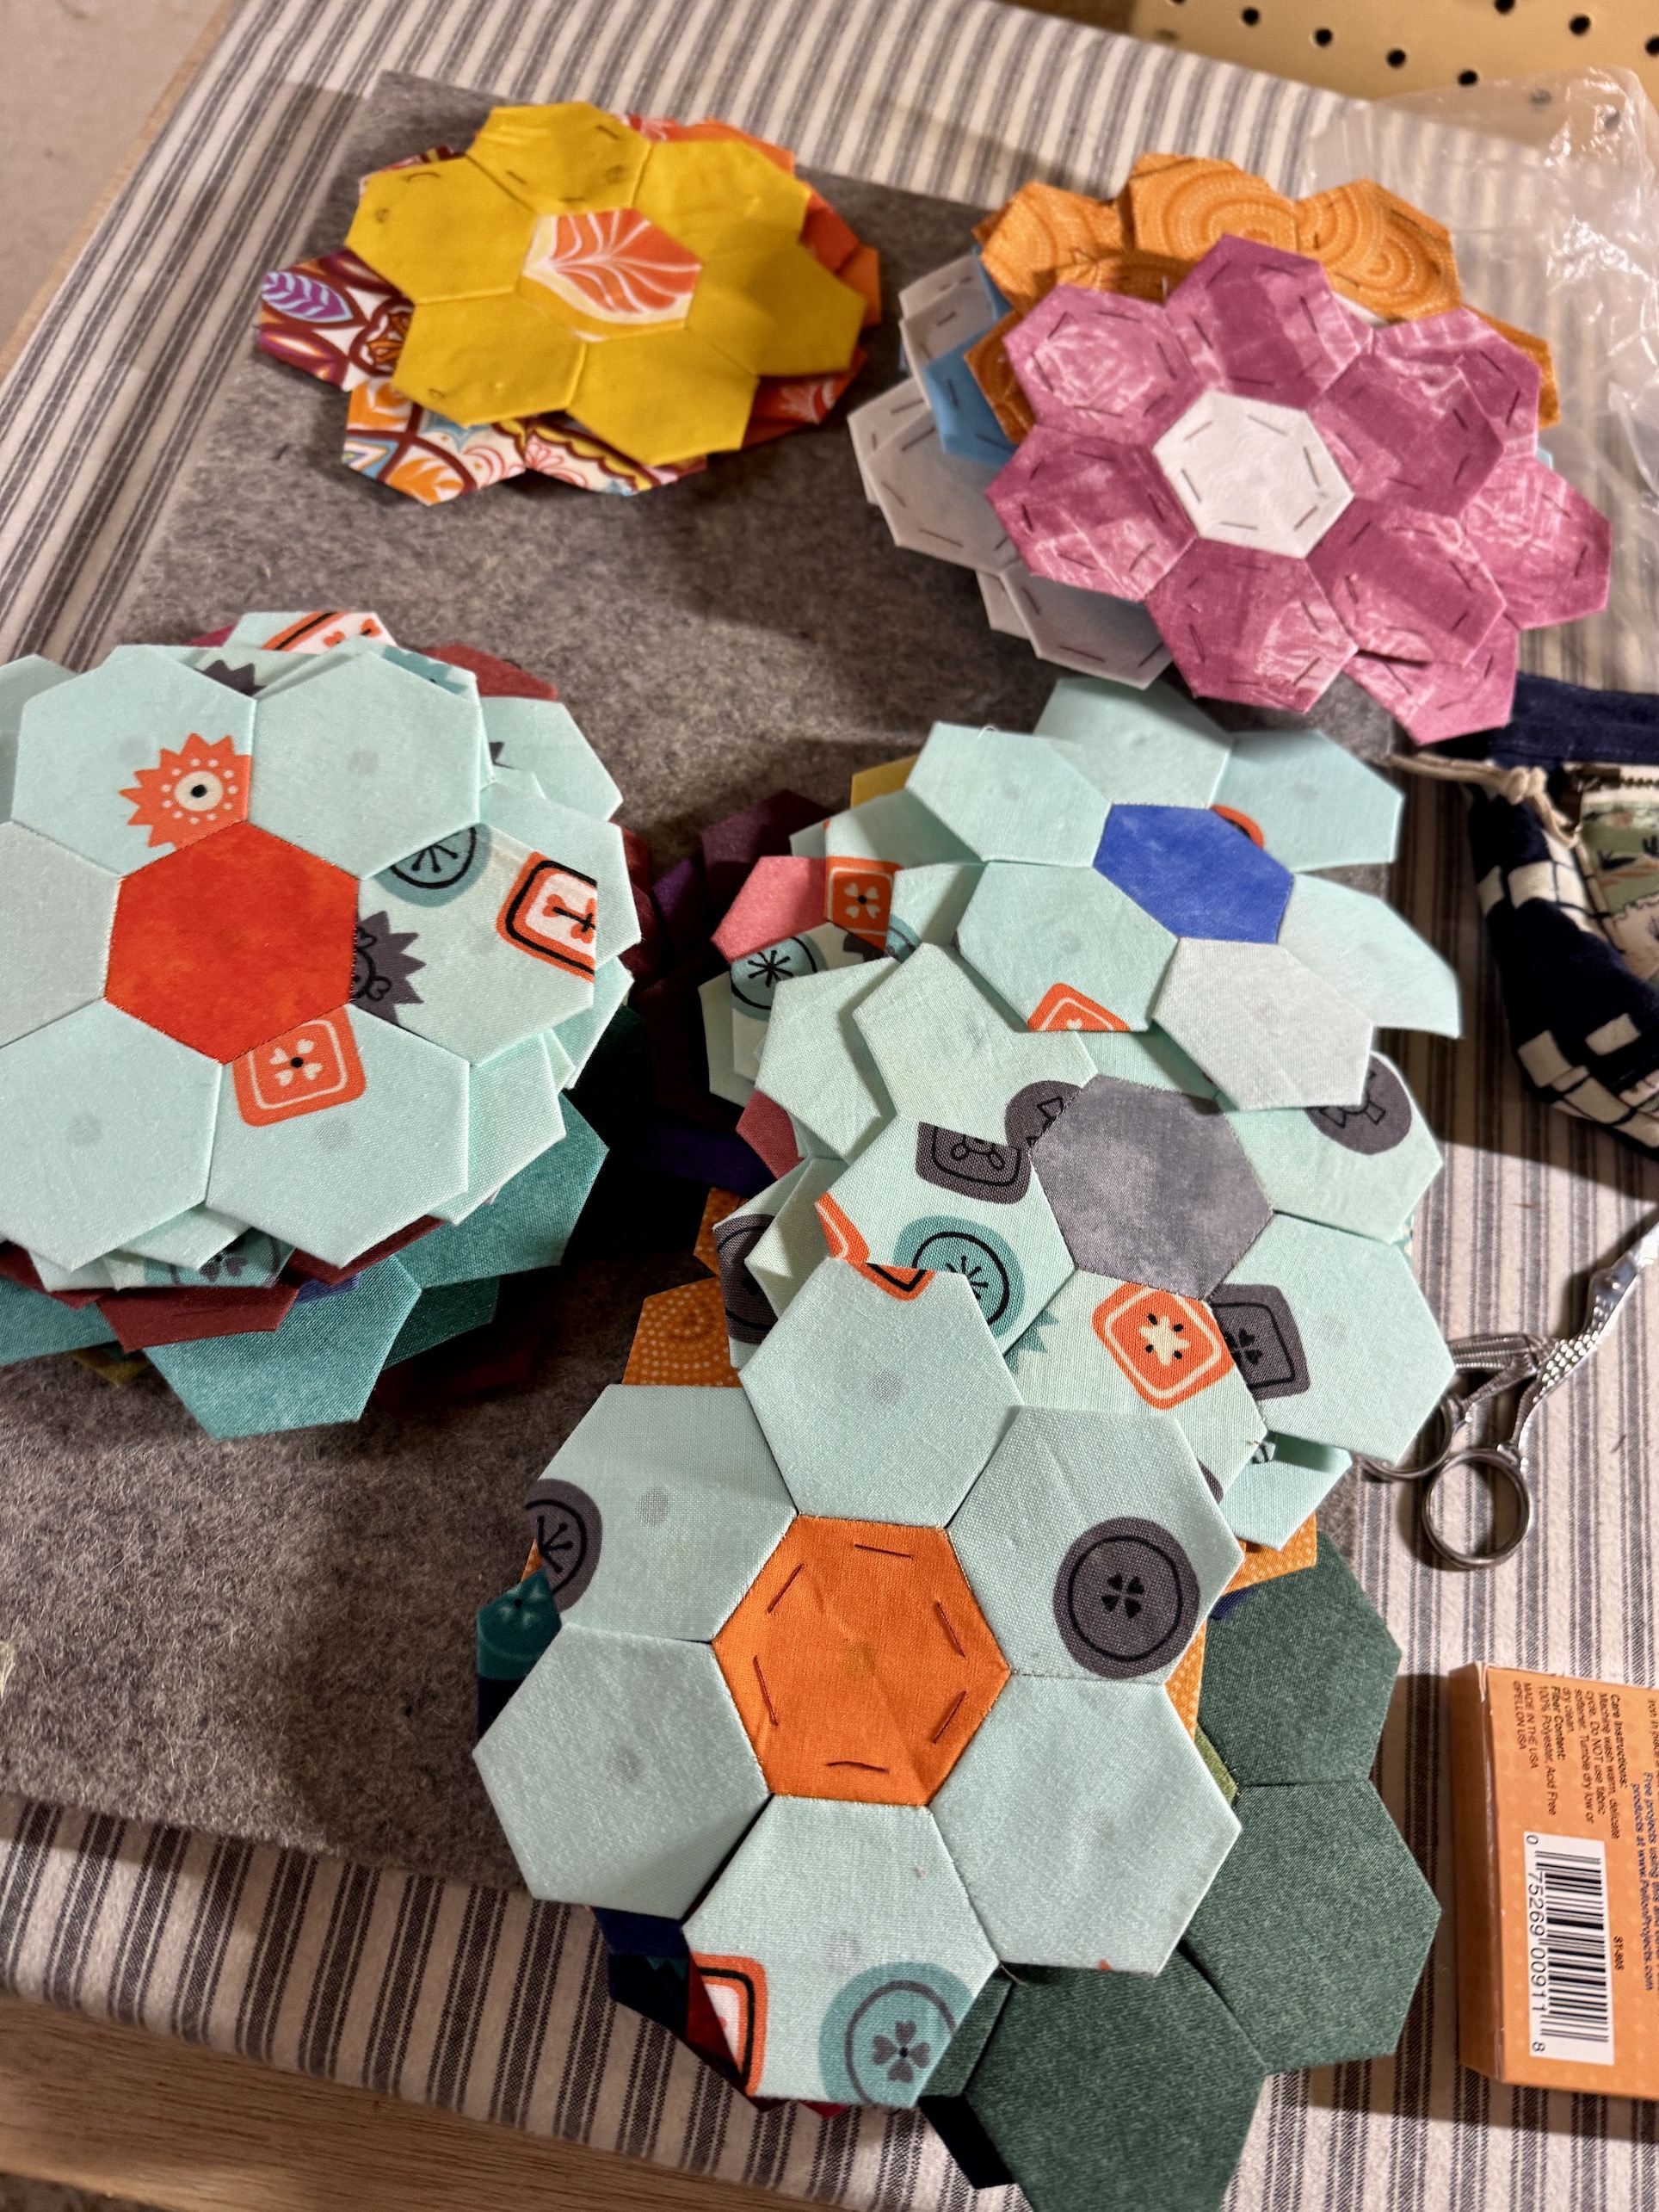
My little challenge is the remaining 50 blocks need my completion of sewing all the hexies in the rosette together! They are just a center hexie with 6 hexies sewn to the center but not sewn to each other…
So I need to settle in for some serious hand sewing to be able to report progress in May’s ScrapHappy post 🙂
I’ve completely fallen off the blog-o-sphere with the move to our new home. After days of endless packing now there are now days of endless unpacking.
We closed on the house on March 2 and the began moving in over a couple of days via many carloads and then on March 5th we had professional movers move our large furniture items.
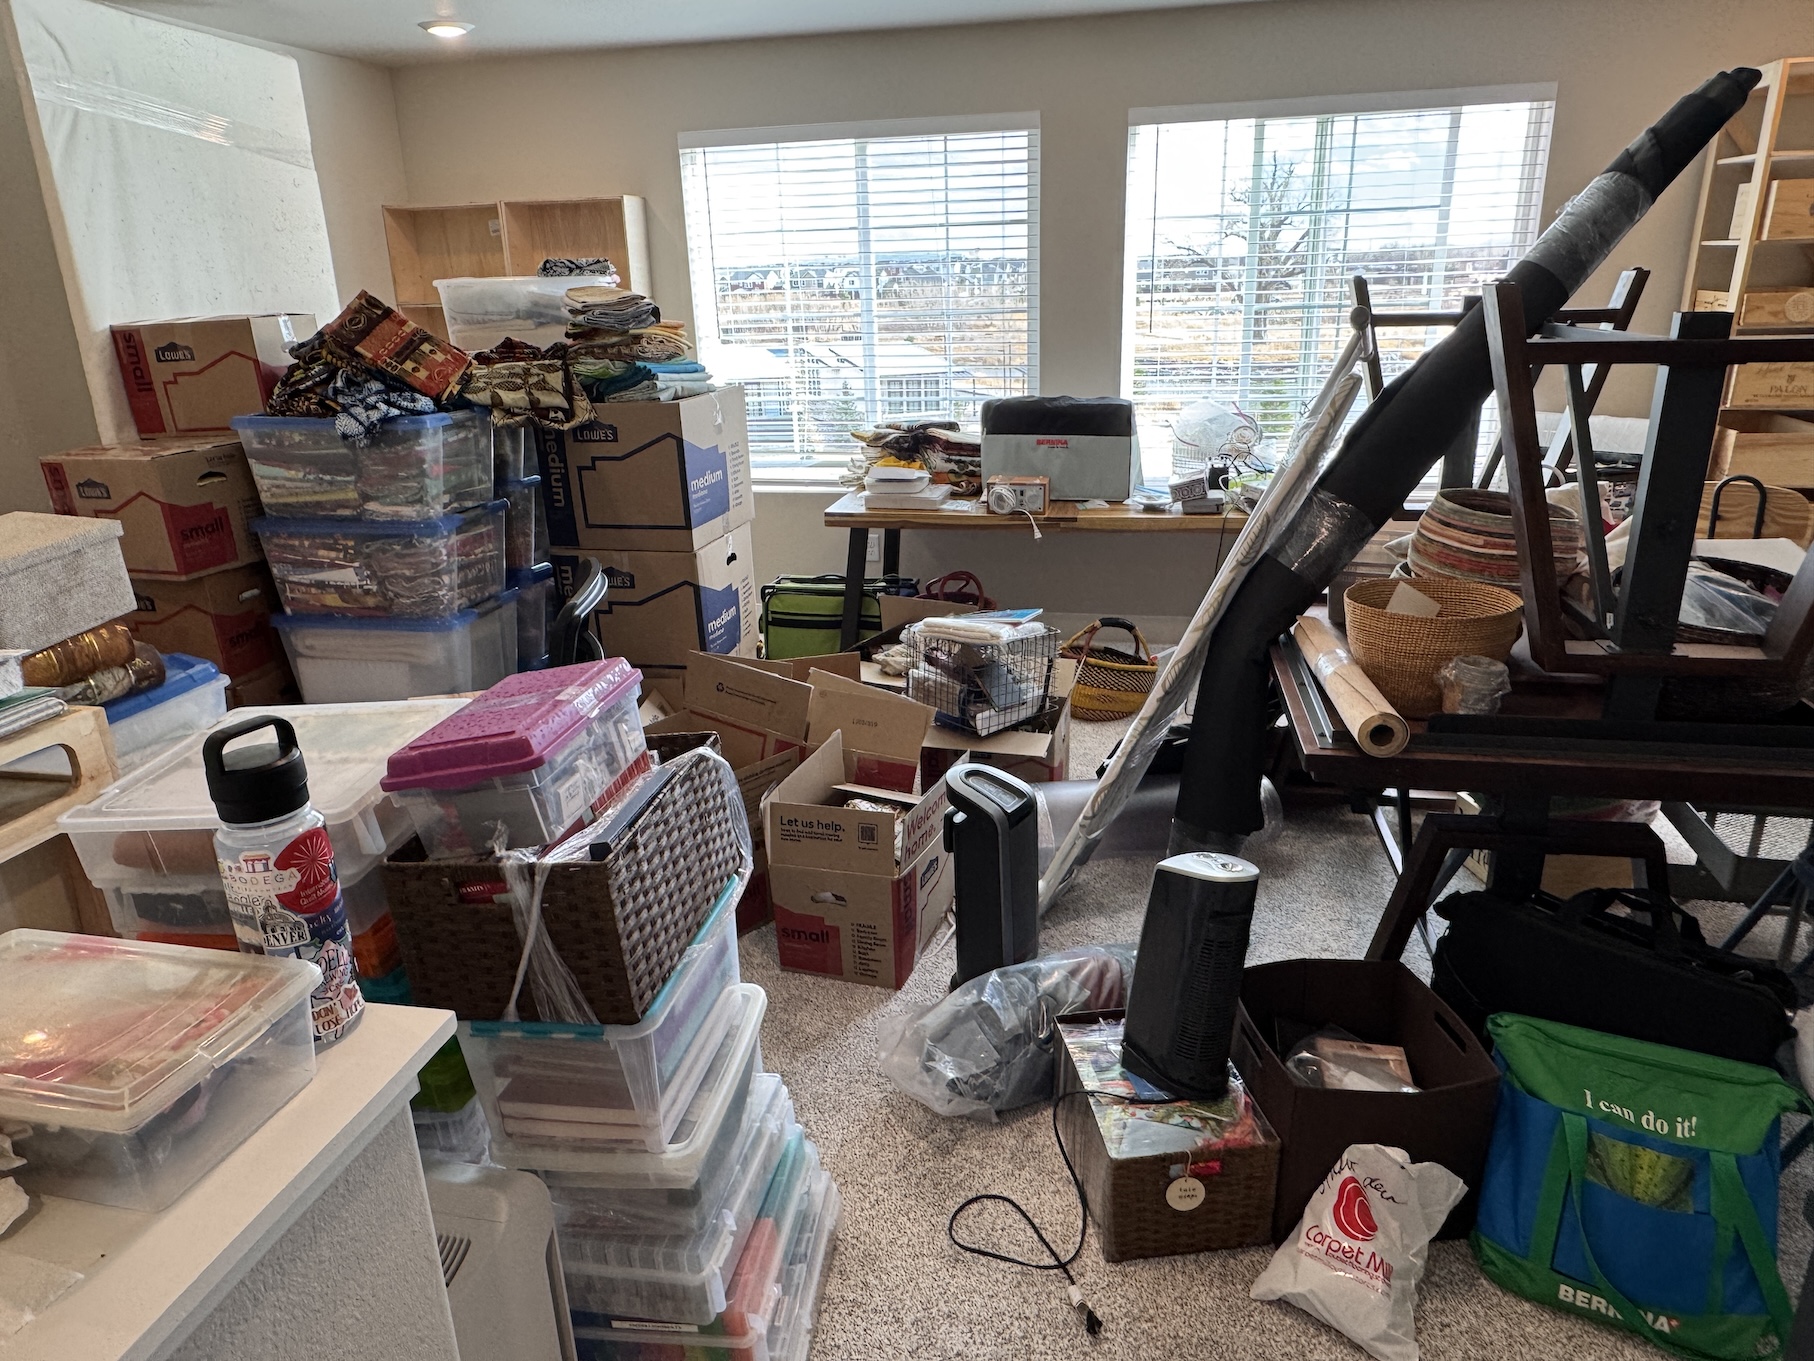
My new studio in the loft of our new home currently looks like this:
So there are no scrappy creations to report for March’s ScrapHappy post.
However I wanted to participate in this monthly celebration of working with scraps/recycled materials so I will provide a tour of some of the scrappy quilts now on display in my new home.
I don’t do well living in chaos so John and I have diligently worked over the past week to get the main floor of our new home livable and even kind of cozy.
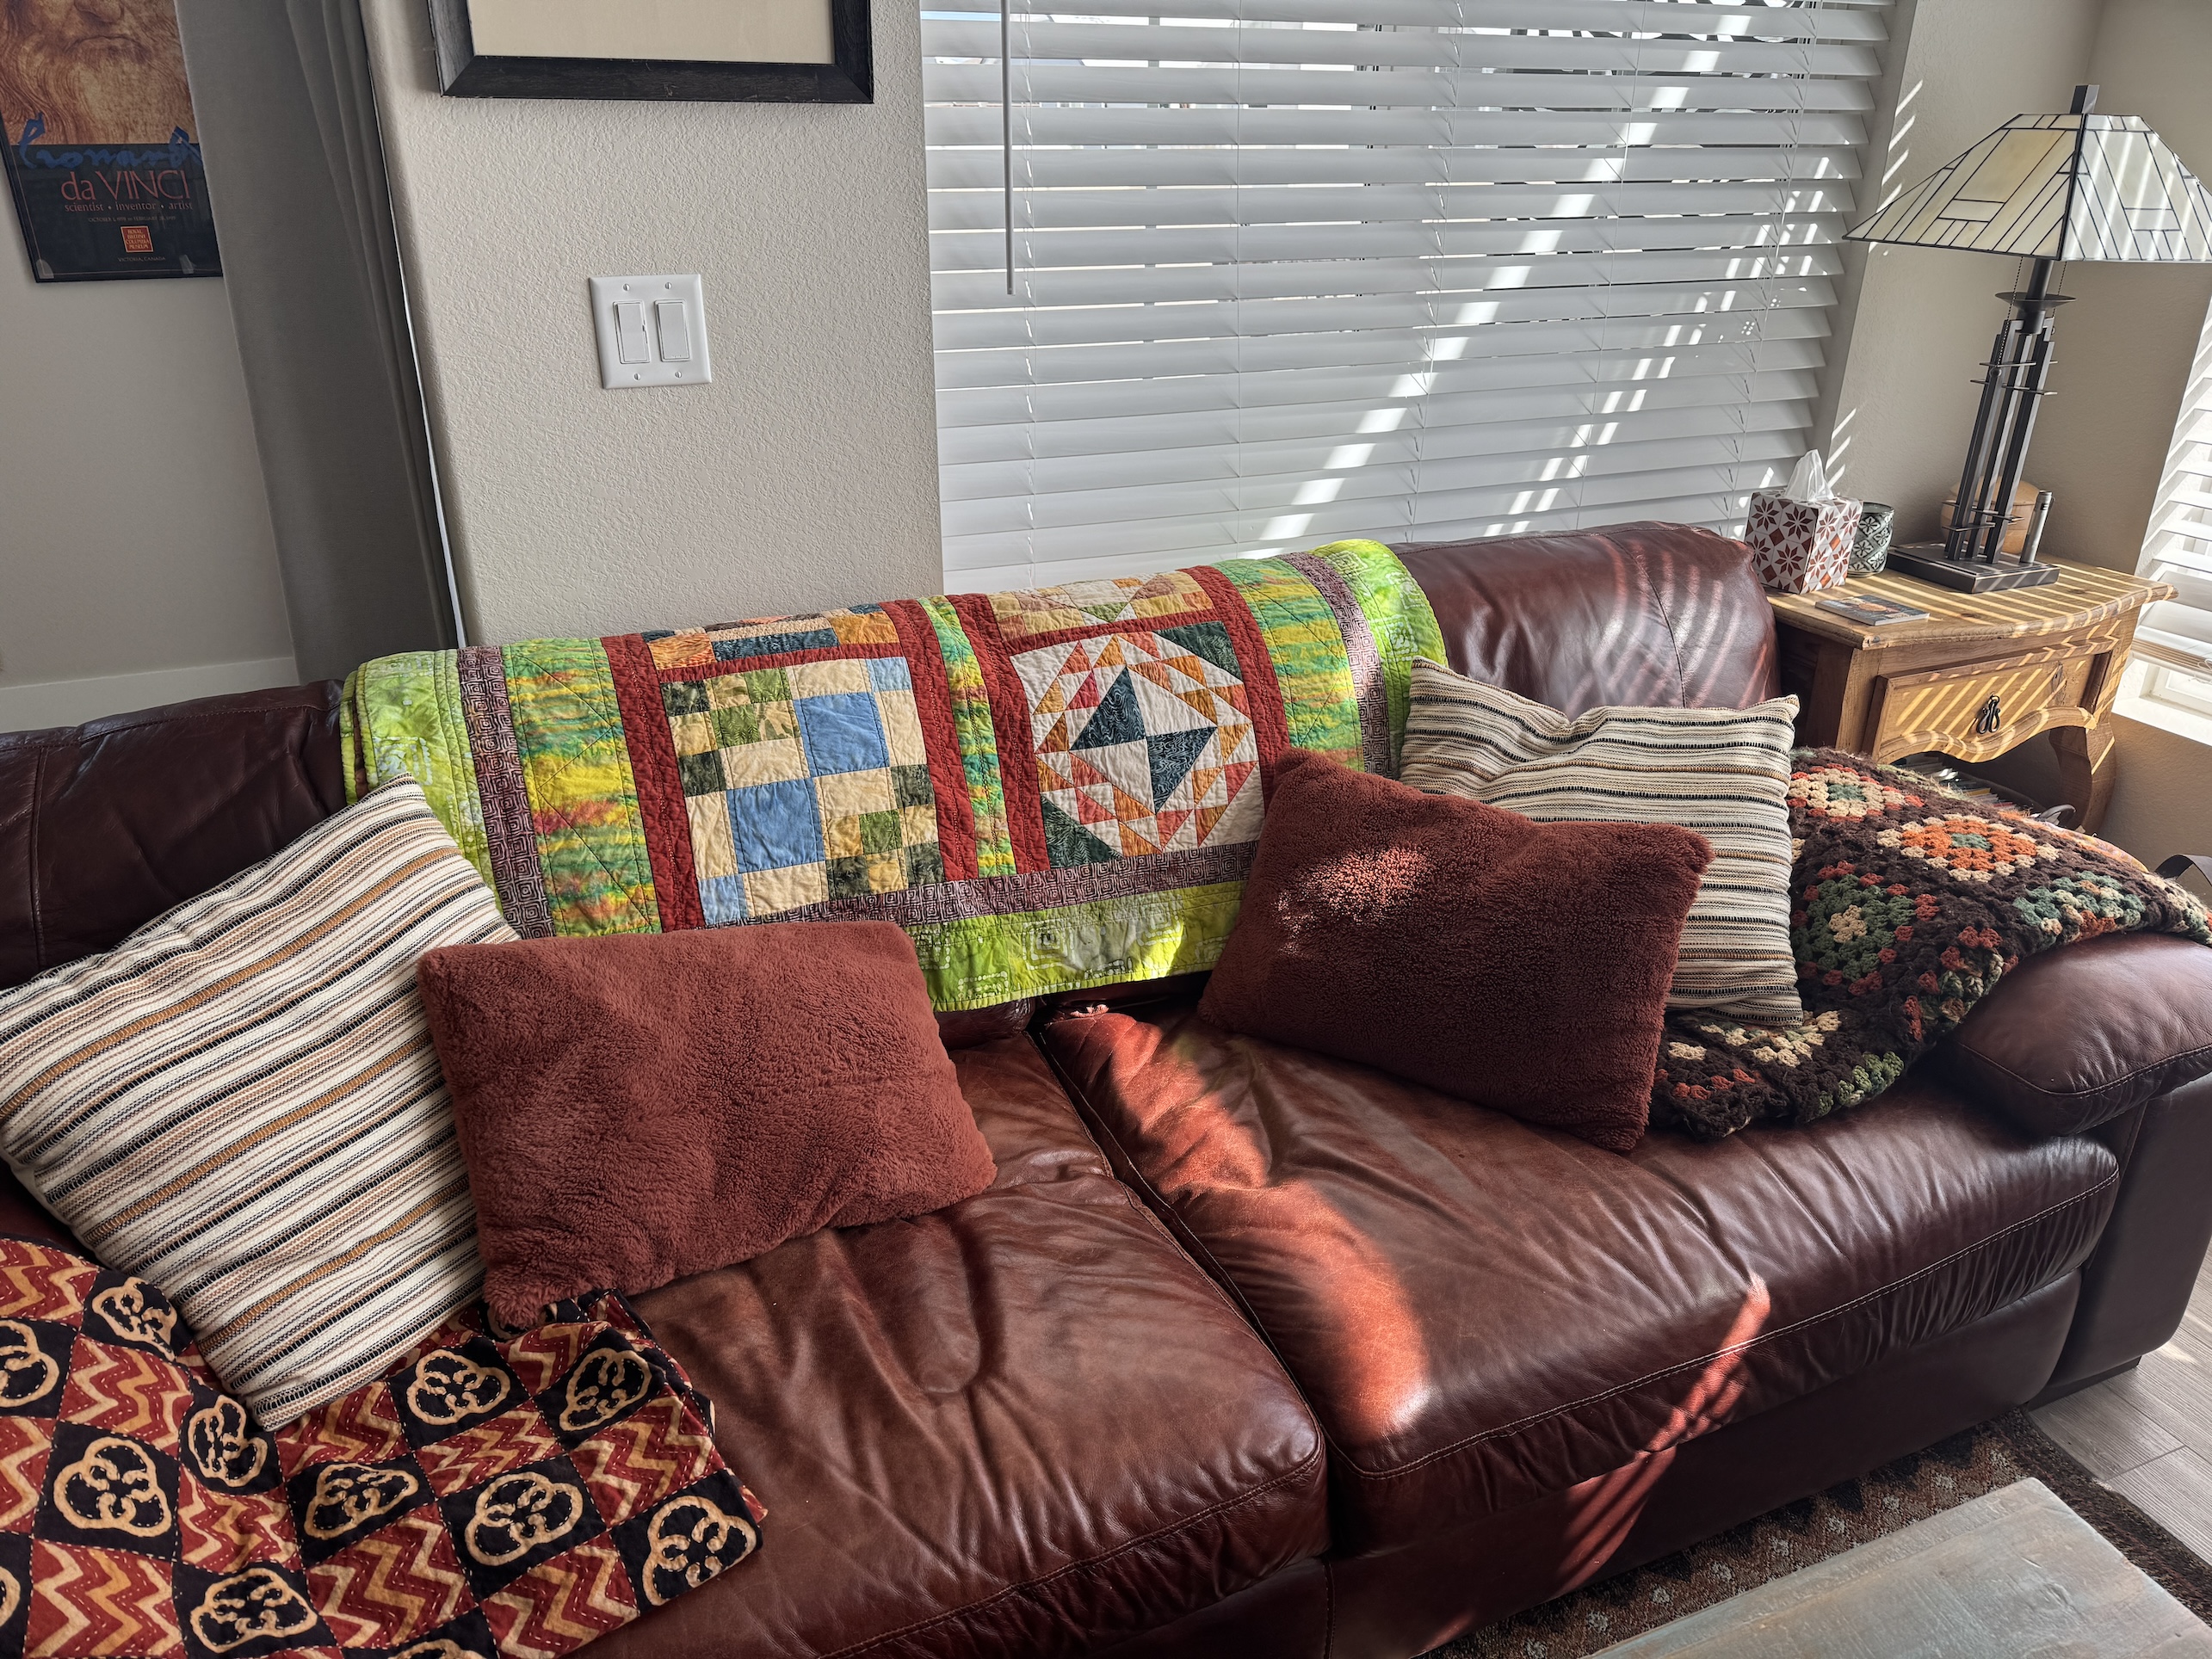
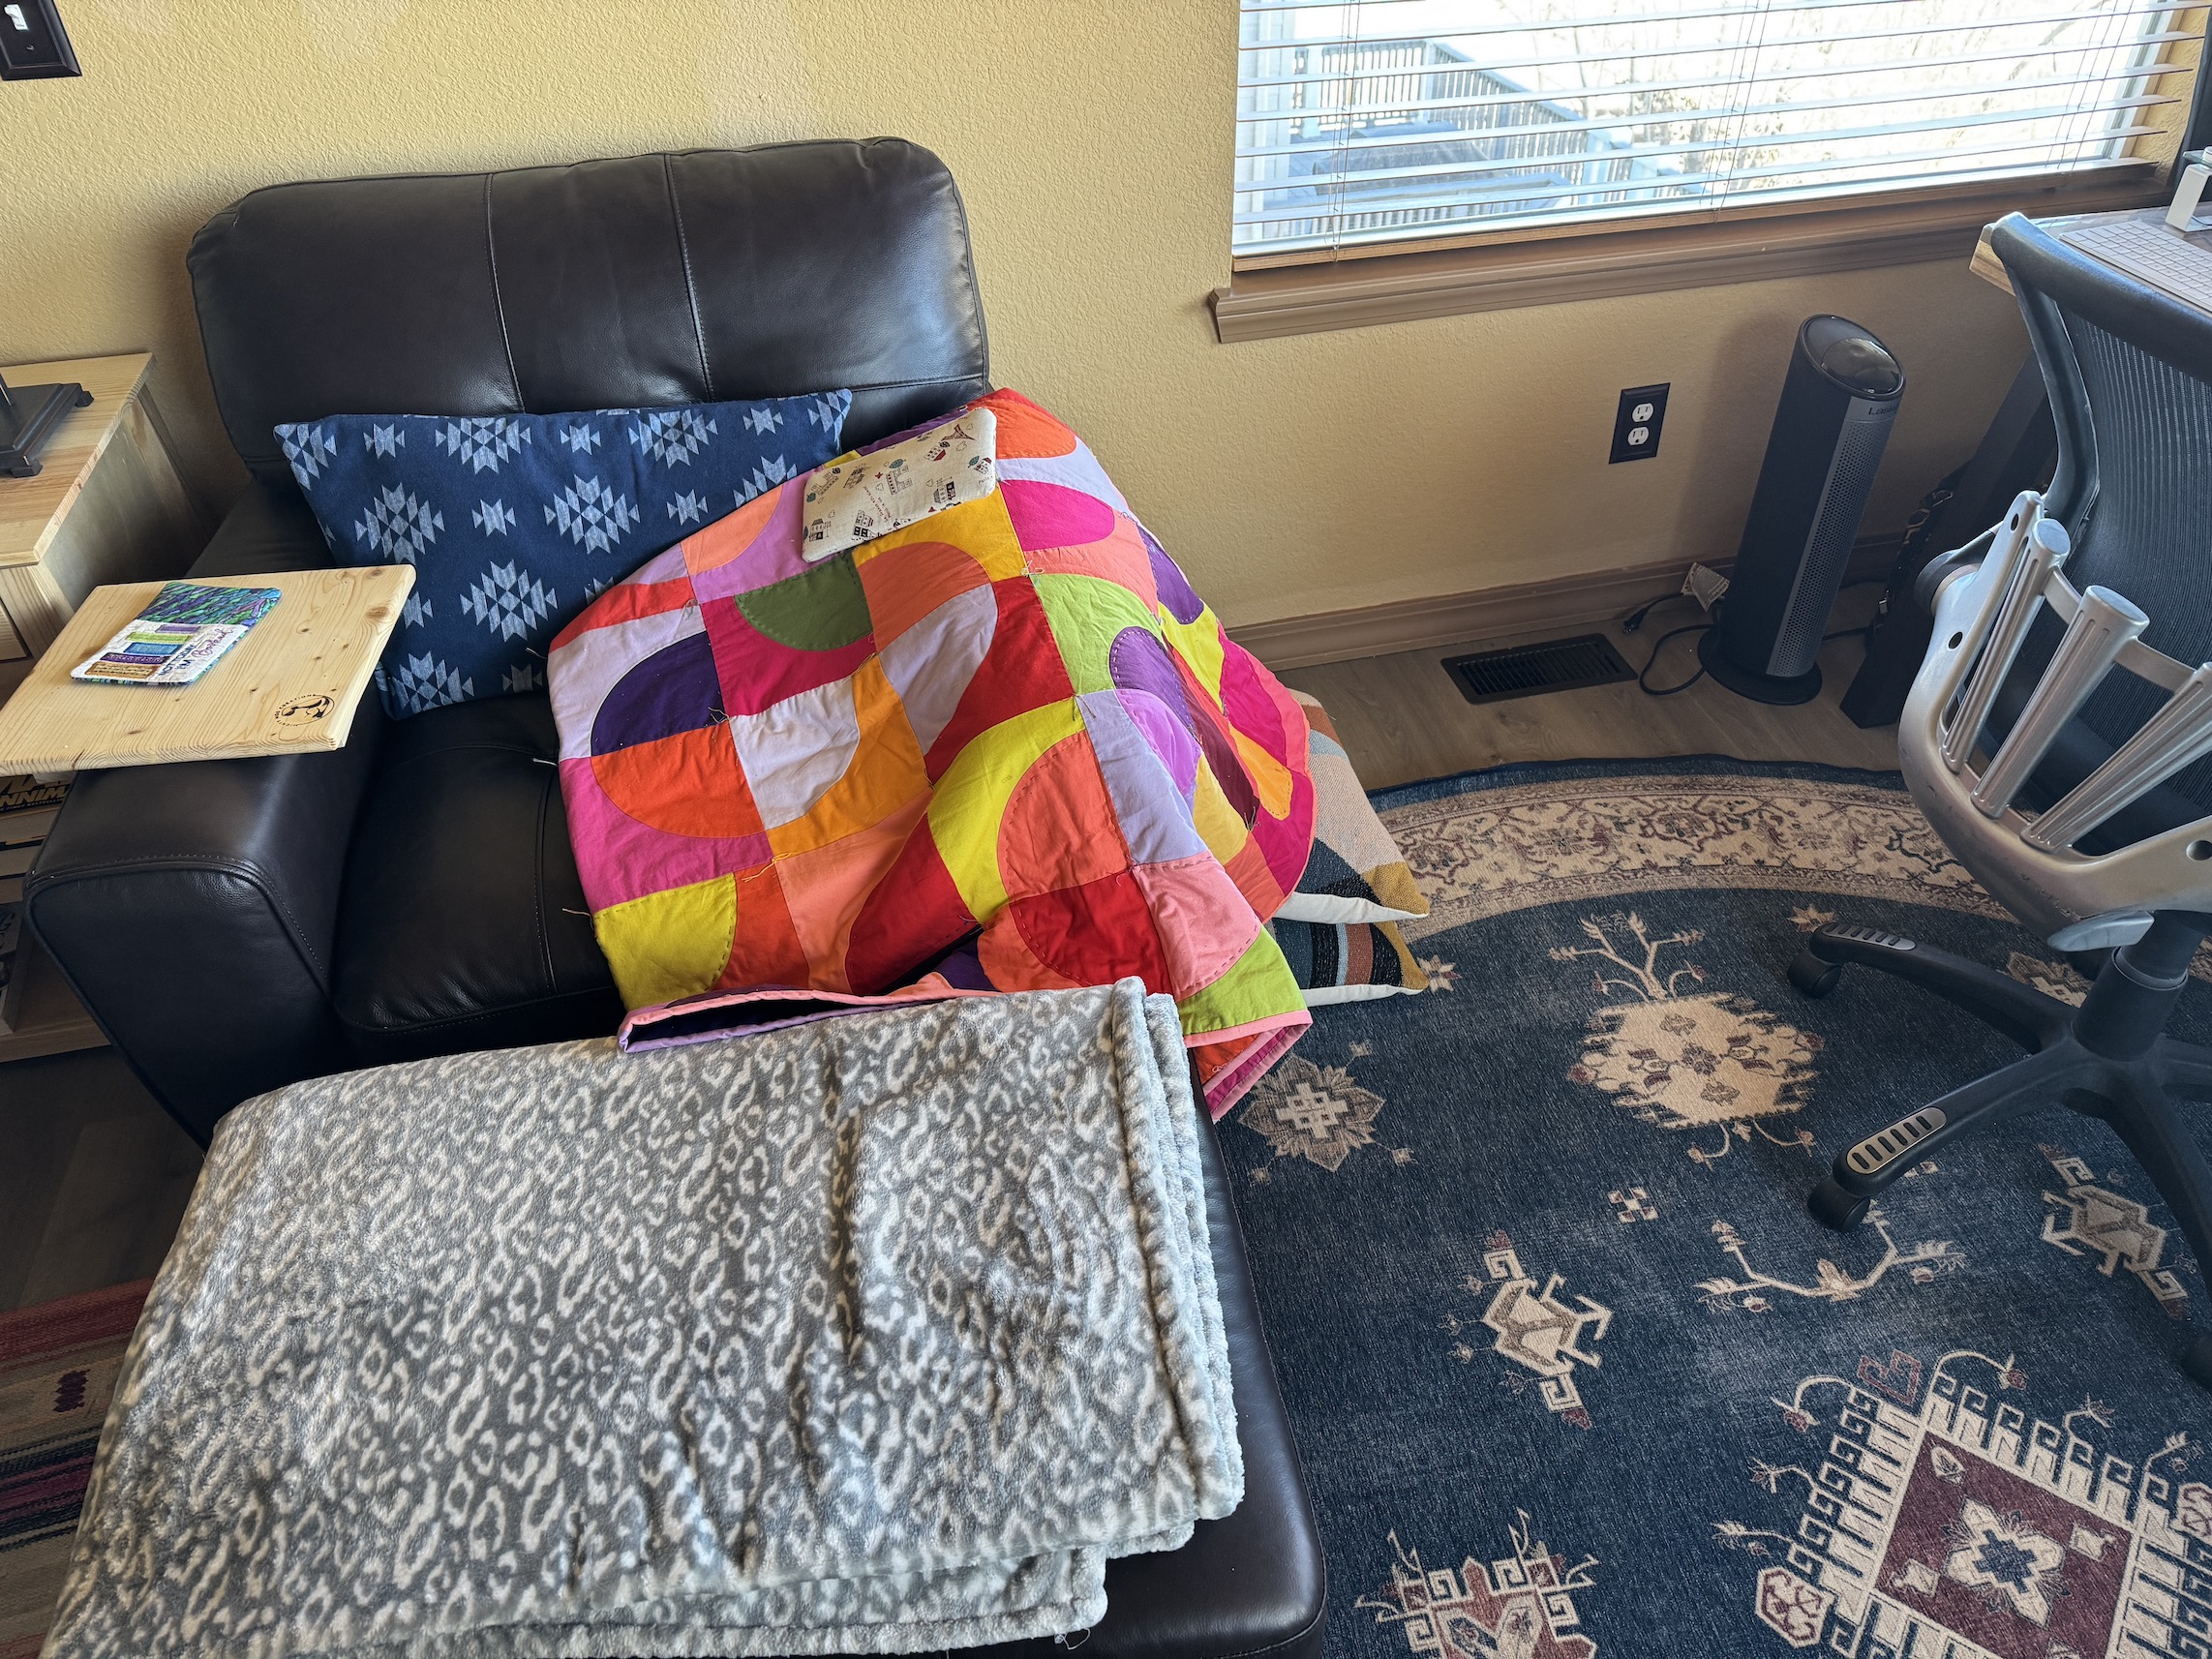
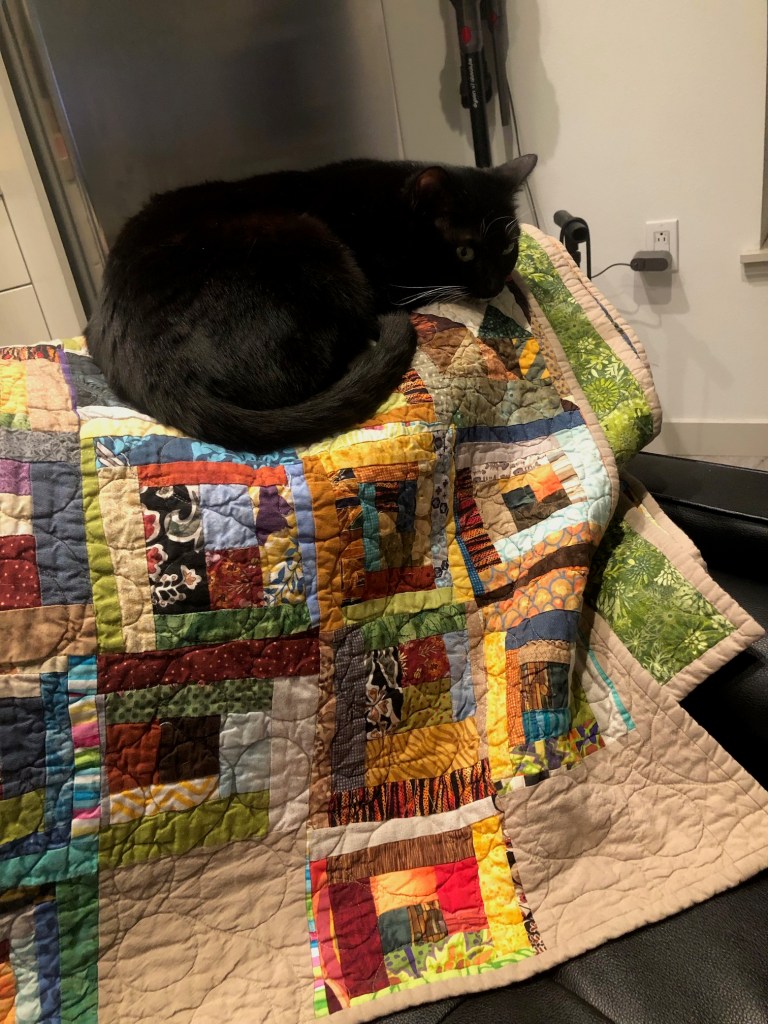
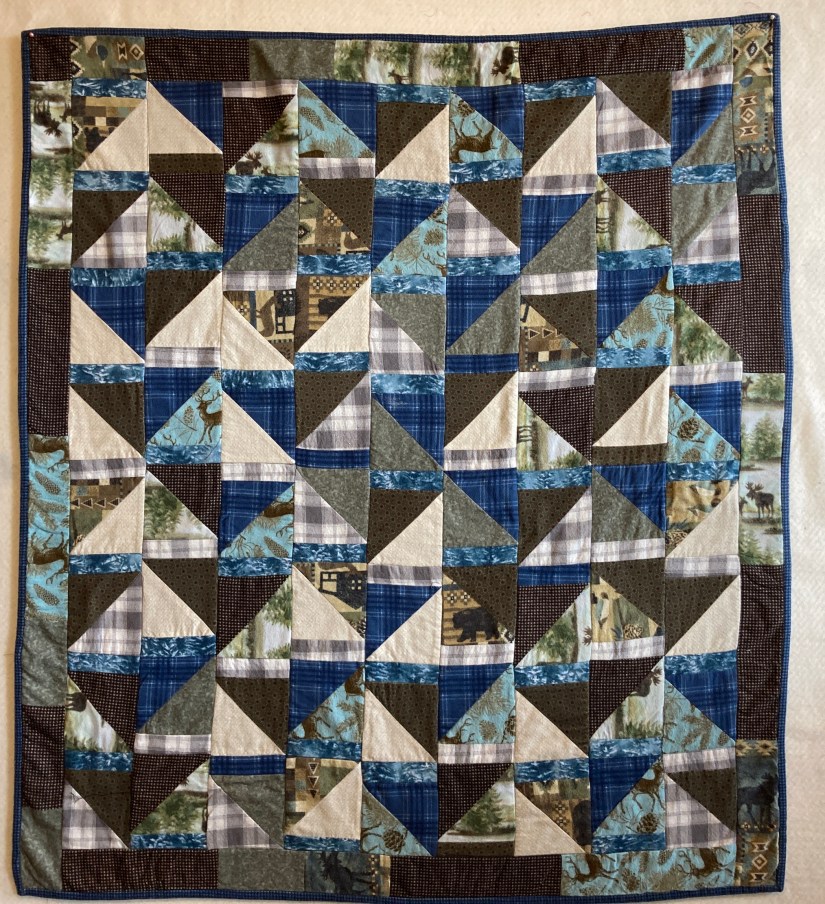
1) Scrappy quilt in my new living room on the sofa:
This quilt was made in the 2000s with batik fabric scraps.
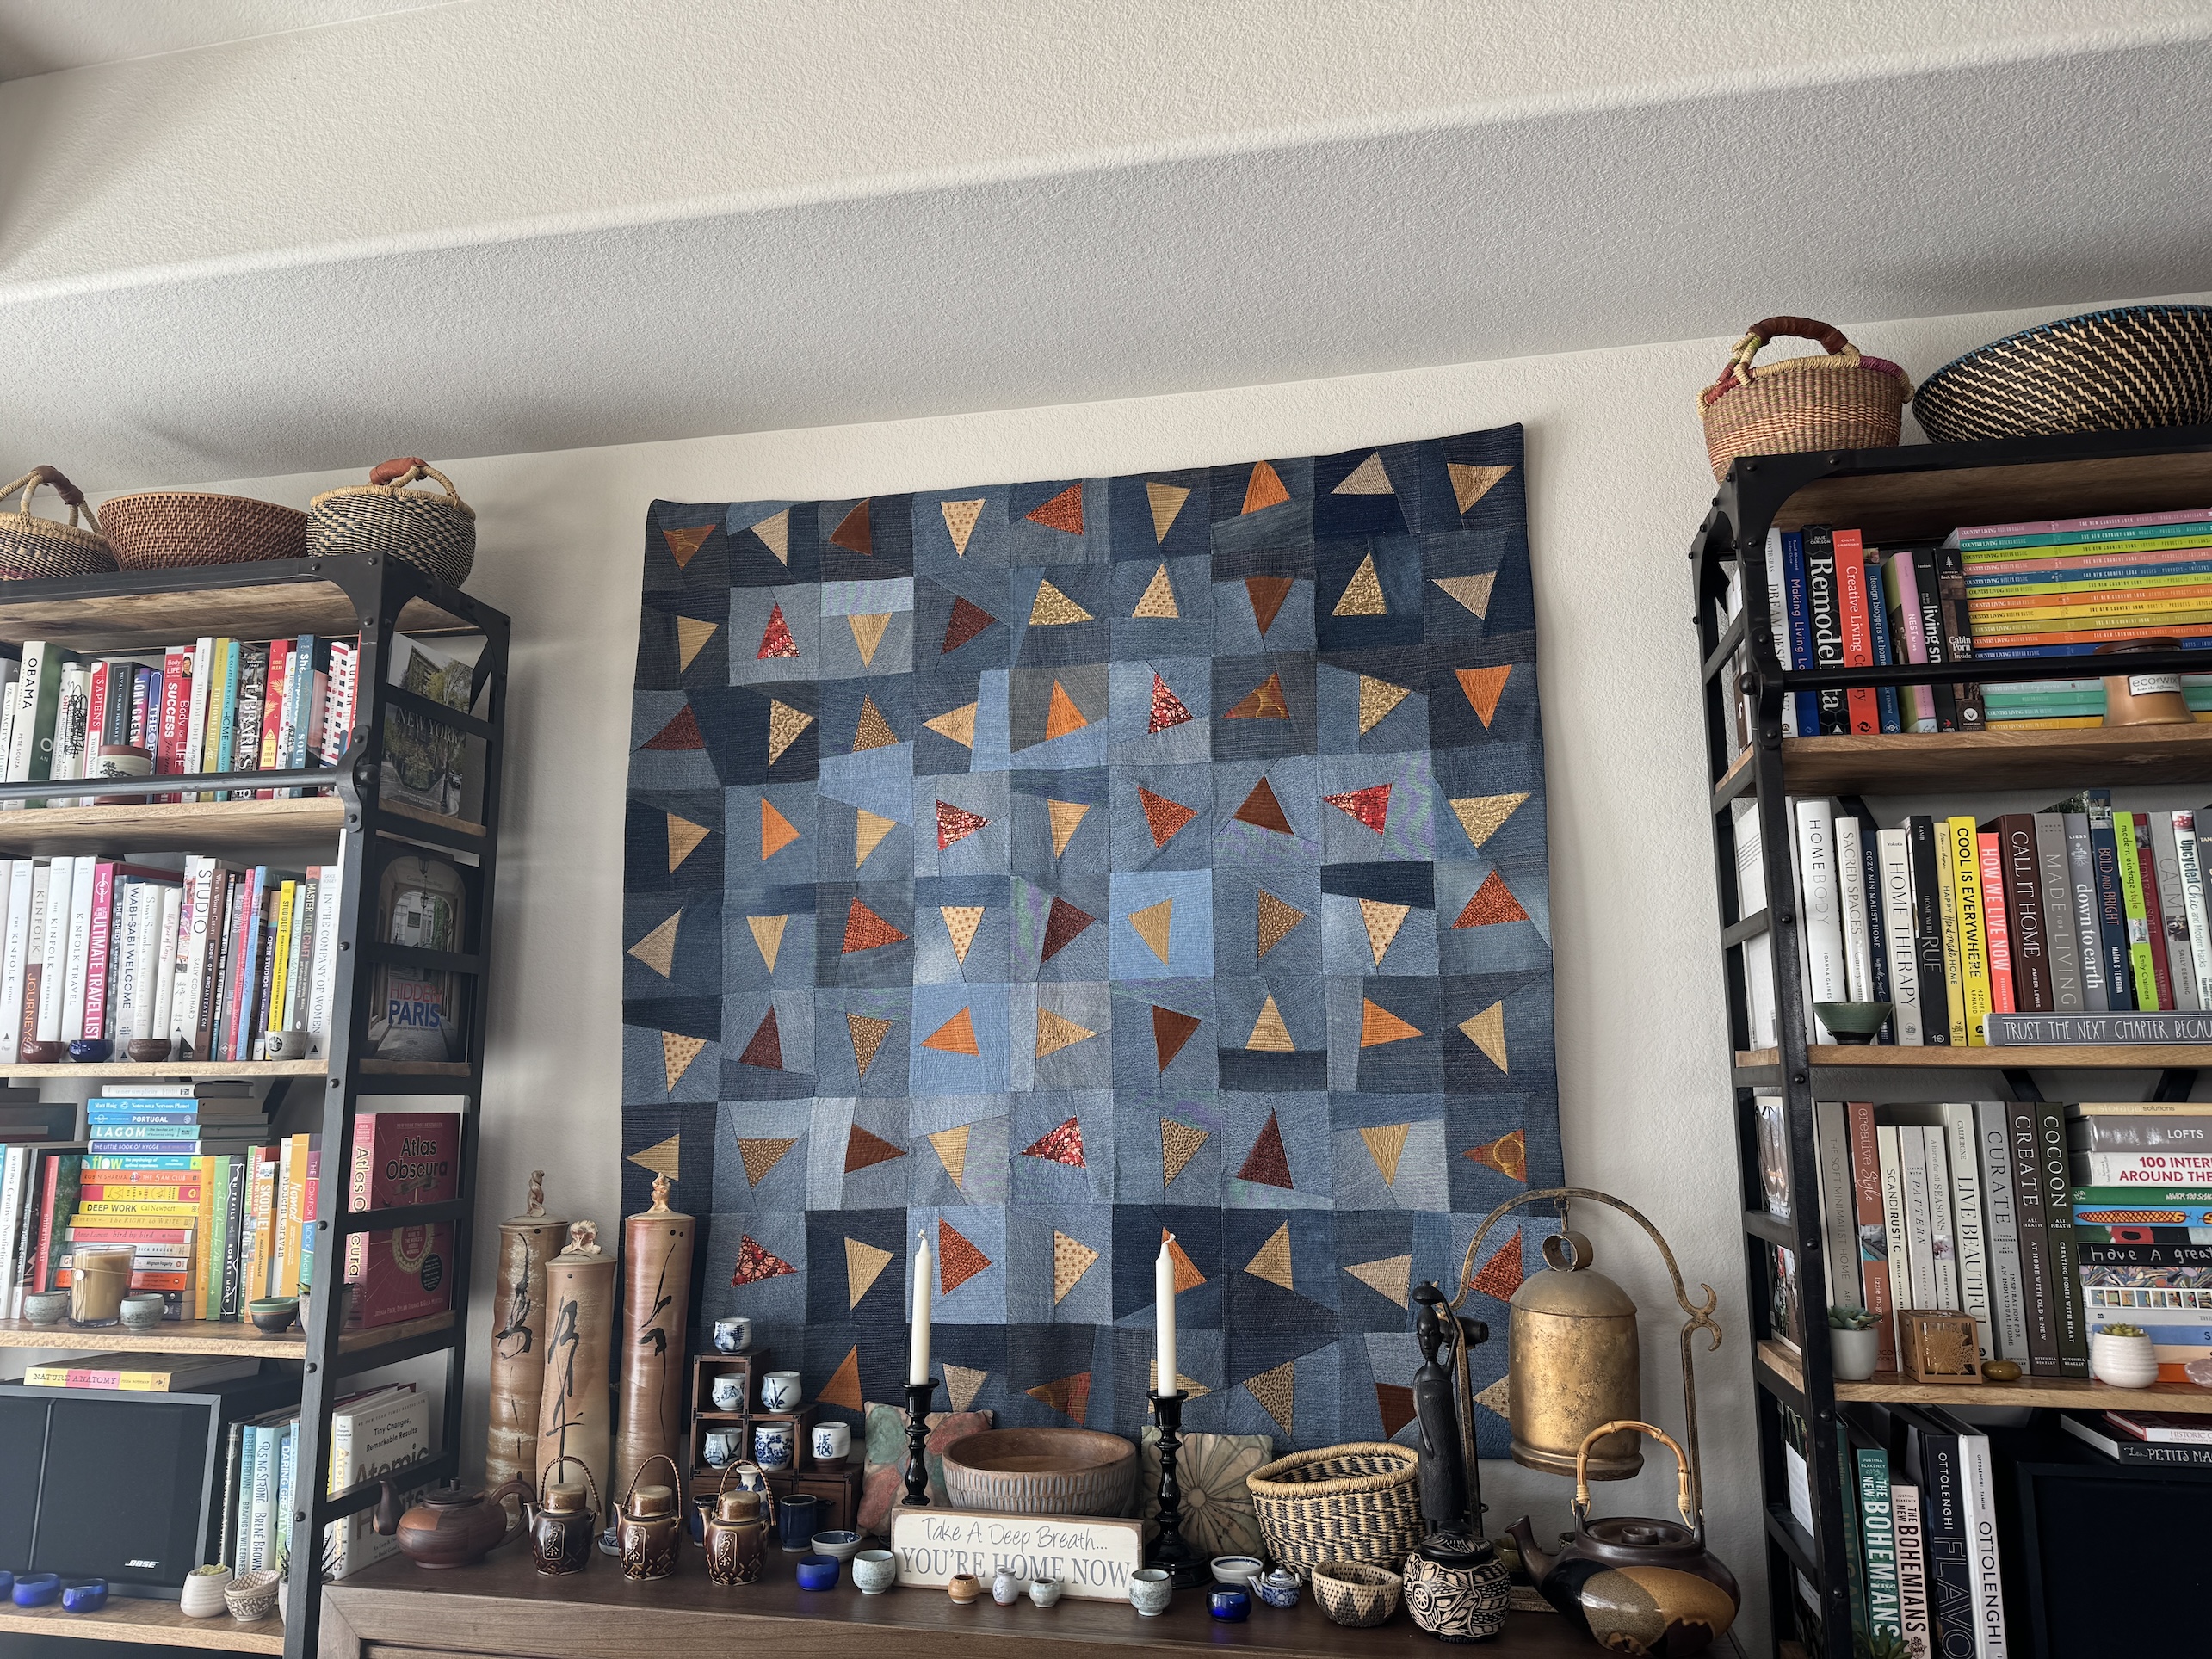
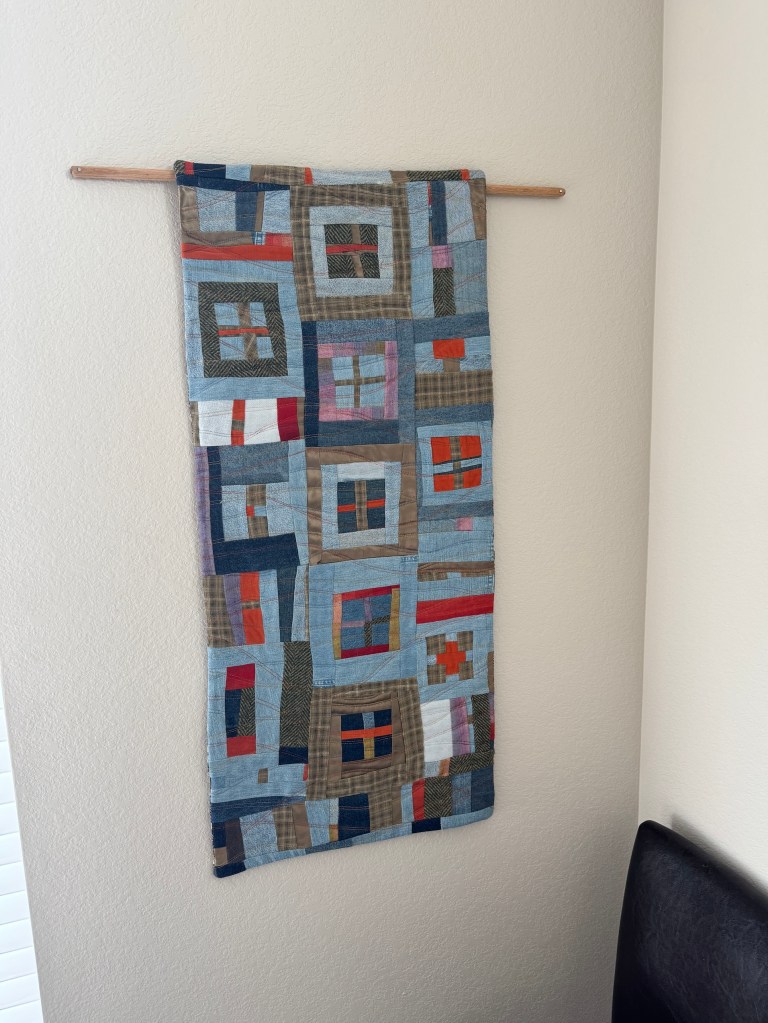
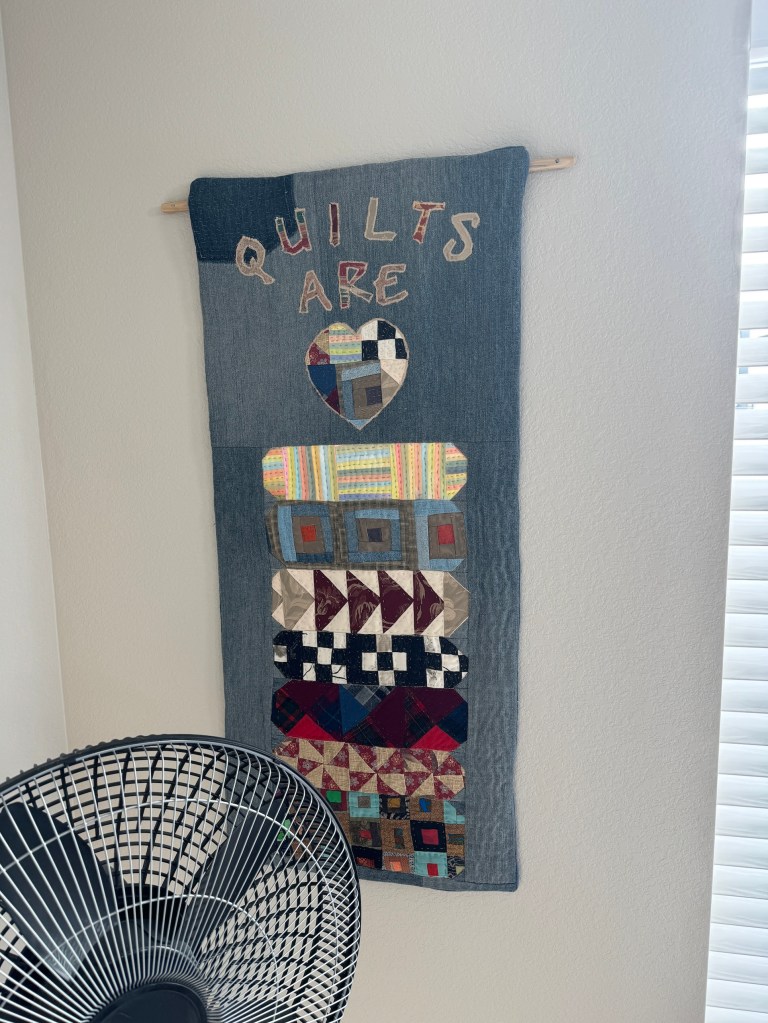
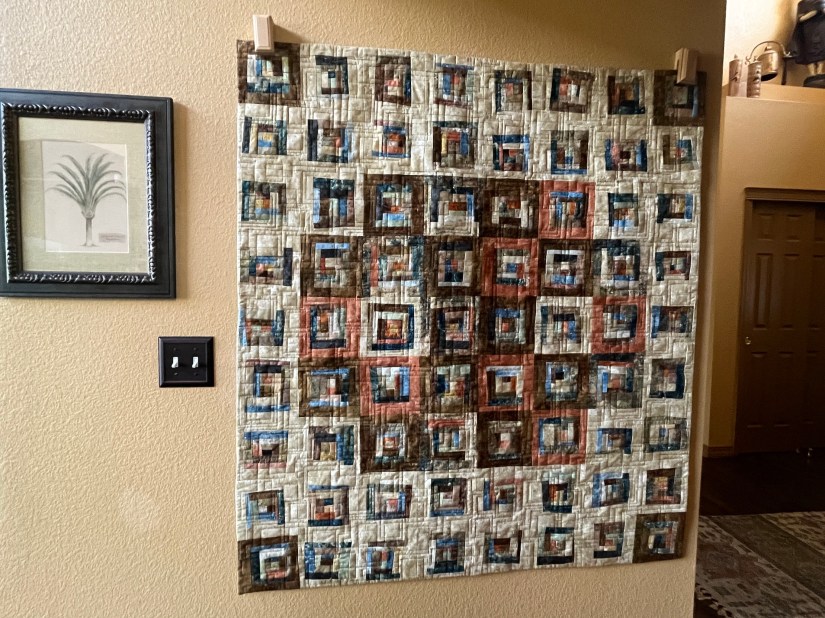
2) Scrappy denim quilt hanging on the wall of the new living room:
Made from recycled denim and home decor fabric samples.
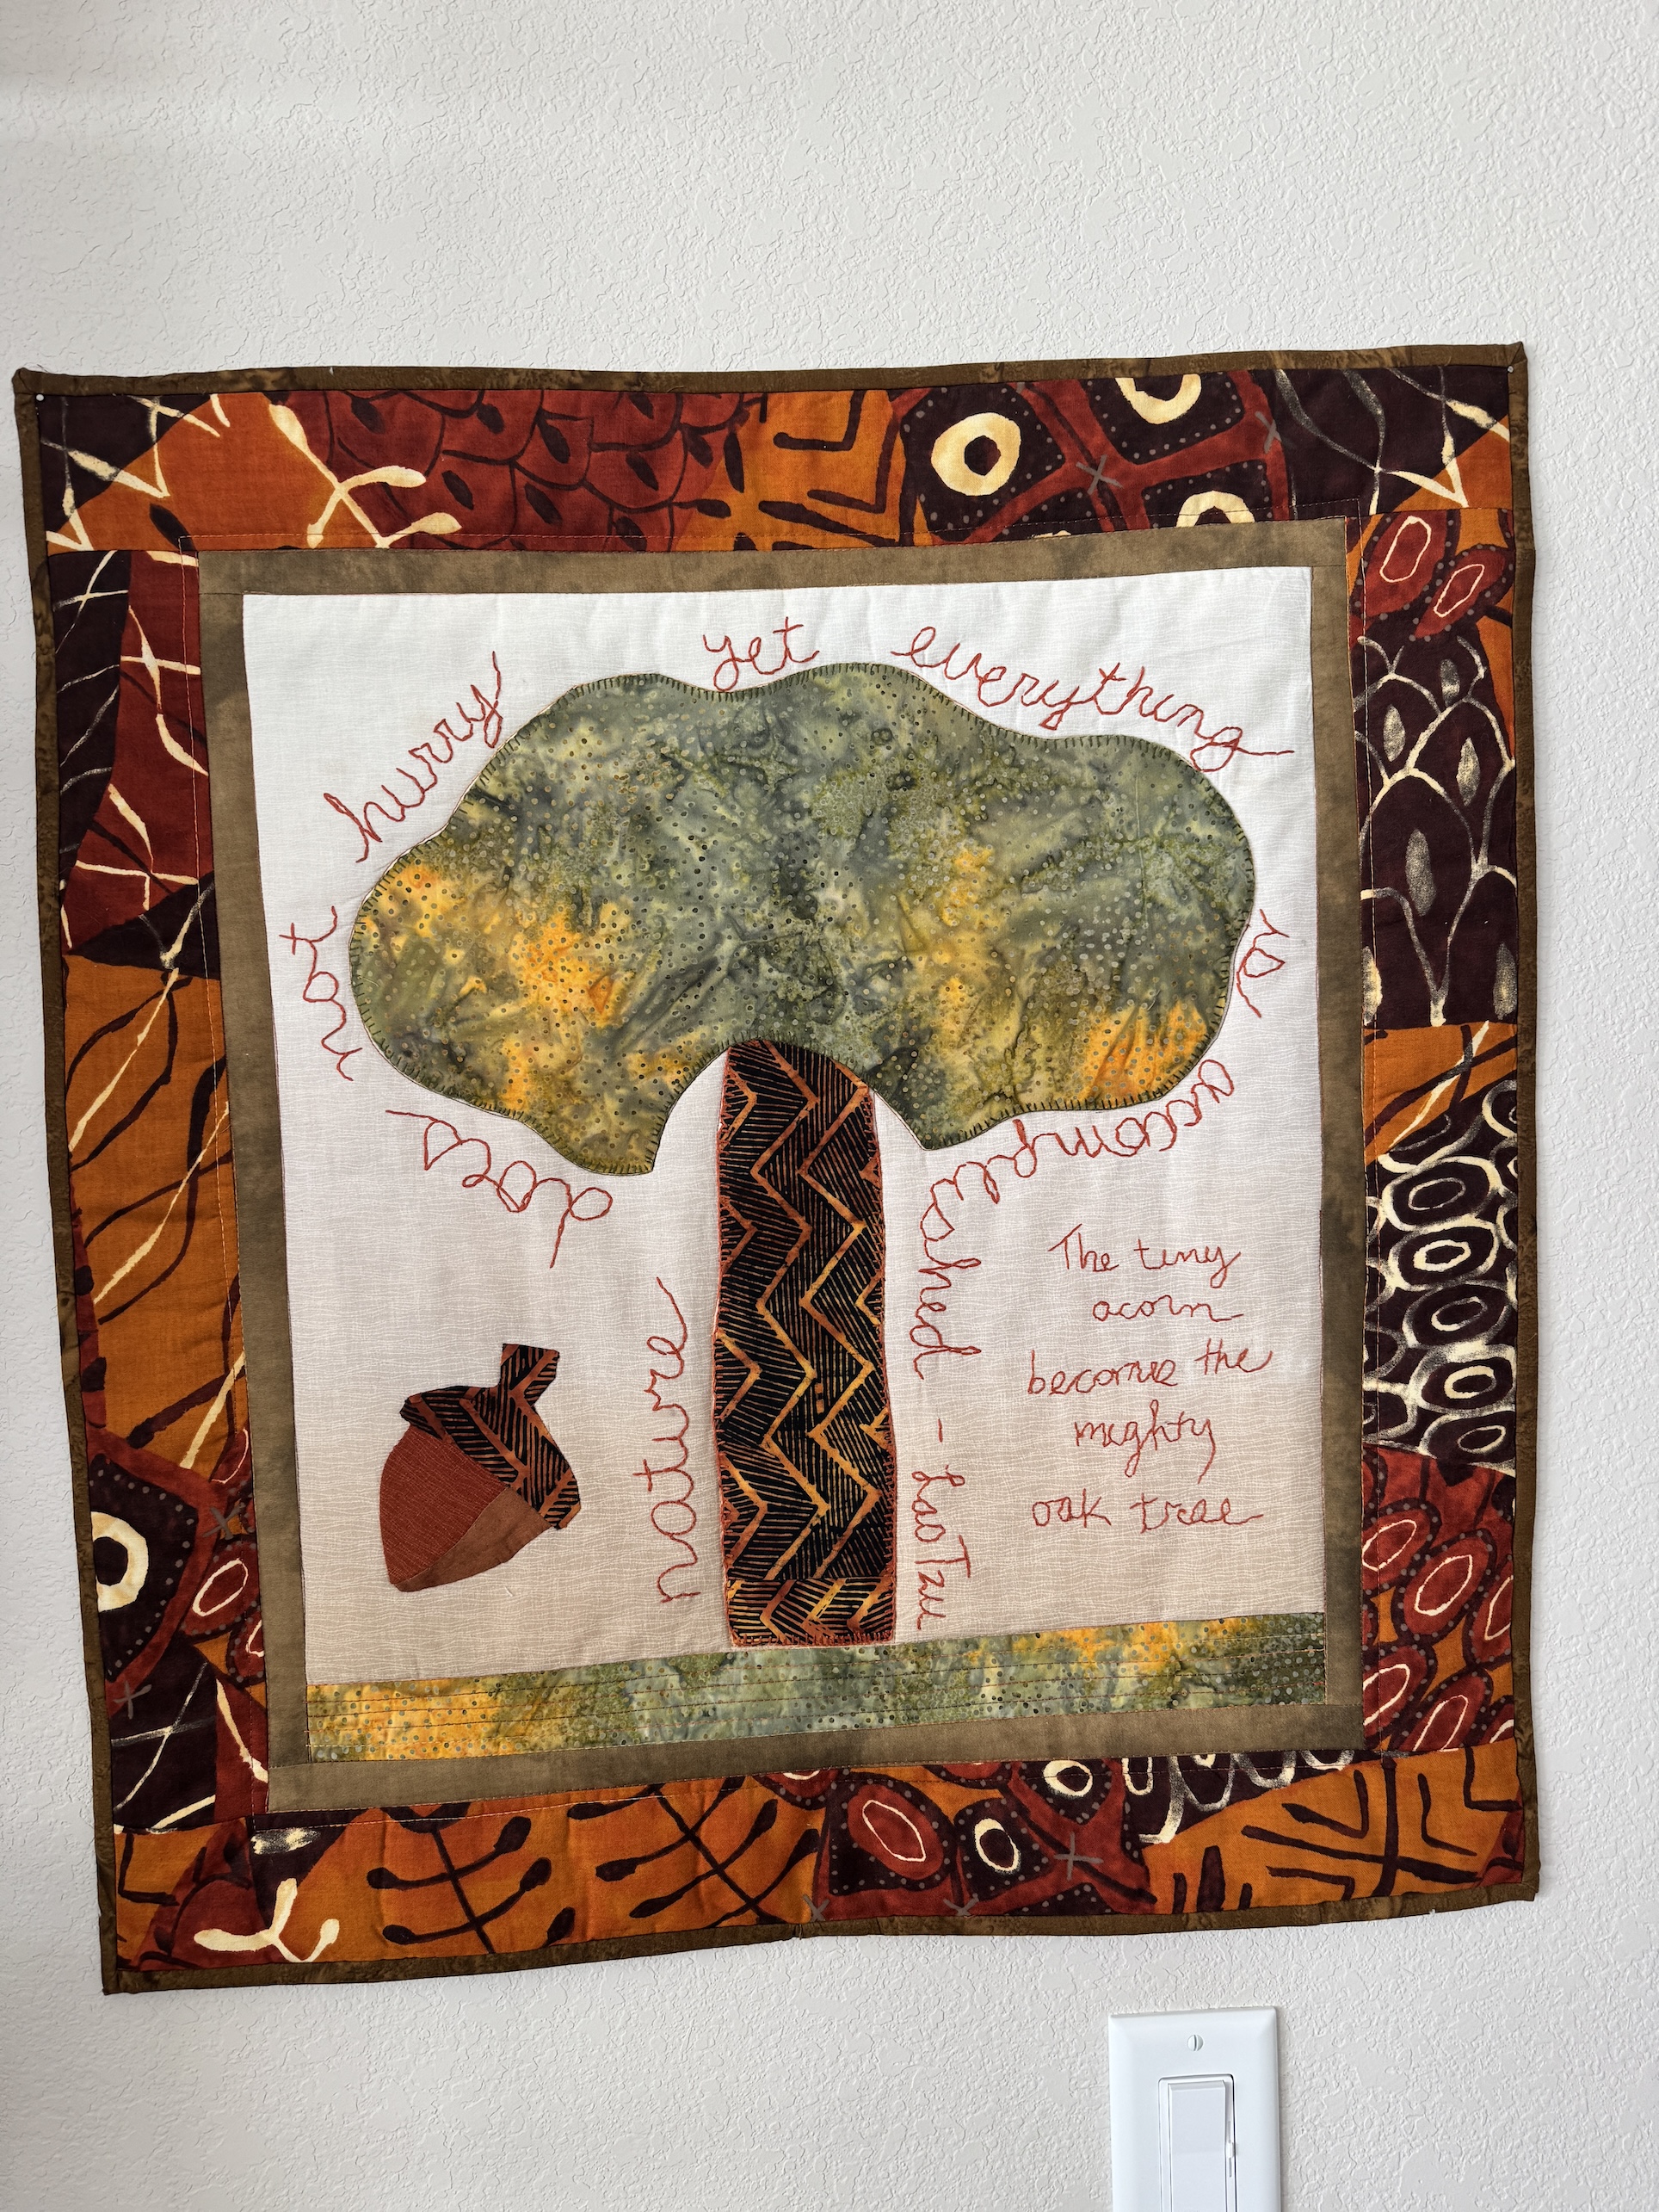
3) Scrappy mini quilt wall hanging in the new living room:
A piece I made in a hand embroidery class at the Stitchin’ Post in Sisters, Oregon when I lived in Central Oregon.
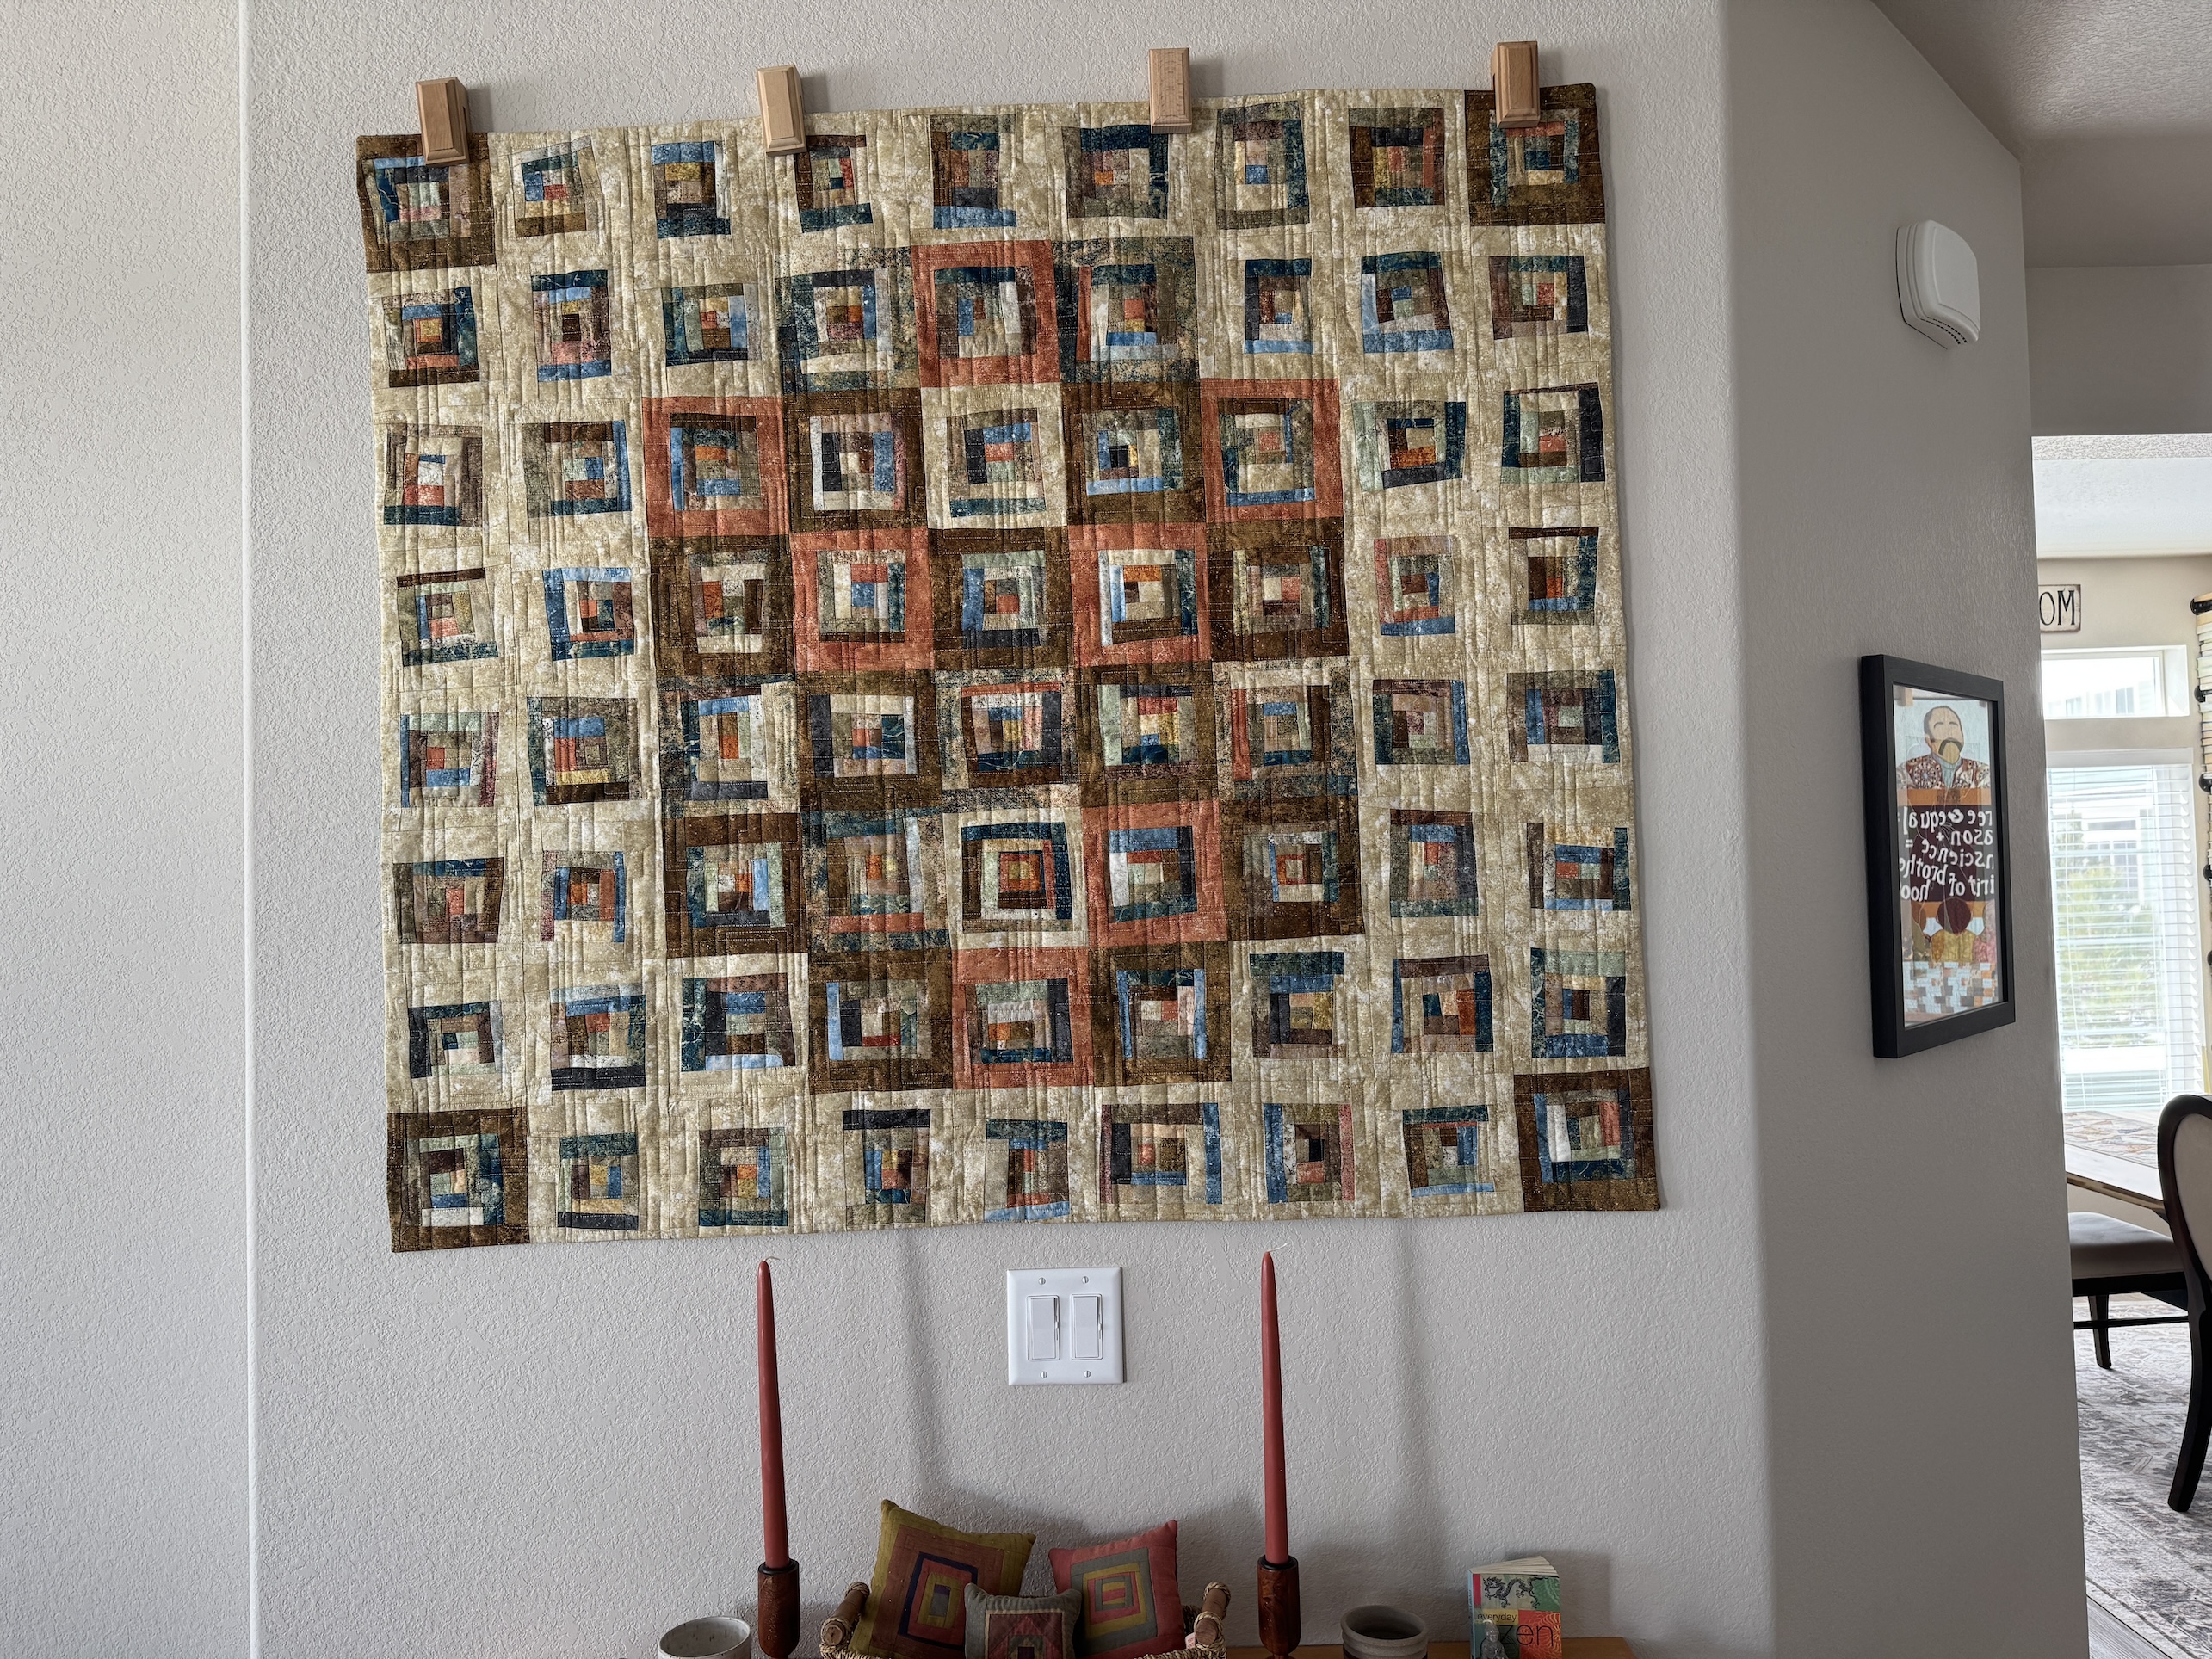
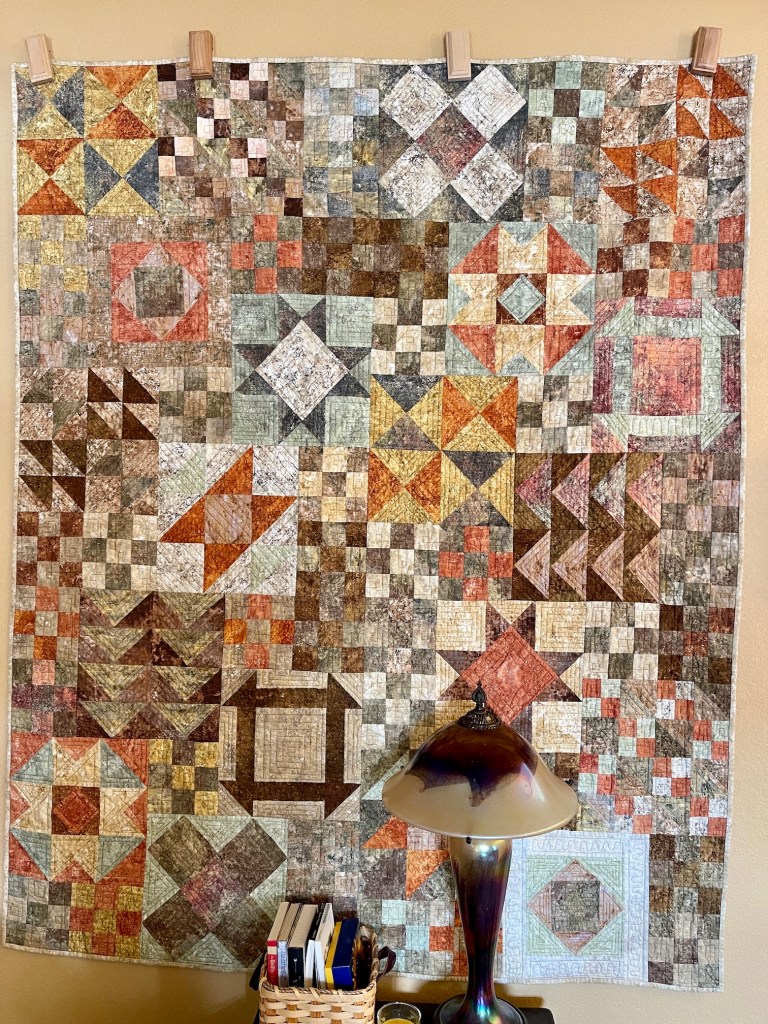
4) Scrappy quilt hanging on the wall in the new kitchen:
This quilt was made with Northcott Fabric’s Stonehenge line scraps. Year ago I was completely in love with this fabric line and a friend their large collection of Stonehenge scraps. Along with a set of fat quarters from the fabric line I made this quilt.
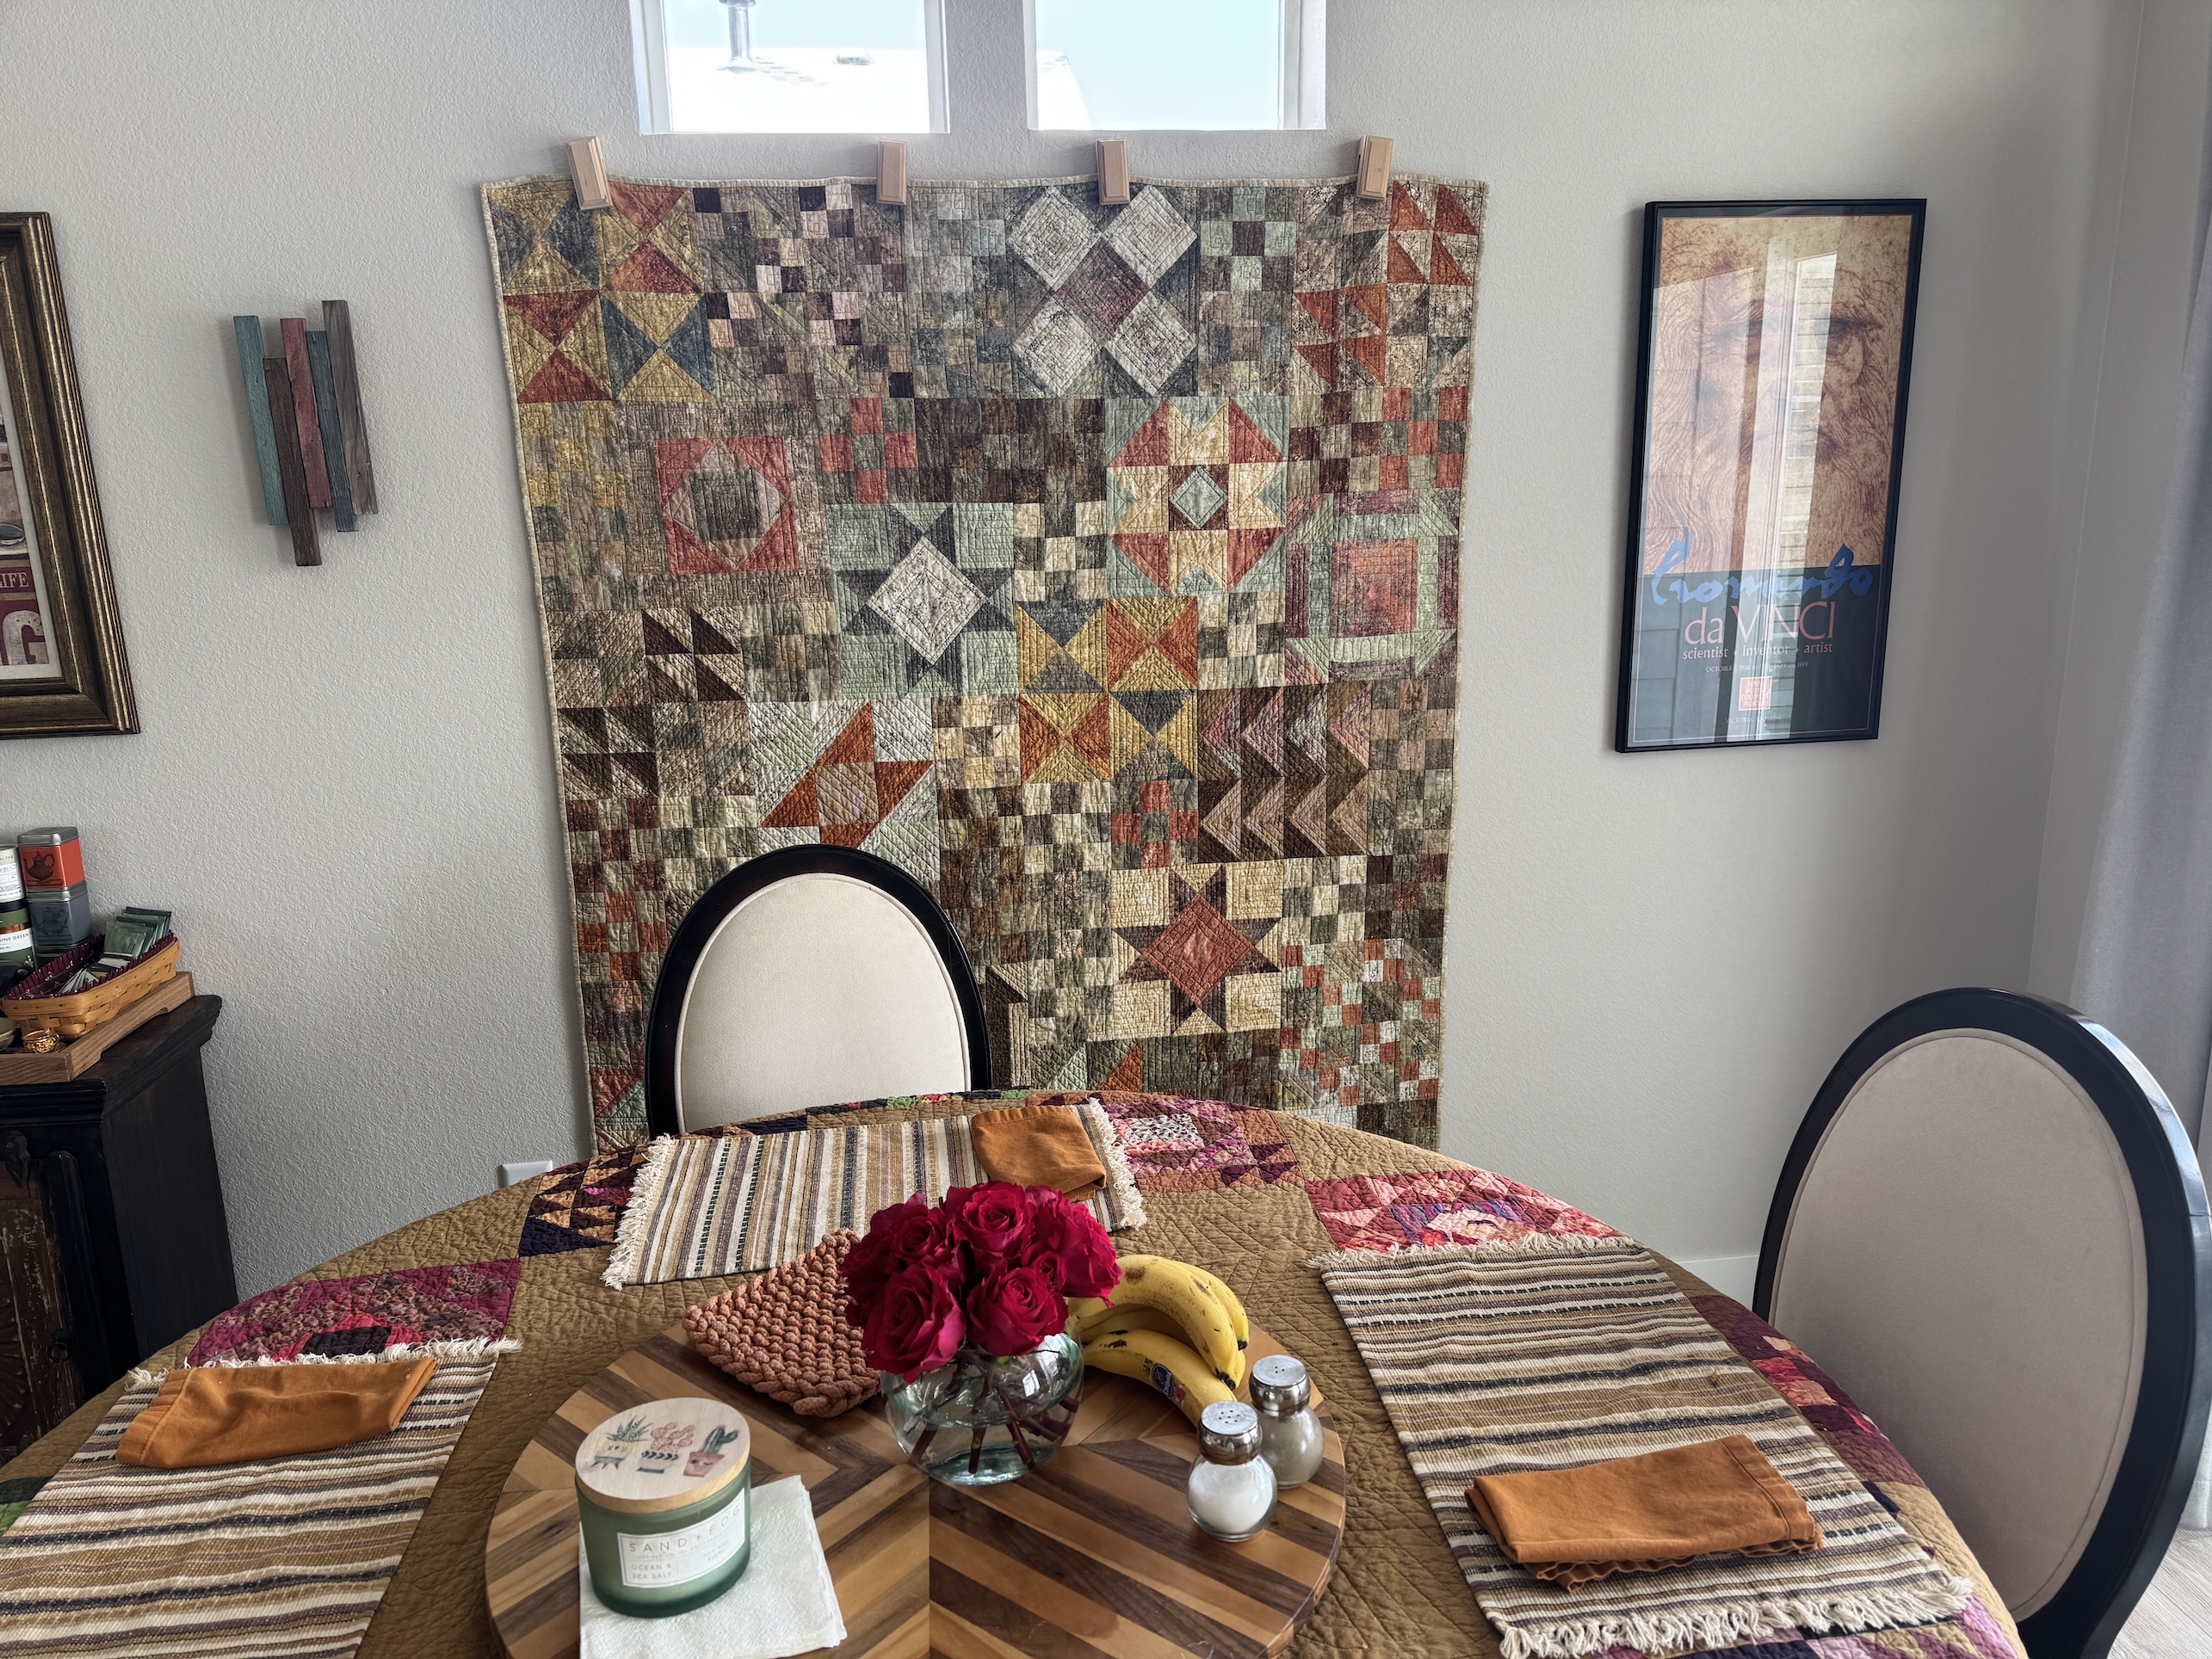
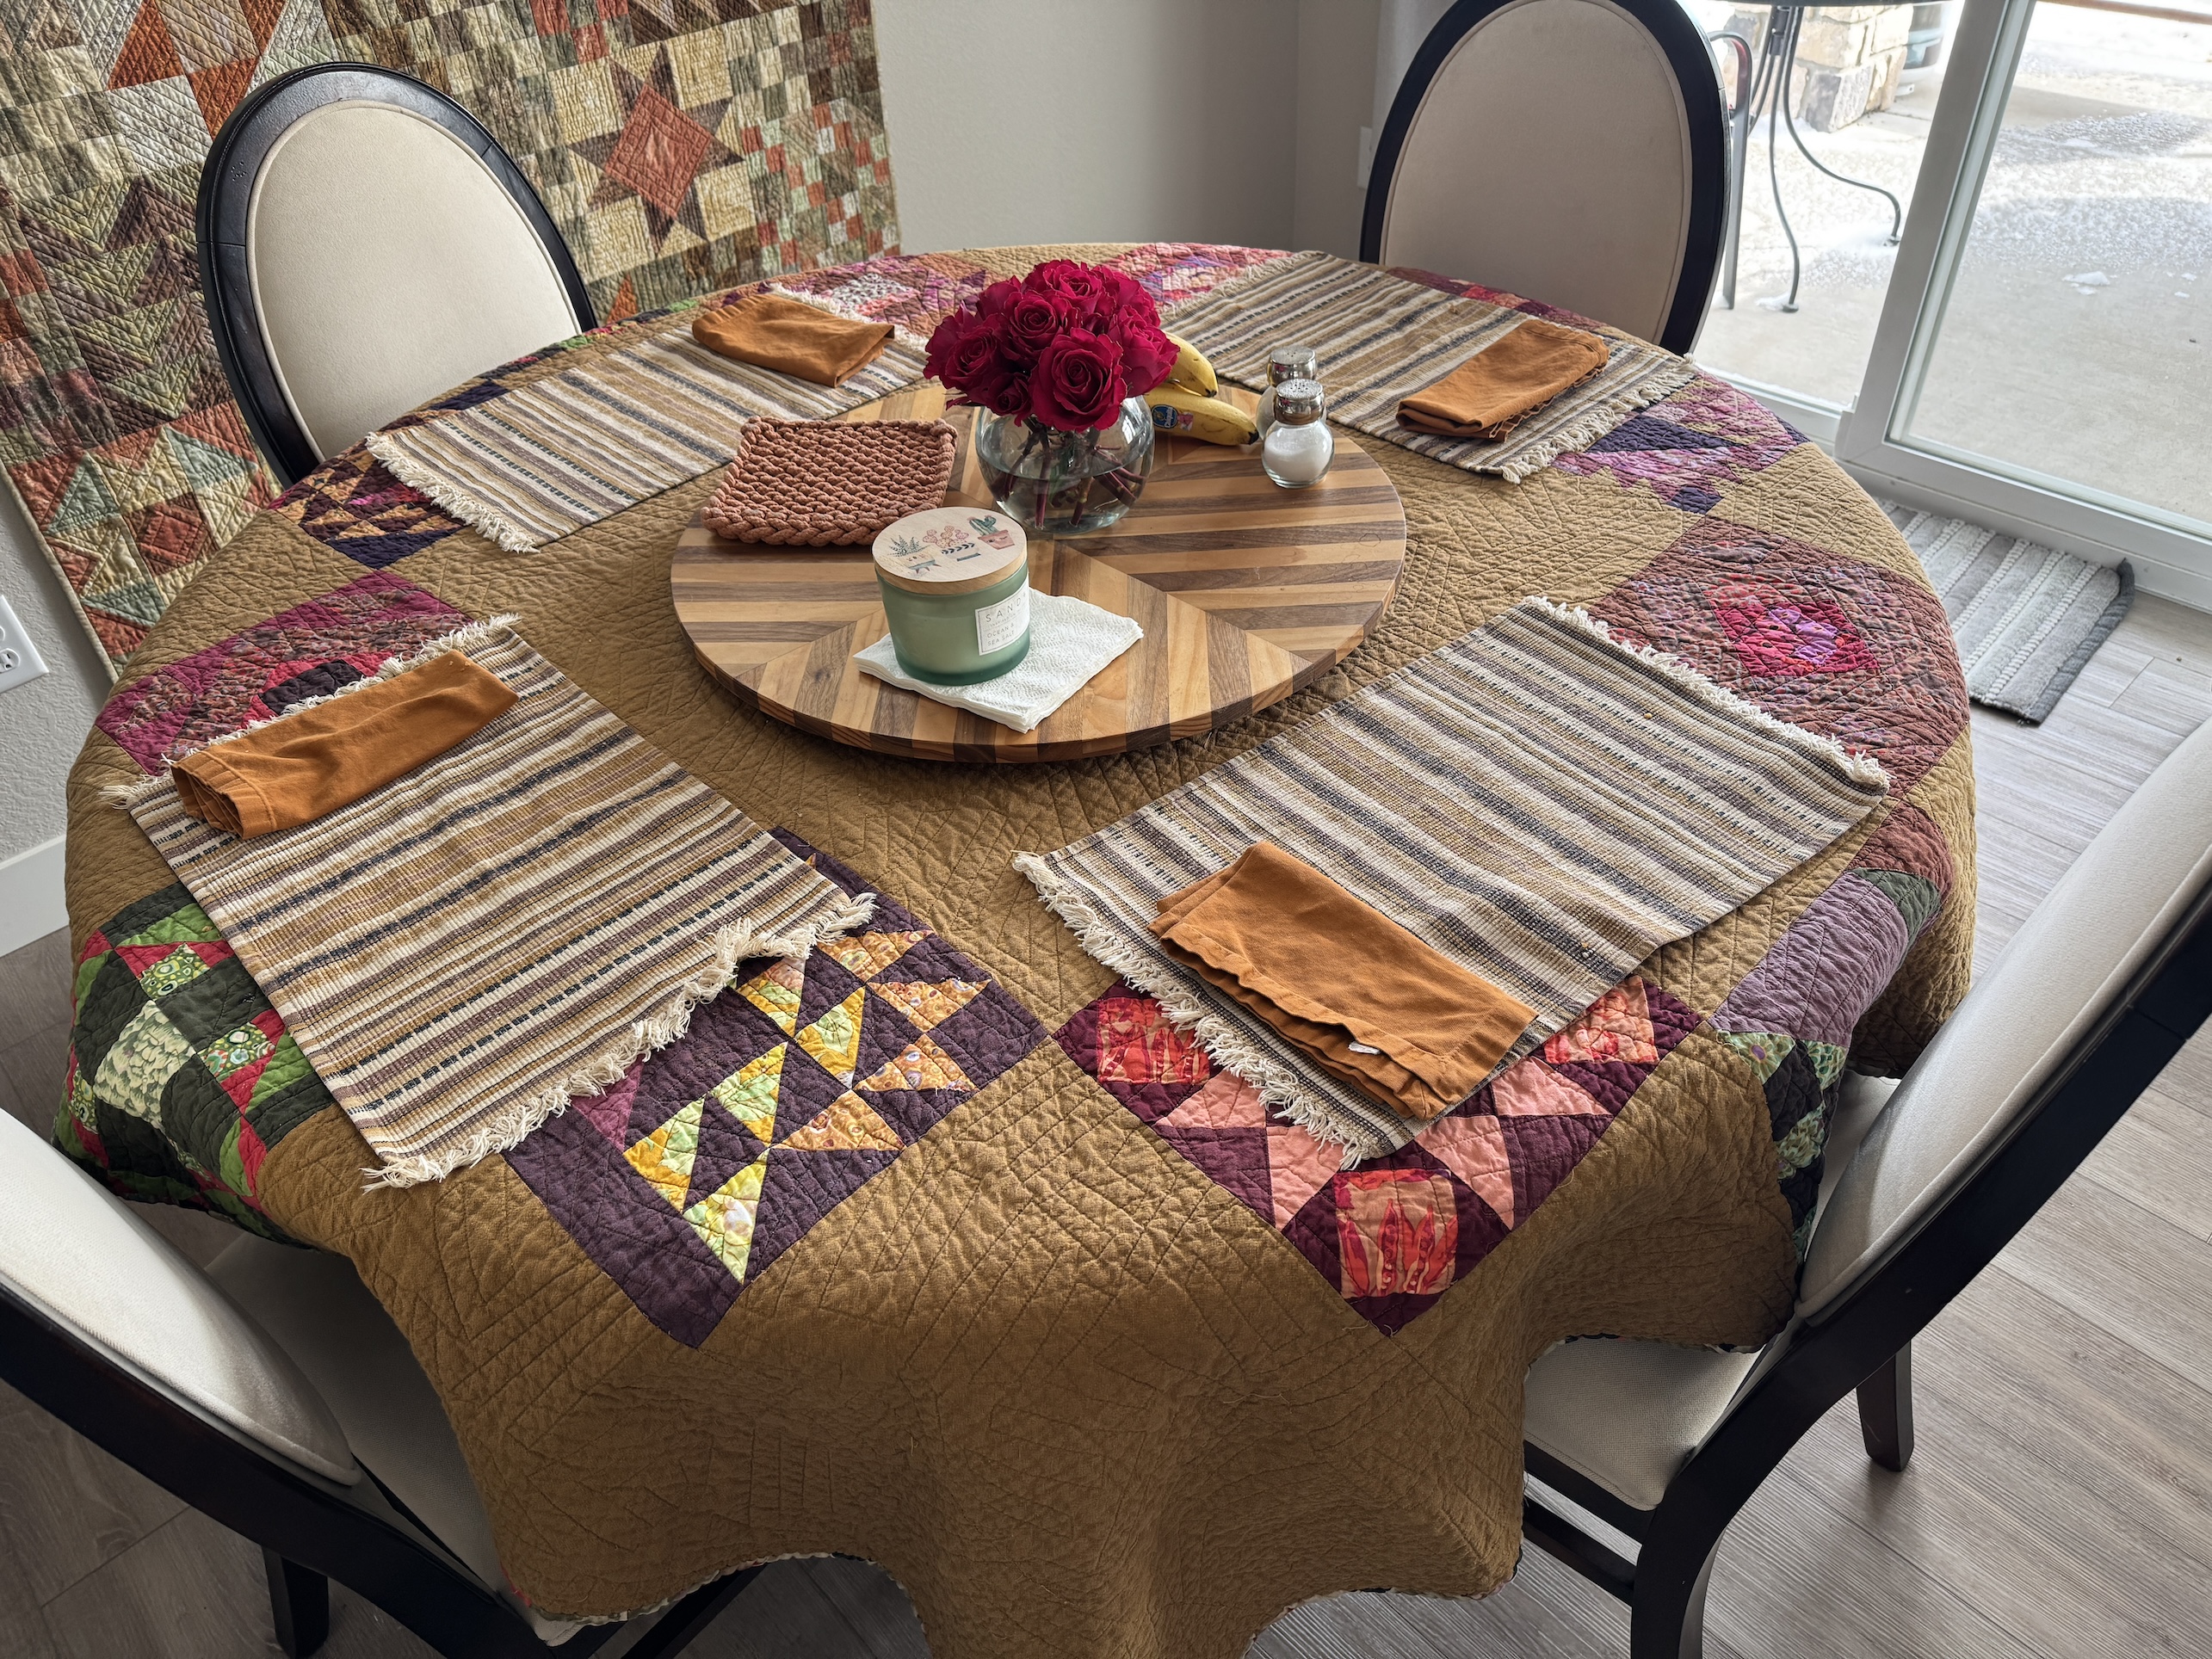
5) Scrappy quilt used as tablecloth in new kitchen:
This quilt is composed of scrappy pieced blocks set in Peppered Cotton.
6) Another scrappy quilt made with Northcott’s Stonehenge fabric line scraps, hanging on the wall across from the new kitchen:
I had so many Stonehenge scraps I made another quilt with the stash.
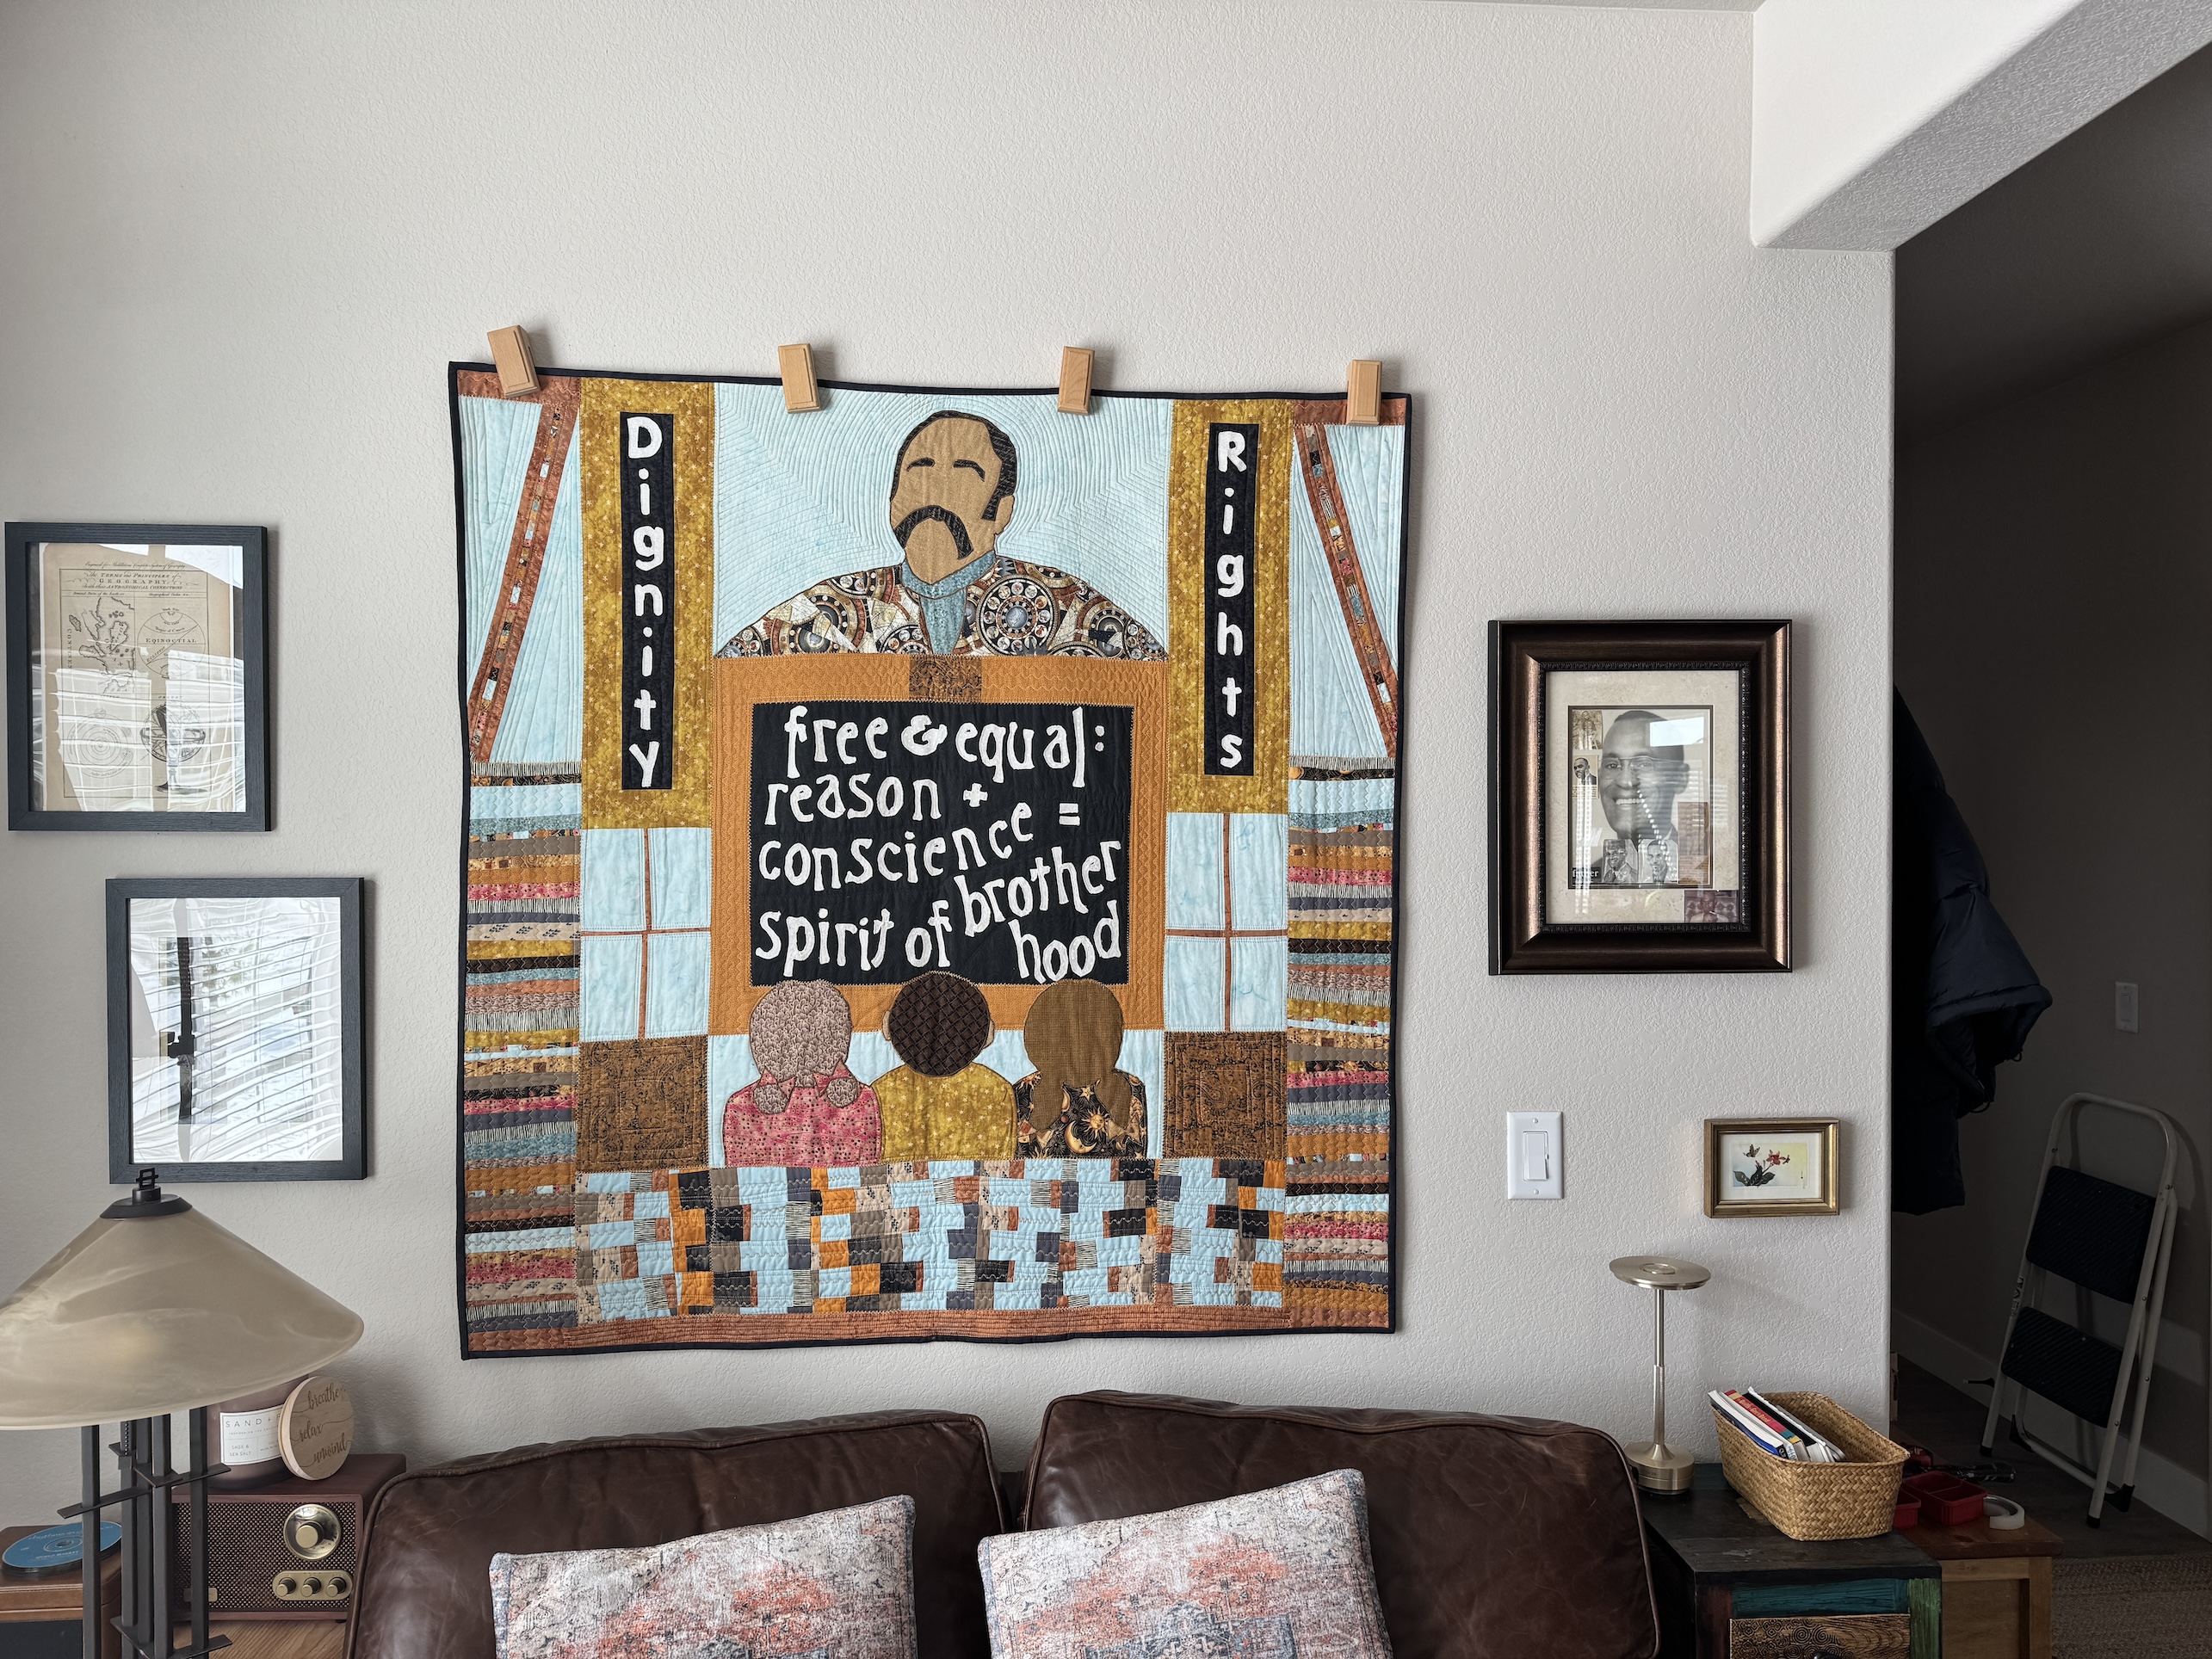
7) My scrappy quilt The Lesson and the Equation I made for the show Visioning Human Rights in the New Millennium: Quilting the World’s Conscience, hanging in my new dining room/library:
I call this my “Dad Quilt” as the lessons my father taught my sibling and I inspired it.
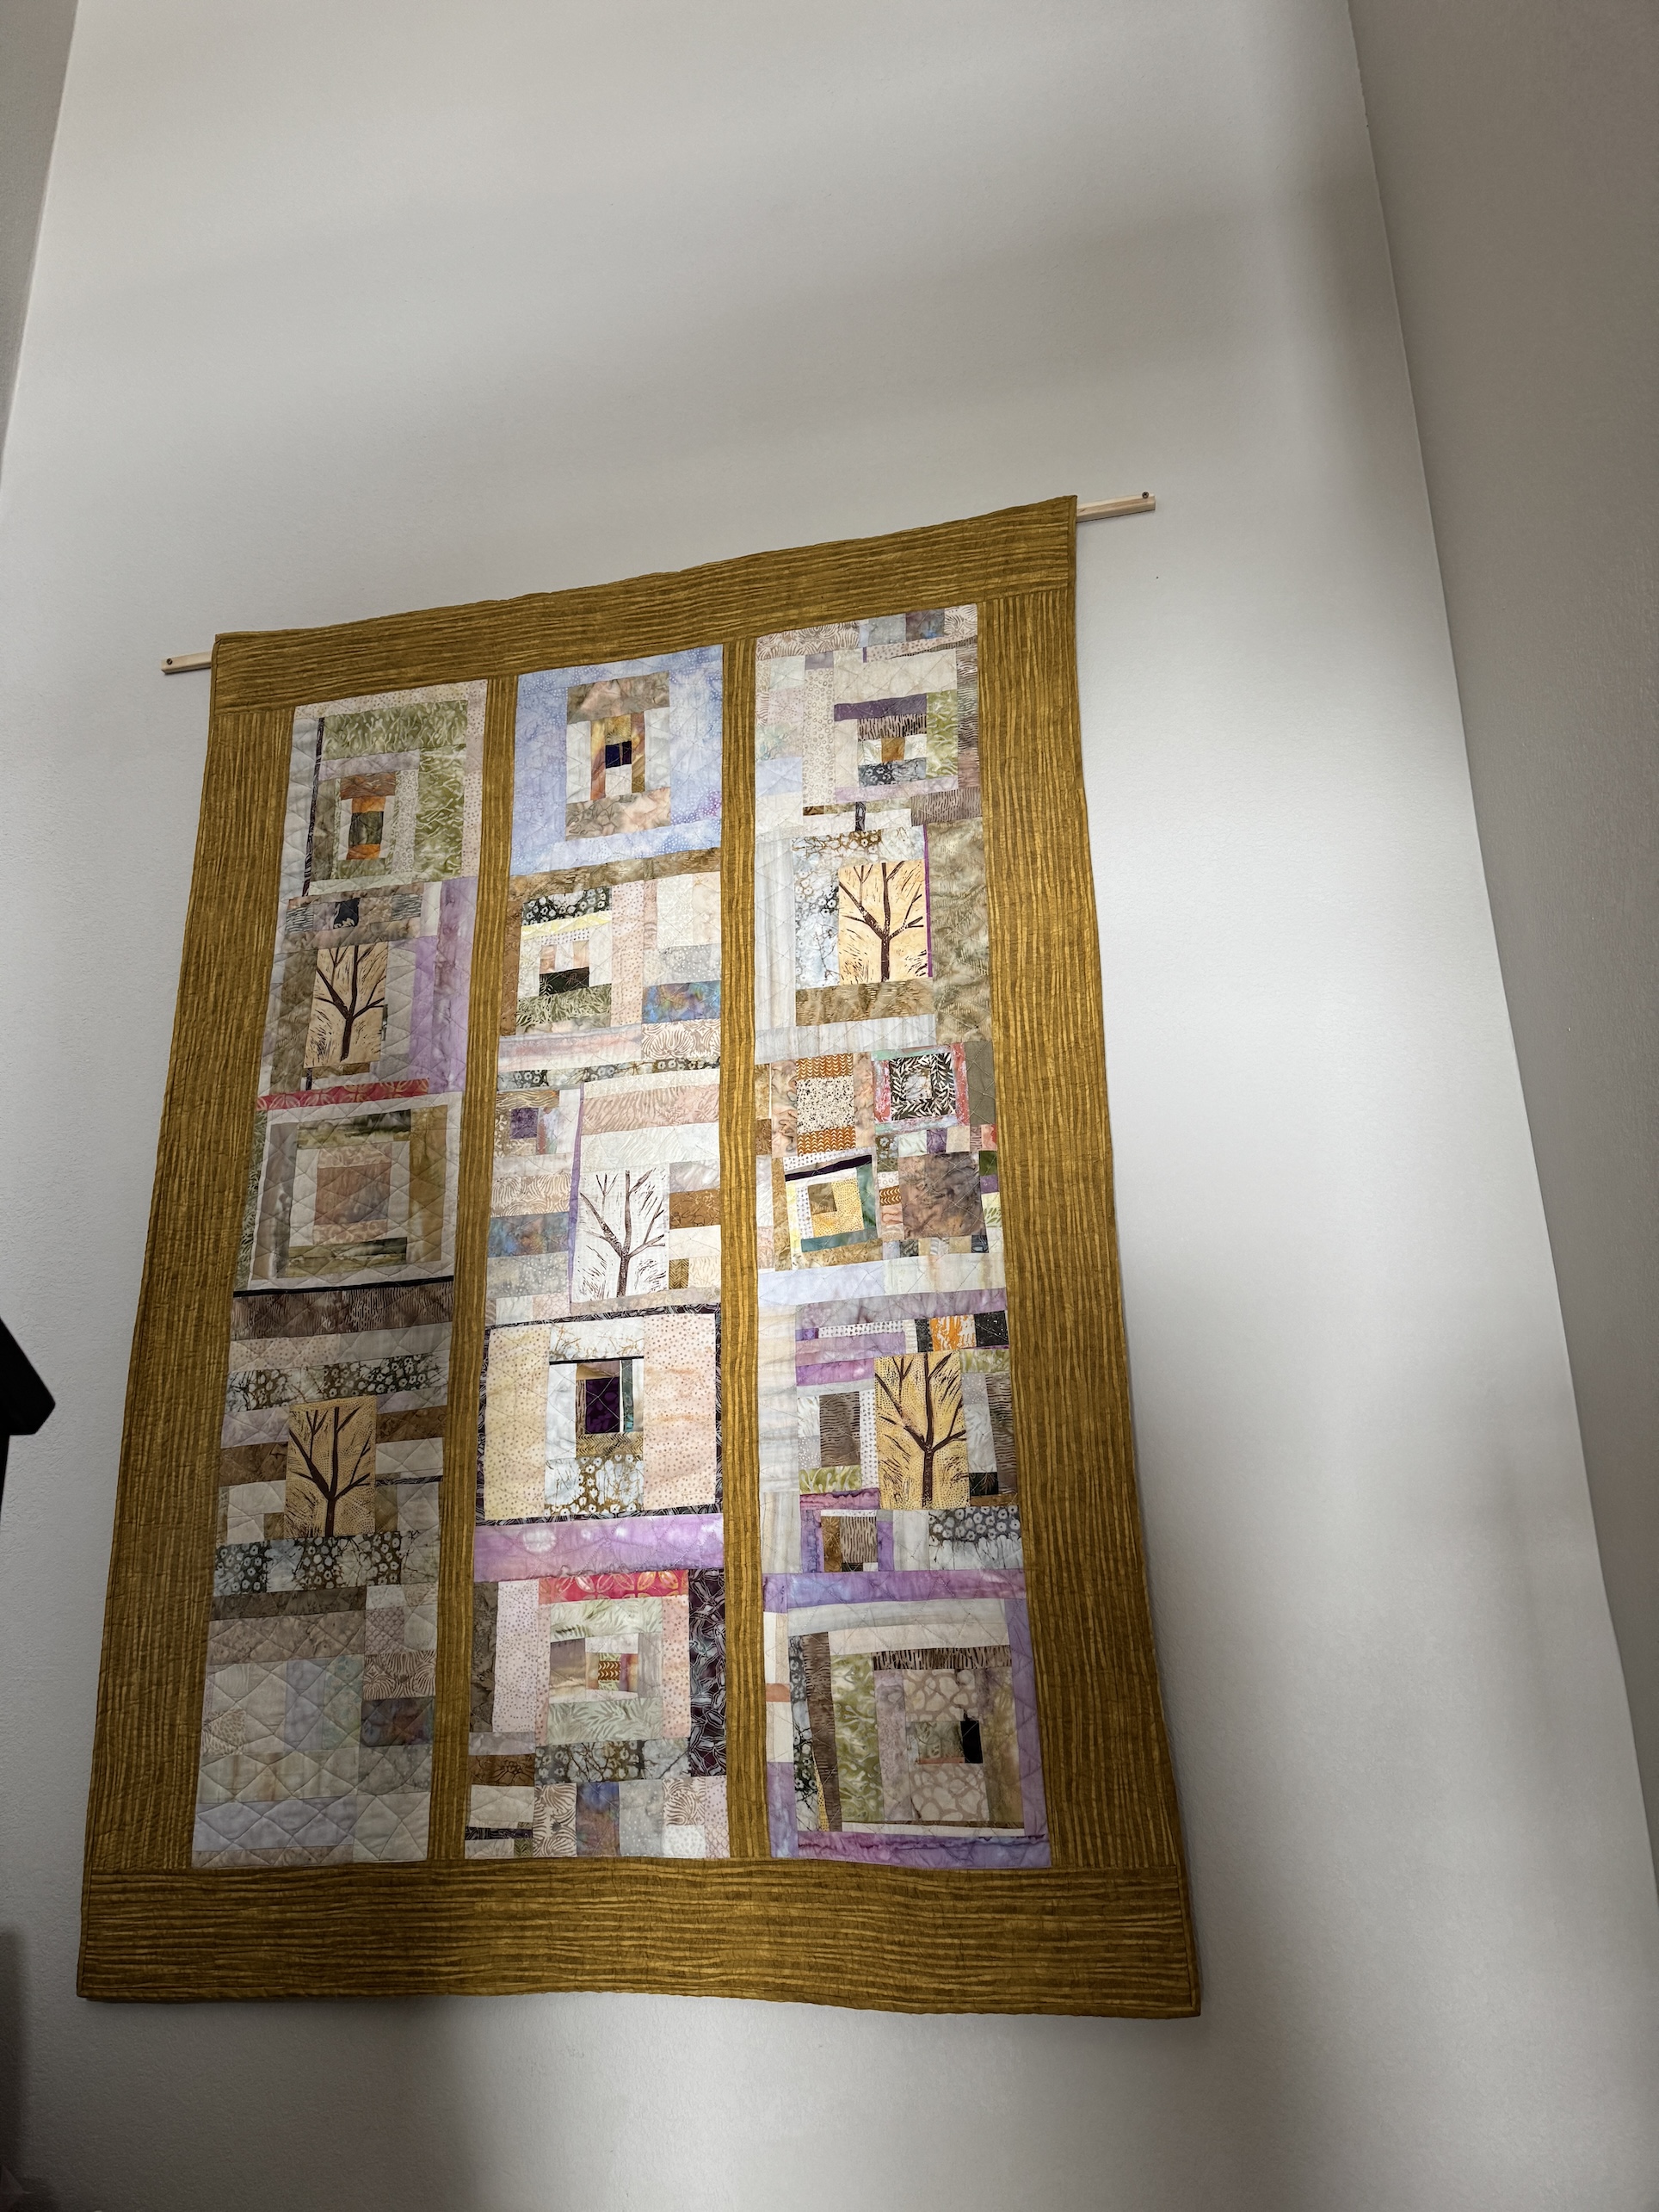
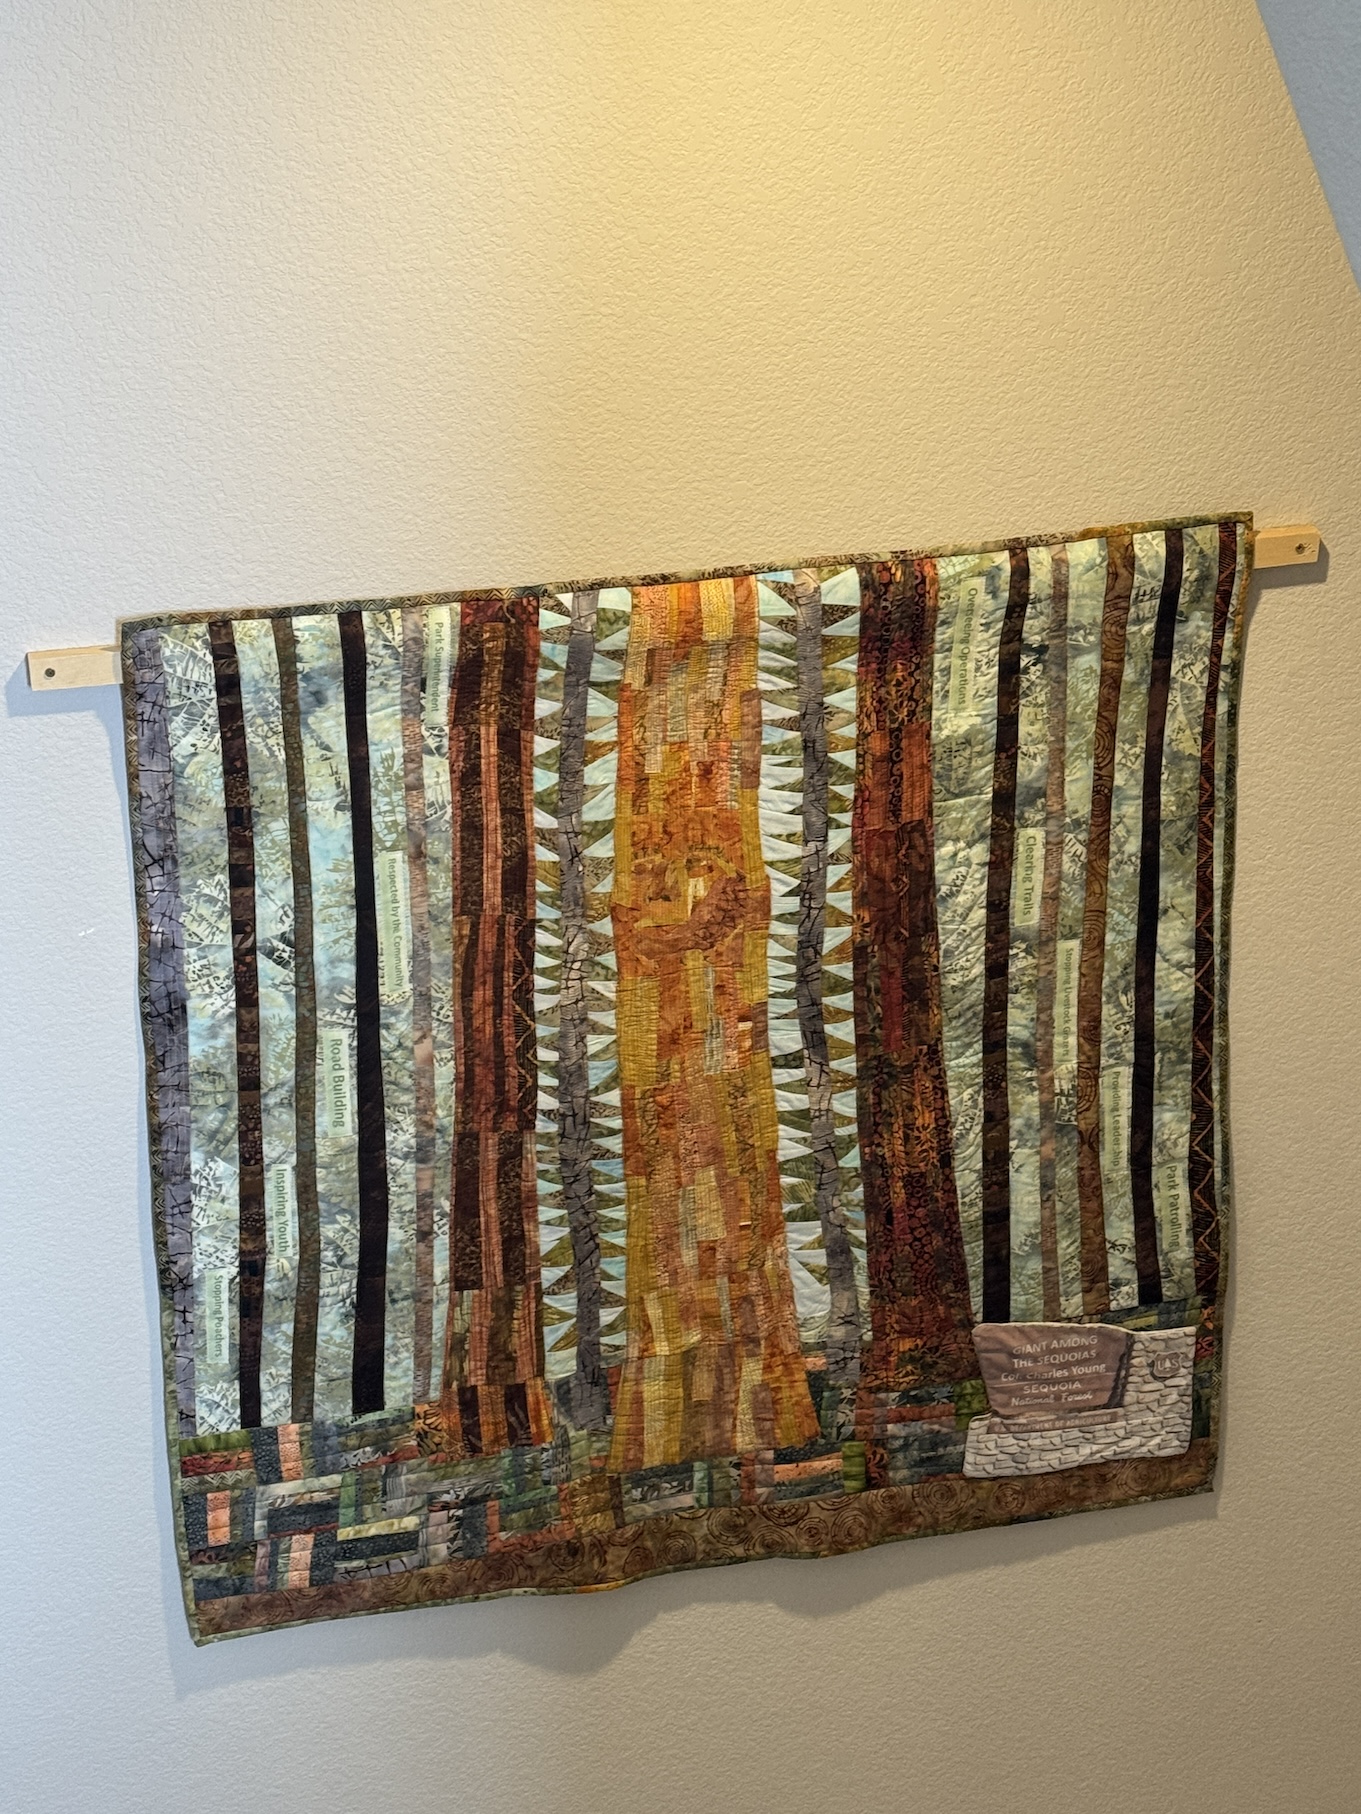
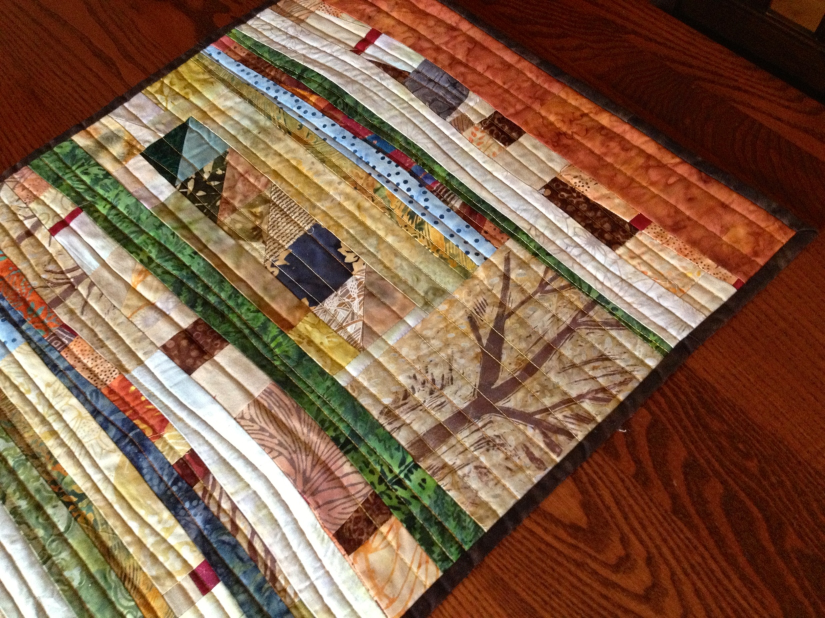
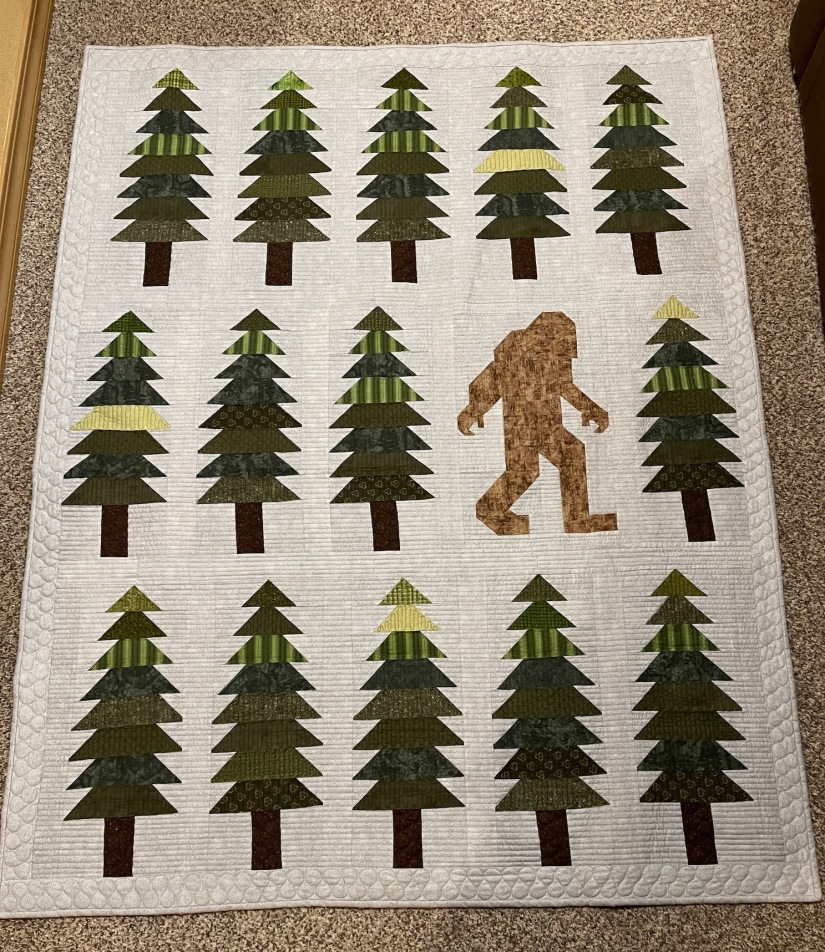
8) My scrappy quilt Trees Outside My Window hanging in the stairway up to the loft:
Improvisational pieced fabric scraps along with trees I stamped on fabric were used to create this very scrappy quilt.
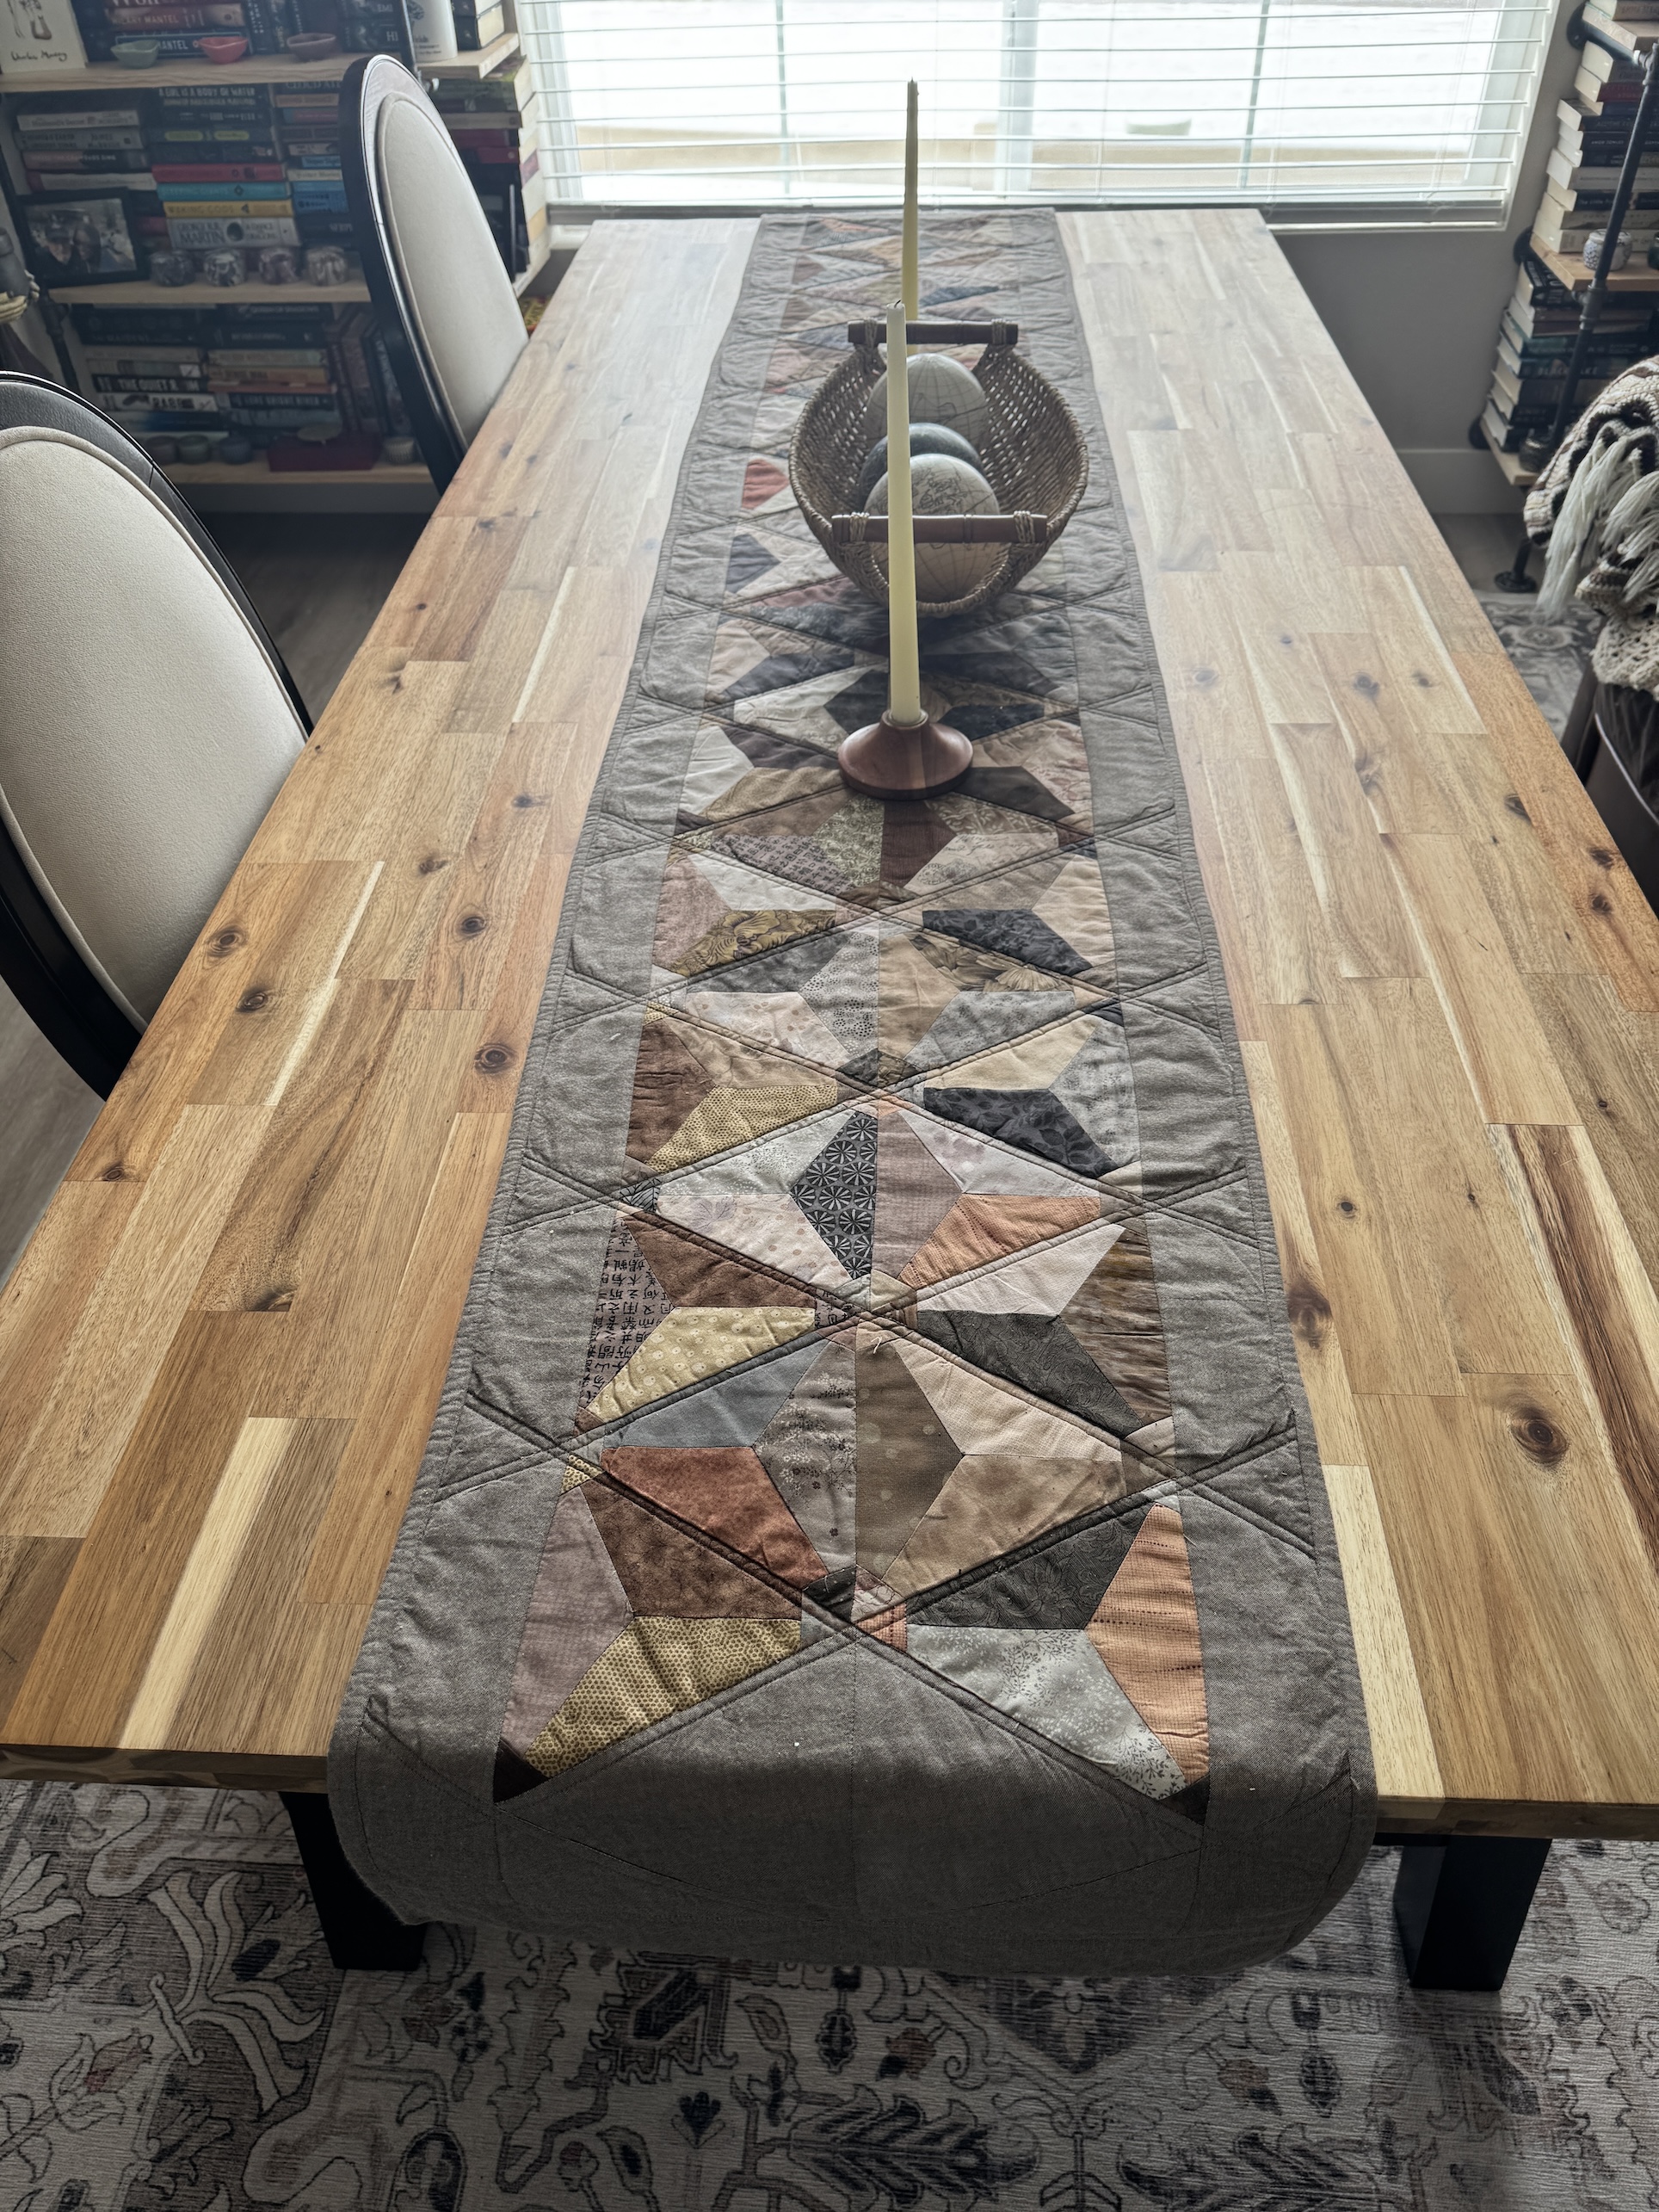
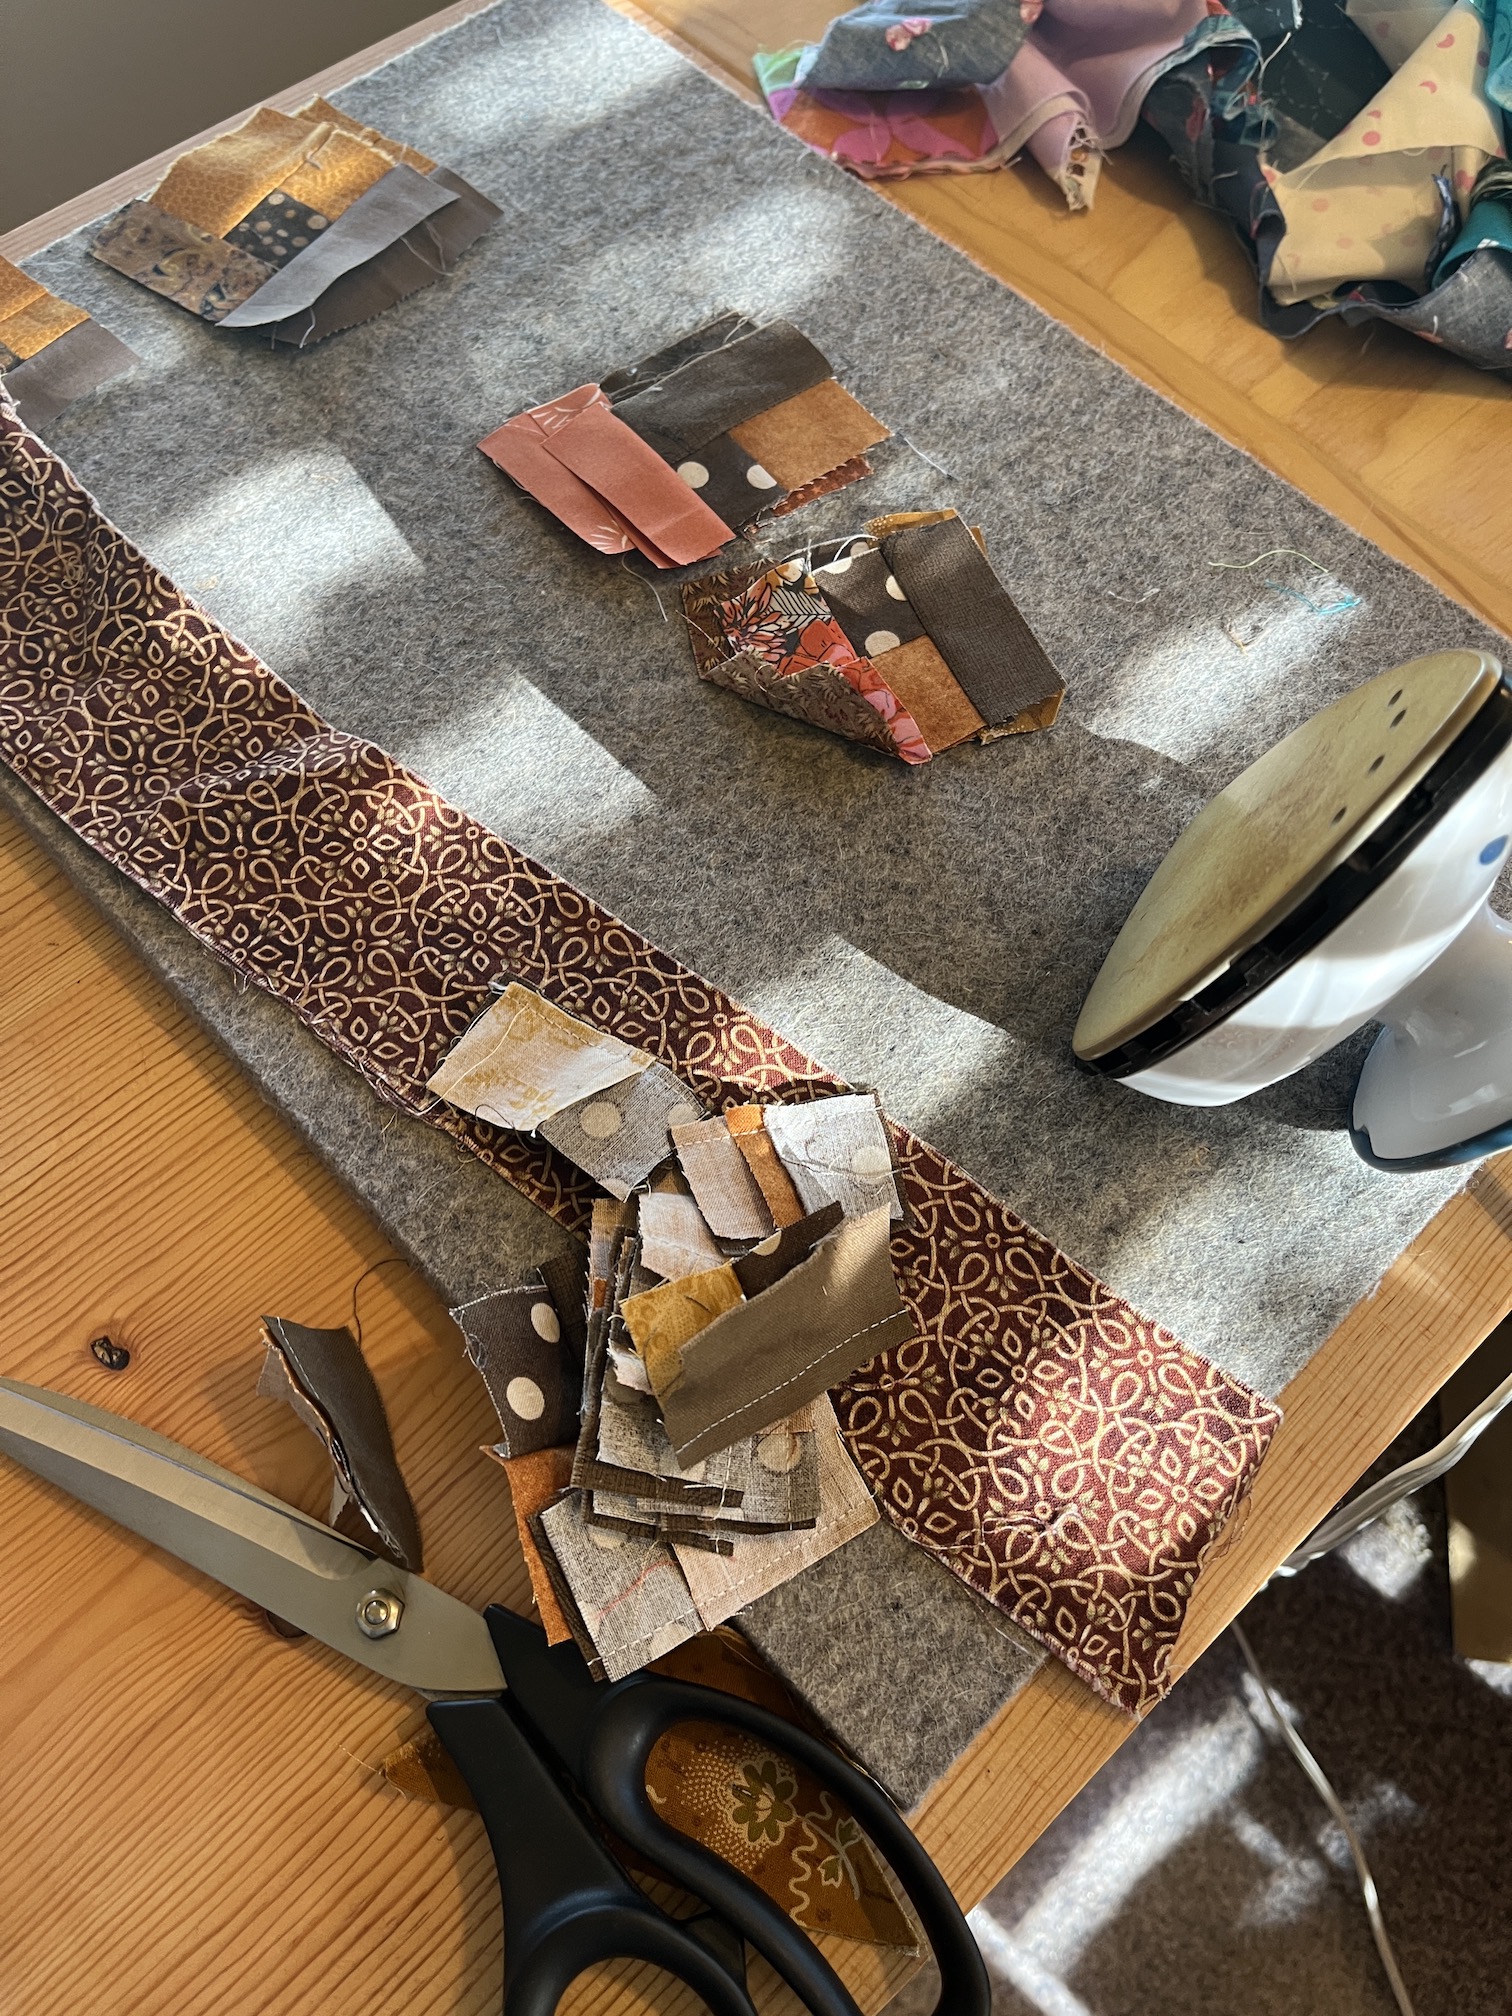
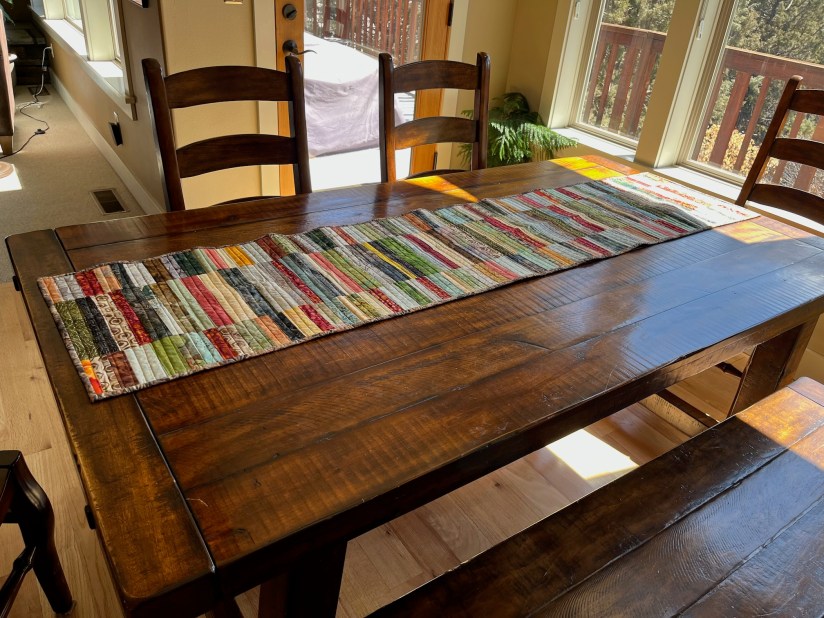
9) Scrappy (and not ironed yet) table runner in my new dining room/library:
My friend Wendy H. that some of you have met through my blog gave me a collection of leftover pieced blocks and fabric scraps which I turned into the table runner.
10) Another scrappy quilt made primarily with batik fabric scraps, in the stairwell down to the basement:
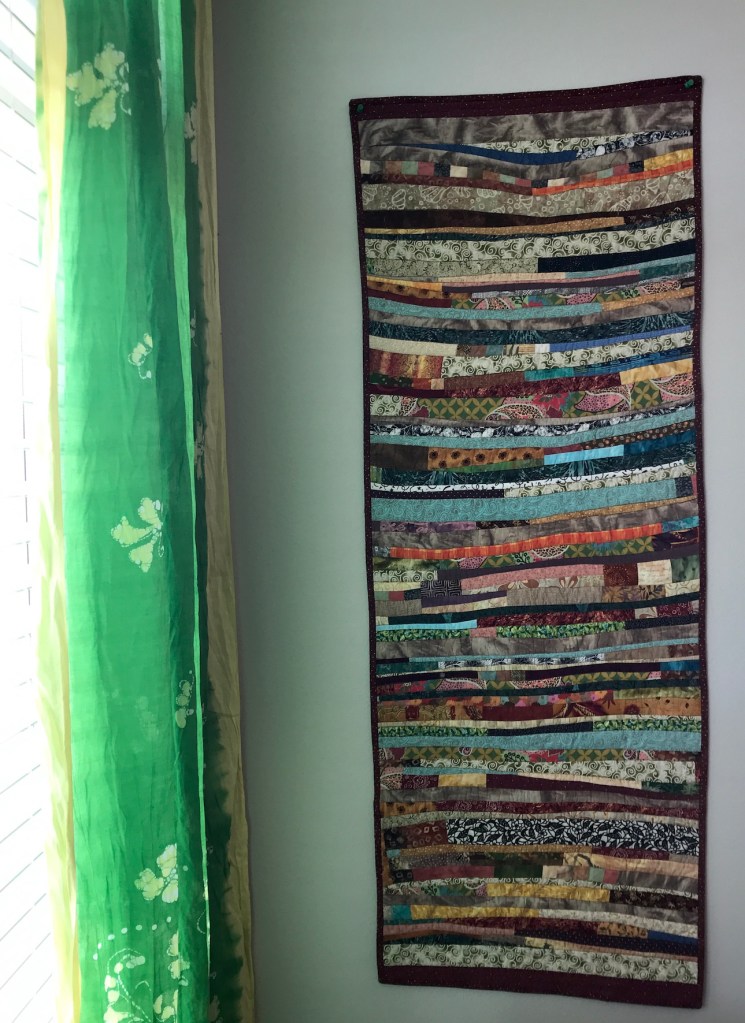
11) A couple scrappy denim, clothing and home decor fabric scraps wall hanging in our new primary bedroom:
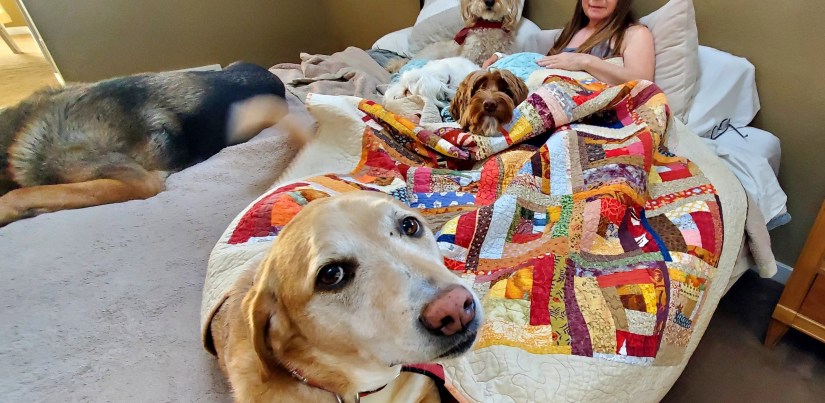
12) Scrappy quilt in the new dining room/library for snuggling under while reading:
There are more scrappy quilts hung about the house but I figured a sampling of 12 was enough for this post.
Apologies that I currently can’t keep up on my blogging buddies posts or read/reply to comments on my posts right now, but I plan to catch up someday.
We have our first out of town visitors to our new home arriving this upcoming week so we are trying to get the basement guest room together. I feel like I have one operational brain cell right now…
Looking forward to settling back into regular life again someday 🙂
In the January 15th 2026 ScrapyHappy post I shared this progress – 9 scrappy EPP flowers machine appliquéd to 6.5 inch by 6.5 inch scrap denim backgrounds:
I made some great progress since then and I now have 37 EPP flowers machine appliquéd to scrap denim:
I’ve developed a rhythm to my machine appliqué of the flowers onto the denim and it’s now so cumbersome now to do it.
I stitch them on a slightly larger than 6.5 inch by 6.5 inch square and then trim to size after I stitch them onto the scrap denim.
Only 62 more blocks to make of the 99 EPP flowers I’ve created.
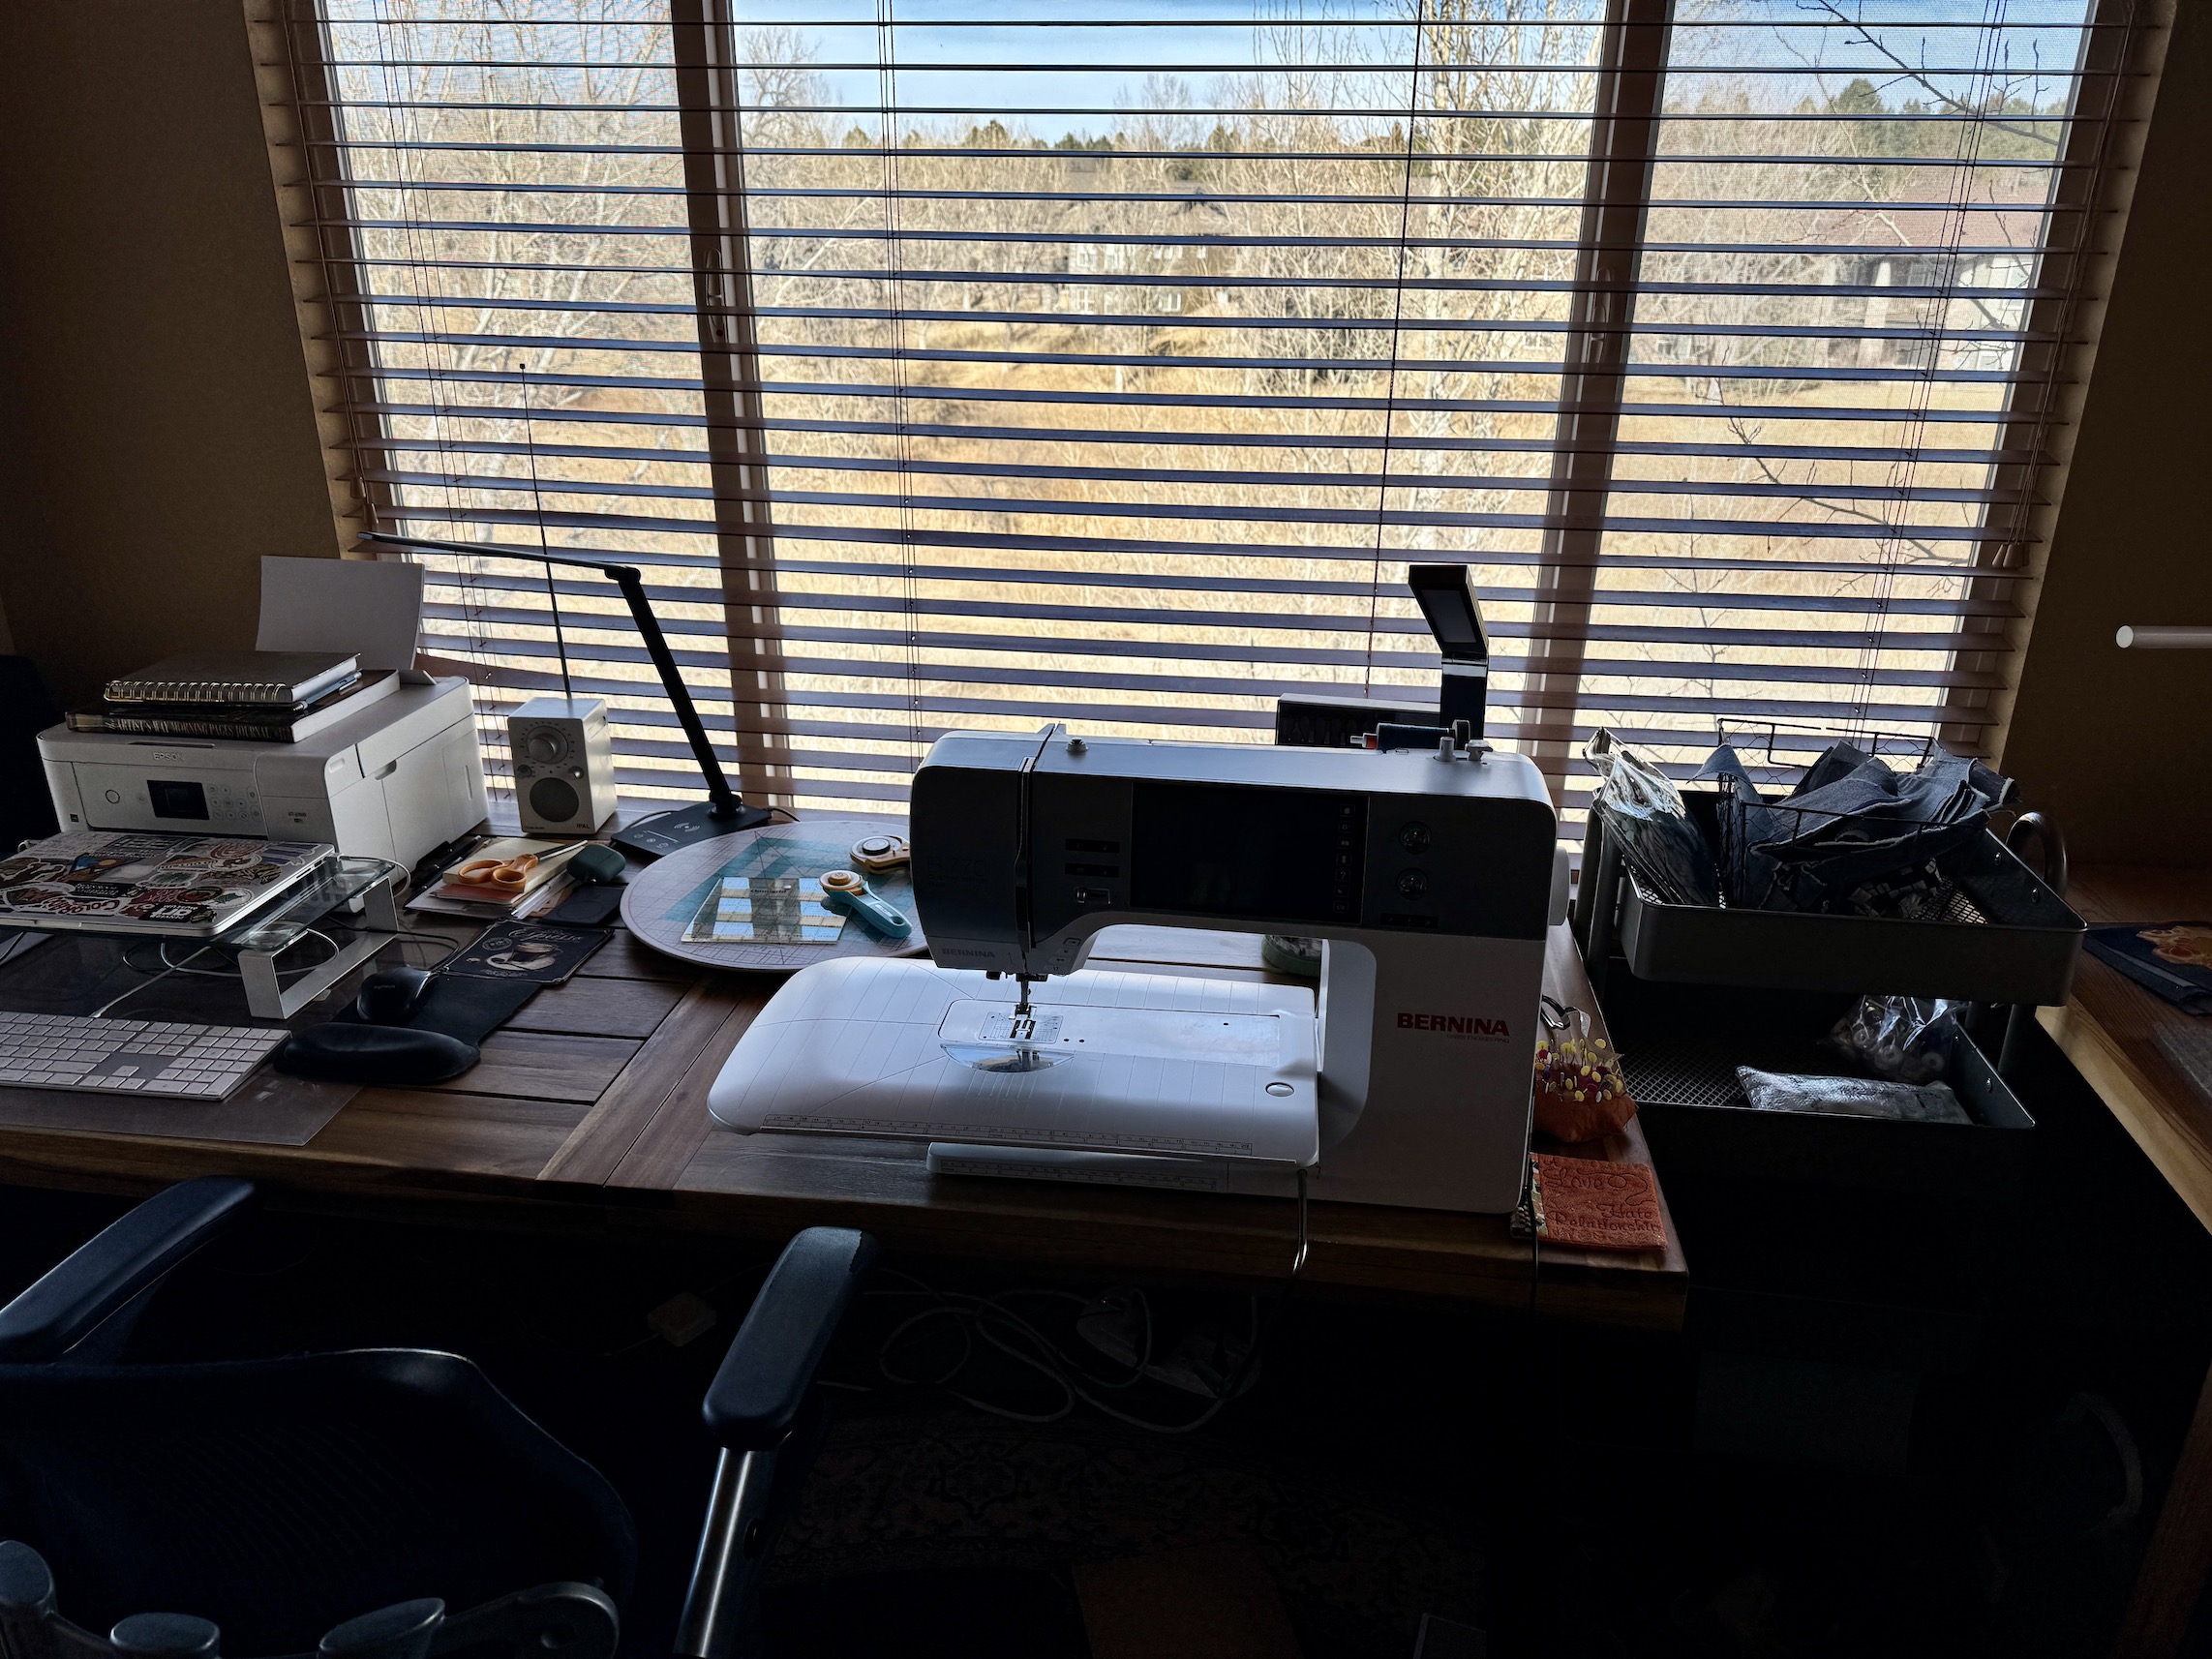
The house is currently in such chaos I needed a calm place in which I could blog and sew if I wanted until we get closer to our move date in early March. John came up with the idea of moving a table into our bedroom in front of the window and setting up my laptop and my sewing machine.
We also set up an area in our bedroom where I could sit and stitch on the quilt I am hand quilting (Hand Quilting “Go Boldly”) or read a book…or just enjoy an escape from boxes…
So now I have a place to escape the madness in the rest of house and write or create (even if most of my stuff is packed up now).
Over the next couple of months I’ll be saving updates on my long time English Paper Piecing hexie rosette project to share on the 15th of each month for ScrapHappy.
In my most recent post on this project, Revisiting the EPP Quilt, I shared that I’ve been working on this project since 2016 when I fell in love with the quilt on the cover of Issue 1: Oregon of Quiltfolk Magazine.
I paper pieced 99 rosettes from my fabric scrap collection, attempting to coordinate the colors:
And finally I’ve begun setting the rosettes into blocks using my collection of scrap denim with plans to trim each block to 6.5 inches by 6.5 inches.
But I had to find the most efficient want to attach 99 rosettes to the denim scraps without having to hand appliqué them to the blocks. I was afraid if I committed to hand appliqué all 99 blocks, it would be another 9+ years until I finished this quilt!
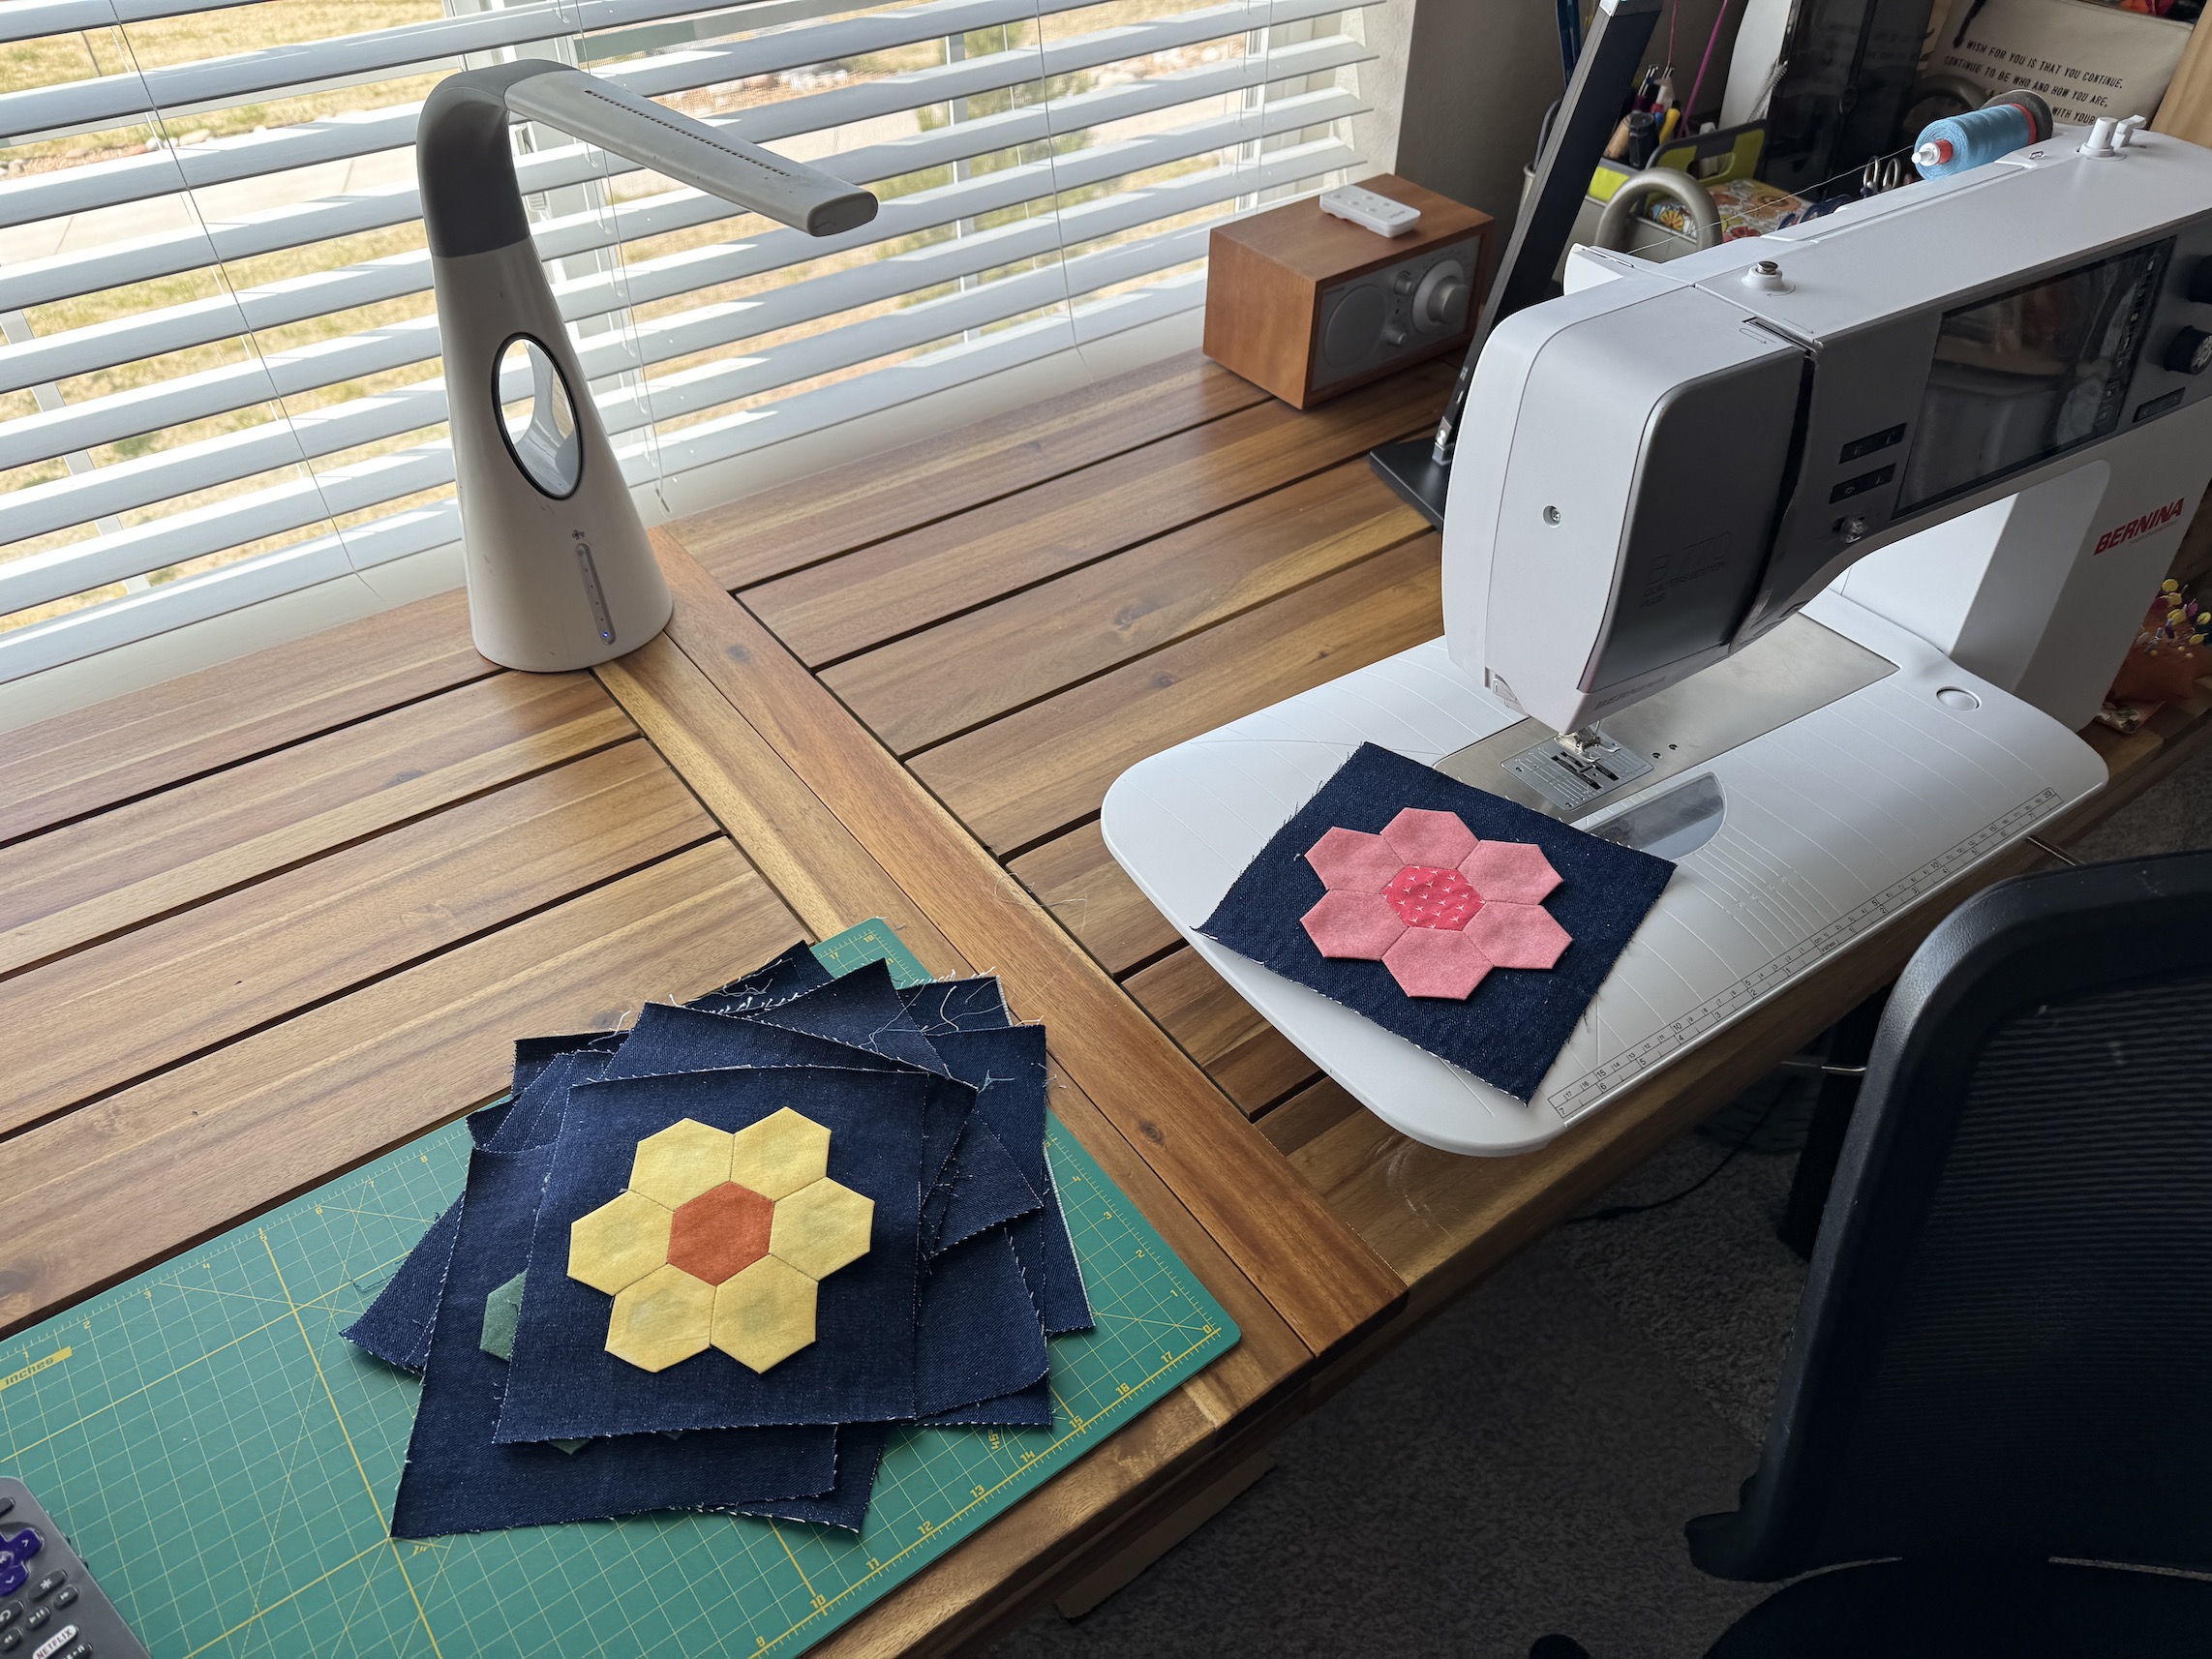
So I decided to find a way to use my sewing machine to do it.
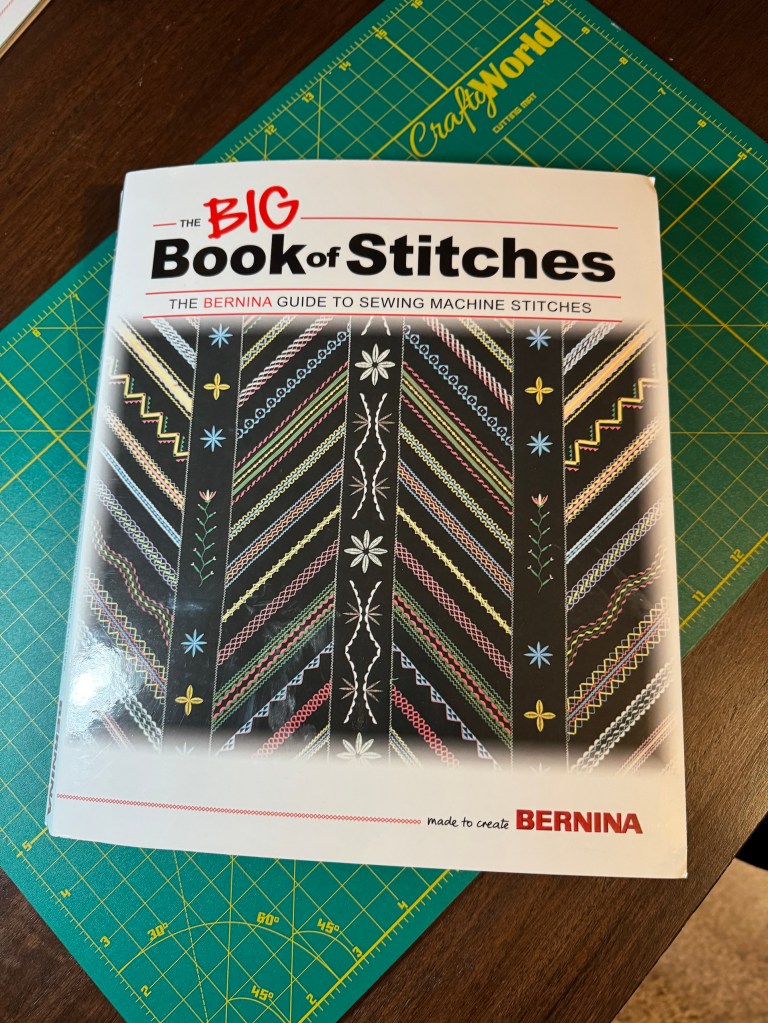
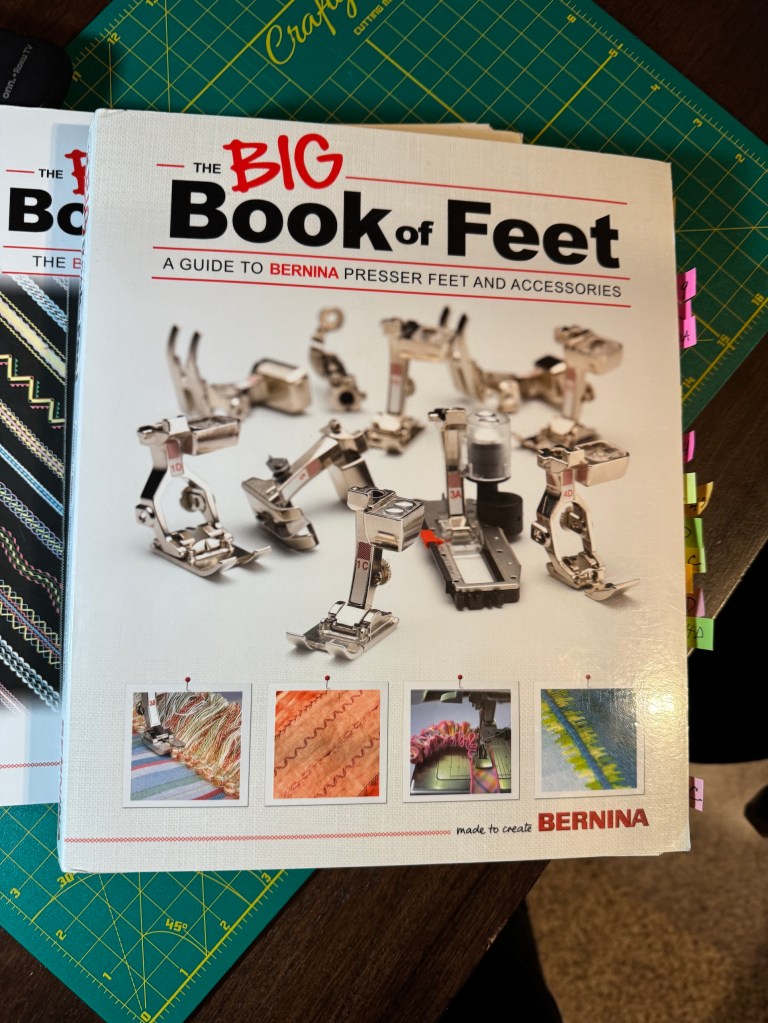
I researched my Bernina sewing machine books on the Bernina sewing machine feet and sewing machine stitches, and discovered I could use the #20C foot to sew a blanket stitch around each rosette to attach it (I decided to use a little Stitch Witchery Tape to anchor the rosette onto the denim before machine stitching).
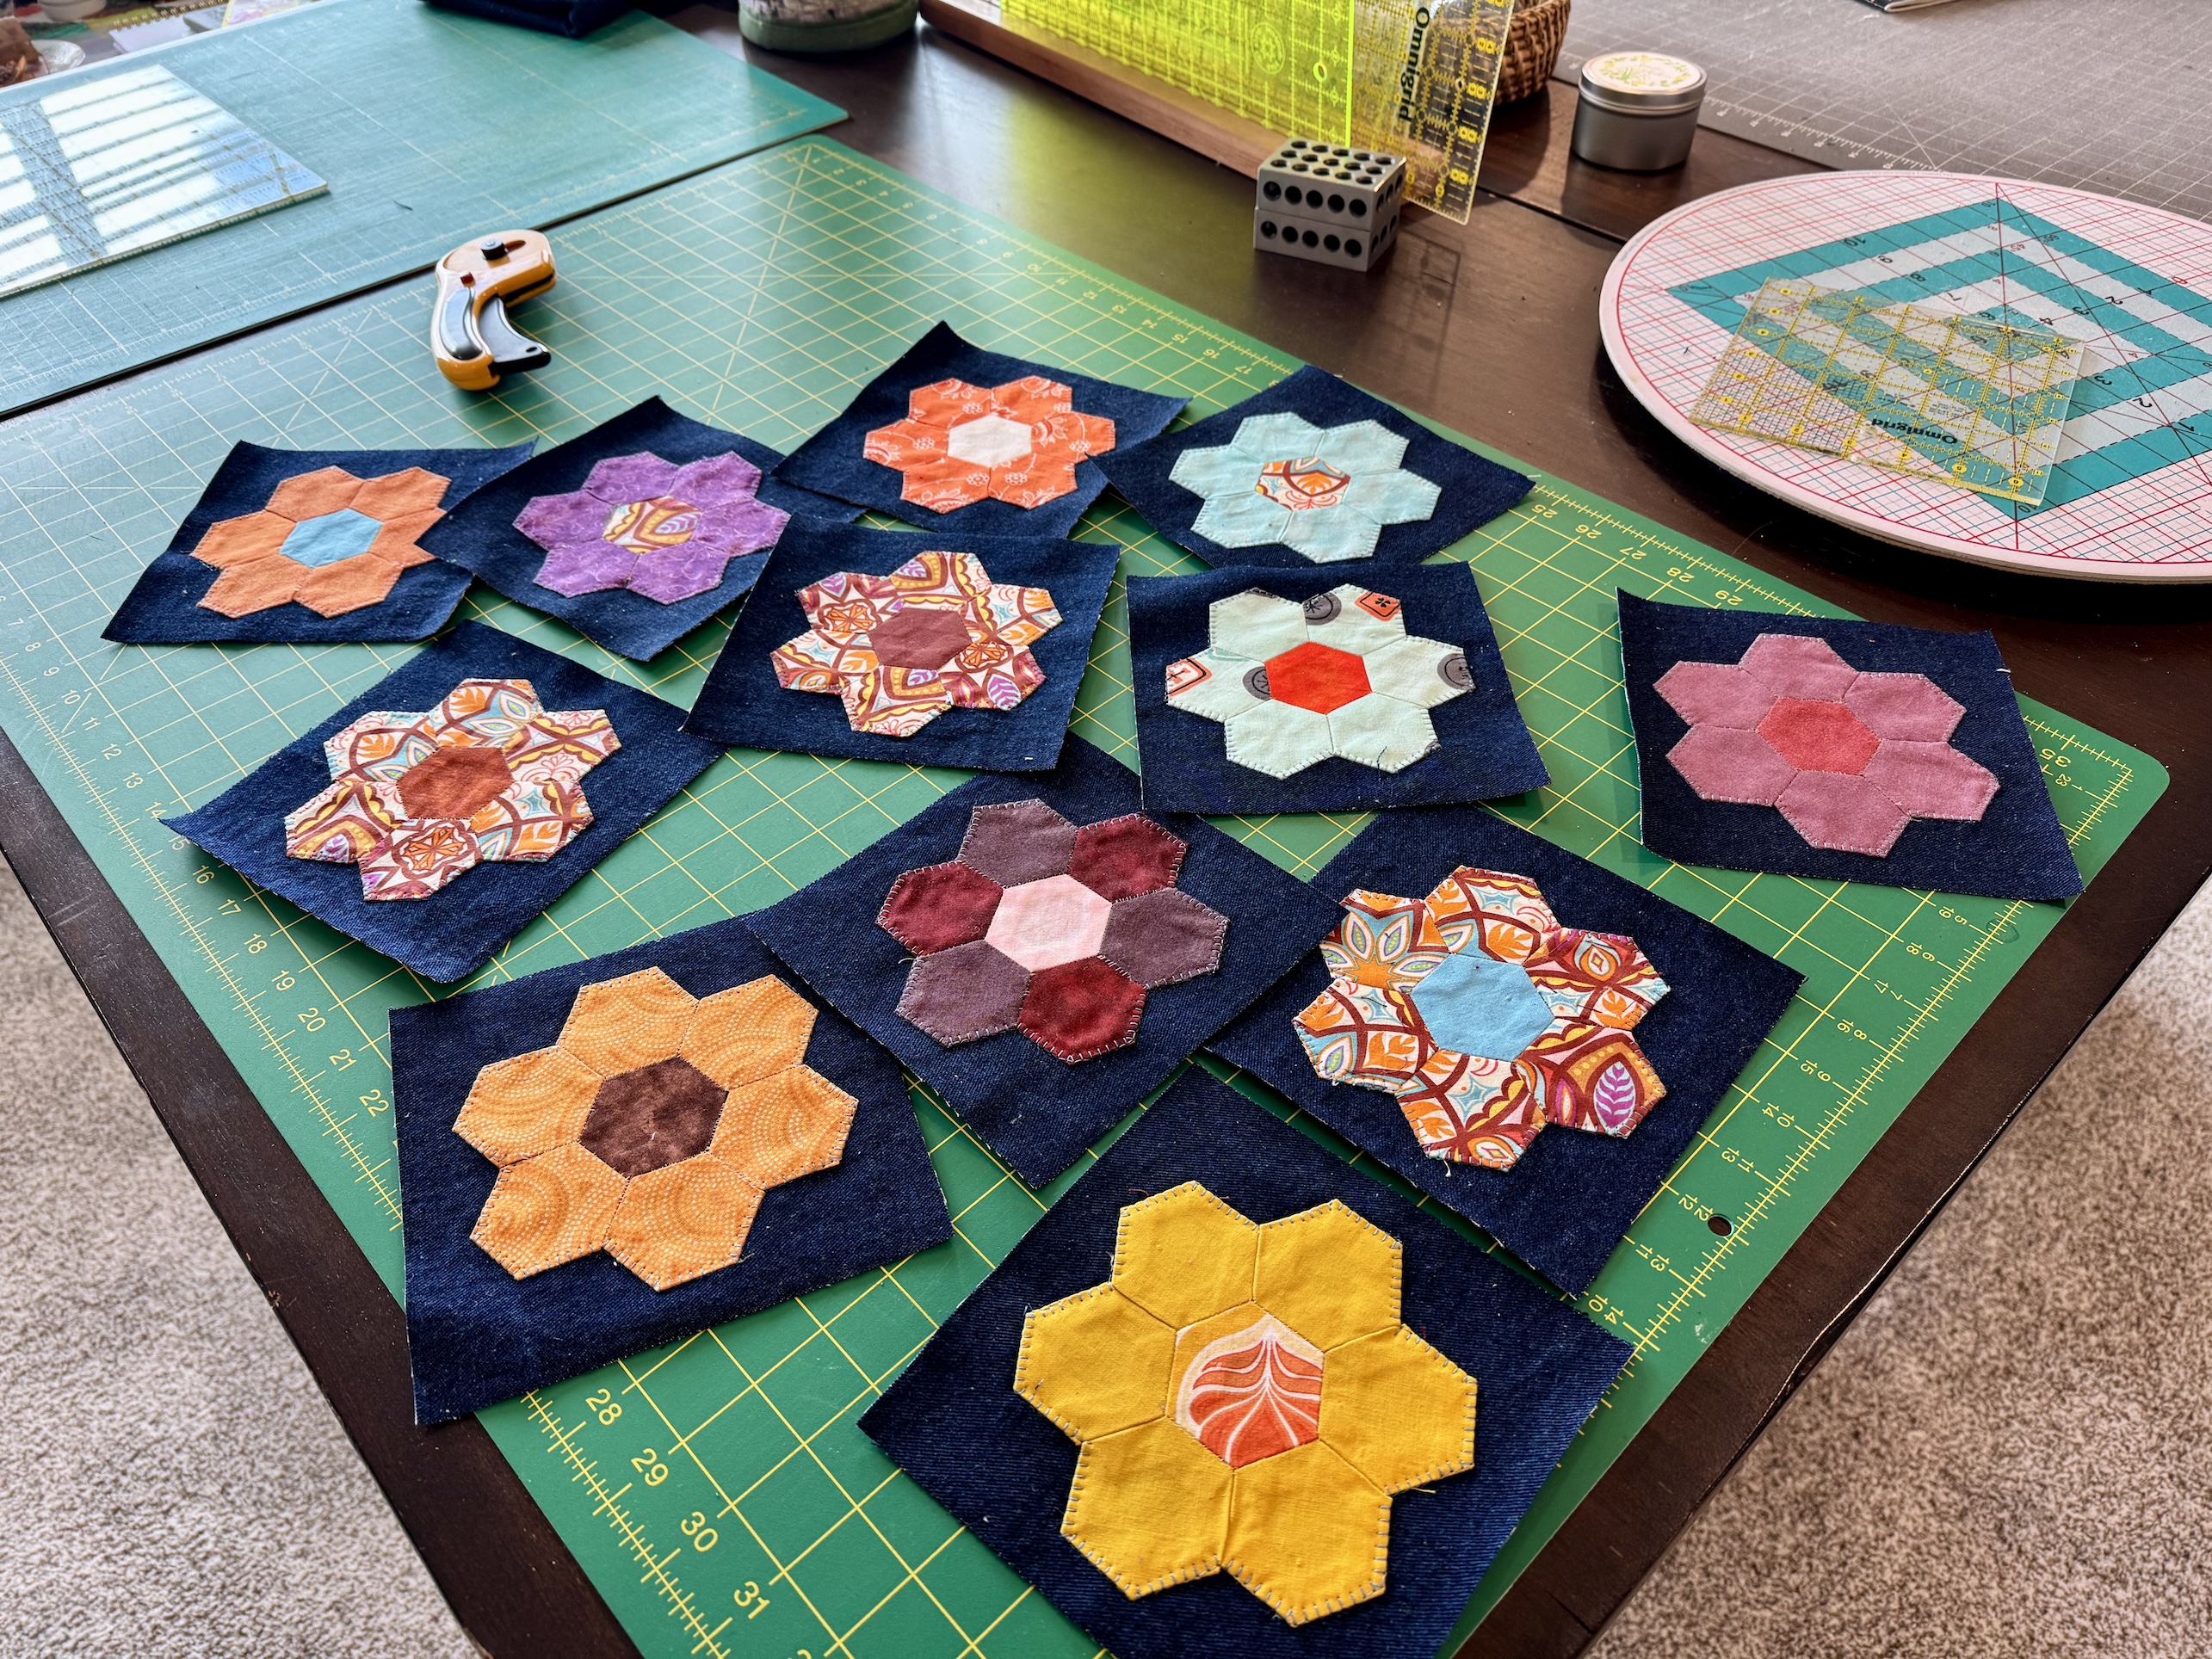
After practicing on scrap denim I was able to figure it out and attach my first rosette and from there I put together my first 9 blocks:
Here they are squished together to sort of give you an idea of how the quilt might look:
I have a long way to go but it is a start!
I did discover that in addition to removing the paper from the hexies in each rosette, I still have to stitch some of the rosettes fully together! So there is a lot of work to get this project done and we’ll see how much progress I will have to report next month 🙂
Oh and yes it will be a heavy quilt using scrap denim as the setting squares but it is going to be a wall hanging in my upstairs guest room, not a utility quilt for snuggling under.
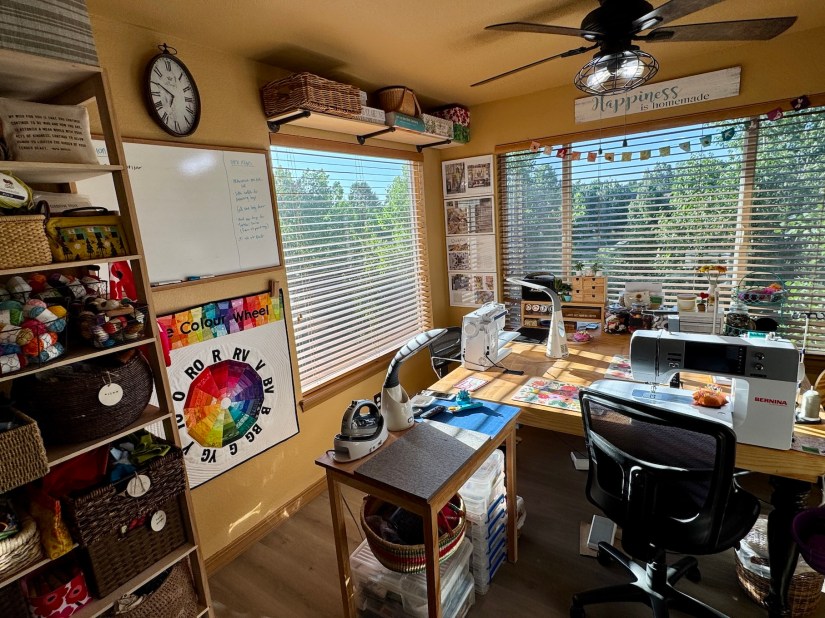
I haven’t shared an updated tour of my quilting/crafting studio in quite a while. I thought I’d share a current studio tour and share how I’ve decorated and equipped it with many thrifted items bought second hand from charity thrift shops (local and found during my travels).
My studio is located in the former Primary Bedroom of the house. A couple years ago my husband John and I decided we didn’t need that much room for our main bedroom and moved to a smaller bedroom. Originally it was a carpeted room but in summer 2024 John put in a floor.
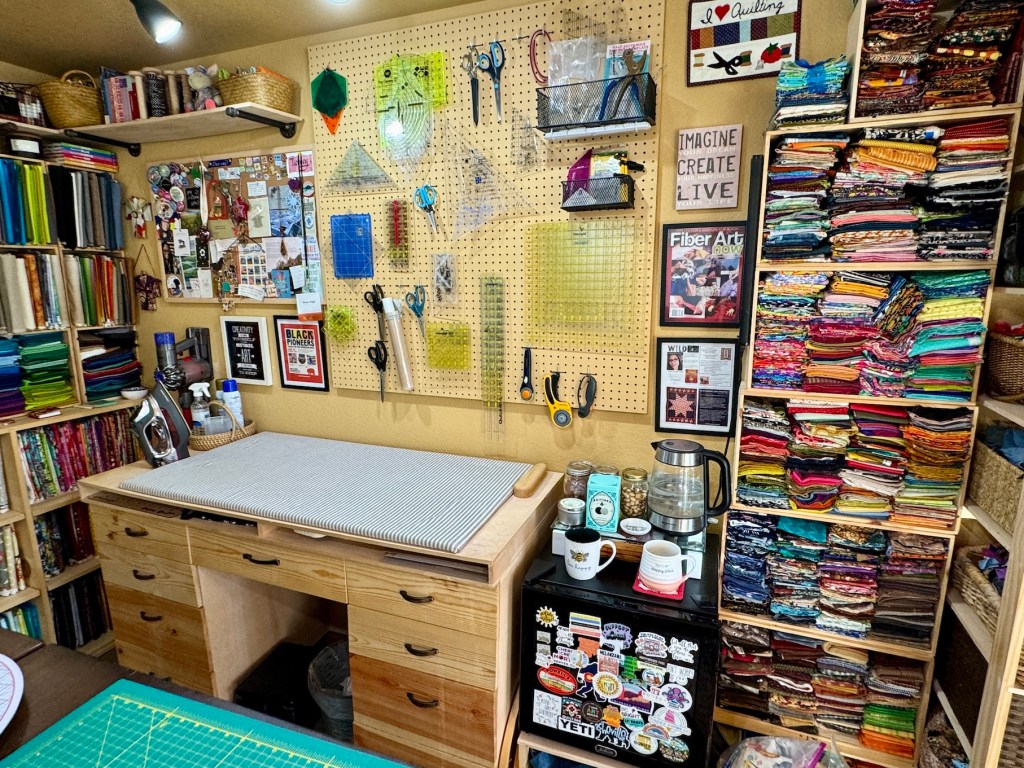
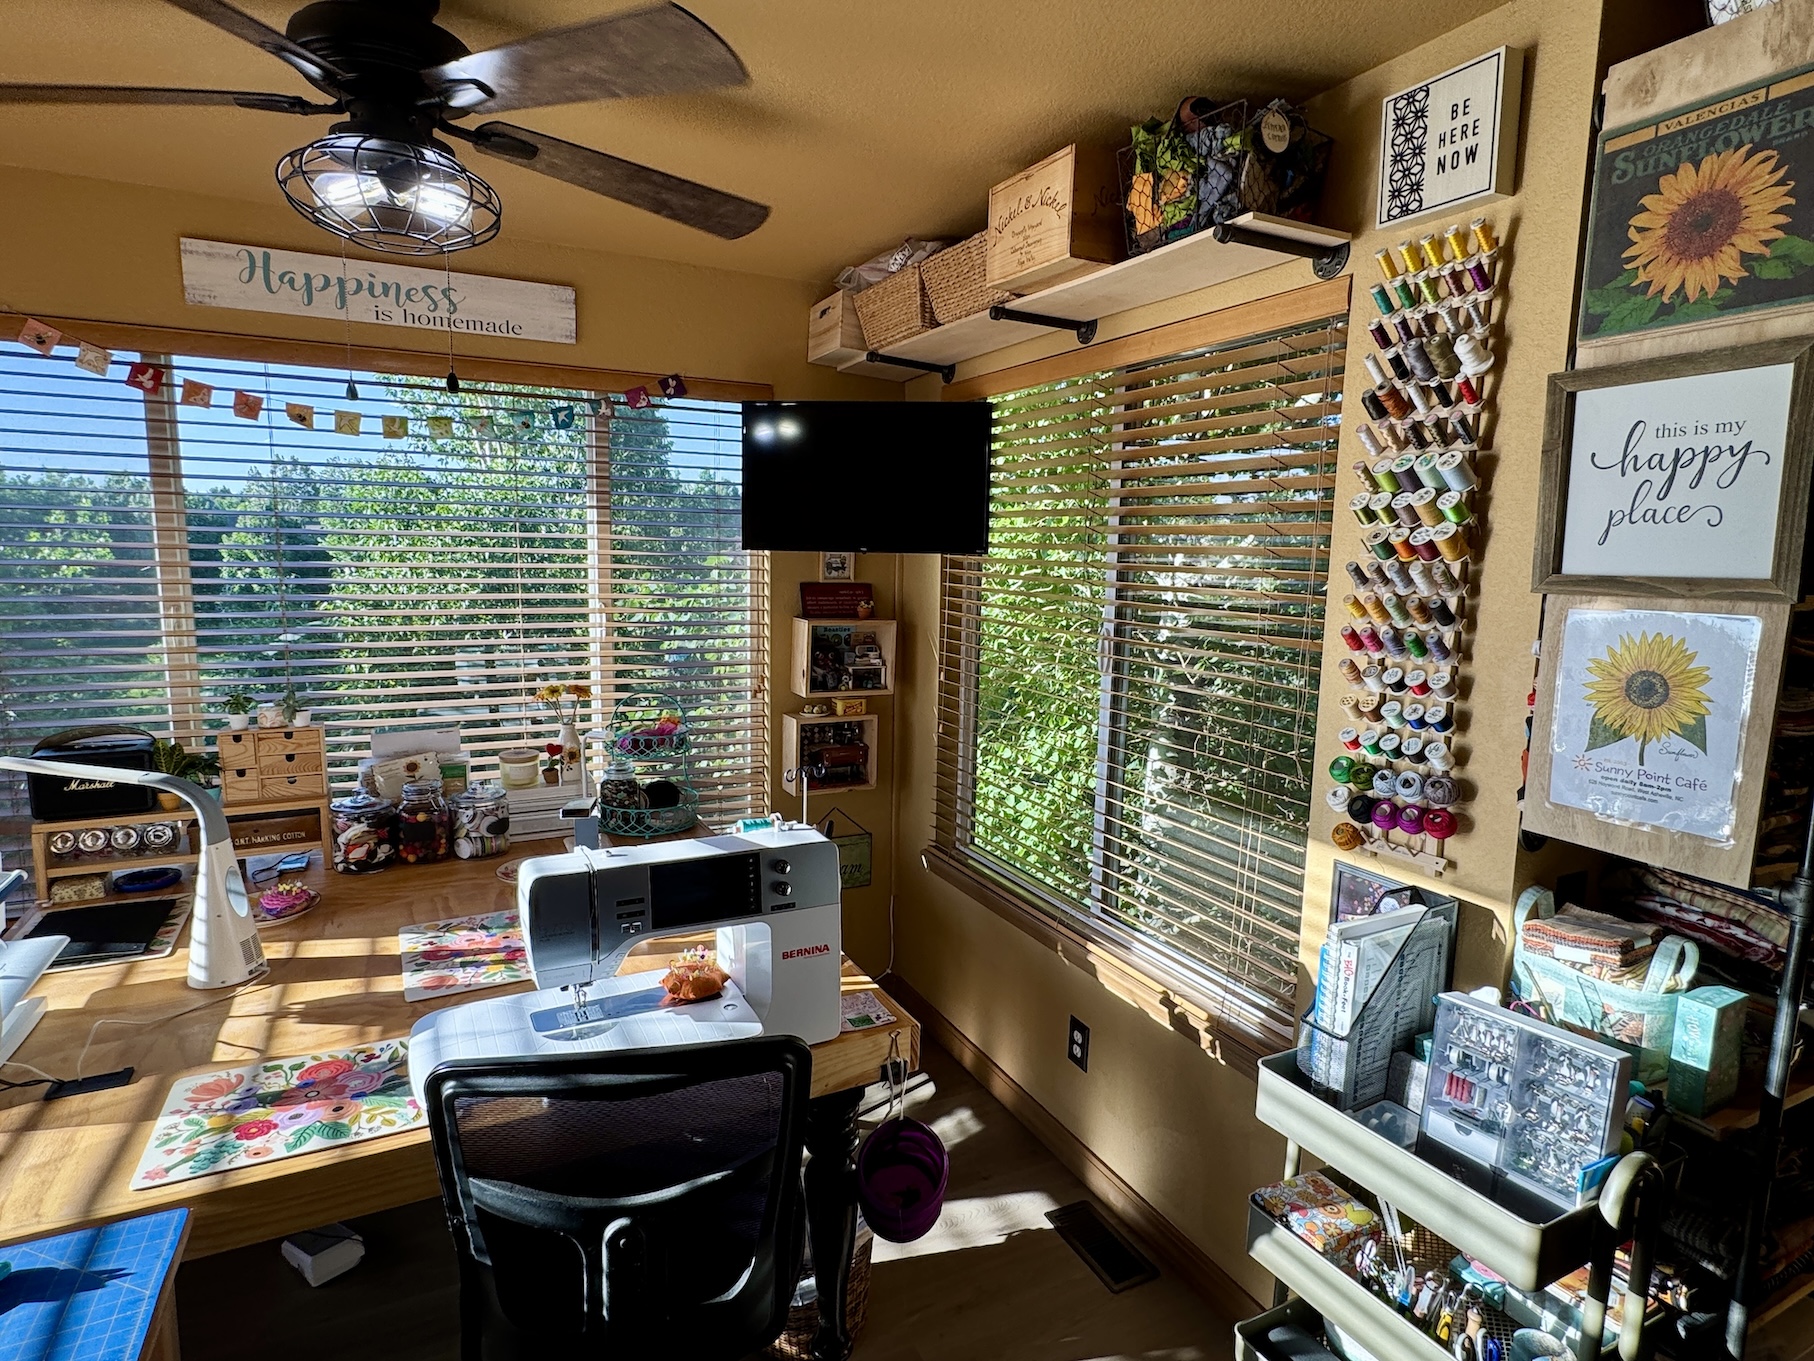
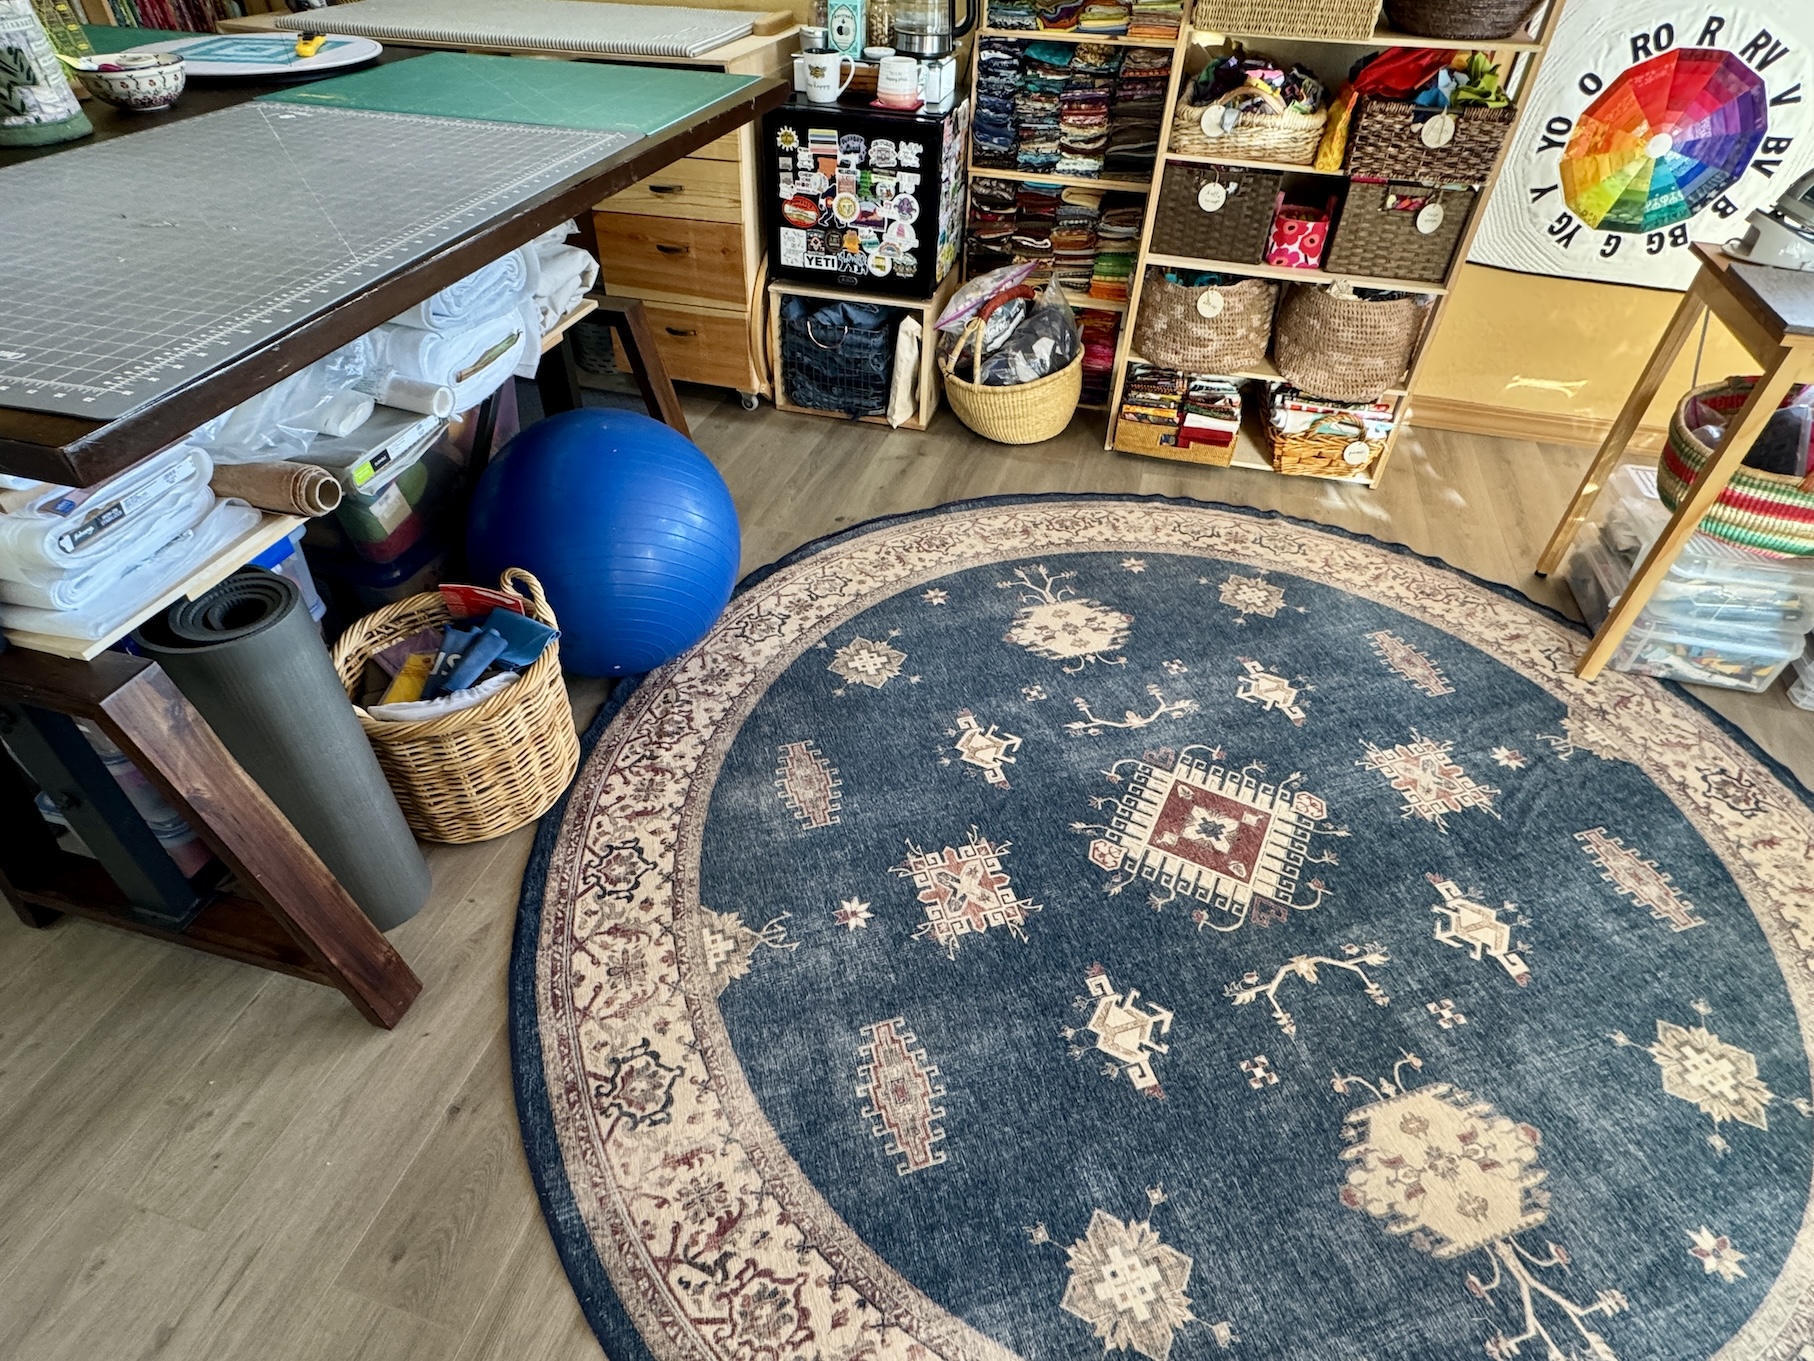
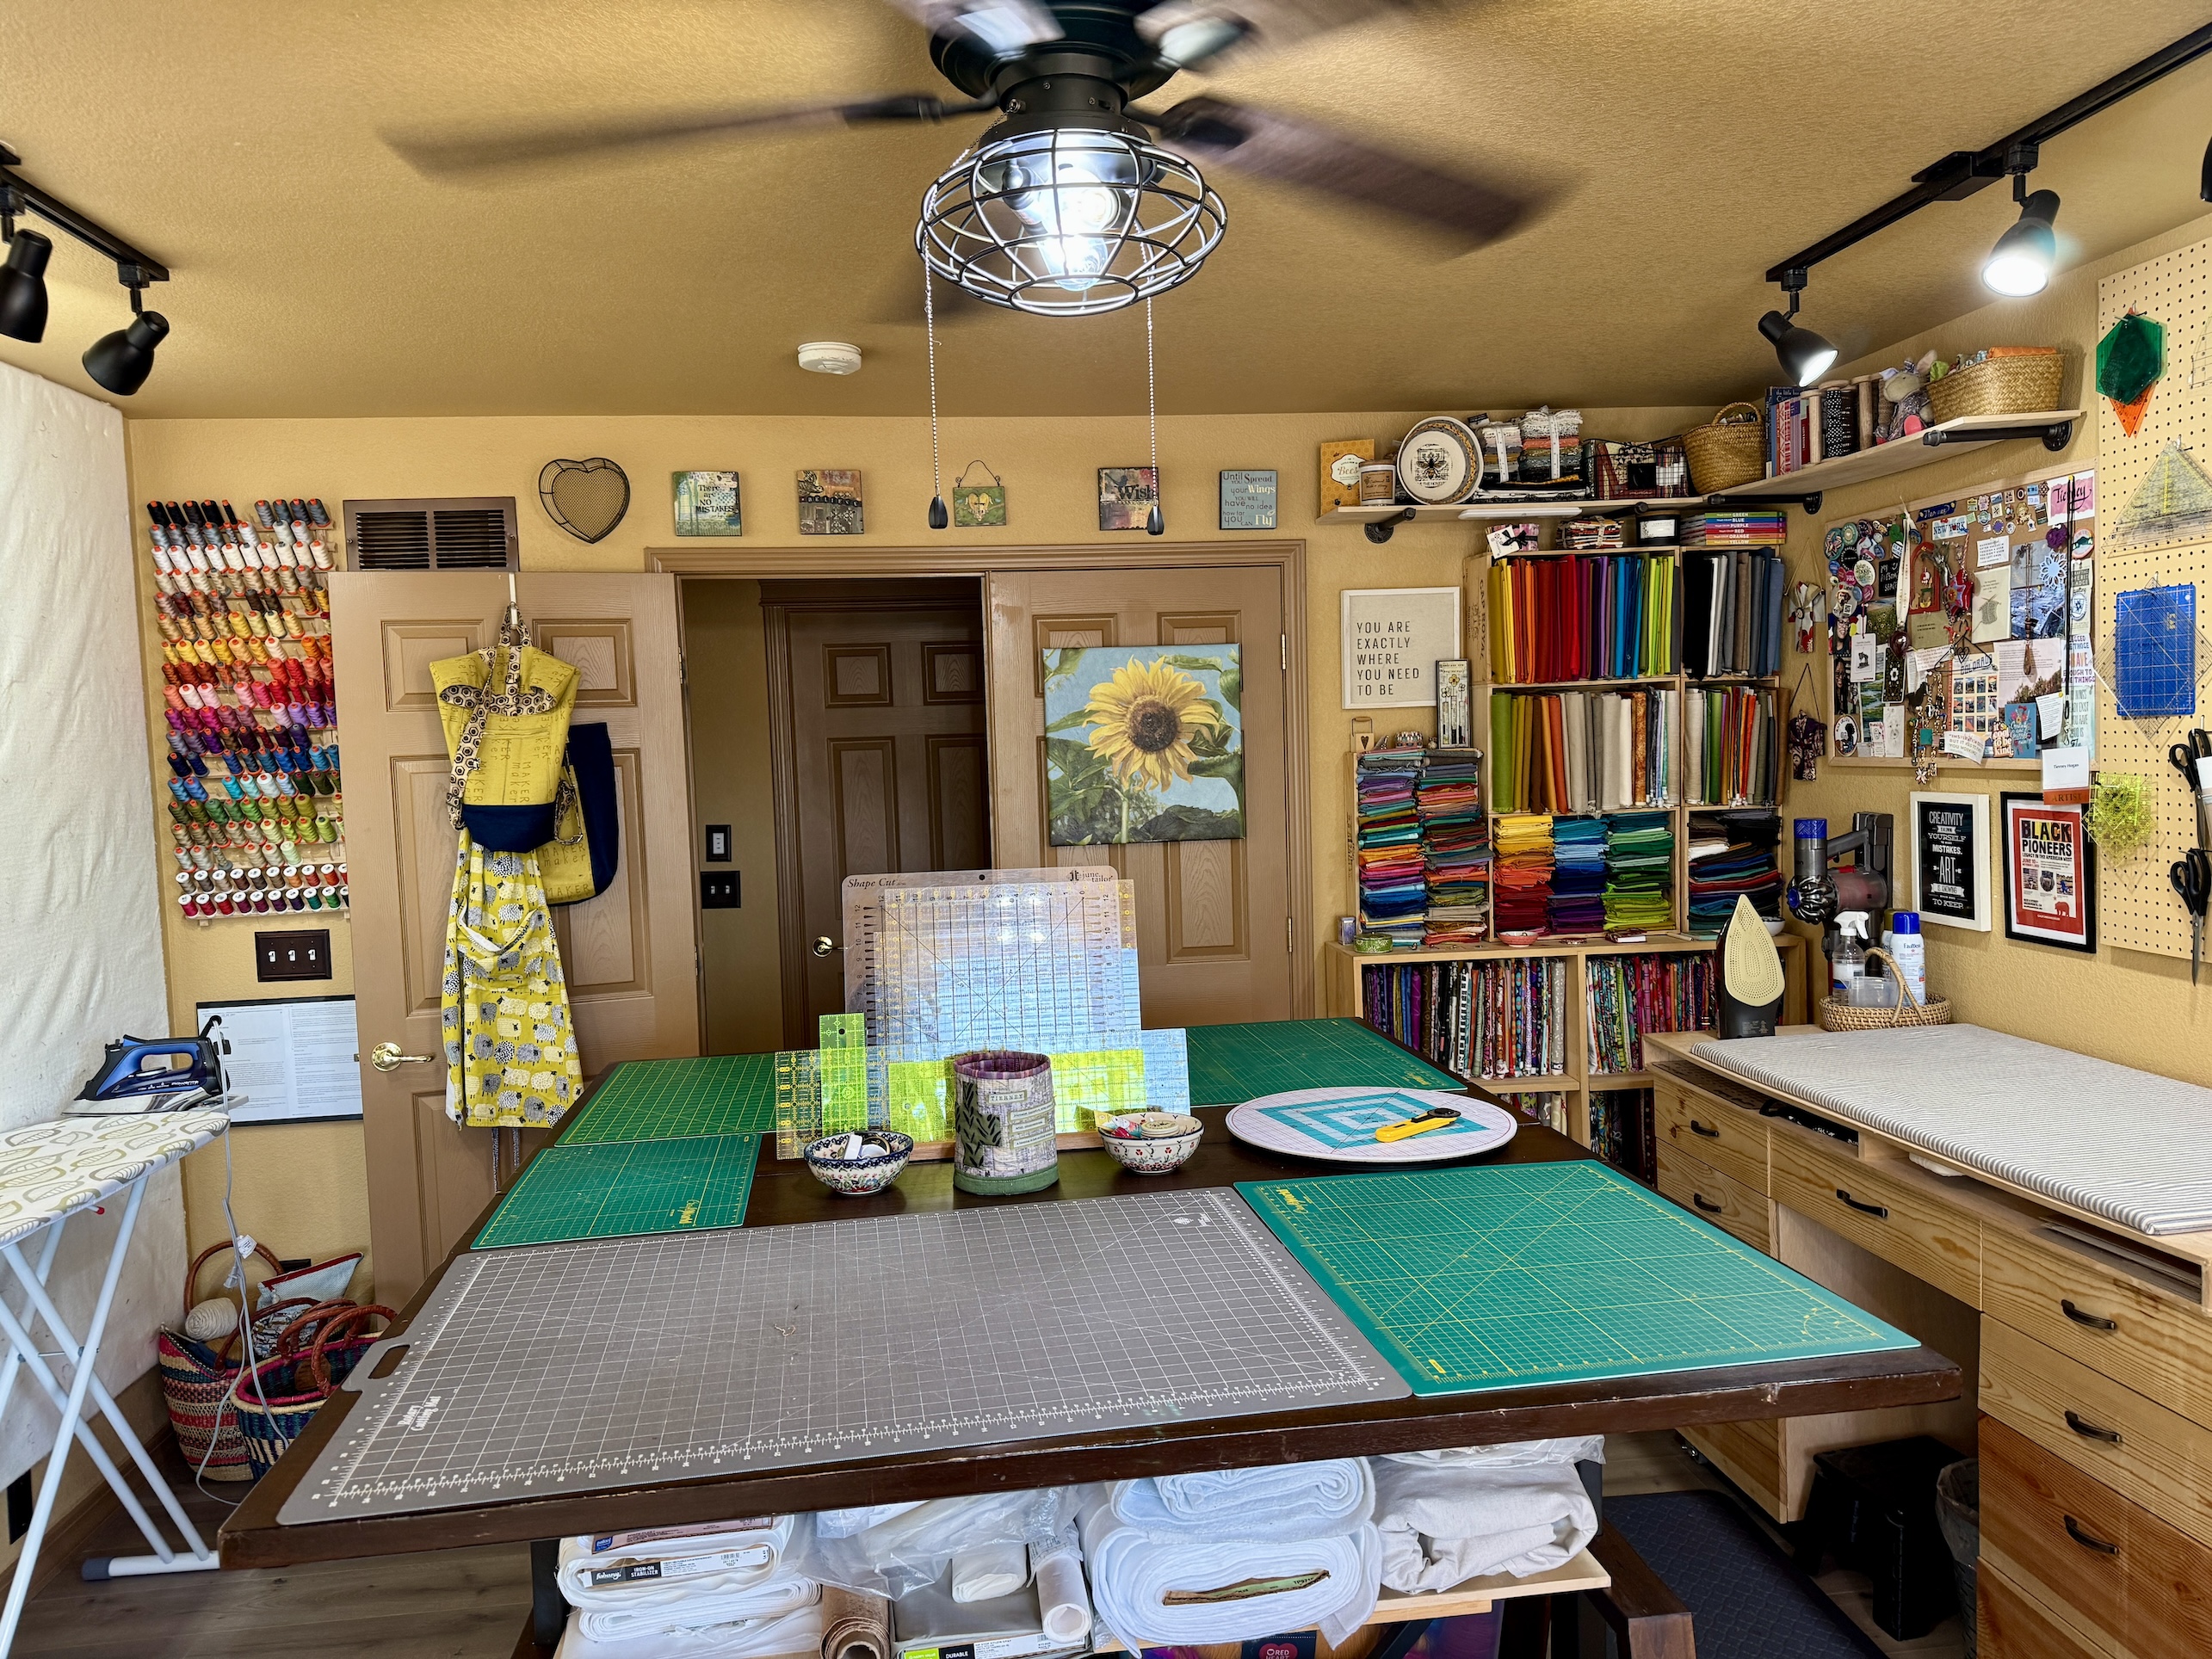
Here is the current view of the studio when you walk in the double doors:
The cutting table is comprised of two adjustable desks from World Market set at their highest position. John built a shelf that connects the two desks to provide additional storage.
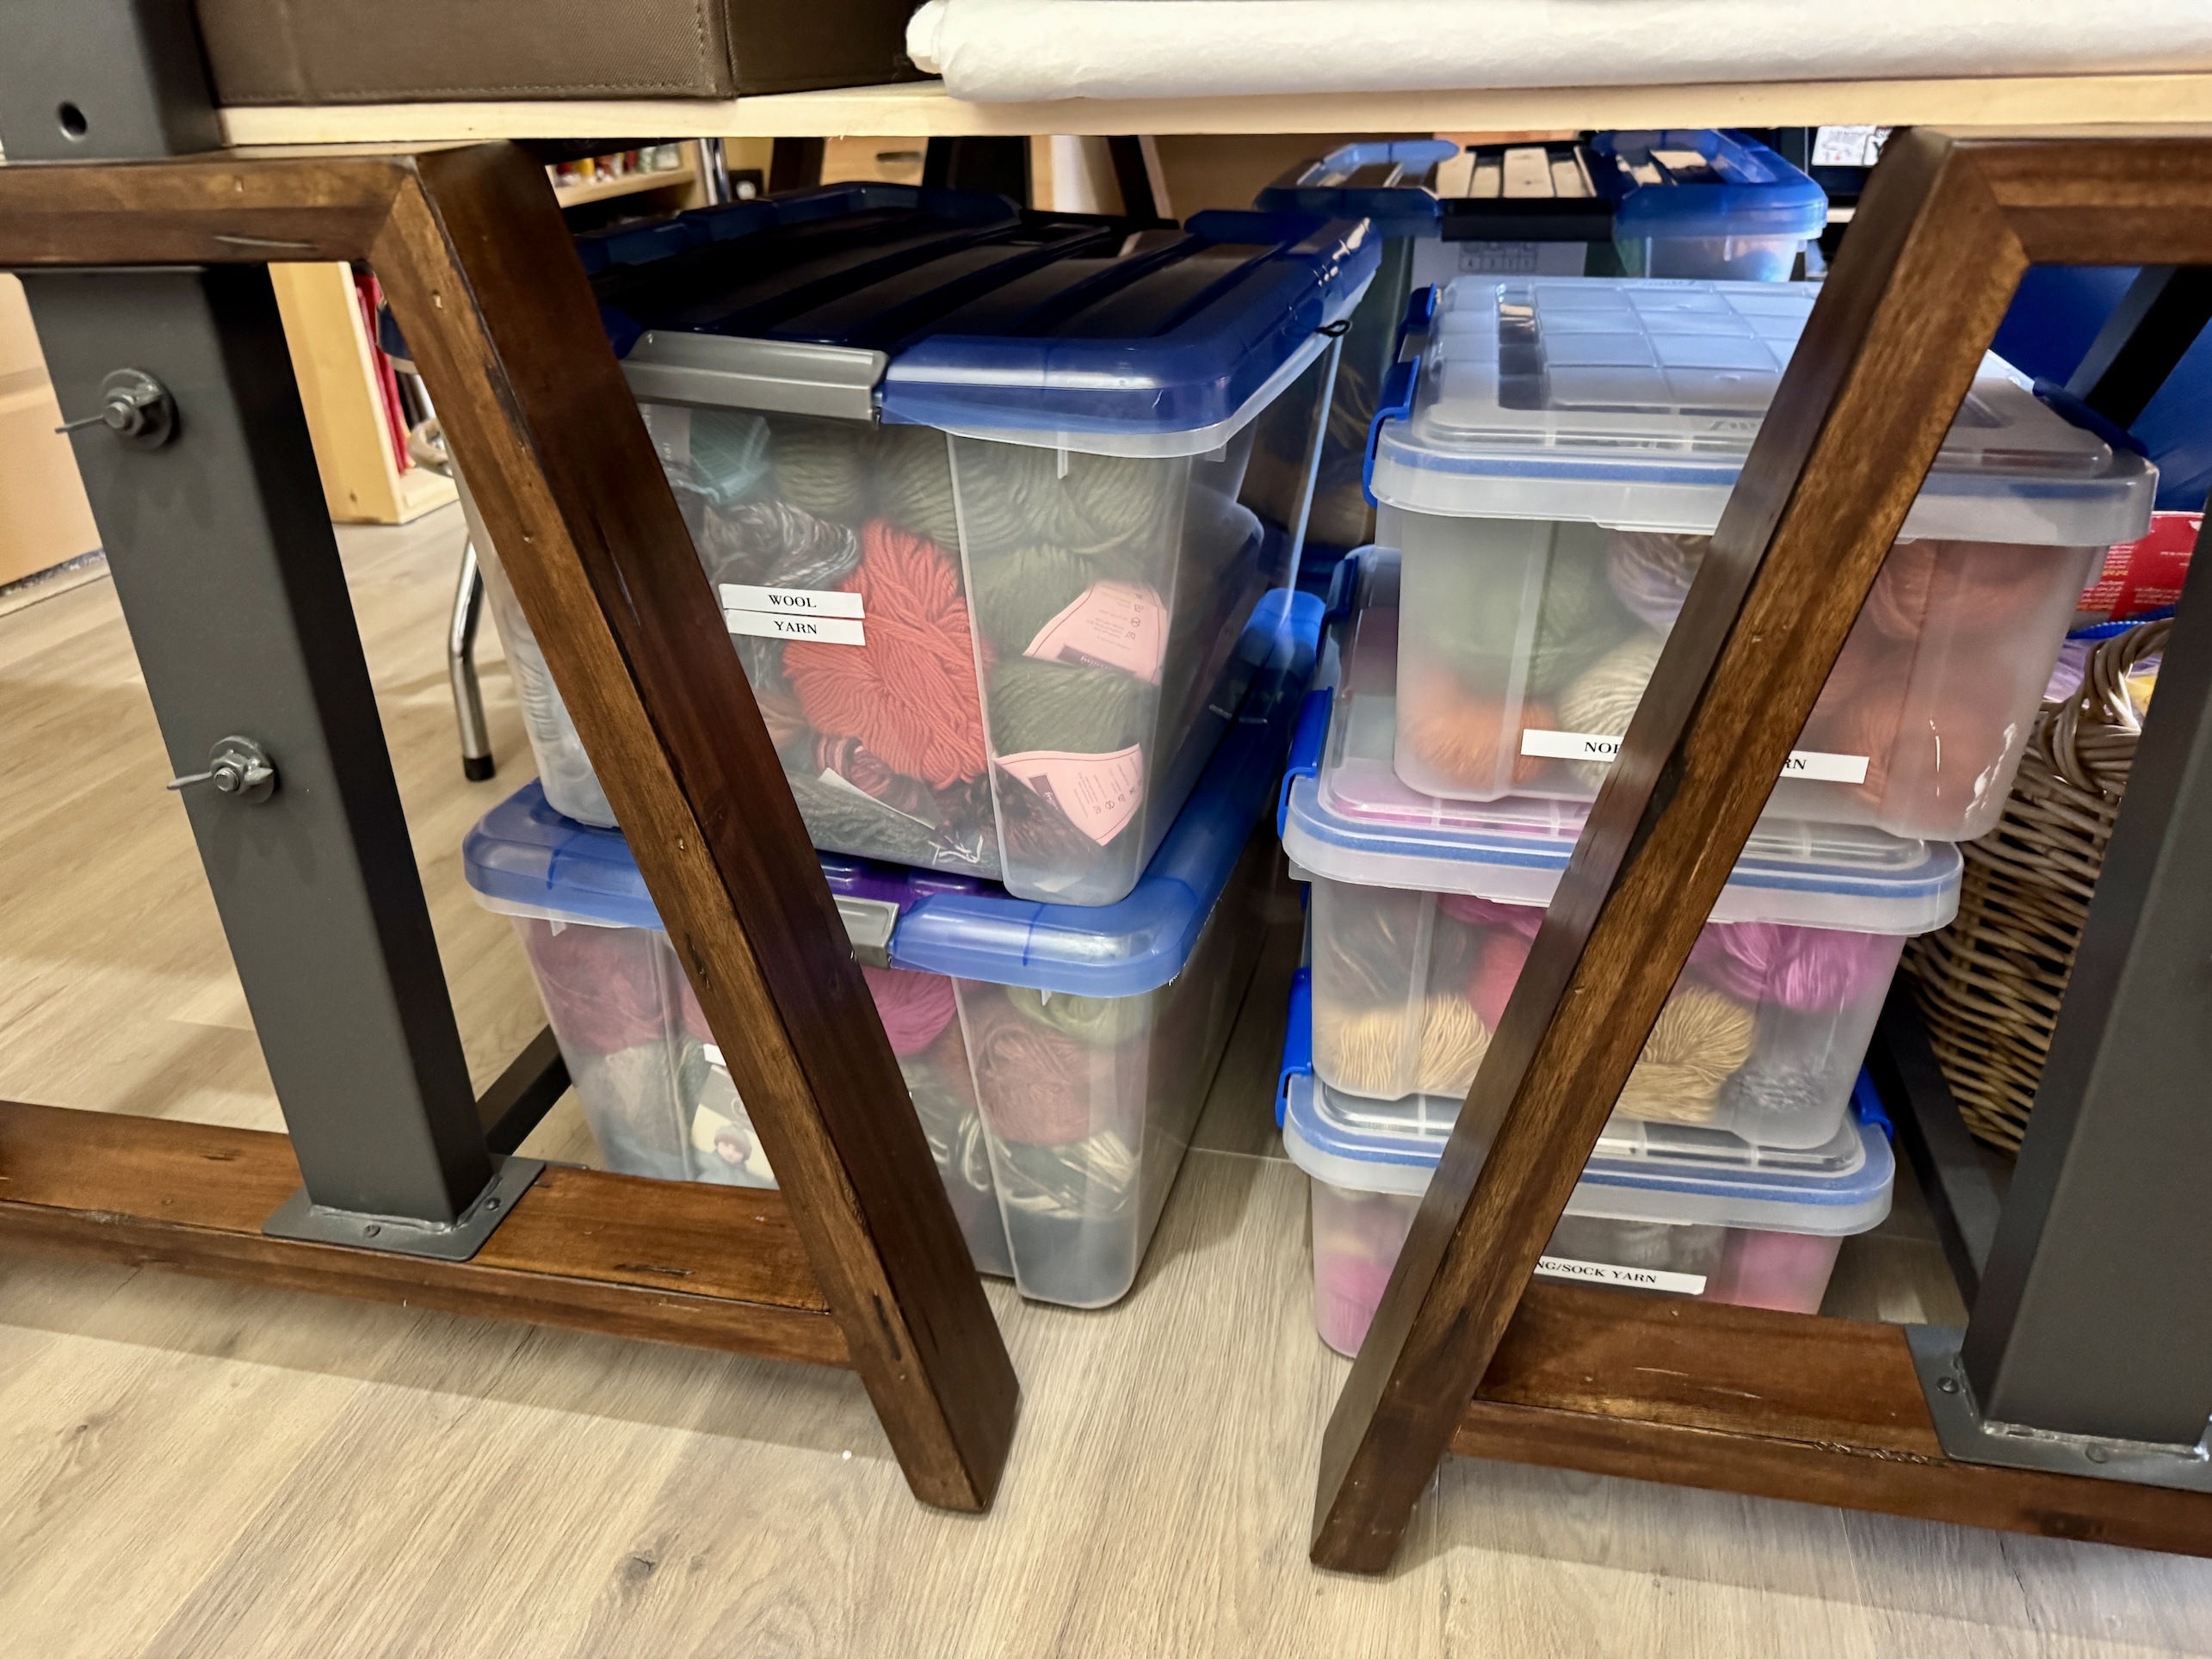
Underneath I store the bulk of my yarn collection which includes a lot of thrifted yarn(last year I came across cheap collection of gorgeous and usually pricey fingerling weight sock yarn in brand new condition at a thrift store that I couldn’t leave the shop without for the imaginary day I start knitting socks…):
I use wine crates from liquor stores (which I either got for free or for a couple dollars) to store my fat quarter fabric collection (which I admit is a bit obscene…). And no I did not drink the wine formerly in the crates in order to obtain empty crates, ha!
John built the shelving unit below the wine crates in the first image above where I store some of my cotton fabric yardage; as well as the ironing station in the second photo.
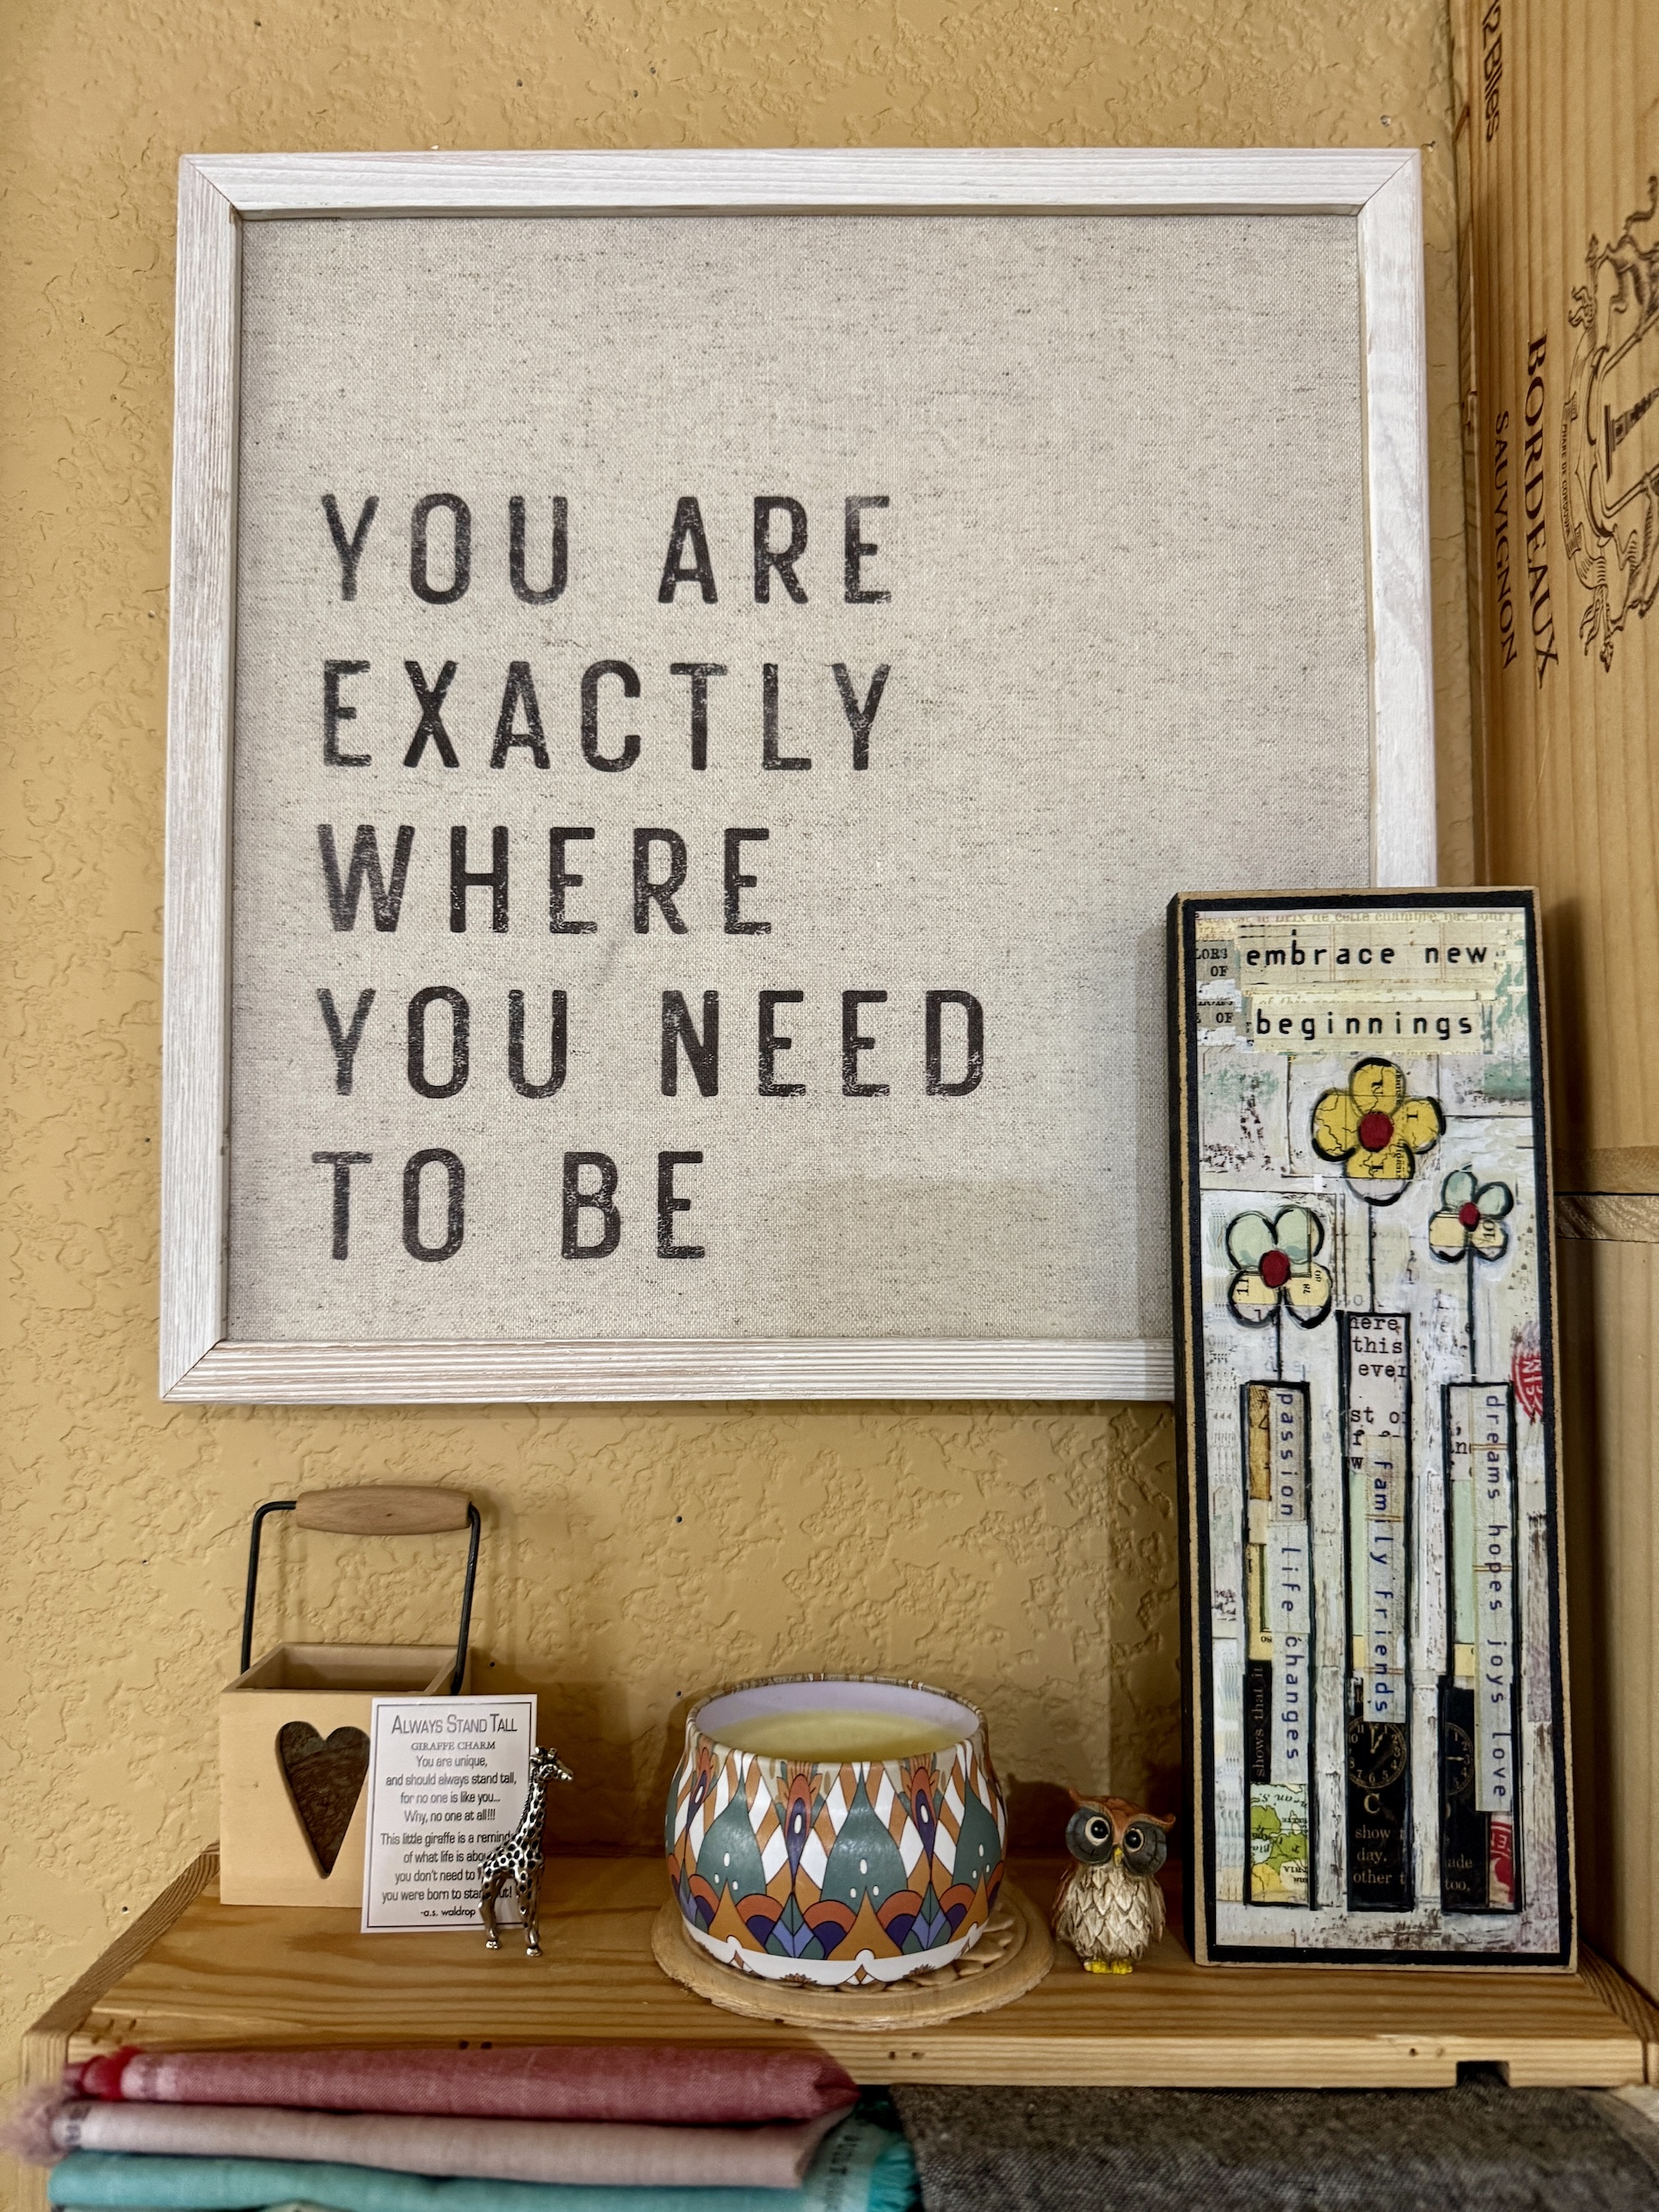
Most of the art in my studio is thrifted including these two pieces that I love:
If you aren’t familiar with my story I am a widow who moved from my awesome life in Oregon to Colorado in 2019 to begin anew and reinvent my life (which included meeting John, a widower, and starting a new journey). Early on I had doubts about my big life move but signs like this remind me that I am where I need to be; and to “embrace new beginnings”.
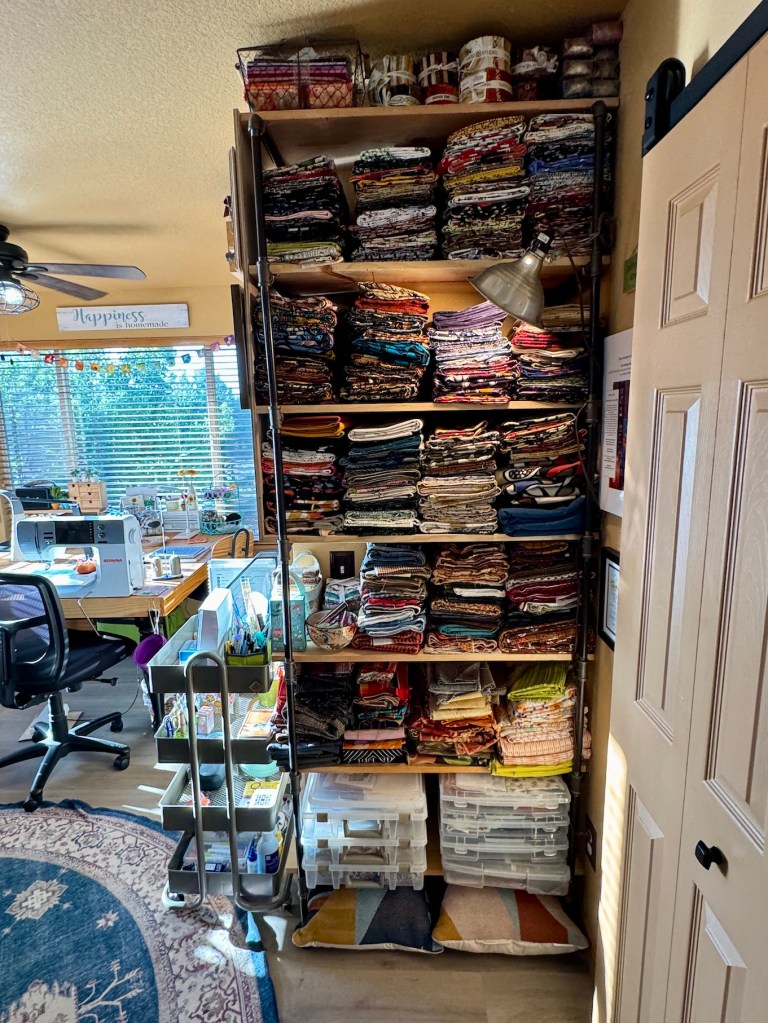
I have a thing for fabric scraps (though I’ve culled my ridiculous collection of fabric scraps over the years and donated many bags of scraps to charity thrift shops) and I store my fabric scraps by theme in thrifted baskets in a shelving unit that John built me a couple years ago.
I have most of the baskets labeled with wooden tags and thrifted adhesive letters. In addition to fabric scraps I have some specialty fat quarters and my collection of fabric panels. The two baskets on the second to last shelf are gifts from an Oregon based friend who had her friend crochet me these baskets/bags from recycled plastic shopping bags!
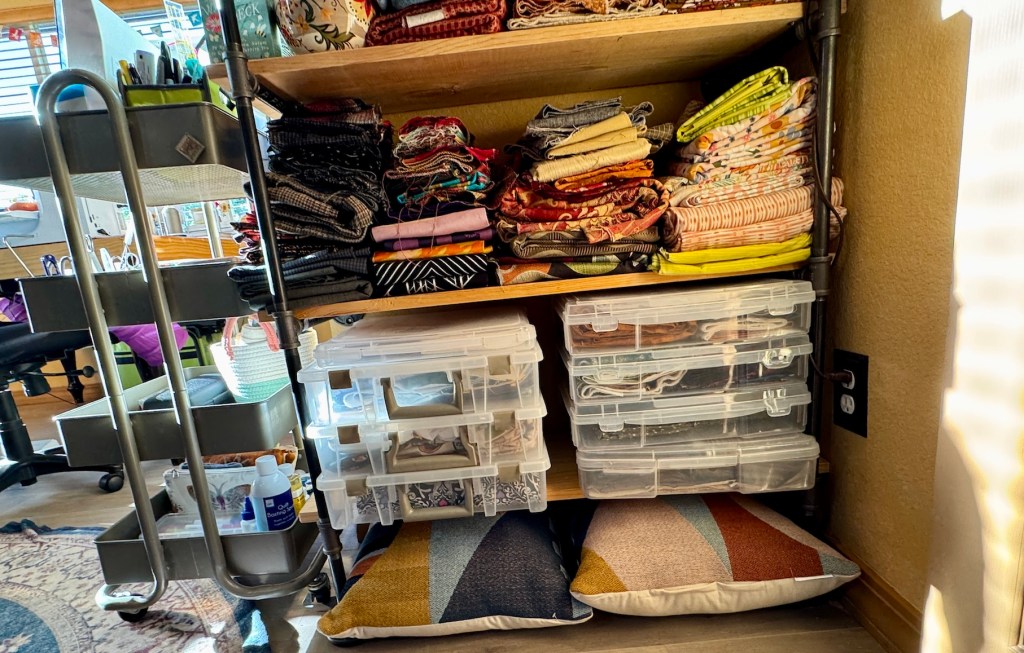
Here is another shelf unit that John made using plumbing pipes and wood. It houses more of my cotton fabric yardage as well as thrifted various thrifted fabrics to include silks, wools and synthetic home decorating fabrics. On the bottom shelf are containers filled with projects waiting to be made.
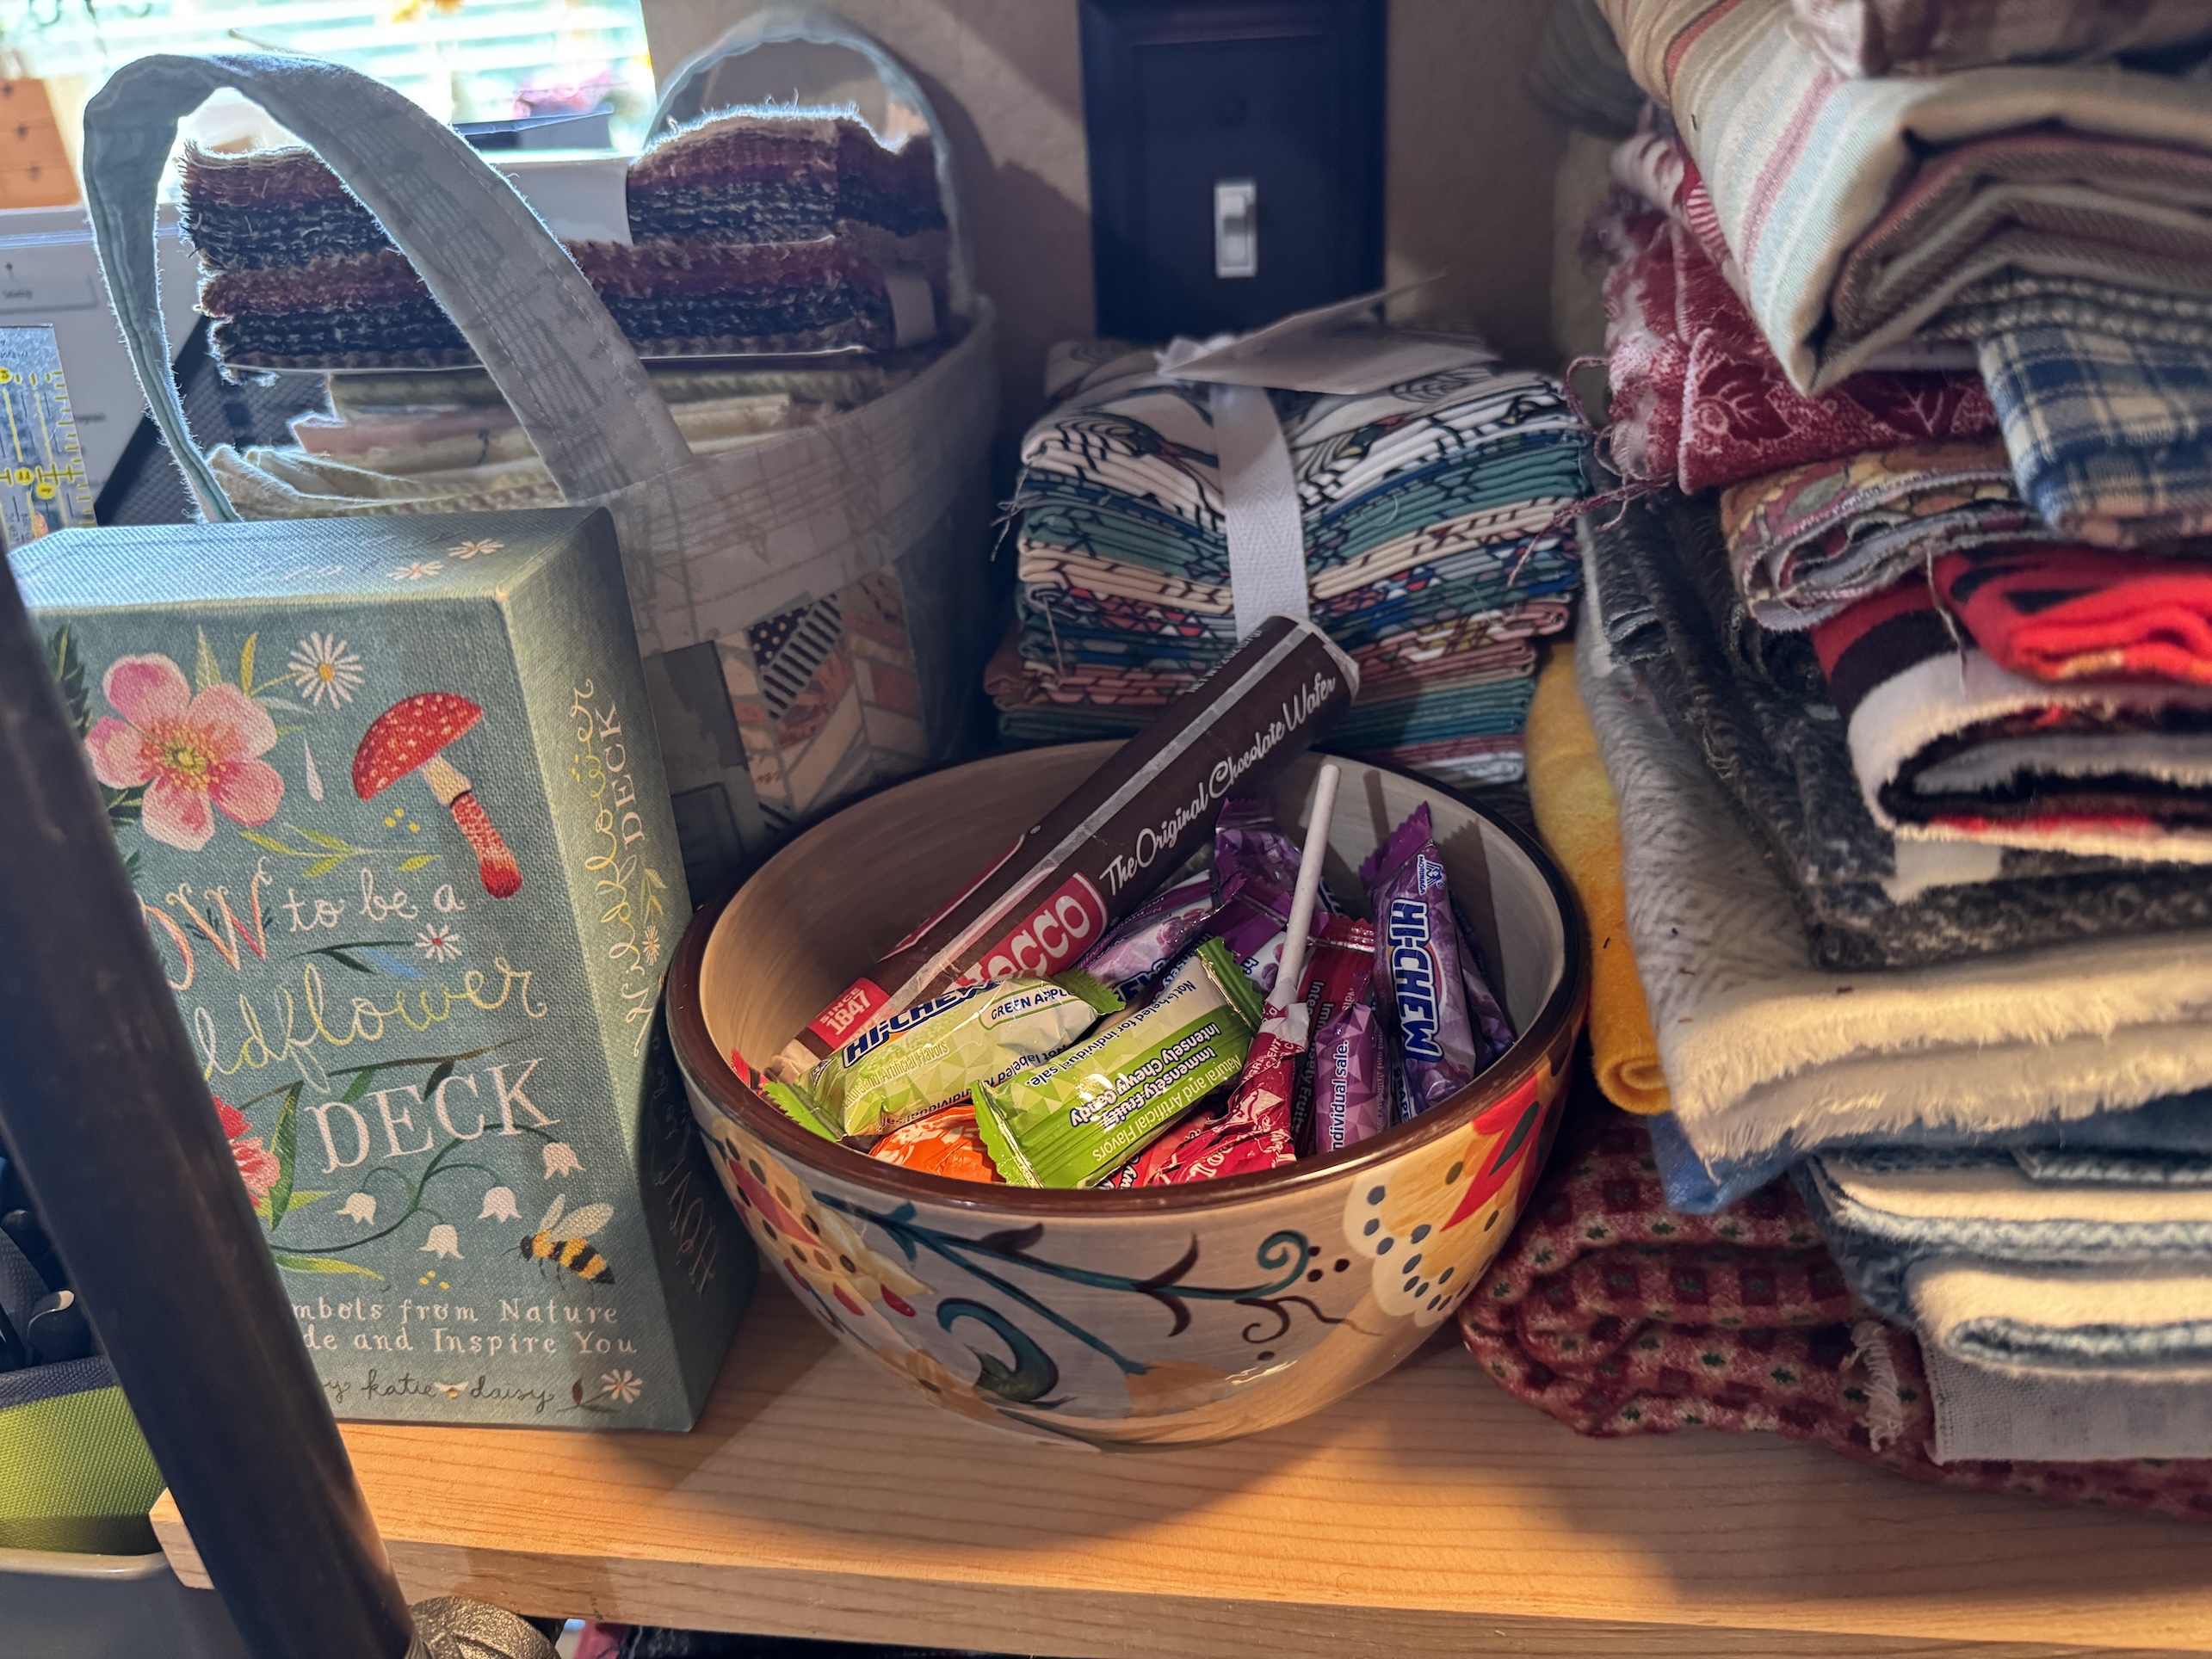
The shelving unit contains a very important item in my studio: the candy bowl which I found at a thrift store:
Occasionally you need a sweet treat while you are creating!
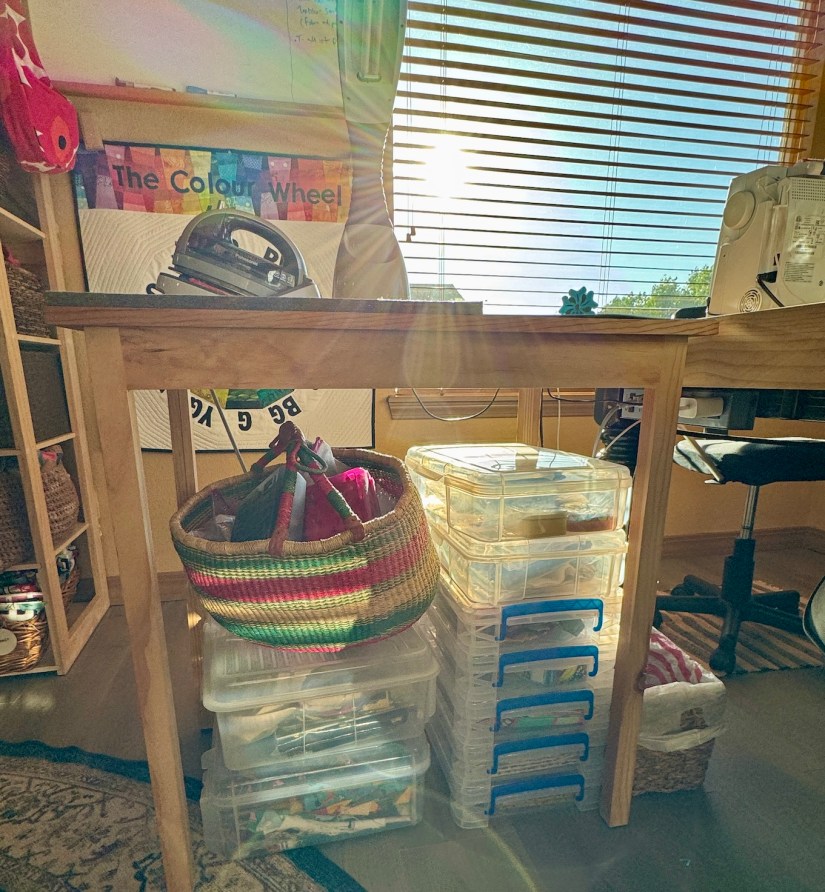
My sewing table was a free table I got from neighborhood online forum offering used items for free or for sale. John made a topper for it to expand the surface area and put openings in the table to run cords through.
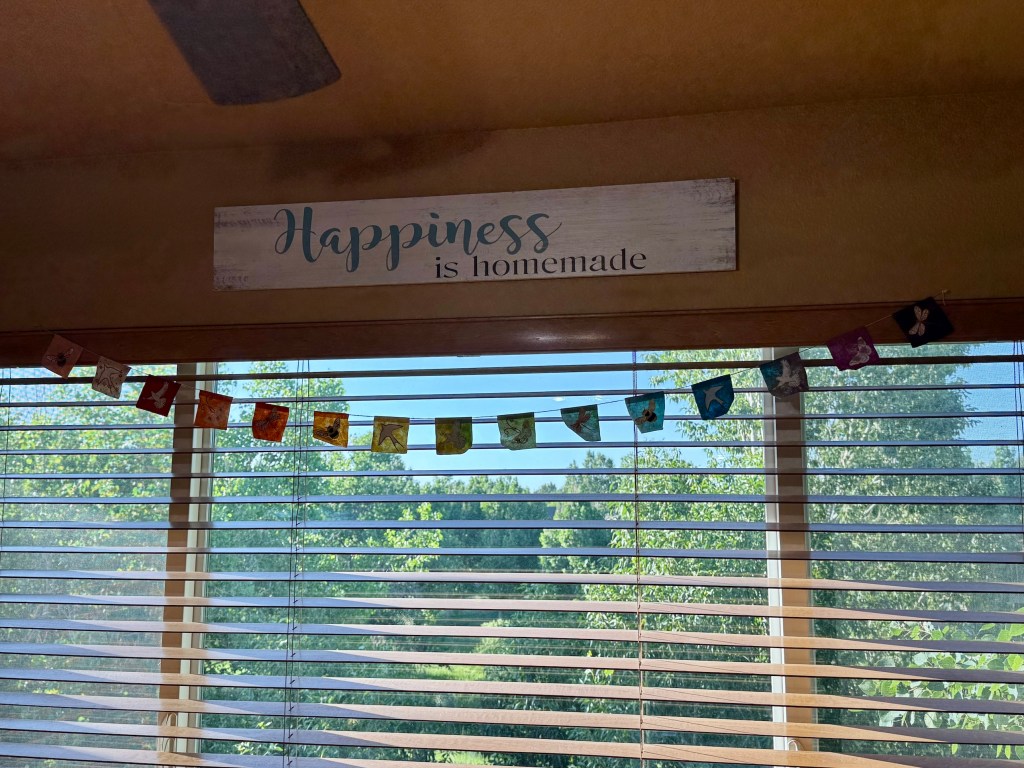
Above the table is the sign: “Happiness is homemade” that I found at a thrift store a couple years ago. It always makes me smile.
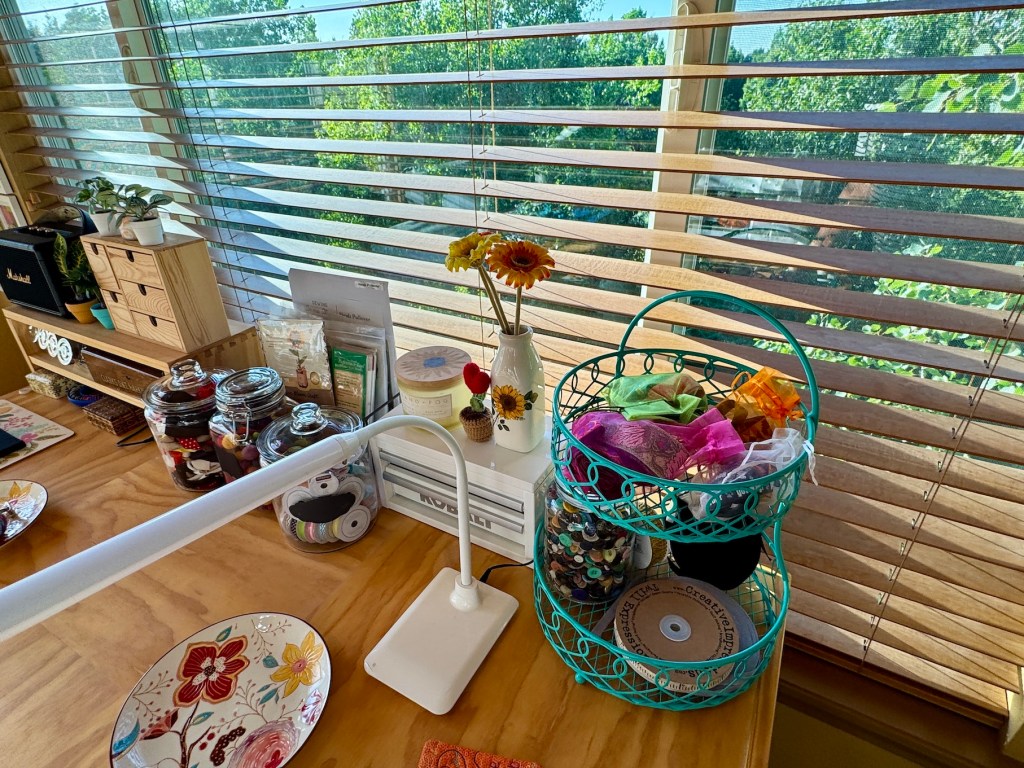
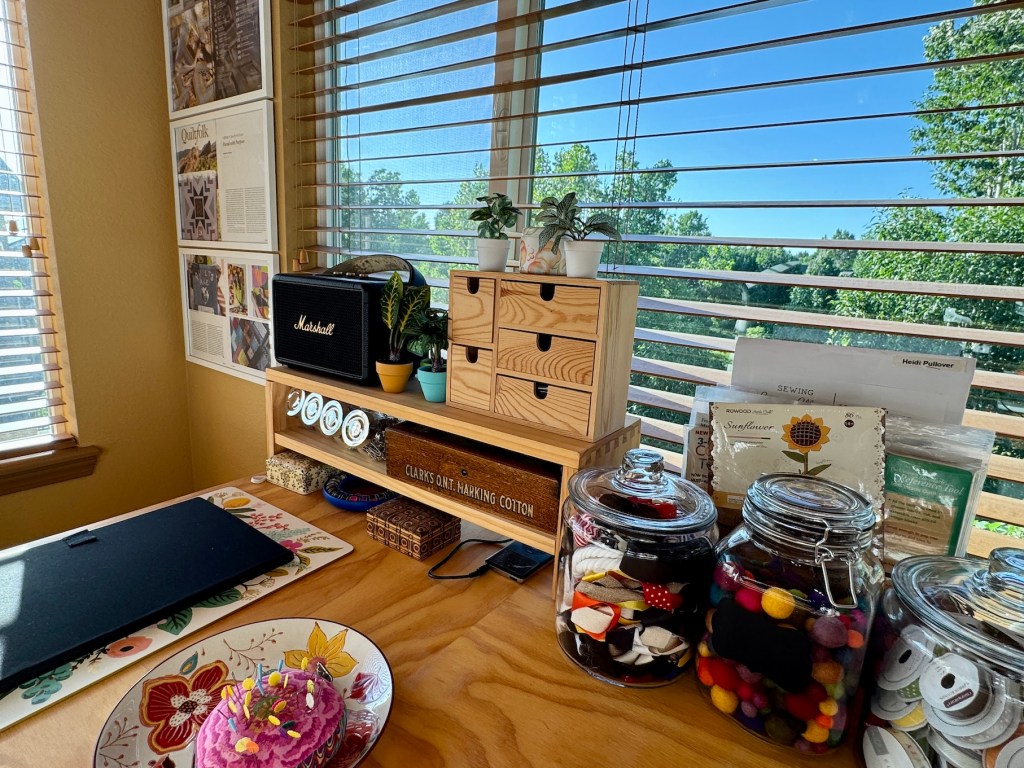
In addition to several of my sewing machines, I have various supplies, goodies, a radio and a bluetooth speaker for crafting music, on my sewing table;
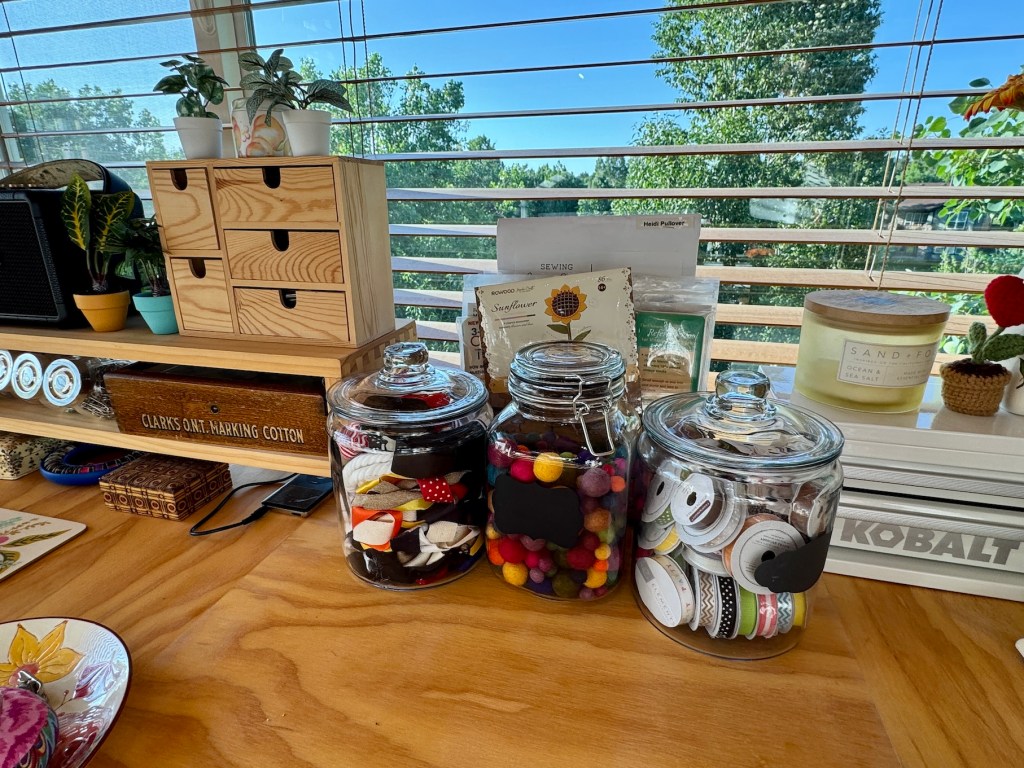
All the jars and containers on the desk as well as the decorative plates holding pincushions, etc. are thrifted. Many of the buttons in the jar of buttons and the little spools of ribbon in a jar are thrifted. The wooden sewing box that says “Clarks…Making Cotton” is from John’s beloved grandmother. I am honored to have it my sewing space and I store larger buttons in it.
John built a little extension table for my sewing table and under that table I store MORE containers with projects waiting to be made; and projects in a thrifted basket.
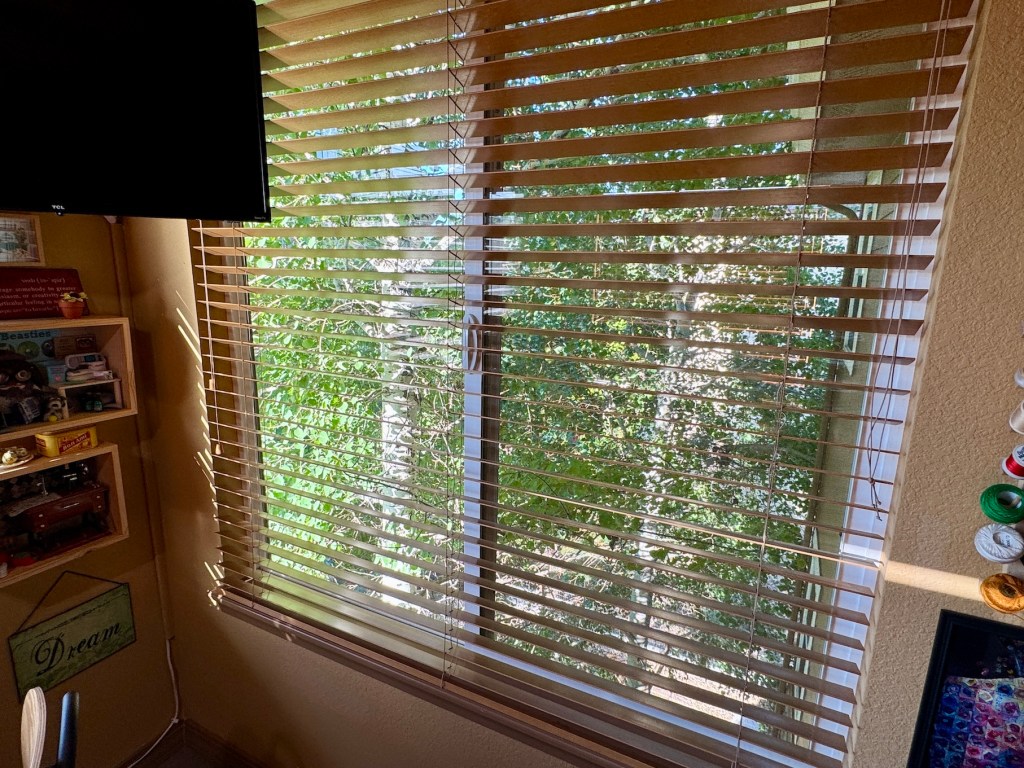
I love the view out my studio windows next to the sewing table. I am surrounded by Aspen trees and it feels like I am in a treehouse.
The little art flags that hang on the window were discovered for $1 all bunched up at a thrift shop. They appear to be images painted on colored kraft paper and using a low heat iron I was able to smooth all the little flags out and hang them at the window.
Above the windows on each side of the sewing table are shelves that John built filled with more thrifted baskets and various decorative boxes storing supplies and fabric scraps:
The area rug in the studio is a Ruggable washable rug that I found for $5 at a thrift store. These rugs retail for over $300! I laundered the rug and purchased the special rug pad for the rug from Ruggable so it would lay properly.
Do you see the exercise ball and thrifted basket to the left of the rug? In addition to a sewing studio, I also use this space as my morning stretching/yoga studio, layout out a yoga mat.
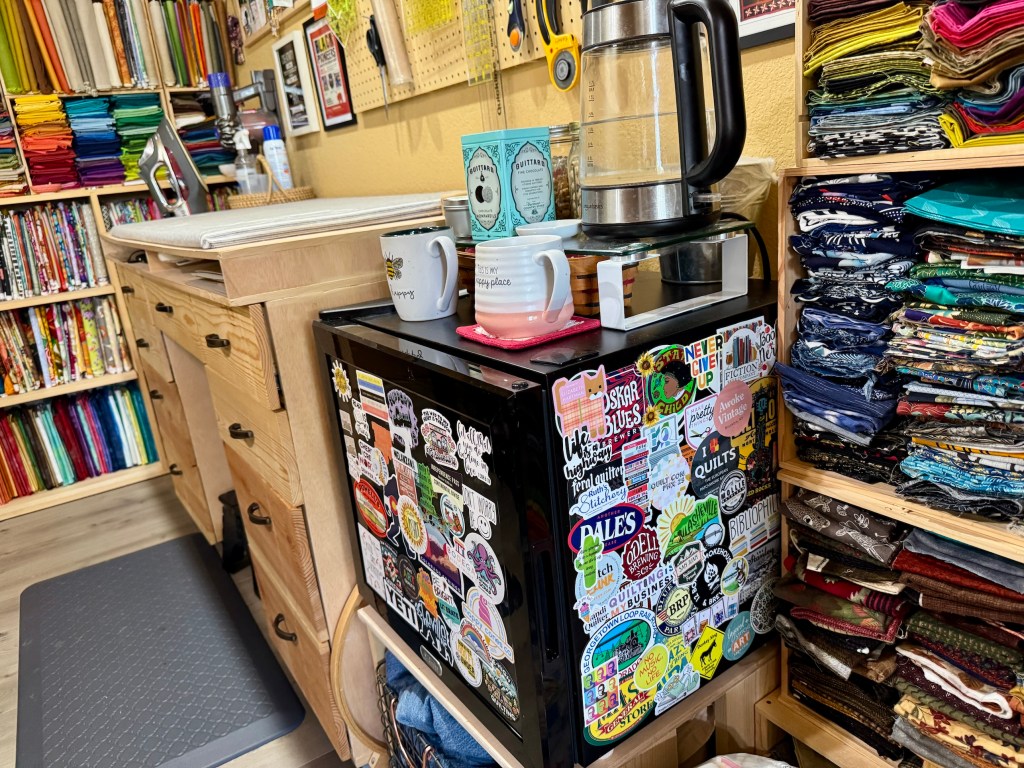
John gave me his old bar mini fridge (which I’ve liberally covered with stickers from my travels) and I added in a tea station to the top of it which includes thrifted containers and baskets for tea and biscuits; and thrifted mugs for tea:
Must have tea and biscuits while crafting!
Maybe I need more tea and biscuits as here is the design wall in my studio that John built which is EMPTY right now as I finish up sewing the binding down on the Pieces of Colorado quilt (see the post Quilt in Progress: “Pieces of Colorado” Update #2):
And finally, the tierneycreates Beastie (made by Helen @ Crawcraft Beasties) hangs out in my studio in her “apartment” box made by John.
The antique sewing machine music box in the “apartment” below was a thrift store find gifted to me by my stepson and his wife a couple years ago.
Thanks for stopping by for an updated studio tour and to see what I’ve collected from thrift shops for my studio!
Sending thanks out to those of you who’ve followed the journey of this quilt completion. A special thanks to Kate of Tall Tales From Chiconia who inspired me to work on this quilt as part of the monthly ScrapHappy online group she helps run (the blocks for my quilt are entirely of fabric scraps, many of them from other quilters).
If Kate hadn’t inspired me, the quilt might have continued to be an old UFO (unfinished object for the non-quilters) for endless years!
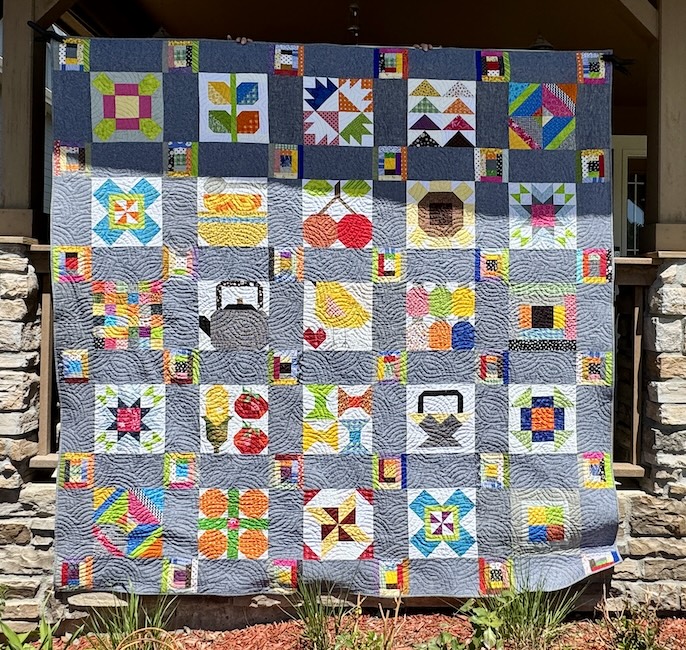
Quick story behind this quilt: I began working on blocks for this quilt at a quilt retreat back in 2017 (yes 8 years ago) when several of my quilting buddies were working on blocks from Lori Holt’s book Farm Girl Vintage. I am not into the “farm girl” aesthetic but the blocks looked so fun; and I was drawn into the fun and excitement my friends were having making the blocks.
But the blocks got put away to gather dust (because I didn’t know what I would do with such a quilt that didn’t fit into my more Bohemian decor aesthetic) until I did an audit a couple years ago of my UFOs and decided I should finish the quilt.
And now finally the quilt is done!
I hate binding quilts and decided to try out of new technique for binding the quilt per this YouTube video:
It worked and I ended up with nice crisp corners, which I’ve always struggled with:
The finished quilt measures approximately 96 by 97 inches (2.44 meters by 2.46 meters) and it was a bit unwieldy to try and photograph for this post. First I tried photographing it on my front porch draping it over the railing and photographing the front and back on the rail:
Then John got a long board of wood from his woodworking project pile along with a couple of woodworking clamps and clamped the quilt on. He held it above his head while I took photos.
Yes there is a shadow up top but I didn’t want to ask him to redo it in another location. This photo is good enough!
And here is a little section of the quilted back of the quilt with the Cortez Mill Flour sacks and disassembled recycled duvet cover:
So my future plan is to send a photo to the Cortez Flour Mill so they can see what I did with their flour sacks!
It’s the 15th of the month and time for my monthly “ScrapHappy” post as part of the ScrapHappy group I belong run by Kate and Gun. At the end of this post I have a link to the other blogs participating in this monthly event in case you’d like to check out their ScrapHappy posts.
Update on the Denim Quilt
For this month’s ScrapHappy post, I am updating you on my post Now Quilting the Denim Quilt! on beginning the quilting the denim quilt I pieced from denim scraps (recycled old jeans) and home decorating/upholstery fabric samples scraps.
I finished quilting the quilt using an “organic matchstick” pattern and two different threads.
I decided to put a “facing” on/”face” the quilt instead of adding a binding on the edges. If you are unfamiliar with the concept of “facing” a quilt, here is the handy YouTube video I used to remind myself on how to do a facing as it seems like years since I added one!
Here is the newly faced quilt on the ironing table in my studio getting a good press:
Here is the back of the quilt showing the thrifted cotton tablecloth I used as the backing:
And finally, here is the quilt (still needing the facing edges sewn down) nearly completed:
Thanks to my friend Rick G. on photographing this quilt using his equipment.
So what name did I finally decide on for the quilt and what is my Artist Statement? The answer is below:
What Direction Do I Go?
54 inches by 53 inches
In my early 50s the direction of my life radically changed with the sudden passing of my husband who’d been part of my life since I was 20 years old. Part of my identity and all the direction of my life evaporated and I was left with the following life question: What Direction Do I Go? Made entirely with recycled fabrics including the batting, this quilt reflects my struggle to find a new direction.
I decided to stick with my original concept for the quilt that I discussed in an earlier post when I was piecing this quilt.
Here are the other bloggers that participate in the ScrapHappy monthly posting event, check out their blogs linked below for their ScrapHappy posts:
It’s the 15th of the month and time for my monthly “ScrapHappy” post as part of the ScrapHappy group I belong run by Kate and Gun. At the end of this post I have a link to the other blogs participating in this monthly event in case you’d like to check out their ScrapHappy posts.
The 15th of the month came around quicker than anticipated and I already blogged about the 22nd block I made for the very scrappy Farm Girl Vintage quilt I am working on September 26 (see post I Sewed Something!) so I couldn’t use that for my October ScrapHappy post, sigh.
So instead I will discuss my series of art quilts made from scraps of recycled denim, clothing and home decorating fabrics – Recycled Hope; and update on you that latest quilt I am working on in that series.
The Recycled Hope Series
Recycled Hope an ongoing series of improvisational art quilts using recycled materials to include denim as the primary fabric on many of the pieces, combined with other recycled materials.
“Hope” and the interpretation of the word “hope” is the primary theme of infused into these pieces. Most of the fabrics were not reusable as clothing or home decor and were destined to end up in a landfill. Reimagining recycled clothing and other materials into art quilts satisfies my hopeful desire to honor the environment and make art that is eco-conscious. Ending up in an art quilt is a better outcome than ending up in a landfill.
My first quilt in the series, Recycled Road, was made for annual art quilt show for the local SAQA (Studio Art Quilt Associates) group I belonged while living in Central Oregon:
This quilt was made using my late husband’s clothing that he no longer wanted, several recycled jeans, a little recycled scrap home decor fabric and this awful pair of orange corduroy pants someone gave me to use in an art quilt. The pants were too hideous to donate to be work as clothing but worked in a quilt! The quilt measures 18 inches by 40 inches which was the required dimensions for the art show which was titled “Pathways”.
I no longer own this quilt, it was purchased by a friend who wanted to support my art.
The second quilt I made in the series was also for an annual art quilt show for the local SAQA (Studio Art Quilt Associates) group I belonged while living in Central Oregon and titled Recycled Door:
This quilt is composed of recycled denim, recycled home decor fabric, and a little of those awful orange corduroy pants (I got a lot of use out of those pants, fabric wise). It also measures 18 inches by 40 inches which was the required dimensions for the art show which was titled “Doors”. This quilt was purchased by a private collector.
The third quilt in the series was also for an annual art quilt show for the local SAQA (Studio Art Quilt Associates) group I belonged while living in Central Oregon and titled Recycled Love:
Made from recycled jeans and home decor fabric, the Artist Statement for this quilt is as follows:
The first law of thermodynamics states that the total amount of energy in a system cannot be created nor destroyed, it can only be changed from one form to another.A quilt is made from changing the existing “love energy” from the quilt maker’s heart into a pieced textile; ultimately recycling that love energy into the quilt’s recipient heart.
It also measures 18 inches by 40 inches which was the required dimensions for the art show which was titled “The Threads That Bind”.
I have this quilt hung in my hallway next to my studio to remind me that “Quilts are Love”.
Here are the rest of the quilts in this series which were not created for a specific show.
Recycled Windows of Conversation:
This quilt measures 55” W x 59” L; and is made from recycled jeans, various recycled clothing, and recycled home decor fabric. It was the largest recycled denim quilt i’d made to date.
It was purchased by an art dealer on behalf of their client, and it now sits in the common area of an upscale apartment complex in downtown Seattle, Washington (see post Oh So That’s What Happened to It!).
Recycled Windows:
This quilt measures 18” W x 39″ L, and is made from recycled clothing, recycled denim, and recycled home decorating fabric. It was juried into the New Mexico ArtsArt in Public Places Program but was not selected by any of their public buildings for purchase. So it hangs in my bedroom and I enjoy looking at it everyday!
Recycled Business Casual:
Somewhere in this series of quilts I made this quilt from recycled jeans, recycled wool blankets and menswear wool suiting scraps (this is where I got the name “Recycled Business Casual“. It was more of an experiment than an actual art quilt but it did show along with many of the other quilts shown above in my first solo show: The Wardrobe Meets the Wall in April 2019 at the Seattle Municipal Tower in Downtown Seattle, Washington.
Current Project Update
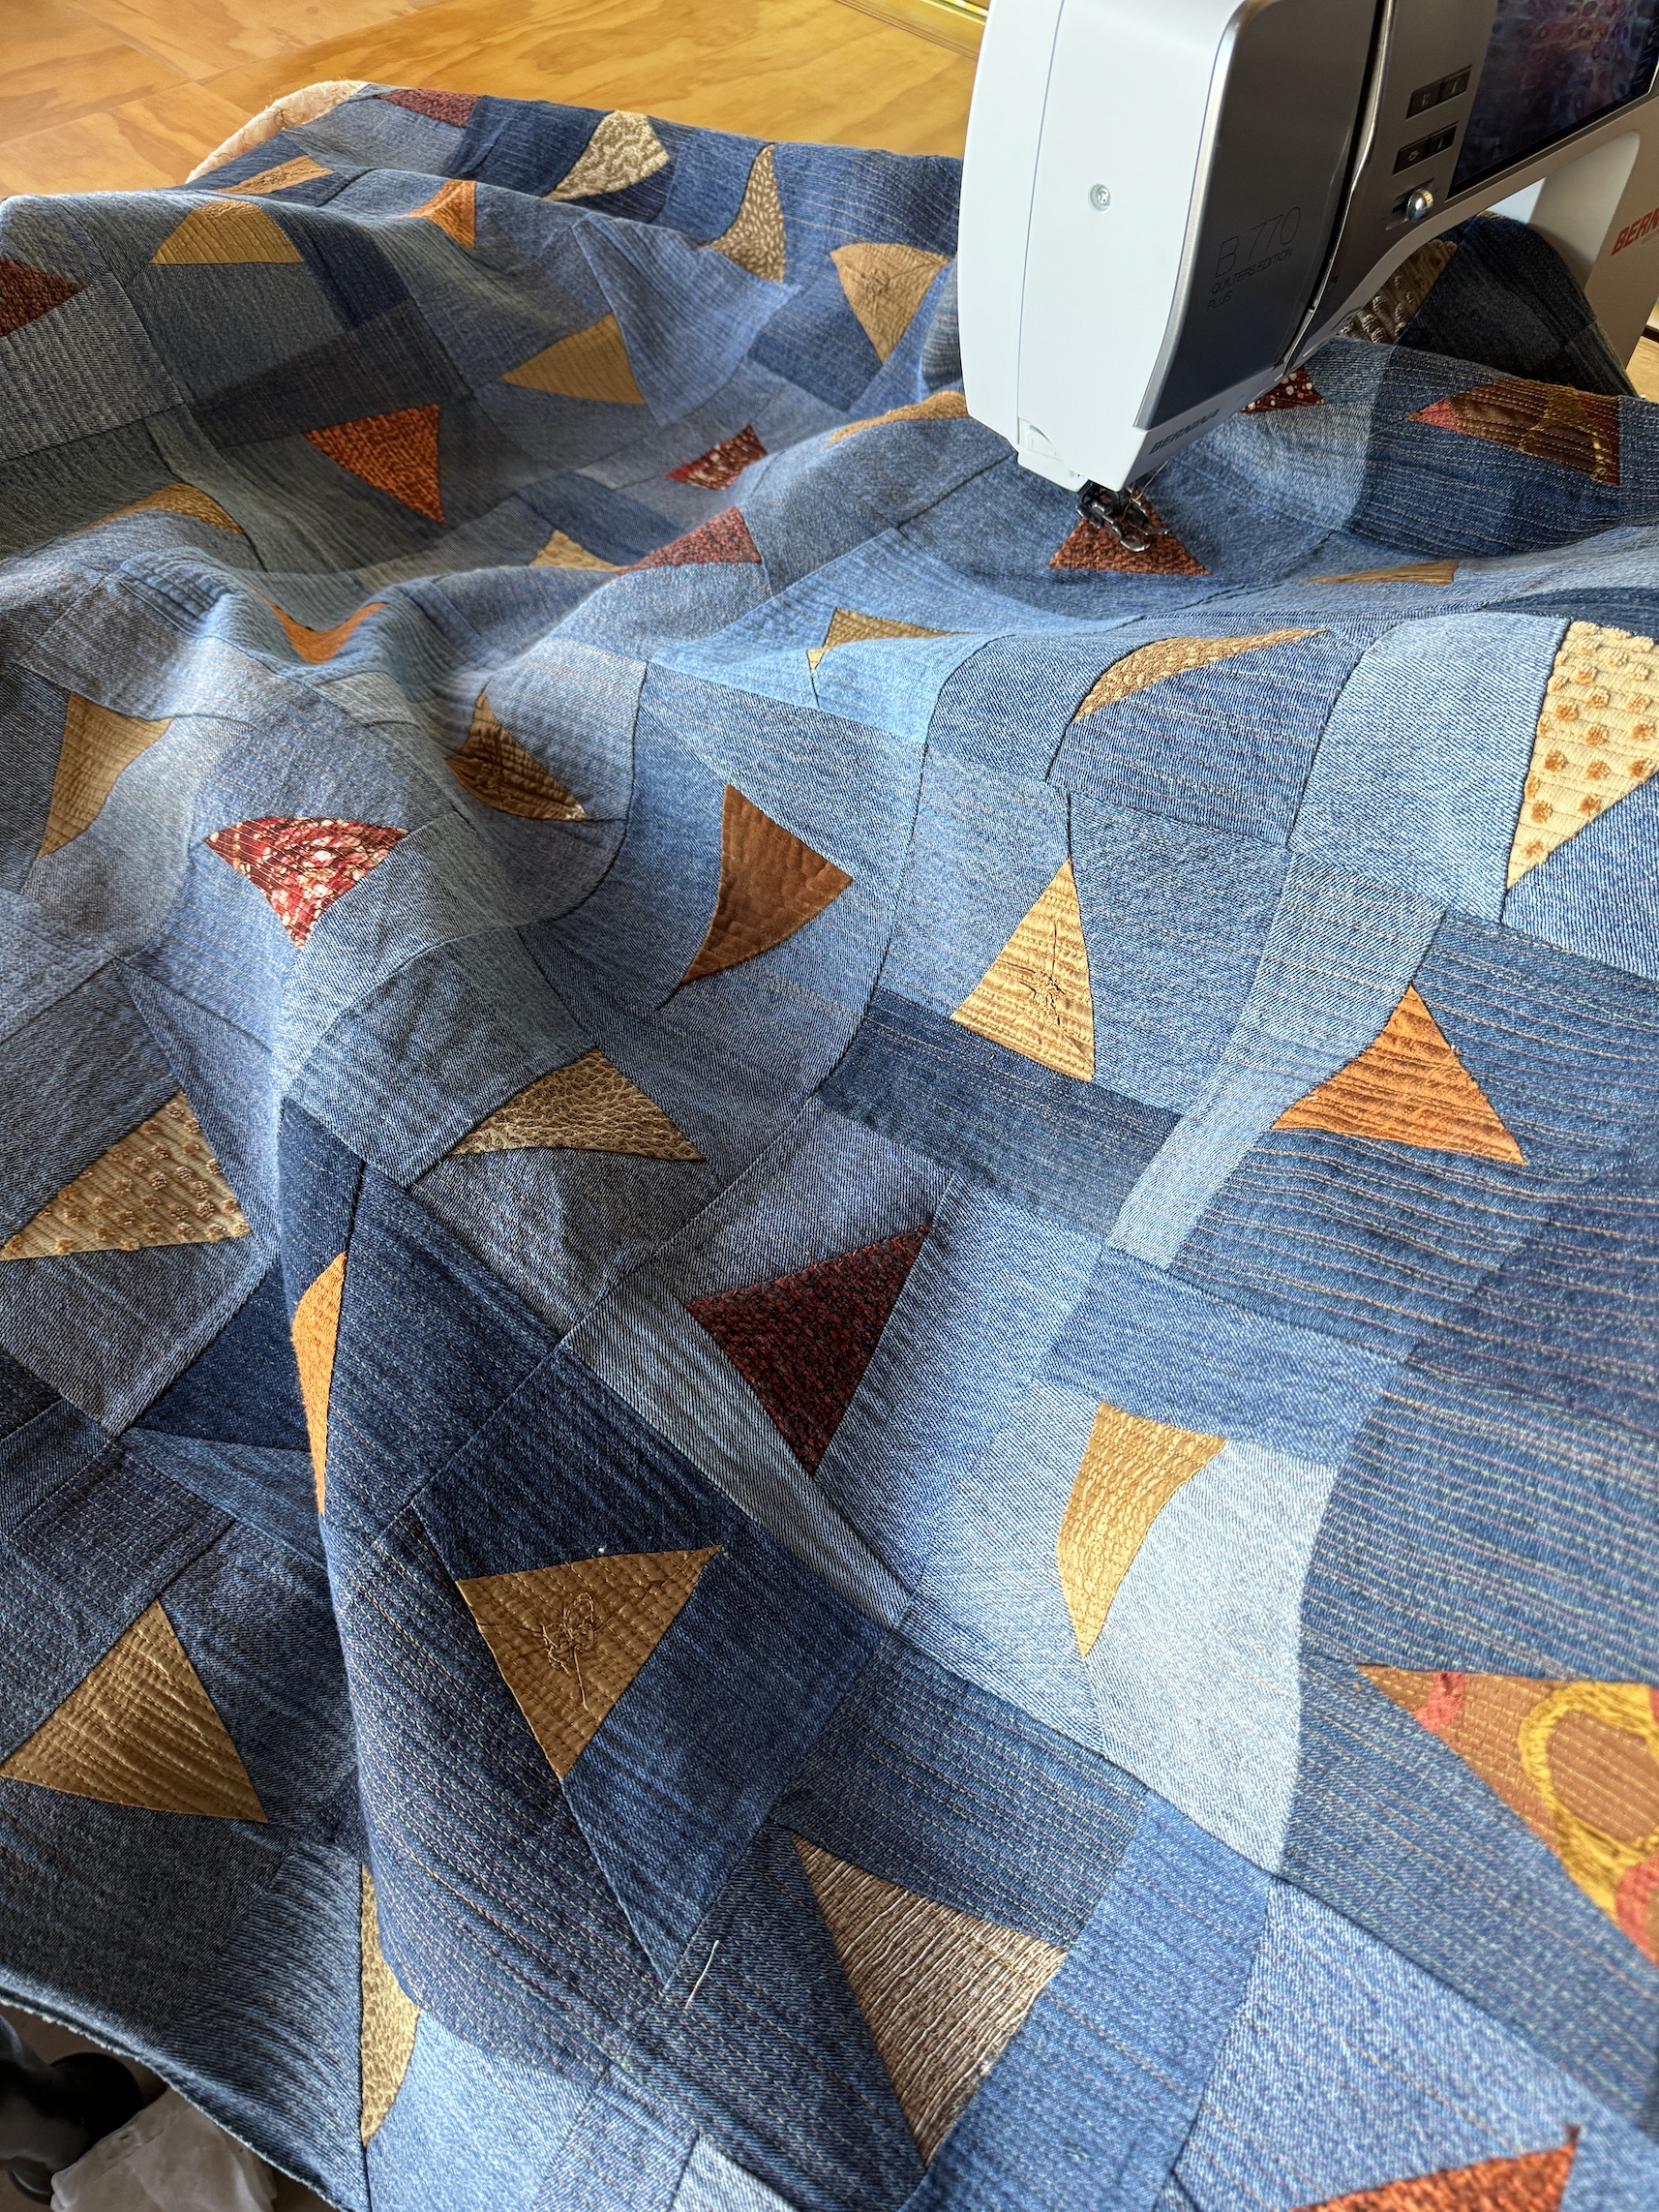
And finally let’s get to my current project in progress to add to the Recycled Hope series – a denim quilt made with lots of recycled jeans and recycled home decor fabric scraps:
The tentative name for this quilt is “What Direction Do I Go?” but I am rethinking the name as my head is in a different space now than when I first started the quilt in October 2023 (What’s on the Design Wall: An “Upcycled” Work).
I have it back up on the design wall and it is set up for quilting with the backing and batting attached.
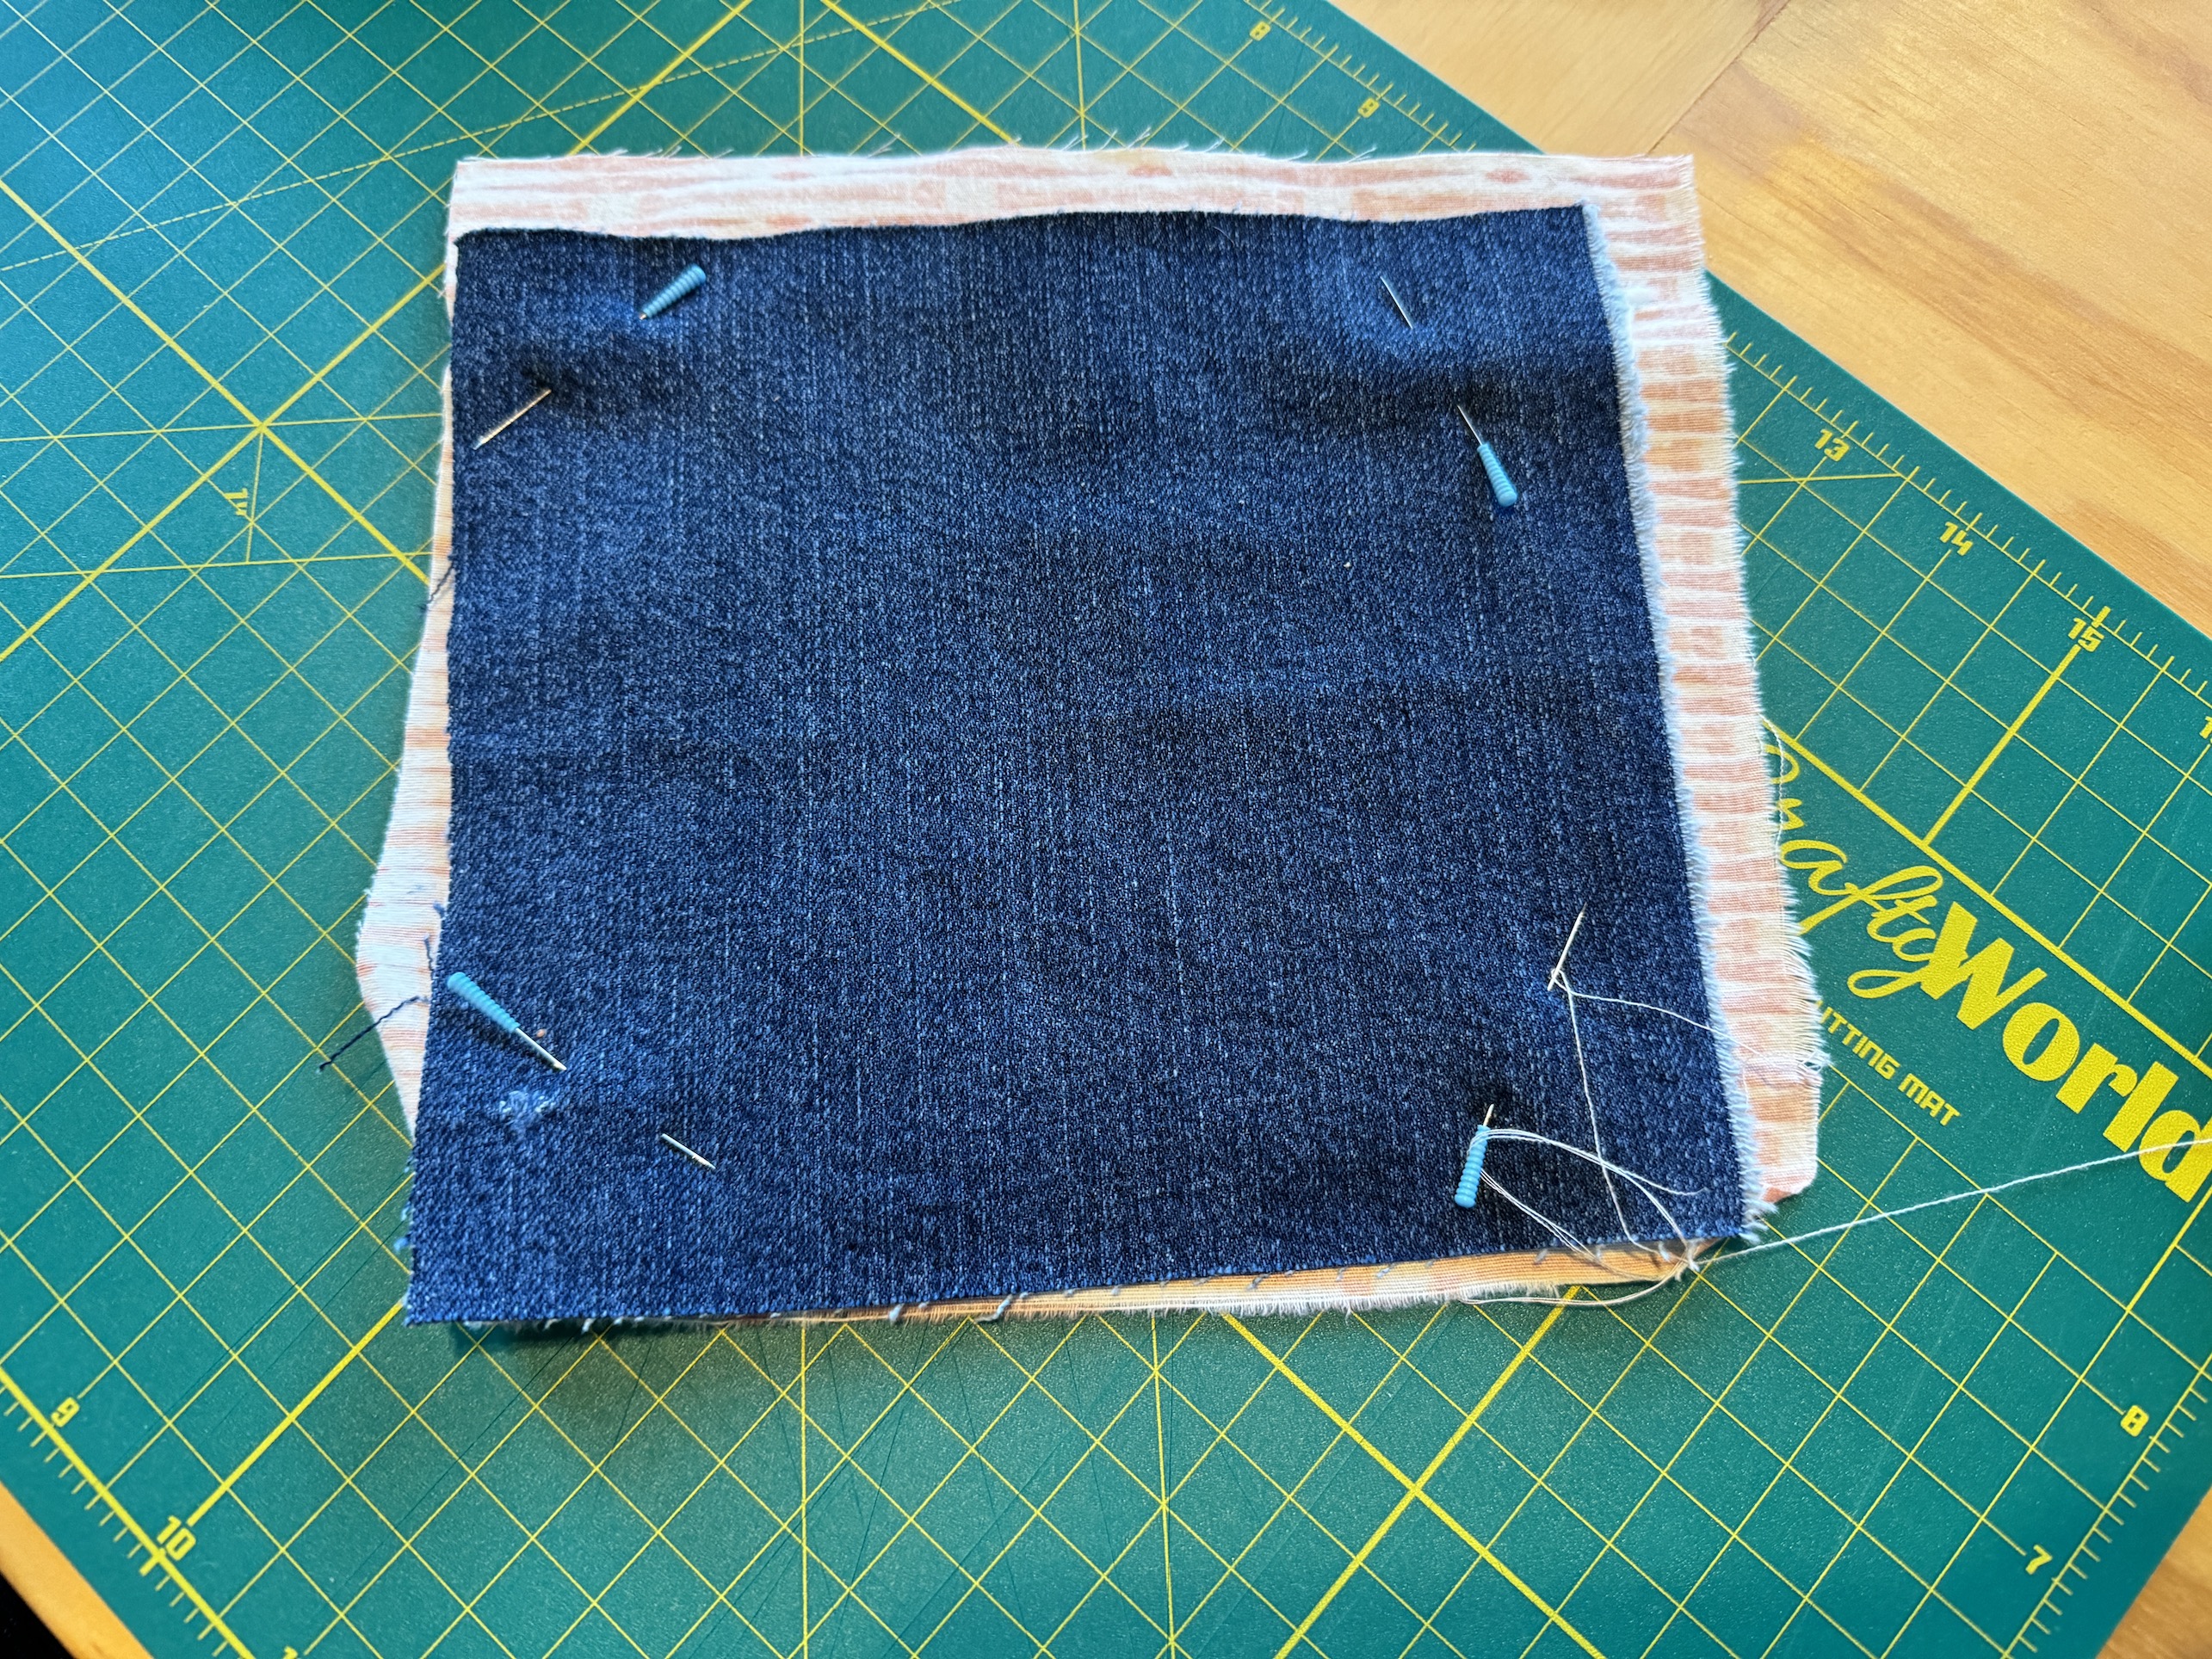
I am working out what quilting design I want to use. I created a sample square of scrap denim, backing and batting to try out some designs:
I am really looking forward to completing this quilt and I have a place on my living room to upstairs stairway reserved to hang this approximately 55 inches by 55 inches quilt.
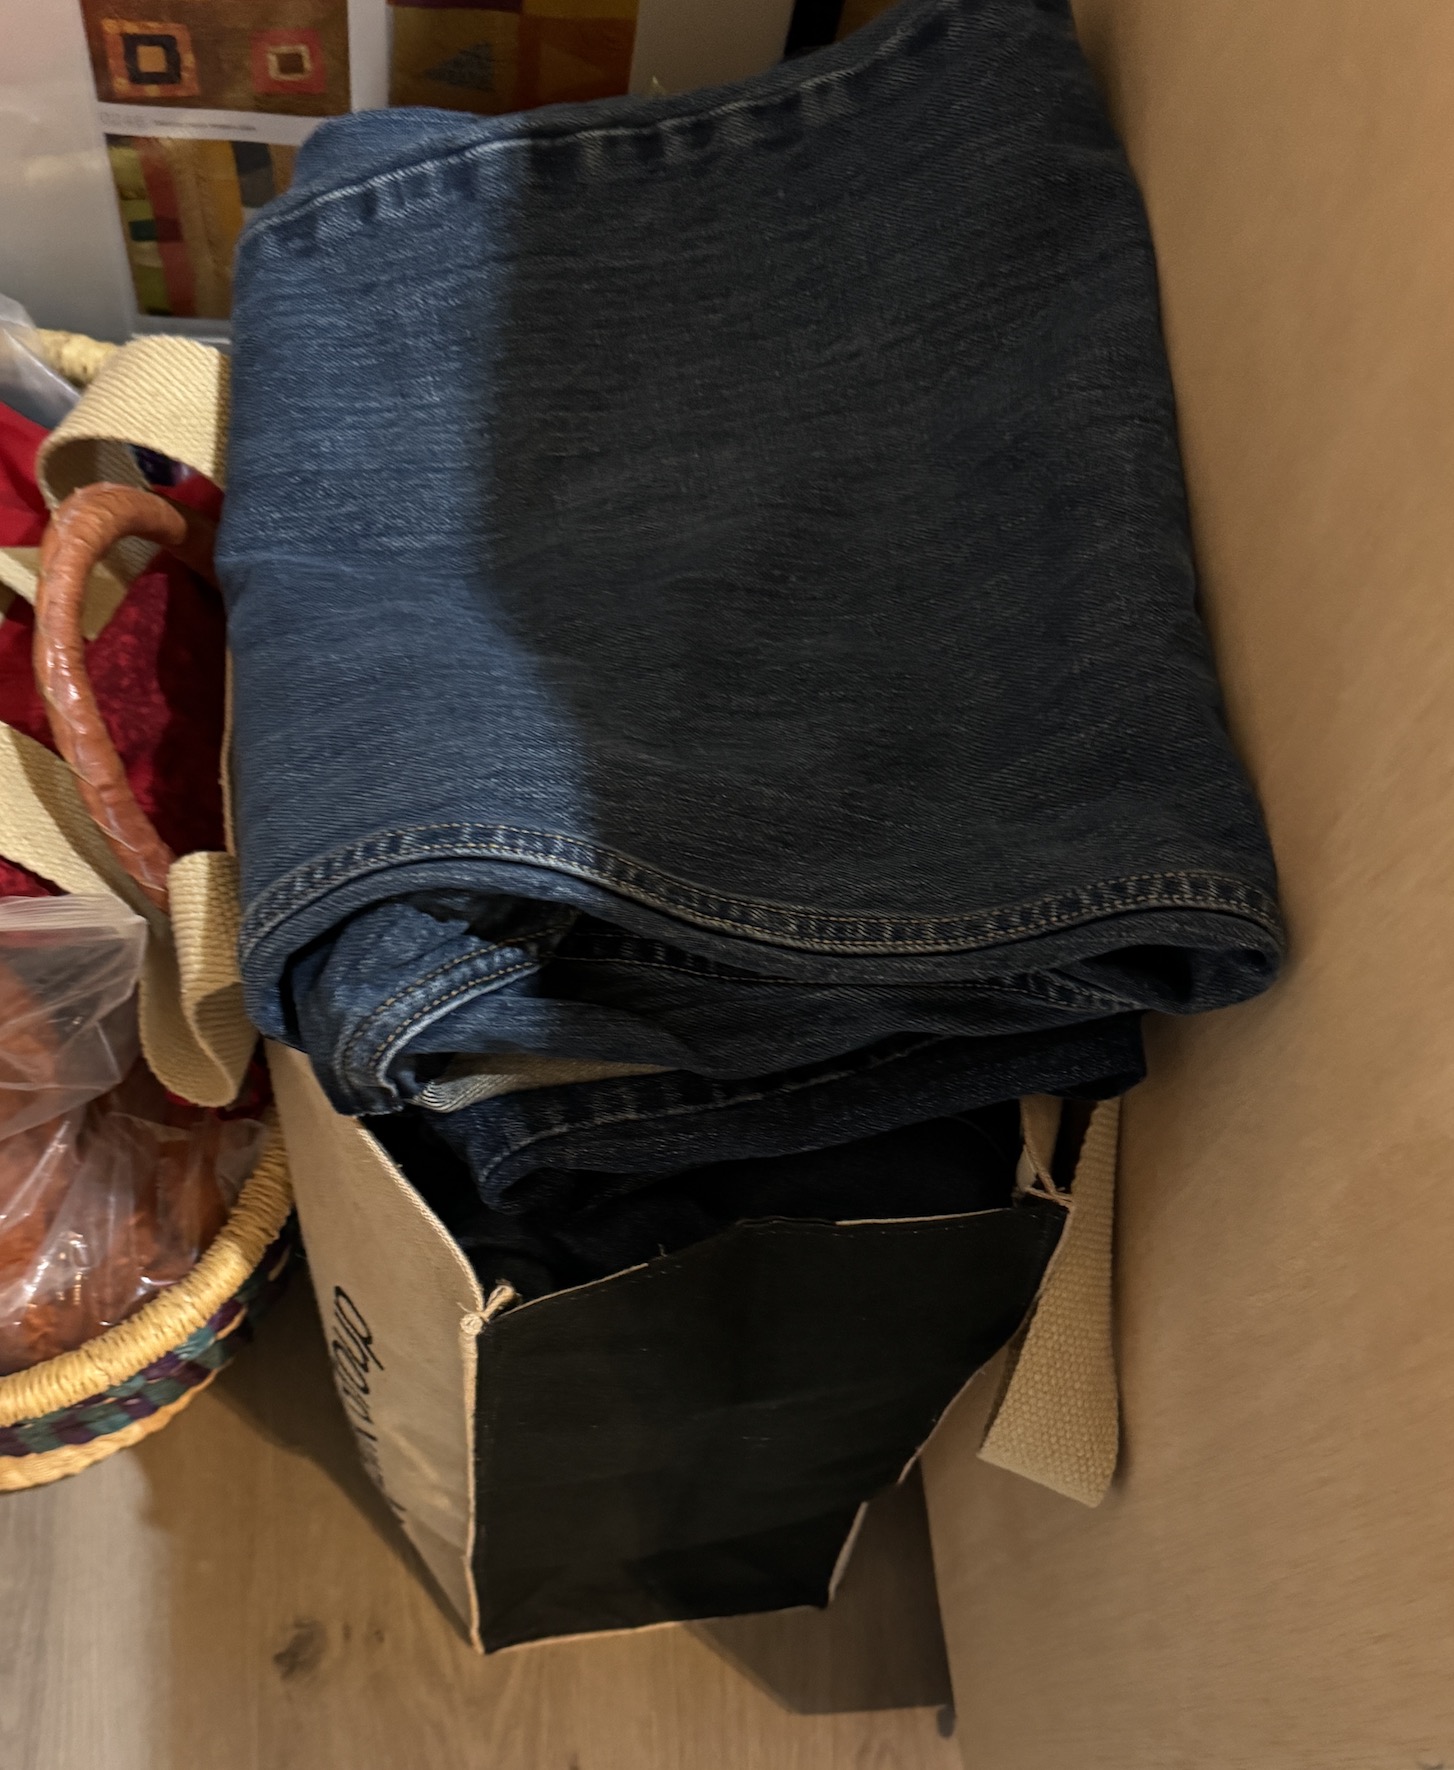
After I finish this quilt, there will likely be more recycled denim quilts in the future as I have a nice stash of recycled jeans in my studio:
Earlier this year a local charity thrift shop had an “All Jeans $2” sale and I stocked up!
Here are the other bloggers that participate in the ScrapHappy monthly posting event, check out their blogs linked below for their ScrapHappy posts:
I am plugging along with this great-to-work-on-while-watching-TV in the evening project. I’m working on attaching the 7th row of blocks. It will be an 8 by 10 blanket when done as I made 80 granny squares. I will add an extra border or two of the same yarn I am using as the lattice (to attach the granny squares).
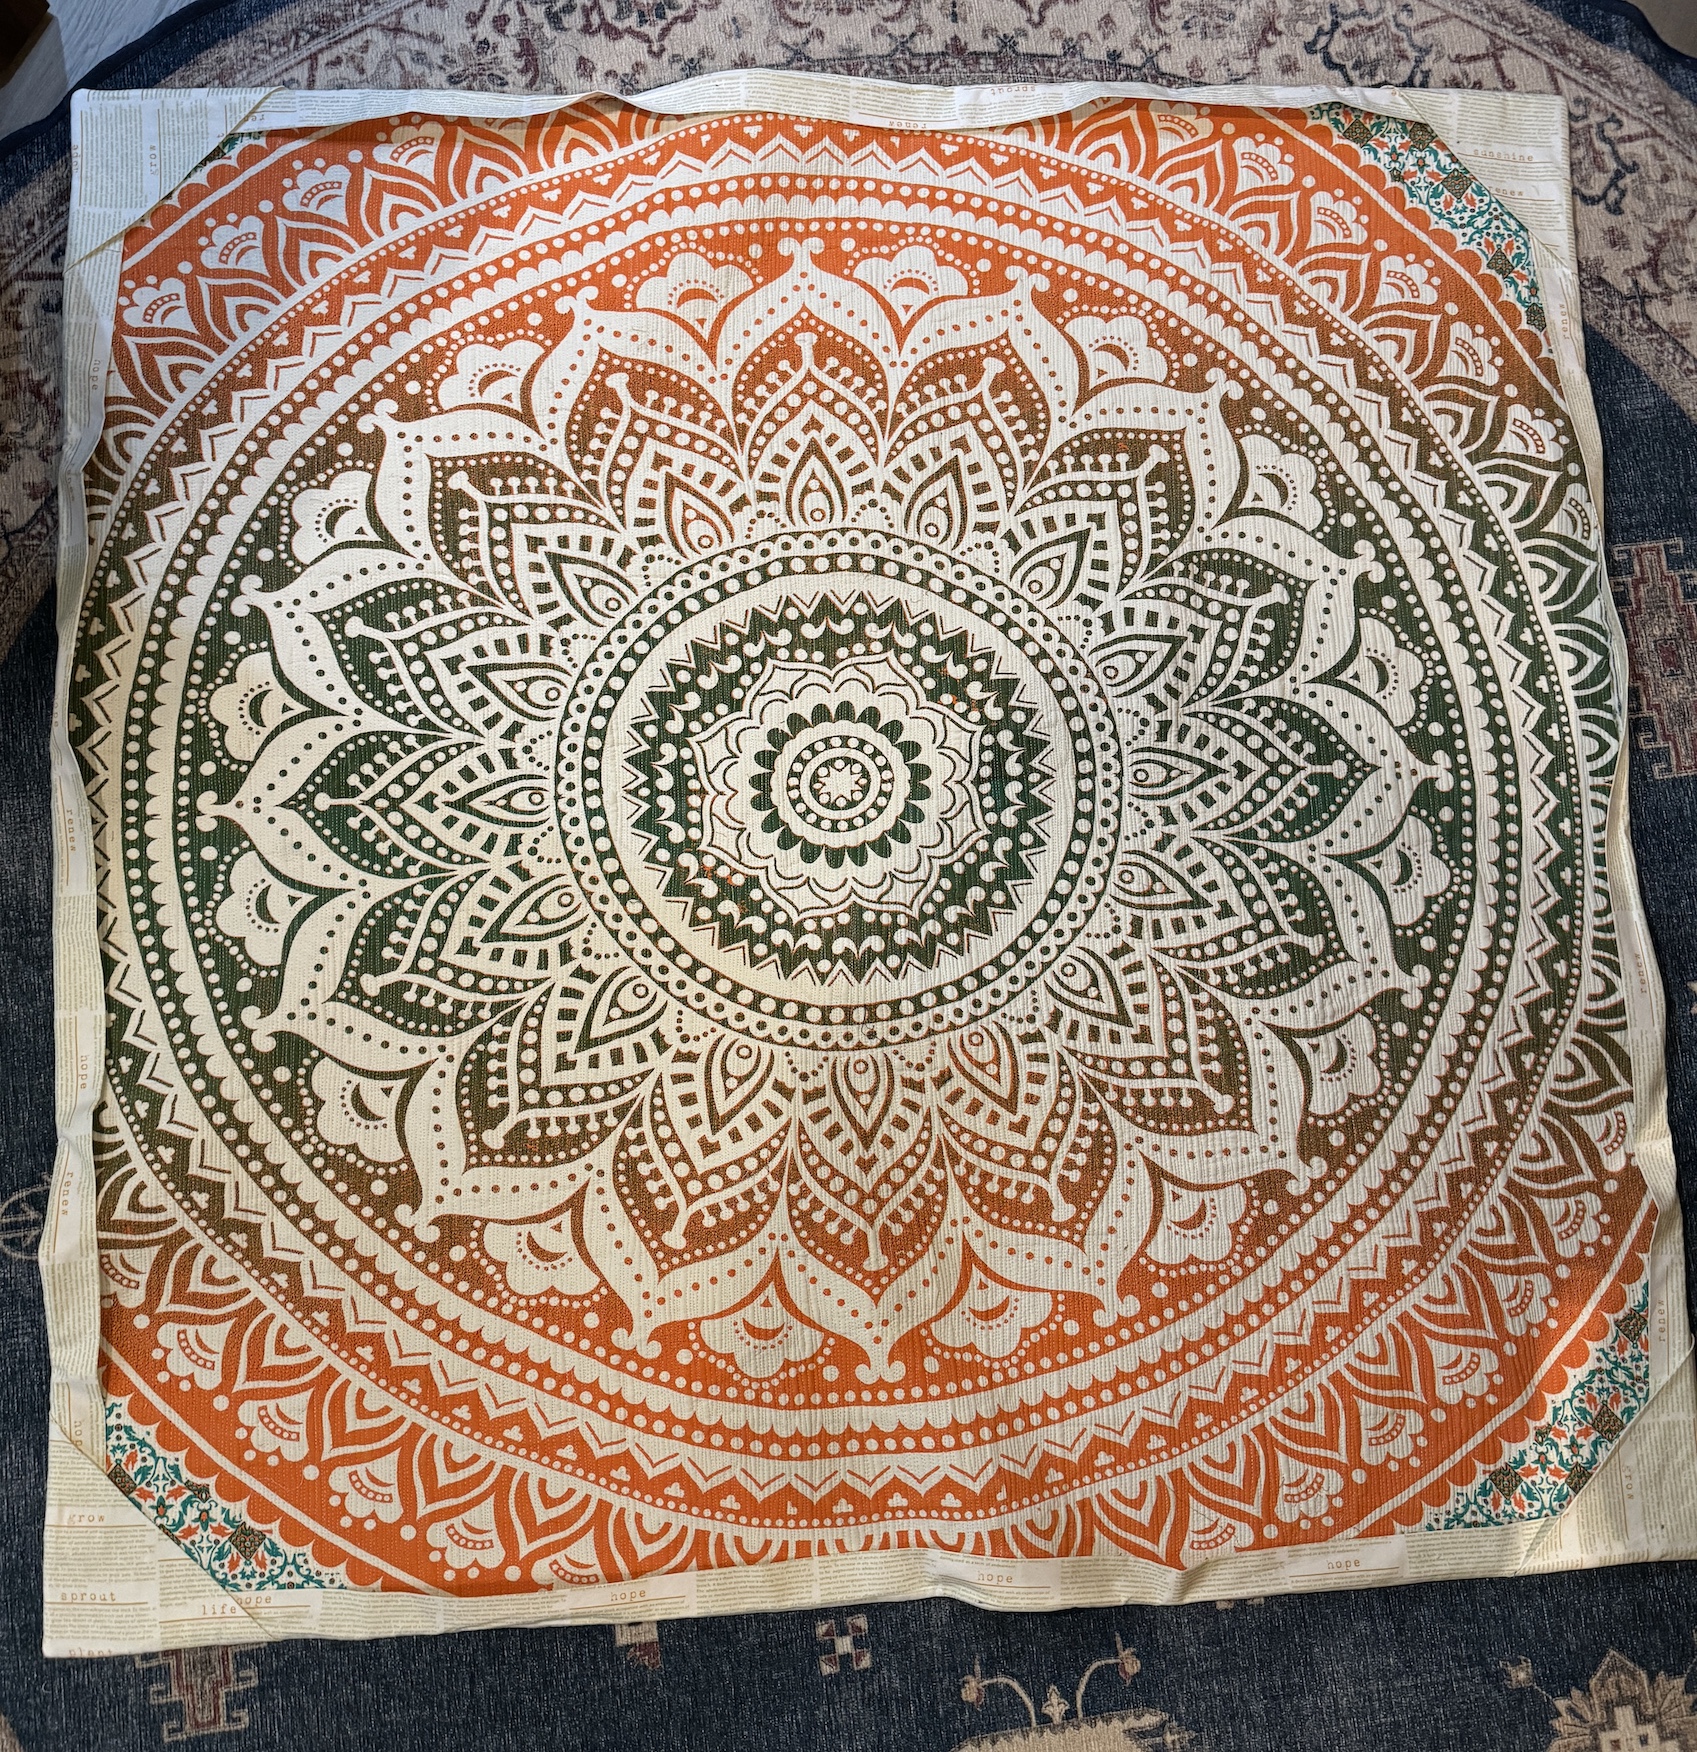
As I mentioned in that previous post, I decided to use a collection of traditionally pieced “orphan blocks” that my friend Wendy gave me as the backing for this table runner.
I figured that if I got a stain on the front of the runner while entertaining, I could flip it over and use the other side!
I’ve completed the machine quilting of the table runner and just need to sew the binding strips together, sew on the binding, and sew down the binding.
For the quilting I just went with a simple double crosshatch pattern (no that is not a real pattern name, I just made it up on the spot), following the lines of the pieced blocks.
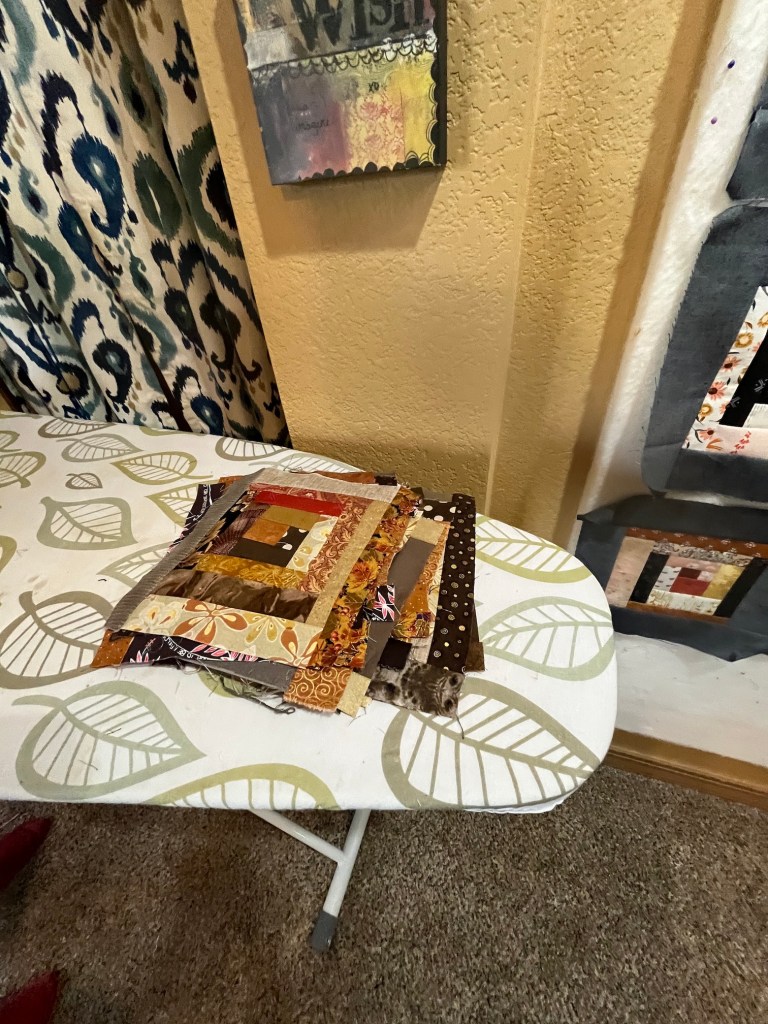
I plan to press it, ha! It just came off the machine and I just finished trimming off the excess batting and backing so it is pretty wrinkly!
I am so looking forward to hand quilting this quilt (yes I decided to hand quilt it)!
I got the batting and backing put together with the quilt top to make the “quilt sandwich”. I’ve also auditioned some threads (I plan to use multiple and to use pearl cotton weight) for the hand quilting.
Other WIPs Growing Inpatient As They Sit in Queue…
I have two more quilt tops awaiting quilting by me:
I haven’t decided on machine vs. hand quilting but if I do hand quilt it I have some cool threads I collected many years ago I want to use.
I will get to these two quilt tops eventually – ha!
I’ve been trying not to start any additional MAJOR projects before finishing my existing WIPs…but then some small projects might sneak in…you know how us crafters are!
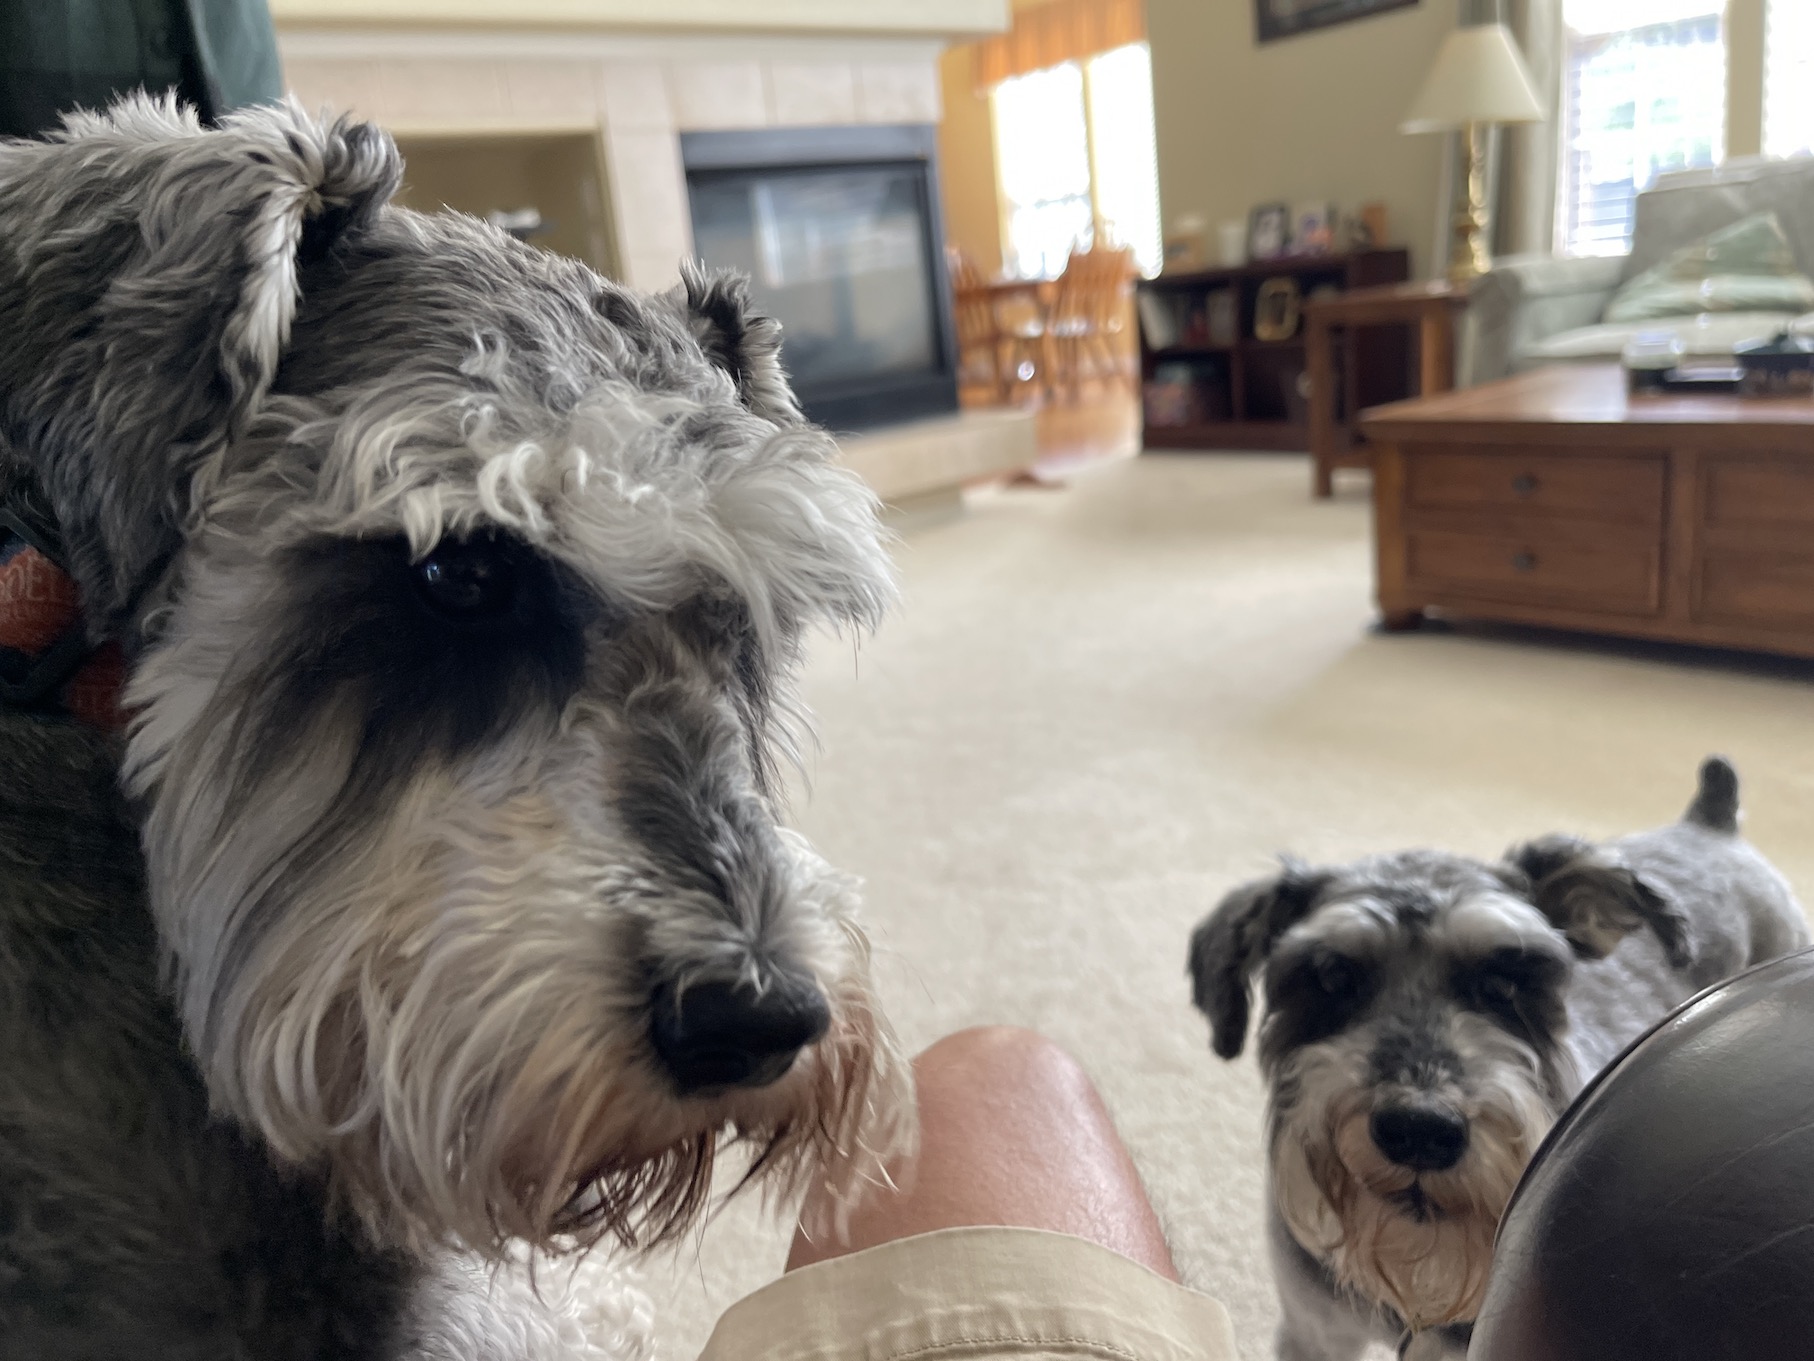
Oh Mike wants me to tell you that he’s happy he doesn’t have to fill in for me with blogging since I seem to be back at it again (see his recent post Guest Blog Post: Humans Traveling and Dog Camp).
This leaves him more time for napping in the sun, on fleece blankets, in the upstairs bedroom (with the occasional waking up to intensely bark at people walking by and delivery trucks coming into the neighborhood).
It’s the 15th of the month and time for my monthly “ScrapHappy” post as part of the ScrapHappy group I belong. At the end of this post I have a link to the other blogs participating in this monthly event in case you’d like to check out their ScrapHappy posts.
For this month’s ScrapHappy post I thought I would honor a legendary scrap quilt and it’s maker.
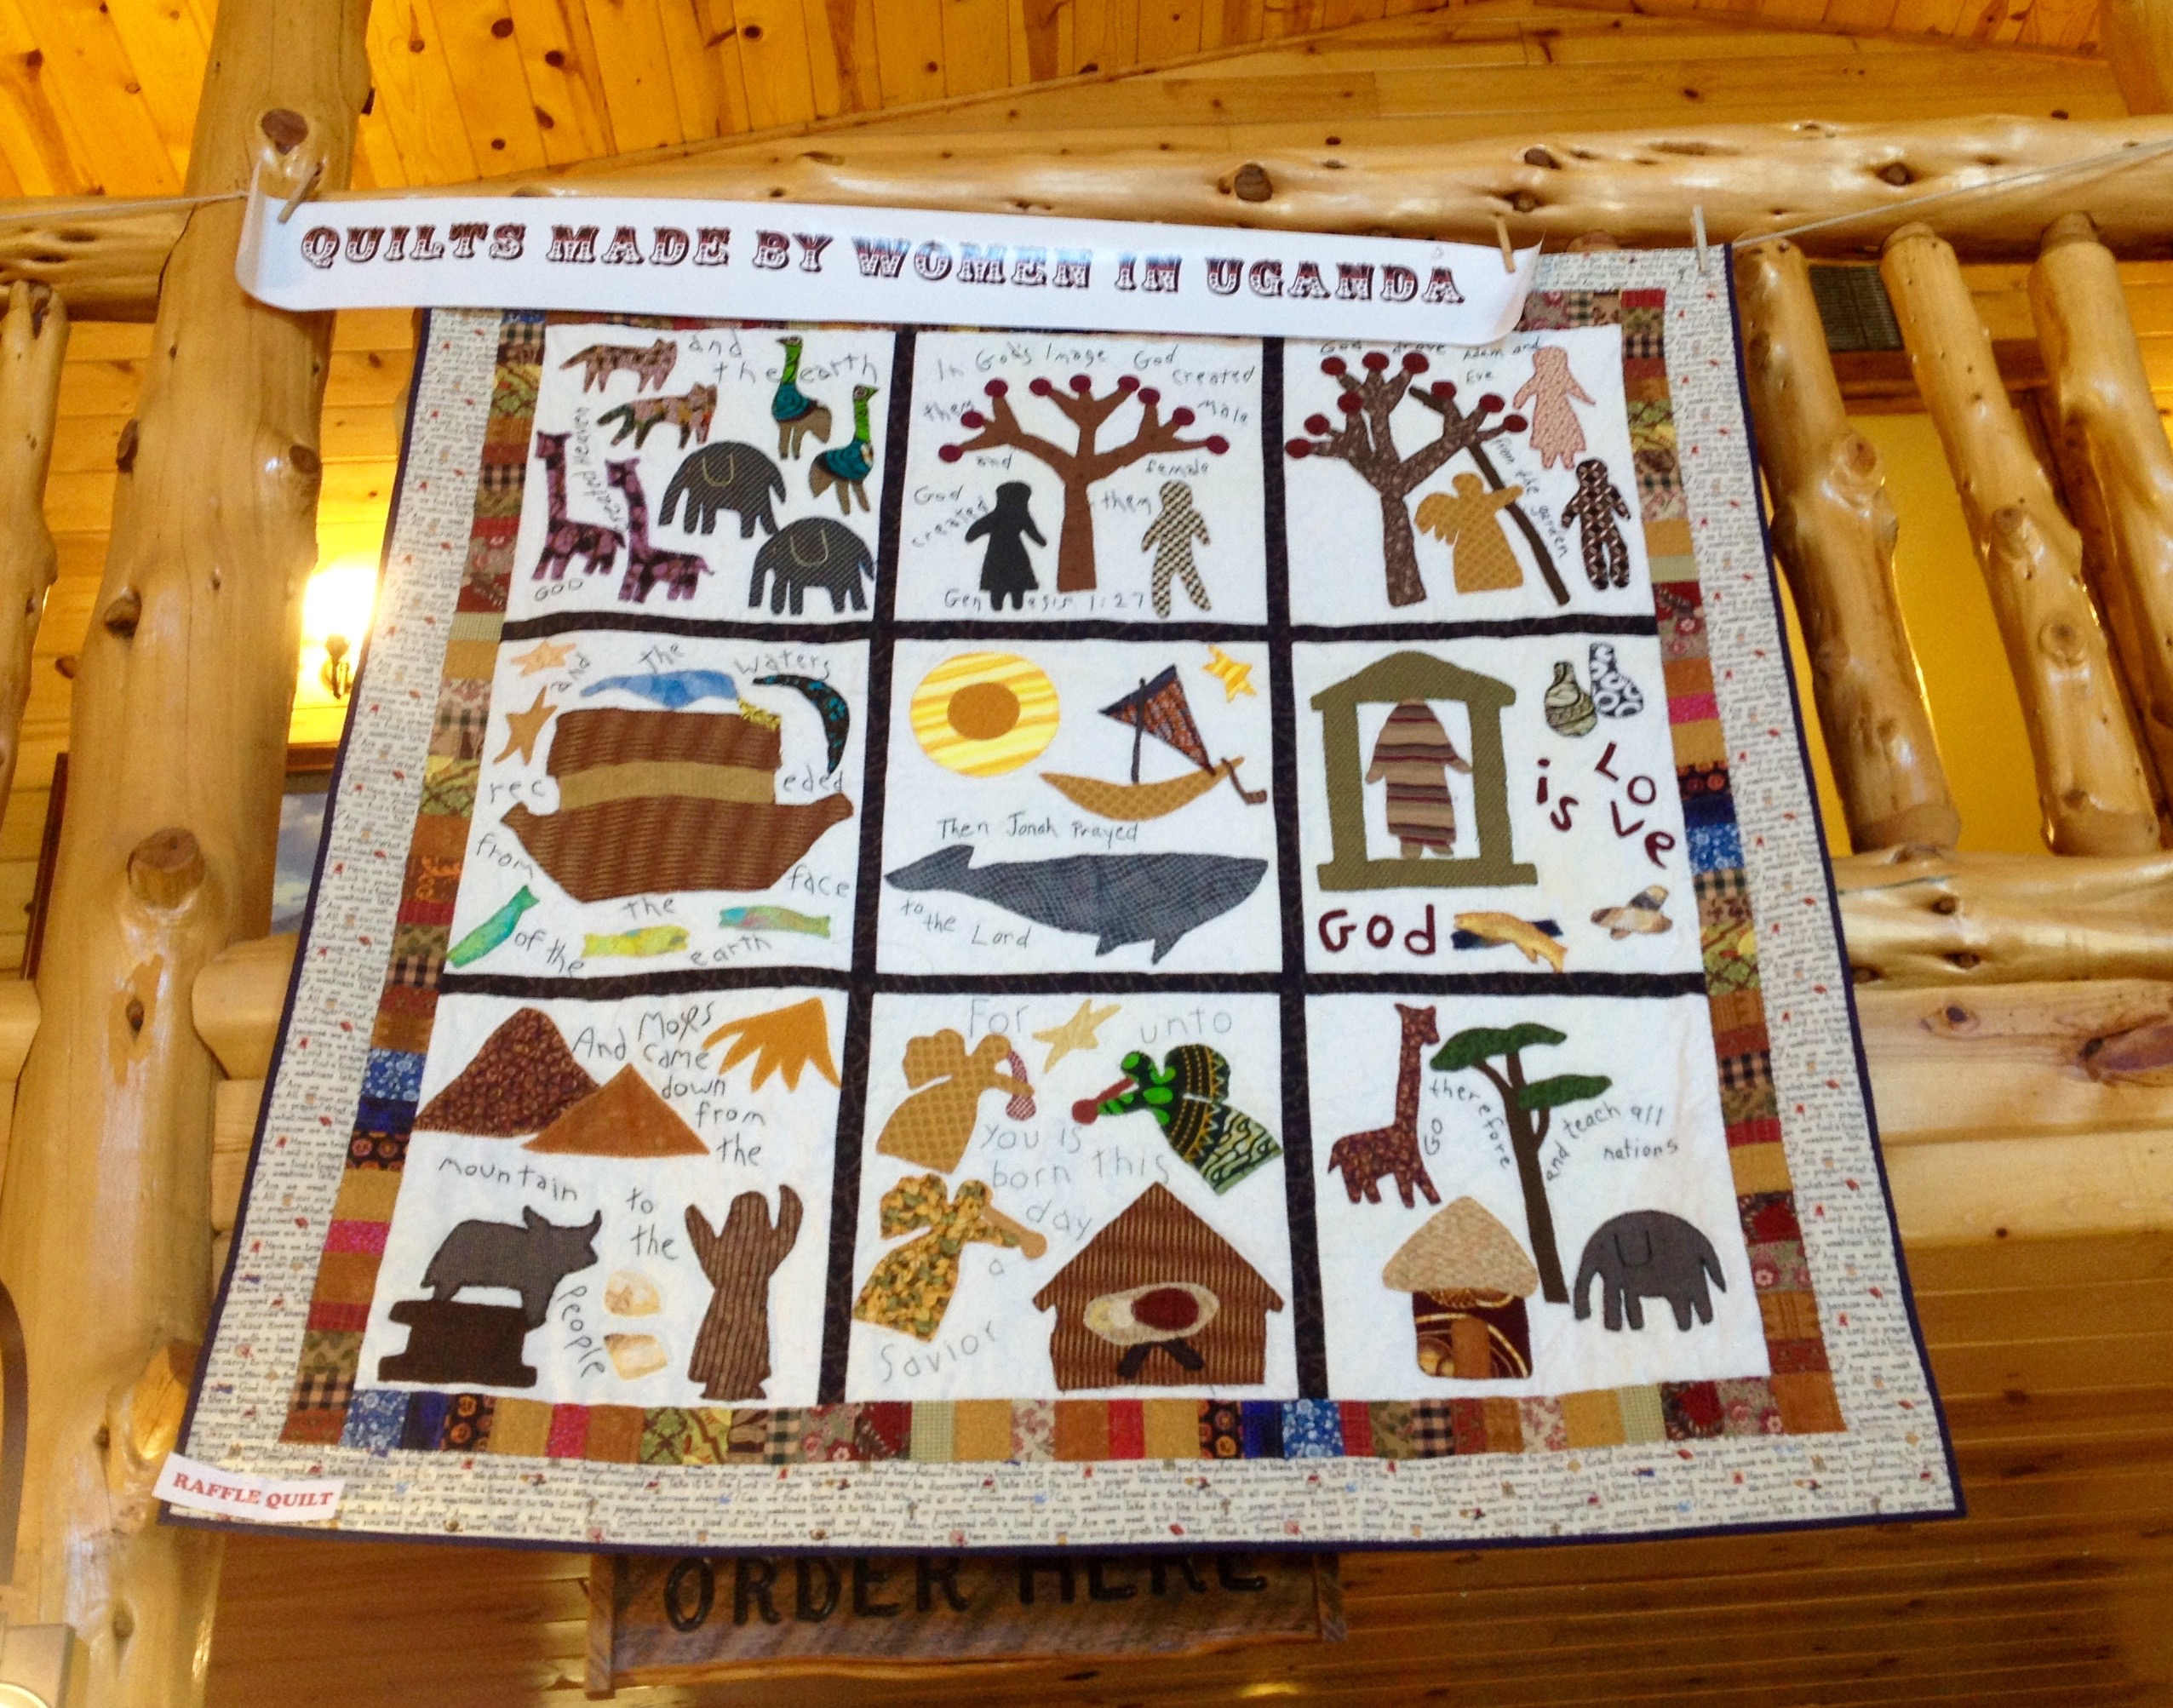
Harriet Powers is recognized in the African American quilting community as one of the “Mothers of African American Quilting” and is known for her famous Bible Quilt (which is a scrap quilt) first exhibited in 1886.
Image from the Smithsonian Museum website
According to the Smithsonian Museum, “Harriet Powers, an African American farm woman of Clarke County, Georgia, made this quilt in about 1886. She exhibited it at the Athens Cotton Fair of 1886”.
Two of her bible themed quilts which are considered icons of American quilt making are in the collections of the Museum of Fine Arts in Boston and the Smithsonian National Museum of American History in Washington, DC.
Here is her Bible Quilt from the collection of the Museum of Fine Arts in Boston:
Image from the Museum of Fine Arts, Boston website
Last yearDr. Carolyn Mazloomi, founder of the Women of Color Quilting Network (WCQN) to which I belong, sent out a request to WCQN members to contribute to purchasing a headstone for the gravesite of Harriet Powers.
Harriet Powers passed away in 1910 and the small cut stone marker, inscribed by one of her sons (she had 9 children with her husband Armstead Powers) originally marked the grave for her and her husband who passed in 1909. In 2008 this fragile marker was broken and removed.
Members of the WCQN, including myself, contributed to purchasing a beautiful headstone for Harriet and Armstead Powers gravesite and on December 2, 2023 there was a “Recommittal and Dedication Ceremony” at Gospel Pilgrim Cemetery in Athens, Georgia.
I was invited but could not attend. Dr. Mazloomi kindly sent me the pamphlet from the ceremony.
When I lived in Central Oregon in 2016 I took an appliqué quilting workshop at the Stitchin’ Postin Sisters, Oregon with the amazing teacher Janet Storton (who runs the Sisters of the Heart Foundation helping women in Uganda empower themselves through craft making).
In this appliqué workshop you could work on making a Bible Quilt inspired by the one made by Harriet Powers or another project. Janet brought in a bag of her scraps, which included African themed fabrics, to share with the class.
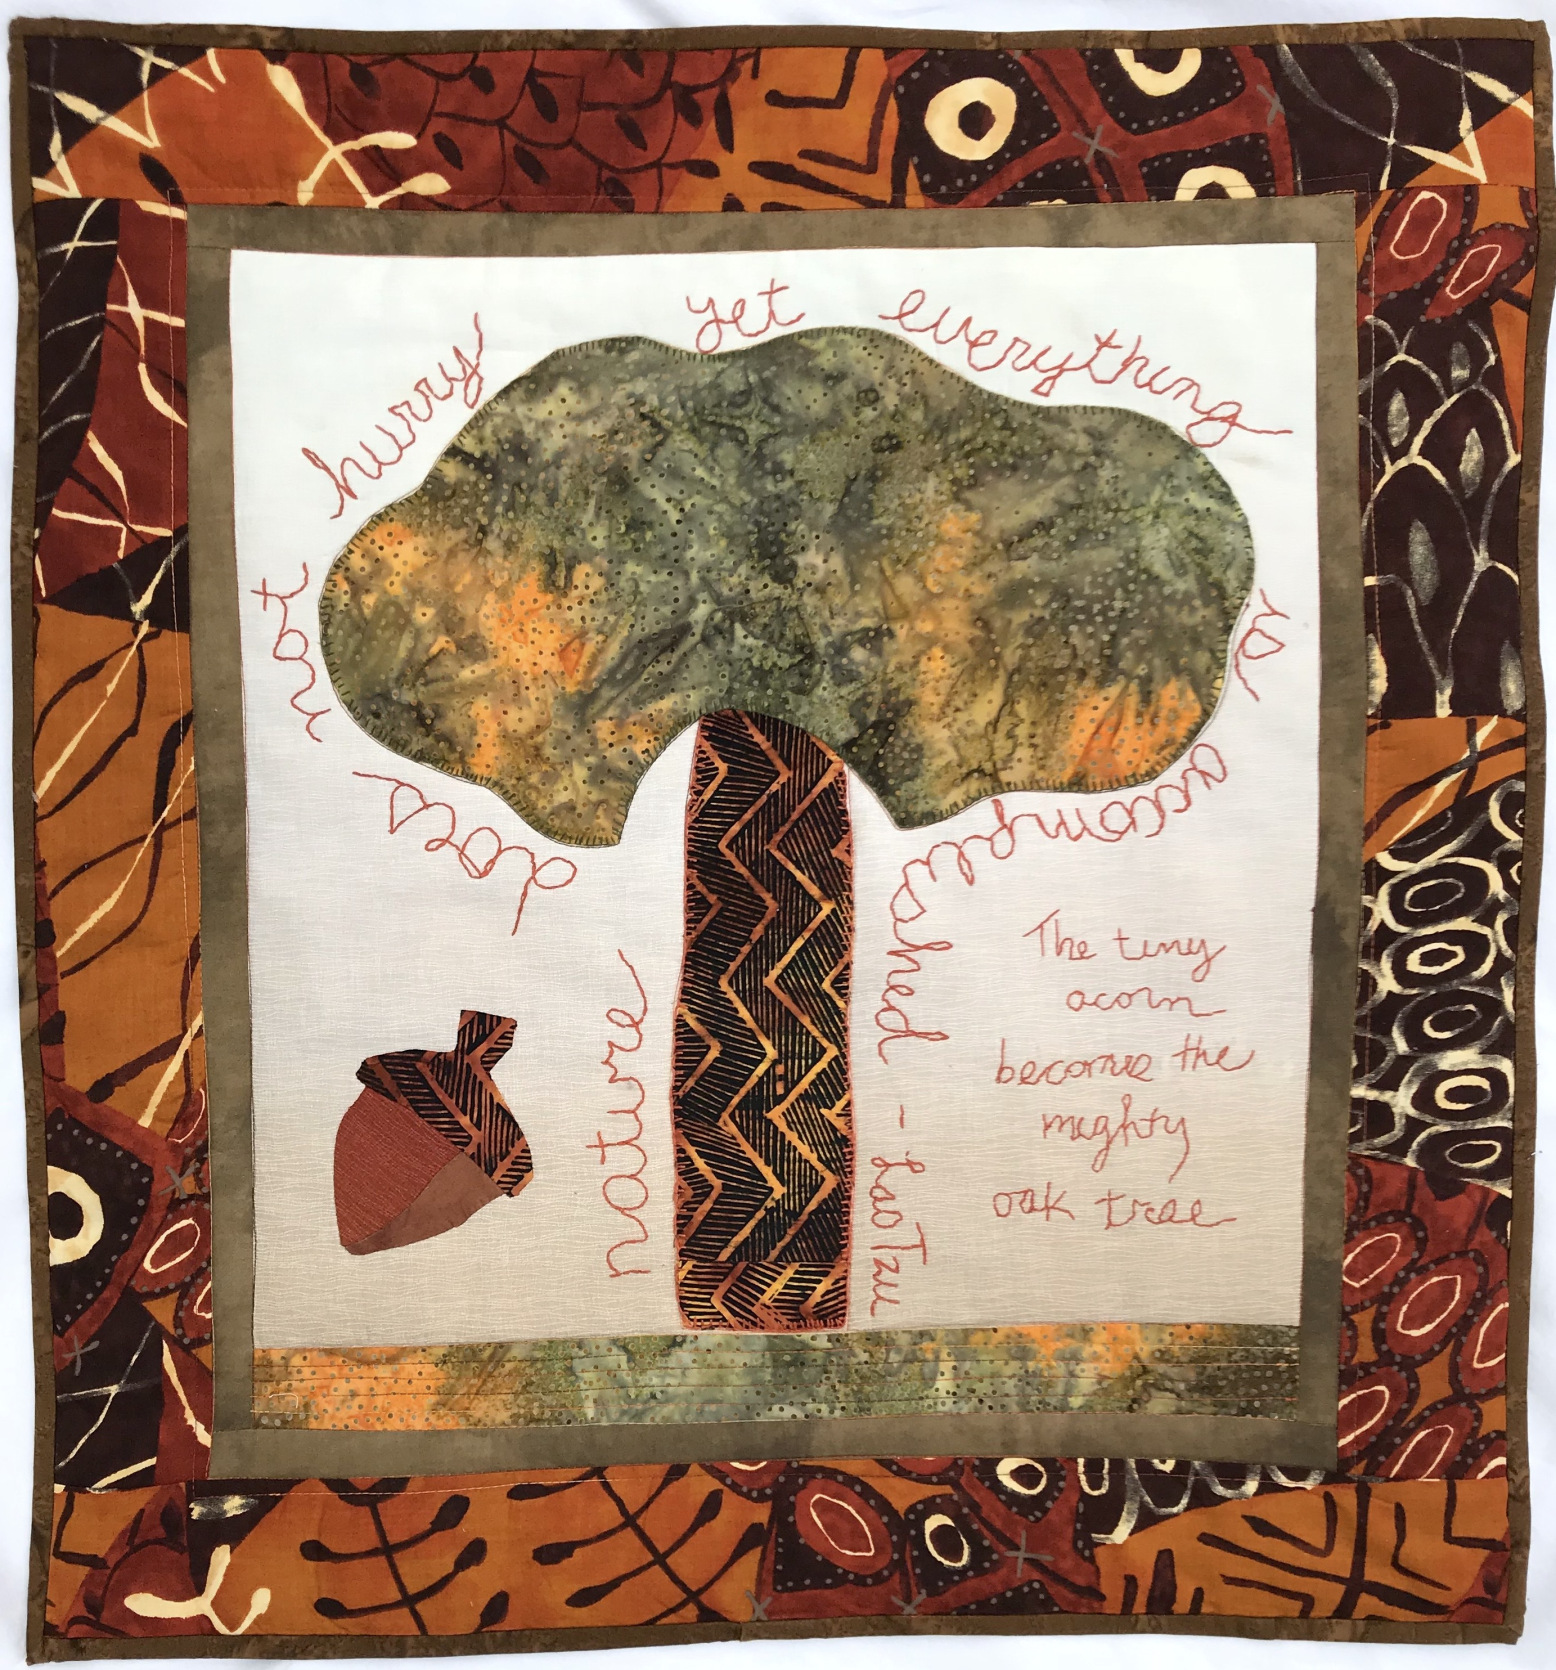
I ended making my wallhanging sized quilt Tree of No Hurry based on the Lao Tzu quote: “Nature does not hurry, yet everything is accomplished” with the new appliqué techniques I learned in the class.
Here are my blog posts from 2016 – 2017 related to the process of making this piece:
Here is one of the Bible Quilts made by Ugandan women that Janet works with as part of her foundation that was exhibited at the 2016 Sisters Outdoor Quilt Show (Janet shared the quilt top before it was quilted during our workshop):
As promised, here are the bloggers that participate in the ScrapHappy monthly posting event, check out their blogs linked below for their ScrapHappy posts:
It’s the 15th of the month and time for my monthly “ScrapHappy” post as part of the ScrapHappy group I belong. At the end of this post I have a link to the other blogs participating in this monthly event in case you’d like to check out their ScrapHappy posts.
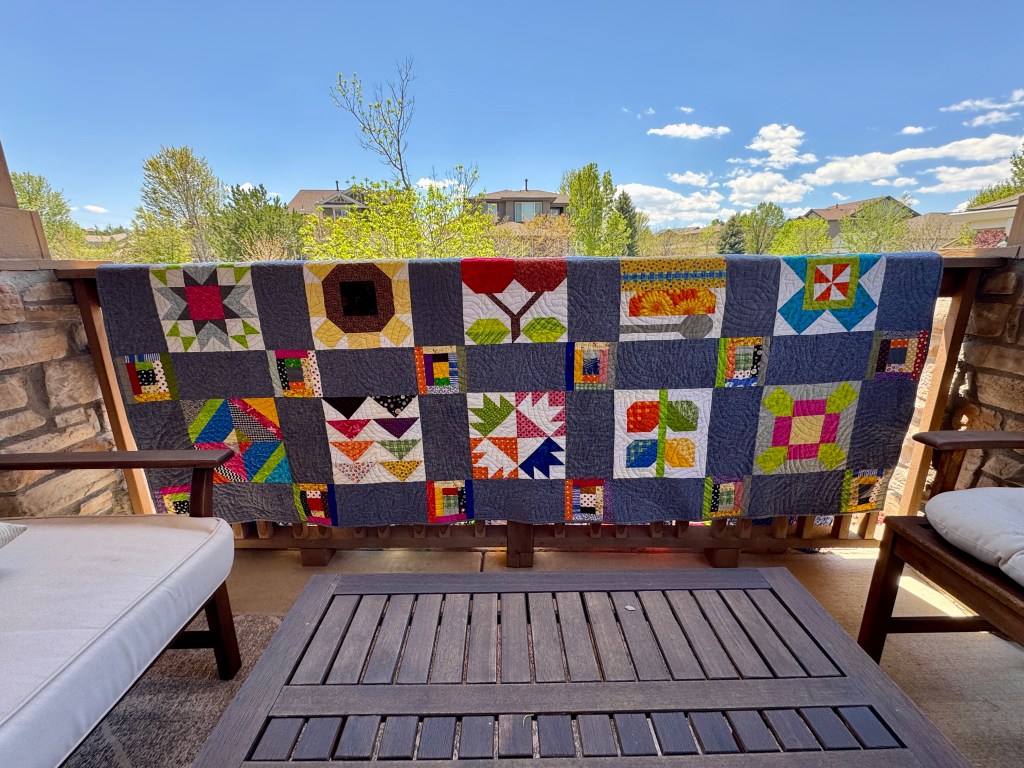
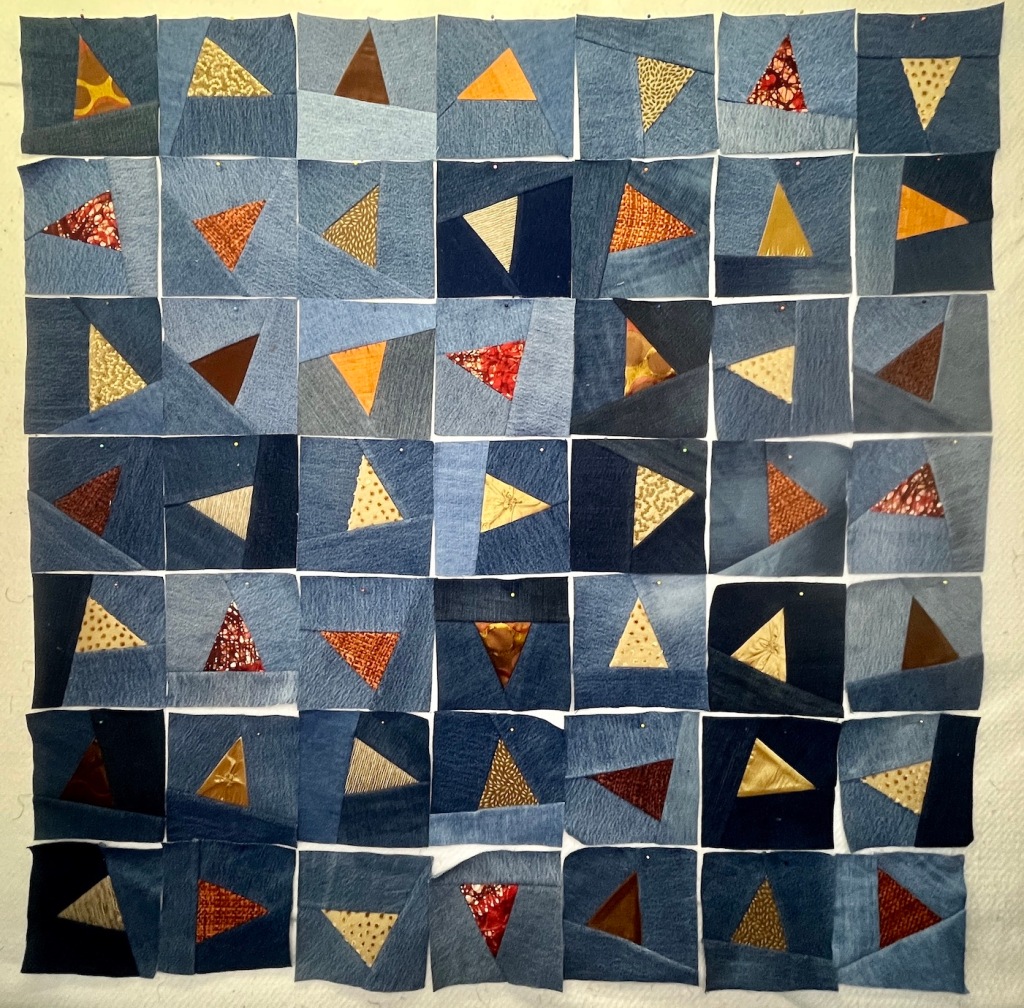
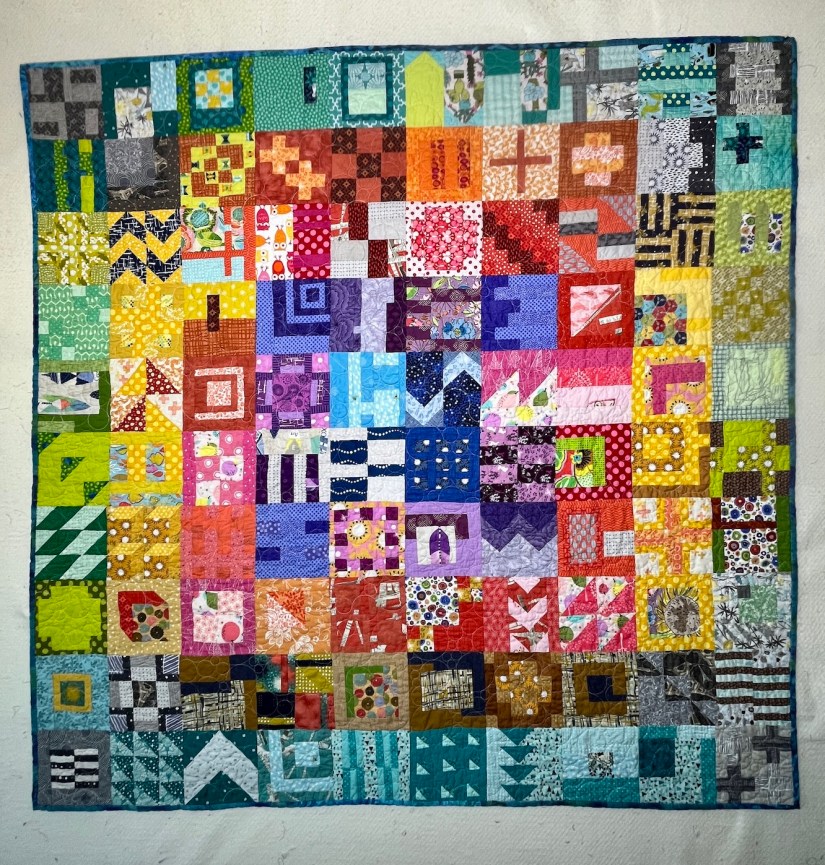
I’ve completed 51 blocks piecing recycled denim/jeans and home decor fabric scraps; and I put 49 of them in a 7 by 7 square so you could see a sample of a layout:
Yes I couldn’t decide which photo to use so I included all three!
I want the piece to be sort of large, and definitely square and I’ve decided to make a total of 81 blocks for a 9 by 9 square piece. I might hand quilt it, I haven’t decided but I am going to try some sample designs with scrap denim to see how the stitching would look.
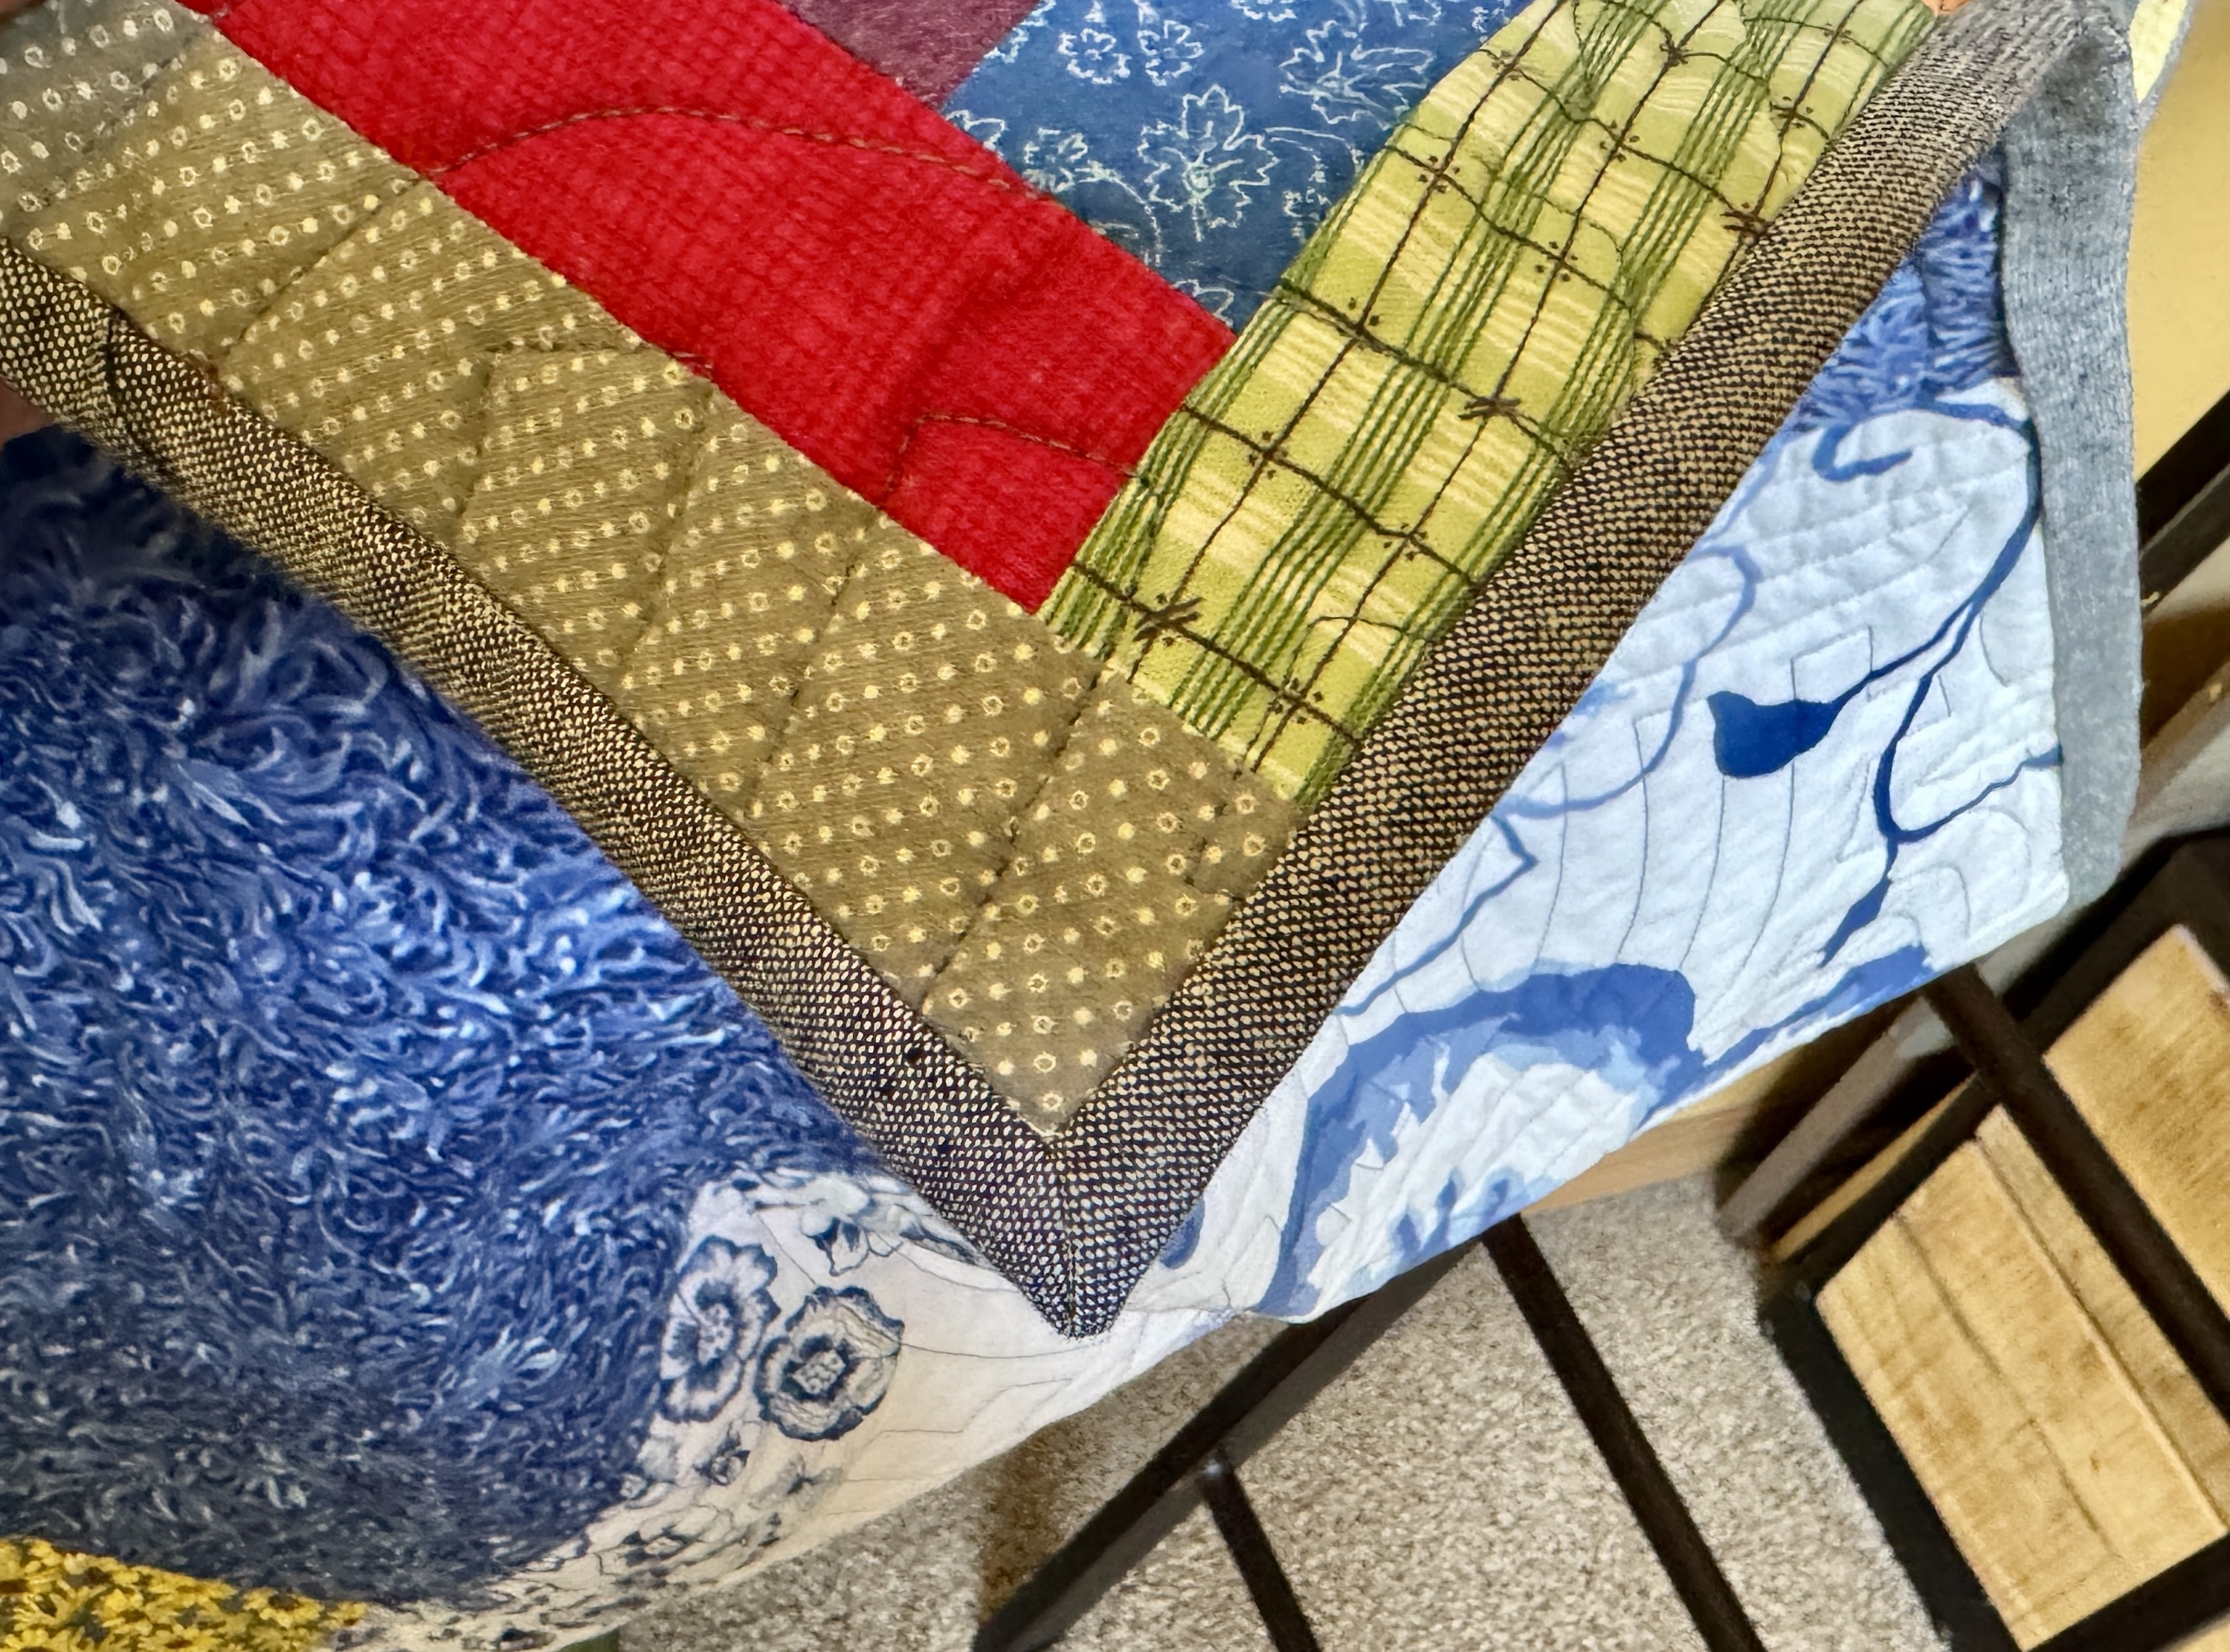
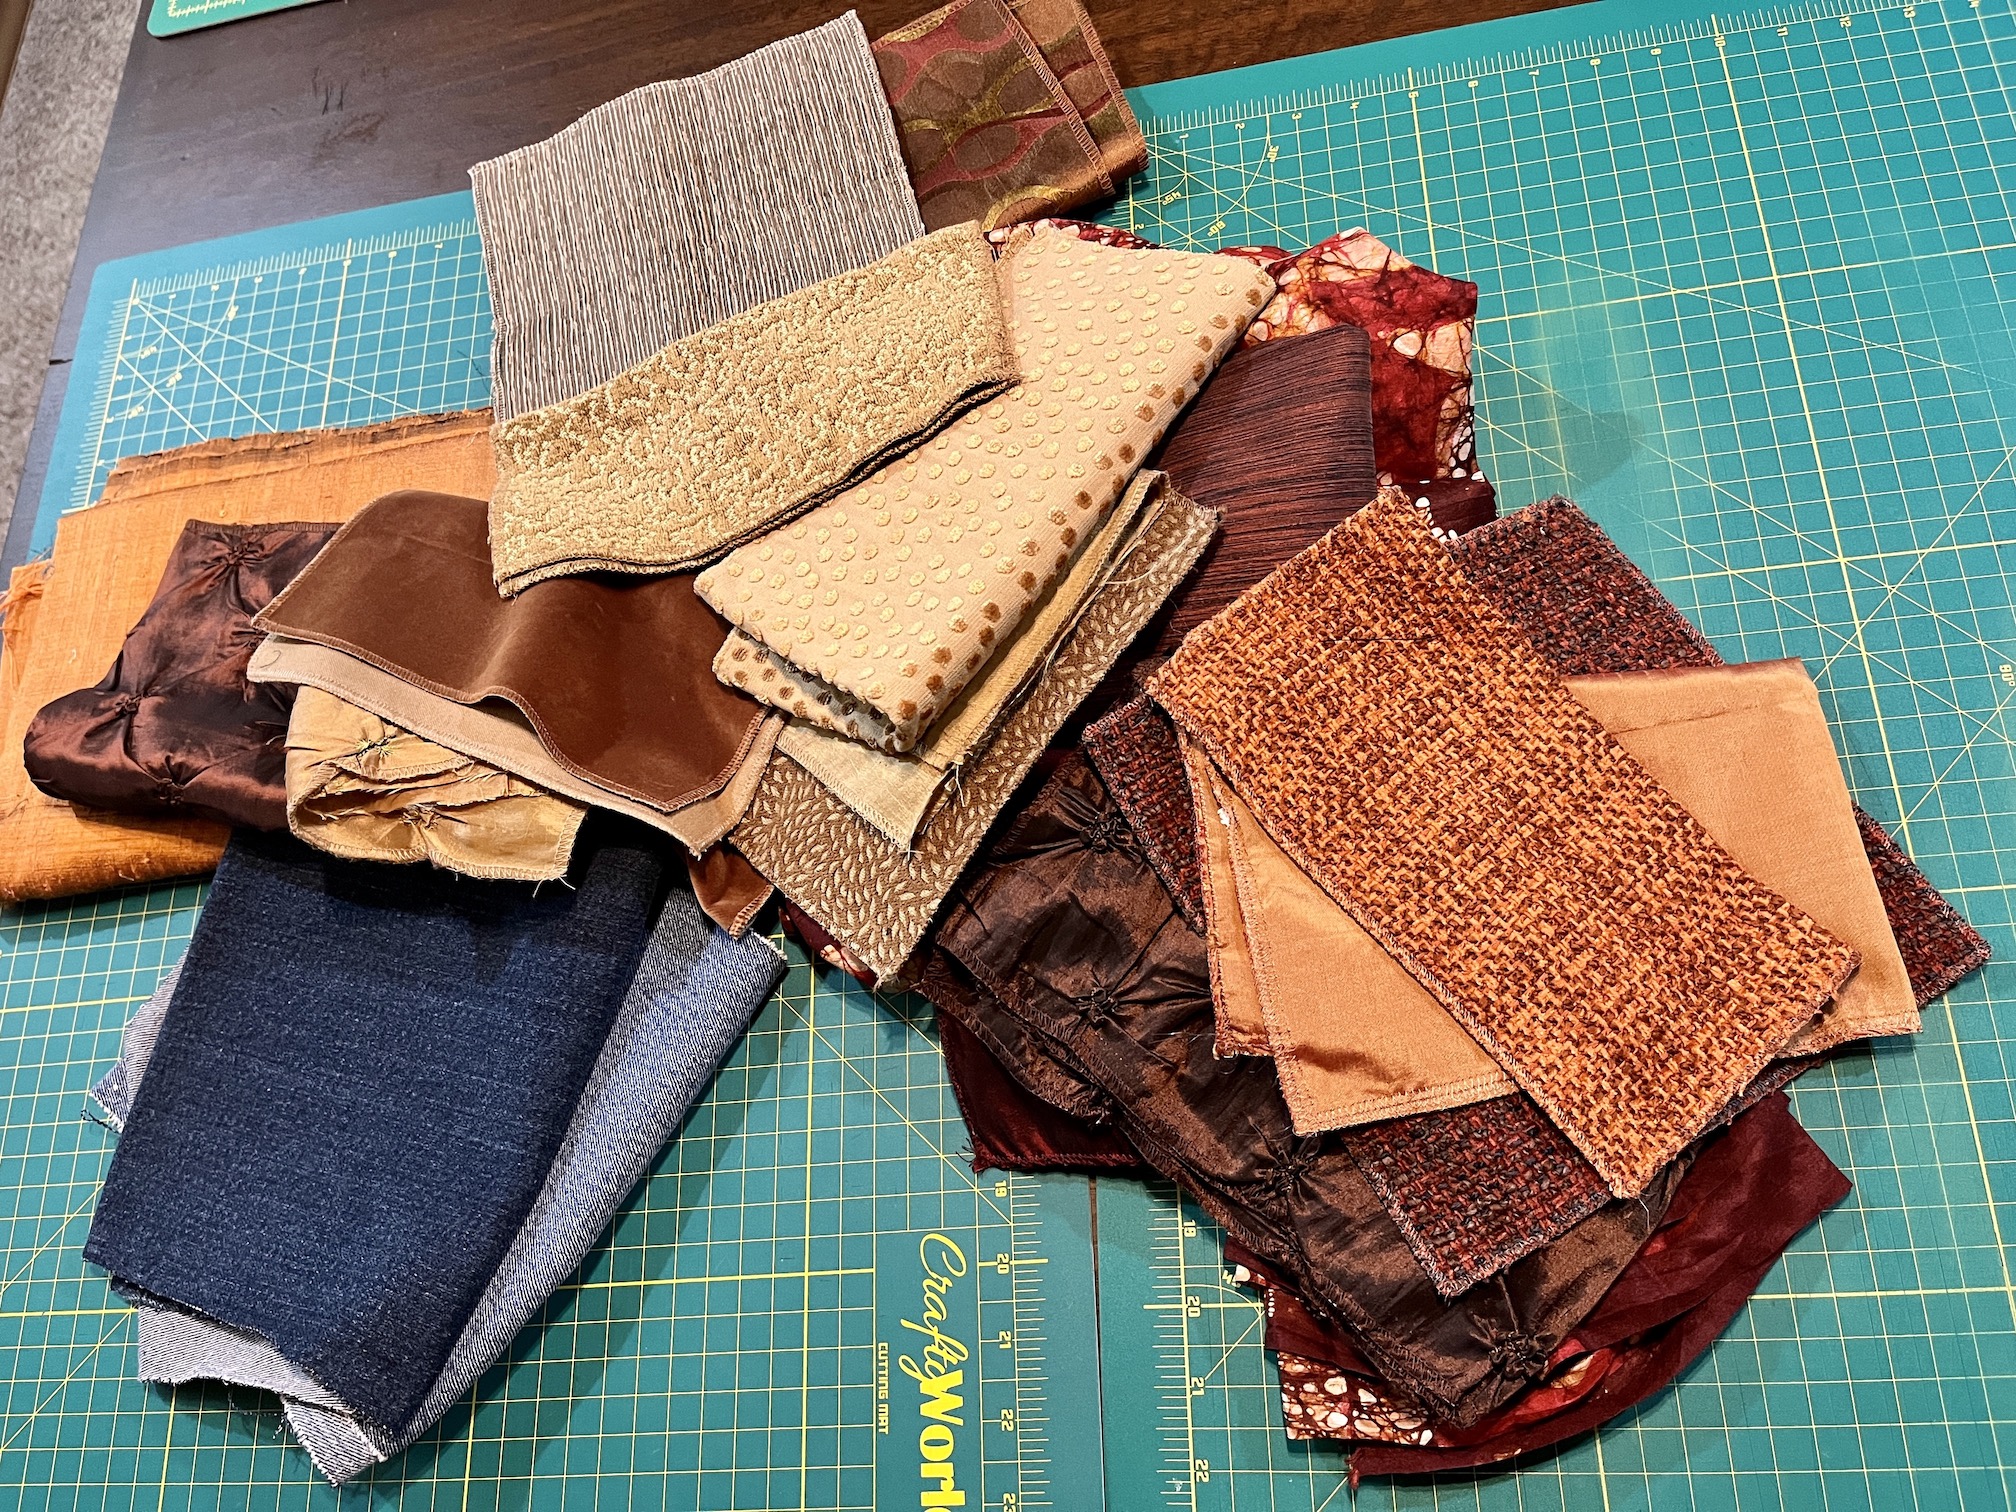
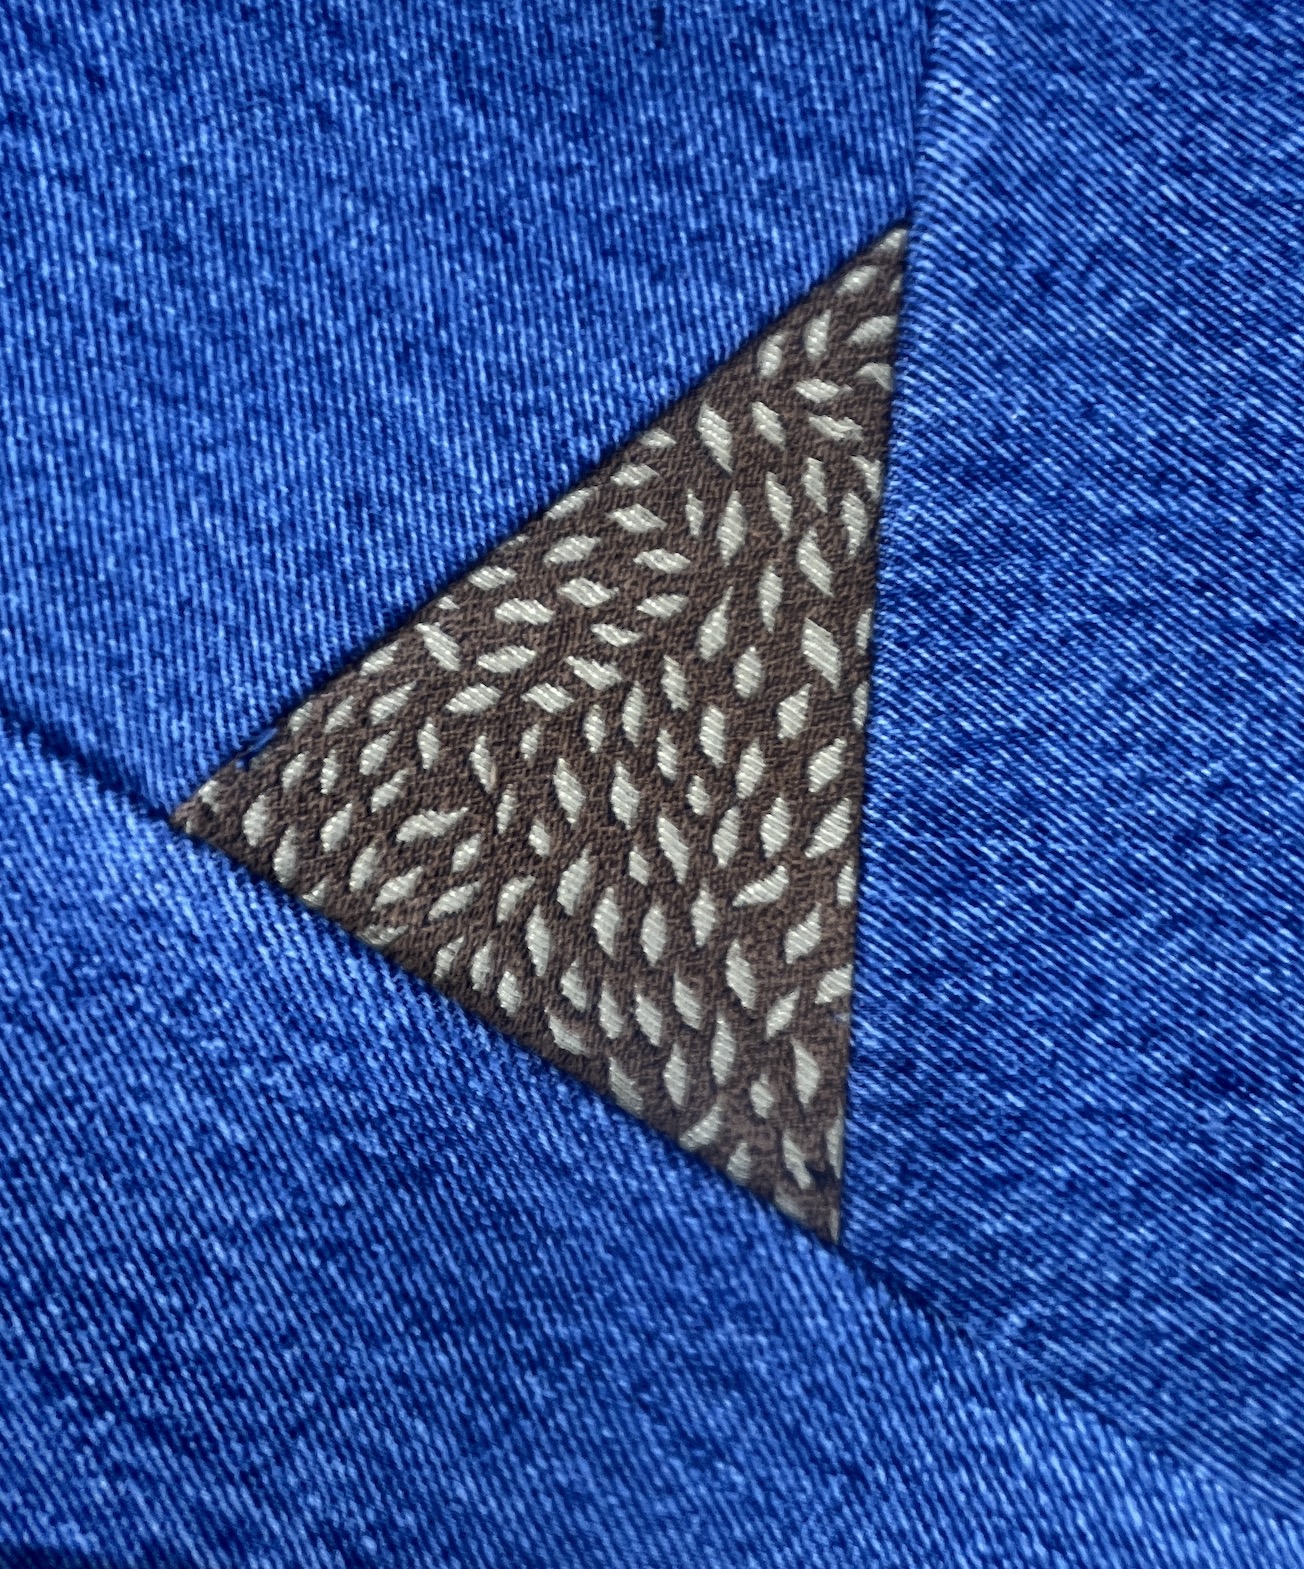
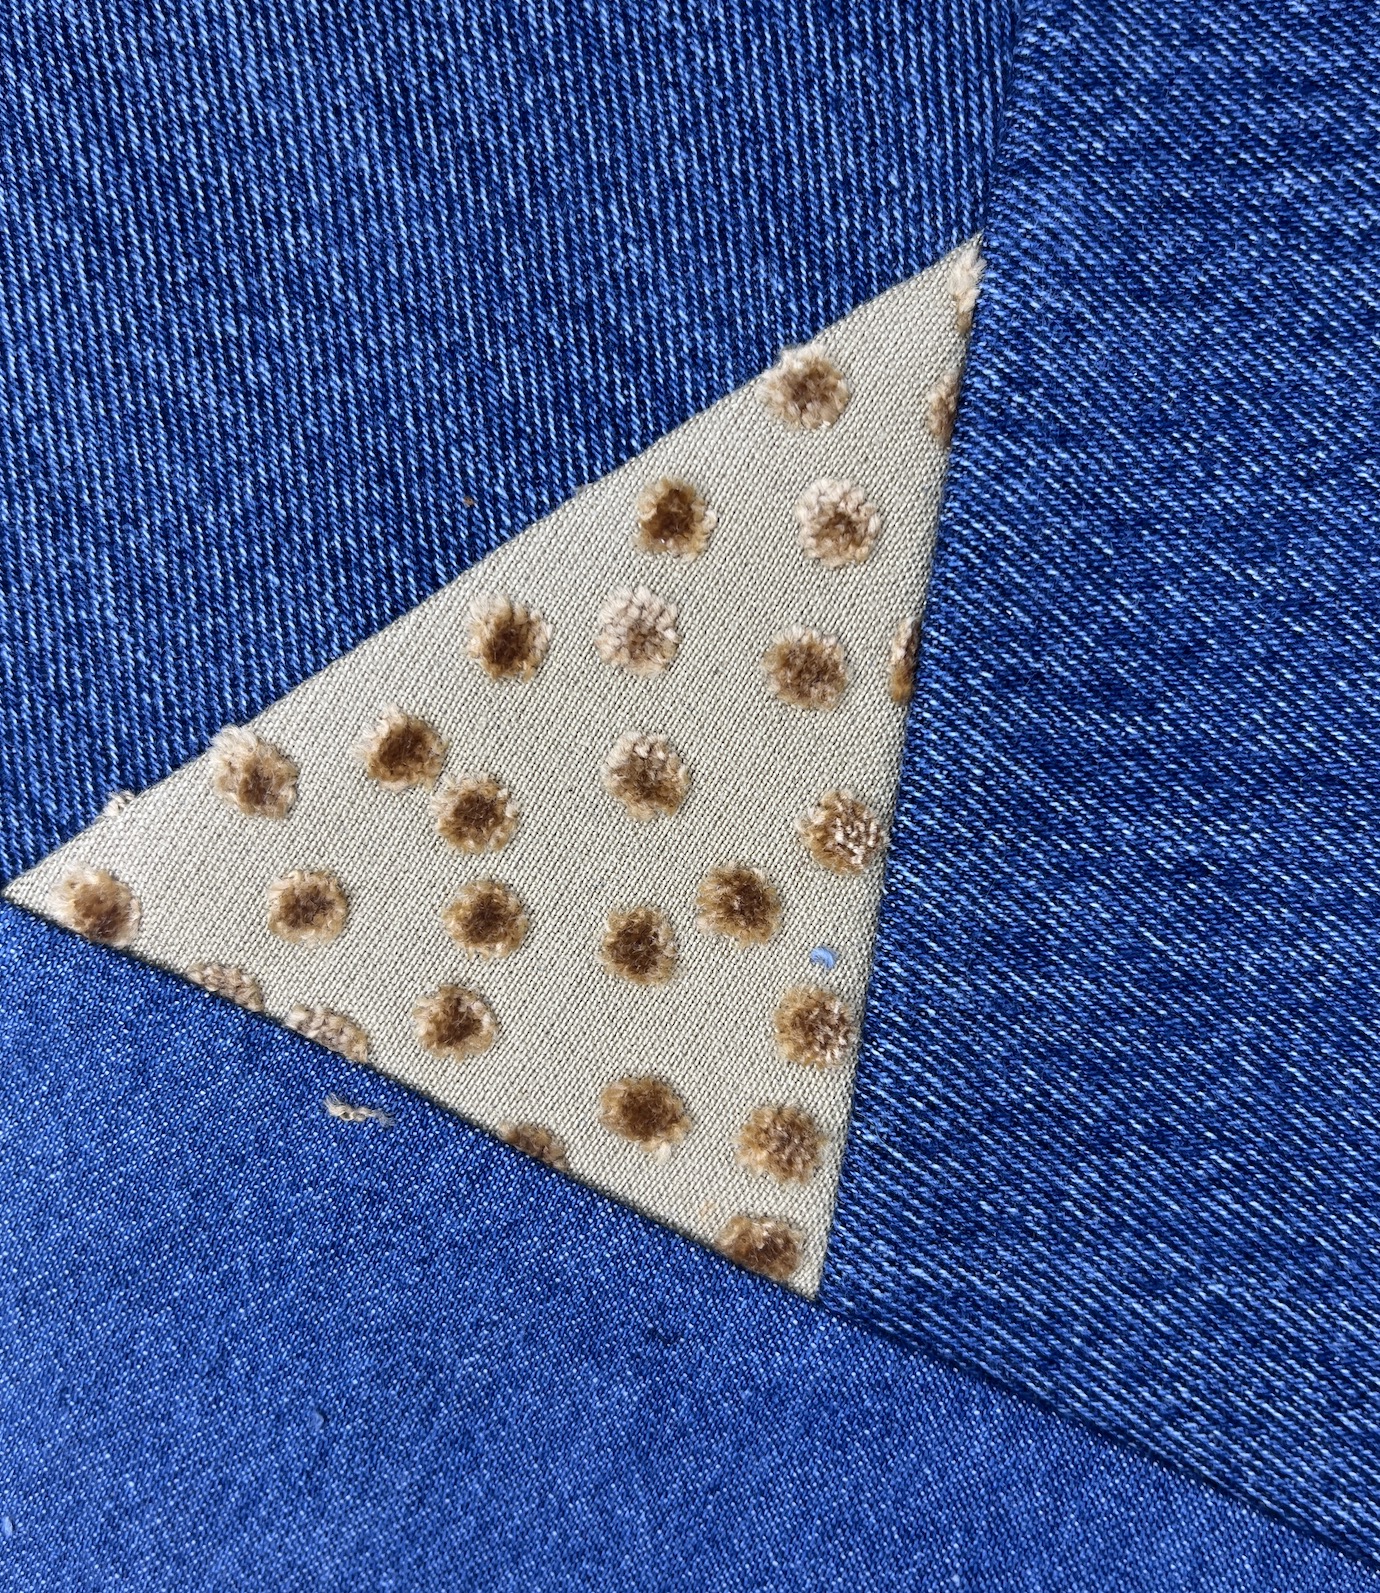
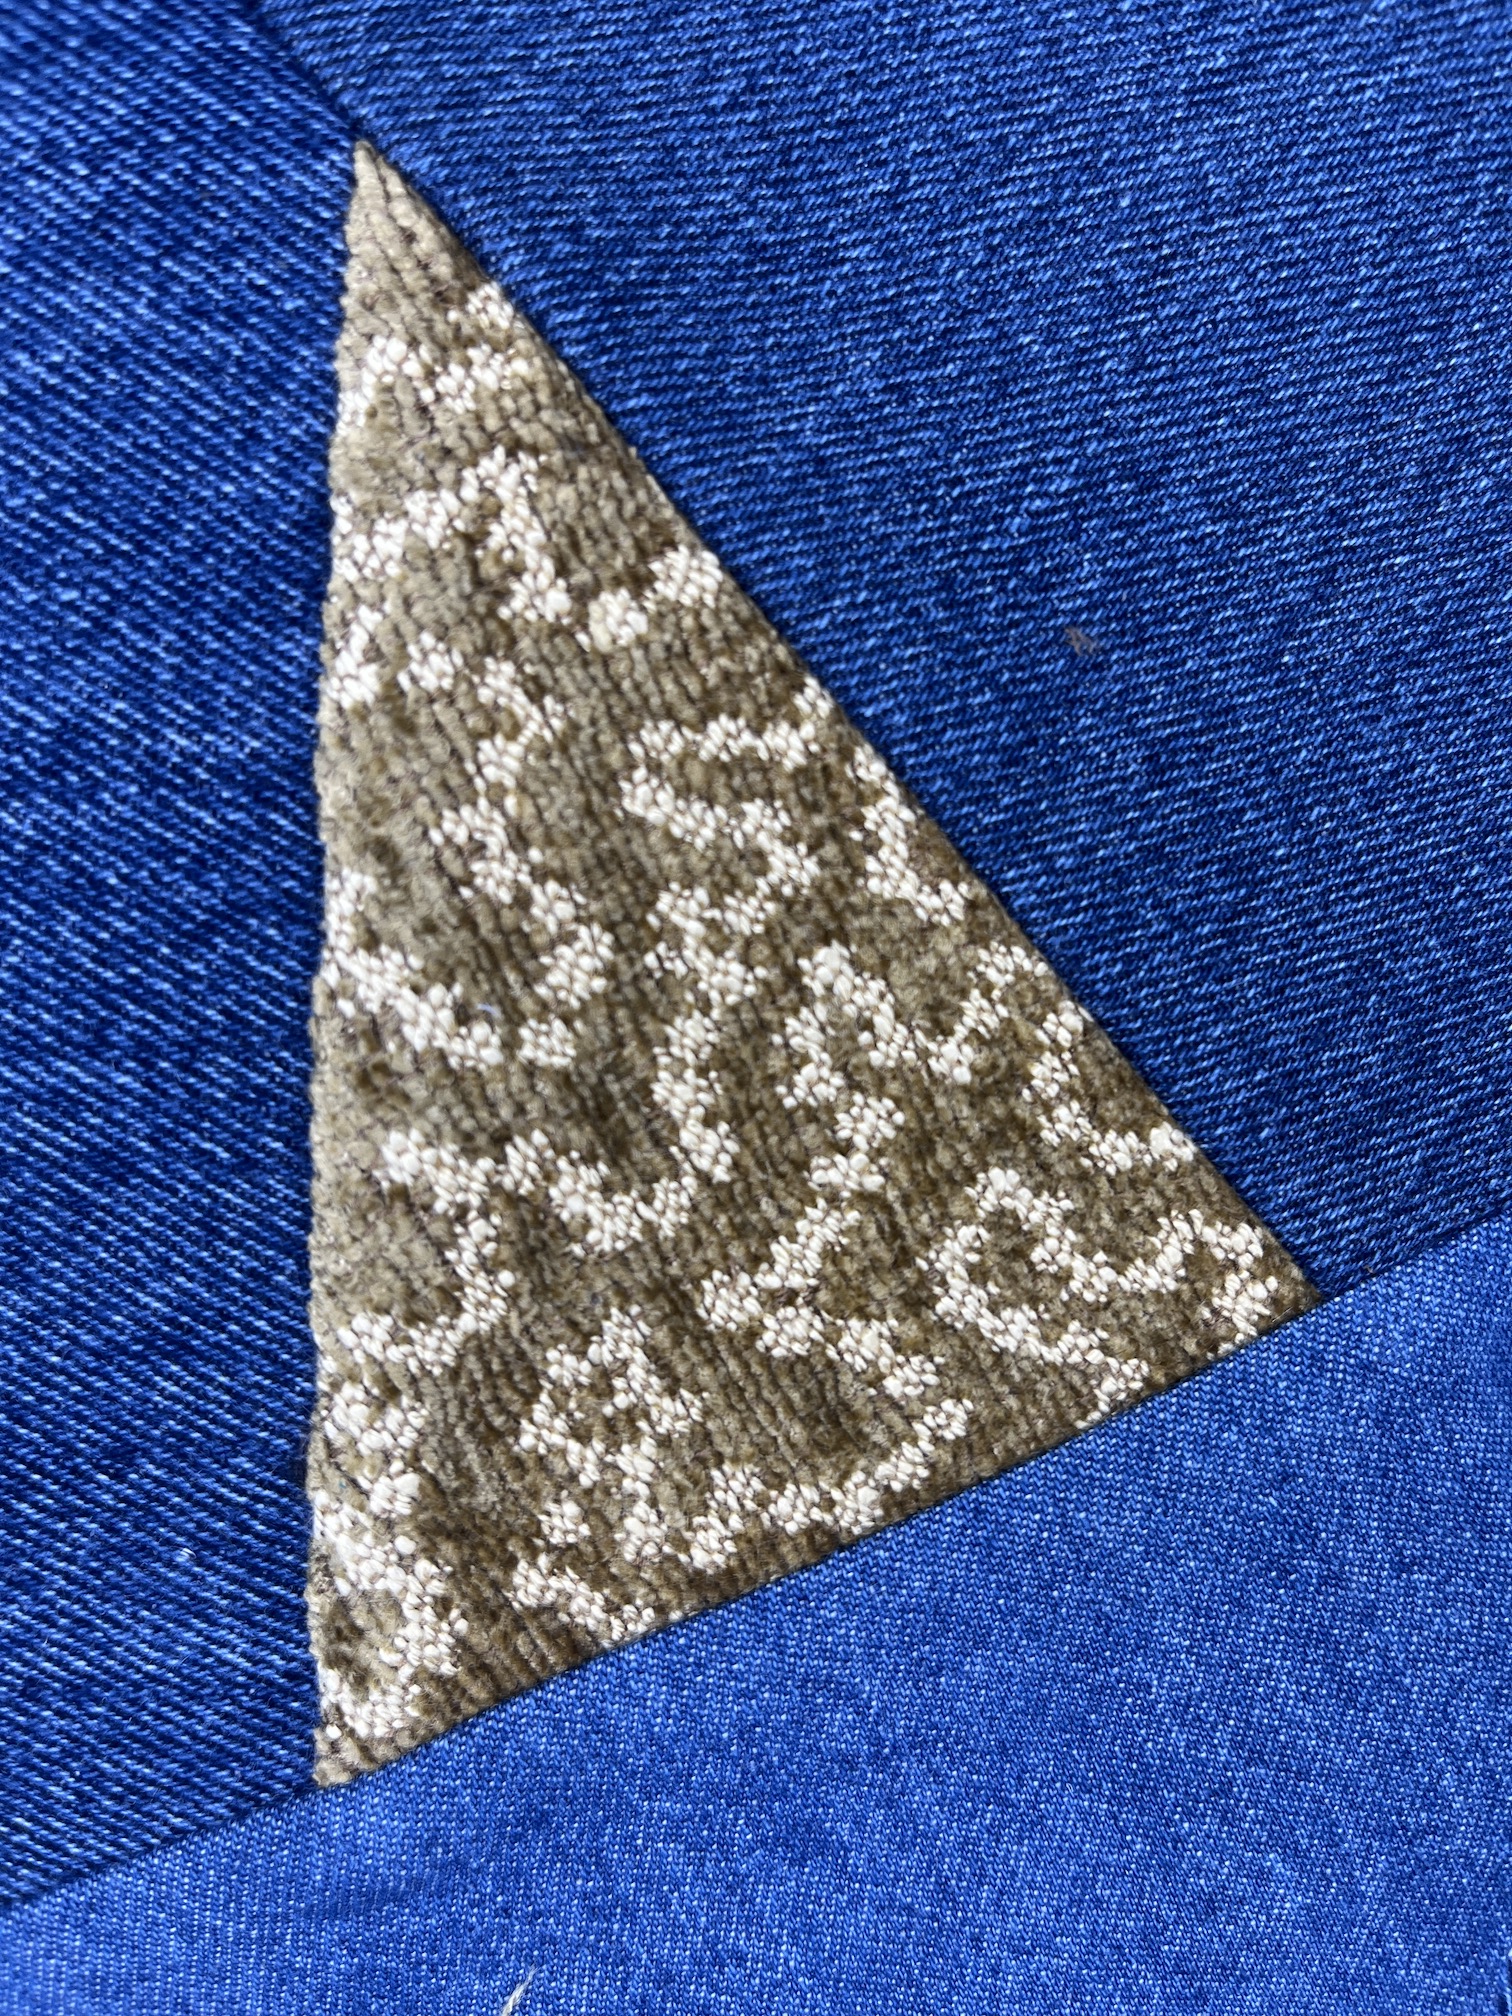
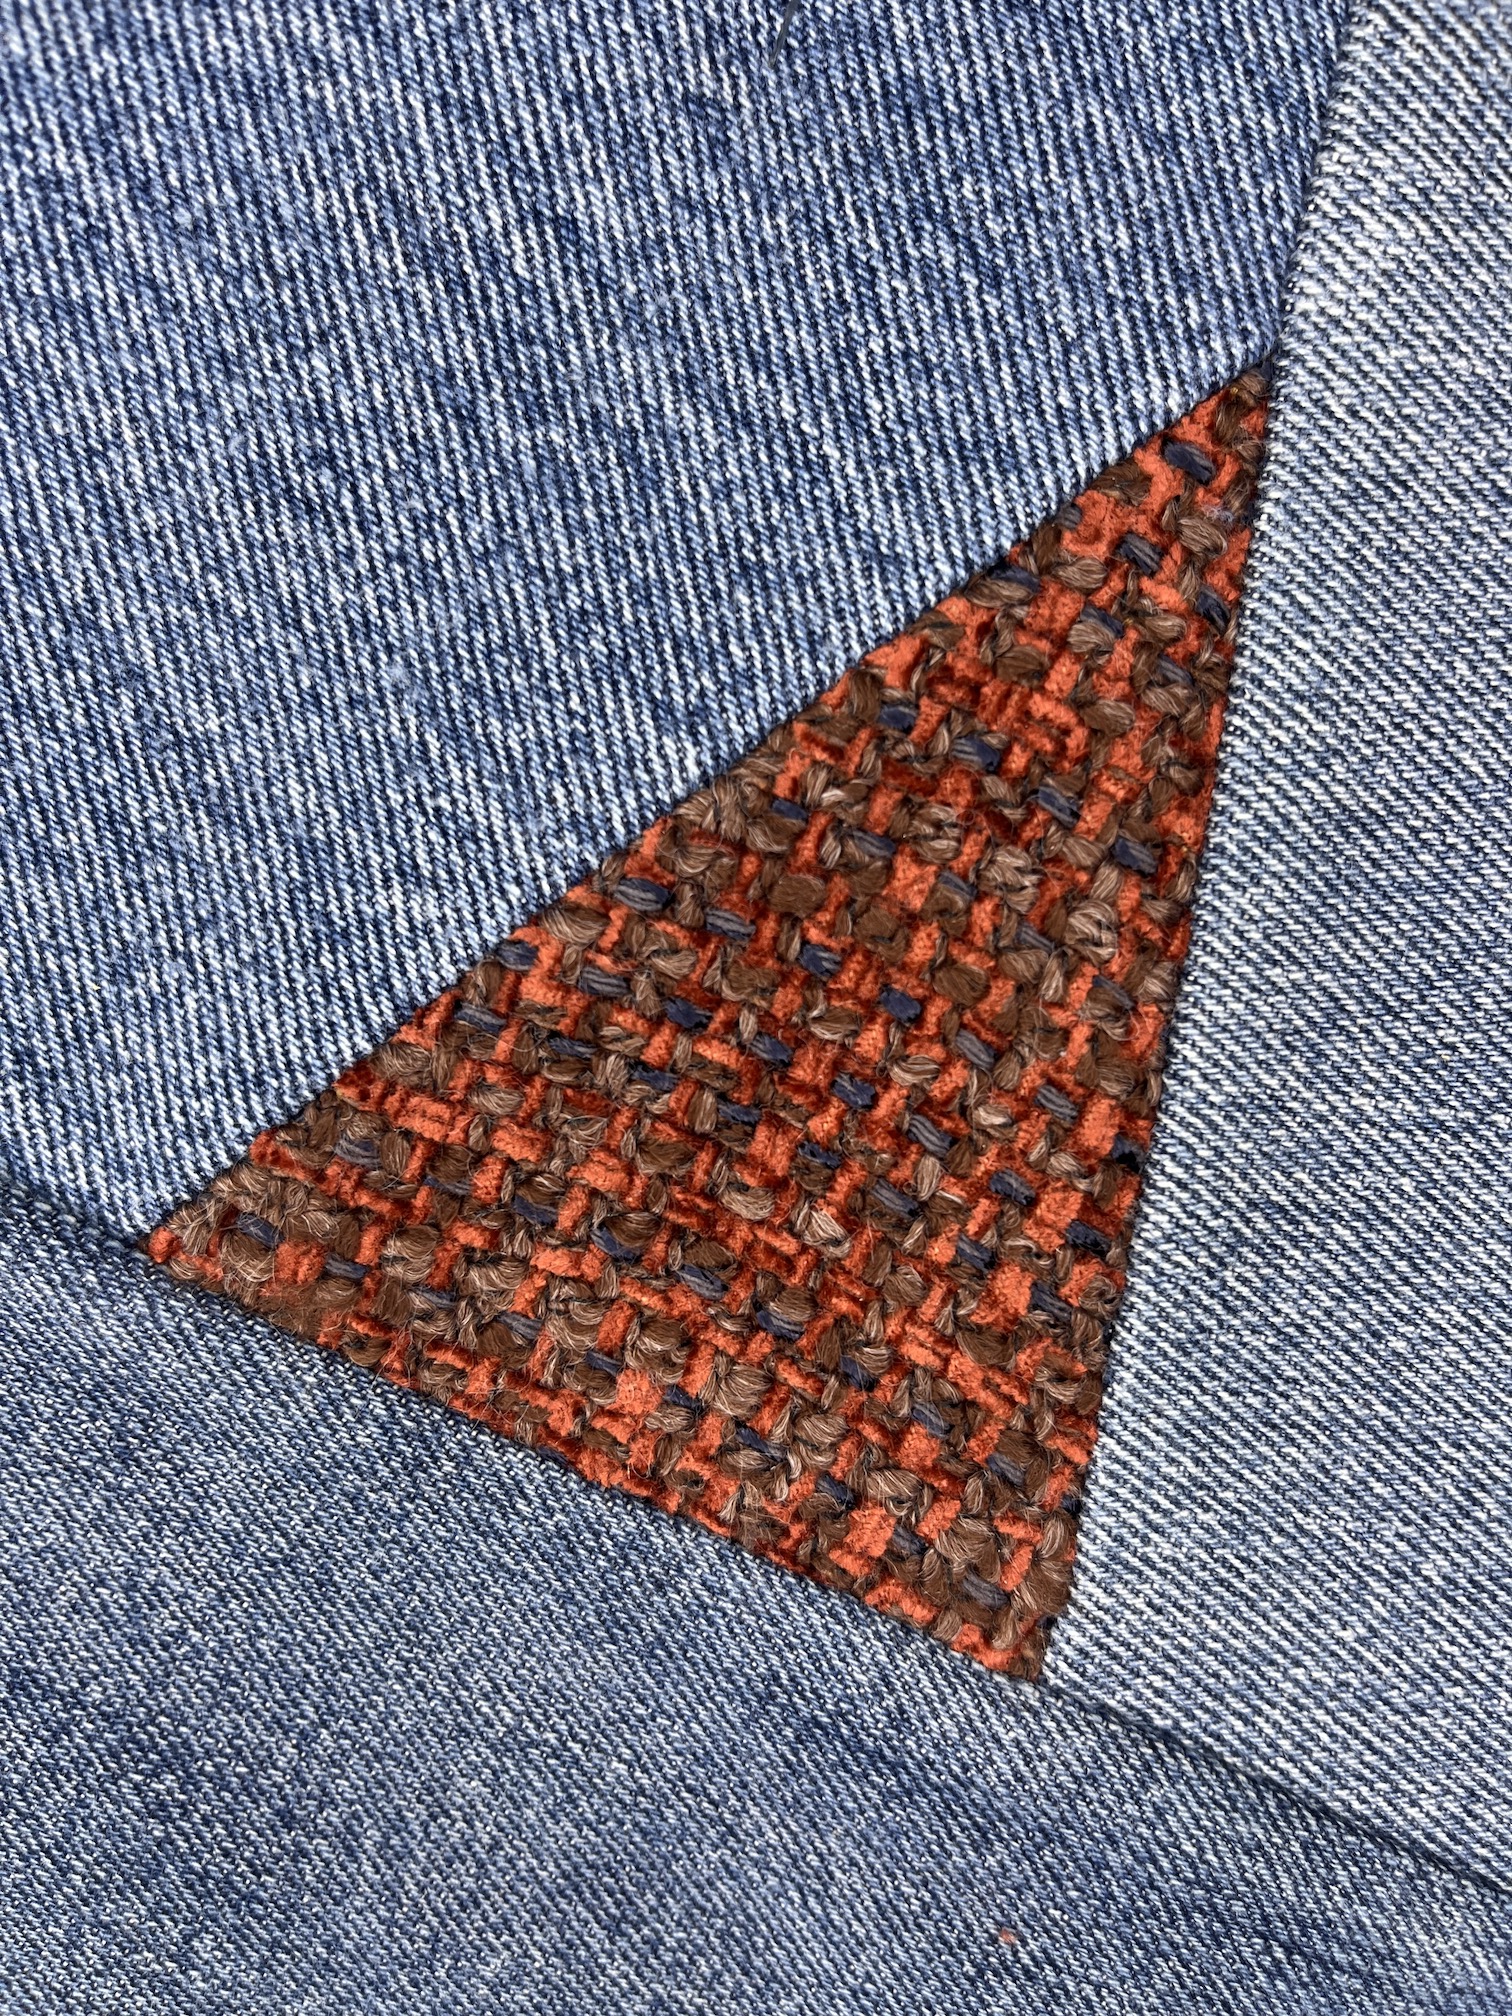
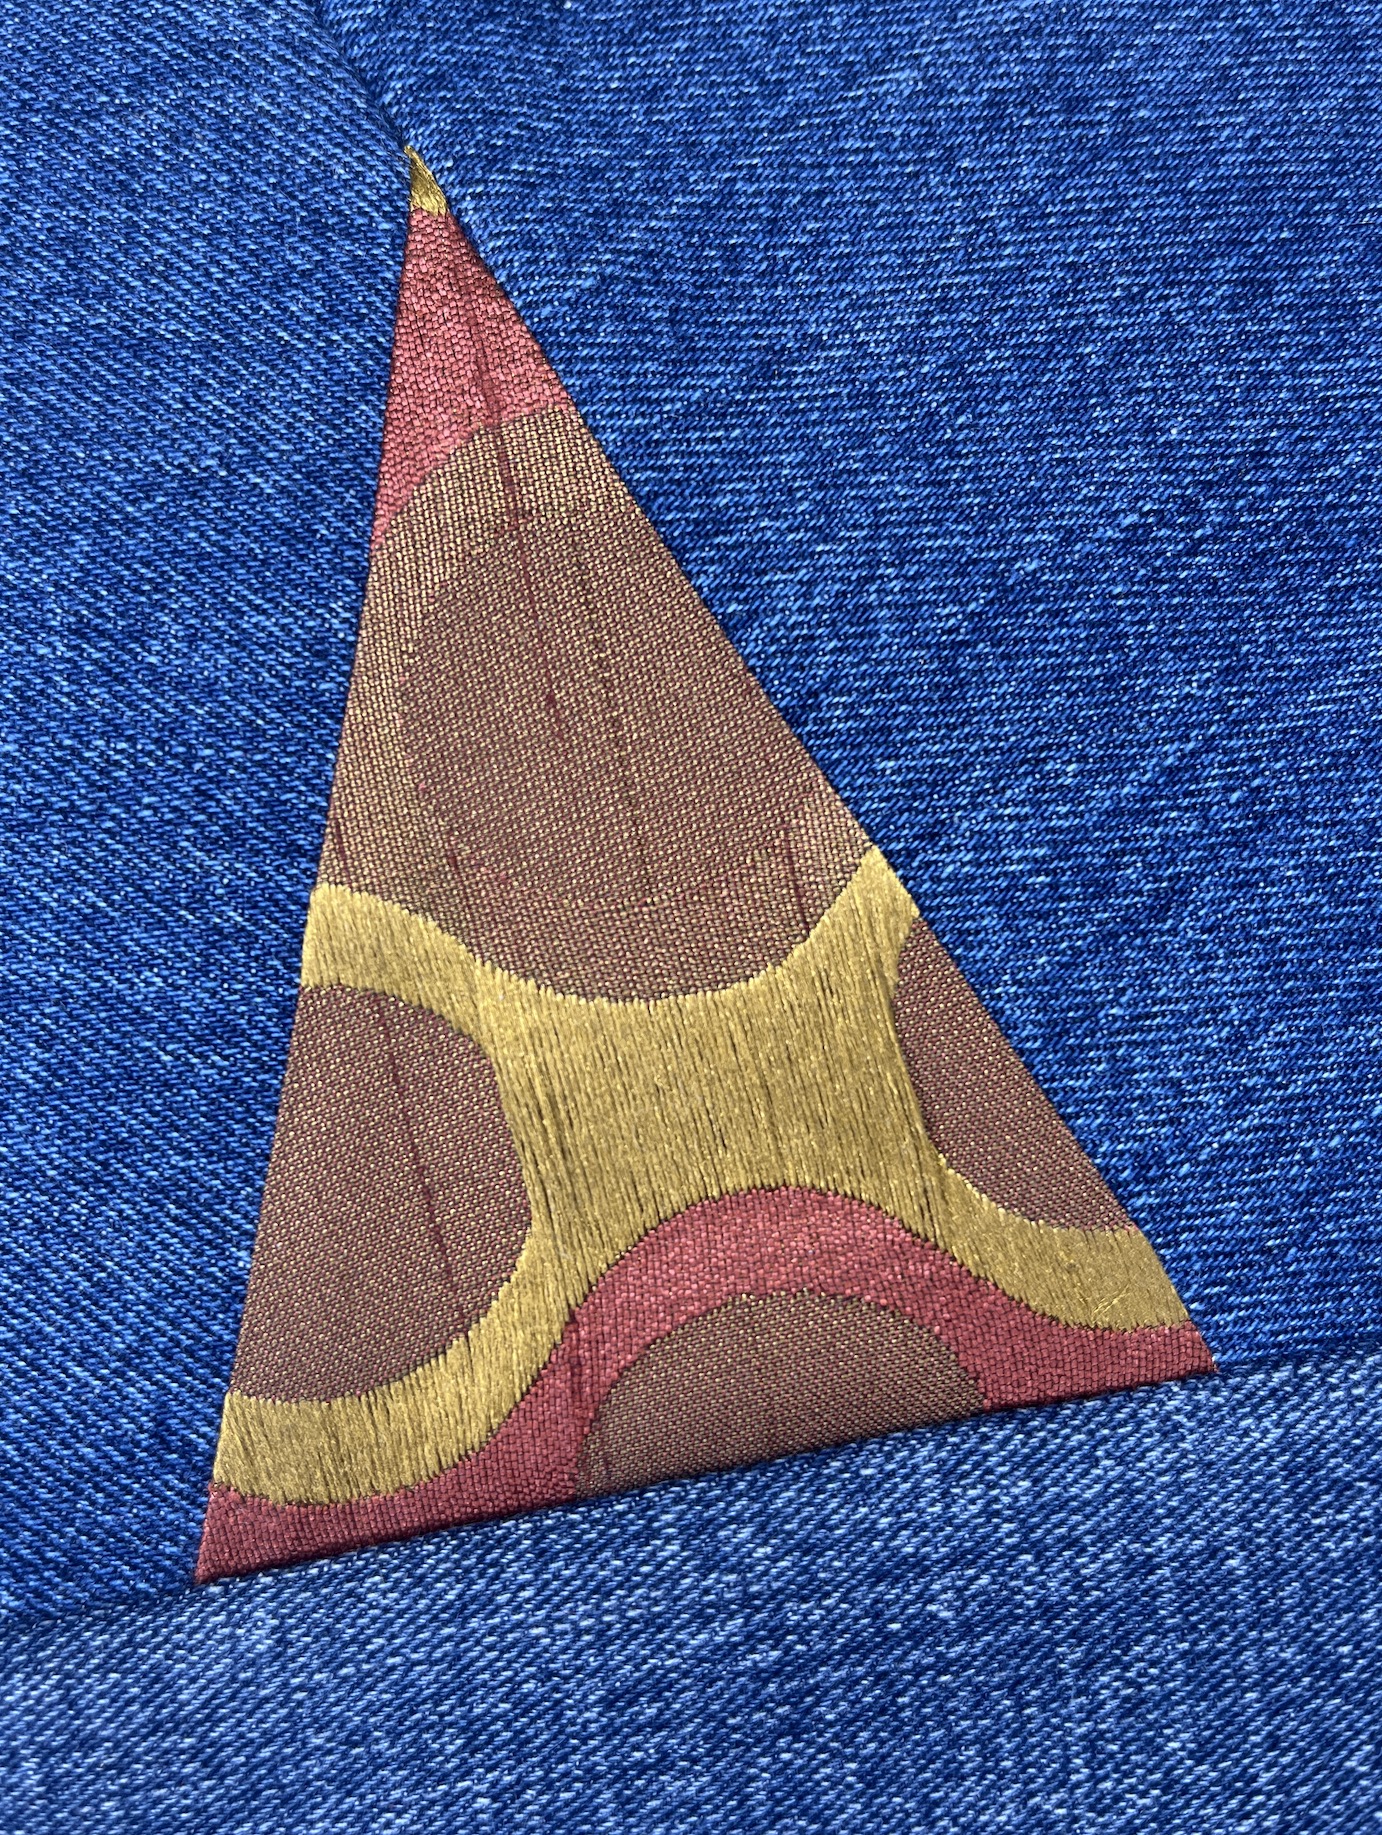
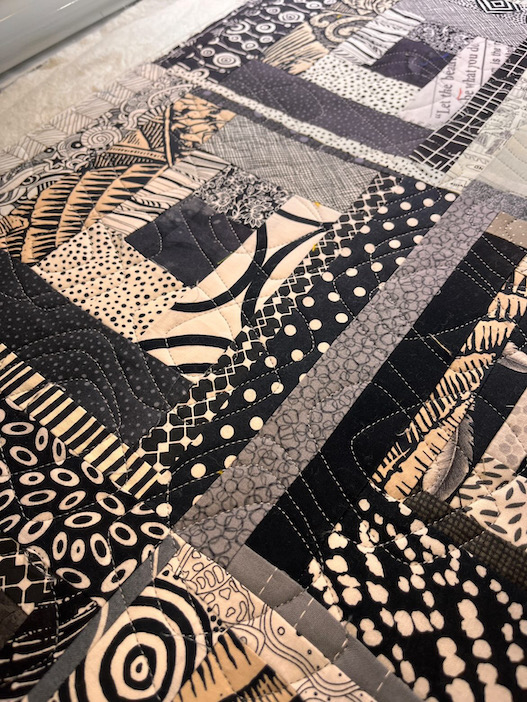
There is going to be lot texture in this quilt, primarily from the recycled home decorating fabric samples I used:
Here is a collection of close up blocks to show you the textures:
There are more fabrics I haven’t cut yet that I will be adding/using for the additional 30 blocks I need to make.
The layout you see on my design wall is not the final layout, just a sample layout. When I finish all the blocks and go to layout the quilt, I realized I need to pay attention to secondary patterns that I might want in the piece.
For example I noticed this secondary pattern, from how the blocks lay together, in one of the sections on the design wall and I like it:
I want to make sure the final layout has a lot of “movement” in it.
My tentative name for this piece is What Direction Do I Go?
It is a deeply personal piece, inspired by my first recycled fabric random triangle piece Flying Triangles (2012); but about my struggles for the past 5 years since becoming a widow, selling my beloved house, moving to Colorado (leaving all I knew there), starting the 2nd relationship in my life, quitting my job, trying to focus on textile art, etc. (Yes I like to lump a lot of life changes and drama into one time period, ha!).
It should prove to be an interesting Artist Statement on the piece when I am ready to write it (not until the piece is done of course).
And you thought it was just some recycled denim and home decor fabric sewn together (wink).
As promised, here are the bloggers that participate in the ScrapHappy monthly posting event, check out their blogs linked below for their ScrapHappy posts:
In honor of the 10th anniversary month of my blog, I am going to attempt blog everyday for the month of October. I’ll be catching up on adventures I’ve not yet shared. Perhaps eventually I’ll share my latest textile project(s) when I get back to working on them…
ANOTHER QUILT RETREAT IN MY HOME (SORT OF)
Back in May I had a “Scrap Happy Quilt Retreat” at my home for my friends D and K, who are both quilters – see series of posts in this blog category Scrap Happy Quilt Retreat, if you’d like to read about our “fabric-scrap-wrangling adventures.
My friends MJ and J got interested in “retreating” at my house – J is a quilter and MJ is not. I met J through MJ and MJ is a long time very dear friend of mine that I met when I lived in Bend, Oregon 2005 – 2018. We planned the retreat for late August 2023.
I thought it would work – MJ and J would come for 5 days and J and I would working on scrappy freeform log cabin quilts while MJ did some other craft and just hang out with us. MJ joked that we were going to give her macaroni, non-toxic glue, popsicle sticks and fingers paints (like in Kindergarten) to work with – ha!
I’ll share what MJ actually ended up doing later in this post (she creatively made her own retreat!) when our retreat in August happened.
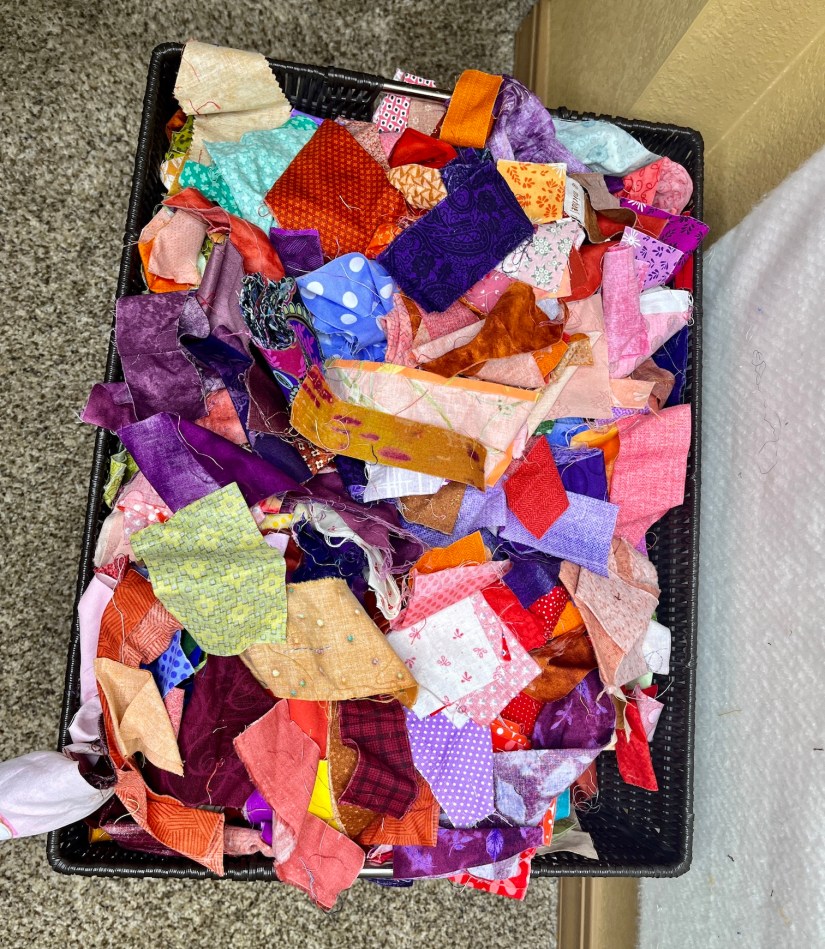
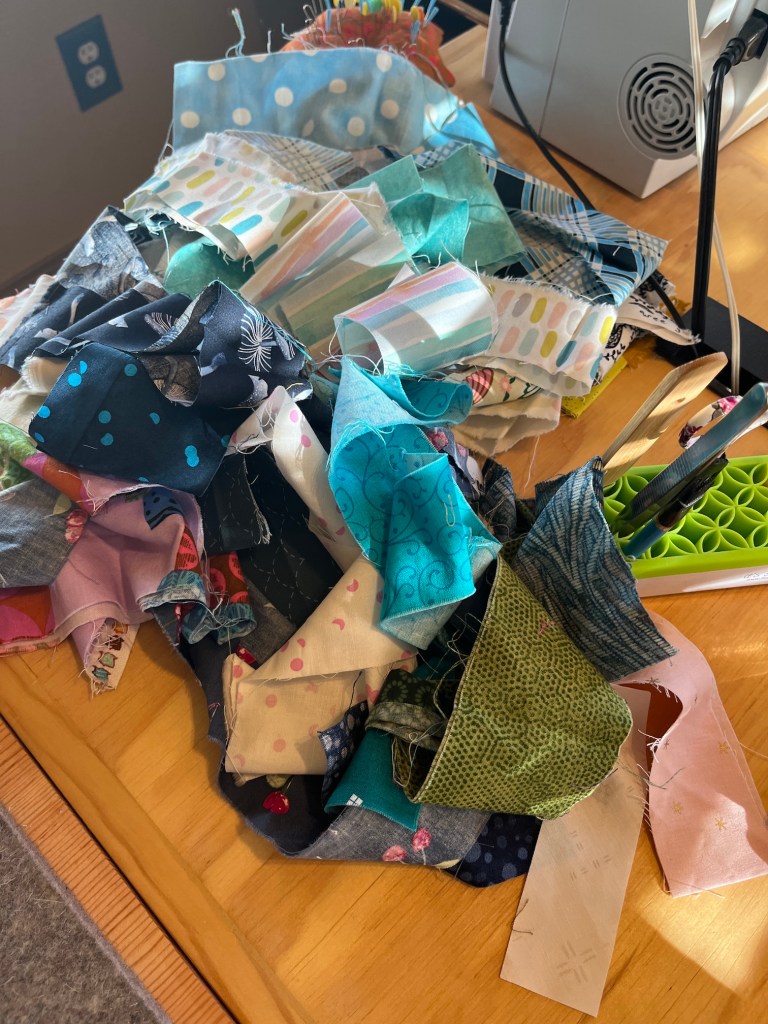
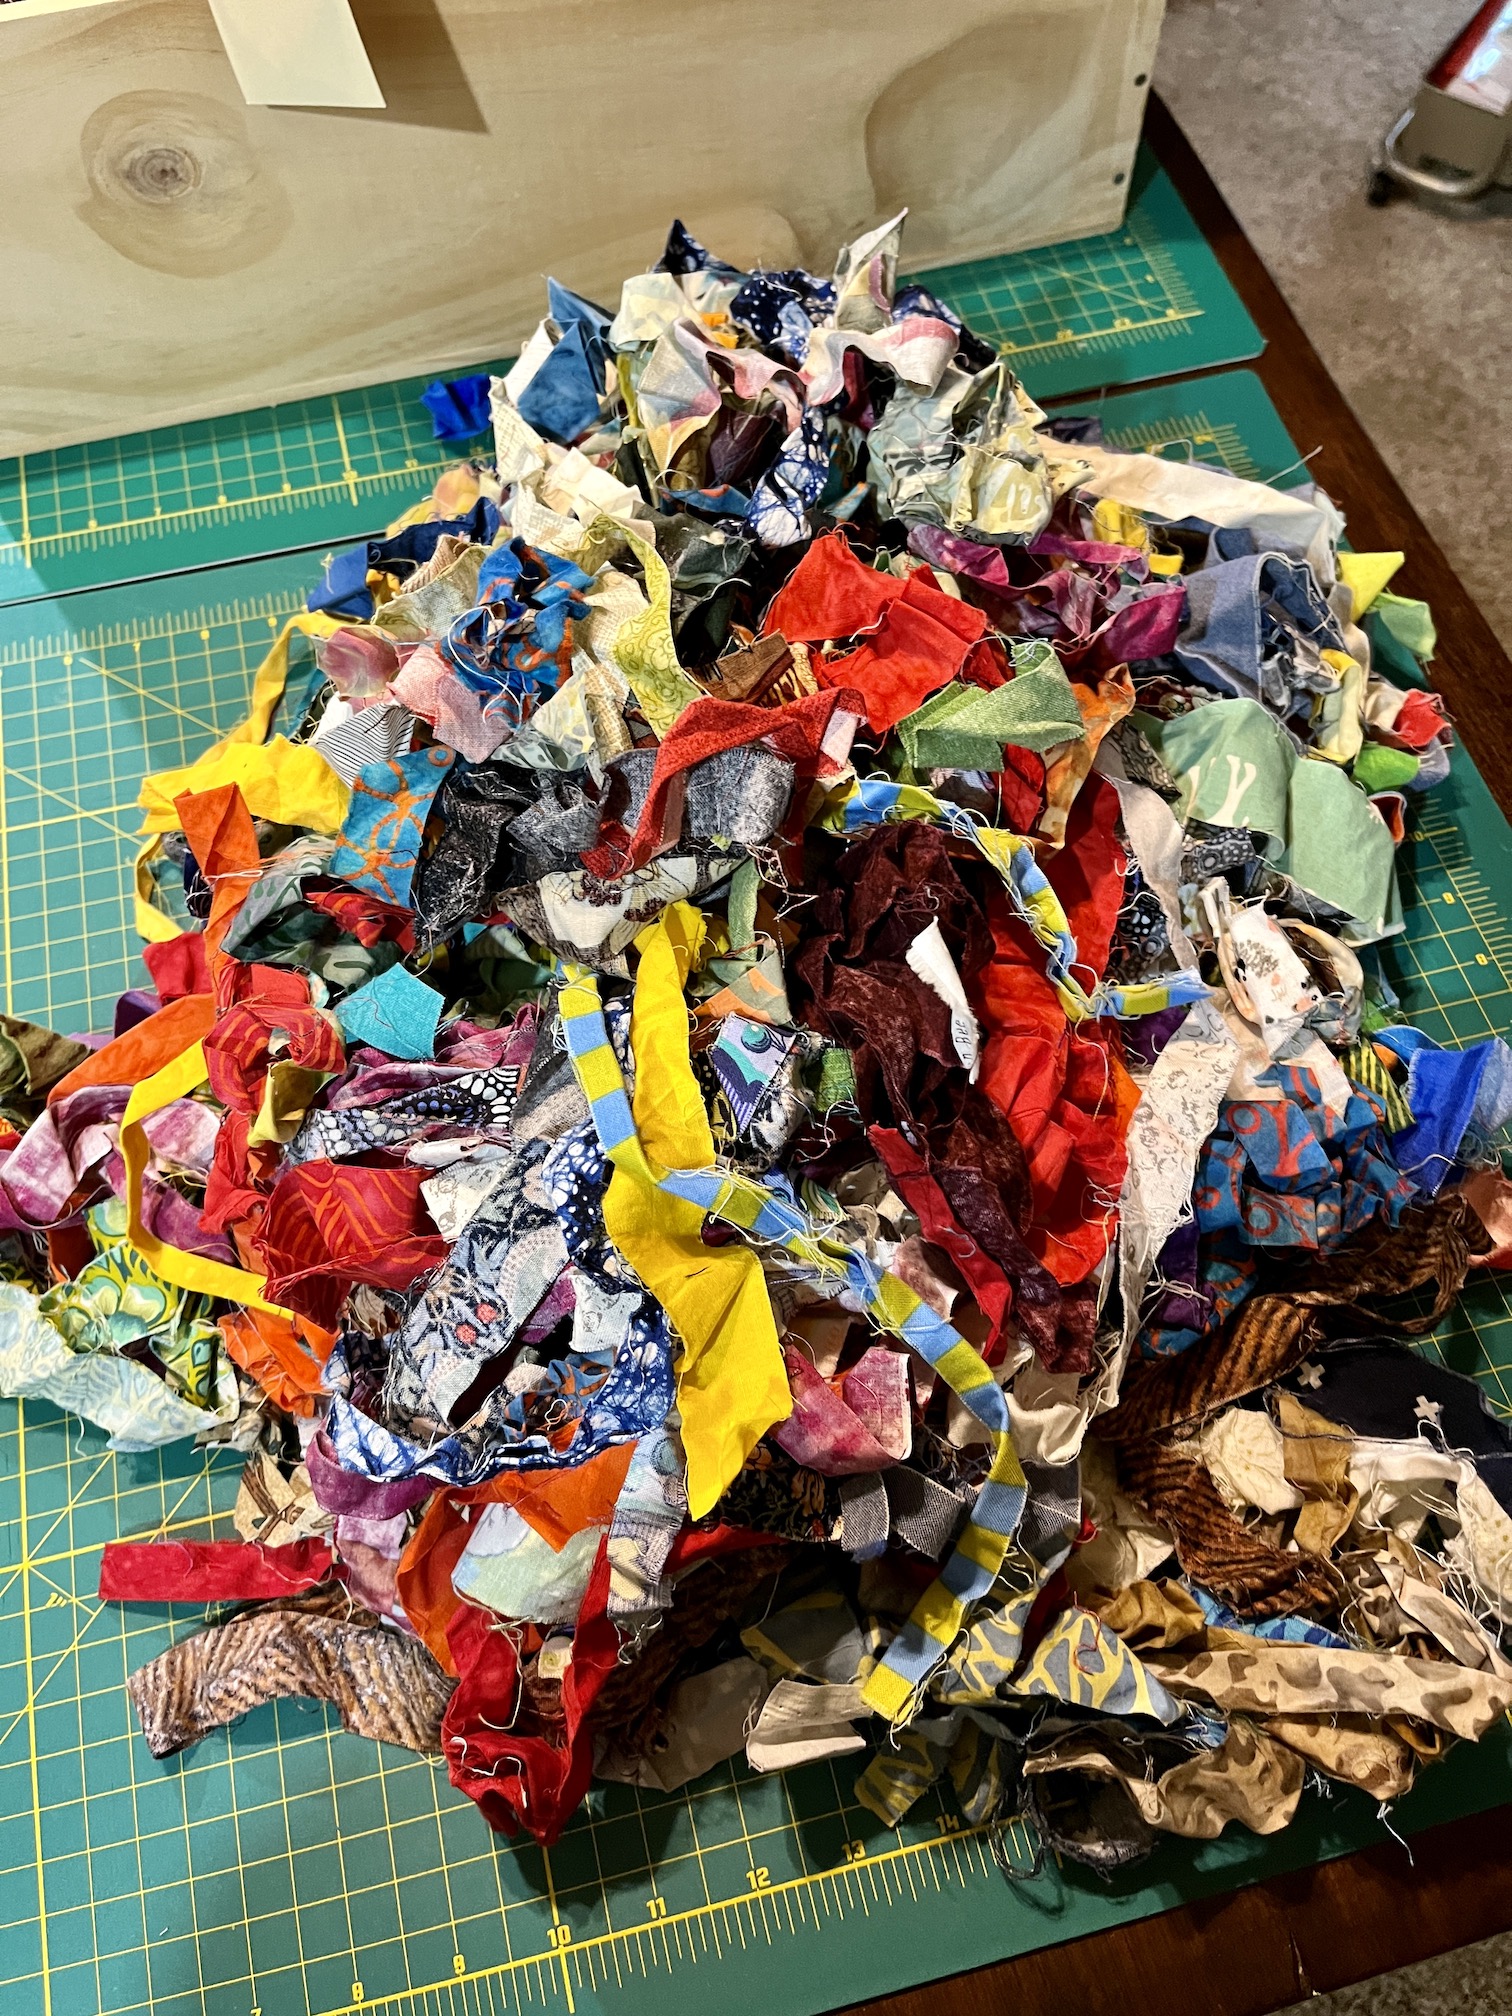
But first I will share the huge fabric scrap pile J and I had to work with during the 5 days in August we had the retreat: it was a combination of my scrap pile and scraps that J brought:
I helped J find some type of inspiration fabric scrap in the pile that had a color palette (as how else to you start sifting through that “hot mess” to design a scrap quilt?). Once she found an inspirational scrap, she started pulling from the scrap pile fabric scraps that coordinated with the scrap to create a palette.
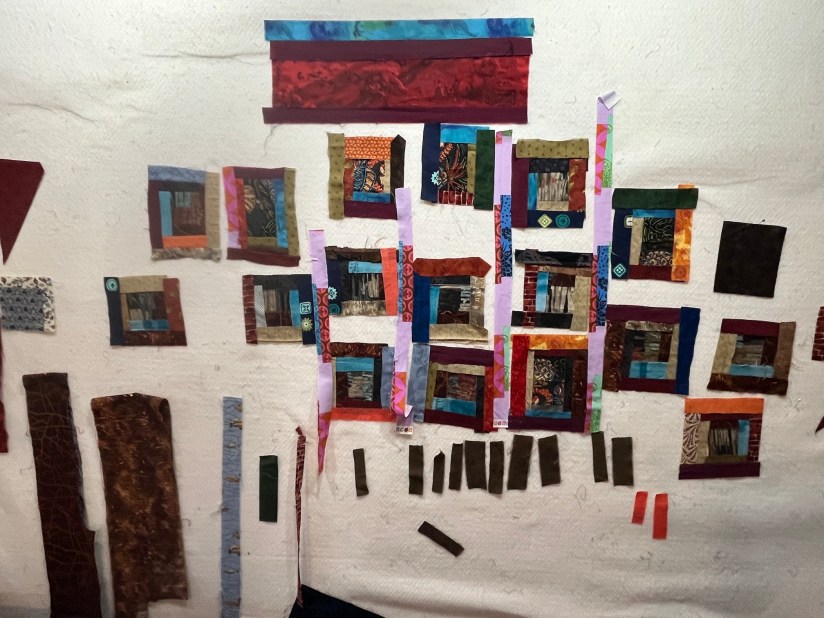
J took off and ran with the concept and before I knew it she was covering my design wall with her improvisational combinations:
Which evolved into these blocks:
I’ll share her pieced quilt top someday in a follow up post when she completes it (if she doesn’t mind me sharing the photo).
What did I work on? I started a new freeform scrappy log cabin but I didn’t like the direction it was going; and after a couple days working on it I recycled it into the scrap pile (and didn’t take any photos of it).
So what did MJ work on? Well not any crafts, ha! She abandoned us in my studio and ended up having a cooking retreat with my husband John.
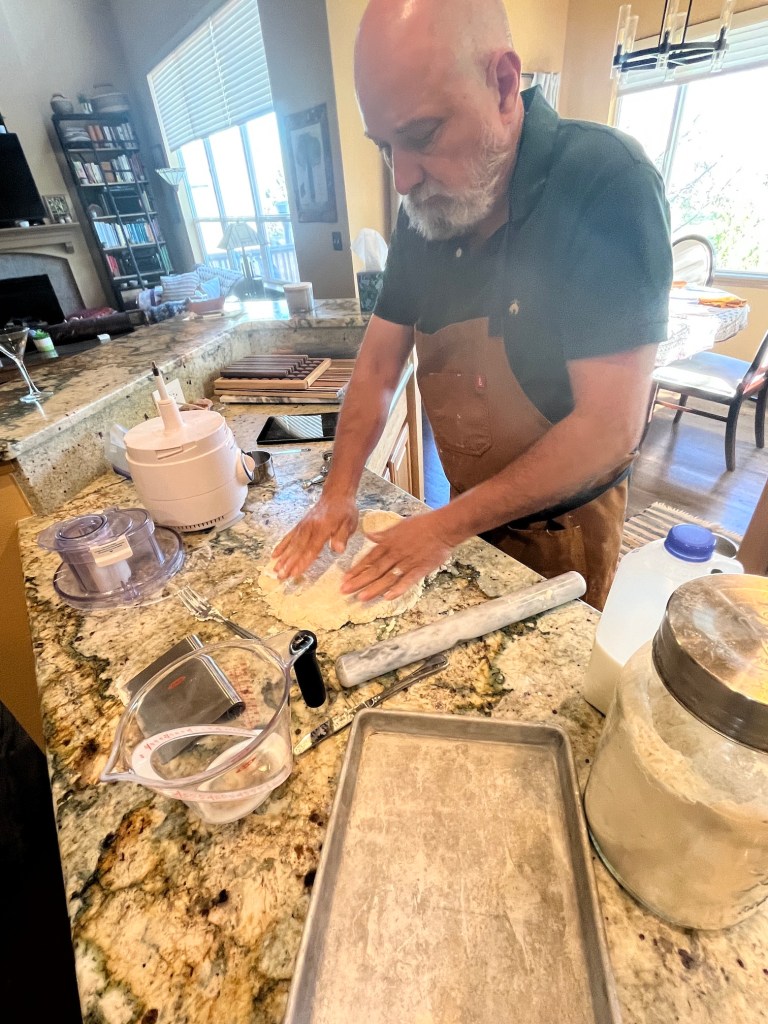
Like the retreat I had in May with my friends D and K, John did all the cooking. MJ helped John do all the cooking and got cooking lessons from him on some of his specialities. Here they are in a lesson:
She also enjoyed hanging out with Mike our dog (MJ is a “dog person”) and binge watching Netflix shows. Here life is very busy back in Central Oregon and she enjoyed just relaxing and helping cook as her “retreat”, while J and I were upstairs in the “quilters sweatshop” working on our scrappy projects!
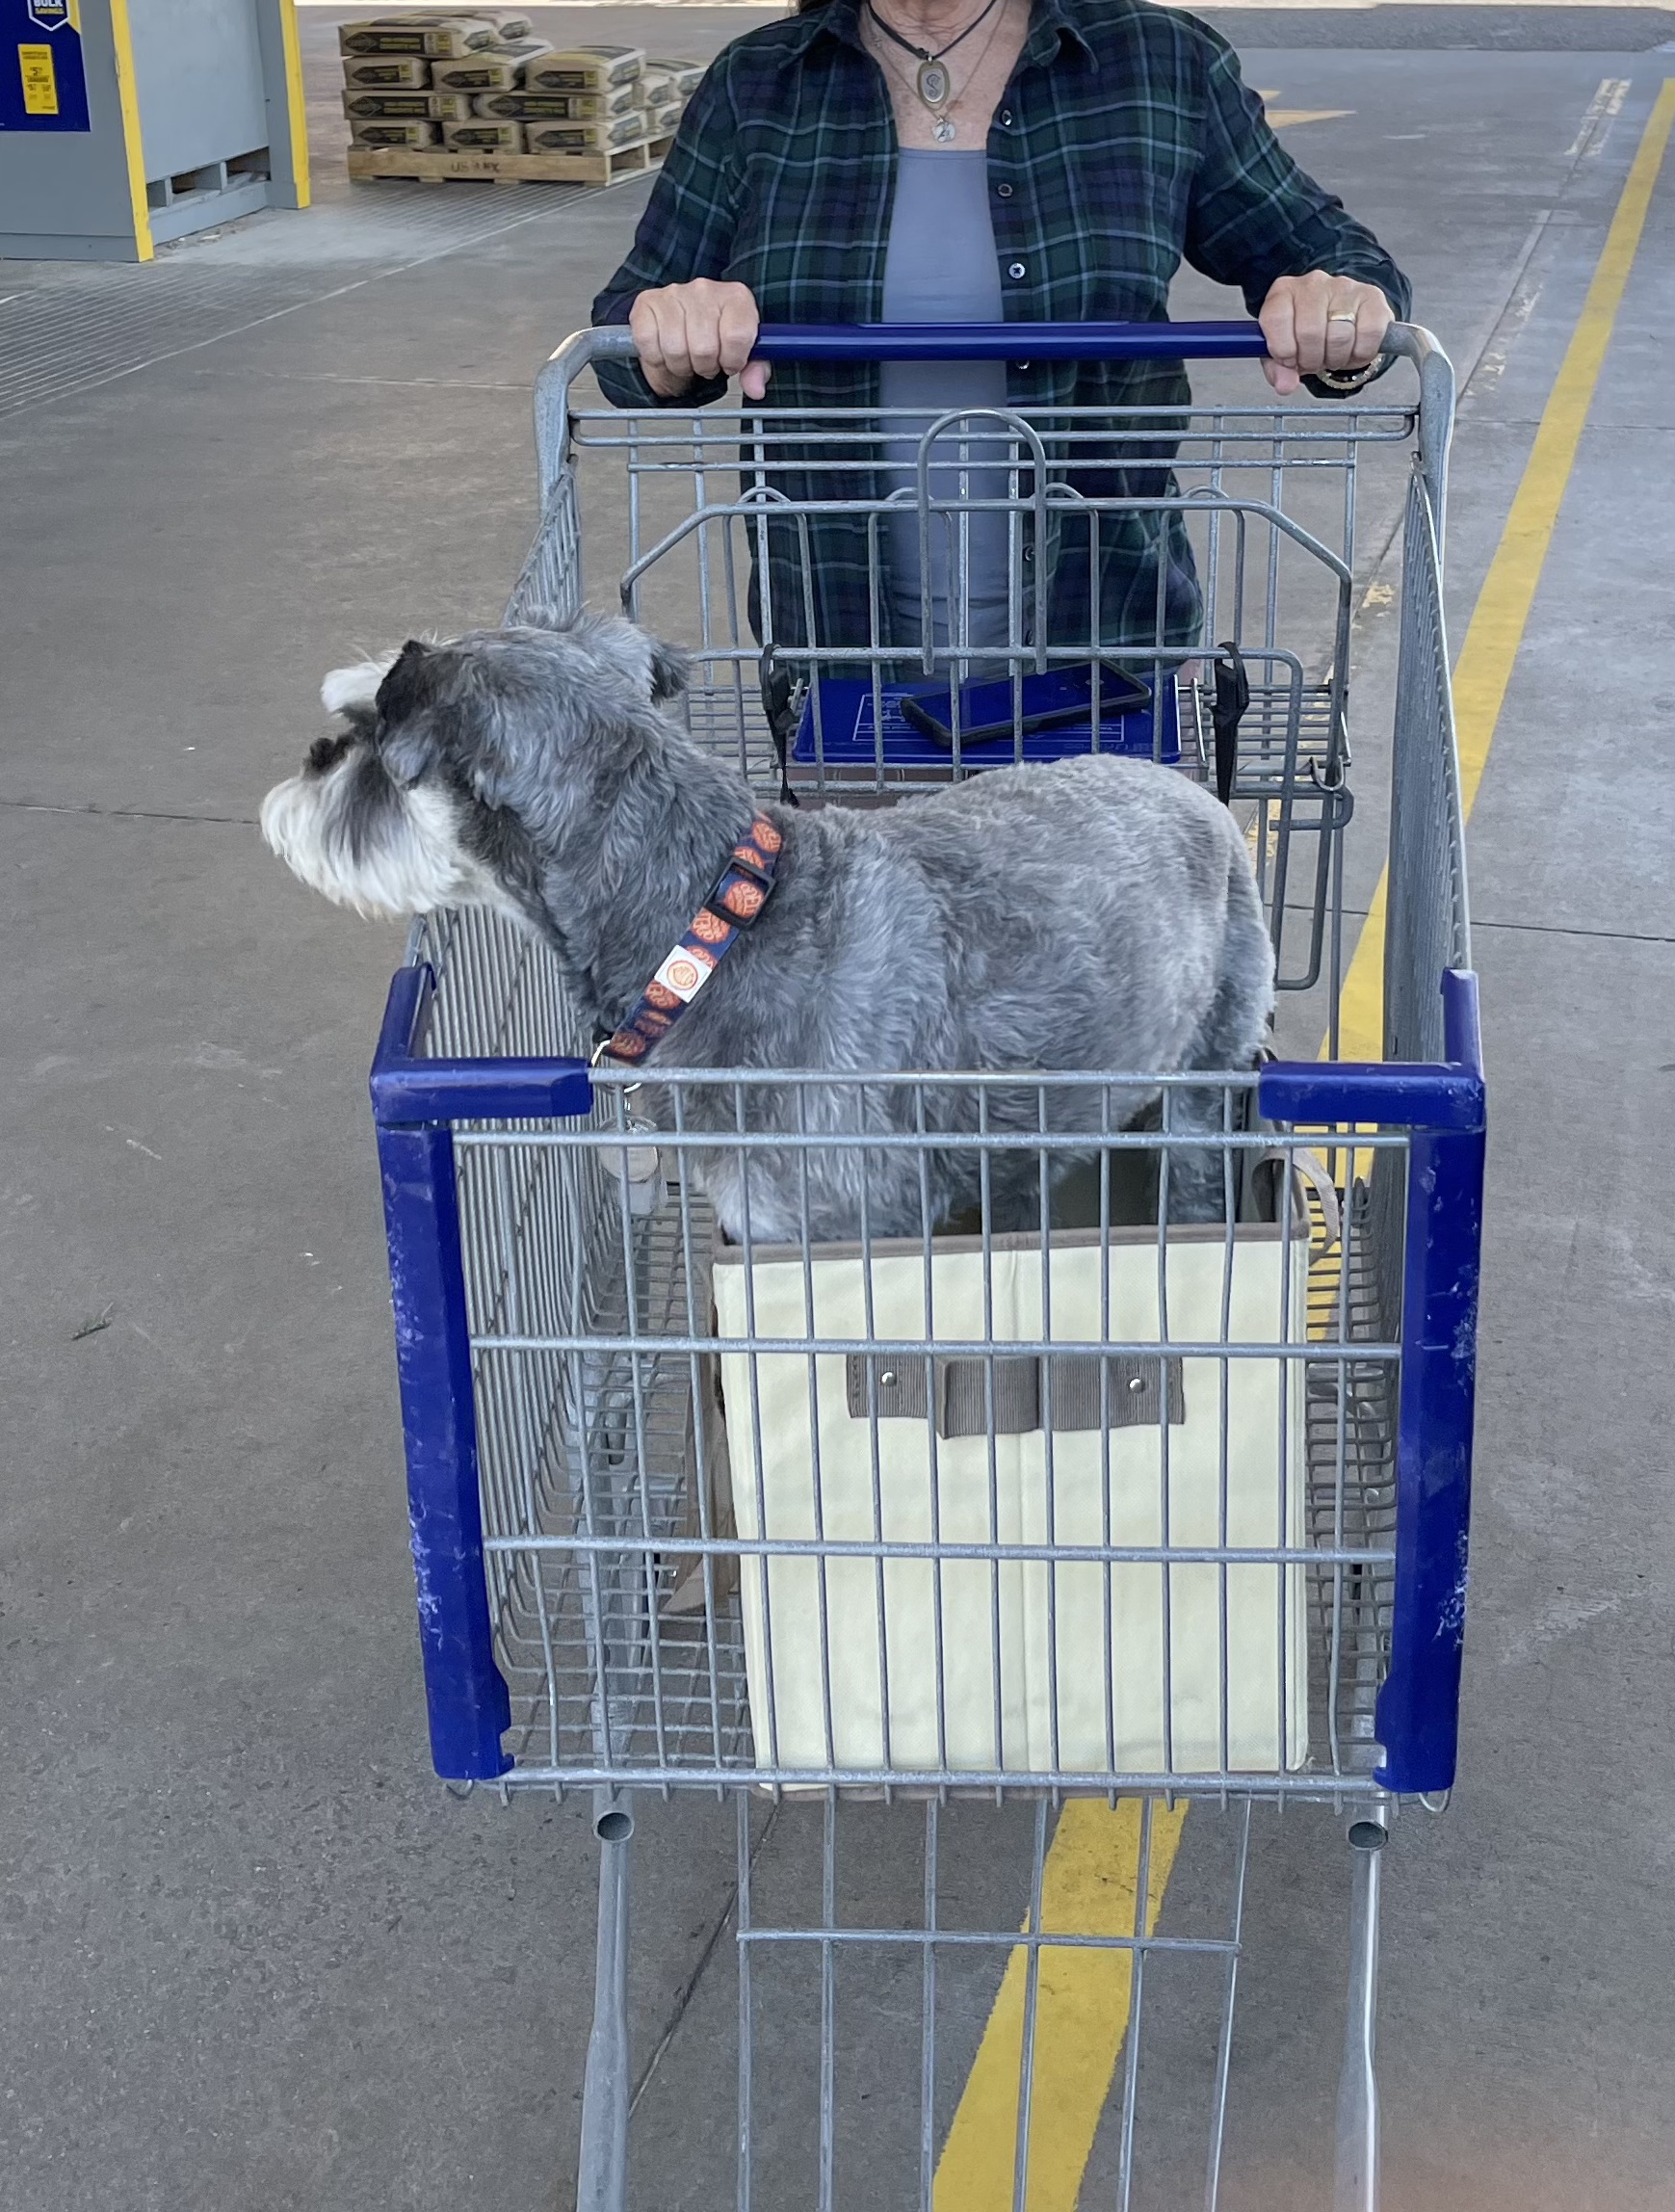
MJ also ran errands to the home improvement store with John and Mike, and she got trained on how to push Mike around in his box in the shopping cart as John does!
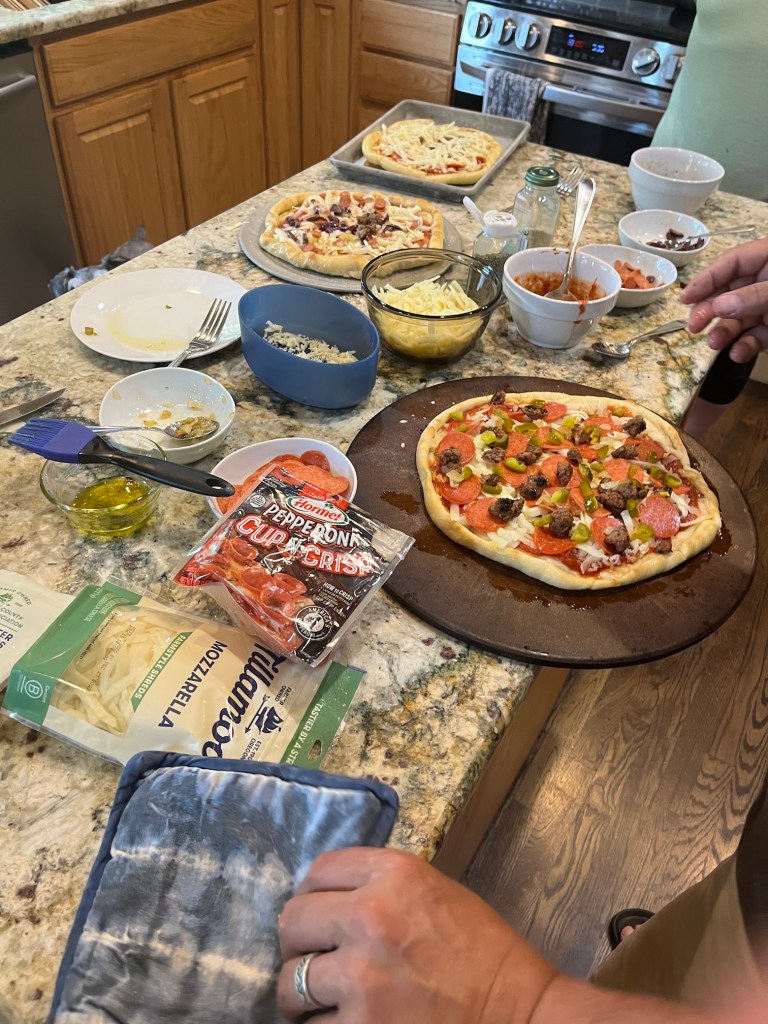
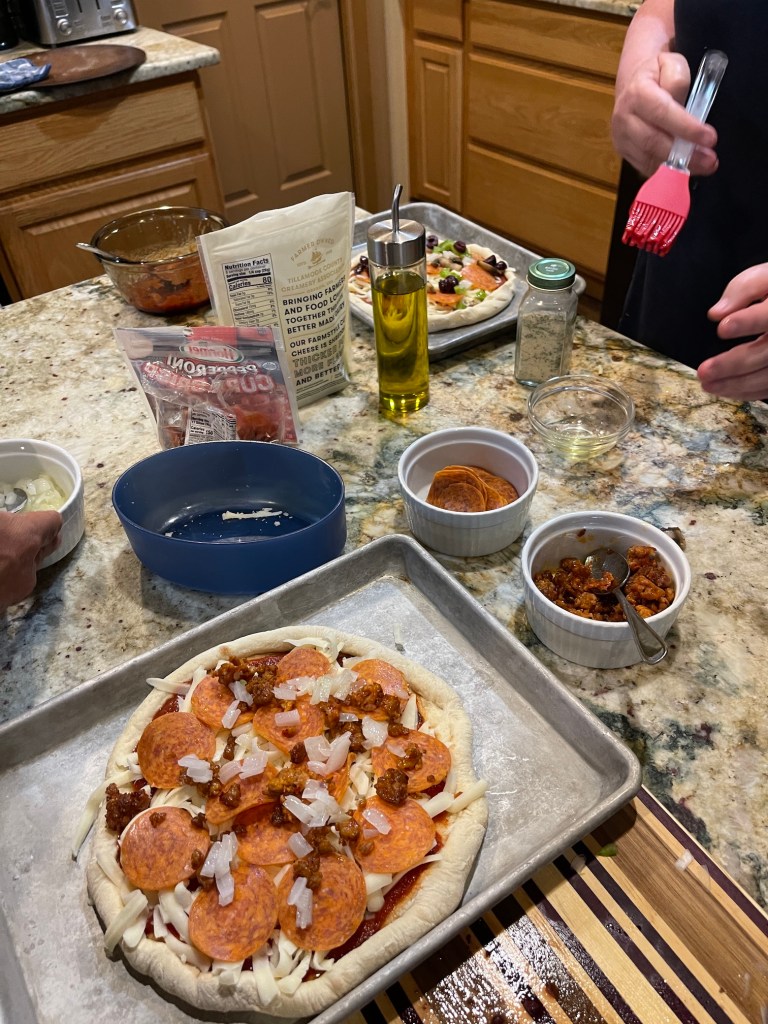
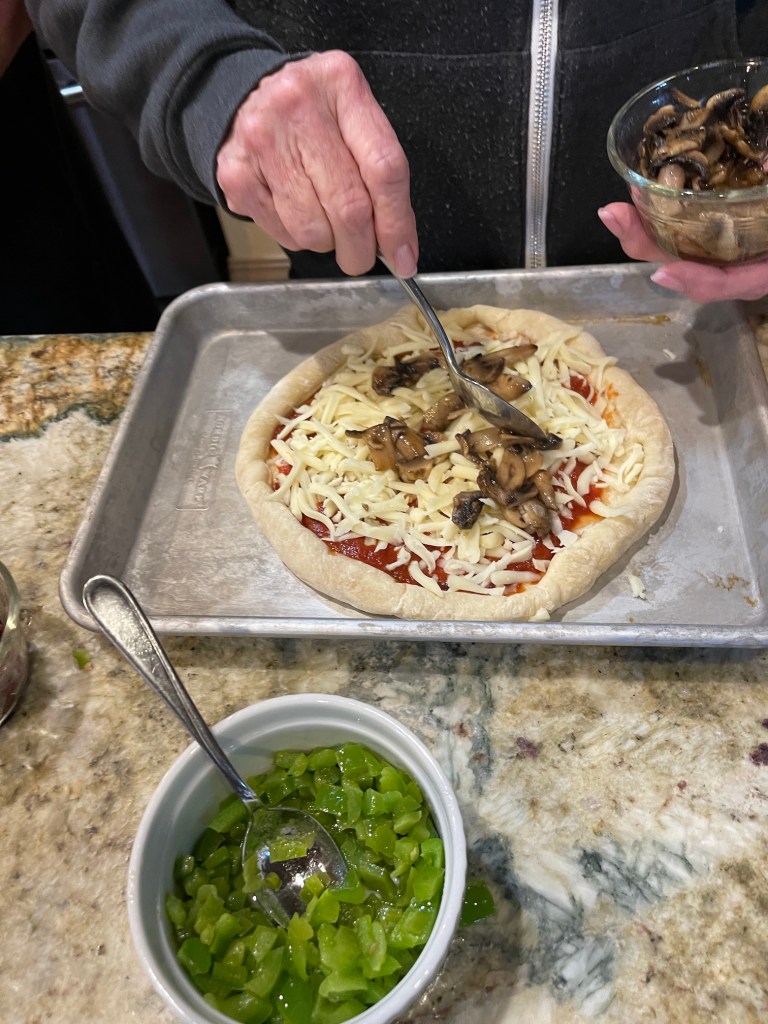
We had a “make/top your own pizza night” for dinner one night, it was so fun. John and MJ pre-baked the pizza crusts and we got to add our own toppings and hang around the oven waiting for our delicious combinations!
We got out of the house and spent a couple hours or a 1/2 day on various adventures.
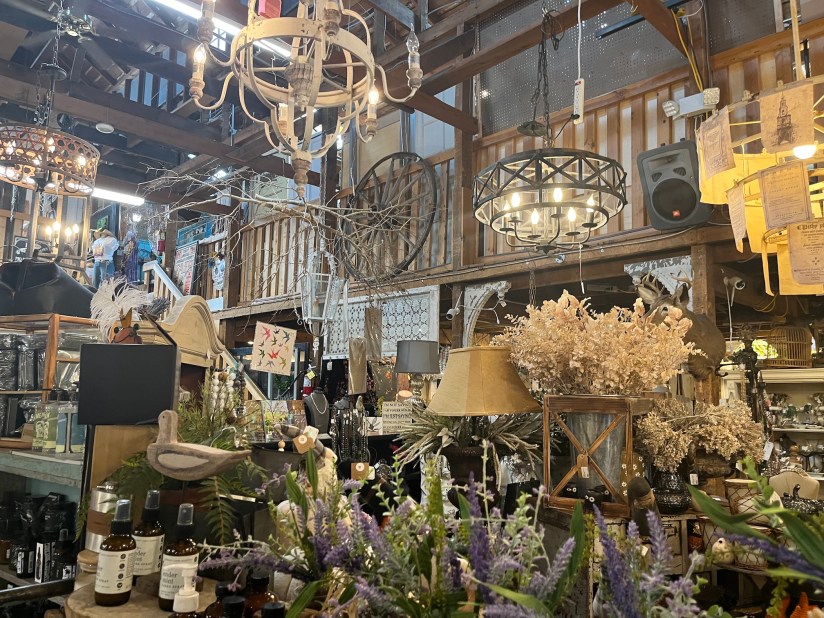
One day we went to Castle Rock, CO and visited The Barn, a consignment/antique venue (sort of like a nicely curated flea market), that I love and is so fun to wander.
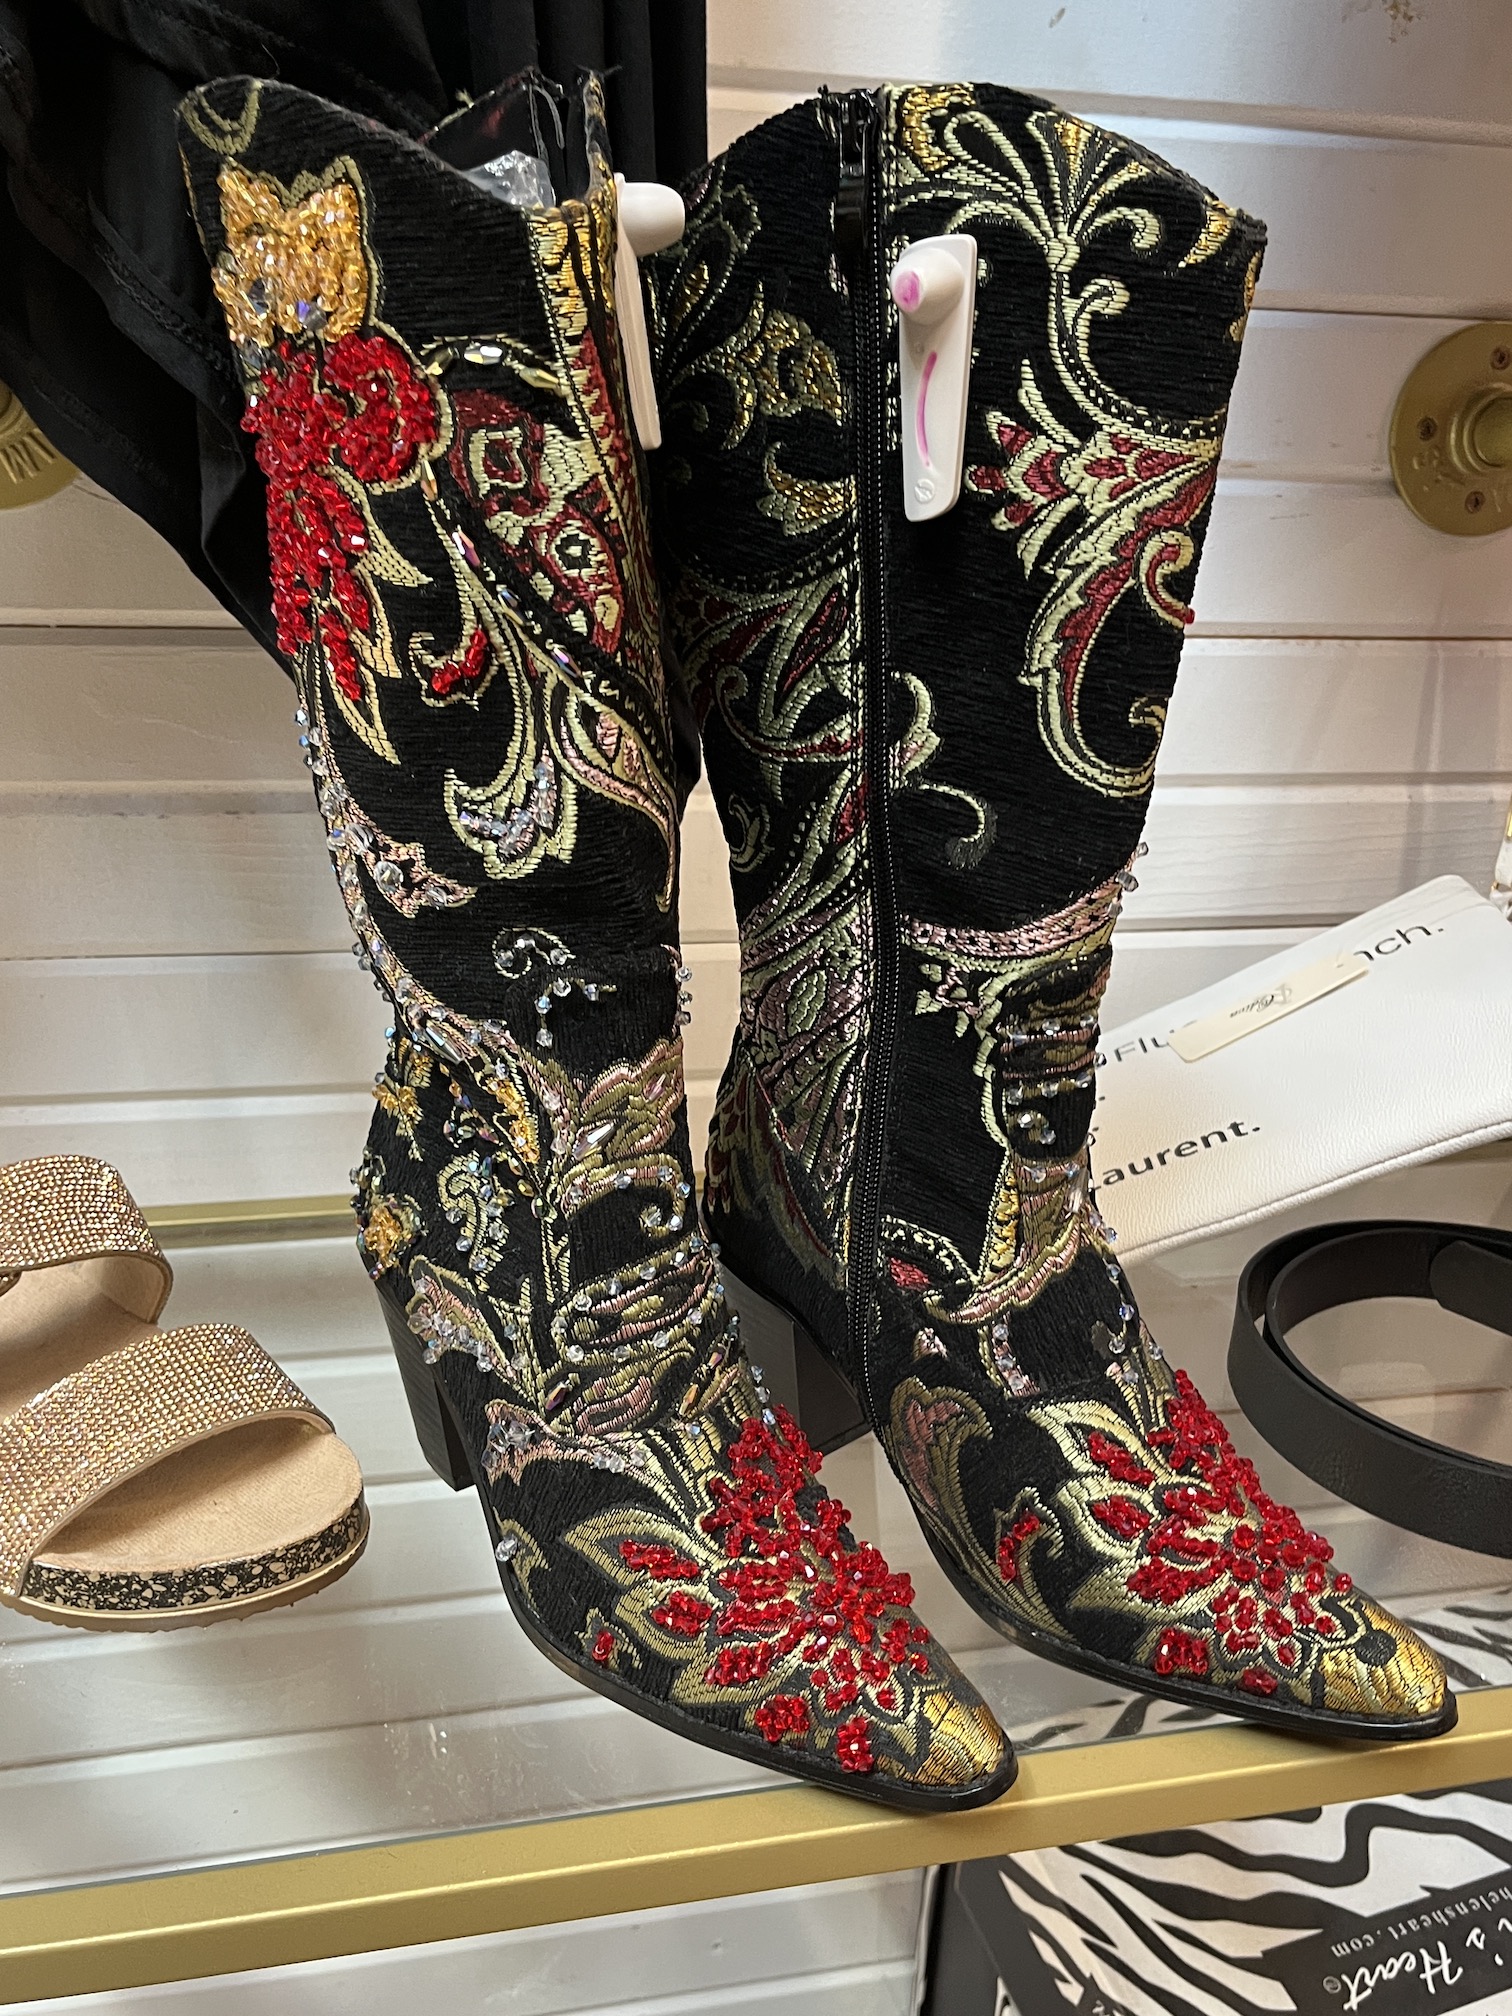
Here are some boots at The Barn I just could not live without (just kidding, definitely not my style):
It is such a fun wander to meandering around The Barn; and as mentioned on their website: “When you walk into The Barn you may feel many things. Among these feelings could be a sense of comfort…..like you have come home. Many customers express these sentiments…it has come to be known as ‘Barn Therapy’.”
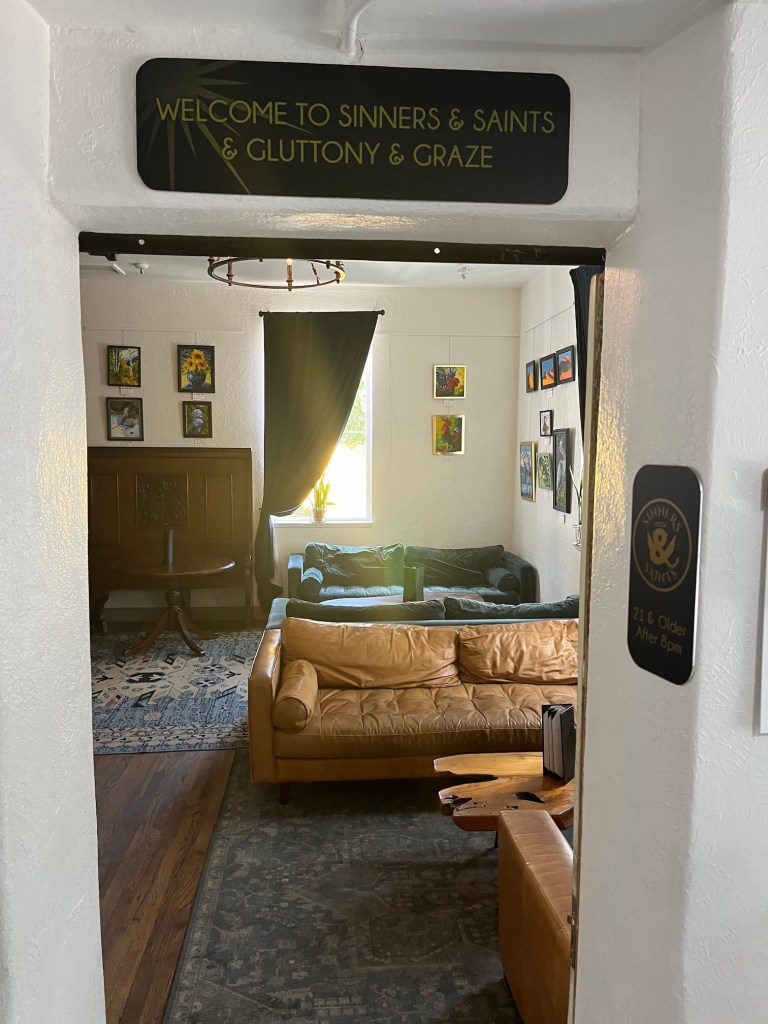
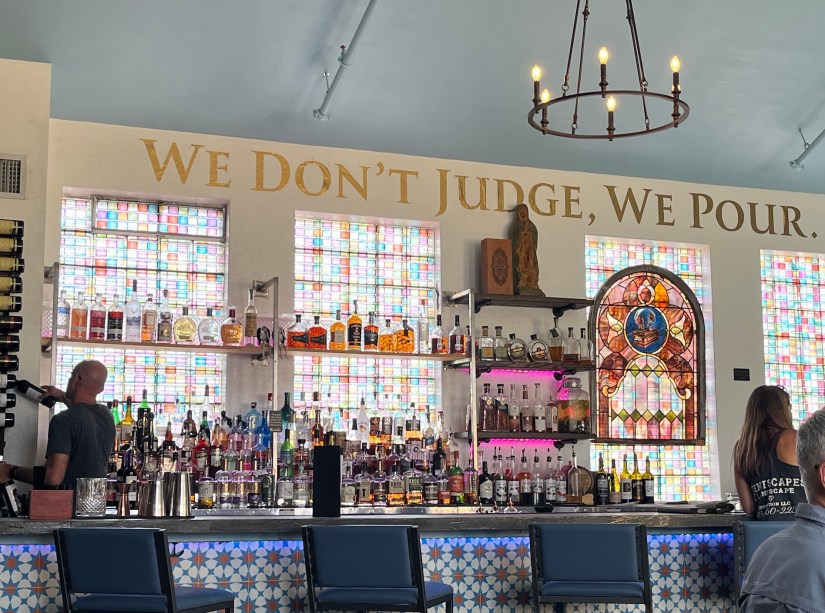
After The Barn we had cocktails and delicious appetizers at the Ecclasia Marketacross the street, sitting in the Sinners & Saints/Gluttony & Graze area of the market on the comfy sofas.
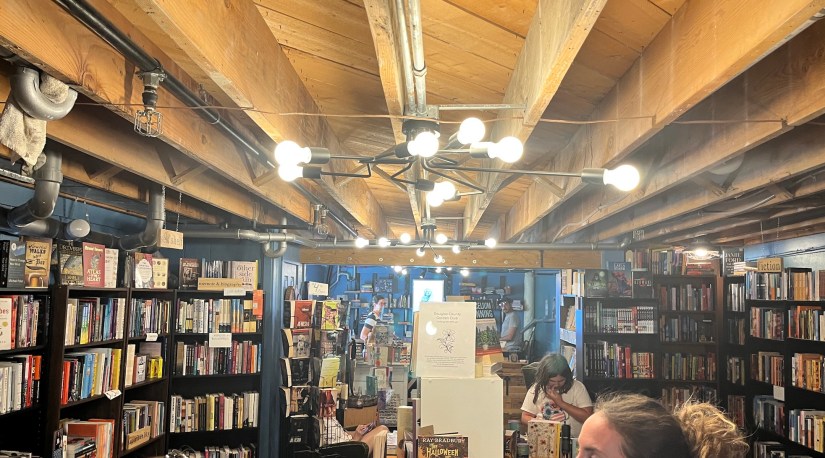
We also stopped at my favorite indie bookstore in Castle Rock – Sudden Fiction Books.
All of us brought books and J bought so many books we wondered how she’d get them all in her suitcase (she did ship them home), especially some amazing Children’s books for her grandkids. This little bookshop has an amazing curated collection.
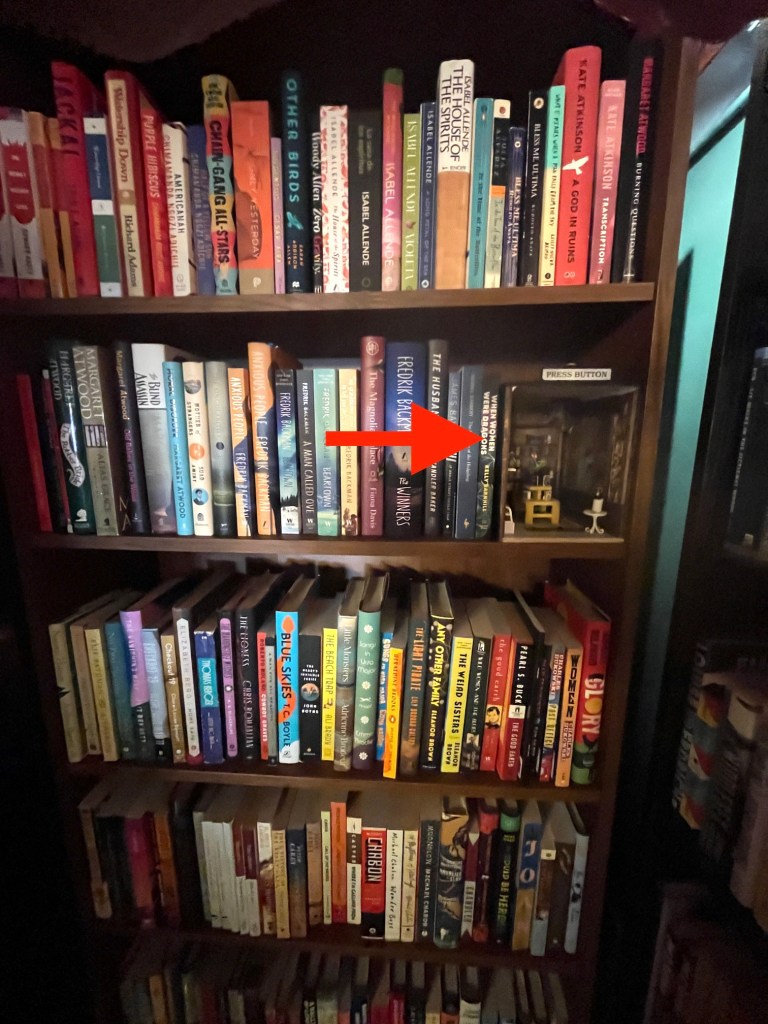
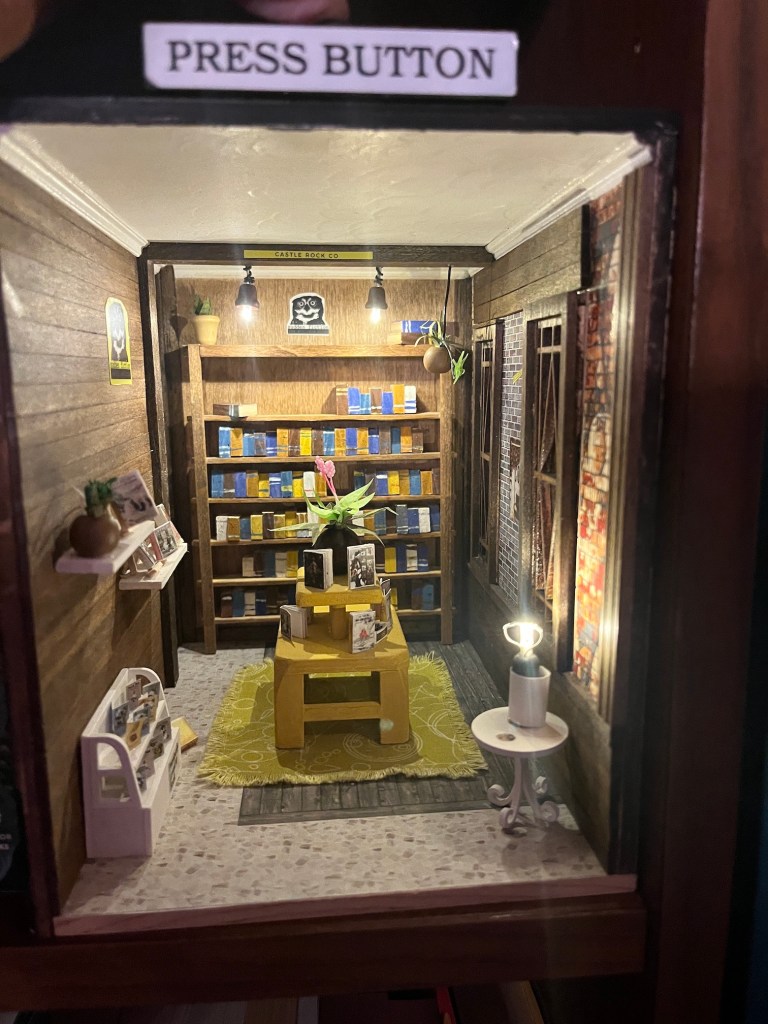
They also had this adorable little miniature room display (that lit up) inside one of their bookcases!
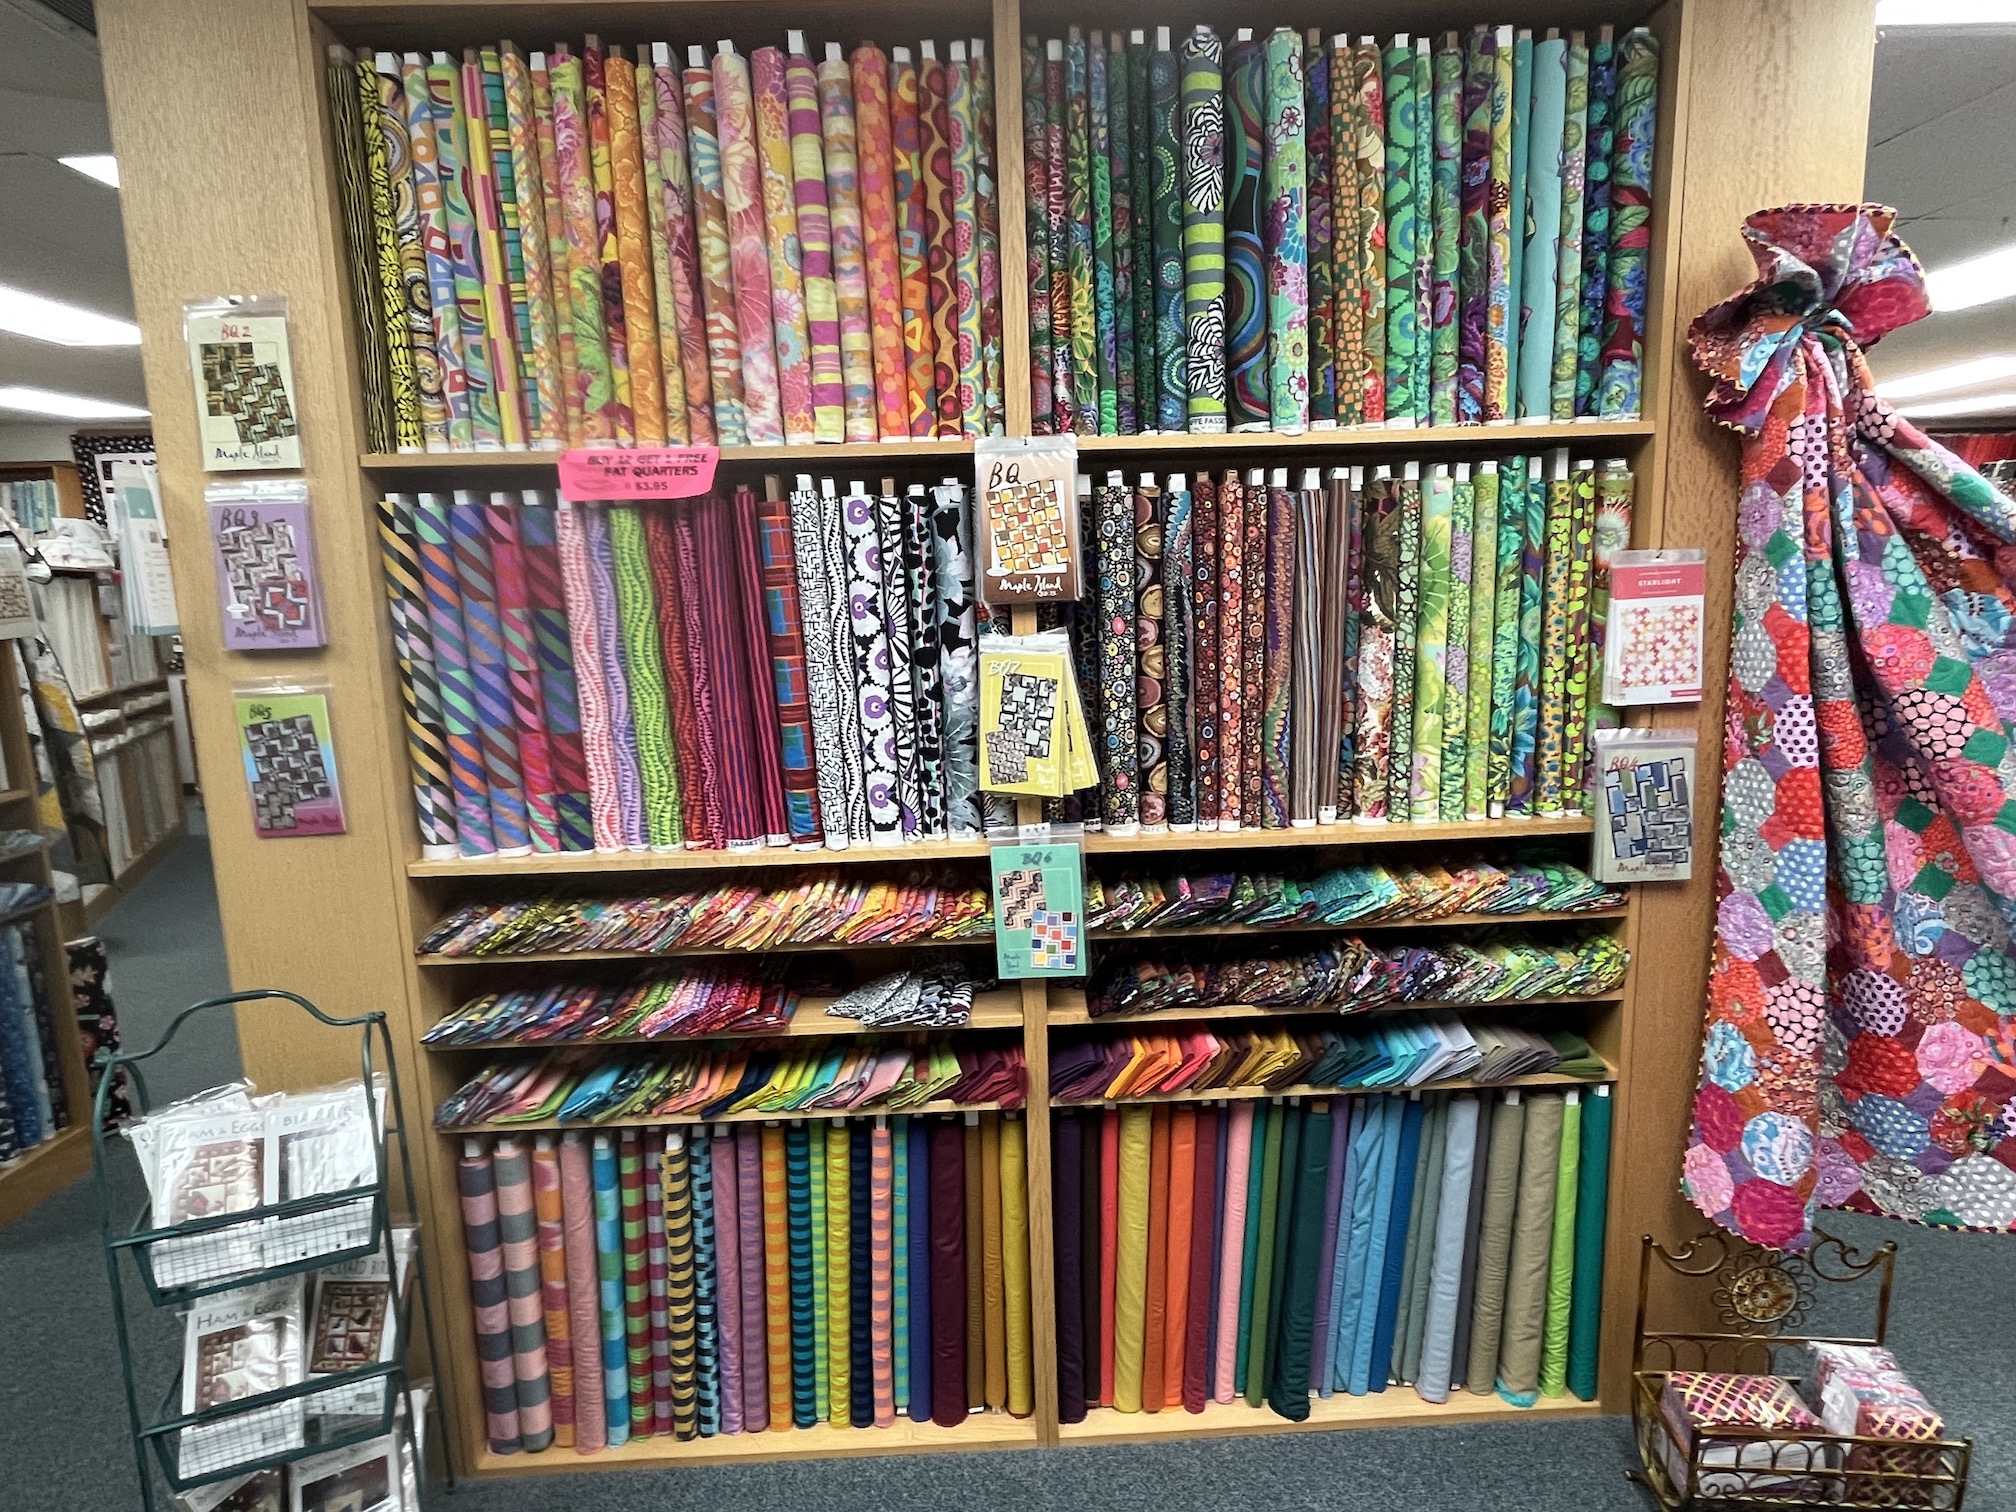
One day I did take J to a quilt shop – we visited Holly’s Cabin quilt shop and J was amazing by their extensive collection of curated Kaffe Fassett fabrics on display:
We had beautiful weather (though a little warm in the afternoons) while MJ and J visited. Every morning MJ (who loves to walk like I do) and I took Mike on a couple mile stroll around my neighborhood. John introduced me to what we call “the nature hike” near our house – miles and miles of wooded trails surrounding and connecting different neighborhoods. I’ll share photos from my new favorite daily walk/hike someday.
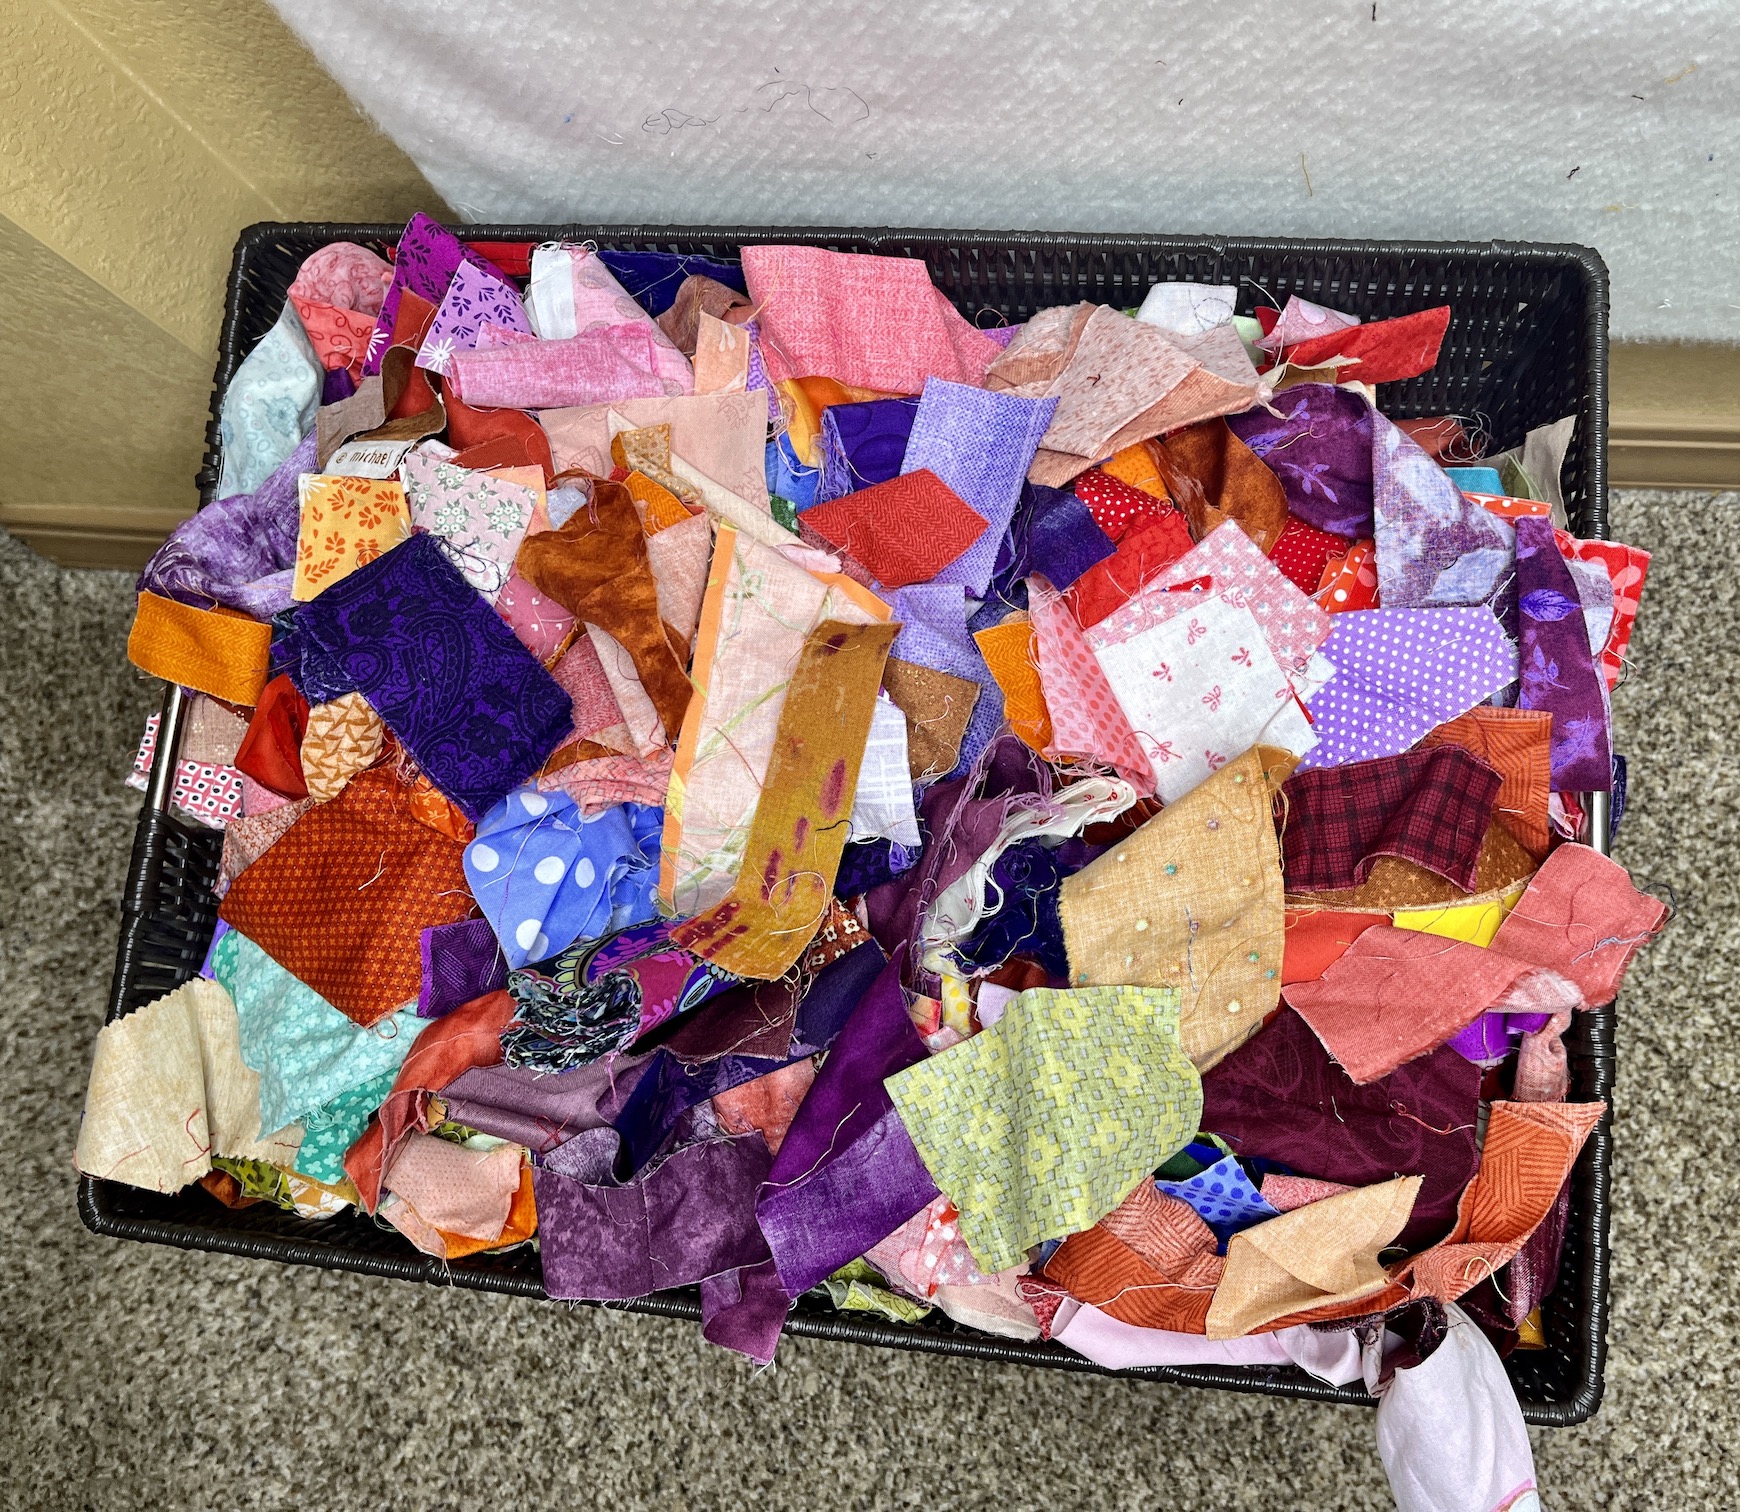
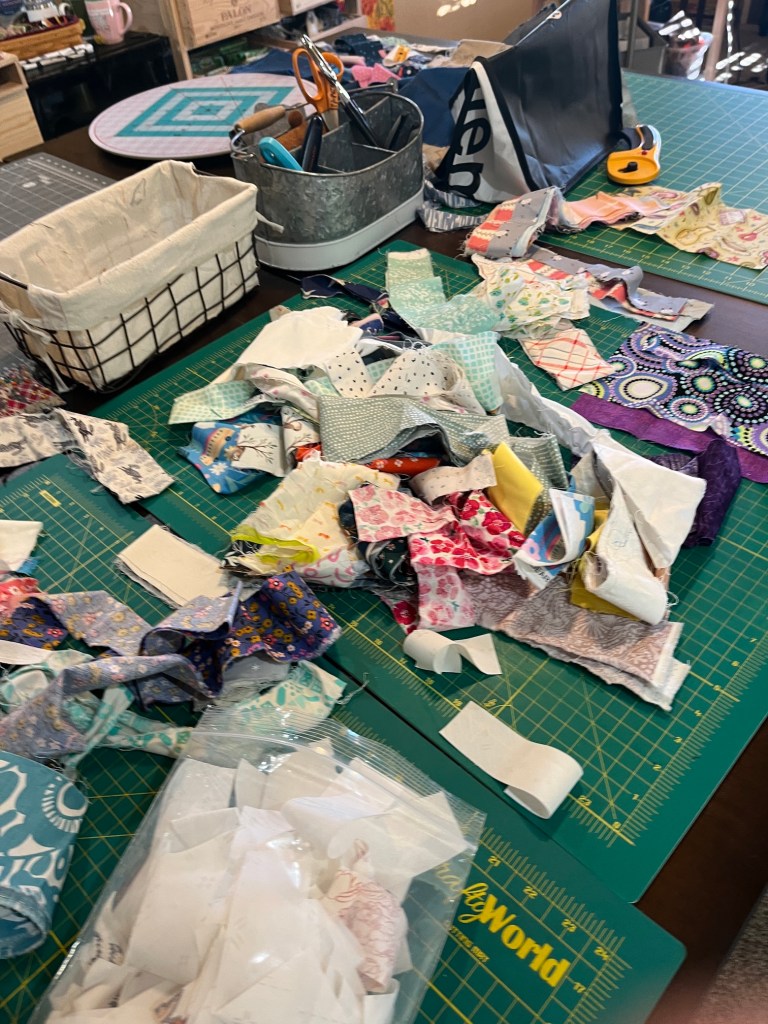
I’ve been busy preparing to restock by Textiles & Smiles Etsy shop and getting ready for another scrappy fabric quilting retreat at my house, I am having with a different set of friends. Below is the basket of scraps they can work from:
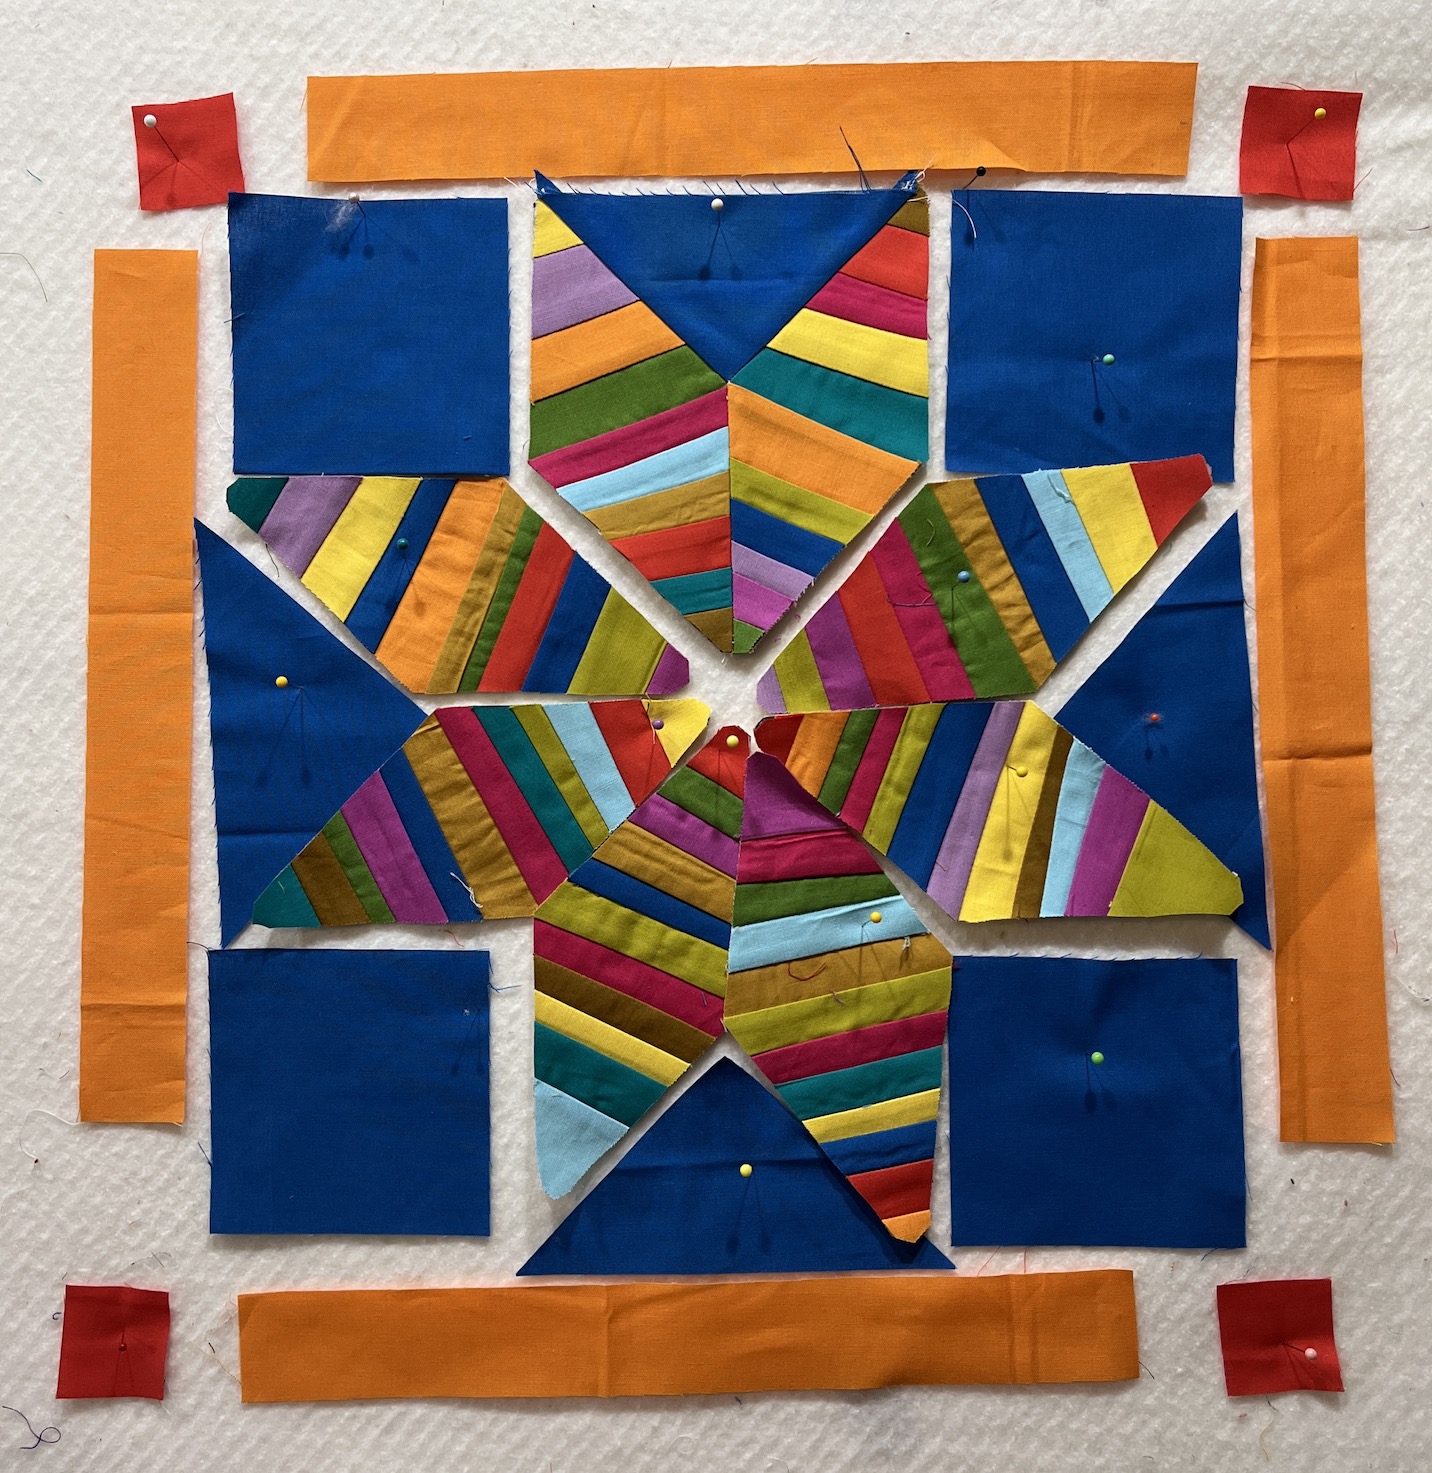
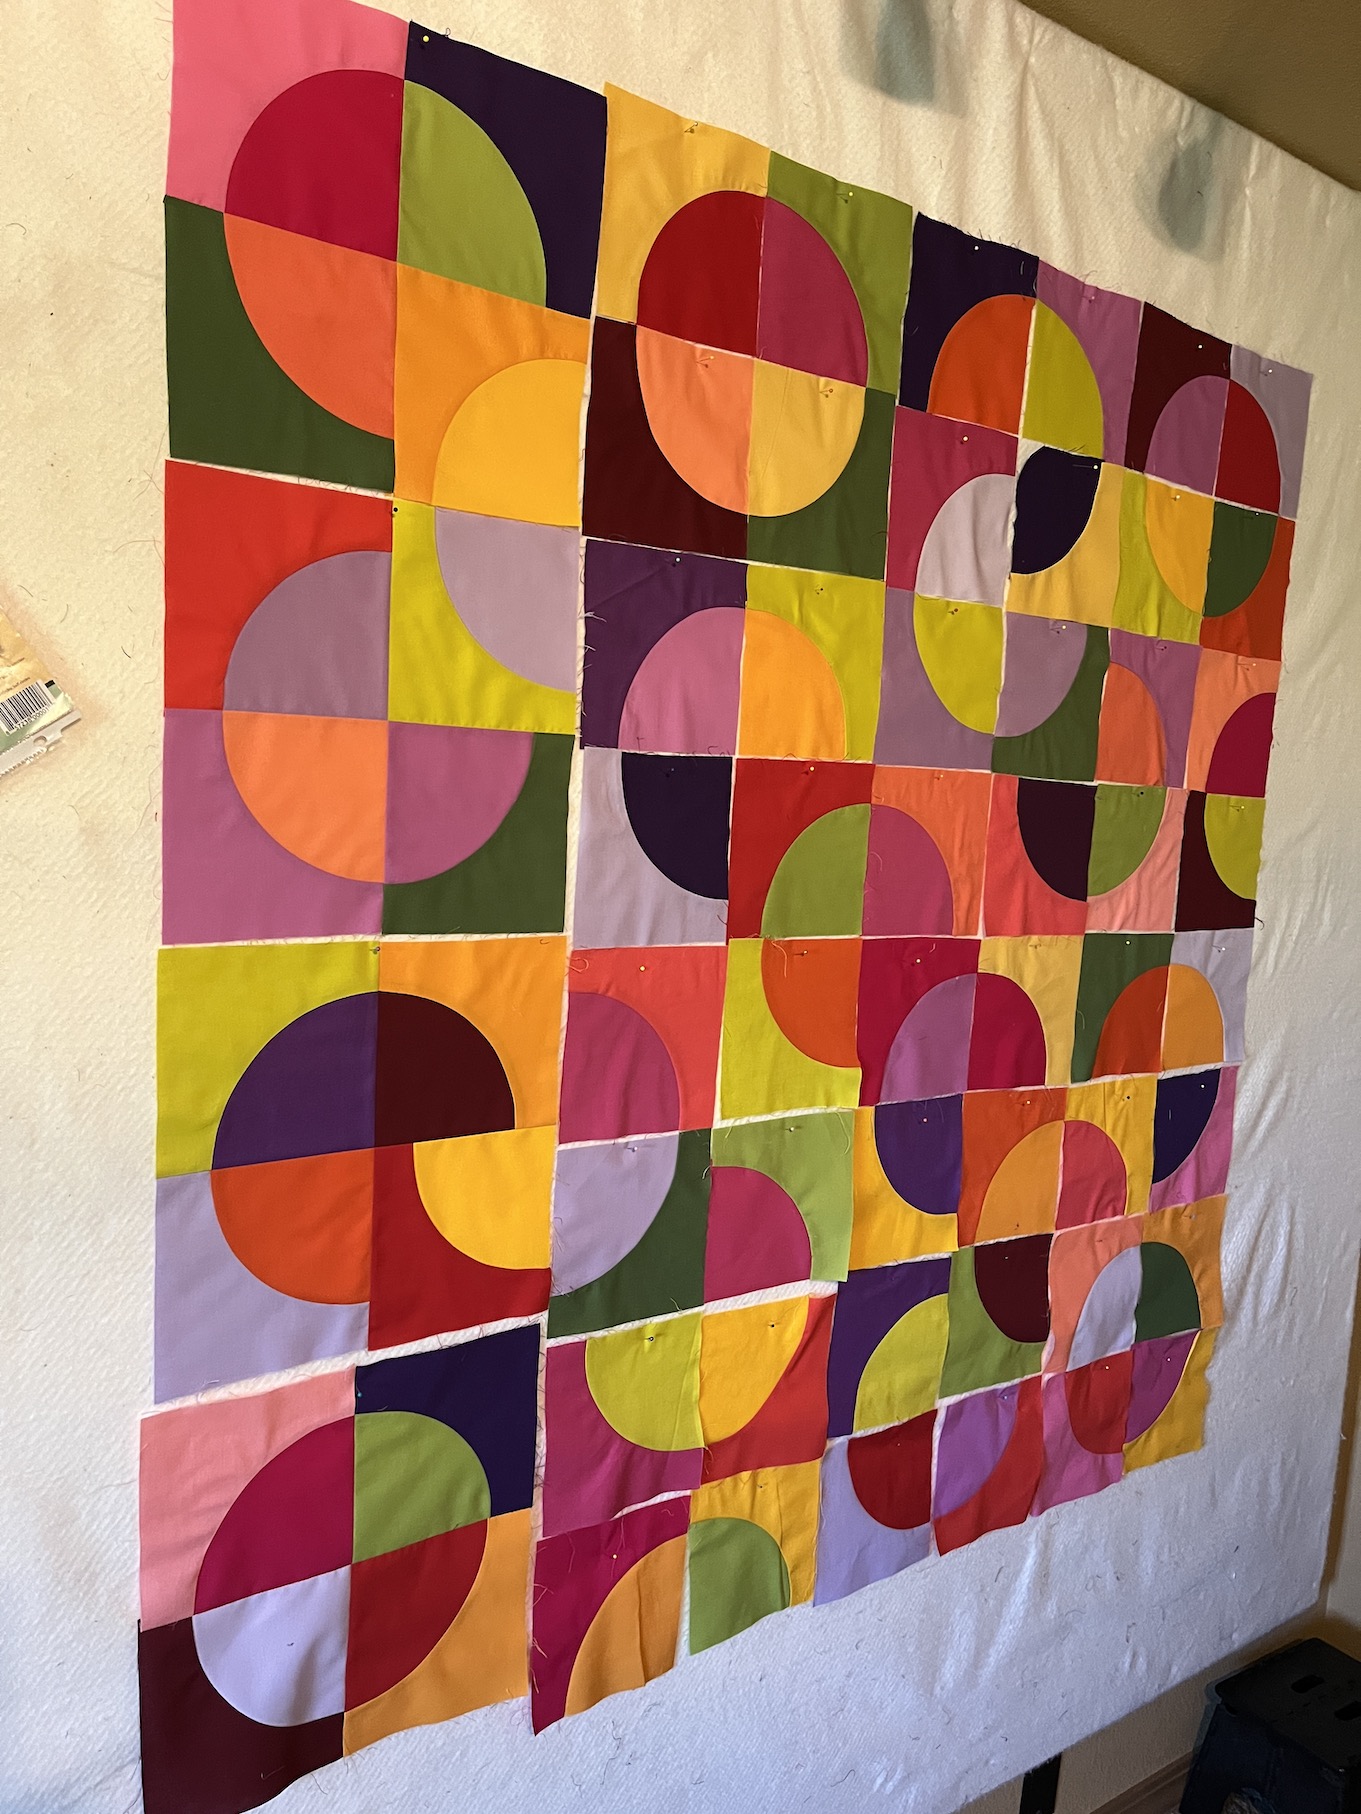
In between that, some road trip adventure with John, and the completion of a home renovation project (well John did most the work), I’ve managed to make a little progress on the scrappy solid color medallion wallhanging I’ve been working on – Strings Attached.
Since my previous post What’s on the Design Wall: Strings Attached, I’ve sewn all the section of the center medallion string pieced star together and done the first border:
There were so many Y-seams! It seamed like every seam (smile) was Y-seam – yikes! I got a little more proficient on Y-seams after doing so many in a row but I don’t have any great insight, tips or wisdom to impart, sorry.
Here is a reminder of what the completed quilt will sort of look like:
It’s the 15th of the month and time for my monthly “ScrapHappy” post as part of the ScrapHappy group I belong. At the end of this post I have a link to the other blogs participating in this monthly event in case you’d like to check out their ScrapHappy posts.
On August 15th, ScrapHappy Day, I’d hope to share the completed quilt top for the VERY SCRAPPY wallhanging quilt I am currently working on – “Strings Attached” from August 2021 issue of AmericanQuilter Magazine, pattern by Lori DeJarnatt (see post What’s on the Design Wall: Strings Attached), but alas, I’ve gotten no further than what I shared on August 9th when I last posted about it.
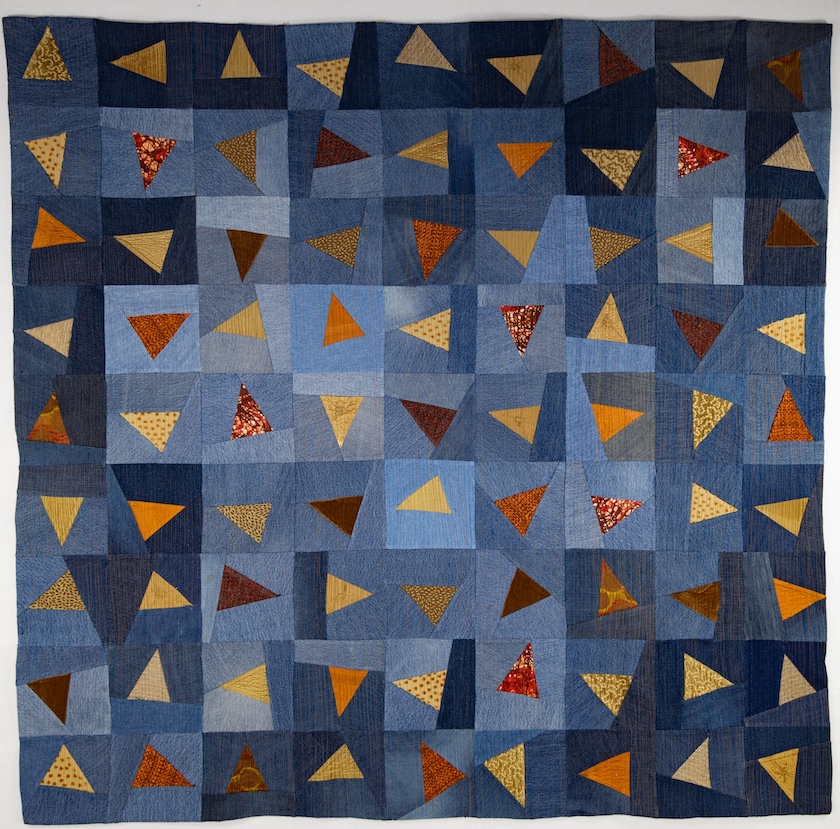
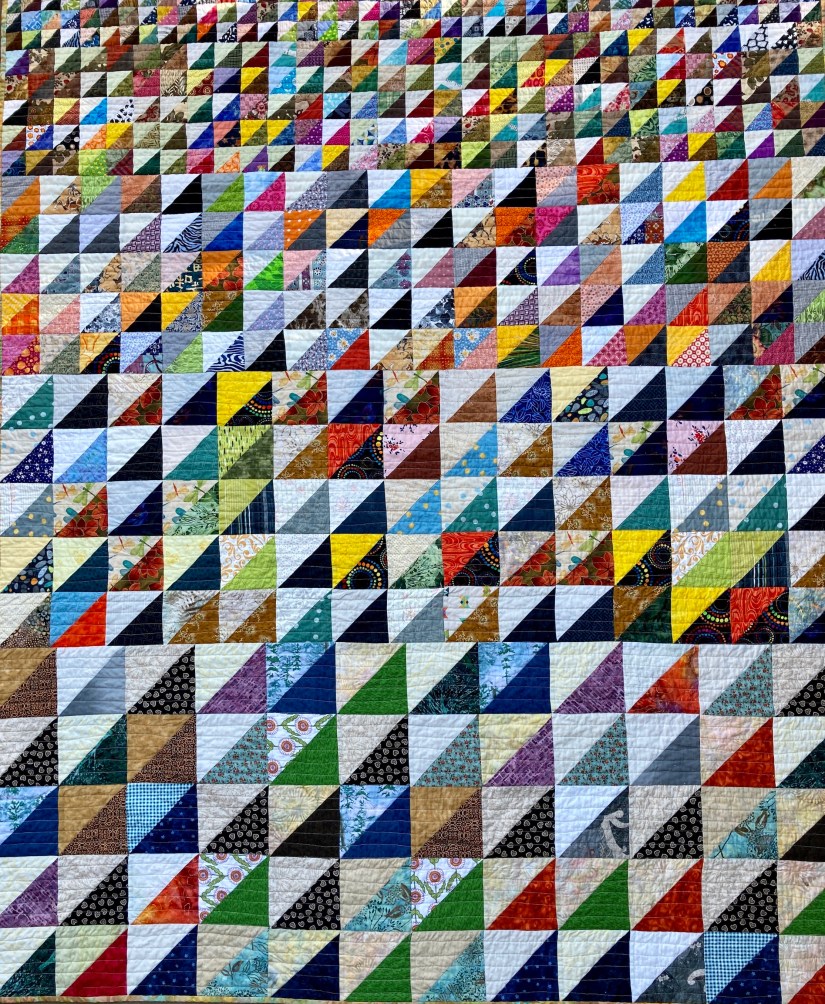
So instead for ScrapHappy August I am going to share the story behind this VERY SCRAPPY quilt – Recycled Hope VII: All the Trimmings
I made this quilt during the COVID pandemic and it holds a lot of meaning, and I will share the “Artist Statement” on this quilt in a moment for the full background. First I want to tell you about my “Recycled Hope” series of quilts:
The Recycled Hope an ongoing series of improvisational art quilts using recycled materials to include denim as the primary fabric on many of the pieces, combined with other recycled materials. “Hope” and the interpretation of the word “hope” is the primary theme of infused into these pieces.Most of the fabrics were not reusable as clothing or home decor and were destined to end up in a landfill. Reimagining recycled clothing and other materials into art quilts satisfies my hopeful desire to honor the environment and make art that is eco-conscious. Ending up in an art quilt is a better outcome than ending up in a landfill.
Okay now that you know the background on this series of quilts (if you want to see the rest of the quilts in the series, check out my Portfolio page) here is the story behind this SUPER SCRAPPY quilt which measures 72.5″ L x 57.5″ W:
Missing my Quilting Community during the 2020 Coronavirus Quarantine and inspired by Amanda Jean Nyberg’s pattern “All Sizes”, I created a quilt from 15 years of scrap triangles collected from my quilting friends at quilt retreats and “sew dates”. Most of the scraps in this quilt are from the trimmings of blocks by many quilters as they made their quilts. Instead of going into the trash, nearly 600 scrap triangles from the trimming of quilt blocks compose this cozy quilt. This piece gave me hope that someday I can return to attending quilt retreats.
Hopefully for next month’s ScrapHappyDay post I can share newly completed work (smile).
HAPPY SCRAPPING!
As promised, here are the bloggers that participate in the ScrapHappy monthly posting event, check out their blogs linked below for their ScrapHappy posts:
It’s the 15th of the month and time for my monthly “ScrapHappy” post as part of the ScrapHappy group I belong. At the end of this post I have a link to the other blogs participating in this monthly event in case you’d like to check out their ScrapHappy posts.
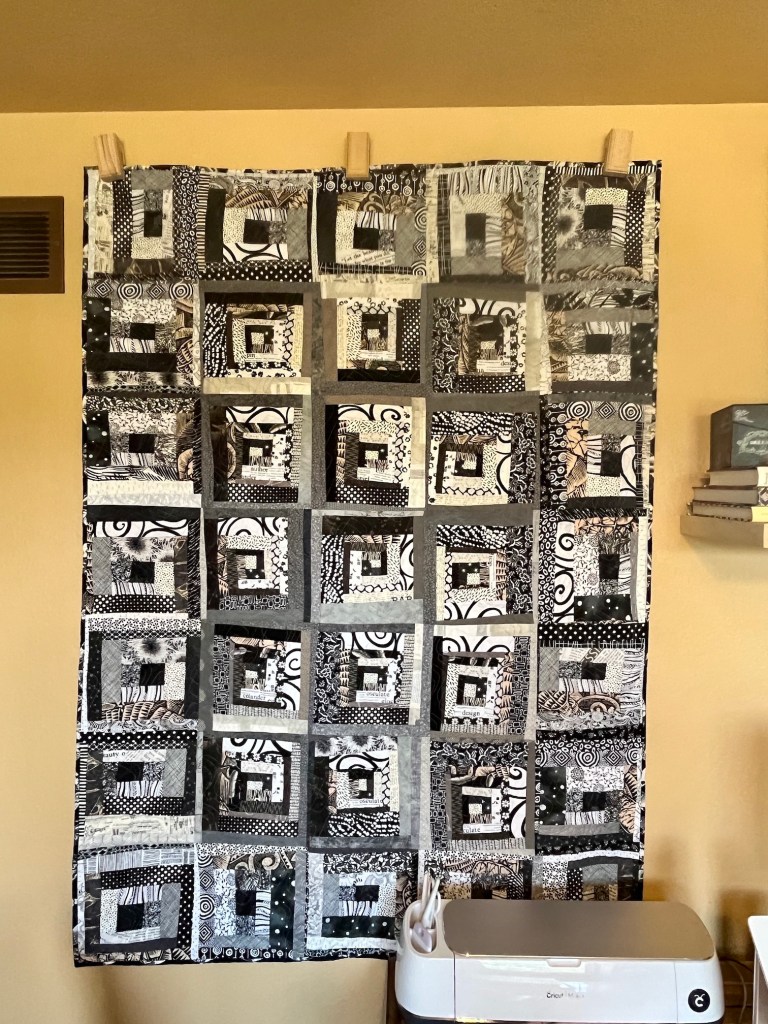
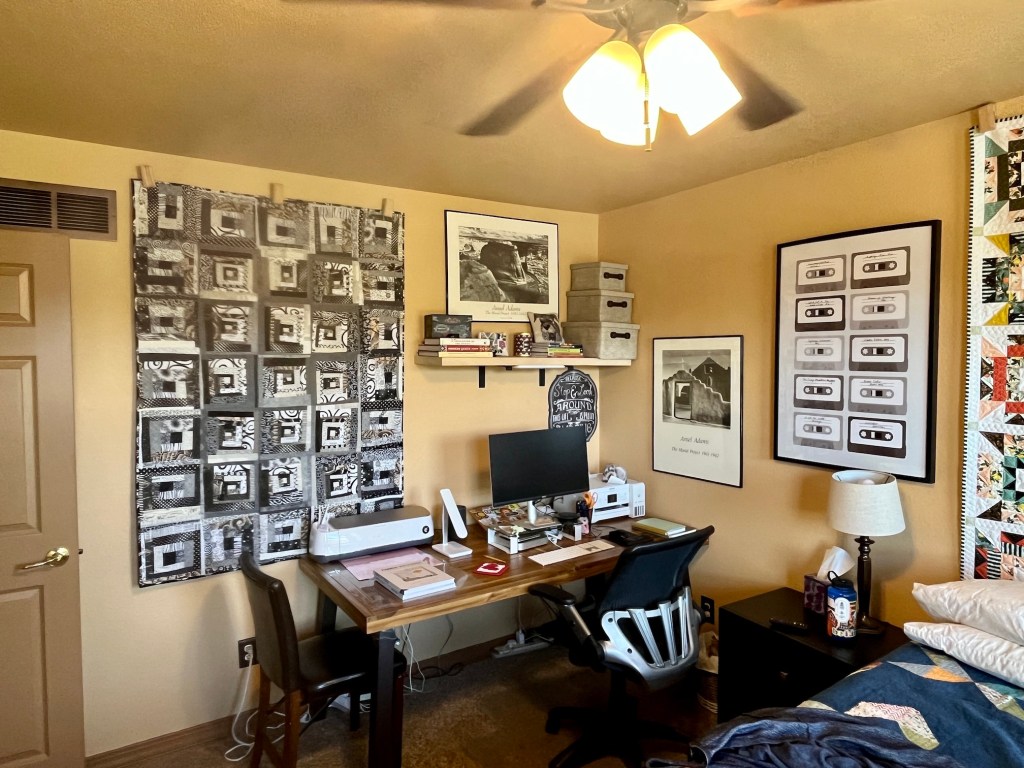
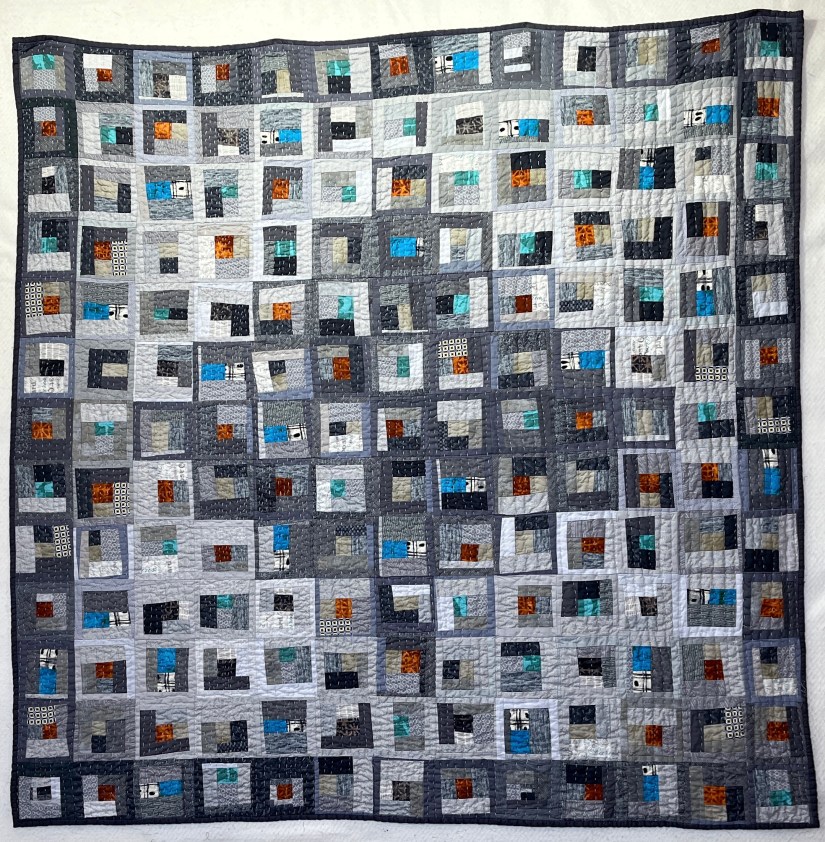
I finished the freeform scrappy log cabin quilt I first wrote about in this post – What’s on the Design Wall: Scrappy Log Cabin. I pieced the blocks as a sample for theScrap Happy Quilt RetreatI had in May. I got it back the other week from the longarm quilter, put on a binding, and earlier this week I finished sewing down the binding.
It is now hung in the wall of the upstairs guest bedroom where I have a B&W theme going on with some framed Ansel Adams posters, Black & White wall art, and B&W photos I’ve taken (on the walls not shown in the images below).
This quilt is very “scrap happy” as the quilt top was pieced entirely from my collection of black, white and gray scraps!
As promised, here are the bloggers that participate in the ScrapHappy monthly posting event, check out their blogs linked below for their ScrapHappy posts:
I had a couple brief updates and I thought I would spread them out into a bunch of brief blog posts but I am lumping them all together.
GO BOLDLY
An update on the quilt (which might end up more wallhanging size) that I mentioned in the post What I’ve Been Up To and What’s on the Design Wall, which I named “Go Boldly“: I am now sewing the blocks together. There are 64 blocks and each need to be sewing into blocks of 4 to make them into 16 blocks to then sew together.
I am currently debating whether to make the quilt larger (I have enough leftover blocks to make 1 – 2 additional quilts or wallhangings) or leave as it is. I think I am going to just sew the 16 blocks (4 mini sections to make a block) together and then decide.
The longarm machine quilter (Sew Colorado Quilting) has finished quilting it and sent me some photos, here is one of them.
I actually picked up the quilt today from her and will do a post on it with more photos once I get the extra backing and binding trimmed (I like to do my own trimming) and decide on a binding. I am thinking about doing a “facing” on it (like you would do with an art quilt) as I plan to hang it on the wall.
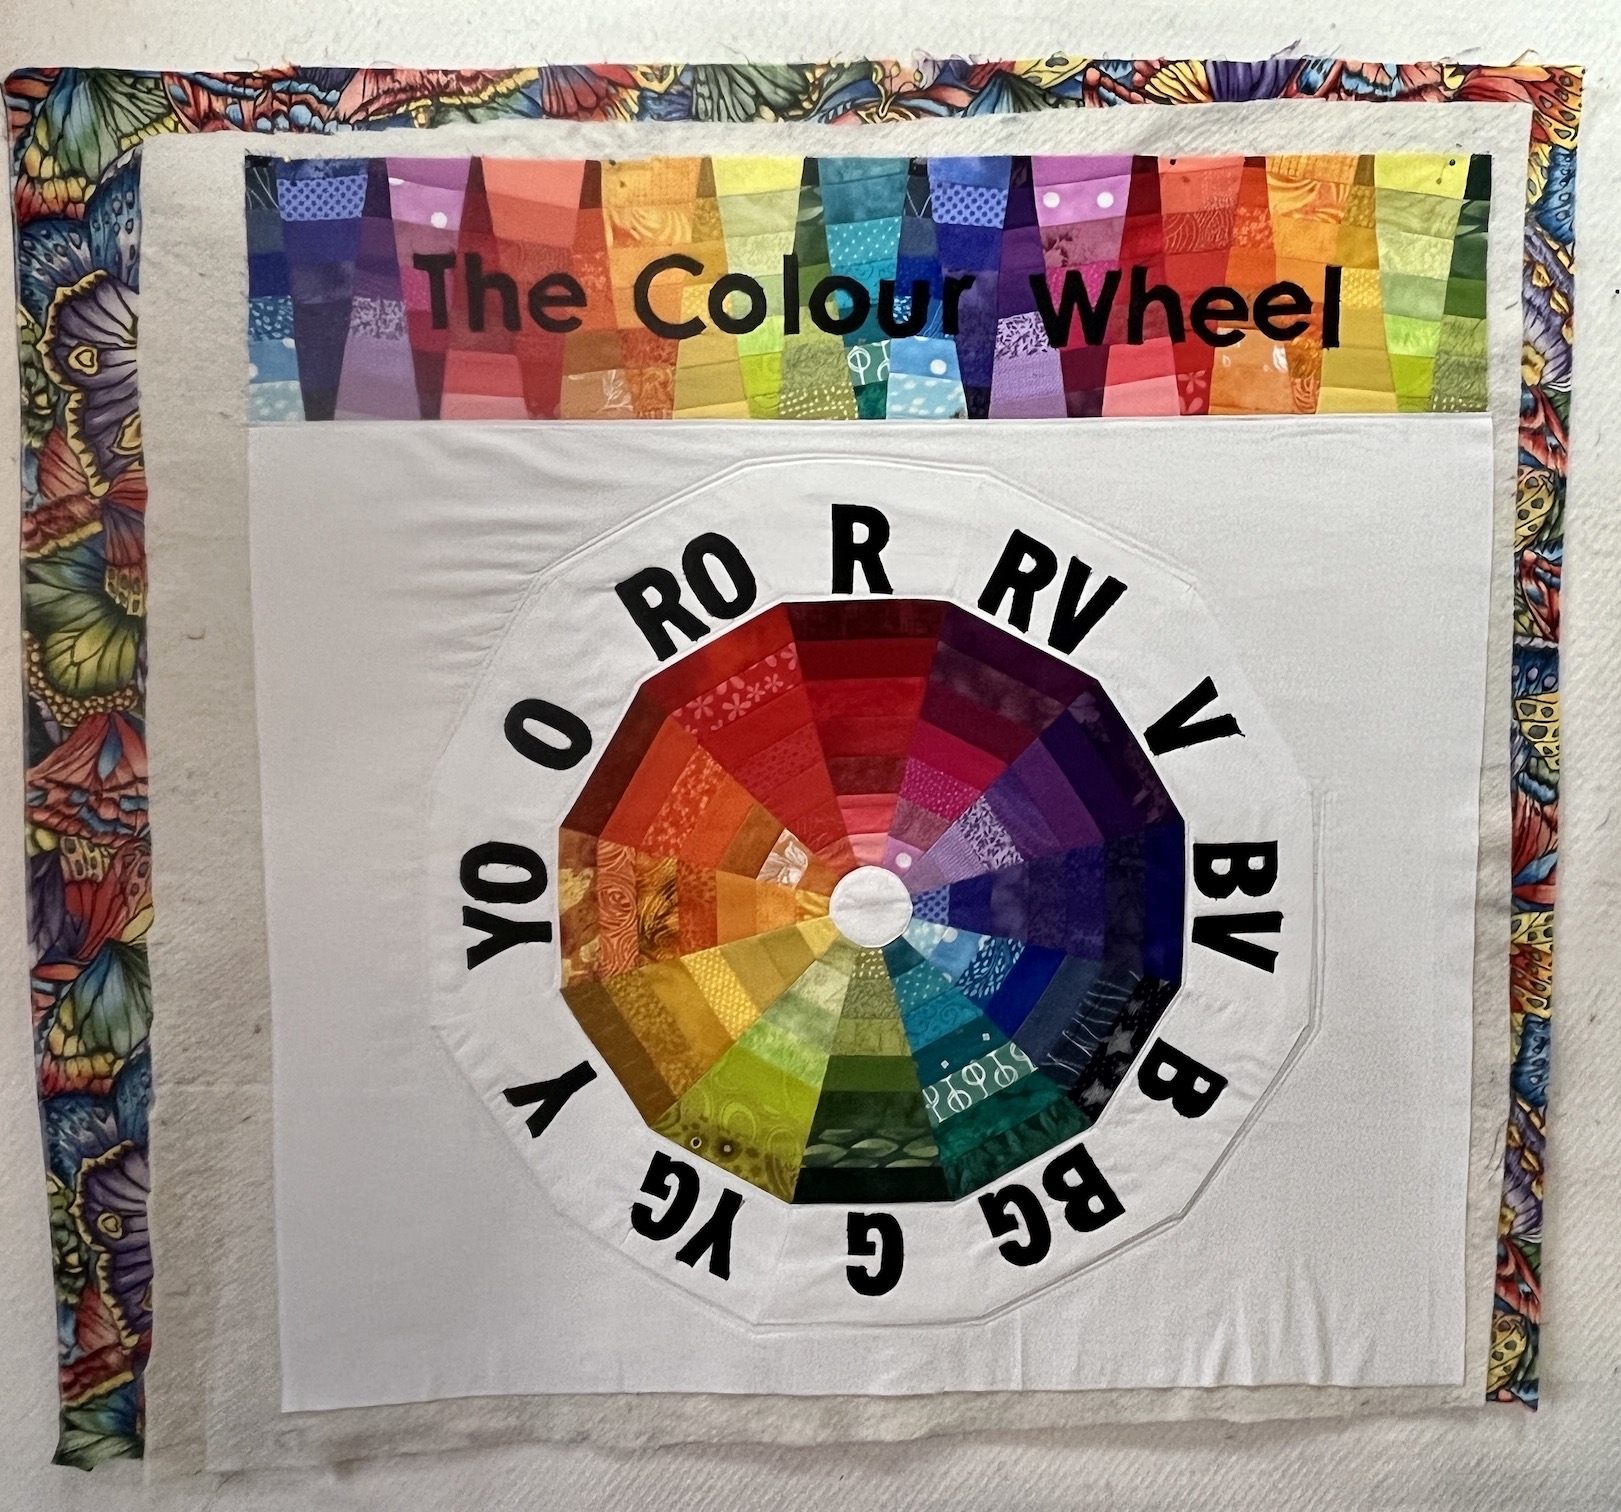
COLOUR WHEEL
A quick follow up on this post The Colour Wheel Quilt is Done, about the color wheel quilt I made to use as a teaching aid when I give a workshop next year (September 2024).
By the way I will share more information about that workshop including the venue once that venue gets ready to publish its online catalogue listing the workshop. If that doesn’t happen before October 2023, then I’ll go ahead and share as I’ve shared it with the Quiltfolk article writer for Issue 28 that comes out in October so it will be publicly revealed then anyway!
I had put the quilt away until next year for the workshop but then I decided to find a place for it in my studio so I could enjoy it before then – here it is now on a wall in my studio that I rearranged to make room for it:
VARIOUS RANDOM INFORMATION
John who loves to cook, tried making Ramen for the first time the other night and it came out pretty good!
My yellow rose bush in my front garden is finally taking off and here is one of its lovely roses:
And finally, here is Mike and his “cousin” Goose both trying to via for John’s laps (Goose won) when John was visiting his Dad the other day.
Hmm, I just realized that technically Goose is Mike’s “uncle” not his cousin – ha!
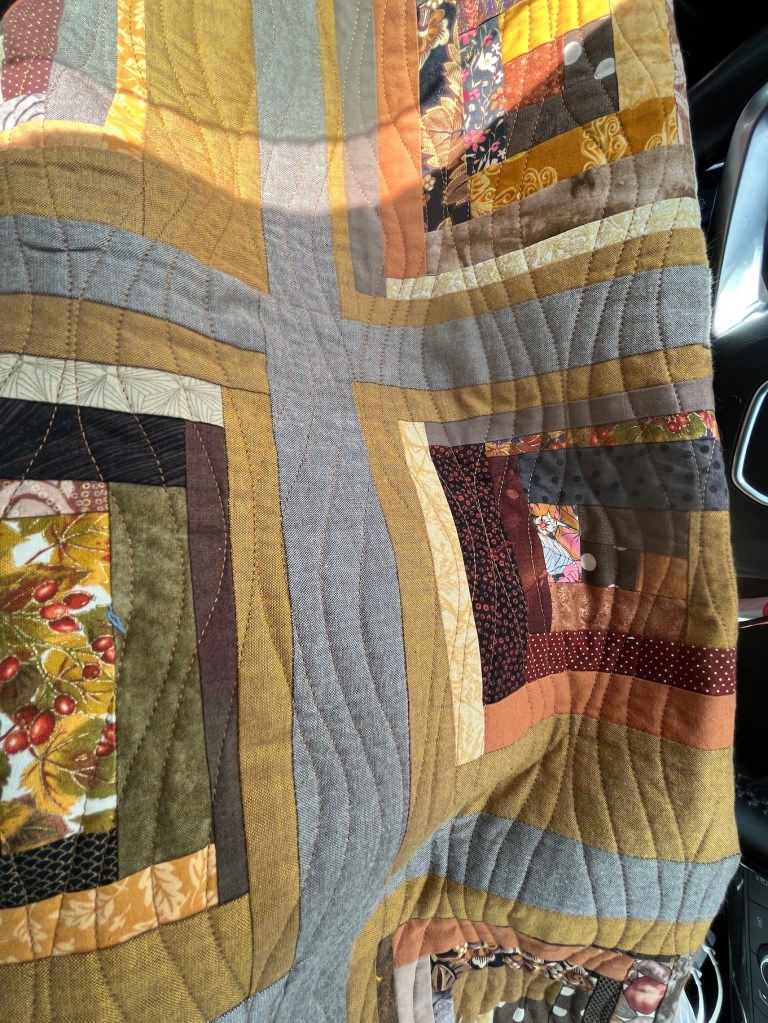
I picked up Scrappy Autumnal Splendor from the longarm quilter on Thursday, I’ve sewn on the binding and I am working on sewing down the binding and then the quilt will be finished!
I got a preview sent to me by Cara @sew_colorado_quilting (IG page) who did the longarm quilting. Here are the photos she sent me before I picked up the quilt:
I was beyond excited to pick up the quilt and had to take some photos on Thursday when I first got it from her (yes I was sitting in my car, opened up the package the quilted quilt was in, and posted photos to IG, ha!)
Here is the quilted quilt on my design wall and the back of the quilt draped over the chair in my studio:
After I finished fondling the quilted quilt (ha!), it was time to finalize my decision for the binding. I decided to go with a gold fabric that had also appeared as fabric scrap pieces in the freeform log cabin blocks, but I also had some yardage of the fabric.
Then the tedious task of sewing the binding onto the quilt:
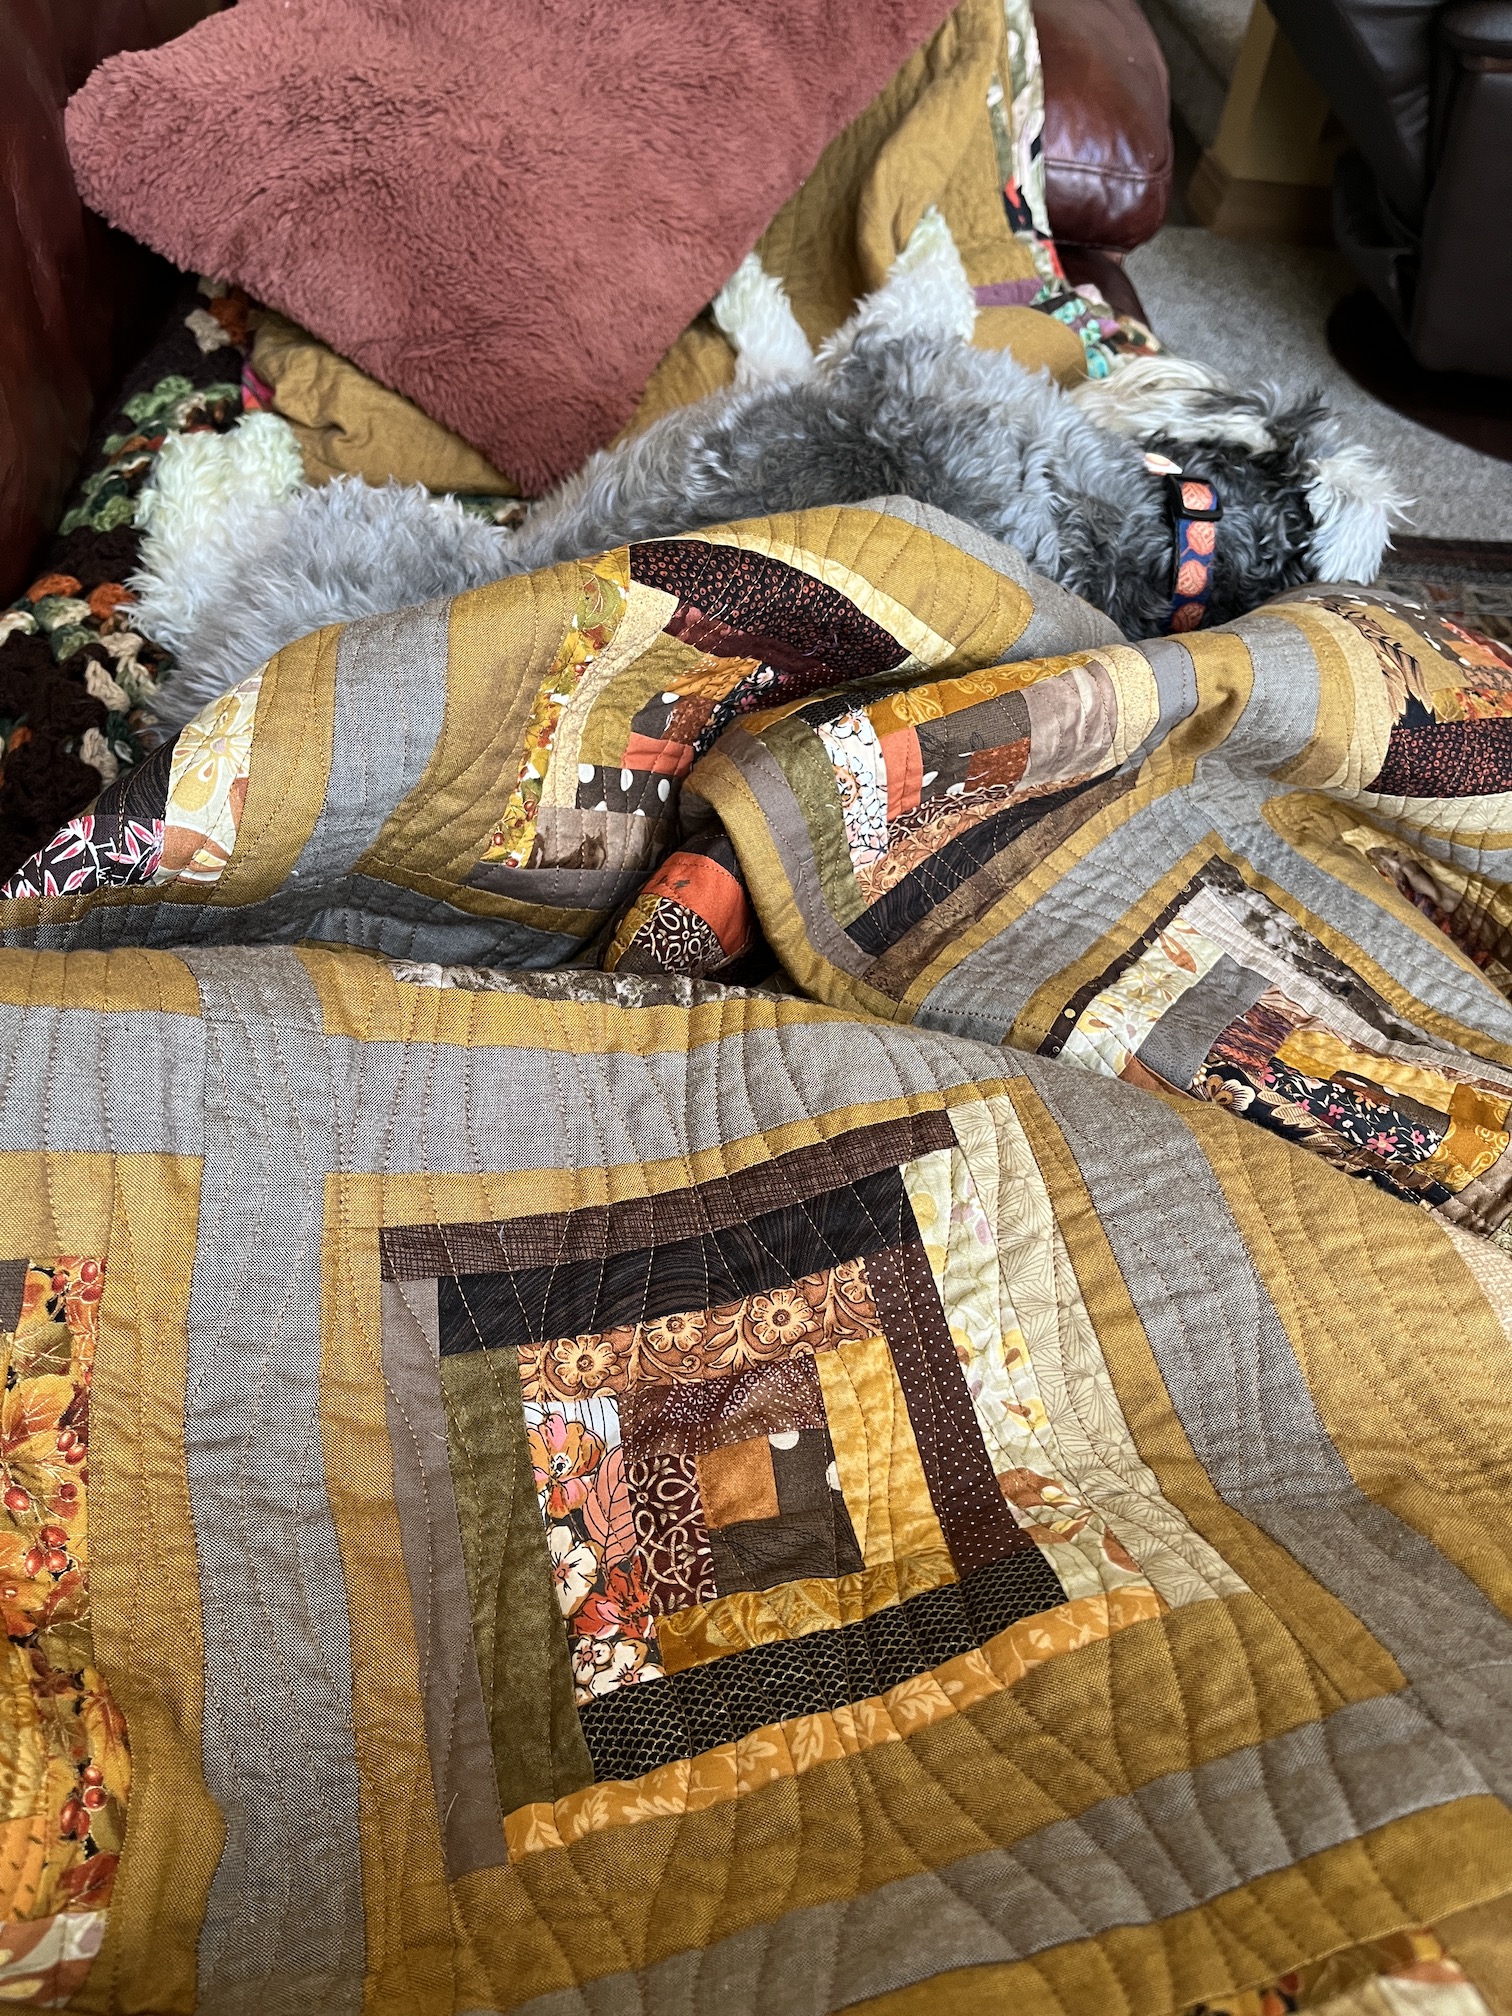
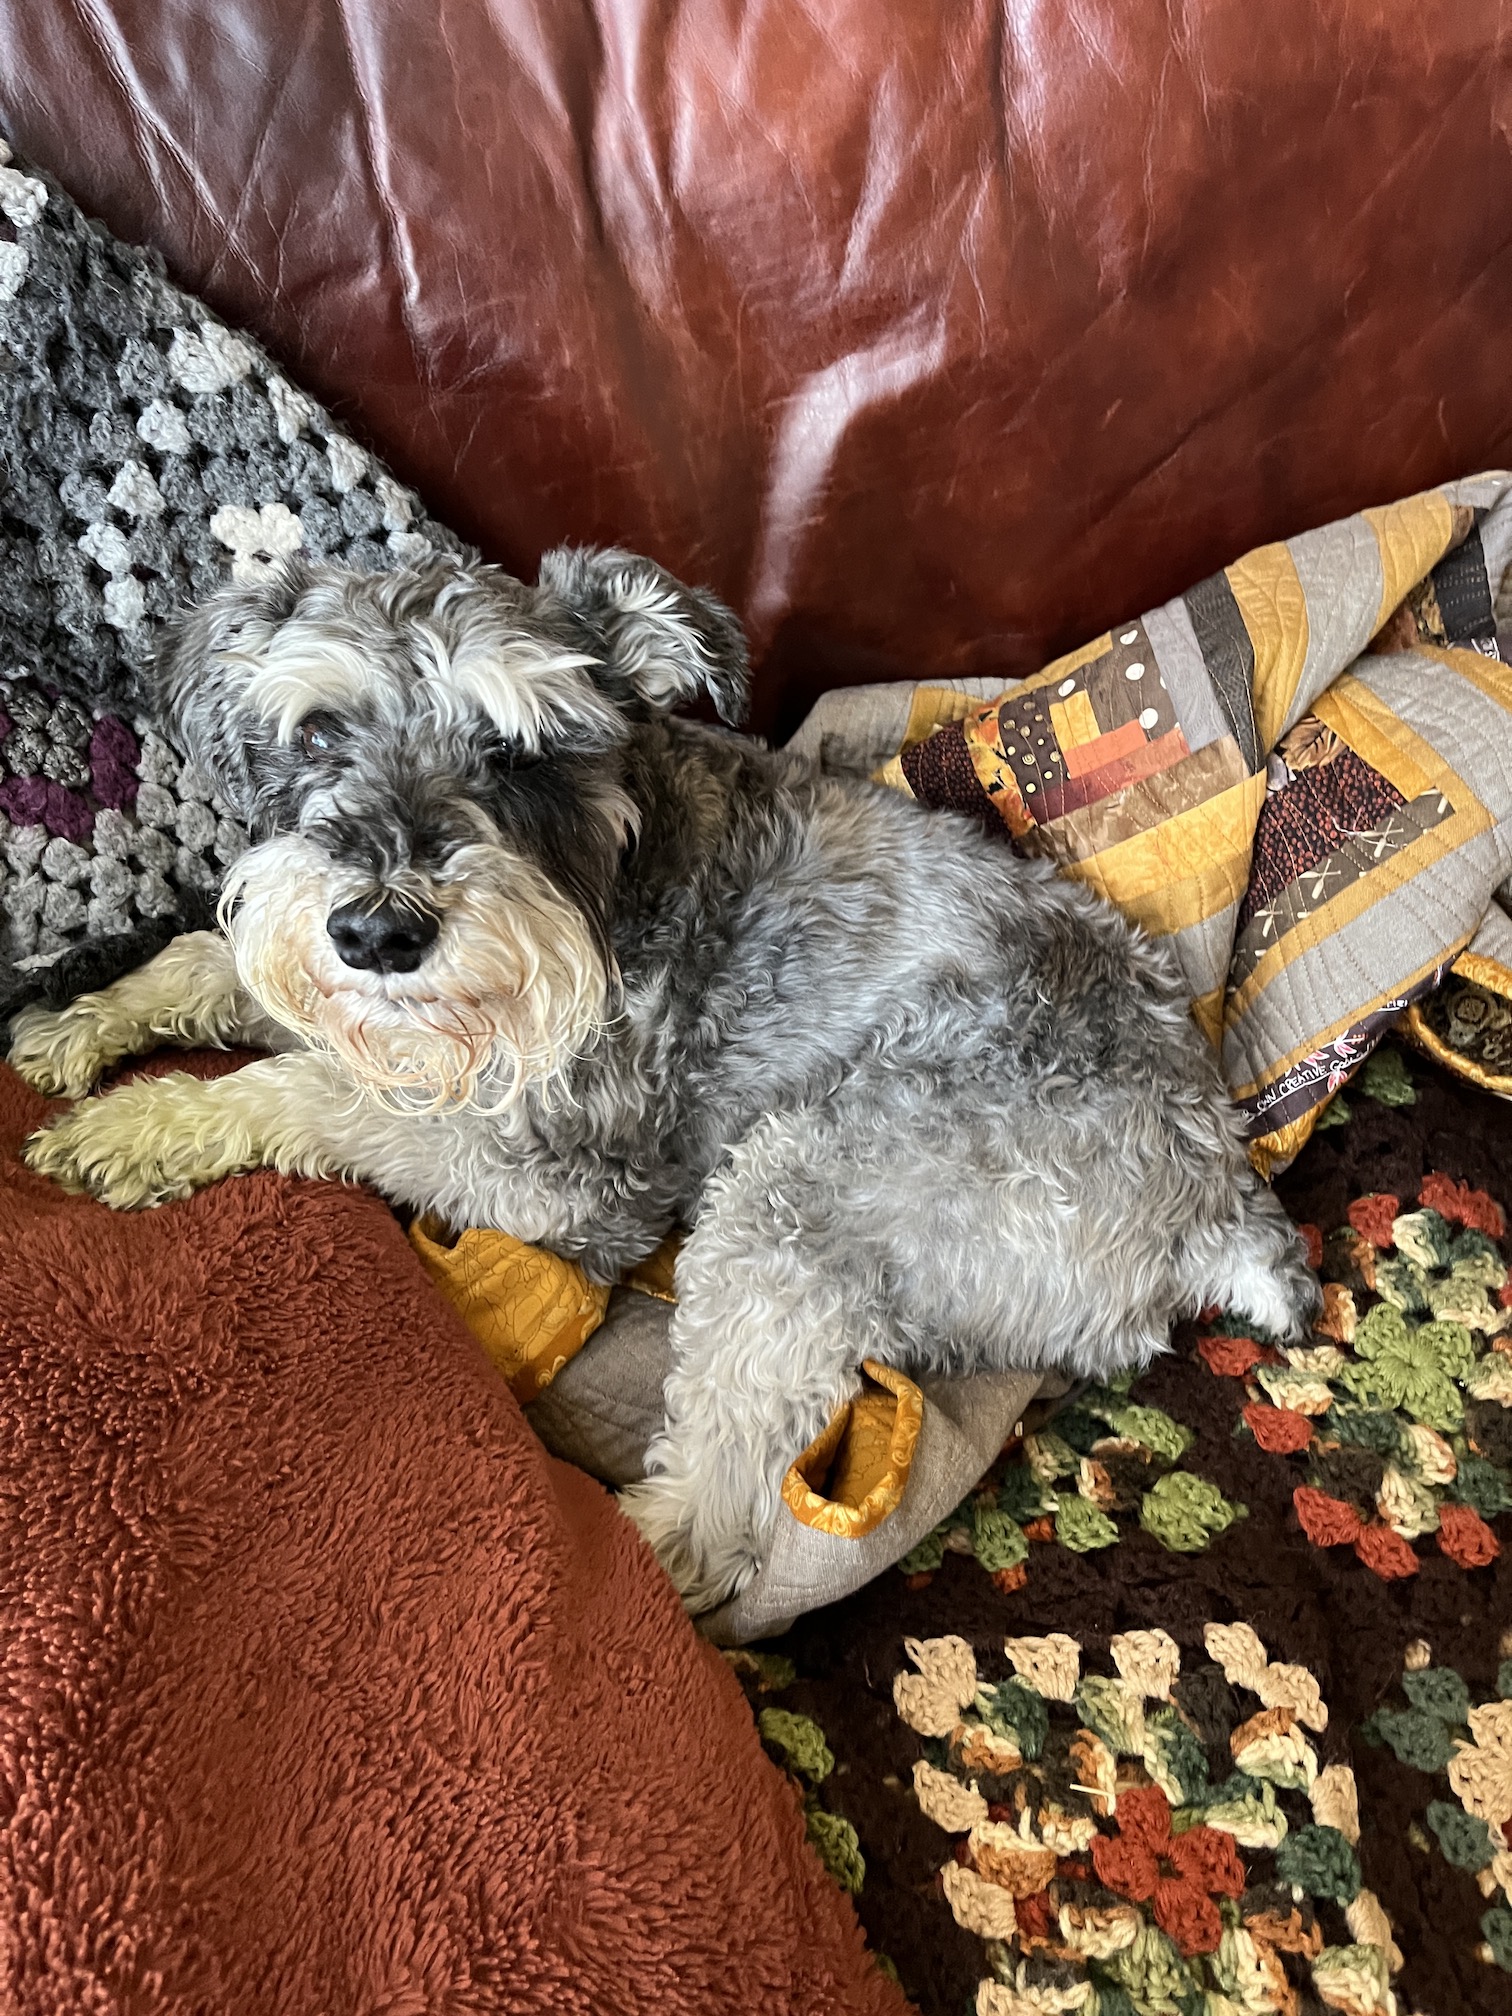
And now I am sitting around sewing down the binding to the back of the quilt. Mike the Miniature Schnauzer is keeping me company:
And moved to nest in the quilt when I took a break and left the quilt on the sofa!
Yes, Mike does need a haircut, he gets one on Tuesday; and yes his paws are green as he was playing ball today in the freshly mown backyard and “naturally dyed” his fur green!
Ok one more post about this quilt before it heads today to the long-arm quilter (I decided to “quilt by check” instead of do it myself!). I decided to name the free-form scrappy log cabin quilt I started during the Scrap Happy Retreat I had in June – “Scrappy Autumnal Splendor” as it reeks of Autumn in it’s color palette!
Here is what it looks like all pieced together:
The border (and lattice) is taupe Peppered Cotton which is a version of a “shot cotton” and there was potential for fraying so I stitched around the entire quilt top 1/8th inch.
After finishing the quilt top it was time to head to my yardage stash and see what kind of backing I could piece together (I was tempted to buy yardage of a single fabric for the back but darn it I am going to use up my stash, ha!):
And here are a couple of the fabrics I found:
Here’s a little peek of the crazy pieced backing I made with bold Autumnal colored fabrics with metallic highlights!
You’ll have to wait until I get it back from the long-arm quilter to see how the back came out (anticipation…smile).
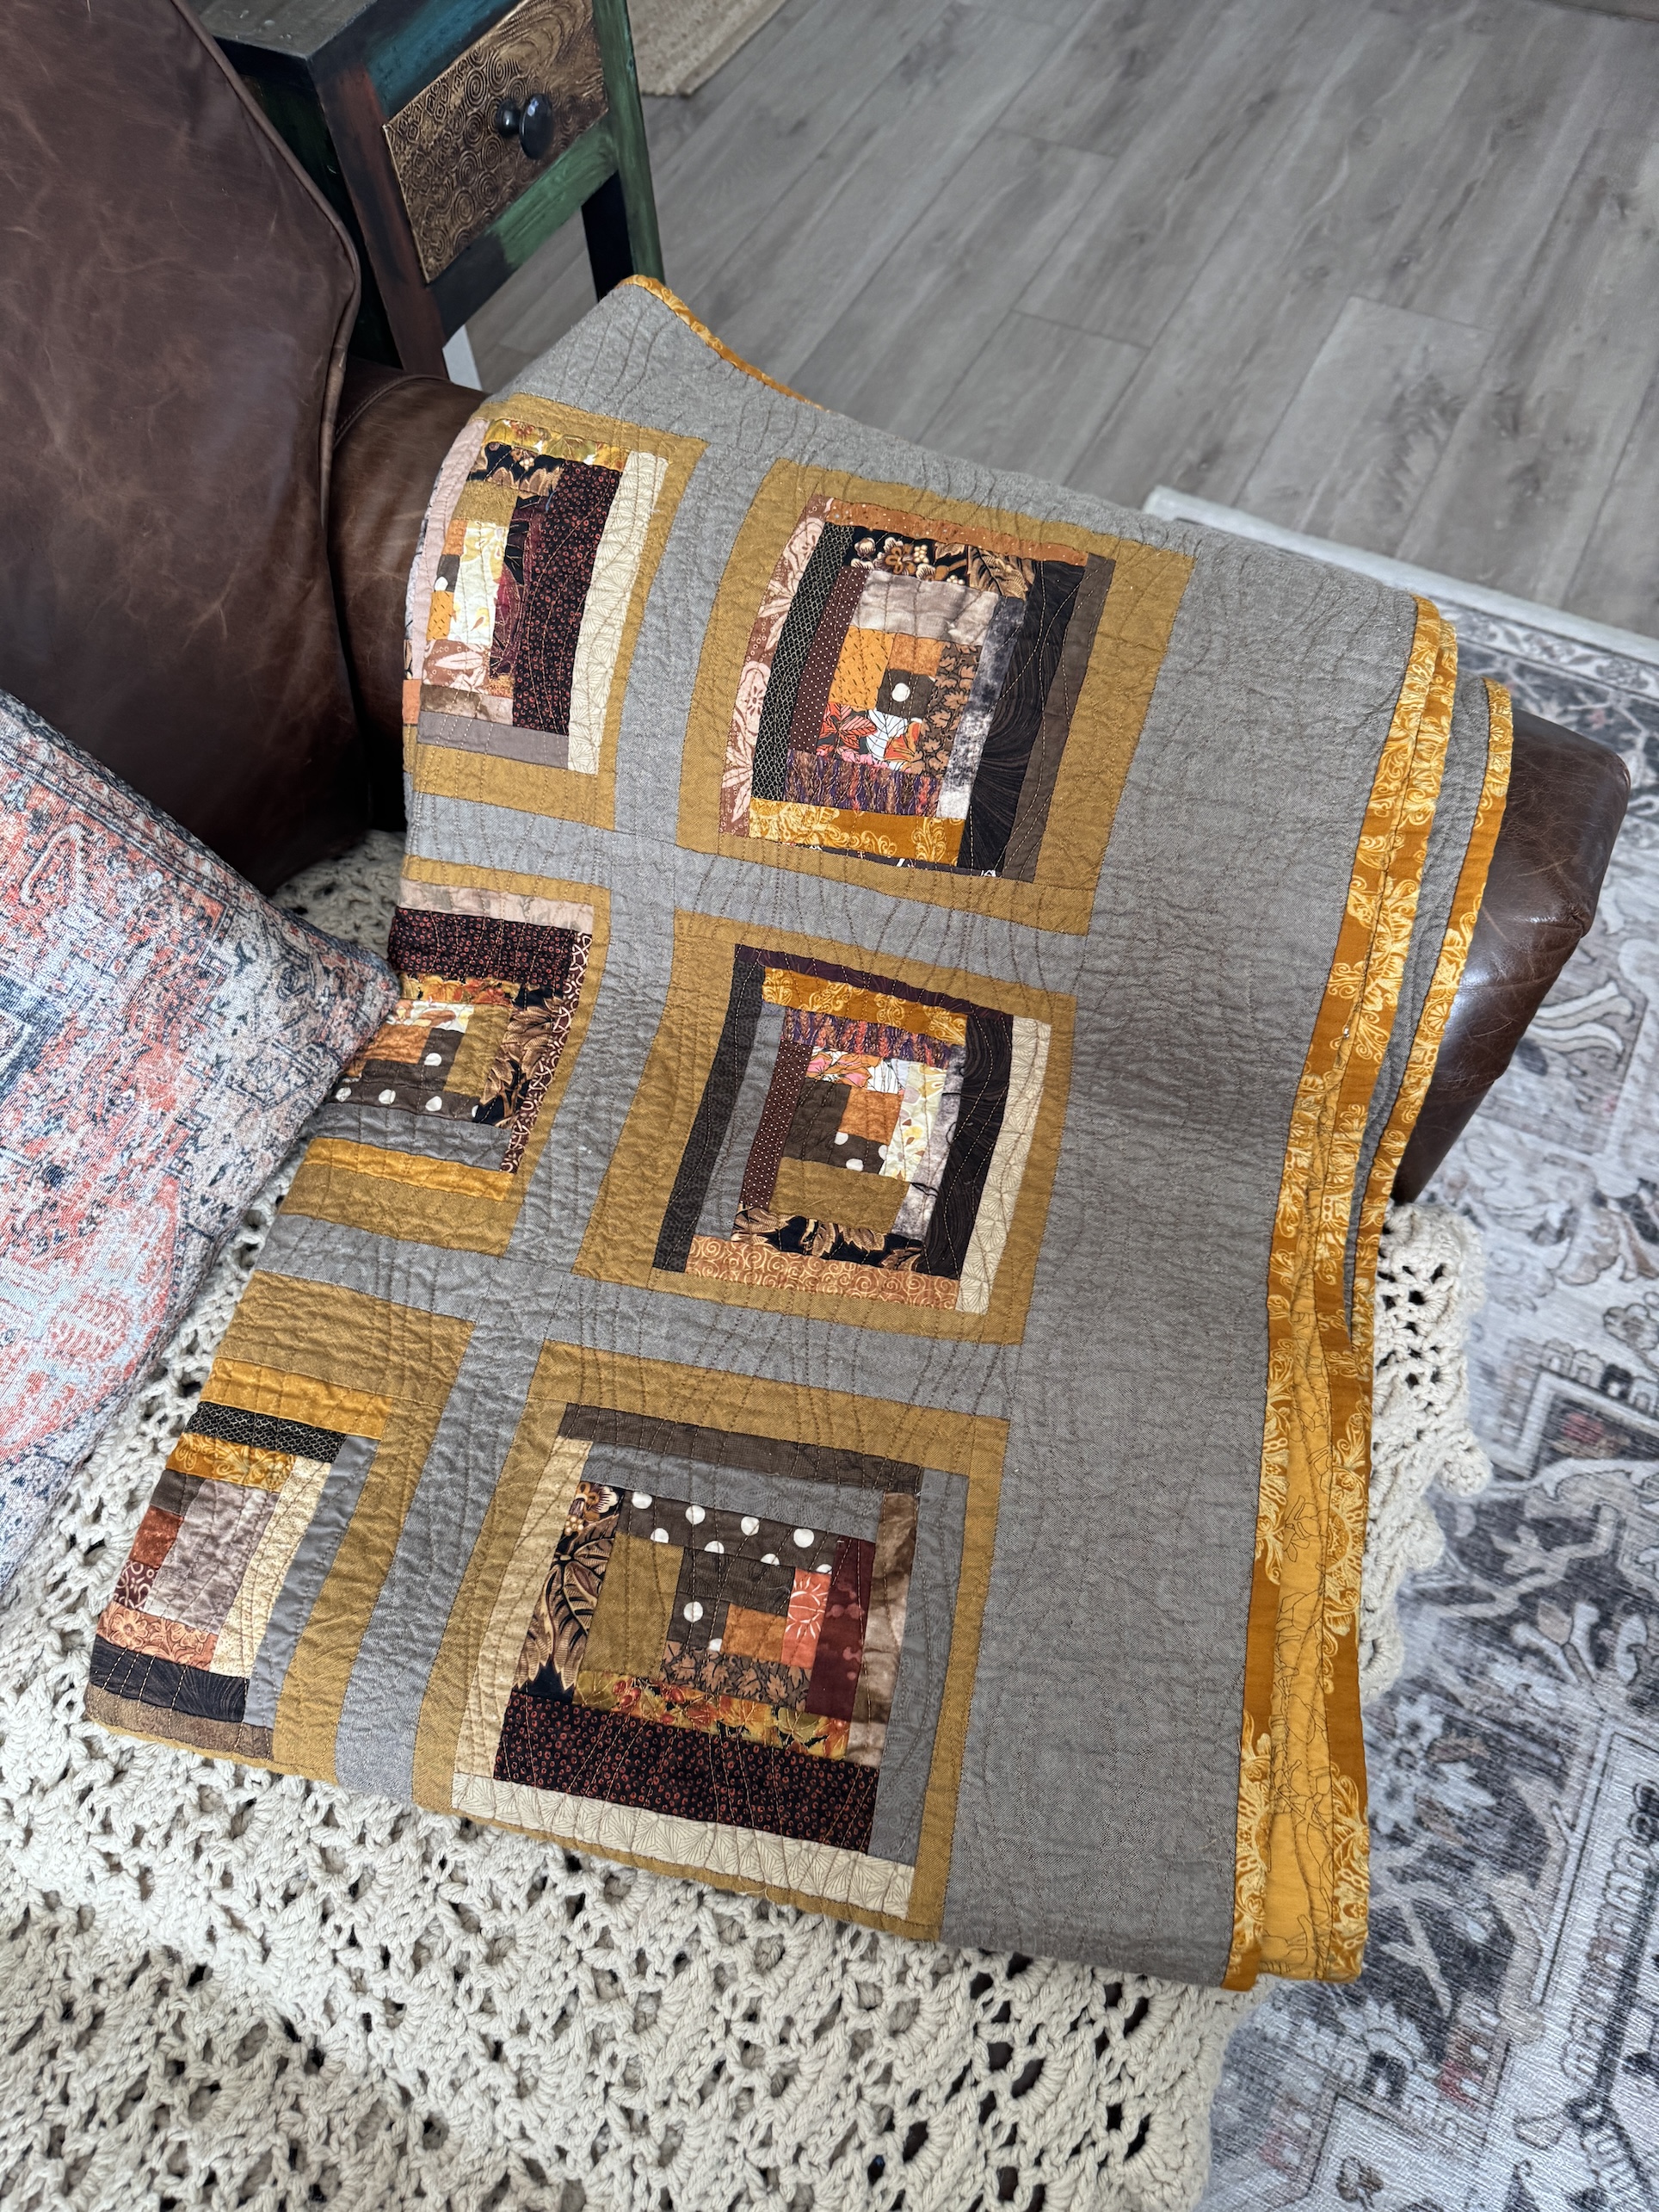
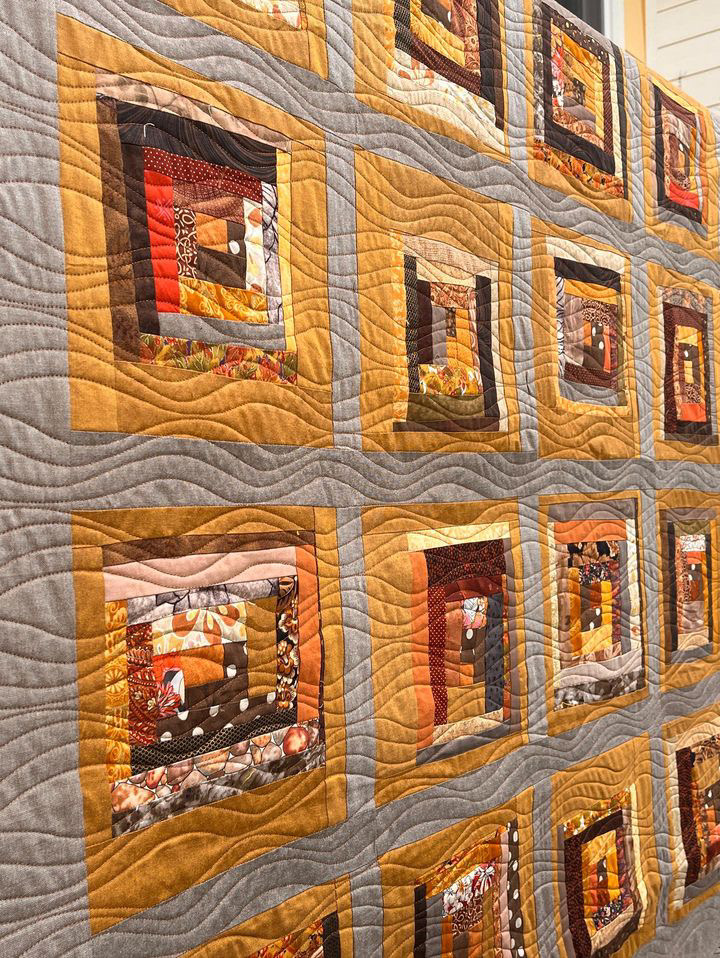
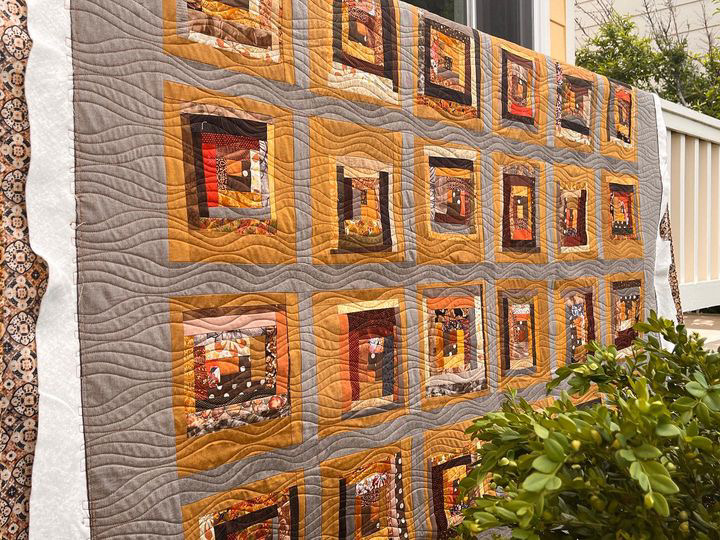
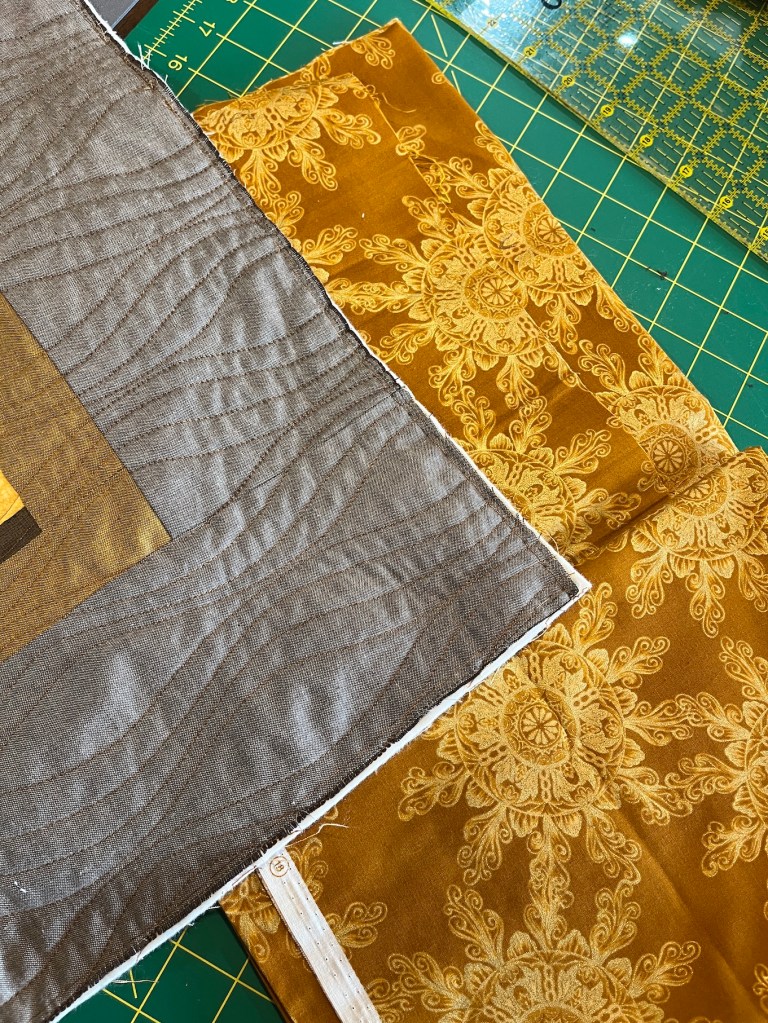
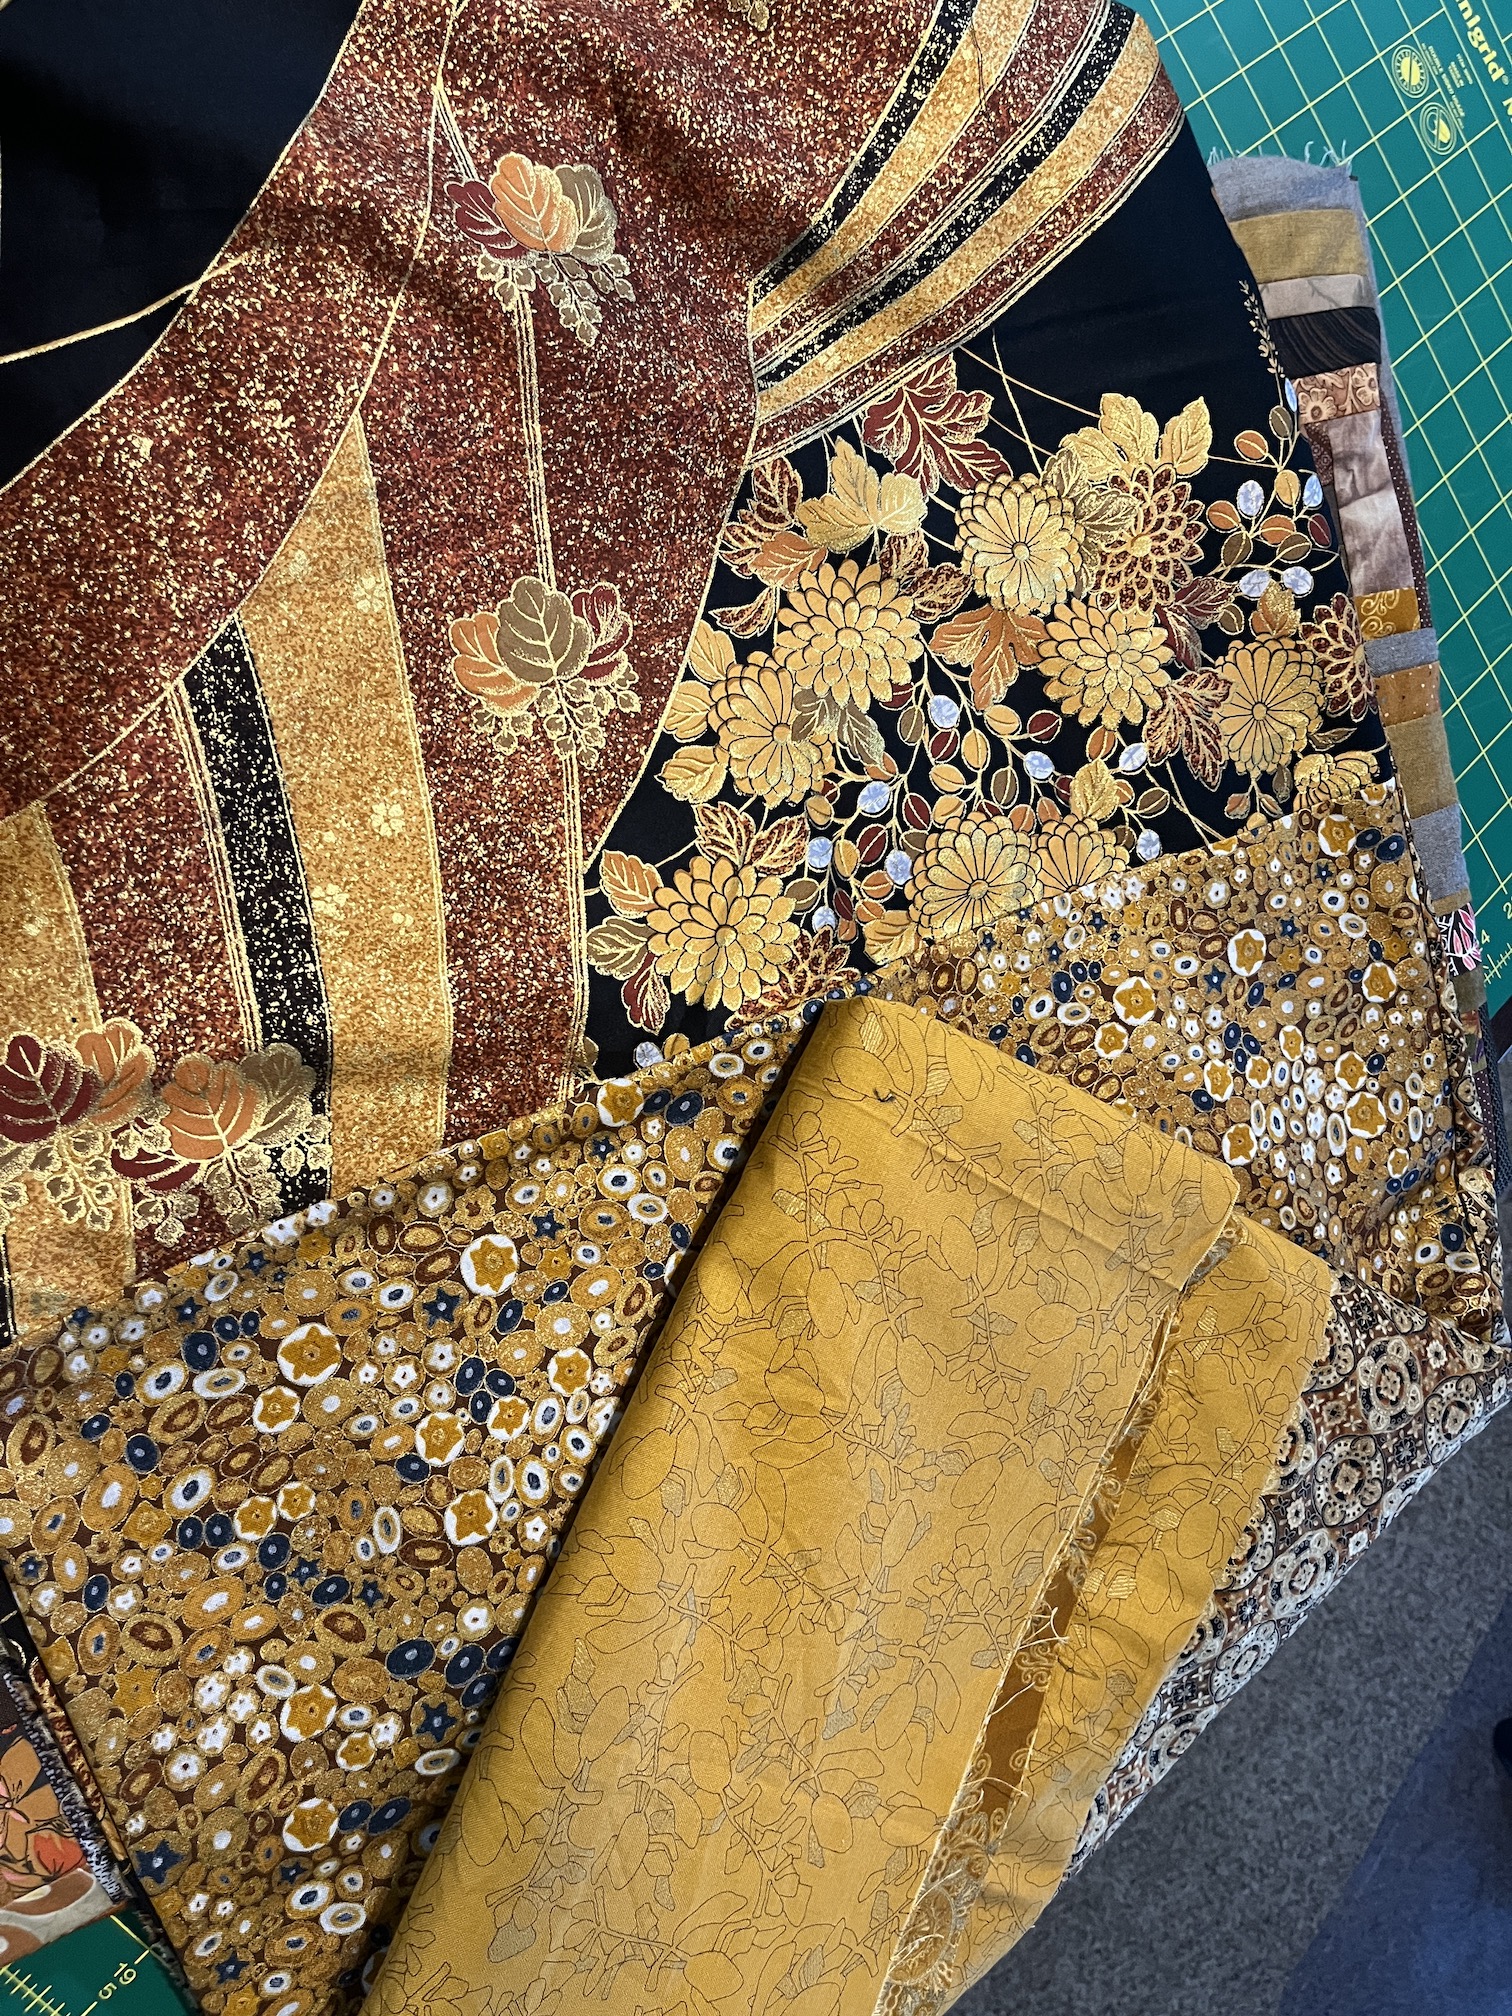
Yesterday I made some major progress on the freeform scrap fabric log cabin quilt I am making in browns and golds.
I got the blocks framed with the taupe fabric – I used 2 inch strips to frame each block. I also cut a couple 5 inch border strips to mock up the border.
Here are a couple photos (I could’t decide which one I liked better):
And here is a close up showing how the blocks will float with a 5 inch border all the way around of the taupe:
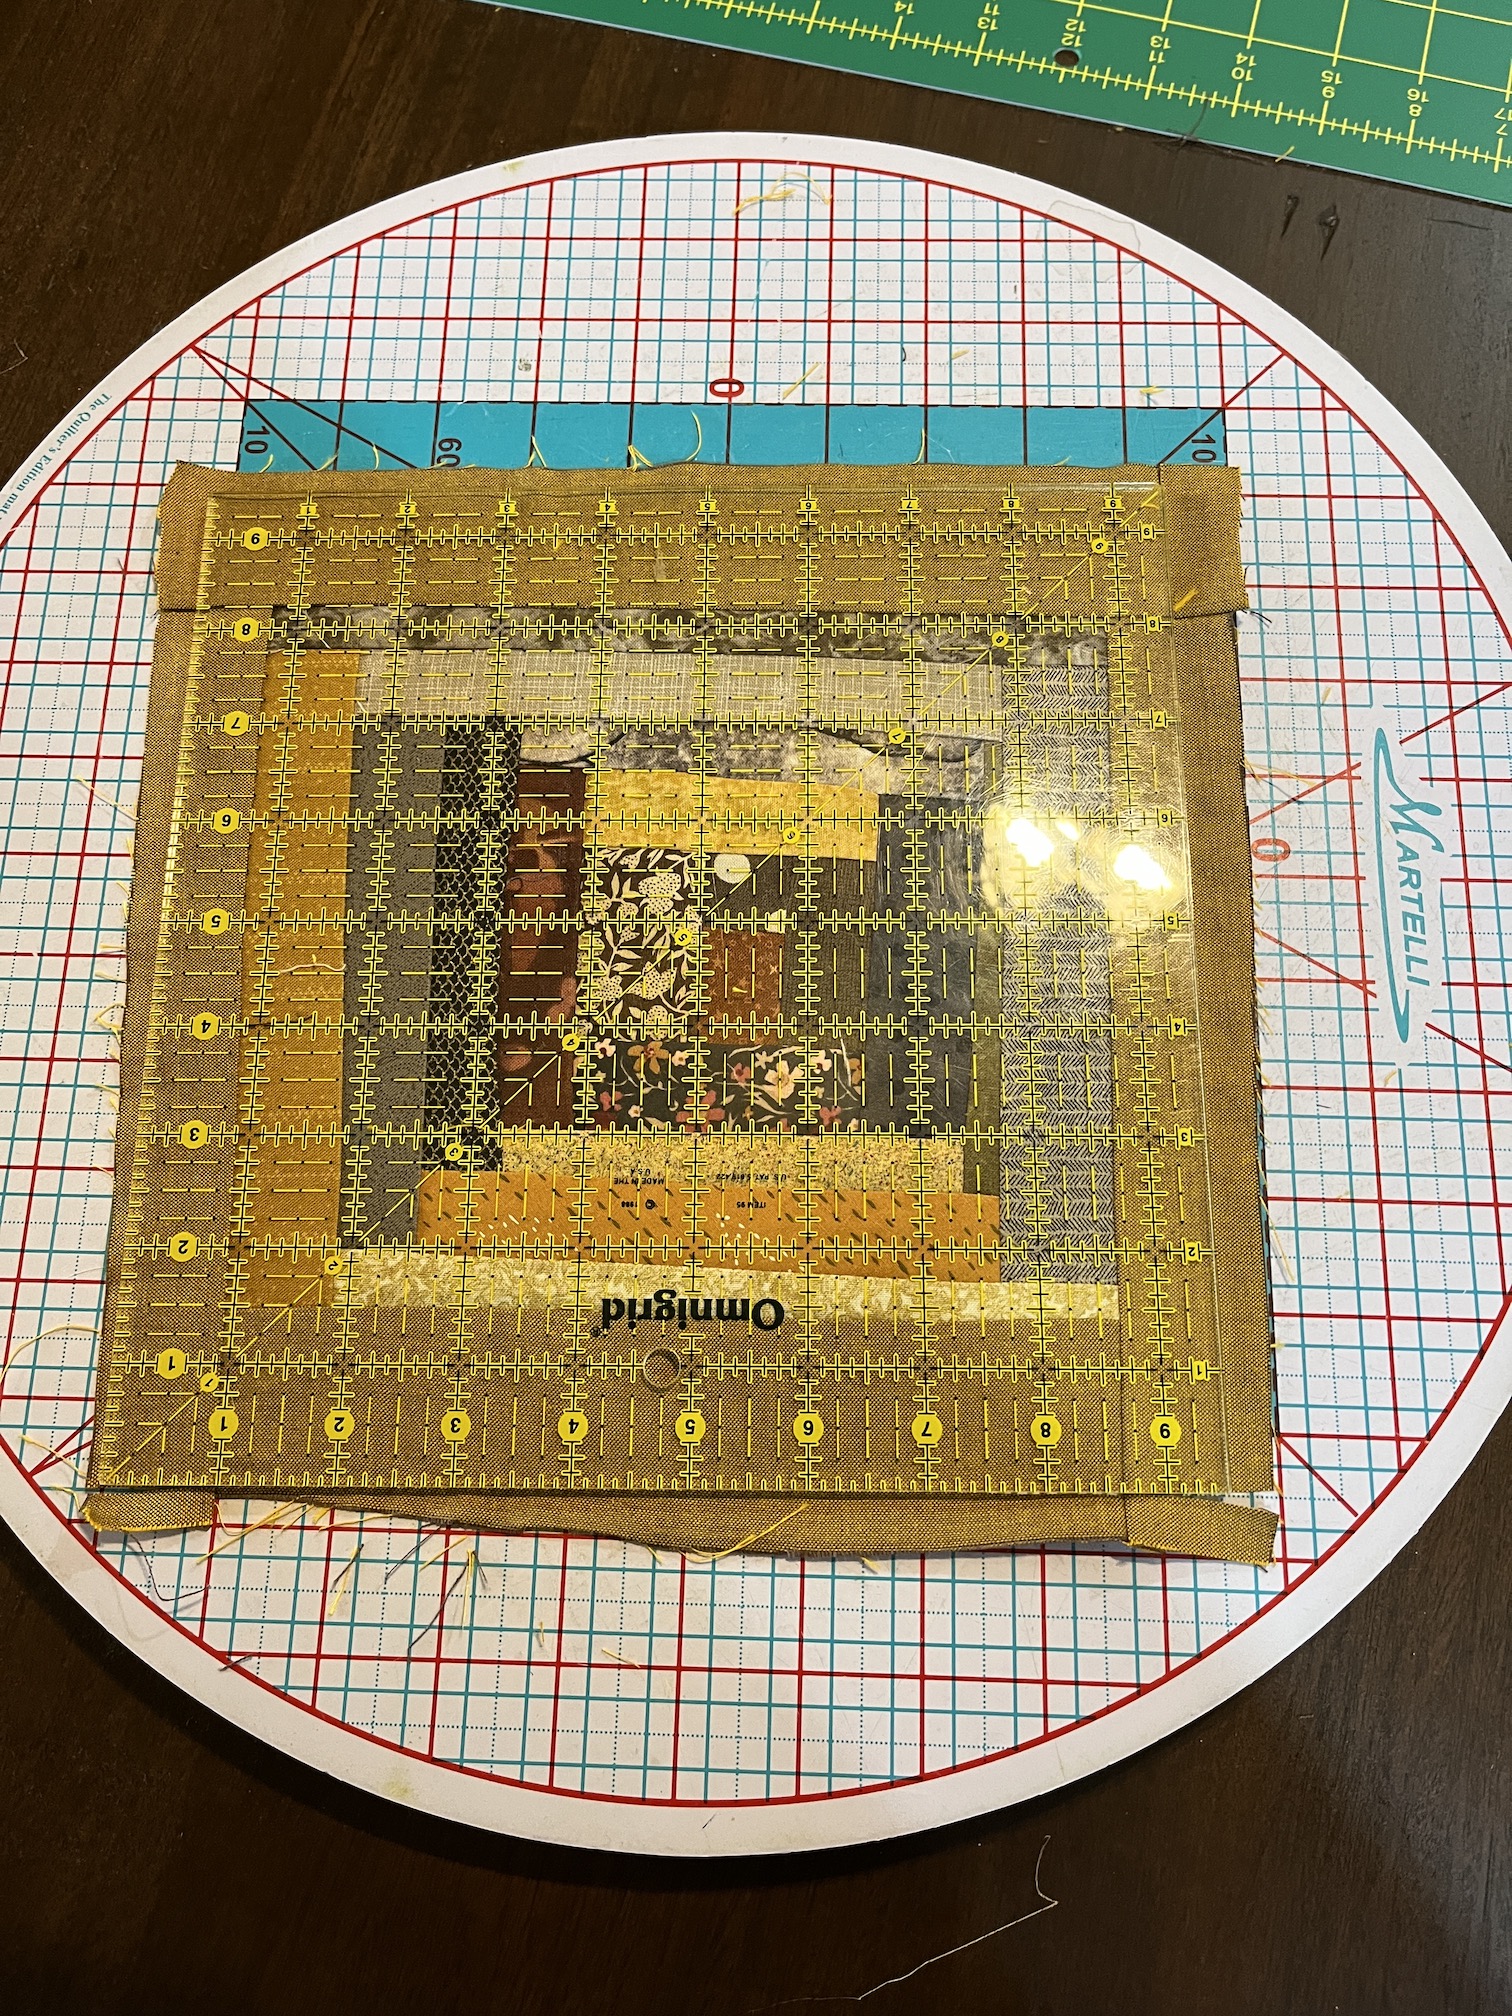
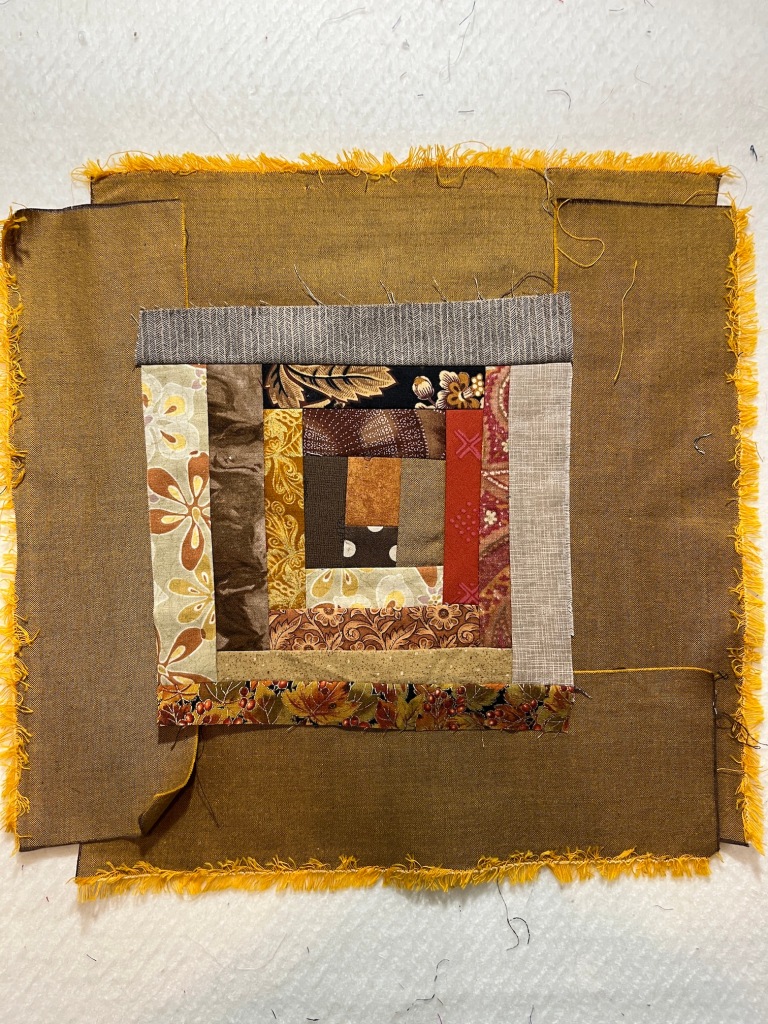
As I mentioned in that post, when making freeform (I think this is what I am going to call them from now on) log cabin blocks, you might want to mock up (or actually sew) one completed block to verify that you like where you are going with you design.
I did this with one of the 42 (well actually 43 – I made a spare one) freeform log cabin blocks I made from my pile of brown, gold and orange scraps:
I decided that I needed something to break up the gold, I did not want to place all the gold framed squares side by side, so I decided to try floating the blocks in a taupe Peppered Cotton.
I’d originally trimmed the freeform log cabin block trimmed in gold Peppered Cotton and trimmed the block to 9.5 x 9.5 inches with my 9.5 x 9.5 inch square ruler. Then I tried framing it in the taupe and trimming it to 12.5 x 12.5 inches using my ruler of that size (the next size up ruler I own after 9.5 x 9.5 inch).
(By the way, I highly recommend some type of rotating cutting surface if you are trimming your freeform log cabin blocks to a uniform size with a square ruler – I have the Martelli Round Cutting Mat).
I realized a problem after I made the demo block: I have 42 blocks and my plan was to make a quilt for my home library for snuggling under while reading that is 6 blocks by 7 blocks.
At 12.5 x 12.5 inches each (12 x 12 inches finished) it would become a bed size quilt…oh no – let me try some fake math – the quilt would end up around 72 inches by 84 inches…actually larger if I added a little border around the quilt to make the blocks “float”.
I did revisit just sewing the gold framed blocks together and it does not make a large enough snuggle quilt. You might be thinking: what about just adding more of the gold fabric on the edges of the quilt as a border to “float” the blocks? Well I’ve run out of the gold fabric! I have less than a 1/4 yard left.
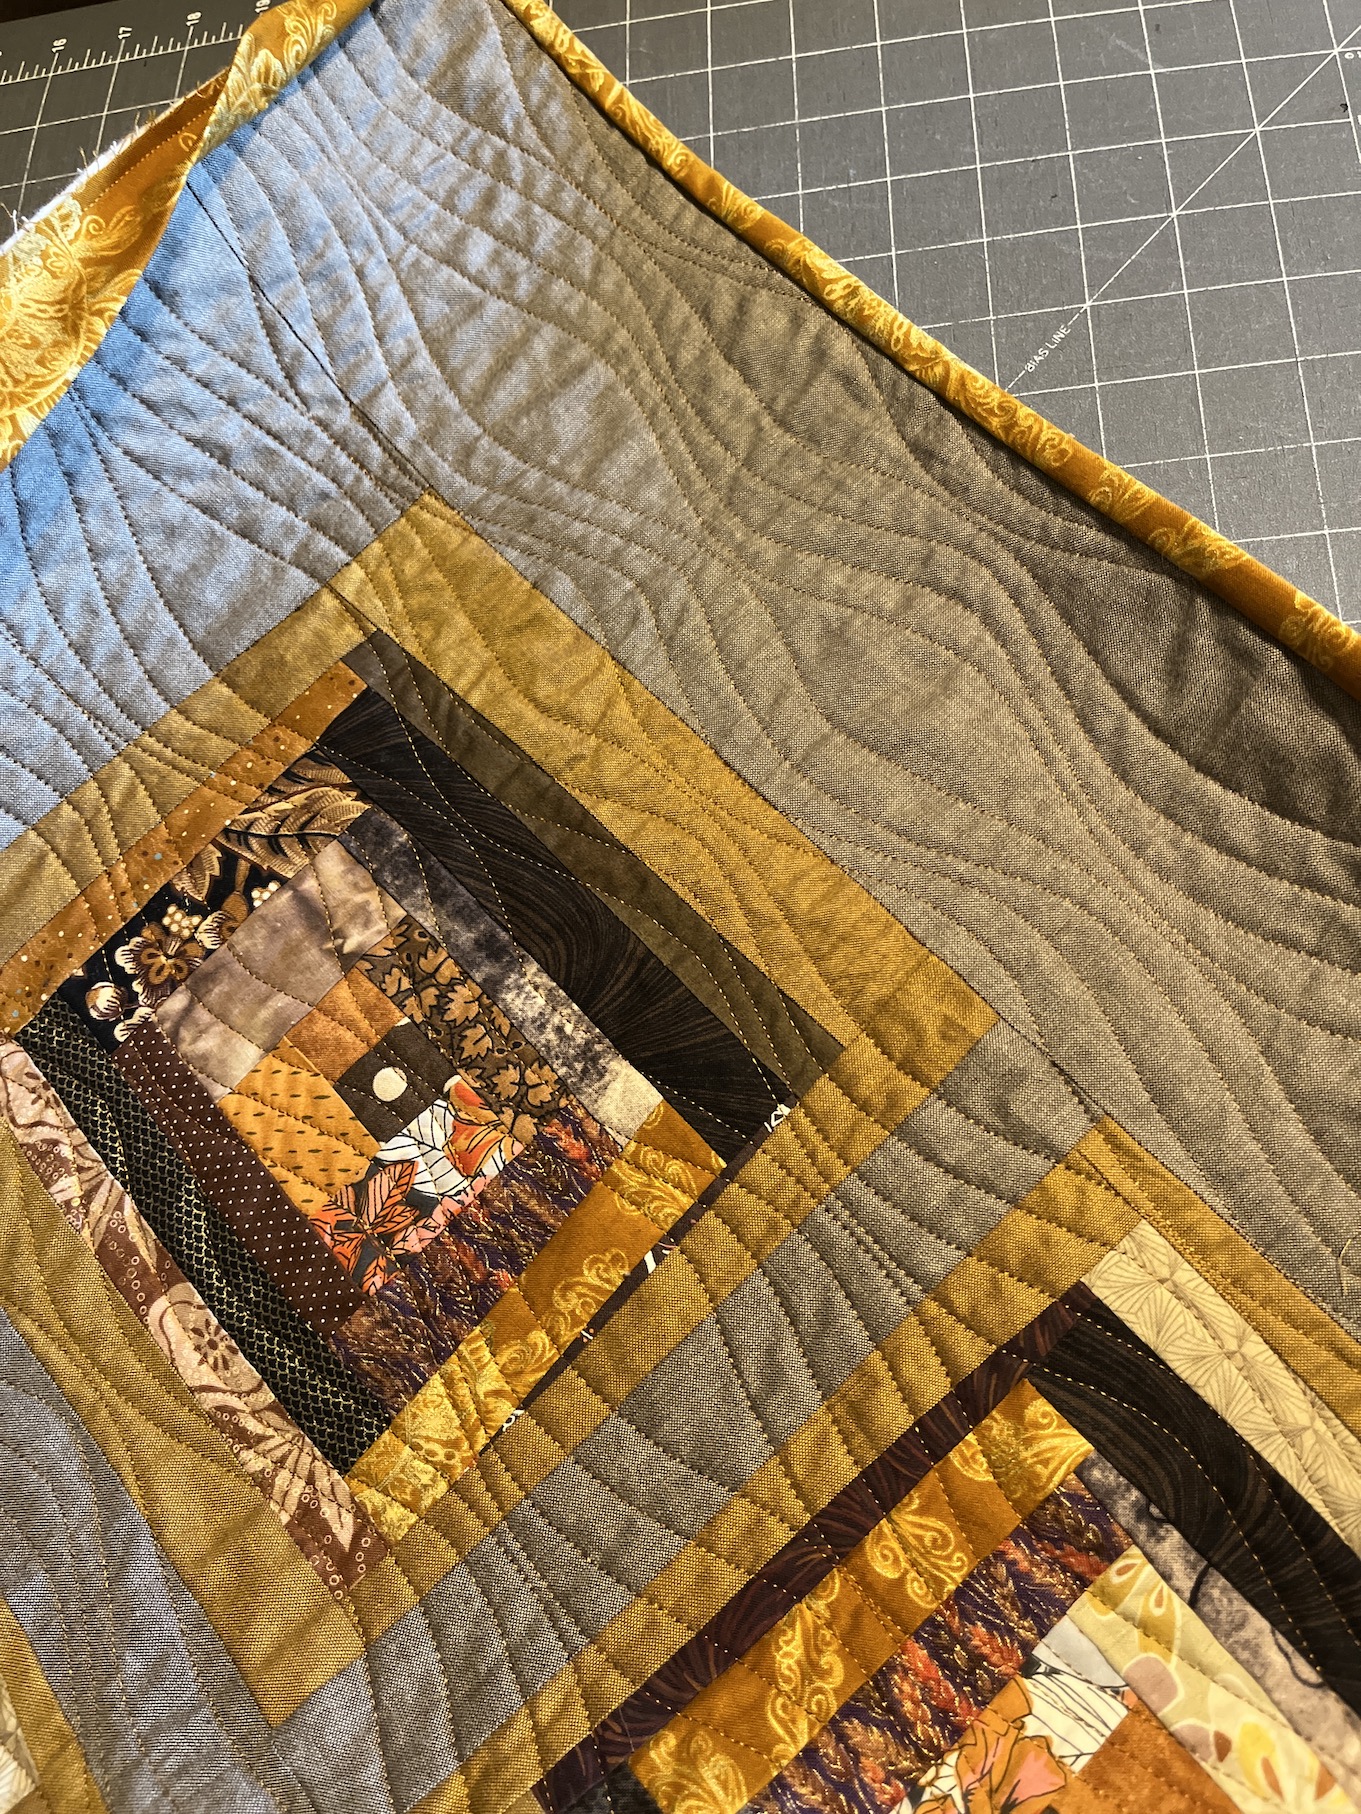
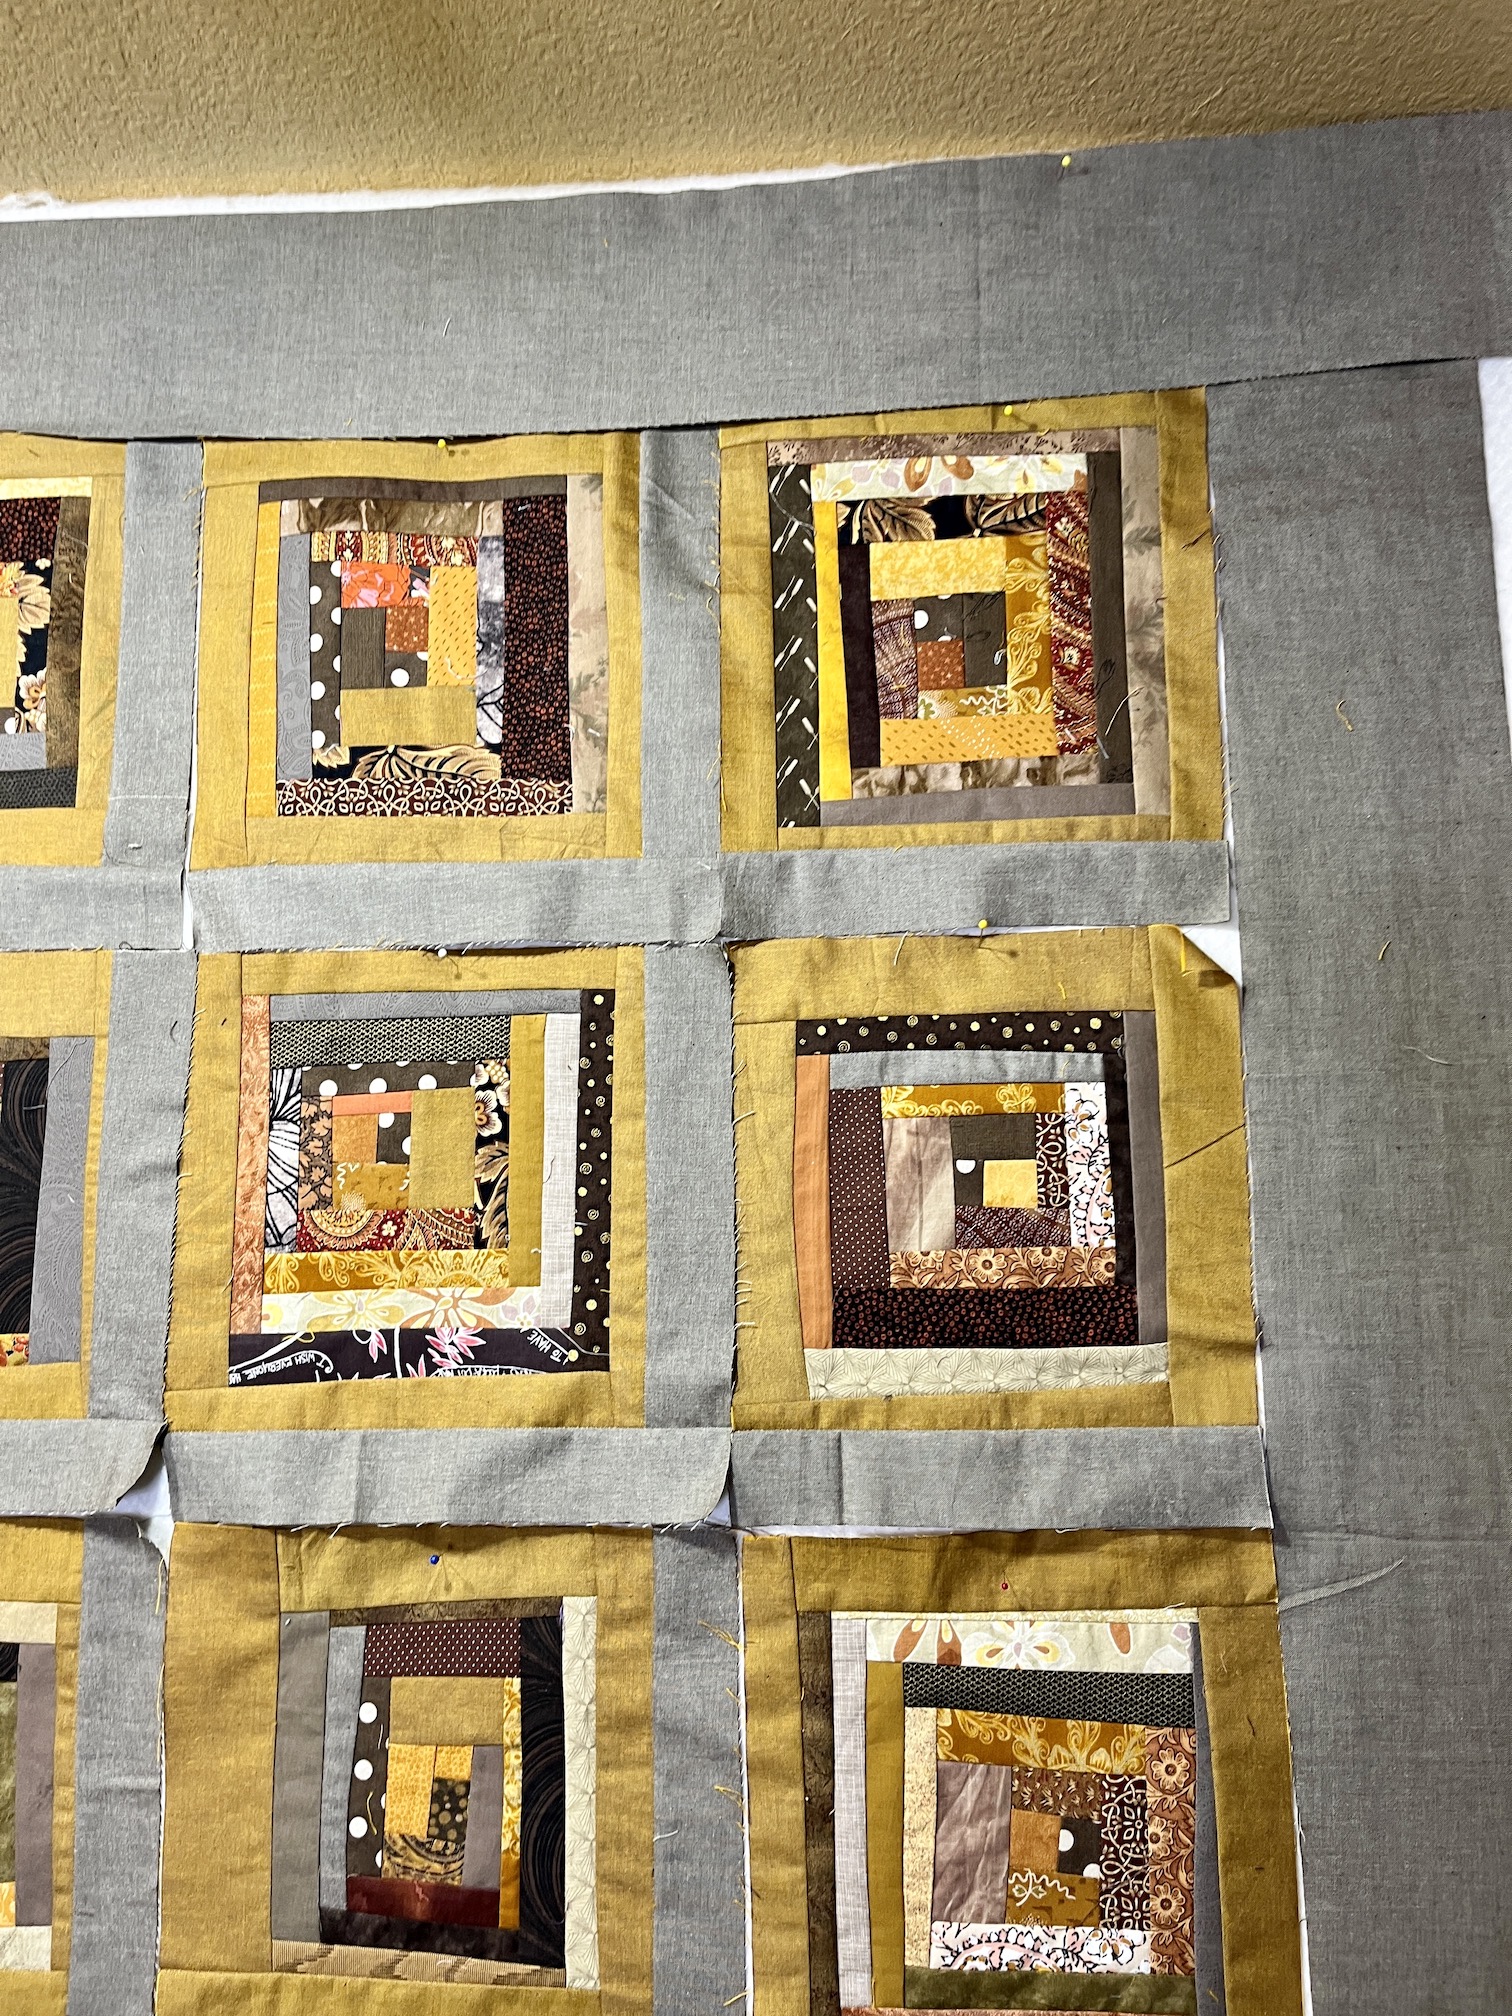
I was pondering my quandary when John asked about latticing instead of floating each block in the taupe – to use the taupe as a “lattice” instead. So I tried it out:
I like it! The taupe quiets the gold and it will all go nicely with the colors in my home library.
(The quilt currently on the loveseat and two little matching pillows, from orphan blocks, I plan to sell on my Etsy shop someday as they are not really my style and I want someone else to enjoy them.)
So that is where I am at in my design process.
Here are the 42 completed 9.5 x 9.5 inch blocks awaiting their lattice:
I decided not to drag out the rest of the story of the 5 day quilt retreat I held at my house last week with two long time friends who are quilters, so I am combining days 4 and 5 into one post.
If you are just joining us the other three blog posts on days 1 – 3 are under the blog category Scrap Happy Quilt Retreat.
We continued working on our improvisational log cabin quilt blocks or “log jamming” which I was originally introduced to during a class I took at the Stitchin’ Post in Sisters, Oregon (I also remember that I’ve previously referred to this type of piecing as making “free form” log cabin blocks).
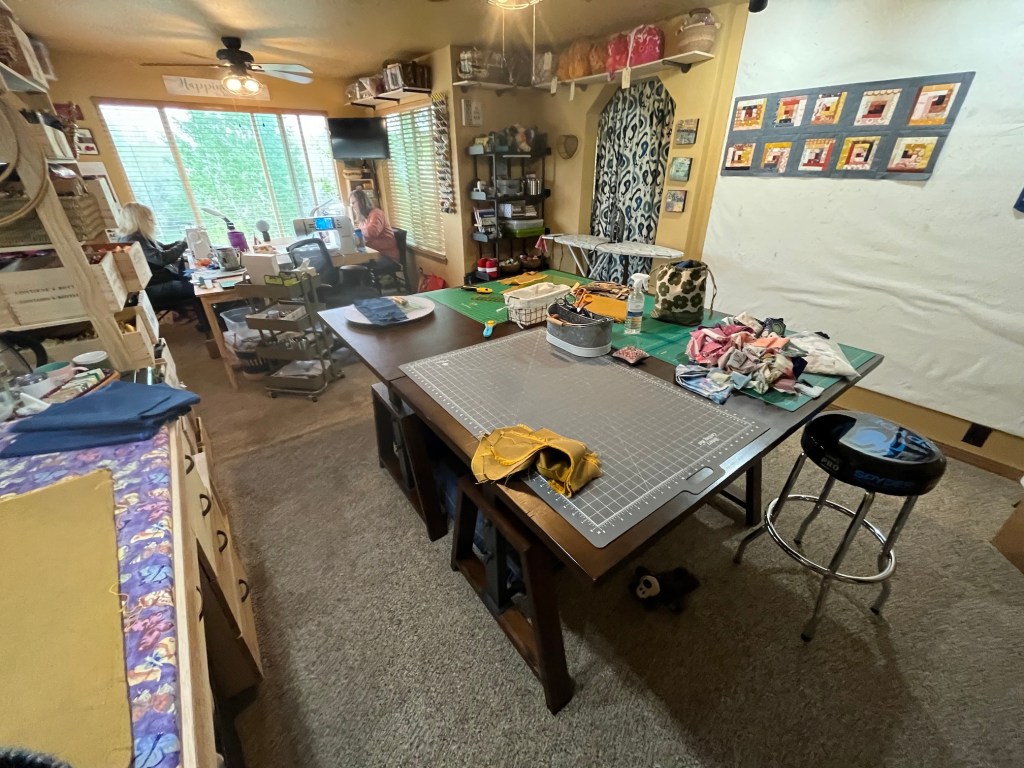
Here are a couple photos of my studio while the retreat was in progress from Days 4 and 5:
And here are the photos of the evolution of D, K, and my blocks:
The photo above is of one of the blocks I pieced with the collection of brown, gold, orange, and copper scraps I put together, set in the coppery color Peppered Cotton I selected.
D was a bit of an overachiever, ha, and actually finished her quilt top (but I think she is also going to add a 3.5 inch border of the gray around it to make the blocks “float” even more and she took some extra fabric home with her) and plans to hand quilt it.
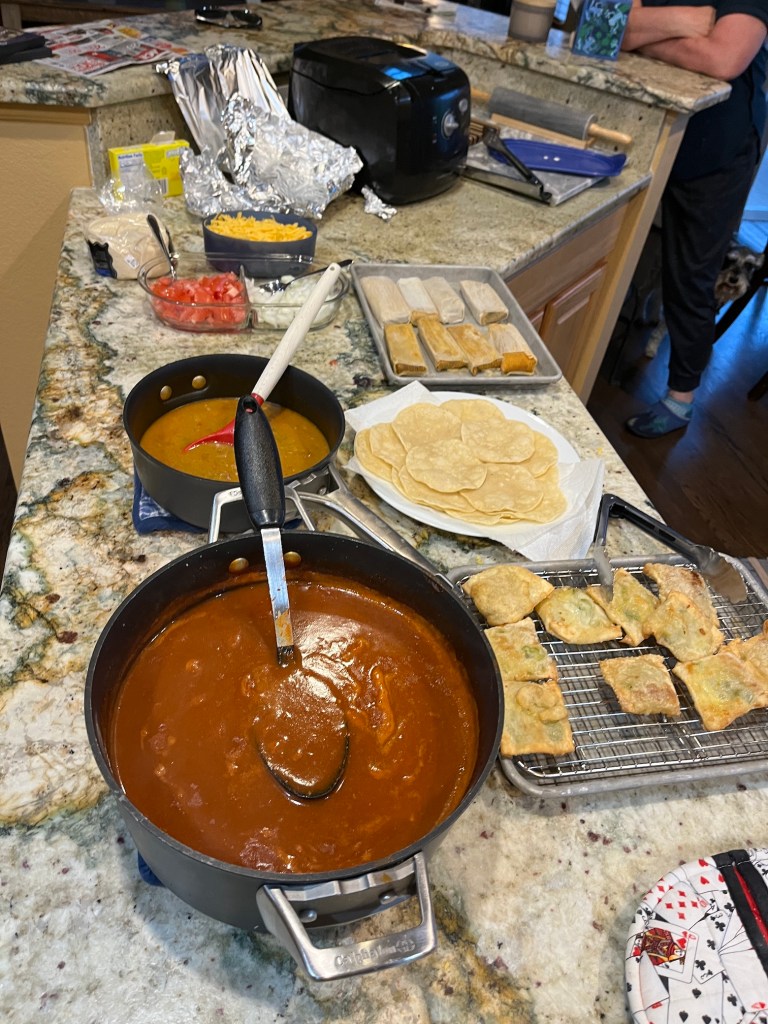
John continued to make us yummy meals and our evening meal on Day 4 was a Mexican Food Feast like the one I shared in the post A Mexican Feast.
On Day 5 D and K surprised John and I with some fantastic hosting gifts. They gave John a gift certificate to his favorite woodworking shop Woodcraft; and they gave me a fat quarter set of the fabric I was drooling over at Holly’s Quilt Cabin during our shop hop on Wednesday May 17th – Celestial by Moda Fabrics:
I just need some yardage of solids (I will probably use the Peppered Cottons that coordinate with the fat quarter set) and I will likely have enough fabric to make the quilt I fell in love with at the quilt shop:
John and I were very pleased with our hosting gifts!
Friday we returned quilters to “Human Storage” (also know as the Denver International Airport, see post “Human Storage” and Airport Lore if you are just joining us); and an exhausted John and Mike the Miniature Schnauzer passed out on the sofa when we got back home.
While cleaning up my studio from the retreat I realized it was a pretty awesome and successful retreat.
And there was a lot of Scrap Happy Happiness over the 5 days (smile)!
By Day 2 of the Scrap Happy Quilt Retreat at my house, Mike the Miniature Schnauzer was getting plenty of pets from visiting quilters (who are lounging about in their pajamas before breakfast):
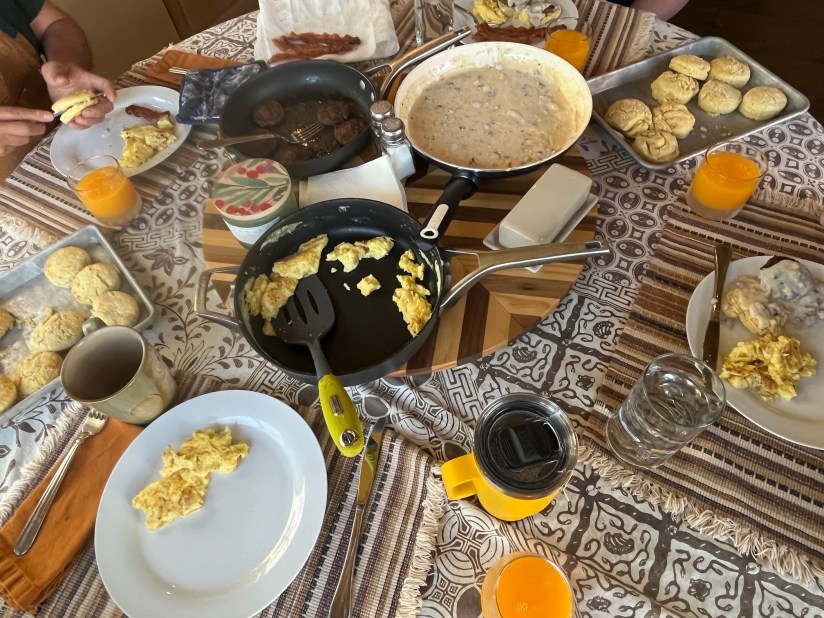
John made us his famous (and amazing) biscuits & gravy breakfast to start our day:
The breakfast includes his sausage patties with caramelized brown sugar (not vegan, ha!) and flaky scratch made biscuits.
After breakfast it was back to work in the studio. I worked on my log cabin blocks – I decided to use brown, brownish-orange, copper and gold fabrics for my blocks:
K and D worked on their blocks and began trying out solid fabric settings for their sample blocks:
K decided to set her blocks in the blue Peppered Cotton and D (after trying out 4 different options) went with the gray Peppered Cotton.
My whole studio looked like there had been a fabric scrap explosion – scraps everywhere!
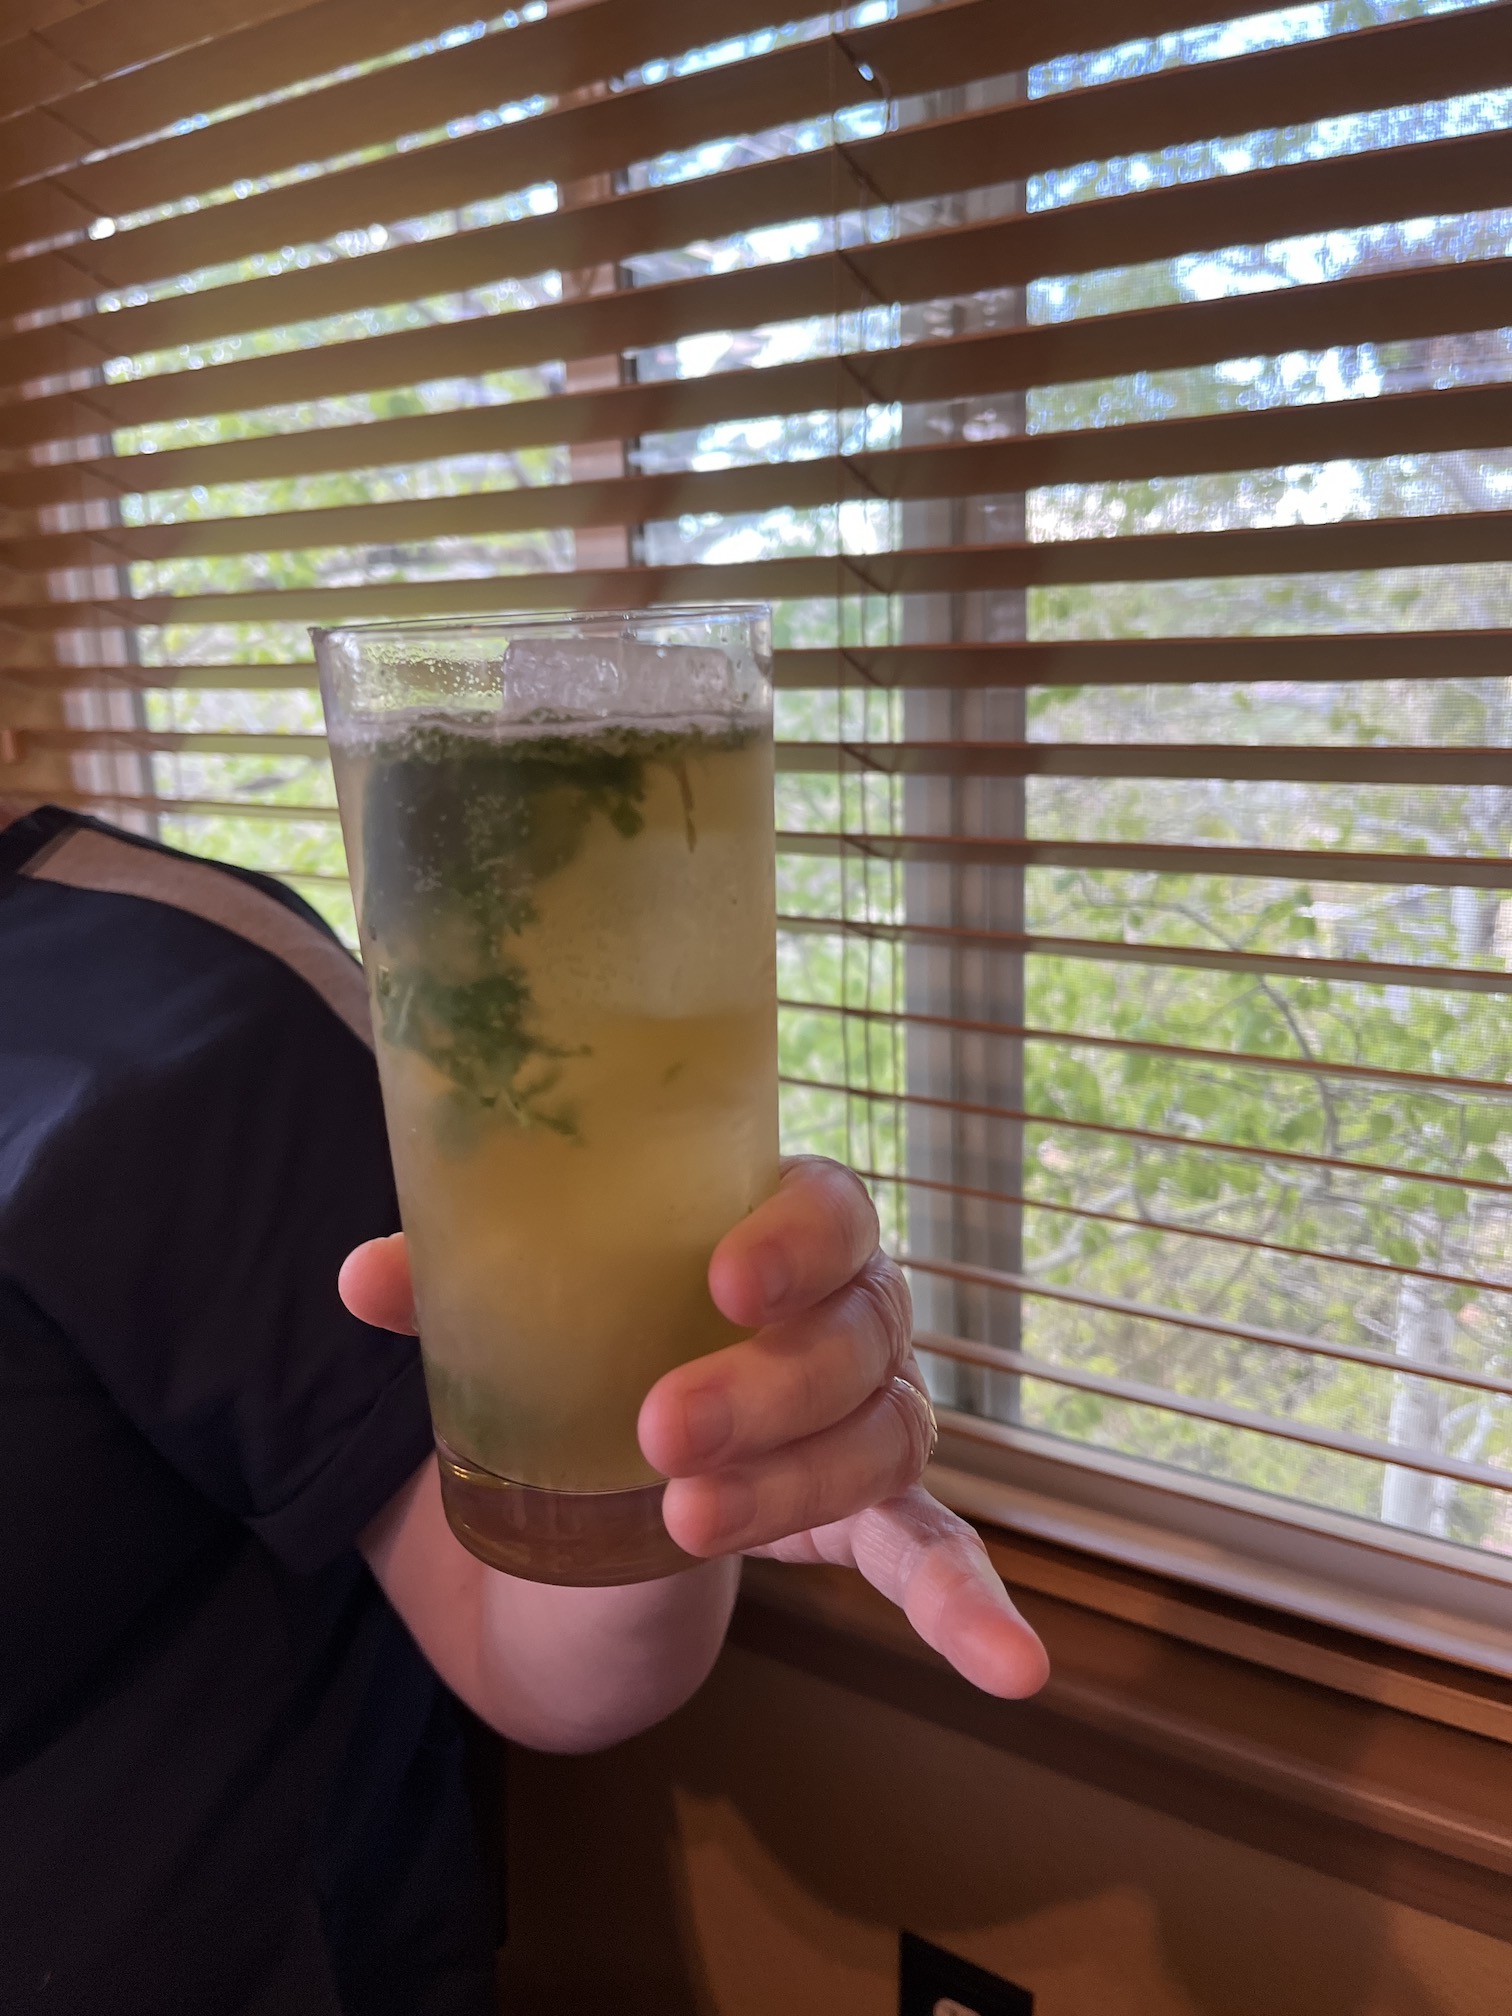
Before you knew it, it was afternoon cocktail time again and John stopped by the studio with Mojitos and Moscow Mules.
I enjoyed putting my trimming scraps in the amazing handmade custom scrap basket that D made me (her own design, no pattern used!) with Marcia Derse fabric (my favorite):
I am getting ready for a “Scrap Happy Quilt Retreat“, which I share more about in tomorrow’s “ScrapHappy May” post, by starting a scrappy log cabin using my ridiculous collection of fabric scraps.
I decided to limit myself to black, white, and gray fabric scraps. First I dug into the bag I have of “fabric strings” which are thinner fabric scraps that I’ve been saving (yes for year, ha!) to make a “String Quilt” someday.
I dug through this scary mess to find the black, white and gray strings and then ironed them (as they were wrinkled/crumped beyond easy use…):
I thought I might have enough to get started but I ended up having to dig into my wine crate box of black, white and gray scraps:
I ended up piecing 35 blocks, which I trimmed to 9.5 inches x 9.5 inches each using my 9.5″ by 9.5″ square ruler:
I started this quilt as an example as the Scrap Happy Quilt Retreat will be at my house starting Monday and I am going to teach my friends how to do improvisational scrappy log cabin blocks (also know as “Log Jamming”) and we are going to use my scraps! (A great way to use up your scraps – dump them onto your quilting friends under the guise of showing them “scrappy quilt making options”…evil laugh!)
More on that tomorrow on the 15th which is ScrapHappy May posting day!
Oh by the way, when I got done piecing 35 – 9.5″ x 9.5″ blocks I did actually (sort of) make a dent in my black, white and gray scrap fabric collection. Here’s what the wine crate looks like now:
(If you can’t tell the difference from the previous photo, just know before it was overflowing and now everything fit nicely in the wine crate with no overflow…)
Kate @talltalesfromchiconia hosts a monthly celebration of reusing scraps and “scrap-happy challenges” called ScrapHappy Day on the 15th of each month and thanks to Alys @gardeningnirvana I found out about this monthly event and Kate let me participate!
Here is my latest scrap-happy project, which is currently in progress awaiting my machine quilting – the Colour Wheel Quilt wallhanging which I will be using as a teaching tool.