
I realized didn’t share very many photos or details about the scrappy improvisational log cabin blocks I made at the Scrap Happy Quilt Retreat (link to all the posts related to this 5 day retreat) last week.
During the retreat I “shopped” from my collection of brown, cream, yellow and gold scraps and selected this collection of scraps to which I also added a couple orange-brown scraps and some scraps D brought to the retreat:
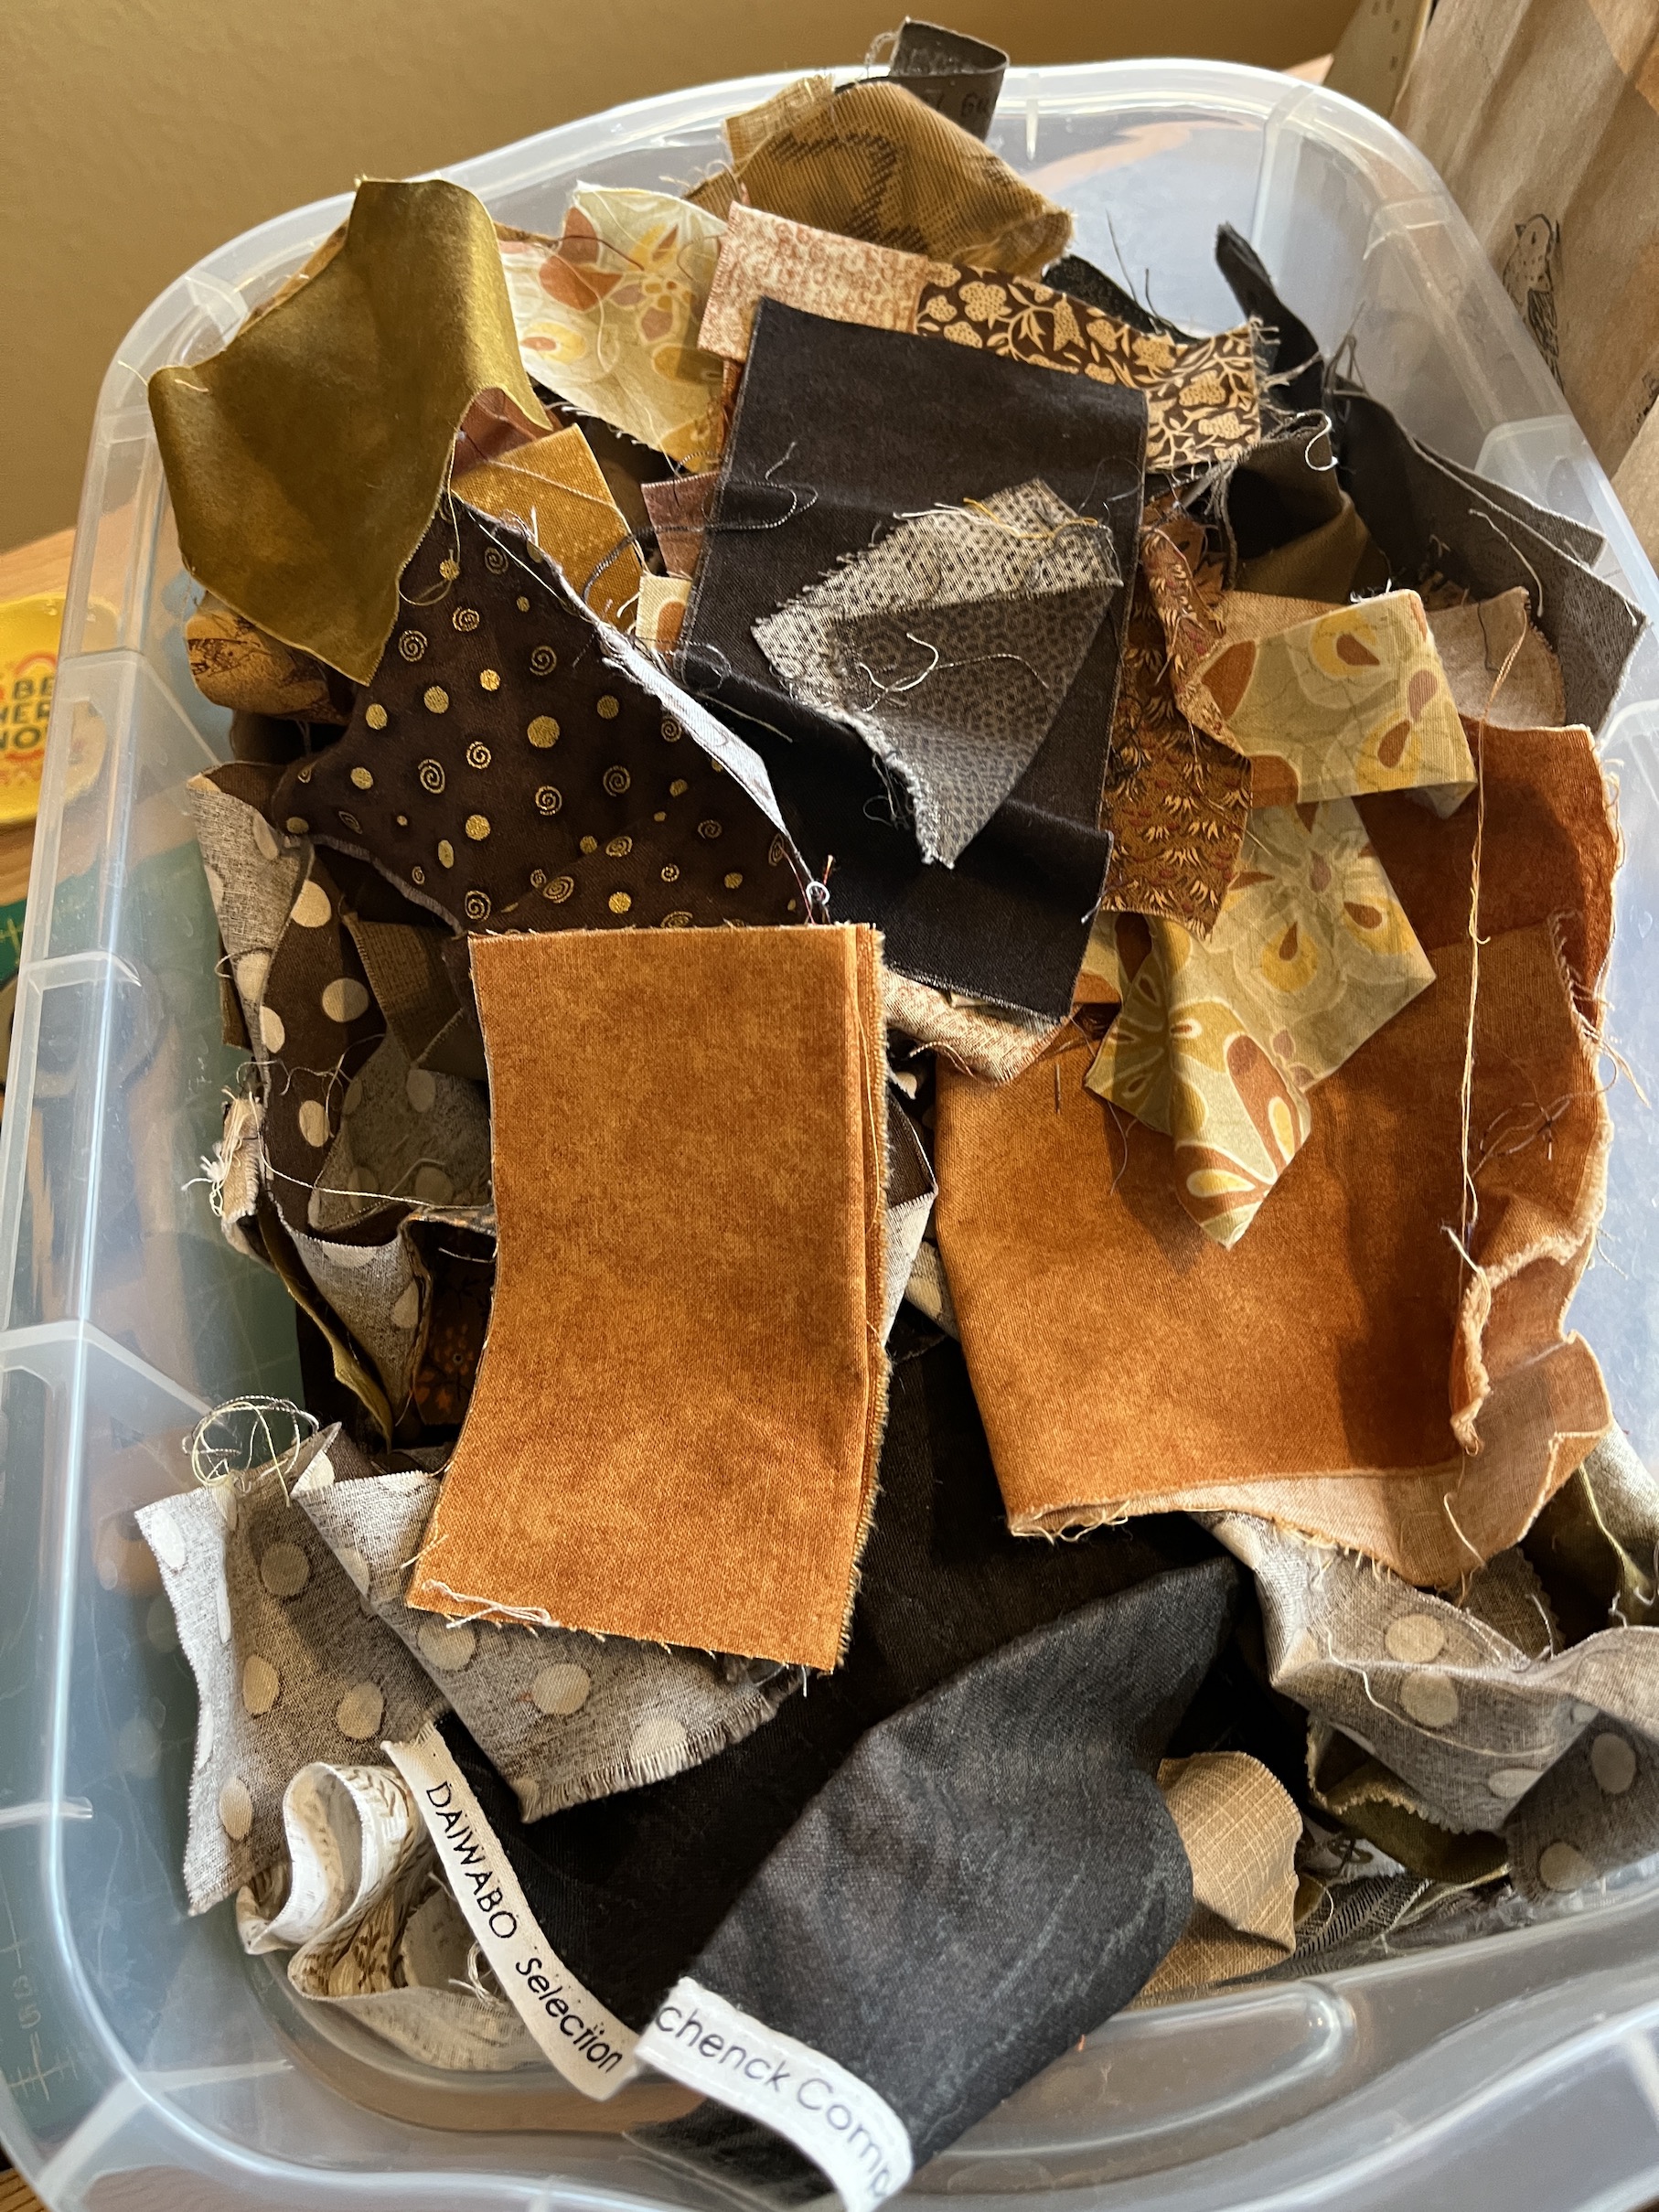
I ended up piecing 46 blocks, which I narrowed down to 42 blocks plus one spare (I recycled into the scrap pile 3 blocks that were pieced too wonky).

At first I decided to float the blocks (but framing them) in some coppery-gold-ish Peppered Cotton fabric I had in my stash:
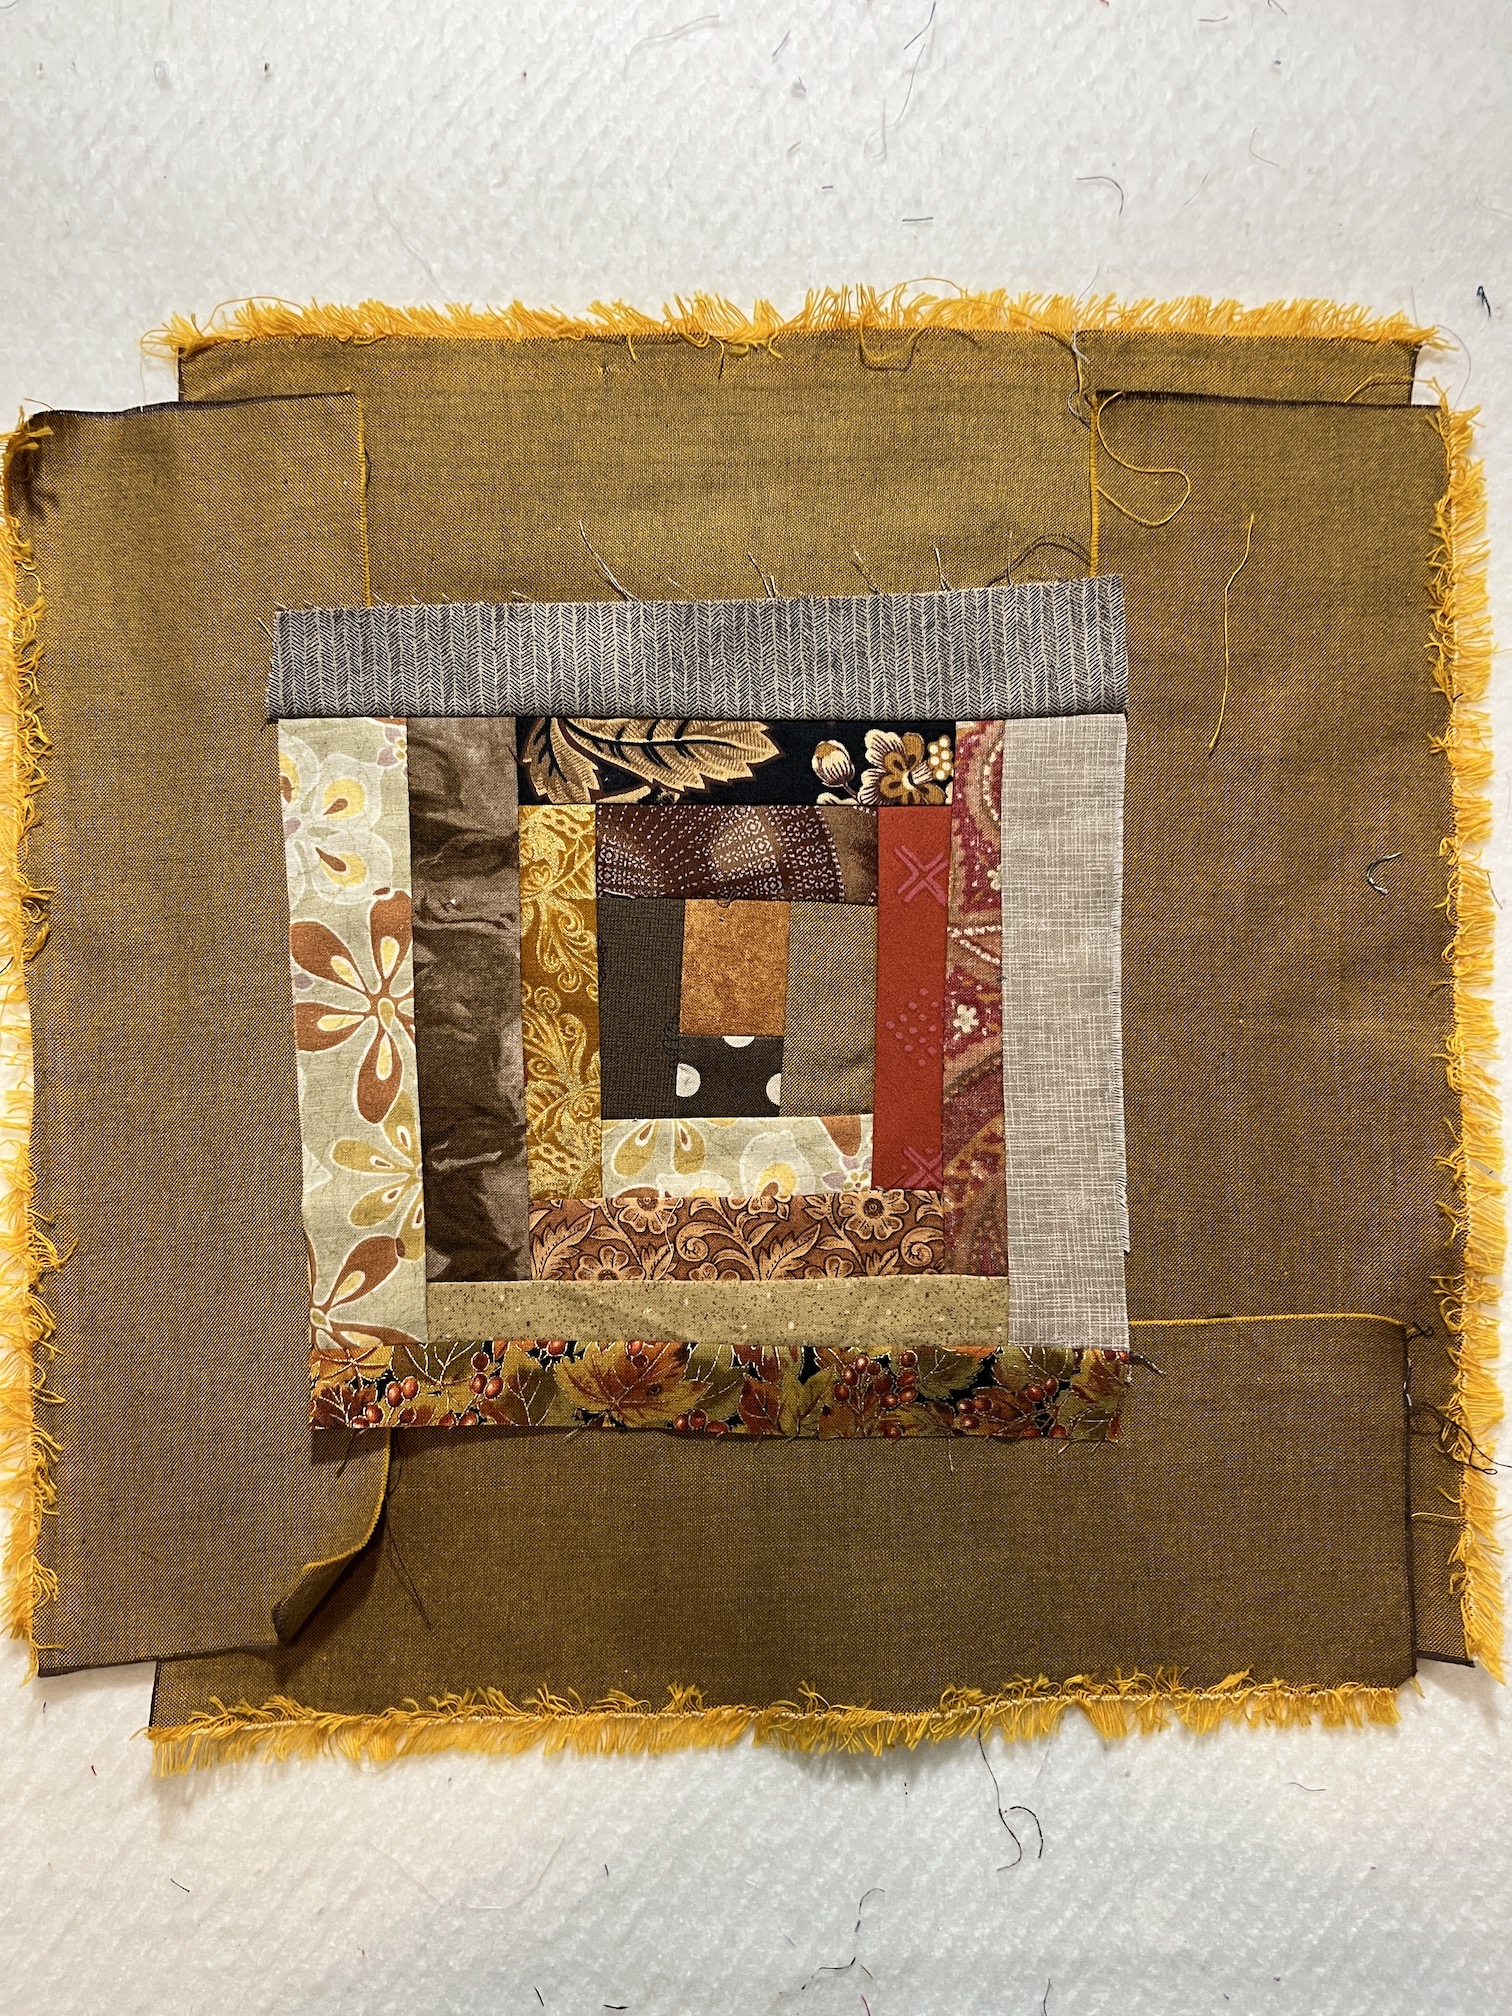
Yes it looks cool and the framing fabric really compliments the fabrics in the blocks, but I decided it would just be too much as an entire quilt.
So I pulled out this brown-taupe-ish Peppered Cotton fabric I had in my stash:

And I decided I would first frame each block in the coppery-gold-ish fabric and then set that block in the taupe-ish fabric:
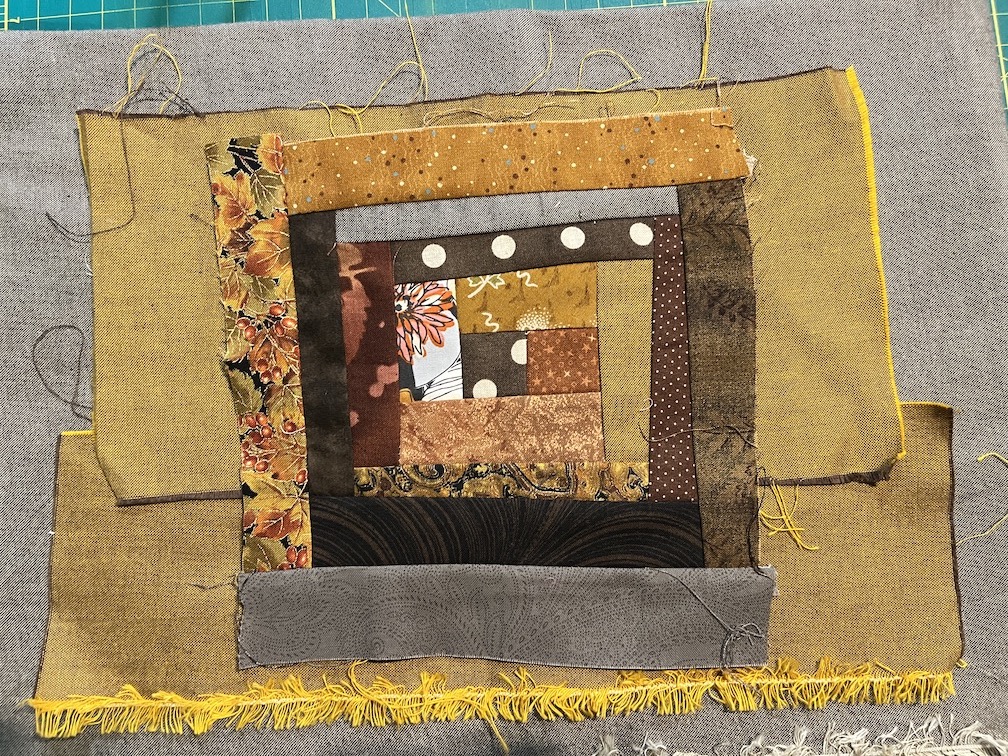

It might be difficult to visualize as I have it laid out in the images above but I will share more images after I try out some sample final blocks. Creating some sample final blocks will also let me confirm that this combination actually works.
We used this method during the retreat – I suggested (and they listened) to K and D that they actually sew a sample final/completed block to decide if they really like a framing/border/lattice color for their block. Just laying the block on the fabric doesn’t already give you the true feeling of the final version. You can always rip it out the framing and reuse the core block if you don’t like the sample.
Here is an example below of what D did during the retreat with her two finalists – the khaki colored fabric vs. the gray fabric – to help herself make the final decision:

A friend who read the posts related to the retreat ask for some overall instructions on making scrappy improvisational log cabin blocks (which I also call “log jamming” or “free form” log cabin blocks).
Here is a quick overview of how I do it, there are several different approaches and in the post ScrapHappy May: Scrap Happy Retreat! I shared links to YouTube videos from the Stitchin’ Post where I first learned how to do it.
IMPROVATIONAL/FREE FORM SCRAPPY LOG CABIN BLOCKS
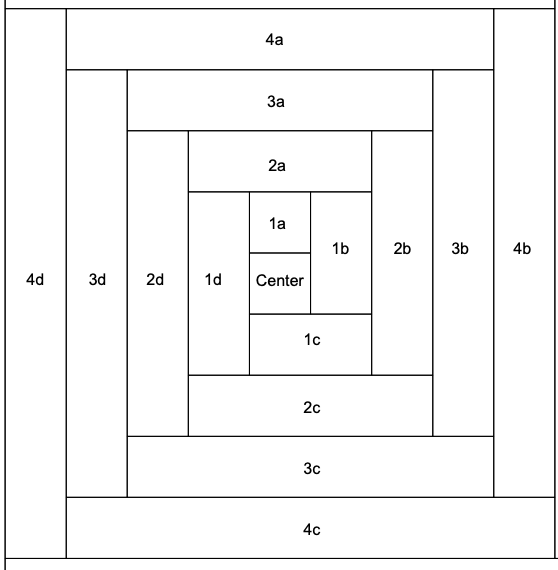
- First you need to understand the concept of Log Cabin Block piecing where you start with a center square and build around it. Below is a screen shot from Generations Quilt Patterns on How to Make a Log Cabin Block that illustrates the Log Cabin Block piecing concept:
- It really helps to have pieced traditional log cabin blocks before you go improvisational.
- Next you need to decide what size you want your final block to be. I decide my final size based on existing square rulers I have as the easiest way to trim the block is using a square ruler on a rotating cutting mat. I have the following square rulers in my collection – 6 inch, 6.5 inch, 9.5 inch, and 12.5 inch, so I make my final blocks one of those sizes. D & K used my 9.5 inch square ruler for the final size on their blocks. I plan to use my 12.5 inch ruler for the final size on my blocks.
- Then it is time to go shopping in your fabric scraps. You need to decide on a color palette (though you could do all random colors but your piece will not look cohesive if that is what you want, but it will look colorful!) for your quilt blocks. As you can see from the pictures from our retreat – K went with pinks and blues, while D went for autumnal colors. You are going to need more scraps that you think so at least initially put together a large pile of scraps.
- Audition your scraps and see how well they work together by laying out a demo block (no need to sew together yet but try and simulate a log cabin block).
- To start you can either 1) sew two strips together, one of the strips being your center fabric; or 2) sew different little pieces of centers to a long strip.
- Cut them apart using scissors to create your first two pieces – if you look at the graphic above this would be Center + 1a.
- From there you can create using log cabin piecing techniques a sample block to see how you like it, or just jump into chain piecing blocks starting with your fabric for 1b.
- Don’t worry about 1/4 inch seams, just do what seam allowance works to piece the fabric to the next fabric – for example if you are using thin scraps you can use 1/8 seam allowances, especially when you are working on rows towards the center, it will end up stable when the entire block is sewn together.
- Using log cabin piecing techniques (working from a center around and around) keep adding scrap strips until you get your block a little larger than the final size you want to achieve.
- Trim your blocks using the square ruler of your choosing to their final size.
I might write an actual pattern of how I do it with lots of images/photos and detailed instructions and sell it as a digital download on my Etsy shop someday. Then I can add in all the tricks I’ve learned over the years of making these blocks. My process does differ from the one I originally learned from Jackie at the Stitchin’ Post.
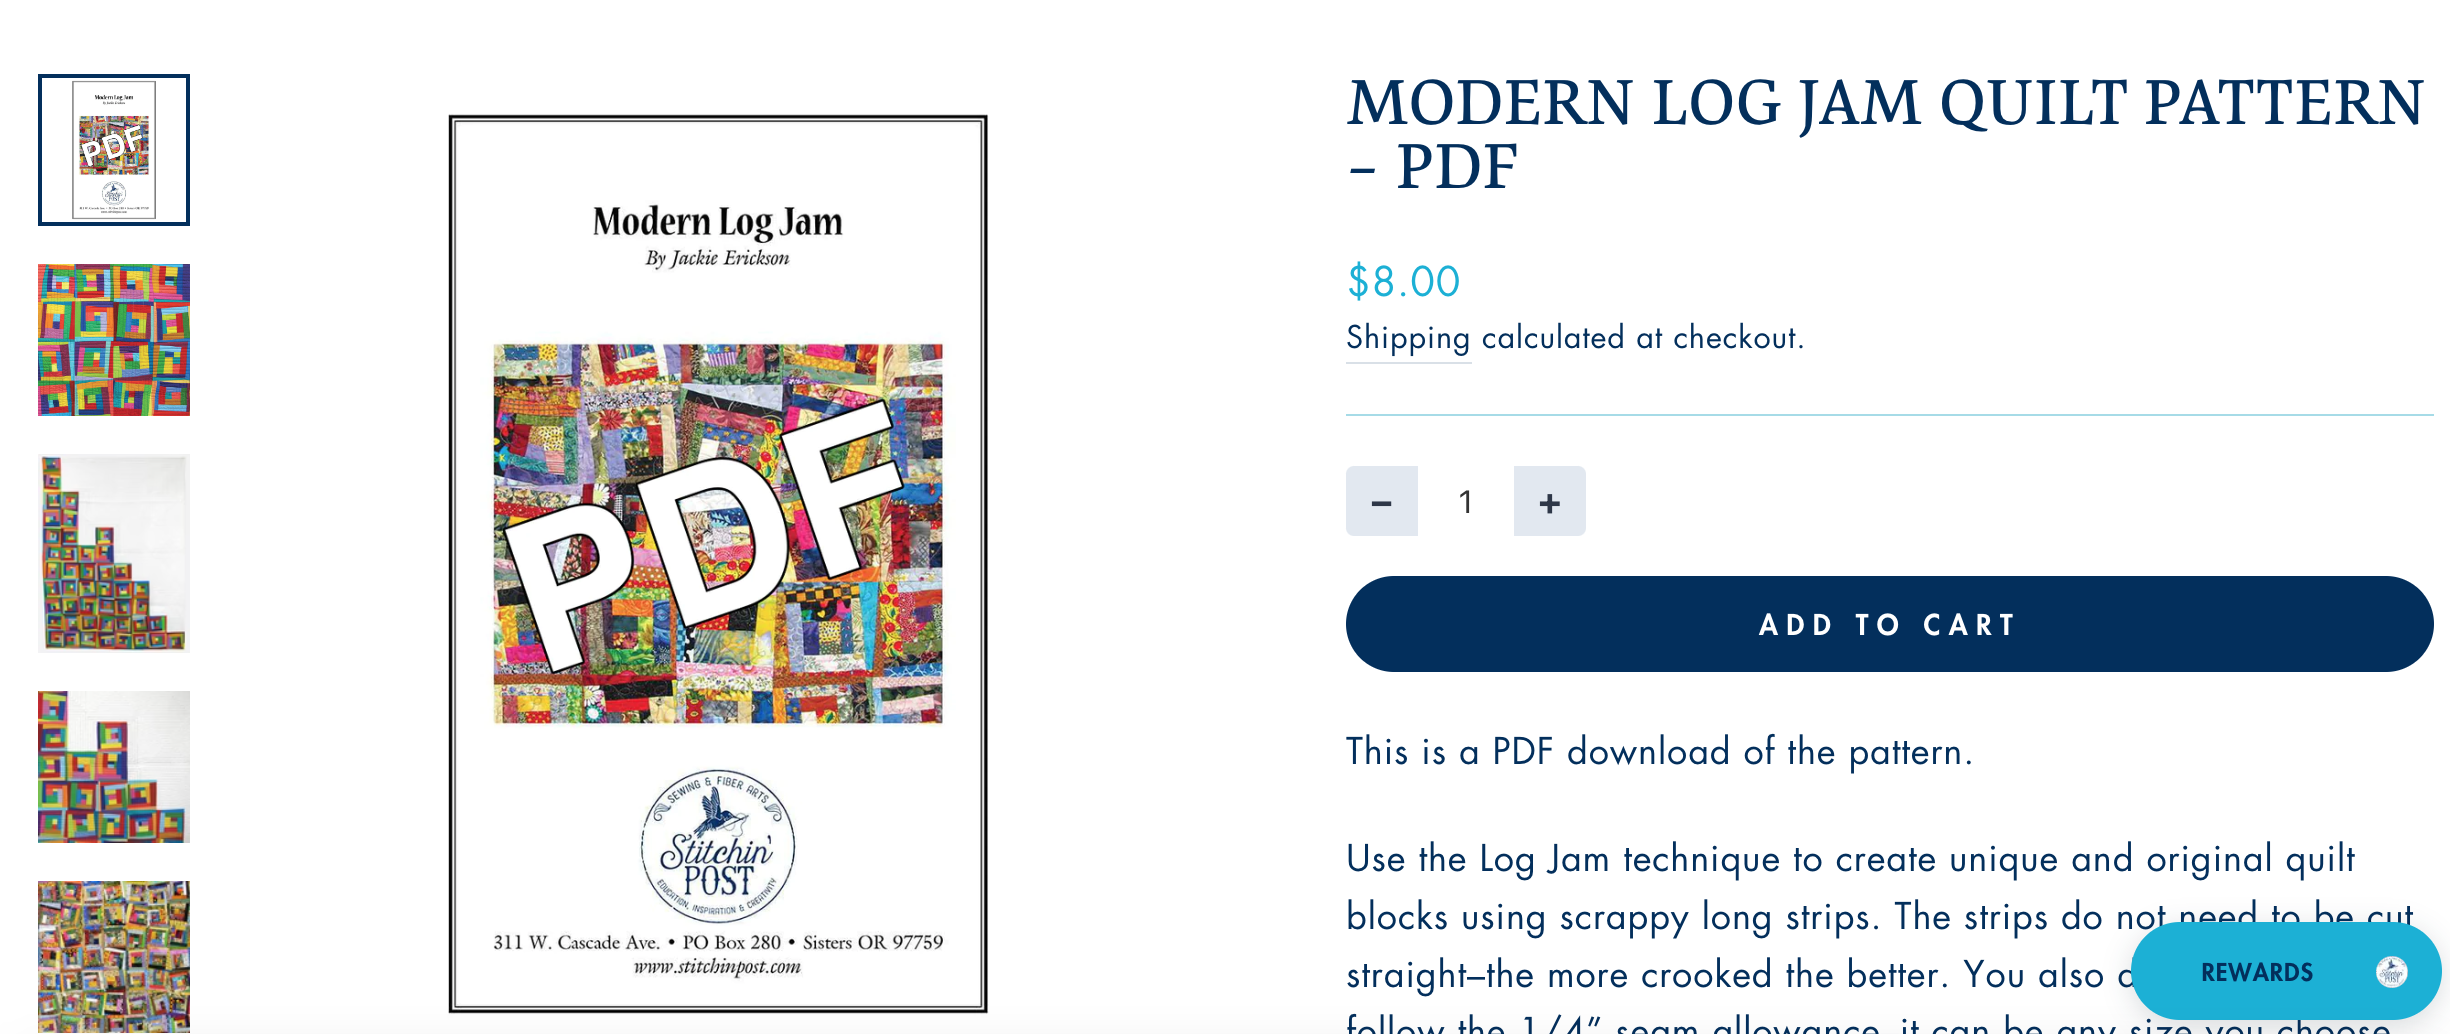
The Stitchin’ Post does sell a pattern for making these blocks called Modern Log Jam Quilt in case you want to try their pattern. It was written by the person (Jackie) who originally taught me (before I created my own process) – I’ve linked it here – Modern Log Jam Quilt.
There are so many options of what you can do with these types of blocks made from scraps. You could do something straightforward like what D made:

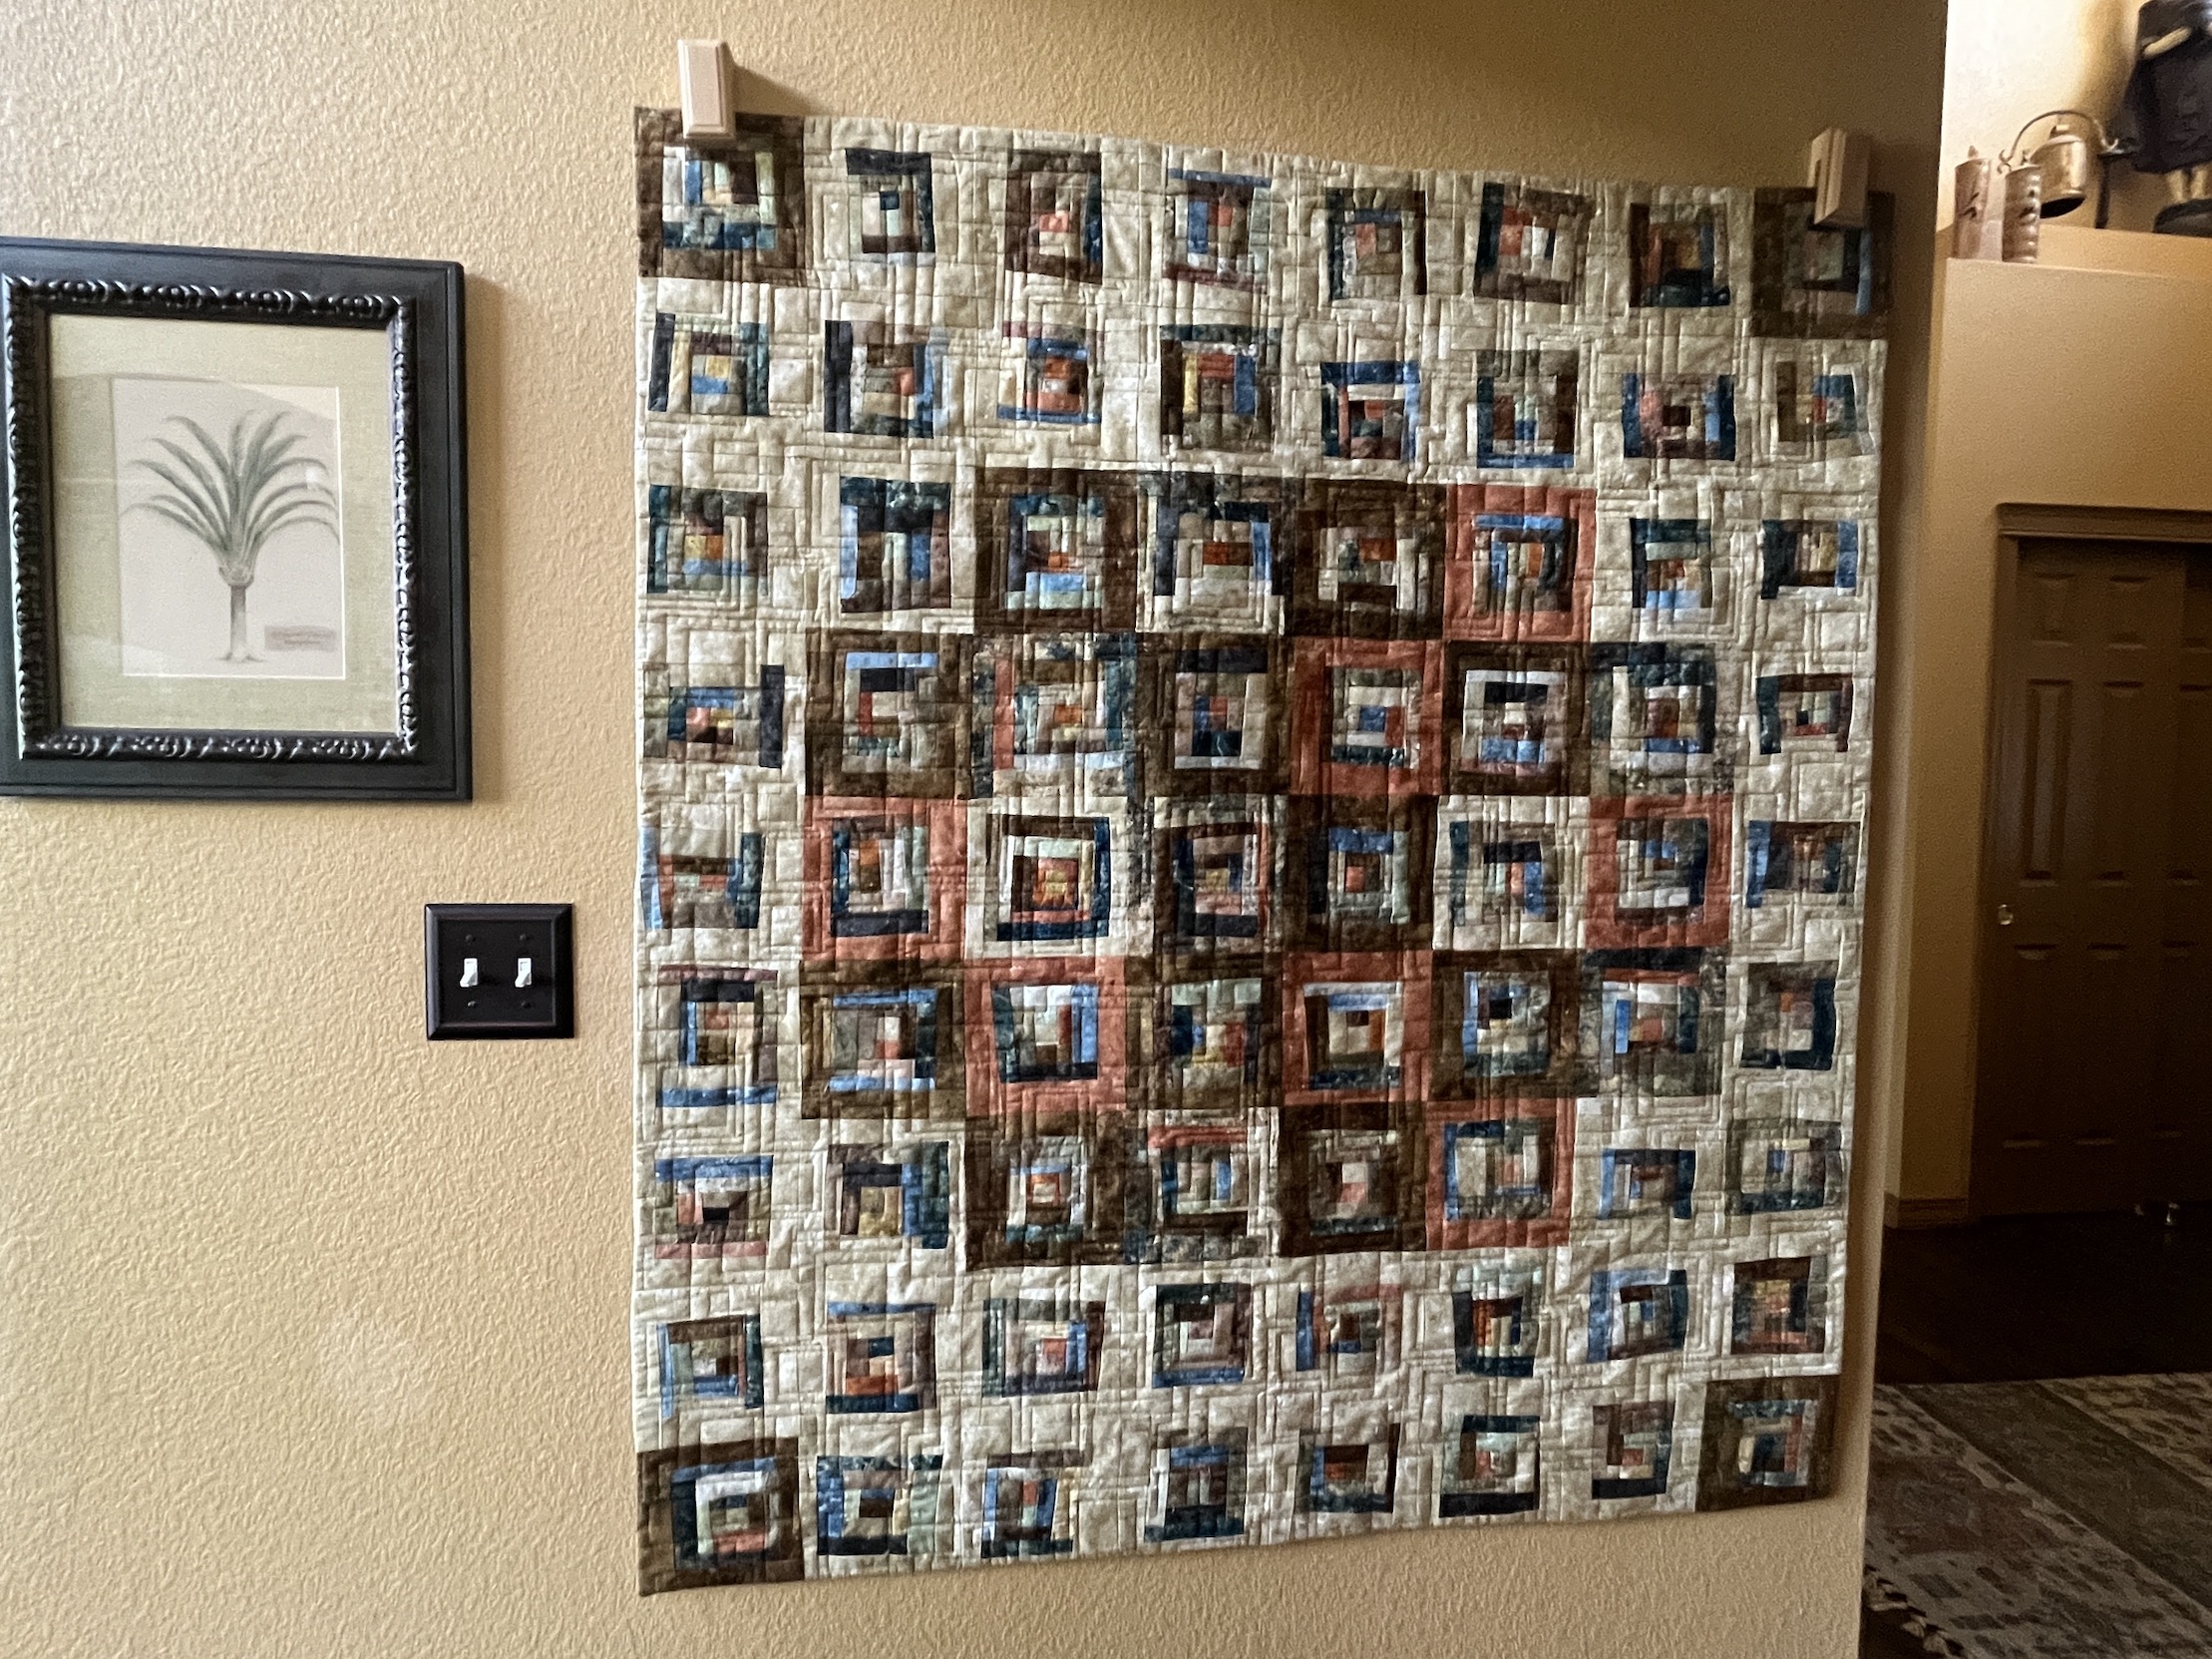
Or you could play with using different framing colors and create additional patterns like this one I made out of Stonehenge fabric scraps:
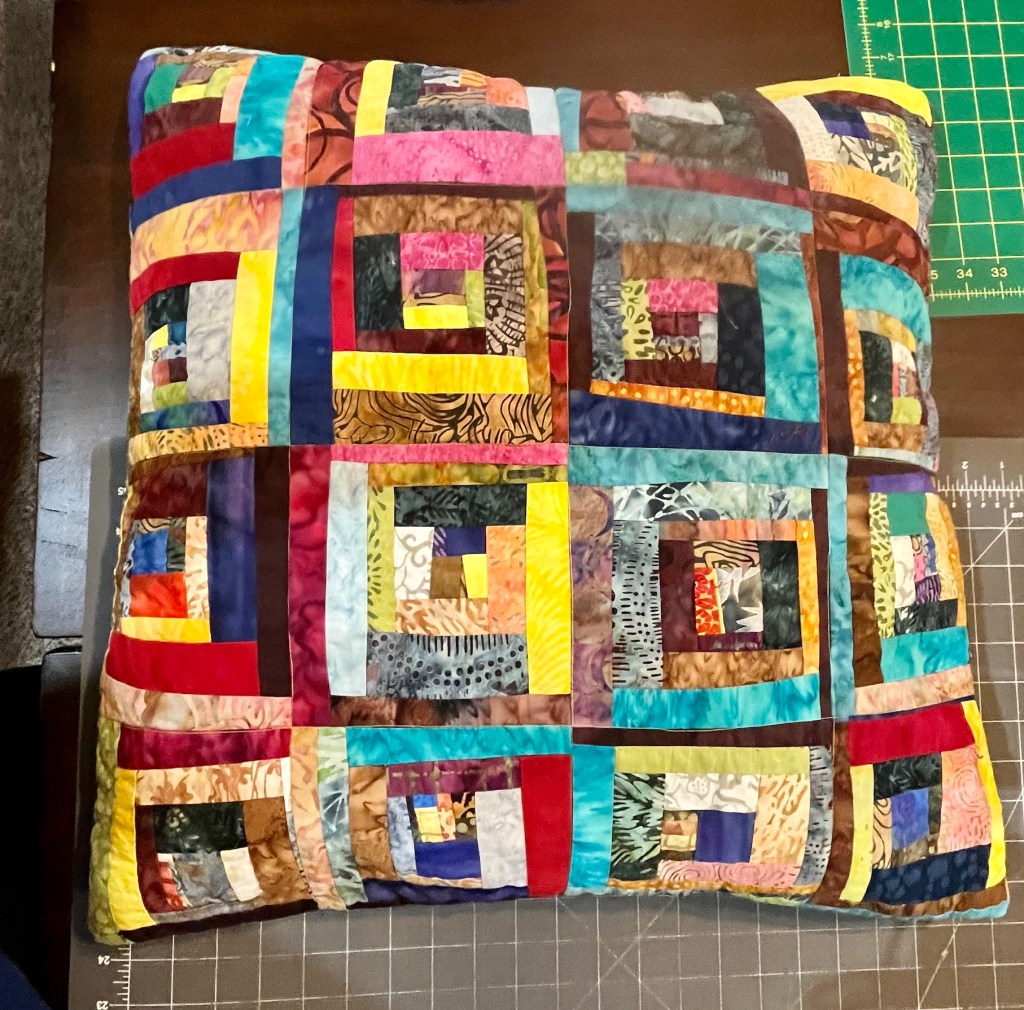
Or you can skip the “framing” of the blocks in a solid color and just sew the blocks directly together like I did for these two pillows I made out of batik scraps:

I’ve made numerous free form log cabin quilts this way.

Wow. This quilting world has so much creativity and ways to quilt. Thanks for sharing this. I learn something every day from you.
LikeLiked by 1 person
Thanks so much I appreciate that 🙂
LikeLiked by 1 person
Thank you, thank you, thank you. I need to decide if I want blacks, whites, and grays, or multi-color scraps from my bins. Maybe if I sort and organize my different colors, it would be easier to make a decision.
LikeLiked by 3 people
I smiled when you mentioned your ‘maybe’ – go for it, Chela!
🙂
LikeLiked by 1 person
Glad you liked it 🙂
Whatever you do I know it will be cool!
LikeLike
Infinite possibilities from this simple procedure. Like a flower blooming, that is what I think of when looking at log cabin piecing.
LikeLiked by 1 person
It is amazing how many options, thanks for stopping by 🙂
LikeLiked by 1 person
Log Cabin process in making a block or pieced fabric has been my go-to (in various incarnations) for decades! I find it relaxing as well as productive.
You clarified a basic approach very well in your tutorial. I discovered most quilters have a go-to process we fall back upon when we come up short for anything new/creative to do with scraps and even normal yardage of fabric. A friend loves 9 patch and it doesn’t end up **looking** like 9-patch – ya know?
BTW: I’m extremely partial to that lovely coppery peppered cotton. I say keep it as the entire outline and floater fabric. But that’s just me.
I’ll bet you’re enjoying some leftovers (scraps and food) from your marvelous retreat.
😉
LikeLike
Thanks Laura! I used to be a 9-patcher in my early days of quilting I was obsessed. That coppery fabric is pretty cool! Yes we did enjoyed leftovers 🙂
LikeLiked by 1 person
You have encouraged me to get out my African scraps and get a log jammin quilt ready to sell at the quilt show. Love keeping up with your journey. Will let you know if I ever make it to Colorado. For now still flying off to Africa as much as I can. Janet Storton
LikeLiked by 1 person
Oh my goodness that would be an awesome quilt with those scraps! So appreciate your readership. Yes let me know if you ever make it to CO and thanks for the good you do in the world 🙂
LikeLike
I enjoyed reading about your process as much as I enjoy looking at all those gorgeous quilts. Thank you for sharing. It must be great to have so many scraps that you can create color palates.
LikeLiked by 1 person
Thanks so much! I am grateful to have so many scraps to play with and share 🙂
LikeLiked by 1 person
That’s interesting and different from the way I make my wonky log cabins as leader-enders. Yours are more colorful and varied, I think. Thanks for a look at a different way of doing things. All the blocks look amazing.
LikeLiked by 1 person
Thanks so much and I am glad you enjoyed it 🙂
LikeLike
I noticed your vibrant colour combination in your previous posts. Thanks for this in-depth post and for the clear instrucitons on yow to log jam
LikeLiked by 1 person
Thanks so much glad you enjoyed it! It was Chela who gave me the idea to share my process 🙂
LikeLiked by 1 person
Good for Chela!
LikeLiked by 1 person
Nice I like those natural colors thank you sharing
LikeLiked by 1 person
Thanks so much!
LikeLiked by 1 person
You are welcome
LikeLiked by 1 person
Very cool! I don’t sew, so it’s interesting to see how you put your quilt blocks together!
LikeLiked by 1 person
Thanks so much 🙂
LikeLiked by 1 person
That sounds like such a simple process, but the results are so pretty. I love how they all look different but still beautiful.
LikeLiked by 1 person
Thanks so much, I am so happy it is all pieced now 🙂
LikeLike