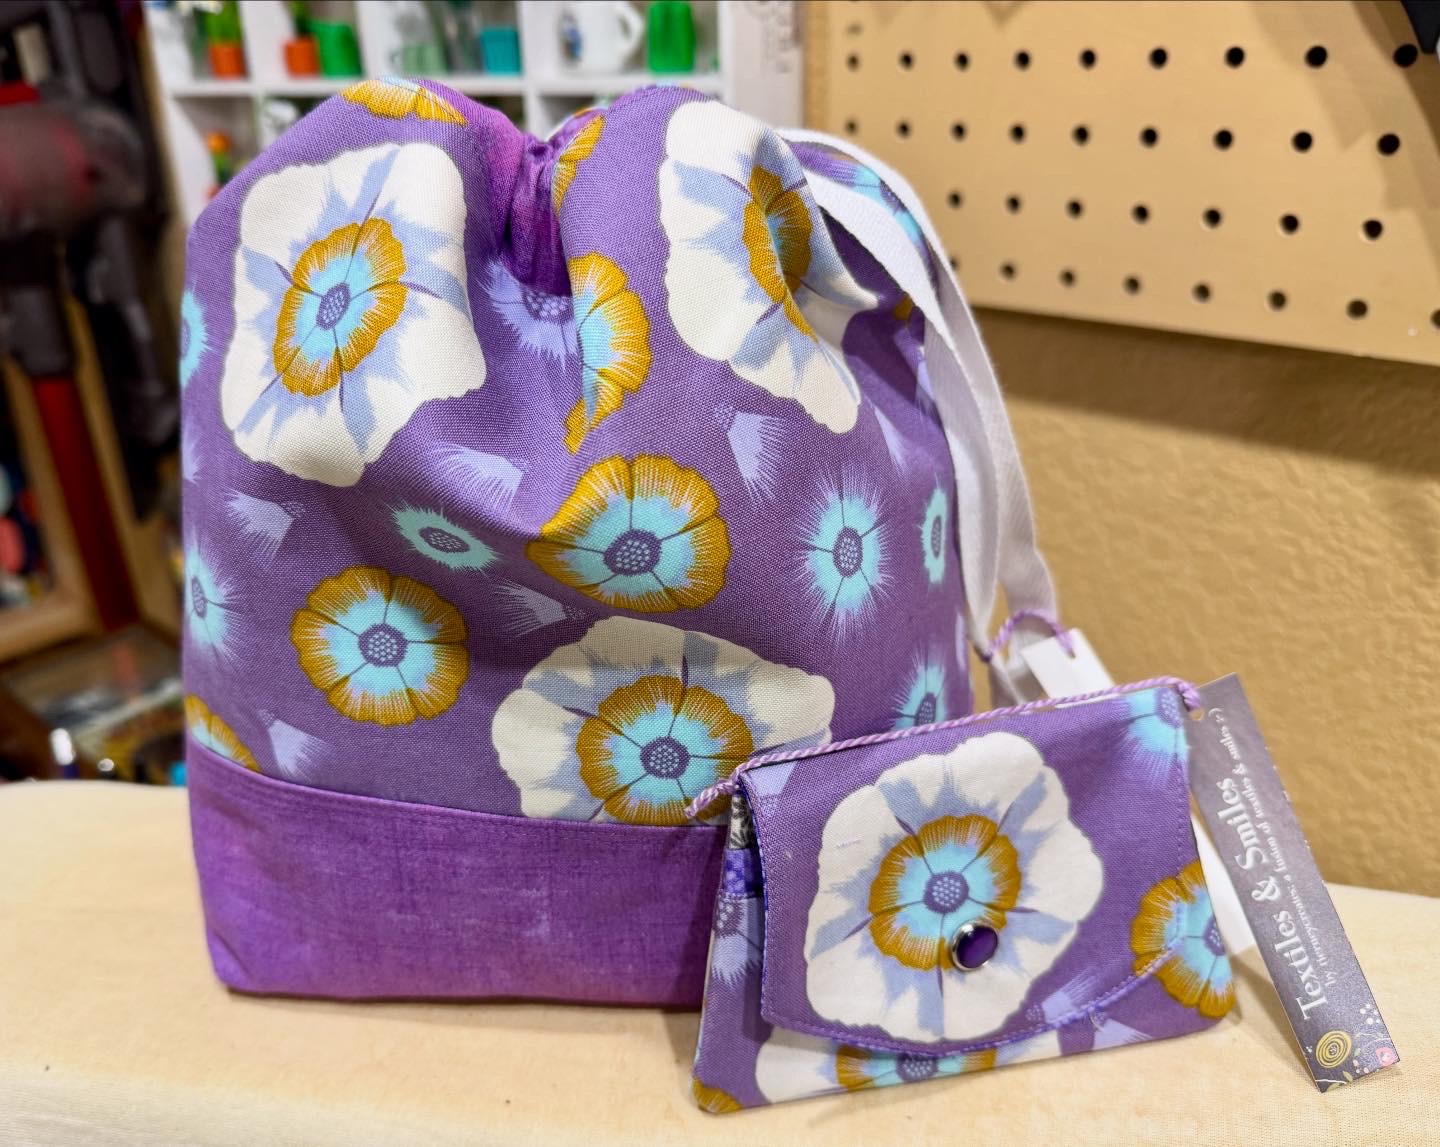
Recently I discovered a previous work friend who I stay in touch with on social media had a very challenging 2025 with some very big life changes.
When I had my Etsy shop open she had supported it by purchasing several items including some drawstring bags.
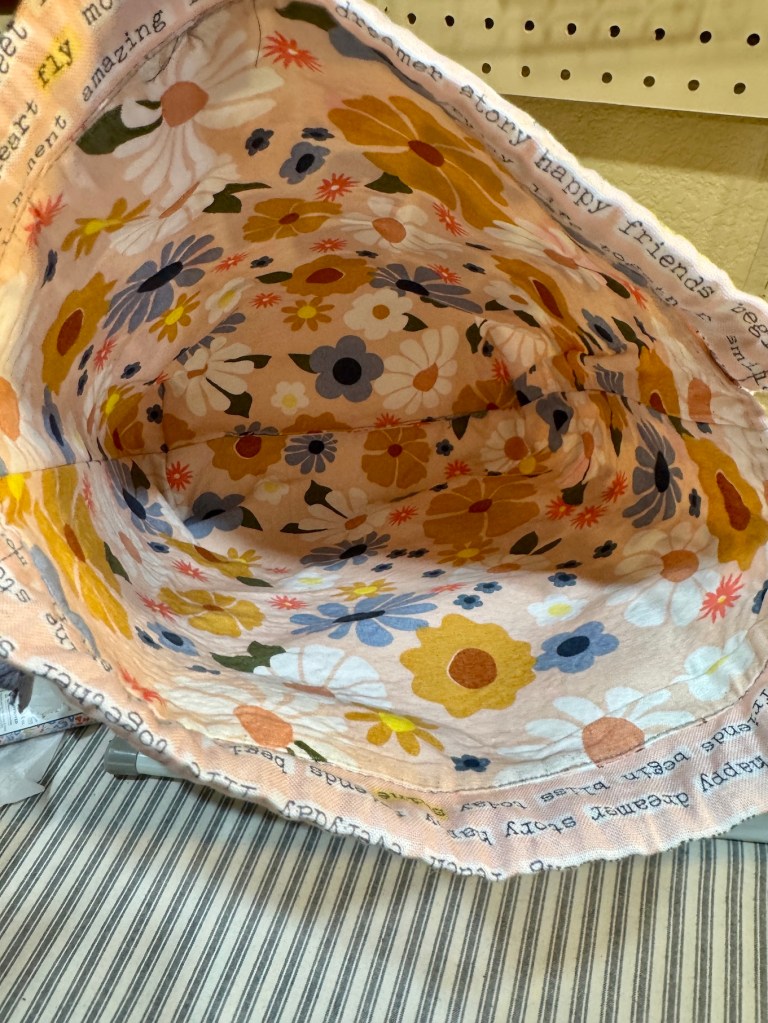
So to send a her a little treat after all she’d been through in 2025, I made her a little drawstring bag and matching little wallet:
If I ever get the Etsy shop up and running again and sell the drawstring bags, I’d like to give and option of a set with with a matching little wallet.
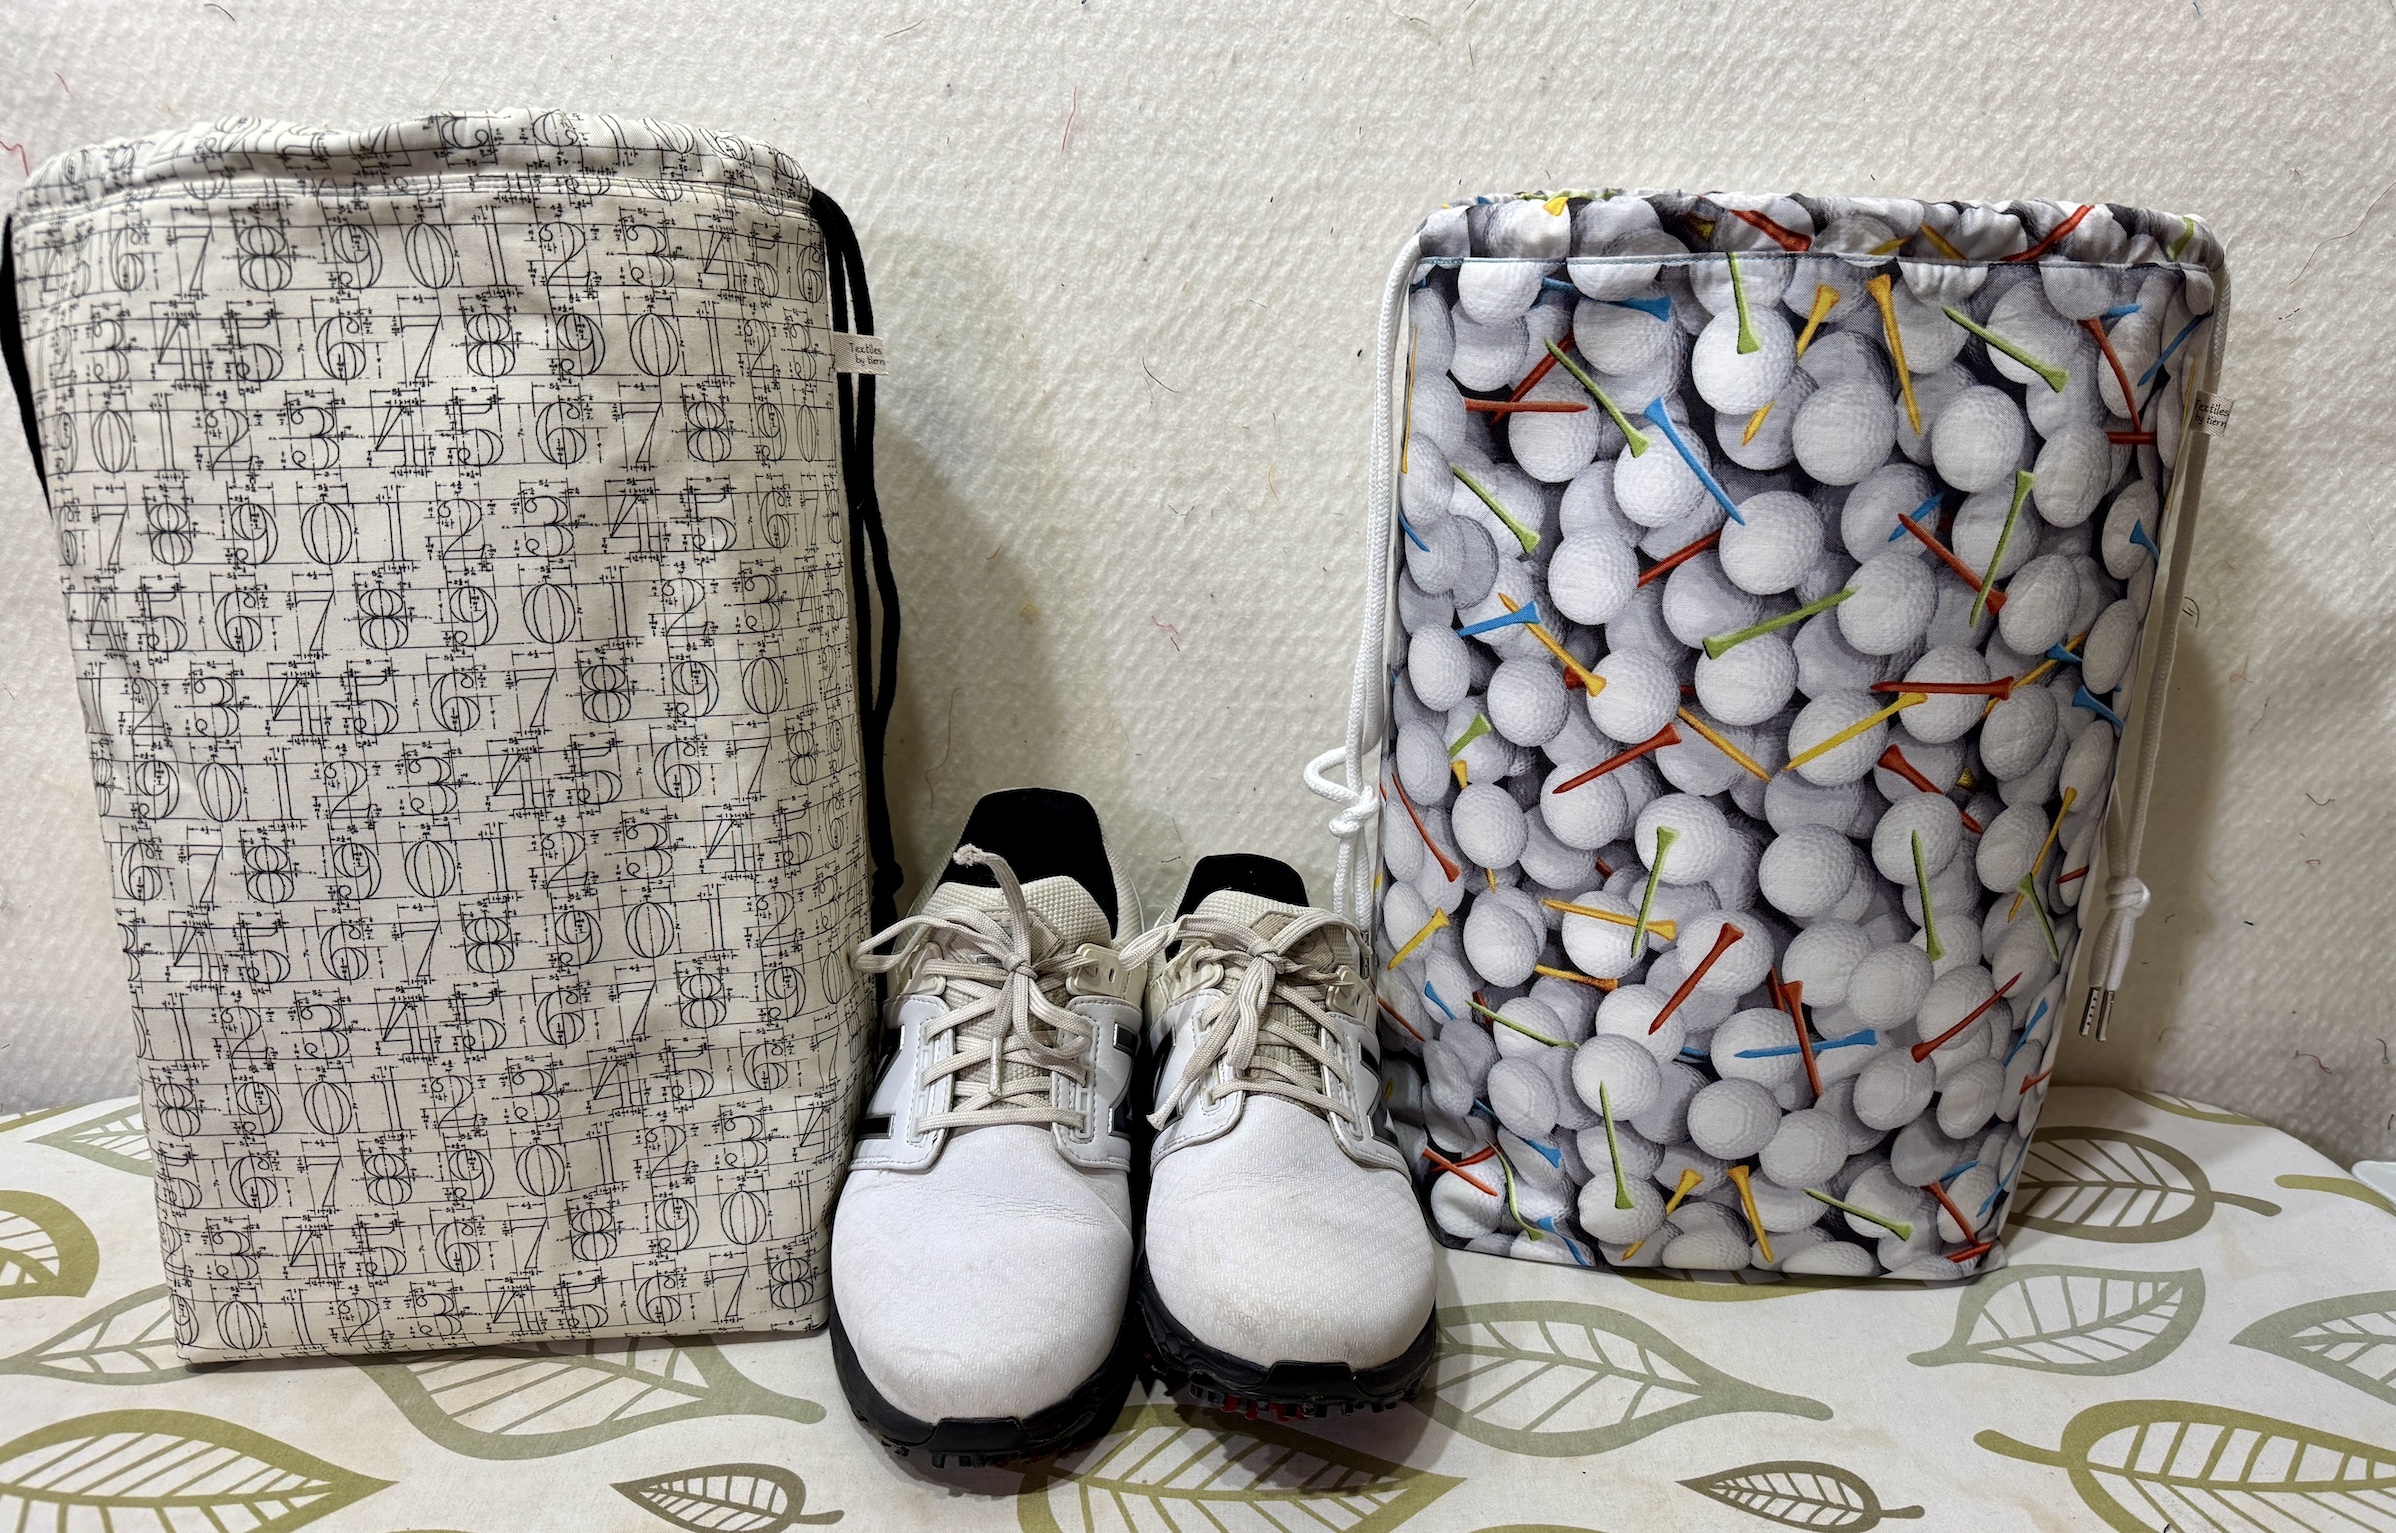
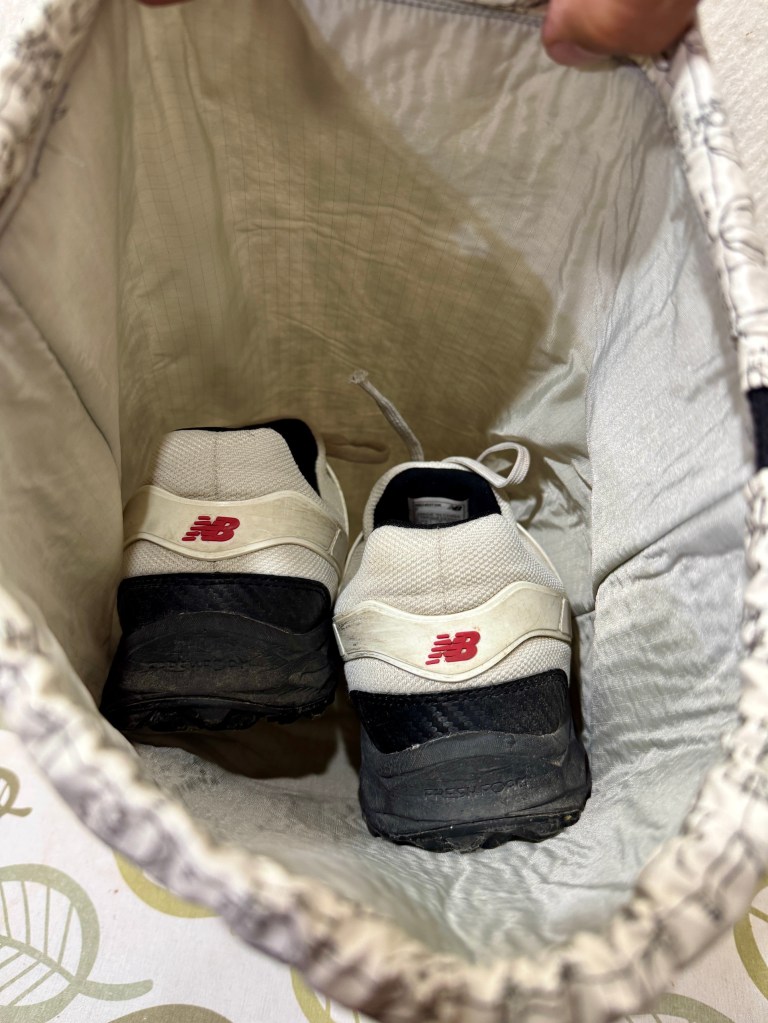
Back in June I experimented with making a golf shoe bag using a modified version of the pattern I use to make drawstring bags (see June 30, 2025 post Experimenting with Making Golf Shoe Bags). The bags are lined with vinyl so that if grassy/dirty golf shoes are put in it the bag can easily be wiped out.
I made one for John and one for his cousin M who we went to visit in Washington State in July:
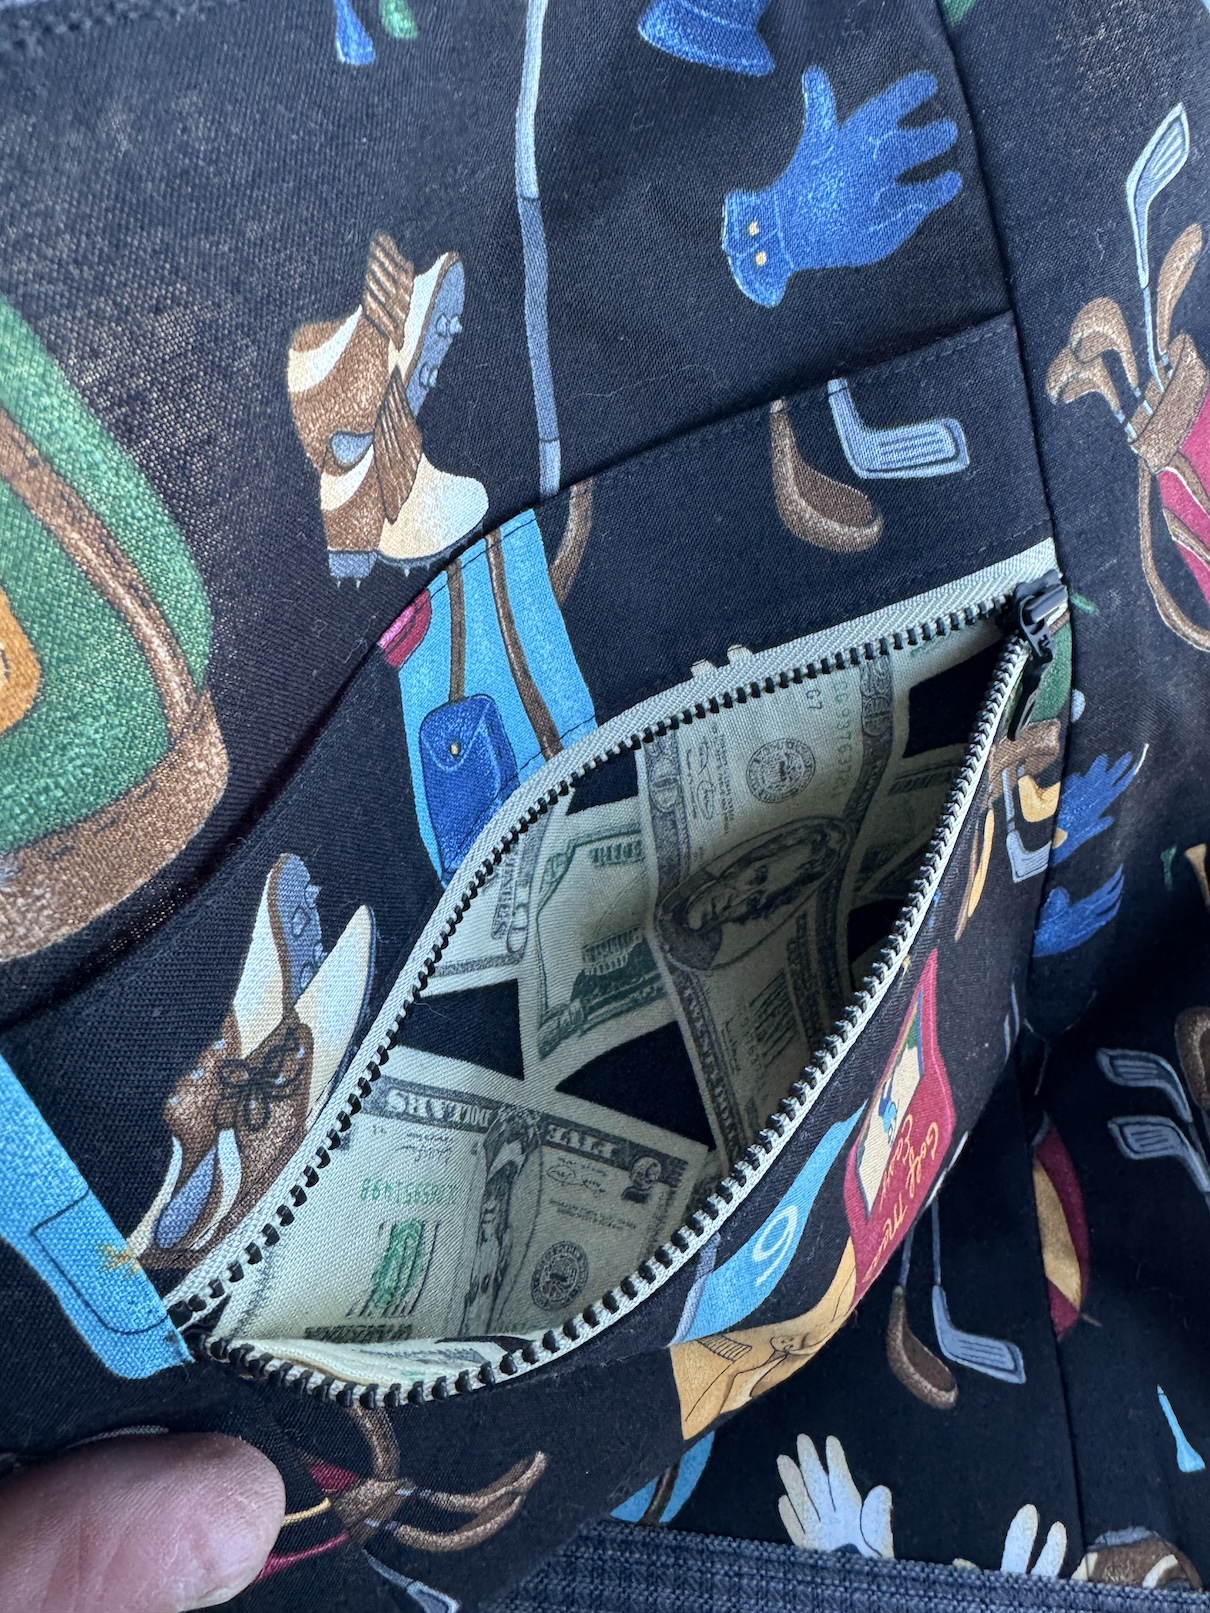
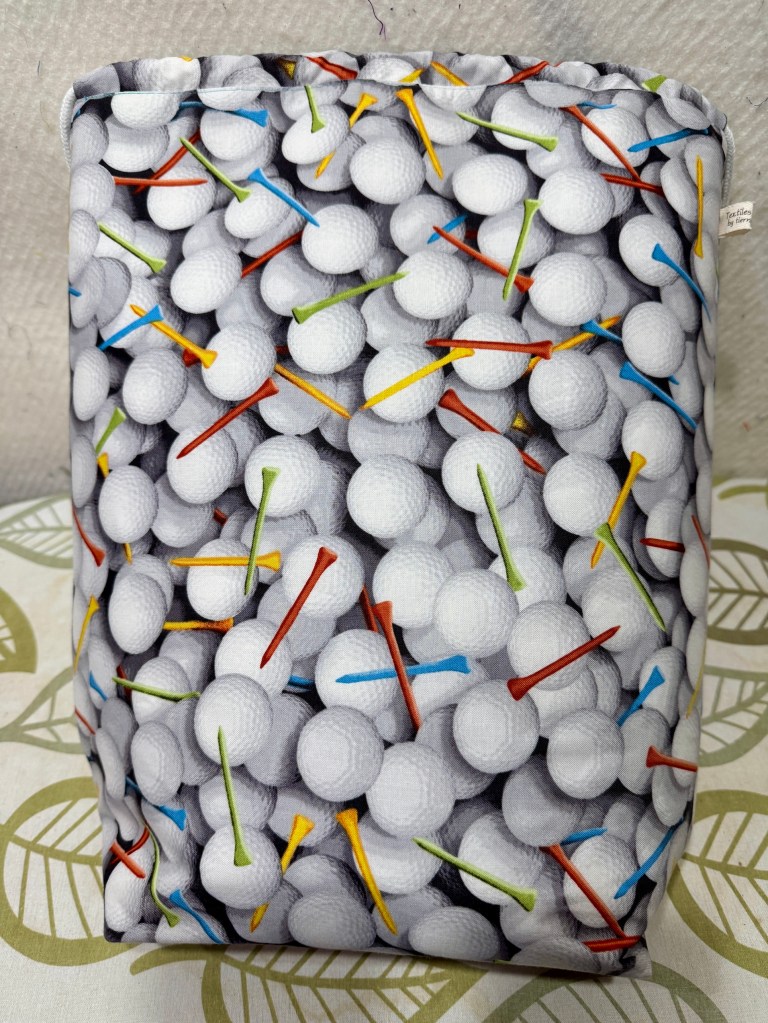
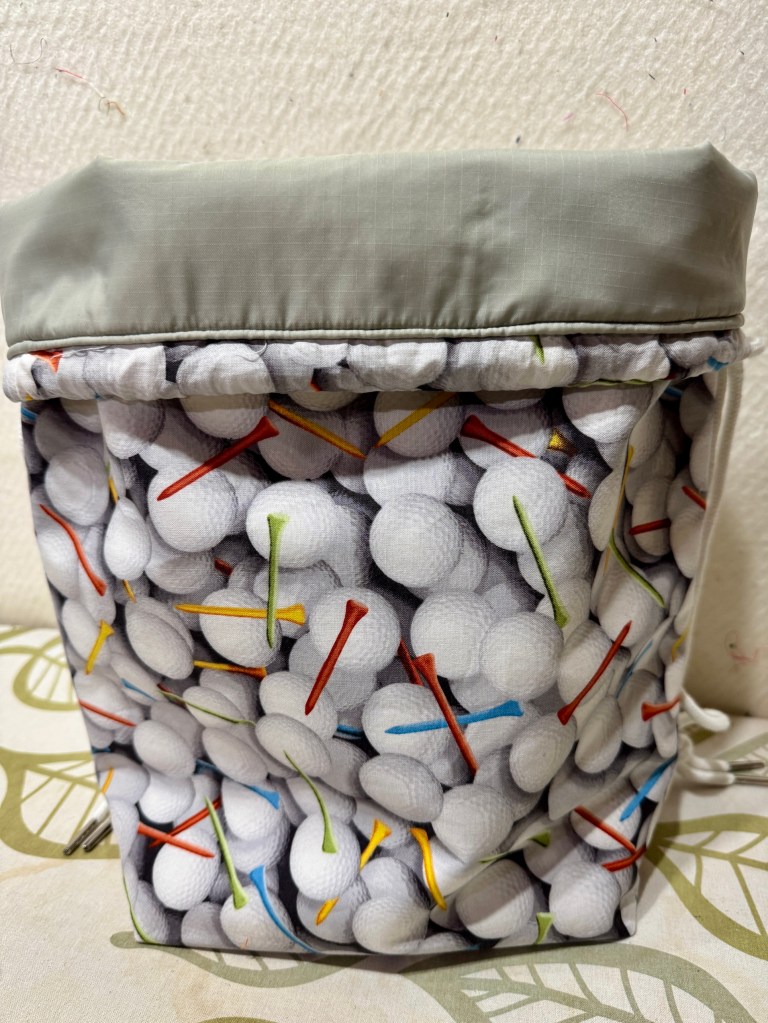
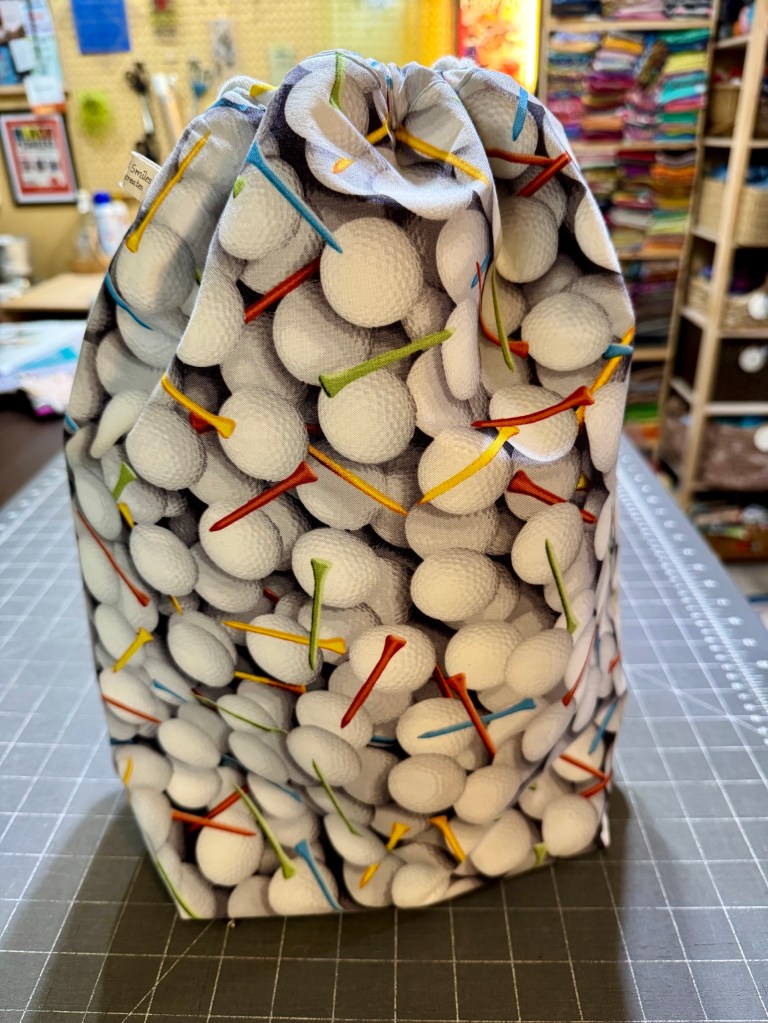
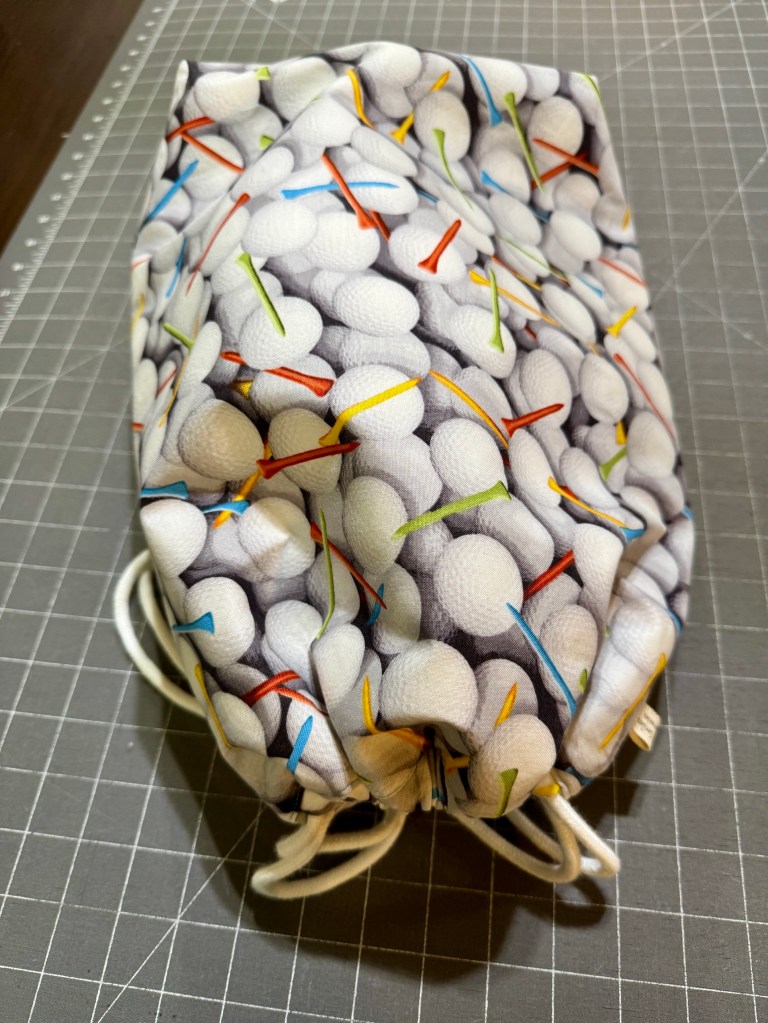
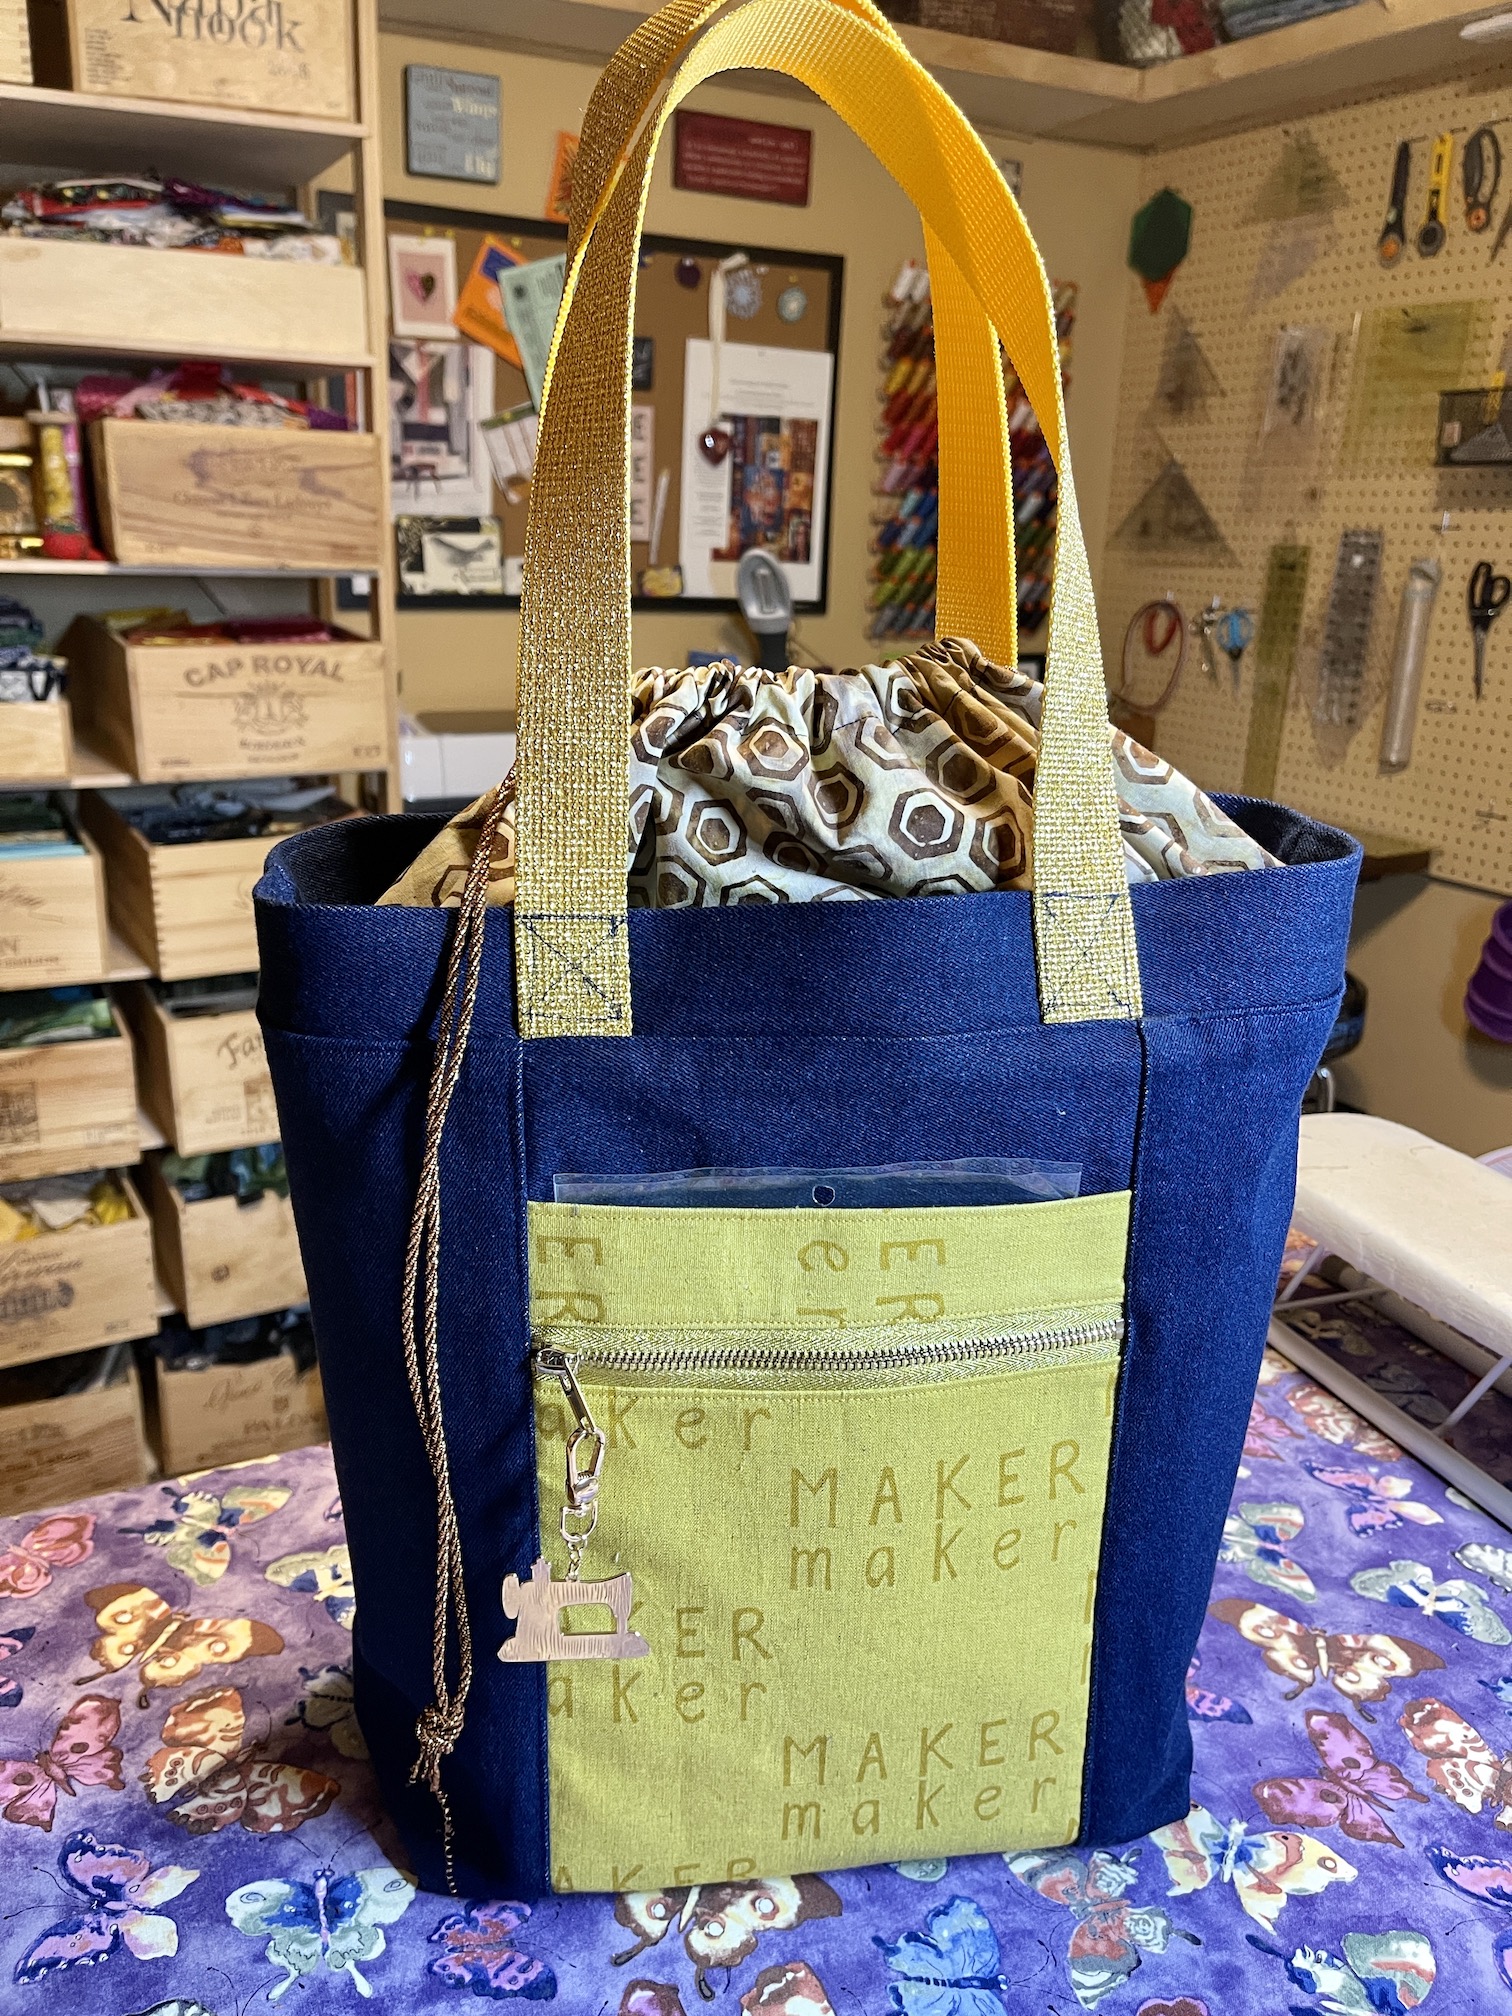
I wanted to make another golf shoe bag for another golfer in my life but this time I wanted to add a pocket to the front of the bag. So I used a front zipper pocket pattern from Noodlehead’s pattern for the Firefly Tote (see December 28, 2021 post Adventures in Bag Making: Firefly Tote is done!).
I forgot to take a photo of the bag back in my studio and here I am balancing it on my lap as we are driving to meet up with my golfer friend to give him his gift.
My golfer friend happens to be in the financial services industry so as a little bit of humor I added a money fabric liner to his zippered pocket:
He loved the bag and said previously he was just throwing his grassy golf shoes into the back of his car when he was done golfing. Now they can be in a nice vinyl lined bag!
John saw all the drawstring bags I’ve made and asked me if I could make him a golf shoe bag for when he goes golfing (one of his main hobbies besides woodworking).
We found a bolt of nylon fabric to line the golf shoe bag and I altered the Sotak Handmade pattern I use for drawstring bags to make it longer for a golf shoe bag. After I made a test bag, I made John a bag.
Here’s the photoshoot:
The nylon liner in the bag is backed with fusible fleece that I had to carefully iron from the fusible fleece side to adhere to the nylon without damaging the nylon with heat. The nylon lining will allow John to easily wipe out any dirt from his golf shoes that gets in the bag.
John told me that “men like long drawstring cords” (Perhaps he secretly did a national survey of preference, ha! And what about women golfers – do they have drawstring preference??!!?!) and so I used long cords used for drawstrings on clothing for the drawstrings for the golf shoe bags.
We are going to give the test bag to his favorite cousin who is also a golfer. They should look adorable on the golf course with their handmade golf shoe bags – ha!
I mentioned in my one of my recent previous posts that I was working on some last minute Christmas gifts.
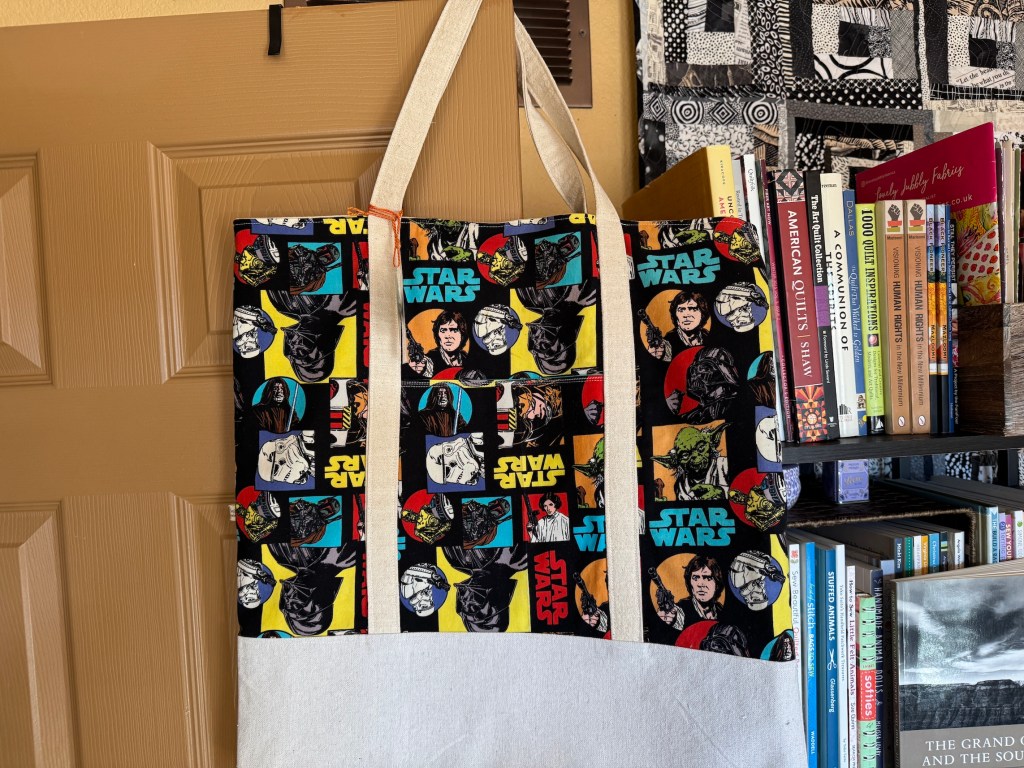
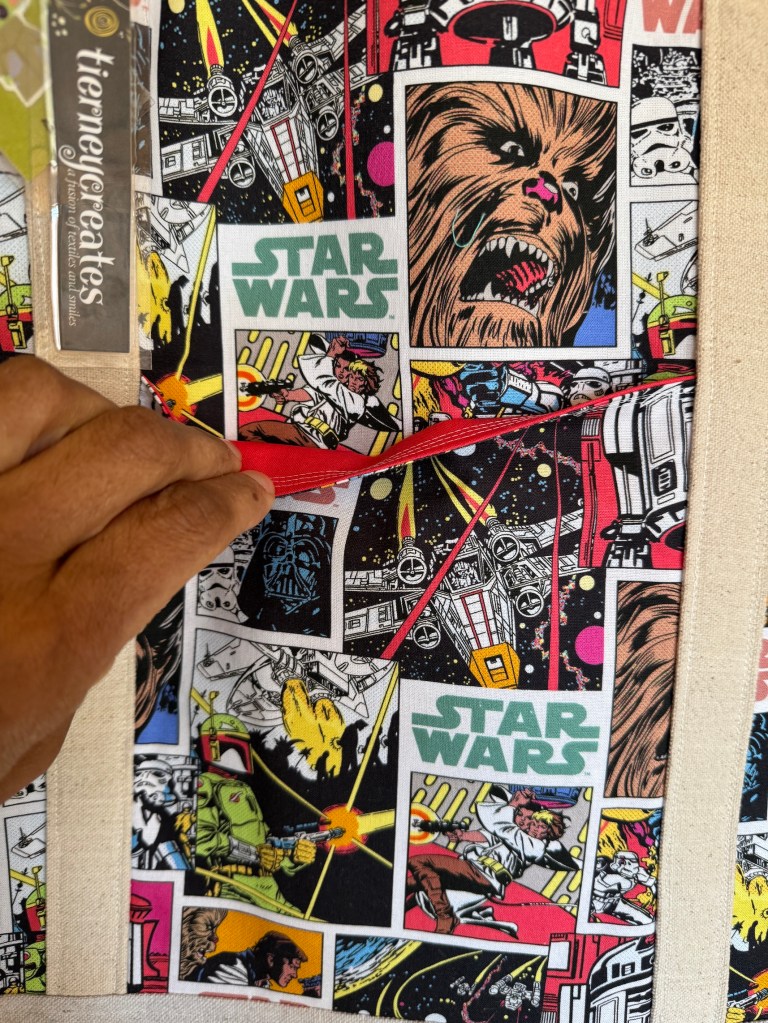
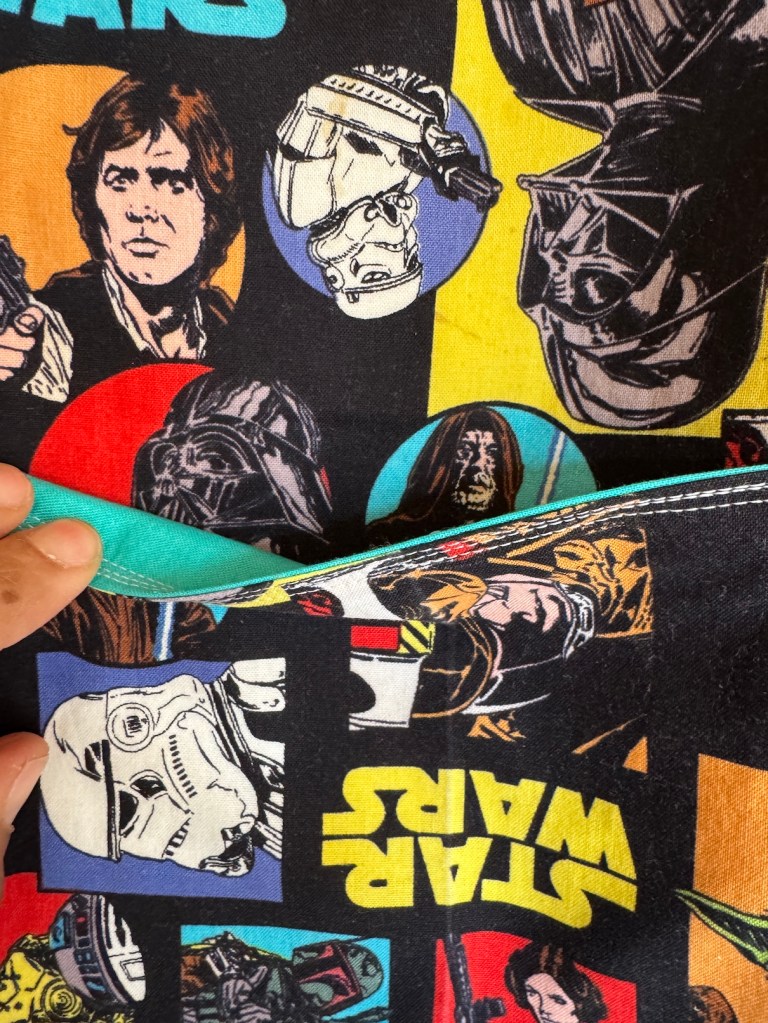
Well I finished the gifts last night – two tote bags for two people in my life who love the Star Wars saga:
They have roomy interiors:
And both external sides of the tote bags have pockets. I used coordinating solid fabric for the inside of the pockets for some contrast.
Now all I can do is see if the tote bag recipients like them!
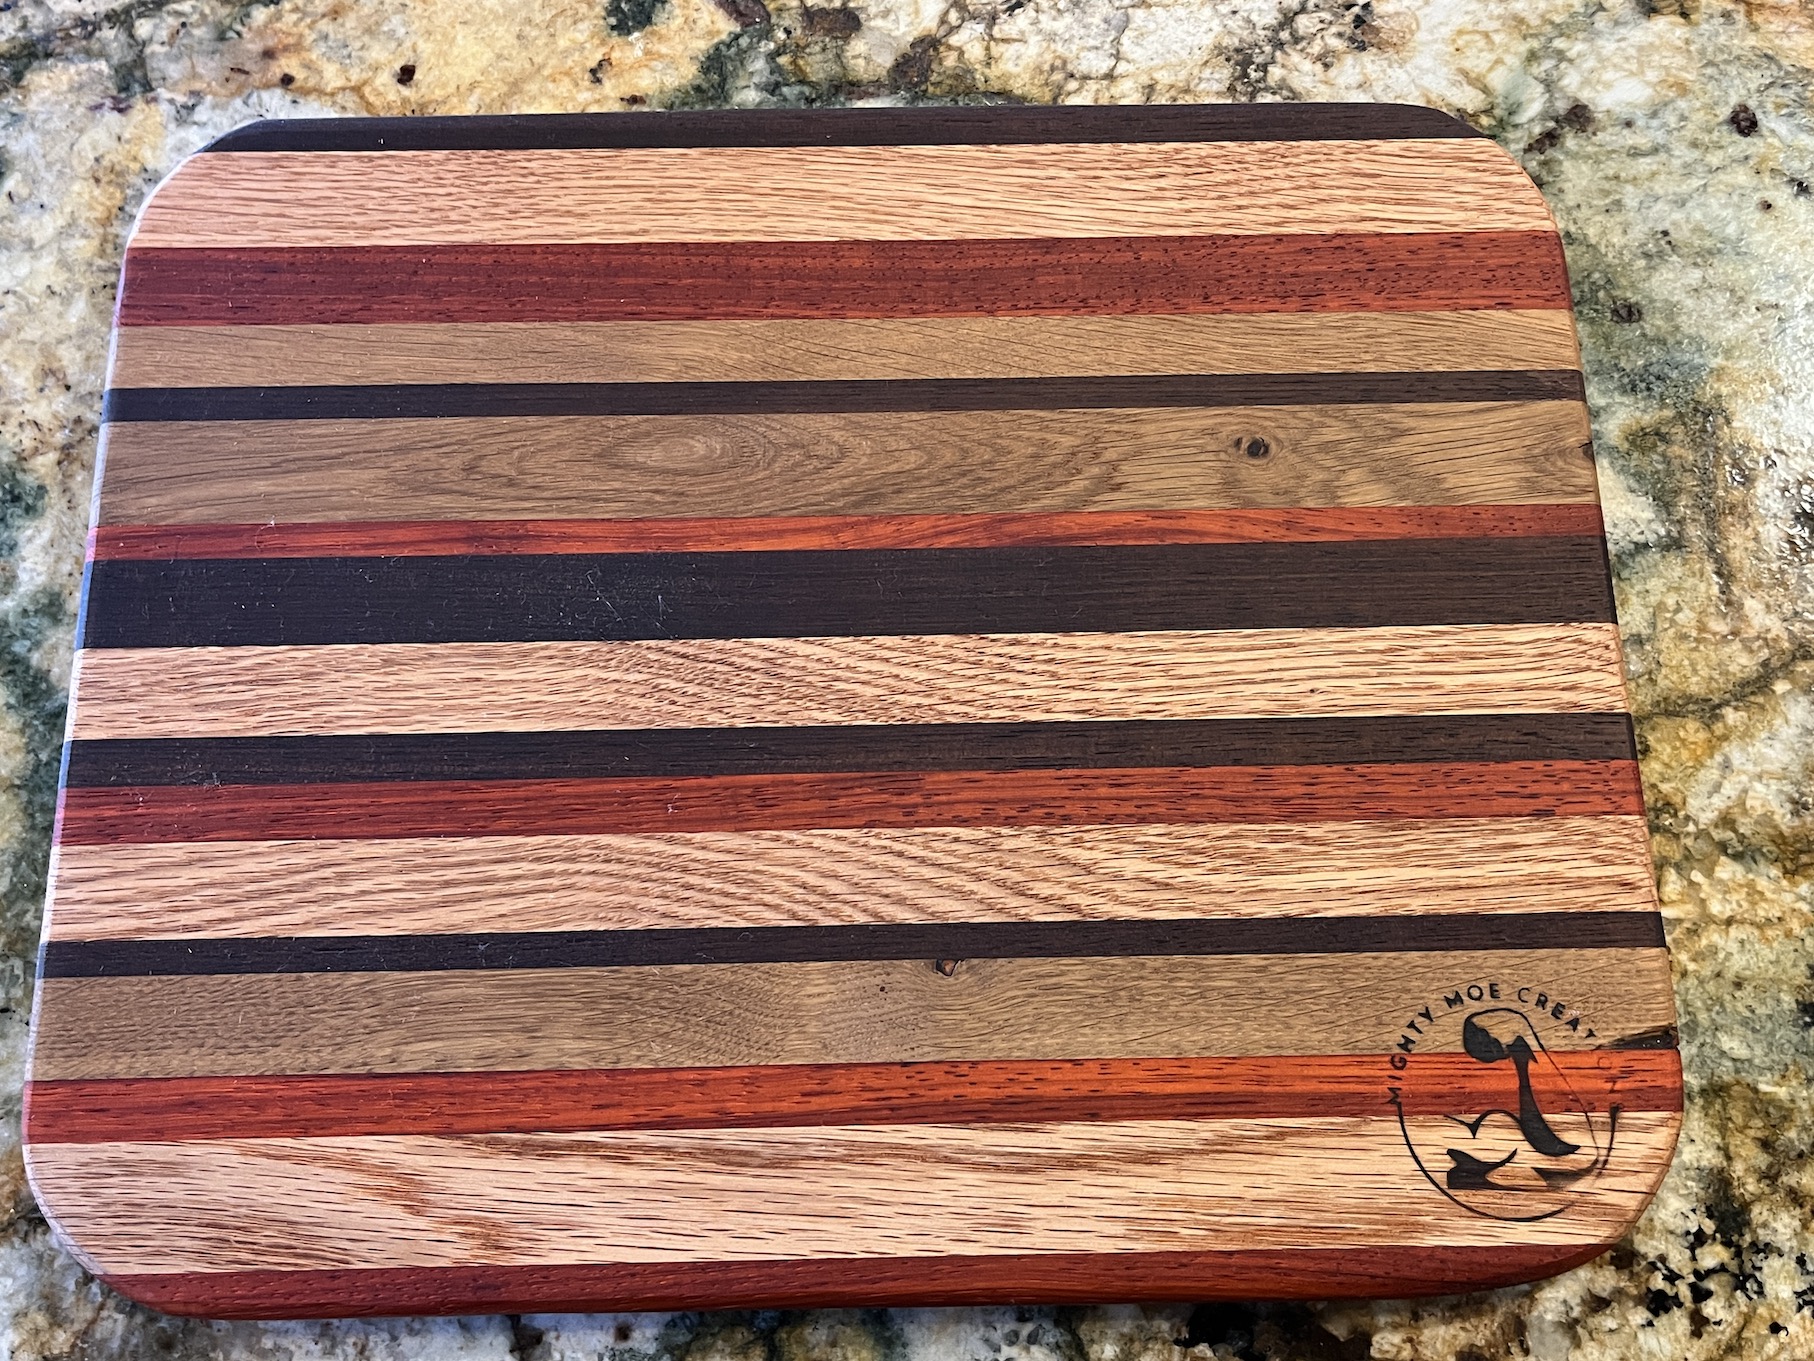
Oh and John worked on a last minute gift too – a set of cutting boards make from the scraps that his friend gave him of their new wood floors. I think they will be pretty pleased when they see the offcuts/scrap wood from installing their floors turned into something useful!
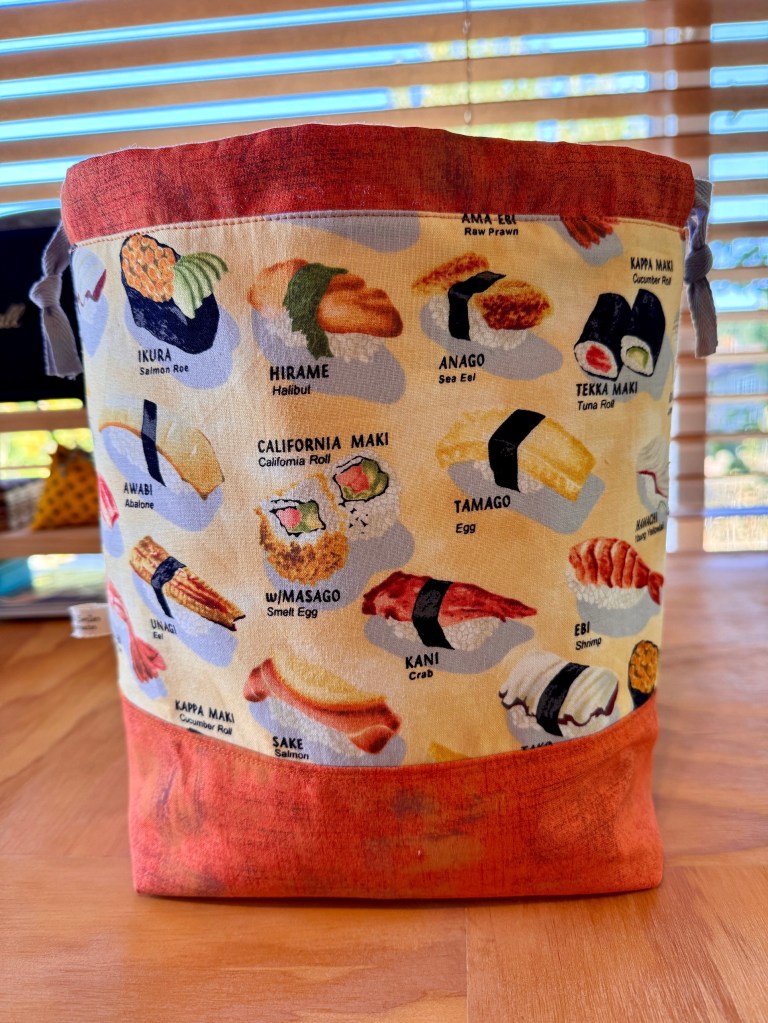
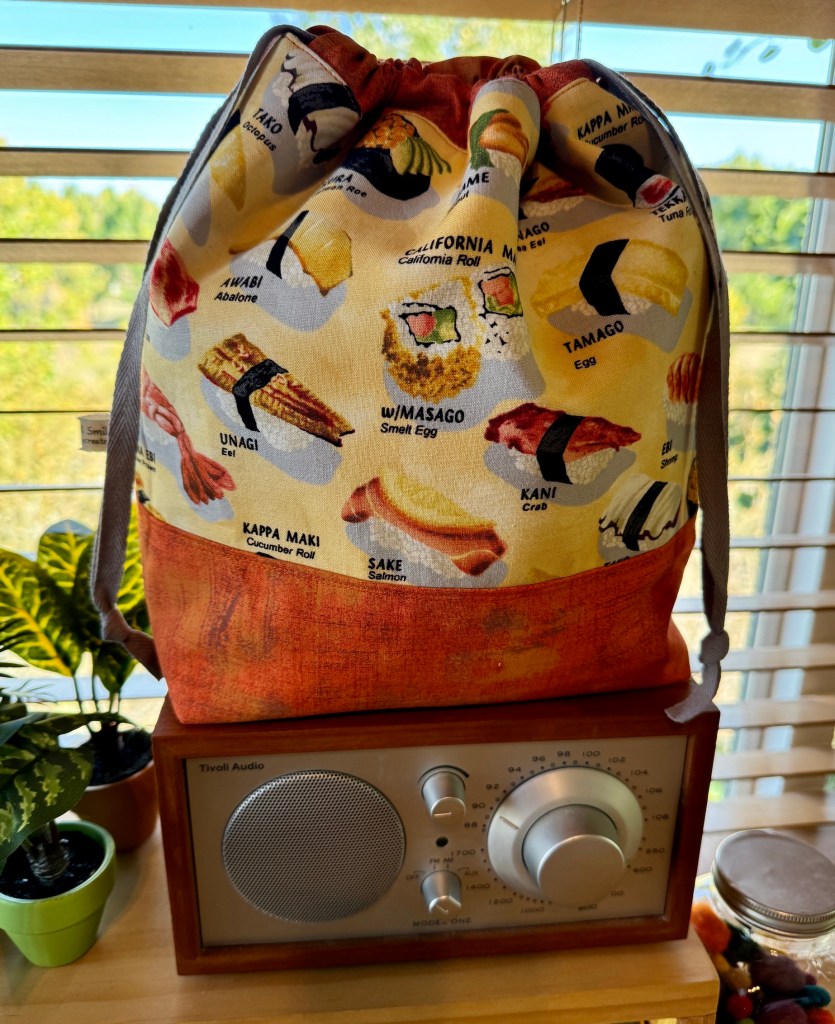
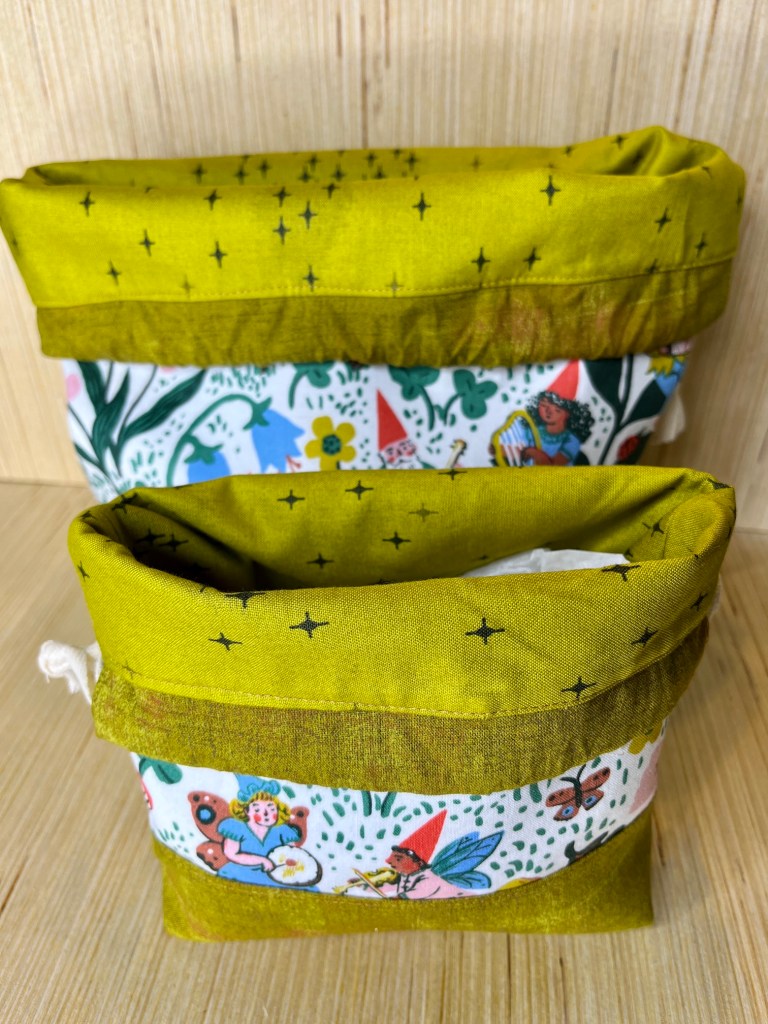
Recently I made a cute drawstring bag as a gift for my stepson Z who loves sushi.
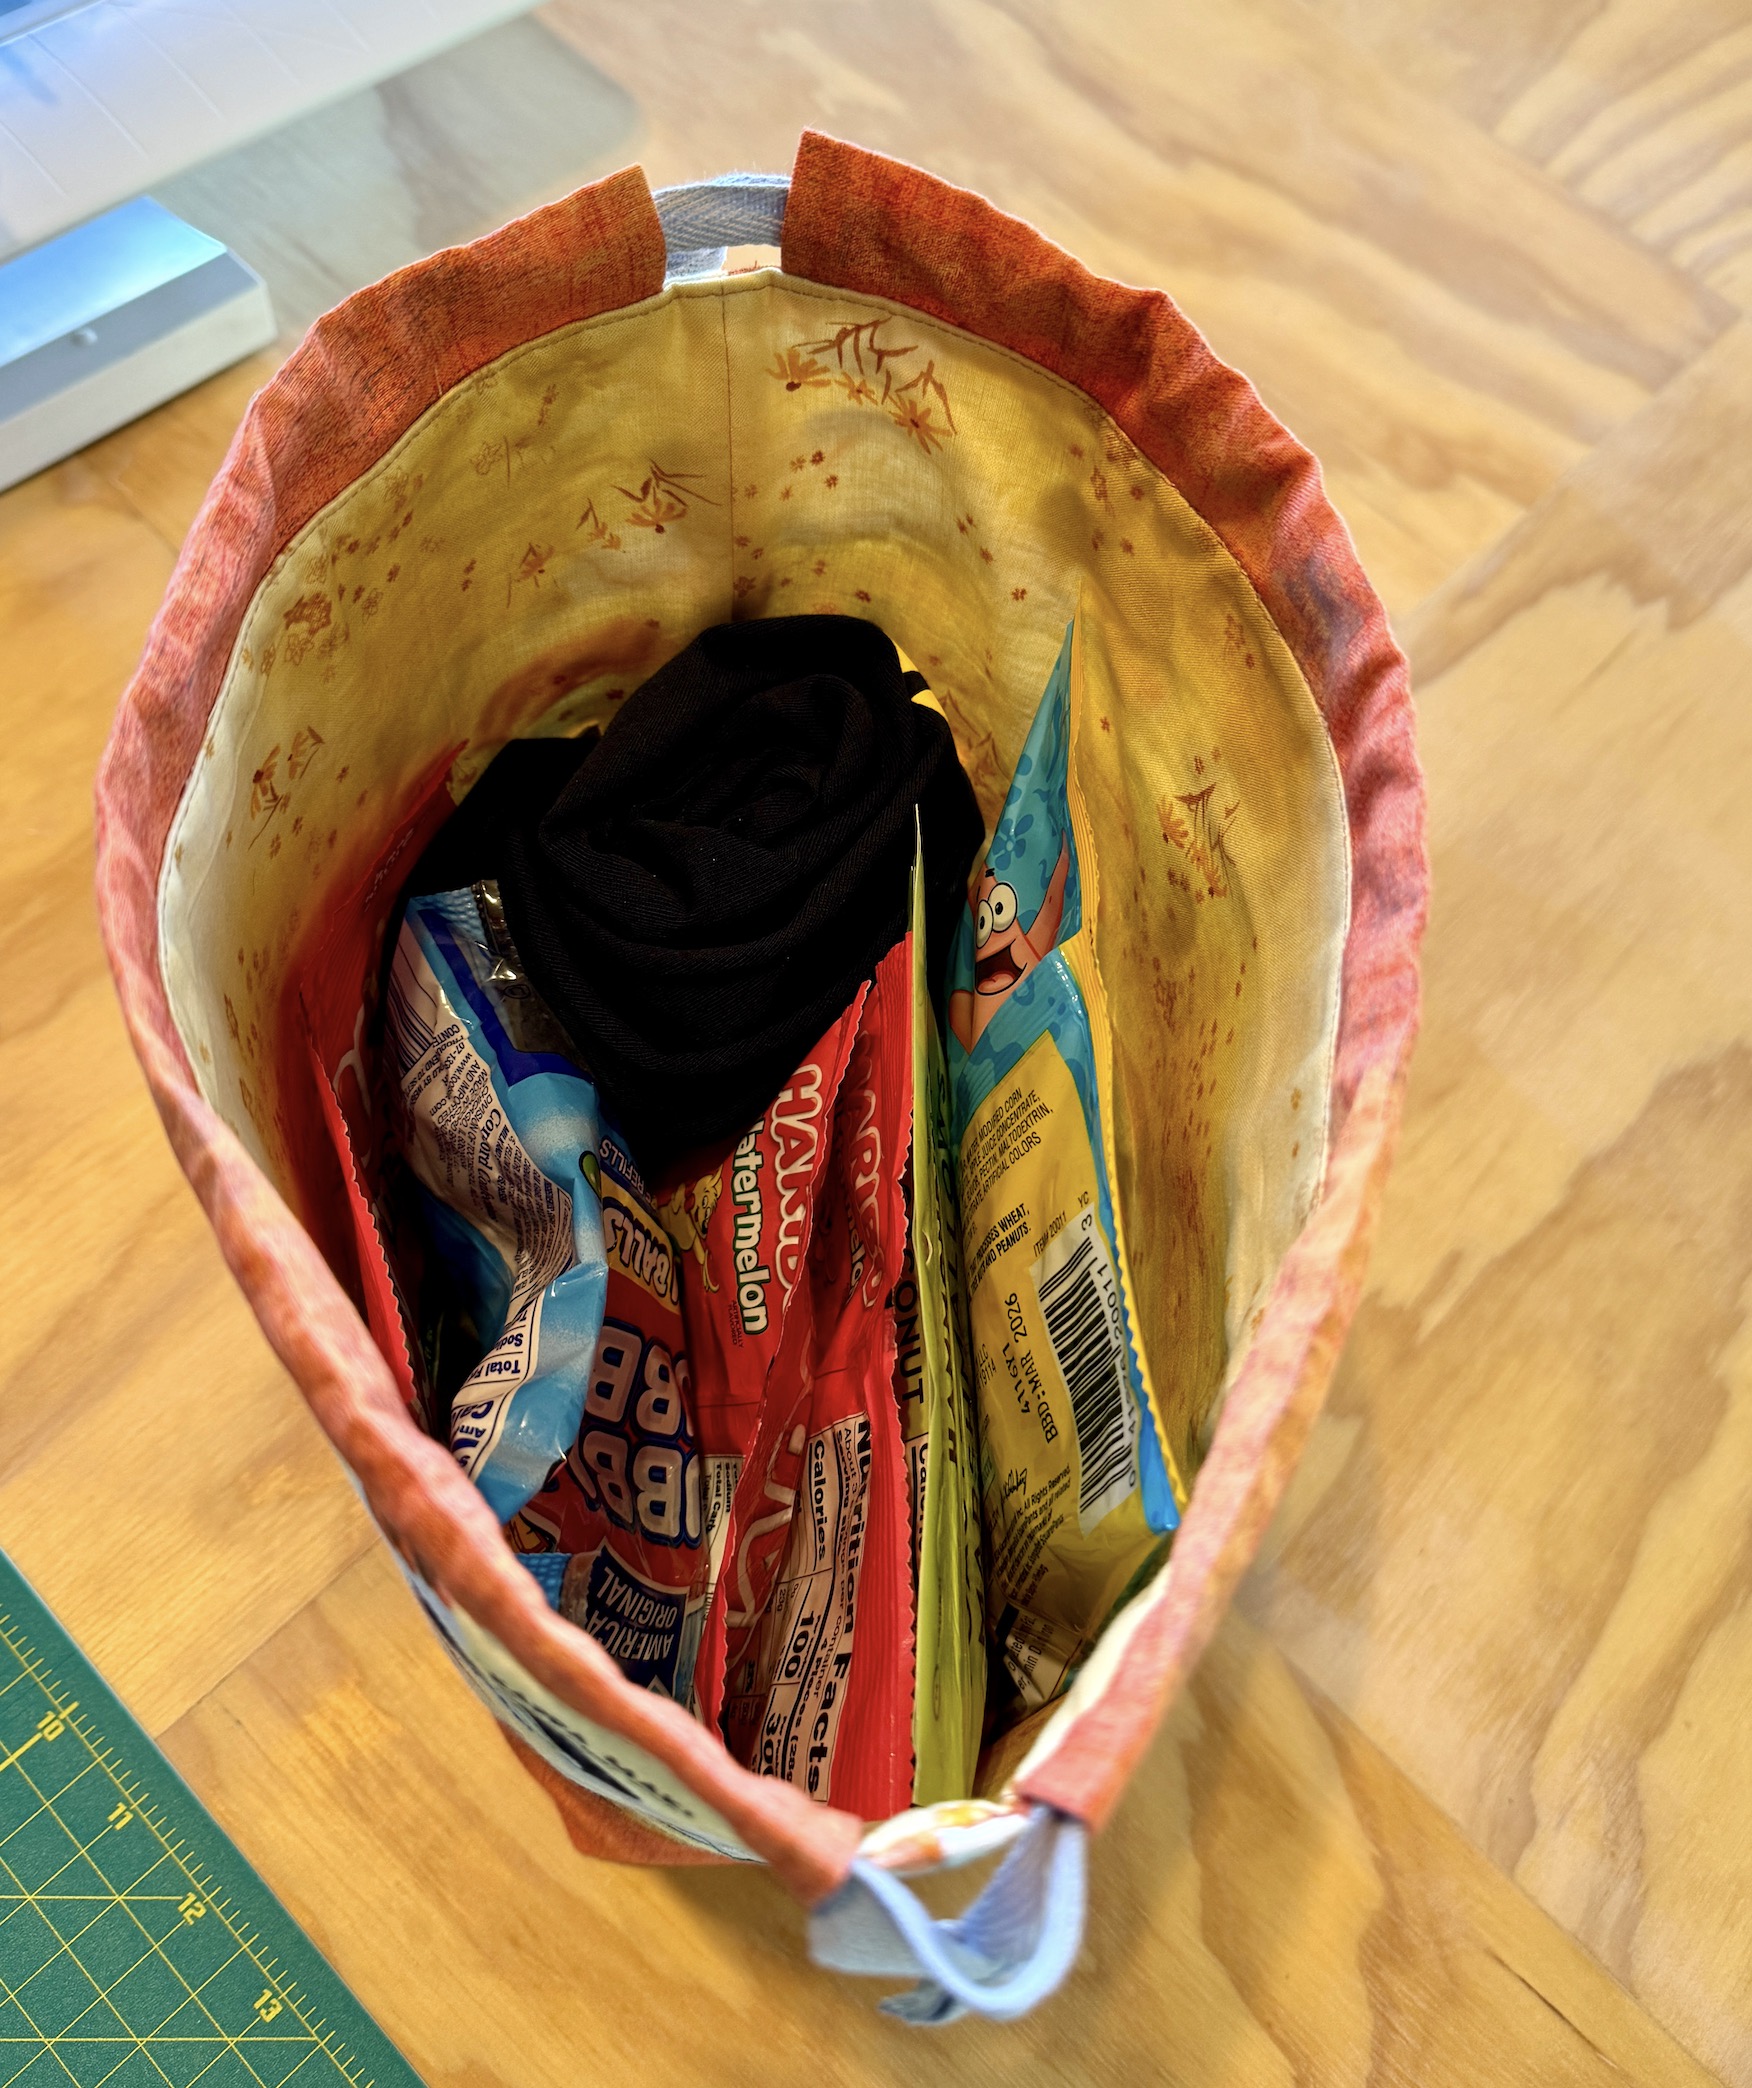
Z relocated to Portland, Oregon a couple months ago for a big promotion and moved into a new place. John and I wanted to send him a little package of some of his favorite tasty treats to celebrate.
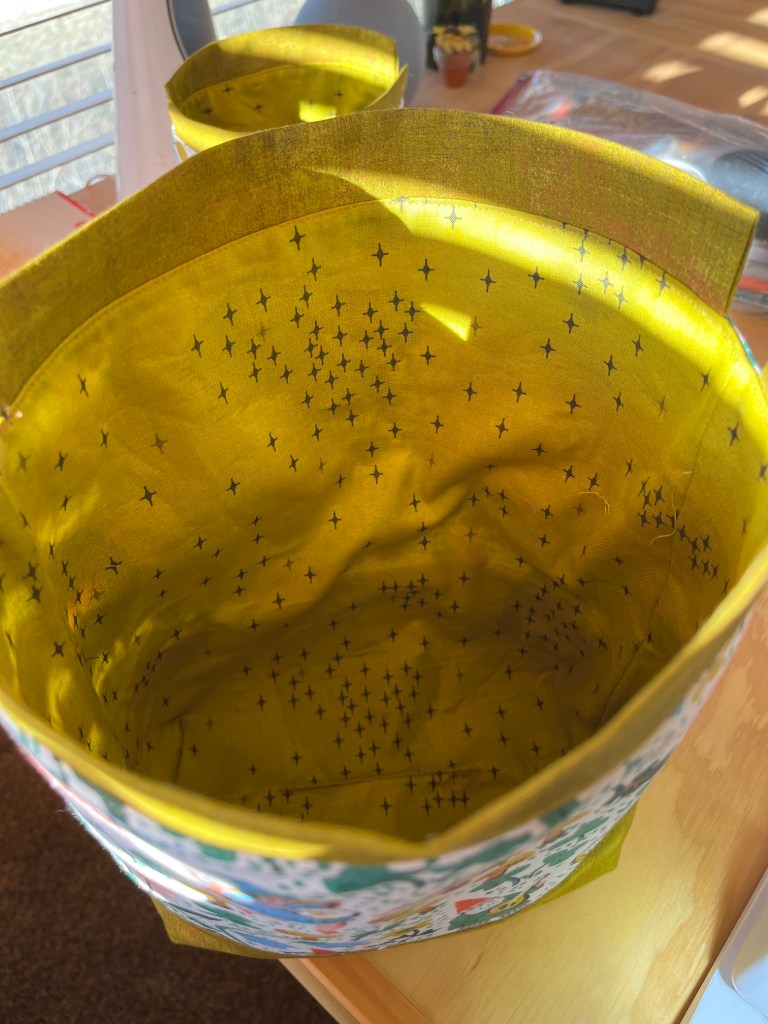
I figured one of my handmade drawstring bags would be the perfect holder for the treats, and I found some cool sushi themed fabric in my fabric stash (who knows where and when I got it)
The treats for Z fit perfectly in the bag:
I had enough left over fabric to make a second one that I might sell someday on my Etsy shop (when I re-open it).
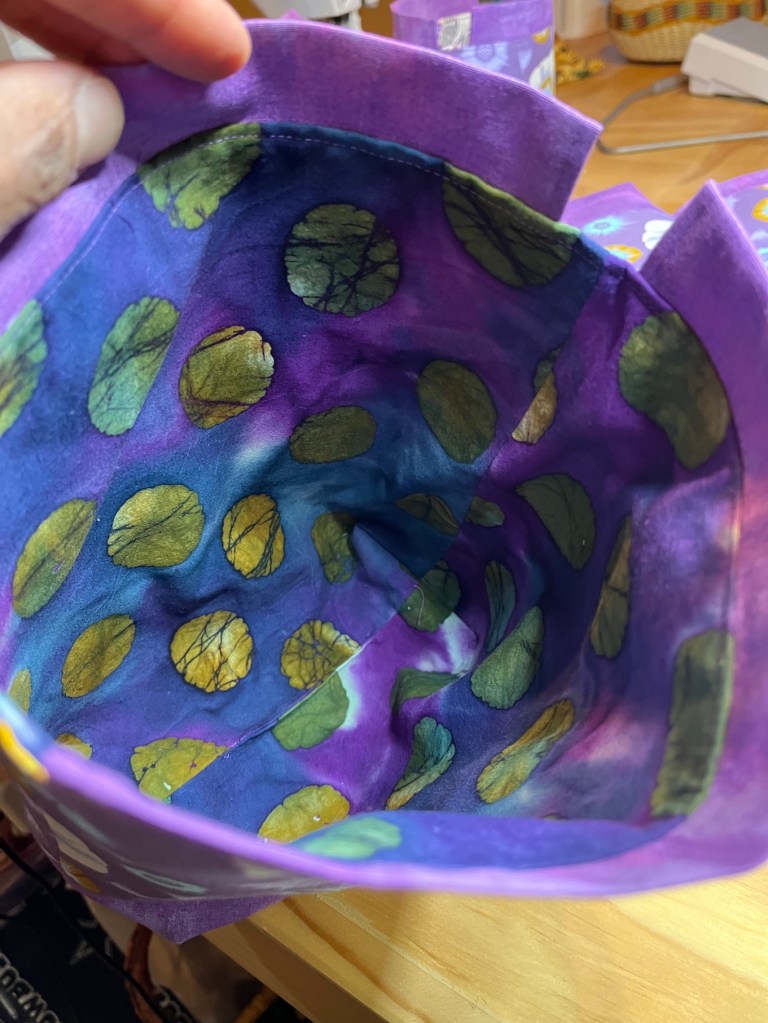
Those of you who’ve followed my blog a longtime might (and it’s okay if you don’t) remember when I was obsessed with making “little wallets”. Here is a batch of them from a post in September 2017 titledLittle Wallet Madness:
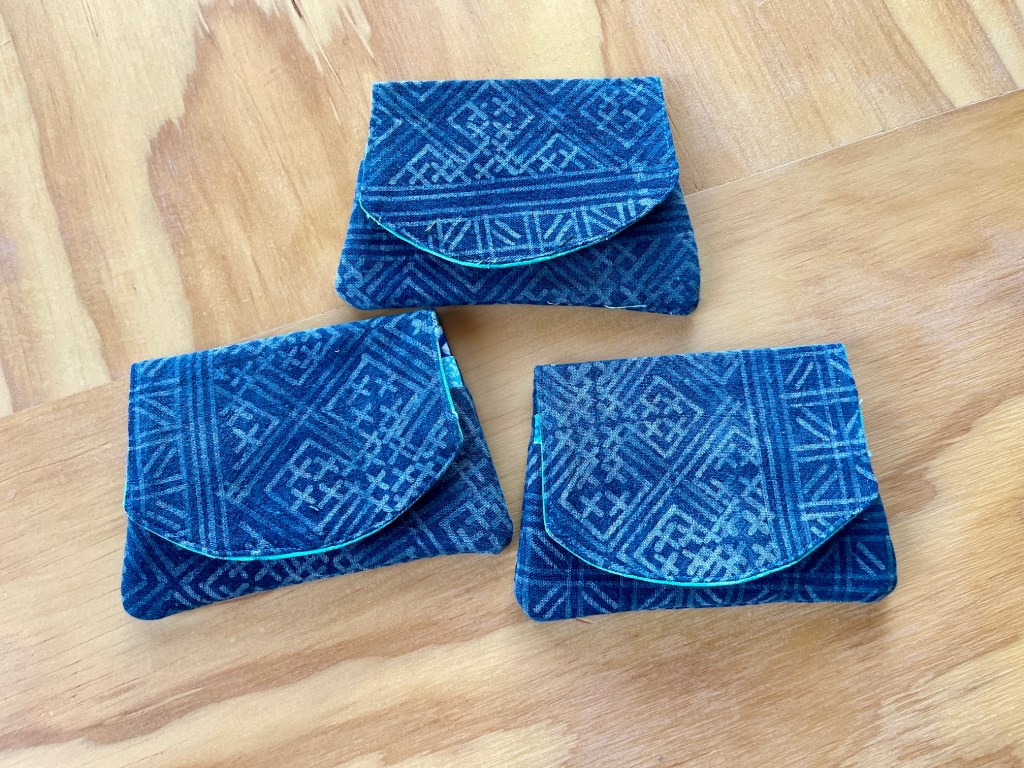
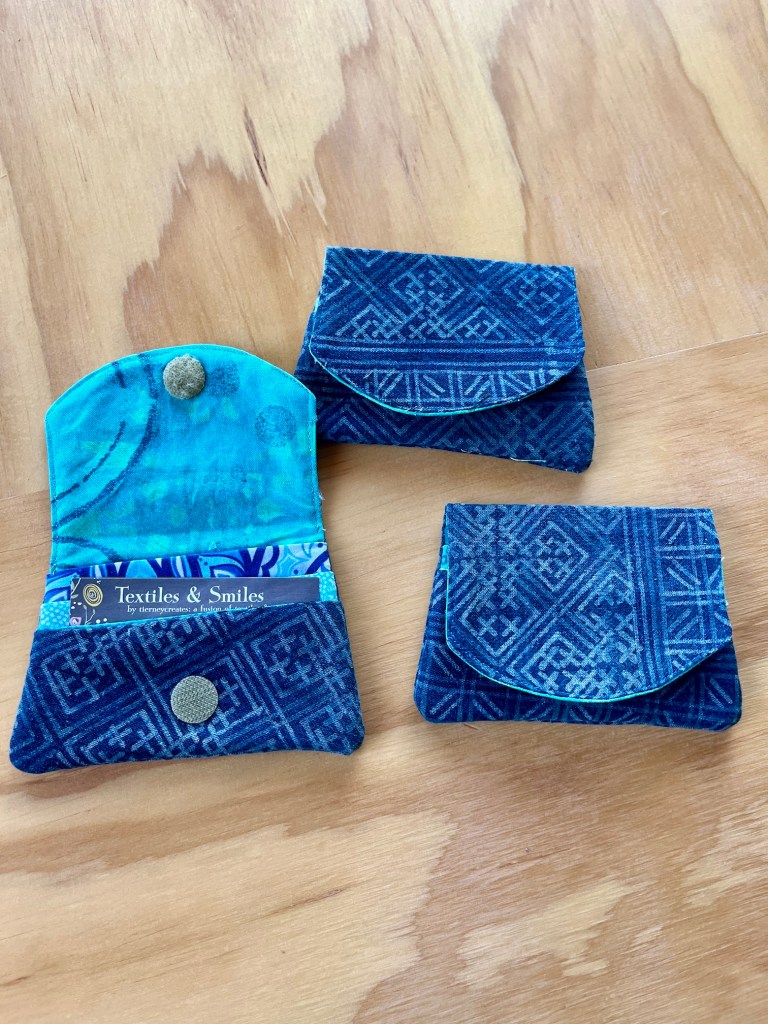
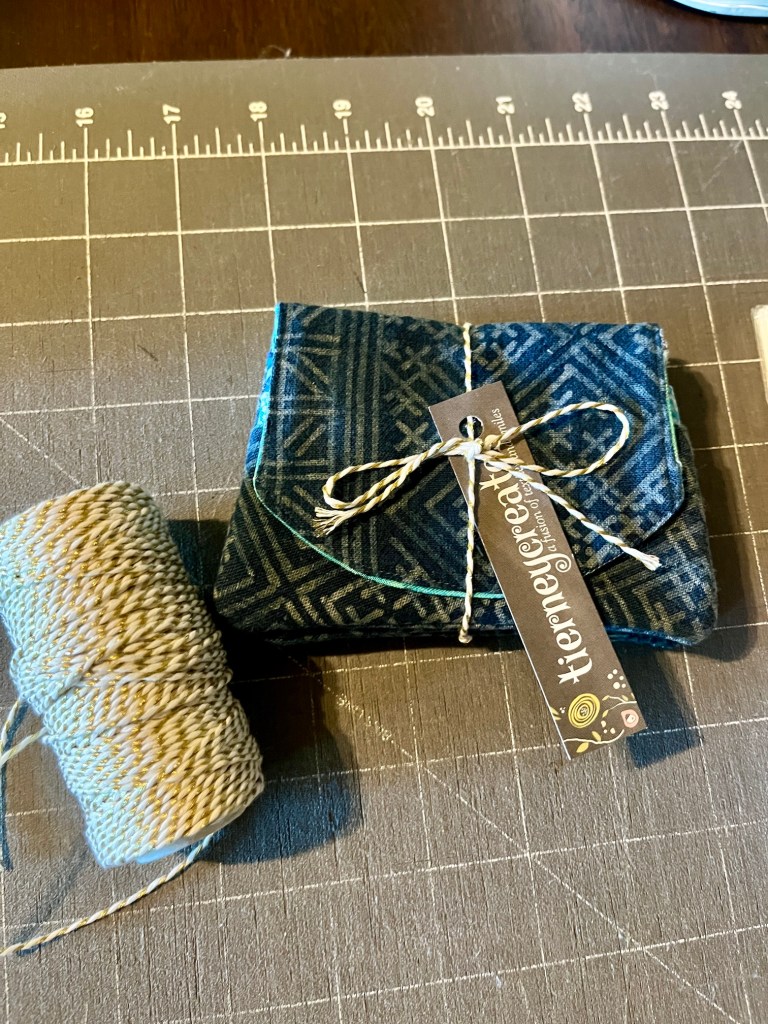
Well recently I’ve made some new little wallets, this time from a recycled indigo batik vest and here is the background on how it came to be.
We visited friends in Asheville, North Carolina in October 2023 (see posts Greetings from Asheville – Blue Ridge Parkway and Folk Art Center, Asheville, NC) and our friend S knew I liked to work with recycled materials so while we were visiting she gave me an old indigo batik vest of hers that she was about to donate to a charity shop. She challened me to make something out of it.
It took me nearly a year to revisit the material (and the pressure of these friends coming to visit in August 2024) to finally make something – a set of little wallets. I made 5 and gave 3 to S when they visited us last week.
Unfortunately I did not think to take a photo of the vest before I cut it up to become material for the little wallets, so you’ll just have to use your imagination.
S was delighted with her 3 little wallets – one to keep and two to give as gifts.
We had a very fun 3 day visit with S and her husband E and we took them on various Colorado adventures including a visit to Fiction Beer/Brewery where you can borrow a book (or take for free) while you have your delicious craft beer!
They loved it and S is a big reader like I am so she left with a book.
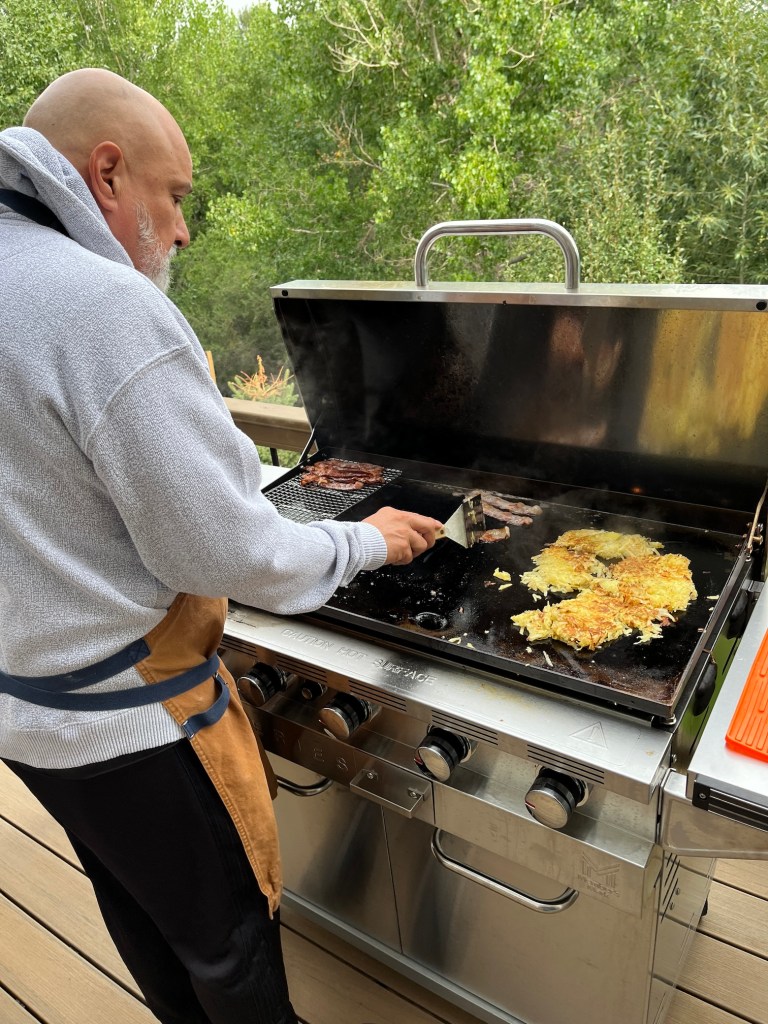
John made lots of good while they visited including using his new outdoor griddle which he loved to make breakfast on; and a wonderful dish called Mexican Picadillo with simmered meat and potatoes served in corn tortilla with various toppings:
We ate outside nearly every meal as the weather has been nice in the Denver area, especially in the mornings and evenings.
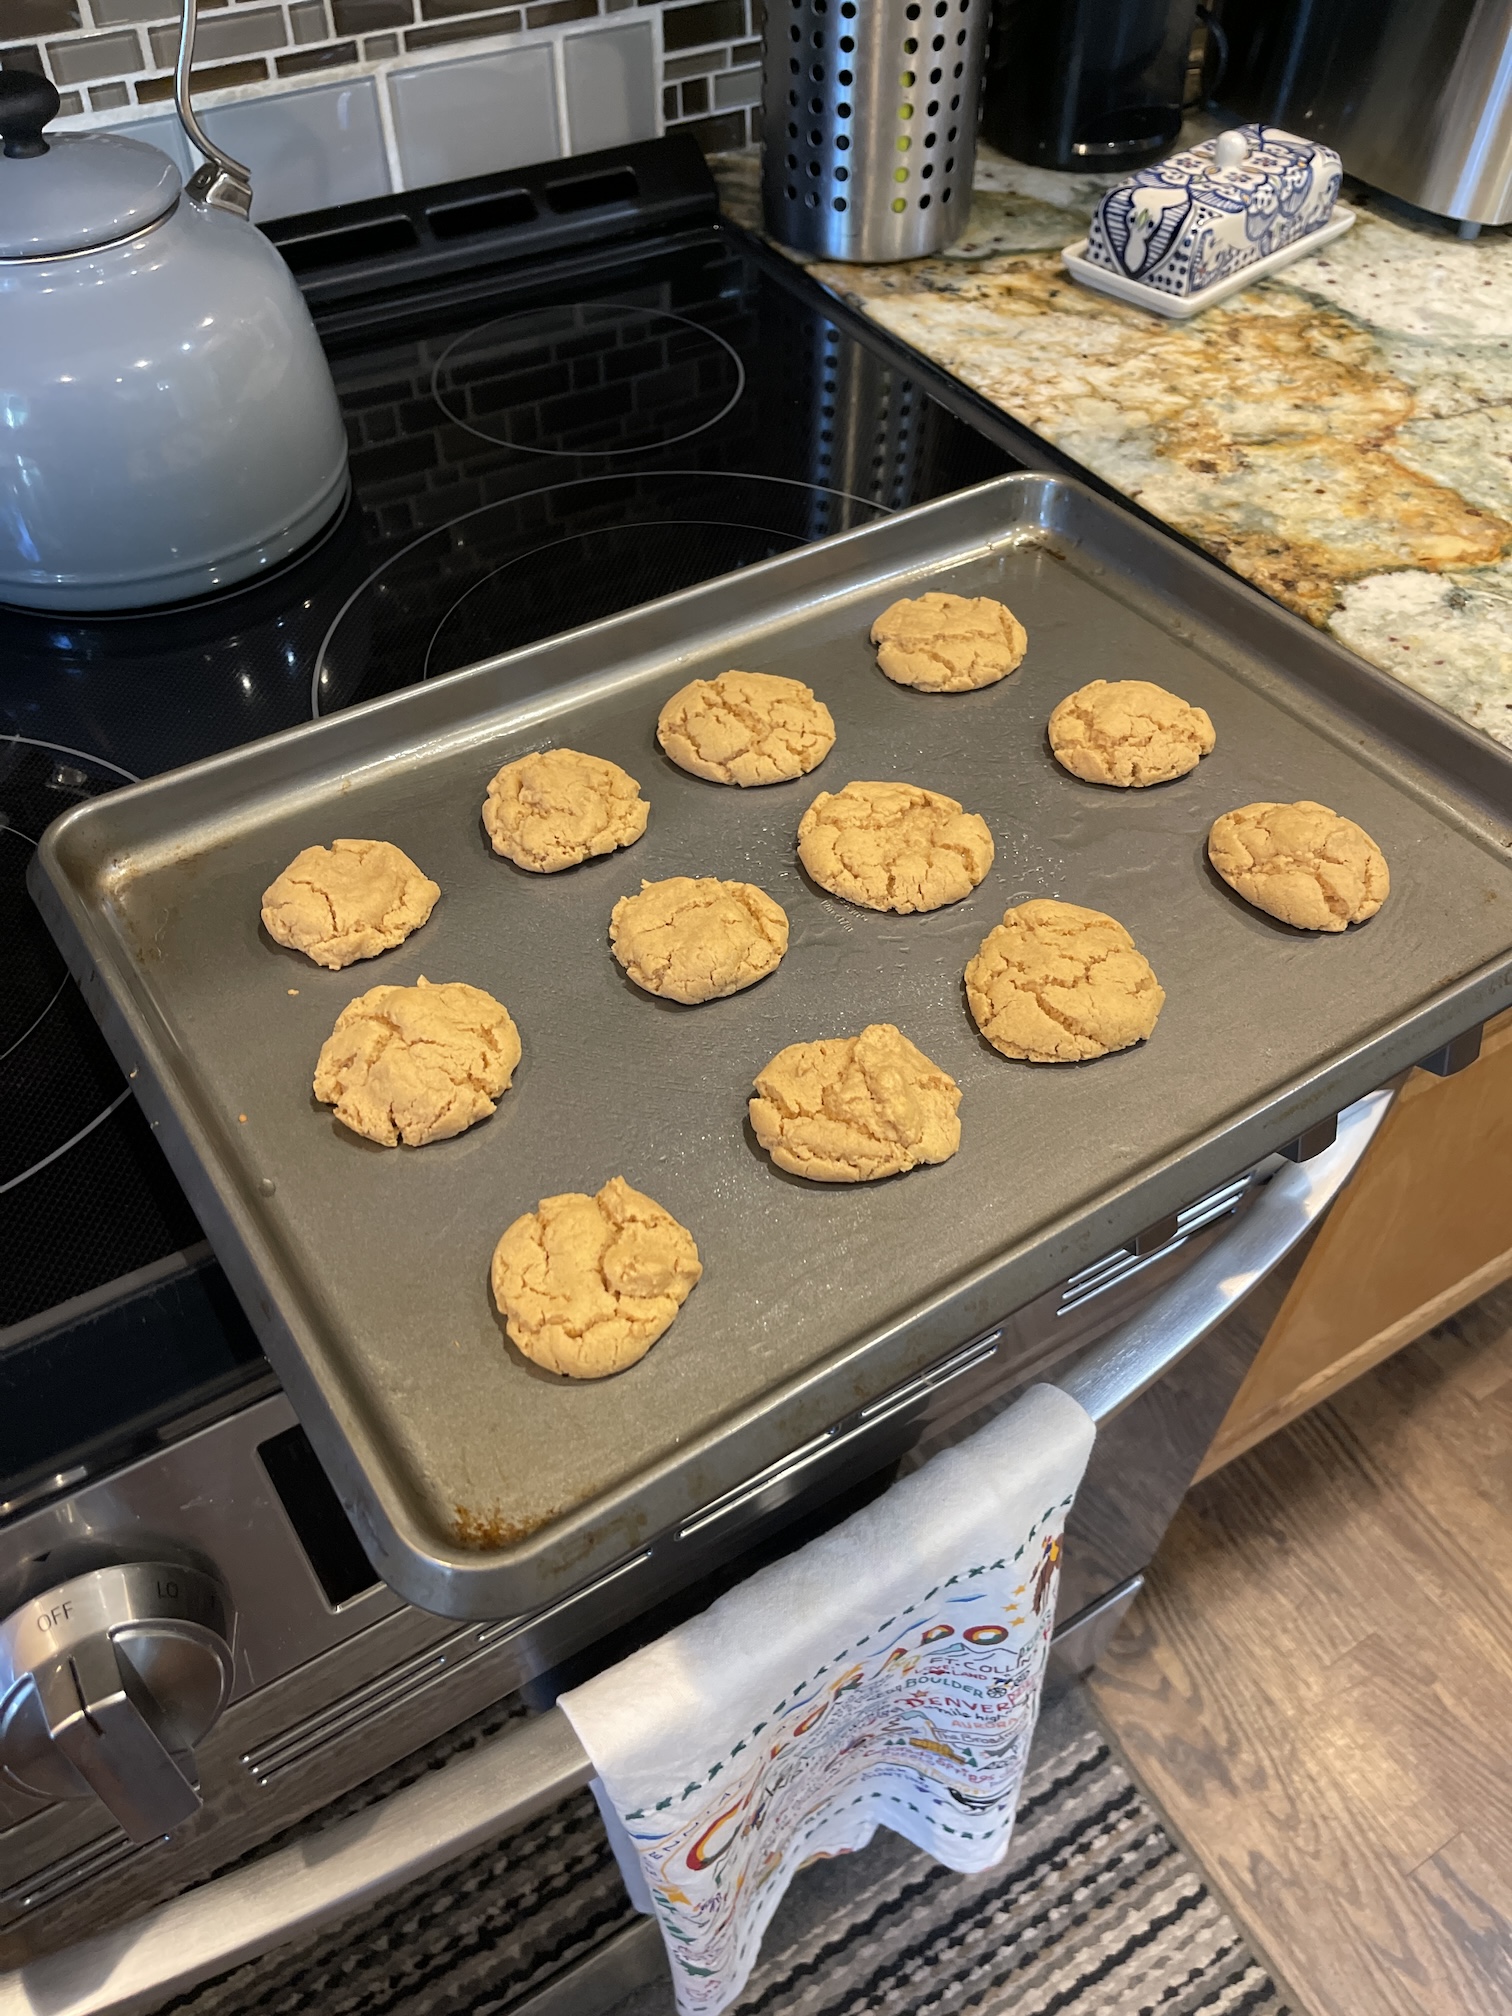
S lives a “gluten-free” lifestyle so I challenged myself to do some “gluten-free” baking while she visited and made my first “gluten-free” cookies – peanut butter cookies without flour:
They were delicious but very crumbly!
Our non-stop summer of traveling or out-of-town visitors in nearly coming to a close. We’ve had fun but we are looking forward to a semi-quieter Autumn and tentatively a very quiet Winter…perhaps I can even get some “tierneycreating” done 🙂
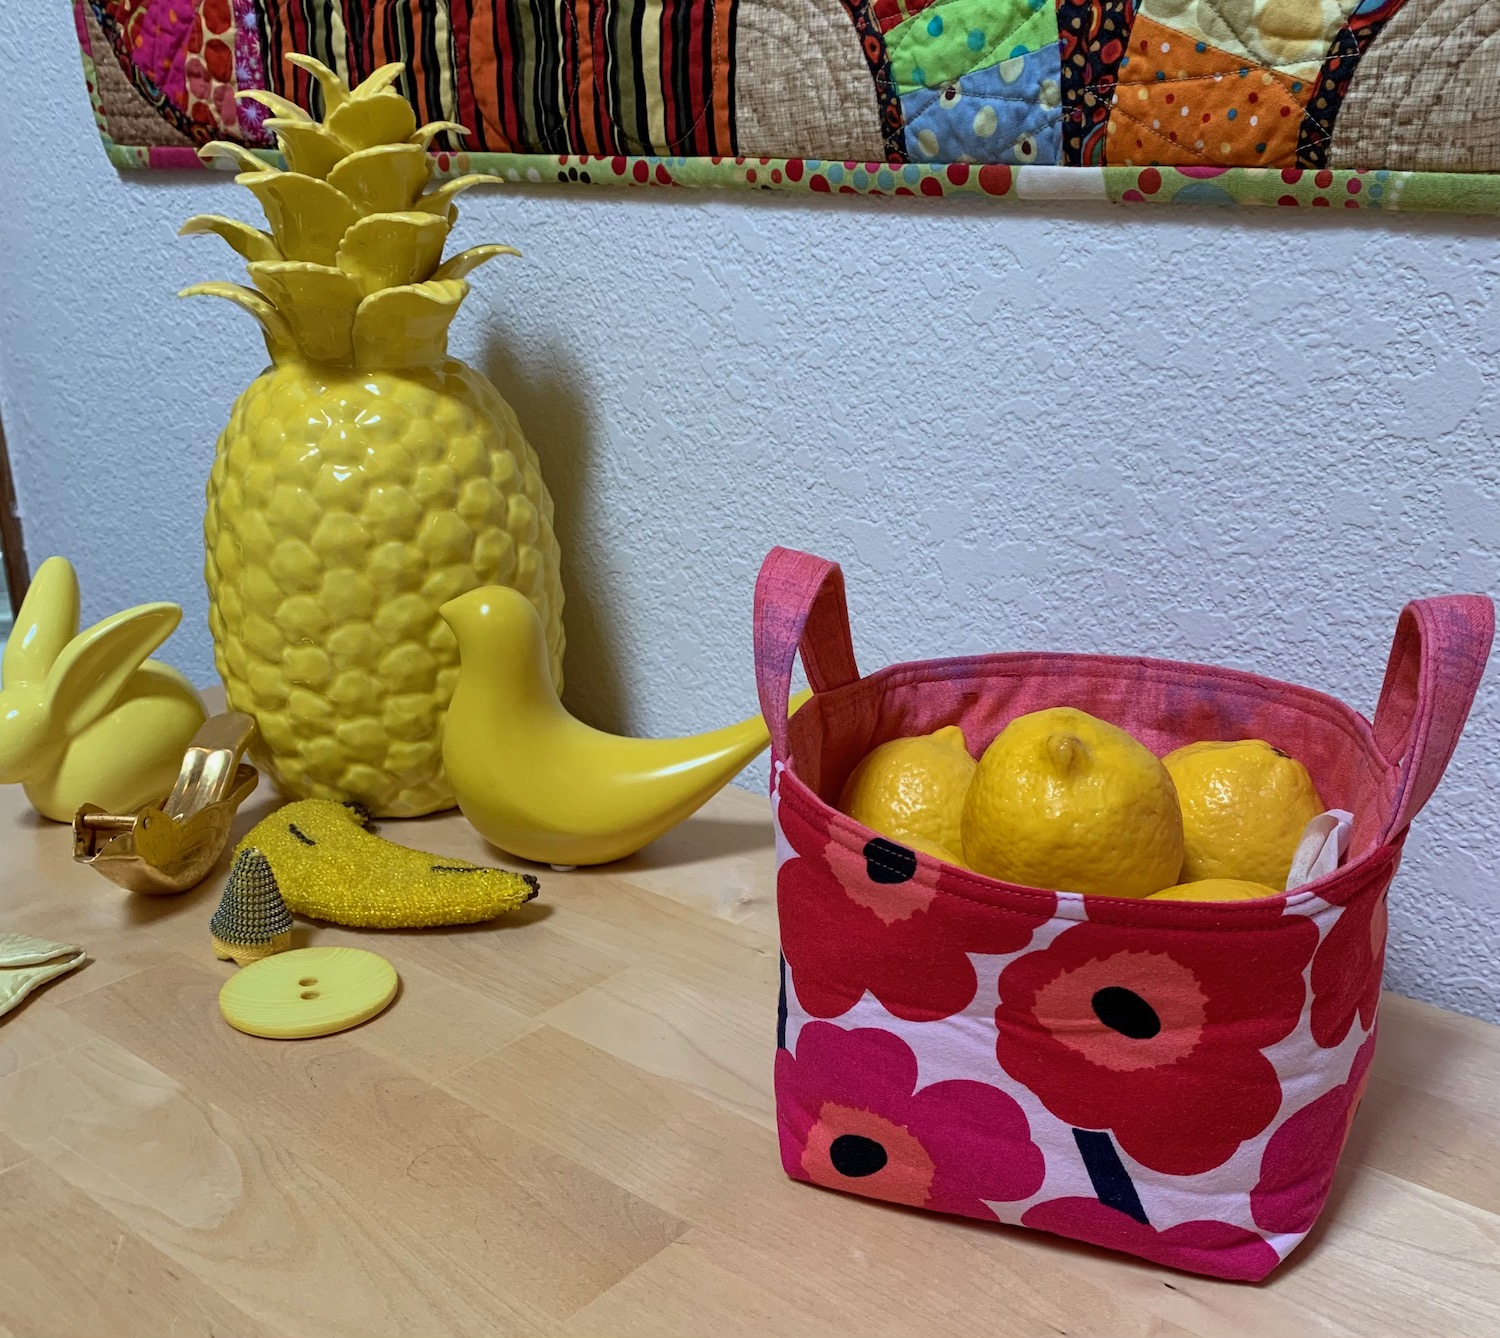
You’ve heard of “animal rescue”, well I’ve been involved with “handmade basket rescue” (smile)!
I know, silly, but when I am at a charity thrift shop and I see a handmade basket, I seem to need to bring it home!
Recently I picked up this basket at a thrift shop:
Which looks like a larger version of a Sotak Handmade basket pattern I made in the past:
On closer inspection turned out it was the same pattern!
I know the work it takes to make this basket, so how could I just leave one in excellent condition for only a couple dollars in the thrift store unloved?!!??! (Yes these are the justifications I tell myself…) I just had to give it a home 😉
I have this collection of Art Gallery Fabrics scraps that I plan to use to make this quilt my friend D made me – Then Came Jone’s Nova Star:
So I thought my new basket would be the perfect vessel to store those scraps:
Here is another basket in my studio (different pattern) I rescued a couple years ago from a thrift shop which houses a collection of precut flannel squares:
I hope I come across more of these baskets in the future when thrifting, as a crafter who appreciates the work that went into them, they are a special and useful find!
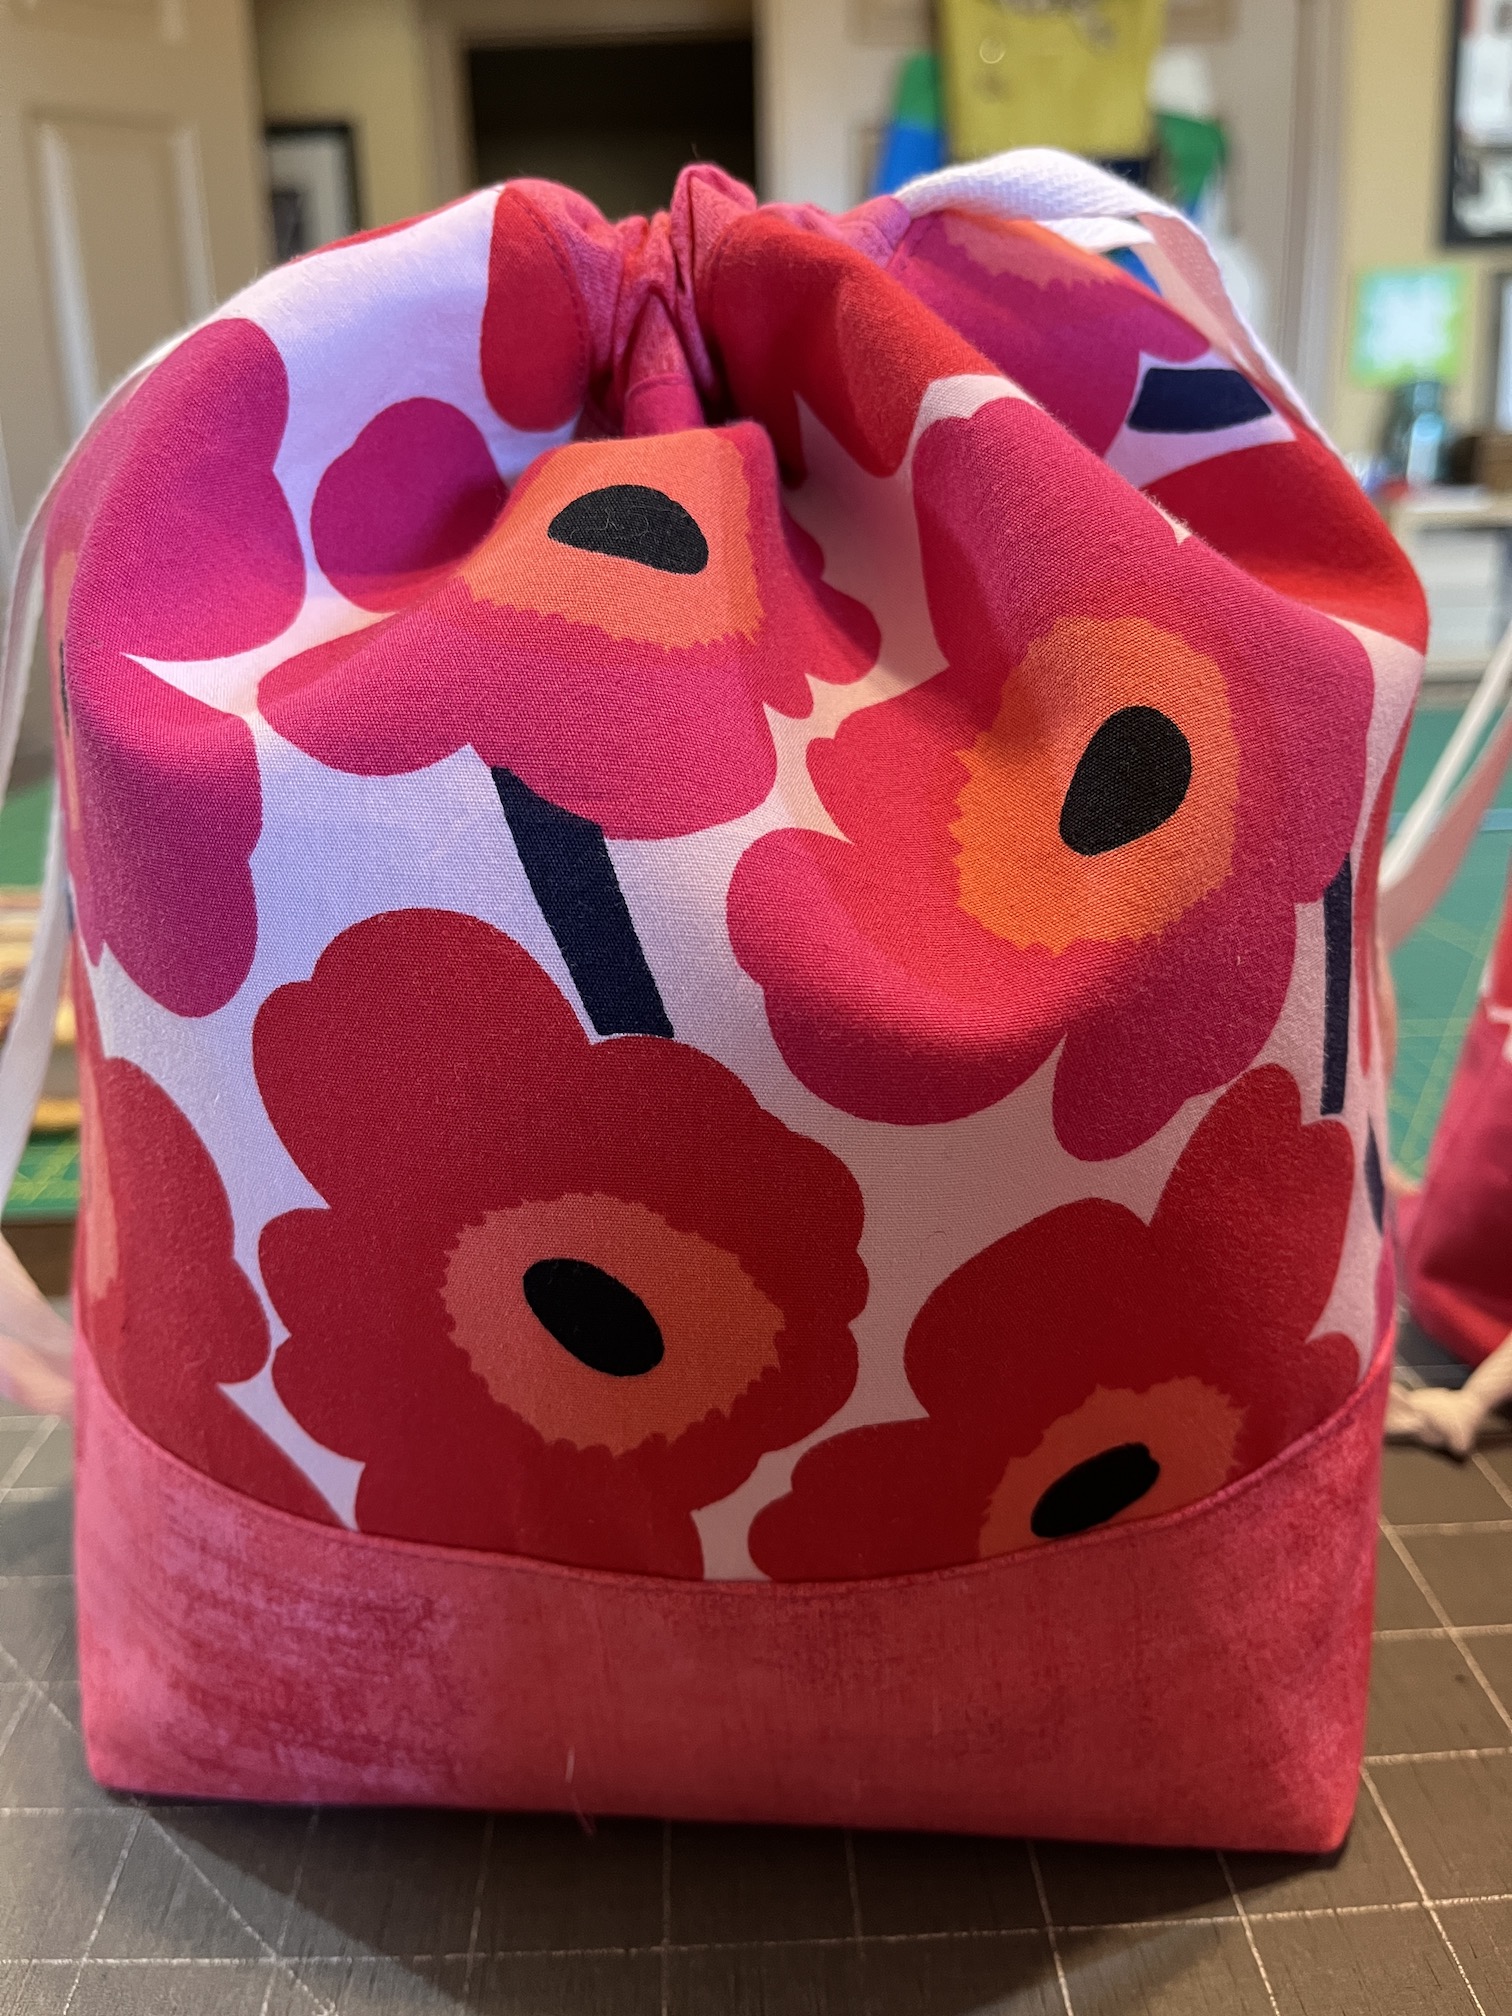
One of my favorite bag designers is the Netherlands based designer Svetlana Sotak of Sotak Handmade. The drawstring bags I’ve made (feels like I’ve made hundreds of them) is based on her pattern. I like that she supports small businesses by licensing them to sell items make from her patterns by purchasing the pattern.
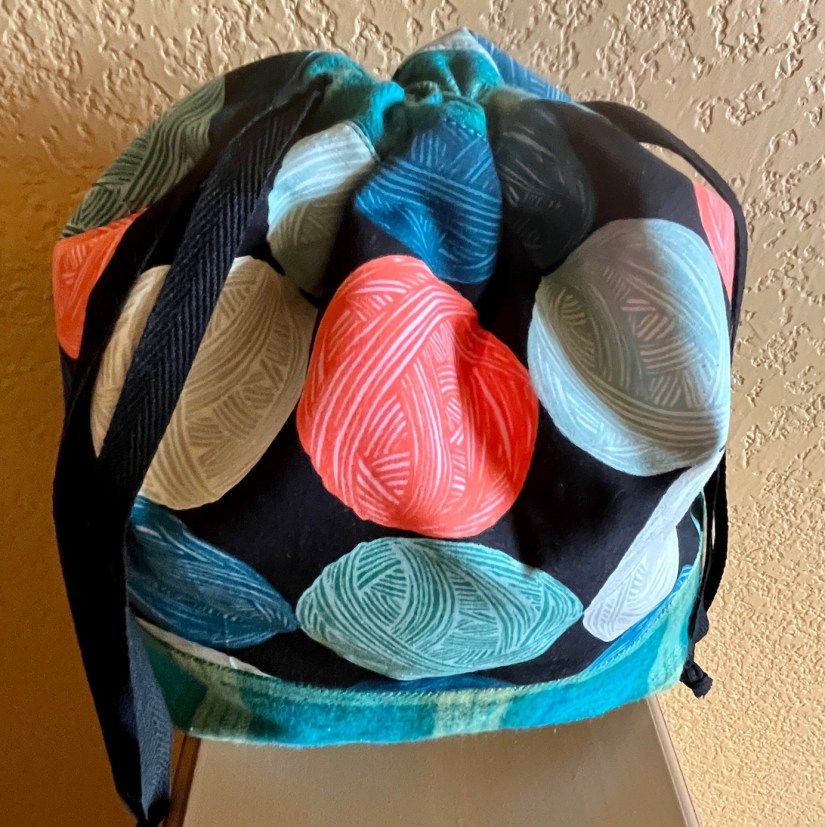
It was time for me to try out a new pattern so I made a friend who loves to knit a project bag from the Sotak Handmade pattern – Denver Tote with knitting/yarn themed fabric by Ruby Star Society fabrics.
I was proud of myself because I installed a magnetic snap for the first time on the liner and reinforced it with heavy weight interfacing so the snap did not pull on the liner (which has medium weight interfacing attached).
Next time I make it I might make coordinating handmade handles. I was trying to coordinate the handles with the drawstring that is part of the bag too.
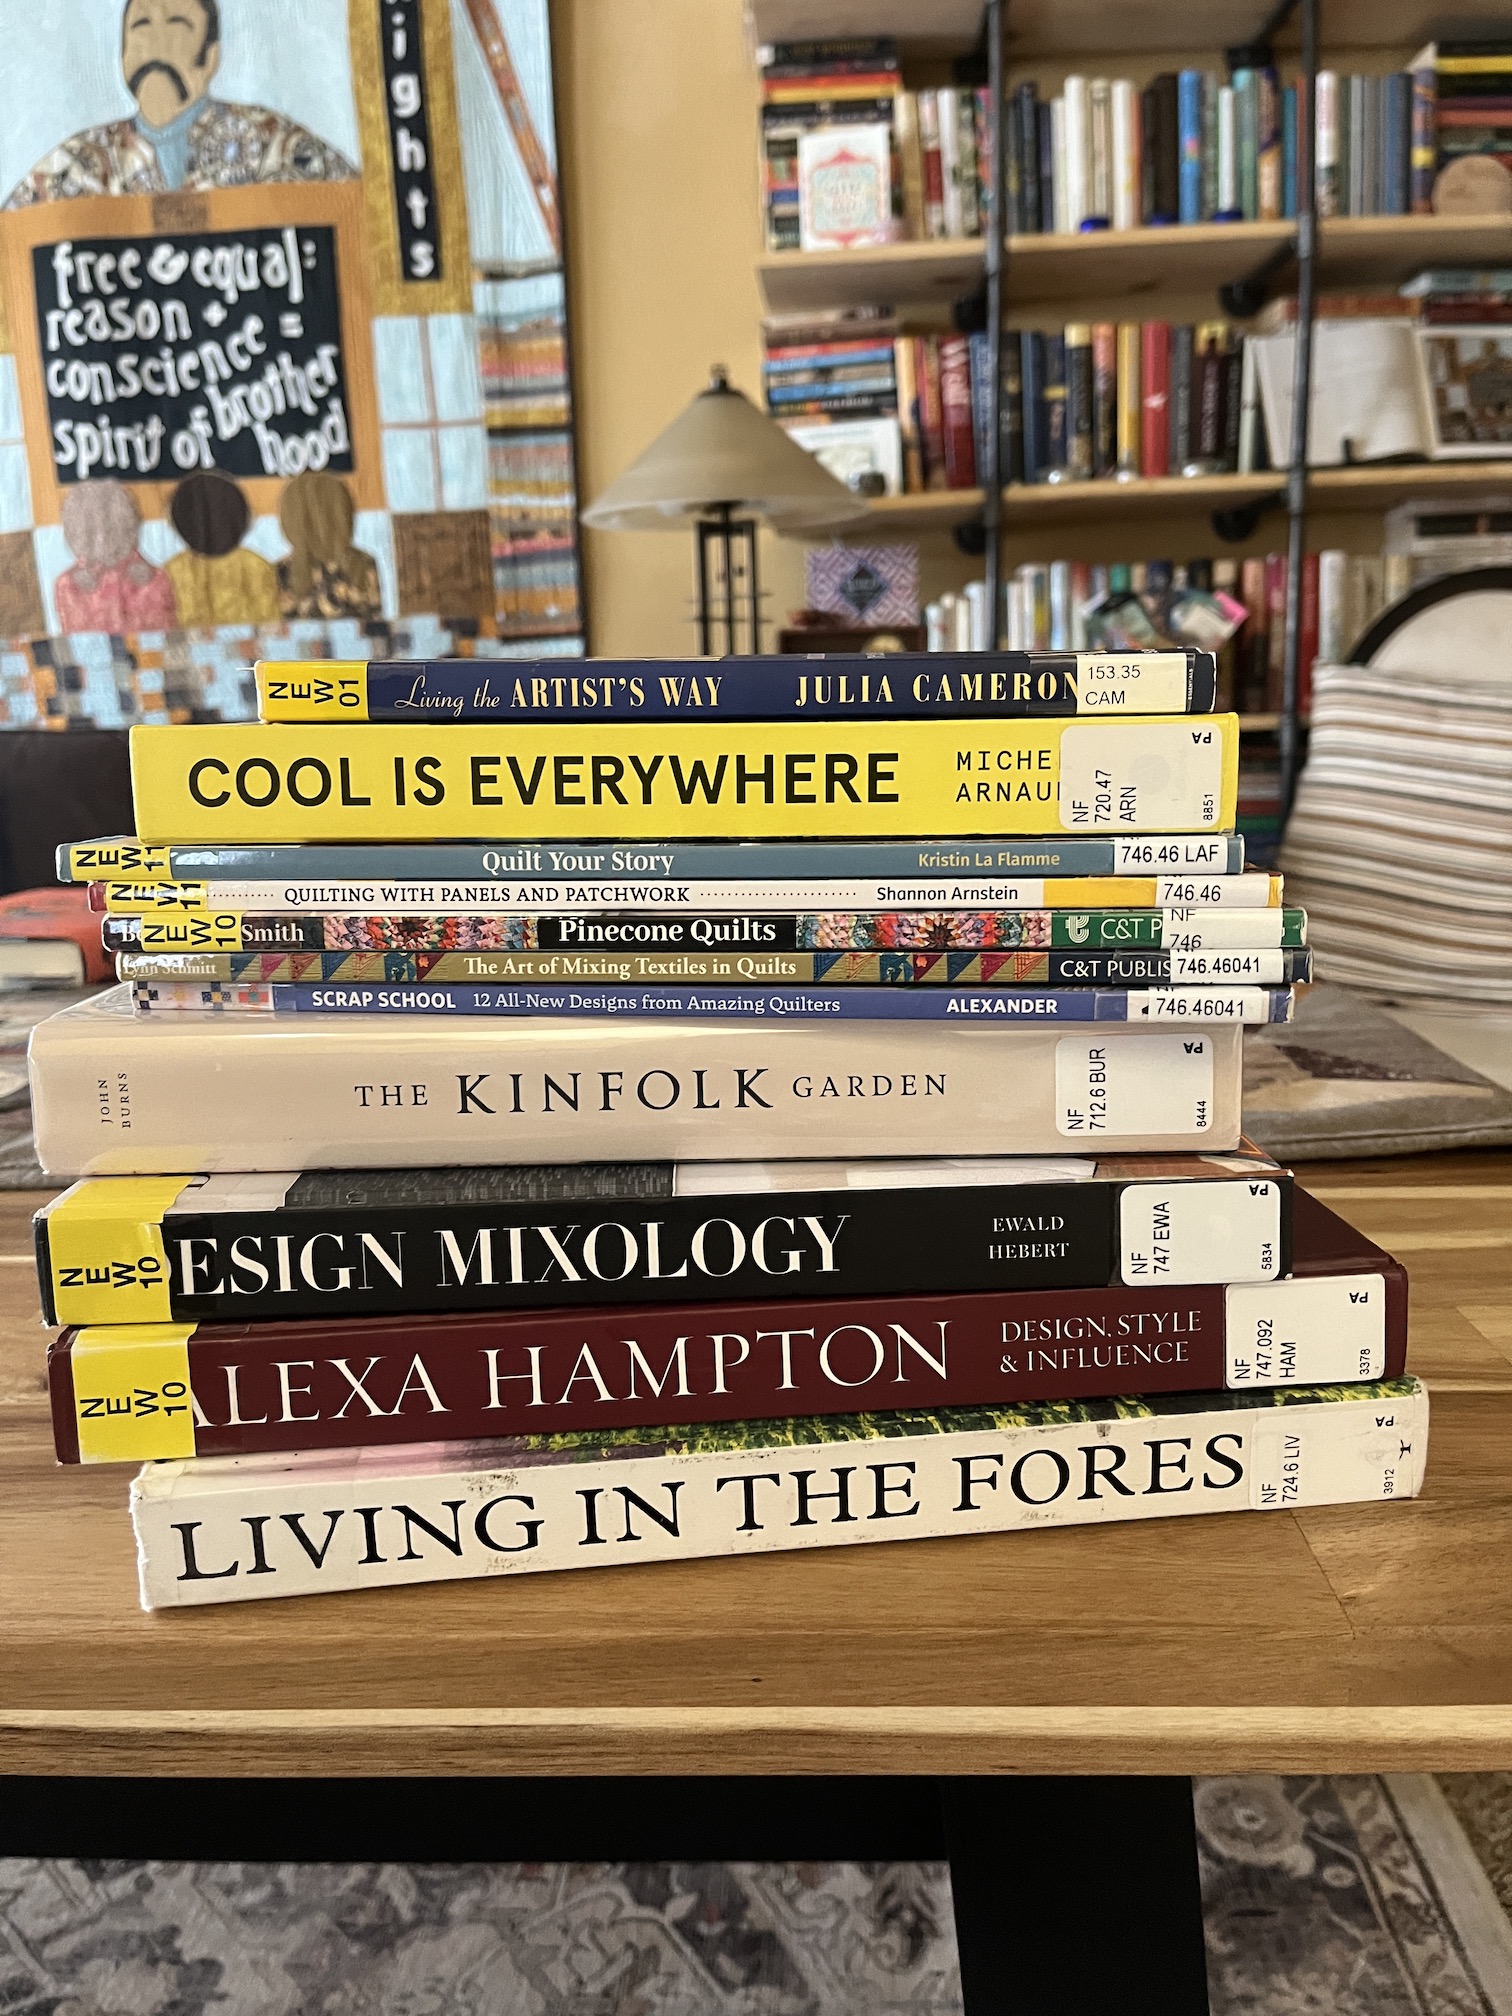
Oh and speaking bags, I don’t think I’ve shared this lovely tote bag I found while thrifting that I love to take everywhere, especially to the public library to pick up my holds!
Here is my latest library stack I brought home with the tote and so far I’ve really enjoyed the bookCool is Everywhere.
I am really pleased with the interior/lining fabric I put in this bag – representing the “fields of grain”/grain fields you might pass during a journey on Route 66!
The previous time I sold my bags on my Etsy shop I include a little wallet as a thank you gift. This time I decided to include the little wallet in the Etsy listing. I plan to try and select a little wallet that coordinates with the bag.
Well at least I got one listing done, ha, and tomorrow is another day to get more done.
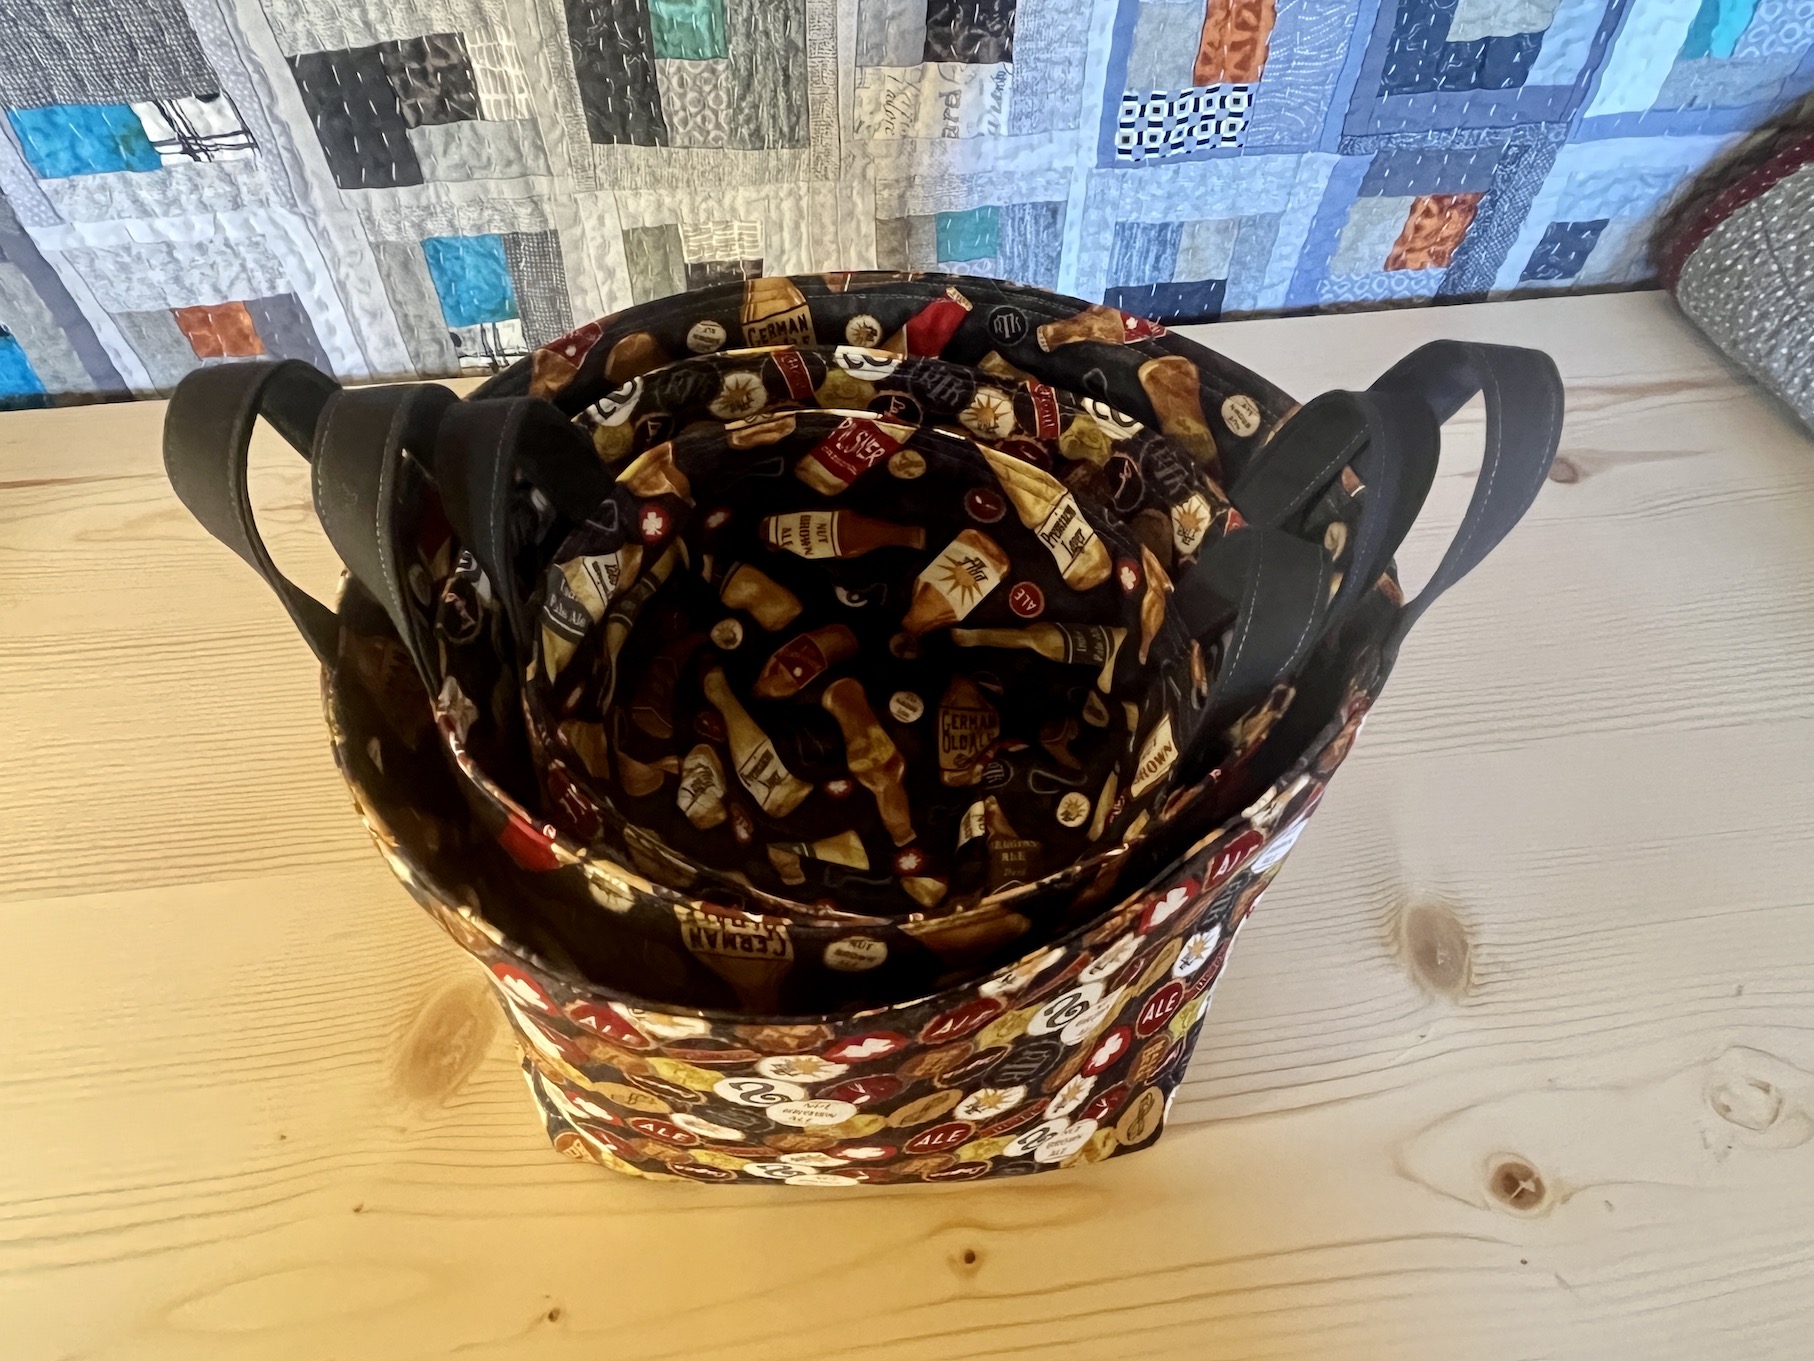
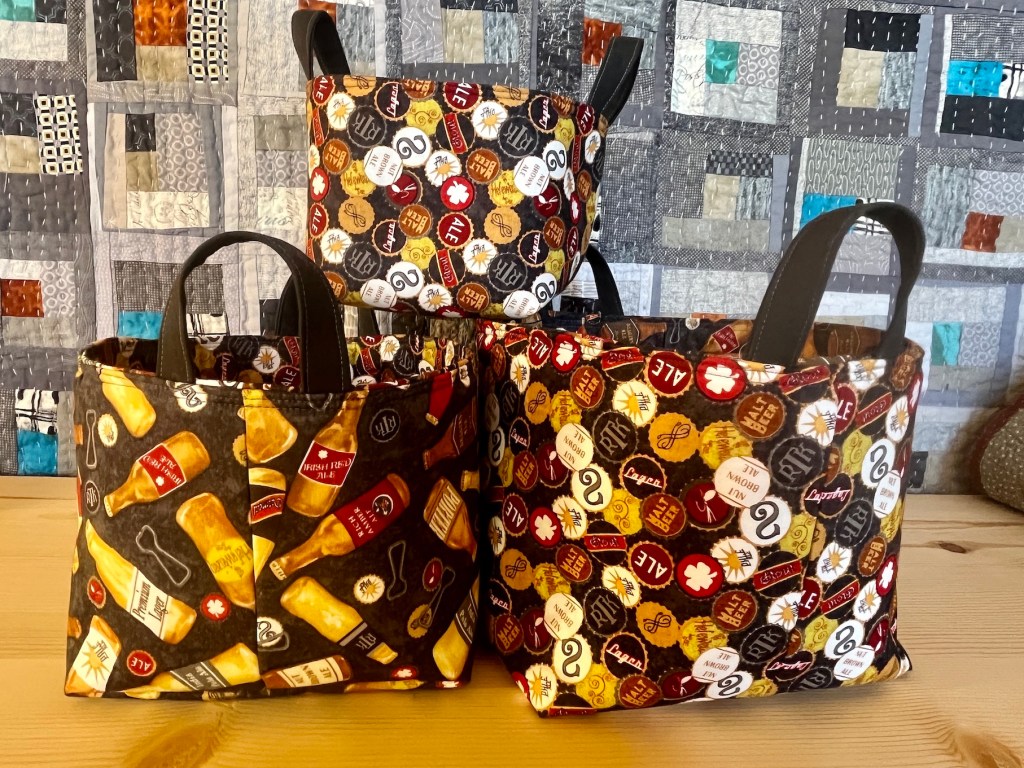
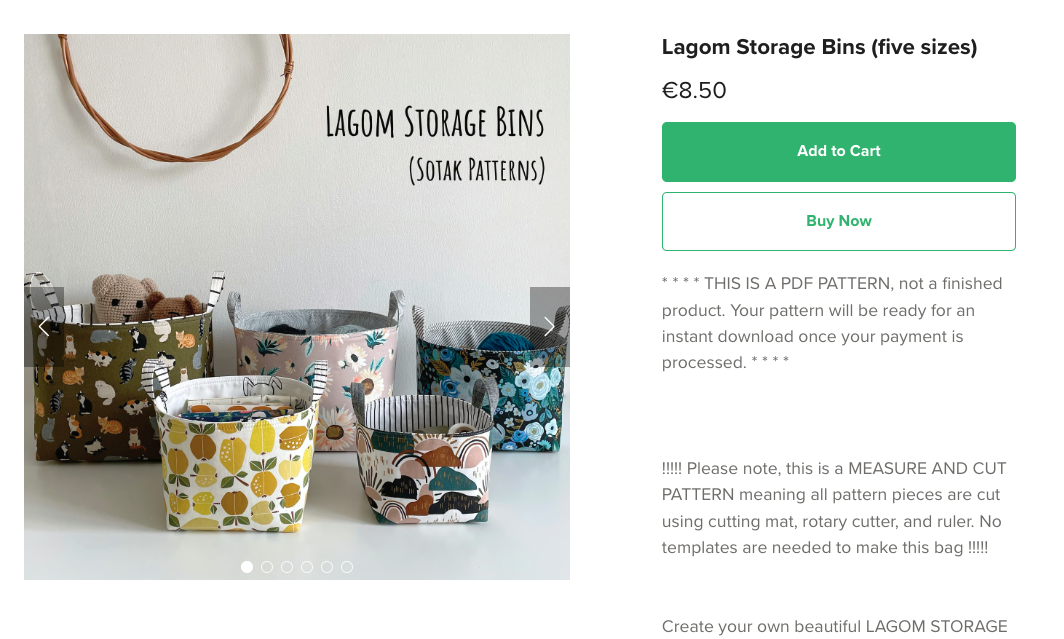
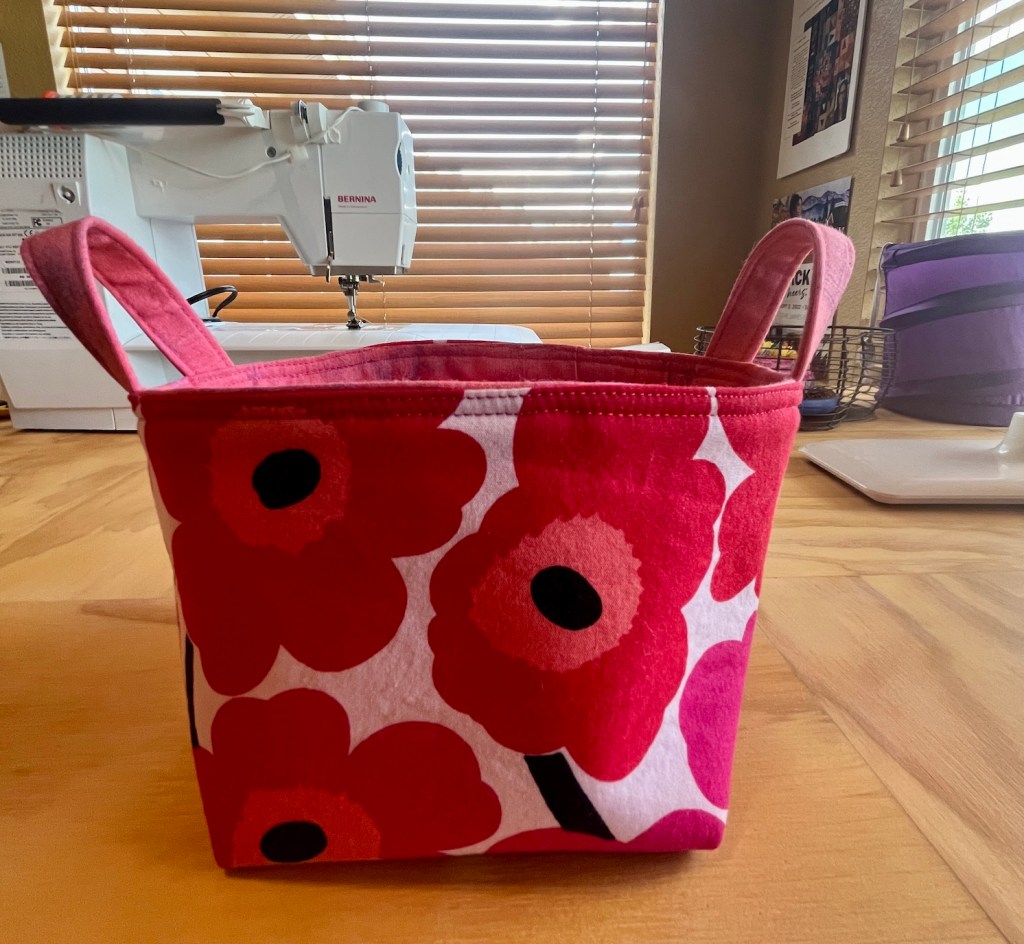
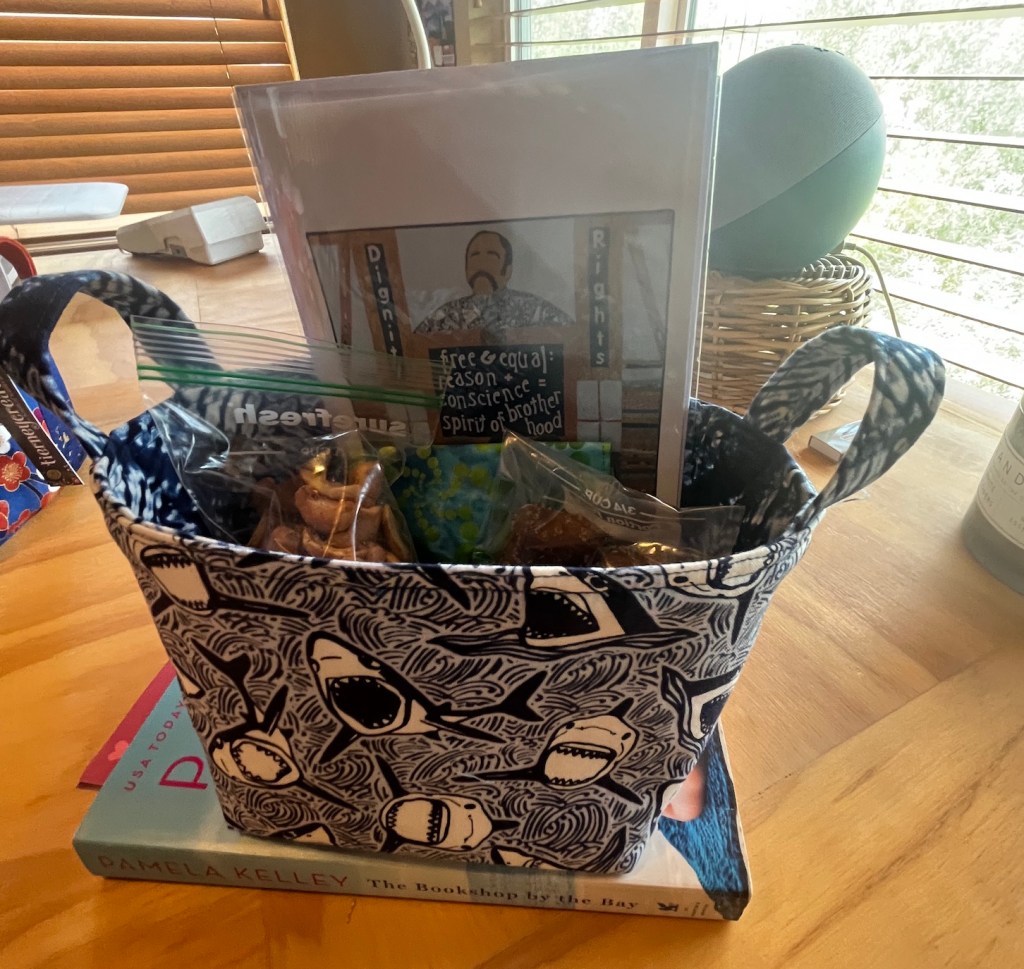
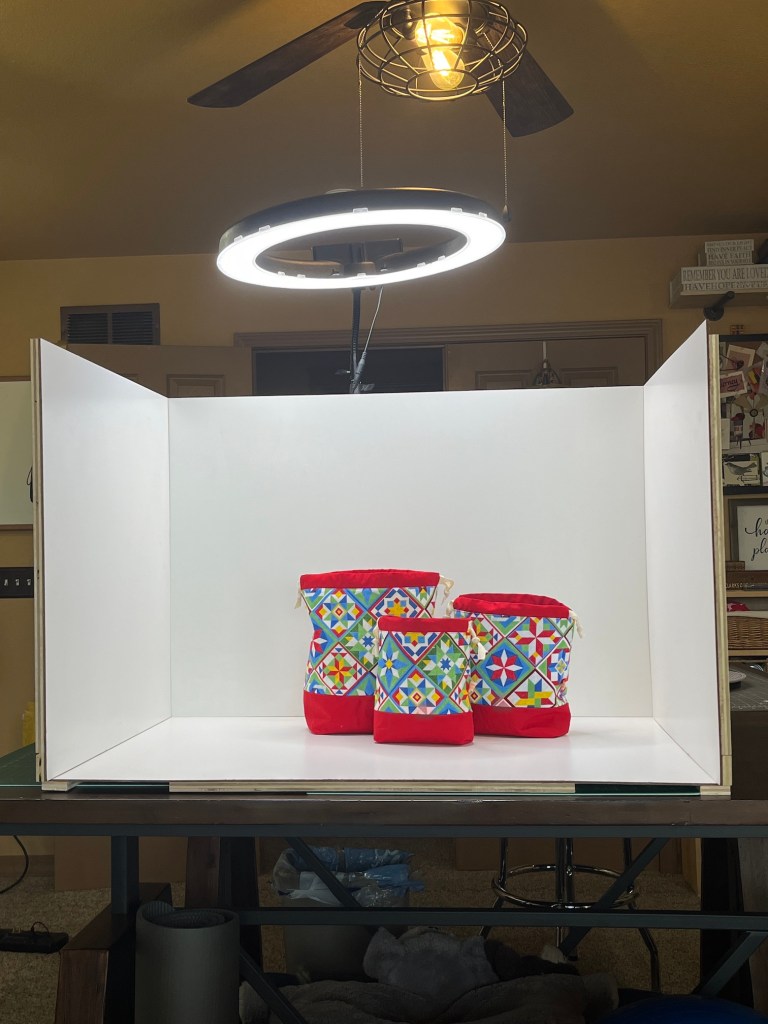
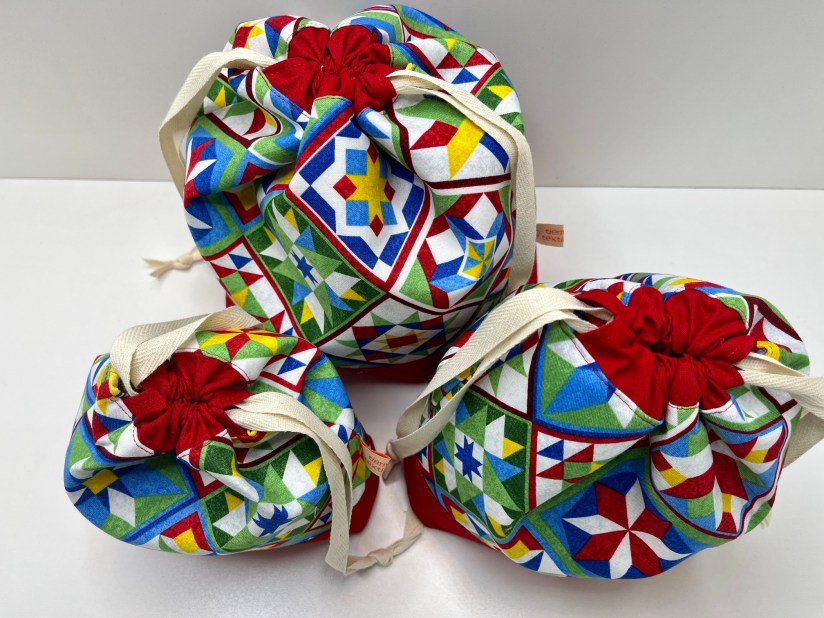
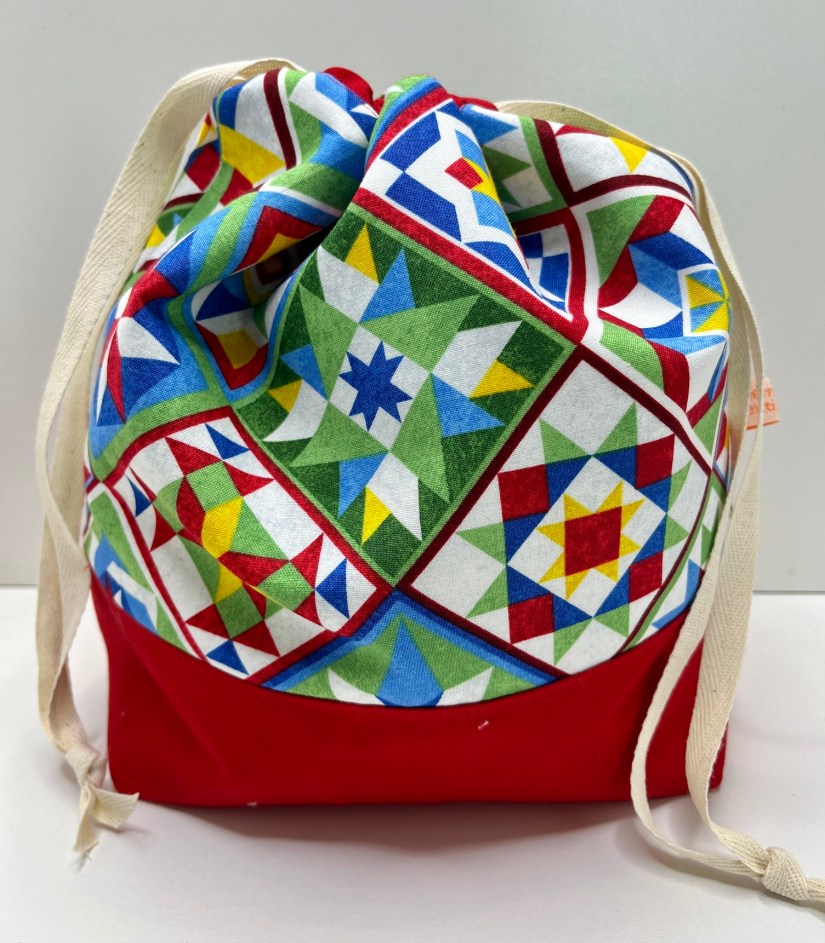
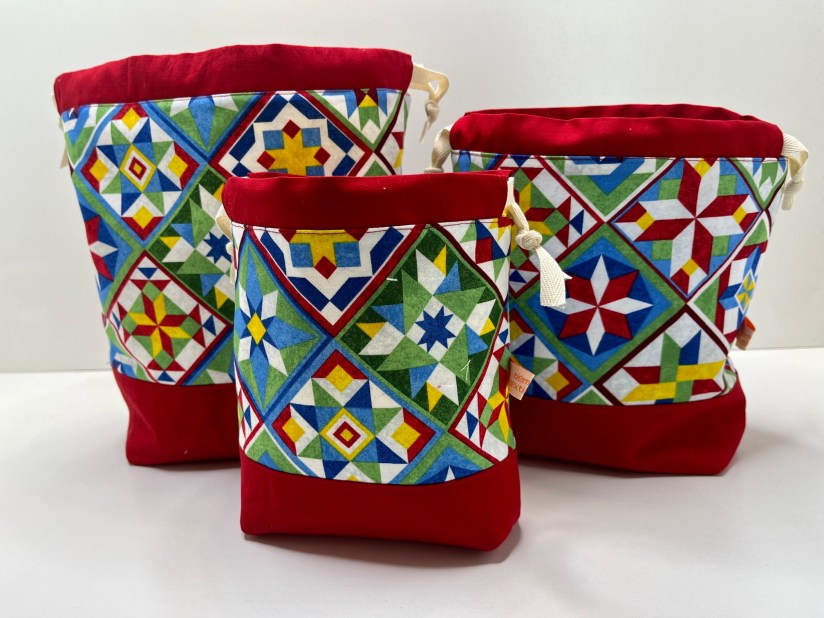
John and I are going in the near future to visit his childhood friend and his wife. We are staying their home and I never show up as a guest as someone’s home without a gift (nor does John); and with some Instagram snooping I discovered they love craft beers and so I made them a set of Lagom Storage Bins, pattern Sotak Handmade.
These are the same bins I made a couple months ago for some friends (see postLagom Storage Bins). After I made them the first time I was not sure I was going to make them again as they use two different types of interfacing (SF 101 and Fusible Fleece) and they seemed sort of tedious to make (but the pattern is well written).
But on second round of making these bins they are growing on me. I did discover that with the larger sizes you would be better off making them with a cotton canvas/linen canvas for more strength. I used quilting weight fabric and the largest one I made seems slightly “floppy”.
The first time I made them I only made the smallest size “X-small”). Here are the sizes they come in per the pattern designer’s Etsy shop:
This time I made them in three sizes – X-Small, Small, and Medium.
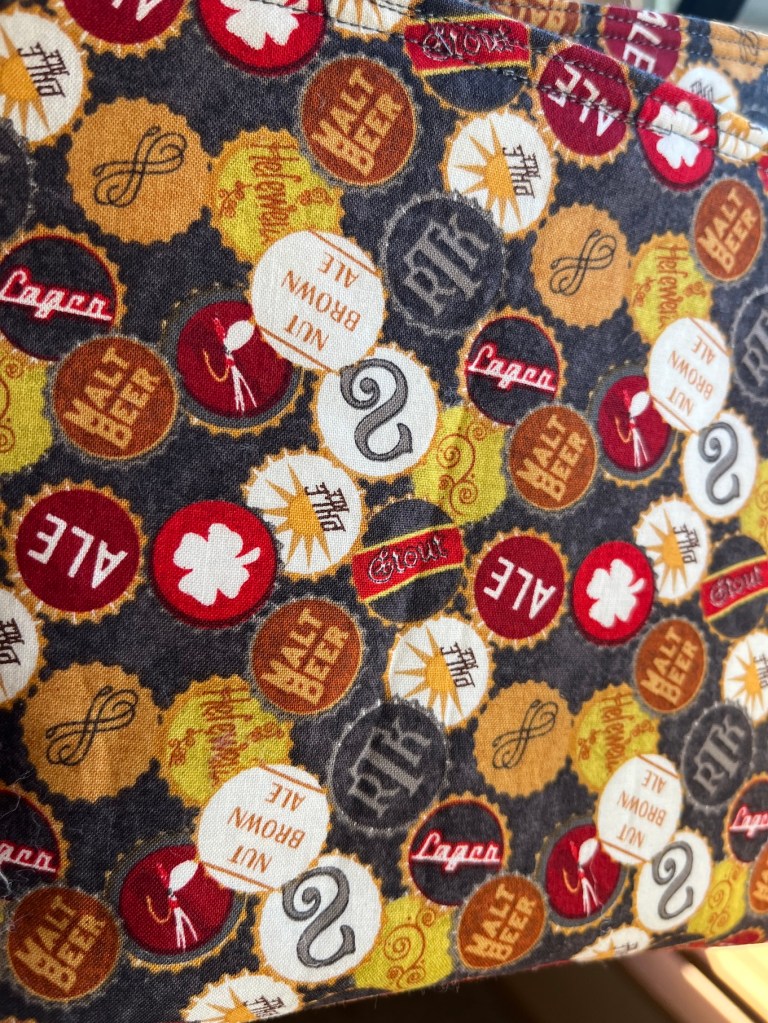
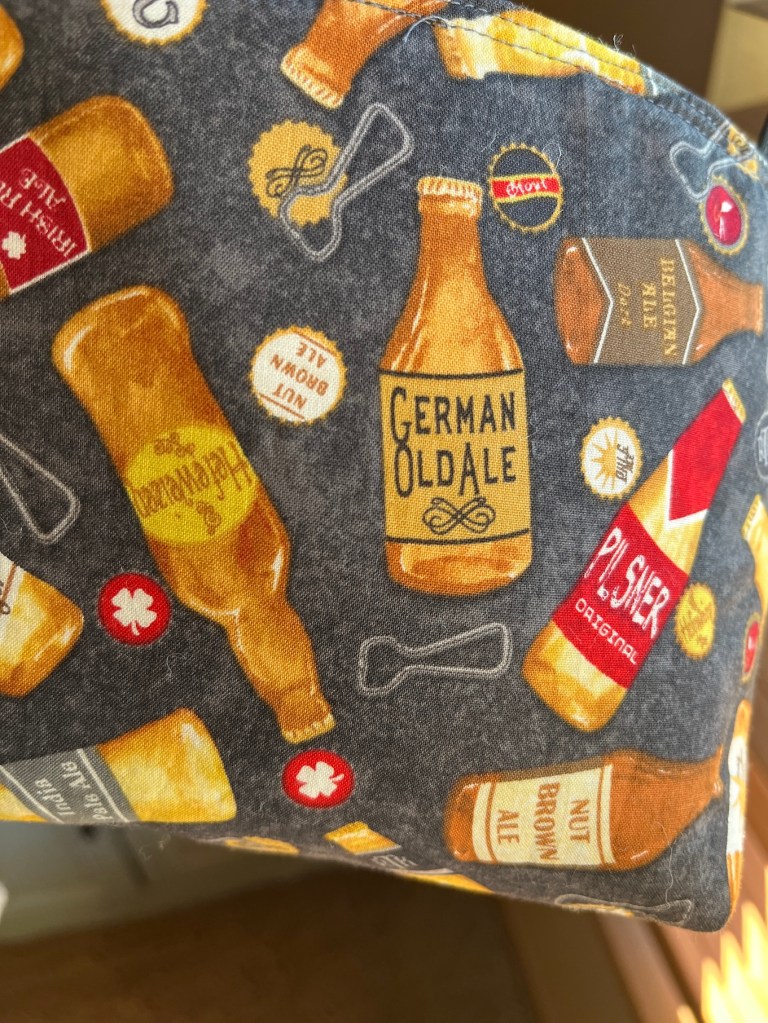
I found some cool craft beer themed fabric that my late husband Terry had selected (he loved craft beer, dogs, and flannel fabric; and a lot of his fabric stash as a quilter was in these themes):
Here are photos of the bins (and I love how nicely they stack together!):
I hope they like them! I have no idea how their home is decorated as I am visiting them for the first time; but I thought using the theme of something that interests them might be safe…
John also made a host gift – a cutting board for them:
Rounded corners is a new thing he is trying on his cutting boards.
We are feeling pretty proud of ourselves as we didn’t wait until the last minute to make these gifts!
One of my favorite bag designers is Svetlana Sotak of Sotak Handmade out of the Netherlands. The drawstring bag pattern I use is one of hers. I love that buy purchasing her patterns she licenses handmade craft businesses to sell them on a small scale, all she requests is that you credit her as a pattern maker, like I’ve done in my Etsy listings in the past. (Note she sells her patterns on Etsy and that is where I purchase them in the US market)
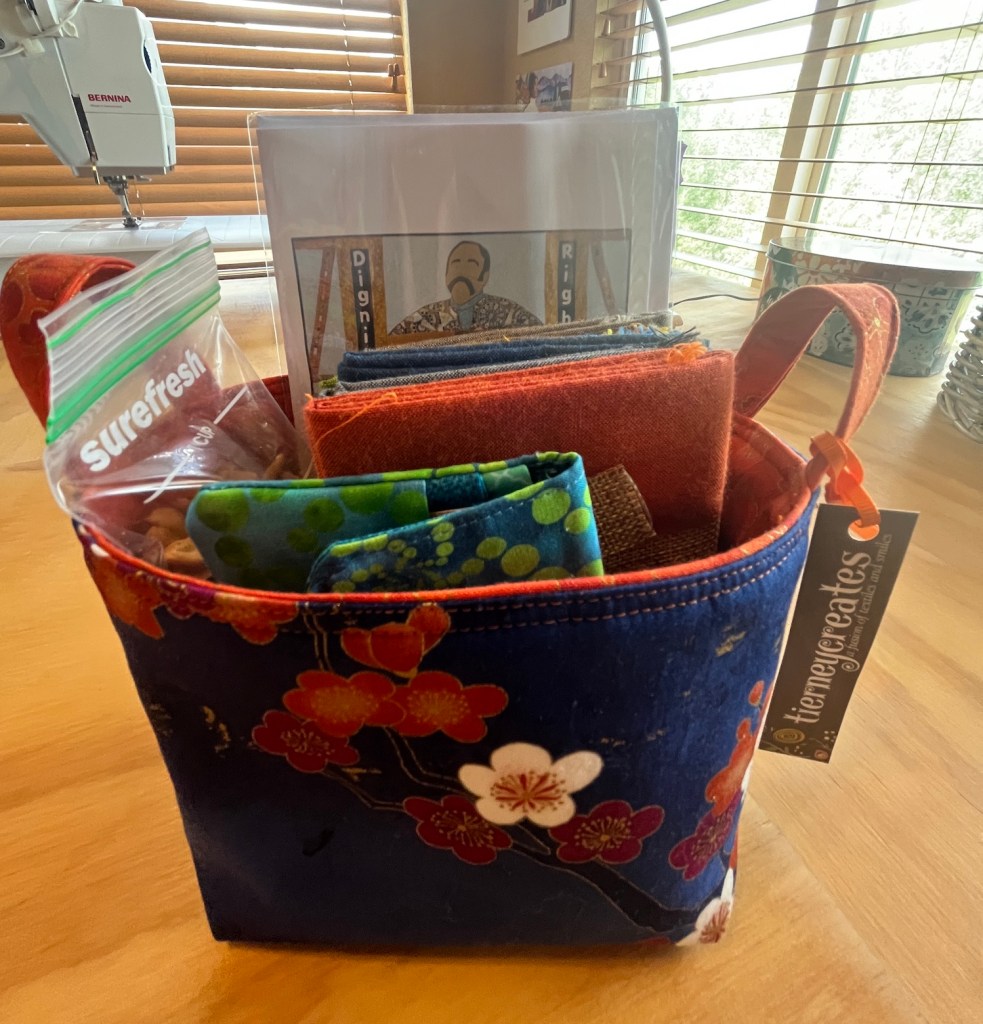
I have several of her patterns and I recently tried out the pattern Lagom Storage Bins:
Image credit – sotakco.nl
Here are the three Lagom Storage Bins I made in the smallest size (the pattern has 5 sizes!!!) as gifts for friends:
The first one was made with Marimekko fabric from Finland was sent to my friend W in Central Oregon. The cool shark fabric is from my friend D when she came for a quilt retreat to my house in May (she brought awesome fabric for me as a hostess gift). The Asian fabric is from my stash and was actually selected by my sister for a future project she’d like me to make her for Christmas – a whole backpack out of that fabric.
As far as the Marimekko fabric one, here is how my friend W is using it in her home(thanks to W for the photo!):
The other two storage bins were given as welcome gifts to my friends MJ and J when they arrived at my home for a little quilting/girls retreat a couple weeks ago (I’ll share a post someday about that):
I didn’t enjoy making the baskets as much as I enjoy making the drawstring bags but I might just need to make more of them to get a true feel for what it is like to make them.
They do use two types of interfacing, which makes them a little more expensive to make that the drawstring bags, but they do not have a drawstring to have to thread at the end of the process (which is sometimes a little tedious when you just want to be done!).
I haven’t decided if I will offer them someday on my Etsy shop or not. First I have to grow to love making them 🙂
Oh and speaking of baskets, here is an amazing giant bag made out of recycled plastic grocery shopping bags my friend MJ brought me as a hostess gift when she came for the retreat. A friend of hers crochets them from her stash of grocery bags.
I always appreciate a thoughtful hostess gift, especially handmade!
A month or so ago (this summer is a little blurry as it has been rather busy), I went with John to a large food and shopping market in Denver/Edgewater called the Edgewater Public Market. John was meeting some previous job colleagues there for a reunion. They are friendly people but I decided I would just wander the market on my own for the evening (if you check out the market on the link above it is pretty cool!), grab dinner on my own from one of the many eateries in the market, and read my book/work on my portable crochet granny squares.
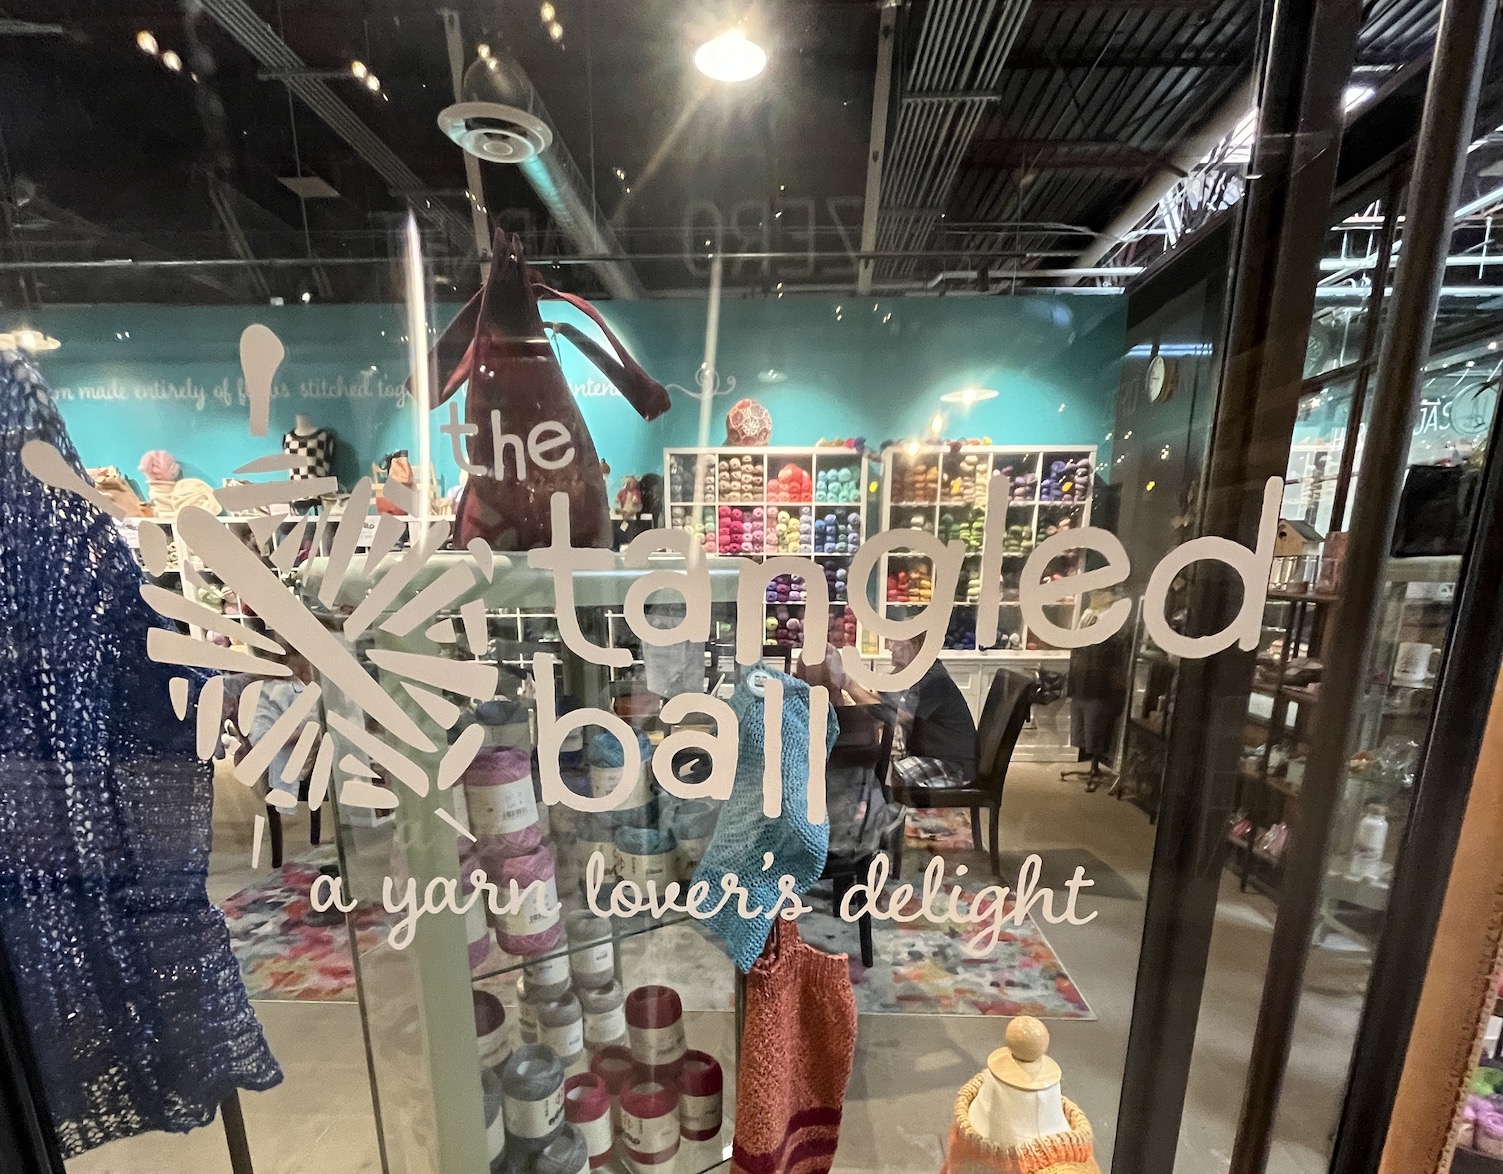
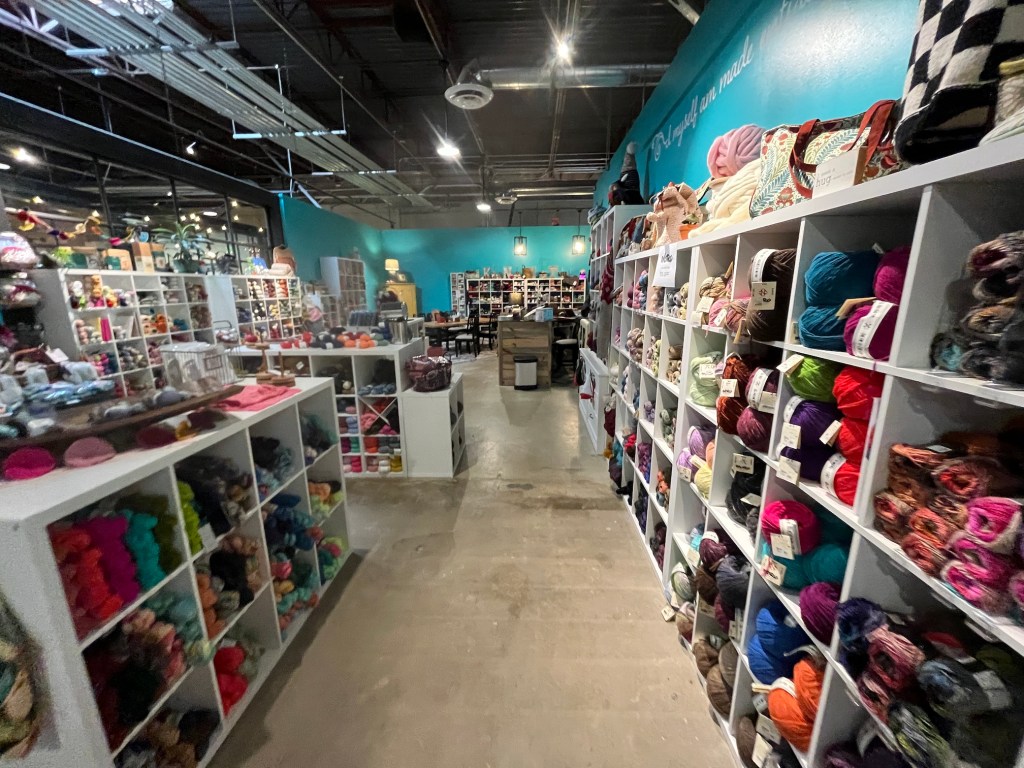
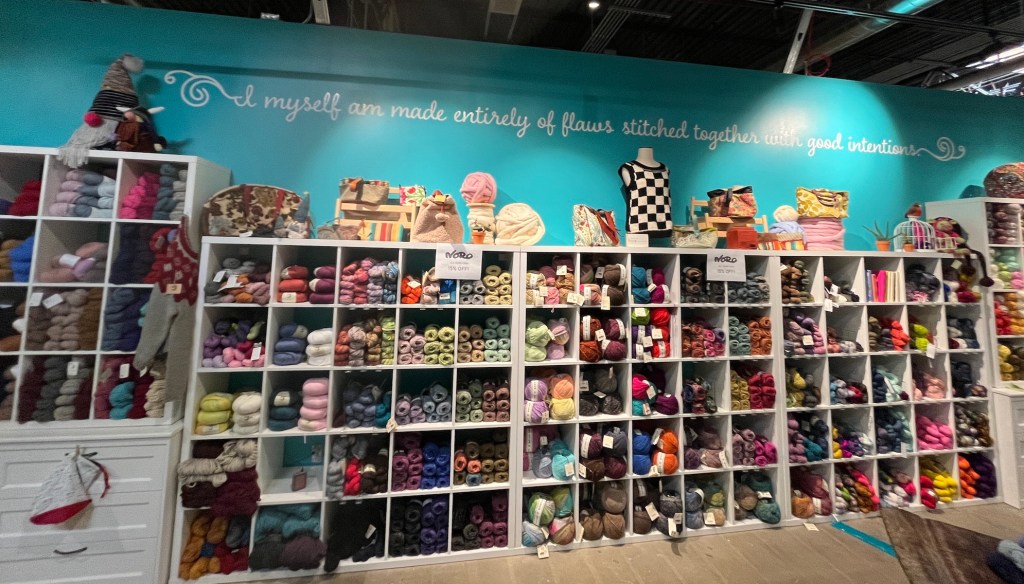
While I was wandering the Edgewater Public Market I came across this storefront for The Tangled Ball:
A “yarn lover’s delight”! I love yarn and I had time to fill so after I ate my dinner, I wandered in. Next thing I knew I was sitting at one of the big tables in the shop with the owner and her husband (who is also a knitter and was working on a pair of socks) and working on my granny squares while chatting with them.
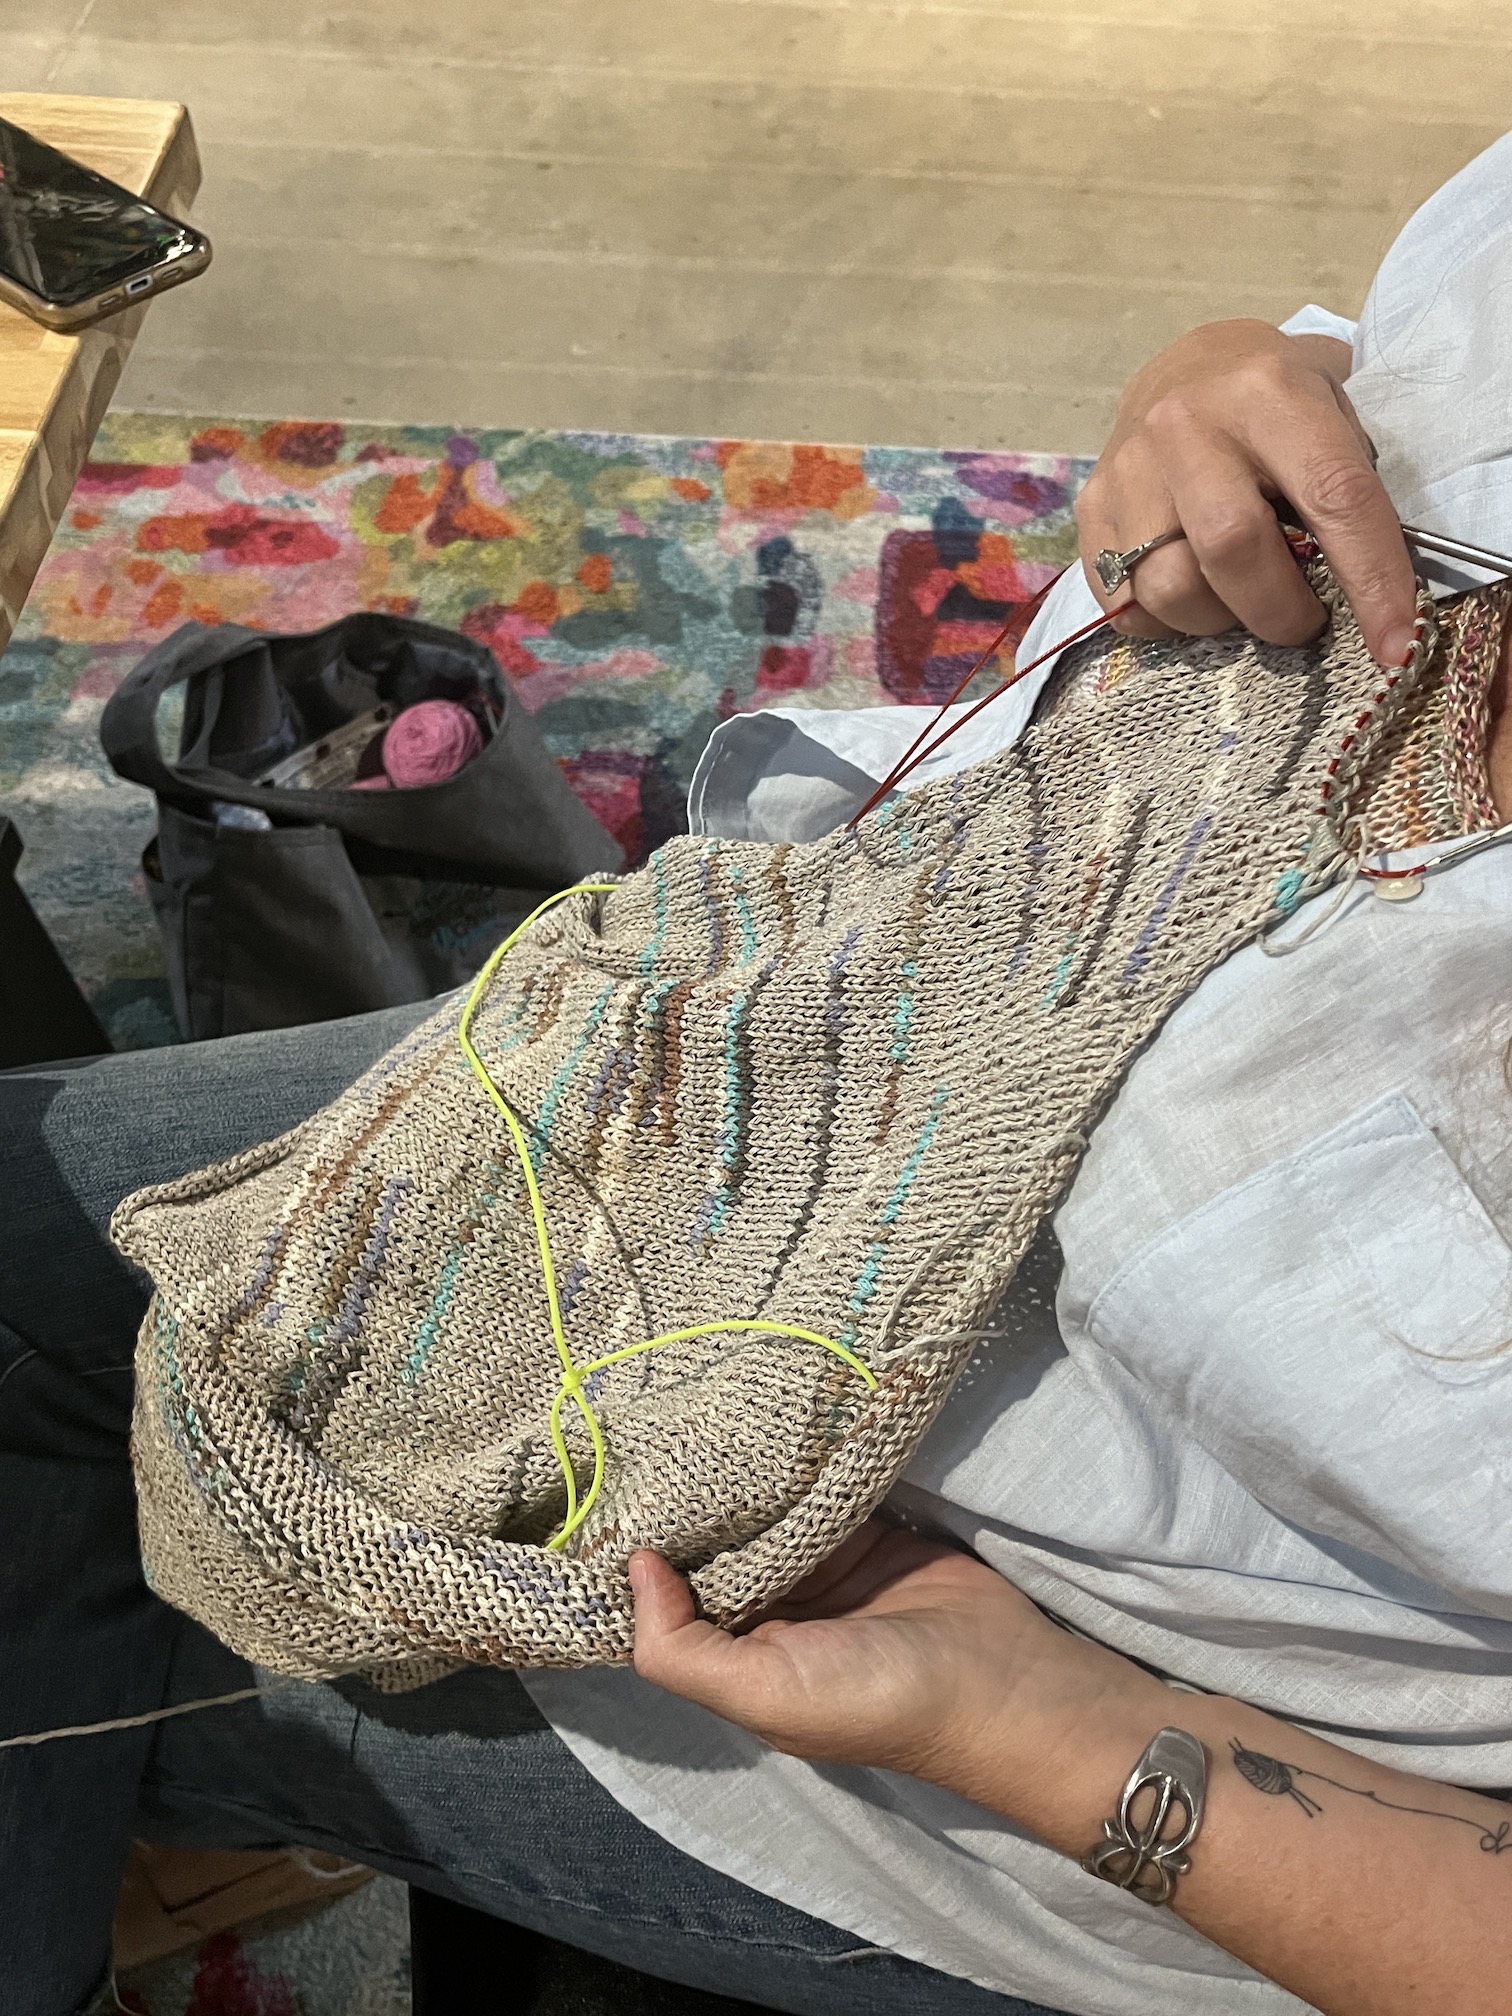
Here is what the shop owner was working on – a lovely knitted vest:
While we were talking at the table, working on our projects, I admired a cute project bag sitting on the table. The owner mentioned a local crafter made those bags but was no longer making the bags for the shop. She said she was looking into another source for project bags for customers to buy. I mentioned I make Drawstring Project Bags and she was interested in potentially selling them at The Tangled Ball.
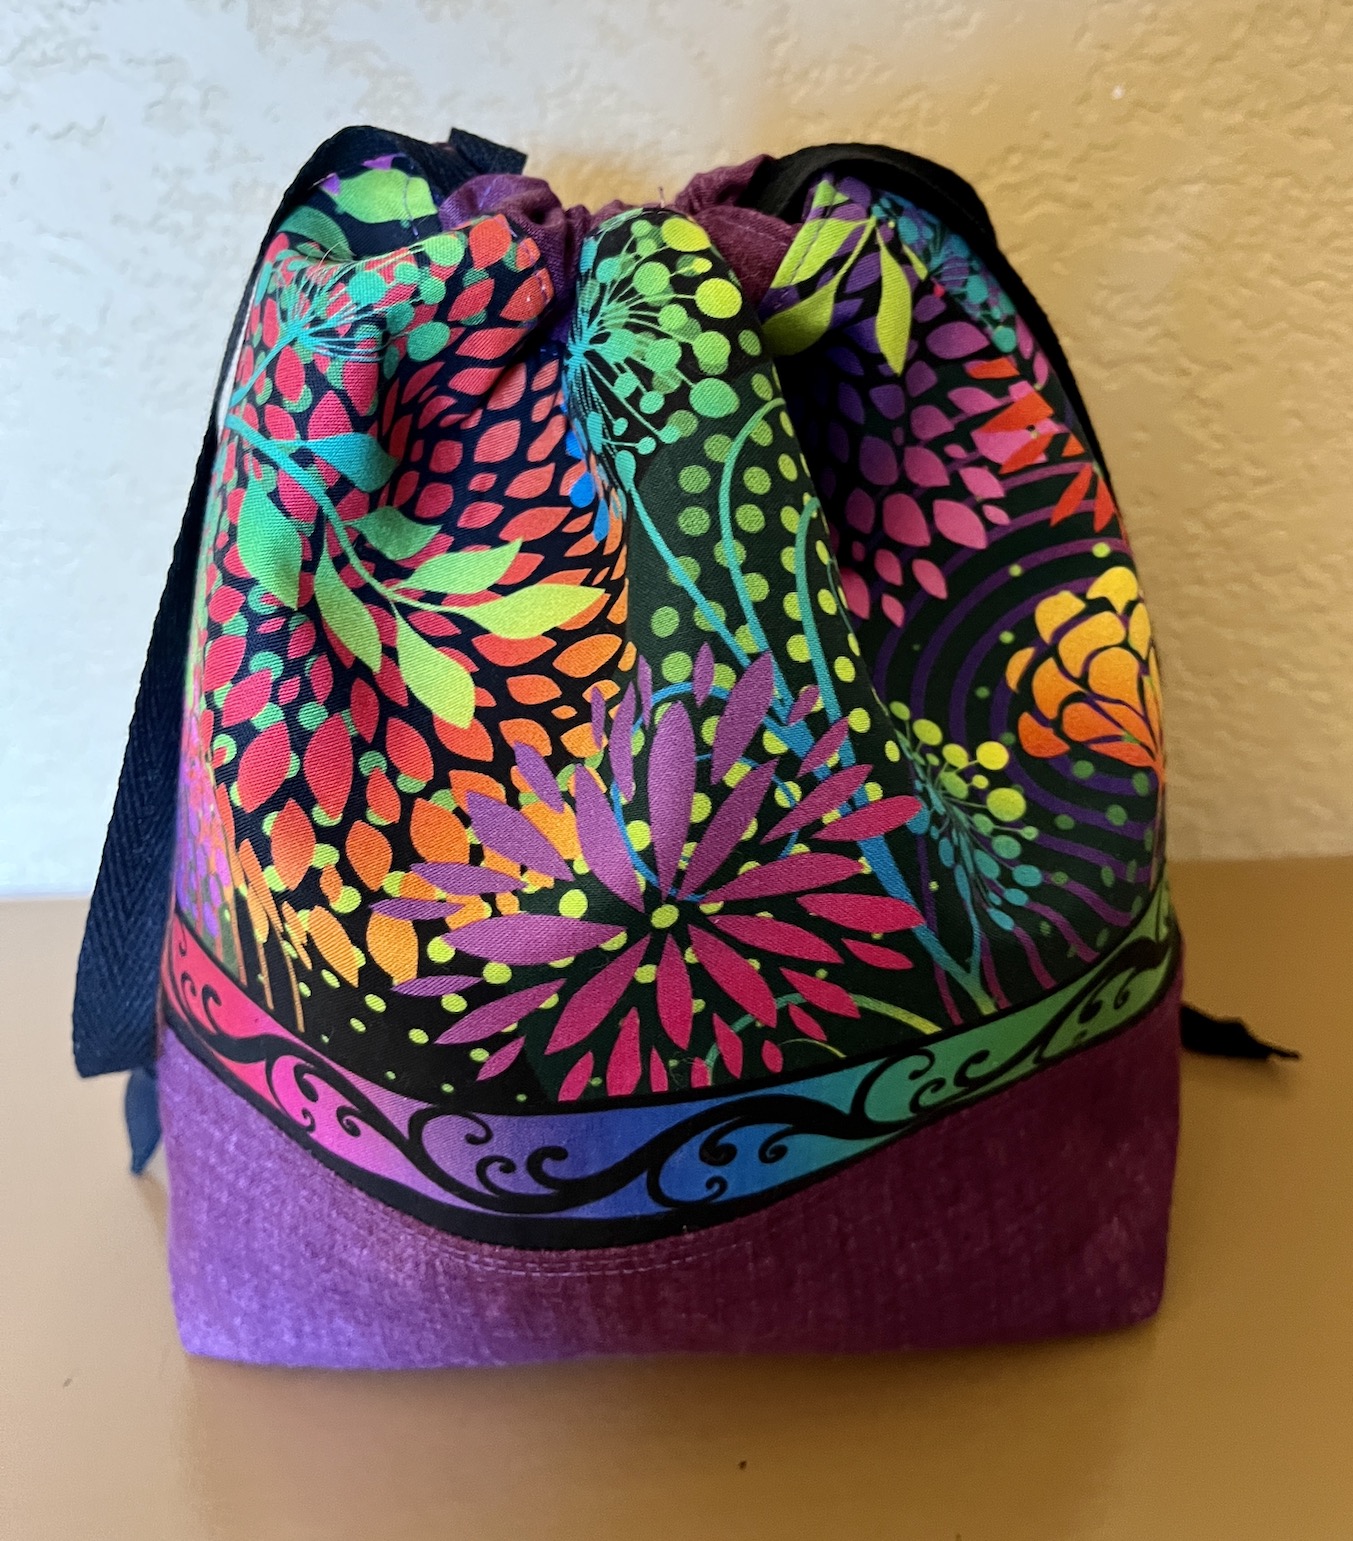
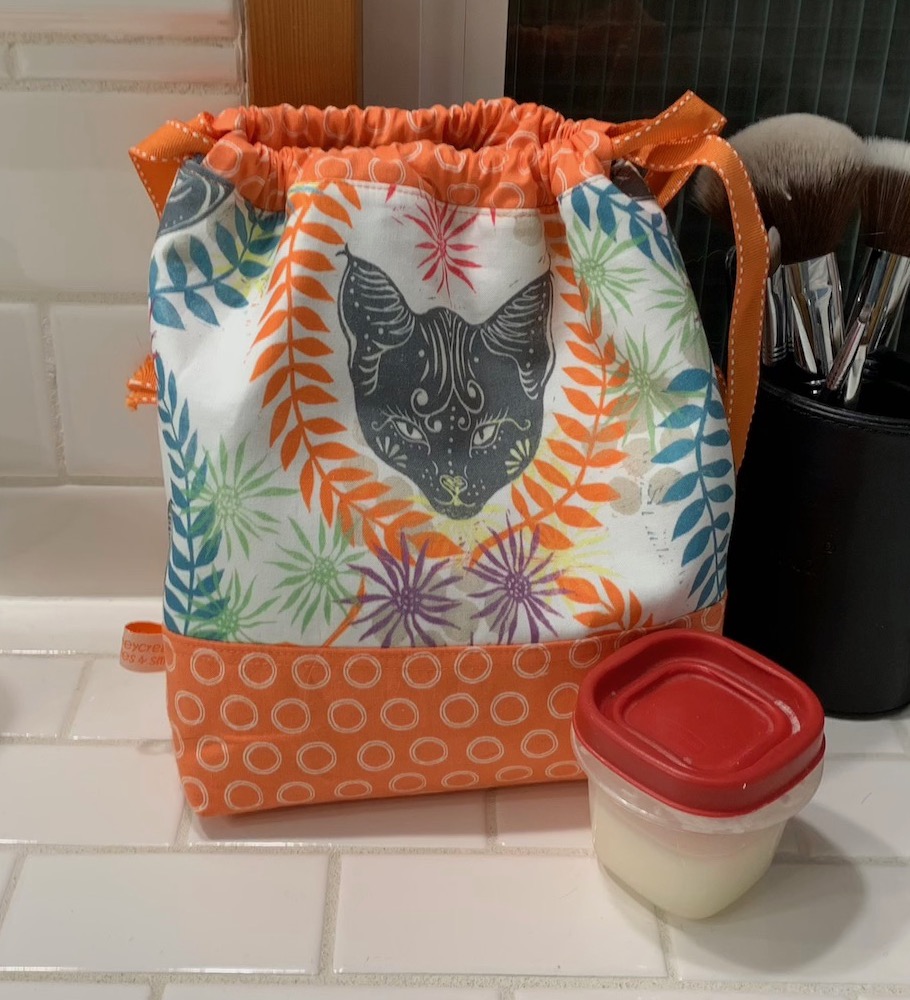
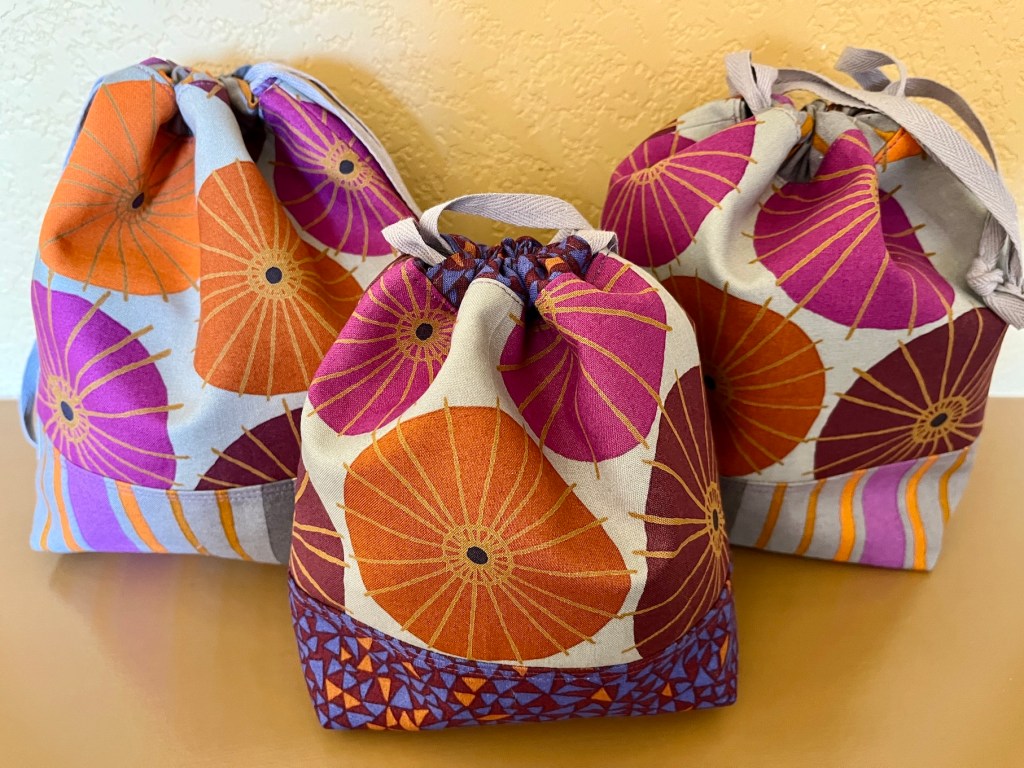
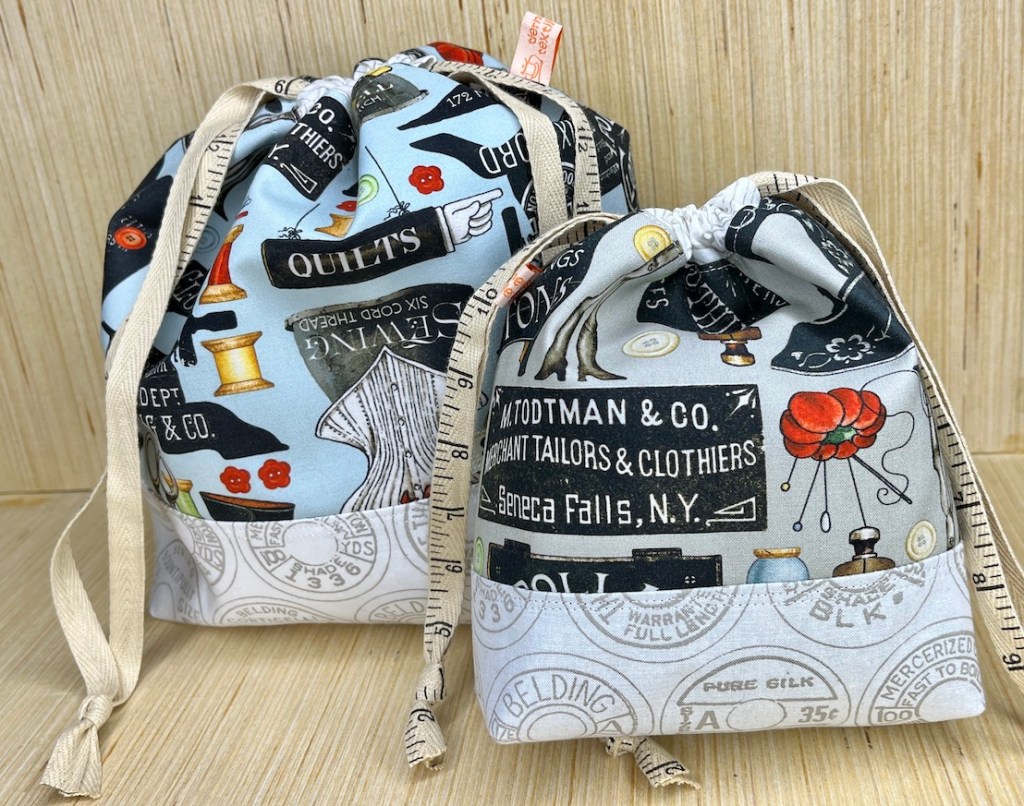
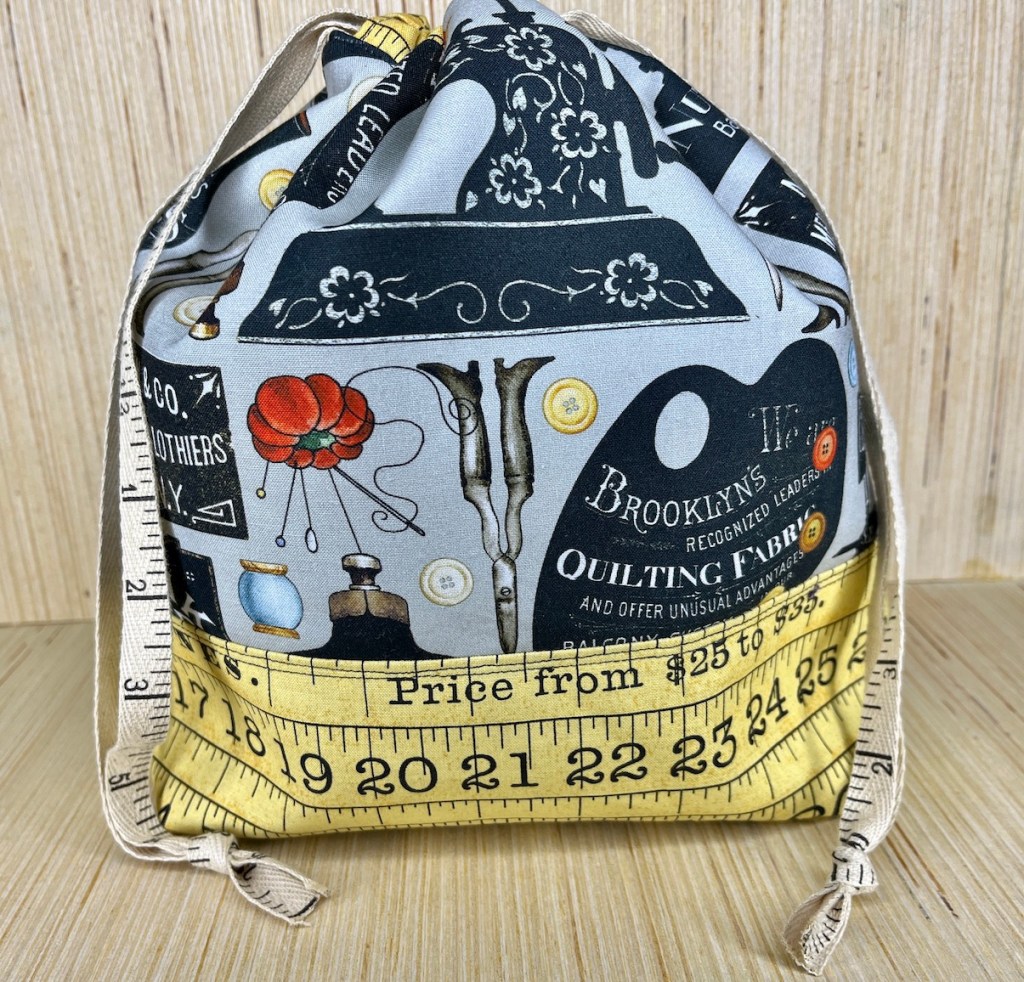
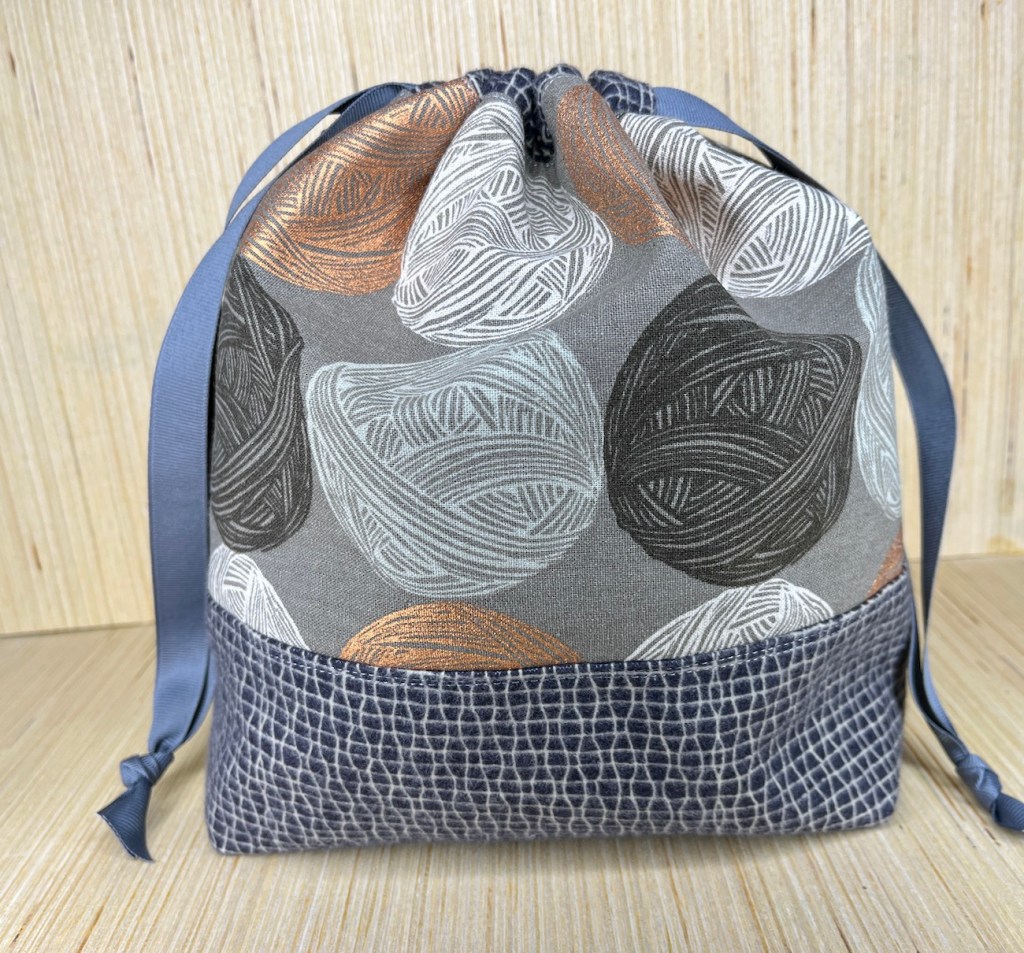
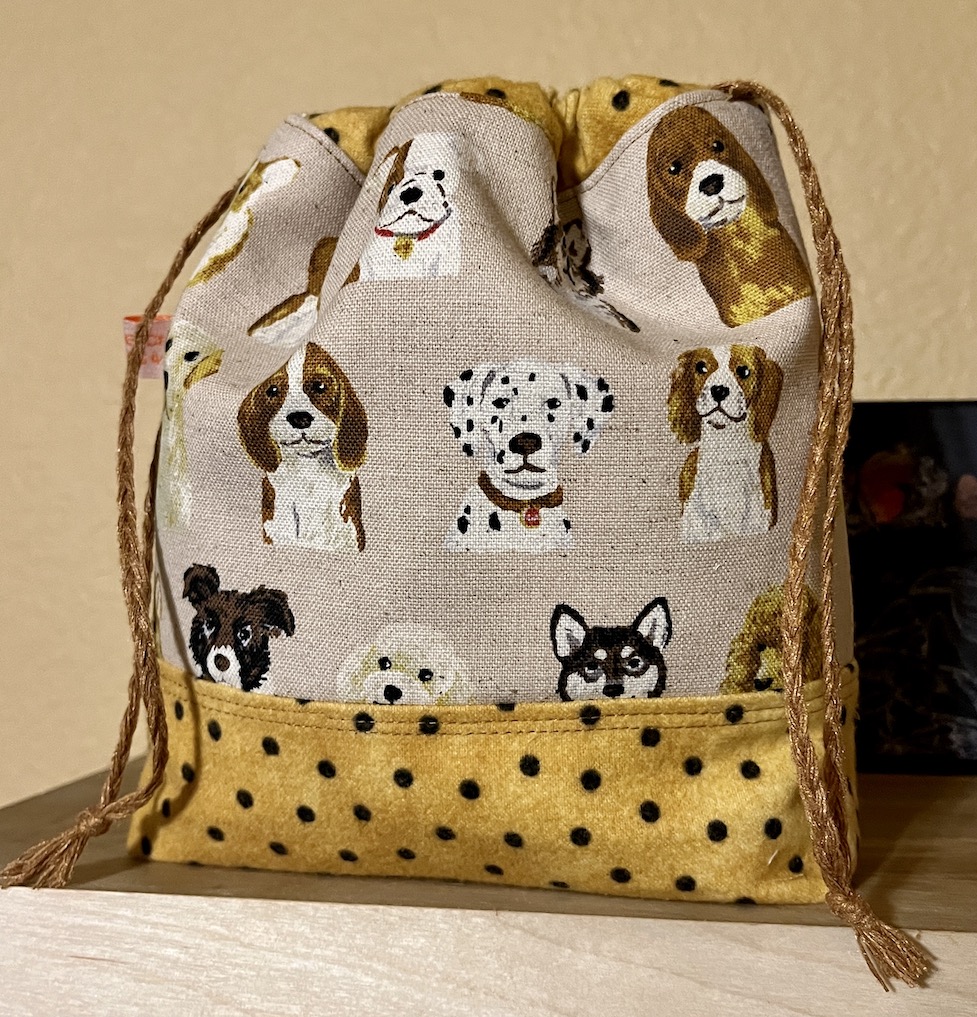
If you are new to my blog, here are some examples of the drawstring project bags I make:
I’d planned to sell them again on my Textiles & Smiles Etsy Shop but I haven’t done all the product photography and writing of the listings to get them up on the shop yet.
So we agreed I would bring the bags by her shop in the future for her to see in person.
Before I get back to what happened with the bags and the yarn shop, here is a little tour for my fellow Yarn Lovers of The Tangled Ball:
I really loved the giant knitting needles with a Work in Progress (WIP) on the needles!
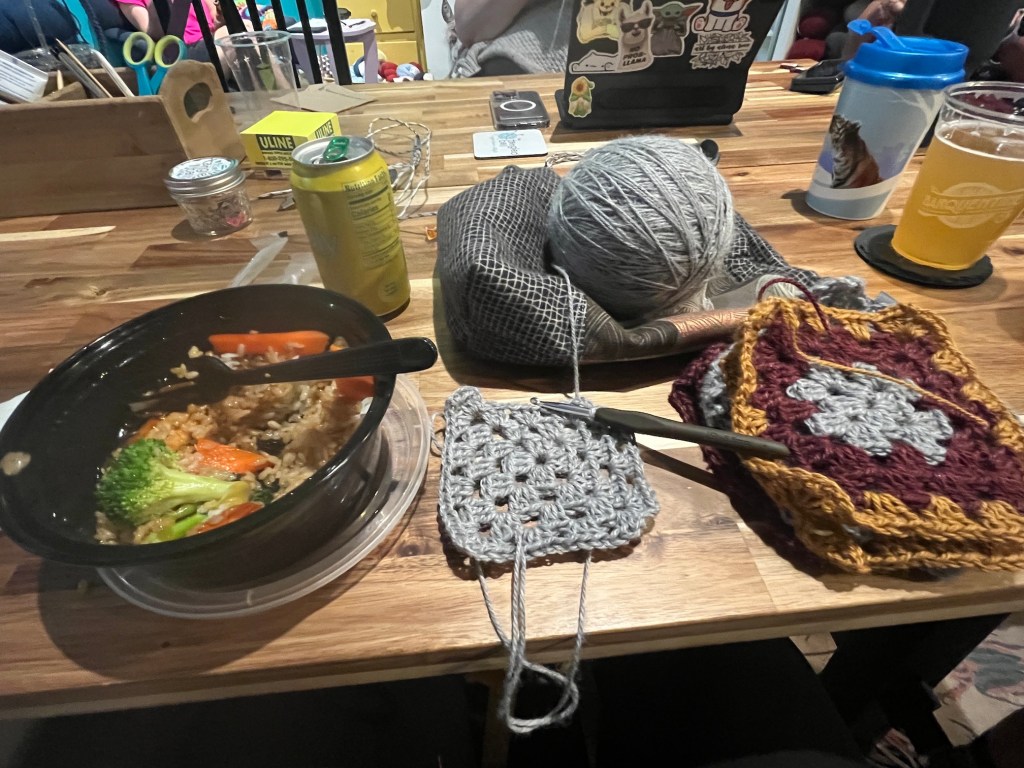
A week or so passed and I returned to The Tangled Ball to attend Colorado Makers Night Out held several times at month at the shop; and to bring a large sampling of my drawstring project bags for consideration to sell at the shop.
At the Colorado Makers Night Out I worked on my granny squares, while dining at the community table and visiting with some VERY talented and engaging knitters. Below are photos of my section of the table (my food, my project, and a drawstring bag I brought it in); and and amazing sweater (the photo does not do it justice) that one of the knitters was working on:
The other makers at the table were all beyond my skill set of knitting! (and I was the only person not knitting, ha, I was crocheting!) It’s was like sitting around with some of my blogging buddies who are knitting goddesses (you know who you are…) and watching in awe.
As far as the bags, the shop’s owner purchased about a 1/3rd of the bags I brought to try out at her shop. I recently found it she’s sold a couple of them so far!
I am so honored to sell my bags at a yarn shop but I will need to see if I can afford to continue sell at “wholesale prices” that the shop owner offers, when I do not buy my supplies at wholesale, etc. She owns a small business and is limited on what price she can pay for and then sell the bags for in her shop. It’s just the reality of the market.
I am going to get my act together and project bags up on my Etsy shop soon.
If you are a Yarn Lover and in the Denver area, I highly recommend this lovely yarn shop!
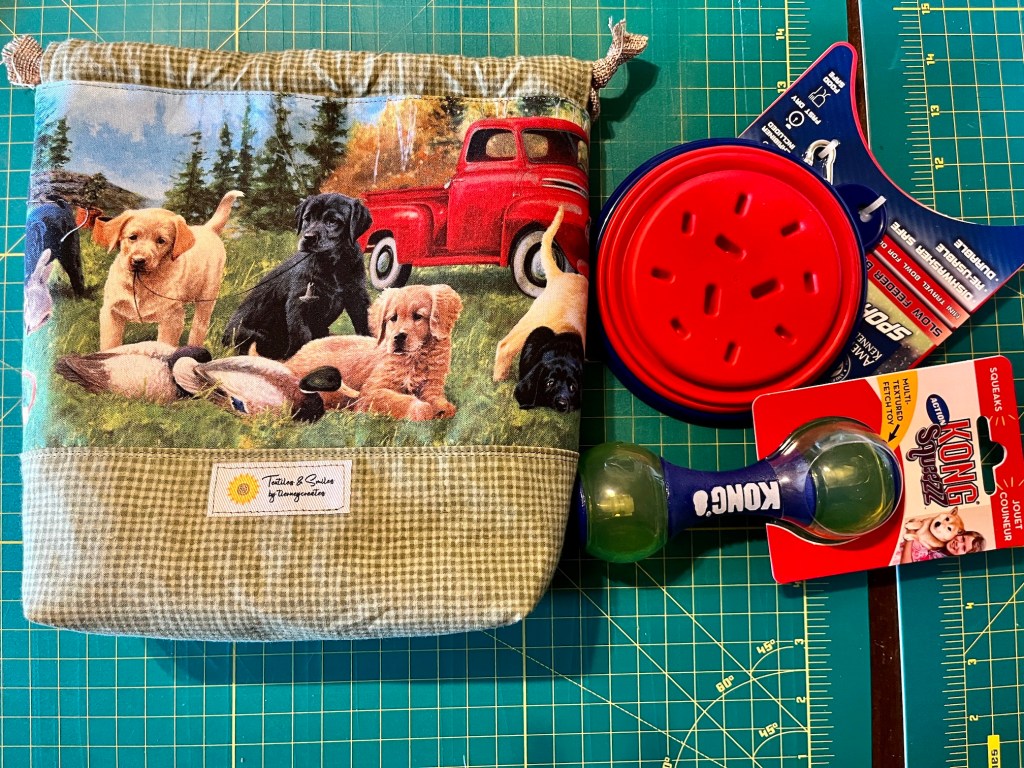
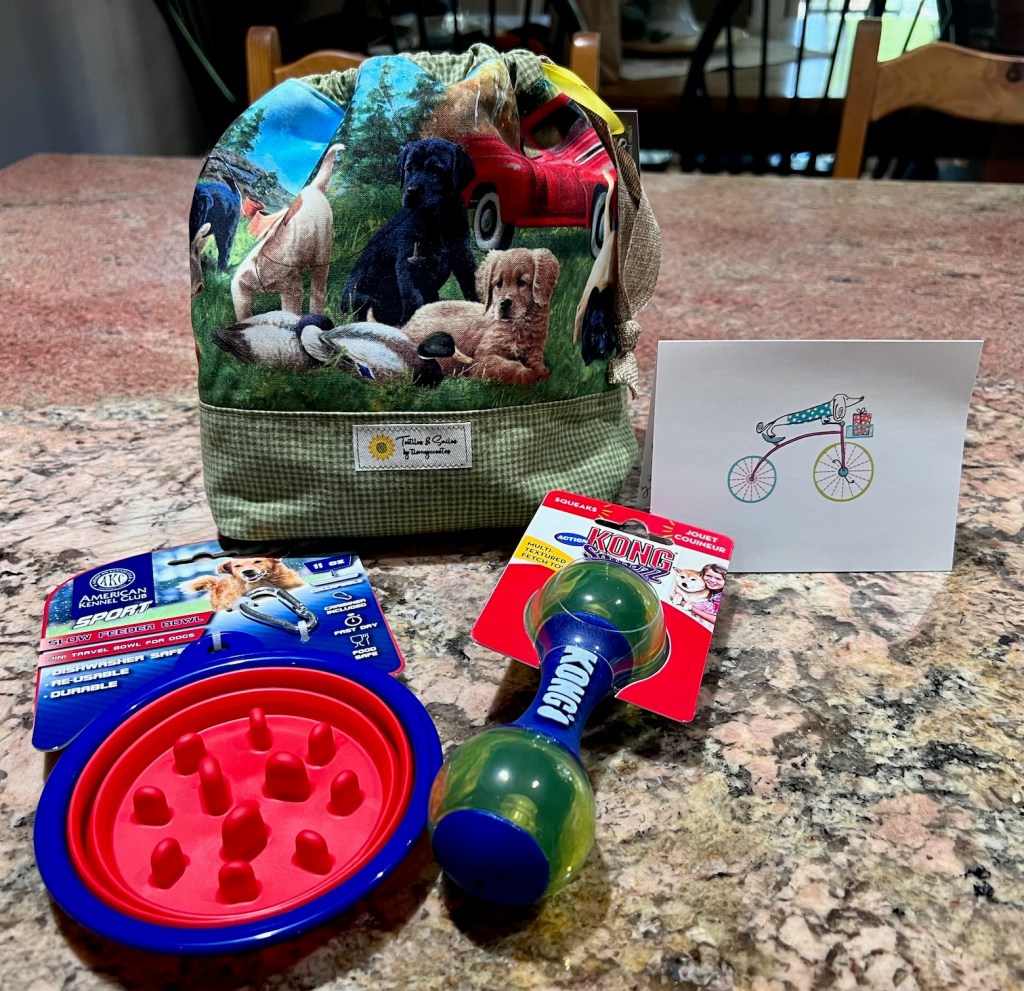
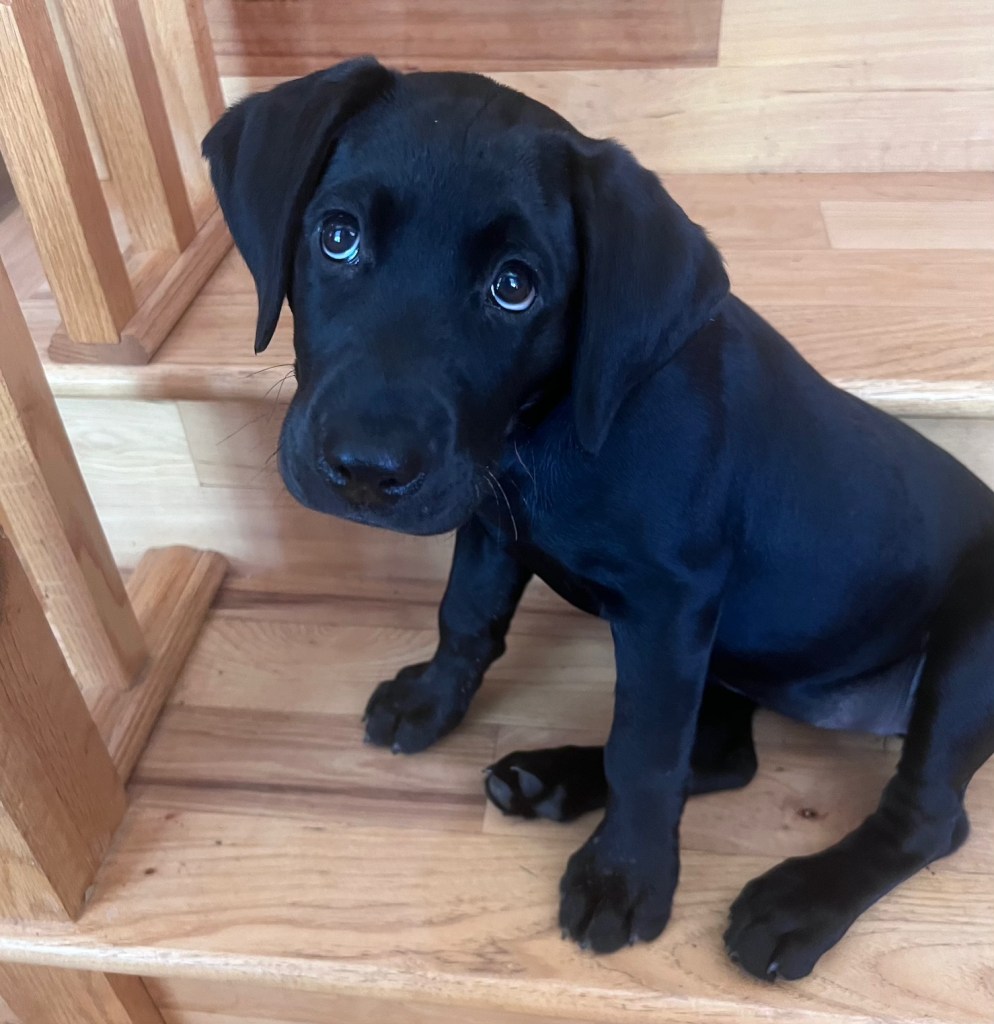
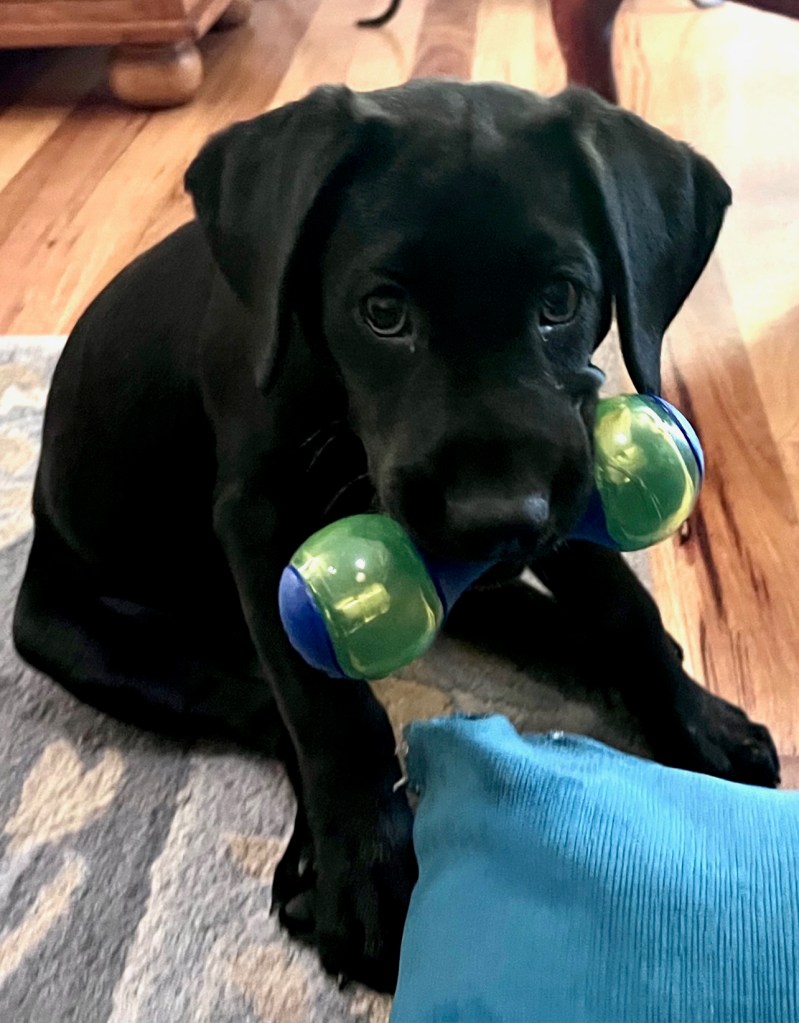
Our friends K&M are Retriever aficionados, and they appear to especially like Labrador Retrievers (“Labs”). They’ve had various “labs” as part of their family for years (Yellow, Chocolate, etc.) and now they’ve recent adopted a new Black Labrador Retriever puppy named “Murphy”.
While I was on the Oregon Coast (someday I will finish up my series of posts about that trip in July) I found this awesome fabric which was a tribute to Retrievers including Labradors, Goldens, Flat Coated Retrievers, etc., and I made them a drawstring project bag filled with treats for Murphy as a “Puppy Warming” gift.
Here is the front and back of the drawstring bag so you can see more of the fabric and all the different type of Retrievers included:
Here are photos my friend K sent me when they received the surprise Puppy Warming gift in the mail from me, including photos of the adorable pup Murphy!
I can’t wait to meet that cutie in person someday!
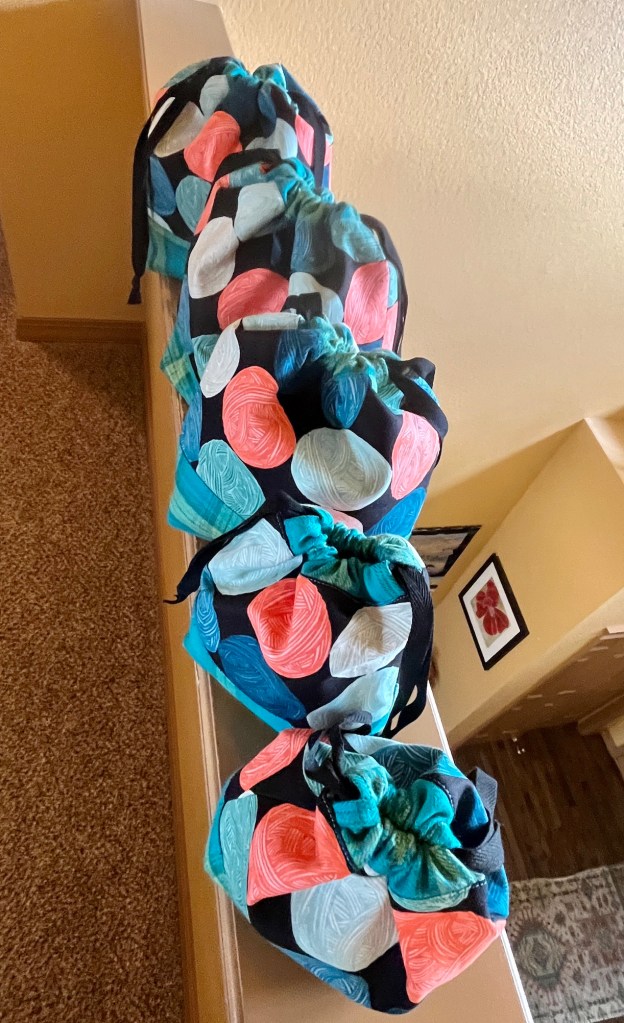
As part of my “A Year of Finishes – 2023“ project, I finished the last 8 drawstring/project bags of the bags I’d already cut out and interfaced.
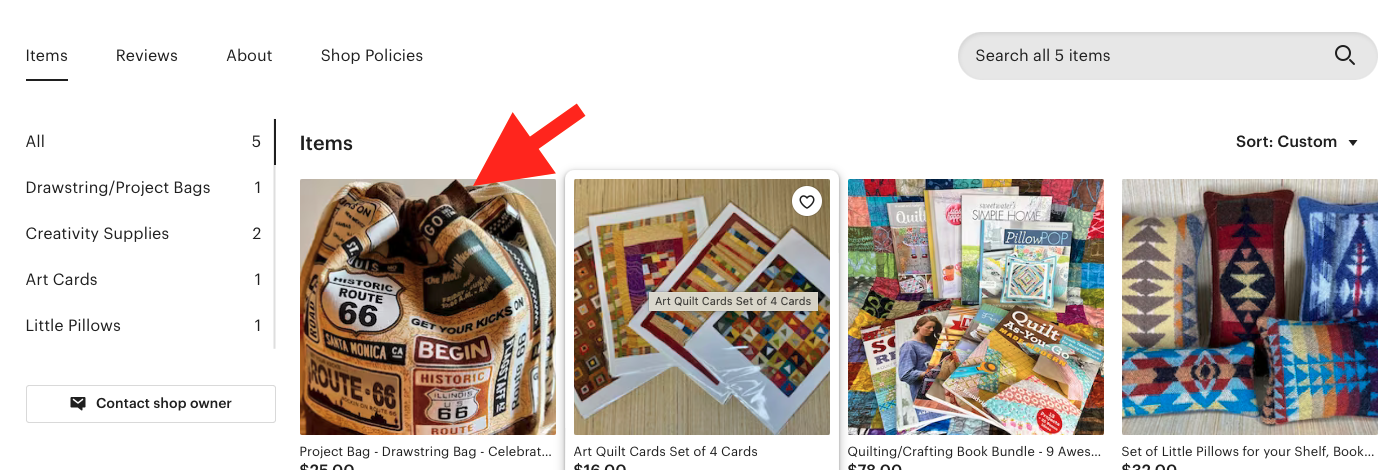
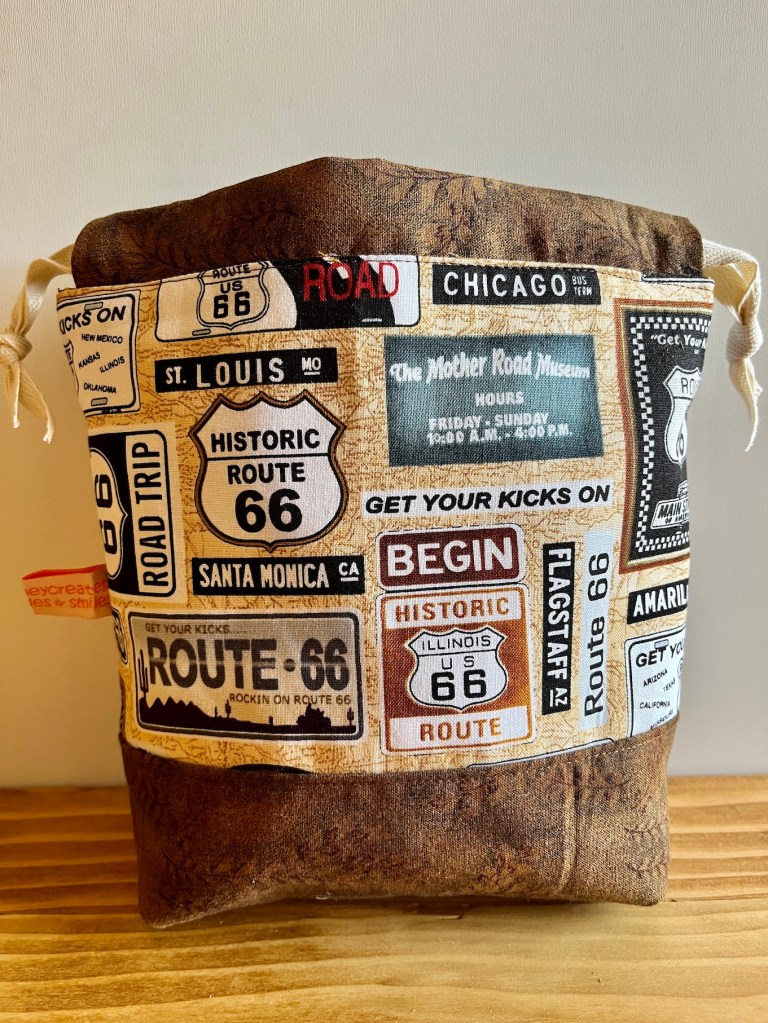
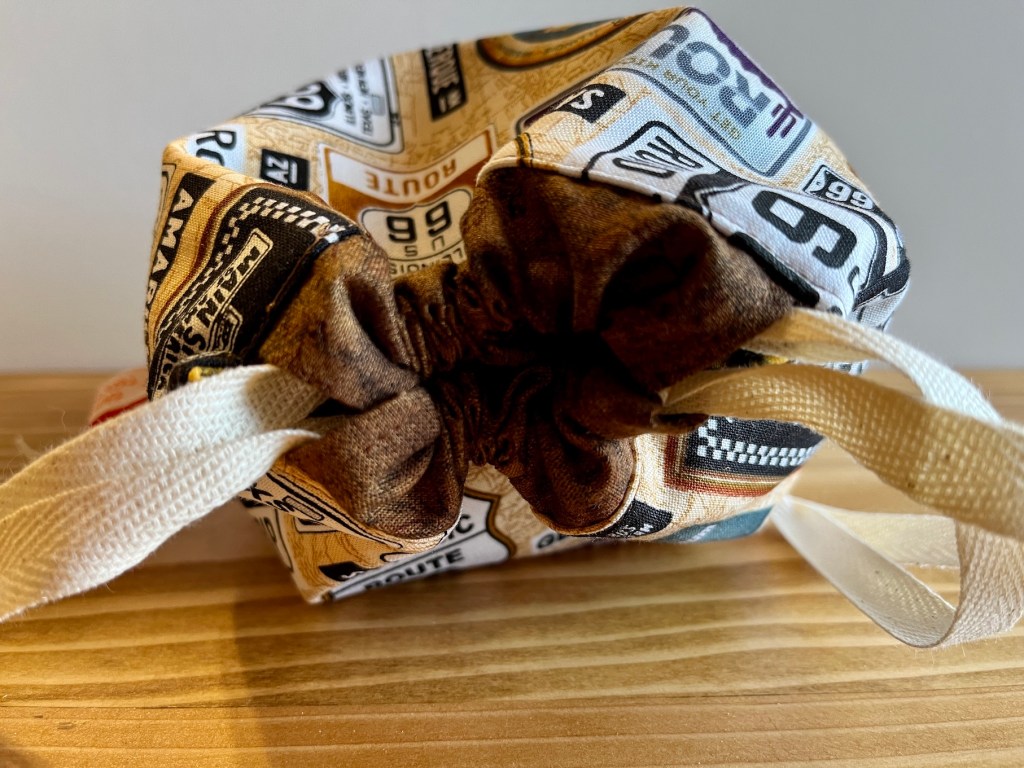
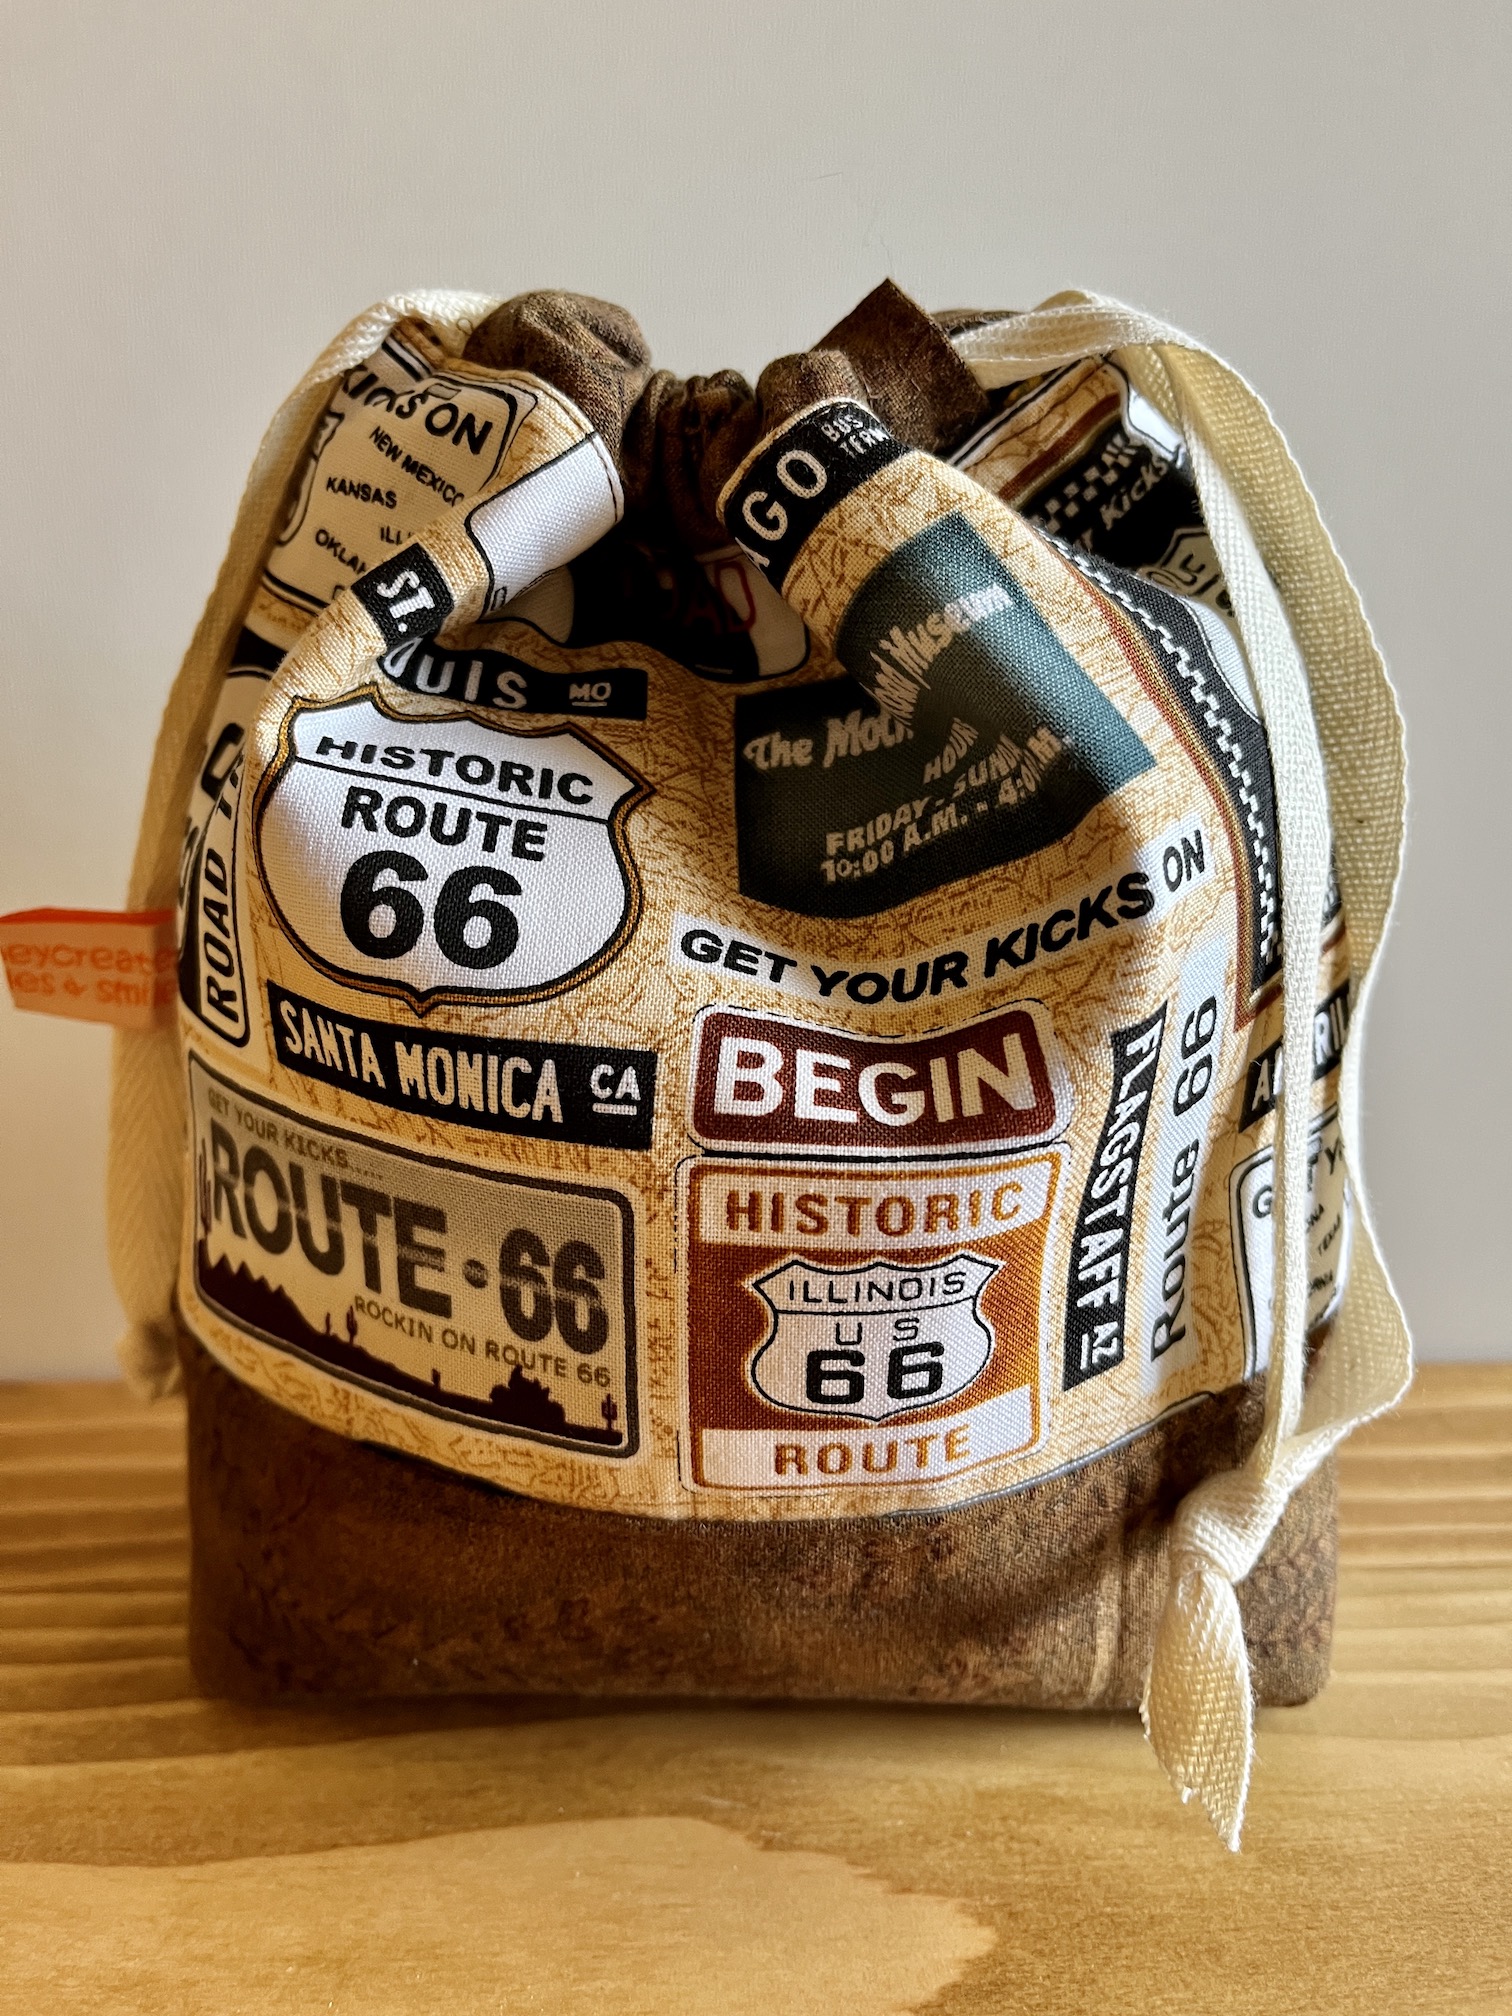
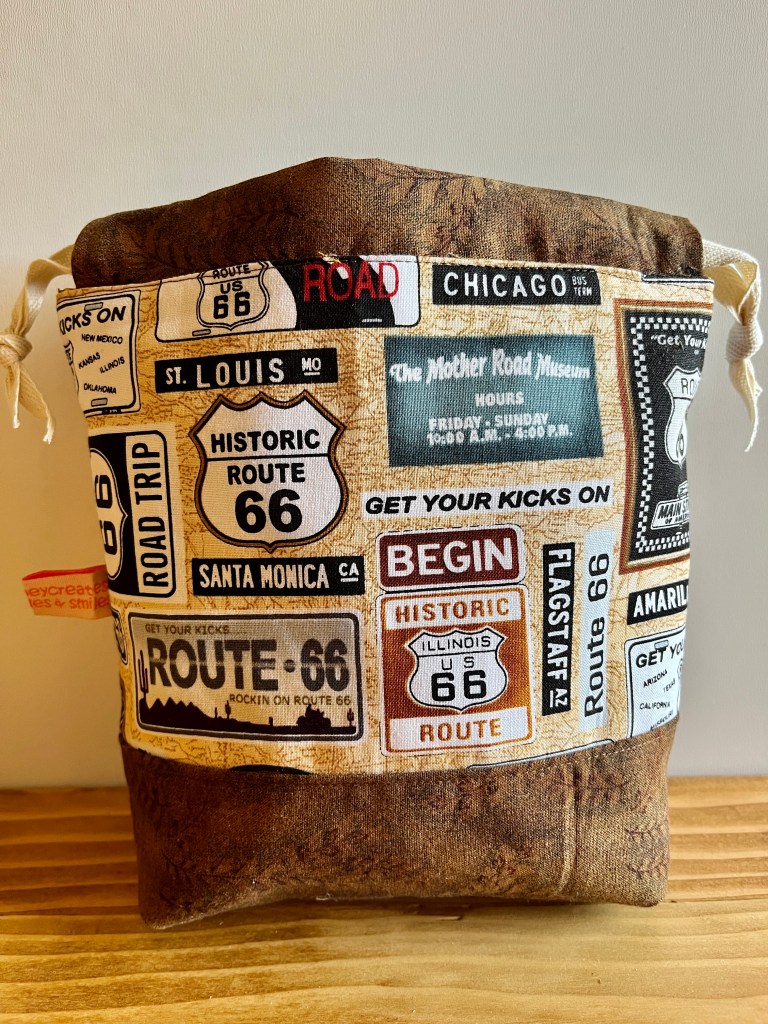
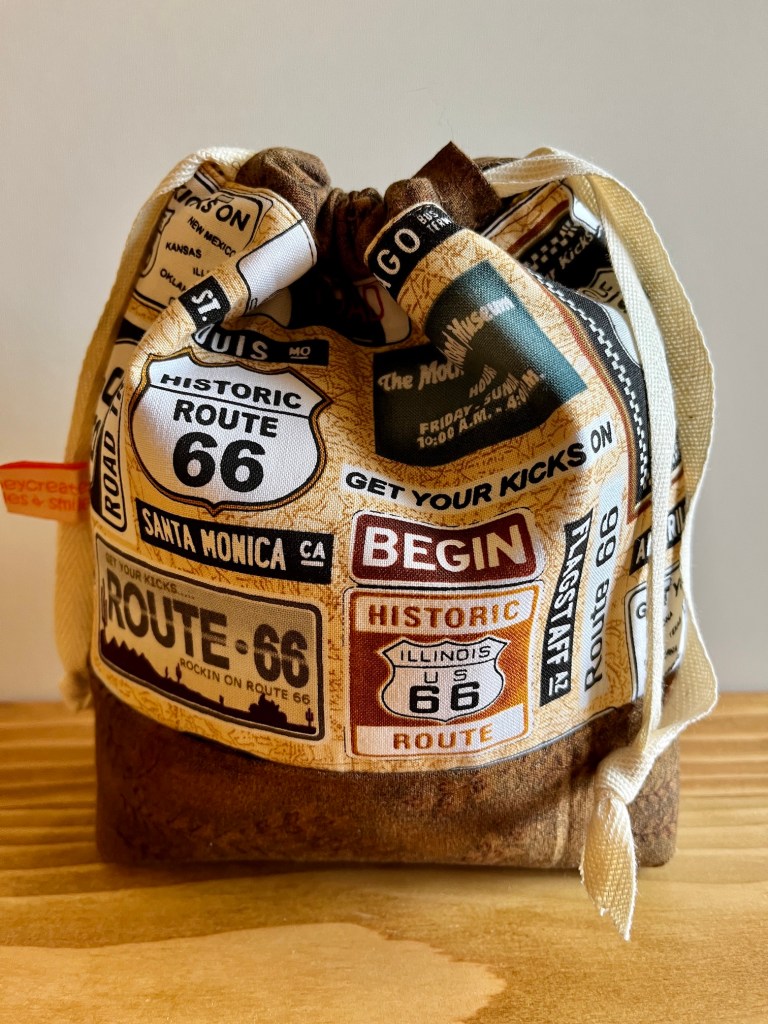
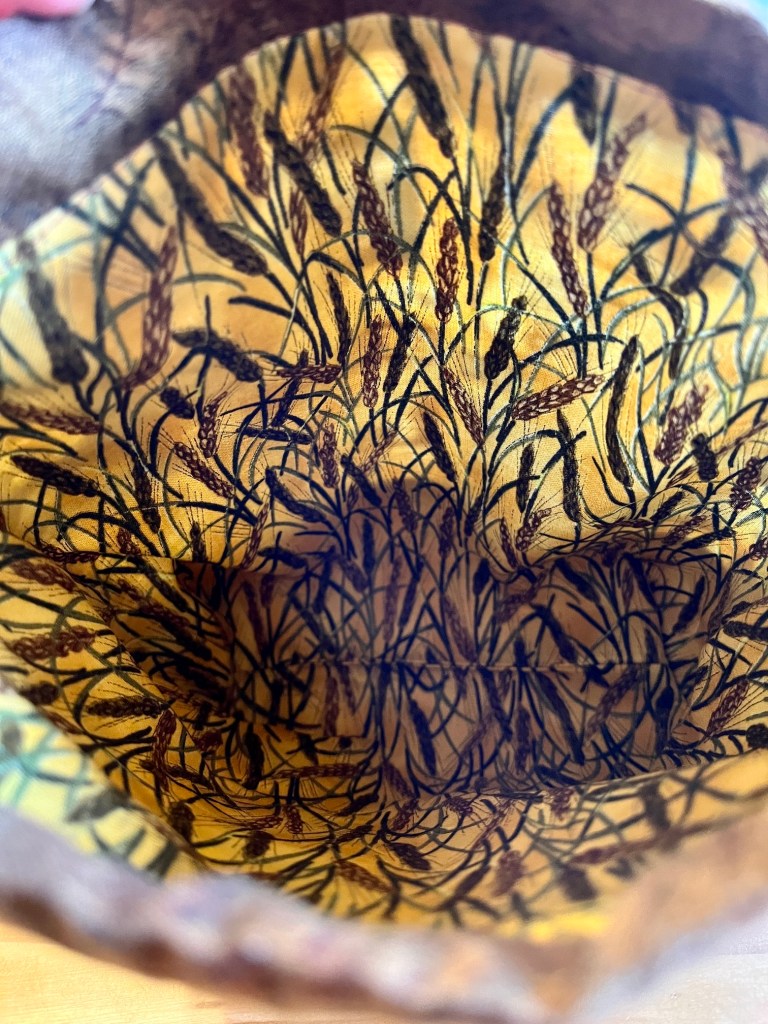
Here is 1 of 8 that I will call “Get Your Kicks on Route 66” with Route 66 themed fabric:
I only had enough of this fabric to make one bag. I was originally making it for a family member who was going on a Route 66 roadtrip, but the roadtrip got cancelled. I like the lining fabric I found in my stash for it which represents the wheat fields you might see on an across America roadtrip.
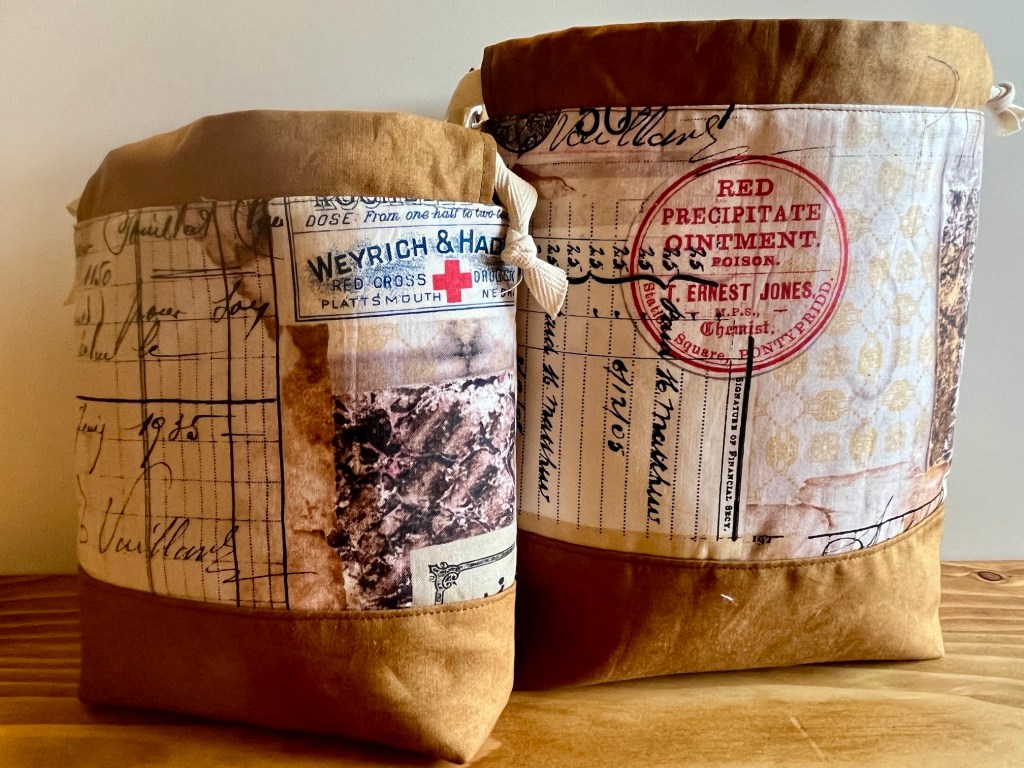
The next two bags (2 and 3 of 8) I finished are from vintage pharmacy inspired fabric. I don’t have a name for these two bags, but here you go:
And here are the remaining bags (4-8 of 8). These five bags are made from the awesome Ruby Star Society fabric line called Purl. I think they would make perfect knitting/crochet project bags:
I didn’t photograph the linings but they were coordinating colors of teal or reddish orange. I have temporary drawstring-bag-photography-burn-out, ha!
So with the completion of these eight bags that is the “end of an era” of drawstring bag making.
John encouraged me to figure out just how many drawstring bags I’ve made over the past couple of years to include the ones I made and sold on my Textiles & Smiles Etsy shop in 2021 to 2022, given as gifts, and currently have on stock waiting to be listed on Etsy.
Guess what the number is?
105 or so!
That is why I think it will be quite a while before I want to make another one. There are so many other things to make, ha!
John recently built a “photo box” (not sure what to call it) for photography my items for my Etsy shop (TextilesandSmiles) and for photographing items for his Etsy shop (to be opened someday and hopefully called MightyMoeCreations). He designed it so it could be easily assembled and dissembled for storage.
The fabric is from my trip to the Missouri Star Quilt Company(MSQC) for a quilting retreat in early 2022. It is their custom fabric which is designed to look like traditional quilt blocks in a quilt. If you’d like to see the posts from my MSQC Retreat adventure here is the link to those 6 posts – Missouri Star Quilt Retreat.
I continue to shamelessly count each completed Project Drawstring Bag as a finish on my unfinished projects (that I started prior to 2023) for my project “A Year of Finishes – 2023“(if you are really bored, click on that link to see all blog posts related to this project…zzz).
After finishing the Colour Wheel Quilt (see post The Colour Wheel Quilt is Done) I was planning to start an improvisational art quilt project (preparing for the 6-day workshop I am teaching next year, more to come on that someday) but was not “feeling it” yet.
So I thought I would assign myself the goal of “making something each day” to keep my creating vibe going (even if it’s just one quilt block) and decided to continue making the drawstring/project bags which I will someday list on my Textiles & Smiles Etsy shop (when I reopen it again).
I made 4 more bags. They were quick to put together as I’d always cut out all the fabric and interfacing, as well as did the fusing, etc. several months ago.
I am getting a kick out of the fun fabric combinations.
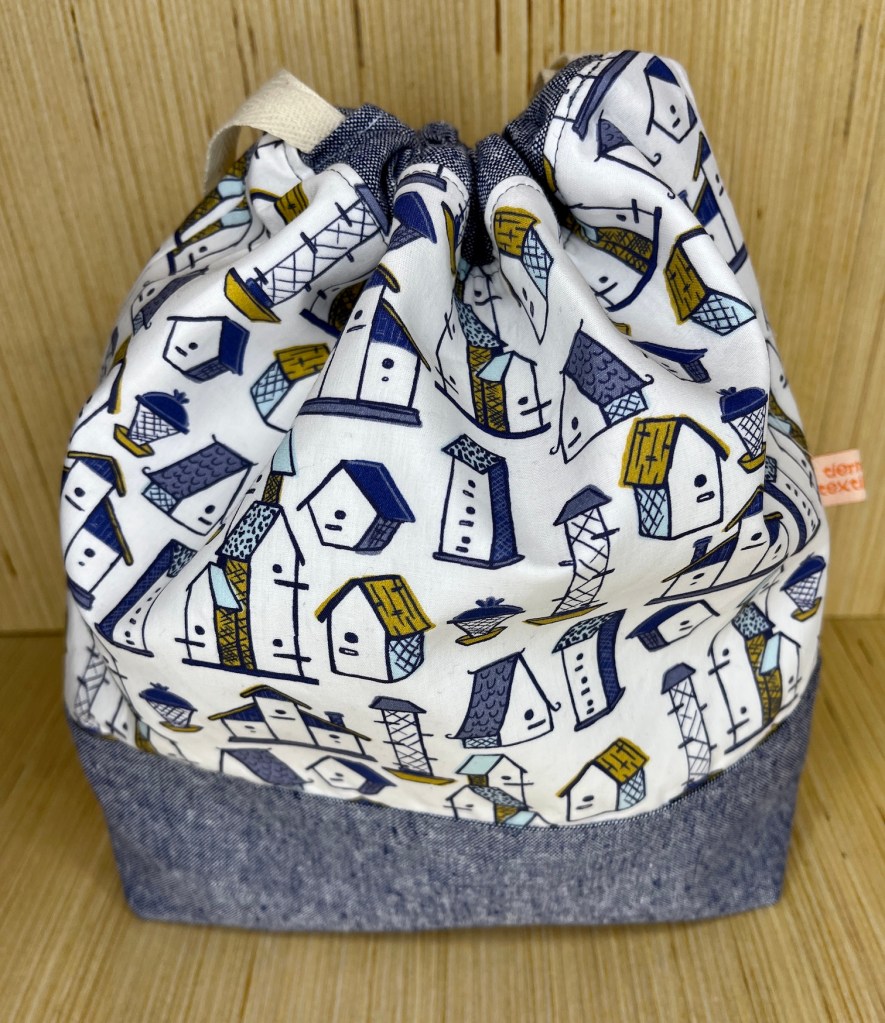
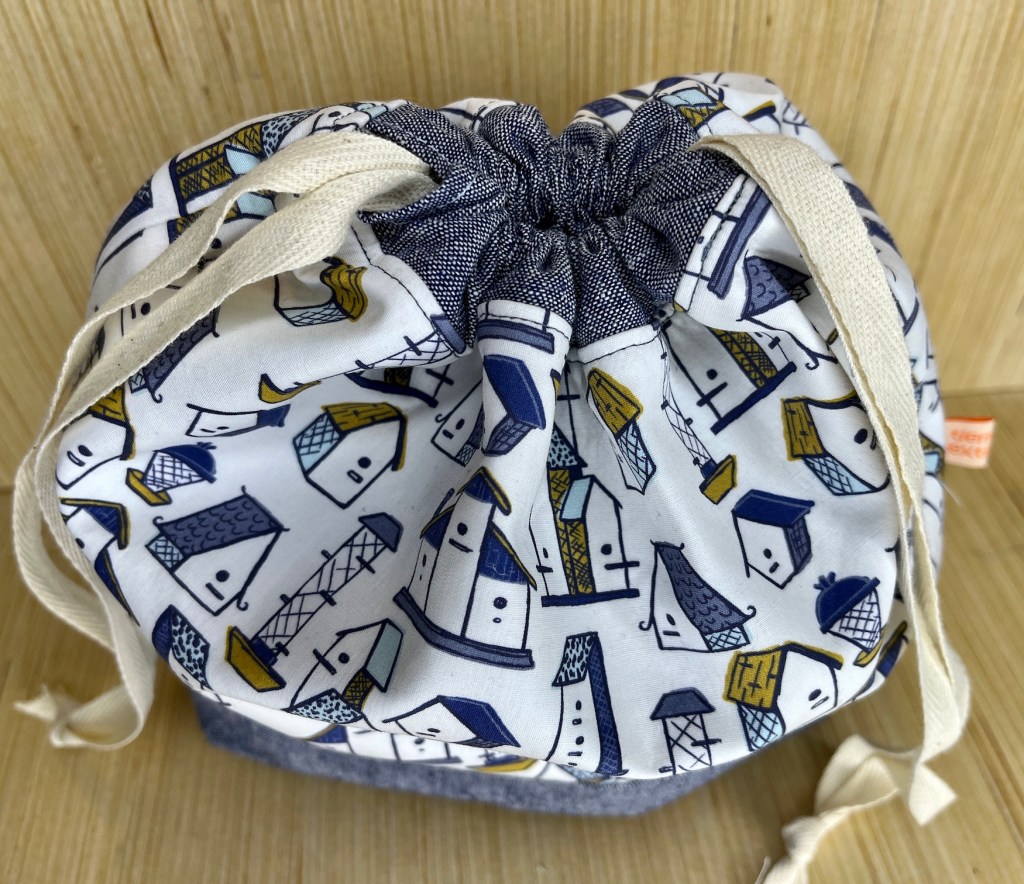
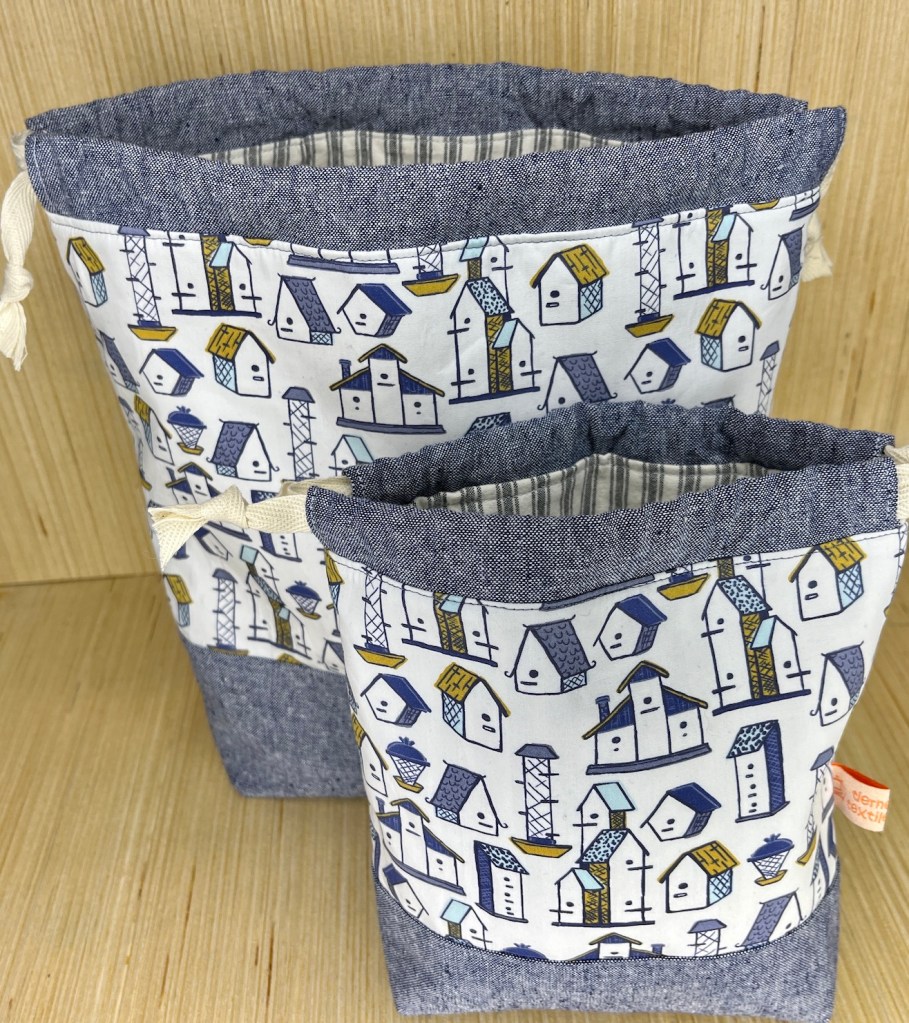
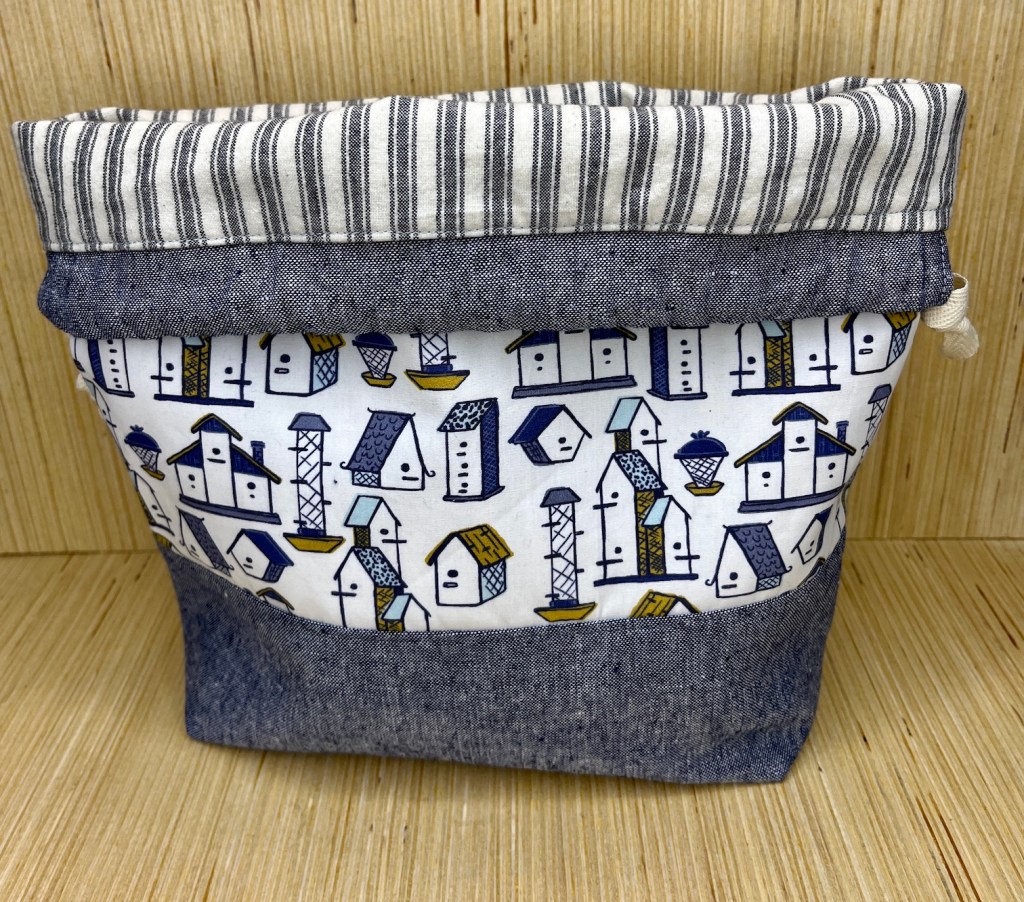
Here are two for the bird/bird house aficionado:
I was practicing taking photos for the eventually Etsy listings so I have a lot of photos of these bags (and likely more than I needed to share on this post, ha!)
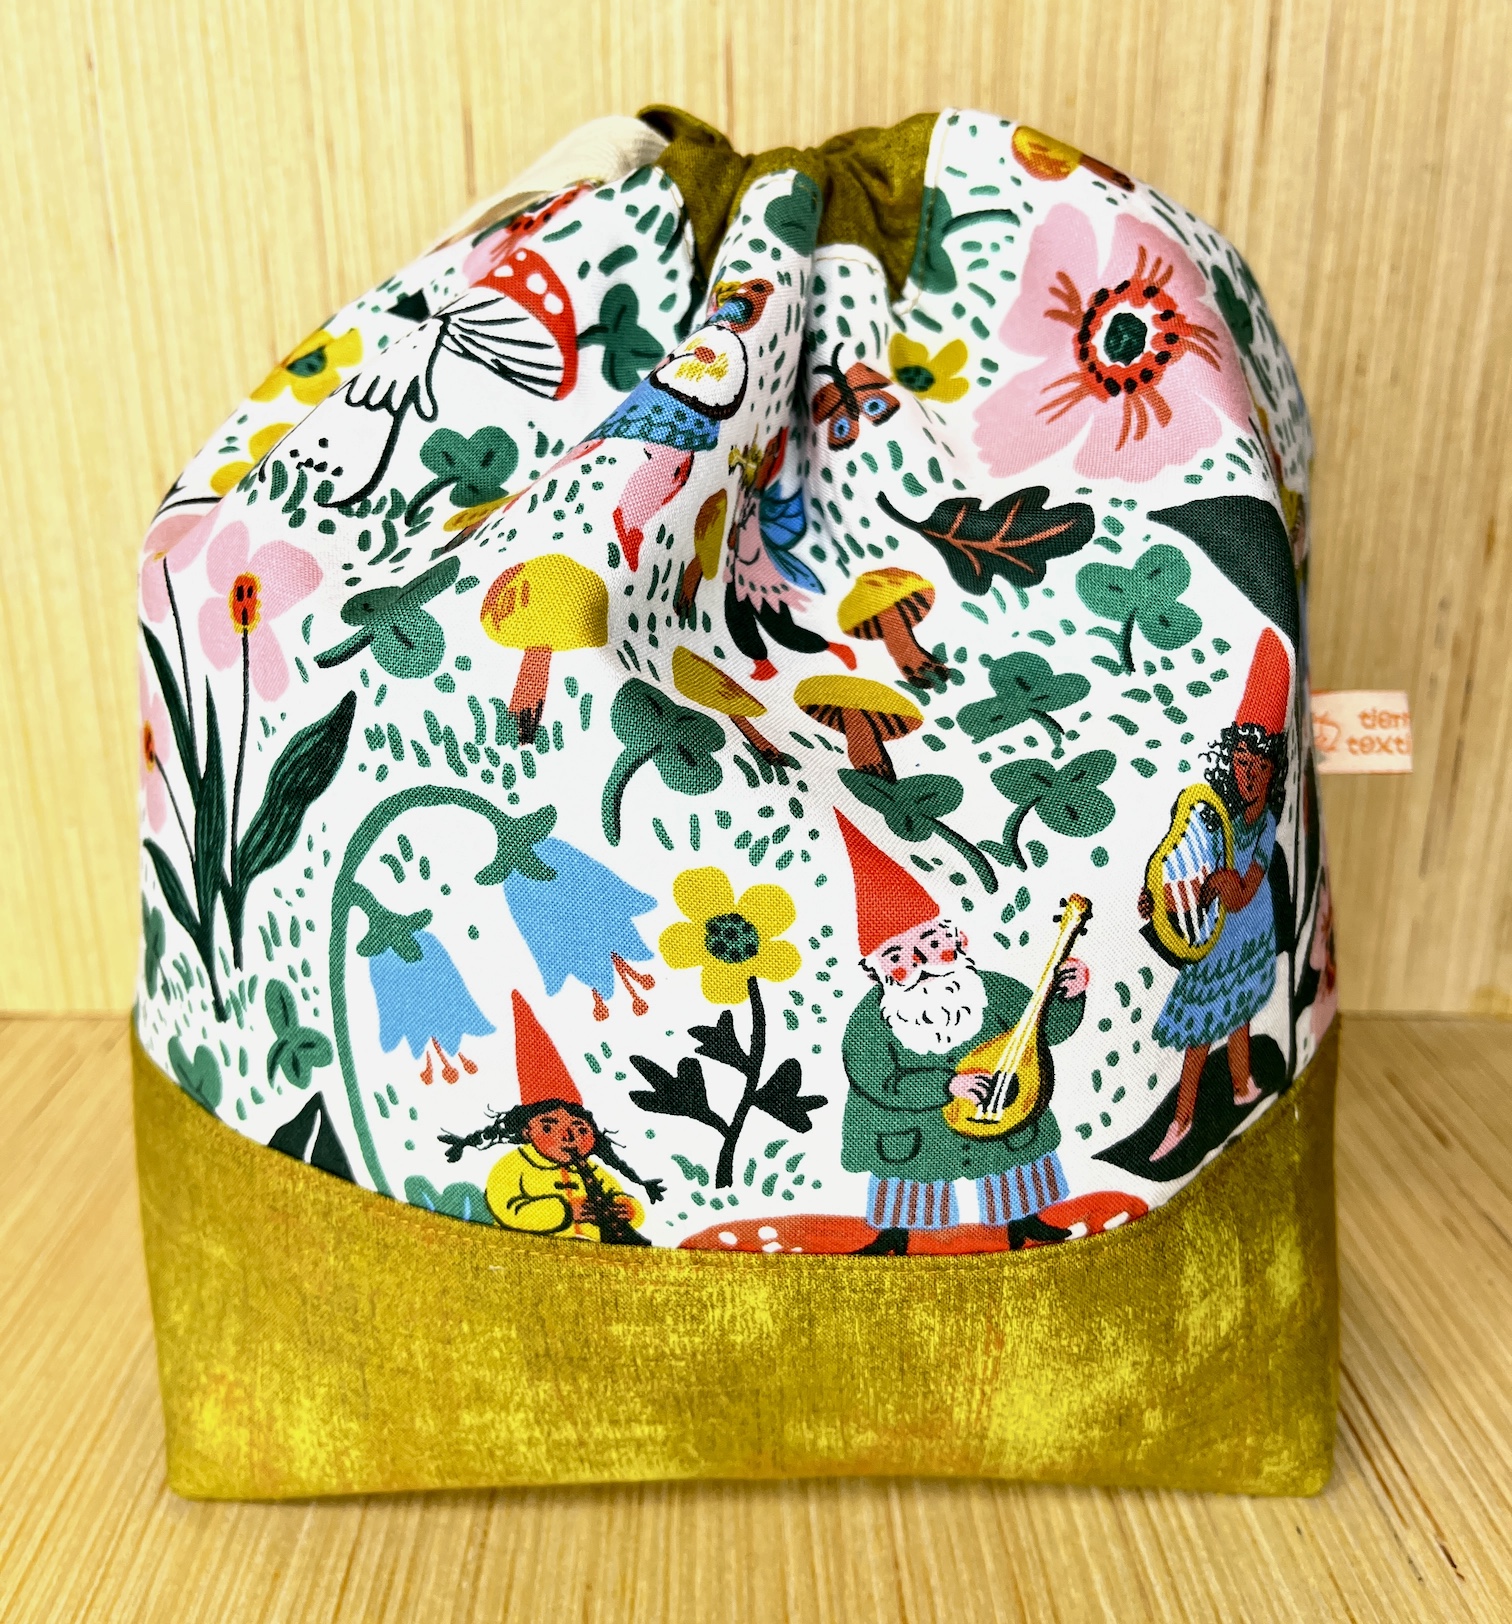
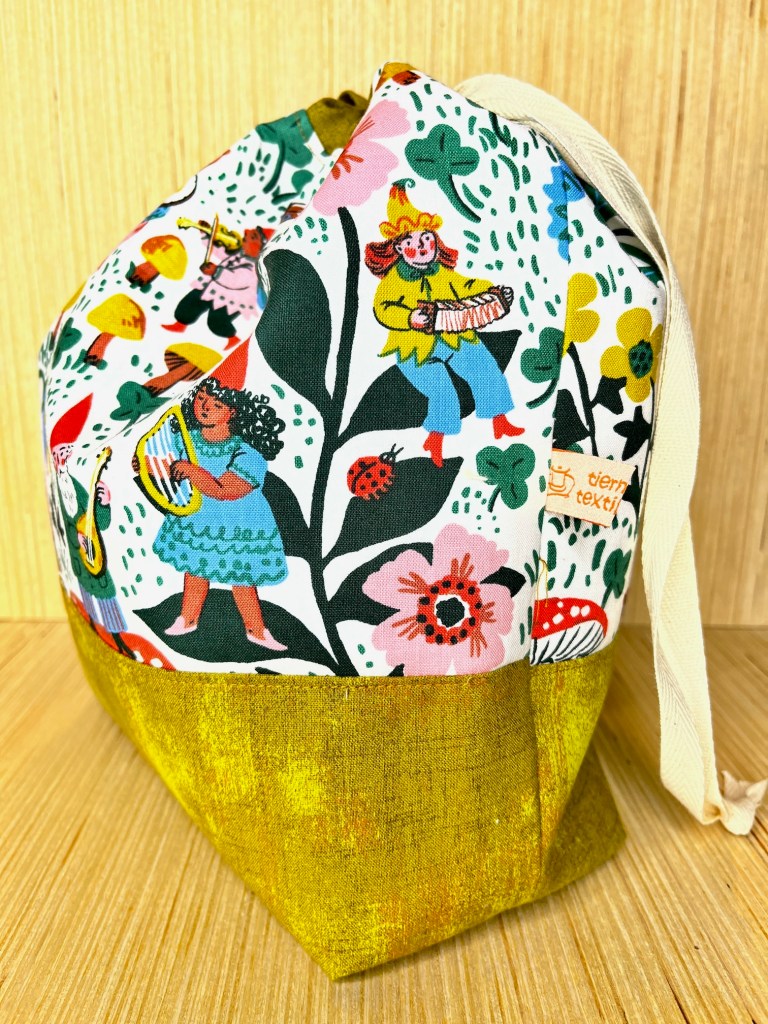
And for the person who likes a little woodland whimsy, here are another set of drawstring/project bags:
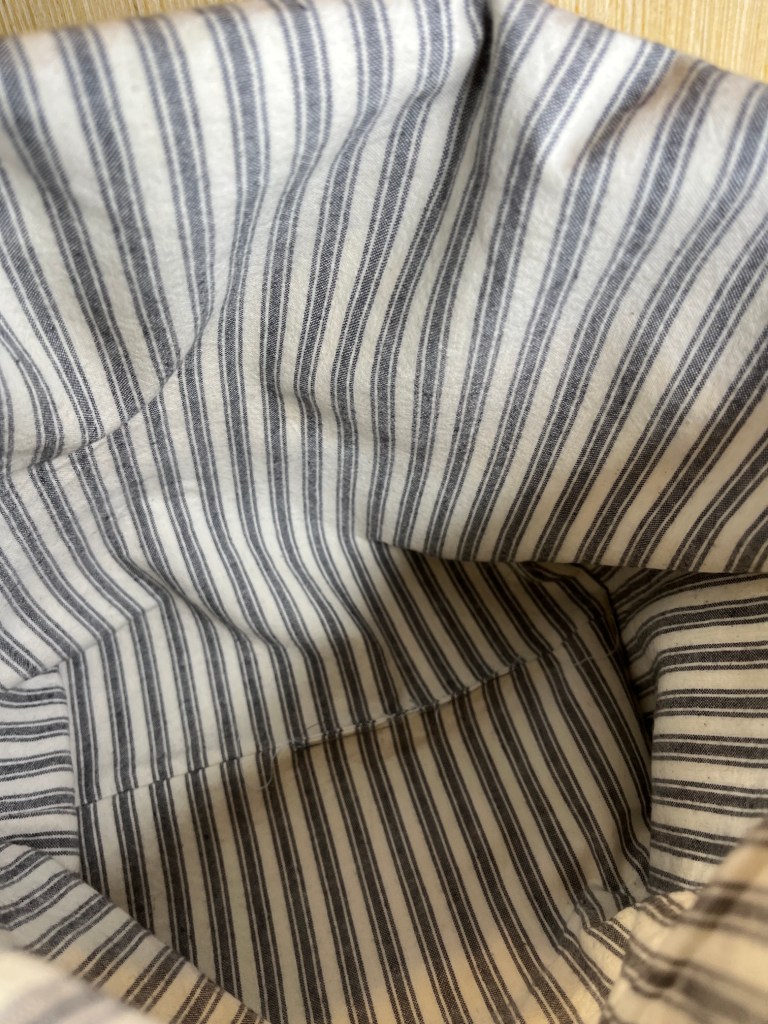
I love the lining in these two bags!
So there you go – 4 more finishes of unfinished projects I started prior to 2023 (I like to make very small accomplishments sounds very exciting, ha)!
Yes I am shamelessly counting each completed Project Drawstring Bag as a finish.
Before moving on to prepare for the art quilting class I am teaching next year, I finished another round of project bags which I will someday list on my Textiles & Smiles Etsy shop.
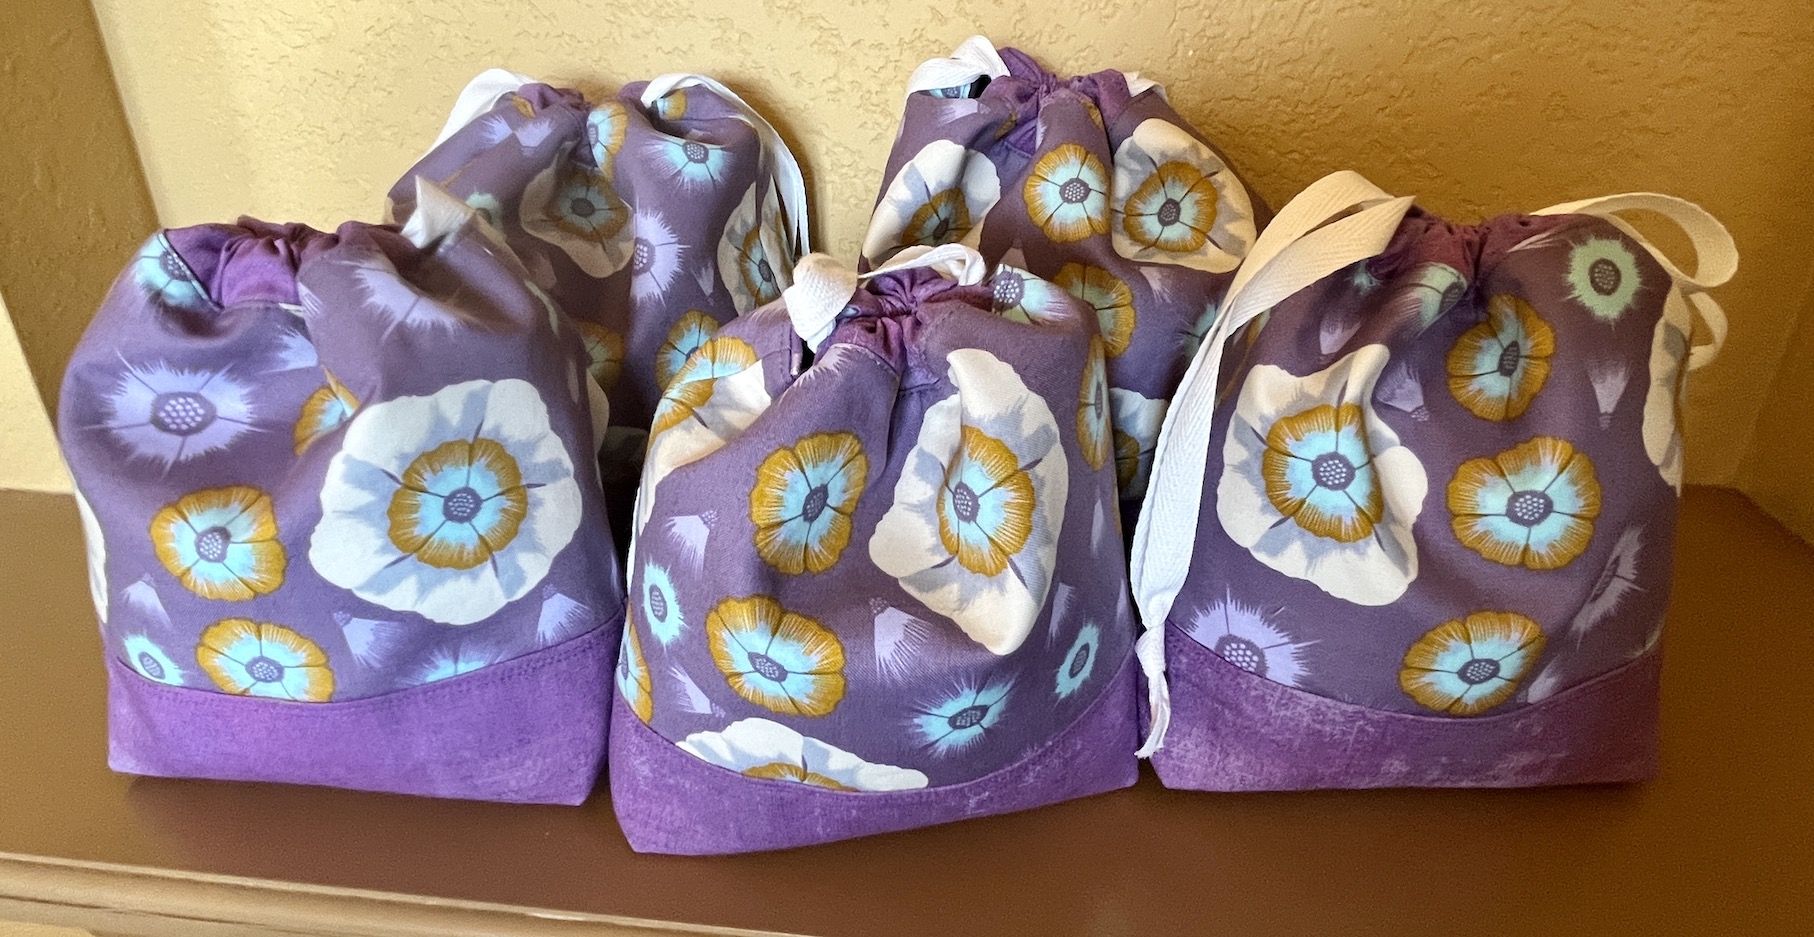
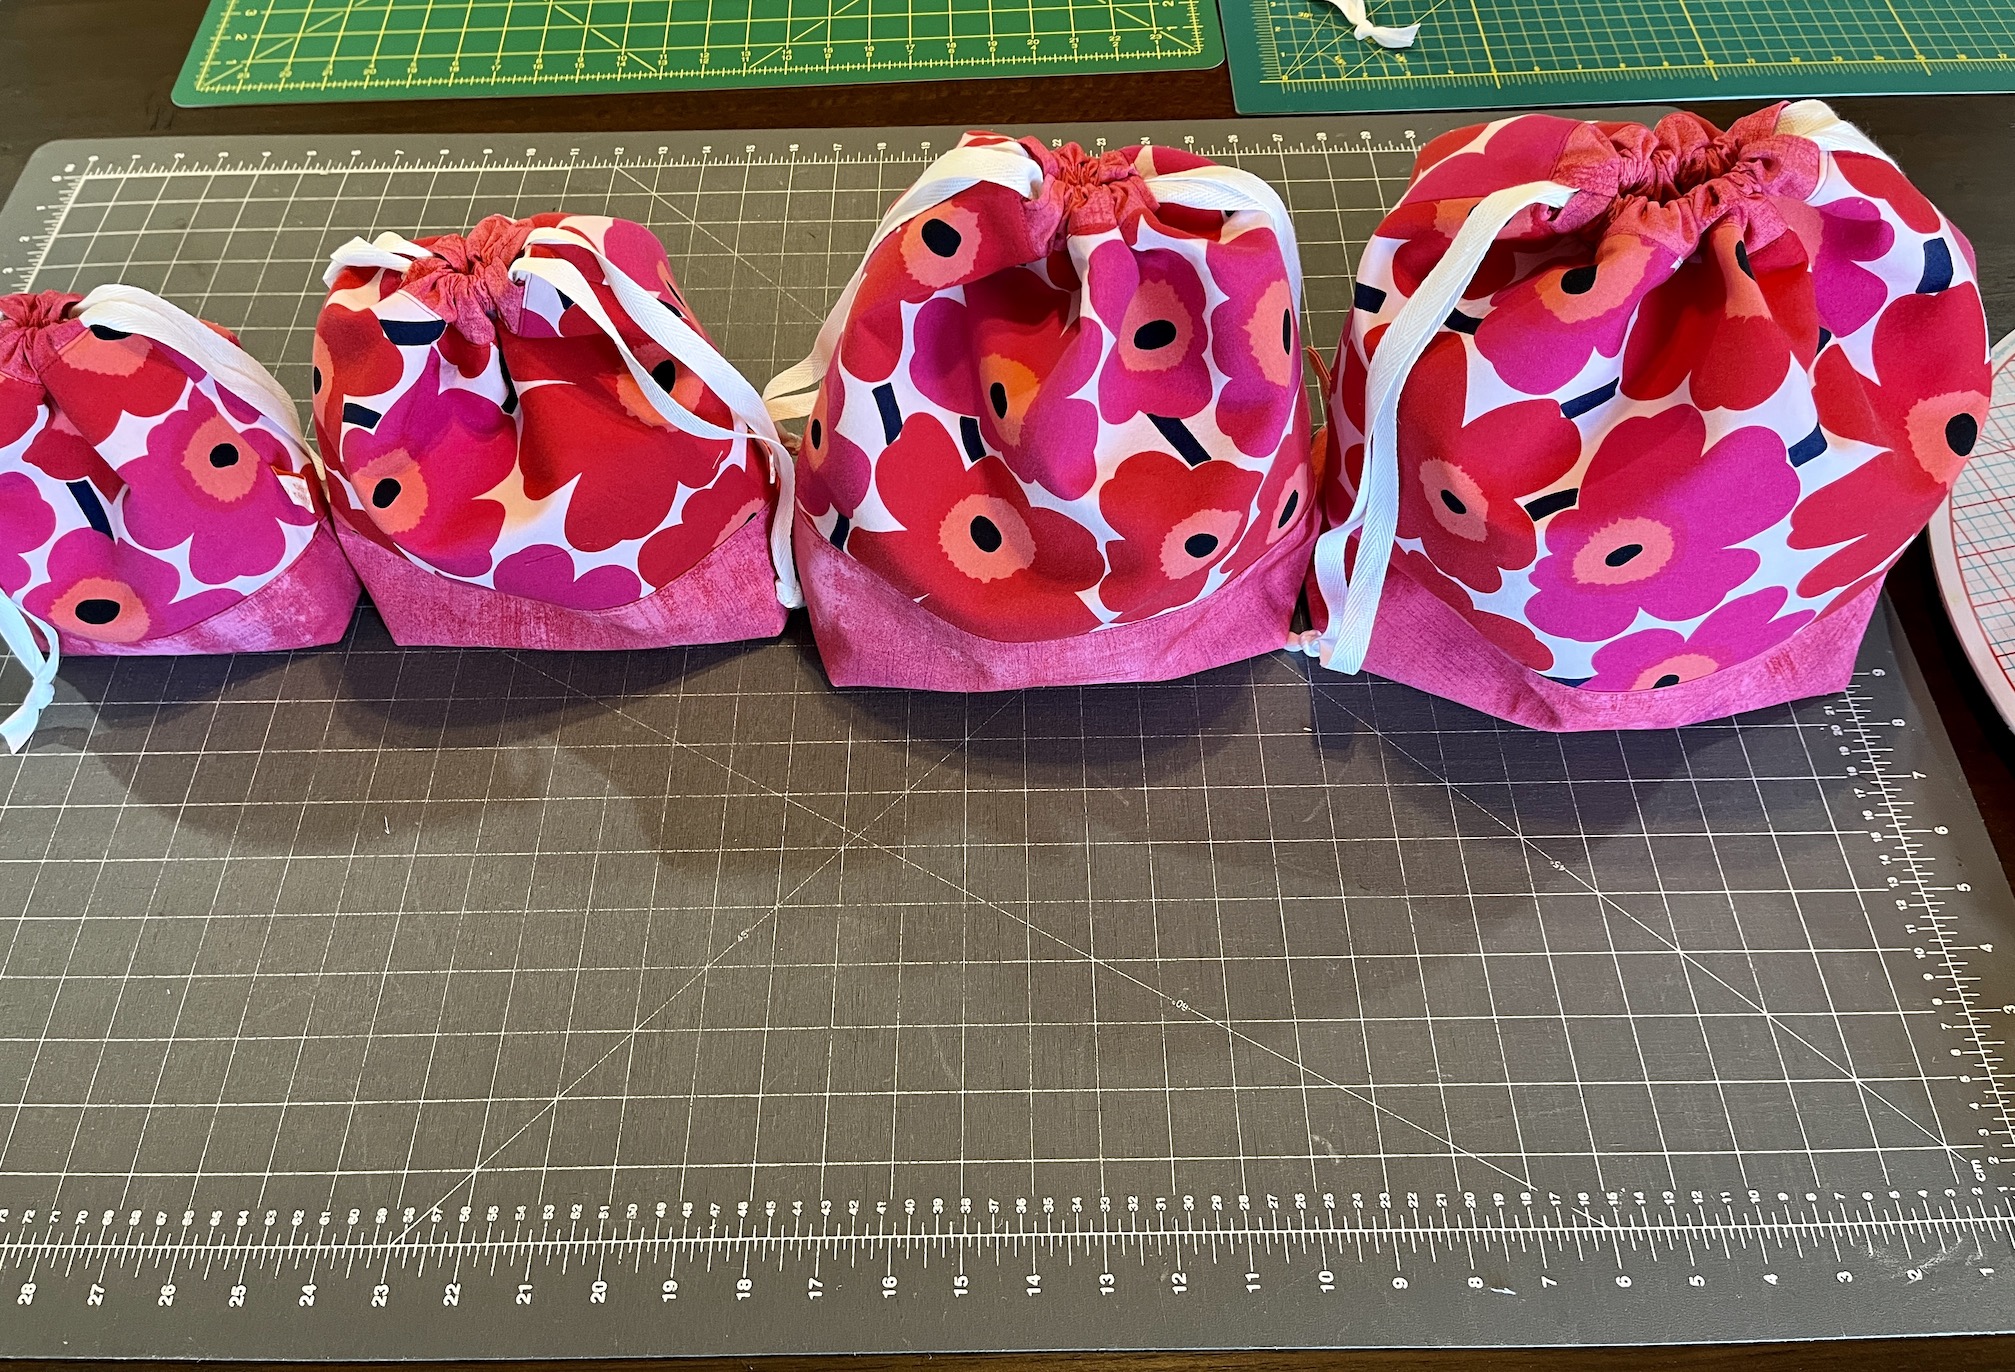
Recently I completed 11 bags in a sweet Marimekkofloral fabric for the top of the bag; and a lovely Moda Grunge fabric for the base:
I made them in sizes small to extra large and I might sell them in sets like this:
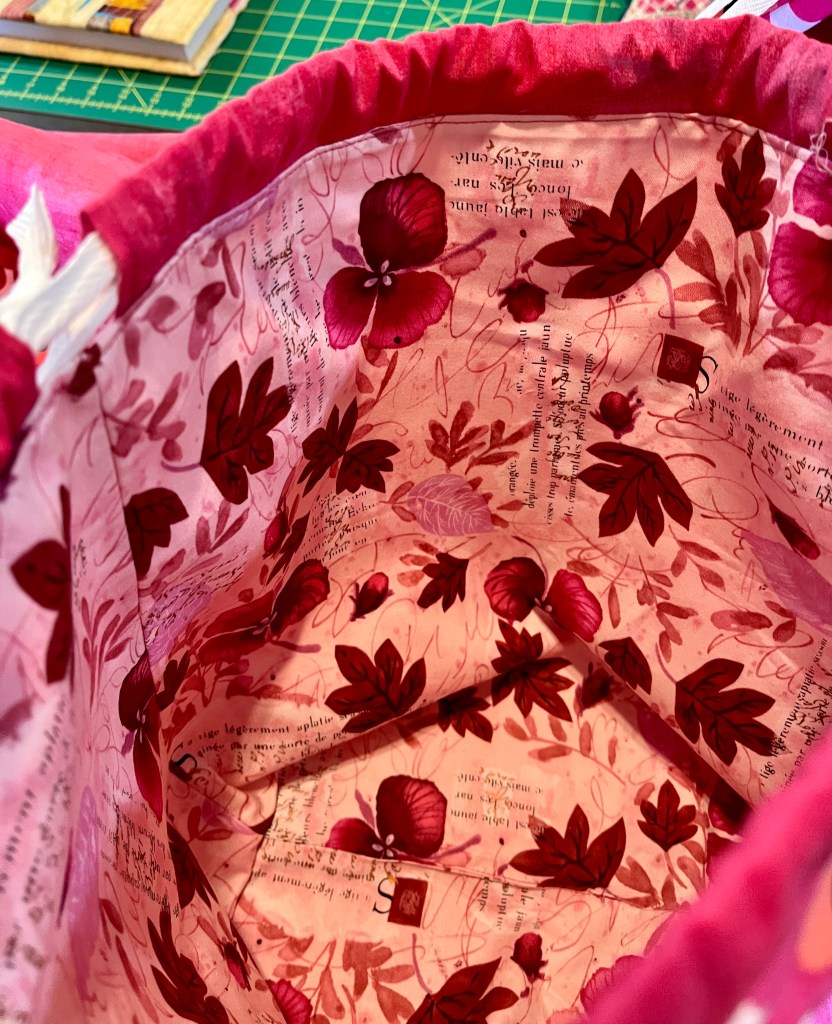
I love the two floral fabrics I used as linings that I found in my stash:
I still have fabric cut out and interfaced to make like 15+ more bags but I’ve put that all away for now!
Yes, I am counting each individual drawstring/project bag as one finish…
So I finished 9 more drawstring/project bags recently as part of my A Year of Finishes – 2023 Project.
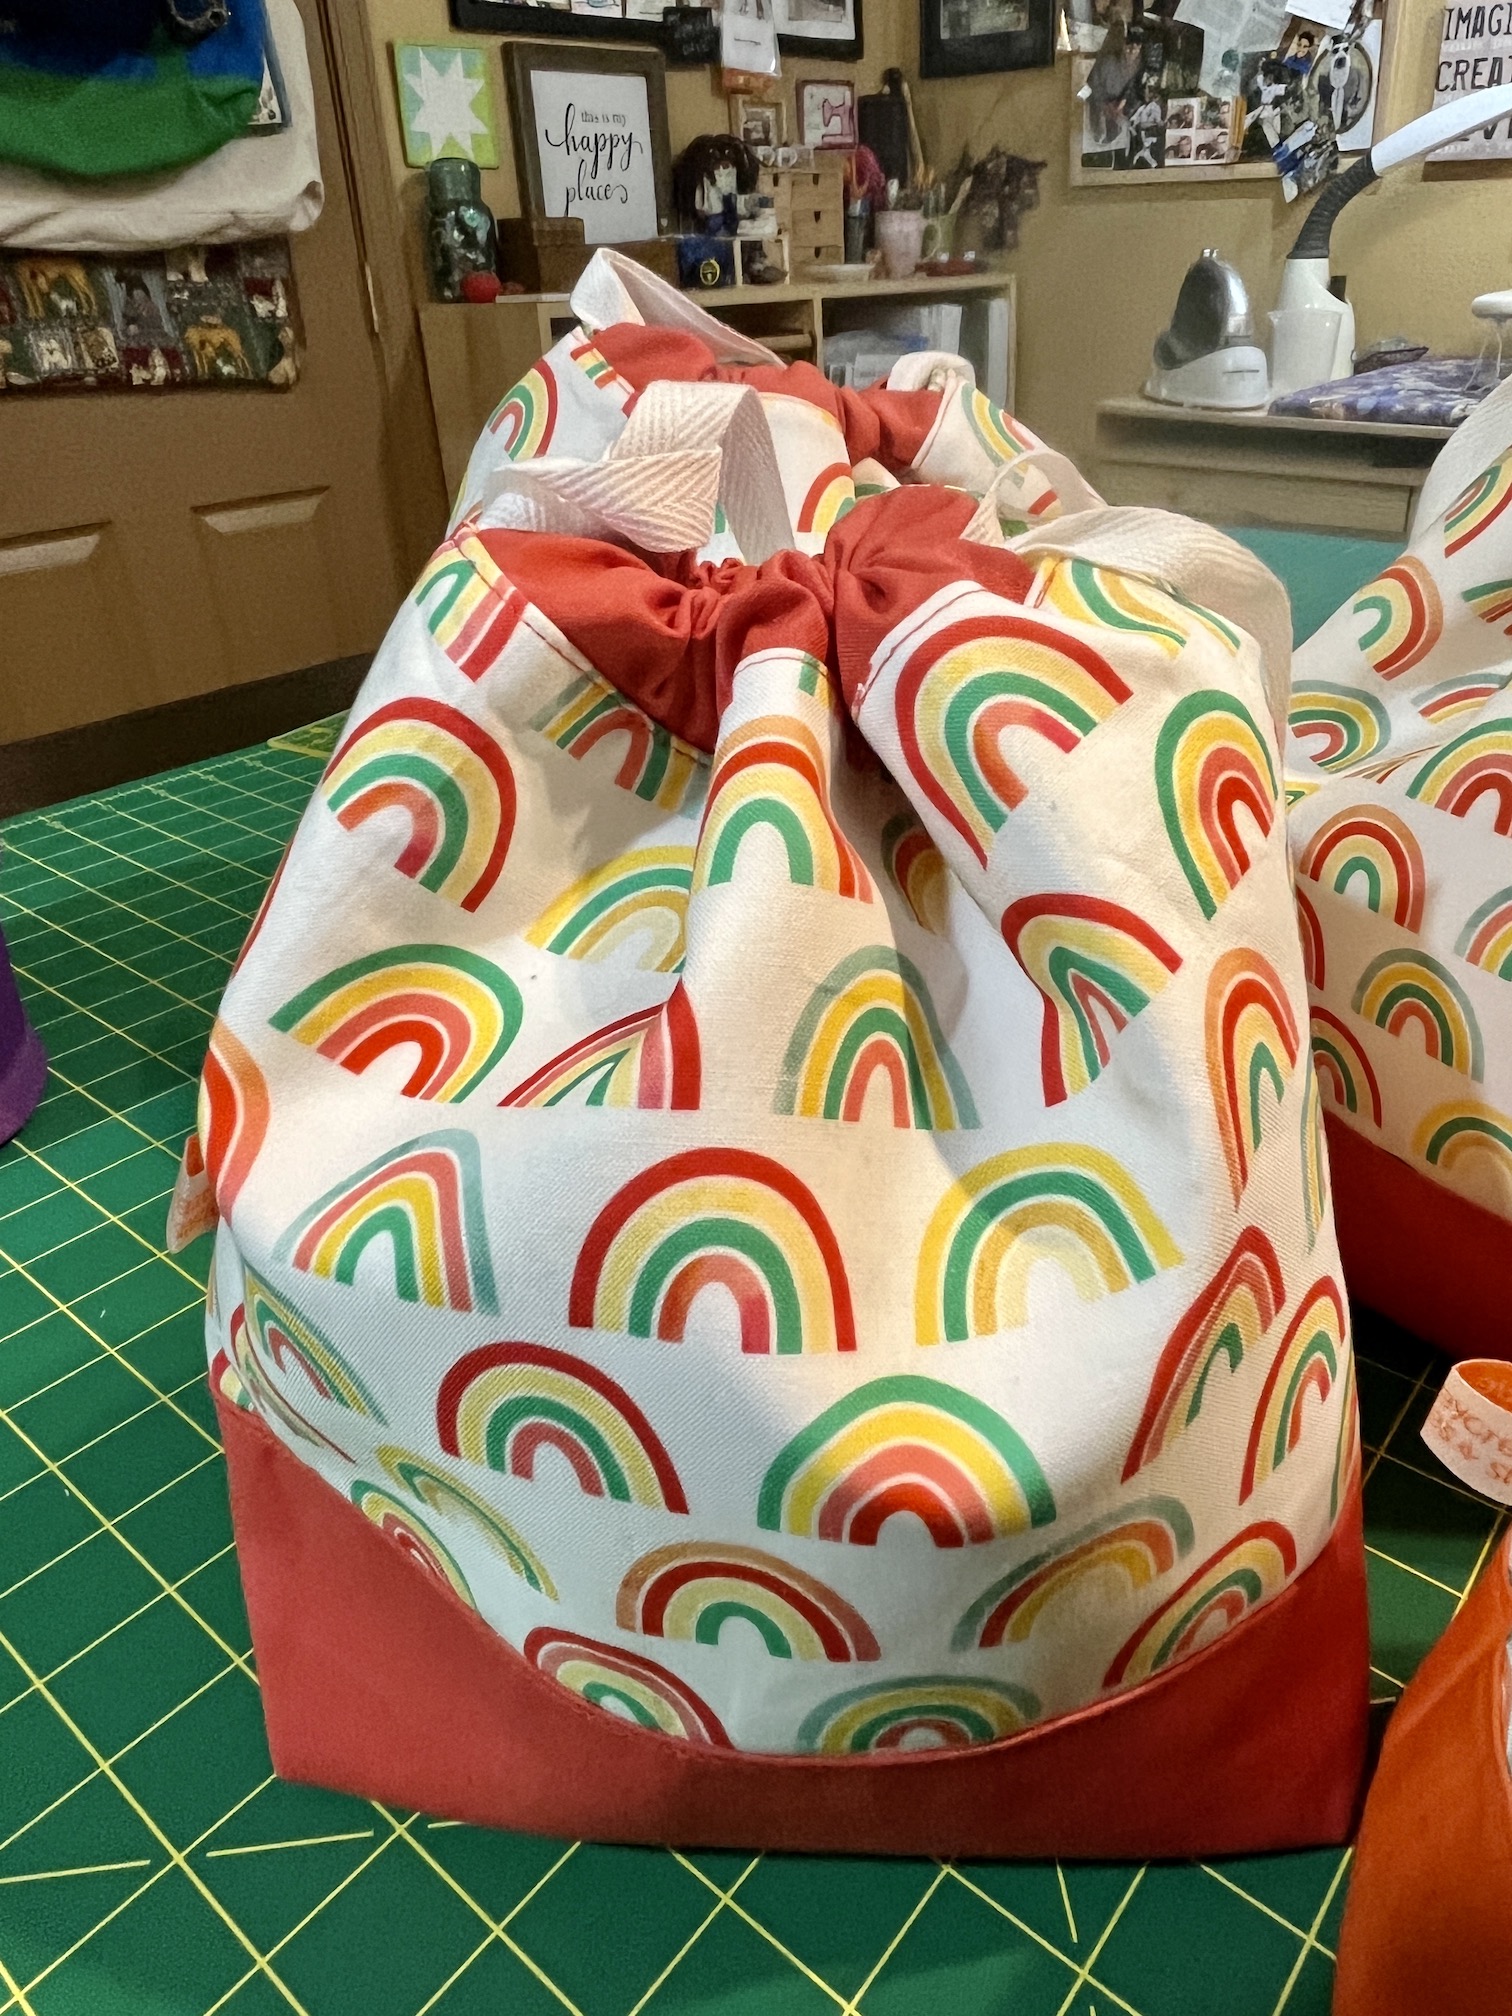
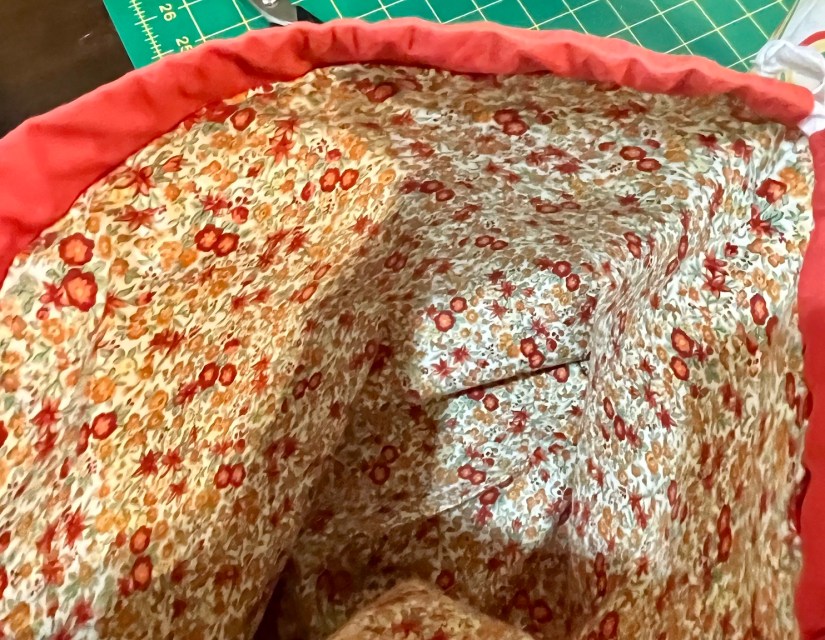
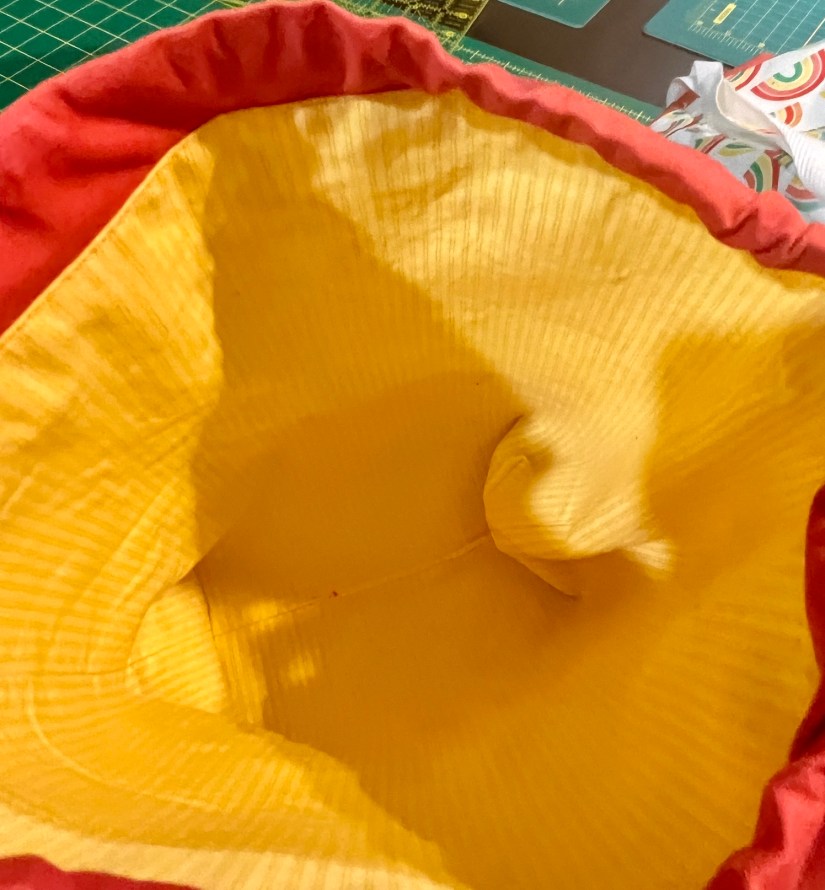
Five (5) rainbow fabric bags:
With either a coordinating floral or a yellow striped interior:
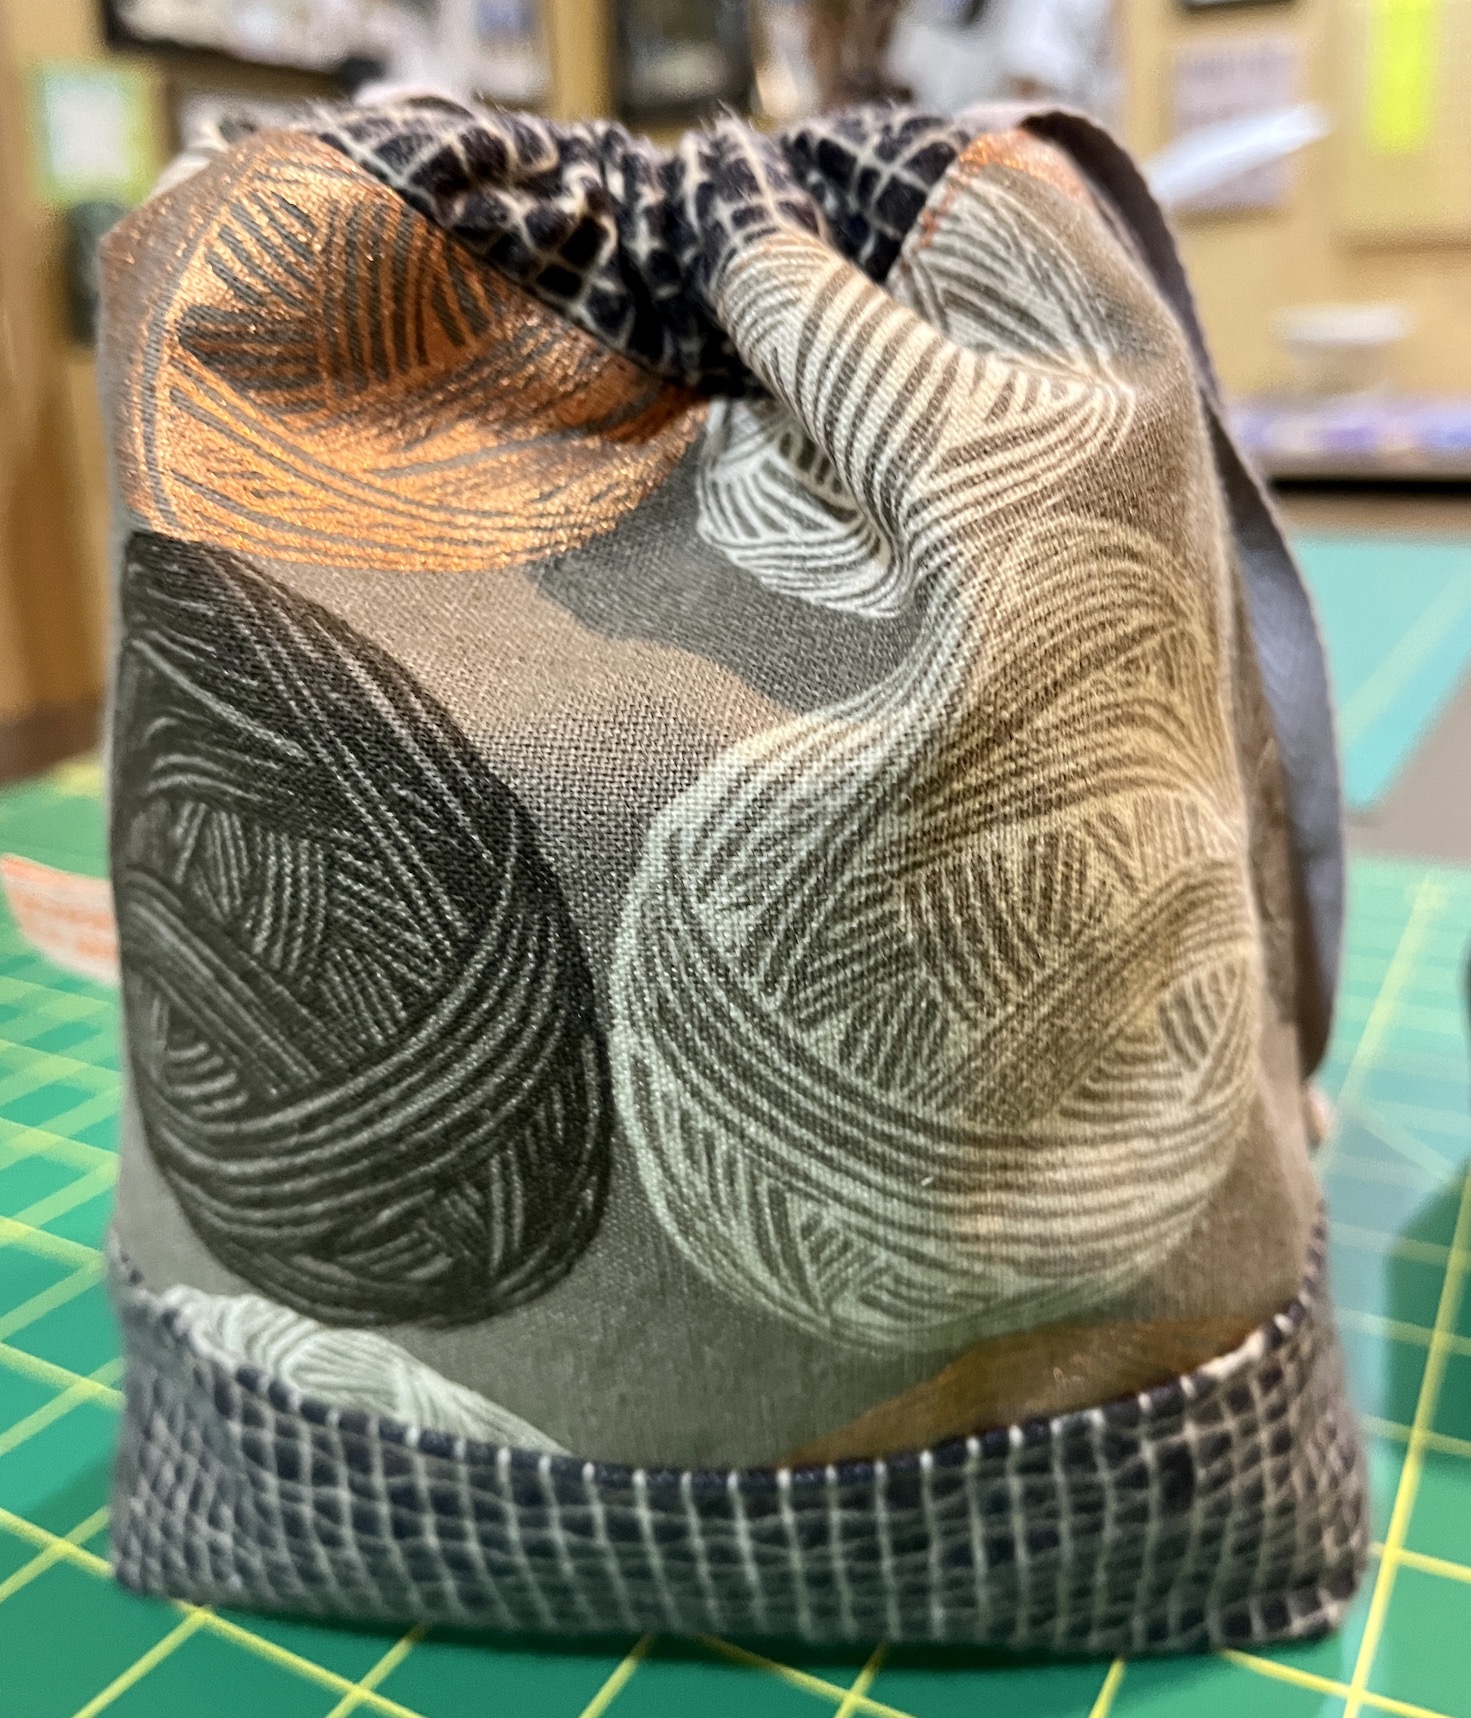
I also finished four (4) gray/copper knitting themed bags with gray flannel bottoms and trim:
I had this cool Moda fabric in my stash that I made the interior of the bags:
I am probably going to finish one more set of the drawstring/project bags and then stop. Recently an exciting opportunity for 2024 has come my way and I need to pivot on my priorities. More in a future post!
2023 is my year to make a dent in my outstanding projects (next post I will share the audit I did of my outstanding projects); and I’ve sort of made a dent in stack of drawstring/project bags to be completed (which I put on hold in November 2022 – see post That darn grief, the Etsy shop saga, and a little grace ).
Here is the pile of some of the unfinished bags:
I am still non weight bearing on my left leg after an ankle fracture and subsequent surgery to repair, I wanted to return to my sewing machine (enough with the hand sewing only!)
So John helped me get all set up at the sewing machine with everything within easy reach and I got to work!
I started with making bags that need purple thread as there is a thread and bobbin thread change for each set of project/drawstring bags.
I finished 9 drawstring/project bags (3rd to 11th finish of 2023!):
The bags had some fun linings:
Here are close up photos of the bags grouped by fabric:
Next I am switching to an orange thread to work on the next set of bags.
It felt good to be at my sewing machine again even if I had to take some frequent breaks.
Postscript
The other day a friend share photos of how she is using the drawstring/project bag she got from me last year – as a toiletry bag while traveling:
It was cool to see one of the bags I made in practical use!
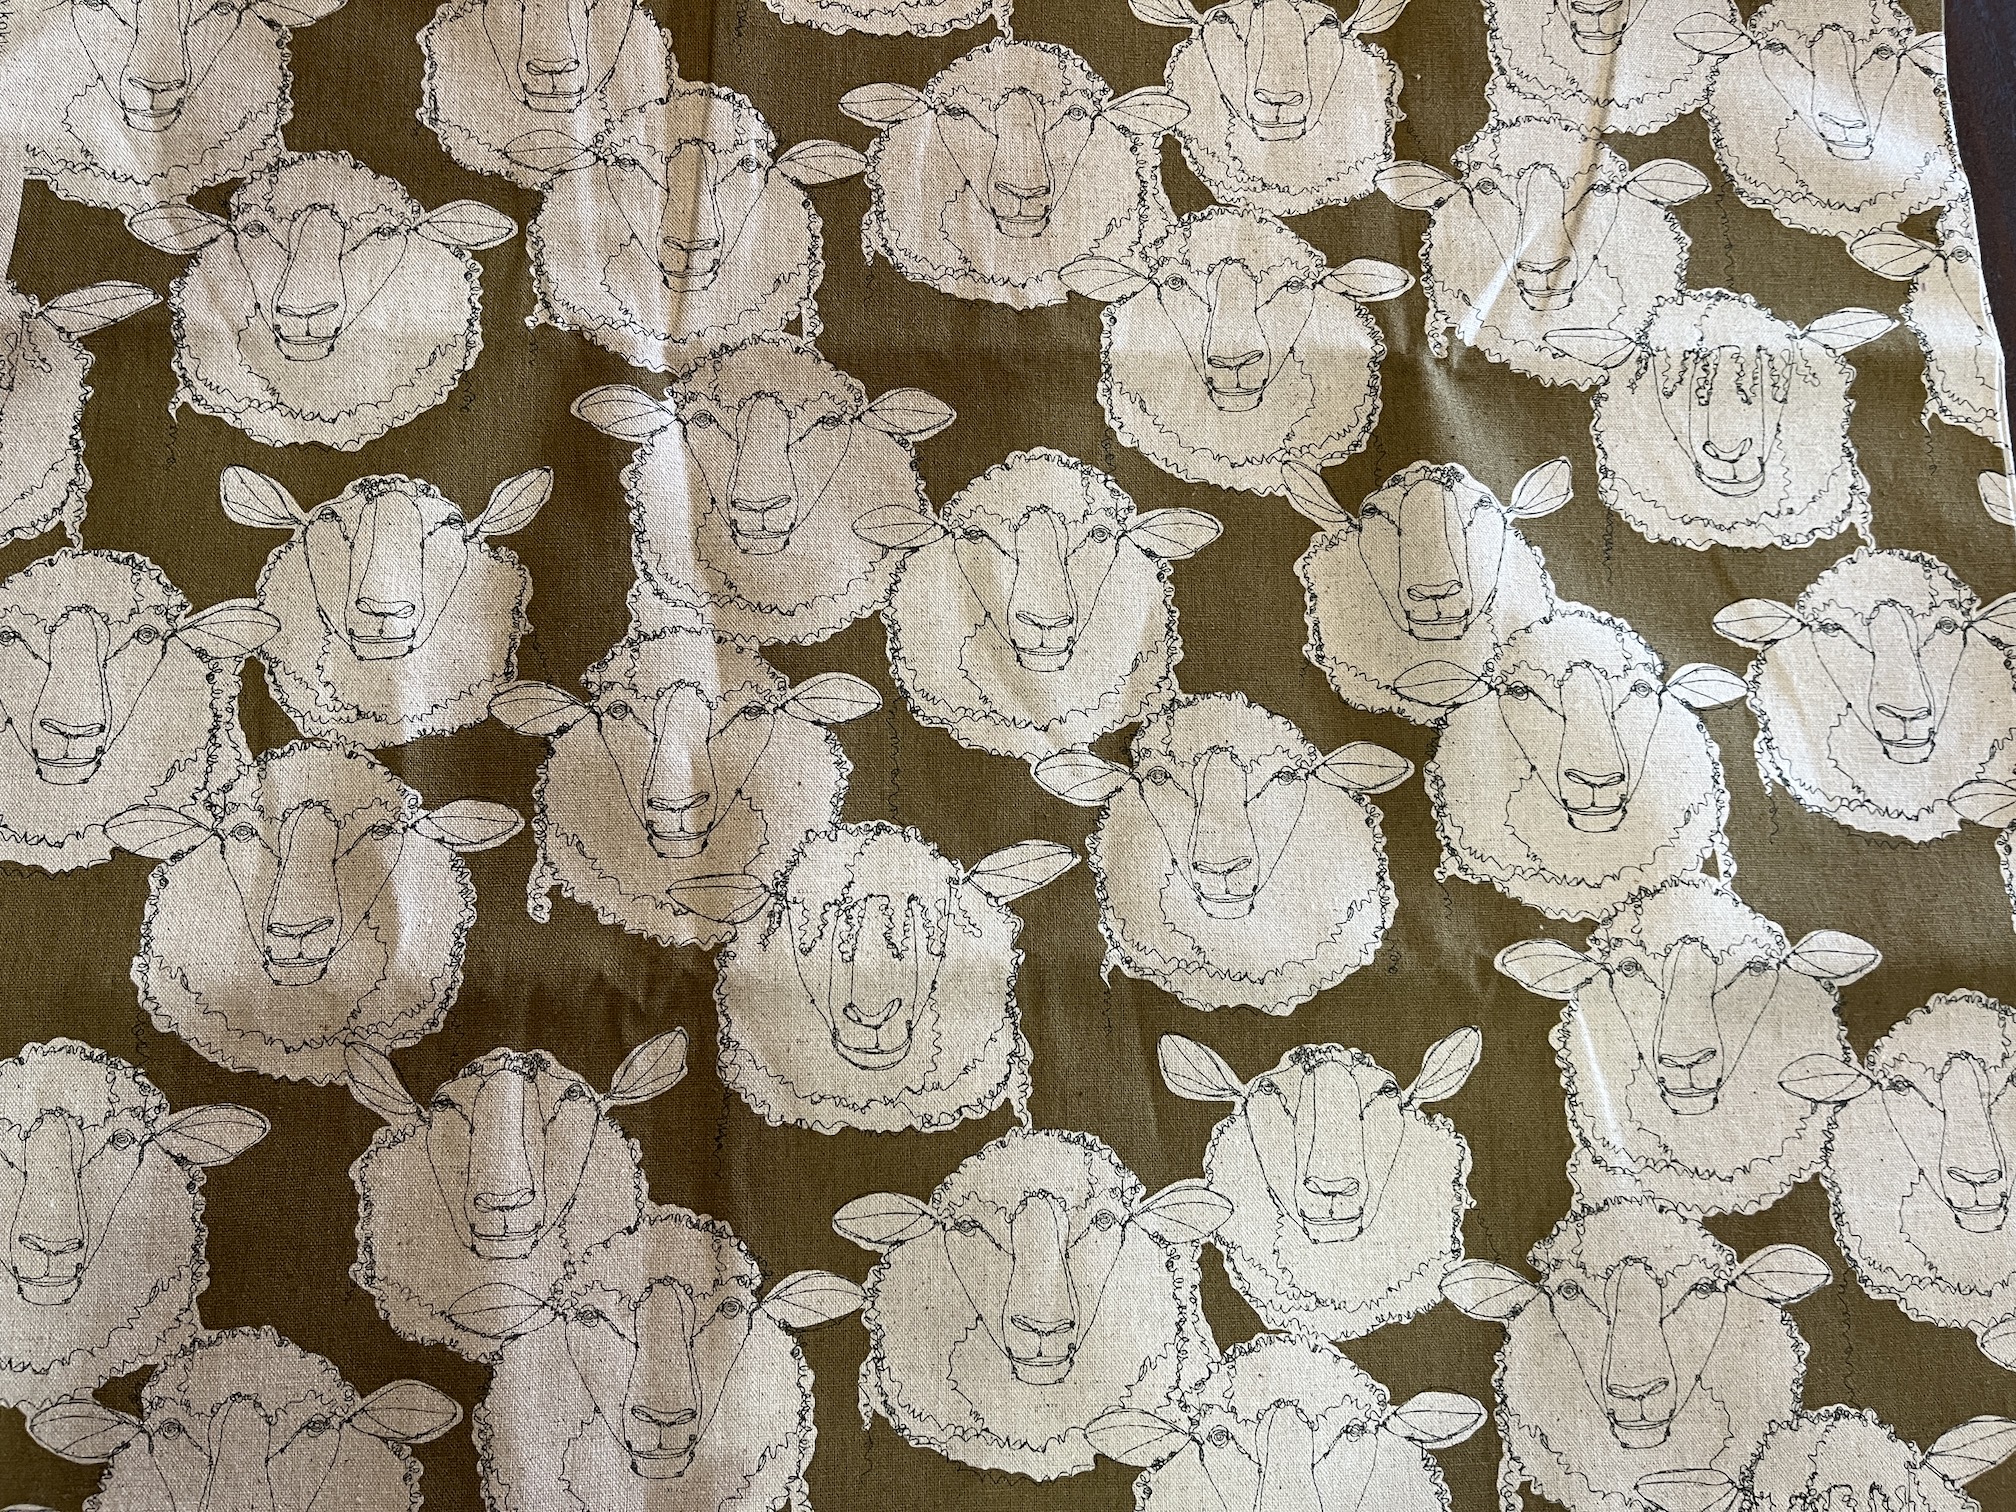
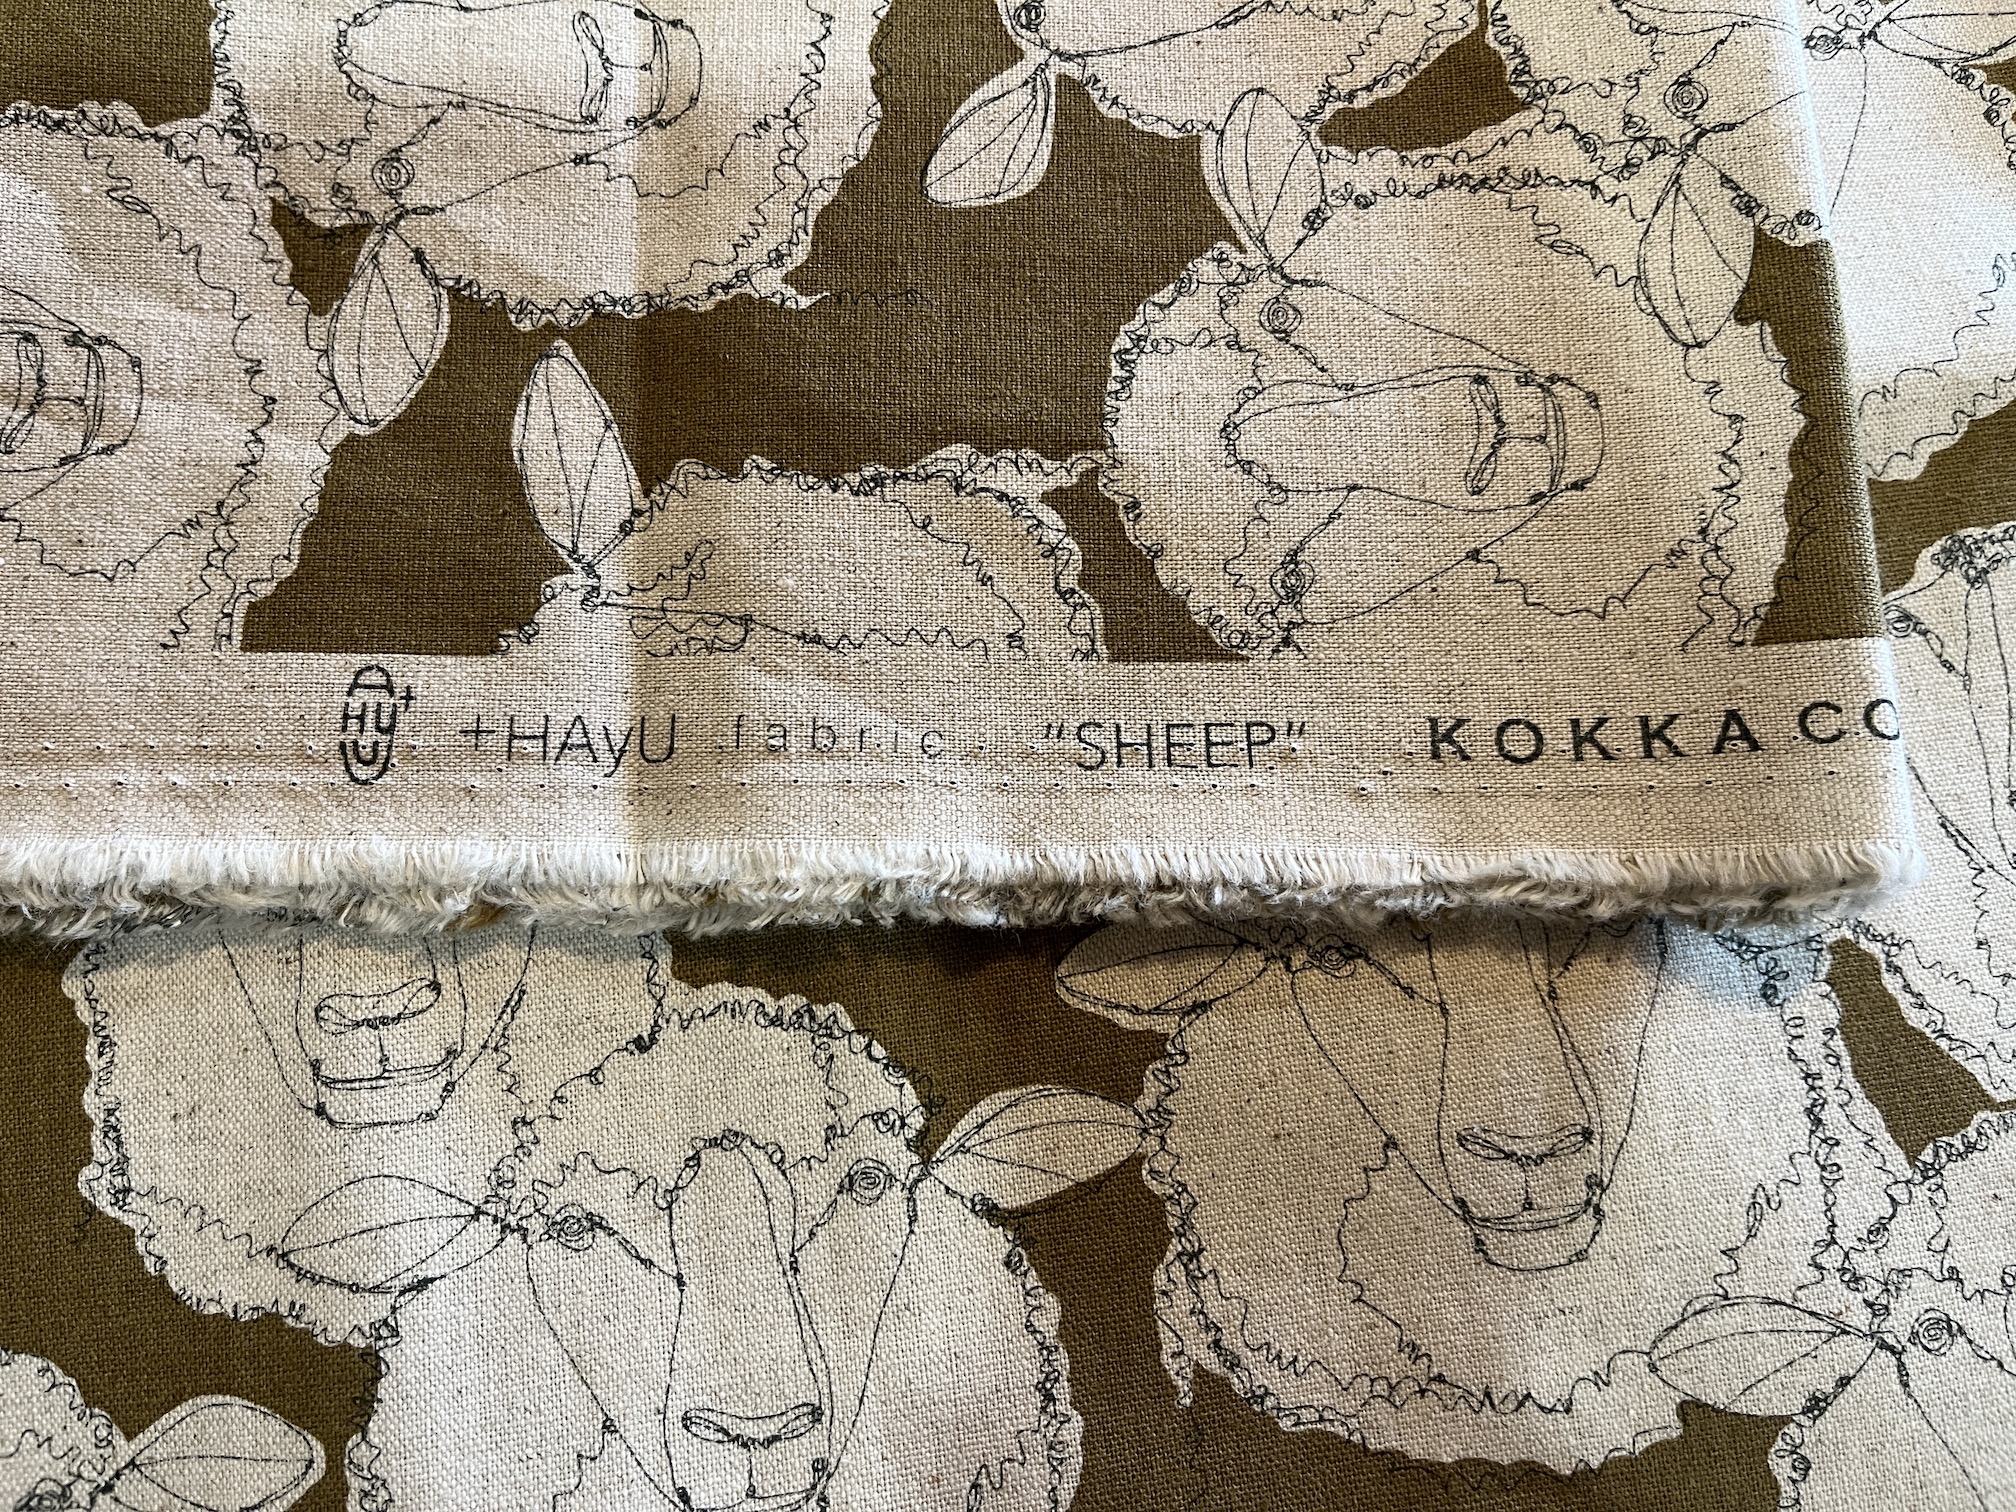
Currently I’m sitting around, doing some handwork (will share when I made more progress) while I recover from my left ankle break and the subsequent surgery I had to repair the fracture (see post 2022 in Review: A Year in Travel). The other day I received some mail from one of my dear blogging buddies that really brightened my day: sheep themed linen cotton fabric!
What a thoughtful surprise and I cannot wait to make something with it – like a cool knitting/crochet project bag! Maybe one like this Noodlehead pattern – Firefly Tote that I made in December 2021:
I hope you all are having a wonderful holiday season and if you celebrate Christmas then I hope you had a very Merry Christmas. It is actually BEFORE Christmas right now and I am sitting in an airport waiting for my delayed flight and I thought” “what the heck, I will work on some future blog posts!”
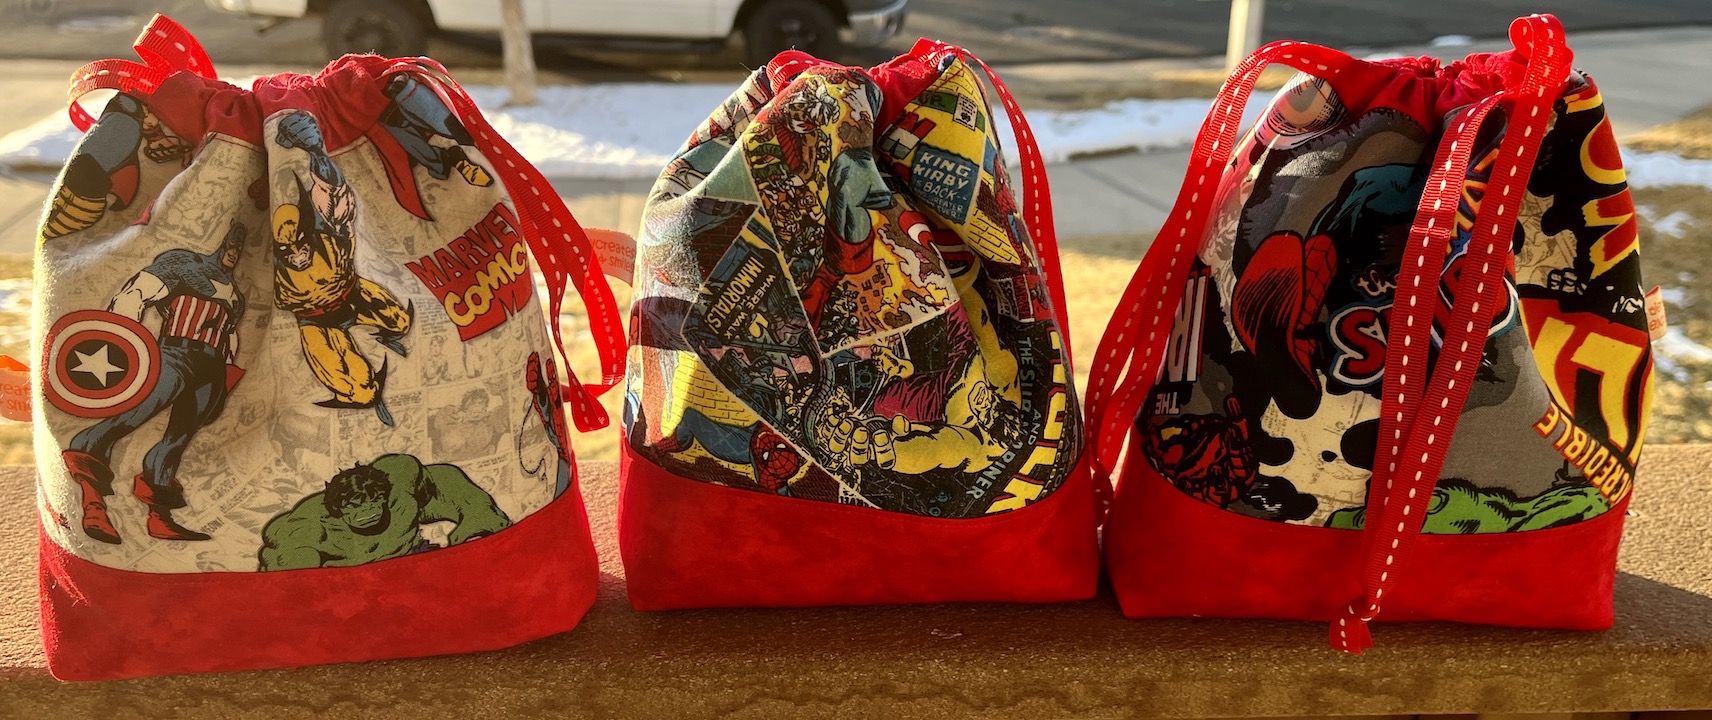
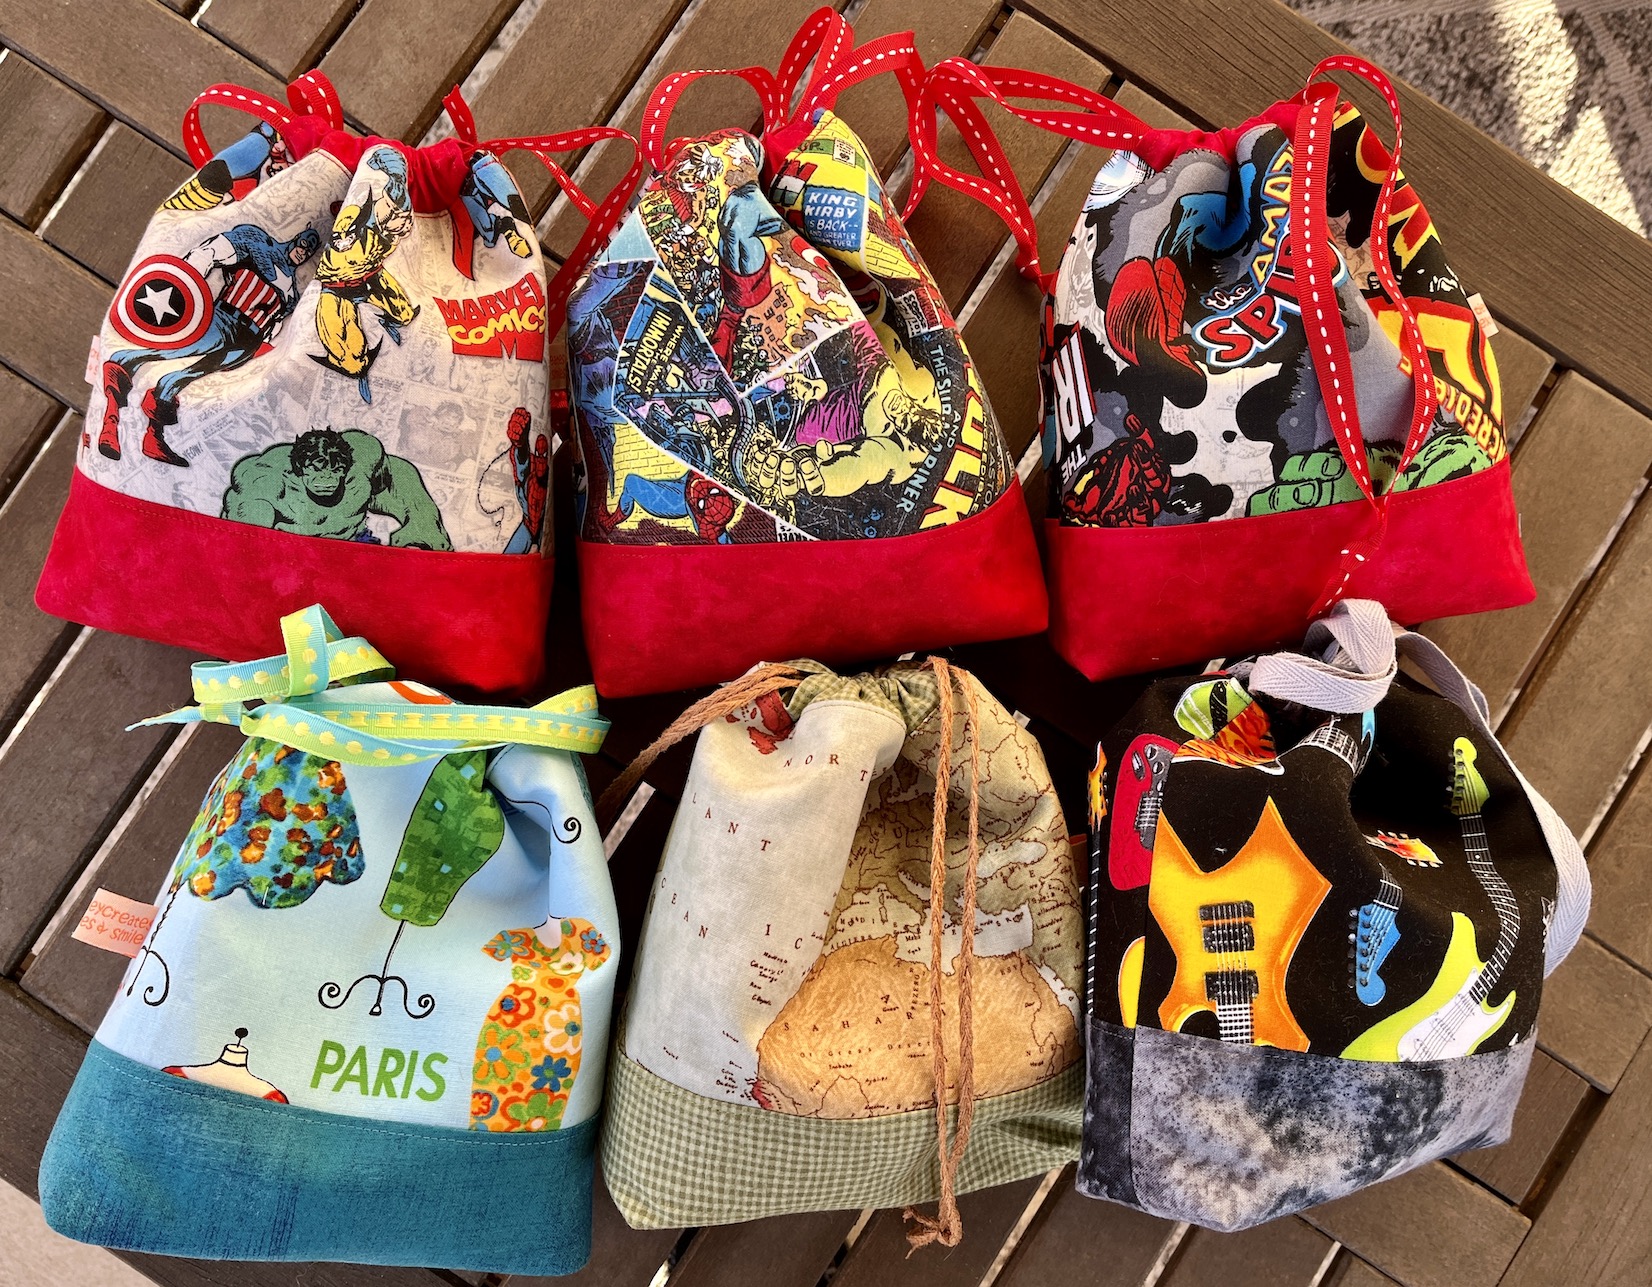
If you’ve been following my blog you know I’ve been obsessed in the past with making project/drawstring bags (pattern by Sotak Handmade). Well I thought it would fun to make the small sized bags as gift bags for my family for Christmas.
I made a bag for each person based on their interests and what fabric I had on hand.
For example my brother and his family love the Marvel Avengers movies. They’ve seen all of them (they go as a family) and several of them have also read the comics. Surprisingly I had a little collection of Marvel Avengers fabric in my stash (not sure why but it was there) and here are the gift bags I made my brother, his wife and their son:
The lining of each bag is a different Marvel Avengers fabric.
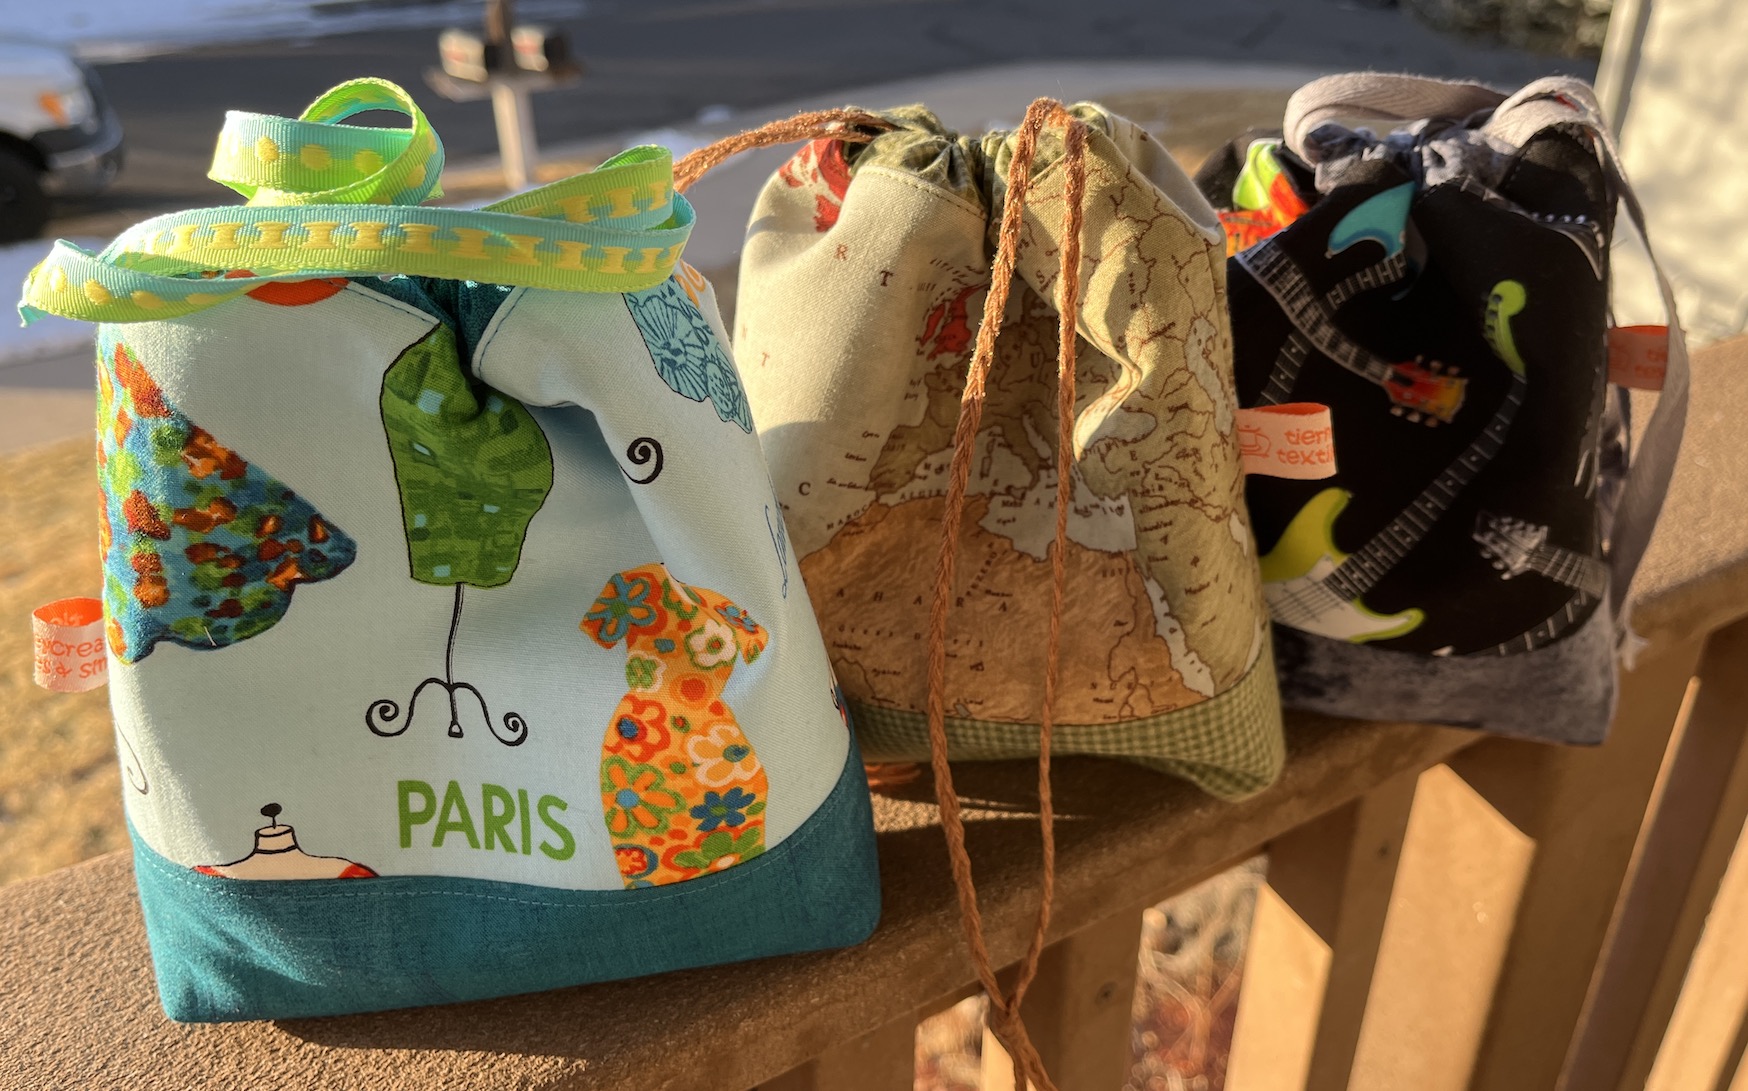
Then for my sister’s family I made them gift bags based on their interests:
Here are all the gift bags together:
I just love these bags and I still have a whole box of project bags in various stages of assembly for when I am ready to return to making them to possible sell of my Etsy shop someday…
Over the past couple of months on Instagram, I’ve been posting images of the project bags/drawstring bags I’ve been making in preparation for holiday season sales on my Textiles & Smiles (textilesandsmiles) Etsy shop.
Here are some of the cuties I’ve made:
And I had a lot more planned…
The bags are super cute in person and they have interfacing throughout the bag so they have a good heft and stand up on their own, I love them so much and I was excited to offer them on my shop (I sold out of the batch I made last year for the shop).
But, alas, that darn grief has taken ahold of me this holiday season/pending Winter again and as I approach the 4th anniversary of the passing of my life partner for 30+ years, Terry the Quilting Husband.
And I am not up to fulfilling orders this holiday season so I am putting my Etsy shop on hold for now.
This widow thing is a curious journey, you never know when you will suddenly be gutted with grief…
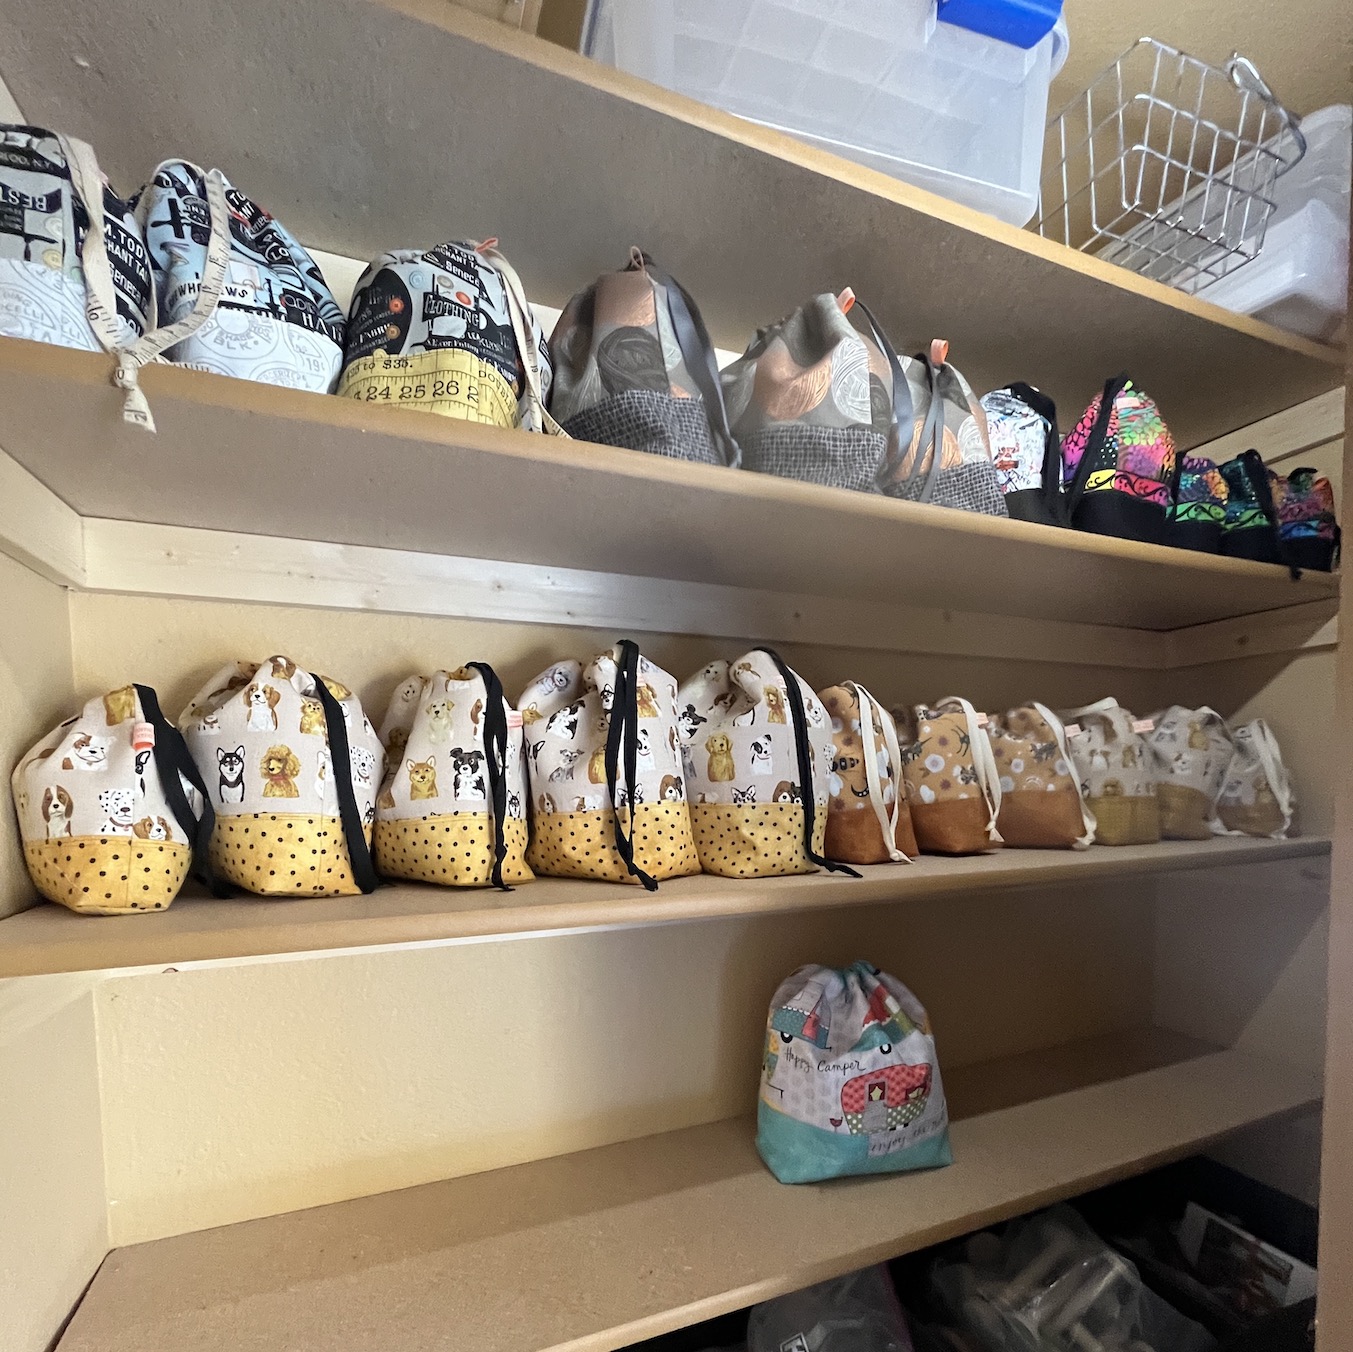
Thanks to everyone who has supported my Textiles & Smiles Etsy shop since I reopened it last November. Also thanks to those who were enthusiastic about the Project Bags (the photo below = a bedroom closet with some of the completed bags I was going to sell) I’ve been posting on IG that I was getting ready to offer on my Etsy shop this holiday season.
I was taking forever, and it did not make sense, to get the photos of the items and the listings up on Etsy. I finally figured out was was paralyzed with grief and could not bear fulfilling orders, etc. I had a recent sale on Etsy of the spools that John had made (see post Handmade Spools) and it was pretty excruciating to get that order completed.
Who knows why last year during the holiday season I could offer stuff on my shop and fulfill orders but this year I cannot. Grief is a mysterious weird thing.
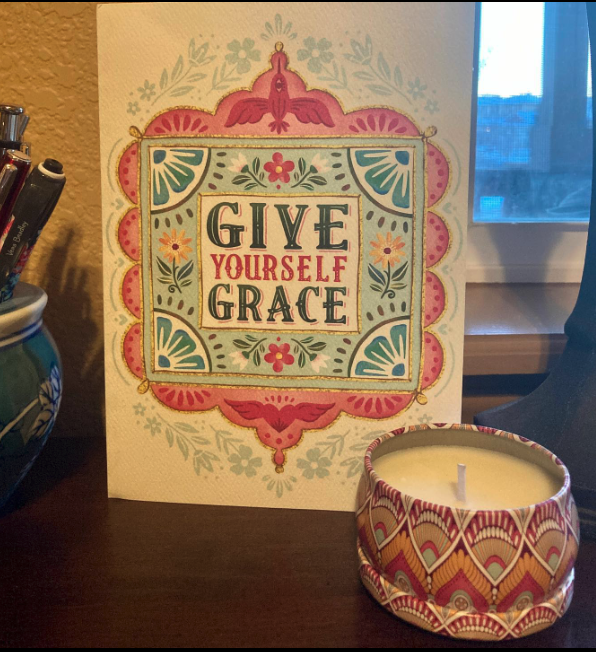
I think of a wonderful card my friend Wendy sent me awhile back with with a reminder to “give yourself grace”:
I keep this card along with a matching candle I found while thrifting right before the card arrived (!) on my bookshelf to always remind me that sometimes I need to just take a breather…
So giving myself some grace, I’ve put my Etsy shop on hold for now and I am going to work on what is calling my heart – working with recycled materials and creating a new body of work of my art quilts.
Andwhat will become of the existing project bags? I will put the completed ones away for now and then decide whether to just finish up the ones in progress or put them away also…
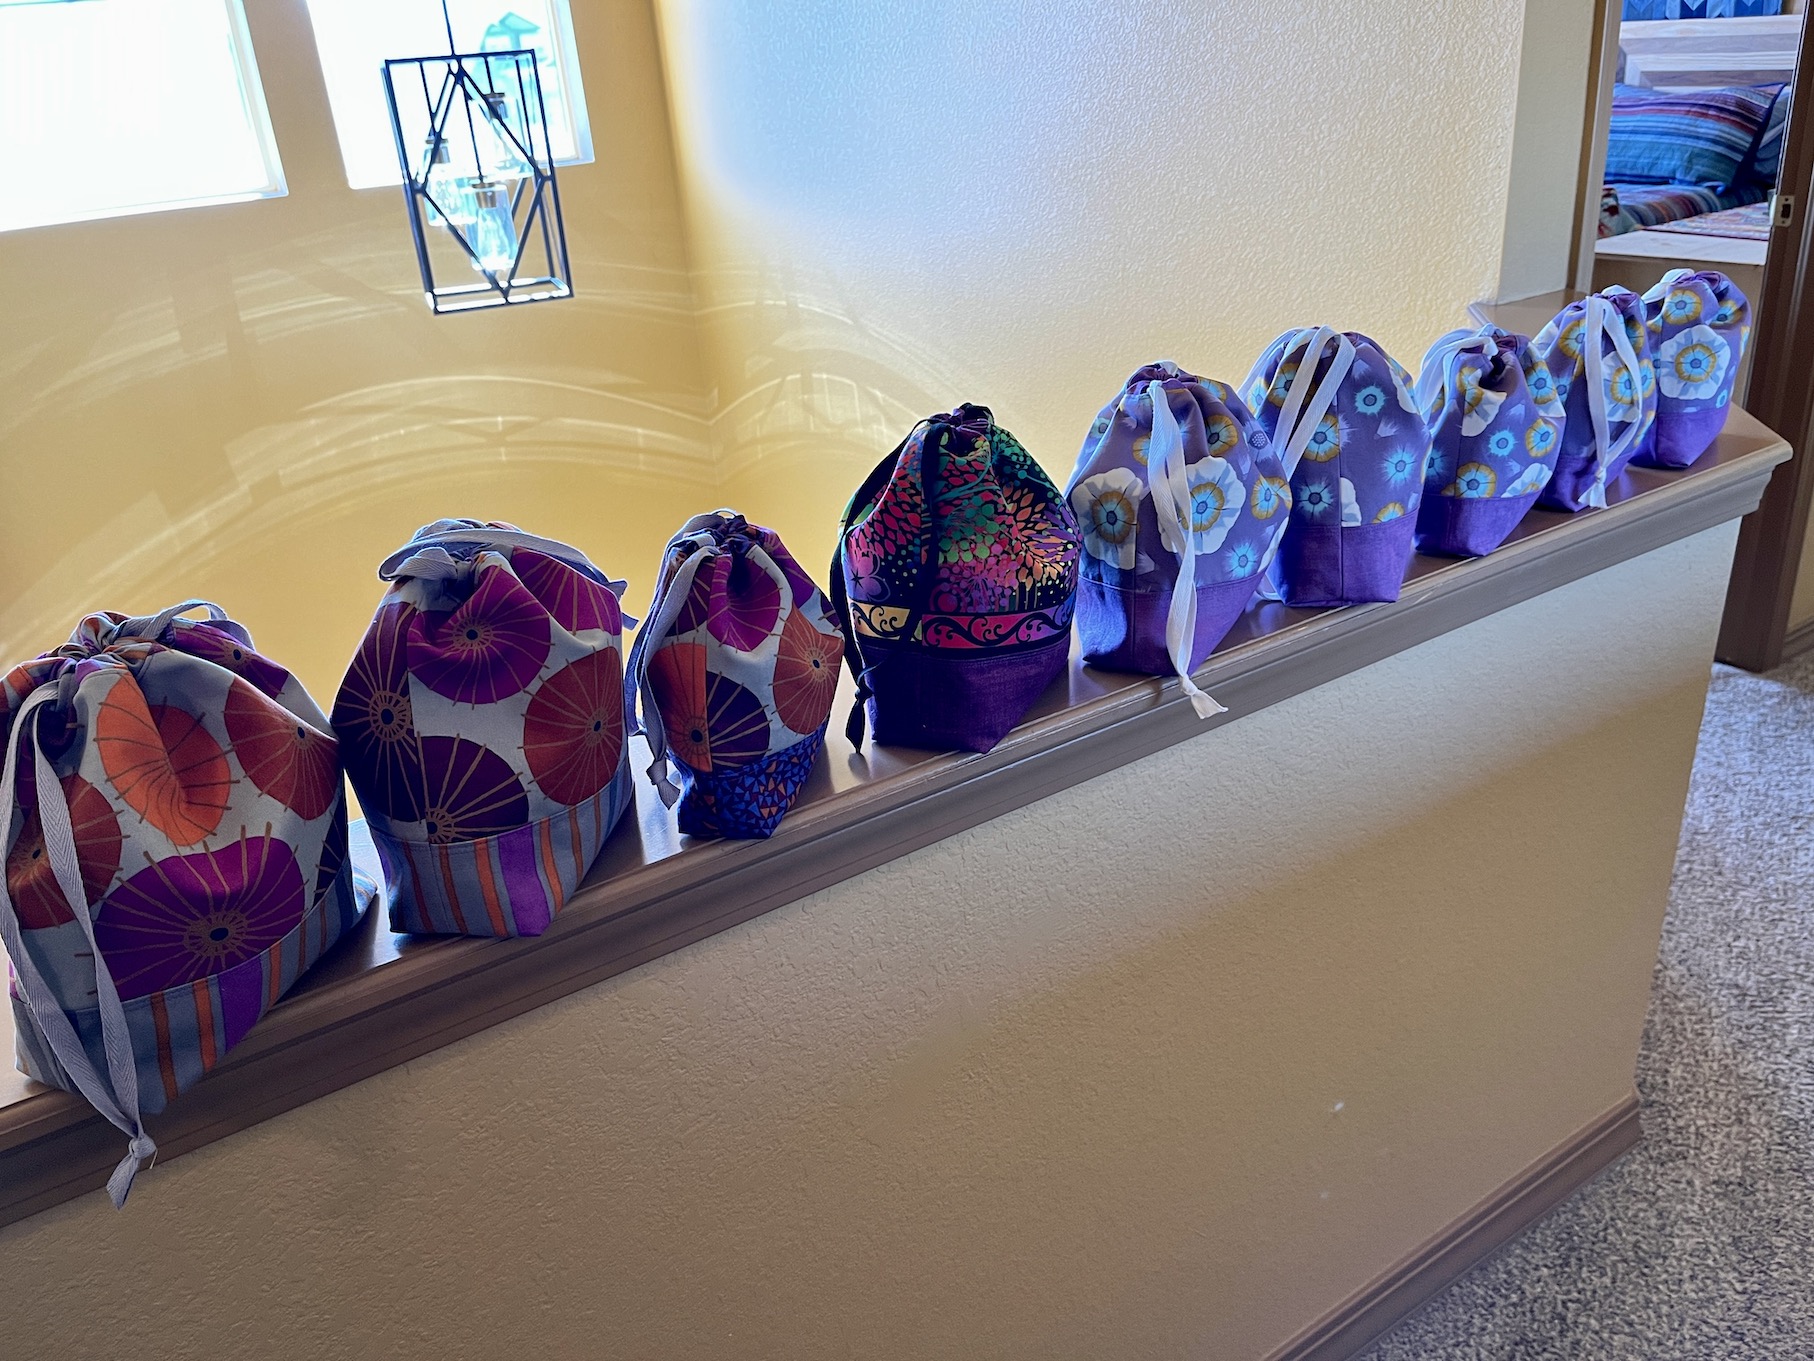
It’s time to restock my Etsy shop Textiles & Smiles that I reopened last November and I’ve decided to first make a stash of drawstrings bags which sold well with my first reopened shop offerings.
(Previously my Etsy shop was called “tierneycreates” but there was a whole reopening fiasco that I shared in the post My Etsy Shop is Now Reopened – tierneycreates is now TextilesandSmiles. I’ve grown to embrace the new name “Textiles & Smiles”, which is part of my original tagline – “tierneycreates: a fusion of textiles & smiles”.)
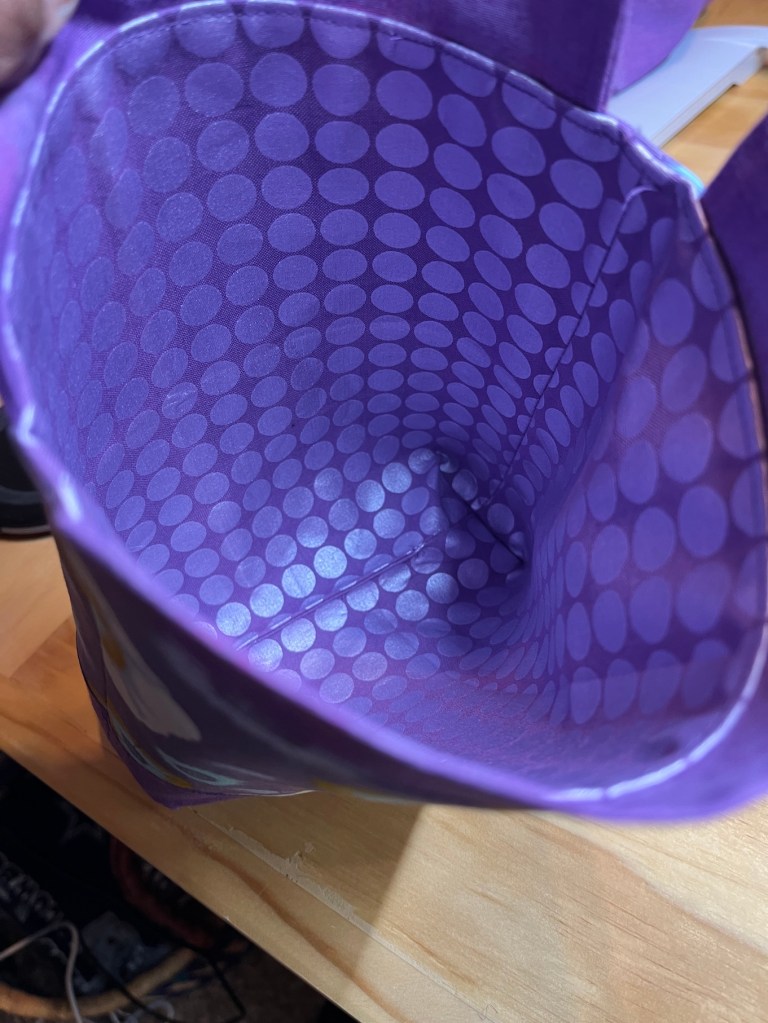
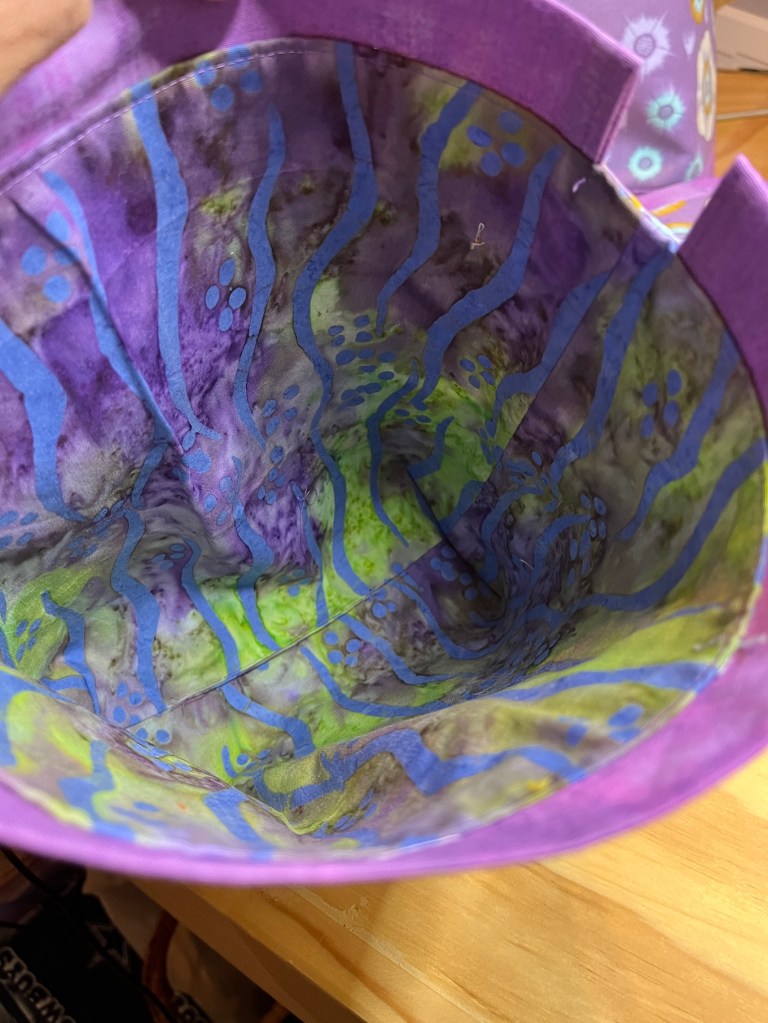
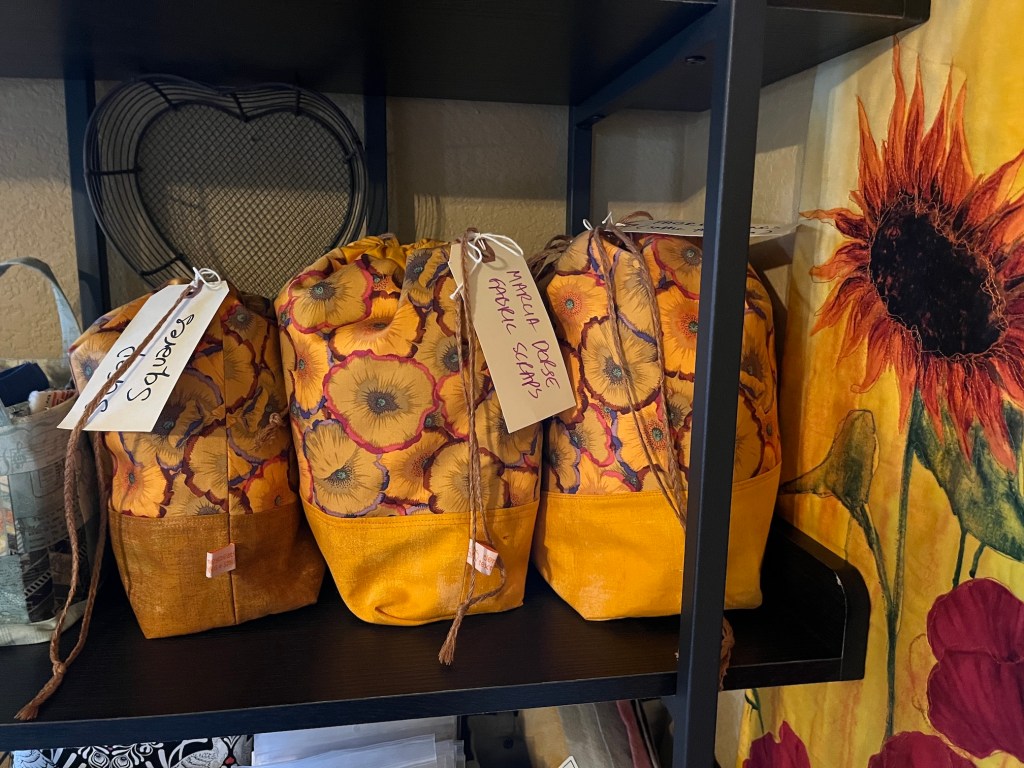
I kept some of the drawstring bags for use in my studio, they are great for storing scraps:
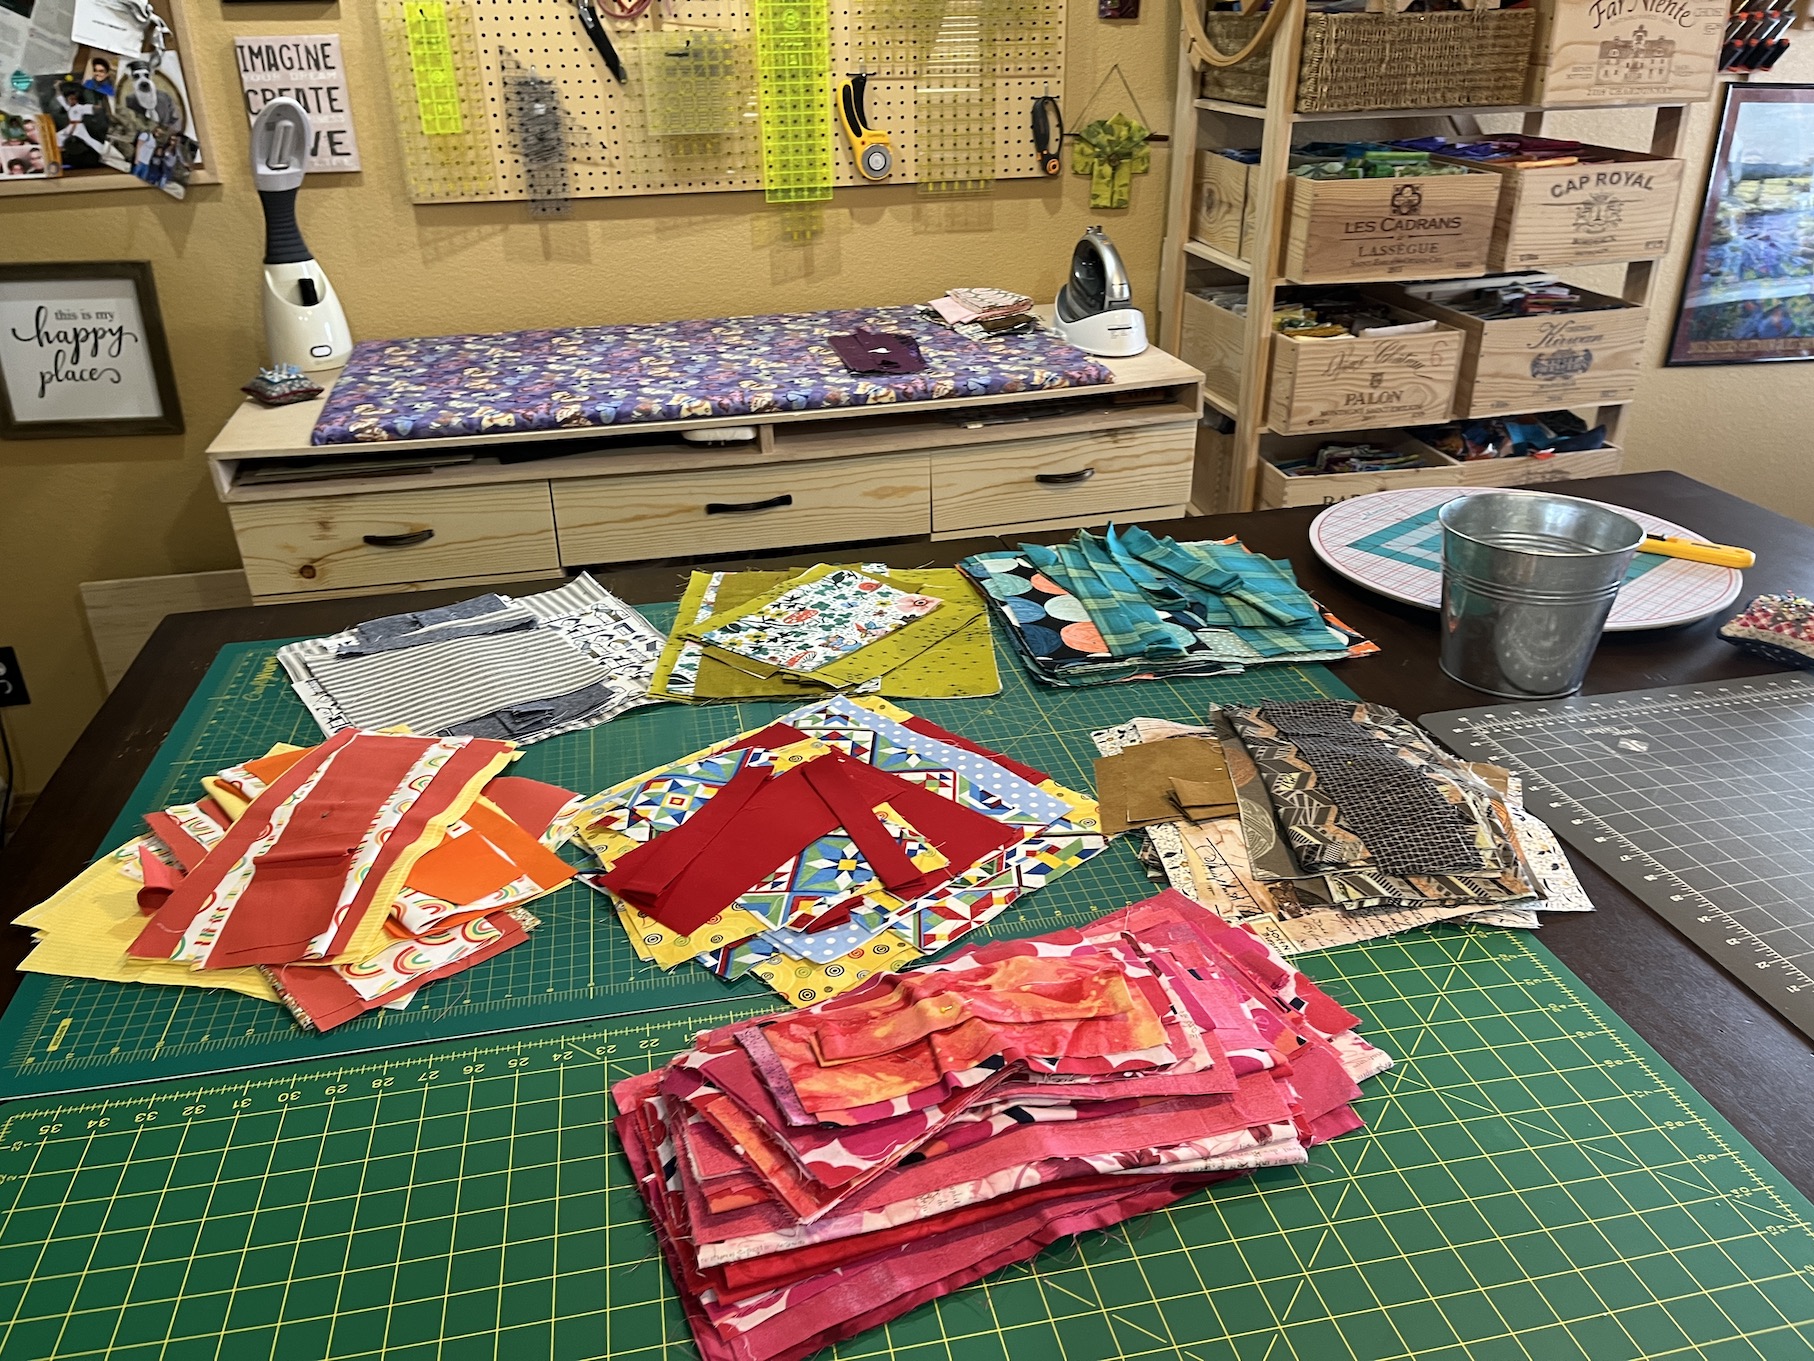
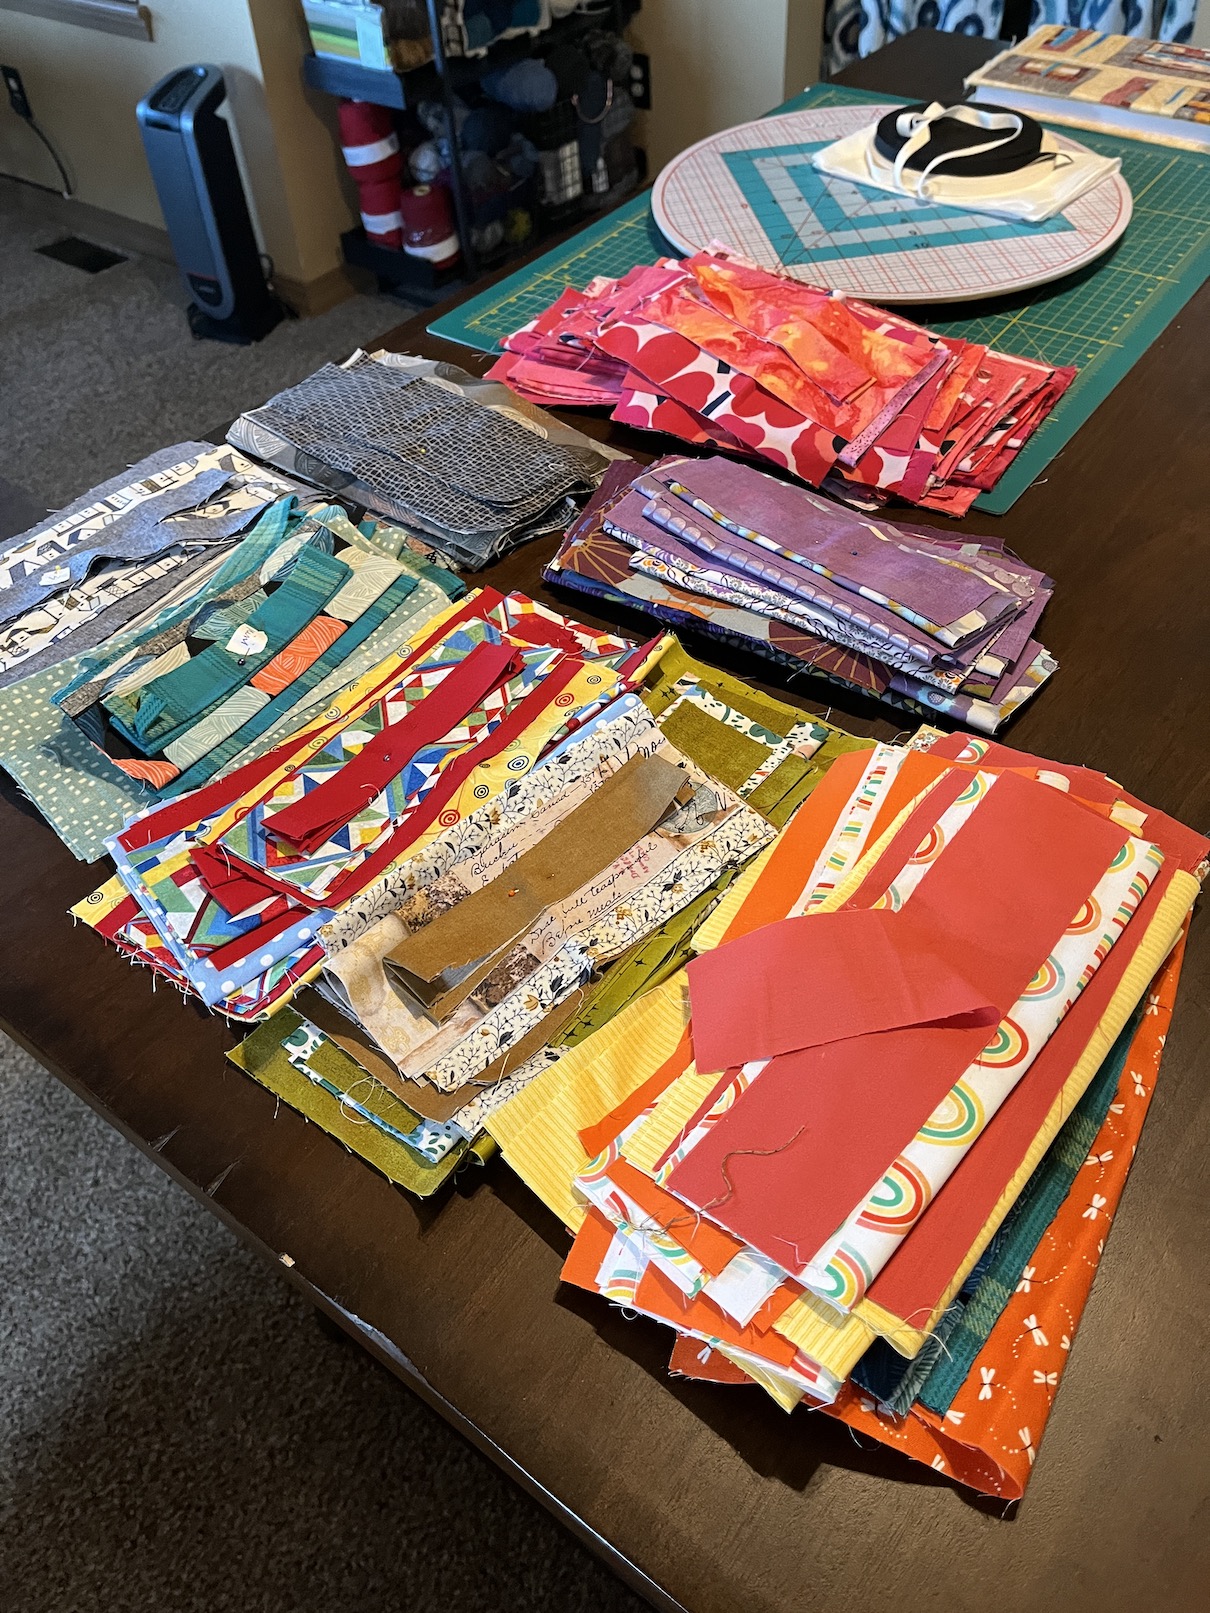
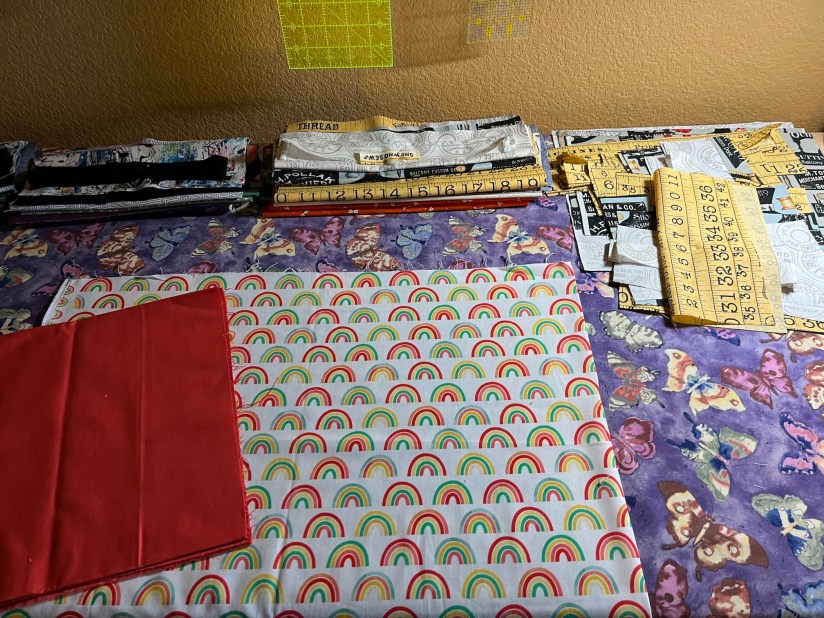
Over the past week I’ve enjoyed picking out fabric combinations for the top, bottom, and lining for the bags. Here are some combinations I got excited about:
I’ve also selected some fun novelty fabrics that I think will make fun bags.
So far I’ve cut out 30 bags and then it is time to get them all interfaced and then get to sewing!