Well we’ve come to the end of my series of posts on my new studio in the upstairs loft of my new home. The previous related posts can be found in these links:
Thanks for reading this series of posts on my journey to put together my new studio and here is the full tour.
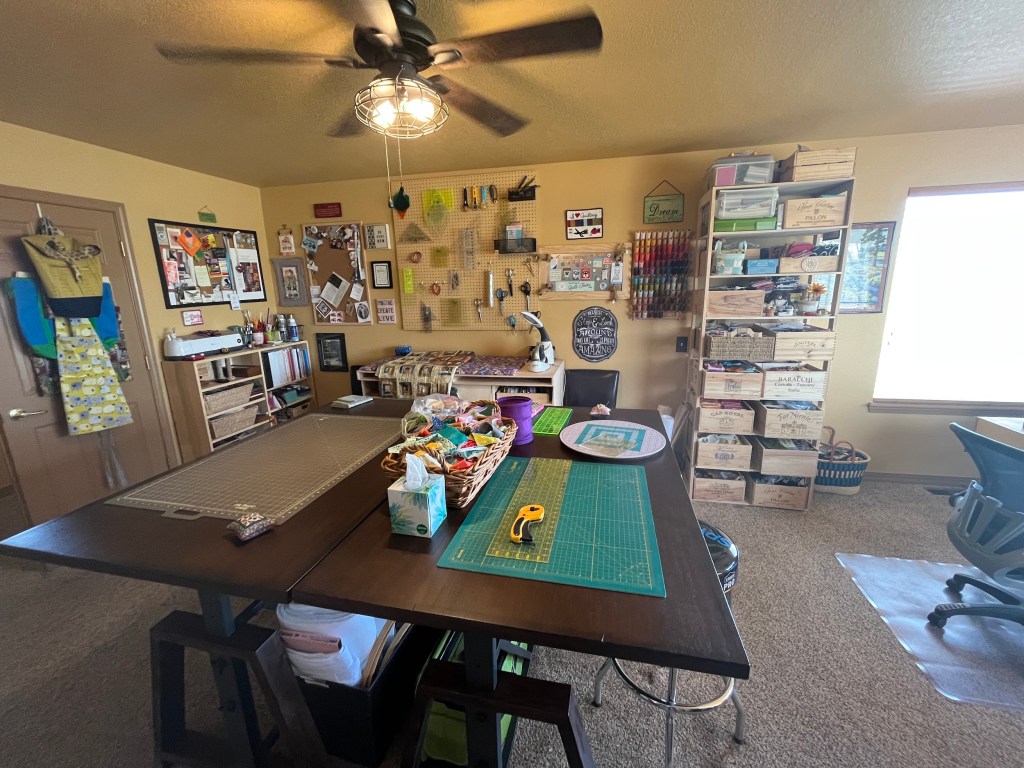
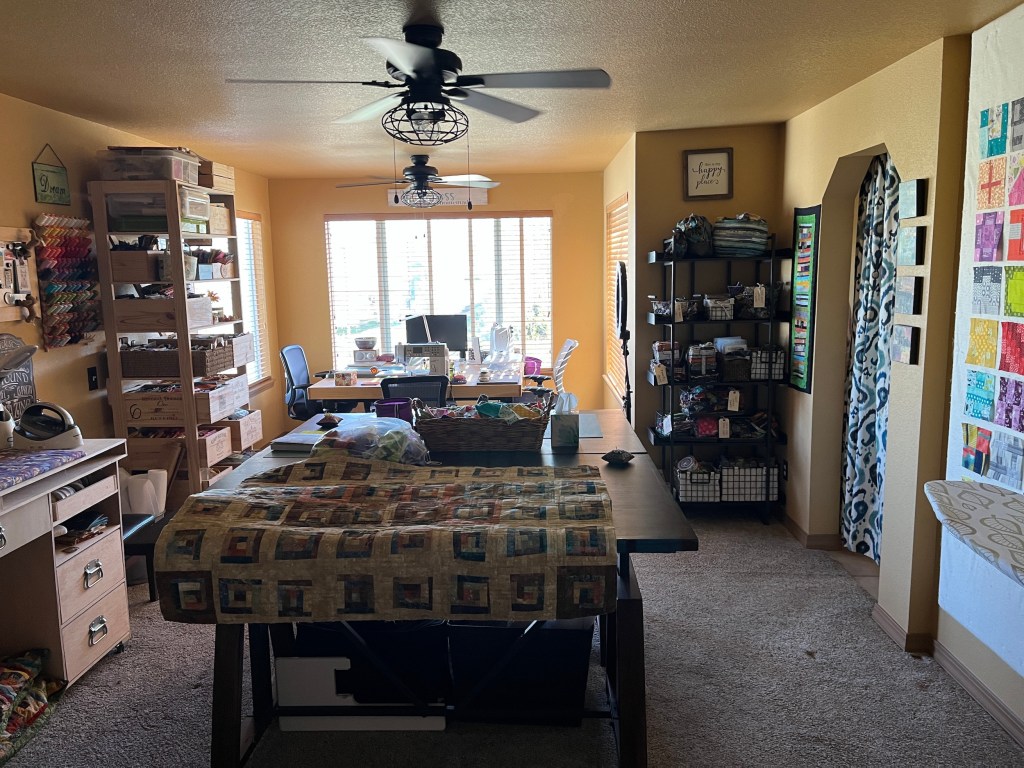
Full Studio Tour
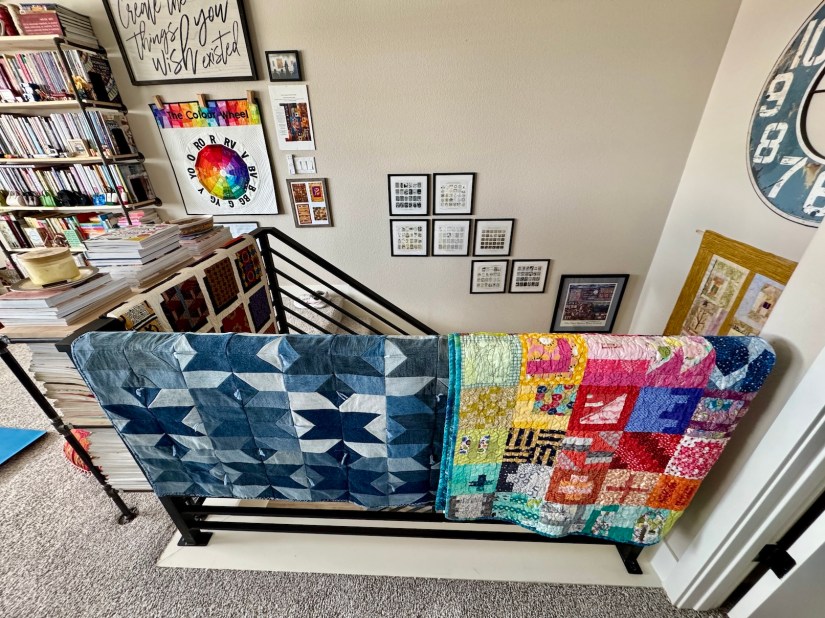
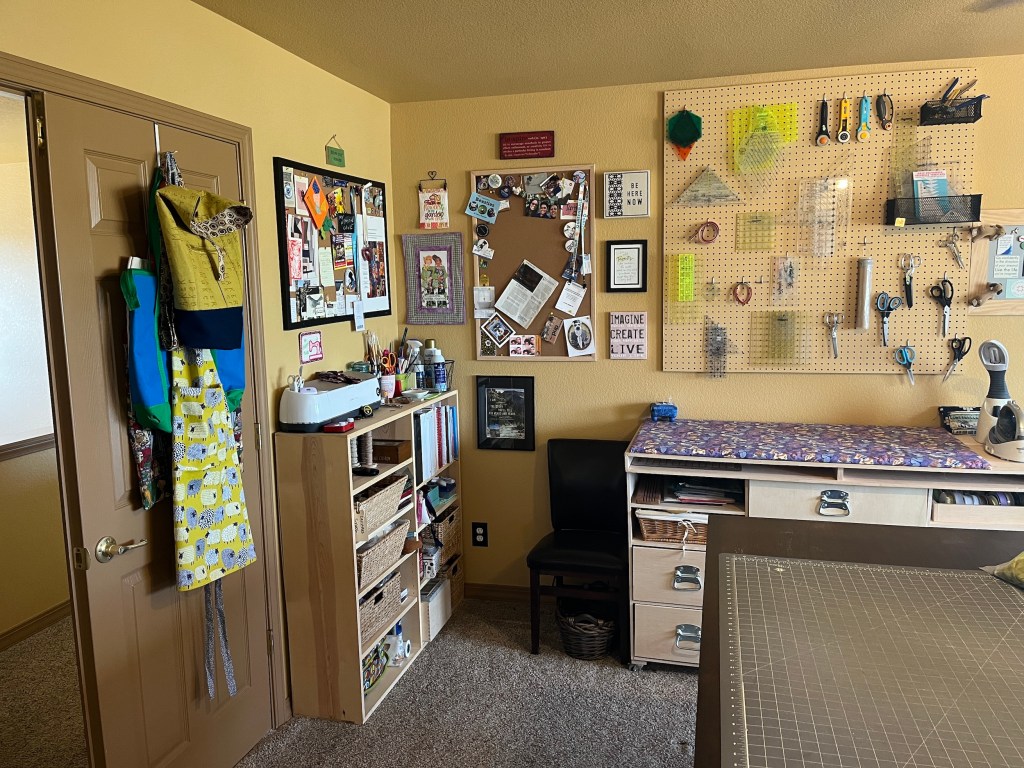
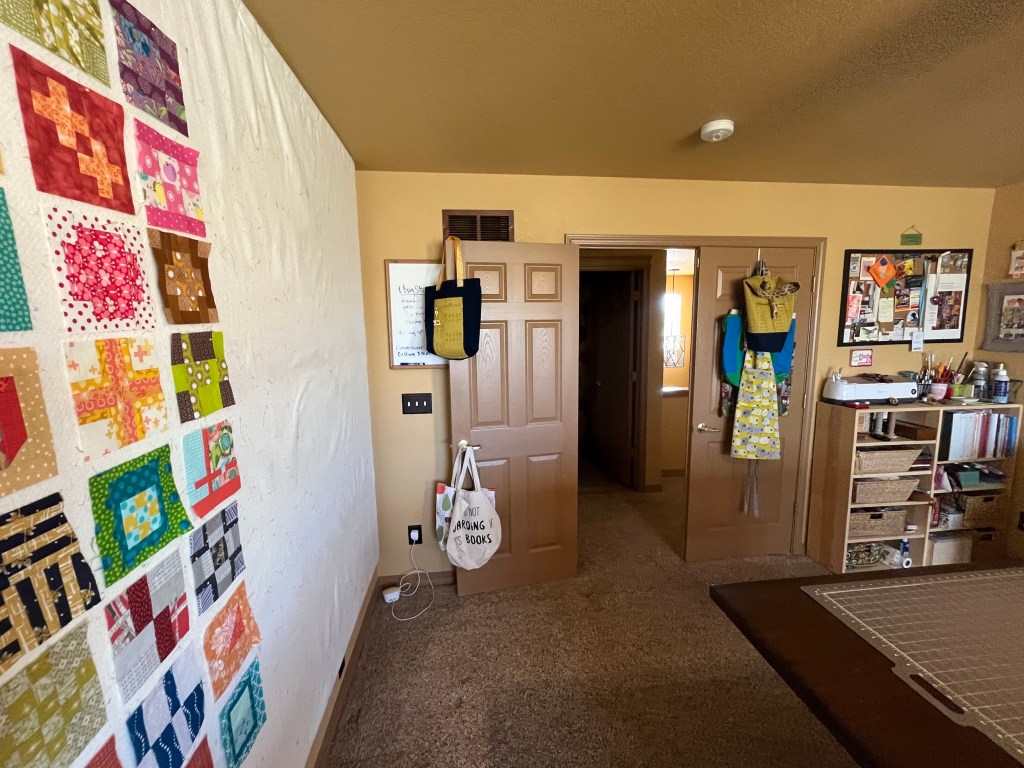
The stairs up to the loft (photographed looking down from the loft):
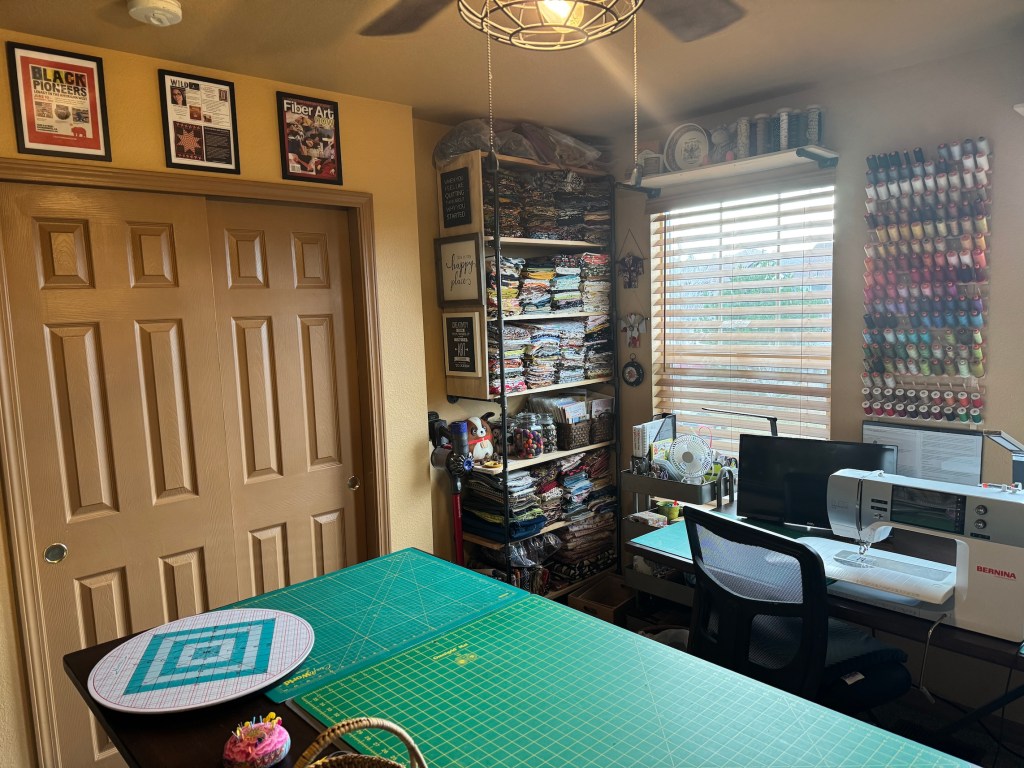
Entering the loft:
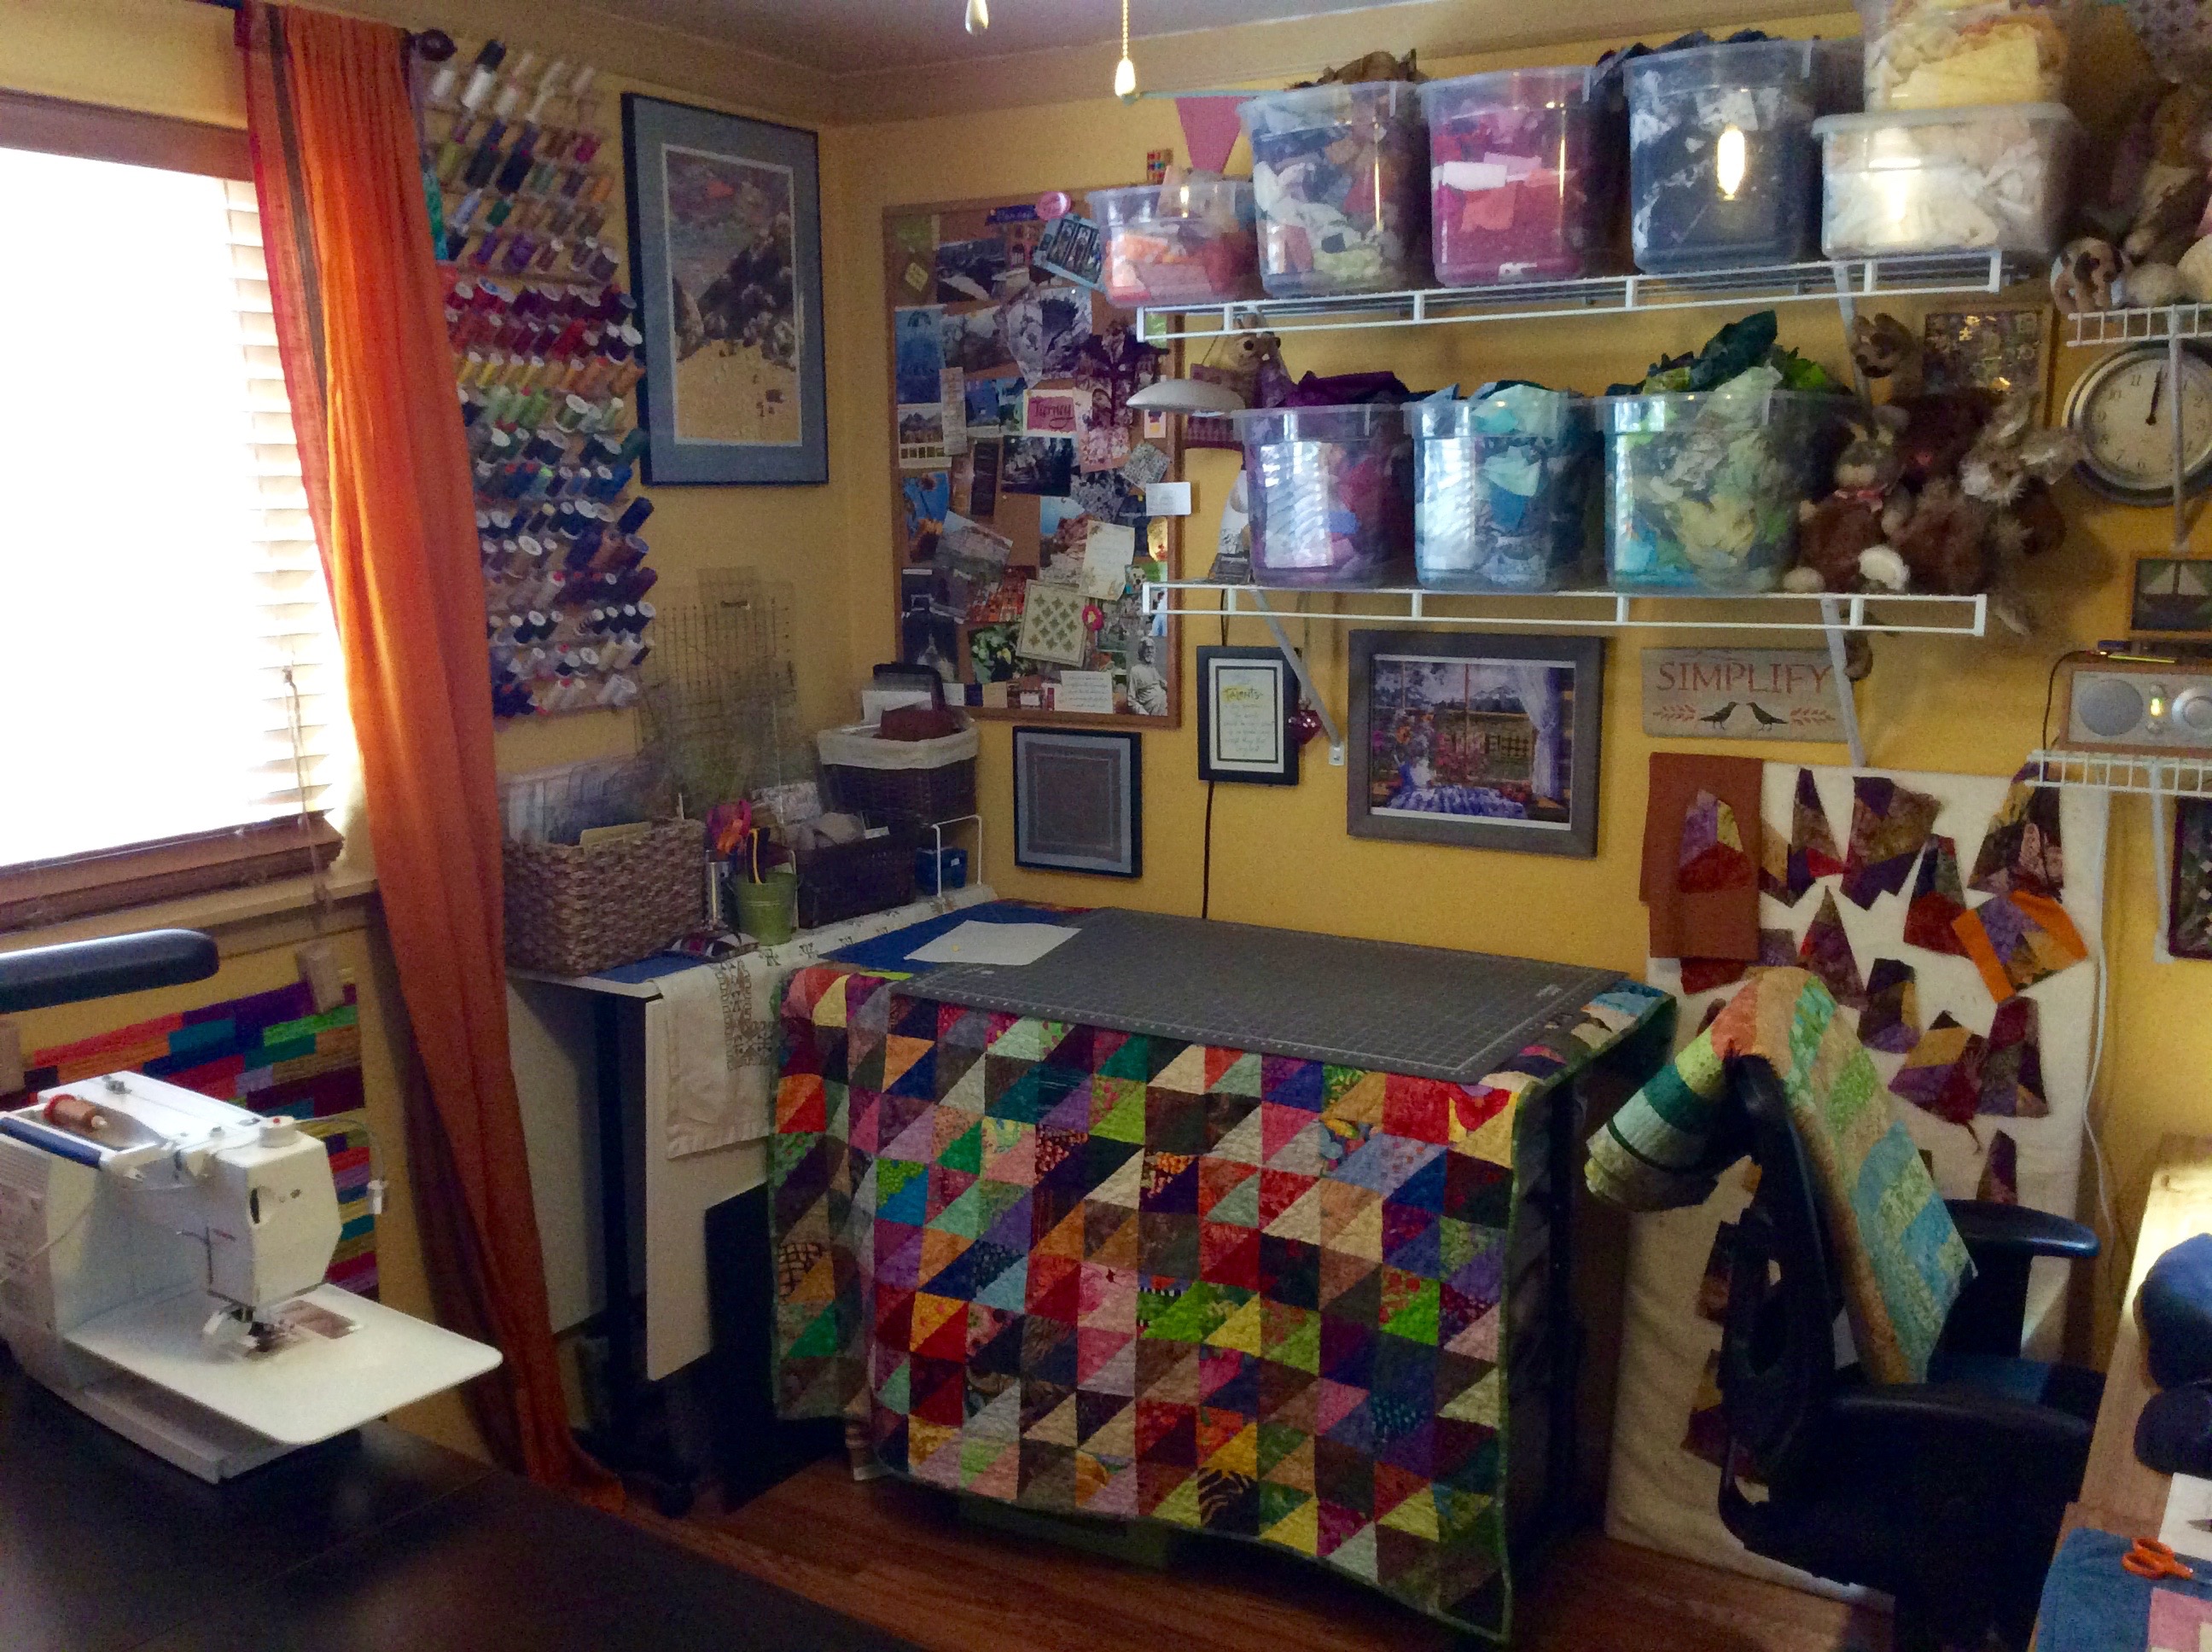
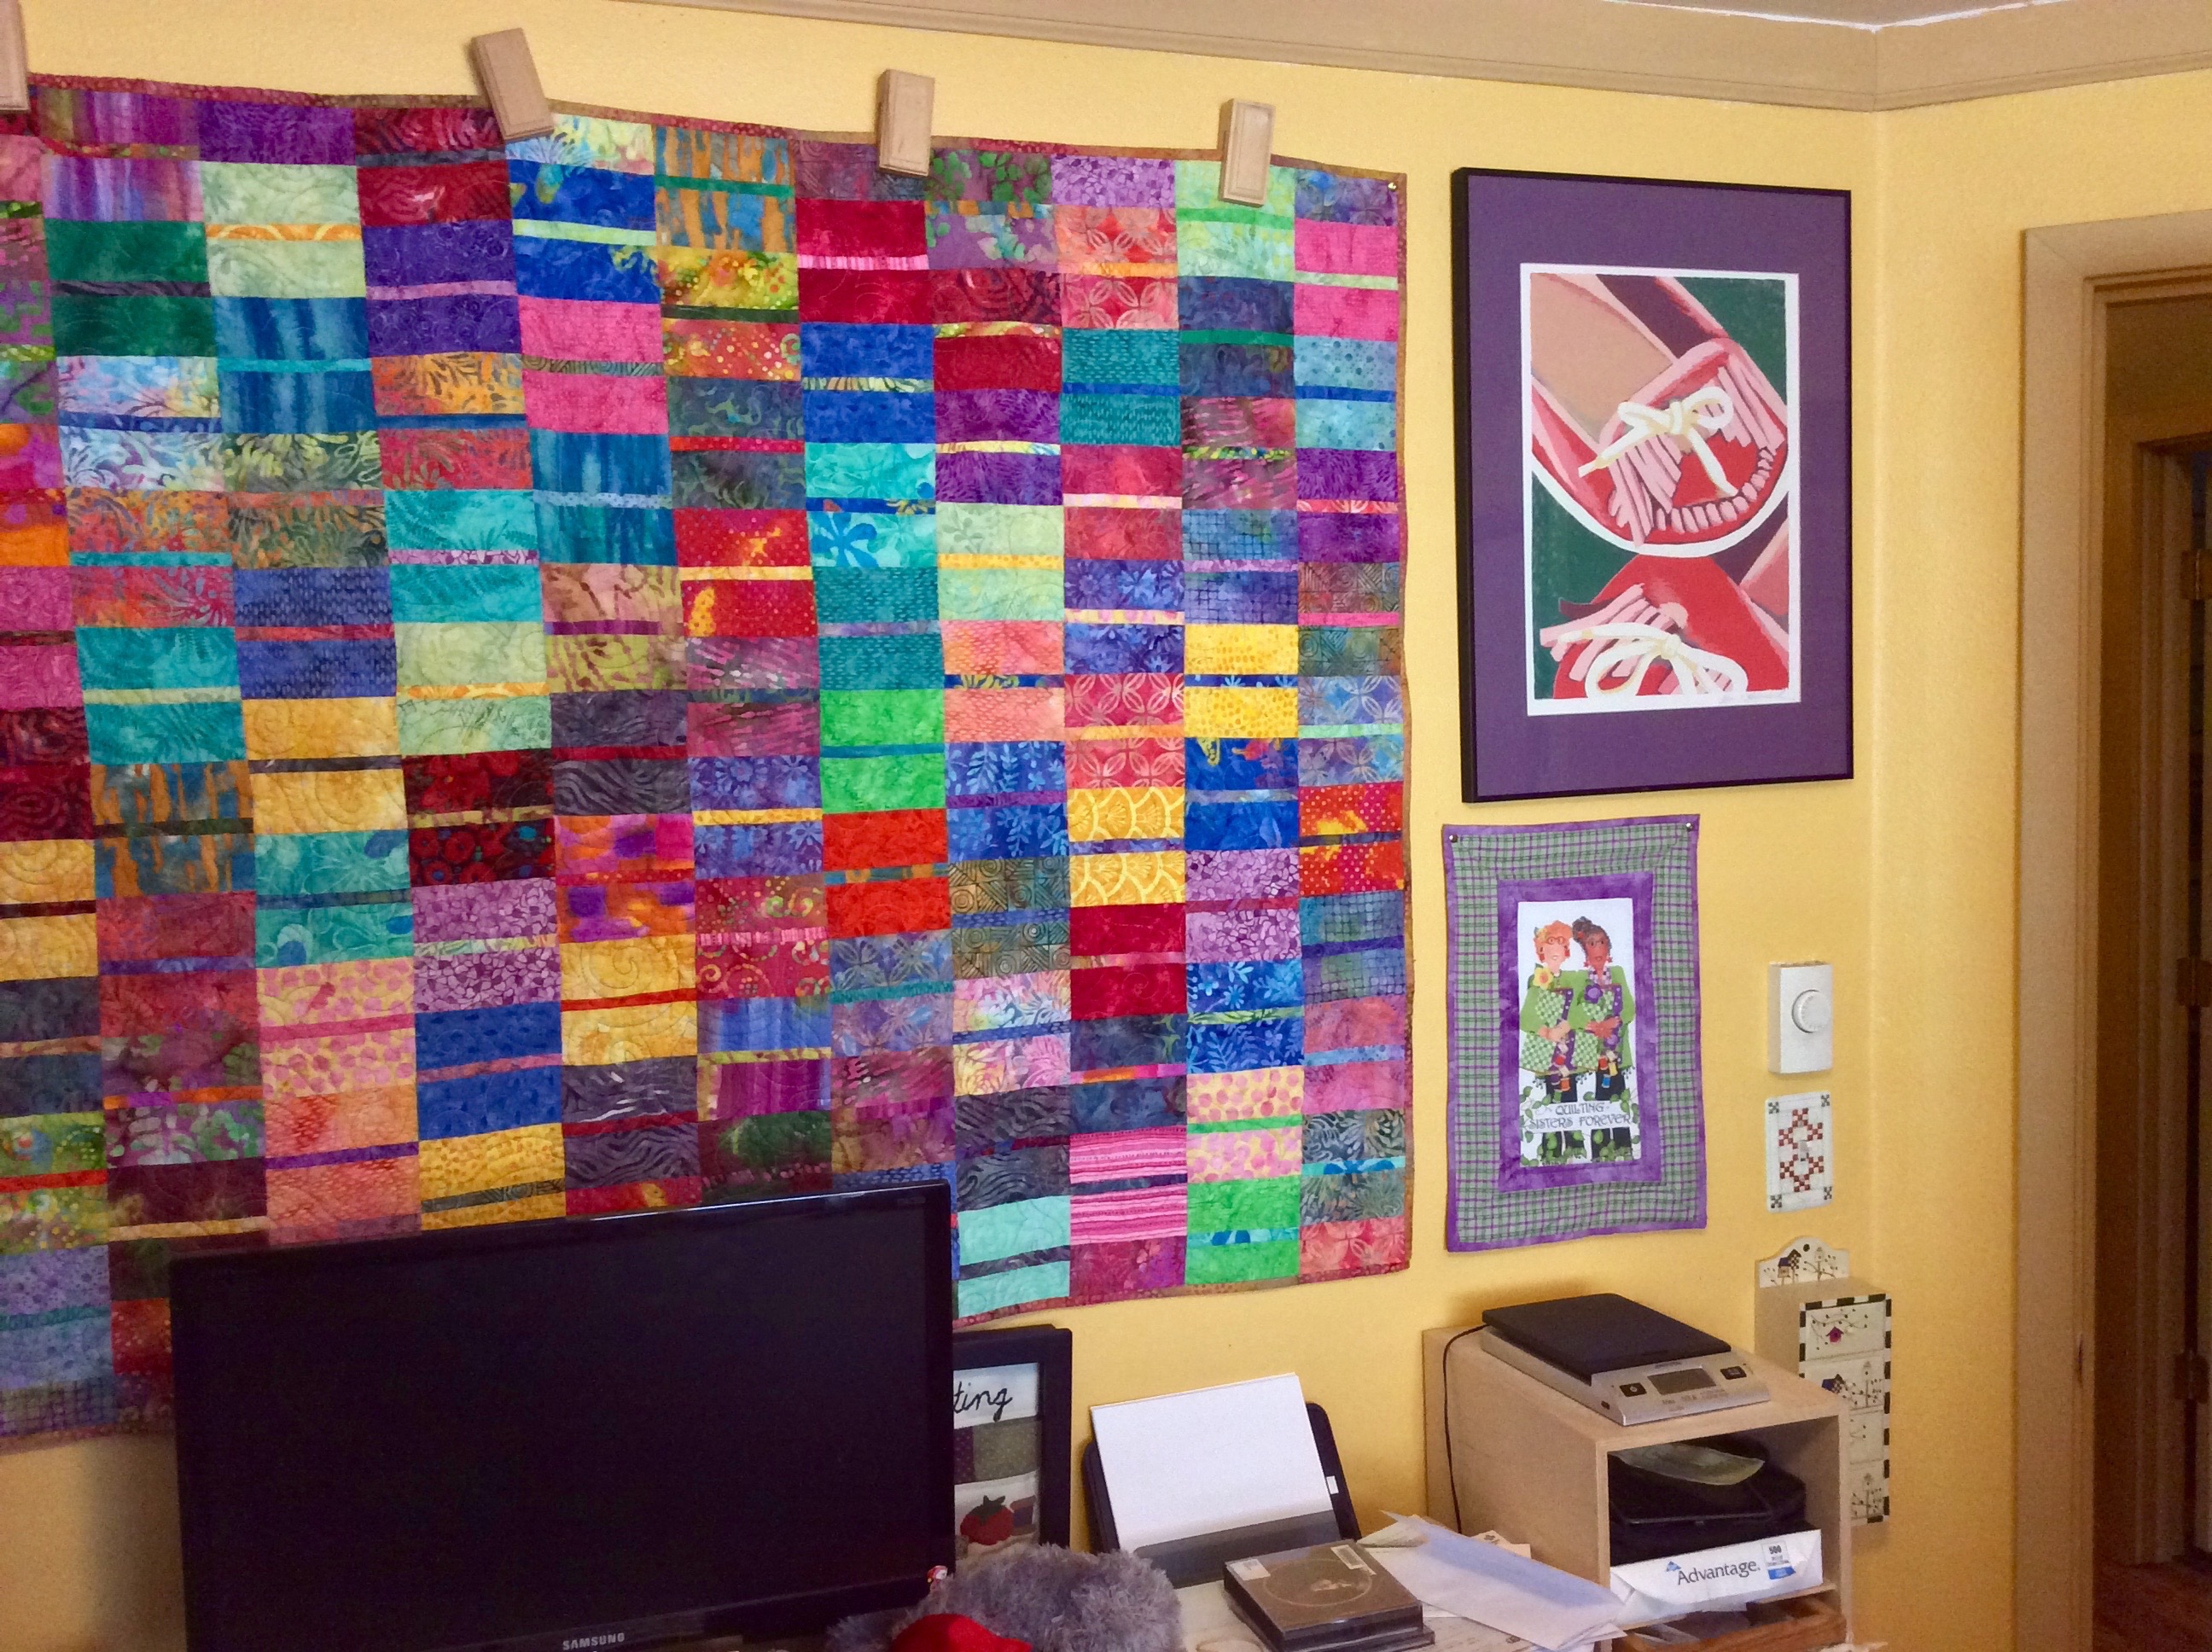
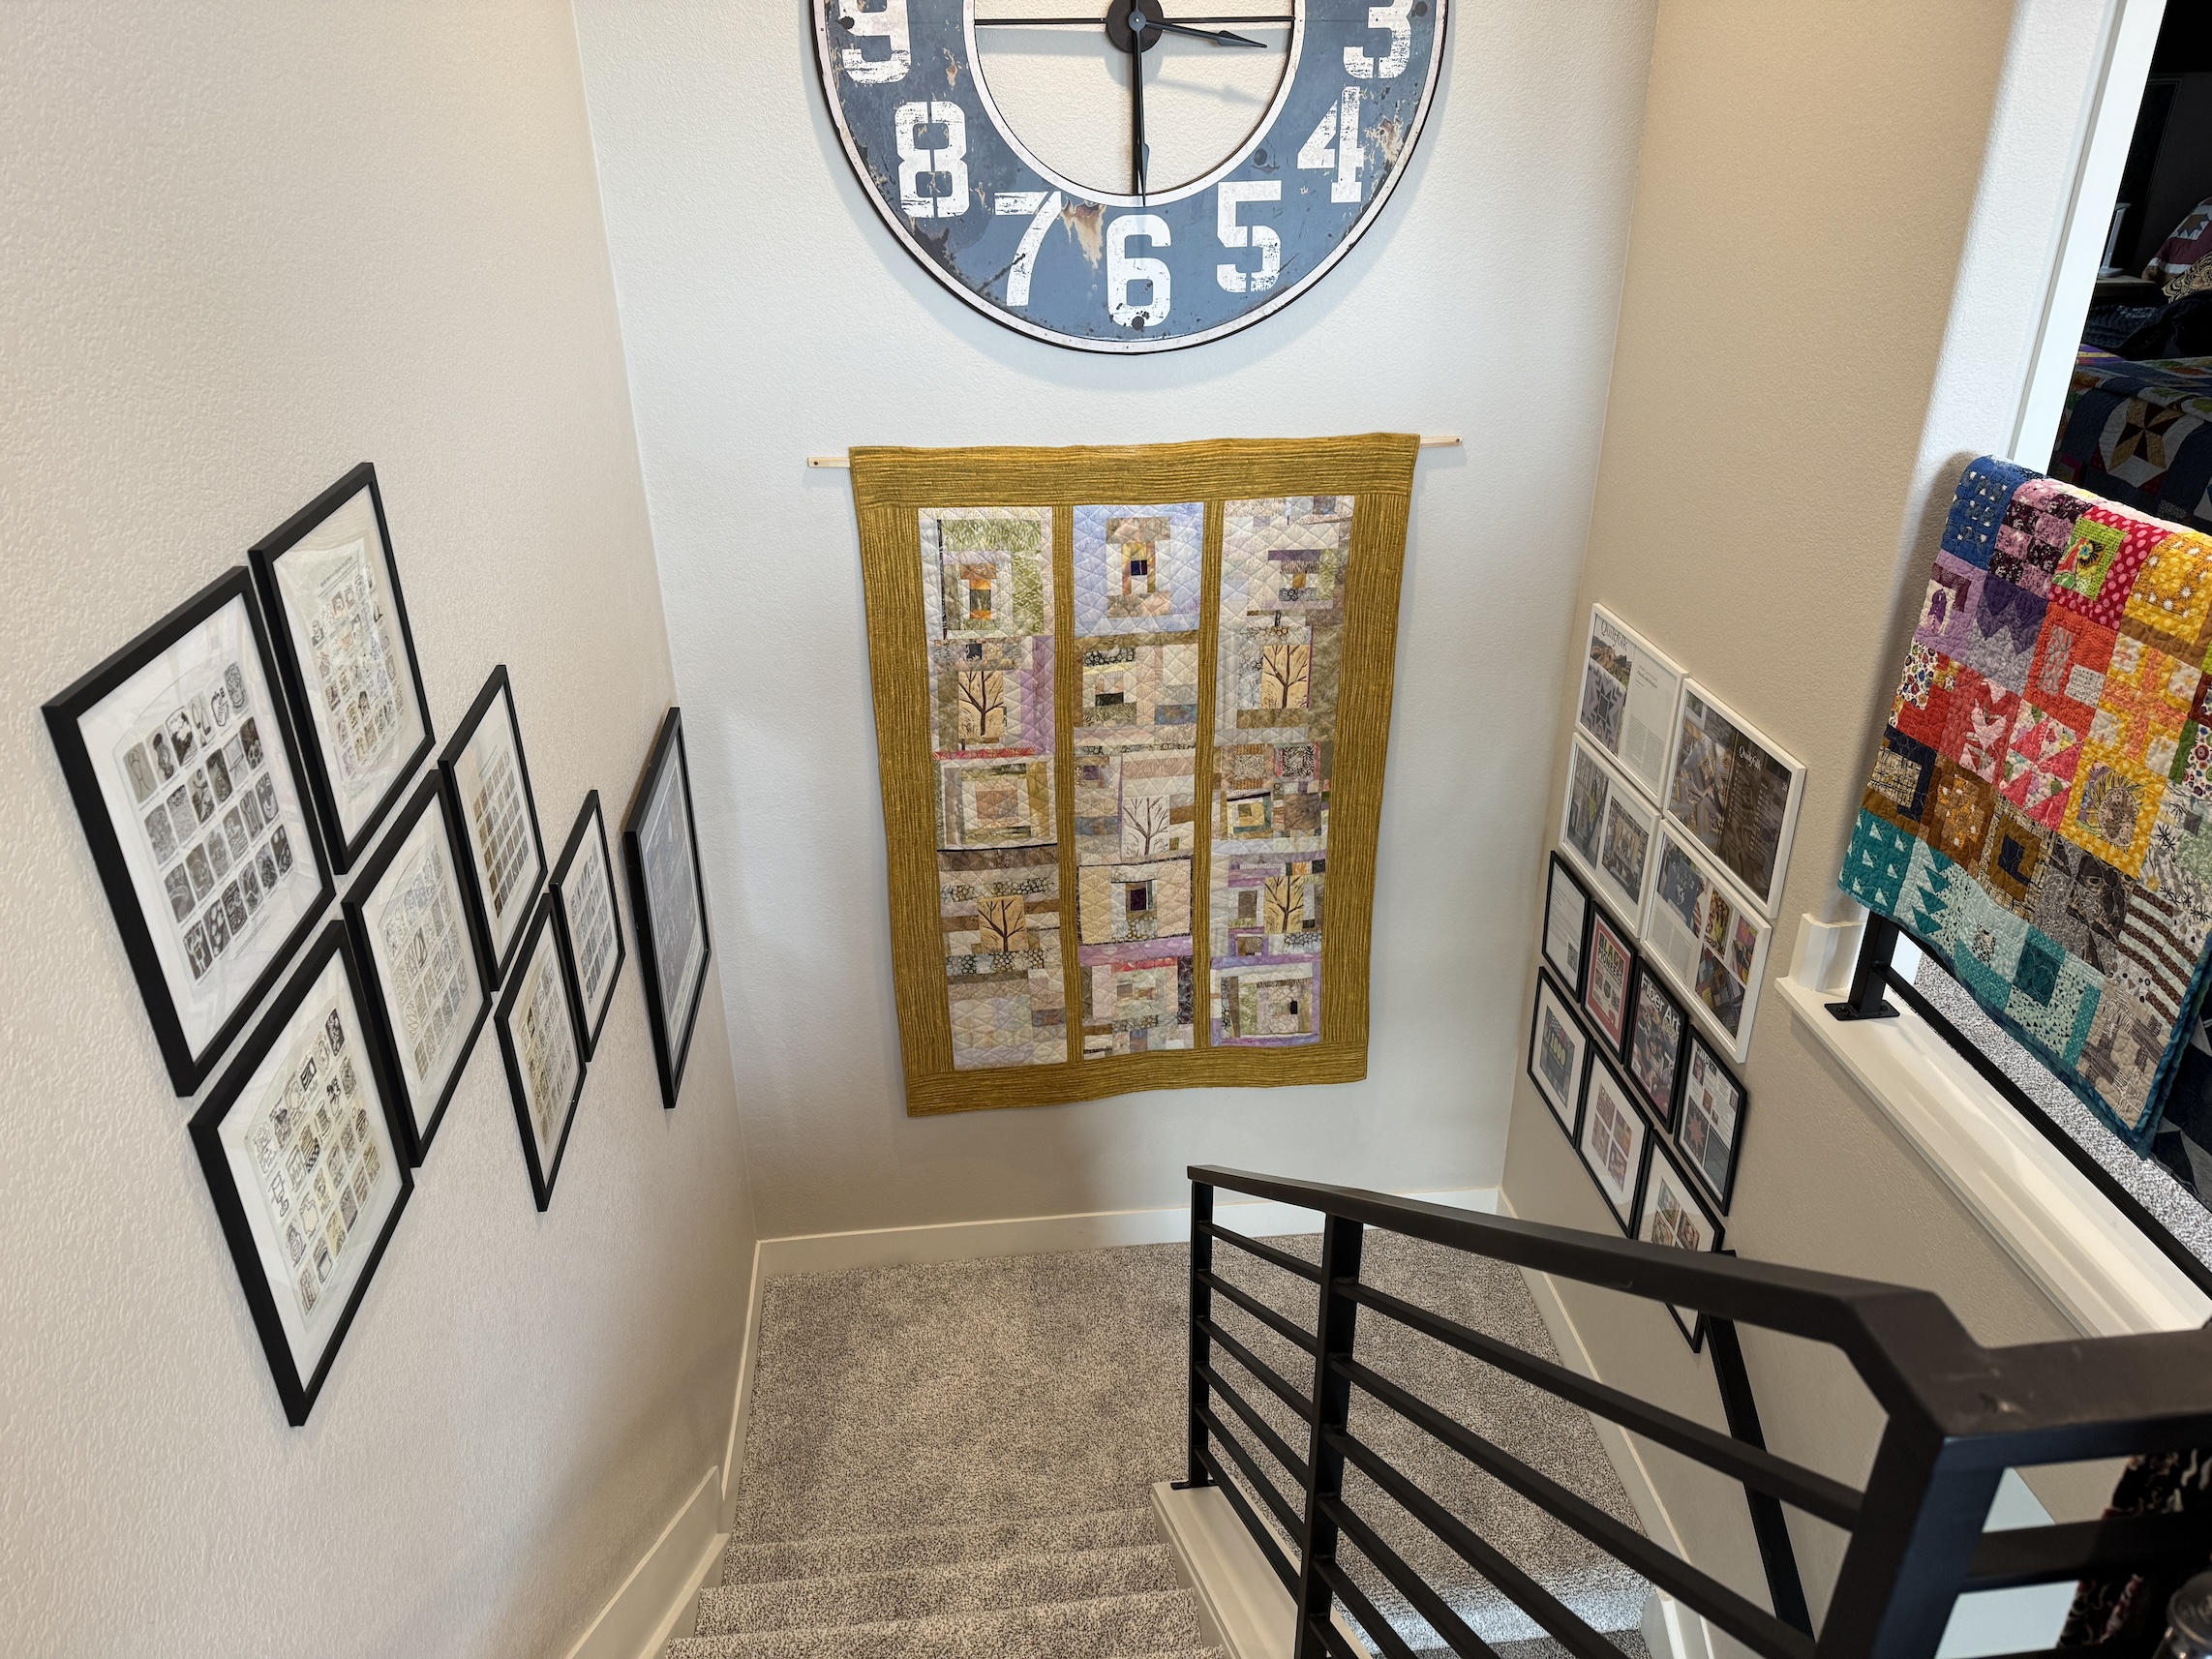
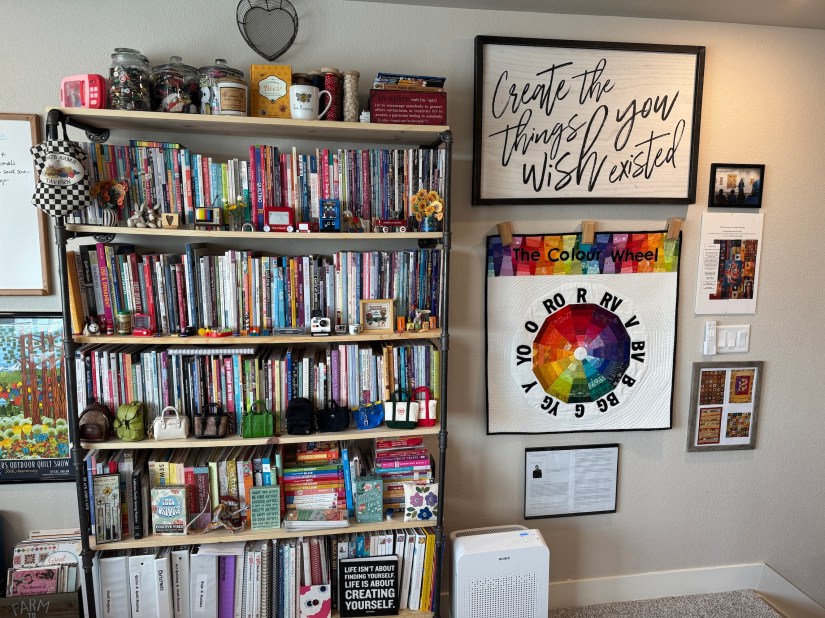
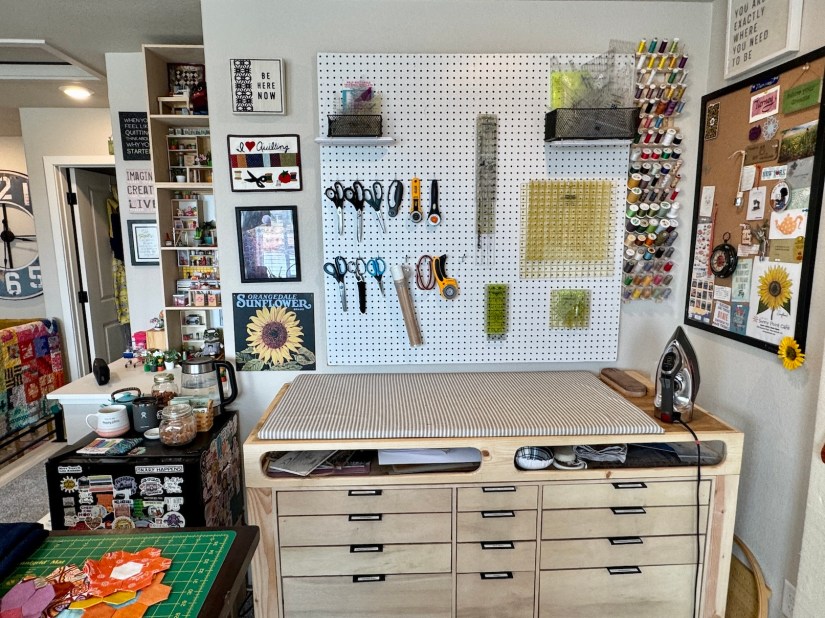
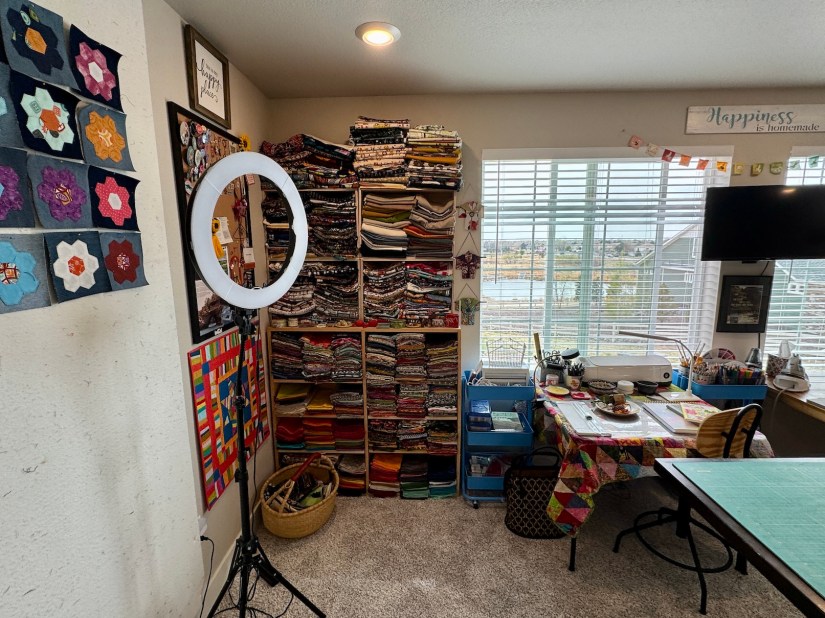
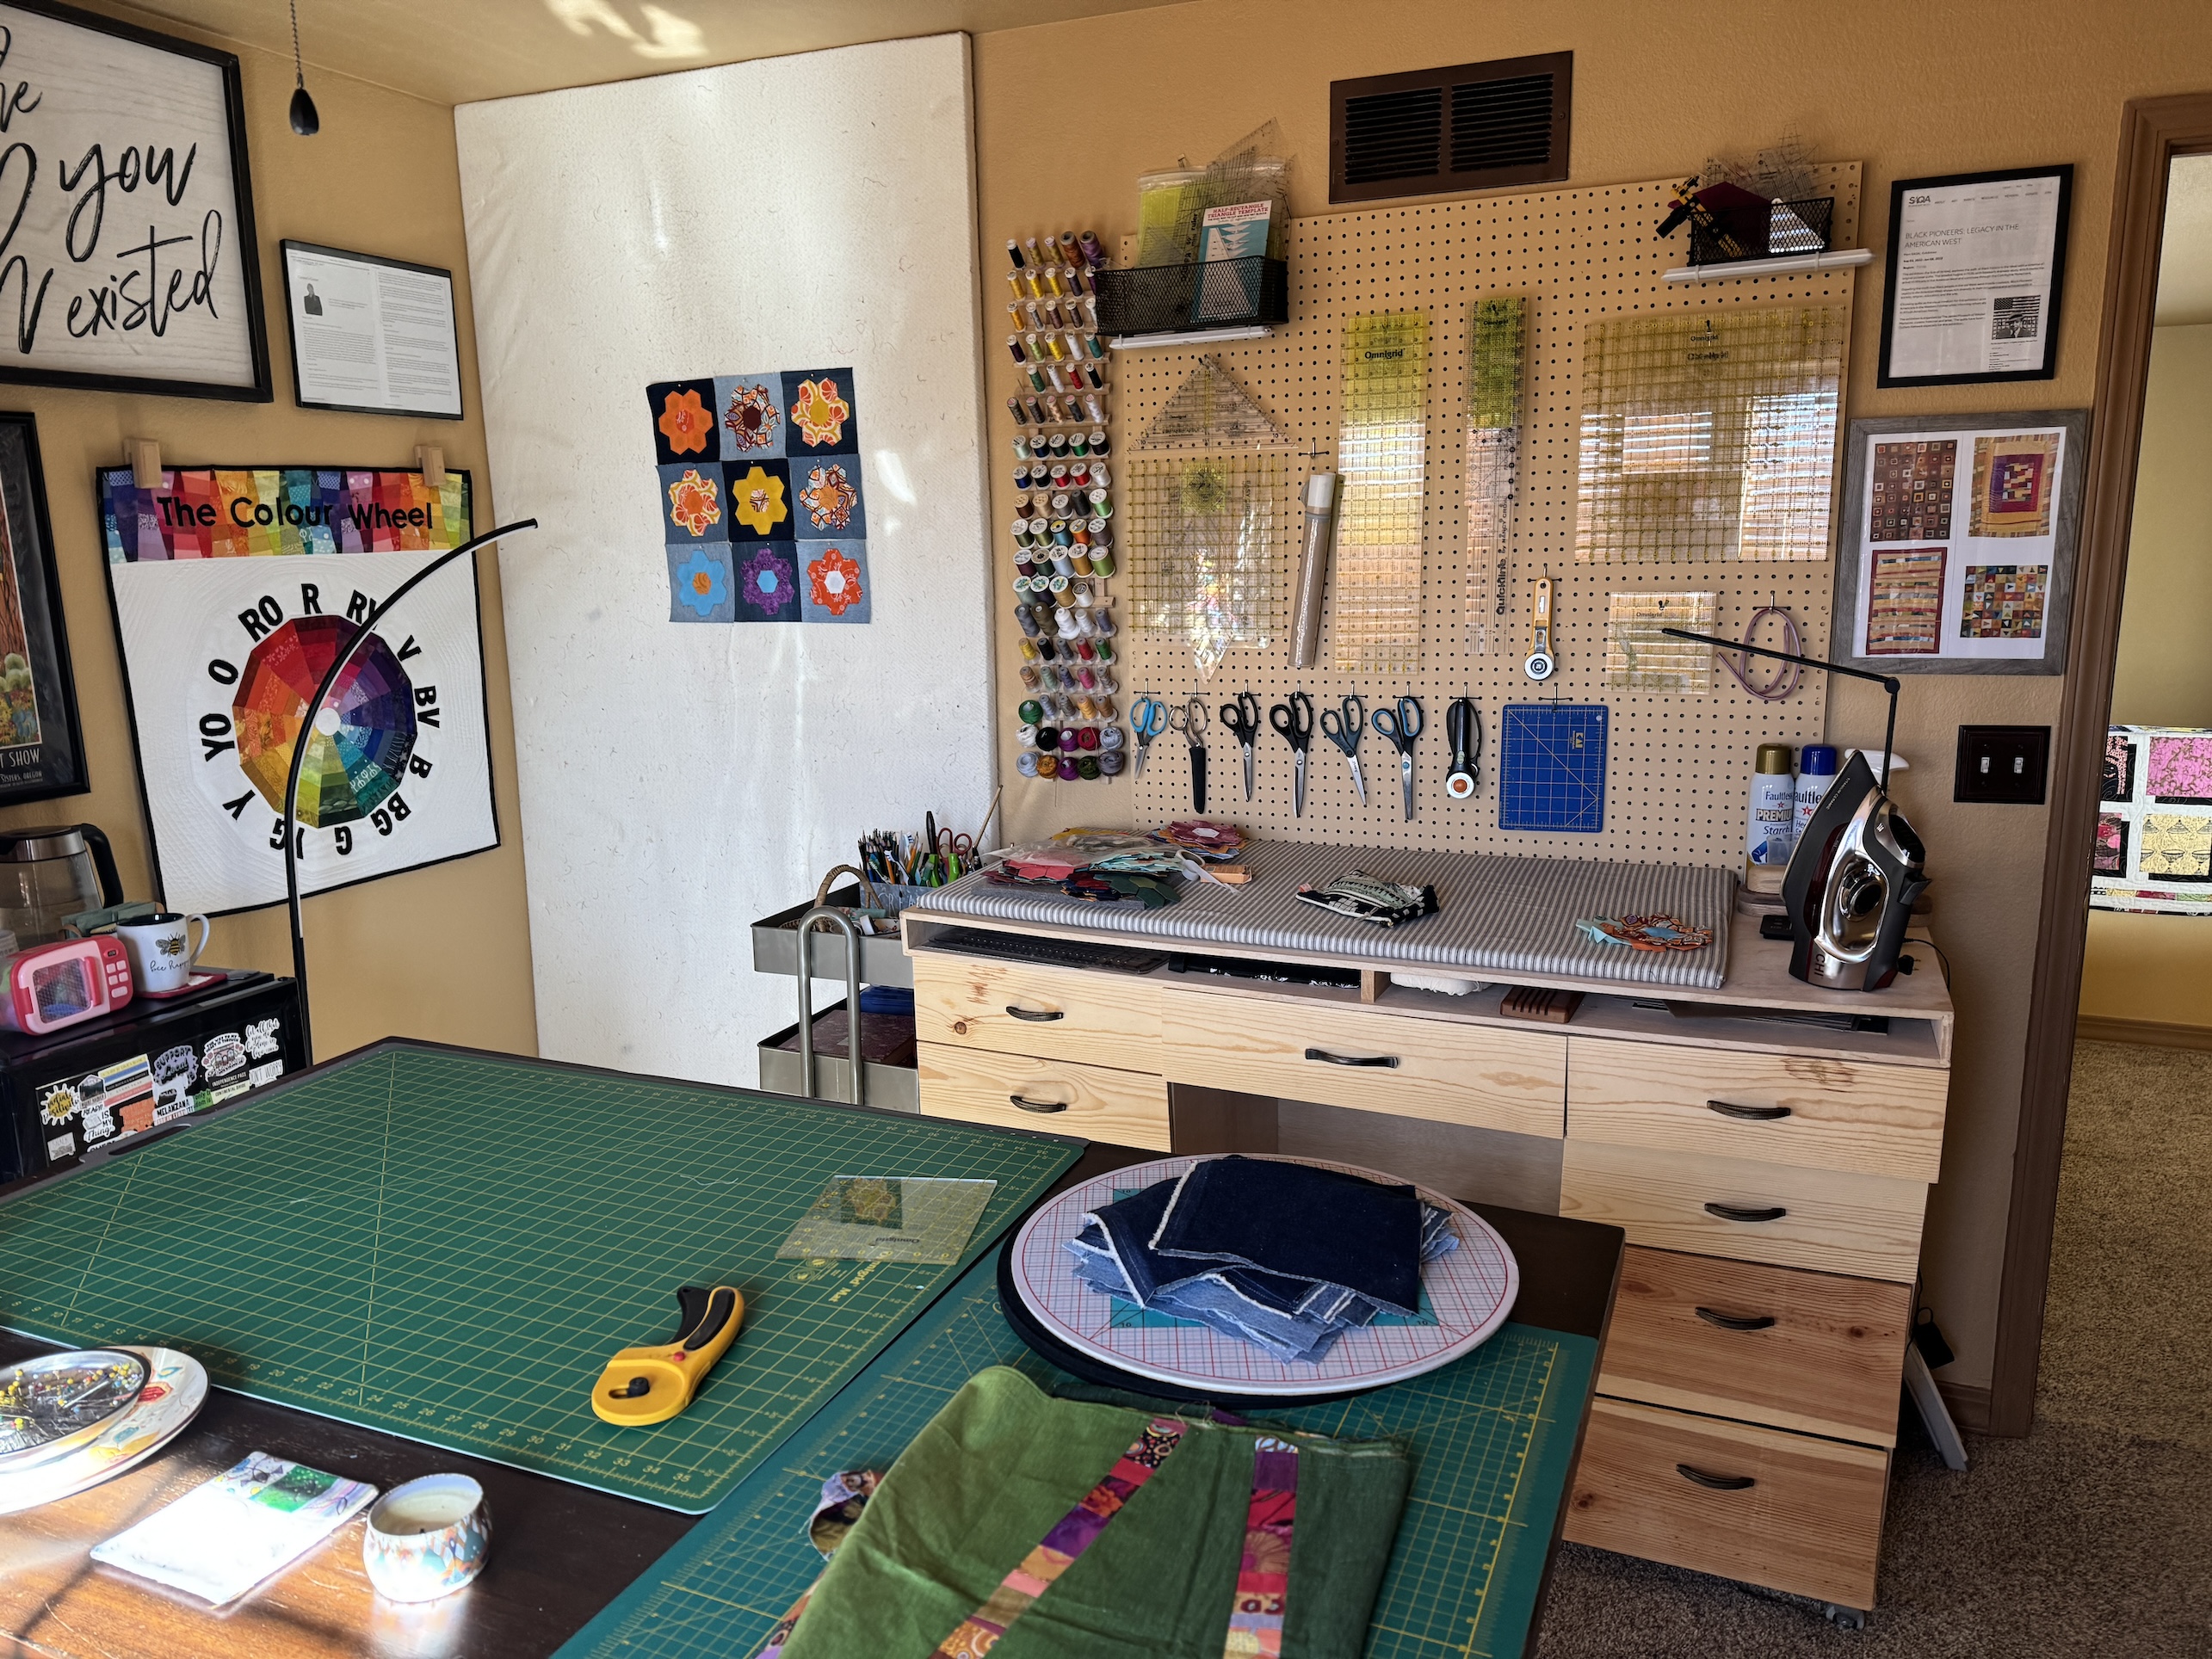
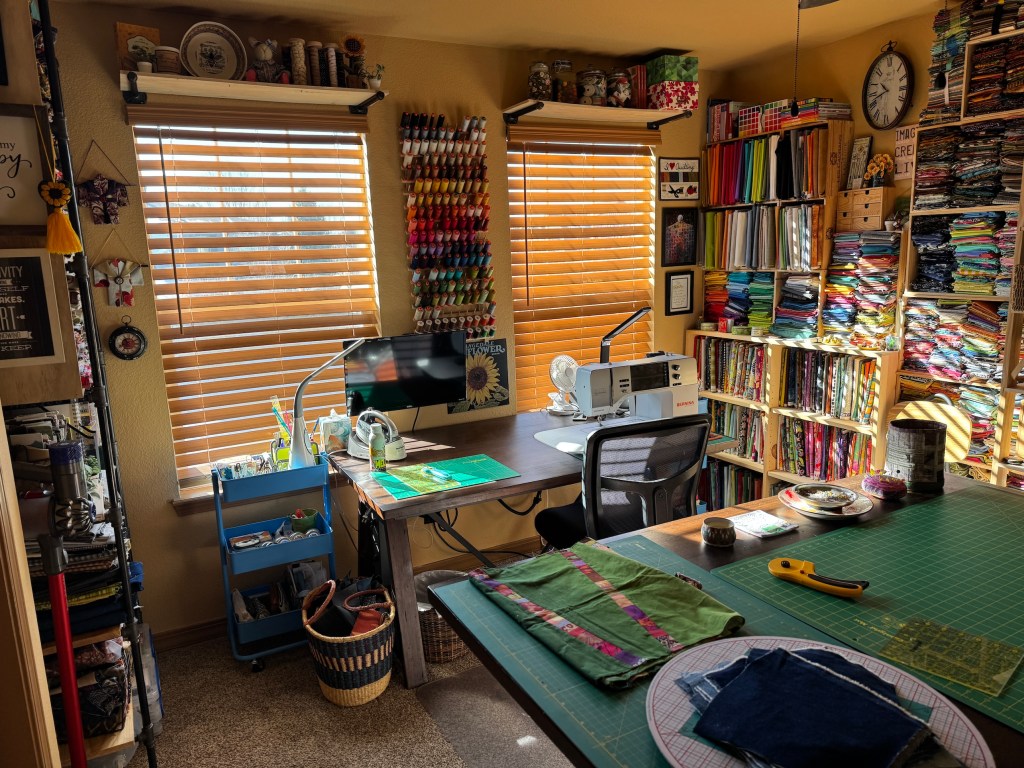
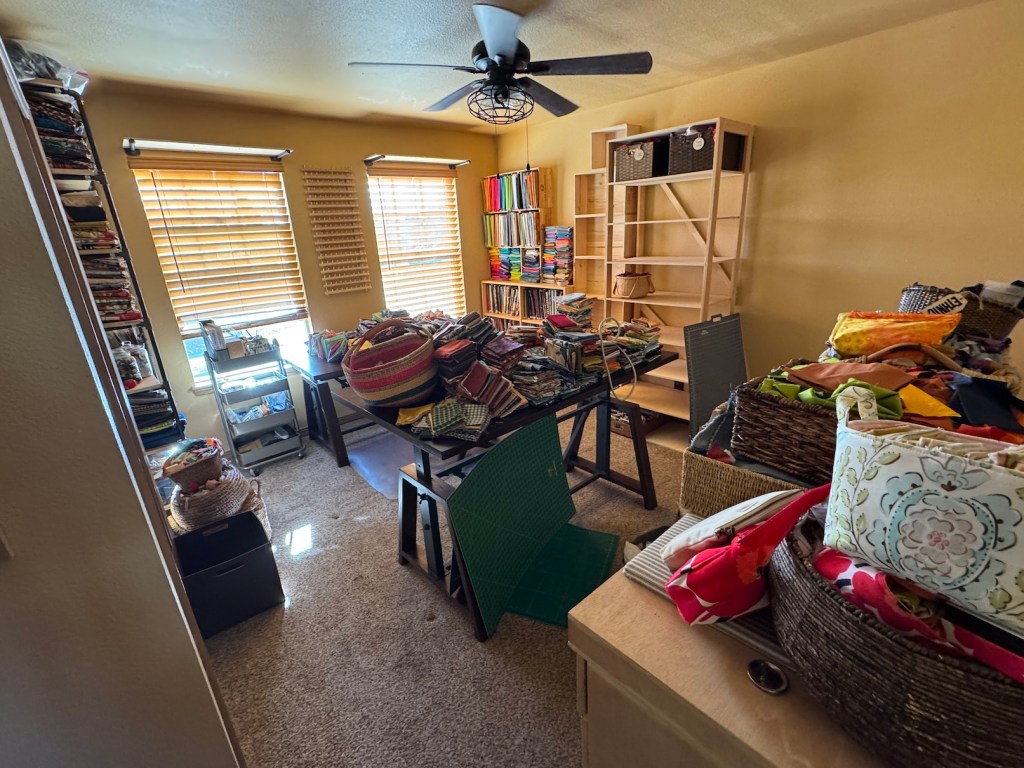
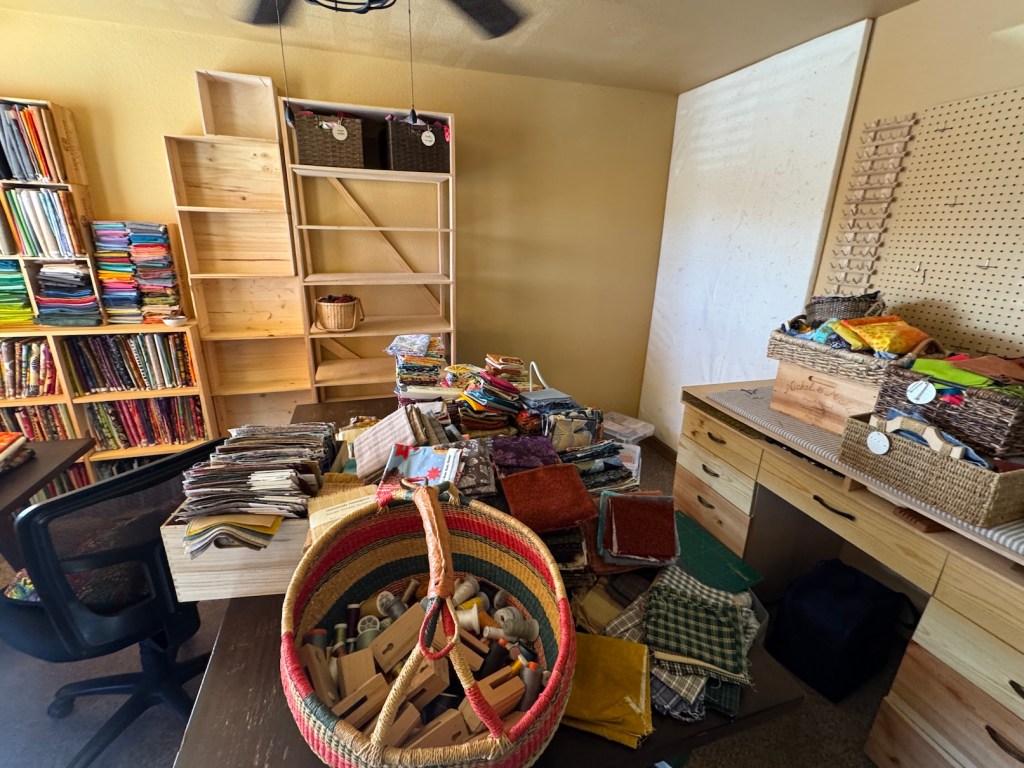
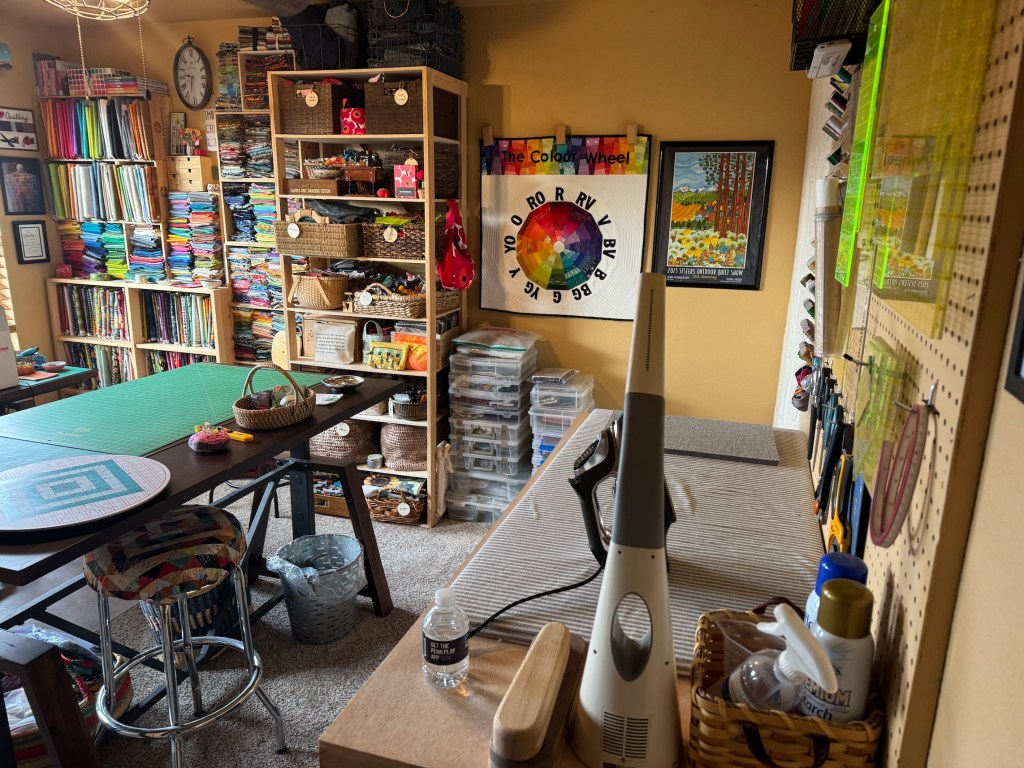
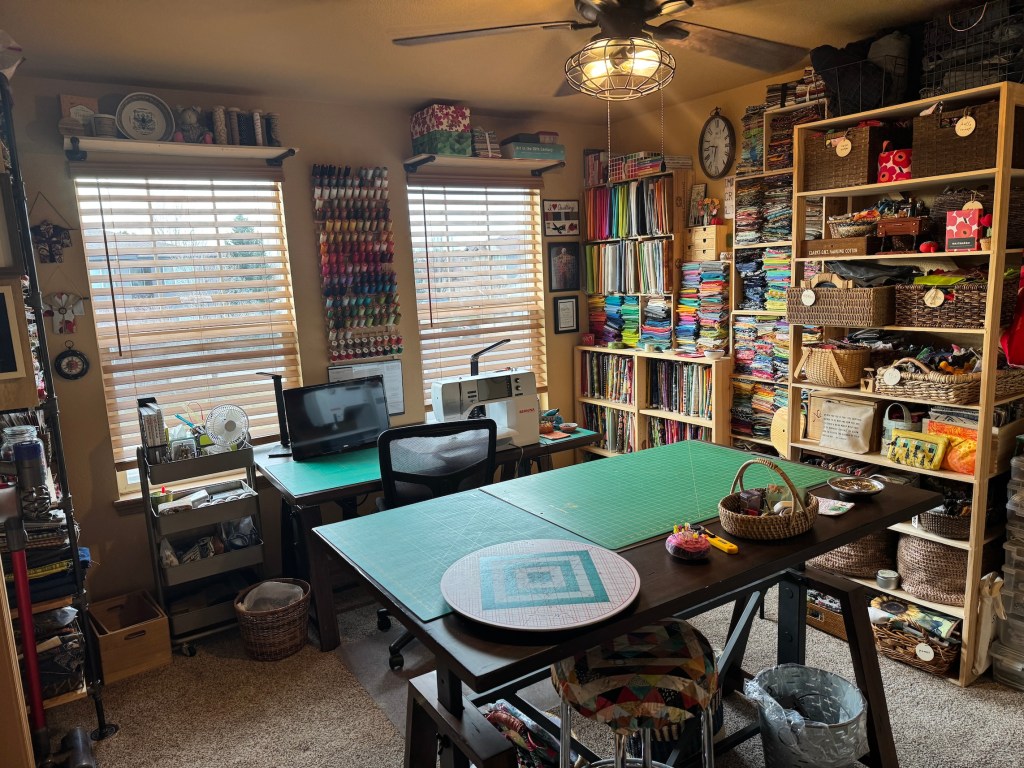
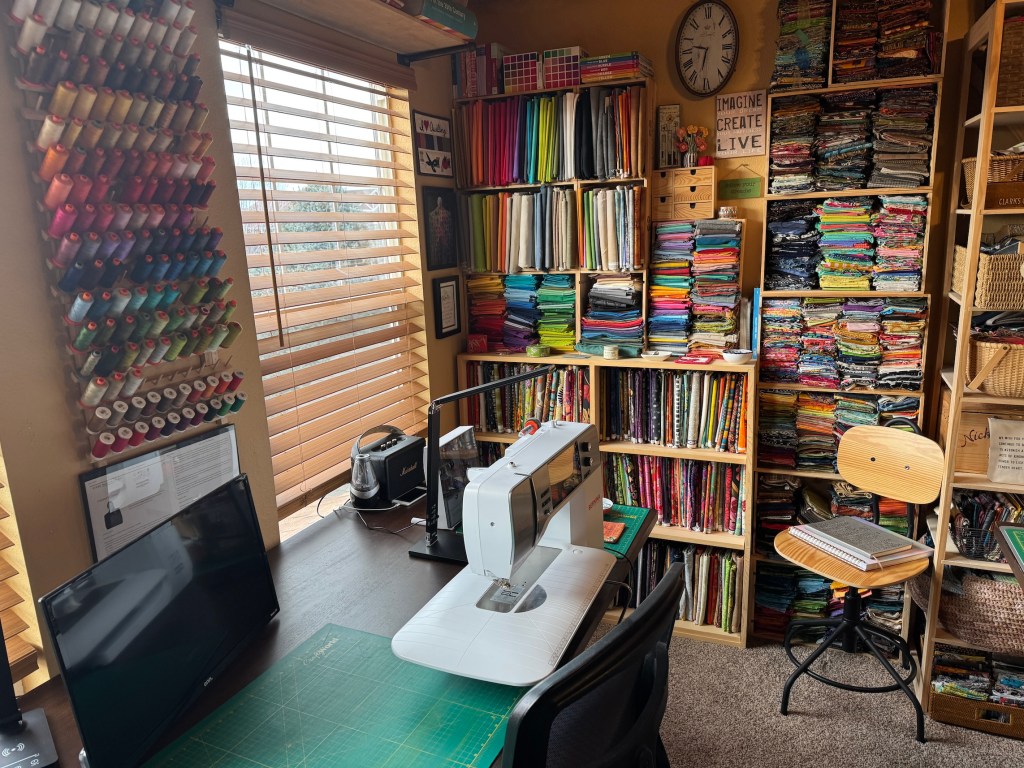
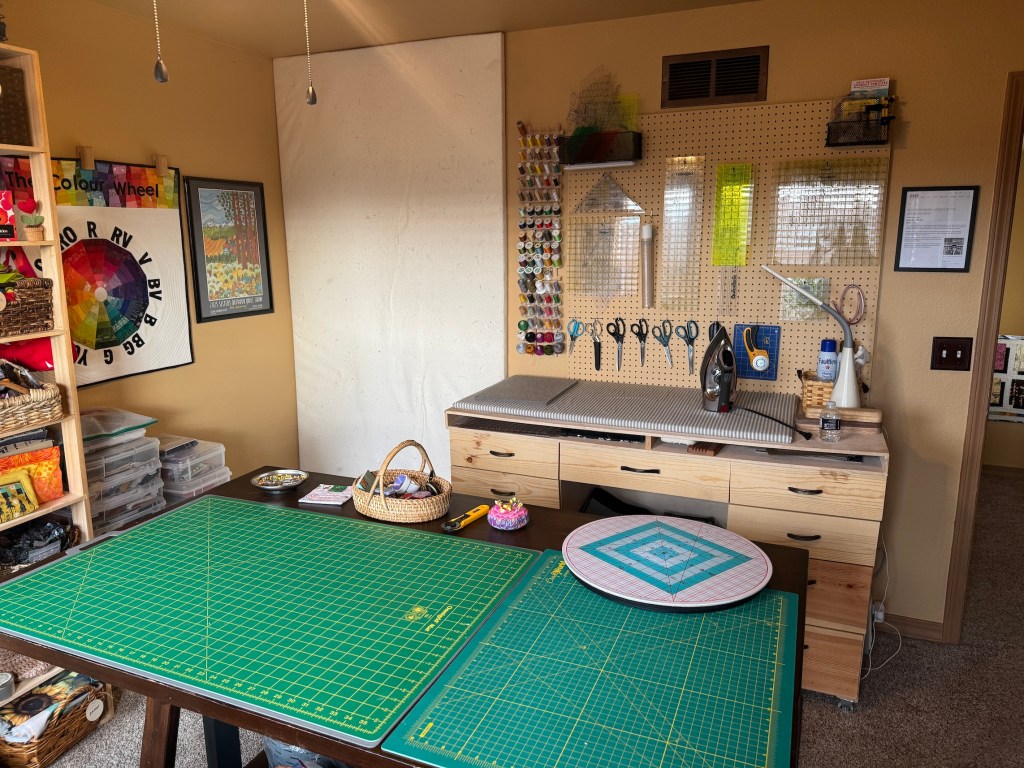
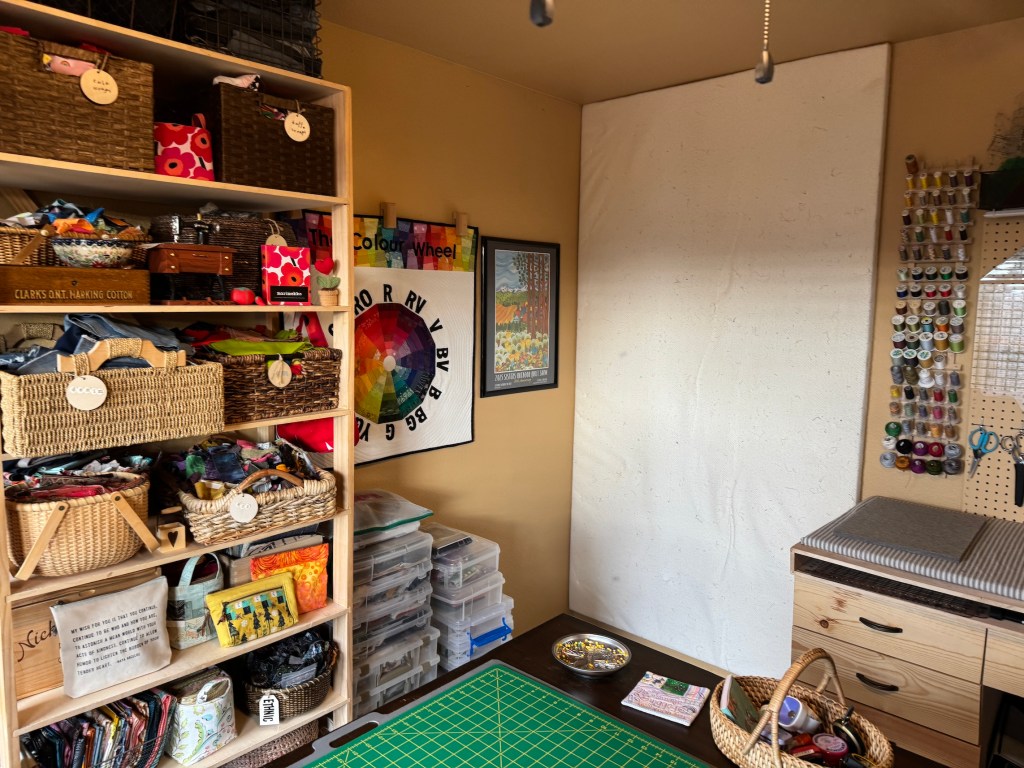
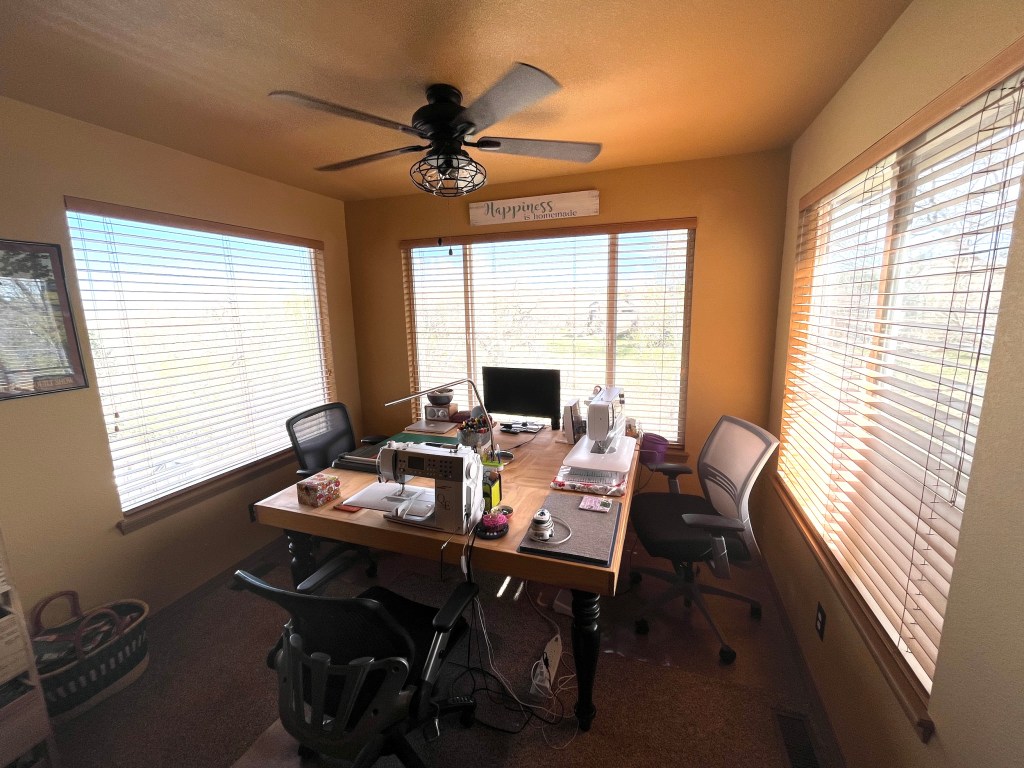
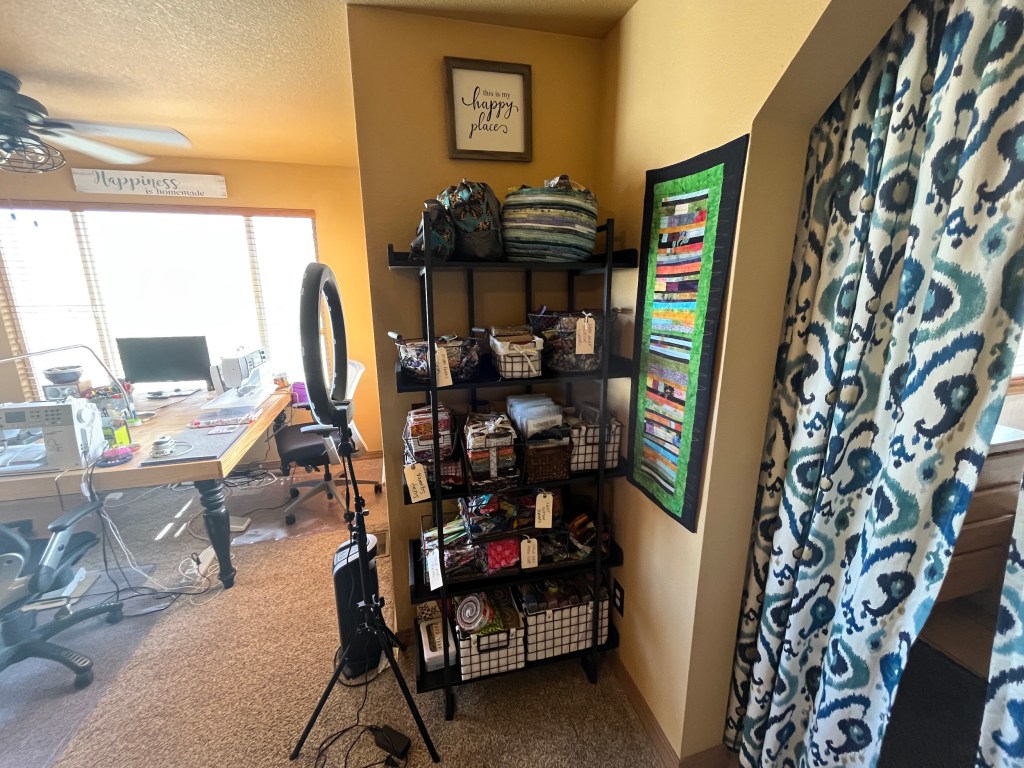
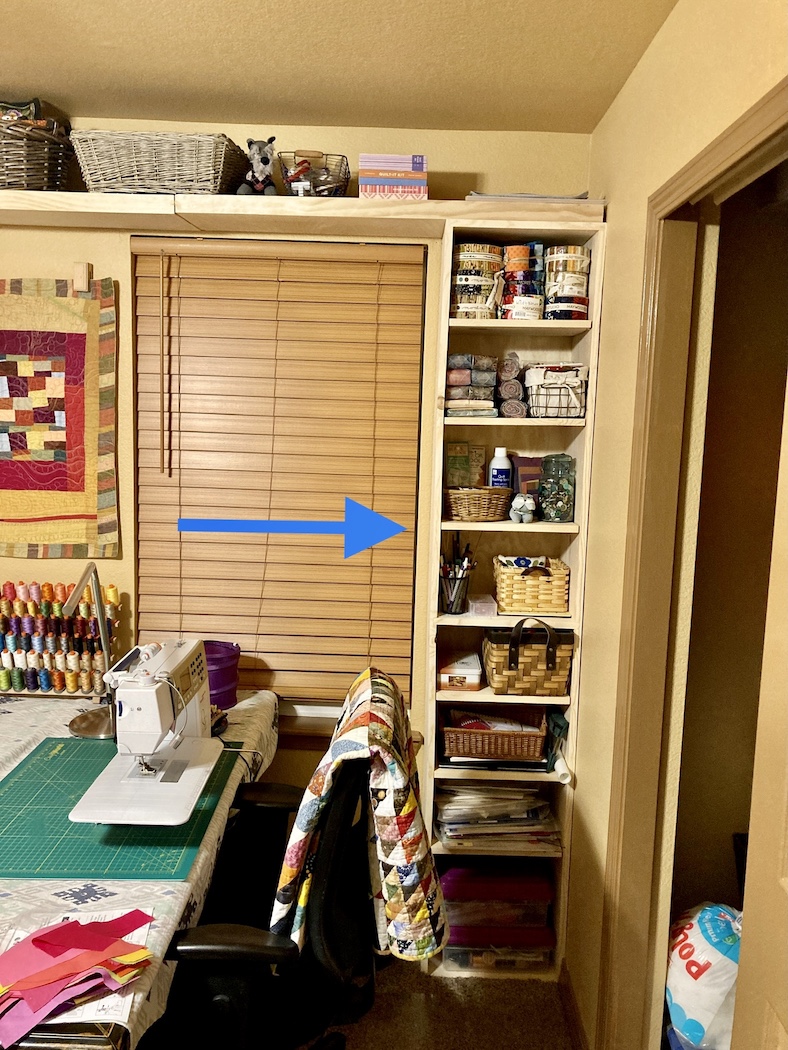
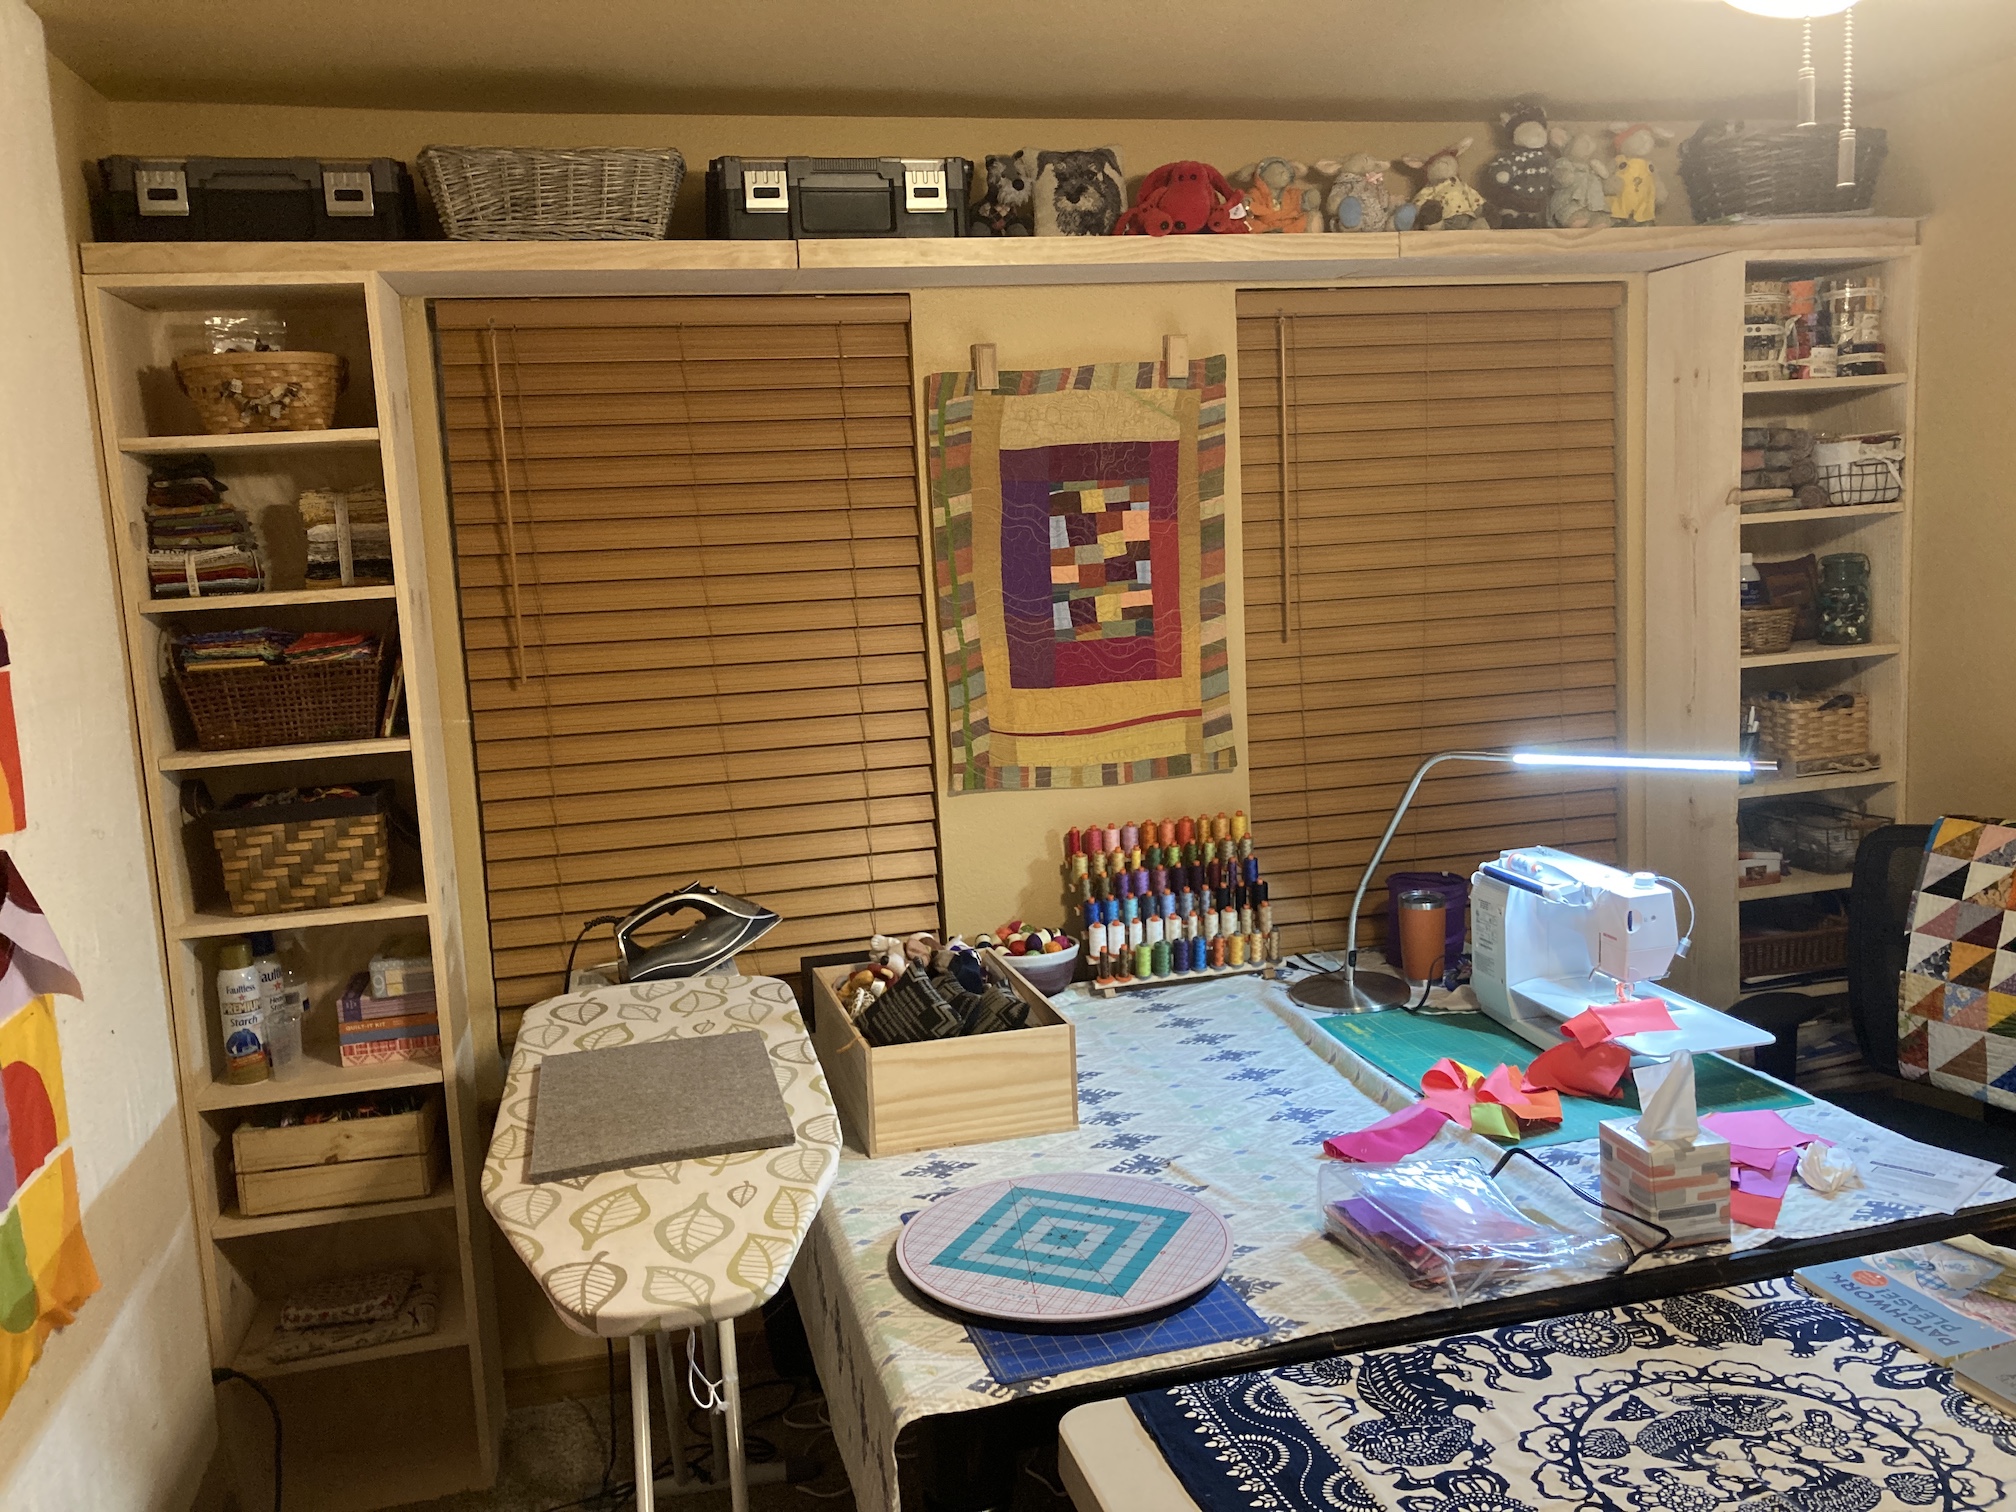
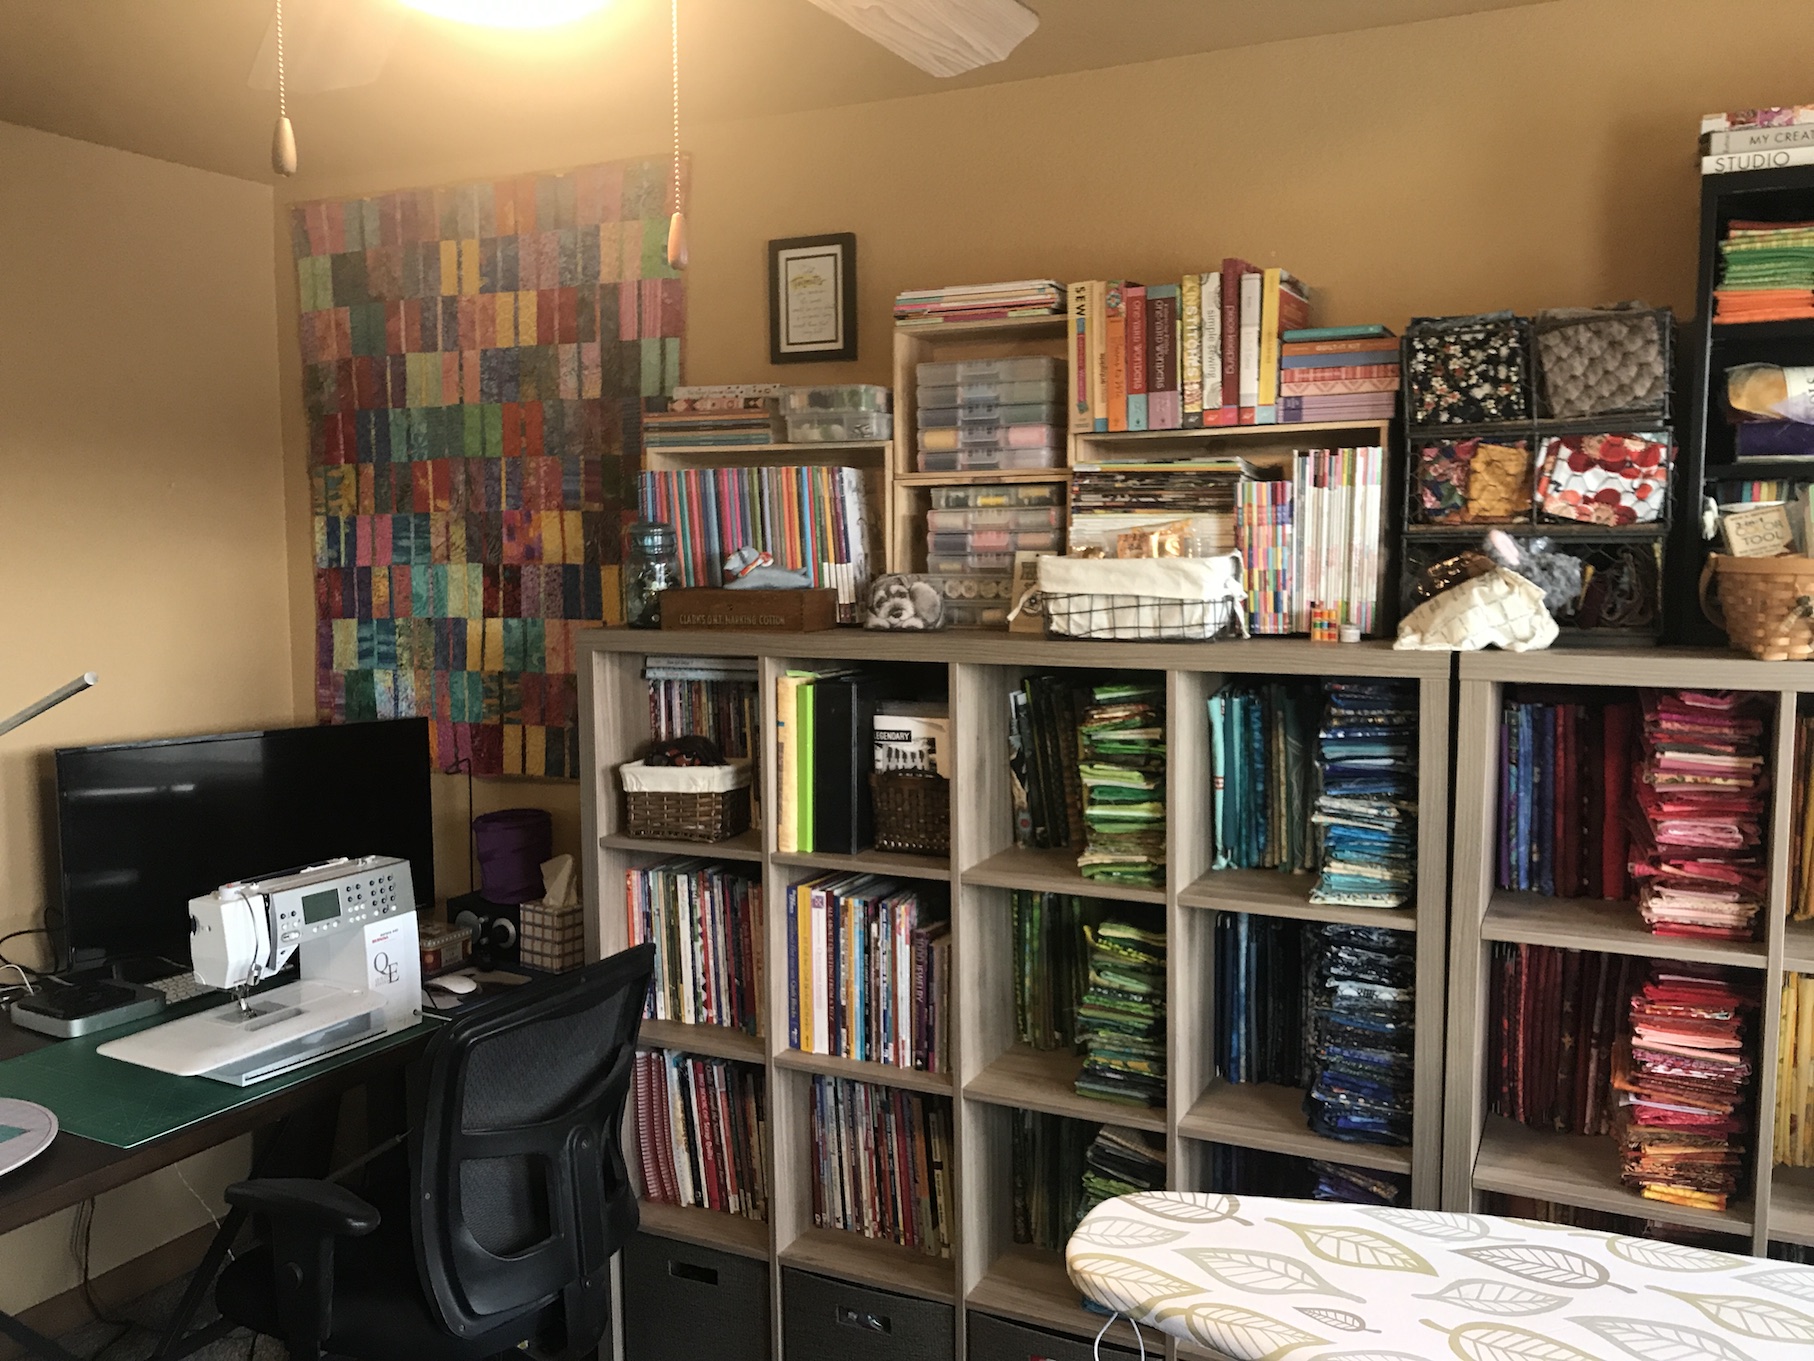
Around the room:
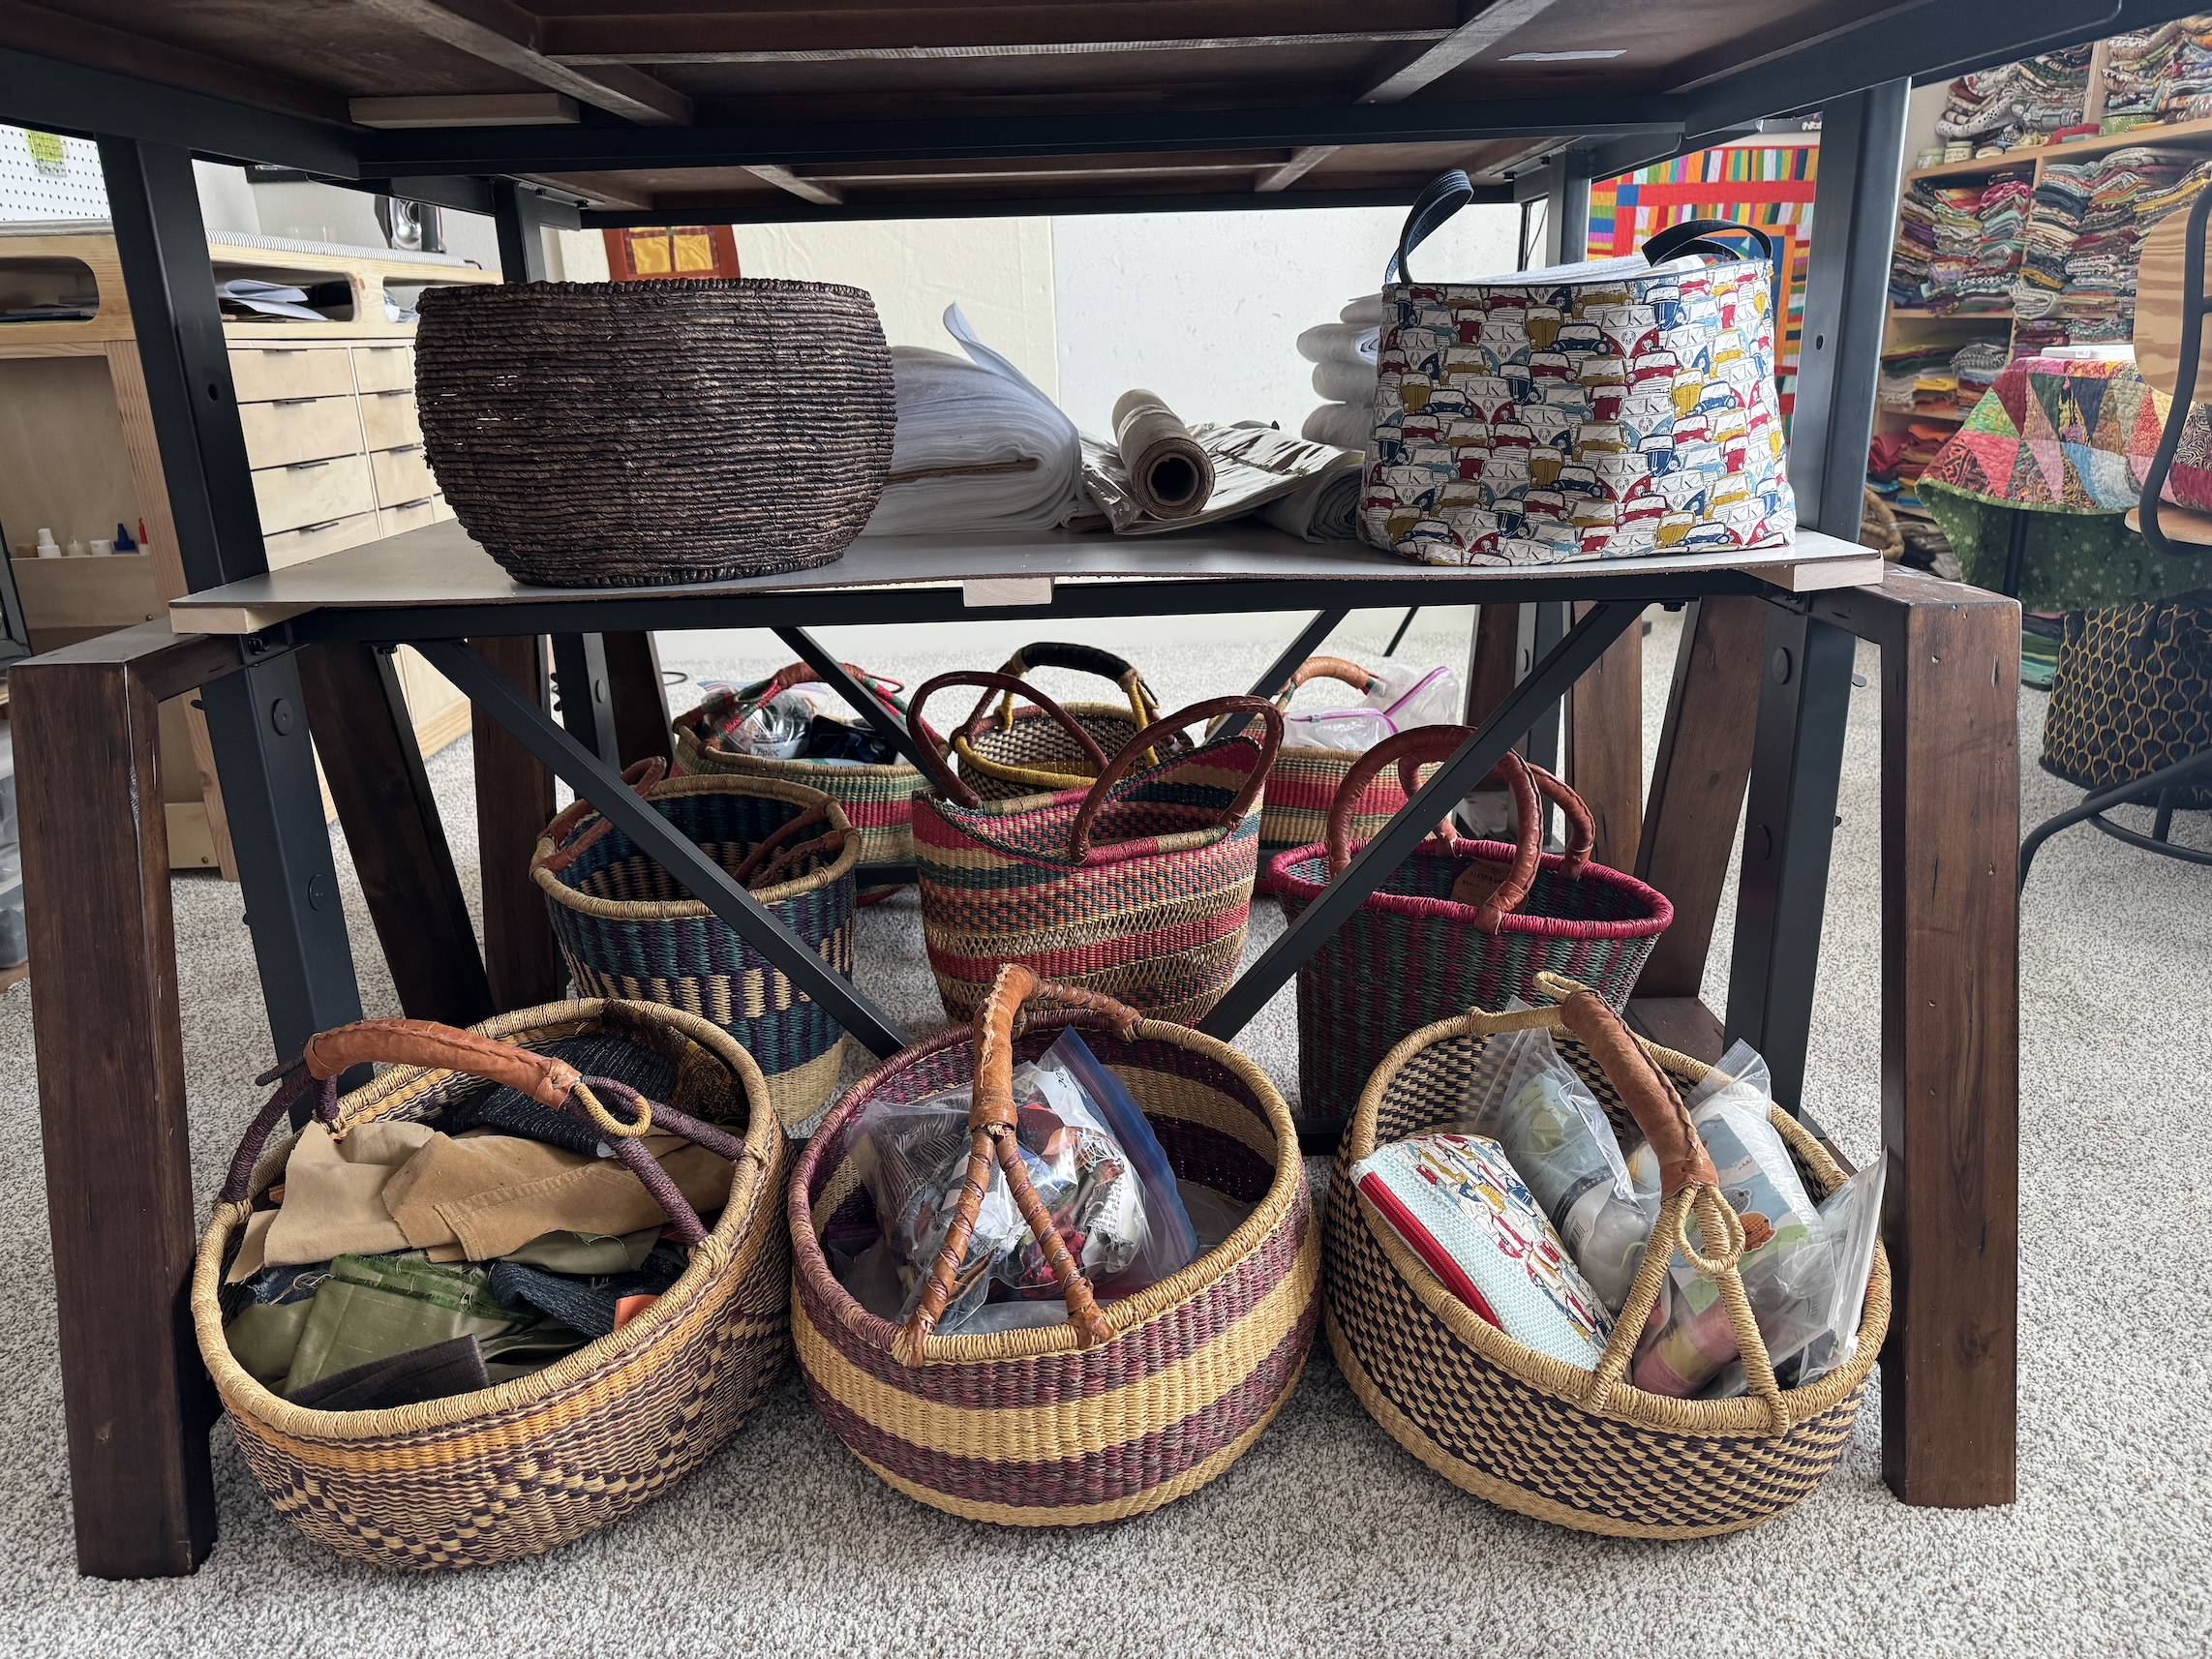
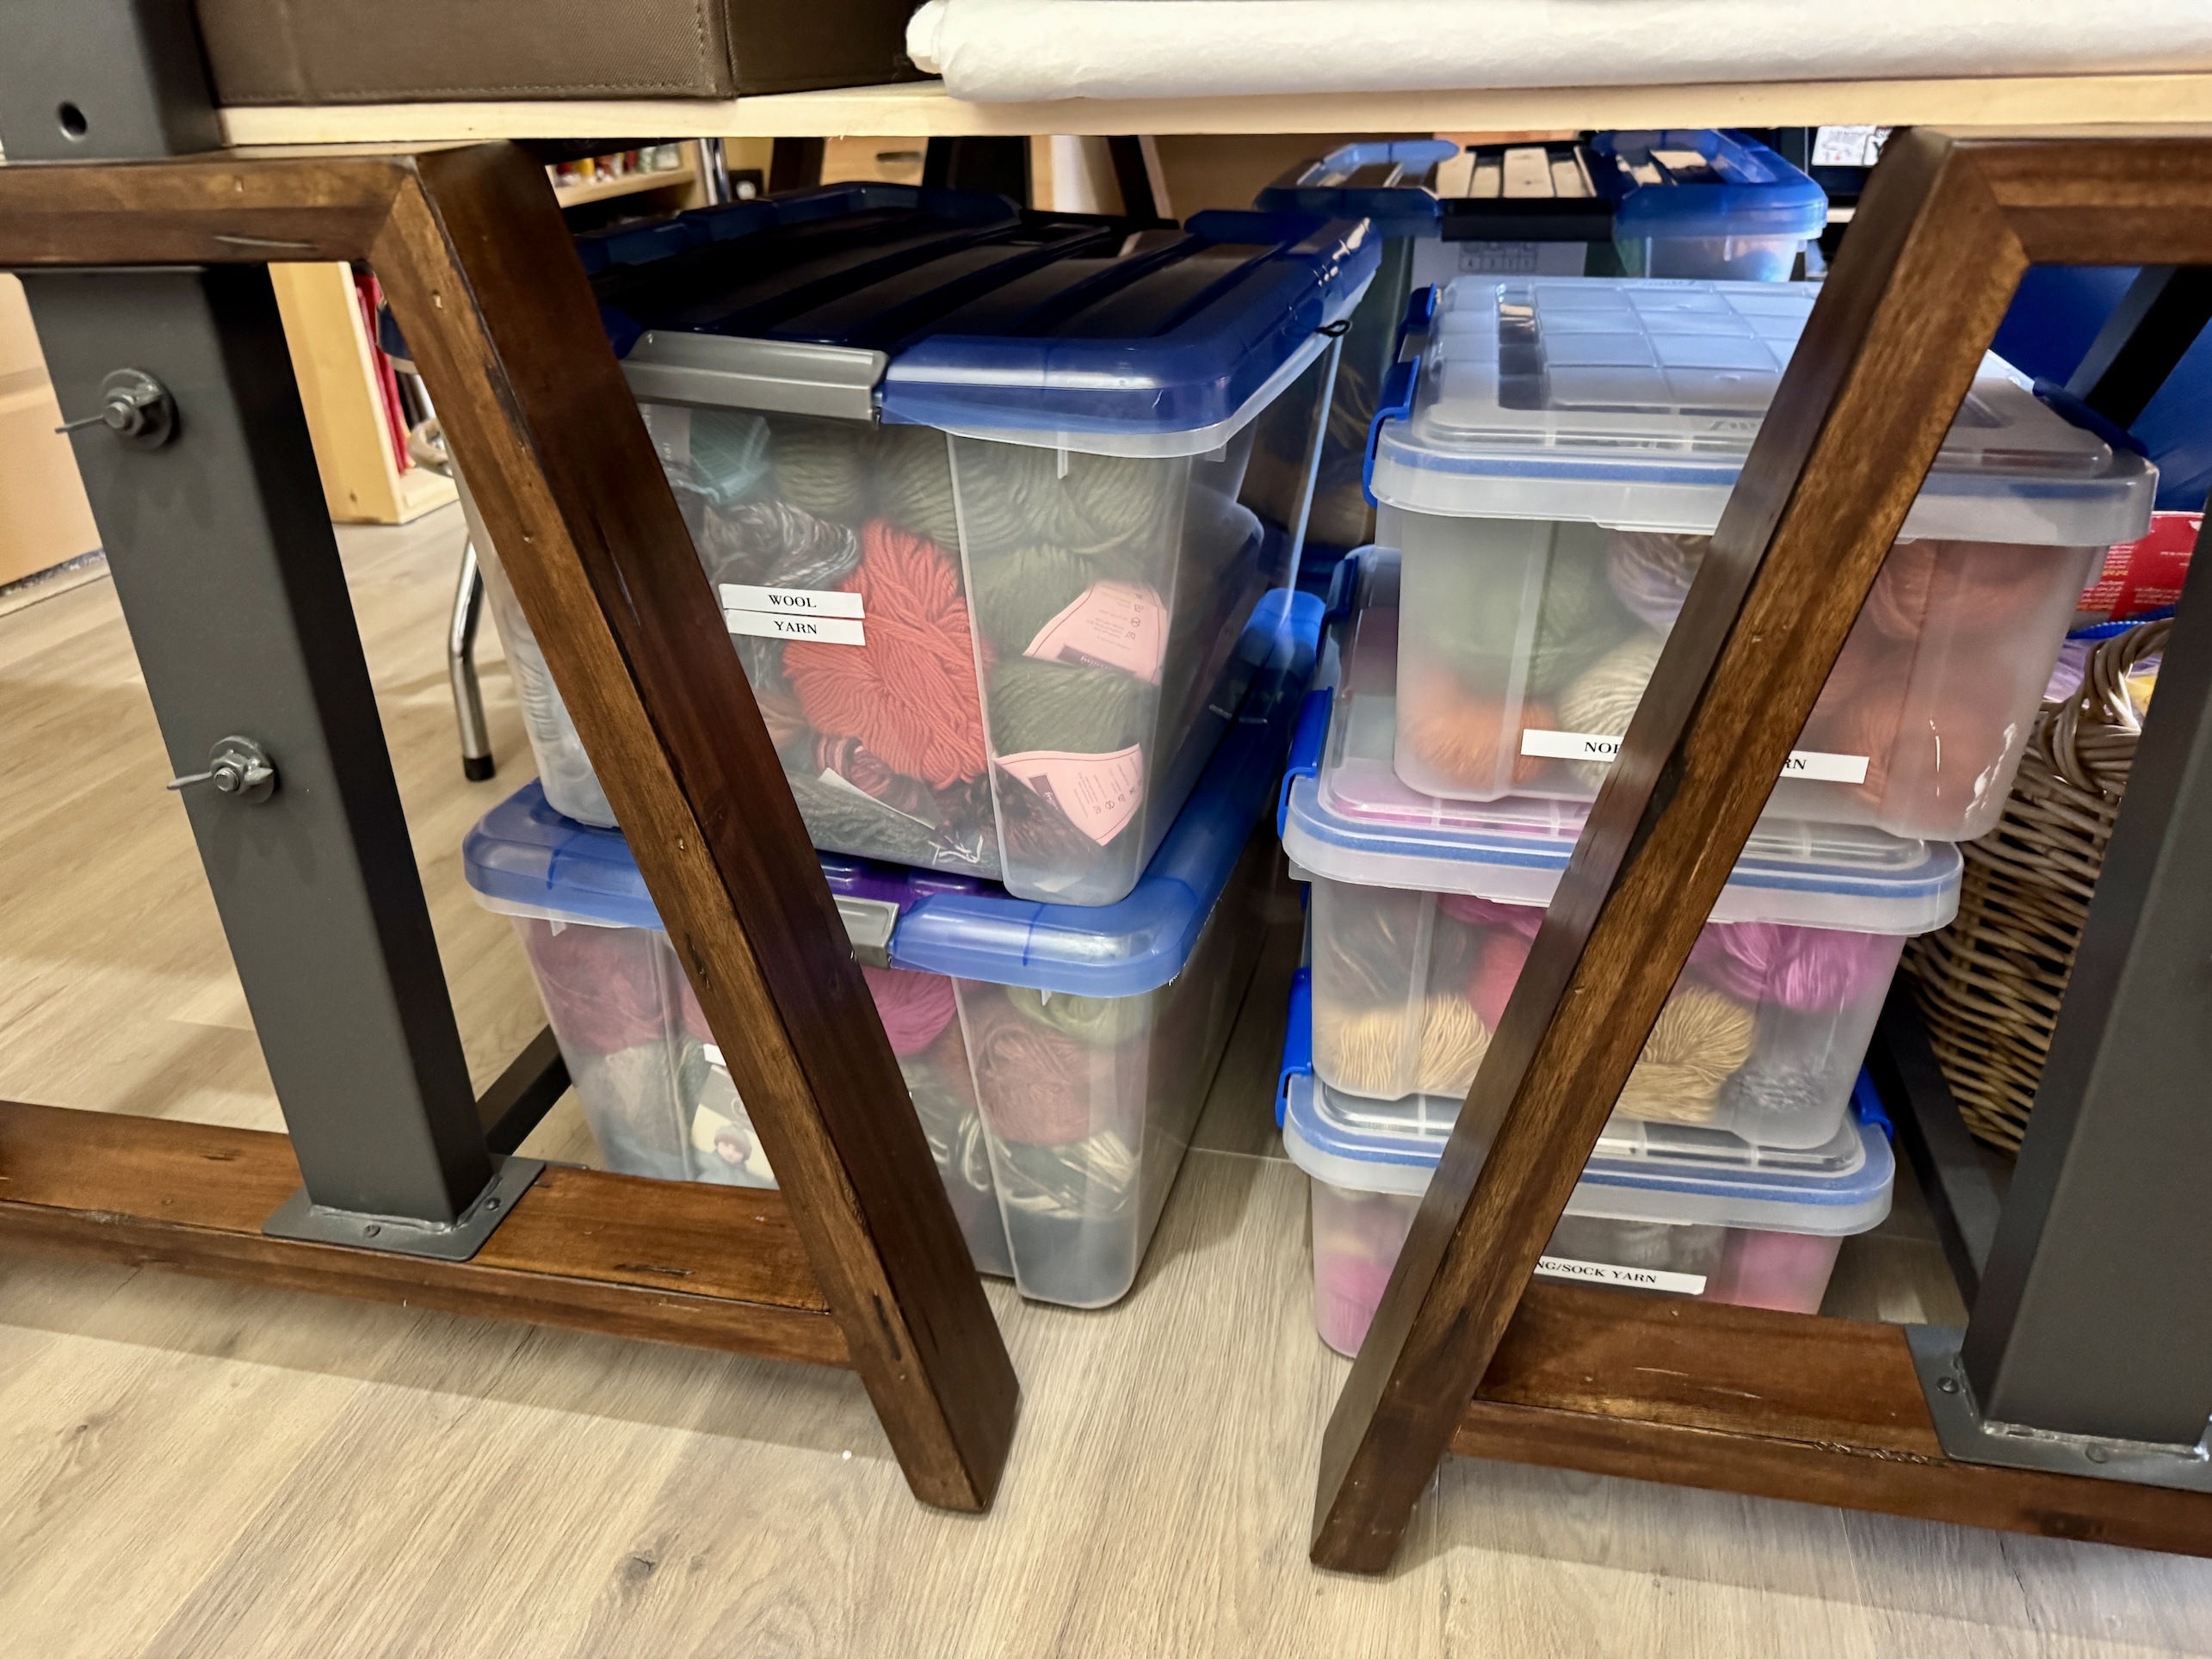
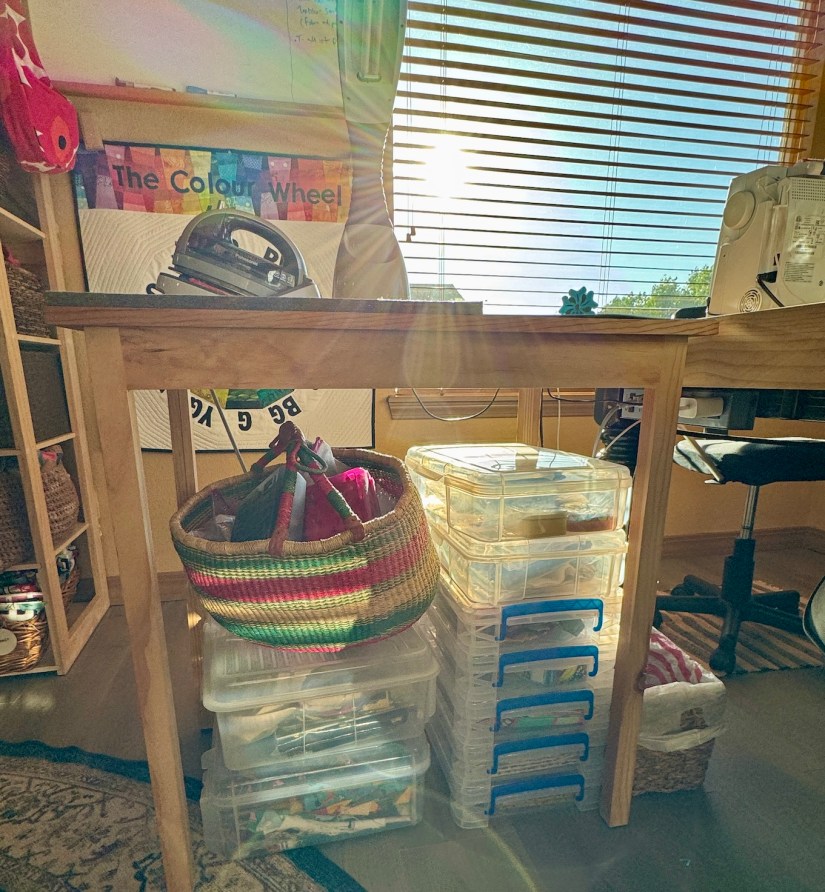
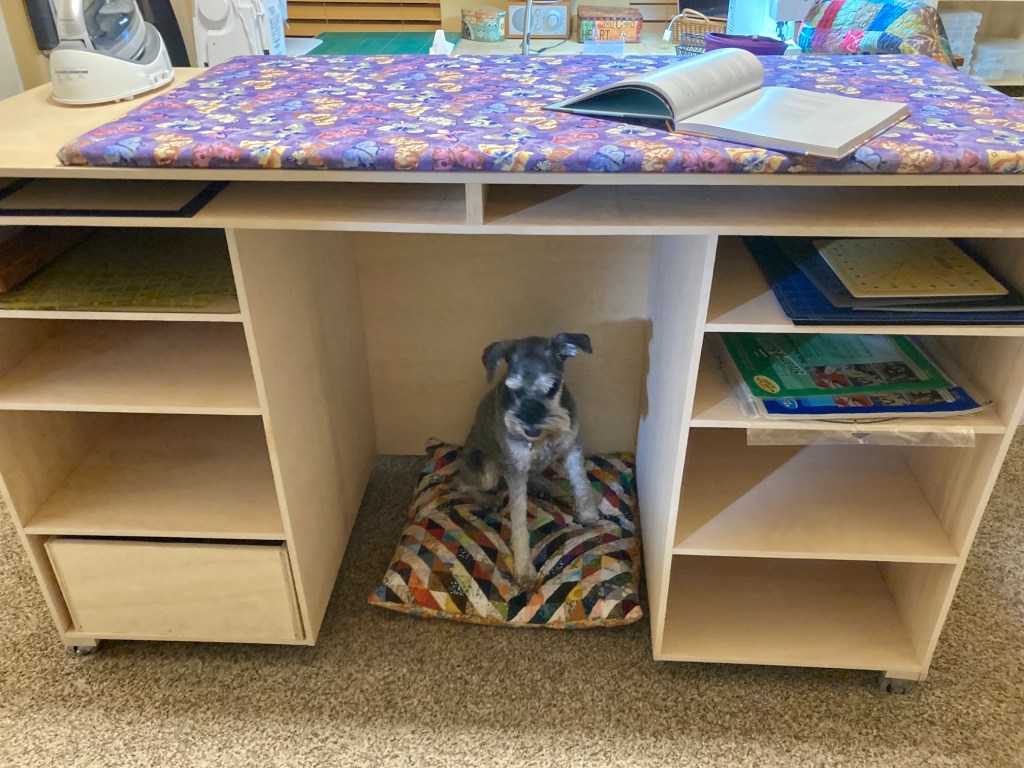
Projects stored in baskets under studio table:
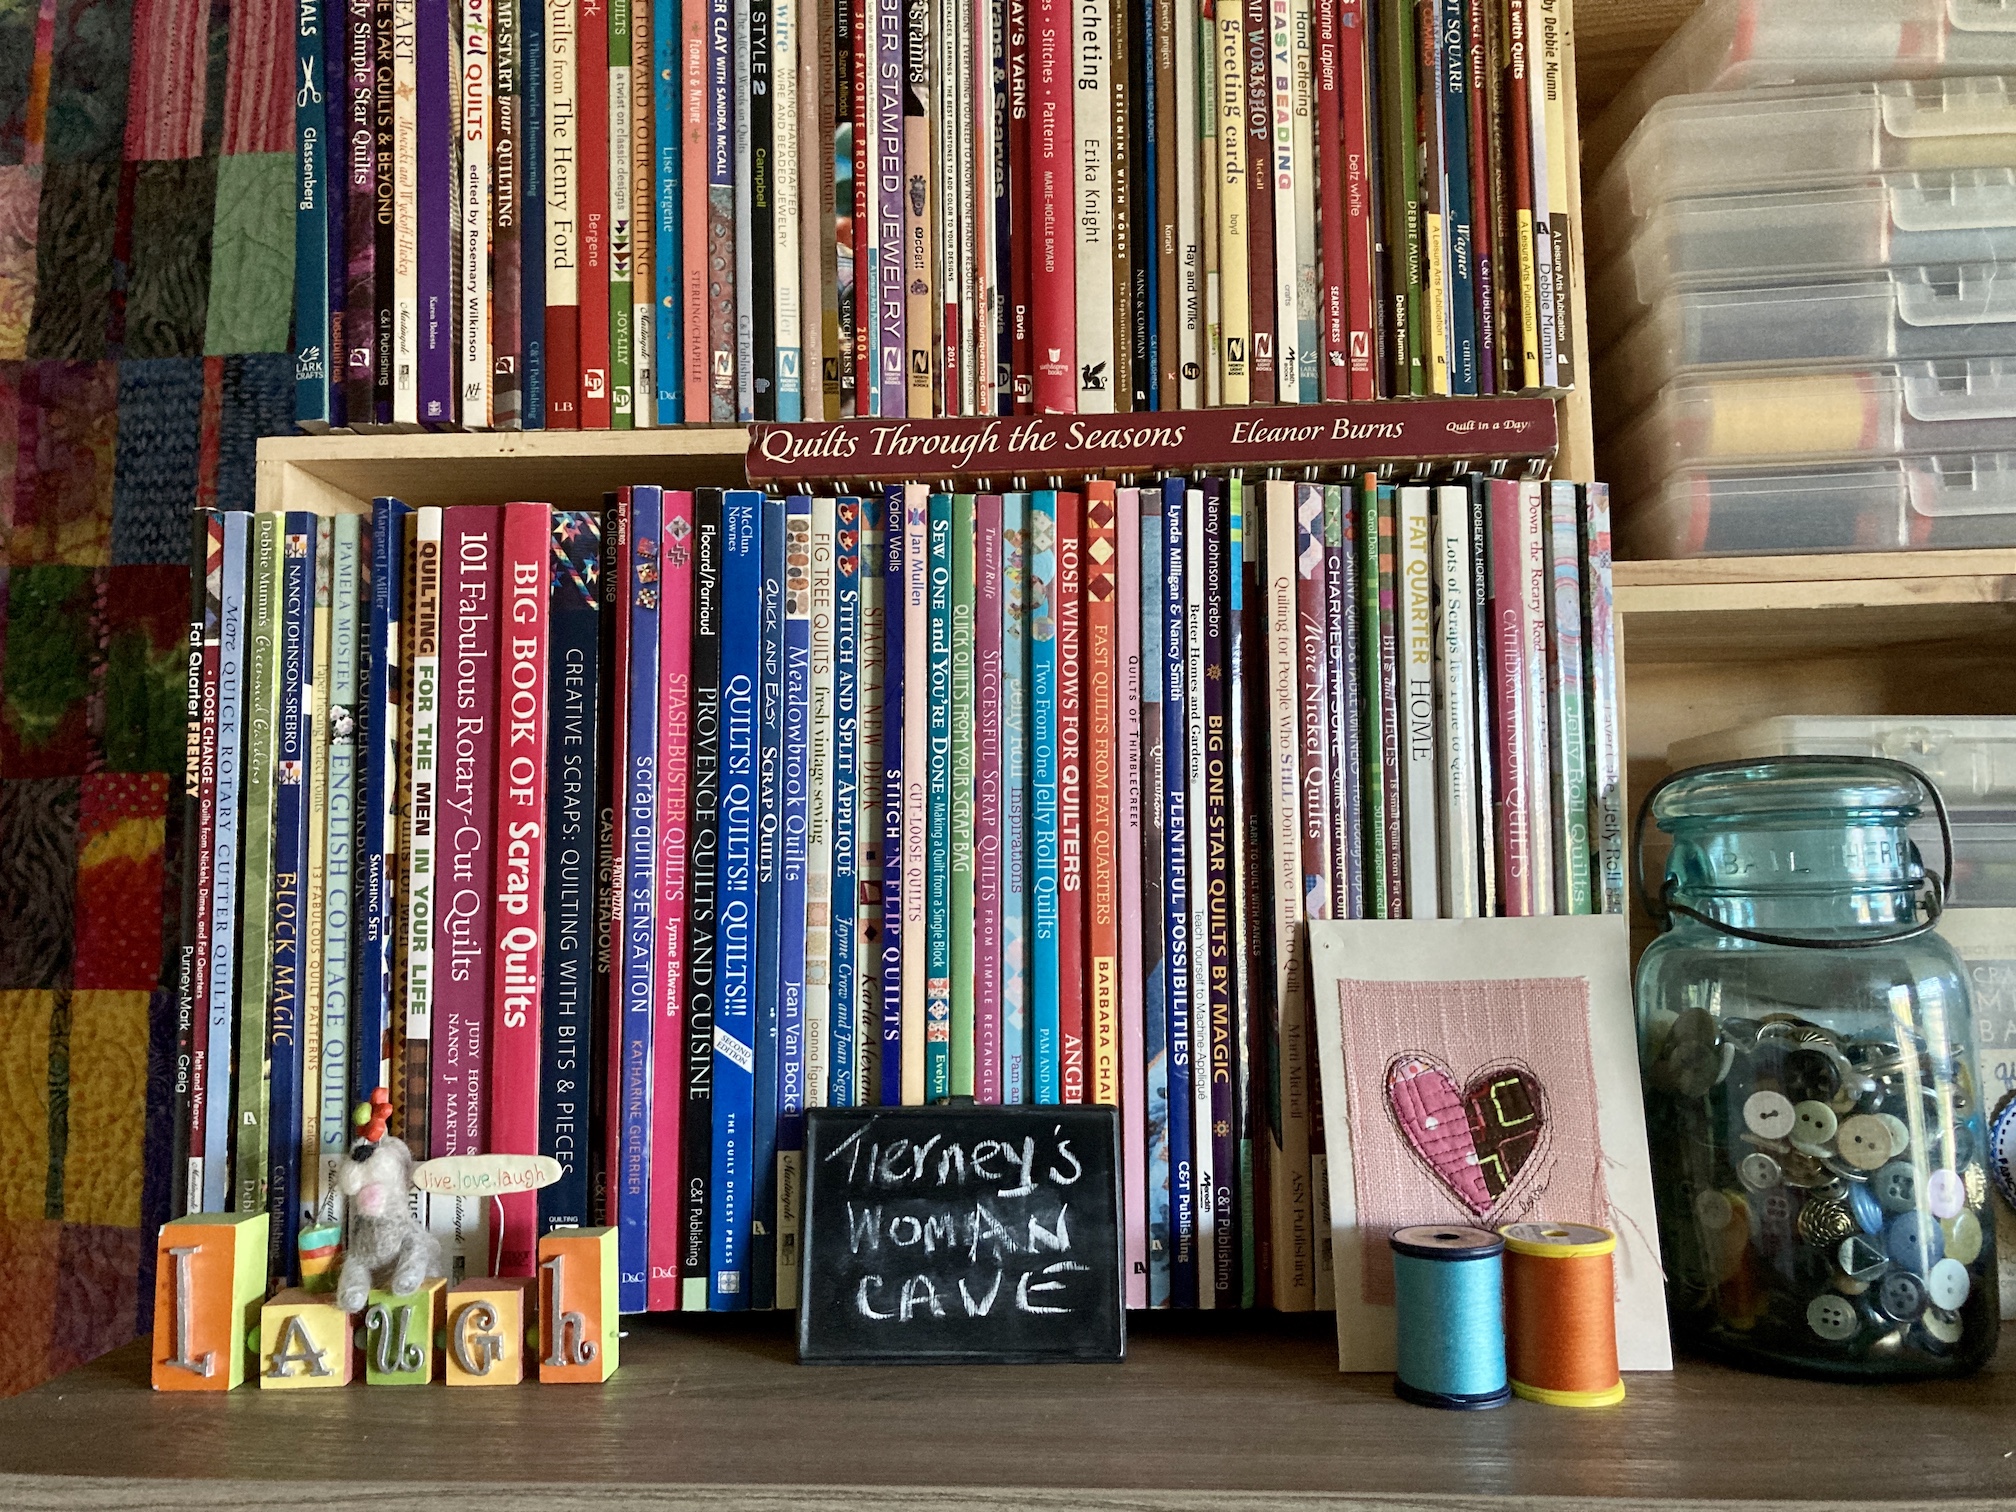
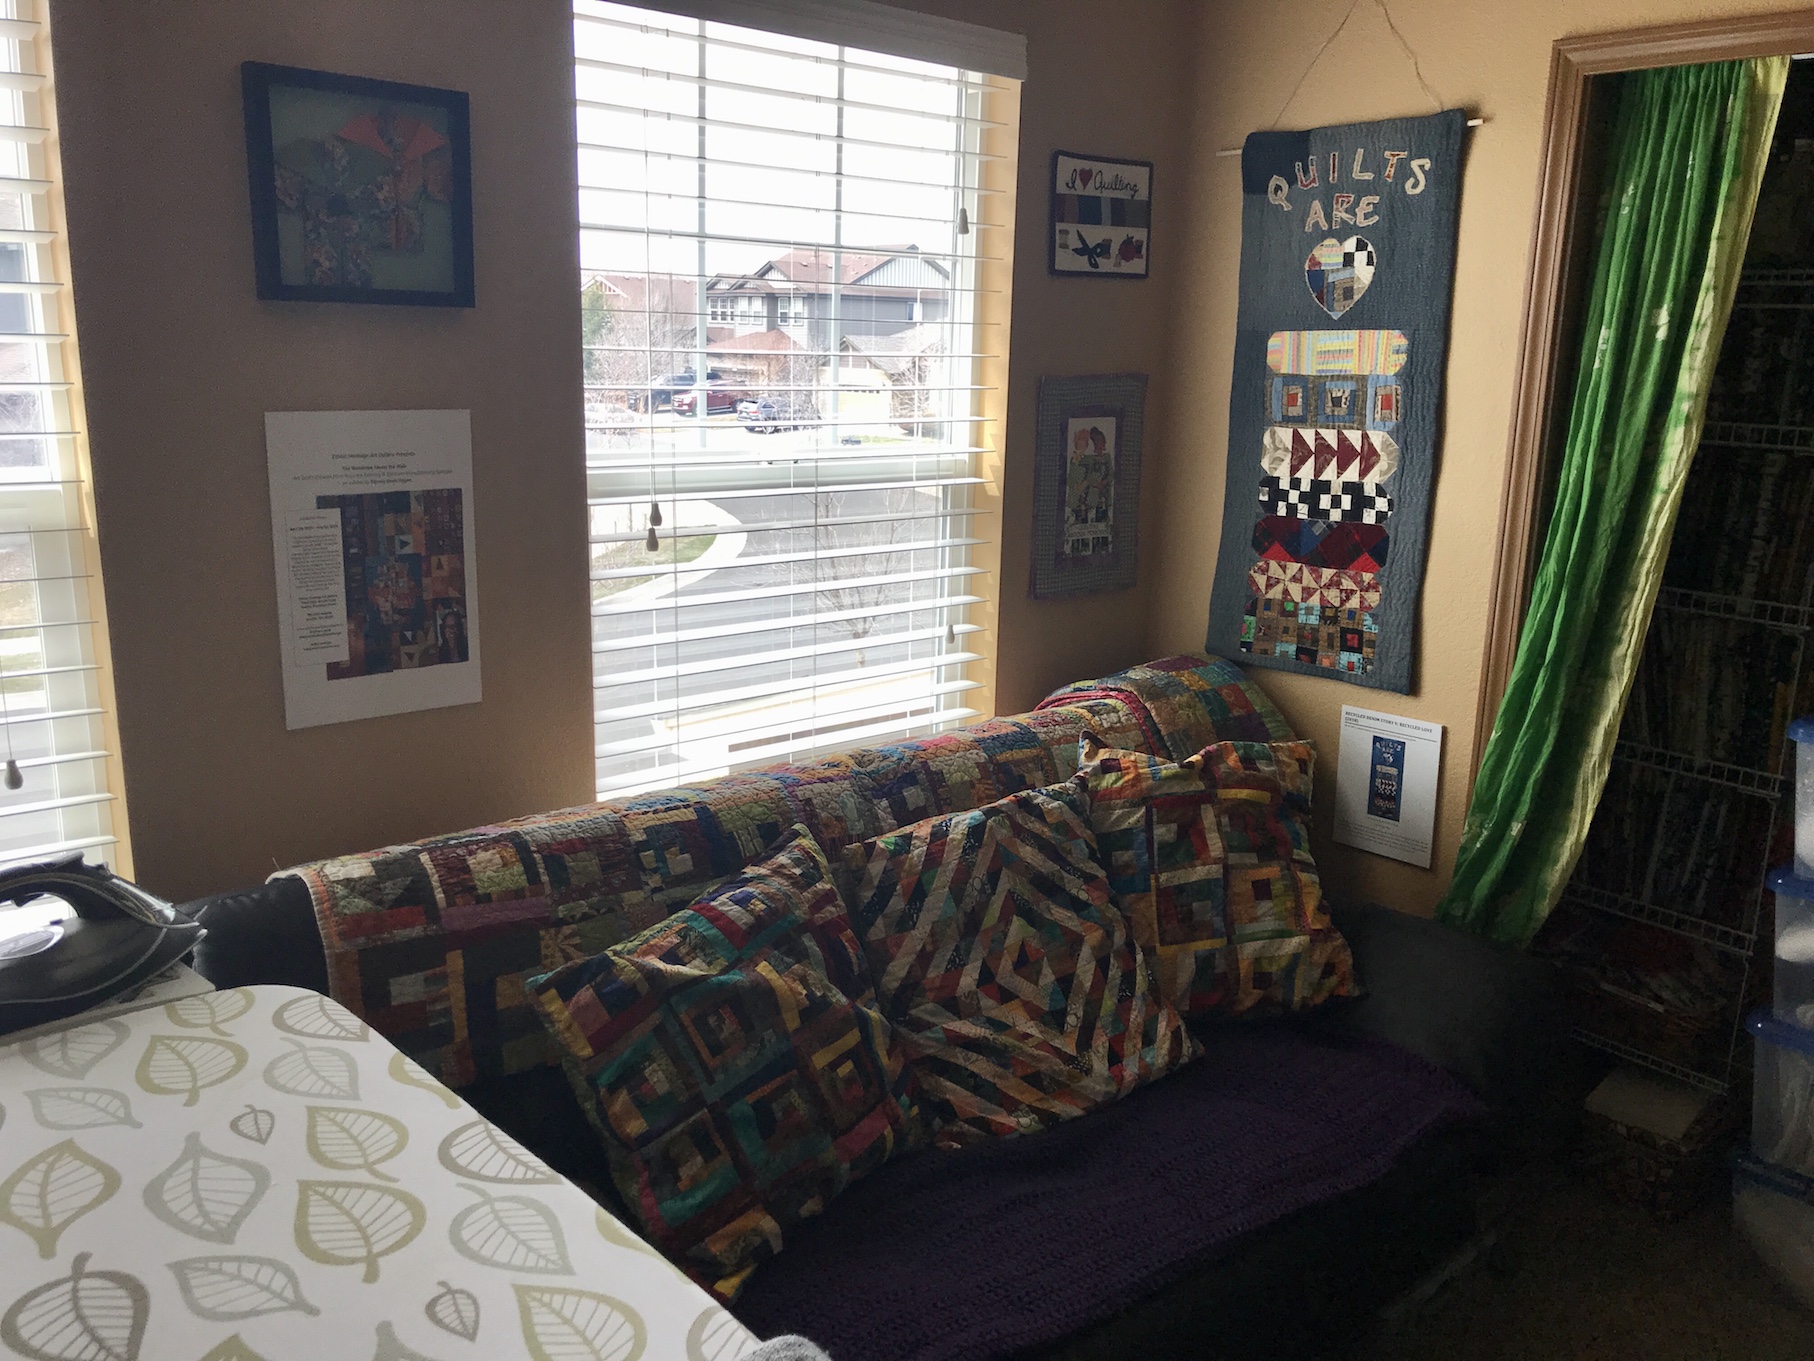
One of my favorite signs:
So the journey is complete and that is enough about where I create, it’s time for me to get back to creating! This will be my focus for my future posts 🙂
Back in mid-December 2025 I shared in the post Chaos in the Craft Room! that we had moved my quilting/crafting studio from the large Primary Bedroom to a small bedroom in preparation for putting our house on the market and moving to a smaller home.
Since then I’ve been playing/sewing/crafting in my new studio and doing some re-arranging to make it work best for me.
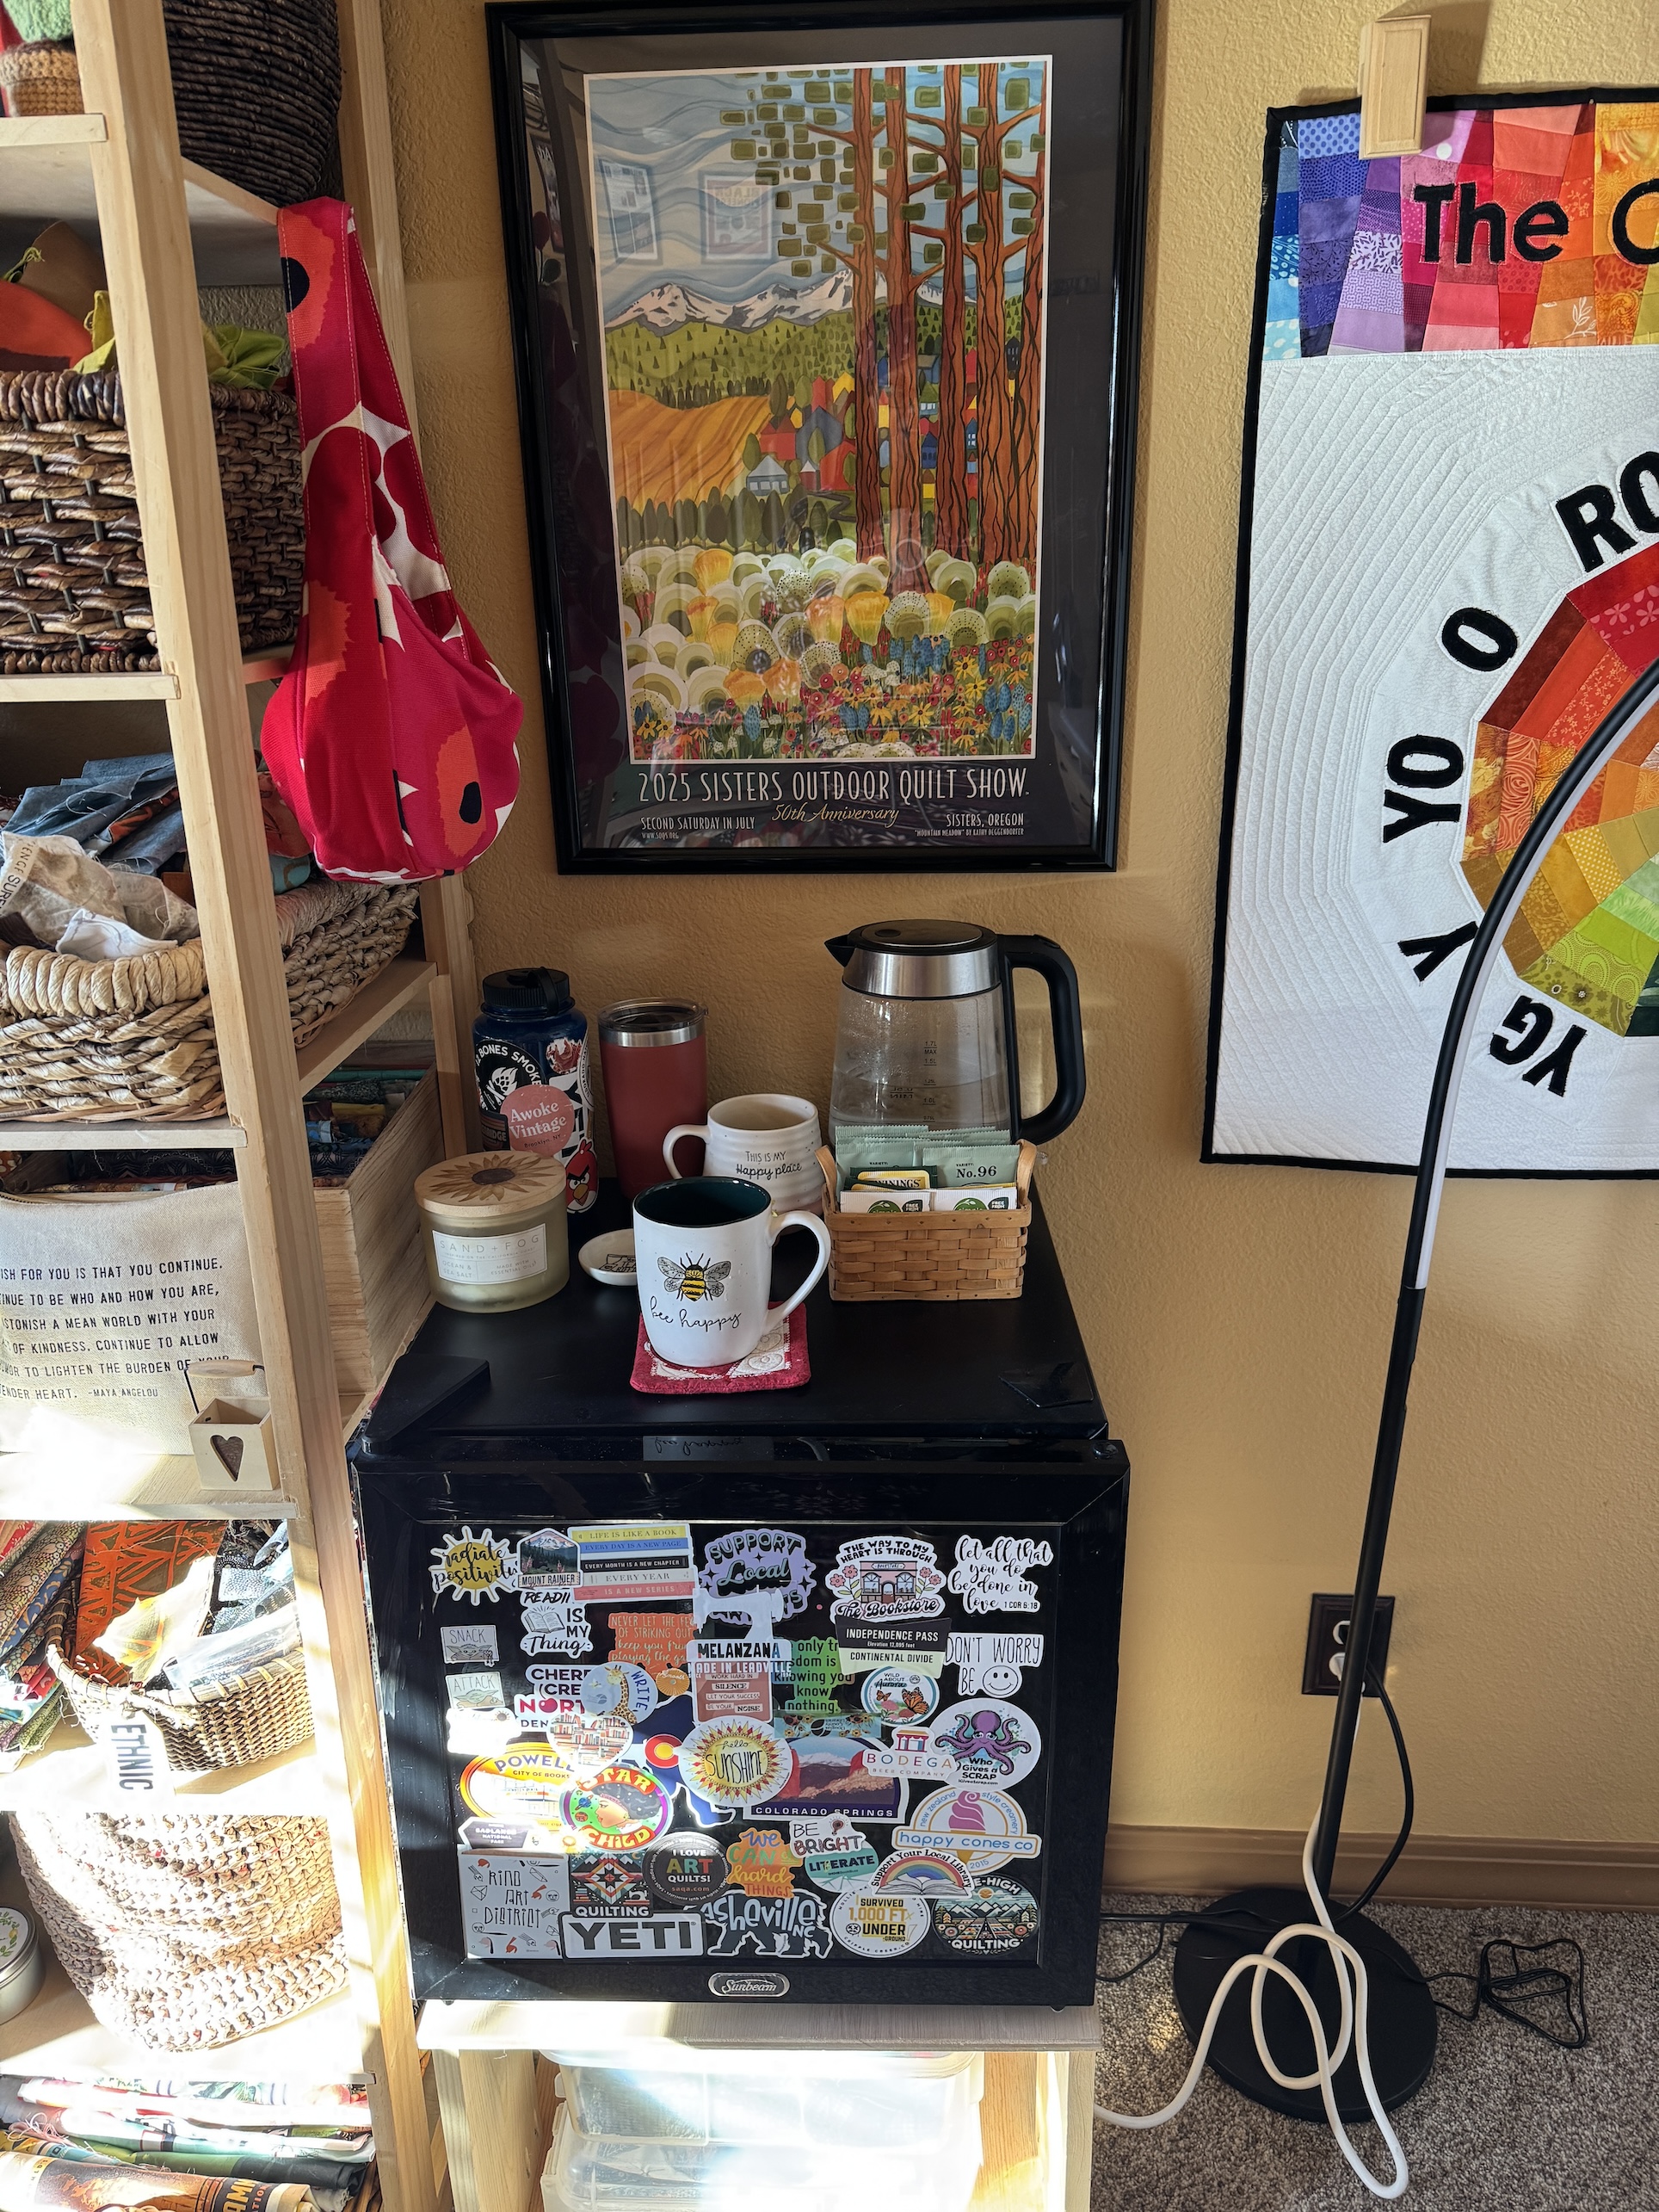
I added back in my tea station and little refrigerator (we tried to make it work in our Primary Bedroom but I didn’t like the low volume noise the refrigerator made when I was trying to sleep at night; and I missed easy access to tea as I need a couple cups a day to keep me happy, ha!):
Thanks to my friend K who attended the 50th anniversary 2025 Sisters Outdoor Quilt Show and got me a poster! (I used to attend it every year when I lived in Oregon for 14 years and had exhibited quilts in it along with my quilter late husband several times…and sold quilts)
I had to rearrange where I kept my projects in queue because this is what the area looked like previously:
Now the projects in queue are stored under my cutting table (I forgot to take a photo).
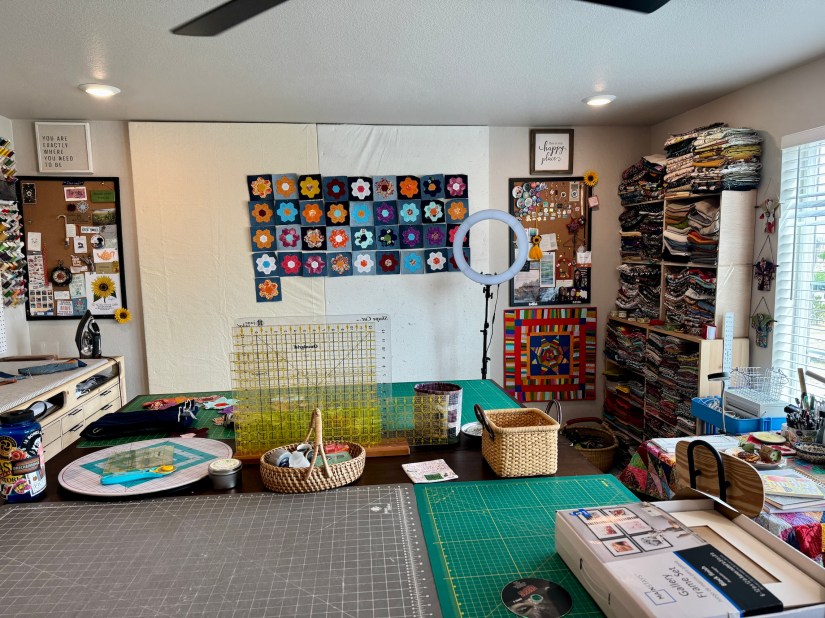
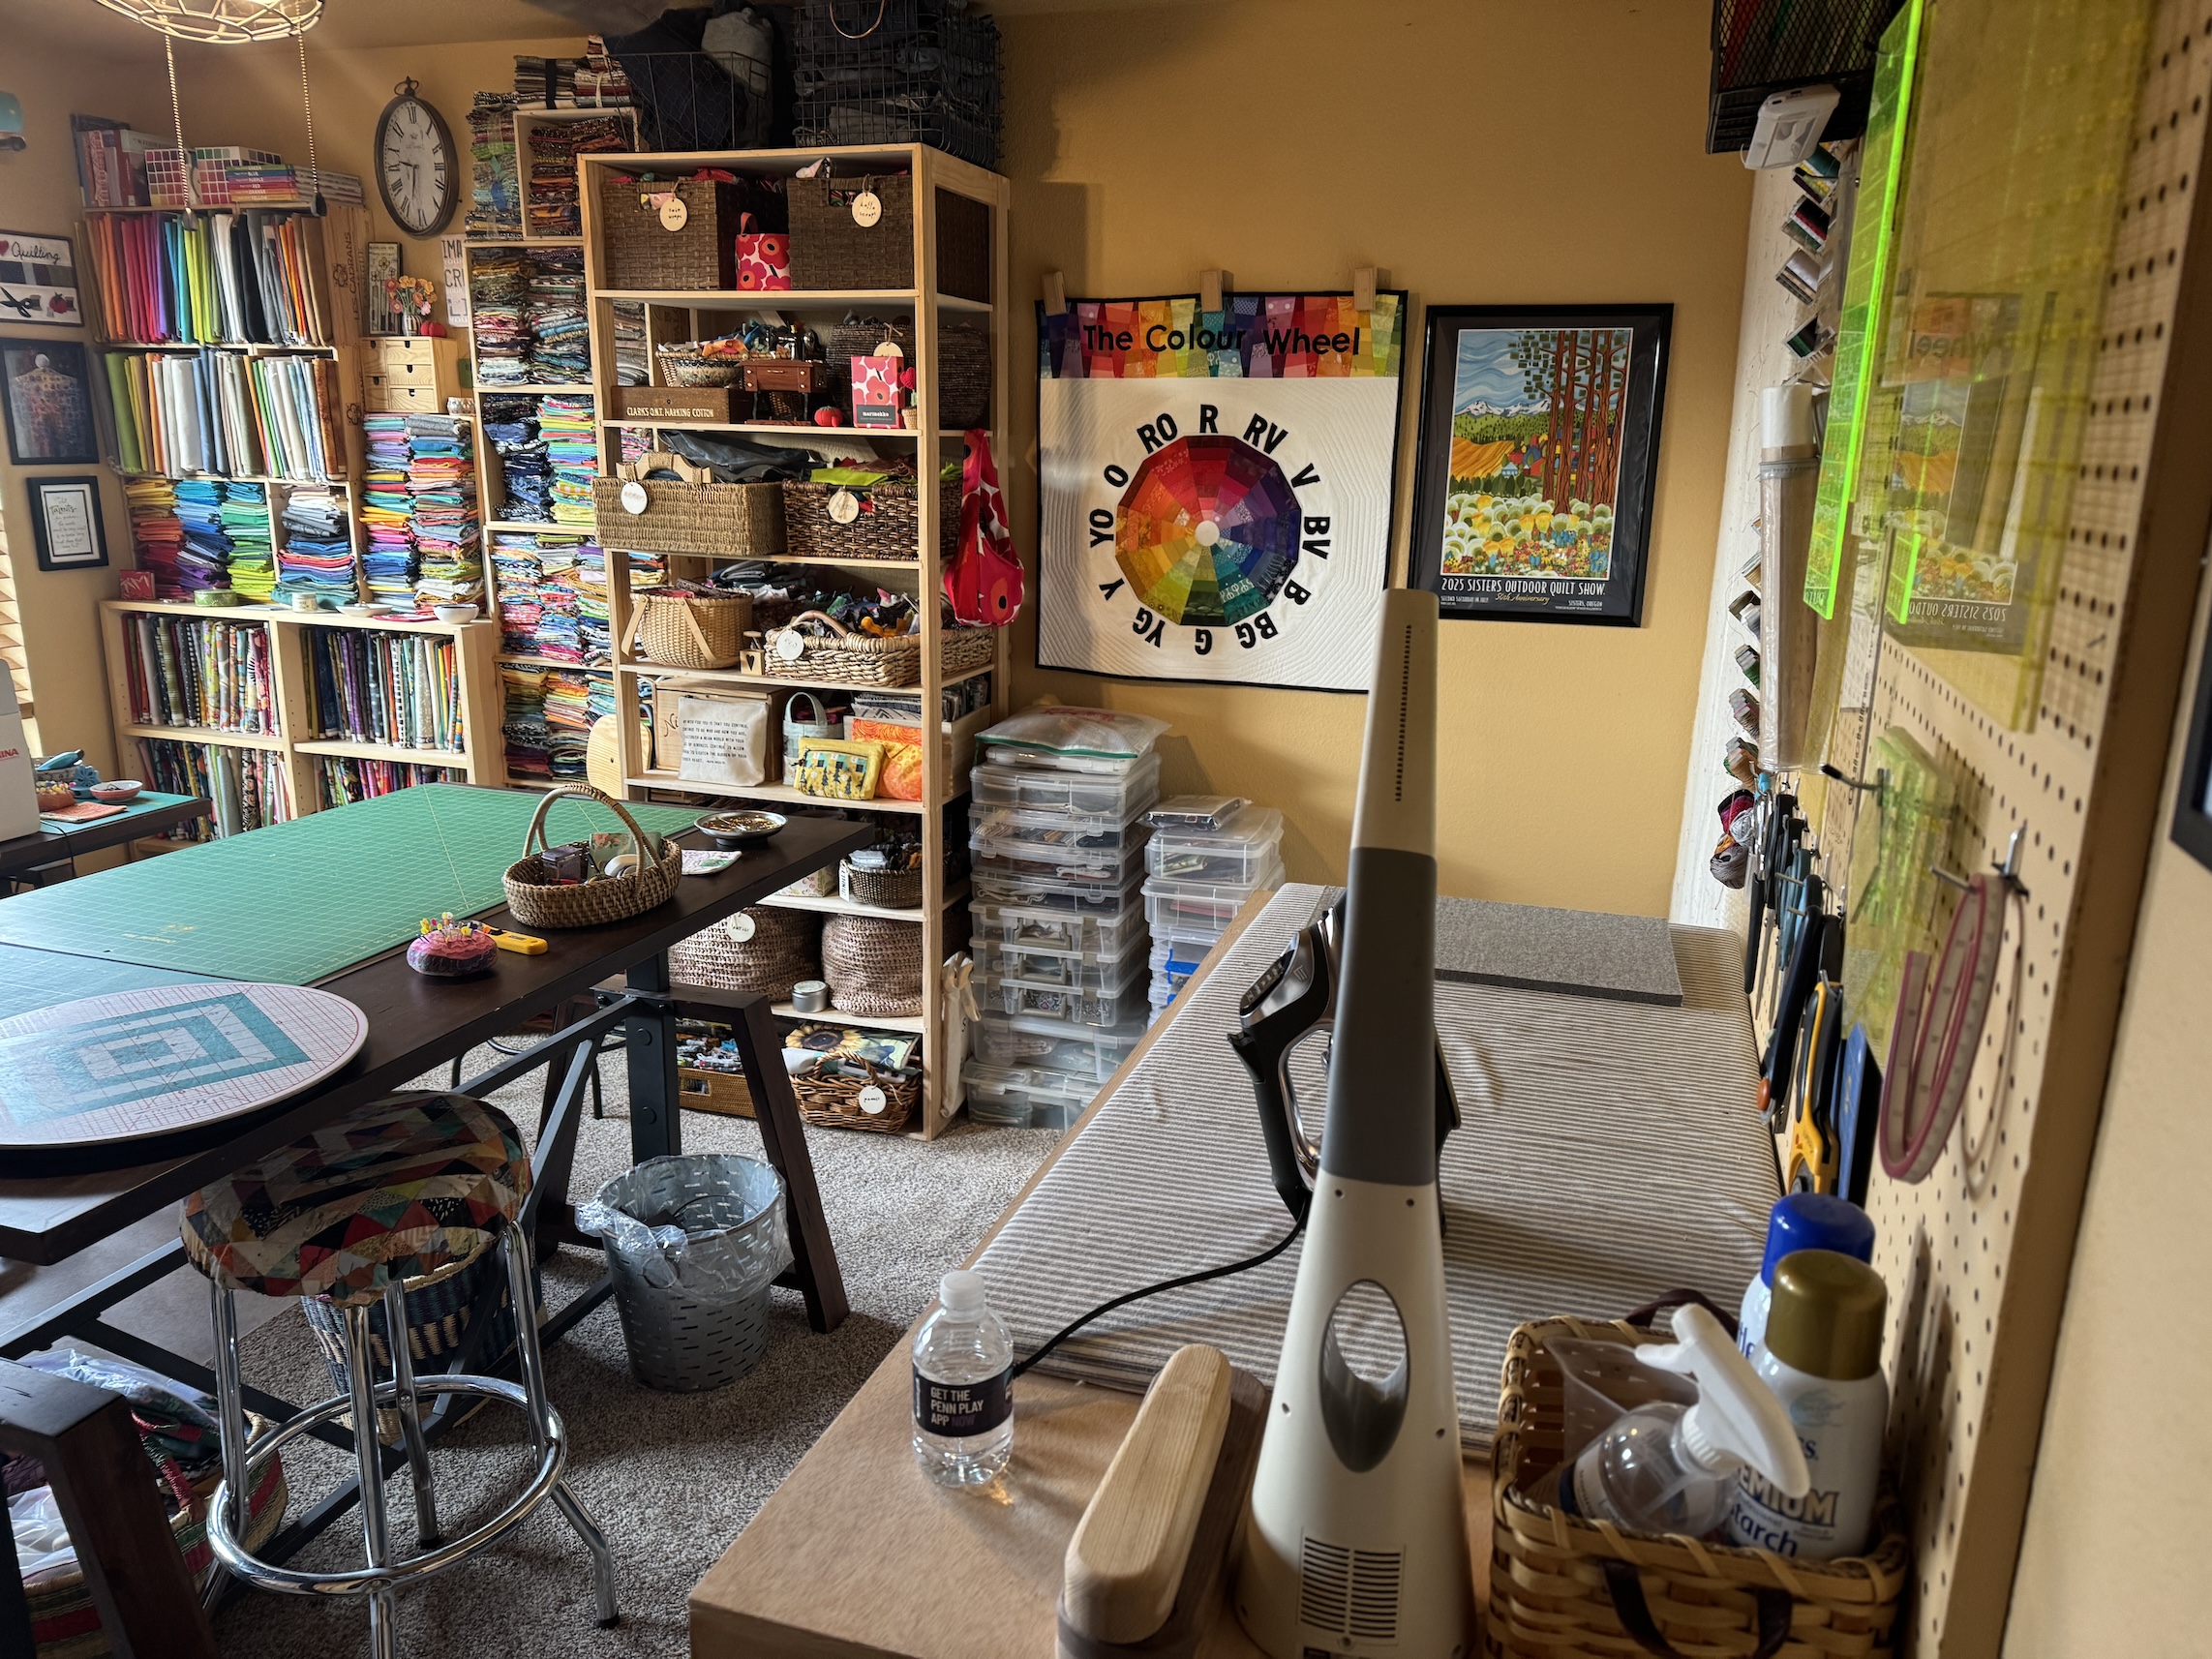
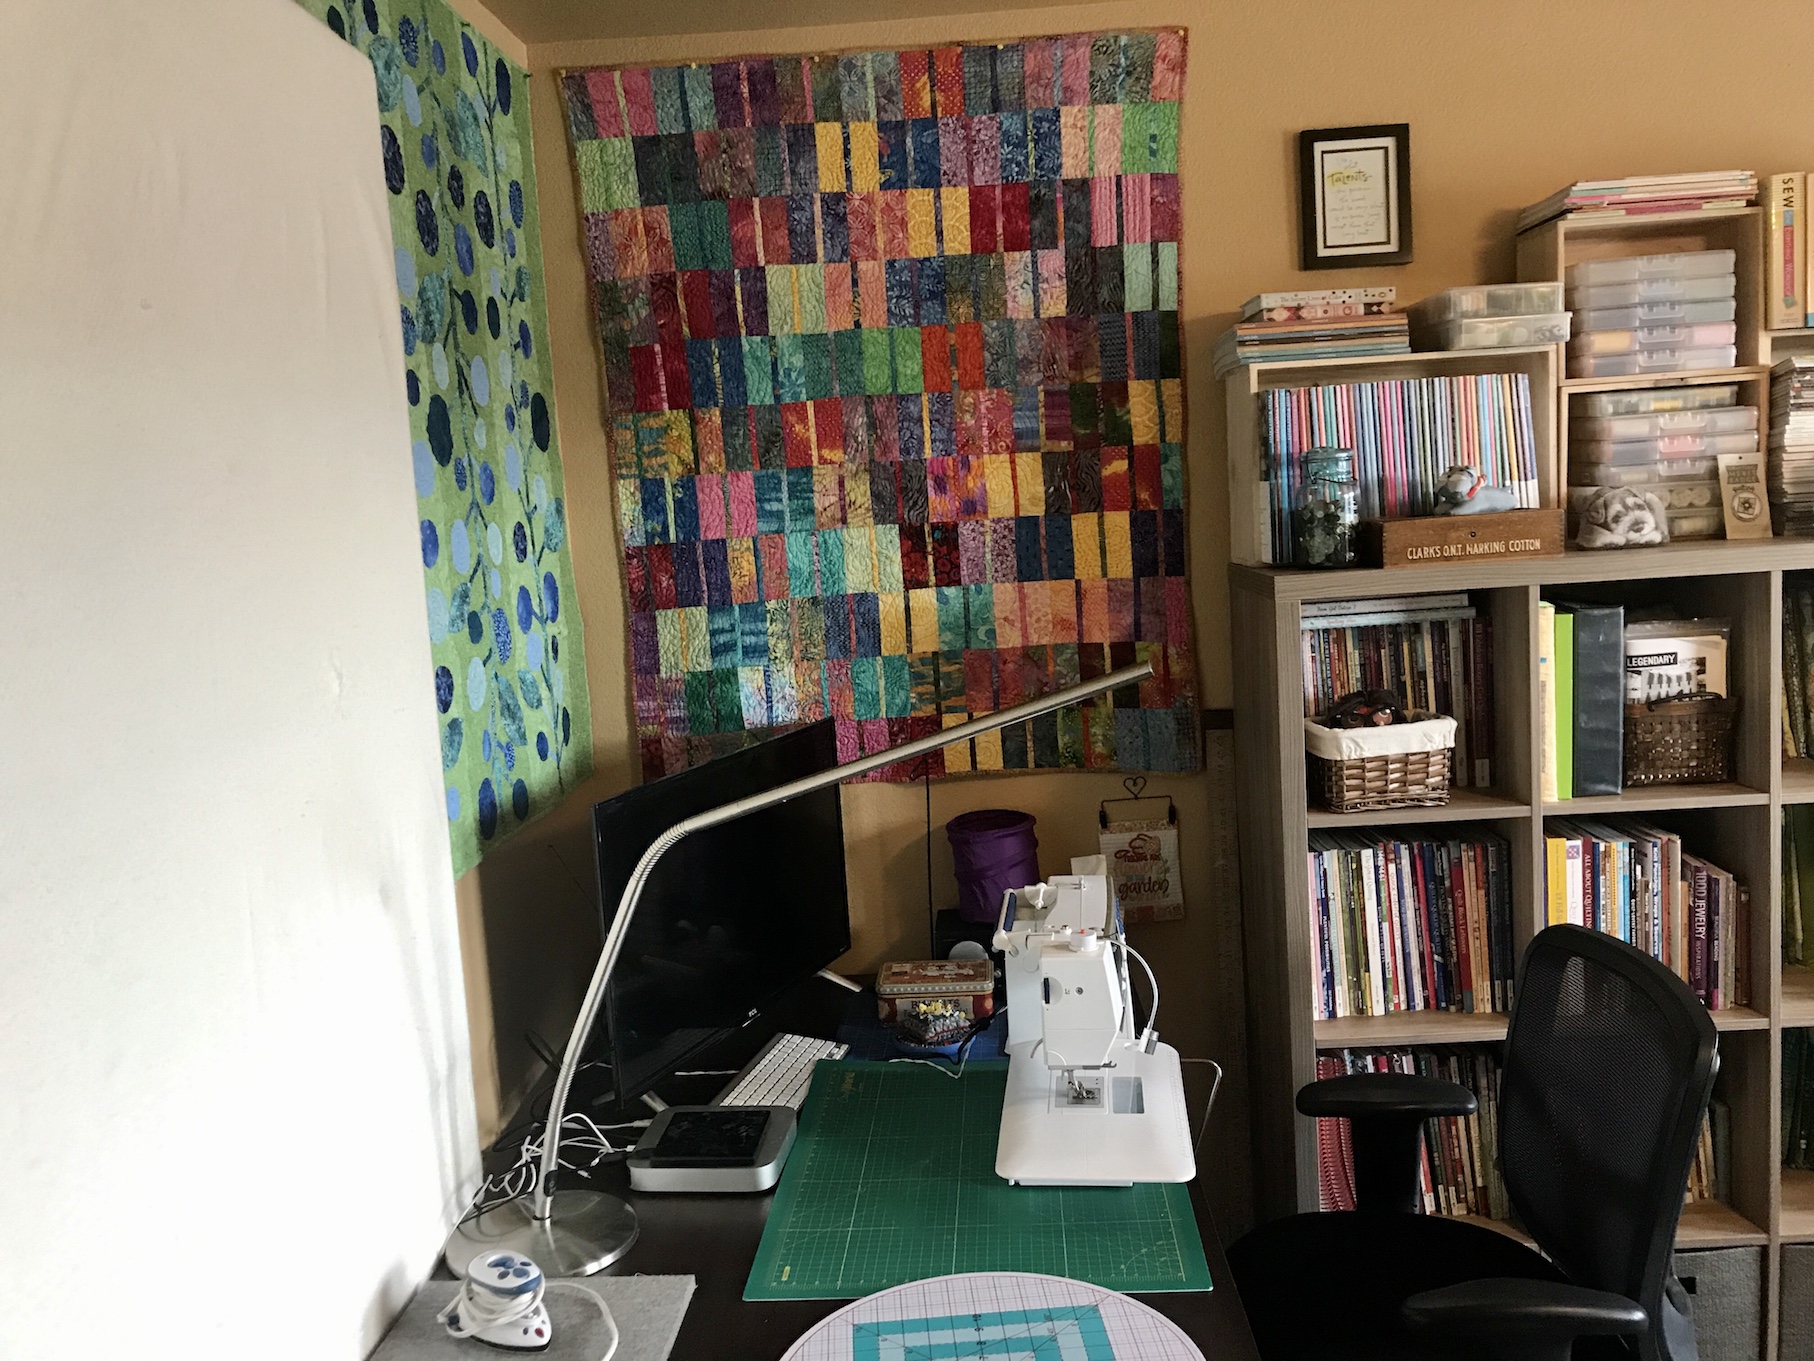
I added a floor lamp (left side of image below) to my half design wall area (we had to break up my former design wall to make it fit in the room). As we plan to sell the house and move next year to a smaller house, John didn’t want to install track lighting in this room like he did in my previous mega-studio that was in our converted Primary Bedroom (which has now returned to being a Primary Bedroom):
I am pleased with the floor lamp and it illuminates the design wall nicely.
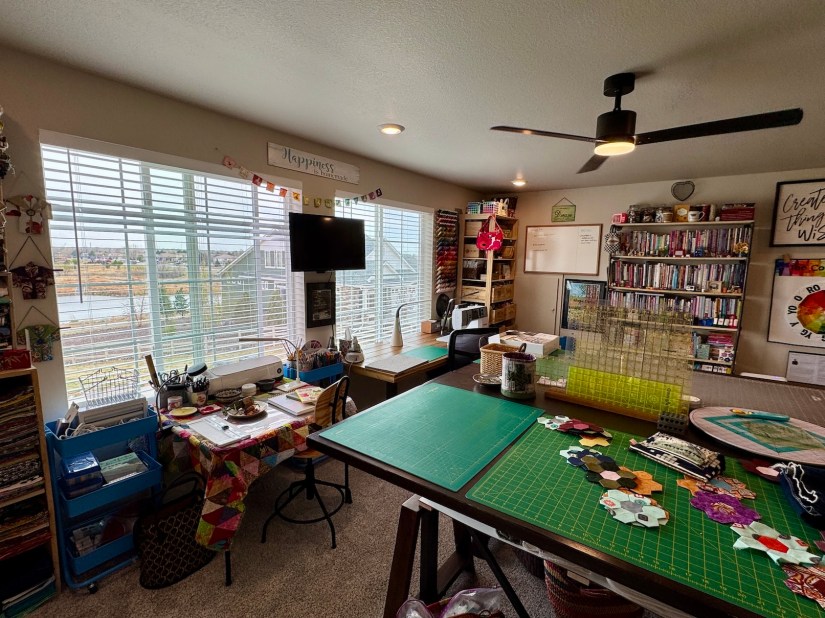
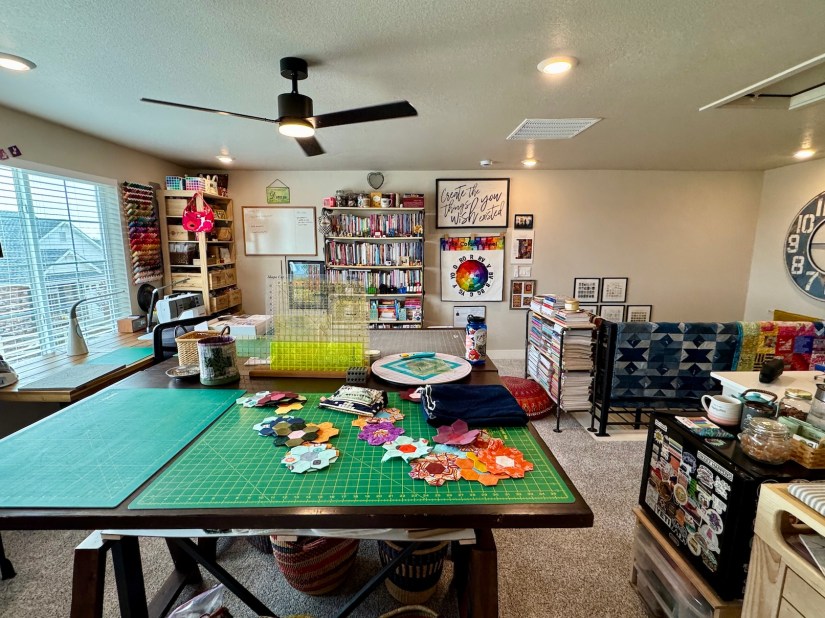
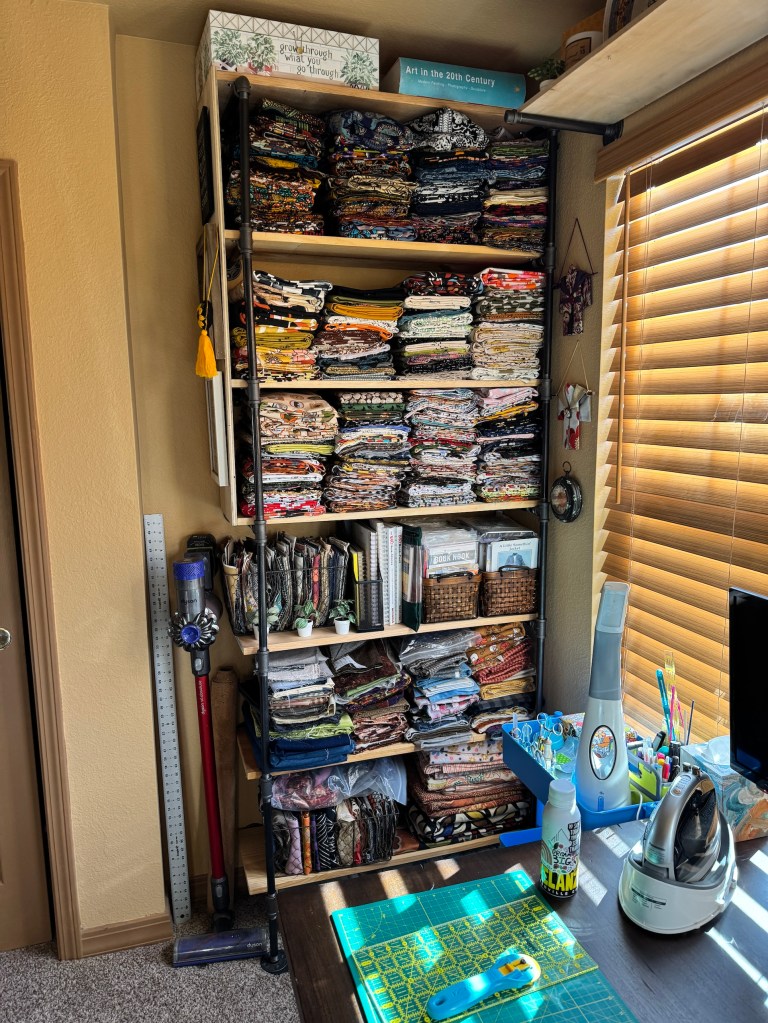
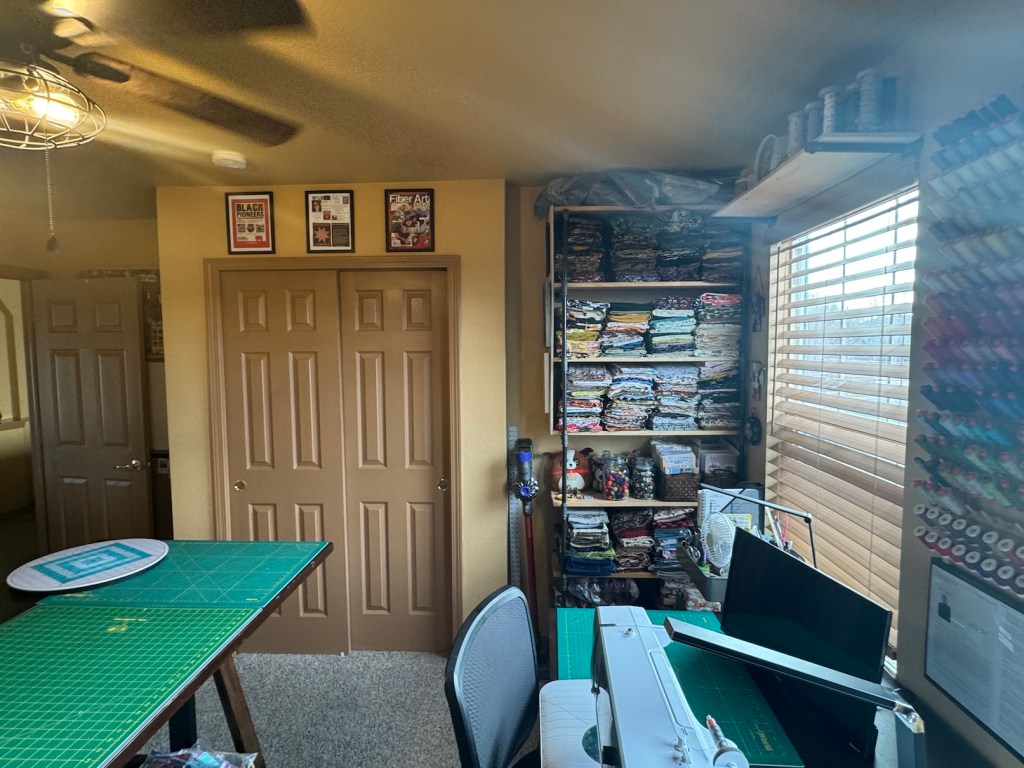
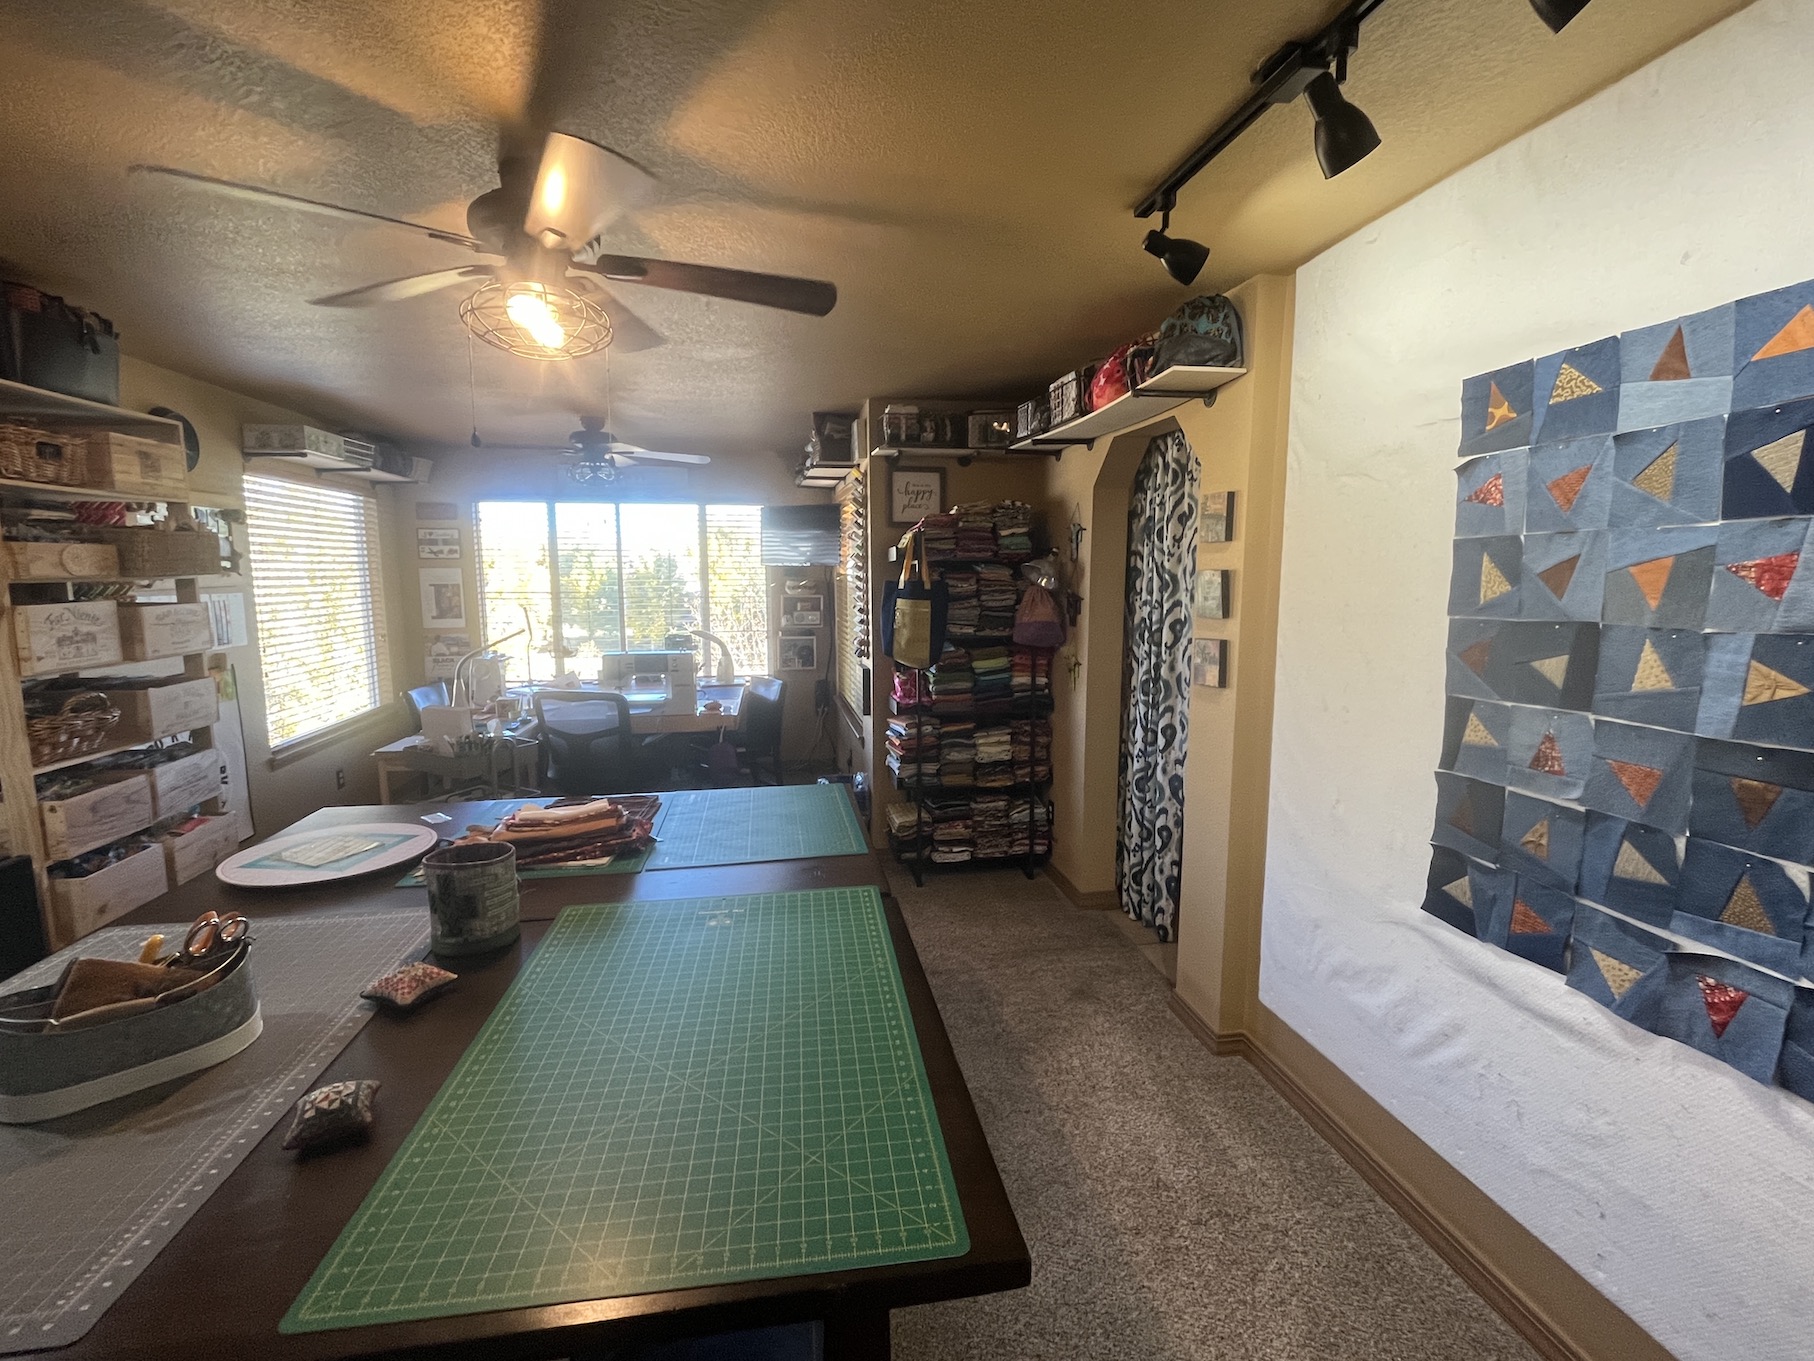
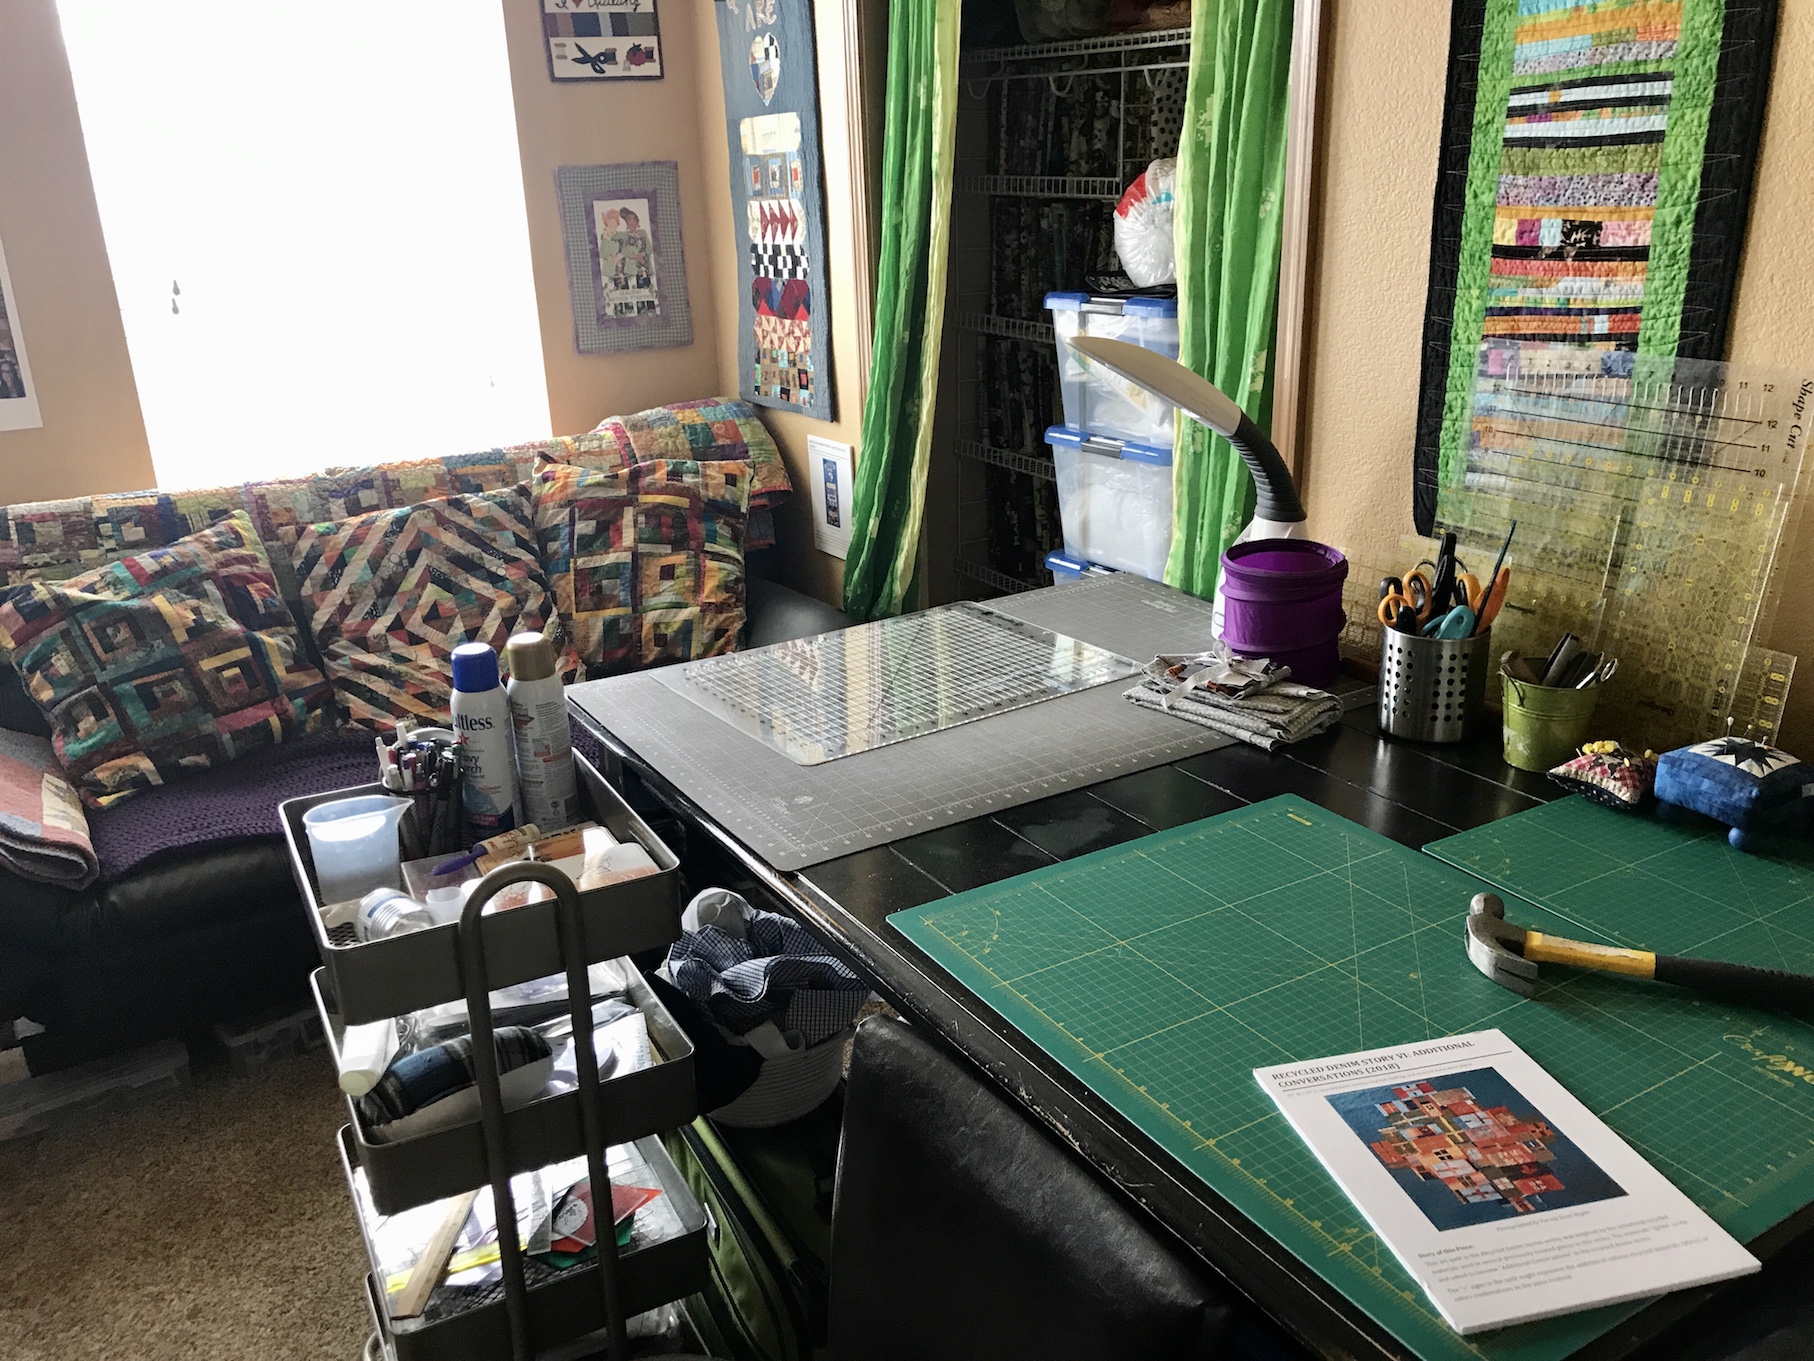
I’ve done additional rearranging and here is what the rest of the room currently looks like:
You might think it would feel very cluttered moving from a large studio (see the post Thrifting for the Studio if you’ve recently joined us and haven’t seen my previous studio) but it feels COZY and like a HUG of CREATIVE INSPIRATION whenever I go into the room.
In addition to being visually “warm and cozy” it’s also physically/temperature-wise warm and cozy because there is less space to heat compared to my big studio. In my post Magnetic Poetry to Ease My Soul I discussed, in the Postscript section, “Creative Restraints”/”Creative Limitations”/”Creative Limits”; and it appears that a smaller space to create in is really fueling/stimulating my creativity!
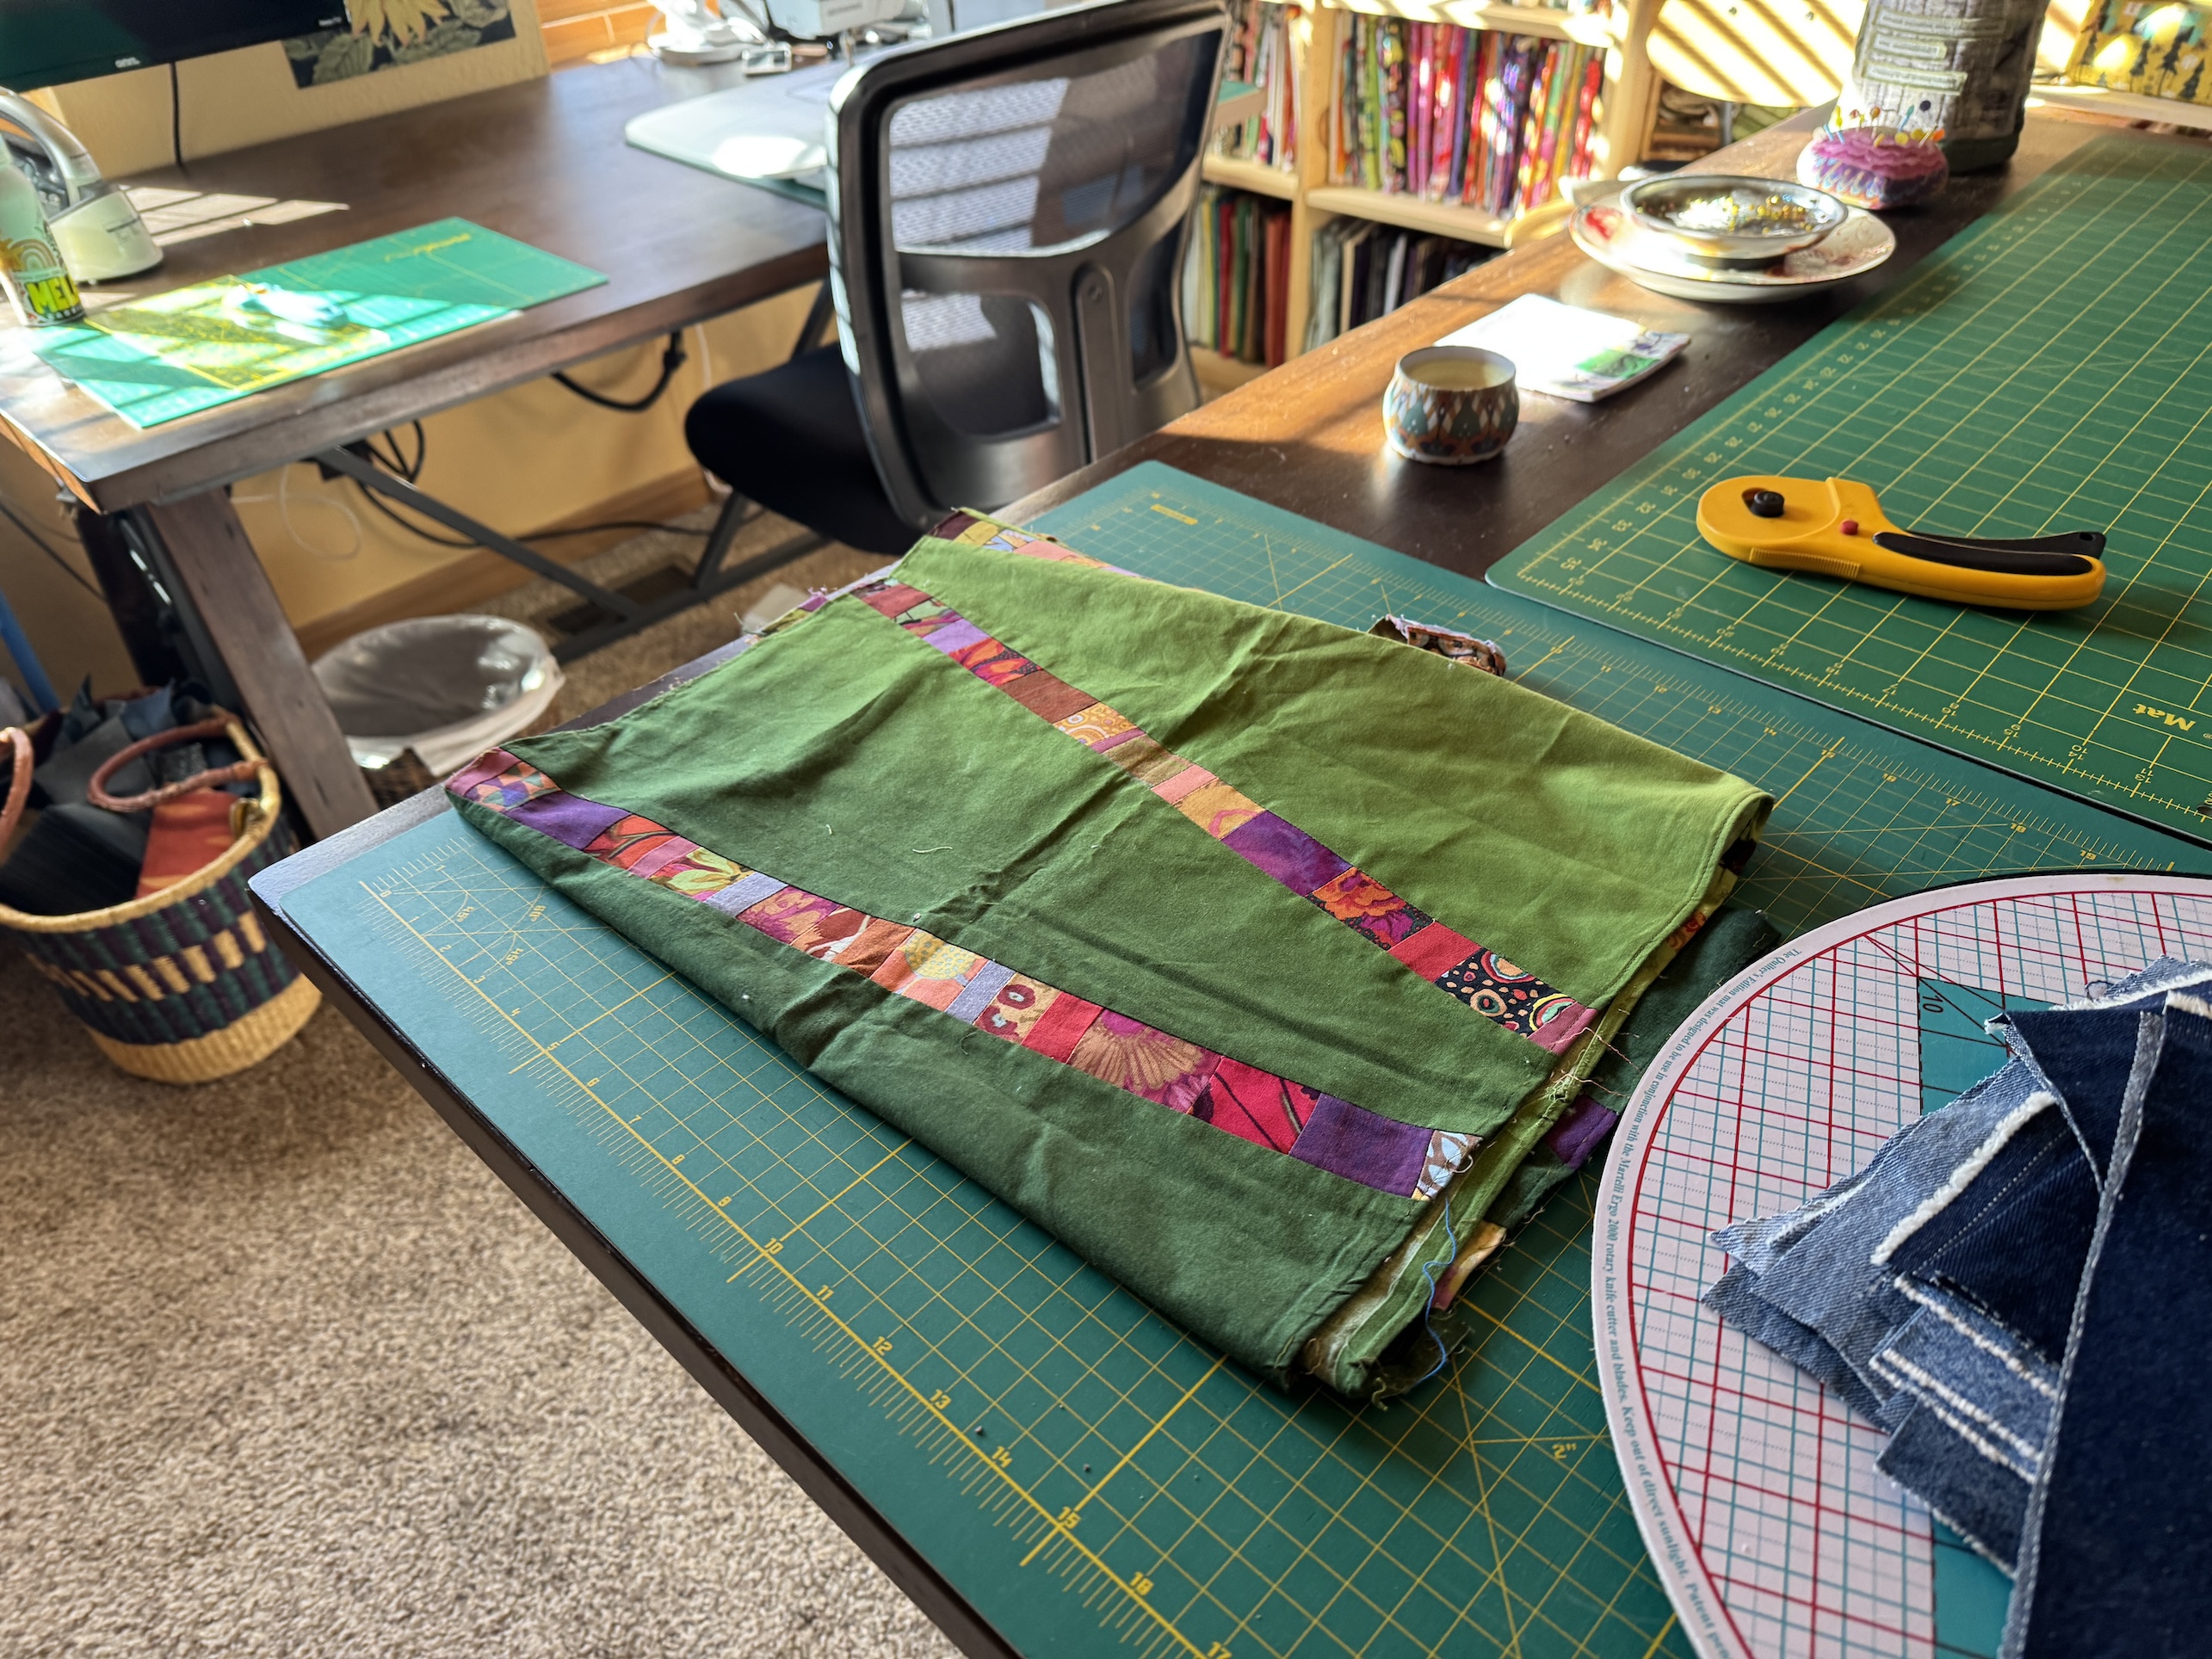
During the studio move and reorganization I’ve had an “archeological dig” of unearthing old projects in progress (or “UFOs”/Unfinished Objects as quilters like to call them). For example I discovered this partially finished table runner that would be wonderful on the table in our entryway:
I actually sold a couple of these when I had my Etsy shop going (see my post from 2017 – What’s on the Design…Ironing Board?) and I guess this one another one from 2017 that I was going to finish and list in my Etsy shop.
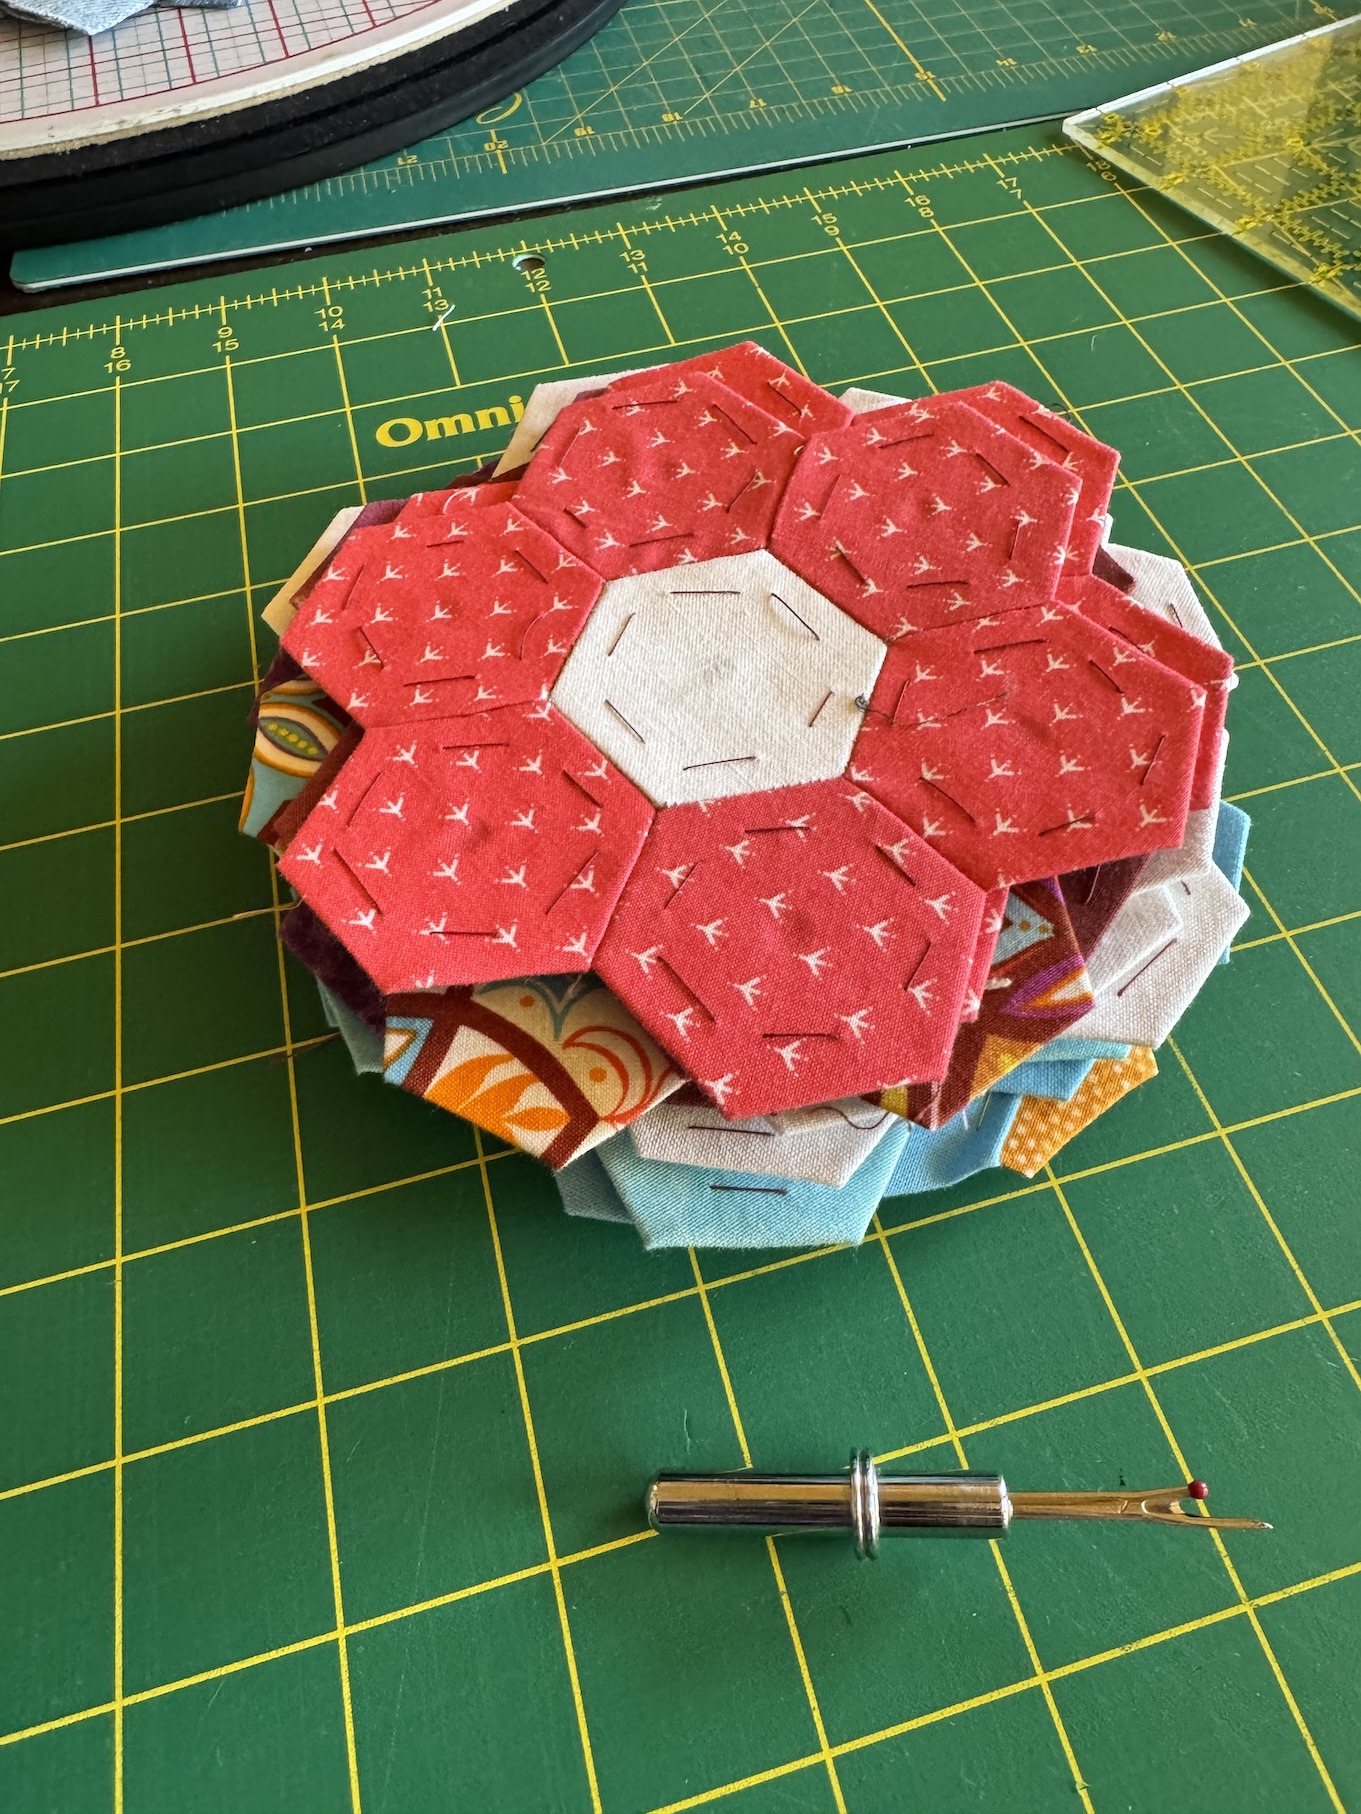
I continue to work on the English Paper Piecing hexie flowers quilt that I shared in my post ScrapHappy January 2026: Moving Forward on the Hexie Project ; and I love sitting my little studio and working on removing the hexie papers from the back of the flowers (so so so many to go…):
(I’ll share an update on the hexie quilt progress during February’s monthly ScrapHappy post.)
So a couple days ago John and I decided to switch back my studio to another room and our bedroom back to the primary bedroom.
In case you have no idea what I am talking about, see this post from June 2025 – Thrifting for the Studio.
My studio is located in the former Primary Bedroom of the house. A couple years ago my husband John and I decided we didn’t need that much room for our main bedroom and moved to a smaller bedroom. Originally it was a carpeted room but in summer 2024 John put in a floor.
I’ve always had a small space to sew and craft until I met John and then a couple years ago we turned our primary bedroom (which is fairly large) into my studio.
However In my small crafting spaces I created entire bodies of work such as those I exhibited in my solo show (see 2019 post Solo Show Seattle Municipal Tower, Part III) The Wardrobe Meets the Wall.(And no new body of work has occurred in my large studio!)
I made that entire TheWardrobe Meets the Wall collection of 12+ quilts in a tiny little back bedroom of my house in Oregon where I had to use part of my hallway as my design wall.
I know of course I traveled a lot in 2025 but this has been an ongoing problem – I don’t seem to be as “creatively inspired” in a large space. I just had a gut feeling that I needed a cozy little space of creativity again.
So we switched the rooms back and Chaos in the Craft Room ensued:
Moving the contents of my large studio and walk in closet into a much smaller space was quite the undertaking!
The good thing of this move is I spent a couple days preparing for it and purging what I didn’t really need. It seems that I thrifted stuff to fill the space – I expanded to fill the space…
It took a couple days after we switched rooms to settle into my new room, which is less than half the size of the space I had in the primary bedroom, and here is what it looks like now:
Yes my design wall had to be split into half as it wouldn’t work in the room in it’s full size.
Besides giving me a small cozy space to work in to stimulate my creativity, John and I also made this switch because we are considering selling the house someday and moving to a smaller Ranch-style house. We recently toured houses in a cool new development in another section of the Denver Metropolitan area and fell in love with a one story house with a basement that could be finished however we liked.
We aren’t ready to sell/move just yet, but we were going to have to switch the rooms back anyway someday in order to put our house on the market.
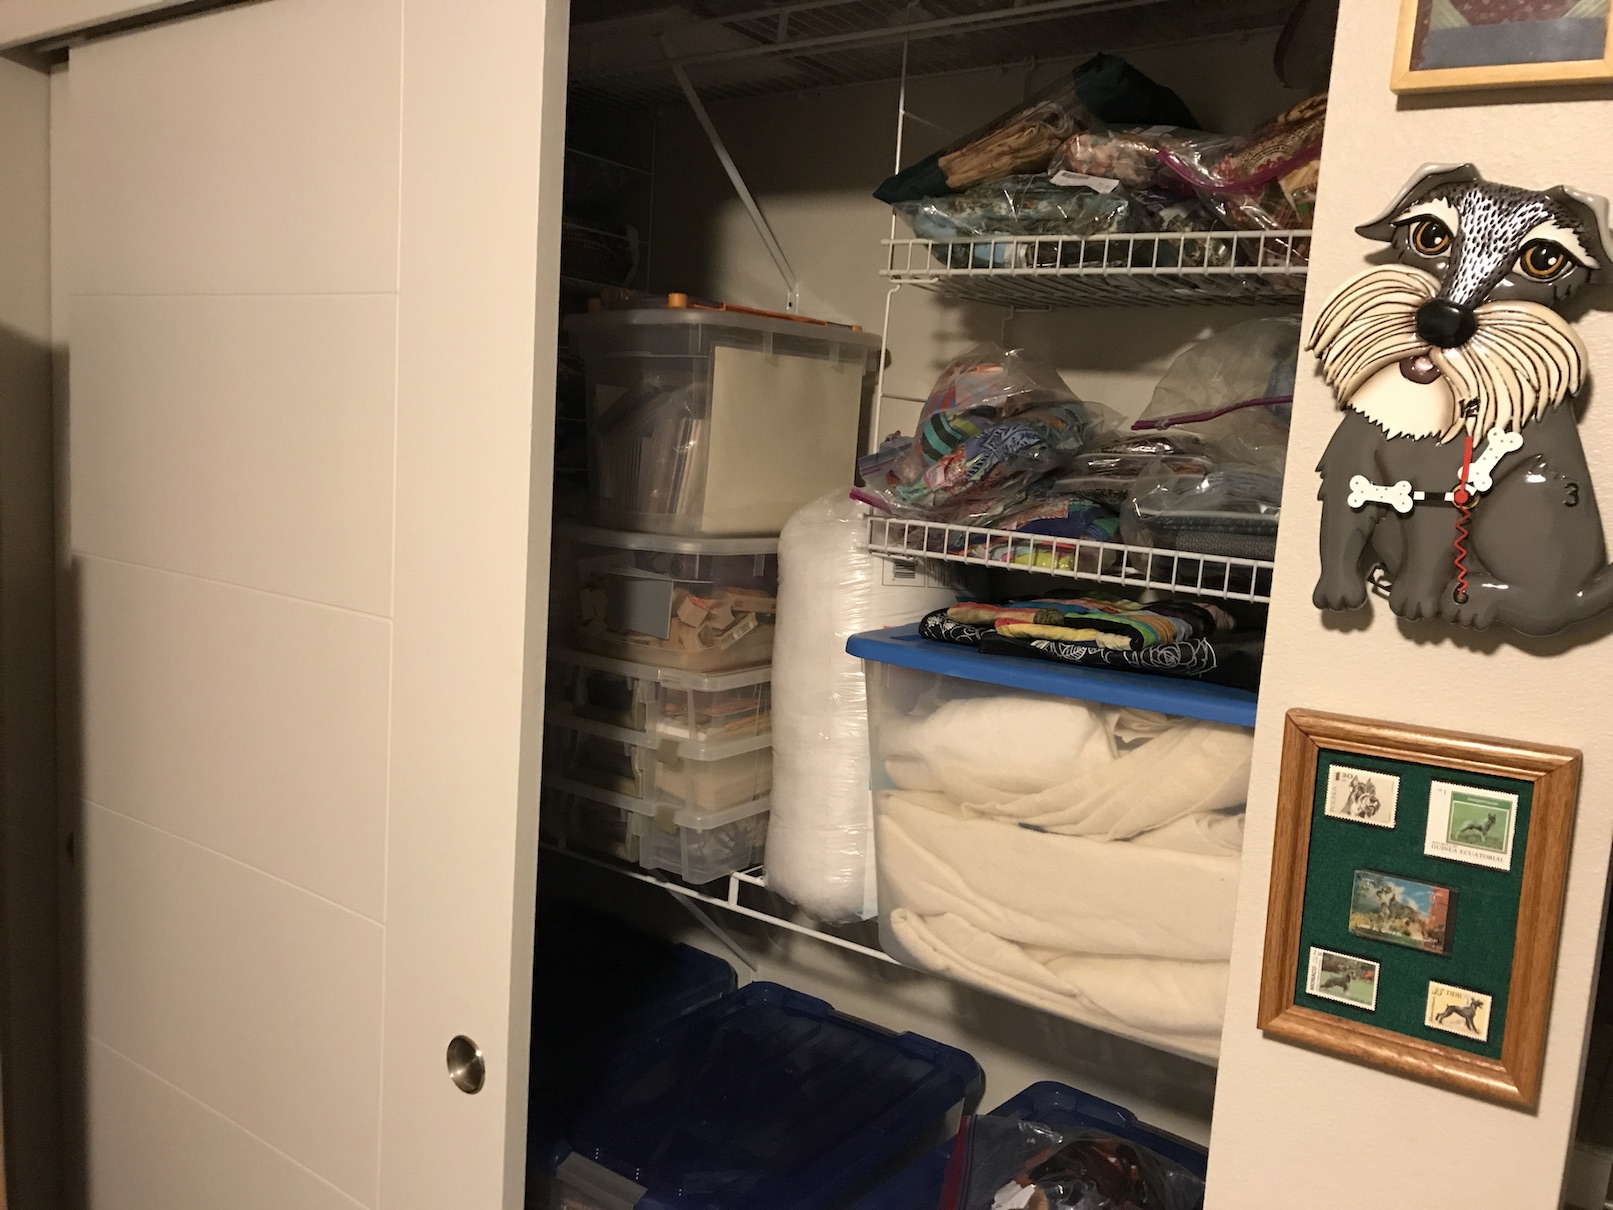
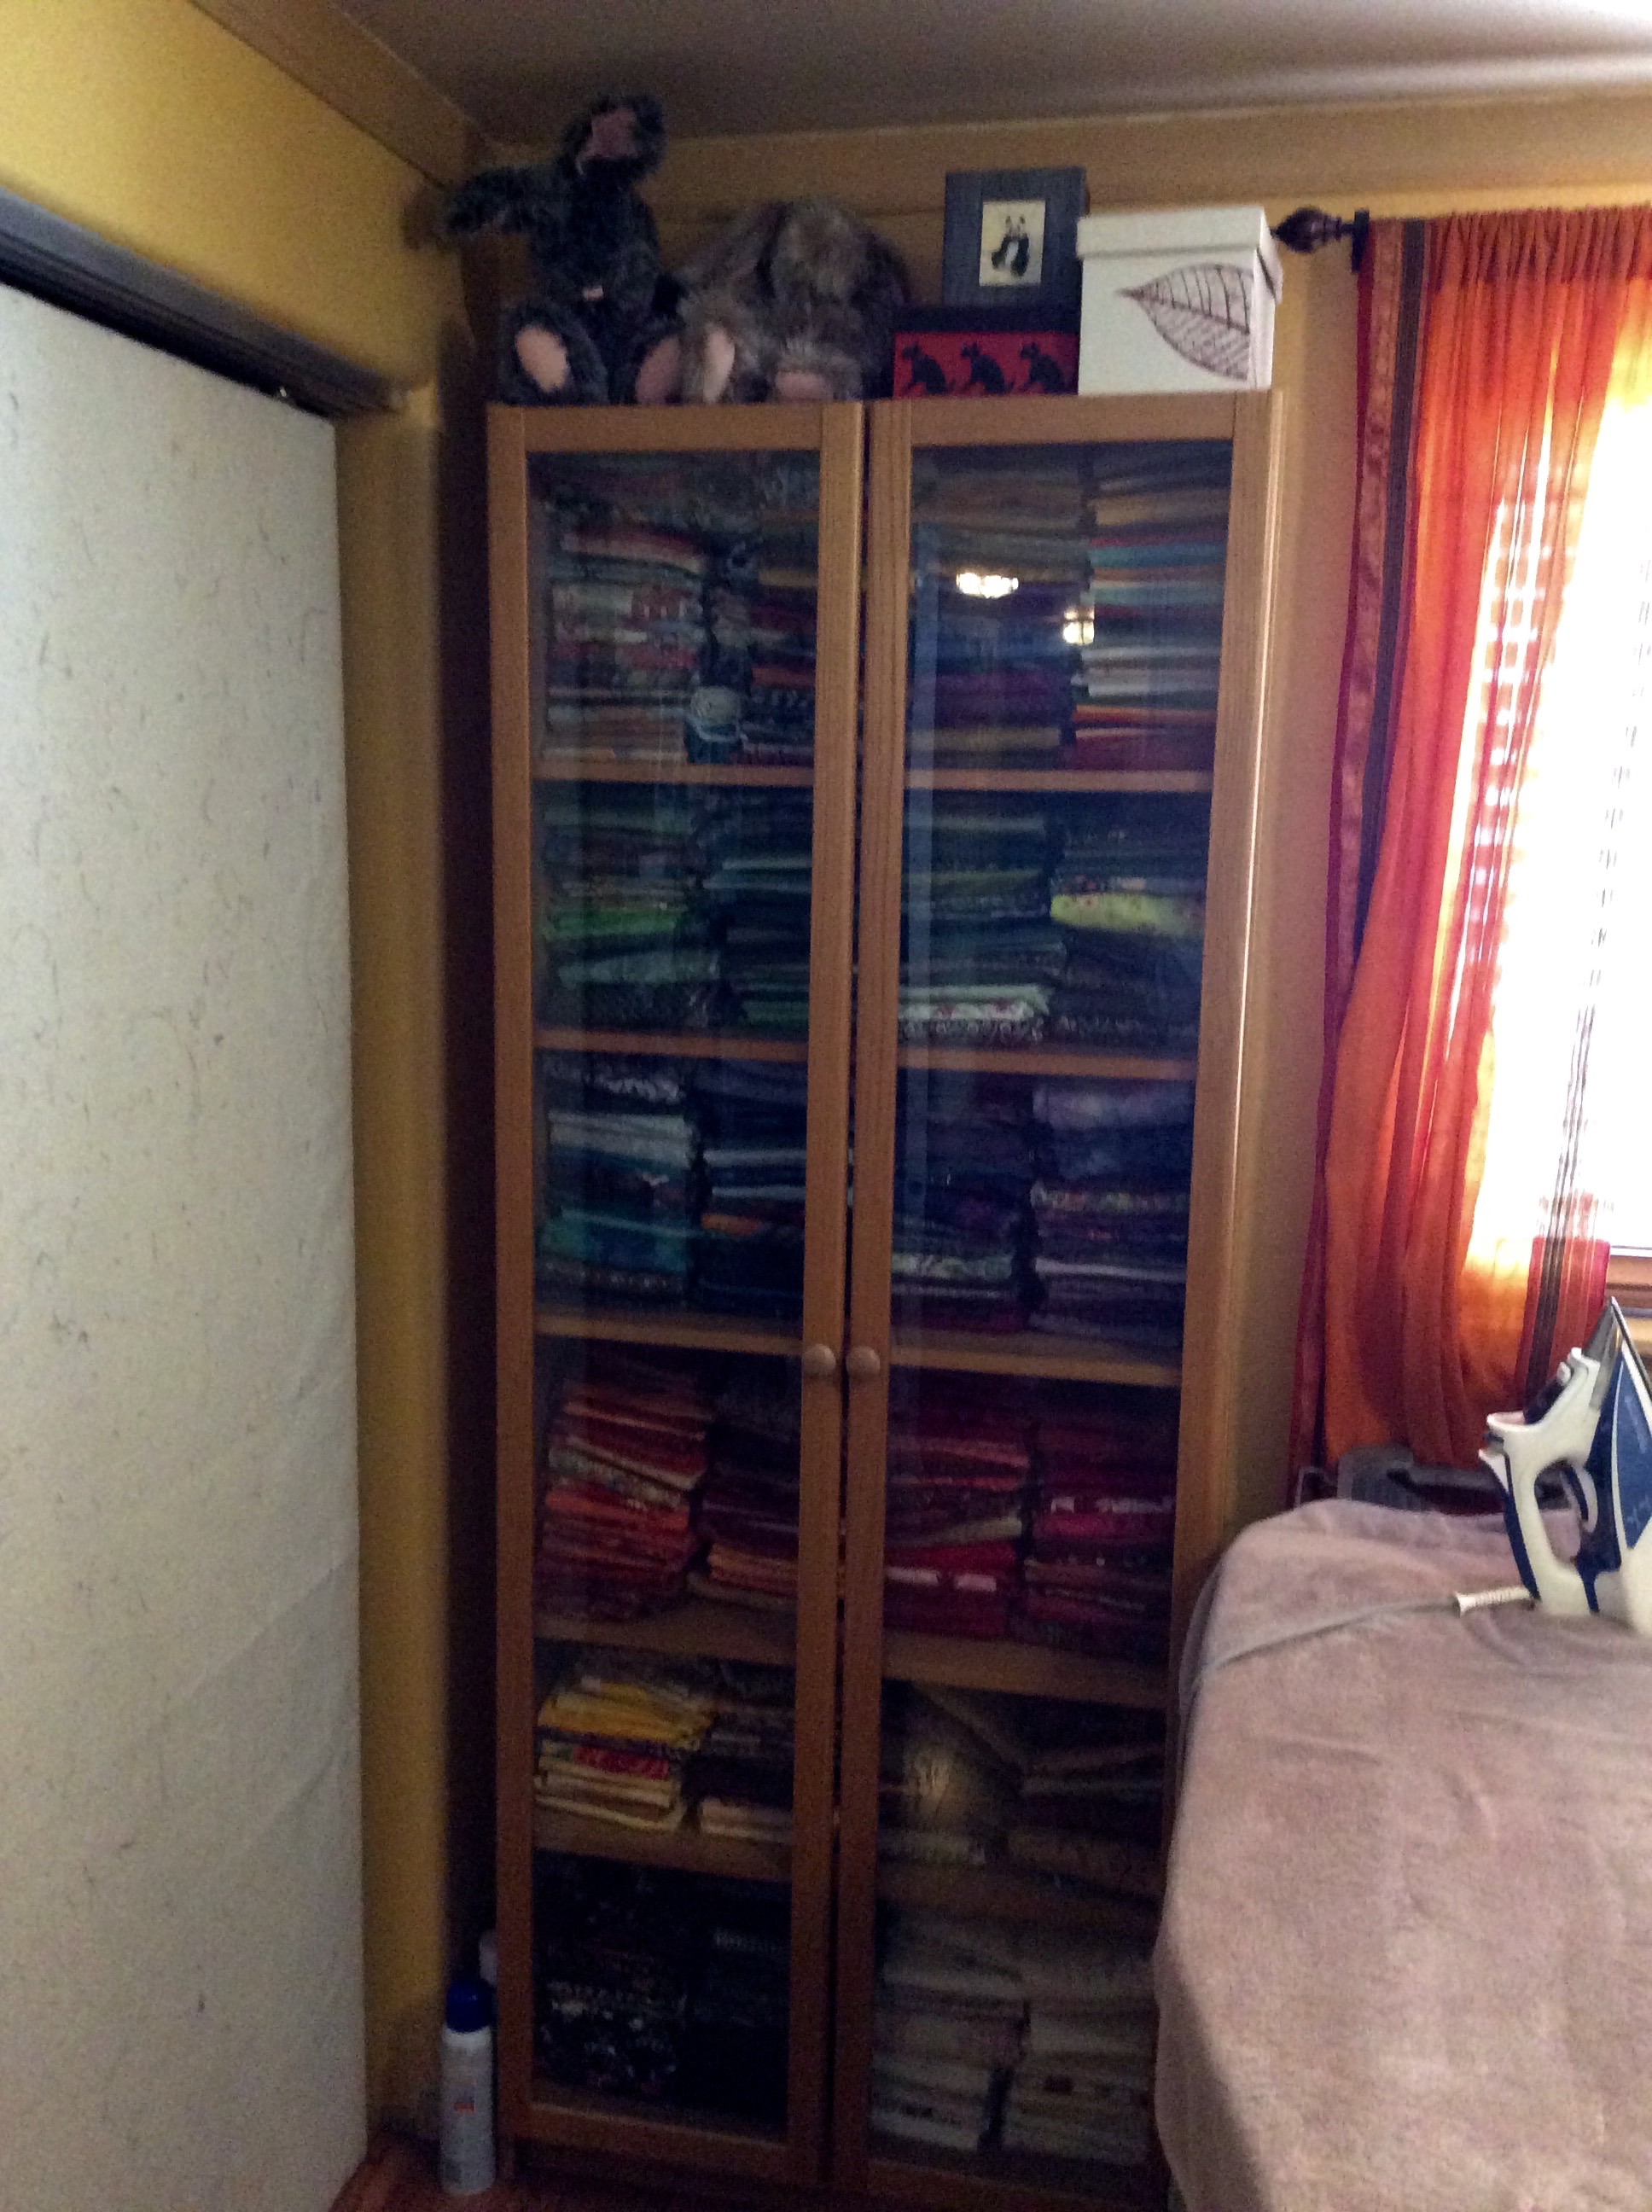
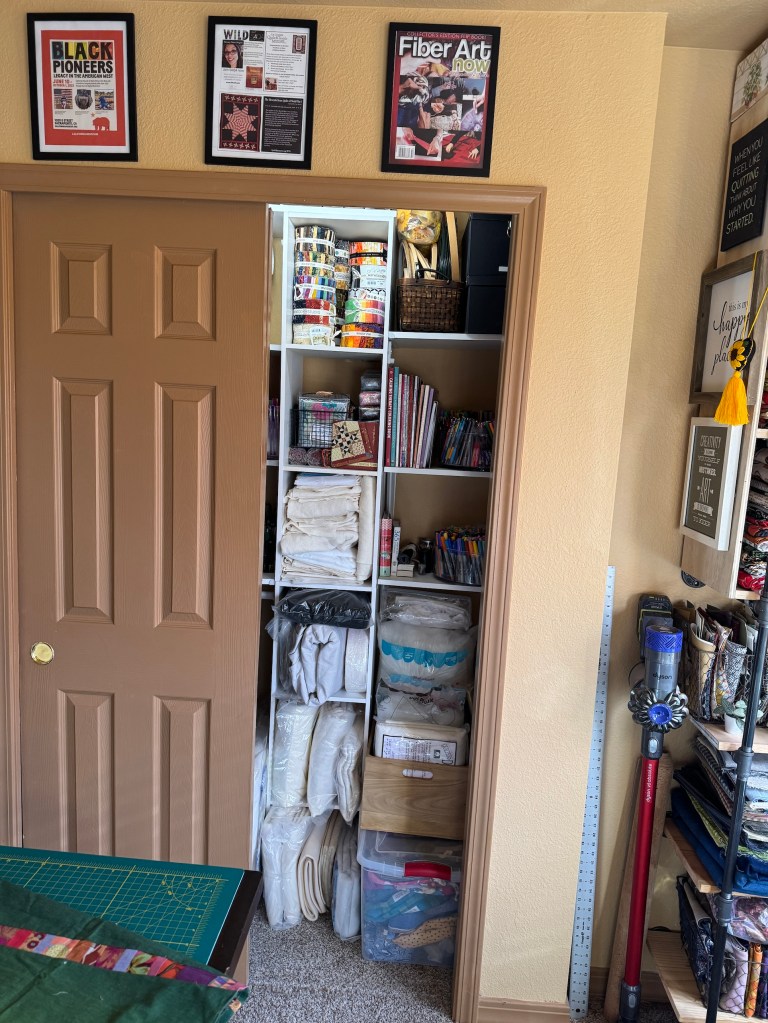
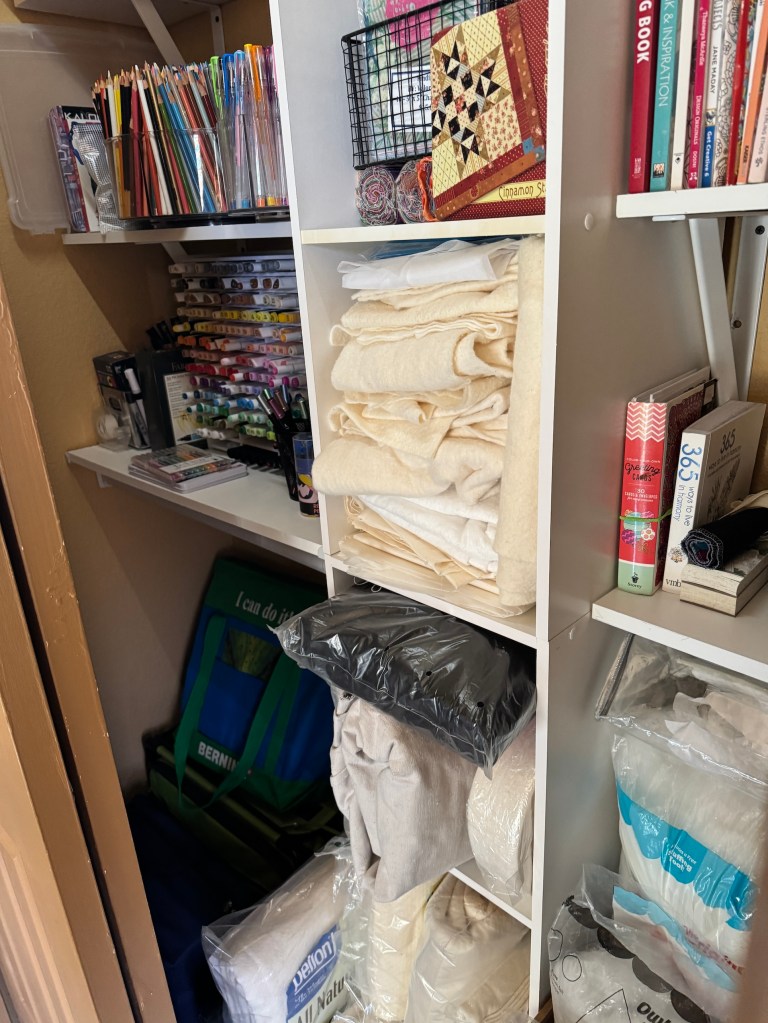
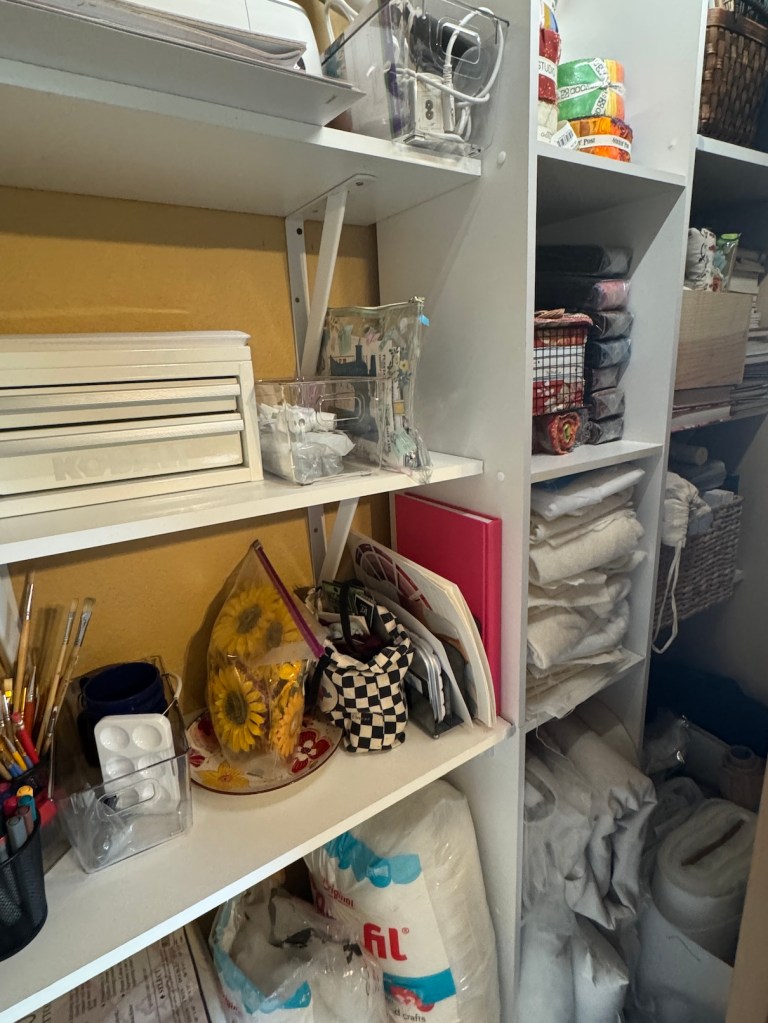
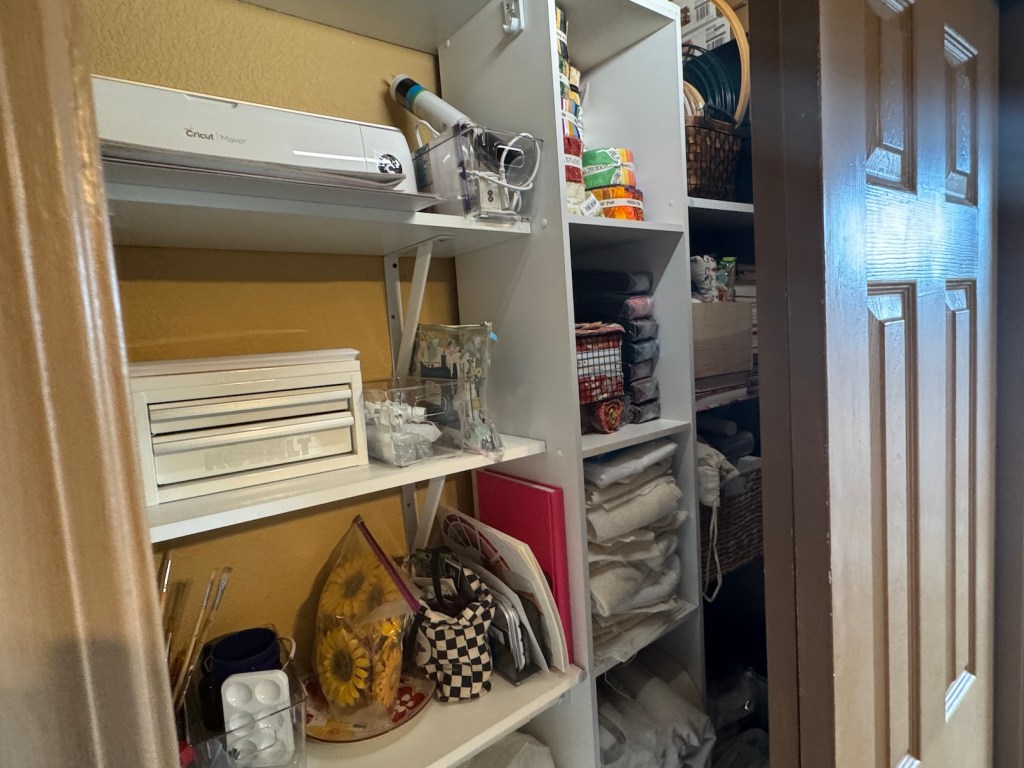
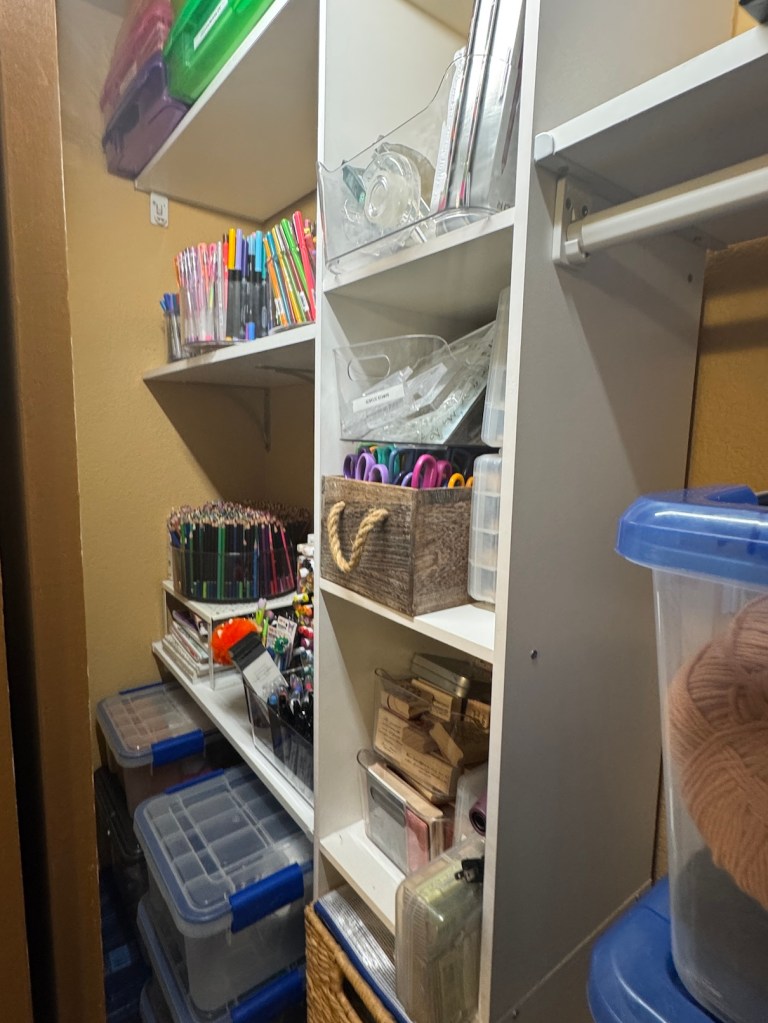
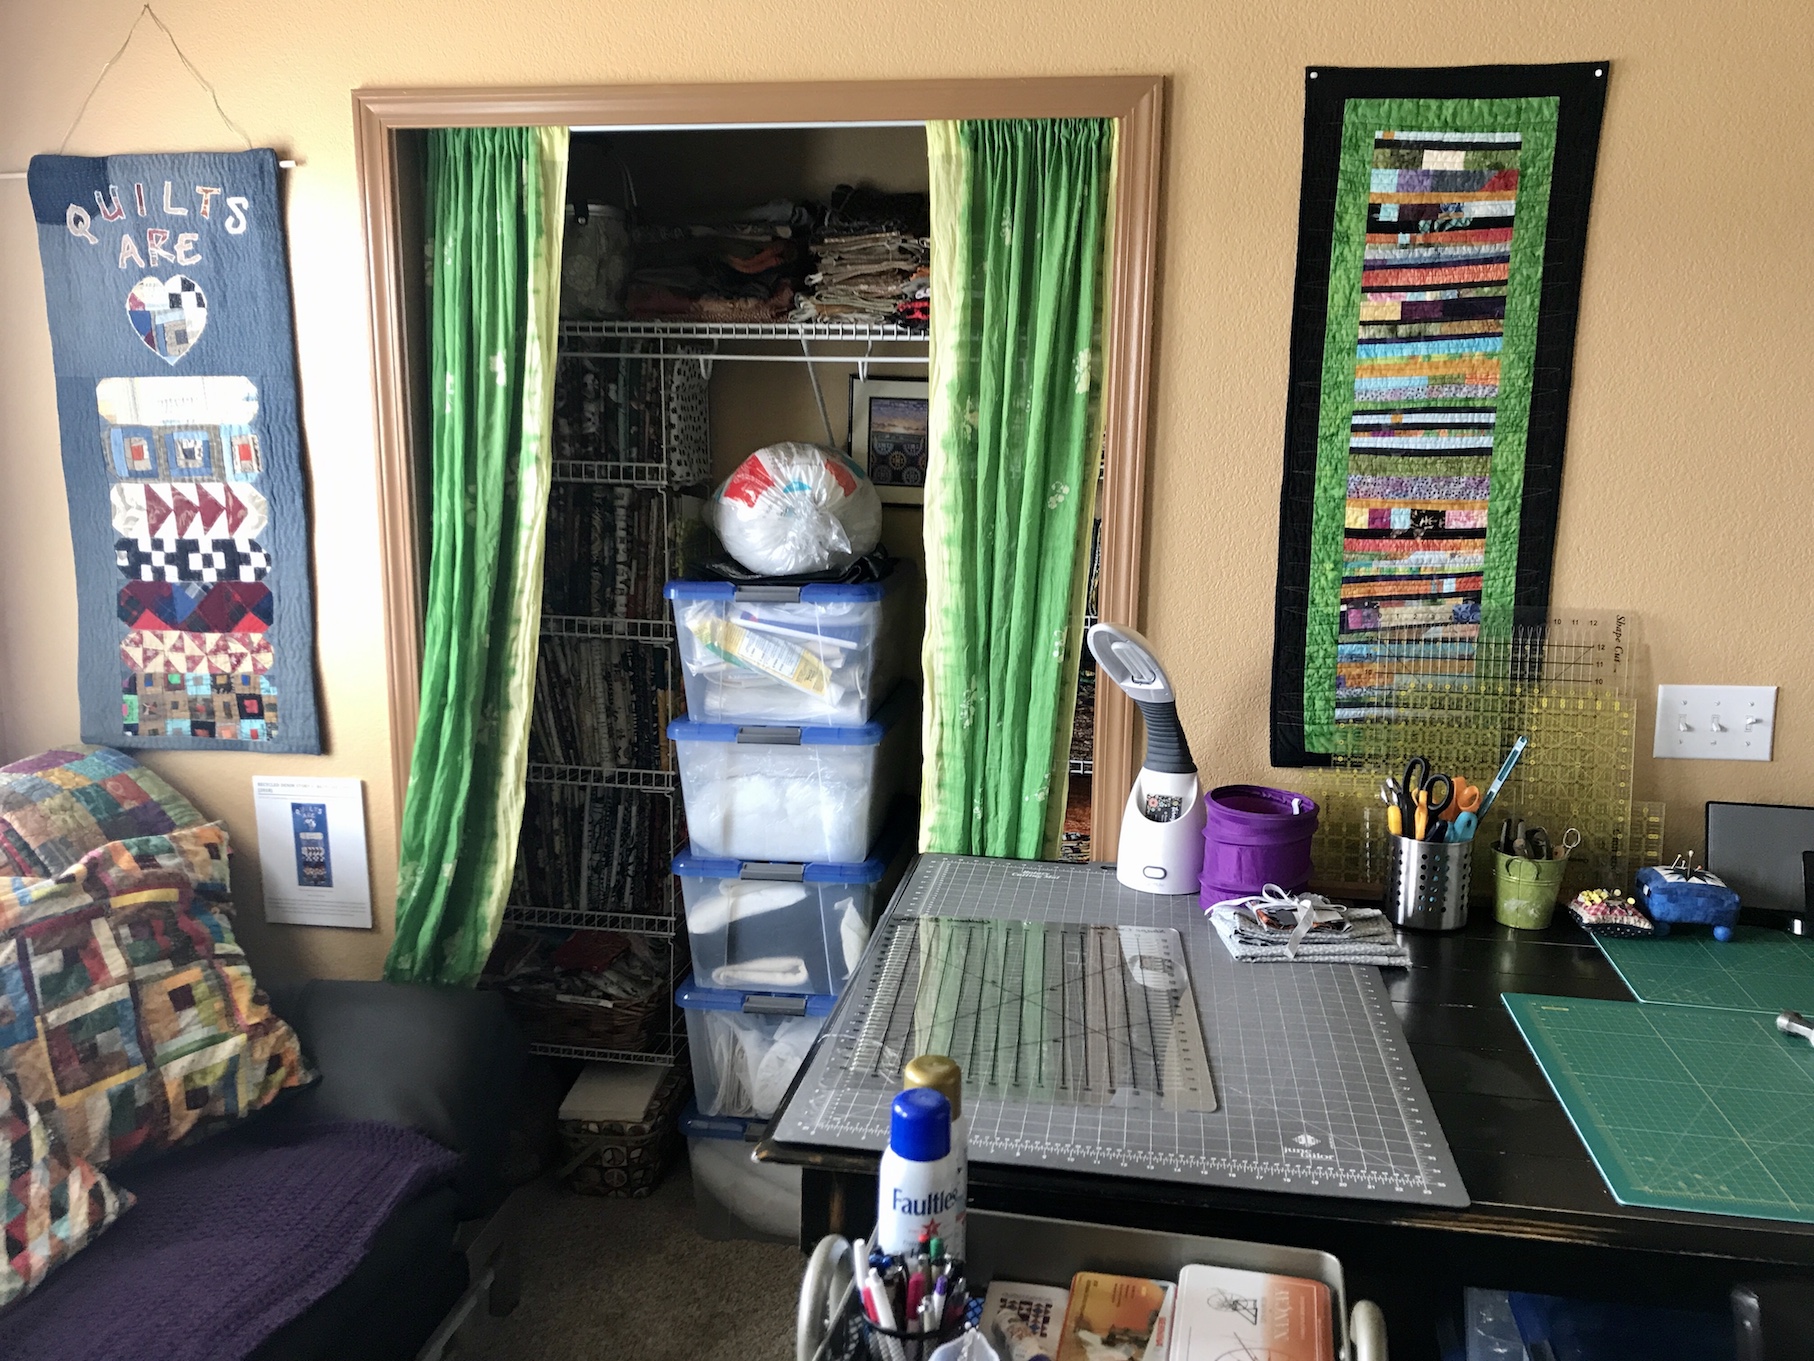
So what became of my huge stash of craft supplies (most of them thrifted)? Well I moved all the sewing related supplies that didn’t fit in the studio shelves into the closet in my new studio:
The non sewing supplies got moved to the closet in the upstairs guest room which had previous housed my clothes, which are now moved into the walk in closet off the primary bedroom.
And…
As far as the Primary Bedroom, John and I took a couple days and turned it into a relaxing bedroom sanctuary. I want it to be our private sanctuary so I am not sharing any photos.(I recently saw on YouTube a tour of a Hollywood actor’s home on the Architectural Digest channel and she wouldn’t show her bedroom because she said that was her private sanctuary. That inspired me!)
Well here’s to getting into my cozy new studio and creating!
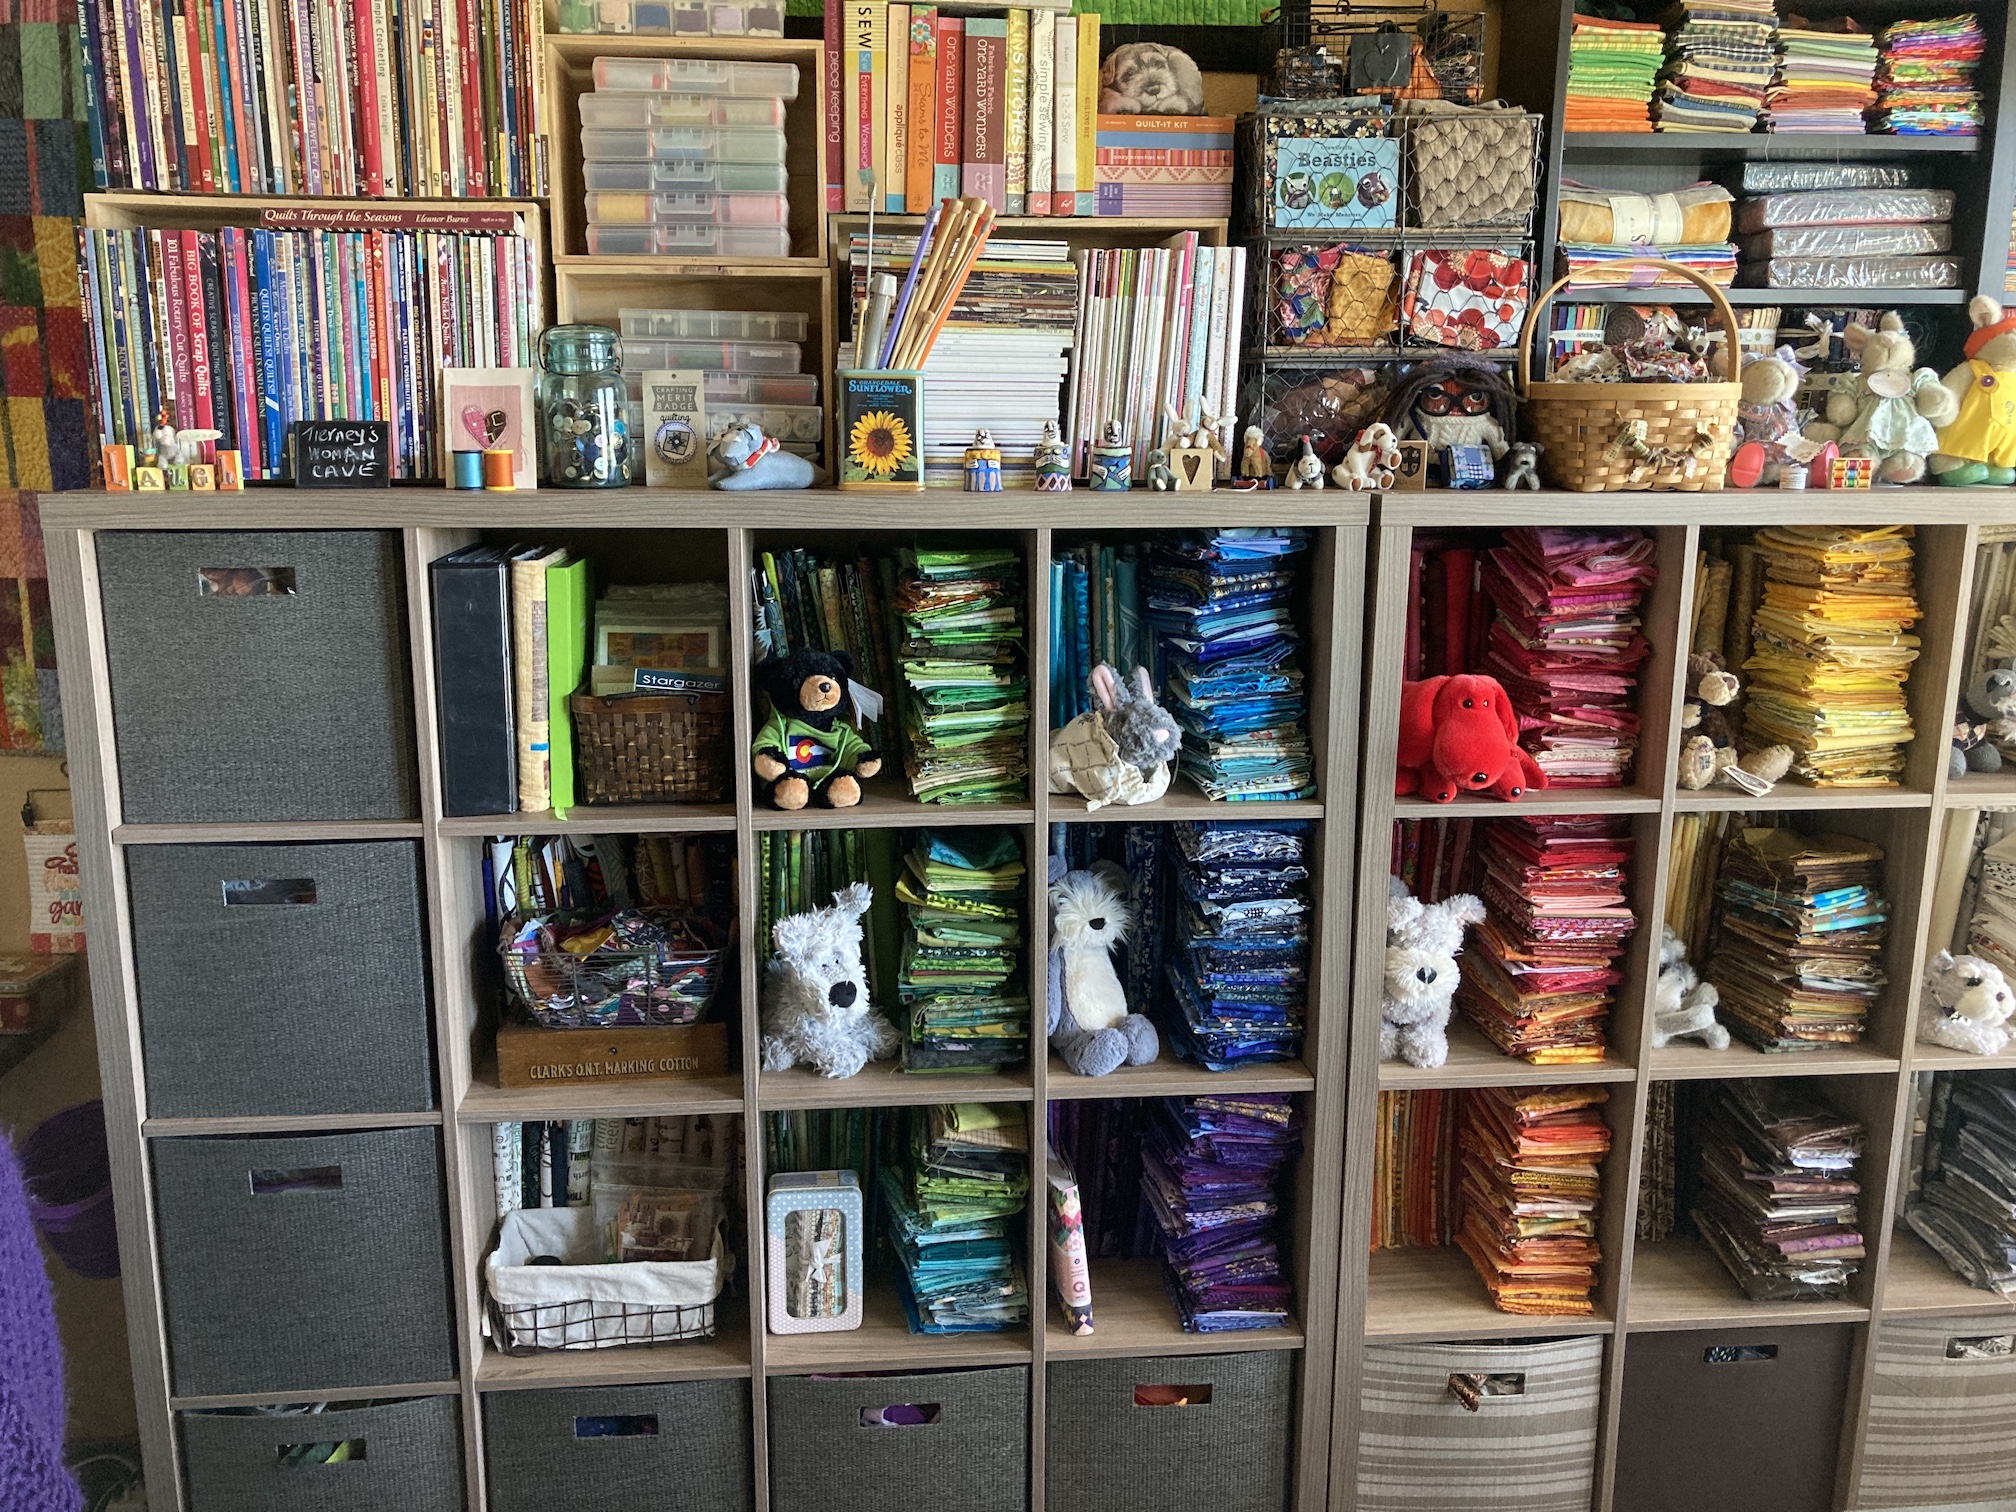
I haven’t shared an updated tour of my quilting/crafting studio in quite a while. I thought I’d share a current studio tour and share how I’ve decorated and equipped it with many thrifted items bought second hand from charity thrift shops (local and found during my travels).
My studio is located in the former Primary Bedroom of the house. A couple years ago my husband John and I decided we didn’t need that much room for our main bedroom and moved to a smaller bedroom. Originally it was a carpeted room but in summer 2024 John put in a floor.
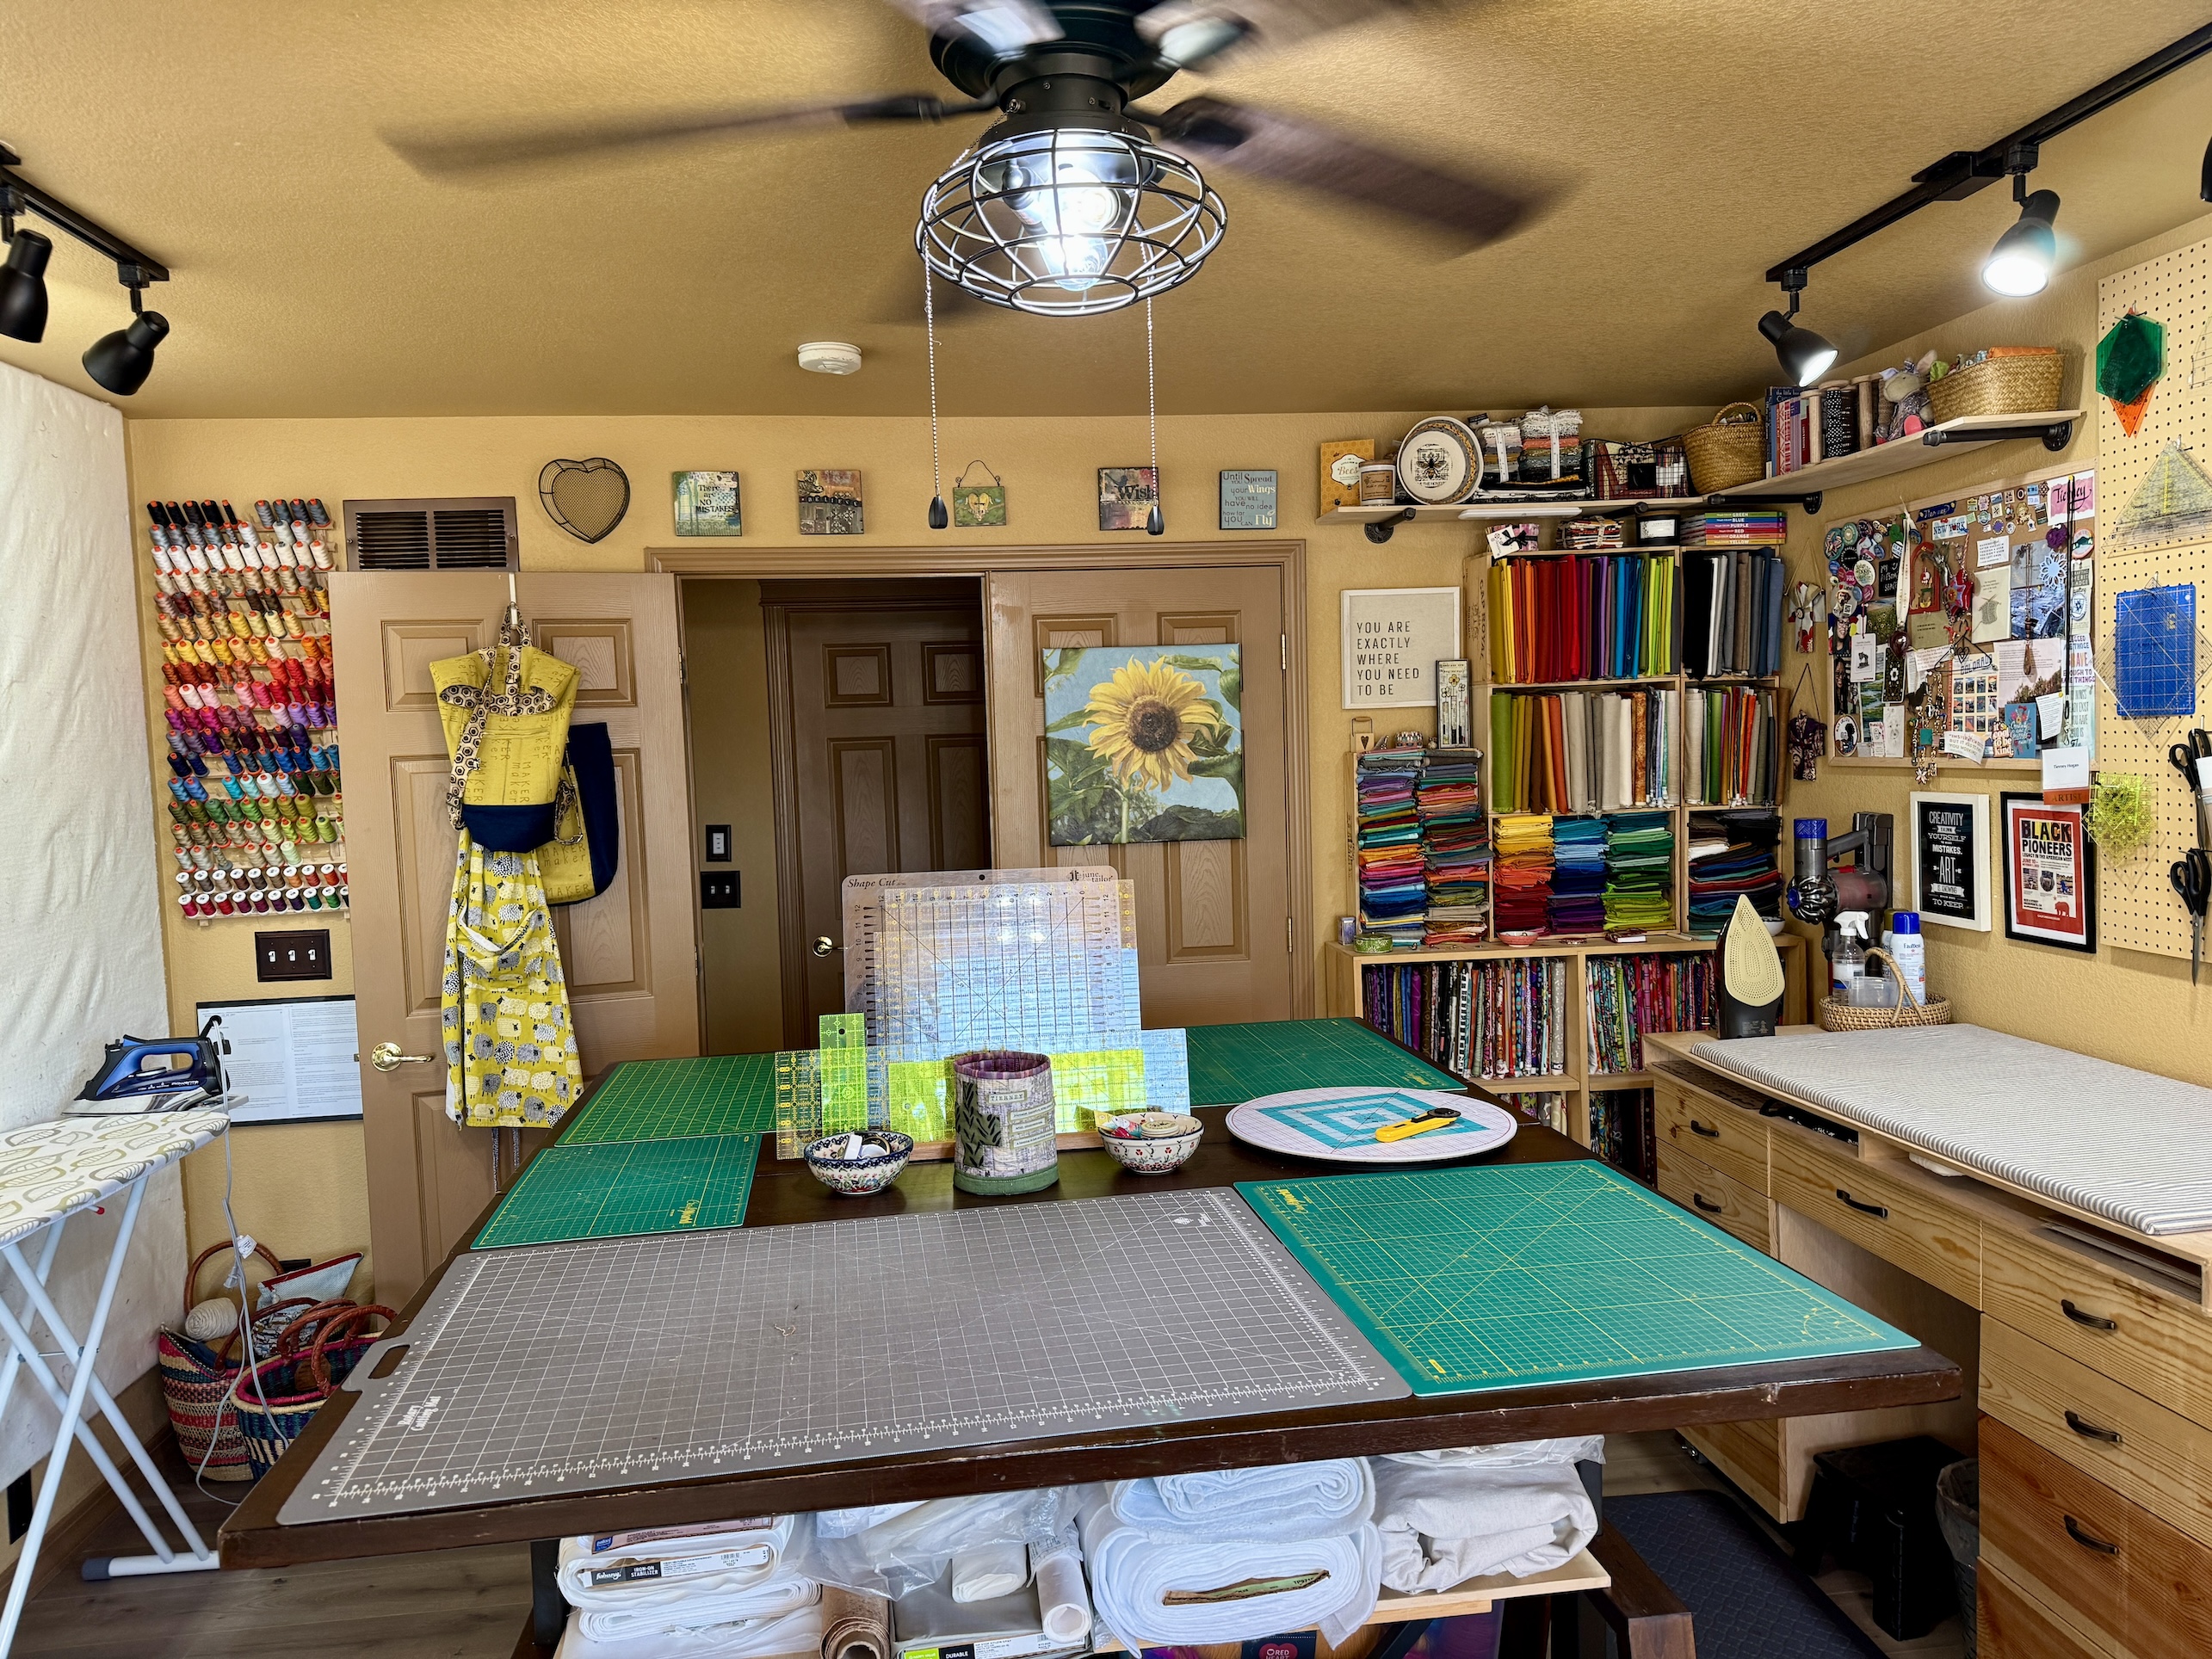
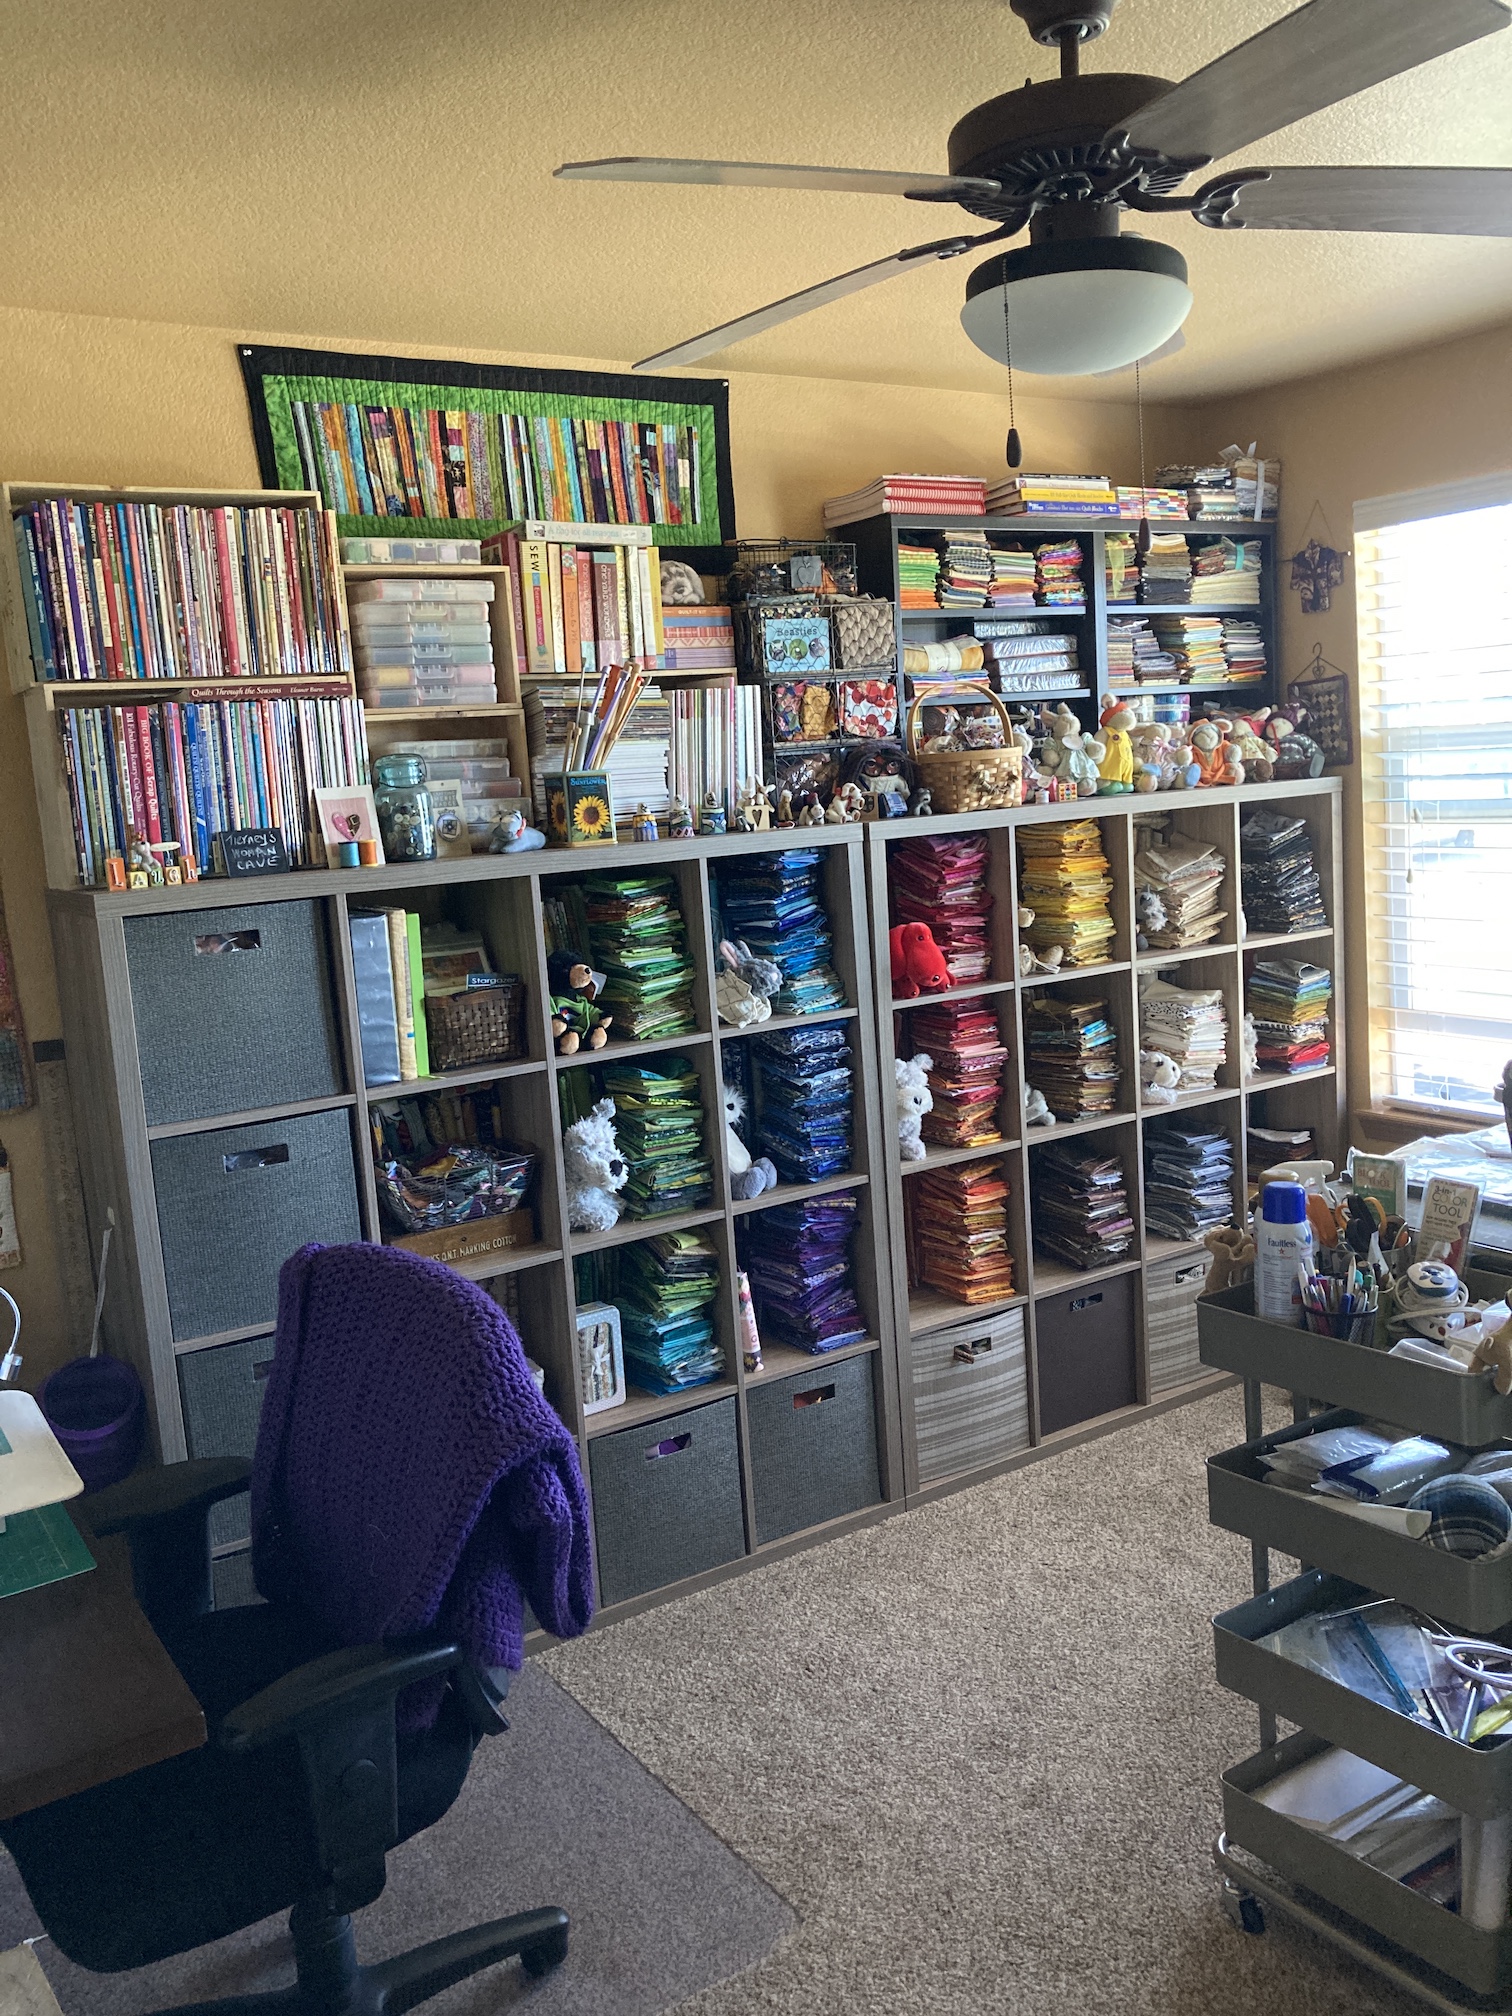
Here is the current view of the studio when you walk in the double doors:
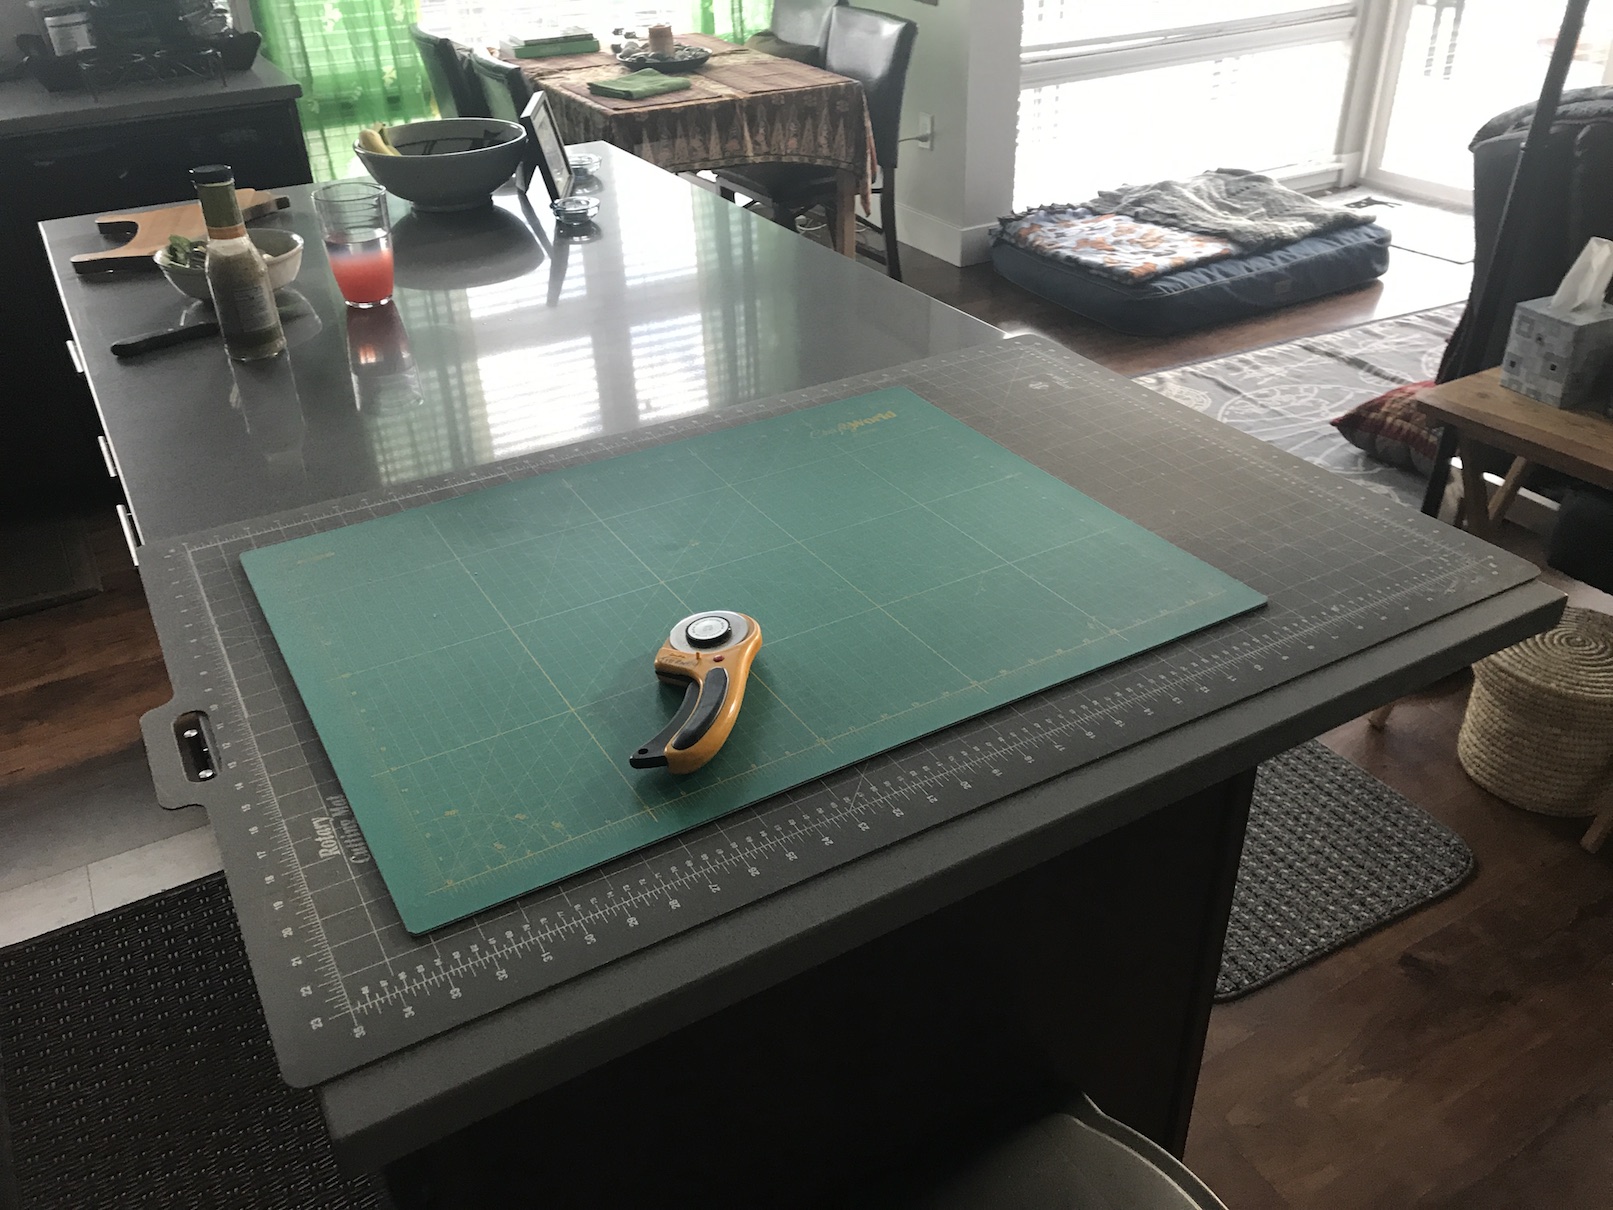
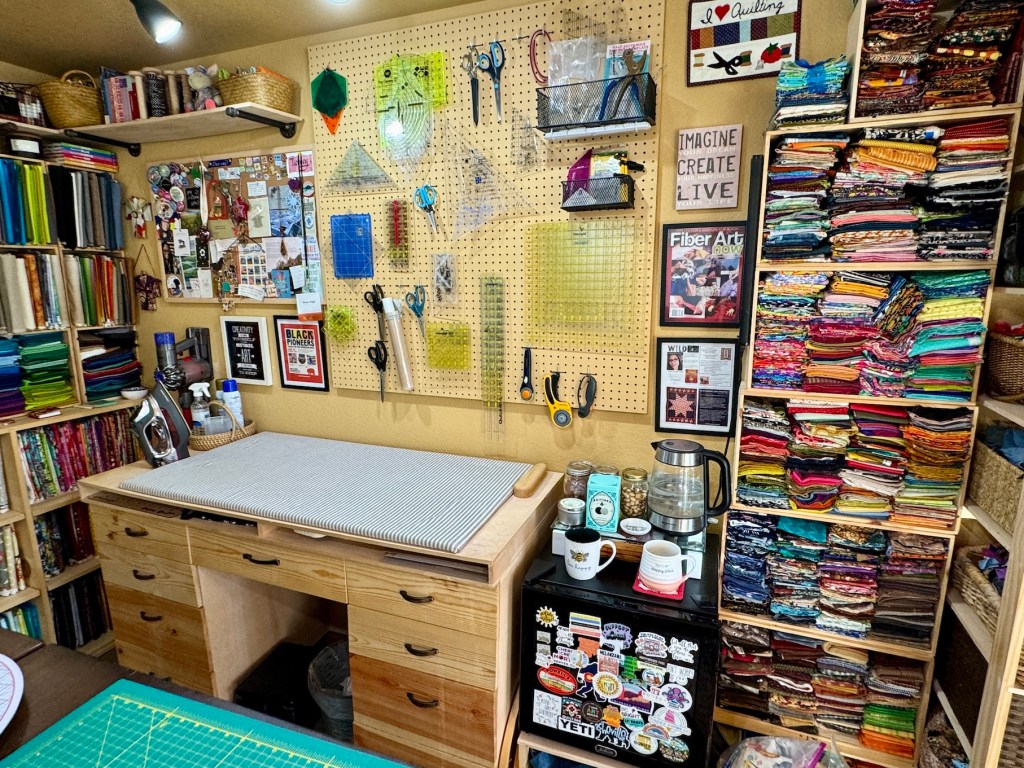
The cutting table is comprised of two adjustable desks from World Market set at their highest position. John built a shelf that connects the two desks to provide additional storage.
Underneath I store the bulk of my yarn collection which includes a lot of thrifted yarn(last year I came across cheap collection of gorgeous and usually pricey fingerling weight sock yarn in brand new condition at a thrift store that I couldn’t leave the shop without for the imaginary day I start knitting socks…):
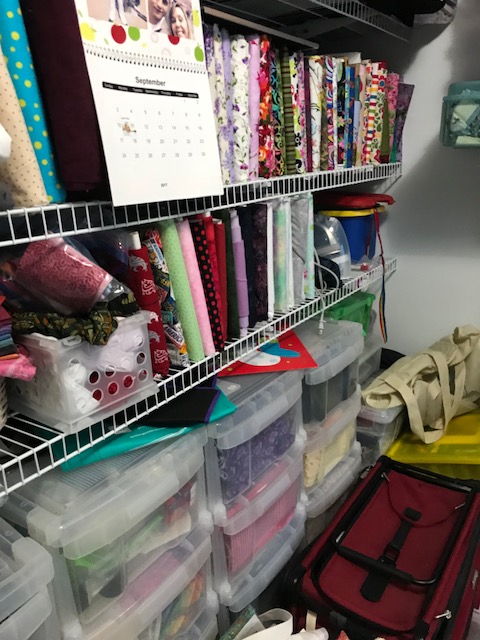
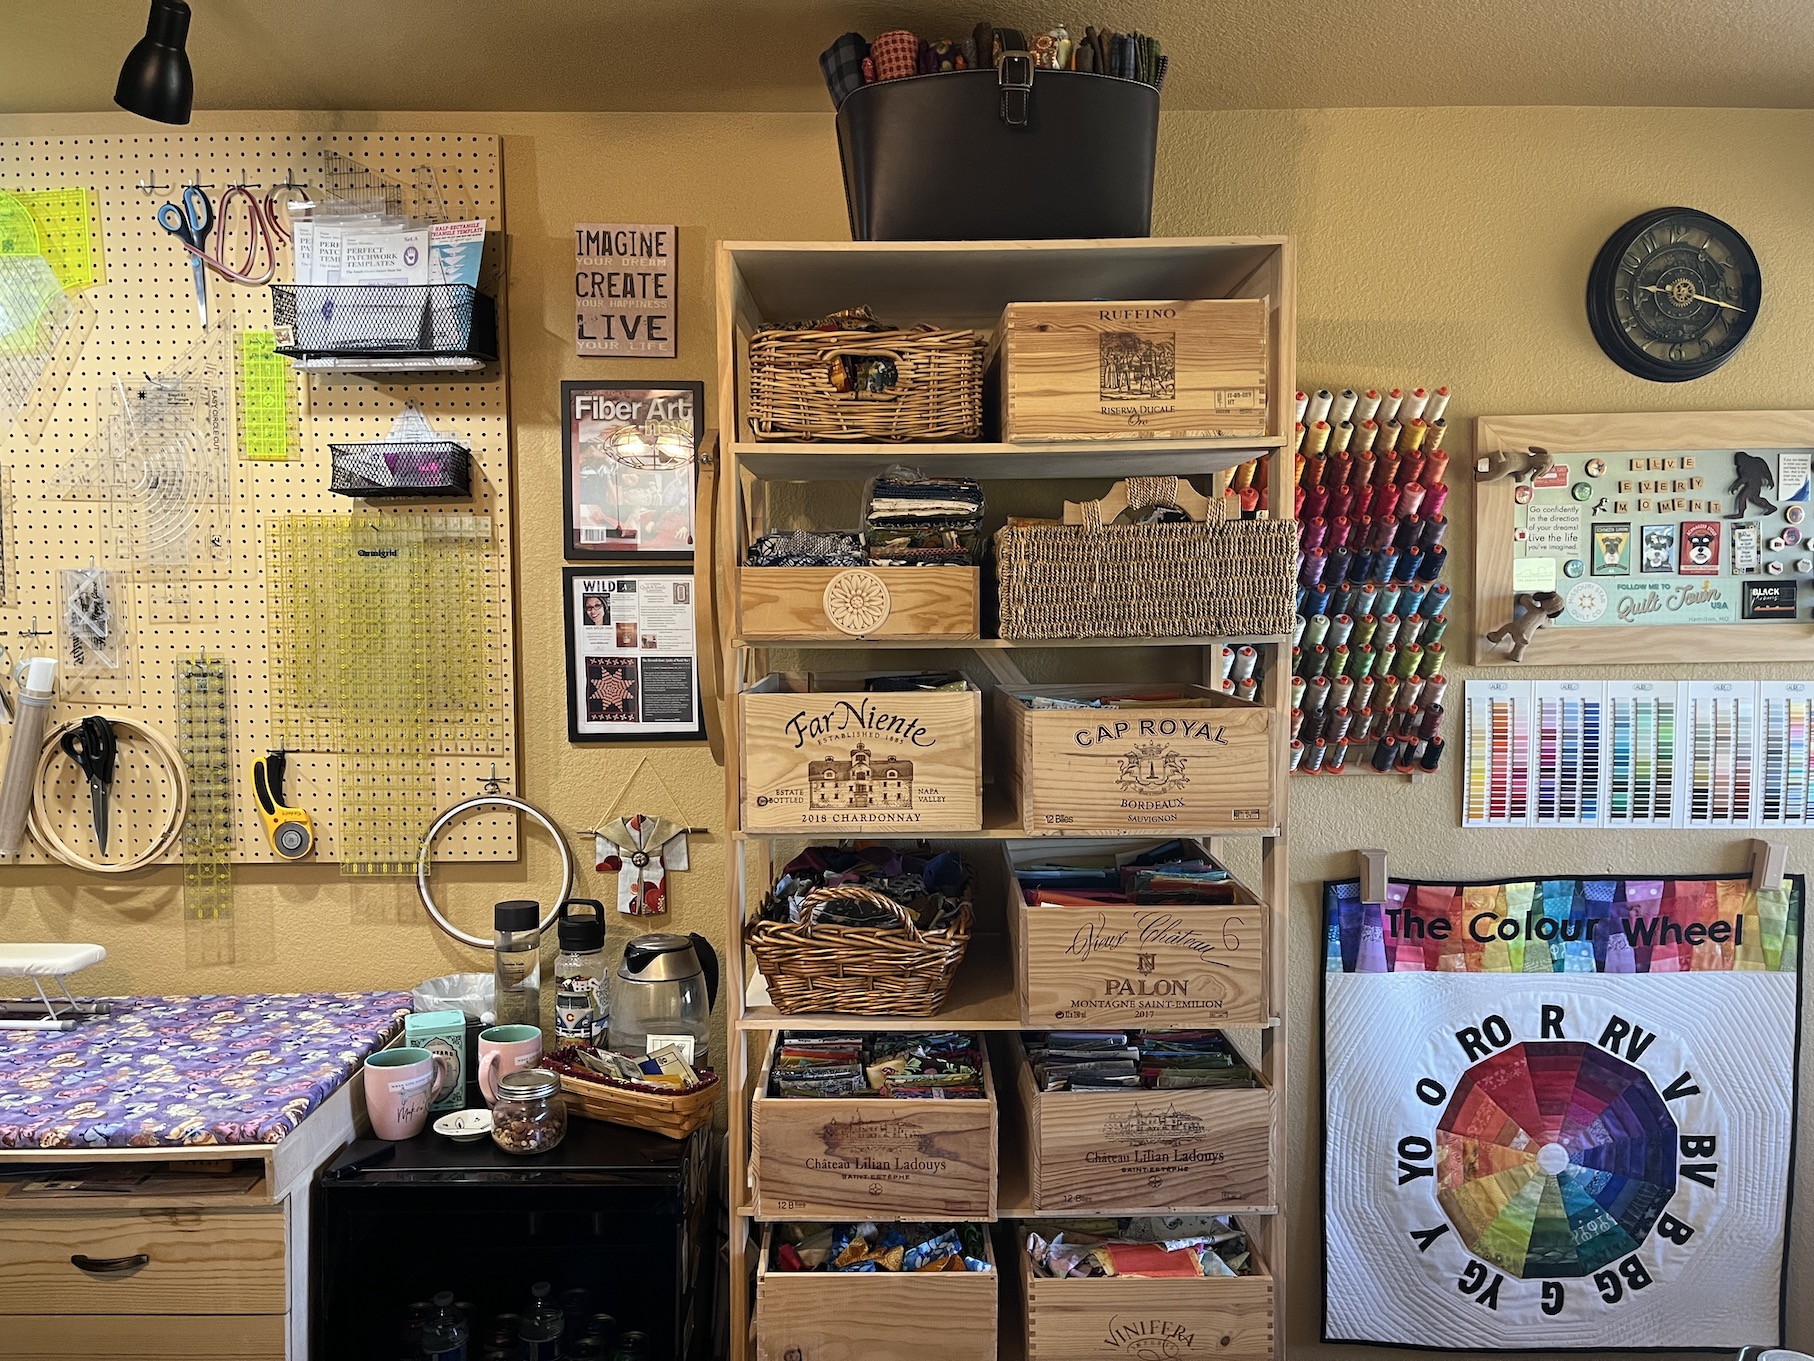
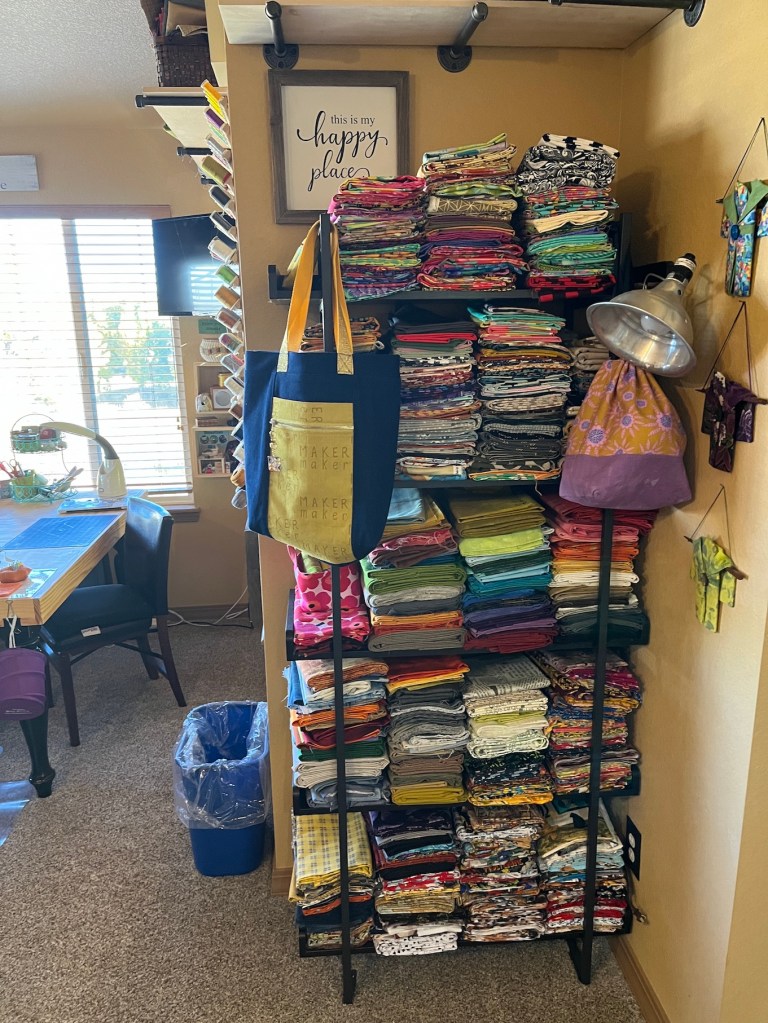
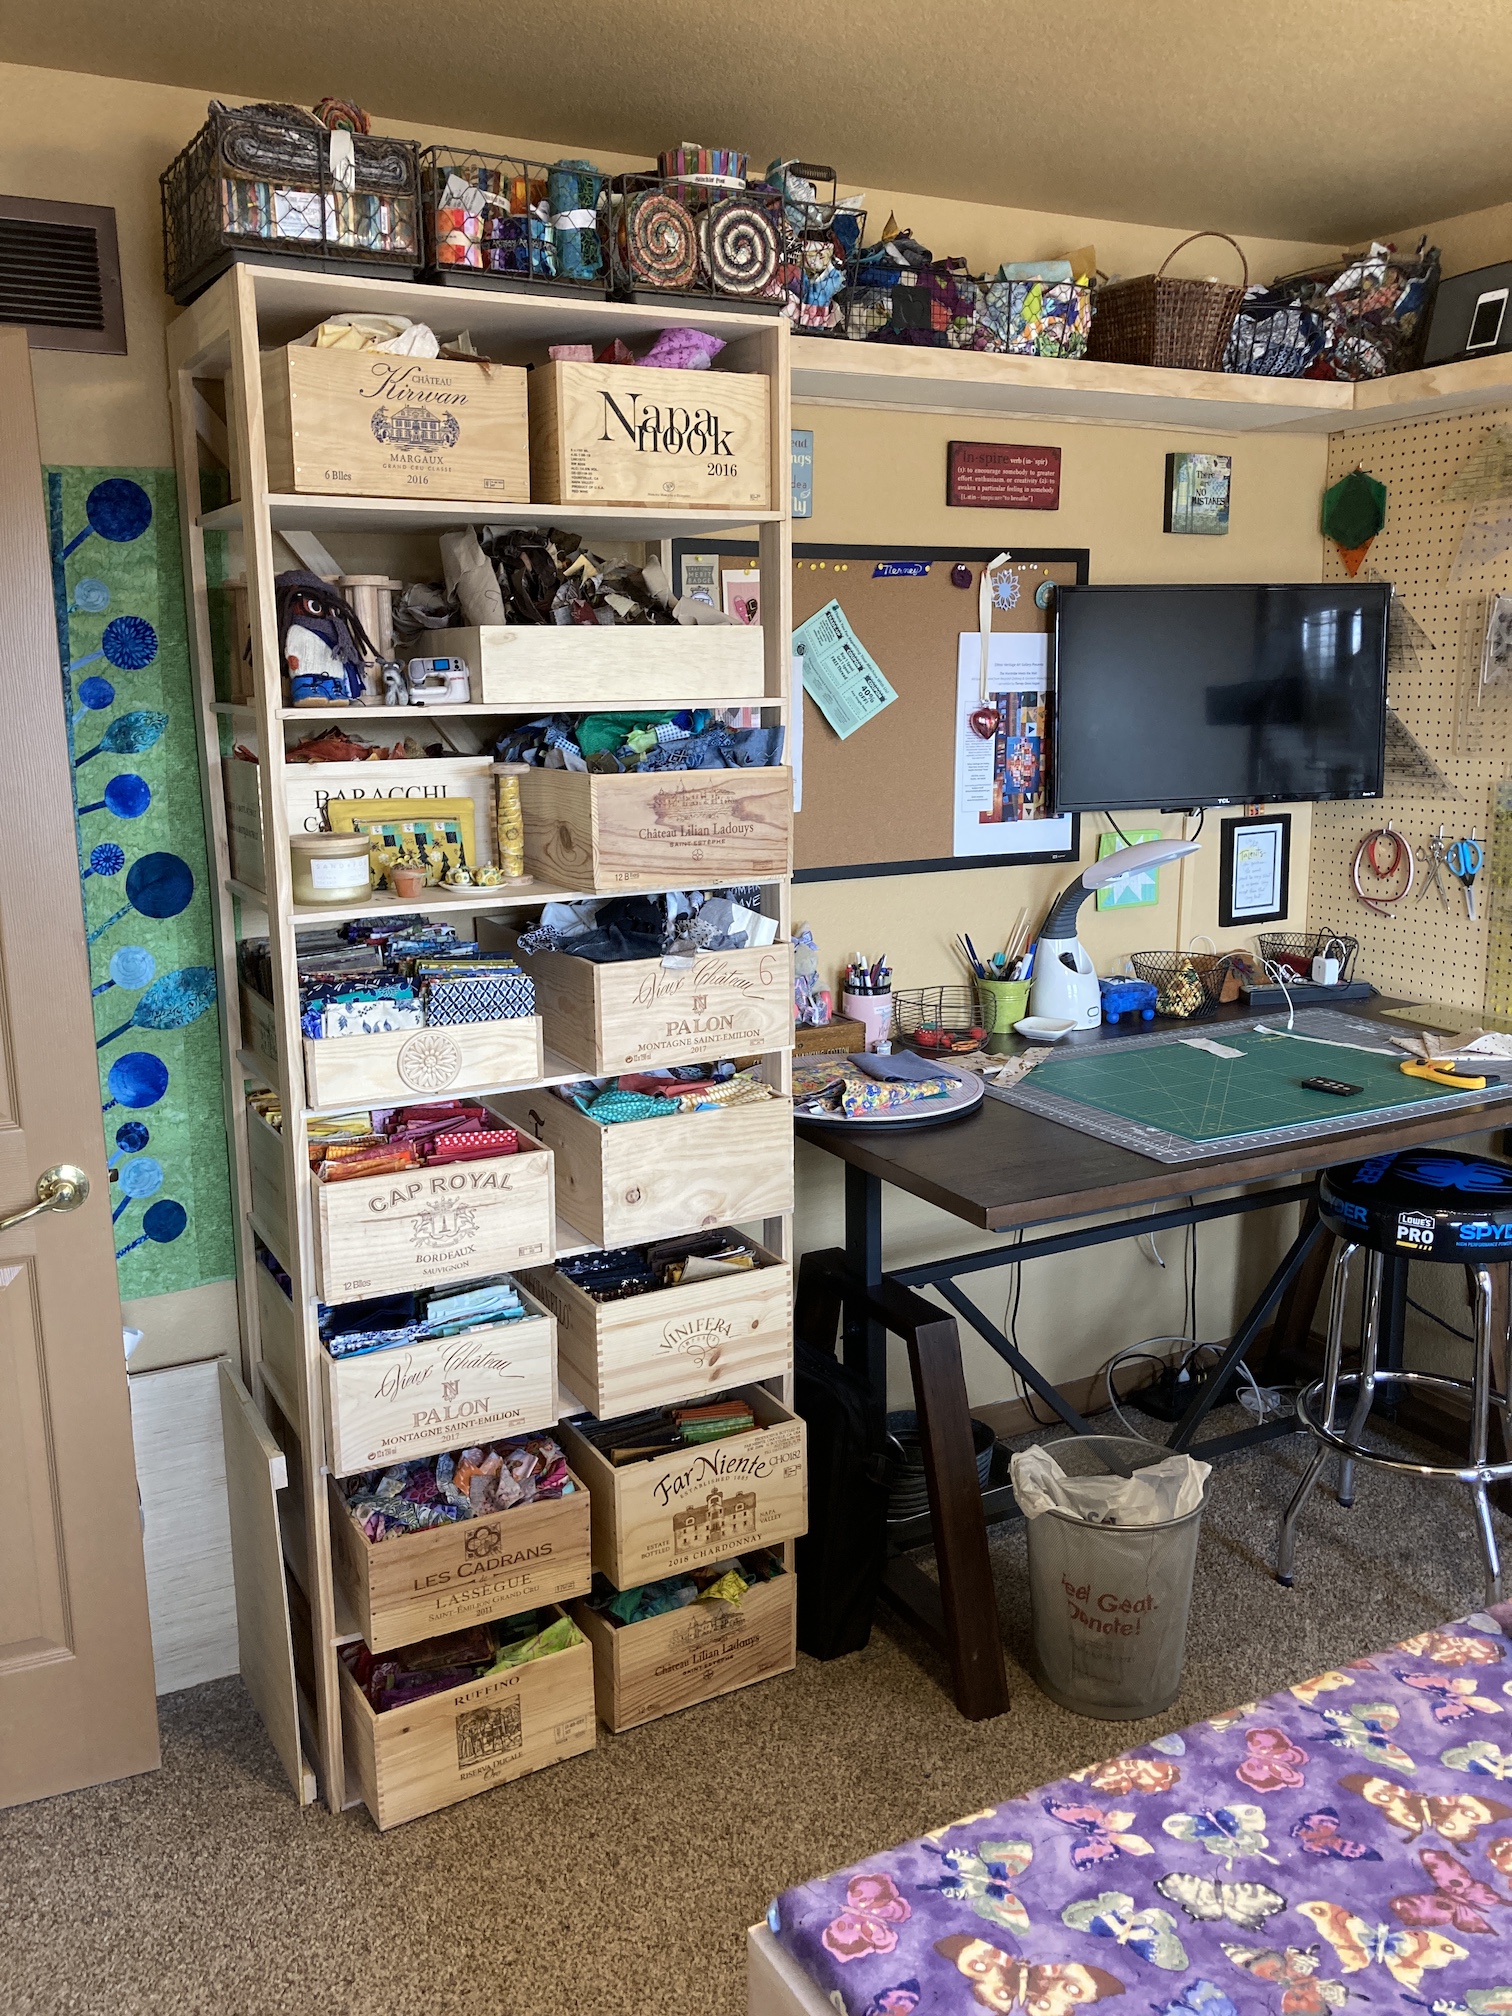
I use wine crates from liquor stores (which I either got for free or for a couple dollars) to store my fat quarter fabric collection (which I admit is a bit obscene…). And no I did not drink the wine formerly in the crates in order to obtain empty crates, ha!
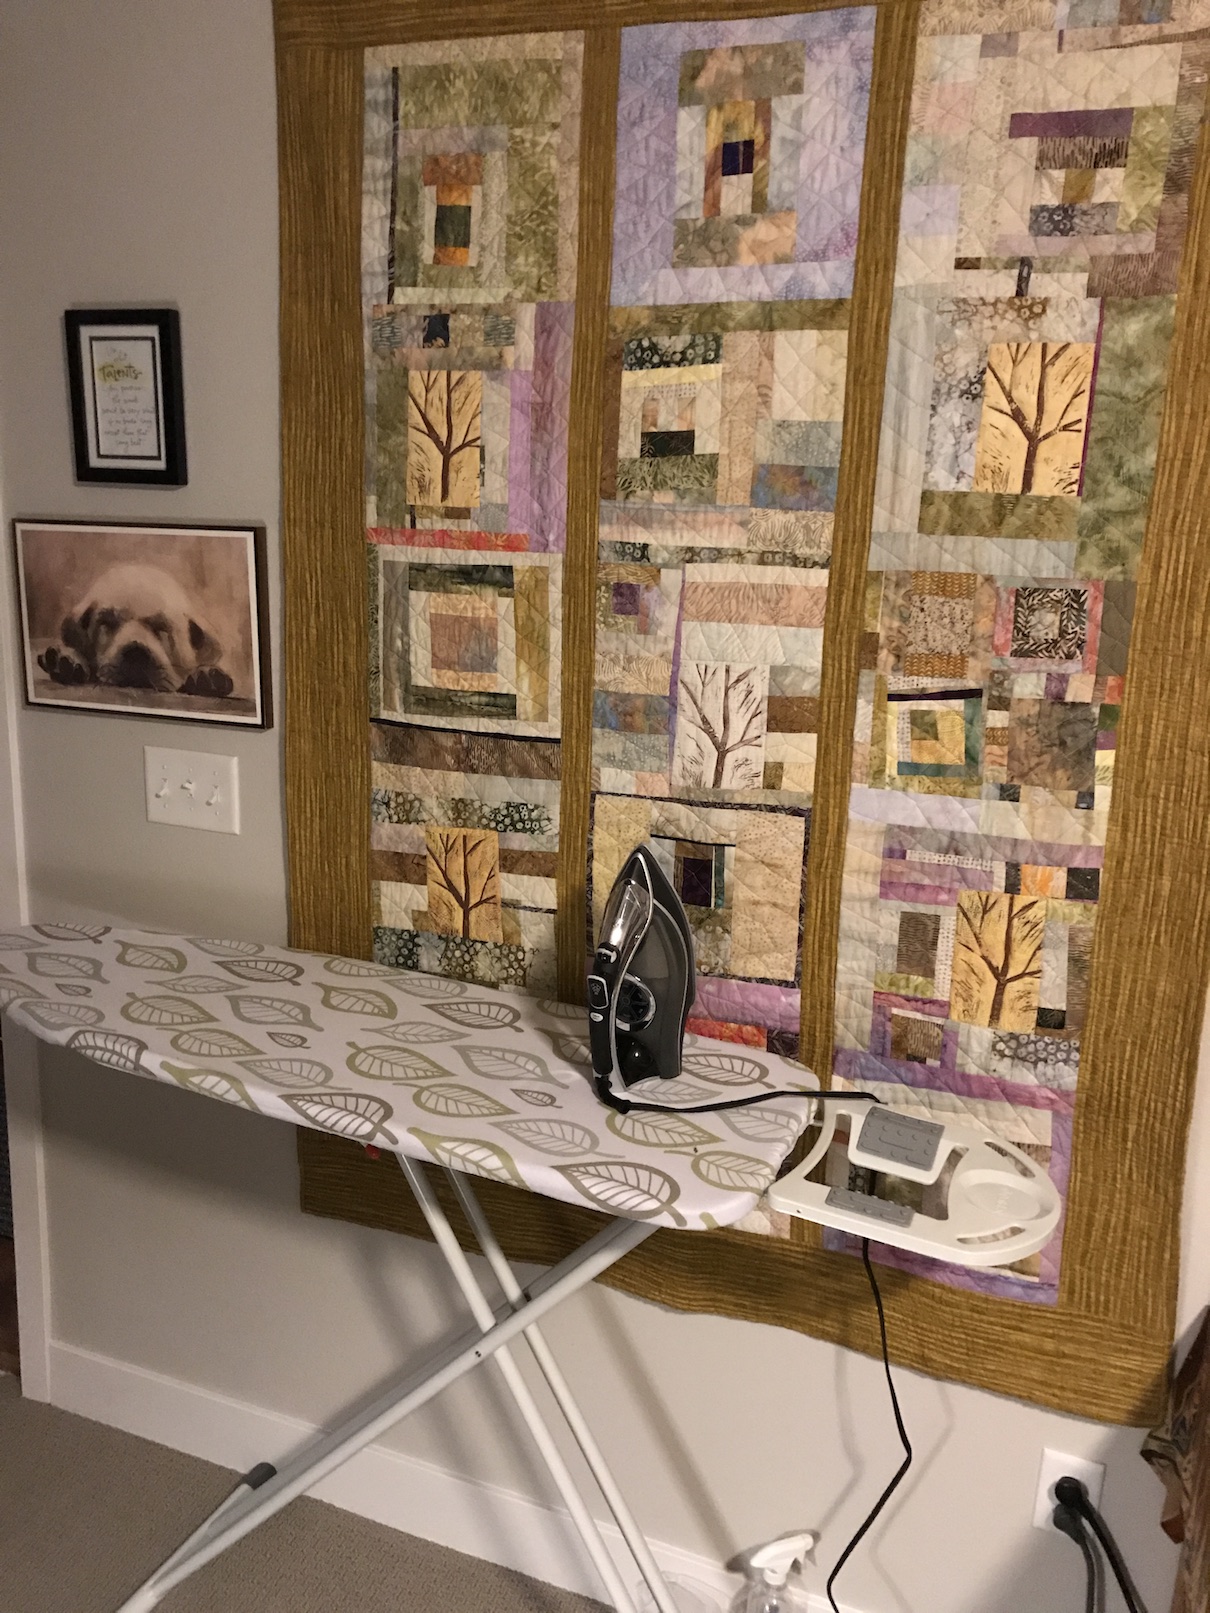
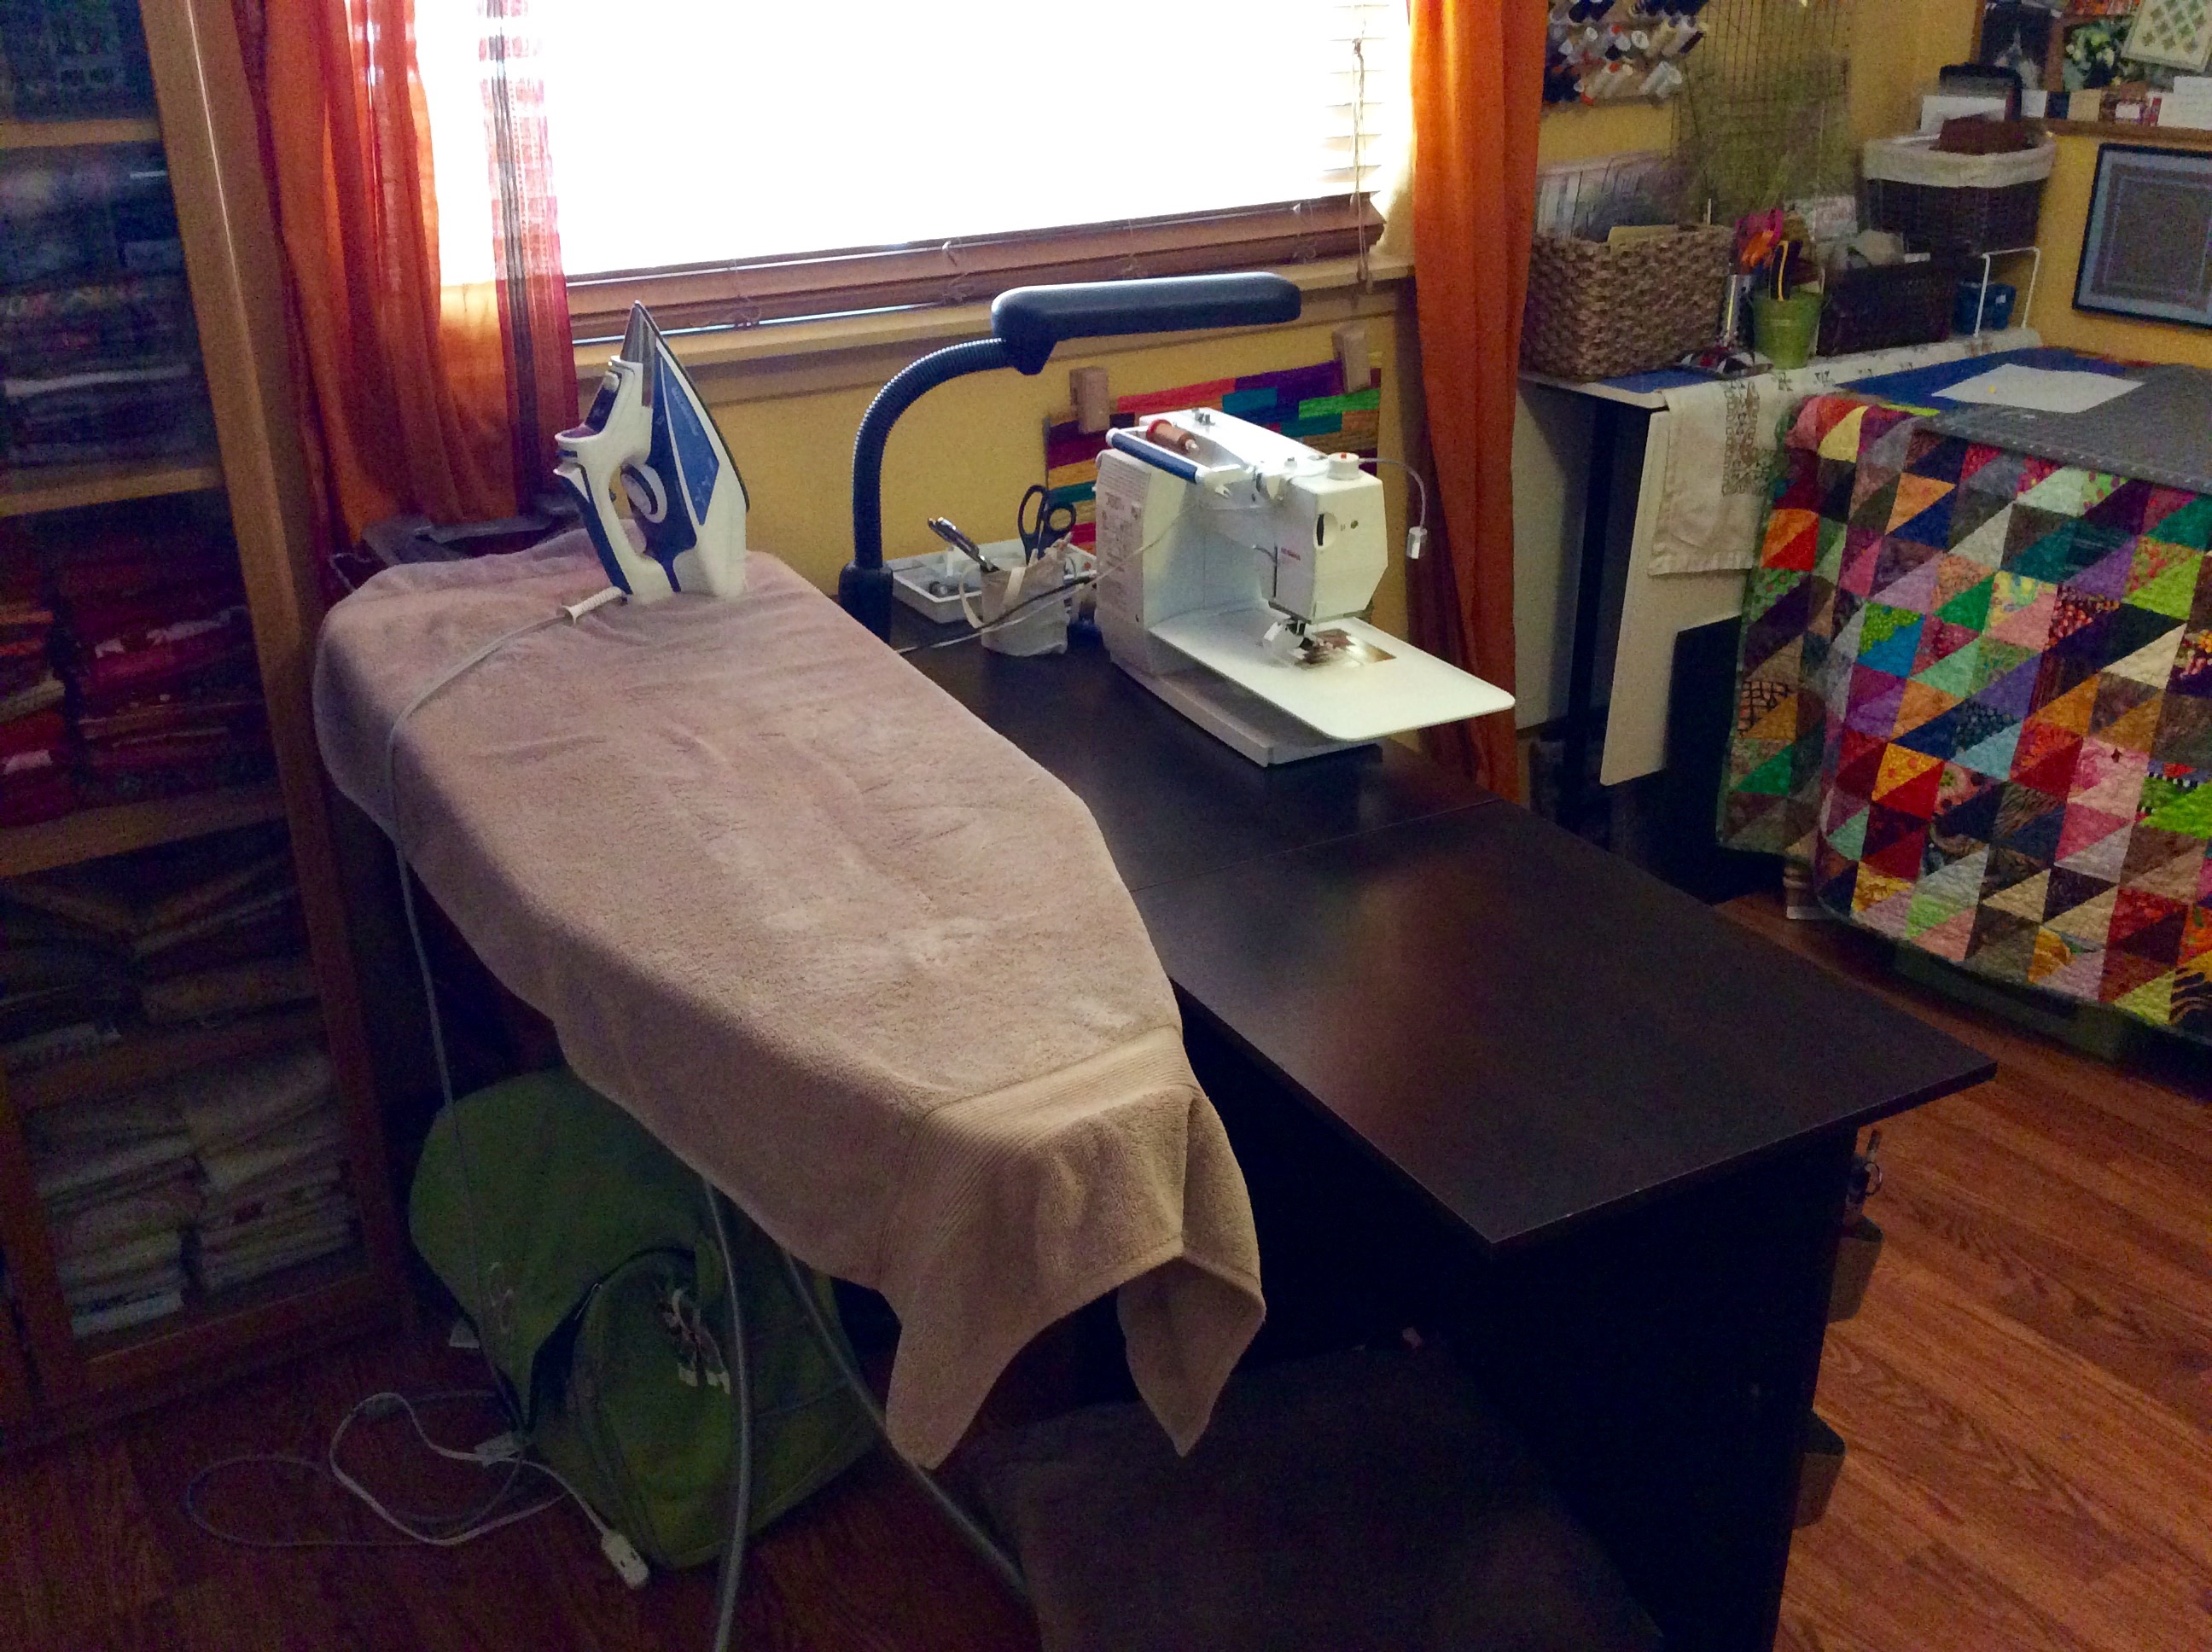
John built the shelving unit below the wine crates in the first image above where I store some of my cotton fabric yardage; as well as the ironing station in the second photo.
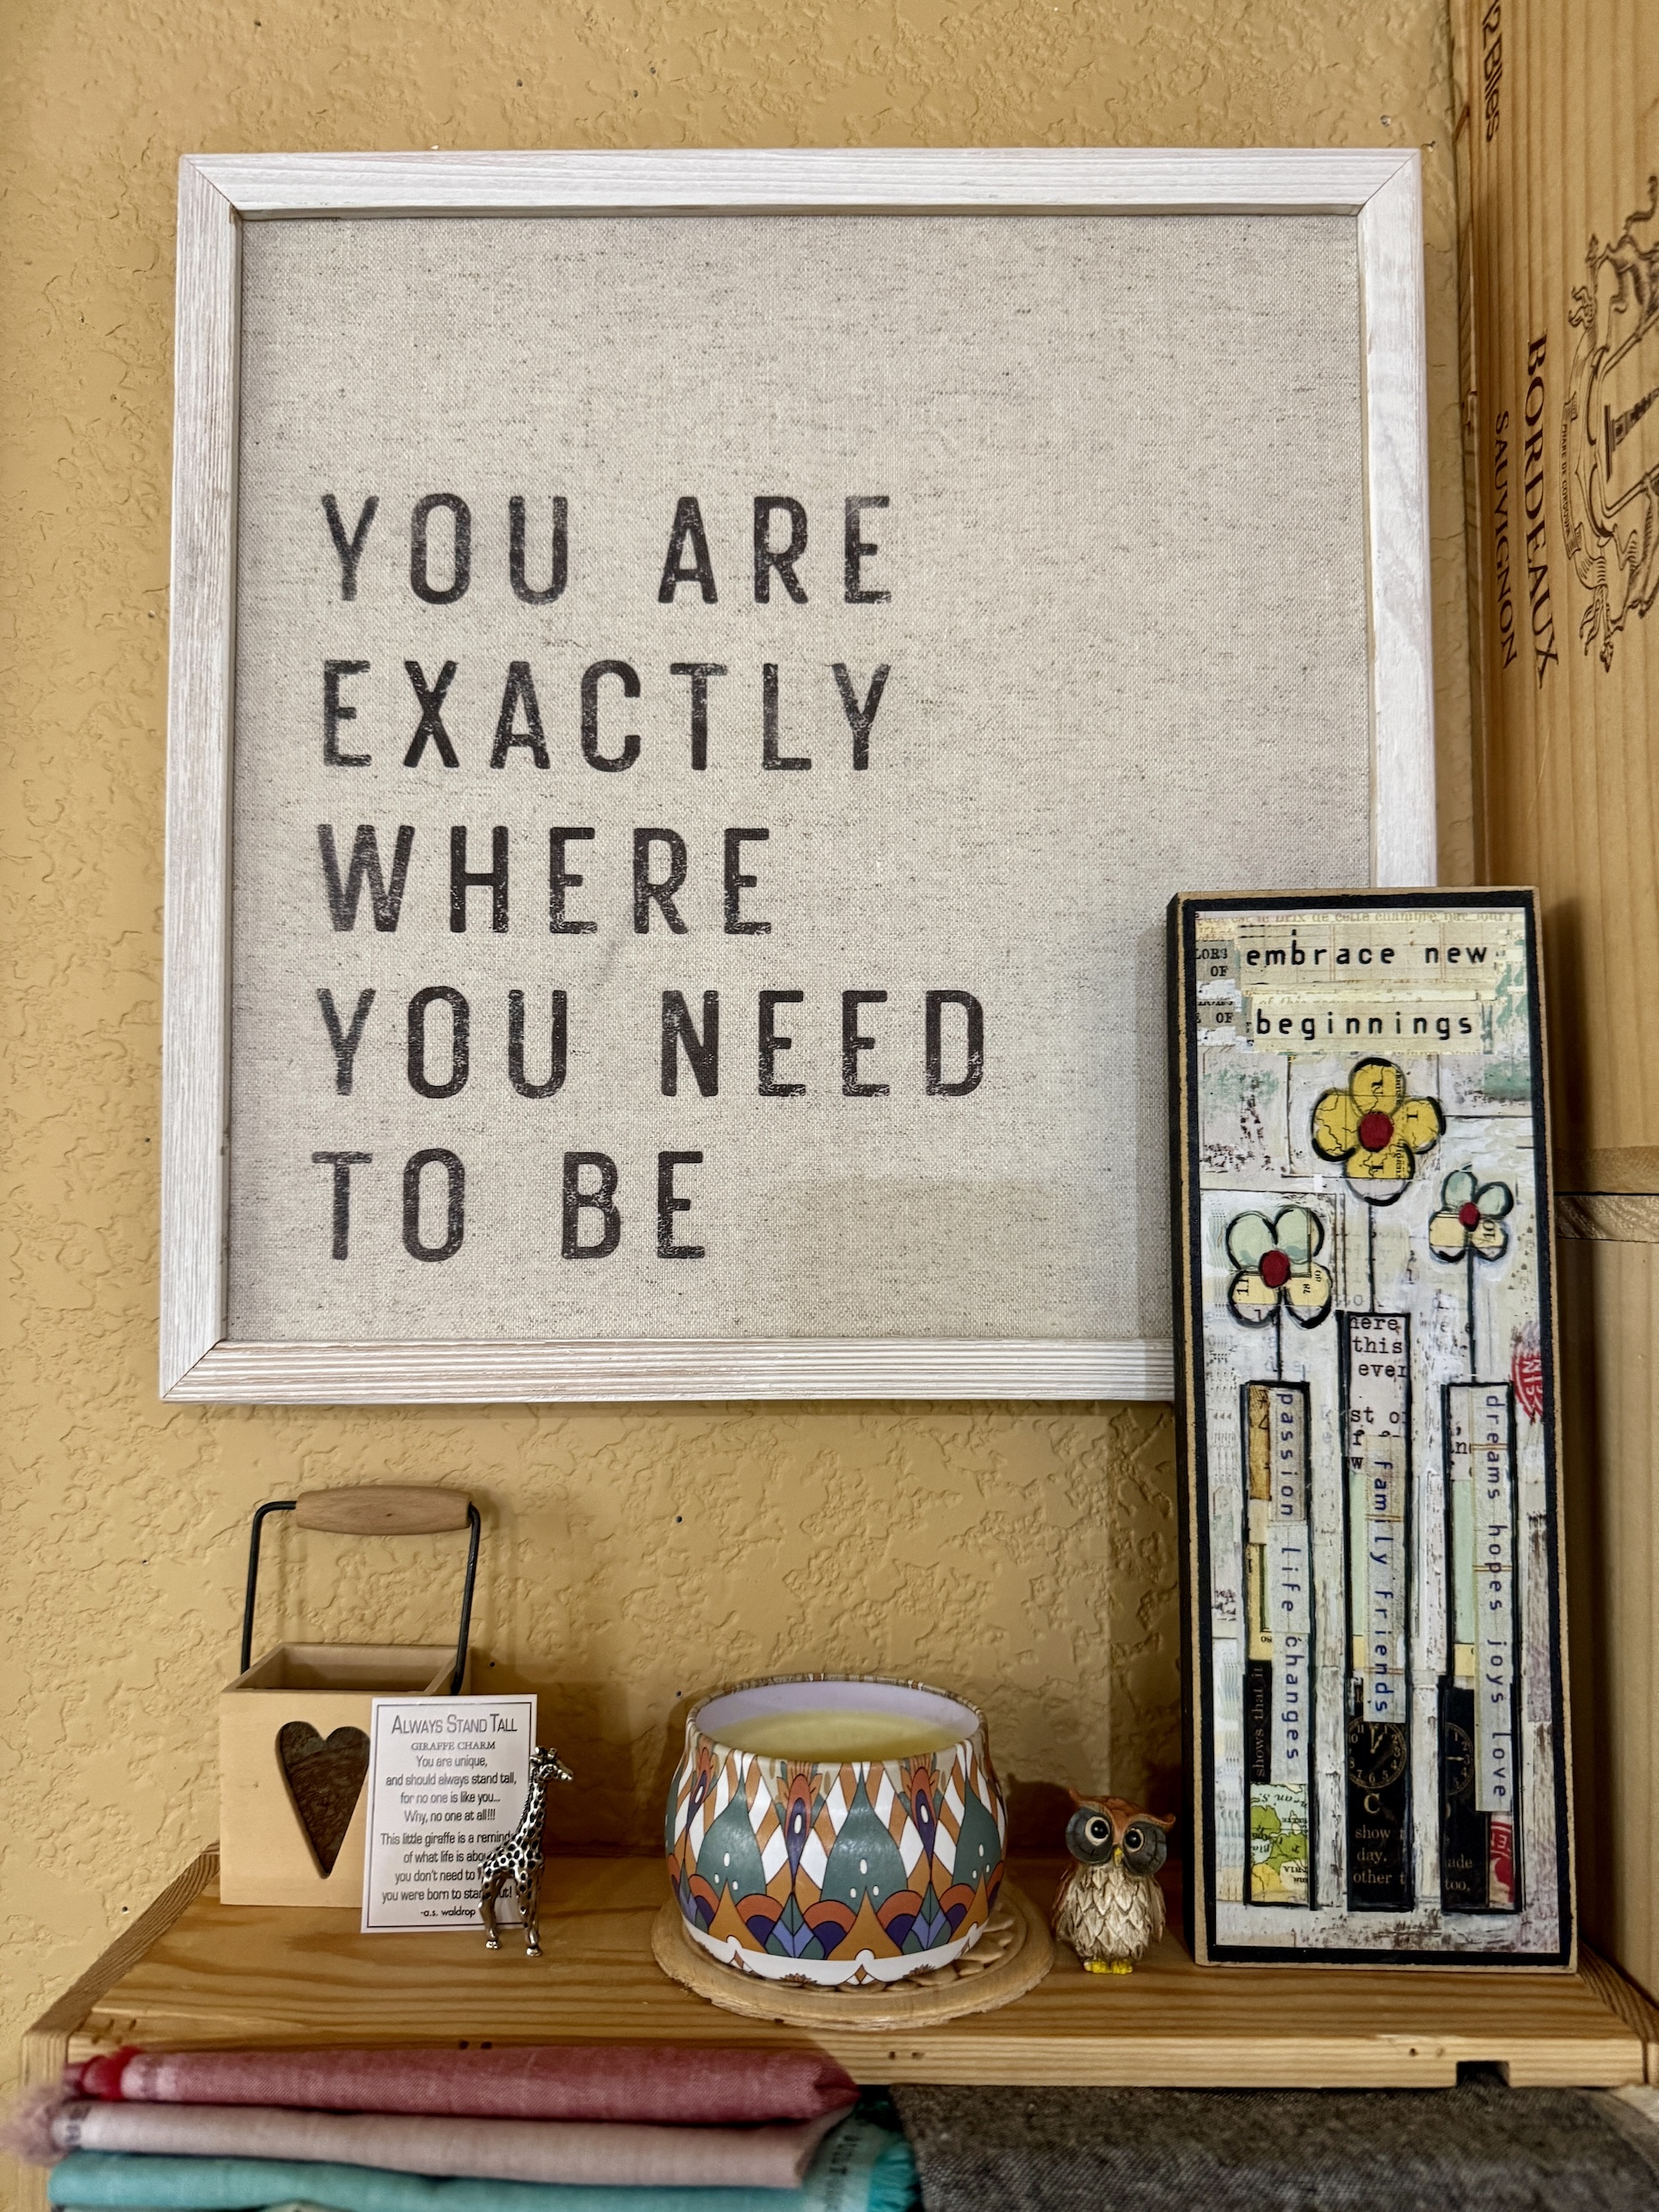
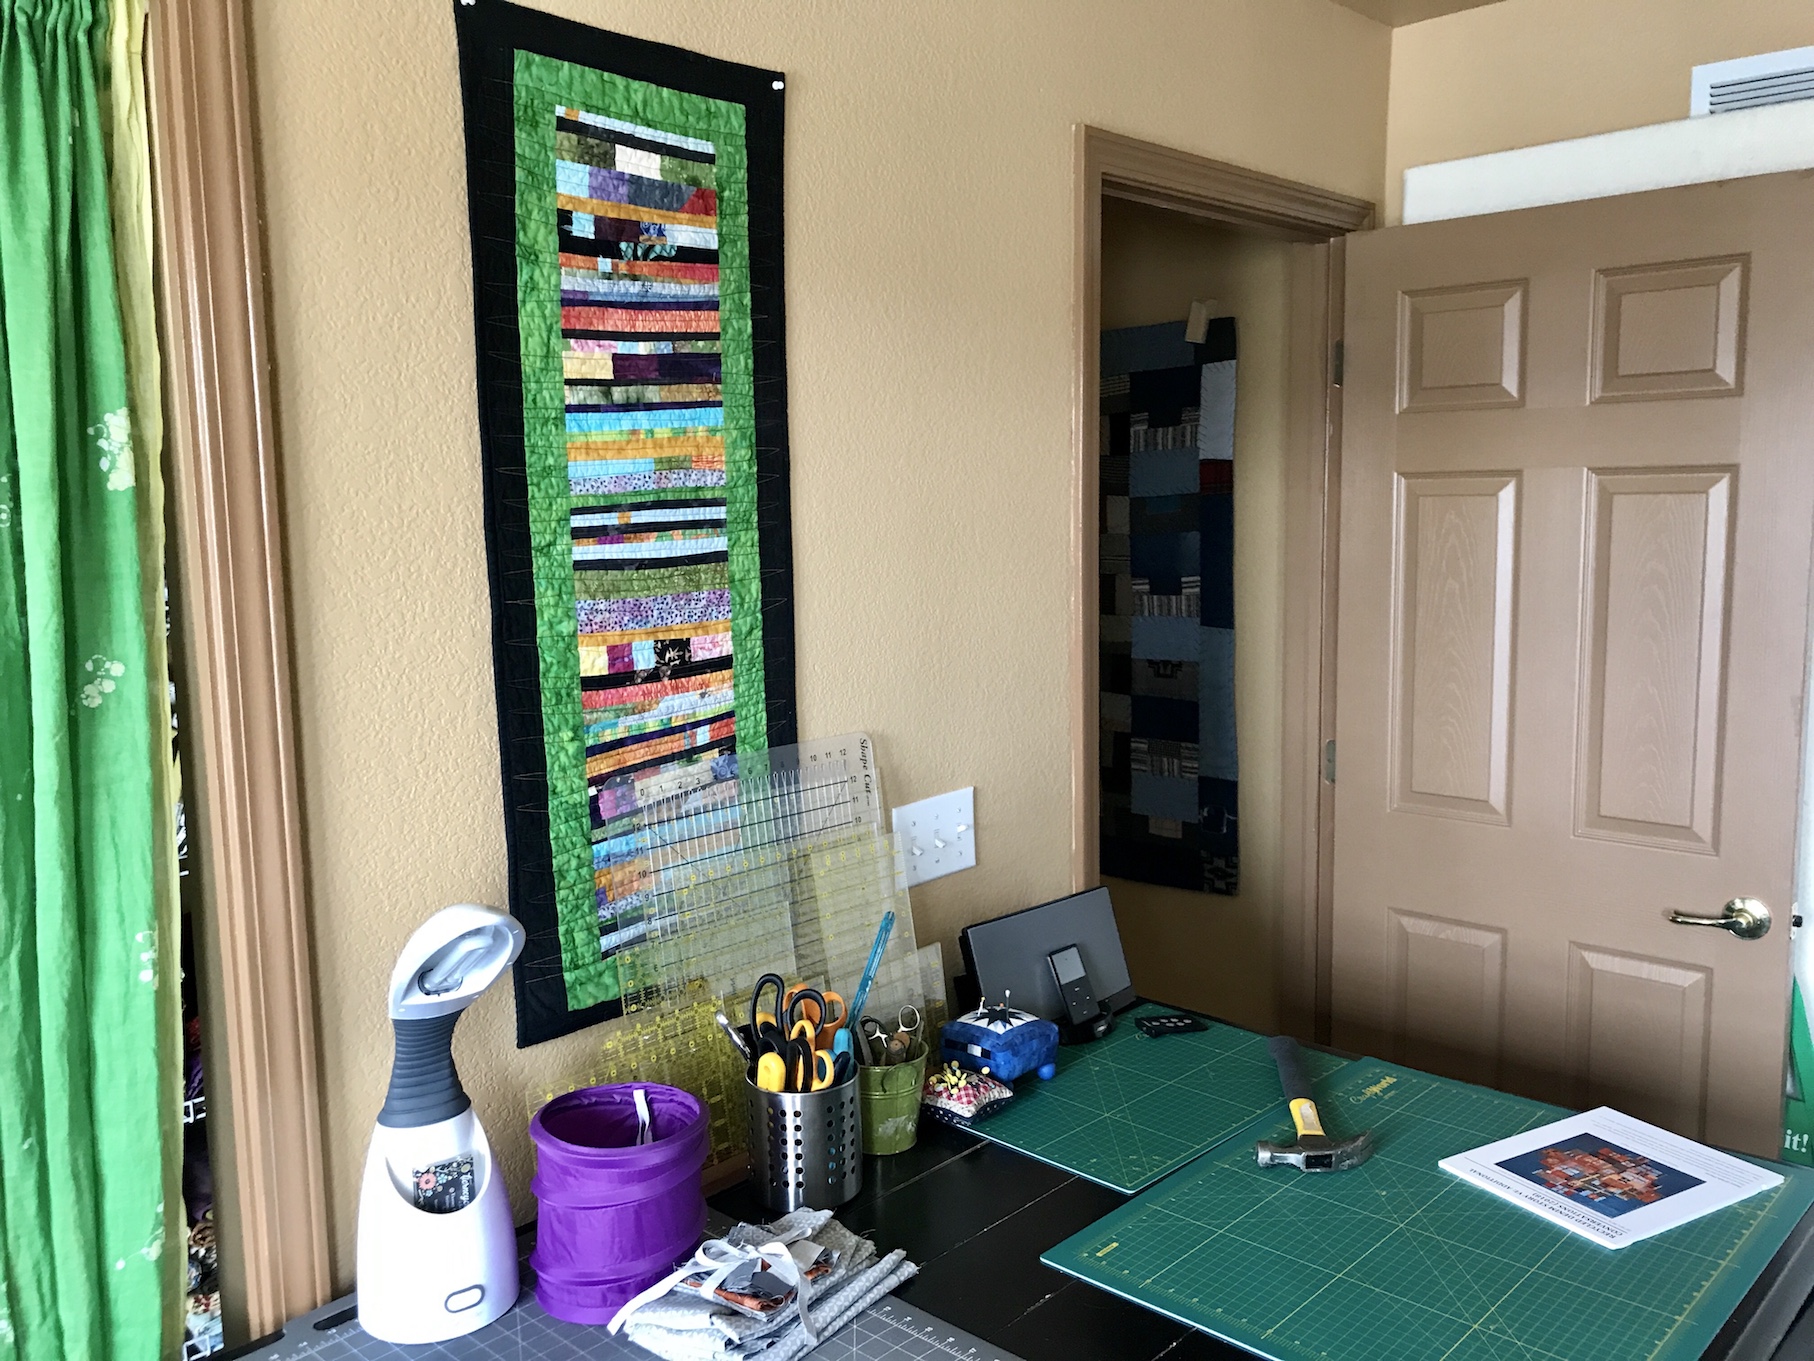
Most of the art in my studio is thrifted including these two pieces that I love:
If you aren’t familiar with my story I am a widow who moved from my awesome life in Oregon to Colorado in 2019 to begin anew and reinvent my life (which included meeting John, a widower, and starting a new journey). Early on I had doubts about my big life move but signs like this remind me that I am where I need to be; and to “embrace new beginnings”.
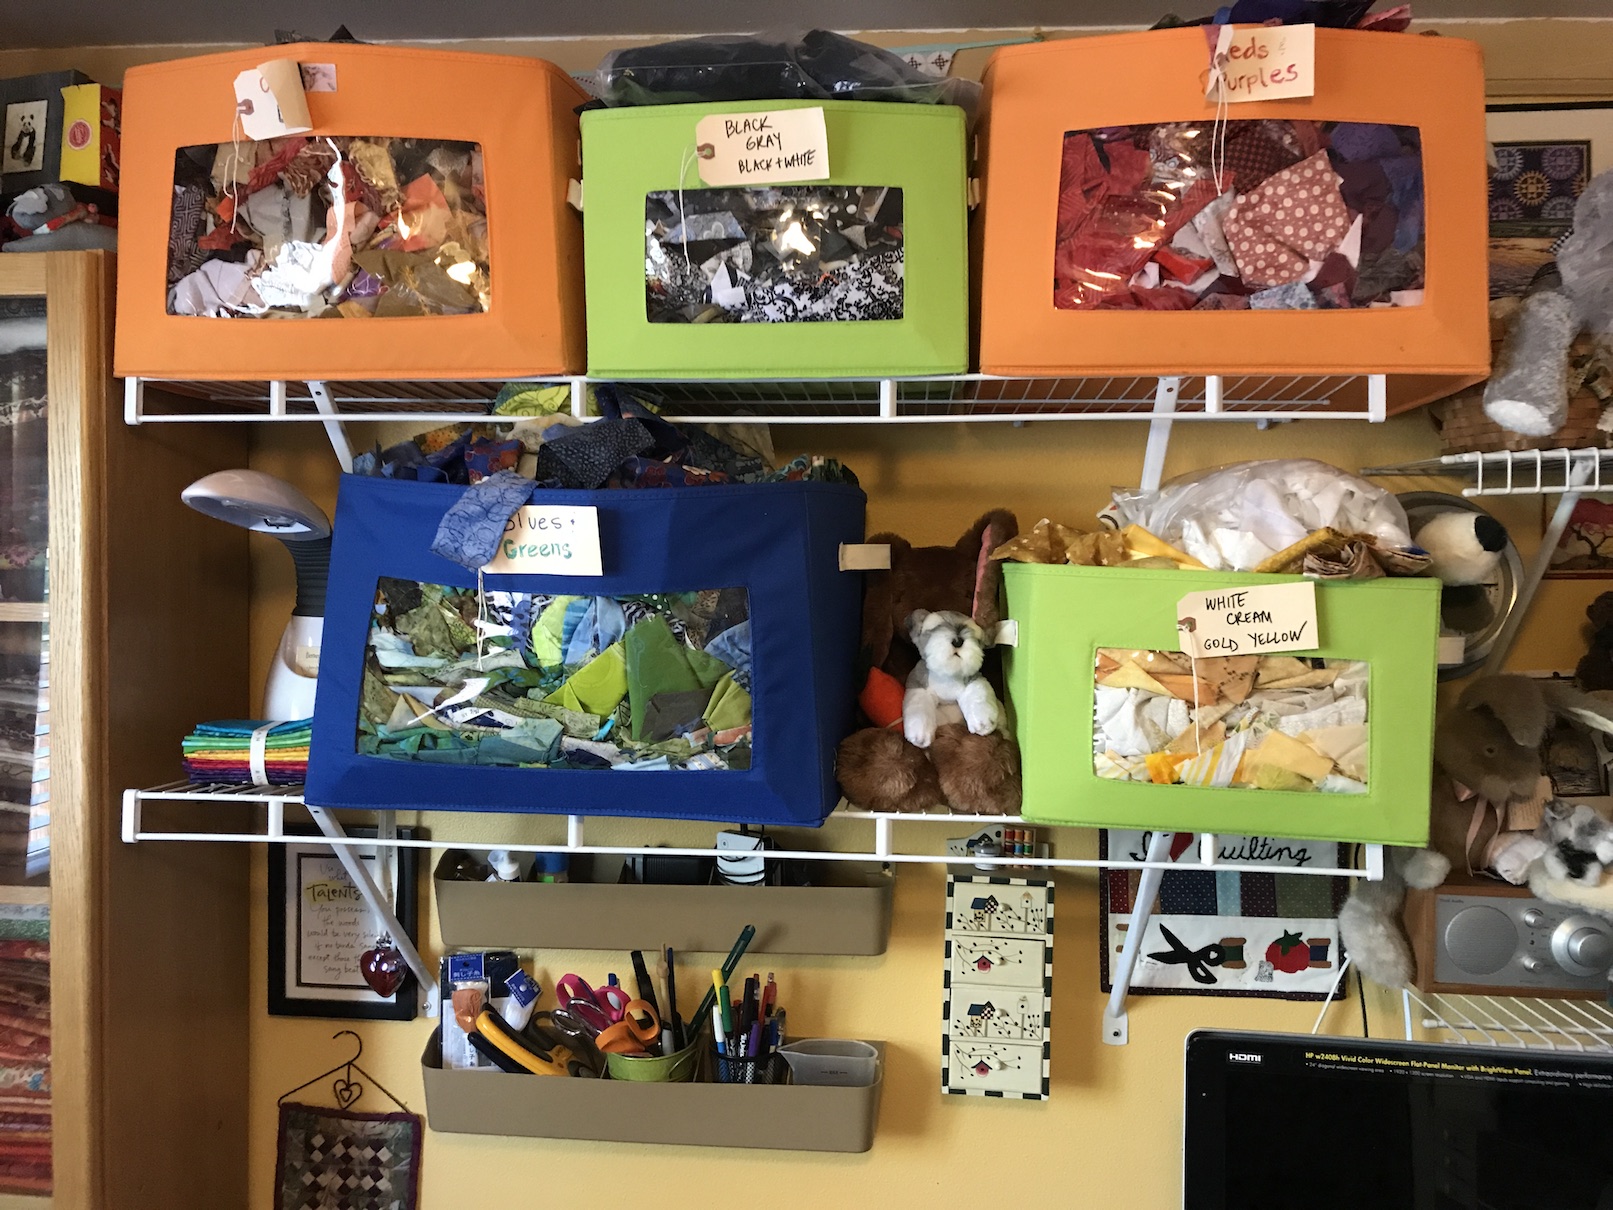
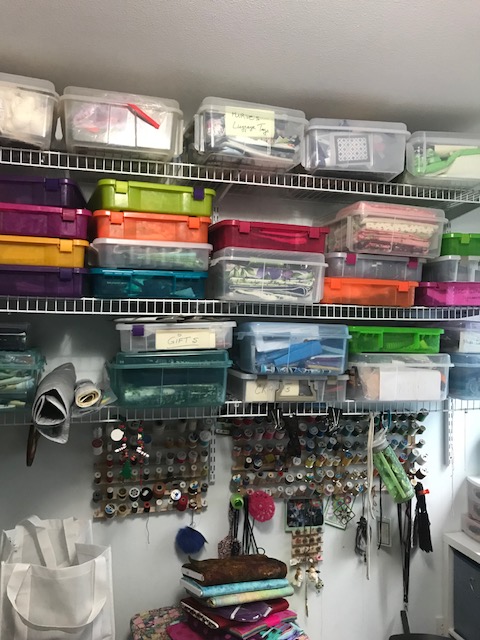
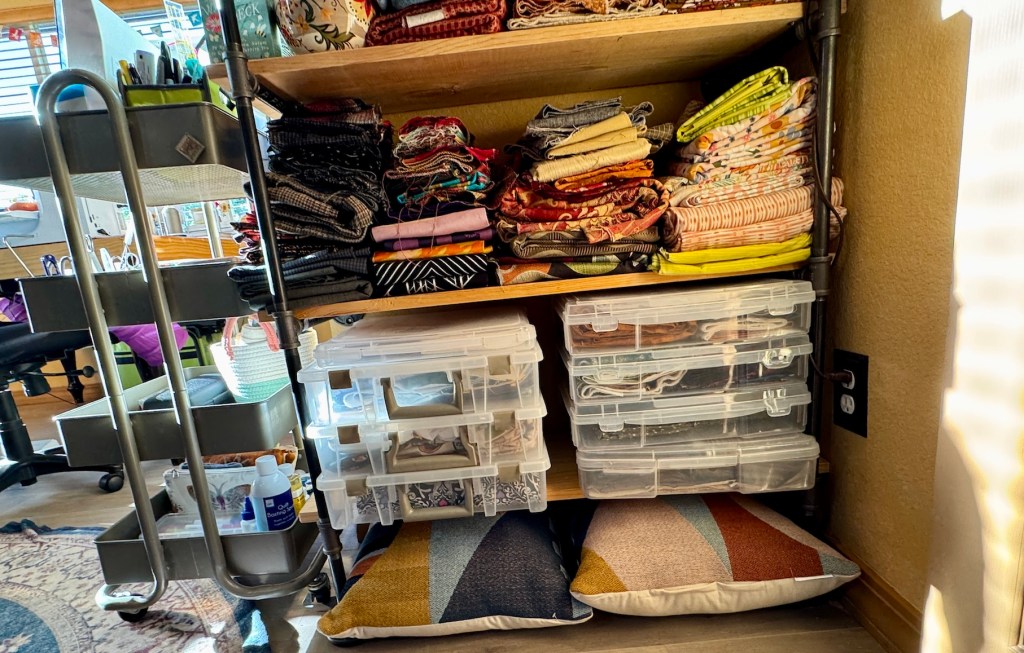
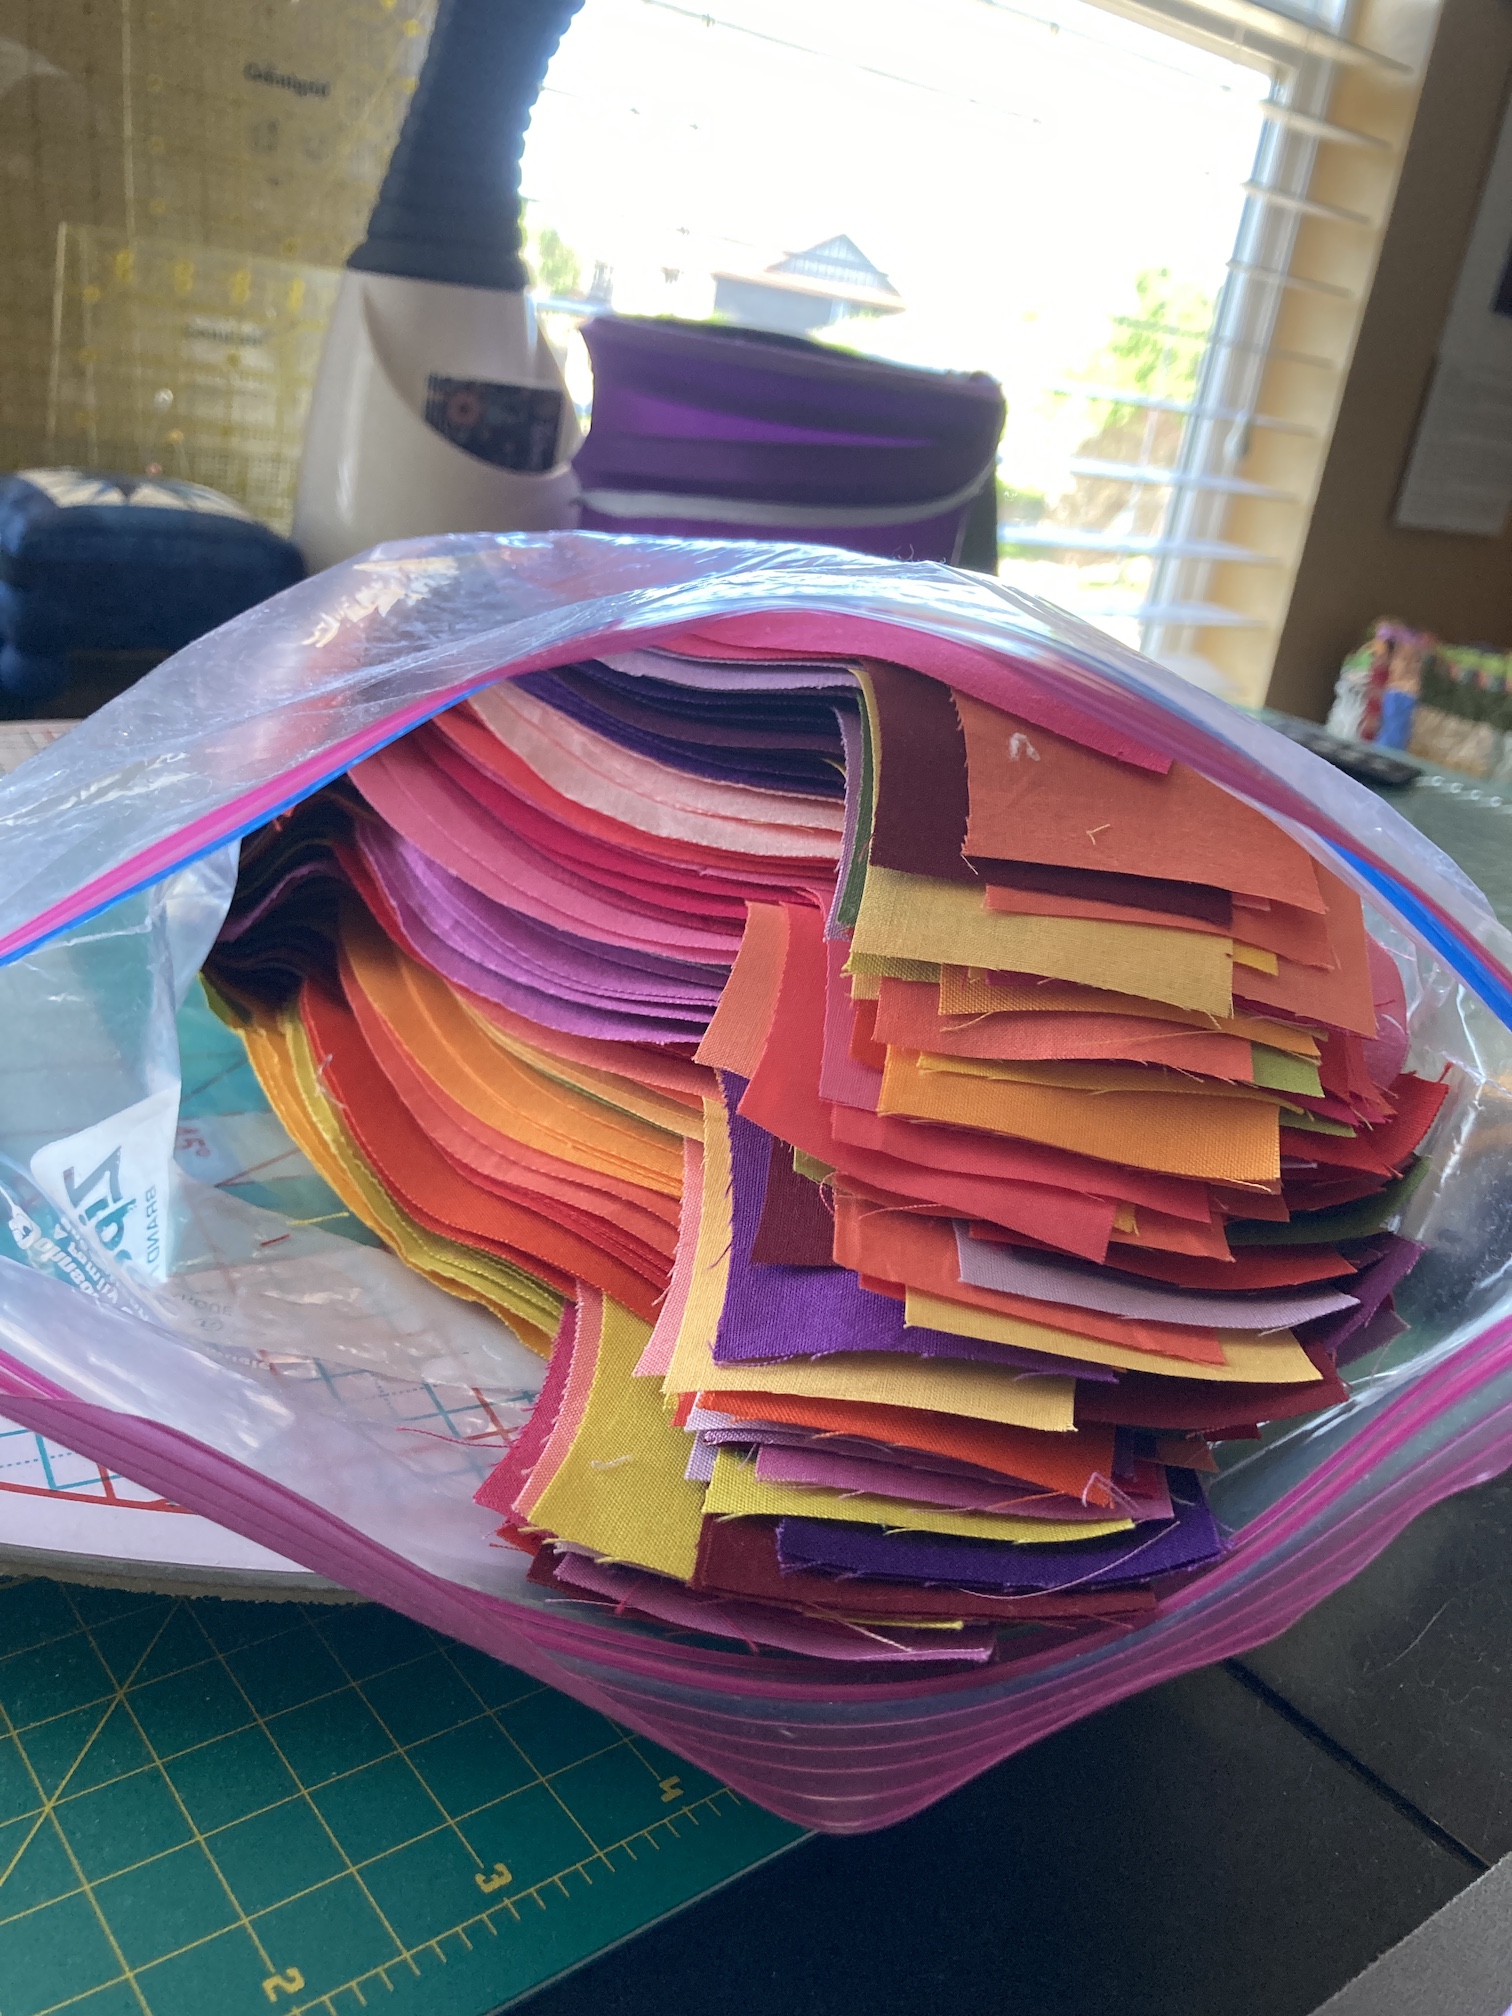
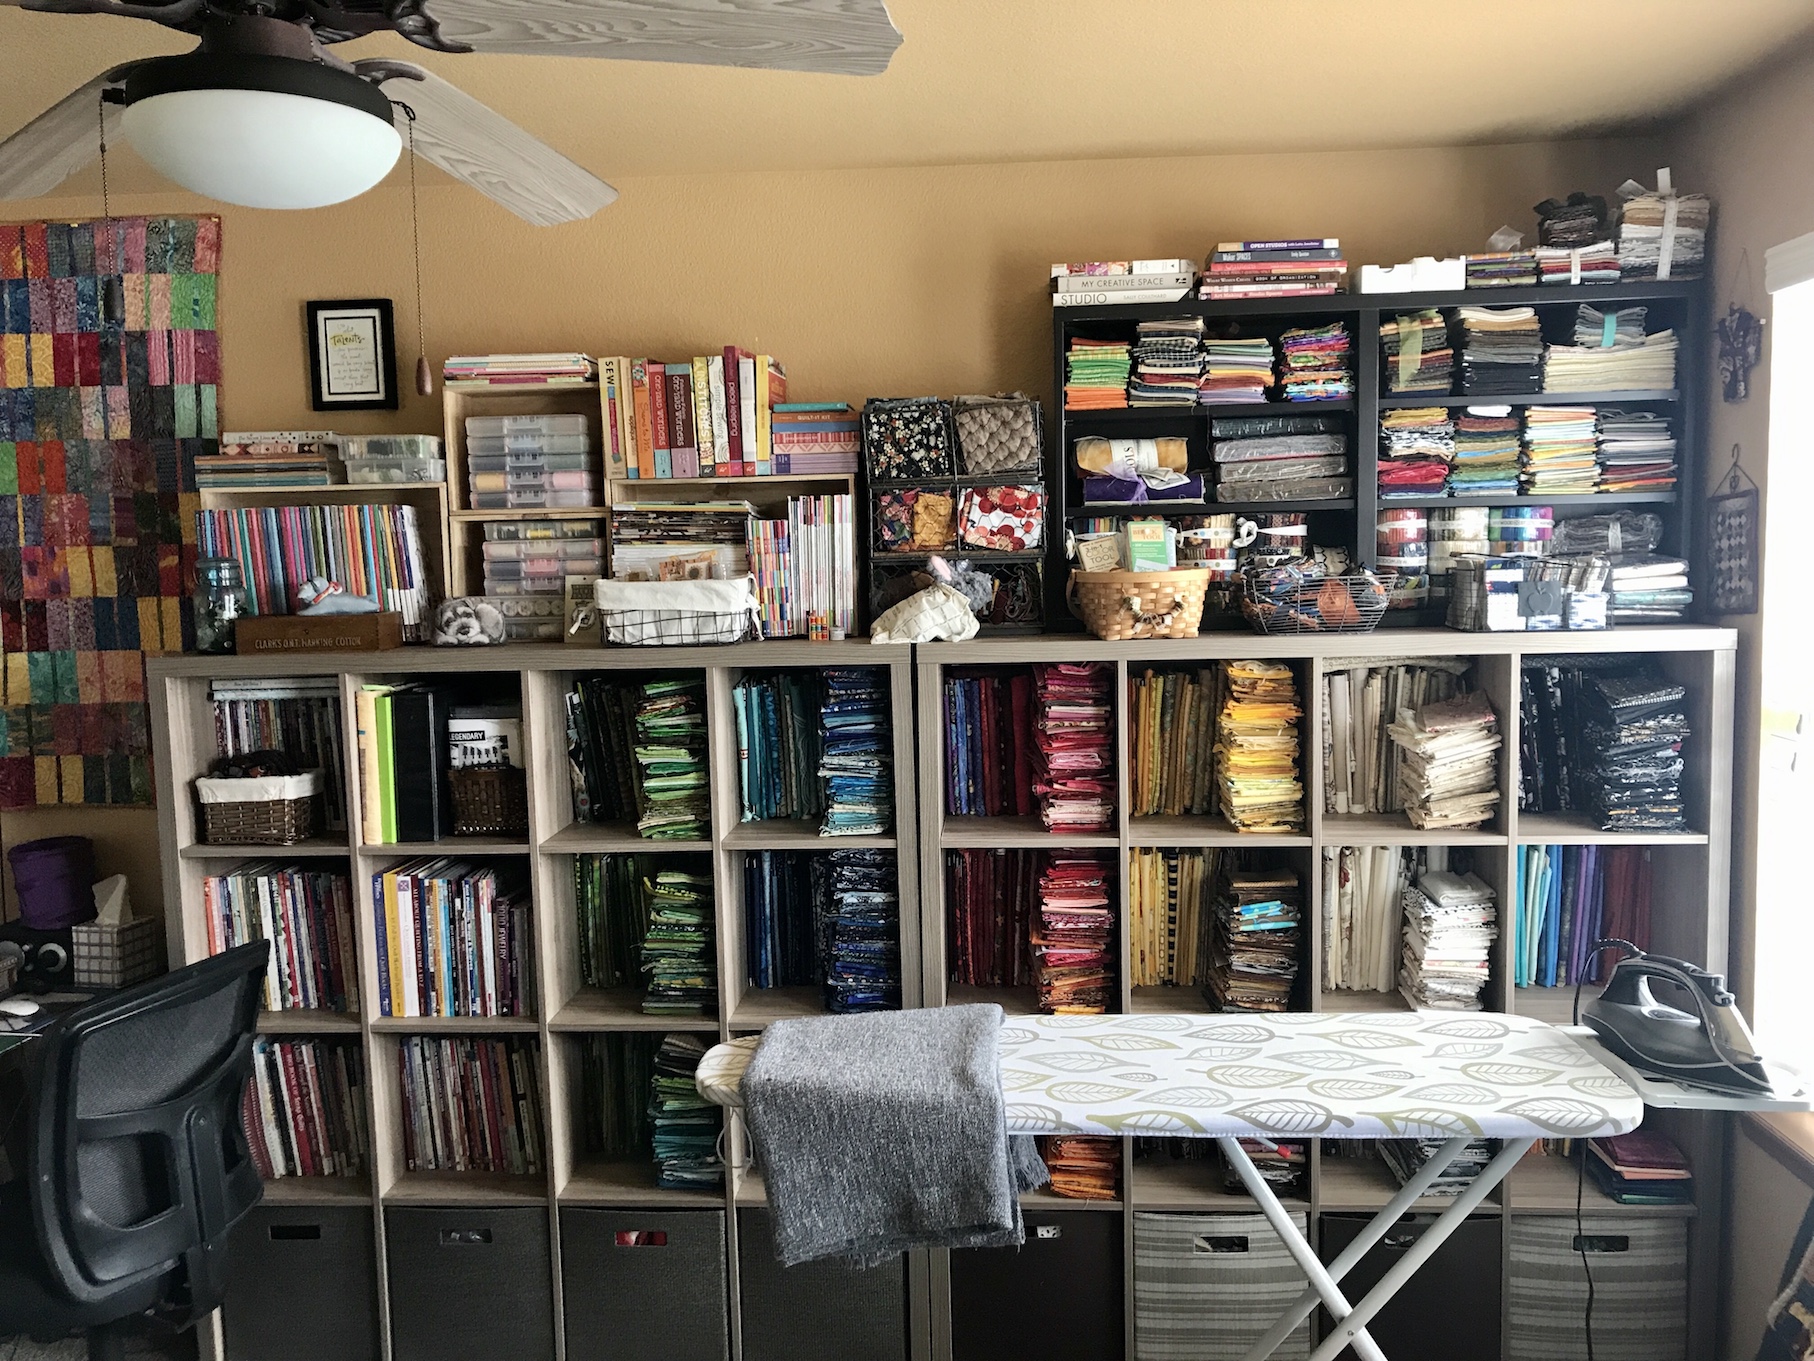
I have a thing for fabric scraps (though I’ve culled my ridiculous collection of fabric scraps over the years and donated many bags of scraps to charity thrift shops) and I store my fabric scraps by theme in thrifted baskets in a shelving unit that John built me a couple years ago.
I have most of the baskets labeled with wooden tags and thrifted adhesive letters. In addition to fabric scraps I have some specialty fat quarters and my collection of fabric panels. The two baskets on the second to last shelf are gifts from an Oregon based friend who had her friend crochet me these baskets/bags from recycled plastic shopping bags!
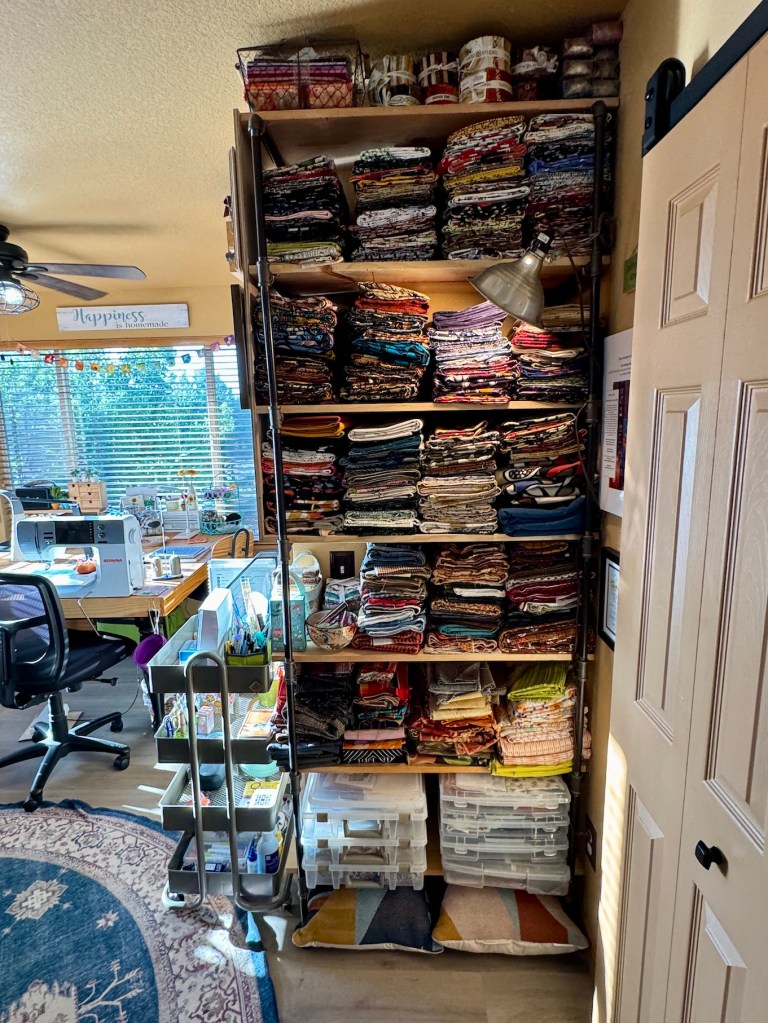
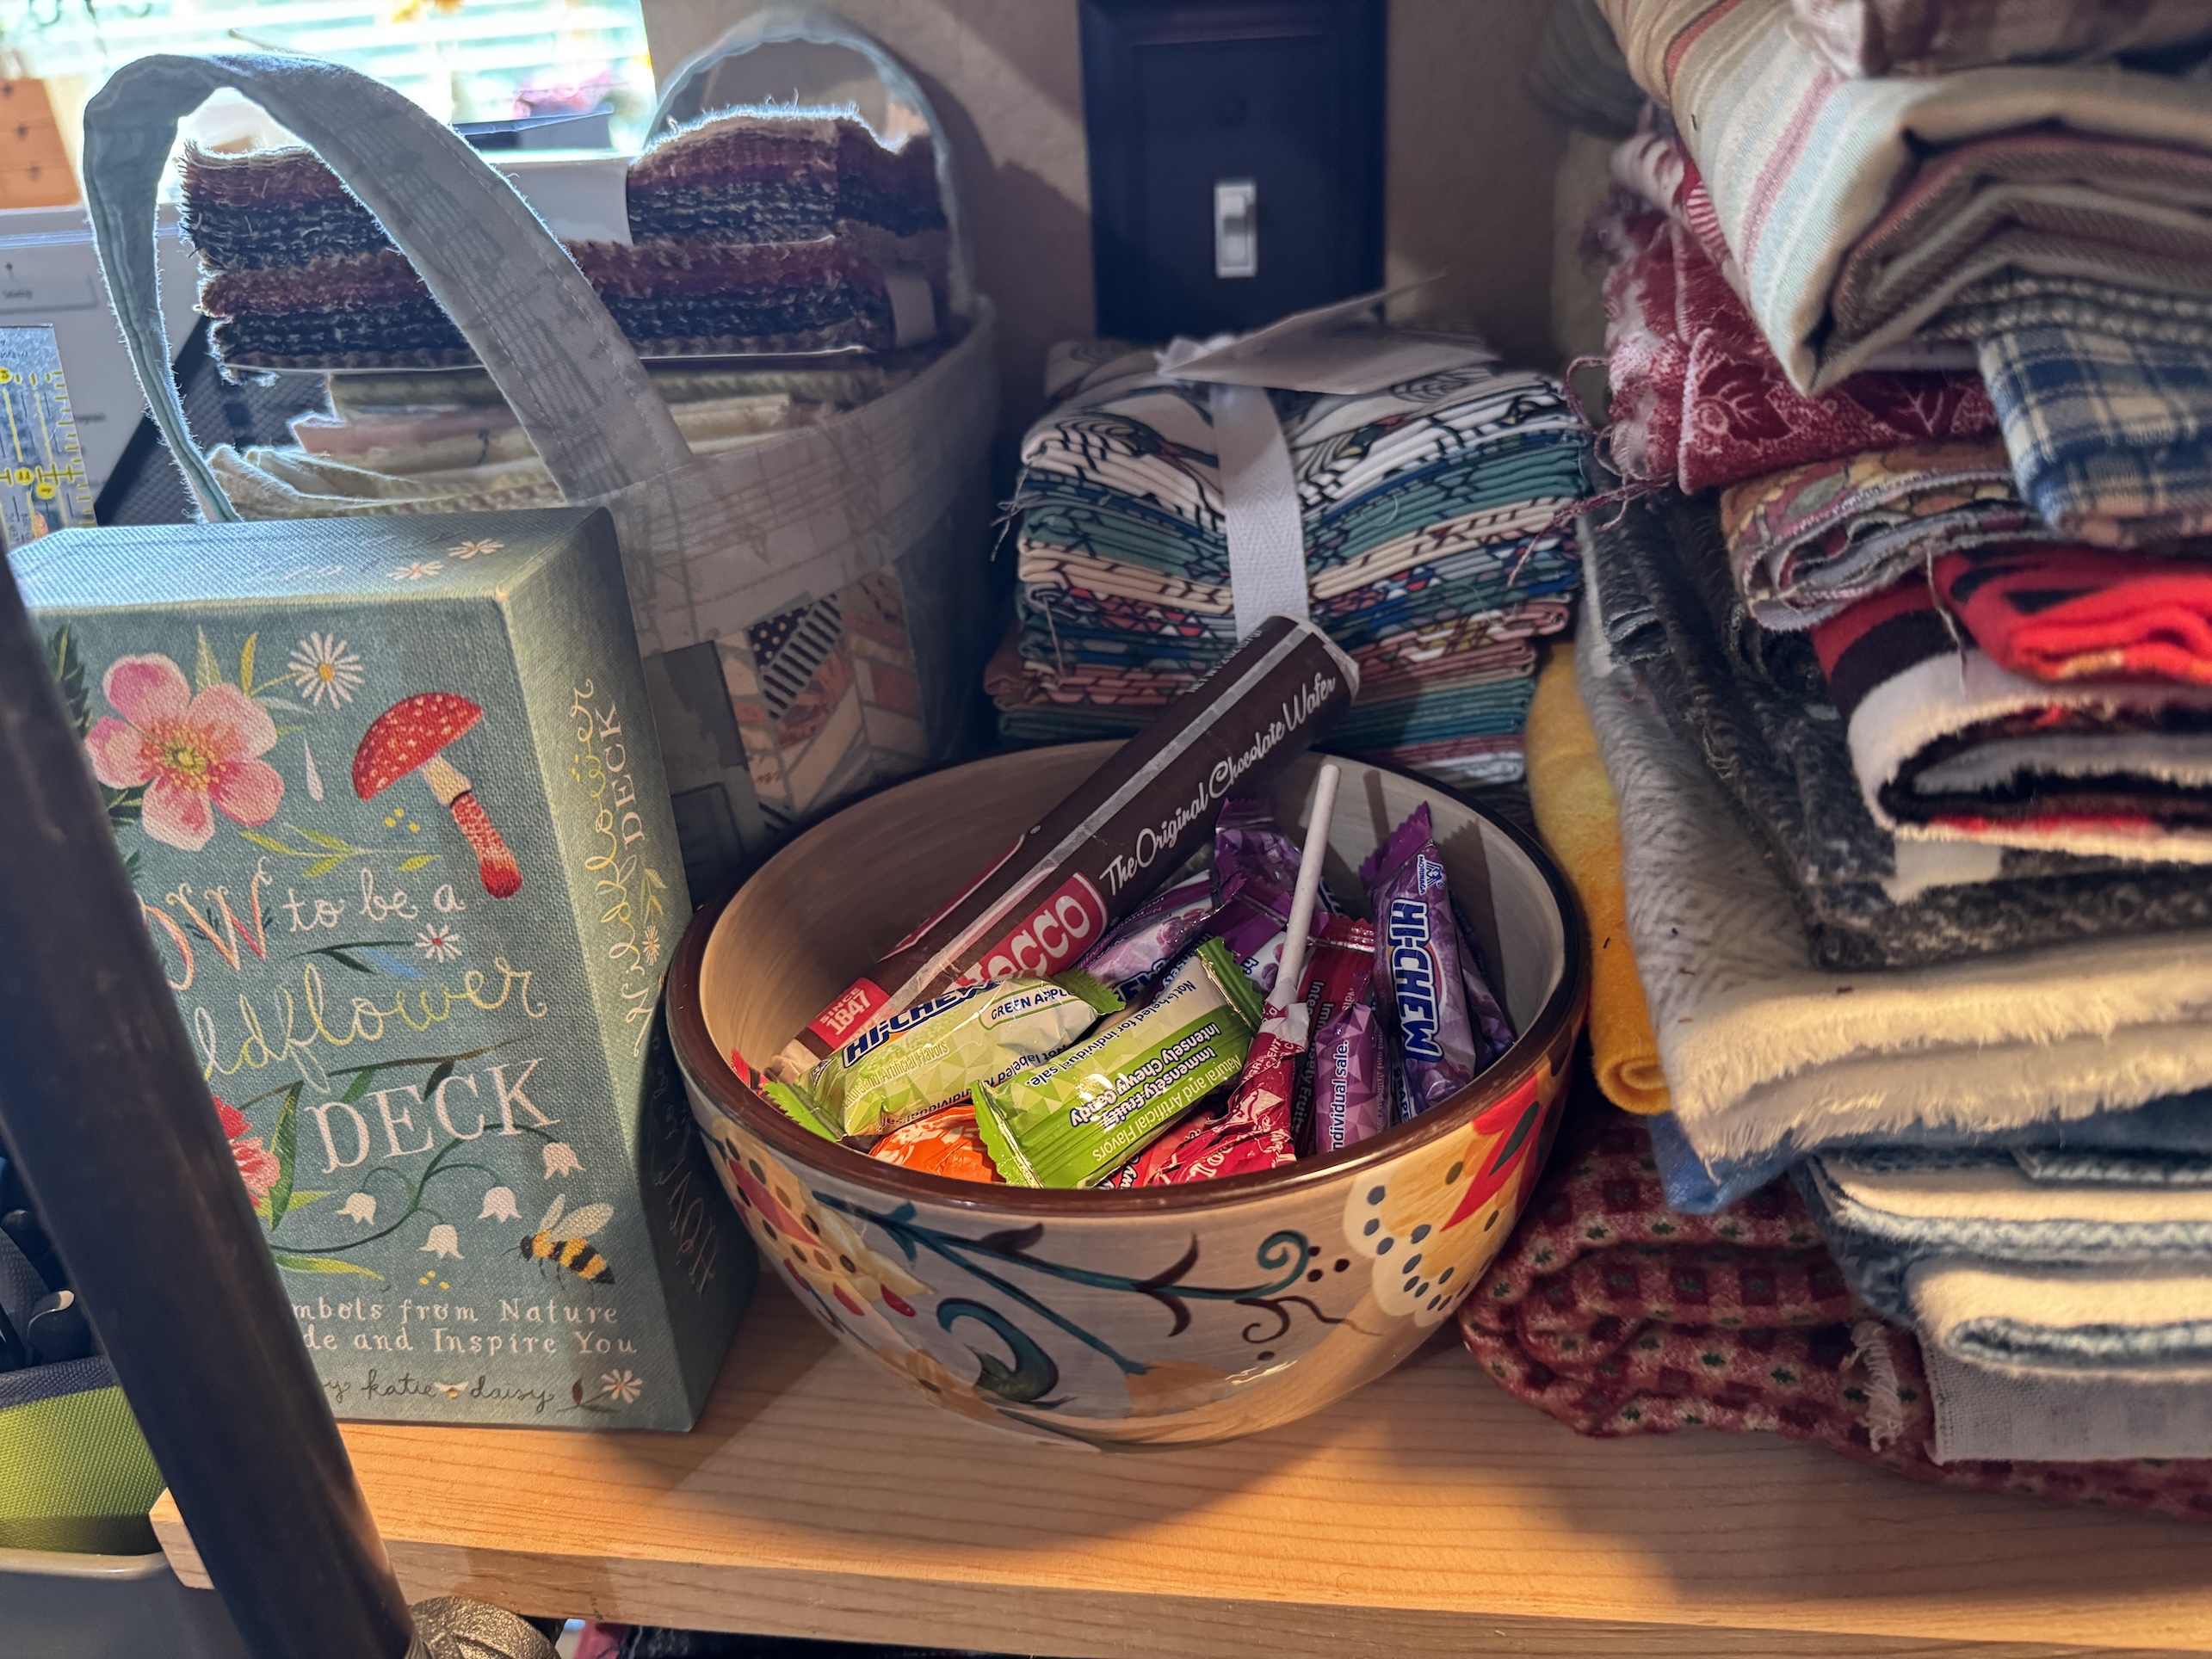
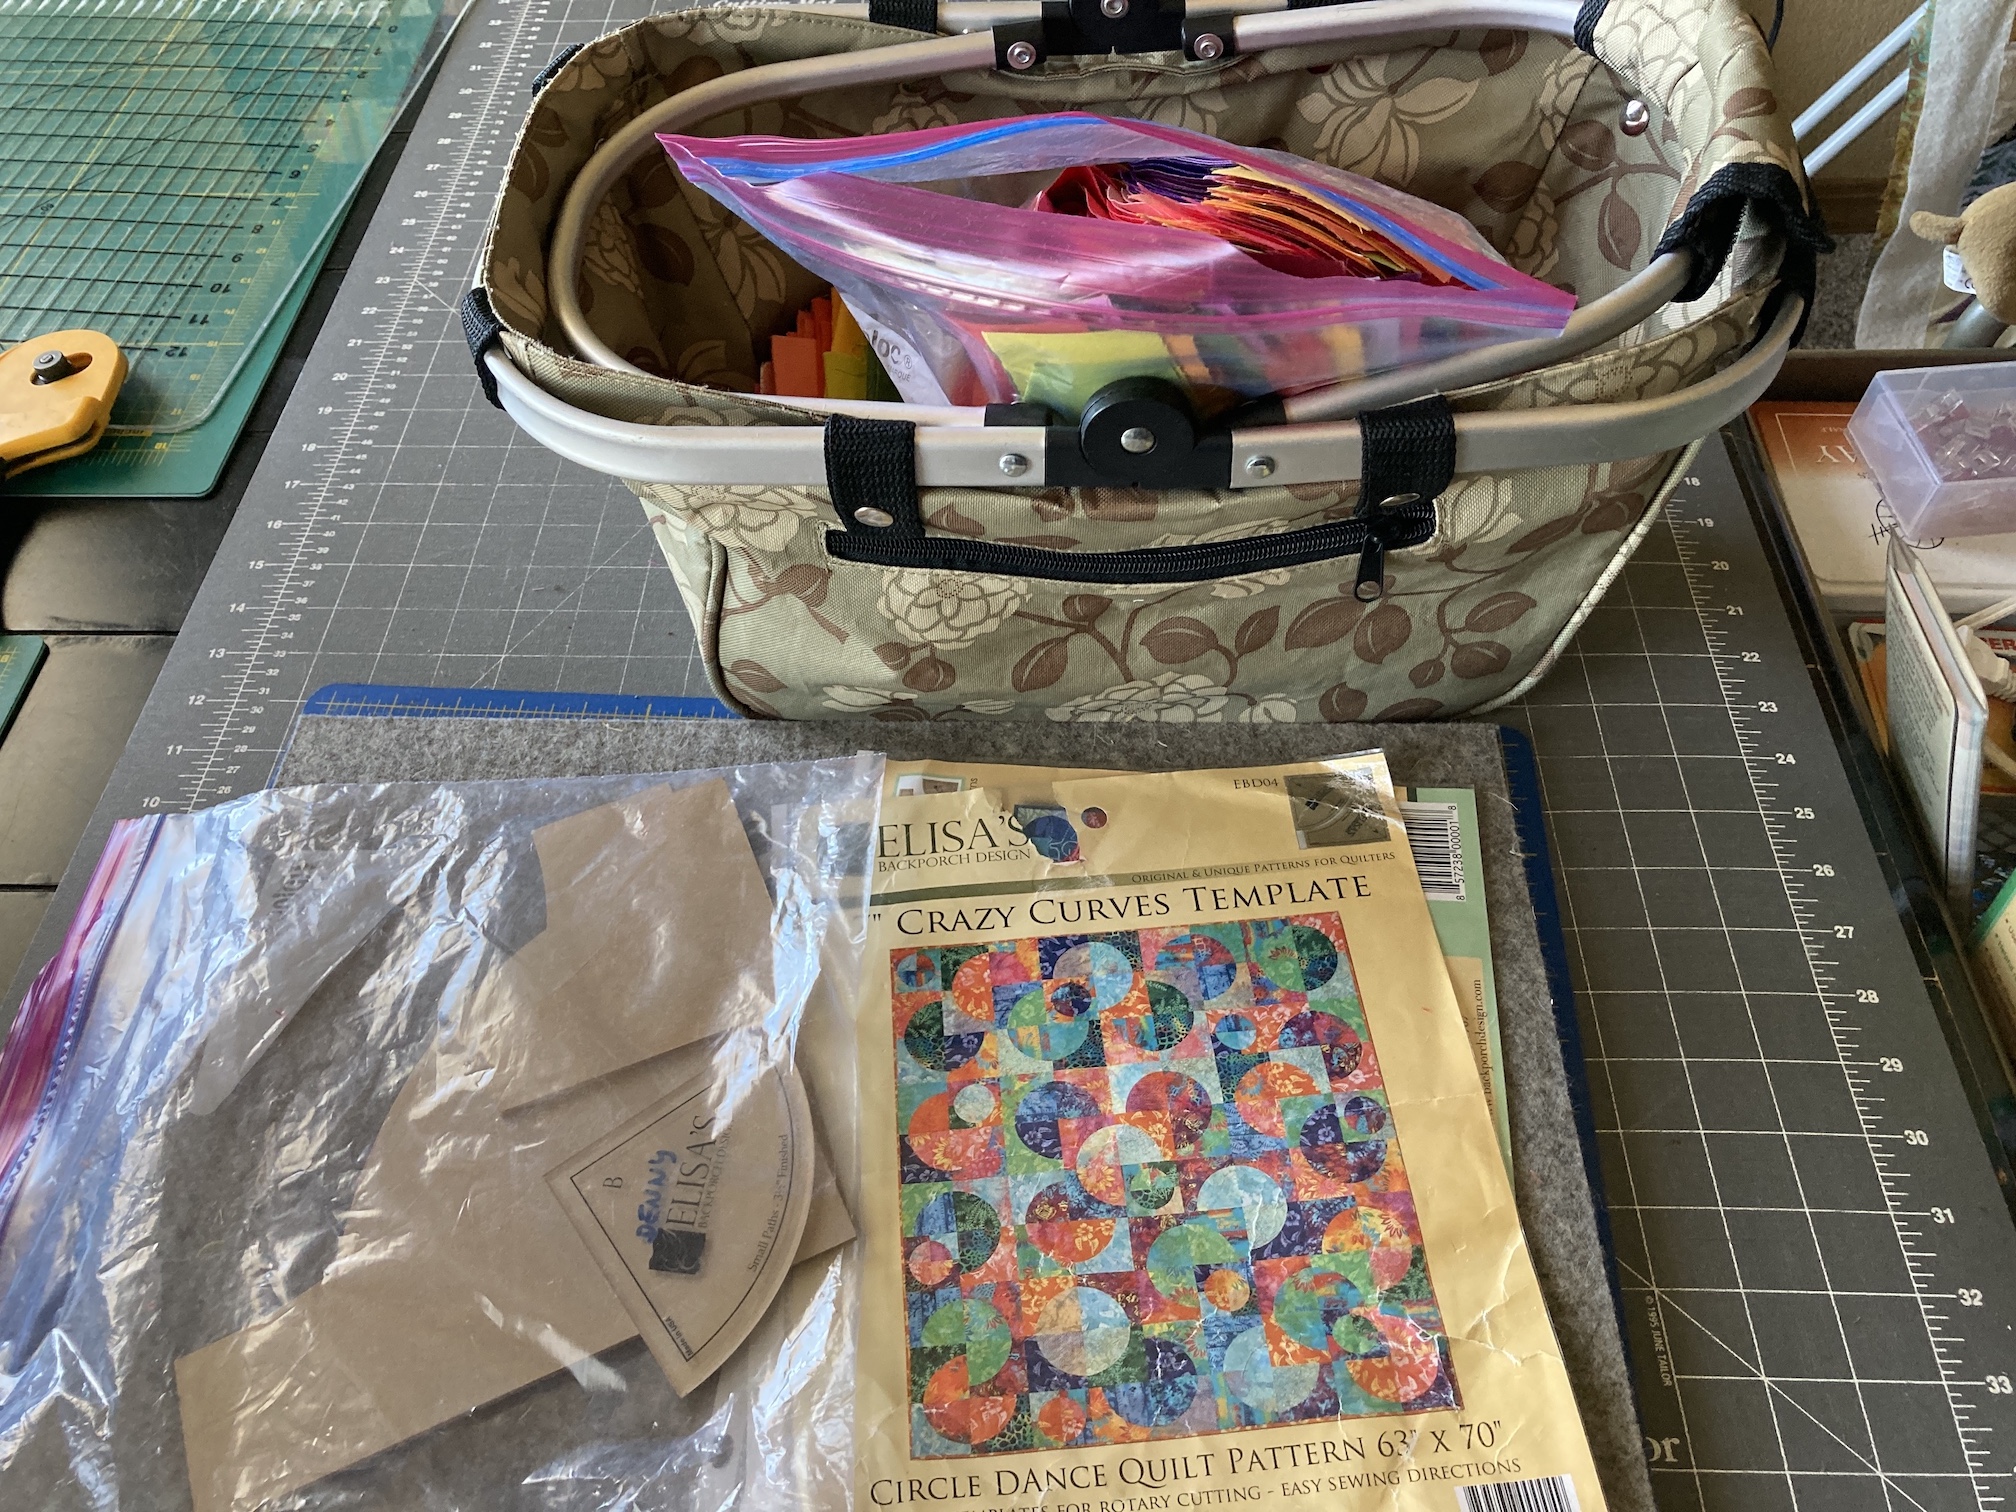
Here is another shelf unit that John made using plumbing pipes and wood. It houses more of my cotton fabric yardage as well as thrifted various thrifted fabrics to include silks, wools and synthetic home decorating fabrics. On the bottom shelf are containers filled with projects waiting to be made.
The shelving unit contains a very important item in my studio: the candy bowl which I found at a thrift store:
Occasionally you need a sweet treat while you are creating!
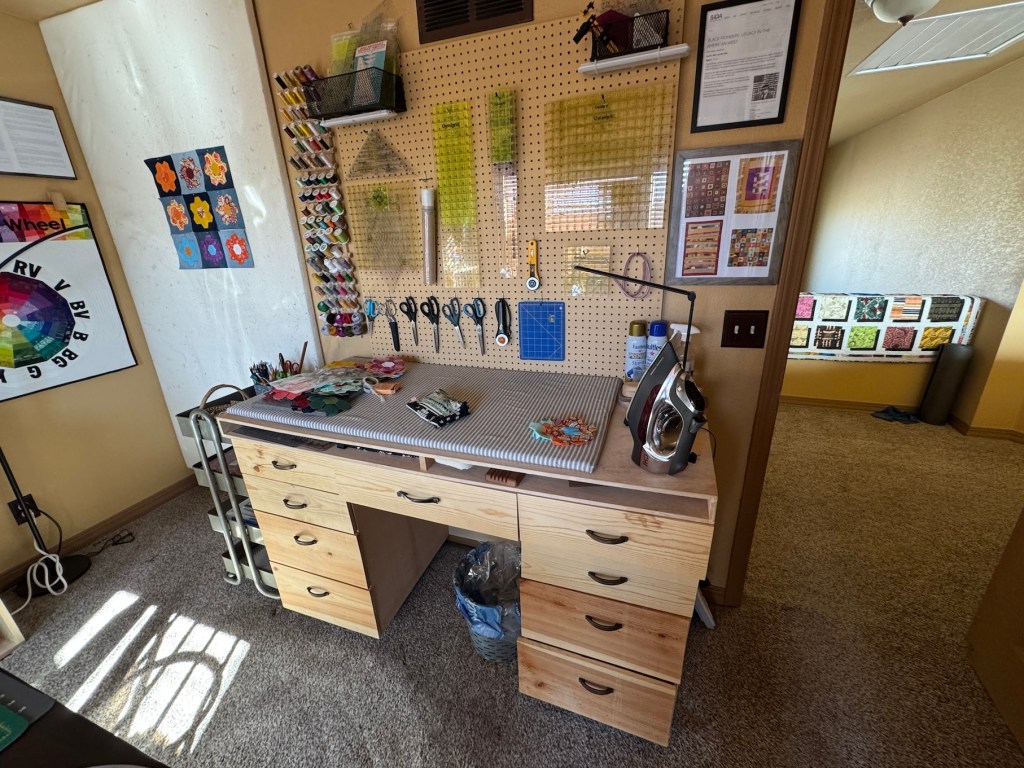
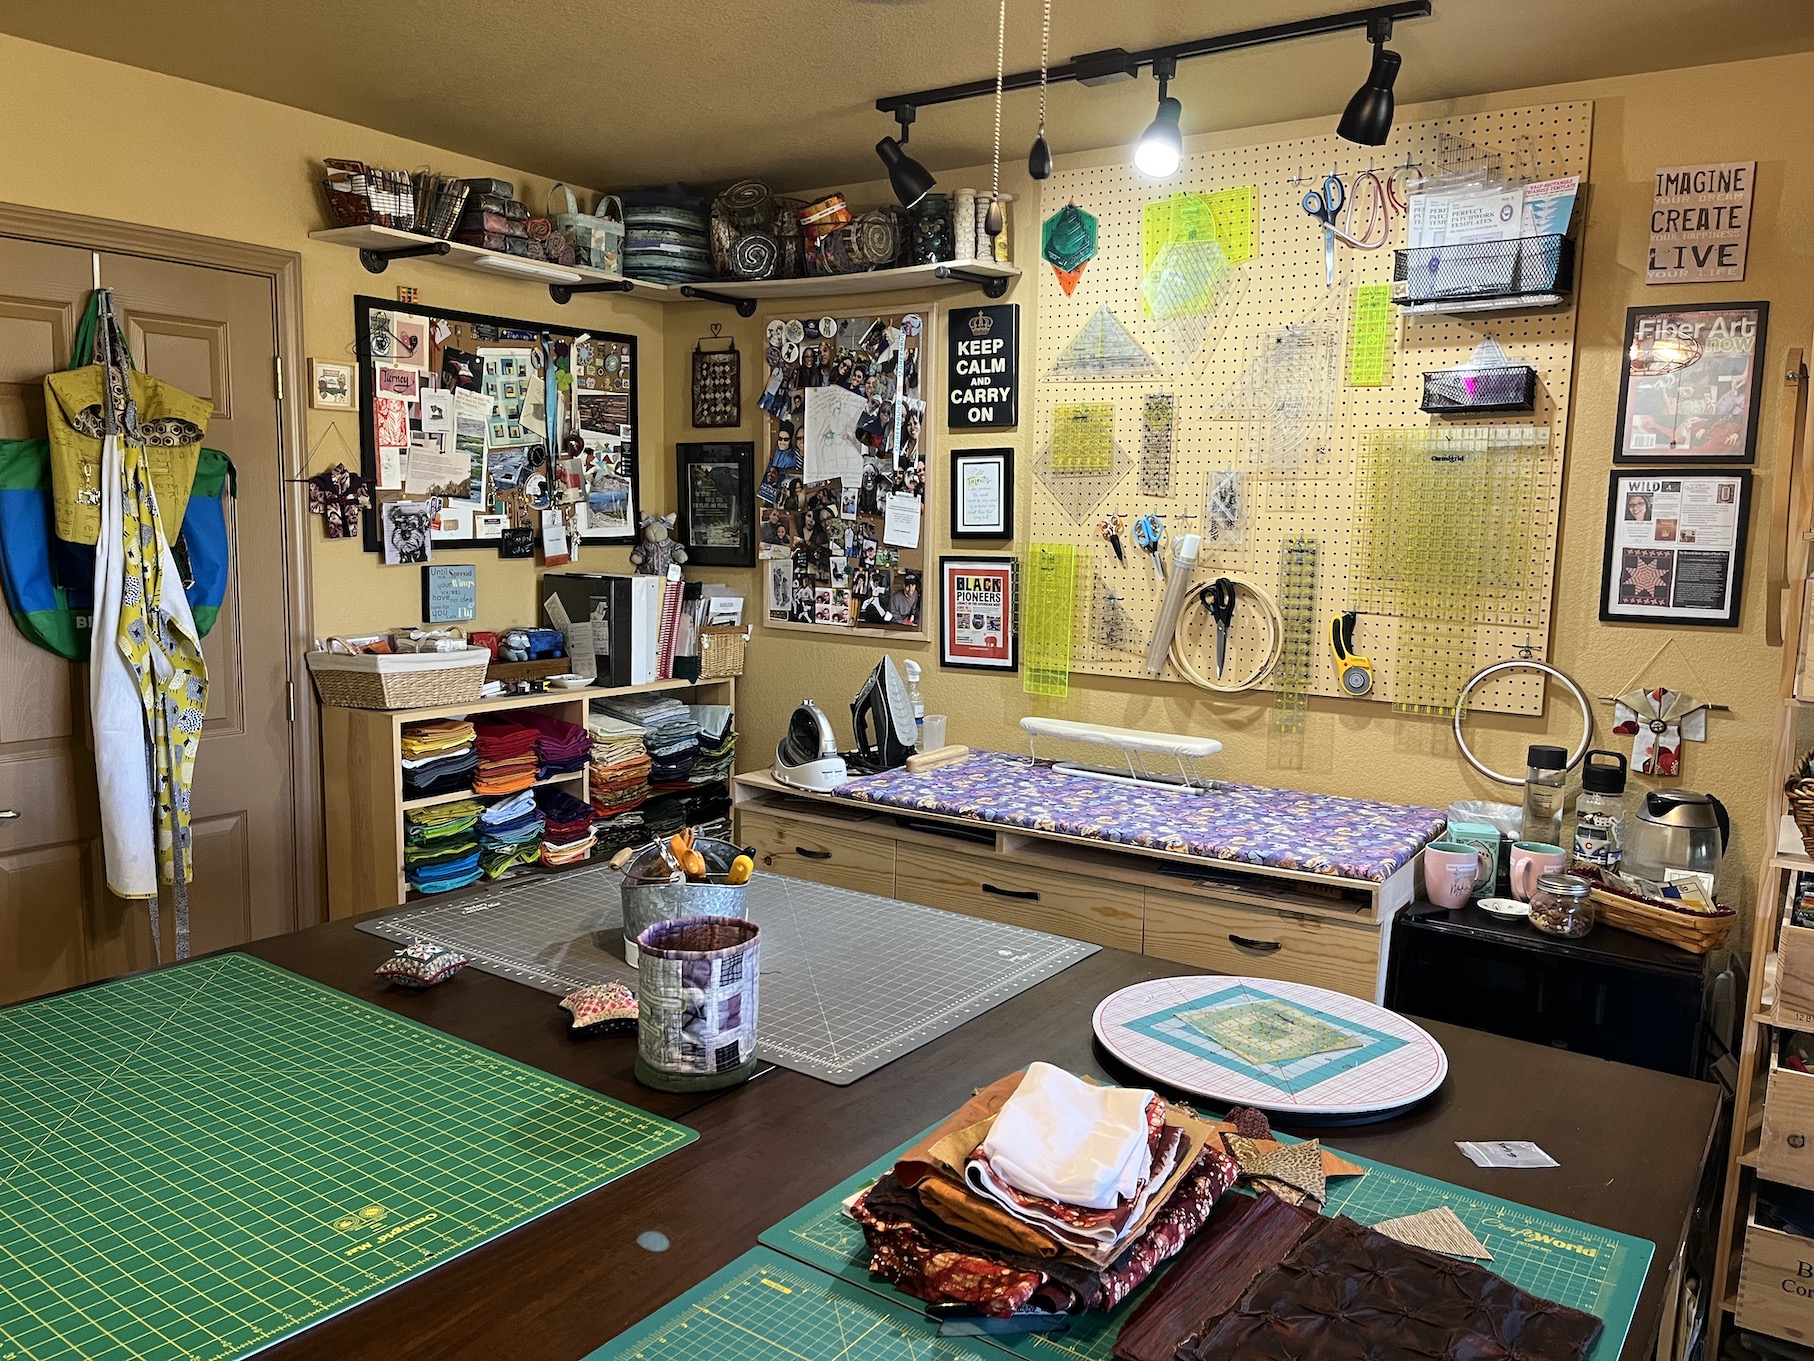
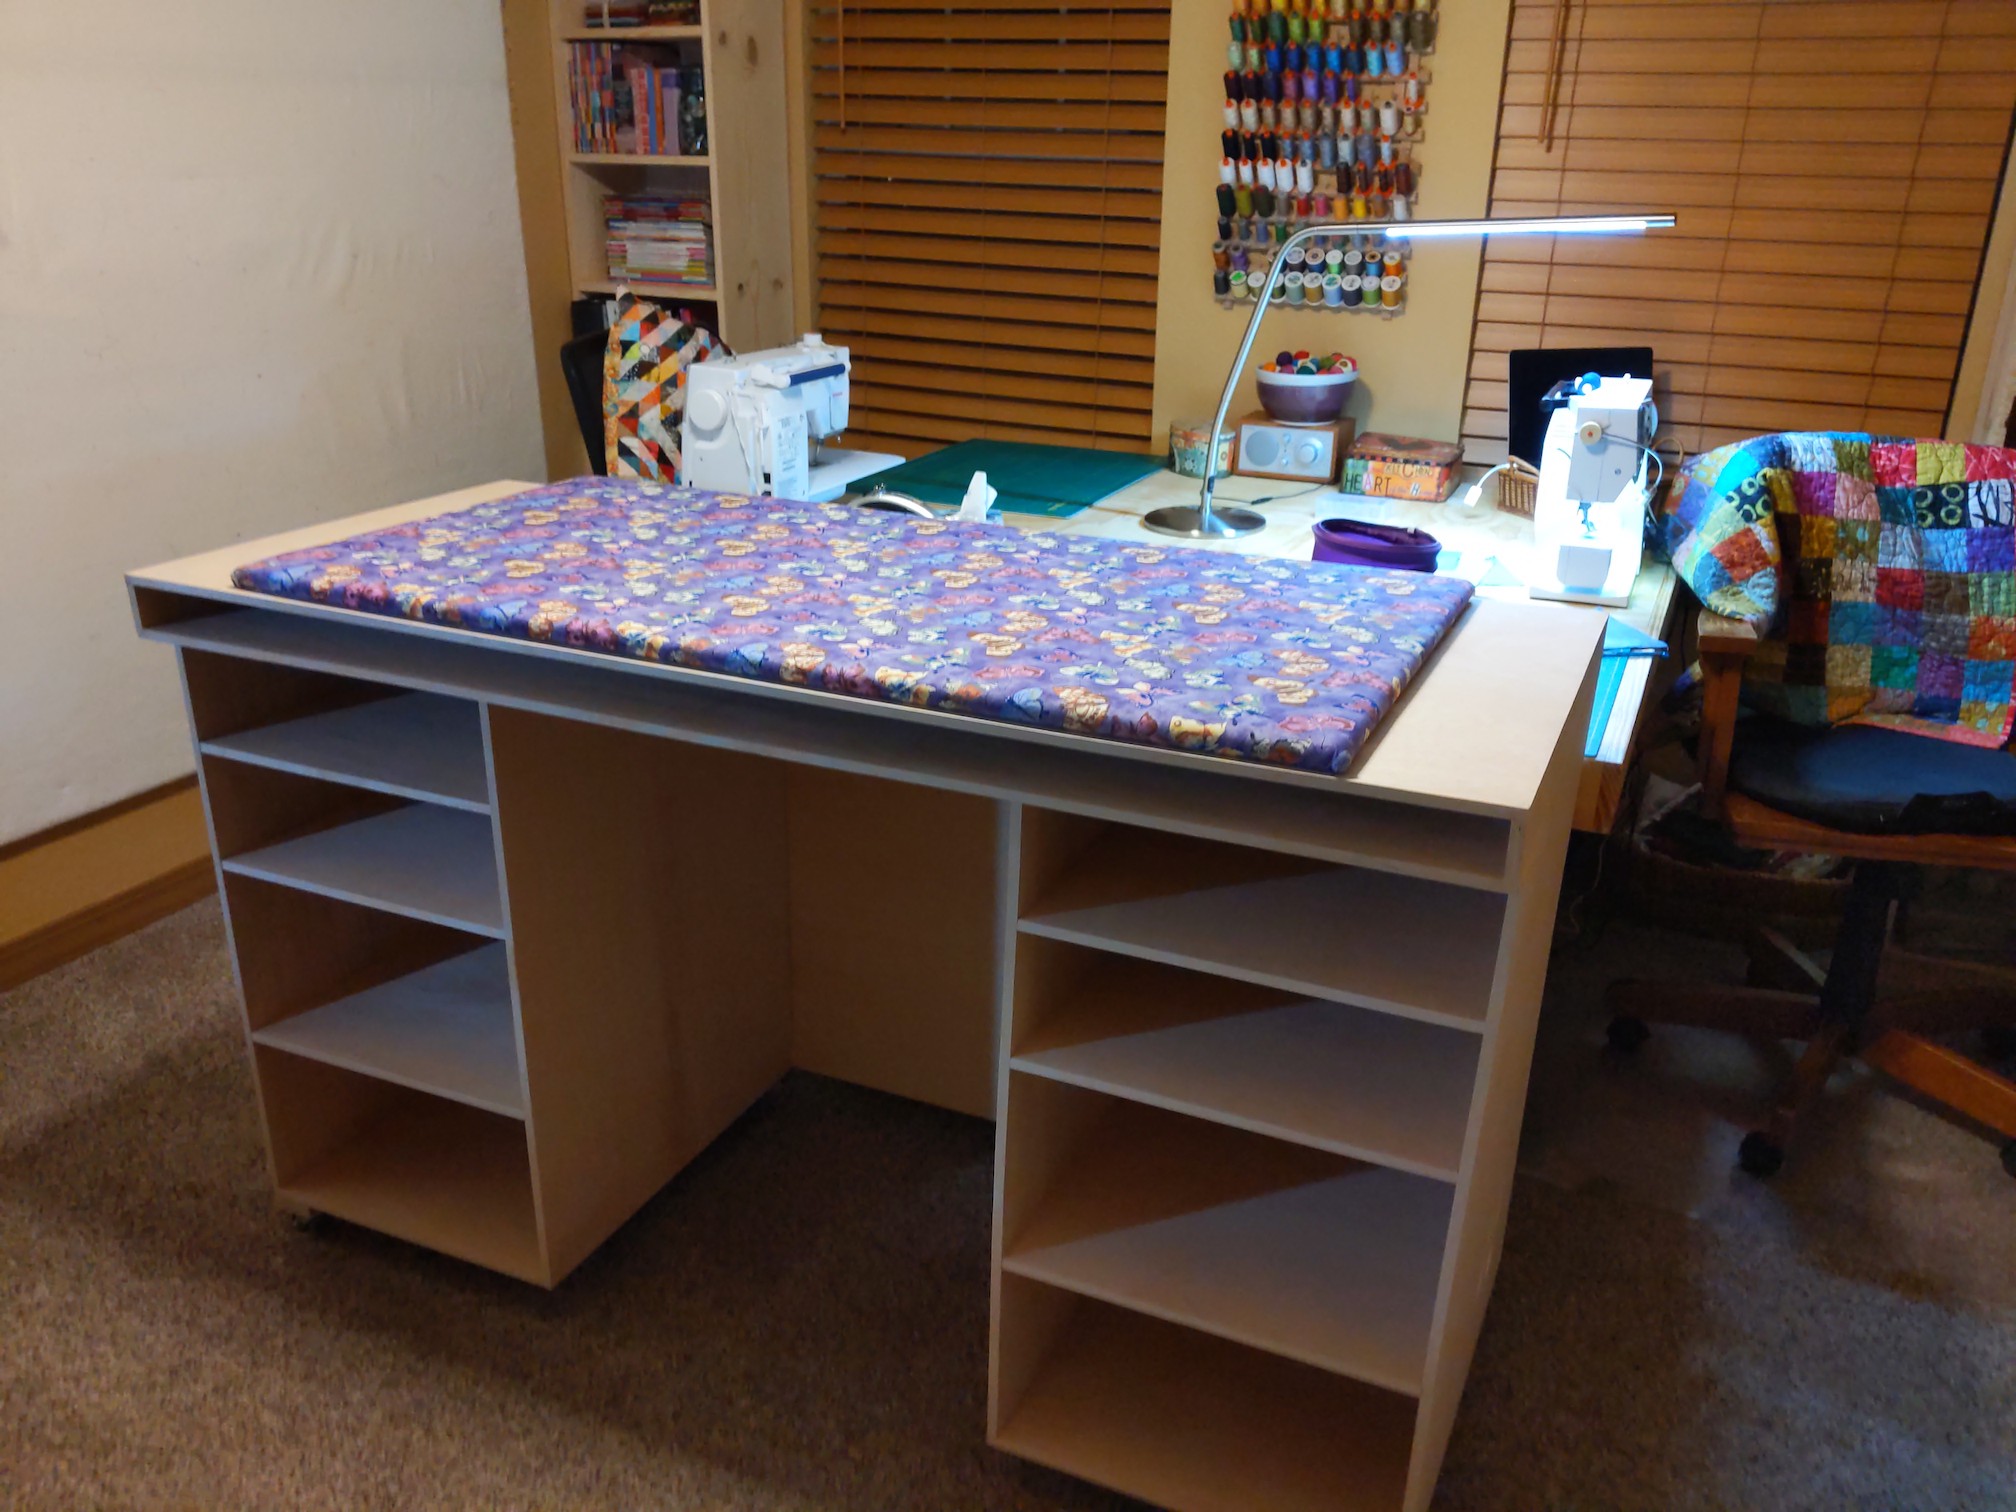
My sewing table was a free table I got from neighborhood online forum offering used items for free or for sale. John made a topper for it to expand the surface area and put openings in the table to run cords through.
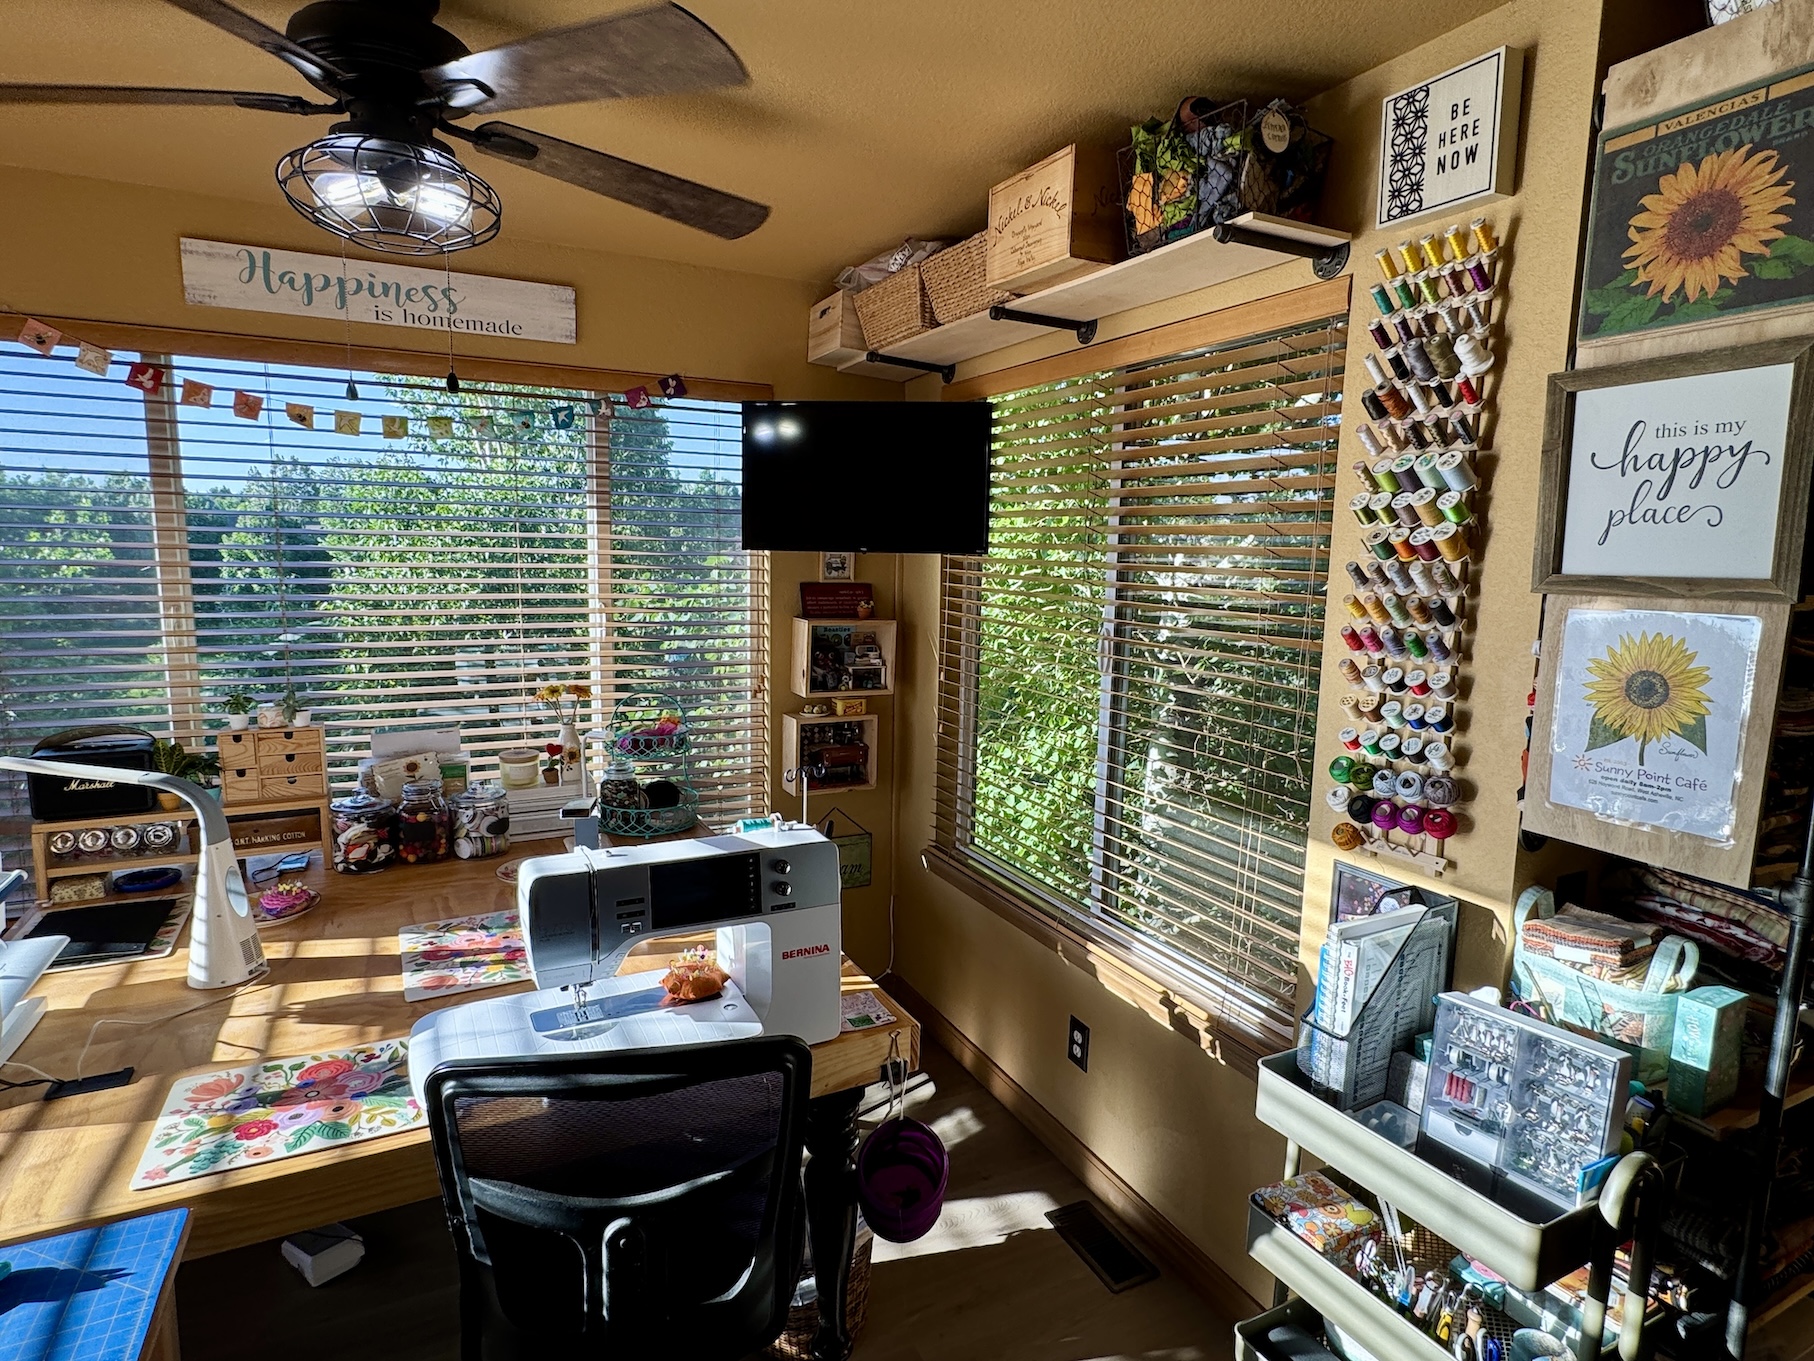
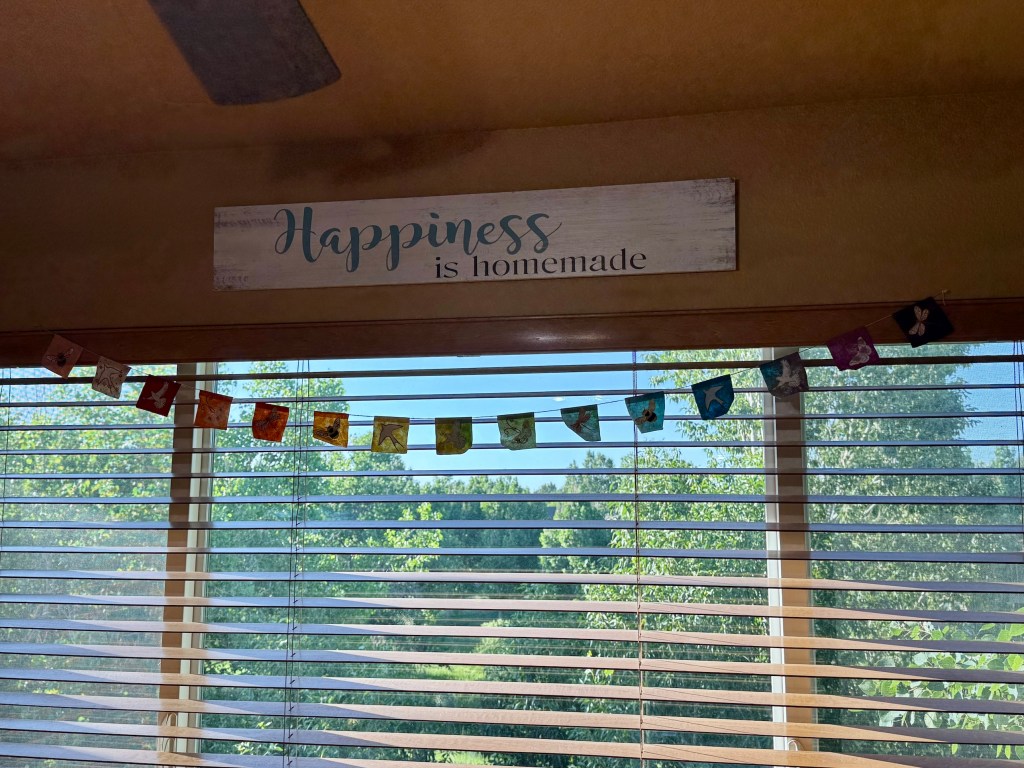
Above the table is the sign: “Happiness is homemade” that I found at a thrift store a couple years ago. It always makes me smile.
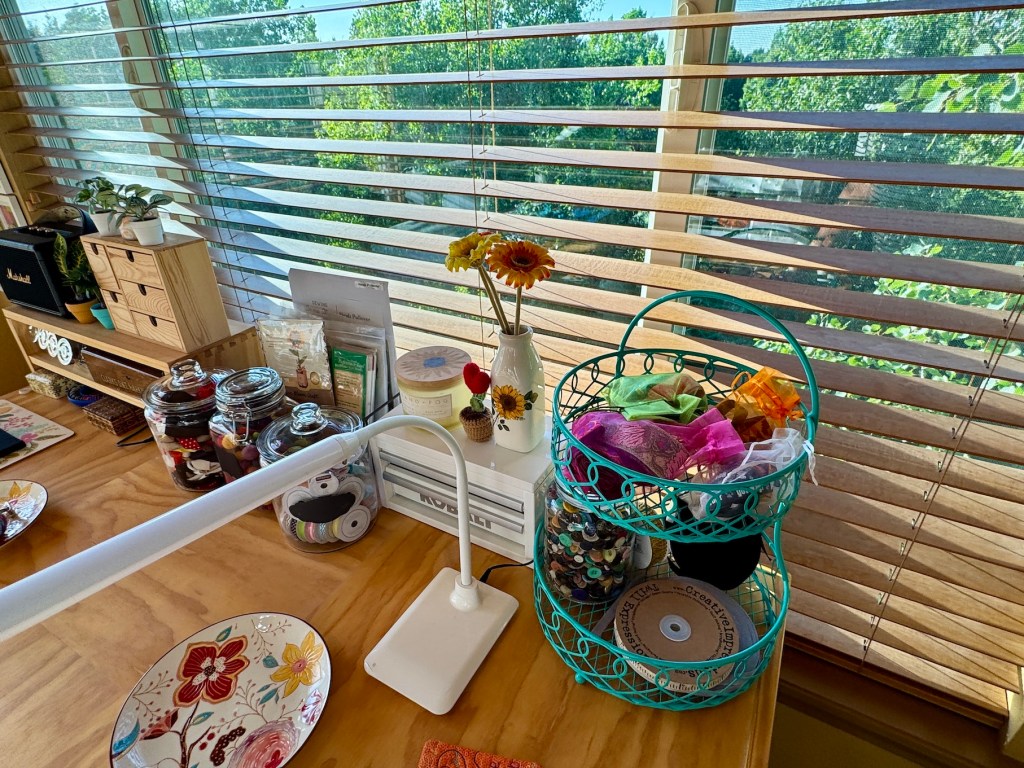
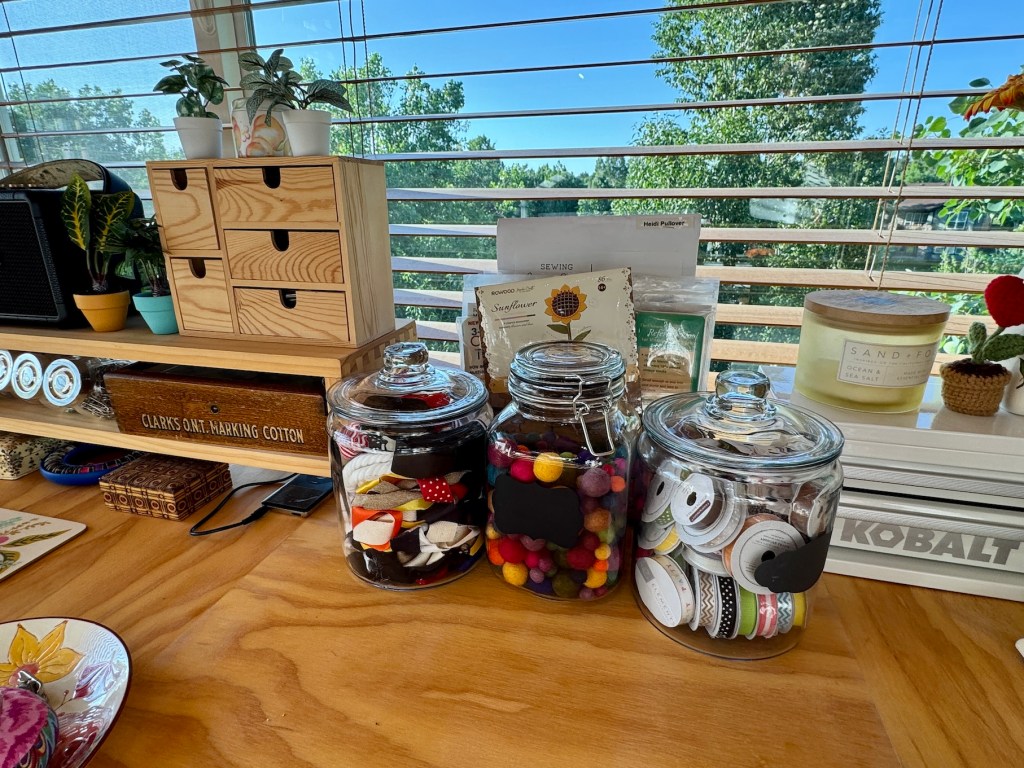
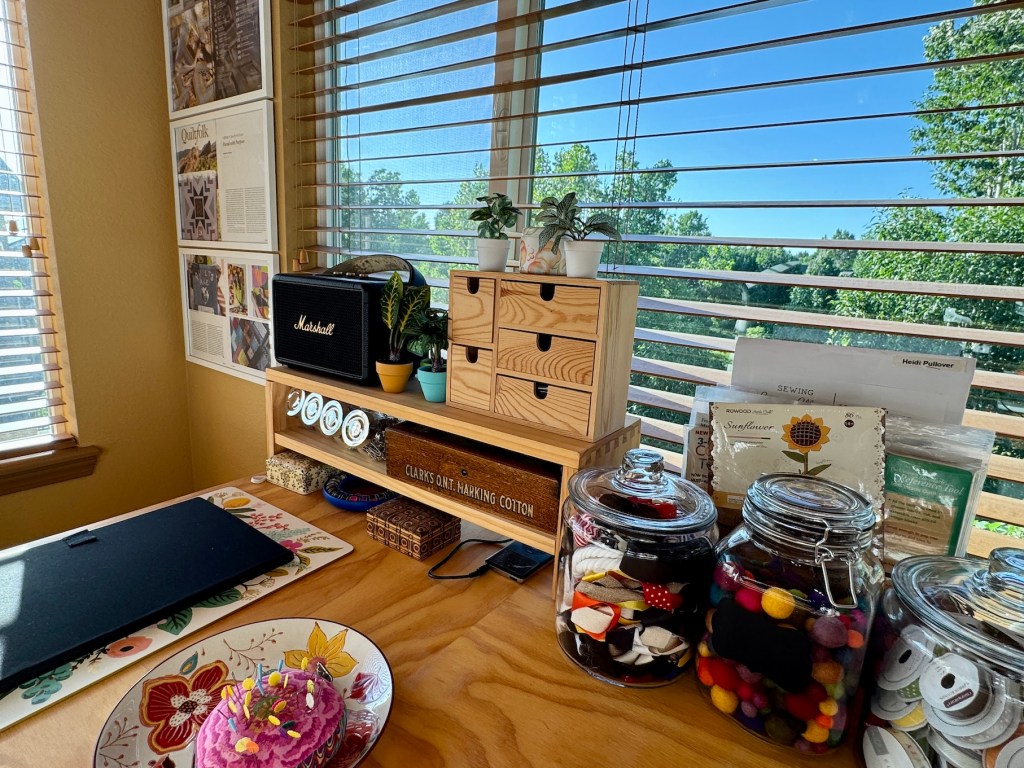
In addition to several of my sewing machines, I have various supplies, goodies, a radio and a bluetooth speaker for crafting music, on my sewing table;
All the jars and containers on the desk as well as the decorative plates holding pincushions, etc. are thrifted. Many of the buttons in the jar of buttons and the little spools of ribbon in a jar are thrifted. The wooden sewing box that says “Clarks…Making Cotton” is from John’s beloved grandmother. I am honored to have it my sewing space and I store larger buttons in it.
John built a little extension table for my sewing table and under that table I store MORE containers with projects waiting to be made; and projects in a thrifted basket.
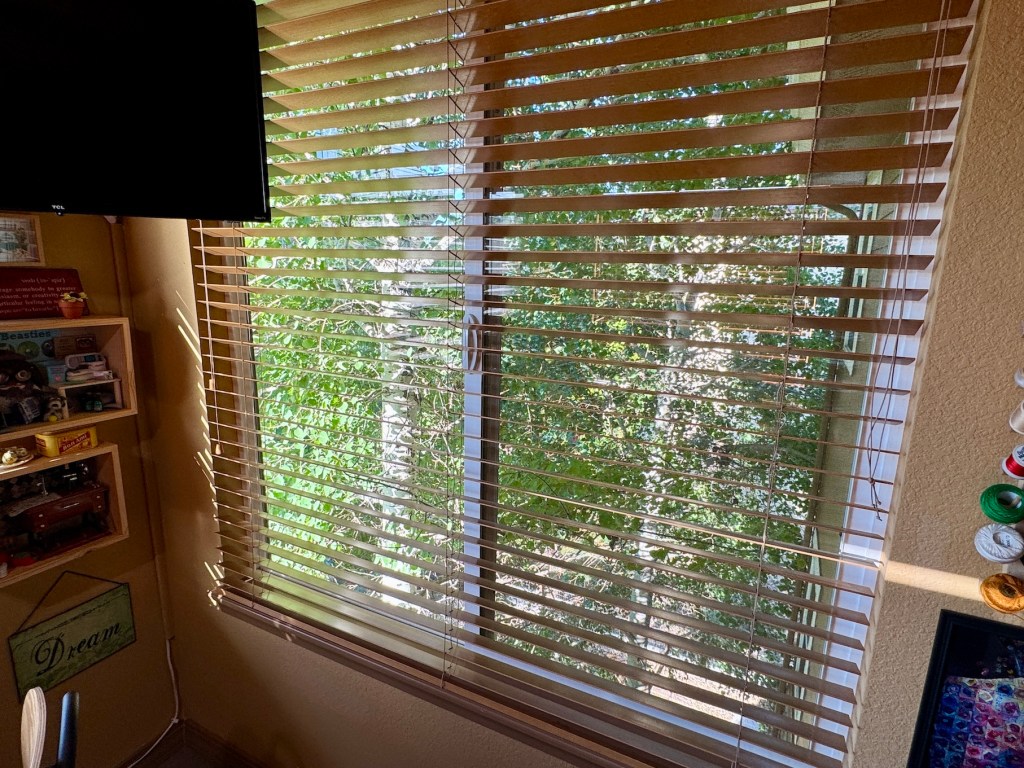
I love the view out my studio windows next to the sewing table. I am surrounded by Aspen trees and it feels like I am in a treehouse.
The little art flags that hang on the window were discovered for $1 all bunched up at a thrift shop. They appear to be images painted on colored kraft paper and using a low heat iron I was able to smooth all the little flags out and hang them at the window.
Above the windows on each side of the sewing table are shelves that John built filled with more thrifted baskets and various decorative boxes storing supplies and fabric scraps:
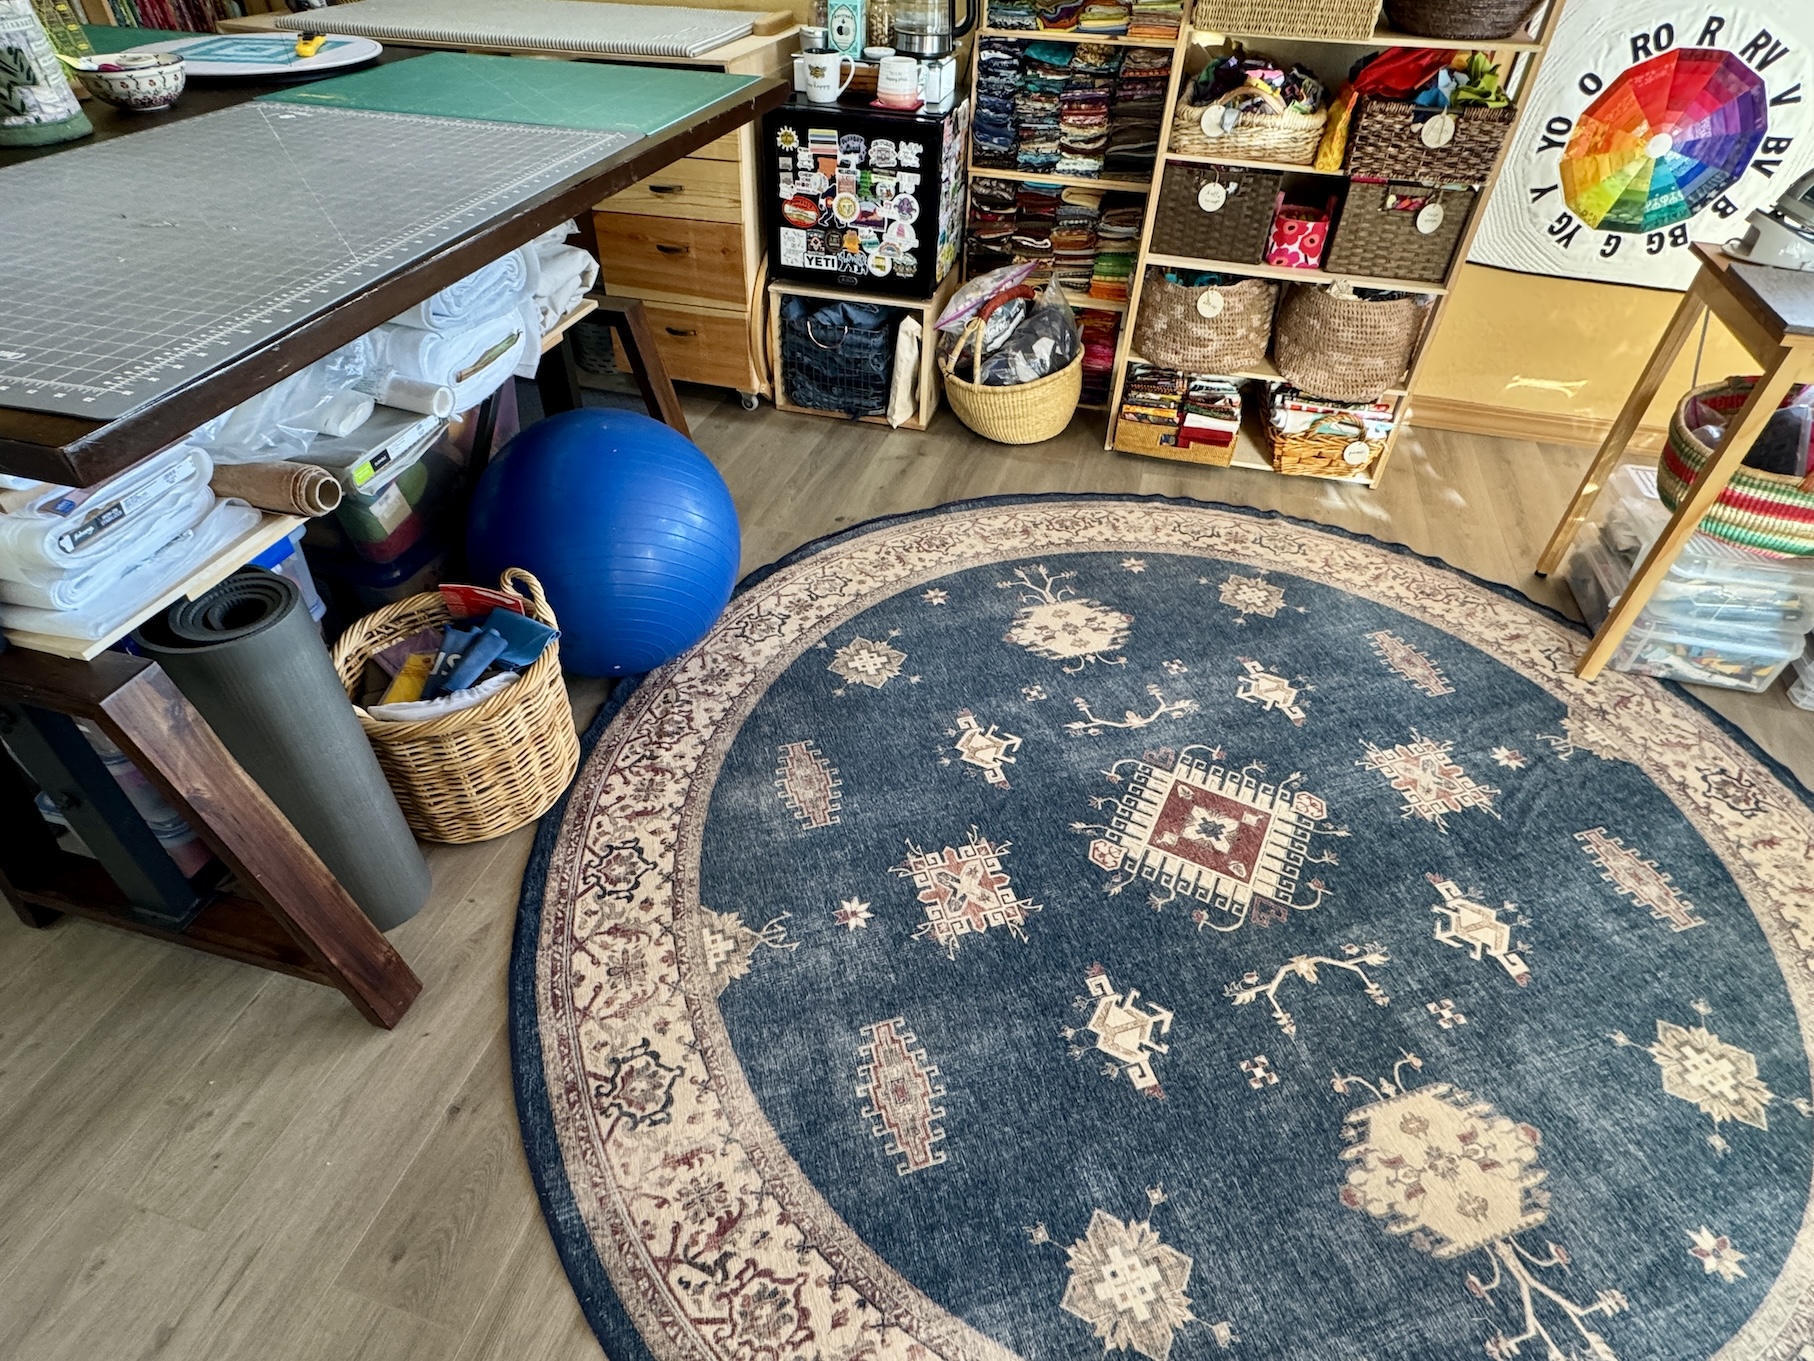
The area rug in the studio is a Ruggable washable rug that I found for $5 at a thrift store. These rugs retail for over $300! I laundered the rug and purchased the special rug pad for the rug from Ruggable so it would lay properly.
Do you see the exercise ball and thrifted basket to the left of the rug? In addition to a sewing studio, I also use this space as my morning stretching/yoga studio, layout out a yoga mat.
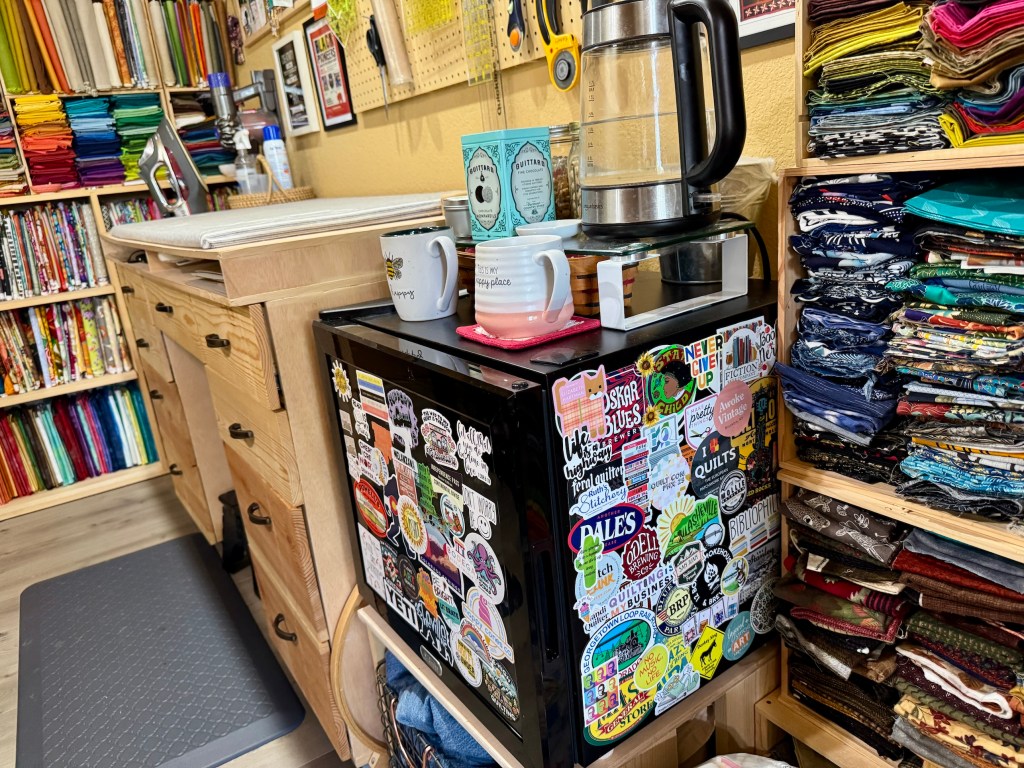
John gave me his old bar mini fridge (which I’ve liberally covered with stickers from my travels) and I added in a tea station to the top of it which includes thrifted containers and baskets for tea and biscuits; and thrifted mugs for tea:
Must have tea and biscuits while crafting!
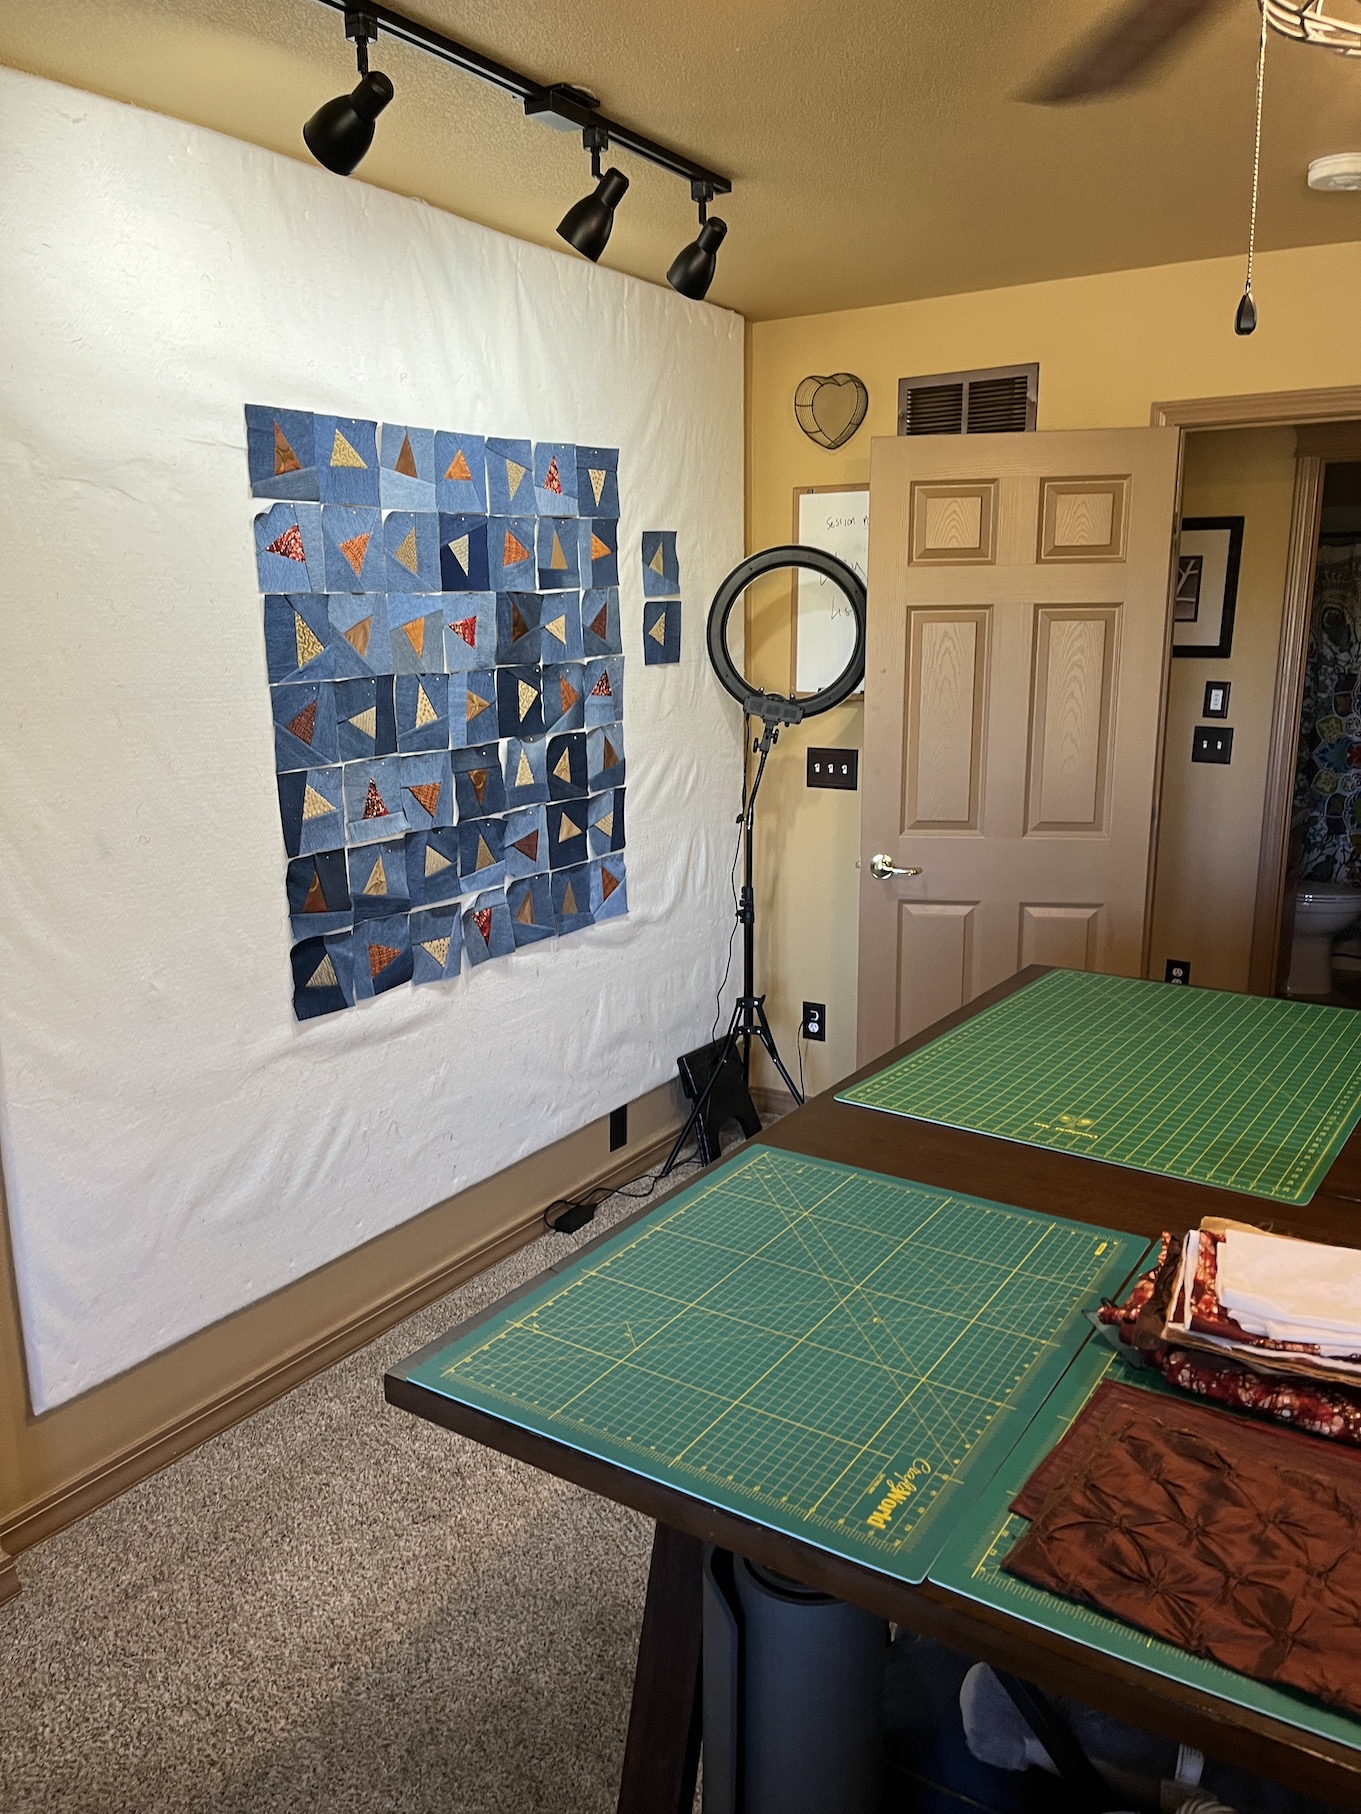
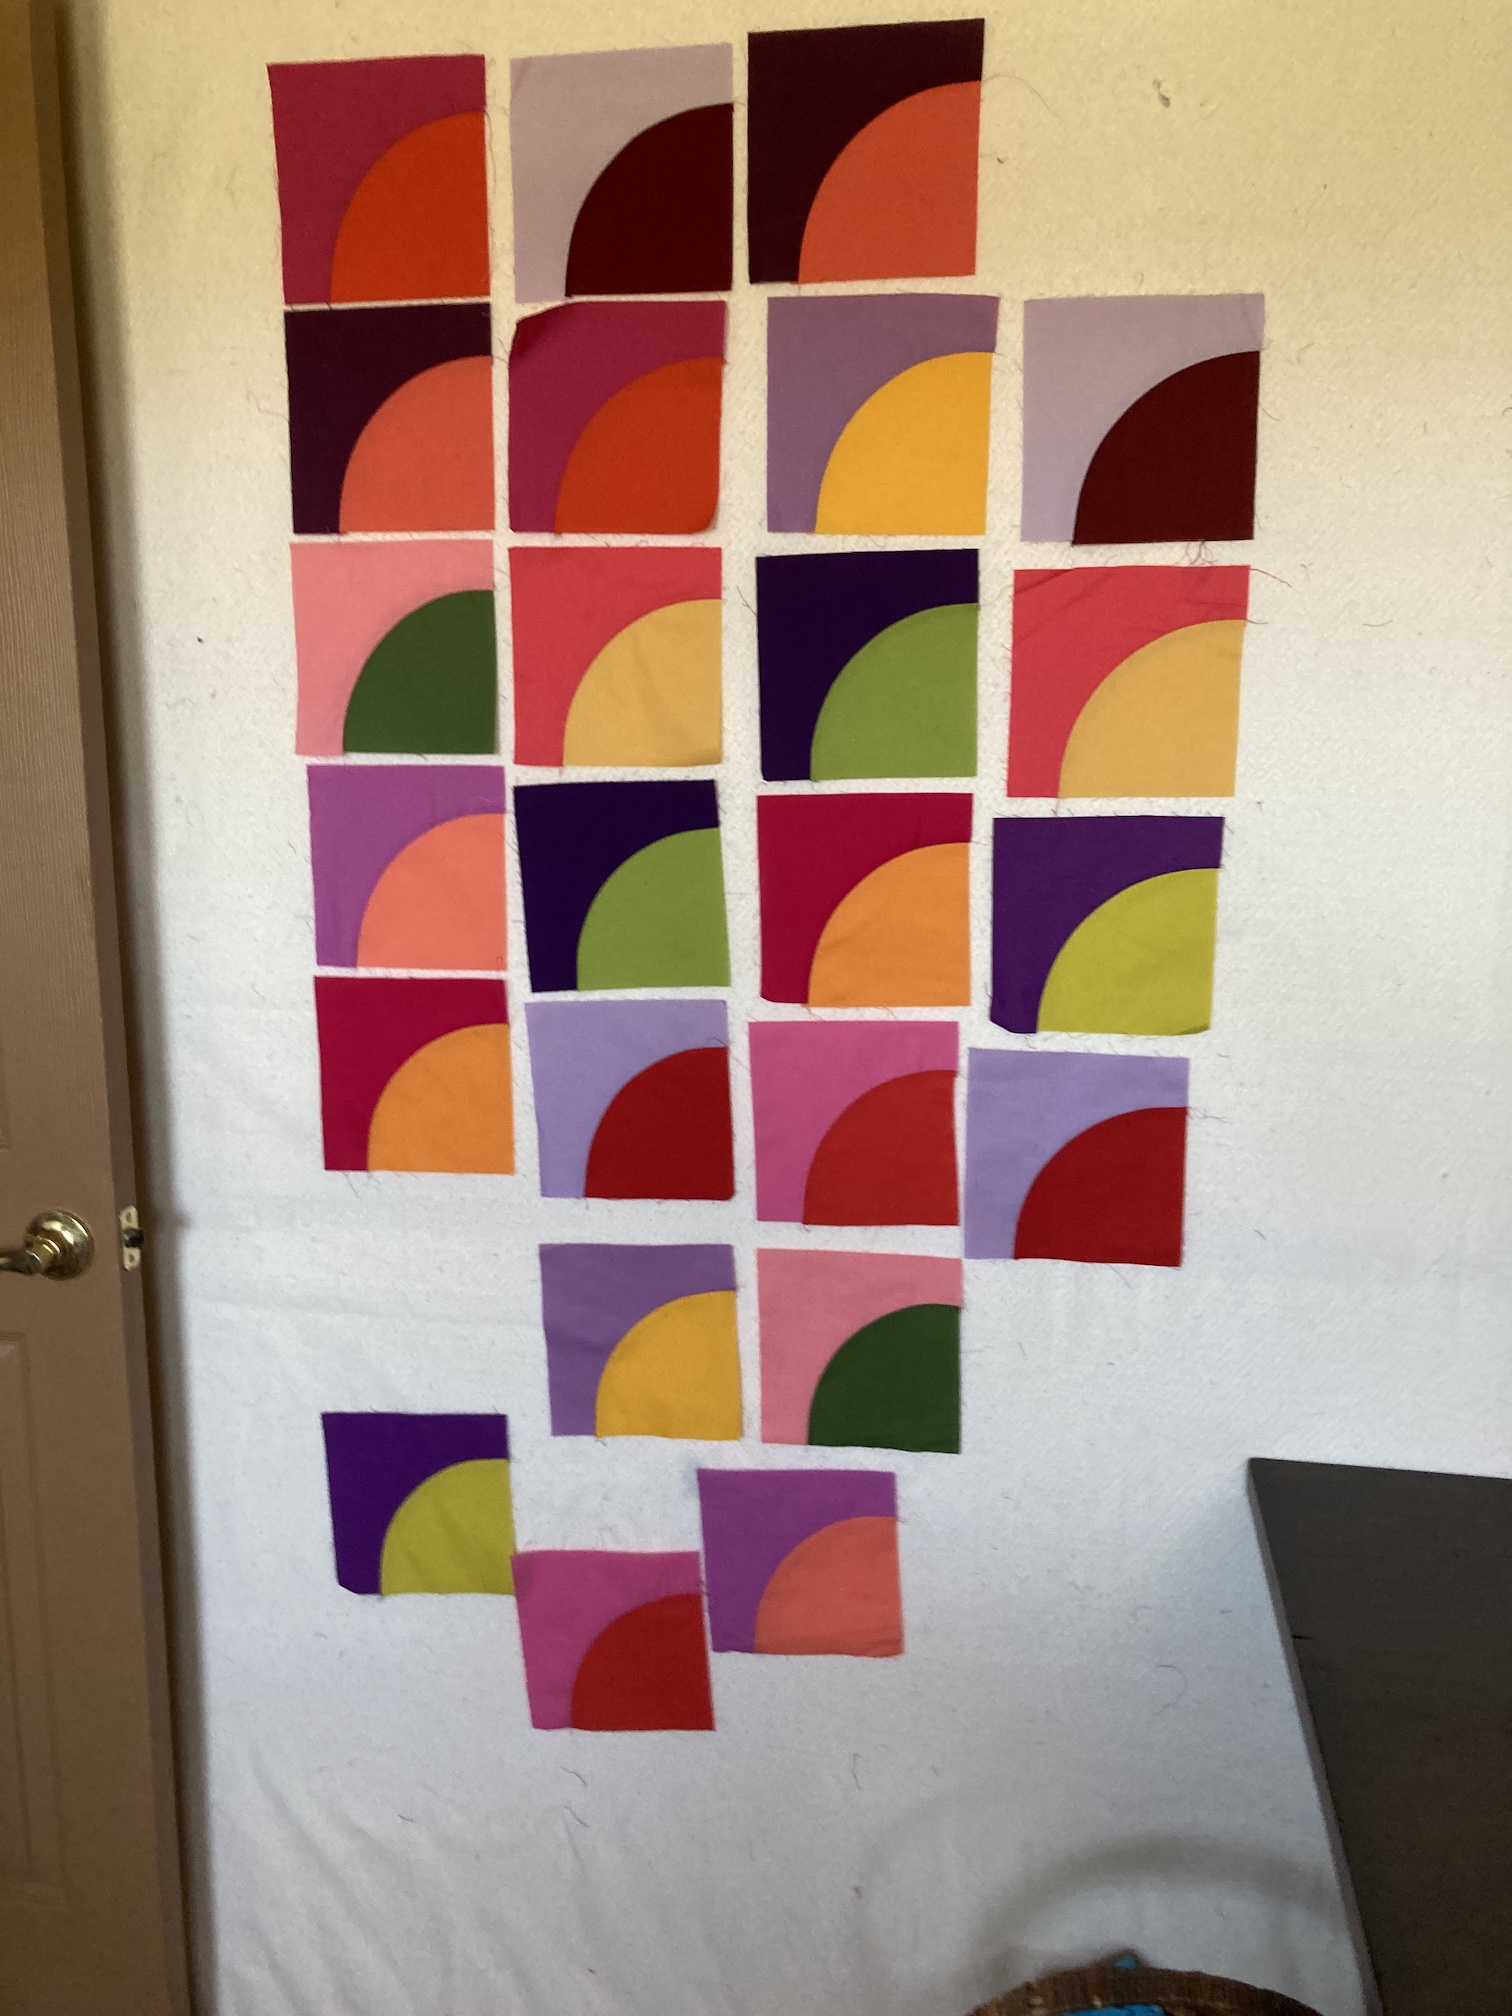
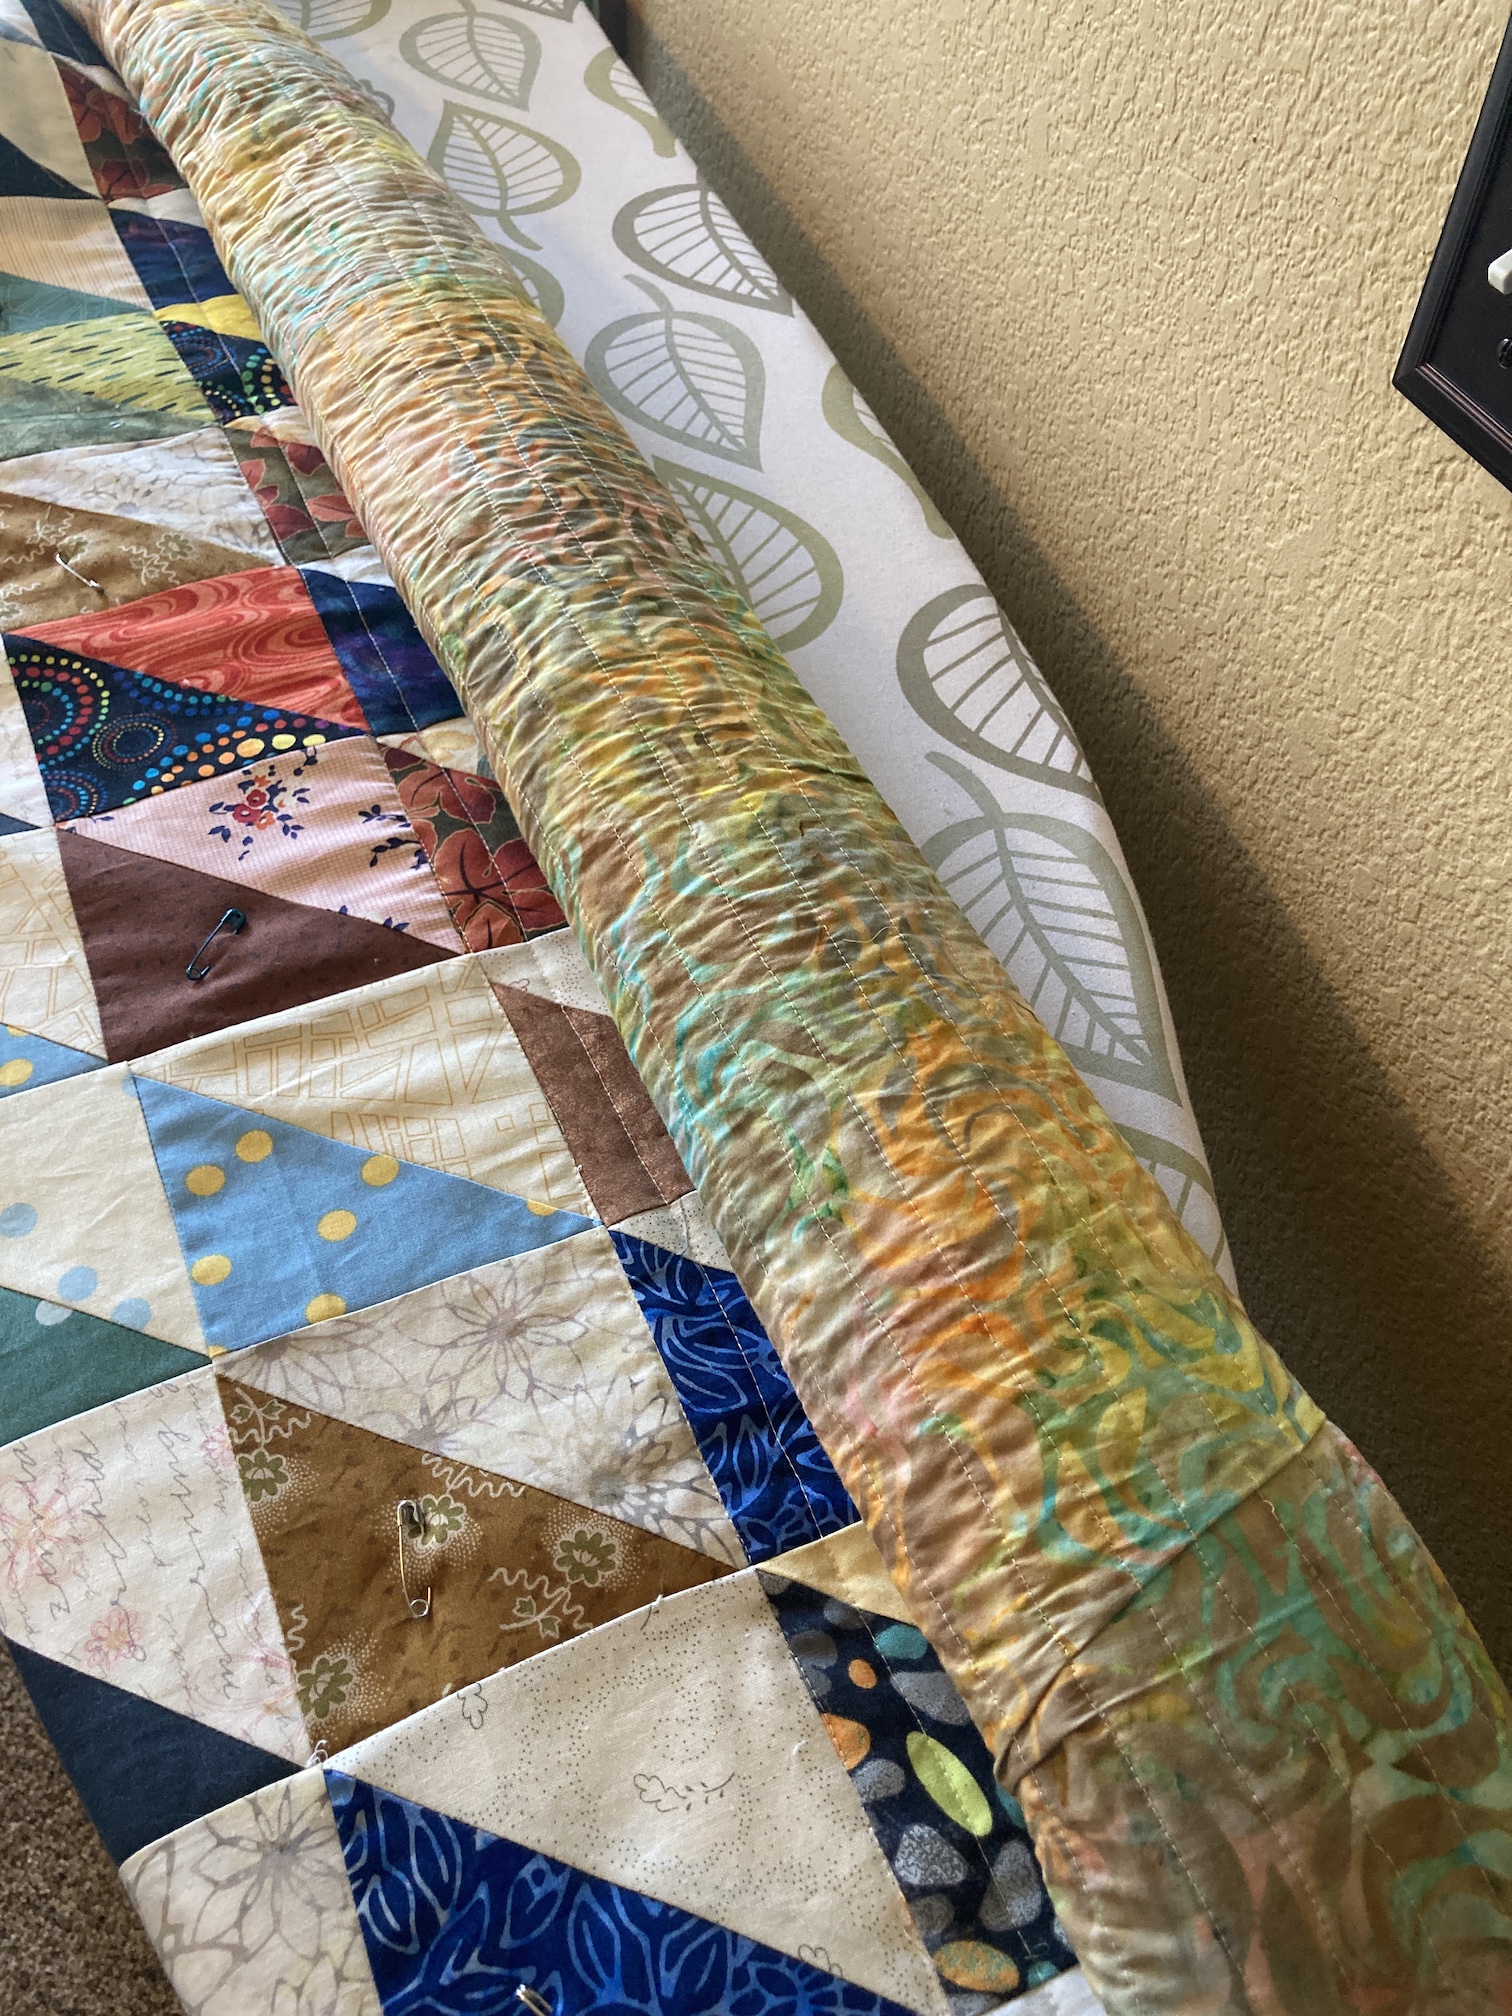
Maybe I need more tea and biscuits as here is the design wall in my studio that John built which is EMPTY right now as I finish up sewing the binding down on the Pieces of Colorado quilt (see the post Quilt in Progress: “Pieces of Colorado” Update #2):
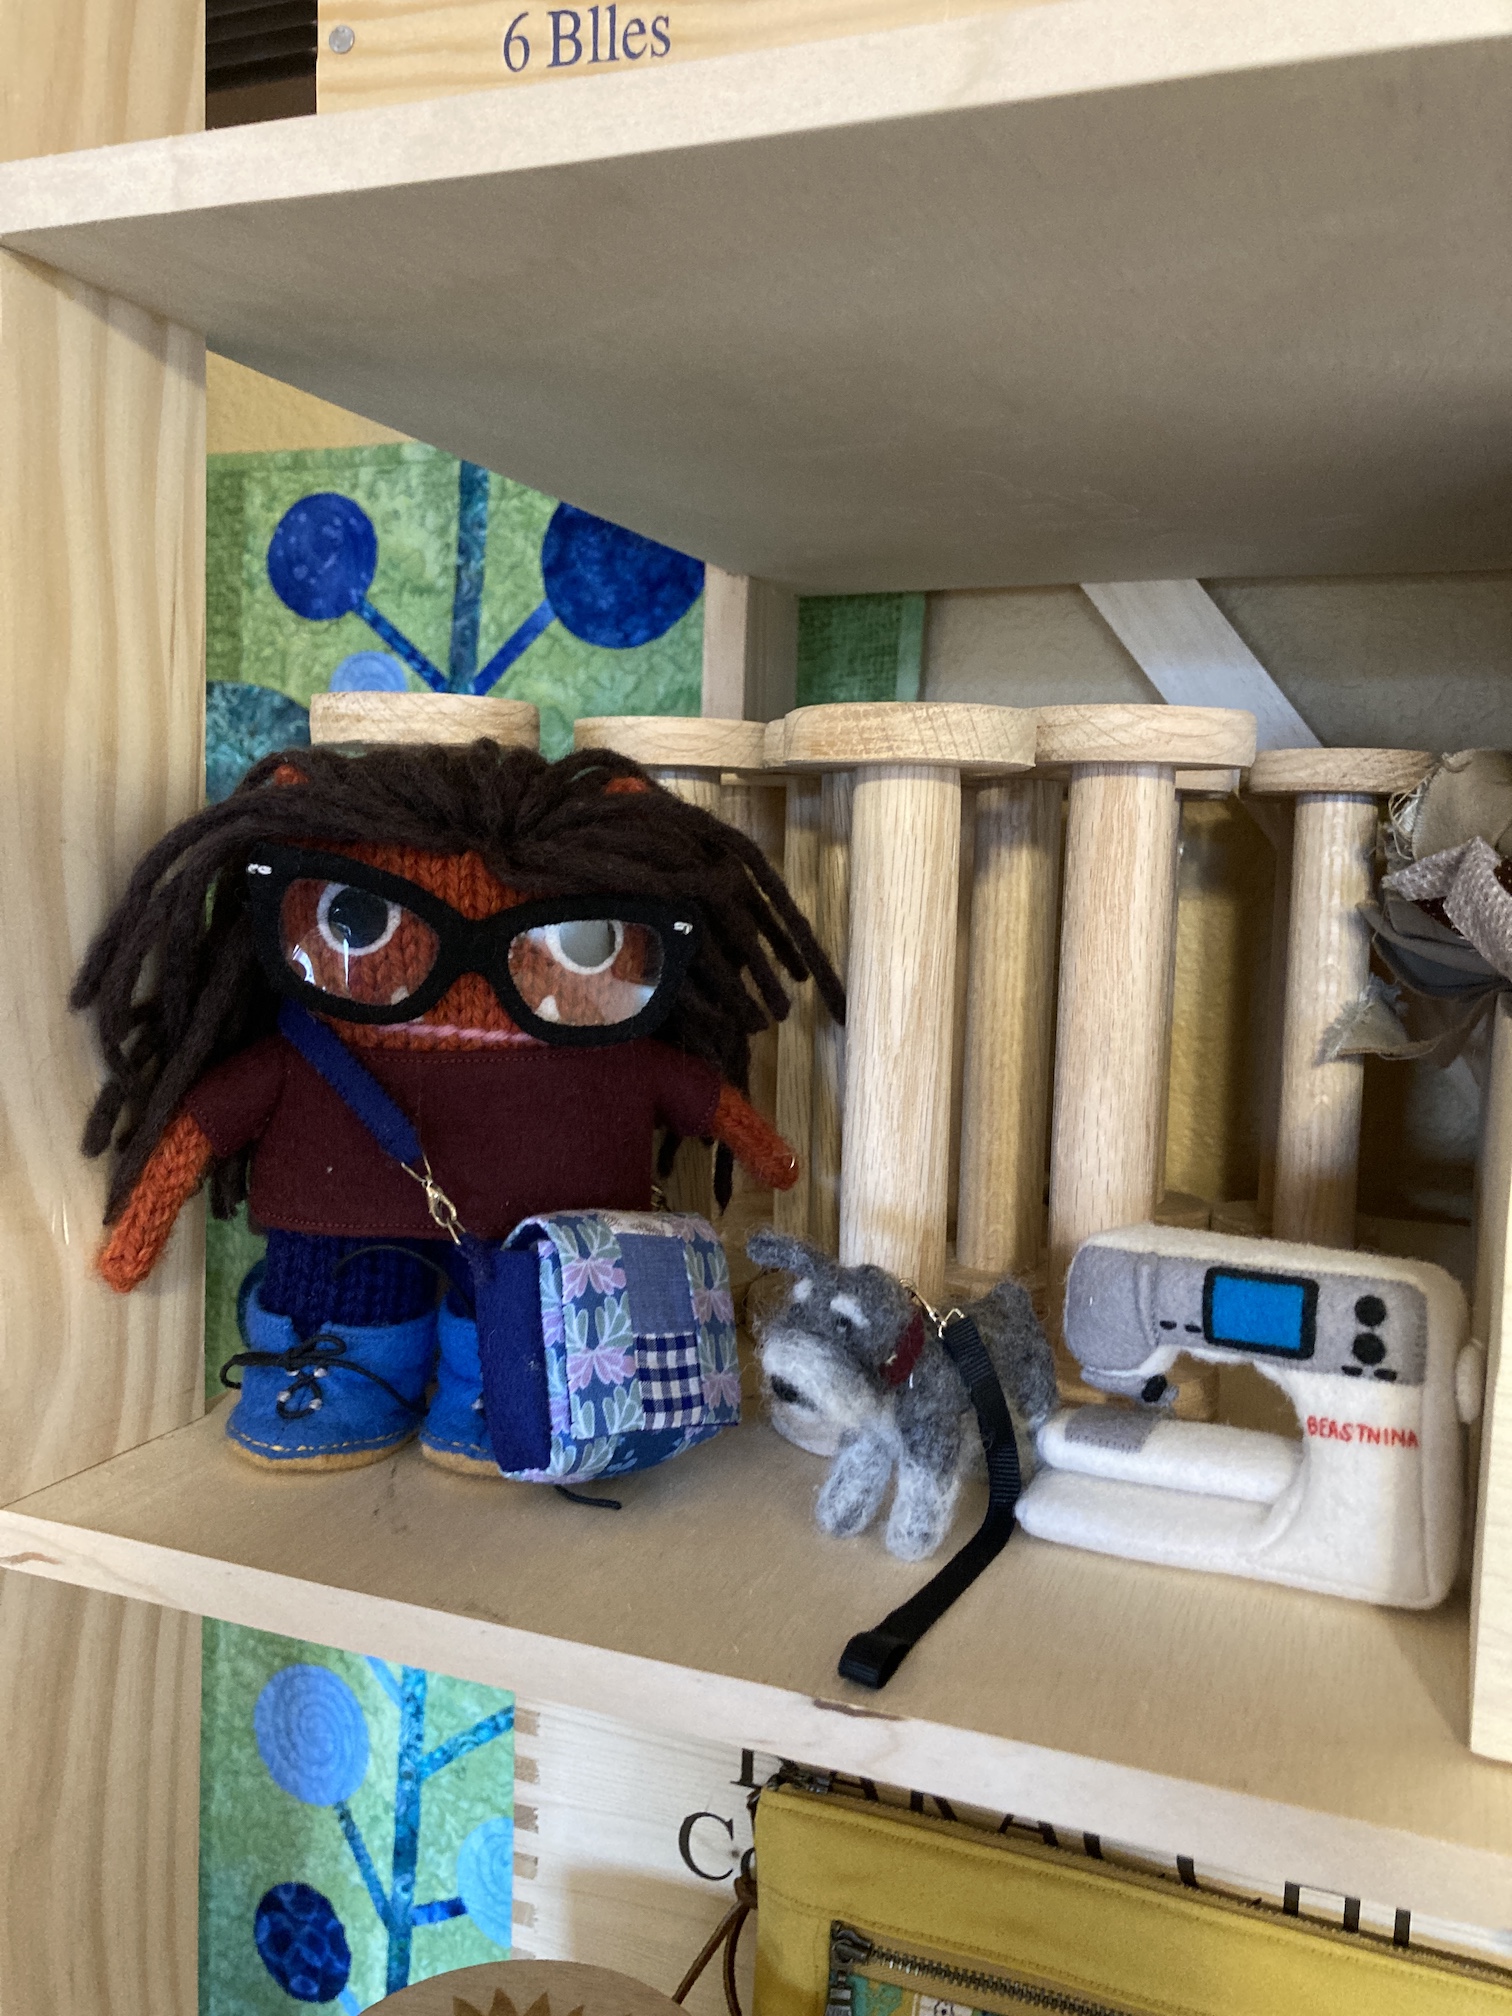
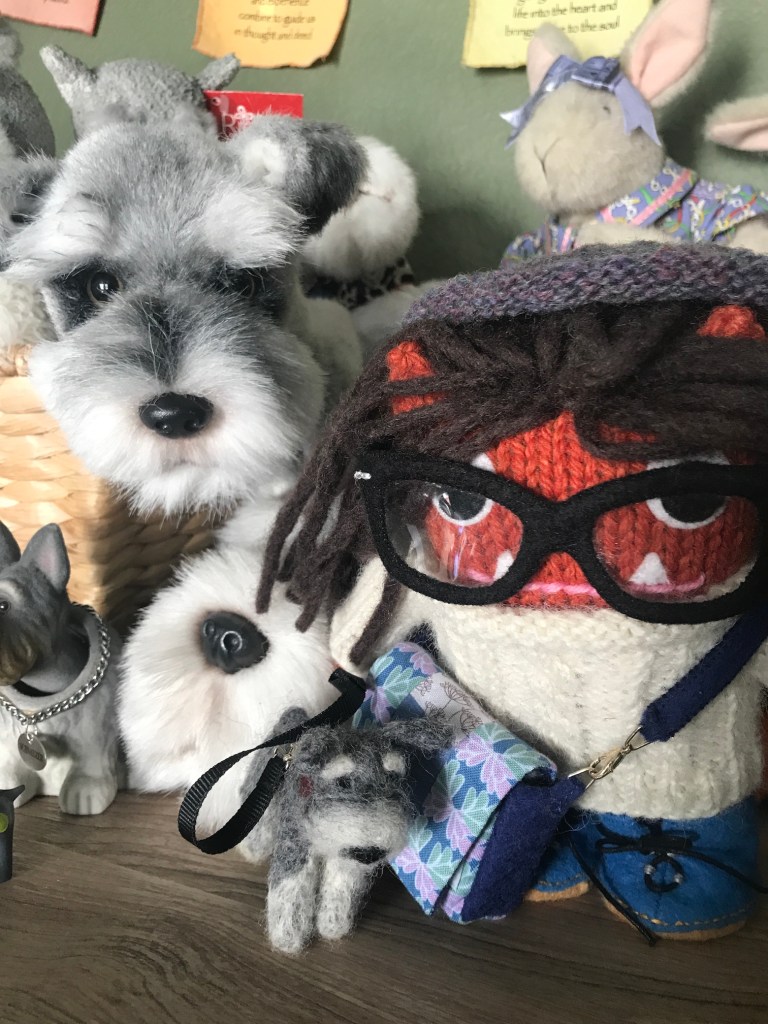
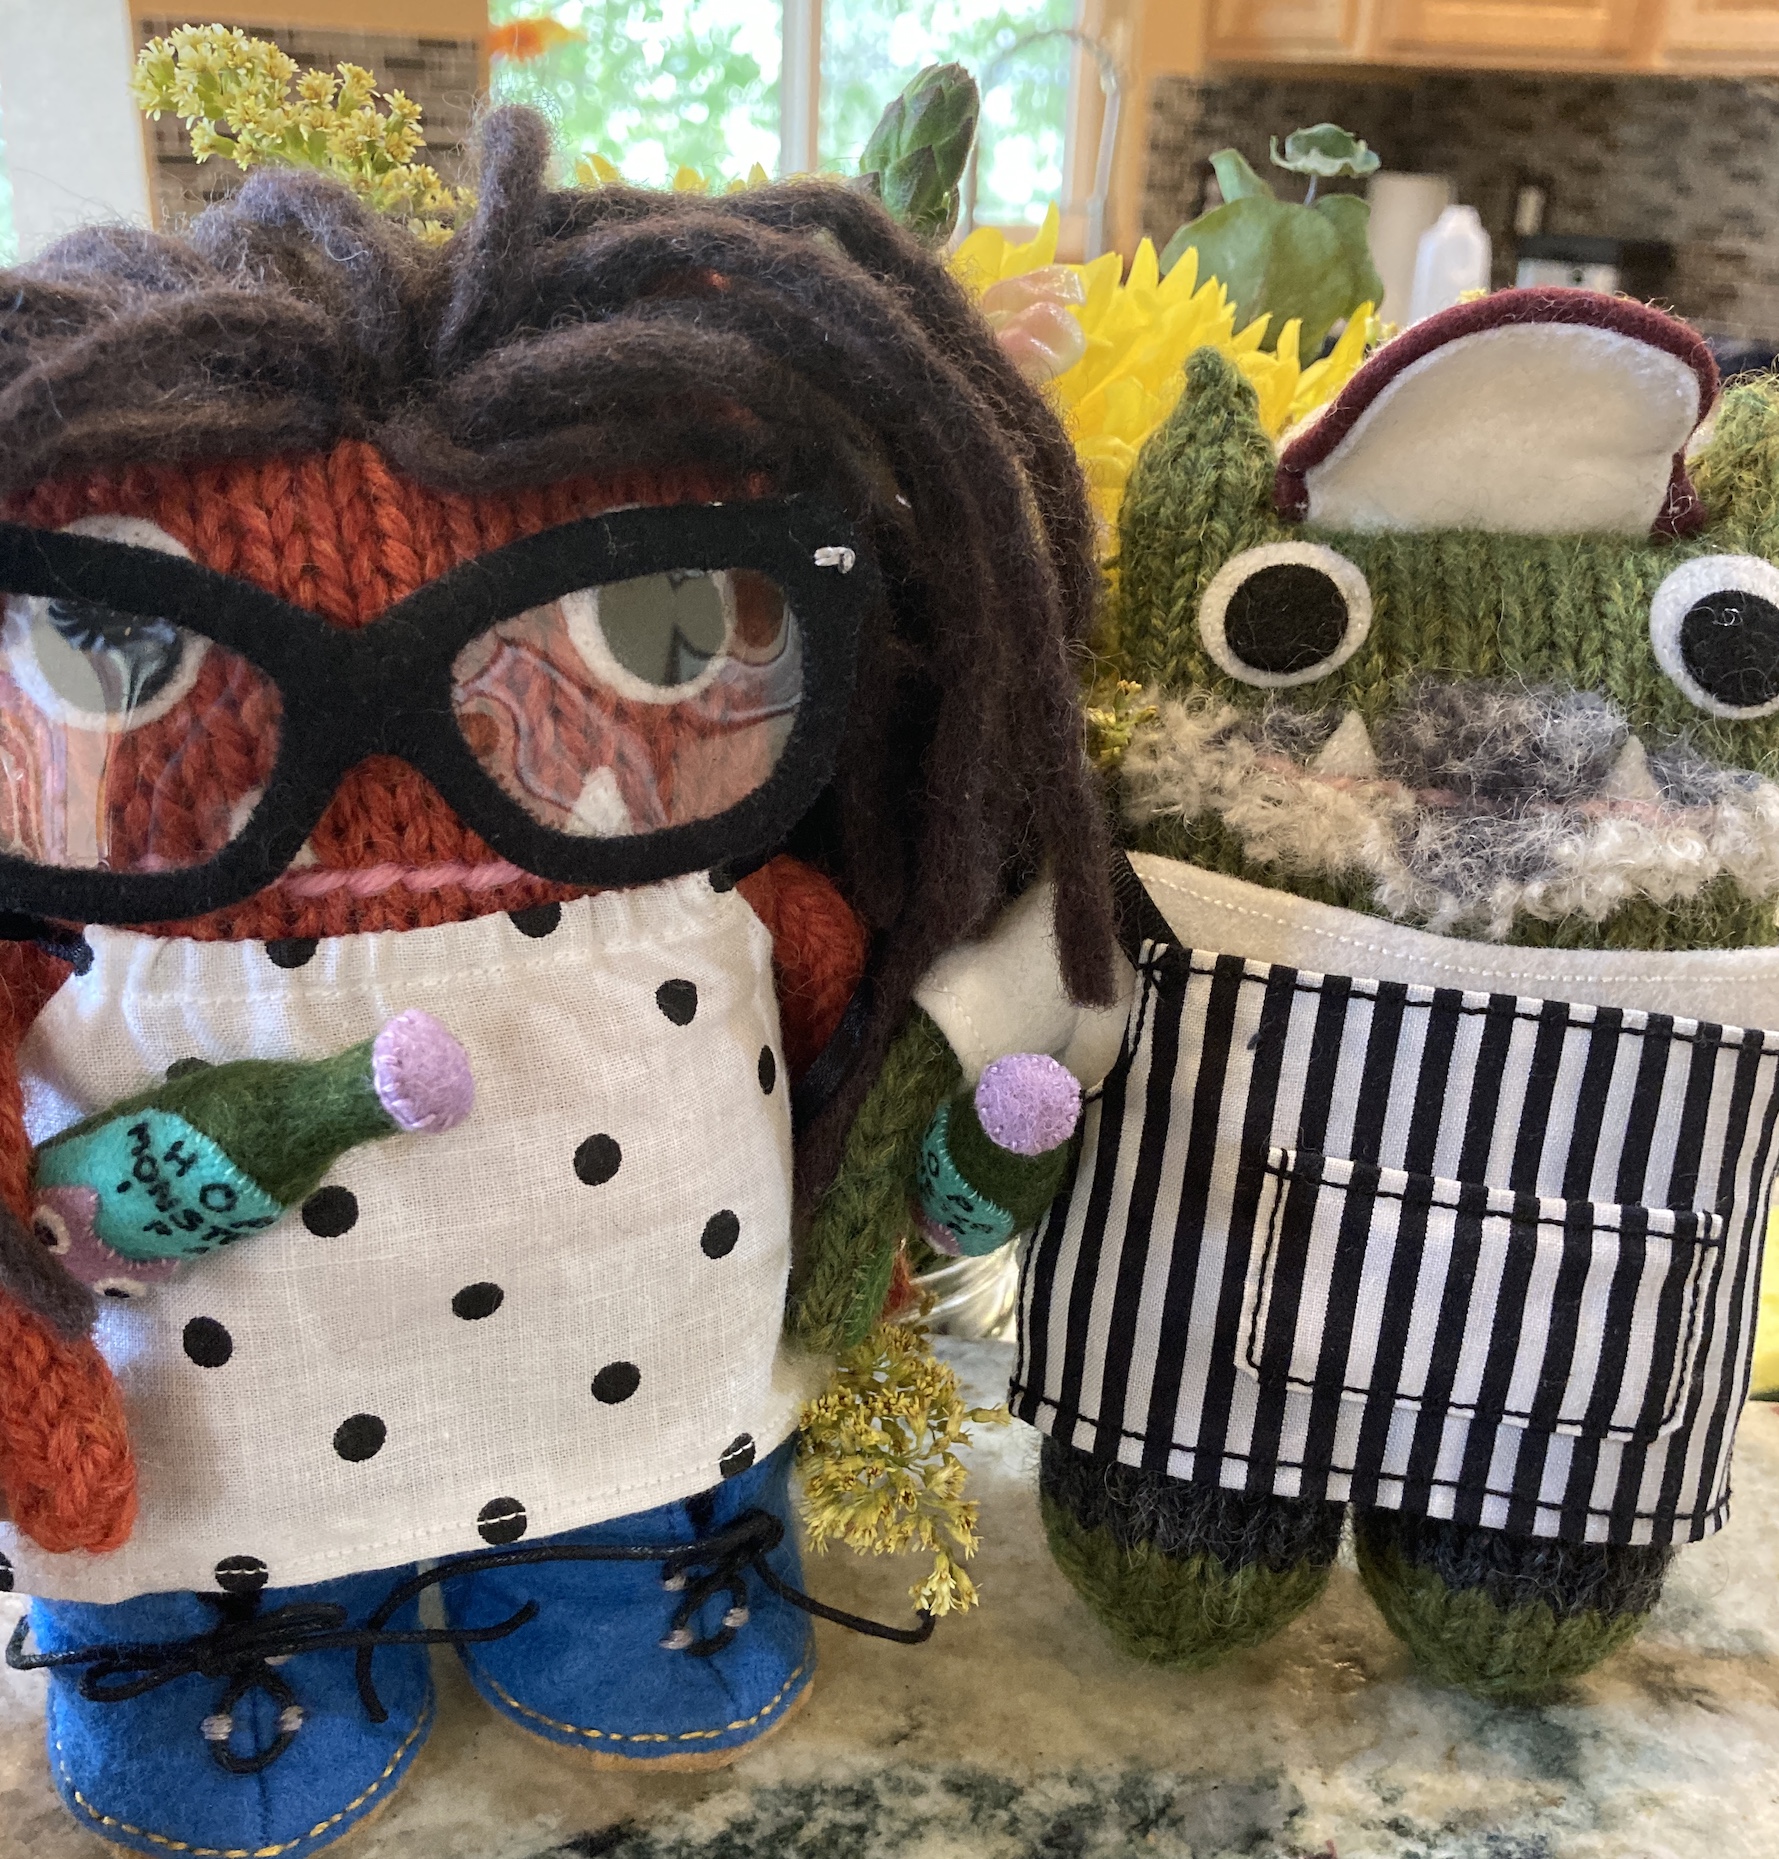
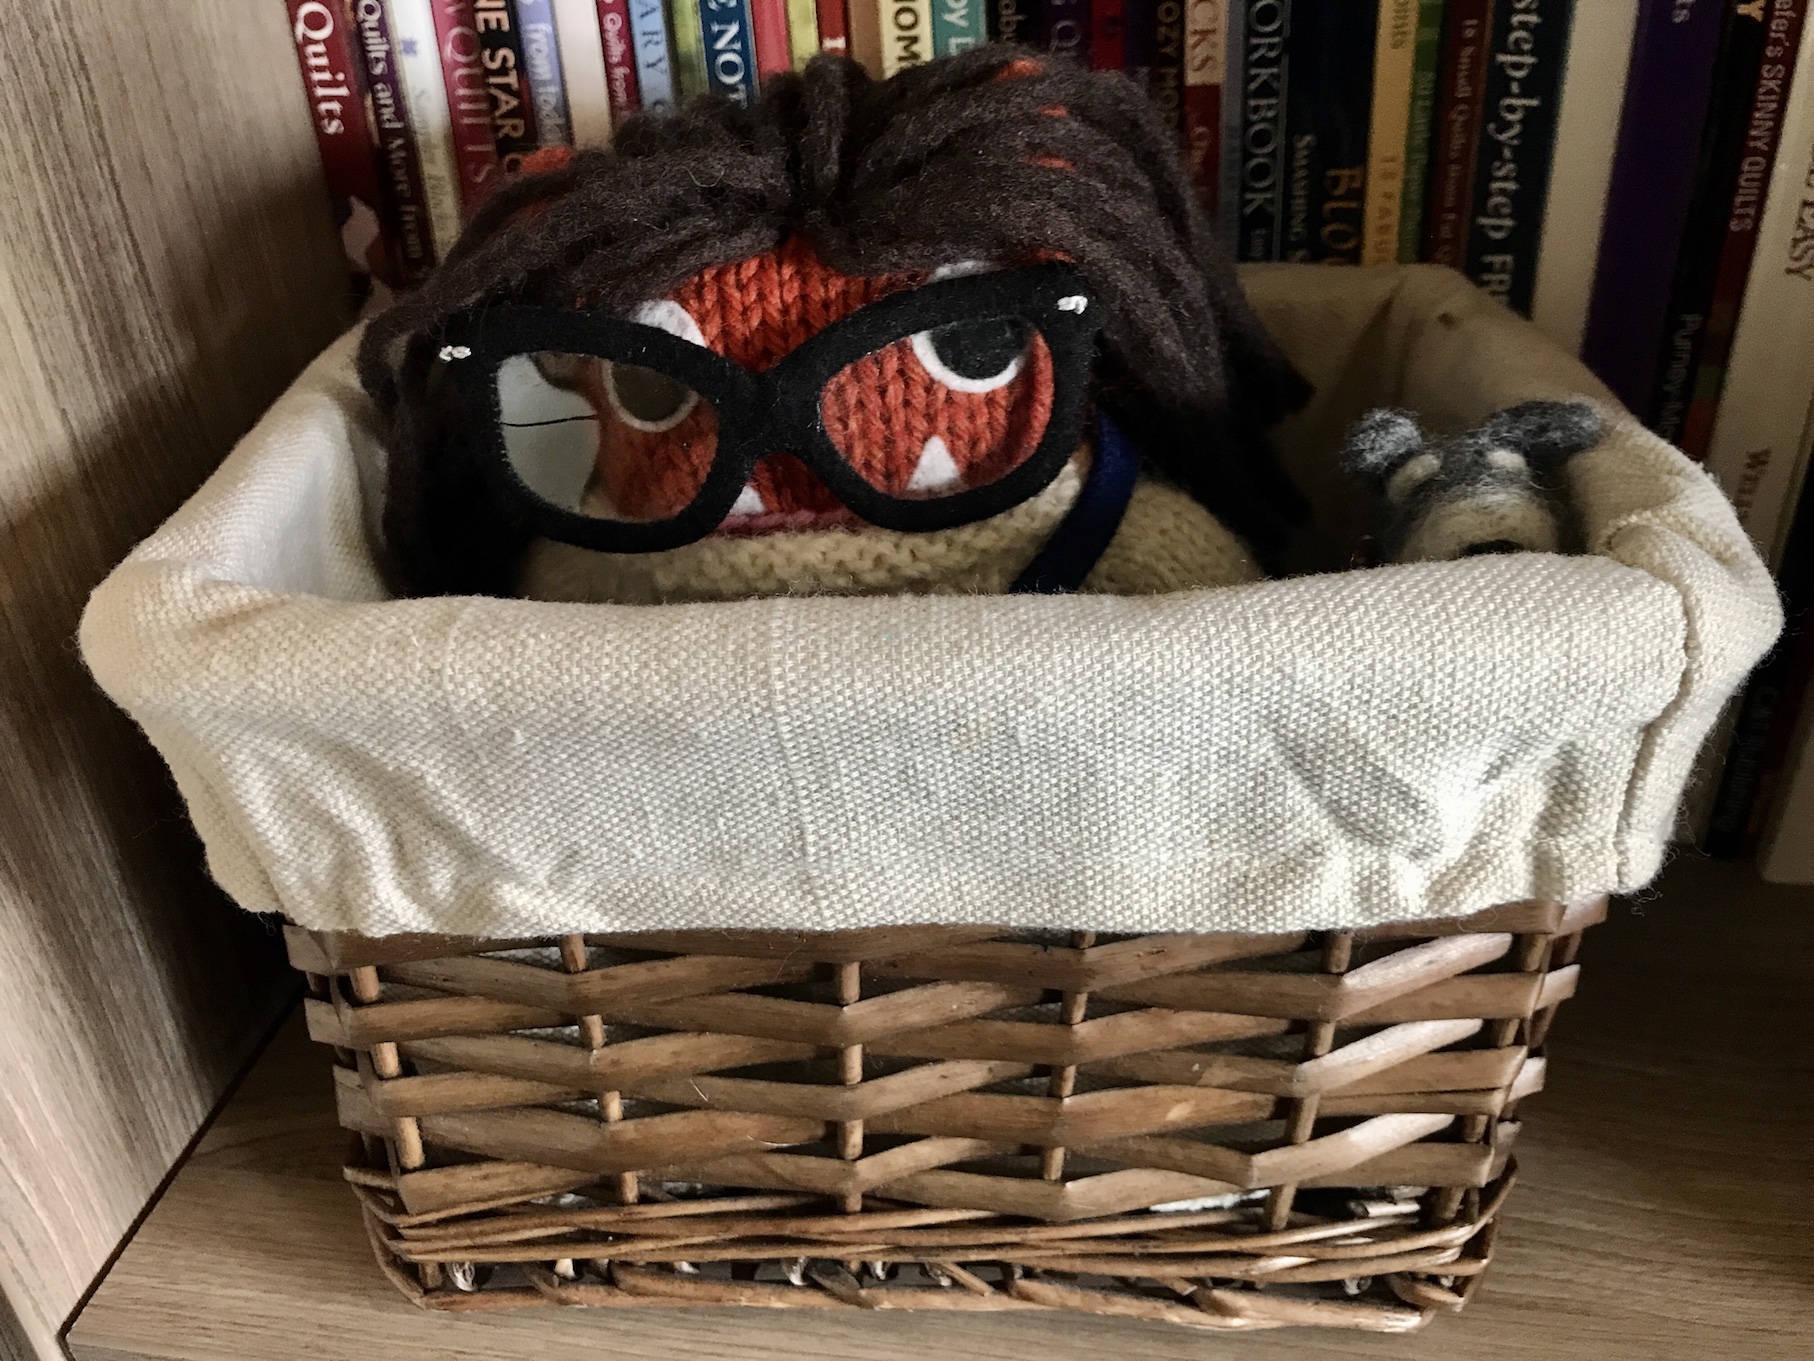
And finally, the tierneycreates Beastie (made by Helen @ Crawcraft Beasties) hangs out in my studio in her “apartment” box made by John.
The antique sewing machine music box in the “apartment” below was a thrift store find gifted to me by my stepson and his wife a couple years ago.
Thanks for stopping by for an updated studio tour and to see what I’ve collected from thrift shops for my studio!
Recently I mentioned in the postNew Use for the “Big Closet” , that I moved my fabric storage out of a closet and into my studio (so I could easily see what I have in my fabric stash and “shop at home”!). I thought I’d share the latest set up of my tierneycreates studio which is our former Master Bedroom that we turned into my studio in 2022 (see postA “New” Studio).
Here is the view when you first walk into the studio:
Here you can see my obsession with color and Aurifil thread (the color chart mounted on the wall is the Aurifil palette/catalogue):
If you are new to this blog and curious about that color wheel quilt I made, here is a blog post on it – The Colour Wheel Quilt is Done.
Here is my fat quarter and fabric scrap storage area:
Ironing station, cutting table and pegboard storage area:
Here is where I am storing my fabric, sorted by either designer or type (including solid colors, batik, etc.):
Here is my sewing table:
I probably should have turned on the light above for better lighting of the image but you get the general idea.
And here is the design wall:
Right now the room is carpeted, because it used to be a bedroom, and the plan in 2024 is to remove the carpet and install hardwood floors. I am also thinking of painting it a white or cream to brighten/improve light reflection.
A week or so ago my partner John and I came up with a crazy idea: We have a large master bedroom and only use about 1/2 of it (the other 1/2 I used for occasional yoga and daily stretches) – why don’t we switch my sewing/quilting studio to the master bedroom and we move our bedroom to a smaller guest bedroom down the hall?
Yes, we’d have to access the master bathroom through my studio but we could keep the closets the same as our clothes are inside the master bathroom in a walk in closet at one end. So all we’d have to do (well it is a BIG “ALL”) is move a couple rooms of furniture around…
THE OLD STUDIO (IN A SMALL BEDROOM)
First, here is what my OLD studio looked like in one of the smaller bedrooms upstairs in my house:
Here is a little video tour of my old studio I posted to Instagram last year. I uploaded it to YouTube:
As you can see I had it jammed packed with stuff, but I made it work!
So over the past 3 – 4 days, doing a little here and there and then doing some big moves, we got rooms switched around. It took another day to get art, etc. hung and finishing touches.
THE NEW STUDIO (IN THE FORMER MASTER BEDROOM)
Here is the reveal of my NEW master bedroom tierneycreates studio:
I really like the table placed in the alcove (where I used to do yoga) with the windows on three sides. During the day it gets a lot of natural light to craft by and I have a nice view of a wooded area.
As far as our “new” small master bedroom, everything is going well so far. All our furniture fit and it feels rather cozy.
I cannot wait to get back to working on projects in my new big studio space!
Tierney is on vacation and she’ll tell you about her trip when she gets back. So I am going to step in and be the guest blogger so she does not go too long without having a new post on her blog (I know, I know, I am so awesome for helping her!).
Oh in case you are new to this blog: my name is tierneycreates Beastie and I am a Monster, but the good kind of Monster. I was made by Helen of CrawCrafts Beasties in Dublin, Ireland. You can read my story at I’m A Monster!!!. You can also check out the other posts I’ve had to guest blog on (i.e. when the human Tierney falls off the blogging-wagon and I have to help) in the series of posts: Beastie Adventures.
A photo from last year of me writing a guest blog post
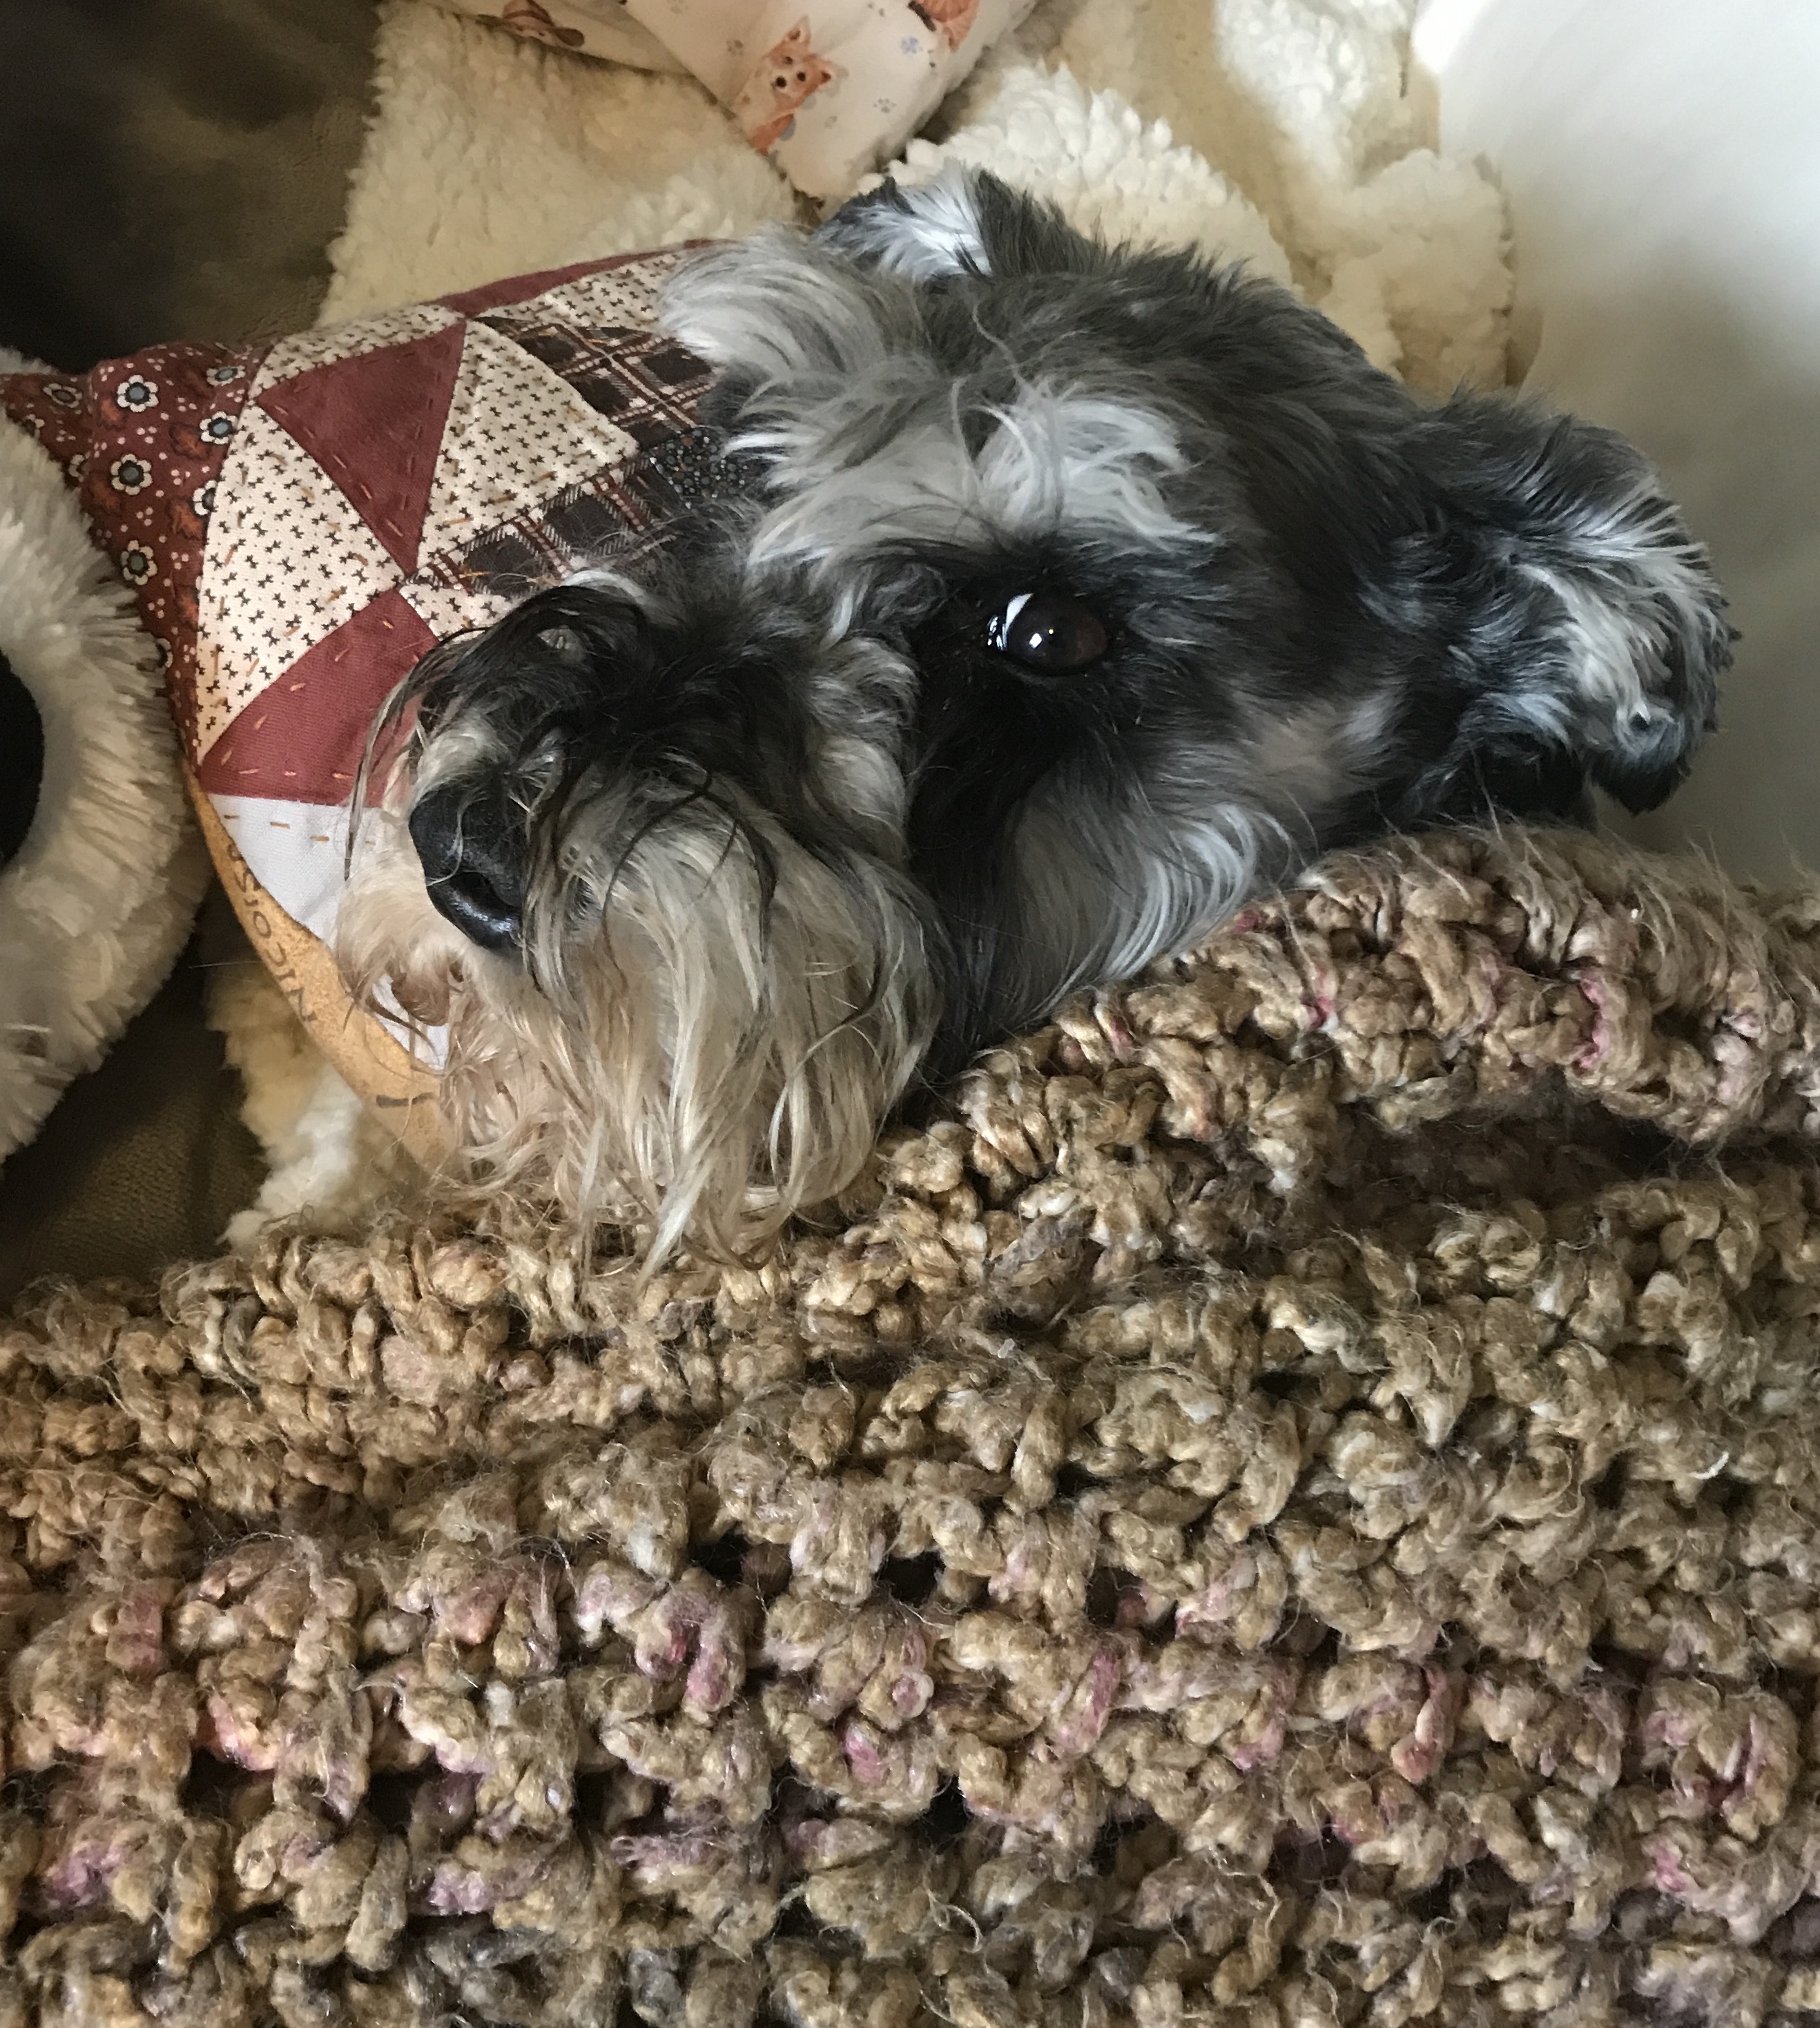
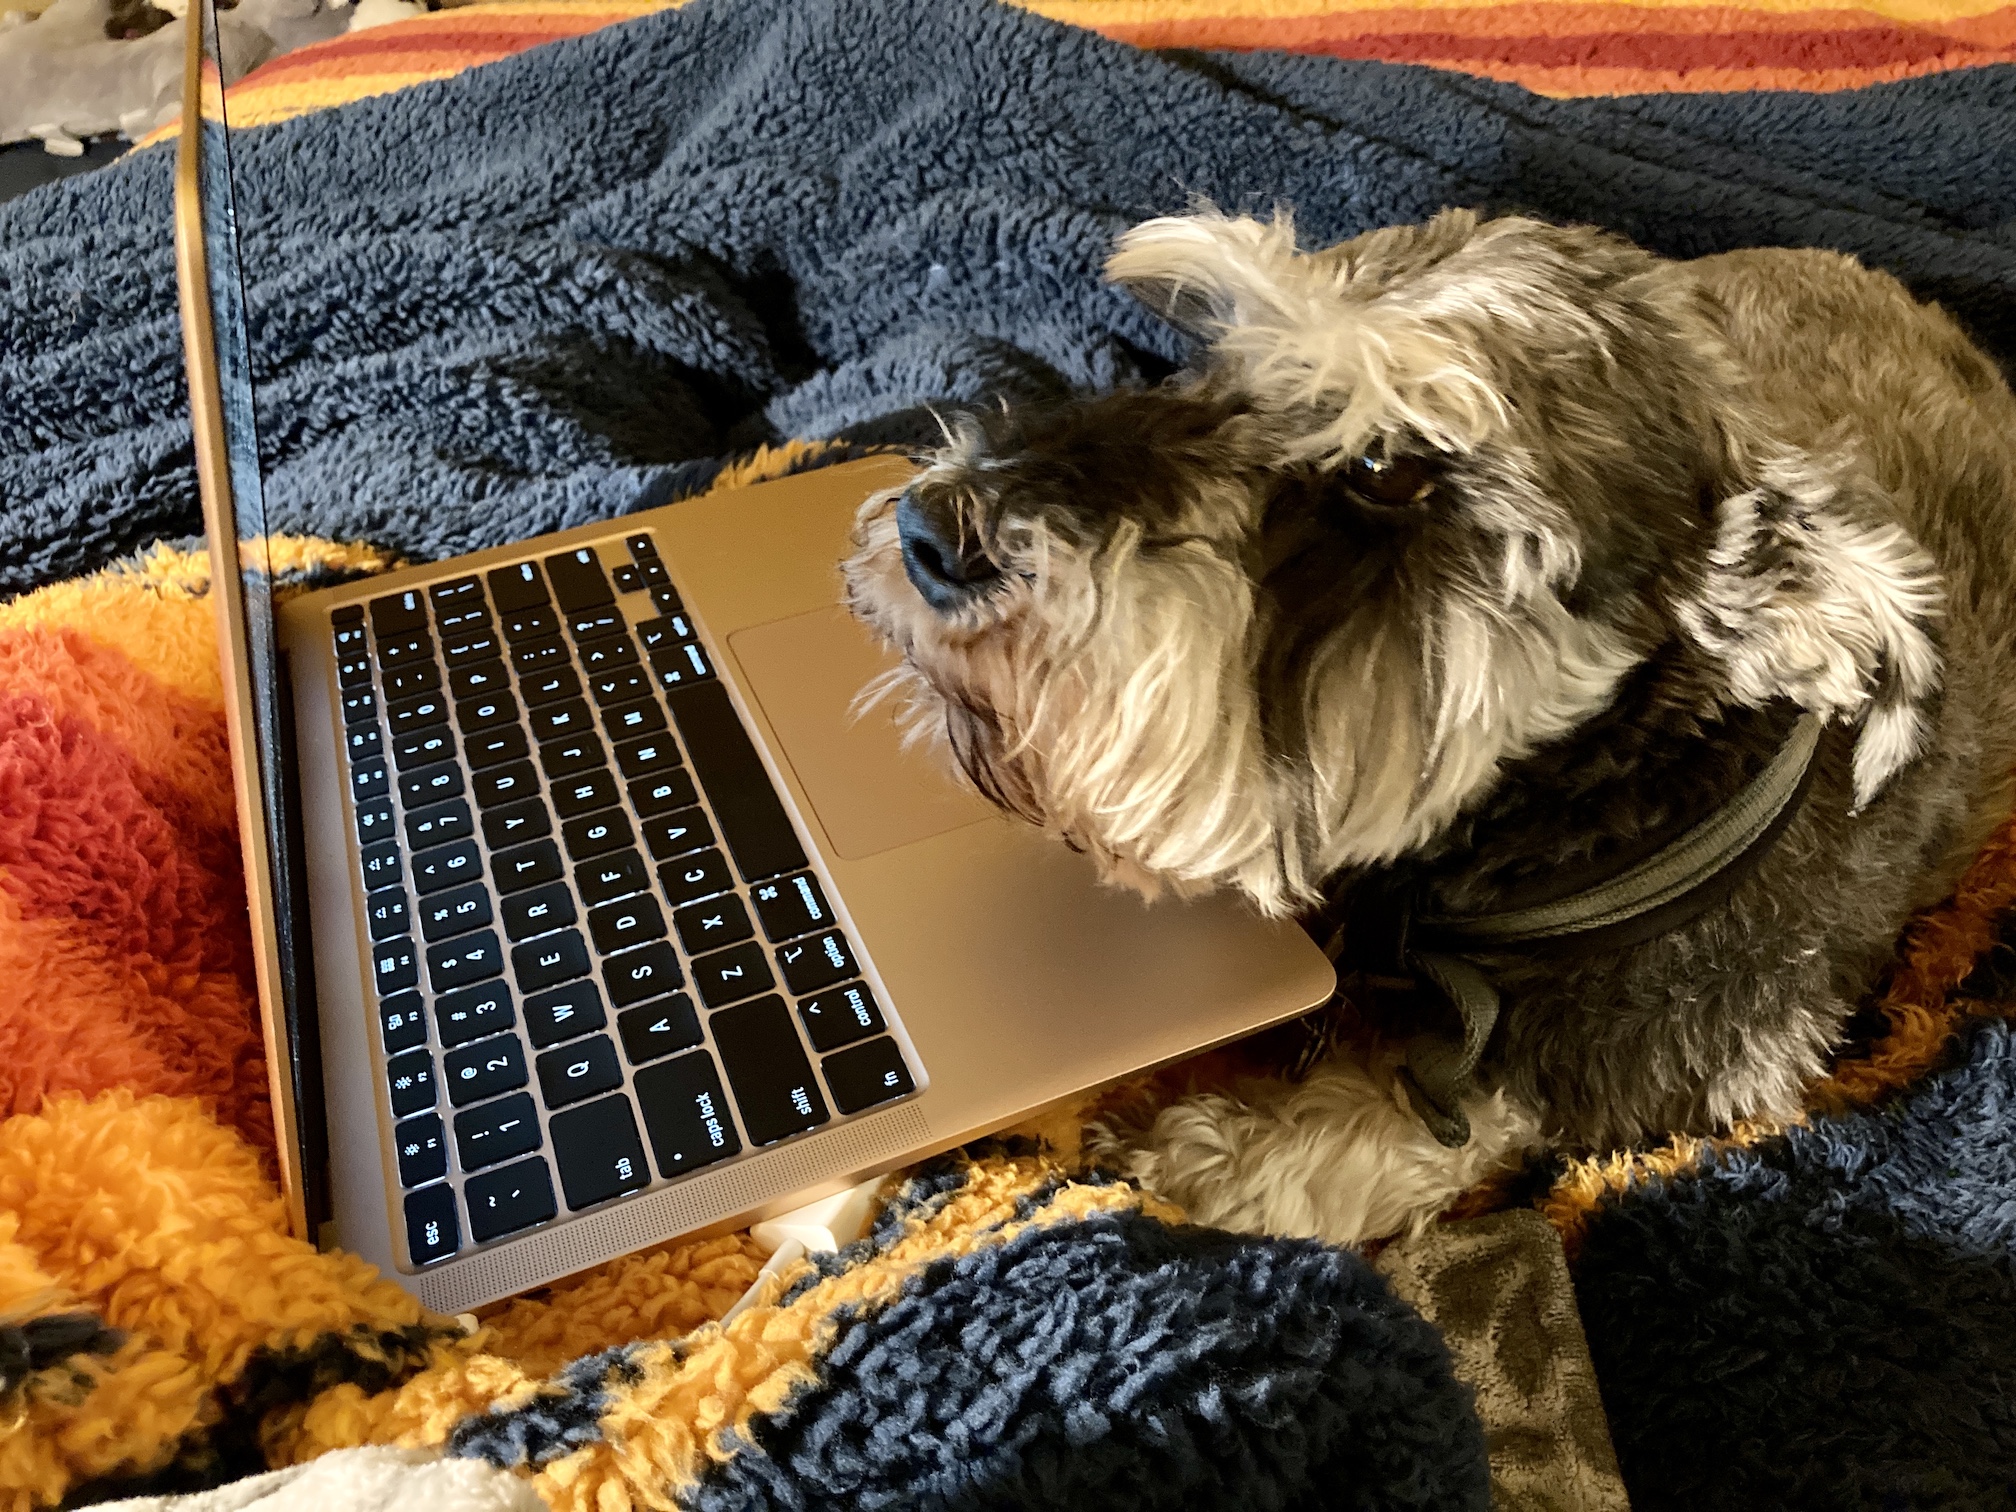
When I am not guest blogger posting, then Mike the Miniature Schnauzer has to guest blog post:
Someone else Tierney uses to do her work: Mike reviewing the draft of his guest post before posting…
Oh and now the subject of this post (which is not to just show how Tierney falls of the blogging wagon and we have to rescue her…) – I wanted to show you the recent updates to my home, which is also Tierney’s crafting studio.
Tierney’s partner John (human John, not to be confused with my Beastie fiancé “John Beastie”, see post Guest Blog Post: Mail Order Groom) has been busy in his Woodshop making things for her studio.
MY NEW “HIGH RISE“
Human John built Tierney a storage unit for her fat quarter collection and fabric scraps which she keeps in wine crates:
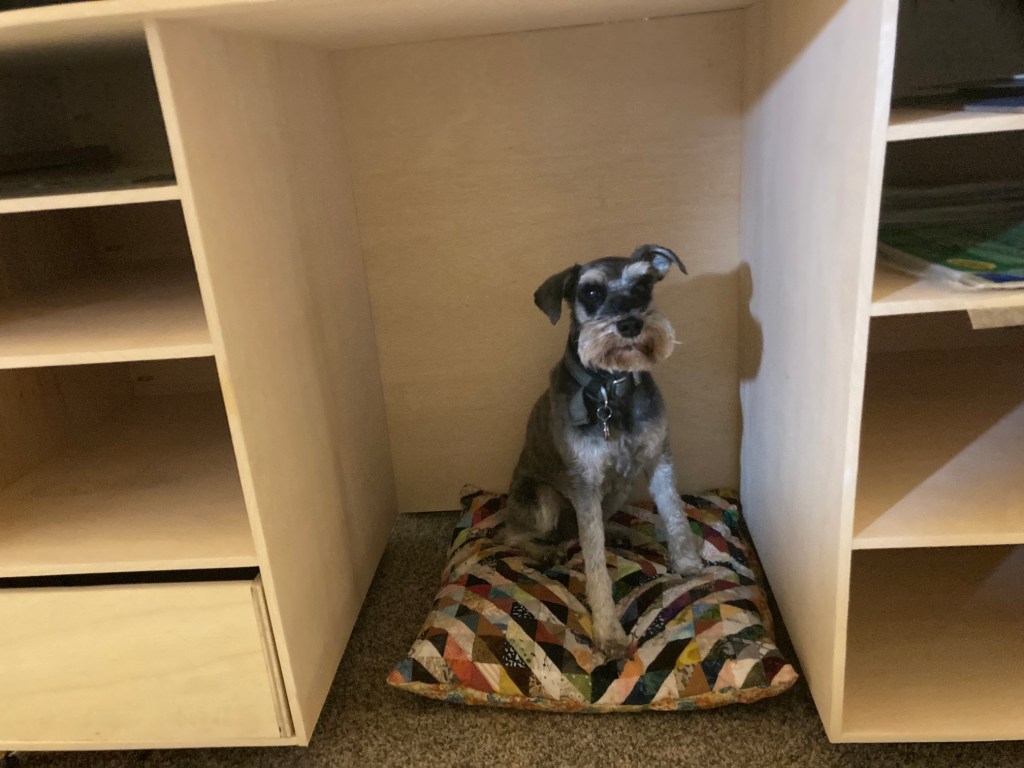
She’s also been known to store a Miniature Schnauzer in there:
THE TABLE
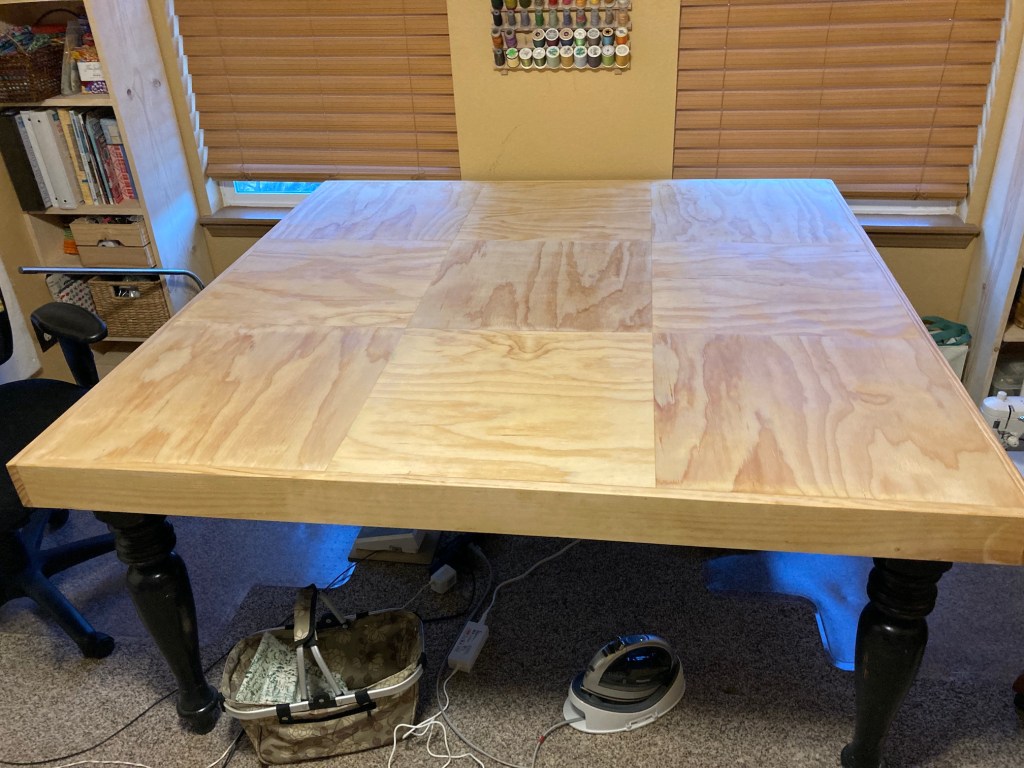
Last year from her local community board for free stuff, Tierney picked up a large black table to use for crafting. It was scuffed up but it worked:
Tierney was “making-do” with the table and covered up the scuffs with an old table cloth but John wanted her to have a decent looking table in her studio so he created a new tabletop for it! John created a pattern with wood like a “nine-patch” quilting block.
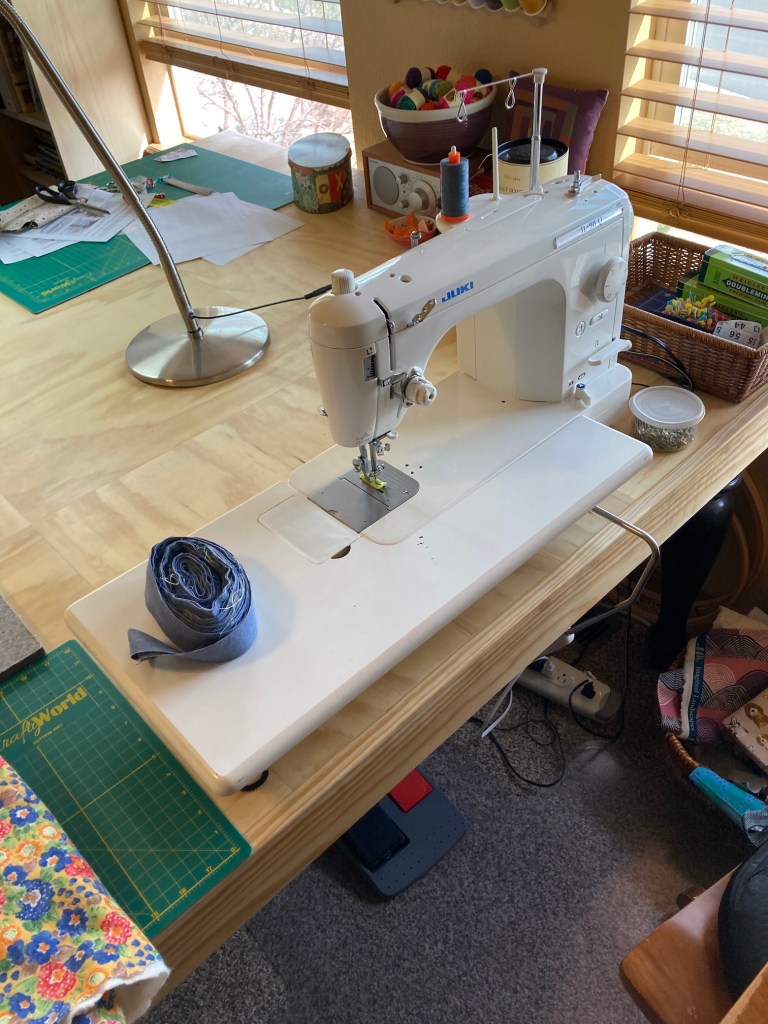
A month ago Tierney bought herself a used Juki sewing machine which is in the image above.
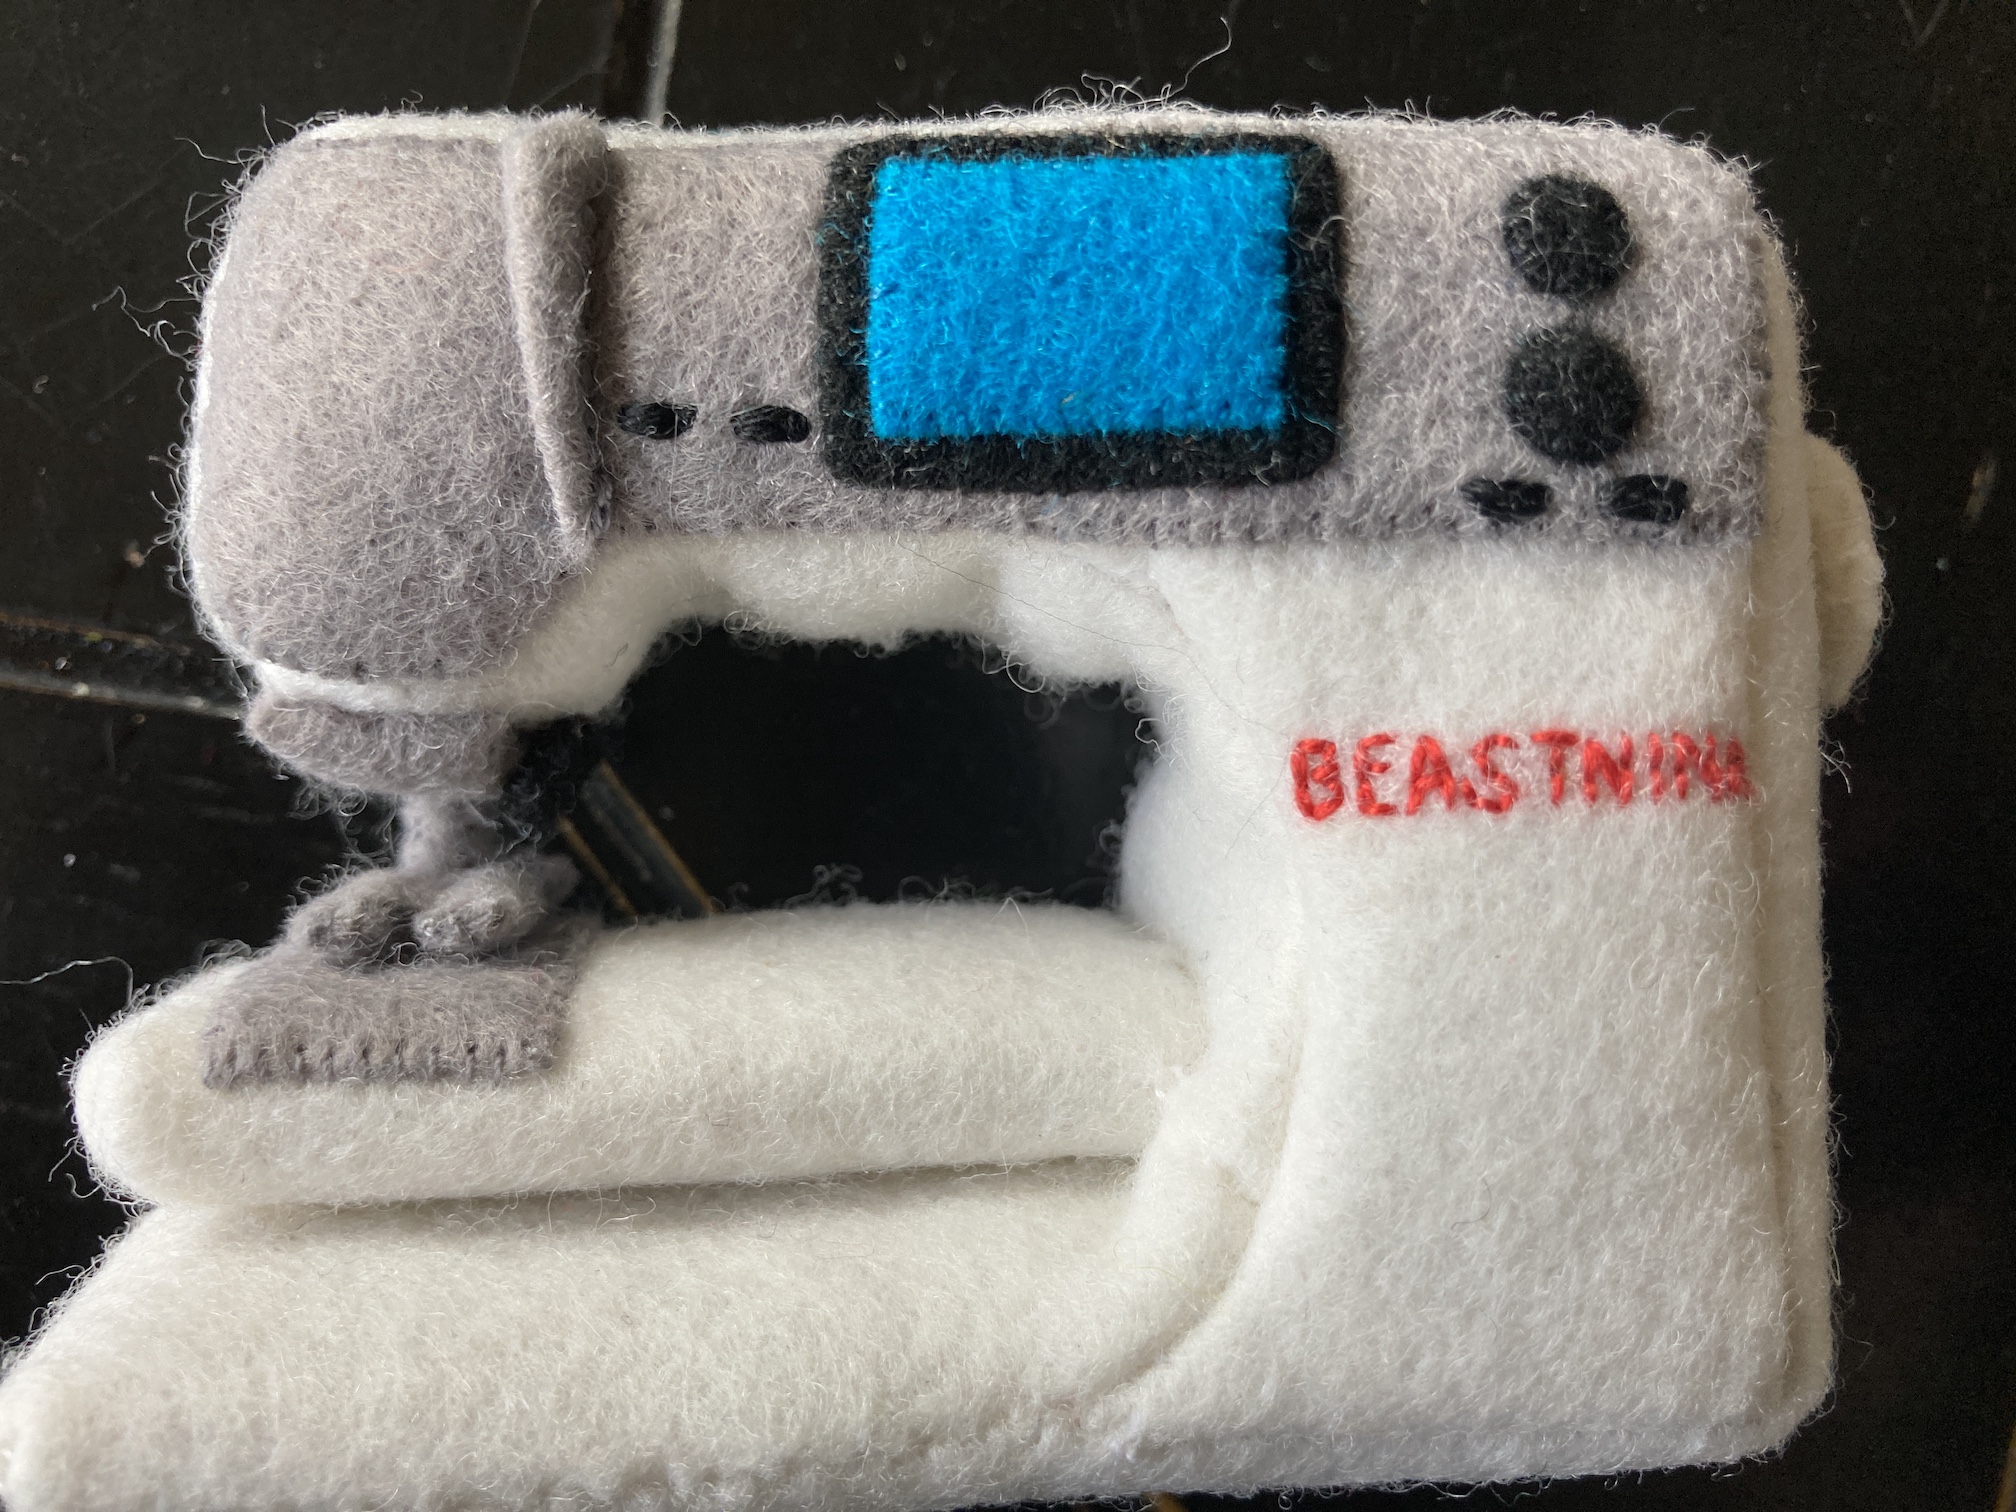
Alas, she did not buy ME another sewing machine, I have to just be happy with my Beastnina:
So those are the changes to my home, the tierneycreates studio!
Tierney will be back on the next post telling you about her trip and she might even catch up with reading her blogging buddies posts and responding to comments.
Until then, here is a sign she saw a couple months ago to give you some inspiration:
It’s been a while since I guest blogged. Hi there – it’s tierneycreates Beastie and I wanted to share some changes to my home (Tierney’s studio).
I’ve titled my post “From the Cutting Table…” because my dog Mikelet and I now live on the cutting table in Tierney’s studio:
In case you are new to this blog, here is a little background on me:
My name is tierneycreates Beastie and I am a Monster, but the good kind of Monster. I was made by Helen of CrawCrafts Beasties in Dublin, Ireland. You can read my story at I’m A Monster!!!. You can also check out the other posts I’ve had to guest blog on (i.e. when the human Tierney falls off the blogging-wagon and I have to help) in the series of posts: Beastie Adventures.
I like the cutting table, I have plenty of room and it is not too scary like it was when Tierney had me next to all those creepy giant schnauzers (see January 2020 post Guest Blogger: What the heck is going on here?)
Can you see the look of sheer terror in my eyes??!?!
Whew, glad those days are over! Oh you might wonder what became of my fiancé John Beastie (see post Guest Blog Post: Mail Order Groom), well he spends most of his time in John the Human’s office downstairs. Tierney and John Human feel it is best not to let a couple of Beasties spend too much time together as mischief is certain to happen! (Just wait until we get married, they’ll never keep us apart!!!)
Here we are in July 2020 celebrating our engagement
Oh I think I am getting off track on my post…
So yes my dog Mikelet and I spend most of our time on the cutting board in Tierney’s studio and we like it, though I have to keep an eye on Mikelet because sometimes he plays in the pincushion and I think that might be dangerous.
By the way my maker Helen of CrawCrafts Beasties made me my own sewing machine so I could help Tierney sew projects and once I figure out how to use it maybe I will have a guest post about my projects instead of Tierney’s!
Now what I was I originally planning to tell you? Beasties are easy distracted. Oh yes, I wanted to tell you about a recent change to my home the tierneycreates Studio.
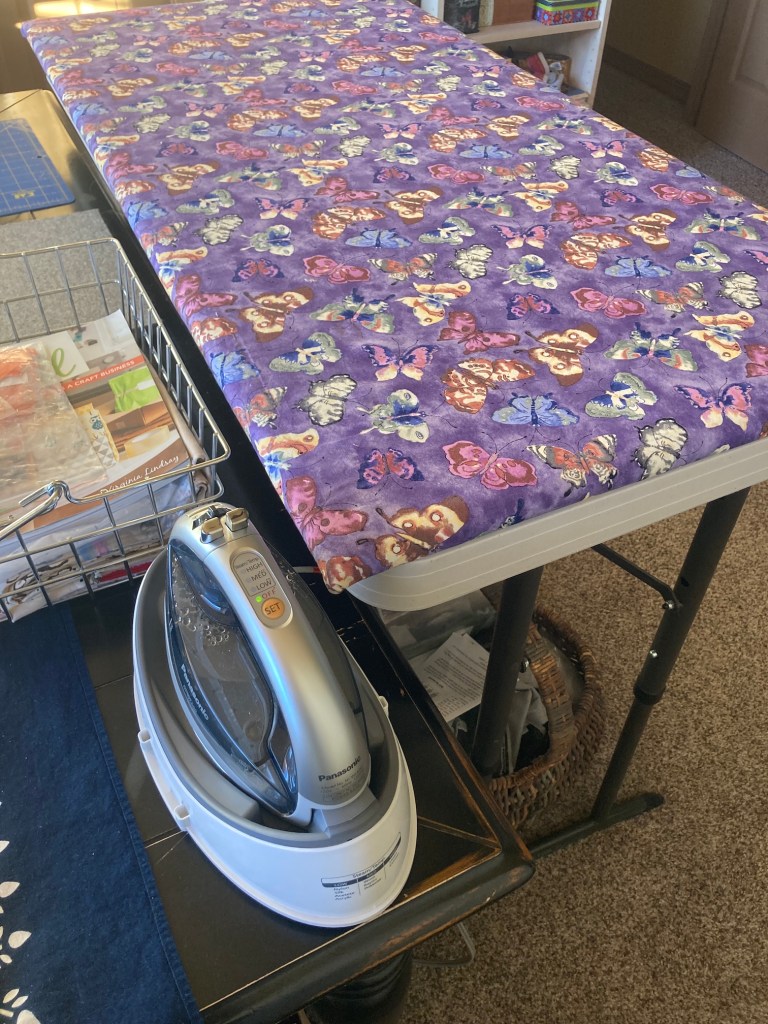
John, Human John not Beastie John, Tierney’s partner, recently made an ironing board table for the studio. Before the new ironing board table, Tierney was using a traditional ironing board and iron.
What started this change was for Christmas John got Tierney a cordless iron:
Perhaps you wanted to see a full image of the iron but isn’t the iron much cuter with me in front of it?!!?!?
Okay here is the iron:
Image from Amazon.com
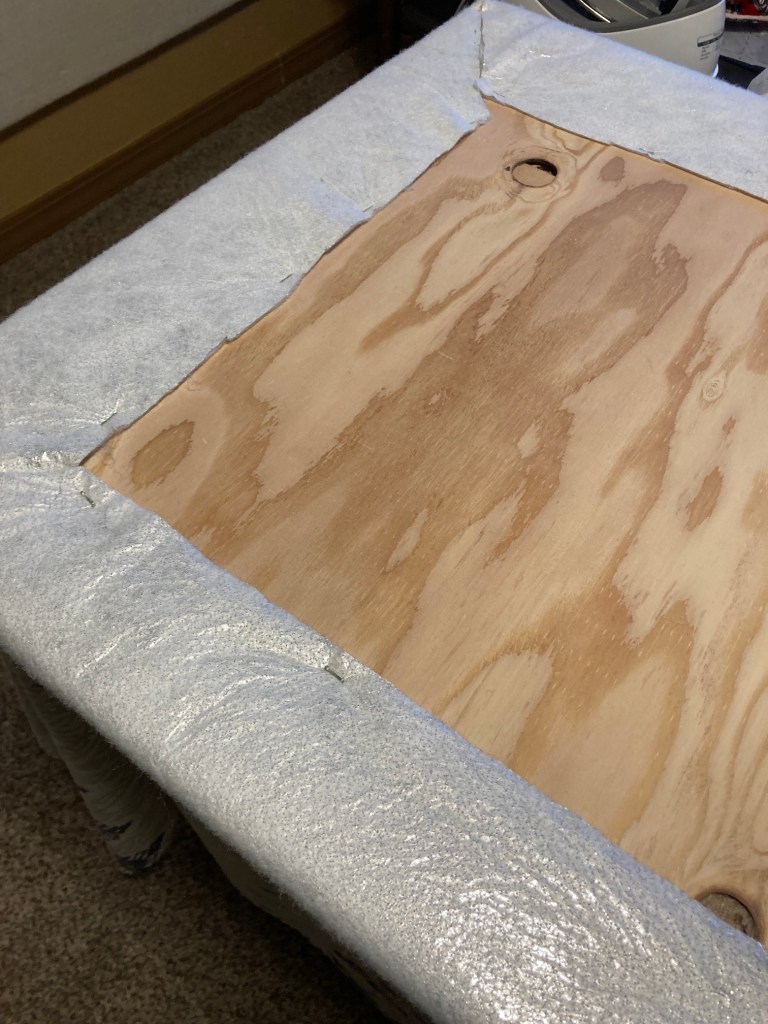
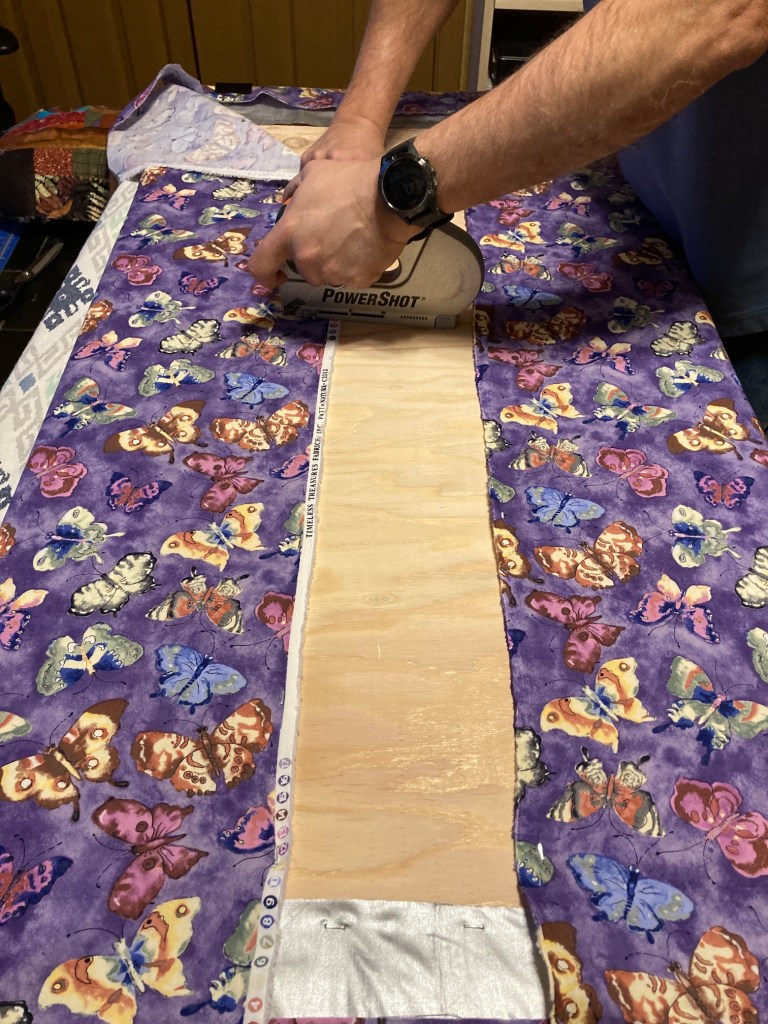
Now that Tierney had cordless iron she had more flexibility on where her iron could be located, so John (again I mean Human John as Beastie John could not have handled the tools involved which are bigger than him…) built her a 2 foot by 4 foot ironing table for her studio.
First John cut a piece of plywood the same size as the table base being used (an old counter height folding table). Then John and Tierney wrapped and stapled four (4) layers onto the plywood base:
Batting
Insul-Brite heat resistant batting
Heat resistant fabric (like the type used for old ironing board covers)
Cotton fabric
Tierney is really pleased with her new ironing table and she used it while making all those tote bags she talked about in her recent post (see post Tote, Tote, Tote Bags).
So that is the big change to the studio.
Somedays I get tired of the studio and miss the days when I used to go on adventures with Tierney. The pandemic has slowed down my adventures. Tierney promises that soon we will resume our adventures, I just need to be patient.
For now Mikelet and I will wistfully stare out the studio window…
Postscript
I am going to close this guest post by sharing a secret: Tierney is sort of a slob in her studio.
Look at these mini Toblerone candy bar wrappers she left on the cutting table!
I caught Mikelet sniffing them, luckily there was no candy in them as chocolate is bad for dogs.
I hope she will be more respectful of my space and clean up her wrappers!
Just a quick(ish) post as I try to catch up on reading all my dear blogging buddies’ posts that happened while I was away from blogging for a little while.
This is an unexpected continuation of my previous post – In the Studio.
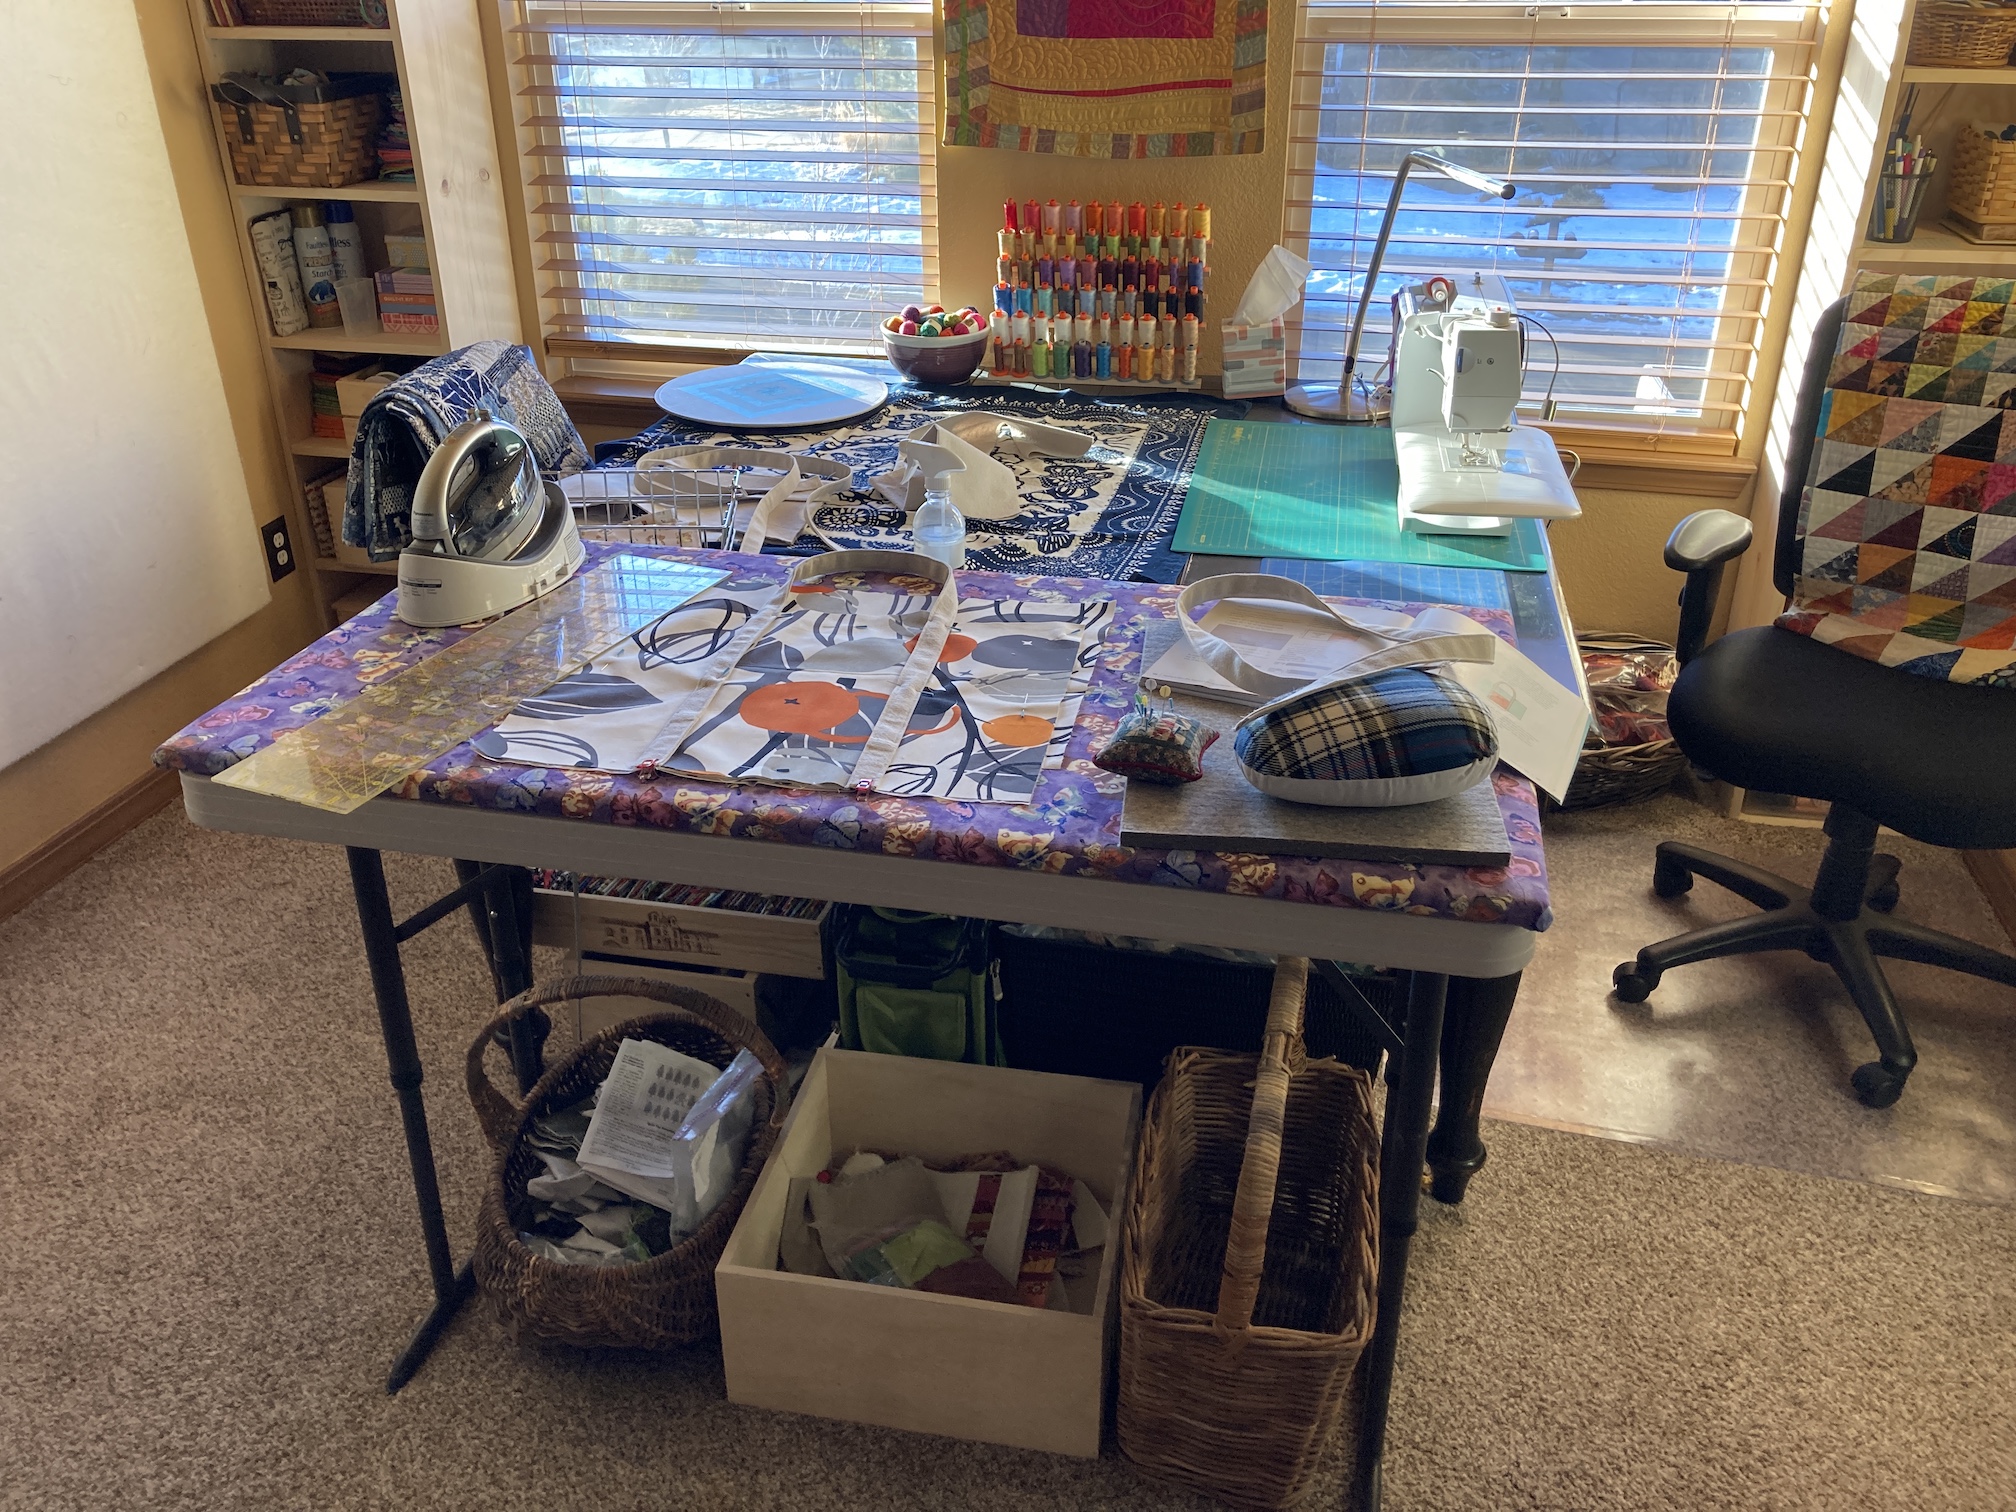
“Mr. Woodworker” (my new nickname for my partner John) is a little obsessed with getting my sewing studio in shape for maximum-creativity-efficiency (or he is just looking for more pandemic projects and we continue to primarily be stuck at home).
He and I came up with the idea of adding some shelving on each end of my new floating shelf he just installed:
Before the additional shelves
Here are the new shelves (just installed yesterday) – one on each side of the window in my sewing studio!
I cannot begin to tell you how pleased I am with my two new bookcases/shelving on each end of the new floating shelf. These bookcases are things I did not even realize I needed until we spontaneously came up with the idea and Mr. Woodworker whipped them up!
I now feel really organized!
What does Mr. Woodworker have planned next for my sewing studio? Well he wants to build me a matching cutting table, a sewing table and one additional bookshelf area. I asked him to hold off for now as I need to focus on using my studio to keep making stuff for my tierneycreates Etsy shop I hope to reopen in January 2021.
Postscript
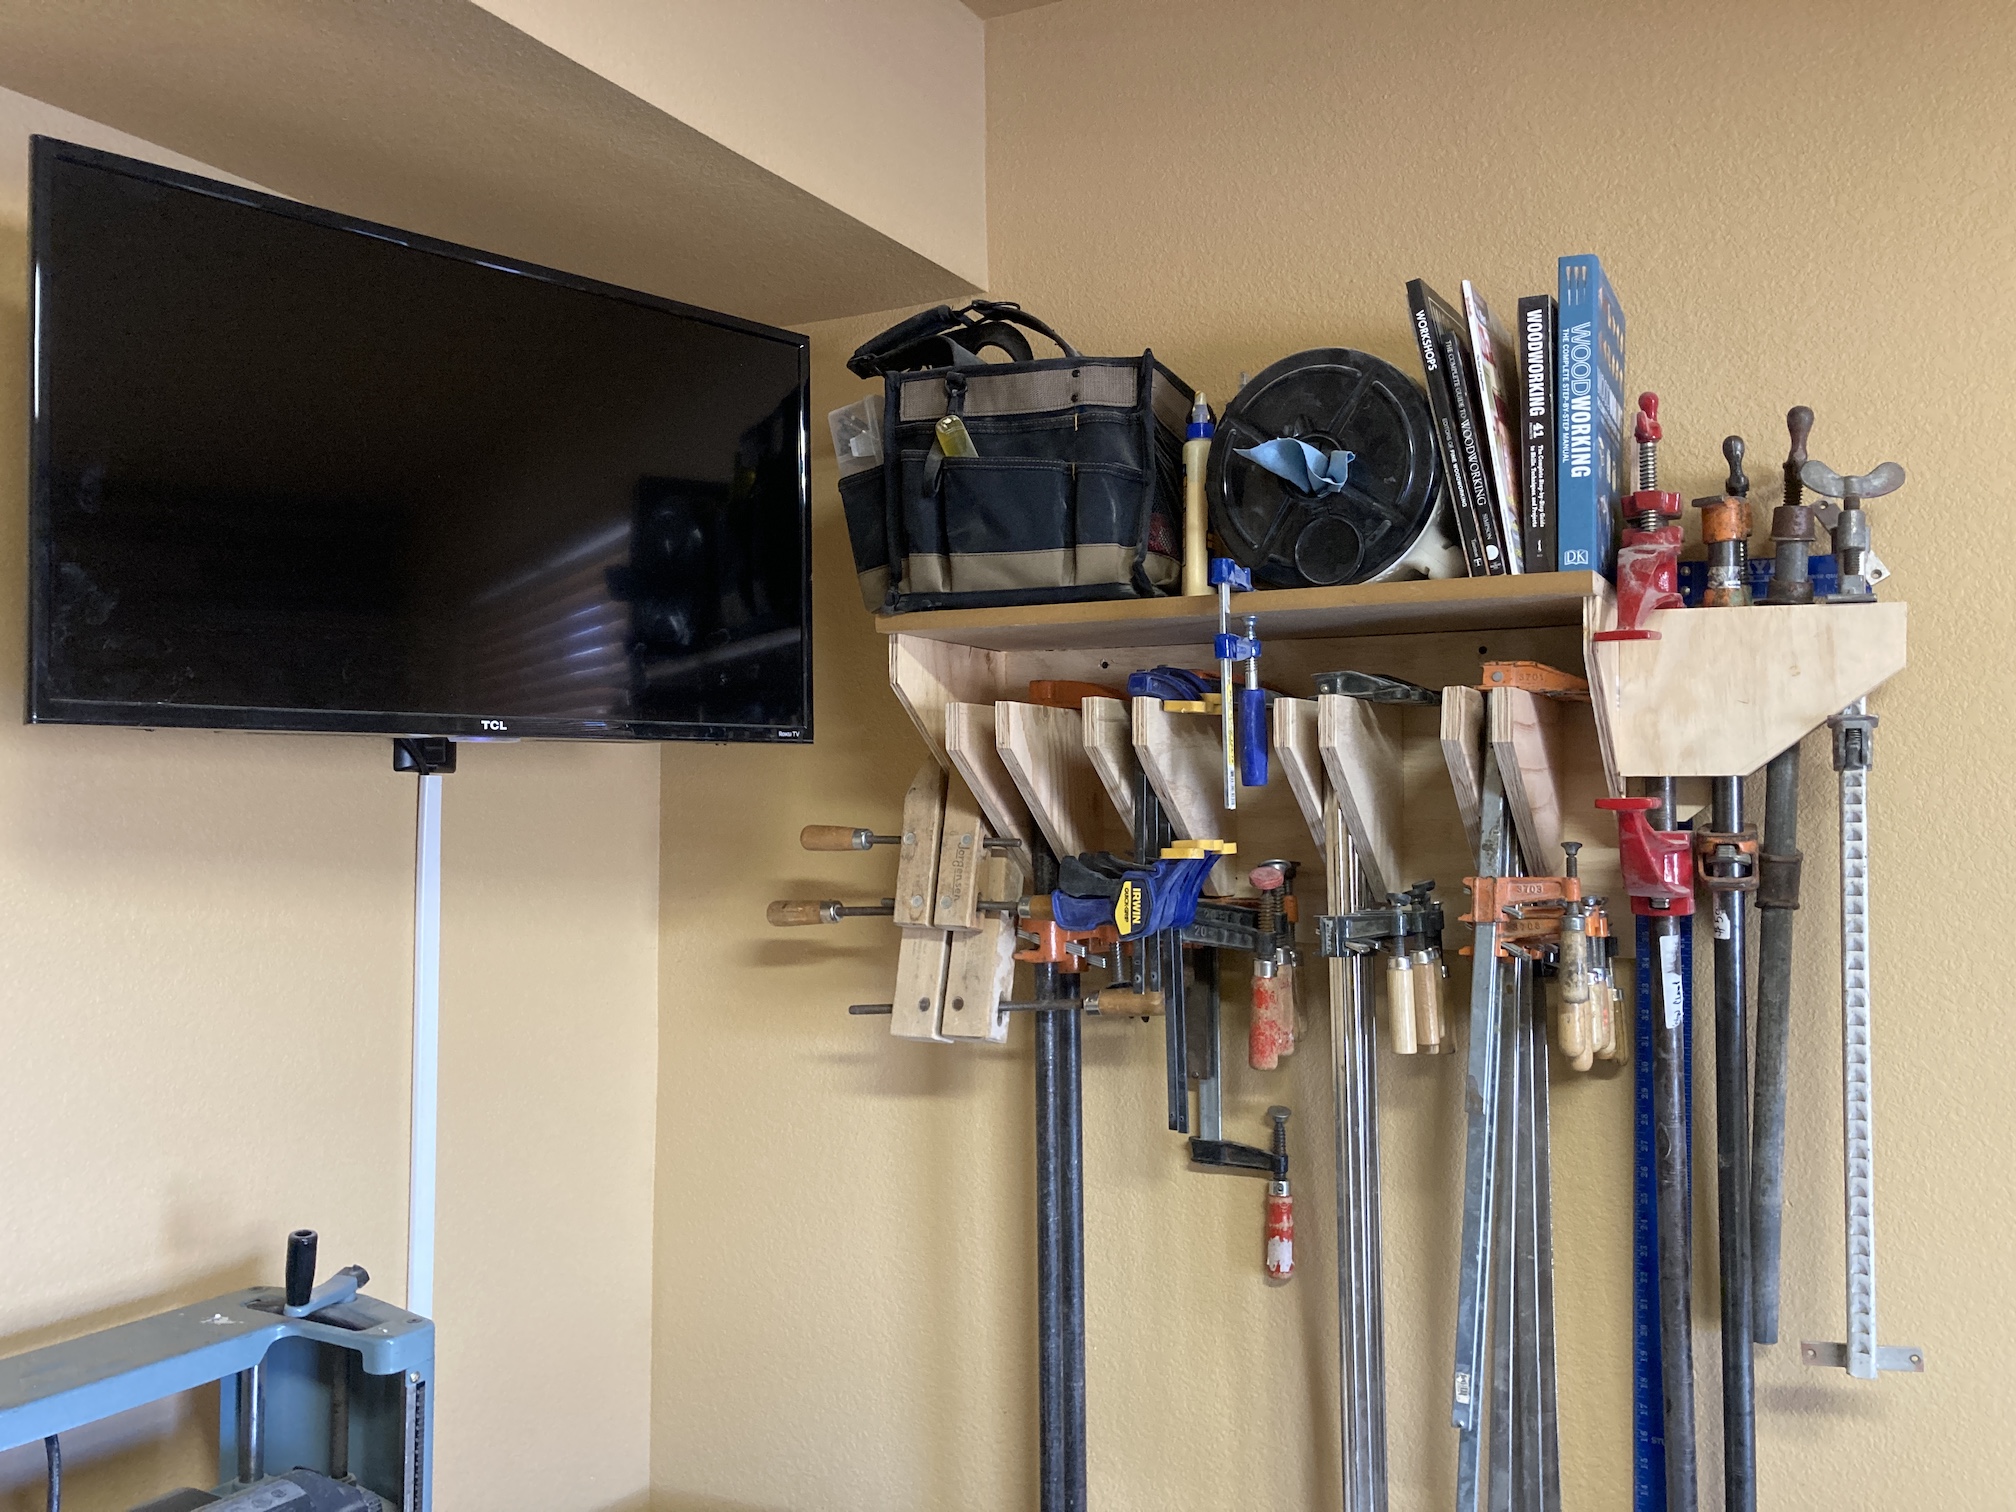
Mr. Woodworker has been working on his own studio too, which is located in the basement. He built himself a clamp stand for his woodworking clamps:
Functional – yes. As cute as my sewing studio area – no – ha!
I love Crafter’s/Artist’s Studio tours! I love to see where people create. If I happen upon a studio tour blog post then it’s time to get a cup of tea and settle back and enjoy!
I have a couple books in my collection of studio tours/ideas and I occasionally pick up the latest issue of the magazine – Where Women Create.
So I thought I’d share an update to the post Guest Blogger: tierneycreates’ “New” Studio Tour, and share some photos of the latest version of my tierneycreates studio (aka back bedroom) in case you like studio tours as much as I do!
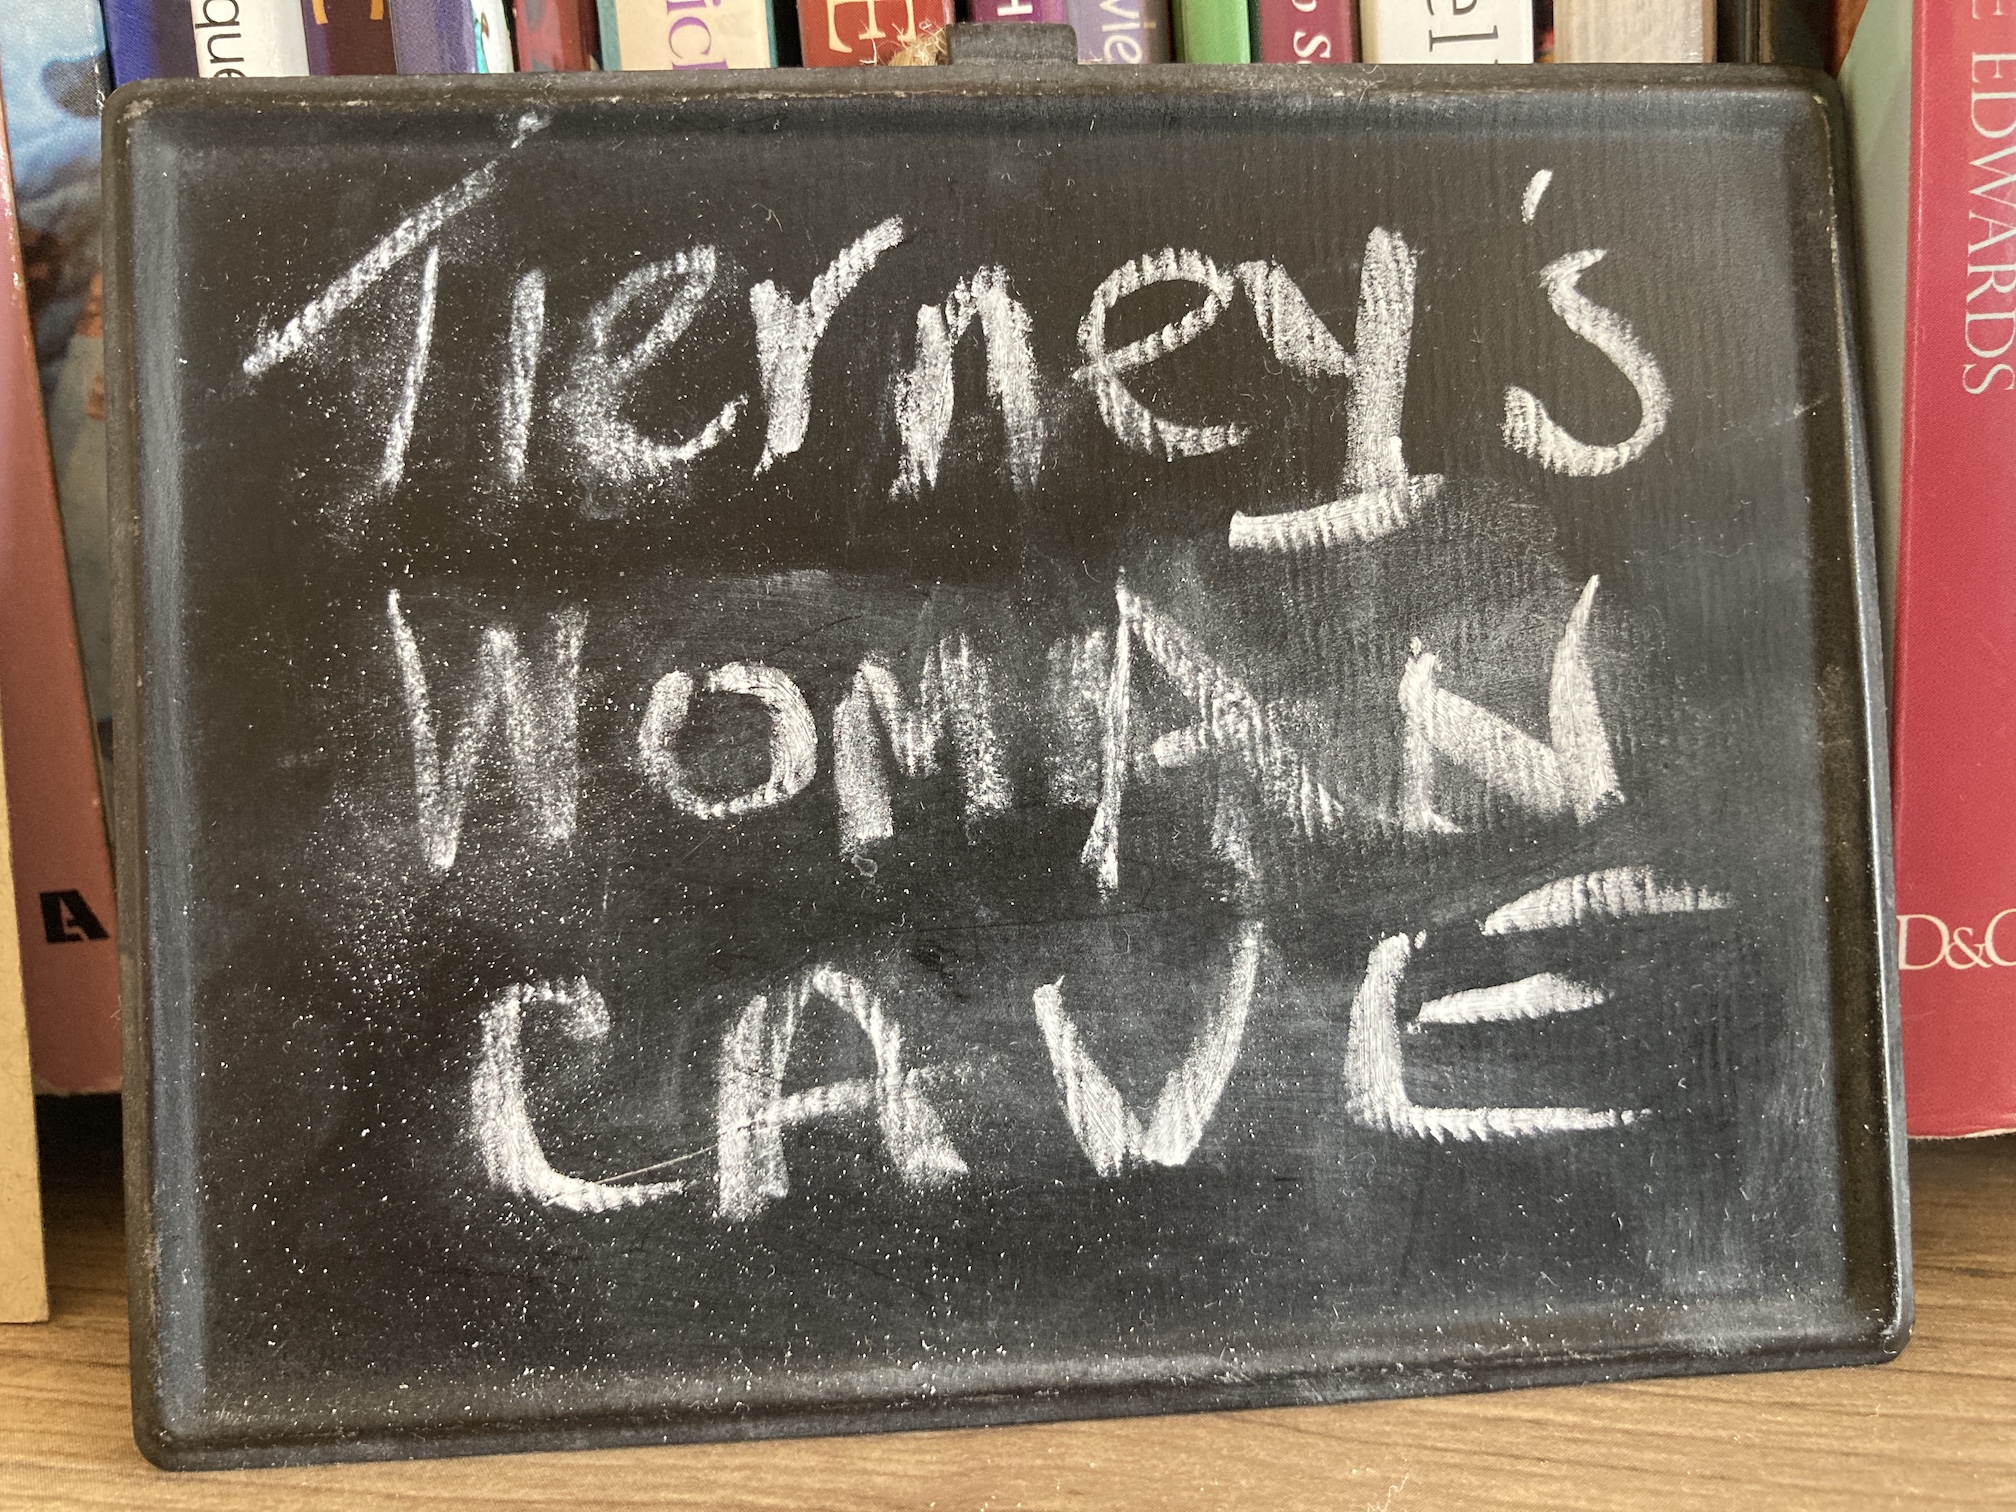
The Studio Needed An Official Name
I decided to name it “Tierney’s Woman Cave”!
New Layout
I changed the layout of the table I have on risers that serves as my cutting table. This is the table I got for free from my community’s for sale/for free online boards.
Before:
After (gave the Eurolounger next to the window to the pre-teen next door for her room remodel):
I had a feeling when I first re-did my studio after moving back into it after we decided in the early COVID days not to sell the house and to stay put (see post Perspective), that I would make tweaks to the layout as I used the studio and got a sense of what worked and what could be better.
I shifted the iron board and re-did the area on top of the bookcases in the room. I also added in additional storage drawers in the cubby bookcases.
New Closet
One of the biggest changes is that my partner John removed the original wire shelf and built me nice shelves in the closet. Previously I had the original wire shelf where clothes would have hung with hanging wire shelves added.
Before: After:
I love my new closet and had so much fun organizing it!
Tierneycreates Beastie’s New Home
I relocated the Tierneycreates Beastie from a basket to the top of a bookcase next to a delicious basket of fabric string scraps (well delicious to me):
Project That is Sort of In Progress
I am will share more on this project in a future post in my series What’s on the Design Wall, but one of my quilting friends gave me a project she decided to give up on after taking a class. Right now I am sorting out the pieces she has sewn together, the pieces she has cut out, the leftover fabric, the pattern and the templates.
I am also still working on machine quilting my piece All the Trimmings which I last discussed in the post Update on “All the Trimmings”. I had to take it off my sewing machine to roll the section I completed quilting to make room in the machine:
I am really enjoying my Tierney’s Woman Cave, it is my “happy place”!
Postscript
A quick follow up to the post Proud of My Maker (Guest Blogger Post) in which the guest blogger, Tierneycreates Beastie mentions that I lost her t-shirt during packing for my move that did not happen.
Well her t-shirt has been found!
Turns out I had shoved it into this antique box when I was packing up:
I originally put the box in my cubby bookcase without even checking the contents, but took a closer look the other day.
So now she has her t-shirt for the warmer weather instead of having to wear her sweater all the time!
As Tierney promised in her previous post Perspective, I am going to be your guest blogger for this post and give you a tour of my “new” home, which is also Tierney’s “new” studio.
Mikelet and I in our cozy basket where we hang out in the “new” studio
But first, in case you are new to this blog, my name is tierneycreates Beastie and I am a Monster, but the good kind of Monster. You can read my story at I’m A Monster!!!. You can also check out the other posts I’ve had to guest blog on (i.e. when Tierney fell off the blogging-wagon) in the series of posts: Beastie Adventures.
Here is what my dog Mikelet and I look like outside our basket (before we were homebound…):
We were created by the very, very, very talented Helen of Crawcrafts Beasties in Dublin, Ireland.
Here I am working from my makeshift desk to bring you this guest blog post:
Well enough about me (even though I am very interesting) and let’s get to the tour of Tierney’s “new” studio.
Oh – first I should address why I keep putting the word “new” in quotes. It’s because, as she shared in her previous post, she did not move into the new house she and John were going to buy. Instead they decided to stay at their current house which was pretty much completely packed up except for basic items to stage the house for sale and to live day to day. Her studio had been painted and converted into a bedroom:
So when they decided not to buy the new house/not to move, Tierney had to unpack her studio and in unpacking her studio, she decided to reimagine the layout.
So she has sort of created a “new” studio!
tierneycreates Studio Tour
Tierney decided to first bring in the IKEA bookcases she had previously in her home office (she has been a full-time telecommuter for the past 14 years, before I was even a ball of yarn…). From there she figured out with her partner John on the best way to layout the room.
Over the next several days she unpacked her boxes (which seemed like they would never end), hung up some art and quilts on the studio wall and found a place for the large design wall her partner John built her.
Here are photos of the completed studio from various angles:
So Tierney is ready to create (she can be tierneycreates again) in her new studio! She is so happy to have her sewing machine unpacked!
These two topics – Oh, Scrap, Part II and New “Studio” Tour, were going to be two different posts but I decided to combine them into one post since they are sort of tied together.
I’ve been getting settled into my new apartment in the greater Denver metro area and I guess I’ve completed my series of posts “Colorado Bound” as now I am in Colorado!
I’ve never lived alone in my entire life, so it has been a huge transition now living alone, but I am trying to embrace it and enjoy that I can set up my apartment however I desire.
Those of you who’ve followed my blog for a long time (some of you for over 5+ years) might remember what my craft/quilt studio area looked like in my former Central Oregon home (which by the way has sold and is now someone else’s home). It was in a small back bedroom in my three-bedroom home, but it worked for me.
Now living in a two-bedroom apartment my best choice for a studio area was to turn my second bedroom into a guest room/studio area. I will give a little tour of that new space in this post, but first I want to share a follow up to post from January 2018 – “Oh Scrap“.
Oh Scrap, Part II
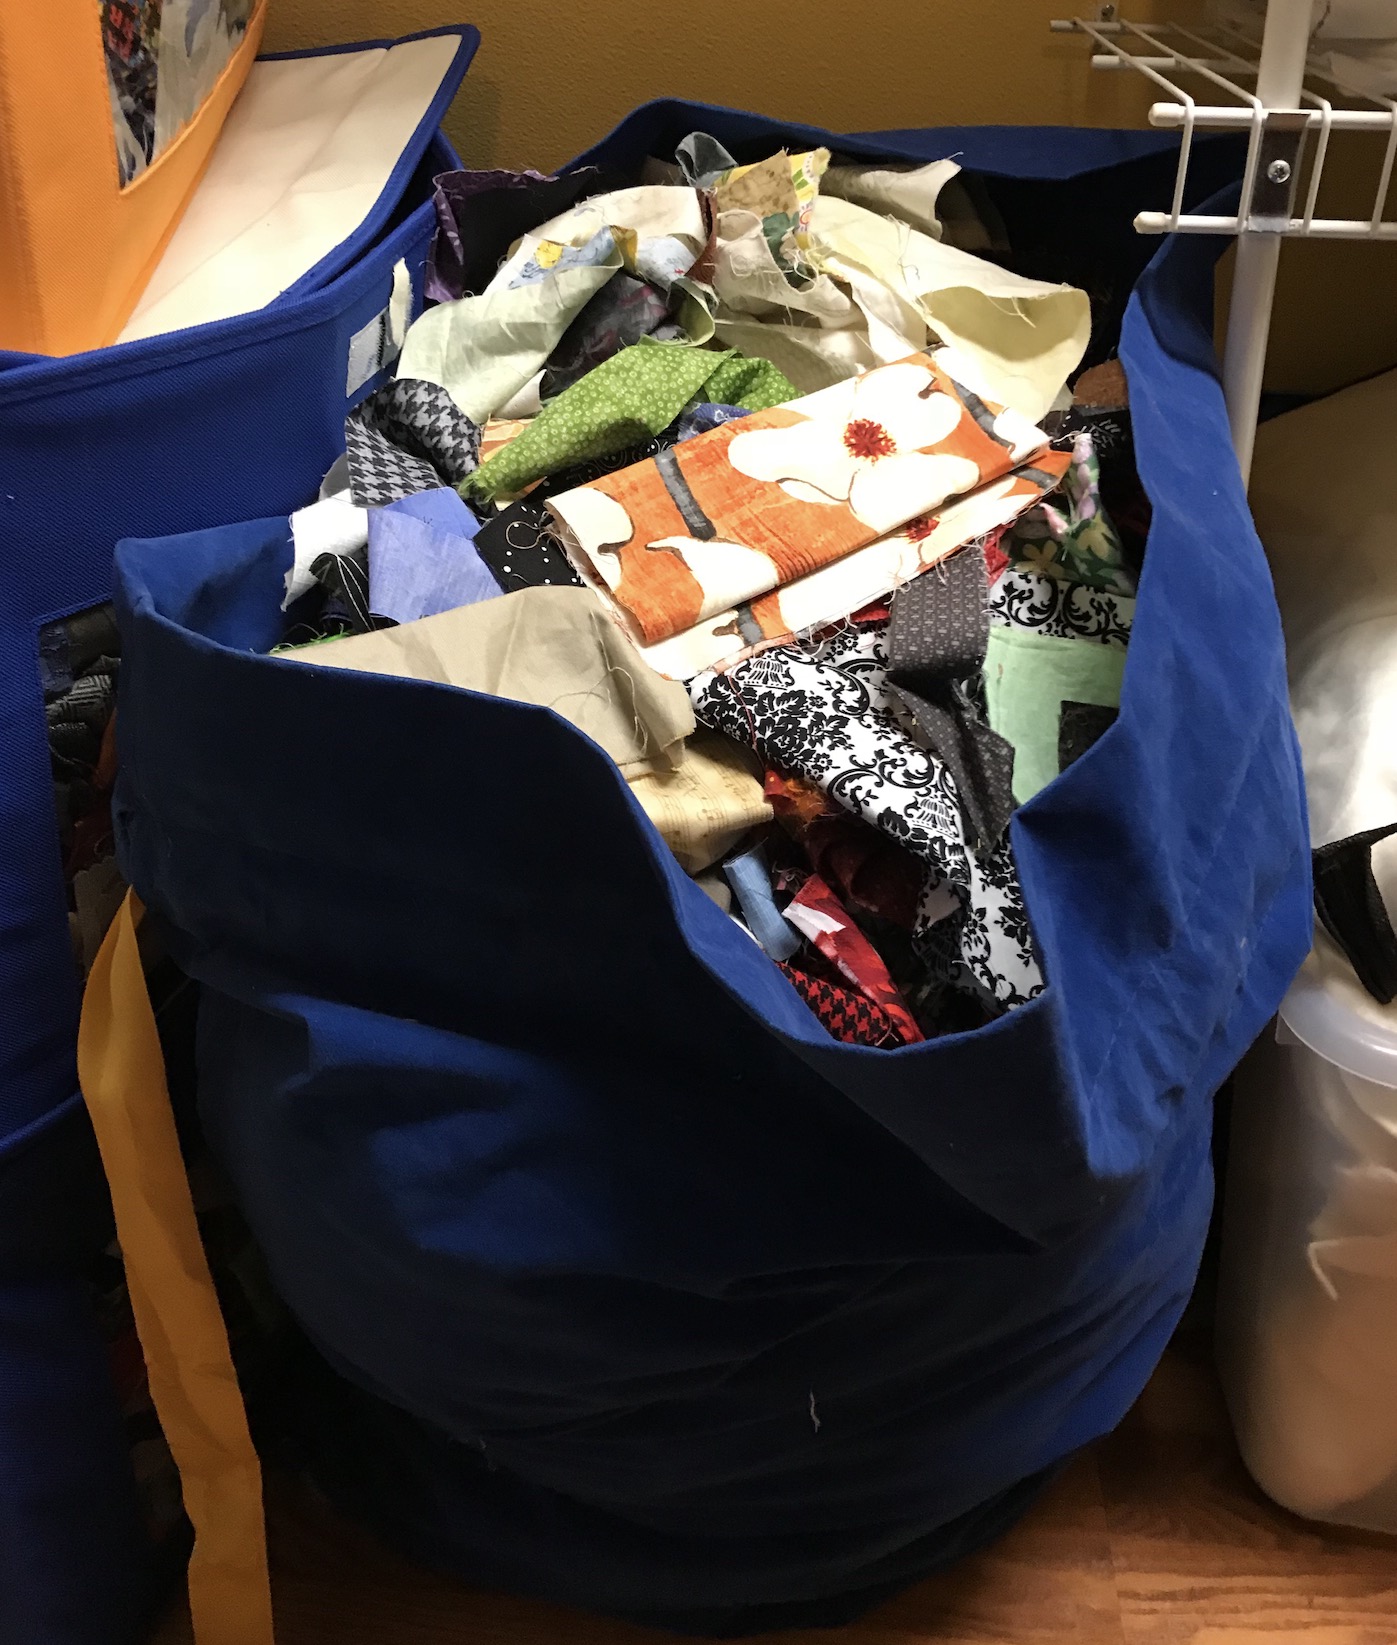
It is always an ongoing challenge to find the best way to organize my…extensive? ridiculous? pathologically large? fabric scrap collection. I’ve experimented with various iterations of fabric scrap organization including organizing them by color into boxes like these:
Or just throwing them all together into a large bag:
As you can imagine, unless you just want to work with random scraps, the “all in one bag” idea did not work for me.
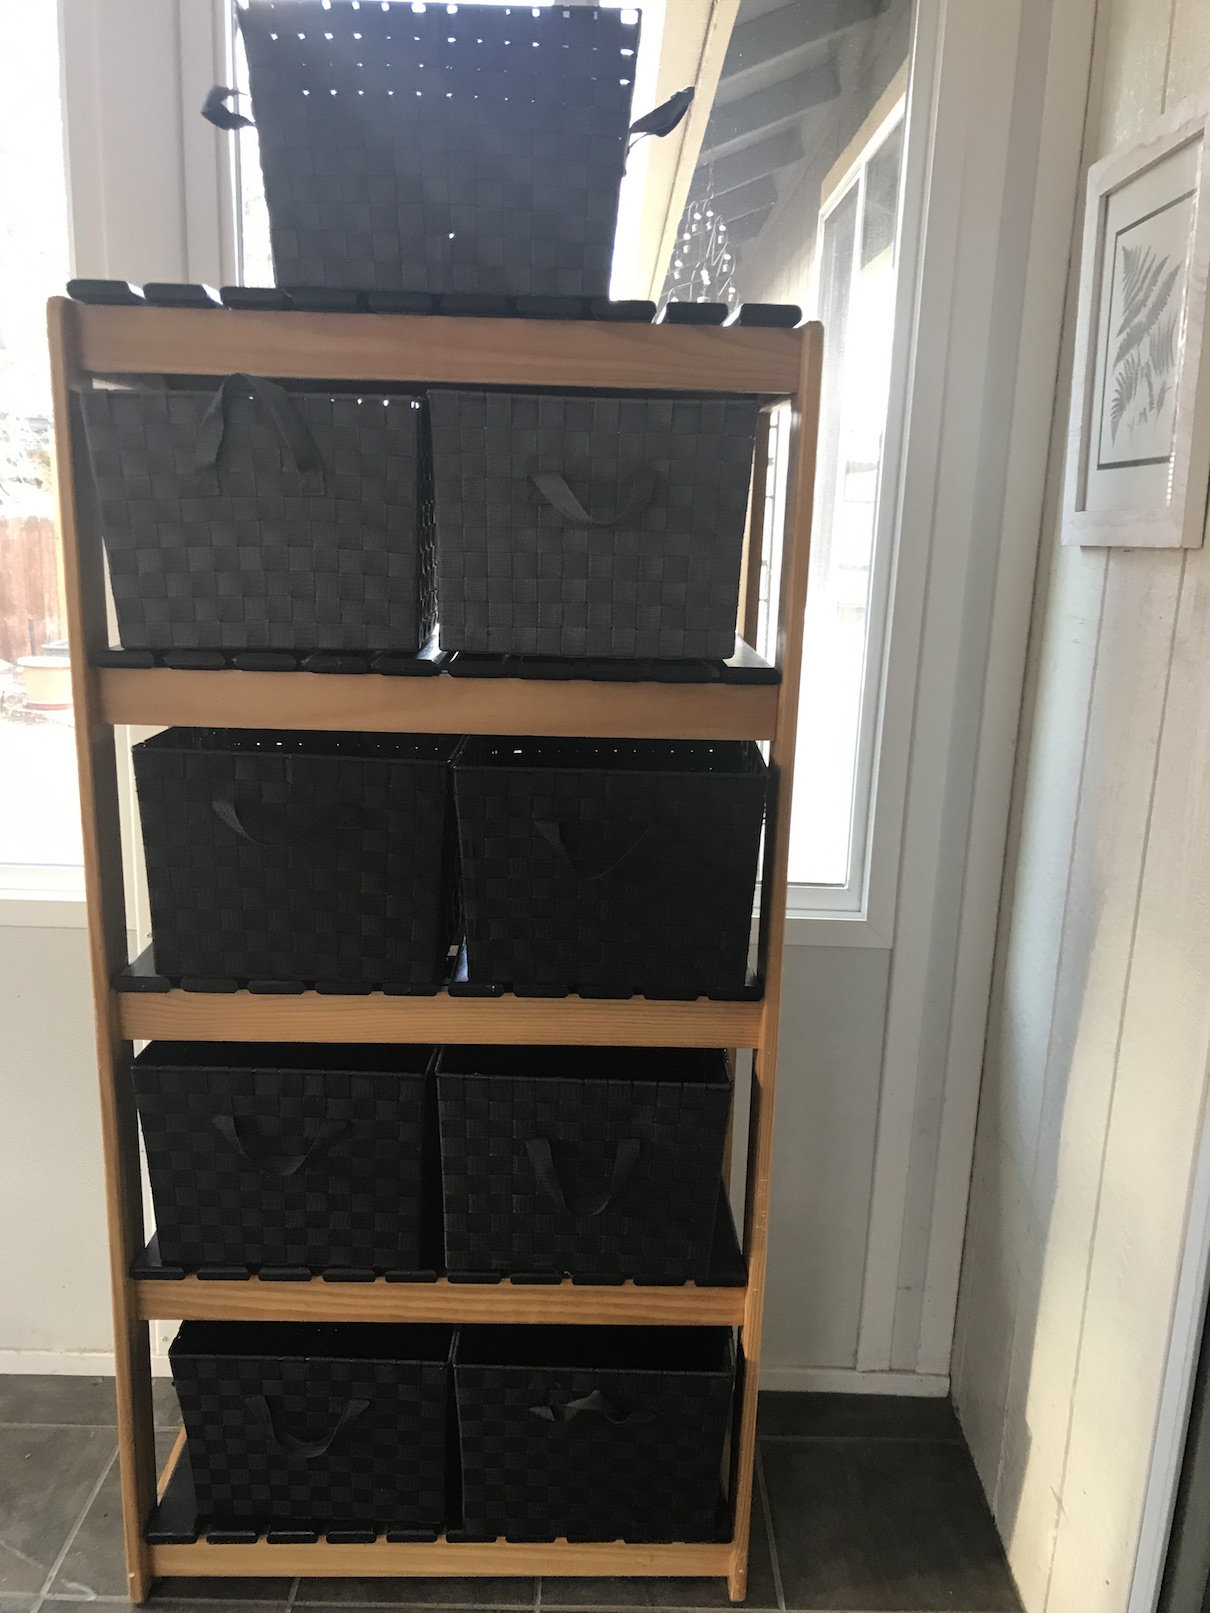
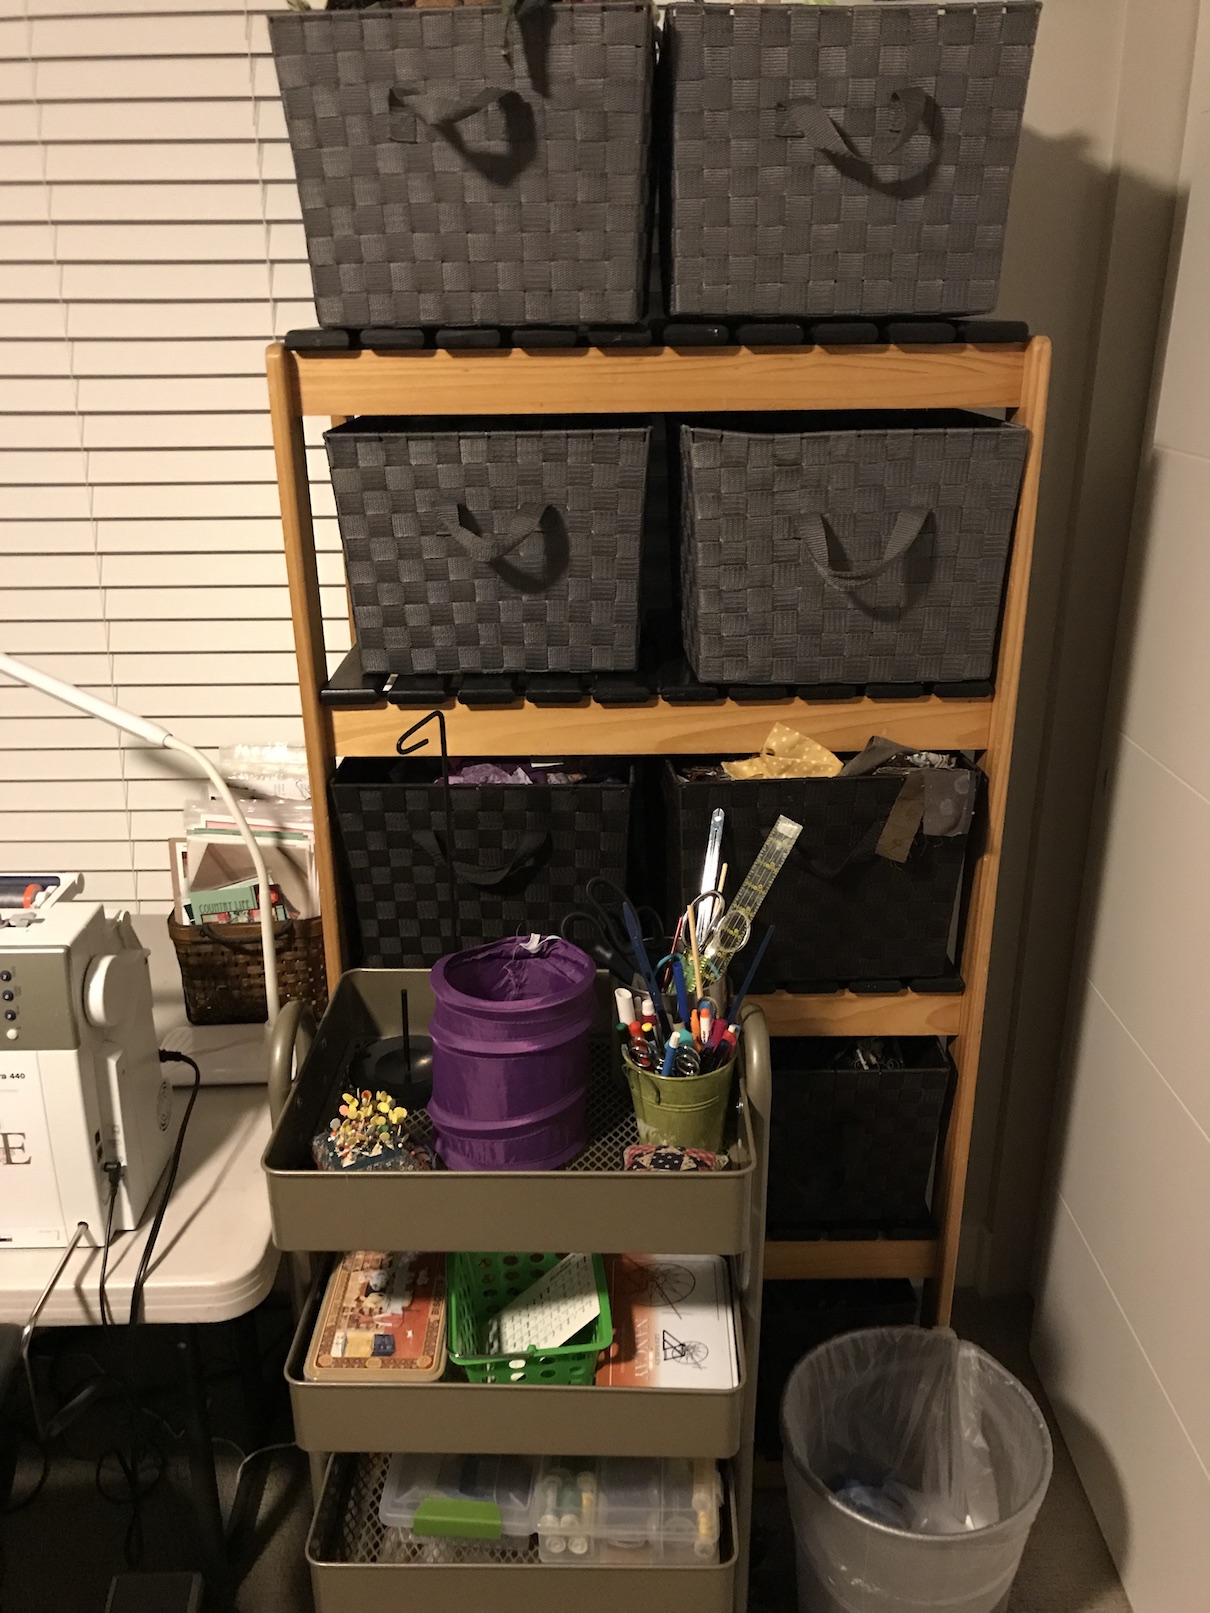
However as I was packing up for my move to Colorado, I came up with an idea: why not use this old shelf unit I had in my sun room in my former house (which easily disassembles for moving) with the baskets I used to store magazines in, to organize and easily access my fabric scraps?
And here is the unit in the guest bedroom/studio of my new apartment:
I have my fabric scraps organized by color or theme (i.e. I have a basket of light batik scraps and a basket of dark batik scraps, etc.).
Now for the rest of the room.
New “Studio” Tour
I put the word “studio” in quotes because I am using this term loosely. It’s not really a studio per se but a place to sew in my guest bedroom, where I’ve used the guest bedroom closets to store my fabric and crafting supplies.
I embraced the concept of “Whole House Crafting” (which I previously discussed in the June 2016 post Whole House Crafting) and put a larger cutting area on my large kitchen island and an ironing station in my master bedroom.
Mike the Miniature Schnauzer wanted to share that he approves of the guest room/studio space as it meets his coziness standards!
He also appreciates the schnauzer themed decor!
Postscript
Speaking of coziness (or “cosiness” for my friends on the other side of the pond), I thought I would share a little follow up to the February 2019 post From “Orphan Blocks” to Pillows.
A couple of months ago I made these two little pillows from leftover blocks from a quilt I made many years ago:
Well Mike is now enjoying one of the pillows as his napping pillow!
Not sure he wanted to be disturbed but I just had to take a photo!
Alas, I am not sharing my studio and house tour. It is more like I am sharing my dream studio and house tour (smile). My house and studio are currently partially packed up and a mess as I sort my stuff out for my move to Colorado this Spring.
This post about another quilter’s studio and house tour.
My dear friend Marla Jo (and her wonderful husband Jason) have been incredibly supportive during this difficult period in my life (my new life as a recent widow) and to give me a distraction from my grief, a couple of weekends ago she invited me see the studio and home of one of her clients/friends (Jaime) who is a quilter.
I thought it would be fun to share some photos from that visit as I would guess many of you, like me, enjoy artist studio tour posts!
The Studio
Here are images of Jaime’s yummy quilt studio:
She has beautiful custom designed cabinetry throughout her gorgeous home.
I was fascinated by how she organized her fabric:
She showed me that she used scrap thin cardboard cut to a uniform size to organize the fabric:
I love how her fabric stands upright like in a quilt shop.
Her organizationreminded me of the studio of my friend Dana which I shared on this post – Ultimate Studio Fabric Organization and the way Dana organized her fabric yardage.
Dana used recycled cardboard from fabric bolts that quilt shops gave to her. She cut them in half and wrapped her fabric around them:
Jaime had a wonderful wallhanging in her studio, made by her sister, celebrating her collection of decorative pins:
The House
The studio was spectacular and the house was equally as spectacular. Here are a couple of my favorite areas of Jaime’s beautiful home:
The Entire Wall Bookcase in the Living Room
My dream!
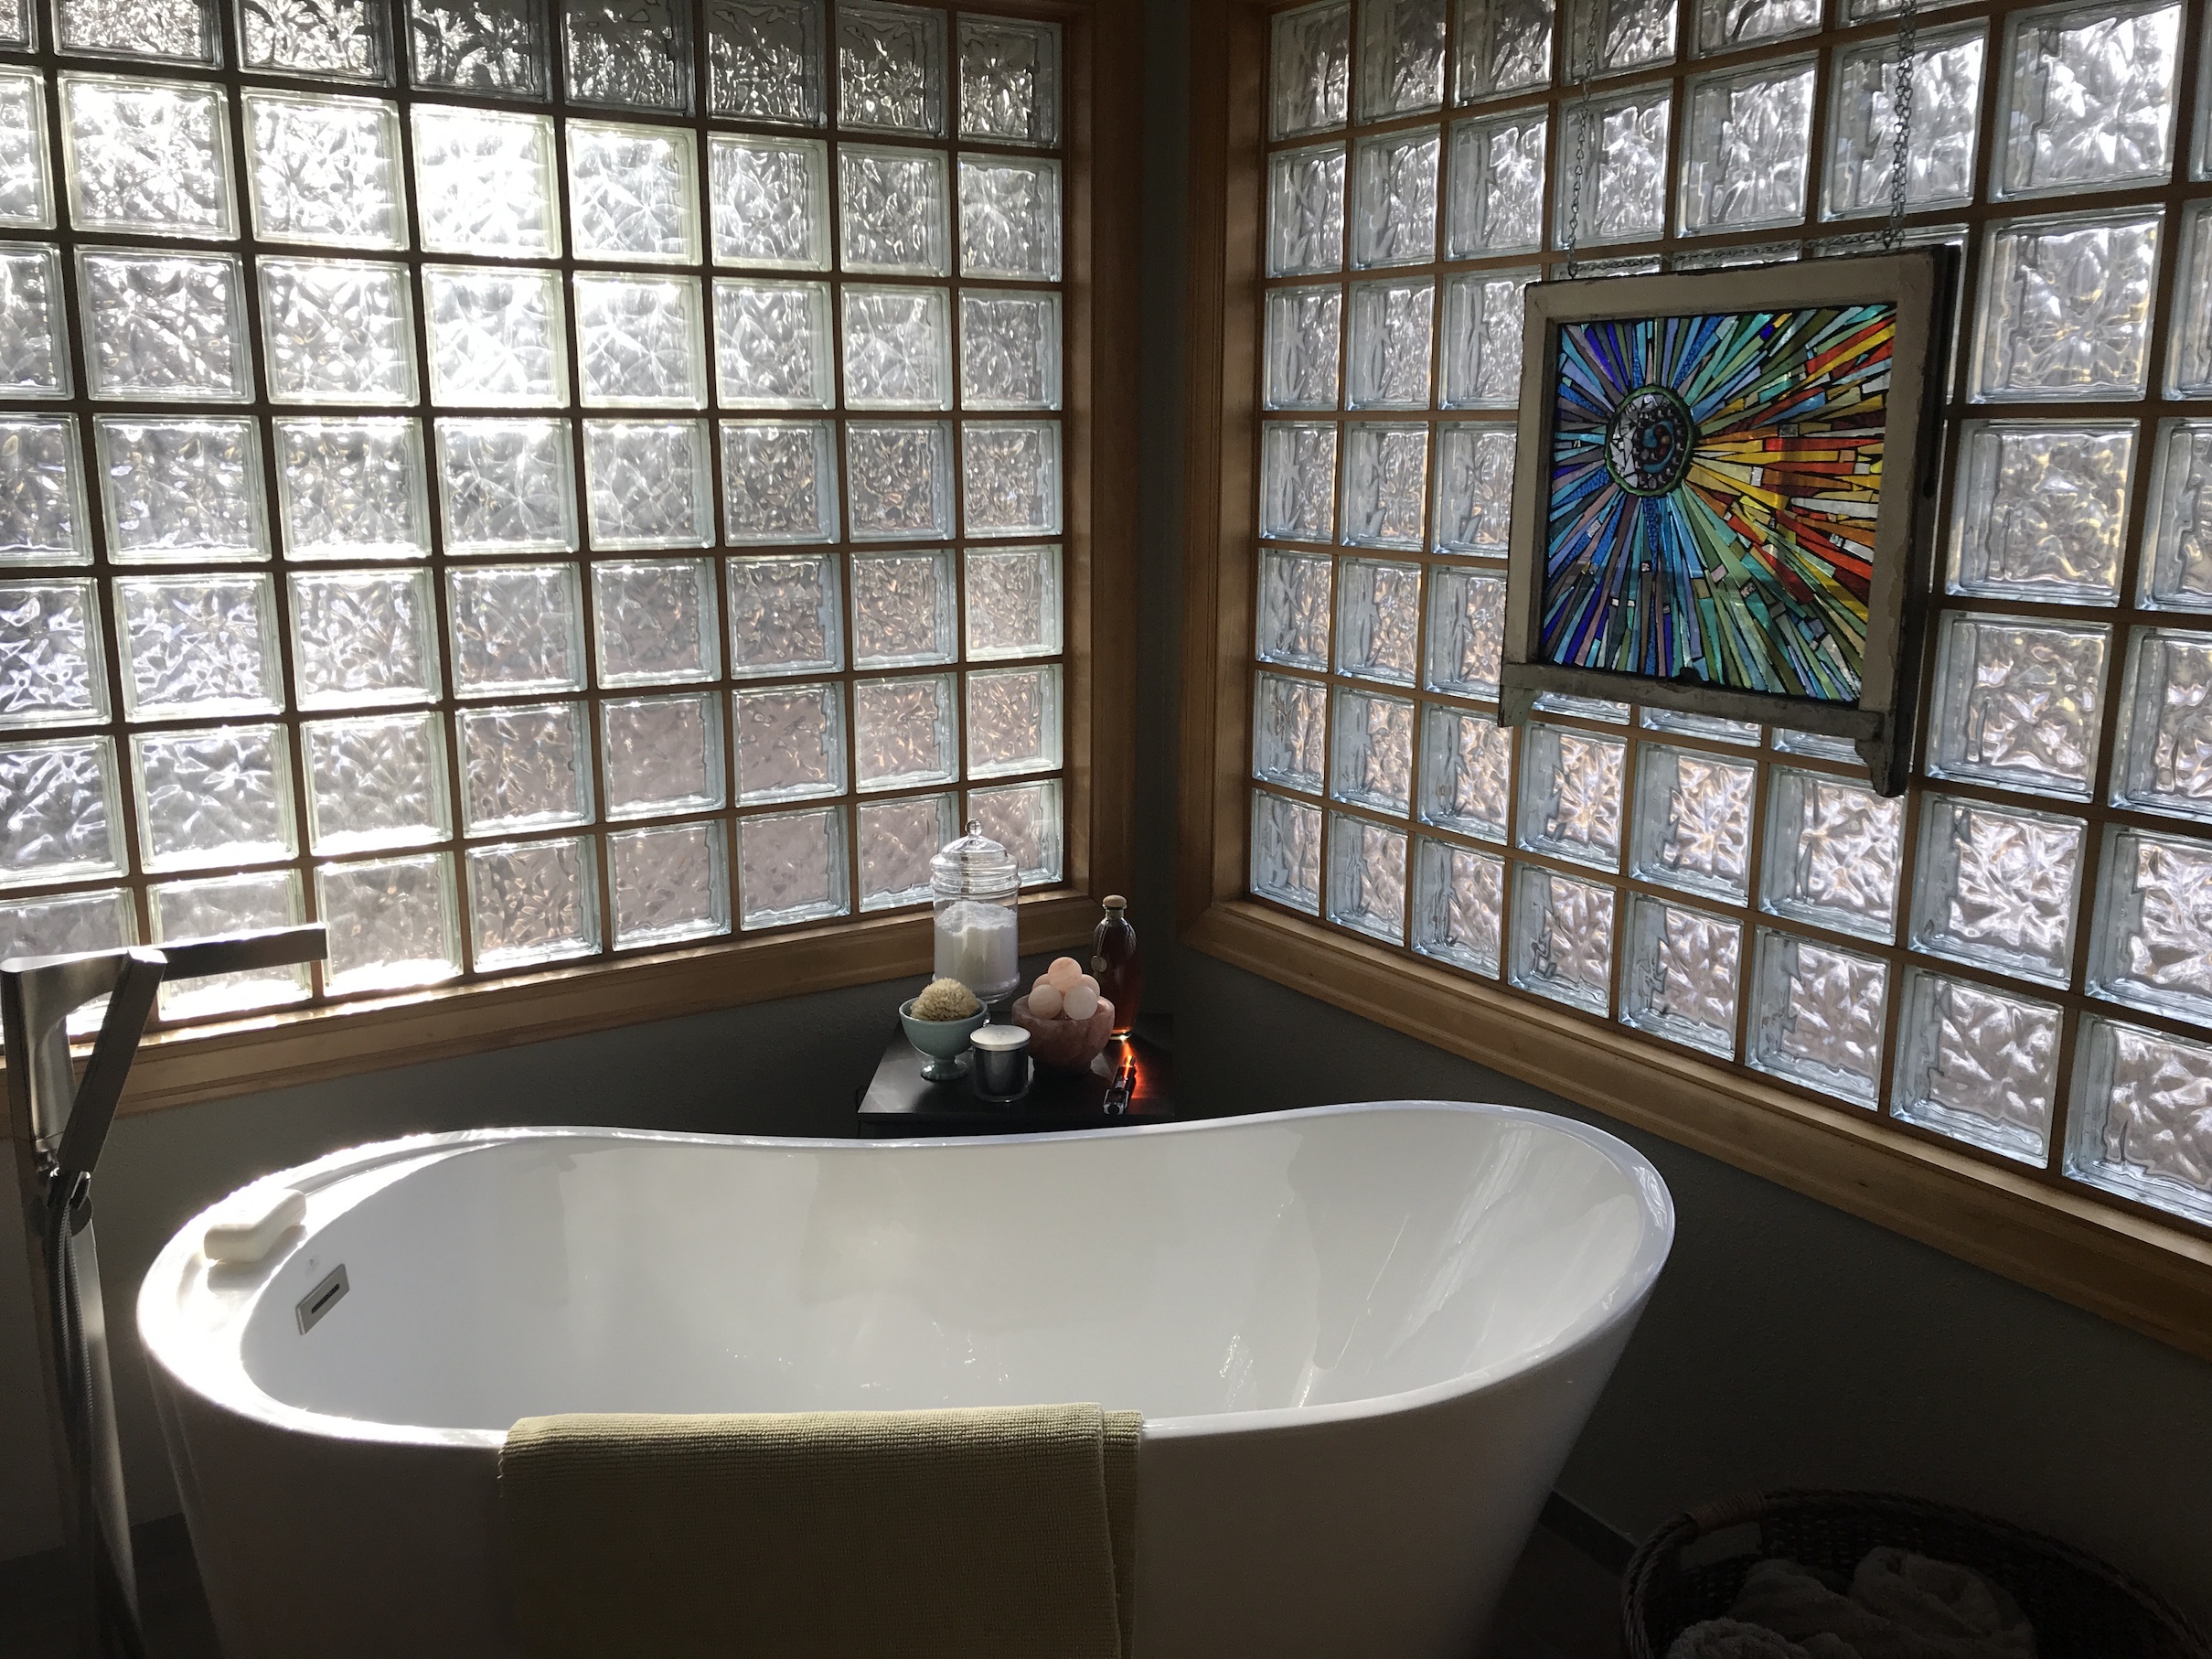
The Dream Soaking Tub
Jaime is an artful decorator and designed a nook in her bathroom to put a peaceful soaking tub:
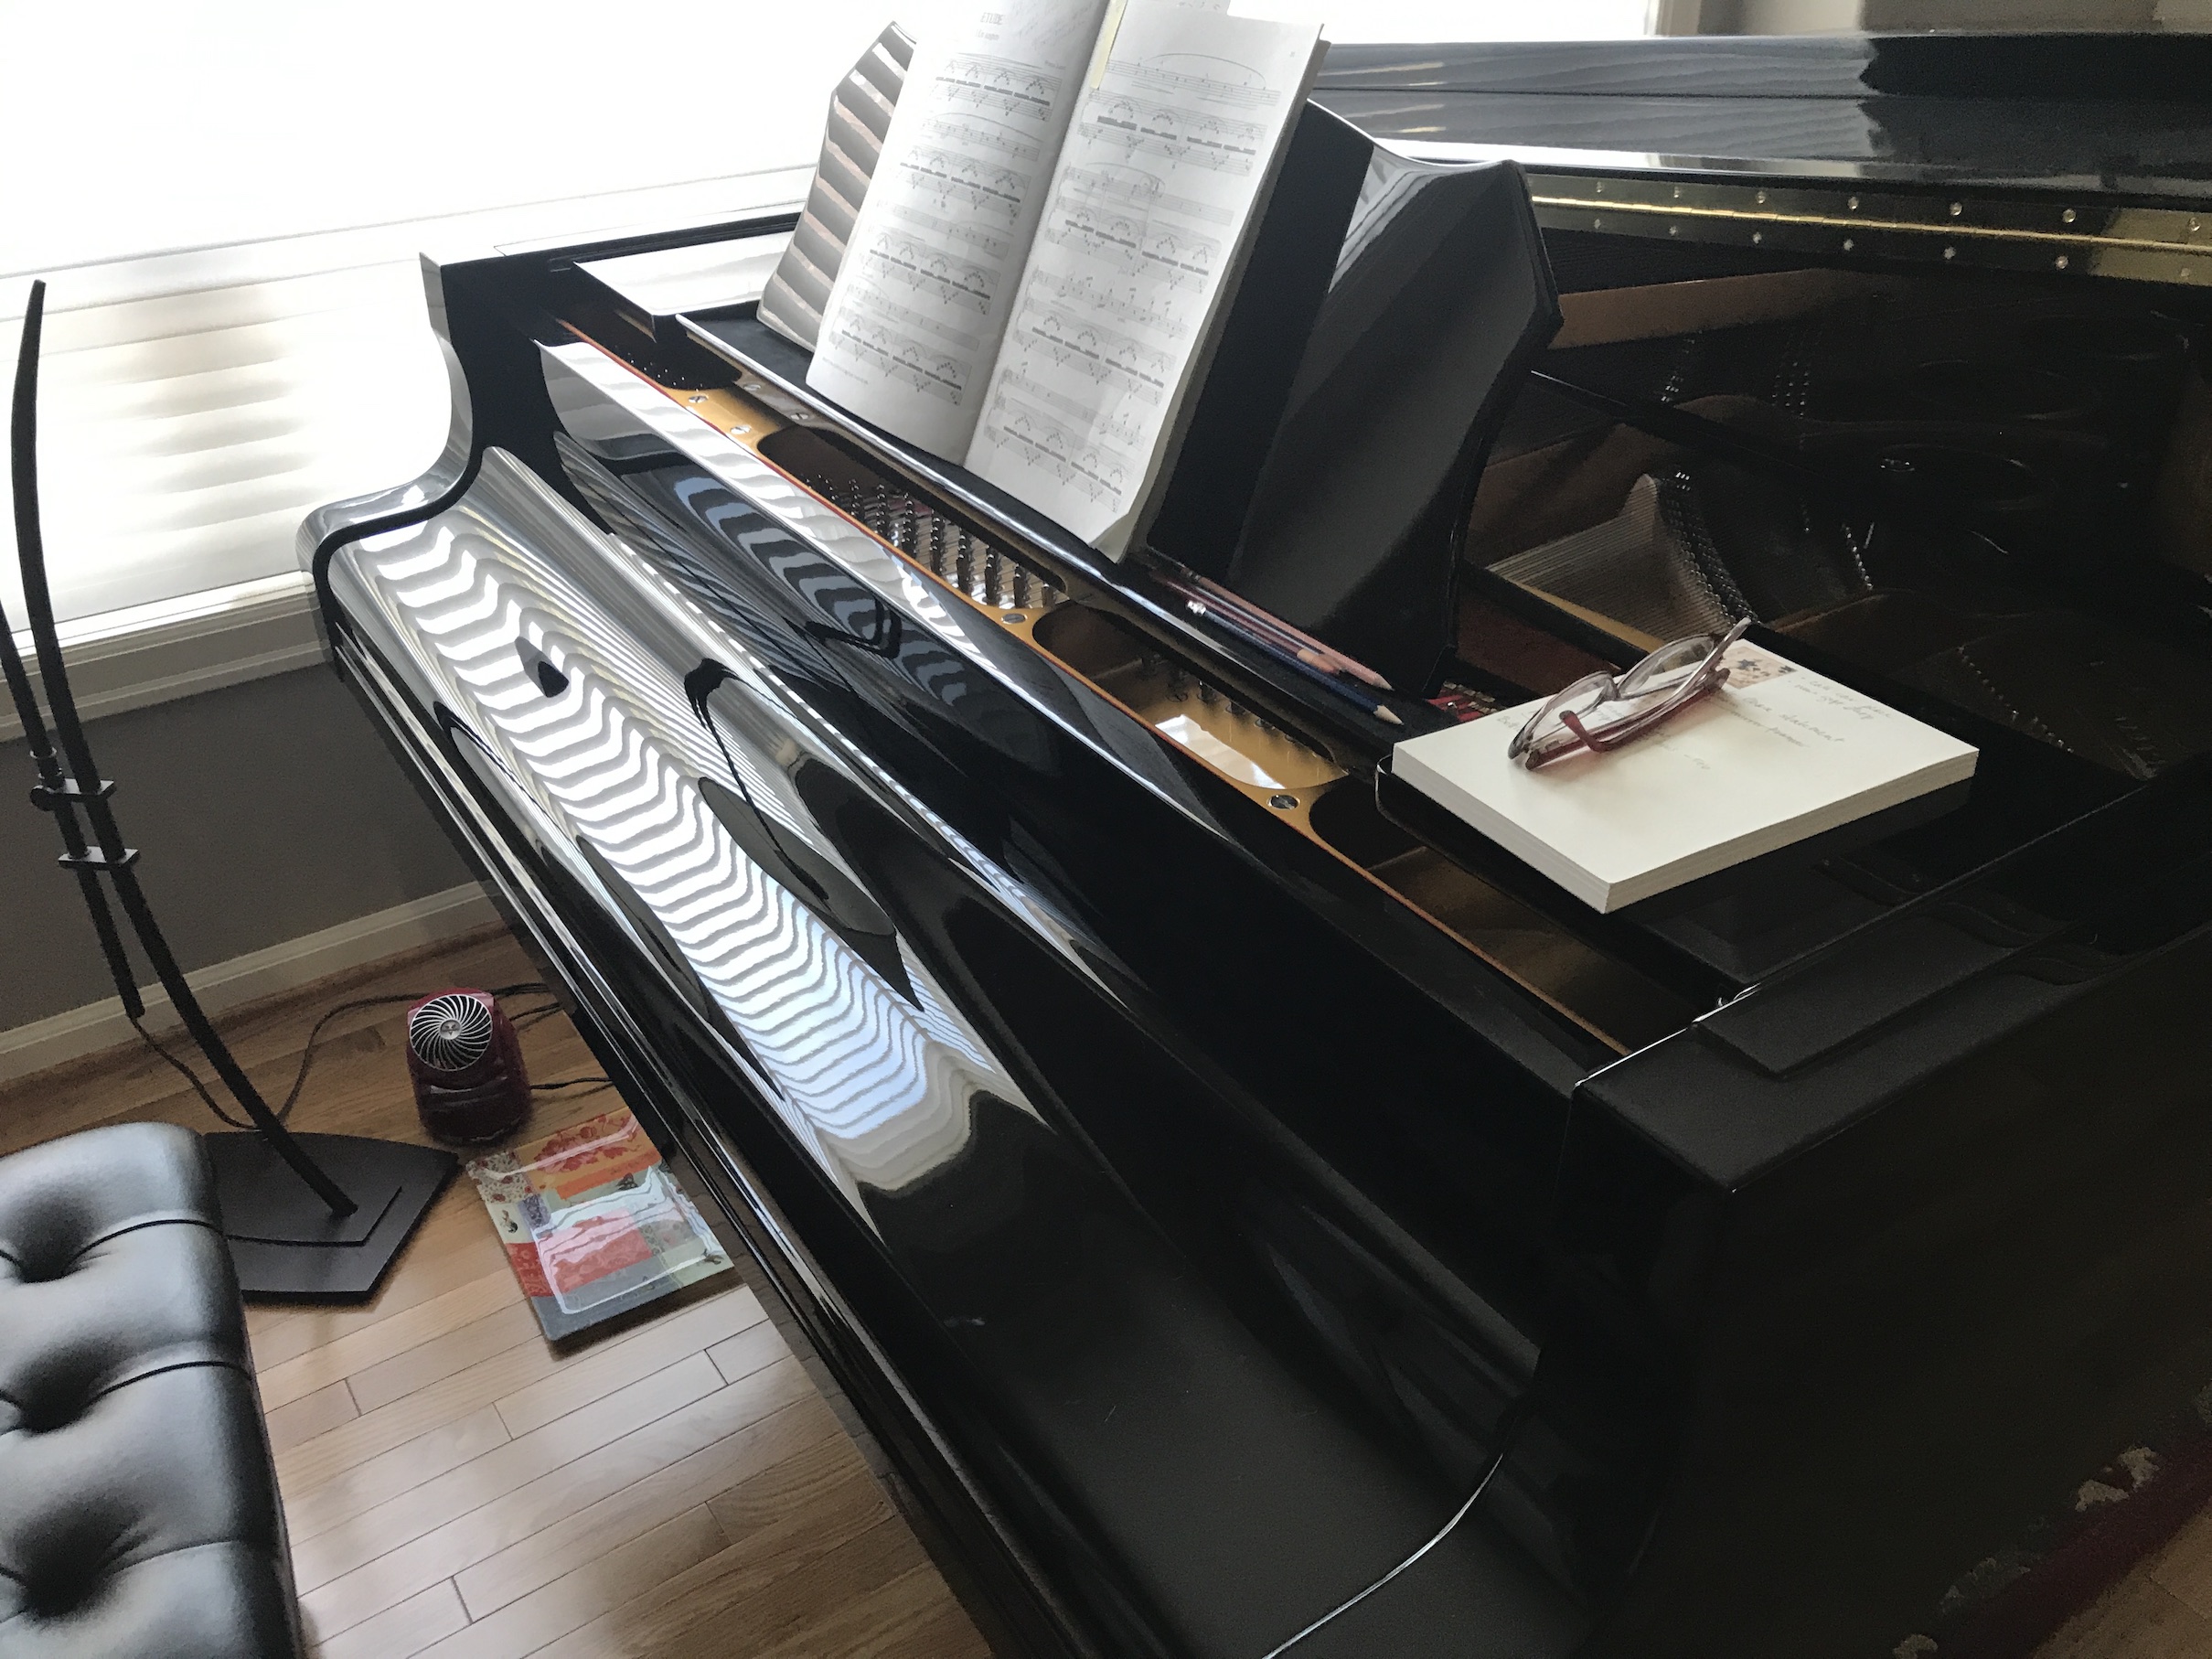
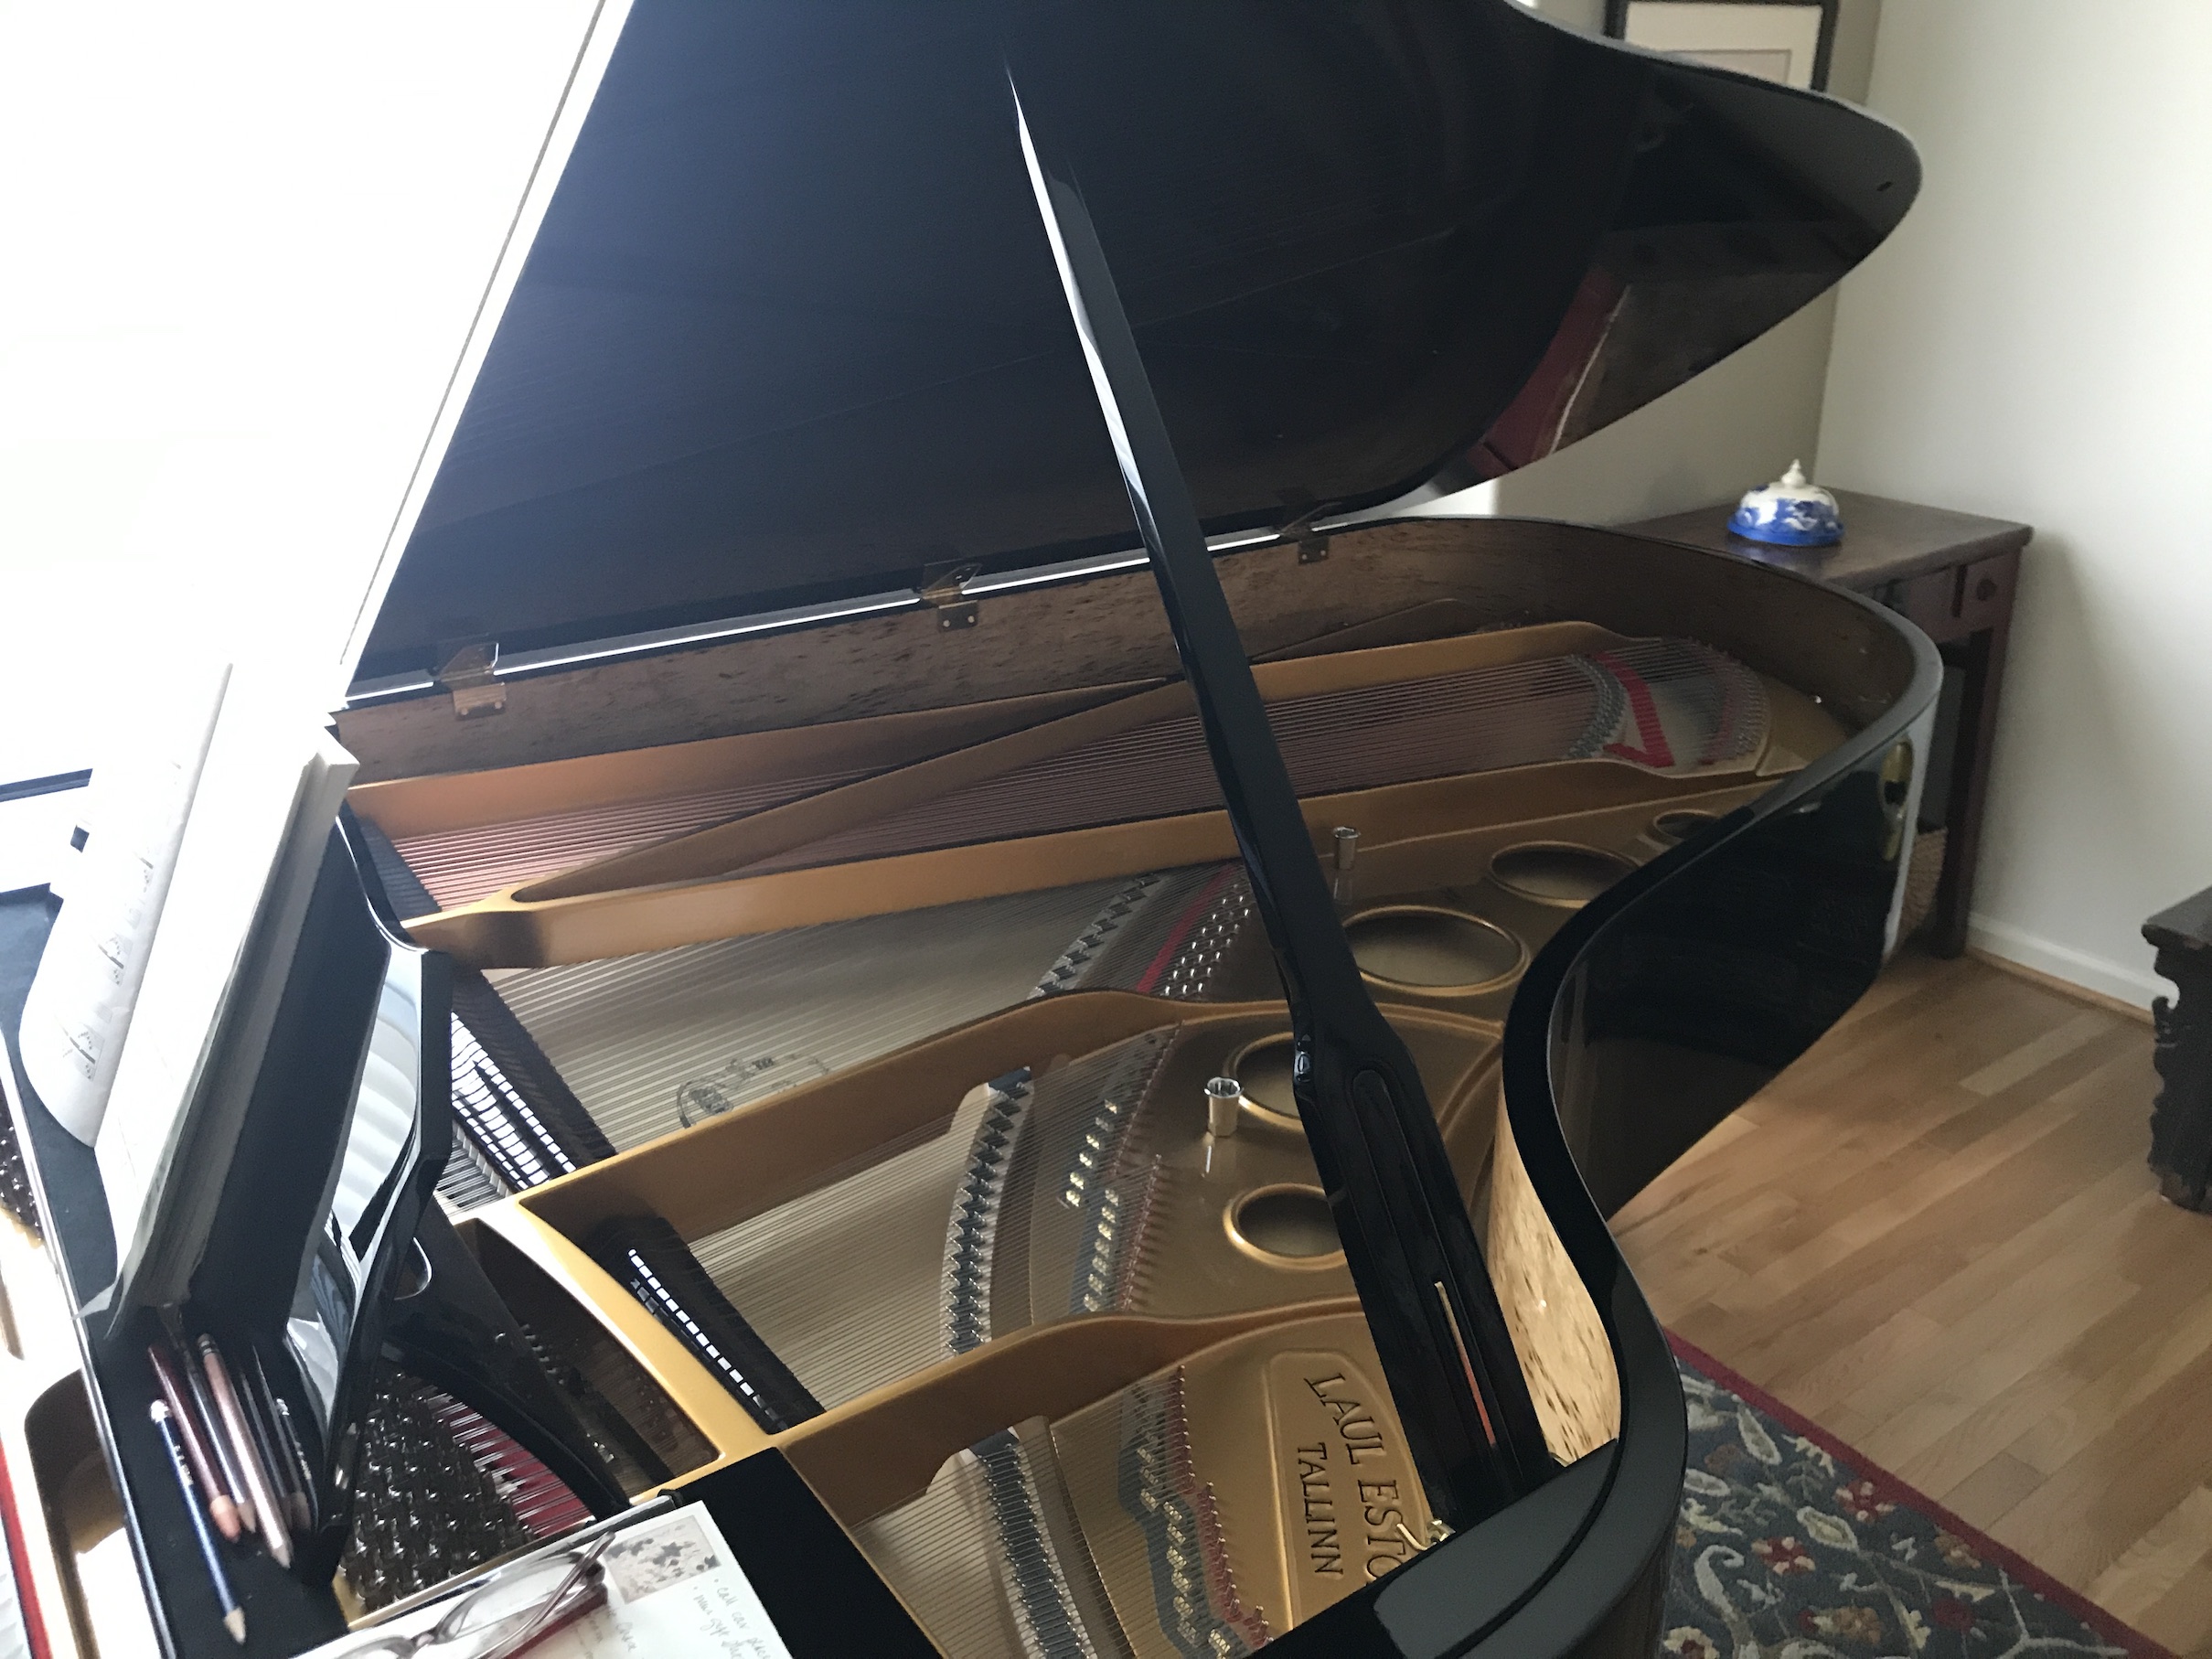
The Grand Piano
At one point in my young life I studied piano and I have always been fascinated with pianos. Jaime had in her sitting room a custom made piano from Estonia that had an exquisite sound (she treated us to a mini concert):
There were many other magical rooms/areas of her home but I wanted to spend time visiting with her and Marla Jo and not be rude and just take photos.
But let’s close this post with a view that took my breath away (my photo does not do it justice) – the view from the upstairs balcony of her home with a view down to the living room:
My tiny studio is nothing to “write home about” but I share photos to encourage other crafters who have not yet created their own little crafting space in their abode to do so.
I’ve proven you can cram a lot into a tiny bedroom (and someday I will install decent lighting into it)!
My studio makes me smile even if is it missing the sense of crisp, coordinated, moderns, elegant, organized, etc. style that I’ve seen in other quilters/crafters/artists’ studio (you’ll never see it featured in magazines such as Where Women Create).
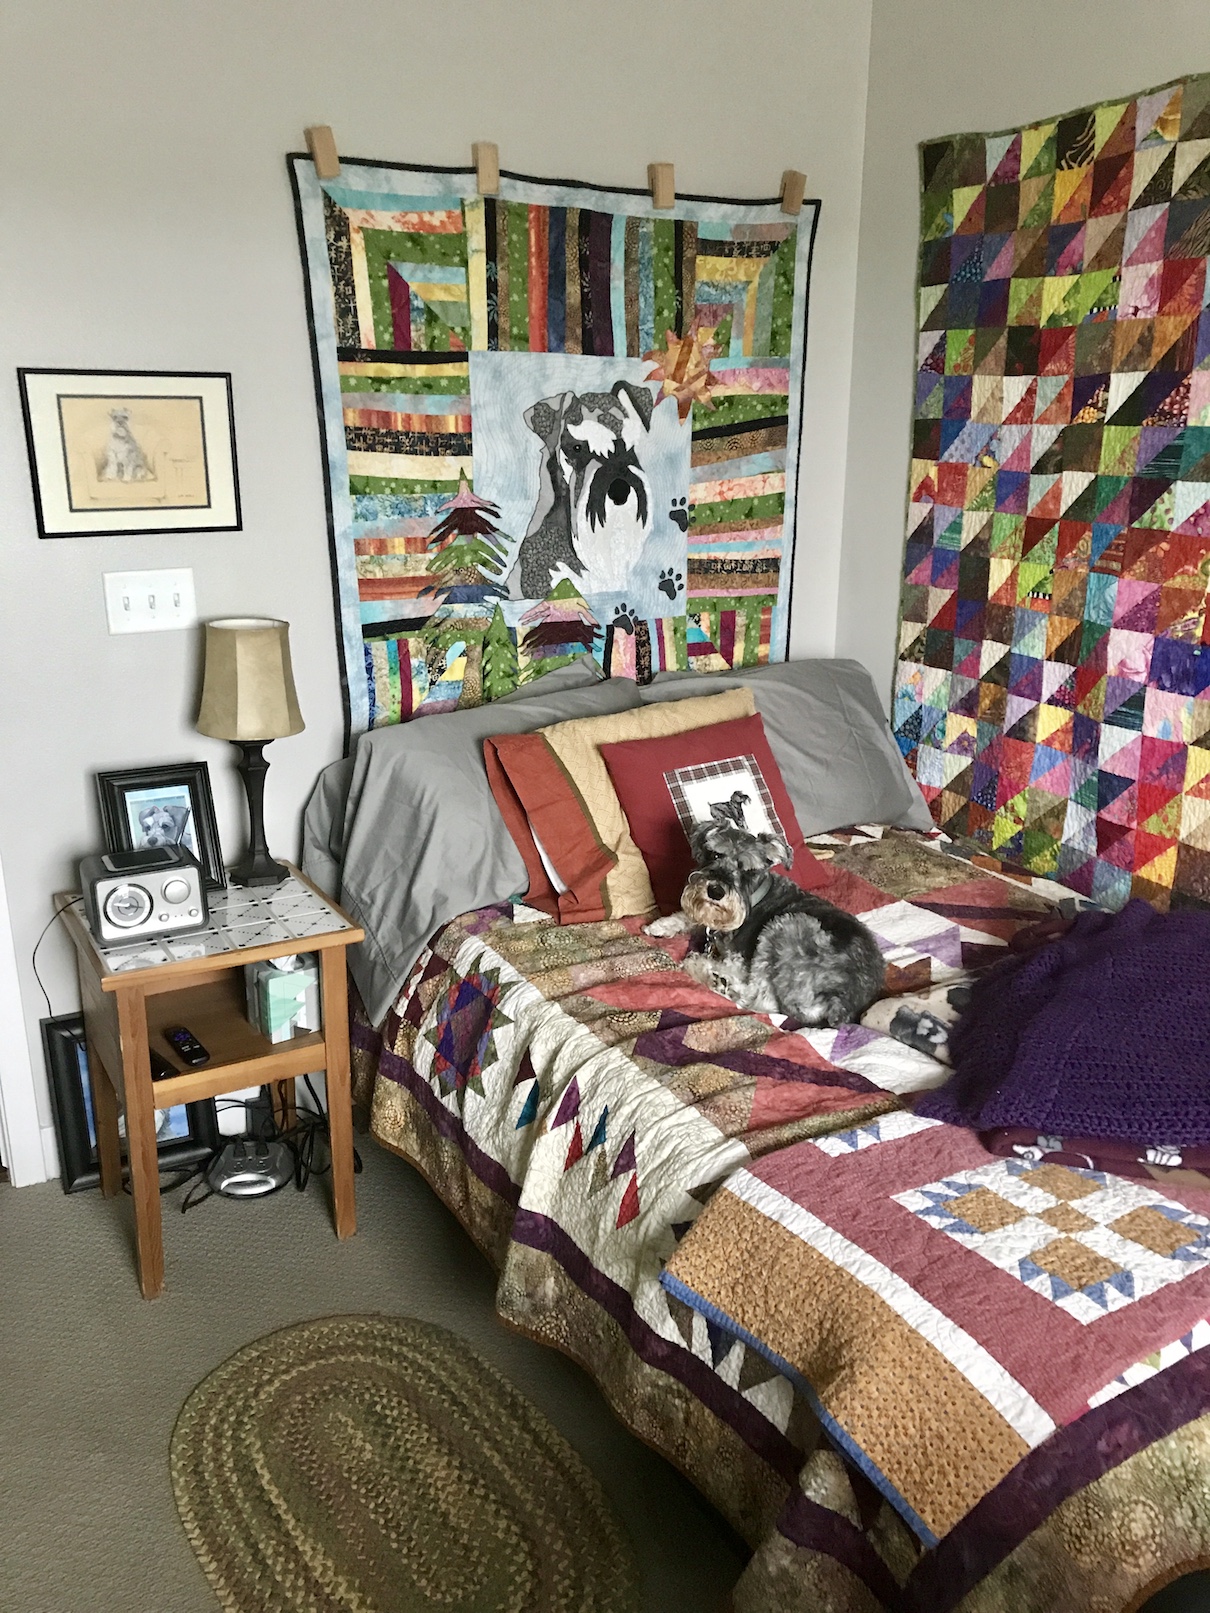
It is a little sanctuary where I have hung on the wall quilts by my Quilting Sisters Kathy R. and Judy D. reminding me of the beauty of life-long true friendships. It is where I enjoy my collection of little toy schnauzers and rabbits, my collection of fabric treats and delights, and a closet full of projects to be made!
From the book Your Creative Work Space: The Sweet Spot Style Guide to Home Office + Studio Decor by Desha Peacock:
A mother bird doesn’t complain that she doesn’t have time or space to create her nest, she just makes do with the resources available to her at the time…Her job is not finished when the nest is built. She still needs to protect it until her babies are strong enough to go out on their own…think of what would happen if the momma bird neglected to actually build the nest because she couldn’t find the perfect materials. Don’t let your creativity suffer or, worse, die because you can’t find the perfect lamp…don’t worry if it’s not perfect. Use the resources you have around you and allow them to blossom with age and use.
Once you create your space, do not abandon it. Protect it fiercely with that momma bird love… – Desha Peacock, Your Creative Work Space (2017)
I hope you all make a nest for the precious baby birds of your creations!
My friend Judy got me into quilting (I have her to blame for all this…smile).
Recently she shared a couple photos of her re-organized sewing room and gave me permission to share on my blog. However, I cannot share her photos without briefly mentioning her “Jelly Roll Love” (notice I am using the term “Love” and not “Addiction”, ha!) and that perhaps this is a love that I also share…
I met Judy years ago when she was a colleague at a job that seems like a lifetime ago. She is one of my “Quilting Sisters“. You know how I refer to my husband Terry as Terry the Quilting Husband (TTQH) – well Judy is my Number One Quilting Sister (after all she got me into quilting) and her new moniker is the “#1QS“!
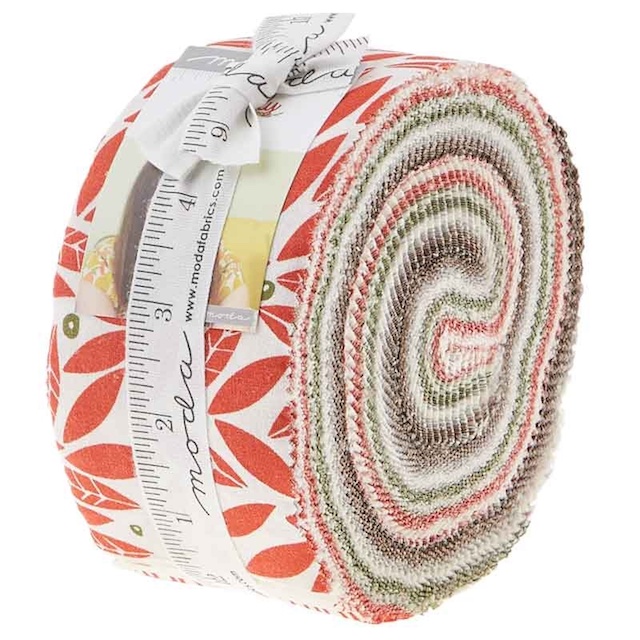
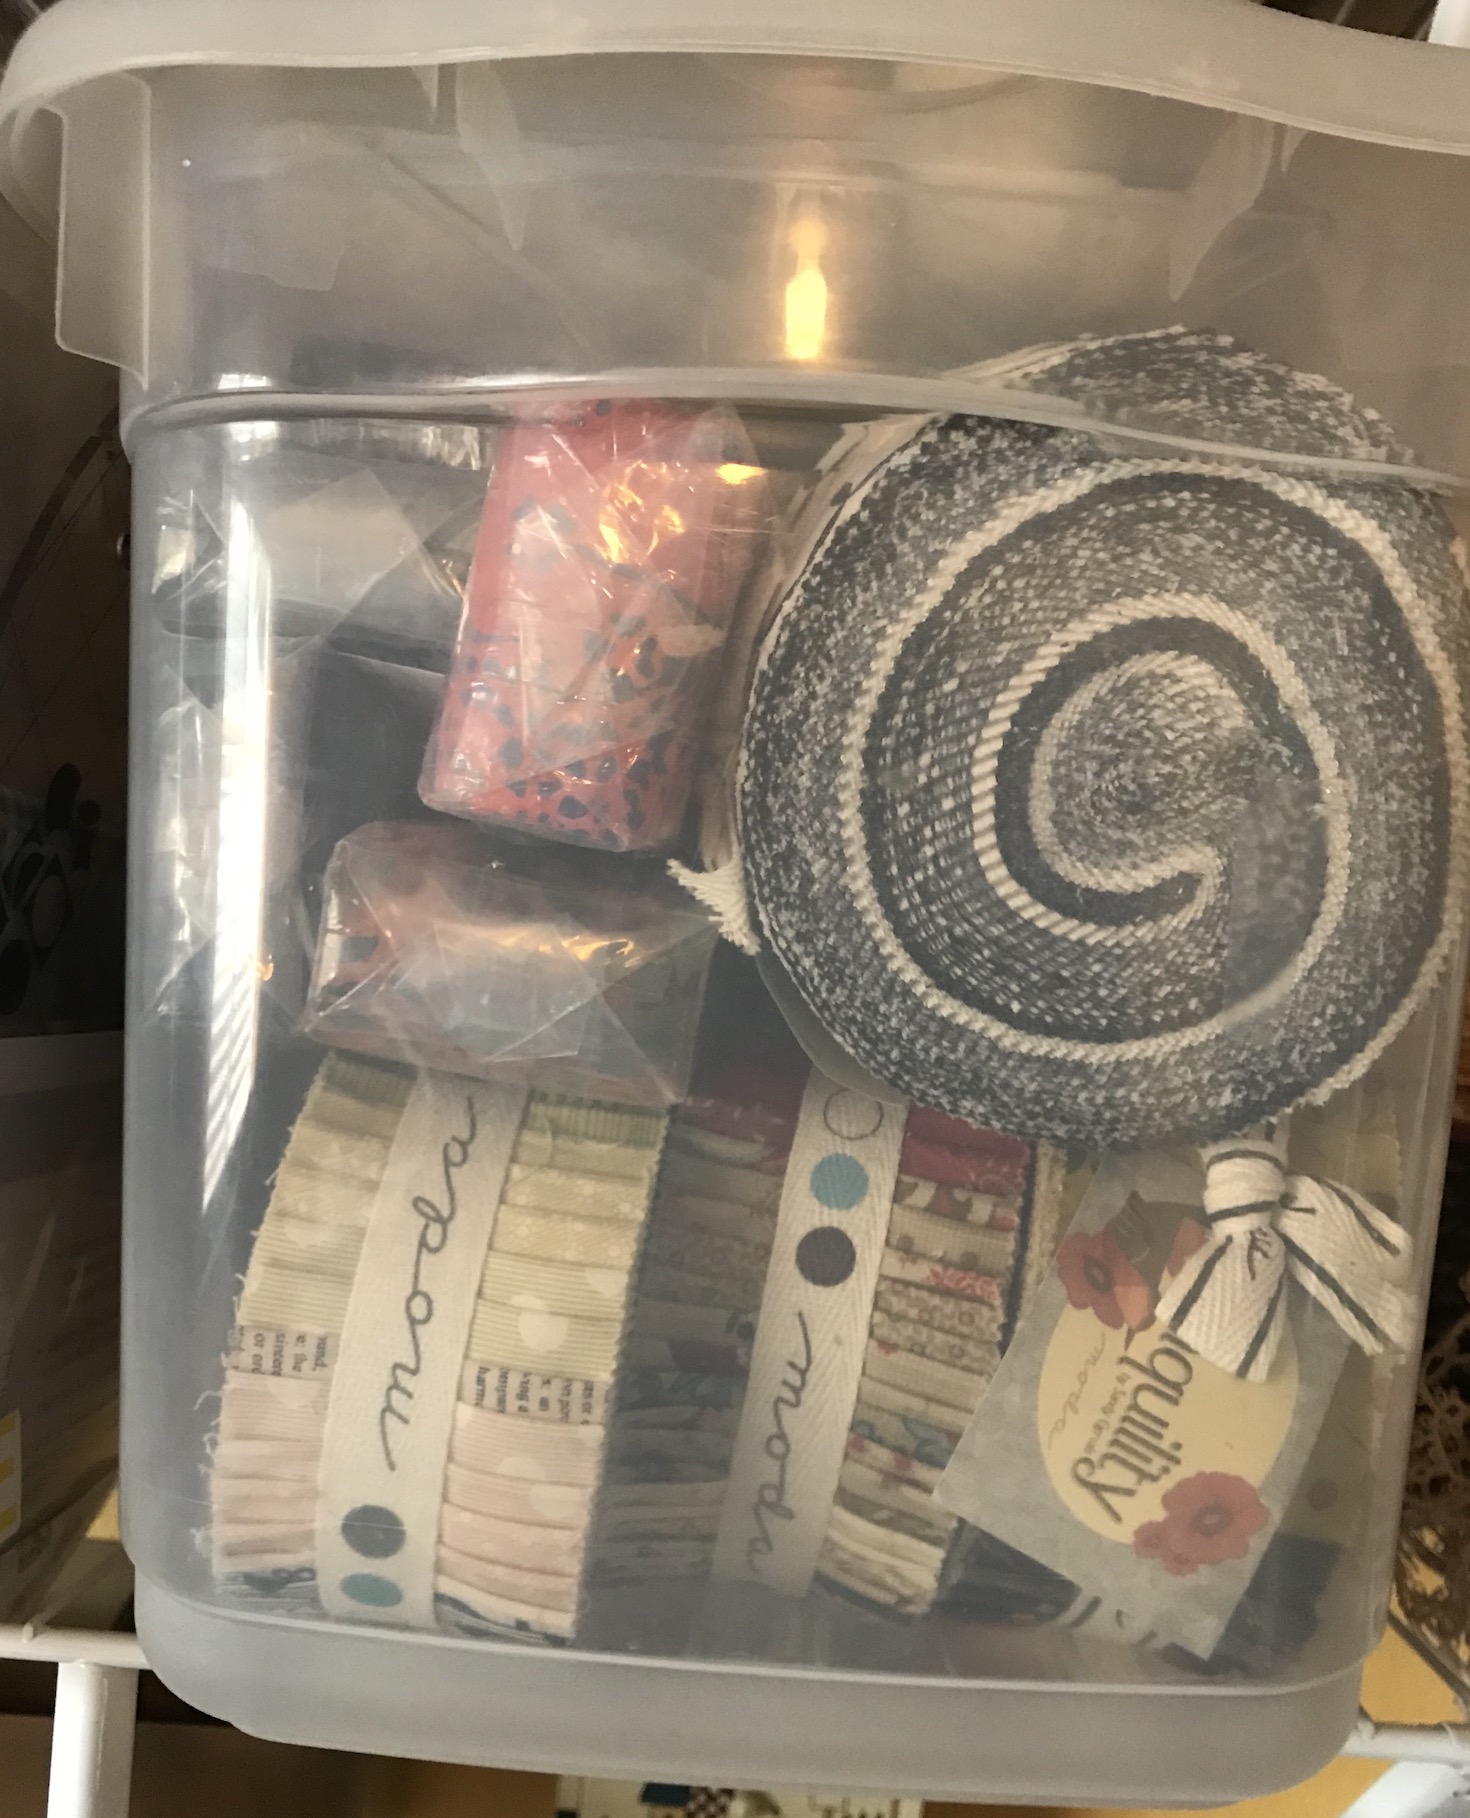
I appreciate that non-quilters follow my blog and out of respect for those who’ve never heard of fabric “jelly rolls” (other than a delicious bakery delight) here is an image of a fabric jelly roll:
Image credit: Missouri Star Quilt Company
A jelly roll is a 42 piece collection of pre-cut 2.5 inch quilting fabric strips and are very popular among quilters (and quite addicting to collect). The appeal for quilters to use “pre-cuts” (pre-cut fabric collections) is that they are time saving and the fabrics are already coordinated.
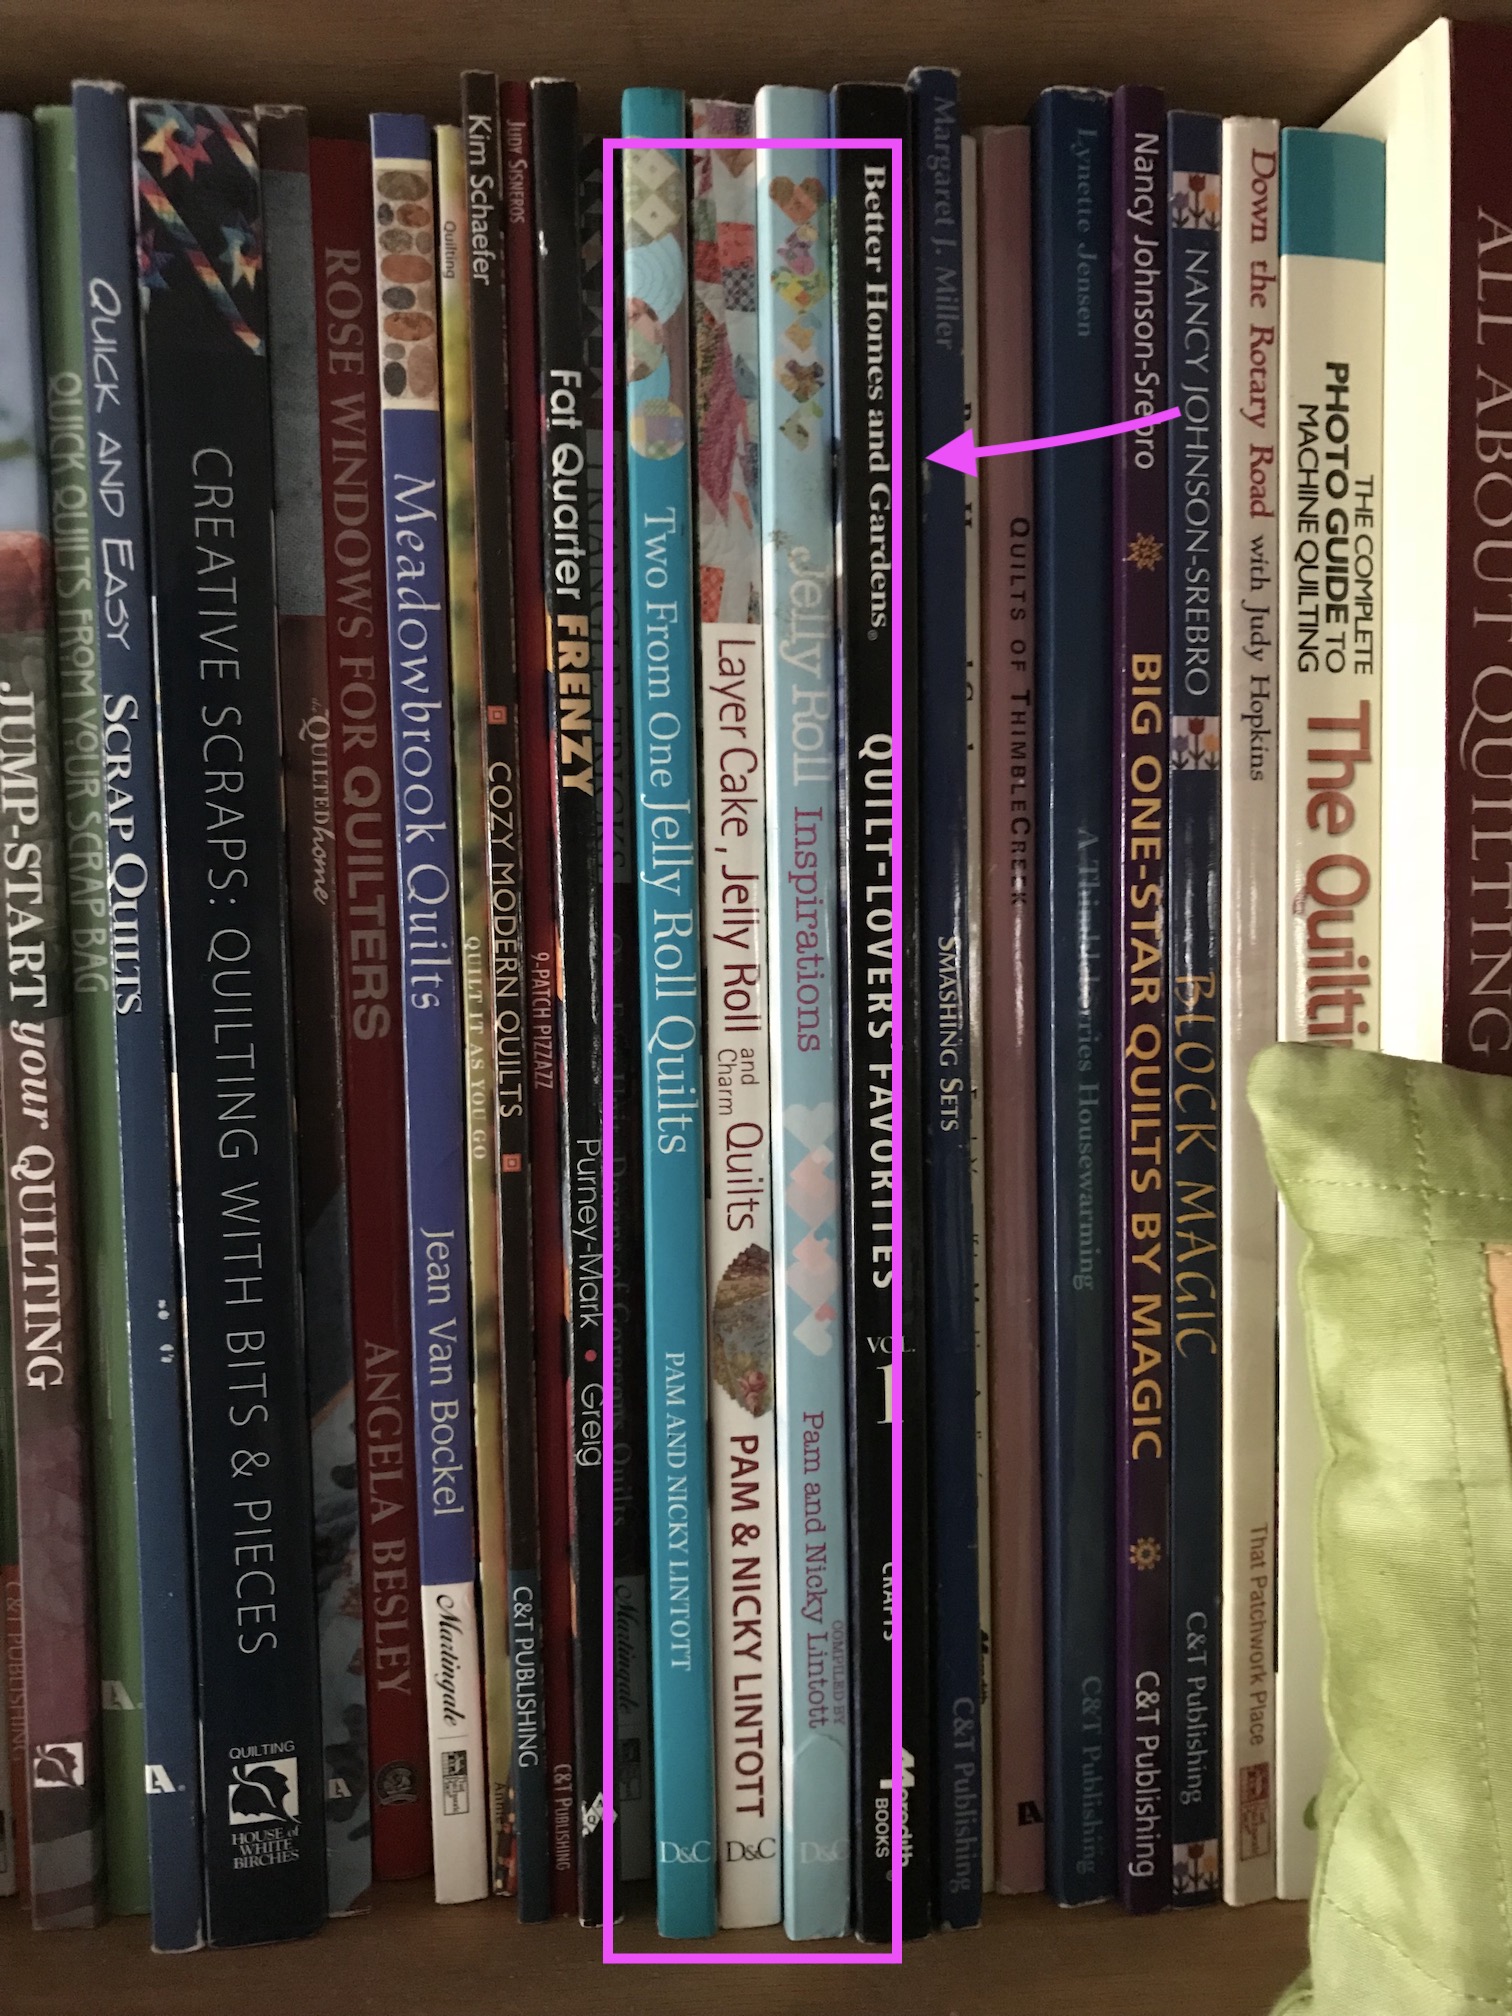
In the late 2000s to early 2010s jelly rolls pre-cuts were gaining huge popularity with quilters. Numerous jelly roll fabric collections and books with patterns on creating quilts made with jelly rolls were flooding the market. I am guilty of buying several of these books myself as you can see in the image from my bookshelf below:
A small section of the obscene tierneycreates craft book library
Judy’s Sewing Space & Jelly Roll Love
Judy, aka the #1QS, used to sew in a corner of her family room.
A couple of years ago, she emptied out a spare bedroom and turned it into her “Sewing Retreat”. Recently re-organized her sewing space and below are a couple photos include one of her drawer of jelly rolls that she has been collecting for years.
Projects, so many projects:
As you can tell, she will never grow bored with all those glorious sewing projects in queue!
Fabric Organized on “Mini-Bolts”
Is that calendar in order to organize when all those projects get started?!?!!
Judy uses cardboard bolts that fabric yardage comes on (like you see in fabric shops), cuts them in half and then used them to wrap her yardage and organize her fabric like a miniature quilt shop!
Another Quilting Sister Dana has done the same thing in her studio/sewing space:
I’ve been with Judy and Dana, during a quilt retreat, when they’ve asked a quilt shop owner for any empty fabric bolts they can spare. Many quilt shops just recycle the cardboard bolts so they are happy to give them to a quilter to use (at least the shops I’ve seen Judy and Dana ask for empty bolts from).
I think the effect of the mini bolts, besides nicely organizing yardage of fabric, is it makes your sewing room look like a mini Quilt Shop!
And Now For the Jelly Rolls
Judy stated this is not her only drawer of jelly rolls but she did not share a photo of her other drawer (or drawers?!?!?).
Judy is not alone in her “Jelly Roll Love”, I’ve been guilty of it myself:
Tub-o-Jelly-Rolls patiently waiting to be loved in the tierneycreates Studio
I won’t tell you the container’s dimensions or just how filled with jelly rolls my “Tub-o-Jelly-Rolls” is: a girl has to keep some things private….
I love seeing where people to create and in case you would like to see where I create, I have added a page to my blog tierneycreates Studio Tour where I will post photos of the latest version of my tiny little tierneycreates studio. More on this later in this post.
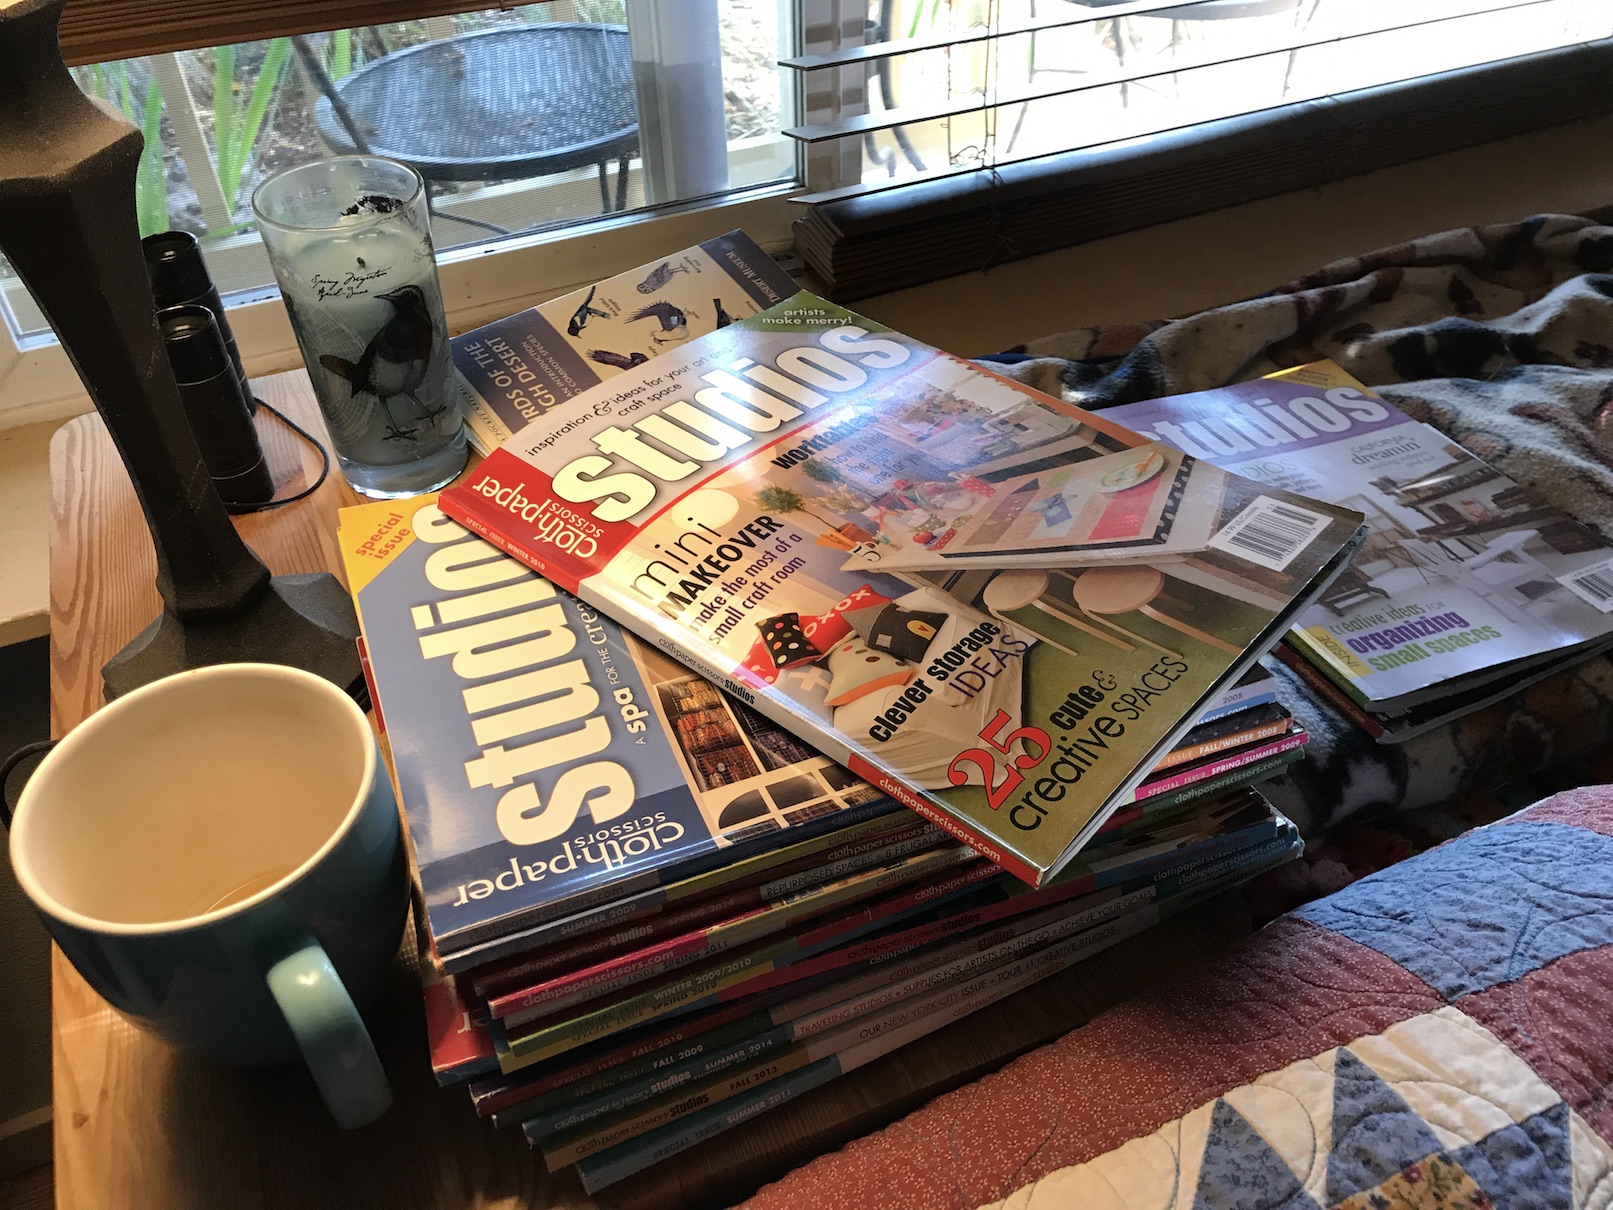
As part of my ongoing journey to curate my life (see post category: My MinimalismJourney ), I am working on letting go of more of my crafting related magazines.
Studios Magazine
I have a stash of Cloth Paper Scissors STUDIOS magazine from 2008 – 2014 (magazine is no longer in publication). This publication featured “artist studio porn”: essays and articles about professional and hobby artists’ studios, tips on designing and organizing your studio, and endless photos of studio layouts. The tagline for the magazine was “inspiration & ideas for your art and craft space”.
There are so many online resources (aka Pinterest) on studio organization ideas, I do not need these magazines. I can let them go, donate them to my beloved local Humane Society Thrift Shop and let them go to someone else to enjoy.
But, I wanted to read through each one, one more time, before donating them.
Working though re-reading the pile with my tea each morning
When I got to the Winter 2010 issue of Cloth Paper Scissors STUDIOS magazine I noticed it featured a collection of tips by various crafters/artists on small space tips.
Recently I re-organized by studio to try and make the best of the small space. I thought I would share some of my favorite tips from this issue from the various studio tours in case my readers find them useful.
Small Studio Tips
In Her Shoes by Catherine Thursby
Get a space of your own, even if it has to be small
Make it personal to encourage your creativity
Have a place “off-site” to keep bulky or seldom used materials
Snowman Season by Sue Pelletier
In a narrow space, set up tables end to end so you can have several projects going at once
A dartboard makes a graphic yet compact inspiration board
Remember that if you want studio space badly enough, you will find a way
The Glitter Fairy by Laurie Davis
Use shelves with cubbies to hold and display rubber stamps
Use under-the-counter space as much as possible
Use stackable containers to hold small items
In a Nutshell – A small space dedicated to creativity by Janice Avellana
Keep supplies out in the open so the work is ready when you are
Disguise a small, open studio behind a tall bookcase
For flexible organization, use painted pegboard
Room of Requirement by Liza Julien
Maximize small space by going vertical with ladder-style shelving
Store papers suspended from pant hangers on a wooden dowel
Install hooks on table legs, the sides of shelving – anywhere that’s handy and out of the way
Studio in the Sky by Victoria Grobels
Store supplies in baskets hung from the ceiling
Make your worktable an inspiration board, too, by slipping photos under a clear, plastic mat
Make a small space seem bigger by positioning it near a beautiful view
The Love Shack by Roberta Philbrick
Use “regular” furniture to hold art supplies
Color-coordinated caddies keep small items organized, portable, and attractive
A glass-topped table cleans up easily and looks polished in a small living/creating space
Strategic Design by Michelle Spaw
For an eclectic approach to organizing, try using non-conventional items such as stackable trays, bento boxes, and takeout-style containers
Removing the doors to your closet is as strong incentive to keep it tidy. Because the contents are always visible, you will be motivated to maintain order and curb the clutter
When purchasing storage boxes, think of color and pattern as a way to identify what you’re storing
Beaddazzled by Linda Dolack
Glue a sample of what’s in a drawer to the front so you can find and retrieve the object quickly
Use simple skirting to hide clutter stored below counters
Install shelving above windows to hold books and display art work out of the way
Where Whimsy Reigns by Elizabeth Holcombe Fedorko
Use collectibles as storage containers that can be displayed
Attach a folding table to the wall: pull it up to work, down to put it out of the way
No matter how small your space, make room for pets!
(Check out Sassy the Highly Opinionated Miniature Schnauzer’s latest musing on her Schnauzer Snips page)
The title of this post makes it sound like a thrilling exposé of what really goes on behind the scenes at tierneycreates: drama, intrigue, maybe even a little scandal…
No not that exciting – just recent photos of my studio where I do my tierney-creating!
The back wall where I keep my fabric scraps by color, and my cutting table where I hide underneath those things that-are-not-finished (that brightly colored batik quilt it meant to distract the viewer from what is beneath…).
To the lower right of the photo you will see my mini design wall. I learned from a quilting friend that it is handy to have a smaller portable design wall.
My sewing machine and ironing board (two very essential items!) I got the idea from another quilter to cover my ironing board with a towel to make ironing smoother and easier. Sometimes I also use a cotton dishtowel to iron small pieces on.
My wonderful brother gave me the sewing table for my birthday last year and the leaf folds down and the table becomes a small cabinet if I need more room).
My IKEA Billy Bookcase of fabric! This organization came out of my massive fabric purge in 2015 (see post The Fabric Purge!). The curtains in the room are made from a sari my friend Jenny brought back from her trip to India for me.
My storage closet with custom made sliding doors which I first discussed in the post Rethinking a Closet. One door has sheet metal mounted to serve as a magnetic idea board. The other has batting attached to serve as a design wall (refer to all my posts on “What’s on the Design Wall).
I am not sure why I selected the color yellow when I painted this room 8 or so years ago. Somedays I think: “I am going to paint it white or some other neutral color”. Yellow can be overstimulating, but I simply embrace the over stimulation and decorate the room with brightly colored things – like this lovely quilt my friend Judy made me and several silk screen prints from an artist friend in my youth (the other silk screen is in the first photo).
I like to watch “quilting movies” (movies you don’t really have to pay close attention to) and documentaries while I am quilting on the screen below.
Another brightly colored piece of art in my studio – a wallhanging from my friend Betty Anne.
Well back to creating in the tierneycreates Studio – I better not keep that Design Wall empty for too long!


 After (gave the Eurolounger next to the window to the pre-teen next door for her room remodel):
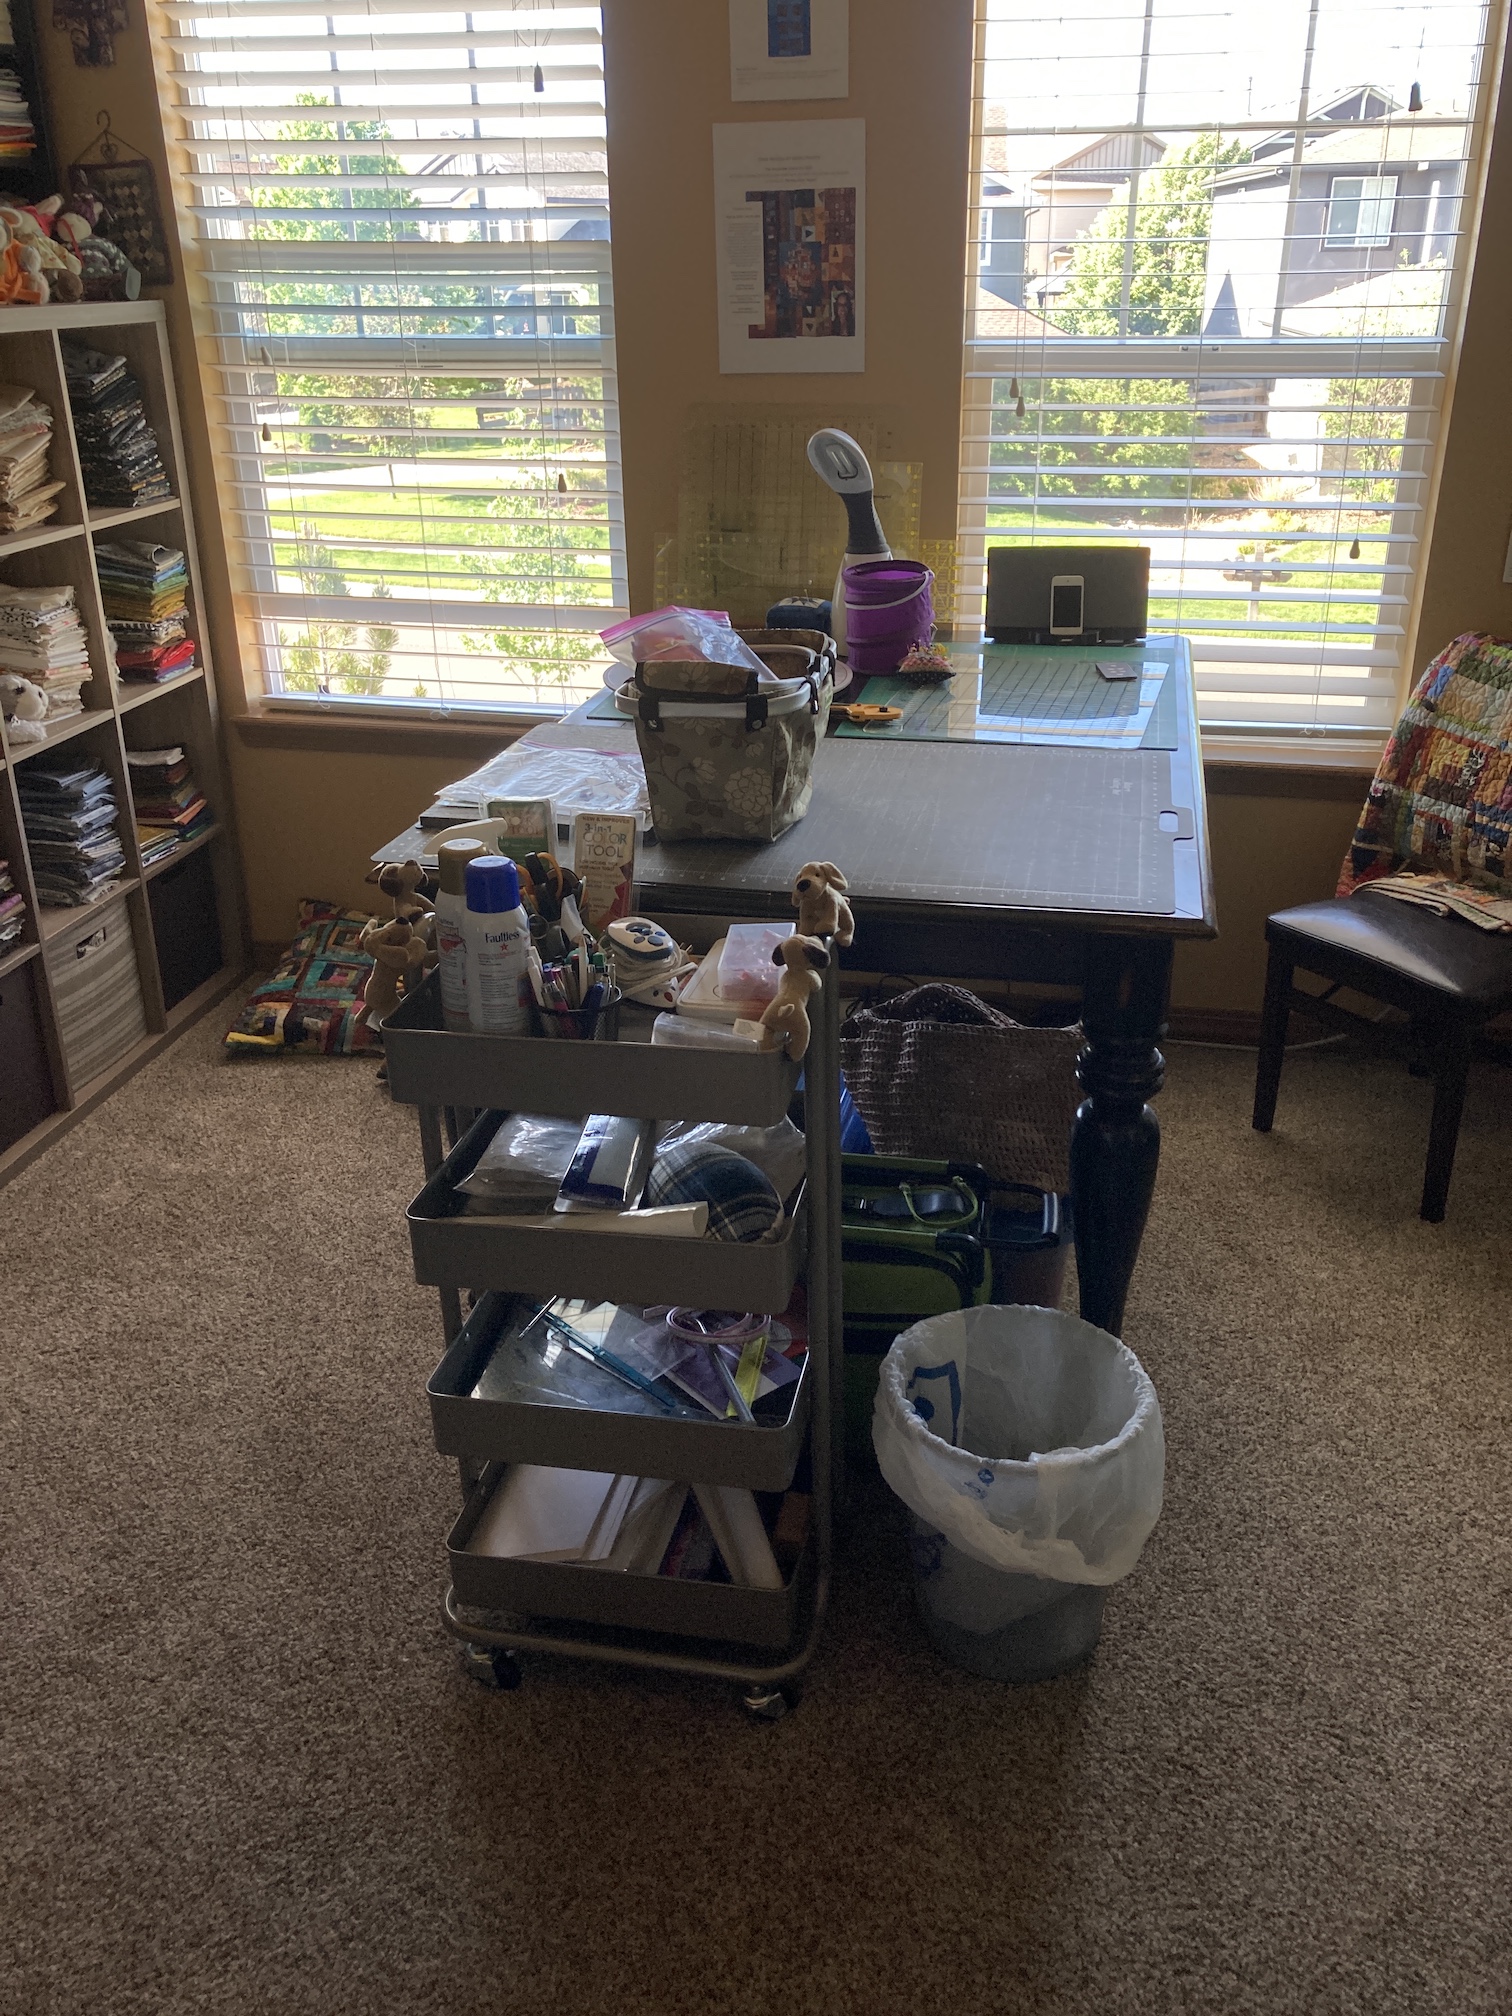 I had a feeling when I first re-did my studio after moving back into it after we decided in the early COVID days not to sell the house and to stay put (see post
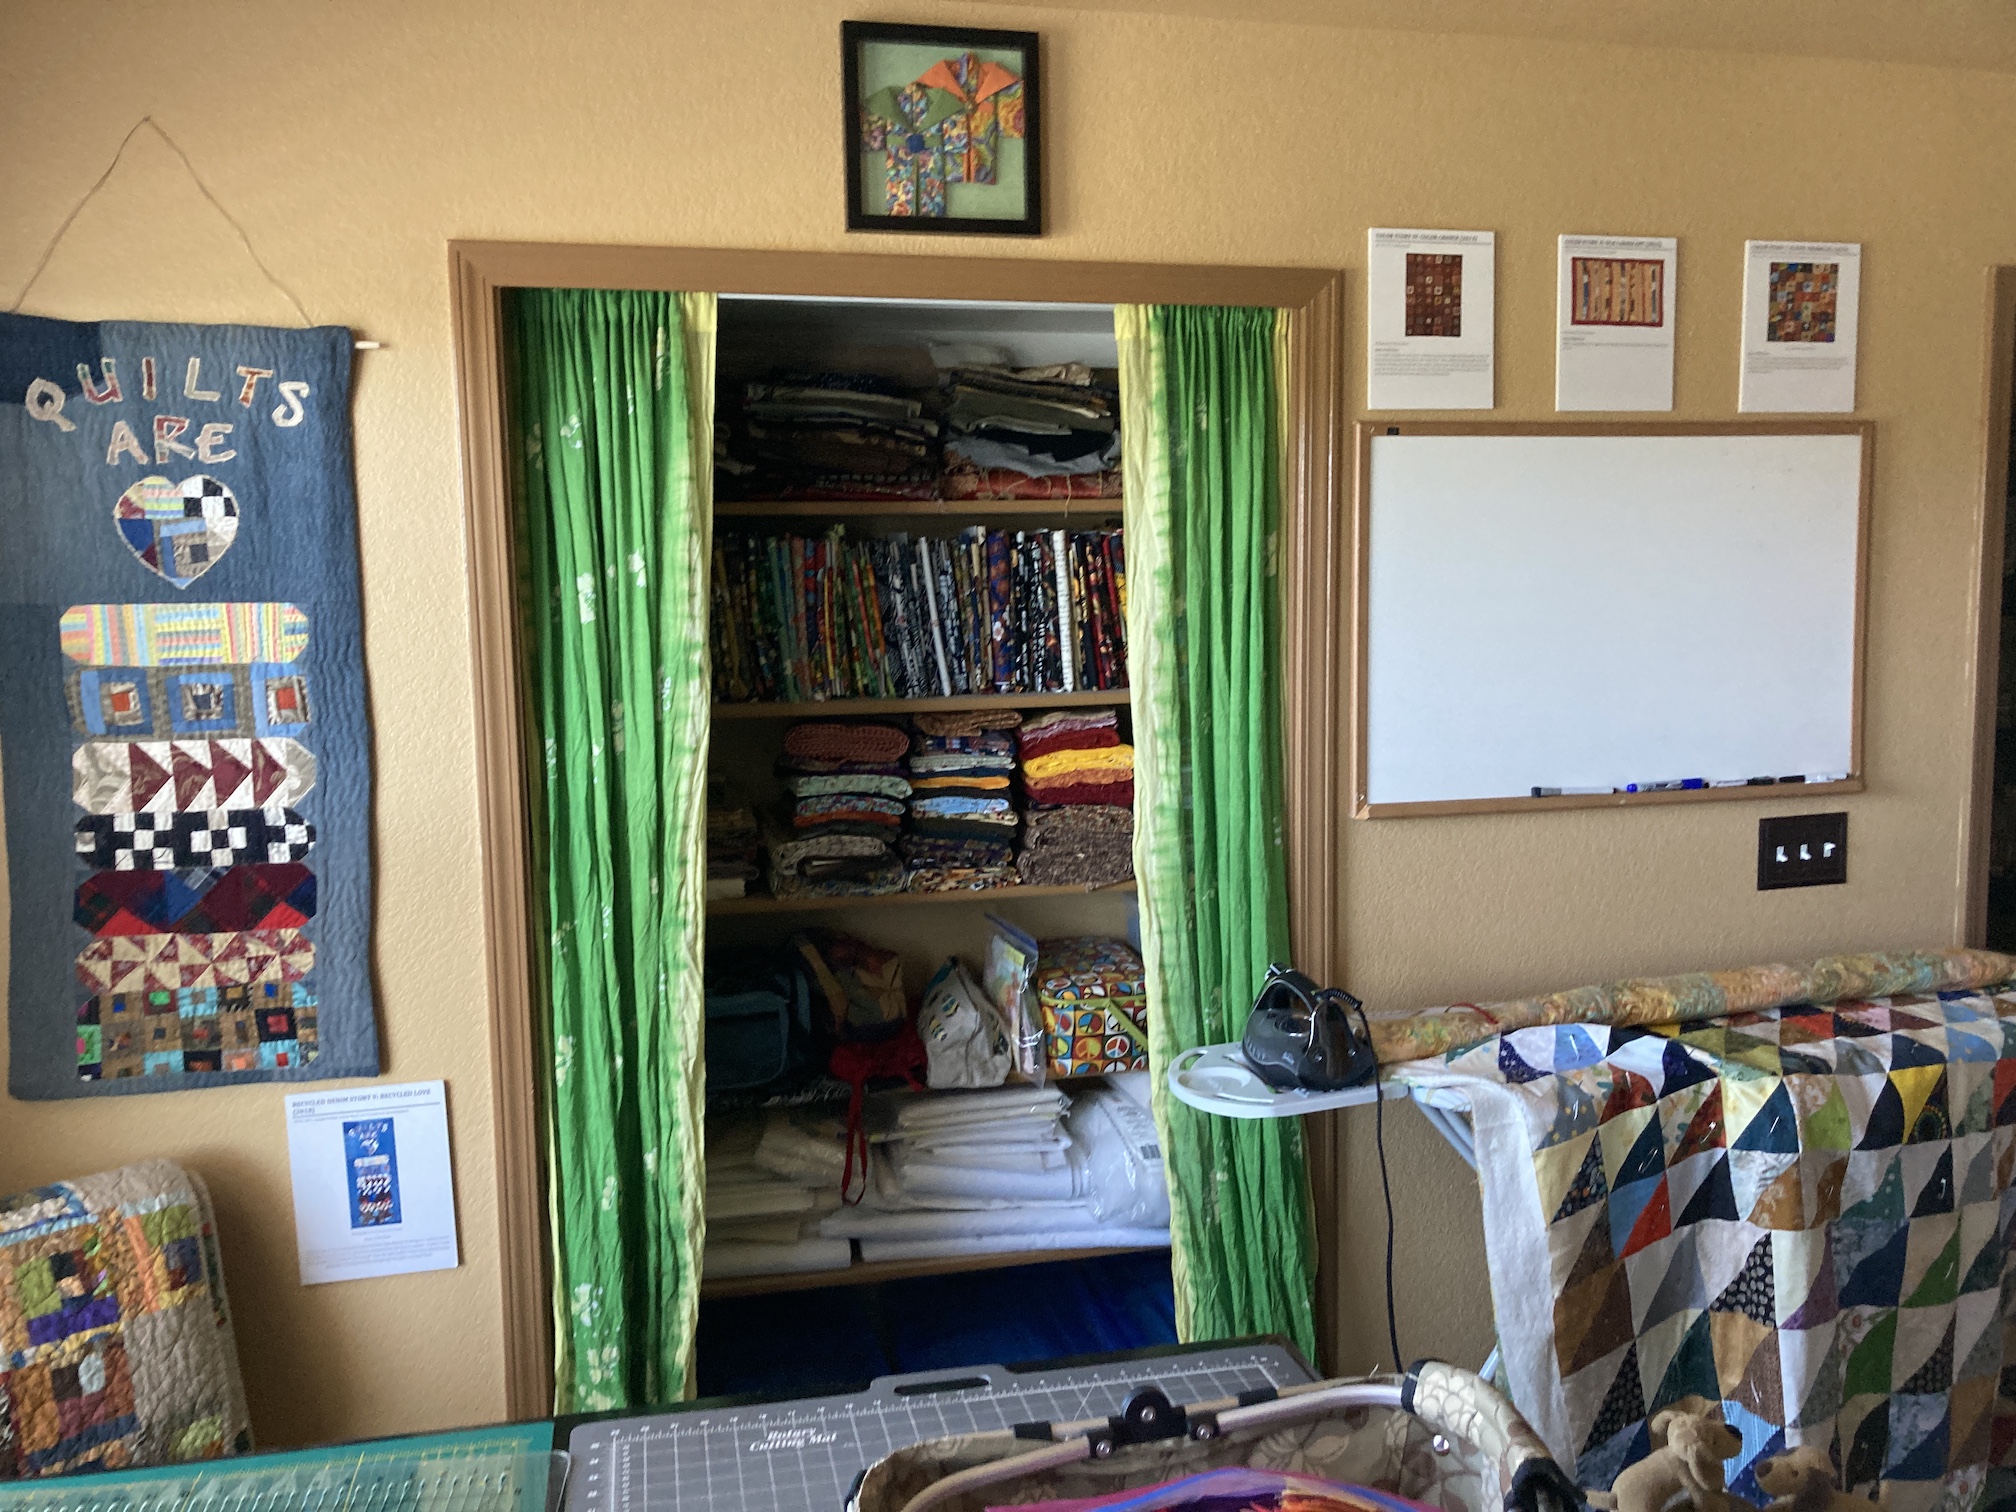
 After:
 I love my new closet and had so much fun organizing it!
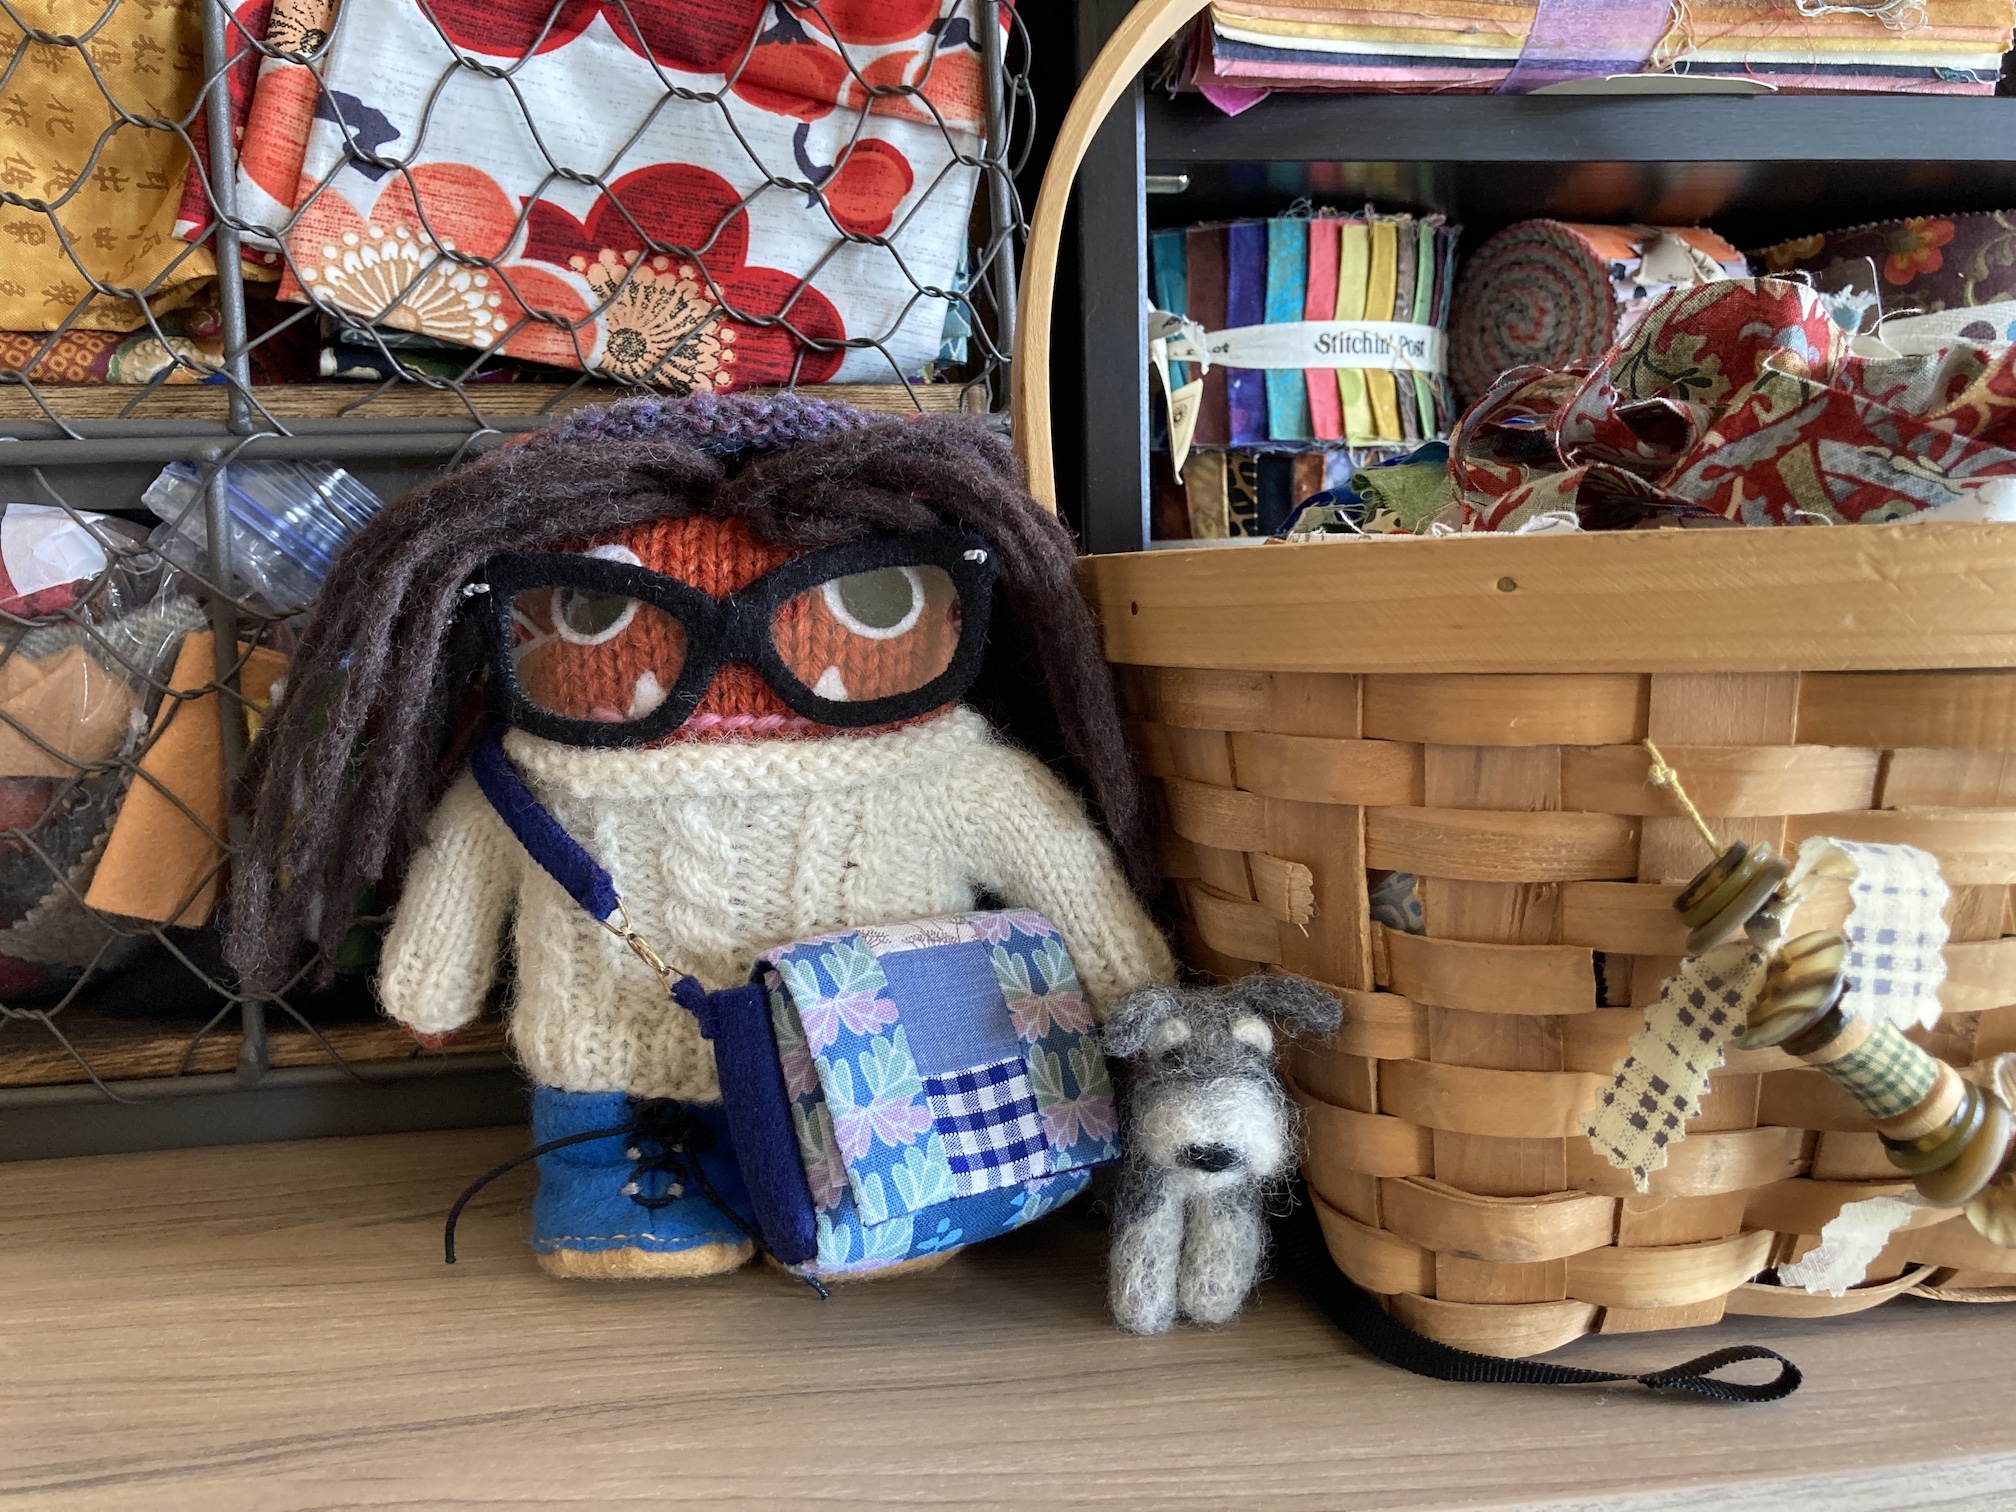

 I originally put the box in my cubby bookcase without even checking the contents, but took a closer look the other day.

 We were created by the very, very, very talented Helen of
 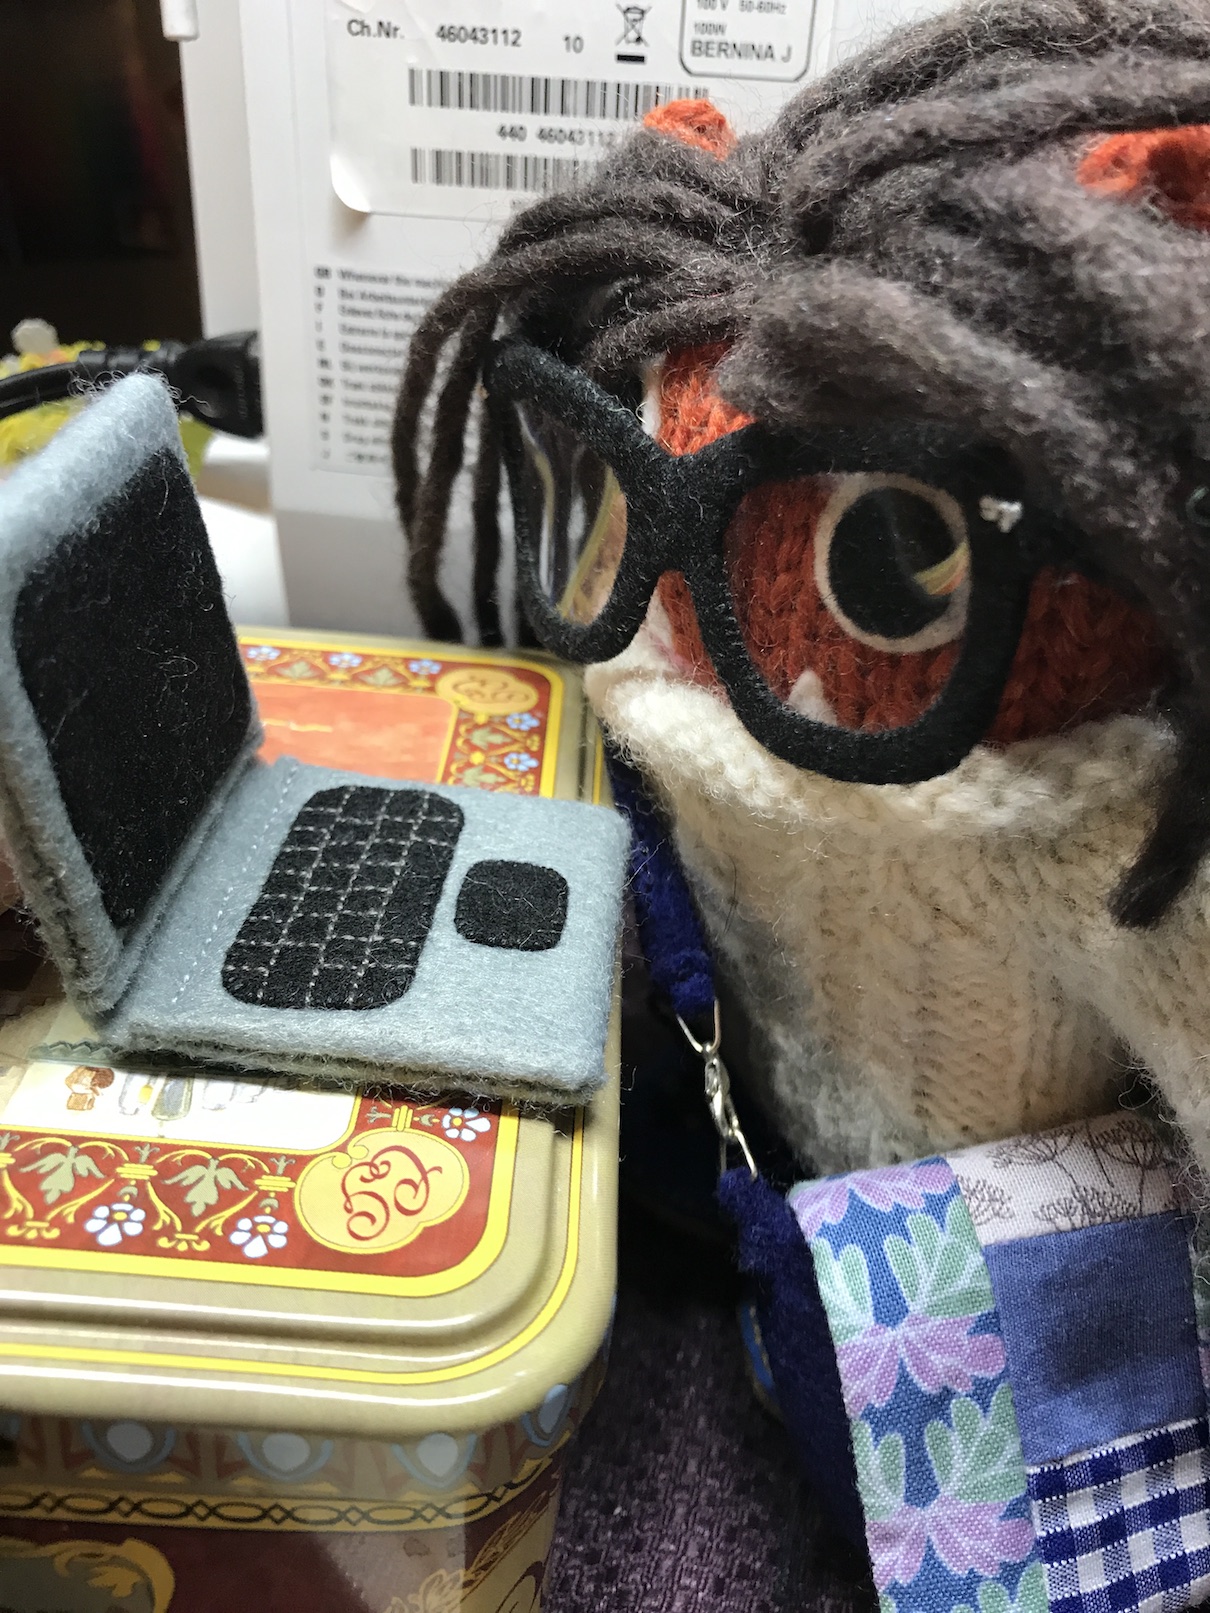 Well enough about me (even though I am very interesting) and let’s get to the tour of Tierney’s “new” studio.
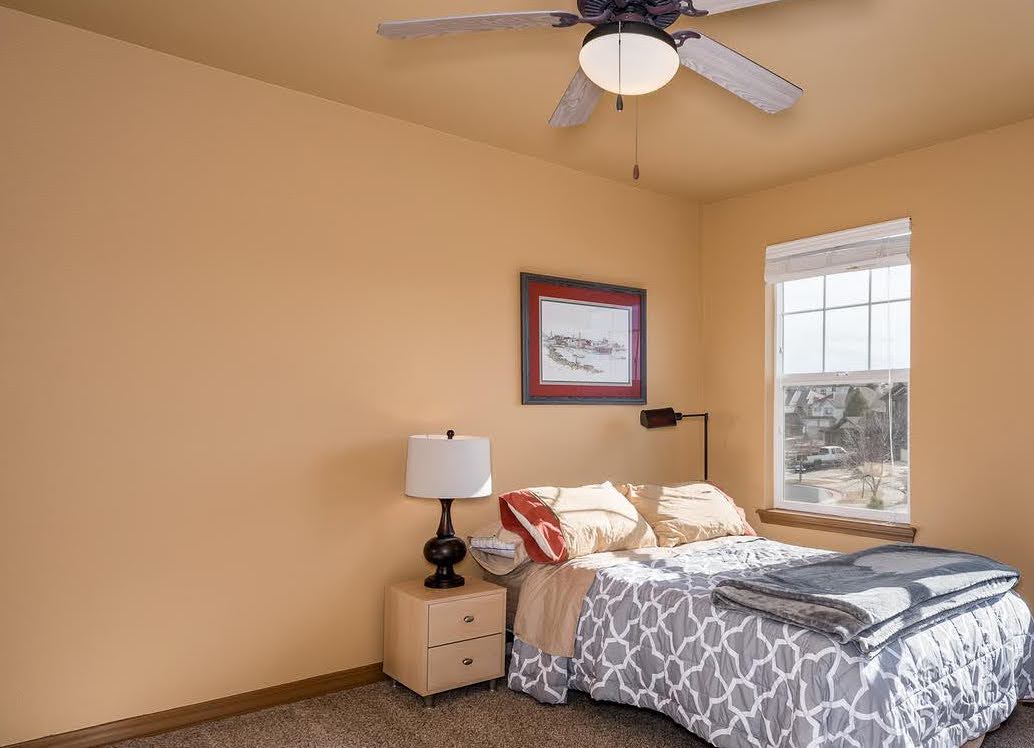 So when they decided not to buy the new house/not to move, Tierney had to unpack her studio and in unpacking her studio, she decided to reimagine the layout.
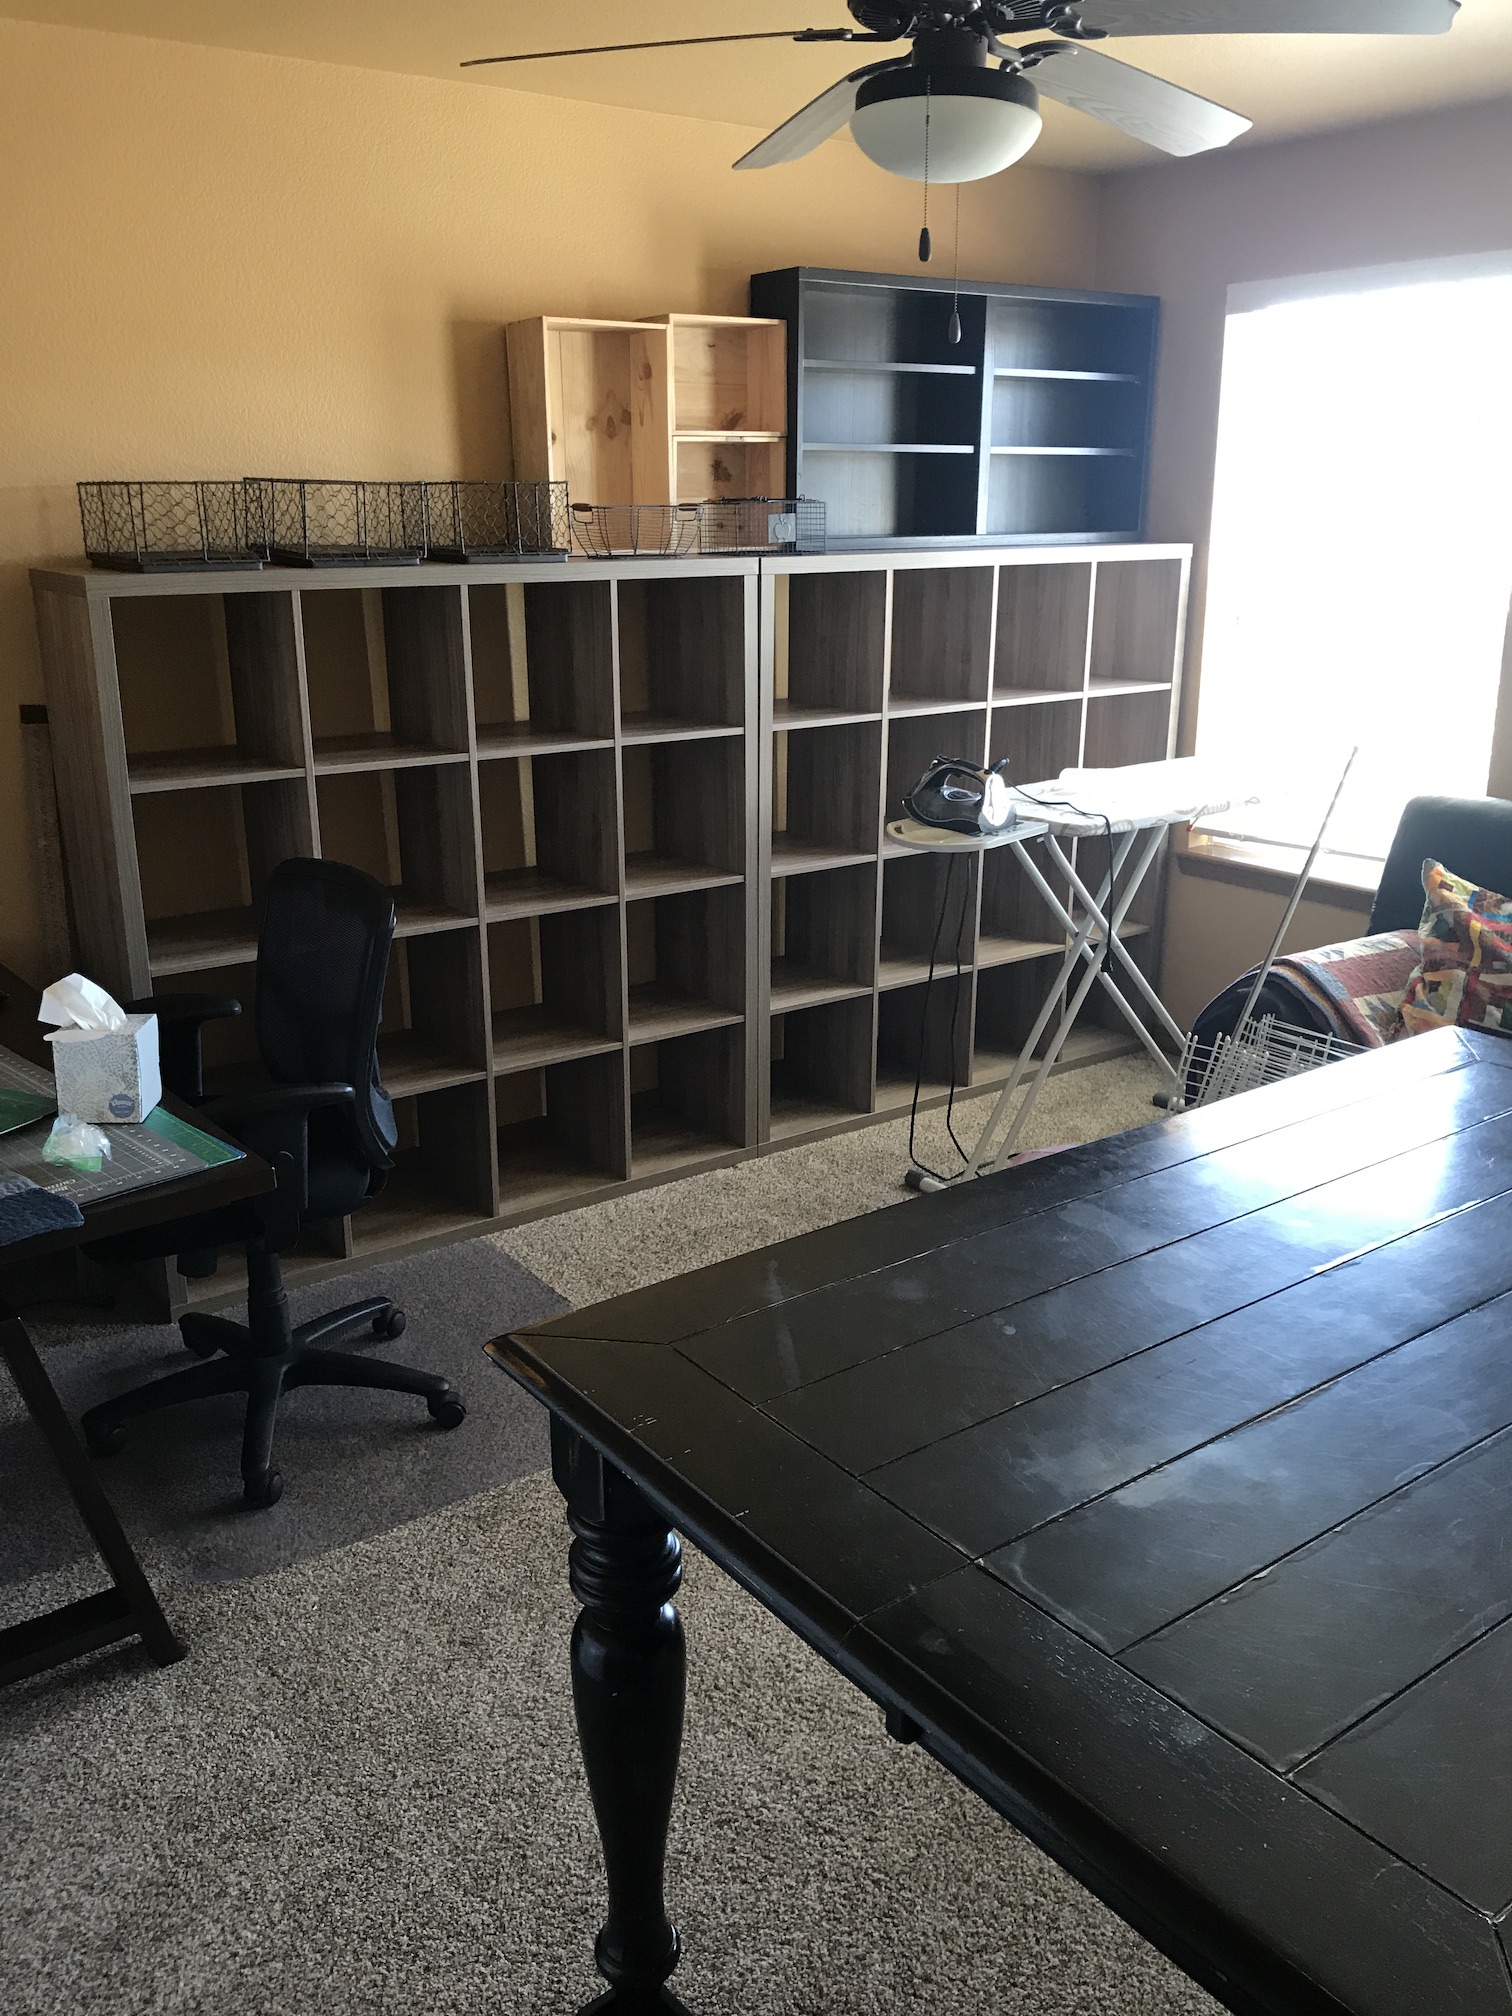 Over the next several days she unpacked her boxes (which seemed like they would never end), hung up some art and quilts on the studio wall and found a place for the large design wall her partner John built her.
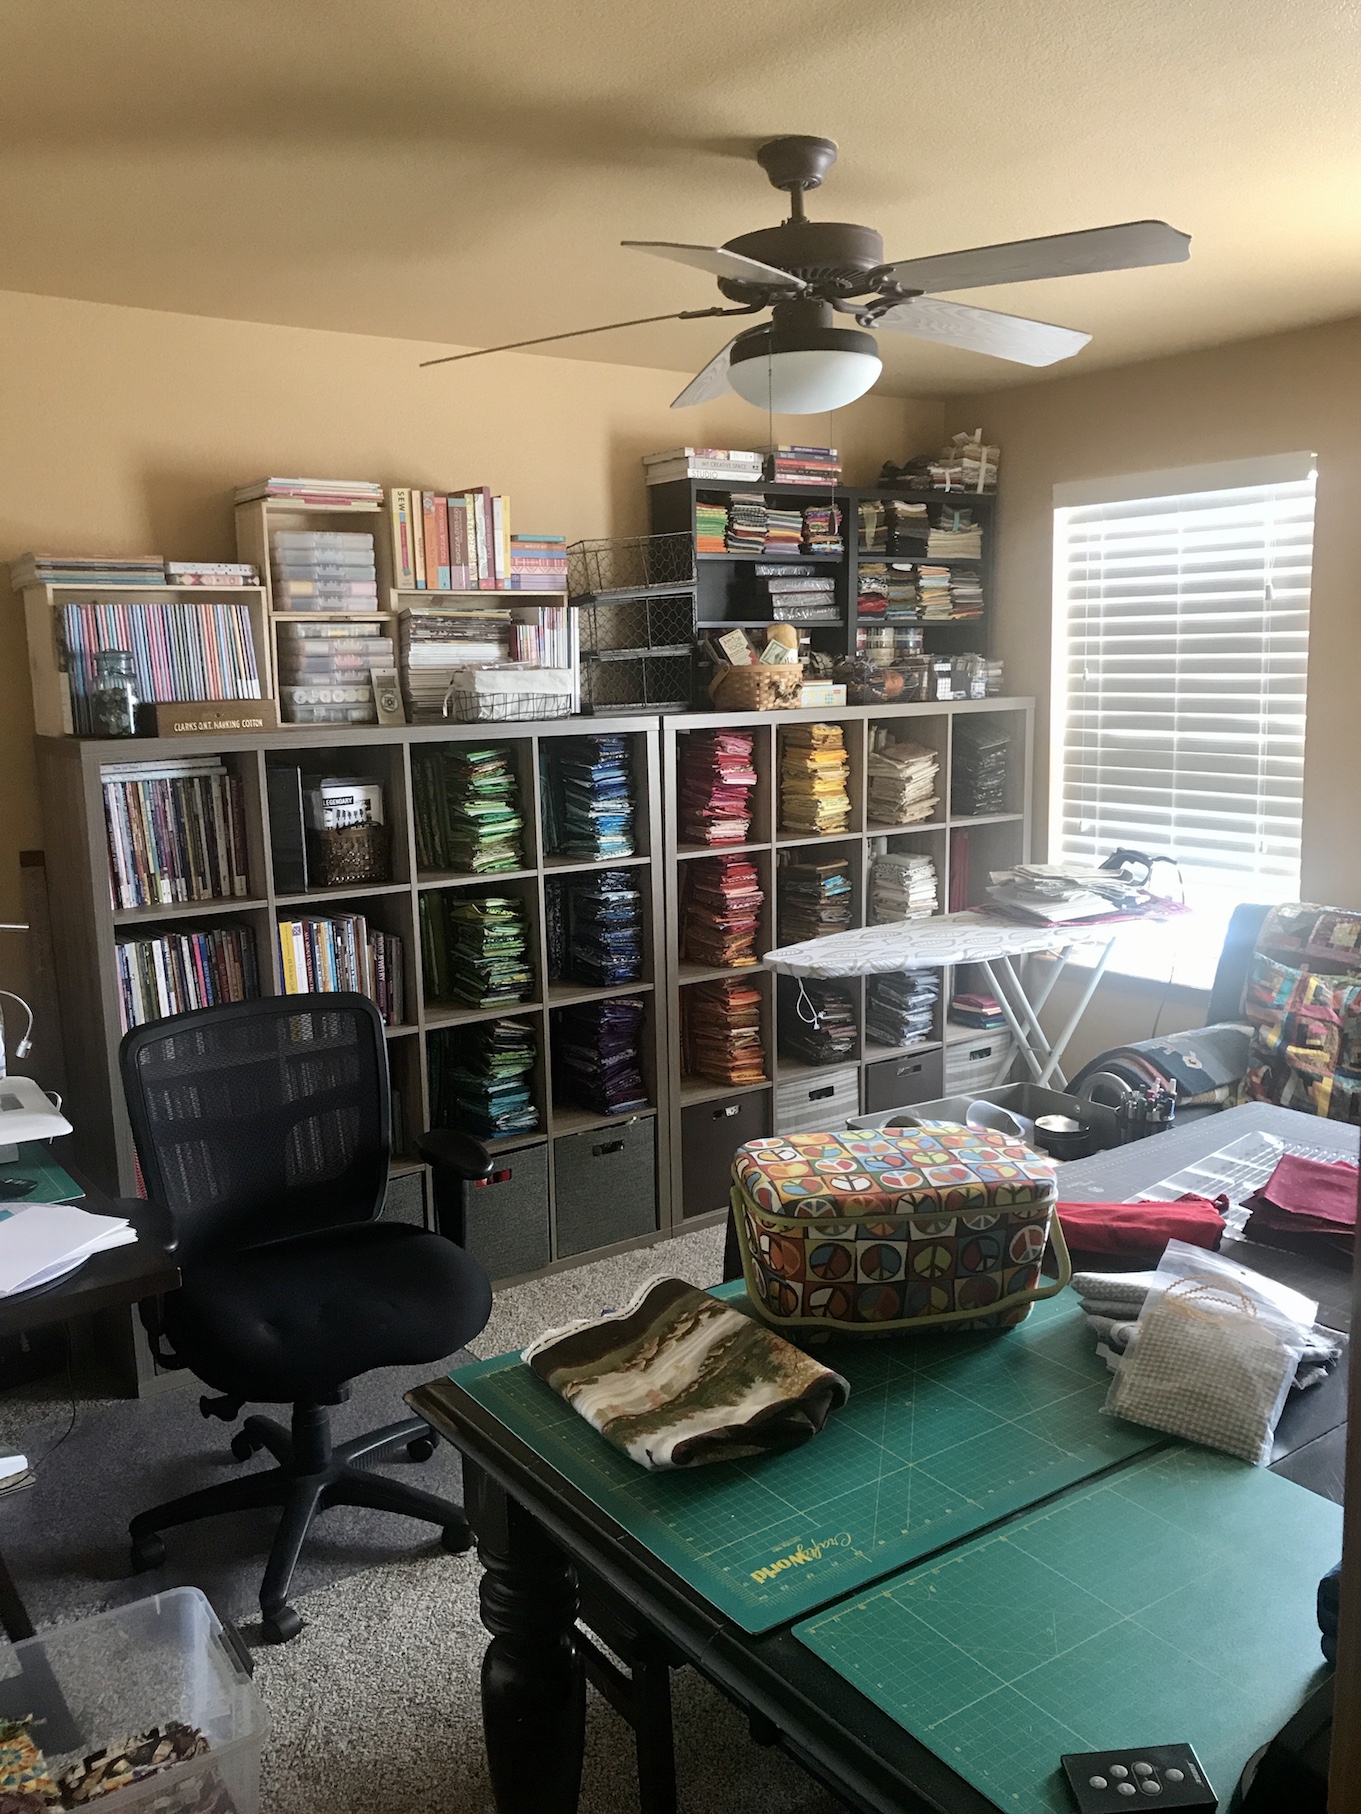
 So Tierney is ready to create (she can be tierneycreates again) in her new studio! She is so happy to have her sewing machine unpacked!
 But she is hoping to start sewing a bit more fun things in the near future than masks…
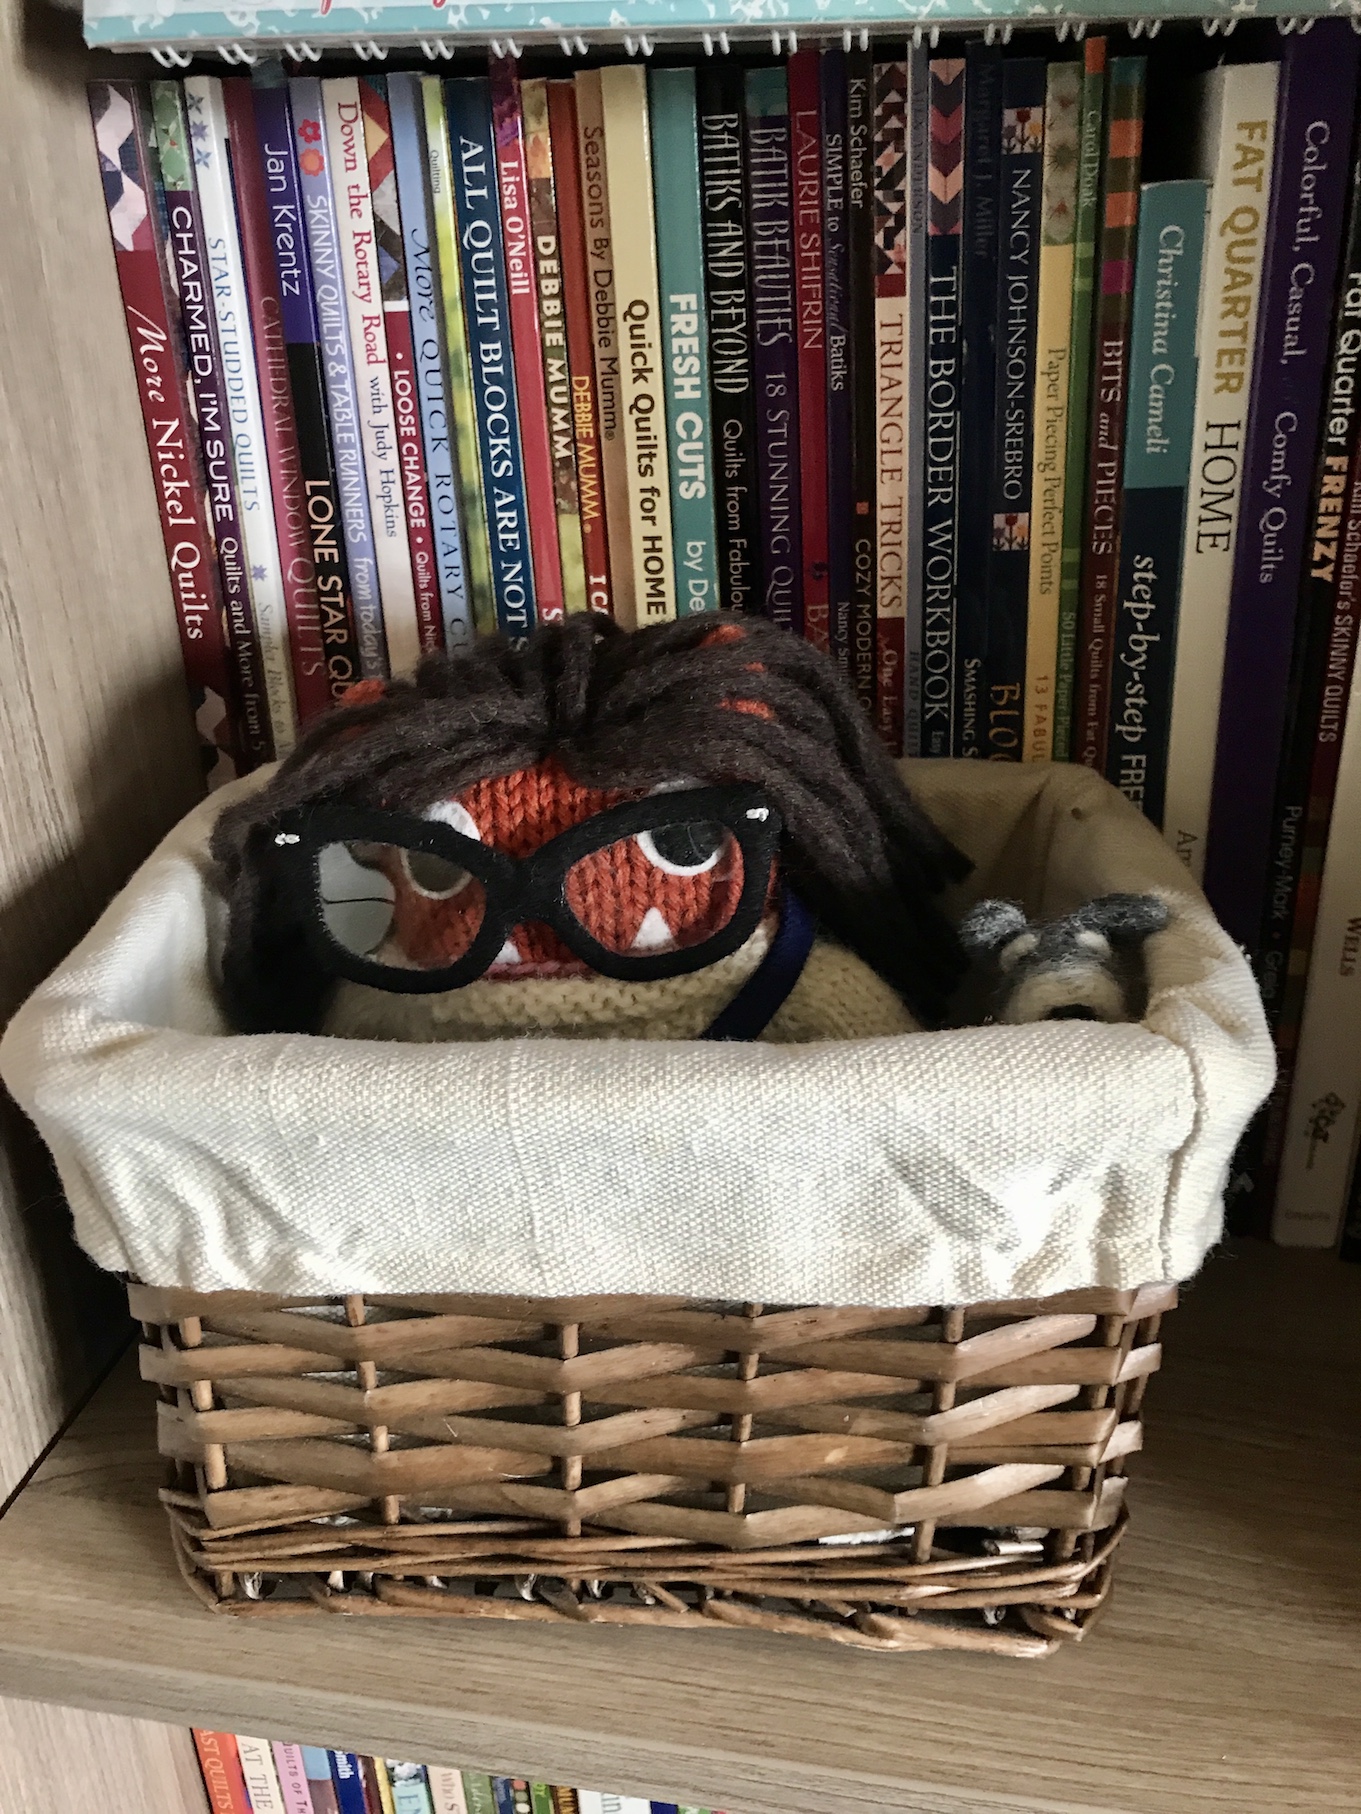 Which of course should have been her first priority from the beginning of setting up her studio!