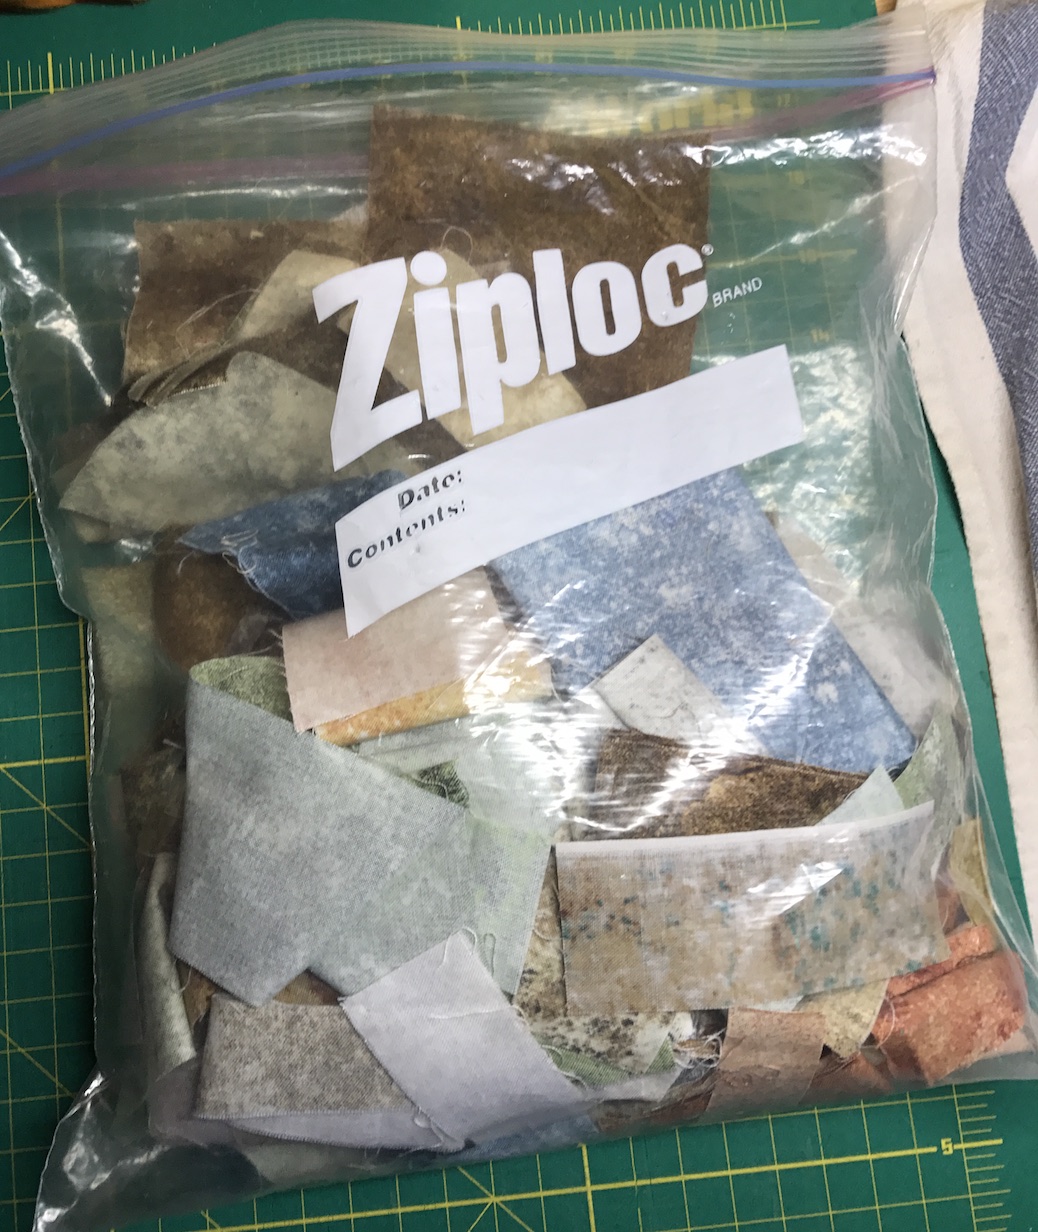
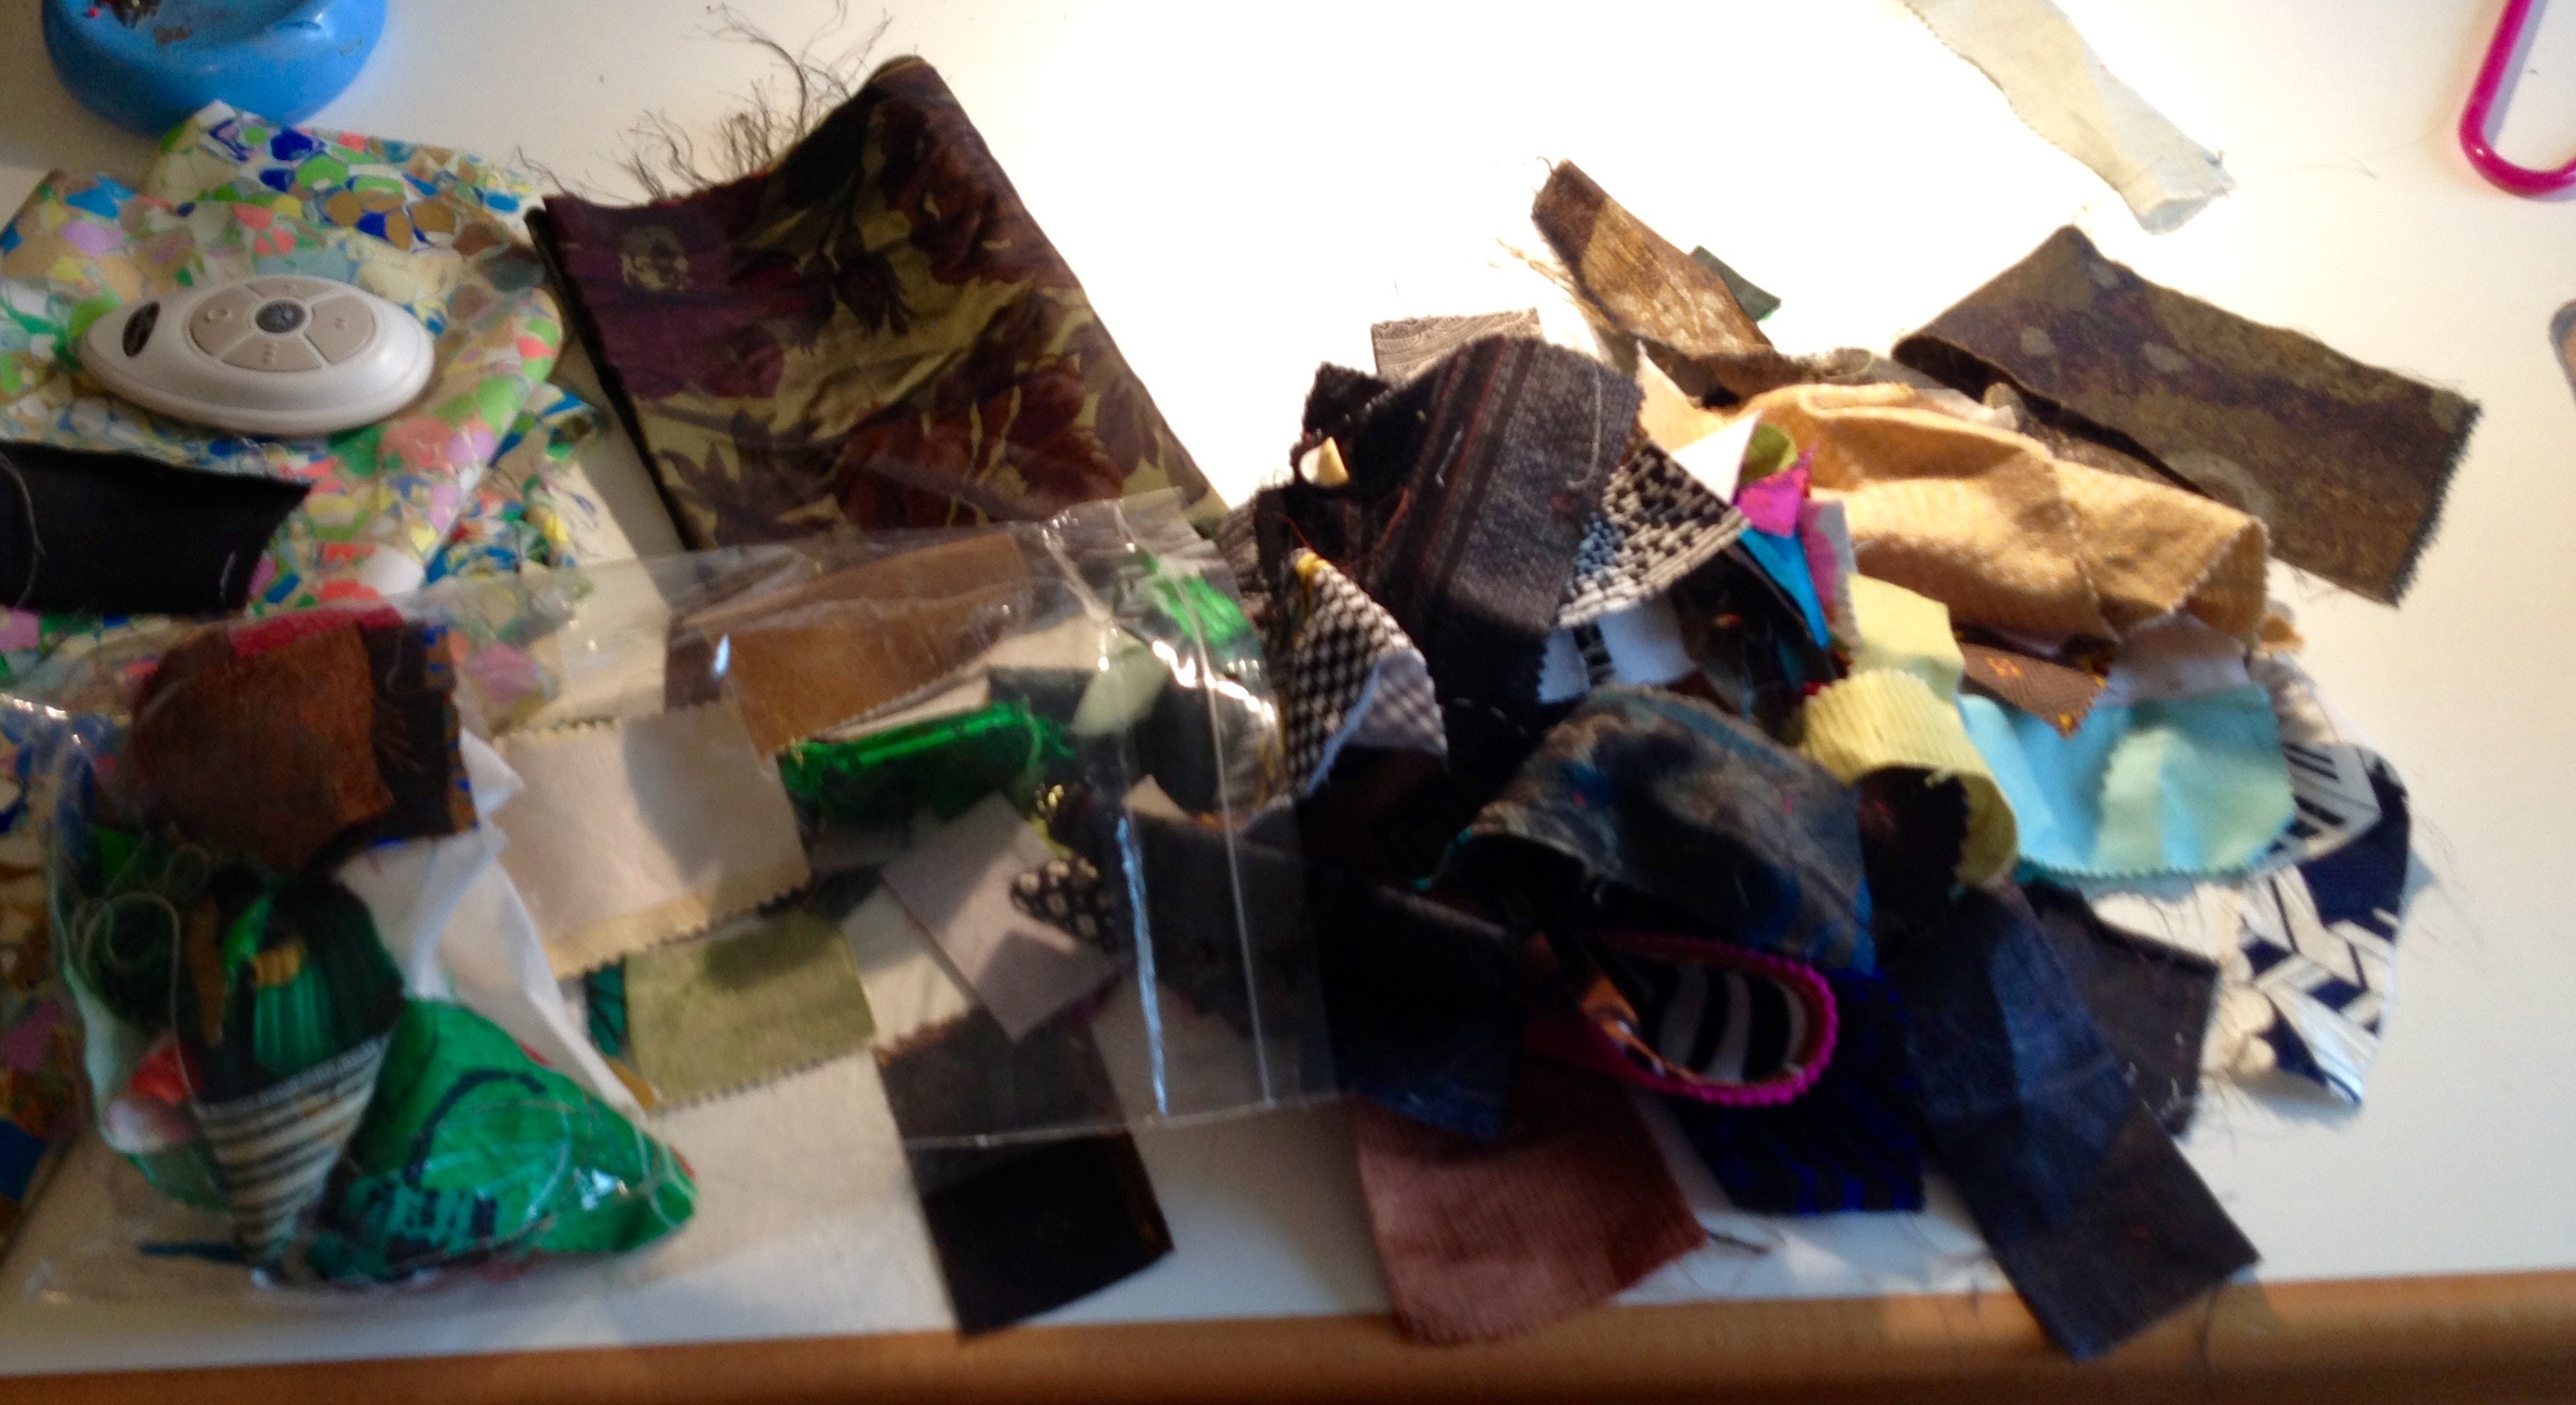
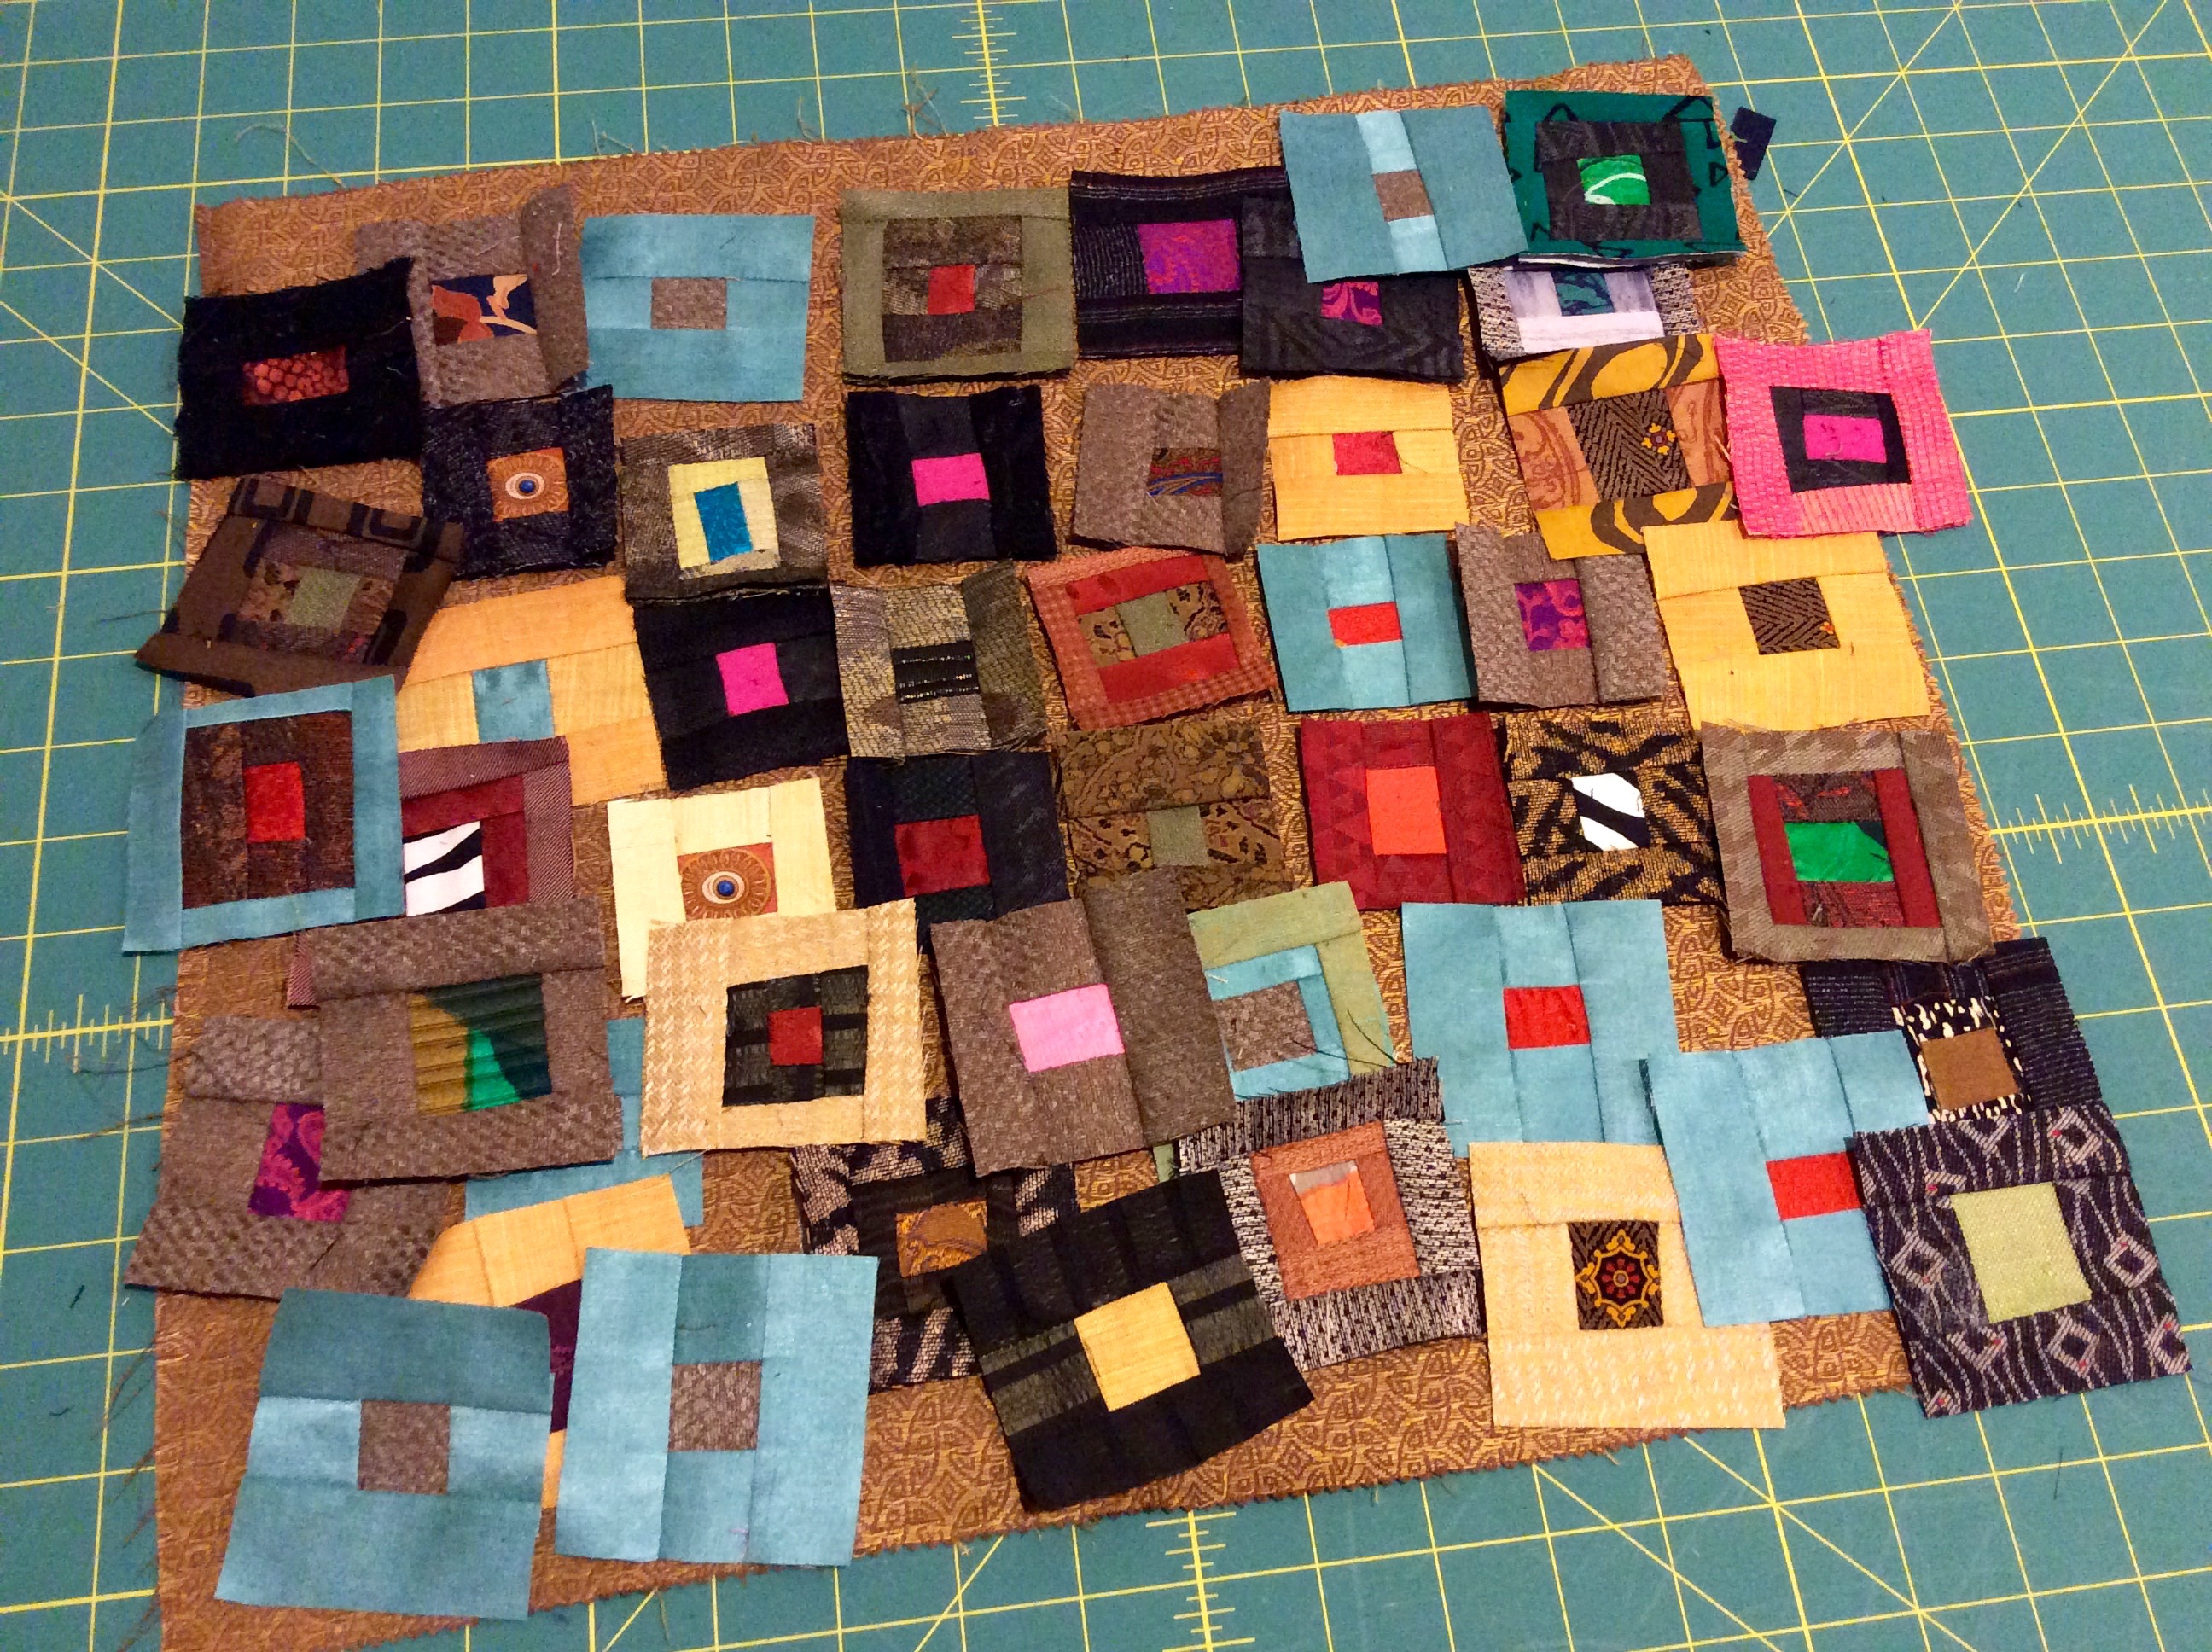
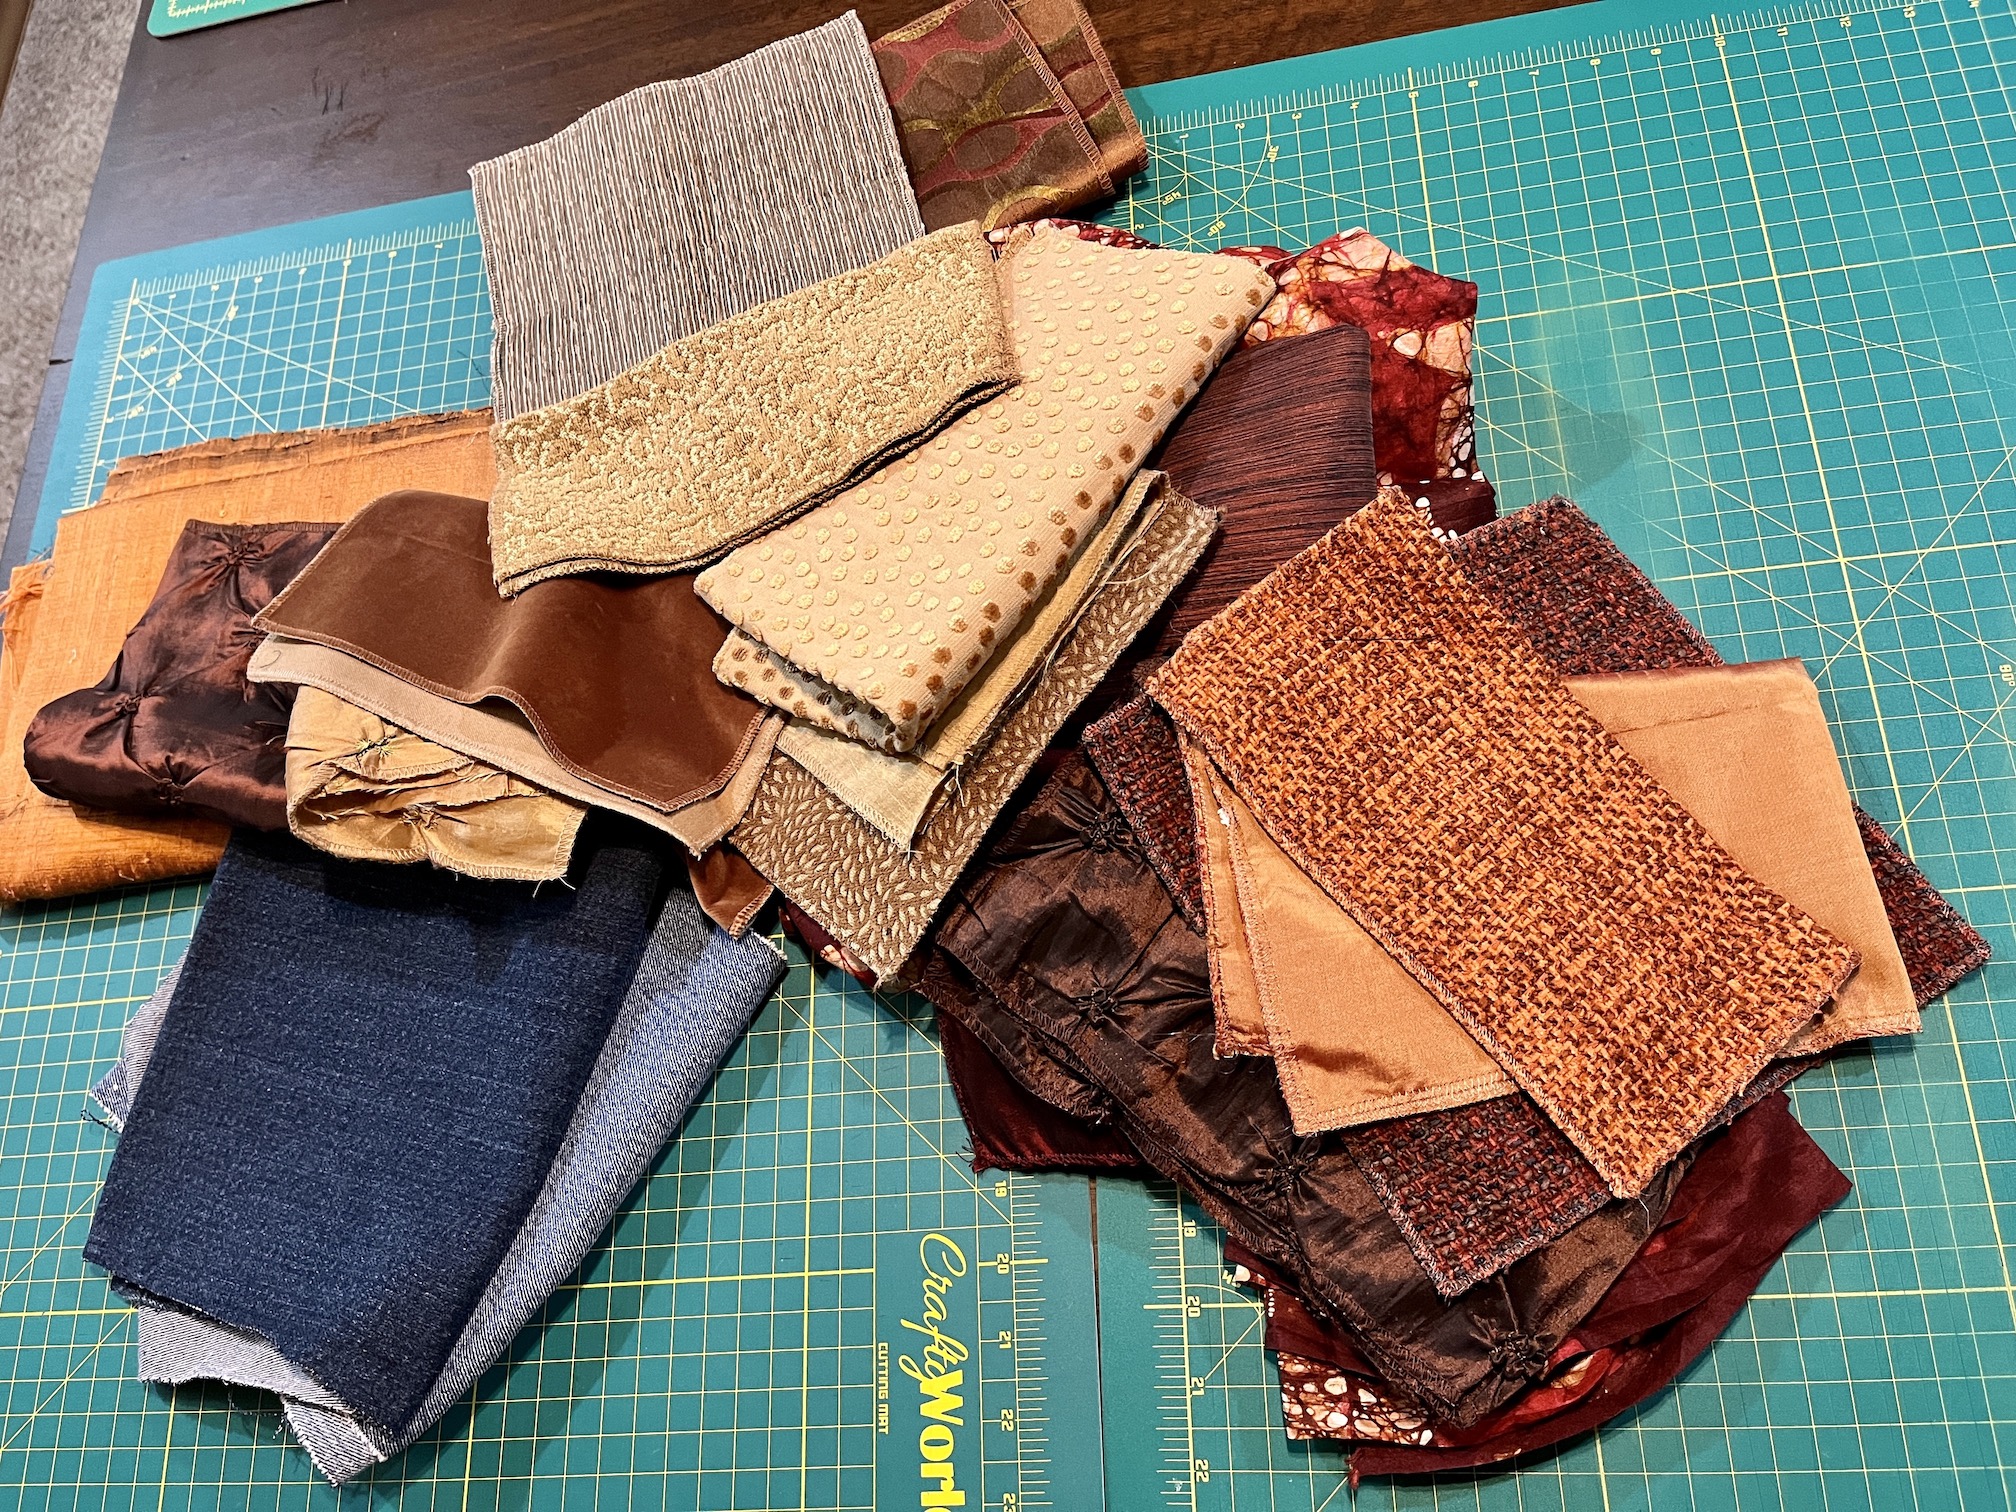
I’ve been itching to work with recycled textiles again and the other day I put together a collection of pieces to work with from my recycled textiles stash (recycled clothing, jeans, home decor fabrics):
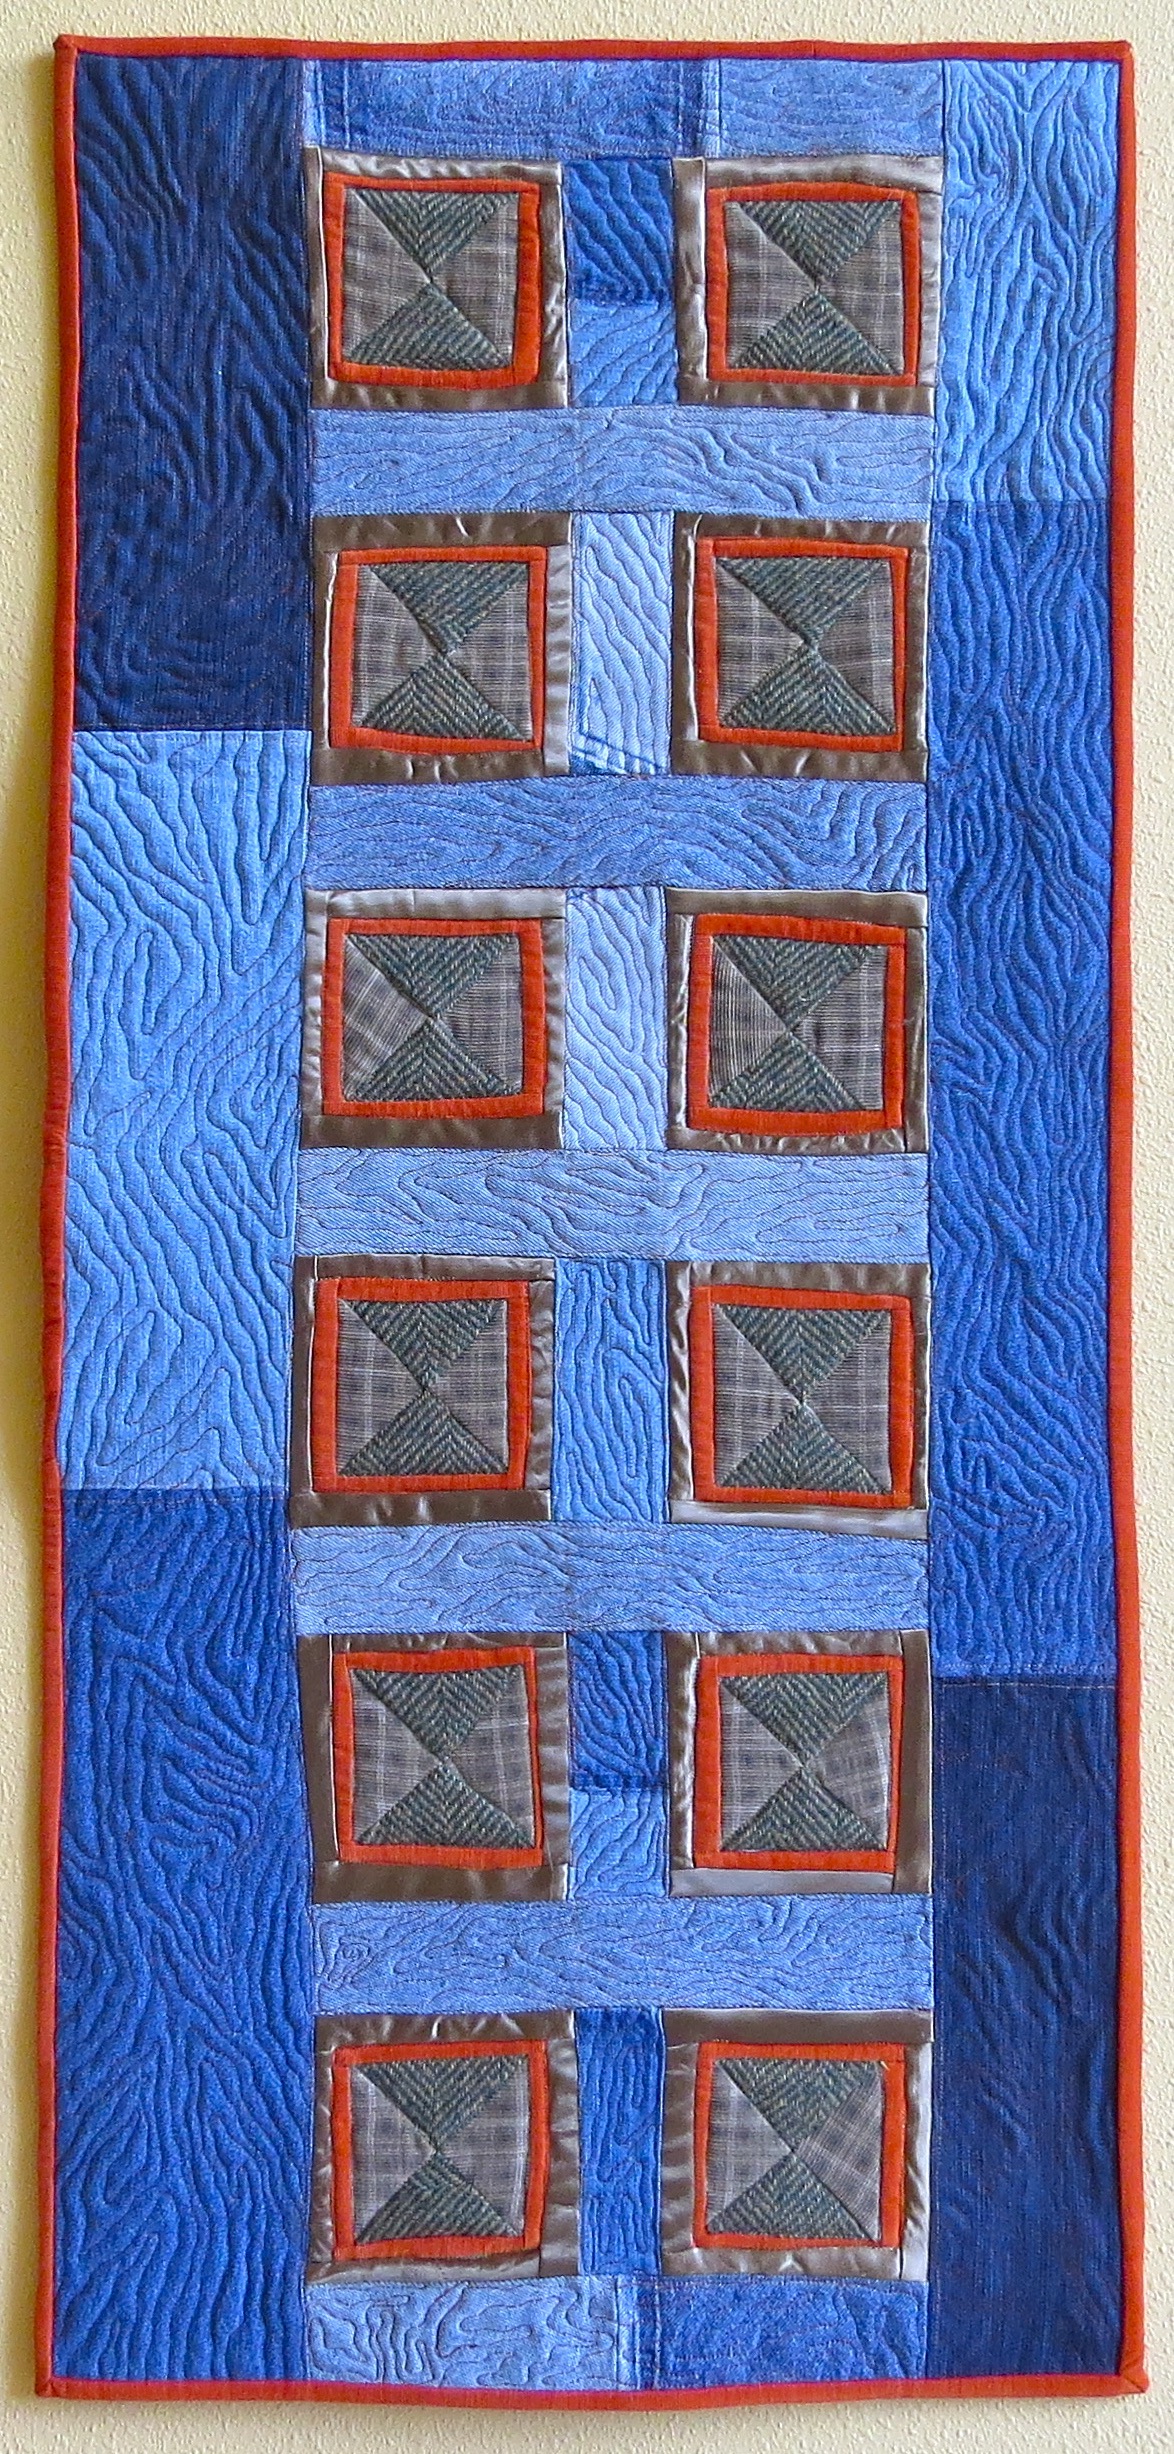
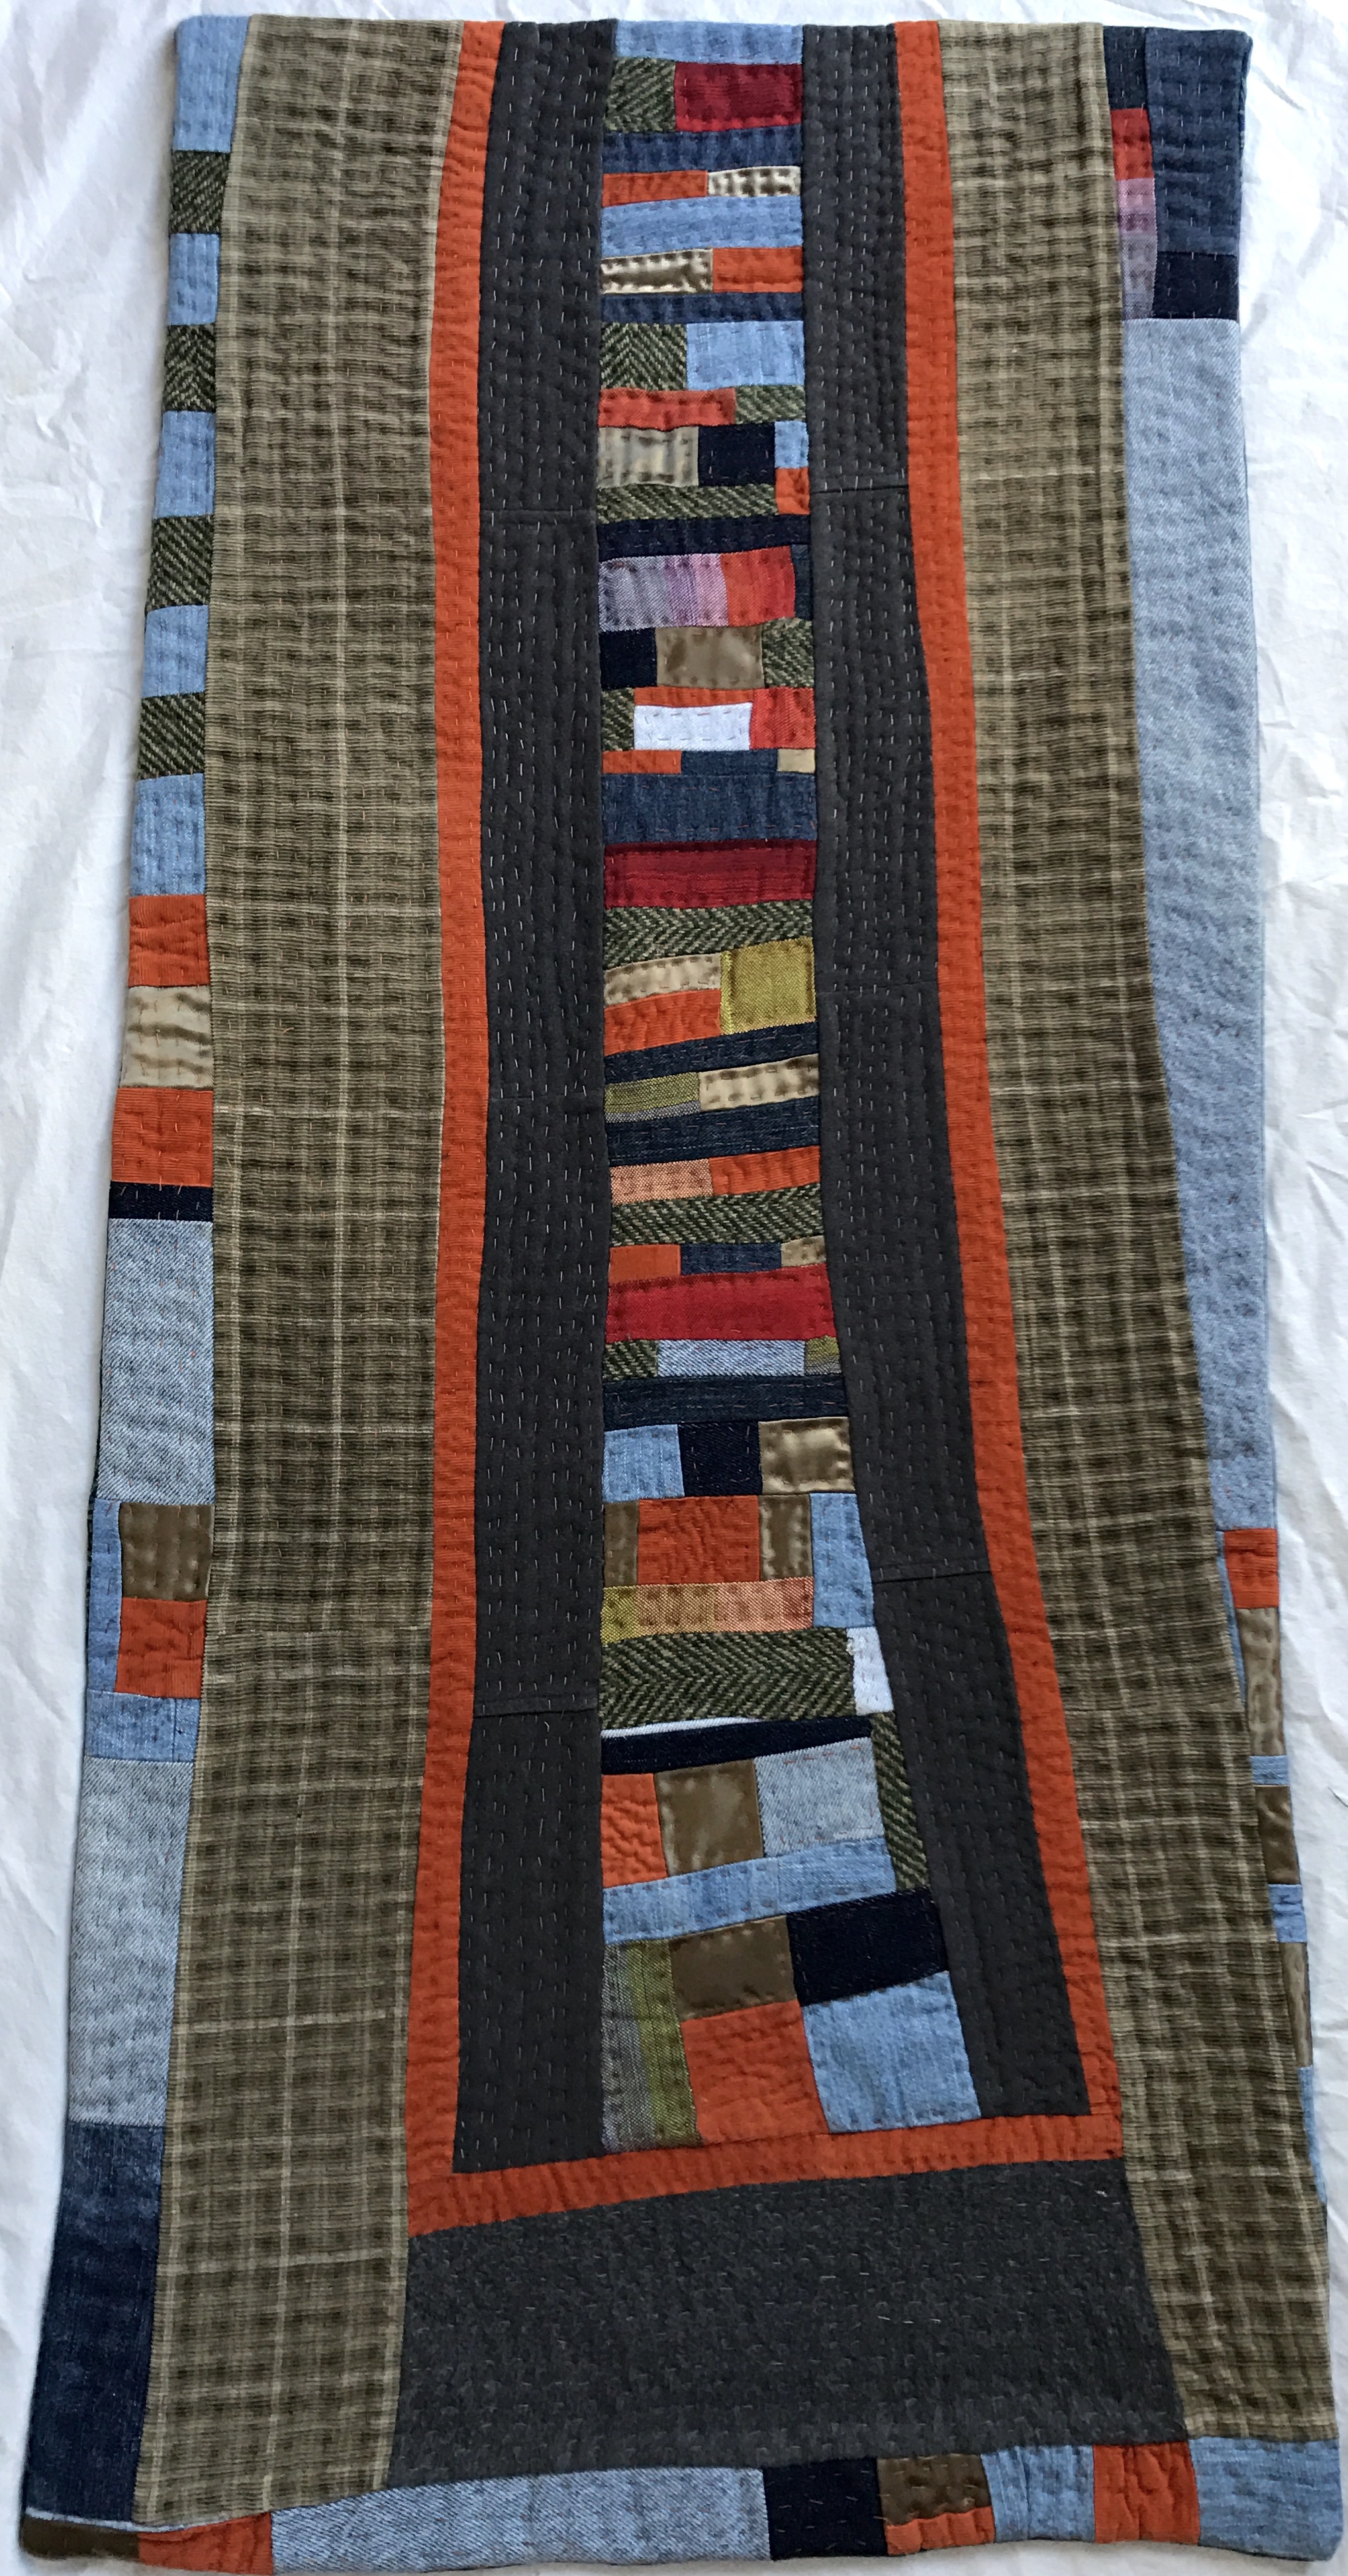
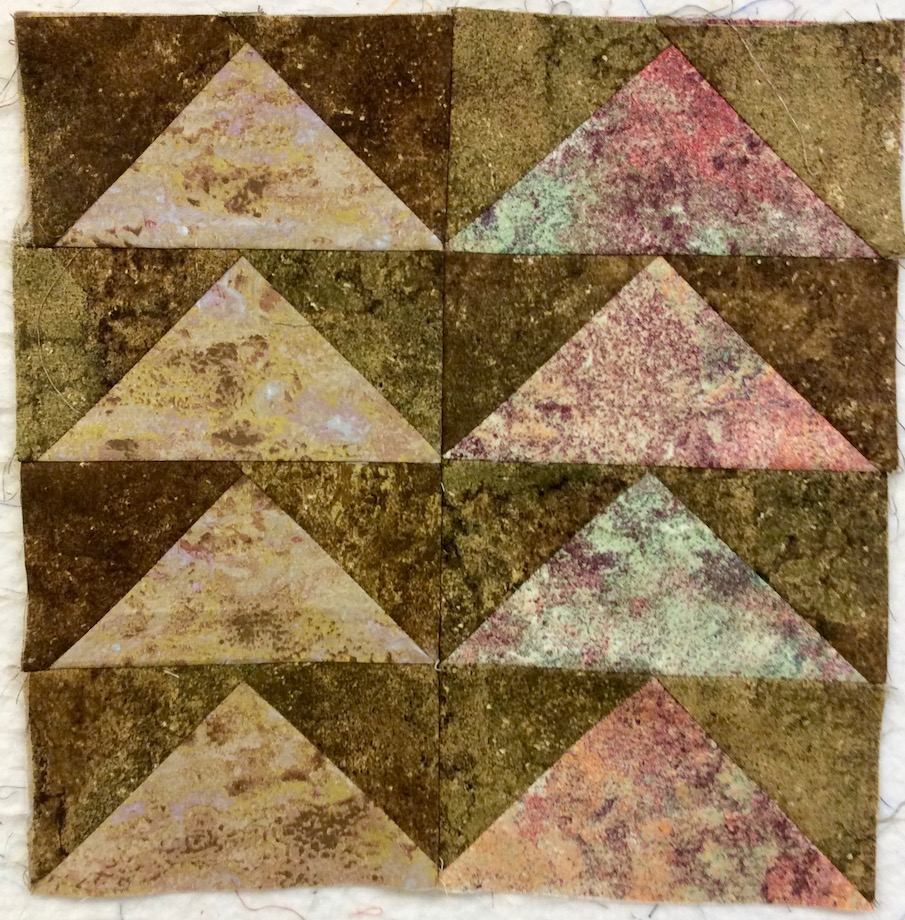
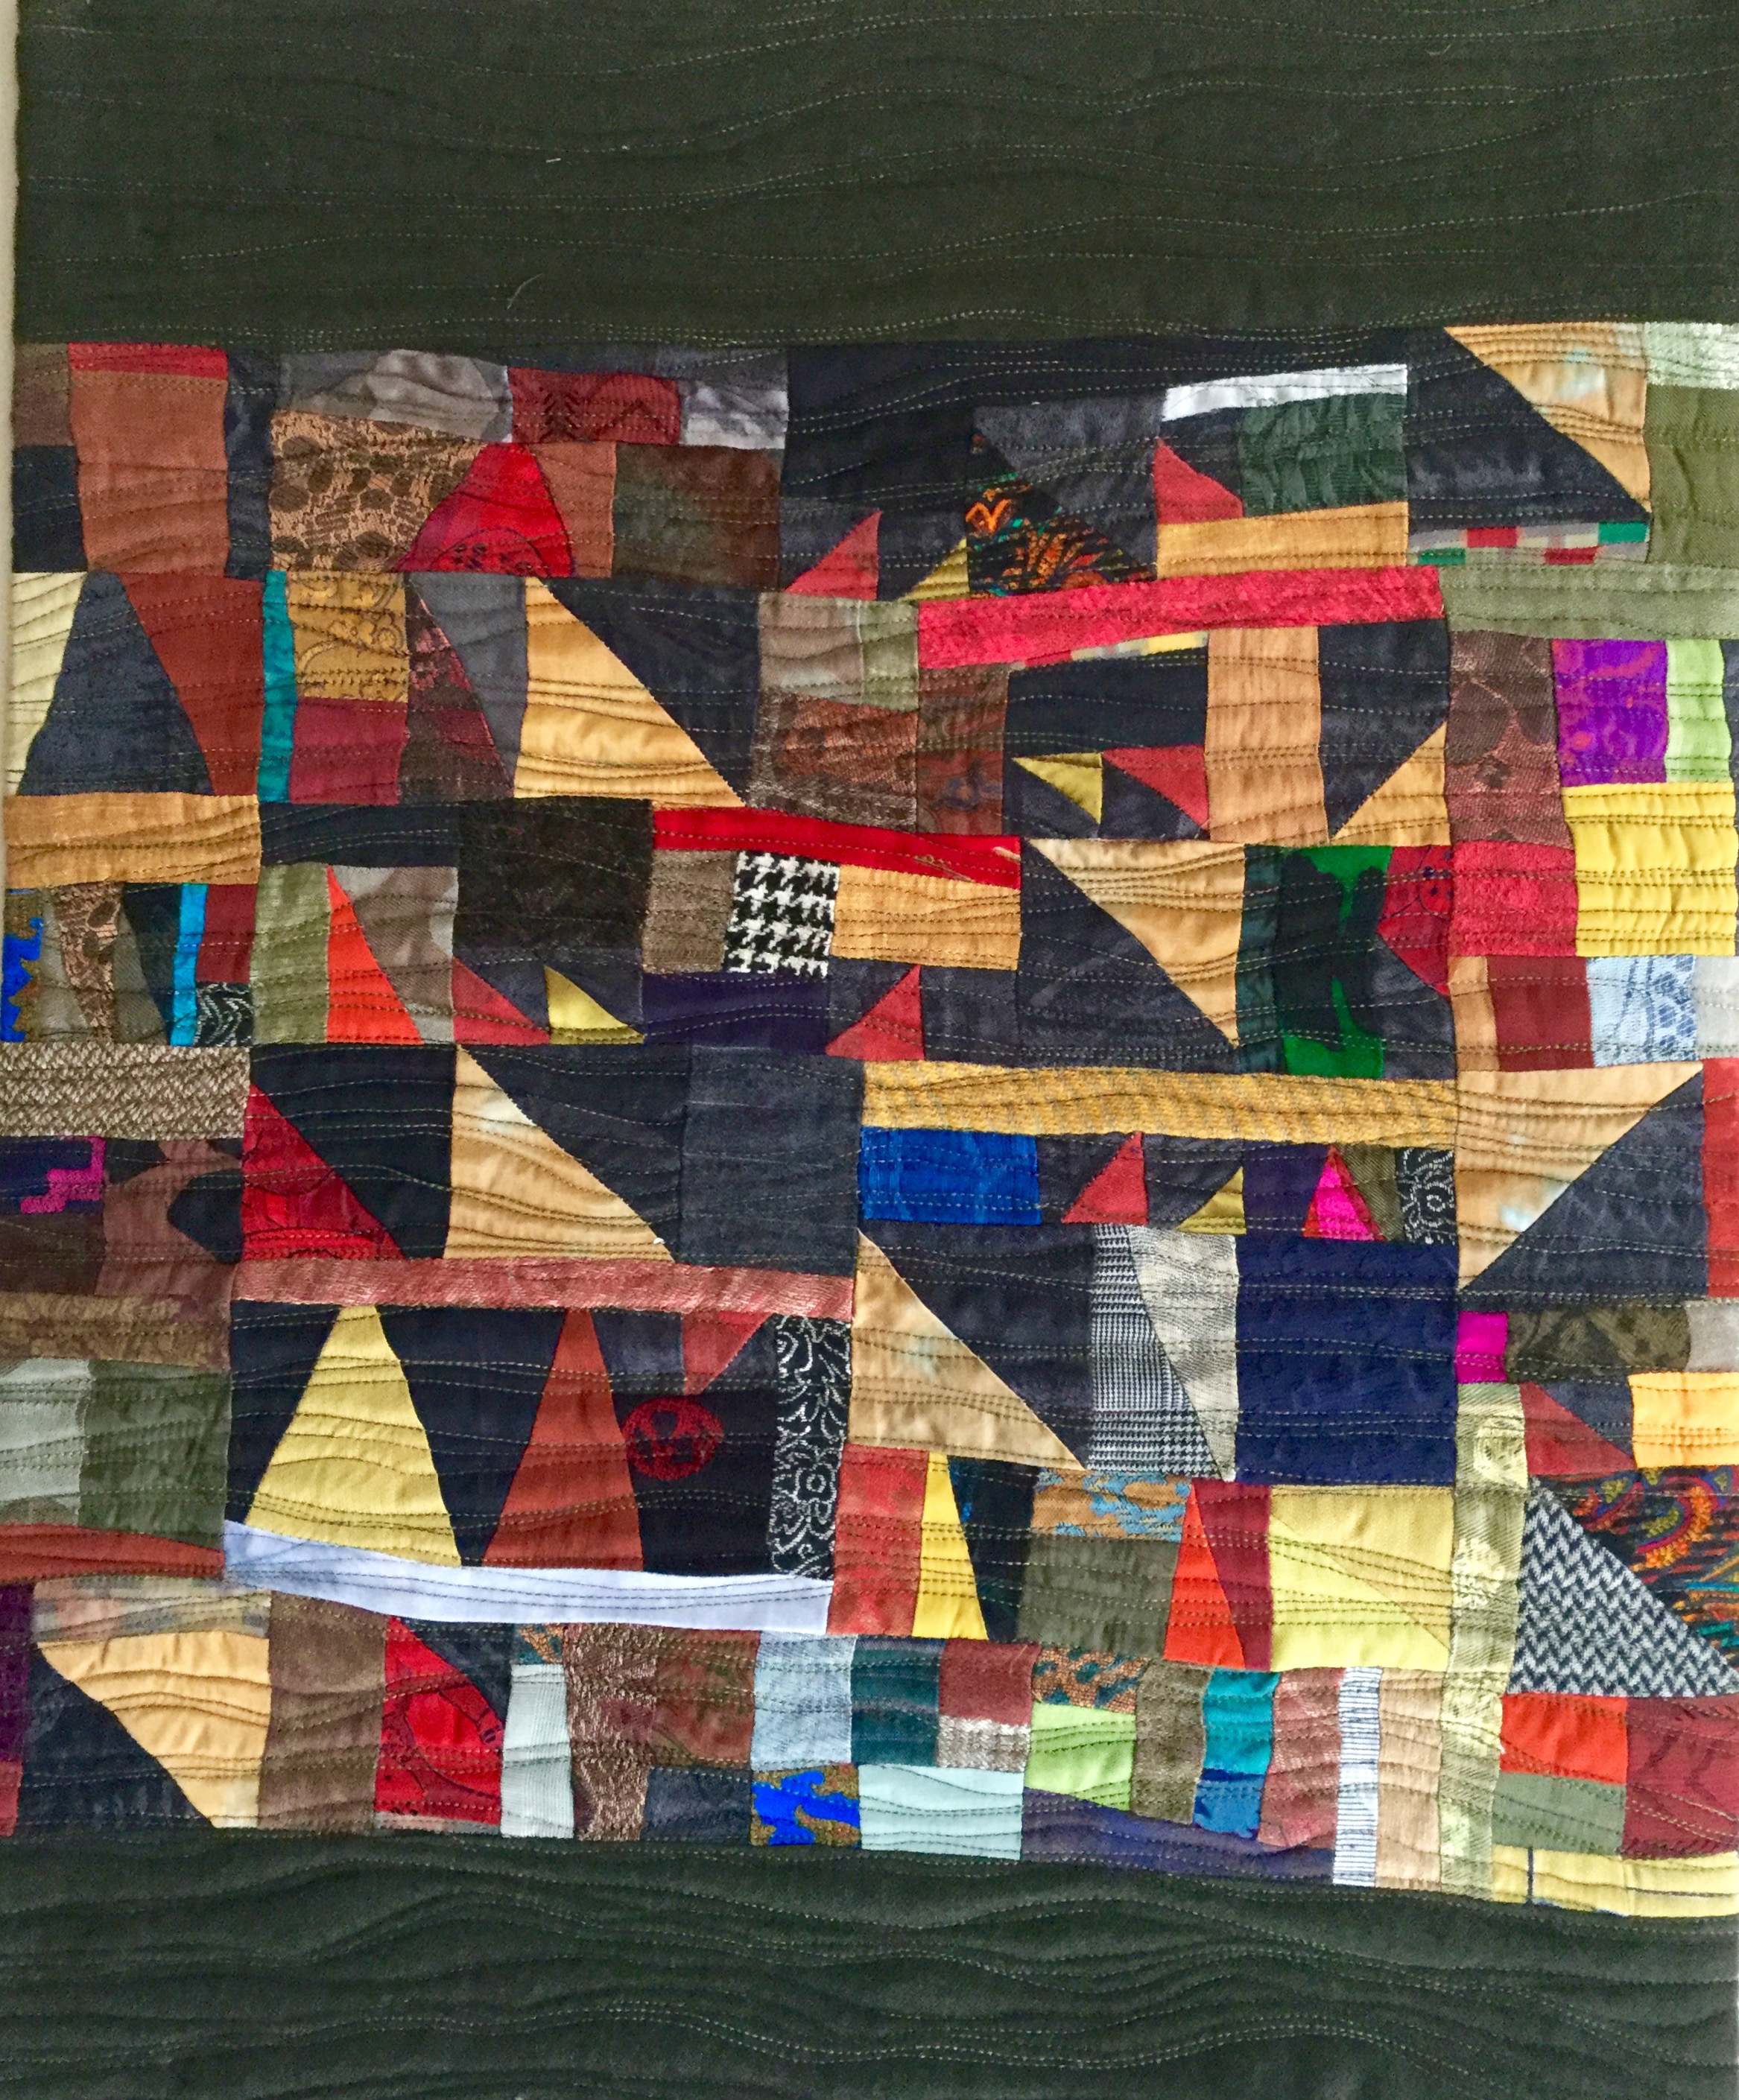
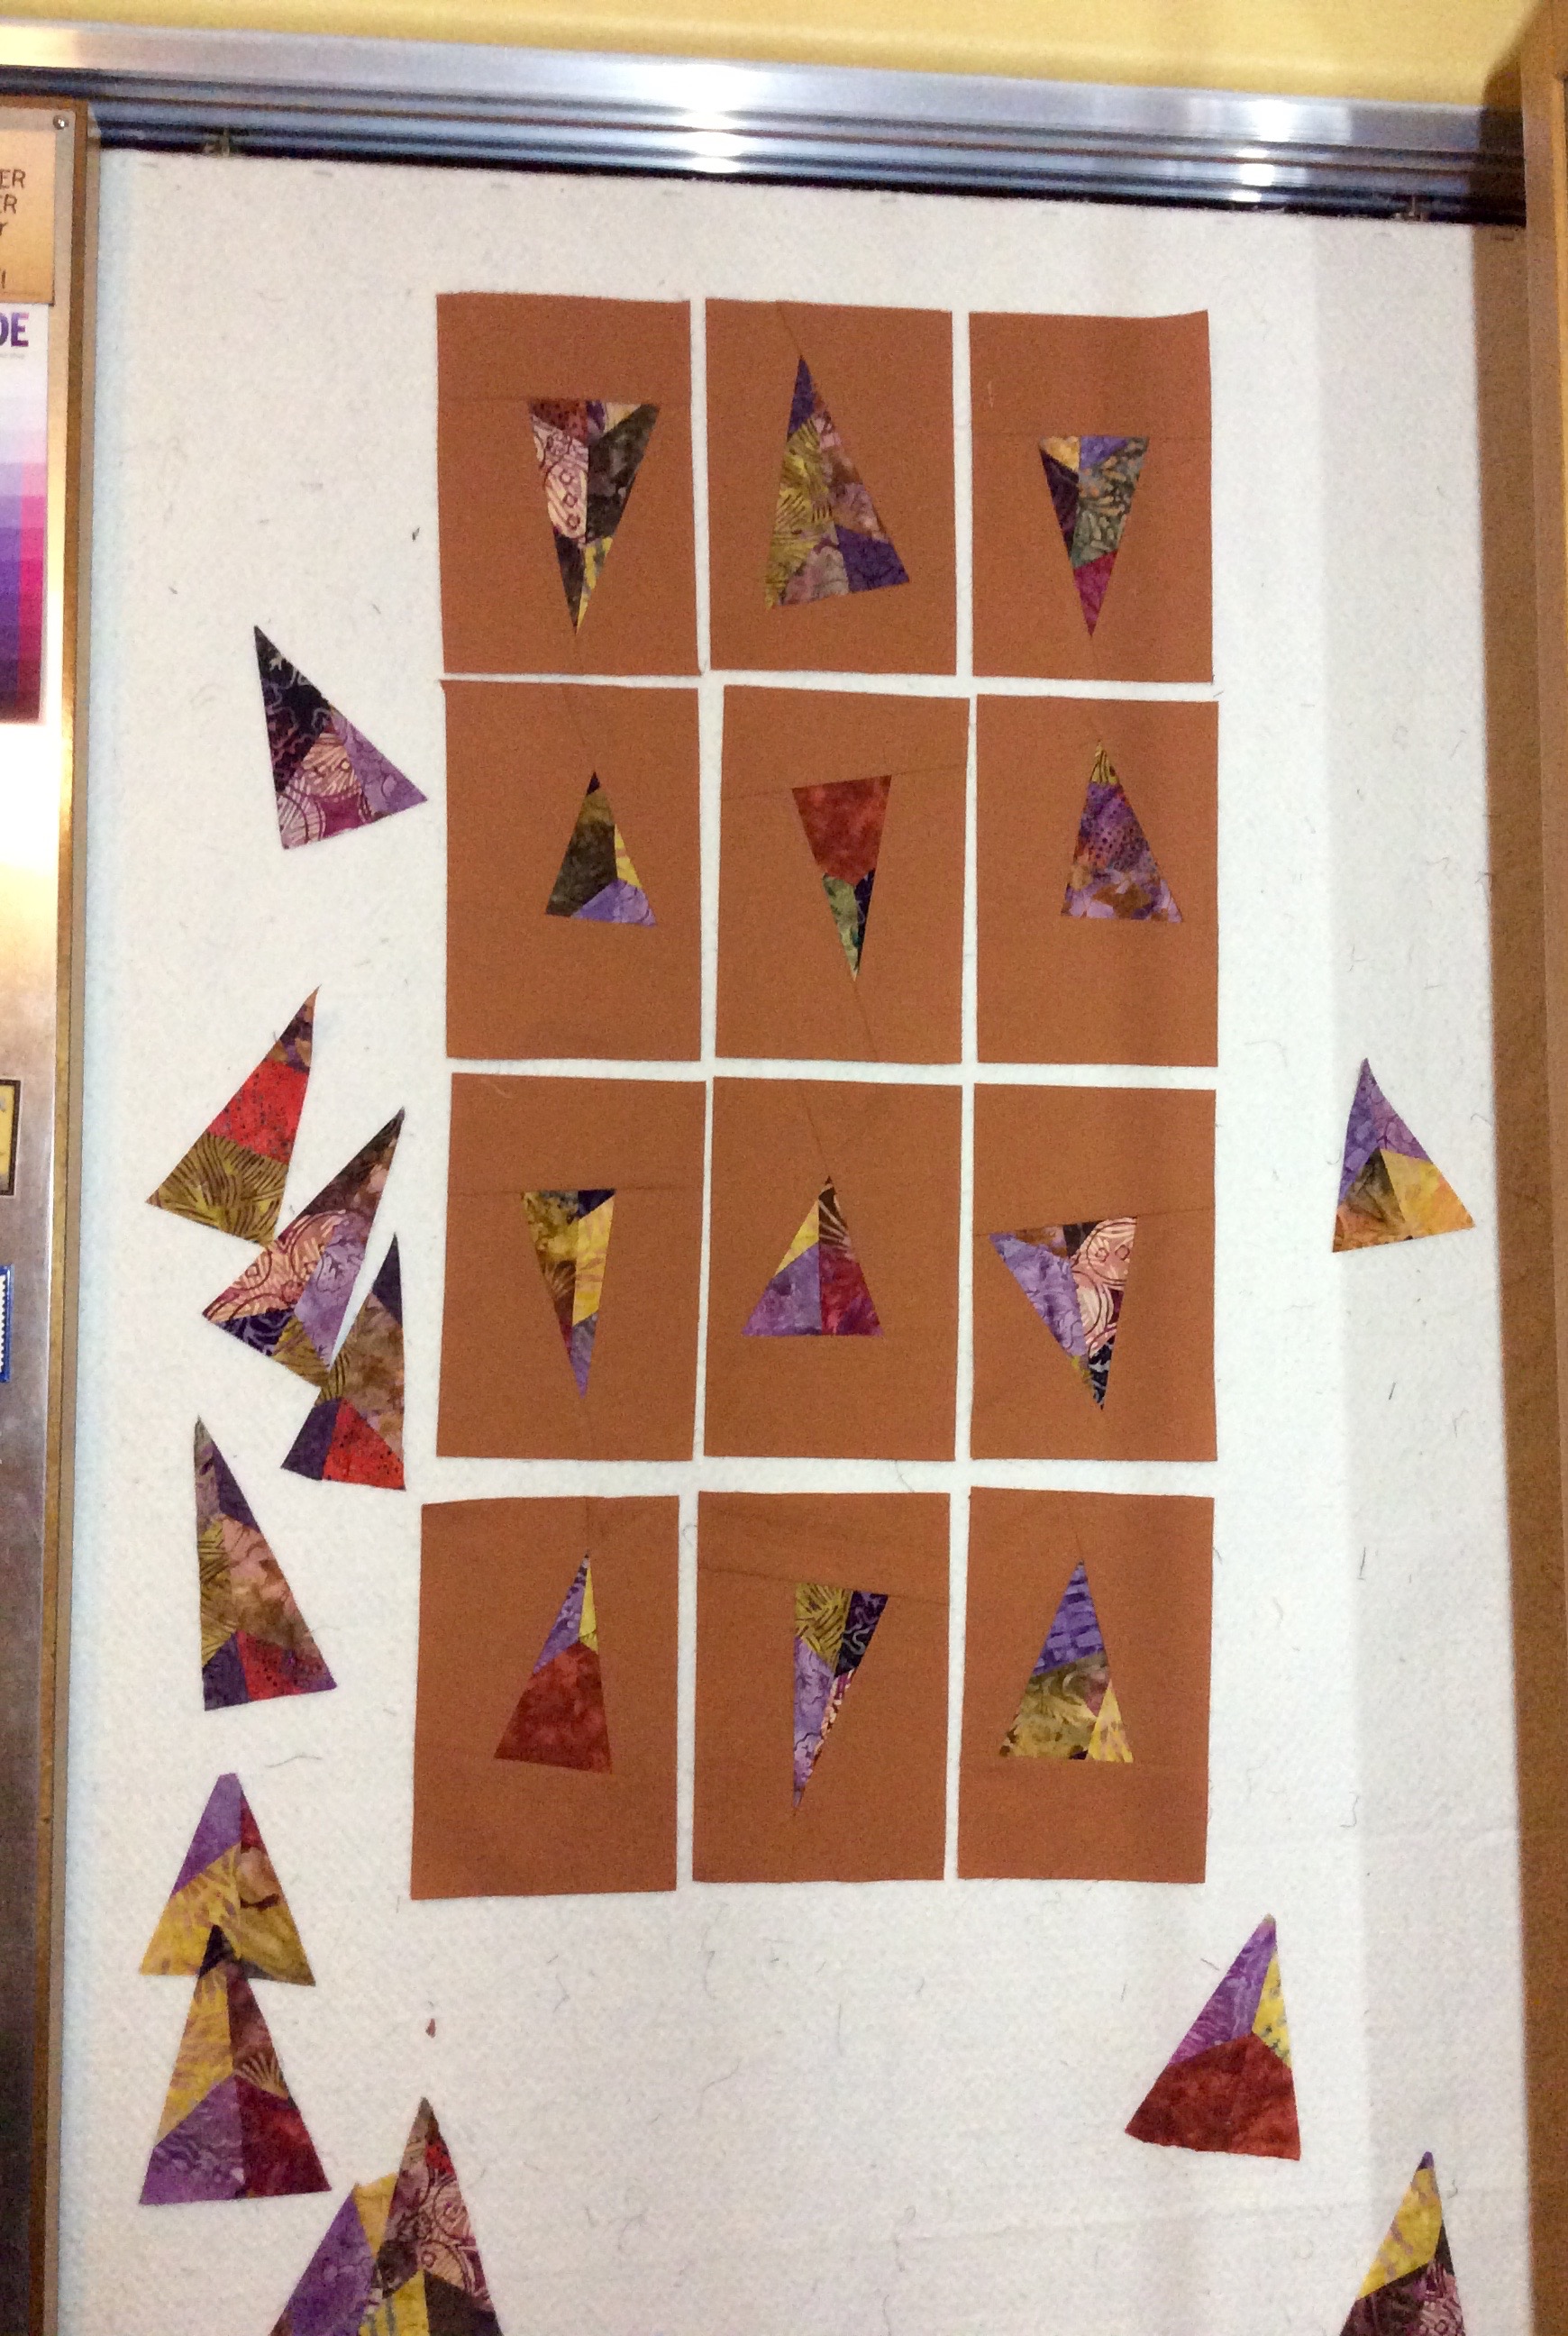
I wanted to make a piece that is primarily recycled denim but also includes home decor fabrics in warm colors with lots of textures. I decided to revisit a piece I made in my early days of improvisational/art quilting (circa 2012/2013) where I was working with recycled silk and linen couture fabric samples – Flying Triangles:
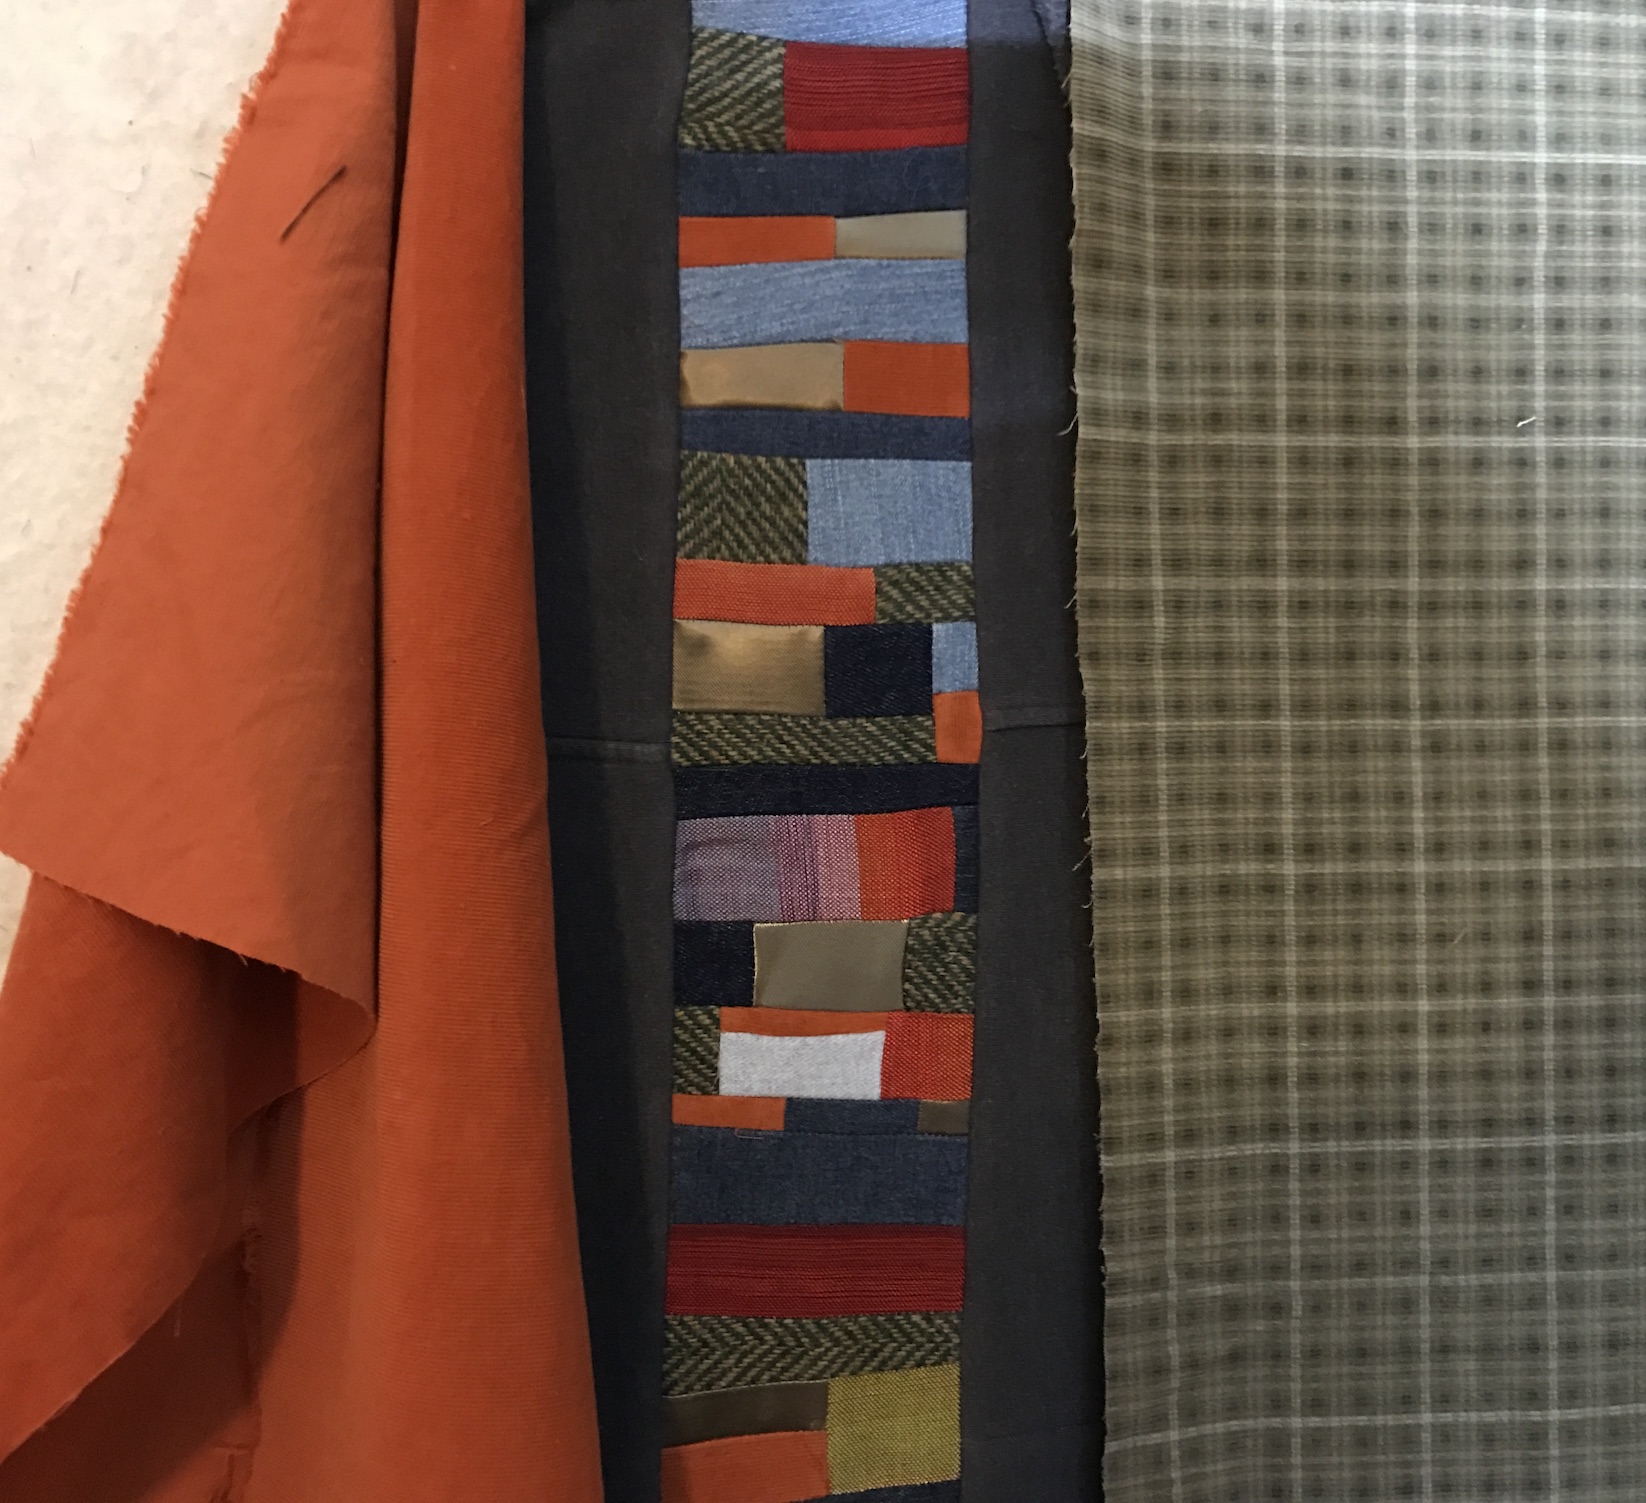
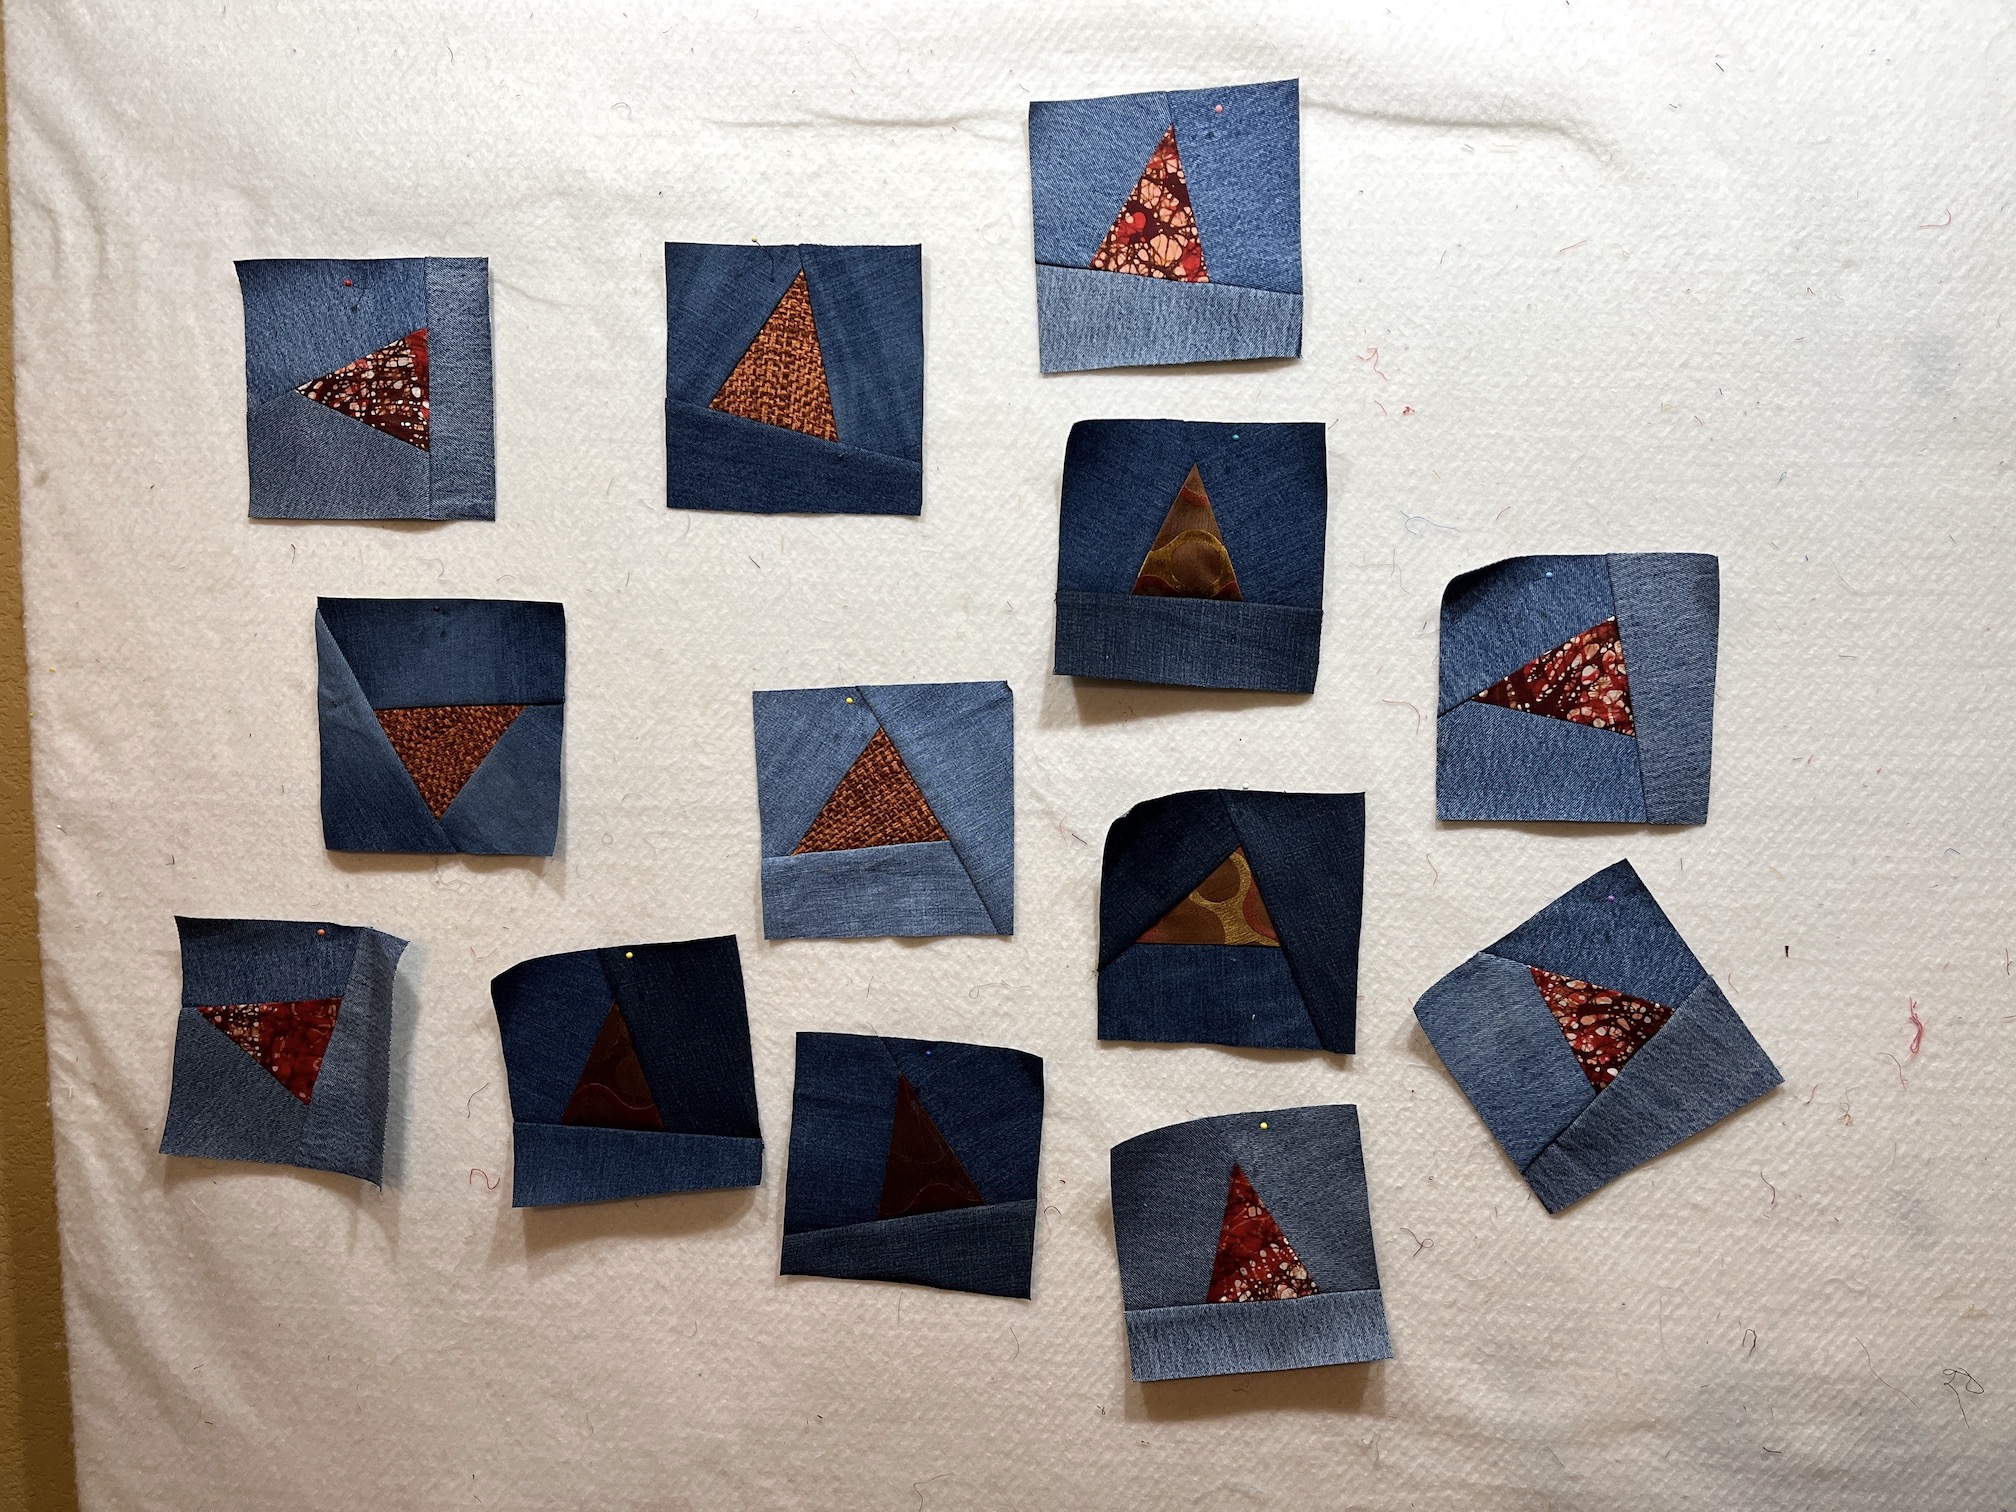
Here is my design wall with the piecing I’ve been playing with this evening. Note it is late at night and I did not bring out the “ring light” I use for photographing pieces so the image is dark:
I am going to keep playing, I started out setting recycled fabrics in oranges in denim; and next I will use some browns and golds, and I’ll see what else feels right.
I’ll share more images in the future as the piece progresses and I’ll even take the photos with better lighting!
Upcycling: The act of taking something no longer in use and giving it a second life and new function. In doing so, the finished product often becomes more practical, valuable and beautiful than what it previously was.
My partner and I were working on buying a house together and he is selling his house. So my quilting studio got packed up and my former studio became a staged bedroom for the realtor house listing photo shoot.
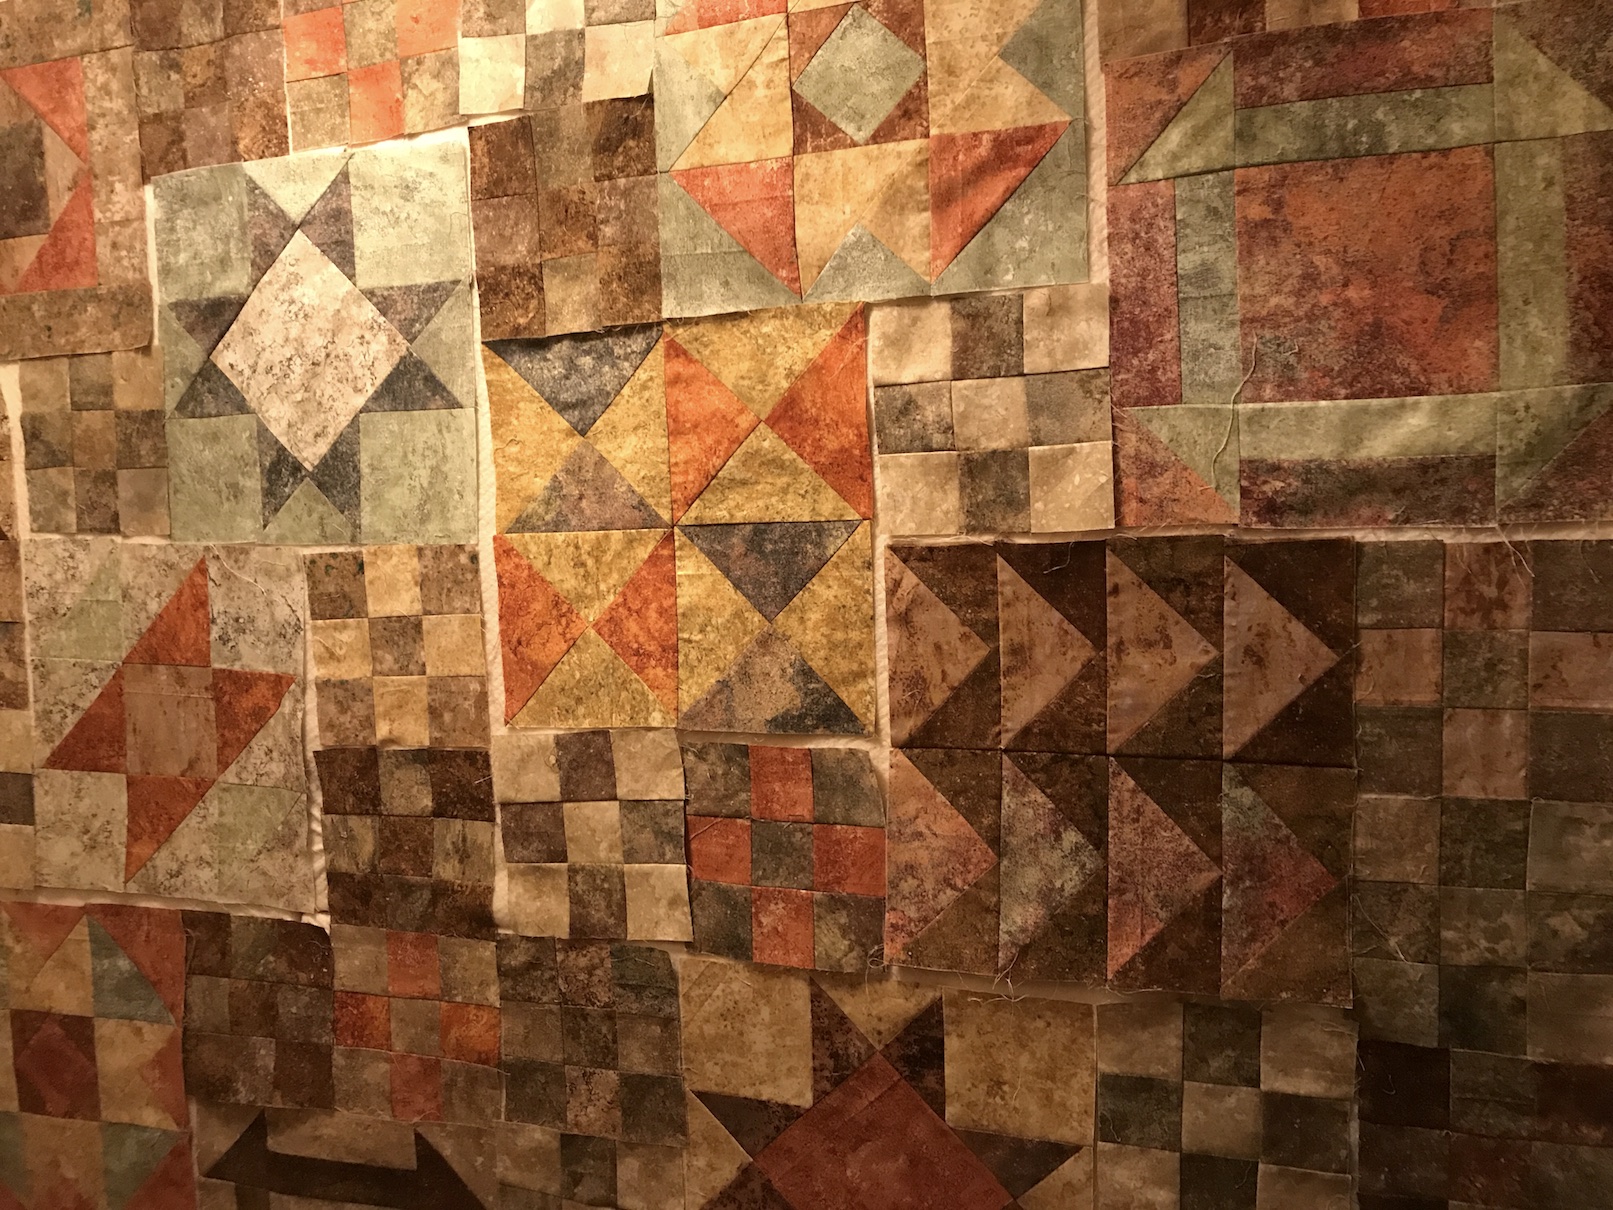
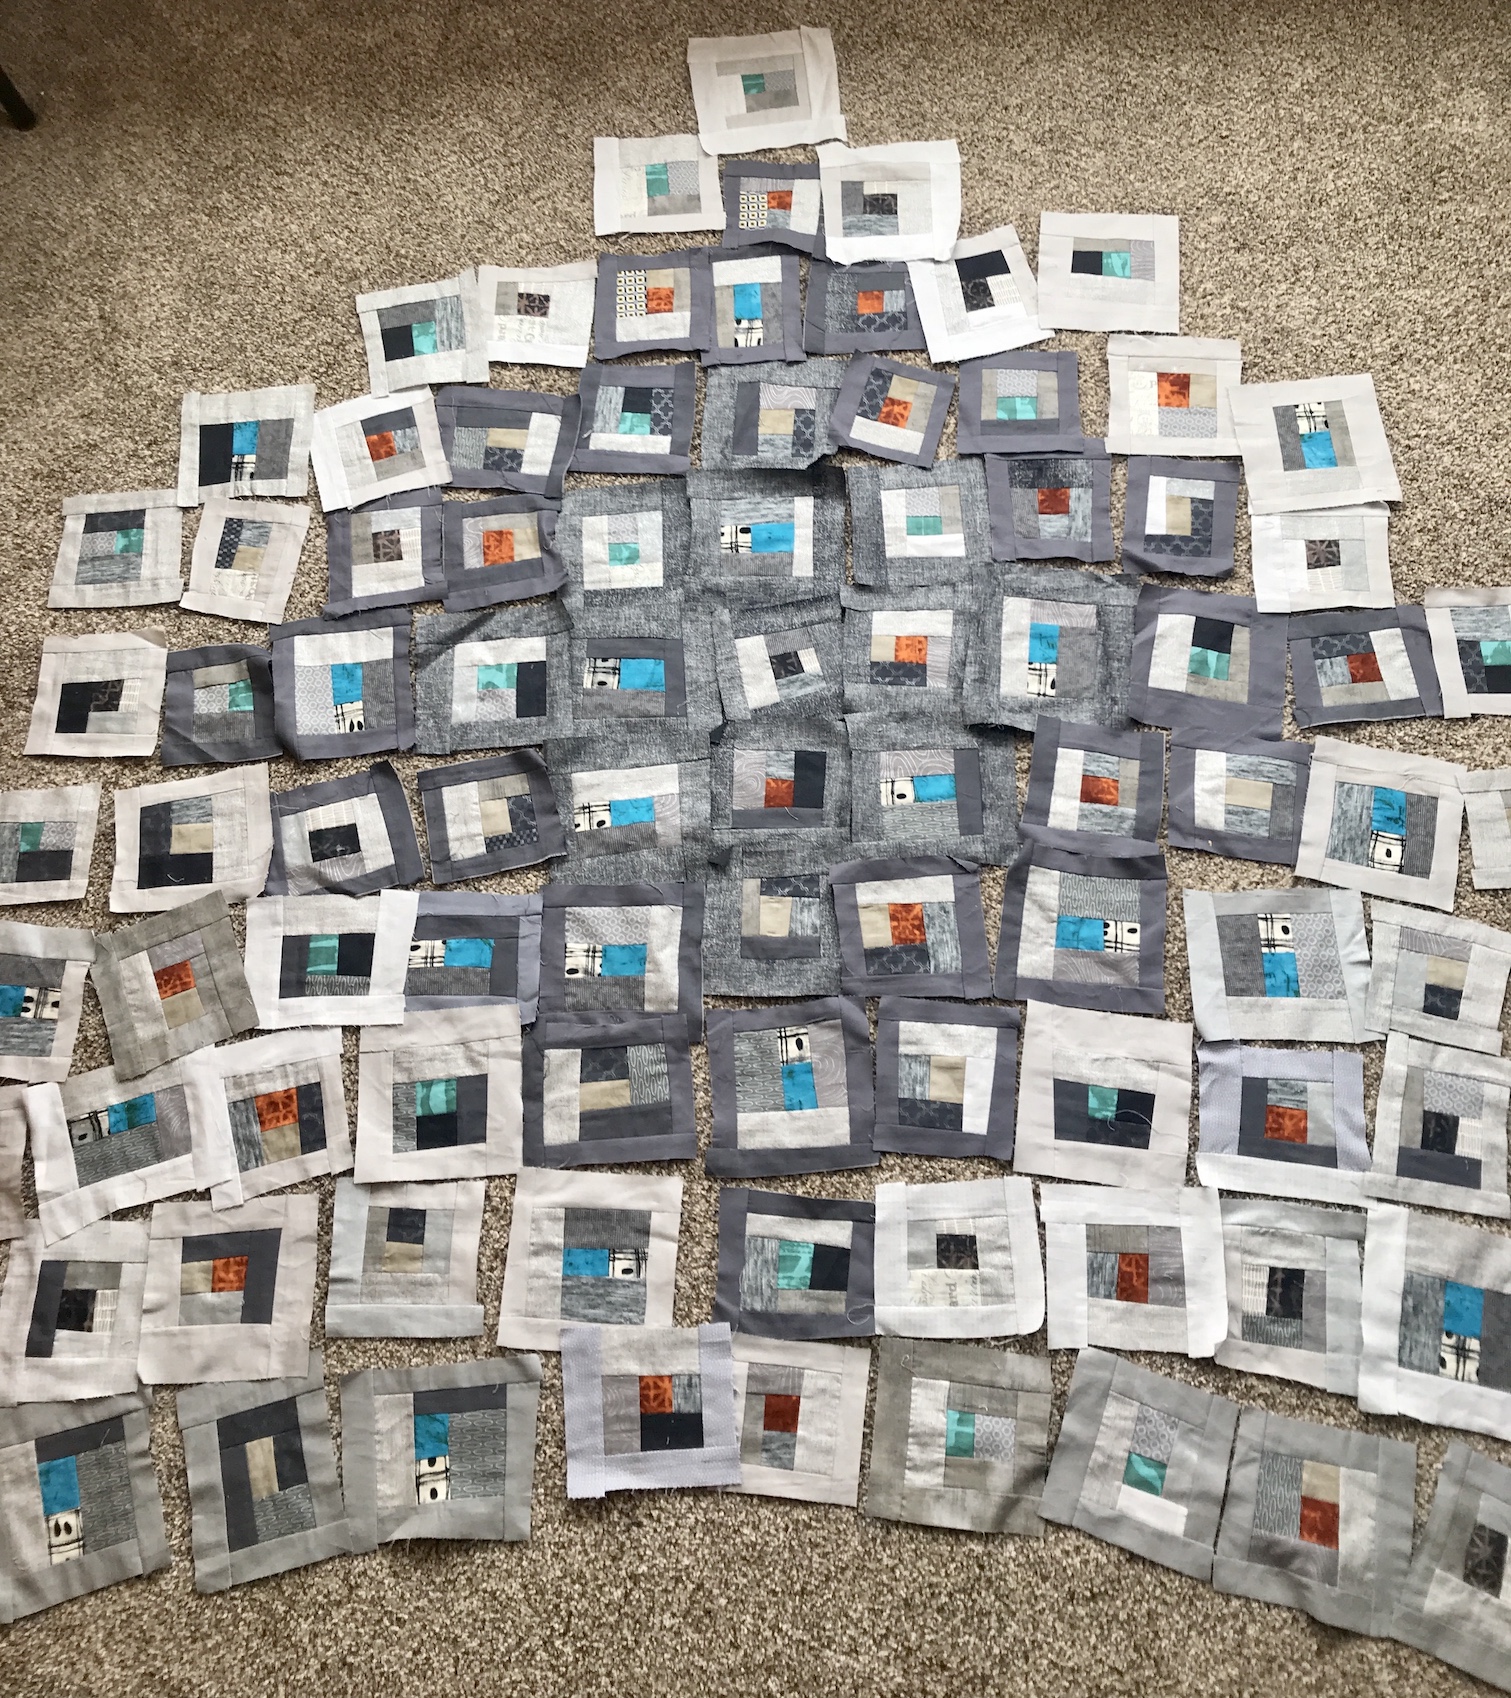
Then I went to a mini quilt retreat a couple weeks ago and created freeform log cabin blocks from a friend’s scraps. Upon returning home I laid them out on the “design carpet” in my bedroom since I no longer had a design wall, much less a studio:
So nearly two weeks ago, my partner and I decided to buy a new house, that is in the process of being built, and will not be ready until the end of April. So we cannot put his house on the market for a couple months – until we get closer to when our new house will close, otherwise we could end up between homes!
Since the house I currently live in was not going on the market for a couple of months, I negotiated that I set up a modified version of a studio that can be easily returned to a staged bedroom for house showing.
Around the same time of this decision, I discovered listed on our community website a free large table being offered.
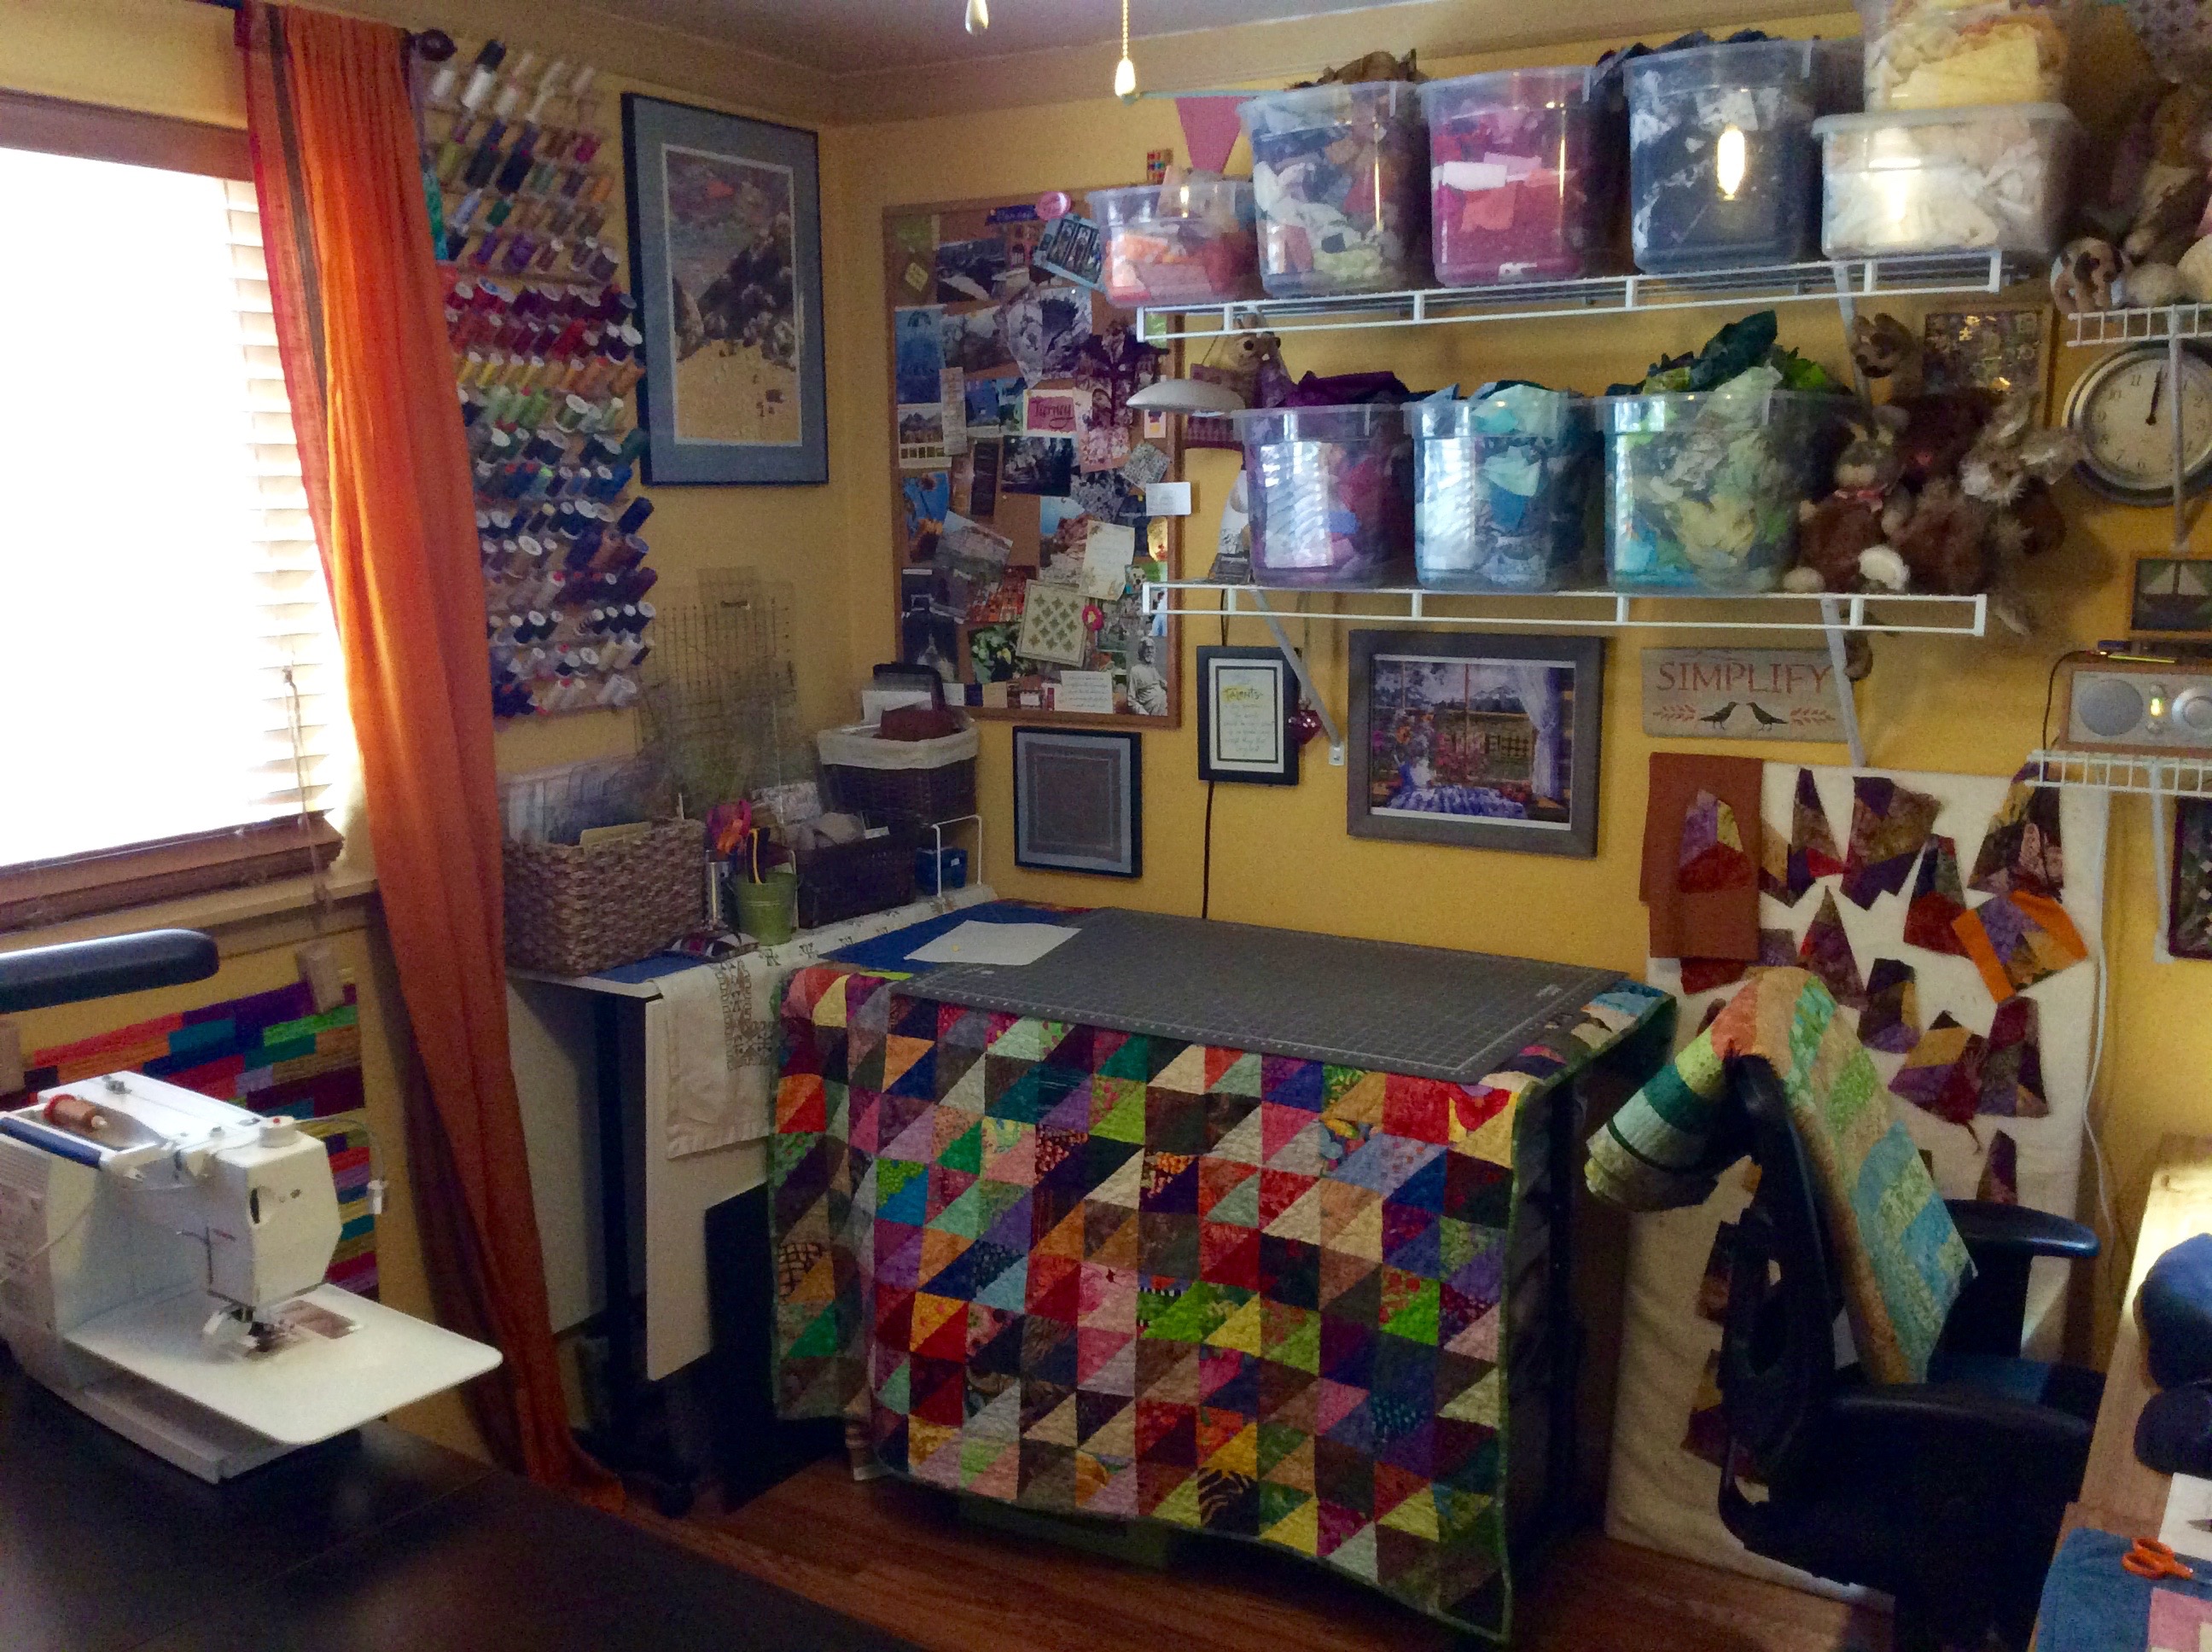
With new large (free) table in hand, I have a makeshift studio:
And to go with my makeshift studio, I made a makeshift design wall:
On Superbowl Sunday (last Sunday), I had a “Stitching Bowl” and worked on getting the center of the piece sewn together:
I am pretty happy with my makeshift studio and will share more photos of the piece as it evolves.
By the way, Mike my Miniature Schnauzer is enjoying hanging out on the bed (from the staging) in my makeshift studio while I sew!
It’s been a while since I’ve added anything to my series of posts: “What’s on the Design Wall”, about my current project up on my design wall.
However as my tierneycreates Beastie shared in the post Guest Blogger: What the heck is going on here? , my studio is packed up and turned back into a bedroom for staging the house I currently live in for sale.
Not having a design wall up on the wall has not stopped me – I’ve discovered: The Design Carpet (patent pending, ha!).
But let’s back-up a moment, and tell you how this piece began and got to this point…
I brought a couple hand work projects from my basket of hand work (see post Inside the Basket ) and had EVERY INTENTION of only working on my hand work projects.
But…
My dear quilting friend Dana brought an extra sewing machine (one her her Berninas, and I love Berninas) and a BAG OF GRAY FABRIC SCRAPS for me to play with – oh no!
As you saw in the “From the Basket” post, I did work on my English Paper Piecing rosettes, but after a while I put them aside and STARTING PLAYING WITH THE GRAY SCRAPS! (I could not resist the temptation to play with fabric scraps)
Before you know it, as I shared on @tierneycreates on Instagram, I began creating freeform pieced/improvisationally pieced log cabin blocks (also known as “log jamming”):
And before I knew it, I had a pile of 138 blocks I made!
Once I got home, I could not wait to play with them and see what interesting pattern I could make with the dark gray and light gray framed blocks, So I decided to use the “Design Carpet”:
I began with creating a pattern with the dark gray framed blocks:
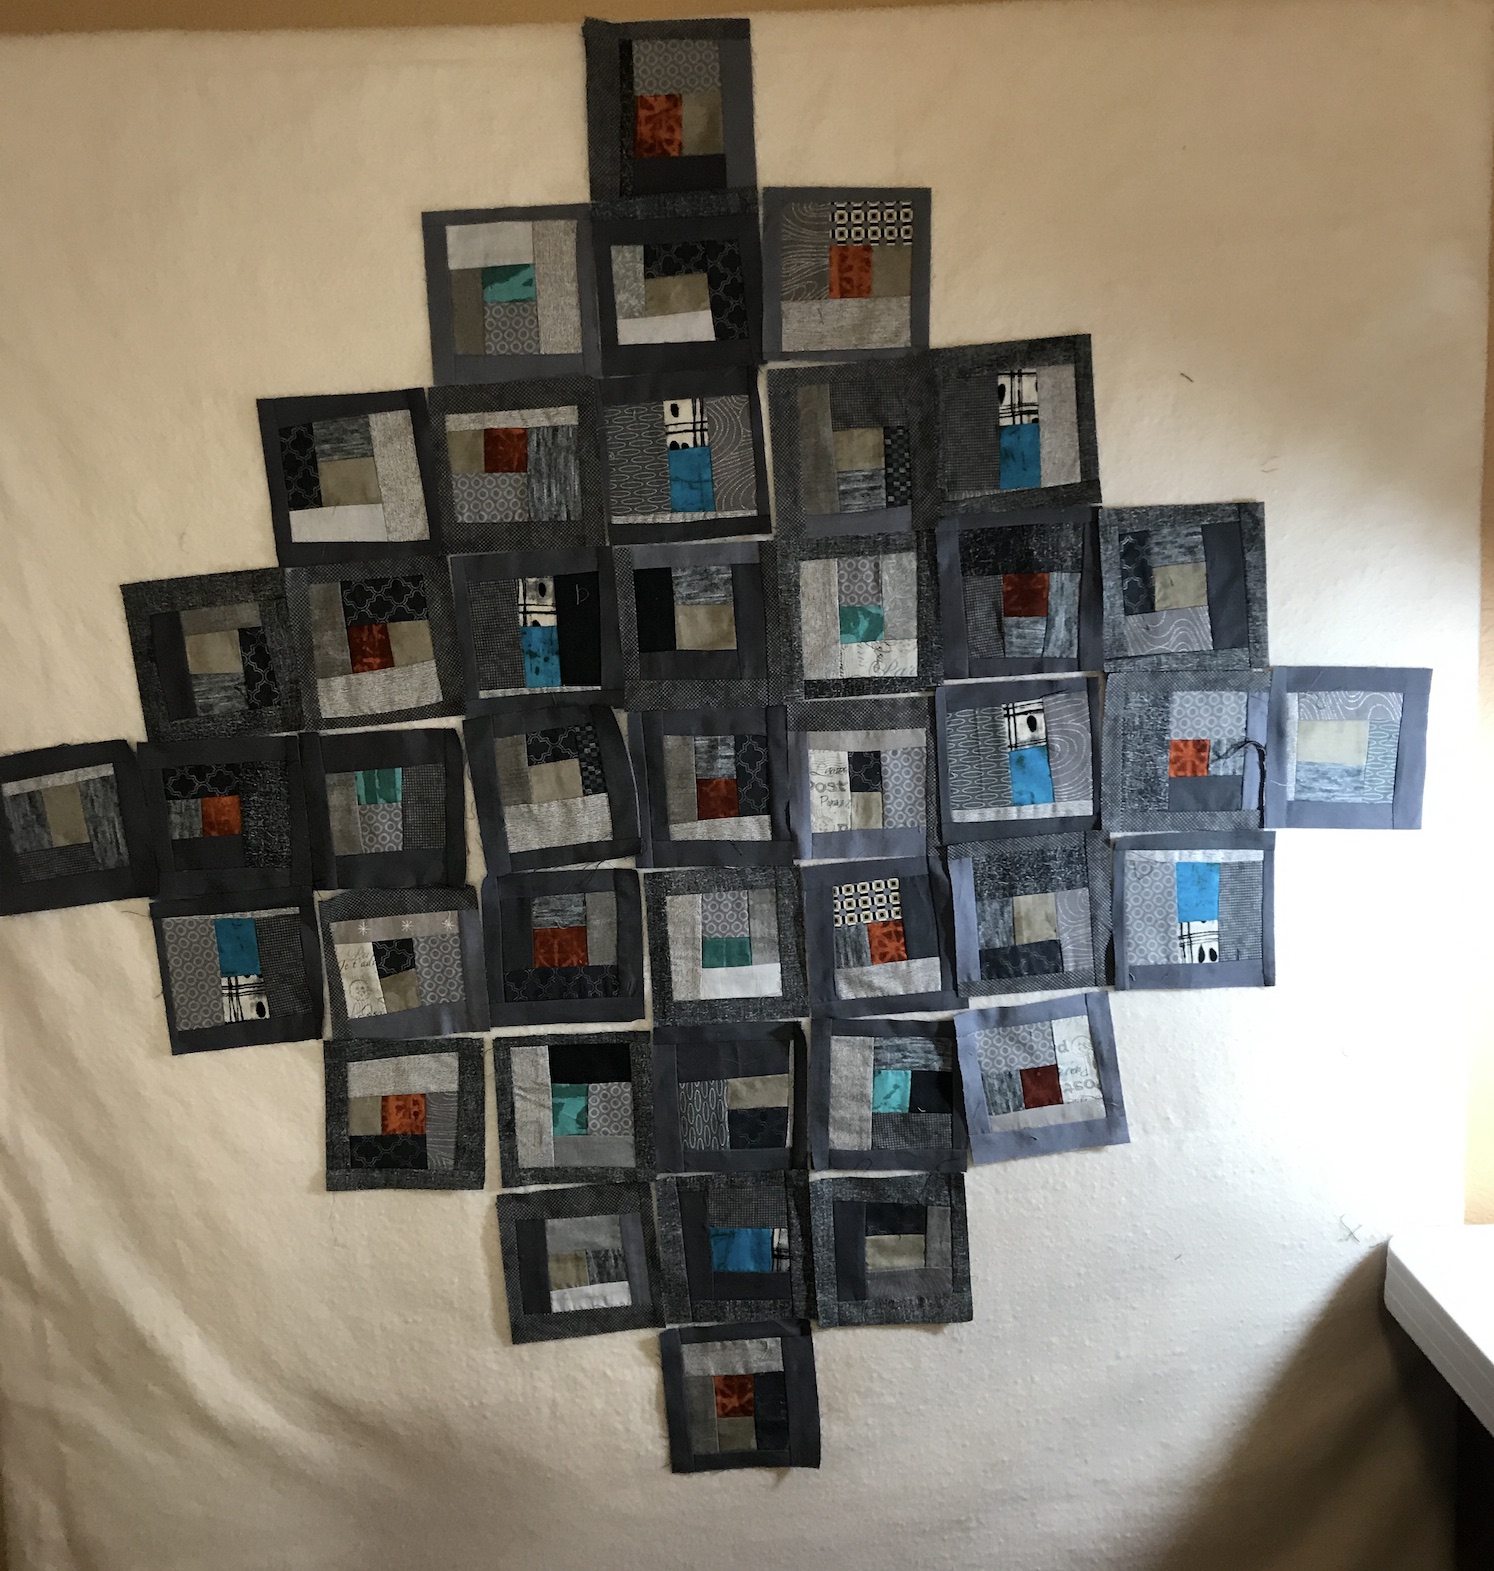
Then I worked on framing them with the light gray blocks:
I like the effect with the dark gray floating in the lighter gray blocks.
Since I took these photos, I’ve made additional progress and pulled out my sewing machine from the storage room (where you hide everything when staging a house for sale)!
Let me make a bit more progress on the piece and I will share in a future post!
Postscript
Let me know if you think I can patent the concept of the “Design Carpet” and make millions on my late-night infomercial selling “Design Carpets” and quit my day job and just sew all day!
“You can own your own Design Carpet for 5 easy payments of $99.99!
But wait, there’s more:
Buy one Design Carpet and get a second one for only $99.99 plus shipping and handling.”
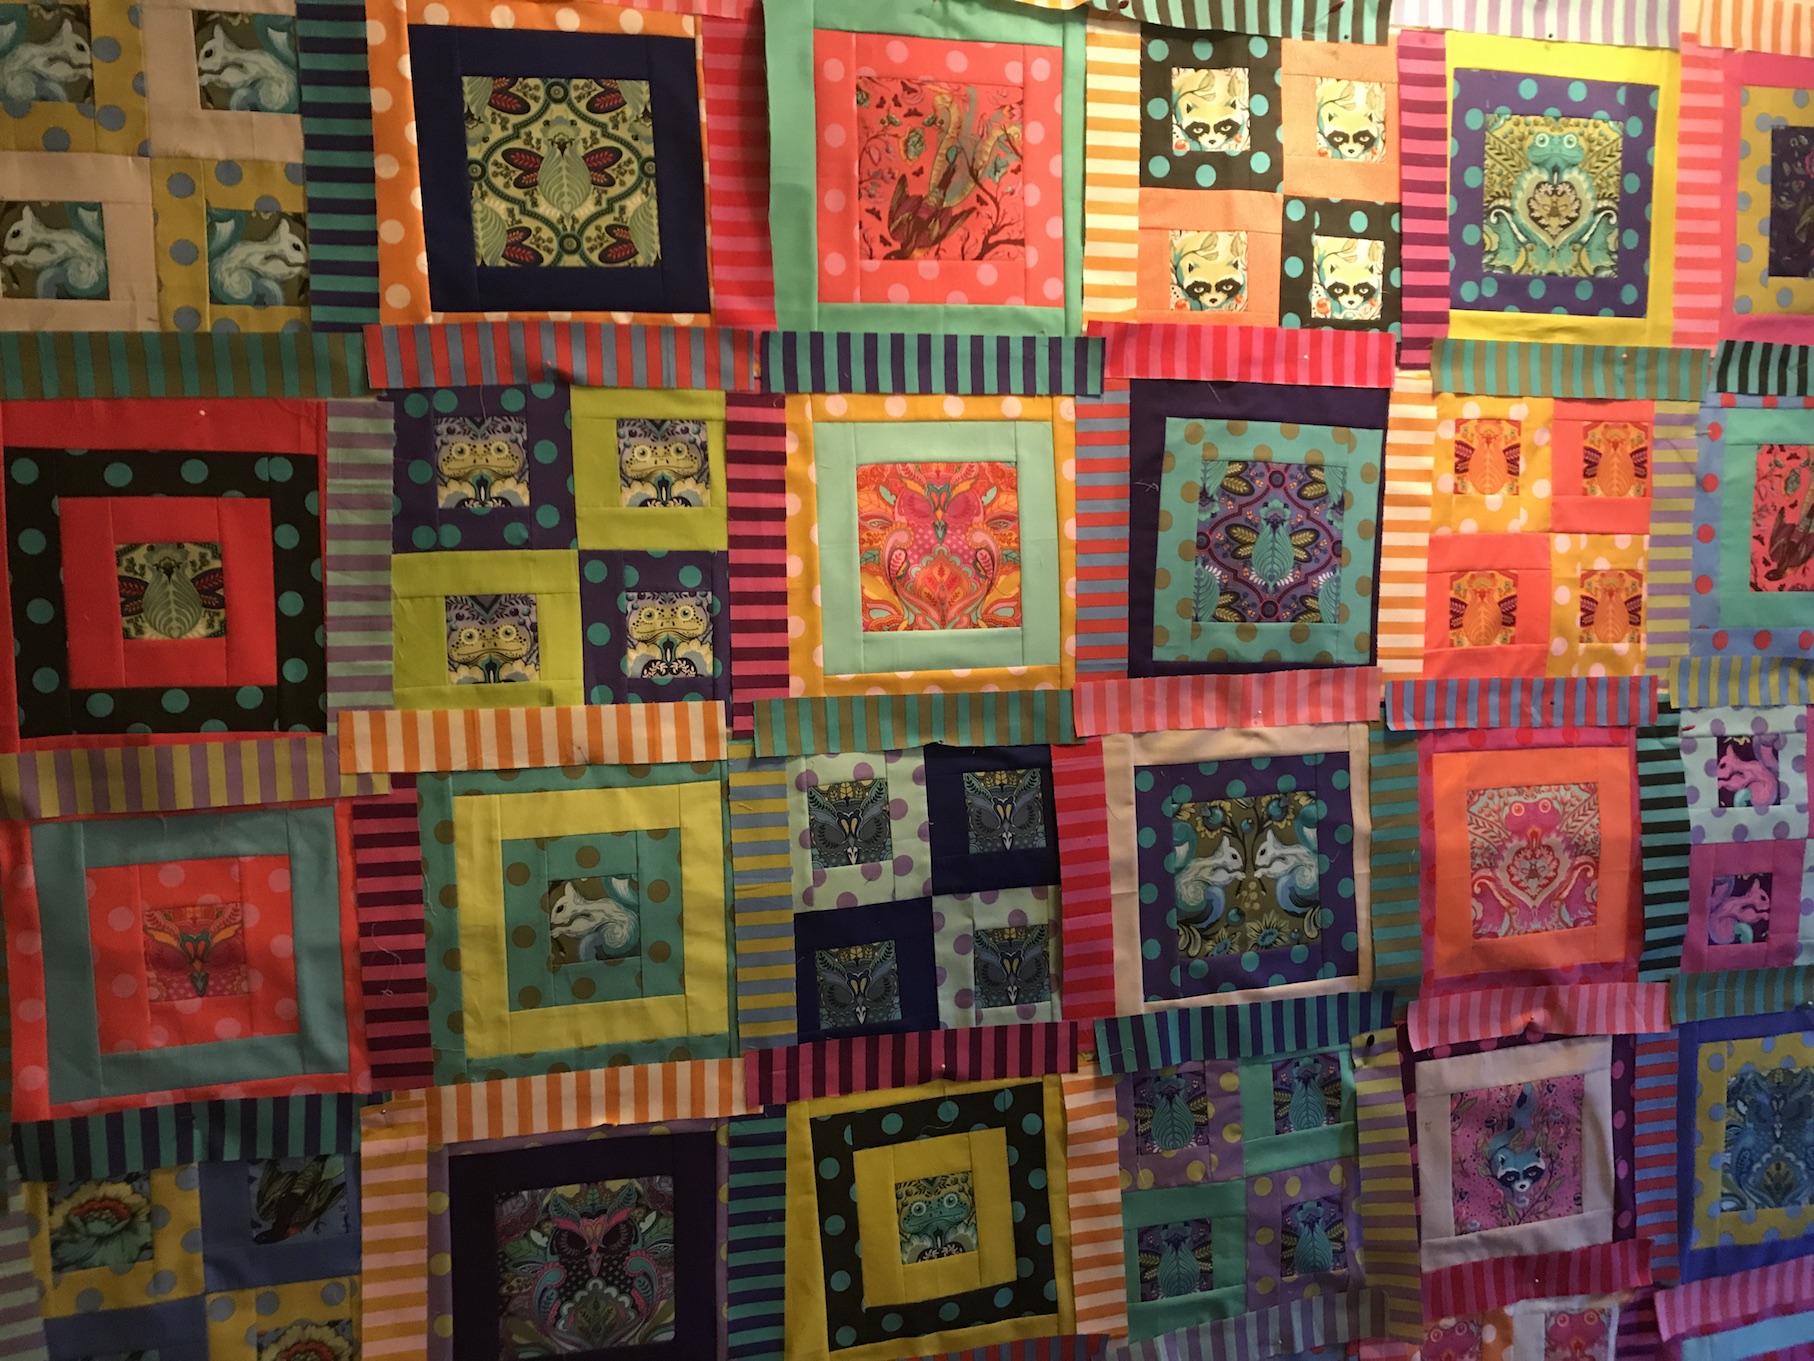
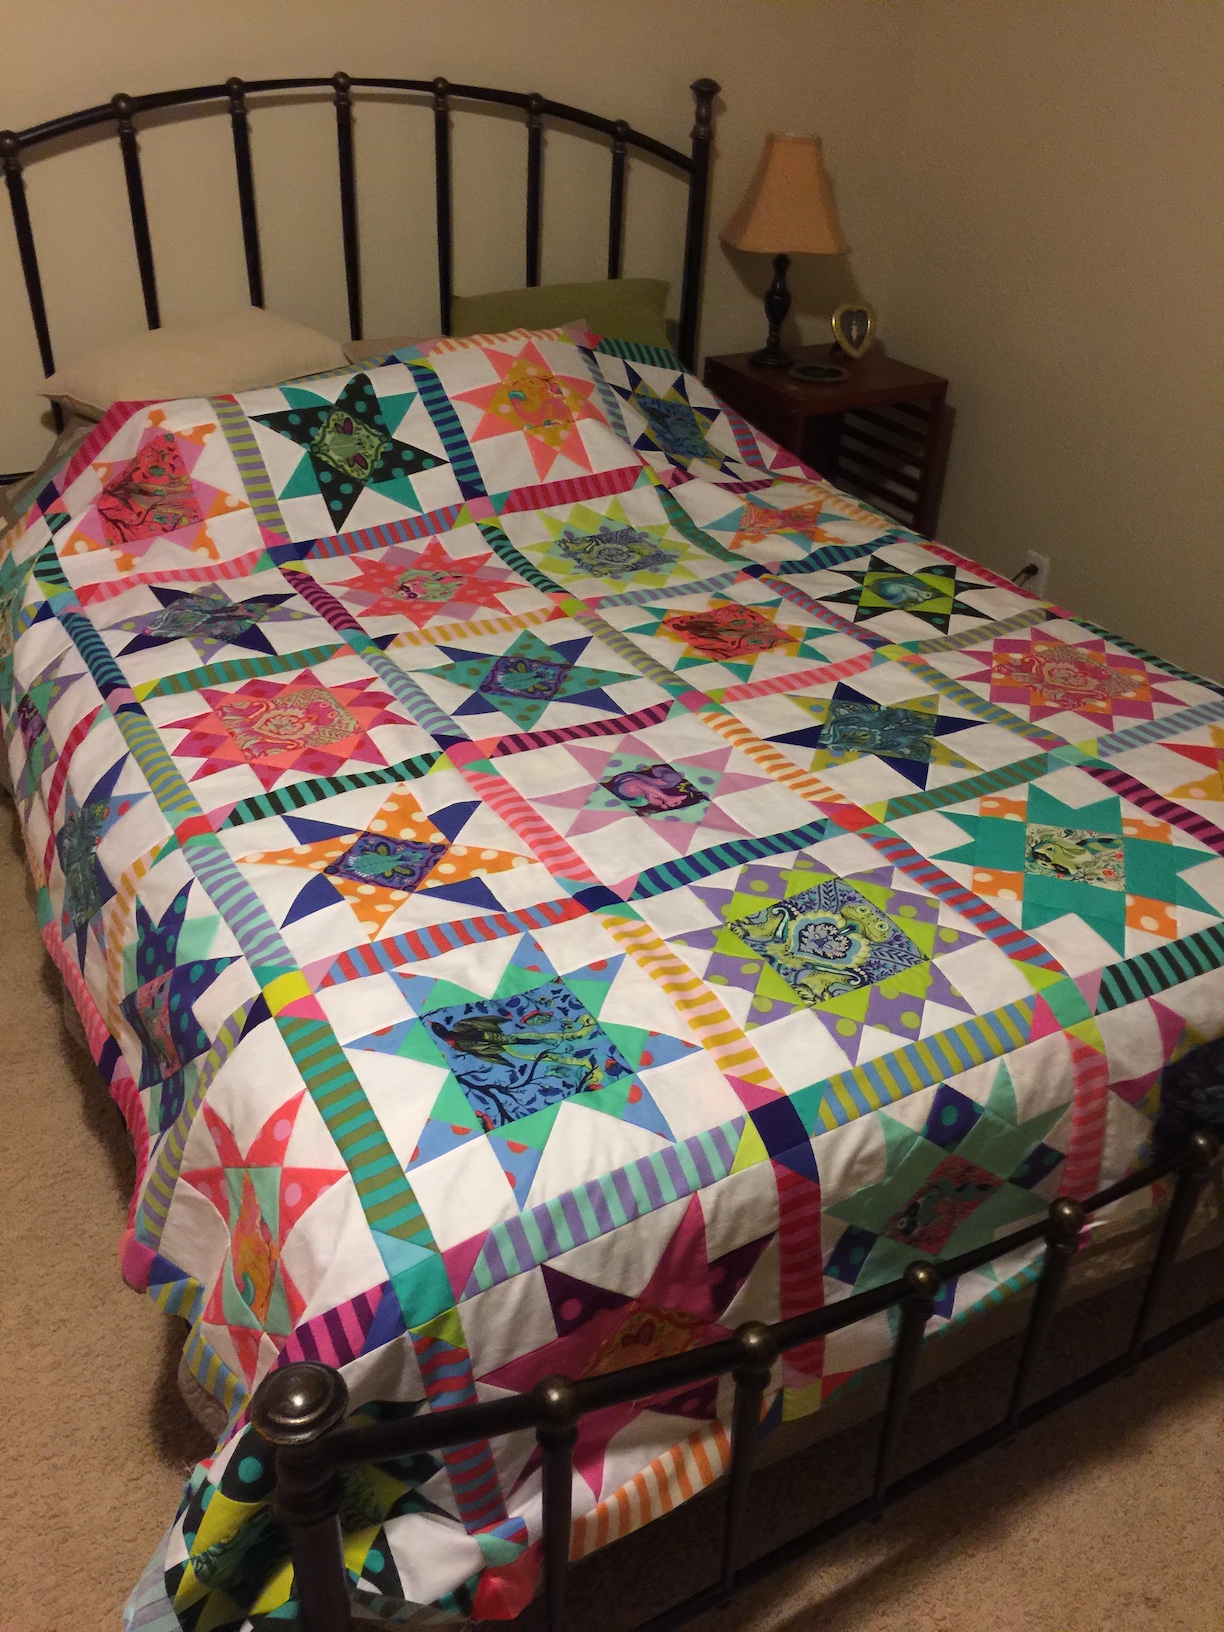
Follow up on my post earlier this week on the quilt, I am working on Tula in a Box – What’s On the Design Wall: Tula in a Box. This quilt is my own design and it is inspired by the colorful fabrics in Tula Pink’s All Stars fabric collection.
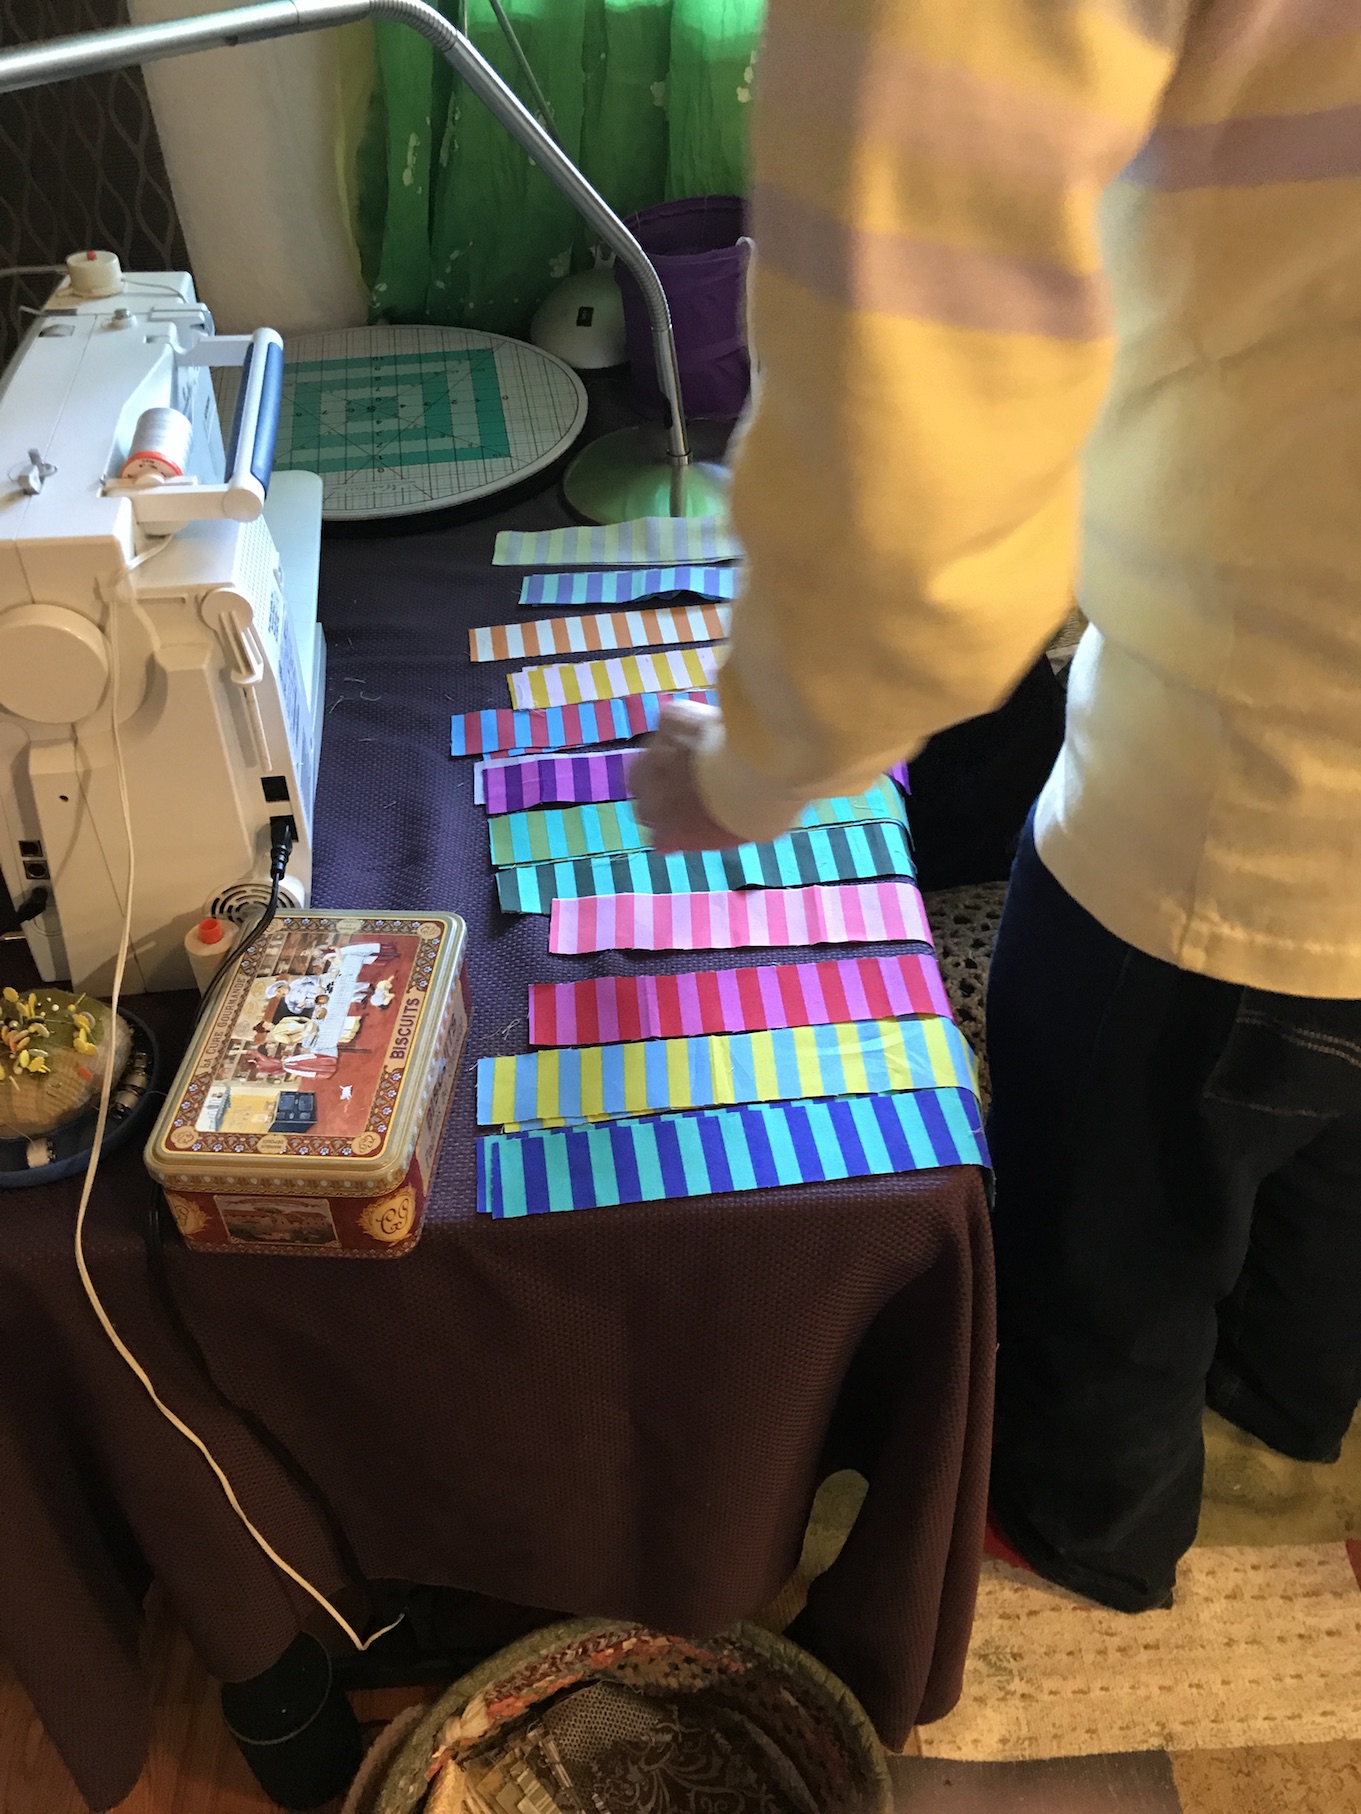
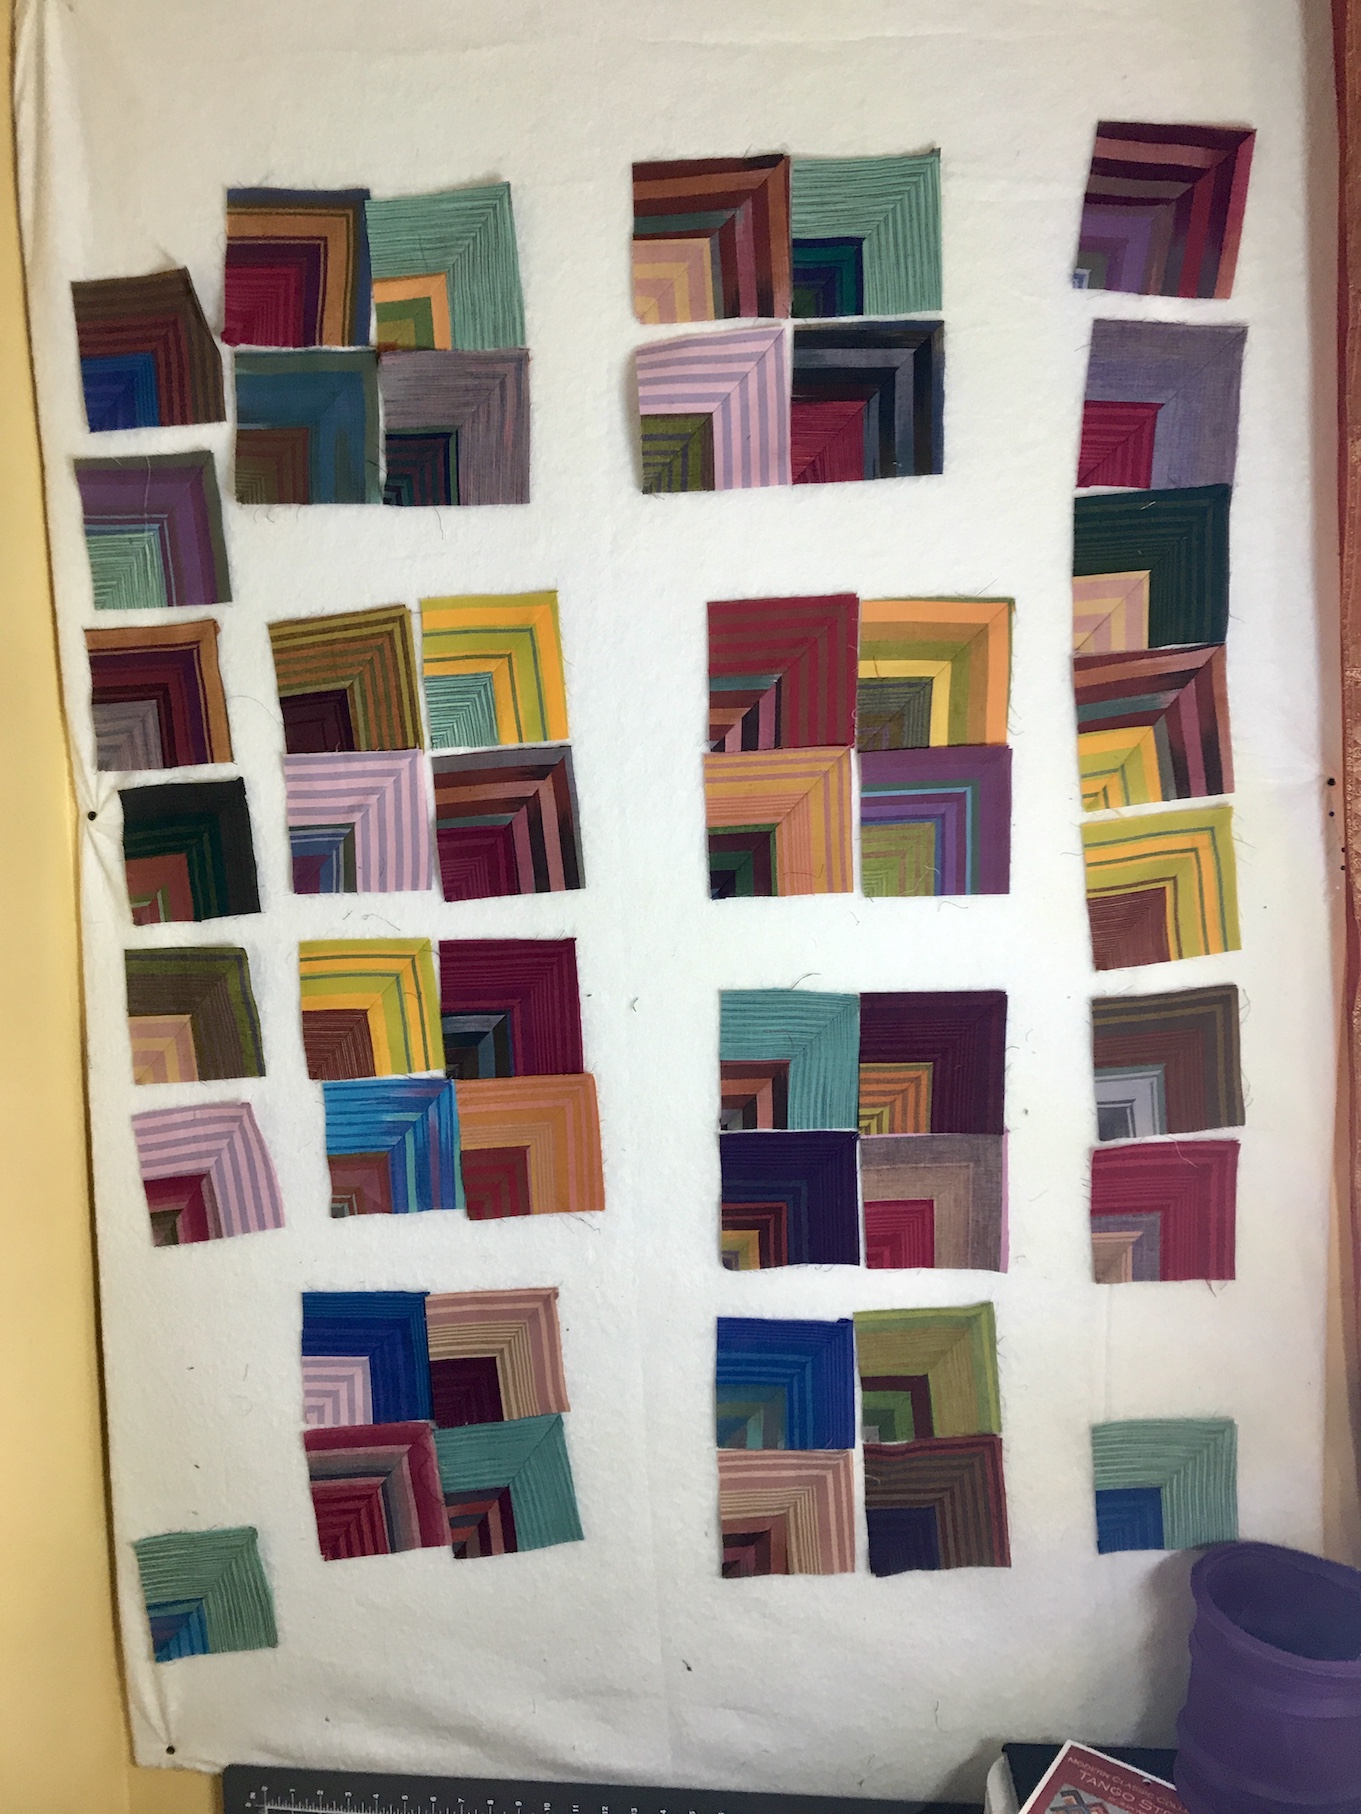
After completing thirty-six (36) 12.5″ x 12.5″ blocks, and having Terry the Quilting Husband (TTQH) lay them out on my large design wall in my hallway, it was time to cut the fat quarter collection of stripes from the Tula Pink All Stars fabric collection for the 2 inch lattice between the blocks:
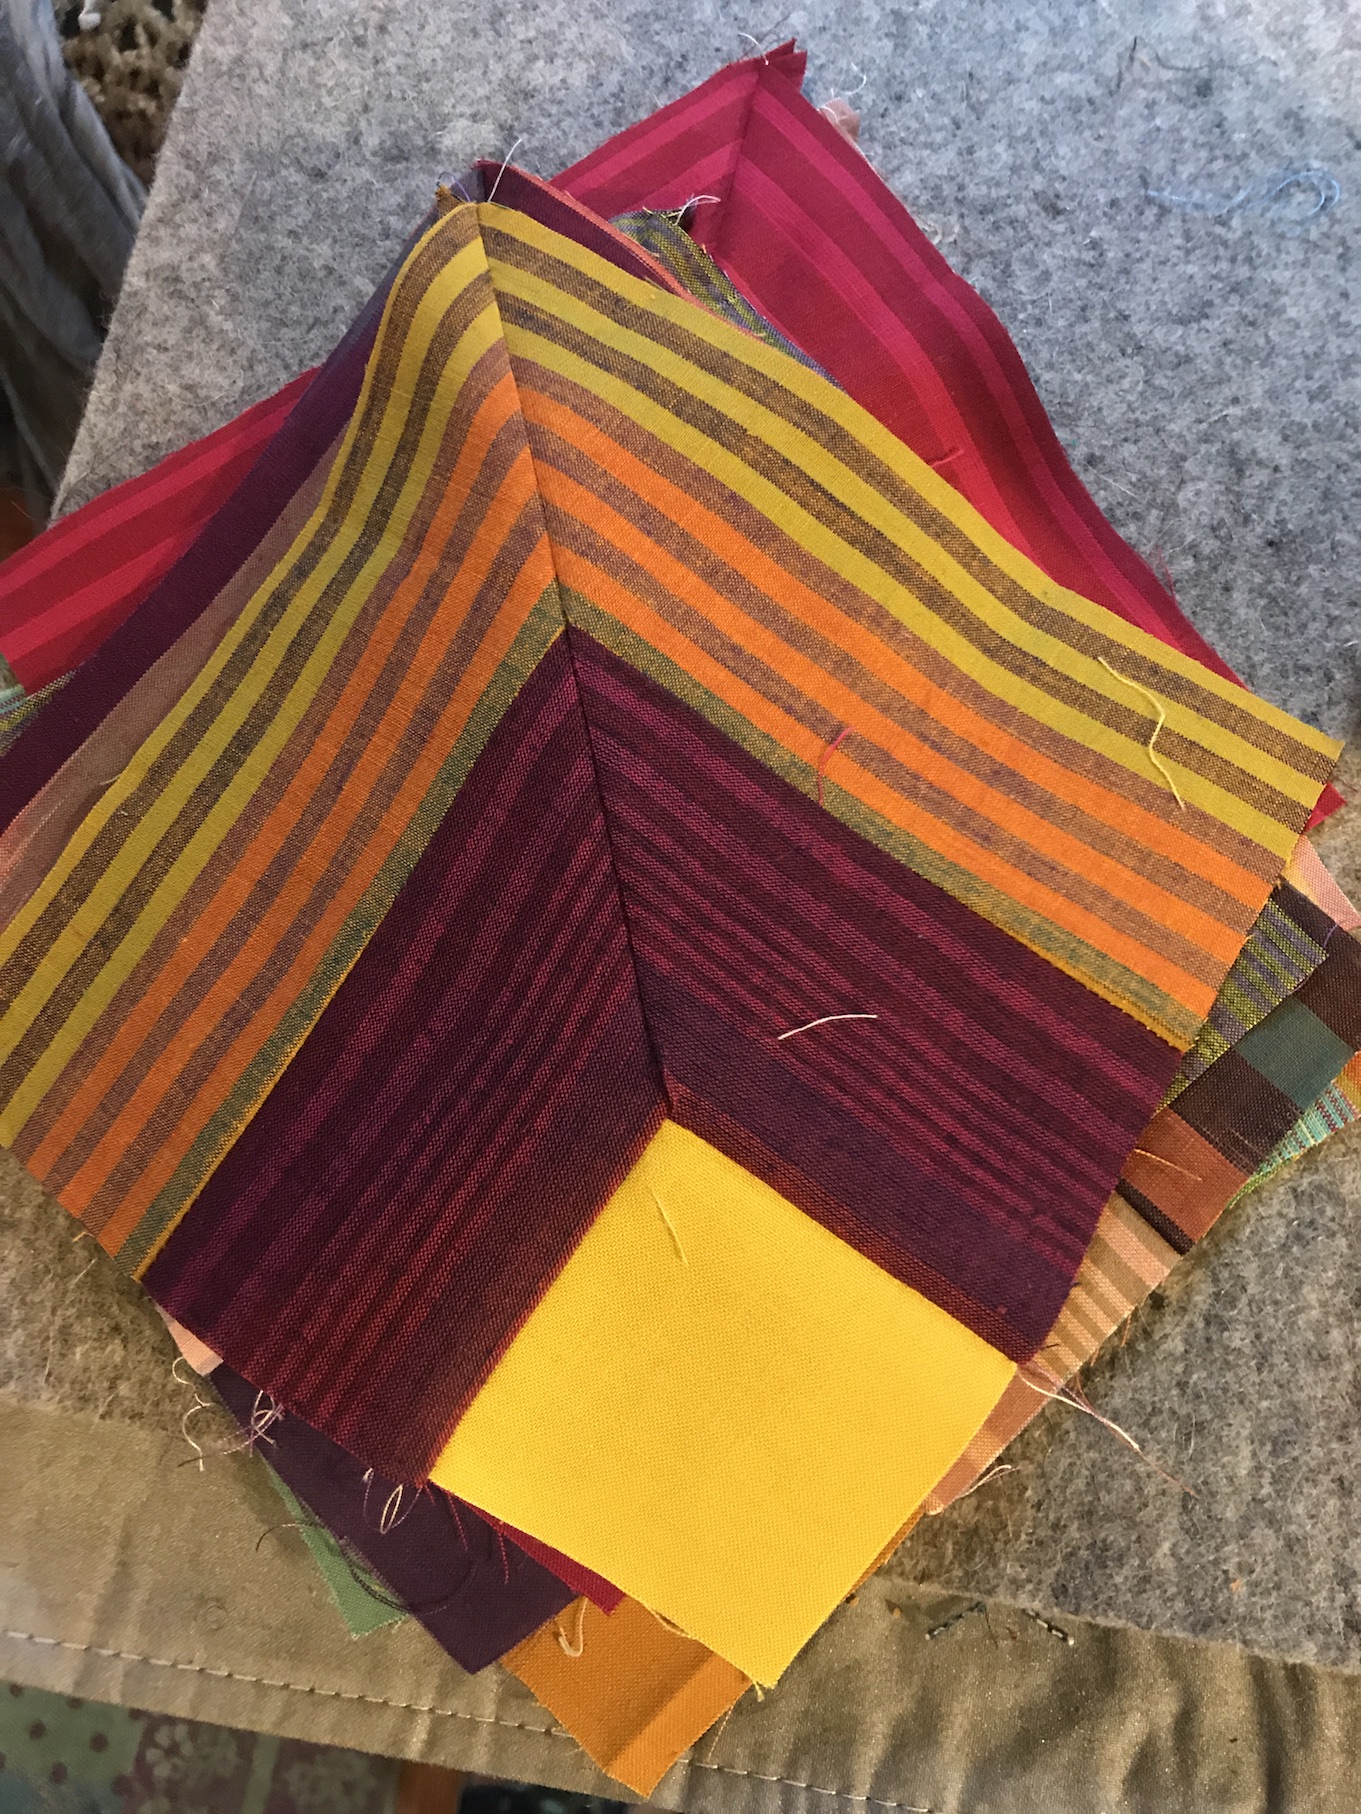
It was a lot of cutting (like endless cutting), but finally I got a “pile-o-stripes” cut:
Then it was time to abuse…um, I mean enlist the help of TTQH again and ask him to lay out the lattice on the design wall:
He is a very nice and patient husband!
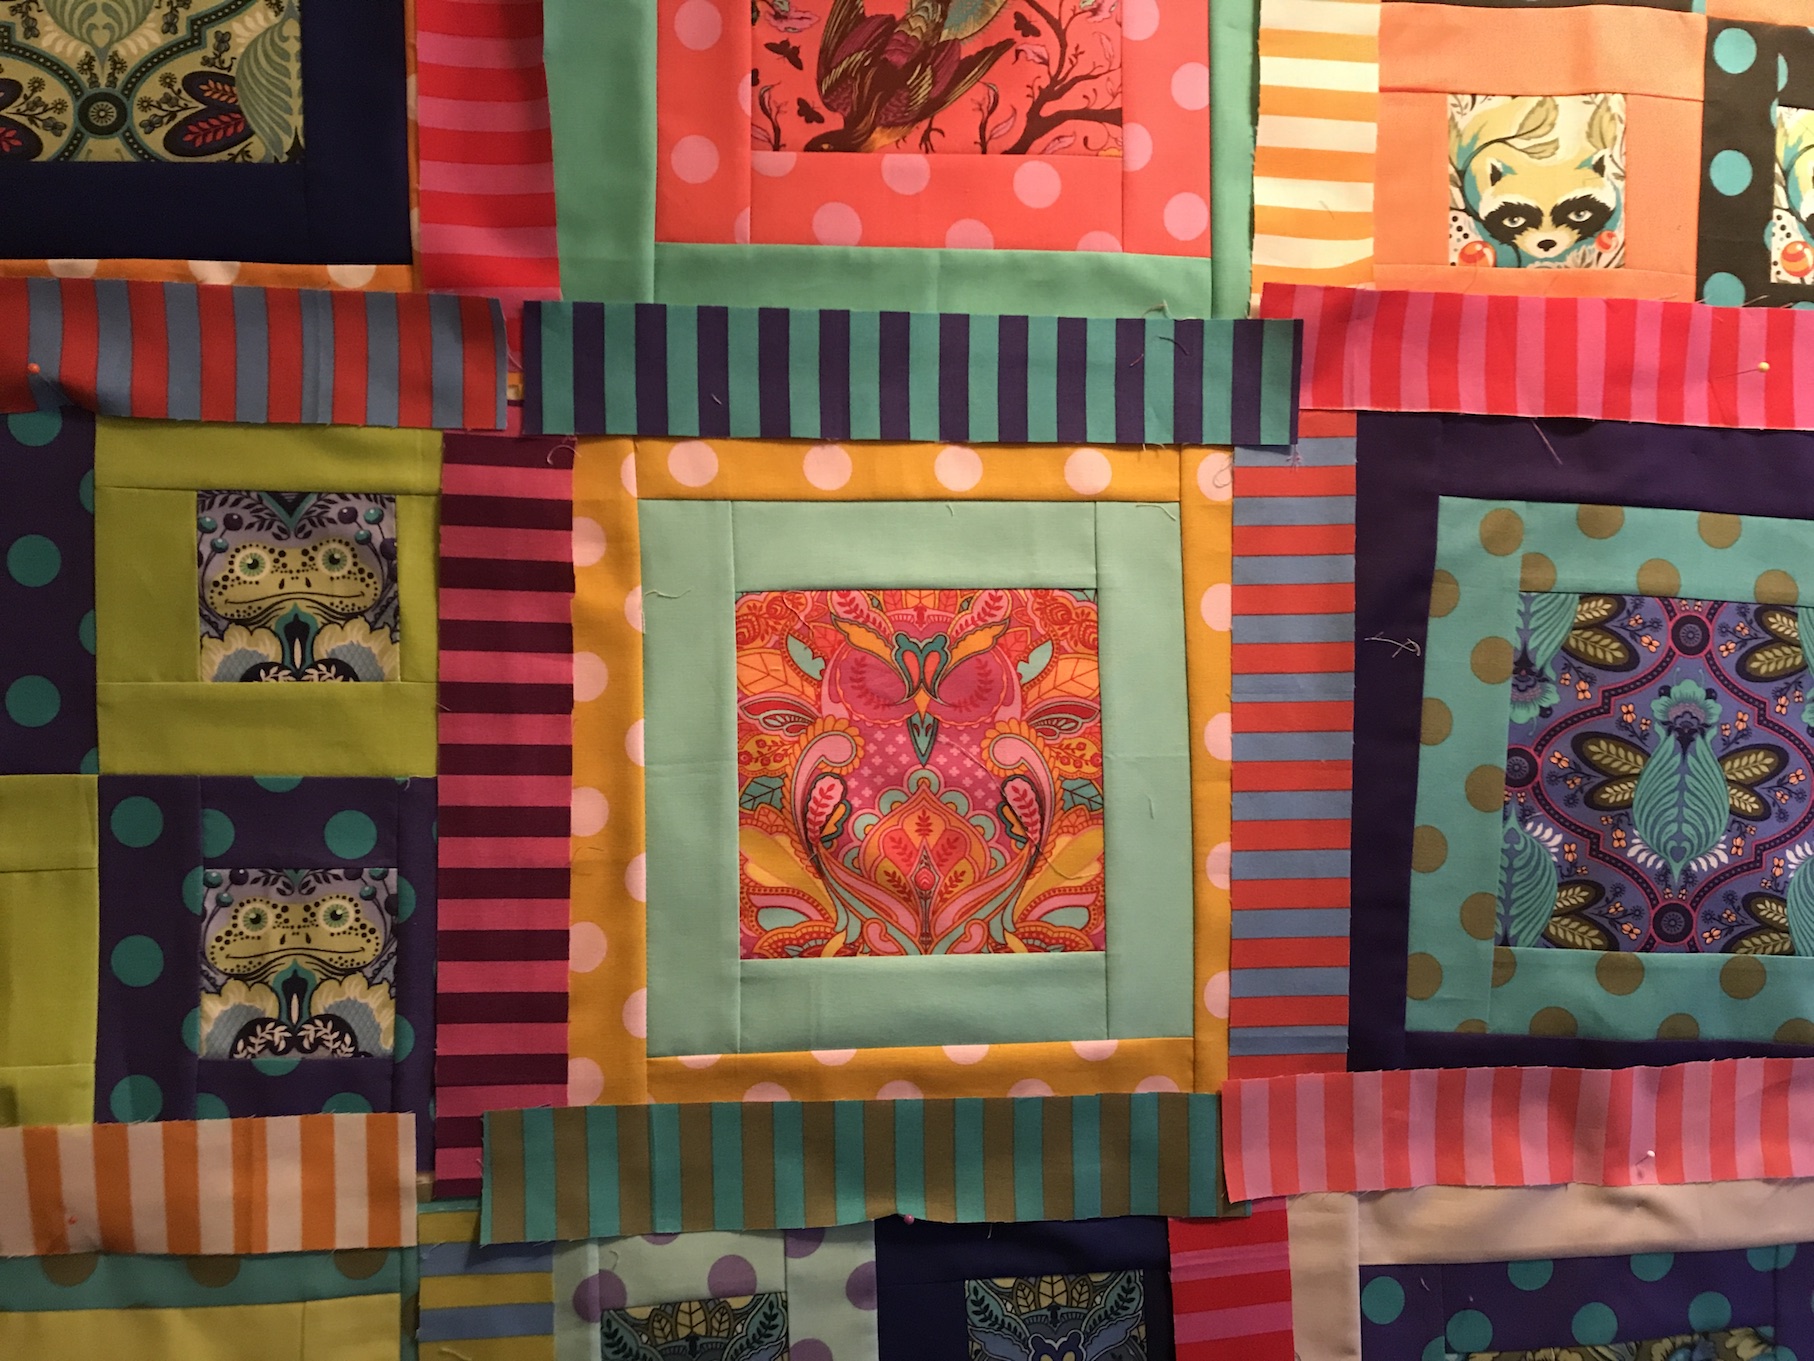
As I mentioned in the post earlier this week, my hallway is narrow and I can only take photos at an angle, but here is what the design wall looked like after TTQH laid out the stripes for the lattice:
After TTQH laid out the lattice, I cut 2″ x 2″ squares from the feature fabrics for the cornerstones between the lattice. For now I have them set on the edge of the design wall (TTQH’s idea) to pull them as I sew the lattice and blocks together:
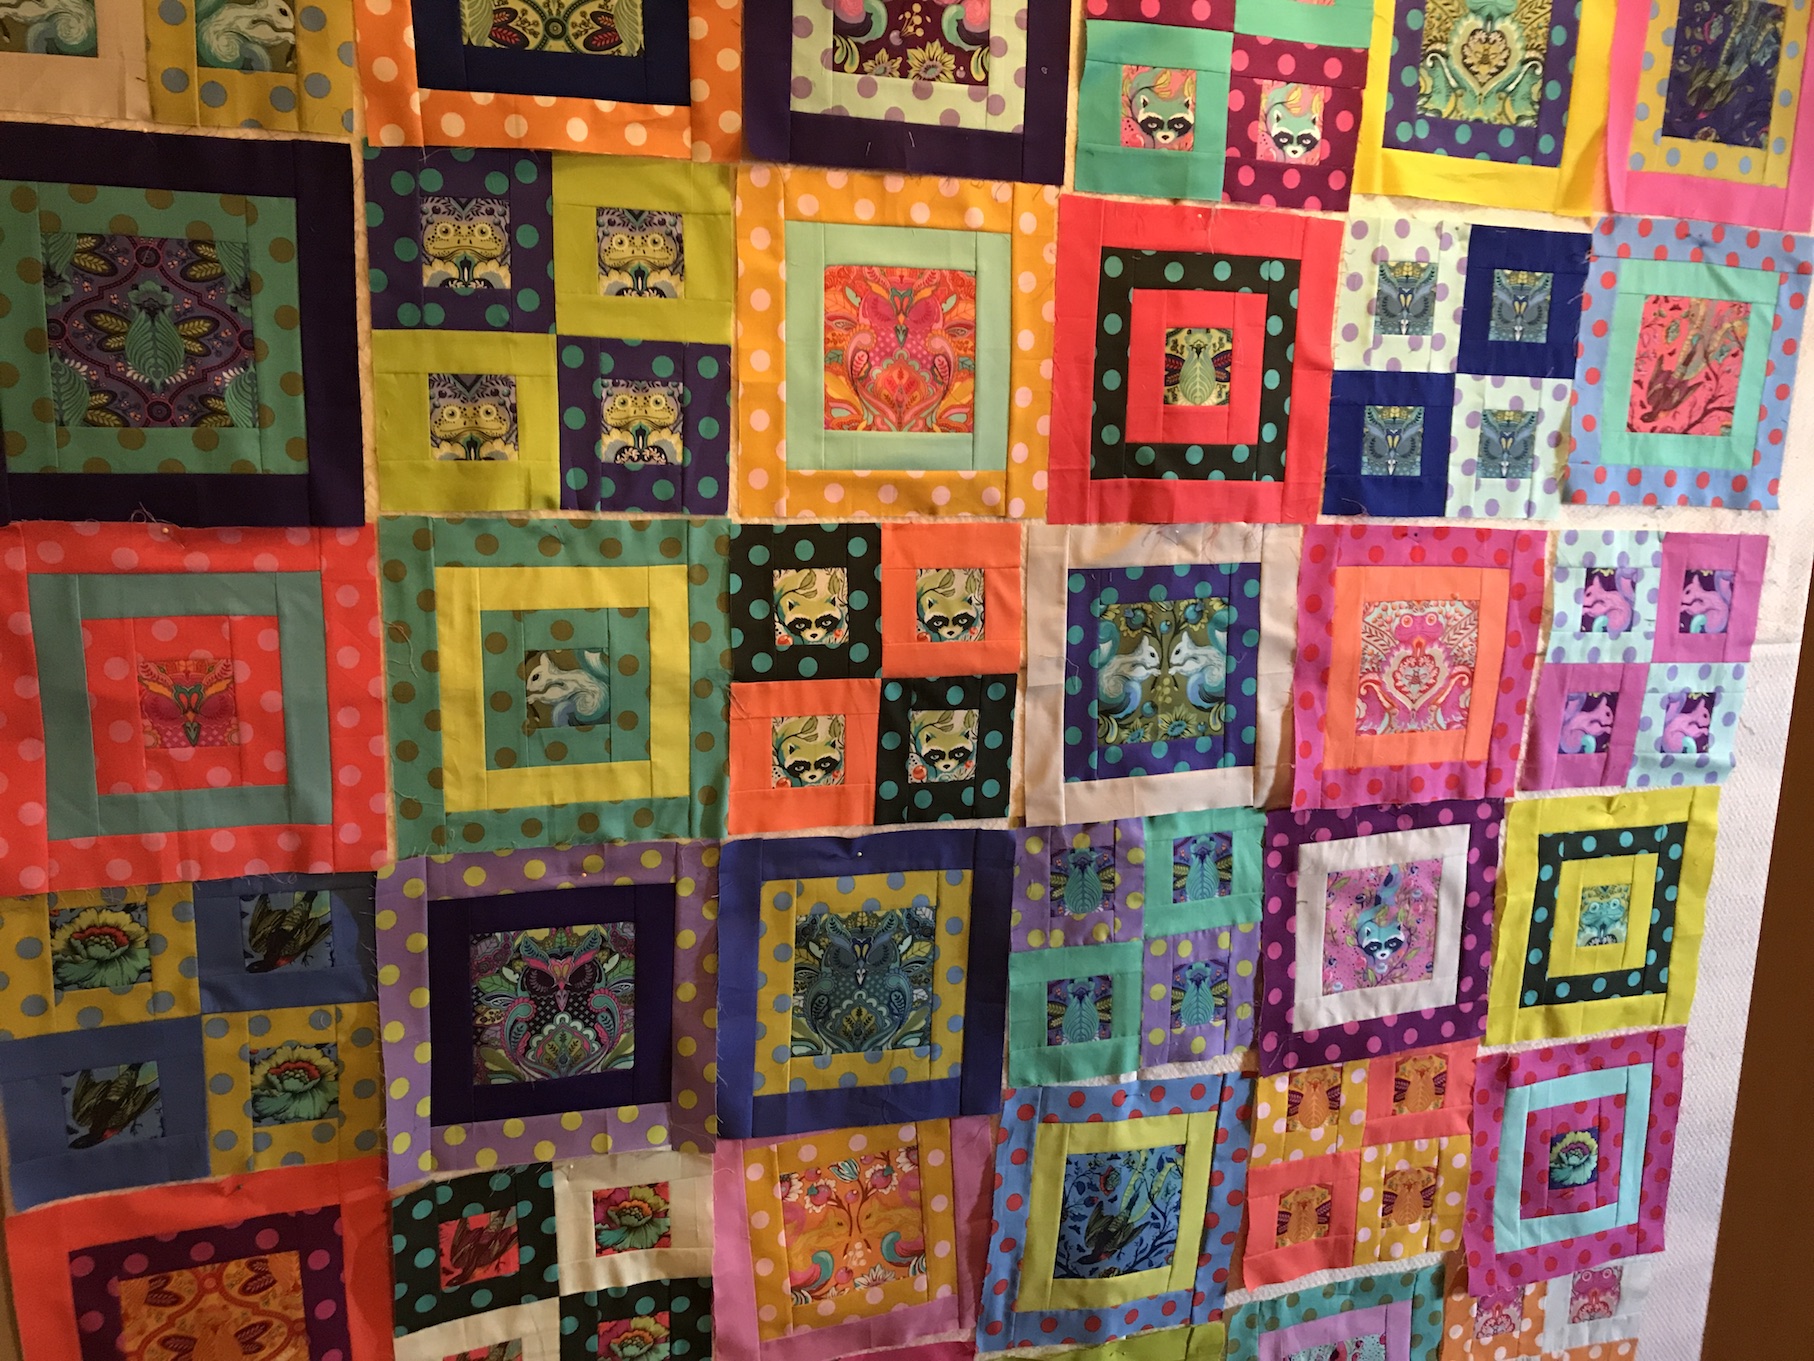
It is certainly going to be a colorful quilt!
As I get it sewn together, I will probably move it from the “design wall” to the “design bed” so I can share better photos of it.
I have a lot of scraps leftover from the Tula Pink All Stars fabric fat quarters collection I made the quilt from. I organized the scraps in smaller bags into dots, stripes, solid and feature fabrics (the Tula Pink animal prints) and then into a large bag.
Some I of the scraps might use for the binding but I have enough to make at least a small lap quilt!
Postscript
It has been very cold in Central Oregon. TTQH took Mike the miniature schnauzer coat shopping the other day and TTQH thought I should share with you all Mike in his new coat to close out this post:
After TTQH and Mike returned home from coat shopping, I realized I could have made Mike a coat myself as it was a simple design. But then Mike would have likely had to wait until Winter was fully here by the time I got the coat made…
First I’d like to apologize for any less than stellar photography. My design wall is in a narrow hallway in my home and I can only photograph it from an angle.
Now that you have that disclaimer and you have lowered your expectations on the quality of the photography on this post, I can continue my series of posts “What’s on the Design Wall”, featuring my latest project up on either one of the small design walls in my studio or the large design wall my hallway.
Up on my large design wall are thirty-six (36) 12.5 inch x 12.5 inch blocks for my quilt I am calling Tula in a Box.
I have Terry the Quilting Husband (TTQH) to thank for arranging the blocks on the design wall. I had looked at them so many times I did not know where to start in laying out the quilt blocks on the design wall!
There is a bit of story behind this quilt if you are new to my blog. You can check out my series of posts Tula Time! if you want to check out the back story.
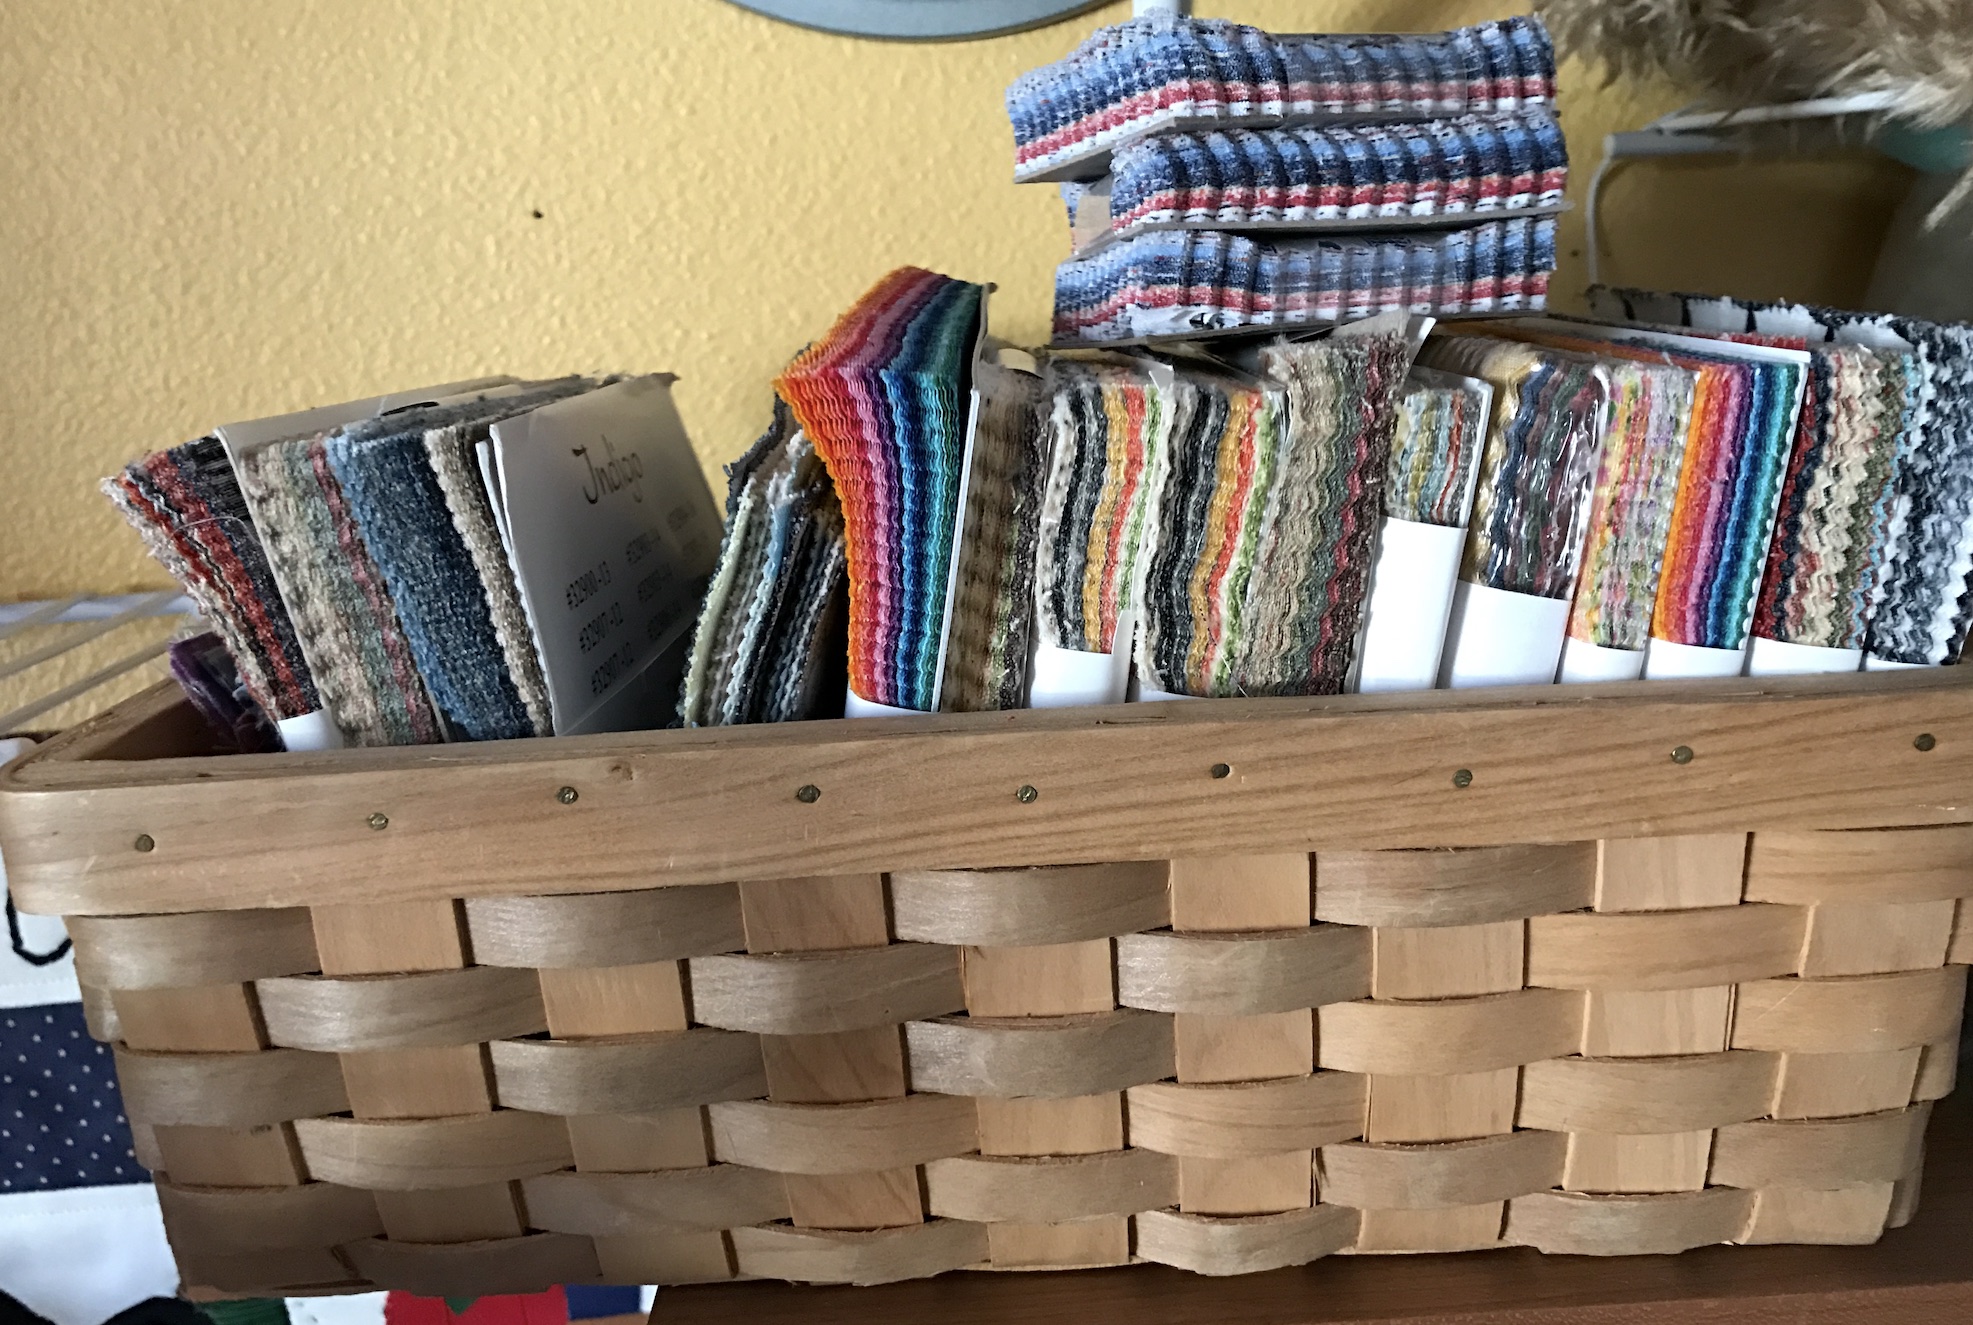
The quilt did begin as an impulse purchase of Tula Pink Allstar fabric fat quarter packs (feature fabrics, stripes, solids, and dots) after seeing my friend Dana’s collection at a quilt retreat:
I’ve now made quite a dent in that stack above while piecing the 36 blocks.
My next step is to create the lattice and cornerstones from this pile (fat quarter collection of the stripes, and scraps from the feature fabric);
I am going to “fussy cut” the scraps of the feature fabric (the 6 different animal prints in 3 different color ways) for the cornerstone between the lattice.
More to come as it progresses, for now I am just so happy to have finished the 36 blocks!
Postscript
My friend Dana who started my Tula Pink fabric obsession, has made great progress on her quilt which is made of pieced stars with the same collection of fat quarters from the Tula Pink All Stars line.
Here quilt got too big for the design wall so she has it laid out on a bed in her studio (every maker/crafter needs a bed in their studio in case they suddenly need a nap while creating, right?).
She is working on figuring out what to do for a border around the blocks.
Our friend Judy who is also making a Tula Pink quilt, is still working on piecing her 36 blocks.
As I mentioned earlier, if you are new to this blog and would like to know the story behind our quilts, check out the series of posts – Tula Time!(this link contains all the posts tagged as related to Tula Pink fabrics, you will have to scroll through the posts to see the other posts).
This post is a continuation of my ongoing series “What’s on the Design Wall”, featuring my latest project up on either one of the small design walls in my studio or the large design wall my hallway.
Before we go any further on the post I need to give you some background to explain the low light and less than stellar photos. In 2016 I decided to embrace “whole house crafting” where I decided to expand my crafting space beyond the little studio in the back of my little house. This included turning part of the only hallway in my house into a large design wall, The only problem is that the hallway is narrow and so I have to take photos at odd angles.
Okay now back to my ramblings about my what is on the design wall…
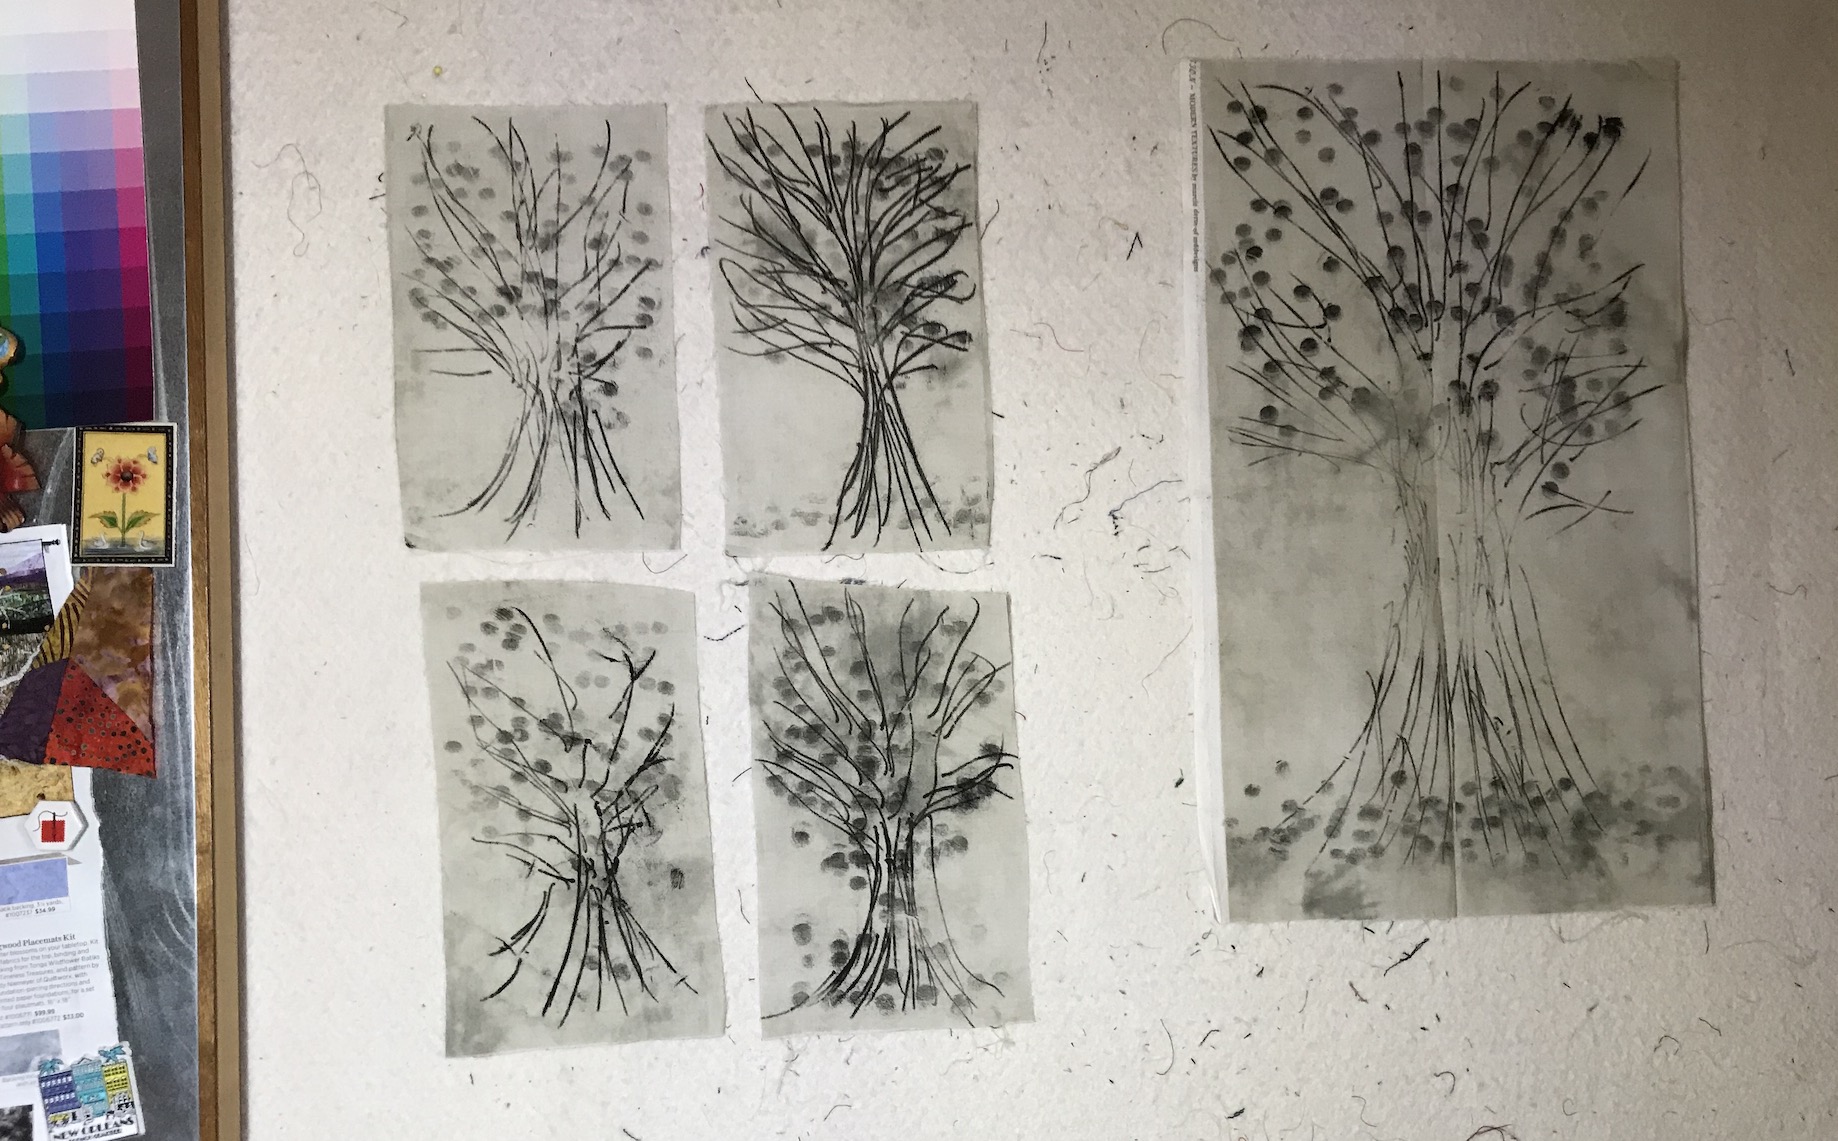
Art Quilter Play Date – Earlier this year I went to a fabric printing workshop held at the studio of one of the artists in the art quilting group I belong. Here are the 5 pieces I printed.
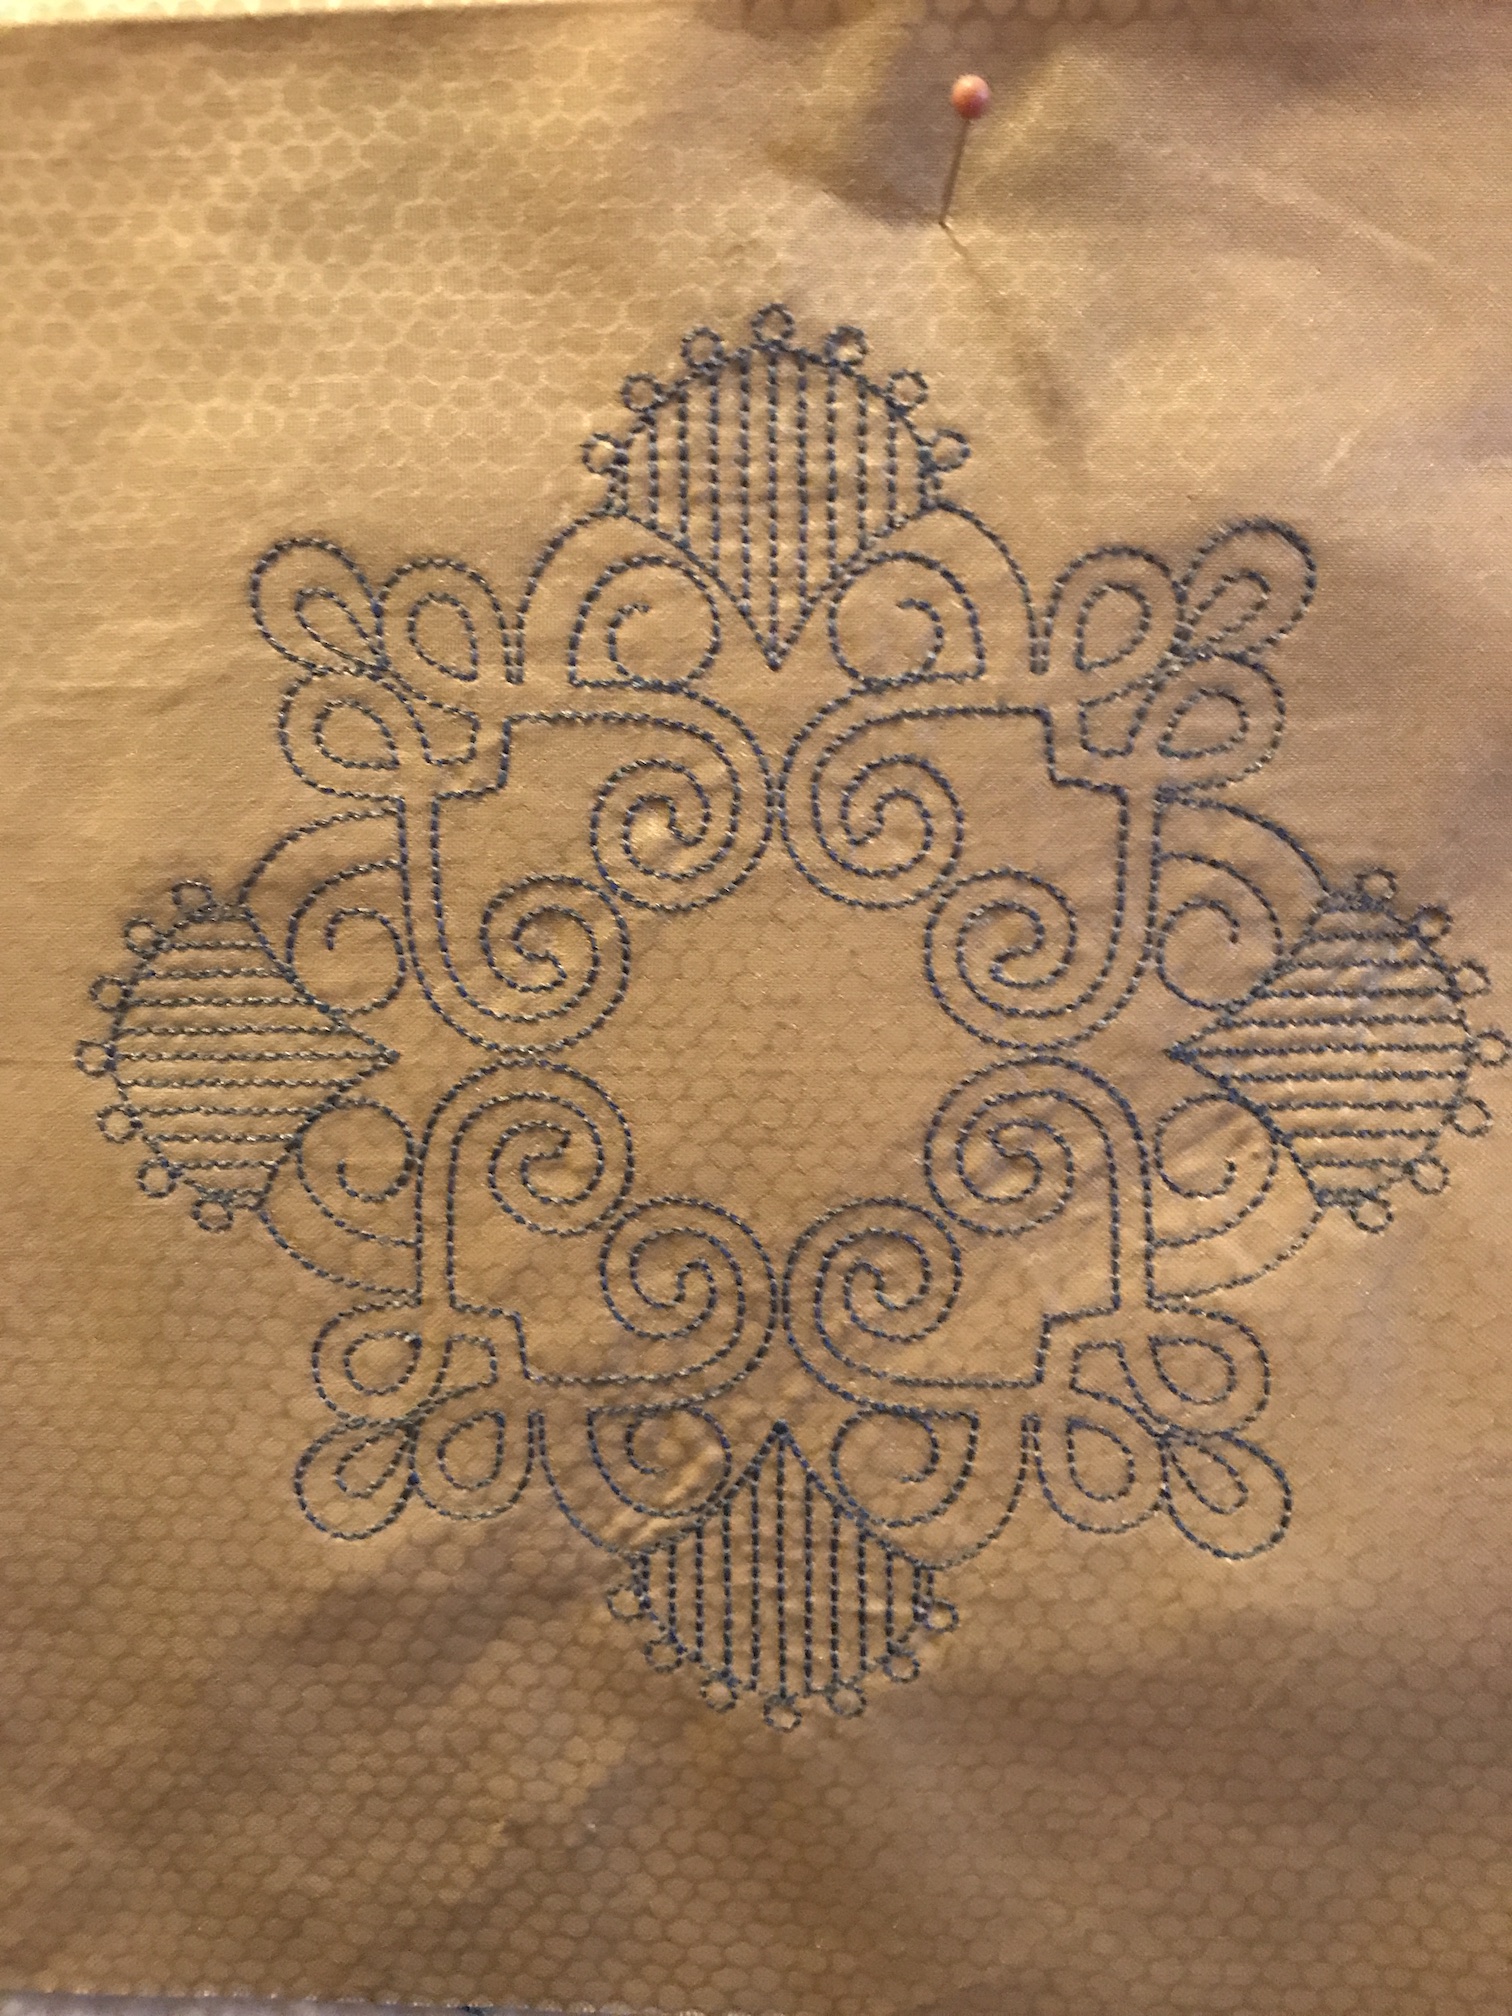
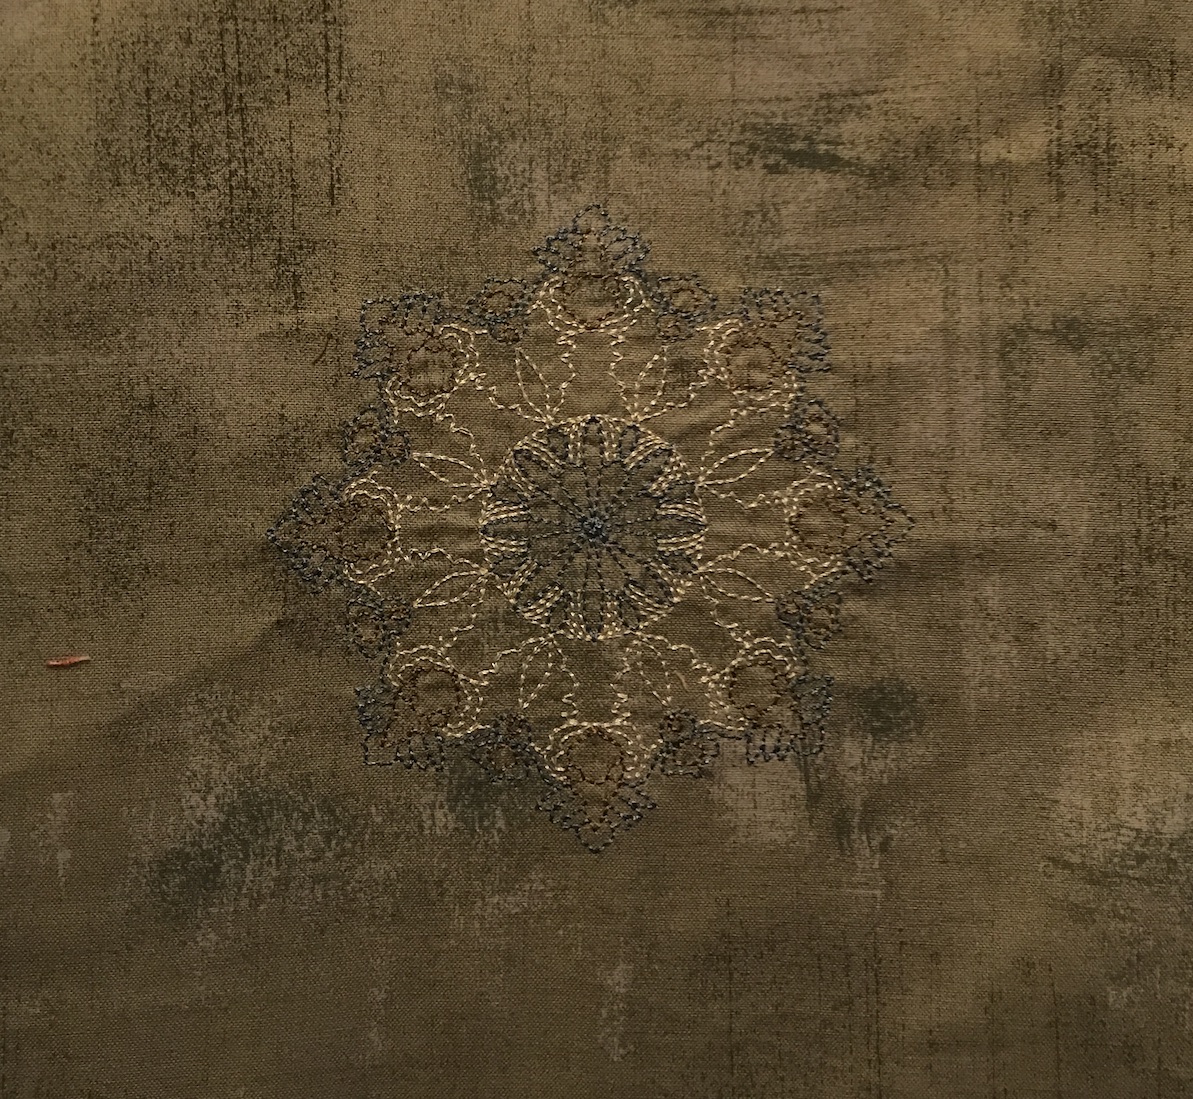
Quilt Retreat Inspiration and Projects. – Last year during the annual May retreat with my quilting friends, my friend Lisa was working on an old UFO from a machine embroidery class she took but was losing interest in finishing the piece. I offered to take it off her hands.
Her blocks looked like this:
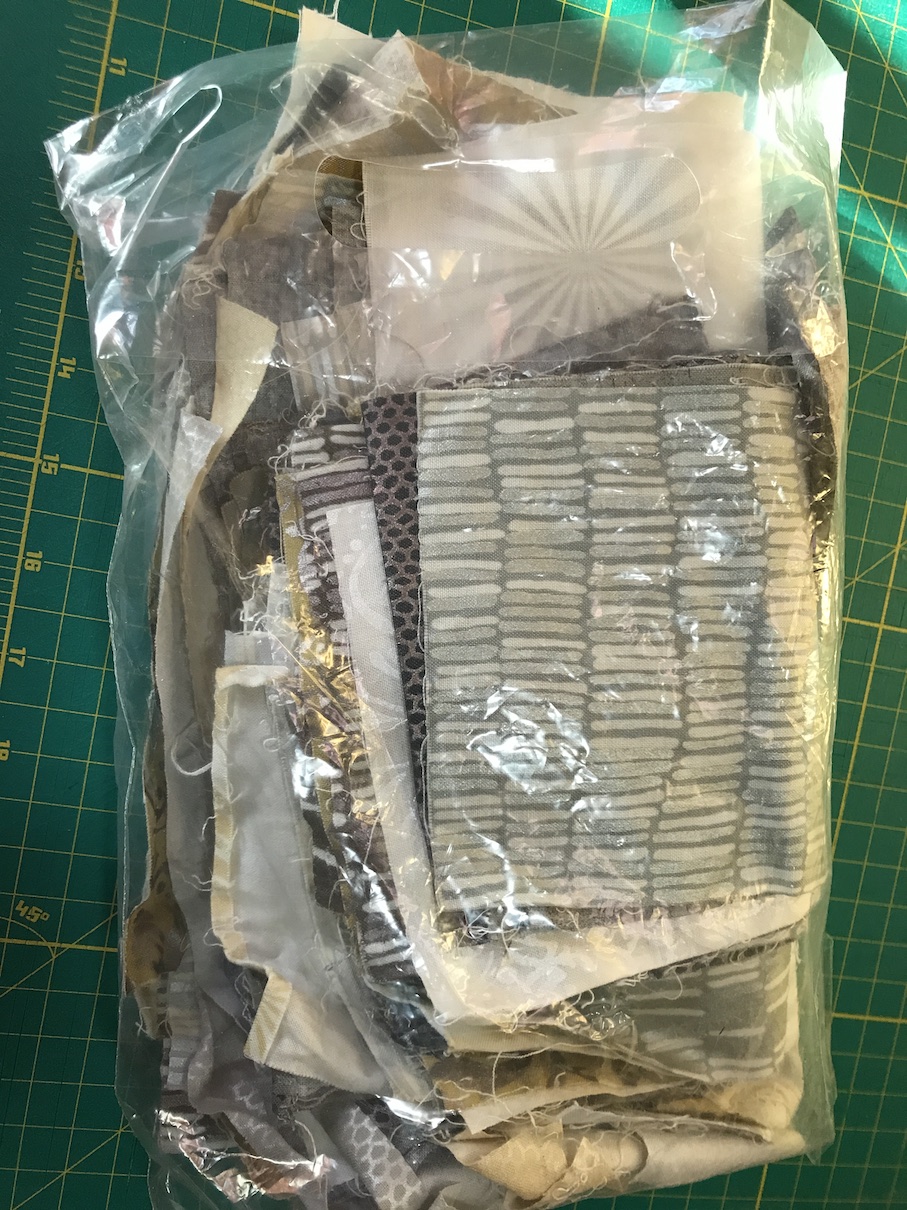
I took them apart and along with the extra fabric end up with a nice package to become a challenge bag (see post Basket of Challenges):
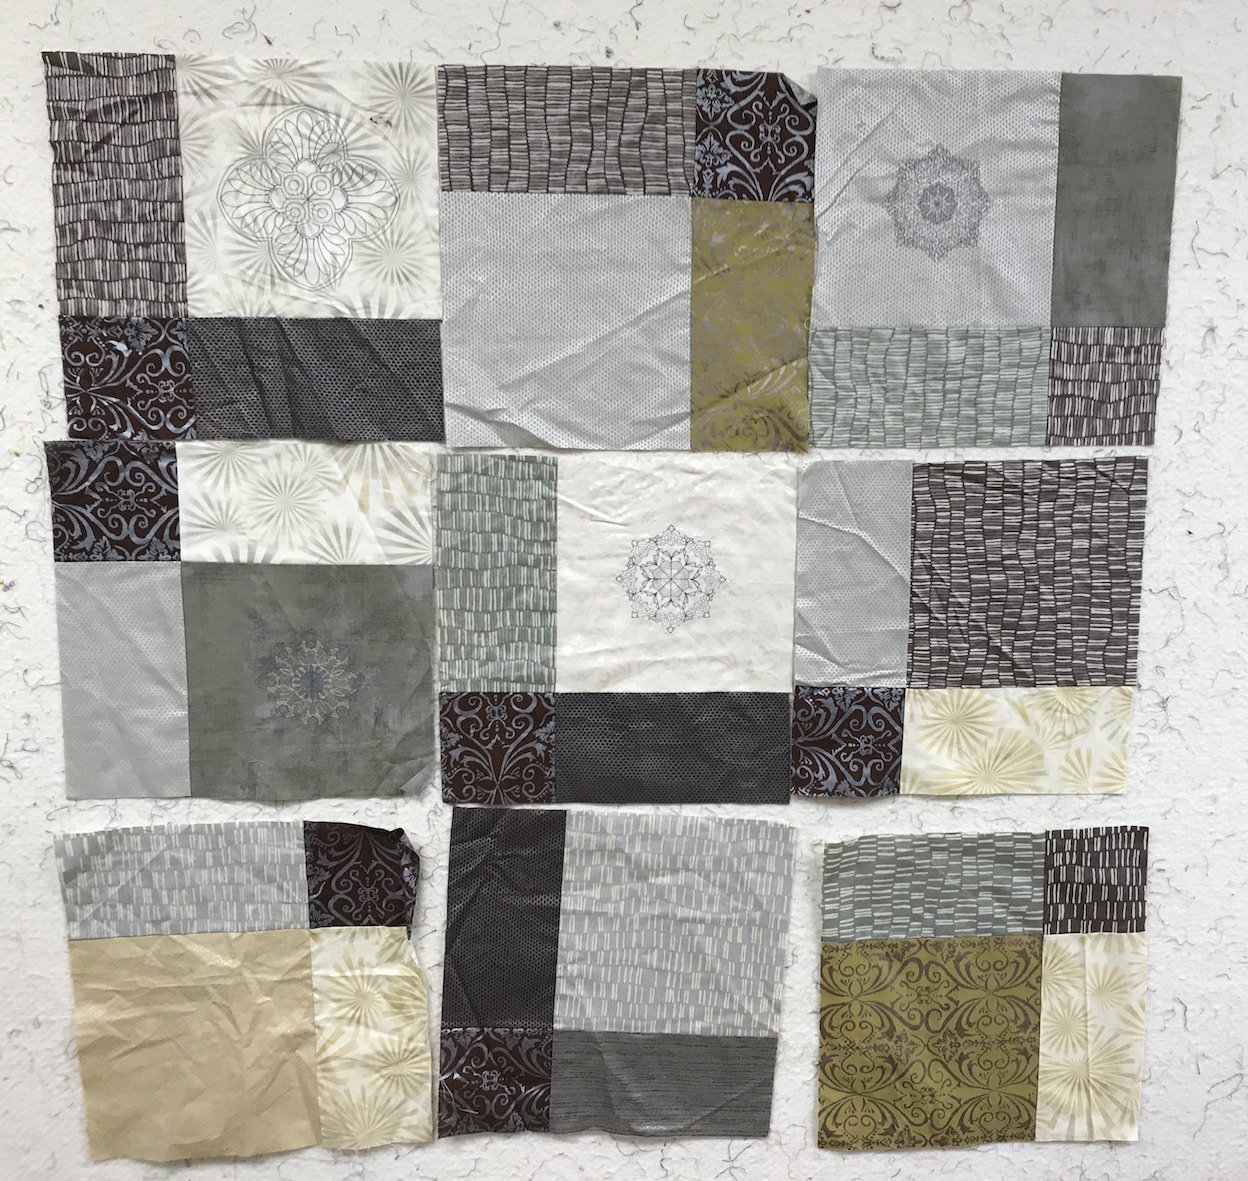
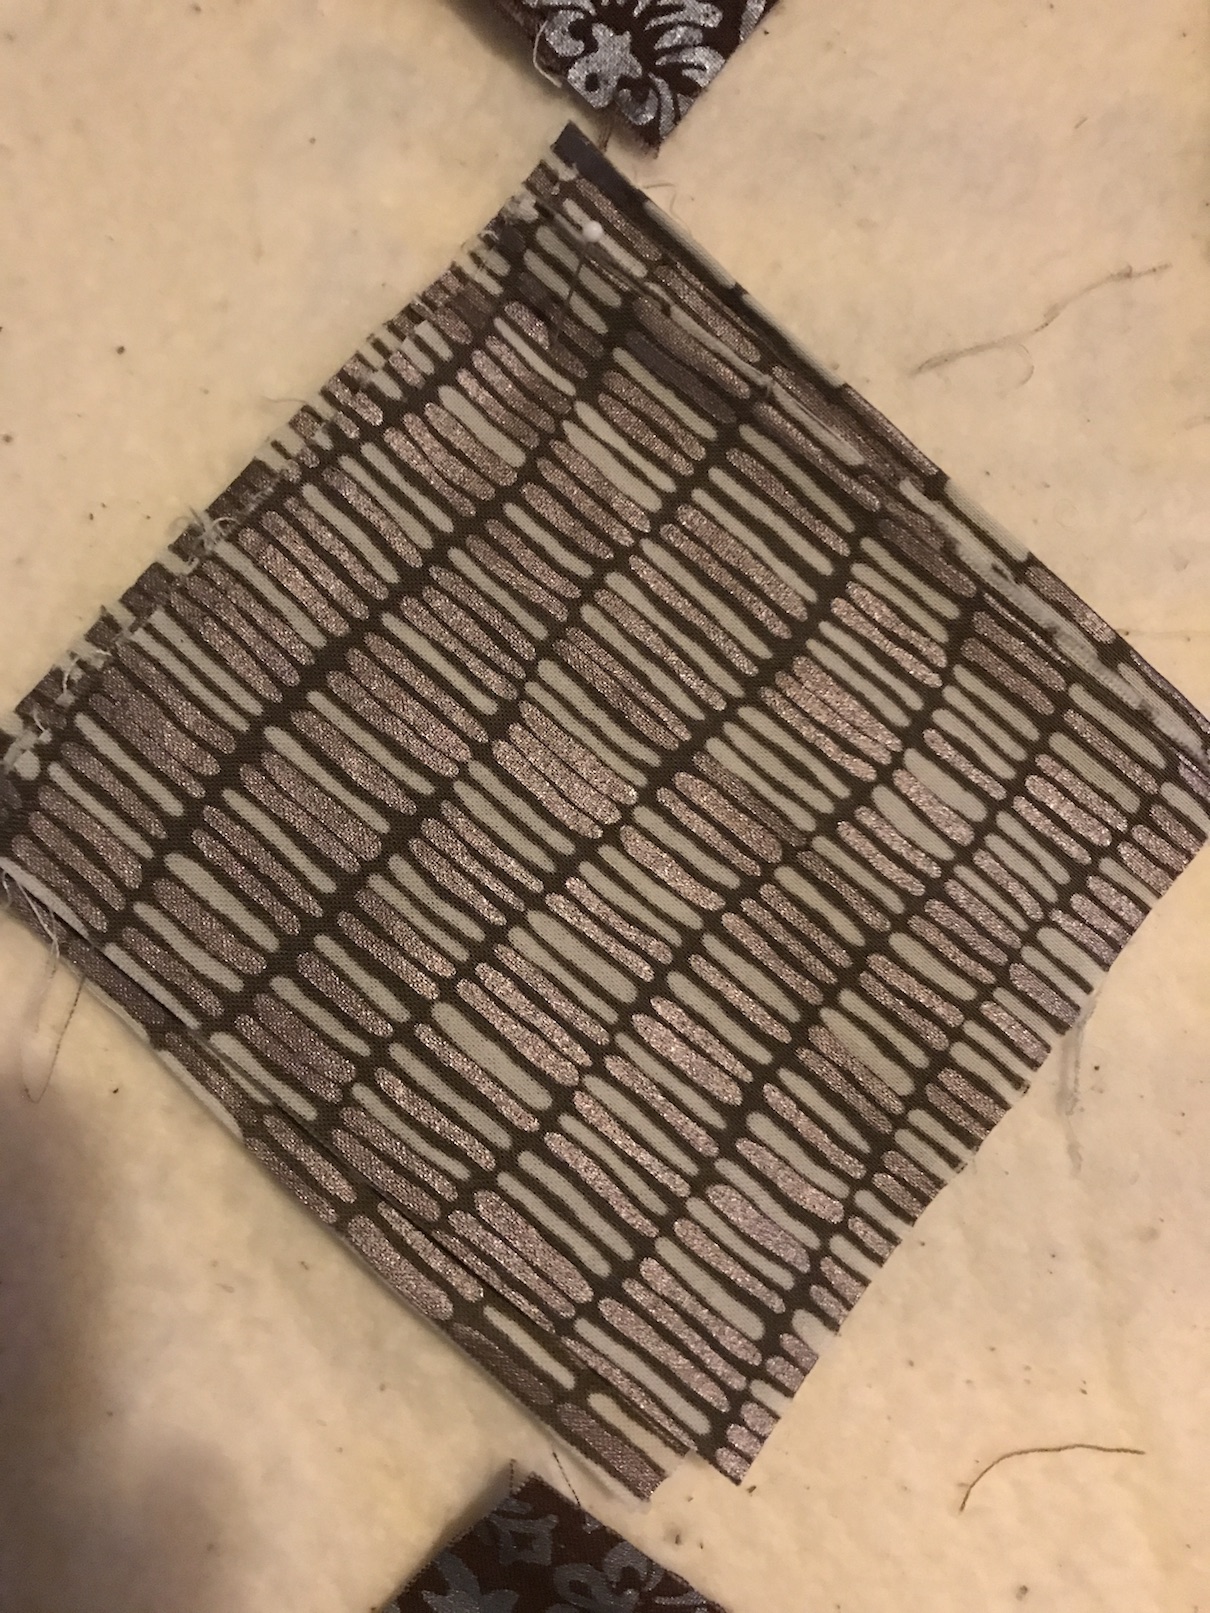
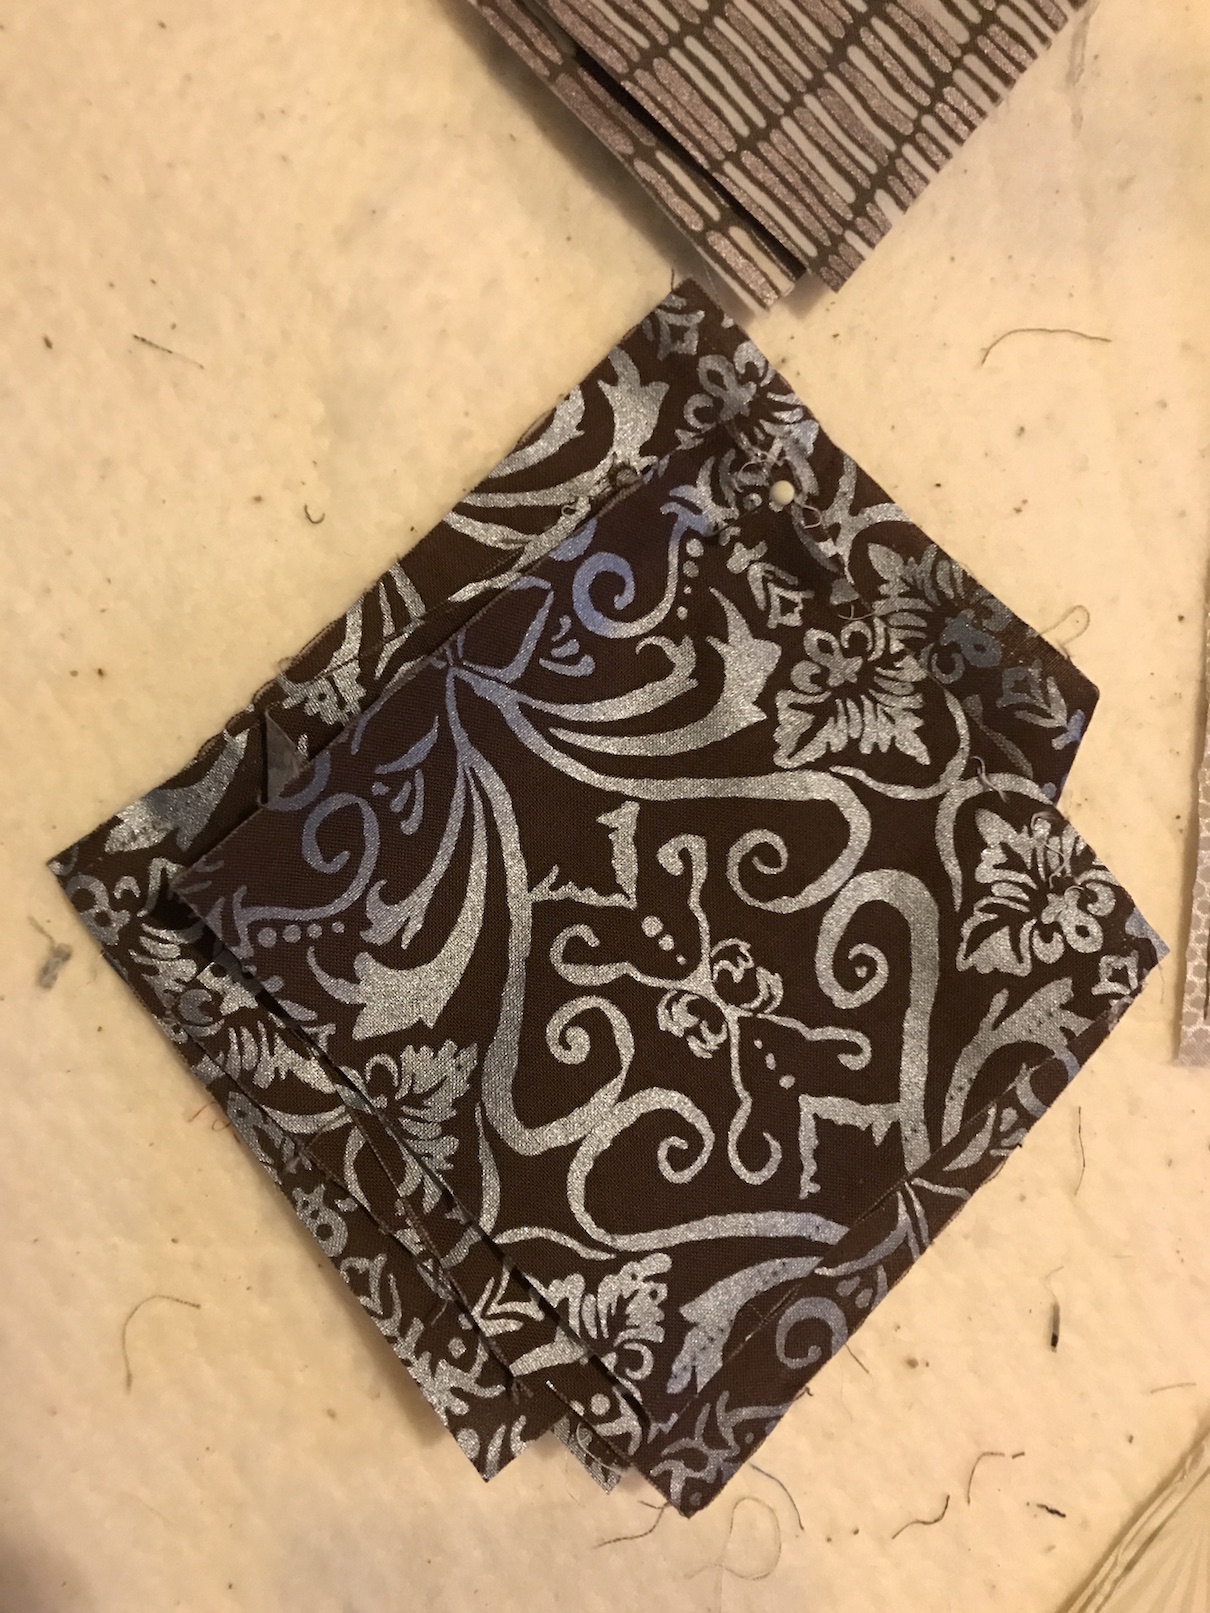
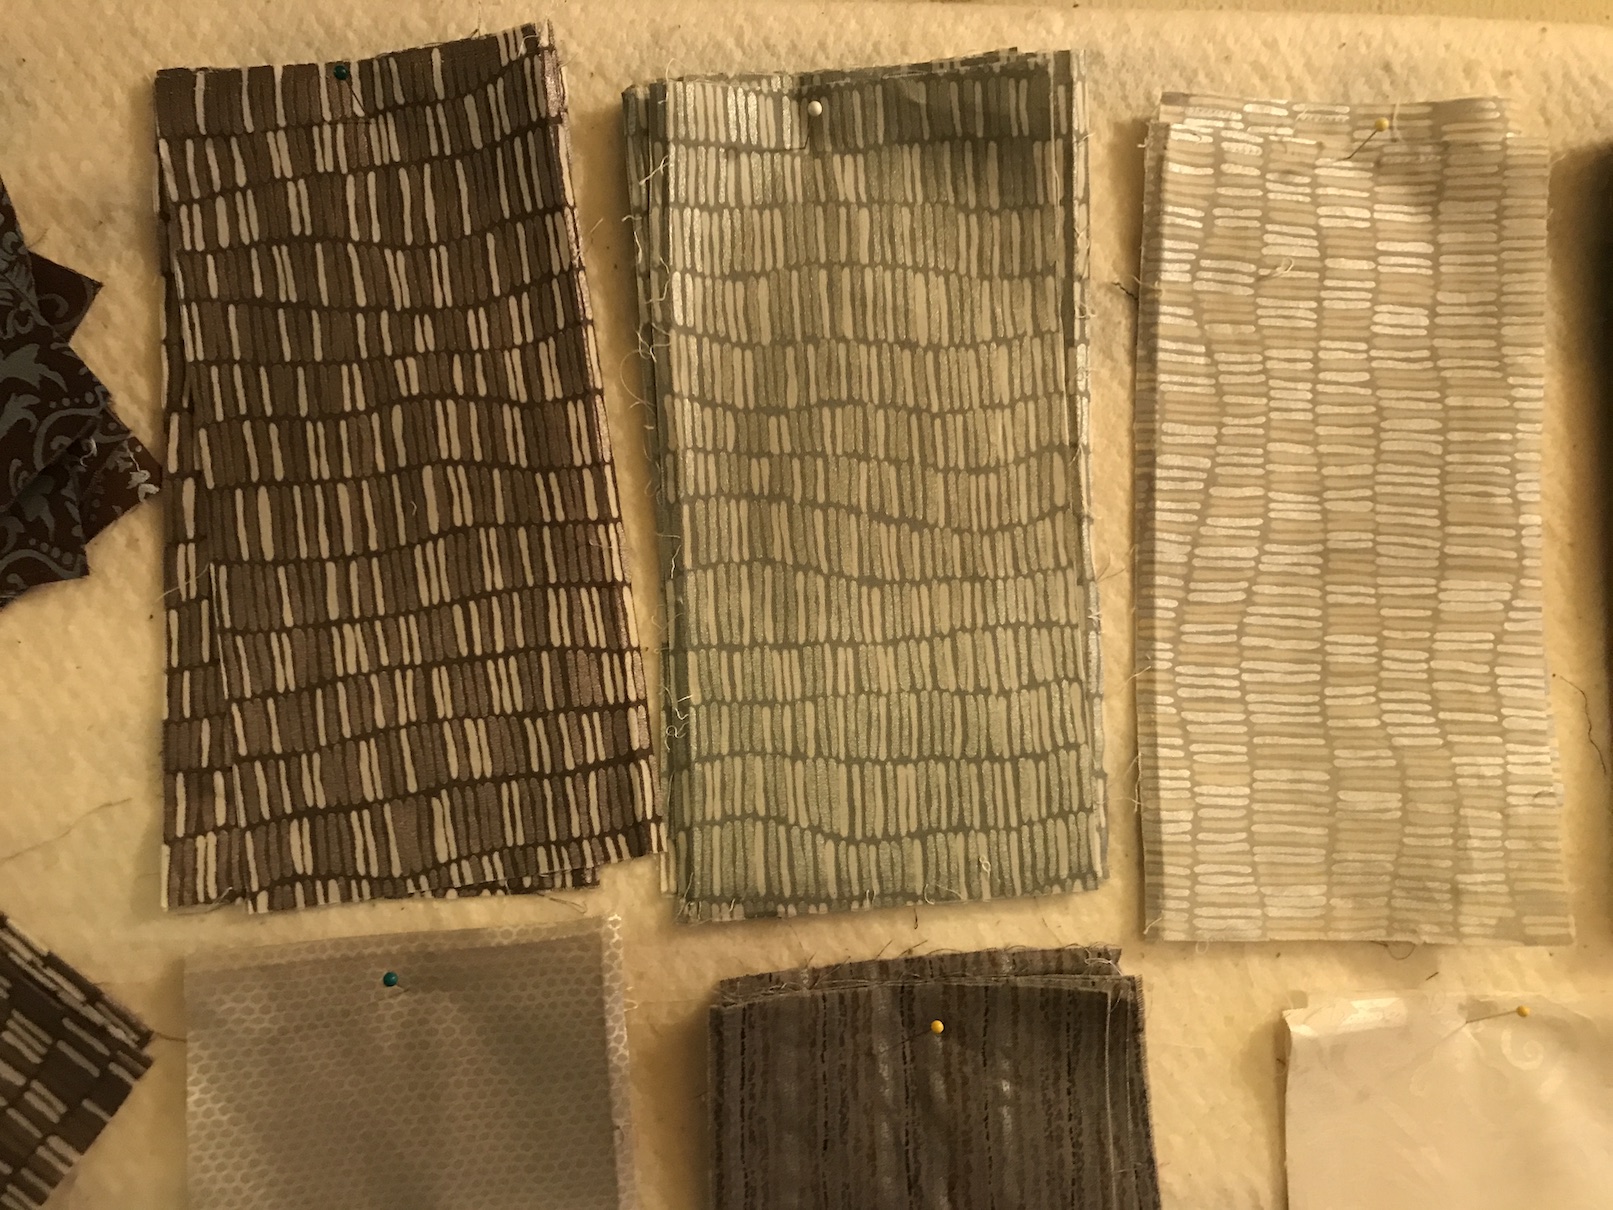
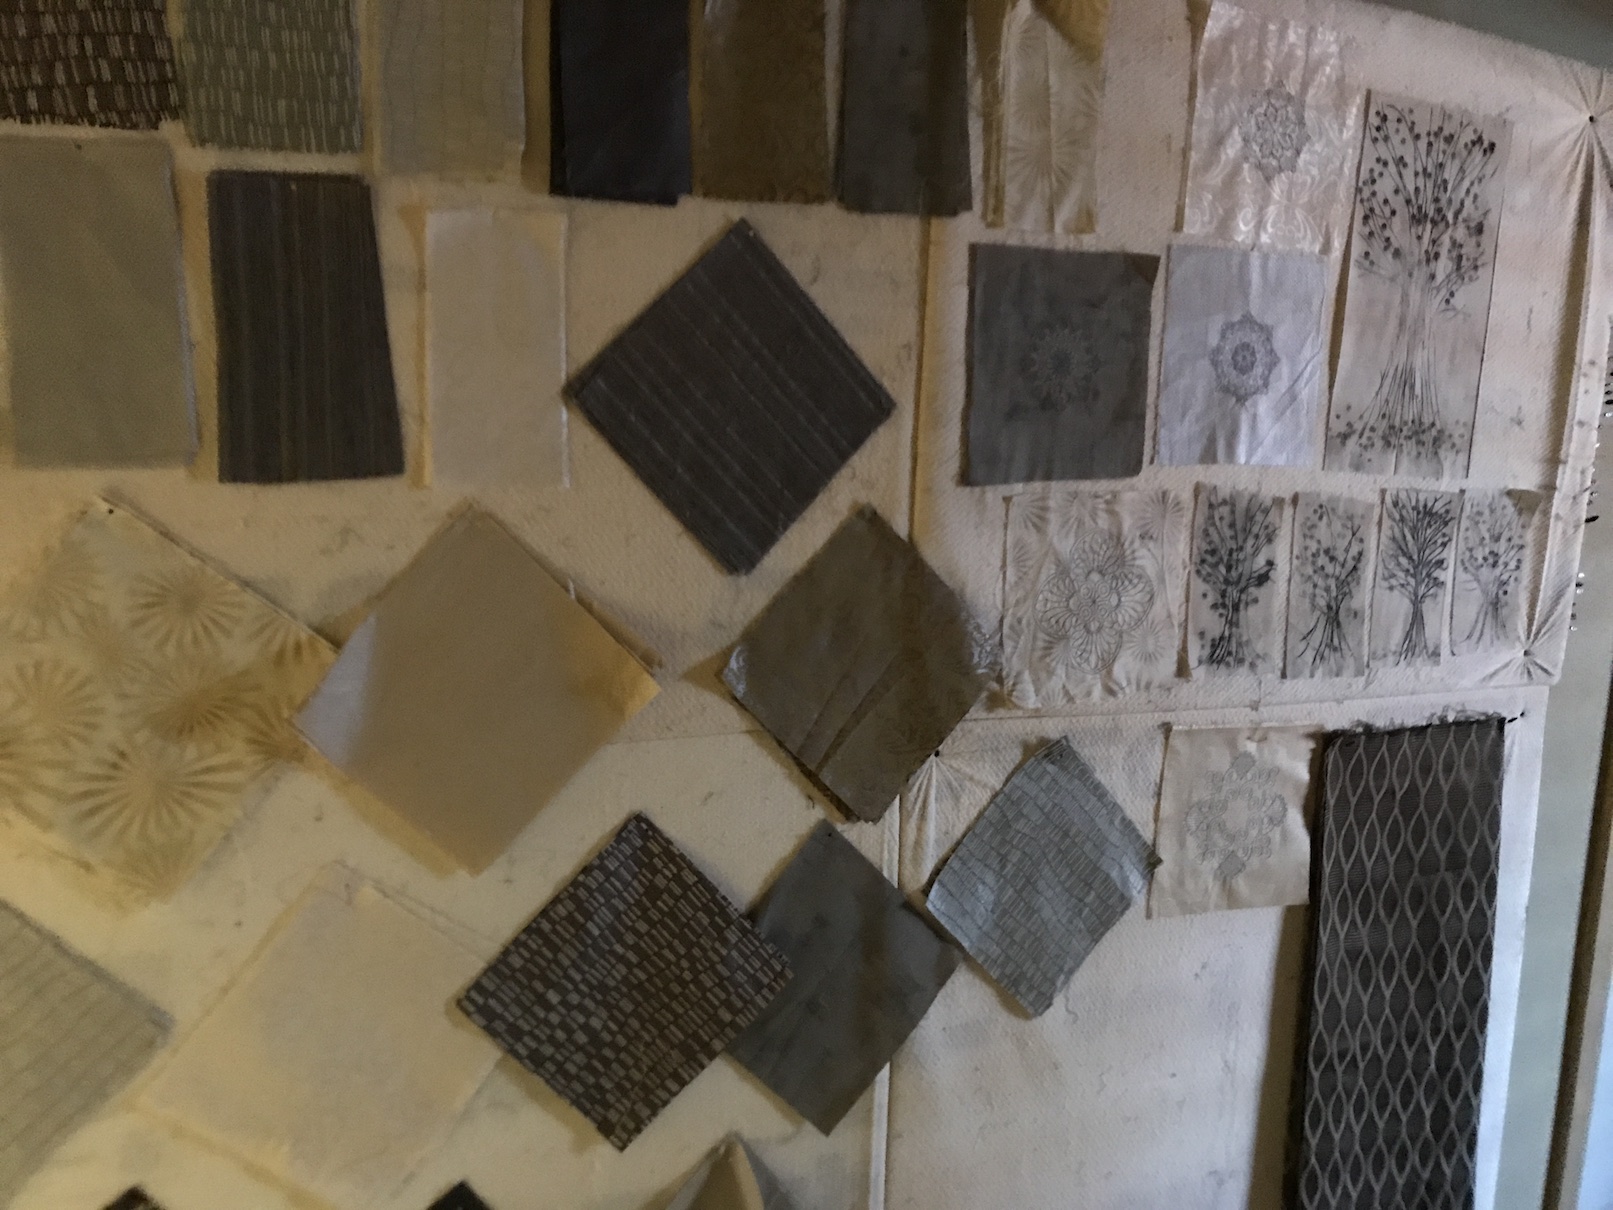
I was rummaging around in my Basket of Challenges the other day and came across this bag. Looking at the fabrics in taupes, browns, golds, creams, and silvers, I realized they might look great with the fabric printed pieces I made earlier this year.
I decided to put everything up on the large design wall, and let them “simmer’ until I decided what type of piece I want to make (most likely some type of improvisational art quilt):
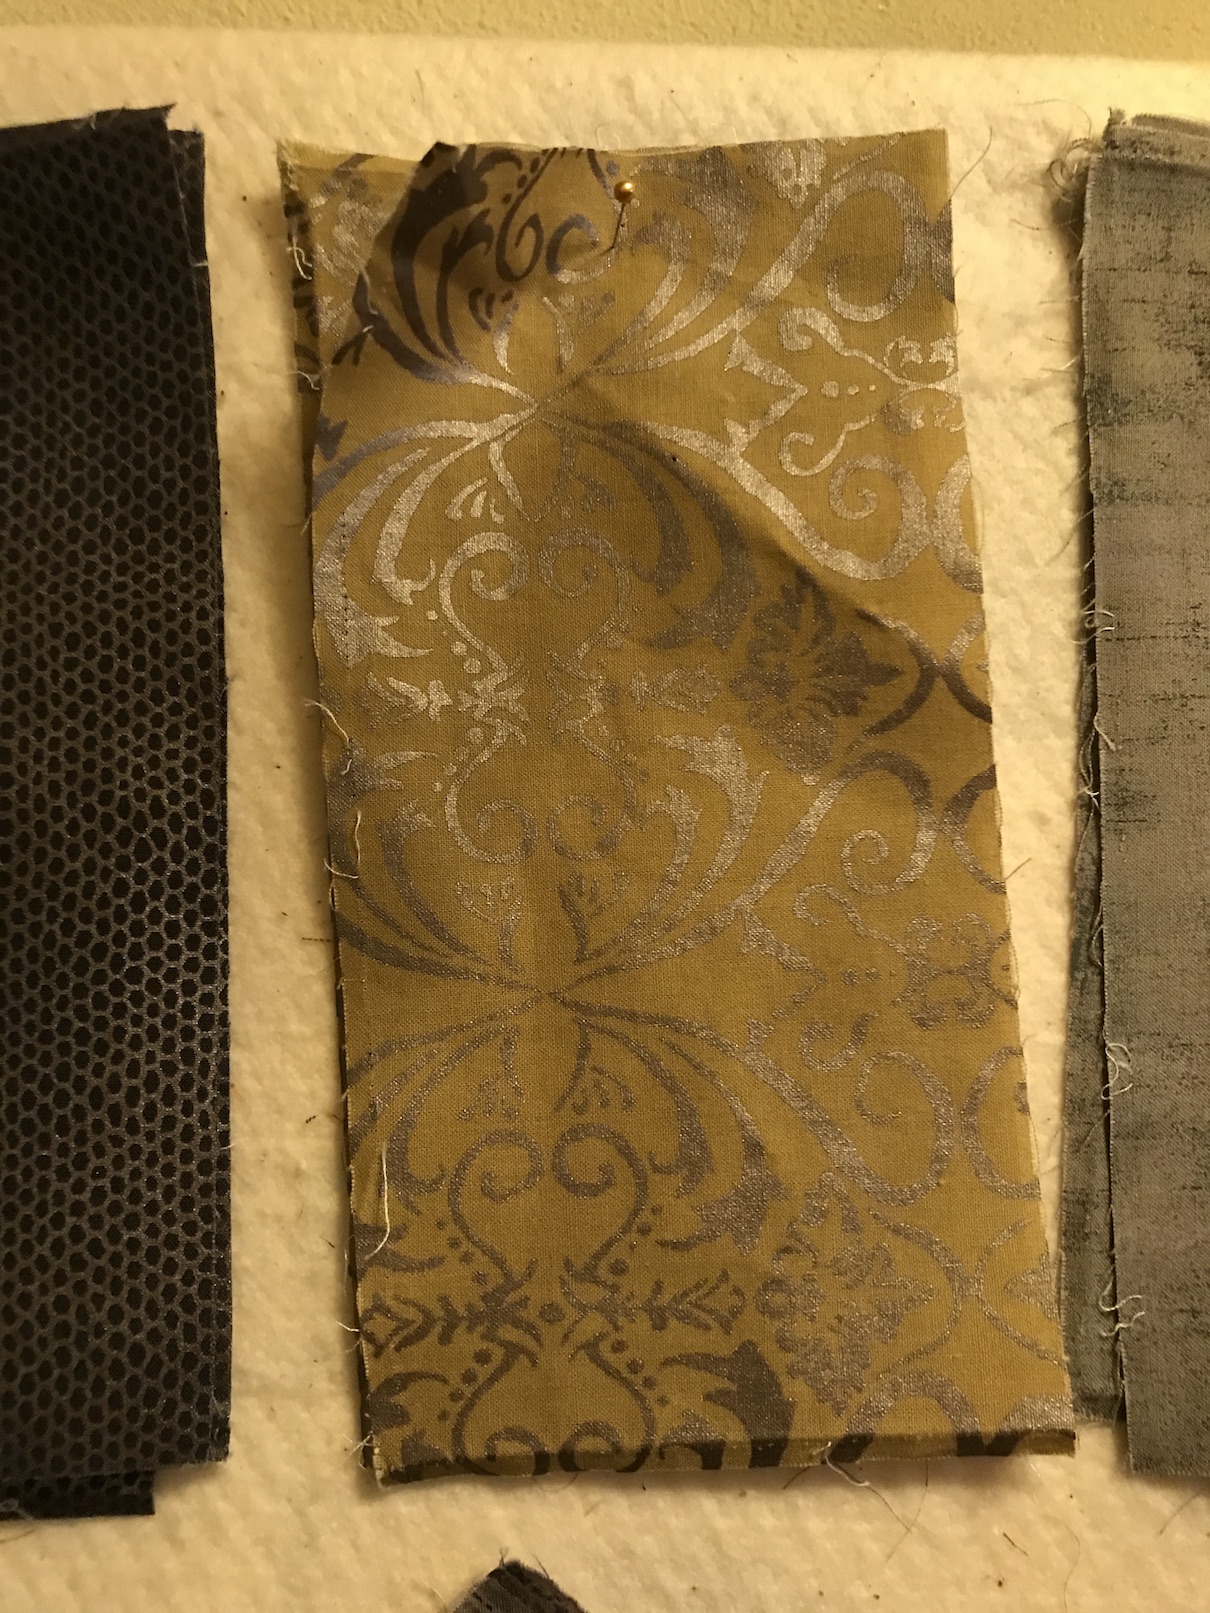
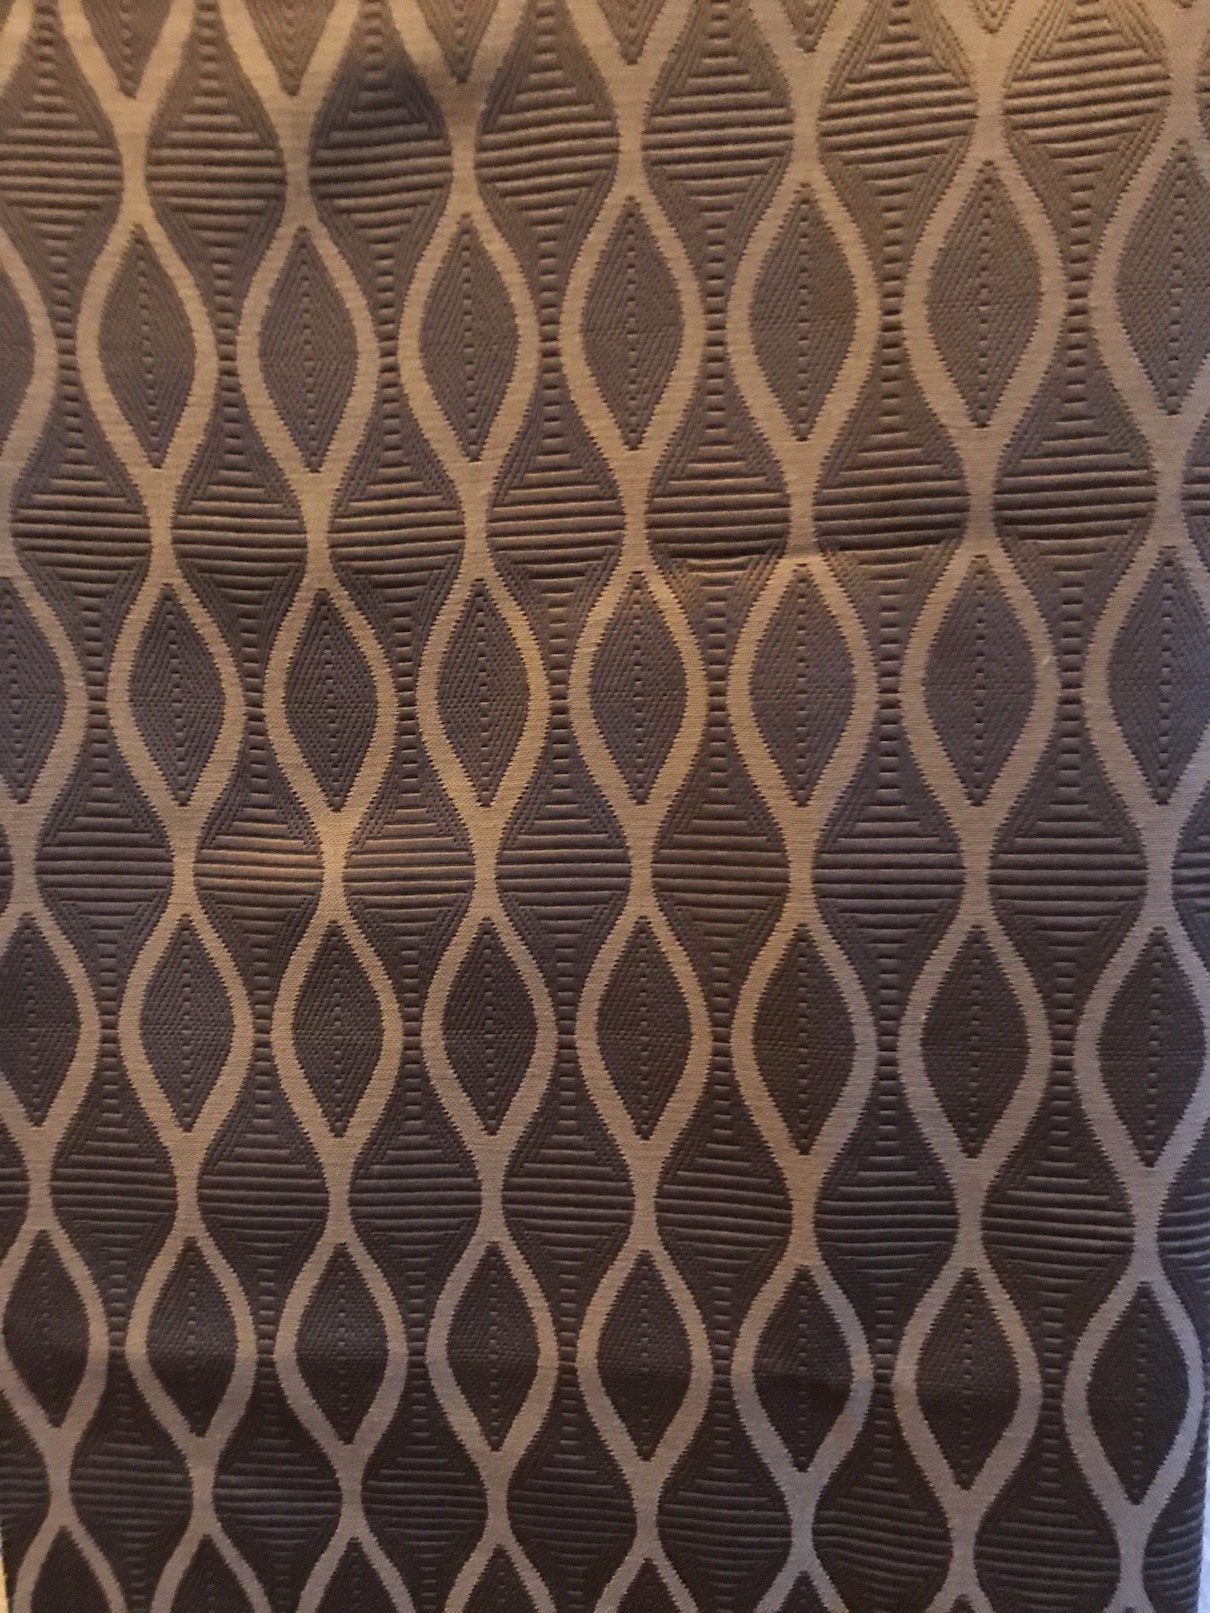
In addition to these fabrics, I put up on the wall this home decor remnant I picked up from Mood Fabrics during a trip to New York City:
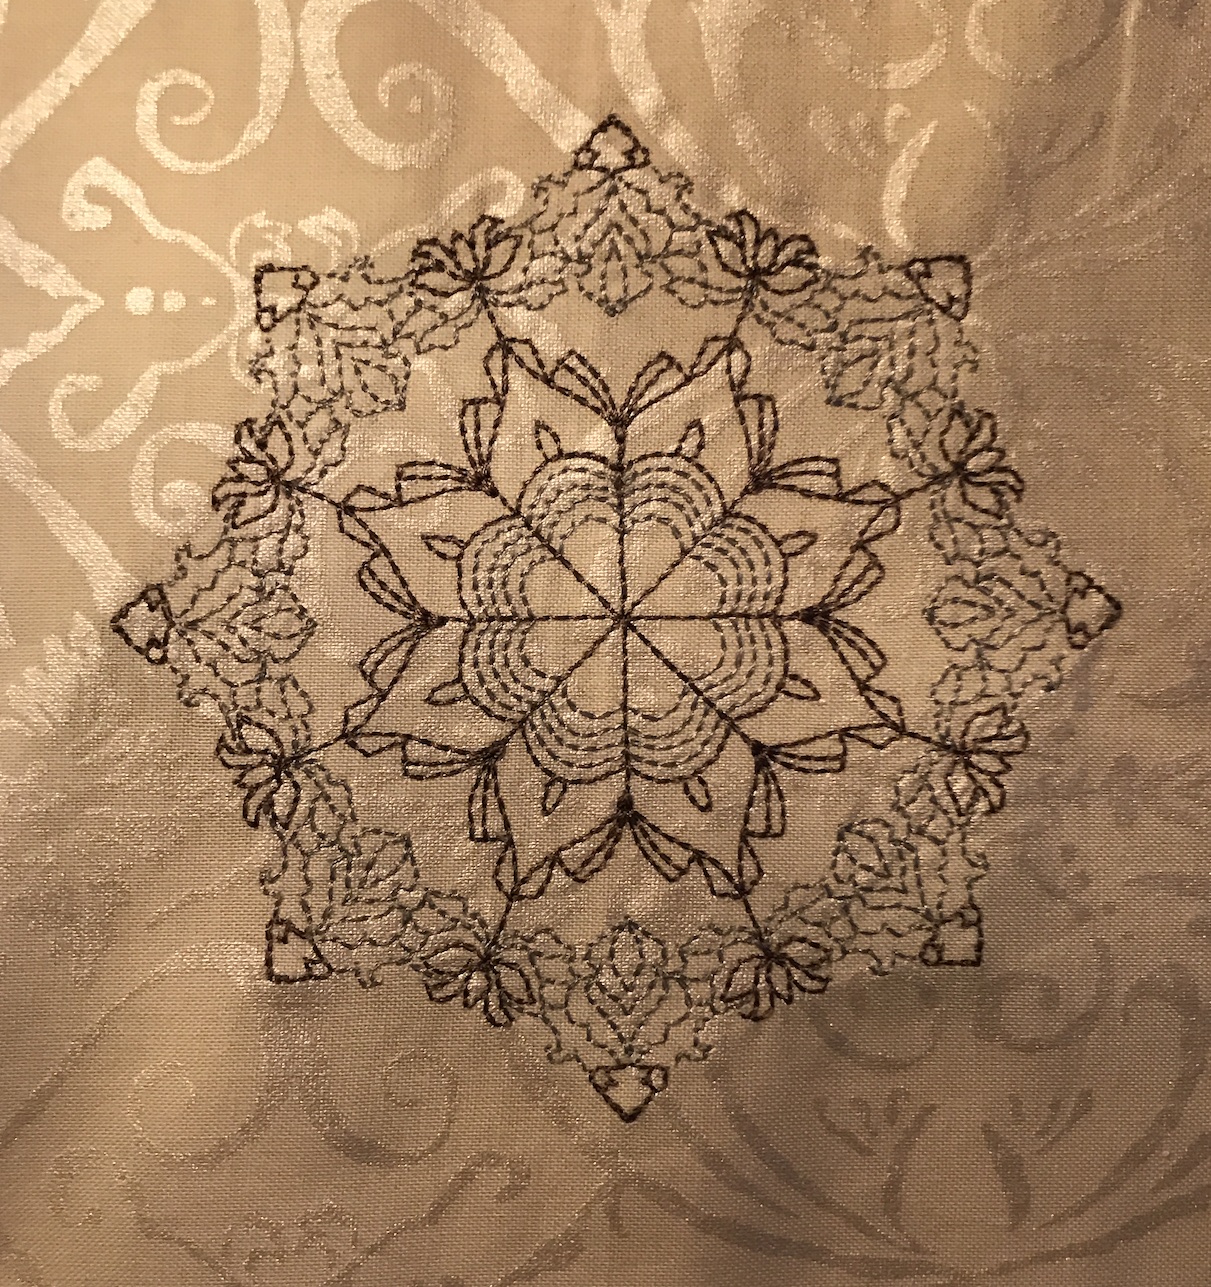
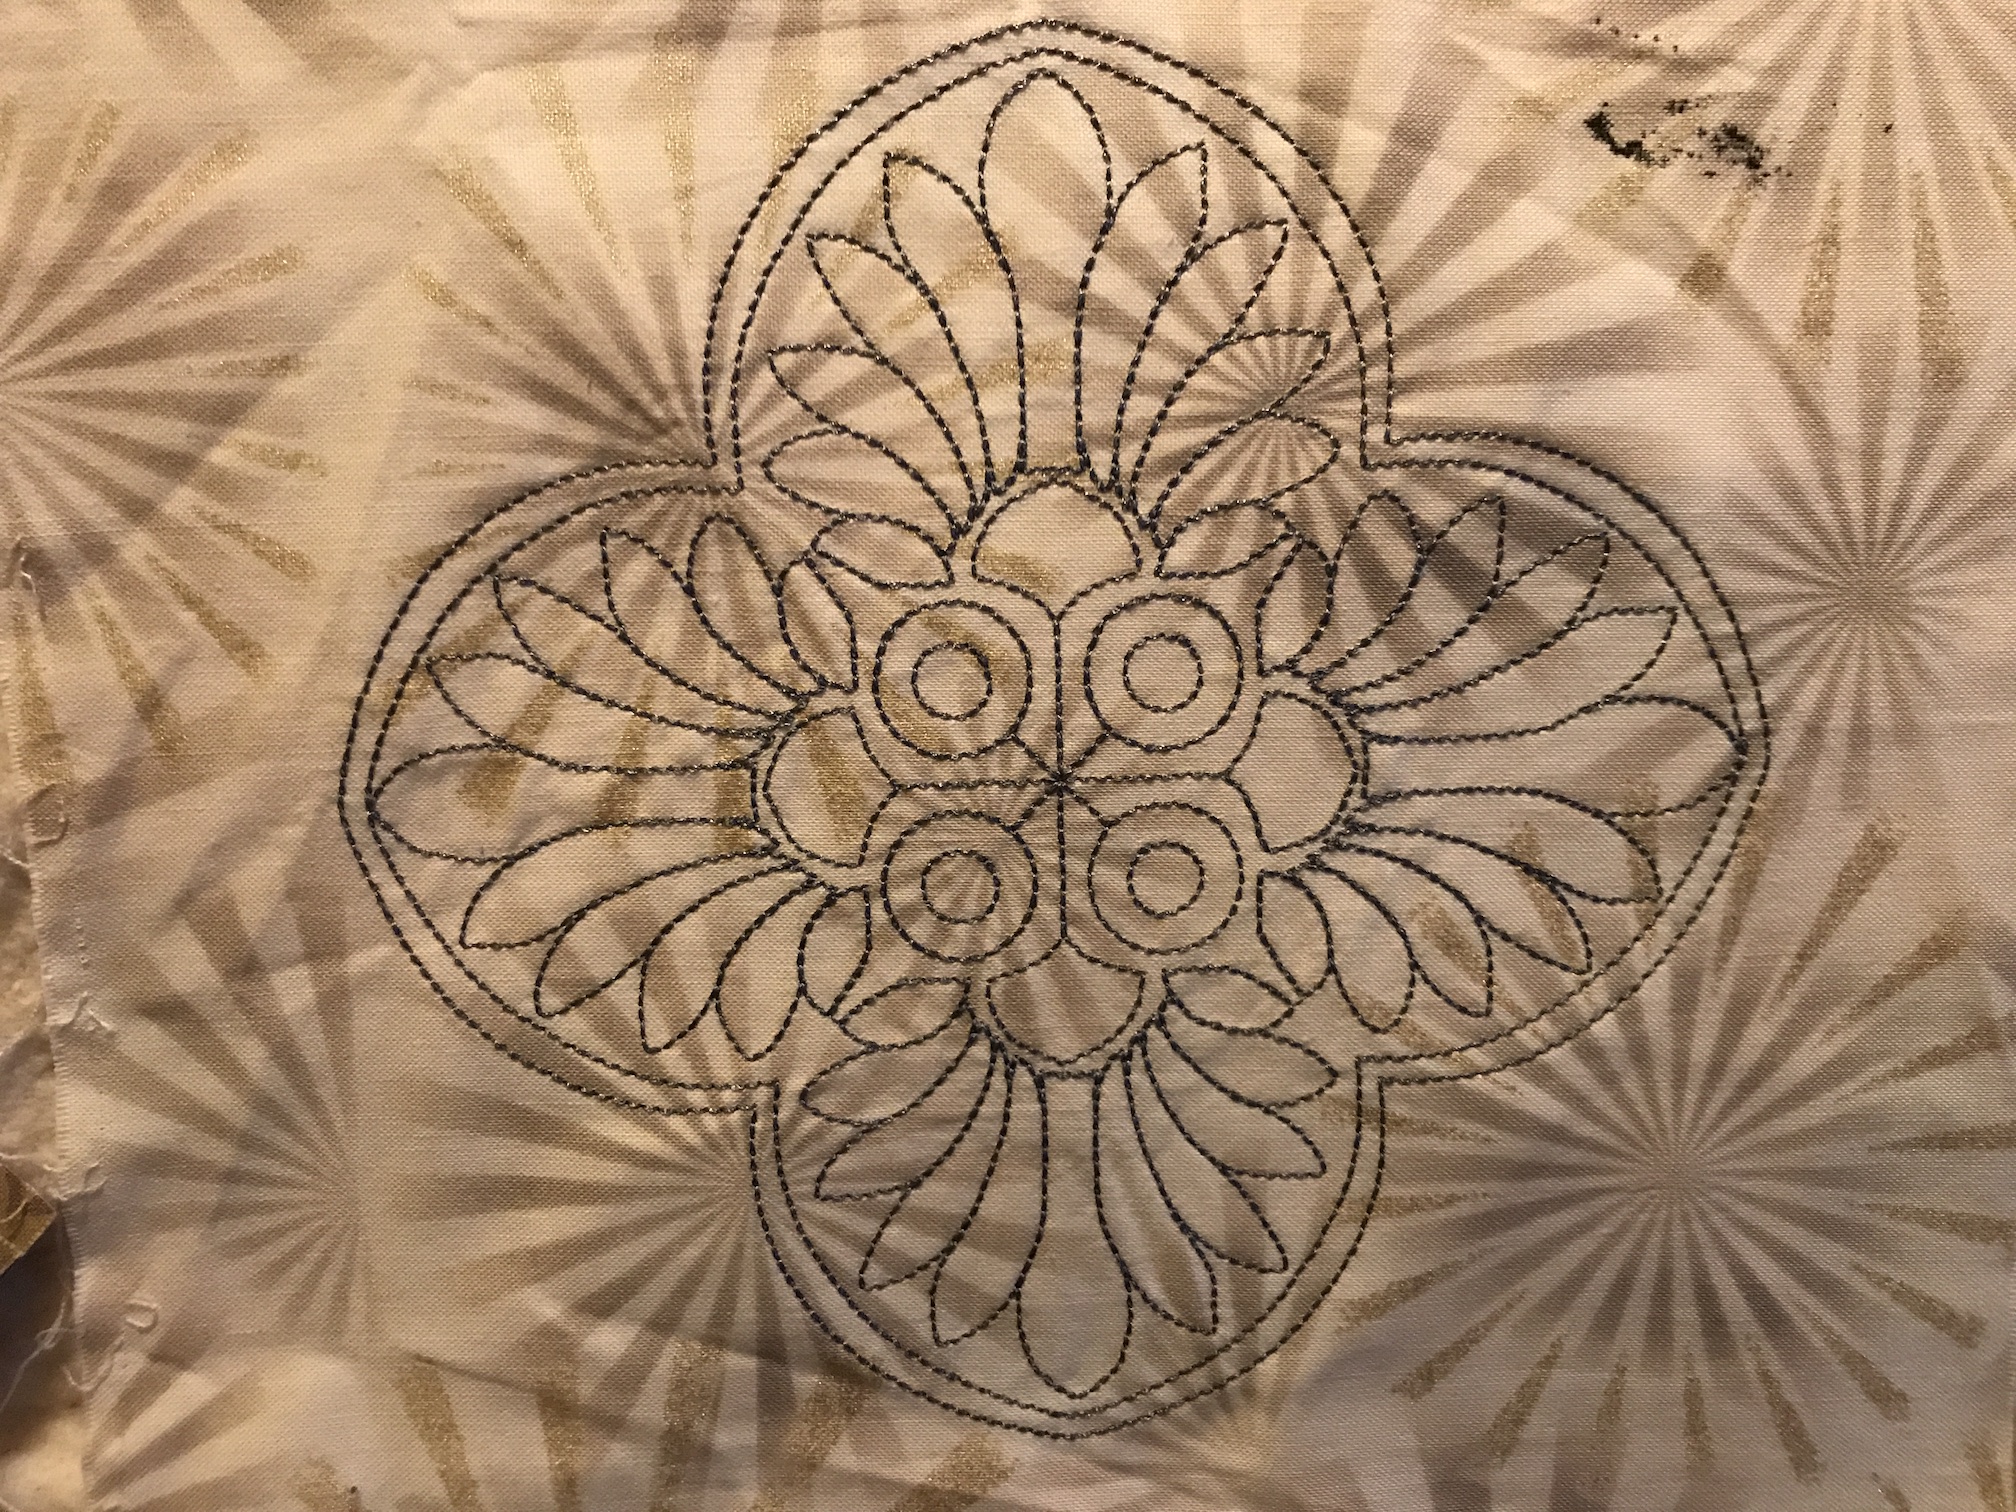
I also have the 5 blocks that my friend Lisa did machine embroidery on, to work into the piece:
I am not going to work on designing the piece yet, I am just going to keep the fabric up on the design wall and let it “simmer”!
This post is a continuation of my ongoing series “What’s on the Design Wall”, featuring my latest project up on either one of the small design walls in my studio or the large design wall my hallway.
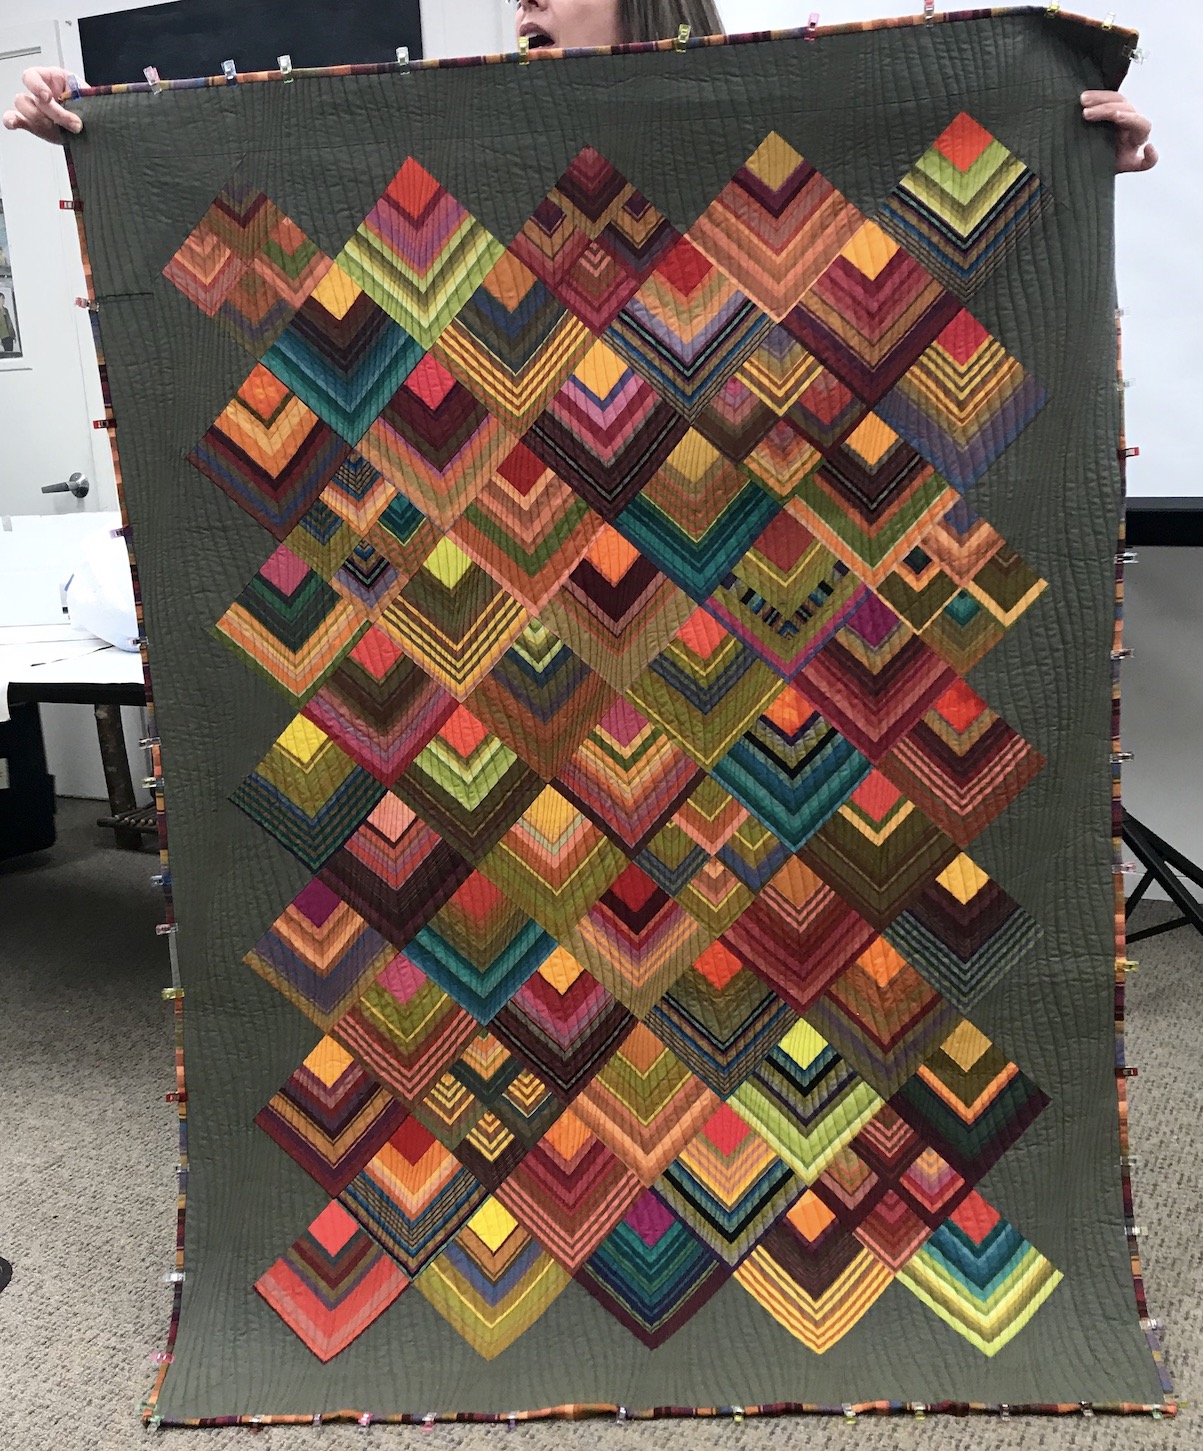
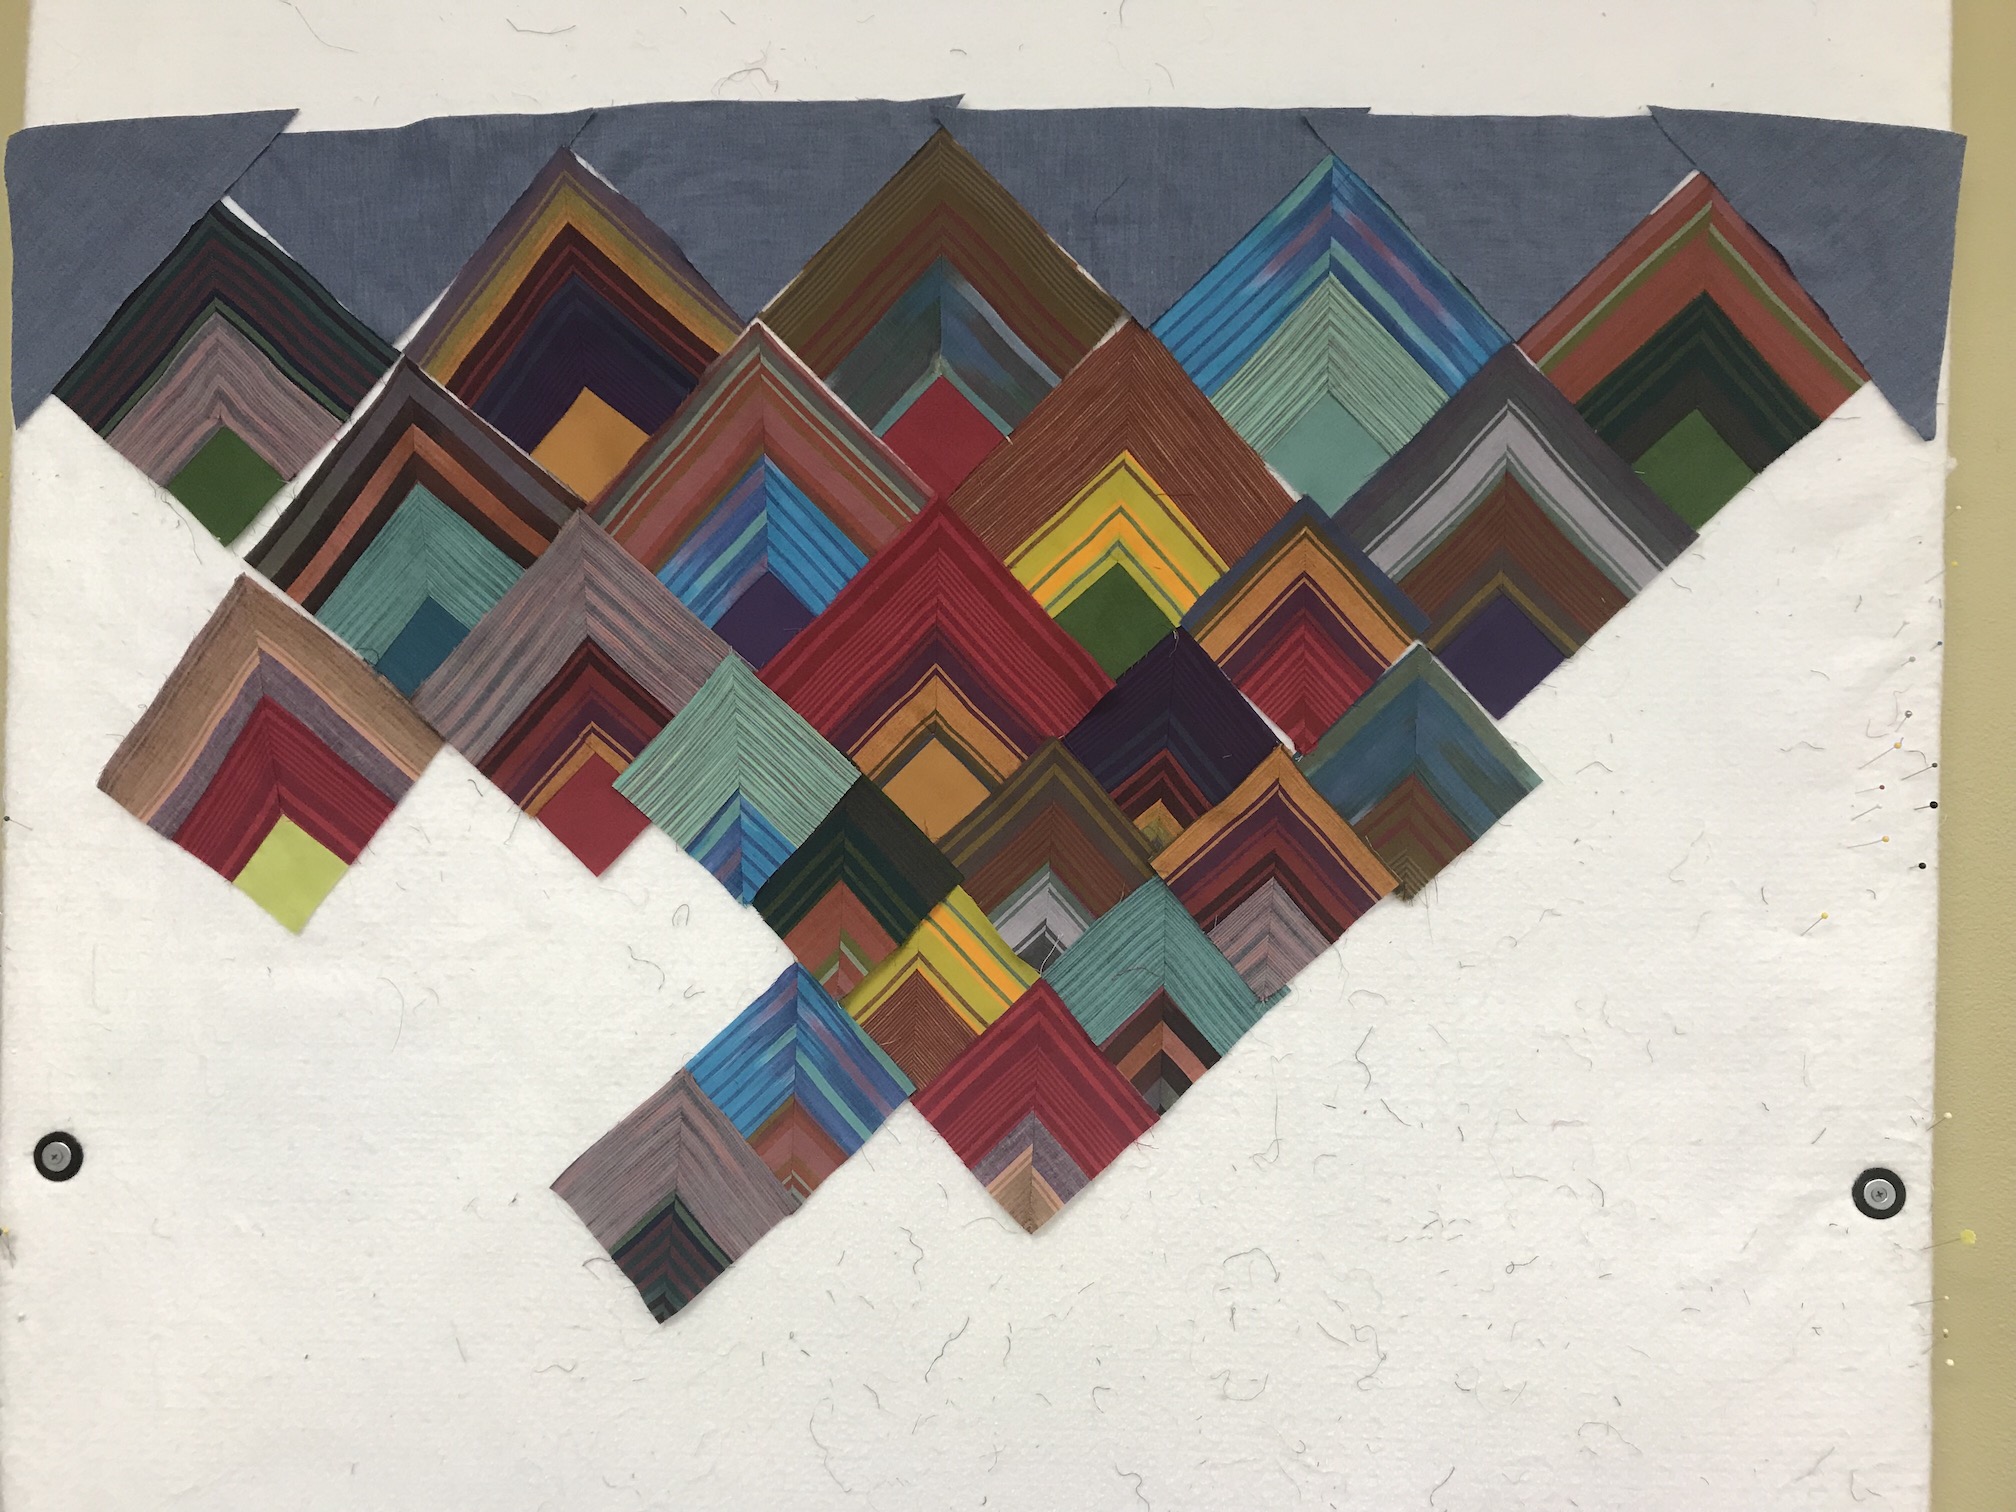
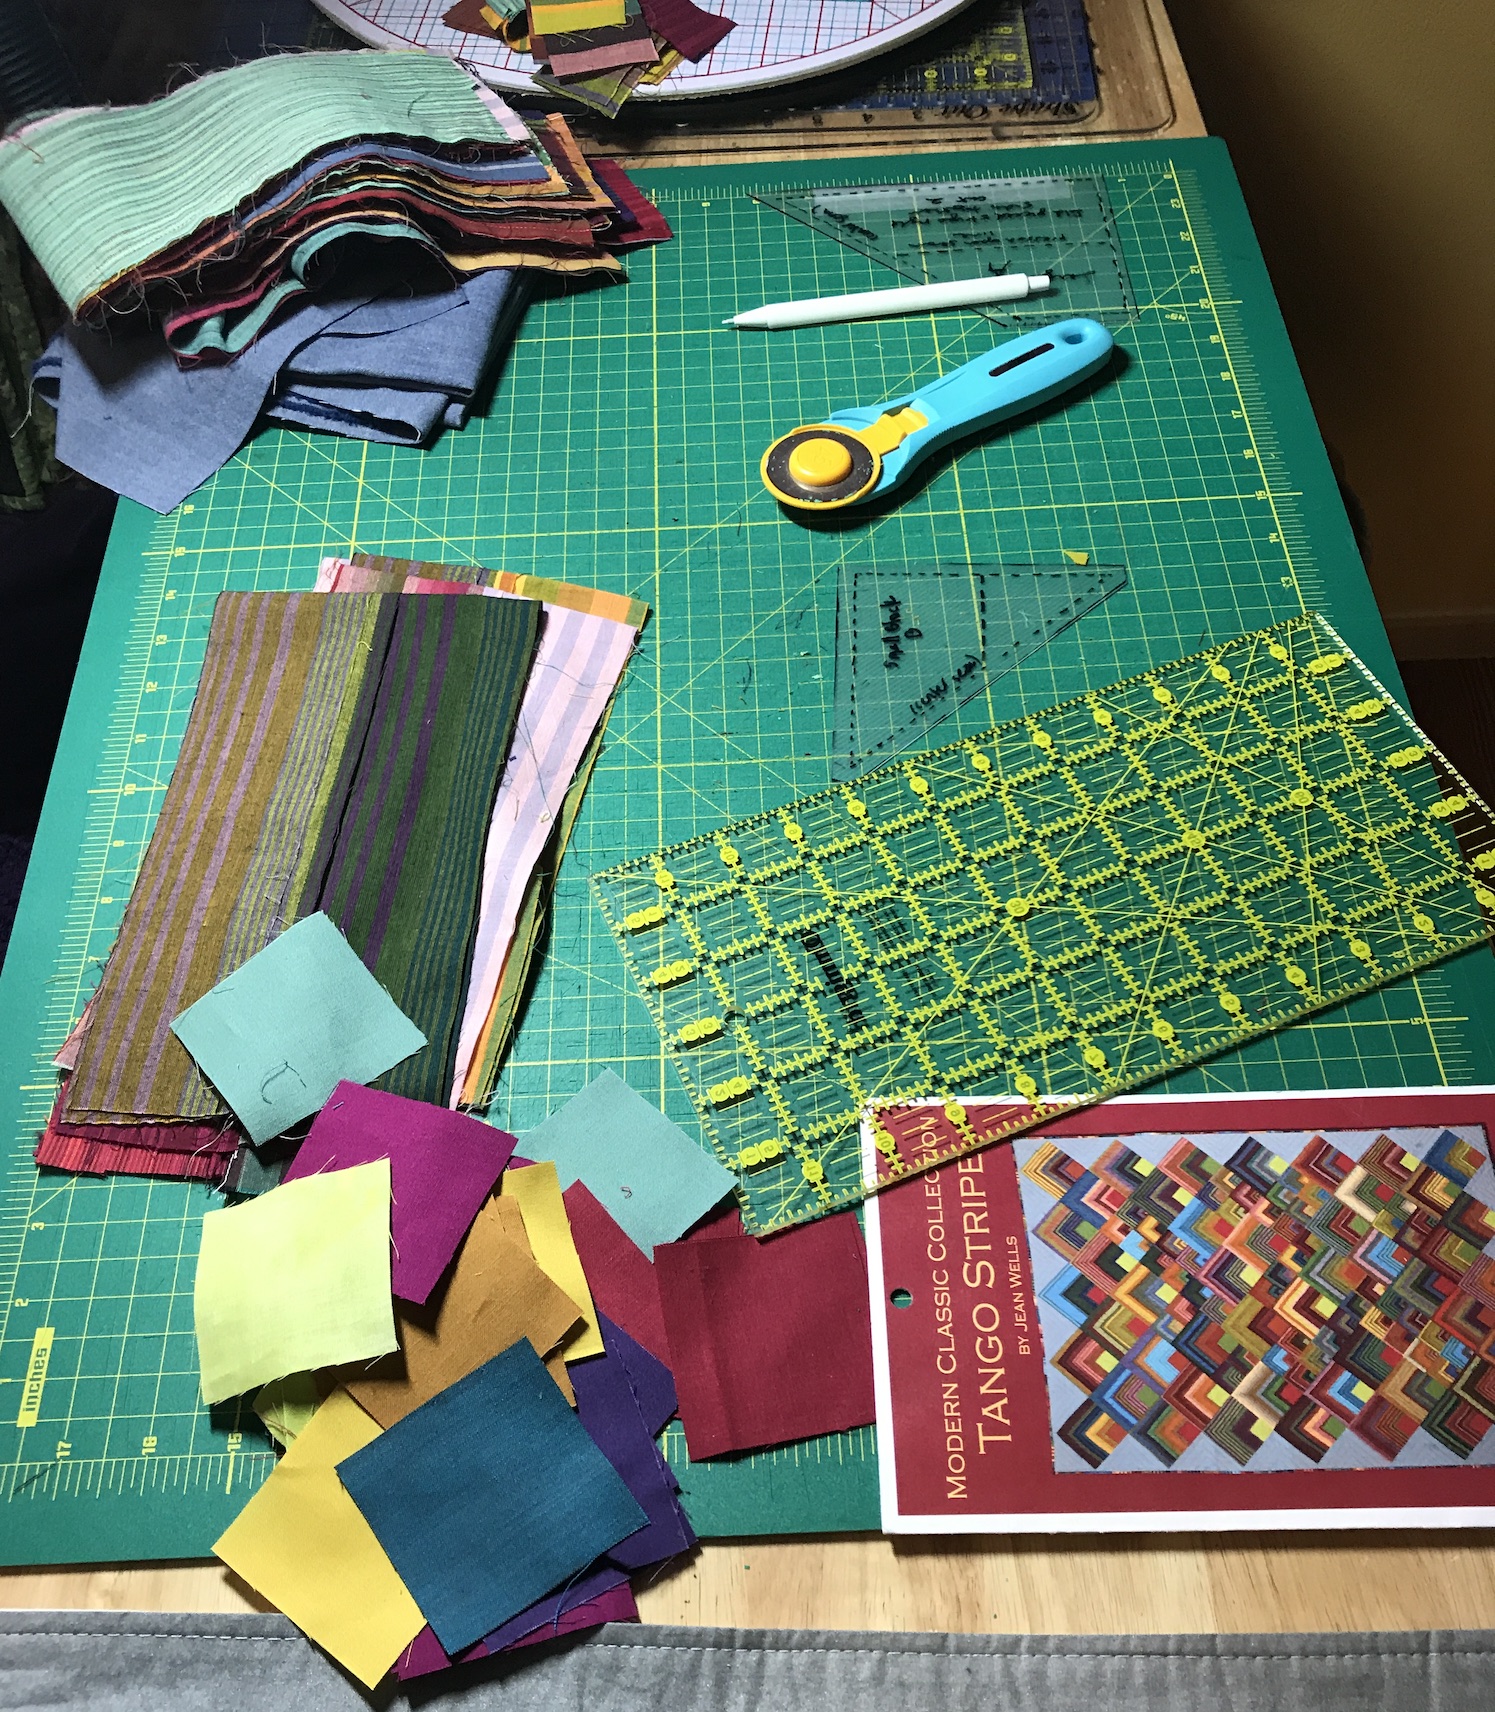
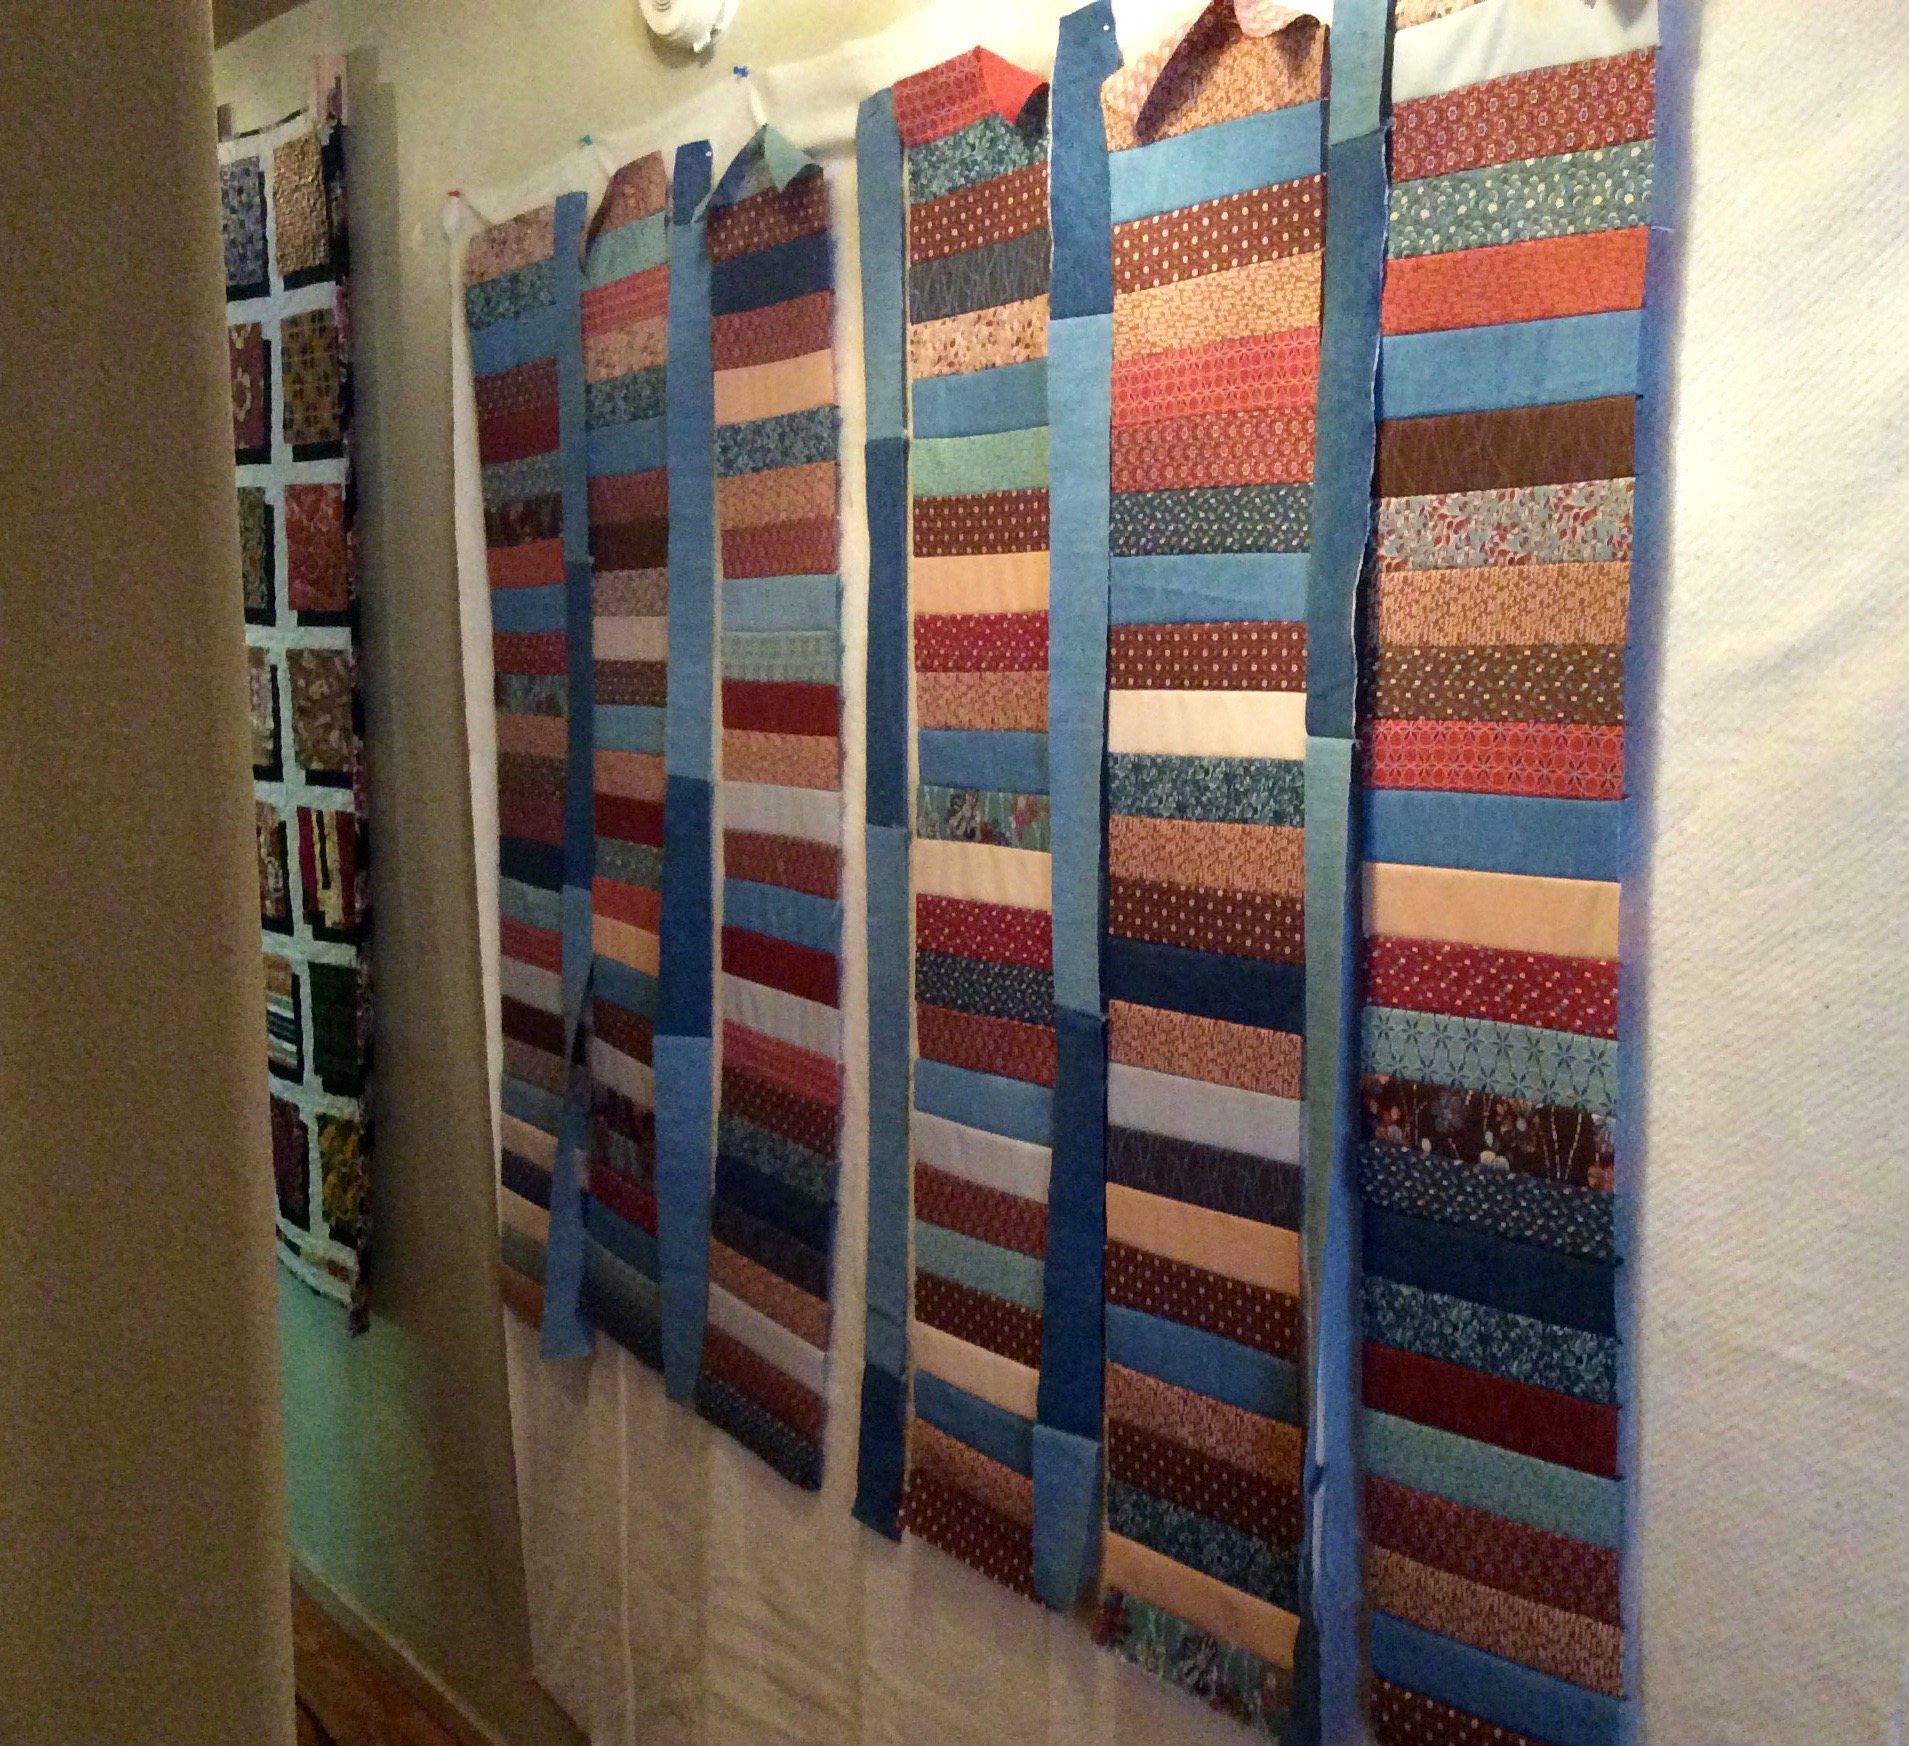
After fun with Tula Pink fabric during a recent quilt retreat (see recent posts), I’ve returned to working on the Tango Stripe (by Jean Wells) quilt with Kaffe Fassett stripes and coordinating solids that I discussed in my 09/13/18 post What’s on the Design Wall: Tango Stripe.
As I shared in that post, here is an example of what Tango Stripe will look liked completed (except mine is set in denim):
Kristin C.’s Tango Stripe
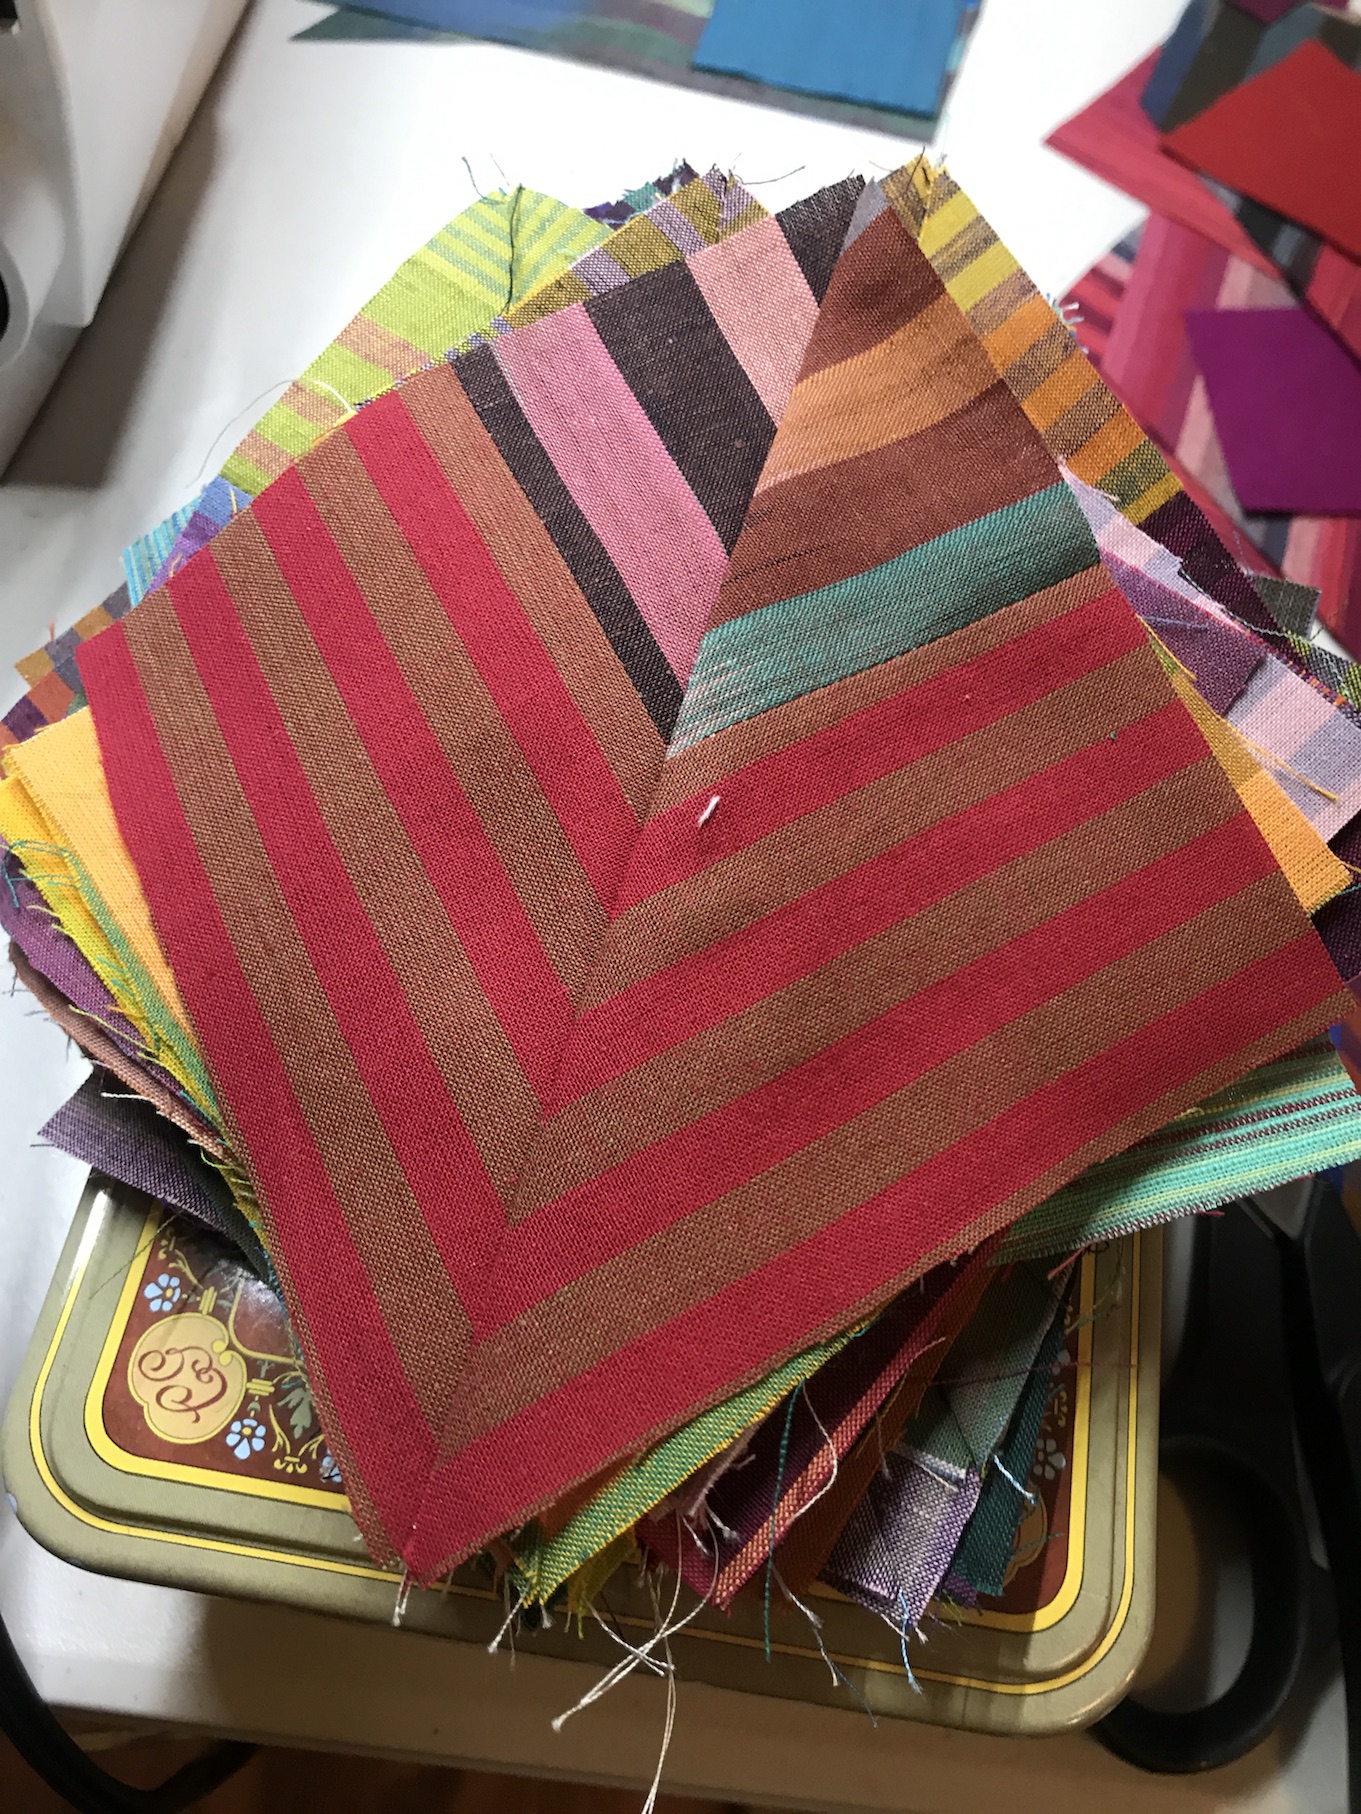
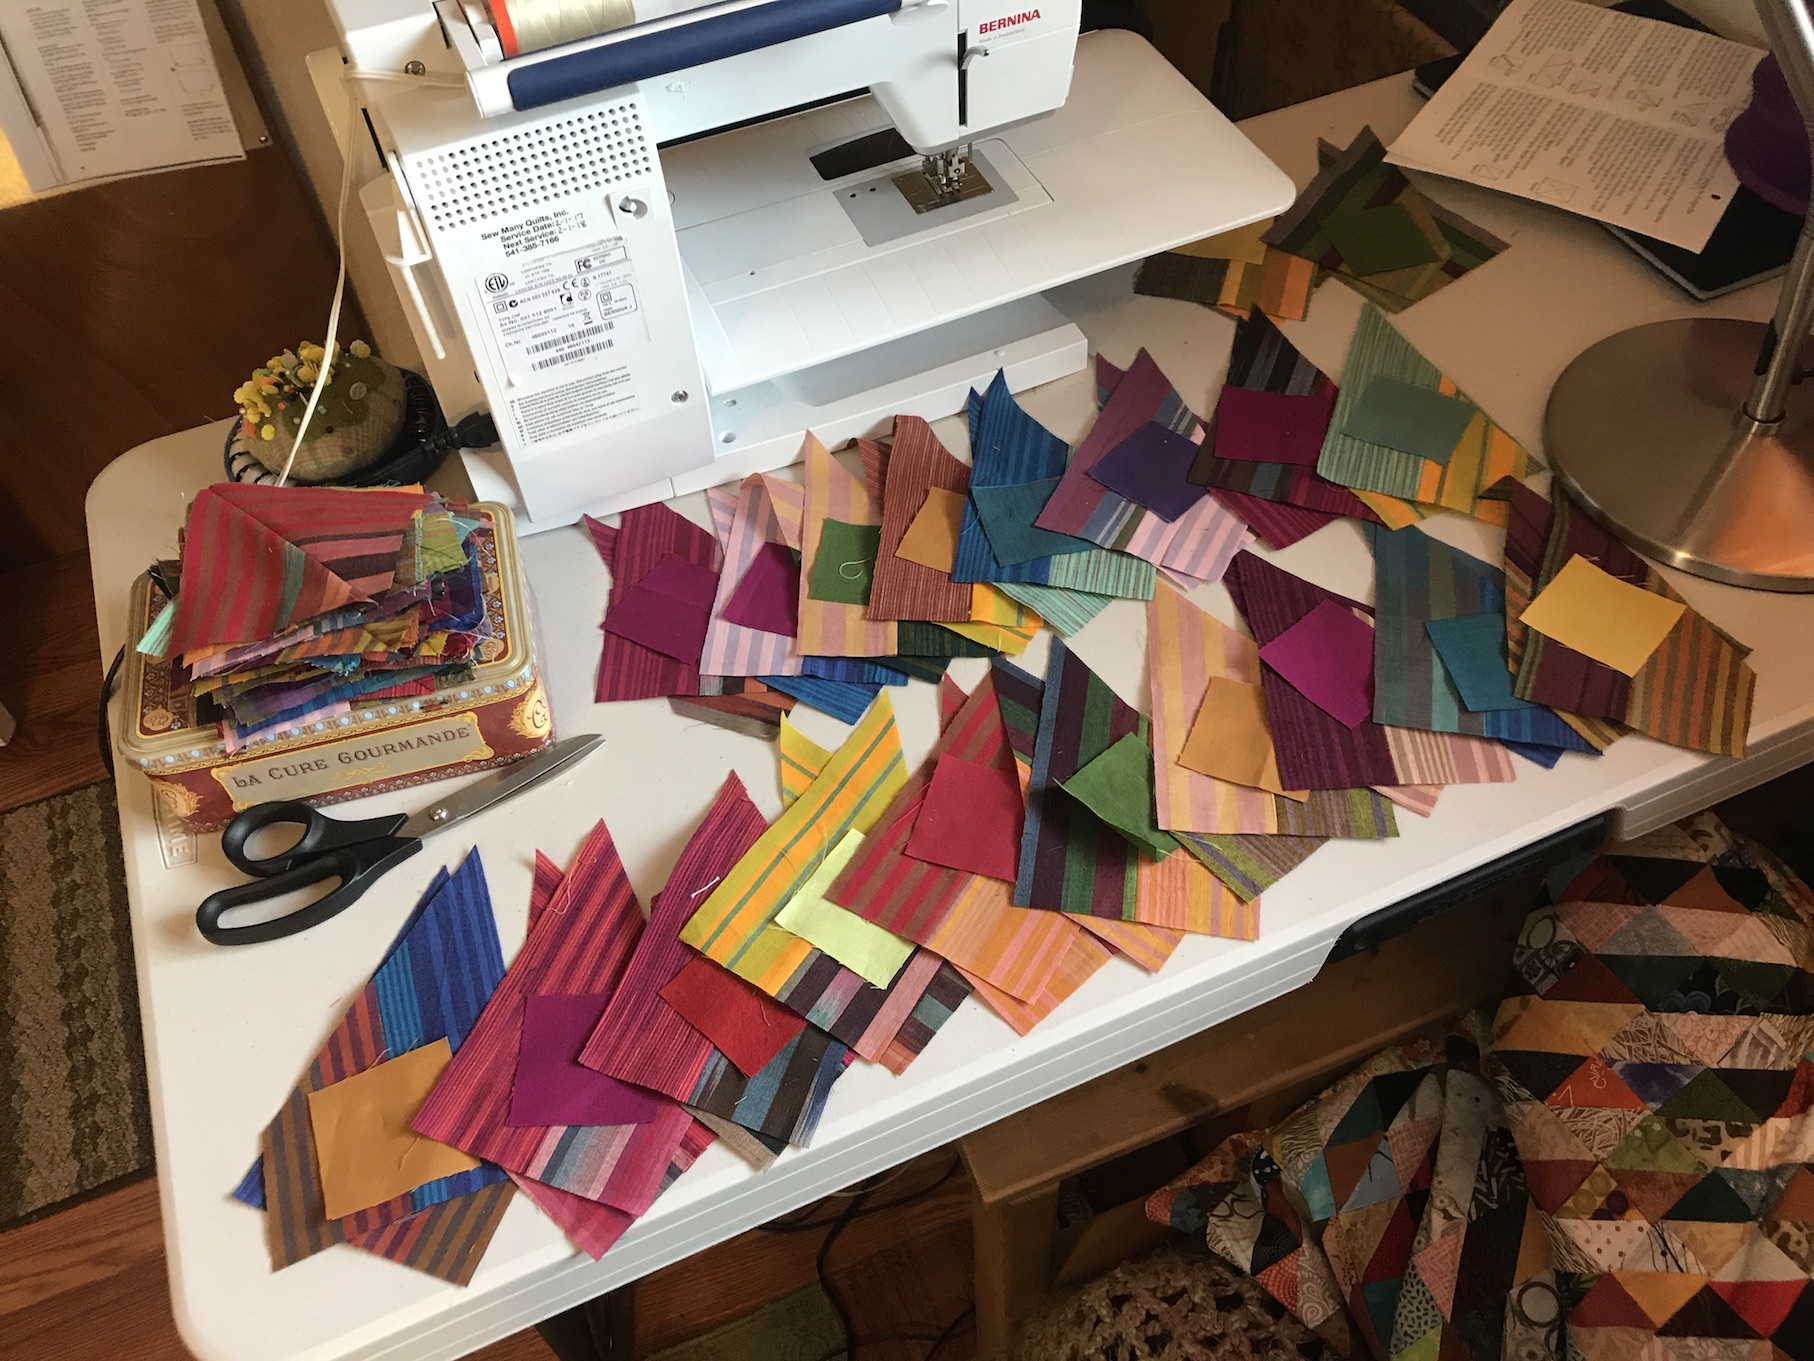
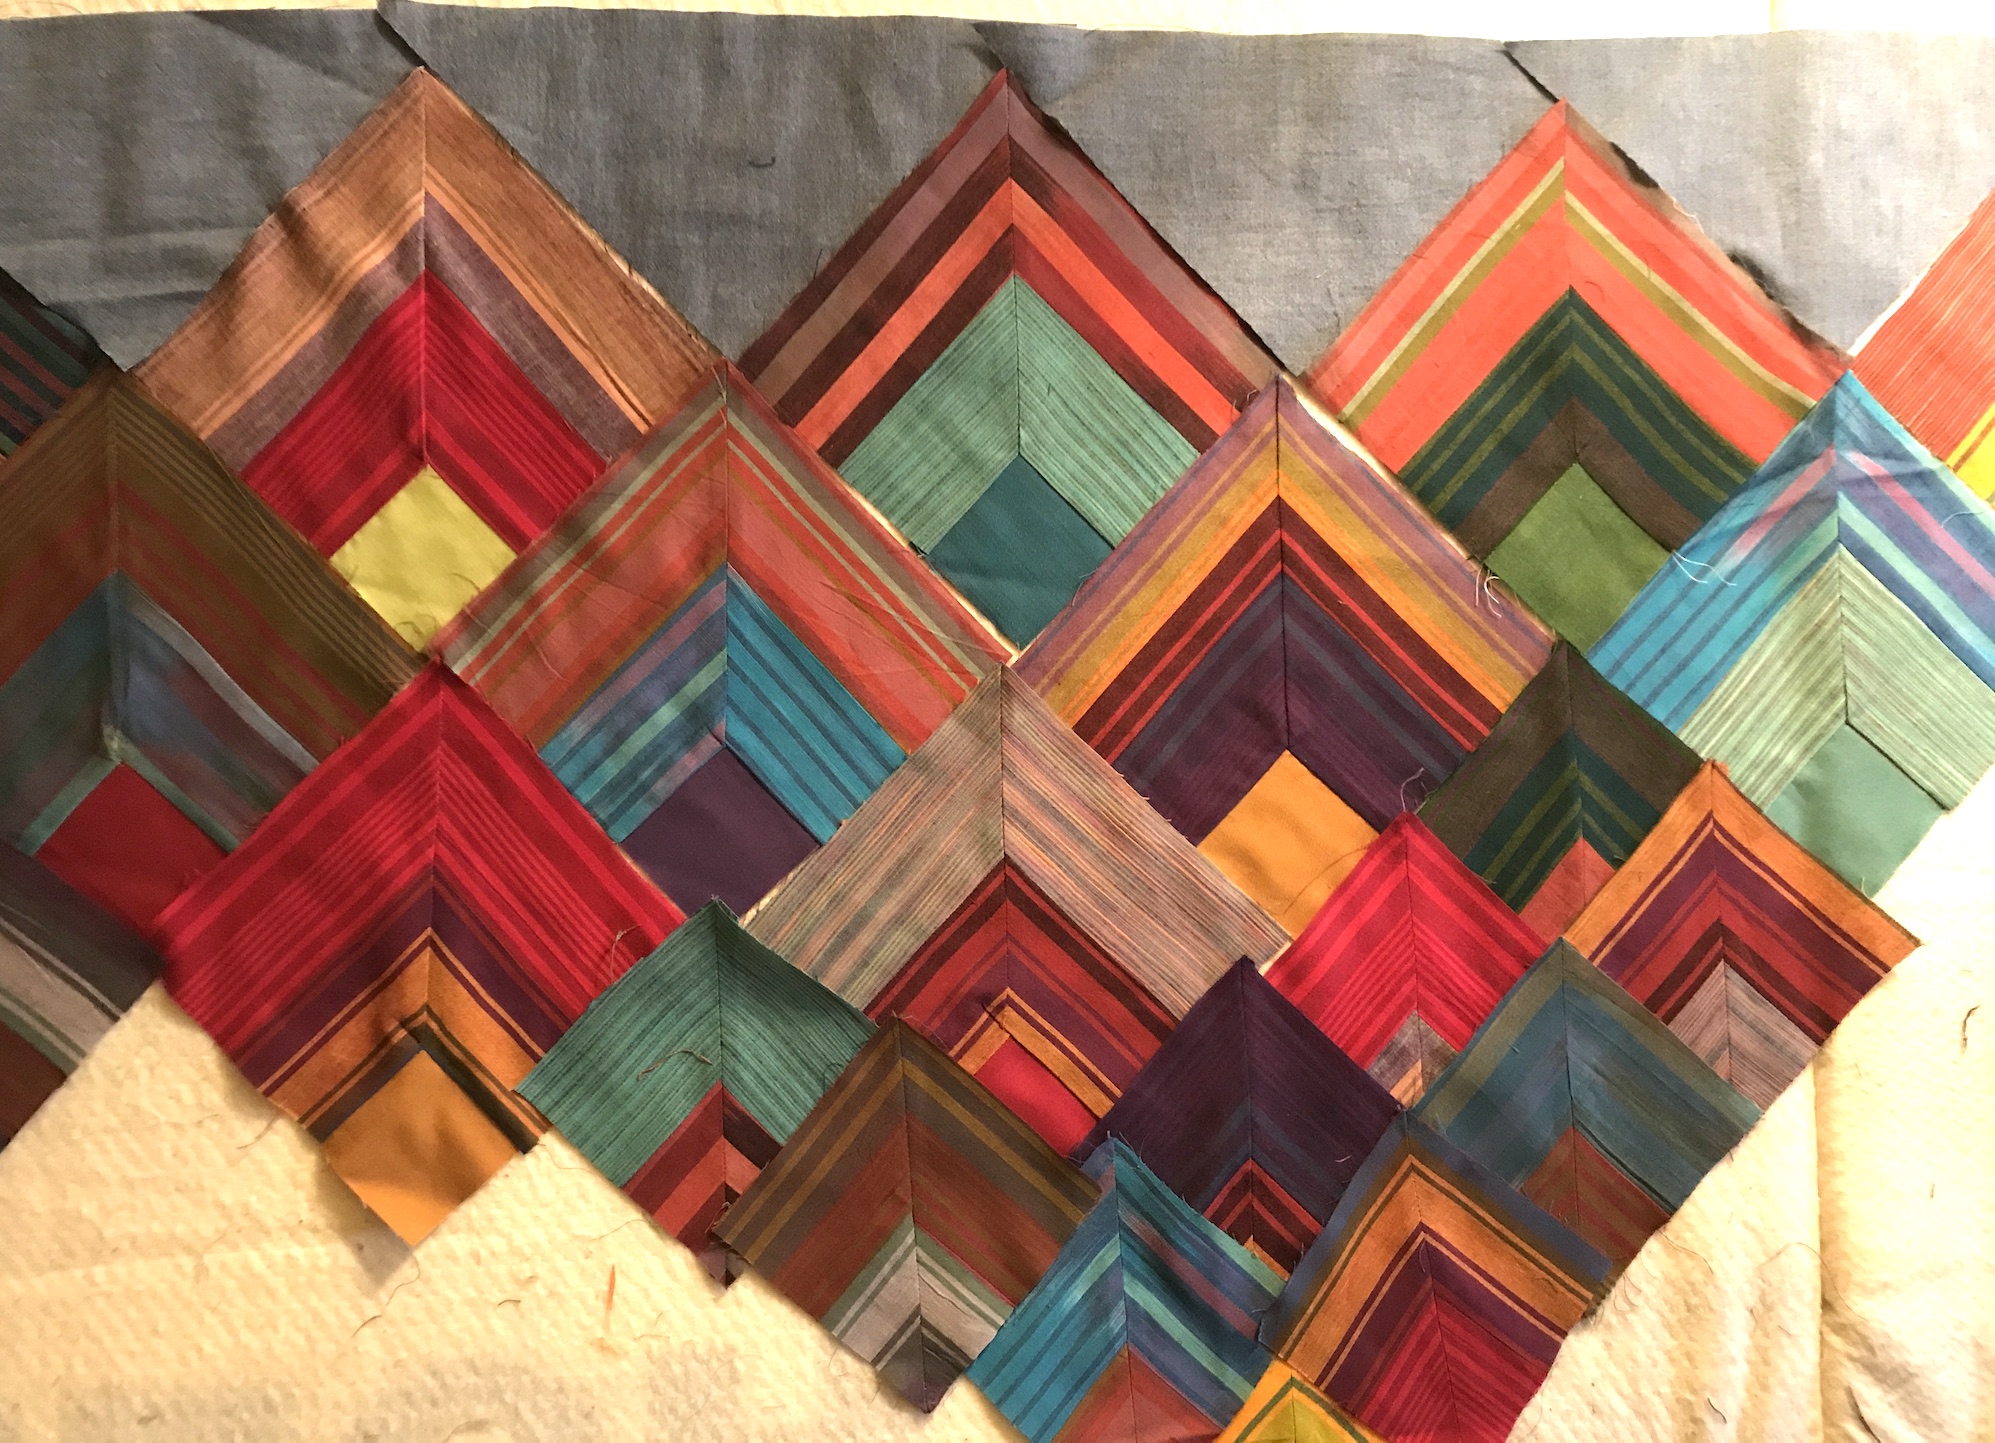
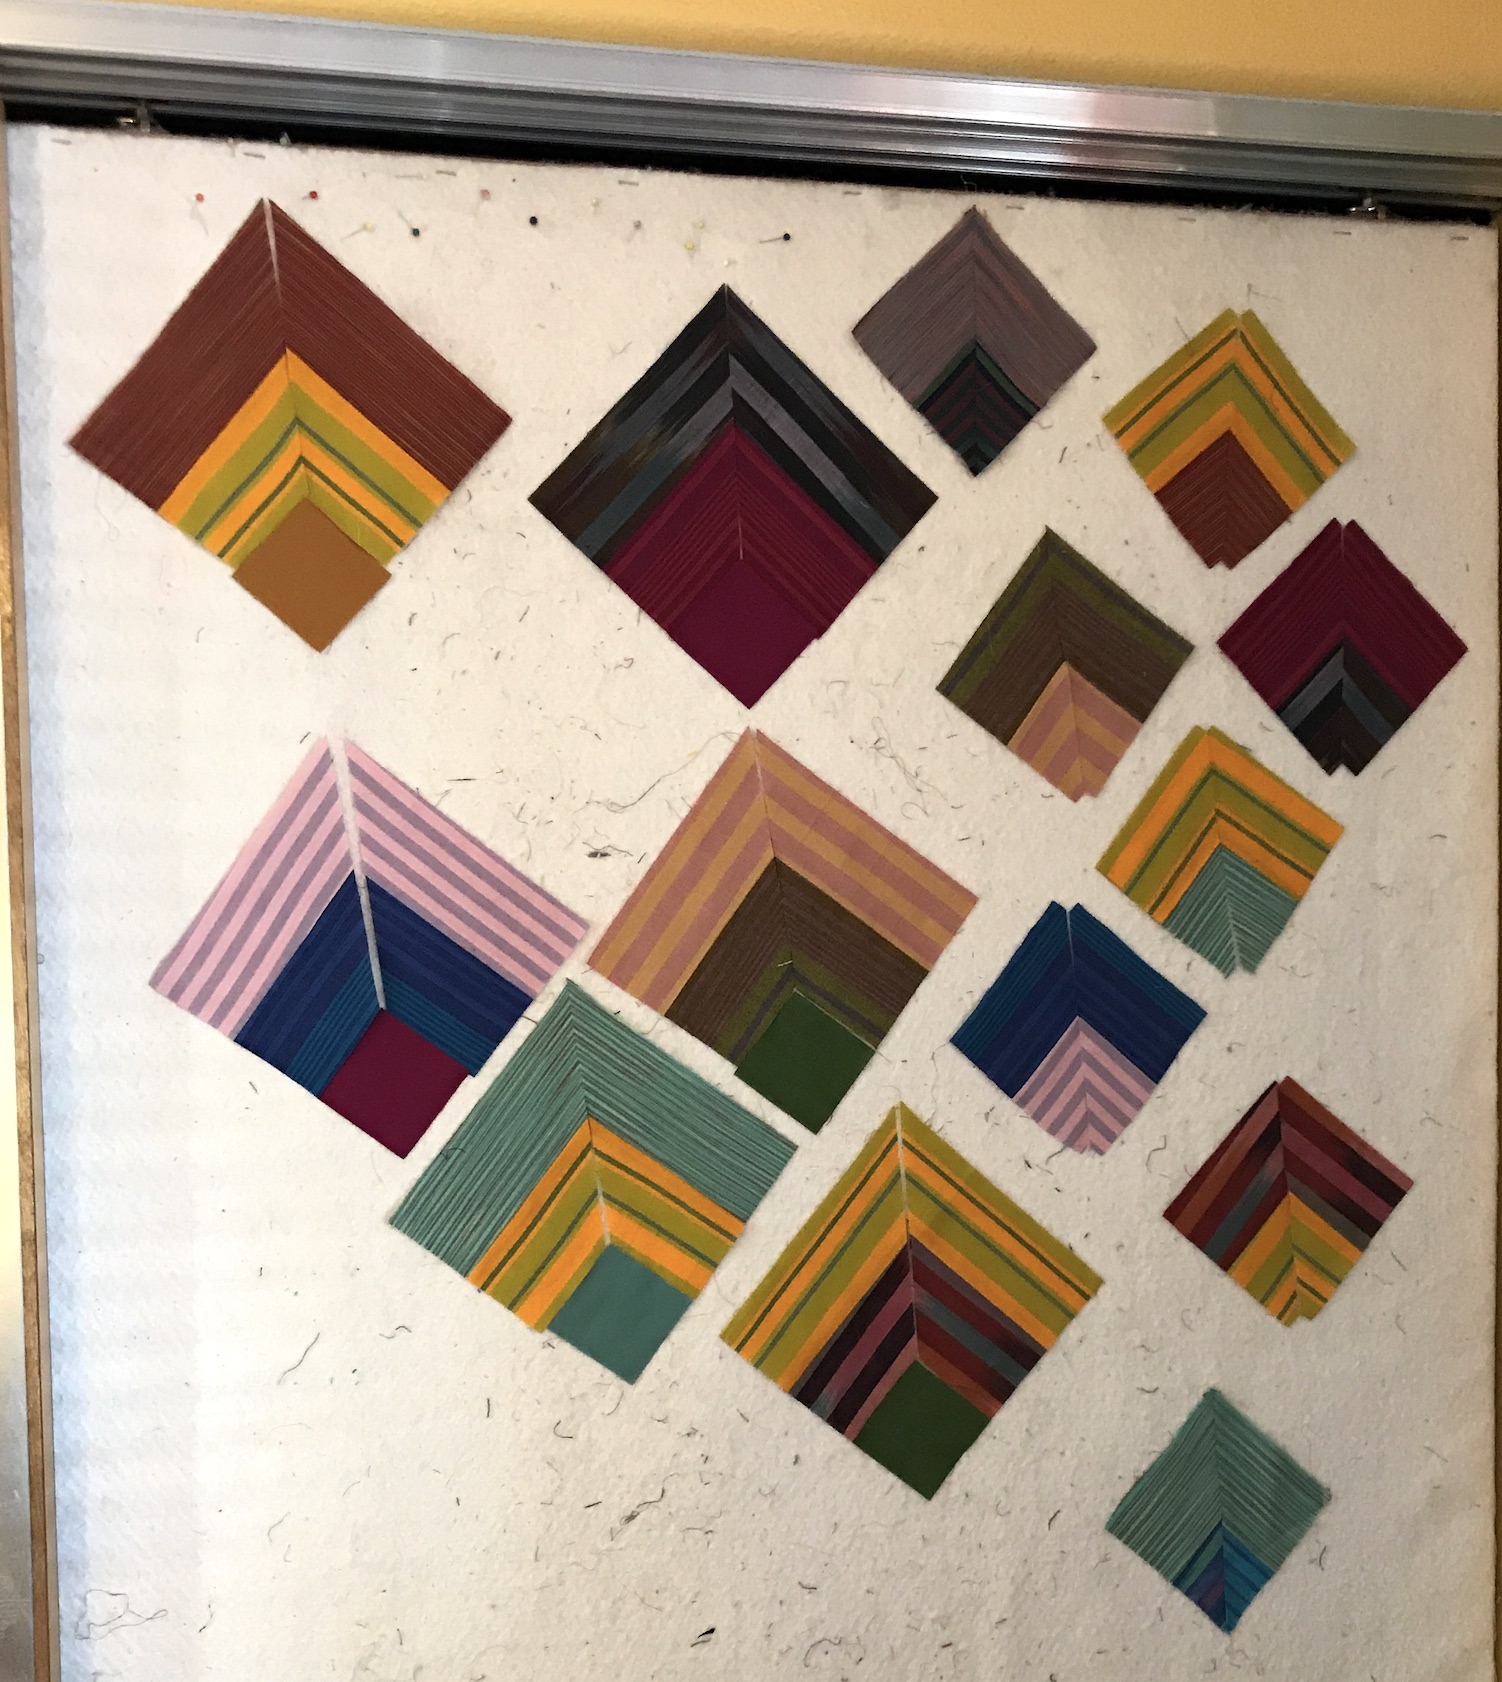
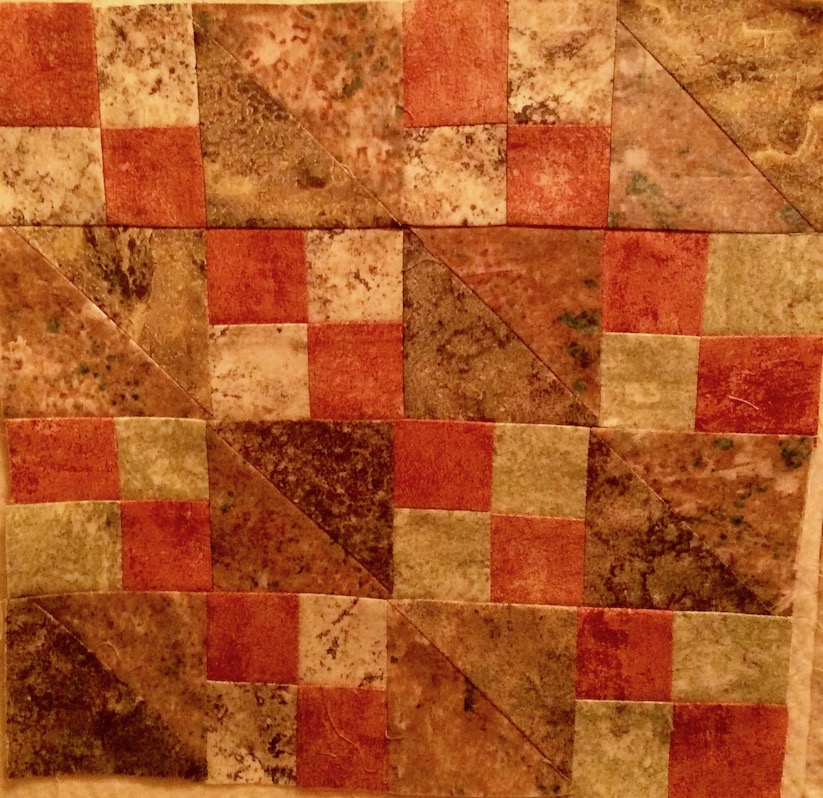
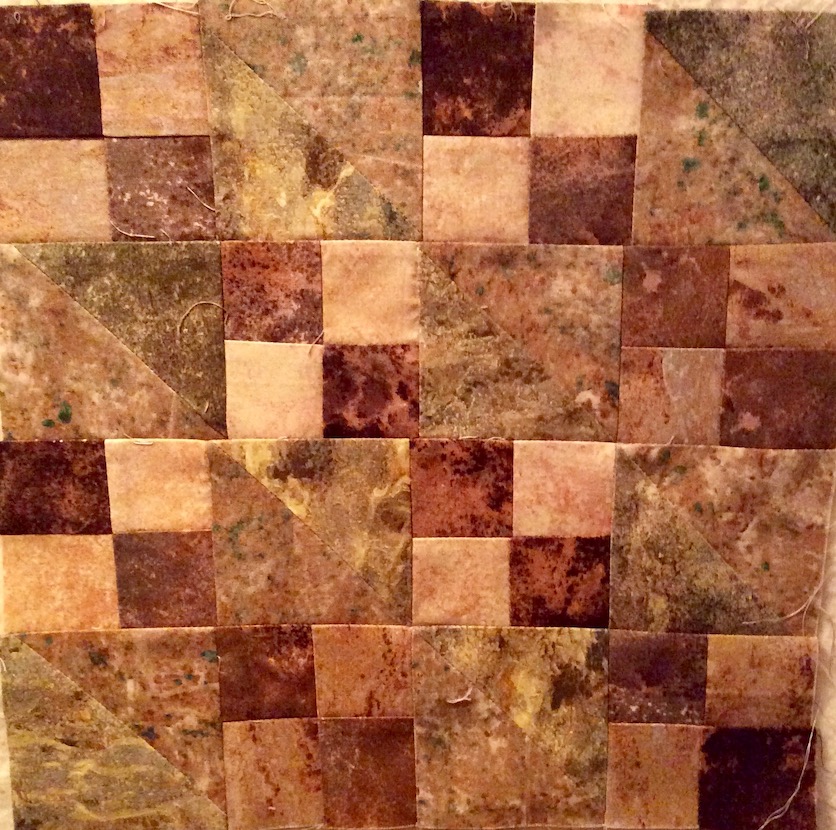
I’ve completed all the small blocks (they were simple piecing) and now I am grouping some of them together in groups of 4 to create larger blocks per the pattern design:
Working on the larger blocks is going much slower as I am having to sew Y-seams (ick) but I’ve started to master them (if you are not a a quilter and are curious as to what Y-seams are, here is a link – Y-Seams – to read about something you will quickly discover you do not want to read about!!!).
My guess is if you are bad in life and go to the “Underworld” when you pass, you are forced to do Y-seams for eternity (either that or complex paper piecing…) for your punishment – so for goodness sake – live a good life!
A pile of larger blocks and their Y-seam party
I did finish cutting out all the large blocks and they are just lined up waiting to be Y-seamed:
At first I was doing one large block at a time and pressing it, hoping all the seams would lay flat and that I did not screw up my 1/4 inch calculations on the Y-seam. After a while I started to relax and I can do 3 – 4 before running over the the iron to see if they will press out okay!
But the piece is moving along and I’ve already cut out all the setting triangles which are made from a quilting weight recycled denim I found at a thrift shop (the liner of a high quality denim duvet).
Once I get the large blocks finished, I can start to lay the entire quilt out on my large design wall in the hallway.
Postscript
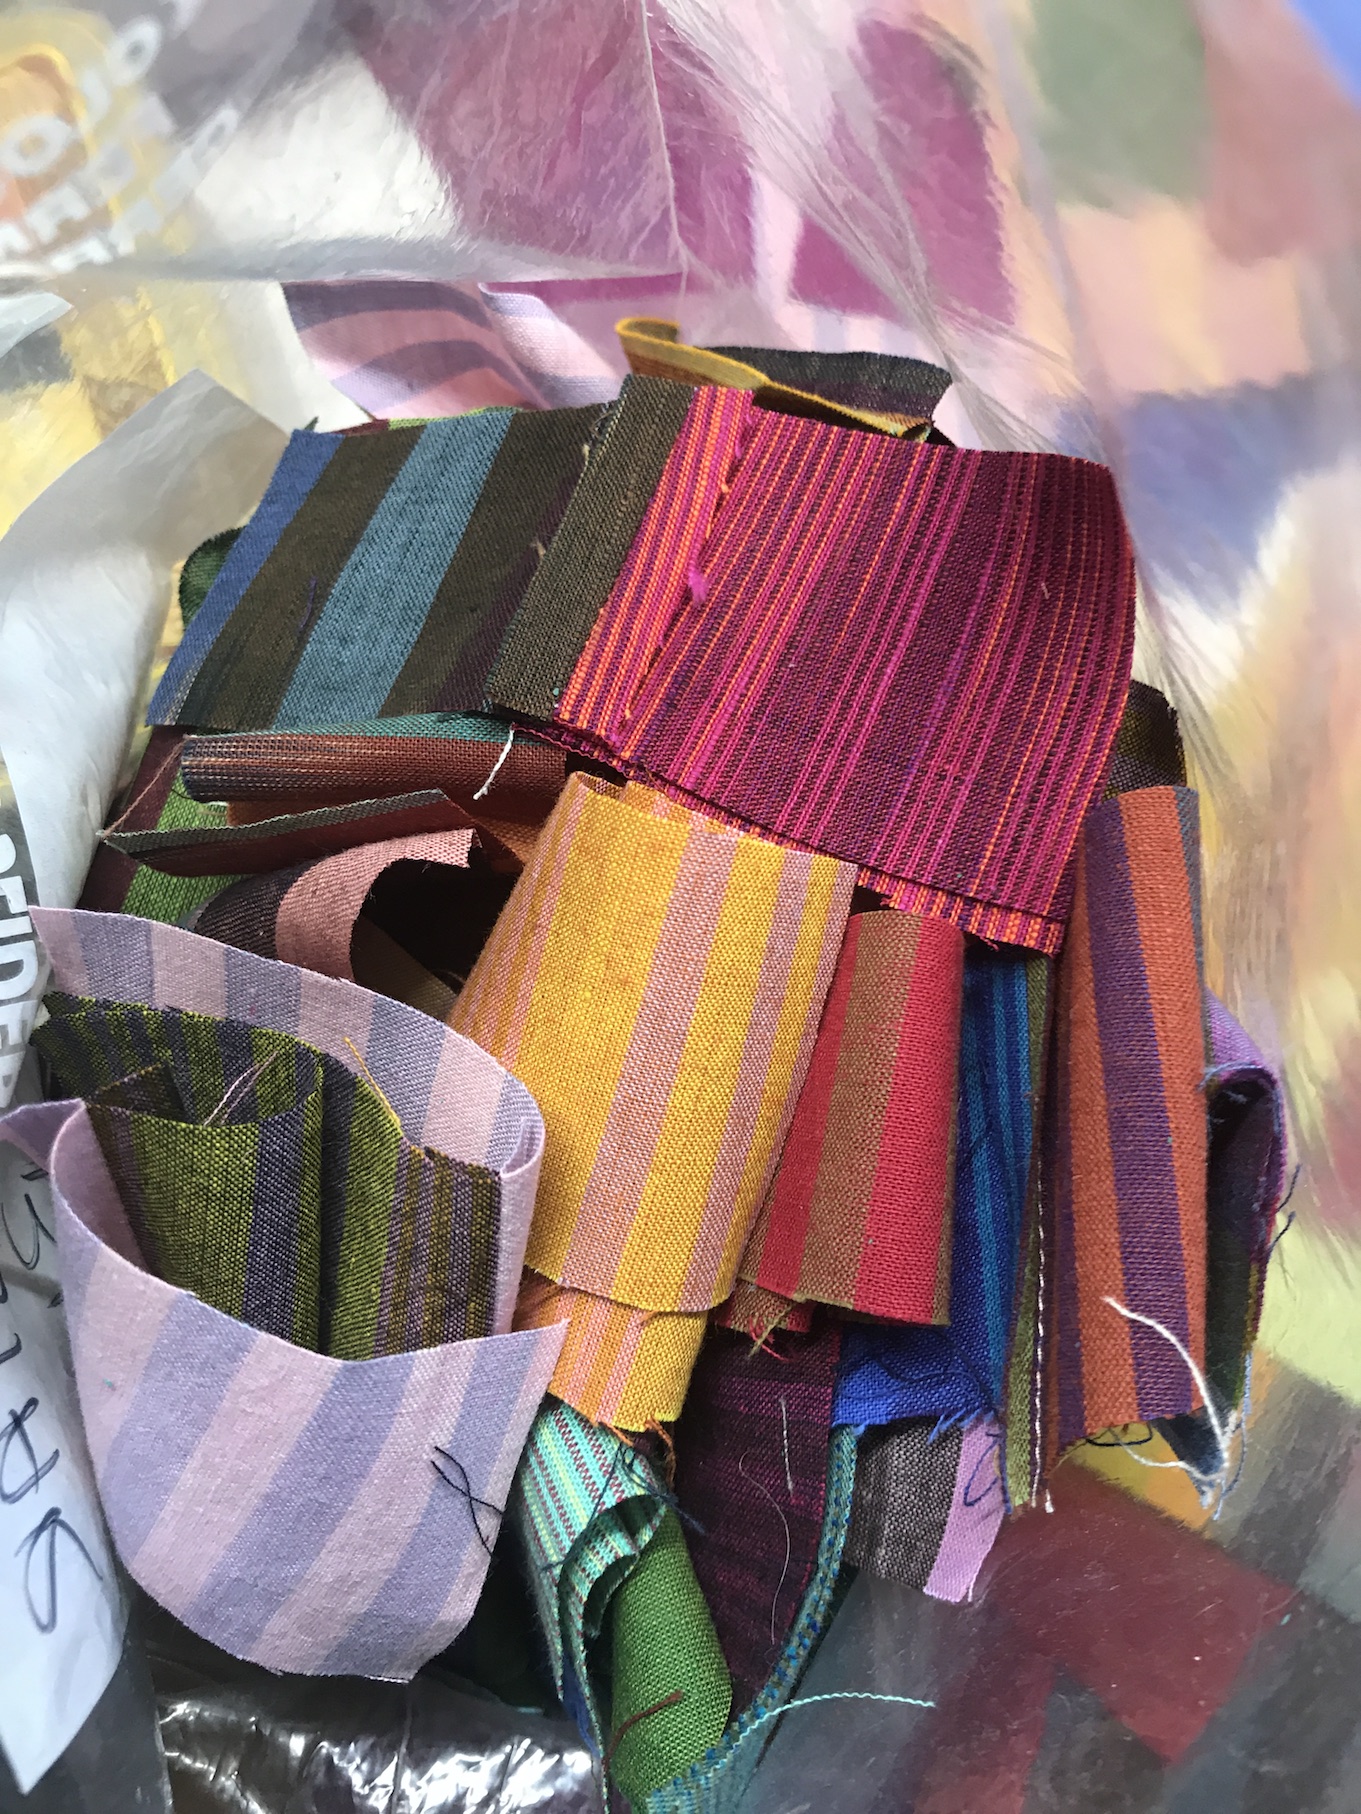
If you’ve followed my blog for a while then you know about my obsession with fabric scraps (a near pathological level of obsession).
Well cutting/piecing this quilt has lead to a nice little bag so far of Kaffe Fassett stripes scraps that will be a fun future project to play with:
A tierneycreates post about Tierney actually creating?
Yes it has been a long time since I’ve shared my current textile project and posted in my series , What’s on the Design Wall where I featured my latest work in progress. For the past couple of months I’ve been working on an art quilt for a future WCQN exhibit and could not share images of the work in progress (or completed work) as the curator has not announced the show yet.
But I’ve finished the piece and now I can start working on my backlog of projects.
The first project in queue is one I’ve had around for a while. You can read it’s story in this June 2018 post – .The Tale of Tango Stripe.
Here is where I left off – I worked on it during a May 2018 quilt retreat:
Up on a design wall at the quilt retreat
I am working in bring this tale to a conclusion!
It felt so good to pull it back out of its box and put it up on the large design wall in my hallway (yes if you are new to this blog, I use my whole house for crafting):
Up on the design wall at my house (hallway design wall)
I’ve been using the smaller design wall on the closet door in my studio to make additional blocks:
On the smaller design wall on my closet door in my studio
Making the blocks is very fun, even though a template is involved (normally I hate templates). The designer, Jean Wells Keenan of the Stitchin Post did a wonderful job with the pattern.
At first I could not understand why she did not give instructions to just make up all the blocks at once. After playing with making a couple blocks during the quilt retreat I attended in May, I totally got why you design your blocks as you go.
The quilt is make with Kaffe Fassett stripes and those are fun to work with and create various pairing combination with solid colors:
I am using recycled denim (from a denim coverlet liner I picked up very cheap at a Thrift store) as the setting fabric. However, earlier this year I saw another amazing setting fabric option – olive green fabric:
Tango Stripe made by Kristan our Central Oregon SAQA group leader
If I ever make a second Tango Stripe quilt I think I am going with the olive or khaki green or even a tan setting fabric.
I will post an update as I progress – I have a lot of blocks to make!
This post is a continuation of my ongoing series “What’son the Design Wall”, featuring my latest project up on either the small design wall in my studio or the large design wall my hallway.
I am working on my fourth improvisational piece from a group of recycled clothing and home decor titled: RecycledWindows of Conversation. This piece will become part of my improvisational art quilt series: Recycled DenimStories.
Here is Recycled Windows of Conversation in progress on my small design wall in my studio:
Recycled Windows of Conversation (2017) – in progress
This art quilt will measure approximately 18″ x 40″, the same size as these two other quilts in the Recycled Denim Stories series, The Recycled Road and Recycled Door:
The Recycled Road (2017) by Tierney Davis Hogan
Recycled Door (2017) by Tierney Davis Hogan, quilted by Guadalupe Designs, photographed by Marion Shimoda
You might ask why did I name the piece in progress, Recycled Windows of Conversation?
The “Recycled” part of the name is to tie it to the two other 18″ x 40″ pieces from the same recycled materials shown above; and the “Conversations” part of the name is to tie to Additional Conversations, a piece I recently finished the quilt top (but have not quilted yet):
Recycled Windows of Conversation is made from the leftover blocks (and additional blocks) from Additional Conversations (which is still laying on my larger hallway design wall awaiting quilting).
In case you are new to my blog and have not followed the development of these previous art quilts, here’s a list of the recycled materials used in these pieces:
Old jeans
Curtain (valence scarf)
Tweed jumper
Old sweat pants
Corduroy Shirt
Gold home decorating fabric scraps (given to me by an interior decorator from her sample collection)
The world’s ugliest orange corduroy pants
Denim duvet cover (used in Additional Conversations only)
I plan to quilt Recycled Windows of Conversation by machine and I have selected my thread colors – gold, blue and orange:
Here is the piecing hanging out on the iron board, awaiting quilting:
In case you are wondering, I have only a tiny pile of scraps left over from these four quilts. I might challenge myself and try to eek out a small piece to make it five total.
I continue to work on having a cohesive body of work when it comes to my delusional journey towards becoming an art quilter!
Postscript
A quilting friend recently remodeled her studio area in her vintage home (circa early 1900s) and asked for help organizing her fabric in the reconfigured back room (that used to be where meat was stored in the early 1900s.
Here is a photo of an alcove with newly added shelves that I found especially pleasing during my time over her house yesterday helping her organize fabric:
Her fabric used to be crammed into a dark back storage room – now it is easier to access!
Yesterday I worked to turn the “hot mess” and former unfinished object (UFO) into something resembling a quilt top. I’ve named the quilt “Cozy Cobblestones” as the fabric is the Northcott Stonehenge Cobblestones line.
I promised better photos, however I was unable to keep my promise. Still struggling with the narrowness of my hallway, I had to take entire layout photos at an angle. Alas, this is one of the “cons” of having a design wall in a narrow hallway!
From the right side
From the left side
Here is one “head on” photo taken by smooshing myself against the opposite wall:
“Smooshed” against the wall!
You are probably wincing at the lighting on the photos. Once I sew the blocks together, I am going to take the quilt outside for a proper photo!
I am likely going to “float” the quilt top in additional Stonehenge fabric (I think I have enough yardage to put a “float” border around it). Here is the fabric I might use (it is my only choice unless I go out and try to find some more):
Next to a section of the blocks layout:
Try and use your imagination of how cool this will look…
I might use the same fabric for the binding too as I am trying to use what I have in my stash. A contrasting binding might be nice but I would have to purchase it new (and I am taking a hiatus from buying fabric right now).
Speaking of my “stash”, I put the scraps and the two remaining fat quarters that I did not use up, in a future “Challenge Bag” (see post Basketof Challenges):
I’m gonna be a future “Challenge Bag” – yay!
Inside the scrap bag you will see the blue scraps that I loved (from another Stonehenge line that a quilting friend donated) but could not work into the piece. We’ll see what I make in the future with this small bag of scraps.
The remaining scraps are fairly small as I worked hard to harvest any piece I could turn into a 2.5″ x 2.5″ block:
Little squares, cutting so many little squares! (42 x 9 = 378)
Quilters reading this may wince, but I did not have enough length of any of the scraps from piecing the original 12″ blocks to make the 6′ nine-patch blocks using the quick “strip-piecing” method. Instead I had to cut out individual 2.5″ x 2.5″ pieces and sew them together to make 42 6-inch nine-patch blocks! I did “chain-piece” the heck out the pieces after a while became a nine-patch block factory!
It was definitely an old school traditional piecing!
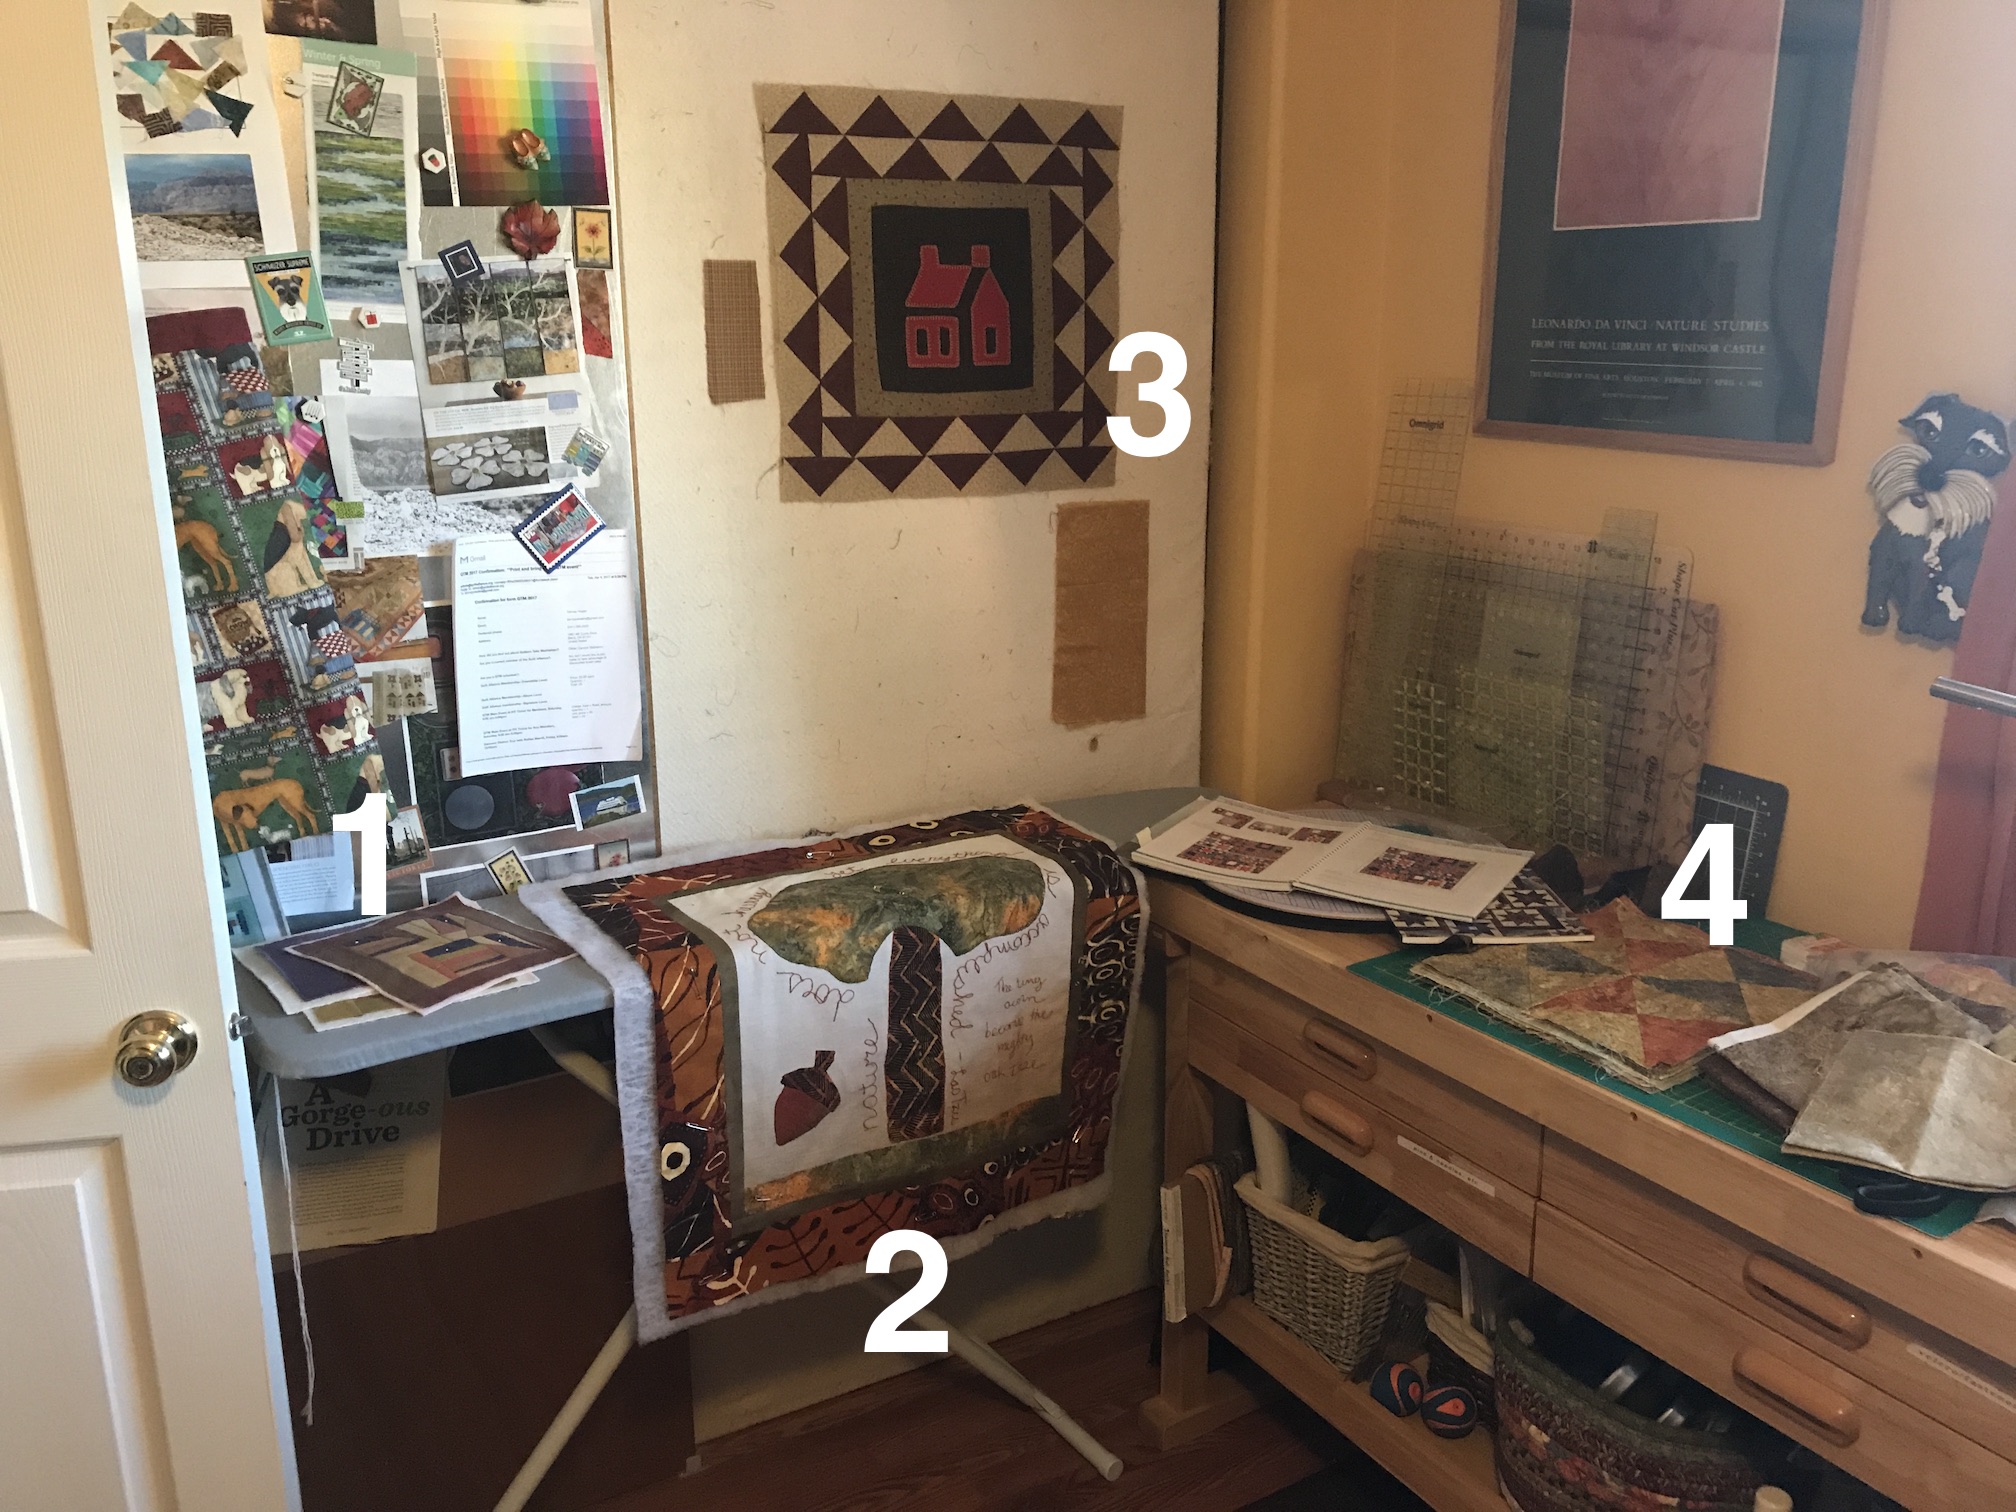
I am feeling pleased with my progress on the “UFOs” in this photo, this quilt top is the #4 in the photo below:
Once I get it all sewn together, I guess I need to work on the only remaining “UFO” – #3 (Medallion quilt) – but I am not feeling inspiration on that one yet!
Postscript
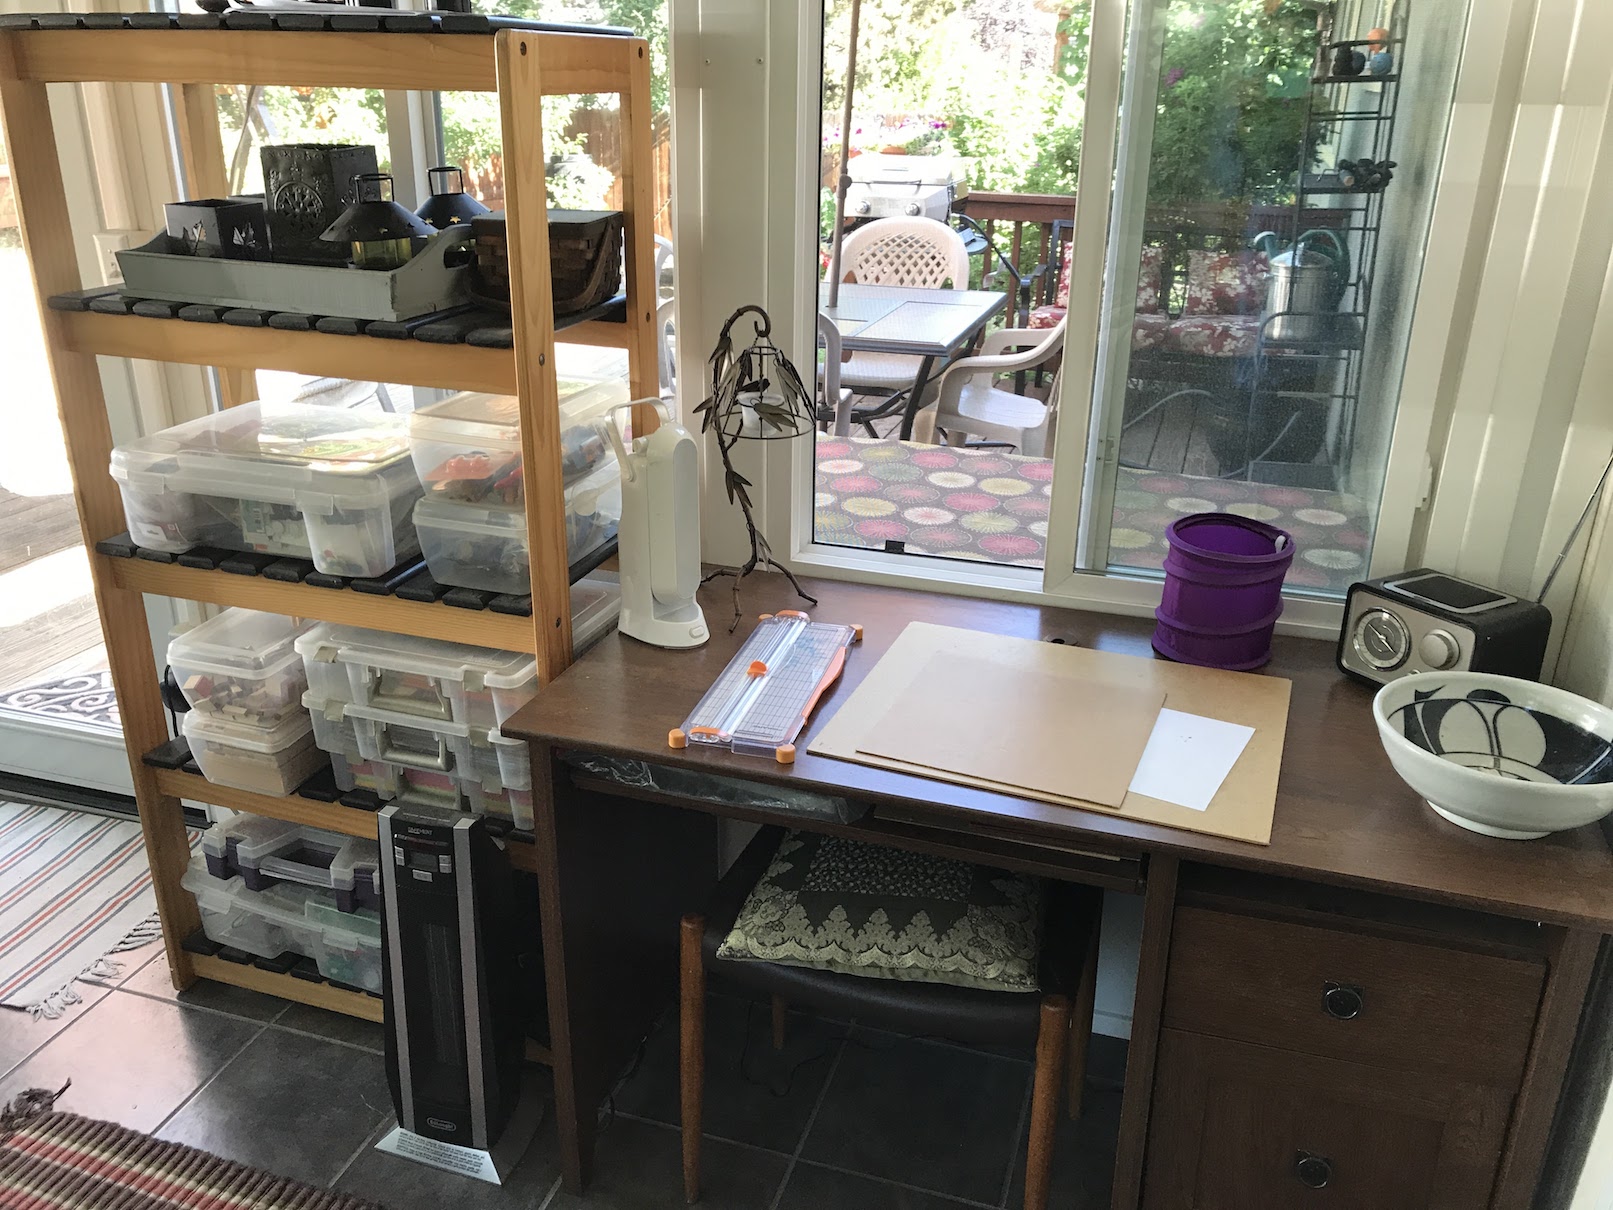
In addition to a push to complete my unfinished projects, I’ve recently experimented with a couple paper-crafting/card making projects in the paper-crafting/beading area I set up in my sunroom:
Here are the two cards I made:
I am not sure if the recipients of these cards actually liked them, but I had fun making them. I listened to a classical radio station on my new(ish) thrift shop radio and found card making very meditative.
Card making was actually my first official crafting hobby that I did with others.
My work colleague got me started in the late 1990s. I think it opened my mind to starting quilting, which I learned shortly after. I still have many of my card making supplies from the late 1990s and early 2000s. I donated about 1/2 of those supplies to charity organizations but I still have some wonderful supplies to make more handmade cards (whether people want them or not – ha!)
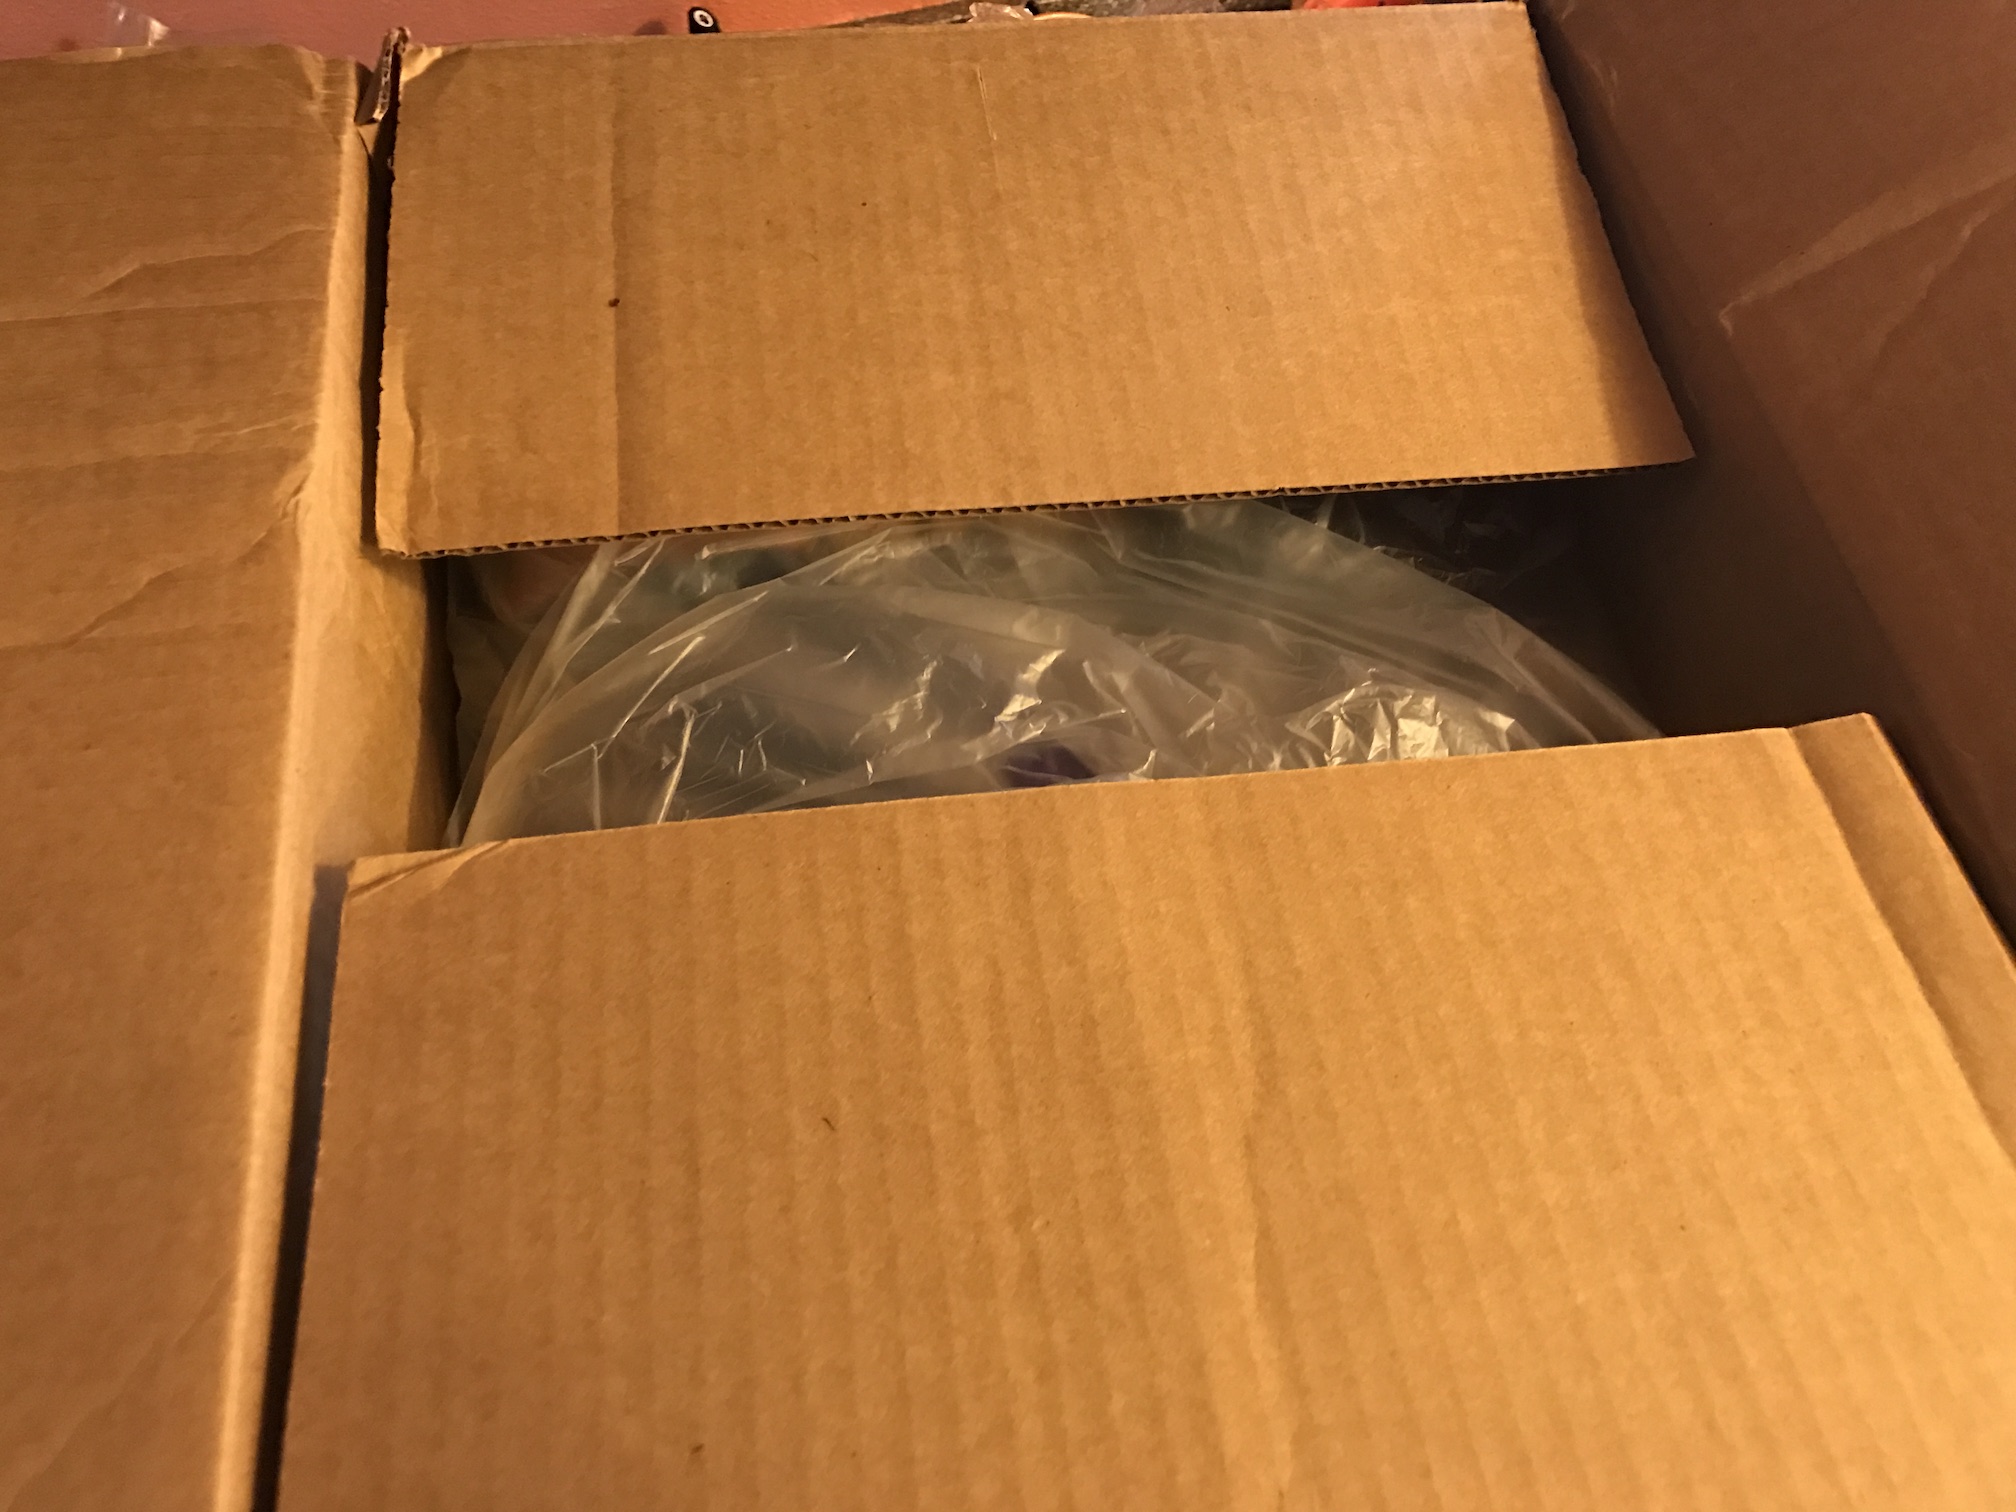
A package arrived in the mail yesterday. A very exciting package. A quilted quilt!
I could not wait to open the package and see Cindy Anderson’s, of A Quilter’s Corner with Cindy Anderson (inastitchquilting.com), long-arm quilting magic!
How fast can I get the box open?
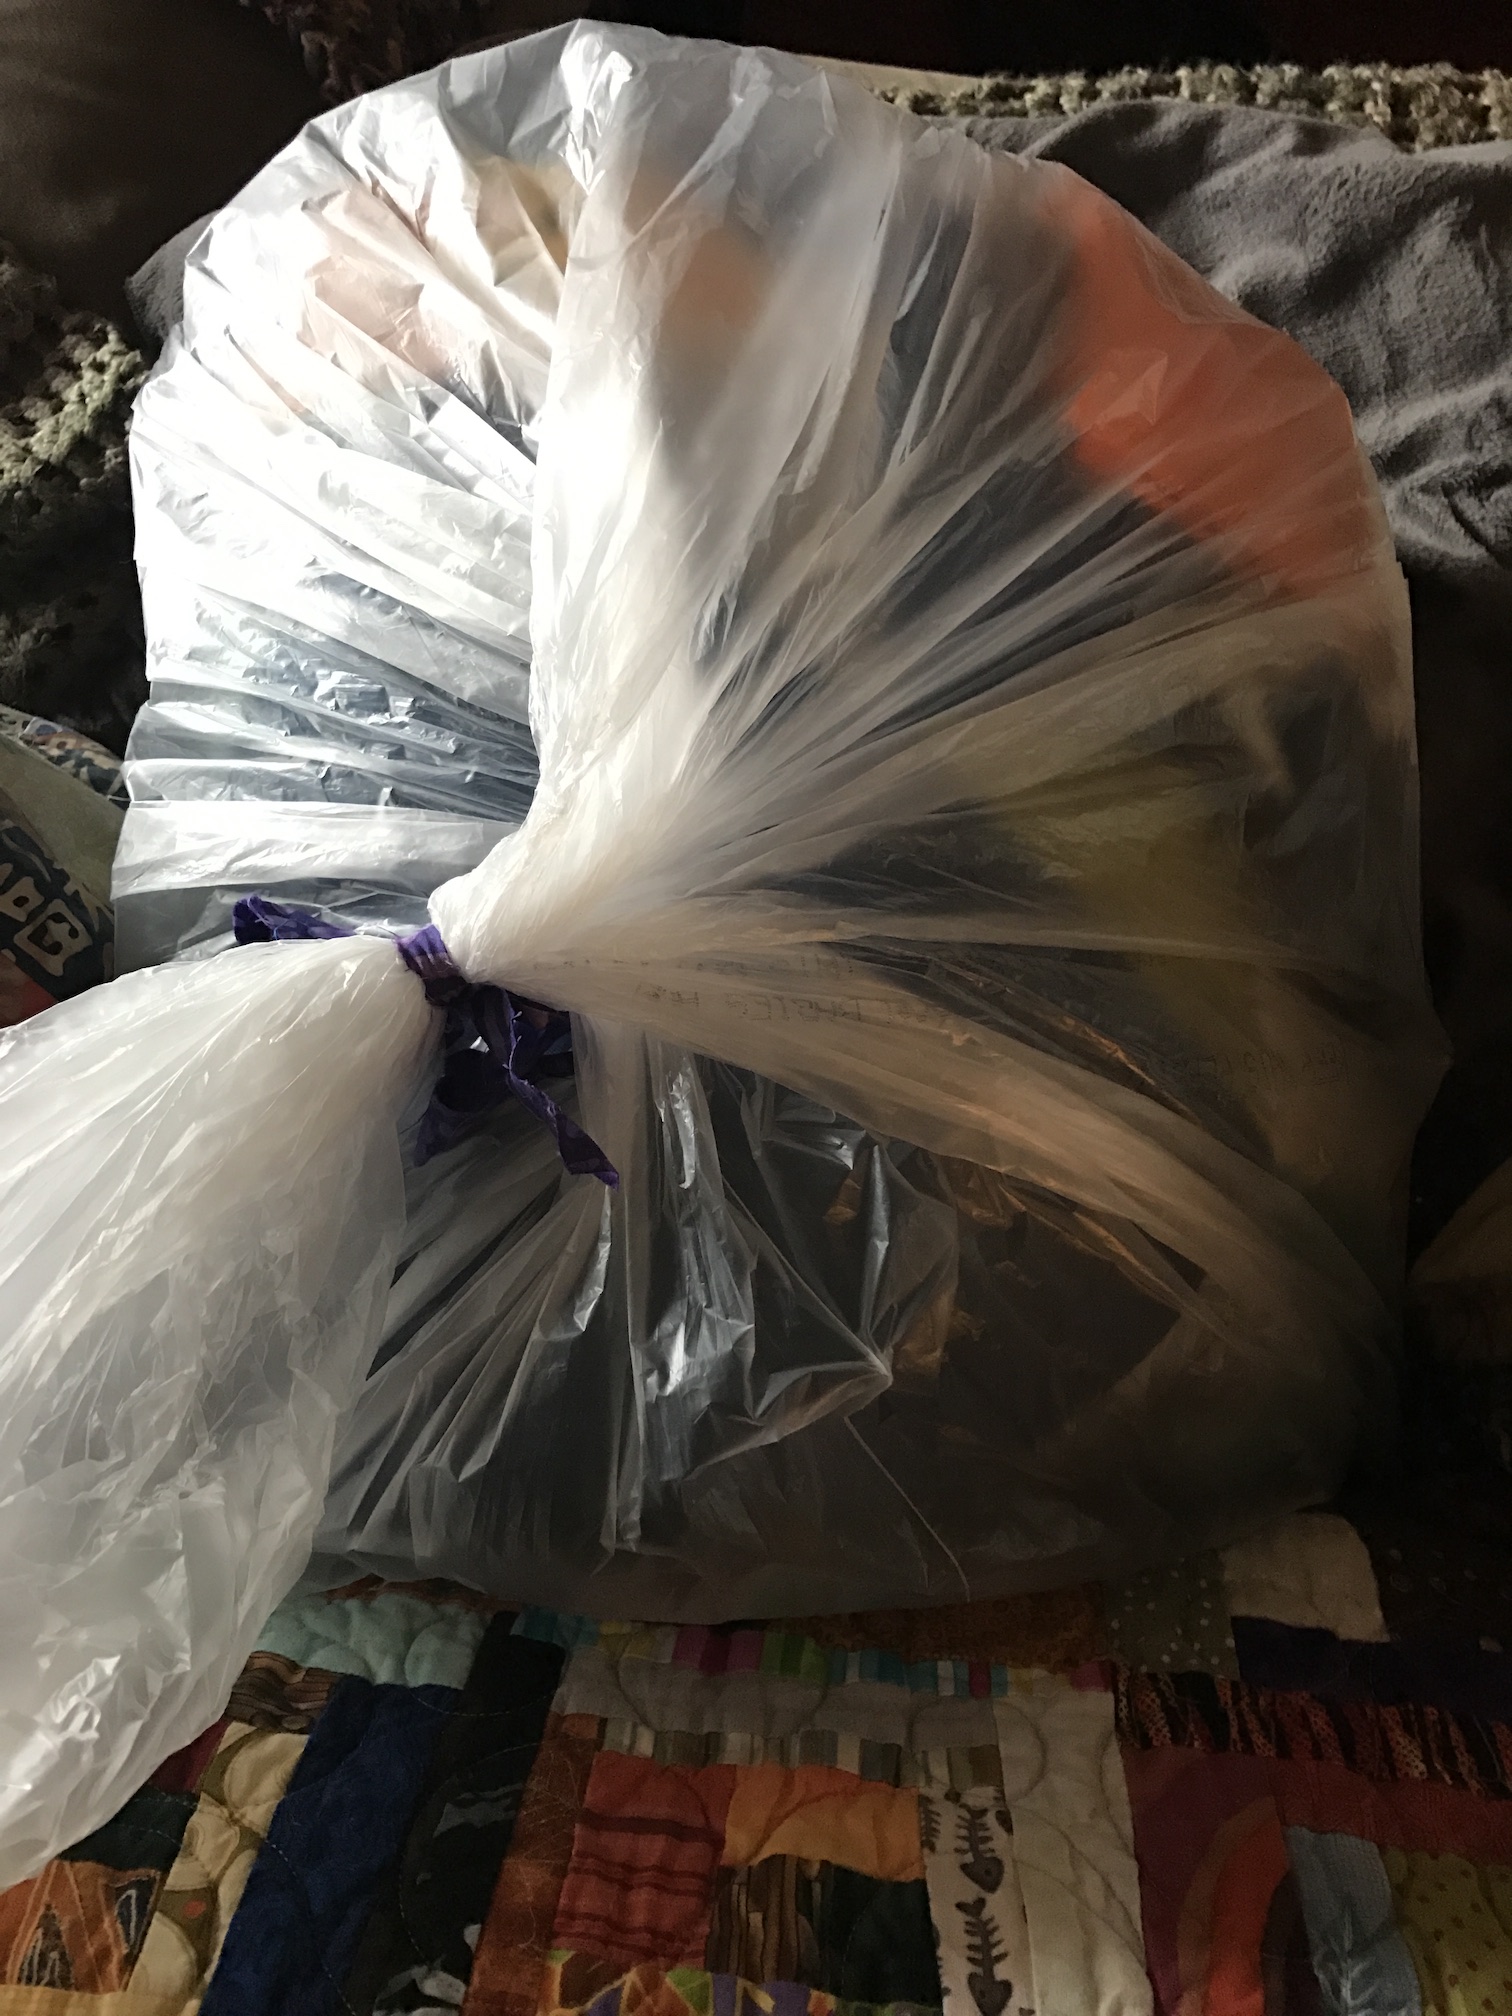
Oh the anticipation, now I have to unwrap it from the enclosed bag!
Before we get to the reveal (don’t scroll down and peek yet!) here is a little background on this quilt.
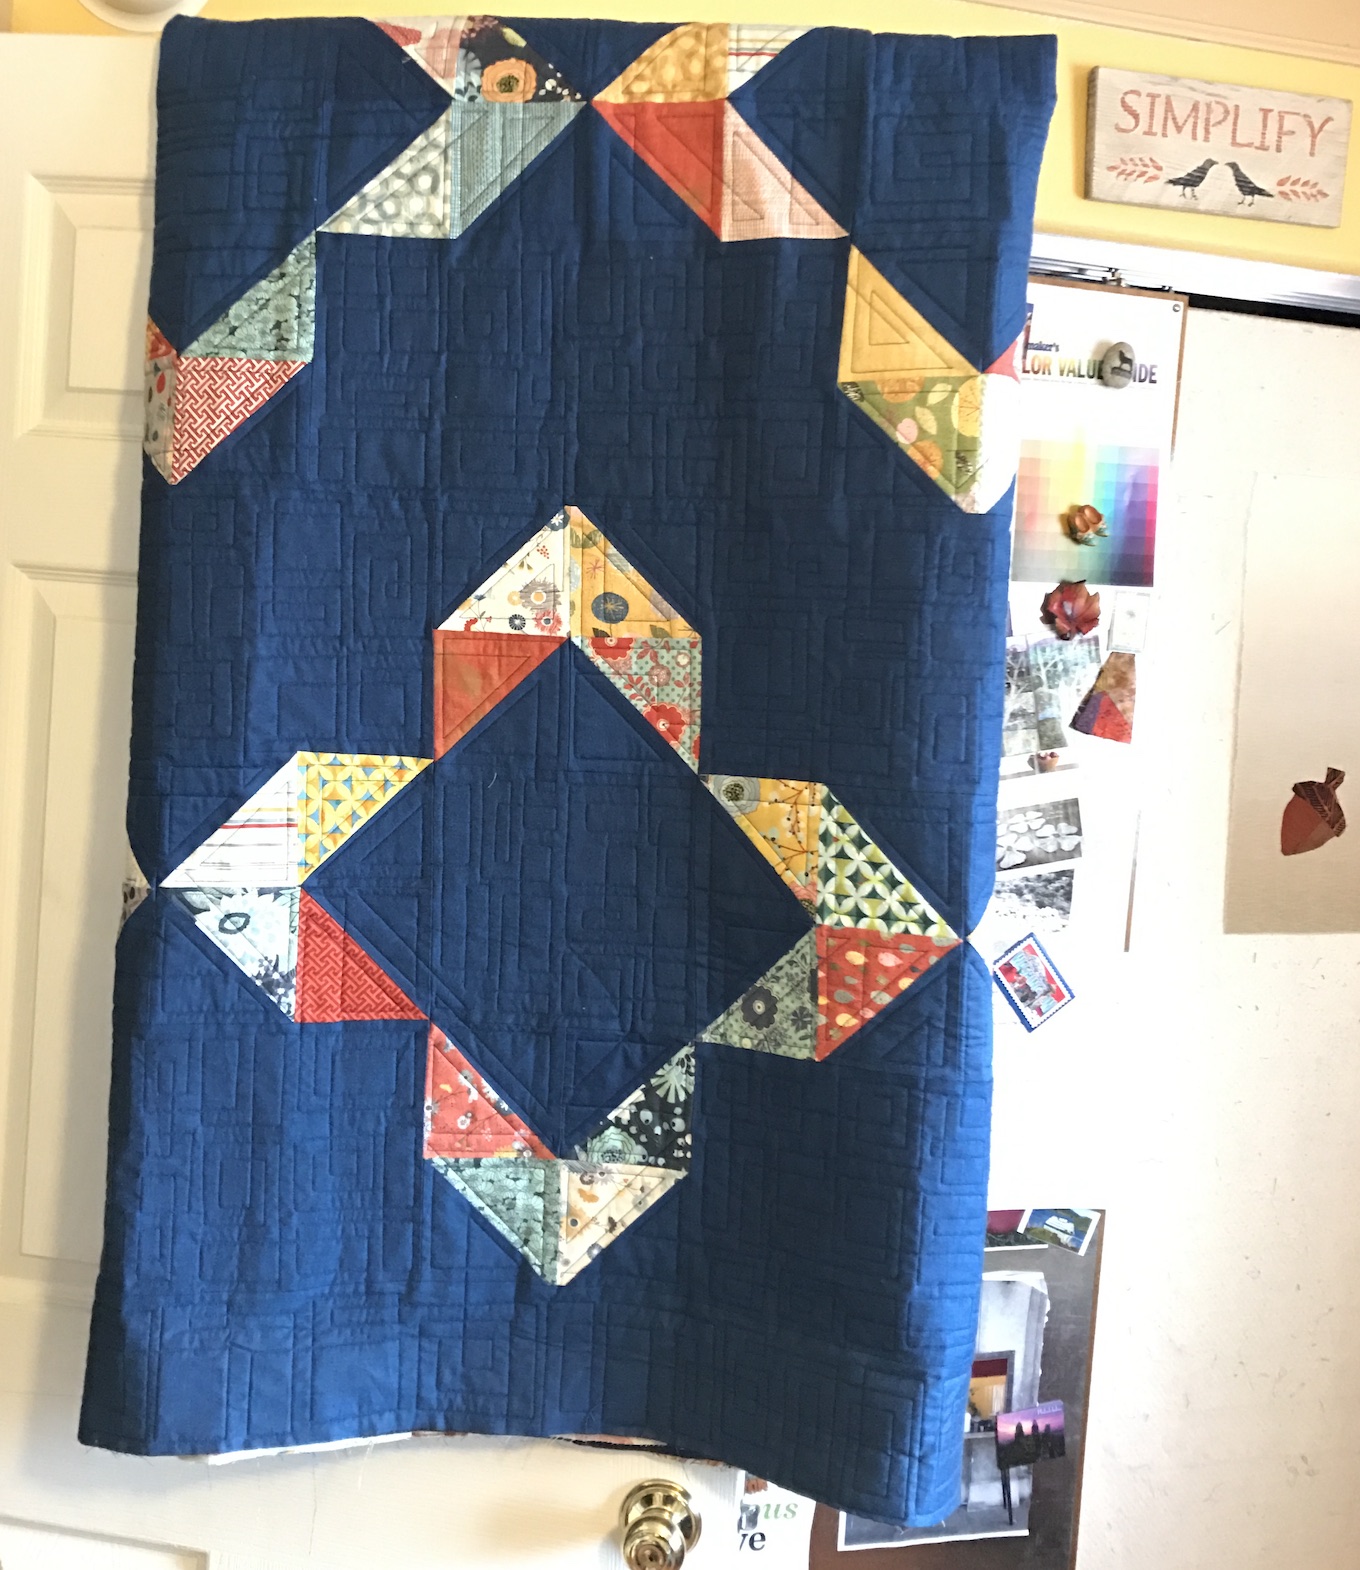
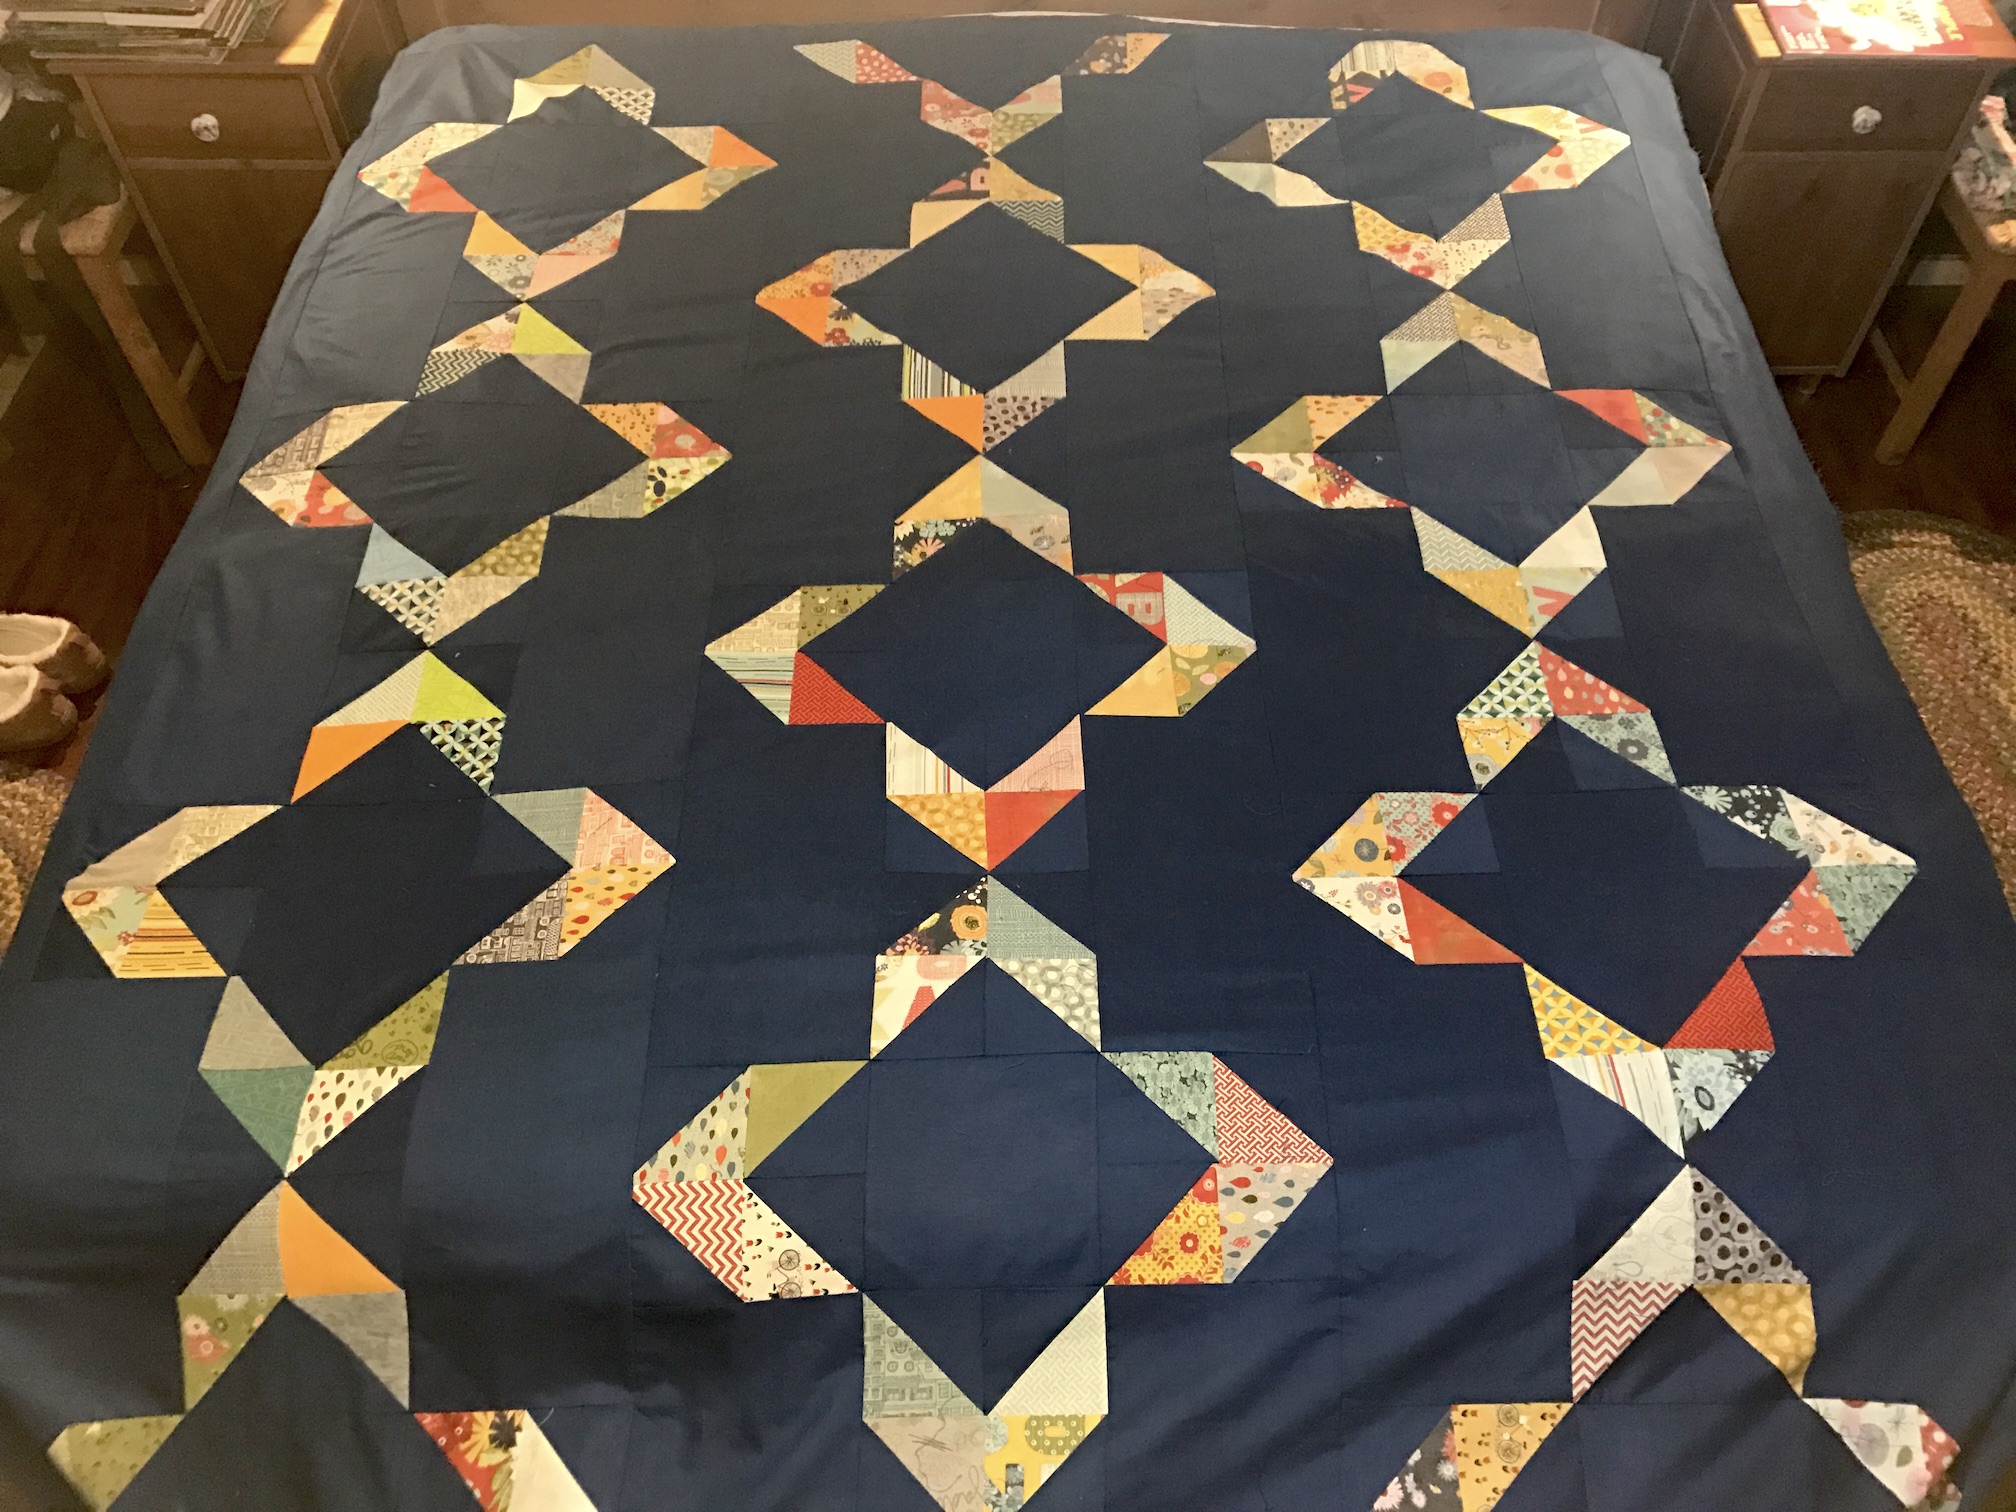
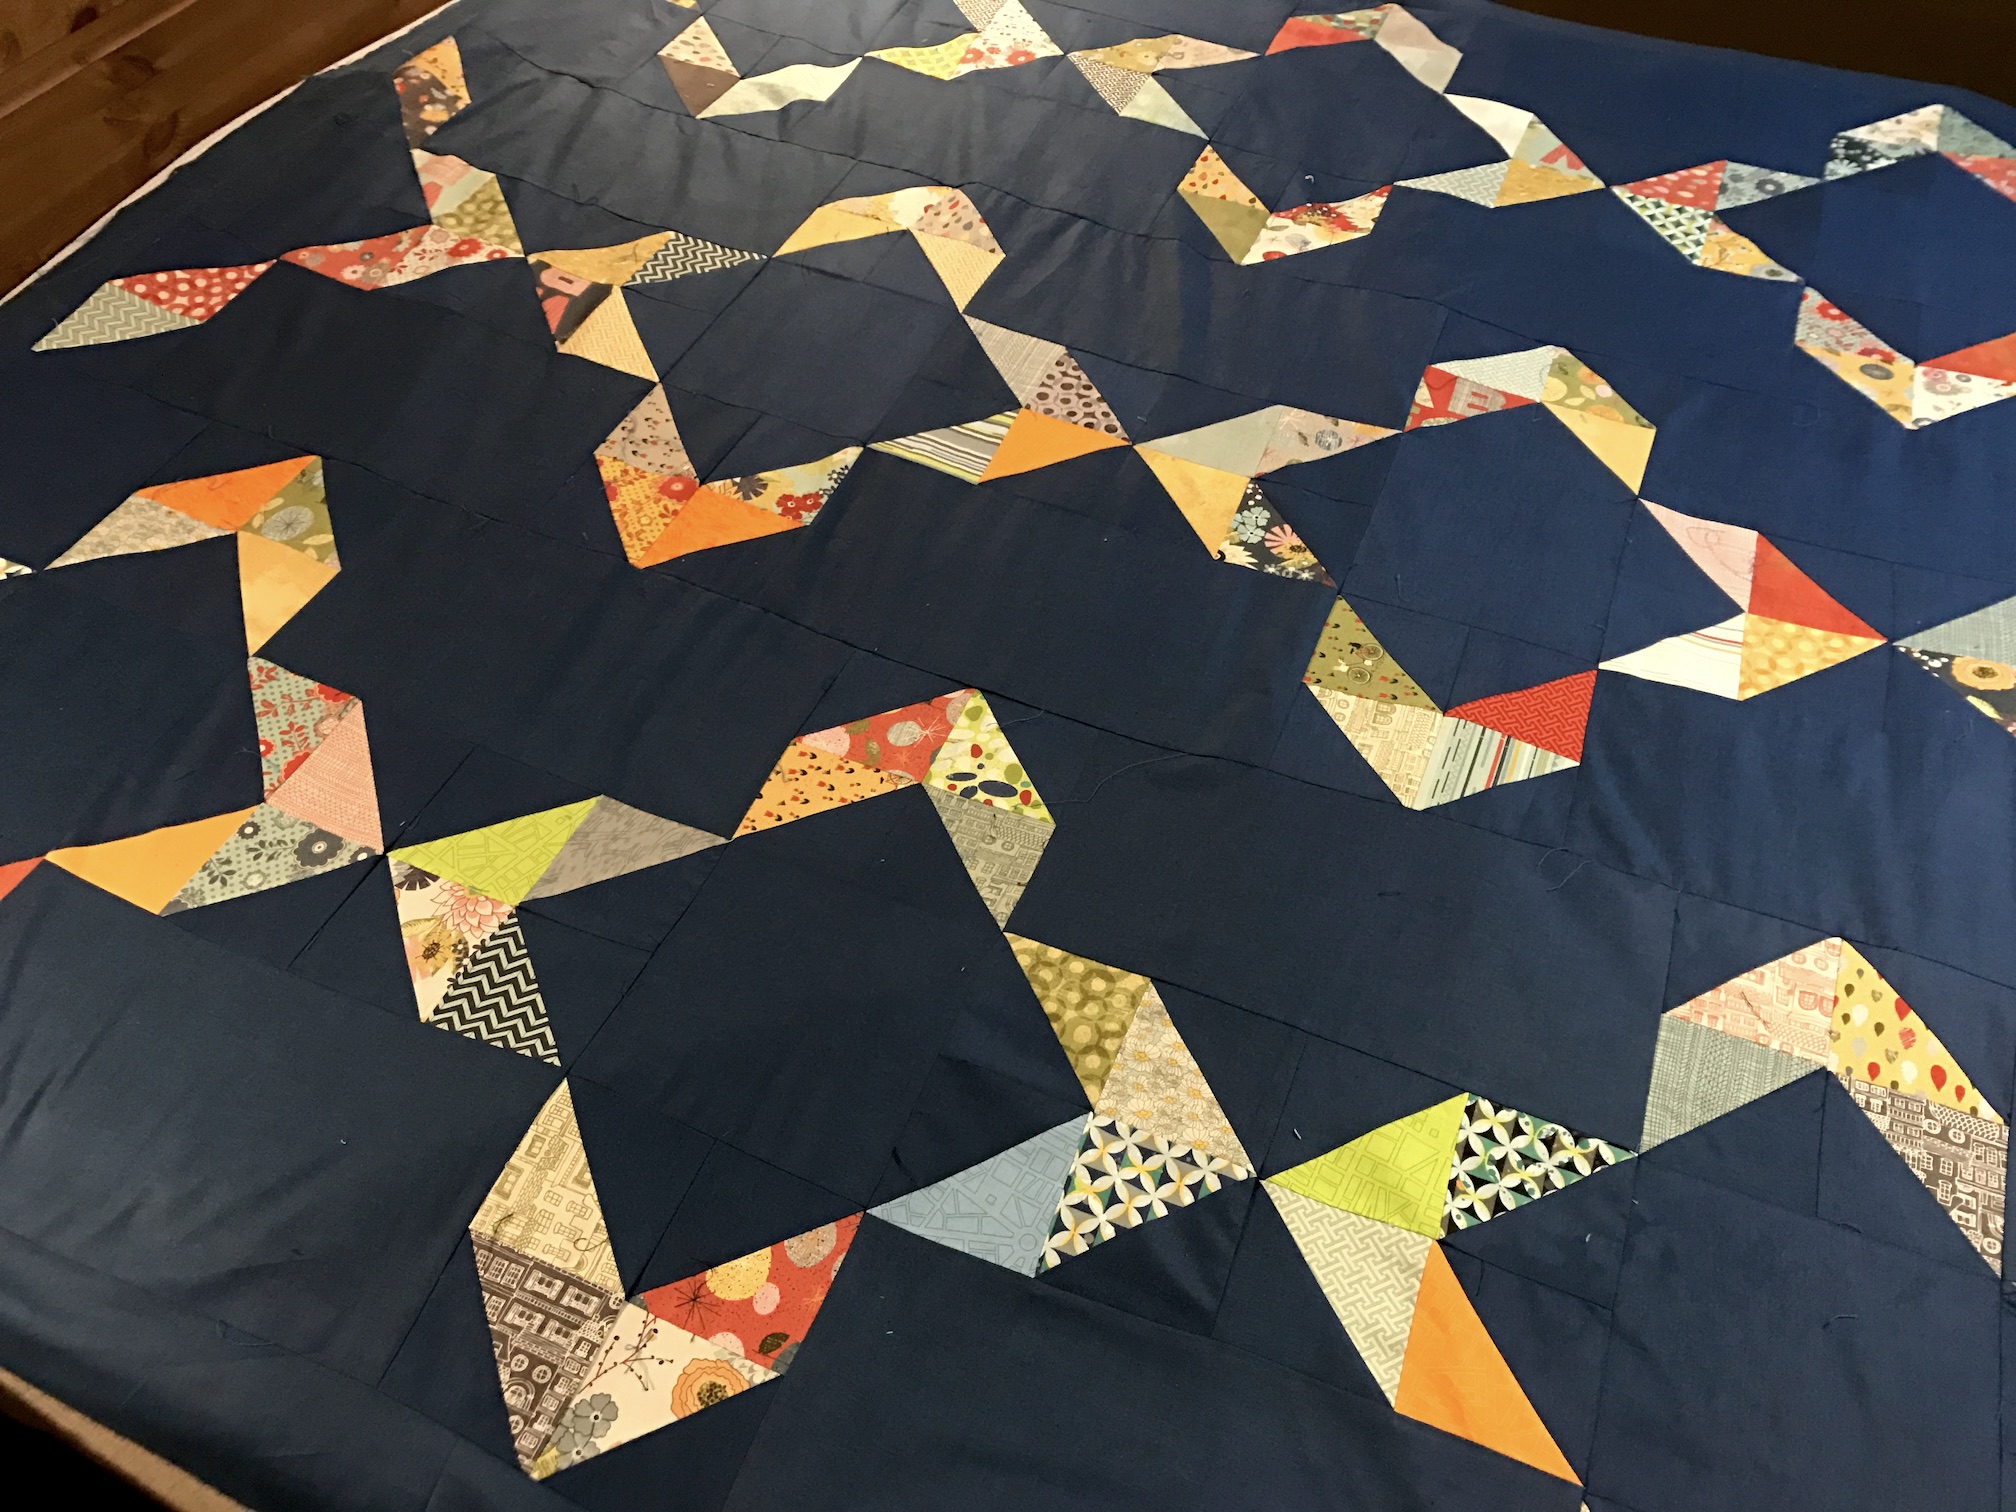
I found the pattern for this quilt, Happy Ending, in a book I borrowed from my public library – Perfect Quilts for Precut Fabricsby That Patchwork Place. The pattern was designed by Lesley Chaisson. I used a couple packages of pre-cut 5 inch squares (charm packs) and deep blue (Ink) Peppered Cotton, shot cotton to make the quilt.
After removing the quilt from the box, Terry the Quilting Husband (TTQH) and I opened it up and laid it out on our bed to get the full effect of the completed:
Draped on a king-size bed
My quilt top traveled from Oregon to Wisconsin and returned from Wisconsin as a quilted quilt!
I wish it was completely done and ready for use, but first I have to make and then sew the binding to the edge of the quilt to finish it.
Originally my plan was to use the deep blue shot cotton (main fabric of the quilt) for the binding. TTQH suggested a contrasting color for the binding instead of the dark blue, like an orange or a red fabric.
I like that idea! I found in my stash a reddish-orange Moda fabric that coordinates with the Moda fabric charm squares. I will post more photos when I get the binding put on the Happy Ending quilt. Photos do not do it justice, the geometric designs of Cindy’s long-arm quilting are lovely on my quilt!
Waiting for the binding to be added
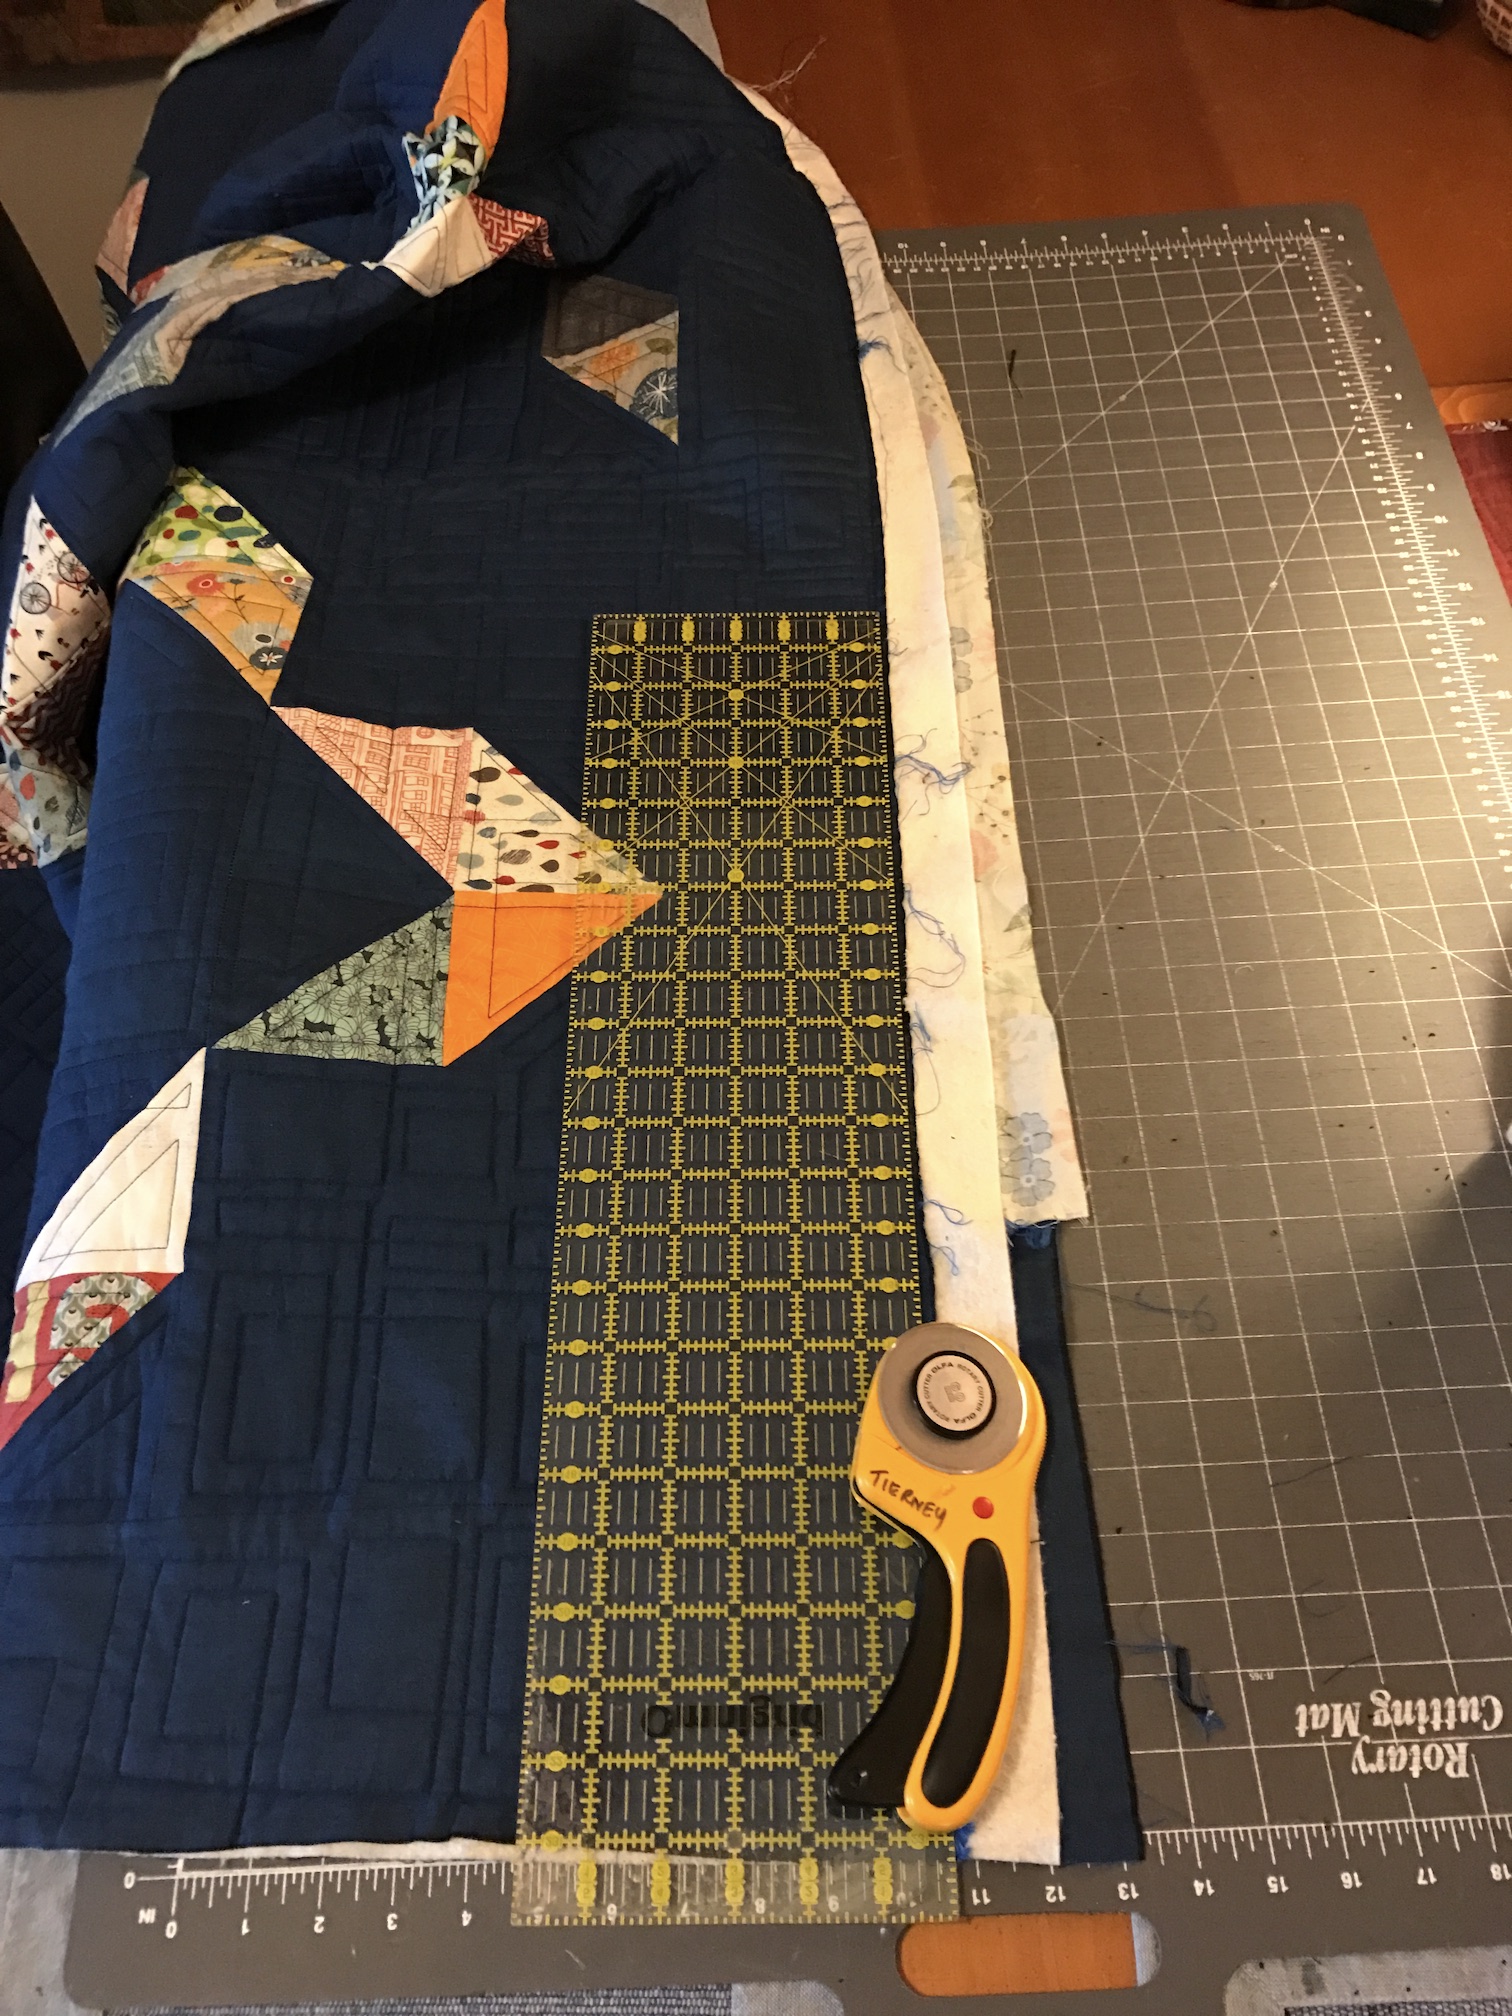
How Do You Trim?
I have a question for the quilters reading: How do you trim the excess batting and fabric off the edges of a quilt that has been long-arm quilted (or domestic machine quilted by you)?
When I began having quilts professionally long-arm quilted, I would use scissors to trim down the quilt. Eventually I moved to using a rotary cutter and a ruler to get a sharp straight edge. This takes a bit of time to complete trimming on a large quilt and I long for the day when I would just use scissors.
Trimming my quilt after long-arm quilting completed
Rotary cutter and ruler or scissors? How do you trim?
Bonus Content
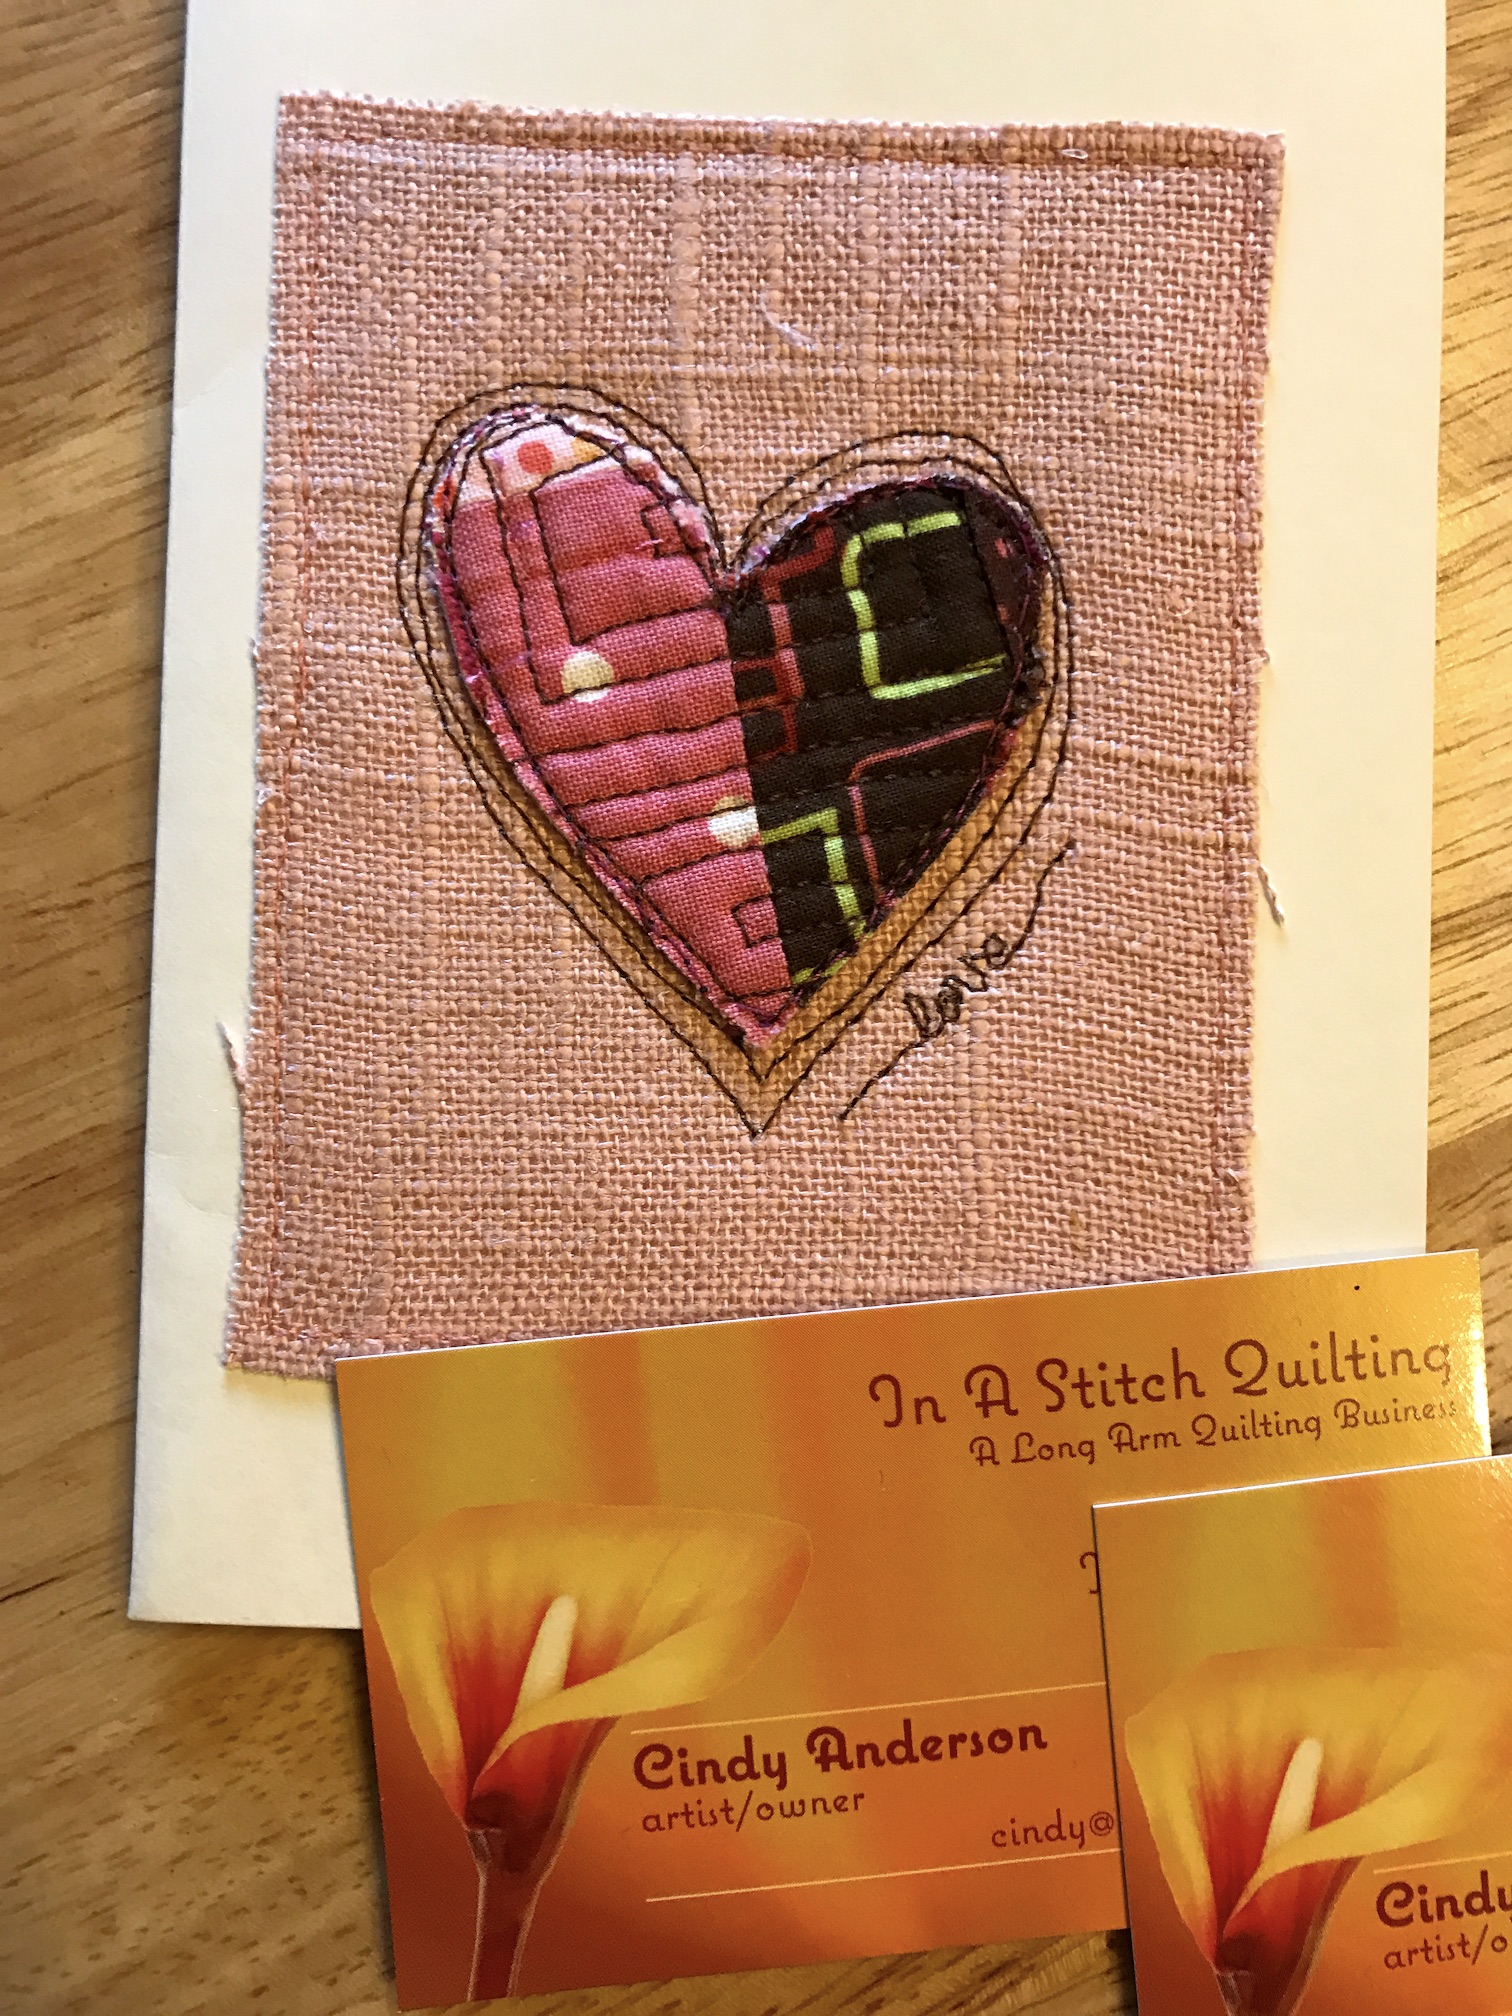
Inside the box with my quilt from Cindy were a couple extra items that made me smile:
A handmade card (not by Cindy but by another artist) from recycled fabric scraps:
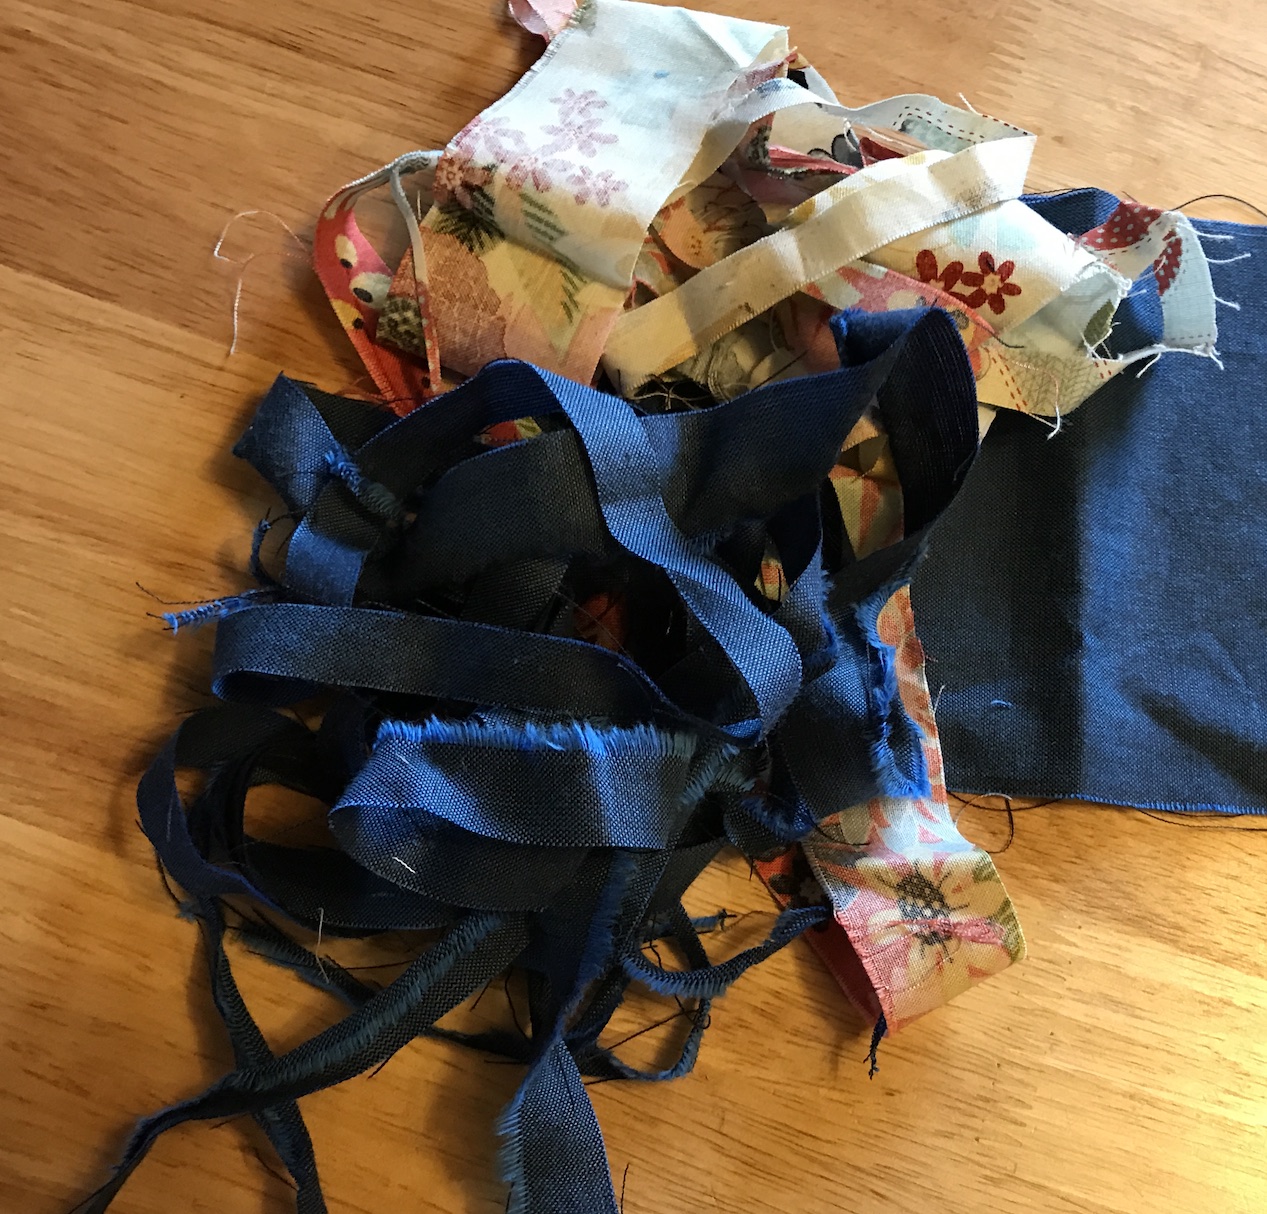
Scraps left over from the quilt including some fairly thin scraps that I think Cindy was challenging to make something with! (ok true confession – my quilt back was little bit short on one side and Cindy had to do some “remodeling” on my quilt back to make it work):
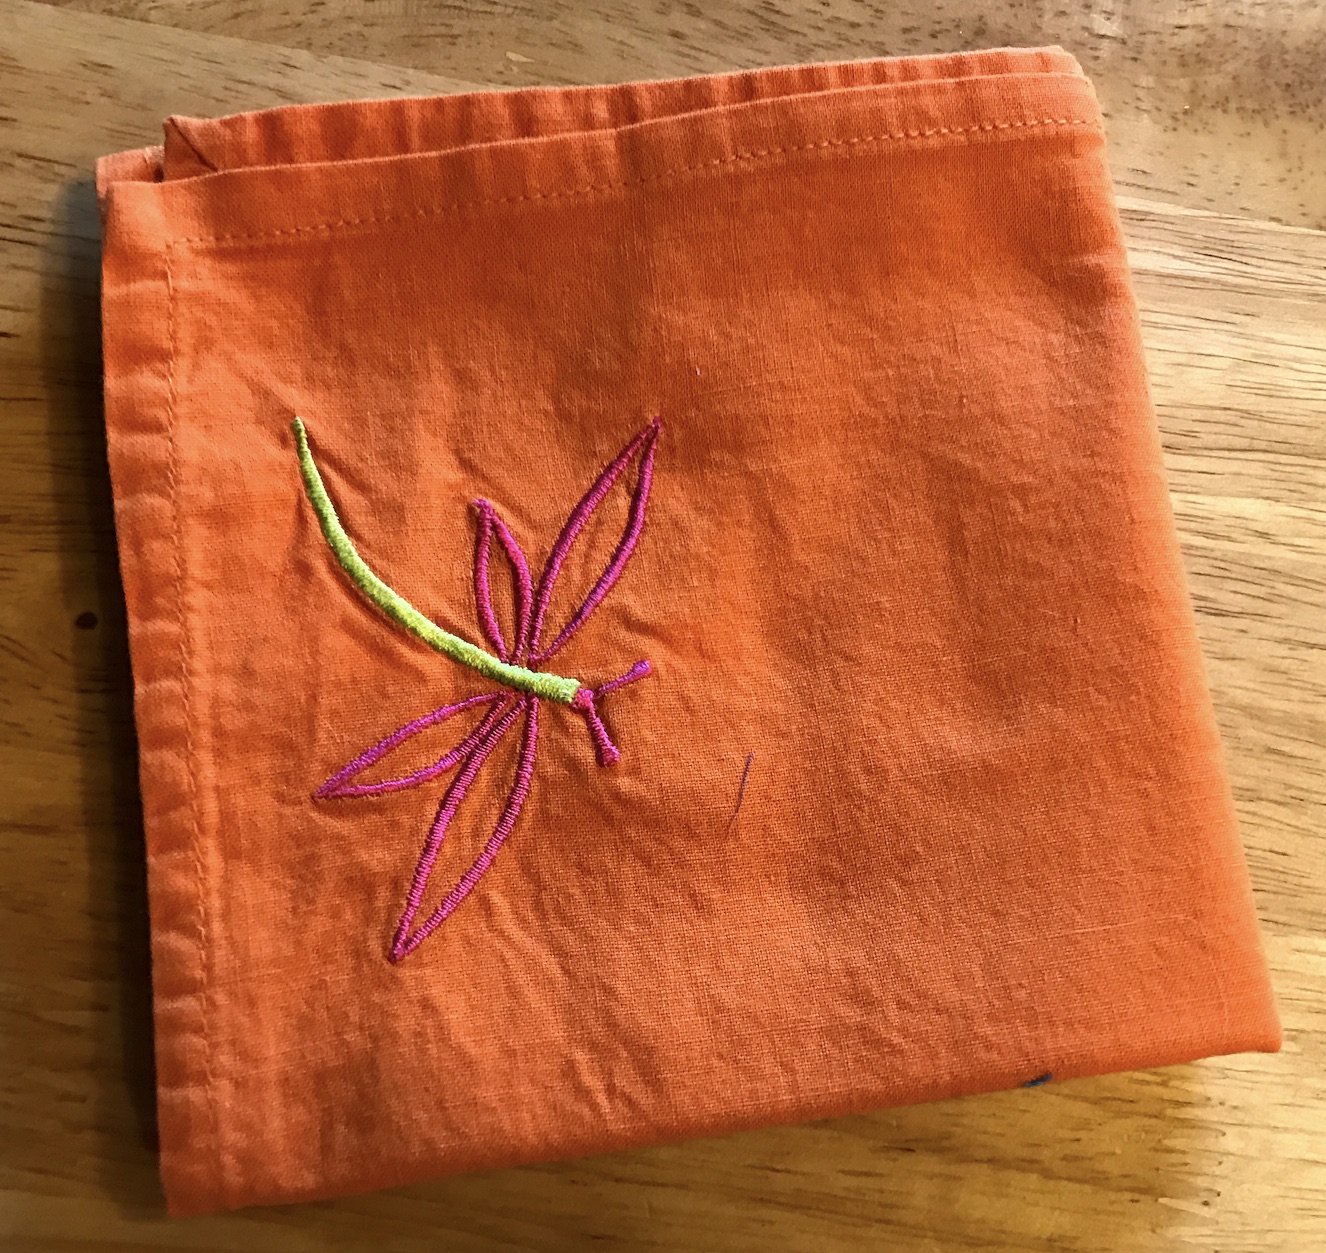
And finally – a challenge piece – an embroidered napkin:
When I saw the napkin, I misunderstood why Cindy sent it. I thought she sent it in support of my post The Napkin Story. However, after chatting with Cindy I discovered she sent it to me as a recycled fabric quilt challenge! She wants to see what I can do with it! (I took it out of my cloth napkin drawer and put it in my studio).
Postscript
I love listening to audiobooks and most of the audiobooks I listen to are borrowed from my public library’s digital download system. You reserve audiobooks just like you would hard copy books (the library is given a limited number of licenses of copies of a digital book they can loan out at one time) and the library e-mails you when the audiobook is available for download. On popular audiobooks, you can wait anywhere from a week to a couple months to get that e-mail.
So I went crazy reserving a bunch of audiobooks a couple of weeks ago when I suddenly ran out of audiobooks to listen – PANIC! Then, yesterday in addition to getting the quilt in the mail, I got an e-mail from my library notifying me that FIVE of the audiobooks I had on hold were available for download:
Norse Mythology – Neil Gaiman
For Women Only: What You Need to Know About the Inner Lives of Men
– Shaunti Feldhahn
We: A Manifesto for Women Everywhere – Gillian Anderson & Jennifer Nadel (yup, Gillian Anderson of The X-Files fame)
Good Omens – Neil Gaiman & Terry Pratchett
Smoke and Mirrors: Short Fictions and Illusions – Neil Gaiman
The loan period is 21 days, so I need to listen to all books in 21 days or have to go back into the reserve book queue – yikes!
I went ahead and started listening to For Women Only: What You Need to Know About the Inner Lives of Men as I was in the mood to begin with my nonfiction options. Also I previously read Good Omens and several of the short stories in the anthology Smoke and Mirrors are in the Neil Gaiman book I read last year, Trigger Warning.
The audiobook is very interesting so far! I might share some insights from this book in a future post.
(Shaunti Feldhahn did also write with her husband Jeff Feldhahn the companion book – For Men Only, Revised and Updated Edition: A Straightforward Guide to the Inner Lives of Women. According to Ms. Feldhahn these books are used as reading requirements in some church-based premarital counseling programs.)
Hi there! Here is a quick update on the 03/30/17 post What’s on My Lap.
This weekend I completed the hand quilting on The Recycled Road, an 18″ x 40″ improvisational art quilt for our annual Central Oregon SAQA Art Quilting Group’s themed exhibit. Our 2017 theme is “Pathways”.
The Recycled Road (2017) by Tierney Davis Hogan
For more background on this piece, please see the posts What’s on My Lap, Slow Stitching, and What’s on the Design Wall. Someday, this art quilt is going to be part of a series of 18″ x 40″ art quilts from recycled materials using the same materials/adding in additional recycled materials as needed for the design.
Here is the other quilt in this series so far – Recycled Door (the 2016 theme was “Doors”):
Recycled Door (2016). Designed and pieced by Tierney Davis Hogan; quilted by Guadalupe Designs. Photograph by Marion Shimoda.
The Recycled Road quilt was made completely with recycled materials: old jeans, sweat pants, corduroy pants, corduroy shirt, tweed jumper, curtains, and home decor fabric scraps. The jeans, shirt, pants, jumper and home decor fabric were reused from the first piece in the series, Recycled Door shown above (which is a much better photo).
All of the clothing or home decorating items used in this art quilt were destined for the landfill. There were all in poor condition, or scraps and not donate-able for reuse as their original purpose.
Currently I am working on the Artist Statement, and in a future post I will share the Artist Statement explaining the piece and share my research on writing an Artist Statement (one of the tierneycreates readers asked for more info on writing Artist Statements, something many of us struggle with!).
This art quilt will debut at the 2017 Sisters Outdoor Quilt Show as part of the special exhibit for Central Oregon SAQA. Eventually become part of the Improvisational Textiles Collection – improvisationaltextiles.com.
I hope to share a better photo in the future of this piece.
It’s time to continue my ongoing series, What’s on the Design Wall, on what I have on either the small design wall in my studio or the large design wall in my hallway.
I am taking a break from working on Farm Girl Vintage blocks, and began working on my art quilt for our annual Central Oregon SAQA (Studio Art Quilt Associates) exhibit. Last year our theme was Doors, and here was my art quilt for the group exhibit – Recycled Door:
Recycled Door (2016). Designed and pieced by Tierney Davis Hogan, quilted by Guadalupe Designs
For 2017, our theme is “Pathways”. Inspired by a SAQA online workshop I attend on “Working in a Series” and Elizabeth Barton’s book Visual Guide to Working in a Series: Next Steps in Inspired Design (2014), I want to repeat most of the fabrics used in Recycled Door (2016) and developed the art quilts from my annual participation in our SAQA group’s annual exhibit, into a series.
Recycled Door (2016) was created with all recycled fabric – used clothing and recycled home decor fabric scraps. See the post Blog Tour Day 4: Unlikely Materials for a list of materials used.
I am repeating the same recycled materials for this year’s art quilt and adding two additional fabrics for the 2017 piece: 1) the fabric from a pair of recycled sweat pants; and 2) a recycled curtain. Tentatively I am naming it Recycled Pathway. (I will have to complete the piece and draft up my Artist Statement before I decide on the final title).
My 2017 piece will be truly “recycled” art – in addition to using recycled fabrics (including fabrics from the 2016 piece), this quilt is being created from recycling of blocks made for another art quilt I started for another project – Sherri Lynn Wood’s (The Improve Handbook for Modern Quilters) Make Do Challenge (#makedoquilt). Please see the 09/13/17 post Make Do Quilt Challenge for photos of the progress I made on the piece (which I eventually abandoned because I was stuck and honestly just did not like it).
Since my improvisational pieced blocks for the #makedoquilt were just not going anywhere (except to gather dust in back of the closet), I cut it apart to reimagine it for the 2017 Central Oregon SAQA exhibit.
Here are photos of my progress “Recycled Pathway” (tentative name), on the small design wall in my studio. I am using the dark gray recycled sweat pants fabric to border my “pathway”piecing of recycled denims, curtain, tweed jumper, gold home decor fabric and orange corduroy pants:
The completed piece will measure approximately 18″ x 40″. I plan to be bold and either machine quilt or hand quilt the piece myself.
Here are the basket of recycled clothing scraps I am working from:
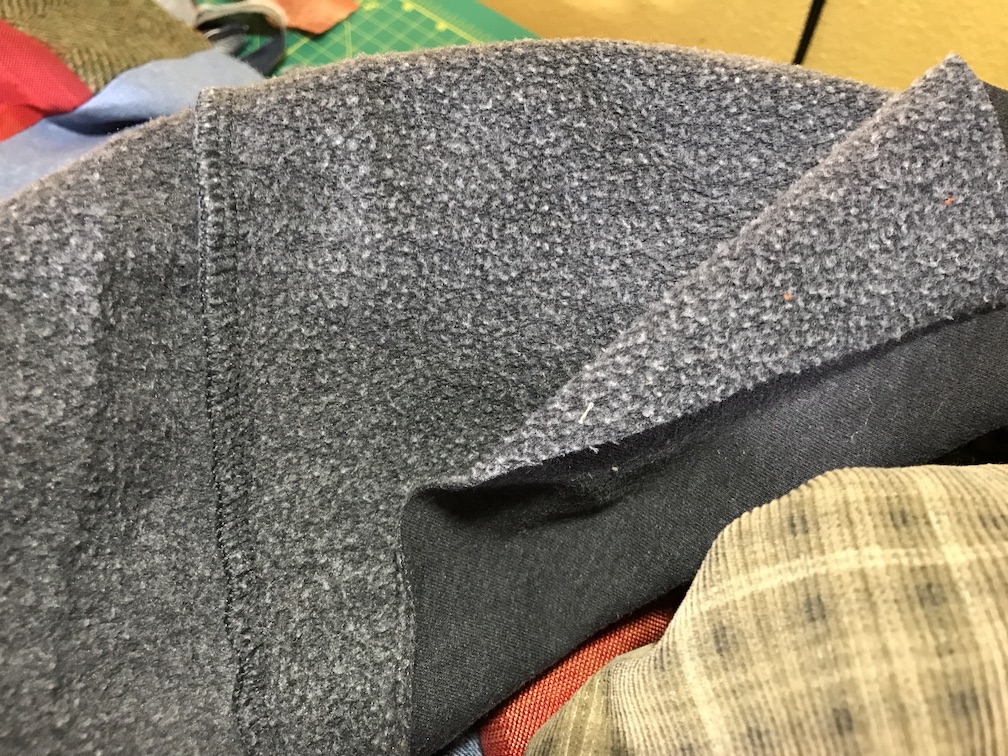
I really like working with the recycled sweat pants and I want to incorporate the “wrong side” of the sweat pants fabric into the piece also as I love the texture:
More to come, I was happy to be visited by Inspiration today in order to start this new piece. Also it was fun to return to working on some improvisational art quilt making!
I am not sure what I was thinking. I have no twin beds in the house, but the quilt top (pattern by Lesley Chaisson, from the book Perfect Quilts for Precut Fabrics by Patchwork Place, 2014) measures 81.5 in. x 105.5 in. !!!
Yikes!
So Many Precuts…
I was going to photograph my entire fabric precut collection (jelly rolls, fat quarters, charm squares, layer cakes) but I am not ready to share my dirty little secret.
I will share that I was able to decrease this basket of charm squares (5 inch precut squares) by 2+ packages of 42 charm squares to make the Happy Ending quilt:
It Started on the Design Wall
I have a giant design wall in my hallway (the one hallway in my little house) and I thought I could layout the entire quilt on the design wall.
Building the quilt top:
Um…it is now dragging on the floor:
So I had to abandon the design wall for the “design bed”.
On the Design Bed
Here are photos of the quilt top completed and laid out on the “design bed”:
I used two Moda Fabrics charm packs (Basic Grey line) to make the half-square triangles. Everything is set in Peppered Cottons by Pepper Cory fabric (color PC44-45 – Ink).
Shot Cotton Challenges
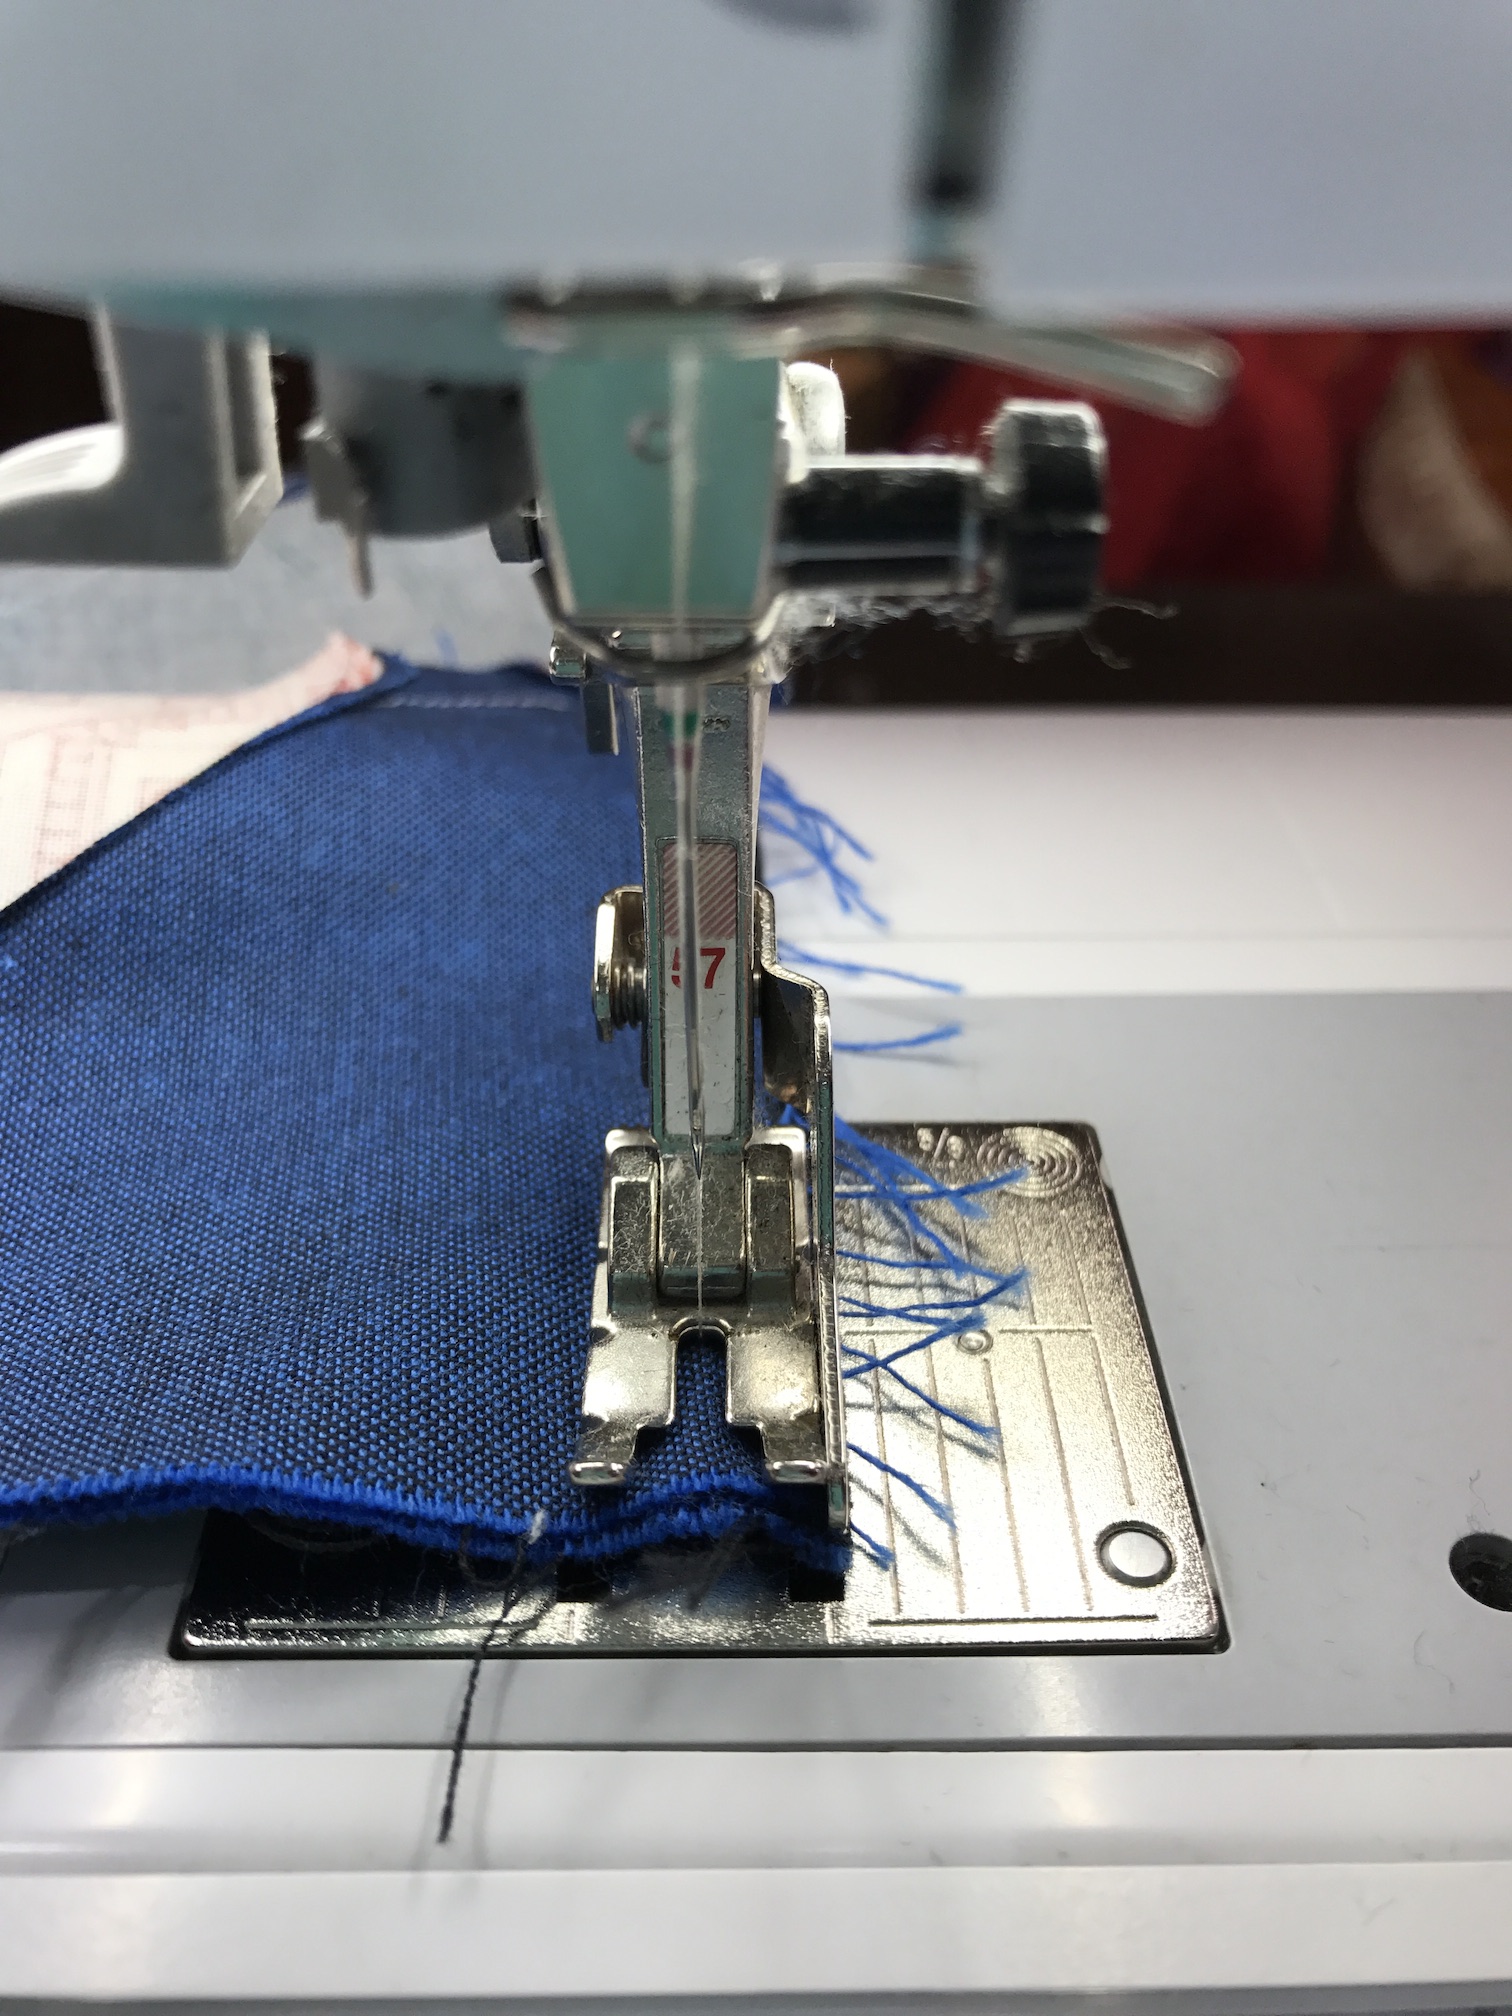
Peppered Cottons are shot cottons are fabrics woven with two slightly different colors creating a shimmering effect (source: Purl Solo). Many shot cottons are lightweight and some are rather sheer. They can be challenging to work with and if not cut correctly can had friable and fraying edges.
As shown in my personal example below:
I was discussing this challenge with my friend Susan who is a masterfully precise technical sewer/quilter, and she advised that if I carefully cut the fabric along the straight line of the threads, I would have less fraying.
I also found these tips (which I should have searched for prior to beginning a project that involved a large amount of shot cotton yardage):
I am putting together the backing (yardage from the Moda Fabrics Basic Grey line):
Then it is time to connect with Cindy of A Quilter’s Corner with Cindy Anderson (inastitchquilting.com) on shipping the quilt top and quilt backing to her. She is my longtime blogging buddy and this will be our first collaboration on a quilt!
NEXT POST: Saturday I took my sewing machine in for service and visited the new Sew Many Quilts quilt shop location. Photos and musing to come.
Follow the musings of Sassy the Highly Opinionated Schnauzer at her Schnauzer Snips blog.
As sort of a follow up to yesterday’s post Terry the Quilting Husband – Update – as I mentioned – Terry the Quilting Husband is hogging the design wall in the hallway.
I like one of my blogging buddies, Claire of knitNkwilt, I had to use the “Design Bed”, and lay out my latest quilt on our bed.
Another quilter was cleaning out her UFOs (if you are not a quilter, please see the post Lexicon of Quilters’ Acronyms) and gave me 12 – 12.5 x 12.5 inch blocks she pieced with beautiful Kaffe Fassett fabrics. They were from a “Block-of-the-Month” club this quilt belonged to and was not interested in making them into a quilt.
example of one of the 12 blocks I was gifted, on the background fabric they were to be set in
At first I put these block in my “UFO” pile but yesterday I felt suddenly motivated to just make them into a quilt.
I used one of the sampler quilt layouts in the book The Quilt Block Cookbookby Amy Gibson (yep, this was one of the books from my posting The Library (Mega) Stack, I returned the book to the library but borrowed it again…when I can justify another book purchase, I am probably going to buy it…)
Photo credit: amazon.com
Here are the 12 blocks on the “Design Bed” waiting for me to sew the rows together.
all bad photography/bad lighting disclaimers apply
I used to sell 8 beautiful fabric selections from this line in my tierneycreates Etsy shop. However, a couple of weeks ago, I decided to stop selling fabric and pulled the yardage, fat quarter sets and jelly rolls from my Etsy shop.
My decision was based on that I did not enjoy cutting yardage for people (I will never own a quilt shop) and I do not want to compete with quilt shops. (You can read from the tierneycreates archives, my first attempt to cut “fat quarter sets” – Adventures in Retail).
So, no judgement on people who sell fabric online, it was just not something I wanted to do any longer.
My plan is to focus my Etsy shop on handmade items. It is called “tierneycreates” after all. Recently, however, Tierney has not been doing any creating for the Etsy shop but has some ideas for 2017 and beyond.
For now Tierney will keep working through her personal UFO backlog (and obviously accept donations from other quilters’ UFO backlogs, ha!).
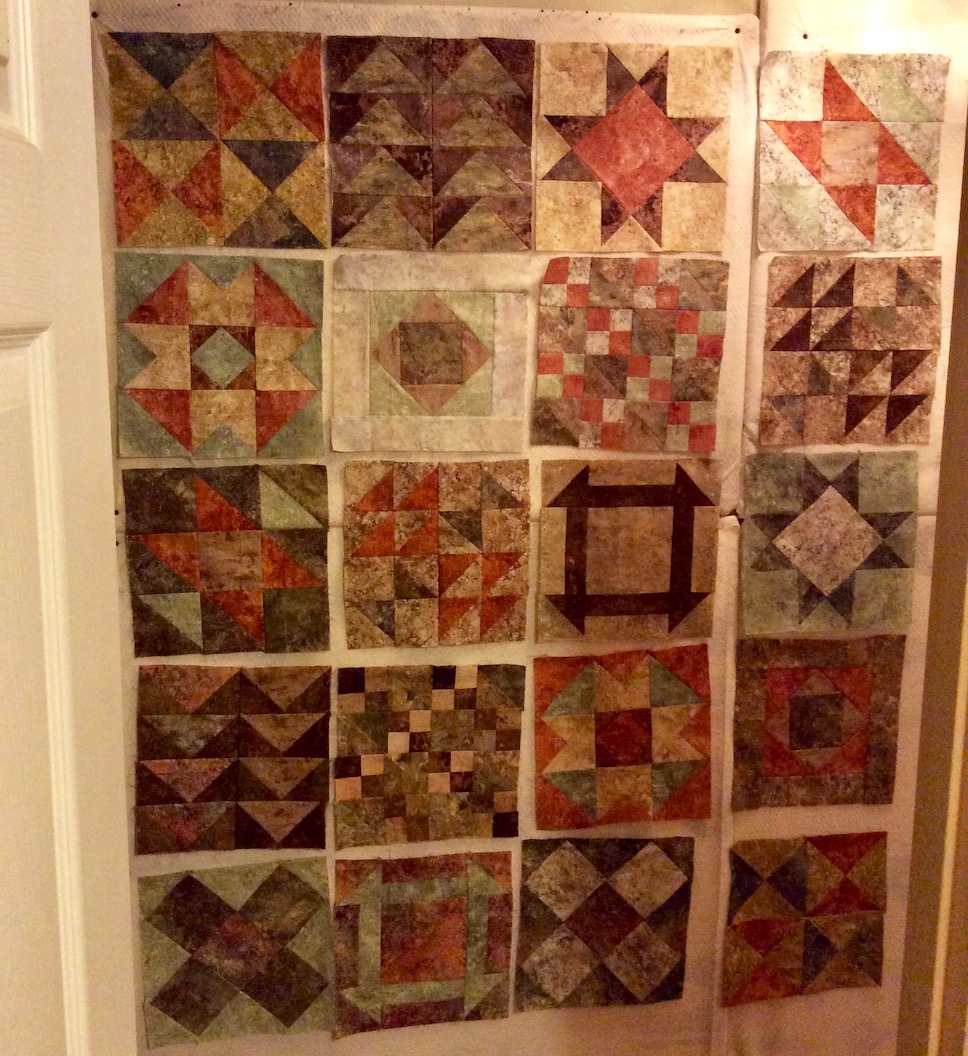
This post is actually a continuation of my series “What’s on the Design Wall” in addition to Part III (well actually Part IV) of my series of posts about taking a break from improvisational quilt design and piecing, and returning to make meditative traditional blocks.
Here are the other posts in this series to bring you up to date. I decided to make a “sampler” quilt by making blocks from the Ladies’ Art Company Block Tool:
In the previous post in this series, I had only 4 more blocks to go into order to have 20 blocks to create a 4 x 5 type of layout.
I completed four additional blocks, of two different block patterns in different color ways:
So here is what all 20 blocks look like on the design wall in our hallway (disclaimer – I do not have the best lighting in my hallway and it is narrow so I can only take photos from an angle or by standing in the laundry room!):
My plan is to set them in a light fabric from the same line (Stonehenge) and then do a cool border (well in my mind it will be cool) with the fabric scraps from the fat quarter set I used to piece these blocks.
The next time I post on this series about revisiting traditional piecing, I will show you the completed quilt.
But…for now…I have to put it aside (No! Please Don’t Go To the “UFO” pile!!!) and immediately work on a baby quilt for an upcoming baby shower.
My next post was going to be about the cool projects other quilters were working on at the retreat (tuffets!) I attended last weekend. However, I do not want to lose the momentum from the project discussed in my Thursday 08/11/16 post –What’s on the Design Wall (Need Your Help).
I so appreciate all the enthusiastic responses, votes, and ideas. I have to tell those of you who commented: You made a MESS of my studio (smile)!
You should have seen my little studio – various fabrics pulled out from my stash in many different colors, from your suggestions, strewn about everywhere. It was like a tornado of fabric options had blown through.
Reading all the comments was very fun – it was like you all were crammed into my tiny studio (where would I fit you all?!??!) and we were looking through my stash together and throwing around ideas (and fabric).
Of course, I would have to plan a snack and beverage for all my studio guests crammed into the tiny room…but where would I set out the plates and cups? (Maybe I could go scavenge some more fruit from my neighborhood to serve as snacks…but that is an upcoming post: Fruits of My Neighborhood Part III!)
THE RECAP
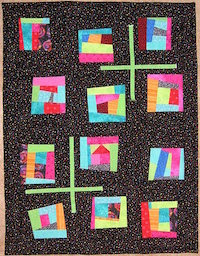
This project began with a bag of colorful Batik scraps (that I embarrassinglyactually purchased…in a moment of weakness from the Stitchin’ Postquilt shop’s basket of scrap bags for sale..that shop is loaded with temptation!)
I turned many of those scraps into 24 6′ x 6″ blocks:
(BTW – I moved these blocks to my new hallway design wall which we created this weekend – but that is another post…)
I presented four (4) options for the layout on the blocks and here are the votes by Option:
OPTION 1A – Float the blocks individually in a neutral background: 2 Votes
OPTION 1B – Group the blocks together and then float the whole grouping in a neutral background: 0 Votes
OPTION 2A – Float the blocks individually in a gray background: 4 Votes
OPTION 2B – Group the blocks together and then float the whole grouping in a gray background: 2 Votes
In addition to voting on options I presented, many of you in your comments suggested different options(I hope I captured the essence of all the comments to date, my apologies if I left a summary of your comment out below):
Group them together on a neutral background not trying to make them perfectly square, use Misty Fuse to attach them
Stitch the blocks together, use a pieced binding to enclose them, they speak so well on their own!
Group them together on the grey but make sure all blue sides are facing opposite of the grey fabric and placed up against another block rather than up against the grey fabric not allowing a blue side to but up against another blue.
Float each block individually, with a PURPLE or RED background- keep the color going! And maybe put a yellowsquare at each “intersection”
Golden brown would be nice also (to float blocks).
I agree with some others are dark brown, plum, dark red, I’d be inclined to try them on different ones and see which calls loudest.I start to wonder if it’s be even better on the dark brown.
I think a chocolate brown would be so cool.
I would make more blocks, group them without sashing or a border, and bind with a pieced binding (NOTE: I did make more blocks, see below!)
If you do want separation, don’t set them straight, in rows and columns. Use your separator in more random sizing — perhaps framing each one with the same fabric but in wonky widths. It might be easiest to pull off with a fabric that has some pattern so the seams between newly framed blocks disappear a bit.
If you really want to set them apart on a different background, what about looking at either a gold dupionior a deep purple dupioni?
(from a text to my phone, not posted to the blog) What came to mind was floating blocks in a round of neutral logs then a round of gray logs – maybe alternate with the reverse – round of gray first then neutral – then you float and have blocks side by side – and I’m thinking of a neutral acid yellow or lime greenor maybe an acid yellow orange – a crisp bright marigold color – all would look good with the blocks and gray.
Option Z: I love love love the blocks, but am partial to flashy colorsmounted on a white background. I also like sashing between the blocks because it makes each one pop.
While I like both versions of placing all the blocks together and placing with sashing, I would need to try the sashing version using a variety of sizes and different shades of either the light or the grey.
One fellow blogger, Melanie @ Catbird Quilt Studio was kind enough to e-mail me a photo of one of her lovely scrappy log cabin quilts, “Broken Pains” as an example of a layout she used:
Photo courtesy of Melanie McNeil, Catbird Quilt Studio. Used with permission; all rights reserved.
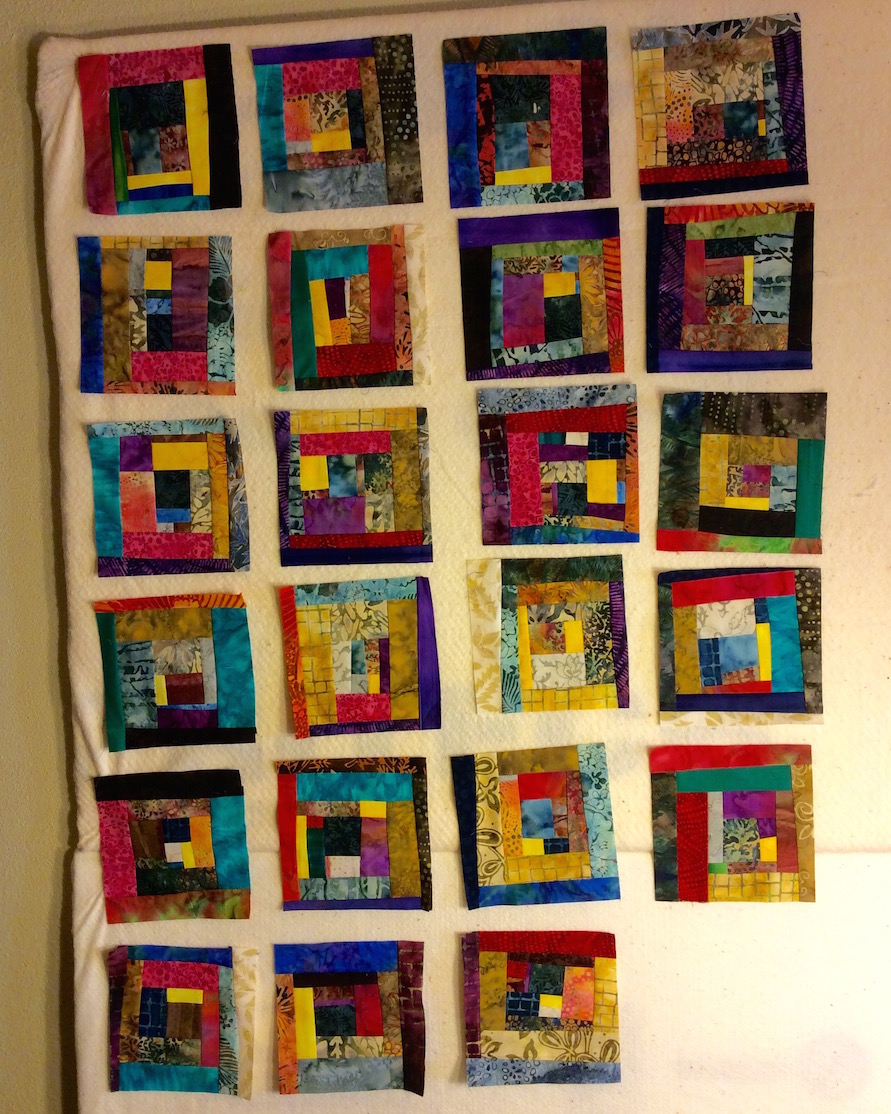
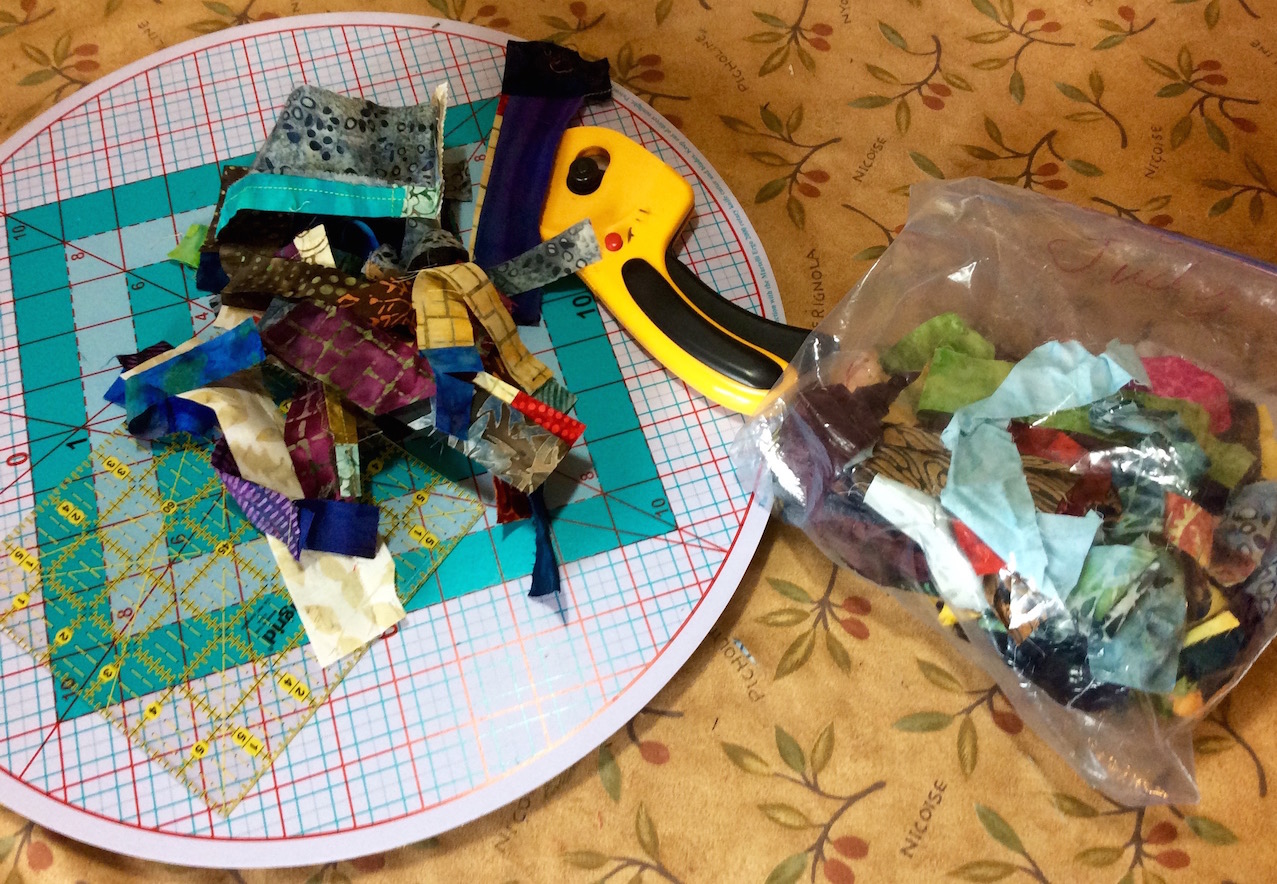
In addition to showing you the scraps I started with, in the previous post I shared the pile of scraps I had left over from trimming the original set of blocks down to a 6″ x 6″ size:
In the evening on Friday and Saturday, I turned the trimmings from those scraps and some of the remaining scraps into 23 more 6″ x 6″ blocks:
(Now why didn’t I make 24 more instead of 23 more? I guess I lost count while piecing!) As you can see, these blocks are somewhat darker and have more piecing. I tried to use all the scraps from the trimmings which had piecing within the scraps.
I now have scraps left over from trimming the latest blocks and the remaining original scraps that started it all…and yes, I am going to make more blocks out of them! (Besides 47, 24 + 23, is an usual odd number of blocks. )
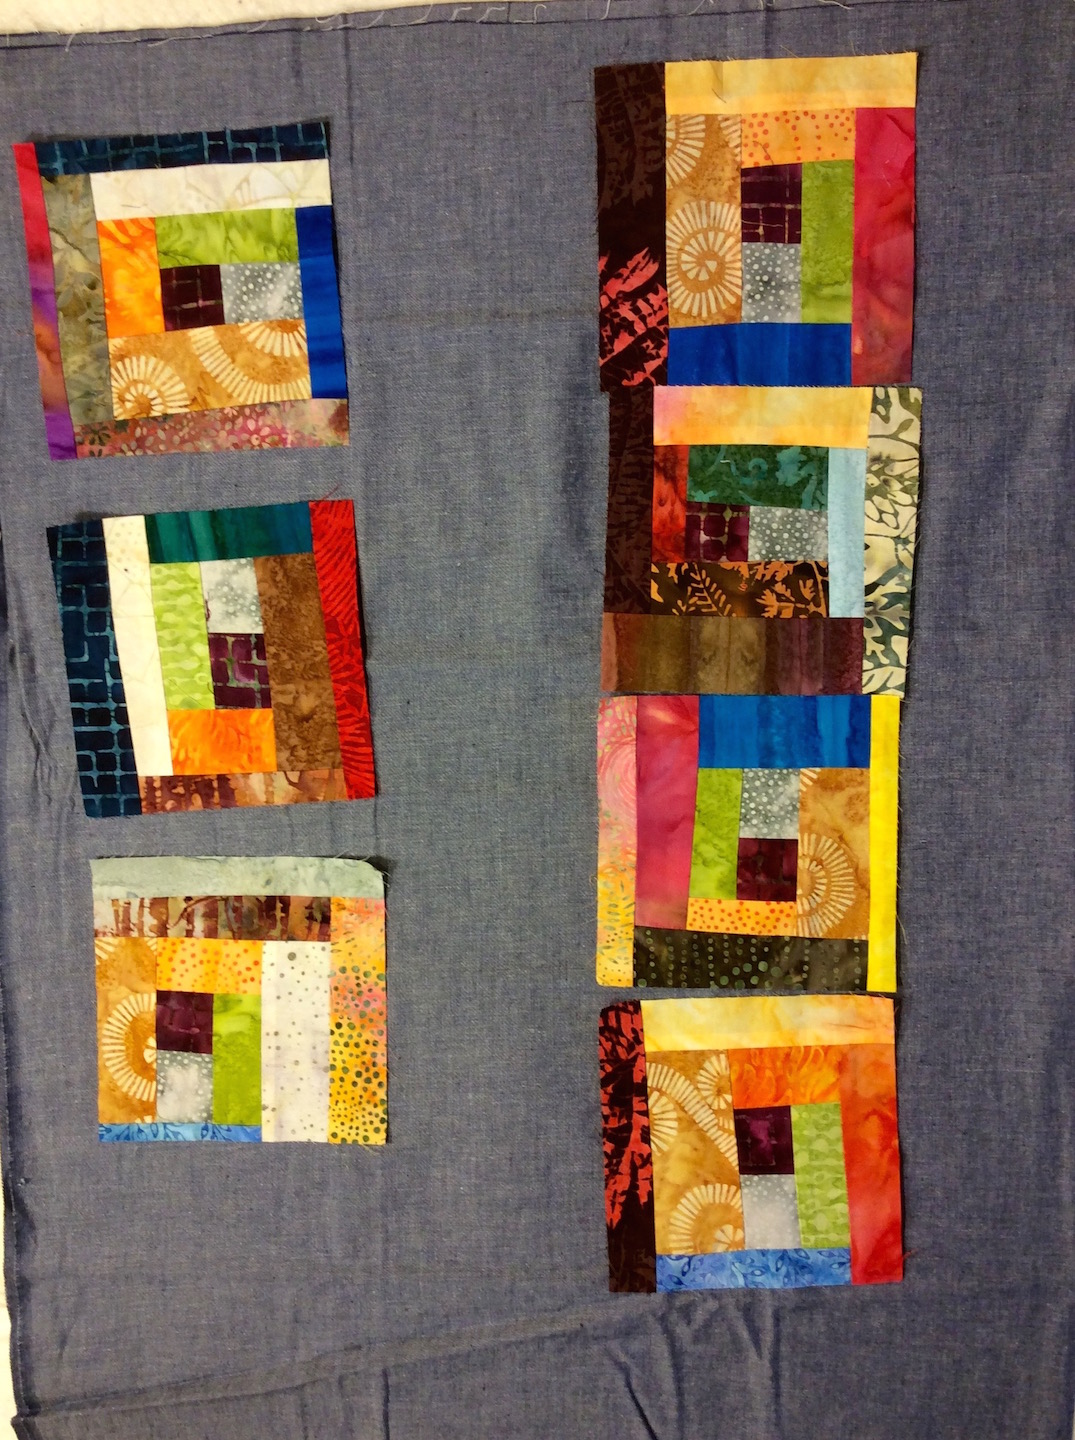
THE EXPERIMENTS
I tried out many of your color suggestions. To save time, I had a “pocket full of scrappy blocks” as I experimented. I never imagined walking around my house with a pocket full of quilt blocks!
Now, try and use your imagination as you look at my experiments. Although I tried to put strong lighting on the design wall, if you have been following my blog for a while, you know I am not the best photographer (if I tried to make photography a career I would be very hungry).
I provide two layouts on each test background fabric: 1) floated and 2) grouped together with a border.
More disclaimers (soon you will be frightened to even scroll down and look…): I did not iron the fabric I used as the test background and I randomly selected the blocks to go onto the test fabric. (If this were a real quilt layout, I would have given more thought to the block placement and order.)
RED – I loved this!
Brown – sort of a “milk chocolate” brown – could take it or leave it…
Dark Brown – I guess the “dark chocolate” brown – I liked it!
Gold – this is a new Moda fabric I picked up – I love it!
Different shades of gray using an ombre fabric – could take it or leave it
Purple – lovely!
White – in concept sounded nice put I do not use large amounts of white in my pieces
Blue-gray – sort of denim like – I liked it! This is one of the Peppered Cottons I have on my Etsy shop
MARIGOLD! Well as close as I could get to marigold – this is a Moda Grunge line fabric and this is my favorite!
Looked for an “acid green” in my stash but this bright lime green was the best I could find. I like it!
THE DECISION
Thank you so much for all the great ideas. I also appreciated all the layout and general design ideas.
My decision is as follows:
Make more blocks, trying to use up nearly all the remaining scraps.
Do not make a quilt with these blocks, instead make a SERIES of artsy table runners for my tierneycreates Etsy shop using various combinationsand layouts of these blocks and my favorites of the backgrounds above (red, marigold, gold, purple, dark brown, and lime/acid green).
Thanks for coming with me on this color and design adventure! I will update you all as I complete the table runners!
POSTSCRIPT
Here is a follow up on the post Mysterious Thrift Store Fabric Find: One of my blogger buddies, Claire @ knitnkwilt.wordpress.com, tapped into her resources and got a translation for the words on the selvage of my mysterious Asian fabric thrift store find:
ll the characters on the left say is ‘manufacturer/maker’. I’m guessing the ones just to the right of Watex are the company’s Japanese name. The handwritten characters say ‘Golden Age’
Thanks so much Claire for helping solve the mystery.
I had more ramblings for this Postscript, but you are likely exhausted after reading this very long post!
This post is a follow up to the 07/14/16 post What’s on the Design Wall(as well as another post mentioned in the Postscript section)
Terry, “The Quilting Husband”, continues his “take over” the large temporary design wall in the hallway (temporary until we install a permanent large design wall in the hallway) with his piece in progress. Here is his current progress from the 07/14/16 post – he has now inserted strips of pieced recycled denim between the rows.
We love recycling denim. Did you know how much it takes to produce a pair of jeans and the impact on the environment to create one pair of denim jeans?
I read an interesting article in the Winter 2015 edition of Interweave’s Stitch magazine, “Denim; Shaping the World, One Pair at a Time” by Kathy Augustine (pages 16 – 17).
Here are some interesting numbers from this article to give you a perspective of what it “costs” environmentally to make a pair of jeans:
An estimated 2 billion pairs of blue jeans are produced each year. It takes one bale of cotton (approximately 480 pounds of cotton) to produced 215 pairs of jeans, or 2.23 pounds of cotton per pairs. One acre of farmland produced approximately 740 pounds of cotton and cotton requires about 1,000 gallons of water per pound of fiber, so it took 2230 gallons of water to make that pair of jeans you are wearing and the average American has 7 pairs of jeans.
So I get pretty happy when I am involved in denim recycling and letting the effort all that water go towards something that can keep someone warm and cozy or decorate their house after the denim is no longer wearable.
I will wait and see what Terry does with the rest of the fabric for this piece he is working on (like an interesting border?) and then I would like to make a table runner with smaller pieces of recycled denim and the scraps from his piece. I think it would make an interesting “Country” style table runner.
Postscript
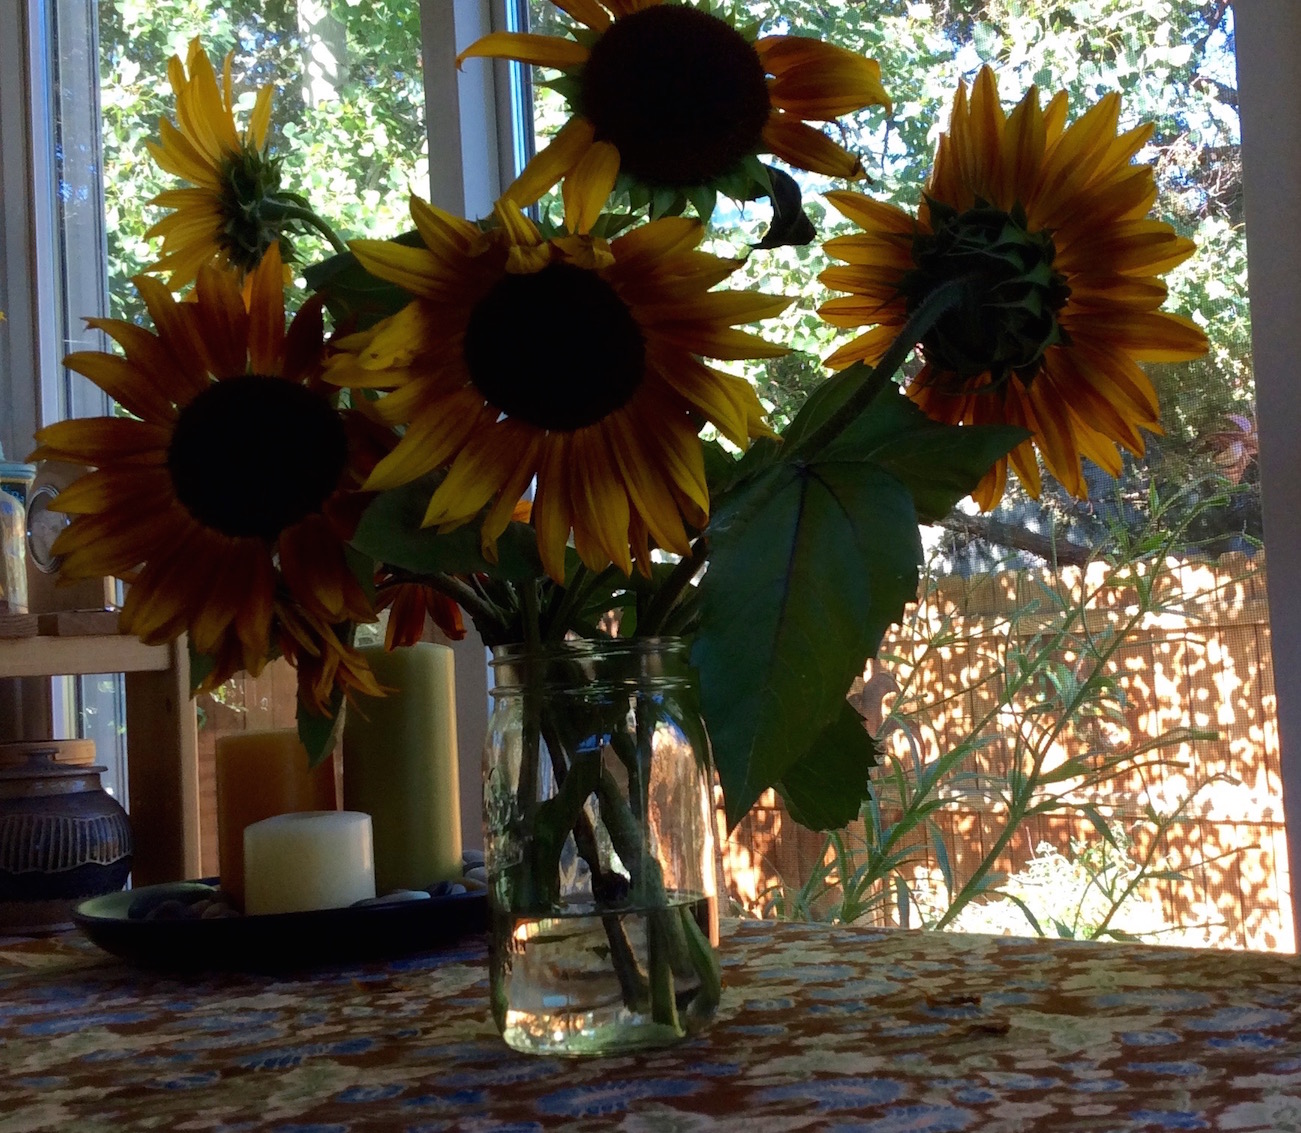
My sunflower obsession continues, as discussed in the post Waiting for the Sunflowers. This weekend I went over a friend’s house who had massive amounts of sunflowers in her front yard . Several of the sunflower plants had reached “Sunflower Tree” heights (nearly “house-size” sunflowers!).
Here are some of my photos (note the sunflowers were towards the end of their blooming):
Of course I took some cuttings home to put in my sunroom!
(Okay Tierney! Enough with the sunflowers already, move onto another topic.)
Maybe. I cannot promise sunflowers won’t be mentioned again in a future post (smile).
Continuing my series on What’s on the Design Wall: Projects in Progress…
Terry the Quilting Husband, fresh from his sale of two of his quilts during the 2016 Sisters Outdoor Quilt Show, is eagerly working on a new piece (maybe for the 2017 Sisters Outdoor Quilt Show?).
Terry is using our new temporary “giant design wall” that I discuss in the post Whole House Crafting. Until we get the interior walls of our house repainted (someday) we are just using a package of Warm & Natural batting on one of our hallway walls. A future house project is to build a nice large design wall on this side of the one hallway in our little home.
Terry likes to work from parameters I start him off with and he does not like quilt patterns of any kind. I tried to help him learn how to follow quilt patterns, but he strongly prefers to work intuitively.
I had a stack of 2.5 inch strips from an old kit (for a very ugly table runner) that I was never going to make. After sewing sections of the strips together, he is going to inset denim between them some how. All his concept – I only gave him the strips.
Here is my stash of recycle denim he is looking through to complete his design:
The chair in my studio with my stash of denim scraps
This is a quick follow up to my post from earlier this week: In Progress: Ohio.
My new recycled silk garment scrap piece is done and ready to go to Betty Anne Guadalupe to work her art quilting magic. It measures approximately 24″ x 14″.
I have not decide if I want the piece to orientate this way:
Or this way:
I welcome any thoughts and comments you have on the orientation – thanks!
Congratulations to Beth T. who won the free copy of Creative Quilt Challenges from the random drawing of names from those who left comments on my Creative Quilt Challenges Blog Tour post – BLOG TOUR DAY 4: Unlikely Materials. Thank you to every who visited the tierneycreates blog for Day 4 of the tour and thank you to those who commented. I so enjoyed reading the comments and they got me inspired to keep experimenting with “unlikely materials”!
What’s on the…Table: “Ohio”
This post is a continuation of my ongoing series: What’s on the Design Wall.
However, this time I am going to share what is laid out on the table in my Studio, instead of up on my Design Wall. This post also demonstrates another example of using “Unlikely Materials” (recycled silk garment scraps) discussed in my Blog Tour post on 03/31/16.
Yesterday I posted about being inspired to create after a walk on a beautiful Spring day and inhaling the delightful fragrances of neighborhood Dogwood trees (Creative Inspiration: The Scents of Spring). Well later that day I pulled out the piece had I started a month or so ago (see post What’s on the Design Wall: Silk Squares) and got creating!
Here is the piece in progress, I am going to name it “Ohio“:
What do a bunch of miniature log cabin style patches (2″x2″ and 2.5″ x 2.5″) have to do with the State of Ohio? Absolutely nothing, but they are part of a story. An ongoing story. Here is a visual summary of that story:
1) The piece started out as my attempt to create an Ohio Star (a traditional quilt block) from recycled silk
Ohio Star, recycled silks (in progress)
2) I was very unhappy with the accuracy of the points on the star (although I interfaced the back of the silks, I had some challenges with accurately piecing the points). So I attempted to save the piece by reimagining the piece, slicing up the Ohio Star and sewing it into a new configuration. I was still not pleased with it.
3) I gave the piece and the coordinated recycled silk pieces I have selected to a friend. She reimagined it into a completely new piece, while integrating all the elements from the original Ohio Star into the piece.
Ohio Star (2016). Designed, pieced and quilted by Betty Anne Guadalupe.
4) My friend gave me the leftover scraps from this piece which included scraps from my original piecing and new scraps from additional recycled silks she used in the piece. She challenged me to make something from those scraps!
5) So, I started working on this piece over a month ago, and I am calling it “Ohio”
Right now I am just continuing to make tiny blocks (2″ x 2″ and 2.5″ x 2.5″) and enjoying the challenging of using up small pieces of recycled silk. I find it to be meditative to quietly work on small slow piecing.
Will post about this piece again when it is nearly complete.
I have been working on assembling the blocks designed from discards, from another quilter’s block piecing, and a solid coppery-rust fabric, into a piece called “We Will Not Be Discarded”.
I am playing with the block arrangements and looking at two different arrangement options for the 15 blocks in progress:
OPTION #1 – All blocks pointing the same way:
OPTION #2 – Blocks pointing opposite ways:
I am leaning towards Option #2 as it makes the piece appear to have more “movement”. Once I finish all 15 blocks, I will play again with the final arrangement.
We Still Will Not Be Discarded!
I am playing with the idea of making a second piece (“We Still Will Not Be Discarded!”) from the discards/trimming of the original discards! (And the scraps from the solid fabric they are set in)
That would be taking recycling to the extreme, right? The challenge does seems interesting…
Trimmed discards from the “trimmed discards” in my little trash basket – tempting!
(Check out Sassy the Highly Opinionated Miniature Schnauzer’s latest musing on her Schnauzer Snips page)
The title of this post makes it sound like a thrilling exposé of what really goes on behind the scenes at tierneycreates: drama, intrigue, maybe even a little scandal…
No not that exciting – just recent photos of my studio where I do my tierney-creating!
The back wall where I keep my fabric scraps by color, and my cutting table where I hide underneath those things that-are-not-finished (that brightly colored batik quilt it meant to distract the viewer from what is beneath…).
To the lower right of the photo you will see my mini design wall. I learned from a quilting friend that it is handy to have a smaller portable design wall.
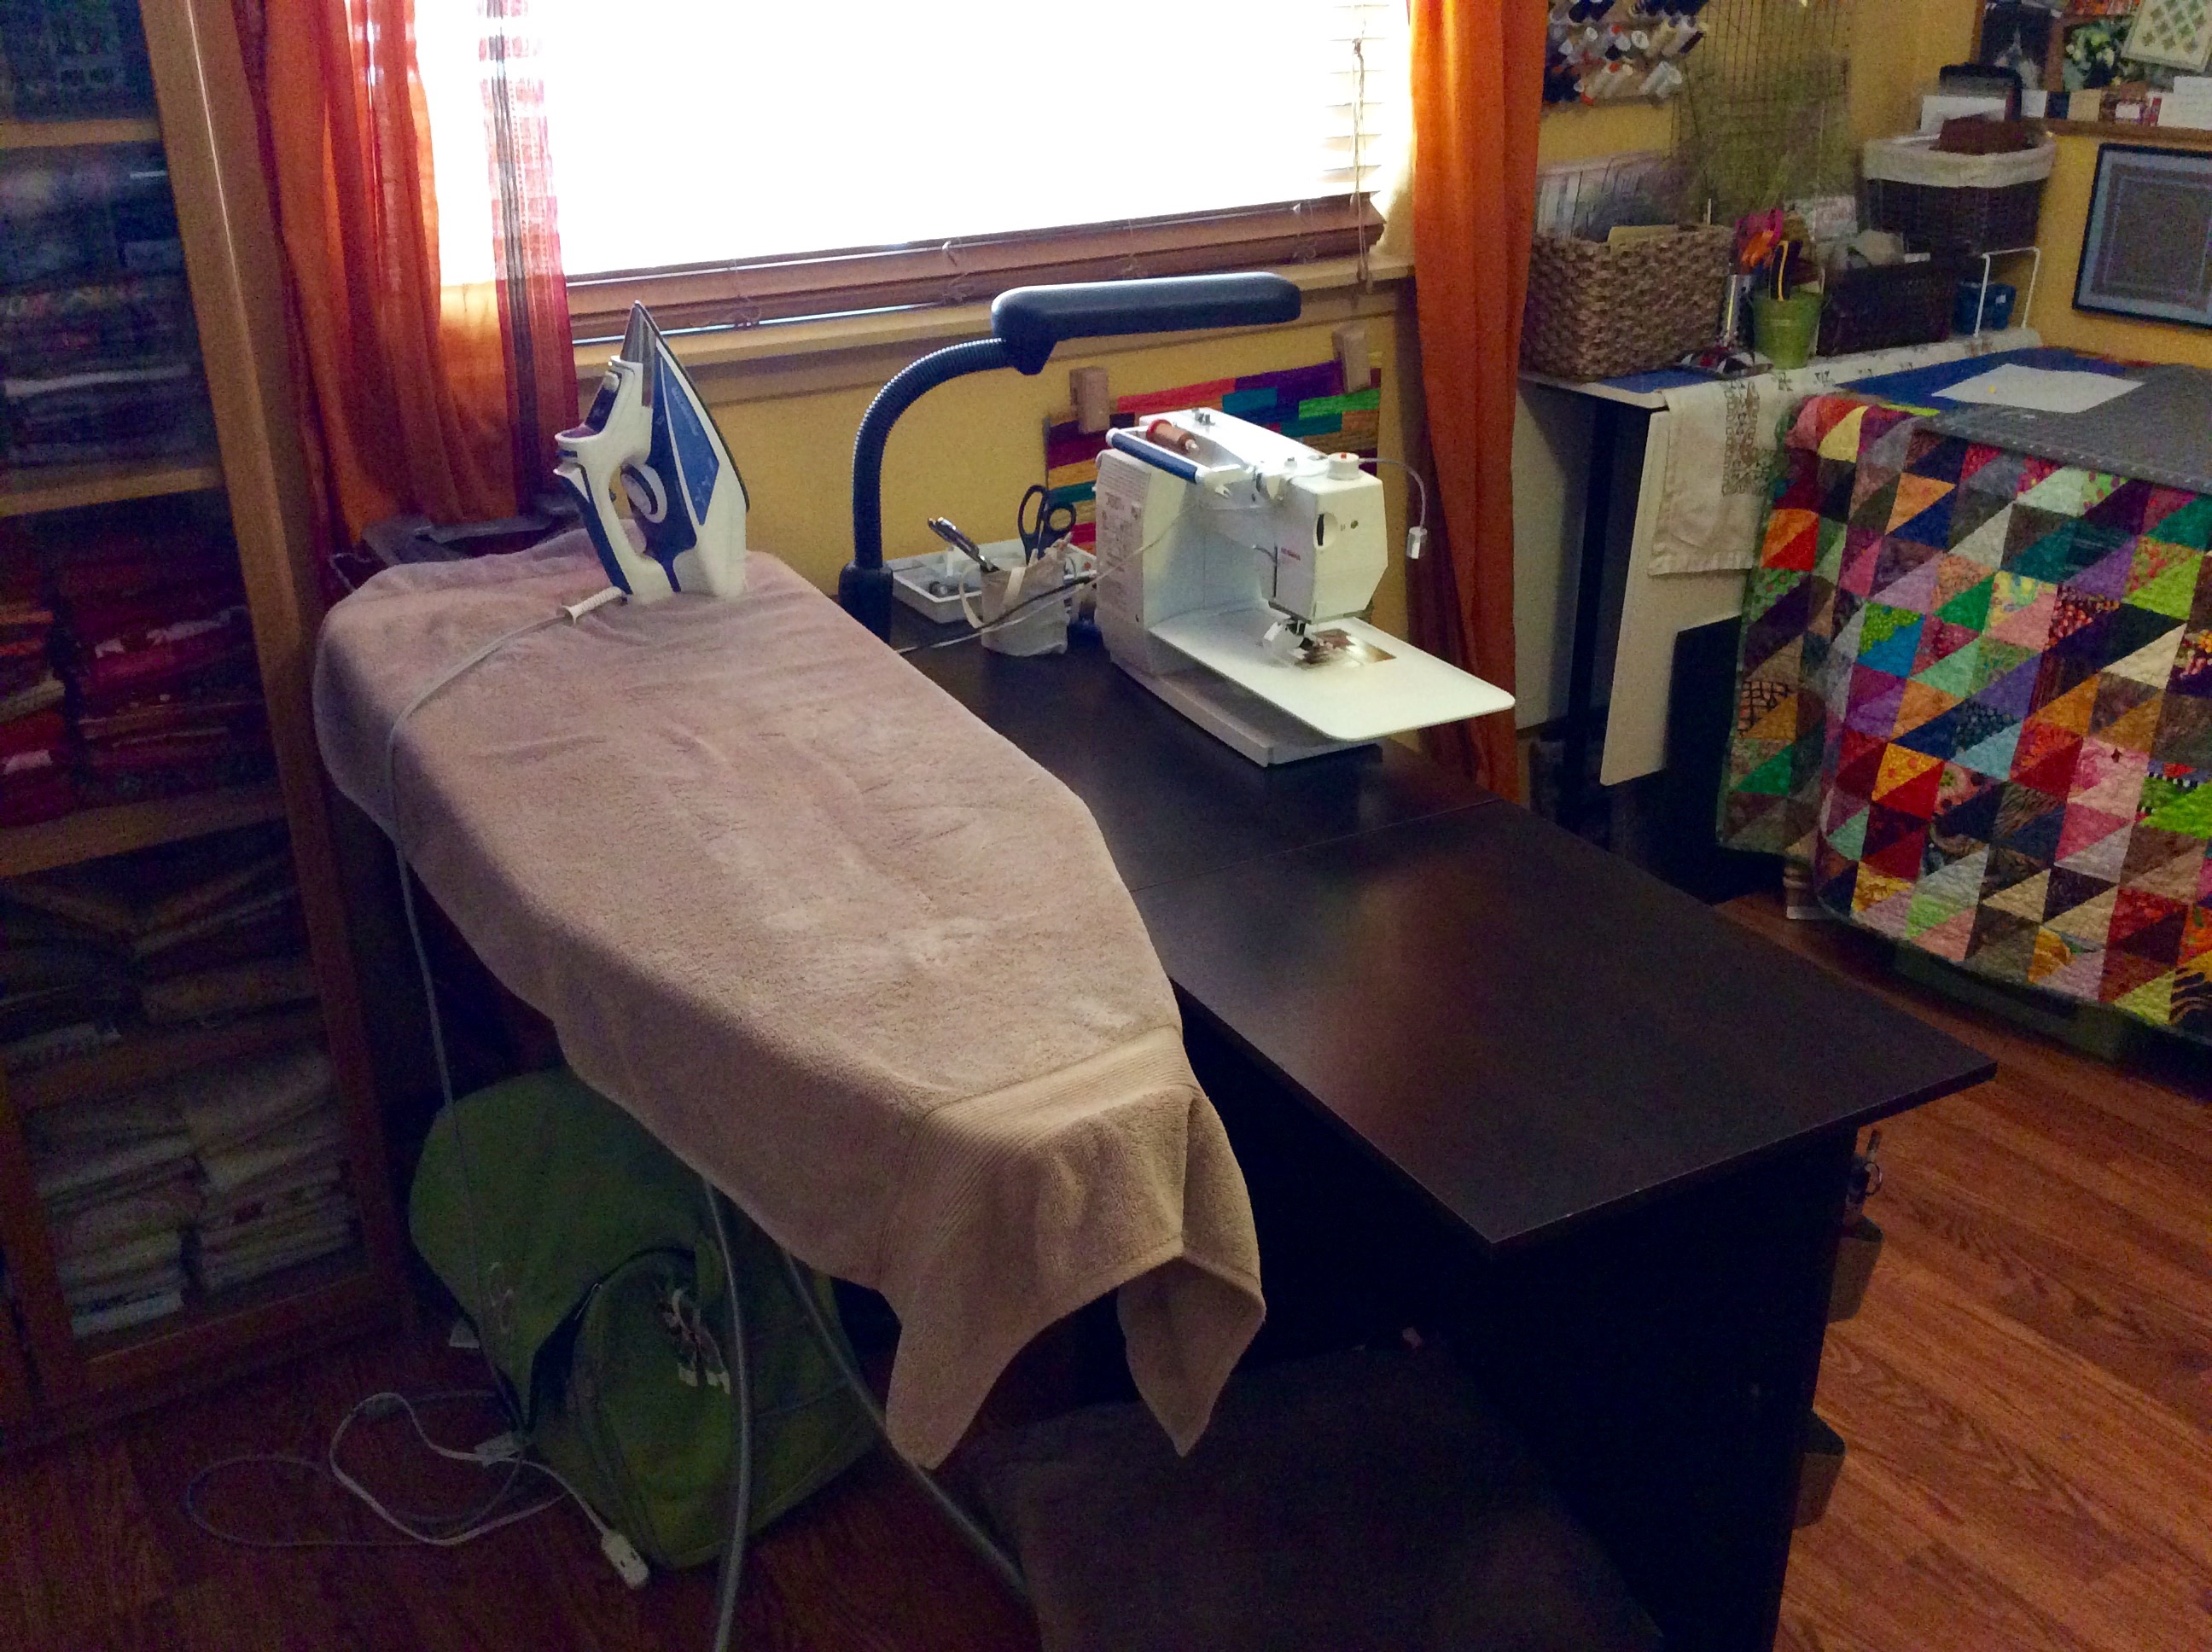
My sewing machine and ironing board (two very essential items!) I got the idea from another quilter to cover my ironing board with a towel to make ironing smoother and easier. Sometimes I also use a cotton dishtowel to iron small pieces on.
My wonderful brother gave me the sewing table for my birthday last year and the leaf folds down and the table becomes a small cabinet if I need more room).
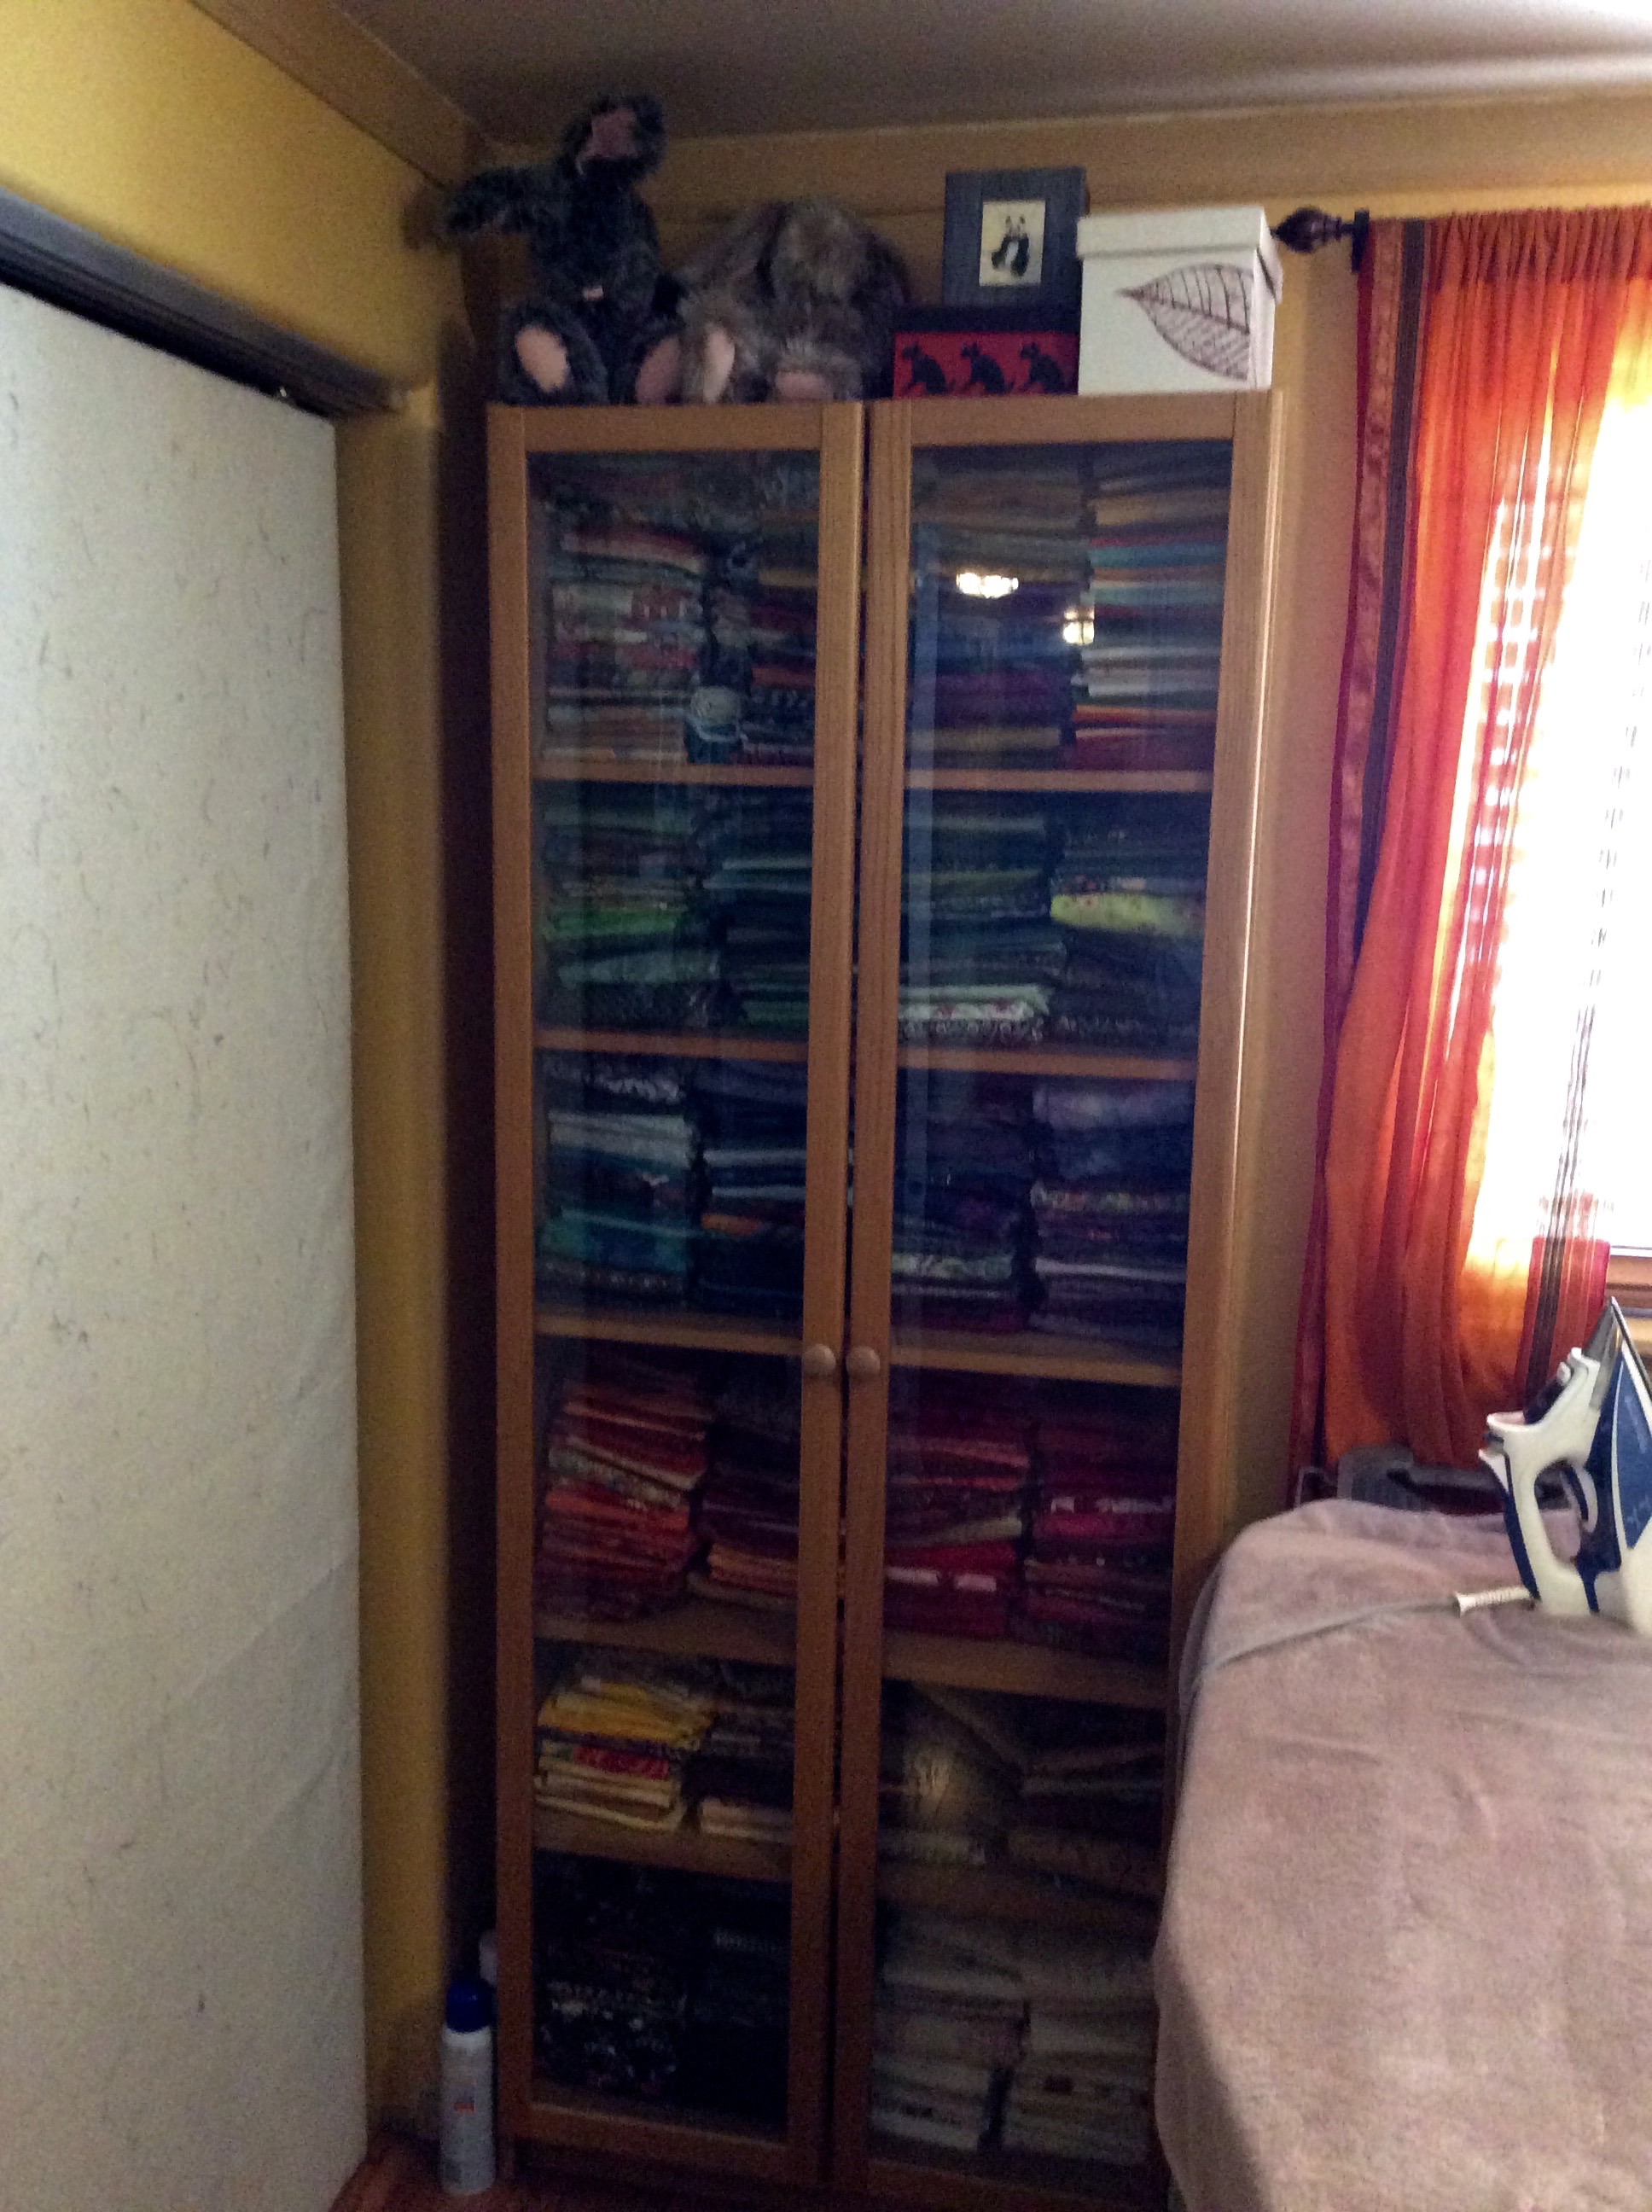
My IKEA Billy Bookcase of fabric! This organization came out of my massive fabric purge in 2015 (see post The Fabric Purge!). The curtains in the room are made from a sari my friend Jenny brought back from her trip to India for me.
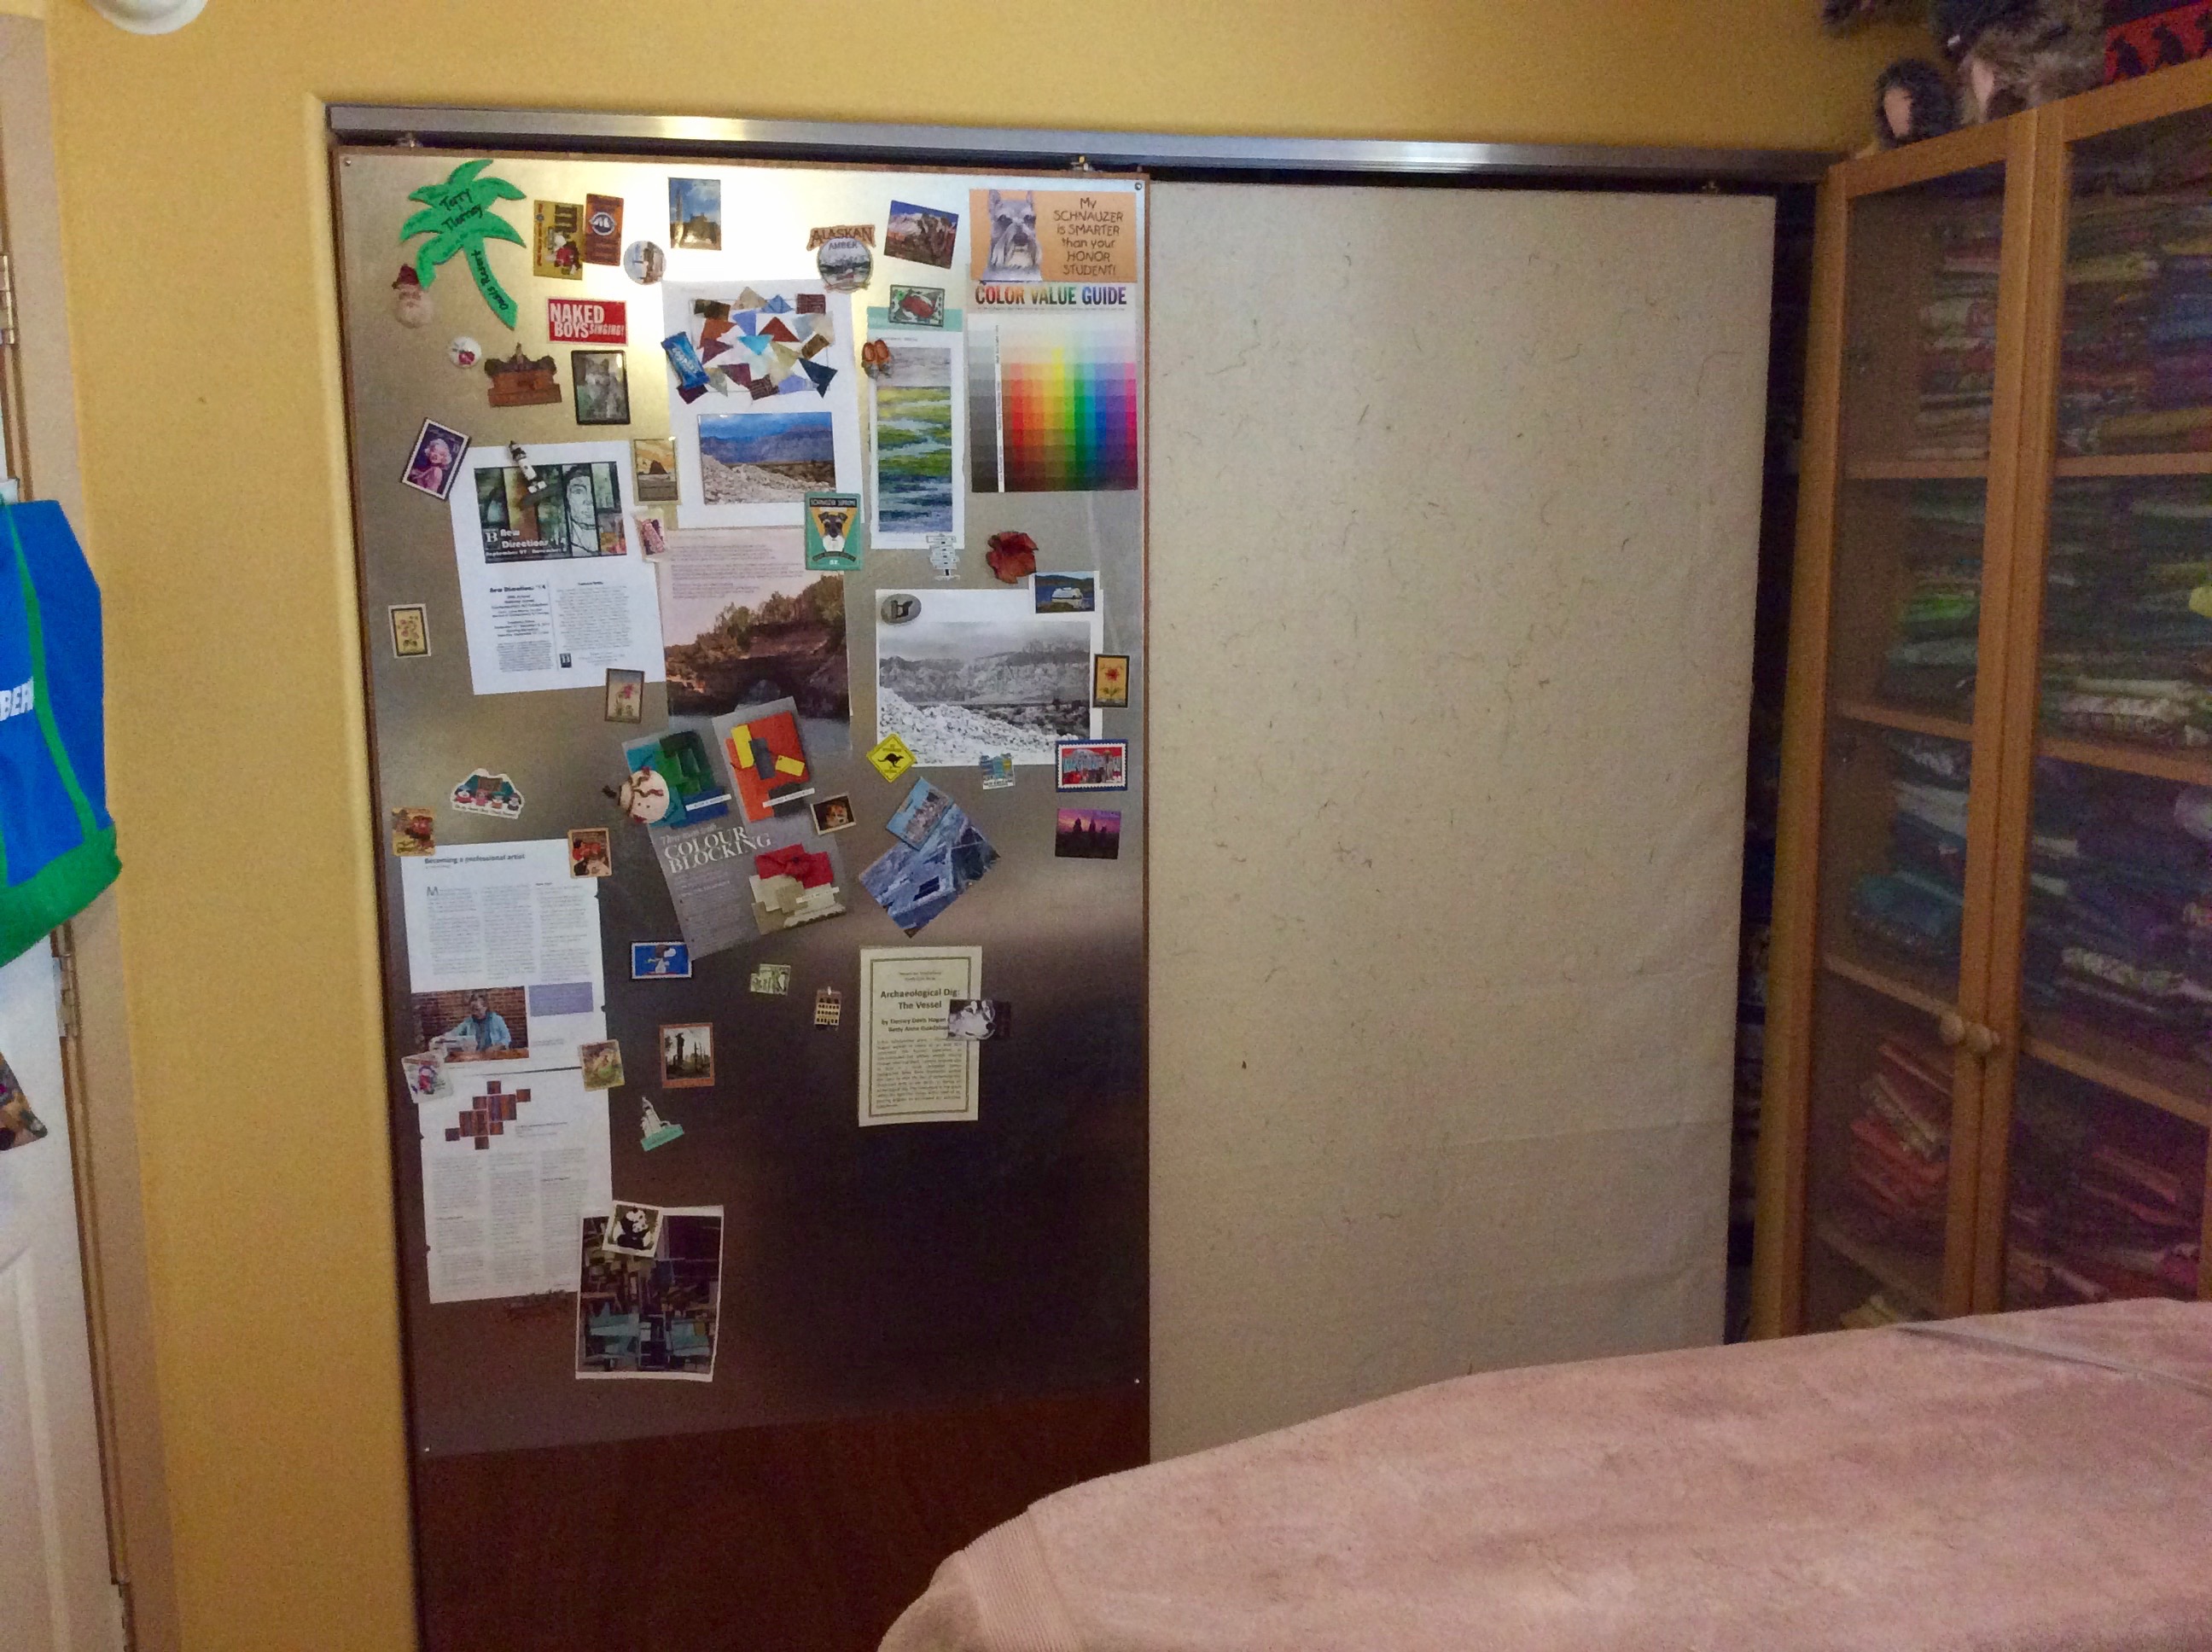
My storage closet with custom made sliding doors which I first discussed in the post Rethinking a Closet. One door has sheet metal mounted to serve as a magnetic idea board. The other has batting attached to serve as a design wall (refer to all my posts on “What’s on the Design Wall).
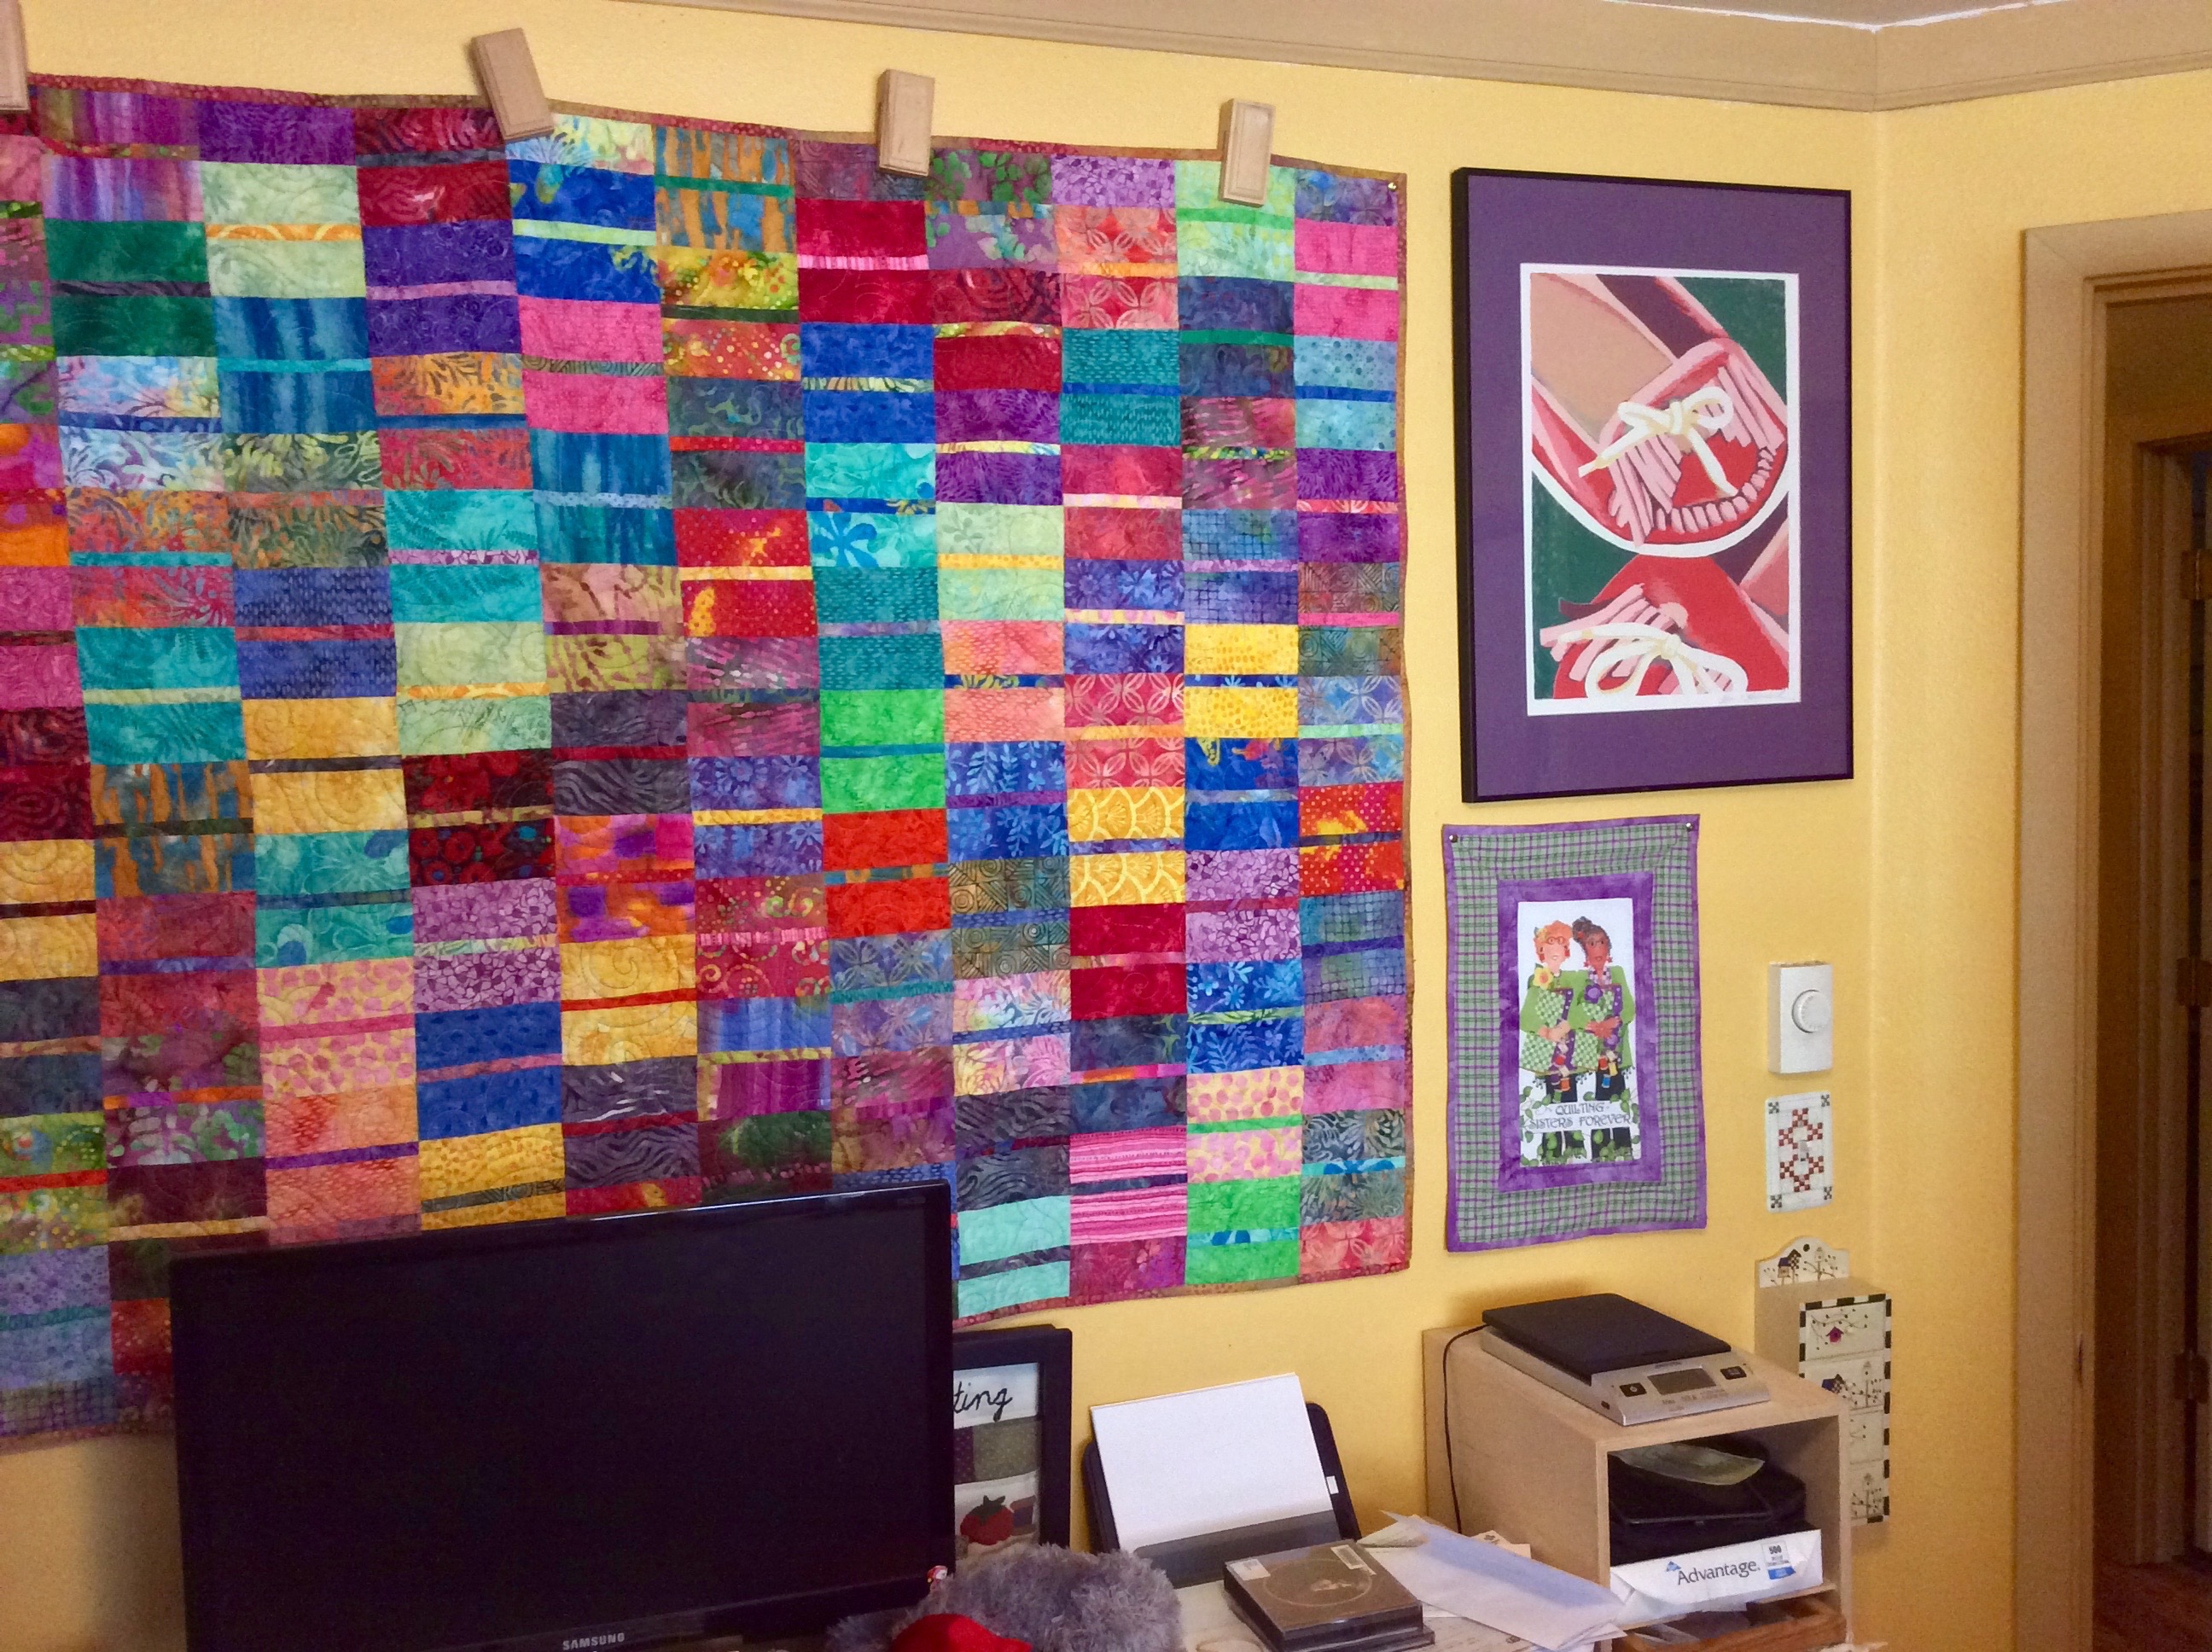
I am not sure why I selected the color yellow when I painted this room 8 or so years ago. Somedays I think: “I am going to paint it white or some other neutral color”. Yellow can be overstimulating, but I simply embrace the over stimulation and decorate the room with brightly colored things – like this lovely quilt my friend Judy made me and several silk screen prints from an artist friend in my youth (the other silk screen is in the first photo).
I like to watch “quilting movies” (movies you don’t really have to pay close attention to) and documentaries while I am quilting on the screen below.
Another brightly colored piece of art in my studio – a wallhanging from my friend Betty Anne.
Well back to creating in the tierneycreates Studio – I better not keep that Design Wall empty for too long!
Interested in experimenting with solids, I made these 6.5 – 8.5 inch pieced blocks a couple of months ago. I recently put them up on the design wall to decide what I wanted to do with them.
I am thinking of making them a series of little decorative modern art pillows to sell on my tierneycreates Etsy shop.
(In addition to the oranges, greens, yellows and purples blocks I did, I also made one with blues and one with reds but I did not like the combination of shades of the blues or reds so they got recycled.)
Not all quilters are like me: saddled with a backlog of projects. I know quilters who (they are freaks!) work on ONE project at time, seeing it through completion, and not starting another project until their current project is complete.
My mind does not work that way. I am basically that golden retriever in the movie Up, who says “Squirrel!“when I see a new project to start. I am easily distracted and I tell myself I will get back to the current/previous project eventually.
I was having a bit of creative block on designing a new art quilt and I realize I need to work through my project backlog. So here it is sitting up the cutting table, festering:
In this pile under the cutting table, I discovered 120+ 6.5 inch log jam blocks (scrappy pieced log cabin style blocks) that I had pieced earlier this year. With the assistance of Terry the Quilting Husband, I got them sewn together and now they are on the Design Wall awaiting assembly of the rows.
I have a total of 10 rows with 12 blocks in each row. I am hoping that by floating the pieced blocks in a solid color border, I can make it a twin, full or queen size quilt top. I will post a photo when the top is complete (before it journeys to the long-arm quilter).
“Never put off till tomorrow what may be done day after tomorrow just as well.” – Mark Twain


 On Superbowl Sunday (last Sunday), I had a “Stitching Bowl” and worked on getting the center of the piece sewn together:


 But let’s back-up a moment, and tell you how this piece began and got to this point…
 As you saw in the “From the Basket” post, I did work on my English Paper Piecing rosettes, but after a while I put them aside and STARTING PLAYING WITH THE GRAY SCRAPS! (I could not resist the temptation to play with fabric scraps)
 And before I knew it, I had a pile of 138 blocks I made!
 Once I got home, I could not wait to play with them and see what interesting pattern I could make with the dark gray and light gray framed blocks, So I decided to use the “Design Carpet”:
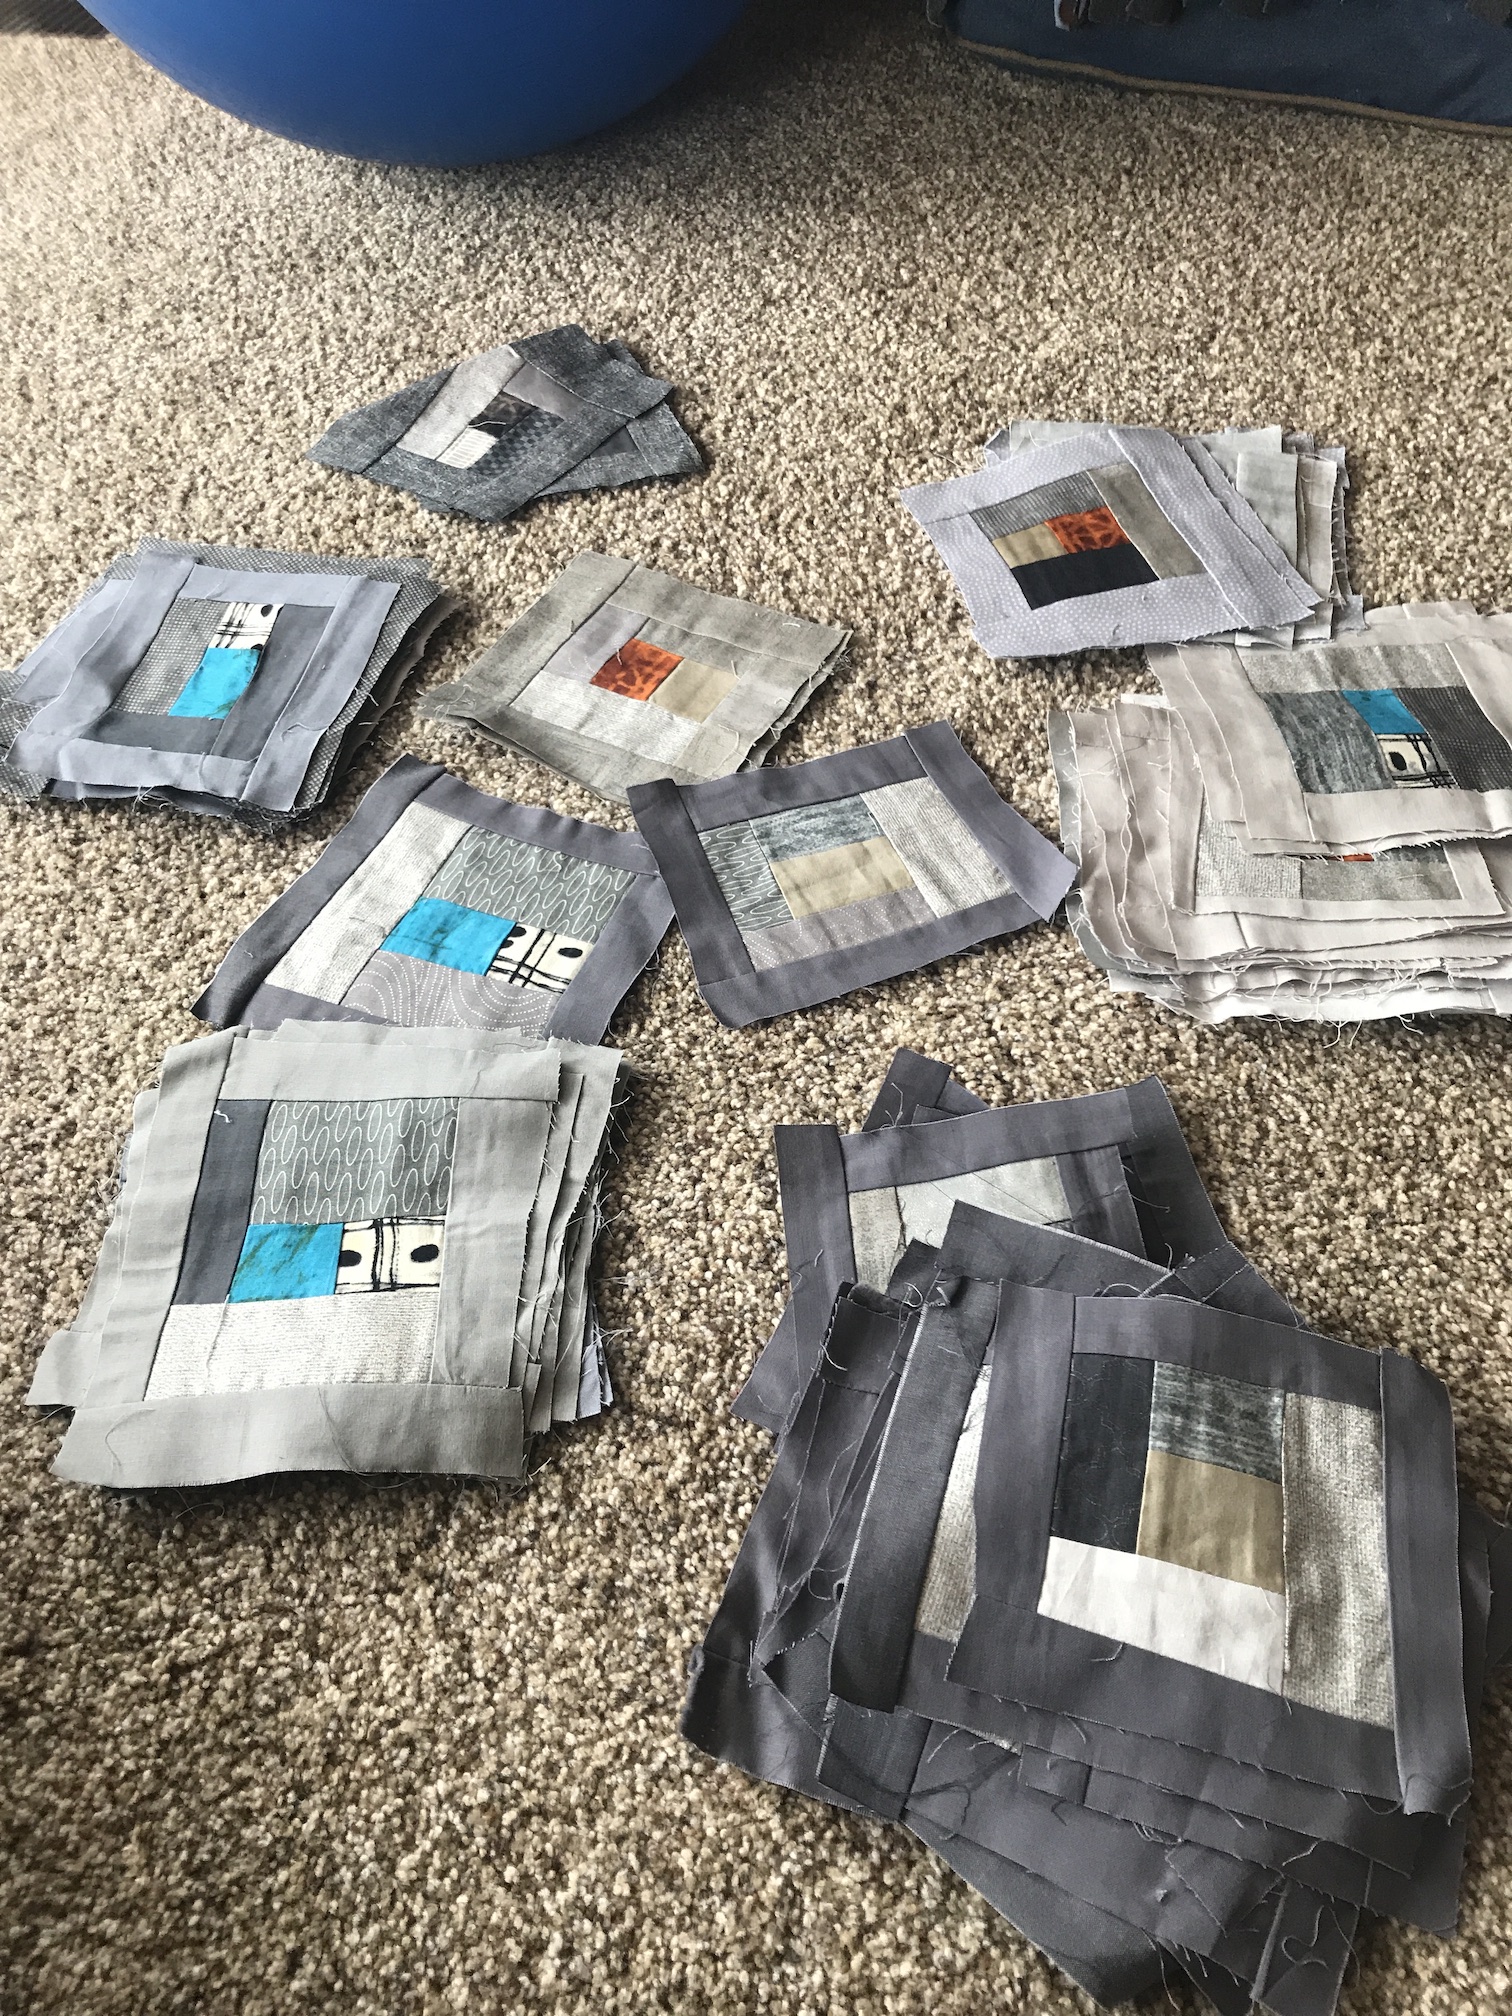 I began with creating a pattern with the dark gray framed blocks:
 Then I worked on framing them with the light gray blocks: