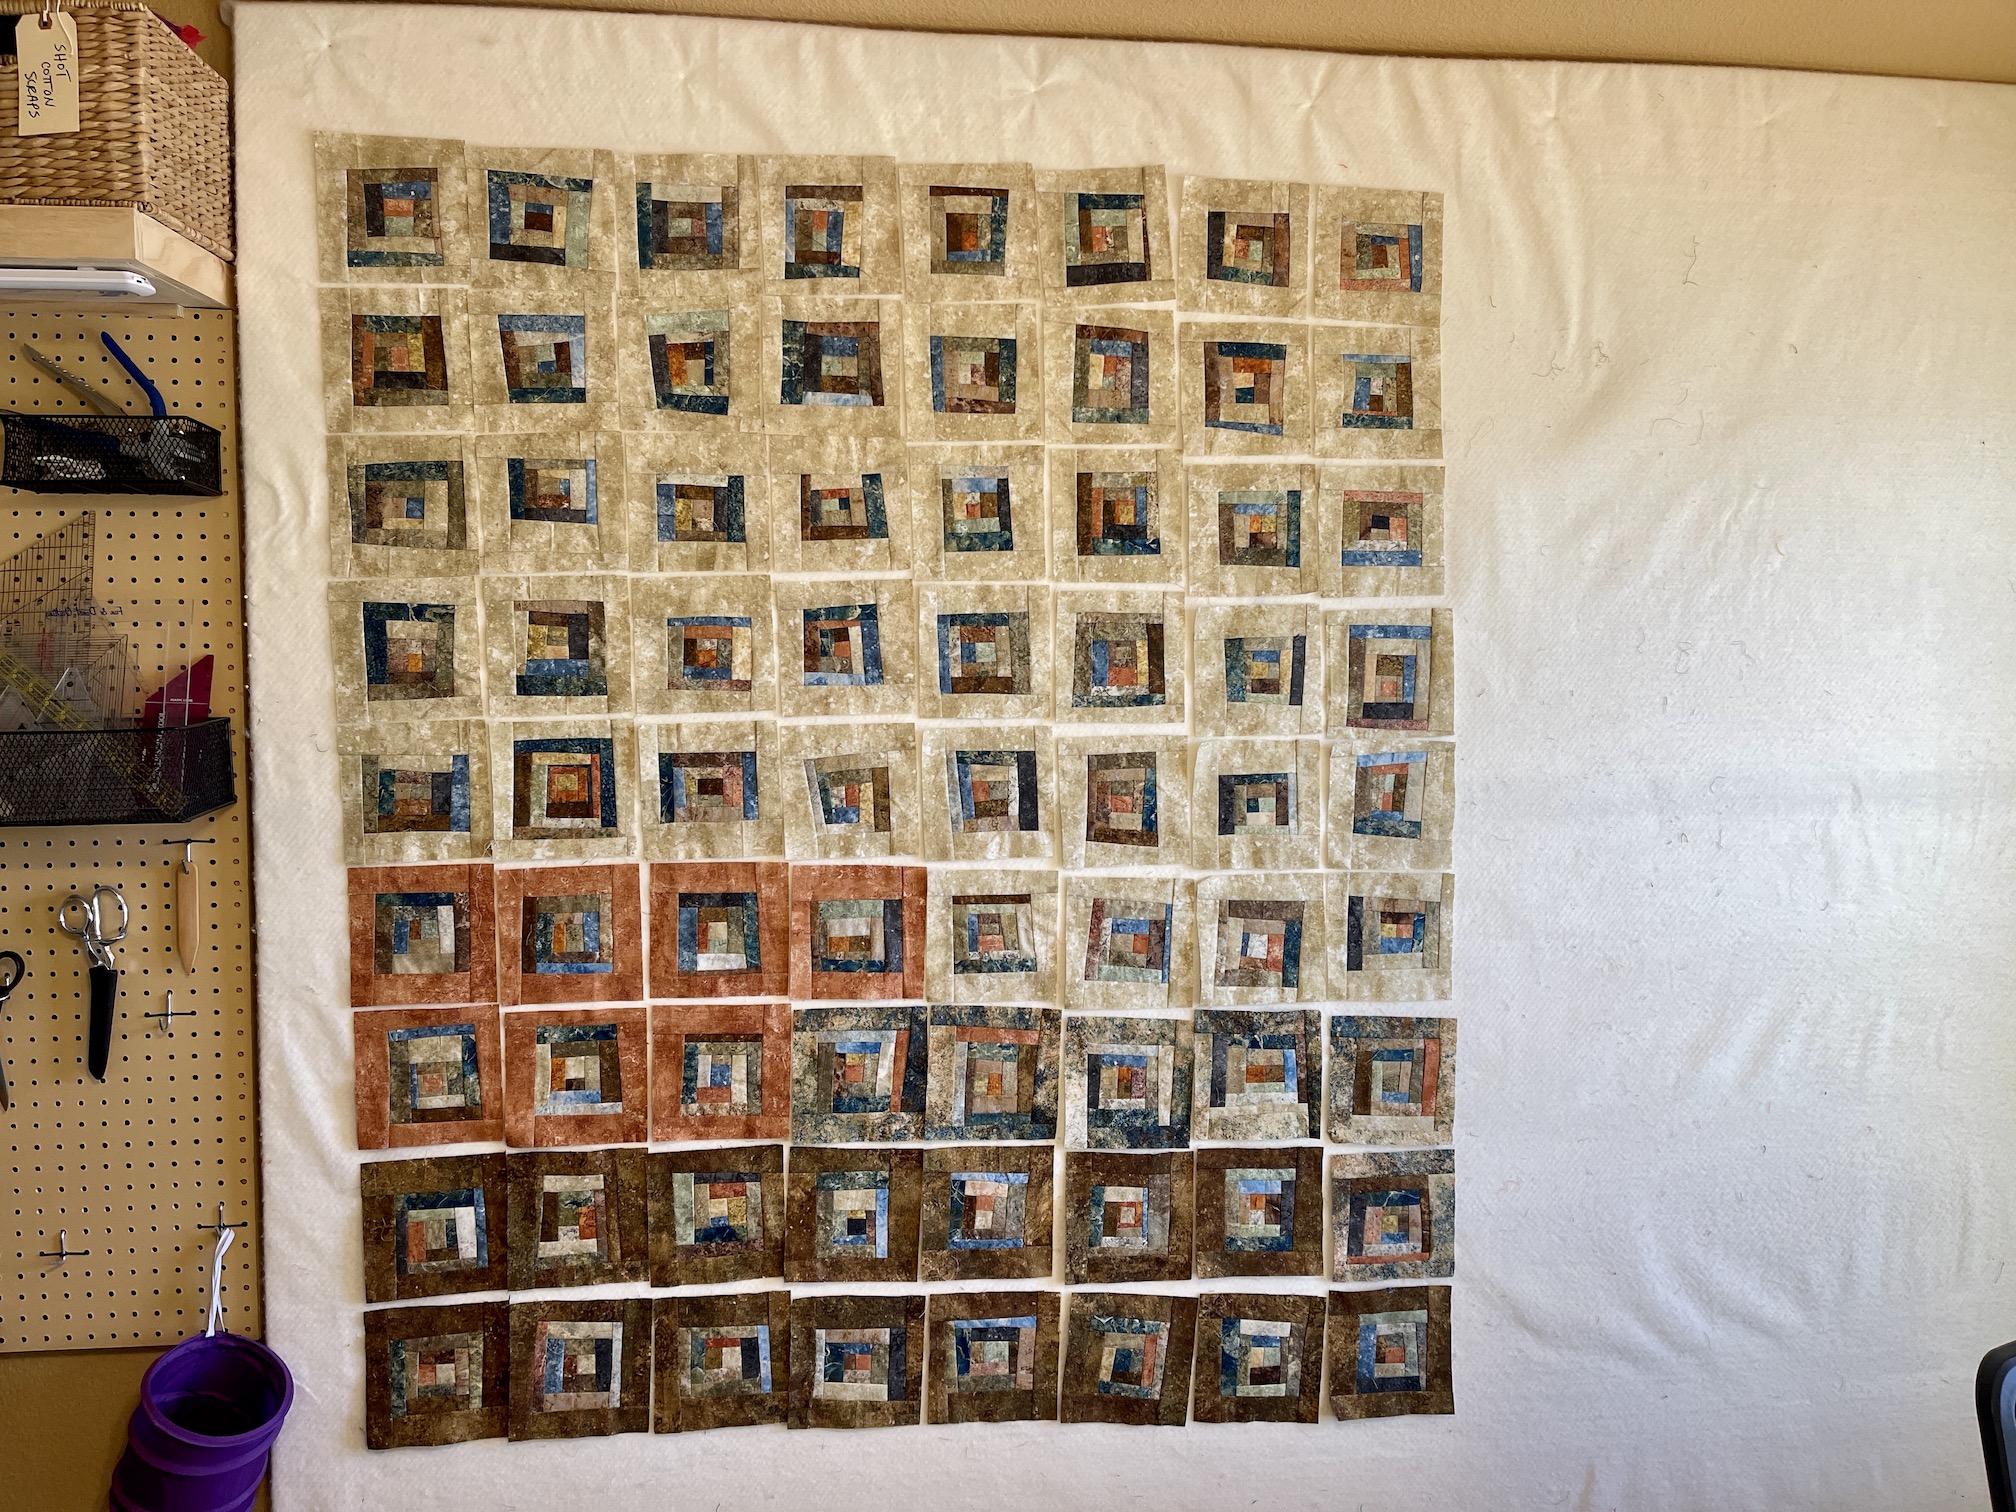
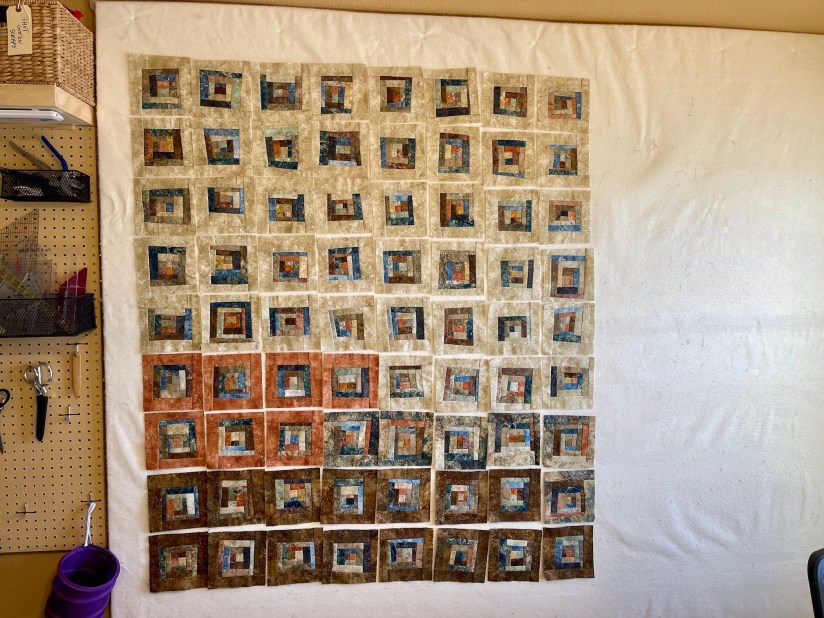
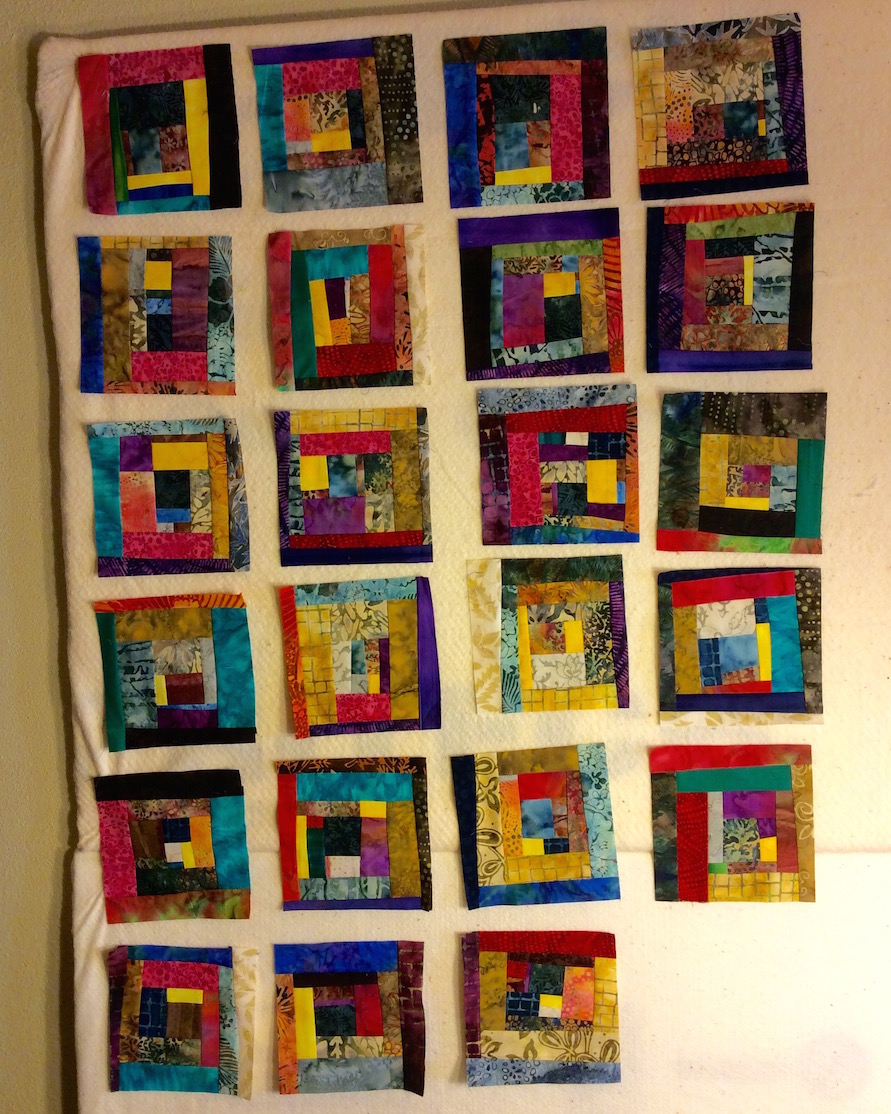
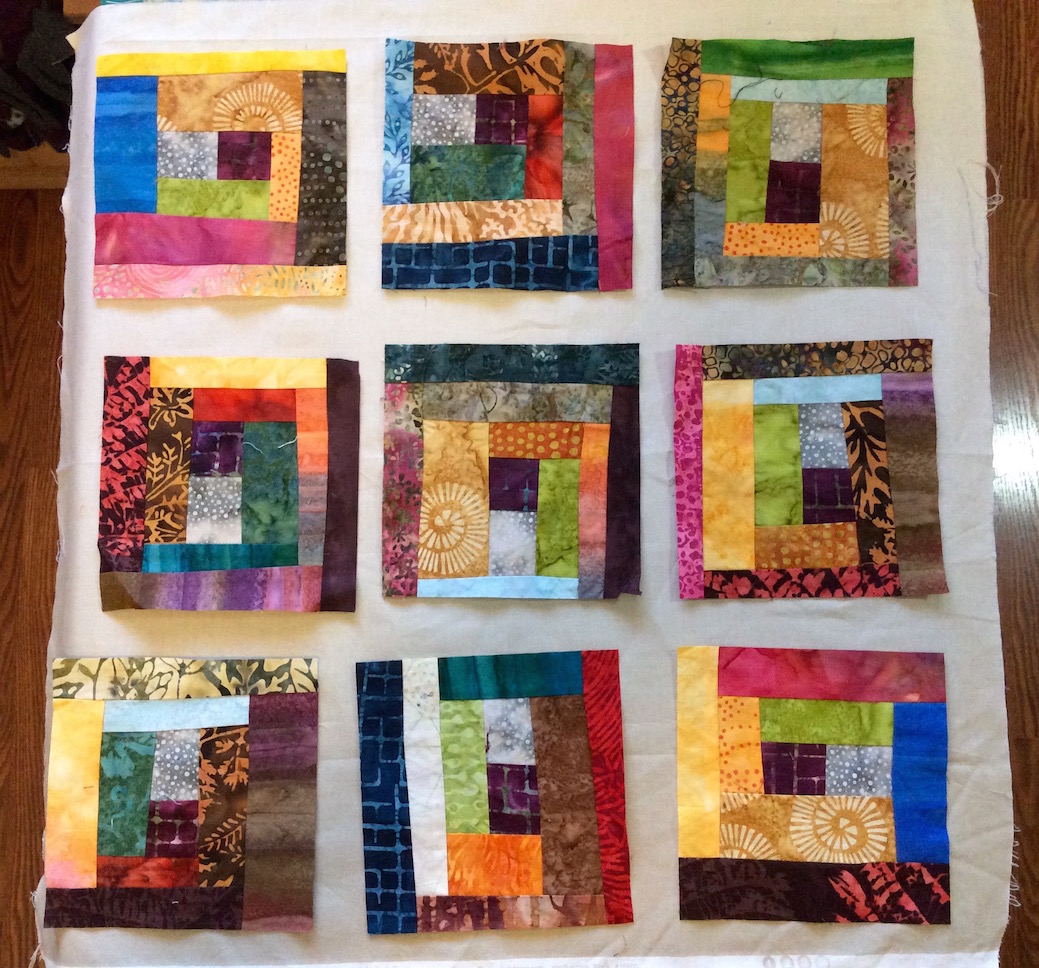
I mentioned in my post Things to Do When You Have a Bad “Cold”, that I’ve been working on a scrappy improvisational “log cabin” block style quilt. I thought I would show you my progress on the piece so far.
All I’ve done is lay the blocks out for now on my design wall, this is not the final design. I have a name in mind for the piece but I am keeping that under wraps until I see if the final design will work.
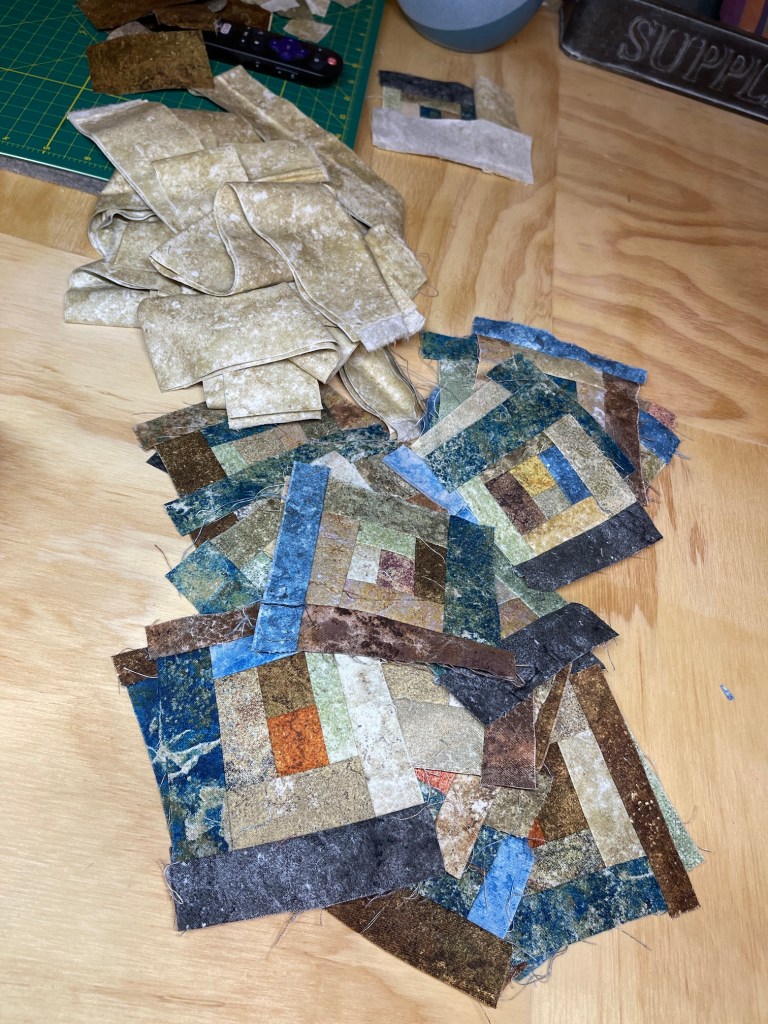
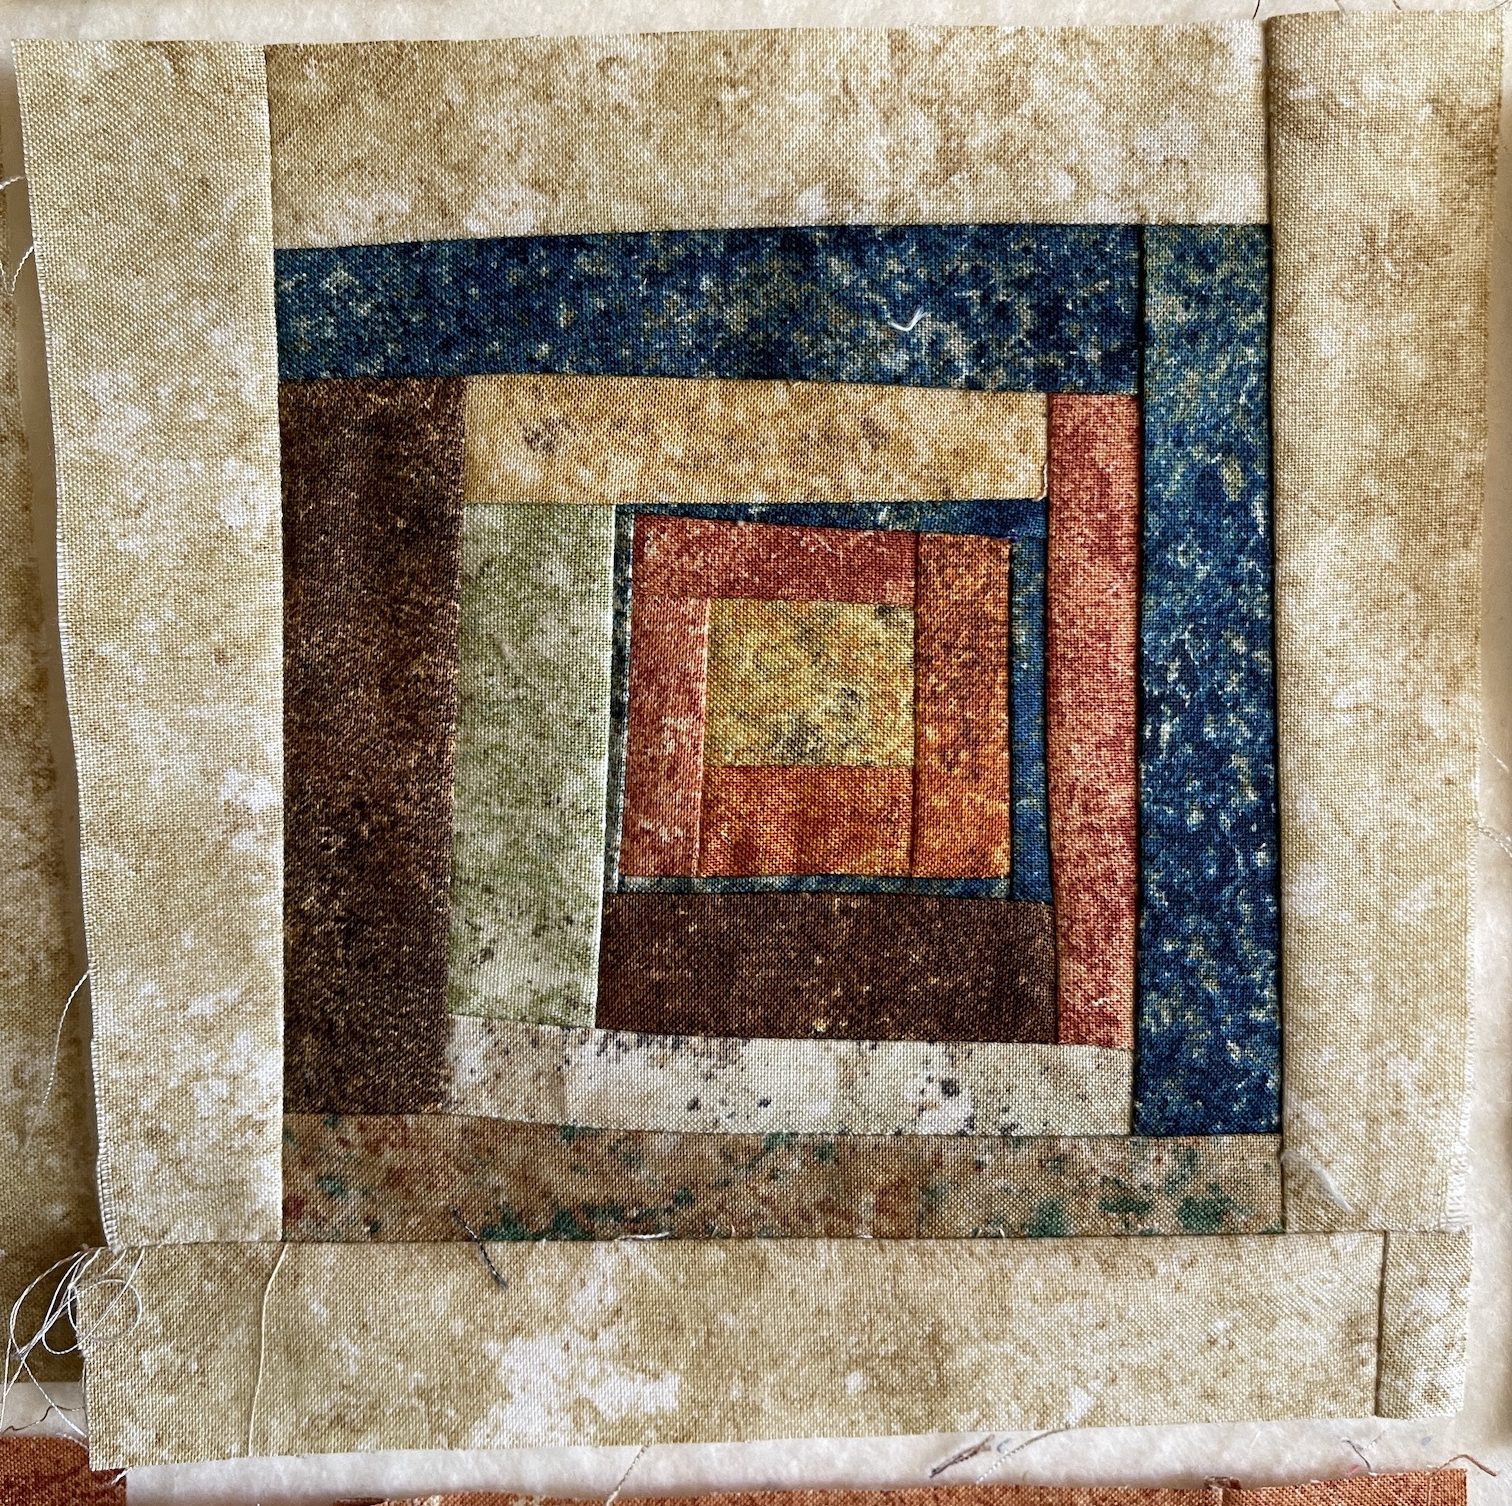
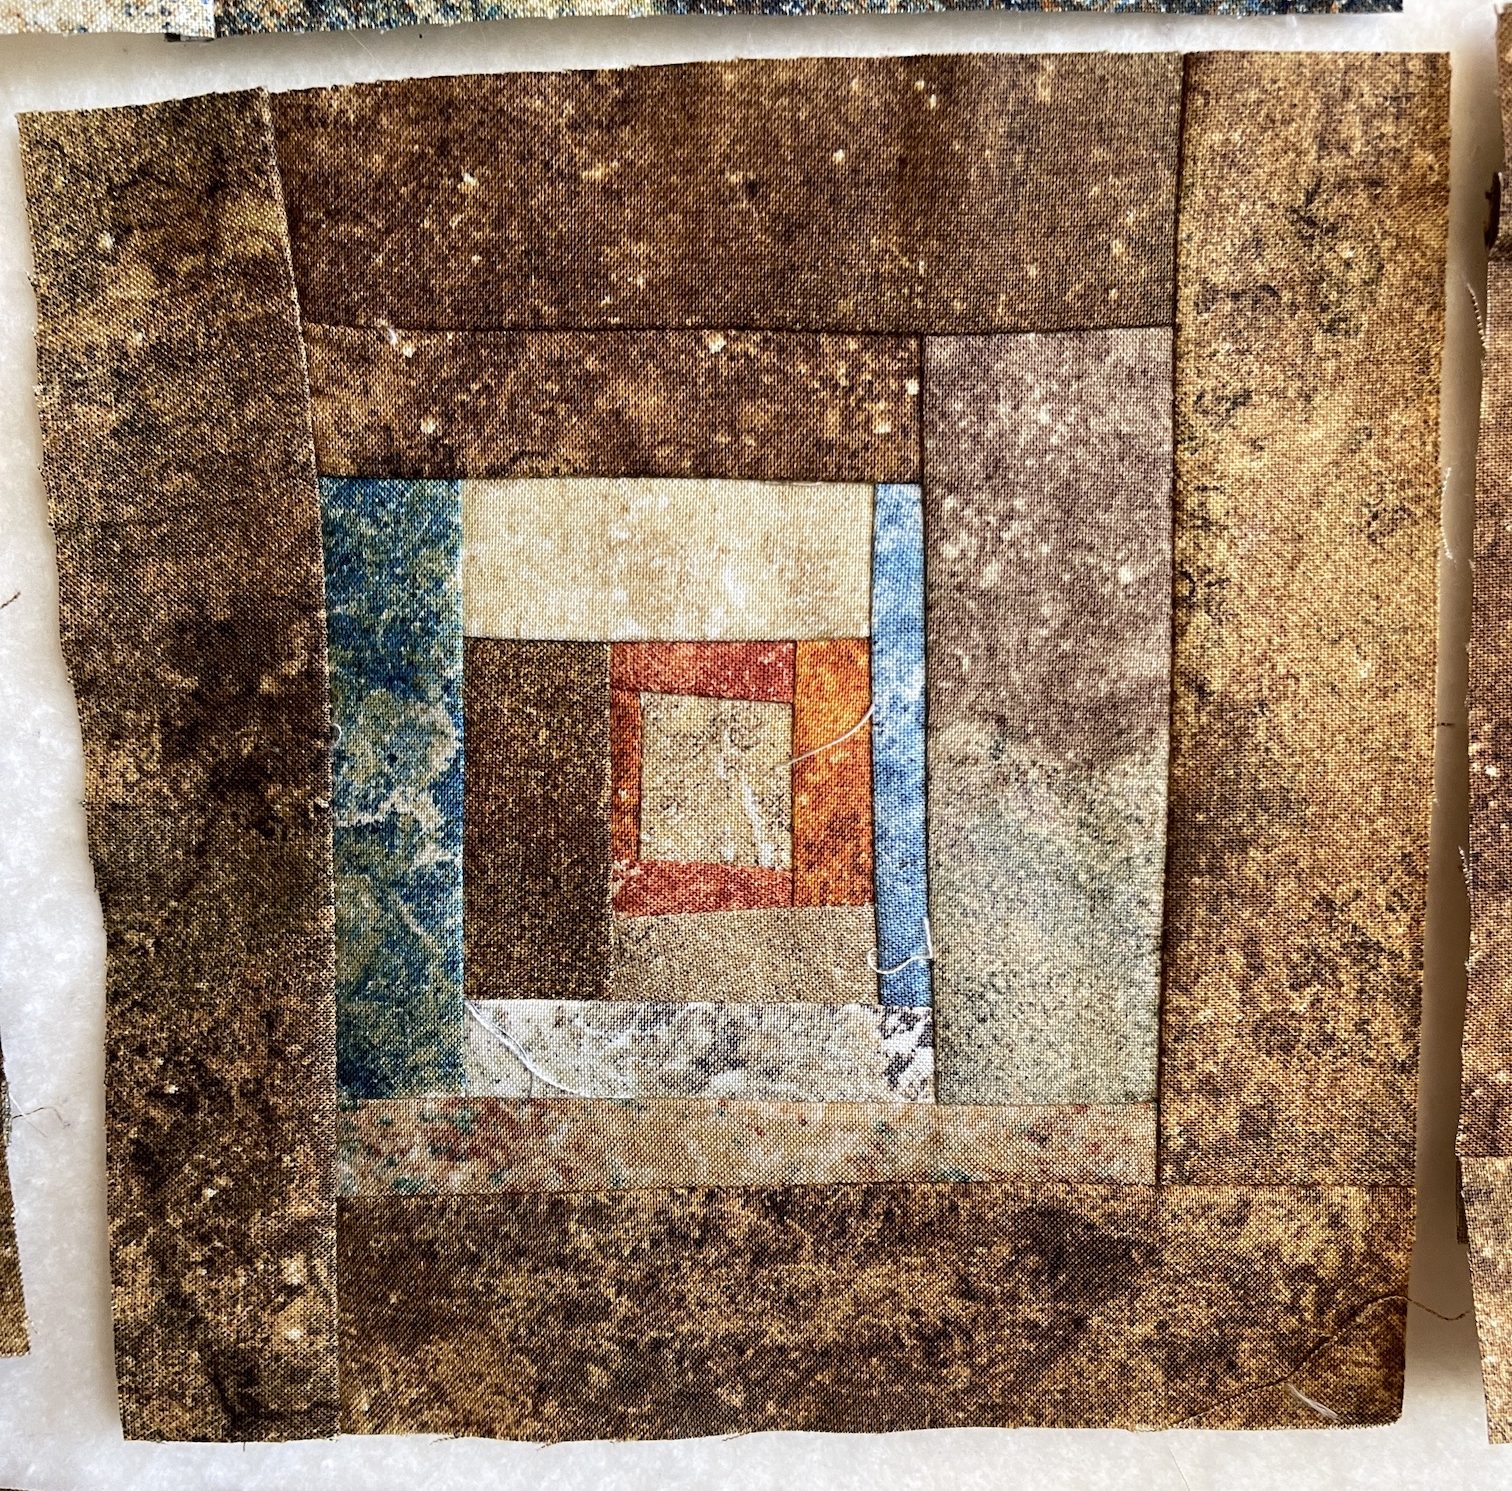
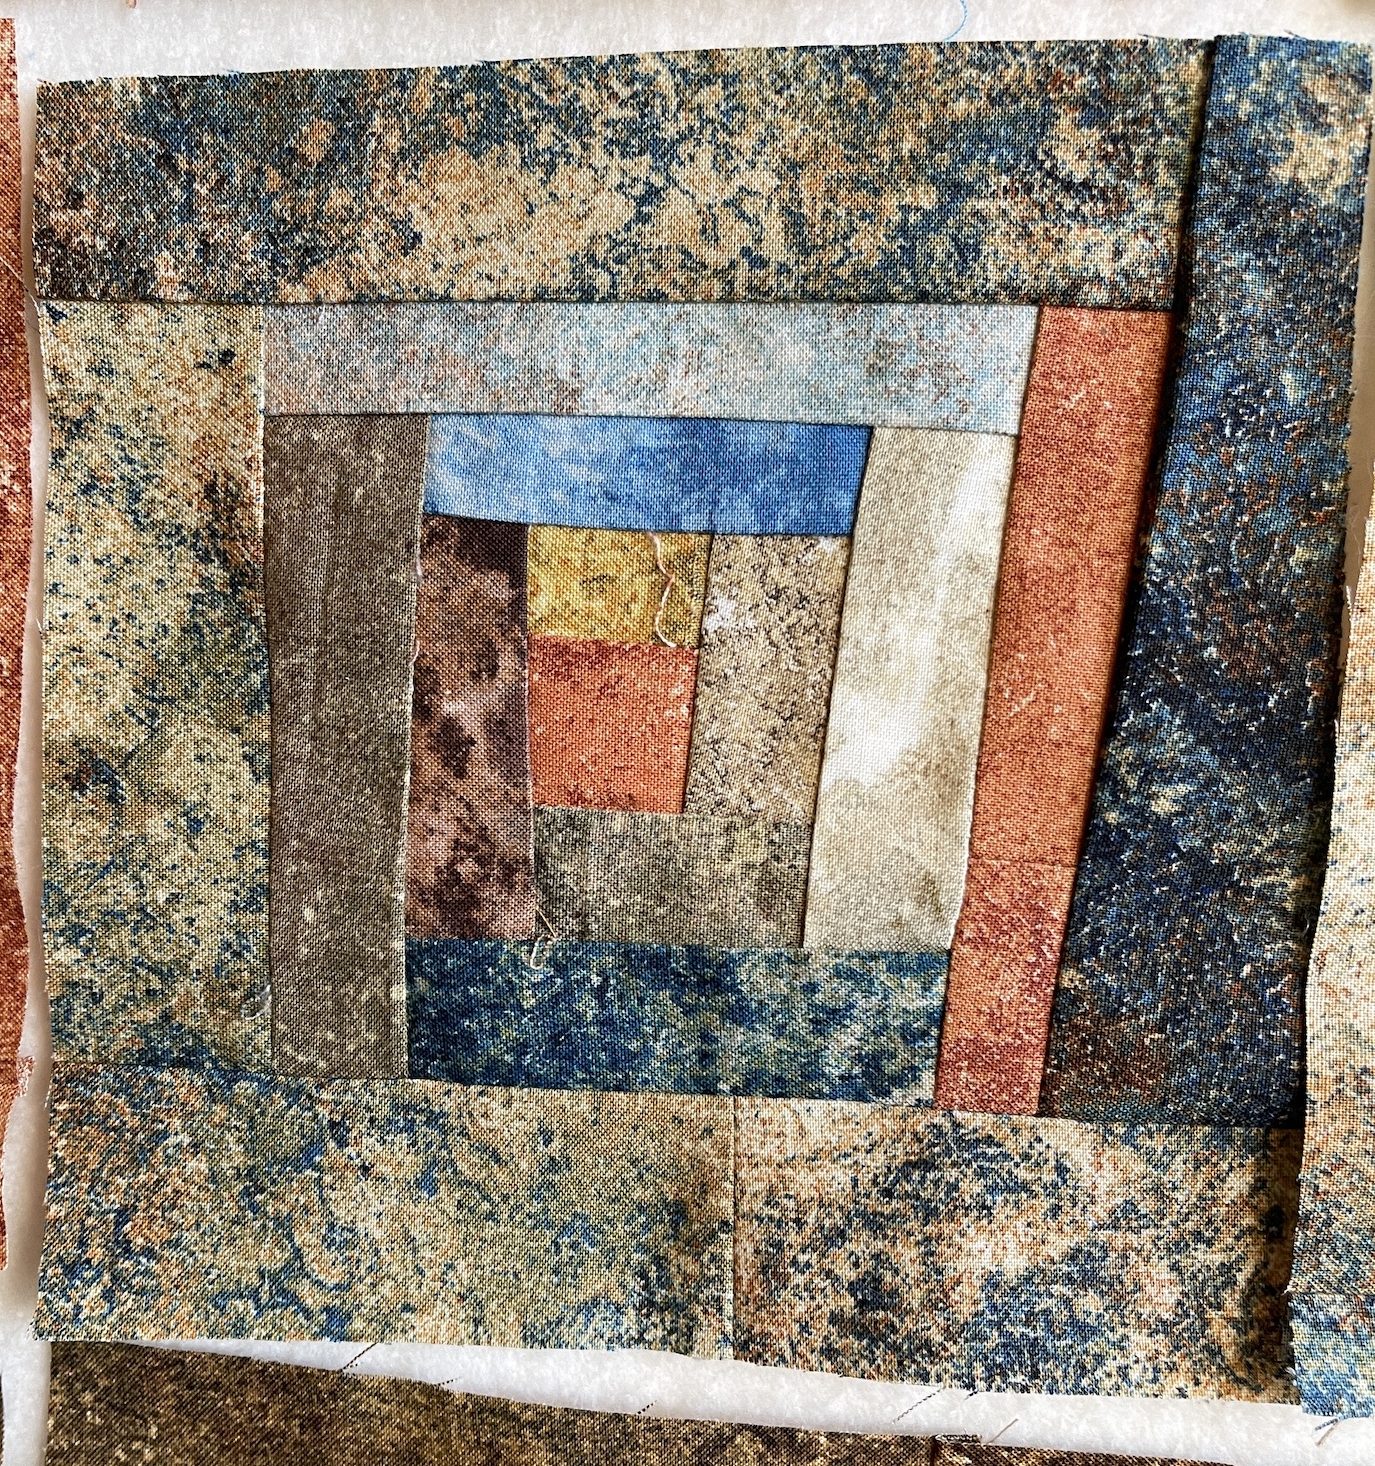
Each block is 6.5 inches x 6.5 inches and was made using scraps of Northcott Fabrics’ Stonehenge line which I love, as well as some small yardage pieces of Stonehenge I had in my stash.
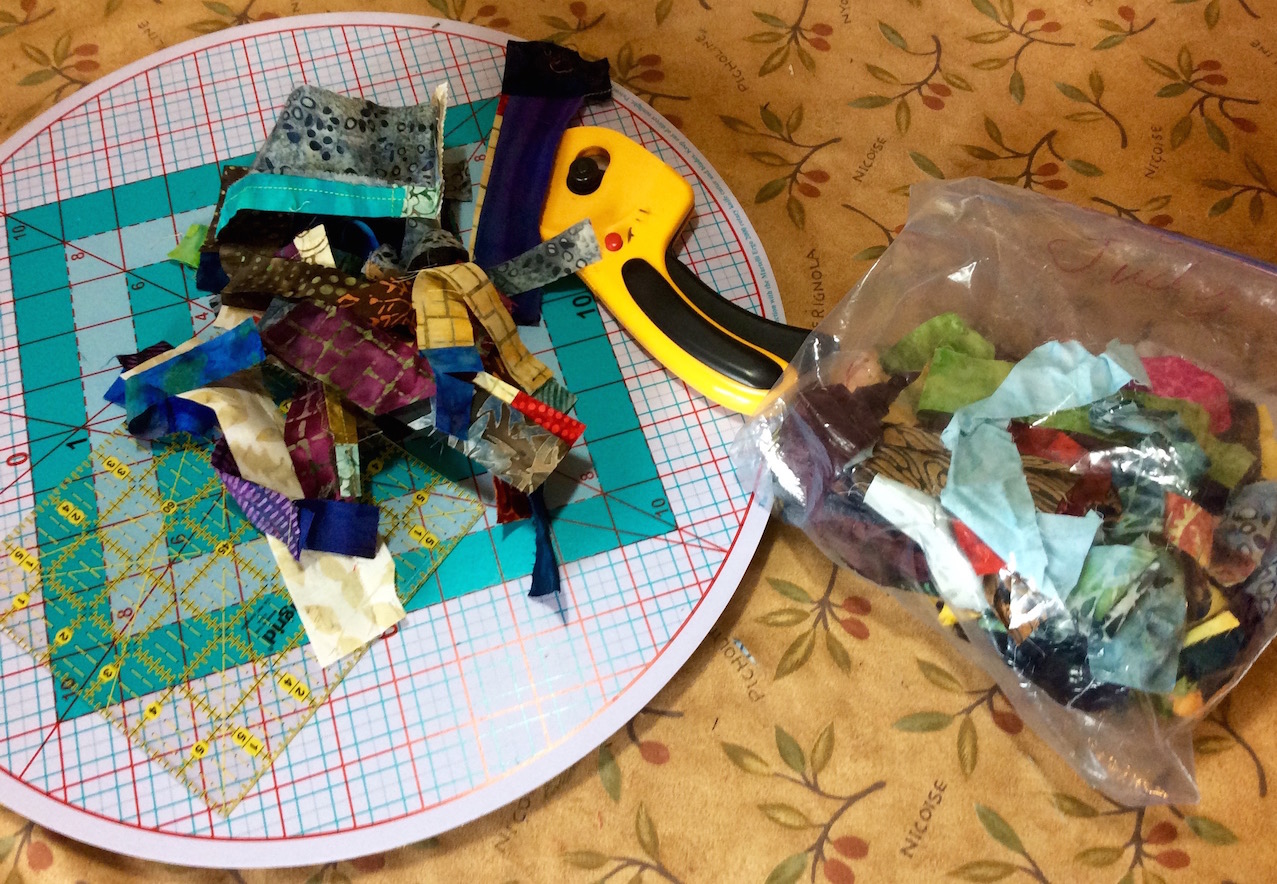
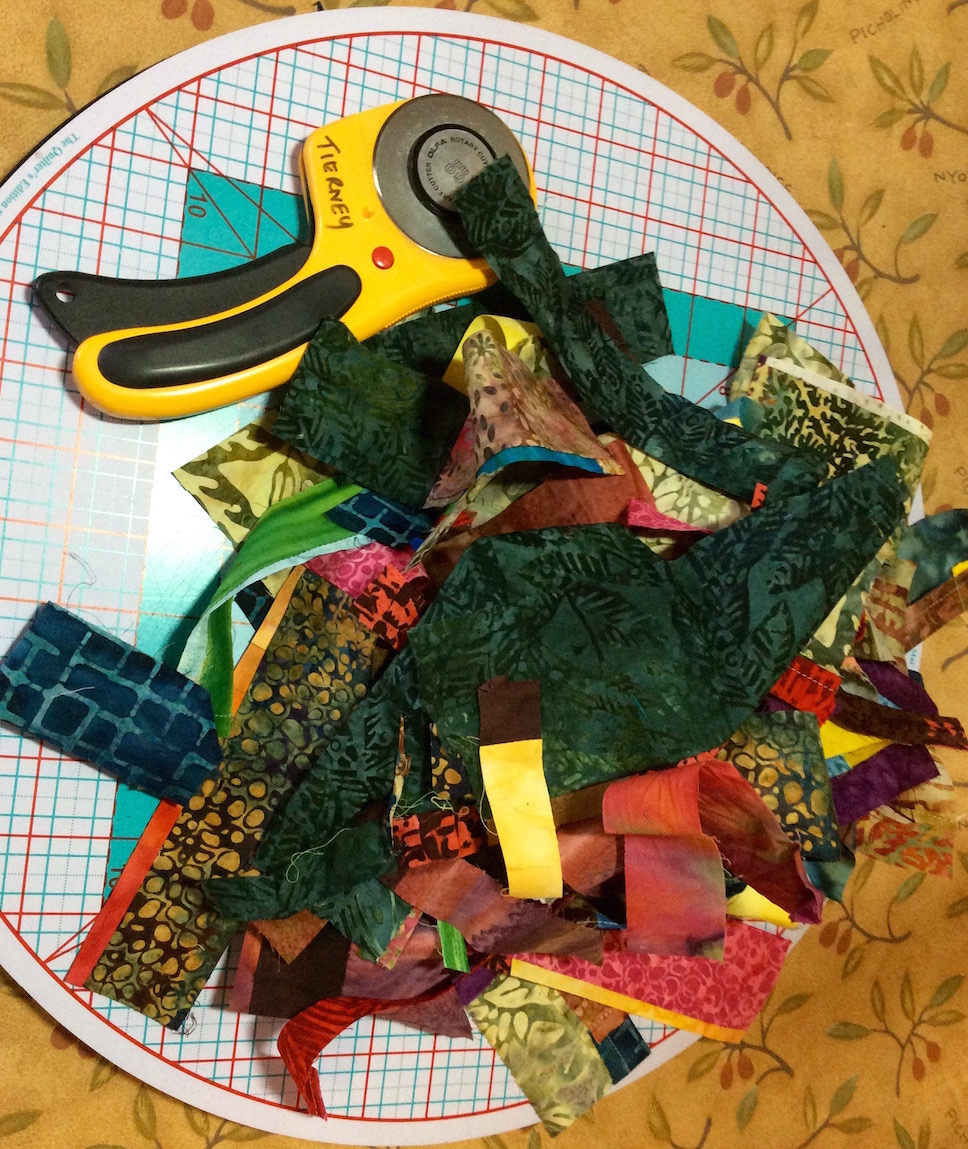
The scraps primarily came from this quilt I made a couple years ago:
This was my pile of scraps that I started with for the piece currently up on my studio design wall which include scraps from the quilt above and scraps given to me by quilting friends:
Eventually I decided not to use the Stonehenge animal print scraps that someone gave me (and recently I donated a pile of them to a local charity thrift store so they can be enjoyed by another crafter).
Here are photos of me chain piecing the improvisational log cabin blocks via a technique I learned from Jackie Erickson at the Stitchin Post when I lived in Central Oregon.
Jackie told us in a class I took at the Stitchin’ Post that “log jamming” that is technique originated in Africa – the using of scraps to randomly put together fabric and create a larger piece of fabric, etc.
While writing this post I googled “log jamming quilting” to see if I could find any official history on this technique and found a VIDEO by the Stitchin’ Post about log jamming!!!
If you want to see a demonstration of the technique, here is the video – enjoy!
Jackie has a pattern she sells on making a log jam quilt and here is the link to it: Modern Log Jam.
image credit: stichinpost.com
I have used the technique I learned from Jackie on so many quilts over the years (as well as taught the late Terry the Quilting Husband to make quilts this way also – see post What’s On The Design Wall: Flannel “Log Jam” Blocks) that she holds a special place in my heart (and she is an awesome teacher!).
In her class she would use a shoppingbag of random scraps and you just pull from that bag and “jam on” while chain piecing.
Okay I went off on a tangent on log jamming, and let’s get back to the story on this current log jam quilt in progress…
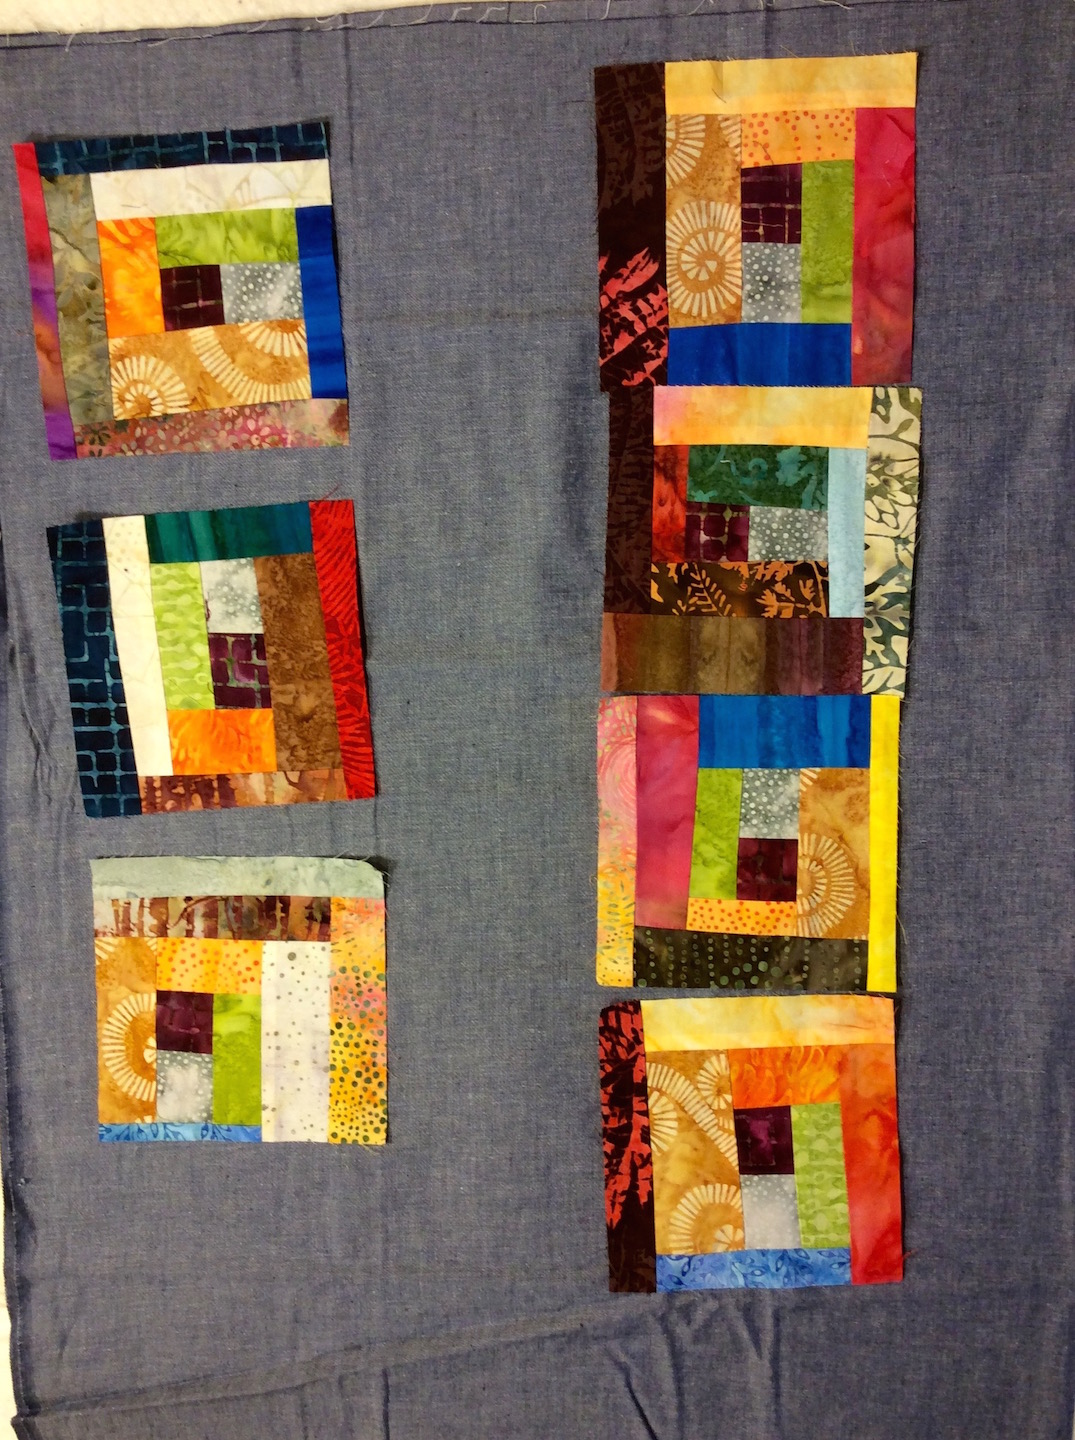
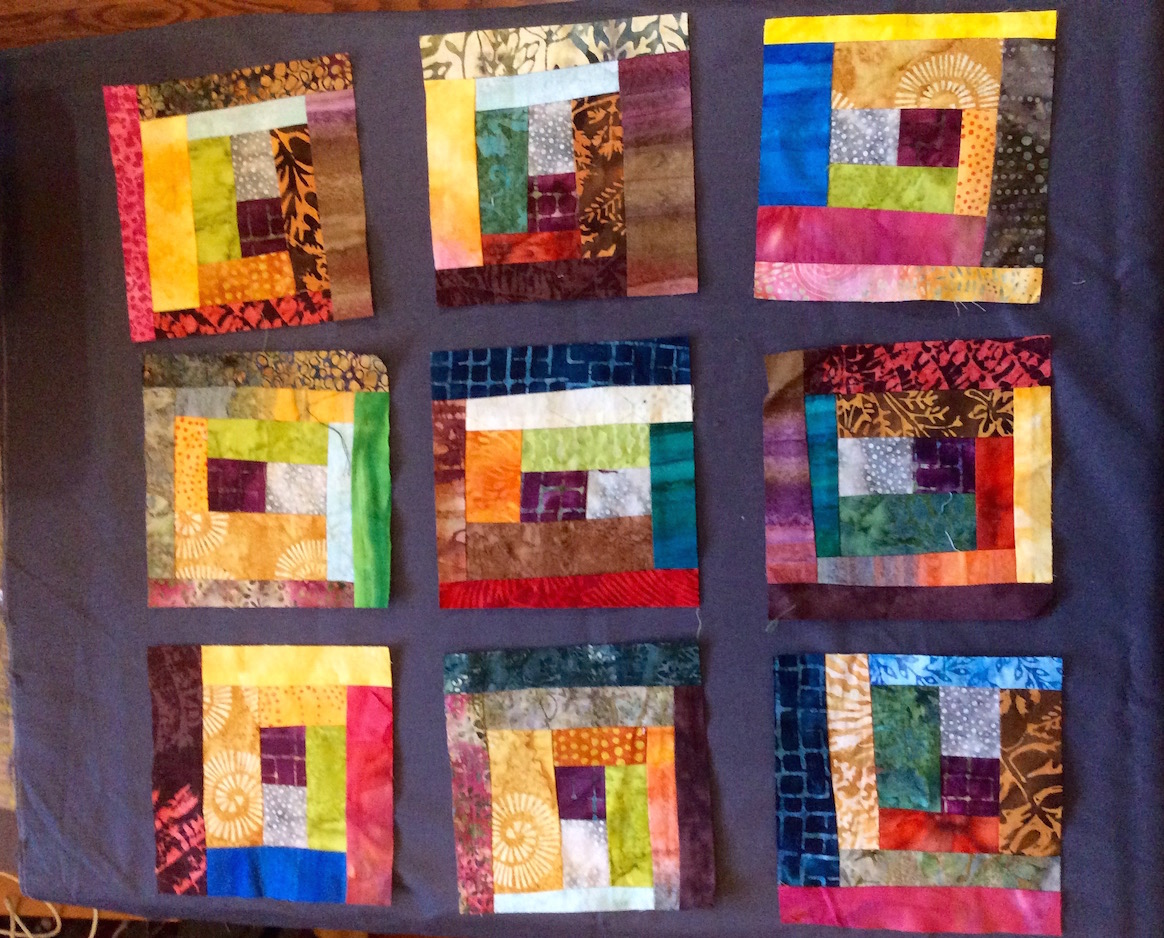
Originally I wanted to frame all the blocks in a cream colored Stonehenge fabric I had in my stash, but it turned out I did not have enough. So I used a smaller brown yardage as well as a couple fat quarters from my stash that I thought would coordinate.
Here are the resulting four (4) types of blocks:
Yes, I have not cleaned up all the loose threads from all that chain piecing I did. But I’ll do that as I sew the blocks together in whatever their final configuration.
For now they all sit on my design wall awaiting my further musings on layout…
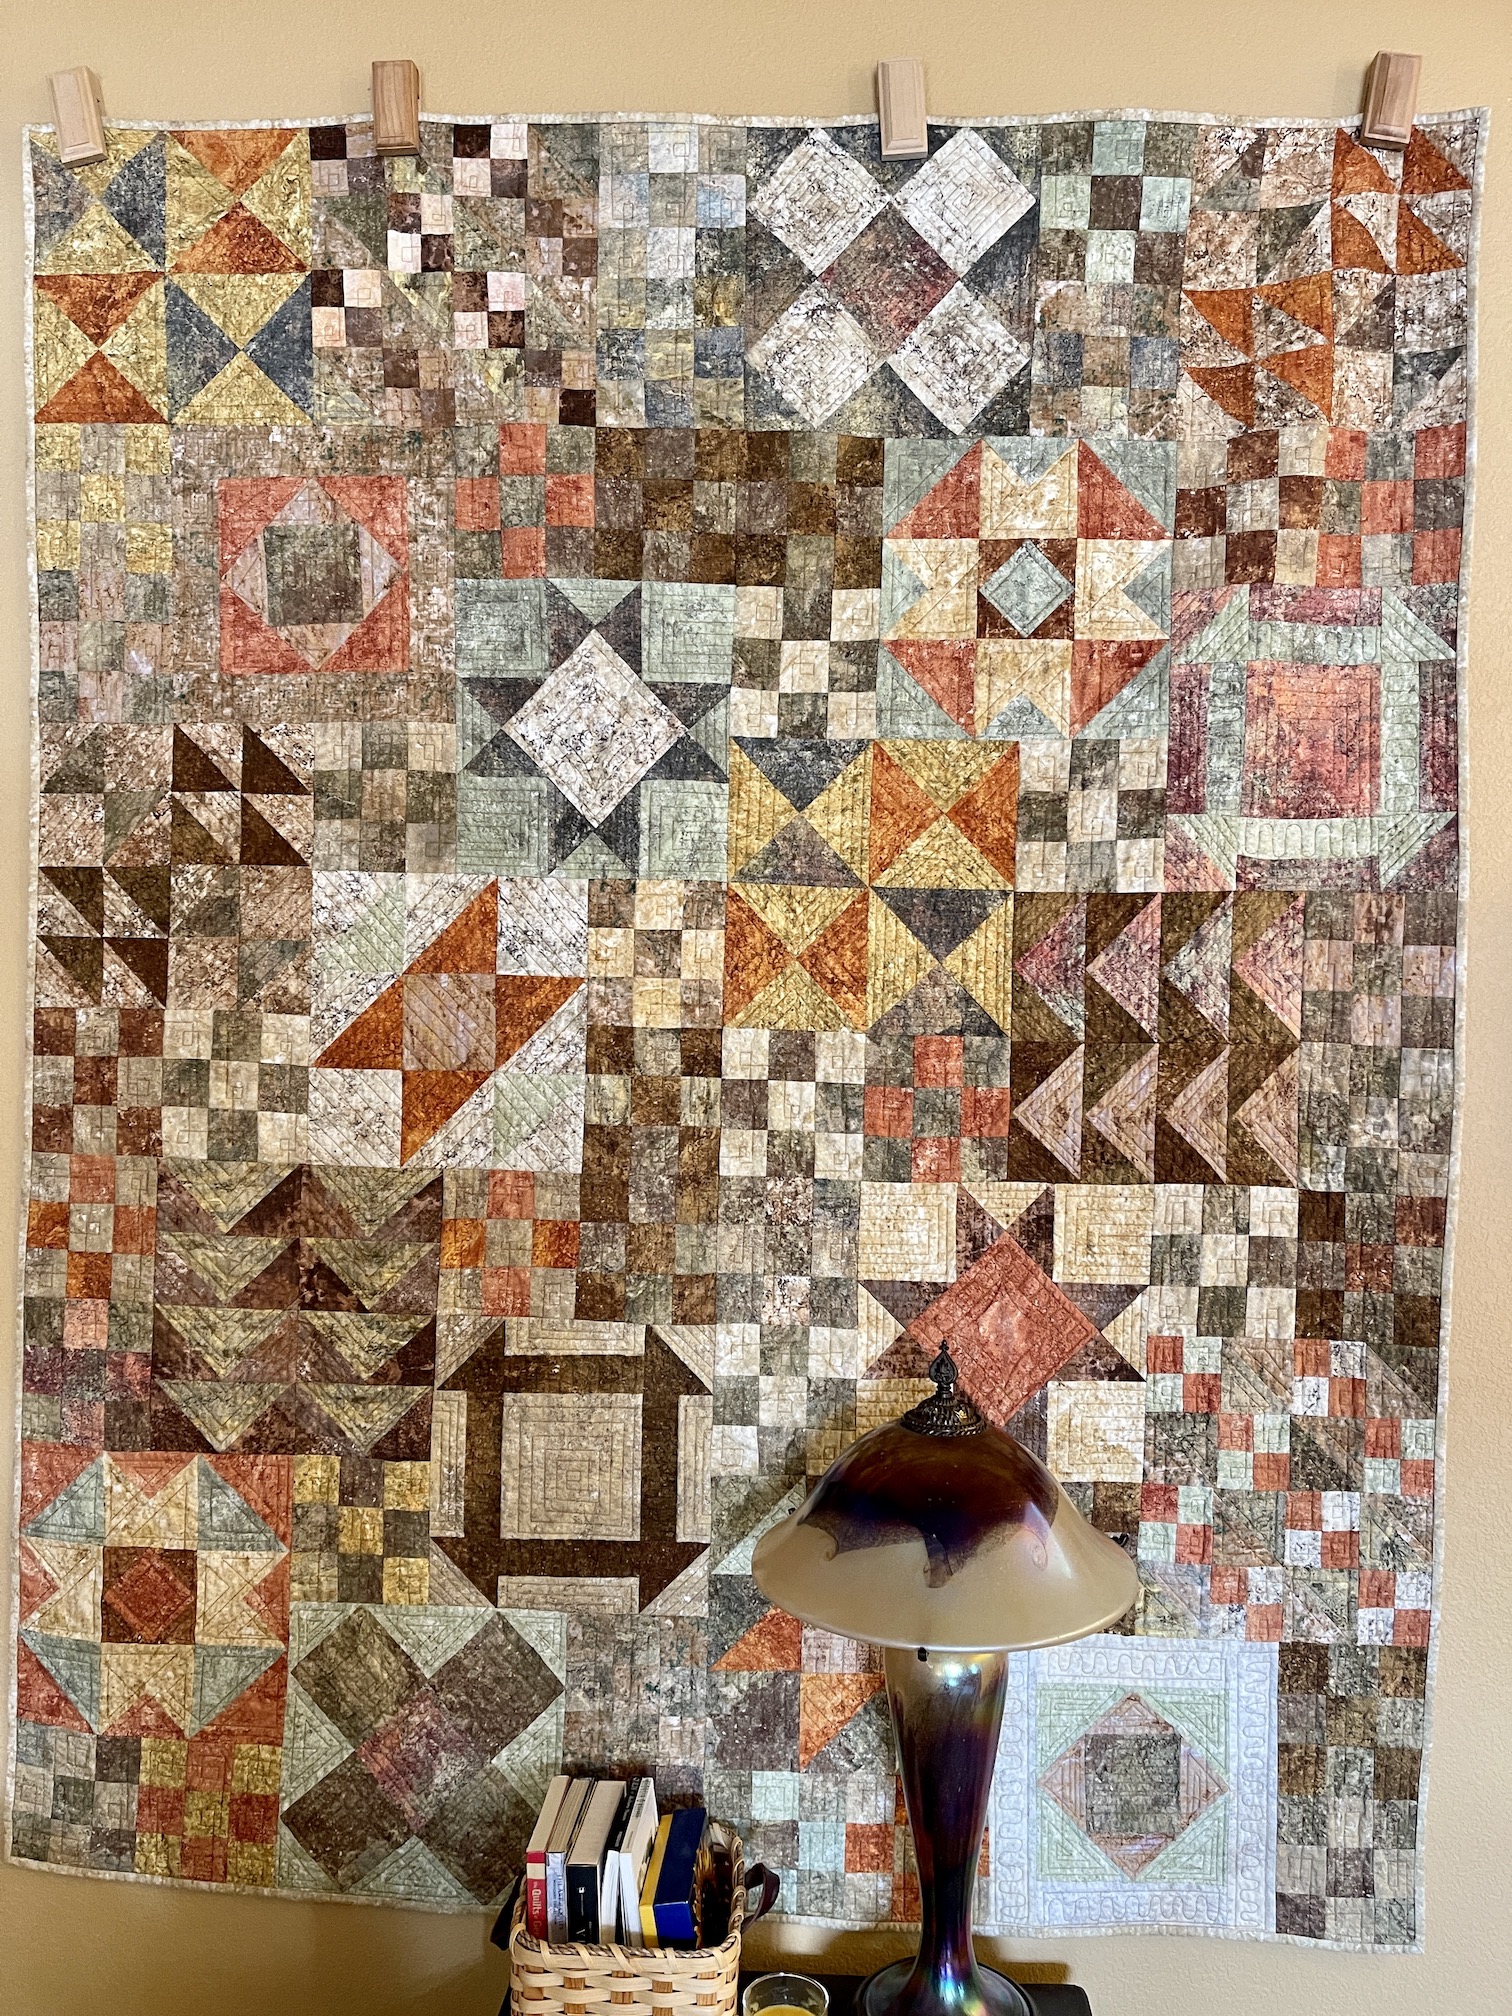
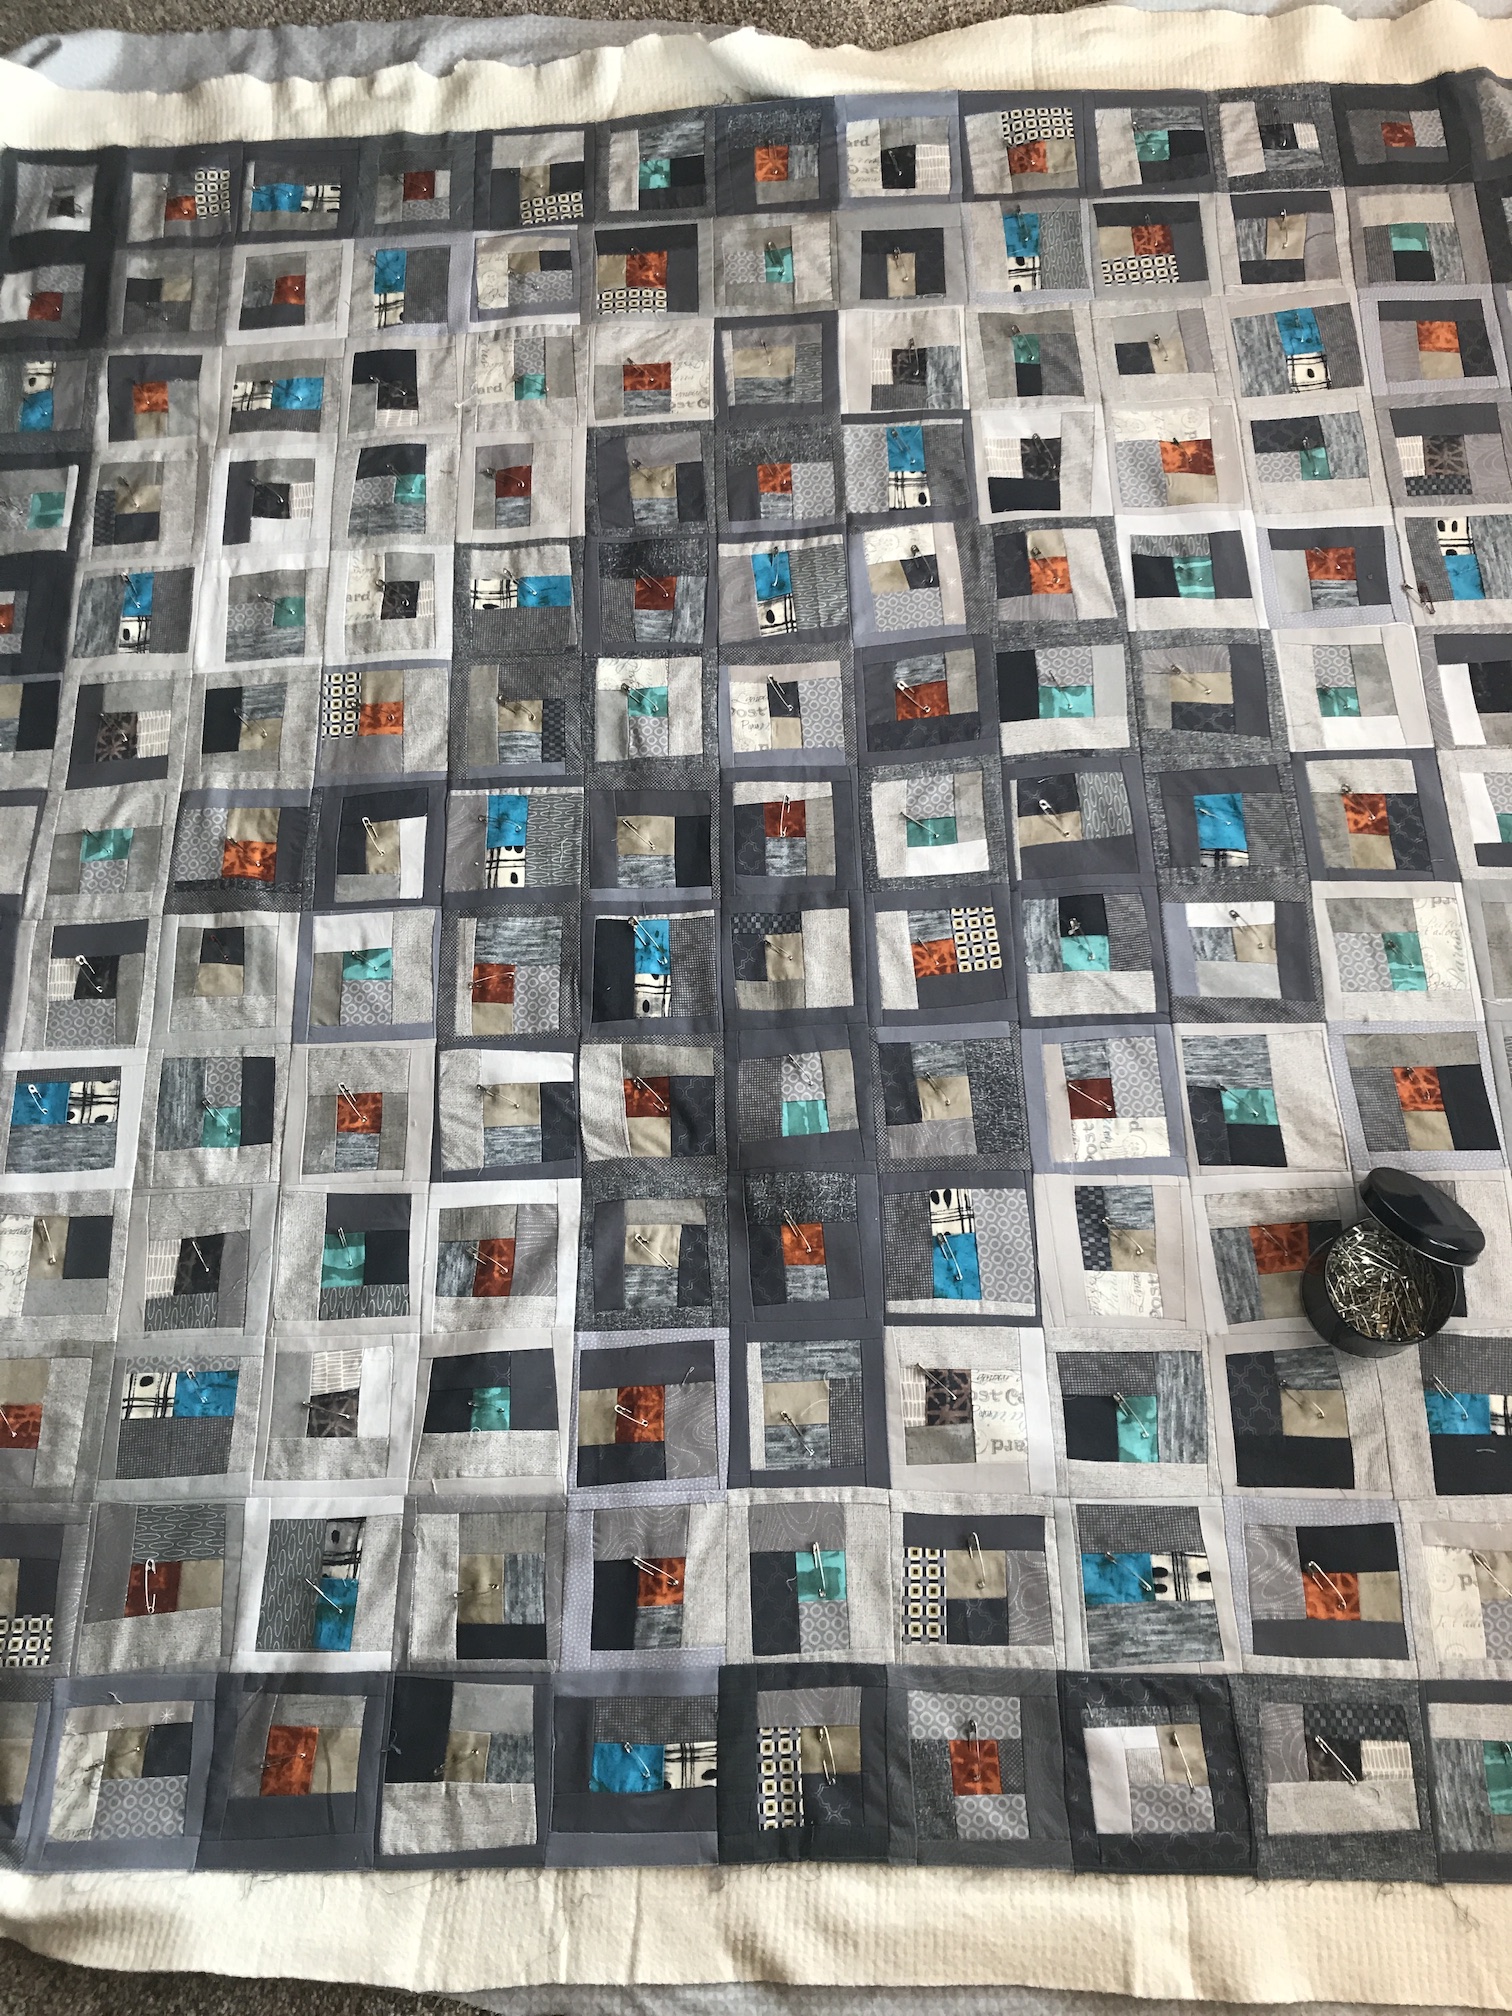
I thought I would give you all an update on the improvisationally free-form log cabin block style pieced quilt I’ve been working on since January 2020 – Seattle Scrappy. I last updated you on this piece in my March post – Update on Seattle Scrappy (though I think here and there in the Postscript section of later posts I provided a brief update…maybe).
The quilt began as a pile of scraps that my friend Dana let me play with when I attended a quilt retreat in Poulsbo, Washington in January 2020 (see posts Mini Quilt Retreat, January 2020 and A Jaunt About Poulsbo, WA). I pieced these scraps into free form log cabin blocks (no measuring, just “eye-balling” and trimming to make fit):
I made a lot of blocks and when I returned home I arranged them into this quilt top:
I decided to name the piece: Seattle Scrappy.
For the past 7 or so months, I’ve been hand stitching the quilt.
Update on “Seattle Scrappy”
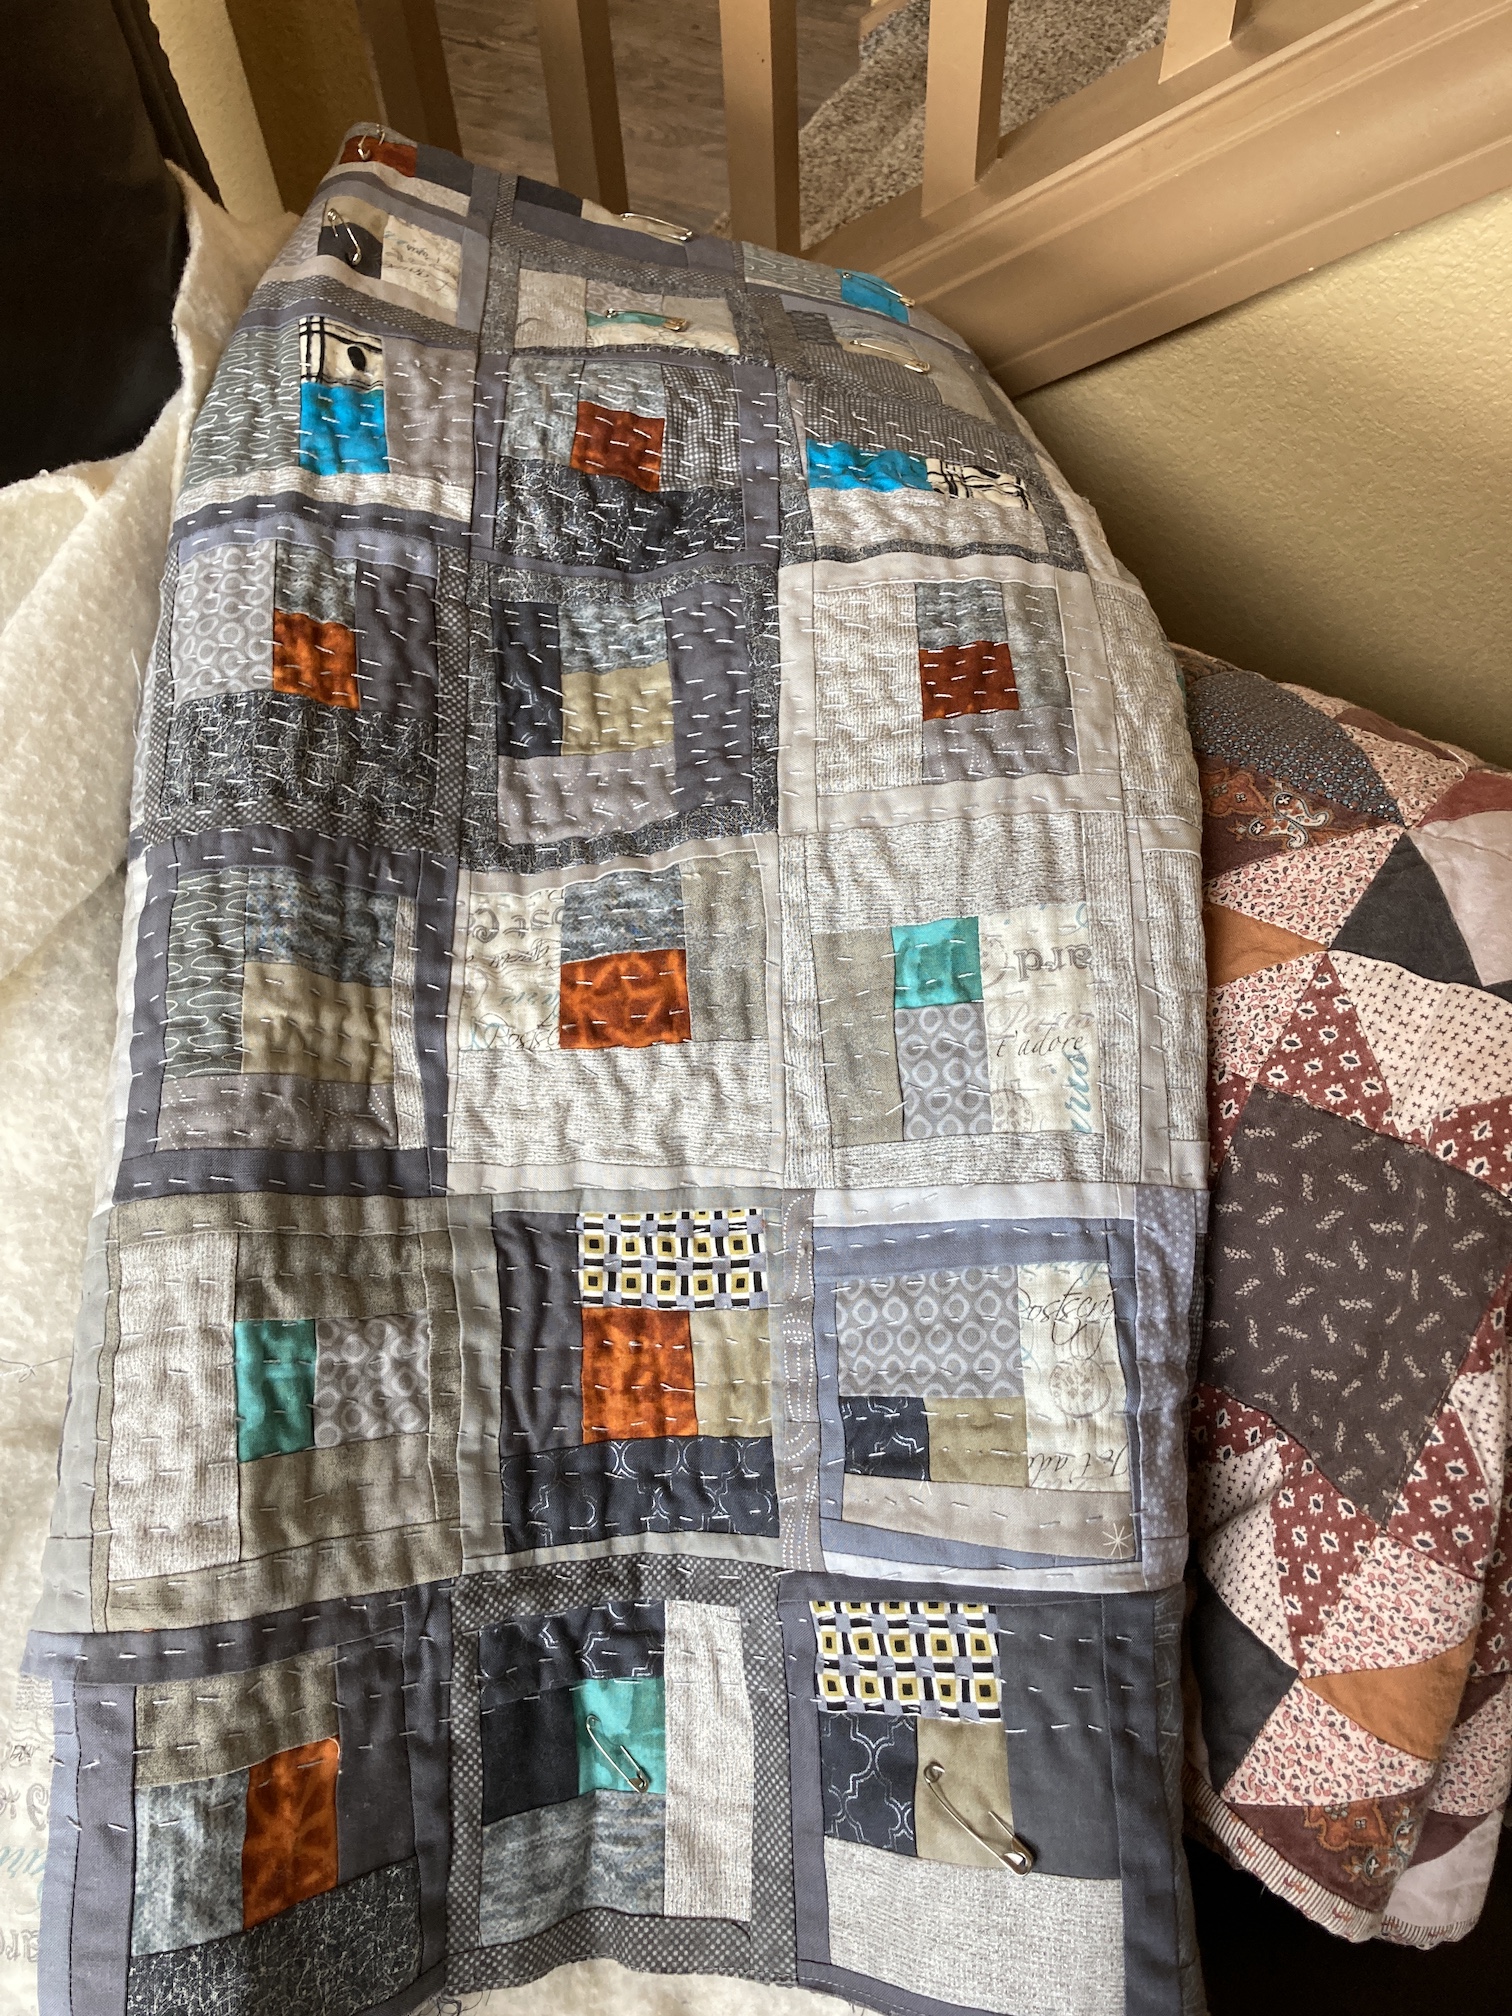
In my mind I am doing something like Kantha hand stitching but actually what I am doing should be called “Drunken Kantha” (no I am not drinking while stitching – that could be disastrous since I am a “light-weight” when it comes to alcohol consumption, I would impale my finger…constantly…with the needle) as, well…it sort of looks…sloppy…
Let’s get this over with – let me show you the photos – I am nearly 1/3rd done on stitching this quilt which measures approximately 60 inches by 60 inches:
If you are gasping or just shaking your head at this point as you look at the nonuniform stitching, I have an artistic design “excuse” for the stitching. It is a weak excuse but here goes: As it frequently rains in Seattle, Washington, I wanted the stitching to capture the feeling of a rainstorm (with the wind blowing the rain sideways…).
There. That sounds quite reasonable – it was just my artistic design, not that I am a terrible Kantha-stitcherist! (smile).
But seriously, I am hopeful it will look acceptable once I get the whole thing stitched, and then trim off the excess batting and backing, do a whole lot of ironing, and bind the edges in some manner (either a traditional quilt binding or the art quilt technique of putting a “facing” on the back edges of the quilt).
I cannot believe how long it takes to hand quilt a lap sized quilt. I’ve hand quilted smaller pieces before (see post What’s on My Lap) and I found it very meditative. I think in the future I will reserve hand quilting only for smaller pieces, it was a bit too ambitious an undertaking (for a slopping hand quilter) to hand quilt Seattle Scrappy!
Till the next update, Seattle Scrappy will continue to sit on the edge of my chair in the living room, waiting for the next set of haphazard stitches!
Postscript
Hopefully I did not visually traumatize you with images of my hand stitching.
If I have, I would like to undo the damage by referring you to look at the website of one of my extremely talented blogging buddies – Mariss the Quilter: Fabrications – who is a masterful Kantha stitcher. Check out her post On Hand Stitching to see some amazing Kantha stitching!
Someday…maybe…I can get my stitching to a “less scary point”. I am not aiming for her level of talent, just not to scare myself or others – ha! I did recently actually invest in a book on Kantha stitching. So perhaps there is hope…
My next post was going to be about the cool projects other quilters were working on at the retreat (tuffets!) I attended last weekend. However, I do not want to lose the momentum from the project discussed in my Thursday 08/11/16 post –What’s on the Design Wall (Need Your Help).
I so appreciate all the enthusiastic responses, votes, and ideas. I have to tell those of you who commented: You made a MESS of my studio (smile)!
You should have seen my little studio – various fabrics pulled out from my stash in many different colors, from your suggestions, strewn about everywhere. It was like a tornado of fabric options had blown through.
Reading all the comments was very fun – it was like you all were crammed into my tiny studio (where would I fit you all?!??!) and we were looking through my stash together and throwing around ideas (and fabric).
Of course, I would have to plan a snack and beverage for all my studio guests crammed into the tiny room…but where would I set out the plates and cups? (Maybe I could go scavenge some more fruit from my neighborhood to serve as snacks…but that is an upcoming post: Fruits of My Neighborhood Part III!)
THE RECAP
This project began with a bag of colorful Batik scraps (that I embarrassinglyactually purchased…in a moment of weakness from the Stitchin’ Postquilt shop’s basket of scrap bags for sale..that shop is loaded with temptation!)
I turned many of those scraps into 24 6′ x 6″ blocks:
(BTW – I moved these blocks to my new hallway design wall which we created this weekend – but that is another post…)
I presented four (4) options for the layout on the blocks and here are the votes by Option:
OPTION 1A – Float the blocks individually in a neutral background: 2 Votes
OPTION 1B – Group the blocks together and then float the whole grouping in a neutral background: 0 Votes
OPTION 2A – Float the blocks individually in a gray background: 4 Votes
OPTION 2B – Group the blocks together and then float the whole grouping in a gray background: 2 Votes
In addition to voting on options I presented, many of you in your comments suggested different options(I hope I captured the essence of all the comments to date, my apologies if I left a summary of your comment out below):
Group them together on a neutral background not trying to make them perfectly square, use Misty Fuse to attach them
Stitch the blocks together, use a pieced binding to enclose them, they speak so well on their own!
Group them together on the grey but make sure all blue sides are facing opposite of the grey fabric and placed up against another block rather than up against the grey fabric not allowing a blue side to but up against another blue.
Float each block individually, with a PURPLE or RED background- keep the color going! And maybe put a yellowsquare at each “intersection”
Golden brown would be nice also (to float blocks).
I agree with some others are dark brown, plum, dark red, I’d be inclined to try them on different ones and see which calls loudest.I start to wonder if it’s be even better on the dark brown.
I think a chocolate brown would be so cool.
I would make more blocks, group them without sashing or a border, and bind with a pieced binding (NOTE: I did make more blocks, see below!)
If you do want separation, don’t set them straight, in rows and columns. Use your separator in more random sizing — perhaps framing each one with the same fabric but in wonky widths. It might be easiest to pull off with a fabric that has some pattern so the seams between newly framed blocks disappear a bit.
If you really want to set them apart on a different background, what about looking at either a gold dupionior a deep purple dupioni?
(from a text to my phone, not posted to the blog) What came to mind was floating blocks in a round of neutral logs then a round of gray logs – maybe alternate with the reverse – round of gray first then neutral – then you float and have blocks side by side – and I’m thinking of a neutral acid yellow or lime greenor maybe an acid yellow orange – a crisp bright marigold color – all would look good with the blocks and gray.
Option Z: I love love love the blocks, but am partial to flashy colorsmounted on a white background. I also like sashing between the blocks because it makes each one pop.
While I like both versions of placing all the blocks together and placing with sashing, I would need to try the sashing version using a variety of sizes and different shades of either the light or the grey.
One fellow blogger, Melanie @ Catbird Quilt Studio was kind enough to e-mail me a photo of one of her lovely scrappy log cabin quilts, “Broken Pains” as an example of a layout she used:
Photo courtesy of Melanie McNeil, Catbird Quilt Studio. Used with permission; all rights reserved.
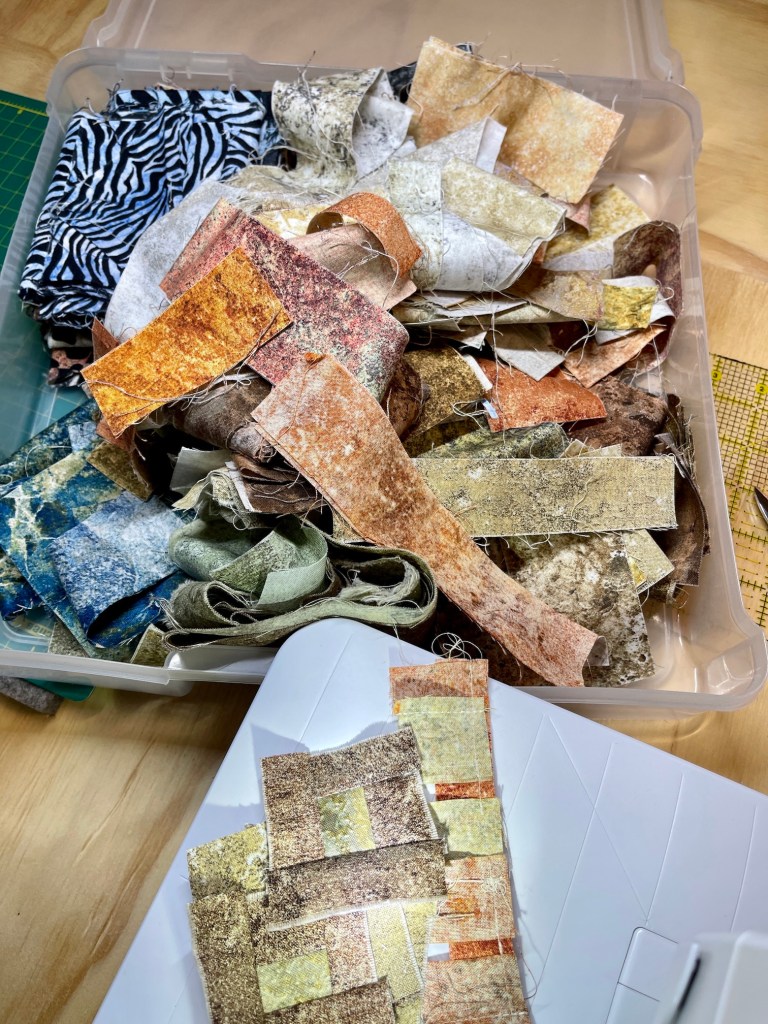
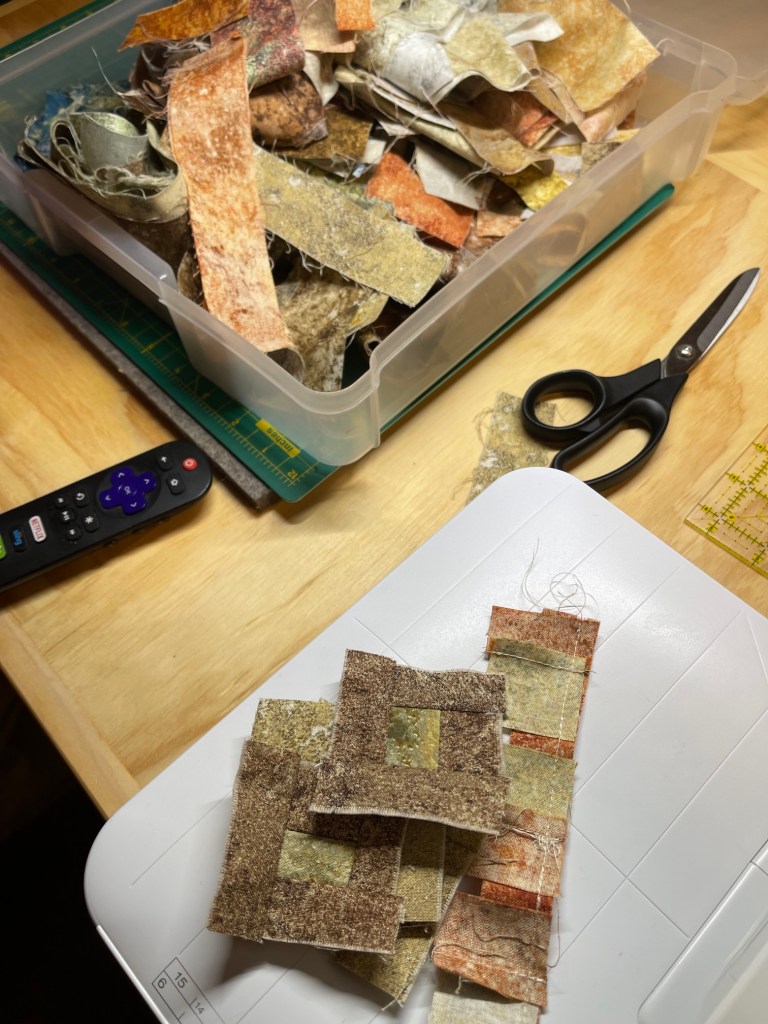
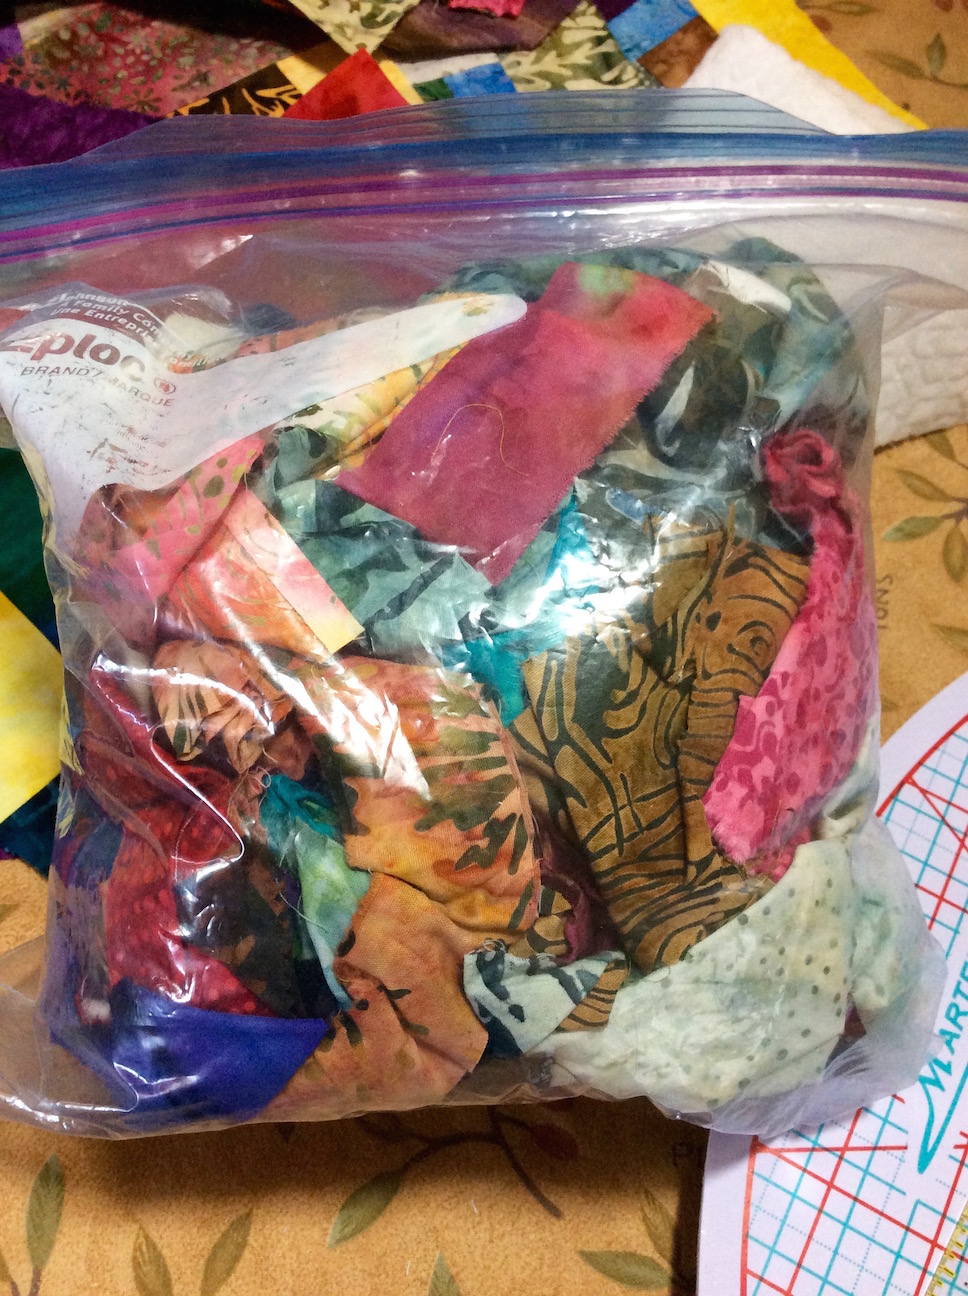
In addition to showing you the scraps I started with, in the previous post I shared the pile of scraps I had left over from trimming the original set of blocks down to a 6″ x 6″ size:
In the evening on Friday and Saturday, I turned the trimmings from those scraps and some of the remaining scraps into 23 more 6″ x 6″ blocks:
(Now why didn’t I make 24 more instead of 23 more? I guess I lost count while piecing!) As you can see, these blocks are somewhat darker and have more piecing. I tried to use all the scraps from the trimmings which had piecing within the scraps.
I now have scraps left over from trimming the latest blocks and the remaining original scraps that started it all…and yes, I am going to make more blocks out of them! (Besides 47, 24 + 23, is an usual odd number of blocks. )
THE EXPERIMENTS
I tried out many of your color suggestions. To save time, I had a “pocket full of scrappy blocks” as I experimented. I never imagined walking around my house with a pocket full of quilt blocks!
Now, try and use your imagination as you look at my experiments. Although I tried to put strong lighting on the design wall, if you have been following my blog for a while, you know I am not the best photographer (if I tried to make photography a career I would be very hungry).
I provide two layouts on each test background fabric: 1) floated and 2) grouped together with a border.
More disclaimers (soon you will be frightened to even scroll down and look…): I did not iron the fabric I used as the test background and I randomly selected the blocks to go onto the test fabric. (If this were a real quilt layout, I would have given more thought to the block placement and order.)
RED – I loved this!
Brown – sort of a “milk chocolate” brown – could take it or leave it…
Dark Brown – I guess the “dark chocolate” brown – I liked it!
Gold – this is a new Moda fabric I picked up – I love it!
Different shades of gray using an ombre fabric – could take it or leave it
Purple – lovely!
White – in concept sounded nice put I do not use large amounts of white in my pieces
Blue-gray – sort of denim like – I liked it! This is one of the Peppered Cottons I have on my Etsy shop
MARIGOLD! Well as close as I could get to marigold – this is a Moda Grunge line fabric and this is my favorite!
Looked for an “acid green” in my stash but this bright lime green was the best I could find. I like it!
THE DECISION
Thank you so much for all the great ideas. I also appreciated all the layout and general design ideas.
My decision is as follows:
Make more blocks, trying to use up nearly all the remaining scraps.
Do not make a quilt with these blocks, instead make a SERIES of artsy table runners for my tierneycreates Etsy shop using various combinationsand layouts of these blocks and my favorites of the backgrounds above (red, marigold, gold, purple, dark brown, and lime/acid green).
Thanks for coming with me on this color and design adventure! I will update you all as I complete the table runners!
POSTSCRIPT
Here is a follow up on the post Mysterious Thrift Store Fabric Find: One of my blogger buddies, Claire @ knitnkwilt.wordpress.com, tapped into her resources and got a translation for the words on the selvage of my mysterious Asian fabric thrift store find:
ll the characters on the left say is ‘manufacturer/maker’. I’m guessing the ones just to the right of Watex are the company’s Japanese name. The handwritten characters say ‘Golden Age’
Thanks so much Claire for helping solve the mystery.
I had more ramblings for this Postscript, but you are likely exhausted after reading this very long post!
Check out Sassy the Highly Opinionated Miniature Schnauzer’s blog on SchnauzerSnips, for her latest musings…
BRIGHT COLOR!!!
One of my blogging-buddies, Laura @ Create Art Every Day, recently asked me in response to my comment on one of her post:
Have you ever done a quilt with lots of white or neutral (back)ground mixed with really bright brights?
Her timing on this question is amazing as I just returned from a four-day quilt retreat with some of my Quilting Sisters and some new quilting friends I met at the retreat. While at the retreat I worked on free-form piecing of log cabin blocks (“log jamming”).
First round of scrappy log-jam batik blocks
These blocks started as bag of colorful batik fabric scraps:
The bag of batik scraps that started it all
I trimmed each block to a 6″ x 6″ block and I have scraps left over from trimming the blocks and I am going to use those “trimming scraps” and the rest of the scrap back to make more blocks.
The leftovers from trimming the blocks
Now here is where I need your help – I am trying to decide what background color to set the blocks into and what layout. I would appreciate input from crafters and non crafters – I want to know what you find most aesthetically pleasing:
OPTION 1A– Float the blocks individually in a neutral background:
OPTION 1B – Group the blocks together and then float the whole grouping in a neutral background:
OPTION 2A– Float the blocks individually in a gray background:
OPTION 2B– Group the blocks together and then float the whole grouping in a gray background:
This dilemma is actually the fault of Laura @ Create Art Every Day (ha!) as originally I had purchased the gray fabric during the quilt retreat to float the blocks. Then I was inspired by Laura’s comment to float the blocks in a neutral background!
I am stuck and would appreciate your vote and any comments you want to make regarding your rationale. THANK YOU!
In my next post I will share what the other quilters were working on at the quilt retreat I recently attended and some cool fabric finds (in addition to the one mentioned in “Postscript”).
POSTSCRIPT
Frivolous Purchase
Speaking of “Bright Color“, while at the retreat, I bought a frivolous but cool piece of fabric – a panel by Hoffman Fabrics of their entire Hand-Dyed Batik Watercolor Palette:
It is now hanging in my studio.
I do love bright colors and here are the quilts I keep on the chair in my studio. The two on the left are made by my Quilting Sisters (Judy D. and Kathy R.) and I was rotating them as wallhangings in my studio prior to getting the Hoffman Batik panel. The one on the right is my first experiment with creating Half-Square Triangles with charm squares using a Batik charm back I bought in the early 2000s (I made this quilt around 2003).
A Blog Recommendation
I follow many wonderful blogs by other crafters, quilters, painters and other artists. I also follow inspirational blogs by non-crafters. Please see my “Blogs of Follow” list section of my Home page.
I was fortunate to discover (I think by a comment on one of my blog posts) a blog by a Nigerian quilter – Sola, called Alice Samuel’s Quilt Co. Her blog is very interesting to read from a quilter’s perspective outside the US. I have also come across various wonderful Australian and UK quilter blogs.
I love how quilting connects us across the globe!
In Sola’s latest post, she has a wonderfully researched (with lots of links to resources) post on:
Thanks to my fellow bloggers for their engaging blogs I love following; and thanks to the tierneycreates readers/followers (extra thanks to those who take the time to comment on posts). I feel very blessed! (huge smile).
Check out Sassy the Highly Opinionated Miniature Schnauzer’s blog page Schnauzer Snips for her latest musings.
Quilt in Progress
Terry the Quilting Husband has been hard at work finishing another quilt for the Sisters Outdoor Quilt Show in July 2016, hoping to get into the Male Quilter exhibit (in the upcoming weeks he will submit his entries to the selection committee).
Over the past couple of months he made 82 9.5 inch blocks from my flannel scraps using the log jam method (see previous posts on “log jamming”) and sewed them into 9 rows of 9 blocks each:
Rows of flannel scrap log jam blocks waiting to be sewn together
If you do the math – 9 rows with 9 block each equals a 81 block quilt. So what became of the 82nd block? I was wondering about that also and went into Terry’s “studio” (he uses the guest bedroom as his sewing studio) to discover the fate of the extra block.
Here is what I found: he kept one of the blocks that had a schnauzer in the center (from a flannel dog fabric scrap with different breeds) and displayed it in his sewing area:
Note: our guest room is extremely dog themed. You would not want to stay at our house if you do not like dogs – ha!
The Pillow
The one block displayed made me smile and I wanted to make it into something more permanent for him, so I made a quick little throw pillow for him with the block.
Now he is focused on sewing the rows together so we can get it to the long-arm quilter.
I suspect when the quilt is quilted, we are going to struggle with wanting to part with it if we decided to put it for sale at the Sisters Outdoor Quilt Show!
Check out Sassy the Highly Opinionated Miniature Schnauzer’s latest musings on the Schnauzer Snips page; and check out the latest updates on the Textile Adventures page.
Terry, the “Quilting Husband” really got into making “log jam” style free form log cabin blocks. He ended up making over 100+ 6.5 inch x 6.5 inch blocks. We set them in 10 x 10 rows to create a quilt top. Betty Anne Guadalupe of Guadalupe Designs professionally quilted the top.
Log Jam by Terry (2015). Quilted by Betty Anne Guadalupe.
The plan was to list it on the tierneycreates Etsy Shop but I fell in love with it and decided – IT’S A KEEPER! So now it is displayed on our dining room wall.
I have pieced many 6.5 inch by 6.5 inch log jam blocks myself (they are a fun and meditative way to use up fabric scraps) and I am thinking of making a Queen size (yikes) quilt with them for sale at the 2016 Sisters Outdoor Quilt Show. First I will have to see how many I have done and then do some math (yikes, again) to figure out how many I will need (hint: 100 blocks only made a lap size quilt…).
POSTSCRIPT
I am not sure how it happened, but my previous post Because Nice Matters, was my 100th blog post! I remember when I started the tierneycreates blog in October 2013, I did not imagine getting to my 100th post (I was just happy to be at 5 posts!). It has been so fun so far connecting with other bloggers and I so appreciate my readers and followers!
Continuing my series of posts on what is on the design wall…
THE QUILTING HUSBAND IS BUSY AGAIN
I had some of my blocks up on the design wall and Terry “The Quilting Husband” was getting impatient. He kept giving me subtle hints (and not too subtle hints) about moving my stuff off the design wall so he can put his blocks up on the design wall (we have a small house and can only make 1 shared design wall work).
The Quilting Husband is working on a new “Log Jam” quilt (see my other posts on “Log Jamming” and “Log Jams” which are free form pieced log cabin style blocks) made with flannel scraps. I have a large box of flannel scraps from making flannel quilts and flannel quilt backs, and Terry came up with the idea of trying to use of the scraps making flannel log jam quilts.
As his confidence grows as a quilter, he gets comfortable with making his own design decisions. He found a stash of dog and cat themed flannel scraps and used them as the center so each block would feature a dog and/or cat face. Very creative!
I taught “The Quilting Husband”, Terry a couple months ago how to make log jam blocks. If you would like to know more about log jam blocks and “log jamming”, see these posts:
Terry, loaded with a box of color coordinated scraps I pre-selected, made endless 6 1/2 inch log jam blocks (120+) and put a dent in my scraps (a small dent but any dent is appreciated!).
Then he took a 100 of the 6 1/2 inch block and created a 10 x 10 quilt. It was a collaborative process as he completed ten – 10 block rows, and I did the final sewing of the ten rows together to make the quilt top. Terry, The Quilting Husband, is not much for matching seams to sew rows together, but that is okay – look at how much he accomplished!
Now I am working on putting the back of the quilt together so it can go to the long-arm quilter!
Then comes the decision – keep it or list it on the Etsy site for sale. We will likely list it for sale…we’ll see…
I love sunflowers and years ago (maybe 10) I bought some sunflower fabric I found on sale. I never used this fabric and it ended up in the back of my stash, forgotten.
A couple of months ago I was purging the fabric that I no longer loved to donate to a charity thrift store (see blog post The Fabric Purge!) and came across the sunflower fabric again. I do not have a photo of the original fabric, but 10 years later, looking at it I thought “what was I thinking?!?!?”
It was…well…quite ugly fabric. Little sunflower images with a very cheesy looking patterns and other images surrounding the sunflowers. No wonder it had been on sale 10 years ago!
A quilter friend of mine suggested a Challenge: Don’t get rid of the fabric – cut out the sunflowers and use them as centers in a log cabin style quilt. She offered to give me some coordinating fabric that she was purging from her stash!
I took on the challenge and made the quilt! I just gave to my long-arm quilter the 88″ x 66″ quilt top made with just the sunflower sections of the ugly fabric and coordinating fabric from a friend’s stash! I set the 9.5″ by 9.5″ inch blocks in a Moda paper bag colored fabric. I cannot wait to see what it looks like quilted!
A couple of weeks ago I was scheduled to take a quilting class called “Log Jam“. Log Jam is an innovative way to rapidly create scrappy log cabin quilt blocks. If you are a new quilter or not a quilter, a “log cabin” block is a quilting block made by starting with a small center square and building consistent standardly sized strips of fabric around the center square. The log jam concept throws the requirement of consistency sized strips out the window. “Log jamming” makes the log cabin style quilt block construction process laid back, casual, scrappy and fun! When making a log jam quilt you can use a specific palette of scraps, solid colors, or random scraps to make the piece very scrappy.
Unfortunately only three people registered for the class (myself and two of my friends) and it this did not meet the threshold to hold the class. The quilt shop was so wonderful and let us use their classroom anyway and hold our own class (two of my friends had taken the class before). So we spent 6 hours having a blast “log jamming“. The “log jam” method involves the kind of quilt block making you can do while chatting and giggling with friends – it is fun and less structured. We ended up being very silly and singing songs while we were working on our log jams. I even modified Bob Marley’s song “Jamming” to “Log Jamming”!
Now the 27 blocks I made log jamming are sitting on my design wall. I am trying to decide what I want to do with these blocks: maybe a table runner for my series of my Modern Quilt Table Runners on my Etsy shop or maybe one quilt with the blocks set into a solid background or floated. Every quilter should find space for a design wall – it helps to lay your pieces out to see where you want to take them!
If you live in the Central Oregon area, the Stitchin’ Post has a wonderful Log Jam class that my friends and I highly recommend you take!