Fabric Scraps Obsession, Quilt Retreats, Studio, What's on the Design Wall

The Pillow Project

Continuing my series of posts about the annual May quilting retreat I attended with my Quilting Sisters in Vancouver, WA May 17 – 20. To read my previous posts about quilting retreats I’ve attended, see my post category – Retreats.

Pulling Out the Old UFOs

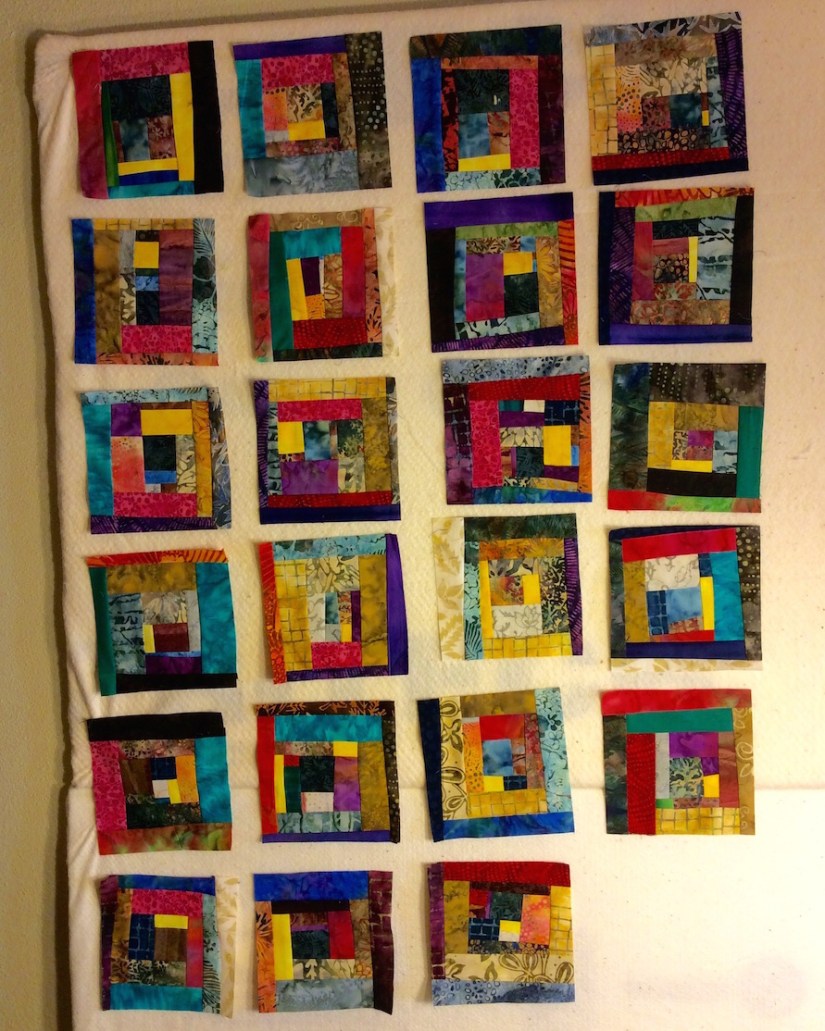
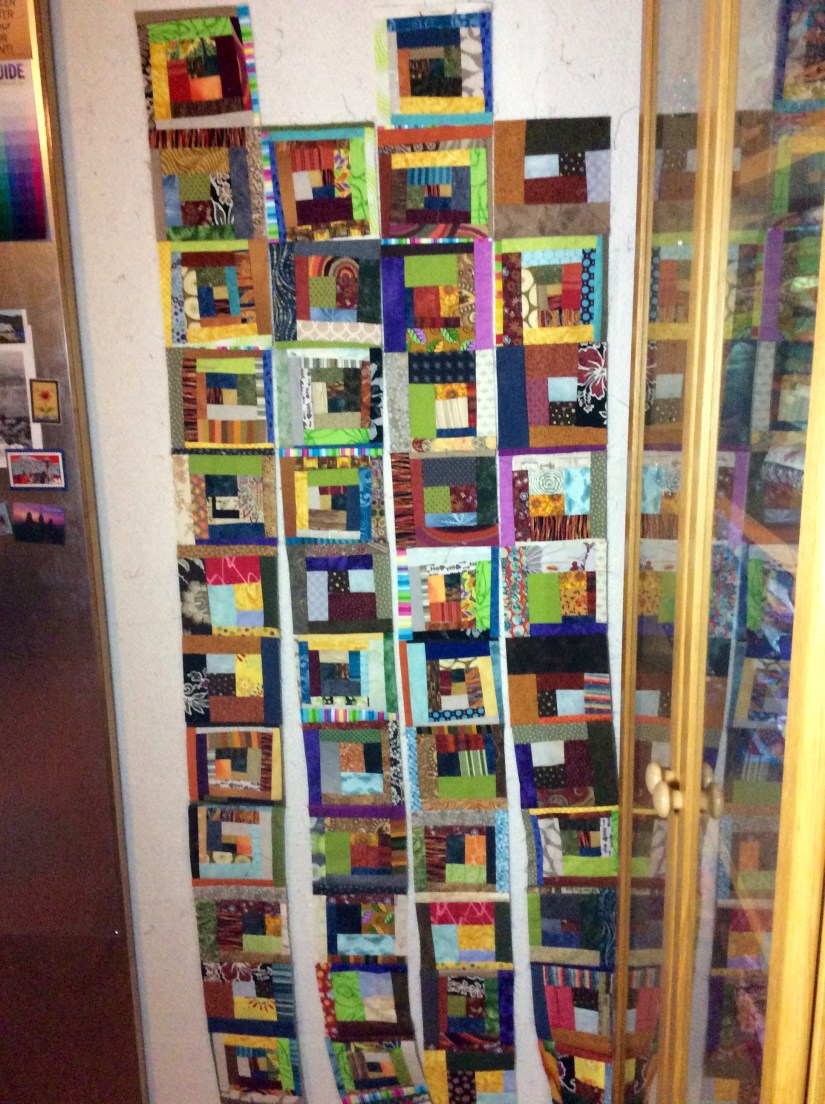
For this May’s annual quilting retreat I pulled out some old unfinished objects/projects (UFOs) or as my blogging buddy Shirley @ handmadehabit calls them – “STRANDED” projects.

Those of you who have followed my blog a long time (I mean a long time) – do you remember this project and post from August 2016 “What’s on the Design Wall (Need Your Help)“:

IMG_2611

As well as the follow up post: “What’s on the Design Wall: Your Ideas“.

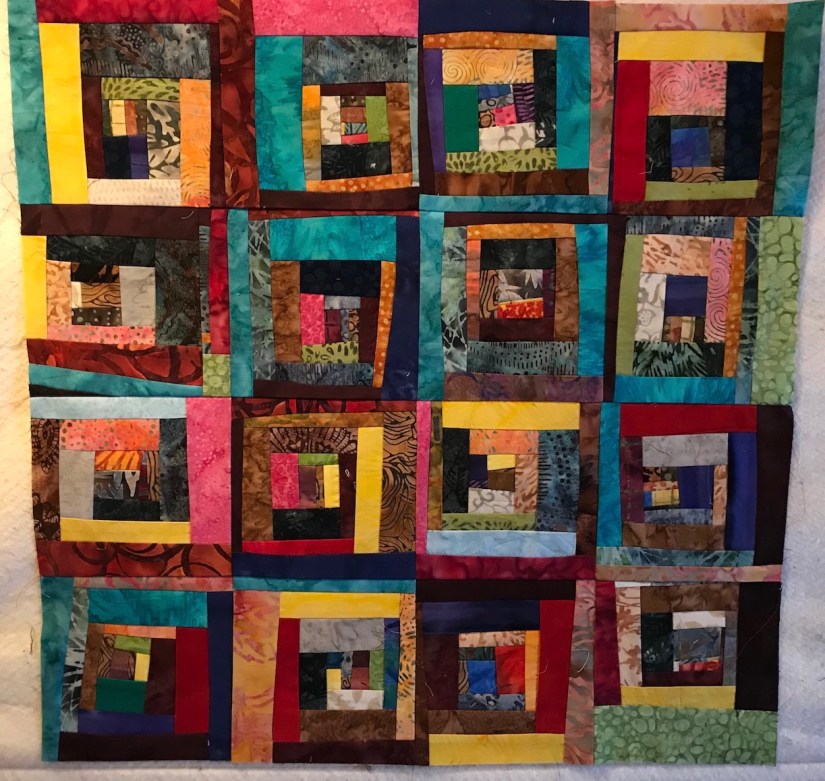
So many readers provided great suggestions on the color of setting fabric for these “log jam” (freestyle log cabin) blocks. Alas, I could not make up my mind and eventually put the blocks away.

I bought the blocks to the retreat to make them into pillow covers!

In Need of Pillow Covers

We have four (4) cozy fleece pillows in the living room that we used in the late Fall, Winter and early Spring but they would be strange to use in the late Spring and Summer:

2018-05-26_06-50-22_5402018-05-26_06-50-29_762

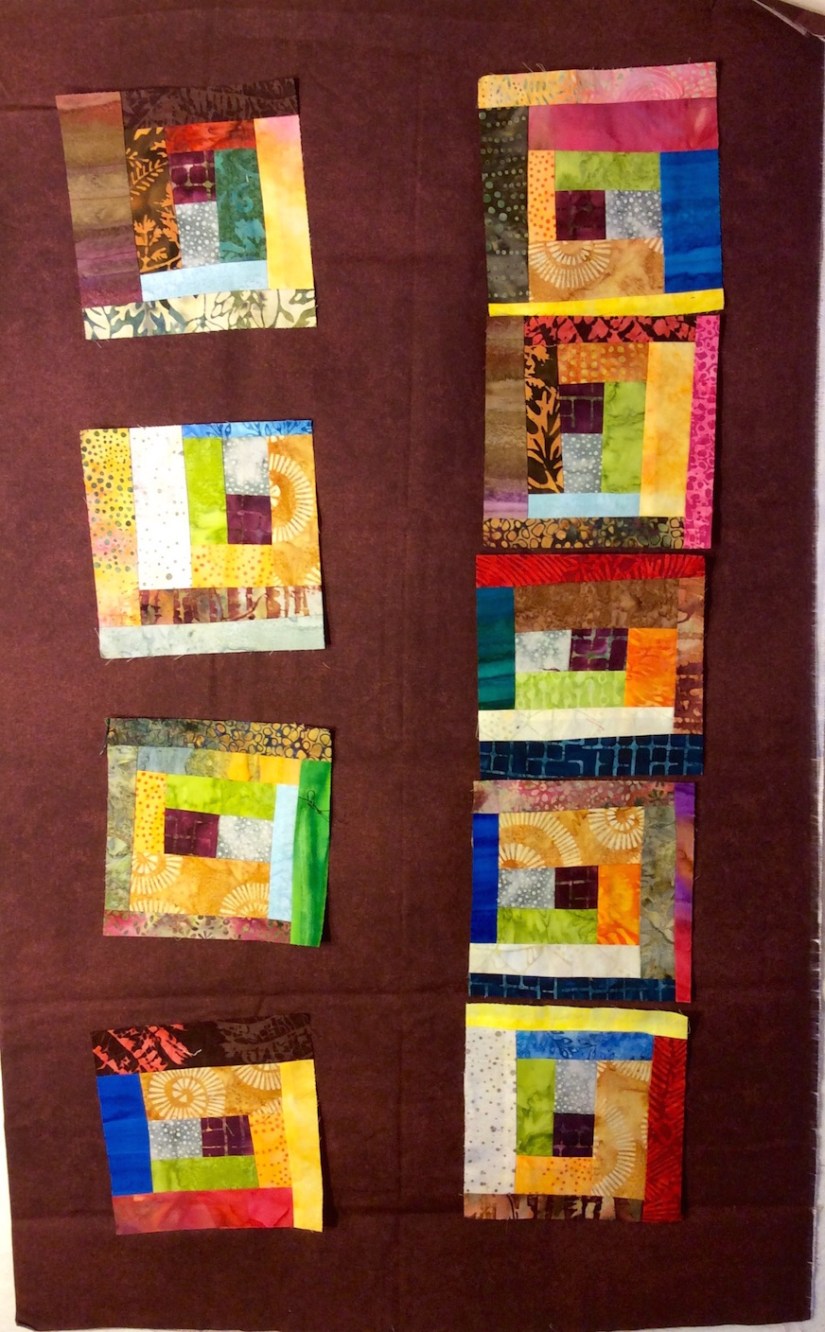
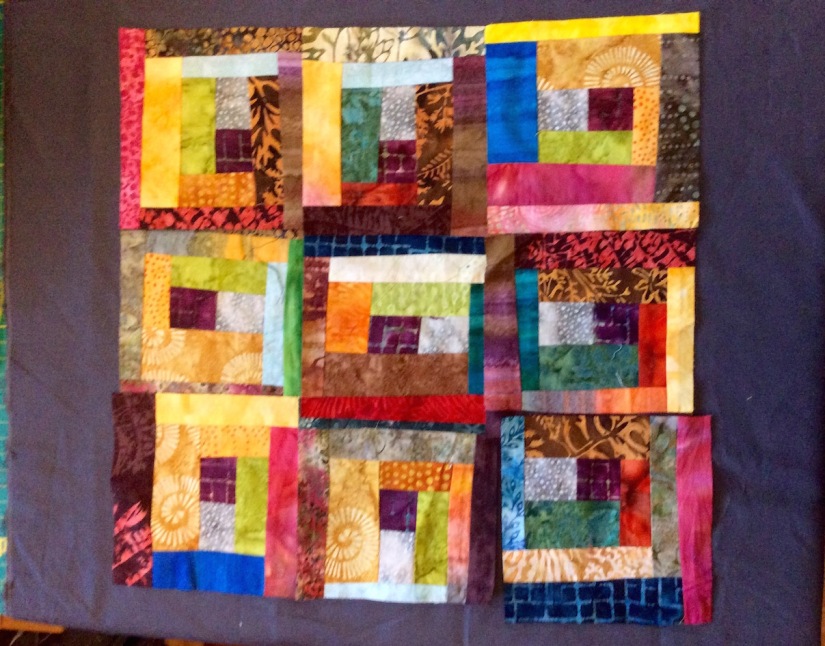
I decided to use the log jam blocks to create Summer pillow colors for the four pillows and started assembling the pillow tops at the retreat:

2018-05-20_11-05-53_750

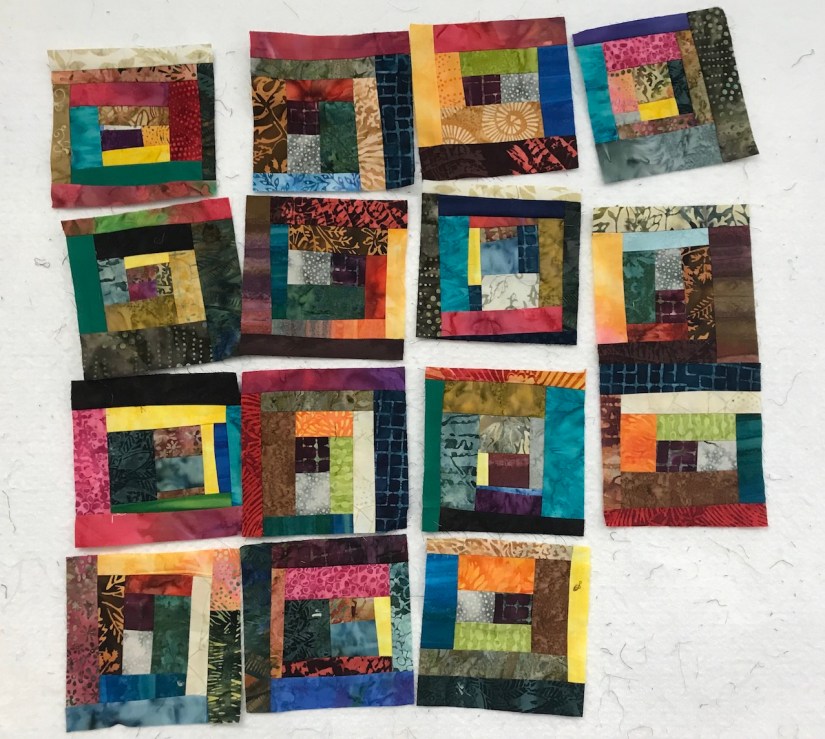
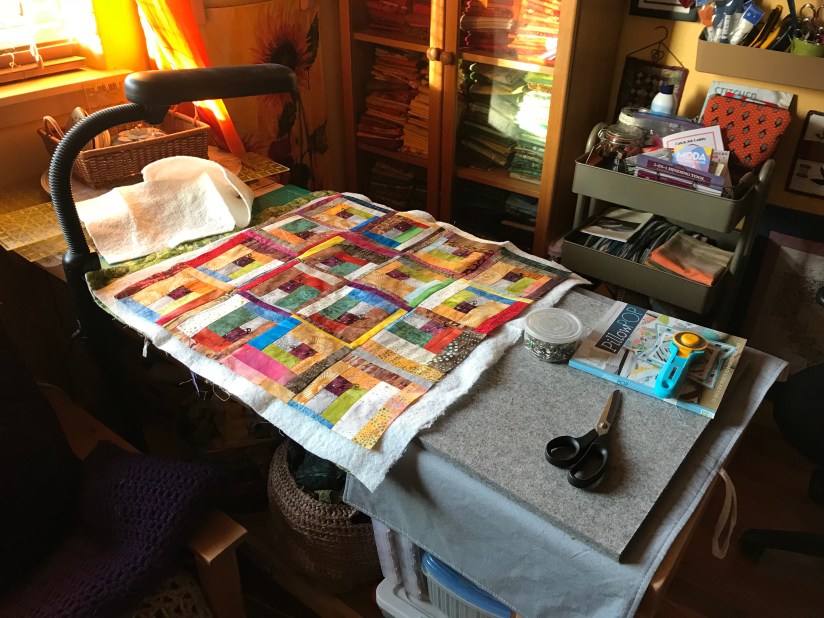
Between the retreat and last week, I completed four pillow tops:

2018-05-26_14-54-13_4602018-05-26_14-54-57_5022018-05-26_14-55-40_9962018-05-26_14-56-54_079

Next step is to quilt the pillows tops and then add envelope backs.

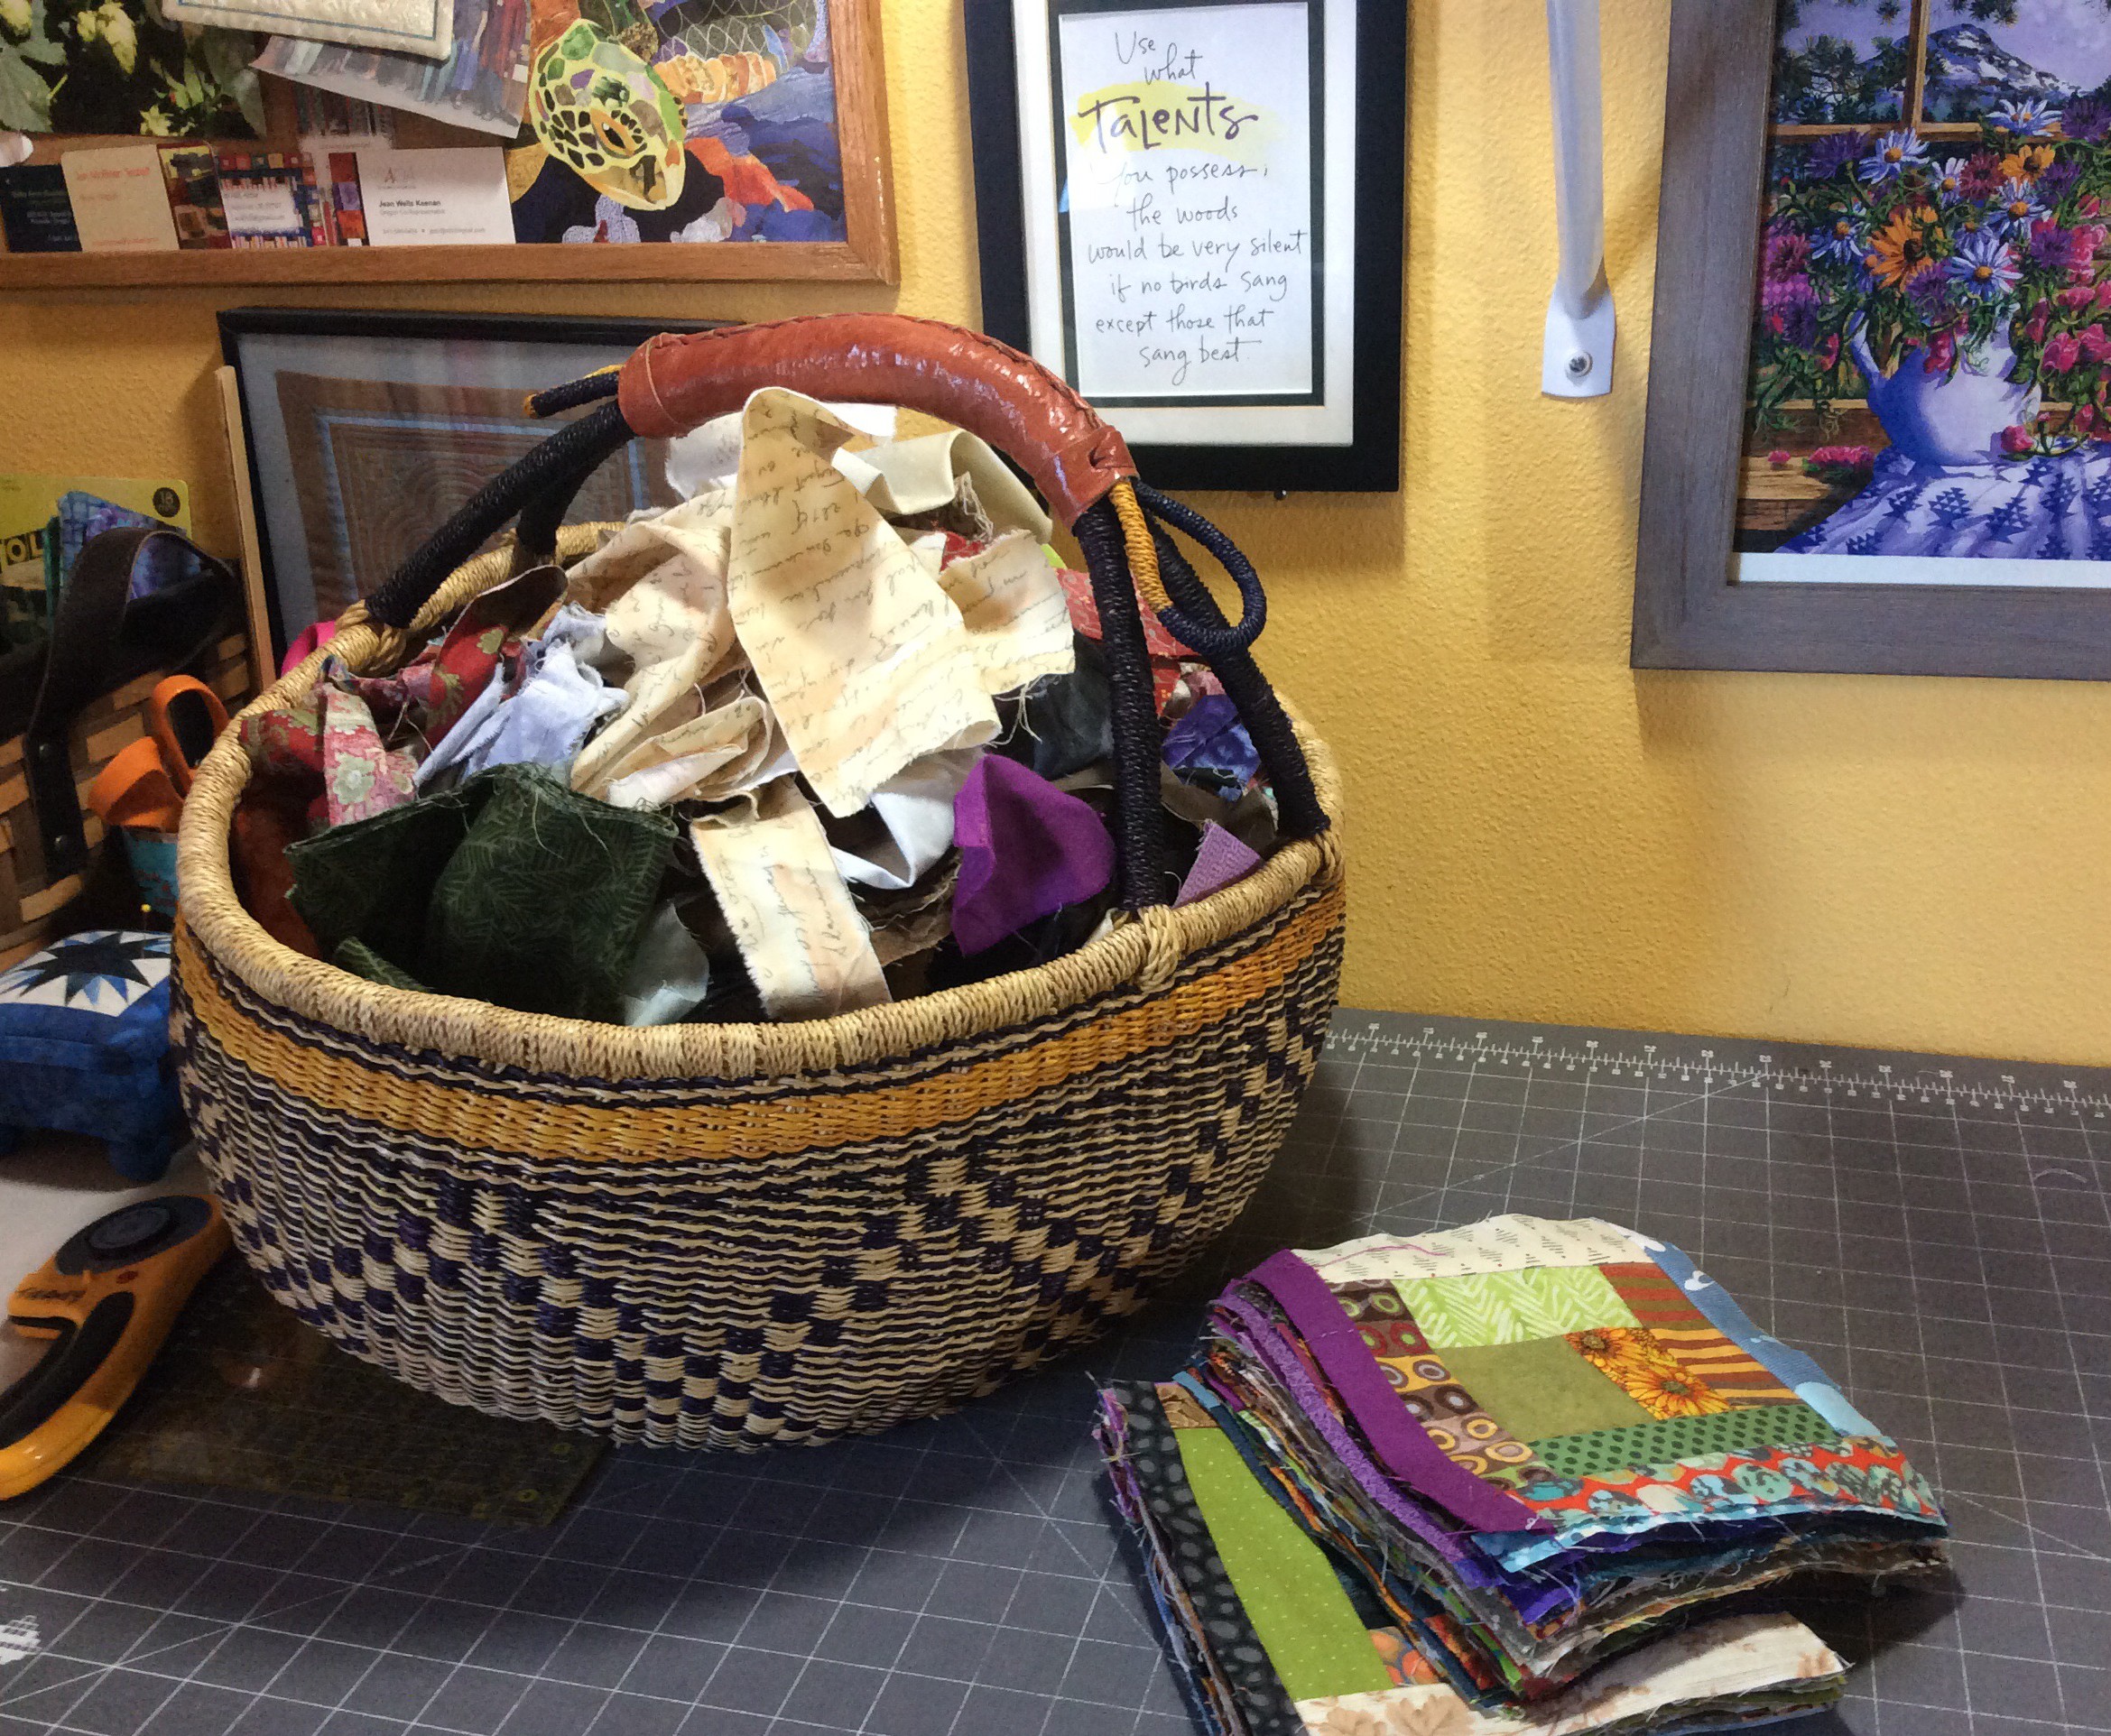
I have some already quilted fabric left over from another project to use in the back:

2018-05-26_18-45-47_653.jpeg

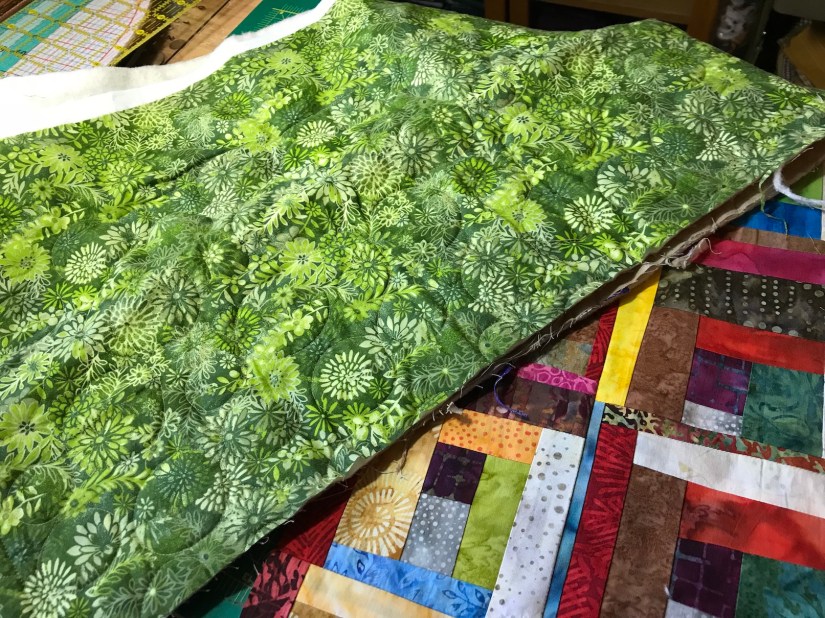
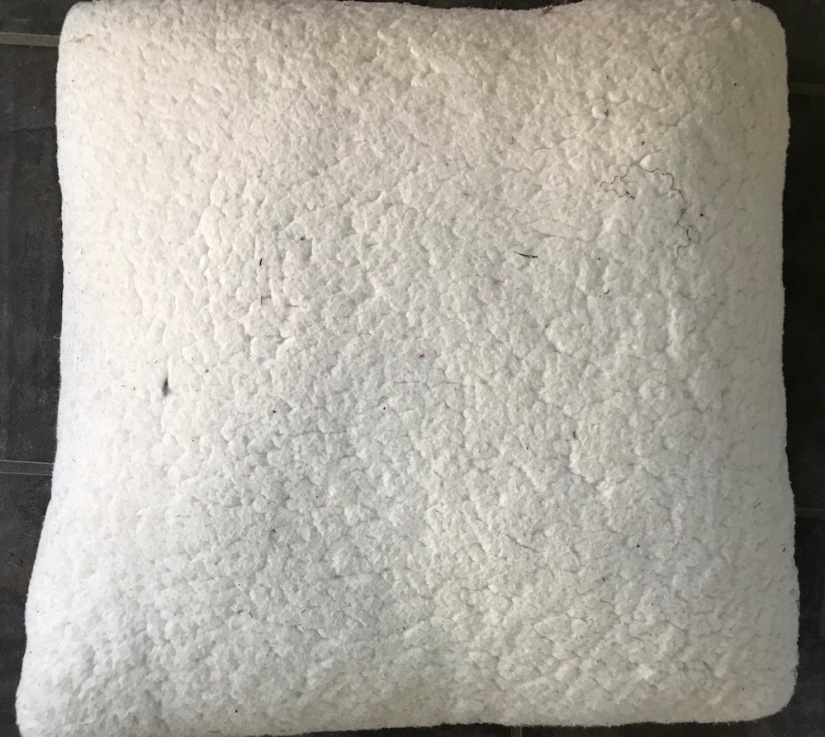
Here is one of the pillow tops awaiting quilting:

2018-05-26_19-40-00_238-2.jpeg

I used up all my already pieced blocks from 2016 and used the rest of the remaining batik fabric scraps from the project to make additional blocks for the four pillows, each made with 16 blocks.

I will of course share photos in a future post of the completed pillow covers, covering the existing fleece pillows!

UPDATE 05/29/18 – one reader asked the size of the pillows – they are approximately 23″ x 23″ each


Postscript

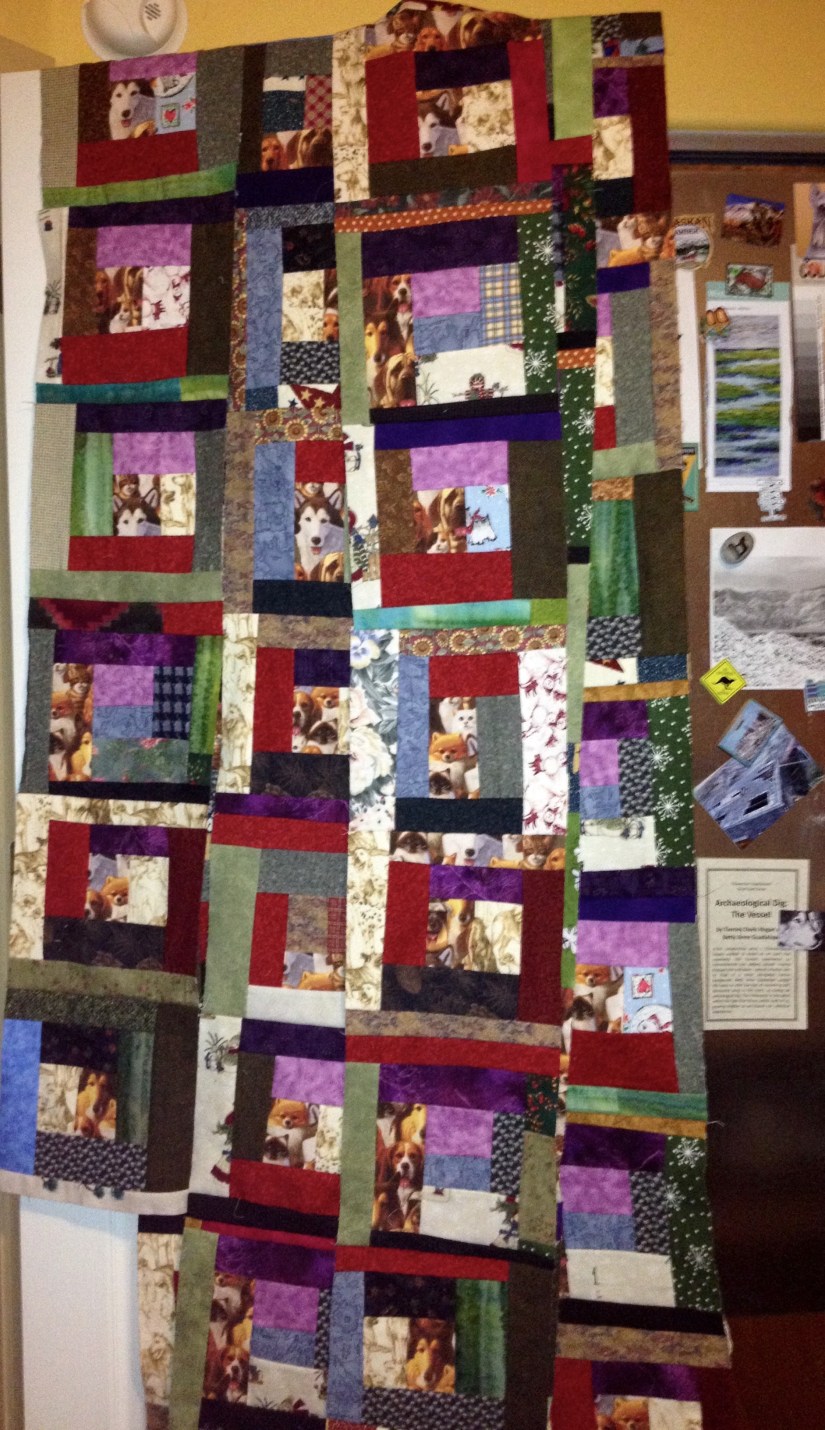
Another pillow in the “Pillow Projects” – here is a follow up to the posts Pillow Popping with the Untethered Soul  and  The “Planning Fallacy”.

I completed the pillow top from scrap 2.5″ squares:

2018-05-21_18-13-30_343.jpeg

I decided not to quilt the pillow top but instead added fusible interfacing. I made an envelope style back and here is the completed pillow on my studio chair:

2018-05-26_18-36-11_576.jpeg


Studio, What's on the Design Wall

What’s on Design Wall: Your Ideas

My next post was going to be about the cool projects other quilters were working on at the retreat (tuffets!) I attended last weekend. However, I do not want to lose the momentum from the project discussed in my Thursday 08/11/16 post –What’s on the Design Wall (Need Your Help).

I so appreciate all the enthusiastic responses, votes, and ideas. I have to tell those of you who commented: You made a MESS of my studio (smile)!

IMG_2641

You should have seen my little studio – various fabrics pulled out from my stash in many different colors, from your suggestions, strewn about everywhere. It was like a tornado of fabric options had blown through.

Reading all the comments was very fun – it was like you all were crammed into my tiny studio (where would I fit you all?!??!) and we were looking through my stash together and throwing around ideas (and fabric).

Of course, I would have to plan a snack and beverage for all my studio guests crammed into the tiny room…but where would I set out the plates and cups? (Maybe I could go scavenge some more fruit from my neighborhood to serve as snacks…but that is an upcoming post: Fruits of My Neighborhood Part III!)


THE RECAP

  • This project began with a bag of colorful Batik scraps (that I embarrassingly actually purchased…in a moment of weakness from the Stitchin’ Post quilt shop’s basket of scrap bags for sale..that shop is loaded with temptation!)

IMG_2590

  • I turned many of those scraps into 24 6′ x 6″ blocks:
IMG_2622
(BTW – I moved these blocks to my new hallway design wall which we created this weekend – but that is another post…)
  • I presented four (4) options for the layout on the blocks and here are the votes by Option:
    • OPTION 1A – Float the blocks individually in a neutral background: 2 Votes
    • OPTION 1B – Group the blocks together and then float the whole grouping in a neutral background: 0 Votes
    • OPTION 2A – Float the blocks individually in a gray background: 4 Votes
    • OPTION 2B – Group the blocks together and then float the whole grouping in a gray background: 2 Votes
  • In addition to voting on options I presented, many of you in your comments suggested different options (I hope I captured the essence of all the comments to date, my apologies if I left a summary of your comment out below):
    • Group them together on a neutral background not trying to make them perfectly square, use Misty Fuse to attach them
    • Stitch the blocks together, use a pieced binding to enclose them, they speak so well on their own!
    • Group them together on the grey but make sure all blue sides are facing opposite of the grey fabric and placed up against another block rather than up against the grey fabric not allowing a blue side to but up against another blue.
    • Float each block individually, with a PURPLE or RED background- keep the color going! And maybe put a yellow square at each “intersection”
    • Golden brown would be nice also (to float blocks).
    • I agree with some others are dark brown, plum, dark red, I’d be inclined to try them on different ones and see which calls loudest.I start to wonder if it’s be even better on the dark brown.
    • I think a chocolate brown would be so cool.
    • I would make more blocks, group them without sashing or a border, and bind with a pieced binding (NOTE: I did make more blocks, see below!)
    •  If you do want separation, don’t set them straight, in rows and columns. Use your separator in more random sizing — perhaps framing each one with the same fabric but in wonky widths. It might be easiest to pull off with a fabric that has some pattern so the seams between newly framed blocks disappear a bit.
    • If you really want to set them apart on a different background, what about looking at either a gold dupioni or a deep purple dupioni?
    • (from a text to my phone, not posted to the blog) What came to mind was floating blocks in a round of neutral logs then a round of gray logs – maybe alternate with the reverse – round of gray first then neutral – then you float and have blocks side by side – and I’m thinking of a neutral acid yellow or lime green or maybe an acid yellow orange – a crisp bright marigold color – all would look good with the blocks and gray.
    • Option Z: I love love love the blocks, but am partial to flashy colors mounted on a white background. I also like sashing between the blocks because it makes each one pop.
    • While I like both versions of placing all the blocks together and placing with sashing, I would need to try the sashing version using a variety of sizes and different shades of either the light or the grey.
  • One fellow blogger, Melanie @ Catbird Quilt Studio  was kind enough to e-mail me a photo of one of her lovely scrappy log cabin quilts, “Broken Pains” as an example of a layout she used:
broken pains
Photo courtesy of Melanie McNeil, Catbird Quilt Studio. Used with permission; all rights reserved.
  • In addition to showing you the scraps I started with, in the previous post I shared the pile of scraps I had left over from trimming the original set of blocks down to a 6″ x 6″ size:

IMG_2591

  • In the evening on Friday and Saturday, I turned the trimmings from those scraps and some of the remaining scraps into 23 more 6″ x 6″ blocks:
IMG_2616
(Now why didn’t I make 24 more instead of 23 more? I guess I lost count while piecing!) As you can see, these blocks are somewhat darker and have more piecing. I tried to use all the scraps from the trimmings which had piecing within the scraps.
  • I now have scraps left over from trimming the latest blocks and the remaining original scraps that started it all…and yes, I am going to make more blocks out of them!  (Besides 47,  24 + 23, is an usual odd number of blocks. )

IMG_2619.jpg


THE EXPERIMENTS

I tried out many of your color suggestions. To save time, I had a “pocket full of scrappy blocks” as I experimented. I never imagined walking around my house with a pocket full of quilt blocks!

Now, try and use your imagination as you look at my experiments. Although I tried to put strong lighting on the design wall, if you have been following my blog for a while, you know I am not the best photographer (if I tried to make photography a career I would be very hungry).

I provide two layouts on each test background fabric: 1) floated and 2) grouped together with a border.

More disclaimers (soon you will be frightened to even scroll down and look…): I did not iron the fabric I used as the test background and I randomly selected the blocks to go onto the test fabric. (If this were a real quilt layout, I would have given more thought to the block placement and order.)

IMG_2624
RED – I loved this!
IMG_2625
Brown – sort of a “milk chocolate” brown – could take it or leave it…
IMG_2640
Dark Brown – I guess the “dark chocolate” brown – I liked it!
IMG_2627
Gold – this is a new Moda fabric I picked up – I love it!
IMG_2629
Different shades of gray using an ombre fabric – could take it or leave it
IMG_2630
Purple – lovely!
IMG_2632
White – in concept sounded nice put I do not use large amounts of white in my pieces
IMG_2633
Blue-gray – sort of denim like – I liked it! This is one of the Peppered Cottons I have on my Etsy shop
IMG_2635
MARIGOLD! Well as close as I could get to marigold – this is a Moda Grunge line fabric and this is my favorite!
IMG_2636
Looked for an “acid green” in my stash but this bright lime green was the best I could find. I like it!

THE DECISION

Thank you so much for all the great ideas. I also appreciated all the layout and general design ideas.

My decision is as follows:

  1. Make more blocks, trying to use up nearly all the remaining scraps.
  2. Do not make a quilt with these blocks, instead make a SERIES of artsy table runners for my tierneycreates Etsy shop using various combinations and layouts of these blocks and my favorites of the backgrounds above (red, marigold, gold, purple, dark brown, and lime/acid green).

Thanks for coming with me on this color and design adventure! I will update you all as I complete the table runners!


POSTSCRIPT

Here is a follow up on the post Mysterious Thrift Store Fabric Find: One of my blogger buddies, Claire @ knitnkwilt.wordpress.com, tapped into her resources and got a translation for the words on the selvage of my mysterious Asian fabric thrift store find:

IMG_2578

ll the characters on the left say is ‘manufacturer/maker’.  I’m guessing the ones just to the right of Watex are the company’s Japanese name. The handwritten characters say ‘Golden Age’

Thanks so much Claire for helping solve the mystery.

I had more ramblings for this Postscript, but you are likely exhausted after reading this very long post!

Studio, What's on the Design Wall

What’s on the Design Wall (Need Your Help)

Check out Sassy the Highly Opinionated Miniature Schnauzer’s blog on SchnauzerSnips, for her latest musings…


BRIGHT COLOR!!!

One of my blogging-buddies, Laura @ Create Art Every Day, recently asked me in response to my comment on one of her post:

Have you ever done a quilt with lots of white or neutral (back)ground mixed with really bright brights?

Her timing on this question is amazing as I just returned from a four-day quilt retreat with some of my Quilting Sisters and some new quilting friends I met at the retreat. While at the retreat I worked on free-form piecing of log cabin blocks (“log jamming”).

IMG_2611.jpg
First round of scrappy log-jam batik blocks

These blocks started as bag of colorful batik fabric scraps:

IMG_2590.jpg
The bag of batik scraps that started it all

I trimmed each block to a 6″ x 6″ block and I have scraps left over from trimming the blocks and I am going to use those “trimming scraps” and the rest of the scrap back to make more blocks.

IMG_2591.jpg
The leftovers from trimming the blocks

Now here is where I need your help – I am trying to decide what background color to set the blocks into and what layout. I would appreciate input from crafters and non crafters – I want to know what you find most aesthetically pleasing:

OPTION 1A – Float the blocks individually in a neutral background:

IMG_2595.jpg

OPTION 1BGroup the blocks together and then float the whole grouping in a neutral background:

IMG_2596.jpg

OPTION 2A – Float the blocks individually in a gray background:

IMG_2601.jpg

OPTION 2B Group the blocks together and then float the whole grouping in a gray background:

IMG_2602.jpg

This dilemma is actually the fault of Laura @ Create Art Every Day (ha!) as originally I had purchased the gray fabric during the quilt retreat to float the blocks. Then I was inspired by Laura’s comment to float the blocks in a neutral background!

I am stuck and would appreciate your vote and any comments you want to make regarding your rationale. THANK YOU!

In my next post I will share what the other quilters were working on at the quilt retreat I recently attended and some cool fabric finds (in addition to the one mentioned in “Postscript”). 


POSTSCRIPT

Frivolous Purchase

Speaking of “Bright Color“, while at the retreat, I bought a frivolous but cool piece of fabric – a panel by Hoffman Fabrics of their entire Hand-Dyed Batik Watercolor Palette:

IMG_2609.jpg

It is now hanging in my studio.

I do love bright colors and here are the quilts I keep on the chair in my studio. The two on the left are made by my Quilting Sisters (Judy D. and Kathy R.) and I was rotating them as wallhangings in my studio prior to getting the Hoffman Batik panel. The one on the right is my first experiment with creating Half-Square Triangles with charm squares using a Batik charm back I bought in the early 2000s (I made this quilt around 2003).

IMG_2606

A Blog Recommendation

I follow many wonderful blogs by other crafters, quilters, painters and other artists. I also follow inspirational blogs by non-crafters. Please see my “Blogs of Follow” list section of my Home page.

I was fortunate to discover (I think by a comment on one of my blog posts) a blog by a Nigerian quilter – Sola, called Alice Samuel’s Quilt Co. Her blog is very interesting to read from a quilter’s perspective outside the US. I have also come across various wonderful Australian and UK quilter blogs.

I love how quilting connects us across the globe!

In Sola’s latest post, she has a wonderfully researched (with lots of links to resources) post on:

The Quilting Process: Basting your Quilt

Thanks to my fellow bloggers for their engaging blogs I love following; and thanks to the tierneycreates readers/followers (extra thanks to those who take the time to comment on posts). I feel very blessed! (huge smile).

A Crafter's Life

Terry the Quilting Husband Hard at Work

Check out Sassy the Highly Opinionated Miniature Schnauzer’s blog page Schnauzer Snips for her latest musings.

Quilt in Progress

Terry the Quilting Husband has been hard at work finishing another quilt for the Sisters Outdoor Quilt Show in July 2016, hoping to get into the Male Quilter exhibit (in the upcoming weeks he will submit his entries to the selection committee).

Over the past couple of months he made 82 9.5 inch blocks from my flannel scraps using the log jam method (see previous posts on “log jamming”) and sewed them into 9 rows of 9 blocks each:

IMG_3059.jpg
Rows of flannel scrap log jam blocks waiting to be sewn together

If you do the math – 9 rows with 9 block each equals a 81 block quilt. So what became of the 82nd block? I was wondering about that also and went into Terry’s “studio” (he uses the guest bedroom as his sewing studio) to discover the fate of the extra block.

Here is what I found: he kept one of the blocks that had a schnauzer in the center (from a flannel dog fabric scrap with different breeds) and displayed it in his sewing area:

IMG_3045.jpg

Note: our guest room is extremely dog themed. You would not want to stay at our house if you do not like dogs – ha!

The Pillow

The one block displayed made me smile and I wanted to make it into something more permanent for him, so I made a quick little throw pillow for him with the block.

IMG_3062

Now he is focused on sewing the rows together so we can get it to the long-arm quilter.

I suspect when the quilt is quilted, we are going to struggle with wanting to part with it if we decided to put it for sale at the Sisters Outdoor Quilt Show!

Studio, What's on the Design Wall

What’s on the Design Wall: Backlog

Not all quilters are like me: saddled with a backlog of projects. I know quilters who (they are freaks!) work on ONE project at time, seeing it through completion, and not starting another project until their current project is complete.

My mind does not work that way. I am basically that golden retriever in the movie Up, who says “Squirrel!“when I see a new project to start. I am easily distracted and I tell myself I will get back to the current/previous project eventually.

I was having a bit of creative block on designing a new art quilt and I realize I need to work through my project backlog. So here it is sitting up the cutting table, festering:


IMG_1252

In this pile under the cutting table, I discovered 120+ 6.5 inch log jam blocks (scrappy pieced log cabin style blocks) that I had pieced earlier this year. With the assistance of Terry the Quilting Husband, I got them sewn together and now they are on the Design Wall awaiting assembly of the rows.

IMG_1251

I have a total of 10 rows with 12 blocks in each row. I am hoping that by floating the pieced blocks in a solid color border, I can make it a twin, full or queen size quilt top. I will post a photo when the top is complete (before it journeys to the long-arm quilter).

“Never put off till tomorrow what may be done day after tomorrow just as well.” – Mark Twain

Fabric Scraps Obsession

It’s a Keeper!

Check out Sassy the Highly Opinionated Miniature Schnauzer’s latest musings on the Schnauzer Snips page; and check out the latest updates on the Textile Adventures page. 

UPDATE

A little update to the post What’s on the Design Wall: “Log Jamming”:

Terry, the “Quilting Husband” really got into making “log jam” style free form log cabin blocks. He ended up making over 100+ 6.5 inch x 6.5 inch blocks. We set them in 10 x 10 rows to create a quilt top. Betty Anne Guadalupe of Guadalupe Designs professionally quilted the top.

Log Jam by Terry (2015). Quilted by Betty Anne Guadalupe.

The plan was to list it on the tierneycreates Etsy Shop but I fell in love with it and decided – IT’S A KEEPER!  So now it is displayed on our dining room wall.

I have pieced many 6.5 inch by 6.5 inch log jam blocks myself (they are a fun and meditative way to use up fabric scraps) and I am thinking of making a Queen size (yikes) quilt with them for sale at the 2016 Sisters Outdoor Quilt Show.  First I will have to see how many I have done and then do some math (yikes, again) to figure out how many I will need (hint: 100 blocks only made a lap size quilt…).

POSTSCRIPT

I am not sure how it happened, but my previous post Because Nice Matters, was my 100th blog post! I remember when I started the tierneycreates blog in October 2013, I did not imagine getting to my 100th post (I was just happy to be at 5 posts!). It has been so fun so far connecting with other bloggers and I so appreciate my readers and followers! 

Studio, What's on the Design Wall

What’s On The Design Wall: Flannel “Log Jam” Blocks

Continuing my series of posts on what is on the design wall…

THE QUILTING HUSBAND IS BUSY AGAIN

I had some of my blocks up on the design wall and Terry “The Quilting Husband” was getting impatient. He kept giving me subtle hints (and not too subtle hints) about moving my stuff off the design wall so he can put his blocks up on the design wall (we have a small house and can only make 1 shared design wall work).

The Quilting Husband is working on a new “Log Jam” quilt (see my other posts on “Log Jamming” and “Log Jams” which are free form pieced log cabin style blocks) made with flannel scraps. I have a large box of flannel scraps from making flannel quilts and flannel quilt backs, and Terry came up with the idea of trying to use of the scraps making flannel log jam quilts.

As his confidence grows as a quilter, he gets comfortable with making his own design decisions. He found a stash of dog and cat themed flannel scraps and used them as the center so each block would feature a dog and/or cat face. Very creative!

Fabric Scraps Obsession, Studio

Collaborative “Jamming”

I taught “The Quilting Husband”, Terry a couple months ago how to make log jam blocks. If you would like to know more about log jam blocks and “log jamming”, see these posts:

Terry, loaded with a box of color coordinated scraps I pre-selected, made endless 6 1/2 inch log jam blocks (120+) and put a dent in my scraps (a small dent but any dent is appreciated!).

Then he took a 100 of the 6 1/2 inch block and created a 10 x 10 quilt. It was a collaborative process as he completed ten – 10 block rows, and I did the final sewing of the ten rows together to make the quilt top. Terry, The Quilting Husband, is not much for matching seams to sew rows together, but that is okay – look at how much he accomplished!

Now I am working on putting the back of the quilt together so it can go to the long-arm quilter!

Then comes the decision – keep it or list it on the Etsy site for sale. We will likely list it for sale…we’ll see…

Colorful Jam by tierneycreates and terrycreates!
Studio, Sunflowers!

Ugly Sunflower Fabric Challenge

IMG_1448I love sunflowers and years ago (maybe 10) I bought some sunflower fabric I found on sale. I never used this fabric and it ended up in the back of my stash, forgotten.

A couple of months ago I was purging the fabric that I no longer loved to donate to a charity thrift store (see blog post The Fabric Purge!) and came across the sunflower fabric again. I do not have a photo of the original fabric, but 10 years later, looking at it I thought “what was I thinking?!?!?”

It was…well…quite ugly fabric. Little sunflower images with a very cheesy looking patterns and other images surrounding the sunflowers. No wonder it had been on sale 10 years ago!

A quilter friend of mine suggested a Challenge: Don’t get rid of the fabric – cut out the sunflowers and use them as centers in a log cabin style quilt. She offered to give me some coordinating fabric that she was purging from her stash!

I took on the challenge and made the quilt! I just gave to my long-arm quilter the 88″ x 66″ quilt top made with just the sunflower sections of the ugly fabric and coordinating fabric from a friend’s stash!  I set the 9.5″ by 9.5″ inch blocks in a Moda paper bag colored fabric. I cannot wait to see what it looks like quilted!

Studio, What's on the Design Wall

What’s on the Design Wall: Flannel Shirt Log Jamming

Check out Sassy’s related post on her blog Schnauzer Snips about her time napping in flannel shirt material  Okay, I promise – no more posts about log jamming for a while after this post…maybe. The log jamming continues and now I have a new recruit: If you read the post This is the Story of a Quilting Husband, you read that my husband Terry recently learned to quilt. This past weekend I taught him to log jam (see posts What’s on the Design Wall: “Log Jamming” and “Log Jamming”: The Sequel). On the Design Wall are his first batch of log jamming blocks, made from Flannel Shirt Flannels!*

First set of shirt flannel log jam blocks by Terry, the Quilting Husband

*The shirt flannels were rediscovered during part two of my purge of fabric (see post The Fabric Purge!). This time I worked through my flannels and weeded out those no I no longer needed and rediscovered my tucked away collection of shirt flannels. 

Fabric Scraps Obsession, Studio

“Log Jamming”: The Sequel

This is a followup to my post What’s on the Design Wall: “Log Jamming” :

Last Tuesday evening I took the Log Jam Class at the Stitchin’ Post quilt shop, this time with the actual instructor, Jackie. Jackie is the Queen of the Log Jam (and a wonderful and fun instructor) and I picked up a couple tips I missed when my friends and I made our own class up earlier this year (when our instructor had to cancel so my friends taught me how to “log jam” as discussed in the post What’s on the Design Wall: “Log Jamming” ).

Taking the class again (well taking it for real with the official instructor), got me even more addicted to log jamming. I also learned that the log jamming technique is based on an old African sewing process. I thought it was something the quilt shop had developed, I did not realize it had so much history. Log jamming is such a great way to work through your fabric scrap collection!

So far I have completed 56 – 6 1/2 inch log jam blocks and I have another 30 some in progress. Not sure when I am going to stop working on the blocks and make them into something. Maybe I will just create a huge pile of log jam blocks enough for a couple King-size quilts. But, alas, that will still not put a dent in my fabric scrap collection

Below is a photo of the basket of coordinating scraps I use while log jamming and my current stack of blocks. My plan is to keep  log jamming with this palette until I exhaust this palette of scraps (or I become exhausted from using the same palette!)

IMG_0378
Basket of scraps for log jamming and stack of completed blocks
Fabric Scraps Obsession, Studio, What's on the Design Wall

What’s on the Design Wall: “Log Jamming”

A couple of weeks ago I was scheduled to take a quilting class called “Log Jam“. Log Jam is an innovative way to rapidly create scrappy log cabin quilt blocks. If you are a new quilter or not a quilter, a “log cabin” block is a quilting block made by starting with a small center square and building consistent standardly sized strips of fabric around the center square. The log jam concept throws the requirement of consistency sized strips out the window. “Log jamming” makes the log cabin style quilt block construction process laid back, casual, scrappy and fun! When making a log jam quilt you can use a specific palette of scraps, solid colors, or random scraps to make the piece very scrappy.

Unfortunately only three people registered for the class (myself and two of my friends) and it this did not meet the threshold to hold the class. The quilt shop was so wonderful and let us use their classroom anyway and hold our own class (two of my friends had taken the class before). So we spent 6 hours having a blast “log jamming“. The “log jam” method involves the kind of quilt block making you can do while chatting and giggling with friends – it is fun and less structured. We ended up being very silly and singing songs while we were working on our log jams. I even modified Bob Marley’s song “Jamming” to “Log Jamming”!

Now the 27 blocks I made log jamming are sitting on my design wall. I am trying to decide what I want to do with these blocks: maybe a table runner for my series of my Modern Quilt Table Runners on my Etsy shop or maybe one quilt with the blocks set into a solid background or floated. Every quilter should find space for a design wall – it helps to lay your pieces out to see where you want to take them!

If you live in the Central Oregon area, the Stitchin’ Post has a wonderful Log Jam class that my friends and I highly recommend you take!