Update on the Scrappy English Paper Piecing (EPP) Project
So here is my update on the scrappy English Paper Piecing (EPP) hexie rosette project I’ve been working on since 2016 that I previously posted about in this post – ScrapHappy April 2026: Update on the EPP Quilt
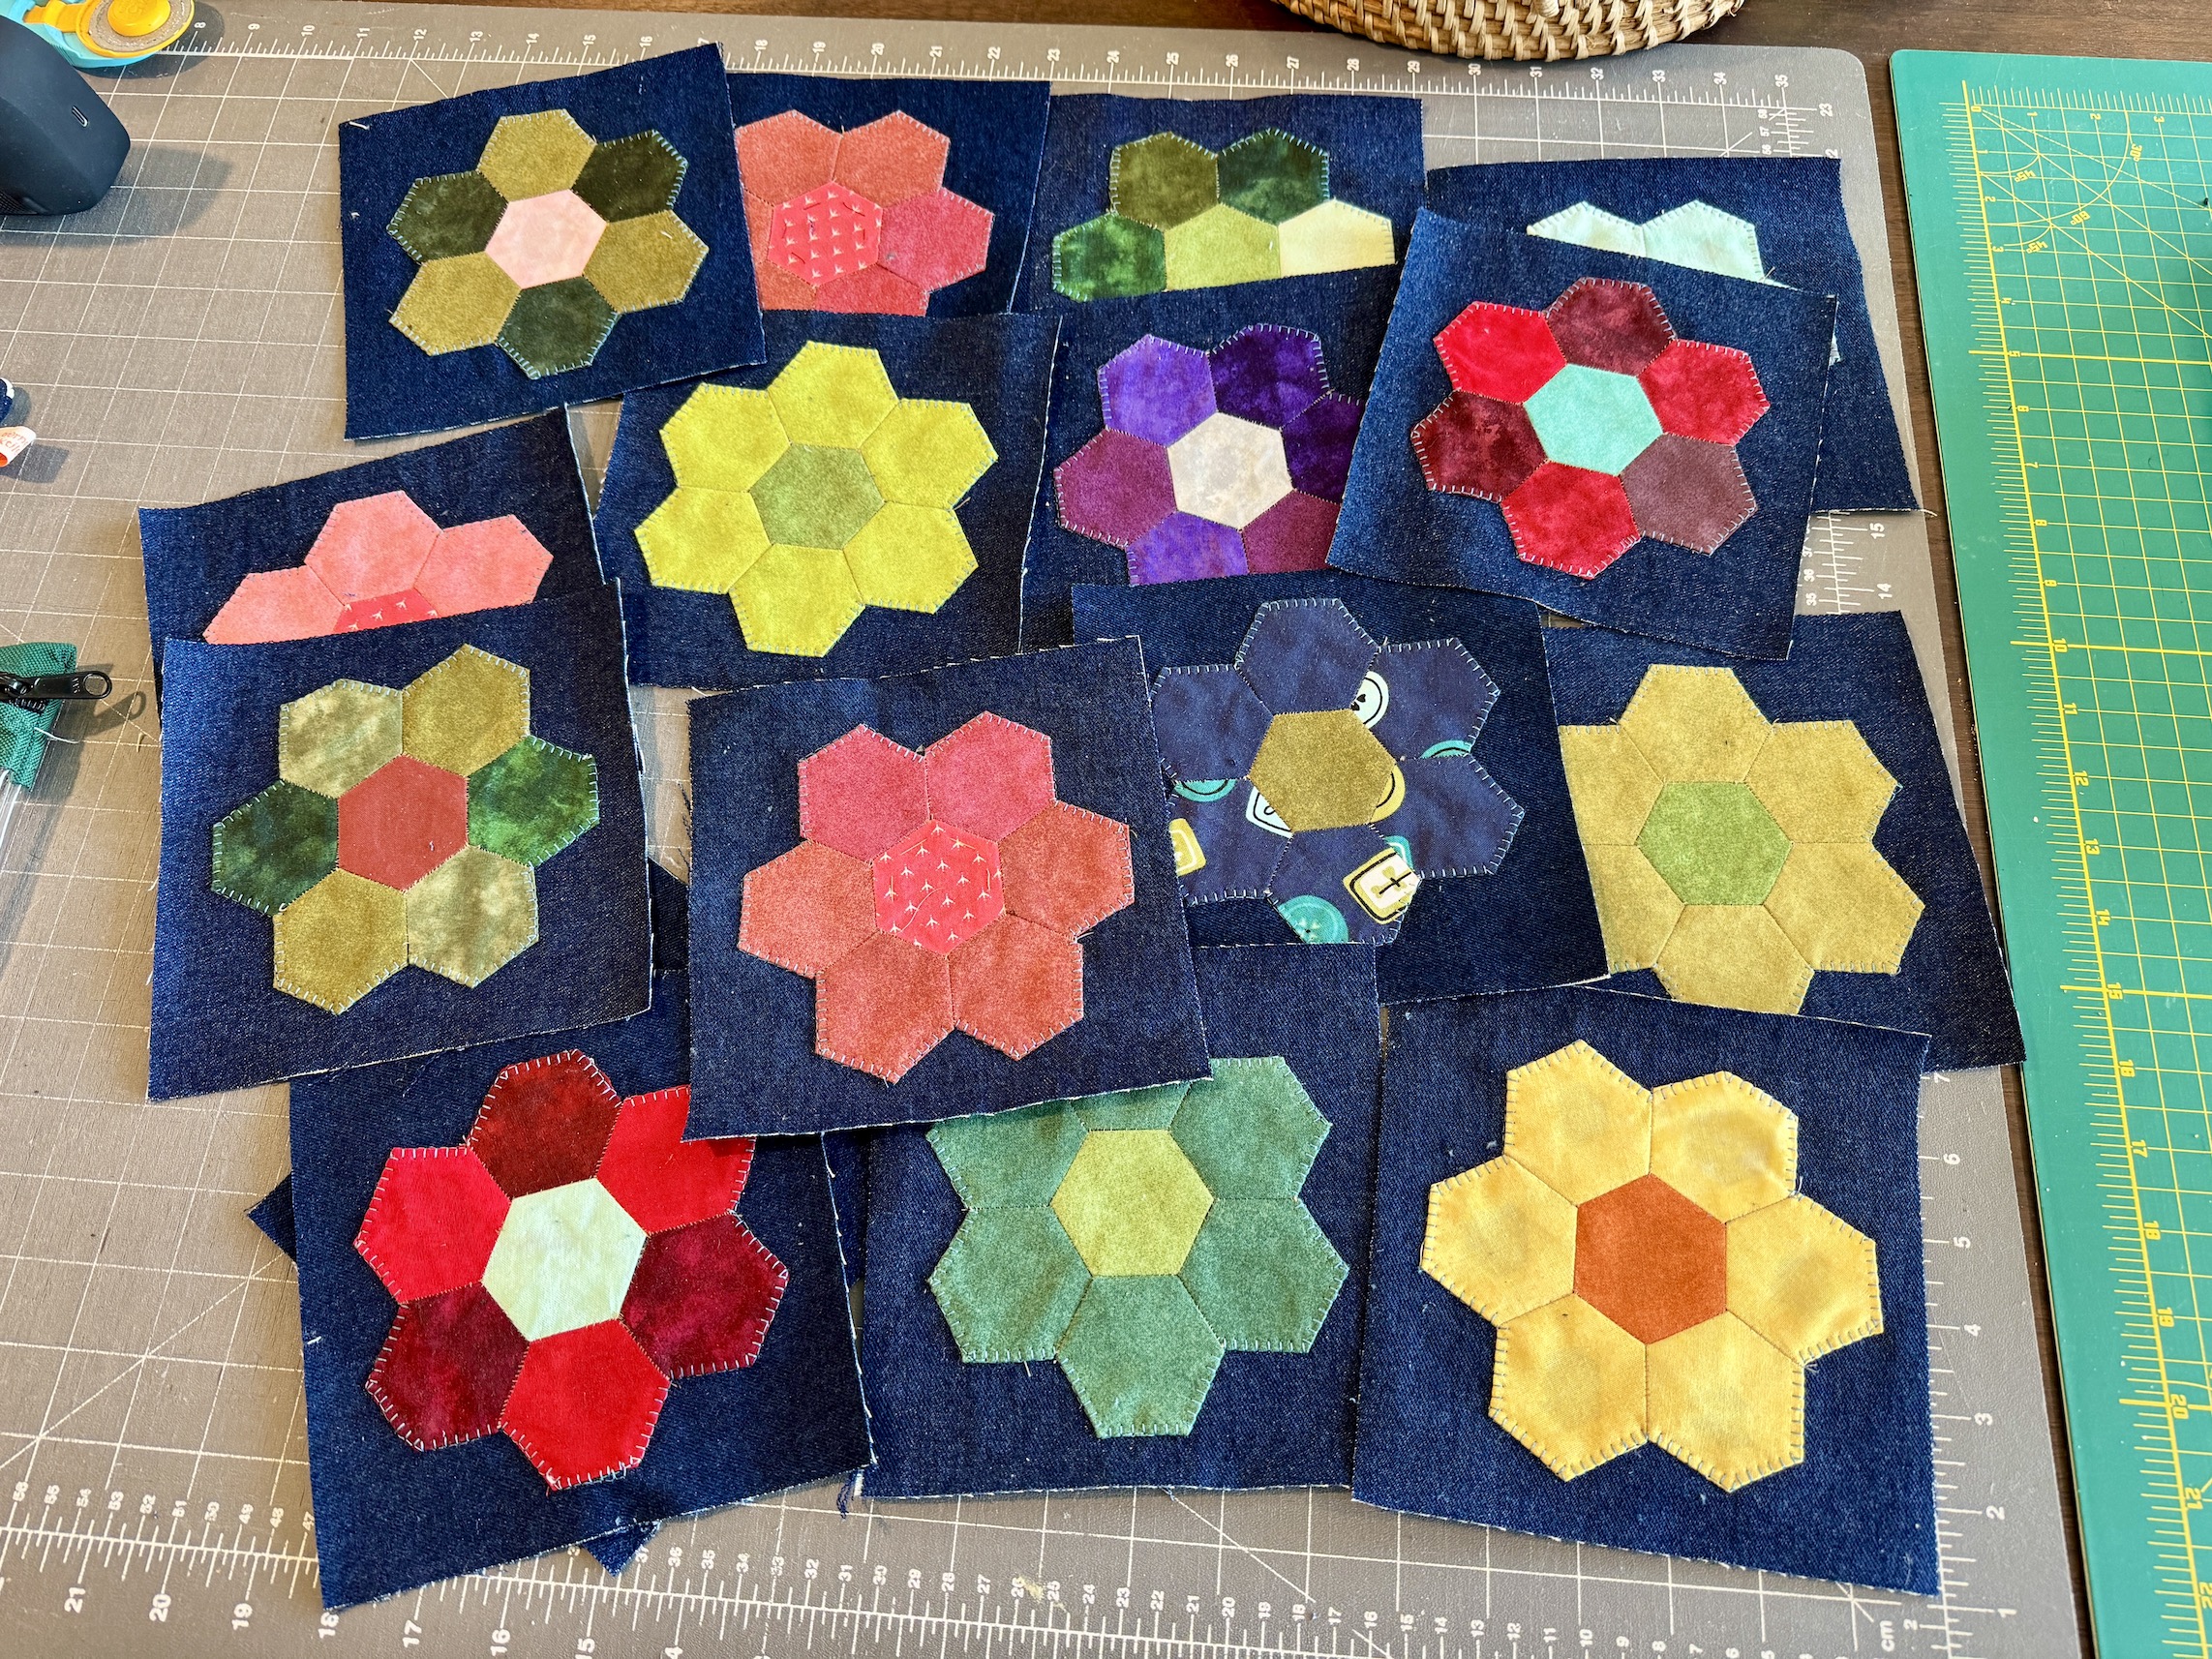
I made a bit of progress from April’s update and completed 16 more blocks.
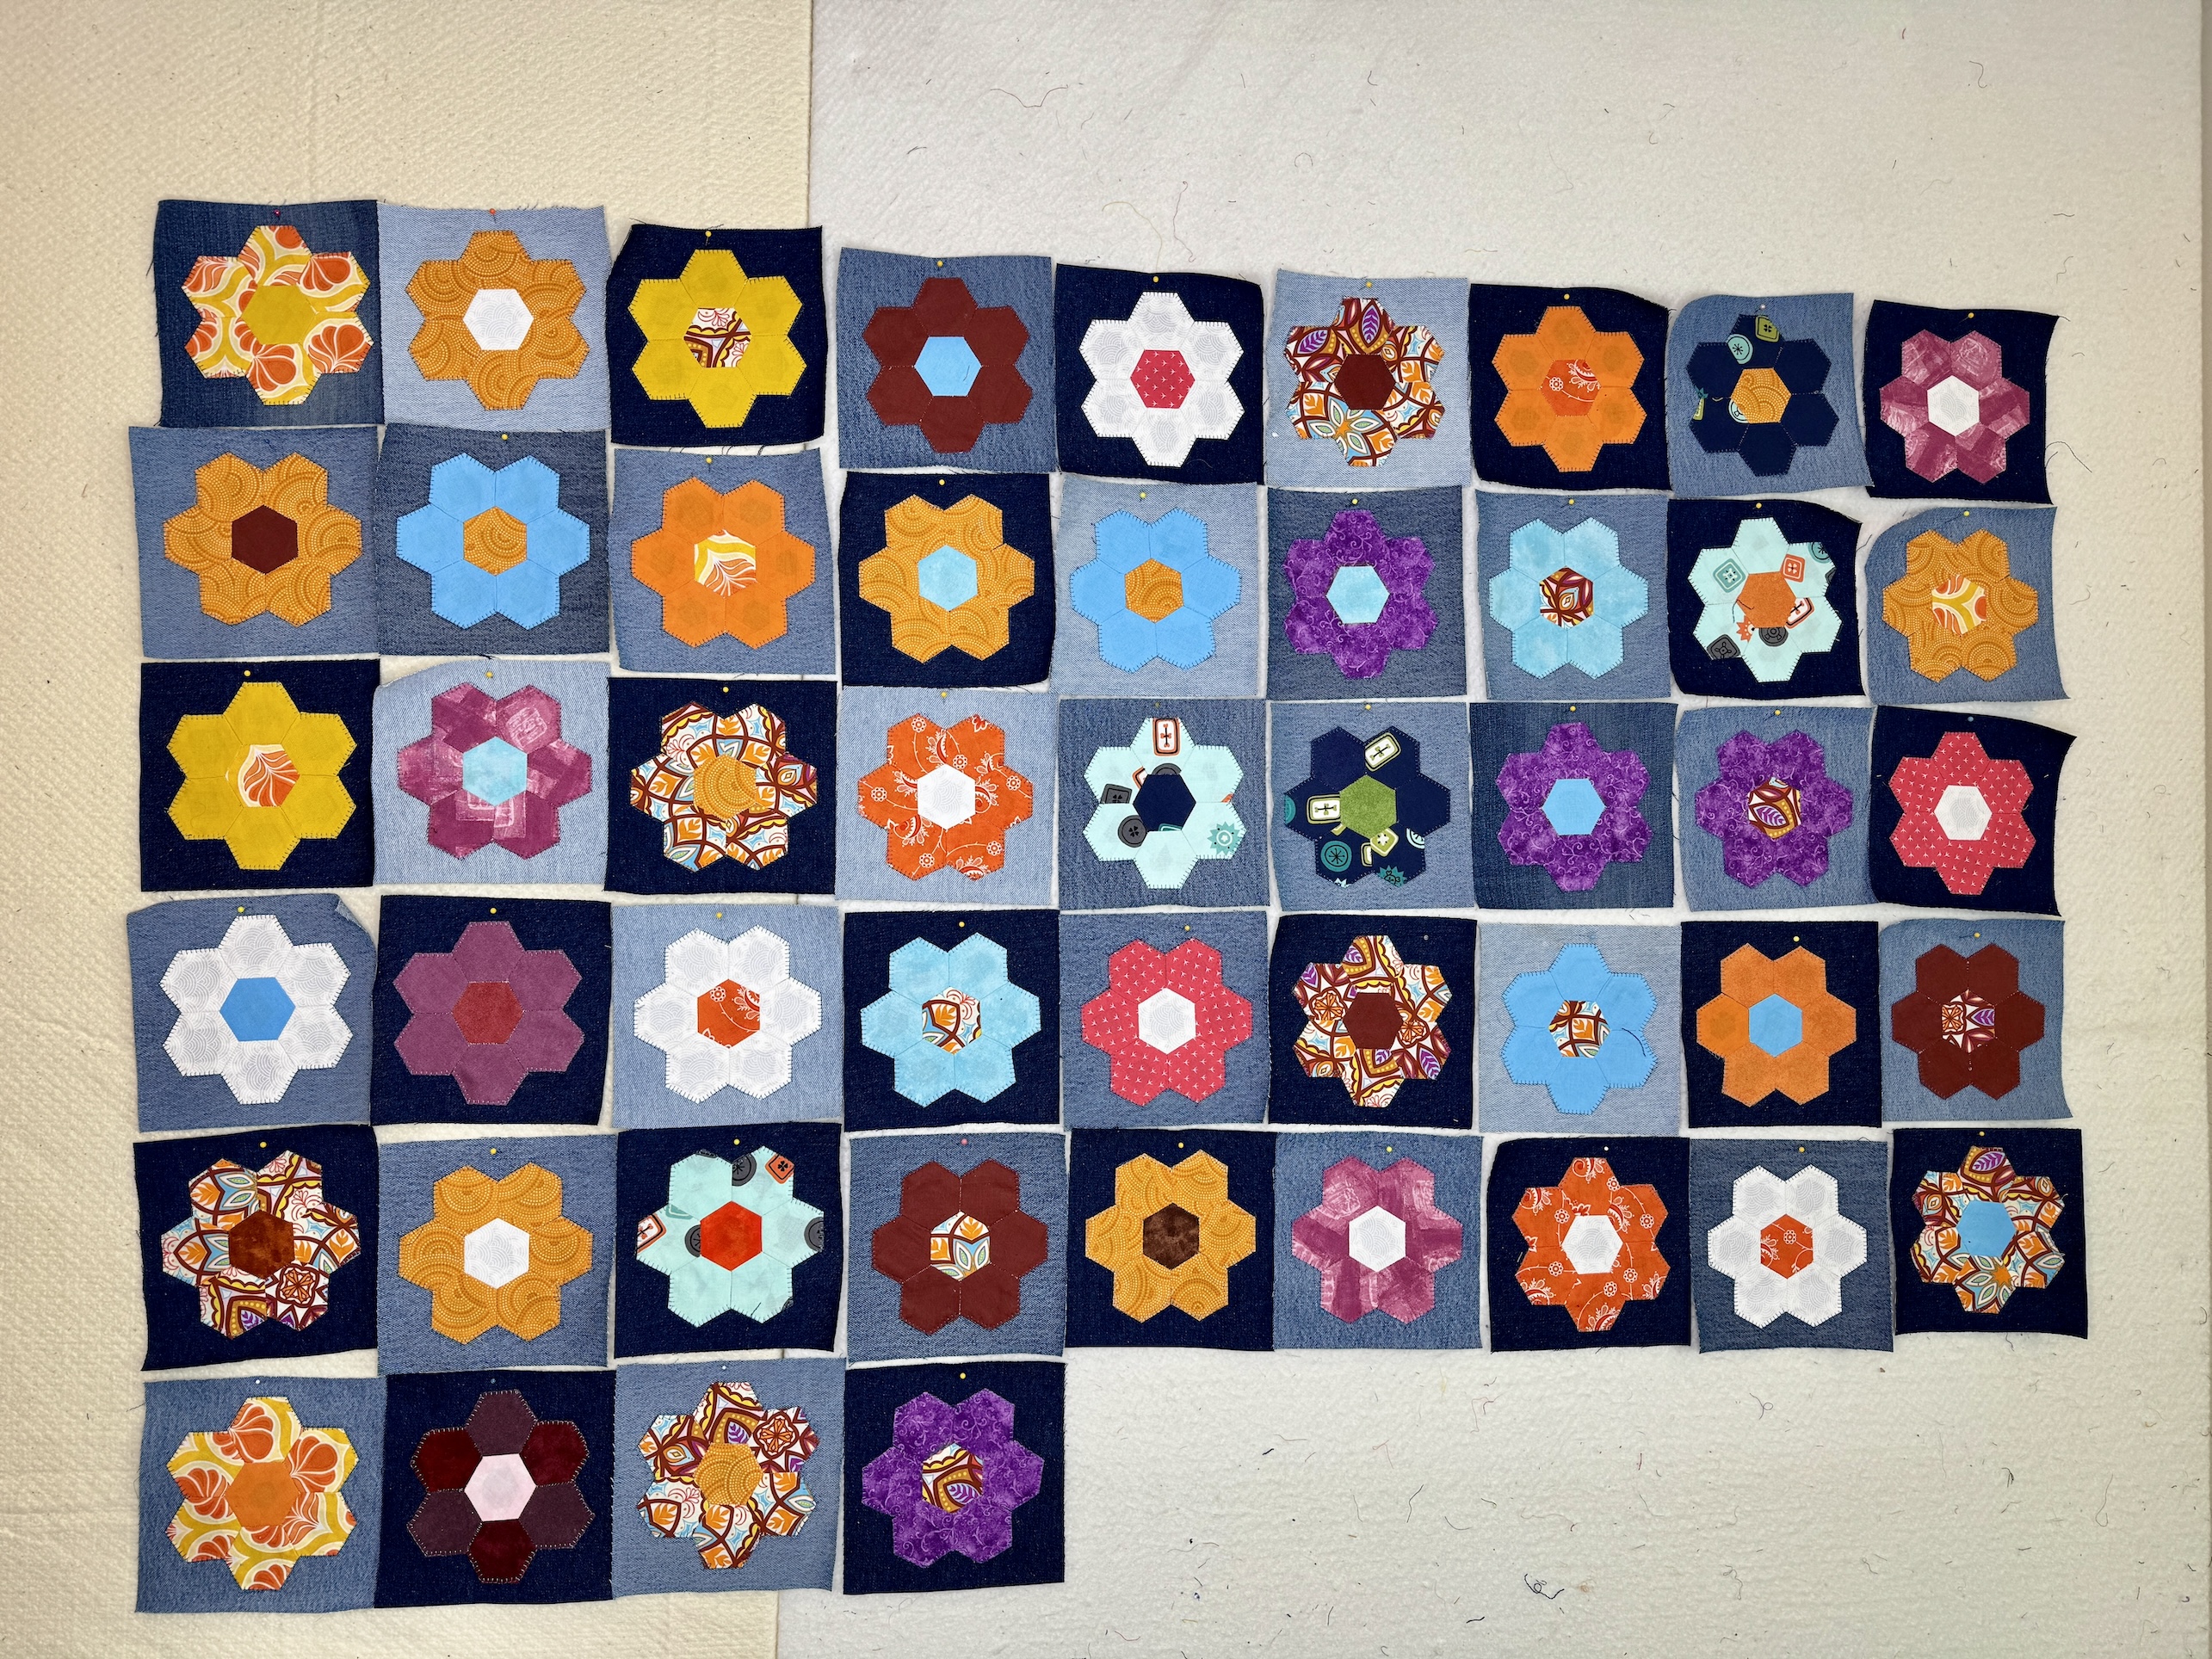
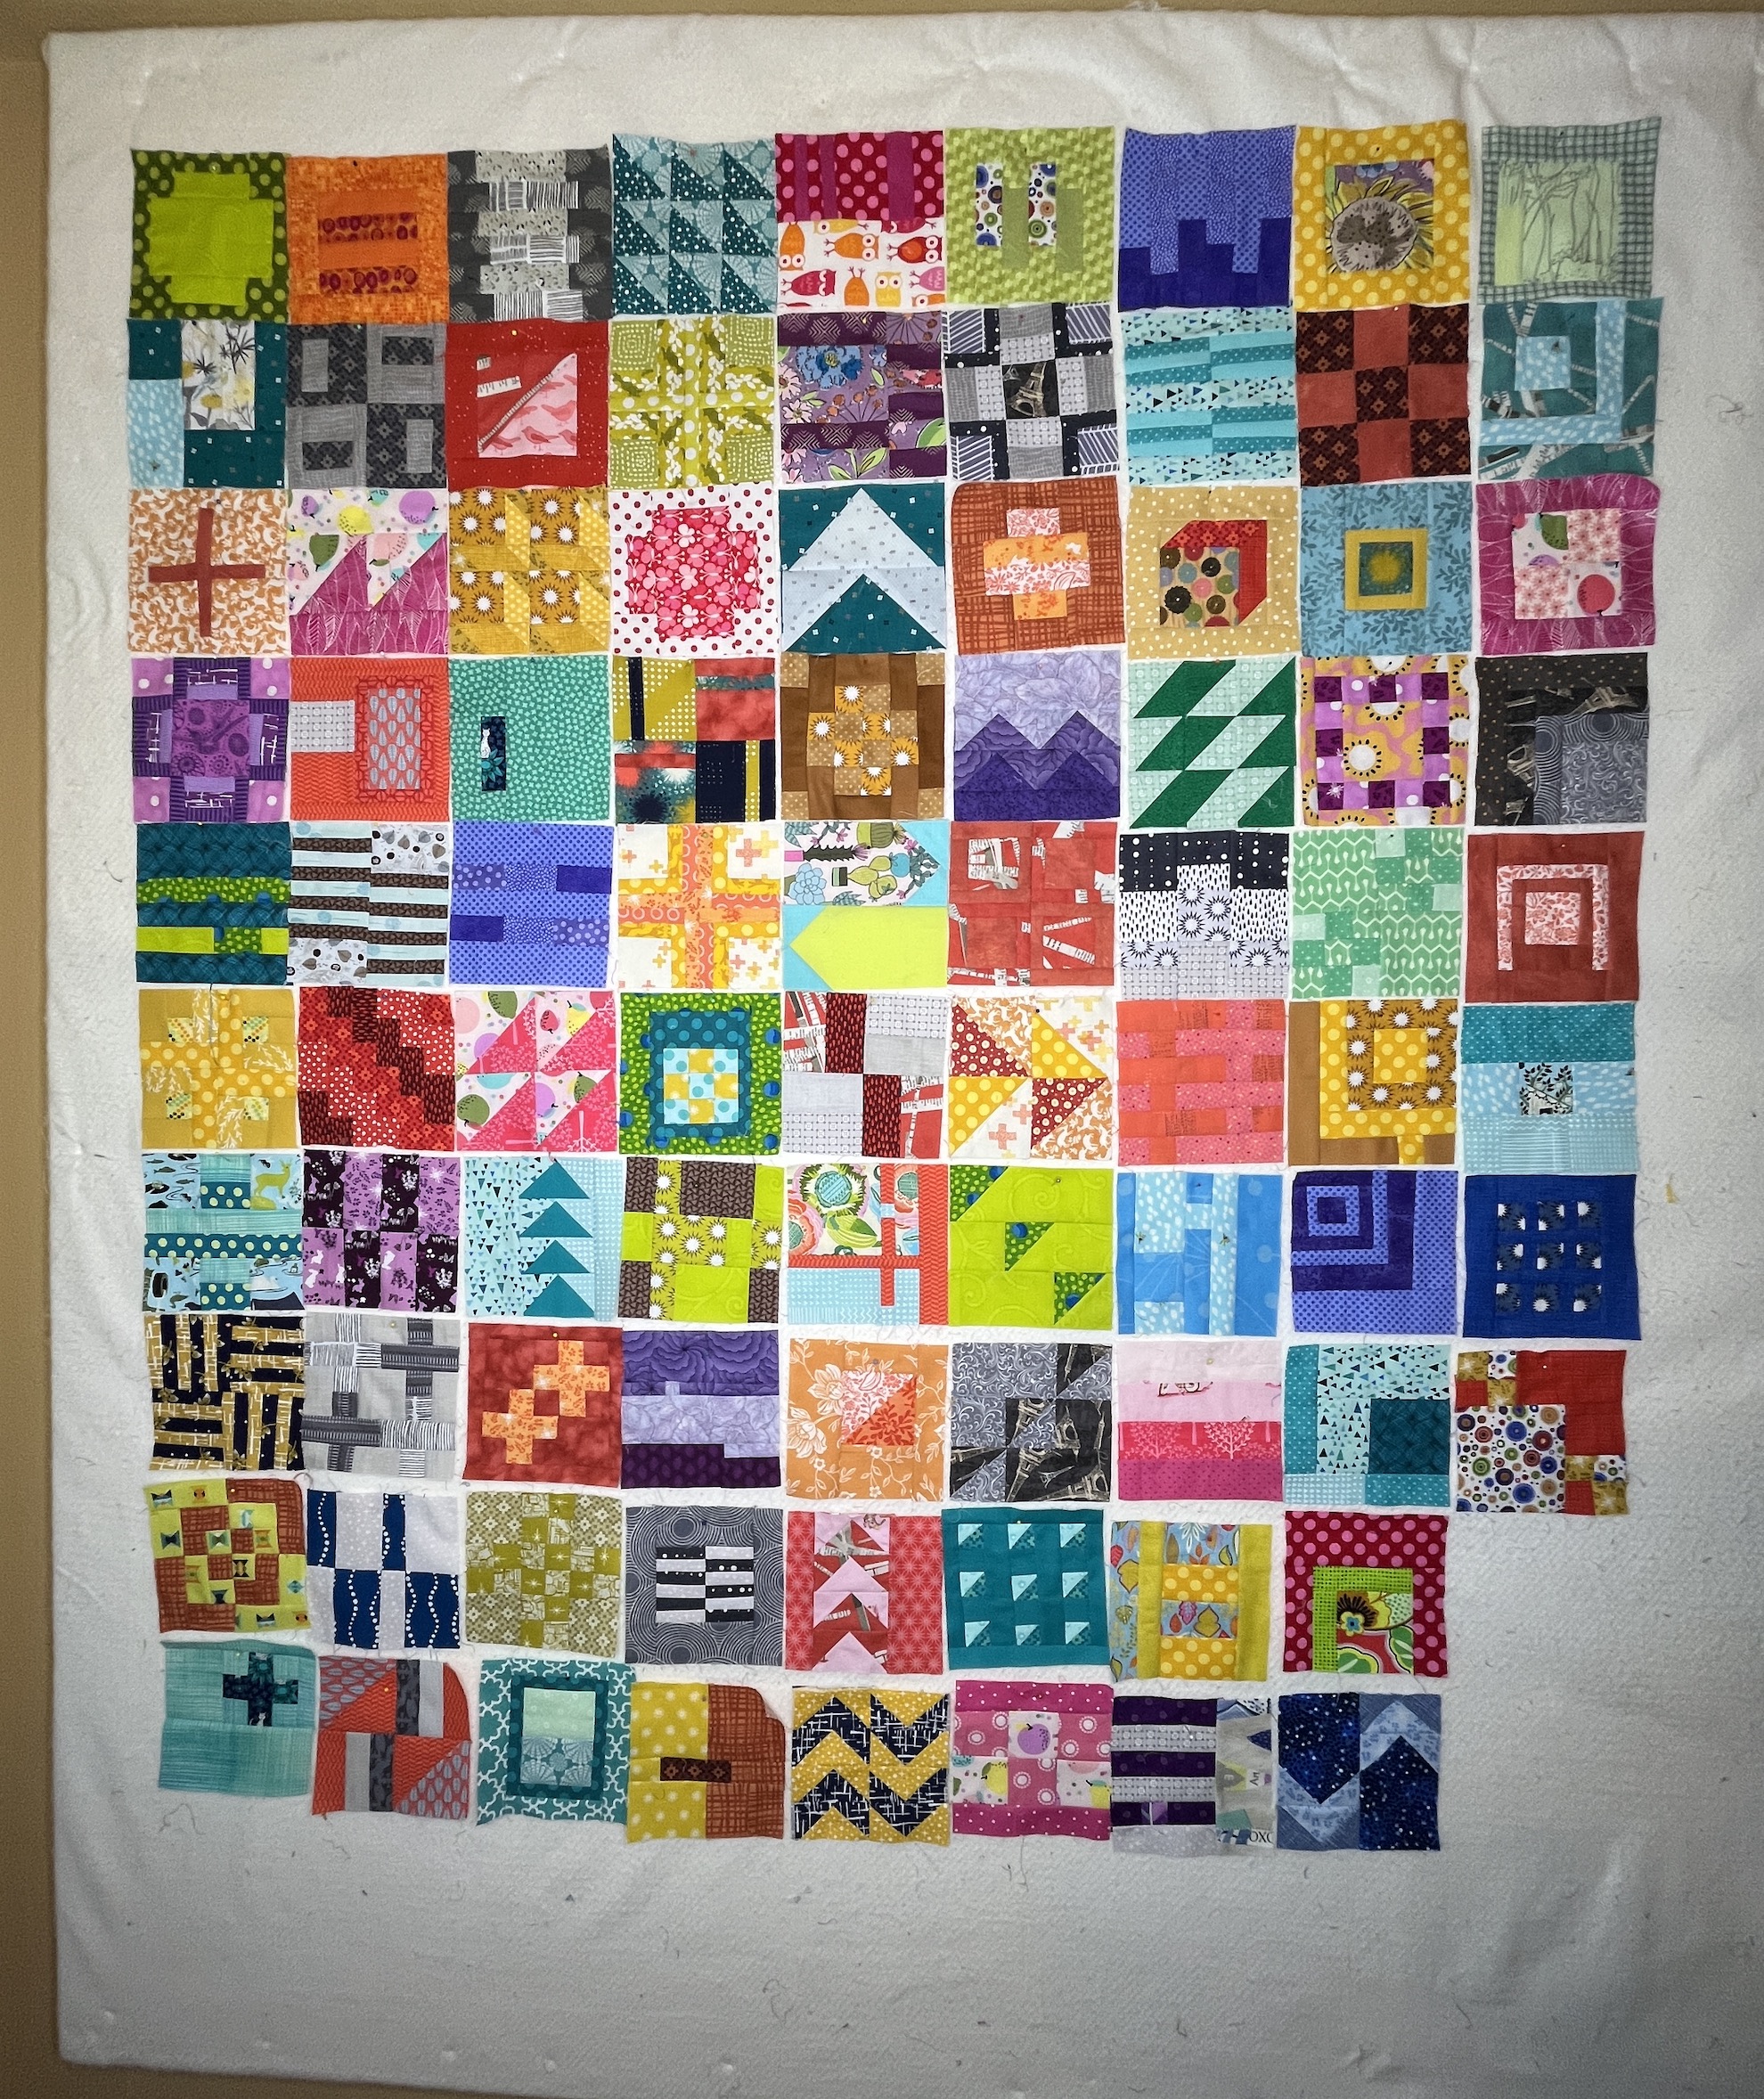
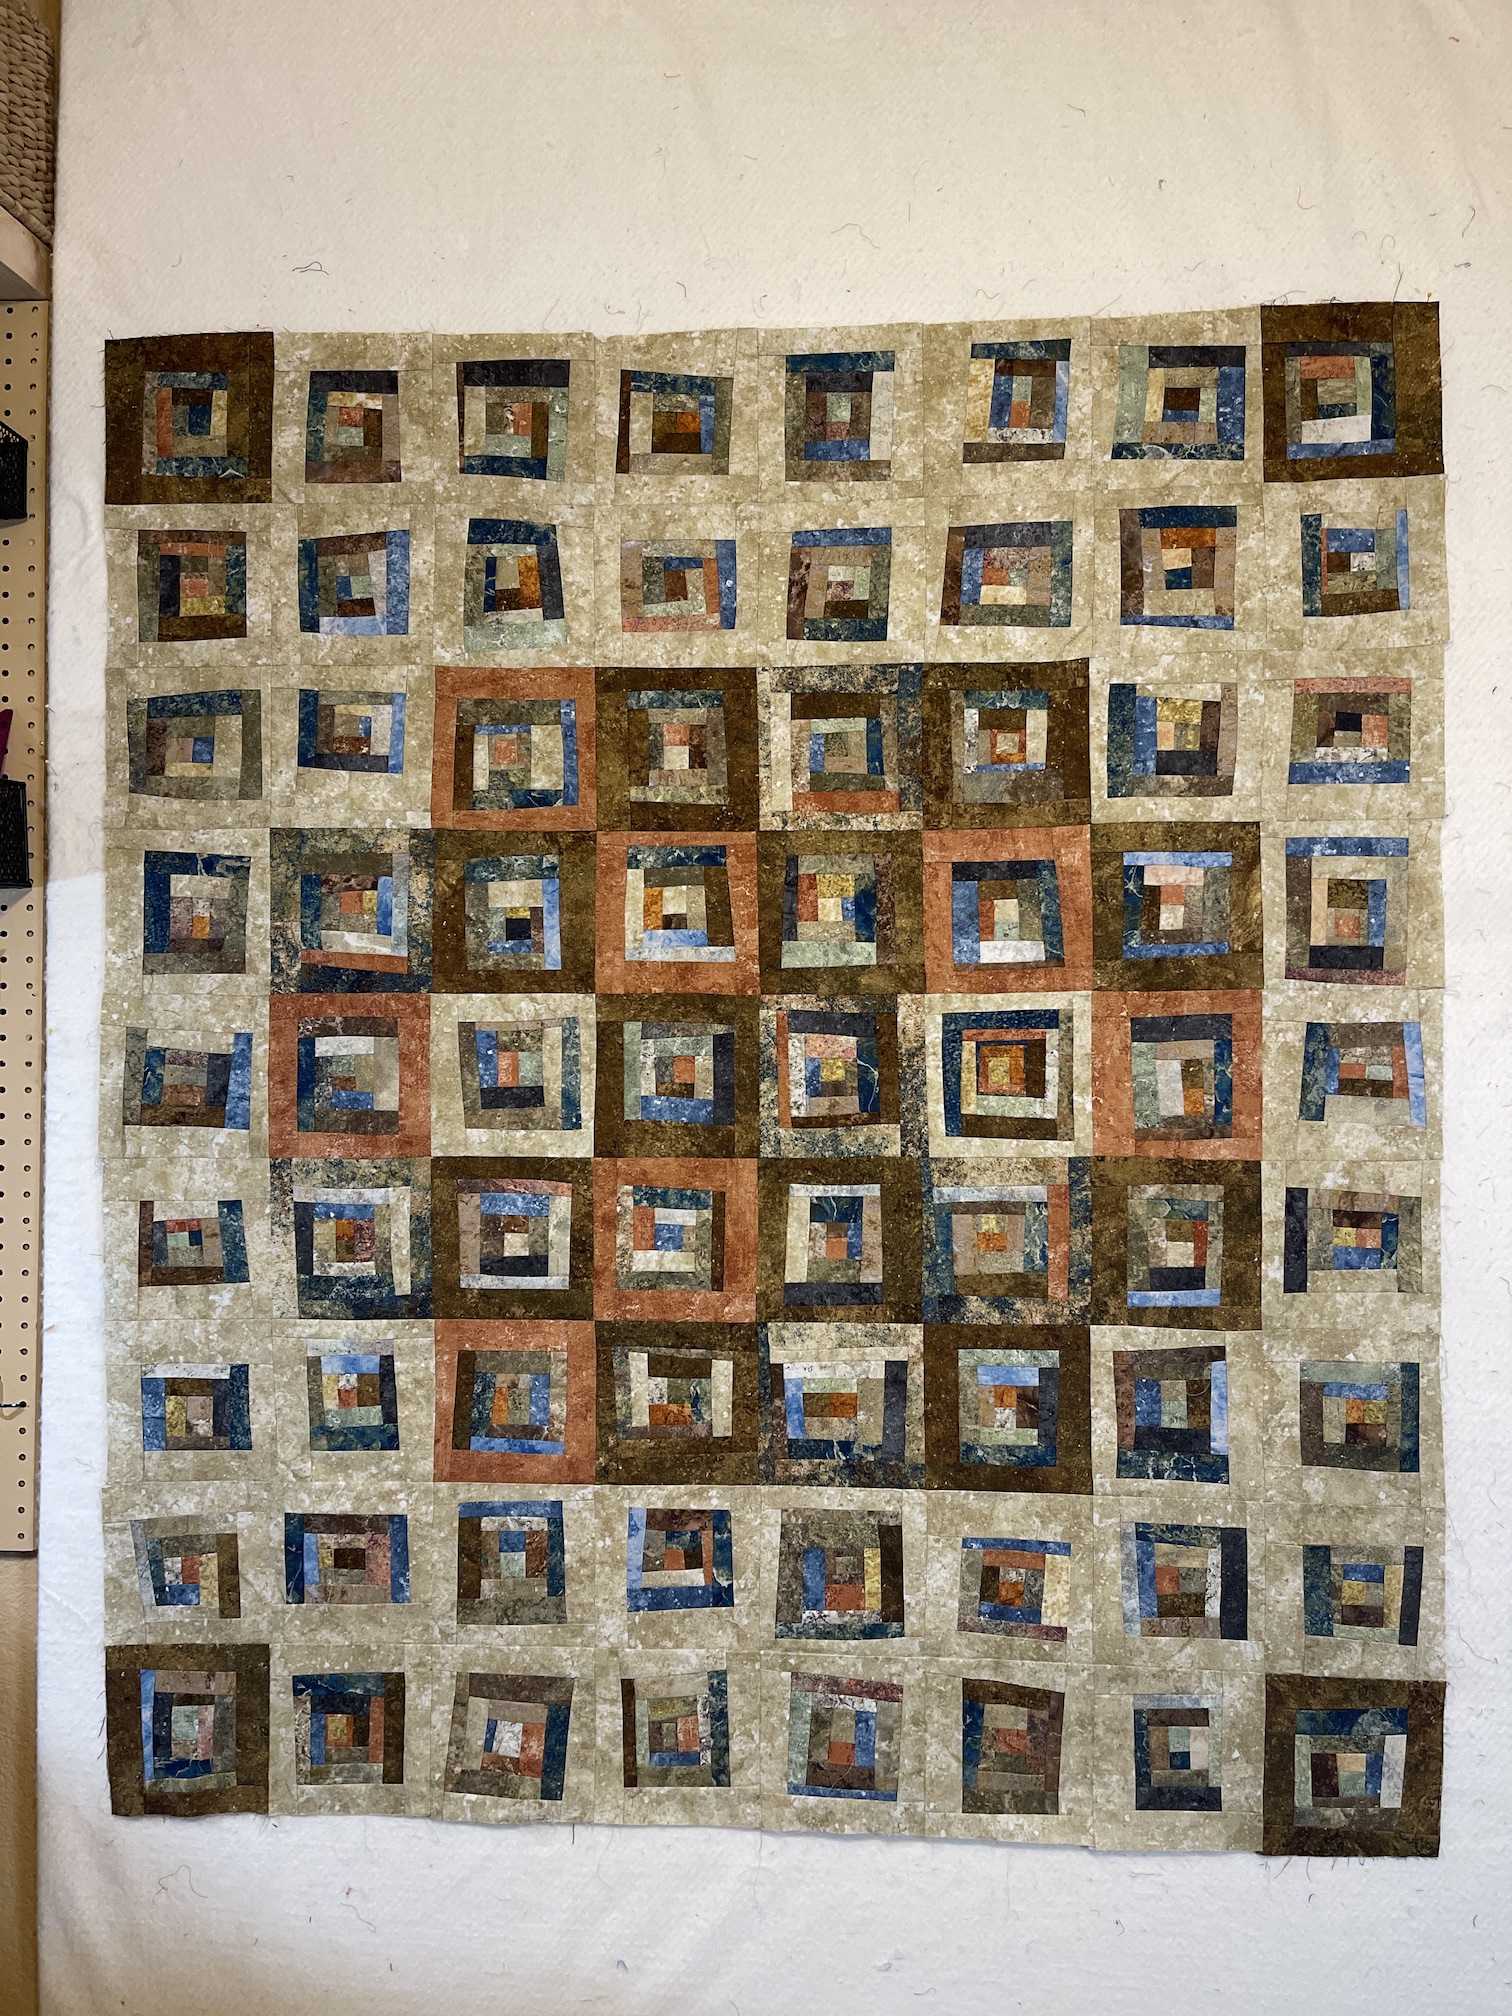
Here is what the quilt in progress looked like in April 2026 with 49 blocks completed:
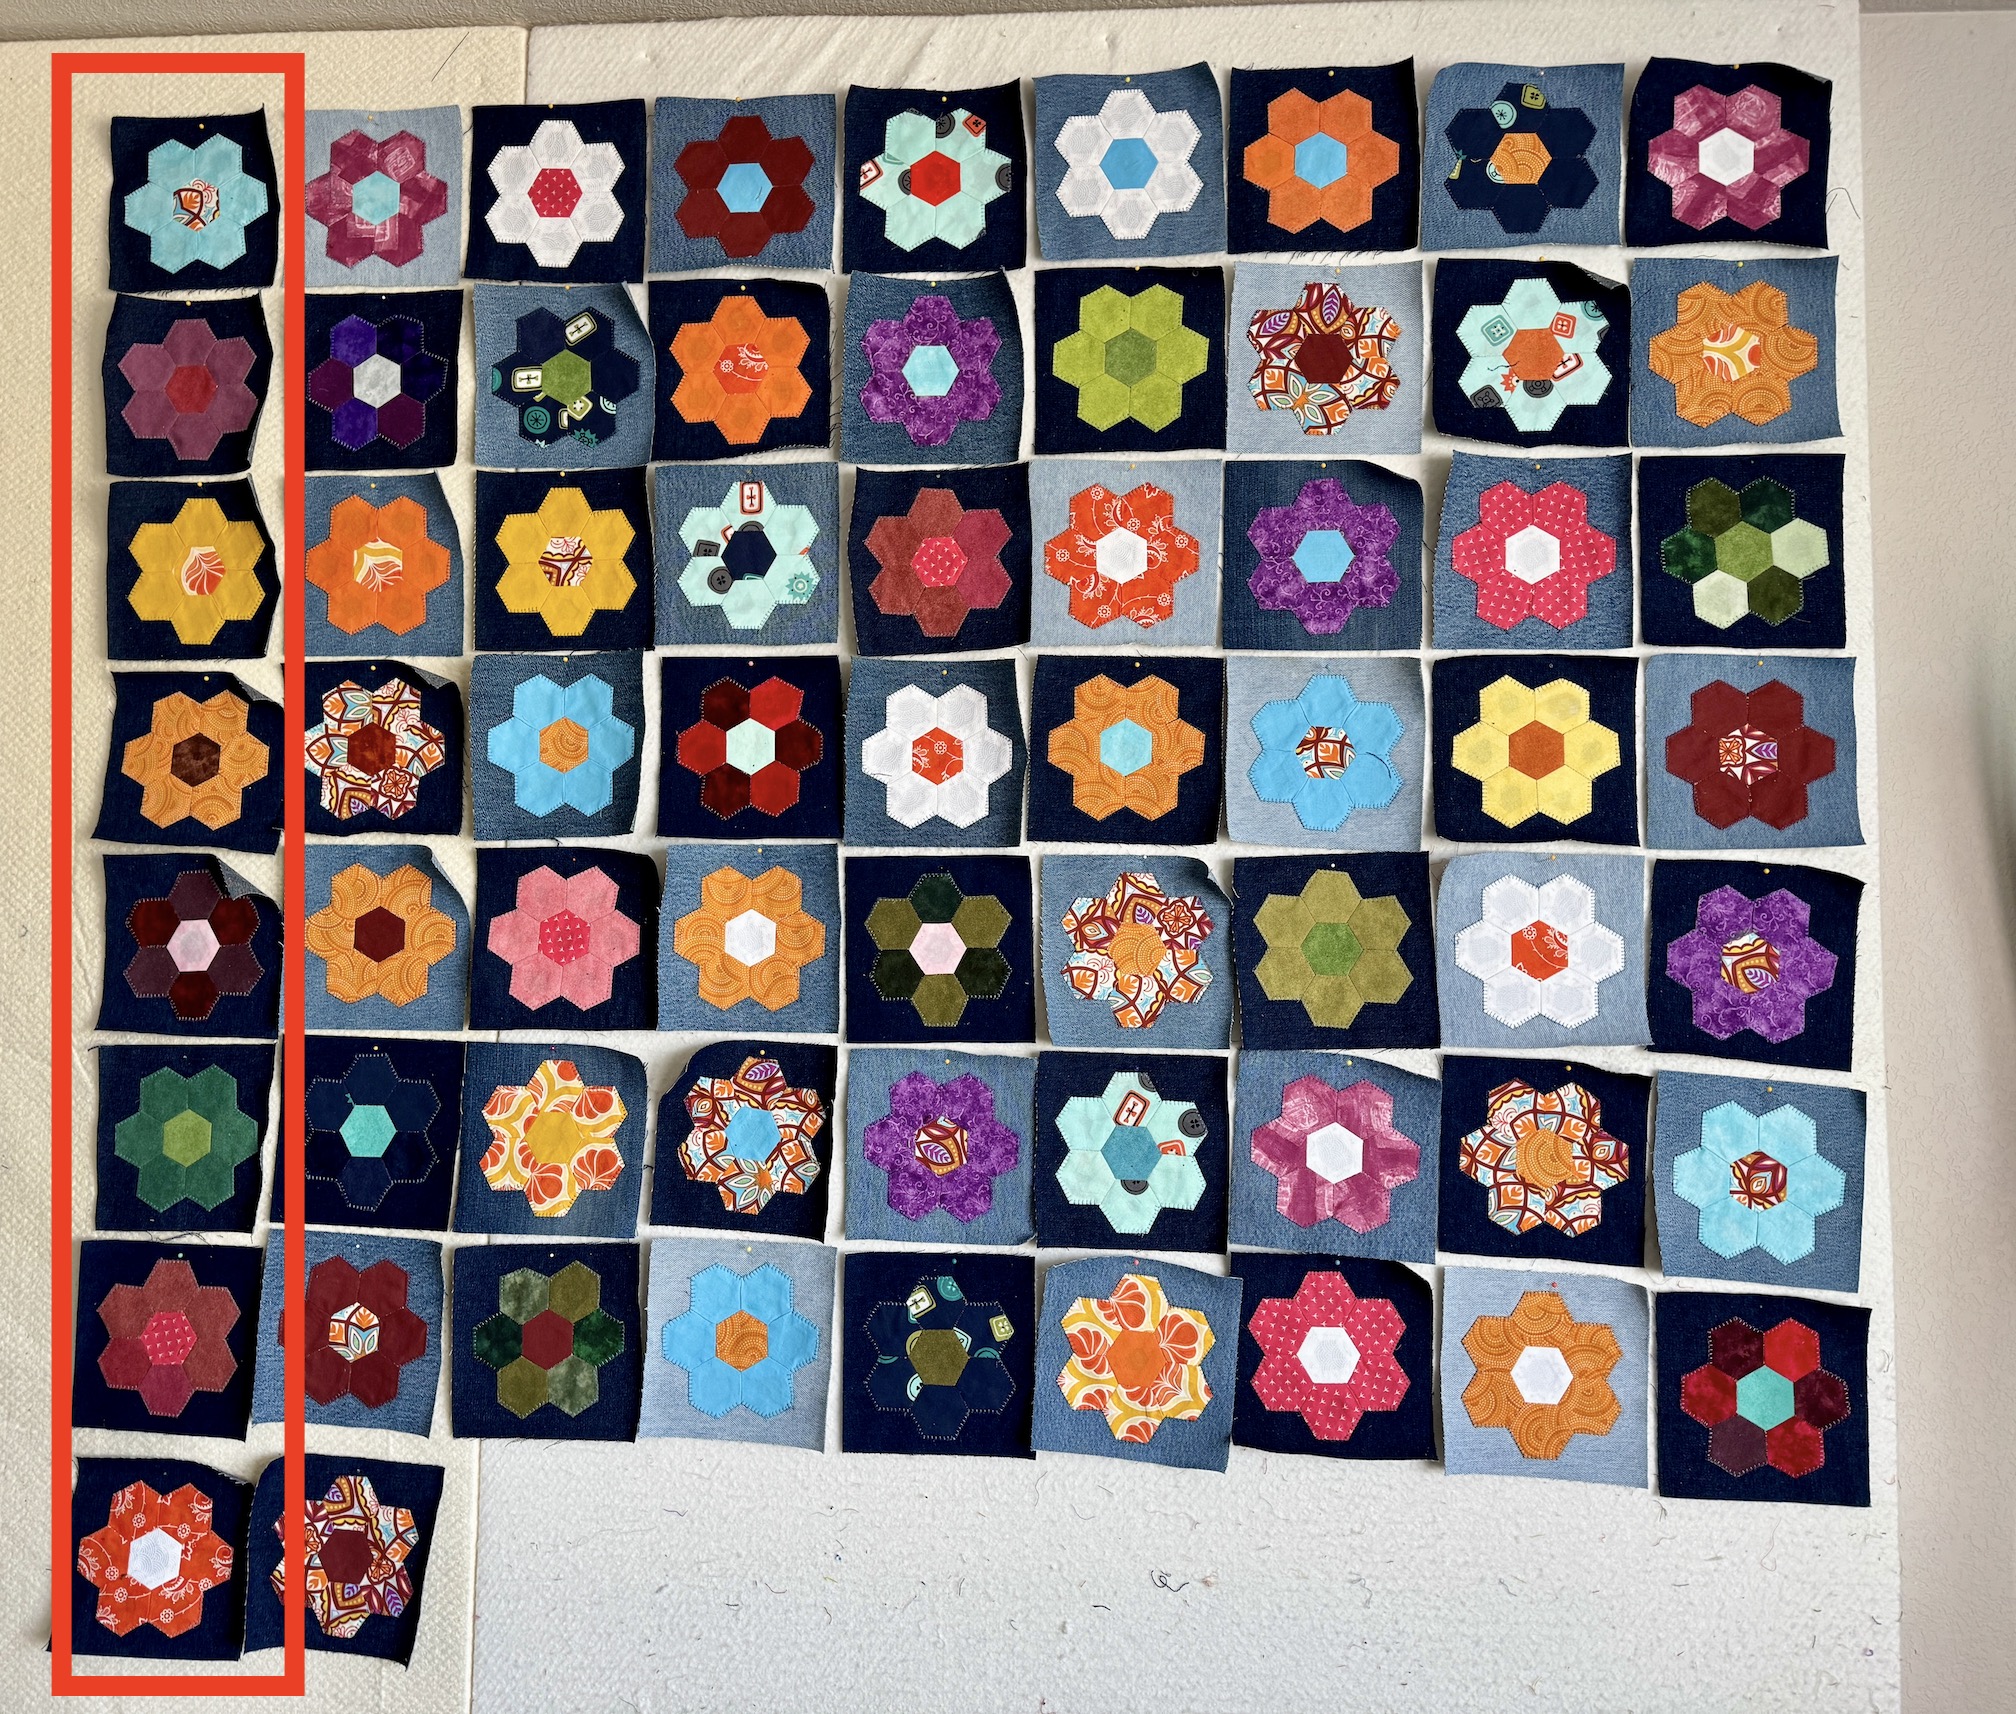
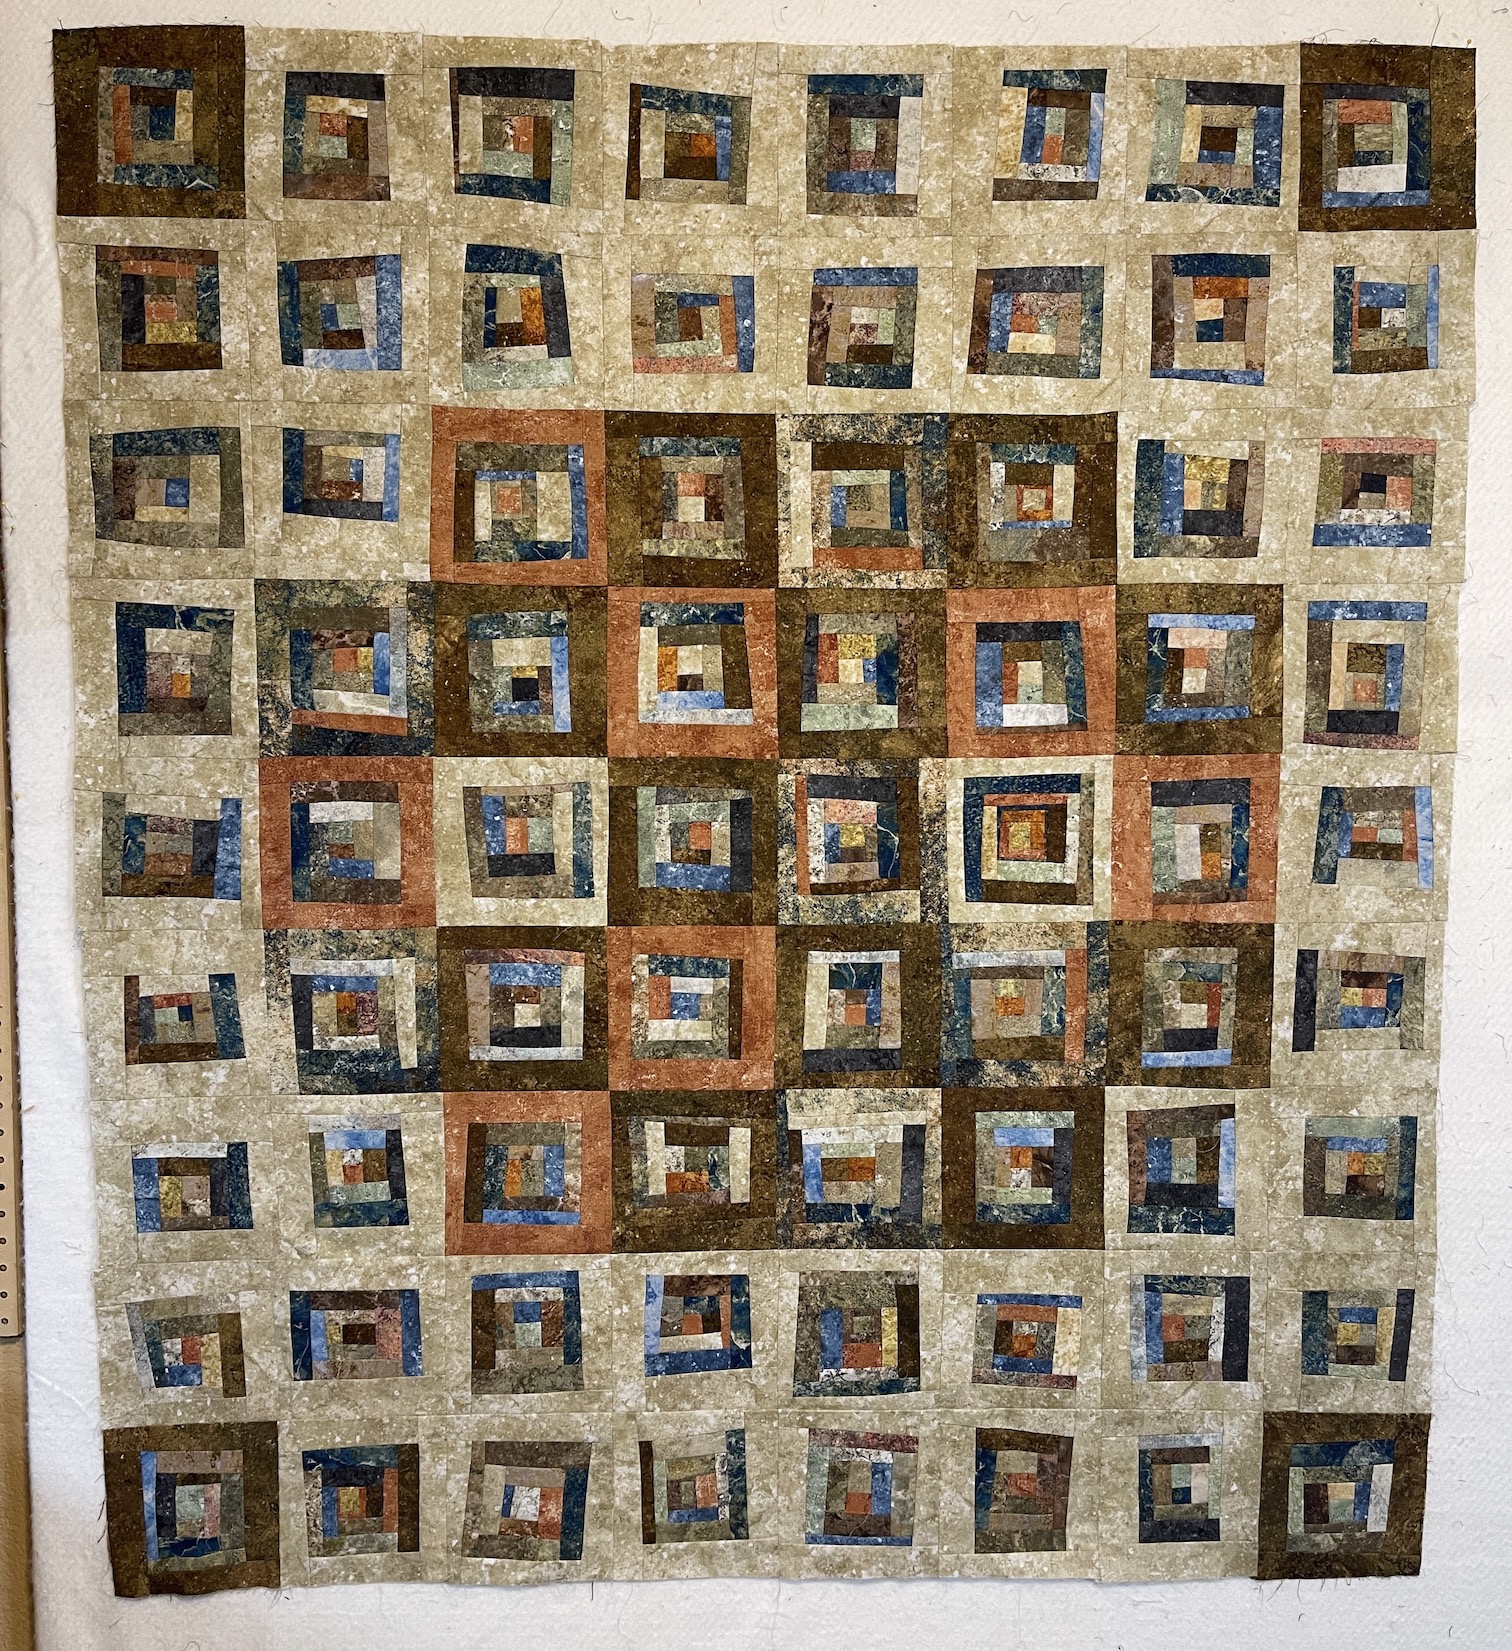
And here is what the quilt looks like in May 2026 with 65 blocks completed (yay!):
The quilt will be 9 by 11 for a total of 99 blocks. So I have 34 more blocks to go!
As I mentioned in a previous post, I have to finish sewing all the little paper pieced hexagons to each other for each rosette (and remove the EPP foundation paper) before I can applique the rosette to the recycled denim background. That is why I only got 16 blocks completed in the past month. Very tedious work!
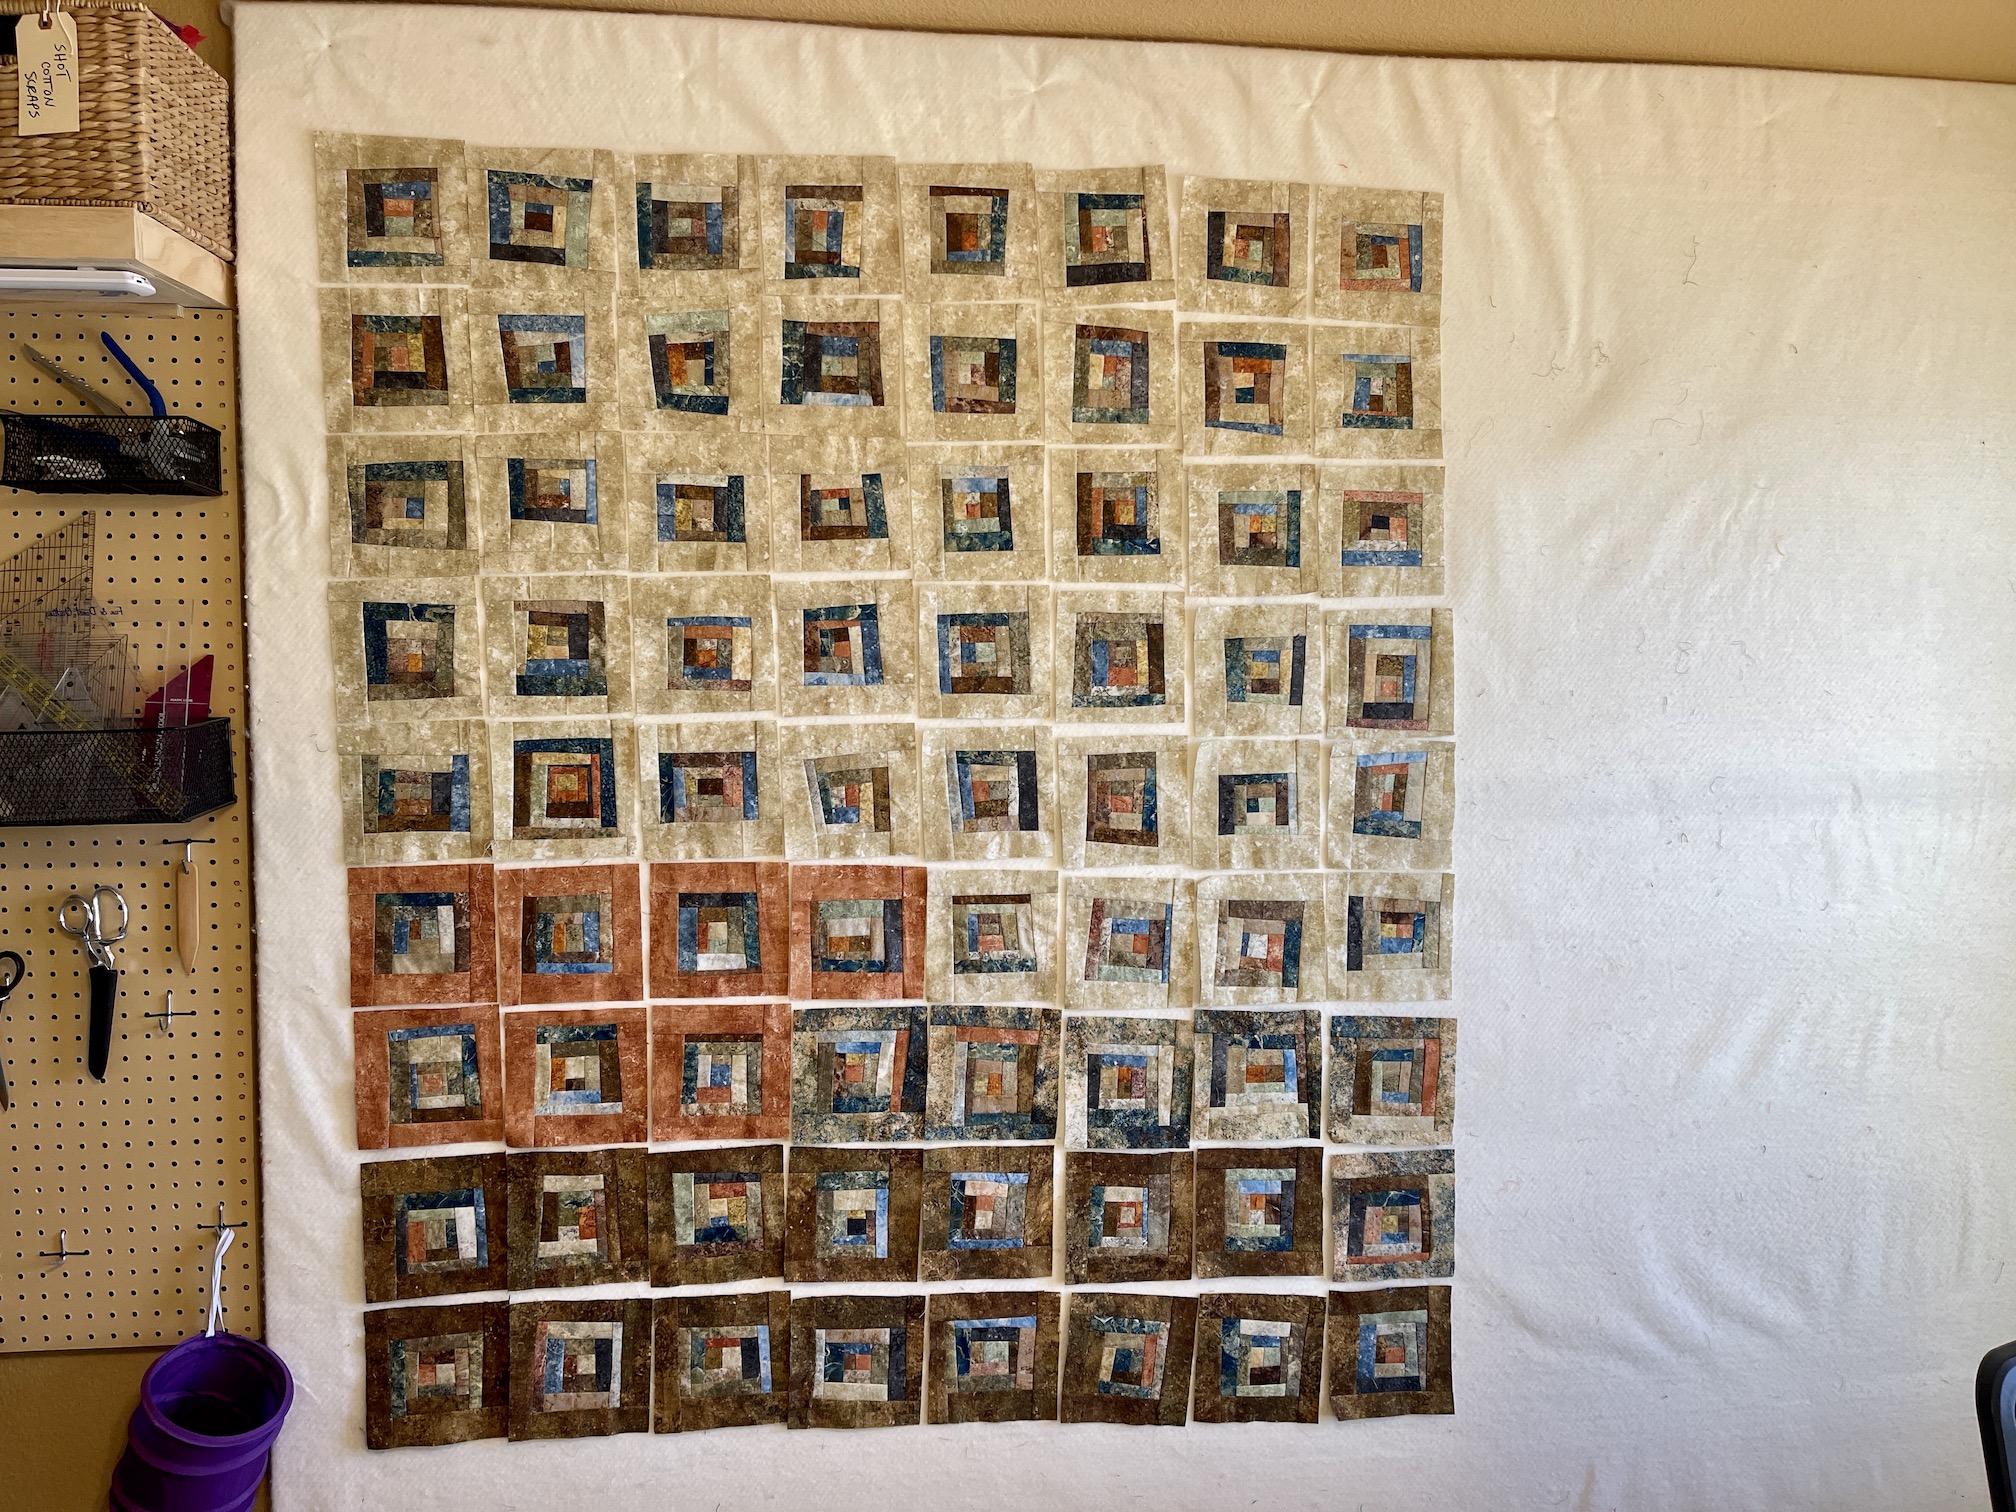
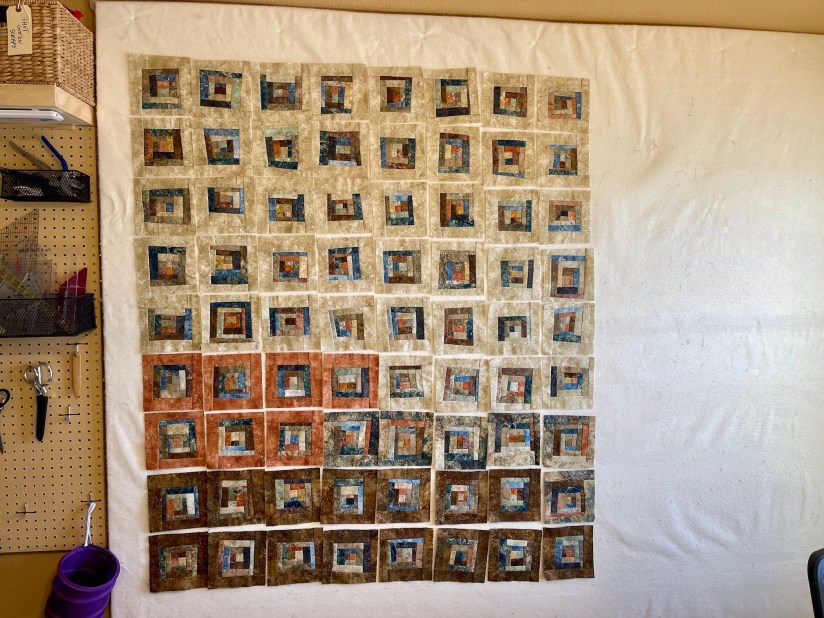
Oh, you might notice that on the left side of the quilt arrangement on my design wall I have all dark background blocks:
That is because I am cutting scrap denim as I need it and I cut too much dark so now I have to make a bunch of lighter background blocks to mix in. But progress is progress and I bet before I know it I will have all 99 blocks done and sewn together!
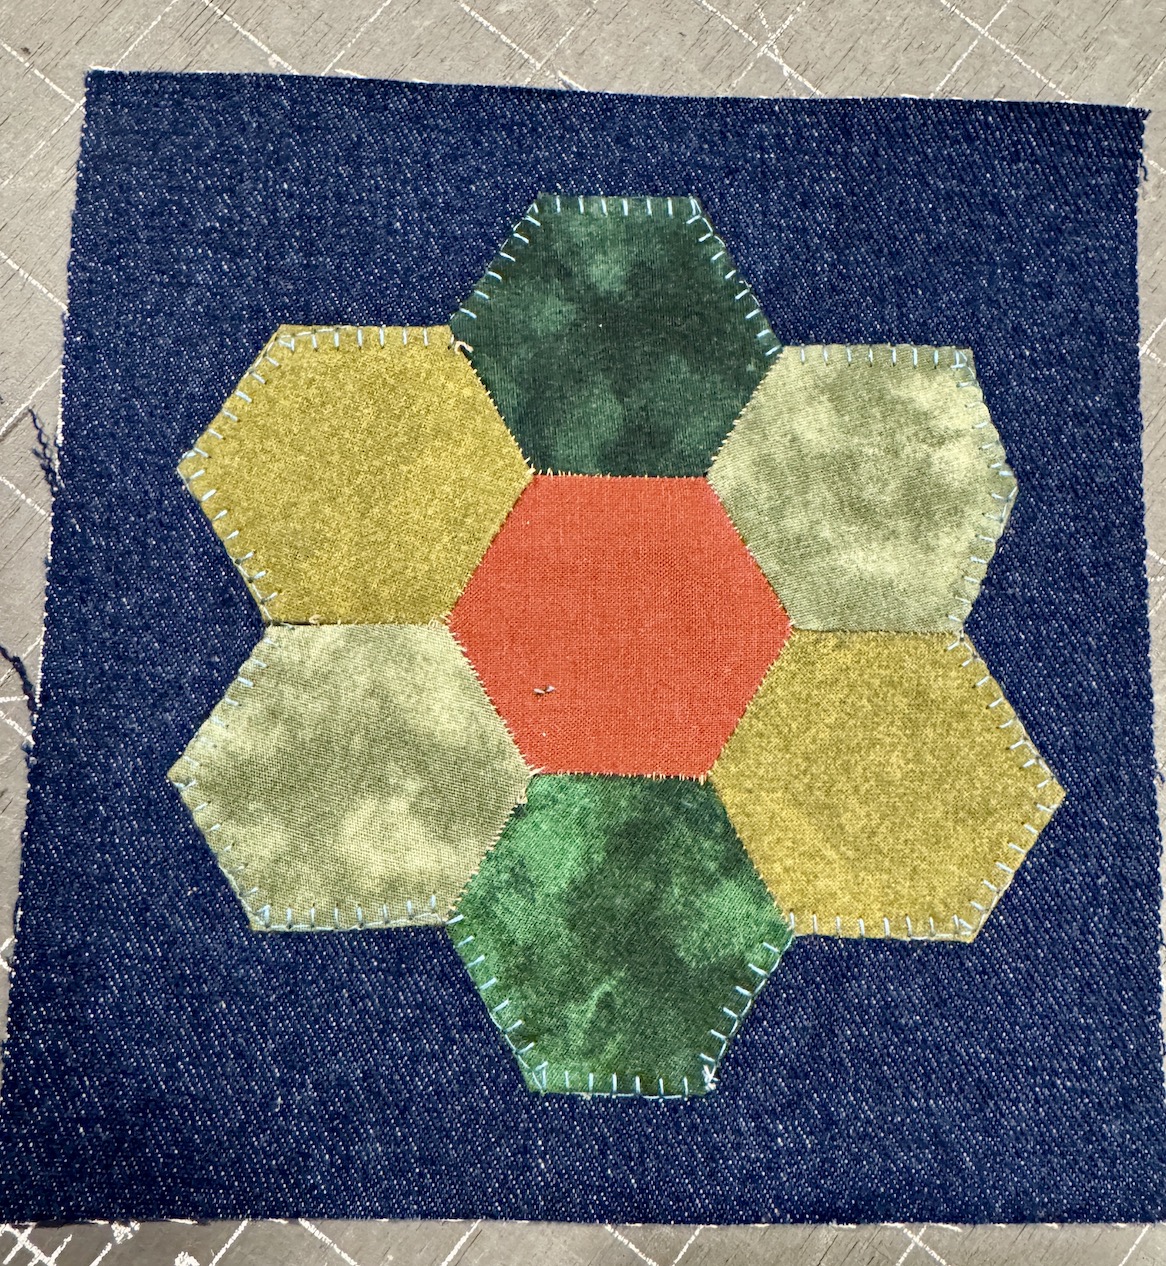
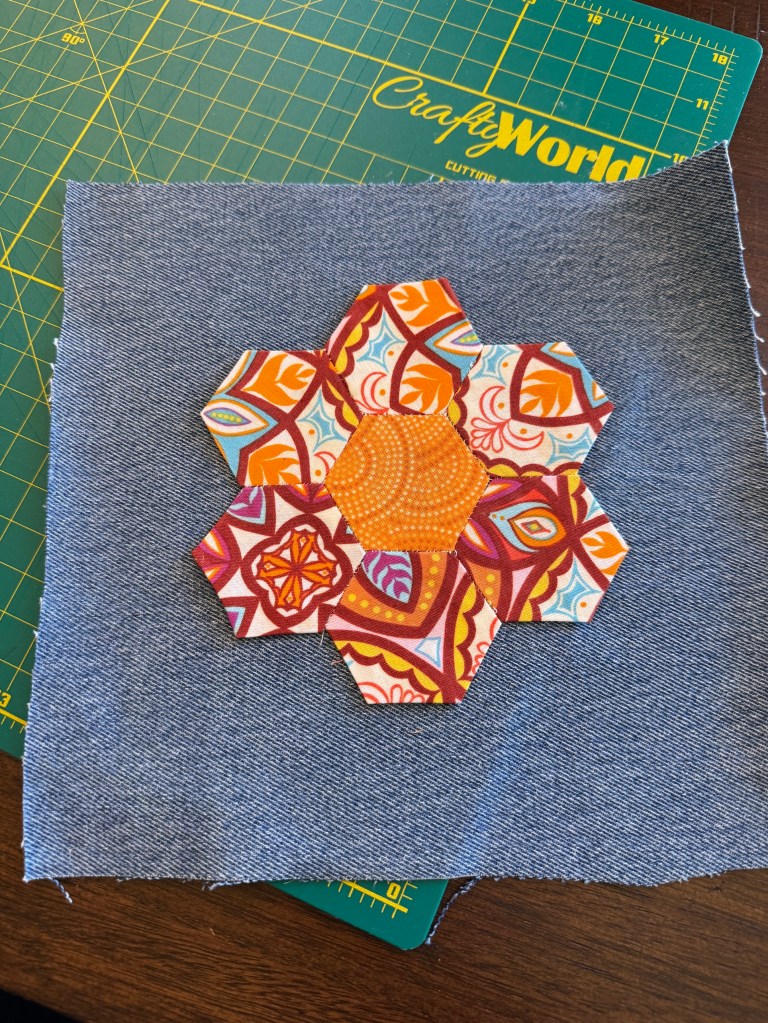
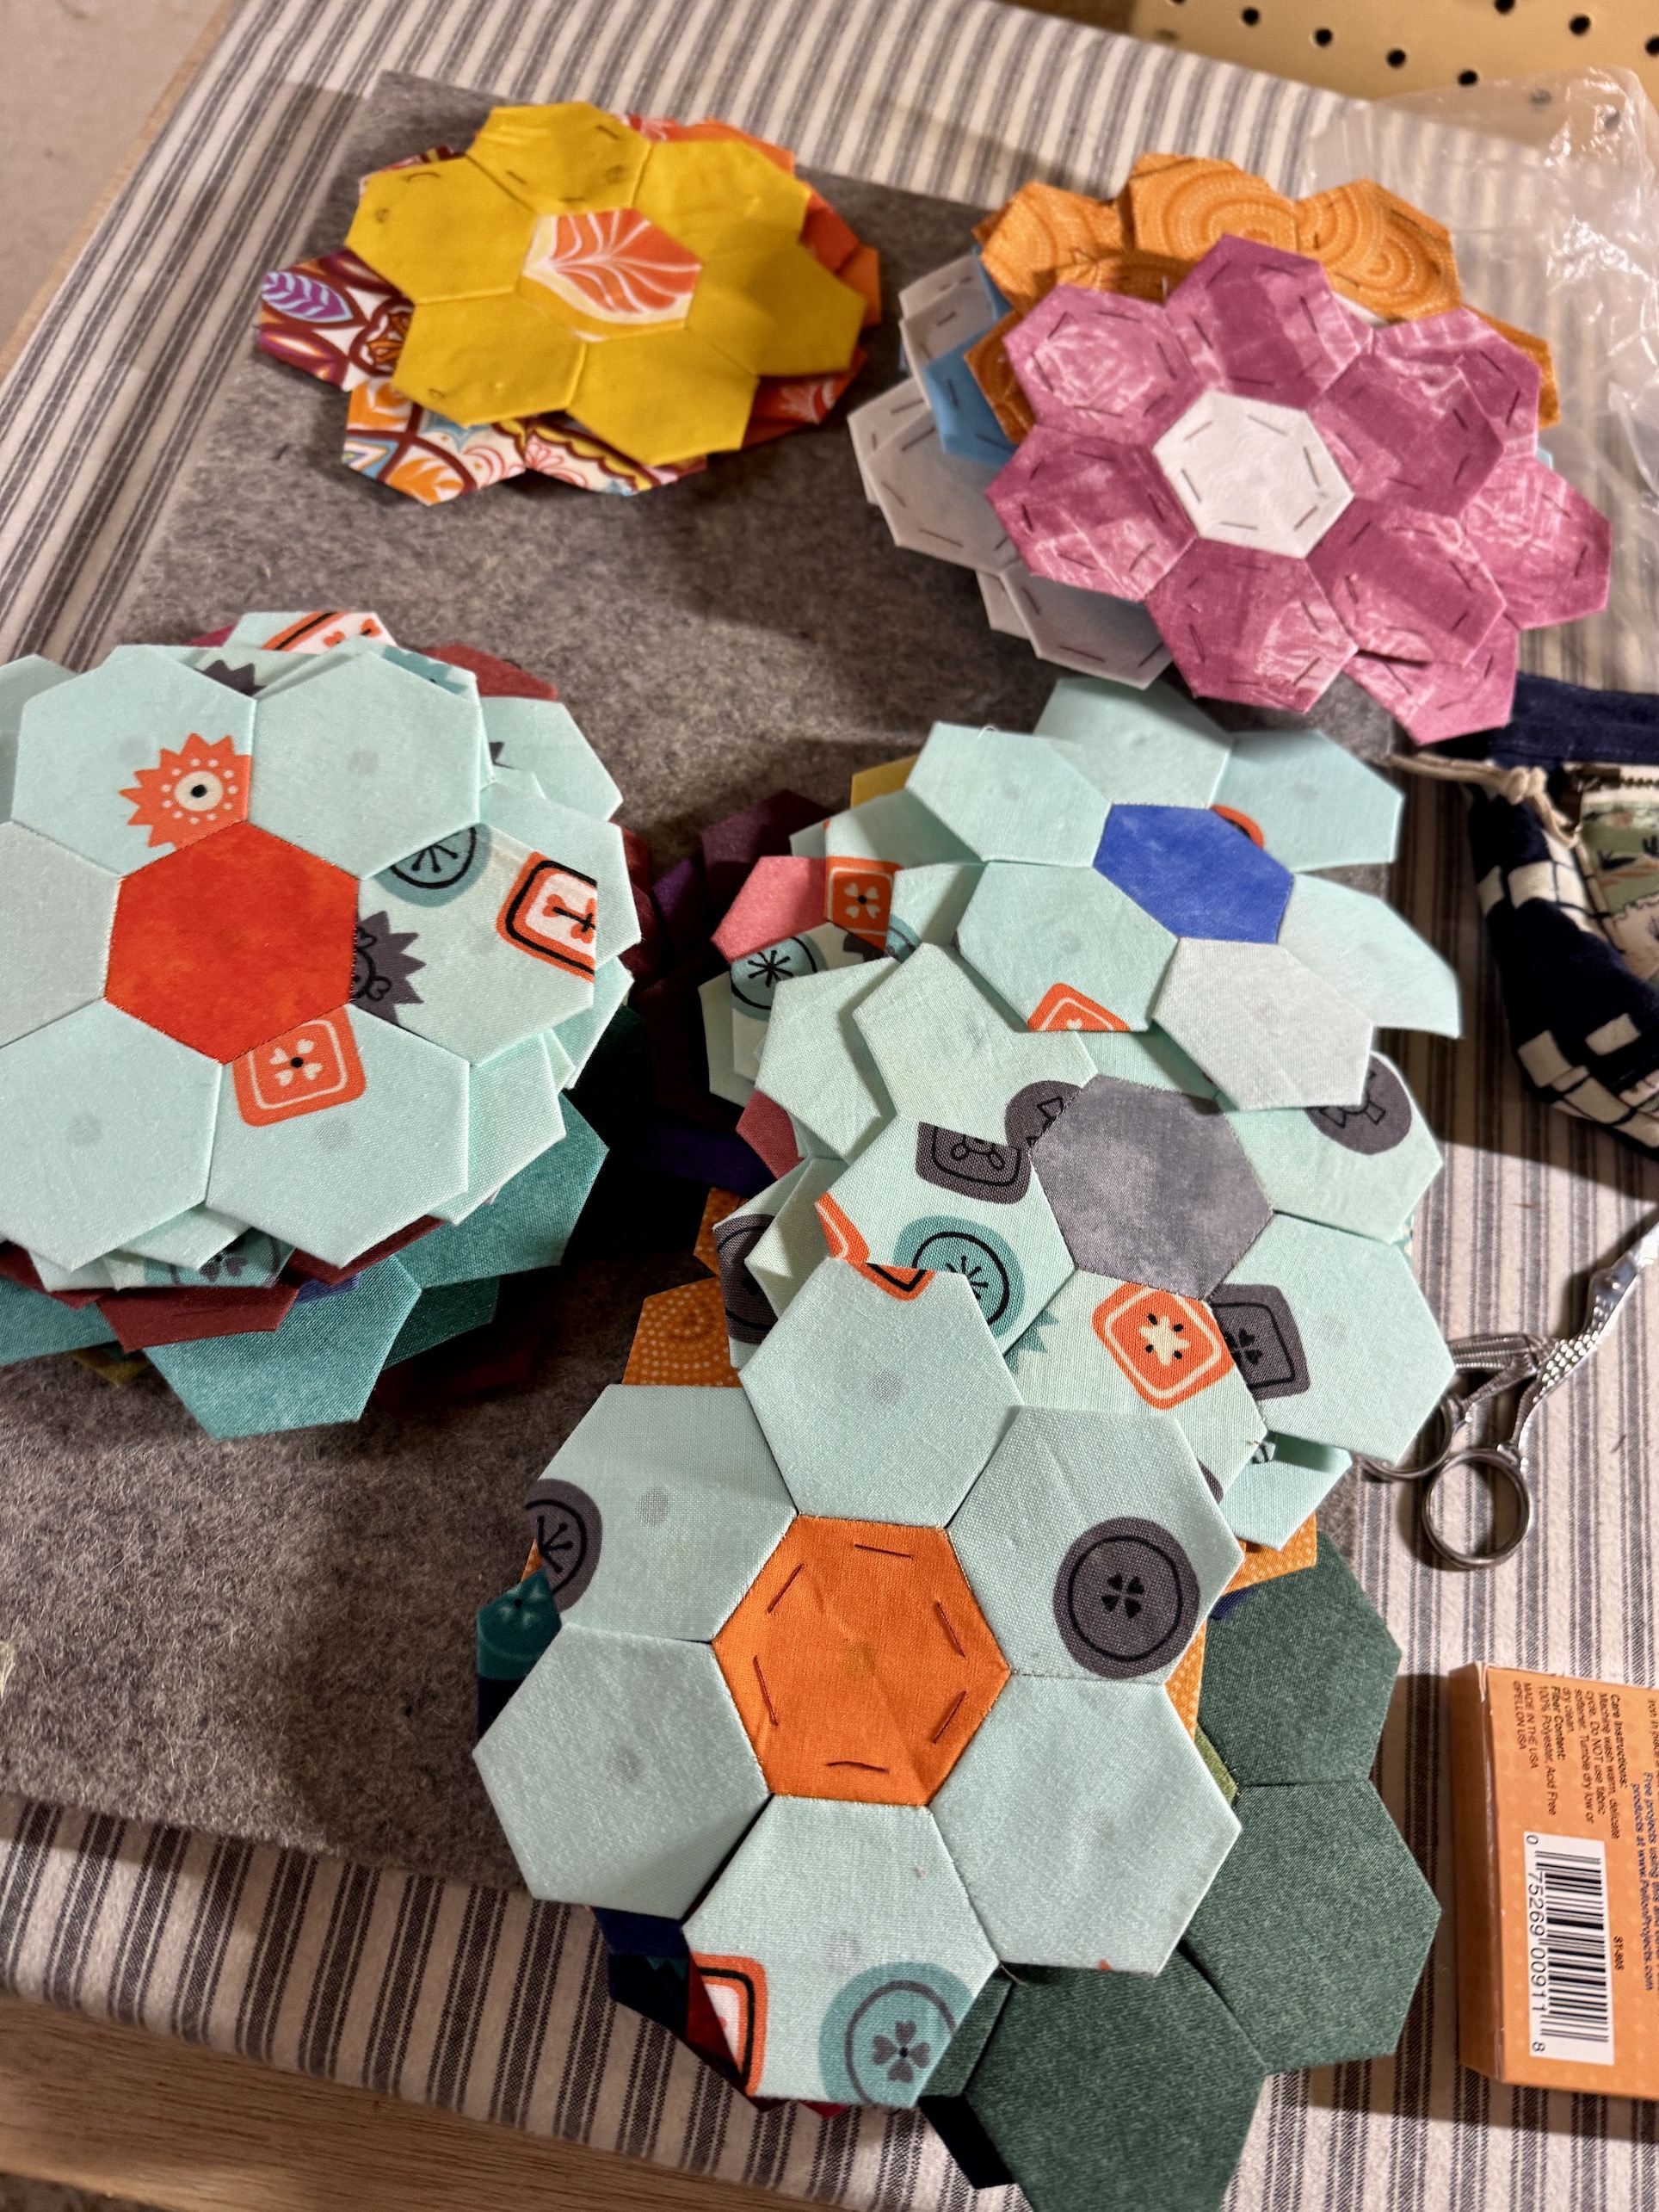
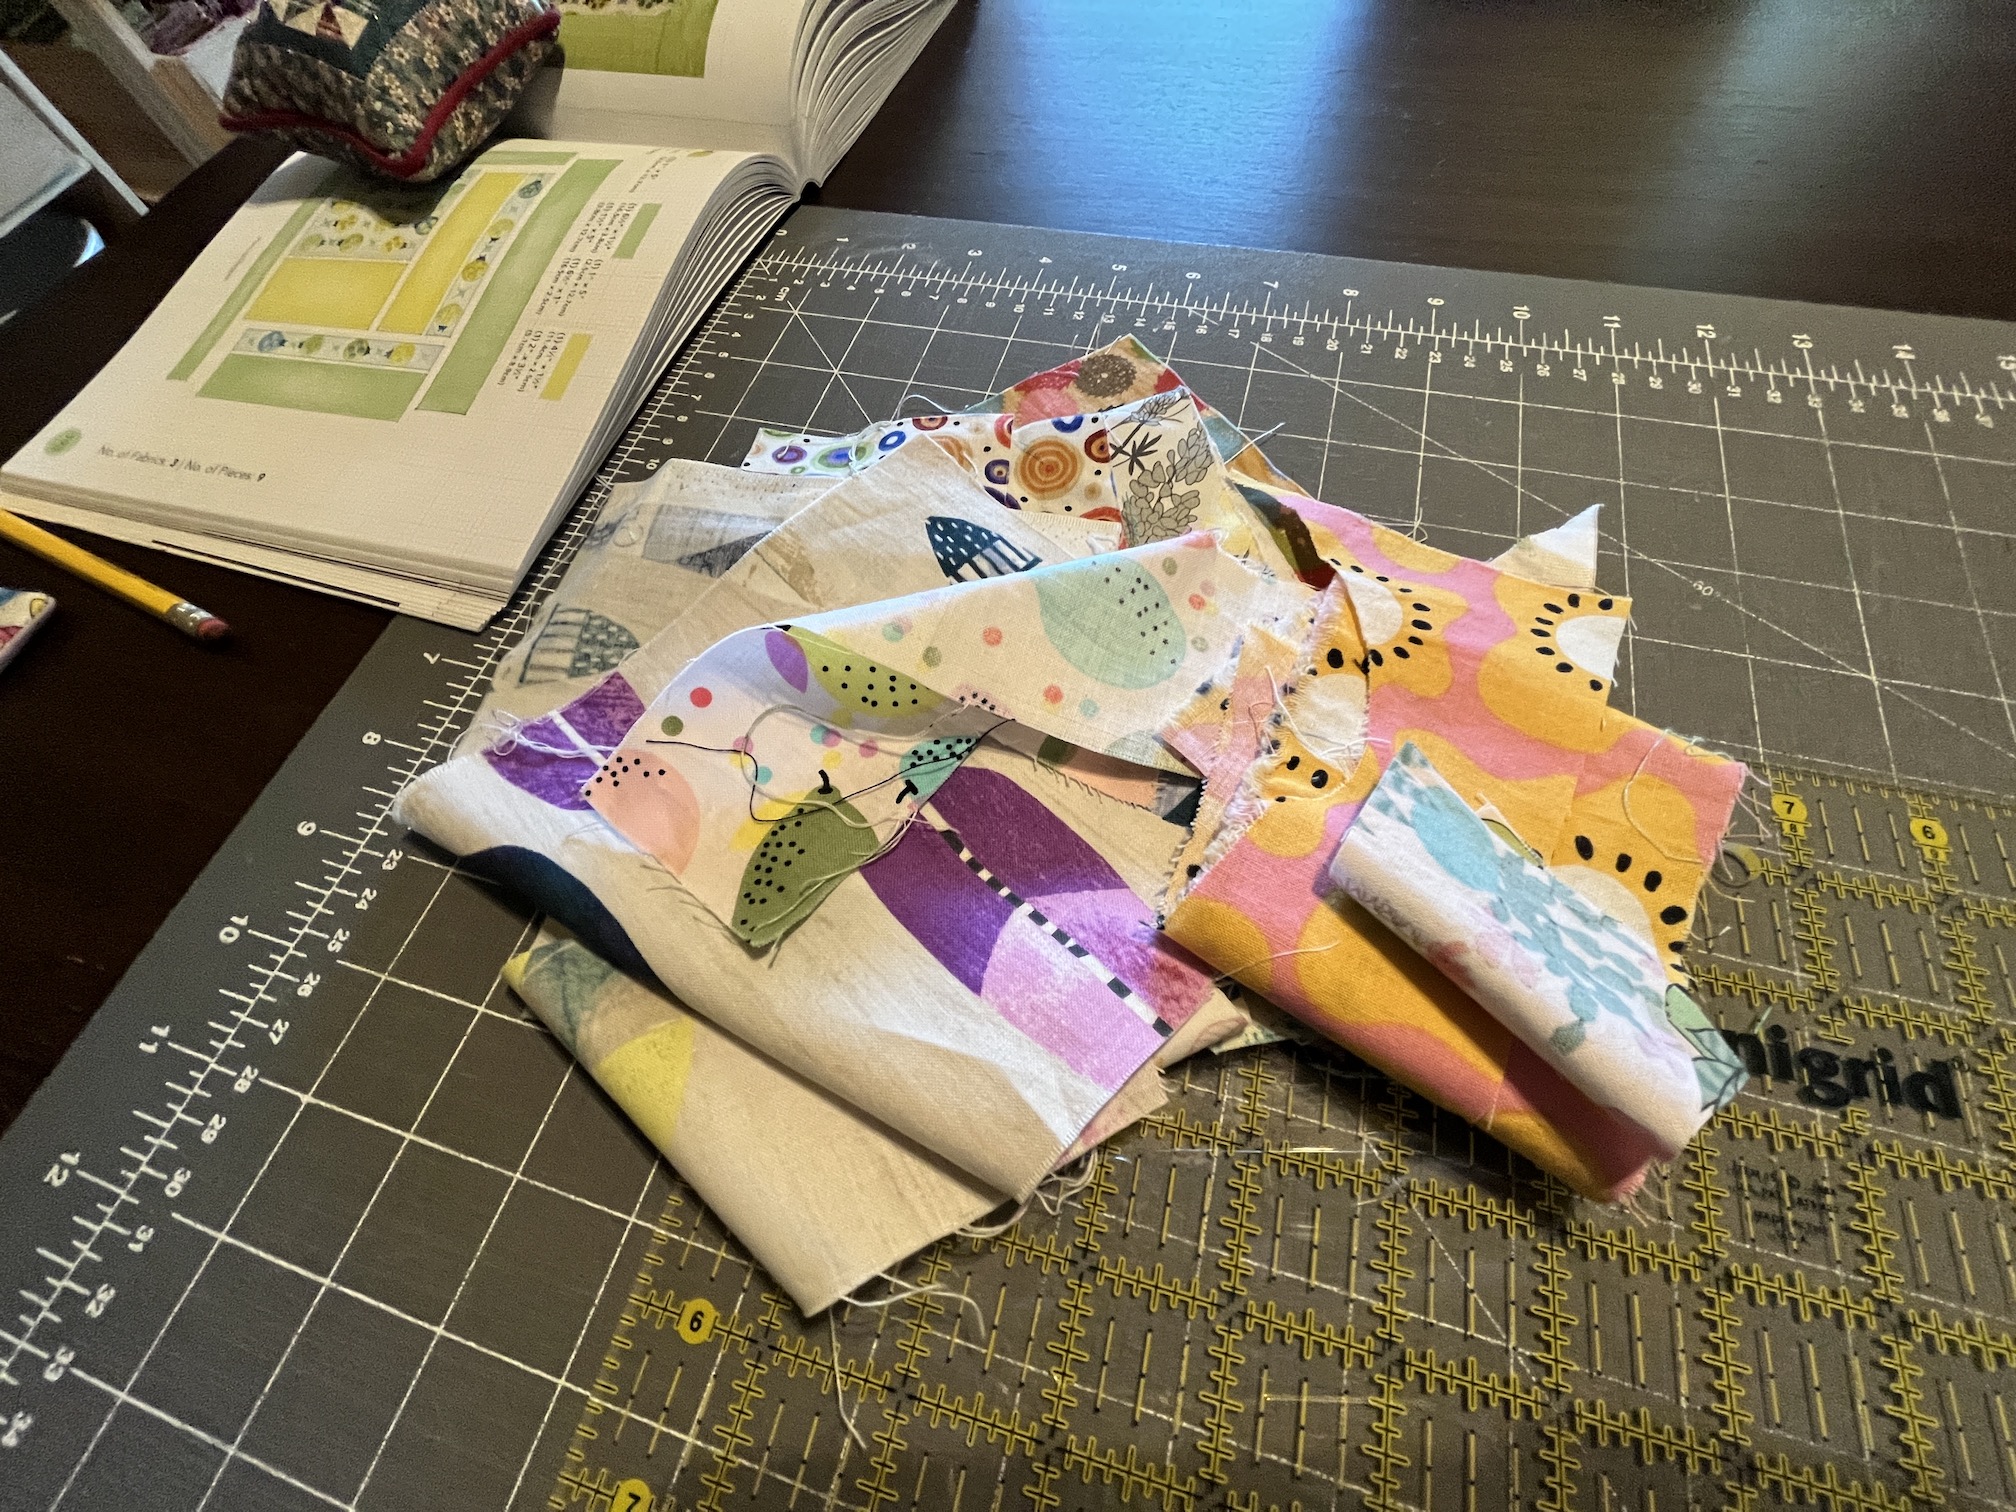
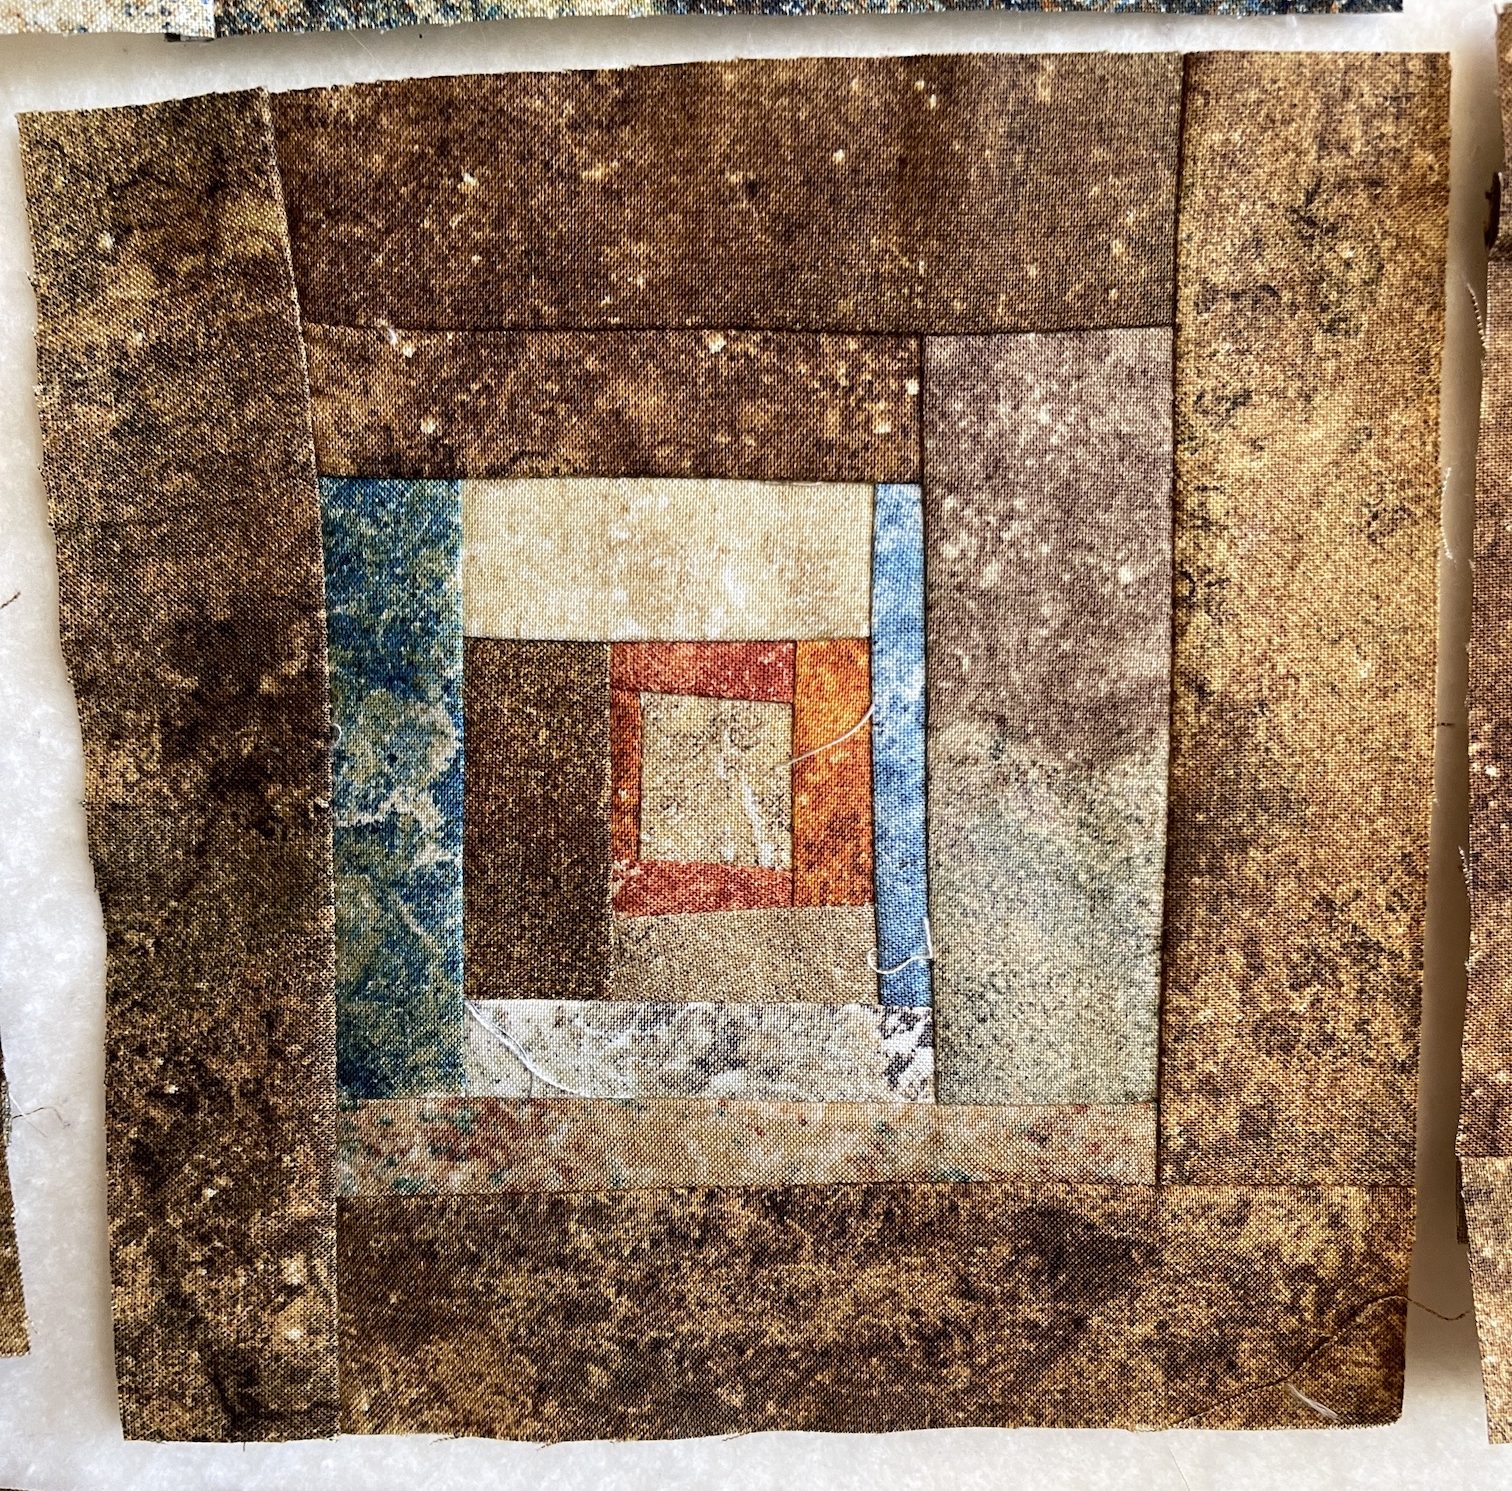
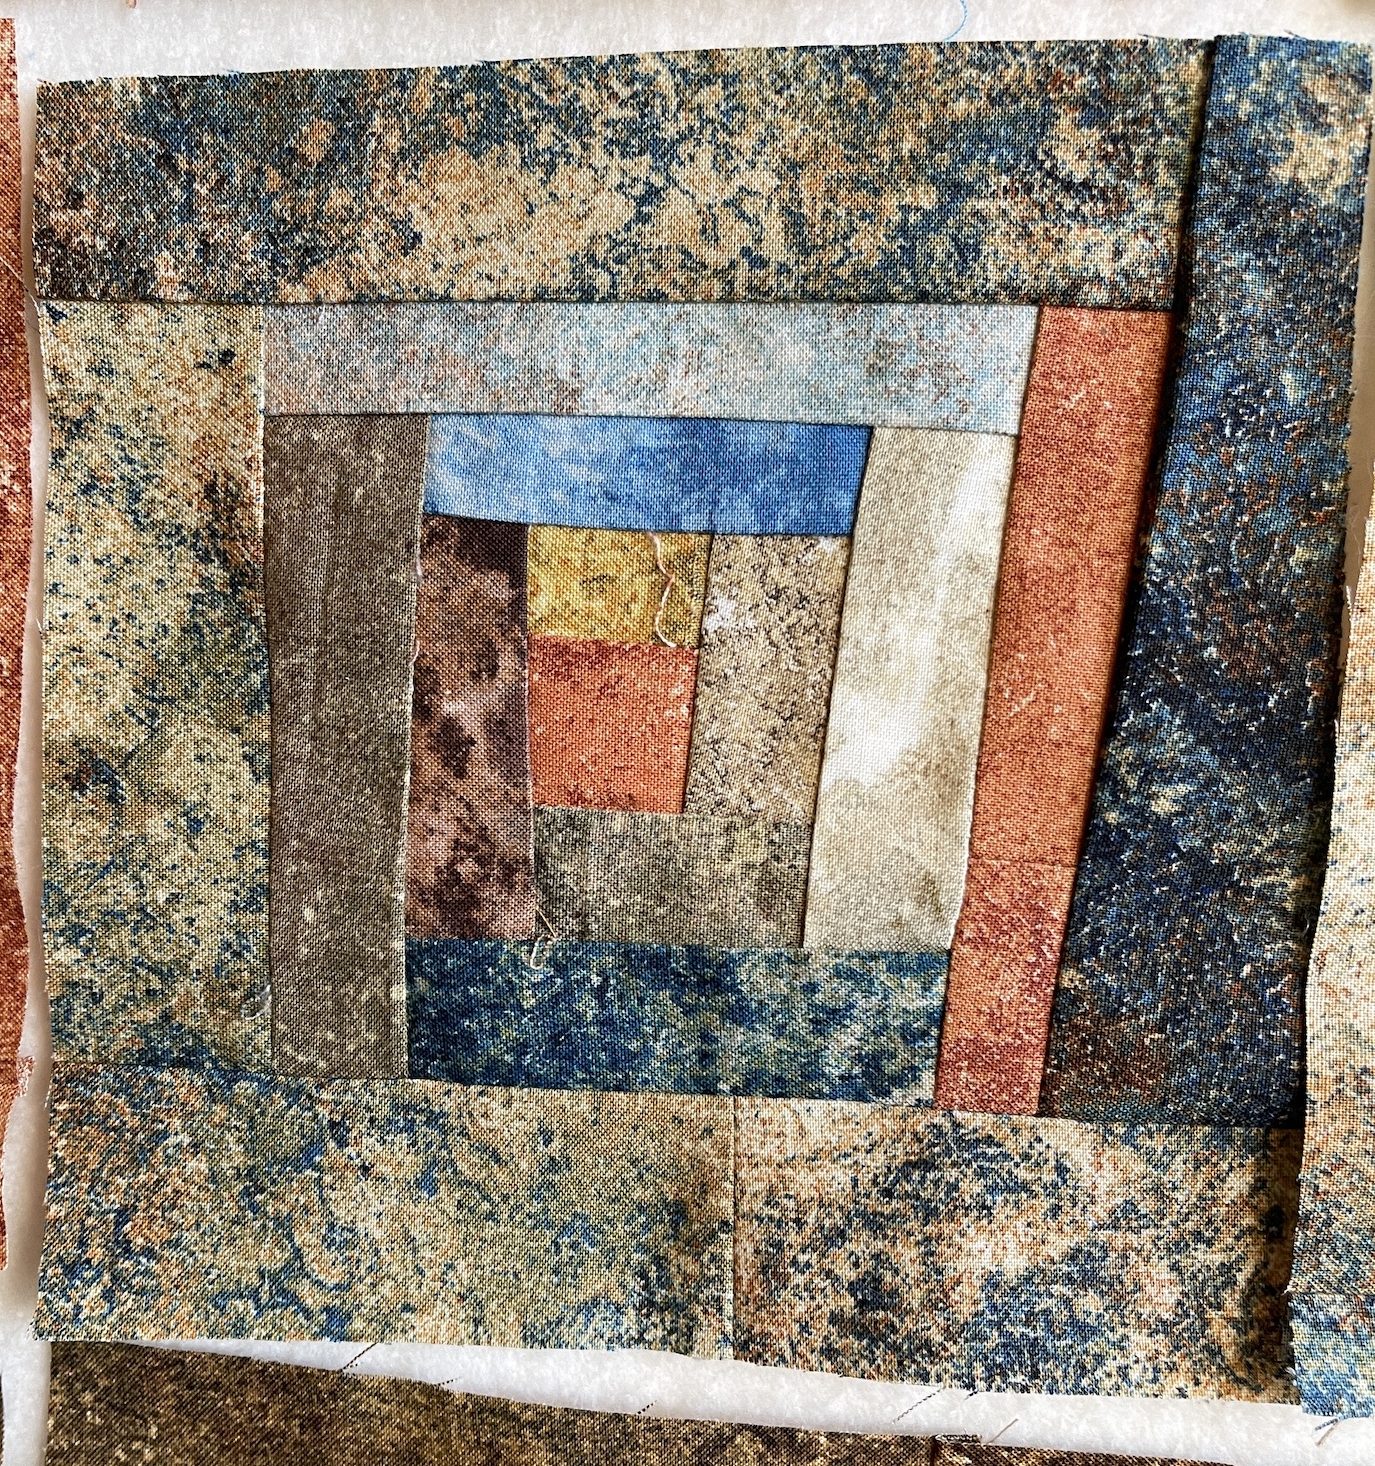
In closing this post I thought I would share that these types of blocks, like the image below, make me smile because they remind me of just how “scrappy” this project is!
I ran out of some of the scrap fabrics and couldn’t make 6 hexagons in the same fabric to surround the center hexagon so I had to mix similar colors (I am using the word “similar” very loosely, ha!):
Over the next couple of months I’ll be saving updates on my long time English Paper Piecing hexie rosette project to share on the 15th of each month for ScrapHappy.
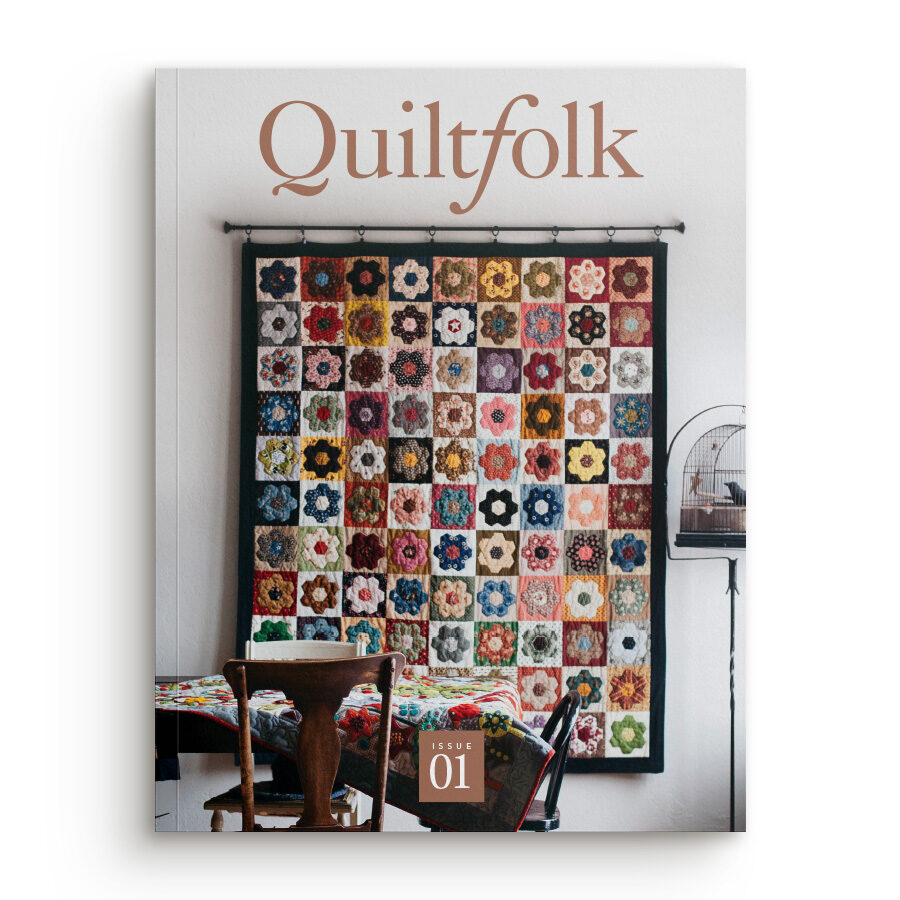
In my most recent post on this project, Revisiting the EPP Quilt, I shared that I’ve been working on this project since 2016 when I fell in love with the quilt on the cover of Issue 1: Oregon of Quiltfolk Magazine.
I paper pieced 99 rosettes from my fabric scrap collection, attempting to coordinate the colors:
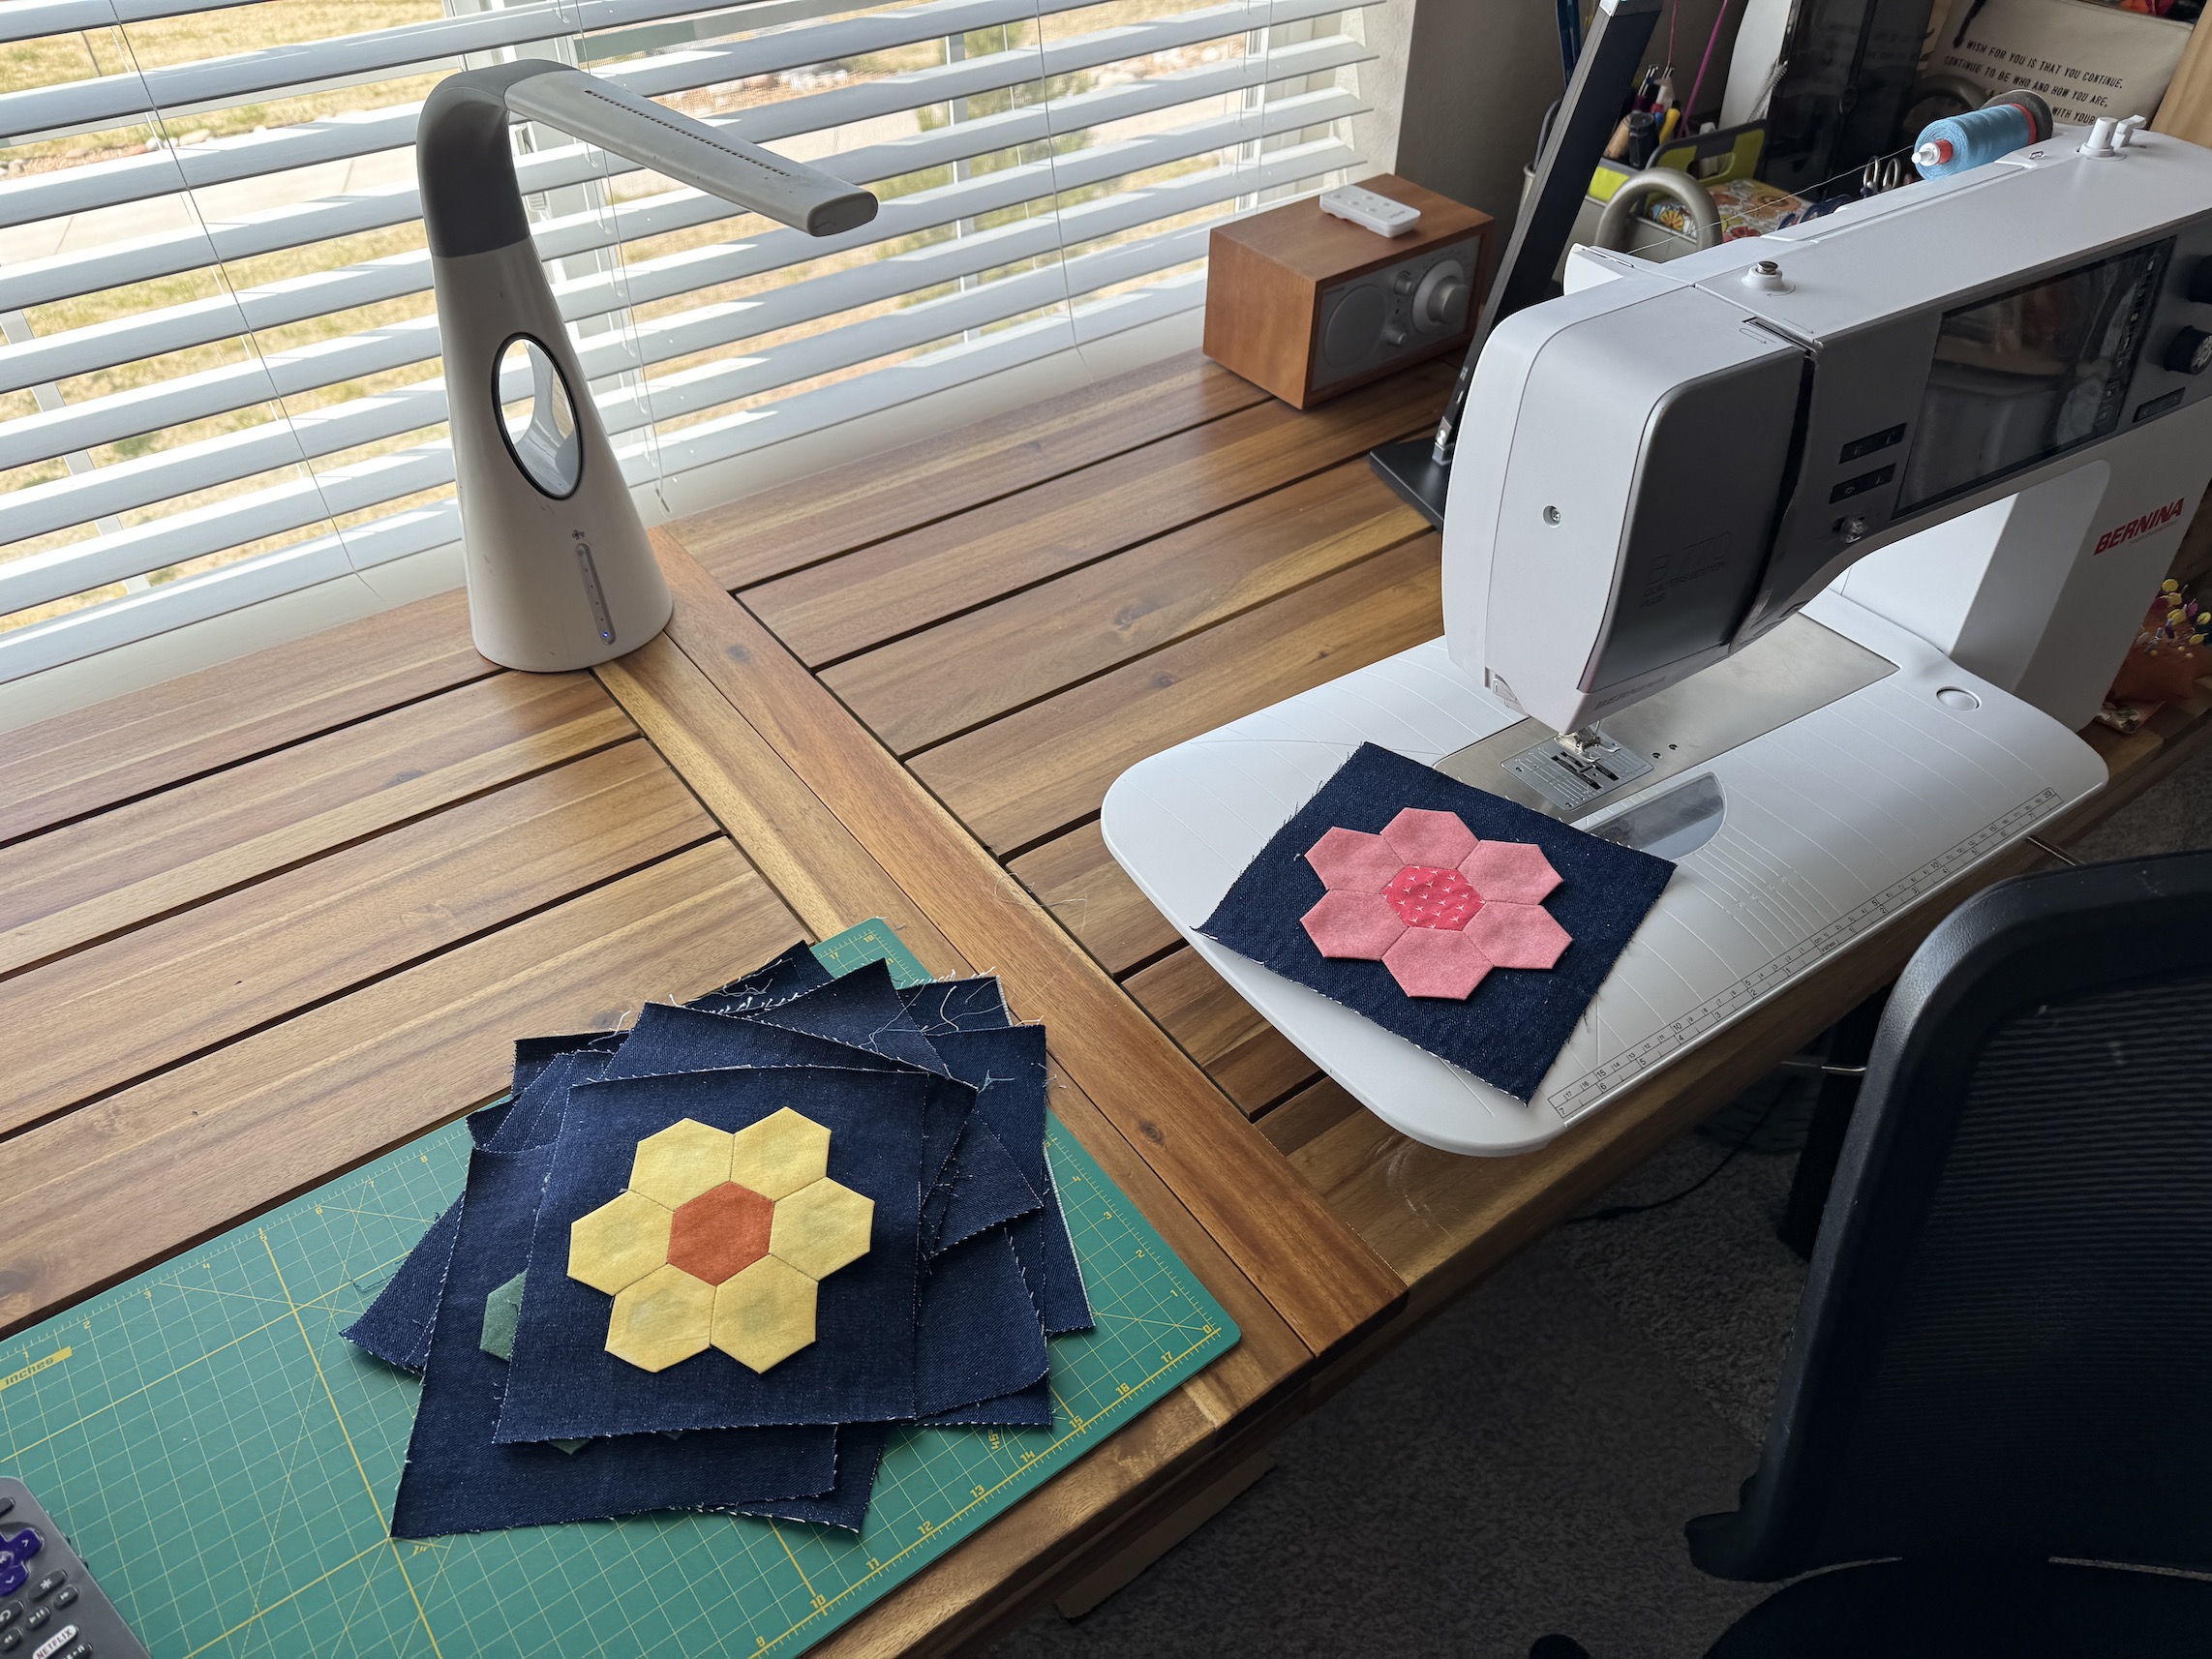
And finally I’ve begun setting the rosettes into blocks using my collection of scrap denim with plans to trim each block to 6.5 inches by 6.5 inches.
But I had to find the most efficient want to attach 99 rosettes to the denim scraps without having to hand appliqué them to the blocks. I was afraid if I committed to hand appliqué all 99 blocks, it would be another 9+ years until I finished this quilt!
So I decided to find a way to use my sewing machine to do it.
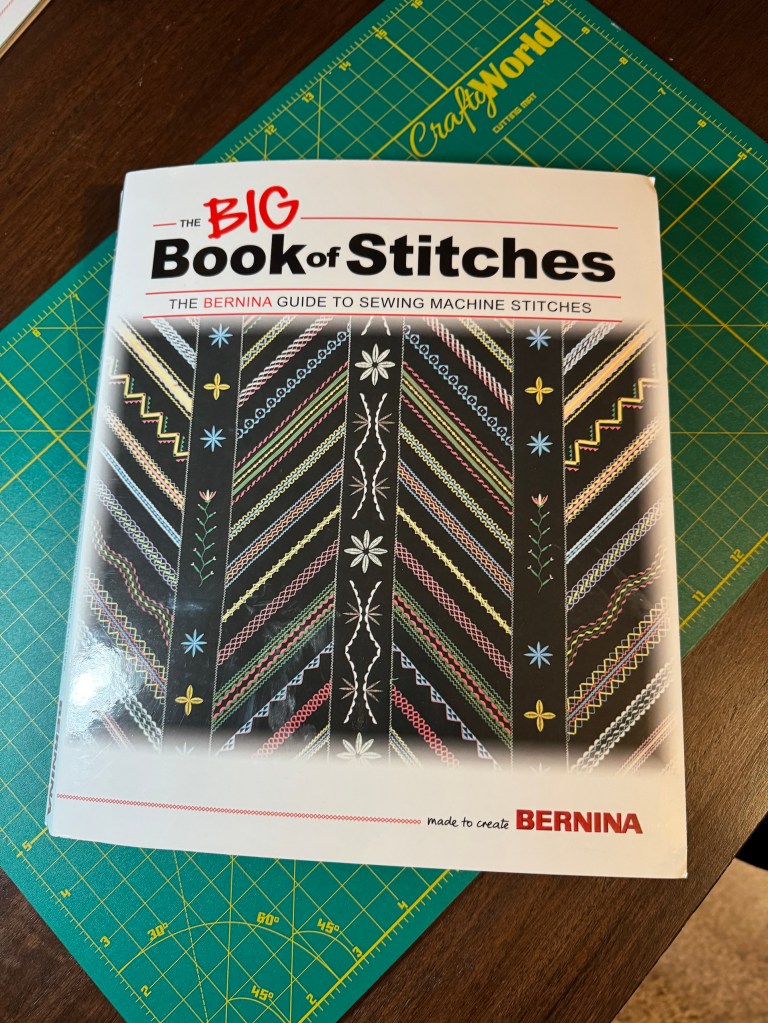
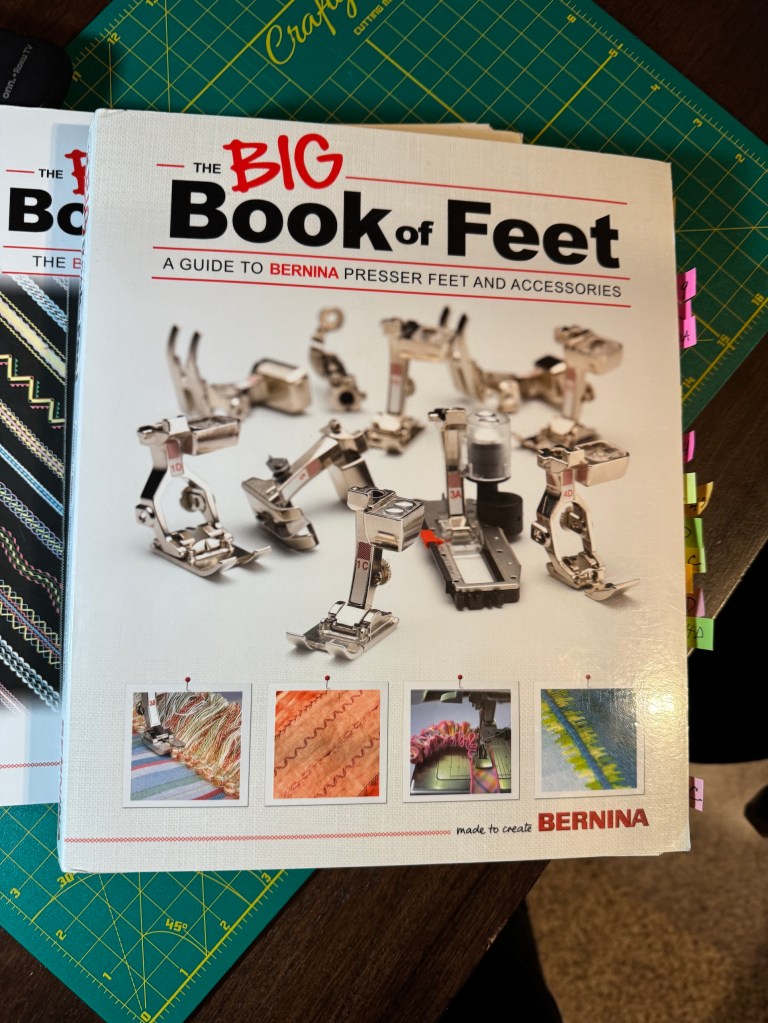
I researched my Bernina sewing machine books on the Bernina sewing machine feet and sewing machine stitches, and discovered I could use the #20C foot to sew a blanket stitch around each rosette to attach it (I decided to use a little Stitch Witchery Tape to anchor the rosette onto the denim before machine stitching).
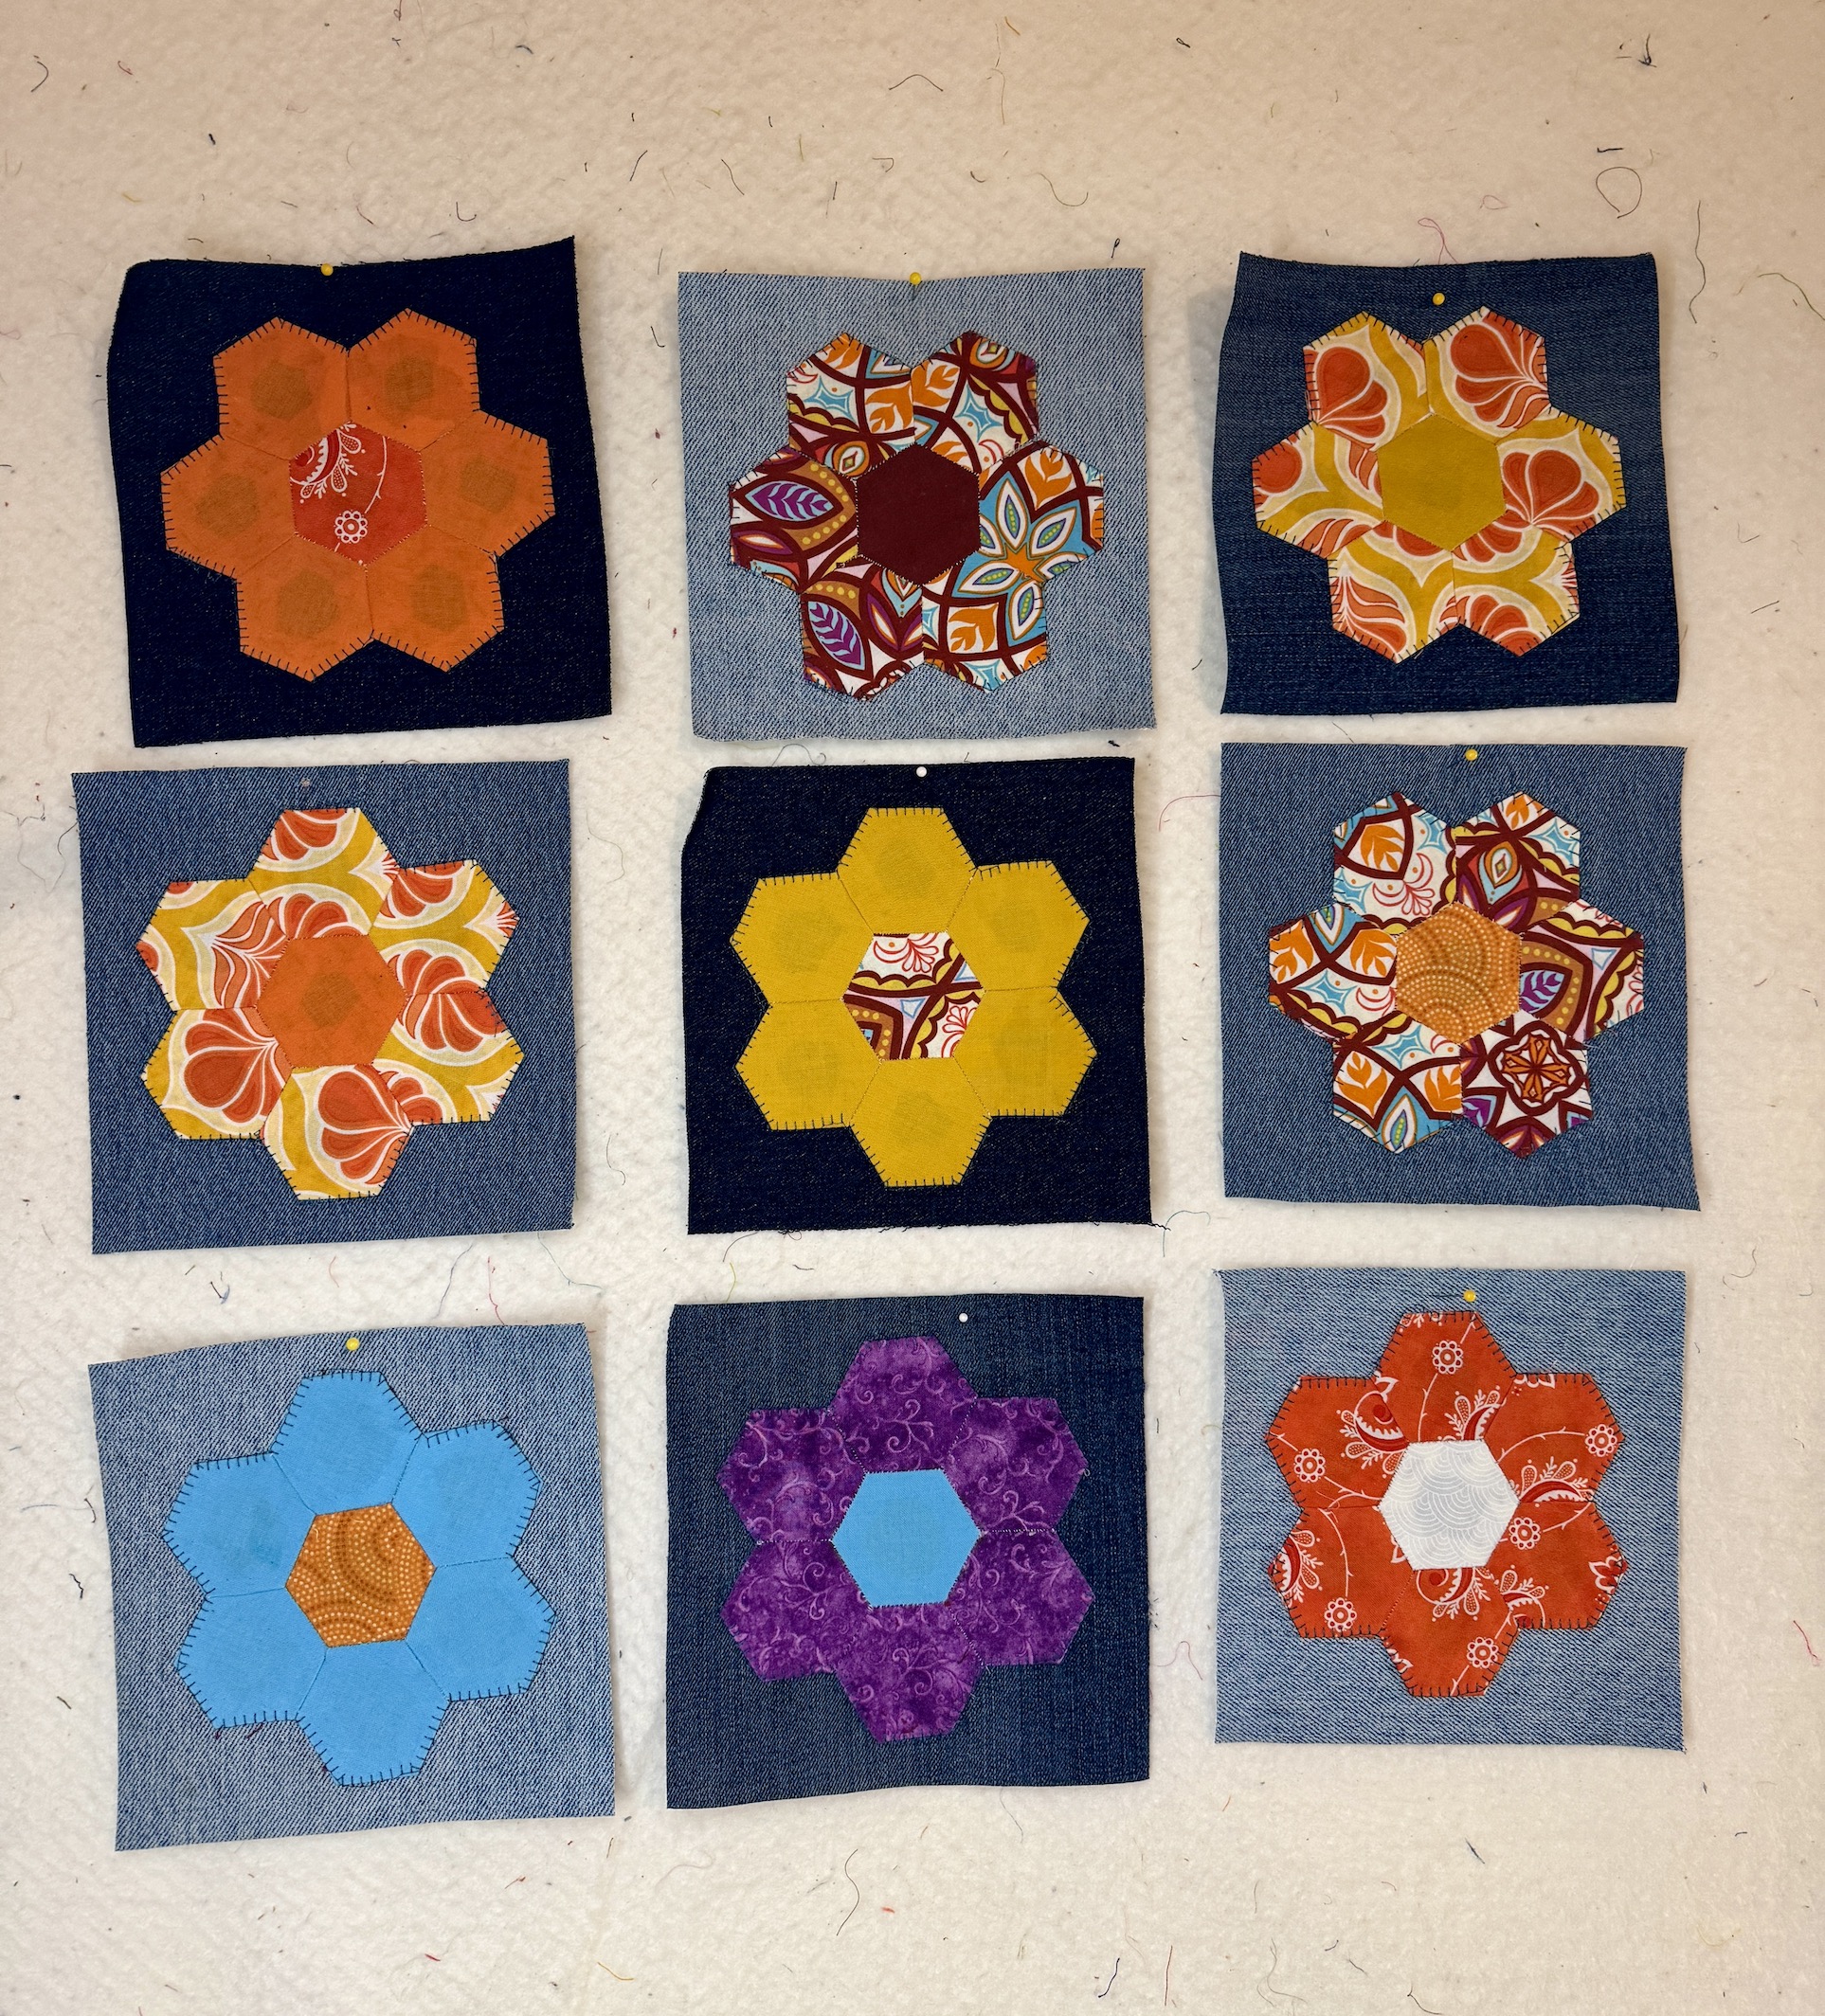
After practicing on scrap denim I was able to figure it out and attach my first rosette and from there I put together my first 9 blocks:
Here they are squished together to sort of give you an idea of how the quilt might look:
I have a long way to go but it is a start!
I did discover that in addition to removing the paper from the hexies in each rosette, I still have to stitch some of the rosettes fully together! So there is a lot of work to get this project done and we’ll see how much progress I will have to report next month 🙂
Oh and yes it will be a heavy quilt using scrap denim as the setting squares but it is going to be a wall hanging in my upstairs guest room, not a utility quilt for snuggling under.
Sending thanks out to those of you who’ve followed the journey of this quilt completion. A special thanks to Kate of Tall Tales From Chiconia who inspired me to work on this quilt as part of the monthly ScrapHappy online group she helps run (the blocks for my quilt are entirely of fabric scraps, many of them from other quilters).
If Kate hadn’t inspired me, the quilt might have continued to be an old UFO (unfinished object for the non-quilters) for endless years!
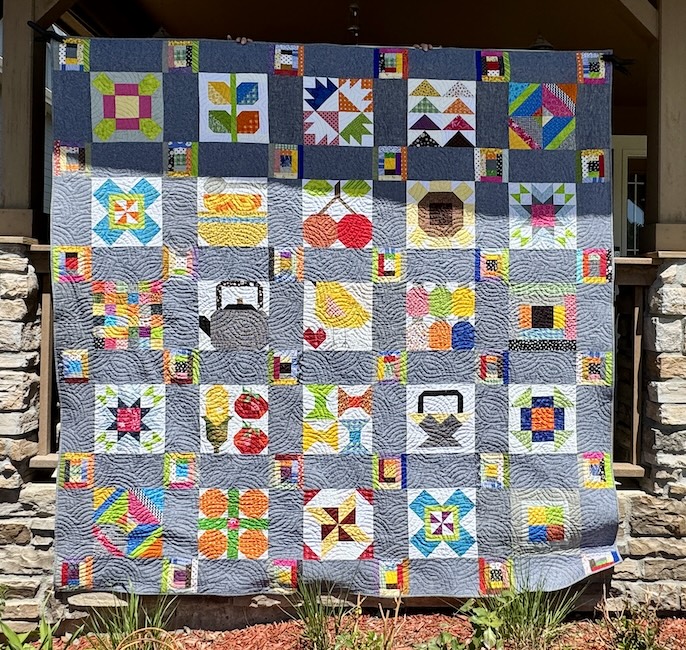
Quick story behind this quilt: I began working on blocks for this quilt at a quilt retreat back in 2017 (yes 8 years ago) when several of my quilting buddies were working on blocks from Lori Holt’s book Farm Girl Vintage. I am not into the “farm girl” aesthetic but the blocks looked so fun; and I was drawn into the fun and excitement my friends were having making the blocks.
But the blocks got put away to gather dust (because I didn’t know what I would do with such a quilt that didn’t fit into my more Bohemian decor aesthetic) until I did an audit a couple years ago of my UFOs and decided I should finish the quilt.
And now finally the quilt is done!
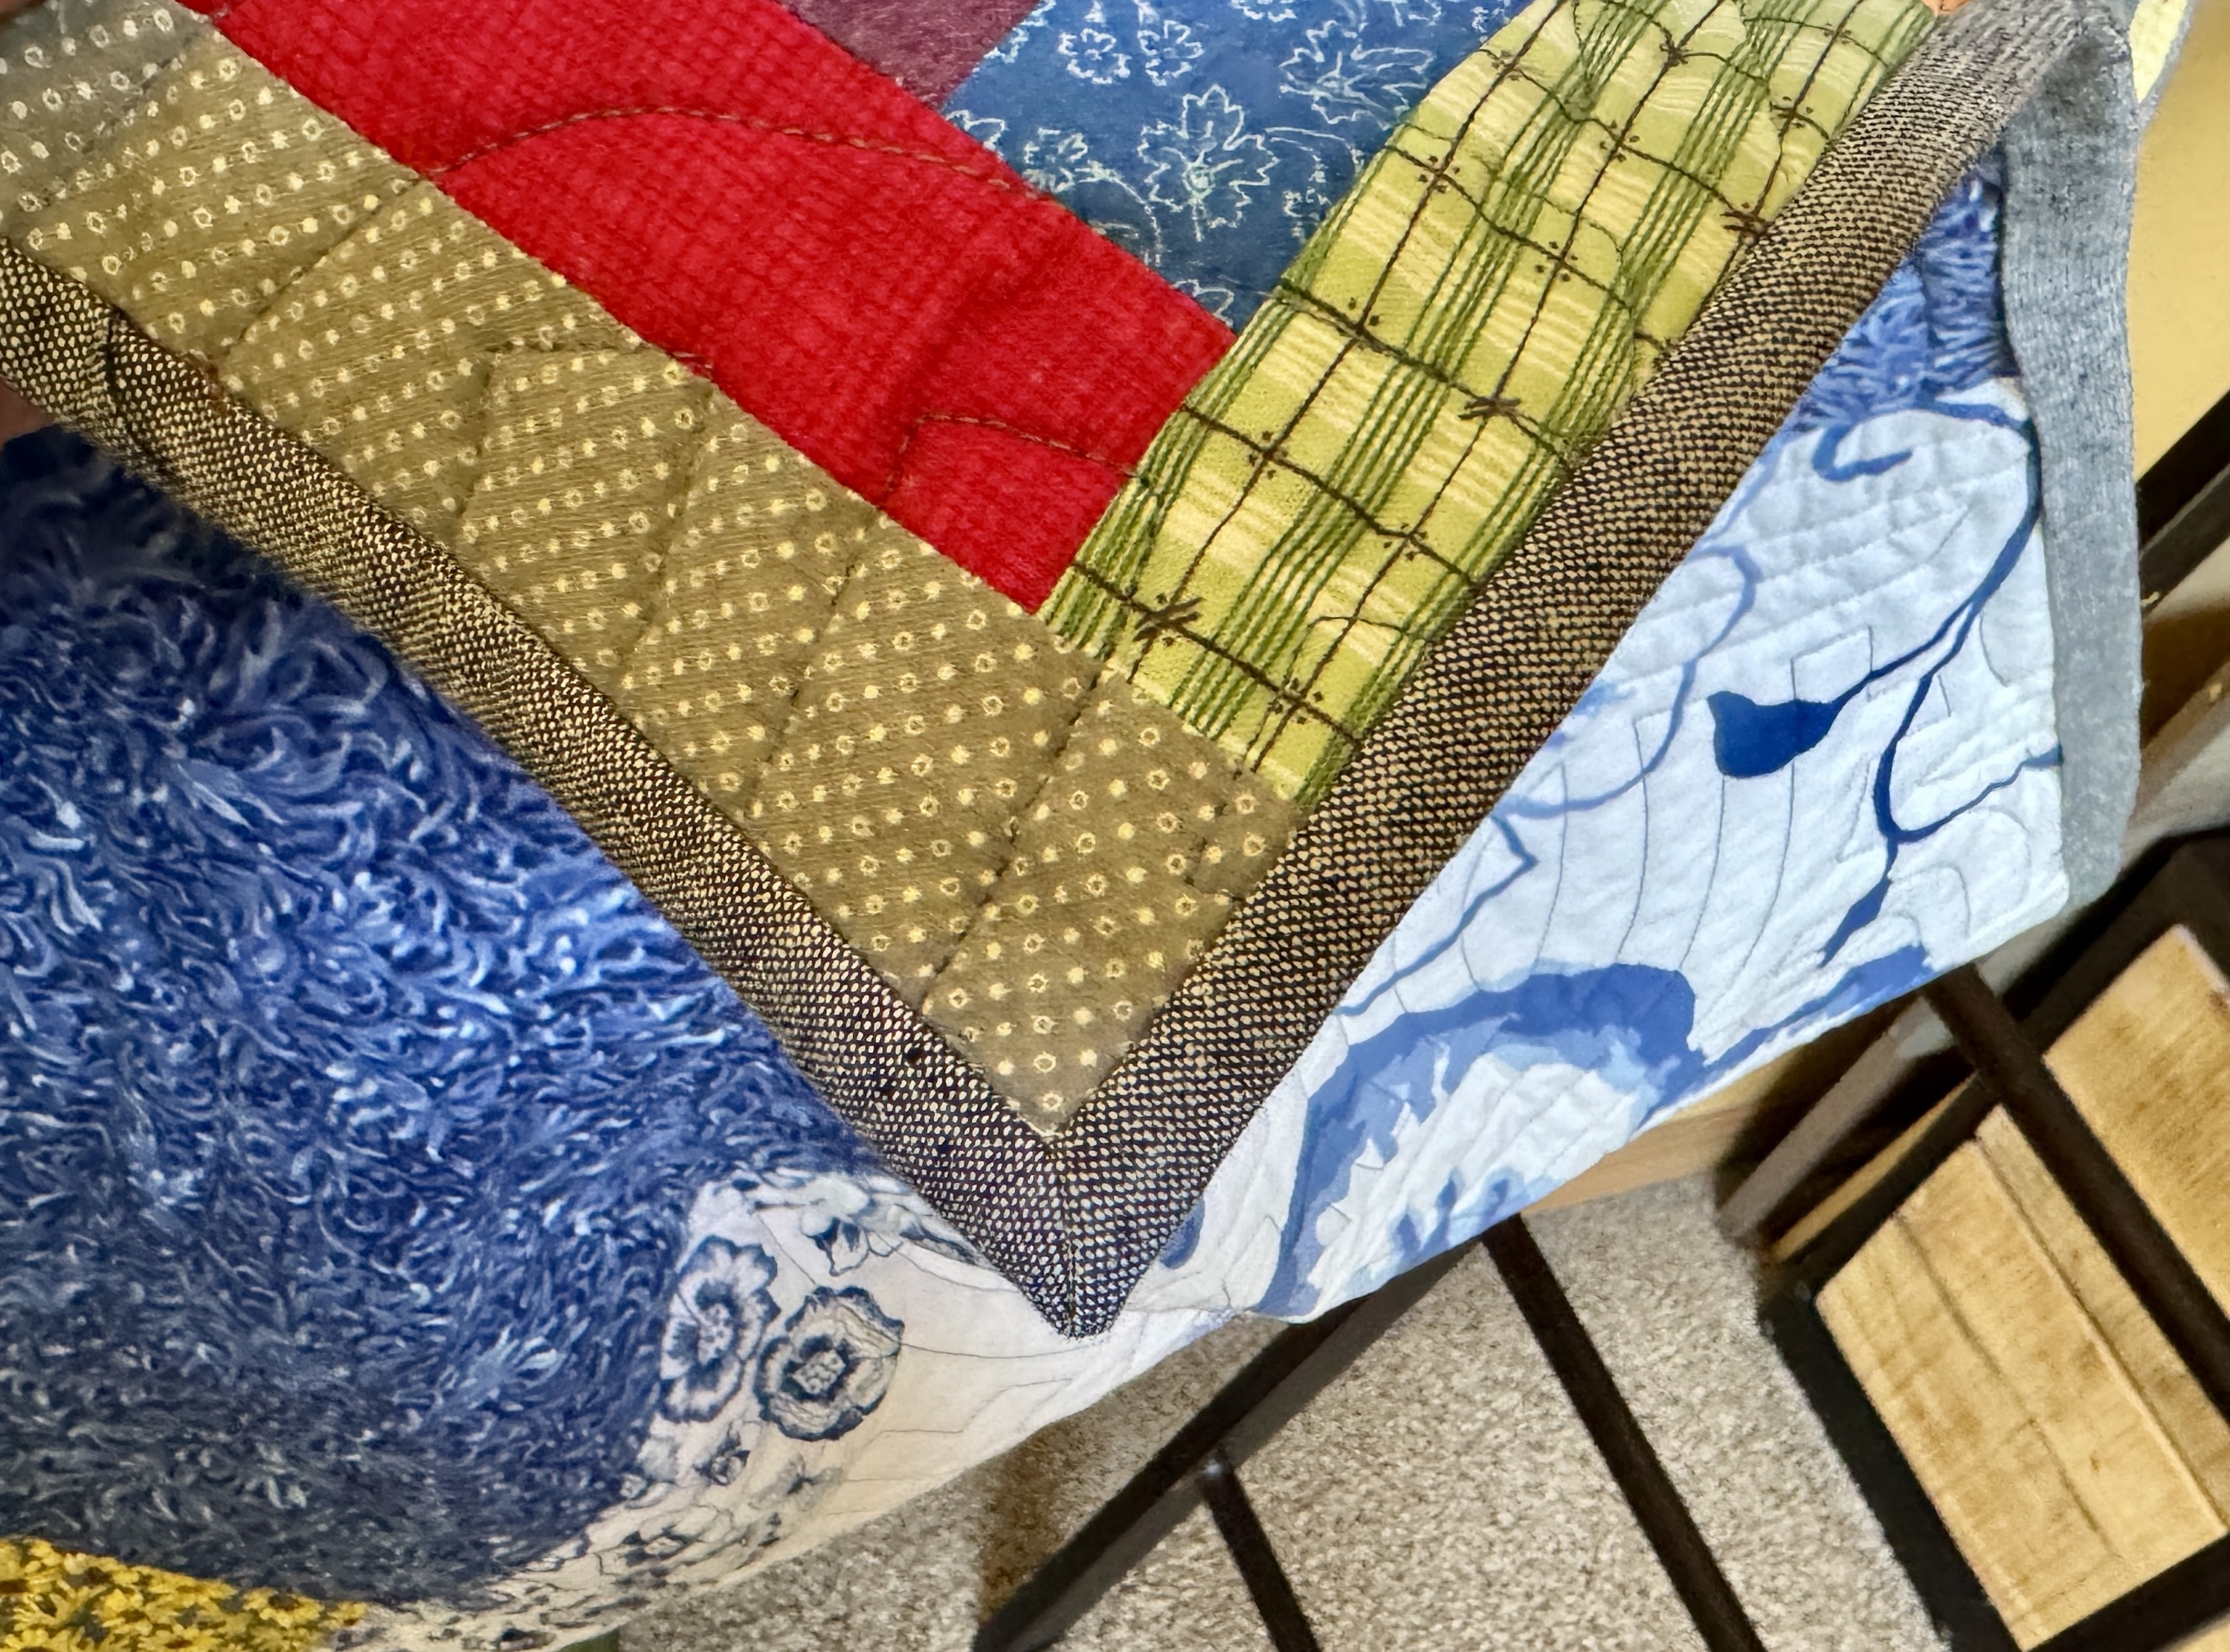
I hate binding quilts and decided to try out of new technique for binding the quilt per this YouTube video:
It worked and I ended up with nice crisp corners, which I’ve always struggled with:
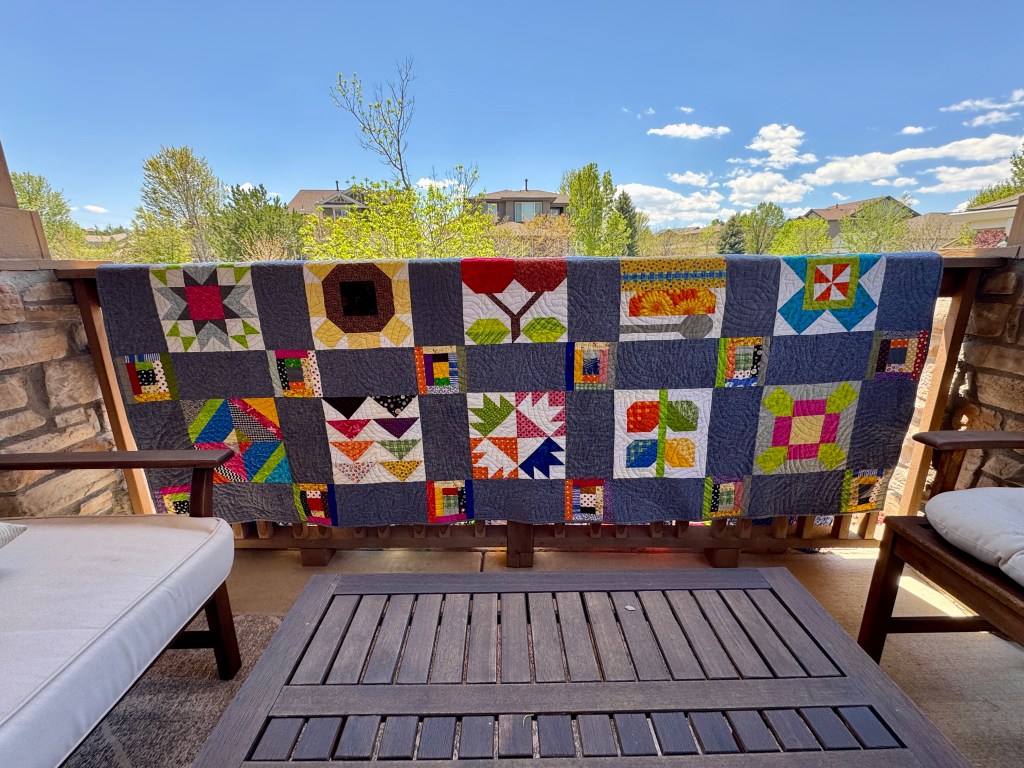
The finished quilt measures approximately 96 by 97 inches (2.44 meters by 2.46 meters) and it was a bit unwieldy to try and photograph for this post. First I tried photographing it on my front porch draping it over the railing and photographing the front and back on the rail:
Then John got a long board of wood from his woodworking project pile along with a couple of woodworking clamps and clamped the quilt on. He held it above his head while I took photos.
Yes there is a shadow up top but I didn’t want to ask him to redo it in another location. This photo is good enough!
And here is a little section of the quilted back of the quilt with the Cortez Mill Flour sacks and disassembled recycled duvet cover:
So my future plan is to send a photo to the Cortez Flour Mill so they can see what I did with their flour sacks!
It’s the 15th of the month and time for my monthly “ScrapHappy” post as part of the ScrapHappy group I belong run by Kate and Gun. At the end of this post I have a link to the other blogs participating in this monthly event in case you’d like to check out their ScrapHappy posts.
The 15th of the month came around quicker than anticipated and I already blogged about the 22nd block I made for the very scrappy Farm Girl Vintage quilt I am working on September 26 (see post I Sewed Something!) so I couldn’t use that for my October ScrapHappy post, sigh.
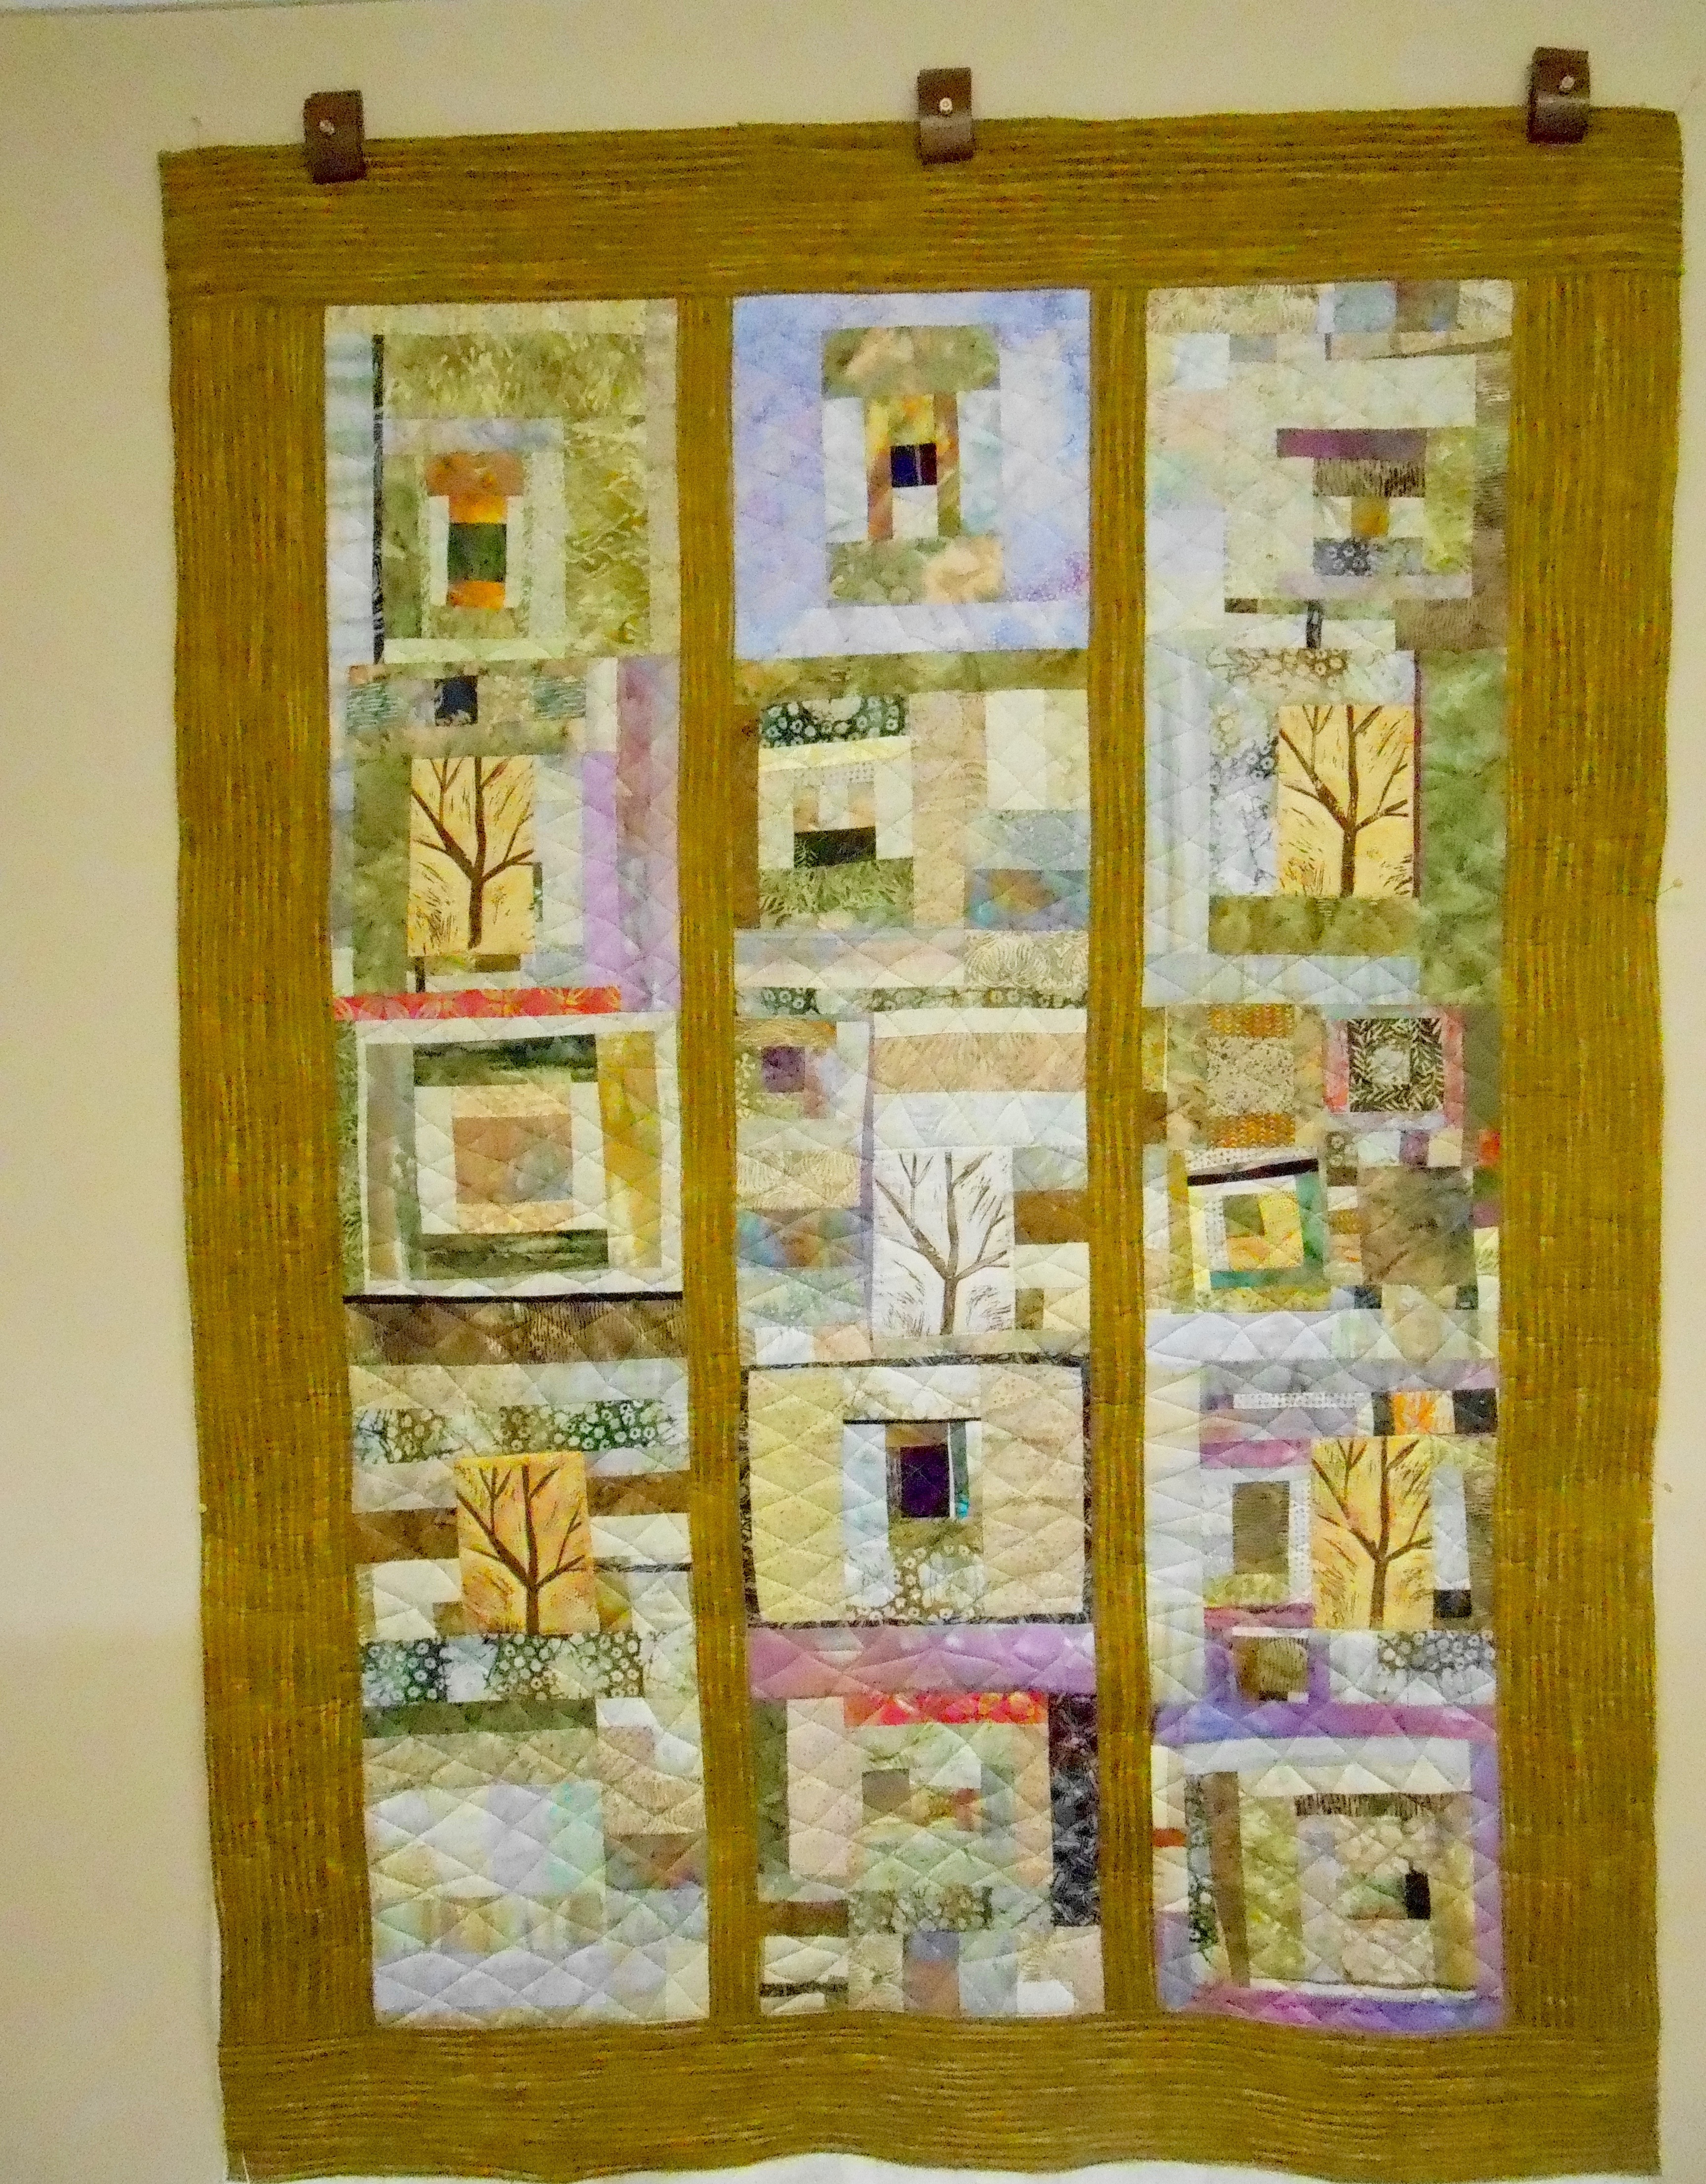
So instead I will discuss my series of art quilts made from scraps of recycled denim, clothing and home decorating fabrics – Recycled Hope; and update on you that latest quilt I am working on in that series.
The Recycled Hope Series
Recycled Hope an ongoing series of improvisational art quilts using recycled materials to include denim as the primary fabric on many of the pieces, combined with other recycled materials.
“Hope” and the interpretation of the word “hope” is the primary theme of infused into these pieces. Most of the fabrics were not reusable as clothing or home decor and were destined to end up in a landfill. Reimagining recycled clothing and other materials into art quilts satisfies my hopeful desire to honor the environment and make art that is eco-conscious. Ending up in an art quilt is a better outcome than ending up in a landfill.
My first quilt in the series, Recycled Road, was made for annual art quilt show for the local SAQA (Studio Art Quilt Associates) group I belonged while living in Central Oregon:
This quilt was made using my late husband’s clothing that he no longer wanted, several recycled jeans, a little recycled scrap home decor fabric and this awful pair of orange corduroy pants someone gave me to use in an art quilt. The pants were too hideous to donate to be work as clothing but worked in a quilt! The quilt measures 18 inches by 40 inches which was the required dimensions for the art show which was titled “Pathways”.
I no longer own this quilt, it was purchased by a friend who wanted to support my art.
The second quilt I made in the series was also for an annual art quilt show for the local SAQA (Studio Art Quilt Associates) group I belonged while living in Central Oregon and titled Recycled Door:
This quilt is composed of recycled denim, recycled home decor fabric, and a little of those awful orange corduroy pants (I got a lot of use out of those pants, fabric wise). It also measures 18 inches by 40 inches which was the required dimensions for the art show which was titled “Doors”. This quilt was purchased by a private collector.
The third quilt in the series was also for an annual art quilt show for the local SAQA (Studio Art Quilt Associates) group I belonged while living in Central Oregon and titled Recycled Love:
Made from recycled jeans and home decor fabric, the Artist Statement for this quilt is as follows:
The first law of thermodynamics states that the total amount of energy in a system cannot be created nor destroyed, it can only be changed from one form to another.A quilt is made from changing the existing “love energy” from the quilt maker’s heart into a pieced textile; ultimately recycling that love energy into the quilt’s recipient heart.
It also measures 18 inches by 40 inches which was the required dimensions for the art show which was titled “The Threads That Bind”.
I have this quilt hung in my hallway next to my studio to remind me that “Quilts are Love”.
Here are the rest of the quilts in this series which were not created for a specific show.
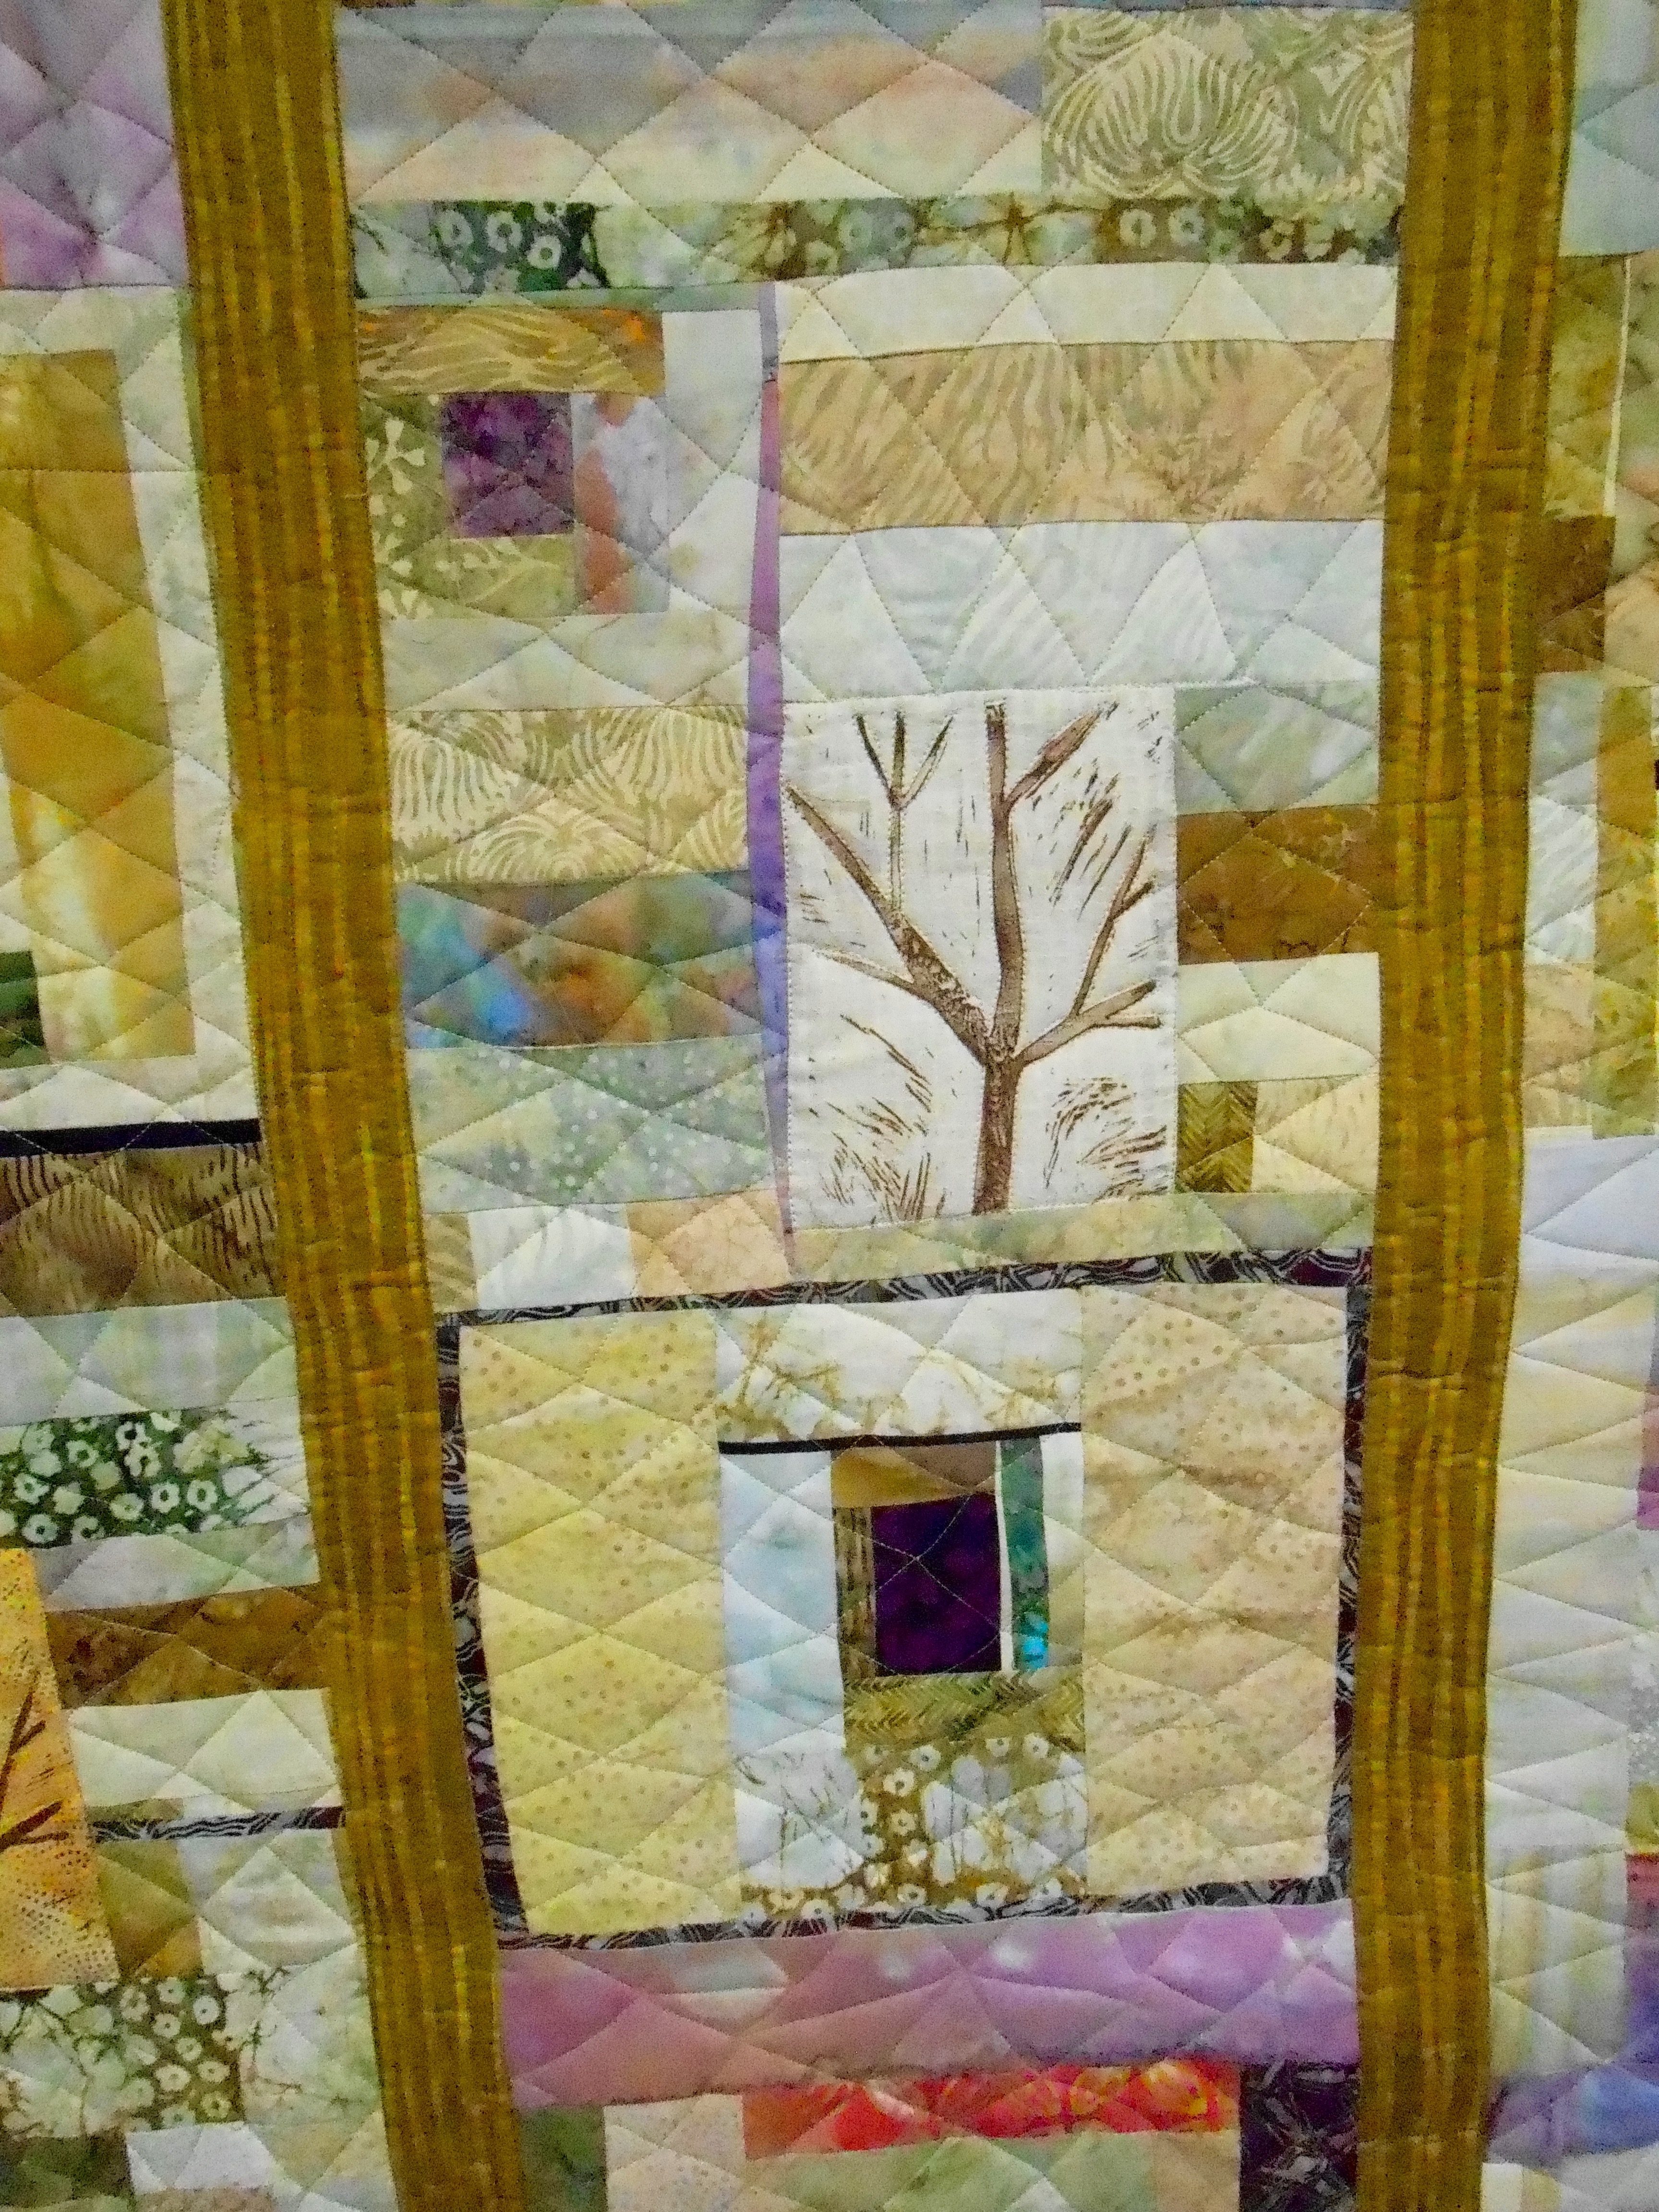
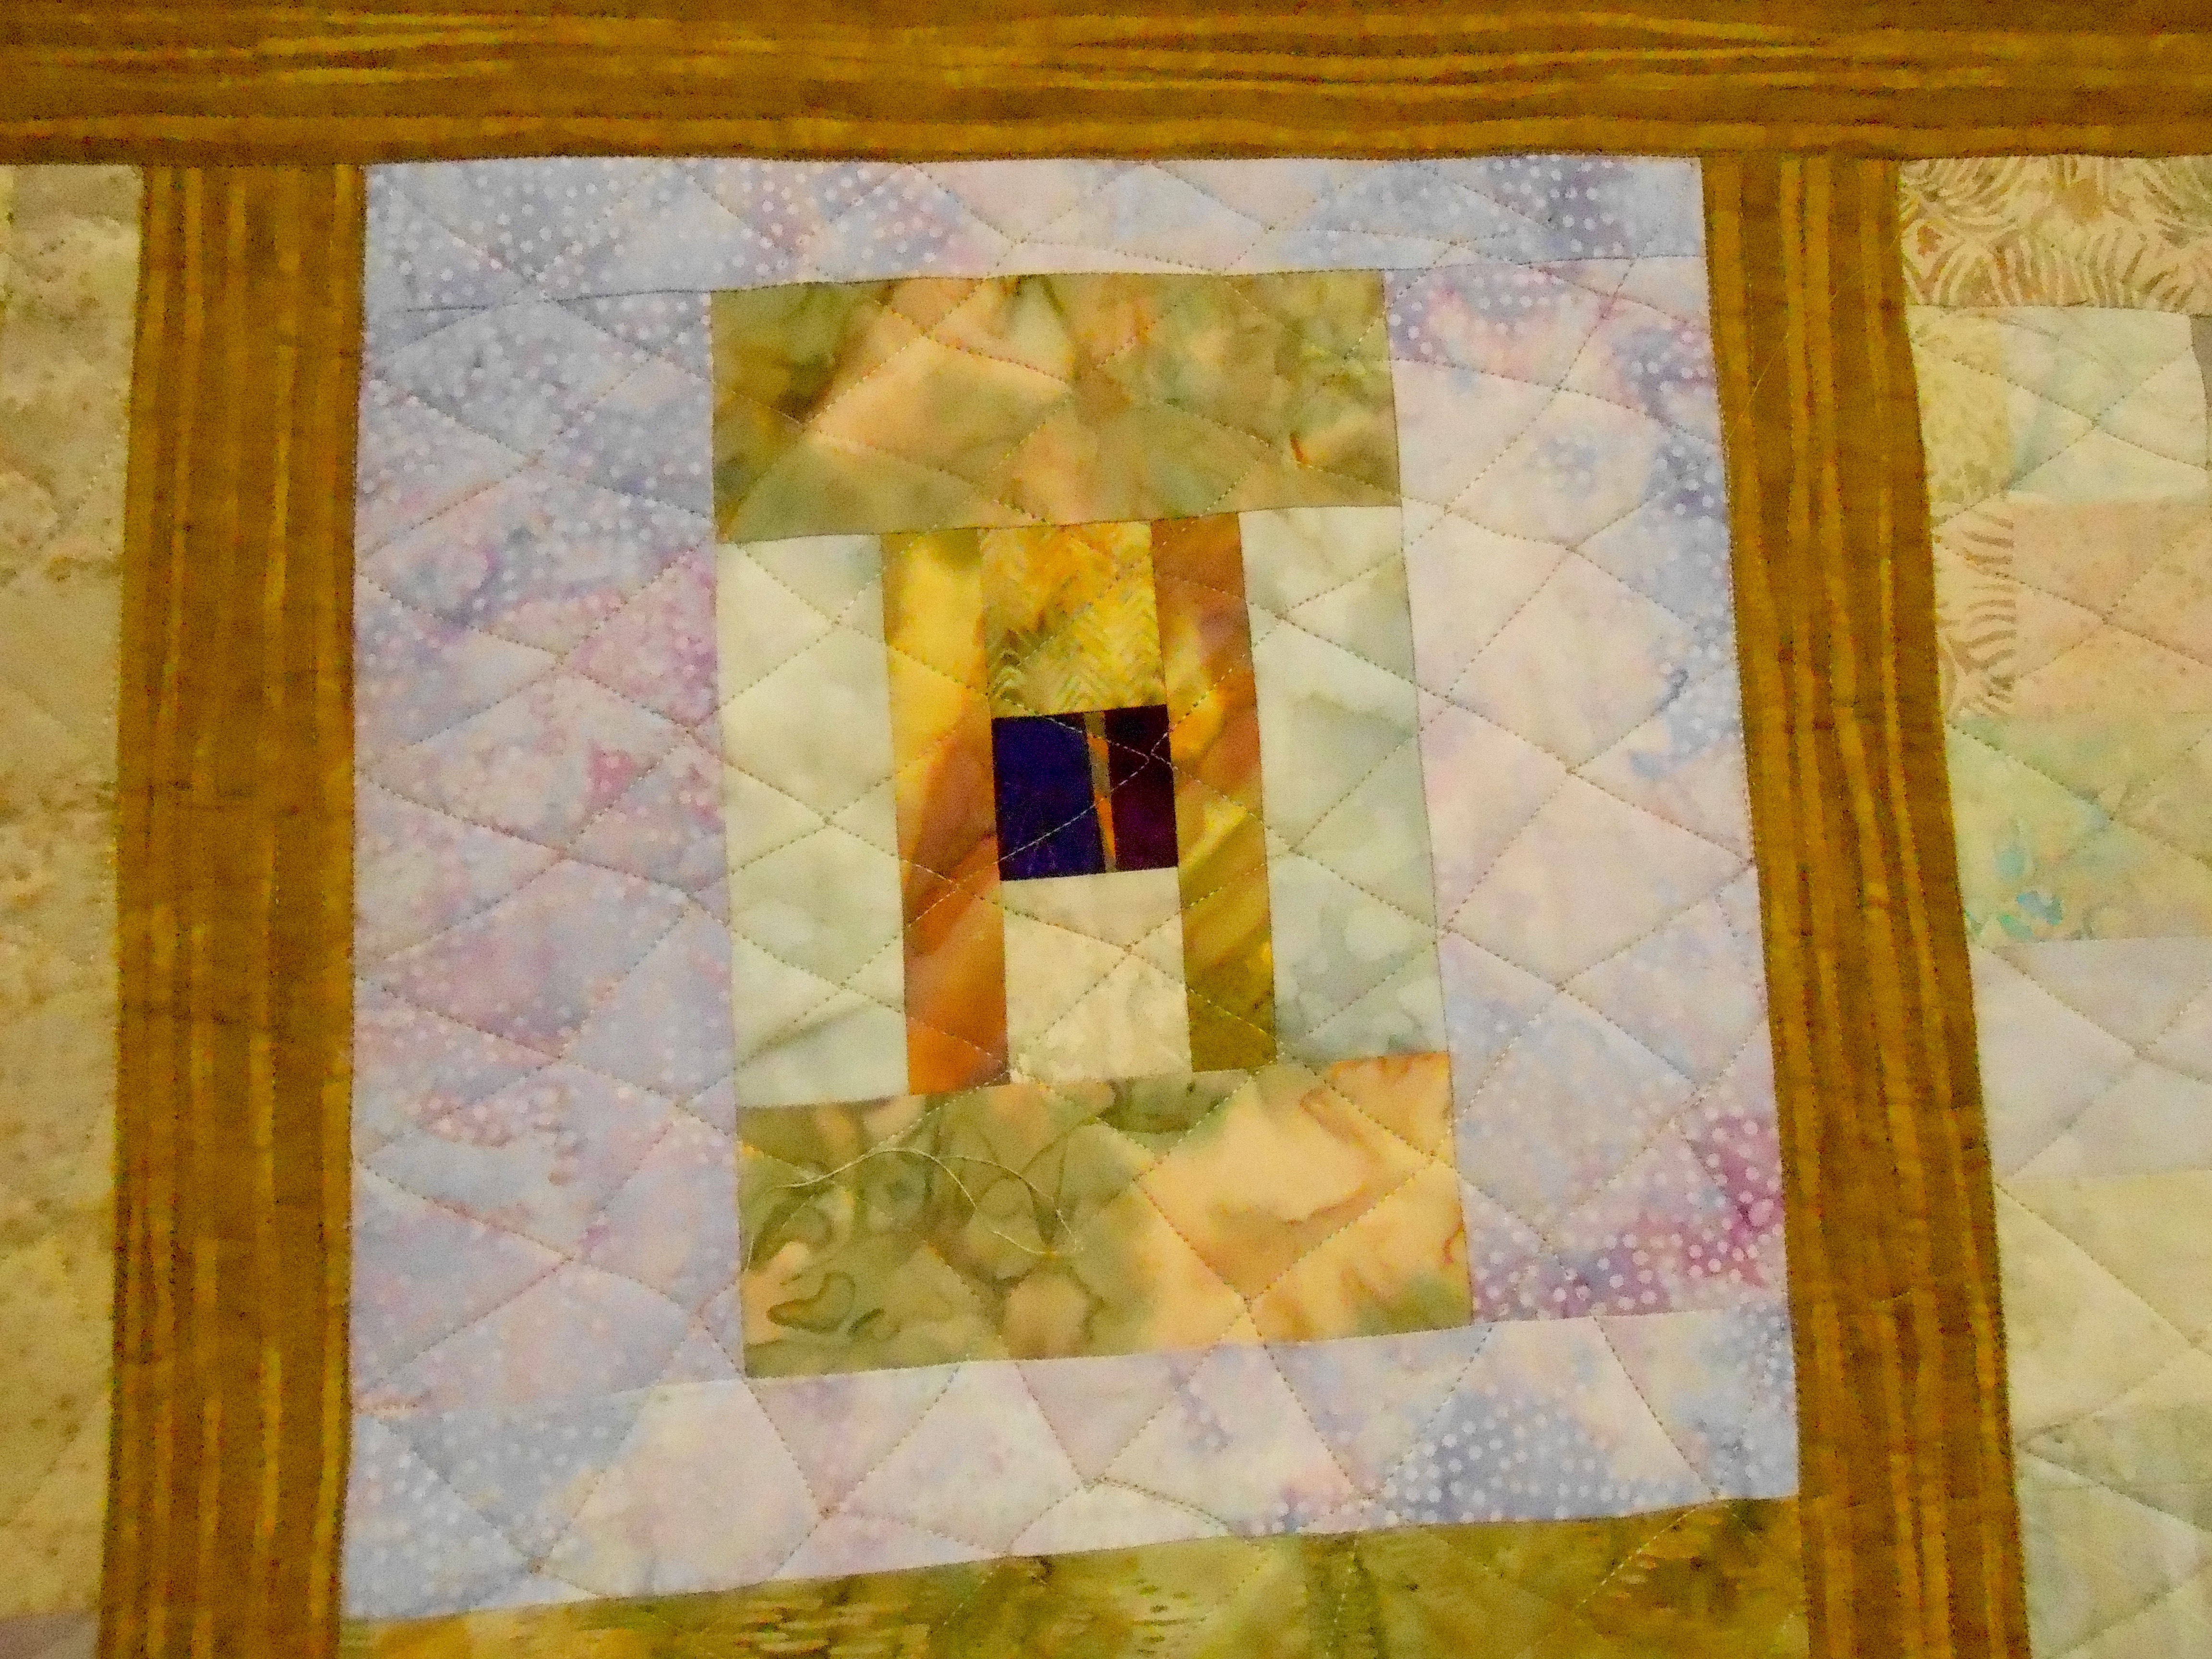
Recycled Windows of Conversation:
This quilt measures 55” W x 59” L; and is made from recycled jeans, various recycled clothing, and recycled home decor fabric. It was the largest recycled denim quilt i’d made to date.
It was purchased by an art dealer on behalf of their client, and it now sits in the common area of an upscale apartment complex in downtown Seattle, Washington (see post Oh So That’s What Happened to It!).
Recycled Windows:
This quilt measures 18” W x 39″ L, and is made from recycled clothing, recycled denim, and recycled home decorating fabric. It was juried into the New Mexico ArtsArt in Public Places Program but was not selected by any of their public buildings for purchase. So it hangs in my bedroom and I enjoy looking at it everyday!
Recycled Business Casual:
Somewhere in this series of quilts I made this quilt from recycled jeans, recycled wool blankets and menswear wool suiting scraps (this is where I got the name “Recycled Business Casual“. It was more of an experiment than an actual art quilt but it did show along with many of the other quilts shown above in my first solo show: The Wardrobe Meets the Wall in April 2019 at the Seattle Municipal Tower in Downtown Seattle, Washington.
Current Project Update
And finally let’s get to my current project in progress to add to the Recycled Hope series – a denim quilt made with lots of recycled jeans and recycled home decor fabric scraps:
The tentative name for this quilt is “What Direction Do I Go?” but I am rethinking the name as my head is in a different space now than when I first started the quilt in October 2023 (What’s on the Design Wall: An “Upcycled” Work).
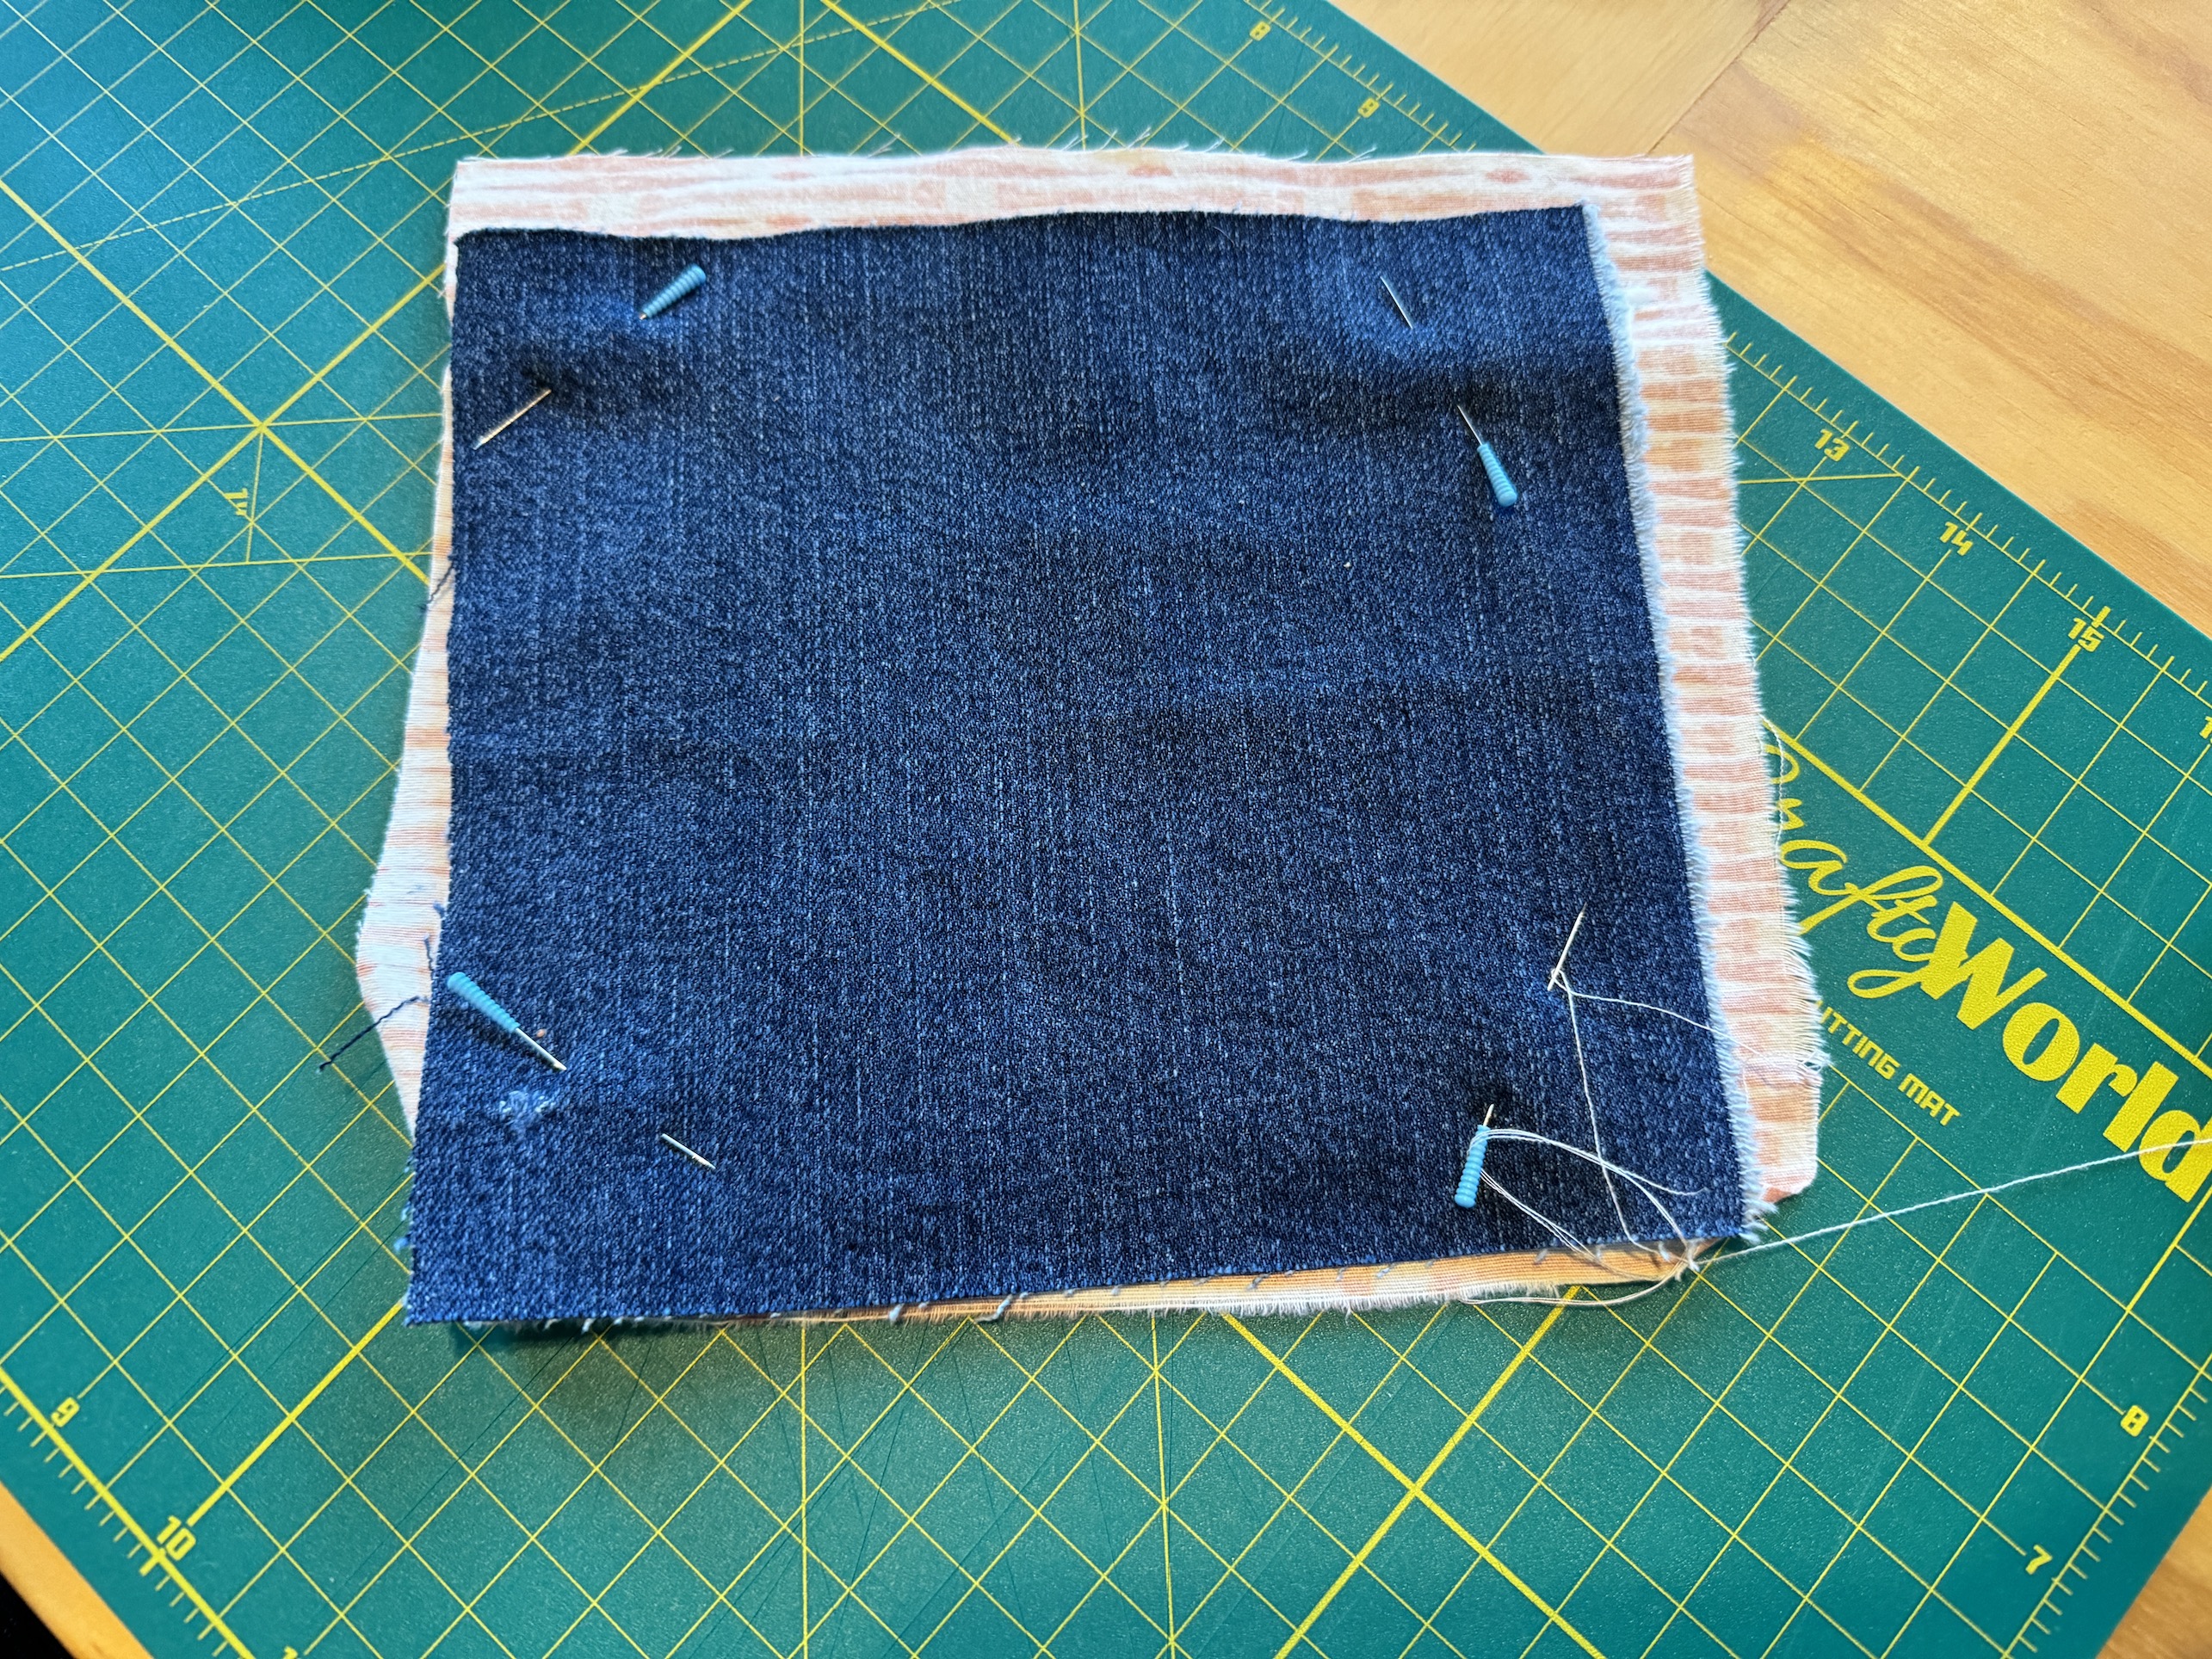
I have it back up on the design wall and it is set up for quilting with the backing and batting attached.
I am working out what quilting design I want to use. I created a sample square of scrap denim, backing and batting to try out some designs:
I am really looking forward to completing this quilt and I have a place on my living room to upstairs stairway reserved to hang this approximately 55 inches by 55 inches quilt.
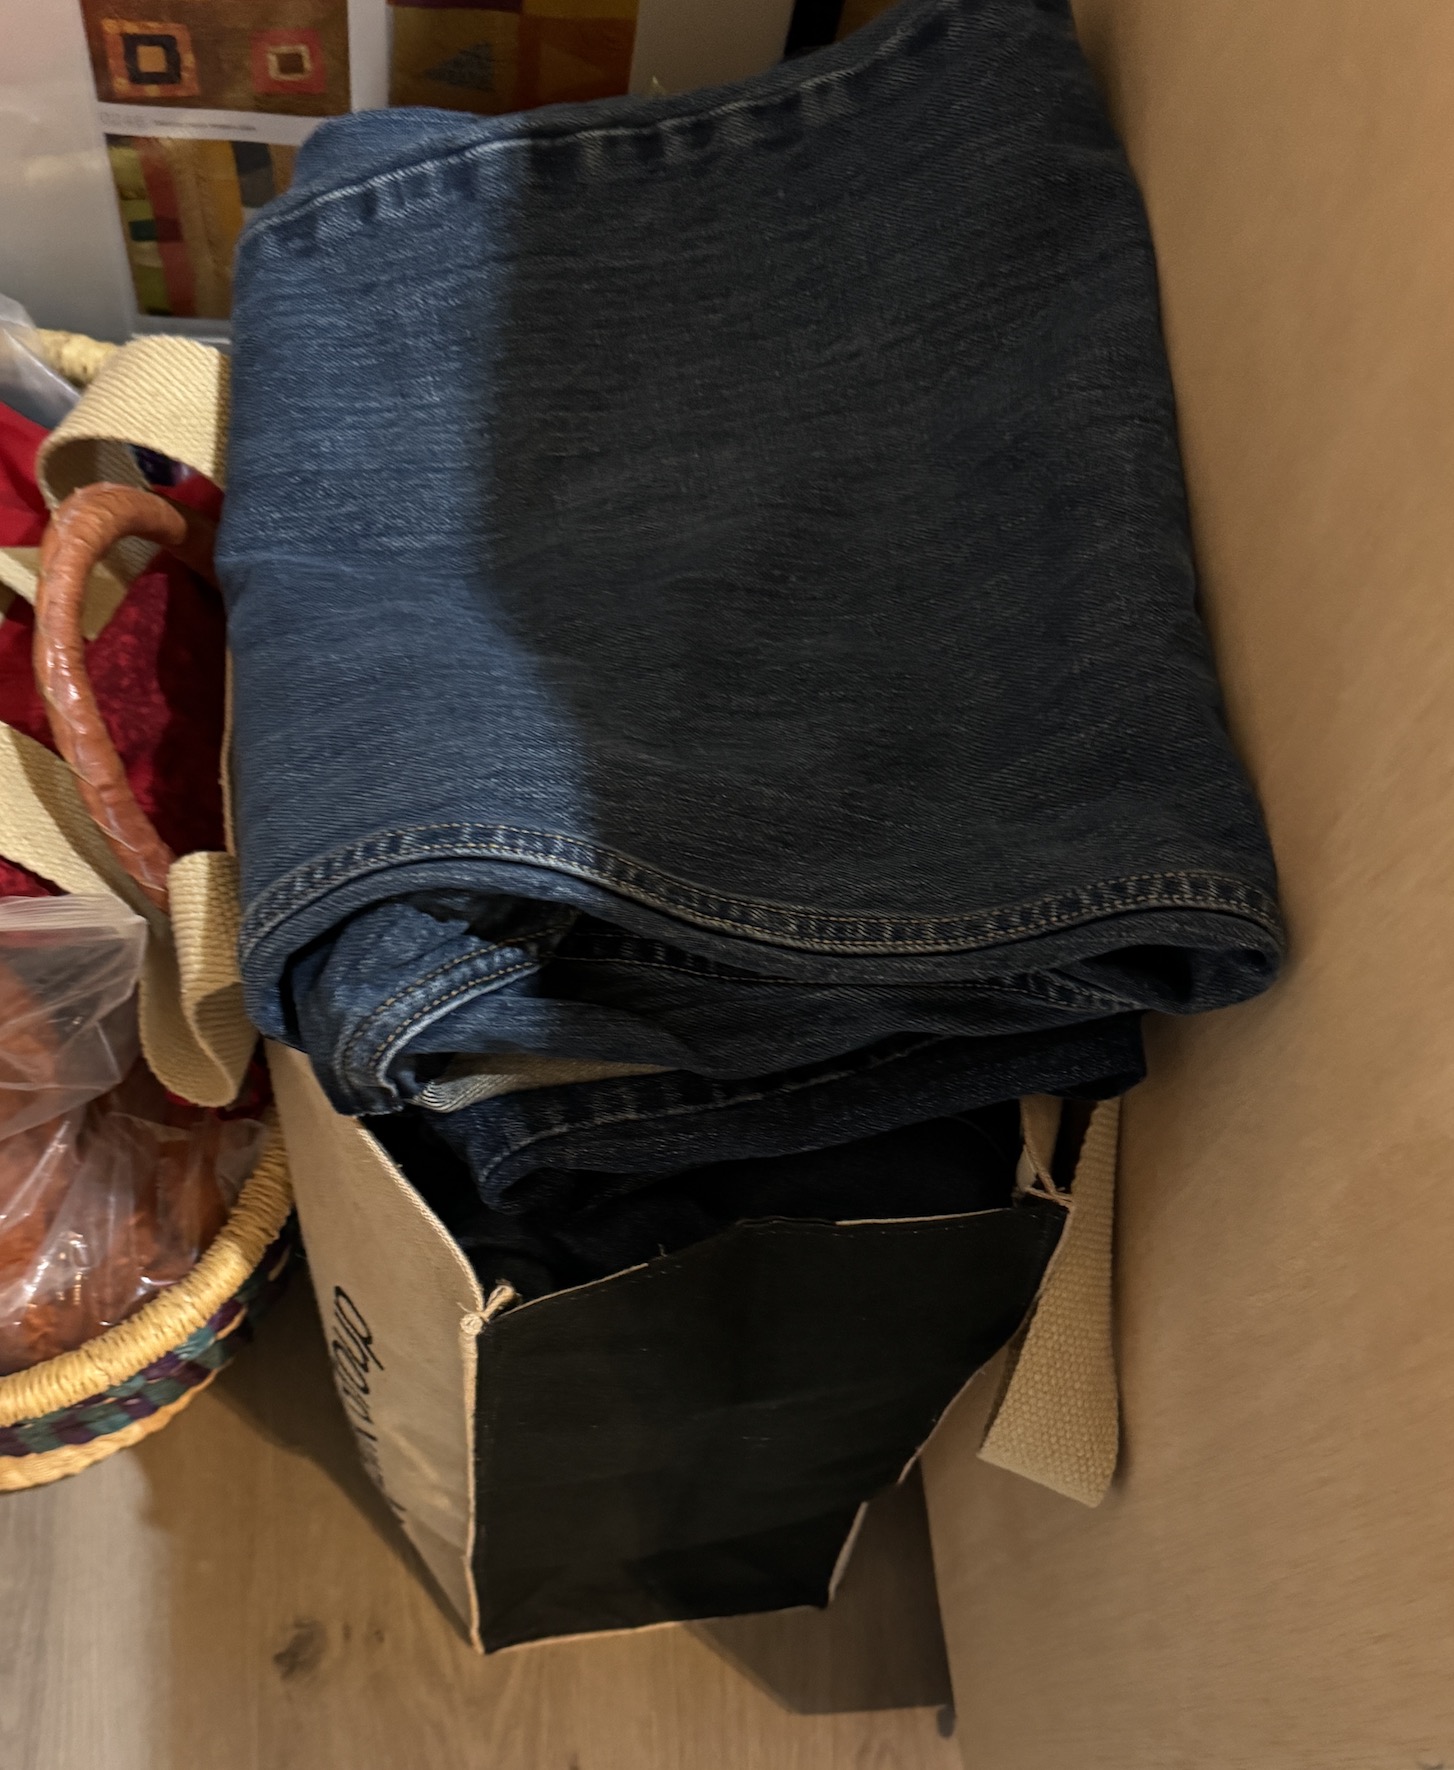
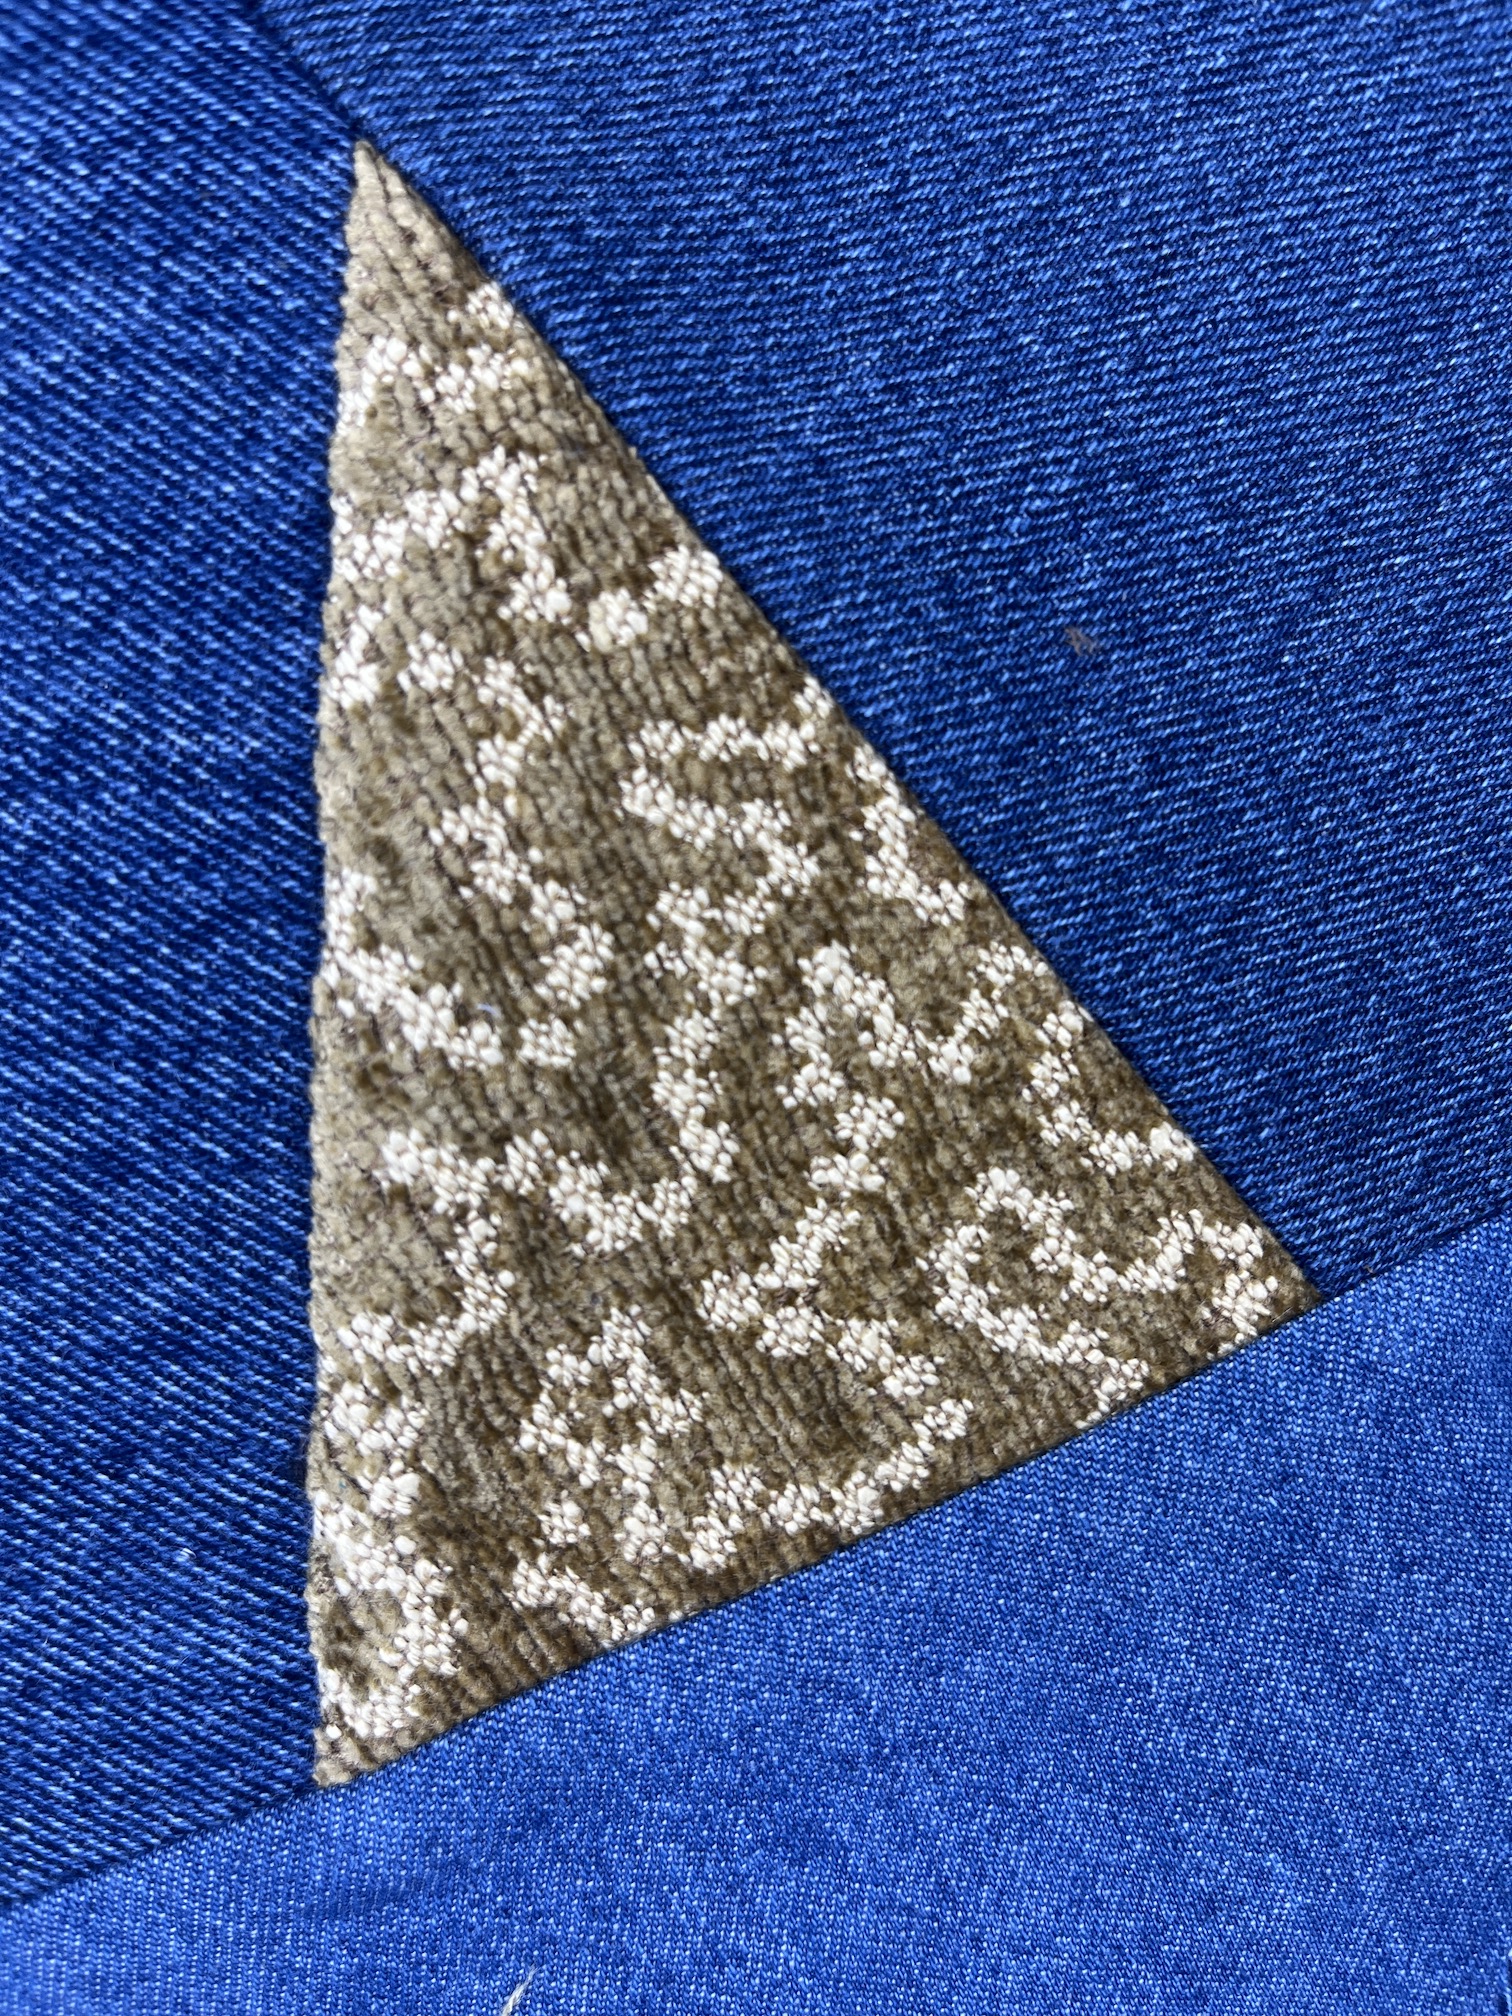
After I finish this quilt, there will likely be more recycled denim quilts in the future as I have a nice stash of recycled jeans in my studio:
Earlier this year a local charity thrift shop had an “All Jeans $2” sale and I stocked up!
Here are the other bloggers that participate in the ScrapHappy monthly posting event, check out their blogs linked below for their ScrapHappy posts:
It’s the 15th of the month and time for my monthly “ScrapHappy” post as part of the ScrapHappy group I belong. At the end of this post I have a link to the other blogs participating in this monthly event in case you’d like to check out their ScrapHappy posts.
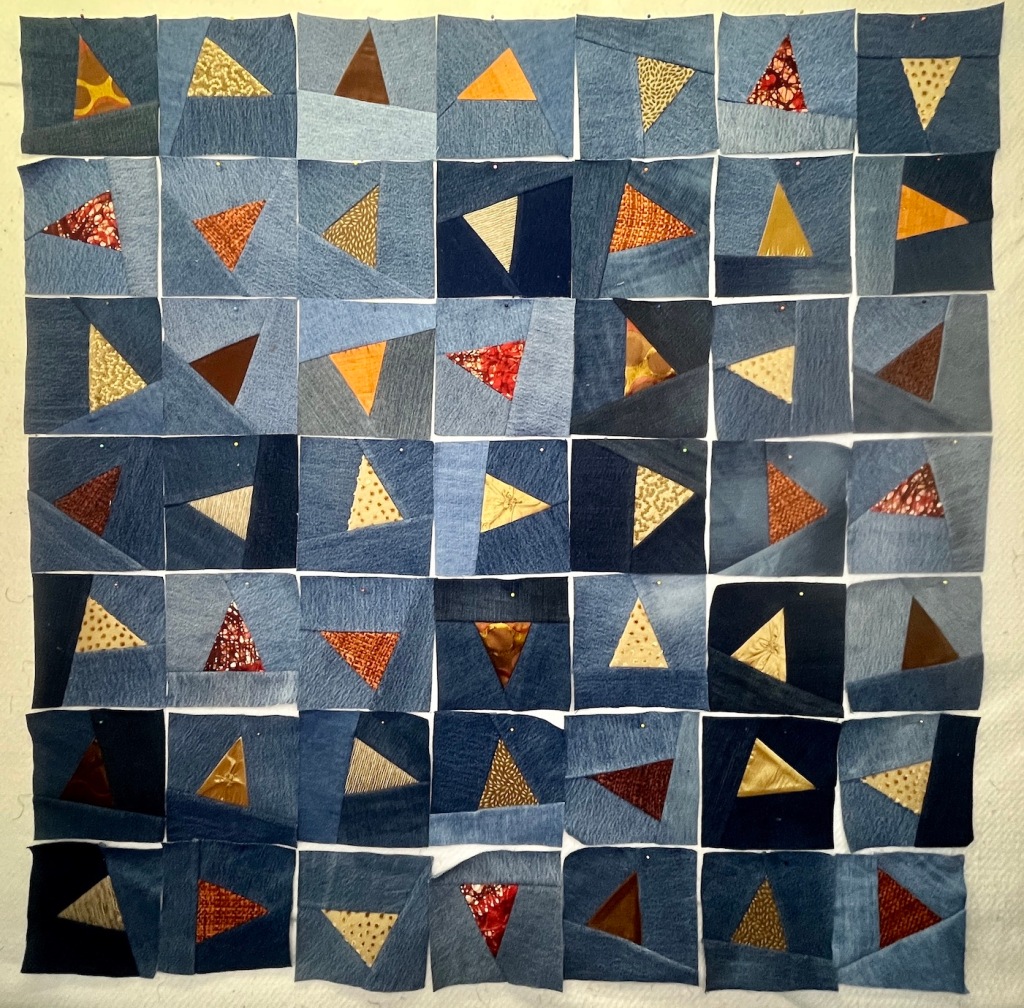
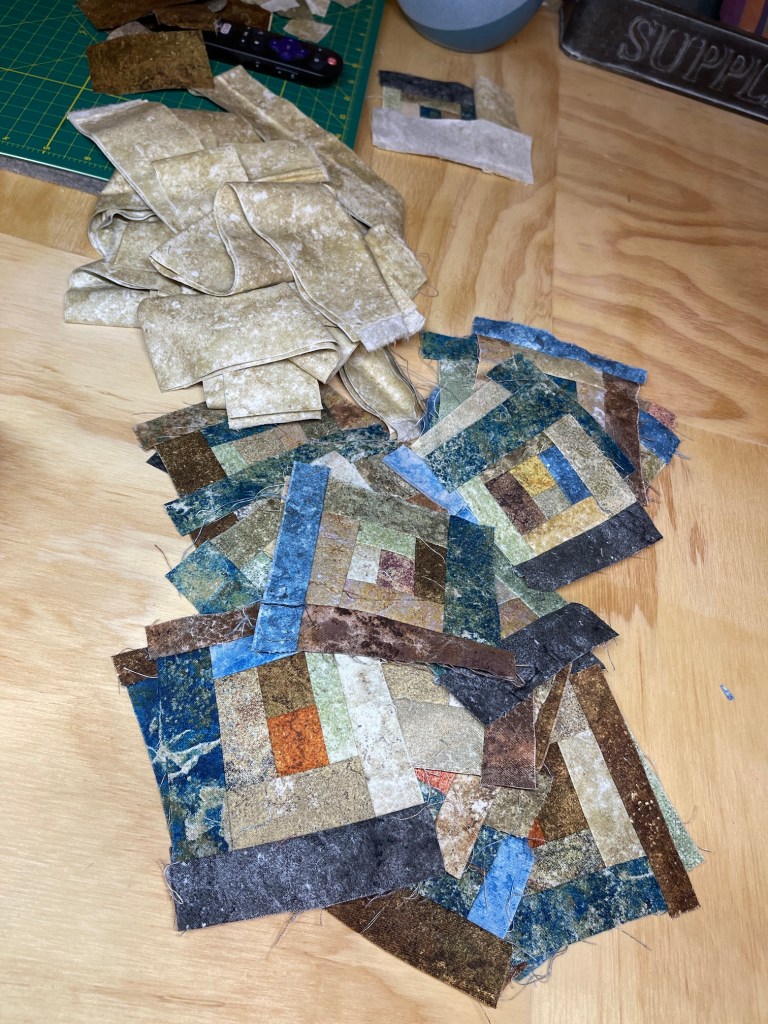
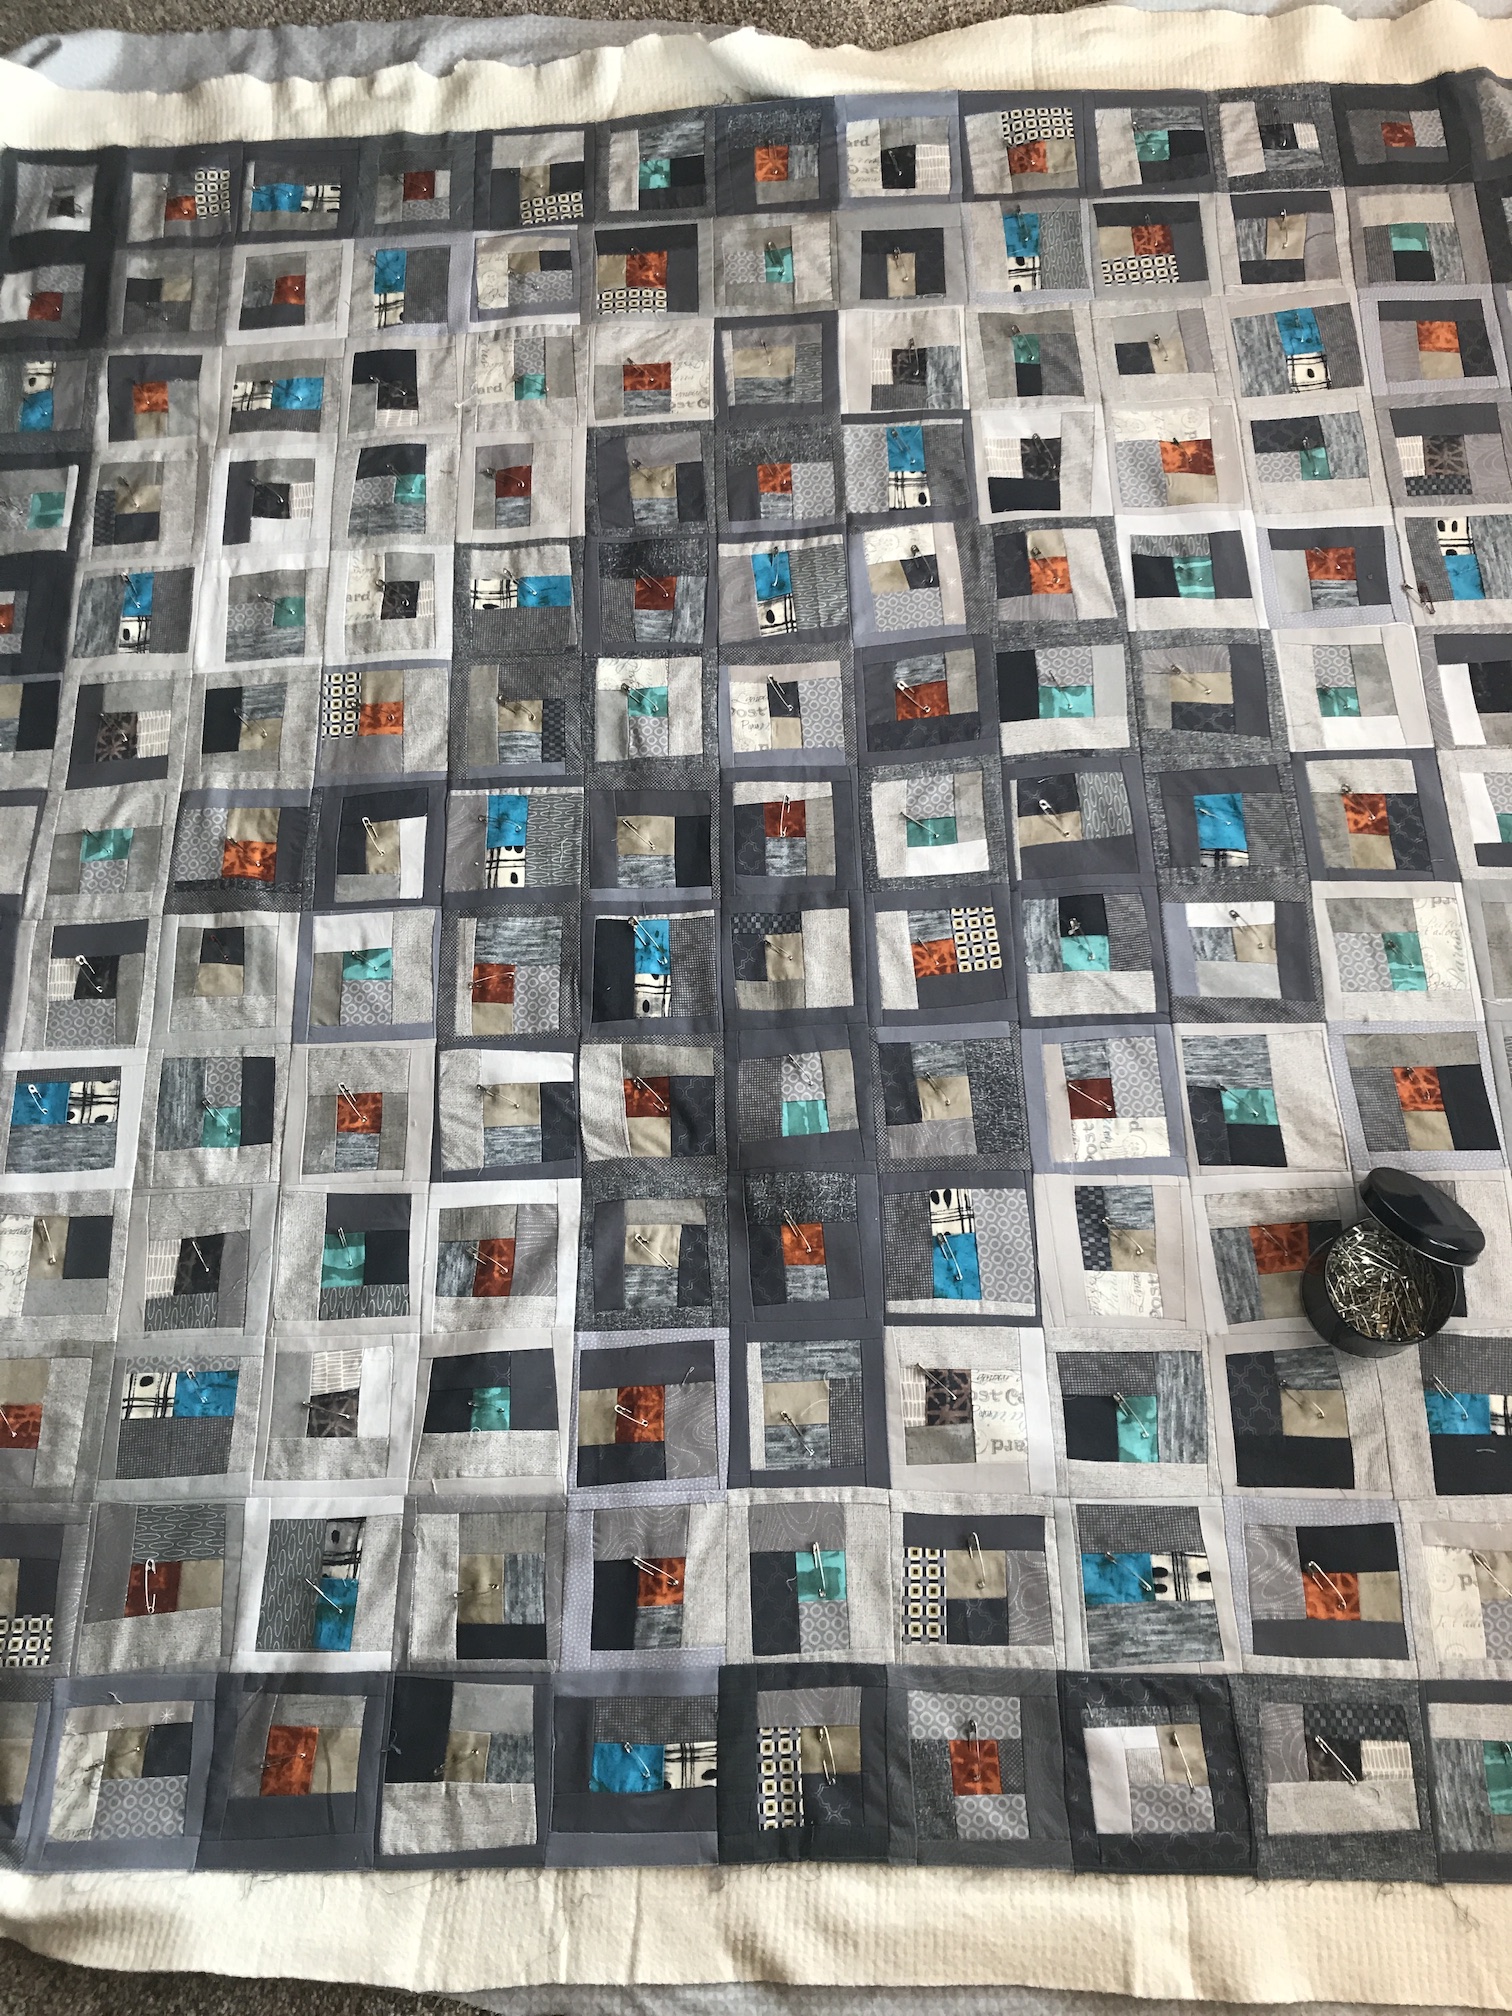
I’ve completed 51 blocks piecing recycled denim/jeans and home decor fabric scraps; and I put 49 of them in a 7 by 7 square so you could see a sample of a layout:
Yes I couldn’t decide which photo to use so I included all three!
I want the piece to be sort of large, and definitely square and I’ve decided to make a total of 81 blocks for a 9 by 9 square piece. I might hand quilt it, I haven’t decided but I am going to try some sample designs with scrap denim to see how the stitching would look.
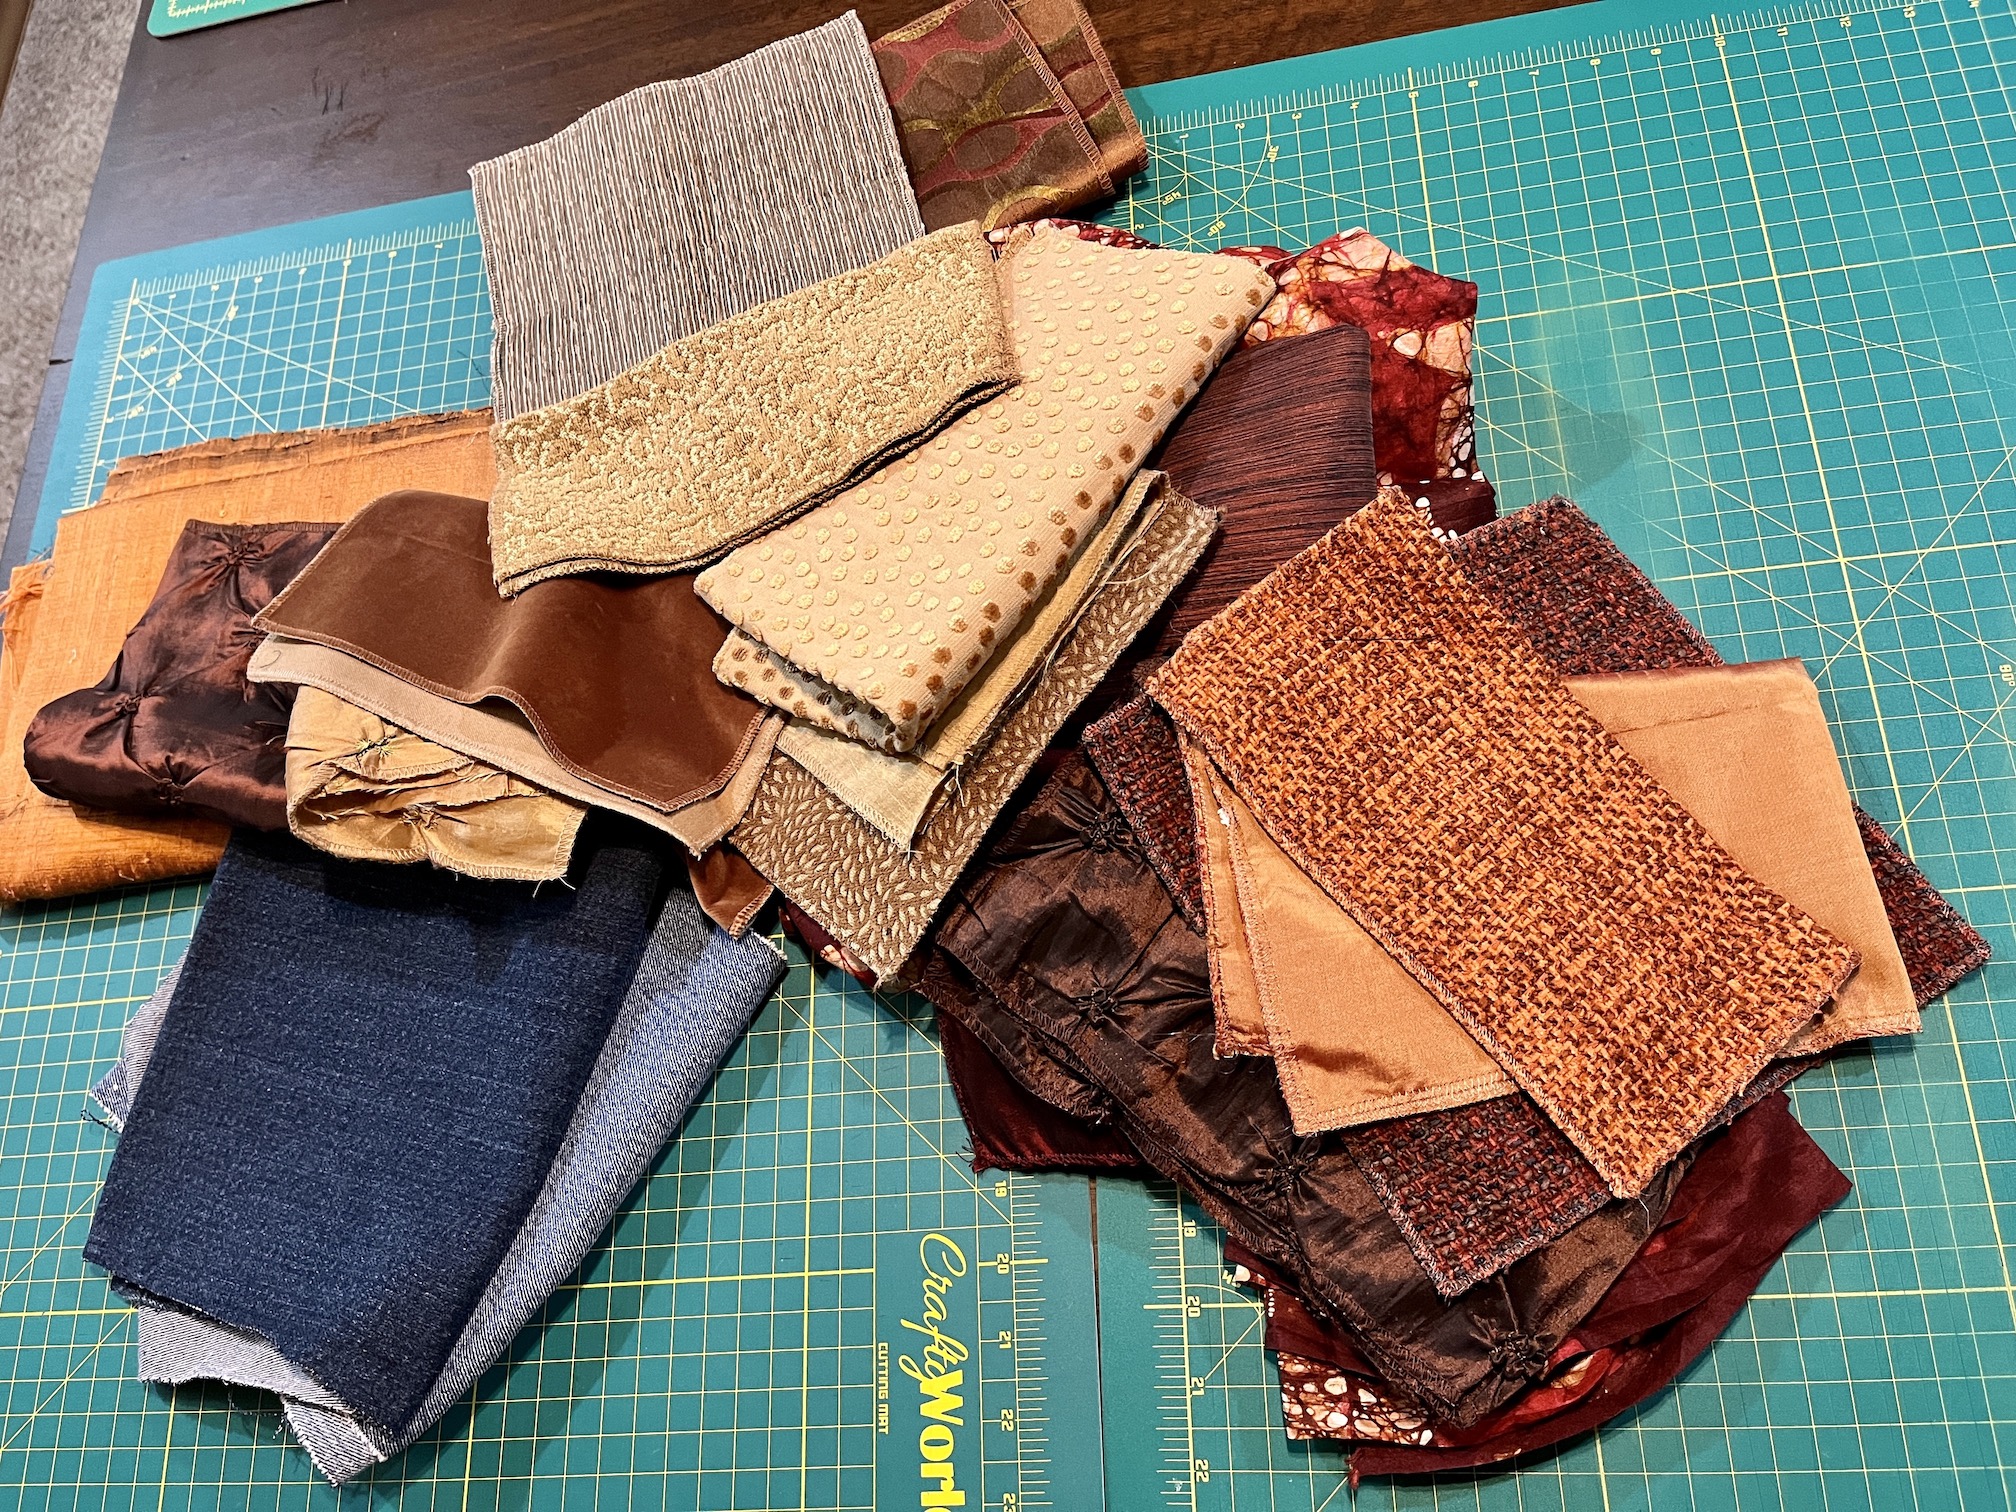
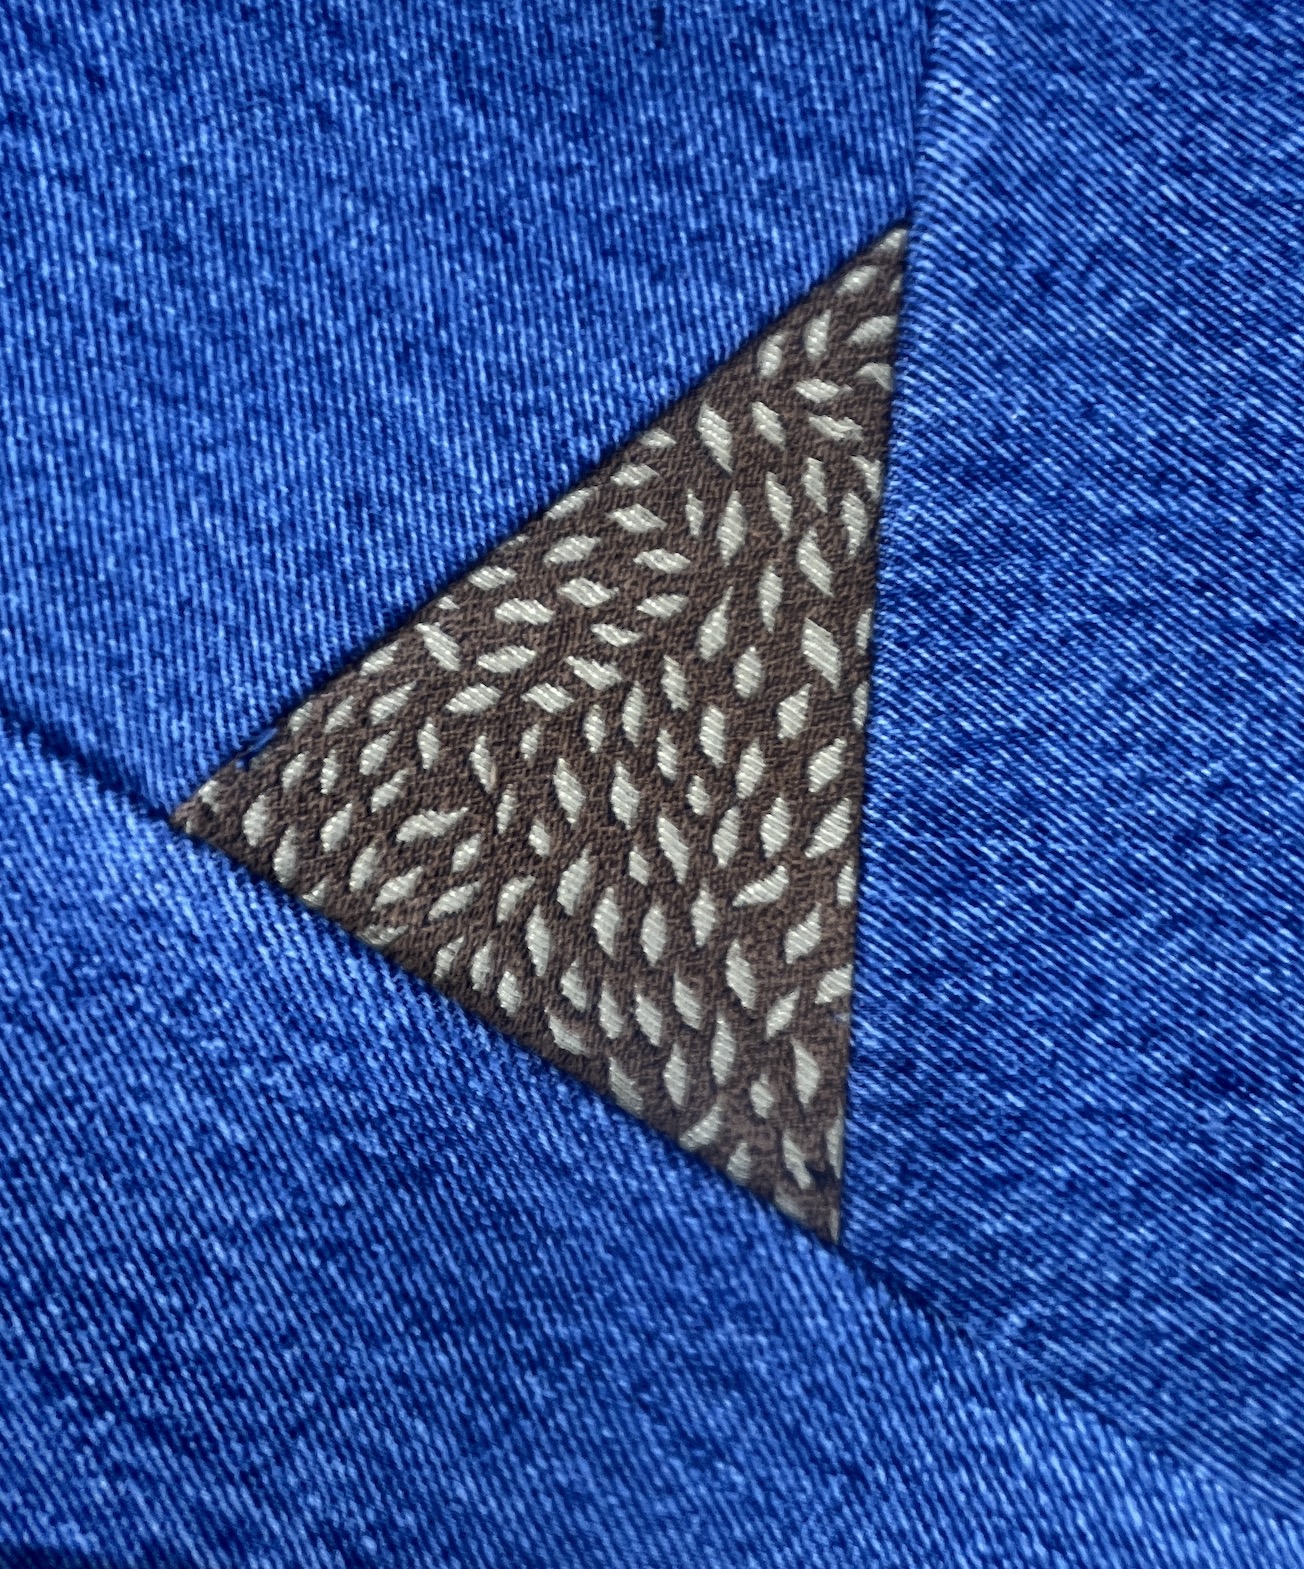
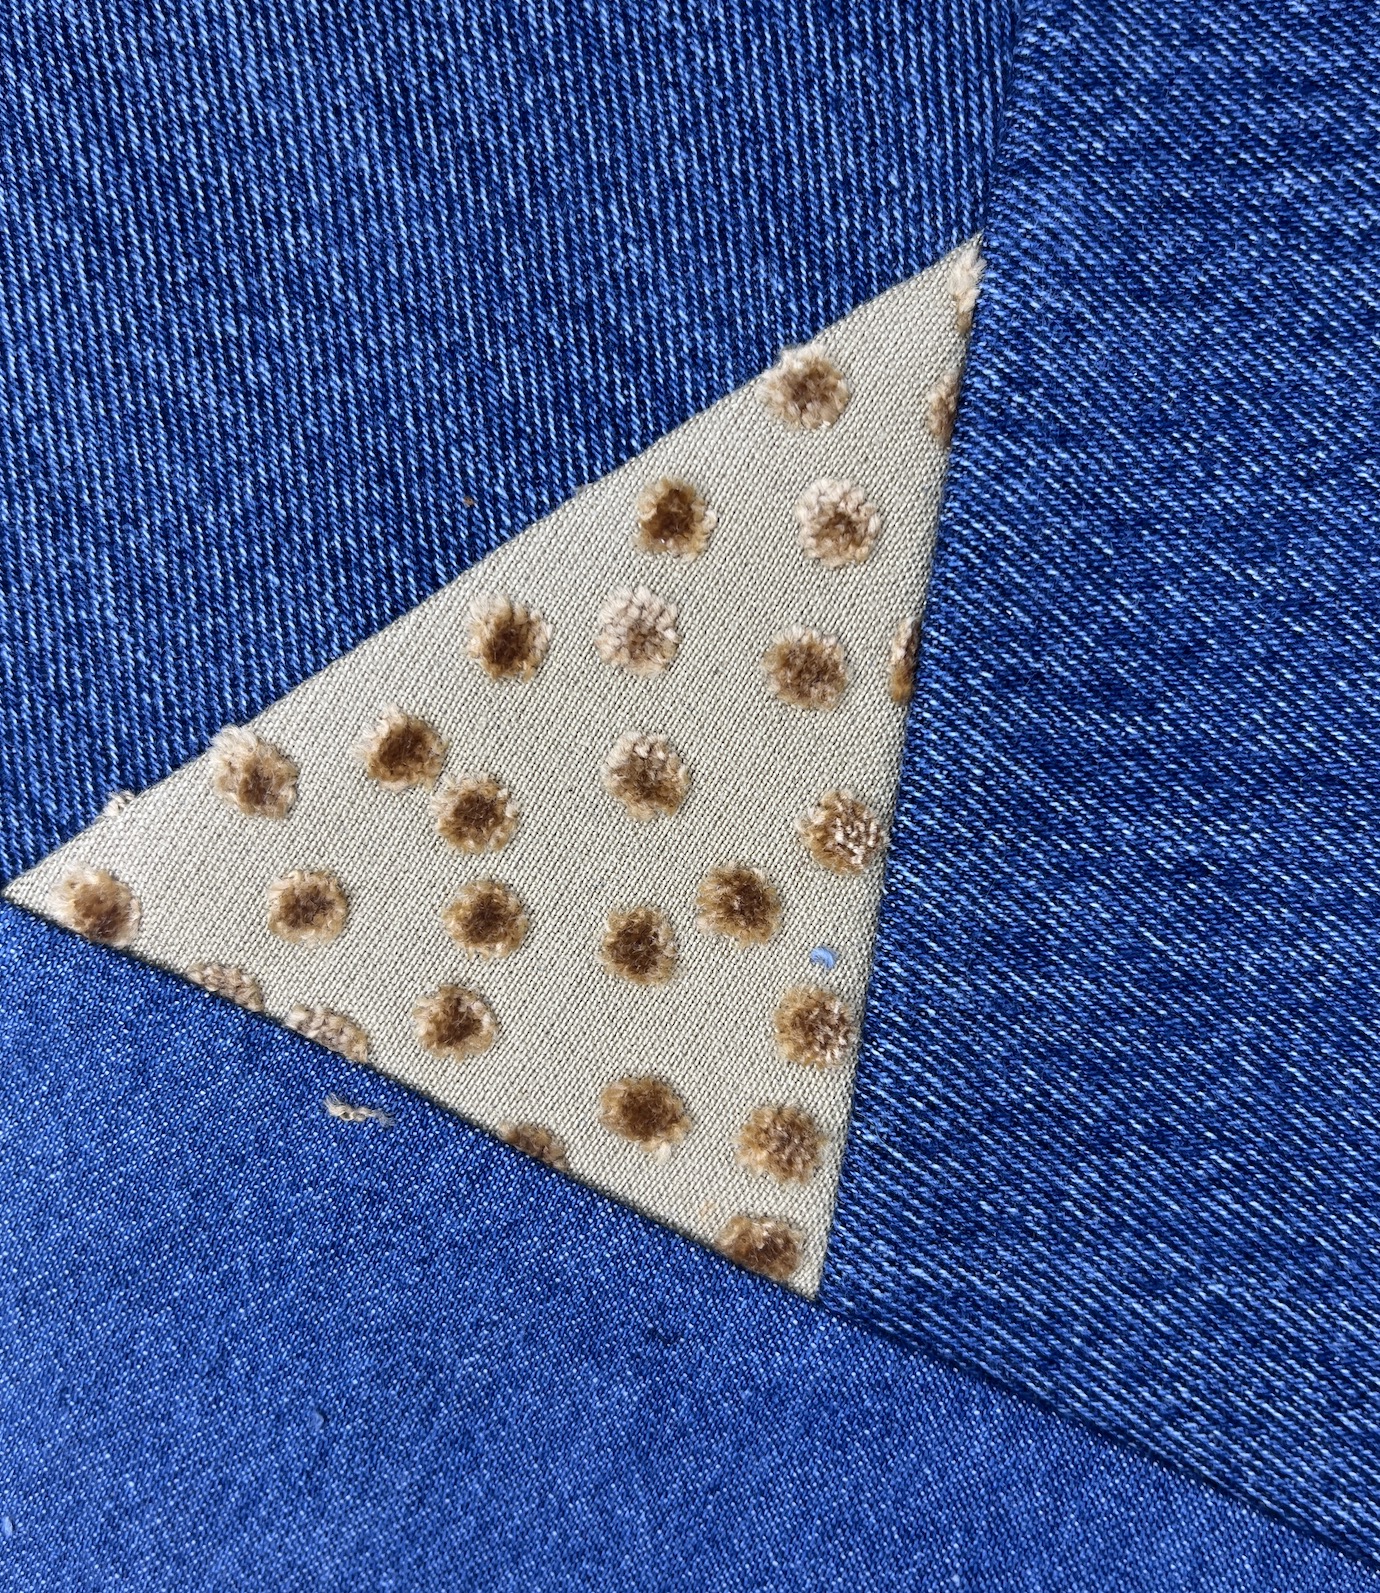
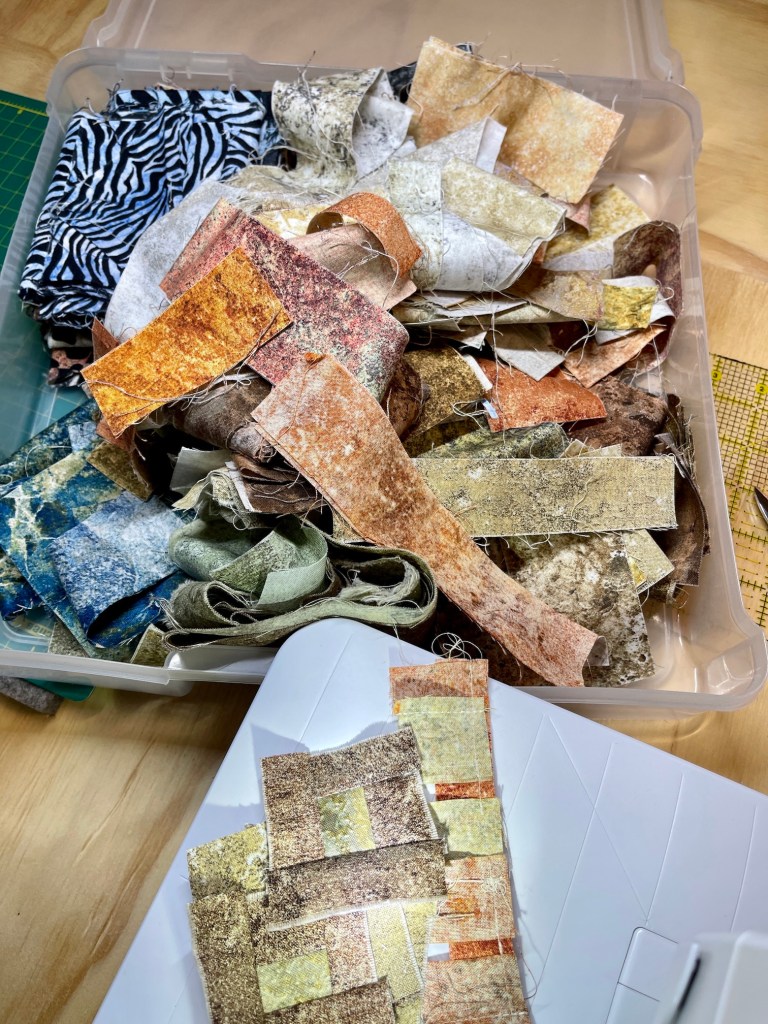
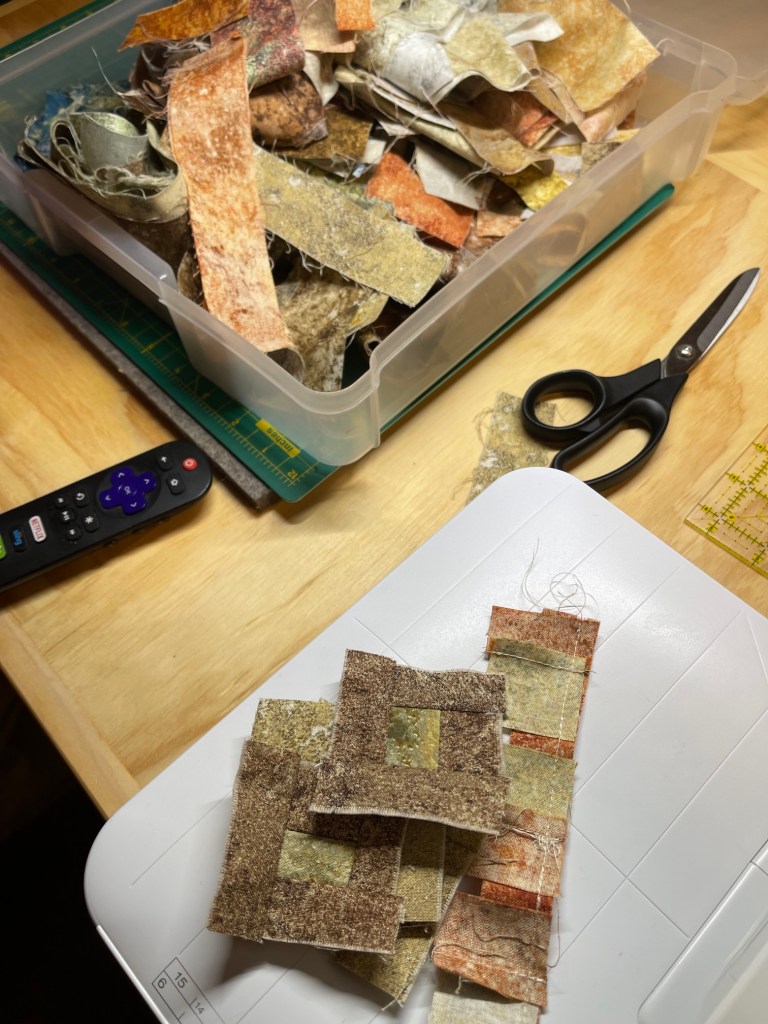
There is going to be lot texture in this quilt, primarily from the recycled home decorating fabric samples I used:
Here is a collection of close up blocks to show you the textures:
There are more fabrics I haven’t cut yet that I will be adding/using for the additional 30 blocks I need to make.
The layout you see on my design wall is not the final layout, just a sample layout. When I finish all the blocks and go to layout the quilt, I realized I need to pay attention to secondary patterns that I might want in the piece.
For example I noticed this secondary pattern, from how the blocks lay together, in one of the sections on the design wall and I like it:
I want to make sure the final layout has a lot of “movement” in it.
My tentative name for this piece is What Direction Do I Go?
It is a deeply personal piece, inspired by my first recycled fabric random triangle piece Flying Triangles (2012); but about my struggles for the past 5 years since becoming a widow, selling my beloved house, moving to Colorado (leaving all I knew there), starting the 2nd relationship in my life, quitting my job, trying to focus on textile art, etc. (Yes I like to lump a lot of life changes and drama into one time period, ha!).
It should prove to be an interesting Artist Statement on the piece when I am ready to write it (not until the piece is done of course).
And you thought it was just some recycled denim and home decor fabric sewn together (wink).
As promised, here are the bloggers that participate in the ScrapHappy monthly posting event, check out their blogs linked below for their ScrapHappy posts:
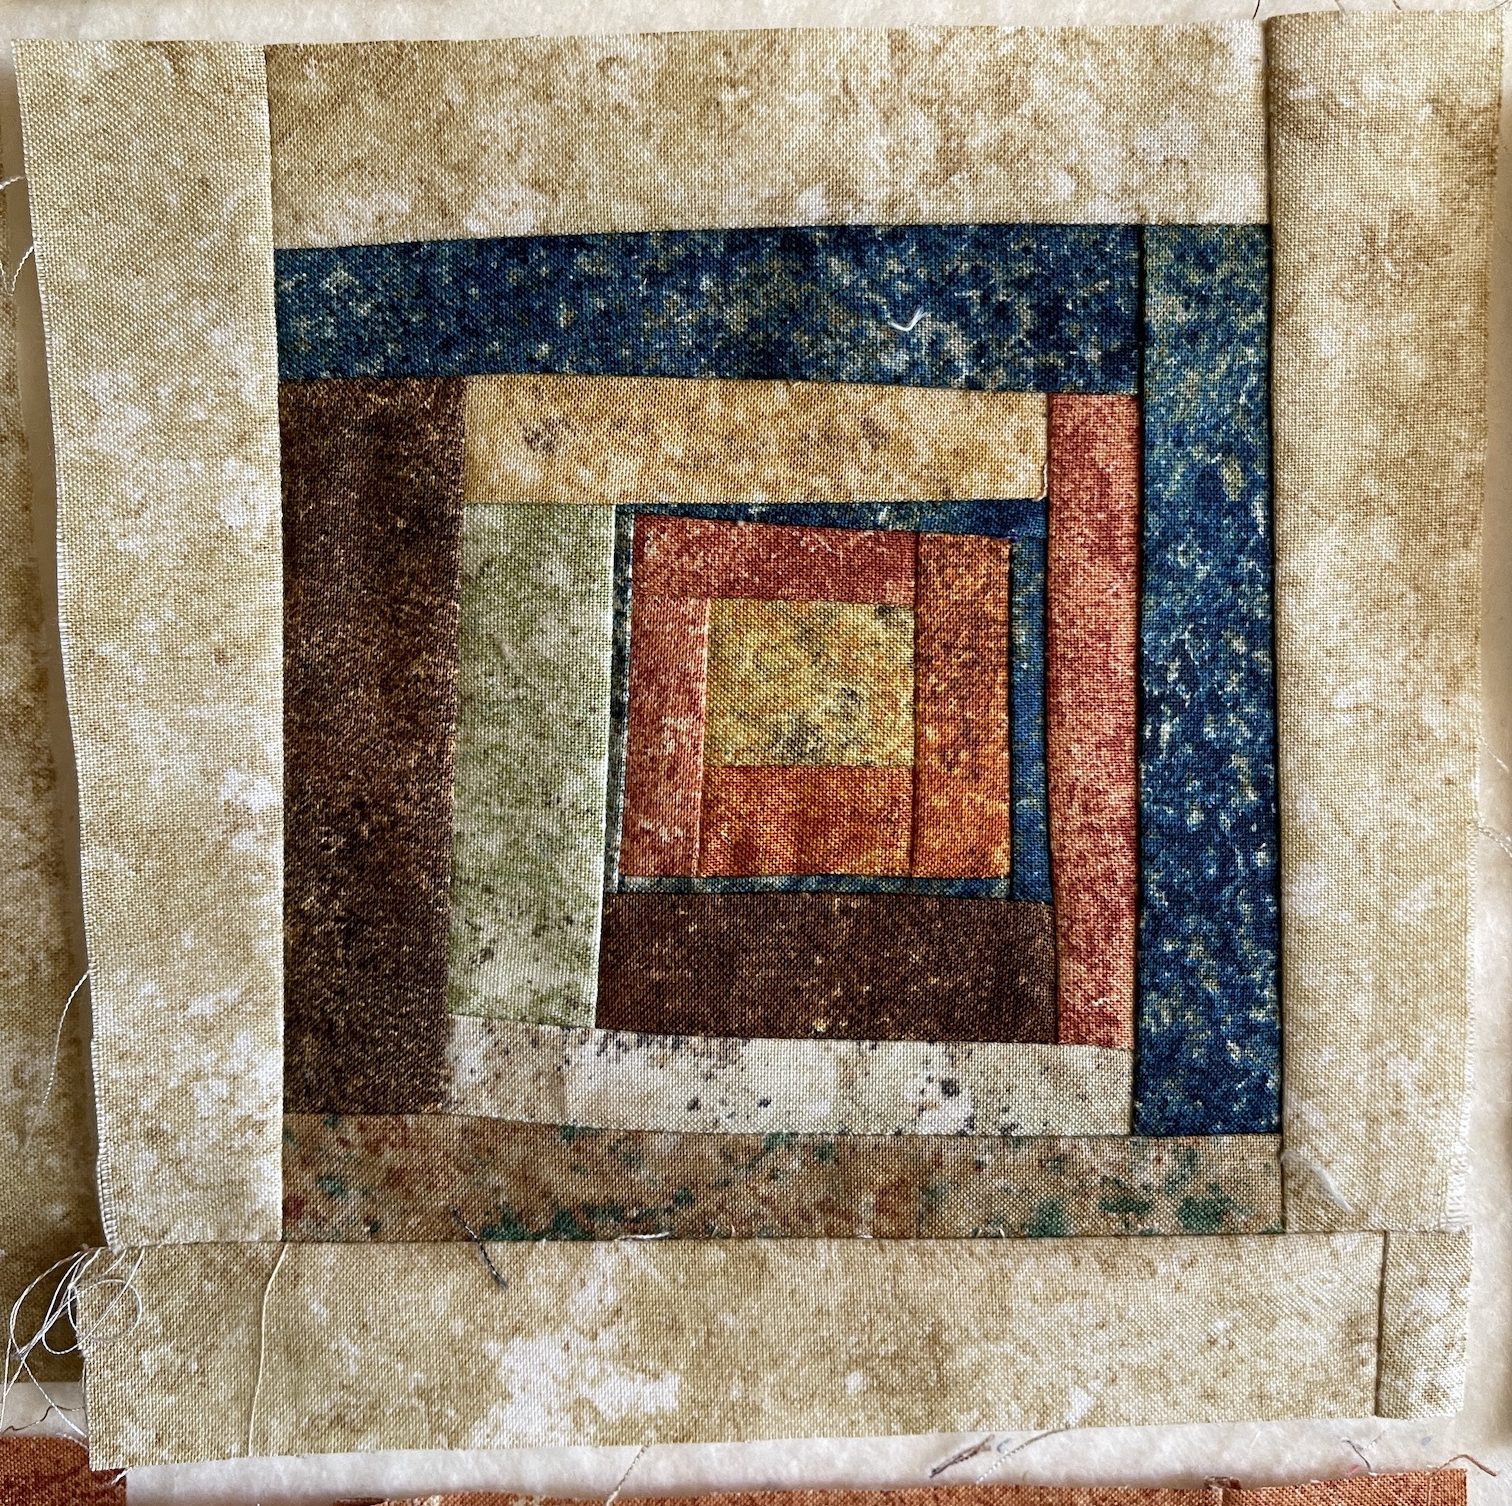
As I mentioned in that post, when making freeform (I think this is what I am going to call them from now on) log cabin blocks, you might want to mock up (or actually sew) one completed block to verify that you like where you are going with you design.
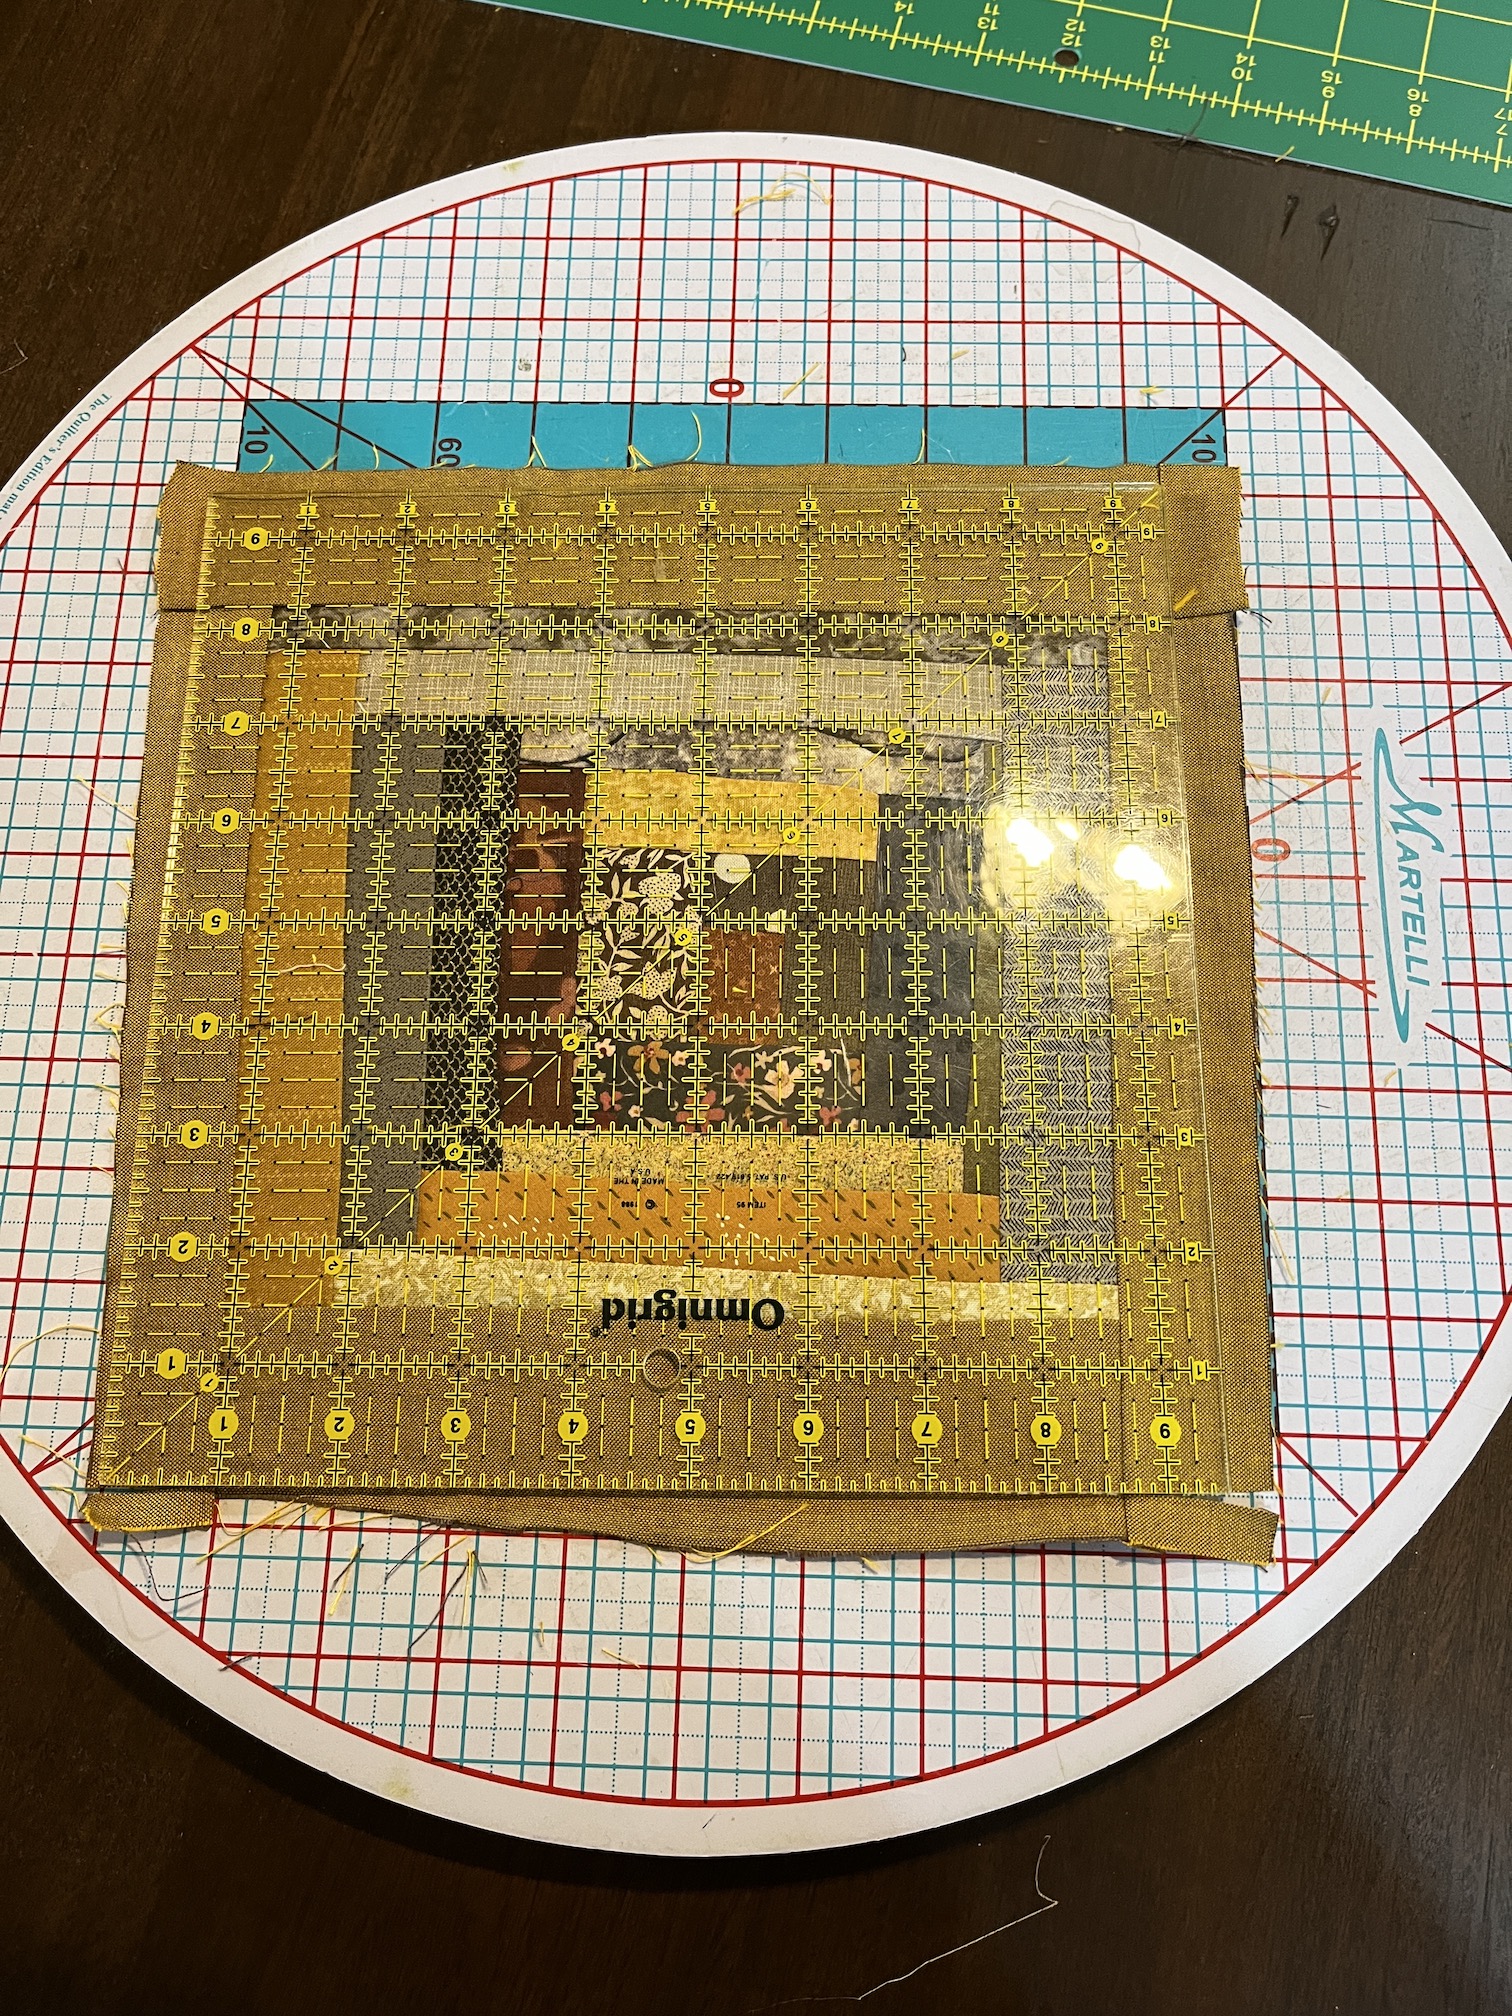
I did this with one of the 42 (well actually 43 – I made a spare one) freeform log cabin blocks I made from my pile of brown, gold and orange scraps:
I decided that I needed something to break up the gold, I did not want to place all the gold framed squares side by side, so I decided to try floating the blocks in a taupe Peppered Cotton.
I’d originally trimmed the freeform log cabin block trimmed in gold Peppered Cotton and trimmed the block to 9.5 x 9.5 inches with my 9.5 x 9.5 inch square ruler. Then I tried framing it in the taupe and trimming it to 12.5 x 12.5 inches using my ruler of that size (the next size up ruler I own after 9.5 x 9.5 inch).
(By the way, I highly recommend some type of rotating cutting surface if you are trimming your freeform log cabin blocks to a uniform size with a square ruler – I have the Martelli Round Cutting Mat).
I realized a problem after I made the demo block: I have 42 blocks and my plan was to make a quilt for my home library for snuggling under while reading that is 6 blocks by 7 blocks.
At 12.5 x 12.5 inches each (12 x 12 inches finished) it would become a bed size quilt…oh no – let me try some fake math – the quilt would end up around 72 inches by 84 inches…actually larger if I added a little border around the quilt to make the blocks “float”.
I did revisit just sewing the gold framed blocks together and it does not make a large enough snuggle quilt. You might be thinking: what about just adding more of the gold fabric on the edges of the quilt as a border to “float” the blocks? Well I’ve run out of the gold fabric! I have less than a 1/4 yard left.
I was pondering my quandary when John asked about latticing instead of floating each block in the taupe – to use the taupe as a “lattice” instead. So I tried it out:
I like it! The taupe quiets the gold and it will all go nicely with the colors in my home library.
(The quilt currently on the loveseat and two little matching pillows, from orphan blocks, I plan to sell on my Etsy shop someday as they are not really my style and I want someone else to enjoy them.)
So that is where I am at in my design process.
Here are the 42 completed 9.5 x 9.5 inch blocks awaiting their lattice:
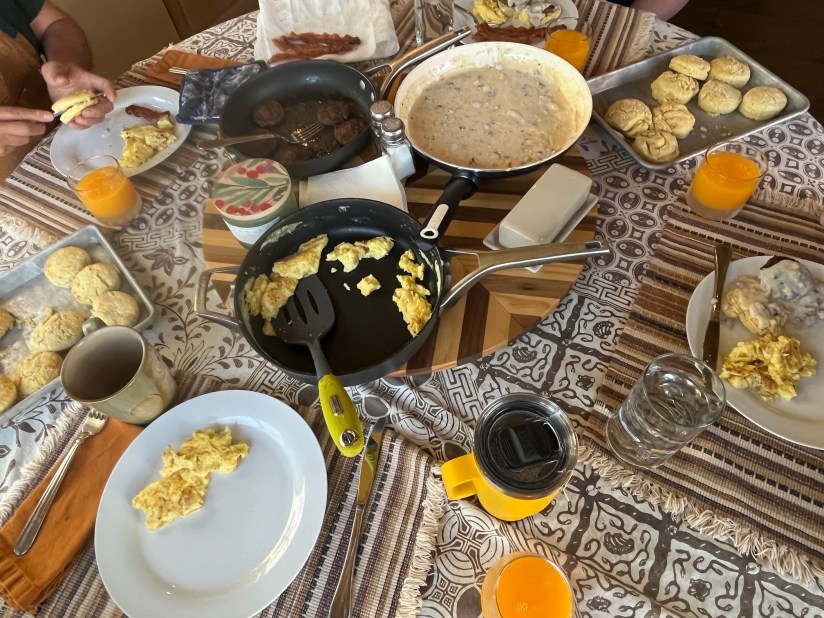
By Day 2 of the Scrap Happy Quilt Retreat at my house, Mike the Miniature Schnauzer was getting plenty of pets from visiting quilters (who are lounging about in their pajamas before breakfast):
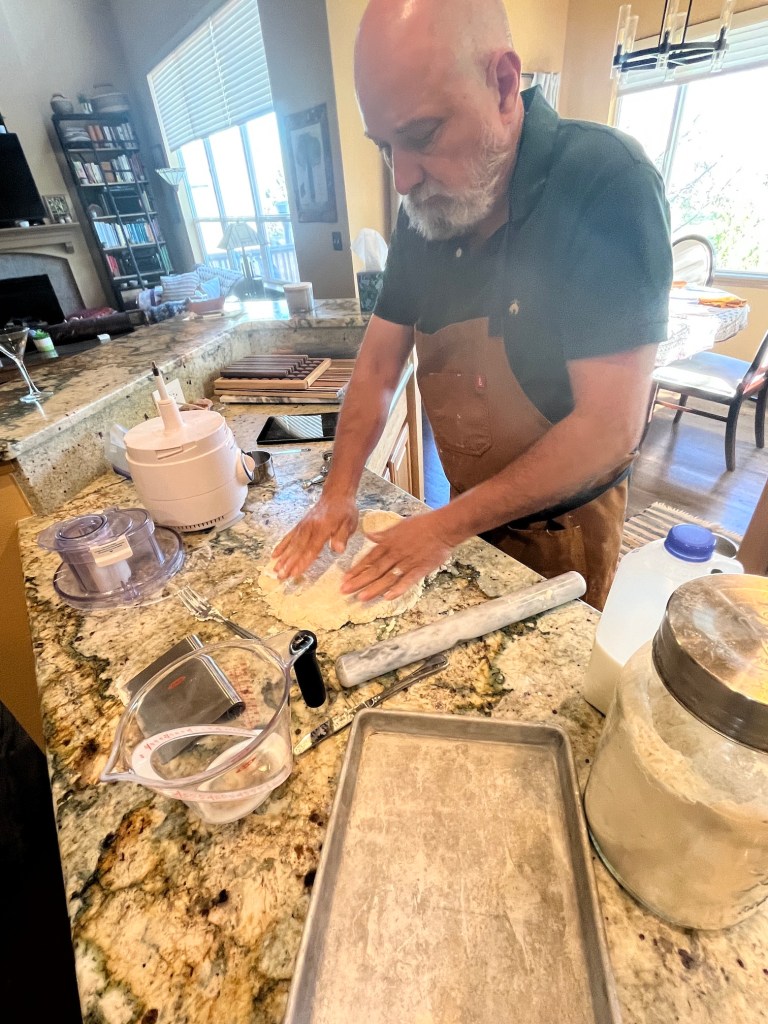
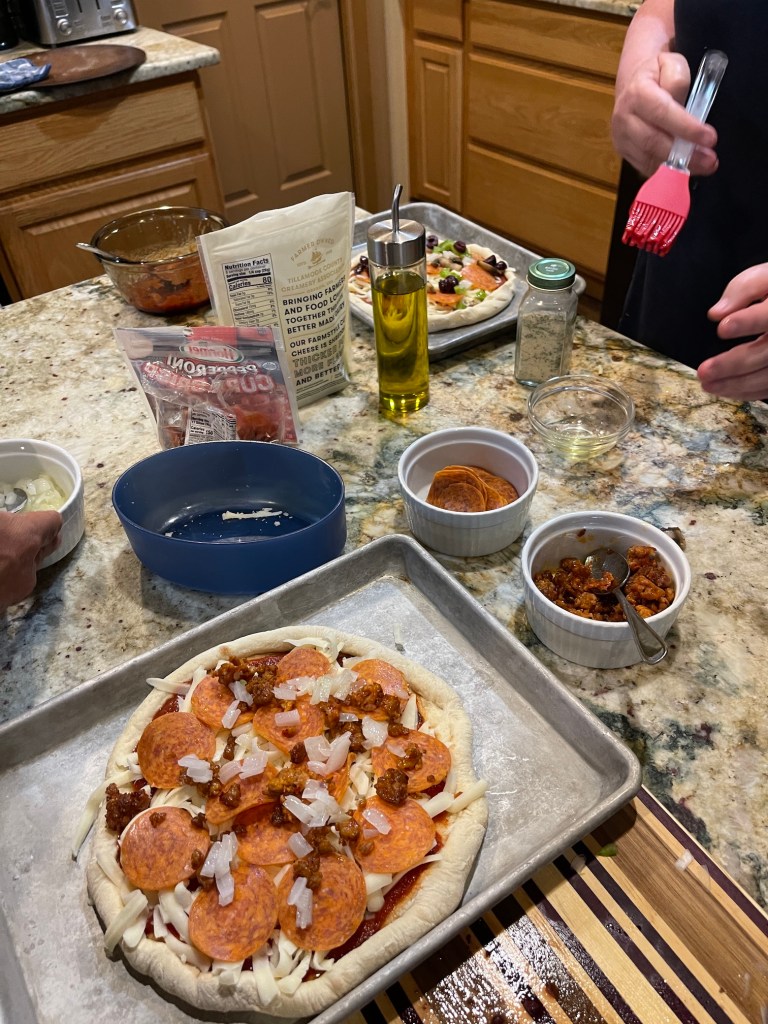
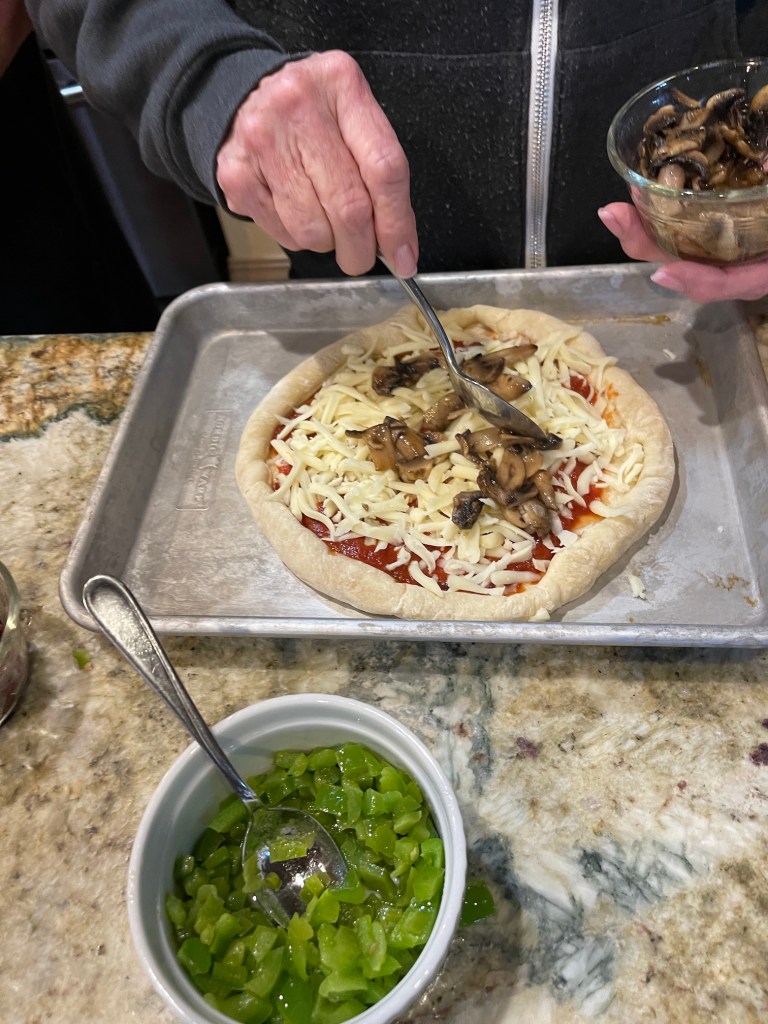
John made us his famous (and amazing) biscuits & gravy breakfast to start our day:
The breakfast includes his sausage patties with caramelized brown sugar (not vegan, ha!) and flaky scratch made biscuits.
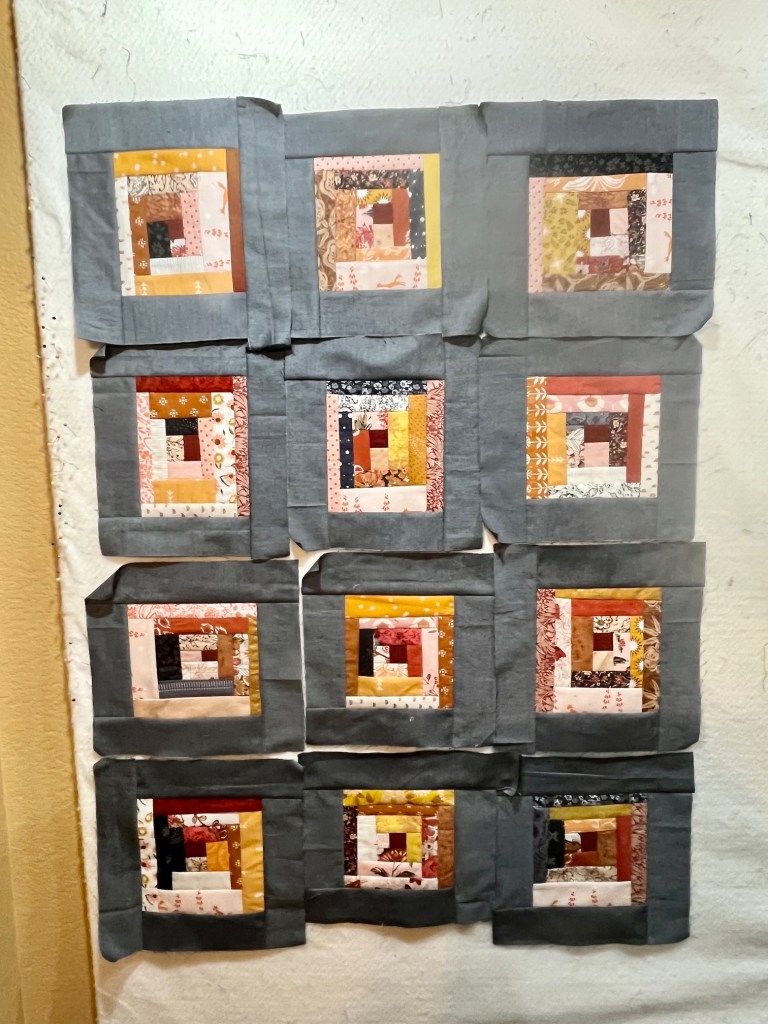
After breakfast it was back to work in the studio. I worked on my log cabin blocks – I decided to use brown, brownish-orange, copper and gold fabrics for my blocks:
K and D worked on their blocks and began trying out solid fabric settings for their sample blocks:
K decided to set her blocks in the blue Peppered Cotton and D (after trying out 4 different options) went with the gray Peppered Cotton.
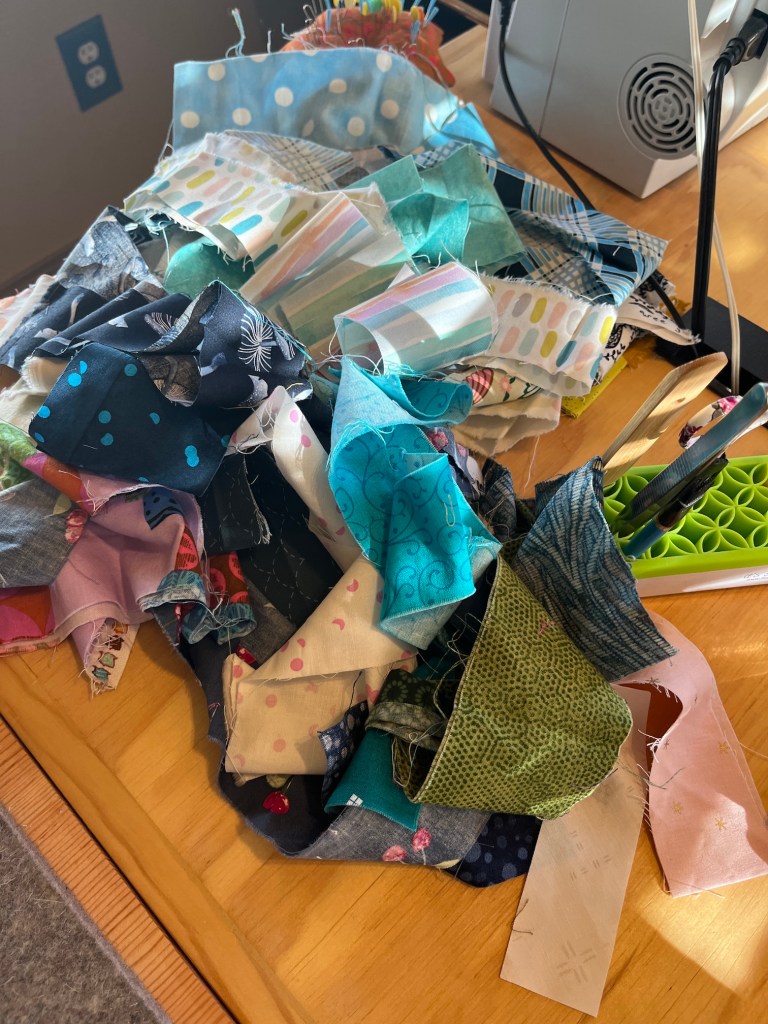
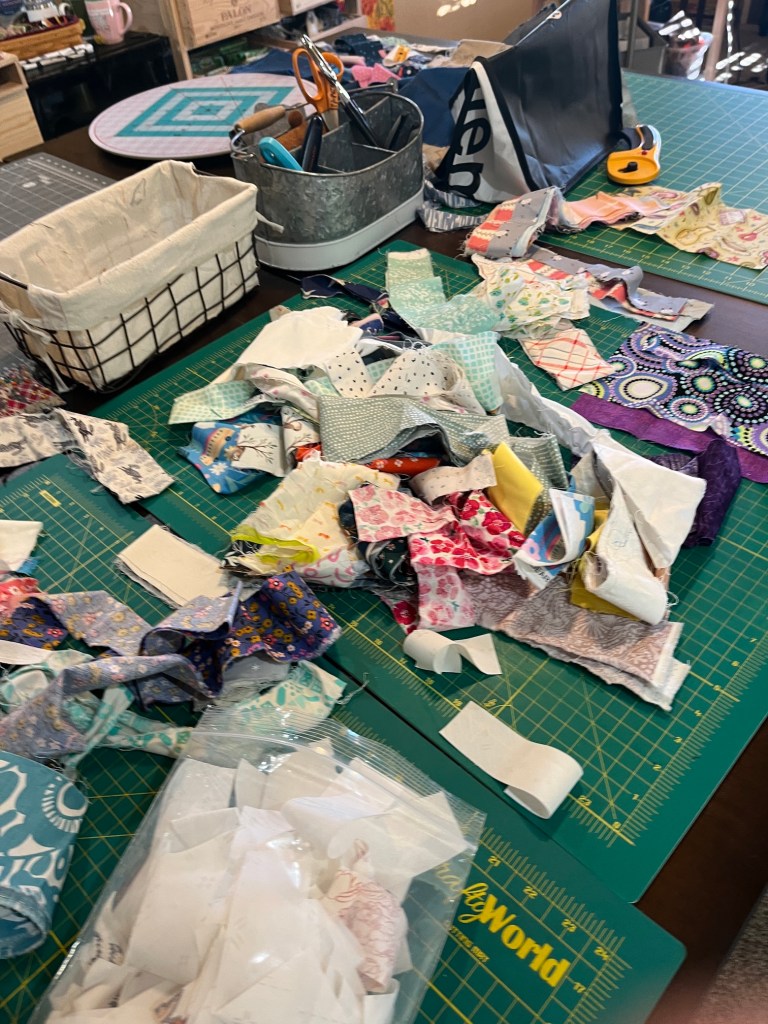
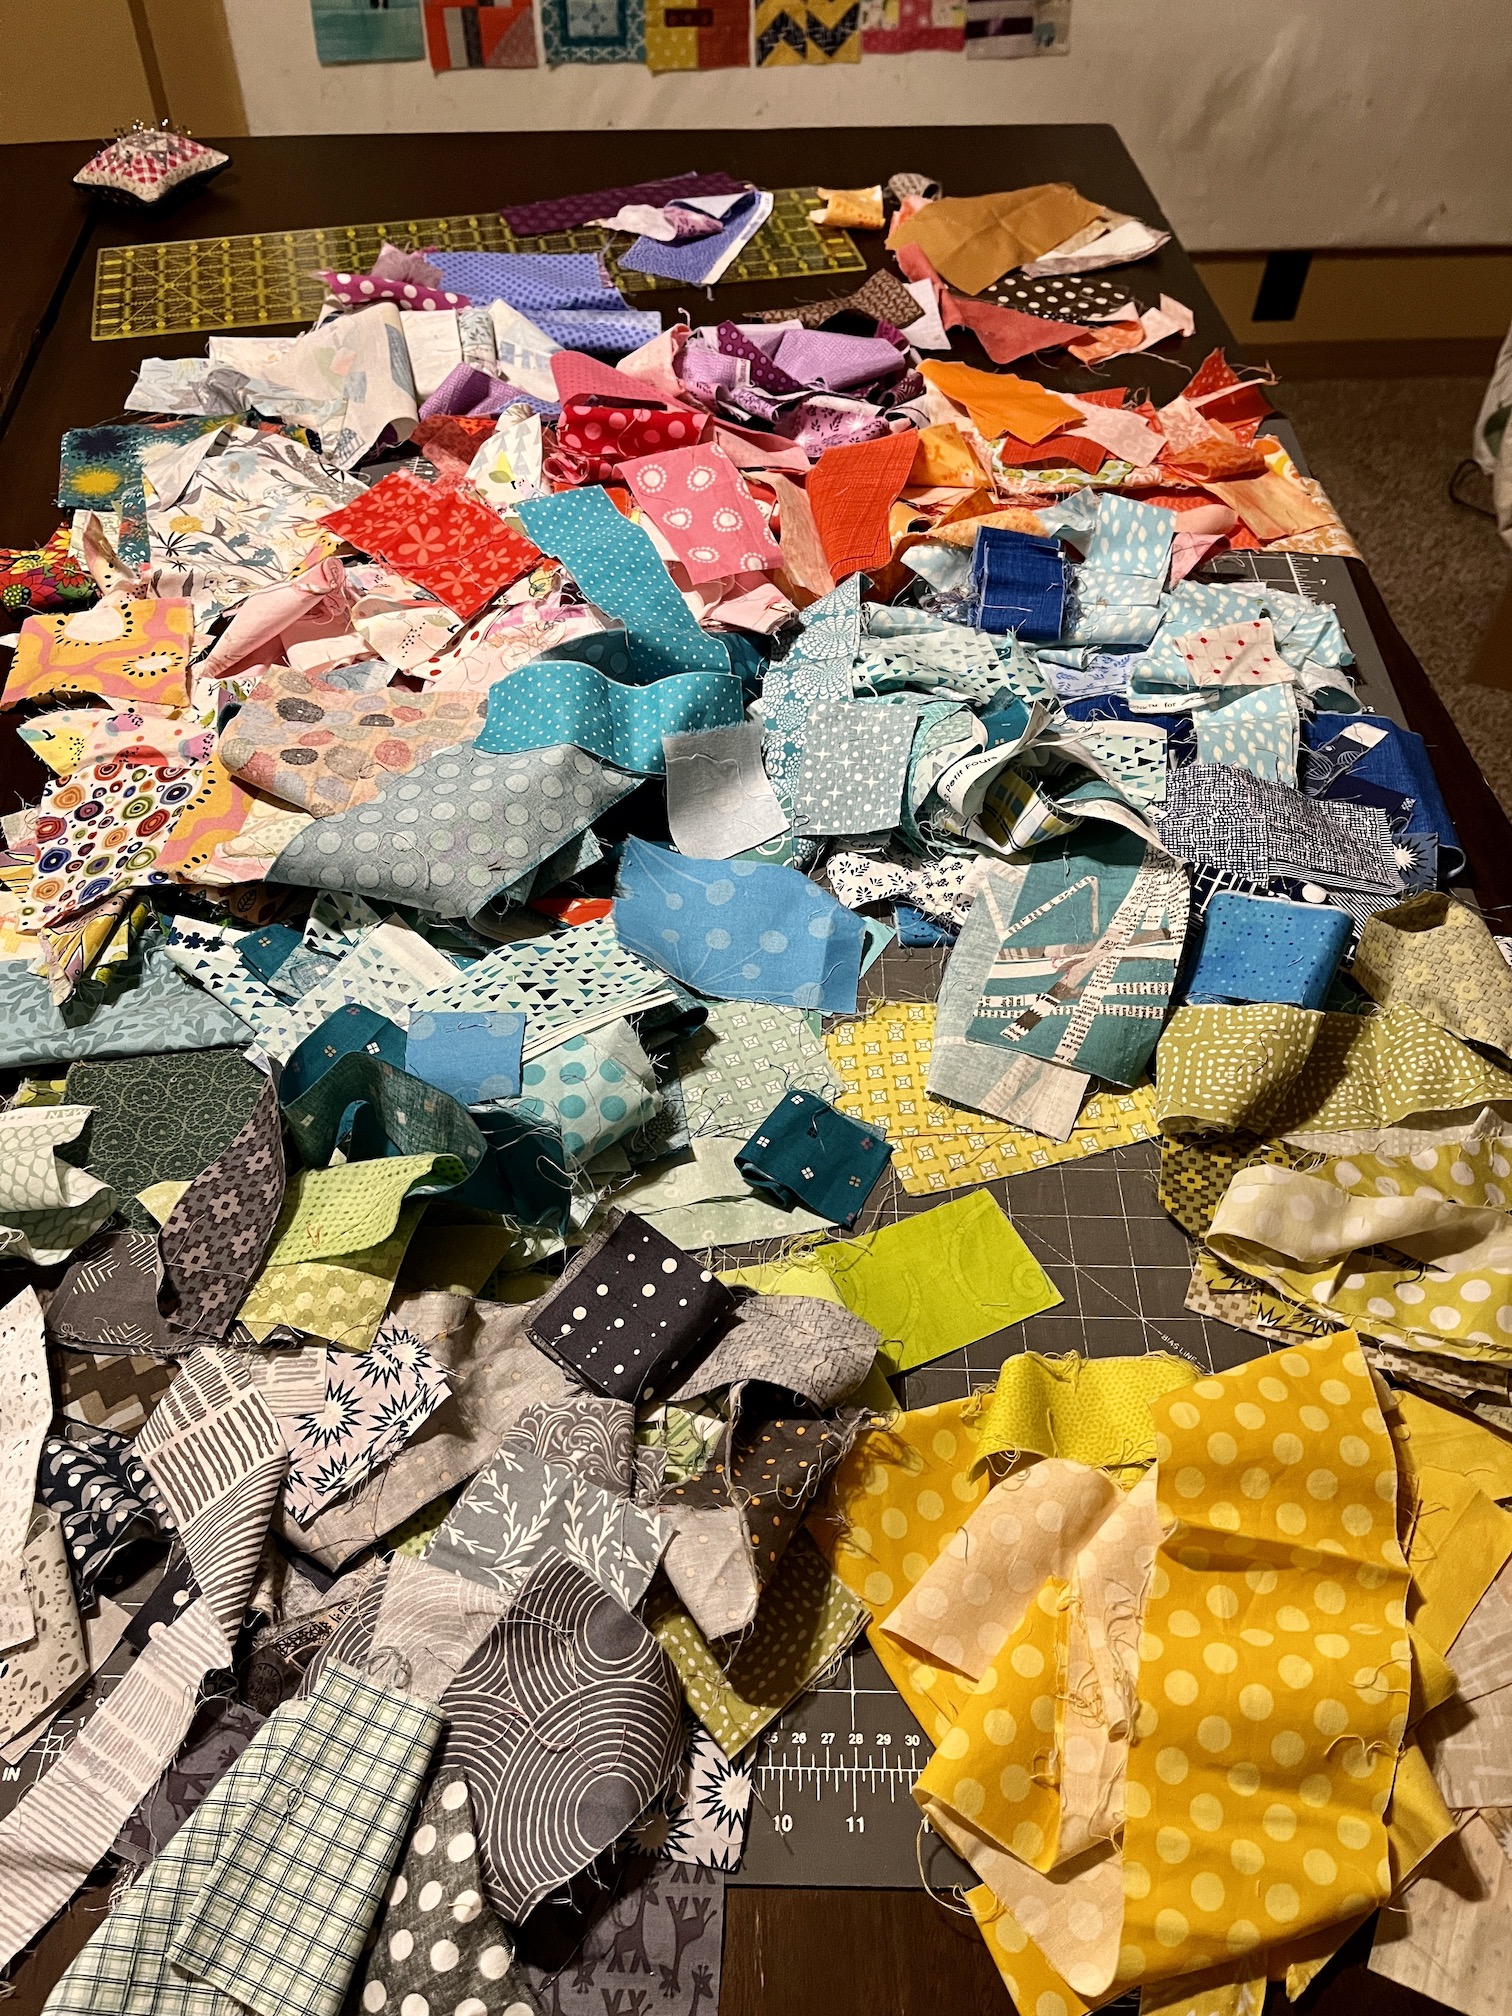
My whole studio looked like there had been a fabric scrap explosion – scraps everywhere!
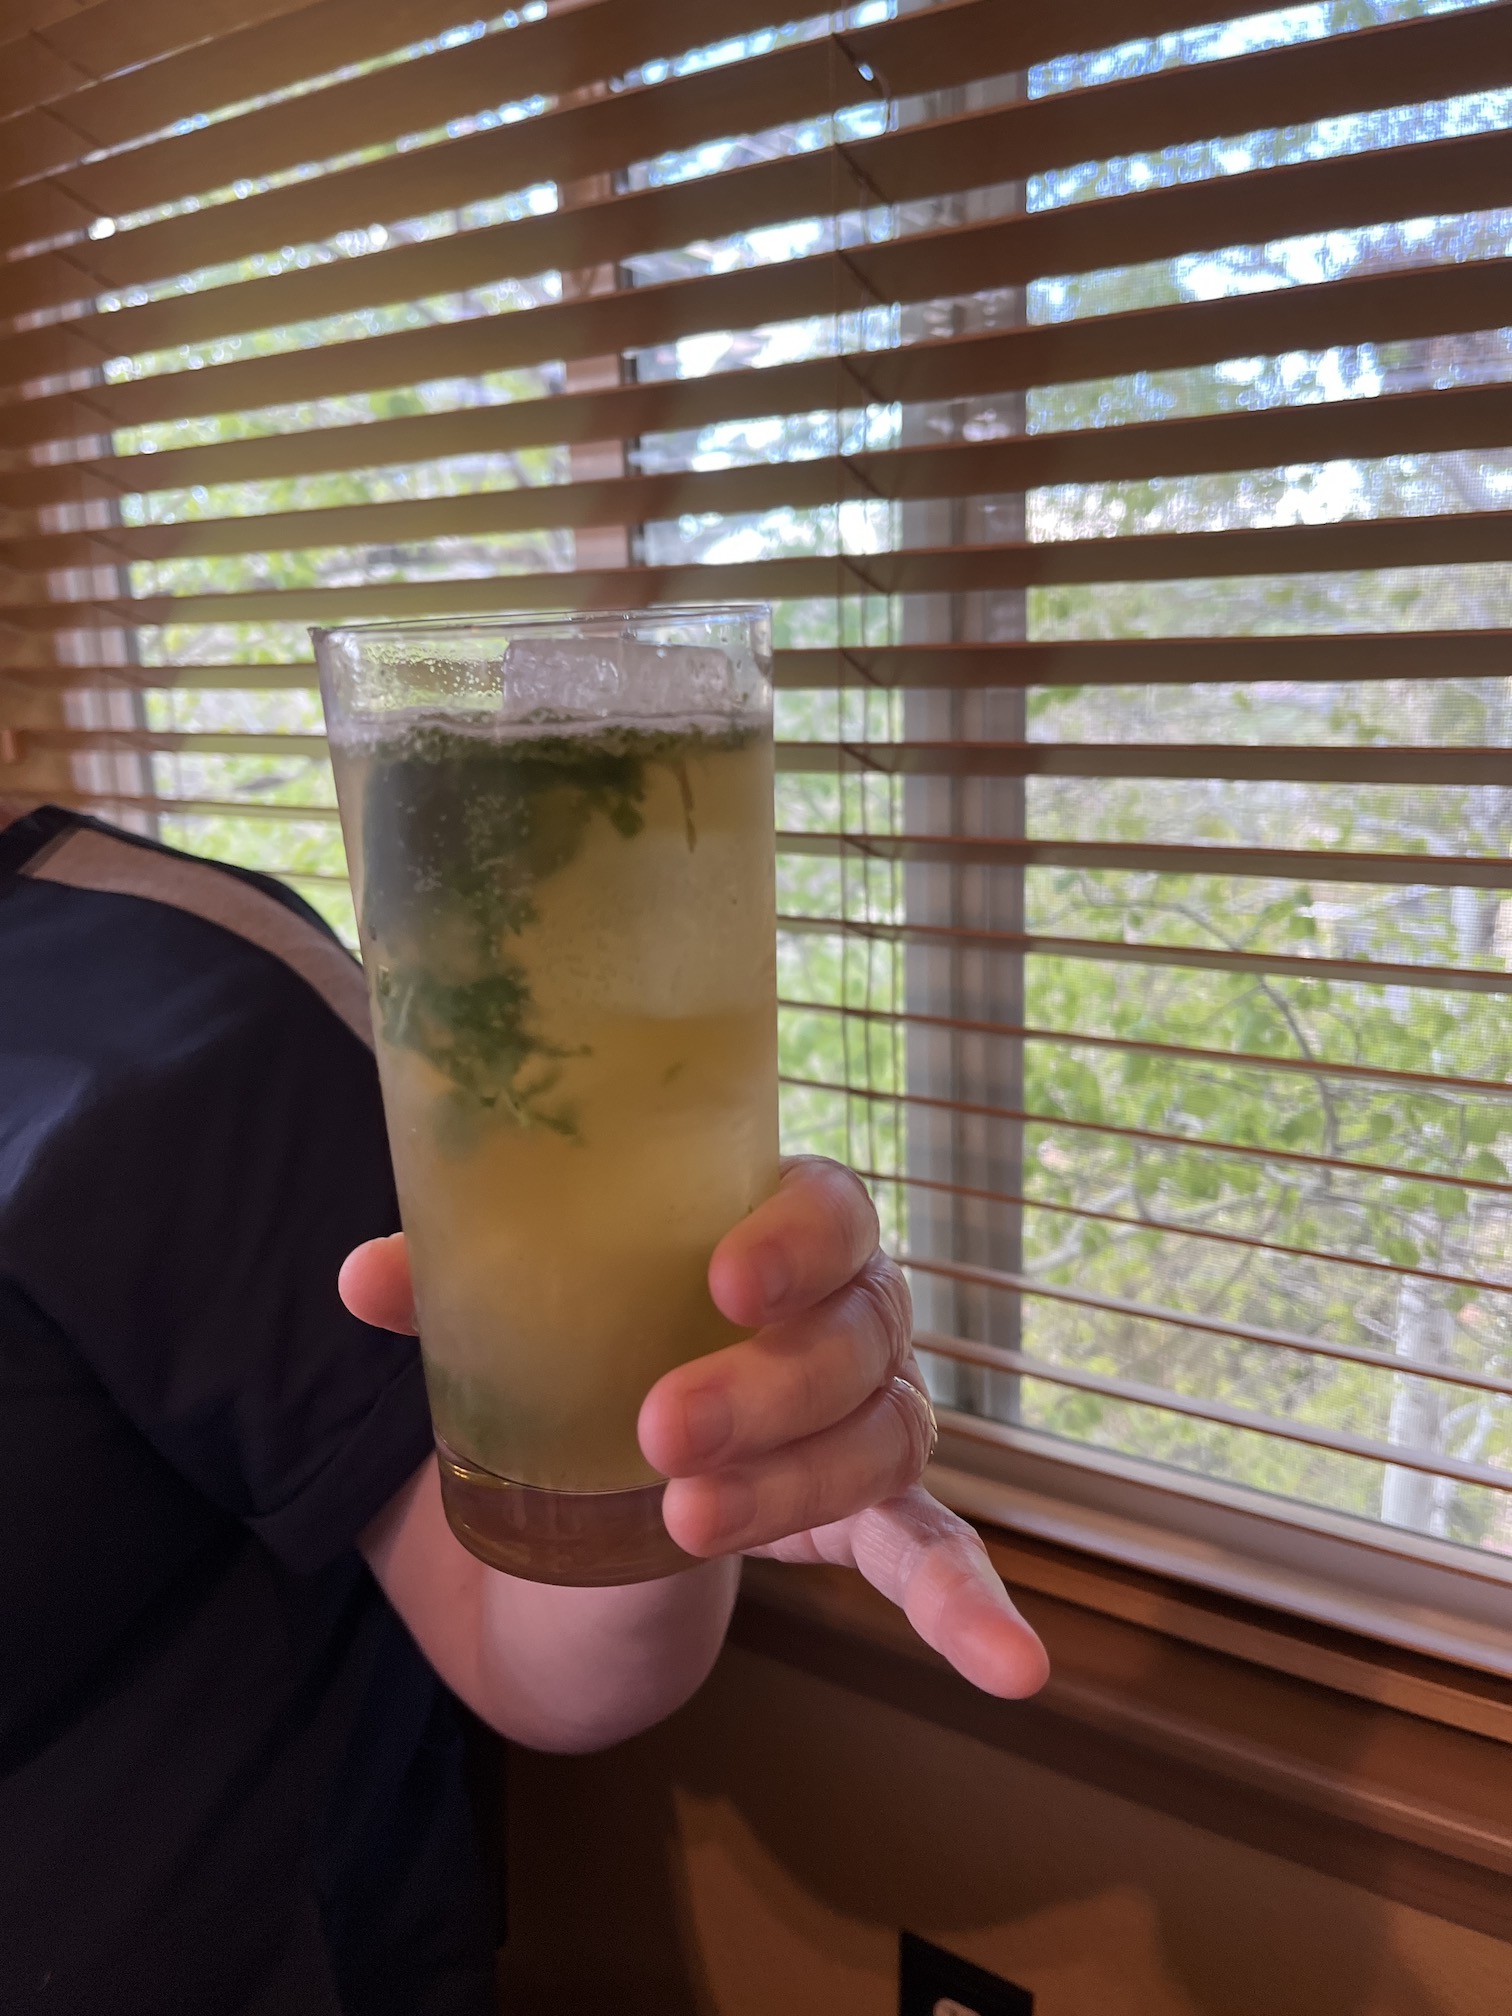
Before you knew it, it was afternoon cocktail time again and John stopped by the studio with Mojitos and Moscow Mules.
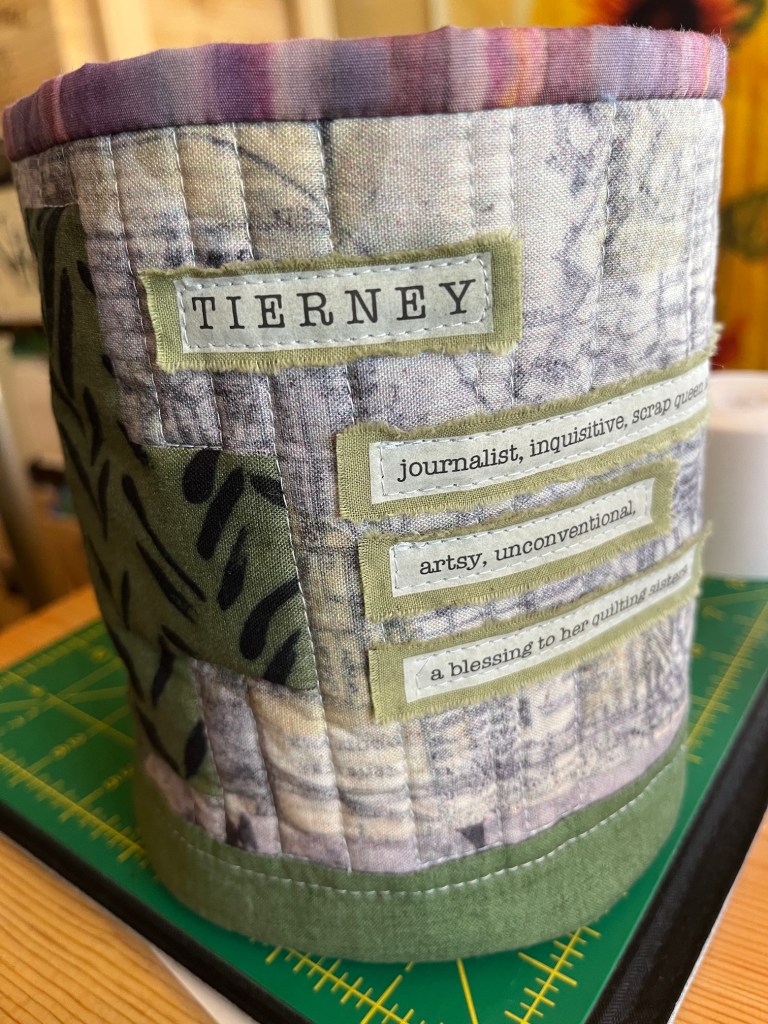
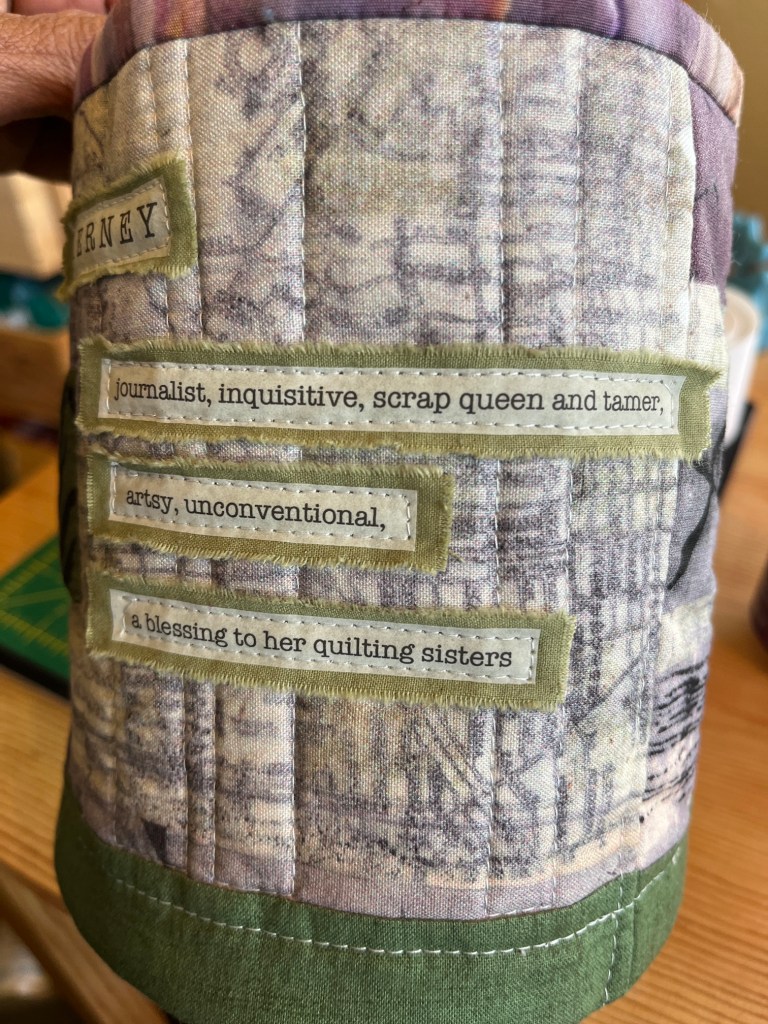
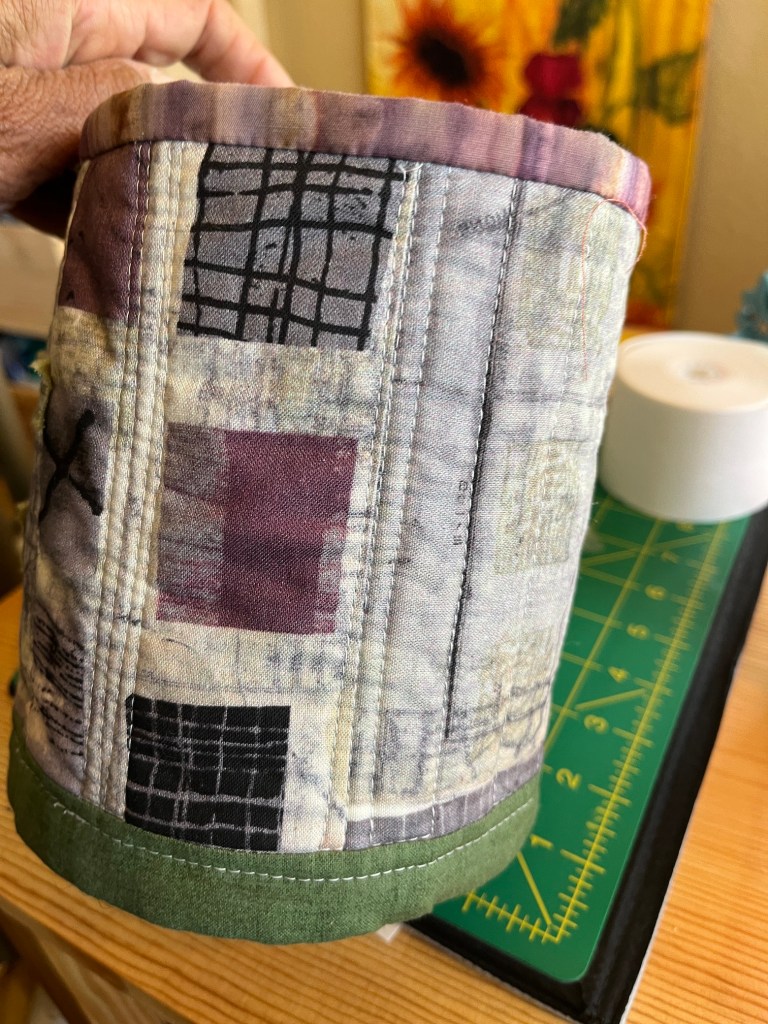
I enjoyed putting my trimming scraps in the amazing handmade custom scrap basket that D made me (her own design, no pattern used!) with Marcia Derse fabric (my favorite):
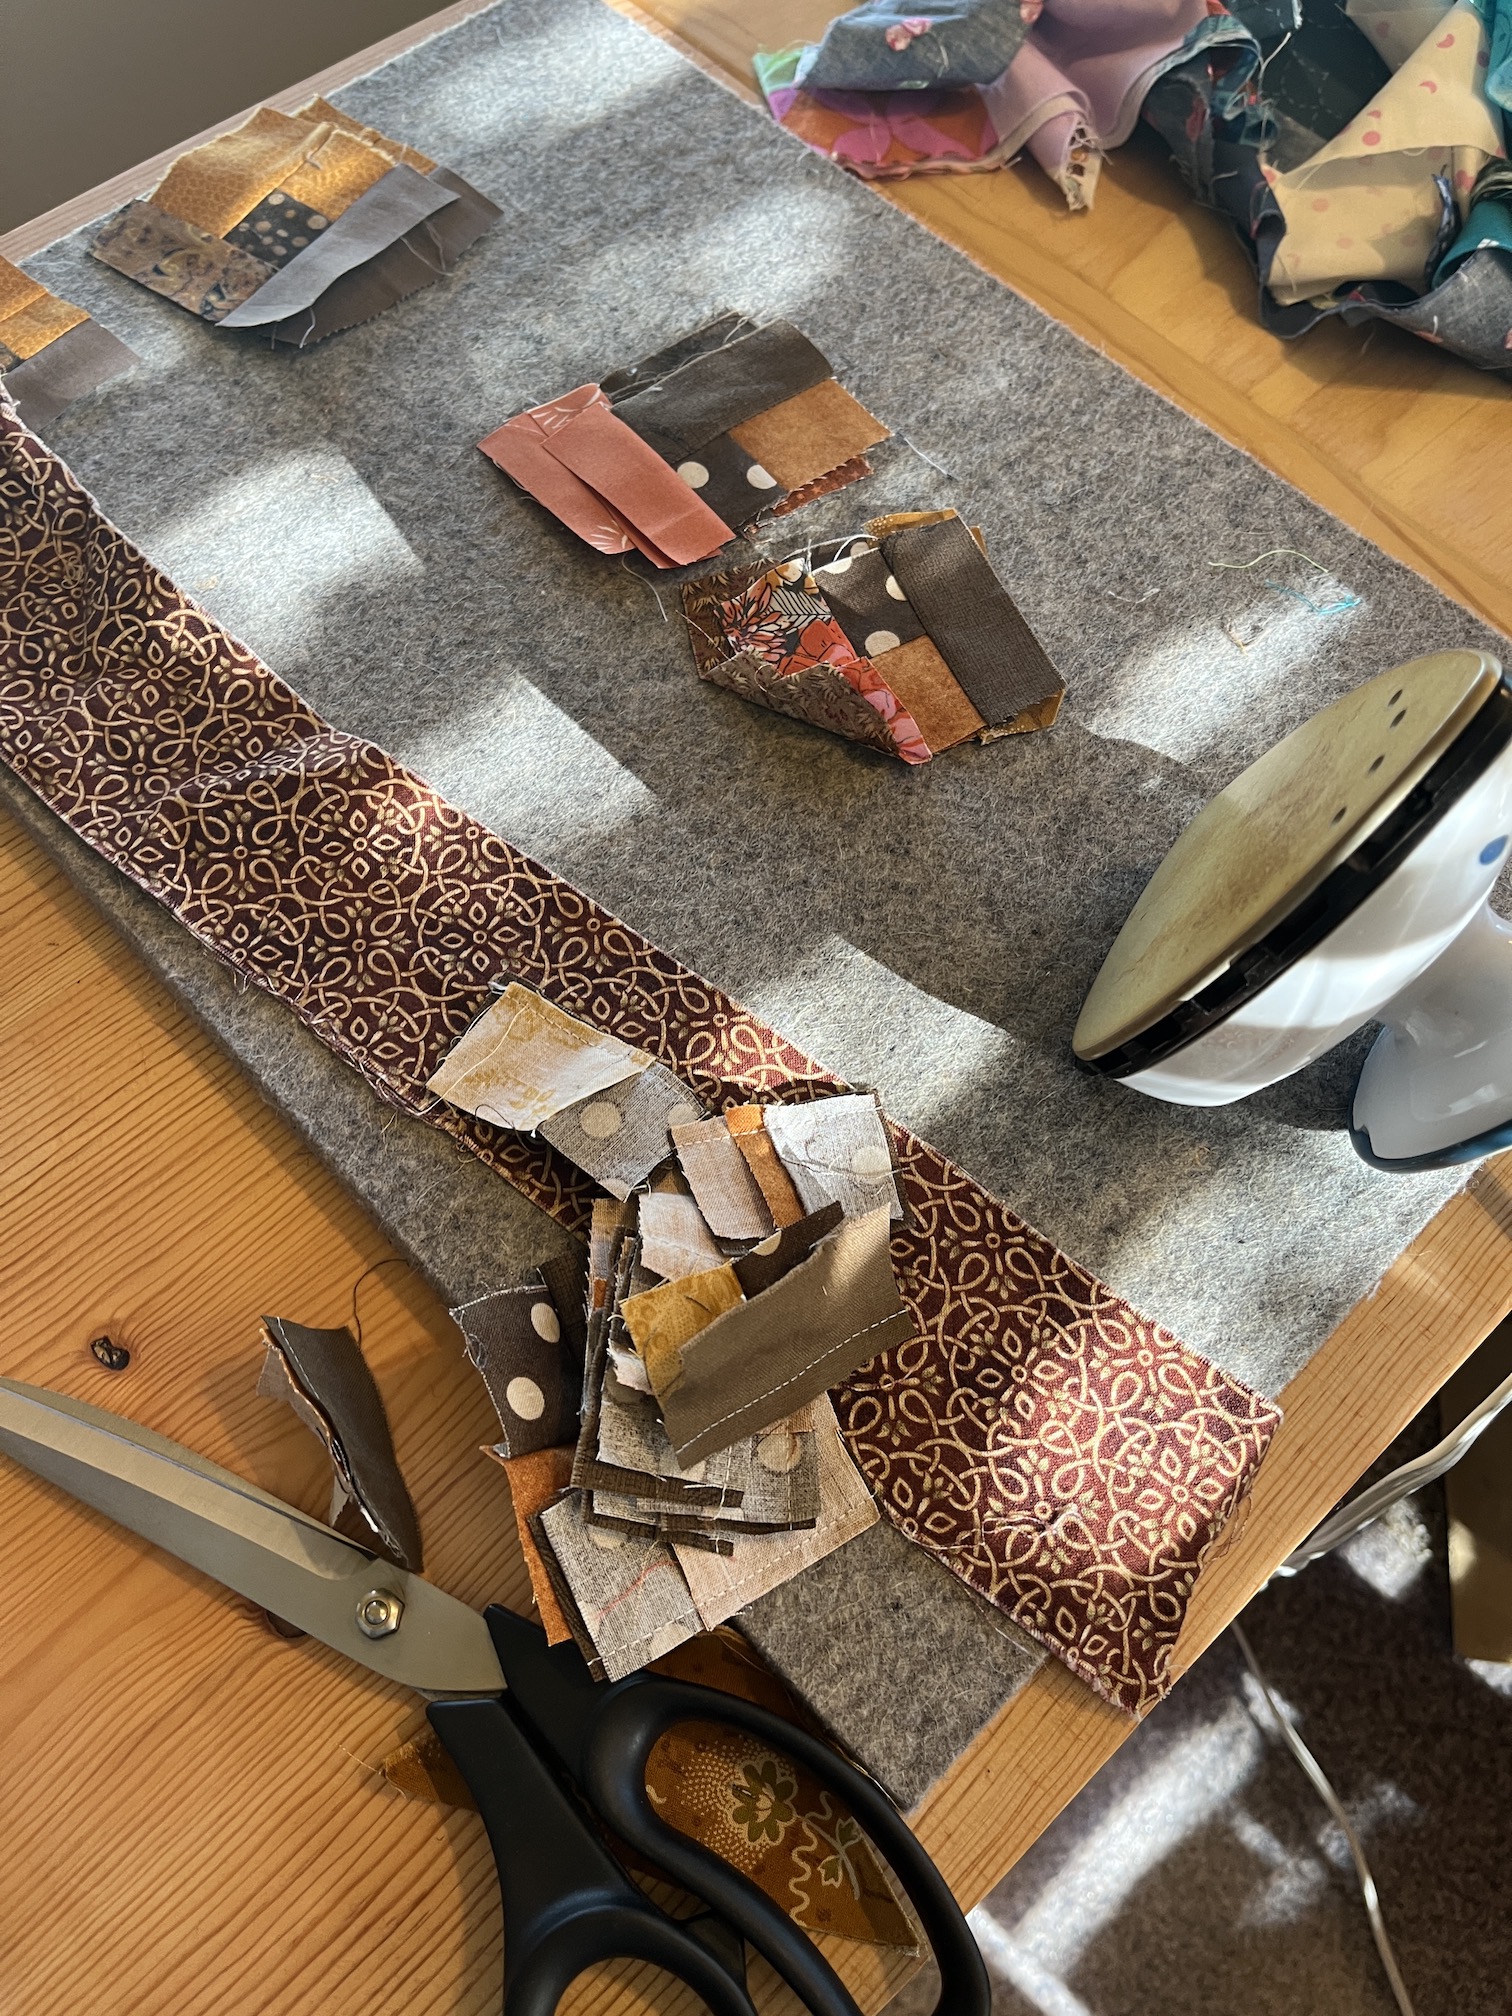
I am getting ready for a “Scrap Happy Quilt Retreat“, which I share more about in tomorrow’s “ScrapHappy May” post, by starting a scrappy log cabin using my ridiculous collection of fabric scraps.
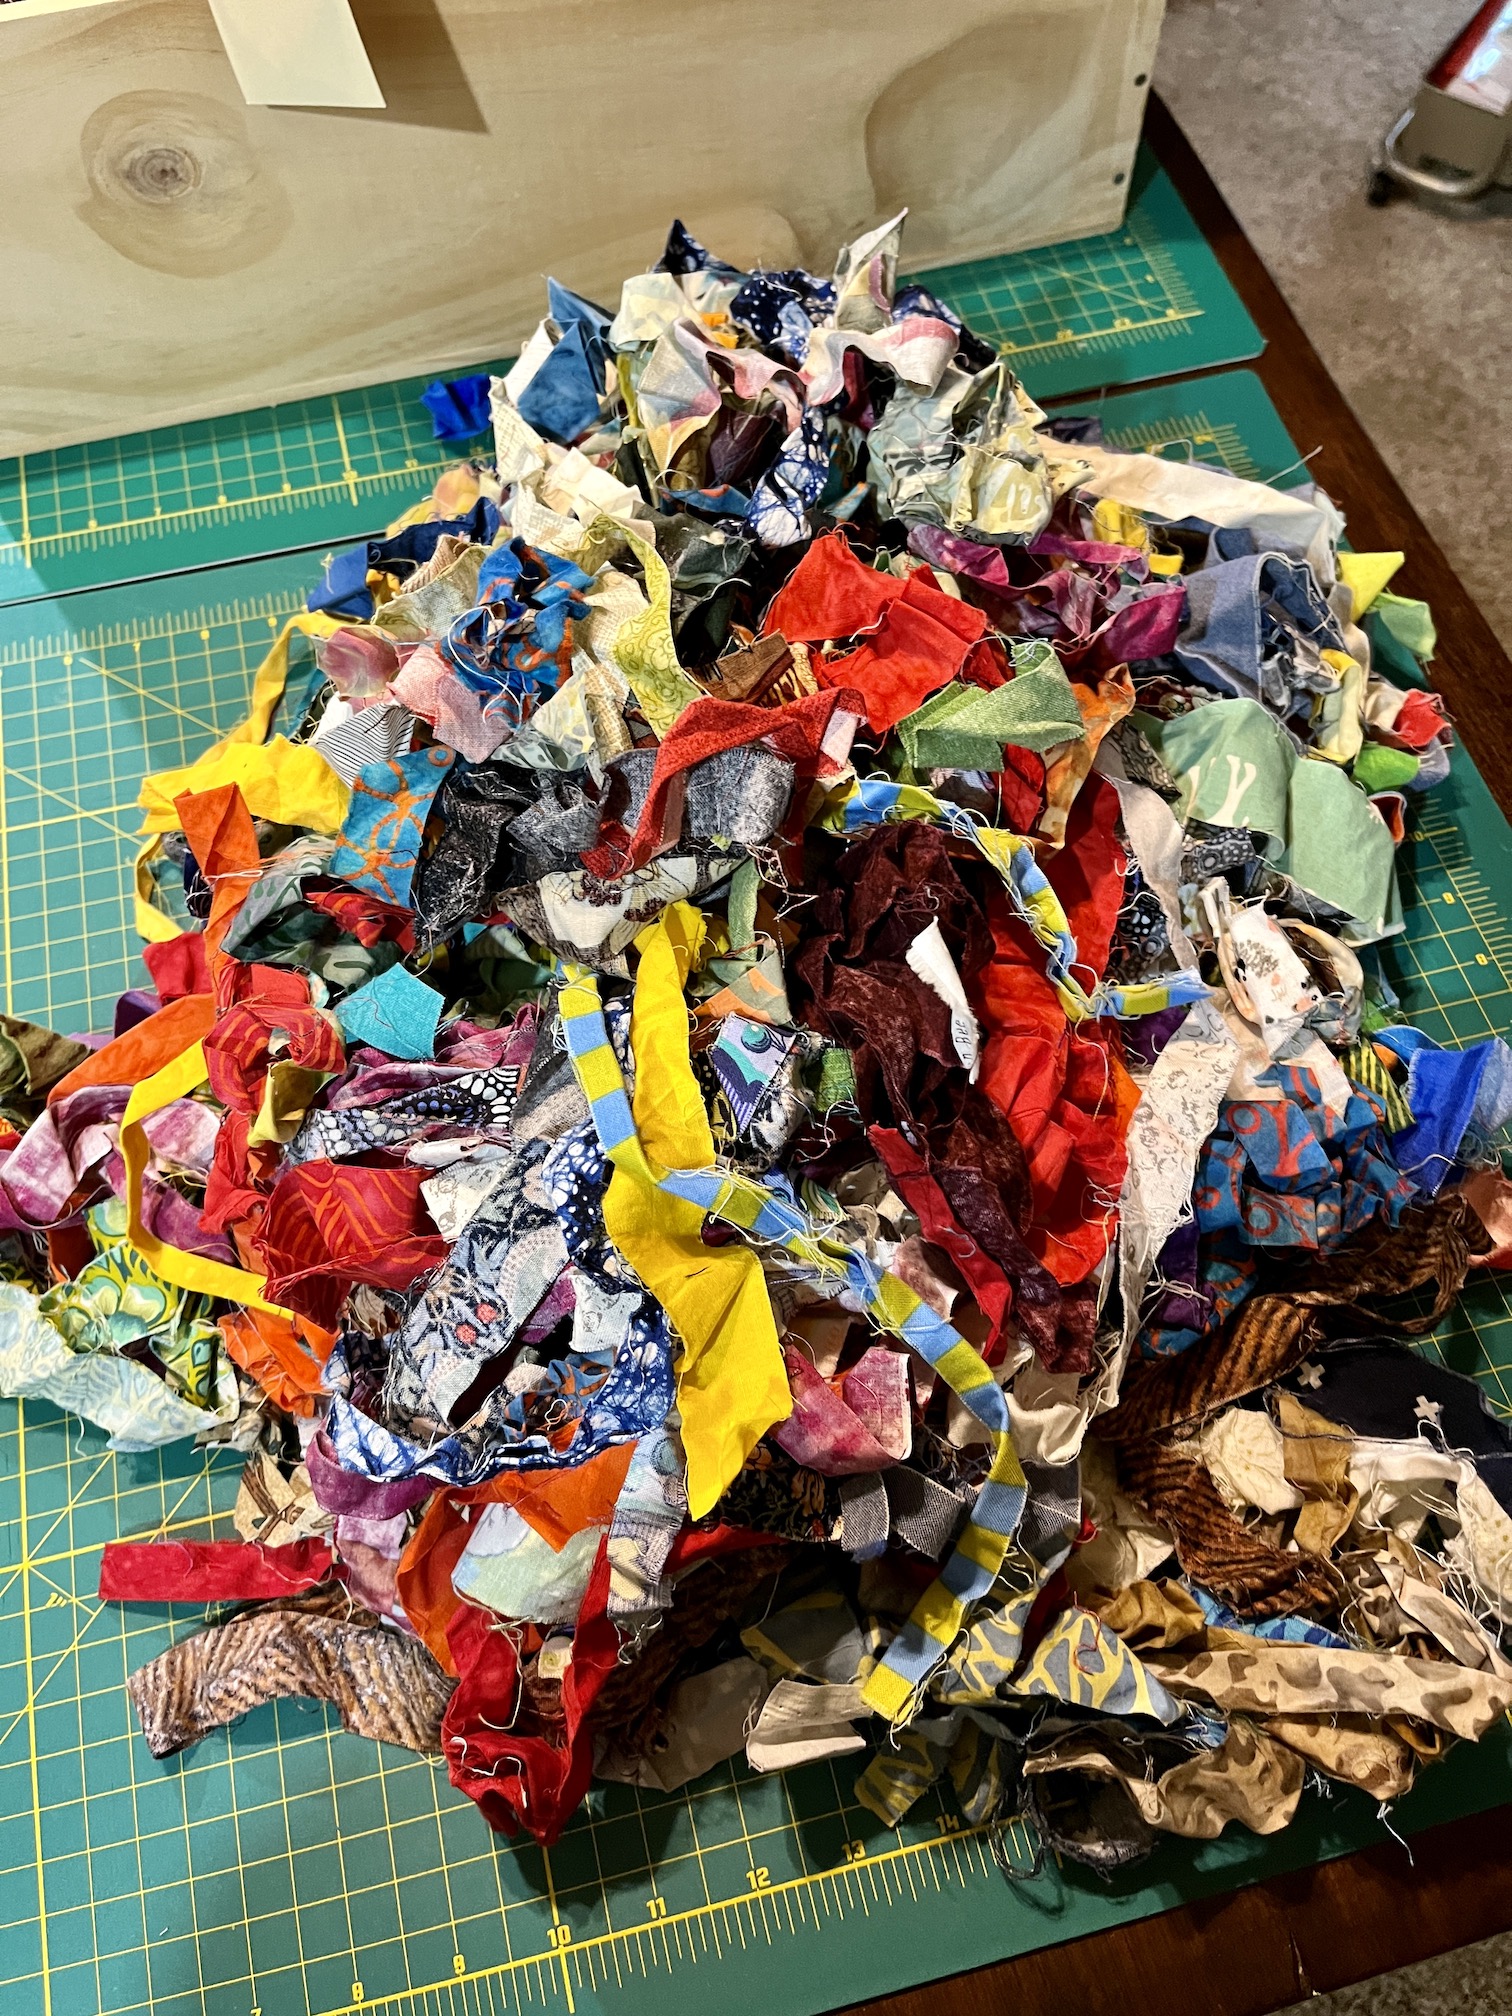
I decided to limit myself to black, white, and gray fabric scraps. First I dug into the bag I have of “fabric strings” which are thinner fabric scraps that I’ve been saving (yes for year, ha!) to make a “String Quilt” someday.
I dug through this scary mess to find the black, white and gray strings and then ironed them (as they were wrinkled/crumped beyond easy use…):
I thought I might have enough to get started but I ended up having to dig into my wine crate box of black, white and gray scraps:
I ended up piecing 35 blocks, which I trimmed to 9.5 inches x 9.5 inches each using my 9.5″ by 9.5″ square ruler:
I started this quilt as an example as the Scrap Happy Quilt Retreat will be at my house starting Monday and I am going to teach my friends how to do improvisational scrappy log cabin blocks (also know as “Log Jamming”) and we are going to use my scraps! (A great way to use up your scraps – dump them onto your quilting friends under the guise of showing them “scrappy quilt making options”…evil laugh!)
More on that tomorrow on the 15th which is ScrapHappy May posting day!
Oh by the way, when I got done piecing 35 – 9.5″ x 9.5″ blocks I did actually (sort of) make a dent in my black, white and gray scrap fabric collection. Here’s what the wine crate looks like now:
(If you can’t tell the difference from the previous photo, just know before it was overflowing and now everything fit nicely in the wine crate with no overflow…)
Recently I’ve been hiding away in my sewing room to escape the world. I’ve been productive during my escape, and I’ve now completed 88 of the 100 blocks for Tula Pink’s City Sampler 100 Modern Quilt Blocks quilt I’ve been working on.
This is not the final layout for the quilt, I’ll decide that after I finish the 12 remaining blocks. It seems a little overwhelming to decide the perfect layout for 100 blocks, but I am going to just try to make them look as random as possible (and try not to let the same color touch…we’ll see…).
If you are just joining us and are interested in the progression of this quilt, check out the previous post about it which also has links to the other blog posts on it – And then there were 70….
For the remaining 12 blocks, I decided to stop trying to find pieces long enough to make each block (a lot of the remaining blocks need fabrics of at least 6.5 inches) from this pile:
Instead I cleaned up my cutting table, putting fabric scraps away by color in my fabric scrap storage system:
And I am going to be very deliberate about color choices (based on what I have too much or too little of in my quilt so far) and shop for fabric scraps from my collection of fabric scraps organized by color in my wine crate storage unit:
I am going to try and use these remaining fabrics, from the initial pile, that I did not put away with the rest:
I want to try and repeat those fabrics.
I’ve decided on how to finish the quilt – I am going to sew the blocks all together in a 10 by 10 row with no lattice, and no borders. Just plain and simple, allowing the blocks to just shine through without any clutter.
I realize this will make it only a lap size quilt instead of a Queen or King size which you could get by using some of the layouts in the back of the book Tula Pink’s City Sampler 100 Modern Quilt Blocks. Lap size works for me as I might actually just hang it on a wall and display it. I’ll decide after I get it back from the long-arm quilter.
Well back to hiding out in my sewing room and finishing up the 12 remaining blocks to get to 100 blocks, which at one point seemed so far away!
Postscript
I developed a sort of production system to sew so many blocks.
I would pre-cut a large amount (15 or more) of blocks; and then sit down and sew them, trying to use chain piecing as much as possible, even working on two or more blocks at the same time.
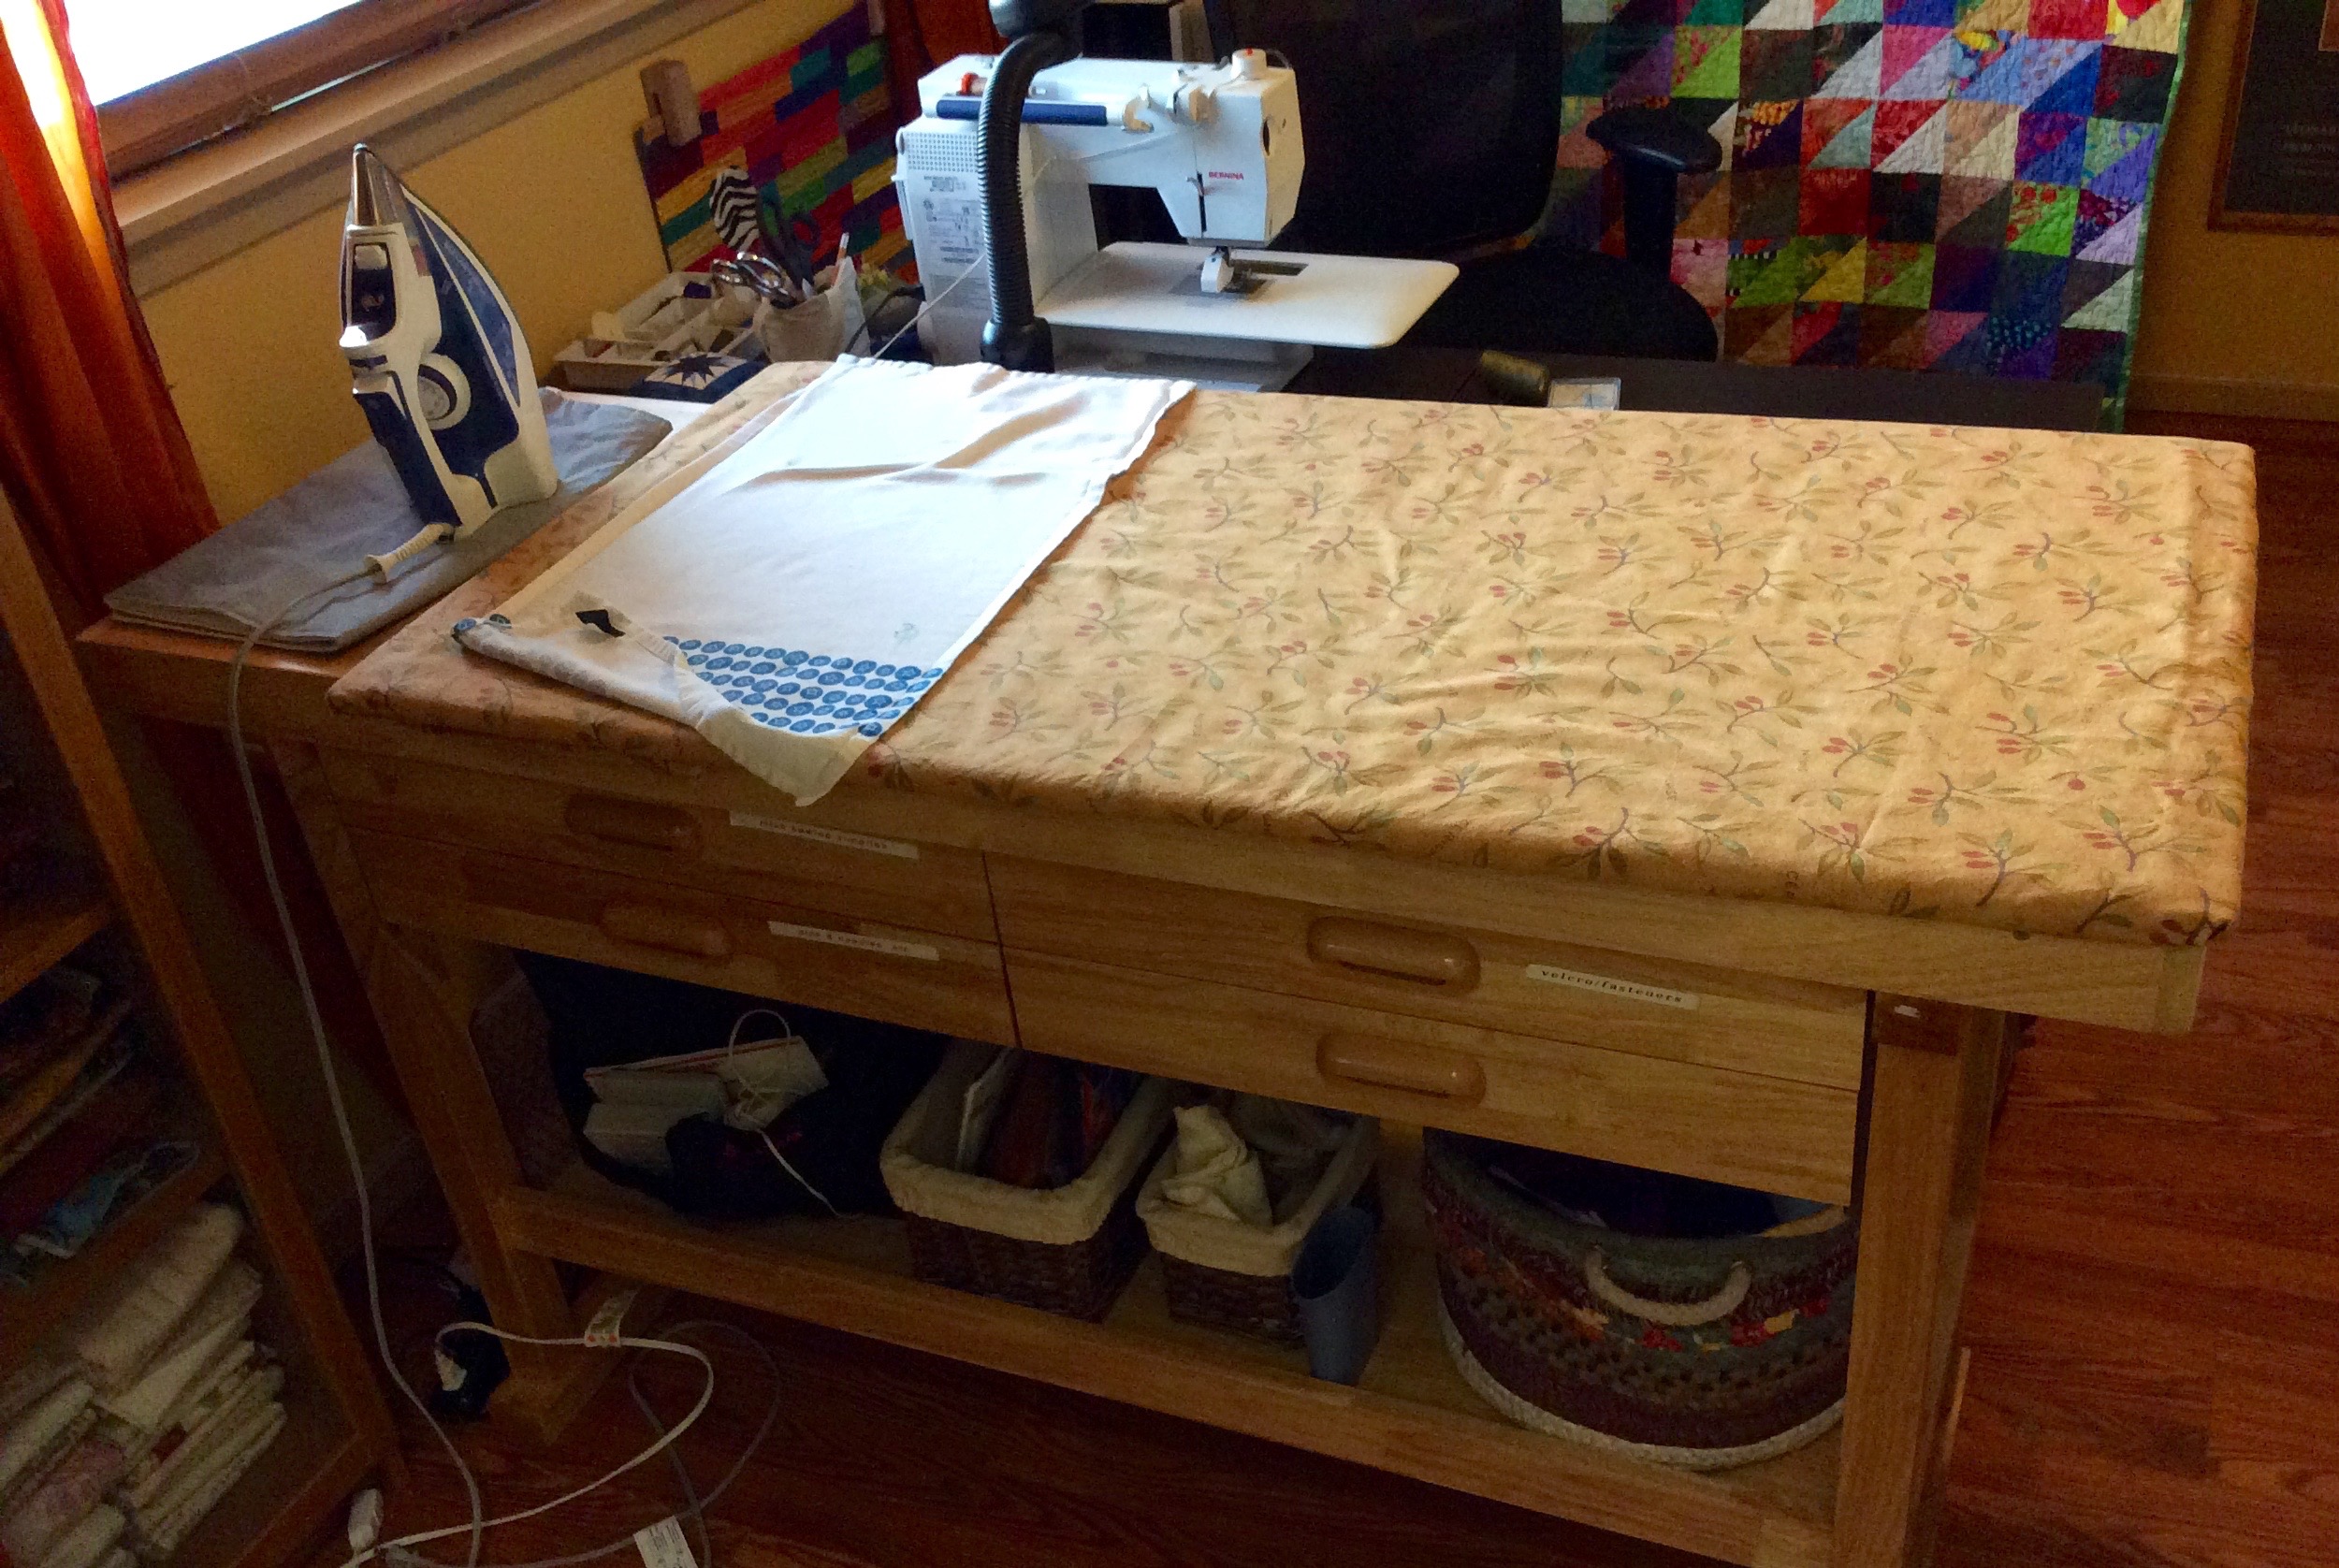
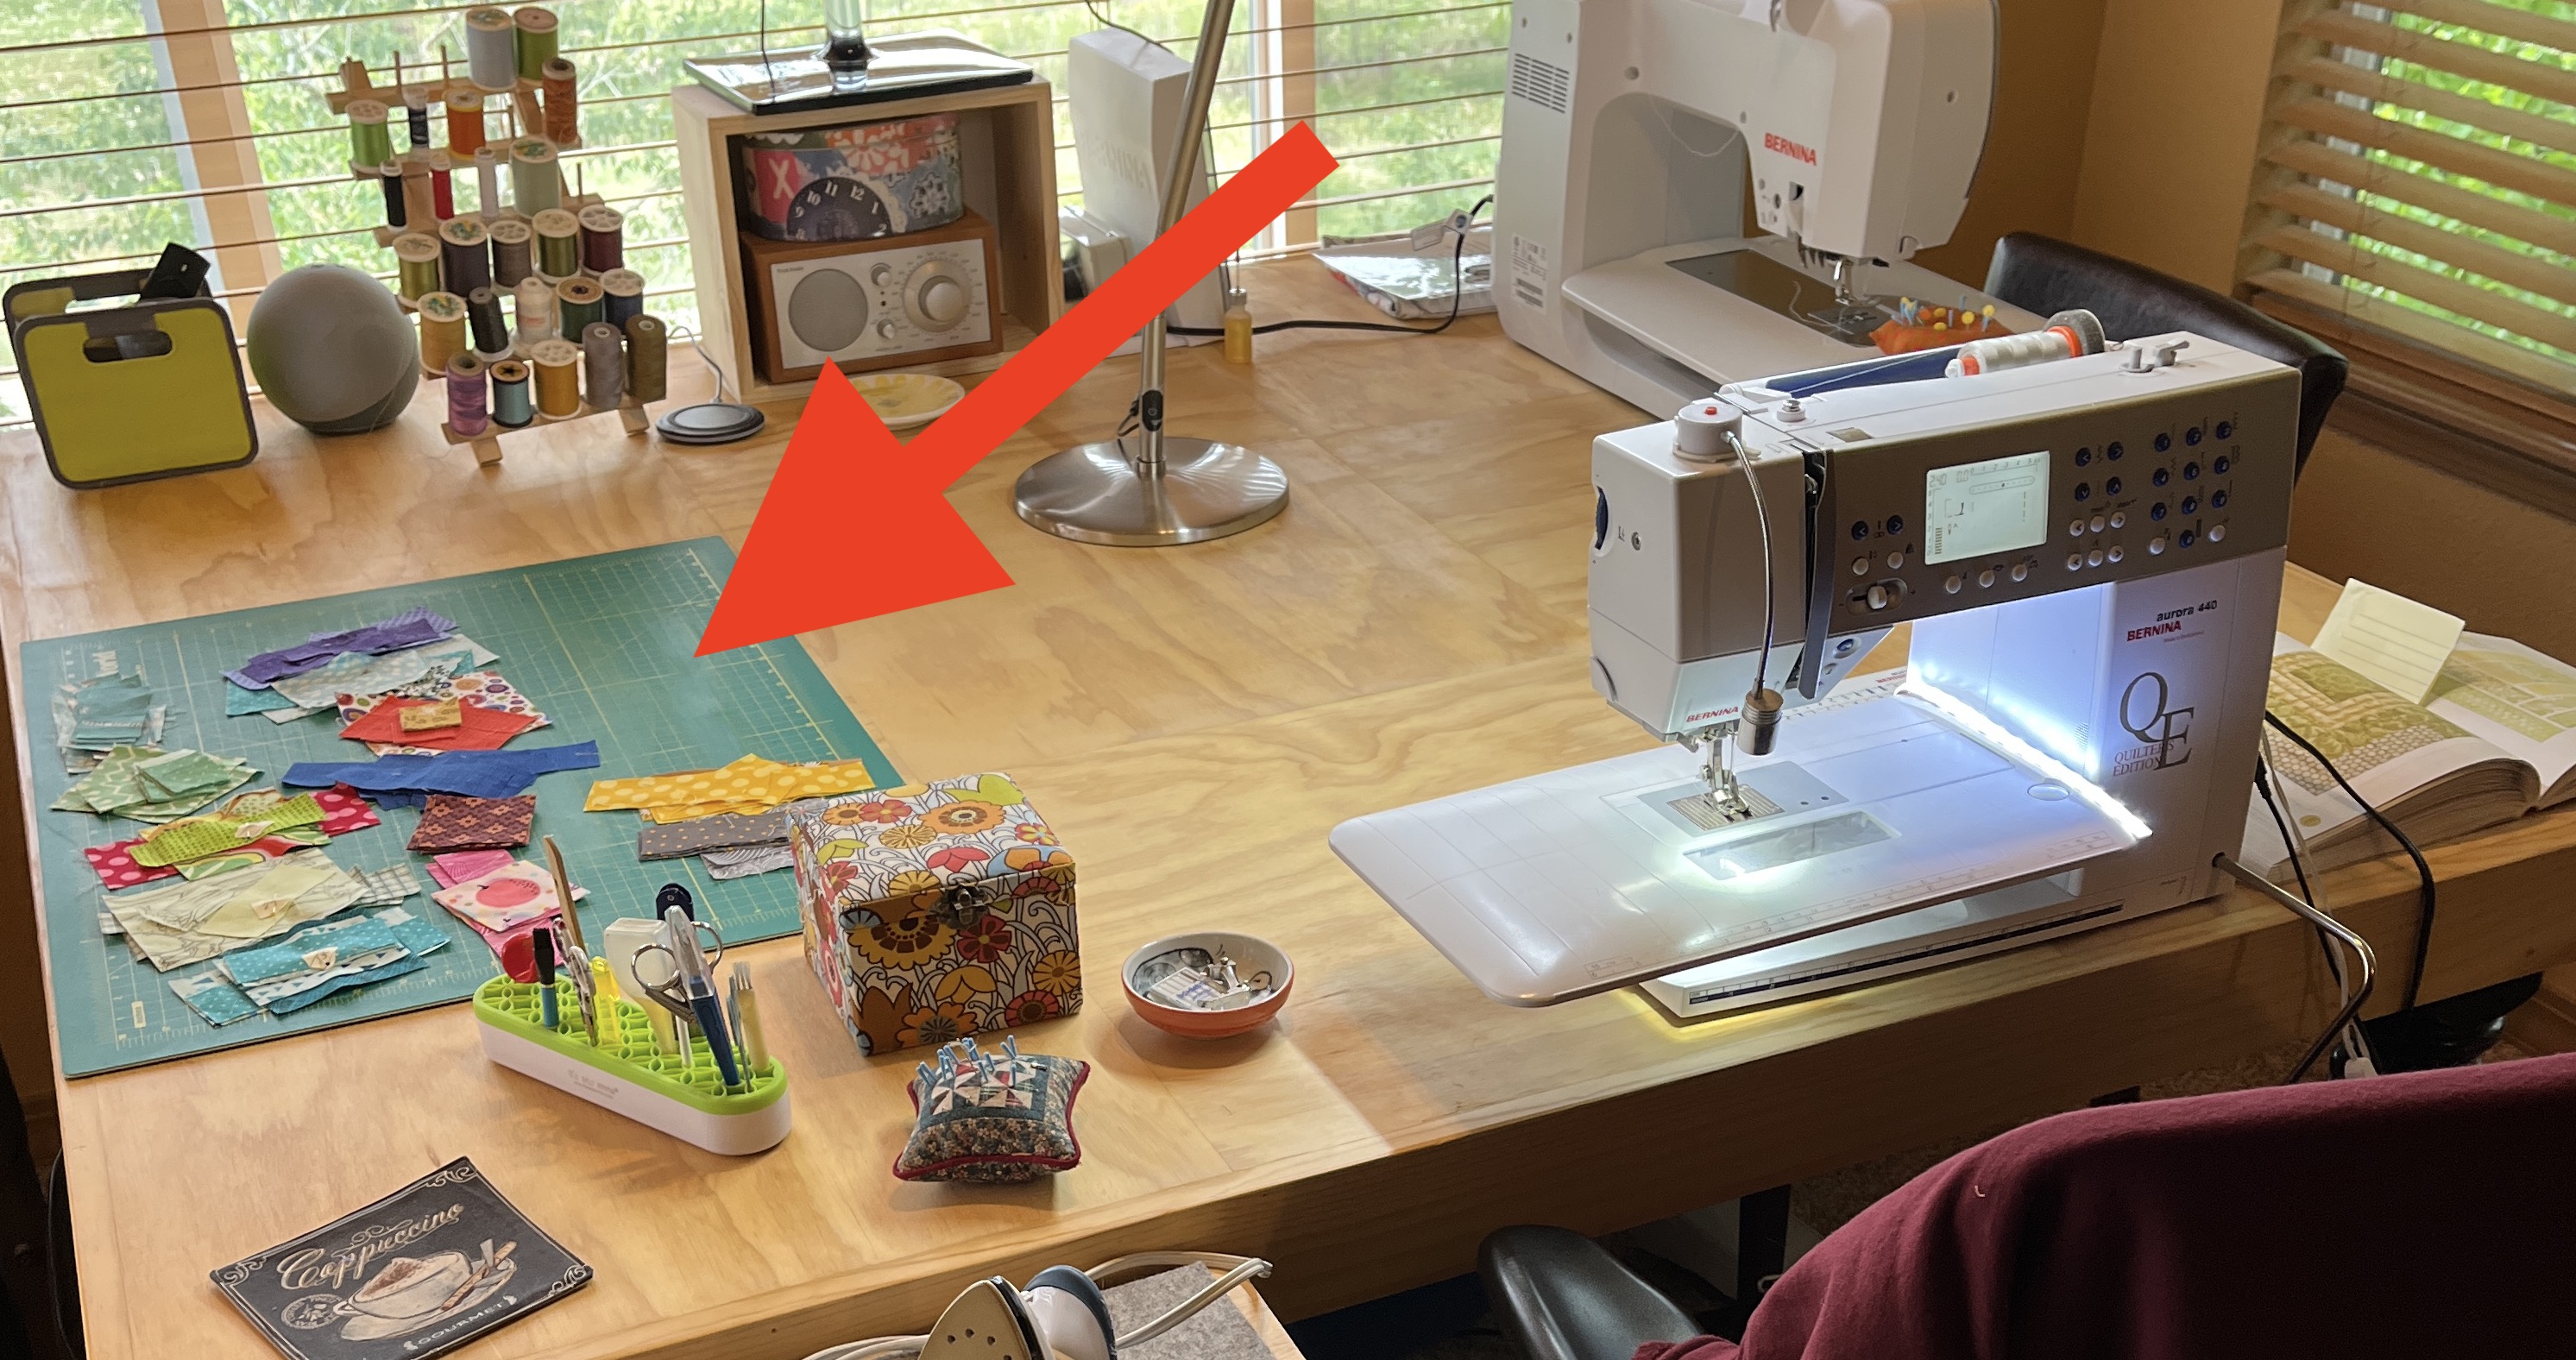
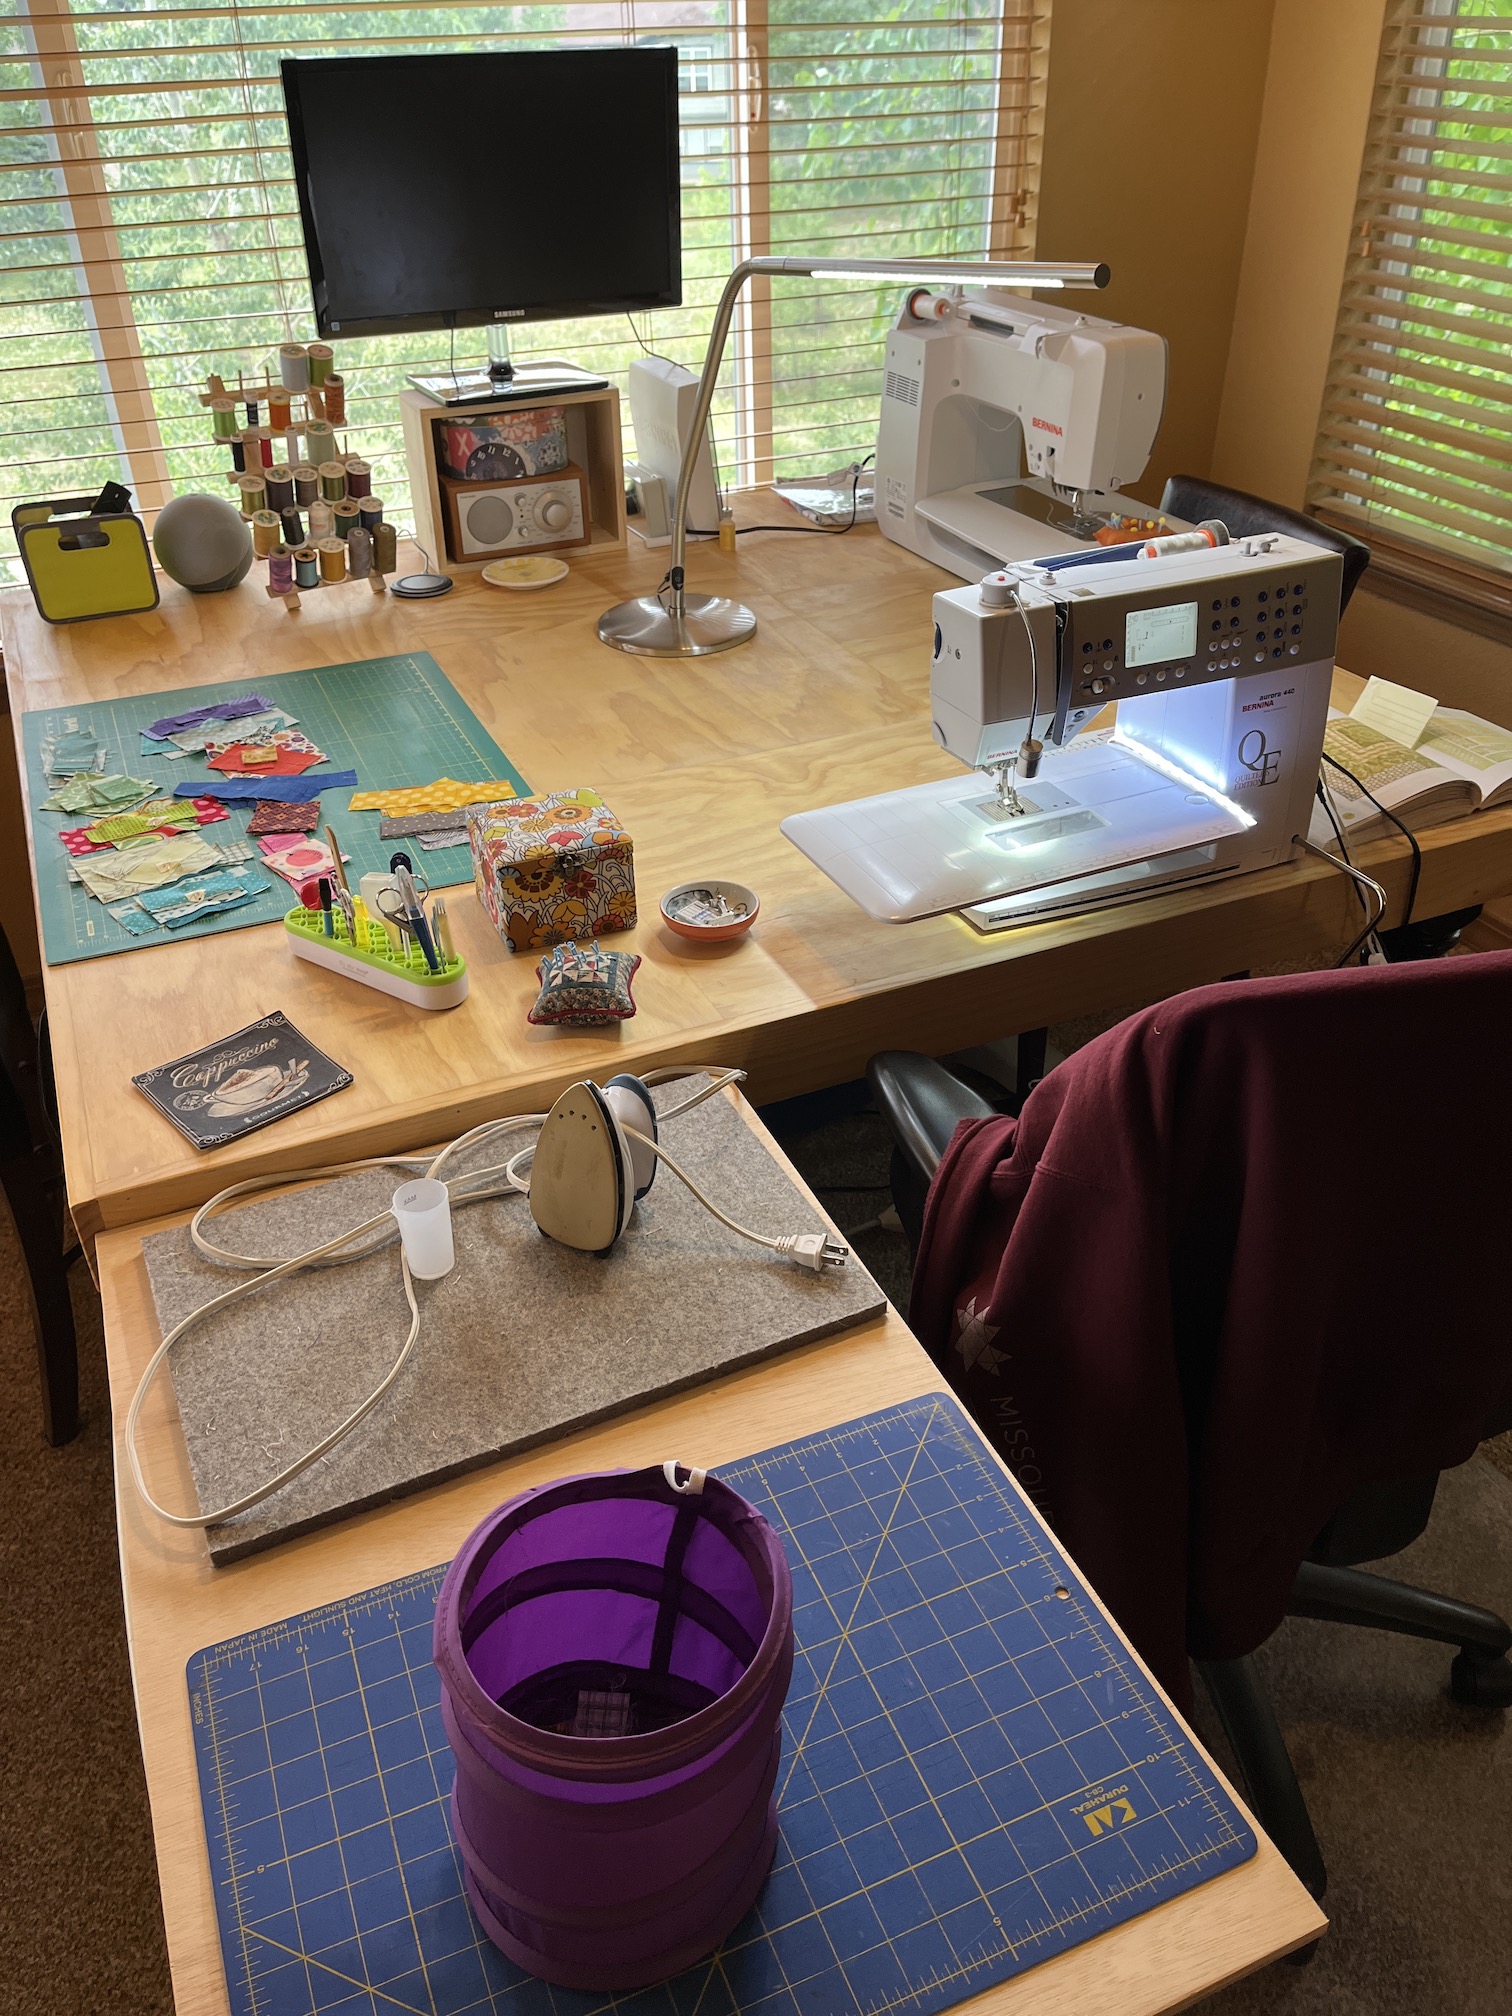
Well my partner John took an old folding table and put a wooden table top on it for me to add to my existing work table to act as a “return” and give me space for ironing while piecing and any trimming needed.
This really added to my efficiency in block making!
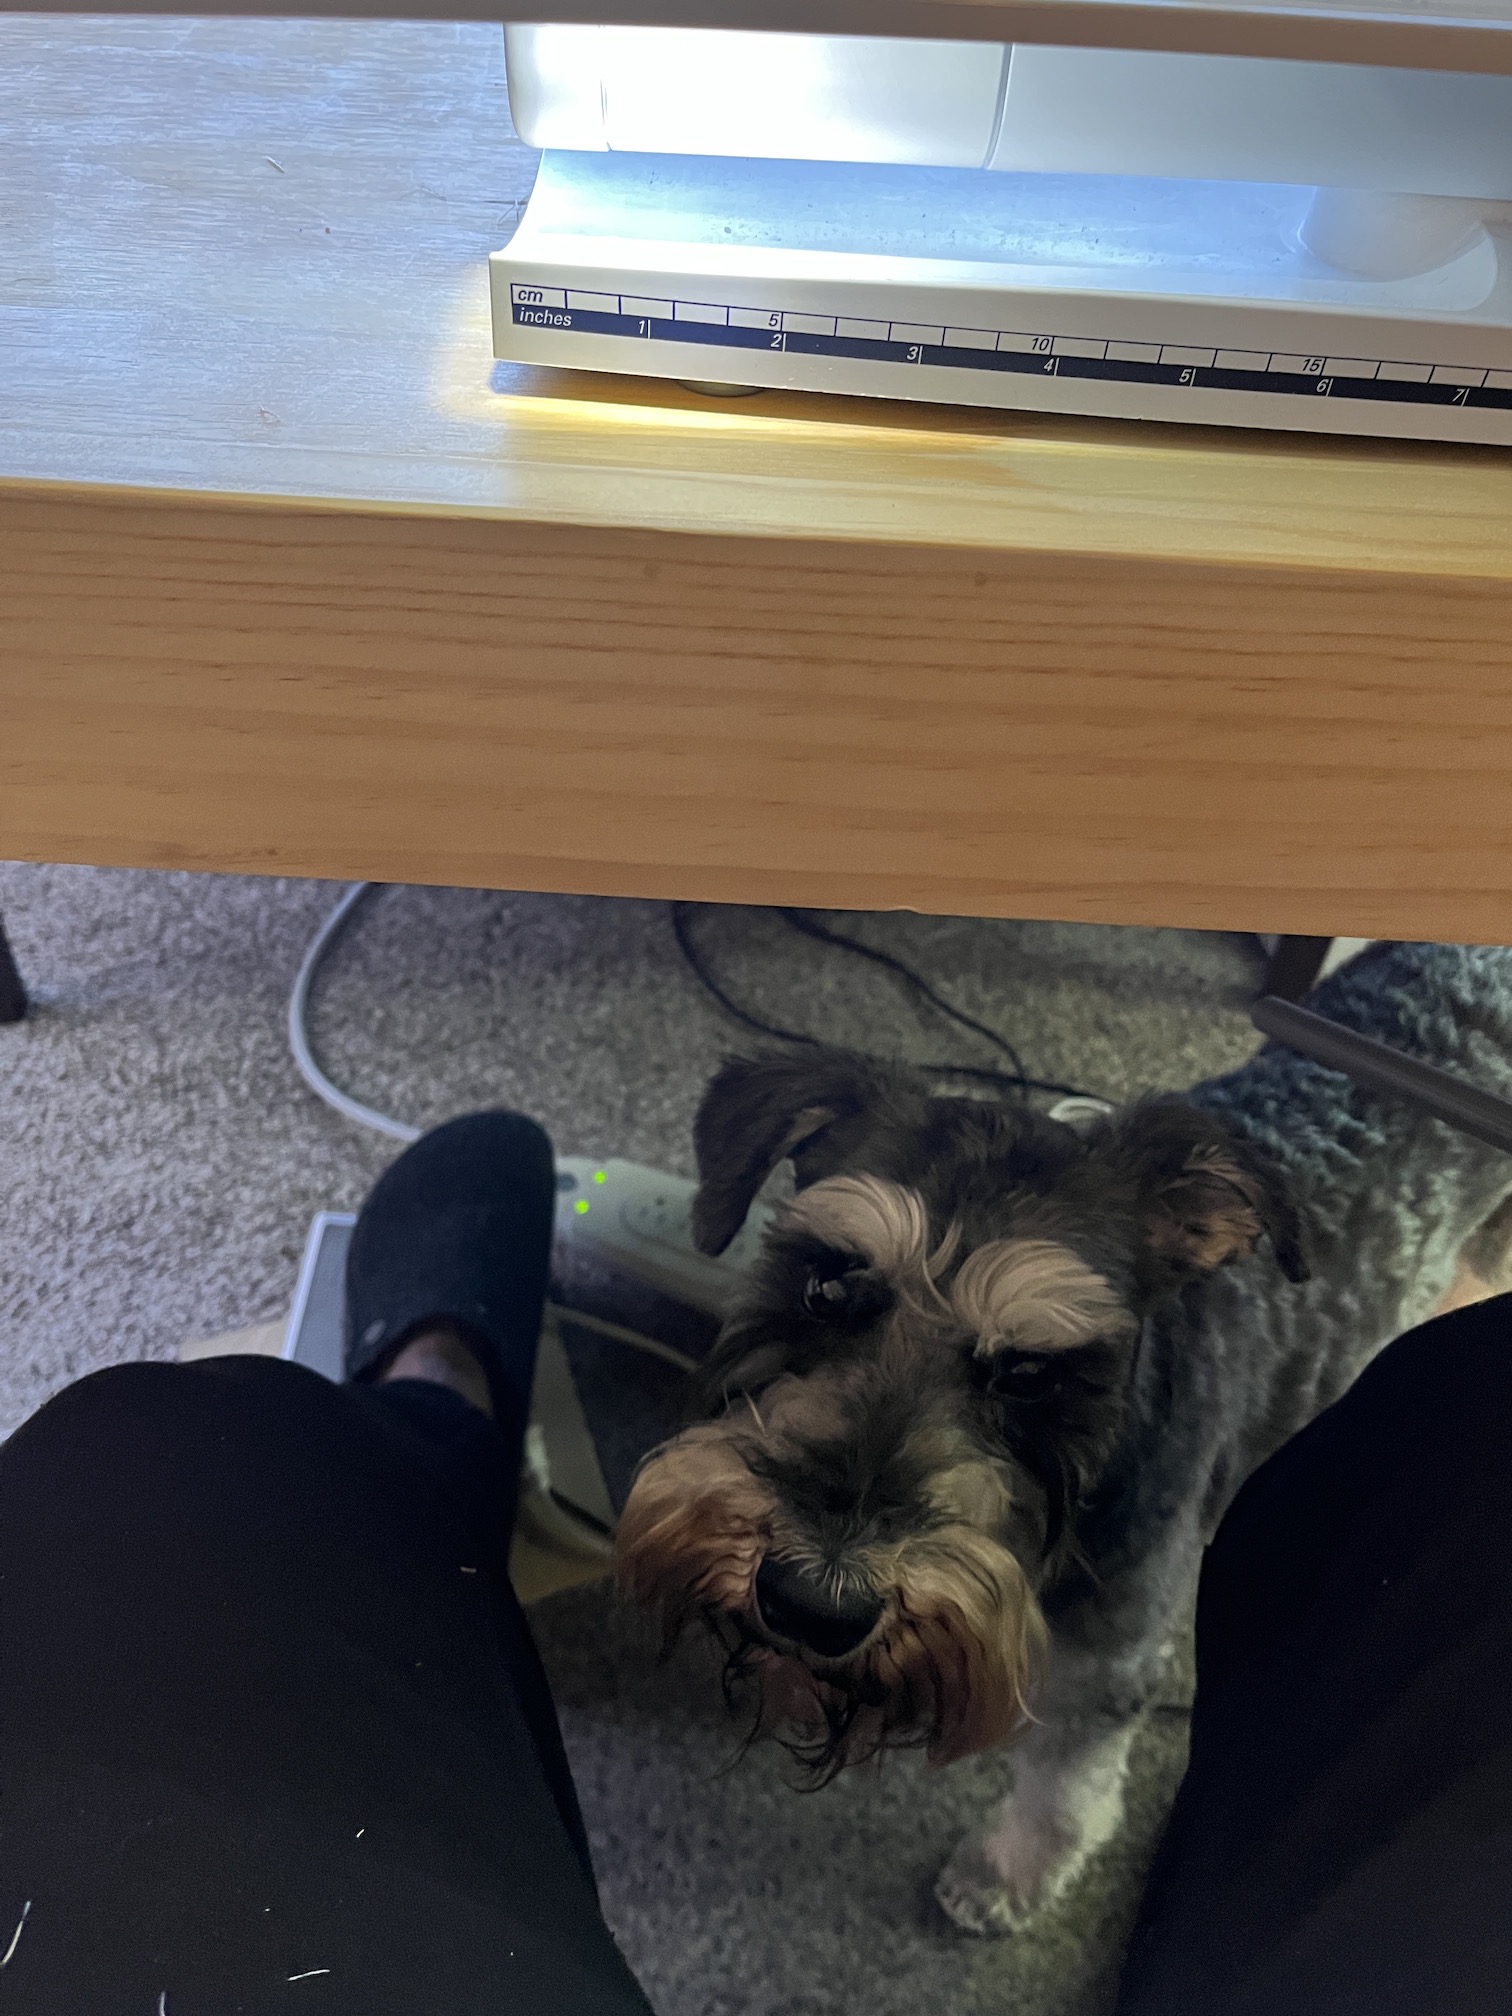
And here is Mike the Miniature Schnauzer hanging out under my sewing table while I am at work:
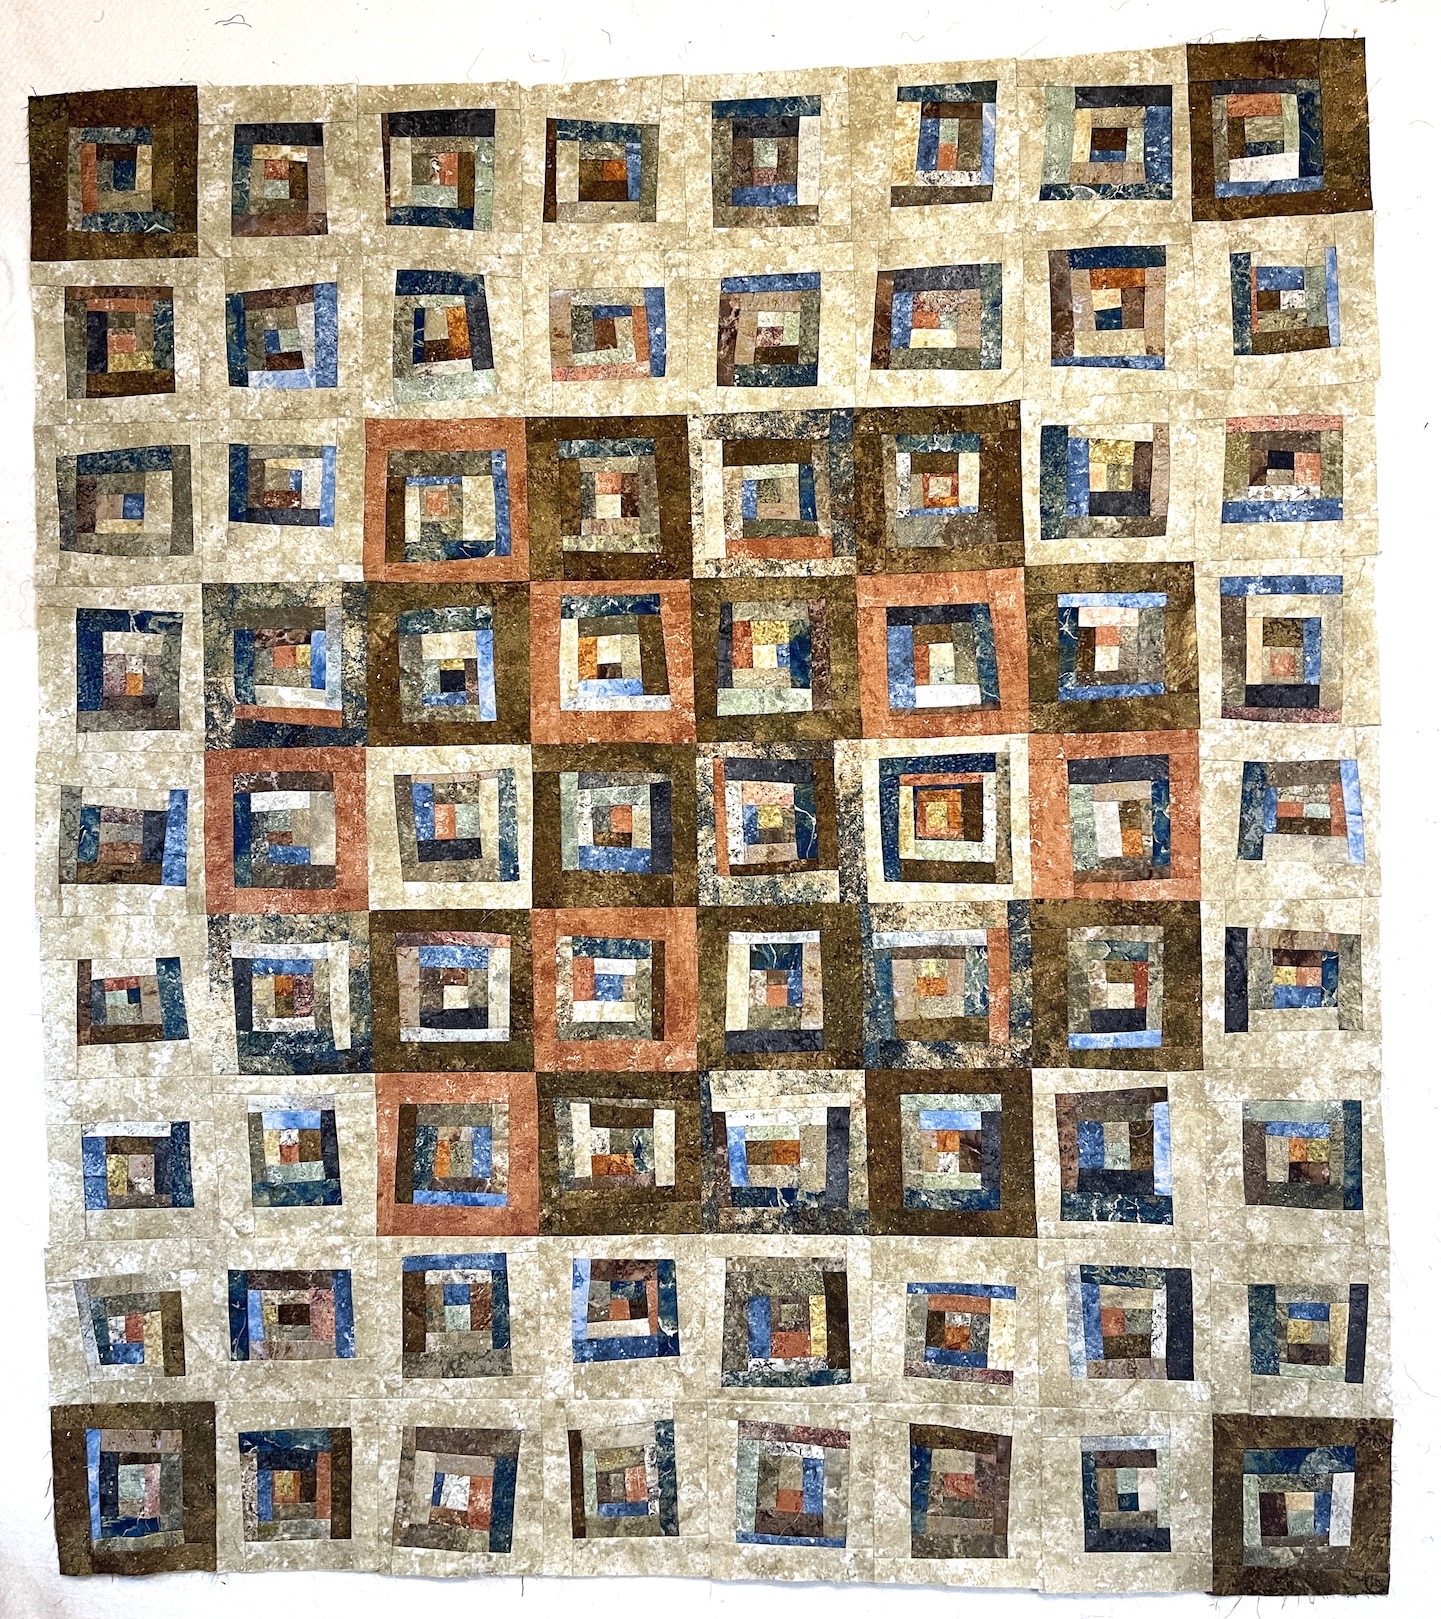
This post is a follow up to my previous post What’s On The Design Wall: Stonehenge Scrappy Freeform Log Cabin, where I was using the freeform/improvisational log cabin block piecing technique – “log jamming” – to create a scrap quilt from my Northcott Fabrics Stonehenge line scraps.
I completed all the blocks and was deciding on a layout.
The layout I came up with was one in which the blocks set in other colors besides the cream Stonehenge fabric, were set in the center of the quilt (except for 4 I saved to use as cornerstones).
I decided to name the piece “Scraphenge” since it was made from Stonehenge fabric line scraps!
It is not a very large quilt, it measures 55 inches tall by 48 inches wide (139 cm by 122 cm).
Right now I am trying to decide whether to quilt it myself or send it to a long arm quilter. However for now I am just going to leave it up on the design wall as I have other projects in queue I want to work on (smile).
I mentioned in my post Things to Do When You Have a Bad “Cold”, that I’ve been working on a scrappy improvisational “log cabin” block style quilt. I thought I would show you my progress on the piece so far.
All I’ve done is lay the blocks out for now on my design wall, this is not the final design. I have a name in mind for the piece but I am keeping that under wraps until I see if the final design will work.
Each block is 6.5 inches x 6.5 inches and was made using scraps of Northcott Fabrics’ Stonehenge line which I love, as well as some small yardage pieces of Stonehenge I had in my stash.
The scraps primarily came from this quilt I made a couple years ago:
This was my pile of scraps that I started with for the piece currently up on my studio design wall which include scraps from the quilt above and scraps given to me by quilting friends:
Eventually I decided not to use the Stonehenge animal print scraps that someone gave me (and recently I donated a pile of them to a local charity thrift store so they can be enjoyed by another crafter).
Here are photos of me chain piecing the improvisational log cabin blocks via a technique I learned from Jackie Erickson at the Stitchin Post when I lived in Central Oregon.
Jackie told us in a class I took at the Stitchin’ Post that “log jamming” that is technique originated in Africa – the using of scraps to randomly put together fabric and create a larger piece of fabric, etc.
While writing this post I googled “log jamming quilting” to see if I could find any official history on this technique and found a VIDEO by the Stitchin’ Post about log jamming!!!
If you want to see a demonstration of the technique, here is the video – enjoy!
Jackie has a pattern she sells on making a log jam quilt and here is the link to it: Modern Log Jam.
image credit: stichinpost.com
I have used the technique I learned from Jackie on so many quilts over the years (as well as taught the late Terry the Quilting Husband to make quilts this way also – see post What’s On The Design Wall: Flannel “Log Jam” Blocks) that she holds a special place in my heart (and she is an awesome teacher!).
In her class she would use a shoppingbag of random scraps and you just pull from that bag and “jam on” while chain piecing.
Okay I went off on a tangent on log jamming, and let’s get back to the story on this current log jam quilt in progress…
Originally I wanted to frame all the blocks in a cream colored Stonehenge fabric I had in my stash, but it turned out I did not have enough. So I used a smaller brown yardage as well as a couple fat quarters from my stash that I thought would coordinate.
Here are the resulting four (4) types of blocks:
Yes, I have not cleaned up all the loose threads from all that chain piecing I did. But I’ll do that as I sew the blocks together in whatever their final configuration.
For now they all sit on my design wall awaiting my further musings on layout…
I was going to give you the last post in the series of posts on my first Rocky Mountain Quilt Shop Hop but I thought I would just do a quick post and tell you all that “Seattle Scrappy” is done!
If you are just joining us – “Seattle Scrappy” is a quilt I pieced from my friend Dana’s scraps at a quilt retreat in early 2020 (pre-Covid pandemic) in a free form log cabin quilt style. Then I took over a year to hand quilt it. After I finished hand quilting it, I had the tierneycreates blog readers help me select the binding.
If you happen to be curious on the full story on this quilt and its journey to completion, here are all the posts:
Of course you might be thinking: “Tierney maybe you would have had the quilt completed sooner if you weren’t blogging about it so much!” – ha!
So here is quilt with the binding on, fresh out of the dryer. I like to wash and dry utility quilts after I put the binding on (I do not wash art quilts):
I gave it little pressing and now it hung in our bedroom so I can look at it each morning when I wake up!
I better get another hand quilting project started before winter starts! I was definitely fun to sit under the quilt while I was hand quilting it in the colder months.
I thought I would give you all an update on the improvisationally free-form log cabin block style pieced quilt I’ve been working on since January 2020 – Seattle Scrappy. I last updated you on this piece in my March post – Update on Seattle Scrappy (though I think here and there in the Postscript section of later posts I provided a brief update…maybe).
The quilt began as a pile of scraps that my friend Dana let me play with when I attended a quilt retreat in Poulsbo, Washington in January 2020 (see posts Mini Quilt Retreat, January 2020 and A Jaunt About Poulsbo, WA). I pieced these scraps into free form log cabin blocks (no measuring, just “eye-balling” and trimming to make fit):
I made a lot of blocks and when I returned home I arranged them into this quilt top:
I decided to name the piece: Seattle Scrappy.
For the past 7 or so months, I’ve been hand stitching the quilt.
Update on “Seattle Scrappy”
In my mind I am doing something like Kantha hand stitching but actually what I am doing should be called “Drunken Kantha” (no I am not drinking while stitching – that could be disastrous since I am a “light-weight” when it comes to alcohol consumption, I would impale my finger…constantly…with the needle) as, well…it sort of looks…sloppy…
Let’s get this over with – let me show you the photos – I am nearly 1/3rd done on stitching this quilt which measures approximately 60 inches by 60 inches:
If you are gasping or just shaking your head at this point as you look at the nonuniform stitching, I have an artistic design “excuse” for the stitching. It is a weak excuse but here goes: As it frequently rains in Seattle, Washington, I wanted the stitching to capture the feeling of a rainstorm (with the wind blowing the rain sideways…).
There. That sounds quite reasonable – it was just my artistic design, not that I am a terrible Kantha-stitcherist! (smile).
But seriously, I am hopeful it will look acceptable once I get the whole thing stitched, and then trim off the excess batting and backing, do a whole lot of ironing, and bind the edges in some manner (either a traditional quilt binding or the art quilt technique of putting a “facing” on the back edges of the quilt).
I cannot believe how long it takes to hand quilt a lap sized quilt. I’ve hand quilted smaller pieces before (see post What’s on My Lap) and I found it very meditative. I think in the future I will reserve hand quilting only for smaller pieces, it was a bit too ambitious an undertaking (for a slopping hand quilter) to hand quilt Seattle Scrappy!
Till the next update, Seattle Scrappy will continue to sit on the edge of my chair in the living room, waiting for the next set of haphazard stitches!
Postscript
Hopefully I did not visually traumatize you with images of my hand stitching.
If I have, I would like to undo the damage by referring you to look at the website of one of my extremely talented blogging buddies – Mariss the Quilter: Fabrications – who is a masterful Kantha stitcher. Check out her post On Hand Stitching to see some amazing Kantha stitching!
Someday…maybe…I can get my stitching to a “less scary point”. I am not aiming for her level of talent, just not to scare myself or others – ha! I did recently actually invest in a book on Kantha stitching. So perhaps there is hope…
Yes, this blog is called “tierneycreates” and Tierney should probably discuss…well…doing some creating…instead of her random rambles about her Minimalism Journey (Part II of her ramble will continue in the next post).
I am participating in Sherri Lynn Wood’s (author of The Improv Handbook for Modern Quilters) recycled quilt challenge: Make Do Quilt Challenge – #makedoquilt. You can read about this challenge on Sherri Lynn’s blog – dainty time.net; or you can read a wonderful post by Kris R. about this challenge and “the skinny on trashing textiles” on one of the wonderful blogs I follow, Coloring Outside the Lines:
The Made Do Quilt Challenge asks you make a quilt out of recycled textiles using one of the “Scores” that Sherri Lynn Wood discusses in her book The Improv Handbook for Modern Quilters (for more about this book, see my postCreative Inspiration: Books I Own).
In her book, she helps guide the quilter, new to improvisational piecing, by providing “scores” to suggest the creation of an improv quilt. Ms. Wood likens these score to “musical scores” and shares the following:
In creating a musical score, a composer is making a record of how the music is to be performed. Yet each performance of the score will be unique. – Sherri Lynn Wood
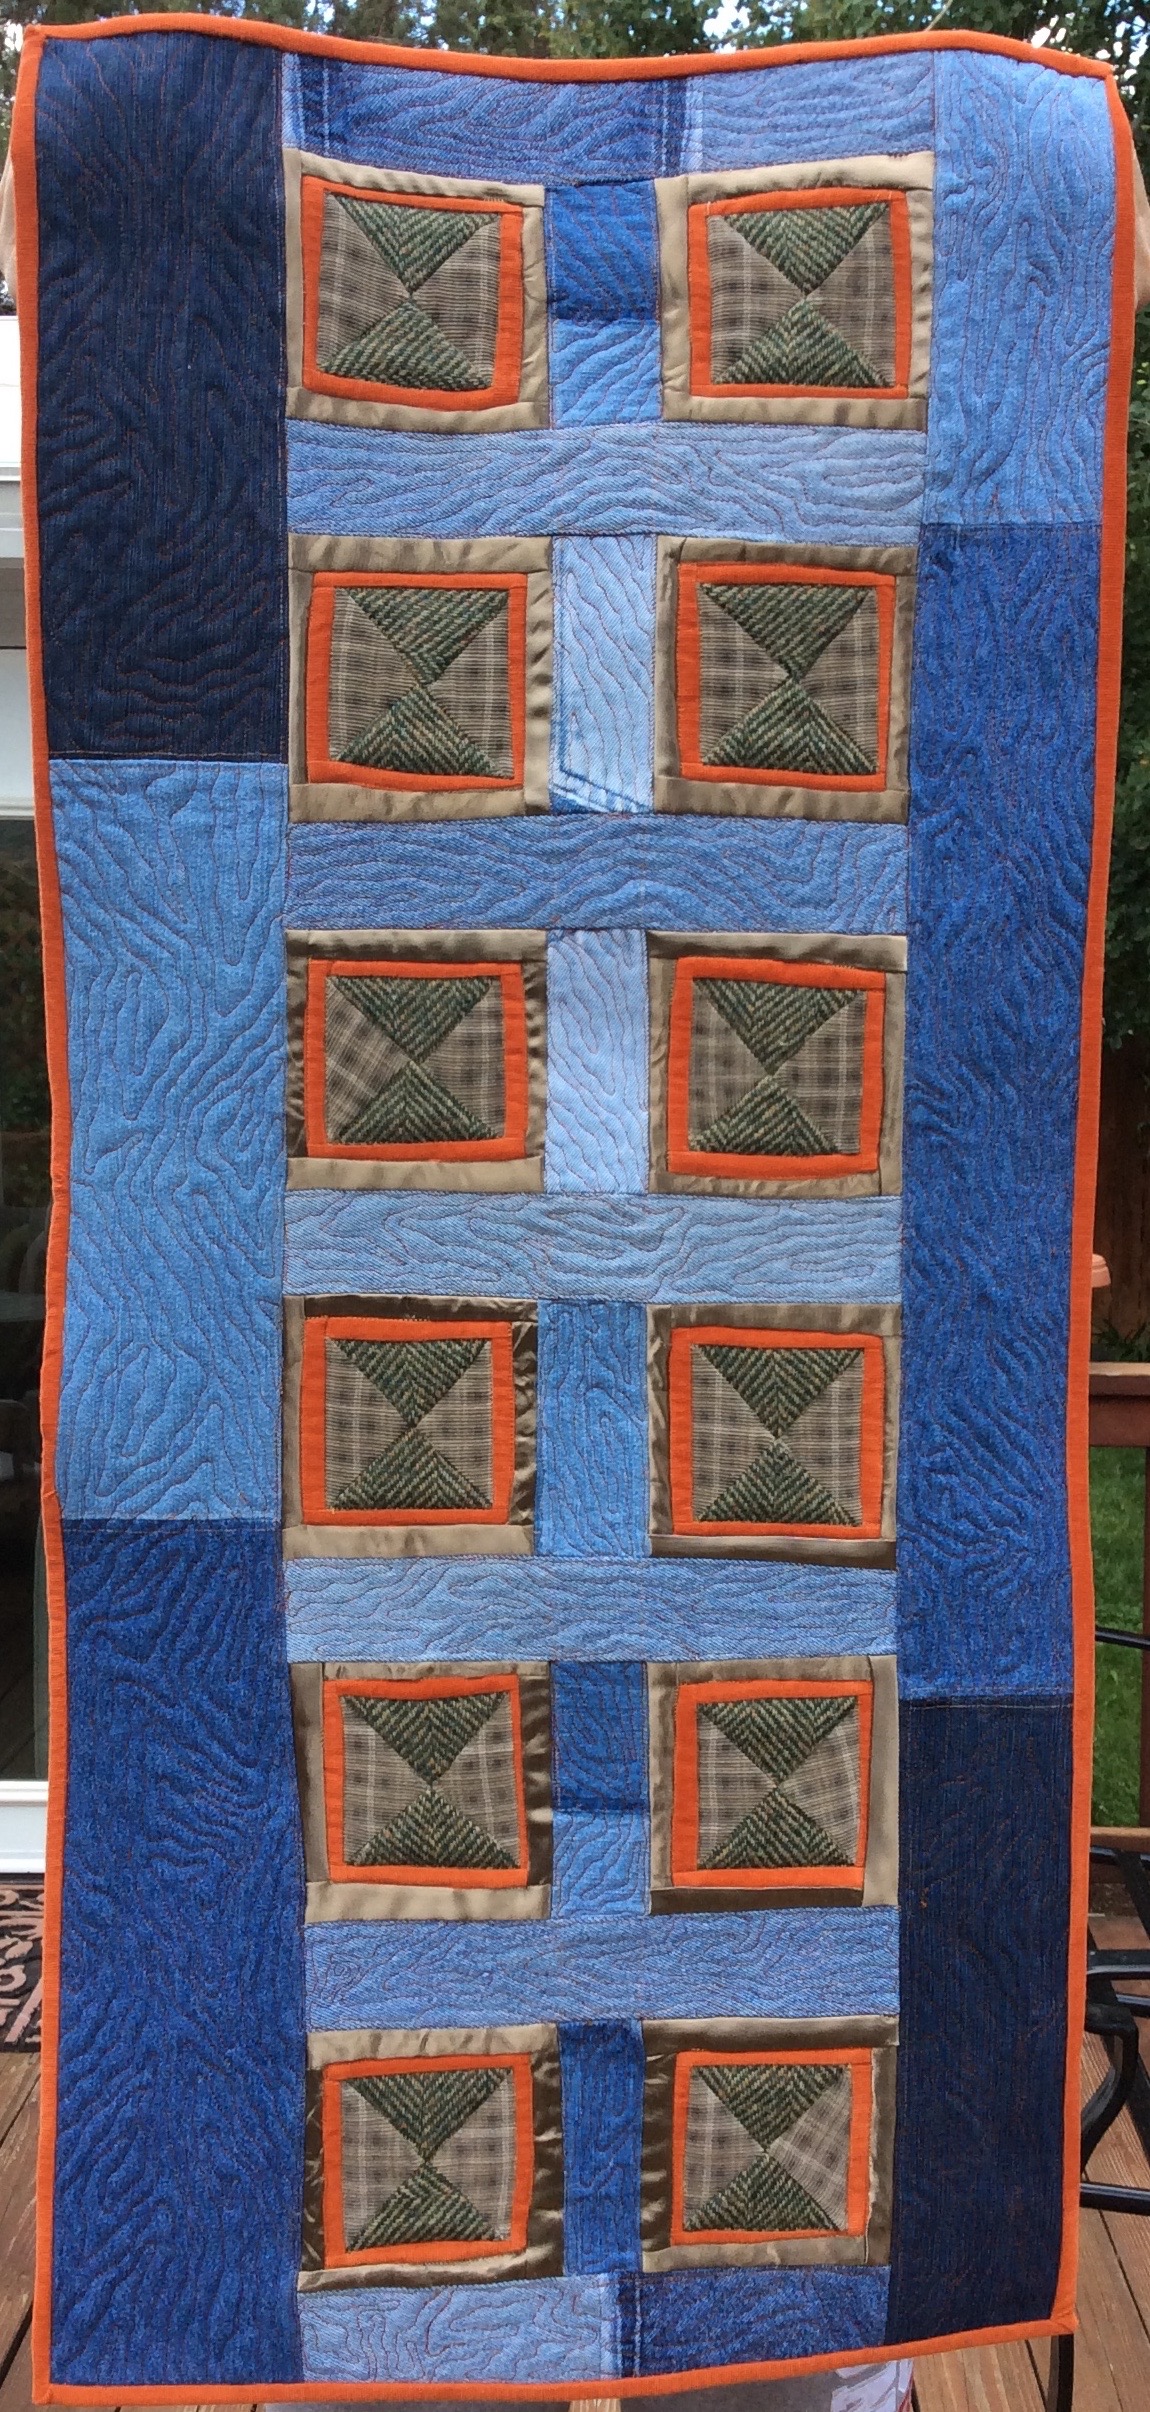
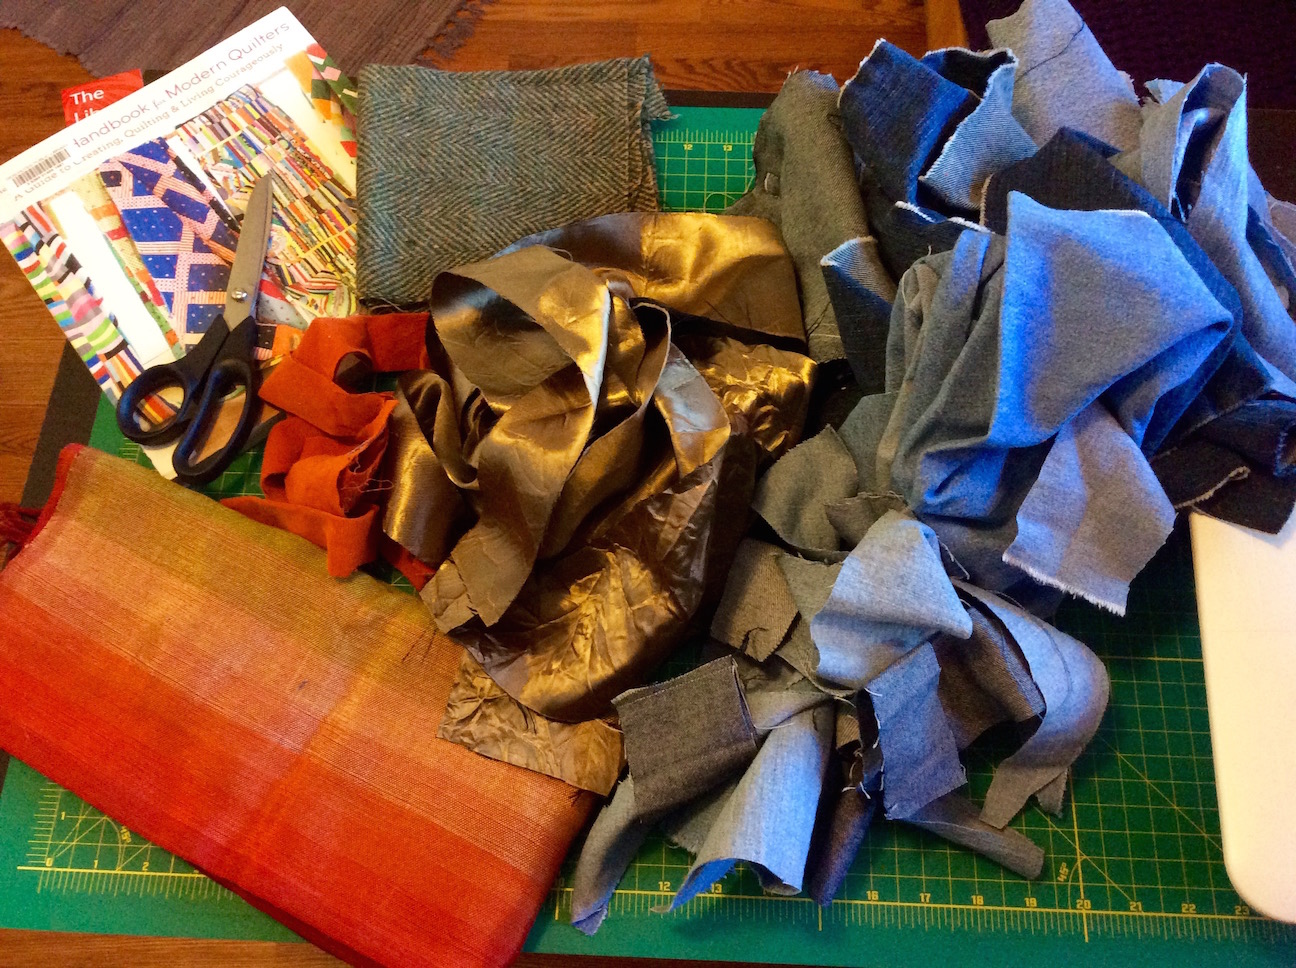
For my challenge quilt, I am using the “Score” called Floating Squares. The score suggests to limit yourself to three fabrics (two used in small amounts and one used to “float” the improv squares). I am using 5 fabrics but treating four of the fabrics as pairs as they are loosely (very loosely) in the sort of same color way.
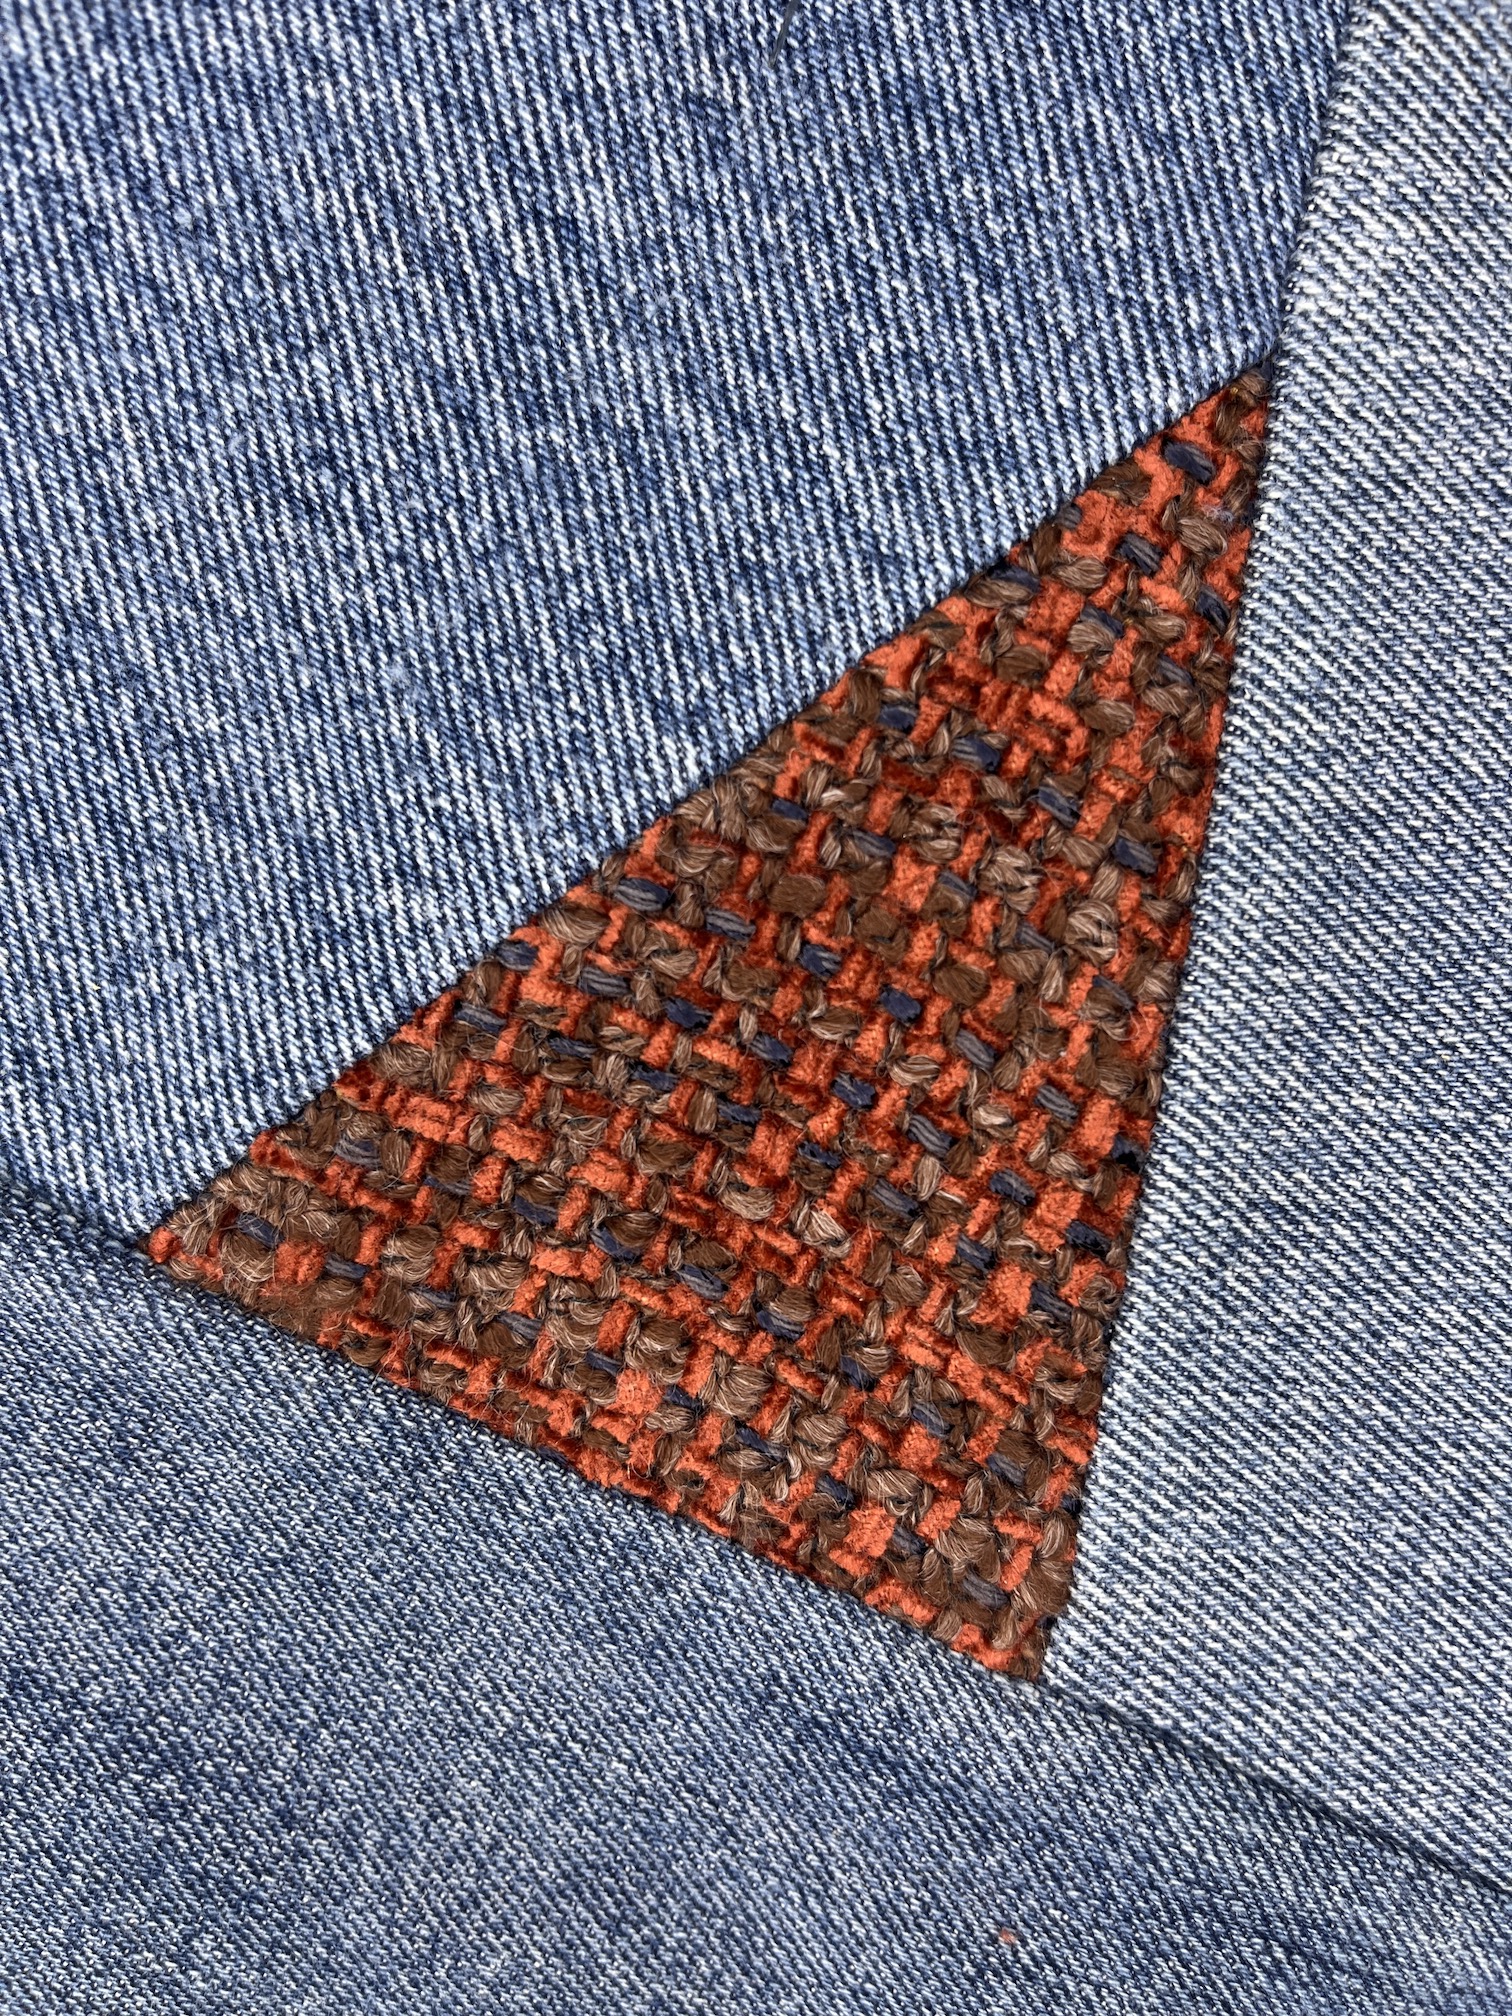
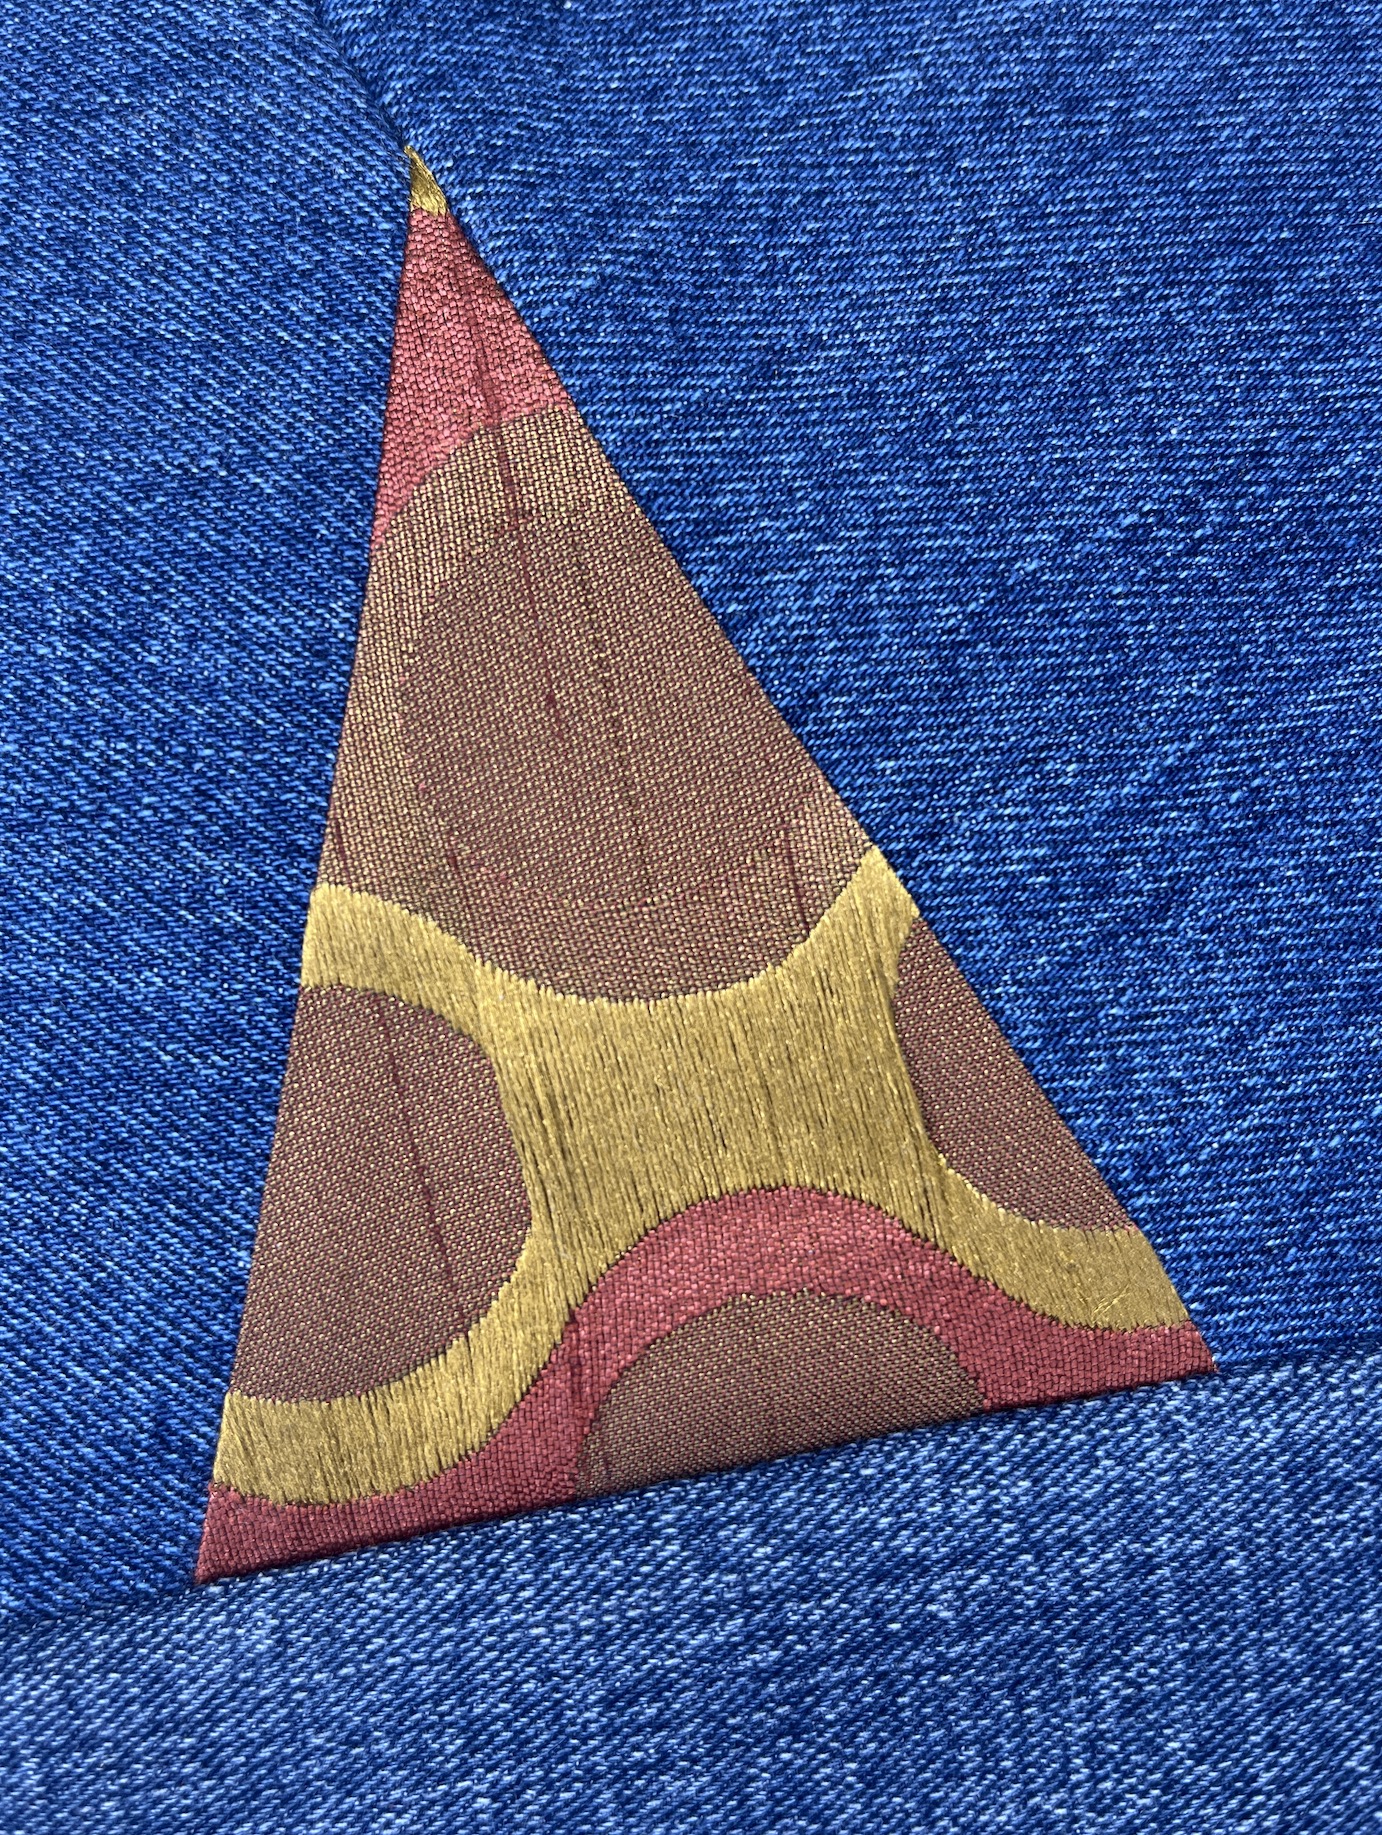
My fabrics are:
A recycled table runner from a thrift shop that is in stripped orange, greens, reds and purples.
Recycled orange corduroy pants (I only have a tiny bit left and it is the companion fabric to the #1 fabric above)
A recycled tweed jumper
Gold-ish recycled home decor fabric scraps (this is the companion fabric paired with the tweed in #3 – yes of course brown tweed and deep gold lame-ish fabric are in the same color way – ha!)
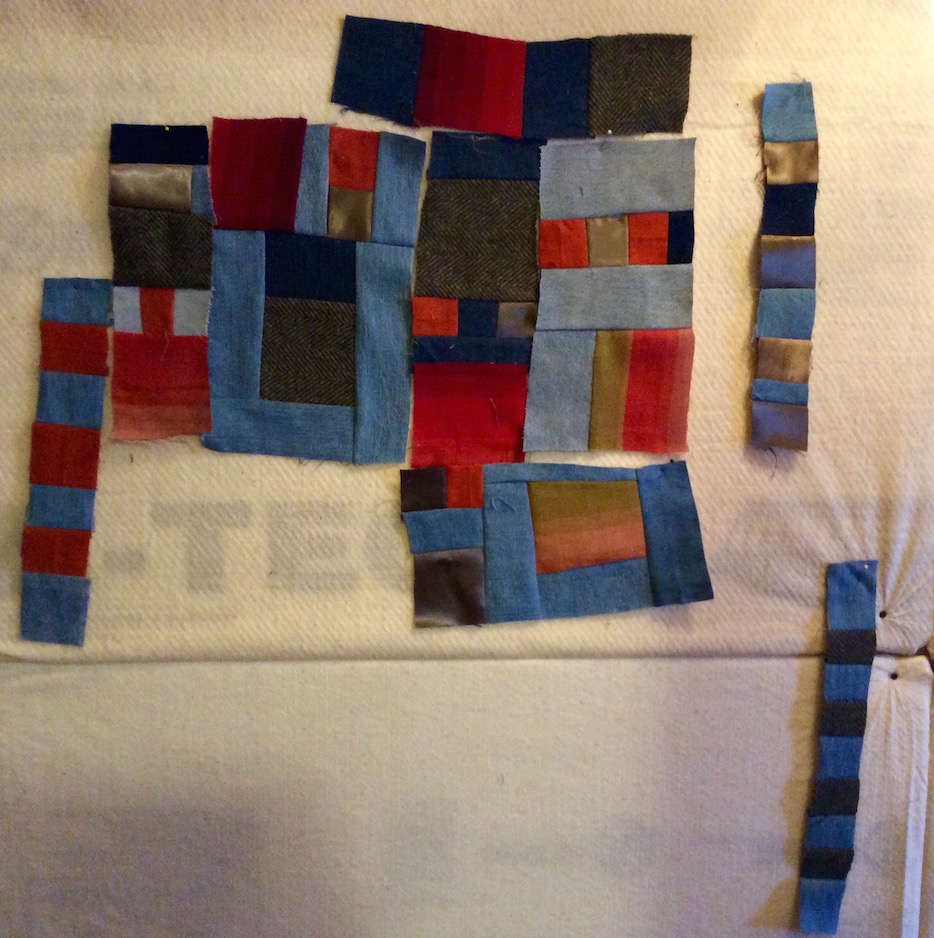
I began with cutting up squares with scissors (Sherri Lynn Wood is all about ruler free design) and ended up with these squares on my design wall:
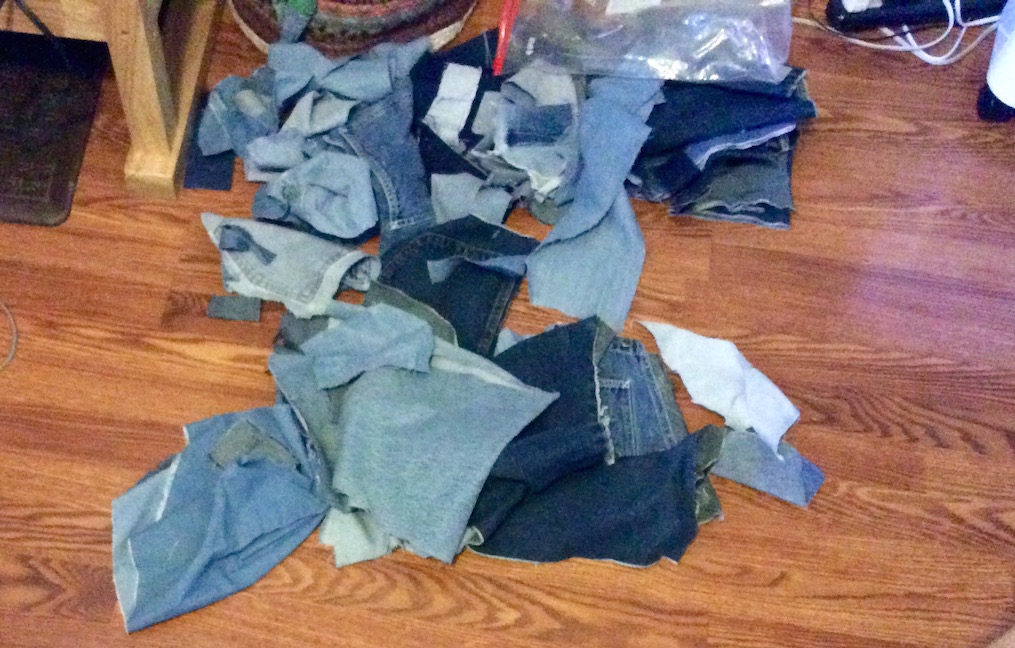
Here is my “pile-o-denim” scraps on the floor to float my squares in:
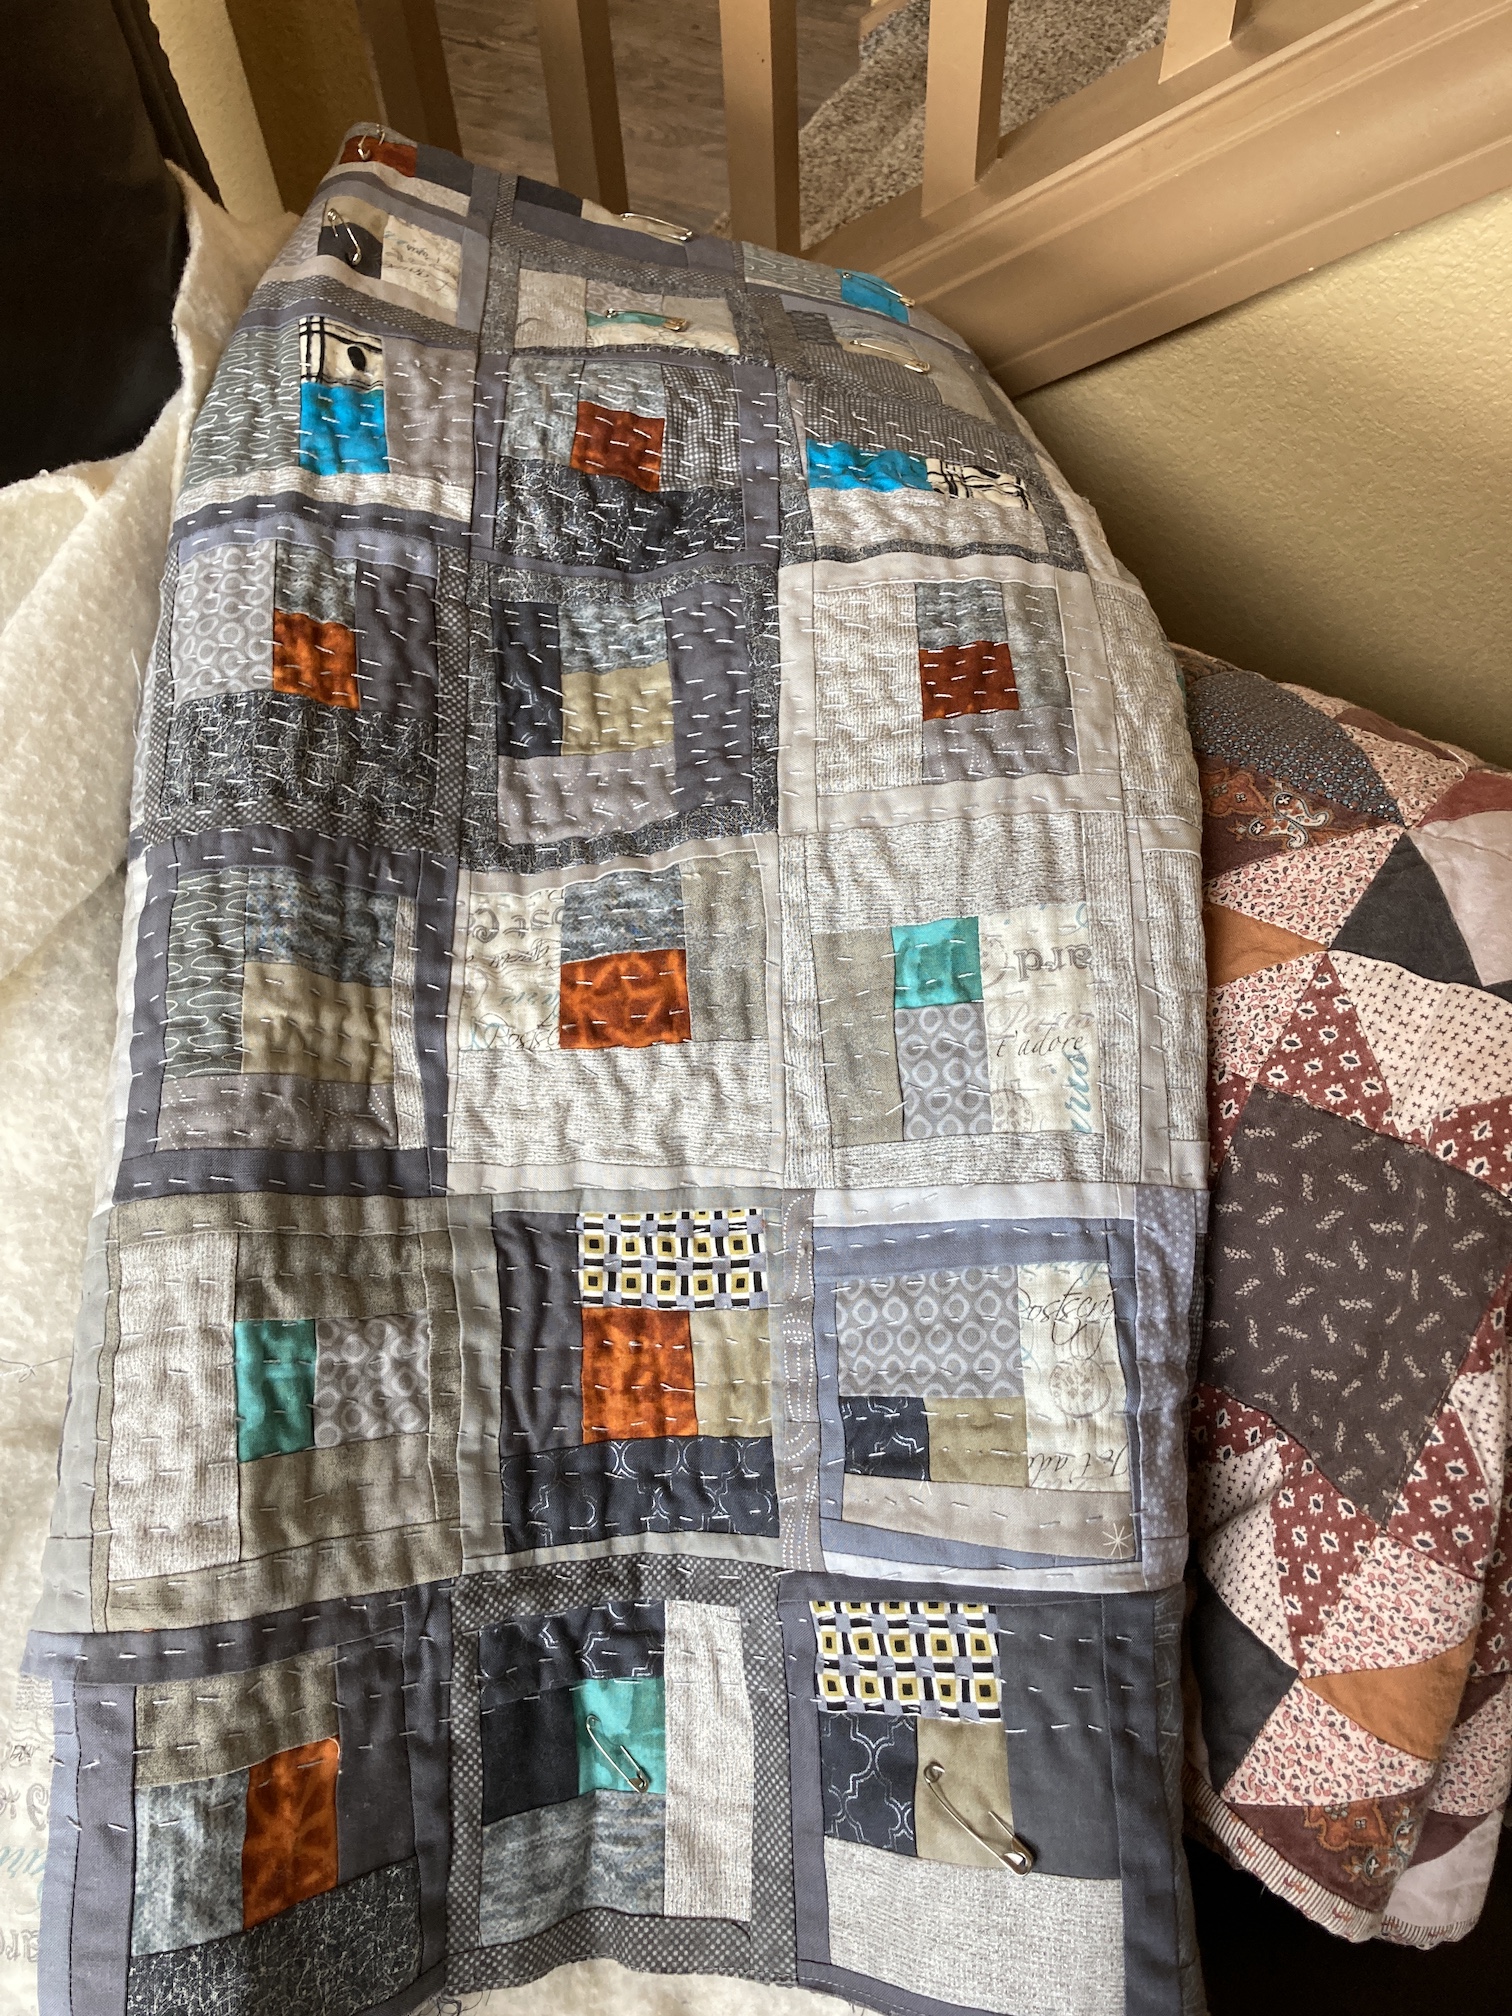
And here is where I am with the piece so far:
I am very interested to see how it comes out. I am just making sections and when I feel I am ready, I will figure out the layout (the initial layout you see above may have nothing to do with the final piece).
So that is my current Tierney-creating!
POSTSCRIPT
Sassy the Highly Opinionated Miniature Schnauzer has taken a short hiatus from her SchnauzerSnips blog page but she will return soon with her story of “The Herd” (recently we babysat two other schnauzers for 5 days).
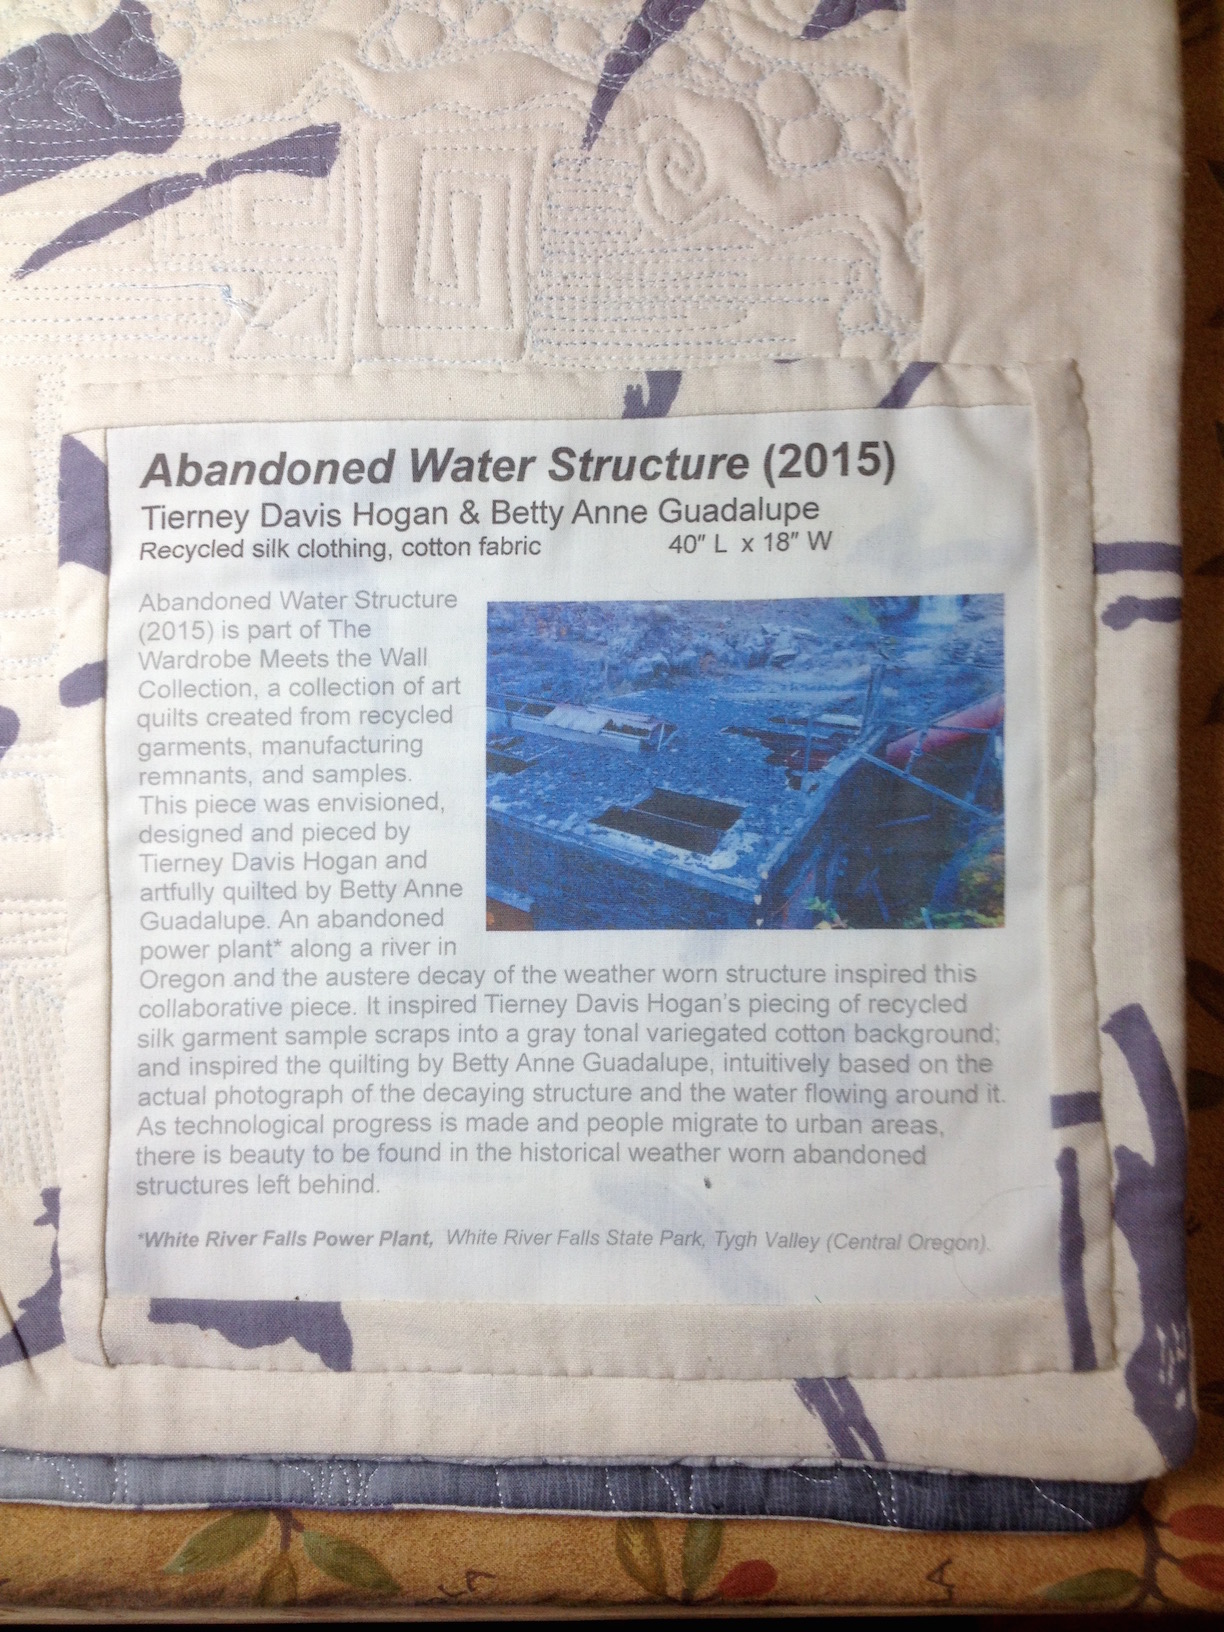
In my post,Seattle Public Utilities’ Portable Works Collection, I shared my elation of the piece Abandoned Water Structure (designed and pieced by myself and quilted by Guadalupe Designs) being purchased by the City of Seattle for its Seattle Public Utilities Portable Art Collection. Yesterday I mailed it off the framer in Seattle and I wanted to share the custom label I made for the back of the piece – I included the photo of the structure that inspired my creation of the piece:
I of course have more random rambles, but I am trying not to make my posts too long (so you do not fall asleep while reading!). More next time!
Feature image photo credit: Charles Novaes, free images.com
My next post was going to be about the cool projects other quilters were working on at the retreat (tuffets!) I attended last weekend. However, I do not want to lose the momentum from the project discussed in my Thursday 08/11/16 post –What’s on the Design Wall (Need Your Help).
I so appreciate all the enthusiastic responses, votes, and ideas. I have to tell those of you who commented: You made a MESS of my studio (smile)!
You should have seen my little studio – various fabrics pulled out from my stash in many different colors, from your suggestions, strewn about everywhere. It was like a tornado of fabric options had blown through.
Reading all the comments was very fun – it was like you all were crammed into my tiny studio (where would I fit you all?!??!) and we were looking through my stash together and throwing around ideas (and fabric).
Of course, I would have to plan a snack and beverage for all my studio guests crammed into the tiny room…but where would I set out the plates and cups? (Maybe I could go scavenge some more fruit from my neighborhood to serve as snacks…but that is an upcoming post: Fruits of My Neighborhood Part III!)
THE RECAP
This project began with a bag of colorful Batik scraps (that I embarrassinglyactually purchased…in a moment of weakness from the Stitchin’ Postquilt shop’s basket of scrap bags for sale..that shop is loaded with temptation!)
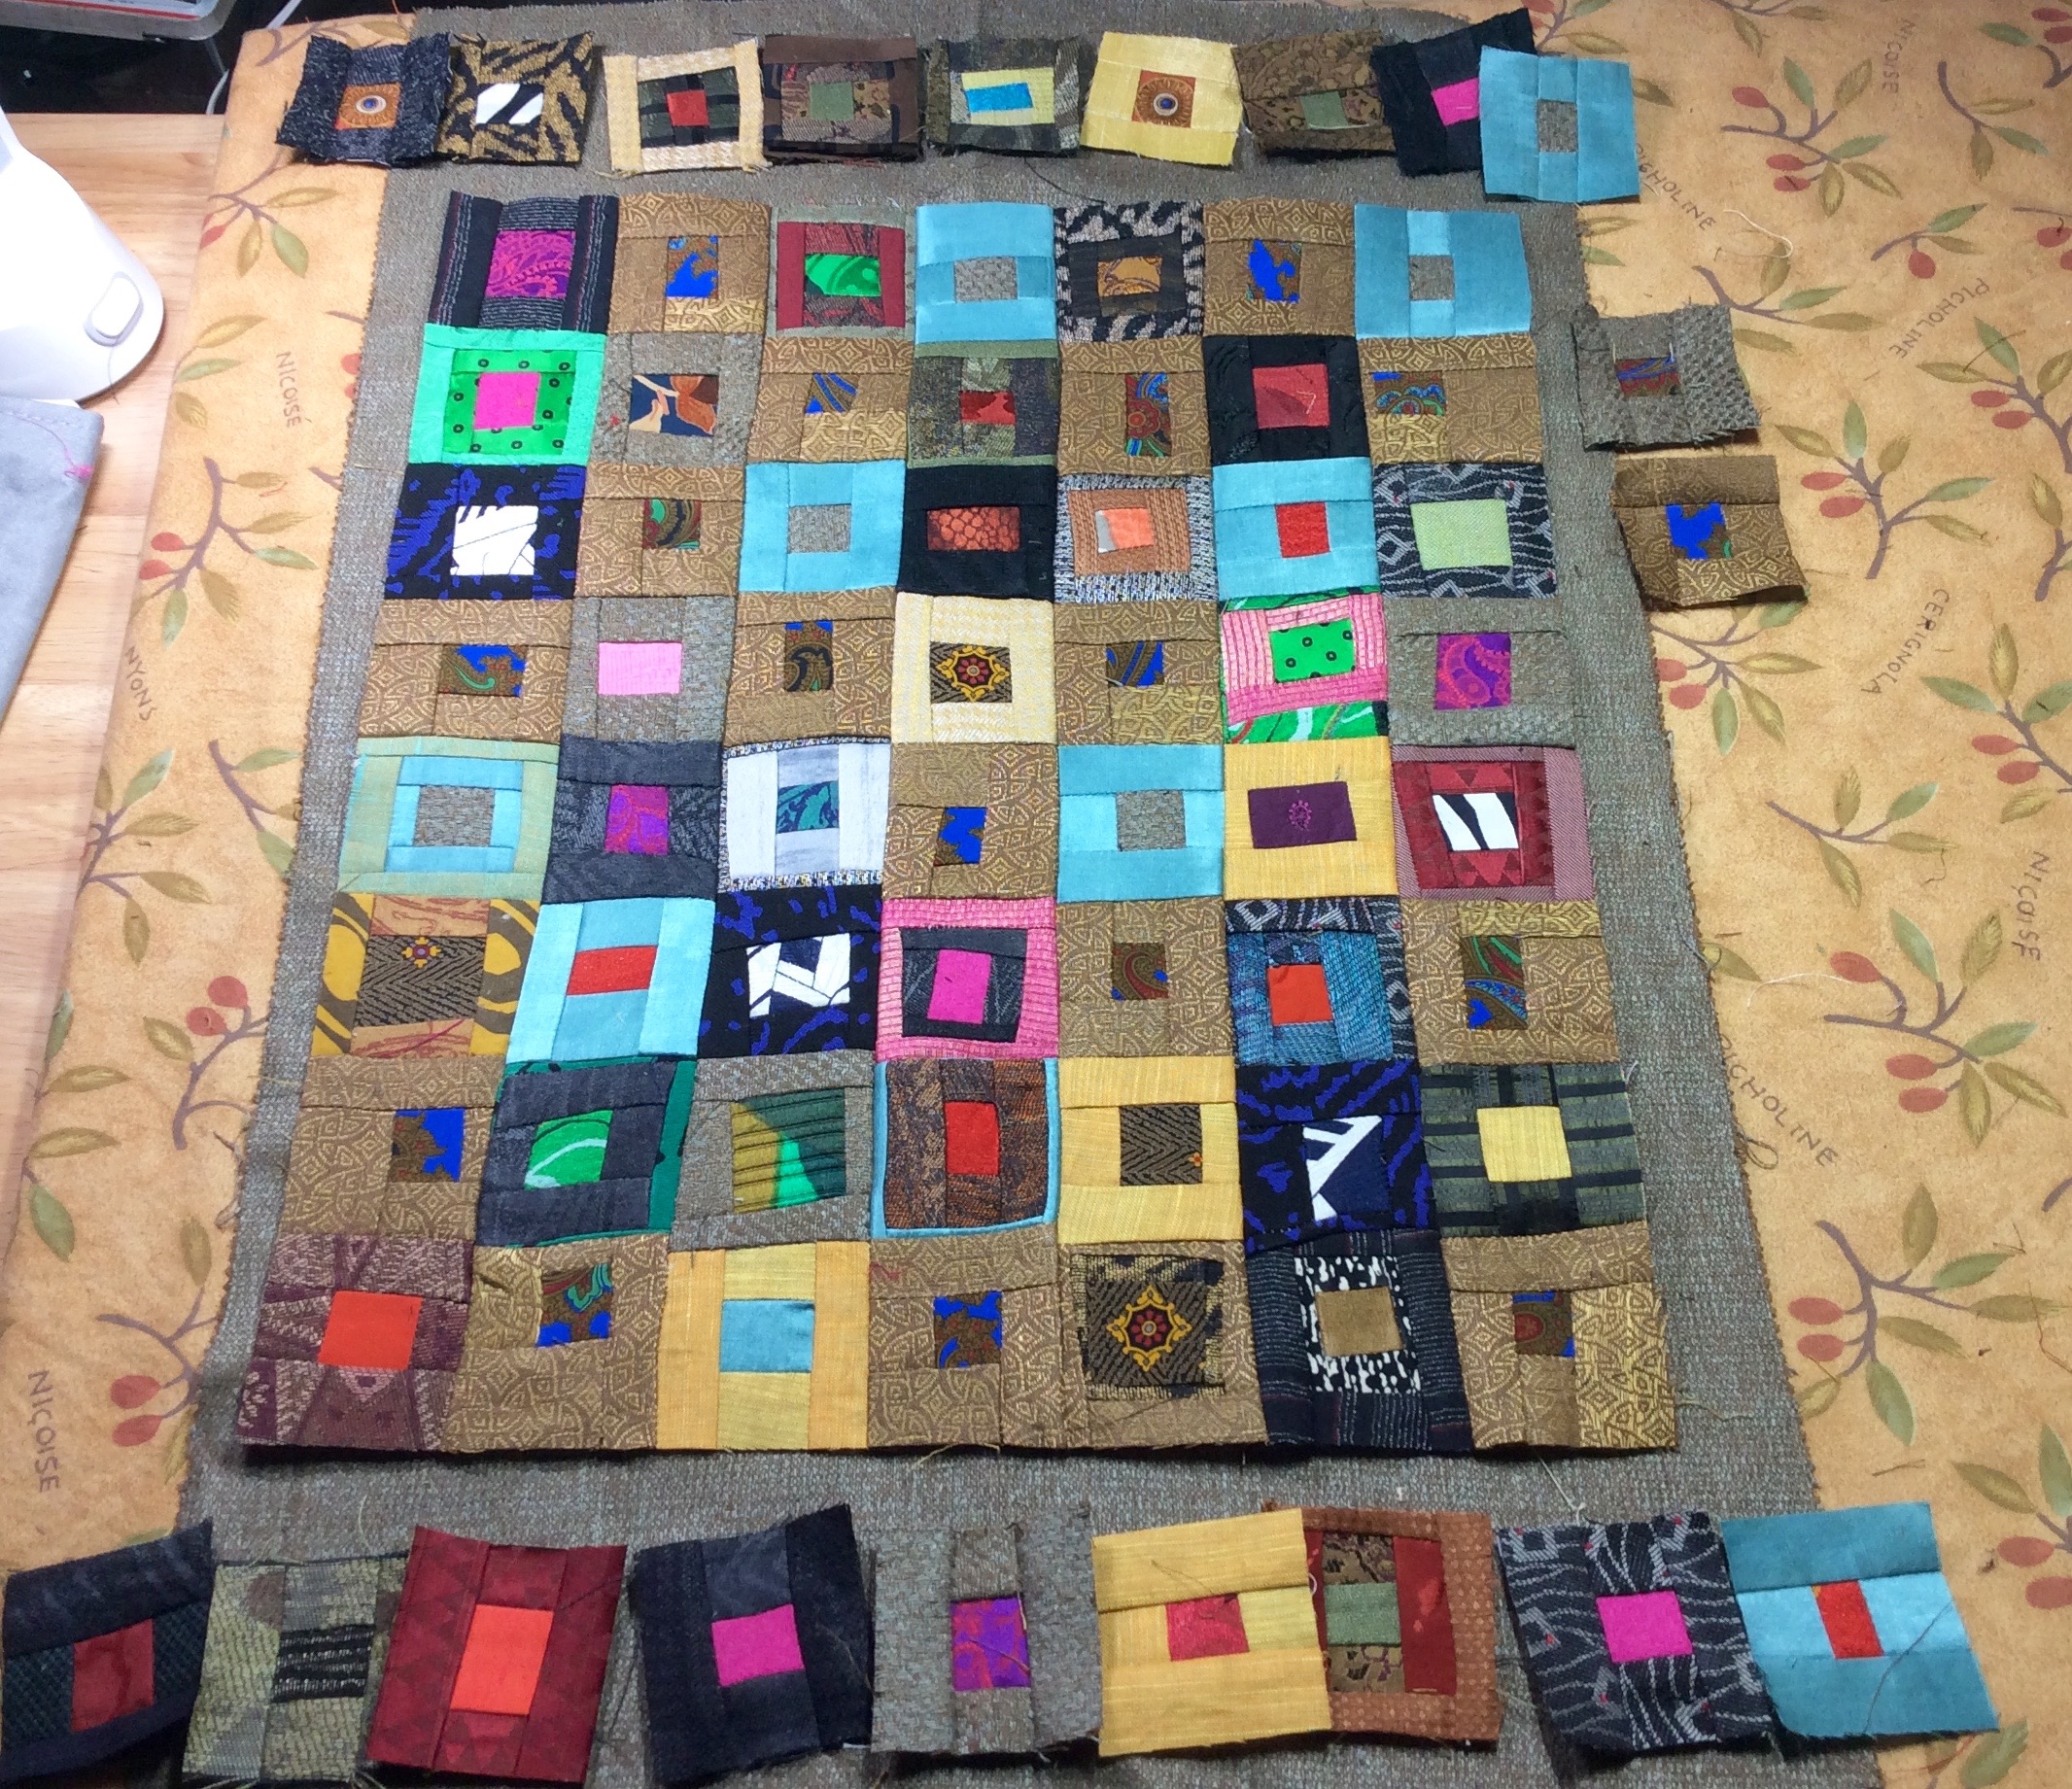
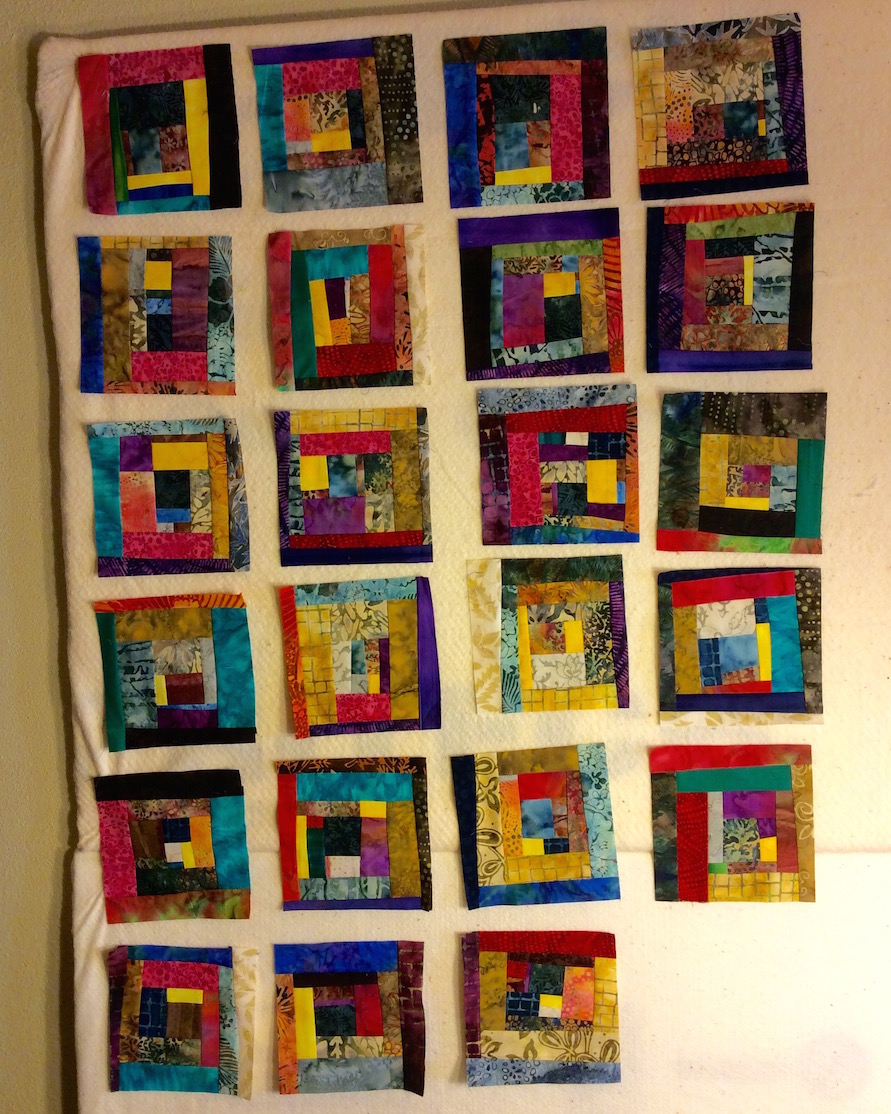
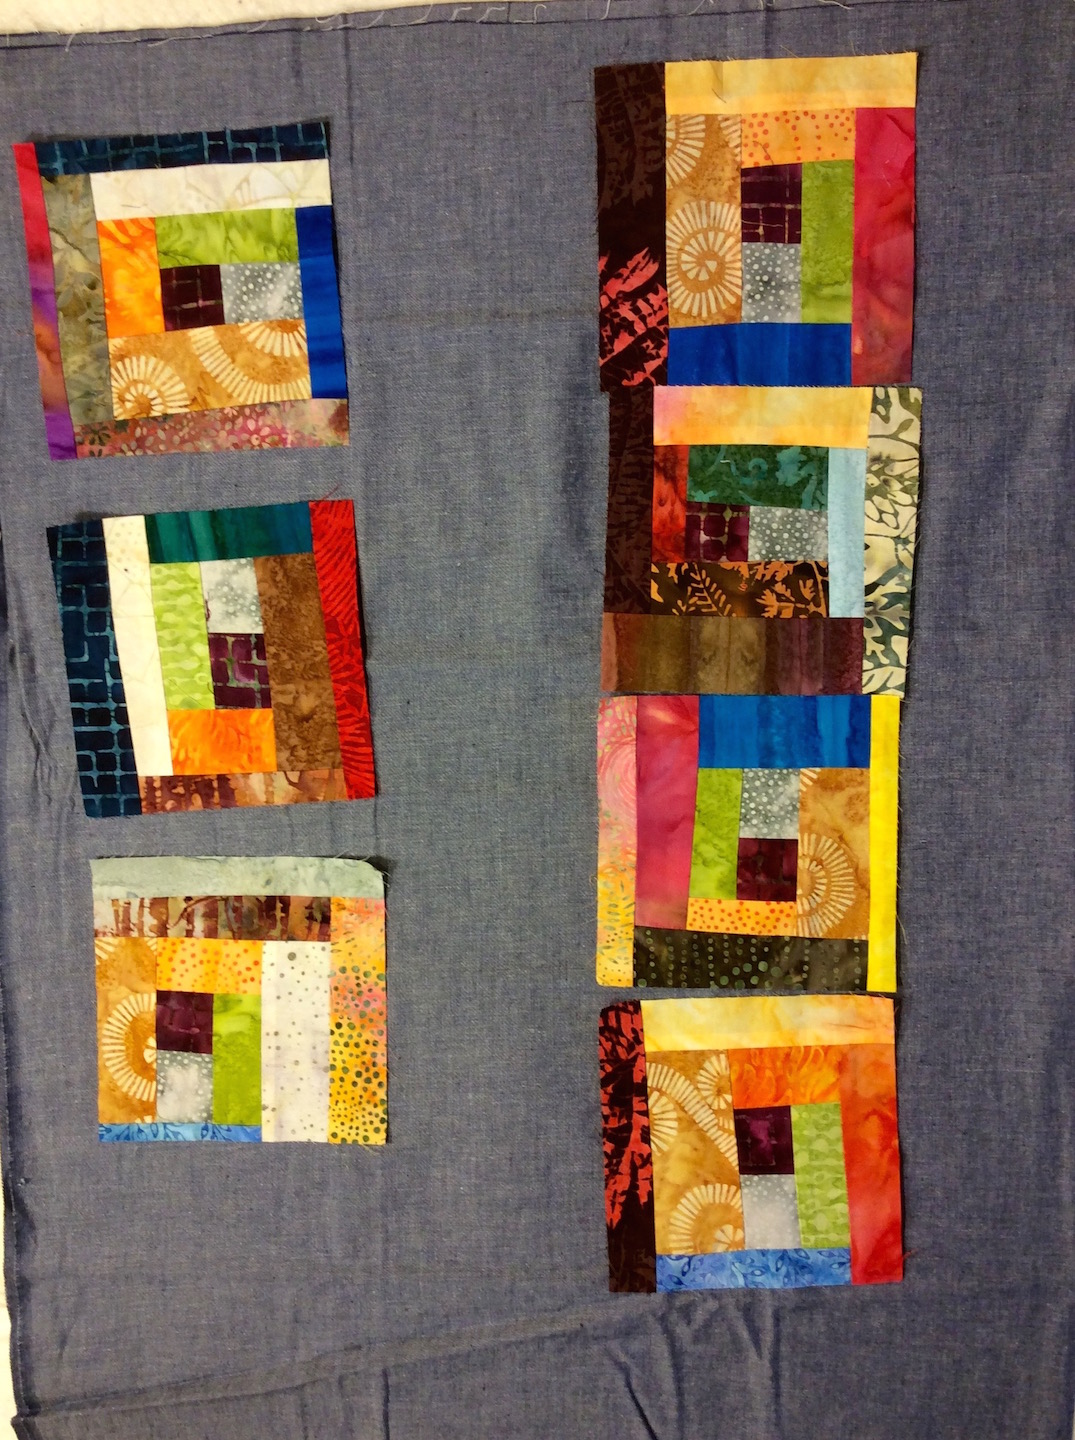
I turned many of those scraps into 24 6′ x 6″ blocks:
(BTW – I moved these blocks to my new hallway design wall which we created this weekend – but that is another post…)
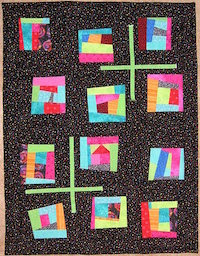
I presented four (4) options for the layout on the blocks and here are the votes by Option:
OPTION 1A – Float the blocks individually in a neutral background: 2 Votes
OPTION 1B – Group the blocks together and then float the whole grouping in a neutral background: 0 Votes
OPTION 2A – Float the blocks individually in a gray background: 4 Votes
OPTION 2B – Group the blocks together and then float the whole grouping in a gray background: 2 Votes
In addition to voting on options I presented, many of you in your comments suggested different options(I hope I captured the essence of all the comments to date, my apologies if I left a summary of your comment out below):
Group them together on a neutral background not trying to make them perfectly square, use Misty Fuse to attach them
Stitch the blocks together, use a pieced binding to enclose them, they speak so well on their own!
Group them together on the grey but make sure all blue sides are facing opposite of the grey fabric and placed up against another block rather than up against the grey fabric not allowing a blue side to but up against another blue.
Float each block individually, with a PURPLE or RED background- keep the color going! And maybe put a yellowsquare at each “intersection”
Golden brown would be nice also (to float blocks).
I agree with some others are dark brown, plum, dark red, I’d be inclined to try them on different ones and see which calls loudest.I start to wonder if it’s be even better on the dark brown.
I think a chocolate brown would be so cool.
I would make more blocks, group them without sashing or a border, and bind with a pieced binding (NOTE: I did make more blocks, see below!)
If you do want separation, don’t set them straight, in rows and columns. Use your separator in more random sizing — perhaps framing each one with the same fabric but in wonky widths. It might be easiest to pull off with a fabric that has some pattern so the seams between newly framed blocks disappear a bit.
If you really want to set them apart on a different background, what about looking at either a gold dupionior a deep purple dupioni?
(from a text to my phone, not posted to the blog) What came to mind was floating blocks in a round of neutral logs then a round of gray logs – maybe alternate with the reverse – round of gray first then neutral – then you float and have blocks side by side – and I’m thinking of a neutral acid yellow or lime greenor maybe an acid yellow orange – a crisp bright marigold color – all would look good with the blocks and gray.
Option Z: I love love love the blocks, but am partial to flashy colorsmounted on a white background. I also like sashing between the blocks because it makes each one pop.
While I like both versions of placing all the blocks together and placing with sashing, I would need to try the sashing version using a variety of sizes and different shades of either the light or the grey.
One fellow blogger, Melanie @ Catbird Quilt Studio was kind enough to e-mail me a photo of one of her lovely scrappy log cabin quilts, “Broken Pains” as an example of a layout she used:
Photo courtesy of Melanie McNeil, Catbird Quilt Studio. Used with permission; all rights reserved.
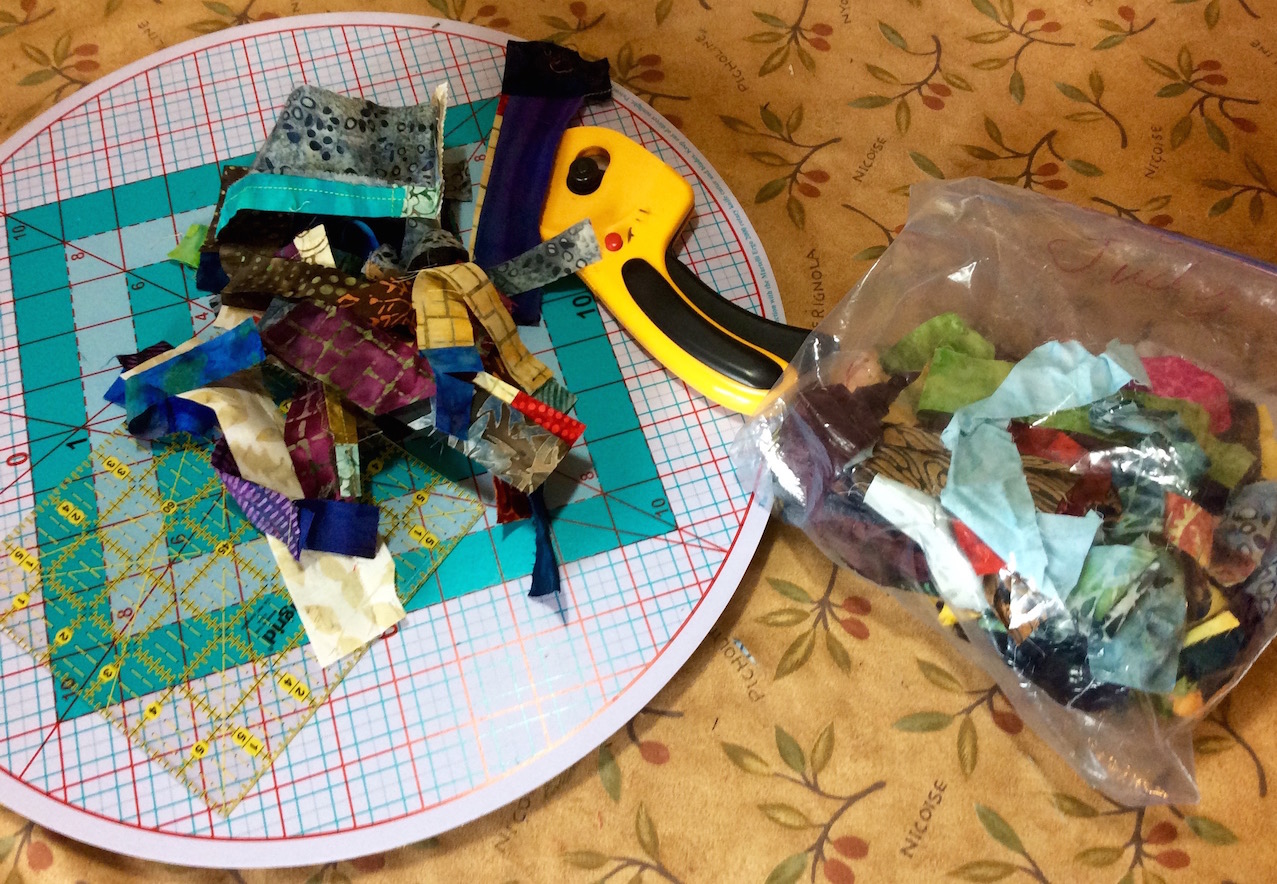
In addition to showing you the scraps I started with, in the previous post I shared the pile of scraps I had left over from trimming the original set of blocks down to a 6″ x 6″ size:
In the evening on Friday and Saturday, I turned the trimmings from those scraps and some of the remaining scraps into 23 more 6″ x 6″ blocks:
(Now why didn’t I make 24 more instead of 23 more? I guess I lost count while piecing!) As you can see, these blocks are somewhat darker and have more piecing. I tried to use all the scraps from the trimmings which had piecing within the scraps.
I now have scraps left over from trimming the latest blocks and the remaining original scraps that started it all…and yes, I am going to make more blocks out of them! (Besides 47, 24 + 23, is an usual odd number of blocks. )
THE EXPERIMENTS
I tried out many of your color suggestions. To save time, I had a “pocket full of scrappy blocks” as I experimented. I never imagined walking around my house with a pocket full of quilt blocks!
Now, try and use your imagination as you look at my experiments. Although I tried to put strong lighting on the design wall, if you have been following my blog for a while, you know I am not the best photographer (if I tried to make photography a career I would be very hungry).
I provide two layouts on each test background fabric: 1) floated and 2) grouped together with a border.
More disclaimers (soon you will be frightened to even scroll down and look…): I did not iron the fabric I used as the test background and I randomly selected the blocks to go onto the test fabric. (If this were a real quilt layout, I would have given more thought to the block placement and order.)
RED – I loved this!
Brown – sort of a “milk chocolate” brown – could take it or leave it…
Dark Brown – I guess the “dark chocolate” brown – I liked it!
Gold – this is a new Moda fabric I picked up – I love it!
Different shades of gray using an ombre fabric – could take it or leave it
Purple – lovely!
White – in concept sounded nice put I do not use large amounts of white in my pieces
Blue-gray – sort of denim like – I liked it! This is one of the Peppered Cottons I have on my Etsy shop
MARIGOLD! Well as close as I could get to marigold – this is a Moda Grunge line fabric and this is my favorite!
Looked for an “acid green” in my stash but this bright lime green was the best I could find. I like it!
THE DECISION
Thank you so much for all the great ideas. I also appreciated all the layout and general design ideas.
My decision is as follows:
Make more blocks, trying to use up nearly all the remaining scraps.
Do not make a quilt with these blocks, instead make a SERIES of artsy table runners for my tierneycreates Etsy shop using various combinationsand layouts of these blocks and my favorites of the backgrounds above (red, marigold, gold, purple, dark brown, and lime/acid green).
Thanks for coming with me on this color and design adventure! I will update you all as I complete the table runners!
POSTSCRIPT
Here is a follow up on the post Mysterious Thrift Store Fabric Find: One of my blogger buddies, Claire @ knitnkwilt.wordpress.com, tapped into her resources and got a translation for the words on the selvage of my mysterious Asian fabric thrift store find:
ll the characters on the left say is ‘manufacturer/maker’. I’m guessing the ones just to the right of Watex are the company’s Japanese name. The handwritten characters say ‘Golden Age’
Thanks so much Claire for helping solve the mystery.
I had more ramblings for this Postscript, but you are likely exhausted after reading this very long post!
This post is a quick follow up to the post Creating… on 07/27/16 where I discussed pulling out from my project pile and completing a set of “art pillow experimentations”.
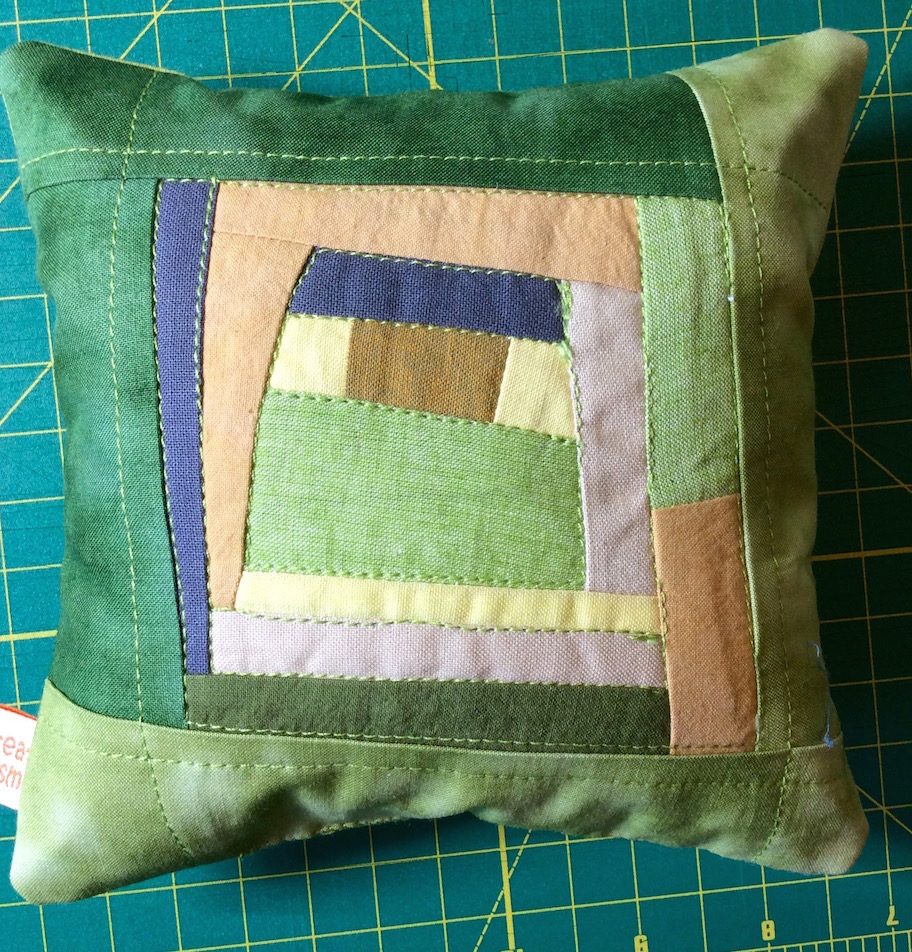
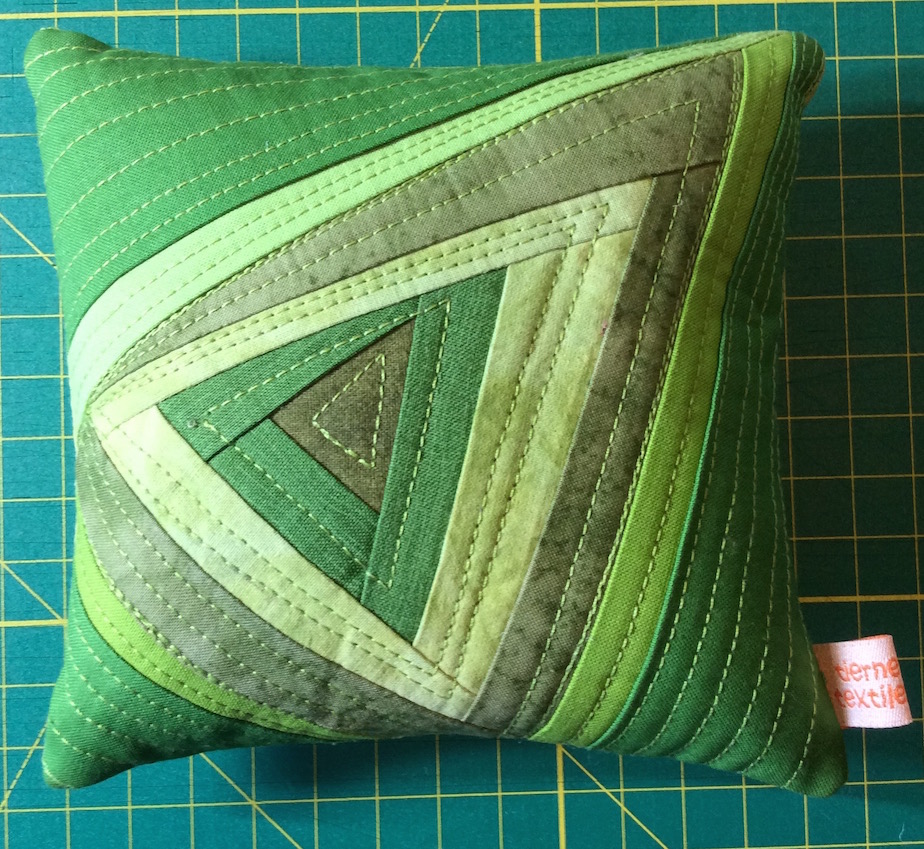
I spent part of this weekend finishing up the rest of the little art pillows (they range from around 6 x 6 inches to 8 x8 inches for the large one).
Here is the full set of the finished pillows (notice my new tierneycreates labels on each pillow):
Here are the backs of the smaller pillows (made with hand dyed fabric found at a thrift store (it was quite the score!)
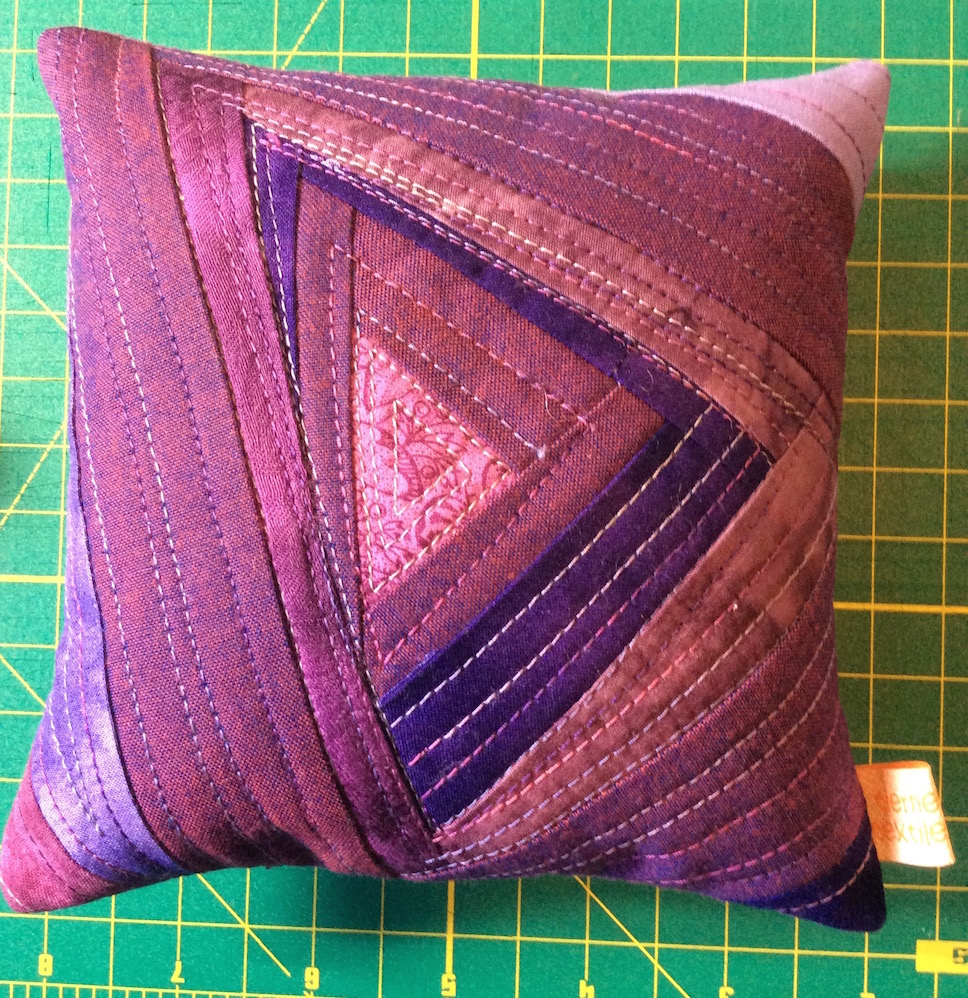
I was going list these three pillows on my tierneycreates Etsy shop as a set but I decided to just list them separately (they do look cute together though):
Here are close ups of some of the pillows:
I am posting this on Sunday night but you will likely read this on Monday, so I wish you all a wonderful week, and talk to you later!
I am inspired by her paintings! I might do a little quilt piece inspired by her work.
In Central Oregon we actually have a famous quilter and a well-known painter collaborating on art projects – Jean Wells Keenan (quilter) and Judy Hoiness (painter).
Continuing my series on What’s on the Design Wall: Projects in Progress…
Terry the Quilting Husband, fresh from his sale of two of his quilts during the 2016 Sisters Outdoor Quilt Show, is eagerly working on a new piece (maybe for the 2017 Sisters Outdoor Quilt Show?).
Terry is using our new temporary “giant design wall” that I discuss in the post Whole House Crafting. Until we get the interior walls of our house repainted (someday) we are just using a package of Warm & Natural batting on one of our hallway walls. A future house project is to build a nice large design wall on this side of the one hallway in our little home.
Terry likes to work from parameters I start him off with and he does not like quilt patterns of any kind. I tried to help him learn how to follow quilt patterns, but he strongly prefers to work intuitively.
I had a stack of 2.5 inch strips from an old kit (for a very ugly table runner) that I was never going to make. After sewing sections of the strips together, he is going to inset denim between them some how. All his concept – I only gave him the strips.
Here is my stash of recycle denim he is looking through to complete his design:
The chair in my studio with my stash of denim scraps
Continuing my series of blog posts of photos and experiences from attending the annual Sisters Outdoor Quilt Show on Saturday July 9, 2016.
Tierney’s SOQS Quilts
Part of the fun (or challenge) of putting quilts in the Sisters Outdoor Quilt Show (SOQS) is finding where they are hung in the show.
In addition to the quilt, Recycled Doors, I had in the Central Oregon SAQA Doors Exhibit (see post 2016 Sisters Outdoor Quilt Show Part II) I had 5 other quilts. I was only able to locate 2 of the 5 other quilts at the show.
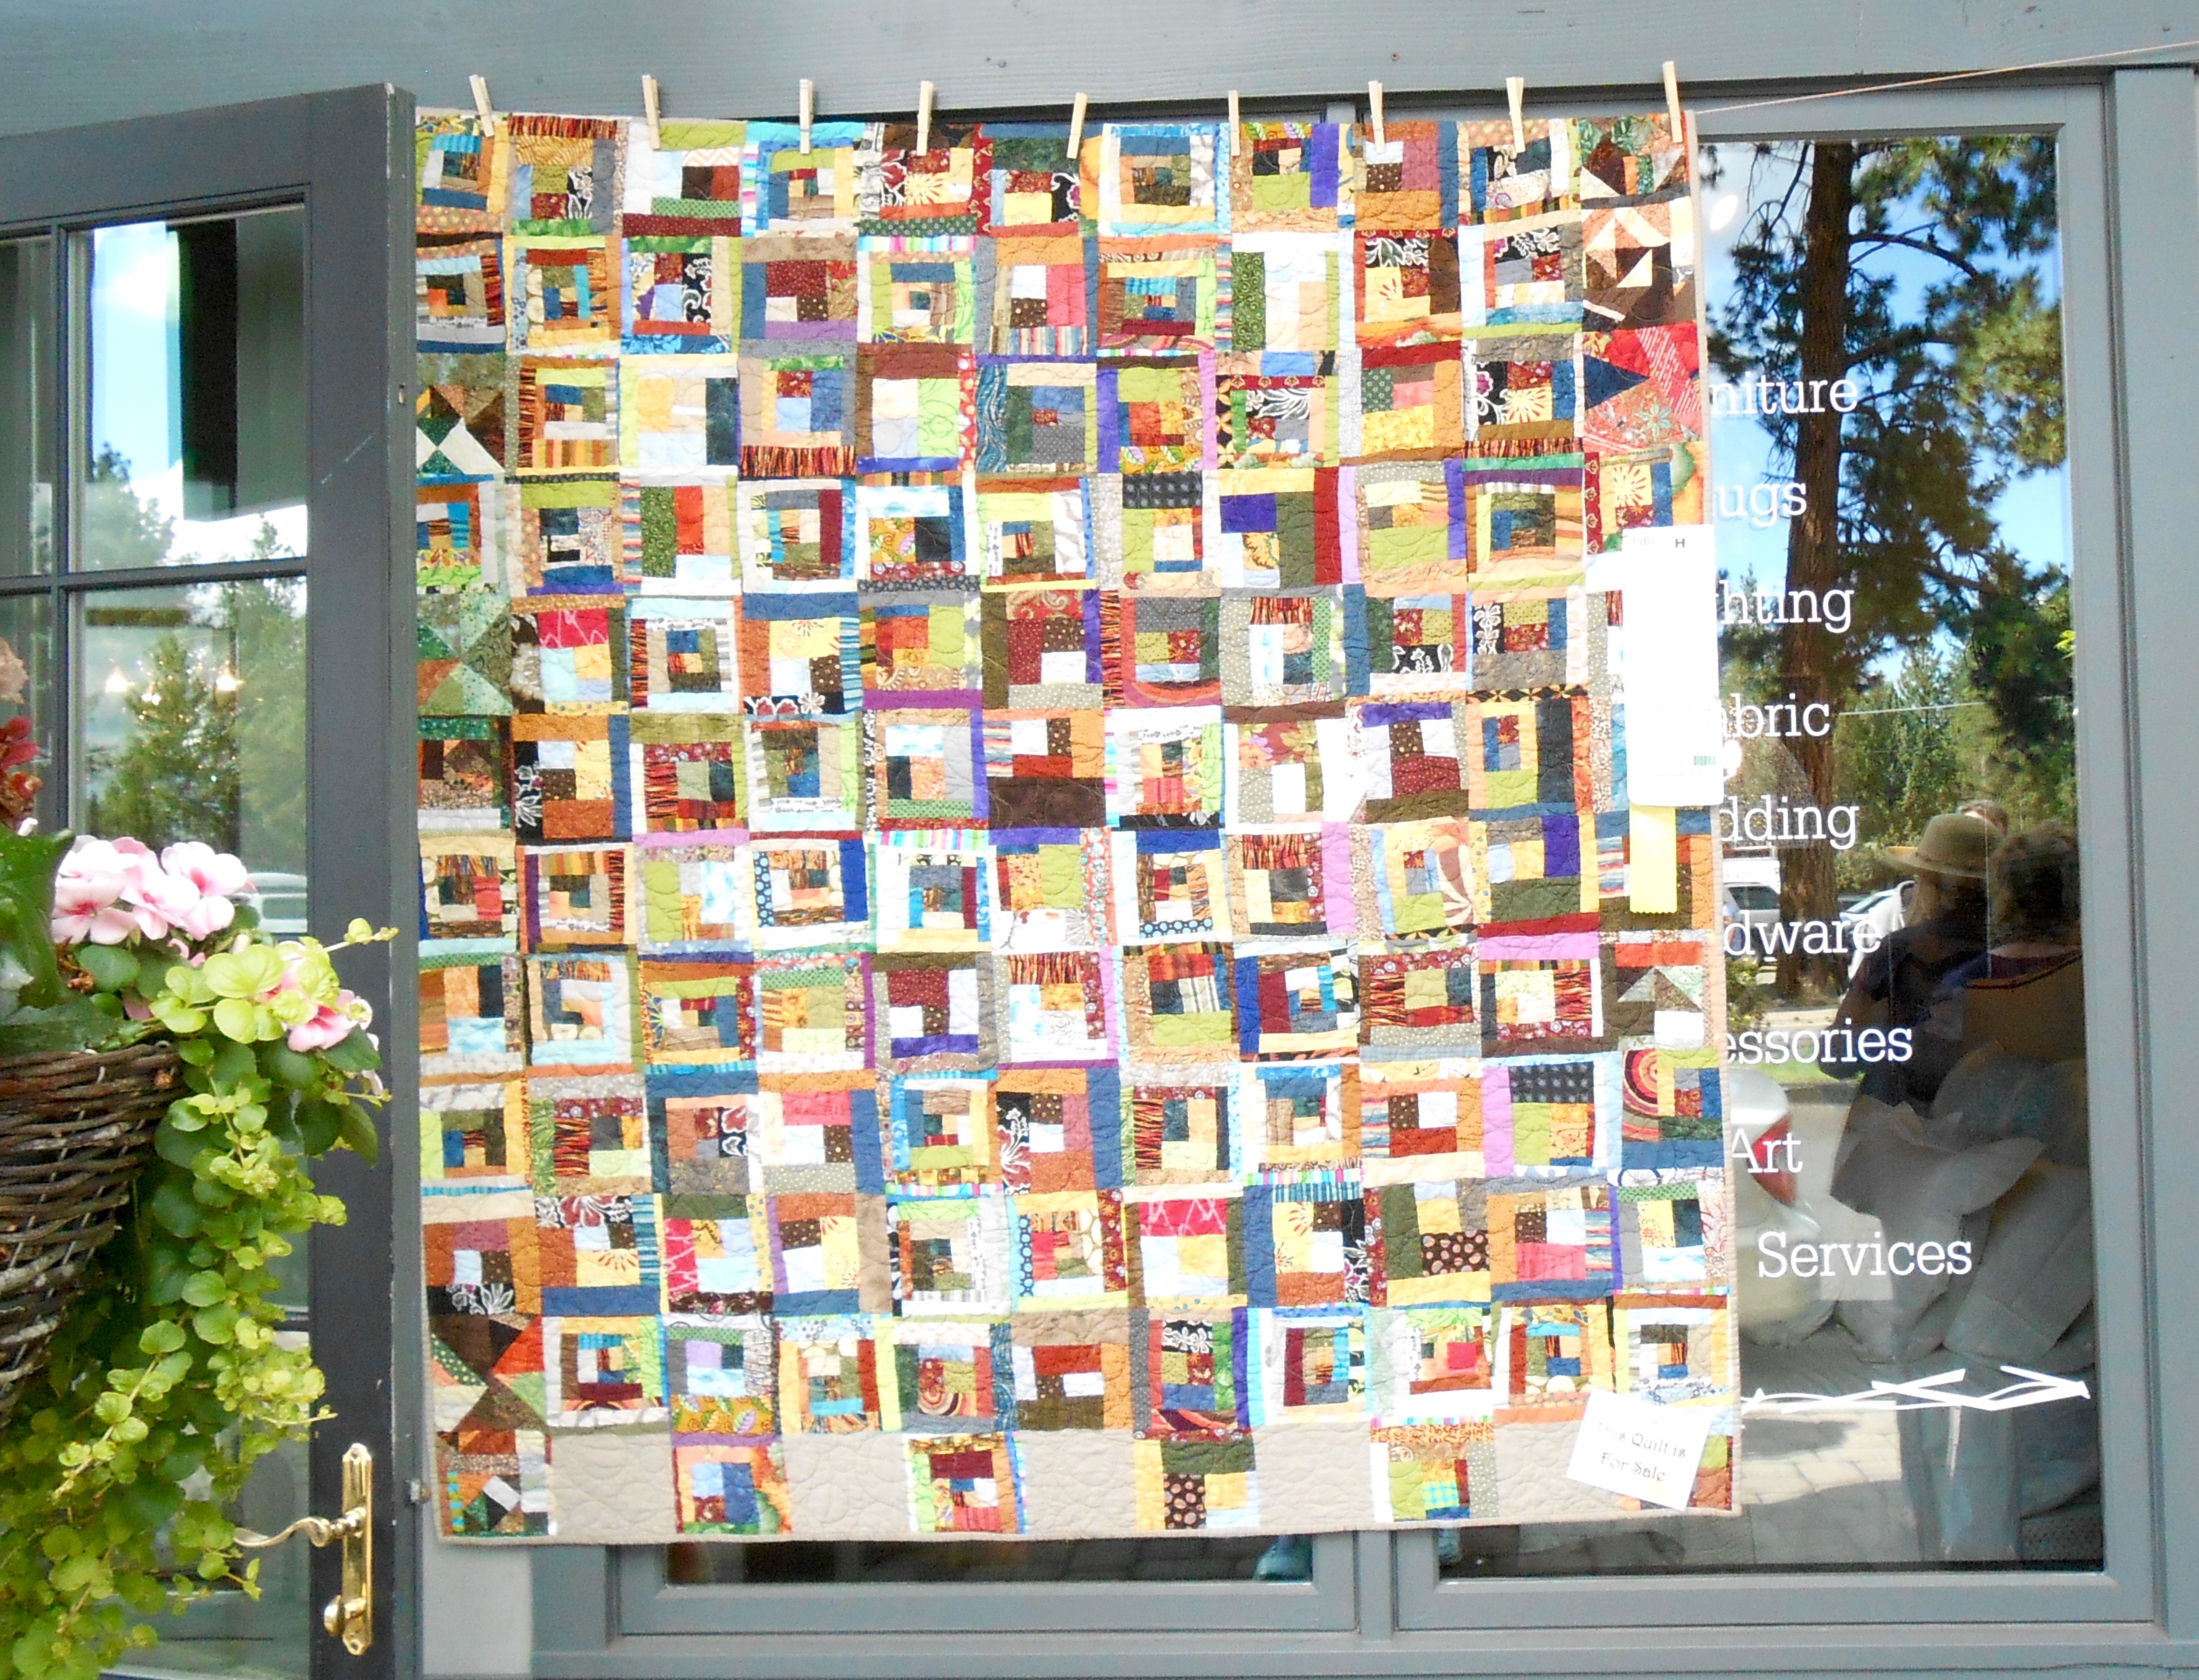
Terry the Quilting Husband and I stumbled upon one of my quilts in an awesome location – in front of The Nest Design Studio. The aesthetic of my quilt hung outside a home design studio was exquisite. I am honored that the SOQS staff selected that location to hang my quilt.
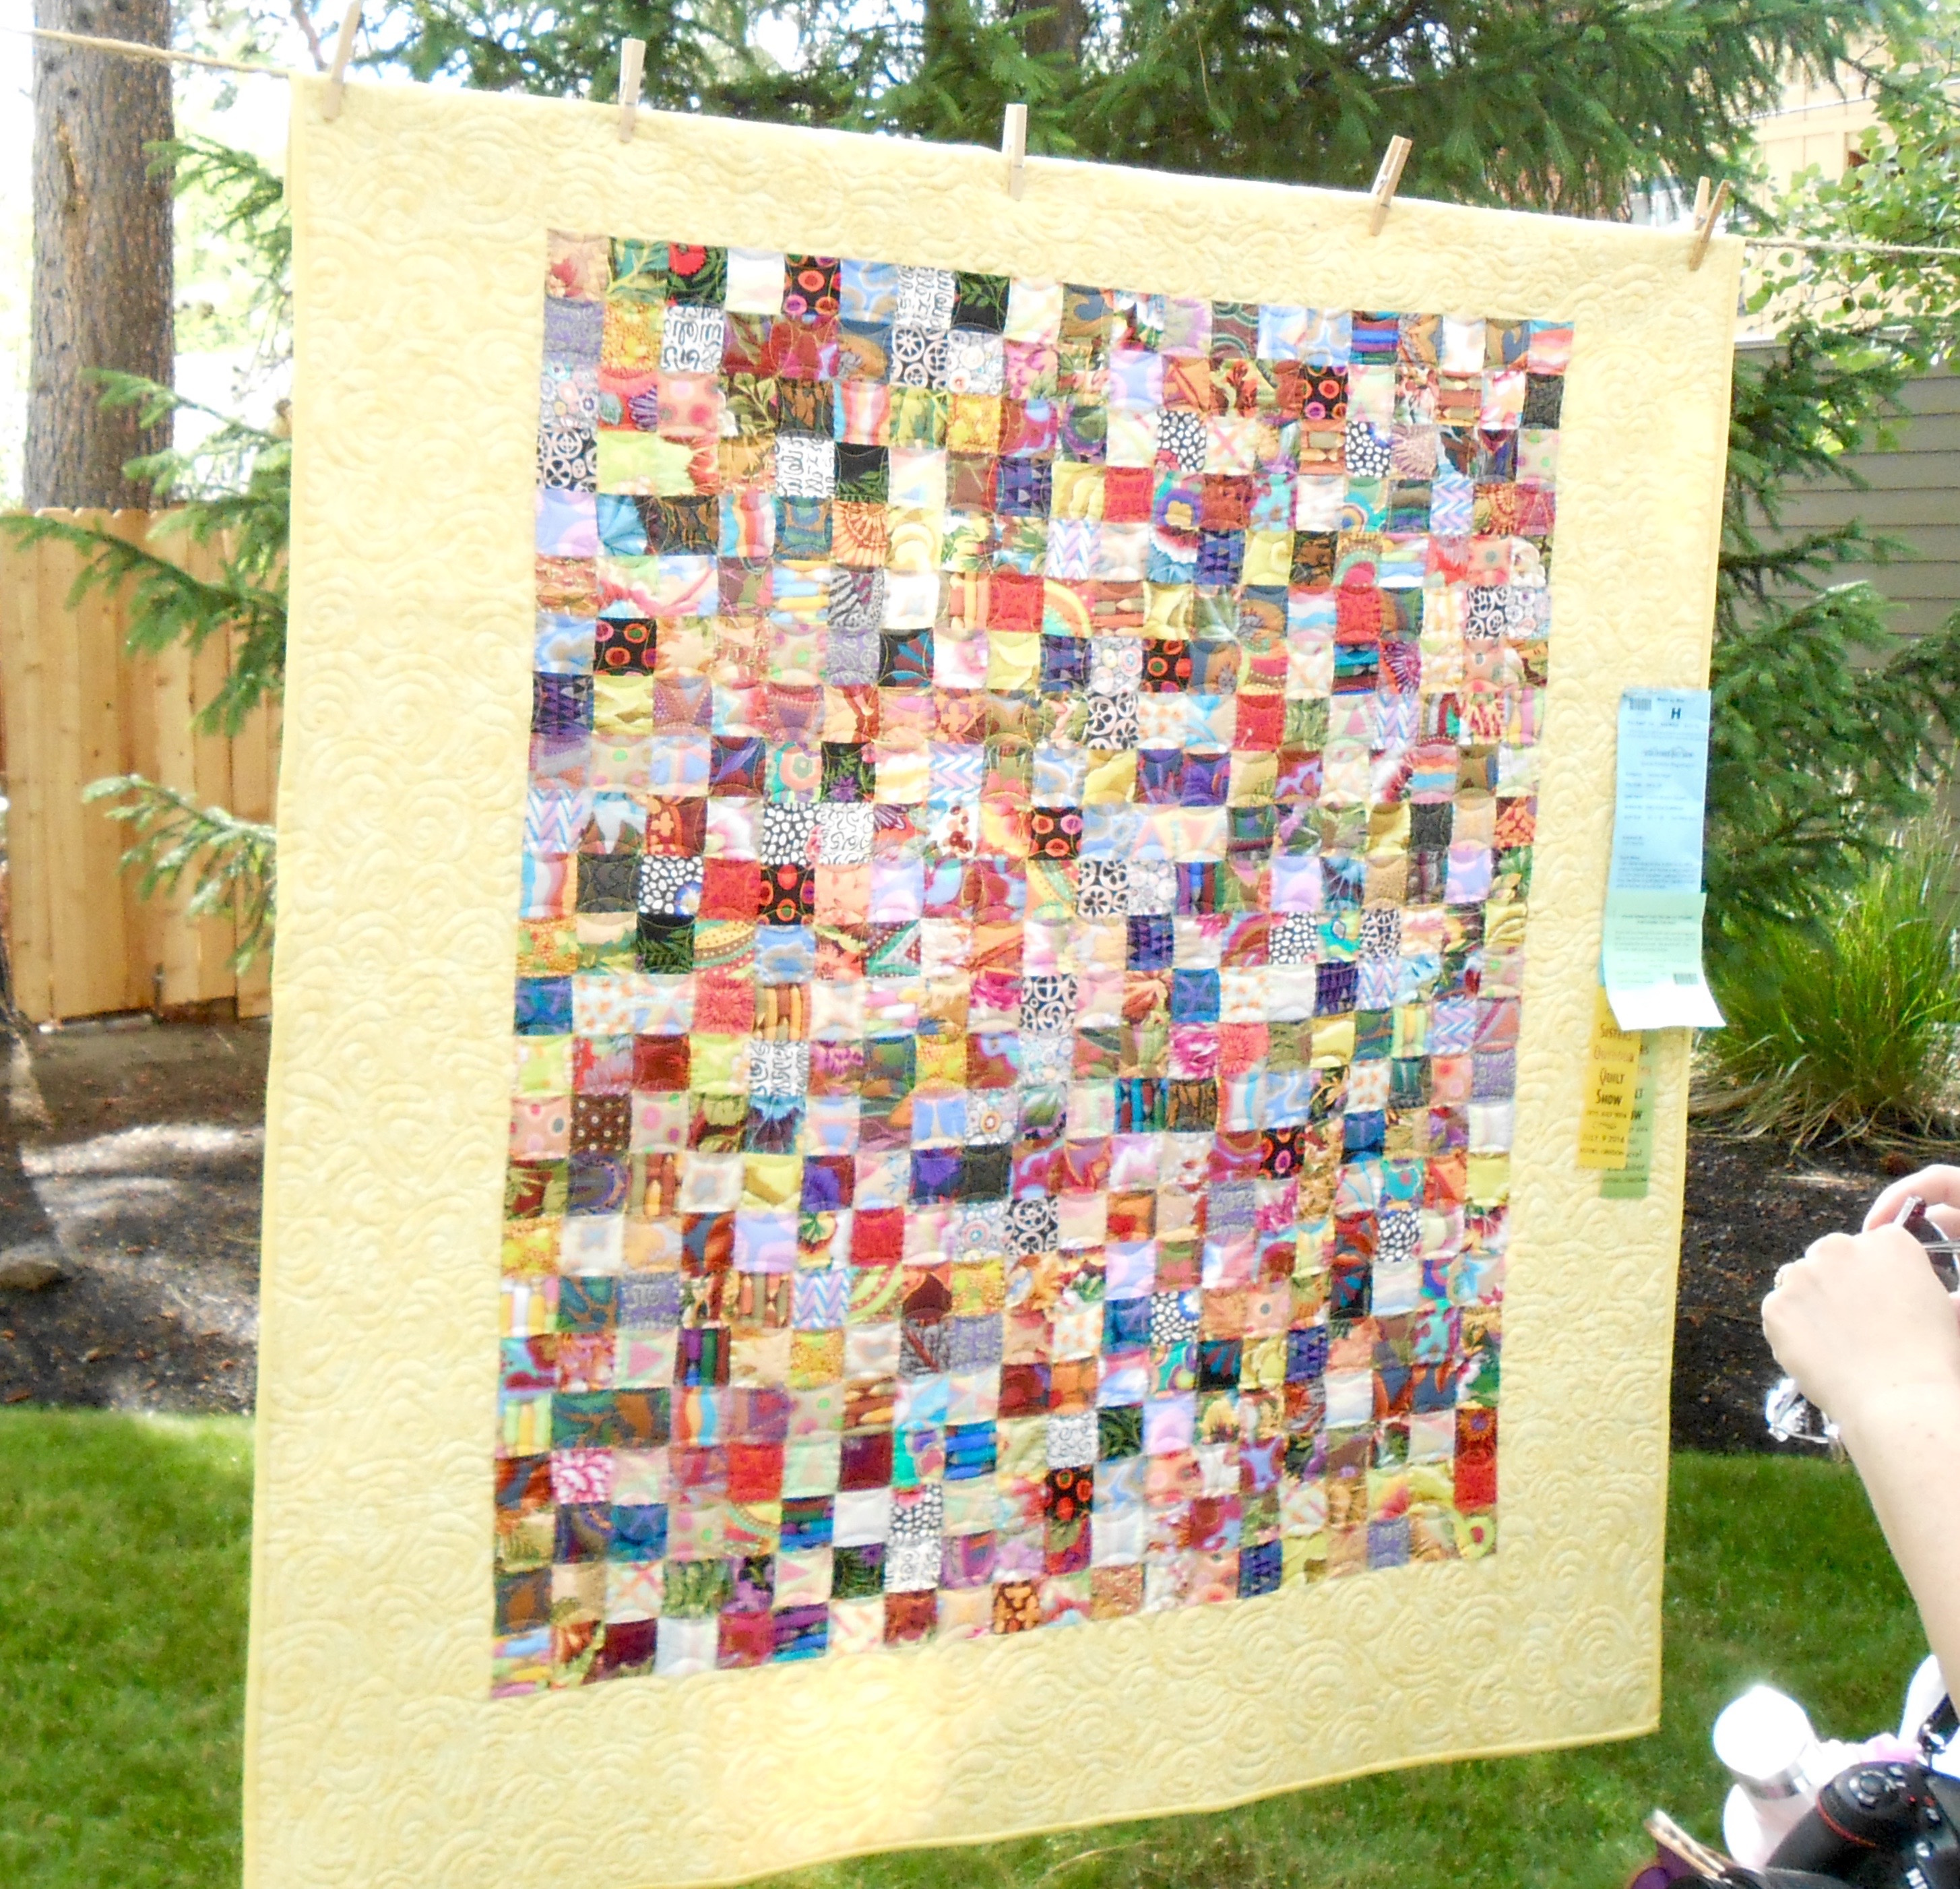
Modern Bedtime – designed and pieced by Tierney Davis Hogan, quilted by Betty Anne Guadalupe
I discovered a crowd of people looking at the quilt and I could not resist: I introduced myself as as “the artist”, answered questions and posed for photos with the quilt.
I also loitered around the quilt for about 5 minutes to introduce myself again to the next group of people admiring the quilt. I got to chat with several lovely individuals, posed for a couple more photos with the quilt, and got some new tierneycreates blog readers!
Alas, the quilt did not sell. I might have priced it too high and it was not bed size as I had originally intended (for that story, please see the 5/1/16 post The Downsized Quilt). However, I am happy to have it back at home. It now rests on the back of the chair in my cozy reading nook.
Terry the Quilting Husband’s SOQS Quilts
The 2016 SOQS was Terry’s first time showing his quilts. He was part of the Special Exhibit: Made by Men. Here is a link to the Bend Bulletin article on the Made by Men Exhibit, which featured 27 quilts made by male quilters from 4 different states:
Terry tried to play it off but I could tell he was pretty proud having his five (5) quilts hanging in the special exhibit.
I dragged him over to several groups of people who were admiring his quilts and introduced him as “the quilter”. It was very endearing to listen to him answer questions on how a quilt was made and his design process!
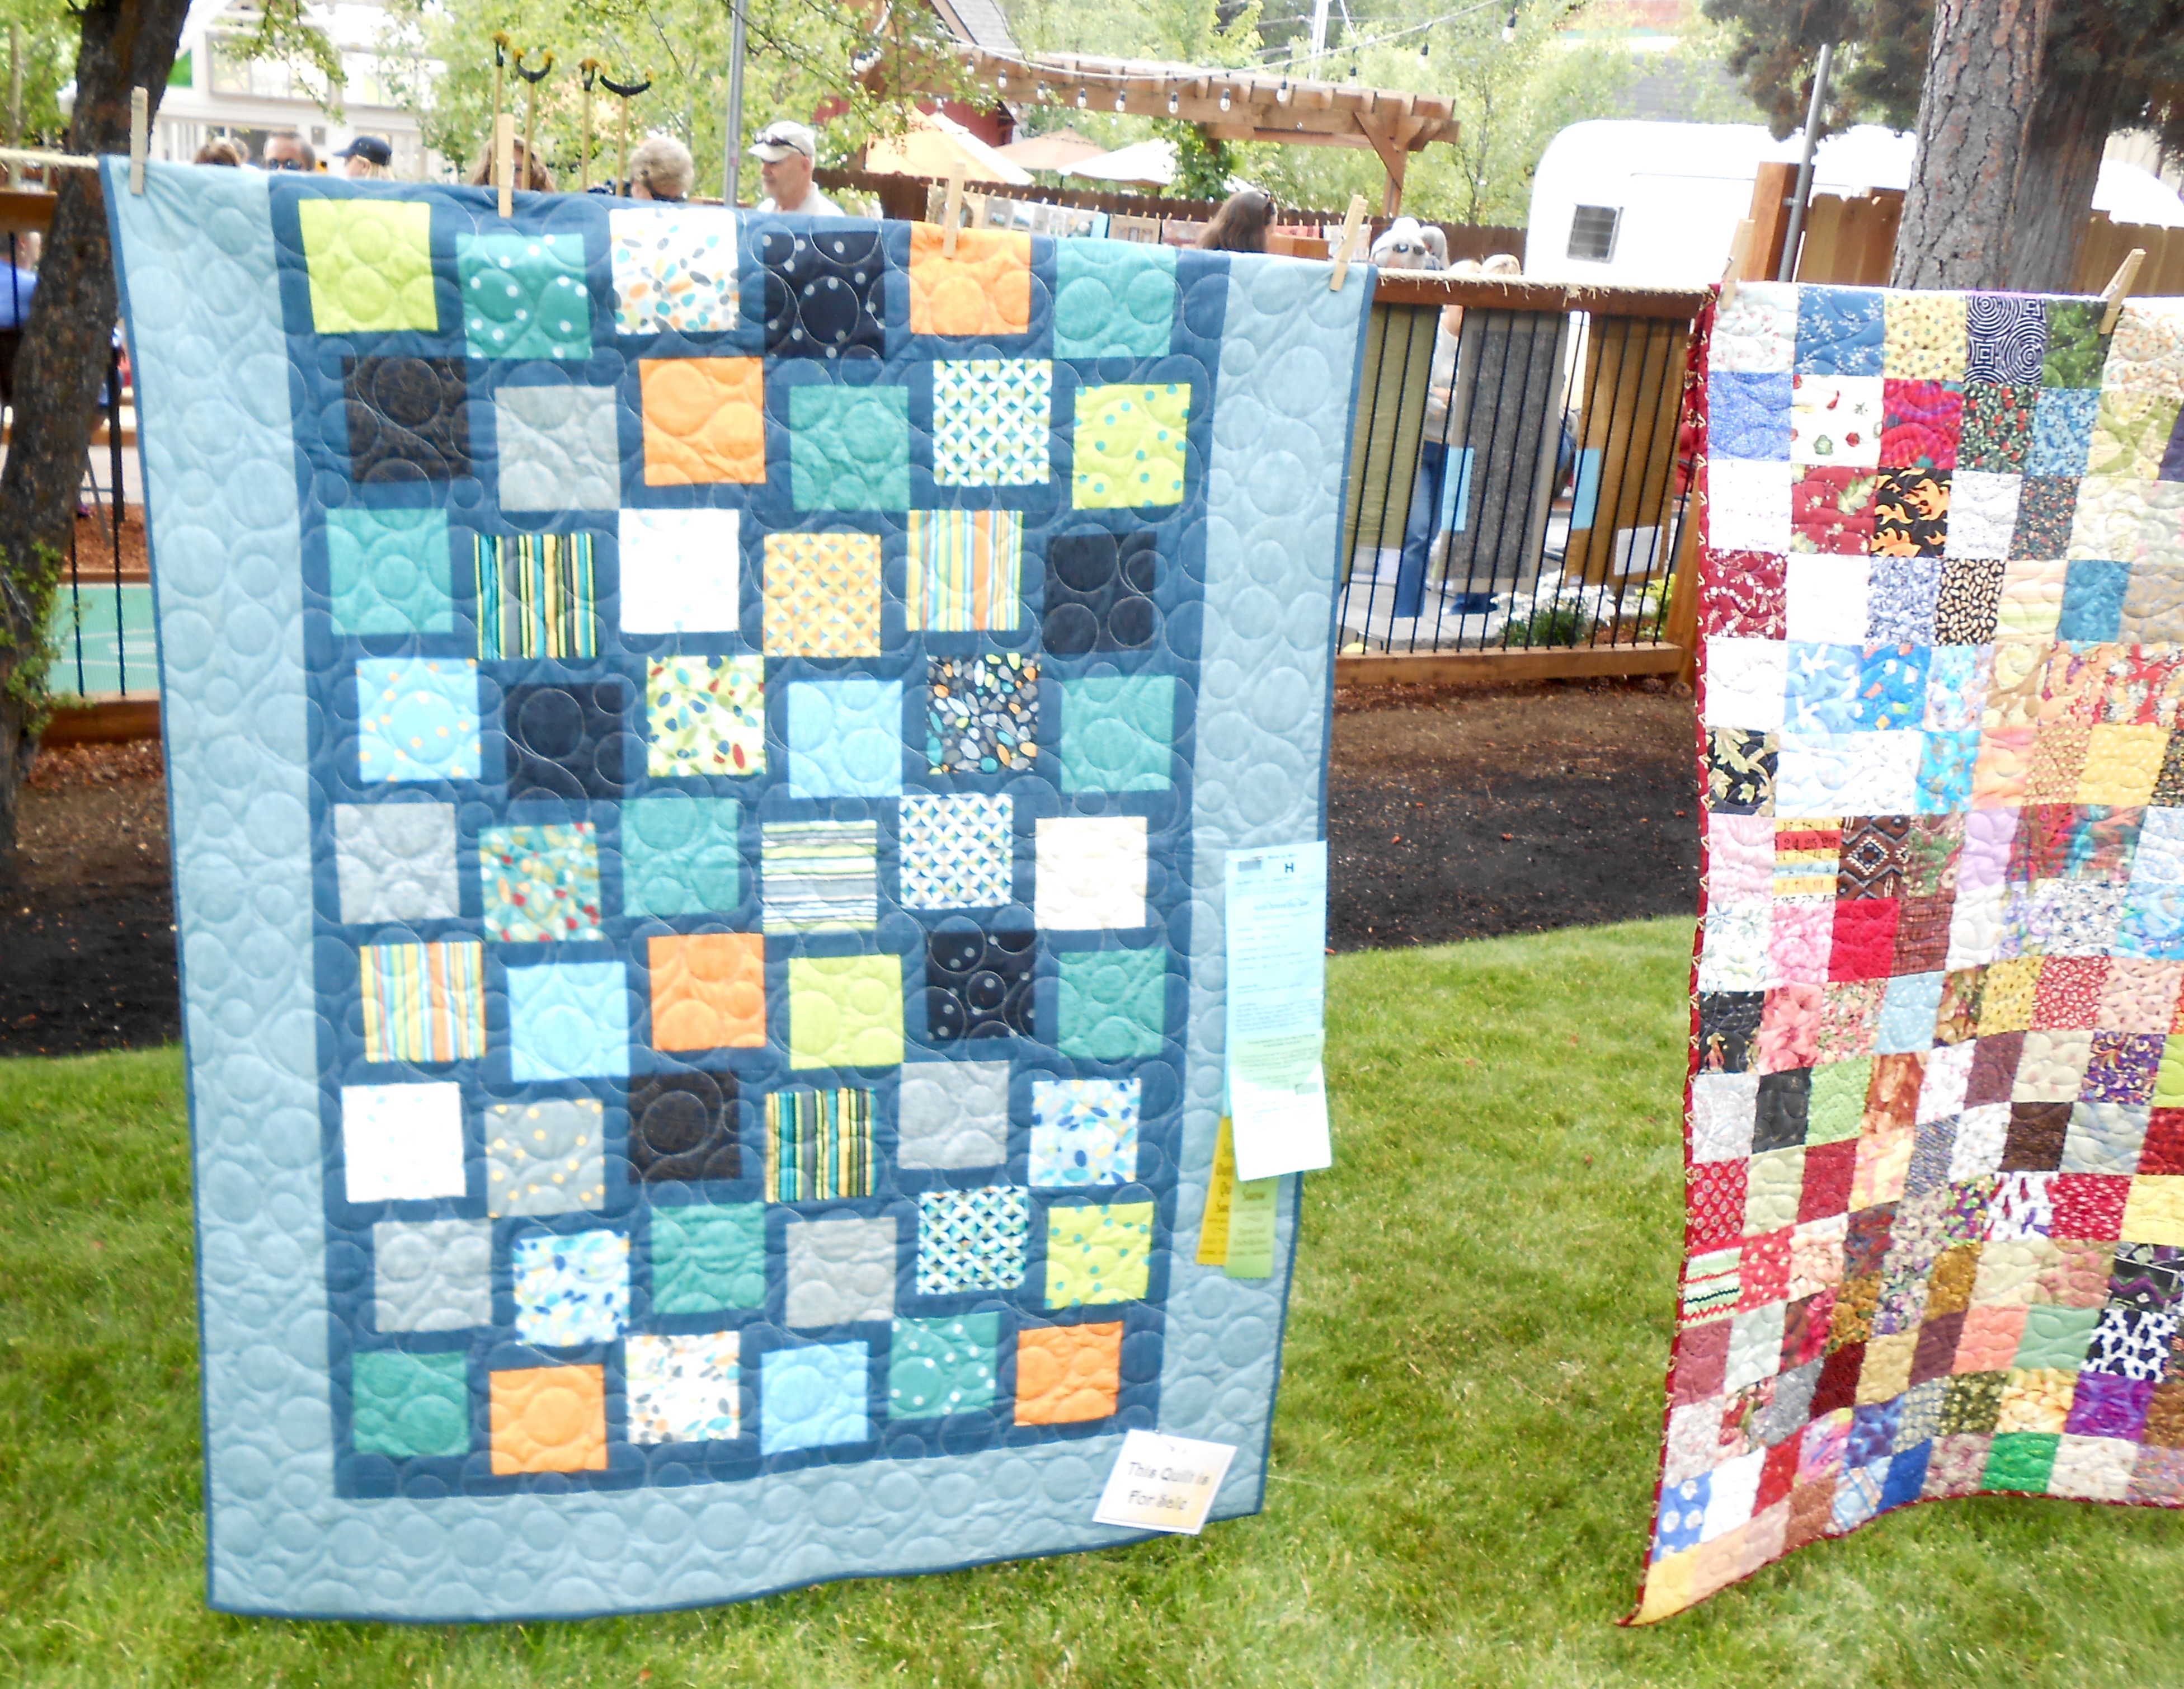
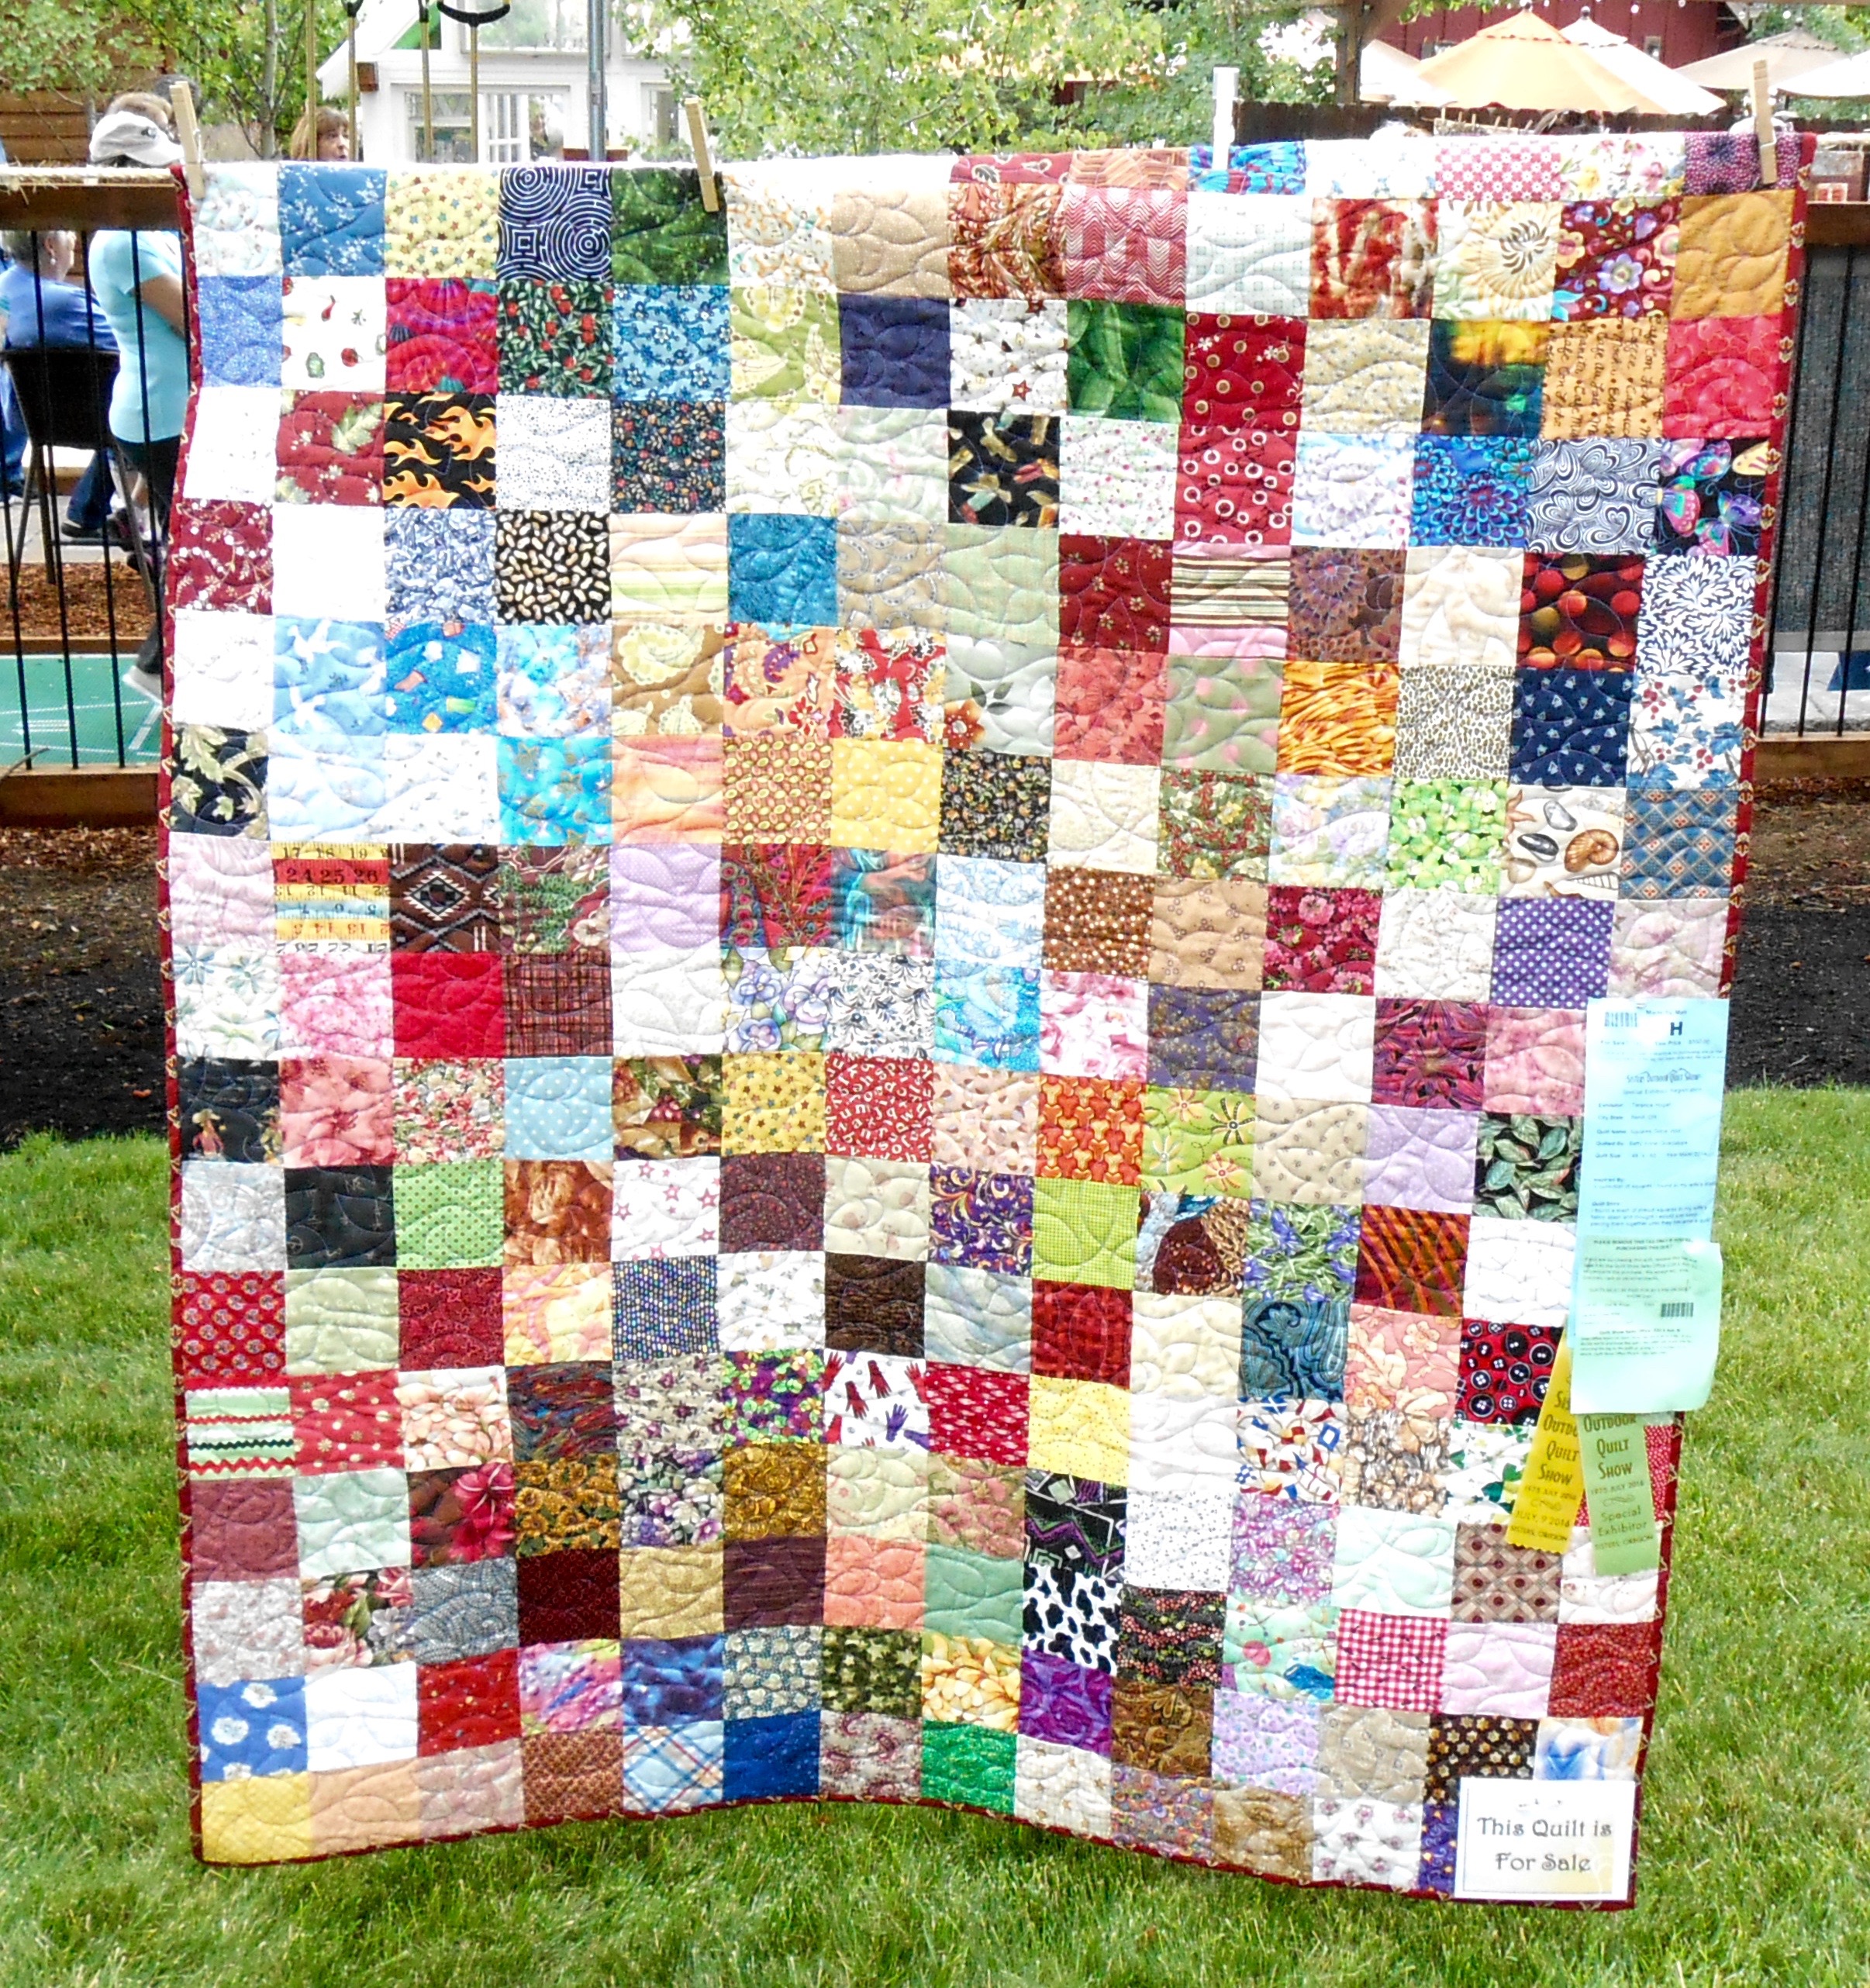
Colorful Modern Squares – designed & pieced by Terry Hogan, quilted by Betty Anne Guadalupe
Charming You – pieced by Terry Hogan, quilted by Betty Anne Guadalupe
Cozy Flannel Shirts – designed and pieced by Terry Hogan, quilted by Betty Anne Guadalupe
Squares Gone Wild – designed and pieced by Terry Hogan, quilted by Betty Anne Guadalupe
Cozy Flannel Snuggle – designed and pieced by Terry Hogan, quilted by Betty Anne Guadalupe
Two (2) of his quilts sold – Cozy Flannel Shirts and Charming You. He already has two quilts in queue for the 2017 Sisters Outdoor Quilt Show!
POSTSCRIPT
I continue to listen to and enjoy the excellent audiobook – Grit: The Power of Passion and Perseveranceby Angela Duckworth (2016), read by the author, first mentioned in my 07/02/16 post Grit.
The author discusses the famous “Bricklayer Parable” in regards to “job” vs. “career” vs. “calling“. Here is a paraphrasing of that parable:
A man comes upon three men laying bricks for a church being built.
He asks the first man: ‘What are you doing?’ The first man replies: ‘I am taking bricks and piling them one on top of the other and putting cement in between them.’
He asks the second man: ‘What are you doing?’ The second man replies: ‘I’m building a wall that will form the outside structure of a large building.’
Finally he asked the third man: ‘What are you doing?’ The third man replies: ‘I am building a house of God.’
All three men are performing the same job but they all have different perspectives on that task – “a job” vs. “a career” vs. “a calling”.
So far (and I am over 1/2 way through) this is, in my opinion, a truly inspirational five (5) star audiobook.
Once upon a time there was a quilter who was also married to a quilter. The quilter and her husband-the-quilter decided to each put five (5) quilts into the 2016 Sisters Outdoor Quilt Show, for a total of ten (10) quilts. They finished their 10 quilts and had them all back from the magical long-arm quilter by April 2016. The quilts needed to be labeled and ready for the show by June 24, 2016.
The quilter and her husband knew they had plenty of time to get those labels on the quilts…
I think this tale will have a happy ending, but right now I am in the “moral lesson” part of the tale. Like in the “Ant and the Grasshopper ” from Aesop’s Fables (the ant spent the summer planning for winter and the grasshopper spent the summer goofing off and we know how that ended…).
We have a stack of 10 quilts needing labels (see photo above!) and Terry the Quilting Husband does not hand sew (he actually hates needles and has no desire to hand stitch anything). So I need to get all the labels on by 06/23/16 to deliver the quilts on 06/24/16 to the Sisters Outdoor Quilt Show Office.
“P” is not just for Procrastination. “P” is for PANIC.
There is song from the 1980s by a British heavy metal rock band Judas Priest titled “Breaking the Law” where in the song, they repeatedly sing the chorus: “Breaking the law, breaking the law, breaking the law, breaking the law.”
When I lived in Seattle a friend and I would enjoy singing choruses of this very campy 1980s song under our breath or at the top of lungs when we were not following standard rules of behavior or etiquette, etc.
This song was played my head when I made the decision to do a traditional quilt binding instead of a “facing”on the back of my art quilt Recycled Doors for the upcoming Central Oregon SAQA (Studio Art Quilt Art Quilt Associates) exhibit at the 2016 Sisters Outdoor Quilt Show. Please see my post Update: Recycled Door for more information on this piece.
(If you are unfamiliar with “facing a quilt”, here is a link to the Quilting Daily’s page on Finishing a Quilt with a Facing. Facing creates clean edges to the quilt with no edge binding.)
Facing the back of an art quilt to create a smooth edge appears to be the expected and acceptable standard and is what I have always done in the past on any quilt I want to be classified as an “art quilt”.
I feel feeling very rebellious after talking to my friend Wendy who suggested, as an option to finishing the quilt, a binding to bring out the orange in the center of the piece. I was reading to do some “law breaking” and did a traditional binding instead of facing the quilt.
Every act of rebellion expresses a nostalgia for innocence and an appeal to the essence of being. – Albert Camus
Postscript
You may notice my new blog template – quite different from the previous one. I really enjoyed the Chalkboard Template, but after reading that article on making blog pages easy for all readers to read and the feedback you all provided, I am going to try this new format for a while.
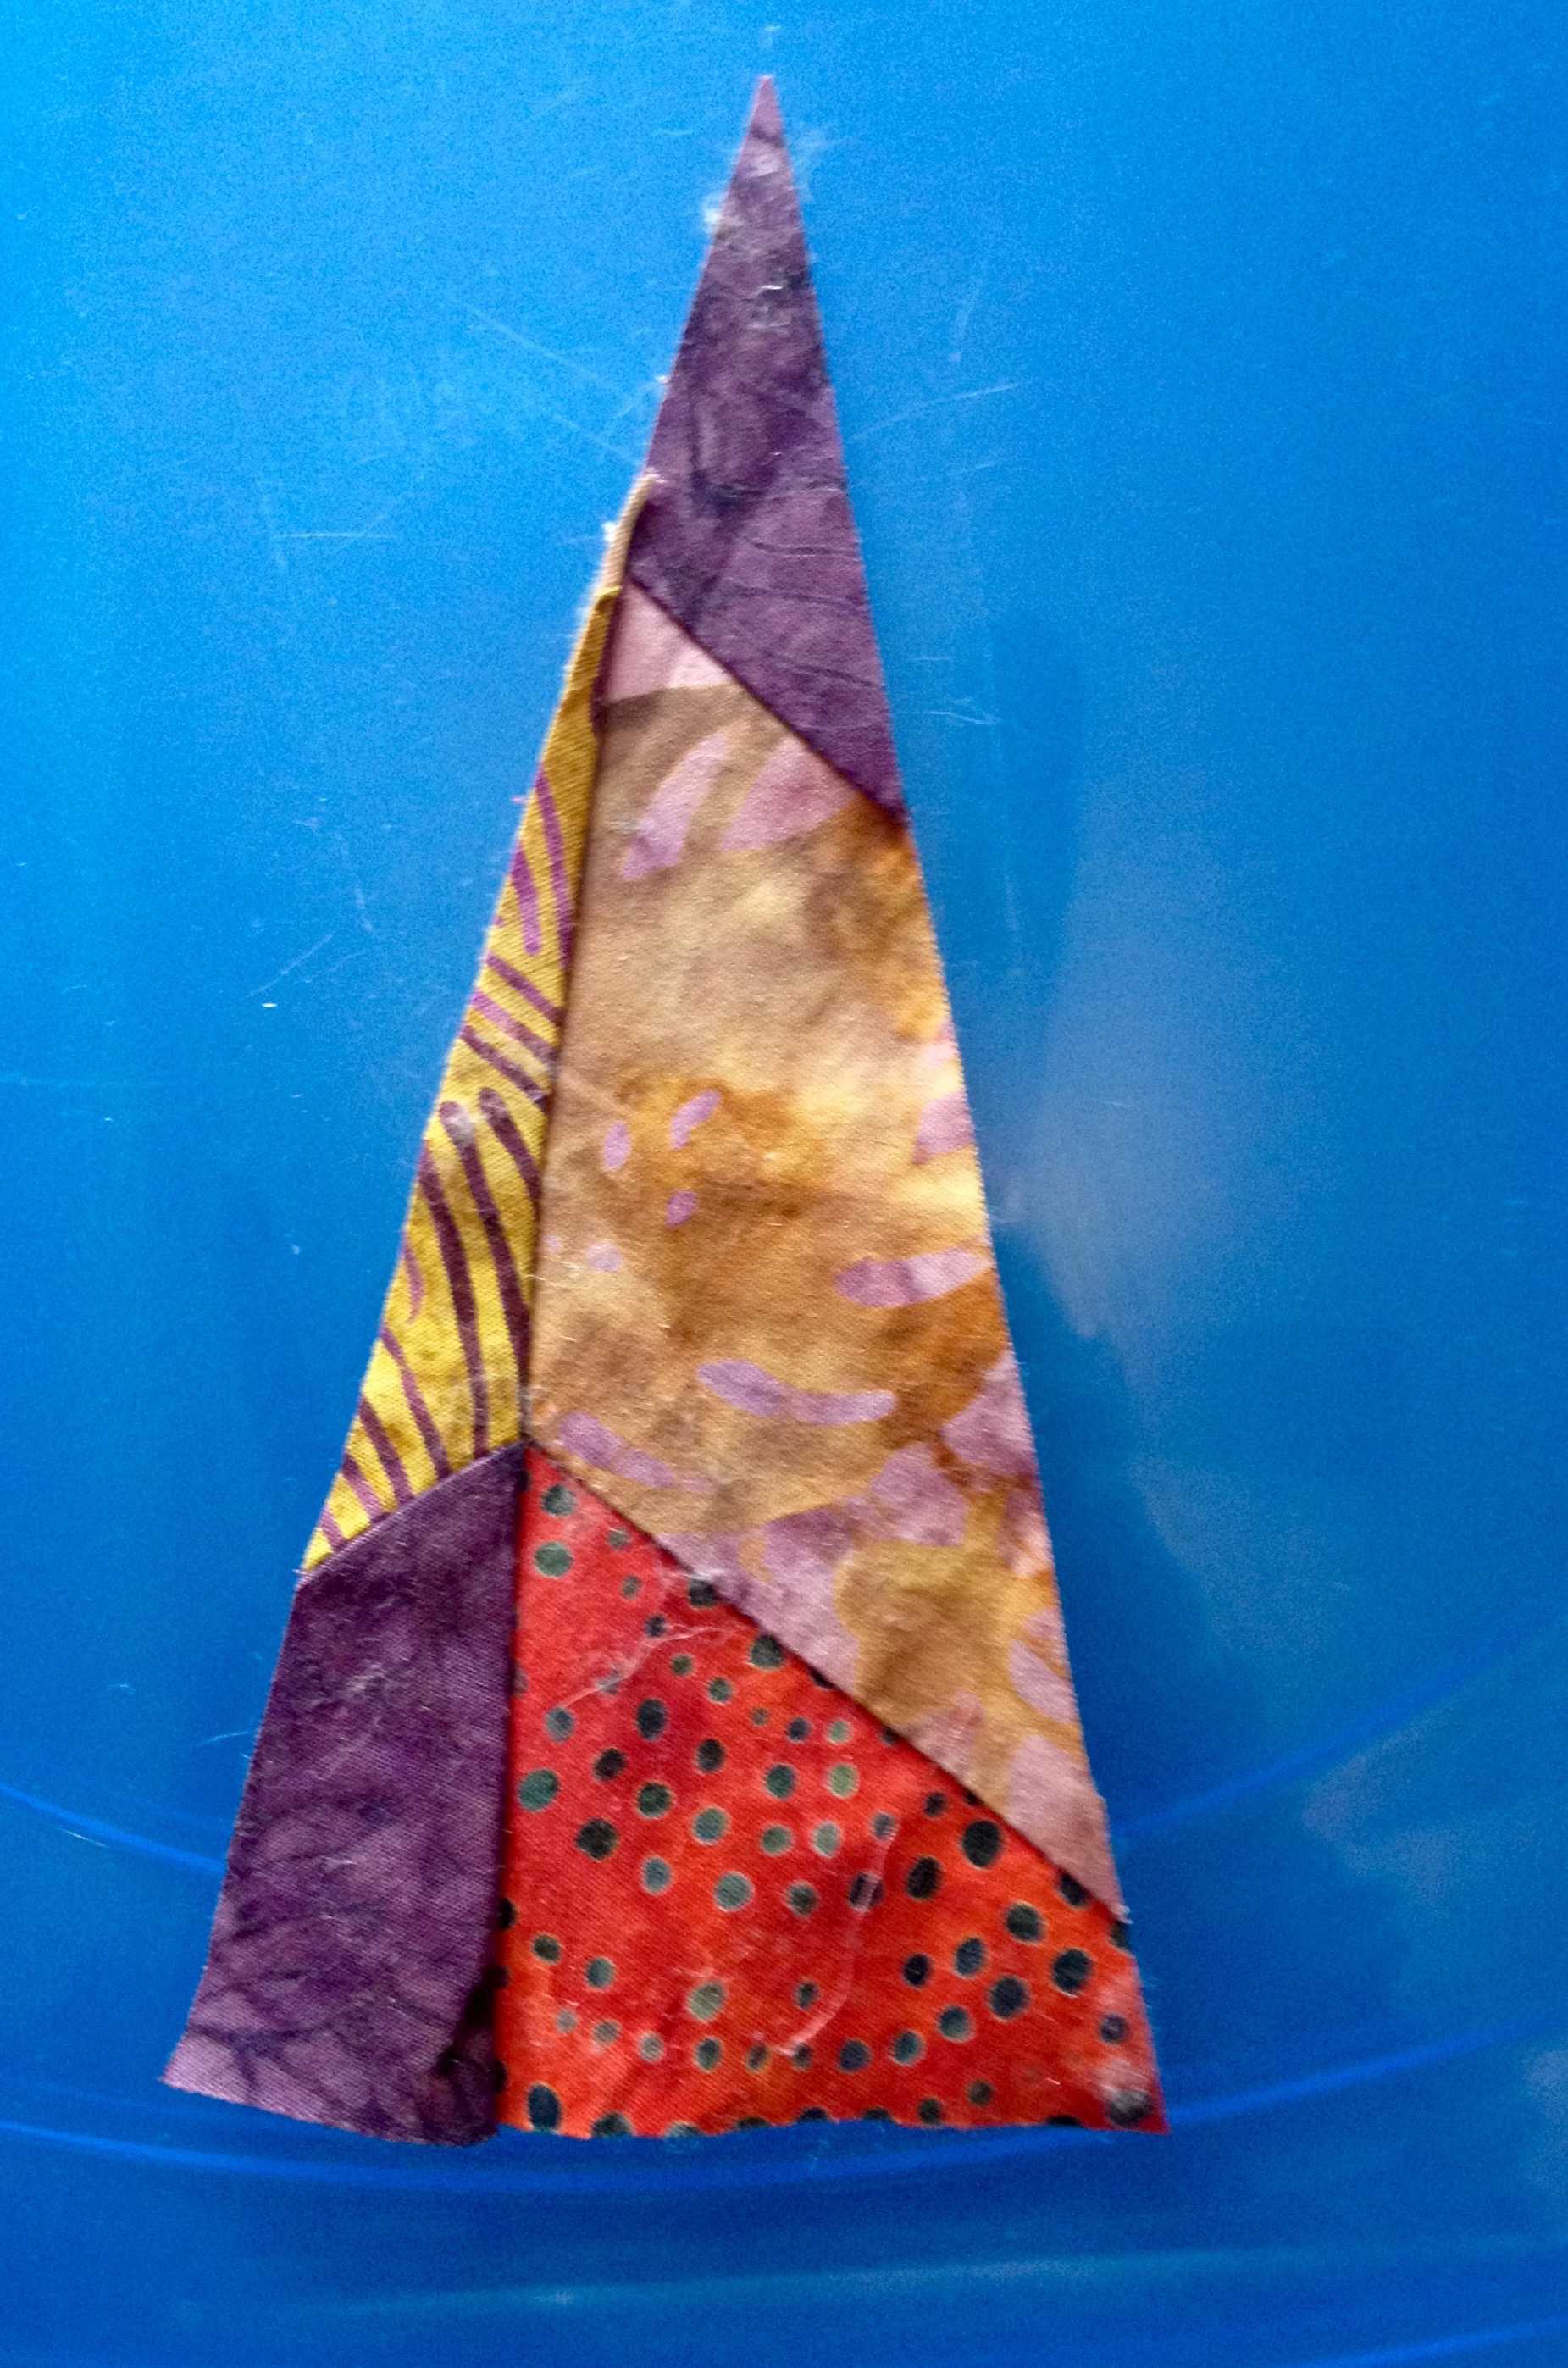
Have you ever just randomly cracked yourself up laughing? Maybe it is a joke no one would understand but you?
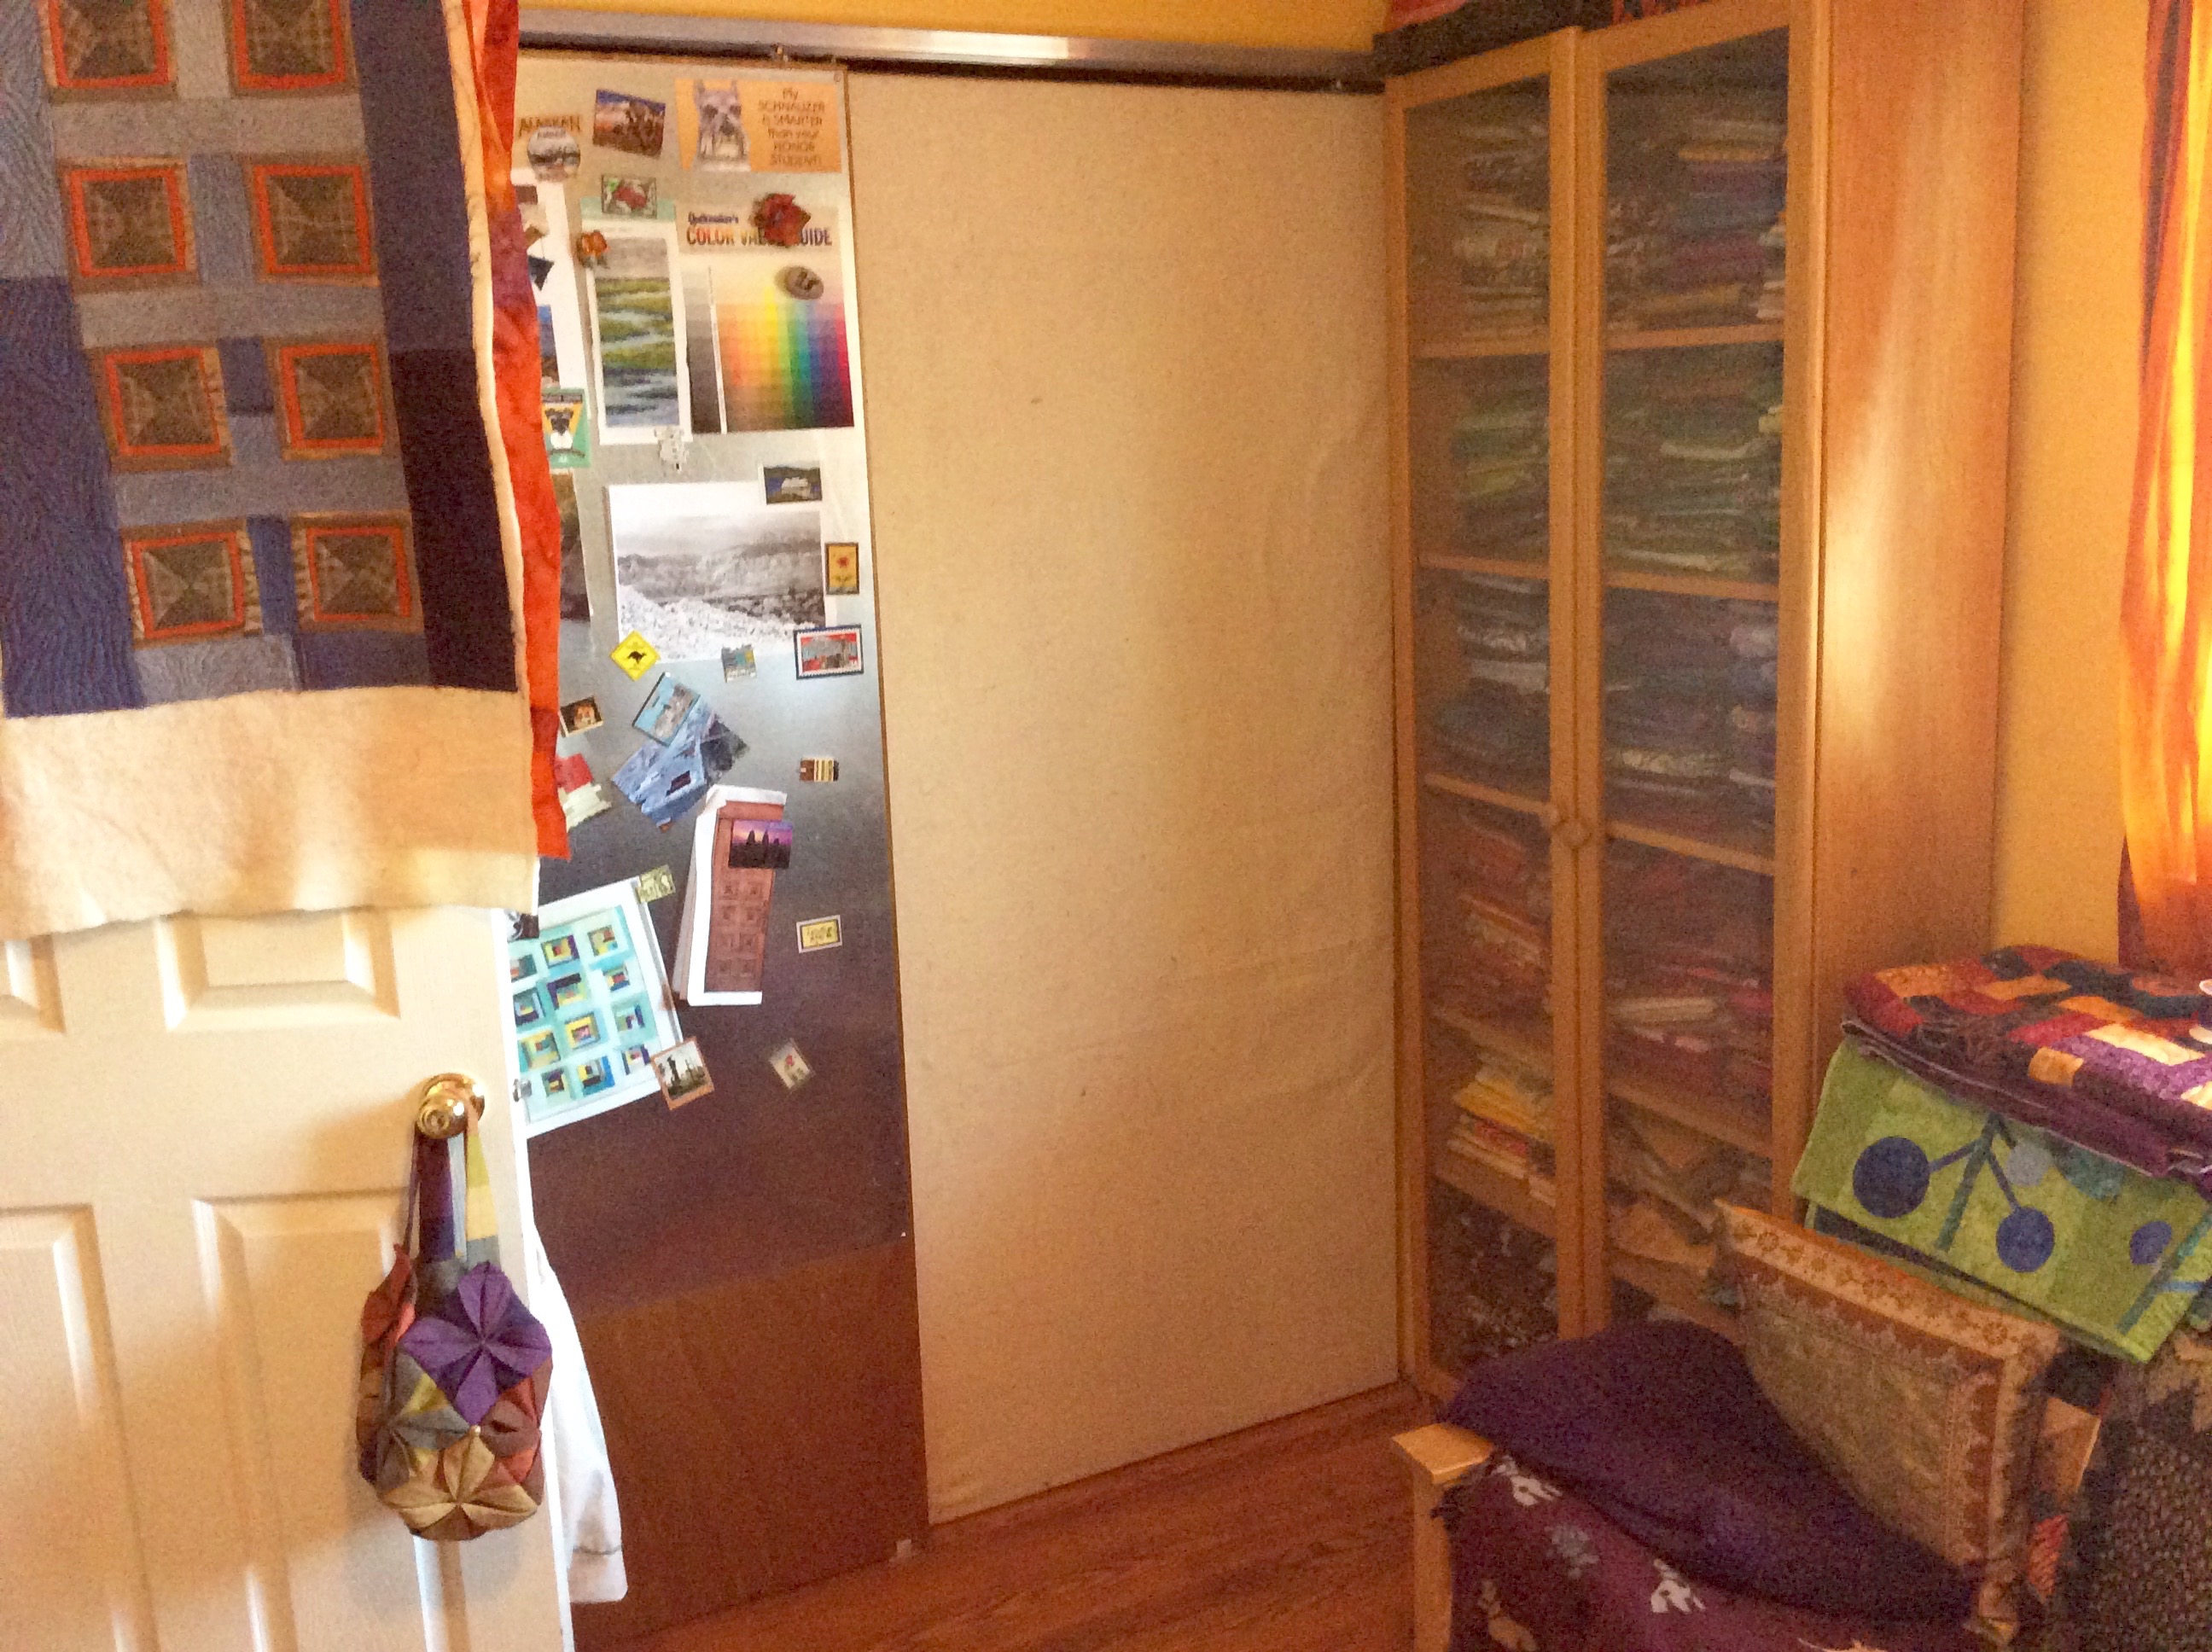
Well I was cleaning up my quilt studio and rearranging it to make it more cozy and less cluttered feeling, and I found this in a corner under a table:
What is this? Well if you refer to my post, We Will Not Be Discarded’s Debut, you will see it is a leftover scrap from another quilters project (their discard, headed for the trash) that I trimmed into a triangle. It’s other “friends” became the piece We Will Not Be Discarded! (that I sold at the Twigs Gallery Show in March – April 2016).
I began laughing at this sly piece hidden away that did not make it into the art quilt. I now have to make a tiny art quilt called – I Will Not Be Discarded!– or maybe just a potholder with it. I cannot bring myself to throw it away.
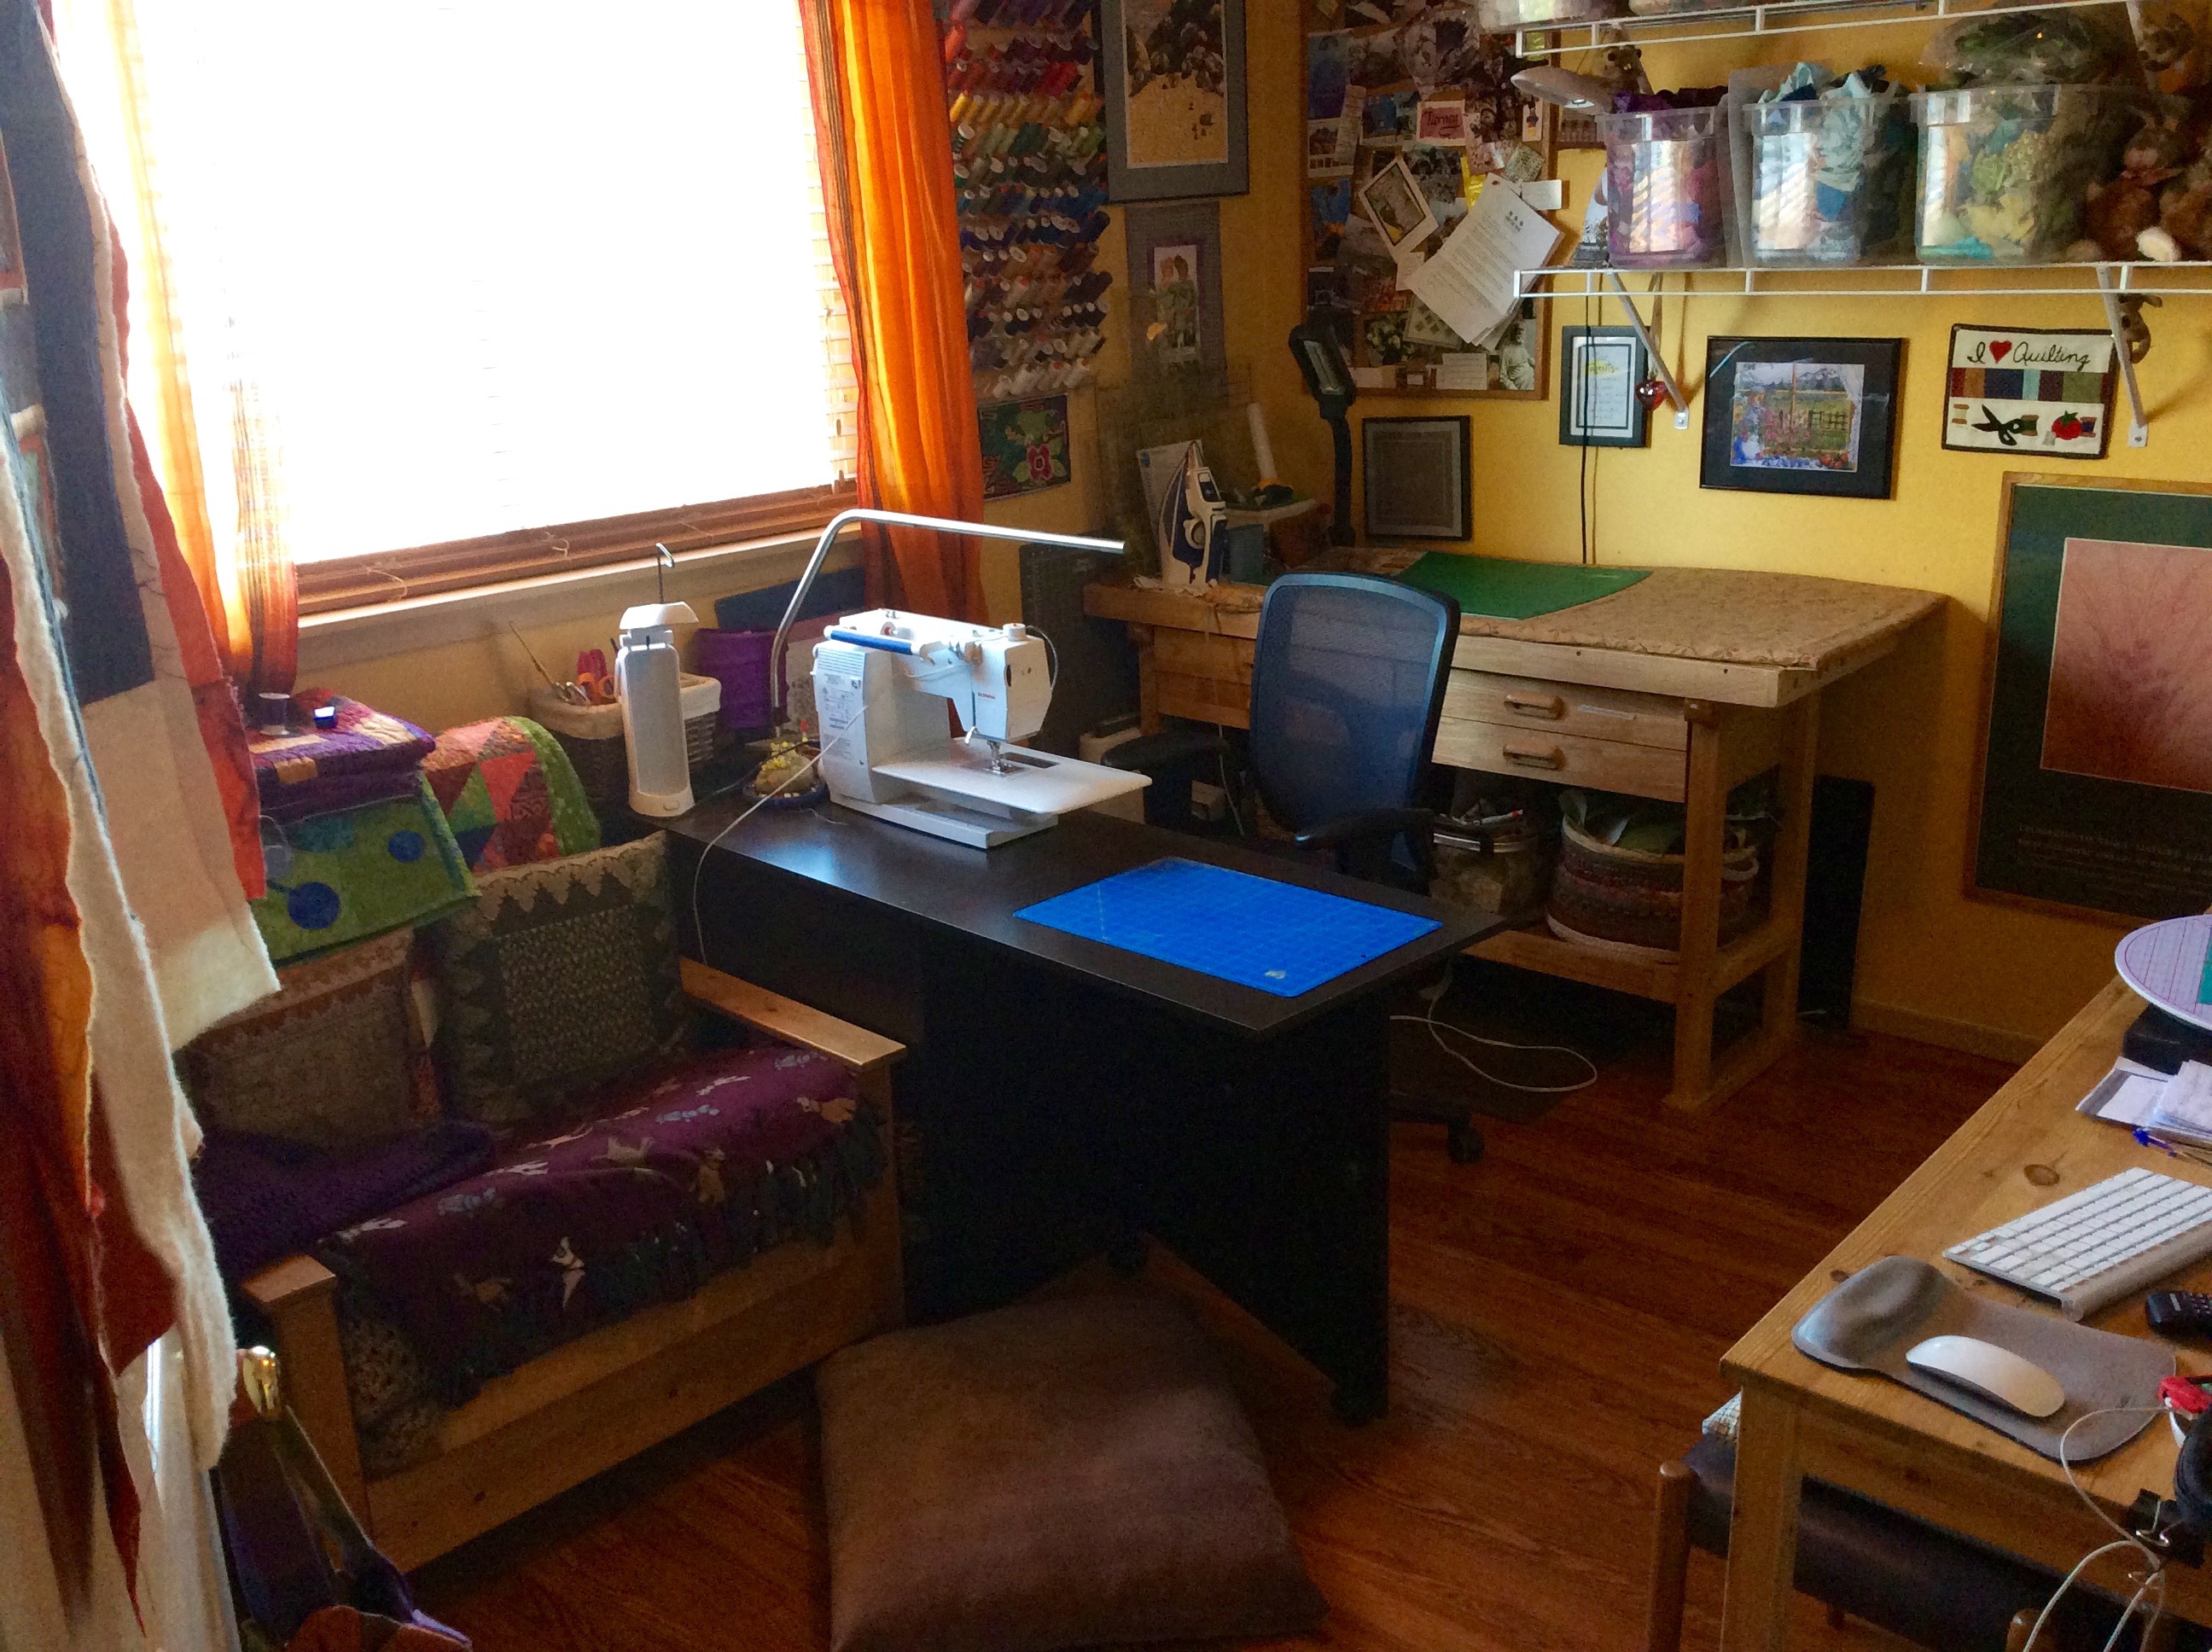
Studio Refresh
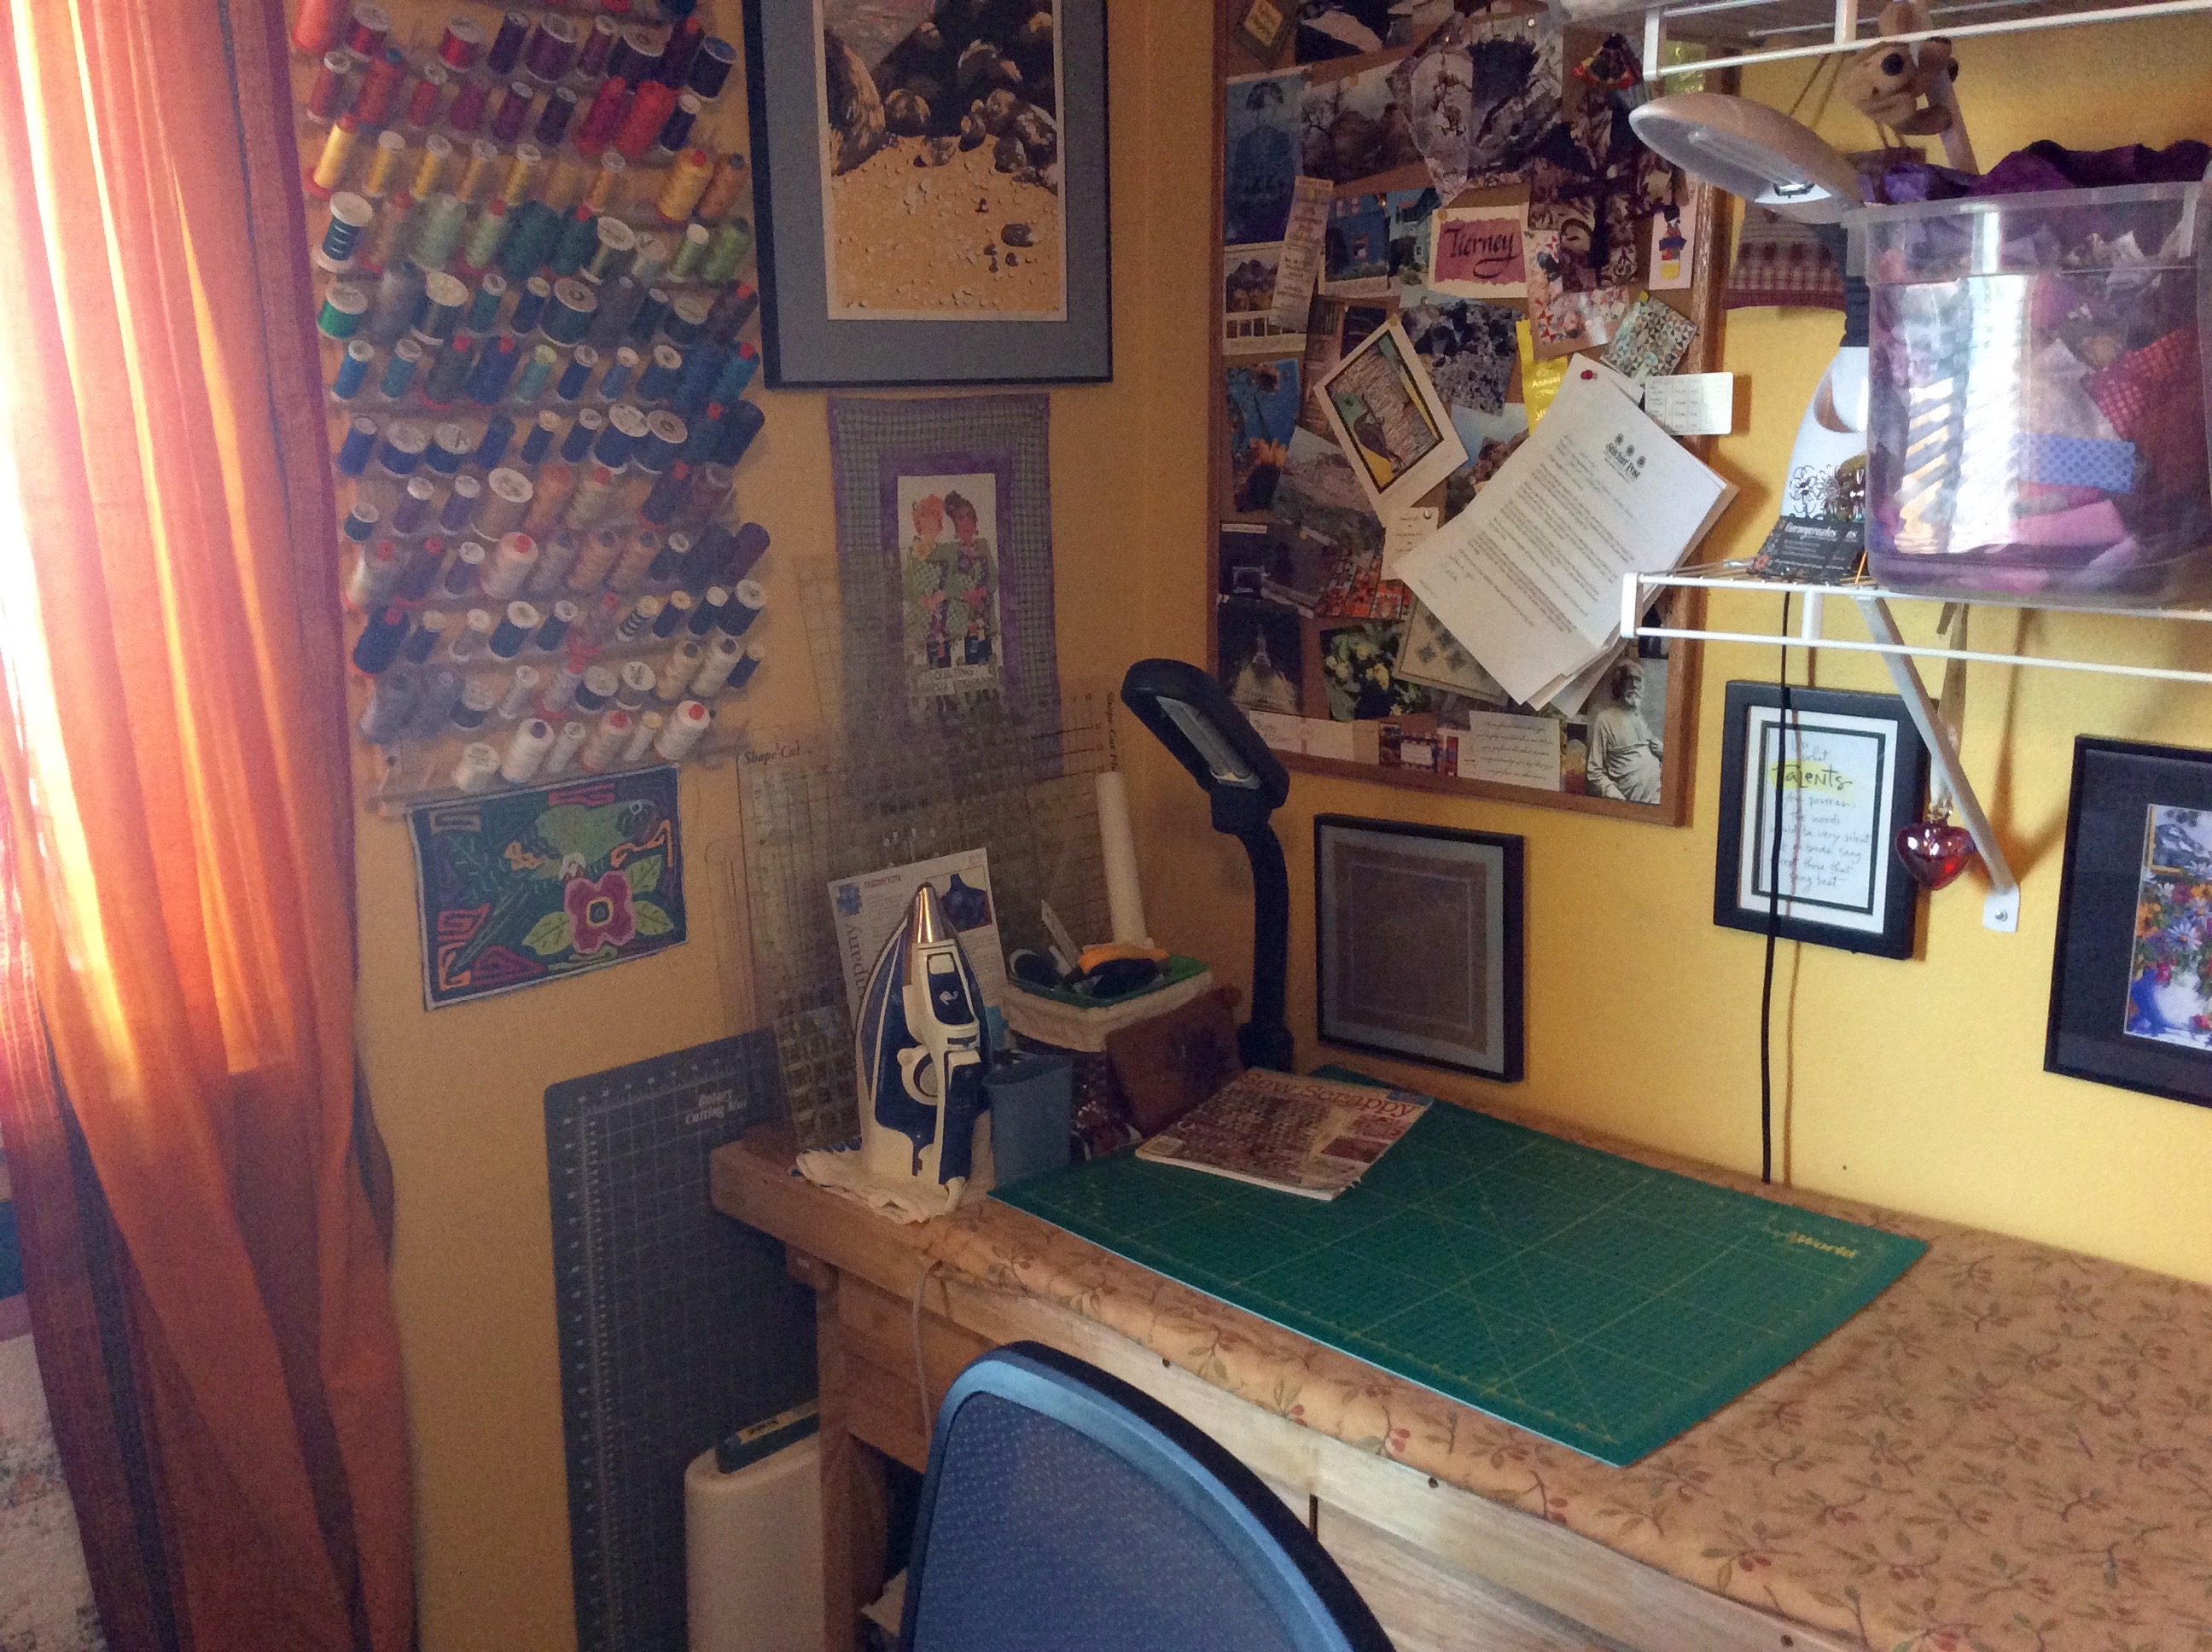
I got rid of one of the tables in my studio, even though I will have to now iron and cut on the same table (I have a removable wide ironing top). It felt like the room was way too clutter.
Instead of the table, I moved a comfy old chair into the room and I can sit and watch TV in the room while sewing down binding if I like. My TV is both a computer monitor and TV (so I can also watch “Tiny House Living” videos – my secret obsession).
The BEFORE:
The table covered with the quilt in the back is the one I got rid of, and I moved the work table to the back of the room.
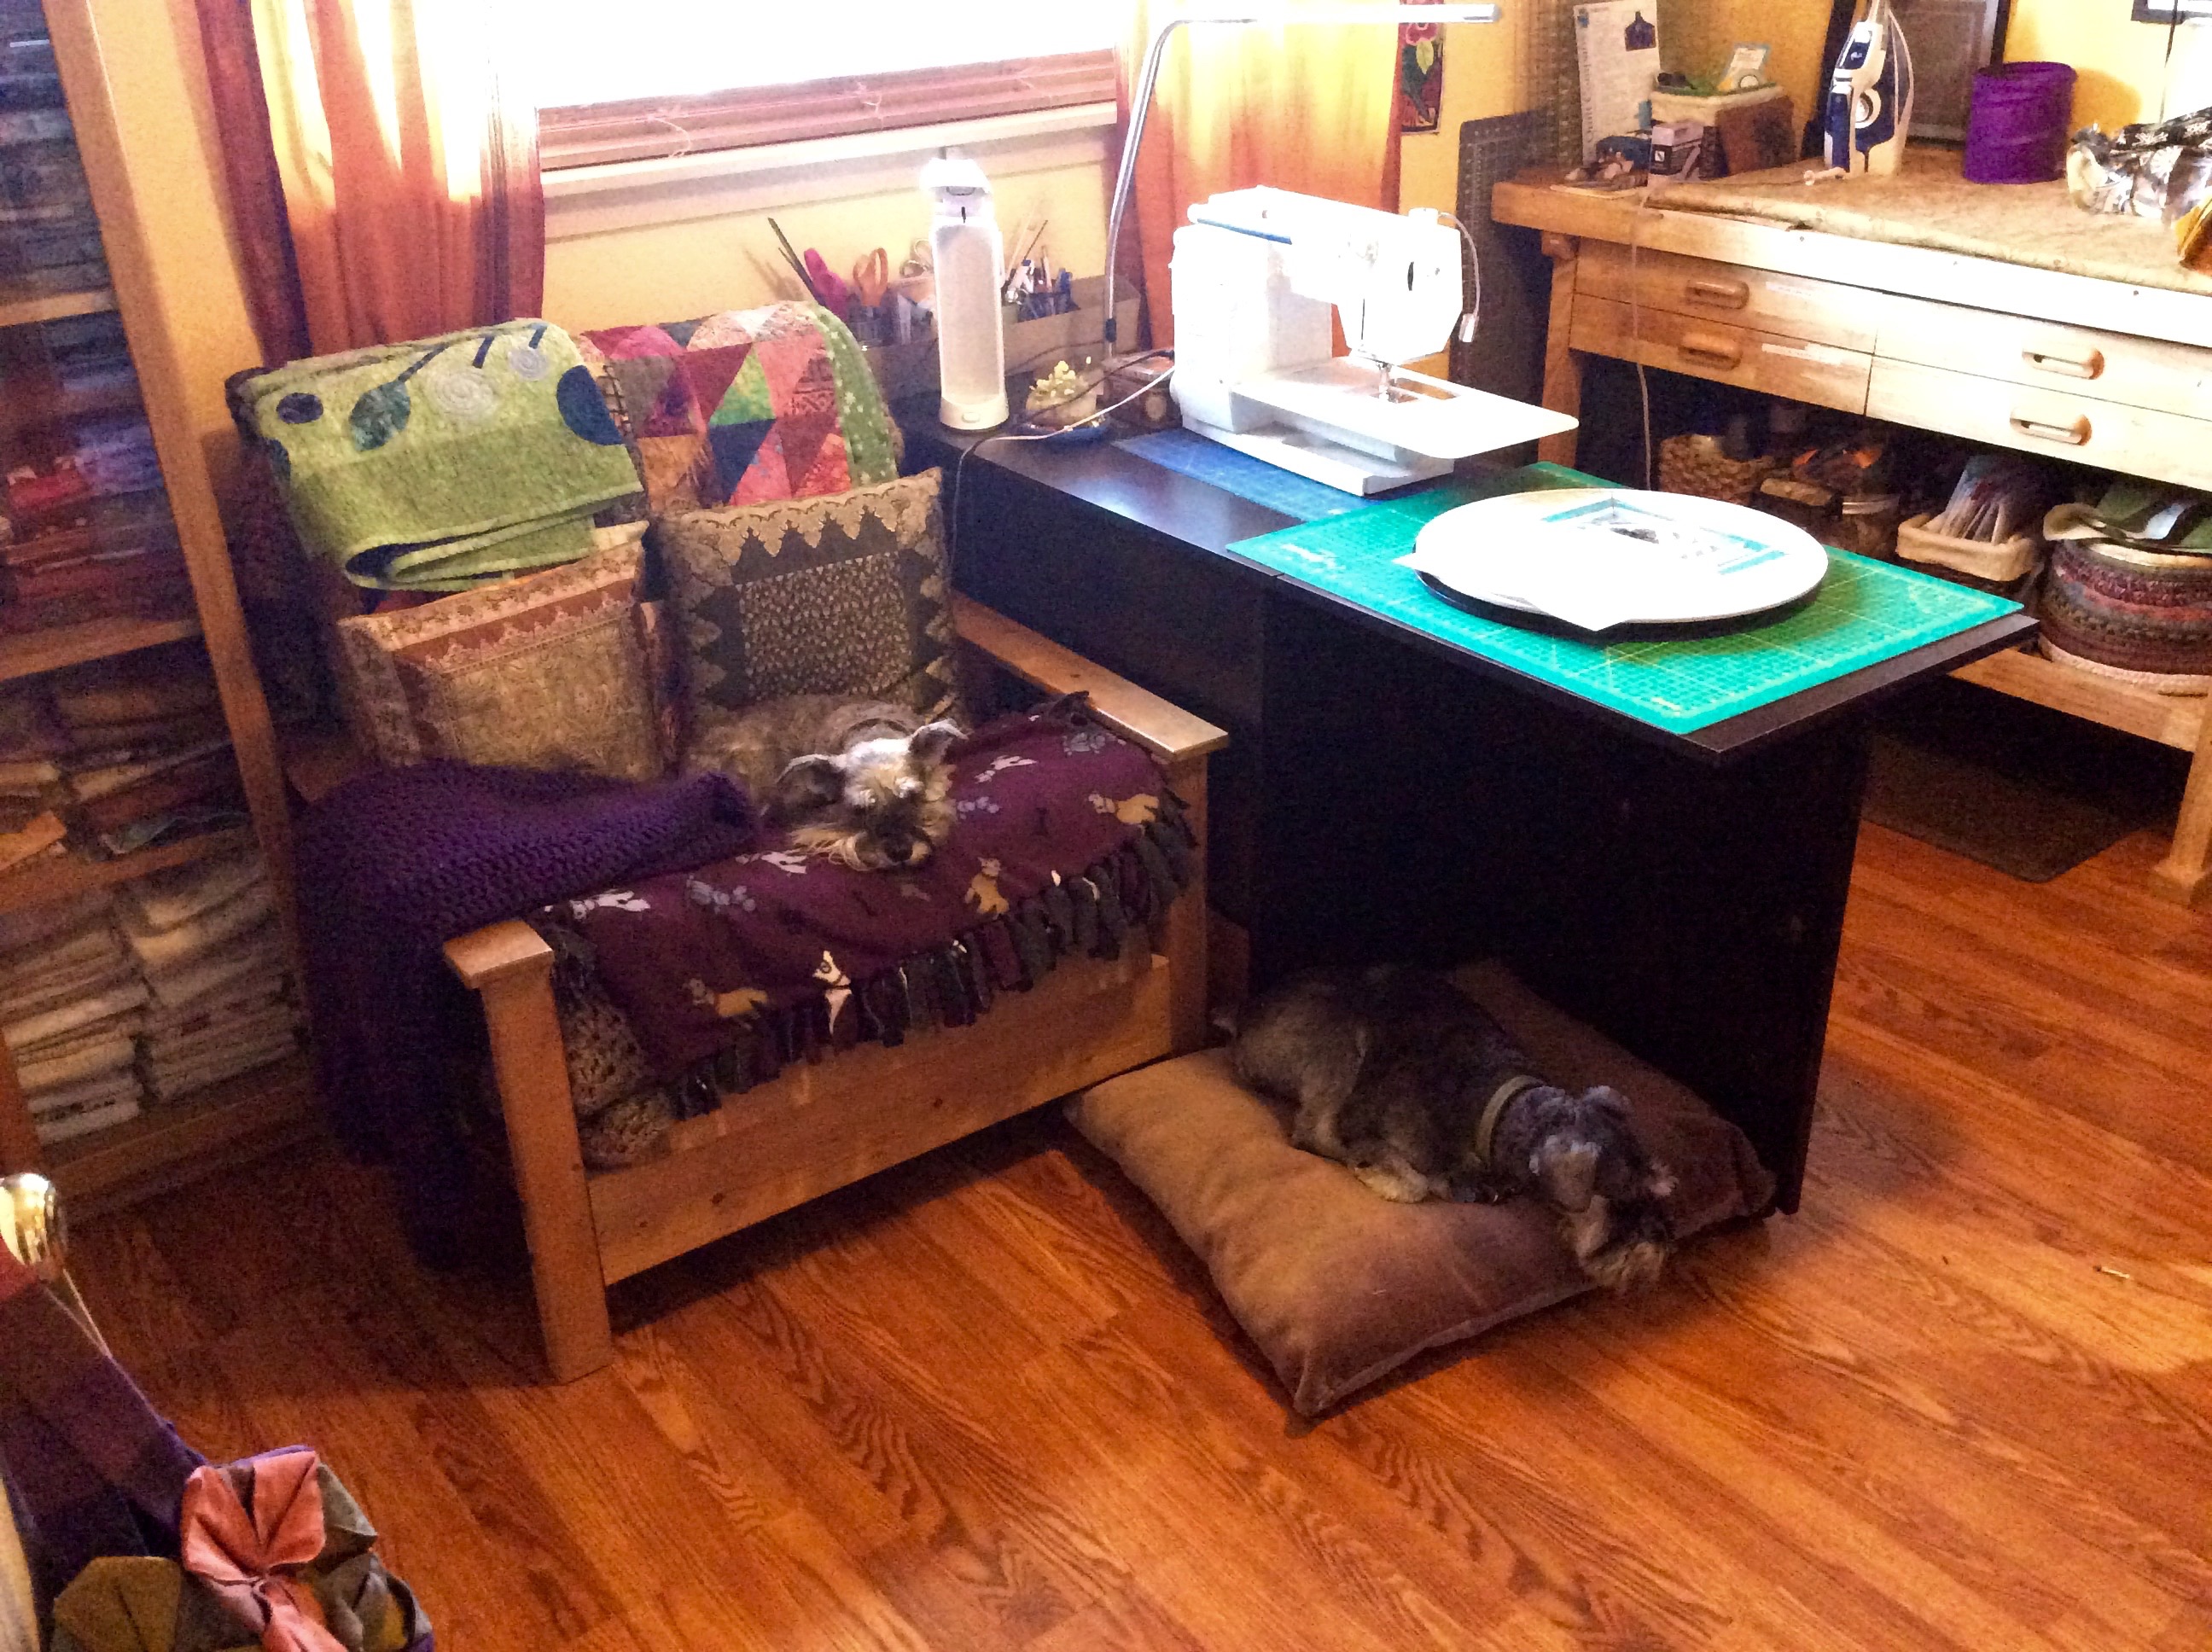
THE AFTER:
Minus the table that was in the back of the room; moved the worktable to the back of the room and added a comfy chair!
I can sit in a comfy chair and think about my huge backlog of projects
The dogs are really enjoying “THE AFTER”
Postscript
I am headed off to the Stitchin’ Post in Sisters, Oregon this am for a day long class on appliqué.
In my post, Creative Inspiration: Stories My Father Told Me, I share how I would like to do a series of art quilts based on stories my father told me growing up. Well I want to brush up my appliqué skills (okay I want to obtain some decent appliqué skills) so that I have more options in creating these quilts which would lend themselves to appliqué.
This is a quick follow up to my post from earlier this week: In Progress: Ohio.
My new recycled silk garment scrap piece is done and ready to go to Betty Anne Guadalupe to work her art quilting magic. It measures approximately 24″ x 14″.
I have not decide if I want the piece to orientate this way:
Or this way:
I welcome any thoughts and comments you have on the orientation – thanks!
Check out Sassy the Highly Opinionated Miniature Schnauzer’s page Schnauzer Snips for her latest musings (and a new homemade dog biscuit recipe!)
This is an update to my 04/07/16 post, What’s on the…Table. I am making progress with my piece “Ohio” and still using the table to design it rather than the design wall (the mini recycled silk log cabin blocks were not sticking well on the design wall).
Ohio (2016), in progress
I have sewn all the 2.5″ x 2.5″ recycled silk blocks together. I decided to “float” them in a piece of taupe/tweed looking recycled silk (it has a beautiful texture, it is a tweed like woven silk).
I am still deciding what I want to do with the little 2″ x 2″ blocks I made; and how I want to float the blocks in the lovely tweed-like recycled silk.
It will be a small piece overall, it was meant to be a companion piece to Betty Anne Guadalupe’s piece, Ohio Star, part of our The Wardrobe Meets the Wall Collection.
I cannot wait to complete the piece and give it to Betty Anne to work her quilting magic/artistry!
I have some scraps left over, and we’ll see if Betty Anne is up to the challenge to try and make a third small piece from the tiny scraps! (My piece in progress, Ohio, is made from her scraps from Ohio Star, which was made from my original piecing disaster Ohio Star!)
As I continue on my journey to scale back my material possessions and focus on the important things in life, I realize I have donated a lot of stuff I no longer need to charity organizations but I have not given any of my handmade items.
It feels like I have not been really giving, as I have only given purchased items I no longer want in my life.
Giving seems more like truegiving, if you give something that is not as easy to part with – like a quilt (or two)!
So I decided to donate a couple small flannel quilts/baby quilts to Project Linus. I had them listed on my tierneycreates Etsy shop and I am taking down their listings and giving them away instead.
Ready for donation
If you are not familiar with Project Linus is a non-profit organization that provides homemade “blankets” to children in need. I am getting together with a couple of friends at the end of this month that have worked with Project Linus in the past and they are going to help me donate my quilts.
It feels like this donation is more meaningful donation than a load of unused kitchen gadgets to Goodwill.


 I continue to listen to and enjoy the excellent audiobook –