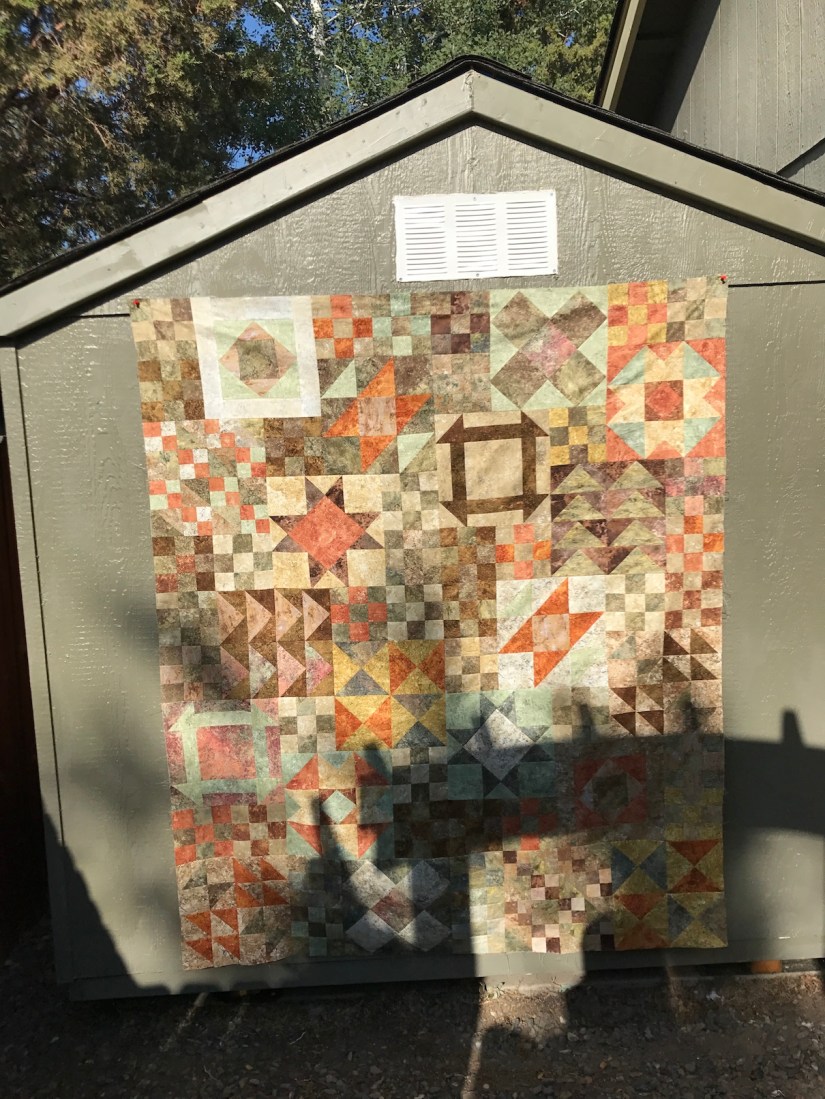
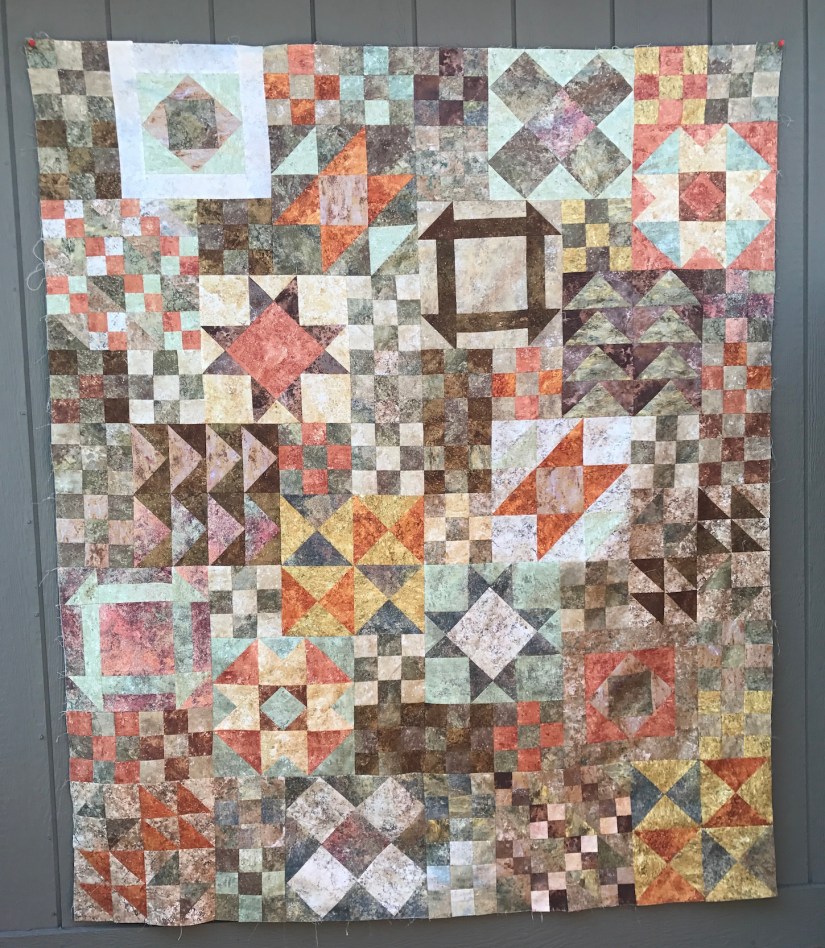
It is a quilt top measures approximately 60″ x 72″ and made with traditional piecing but not a with a traditional vibe.
I tried to photograph it using the back of my shed discussed in the post ThePhotoshoot Shed: Please Give Me Your Ideas, but I had a shadow from the top of my gate due to the position of the sun:
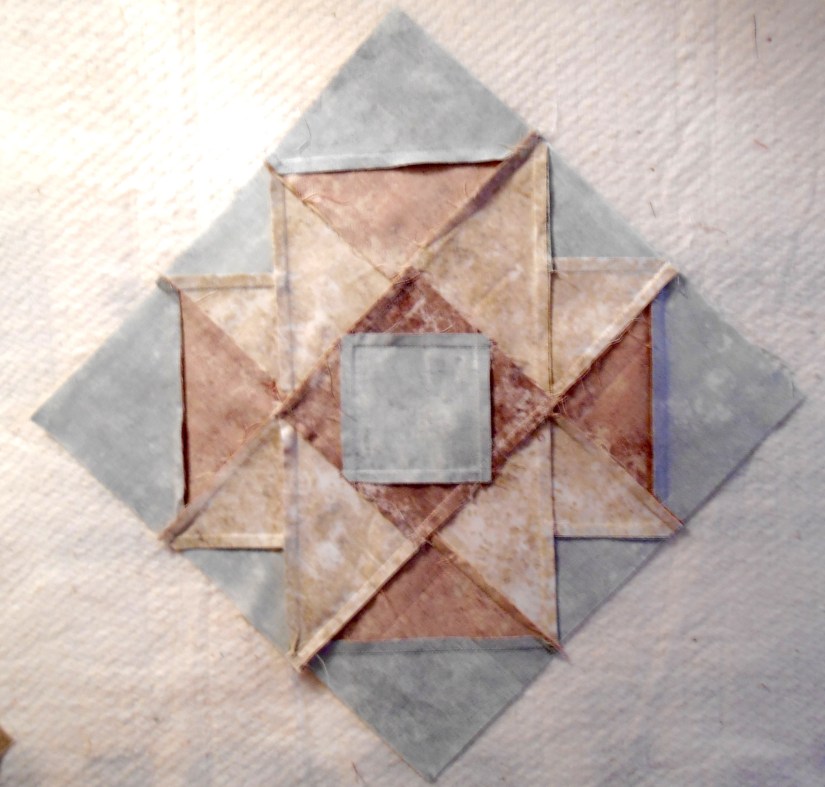
So I moved it to the side of my house which was completely in shadow and got a better photo:
I decided not to put a border on it because I plan to put it into the rotation of quilts I rotate through my living room. A border would make it too large for the space I want to hang it. It coordinates well with the colors in my living room!
So I am working on piecing a backing together with various 1 -2 yard pieces of browns I have (trying to use my stash) and then send it to a long-arm quilter. I will likely bind it in the Stonehenge fabric I was going to use for the border.
I guess I need to work on the Medallion quilt in the photo below next as I have completed #1, #2, and #4!
Postscript
Around this time last year I was posting about the sunflowers in my garden. Well they did not return this year and I did not plant sunflower seeds – so I am sunflowerless!
Luckily my neighbors on the corner have several raised bed boxes of sunflowers in their front yard for me to enjoy:
I will be more diligent next Spring on planting sunflower seeds!
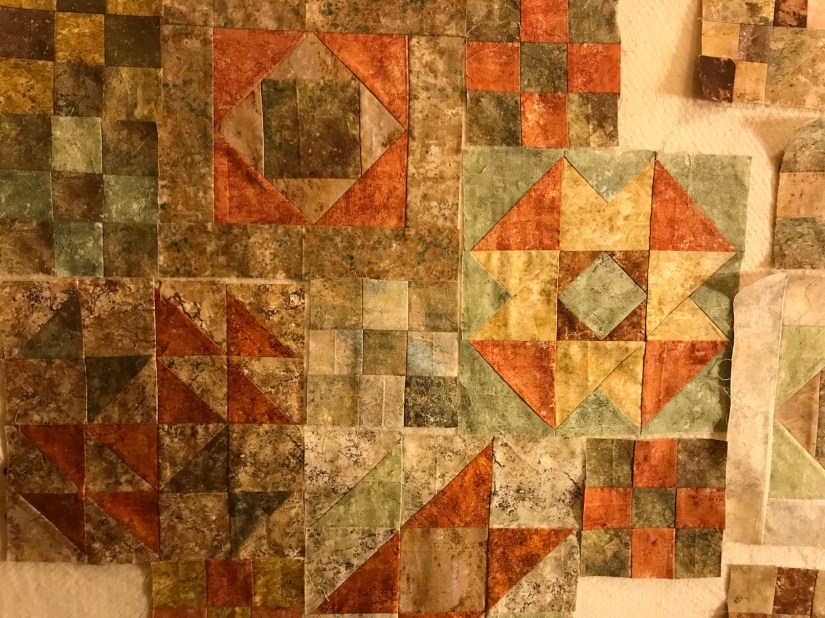
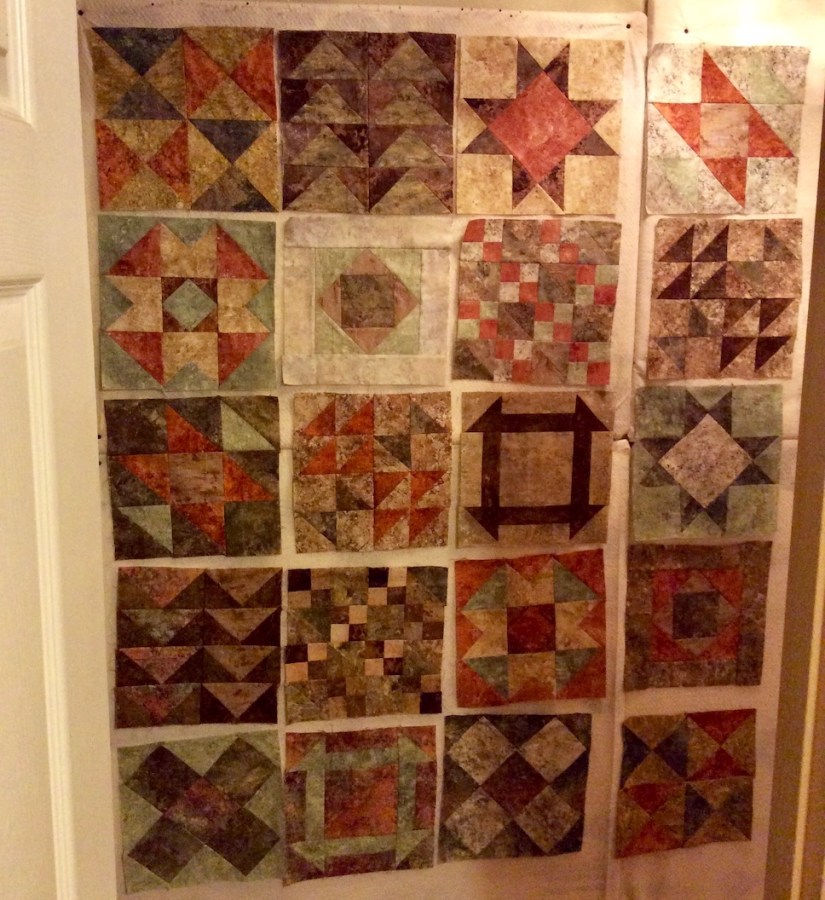
On the large design wall in my hallway is something that resembles a “hot mess“.
The hallway is narrow – it works great as a design wall, but is challenging for photography.
This “hot mess” actually represents quite a bit of progress. I struggled with what to do with the 20 blocks I made during a “traditional piecing” binge I went on October to November 2016 and discussed in the following series of posts:
Prior to working these blocks, it seems like the last couple of years I was primarily focused on improvisational quilting. I was craving structure (and a break from designing my own quilts) and pulled out my old Ladies’ Art Company Block Tool by Connie Chunn (2007) and started making blocks using a jelly roll I found in my stash of Northcott Cobblestone Stonehenge; and some Stonehenge scraps another quilter gave me.
Unfortunately, I did not have enough of the blue Stonehenge scraps to use them in more than just one block so I had to return those to the fabric scrap basket.
(Now I could have titled this post “Revisiting Traditional Piecing…Part IV” but this binge of working on “traditional pieced blocks” has intermittently continued while I sporadically work on Farm Girl Vintageblocks.)
The dilemma – designing the final quilt layout
The reason why the 20 blocks pictured below got put aside after my “piecing binge” was that I could not find a pleasing way to lay them out. I auditioned many different ways of setting the blocks to include traditional ways such as lattice, putting them on pointing, floating them, and various ideas suggested by my readers (much appreciated!)
(Martha and met through this quilt: She bought the green ombre setting fabric for this exquisite sampler quilt through my tierneycreates Etsy shop…glad I met her before I closed the shop!)
Alas, none of the numerous options I explored appealed to me.
Farm Girl Vintage Strikes!
My next venture into traditional-block-piecing-binging was with Lori Holt’s Farm Girl Vintage. In this book I discovered the perfect setting for my blocks! It is called the “Picnic Setting”
For copyright reasons I did not want to photograph the page in Farm Girl Vintage showing the setting, but I did find this photo on Pinterest, pinned by Deborah Thomas, of a quilt in the Picnic Setting:
Photo credit: Deborah Thomas, Pinterest
The setting is a mixture of 12″ (finished) and 6″ (finished) blocks. The 6″ blocks are the setting for the 12″ blocks!
At first I thought of returning to the Ladies’ Art Company Block Tool and creating a bunch of different 6 inch pieced blocks. Thinking through this idea, I realized the quilt top would NEVER get done if headed down this path. How daunting to make 36 different 6″ blocks to set my 12″ blocks! I needed at least 36 of them to make the block setting work, and it would be 2020 before I posted about this quilt in progress again!.
Nine-Patch, an old stand-by
Finally I settled on making “old school” 6″ (finished) nine-patch blocks using up the scraps from the original jelly roll from piecing the 12″ blocks.
Here is the beginning of playing with the layout as I make the nine-patch blocks:
There will not be a lot of contrast, and that is intentional. I want the quilt top to have the feel of looking at a stone floor and the patterns and the colors of the stones flowing into one another.
More to come as I progress on the quilt top (perhaps even better photos, but do not get your hopes up!)
Postscript
Decorating with Pillows
A quick follow up to my previous post – PetitePillow Power!– here is a little vignette in my living room with one of the new pillow, a batik basket I made (the top one), a lidded store bought basket, and a Longaberger basket someone gave me as a gift 20 years ago:
Quilting Meets Couture
In case you’d like to learn more about the project that got me started on my art quilting journey, check out this post on , Improvisational Textiles:
This post is actually a continuation of my series “What’s on the Design Wall” in addition to Part III (well actually Part IV) of my series of posts about taking a break from improvisational quilt design and piecing, and returning to make meditative traditional blocks.
Here are the other posts in this series to bring you up to date. I decided to make a “sampler” quilt by making blocks from the Ladies’ Art Company Block Tool:
In the previous post in this series, I had only 4 more blocks to go into order to have 20 blocks to create a 4 x 5 type of layout.
I completed four additional blocks, of two different block patterns in different color ways:
So here is what all 20 blocks look like on the design wall in our hallway (disclaimer – I do not have the best lighting in my hallway and it is narrow so I can only take photos from an angle or by standing in the laundry room!):
My plan is to set them in a light fabric from the same line (Stonehenge) and then do a cool border (well in my mind it will be cool) with the fabric scraps from the fat quarter set I used to piece these blocks.
The next time I post on this series about revisiting traditional piecing, I will show you the completed quilt.
But…for now…I have to put it aside (No! Please Don’t Go To the “UFO” pile!!!) and immediately work on a baby quilt for an upcoming baby shower.
Sharing a quick follow up to the post – Revisiting Traditional Piecing: The Blocks Part Iin which I shared the first 8 blocks I made for a traditional block sampler, made with non traditional fabrics (a collection of fat quarters from Northcott’s Stonehenge fabric line) for a wedding gift.
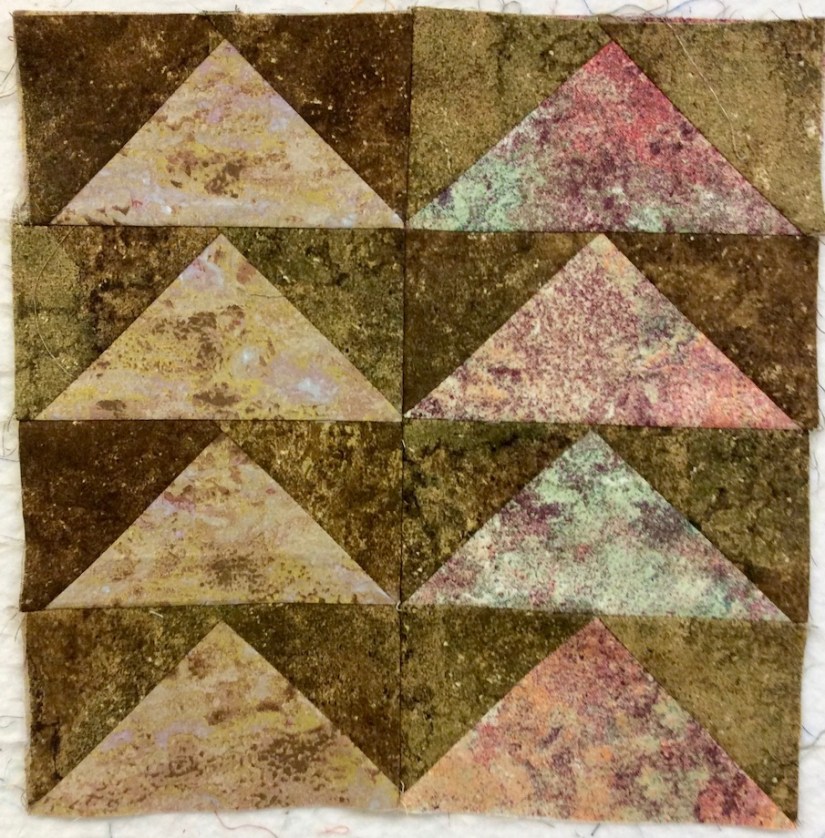
Here are the next 8 blocks I have pieced – four (4) different blocks from the Ladies’ Art Company Block Tool by Connie Chunn, each in two versions:
This weekend I got to play with different layouts now that I have 16 blocks completed. I tried out a traditional sampler layout with sashing and corner stones; and a layout setting the blocks “on-point. I liked the “on-point” version (diamond) instead of square next to square layout.
My plan is to make a queen-sized bed quilt, so I determined I need at least 4 more blocks for a total of 20- 12 inch (finished size) blocks. I tentatively plan to do a 4 by 5 block layout and borders.
Today I completed 2 additional blocks (for a total of 18) and I will post them on the next update. I am also now looking through my quilt book collection and the web for innovative “on-point” sampler quilt settings (and of course going to make the remaining 2 blocks so the blocks can be finished).
More to come but wanted to get this update out there. Happy Stitching!
In my previous post I mentioned the first set of blocks I made with the Ladies’ Art Company Block Tool by Connie Chunn (while participating in a Block-a-Month Quilt Club) were turned into a sampler quilt, Block Filmstrip, around 2008.
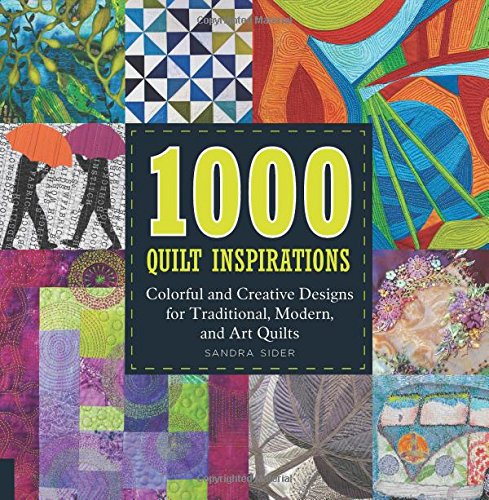
What I forgot to mention was that details of four (4) of the blocks in this quilt ended up in the book 1000 Quilting Inspirationsby Sandra Sider, Quarry Books (2015). It is funny that a a sampler quilt that I was not sure if I even wanted to finish around 2008 ended up as the opening series of “Quilting Inspiration” images in the book – images #0001 – 0004 of the 1000 inspirations!
Filmstrip quilt – four images 0001-0004 are featured in the book 1000 Quilt InspirationsPhoto Credit: Quarry Books
In addition to four (4) images from Block Filmstrip, the book also contains images from four (4) of my recycled silk art quilts and are part of The Wardrobe Meets the Wall Collection.
Making Blocks
Using the Ladies’ Art Company Block Tool by (2007), I have made eight (8) 12 inch blocks (finished size) using a fat quarter packet, scraps and yardage of Northcott’s Stonehenge fabric line, so far as I created a queen-sized sampler quilt to be given as a wedding gift to a young couple.
I made two (2) of four (4) different blocks from the Block Tool:
AIR CASTLE
AUNT ELIZA’S STAR
BIG DIPPER (I made 2 of the same color way)
CHURN DASH
Thinking About Settings and Borders
In case you have not figure this out yet, I plan to set the blocks “on point” that is why they are all turned on point. I originally meant to photograph them in their traditional square orientation instead of this “diamond” orientation. Also I took the photos on the design wall in the hallway where the light is not the best. Life has been busy and I figure if I took time re-doing the photos then I will never get this post up, ha!
Next set of blocks, I will take better photos (smile).
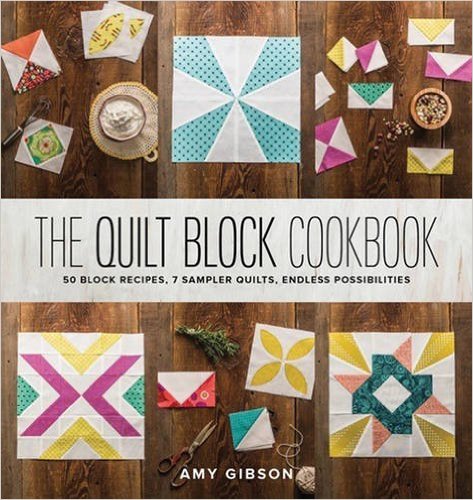
In addition to wanting to set the blocks “on point” I have already started looking at different options for settings. I am currently looking through a book I recently borrowed from the library – The Quilt Block Cookbookby Amy Gibson (2016). There is a wonderful block setting option in this book called “Point Taken”. I am leaning towards that setting.
Photo credit: Amazon.com
I am also thinking about what type of border I want and I have decided to make a pieced border. I want the quilt to be special and I think a pieced border will add a nice touch.
Looking through my collection of quilt books I came across an old book in my craft book library called The Border Workbookby Janet Kime (2006). This book has great ideas for creating lovely pieced borders.
Photo credit:Amazon.com
More blocks to come (and better photos next time)!
Postscript
Traditional piecing seems to be what I need right now. My mind feels overloaded from my non-crafting life, especially related to my job in the healthcare industry. At the end of the workday and the end of the workweek I am feeling “all thought out” and was not inspired to create any art quilts.
Creating these blocks from patterns feels mediative, centering and peaceful. All I have to do is follow the instructions, cutting the fabric to the dimensions indicated and sew the pieces together.
I am also enjoying carefully pressing the different components of each block as I assemble them and trying to ensure the back of the block is nearly as neatly pressed as the front.
The back of a carefully pieced block
While piecing the first couple of blocks I listened to a wonderful and engaging audiobook read by the actor Peter Coyote – The Four Agreements: A Practical Guide to Personal Freedom by Don Miguel Ruiz (1997).
Photo credit: Amazon.com
The Four Agreements are as follows:
Be impeccable with your word
Don’t take anything personally
Don’t make assumptions
Always do your best
These seem logical and on the surface very simple. What makes the audiobook so engaging is the author’s discussion and exploration of each of The Four Agreements. Powerful and centering stuff to listen to and ponder while peacefully piecing my blocks!
Check out Sassy the Highly Opinionated Miniature Schnauzer’s page Schnauzer Snips for her latest musings and recent experience with the “ongoing herd”!
Creative Roadblock Stops with Returning to Traditional Piecing
A couple weeks ago I discussed an art quilt I was working on as part of the recycled materials “Make Do” challenge (Sherri Lynn Wood, The Improv Handbook for Modern Quilters) in the post What’s on the Design Wall.
Well I gave up on that piece for now, bundled it up and put it away for now. I was feeling burned out on creating improvisational quilts.
Around this same time I went over my friend Susan’s house who was working on the Sisters Outdoor Quilt Show 2017 raffle quilt which has some lovely traditional block piecing in it. I found the piecing so pleasing.
I also thought about a blog I follow, Texas Quilting, in which the talented blogger does a lot of traditional block piecing including an incredible sampler she is working on.
Finally, as if the universe was telling me to take a break from improvisational quilting and return to traditional piecing for a while, I was invited to attend a trunk show and talk by Jen Kingwell, Australian quilt designer. She used traditional blocks and piecing in innovative and colorful ways – and she uses lots and lots of scraps in her work. If you would like to see highlights of her talk you can check out the post on the Woolie Mammoth blog – Jen Kingwell Australian Quilt Designer.
Here is the one bad photo I took of one of Jen Kingwell’s awesome quilts from her trunk show (look at the sweet little traditional “Churn Dash” blocks in her quilt, she uses a lot of traditional pieced and appliqué blocks in unique colors and combinations in her work):
To see more of her beautiful work, I recommend checking out the Woolie Mammoth post mentioned above or check out Jen Kingwell Designs website – Amitié Textiles; or her Facebook page Jen Kingwell Designs.
I realized I need to starting working on quilt to be a Wedding gift and wouldn’t a traditional block sampler be a timeless gift? I checked with the bride to be and found out she liked earth tones and then I found a beautiful collection of Northcott’s Stonehenge fabric line.
Now what pattern to use? Should I pull out the old quilting books filled with traditional designs? After pouring over patterns in 10 – 15 books as well as patterns I had clipped from magazines, etc. I came across my old Ladies’ Art Company Block Tool by Connie Chunn (2007).
Photo credit: Amazon.com
I first learned of this tool around 2007. I had recently moved to Central Oregon and joined the Block-a-Month Quilt Club at the Stitchin’ Post quilt shop in Sisters, OR. The goal was to make a block a month from one of the patterns in this tool and then create a sampler quilt from the blocks.
Here is are sections of the quilt I made from those traditional blocks in the Ladies’ Art Company Block Tool:
Block Filmstrip (2008?) – pieced and quilted by Tierney Davis Hogan
After making this quilt I shoved away this block tool/block pattern collection. Now, 8 – 9 years later, this tool would be my solution to my creative block! I would make traditional blocks selected from the 160 rotary-cut block patterns in this tool!
Getting Started on My Traditional Piecing Project
Here is my Block Tool and the fabrics I will be using. I only had a little of the blue you see on the right and I later decided to remove it and make the palette oranges, rusts, browns, greens, and creams. I only had one small strip of the blue in the Stonehenge line and although it would had many an interesting accent, I would need to purchase more to make it work and I am trying to work with what I have in my stash.
I also think the blue was too dark, if it had been a lighter blue that would have worked even better.
As of today, I have made 8 blocks and next post I will share my progress so far!