I continue to work on the Colour Wheel quilt/wallhanging that I most recently blogged about in the post “Colour Wheel” Quilt in Progress, but I am not ready to share my further progress (and I did come up with a plan on how to use the trimmed sections of the color wheel and incorporate them into the quilt!), so instead I will share an update on the batik table runner I made for a friend.
Back when I lived in Bend, Oregon (now over 4 years ago), I promised to make my friend L a table runner for her long dining room table which I had enjoyed several wonderful meals at over the years.
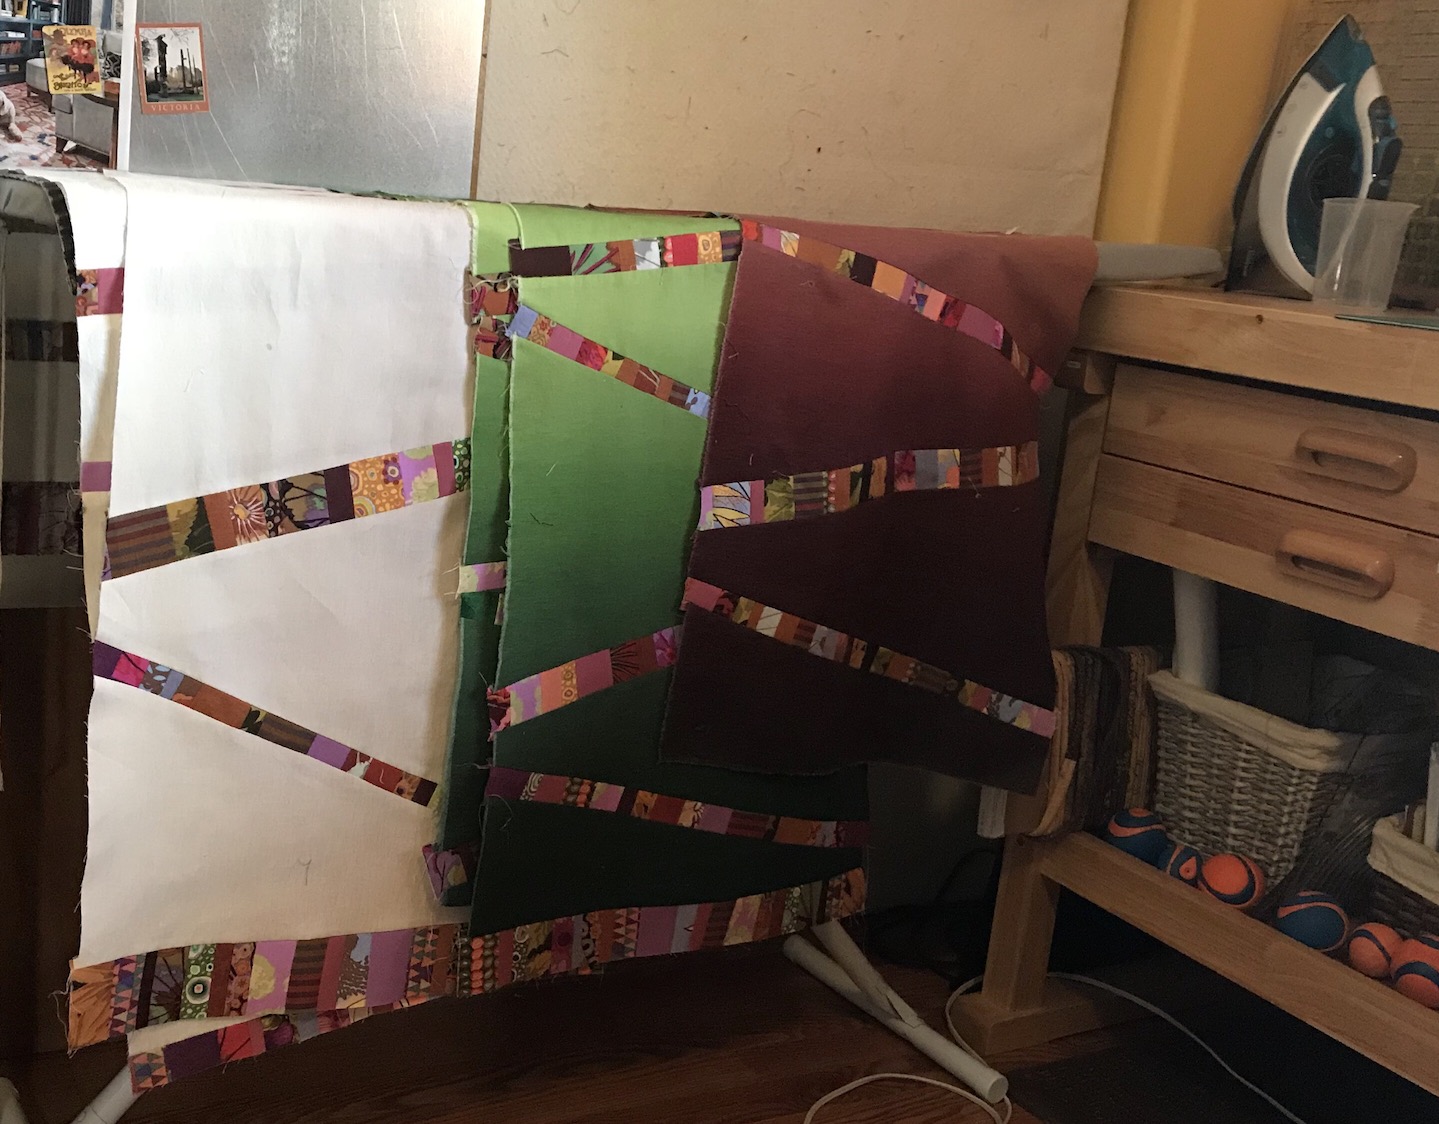
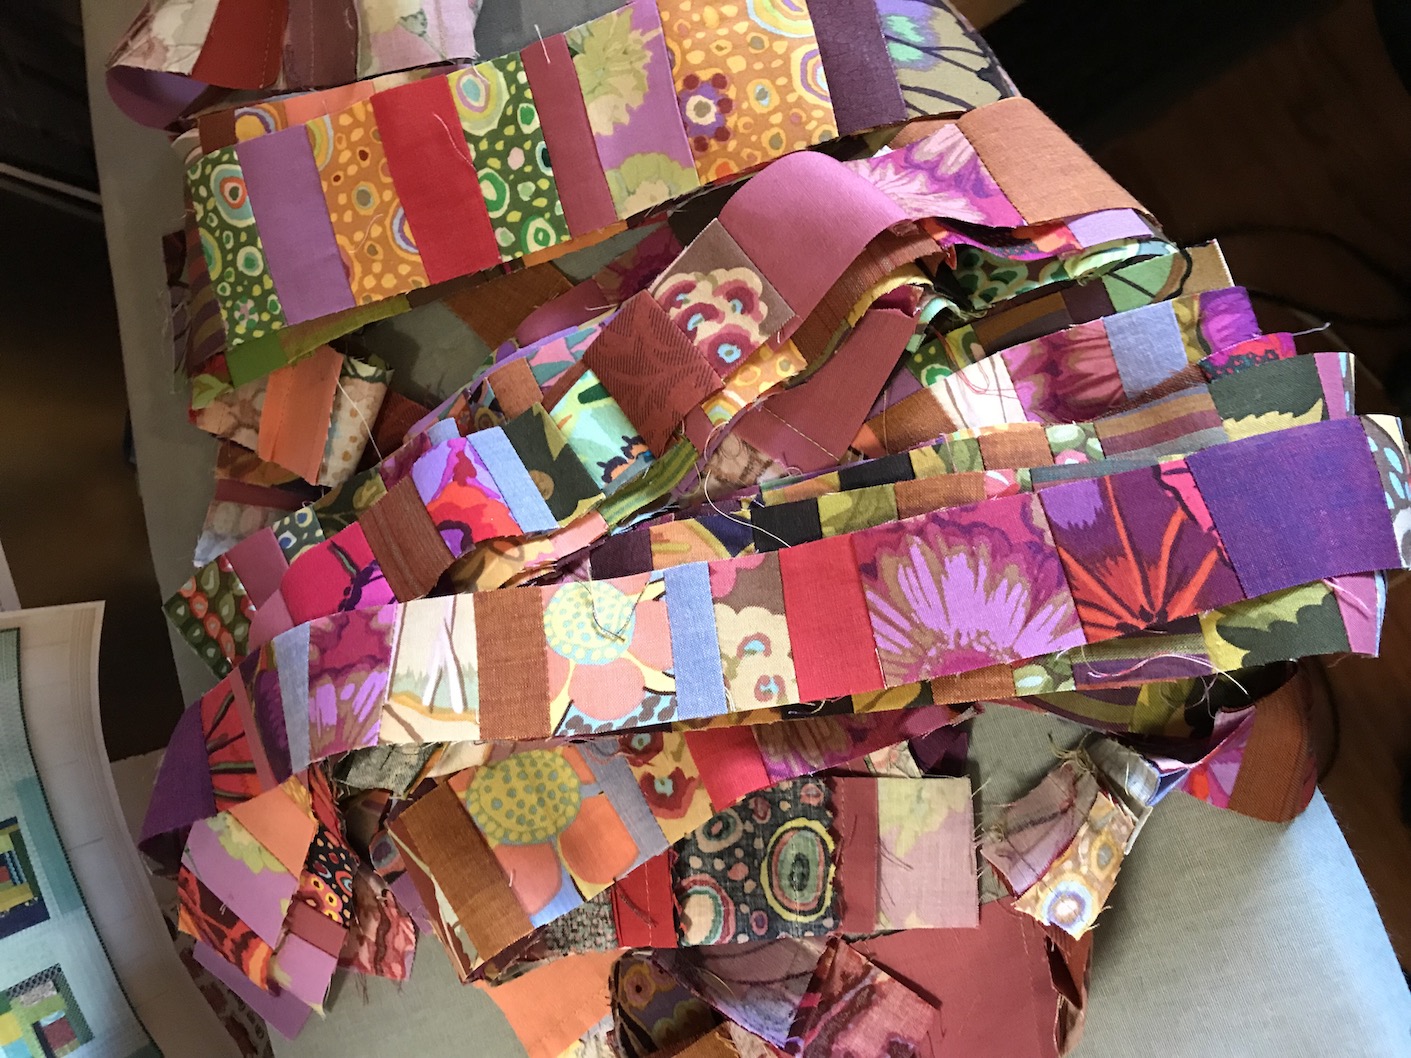
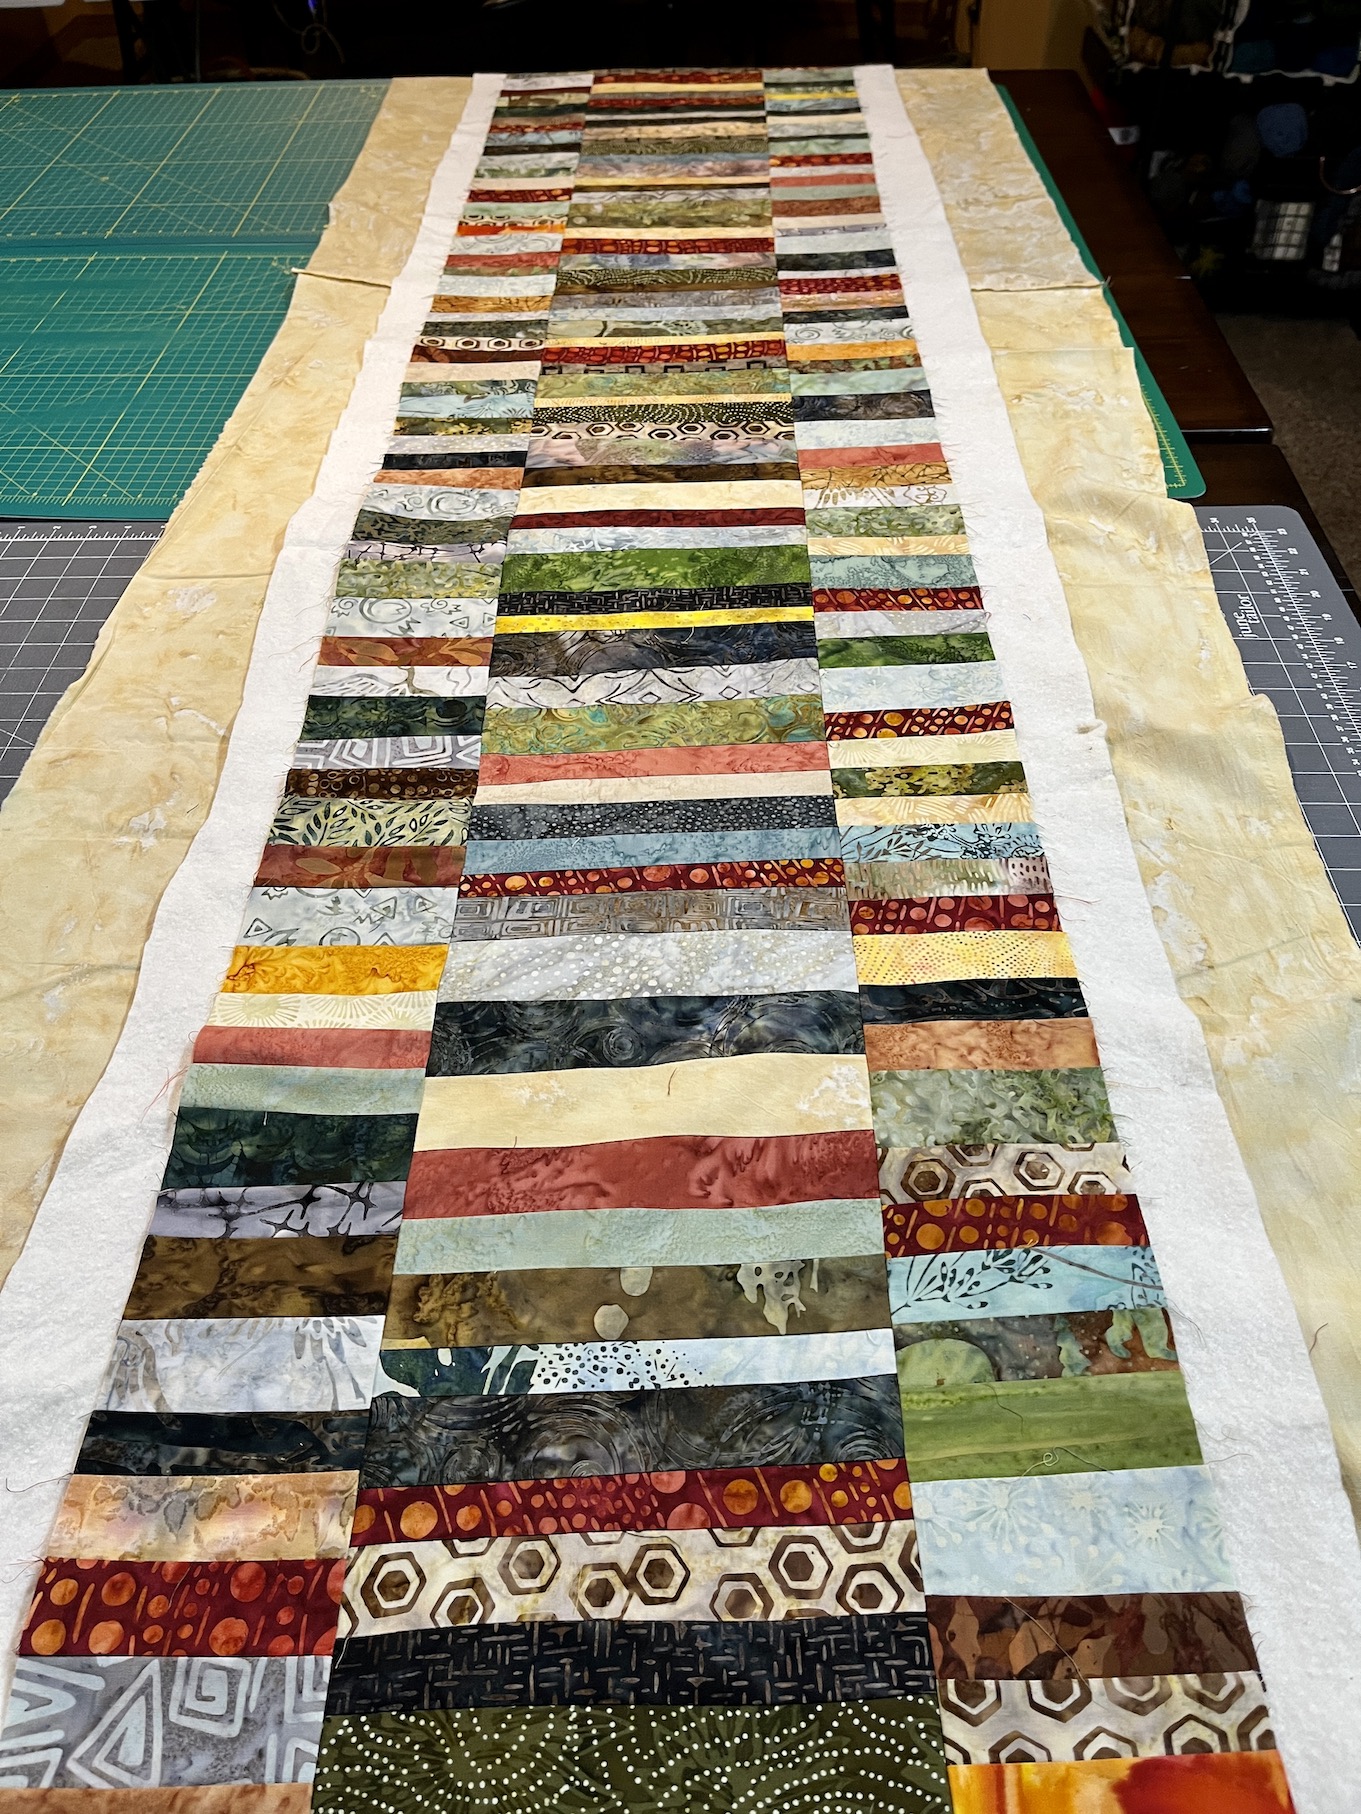
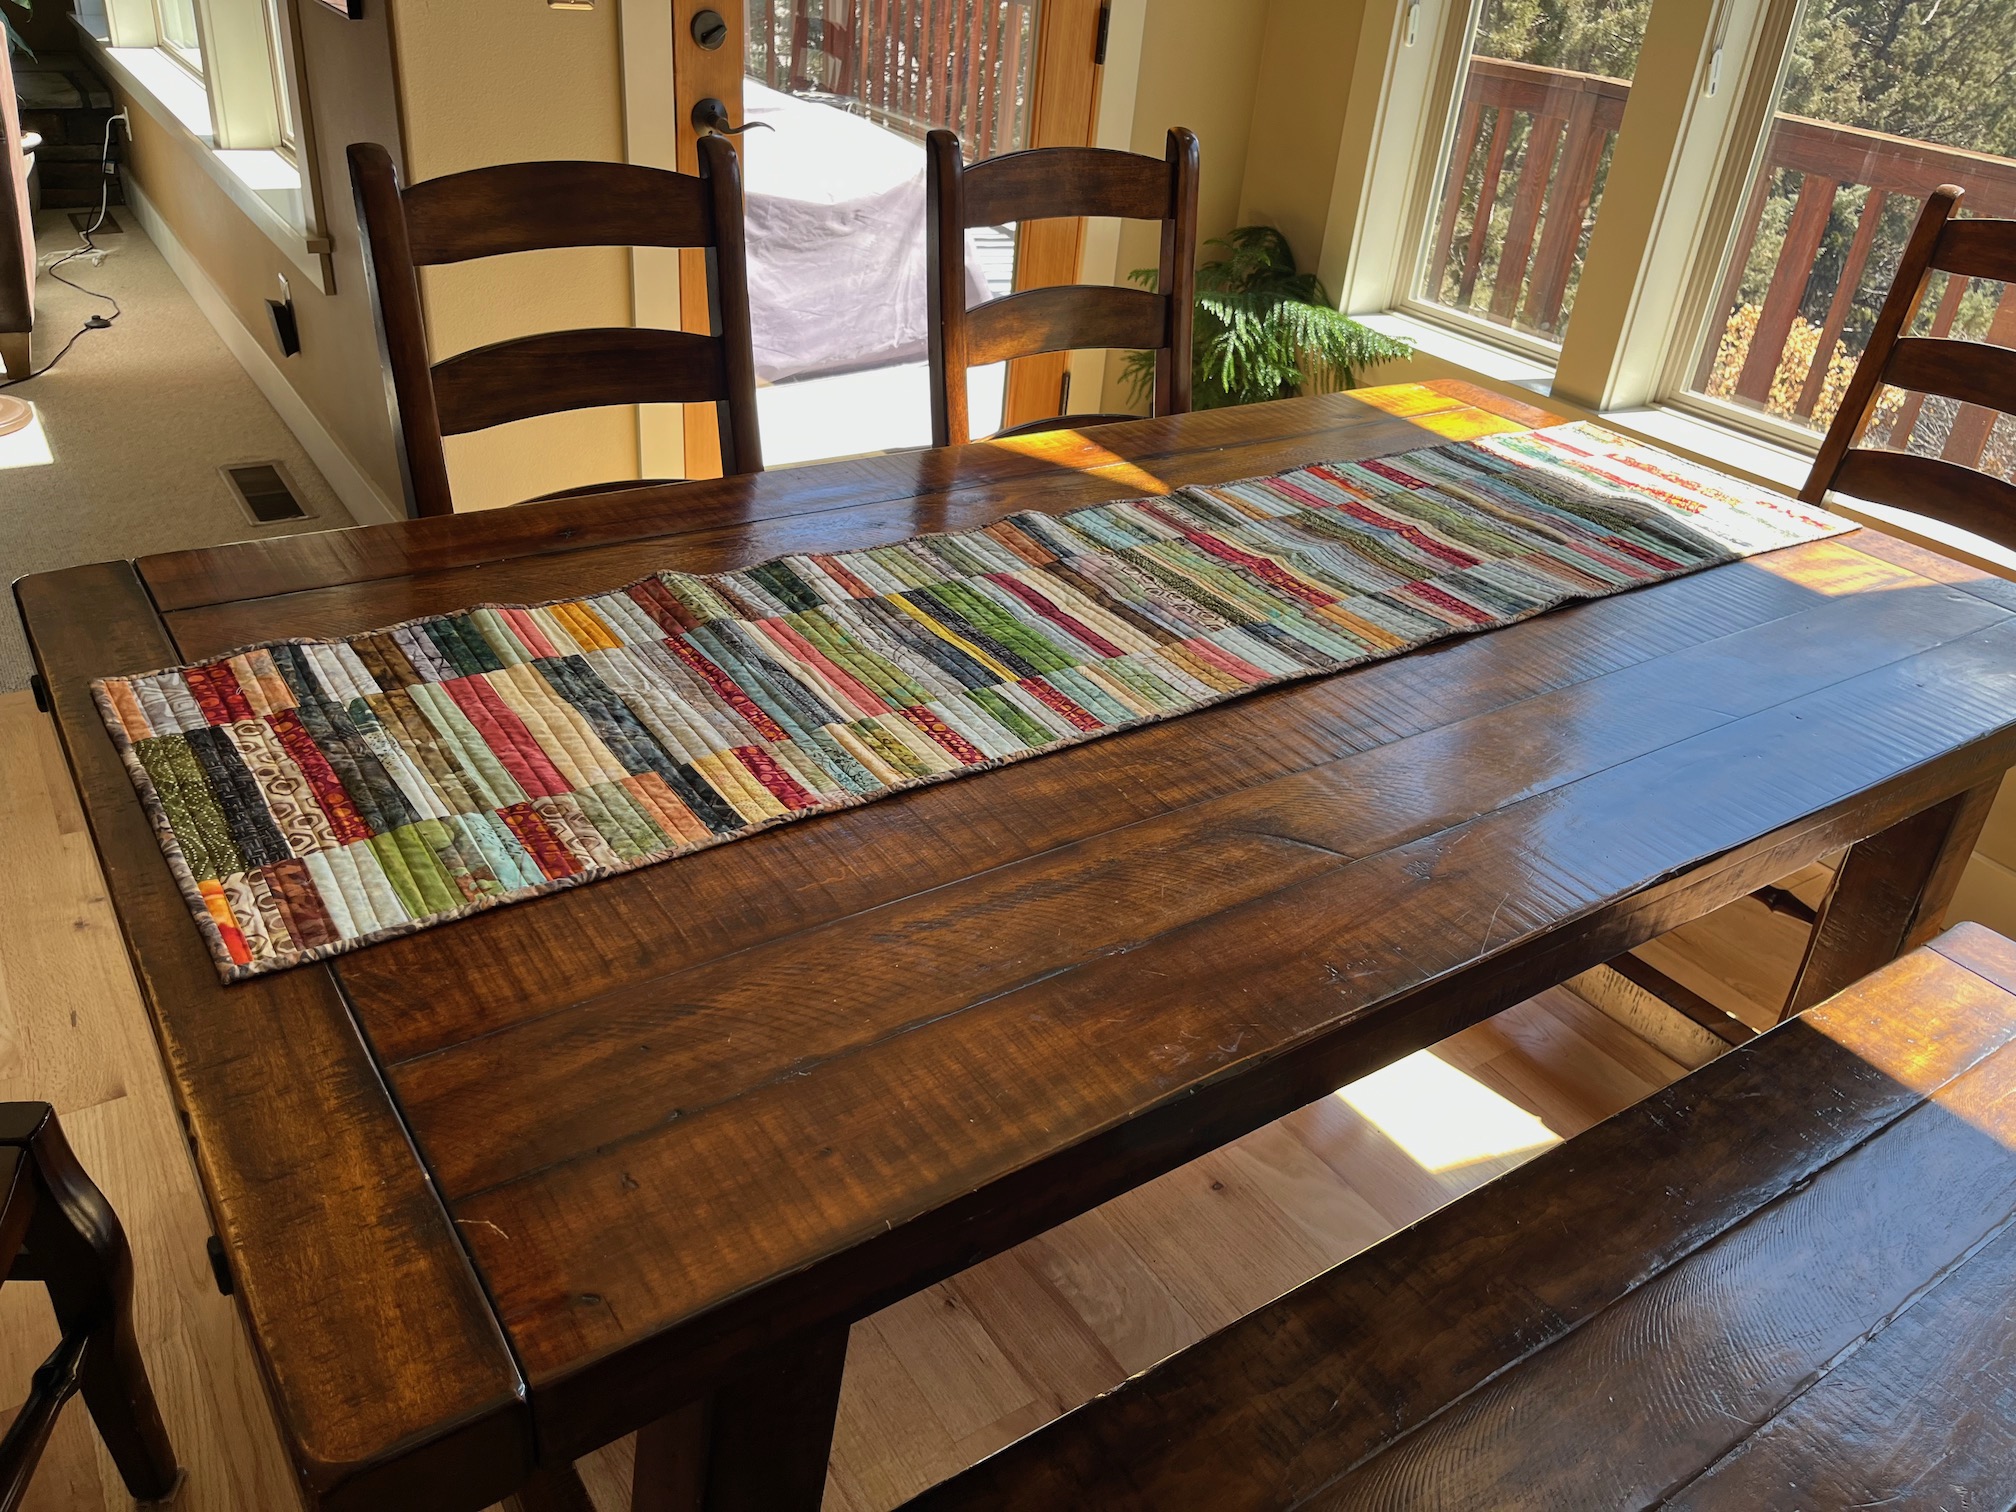
Finally back in December 2022 I started the table runner and made it from batik fabric scraps using the pattern Bamboo Shade by Aardvark Quilts. Here is where I was at in December 2022 – I had pieced it and prepared it for quilting:
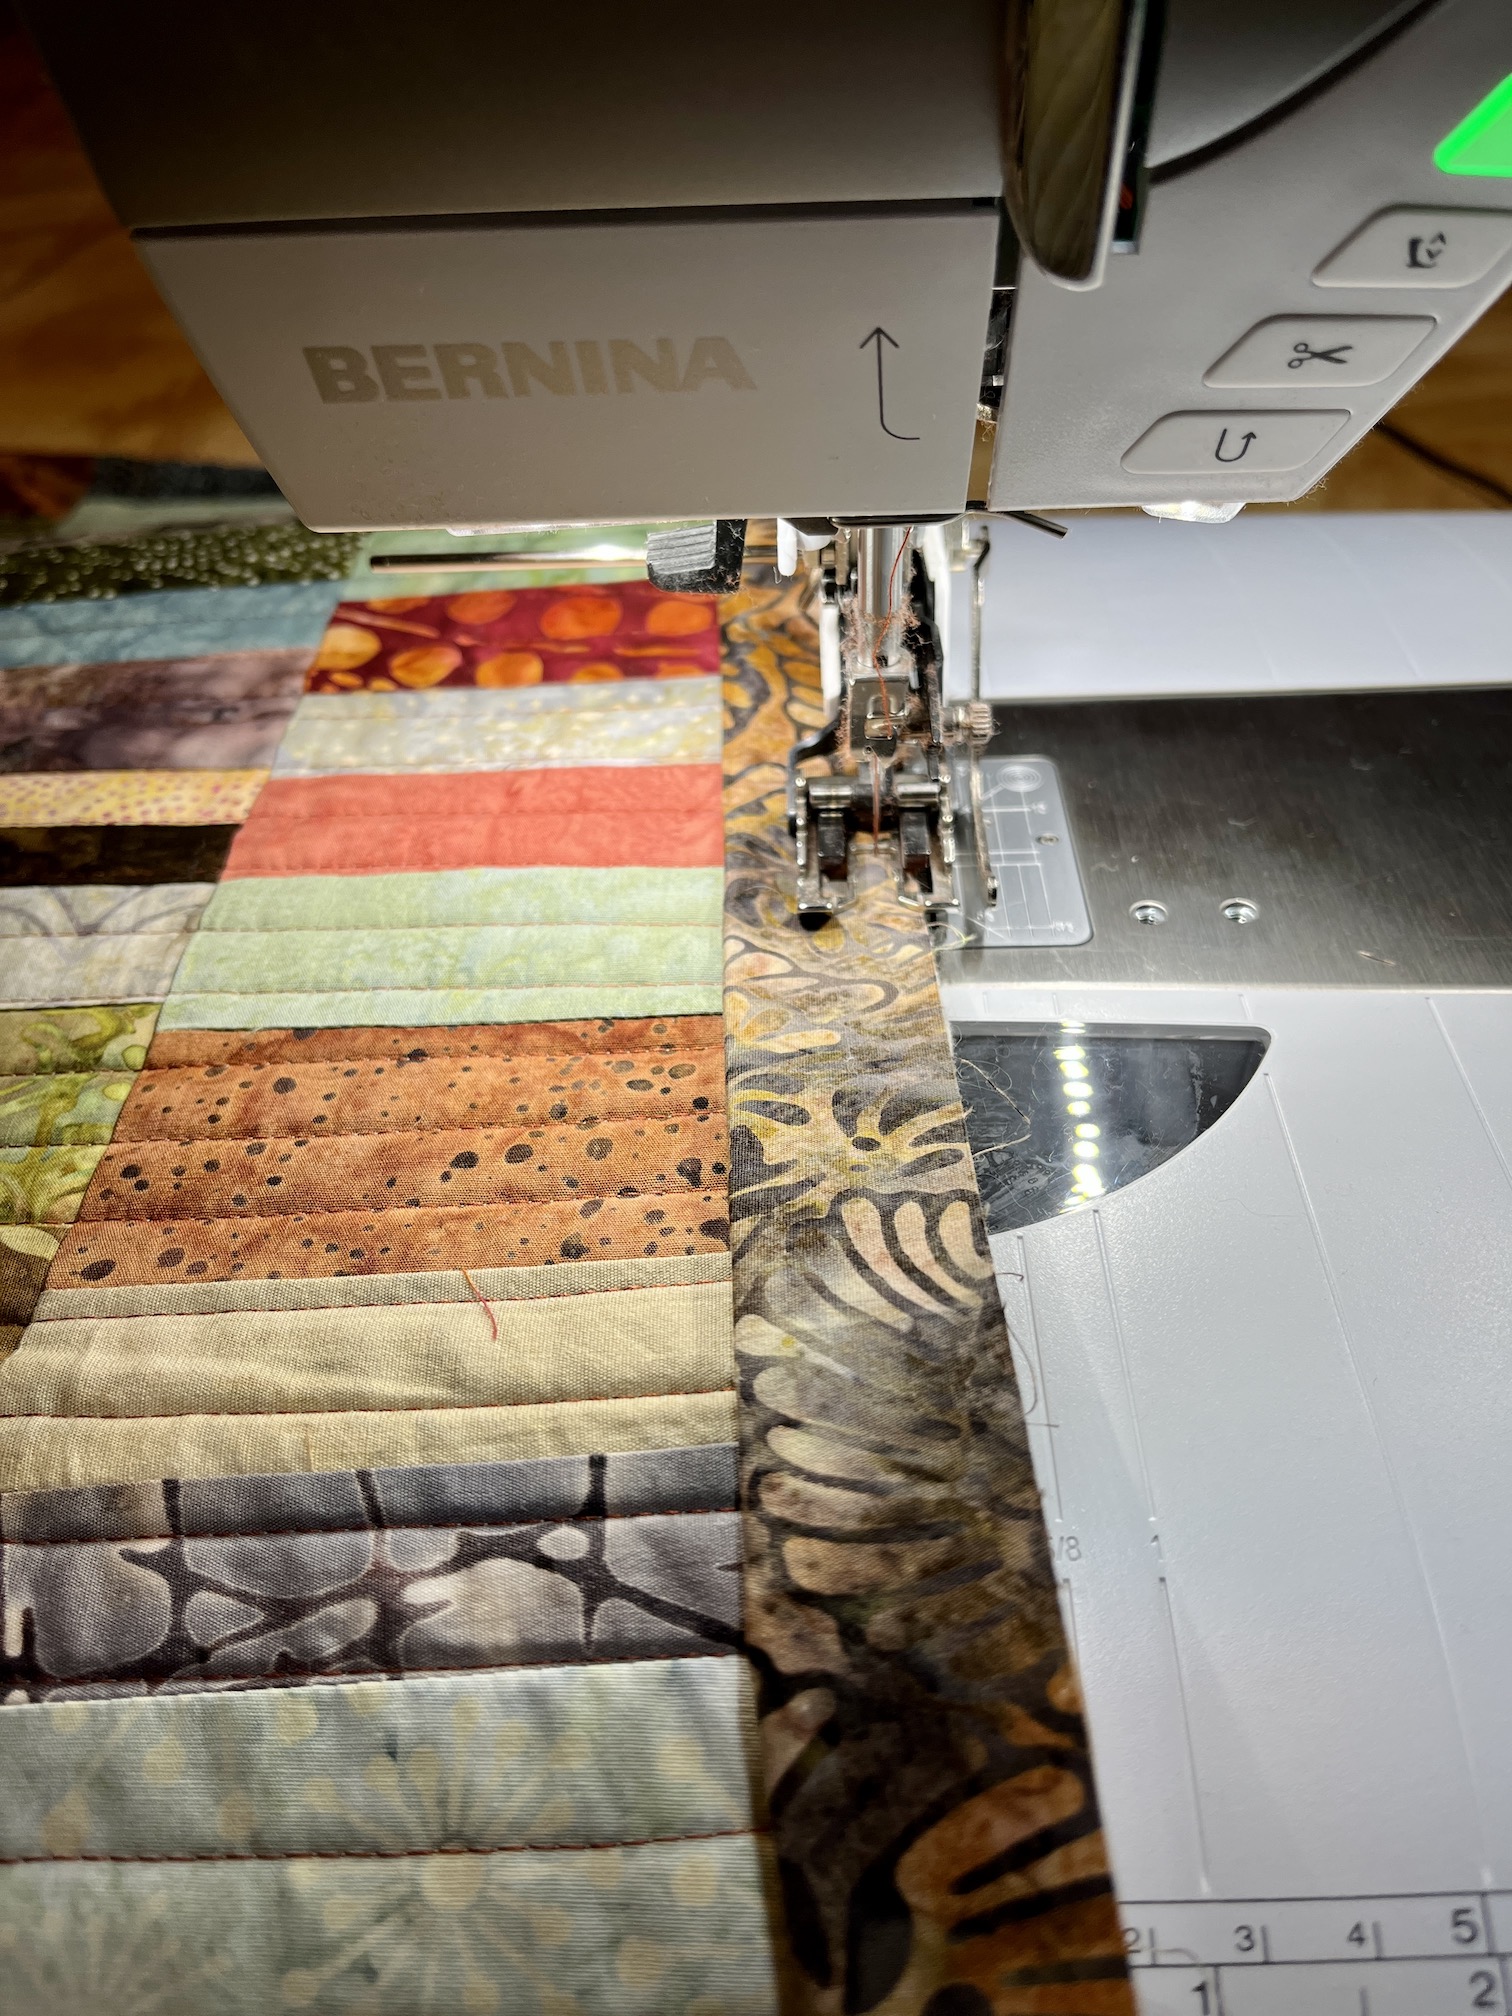
I shared in the March 17, 2023 post7 Million Stitches+, that I was working on machine quilting the table runner on my new sewing machine.
Here is the completed table runner:
And here is the table runner on my friend L’s dining room table (she received it in the mail the other day and sent me a photo)!
It felt wonderful to complete that project and finally give her the table runner!
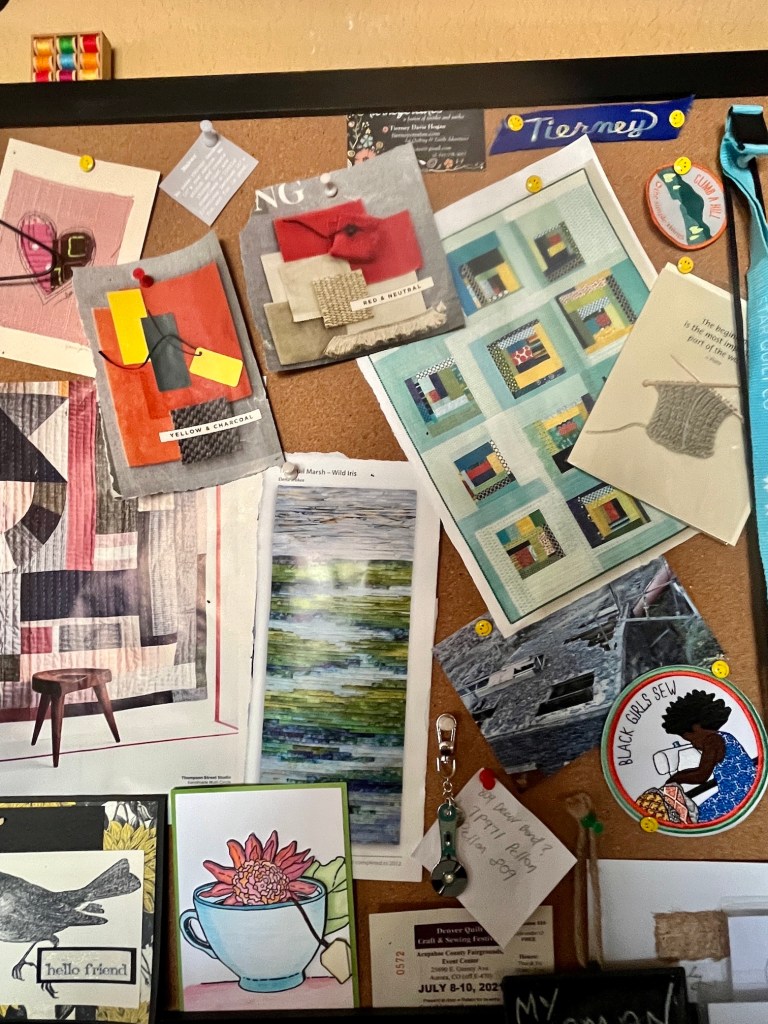
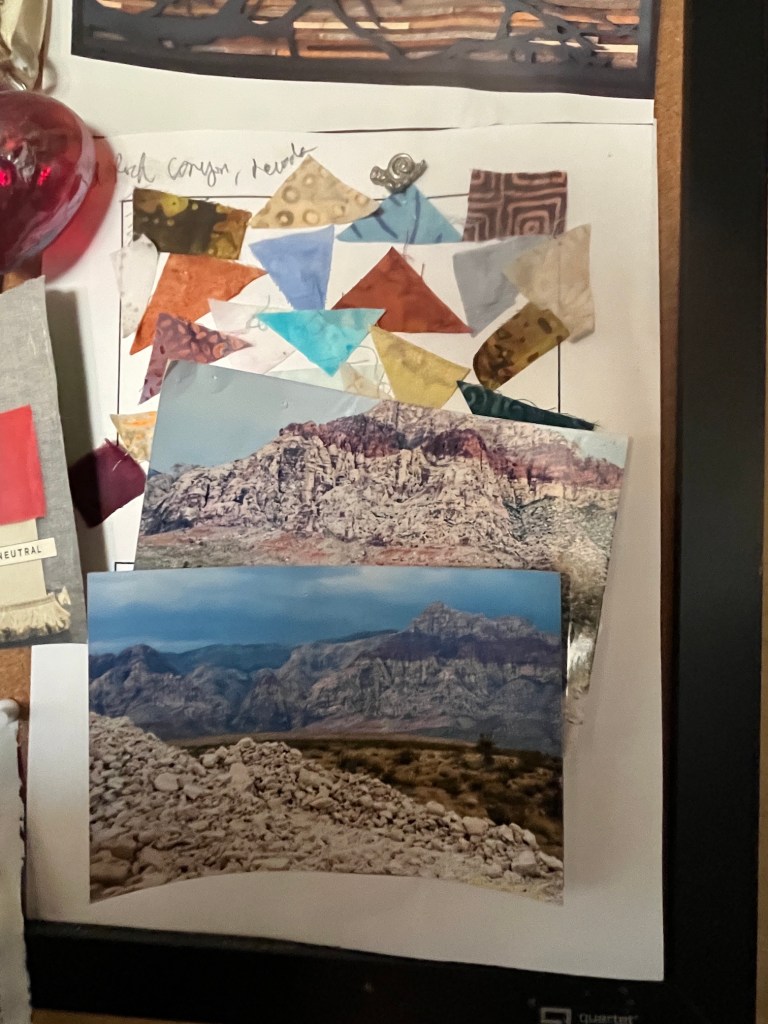
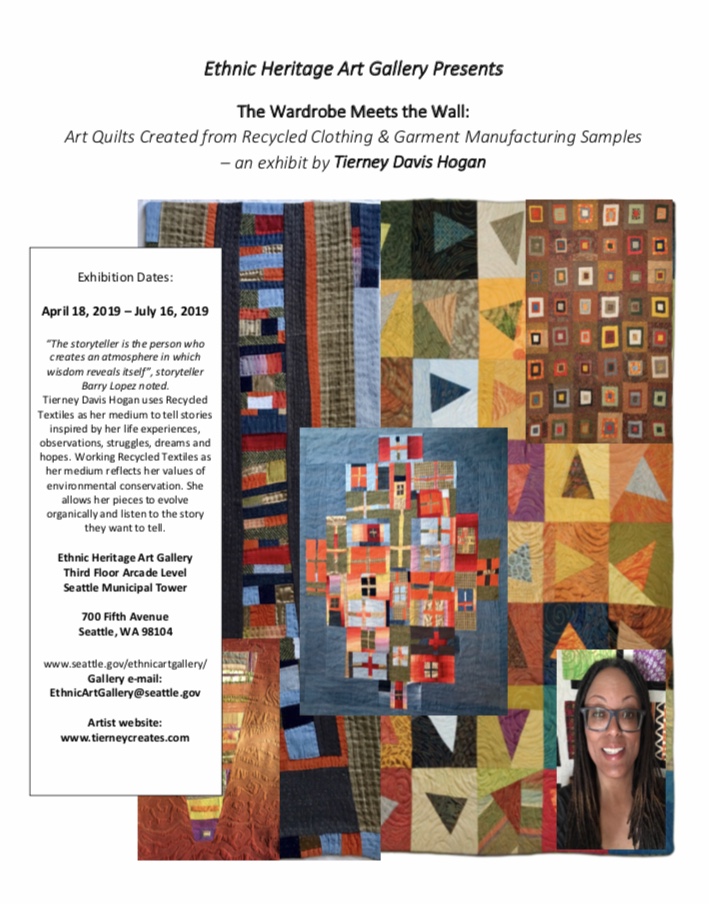
I use color in art quilts intuitively: selecting “what feels right” for a piece. I am inspired by combinations found in nature, color combinations that I see in publications, and colors that I enjoy seeing together.
Below are a couple photos from my inspiration board in my studio:
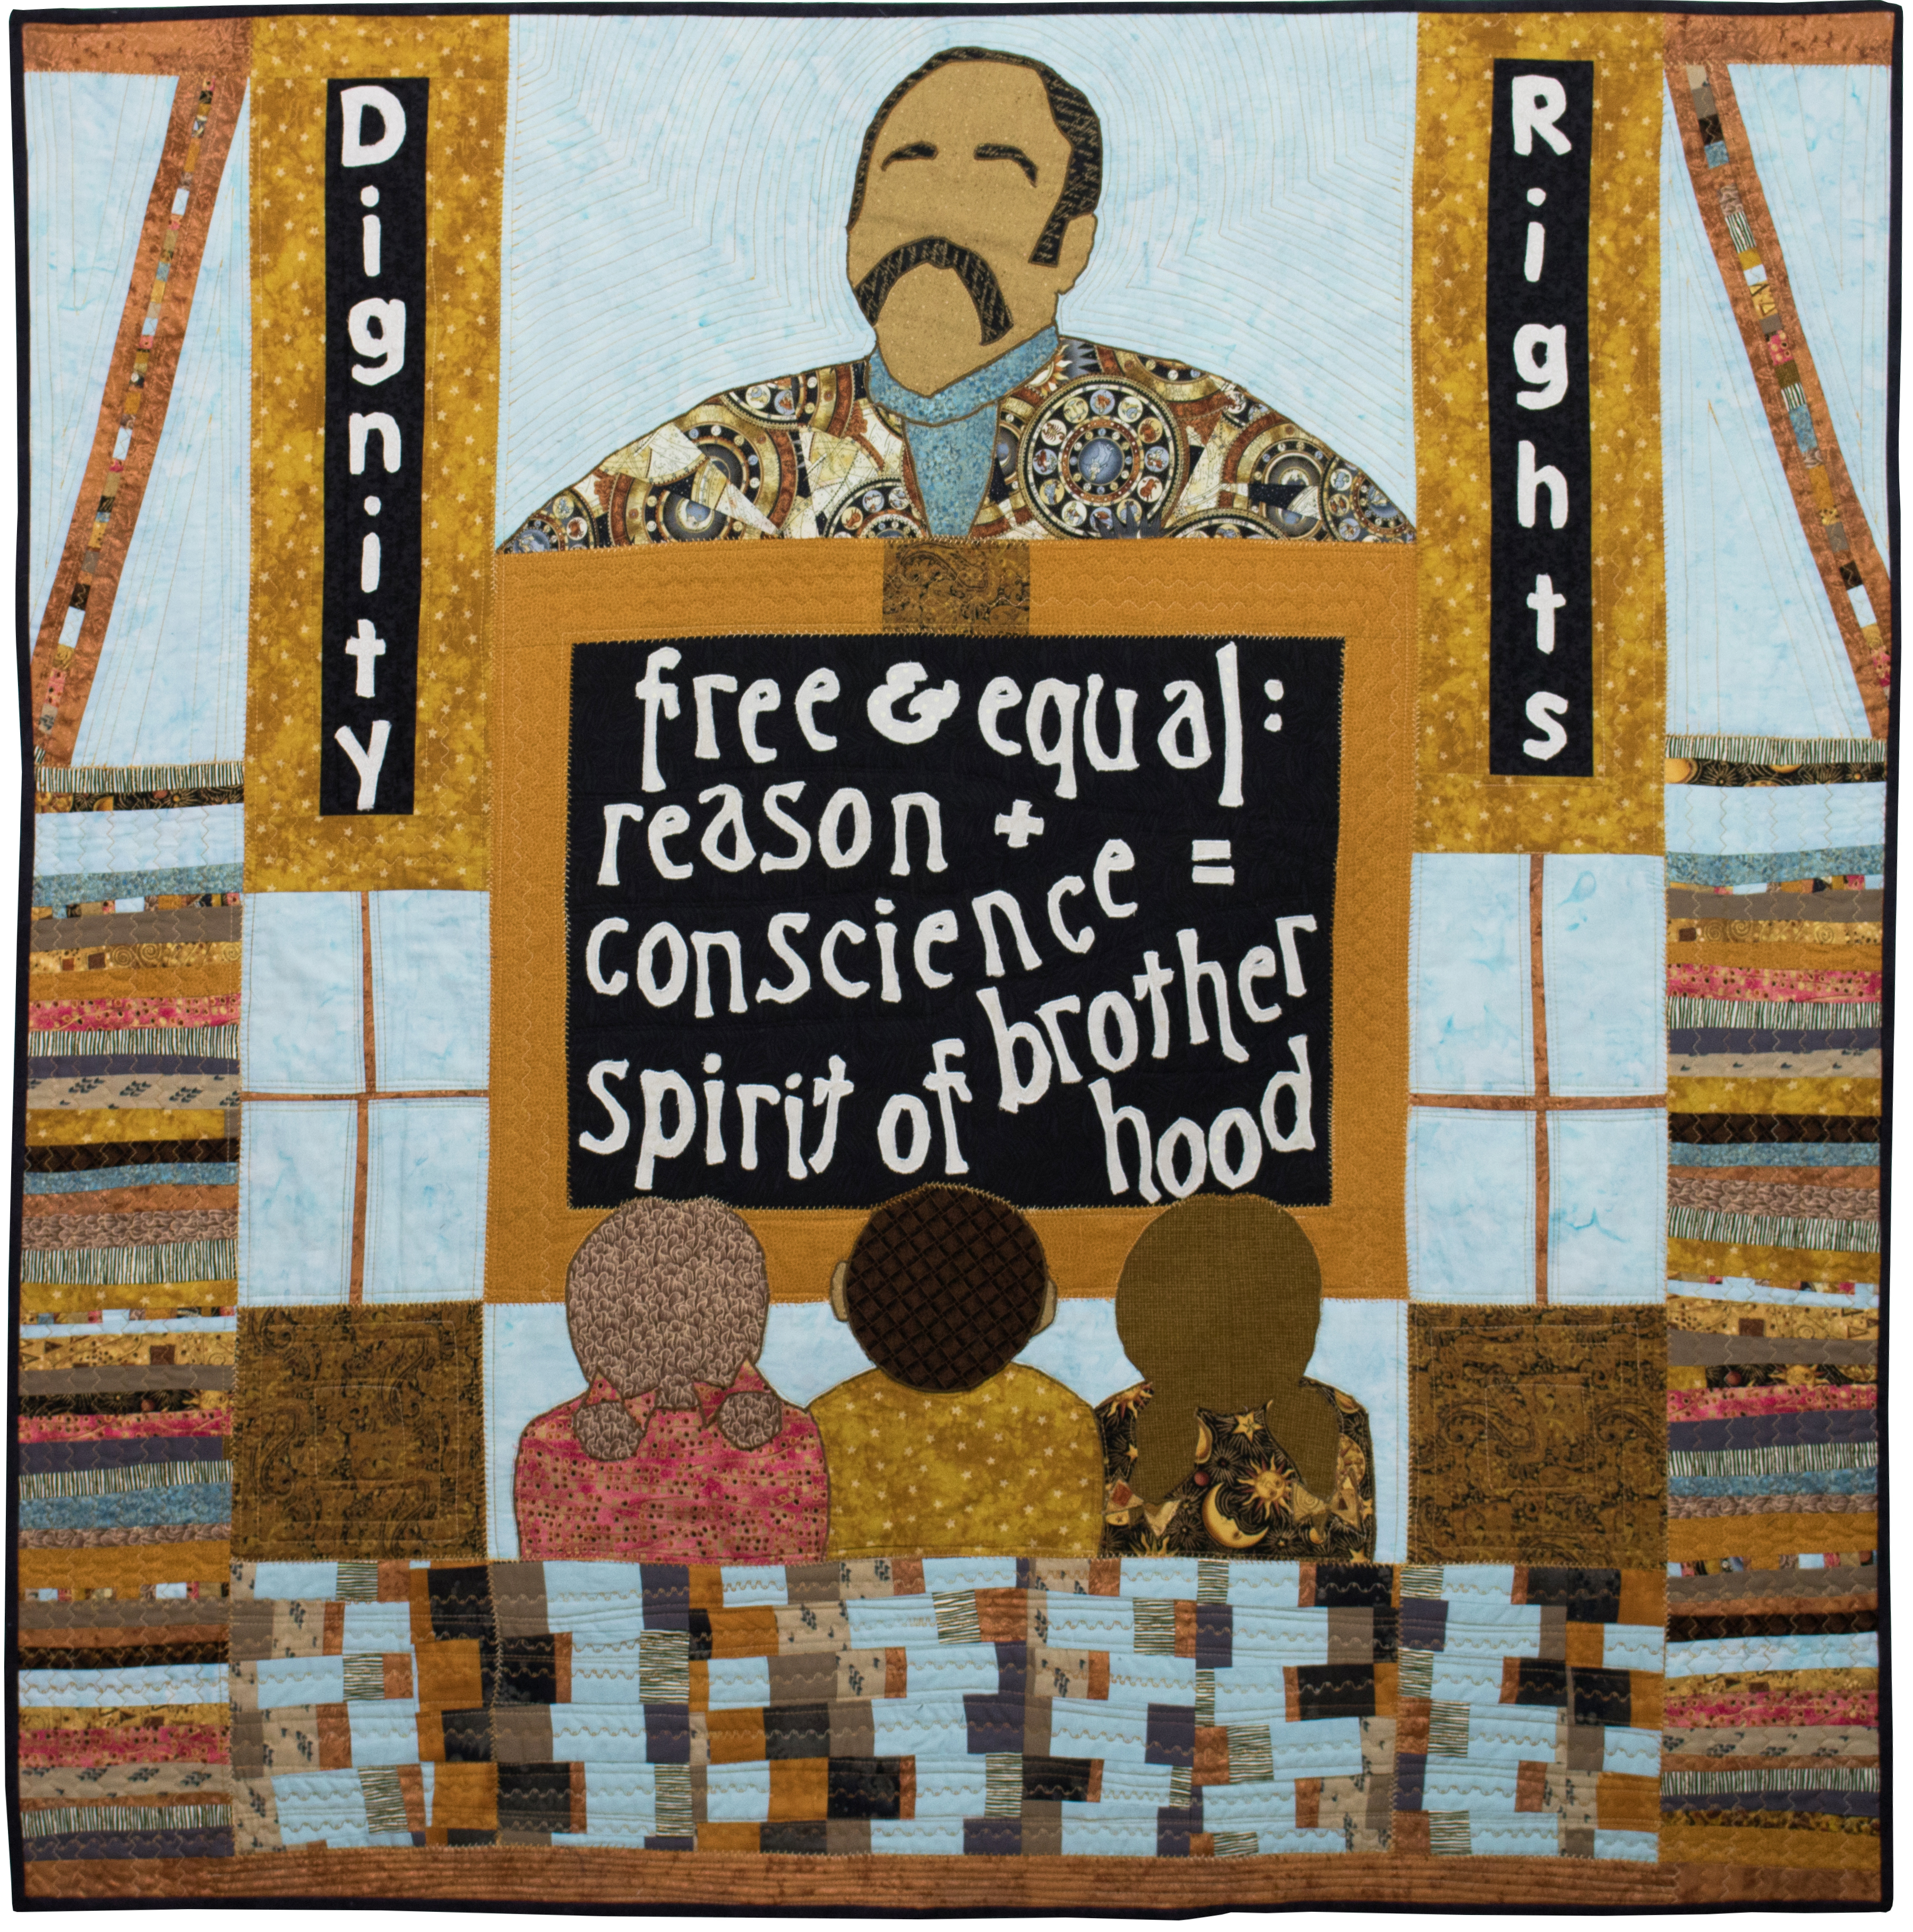
I also have a palette that I love to use, an example is in my quilt below The Lesson & The Equation:
You can also see my palette repeated in this poster from first solo show in April 2019:
(It’s funny but it took a while for me to realize that I actually have a palette that I repeat!)
That being said, I have studied “color theory” in both formal art quilting classes as well as by reading many books. For example I love Joen Wolfrom’s book Color Play: Easy Steps to Imaginative Color in Quilts (2000), the first book I ever read on color theory.
In order to challenge and “break the rules” when creating innovative art quilts, first you have to understand the rules! Although it might be disinteresting to some of the students in my workshop, it is a foundation of artistic creation and one I should cover during my workshop.
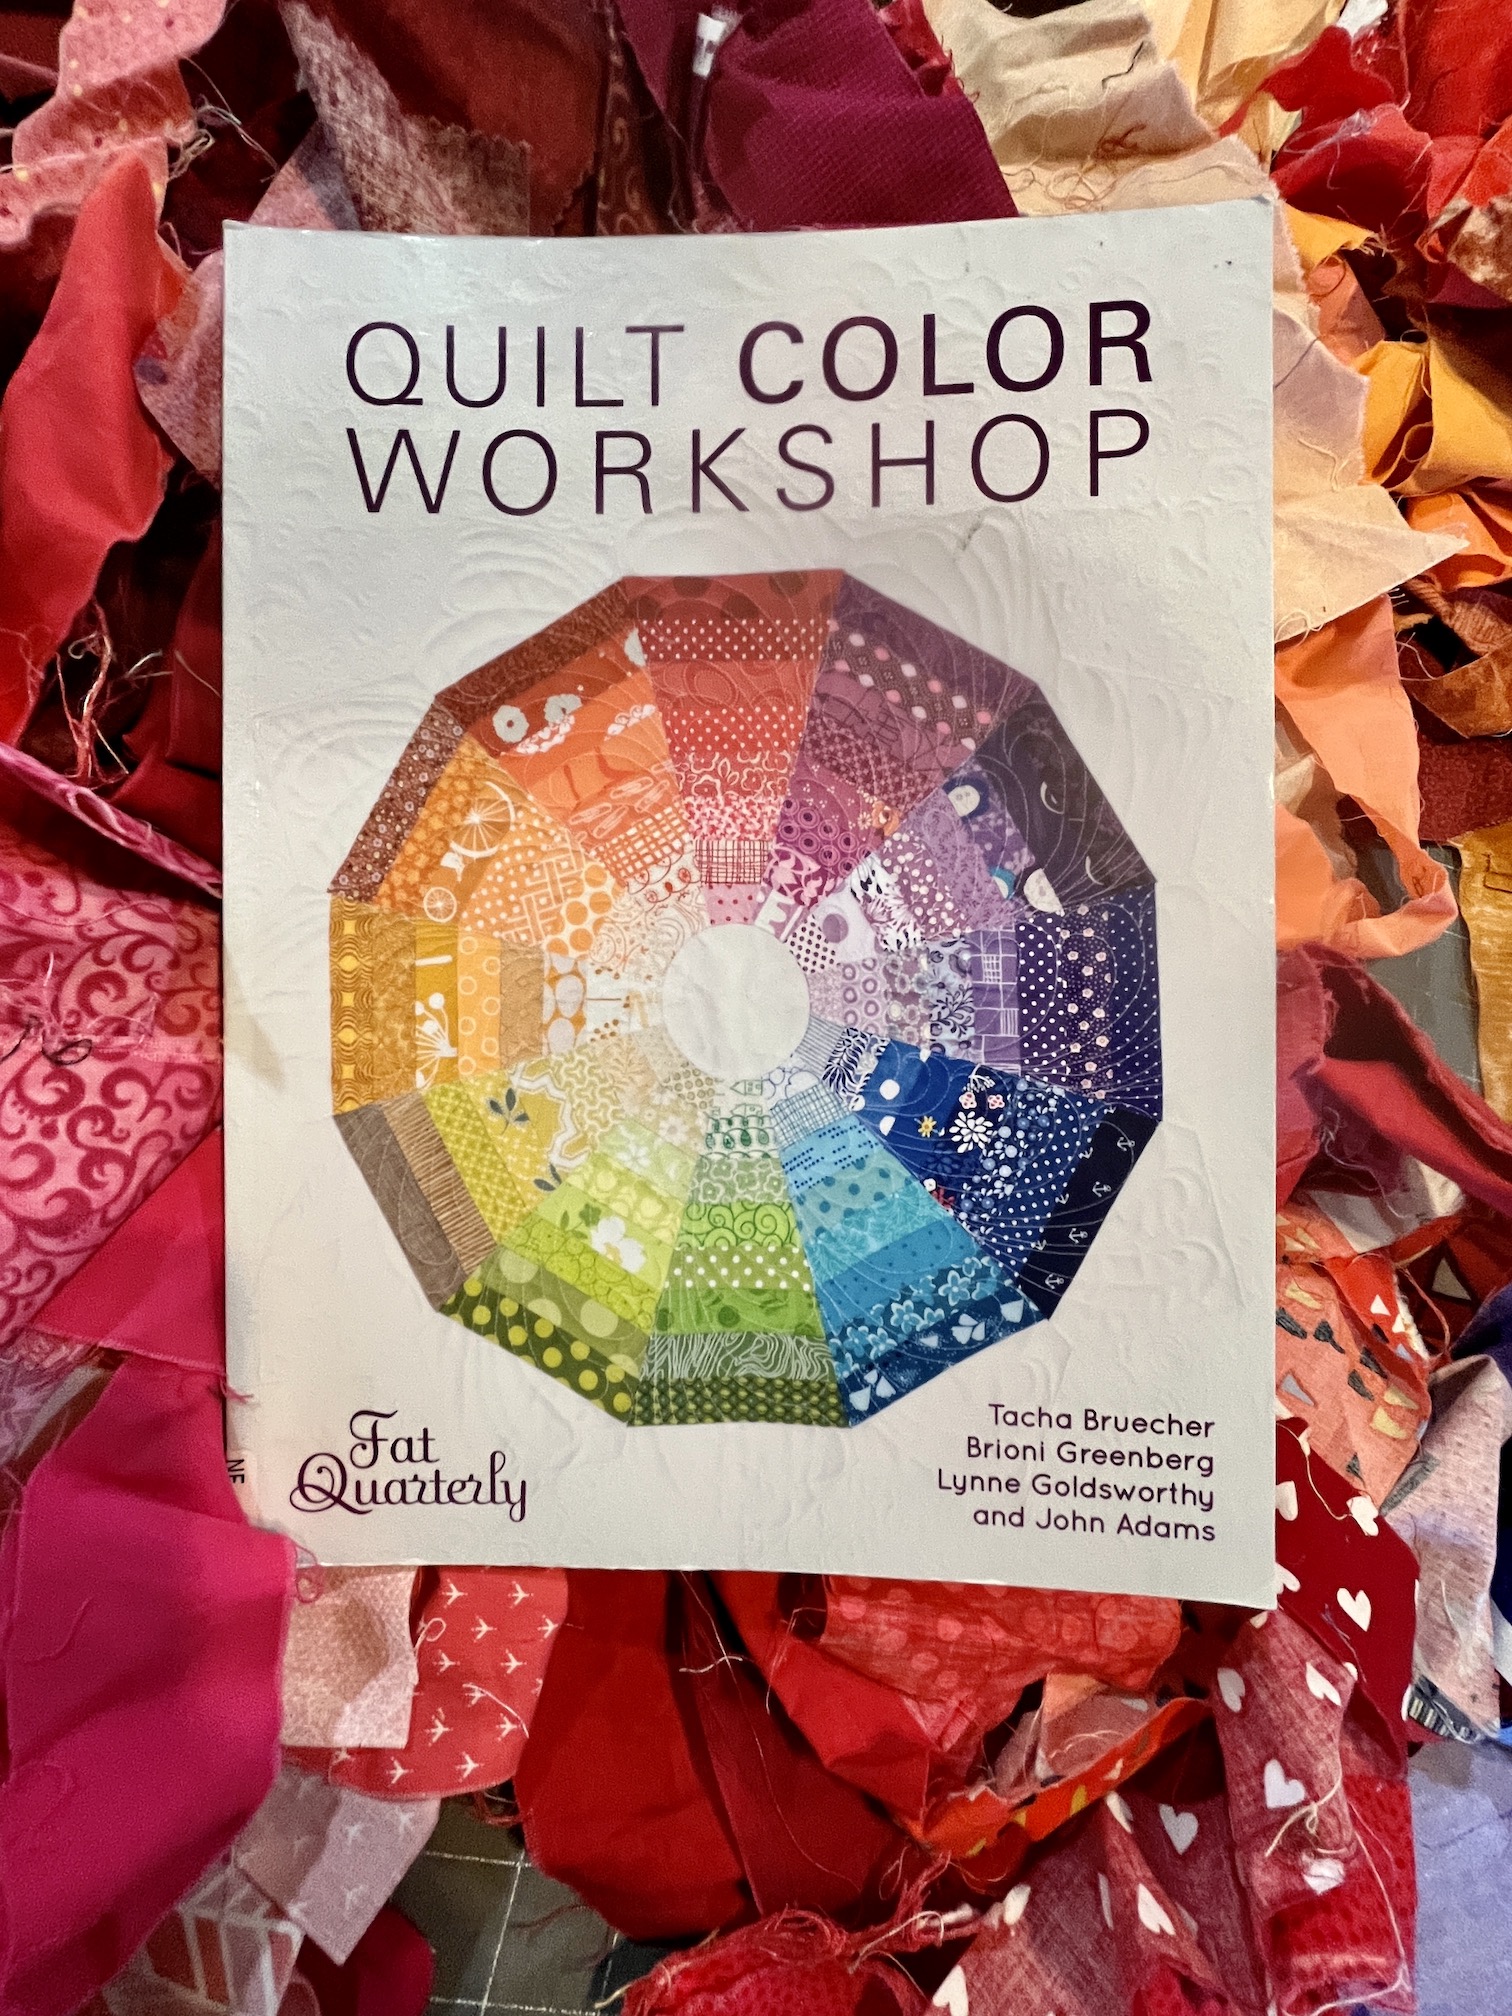
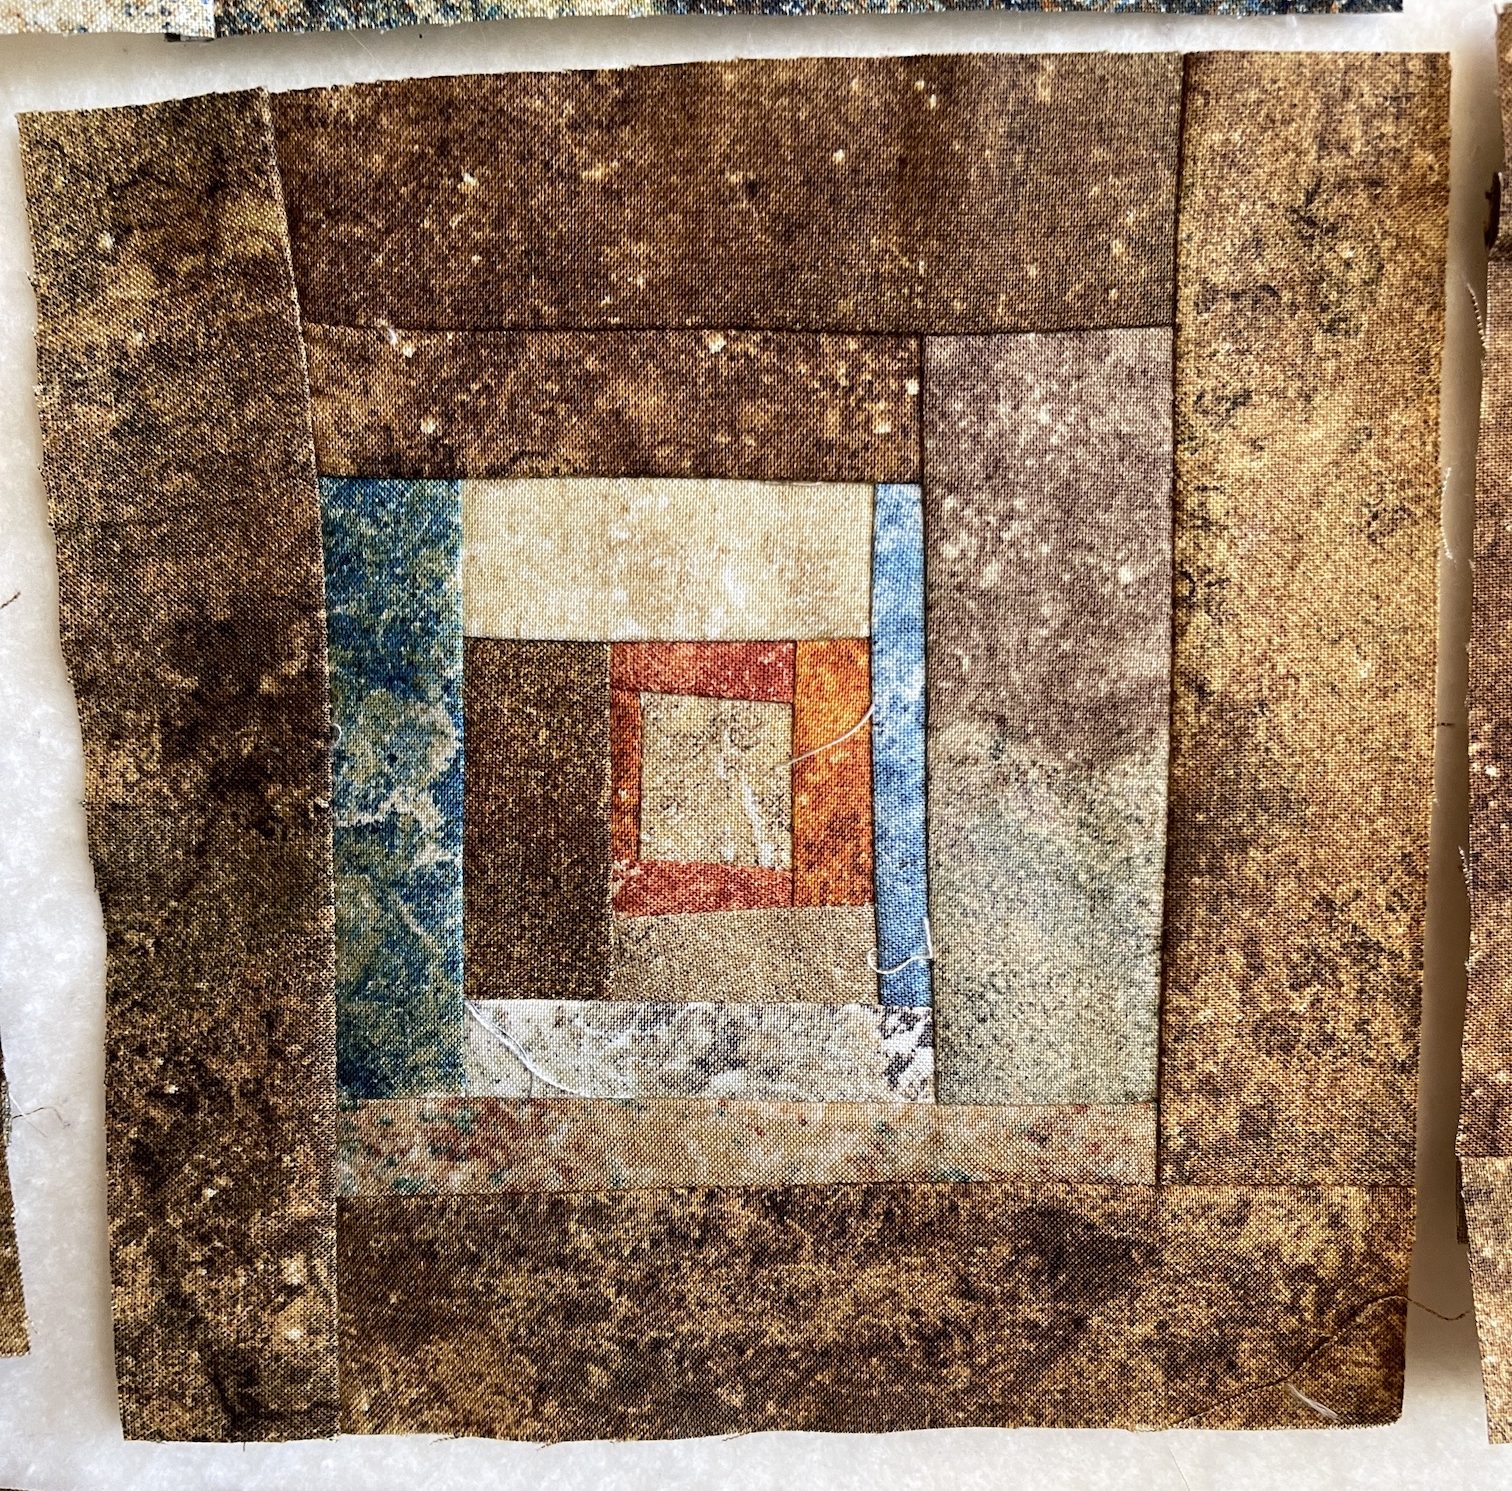
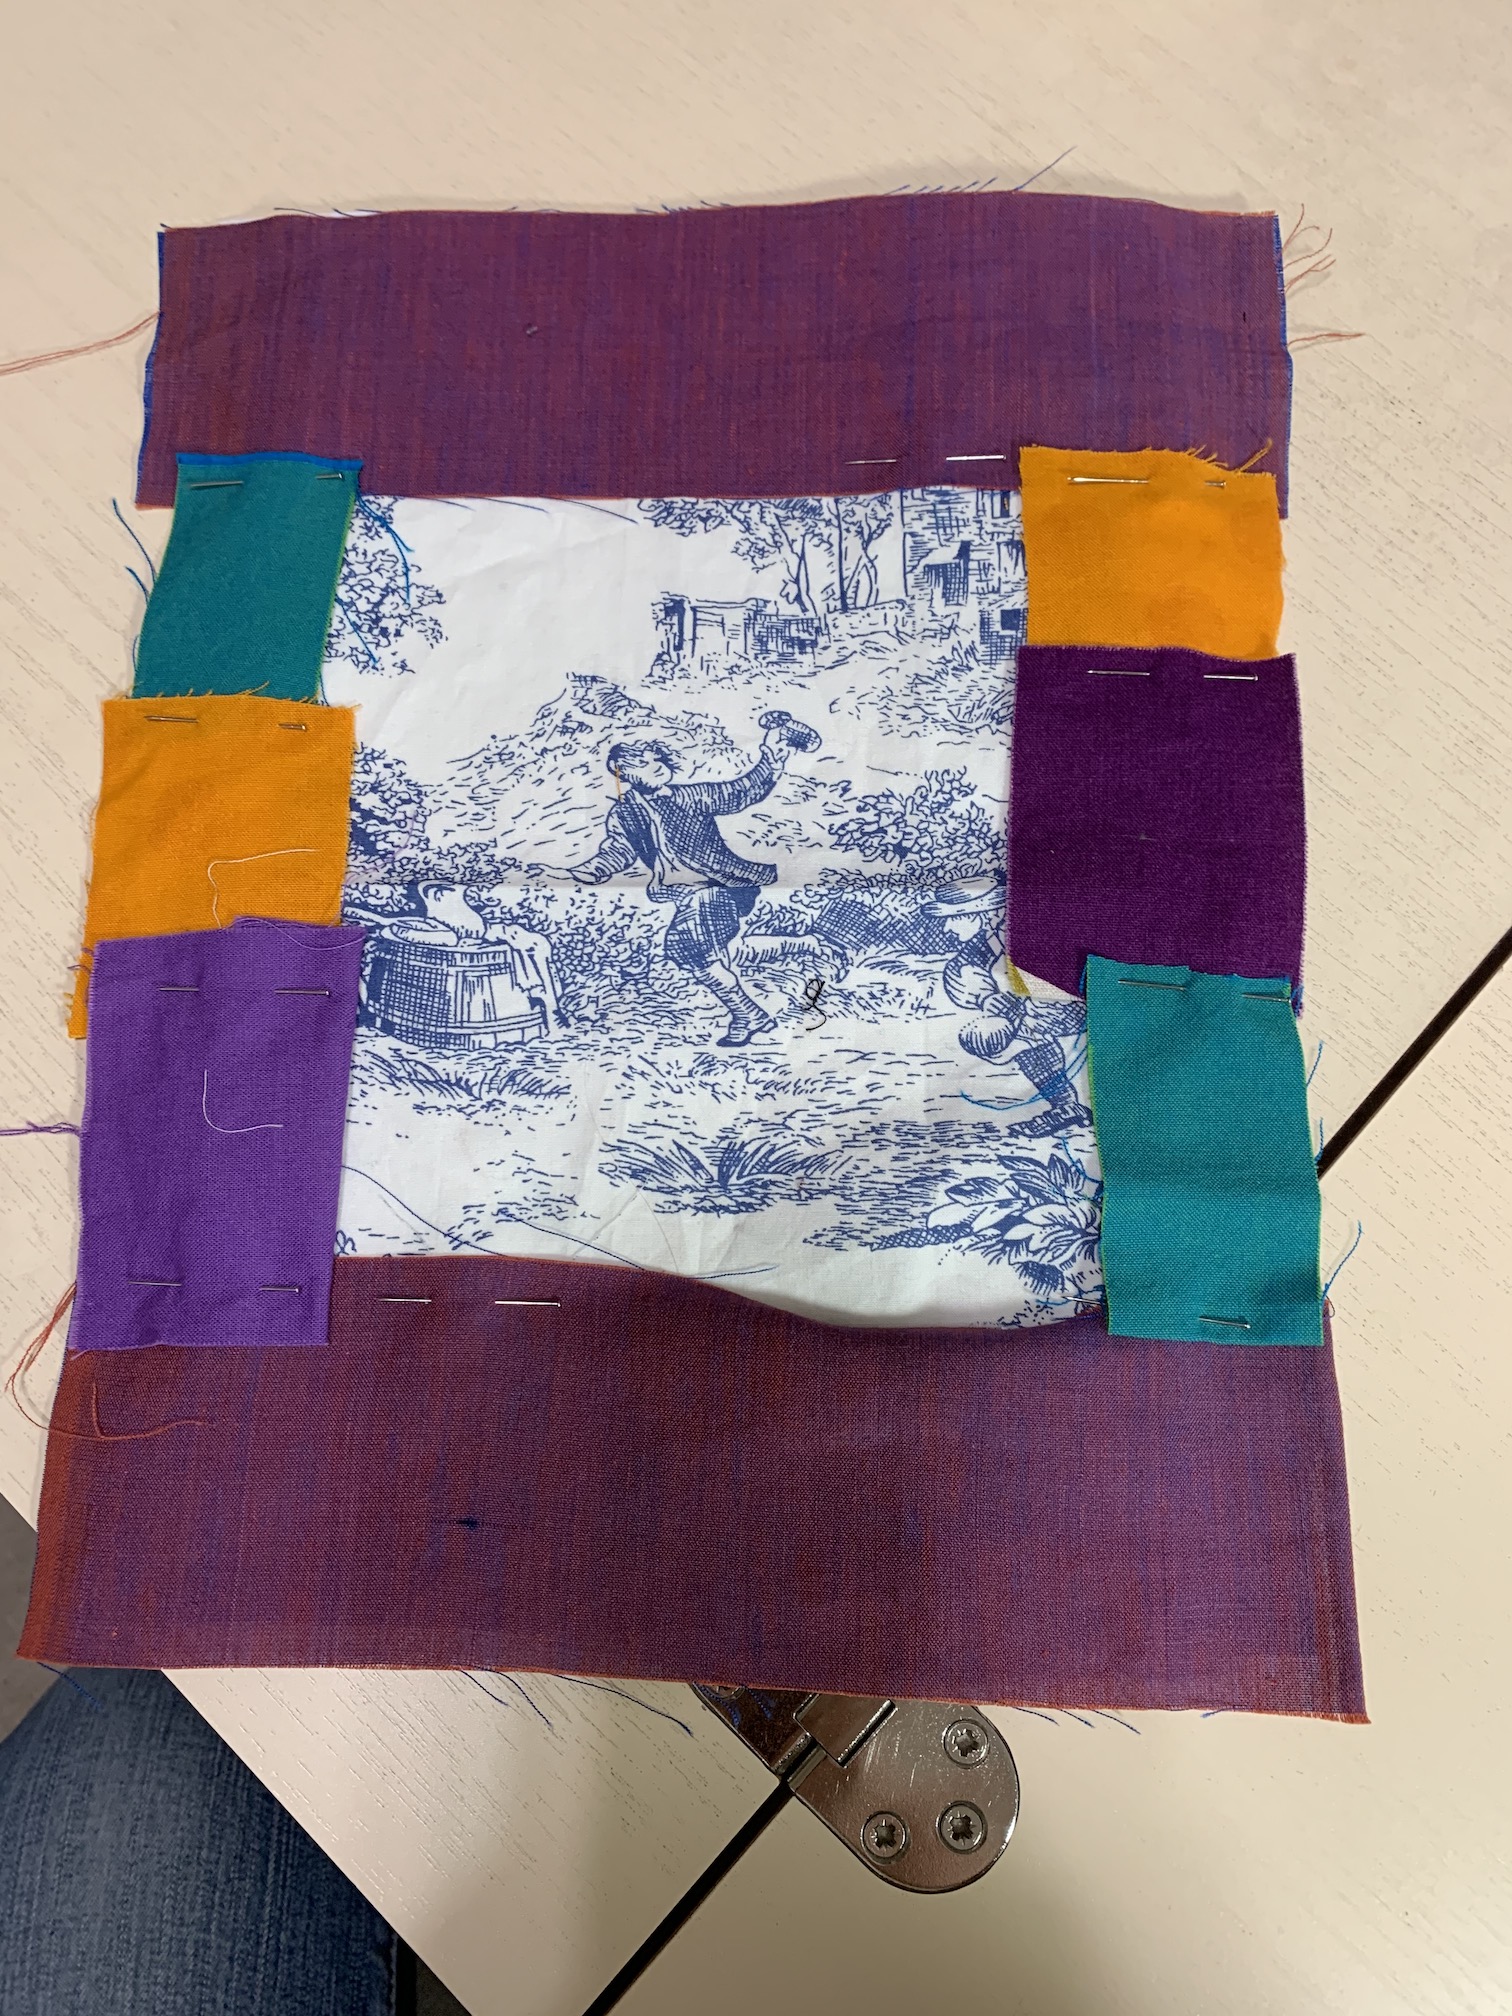
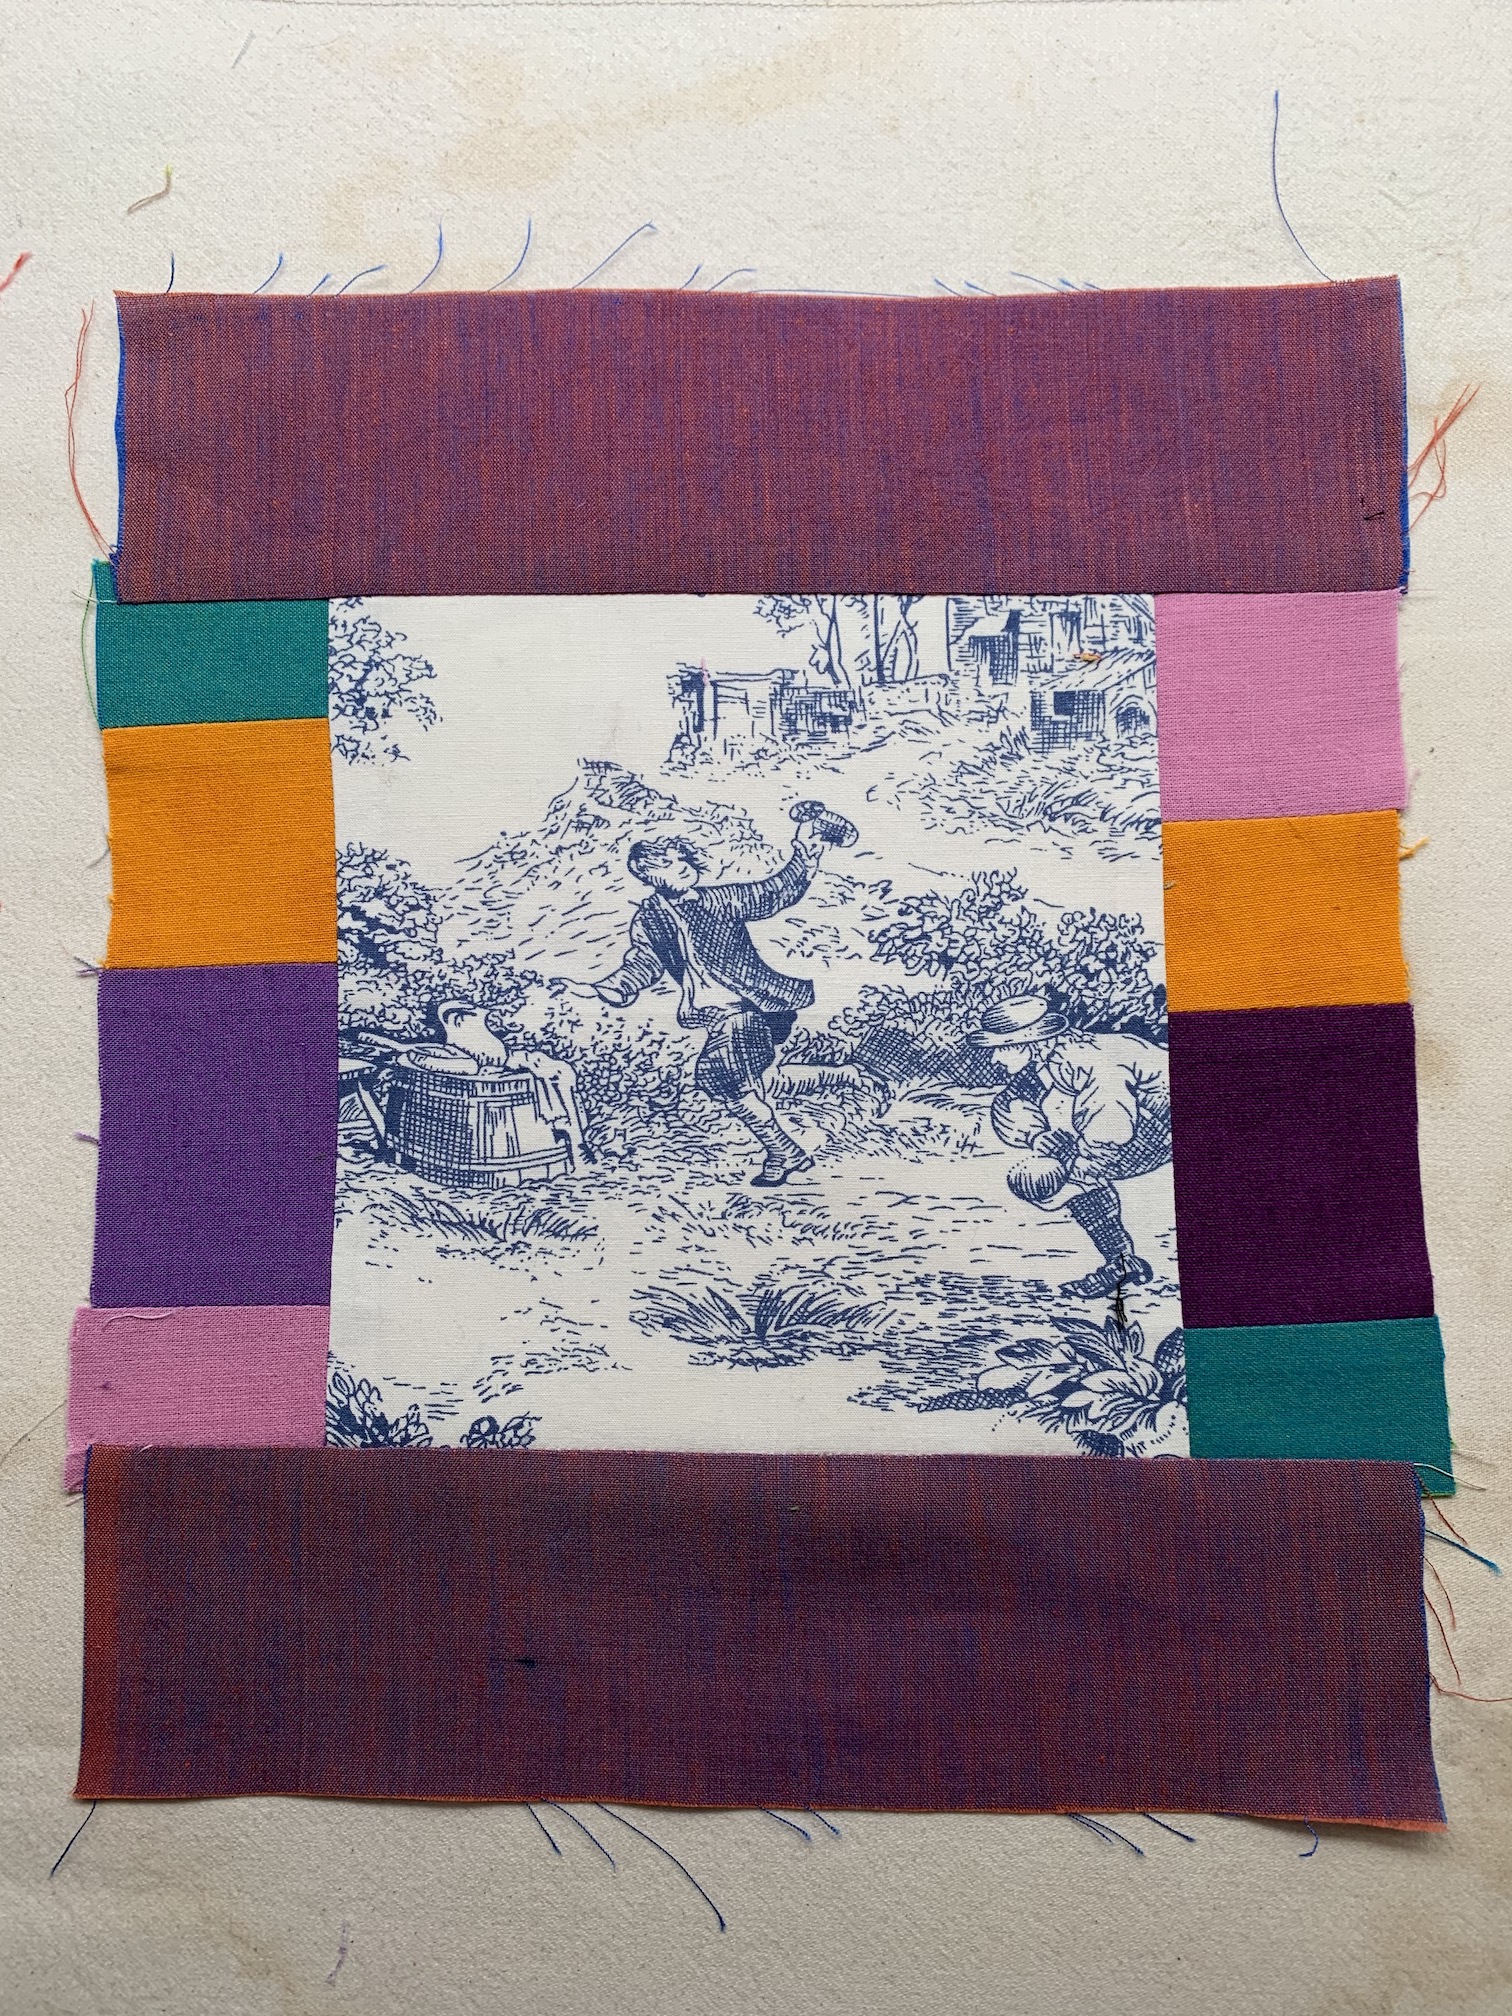
I realized that if I am going to teach an art quilting class next year (see post A Year of Finishes: The Pivot) I need to brush up on color theory. I thought the best way to do this was to create a project I found in the book Quilt Color Workshop by T. Bruecher, B. Greenberg, L. Goldsworthy, and J. Adams (2014), that I borrowed from the library.
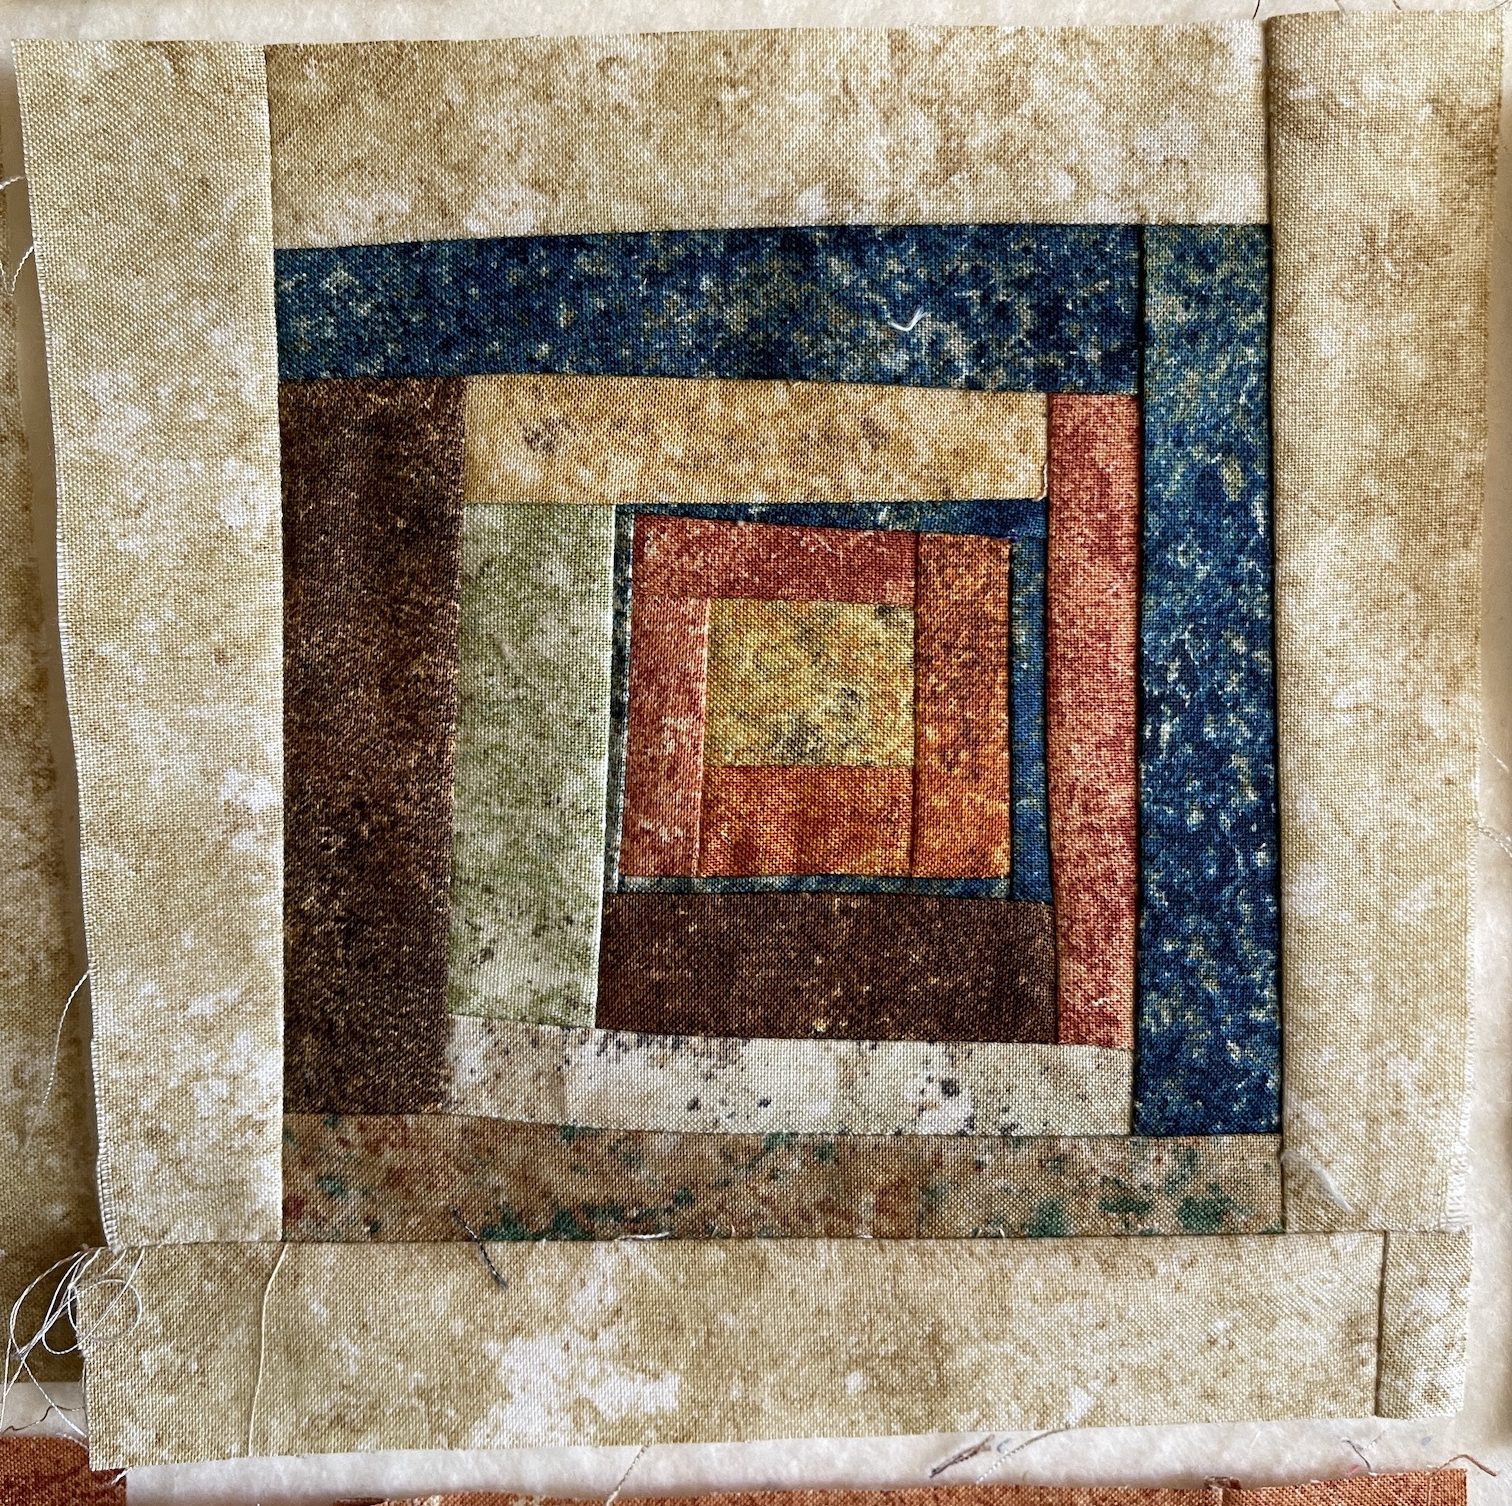
I am making the Colour Wheel Quilt on the front cover, which will serve as a class visual for my workshop as well as refresh my understanding of Primary, Secondary, and Tertiary Colors; and Pure Color, Tints, Tones, and Shades.
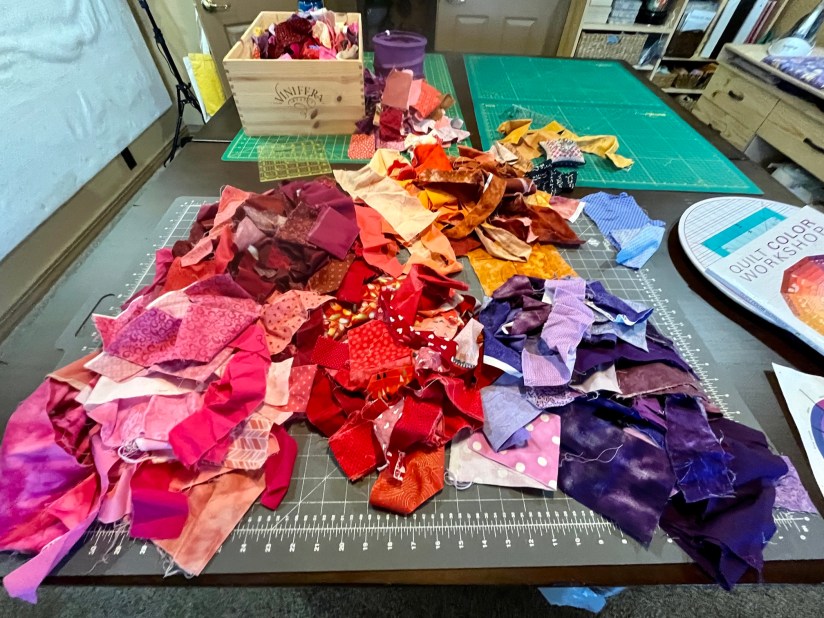
I have a lot of sorting to do to find the strips from my large collection of fabric scraps for the piece.
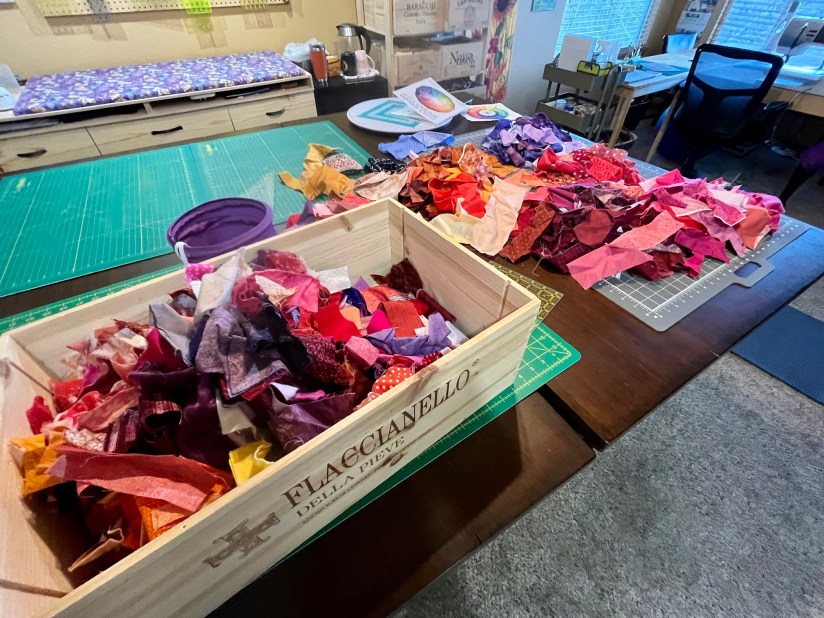
Currently I am sorting through my box of Reds, Purples, and Oranges to begin the project (I’ve organized many of my fabric scraps into wine crates that liquor stores have my kind enough to gift me or sell to me cheaply).
At first it was tedious, but then it became fun. It is a productive way to revisit my fabric scraps.
I am having fun mapping out the 6-day workshop I will give next year. I am planning to ship to the venue a large amount of my fabric scrap collection for the students to use if they like during the workshop. I am ready to move on from my crazy fabric scrap collection* and start digging into my crazy fat quarter collection (and create more scraps – ha!)
*75% of my fabric scrap collection is from fabric scraps others have given to me. So it is from others’ fabric choices. I am ready to primarily work from my fabric choices in the future…
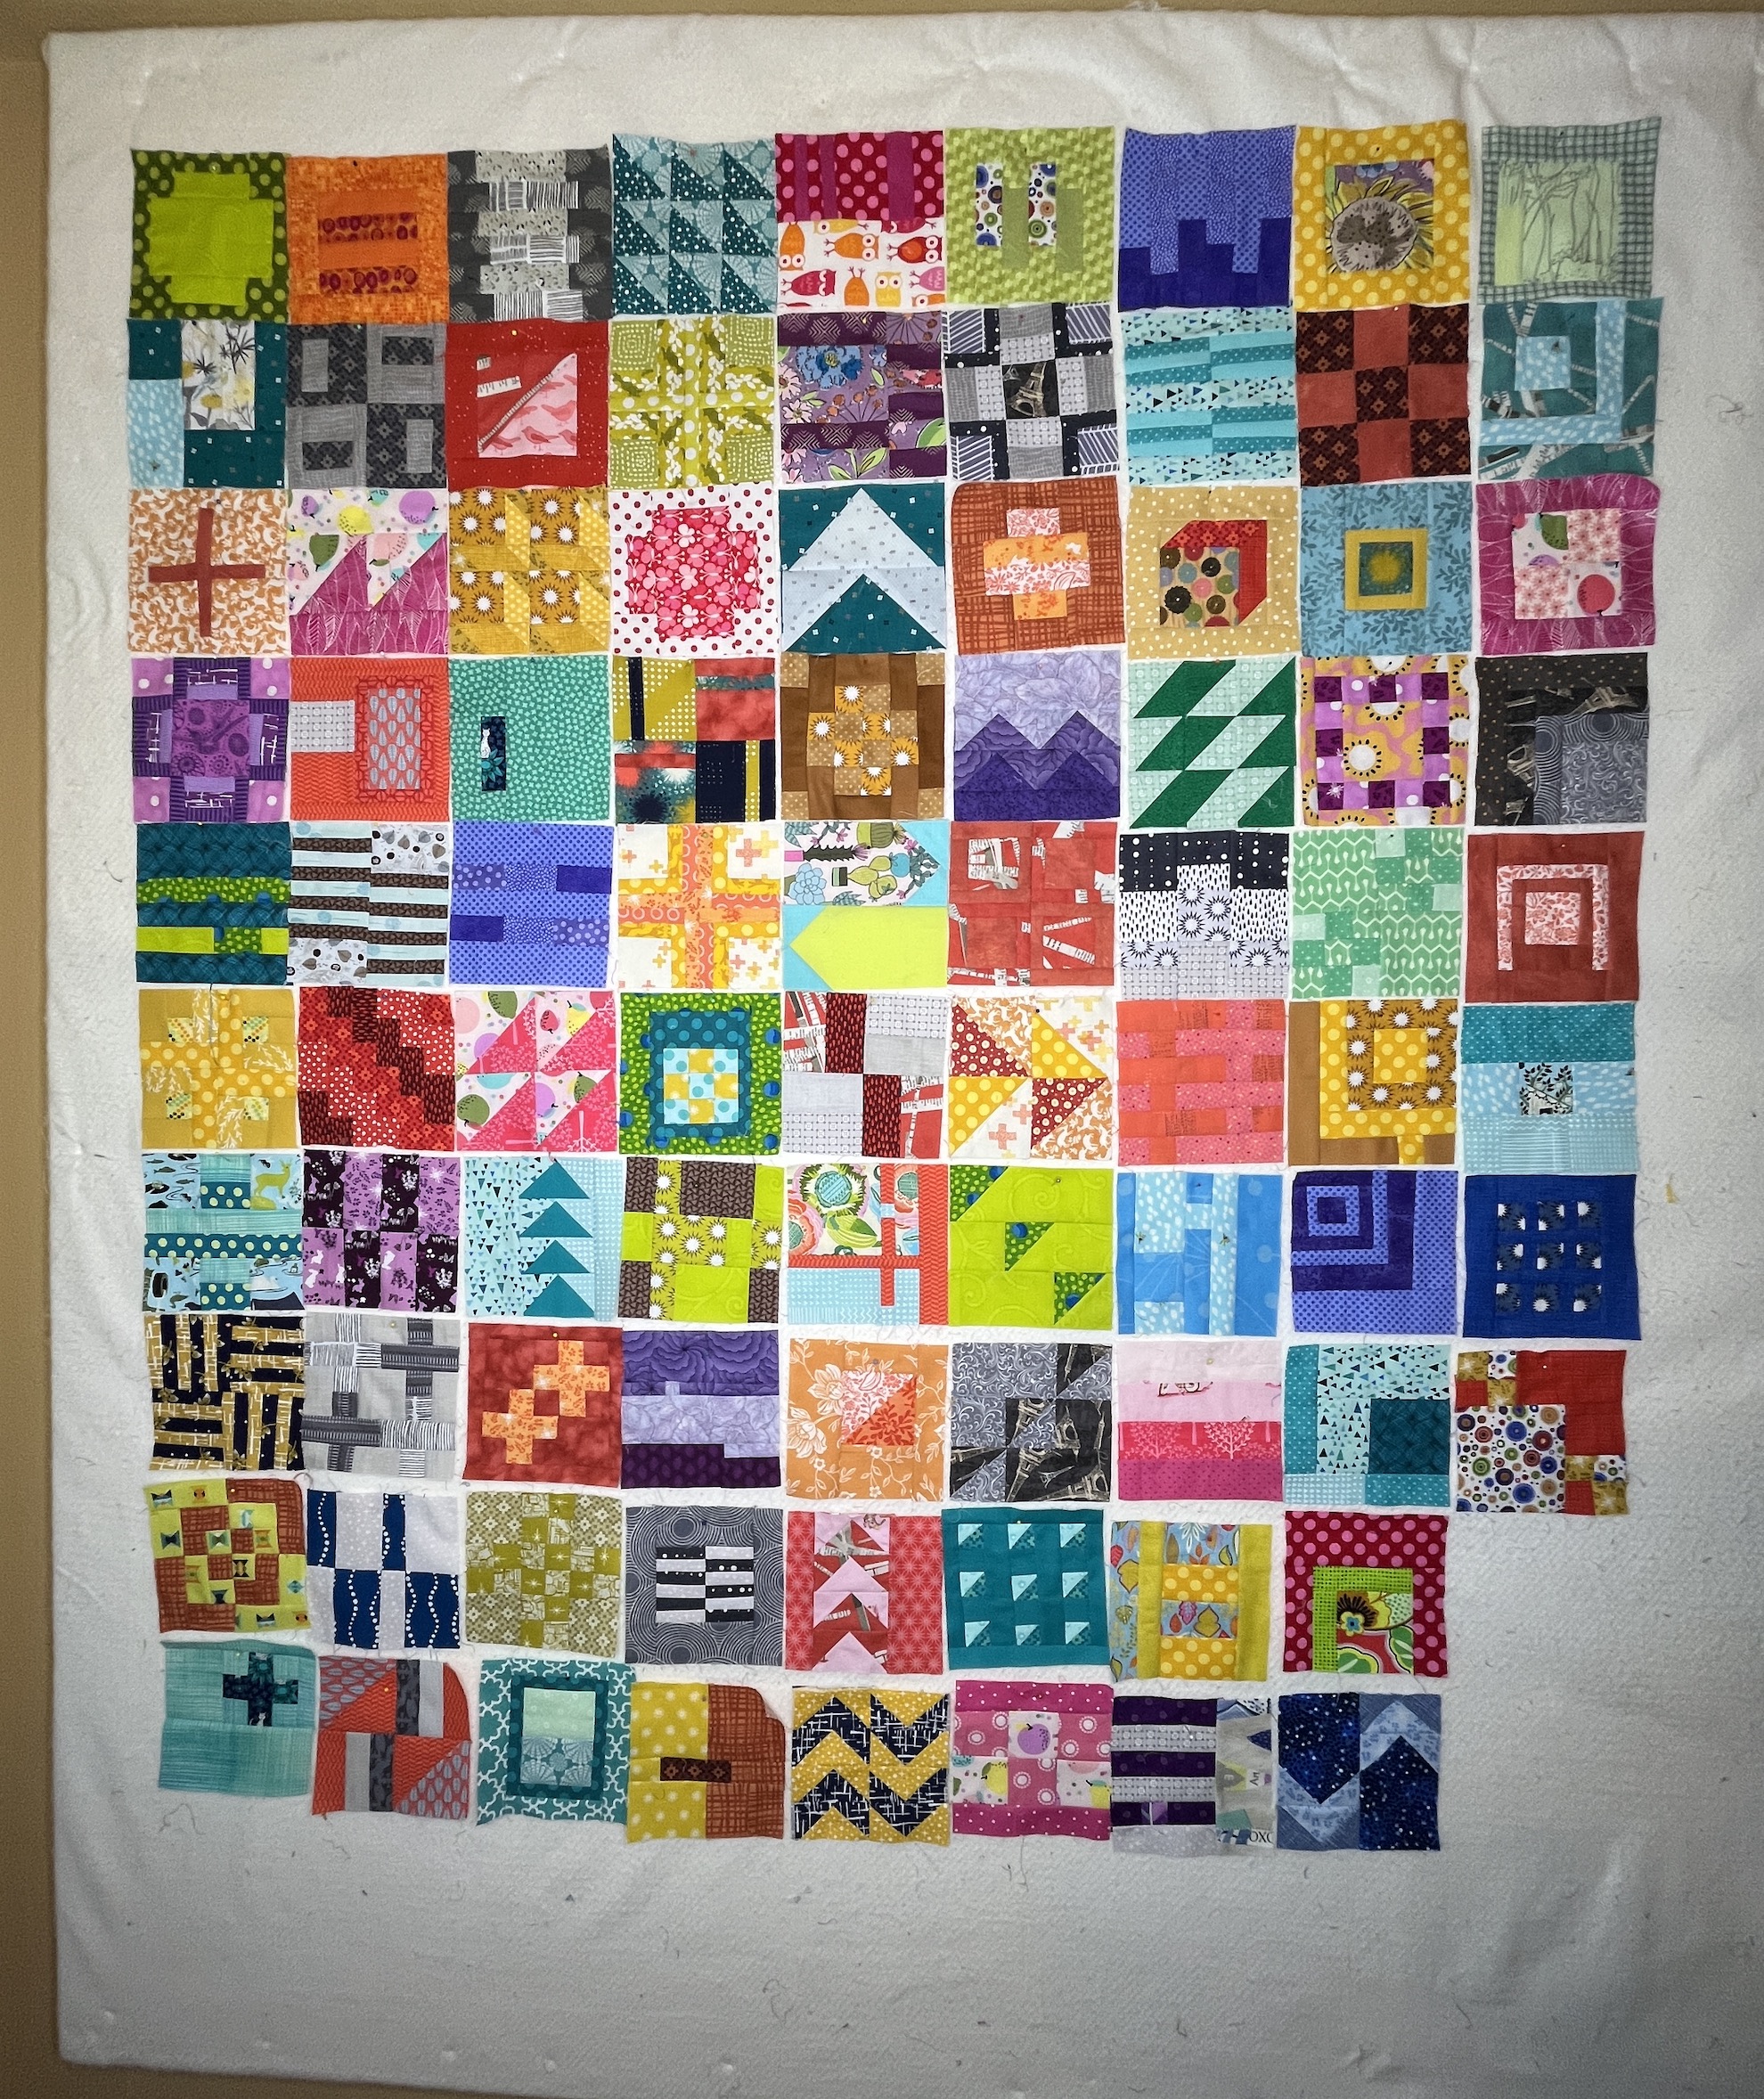
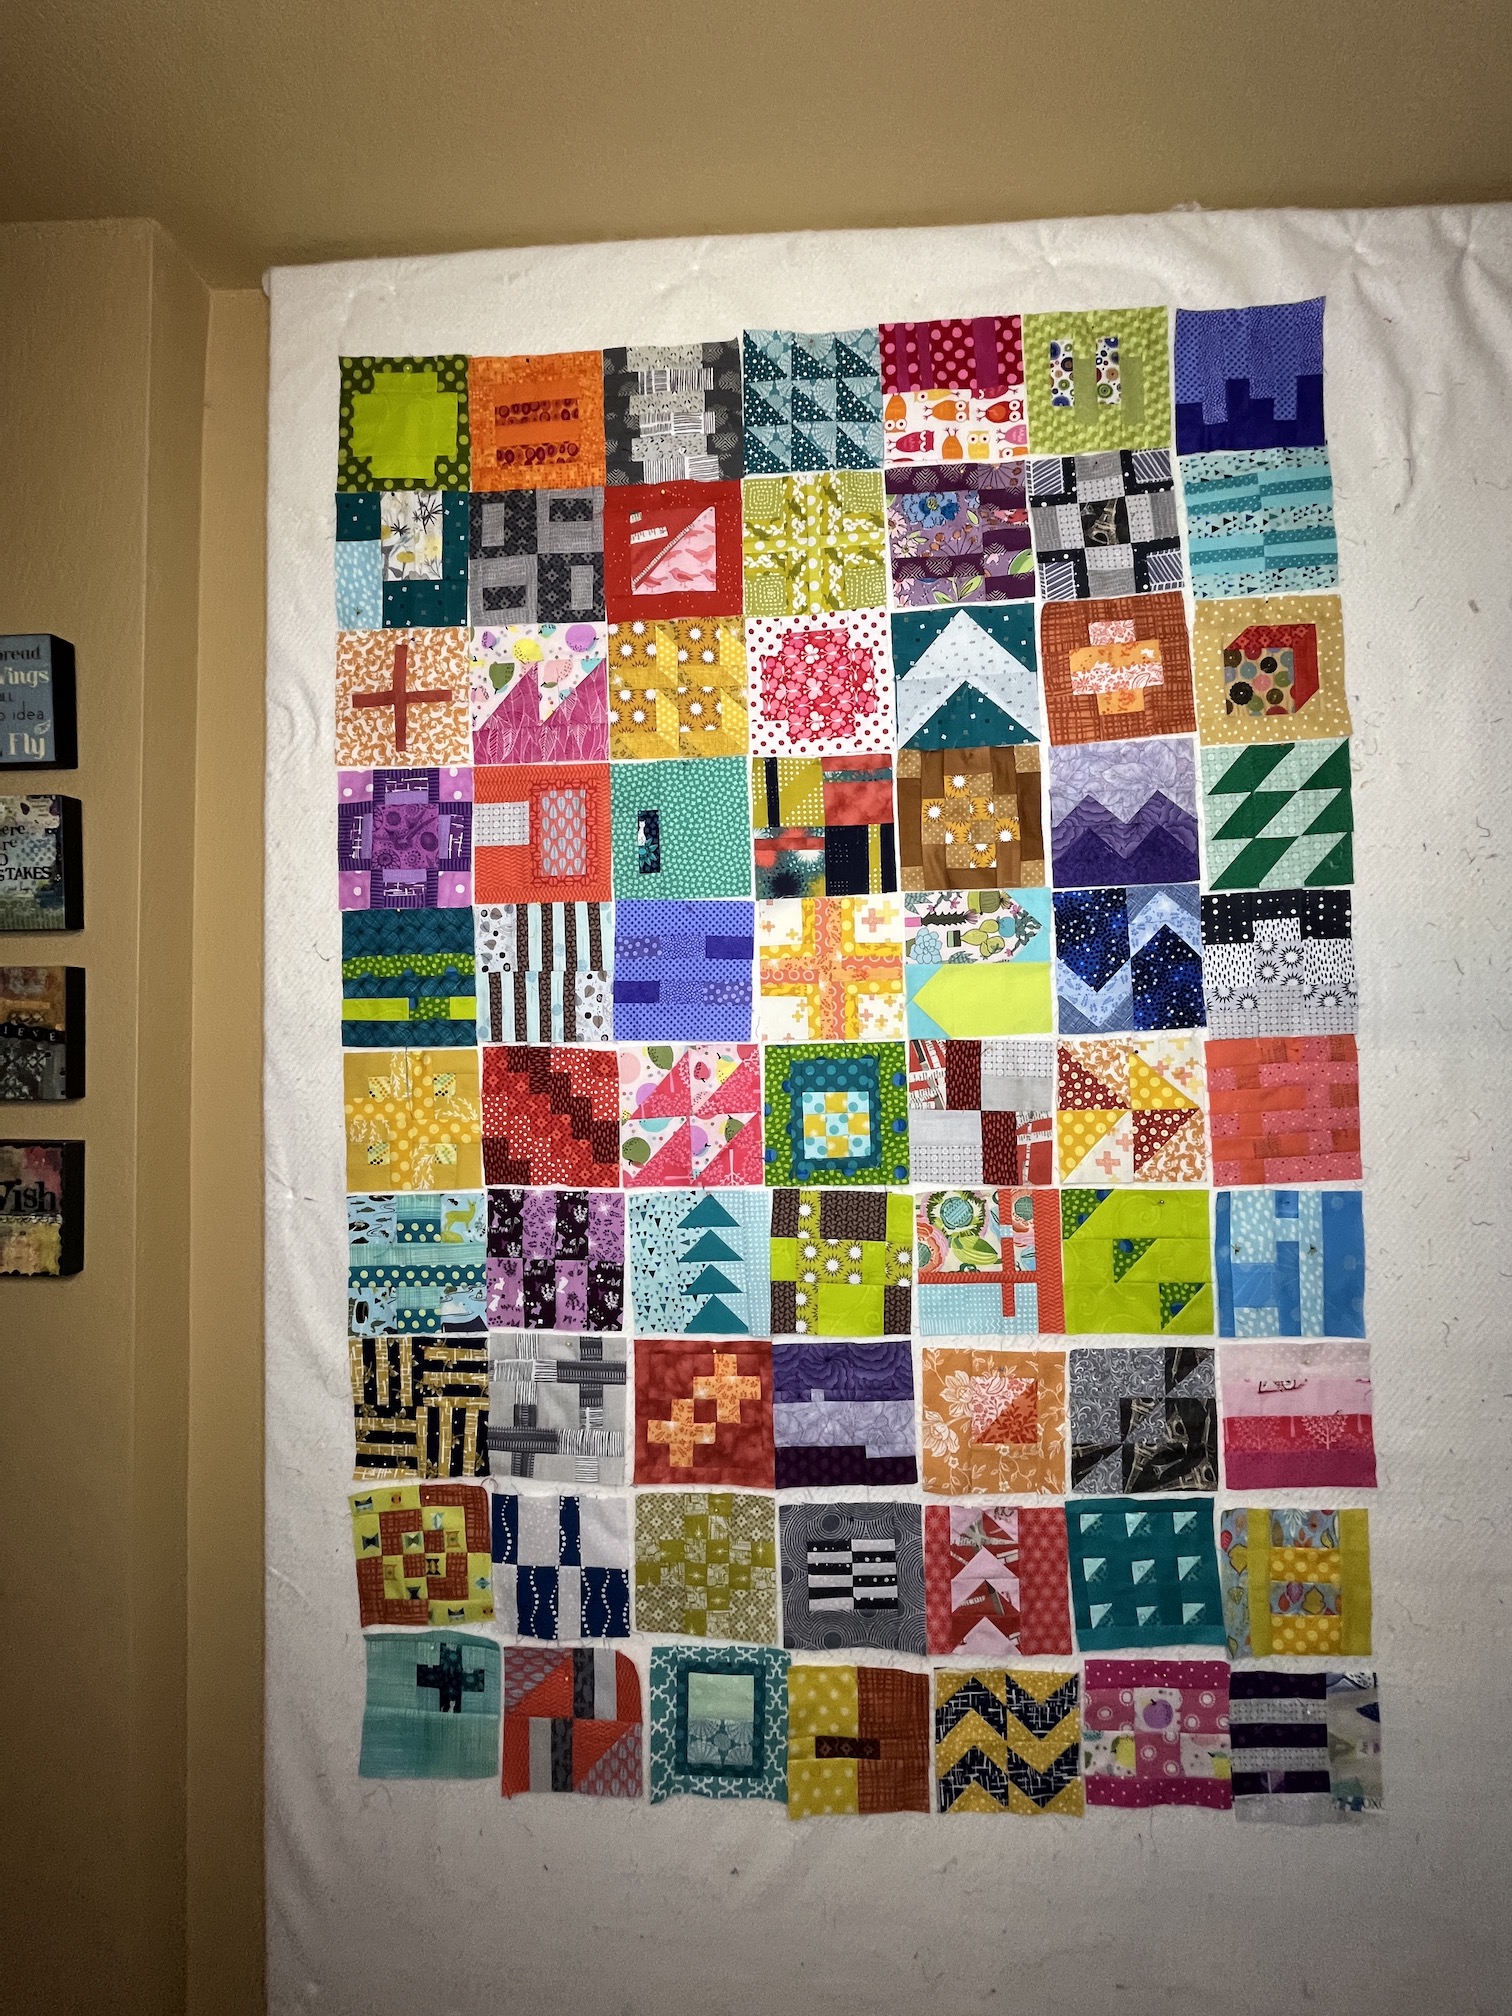
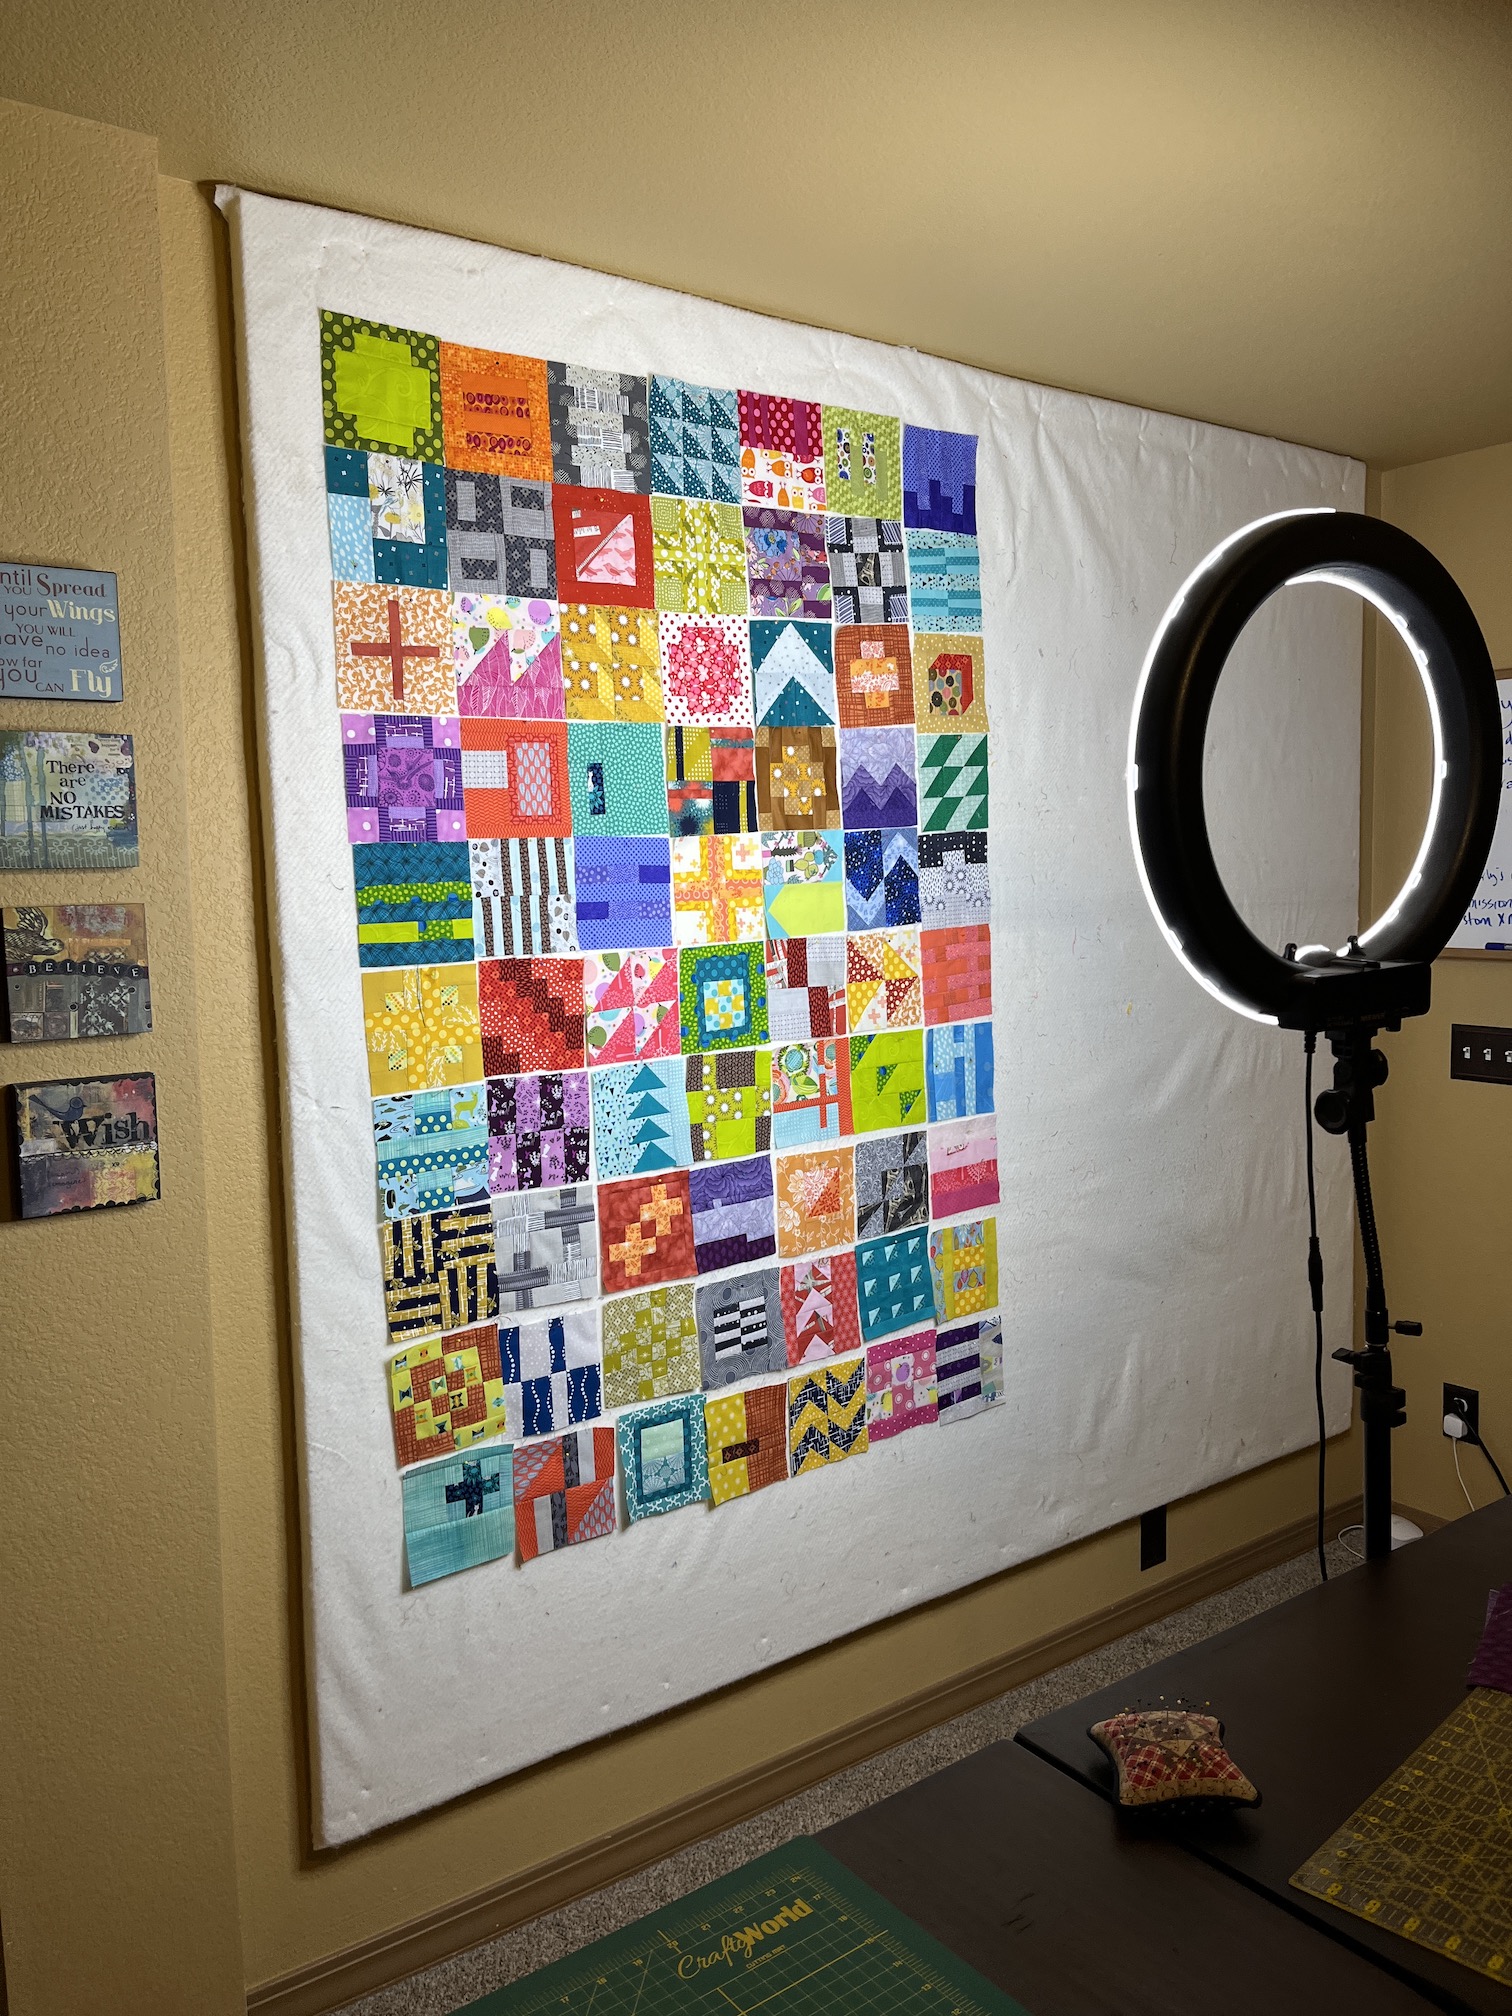
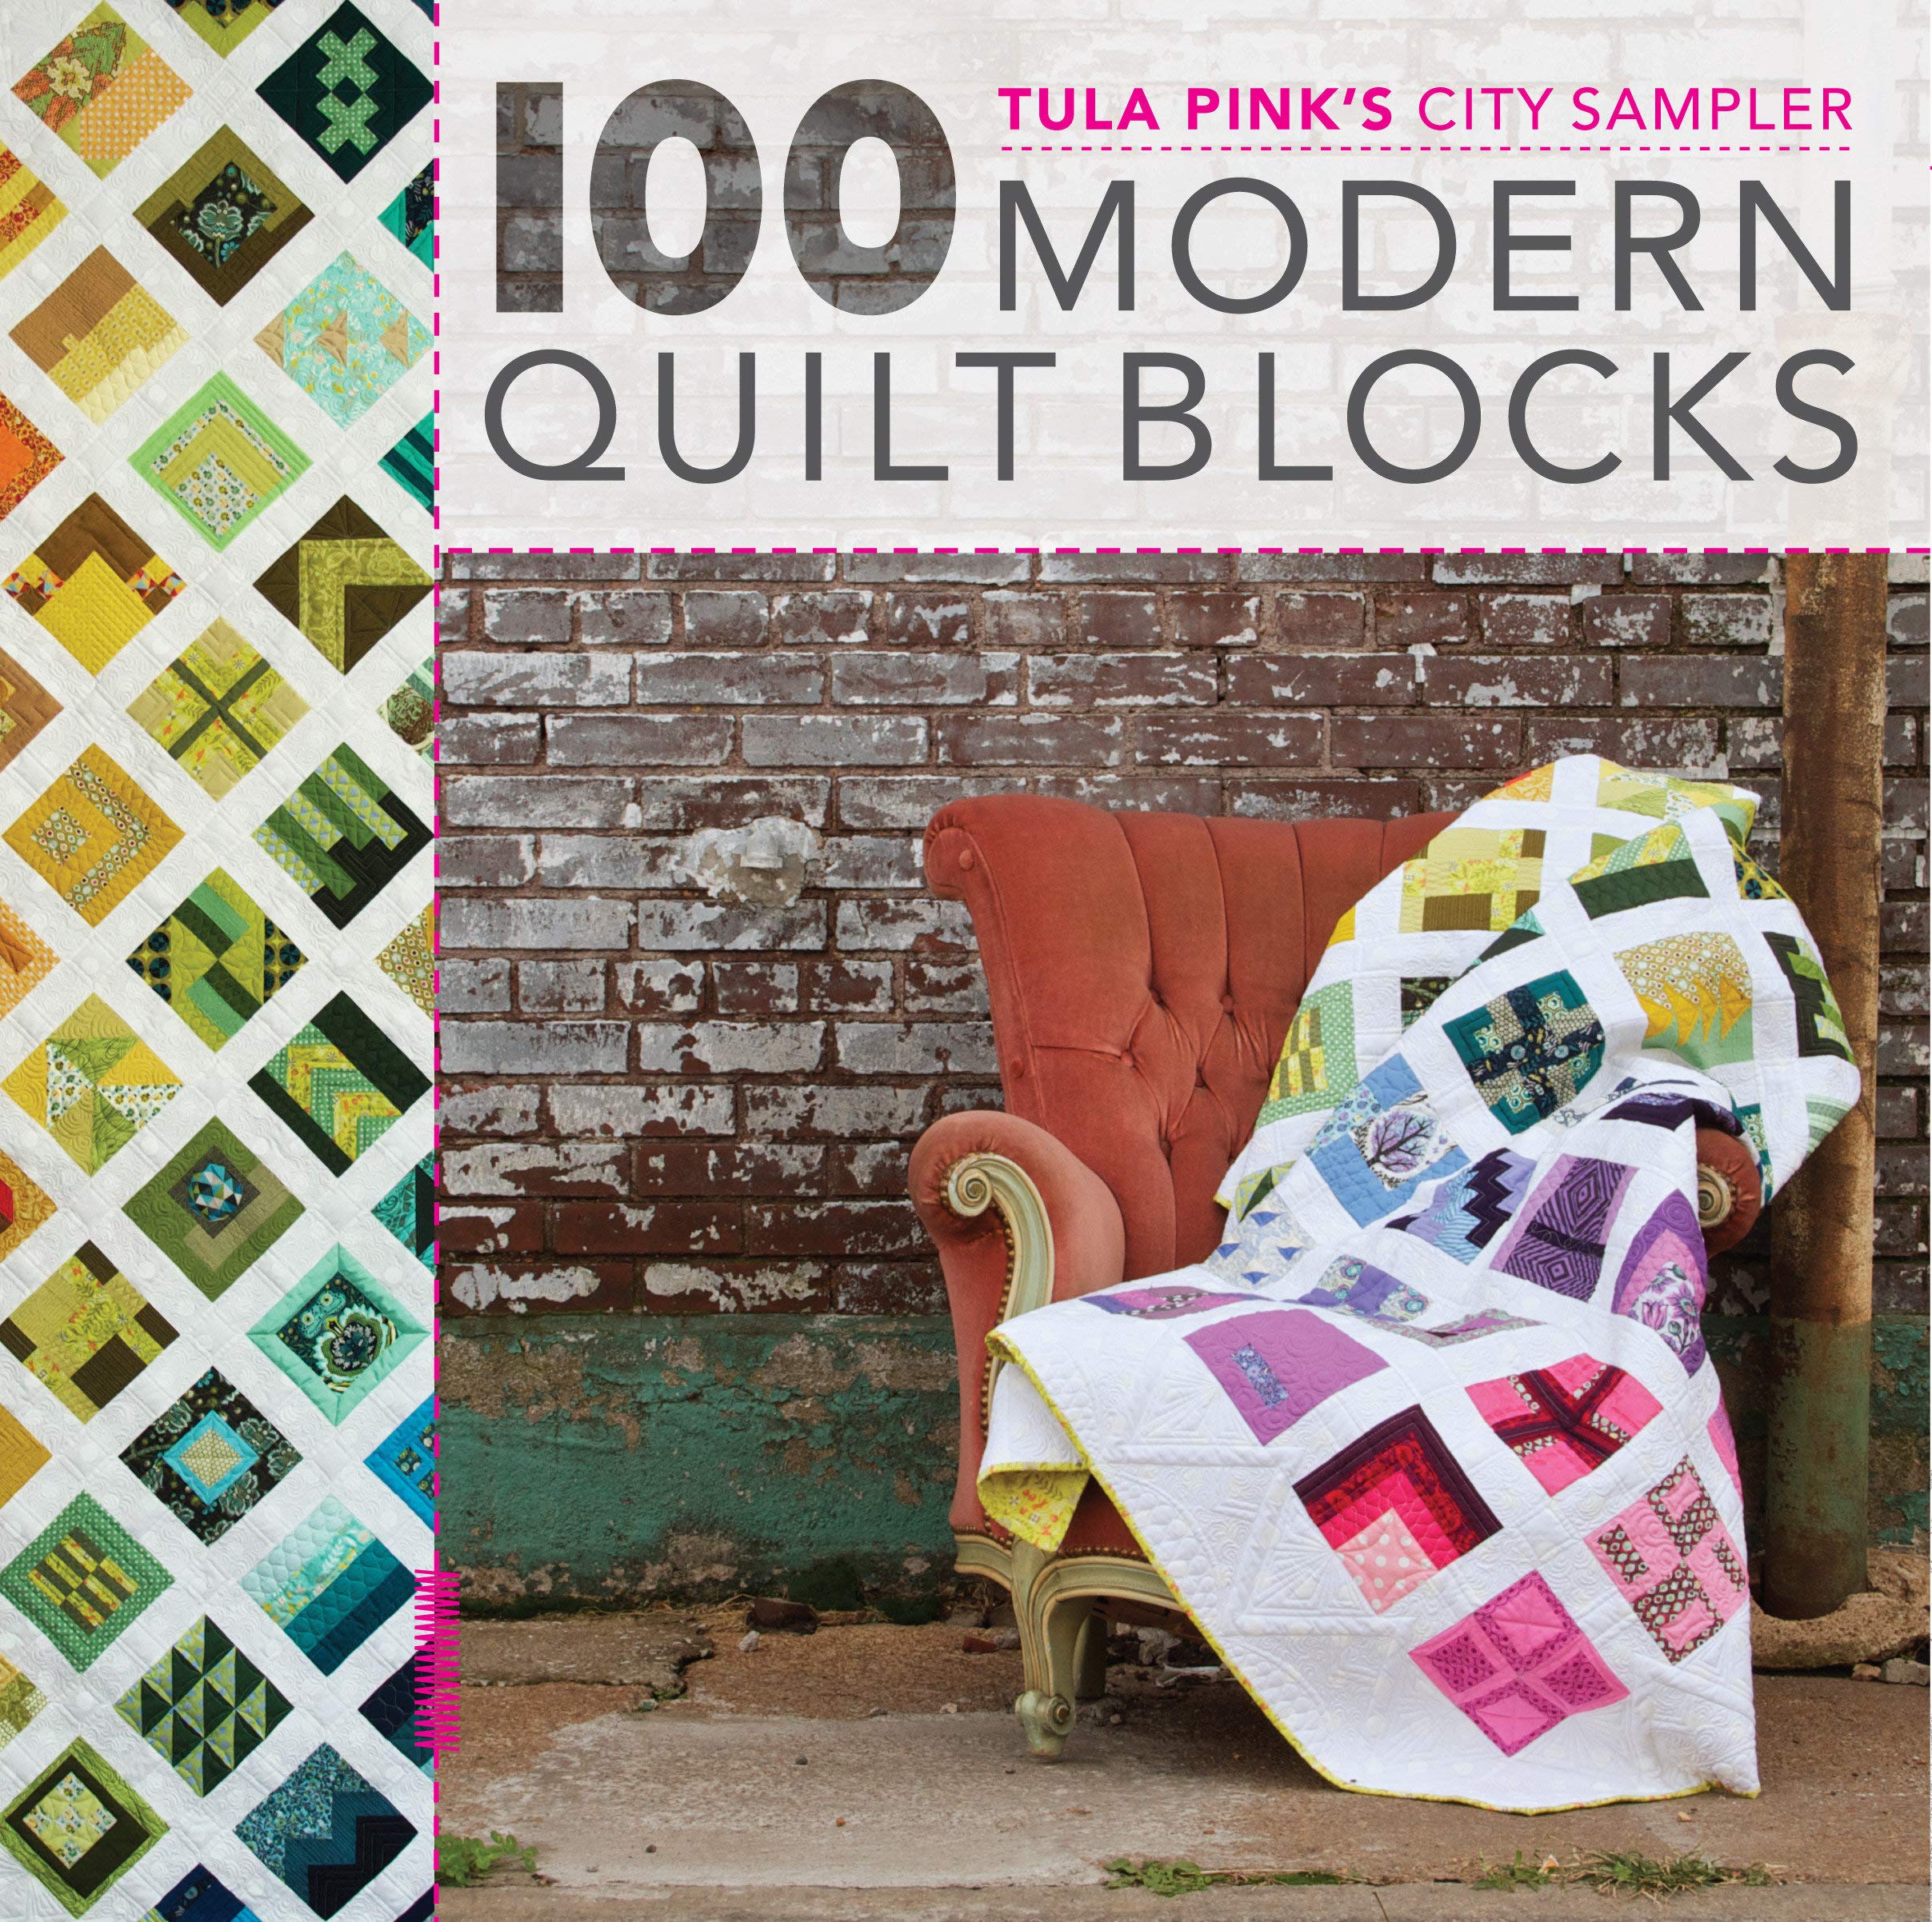
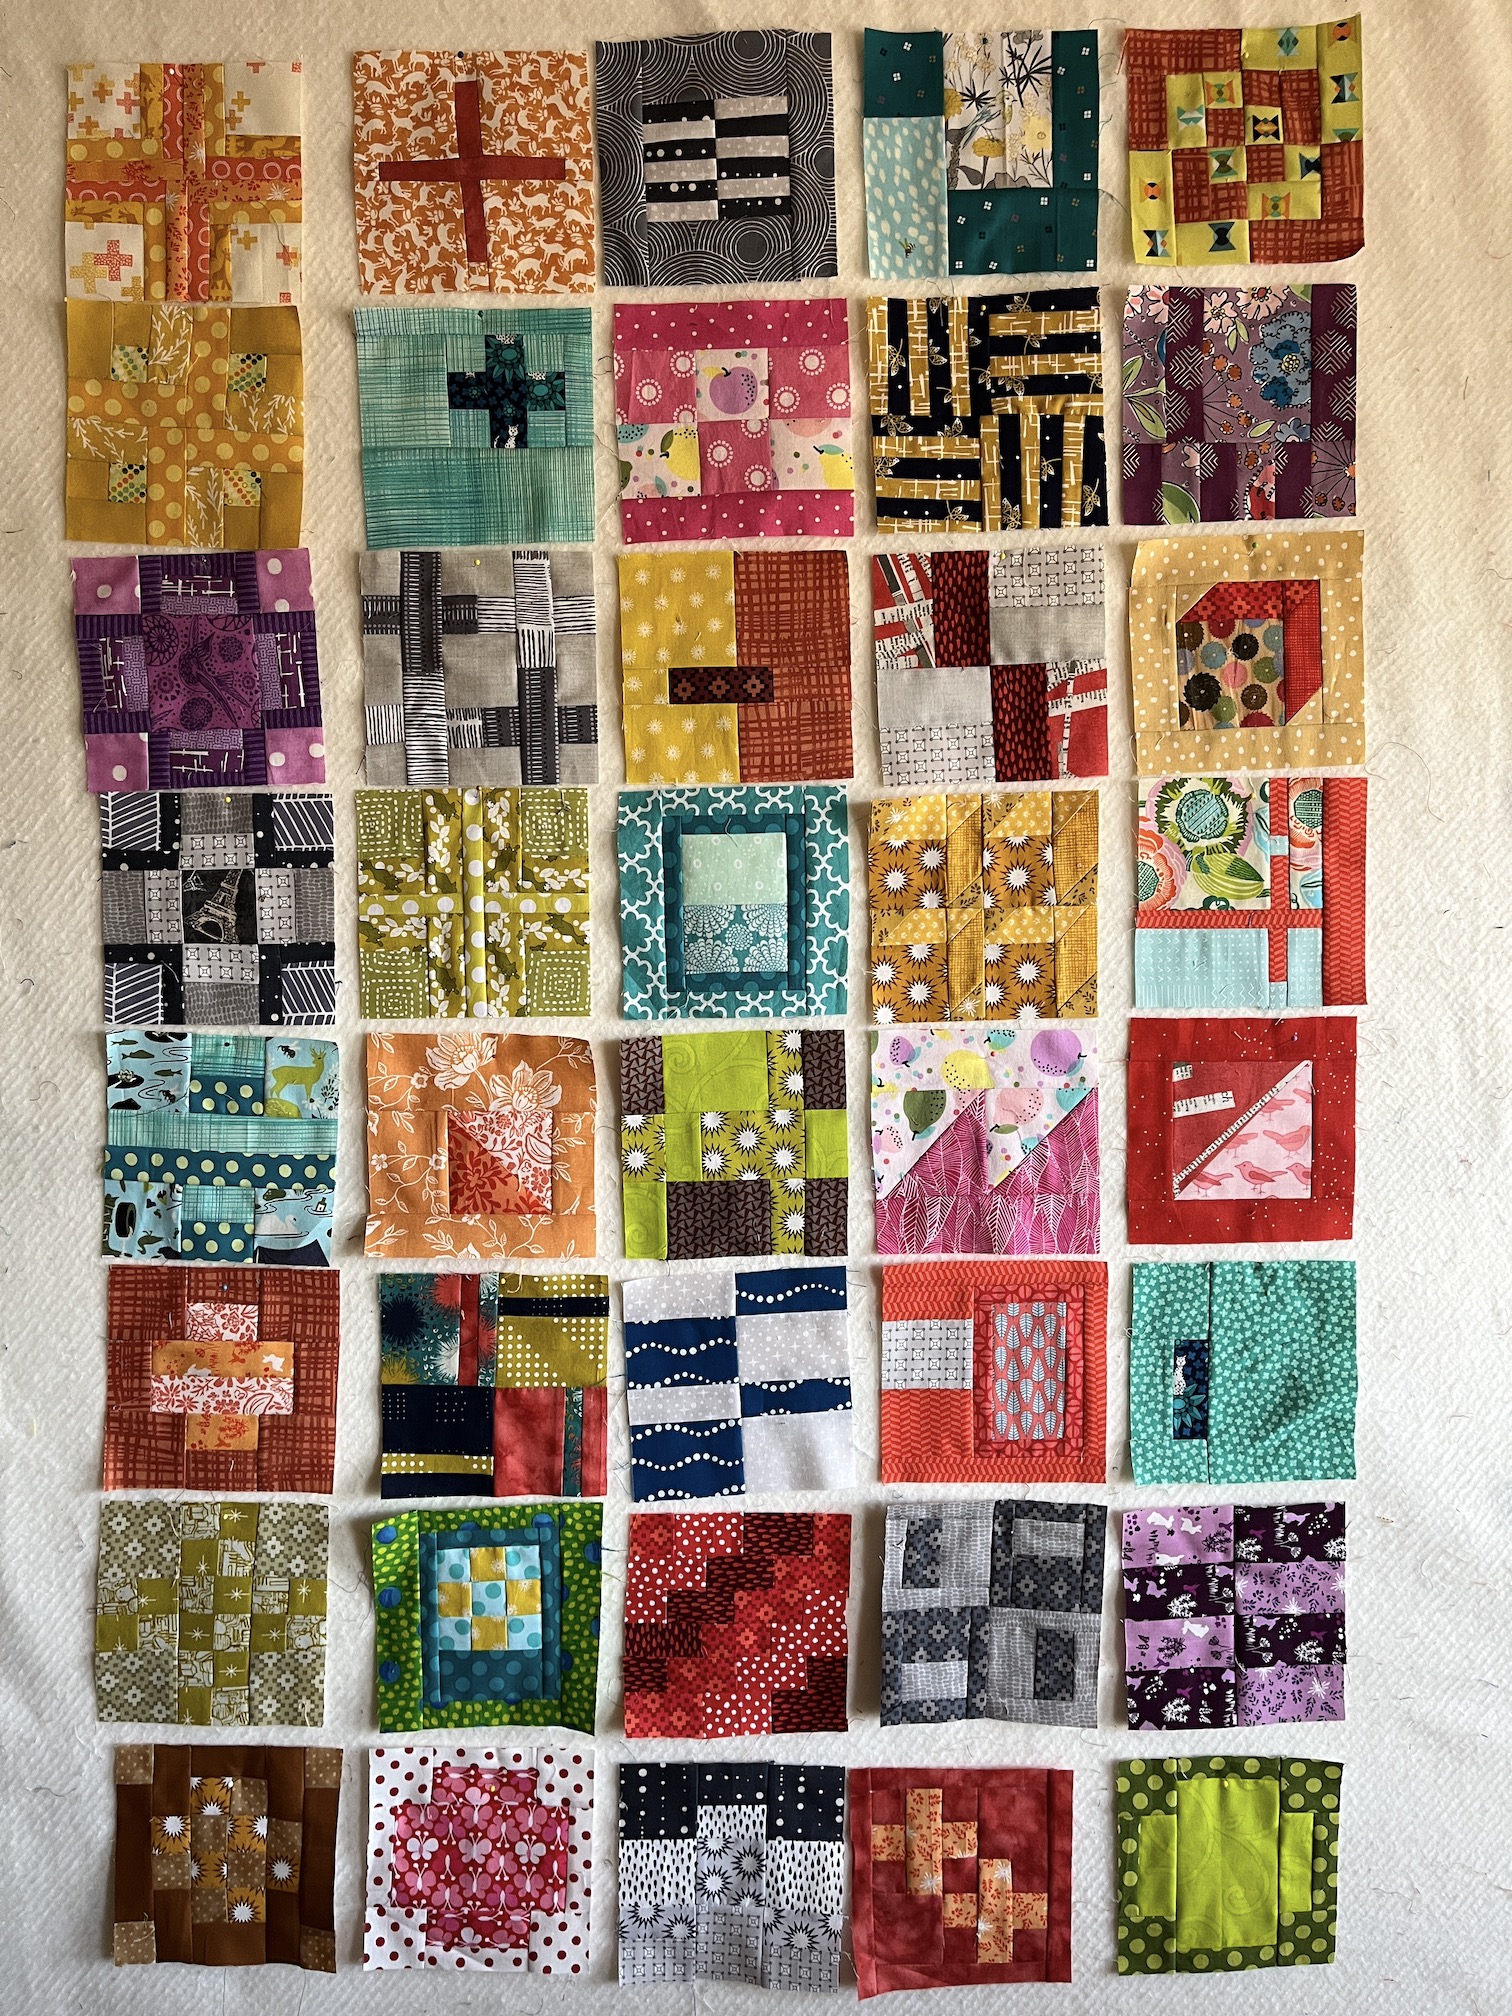
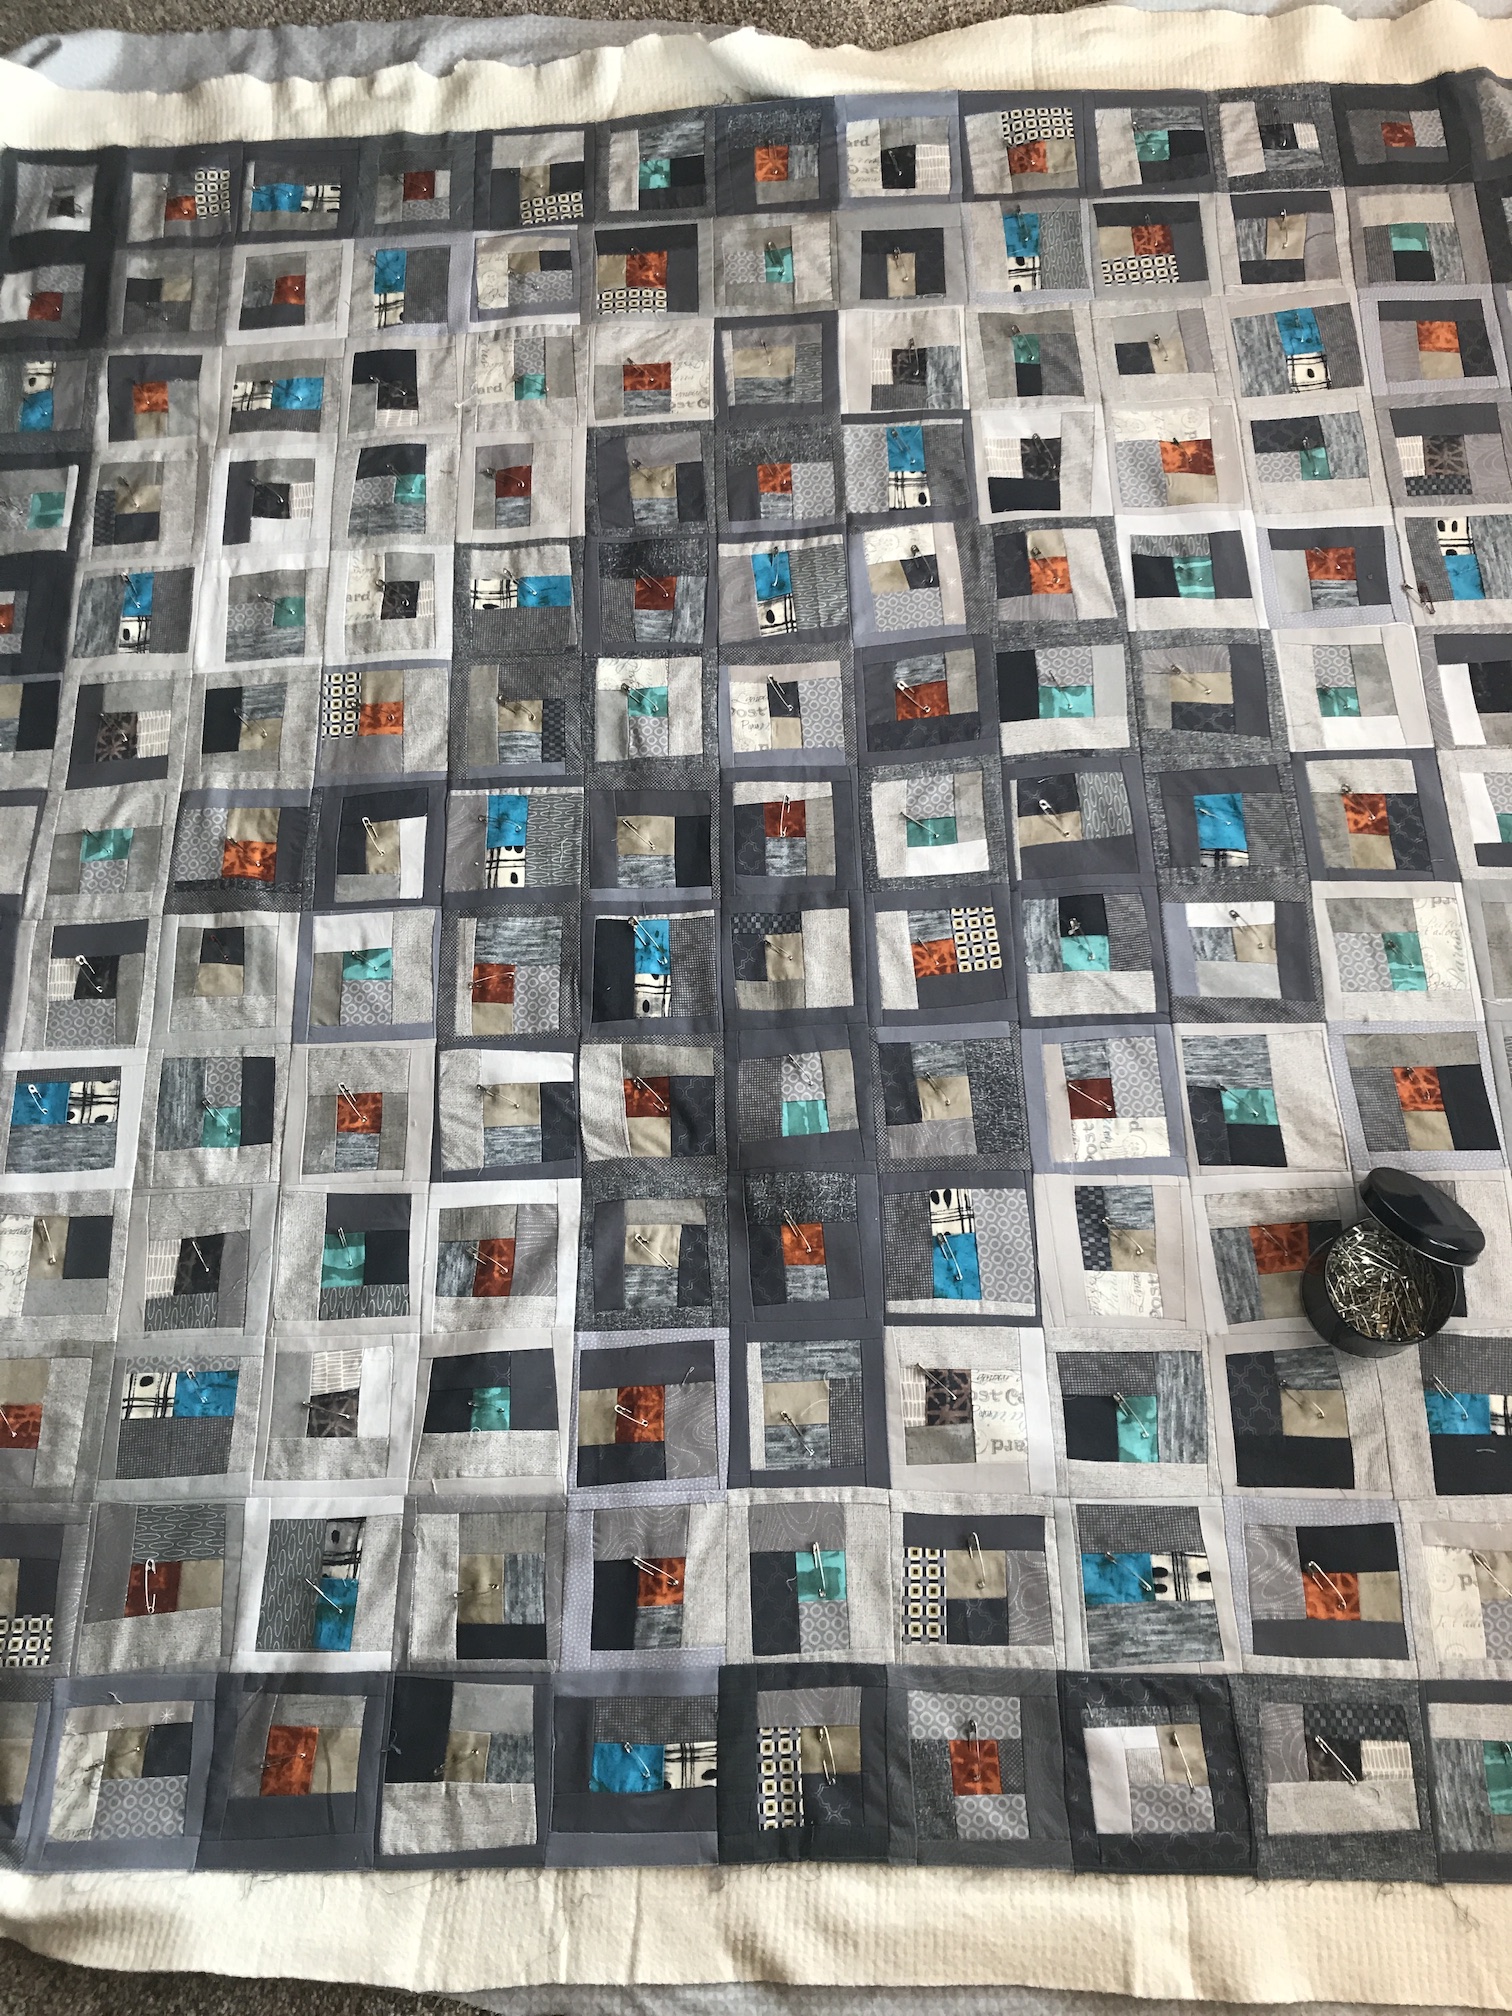
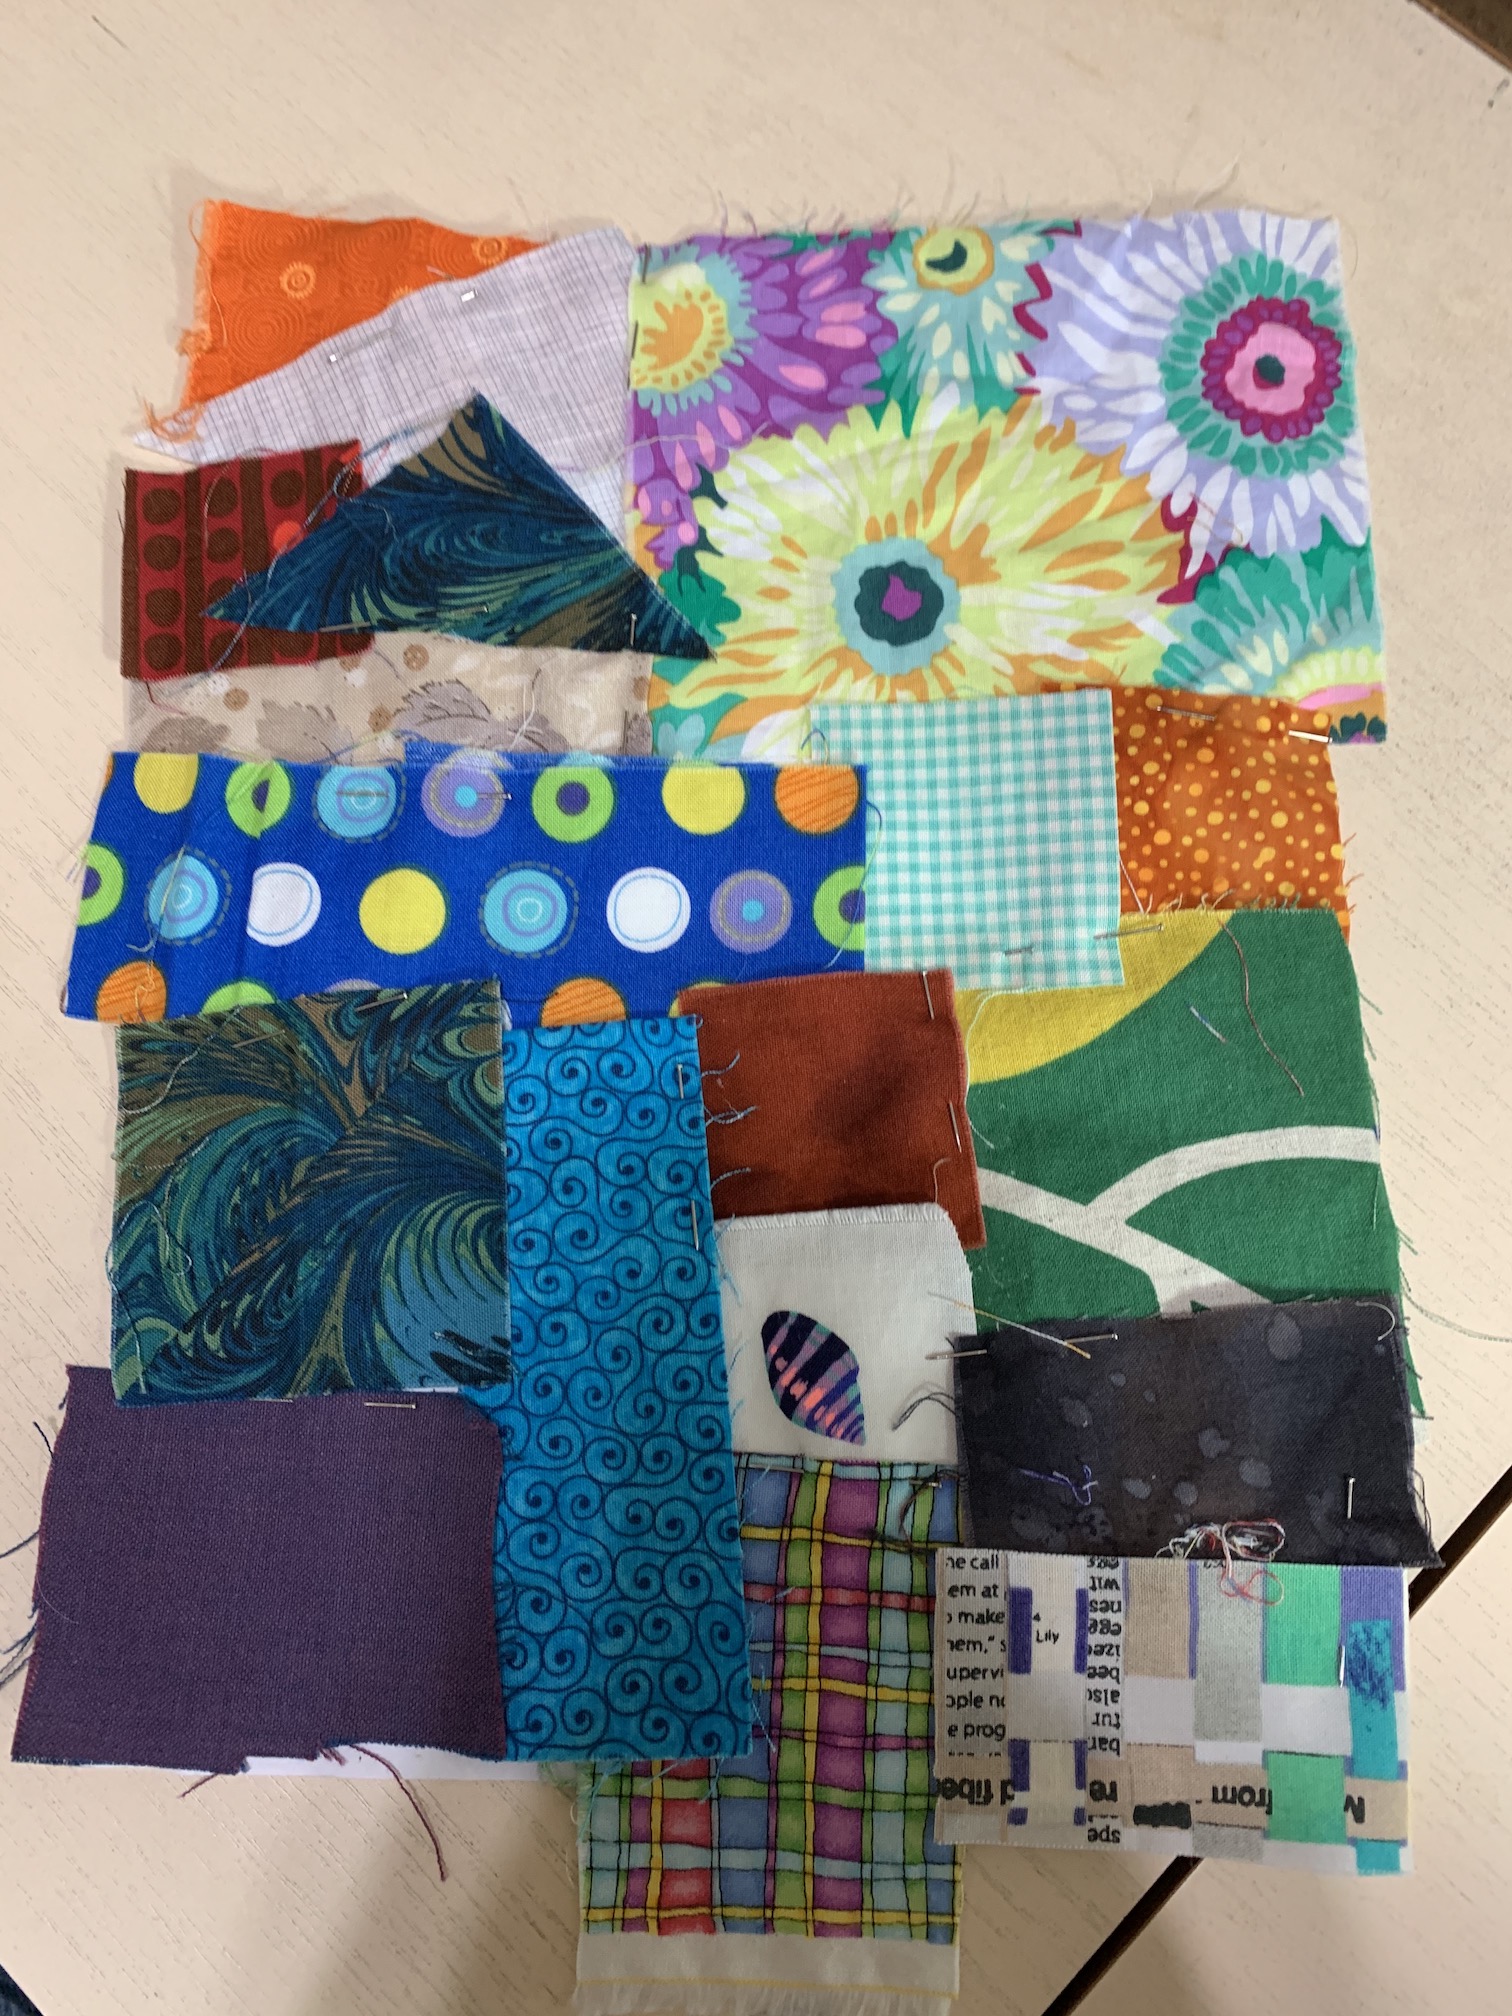
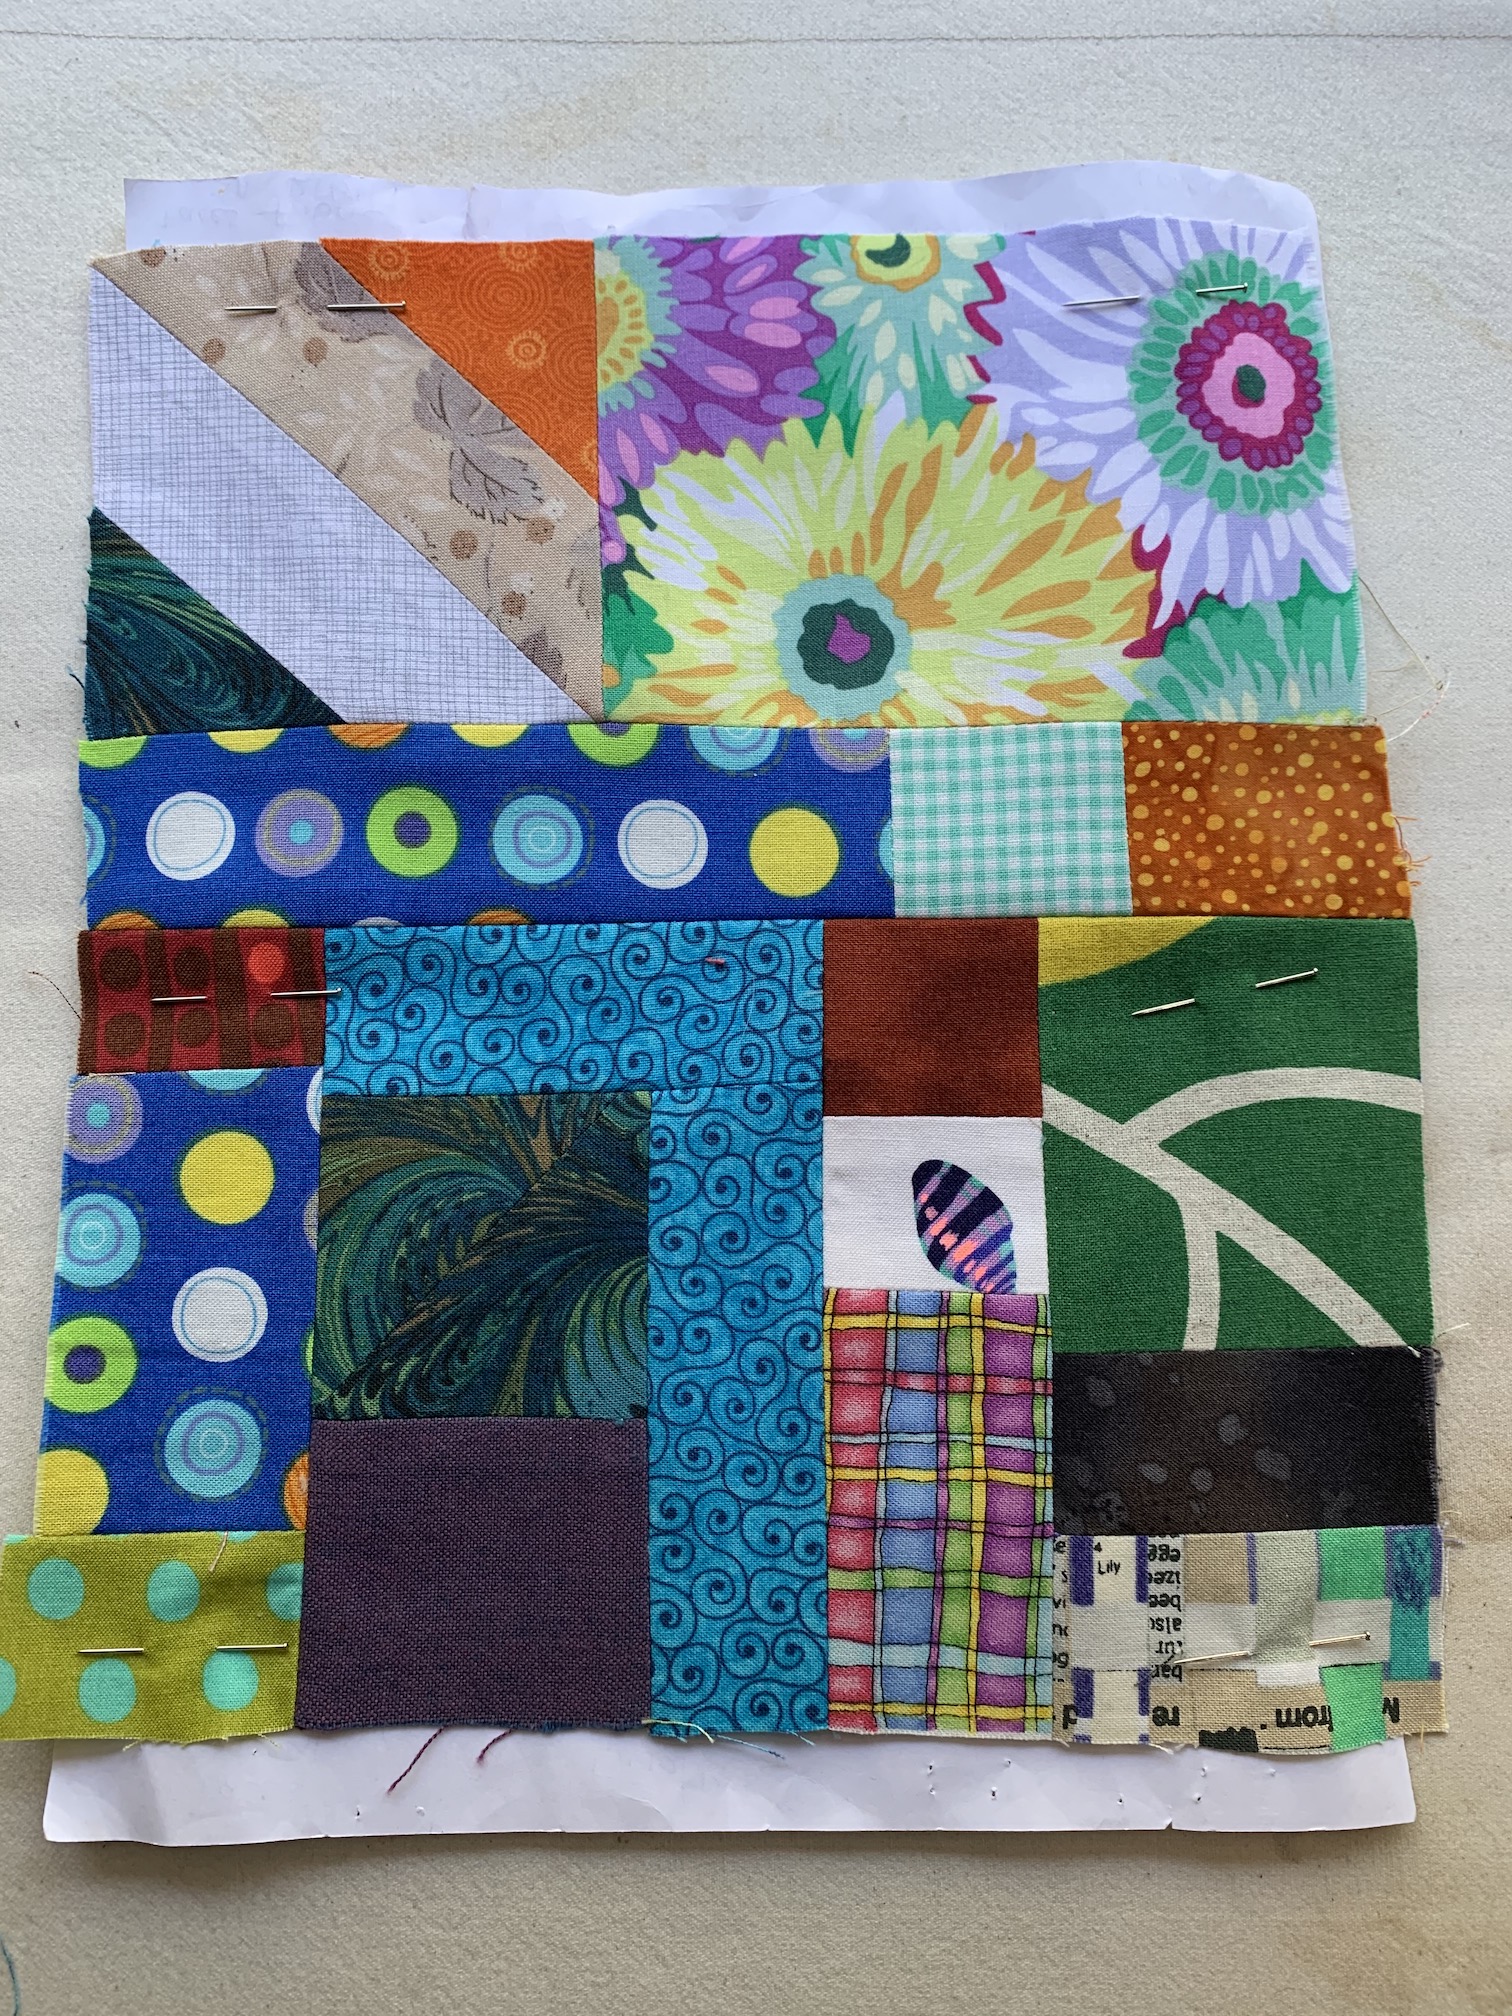
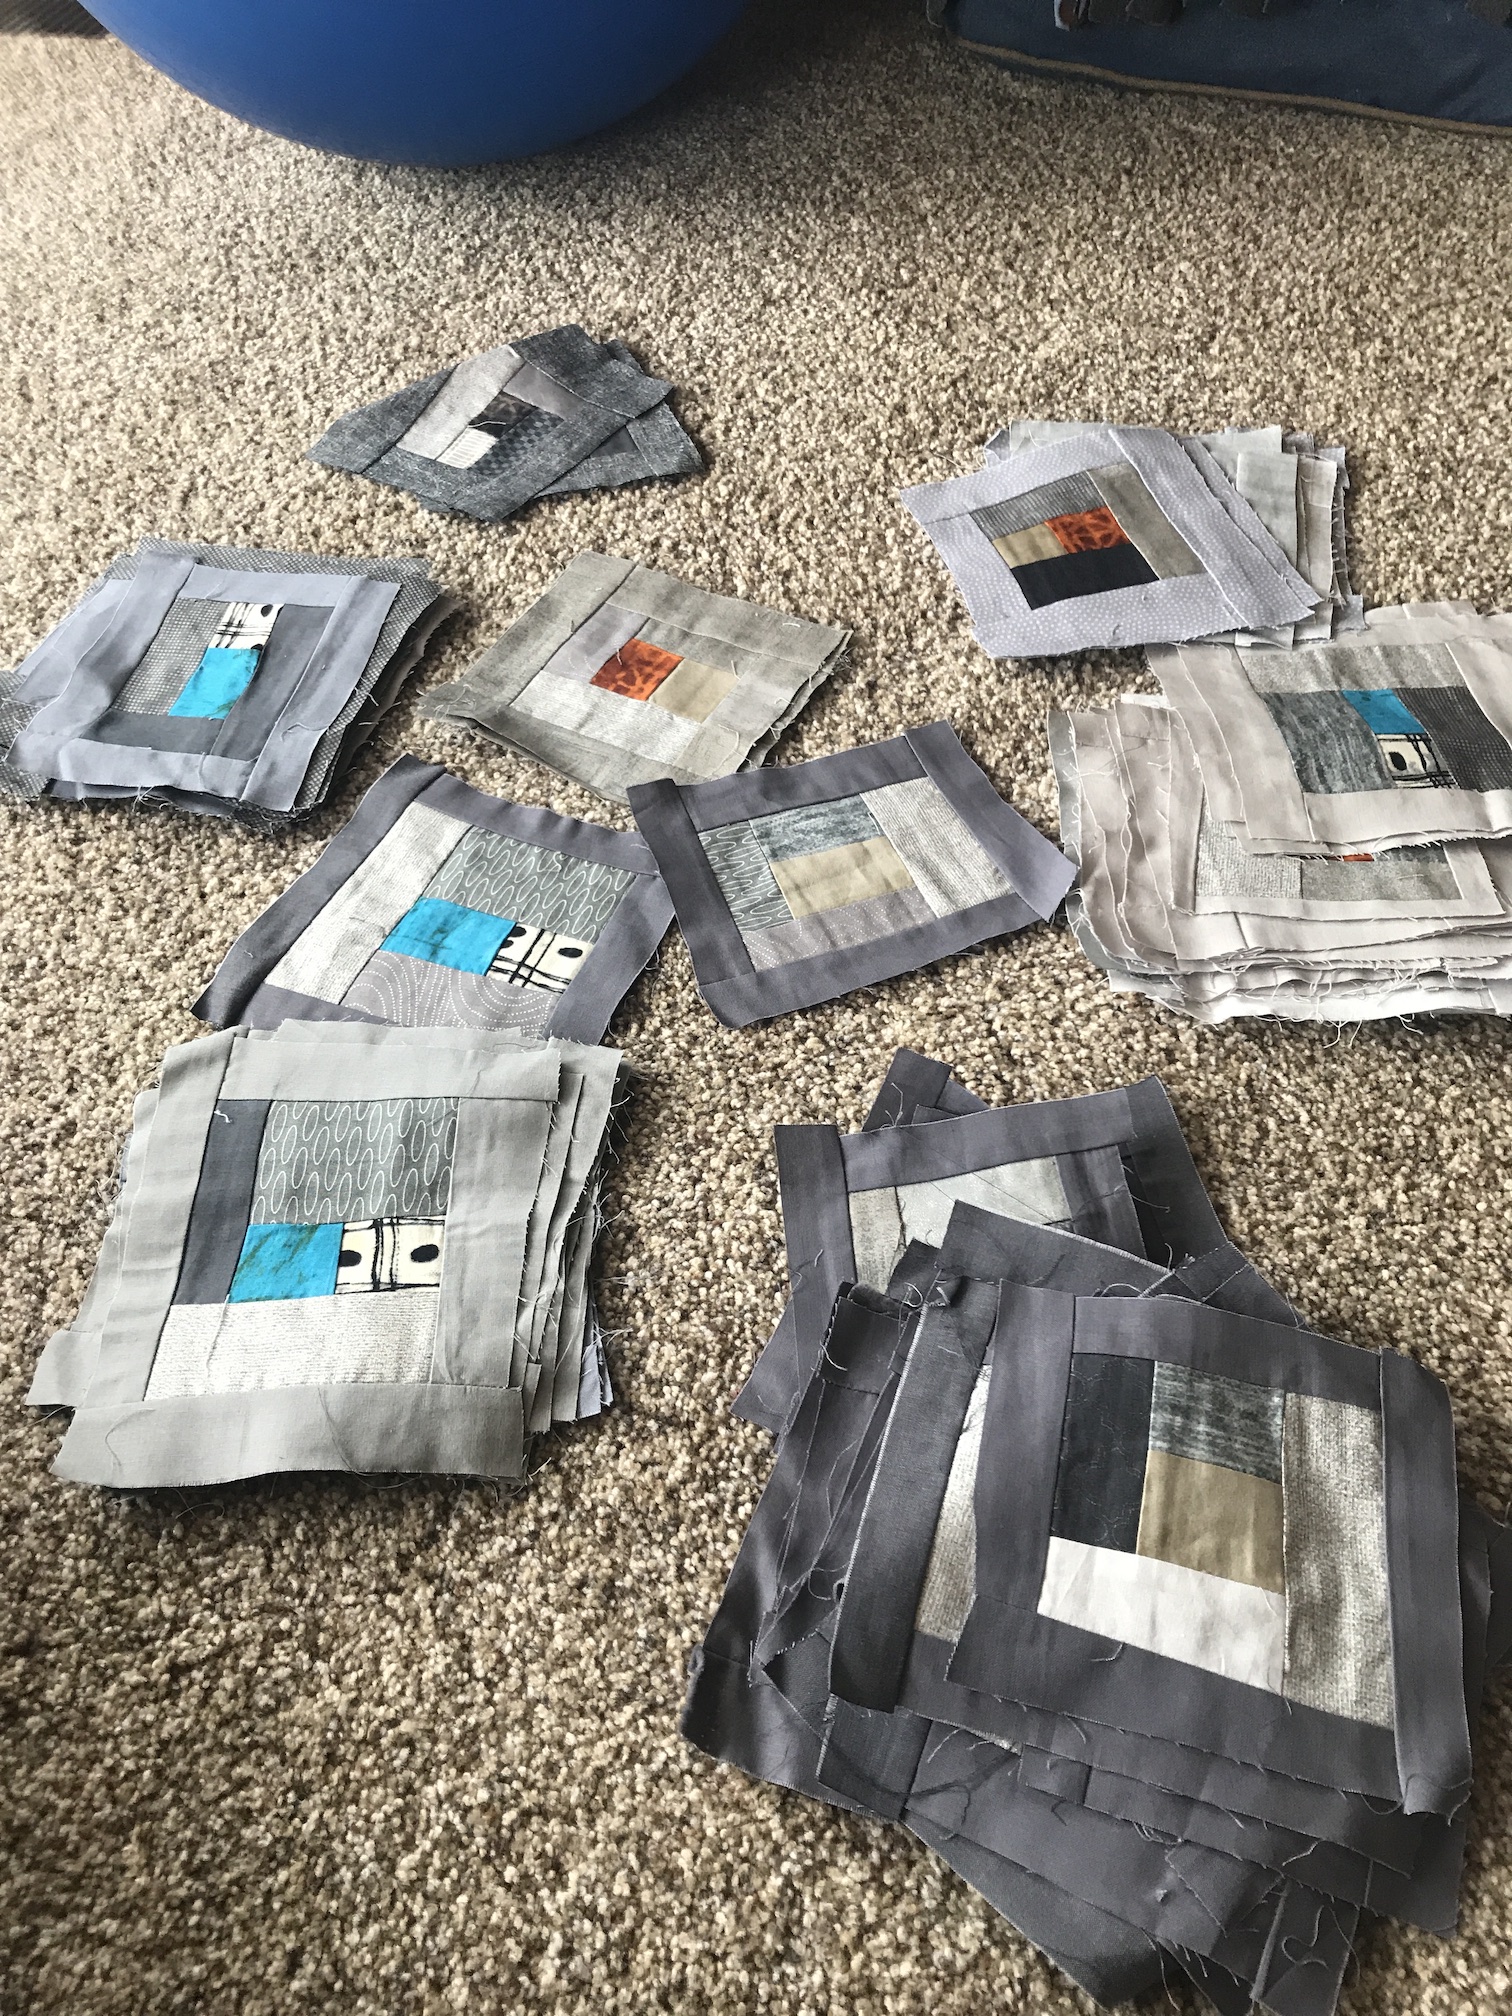
Recently I’ve been hiding away in my sewing room to escape the world. I’ve been productive during my escape, and I’ve now completed 88 of the 100 blocks for Tula Pink’s City Sampler 100 Modern Quilt Blocks quilt I’ve been working on.
This is not the final layout for the quilt, I’ll decide that after I finish the 12 remaining blocks. It seems a little overwhelming to decide the perfect layout for 100 blocks, but I am going to just try to make them look as random as possible (and try not to let the same color touch…we’ll see…).
If you are just joining us and are interested in the progression of this quilt, check out the previous post about it which also has links to the other blog posts on it – And then there were 70….
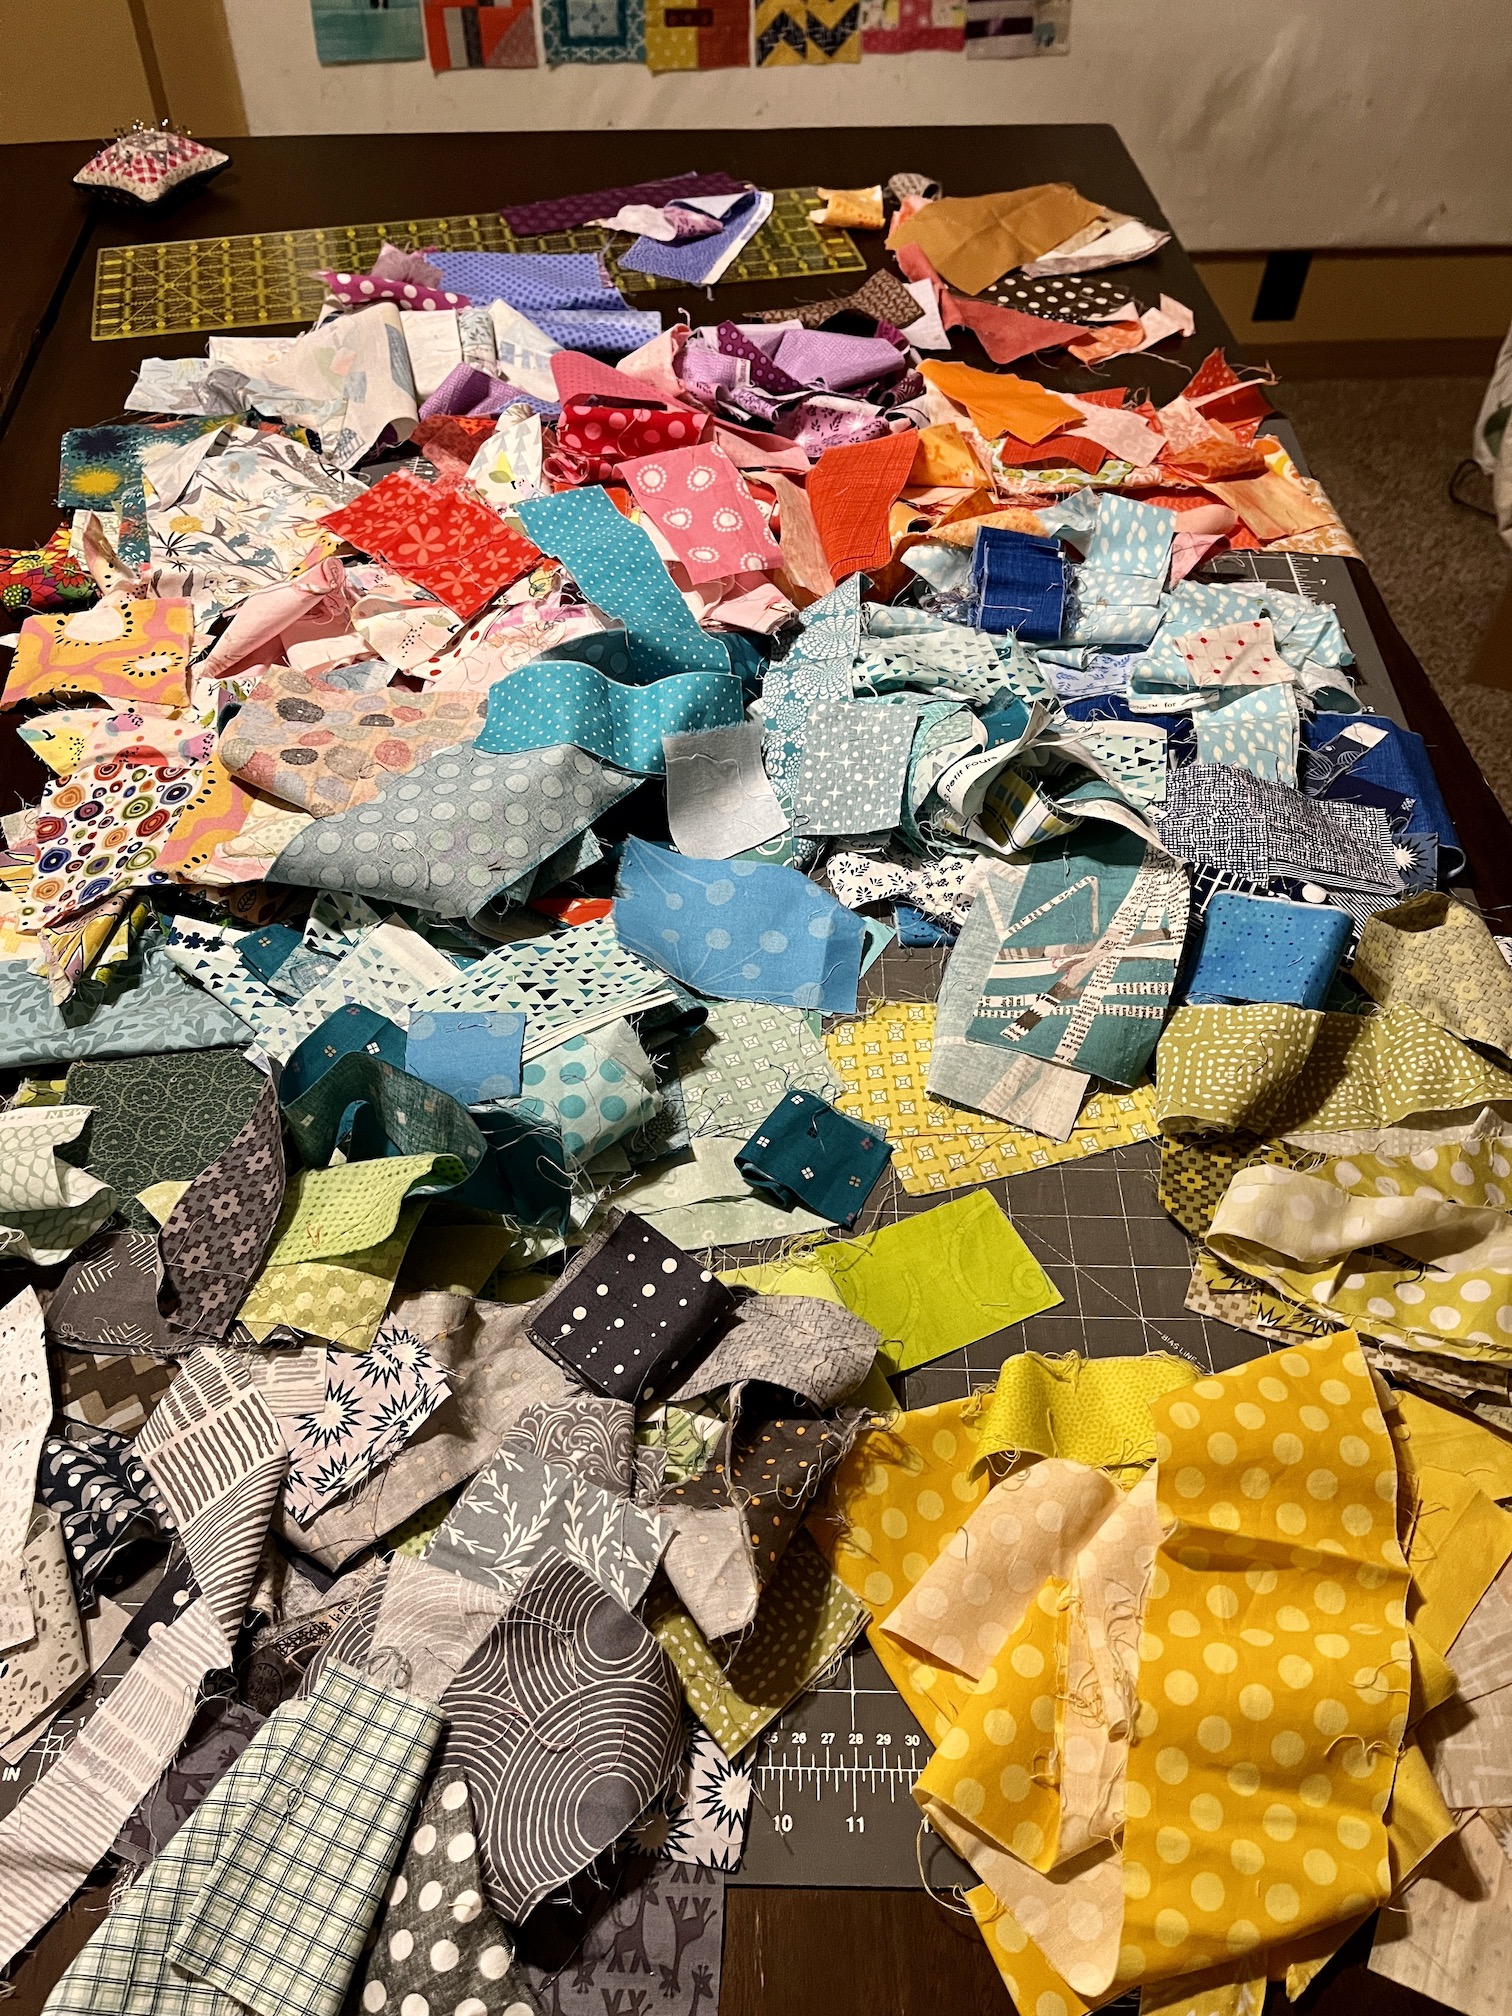
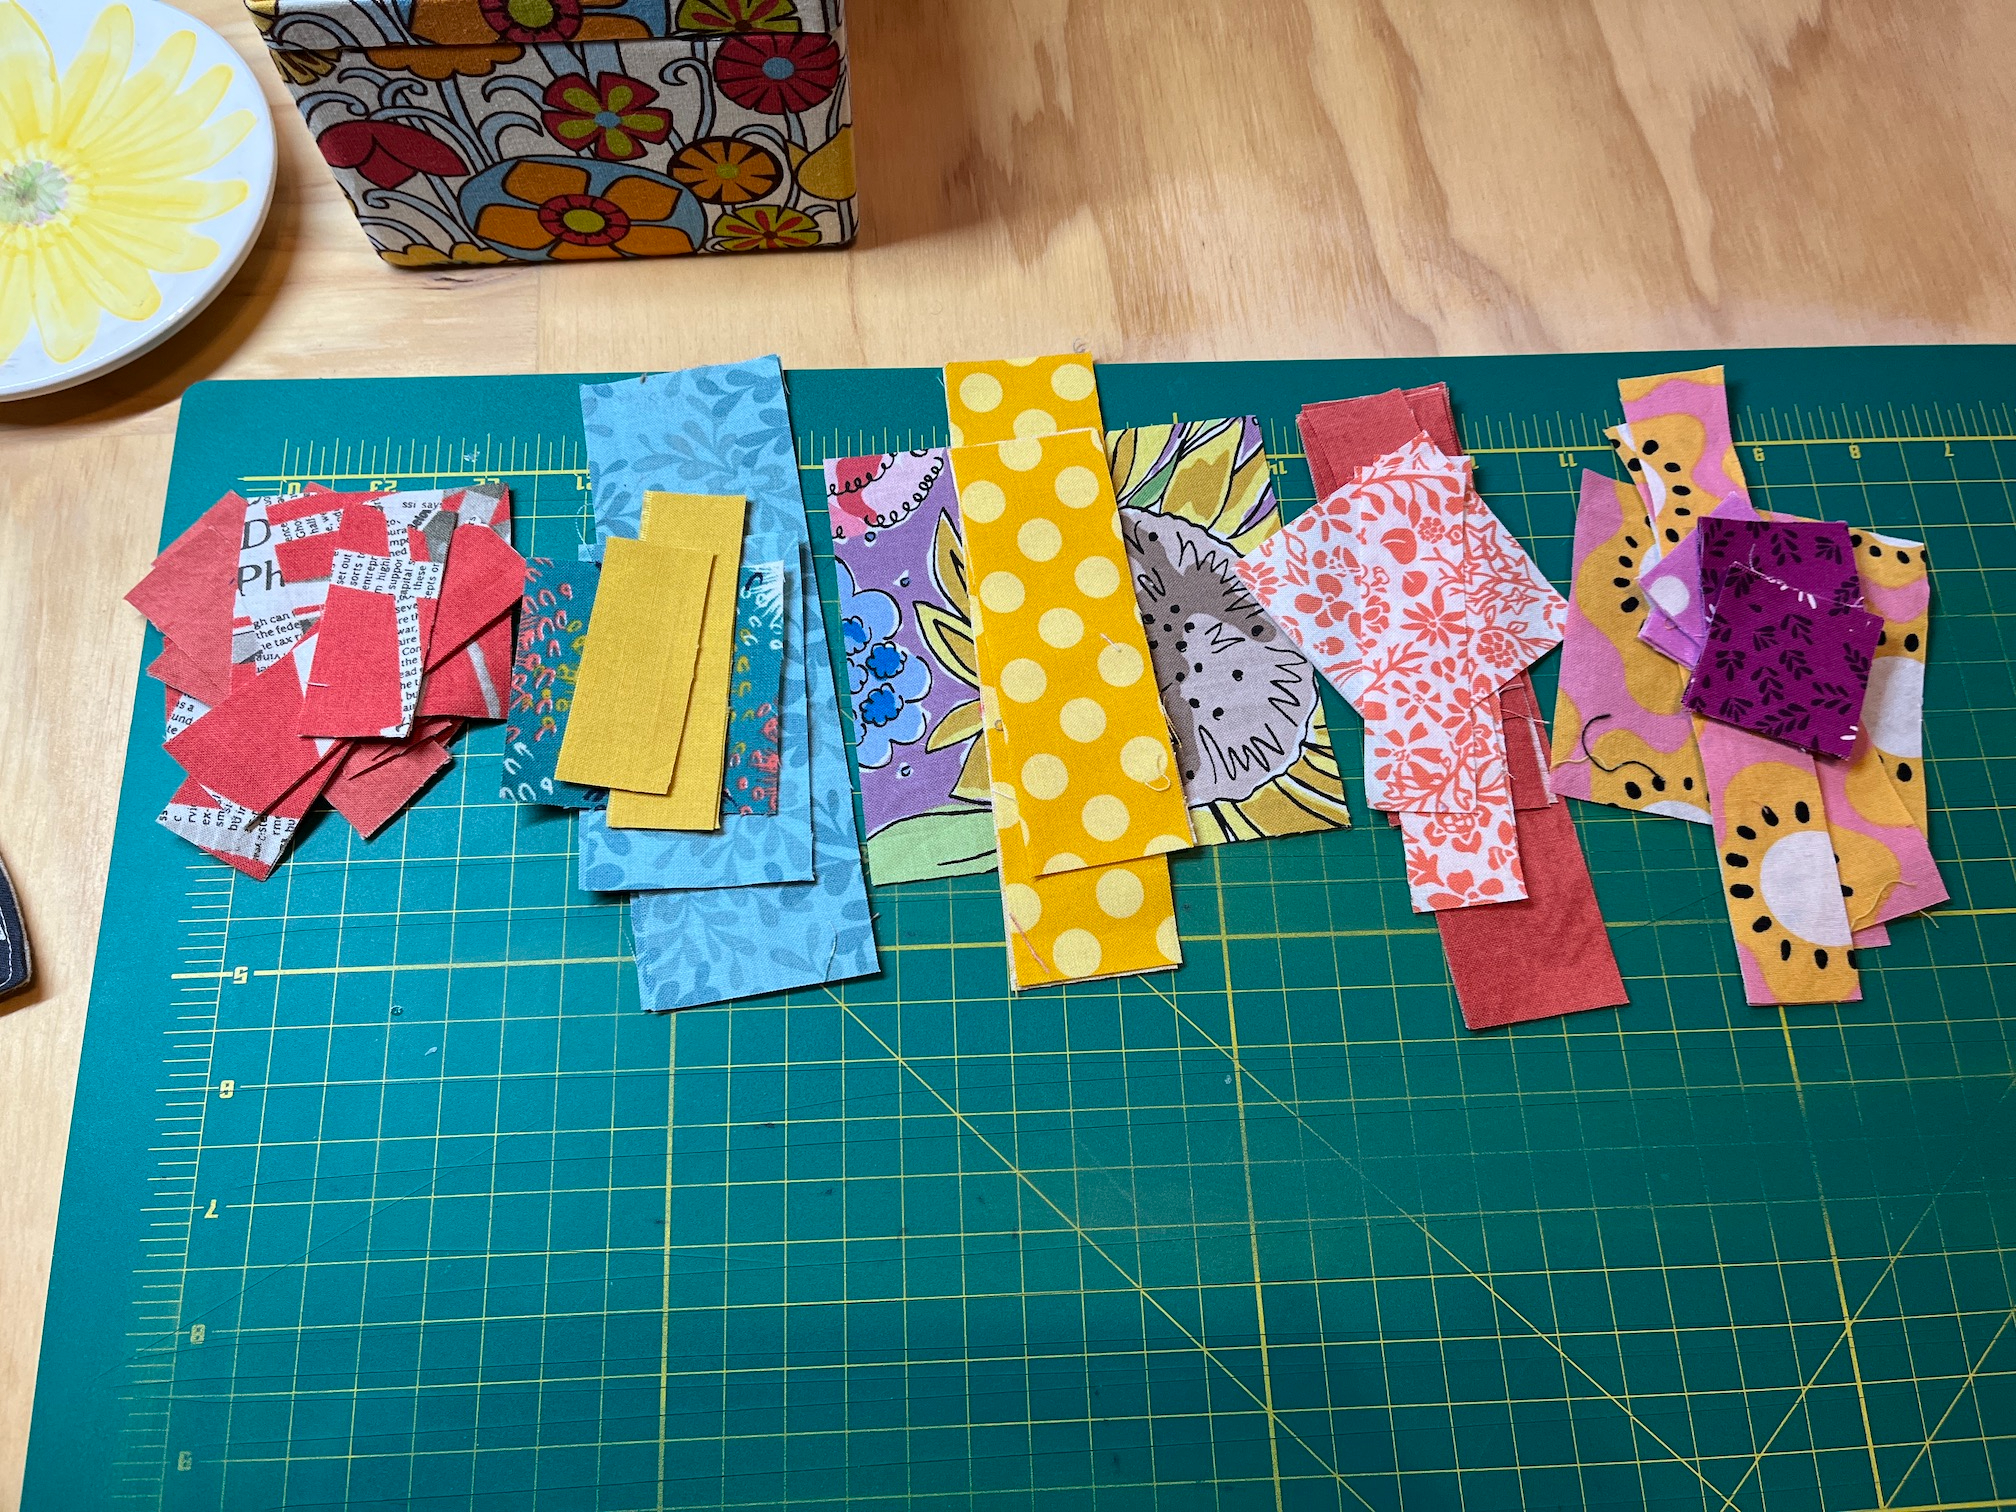
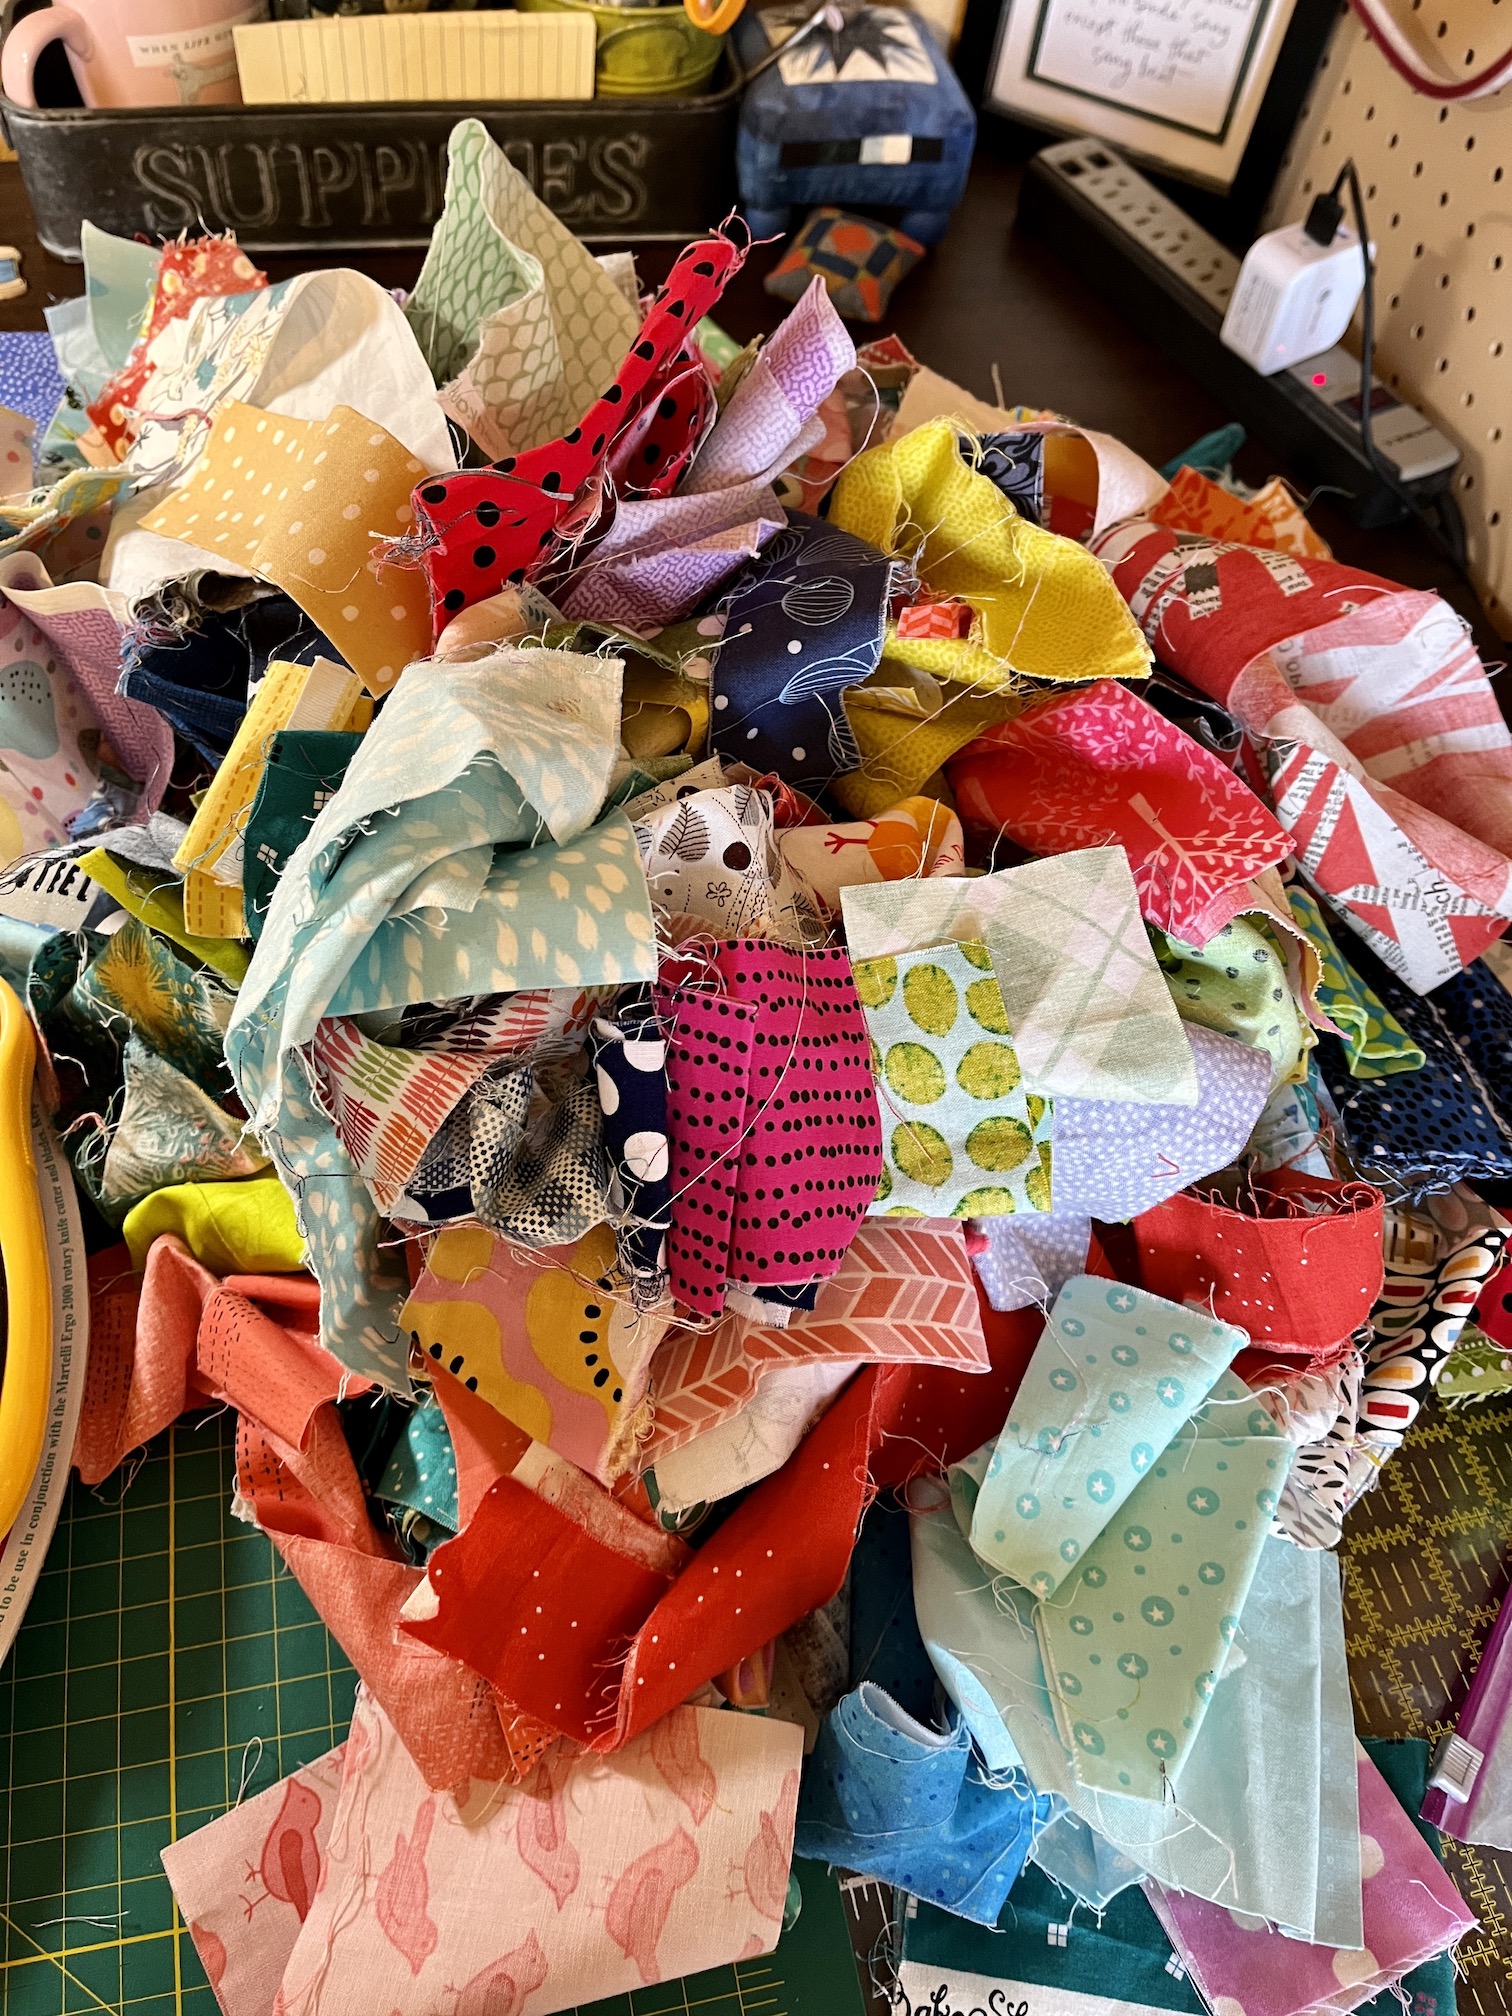
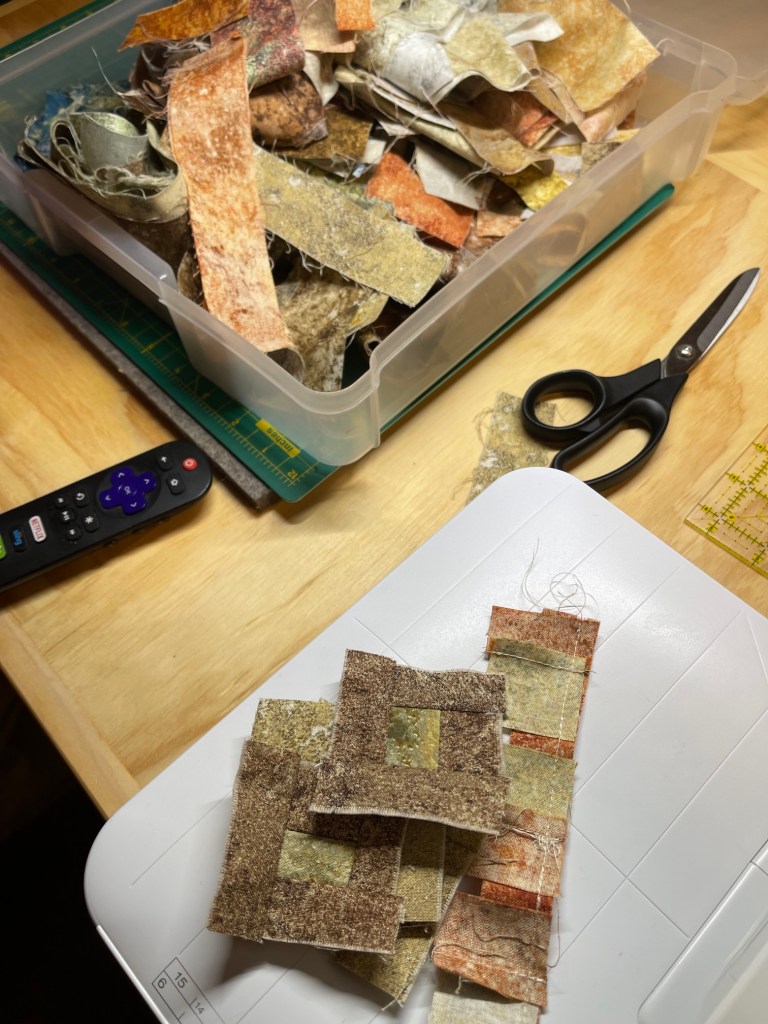
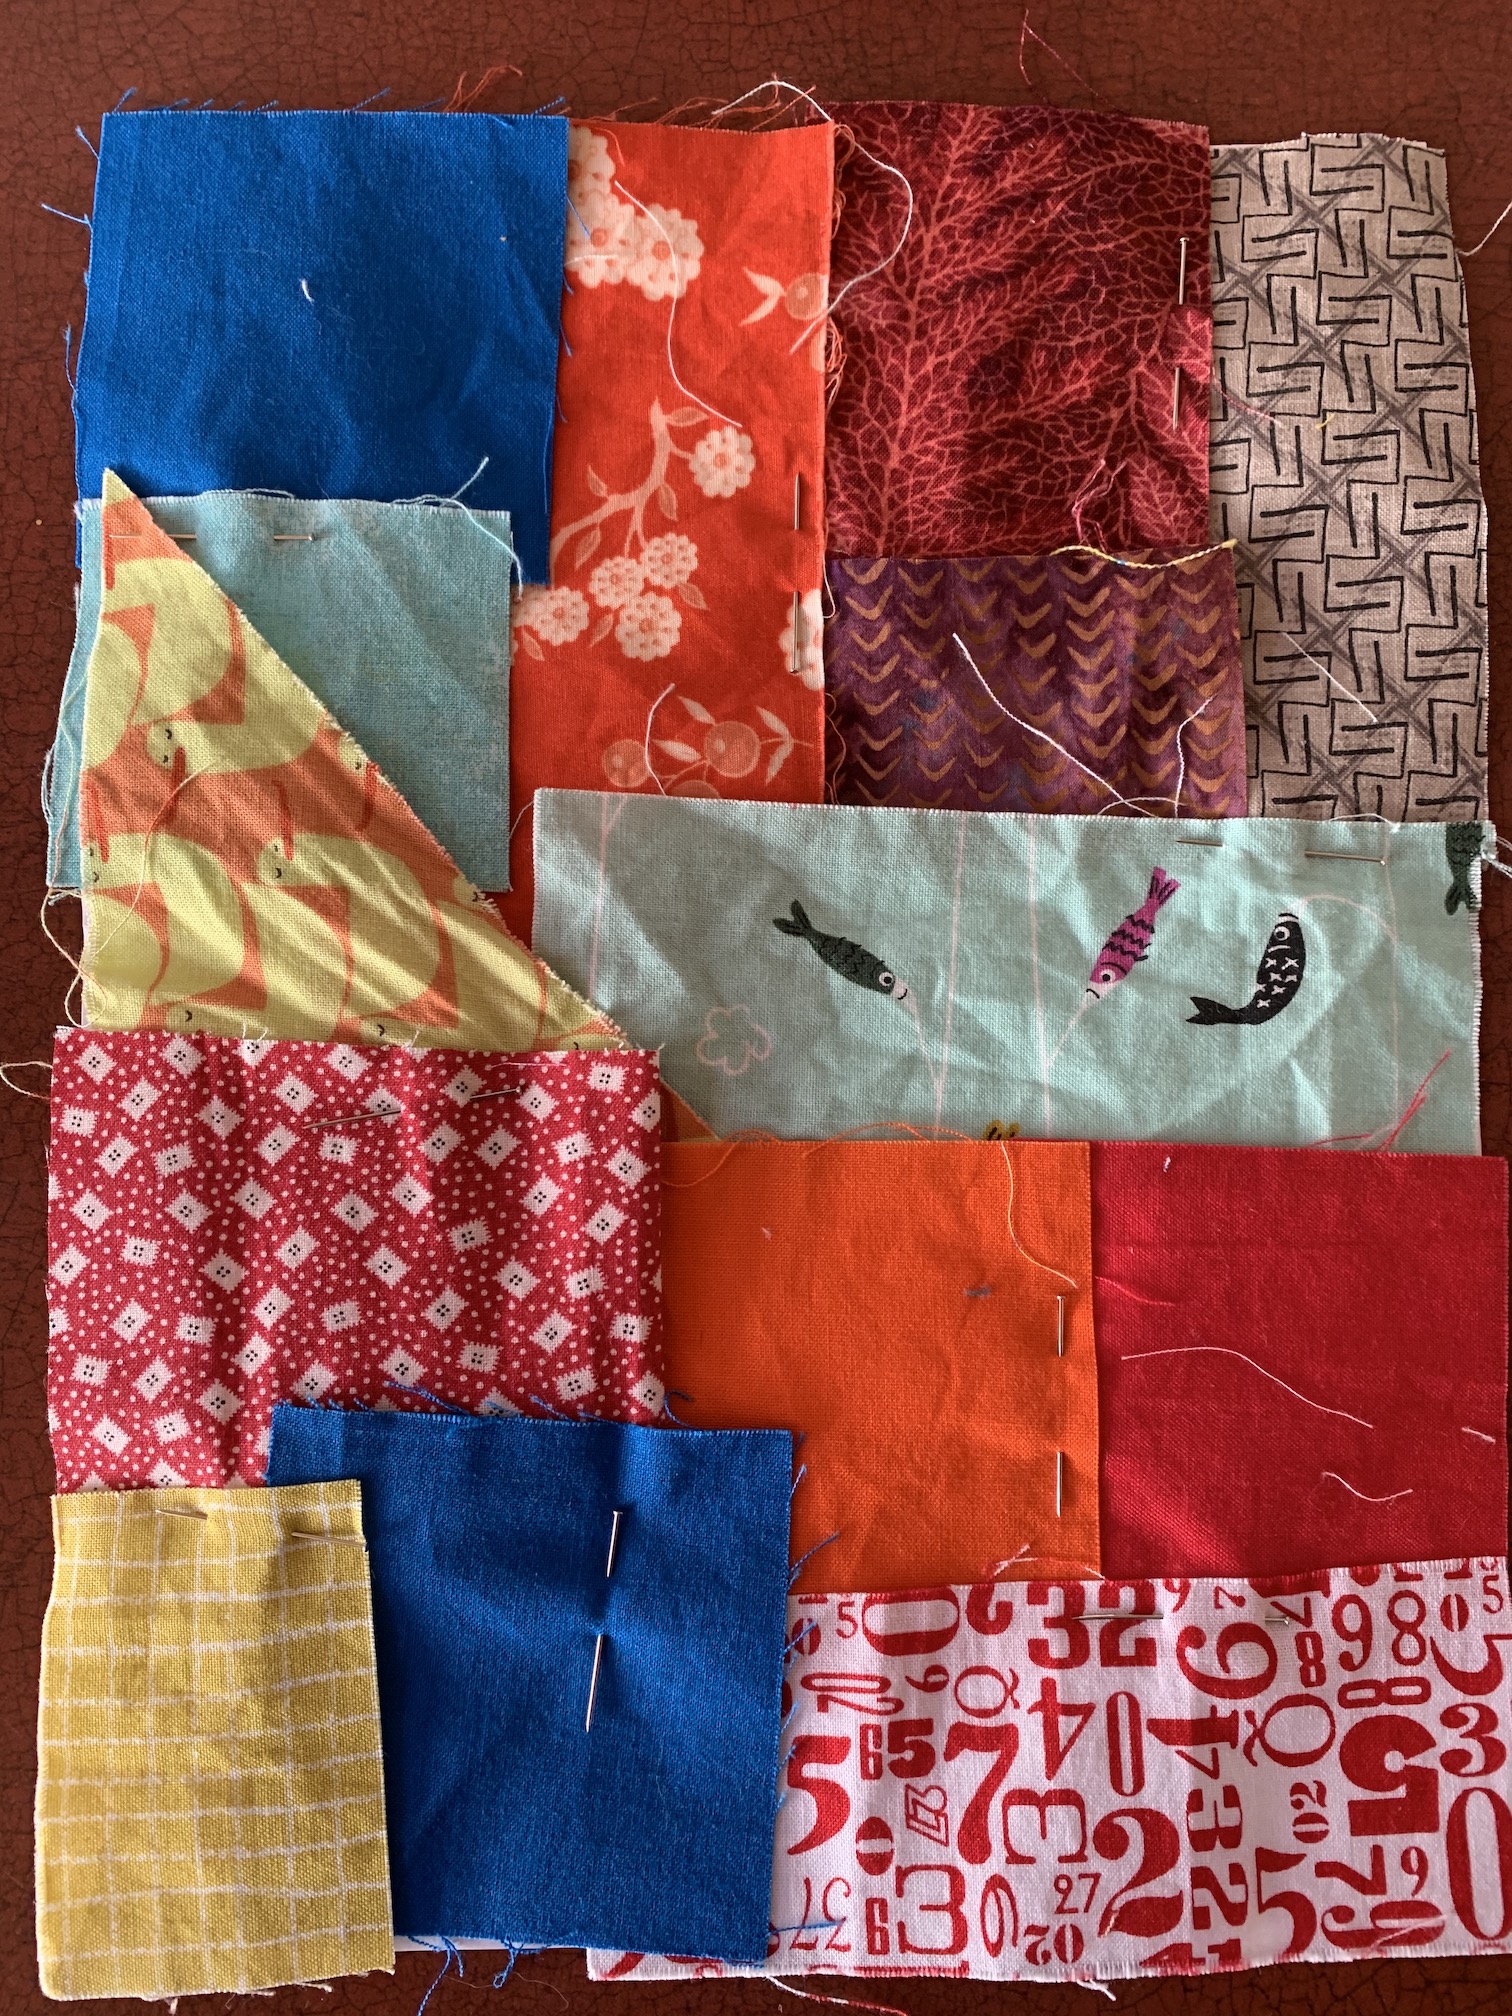
For the remaining 12 blocks, I decided to stop trying to find pieces long enough to make each block (a lot of the remaining blocks need fabrics of at least 6.5 inches) from this pile:
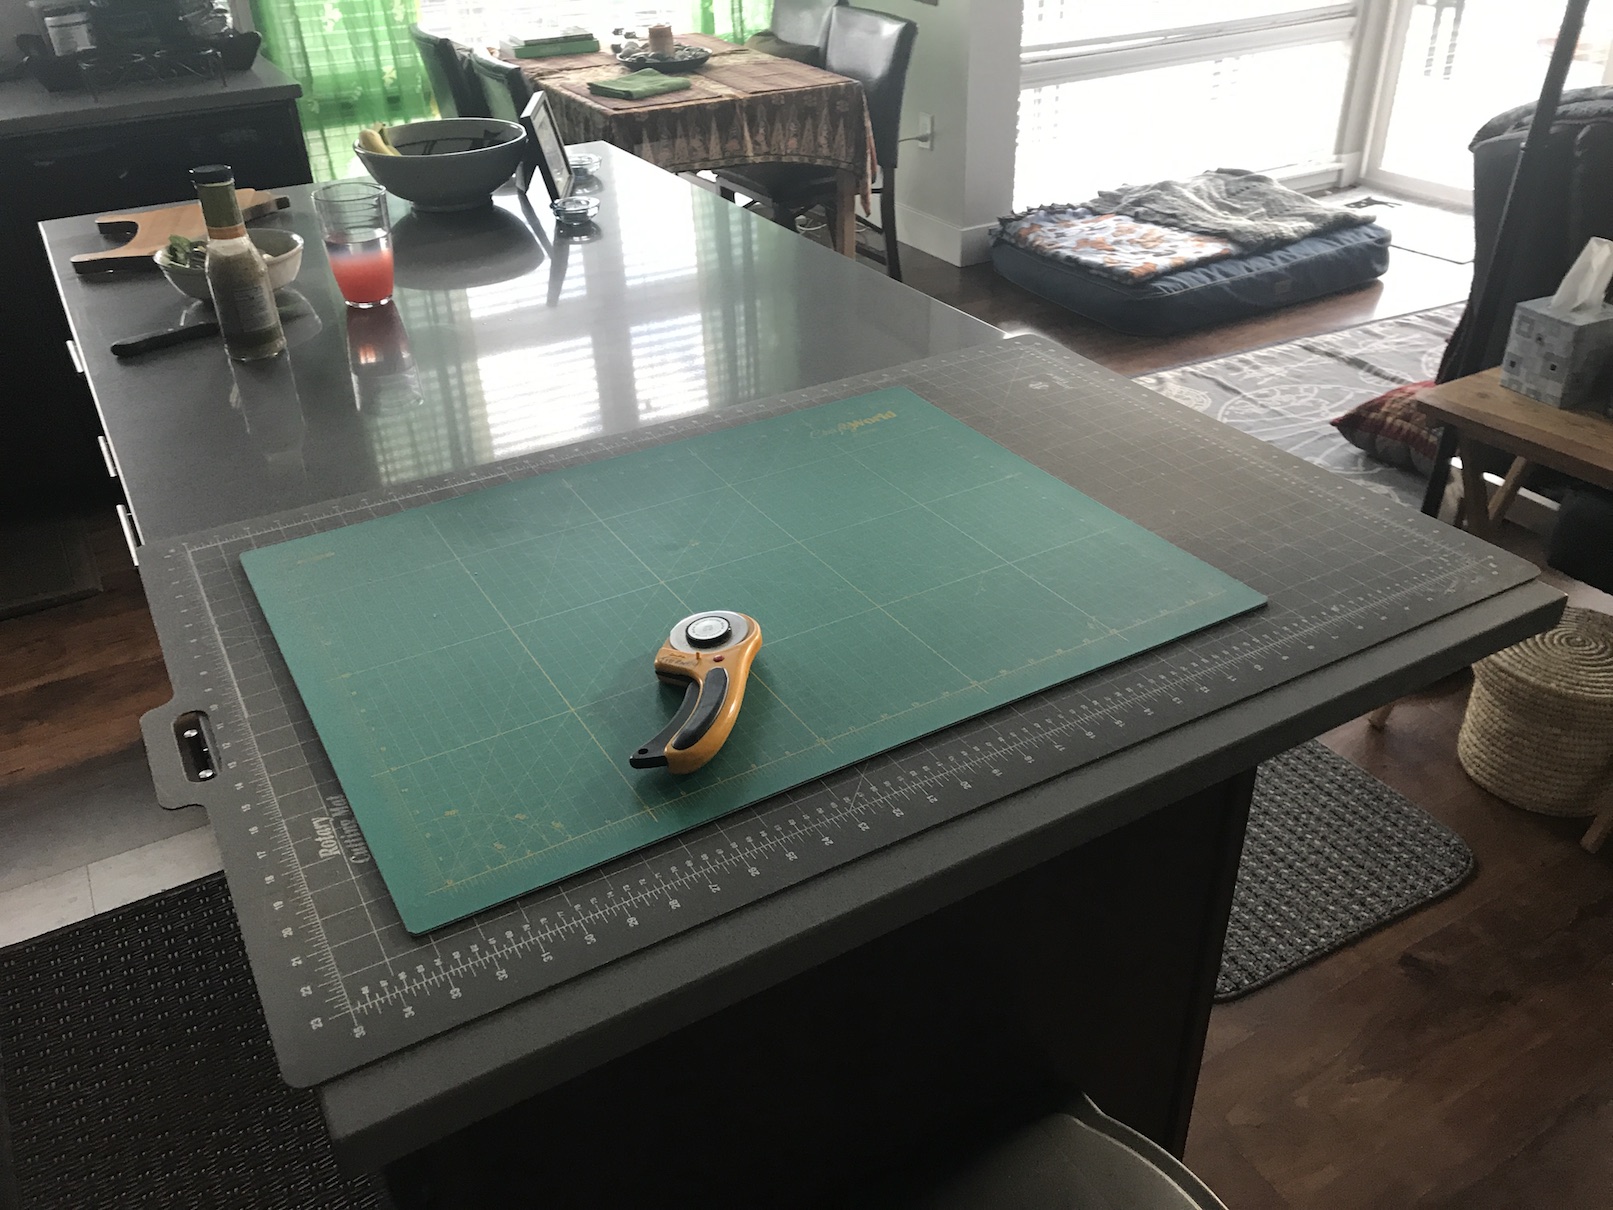
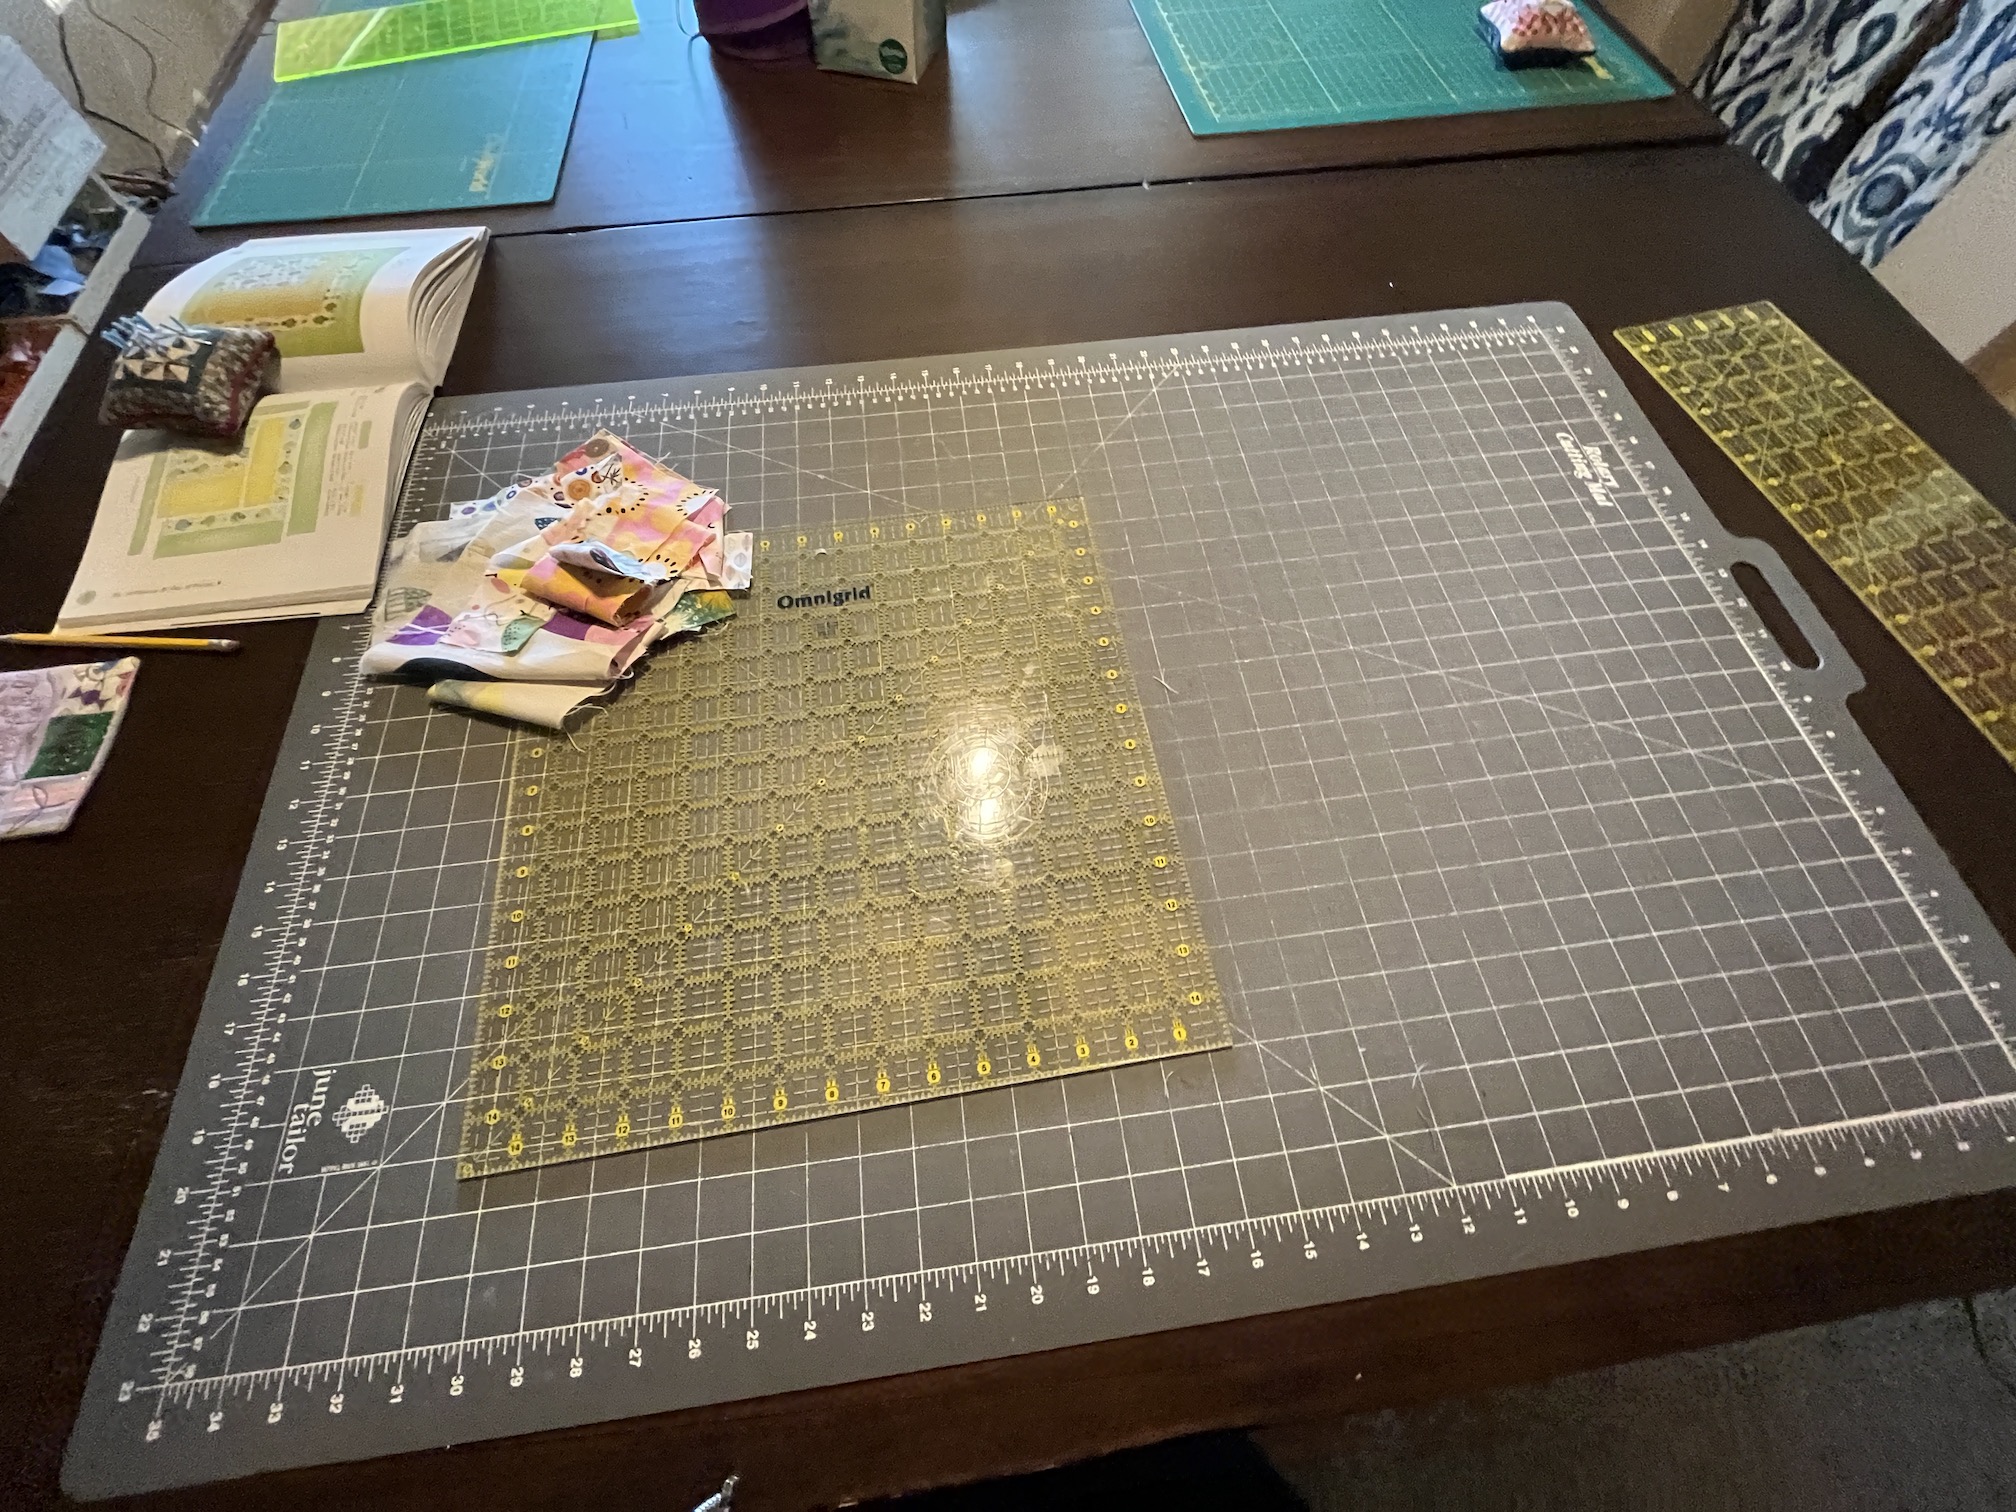
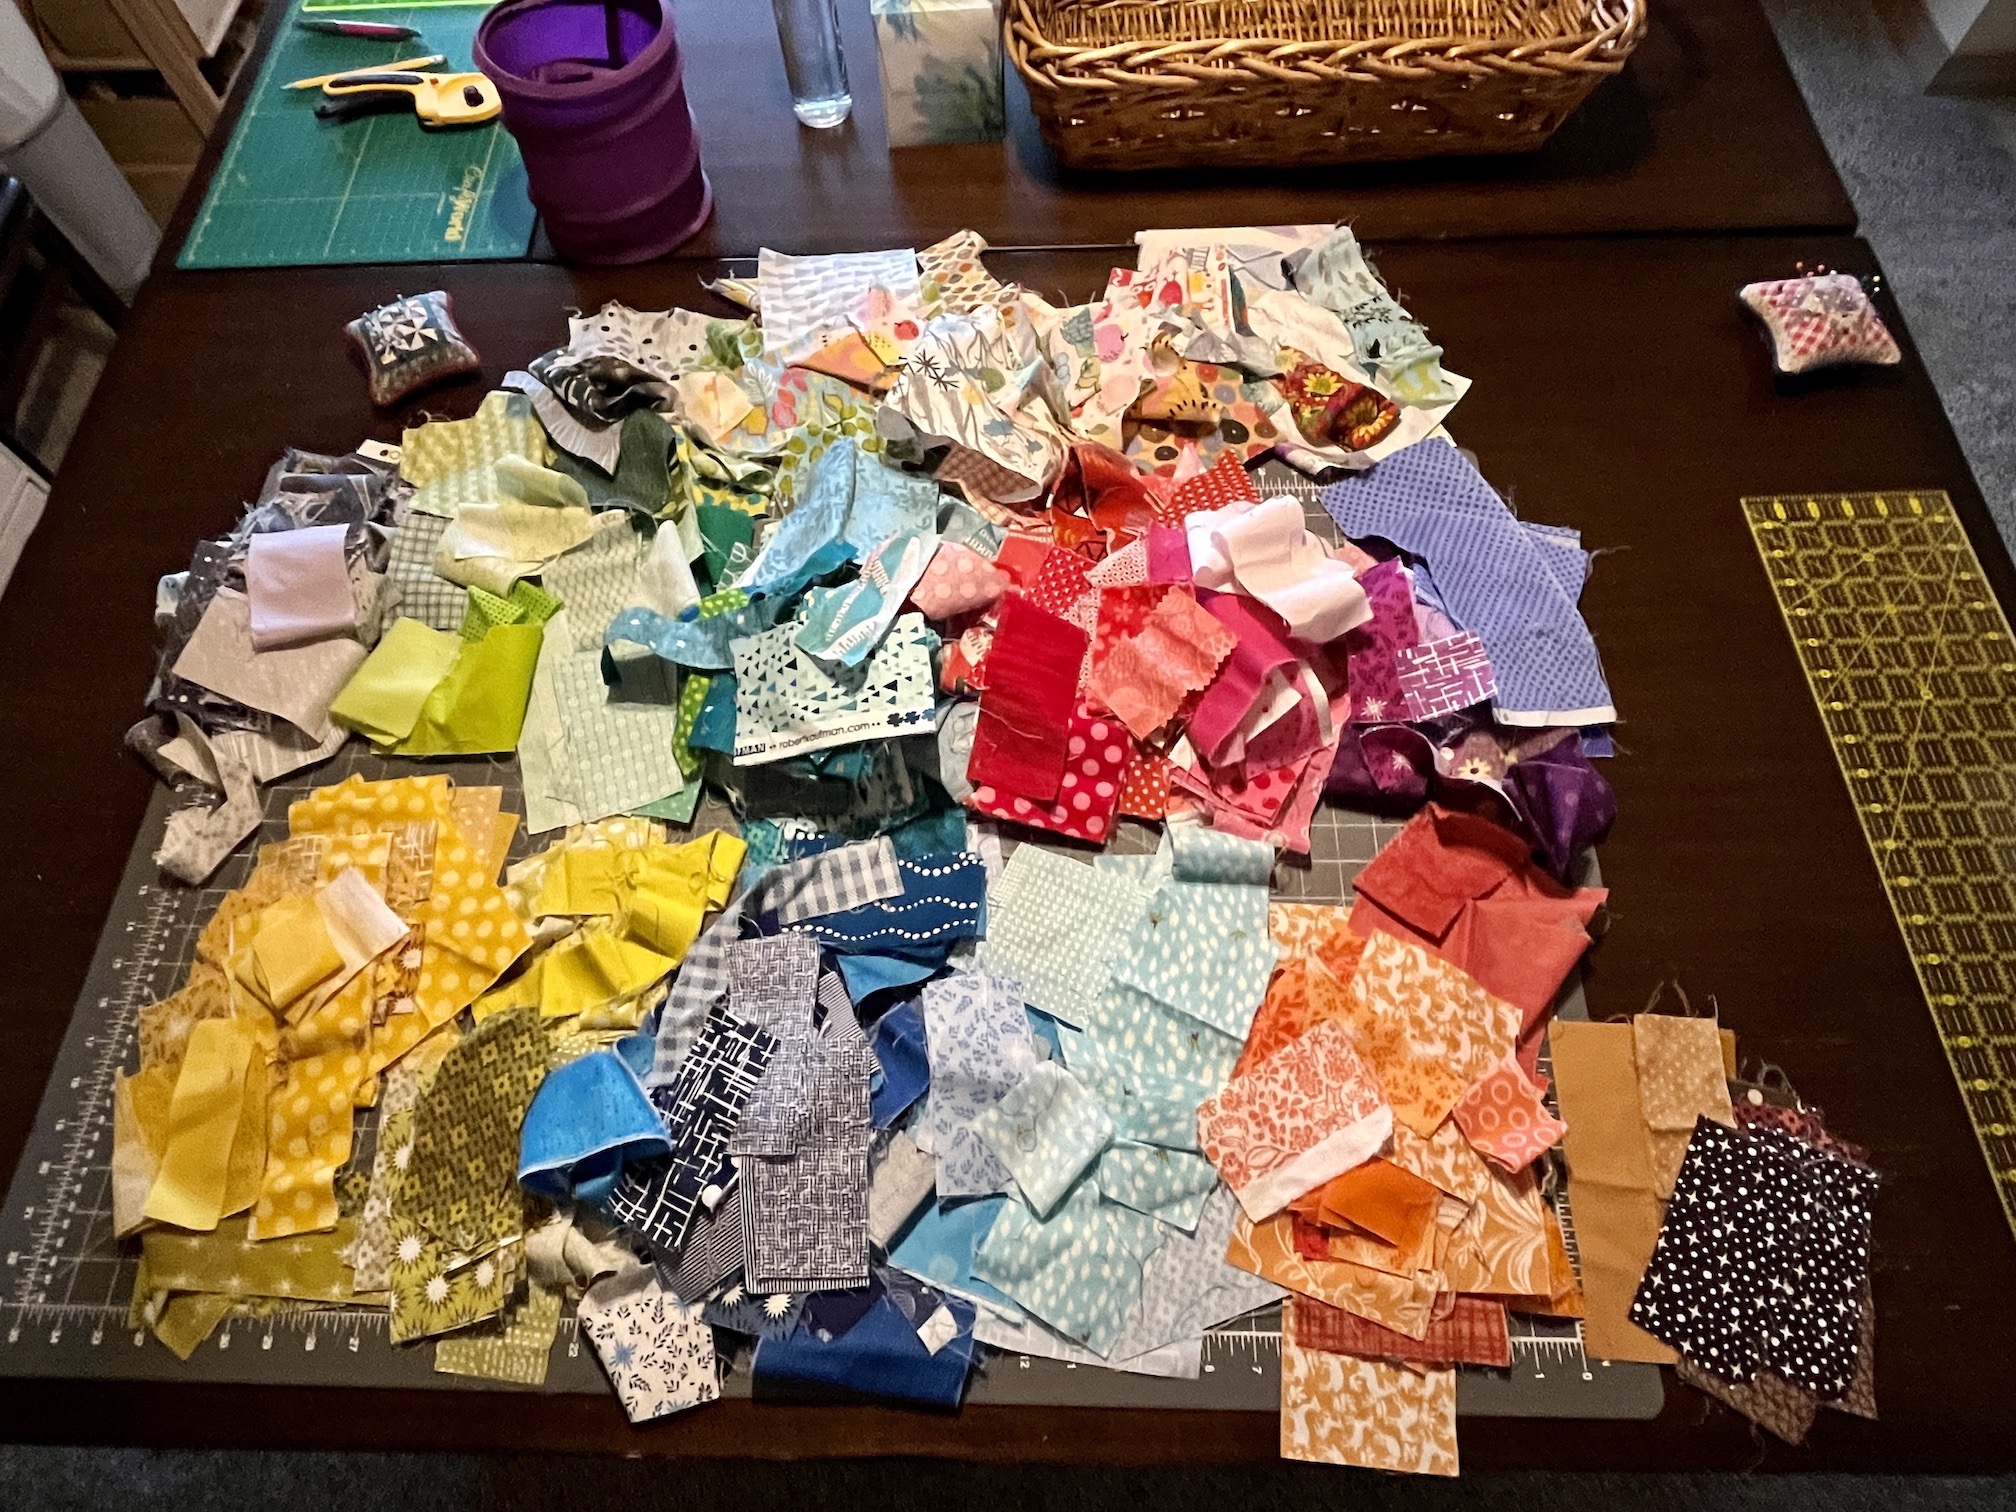
Instead I cleaned up my cutting table, putting fabric scraps away by color in my fabric scrap storage system:
And I am going to be very deliberate about color choices (based on what I have too much or too little of in my quilt so far) and shop for fabric scraps from my collection of fabric scraps organized by color in my wine crate storage unit:
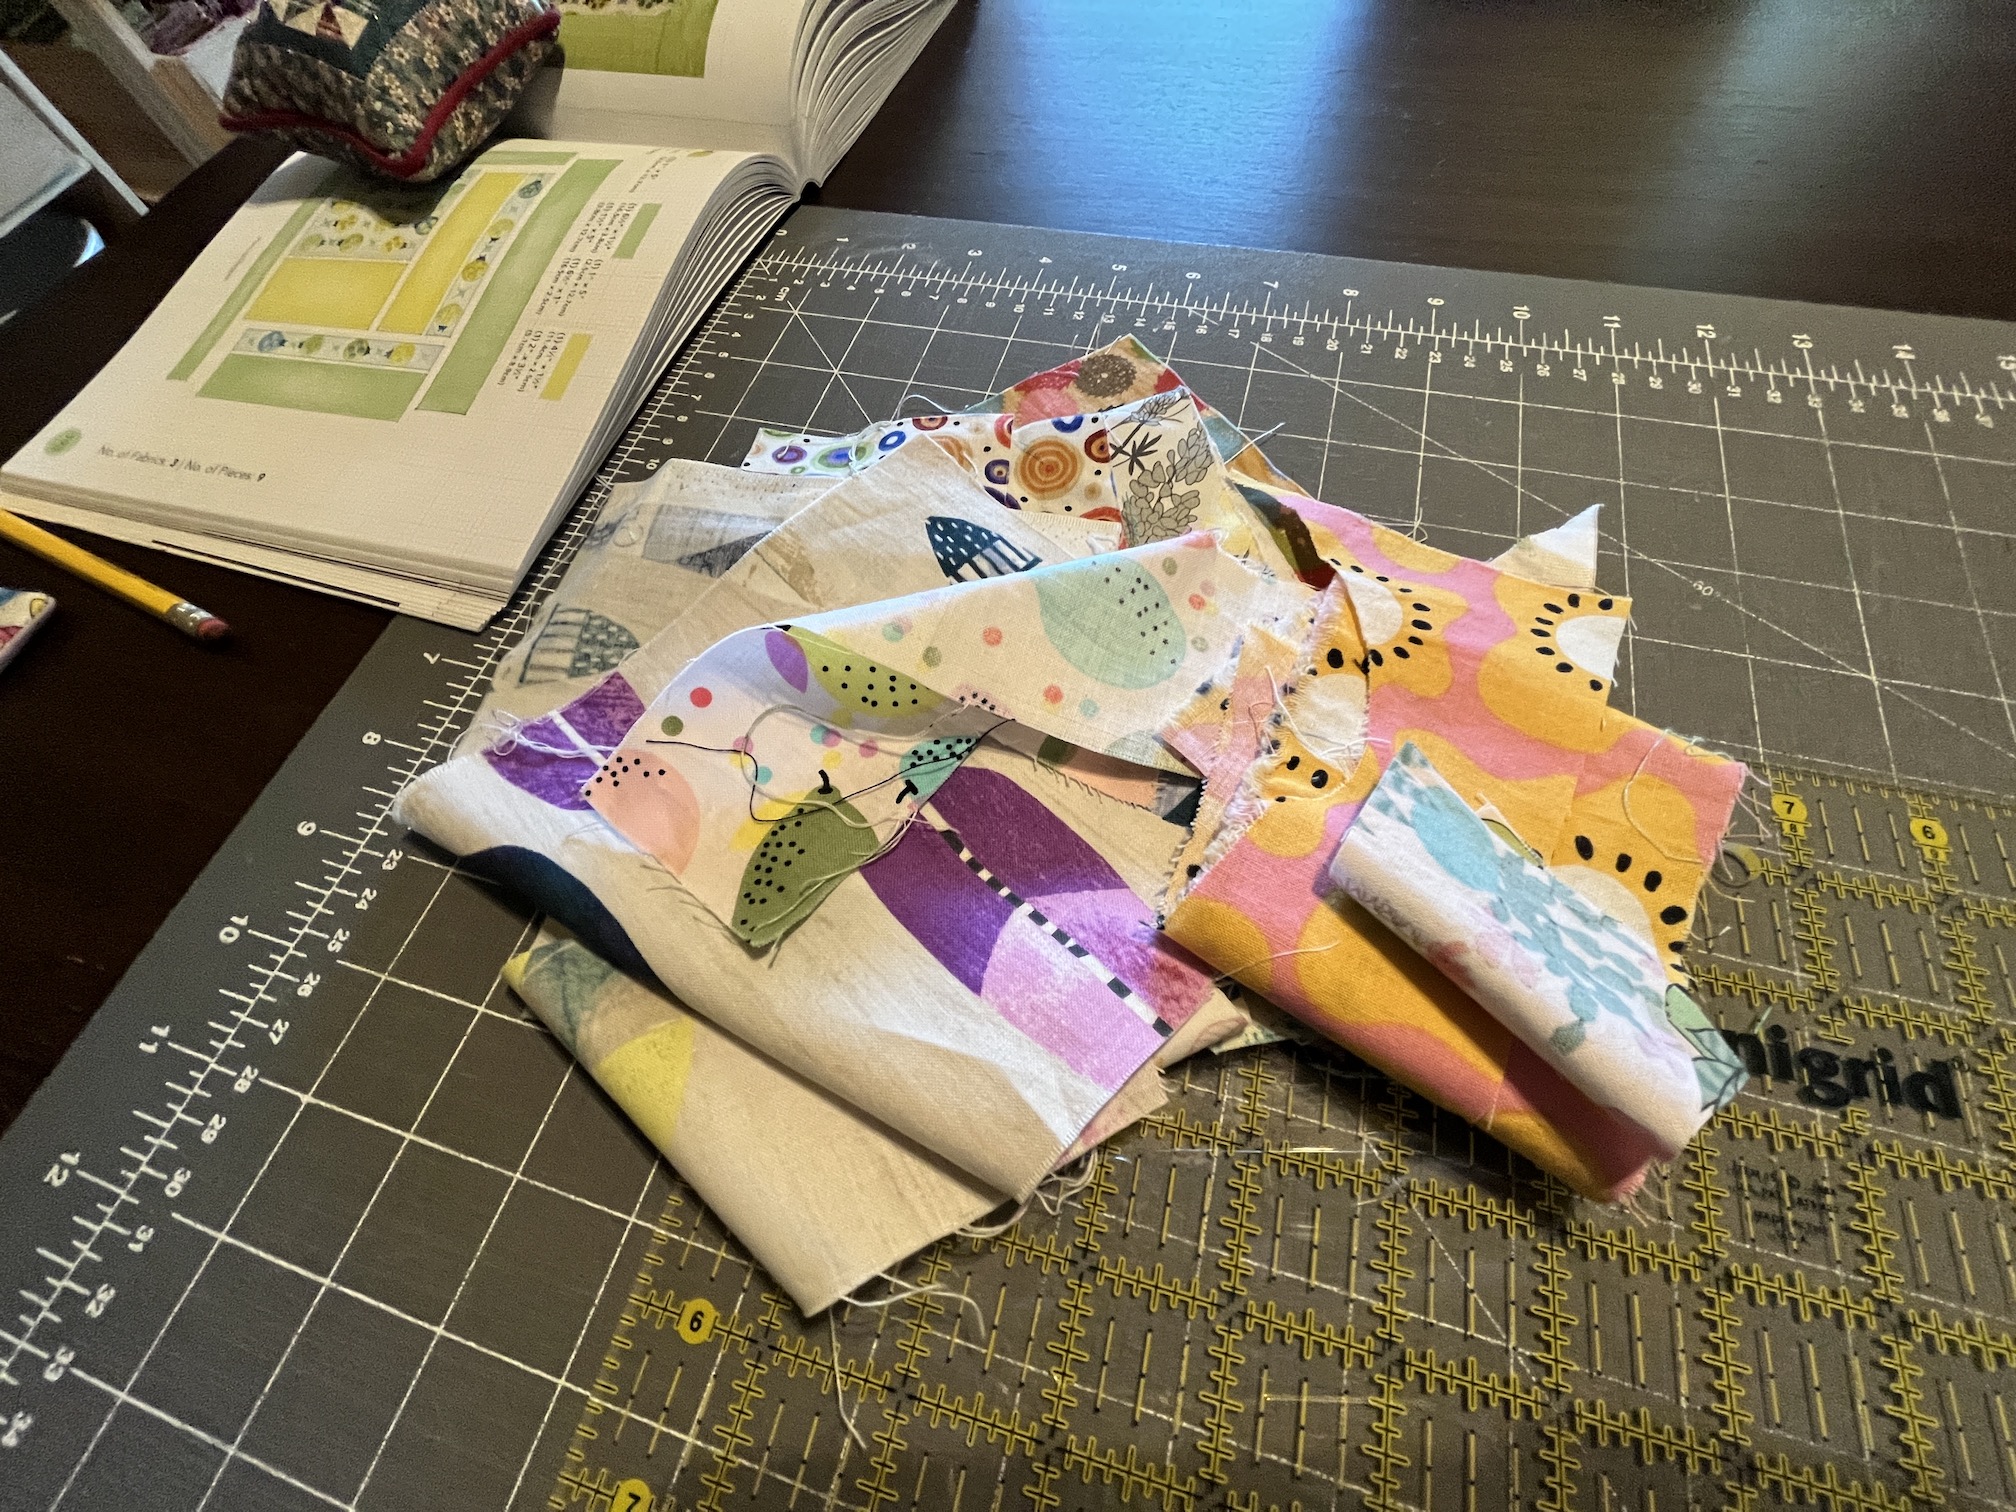
I am going to try and use these remaining fabrics, from the initial pile, that I did not put away with the rest:
I want to try and repeat those fabrics.
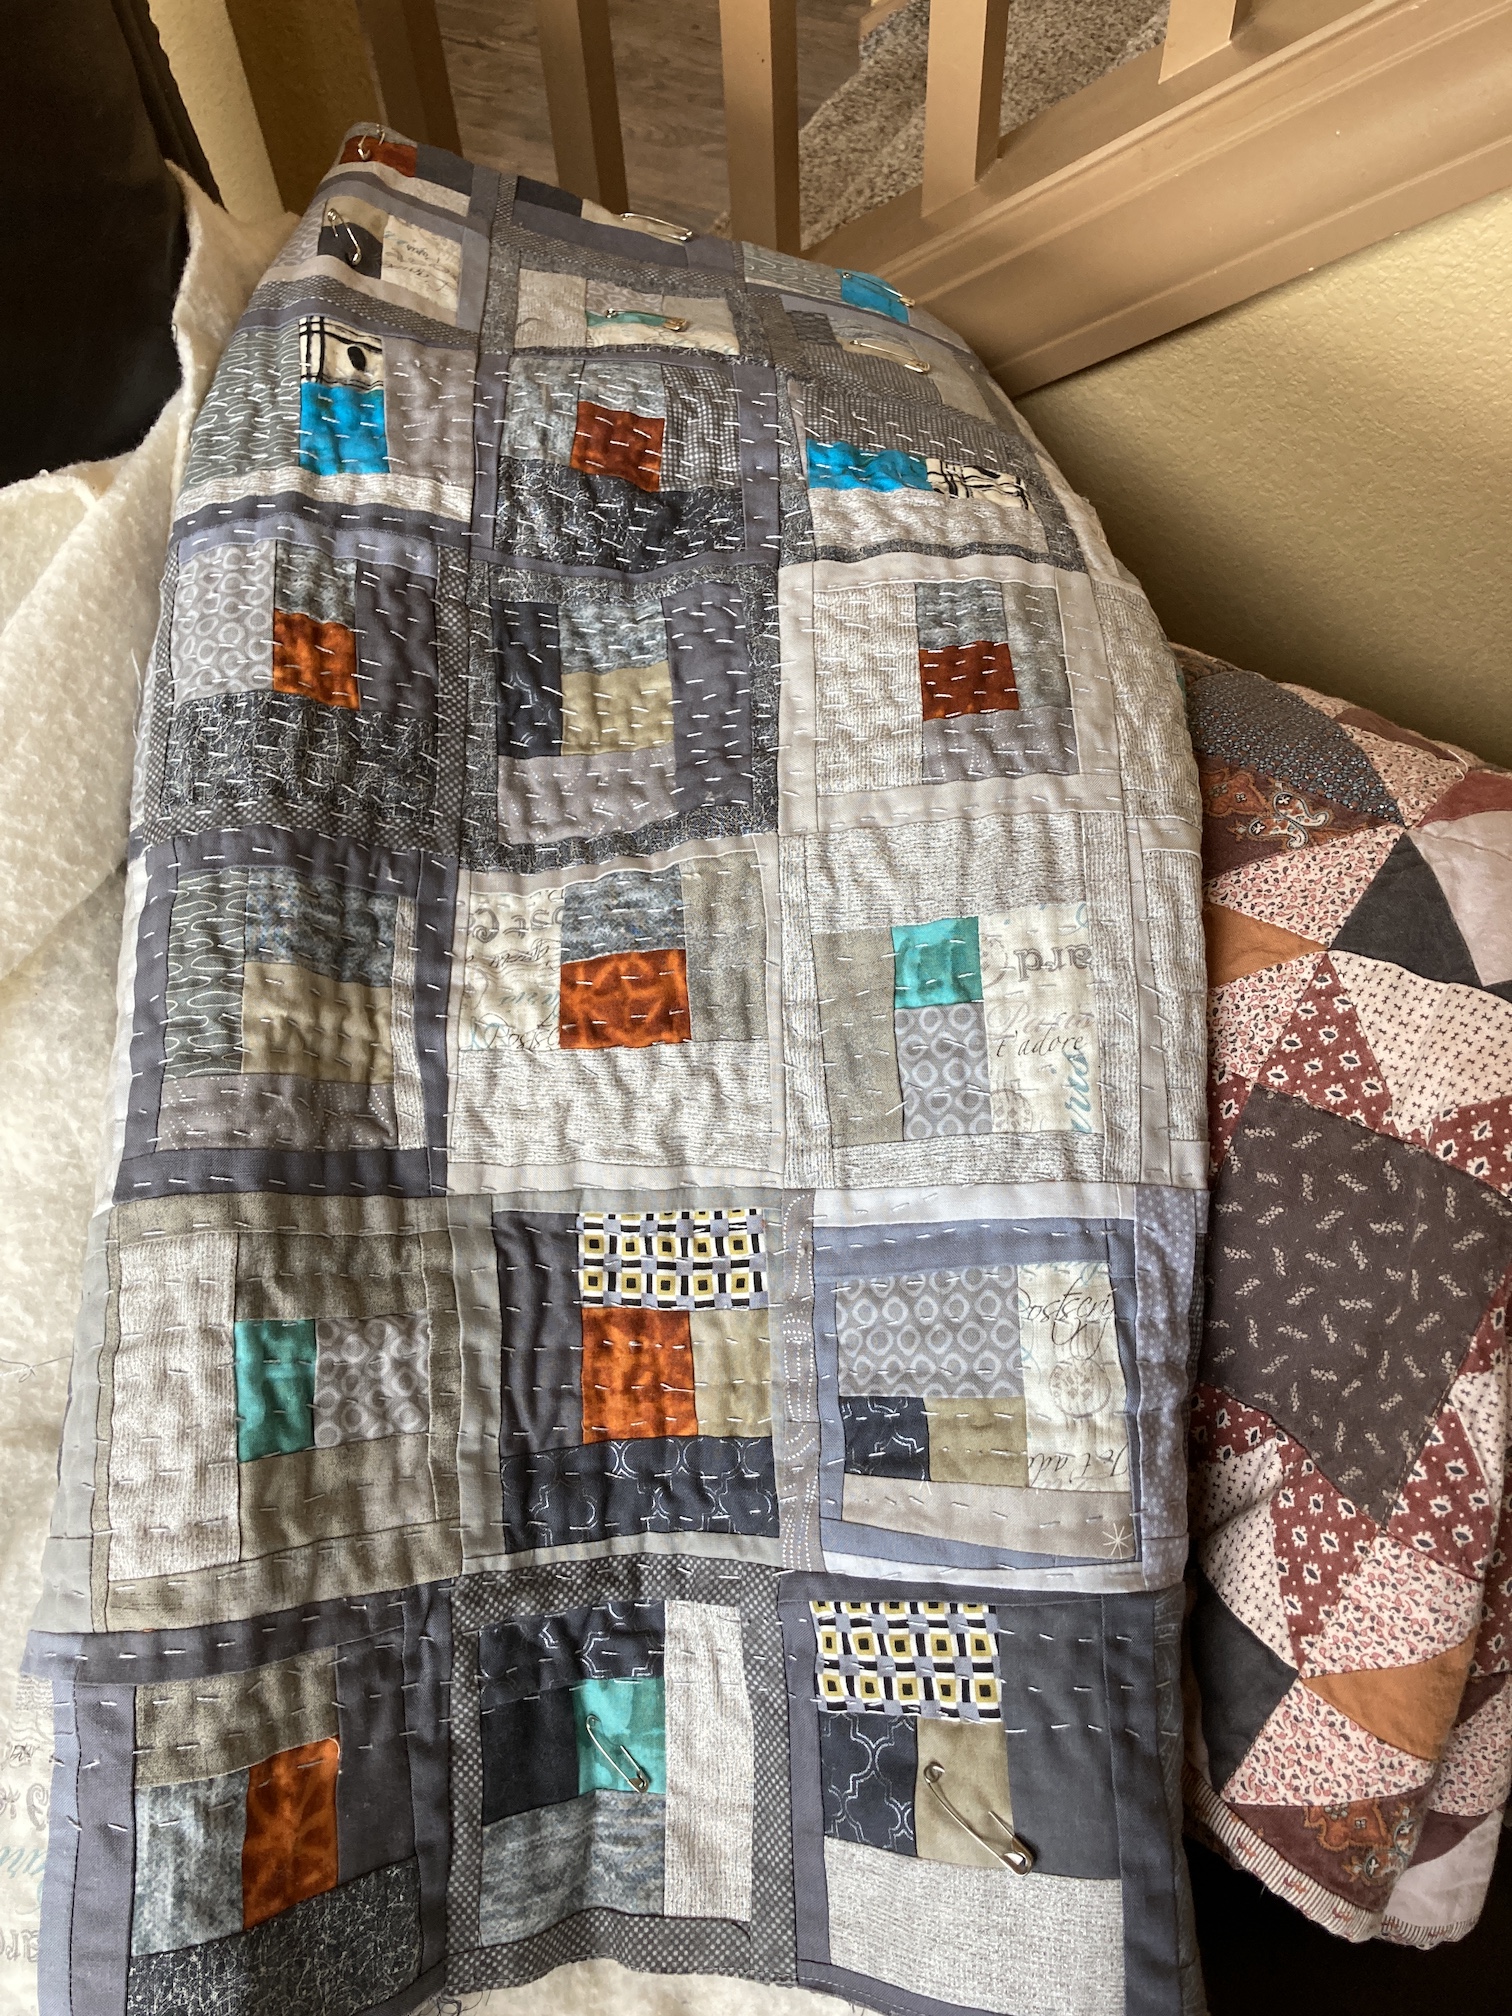
I’ve decided on how to finish the quilt – I am going to sew the blocks all together in a 10 by 10 row with no lattice, and no borders. Just plain and simple, allowing the blocks to just shine through without any clutter.
I realize this will make it only a lap size quilt instead of a Queen or King size which you could get by using some of the layouts in the back of the book Tula Pink’s City Sampler 100 Modern Quilt Blocks. Lap size works for me as I might actually just hang it on a wall and display it. I’ll decide after I get it back from the long-arm quilter.
Well back to hiding out in my sewing room and finishing up the 12 remaining blocks to get to 100 blocks, which at one point seemed so far away!
Postscript
I developed a sort of production system to sew so many blocks.
I would pre-cut a large amount (15 or more) of blocks; and then sit down and sew them, trying to use chain piecing as much as possible, even working on two or more blocks at the same time.
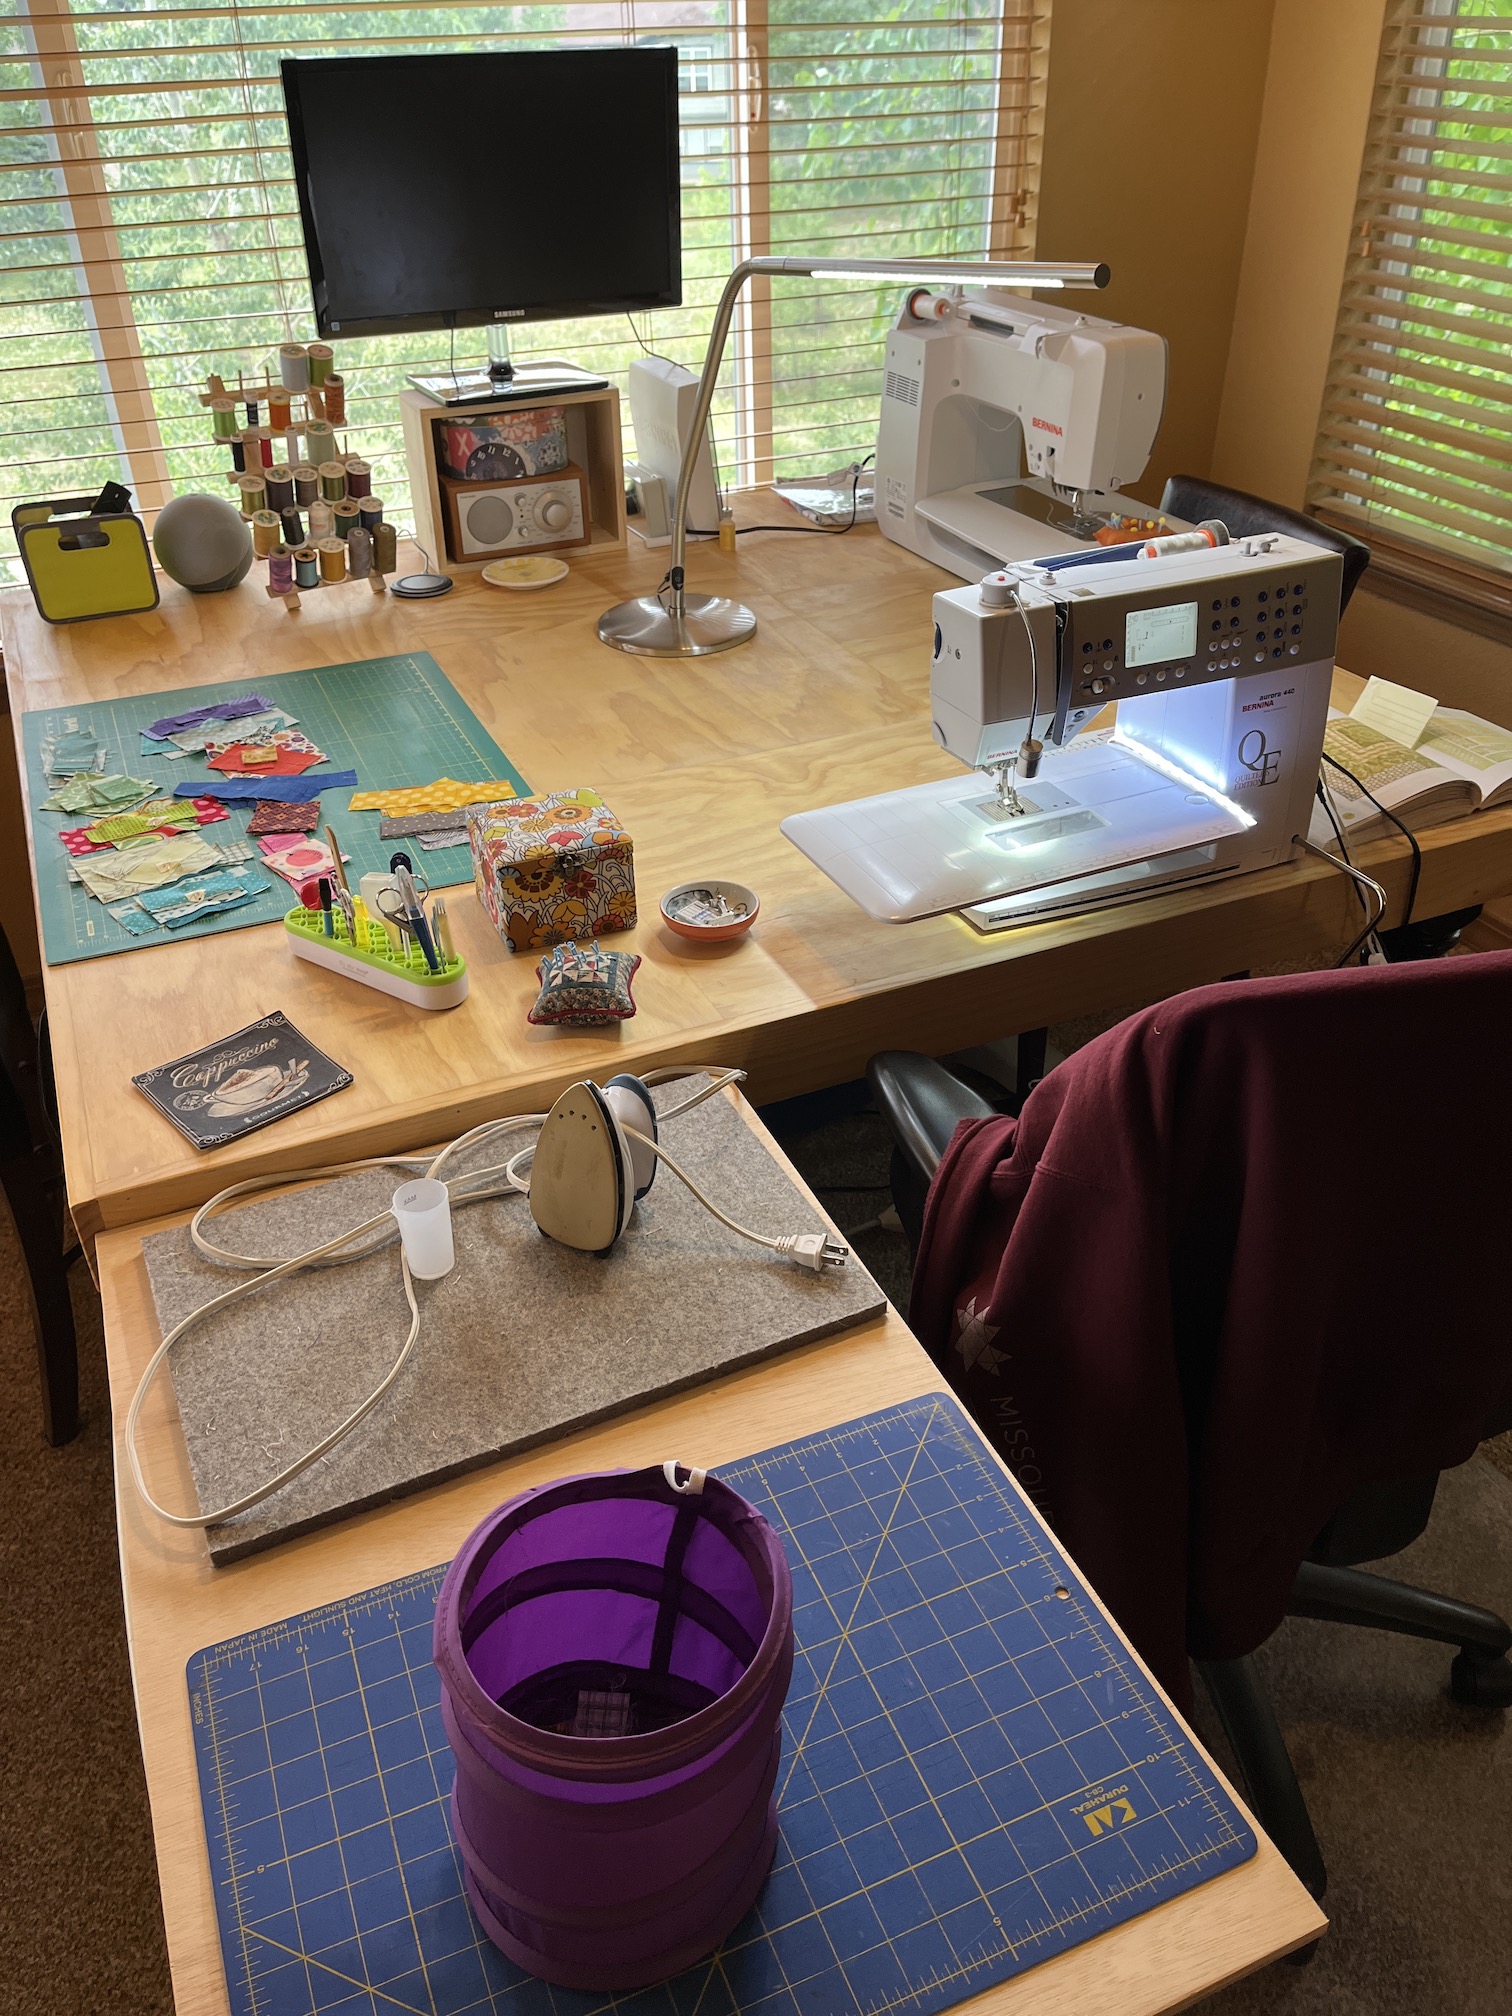
Well my partner John took an old folding table and put a wooden table top on it for me to add to my existing work table to act as a “return” and give me space for ironing while piecing and any trimming needed.
This really added to my efficiency in block making!
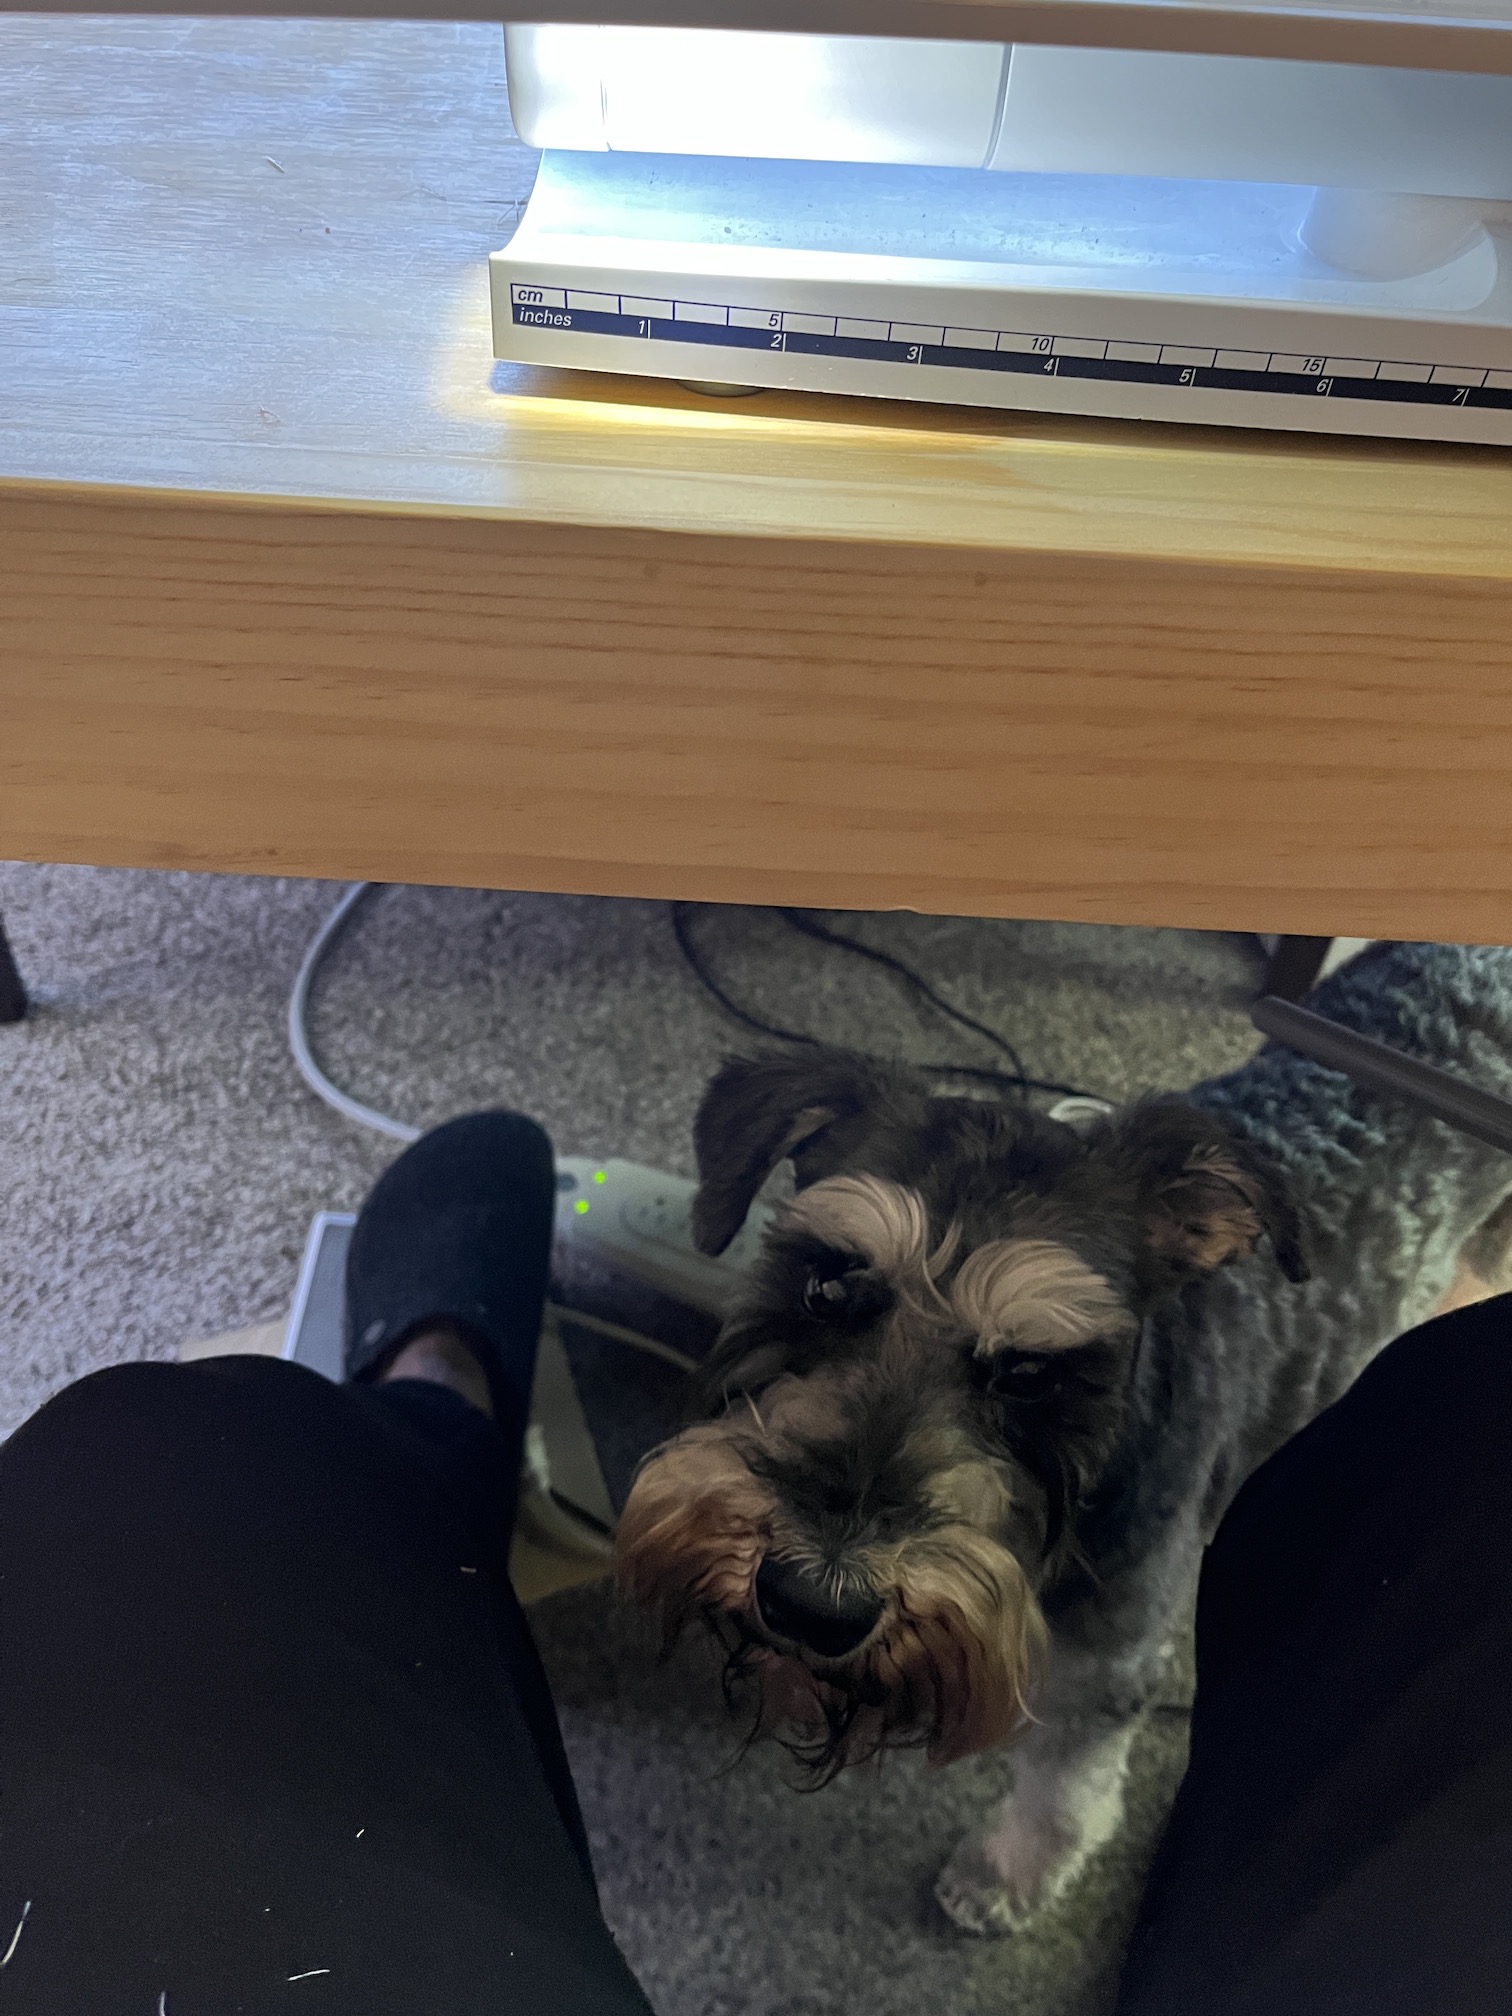
And here is Mike the Miniature Schnauzer hanging out under my sewing table while I am at work:
Here is an update on the Tula Pink’s City Sampler 100 Modern Quilt Blocks I’ve been working on since February.
I now have 70 blocks done, 15 more blocks since my previous post What’s On The Design Wall: Over 50% Done! . So I am 70% done (well if you do not count sewing all the blocks together, making the backing, and putting on the binding after I have it professionally long-arm quilted, ha!).
I am getting some use out of the Ring Light I bought last year and figured out (sort of) how to use it photograph these blocks on my design wall late at night when I didn’t have any natural light available.
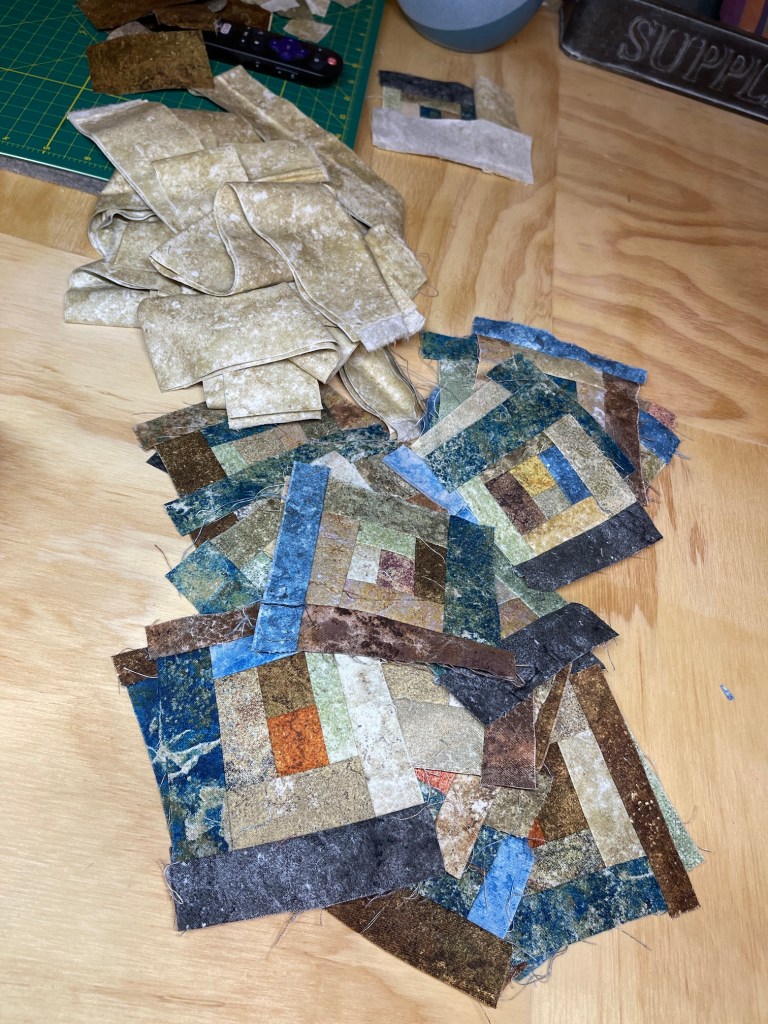
I continue to enjoy “shopping” for fabrics in my pile-o-fabric-scraps, now sorted by color, to make each block:
If you are just joining us (and you are really bored and need posts to read, ha!) here are the previous posts on the evolution of this quilt:
I’ve been thinking about the layout of the final quilt top. There are many ideas in the back of the book – Tula Pink’s City Sampler 100 Modern Quilt Blocks, but I am thinking perhaps of a Dear Jane Quilt setting and looking at ideas such as those I found on this link – Dear Jane Quilt Inspiration. Another thought is just sewing all the blocks together without any type of sashing/setting. But I’ll revisit these ideas once I’ve finished all 100 blocks!
I am now cutting the next batch of 15 blocks and looking forward to getting to 85!
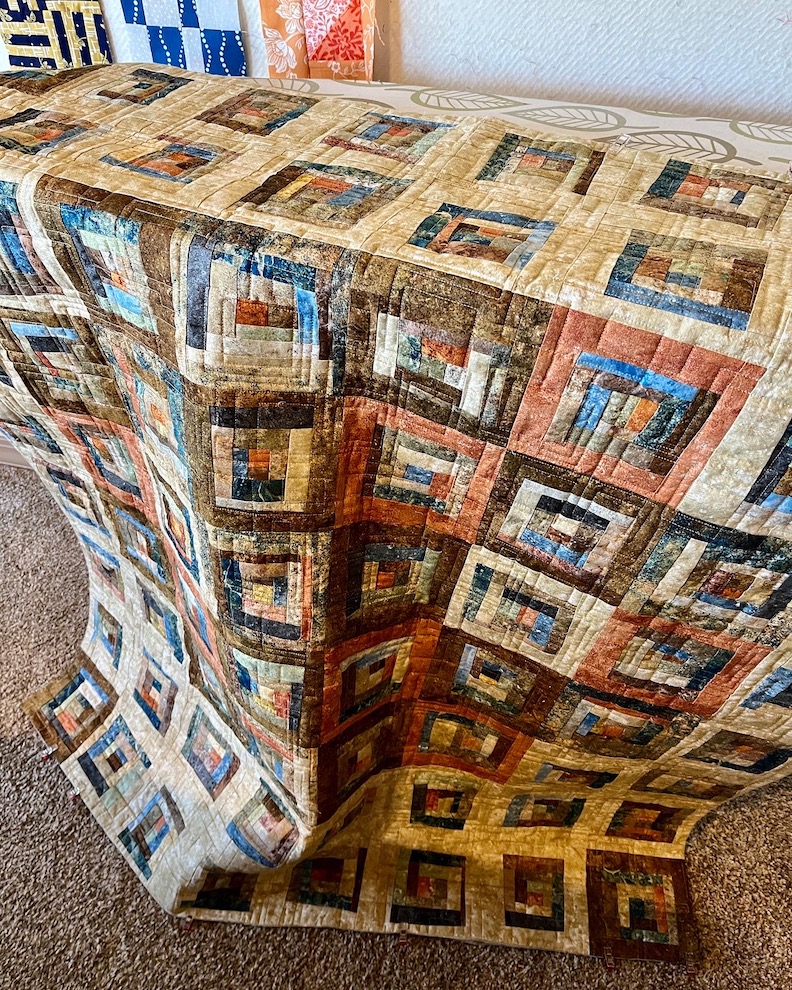
Here is a follow up on two posts about a freeform log cabin quilt I’ve been working on using Northcott’s Stonehenge fabric line scraps, that I named “Scraphenge”:
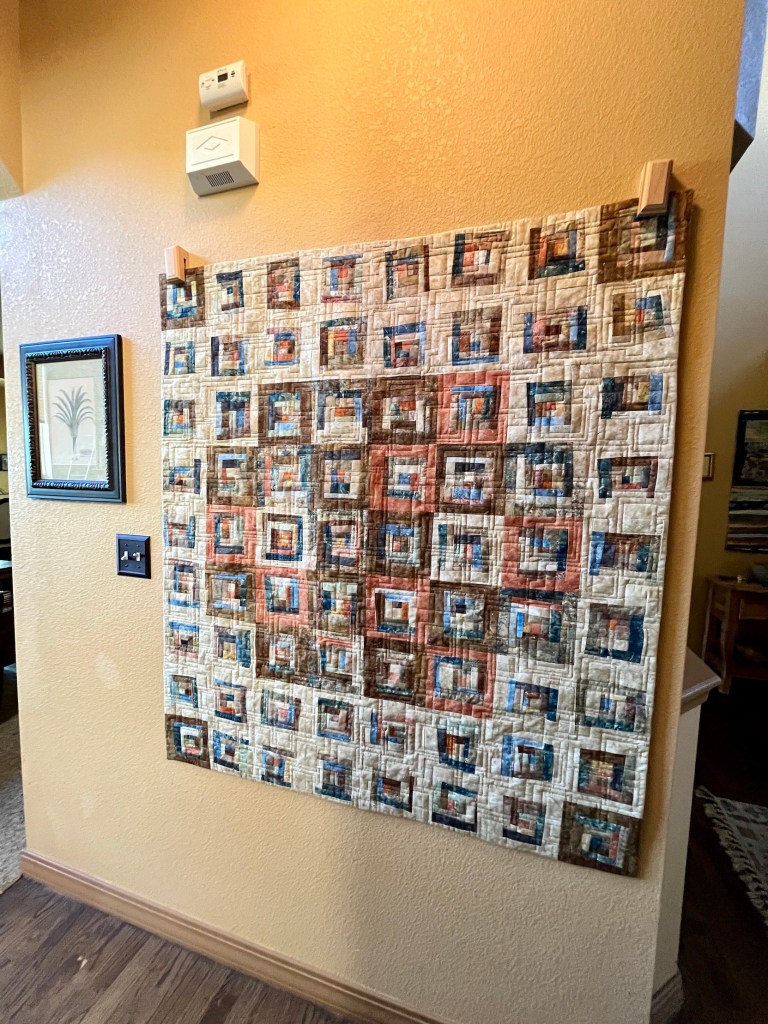
Well Scraphenge is “done and hung“! I received it back from the longarm quilter last week (I used Missouri Star Quilting Company longarm quilting services).
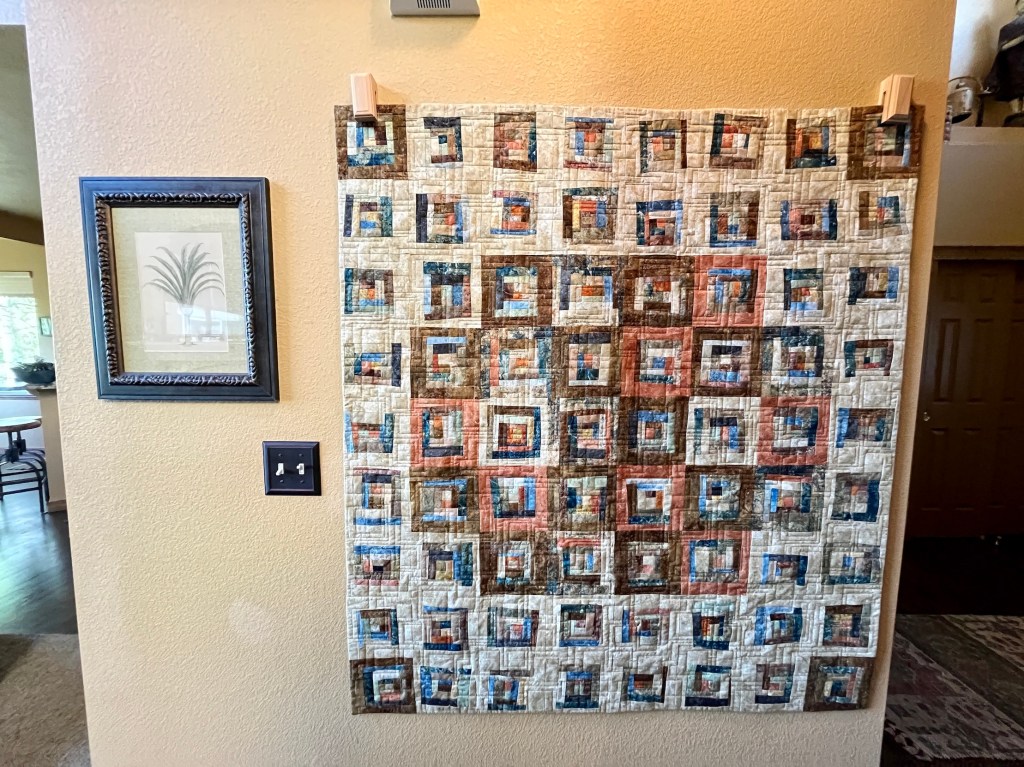
I decided instead of a binding to put a “facing” on the quilt since I was going to hang it on the wall:
Instead of the cumbersome method I’ve used to put a facing on in the past, which I learned from an art quilting book, I searched YouTube to see if there was an easier method and voilà I found one:
And it worked perfectly! It was much easier than the previous method I was using!
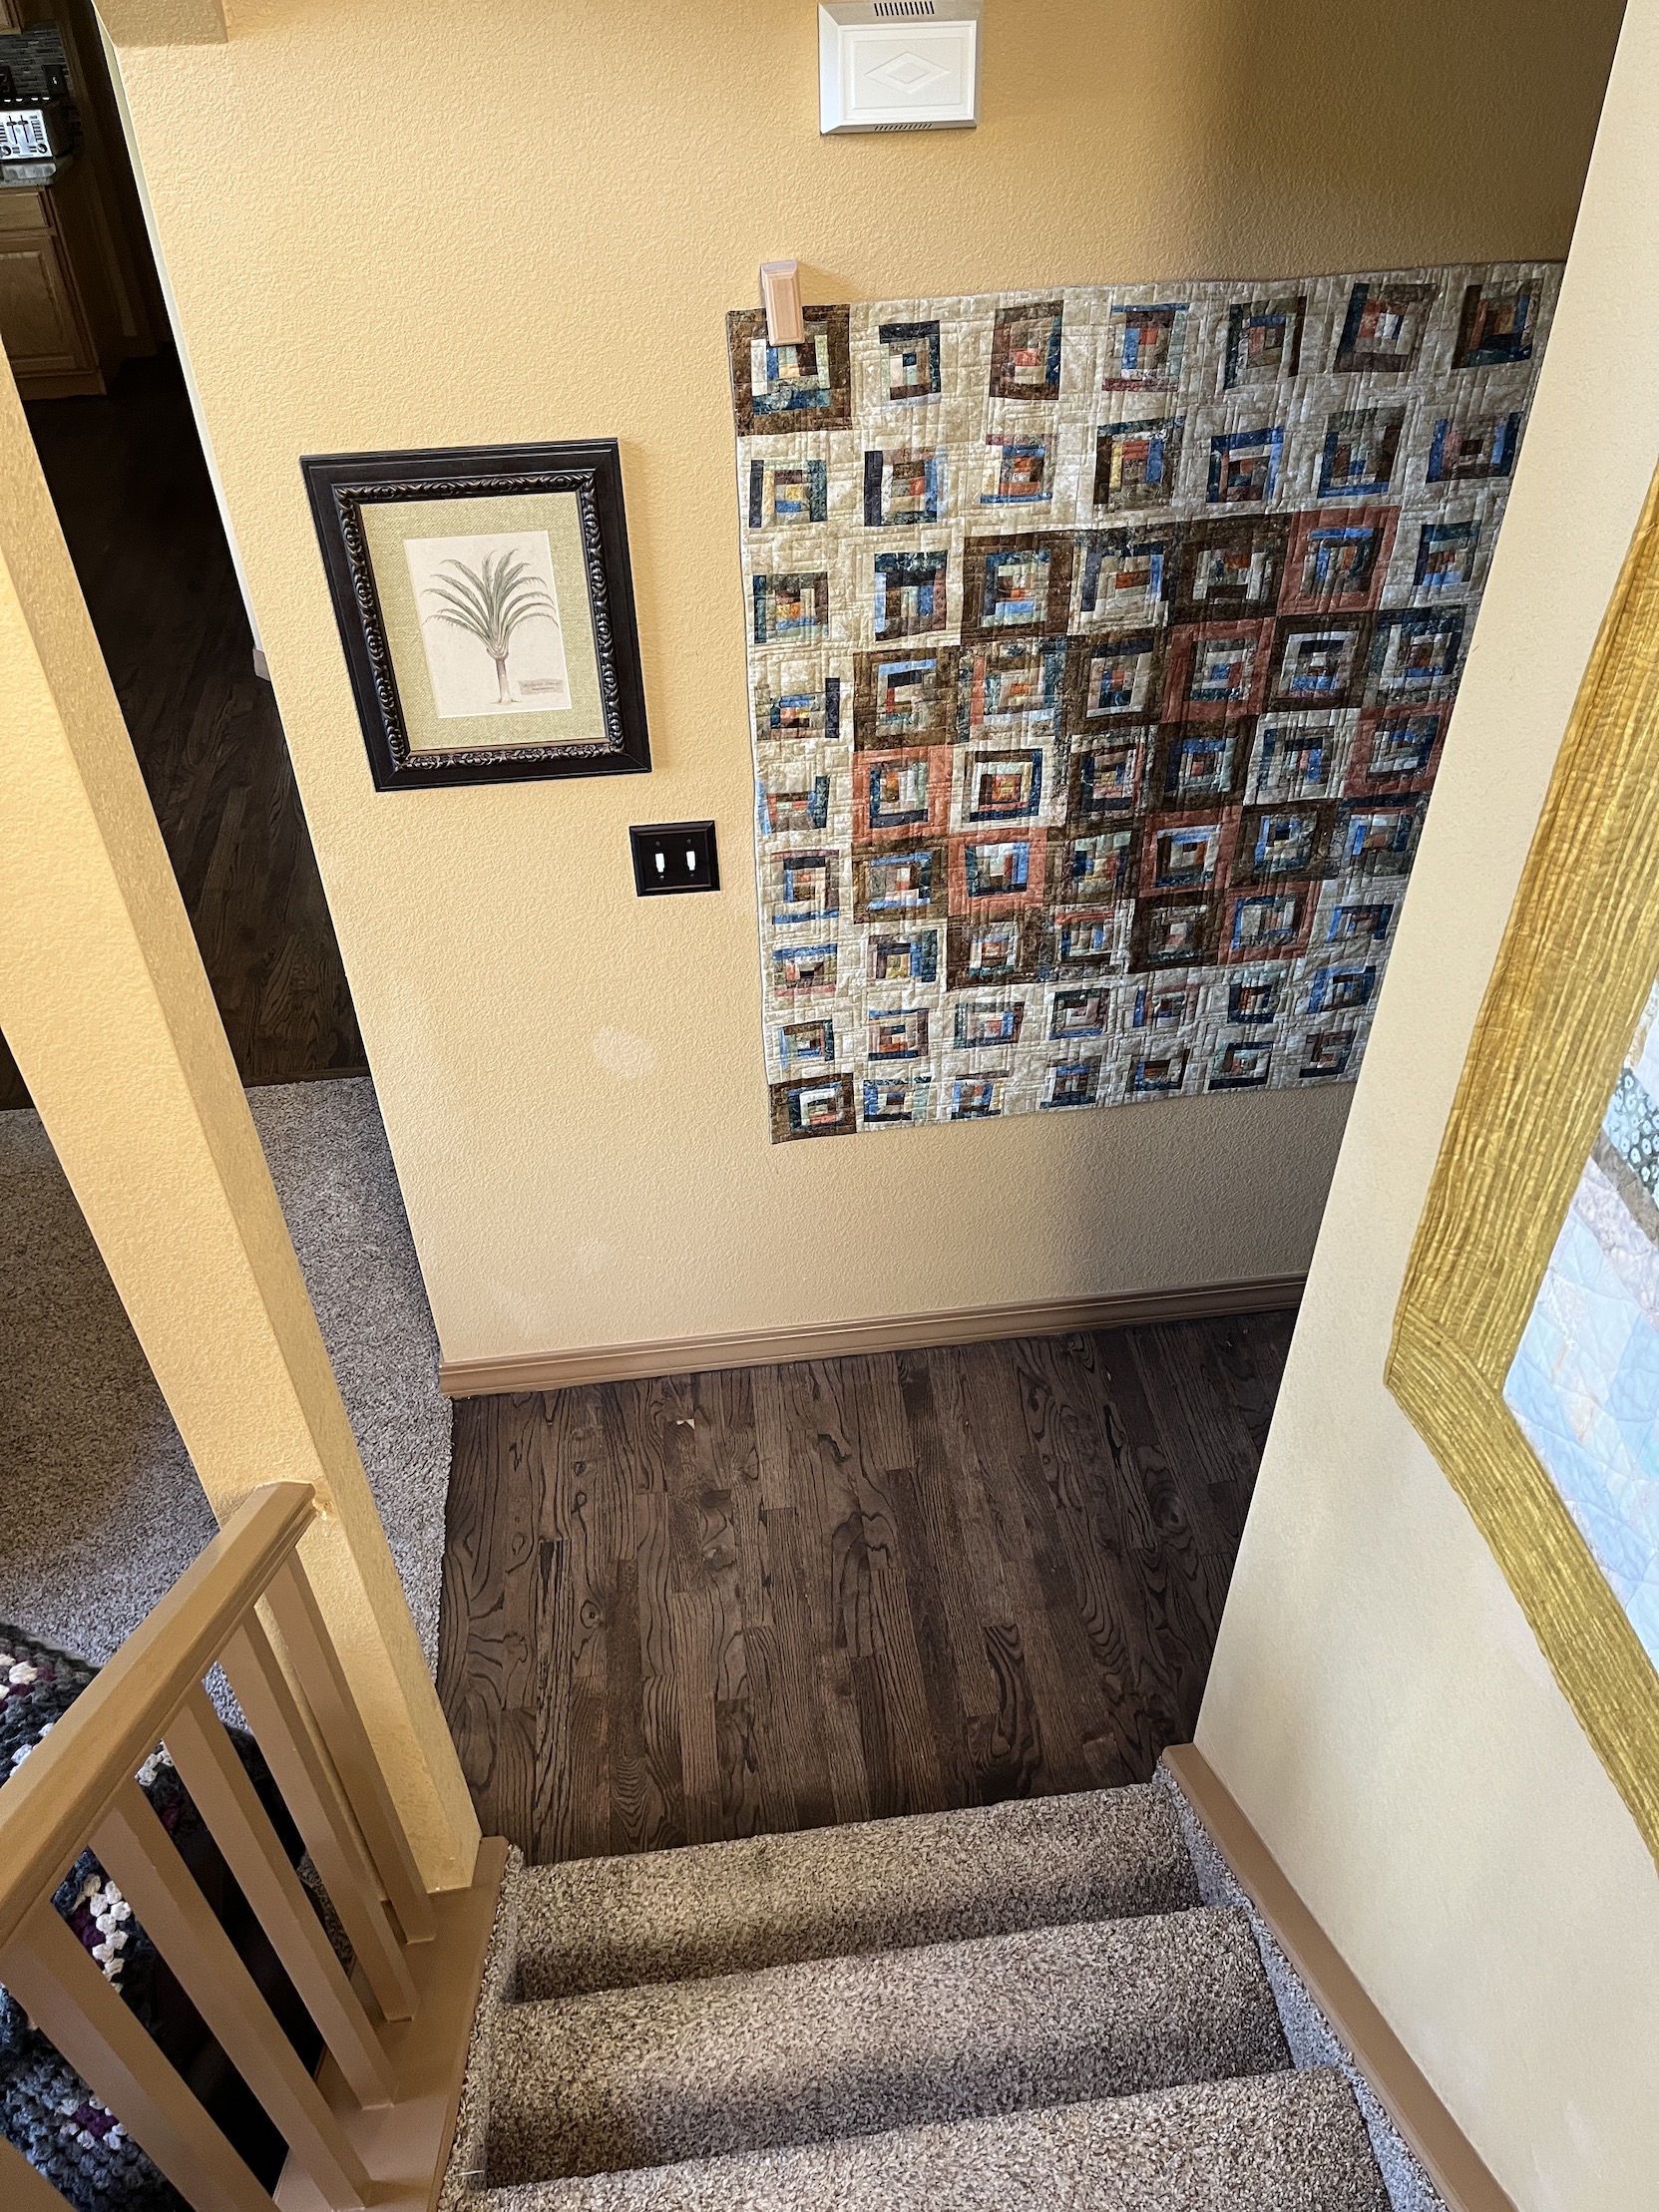
So here is the quilt hung in the hallway next to the entryway to our home. I took a couple different photos as due to the stairways to upstairs and the basement it was challenging to photograph the quilt straight on:
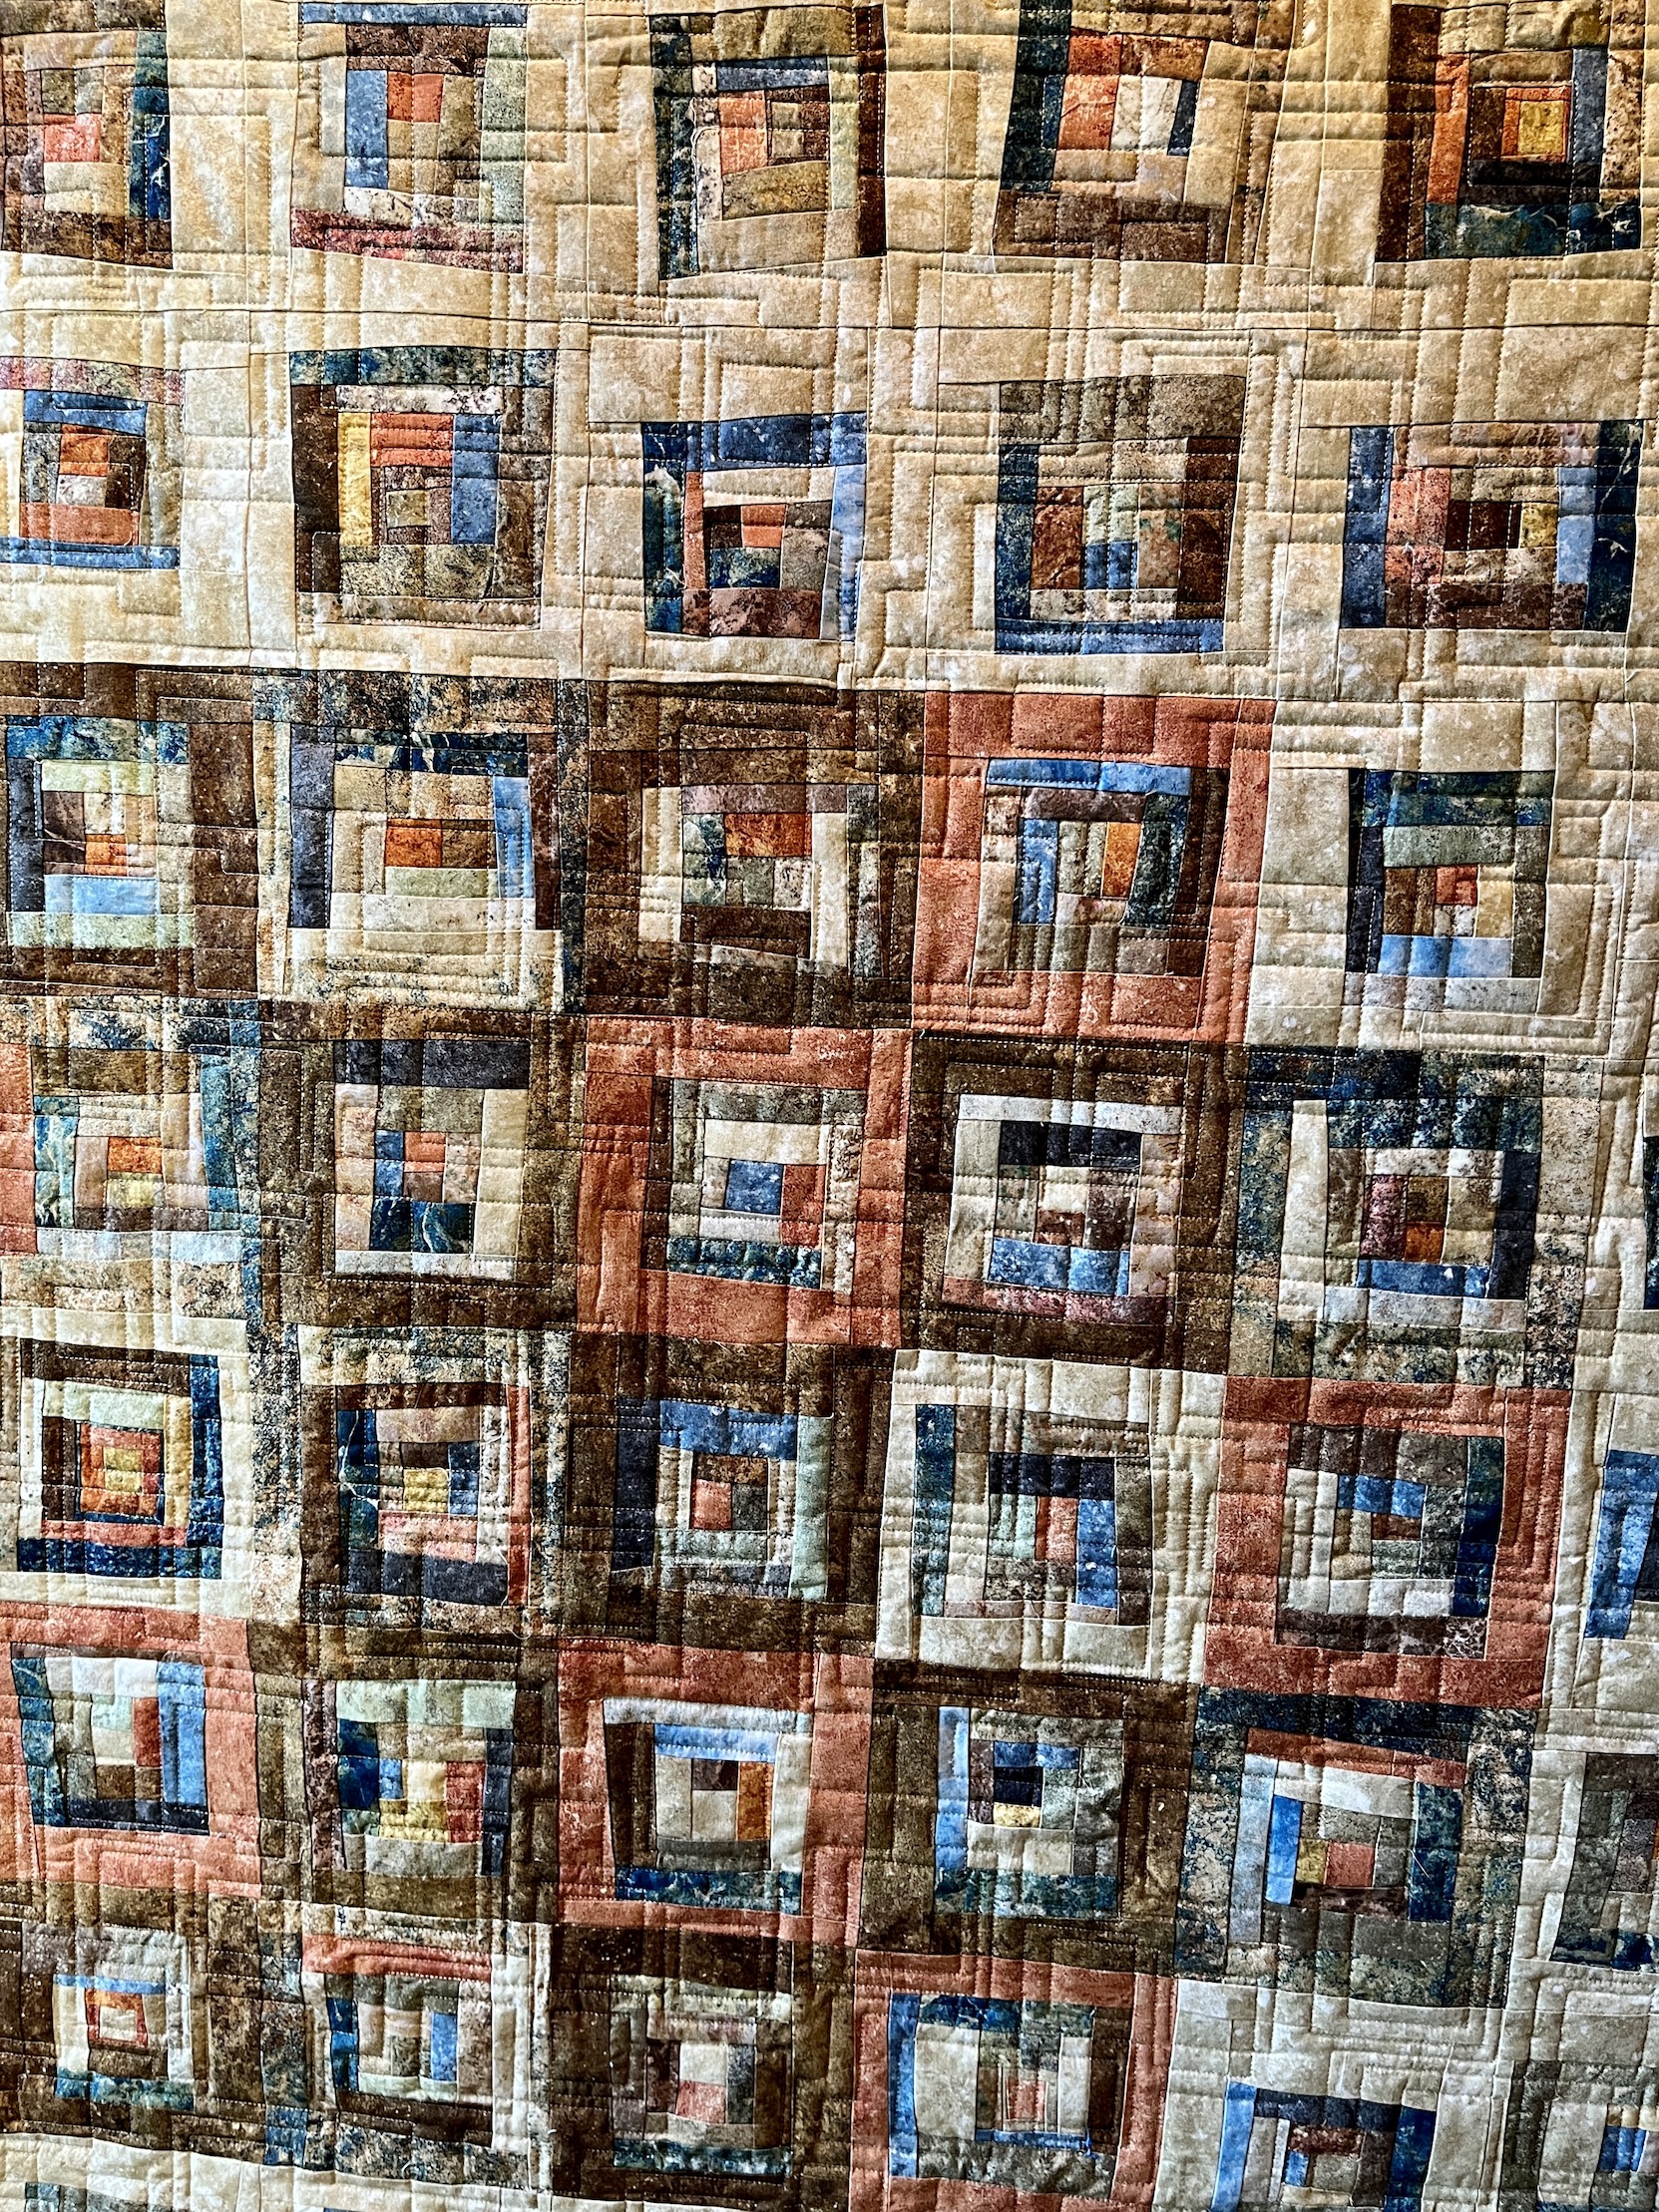
Here is a close up of the quilting:
I love seeing the quilt as I descend the stairs from upstairs to the main floor:
The cool thing about this quilt is most of the quilt top is made from Stonehenge fabric scraps that friends have given me and some Stonehenge fabric scraps I had from a quilt I made. So the quilt top was primarily made from stuff that would have ended up in a landfill. I LOVE SCRAP QUILTS!
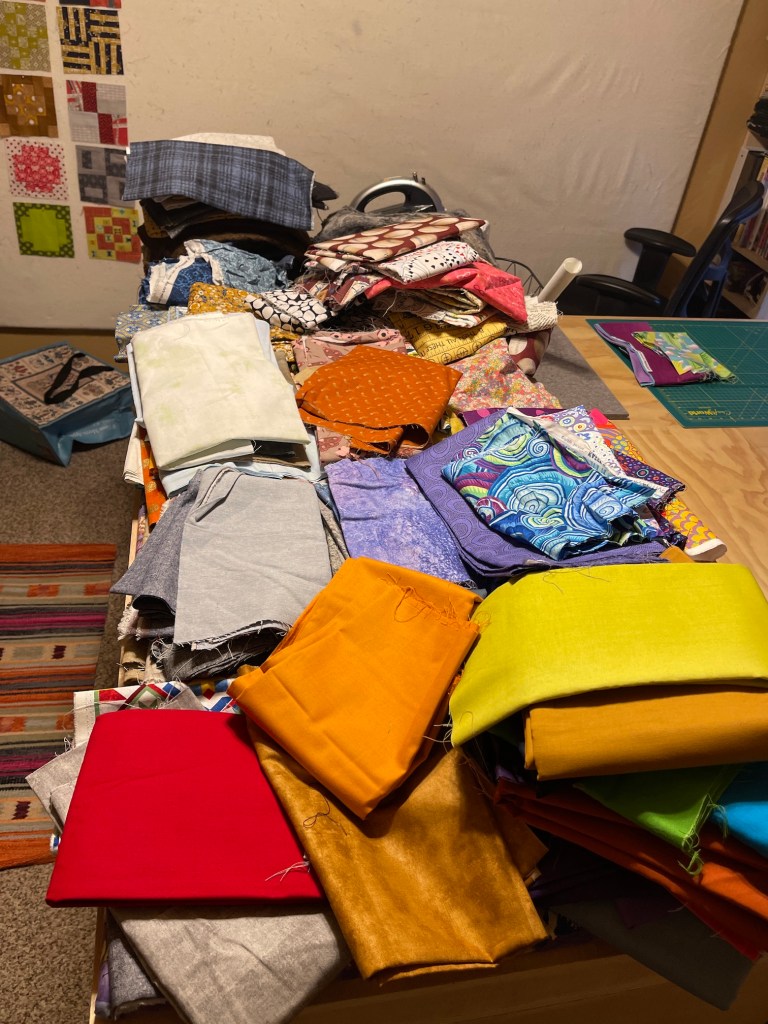
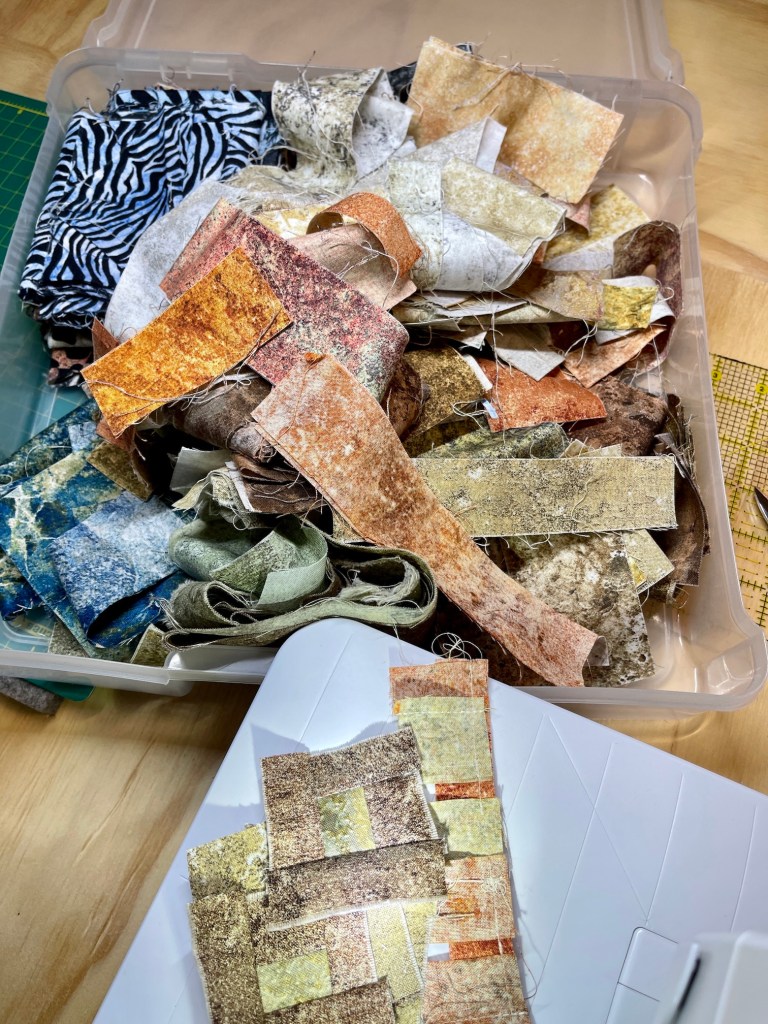
I discovered while working on these 12 blocks that my current system of organization for the fabric scrap collection selected for this quilt did not work. My system was a haphazard pile:
So I spent the time organizing all the scraps selected for this project into piles of color. Now that I have a bigger studio now (see my post A “New” Studio ), I can leave these piles out on the table in my studio until I complete the quilt:
It might still look like a hot mess to you, but for me I can now “shop” by color and pattern easier.
Plus by organizing these piles I got to refresh my memory of what I have to work with; and got some ideas on how to use some of the multicolored fabrics at the top of the photo in future blocks I’ll be making for this sampler quilt.
48 more to go!
Postscript
I actually cut fabric for 15 blocks but I was only up to completing 12 blocks by last night (the deadline I gave myself so I could write this post):
But then this morning I had some renewed energy and completed the 3 additional blocks to bring my total to 15 completed since my previous post on this quilt:
So here are 55 blocks now completed! (Only 45 to go now…)
My sewing “mojo” was hiding somewhere for a while and I had little desire to sew. I had a “sewing-block“. Turns out the best way to resolve it was to sew a block!
I’ve been distracted from time in my sewing studio by some recent travel, visits from out of town friends, and a couple challenging recent life events. A couple days ago I knew I needed to get my back to sewing (as there is just so much fun stuff to be made) and decided returning to working on my Tula Pink City Sampler (100 Modern Quilt Blocks)would be a good place to start.
Once you get started up sewing again, things get rolling, and I was able to make also blocks 32 – 40 over the next several days (my sewing was “un-blocked”!):
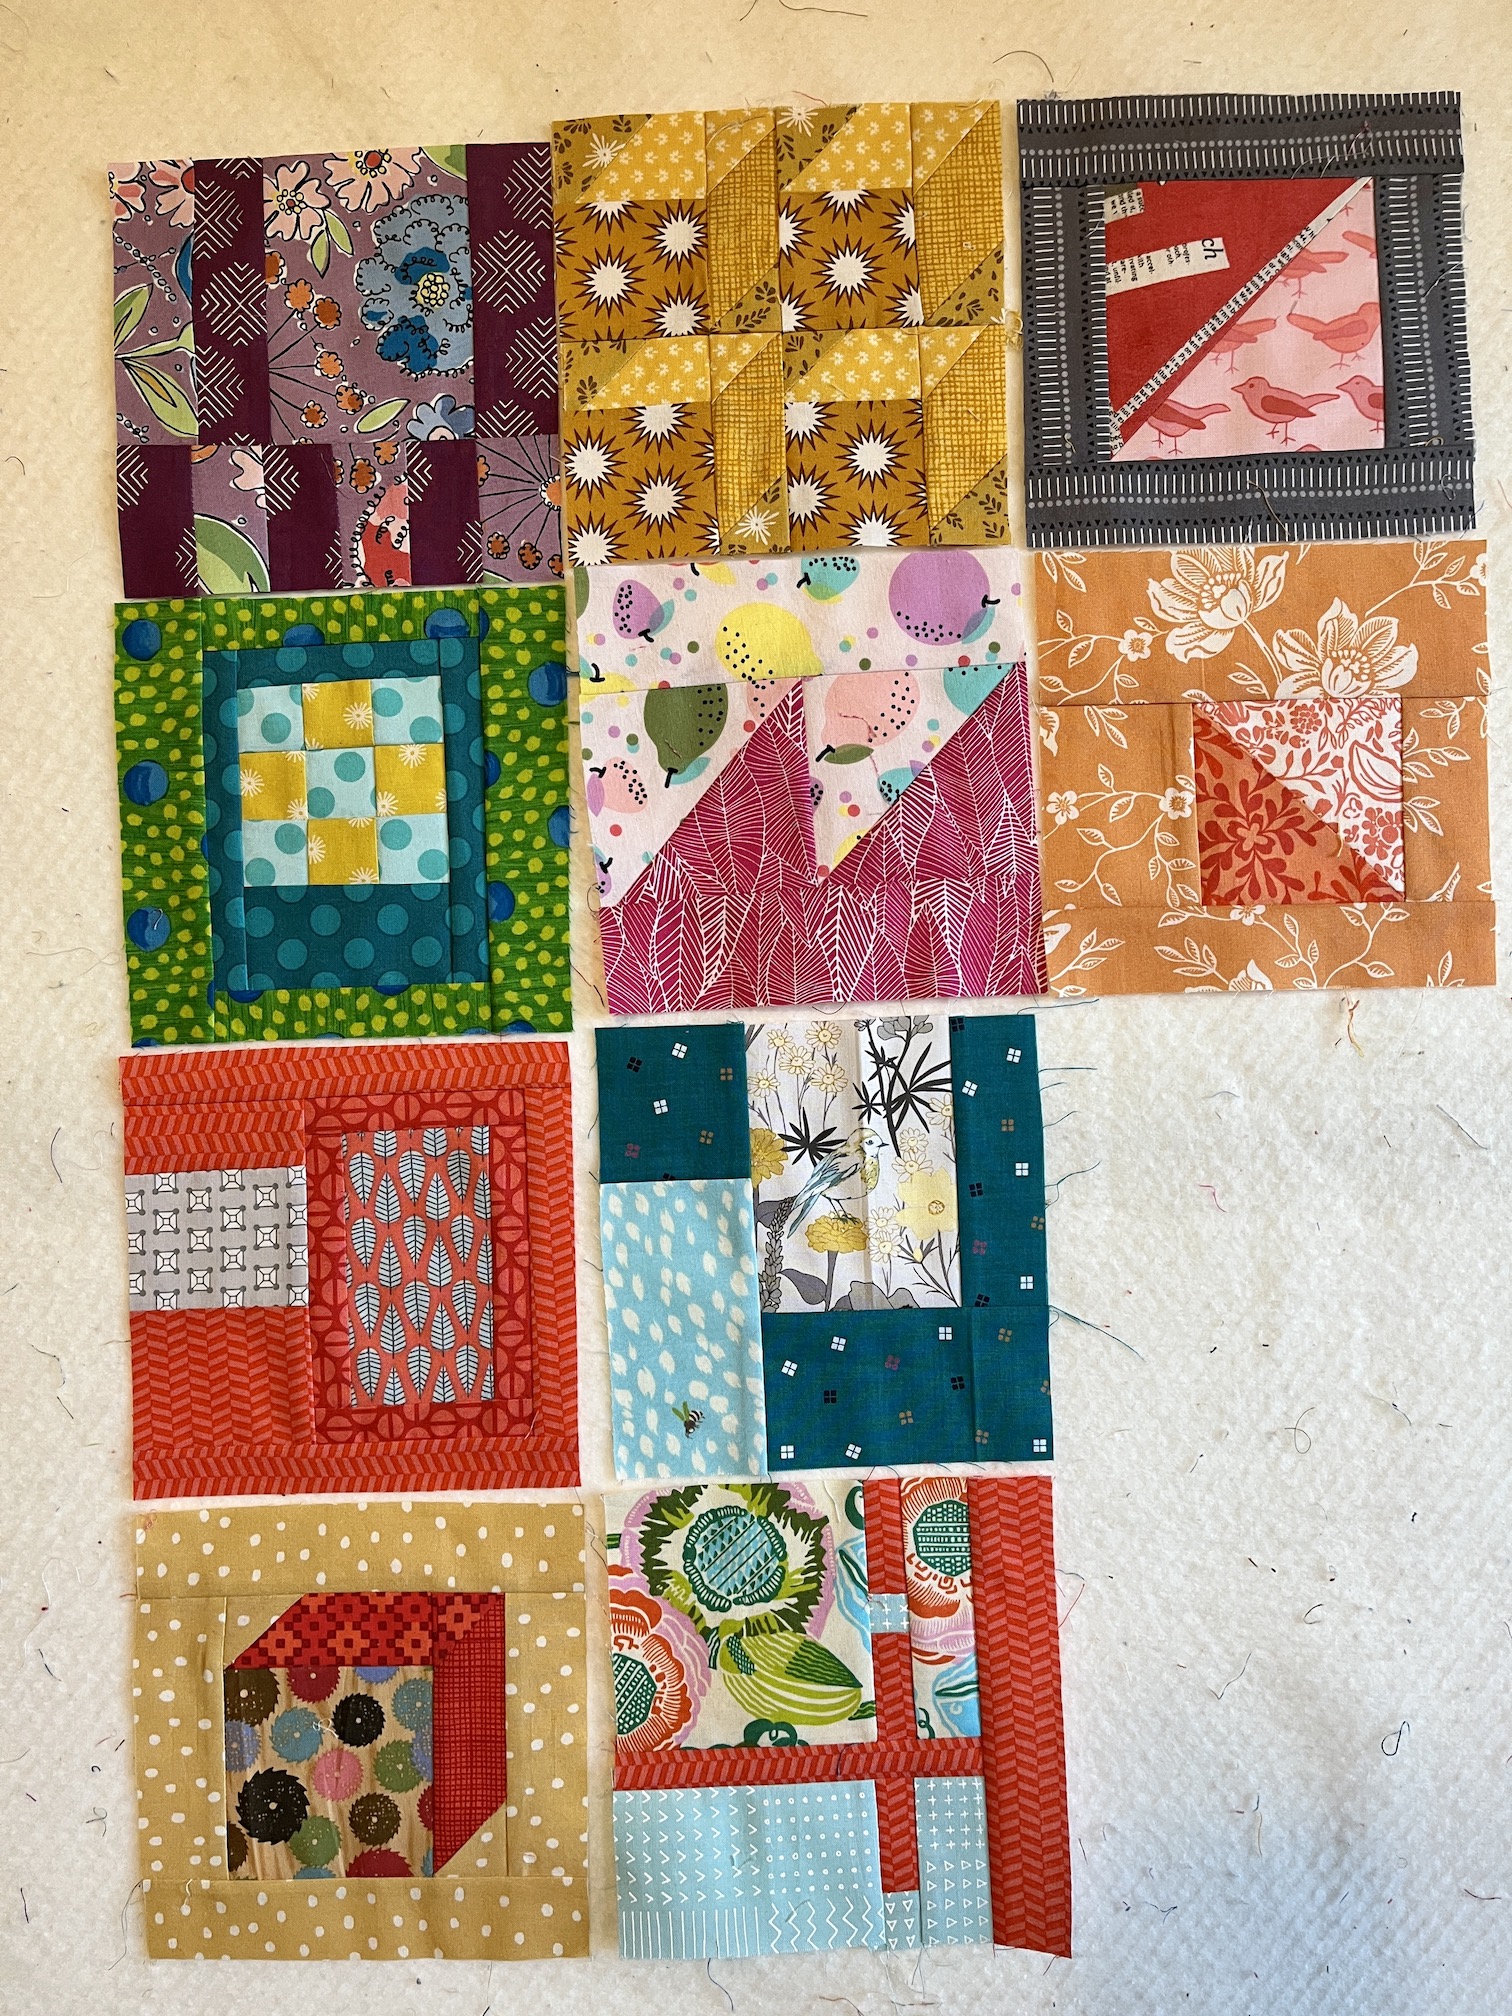
10 block recently completed
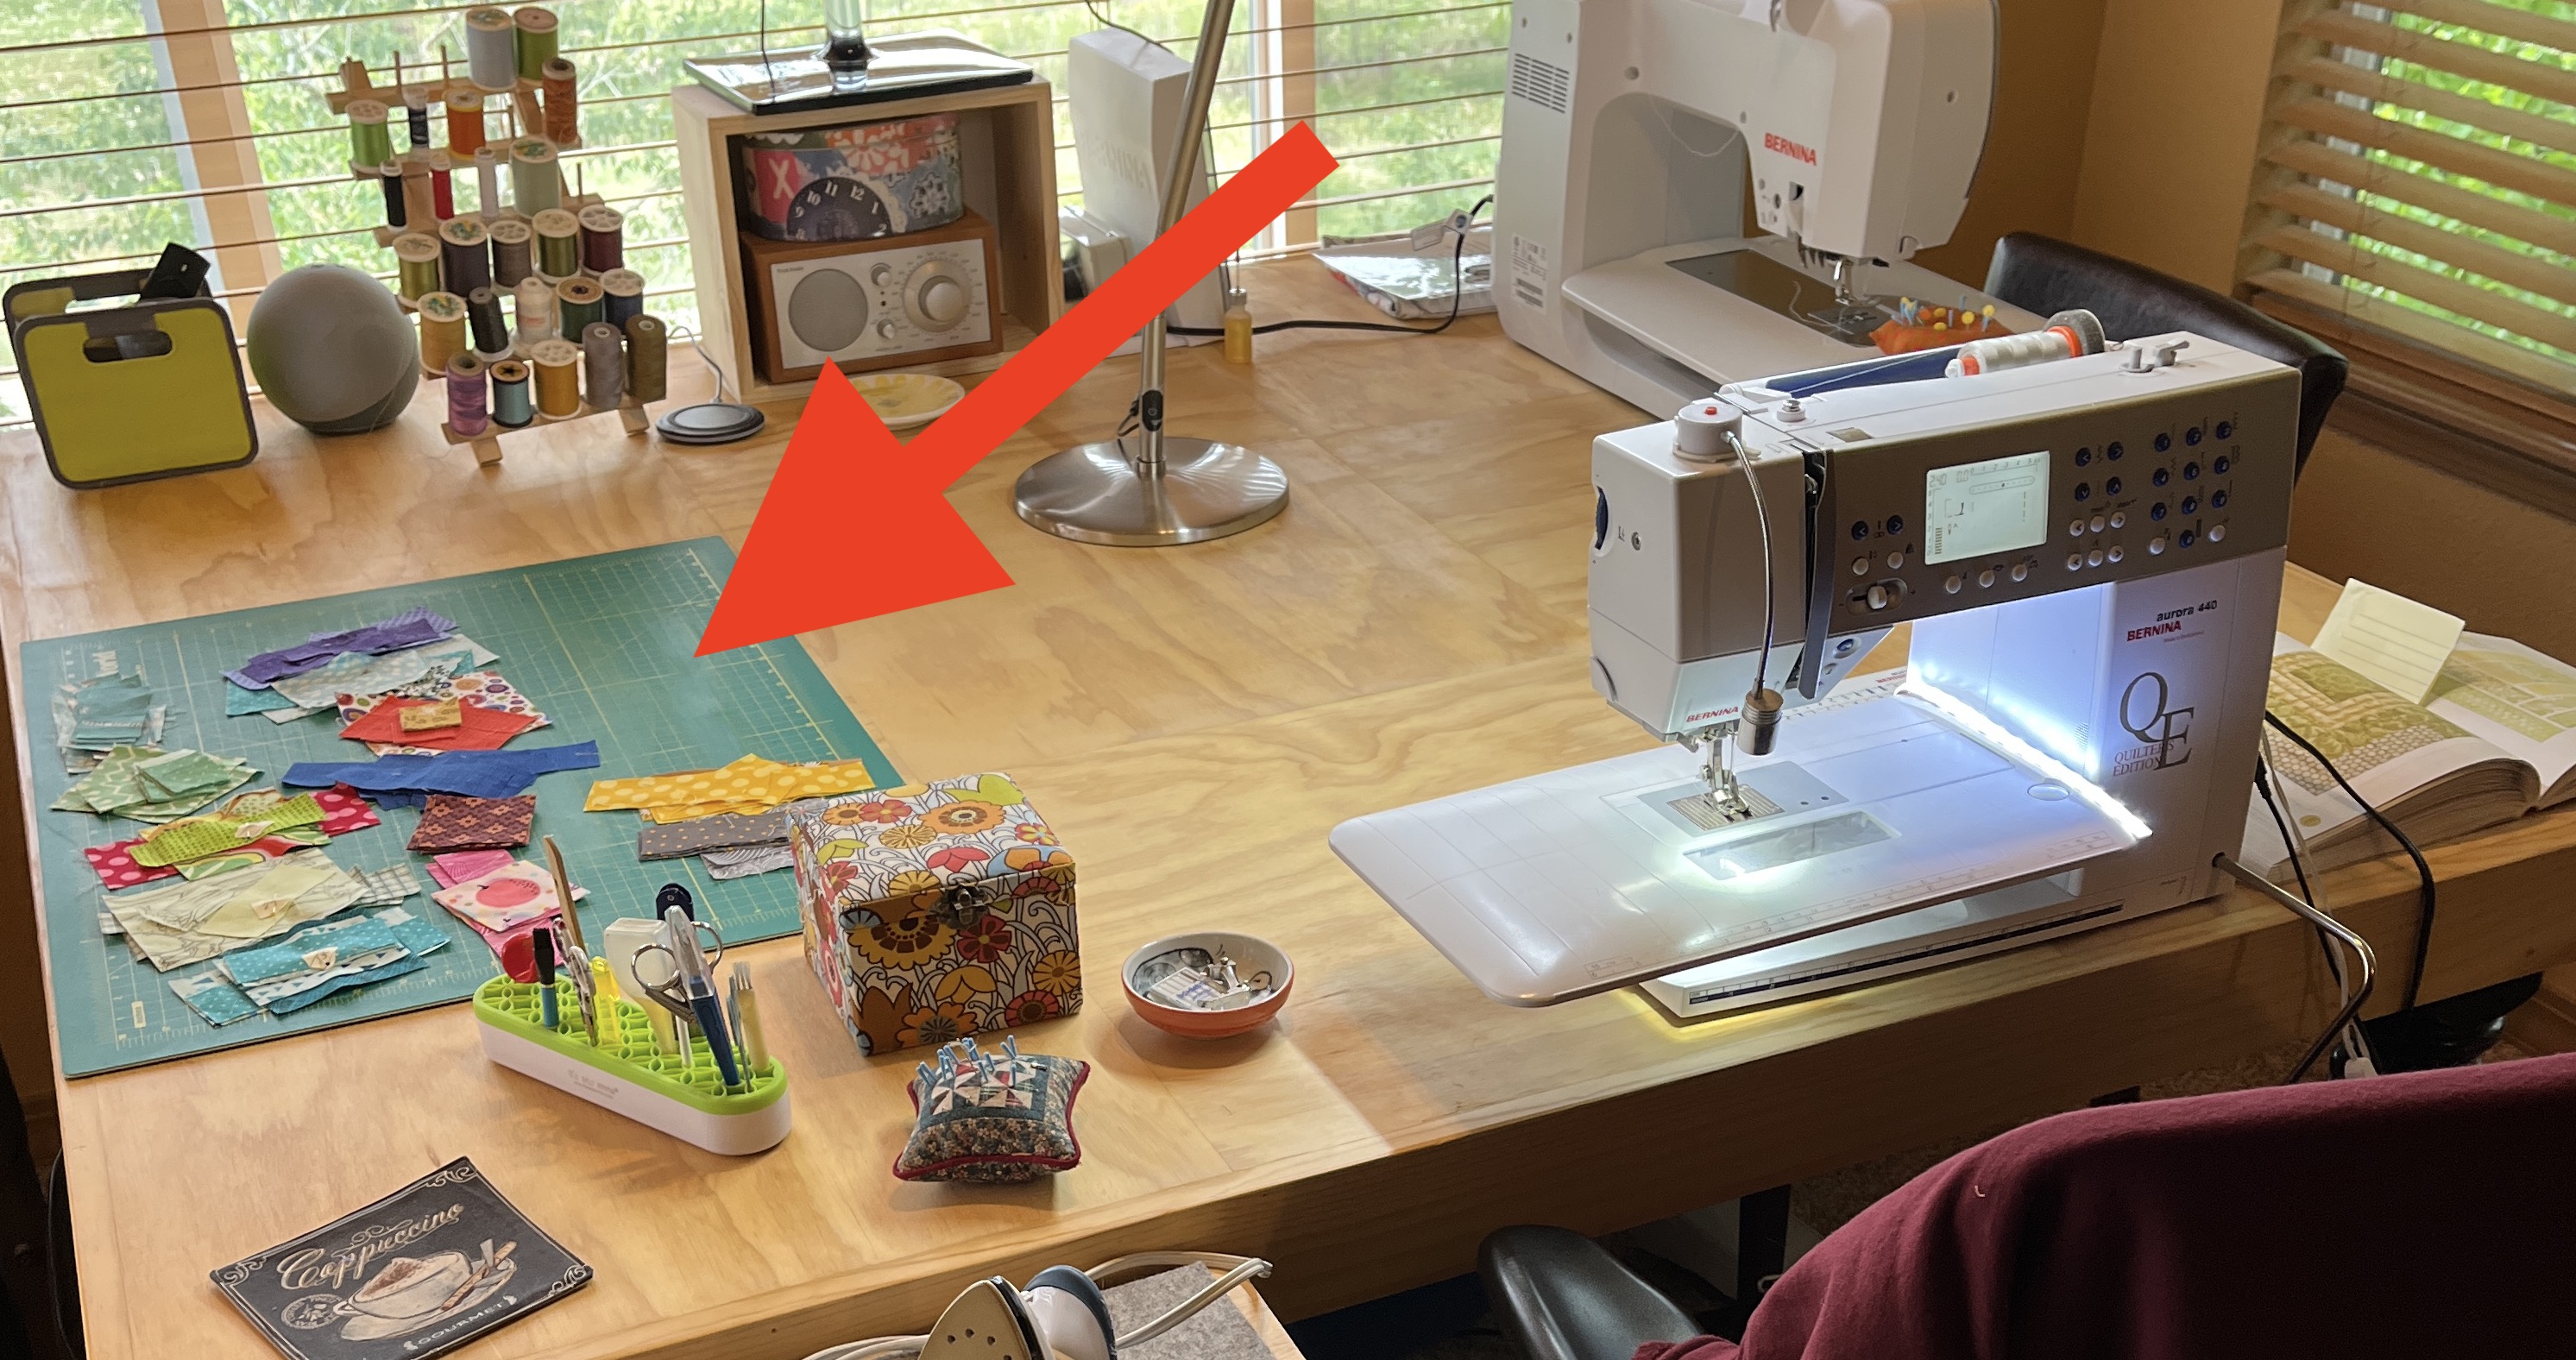
Today while taking photos for this post, I discovered I did not like the gray “frame” in one of the blocks (too overpowering):
see block with red arrow
So I redid it this morning with a red “frame”:
New block frame
Now I have 40 blocks out of 100 now complete!
Only 60 more to go (oh my…)
Not sure why my photos came out so dark from my design wall, I guess it was the lighting in my sewing studio this morning.
I am enjoying working from my piles of scraps selected for the 100 block sampler, and I’ve decided to just keep the piles out until I finish all 100 blocks.
I’ve been making a bunch of small scraps while cutting the fabrics for the 6.5 inch by 6.5 inch blocks and I plan to stuff pincushions like I did in this post – Stuffing it the Eco-conscious Way!
I plan to continue working on the blocks for the sampler and maybe whipping out a pincushion or two between sets of blocks if my tiny pile of scraps gets larger than my little basket for tiny scraps.
This post continues my series of posts on my trip to Quilt Town, USA to attend a Missouri Star Quilt Company (also known as “MSQC”) quilt retreat with my long time quilting friends. The previous three previous posts in the series are:
First of all, do not judge. I have a fetish for fabric scraps – ha! Okay that sounds a wee bit weird, but I would rather make things from fabric scraps than cut into yardage. I only buy fabric by the yard when I absolutely have to or the fabric is so amazing I cannot leave it in the shop (and it looks at me with puppy eyes saying “Tierney take me home…”).
So when I heard that while I was at the MSQC week long retreat there was a “Scrap Bag Sale” at the Penny’s Quilt Shop I shivered with excitement.
This not my first rodeo as they say, I’ve been to lots of fabric scrap sales where you fill a bag for a specific price, with as much fabric scraps as you can fit in (and yeah, I am ALWAYS up to the challenge to see how much I can fit in the bag they provide without it breaking).
But, I’ve NEVER been to a “scrap bag” sale where 1 yard, 2 yard, and even 3 yard pieces are considered scraps!!! Yes there were a couple pieces here and there that you might call “scraps” – like quarter and half yard pieces, but most of what was in their bins were larger pieces that I definitely would not classify as “scraps”.
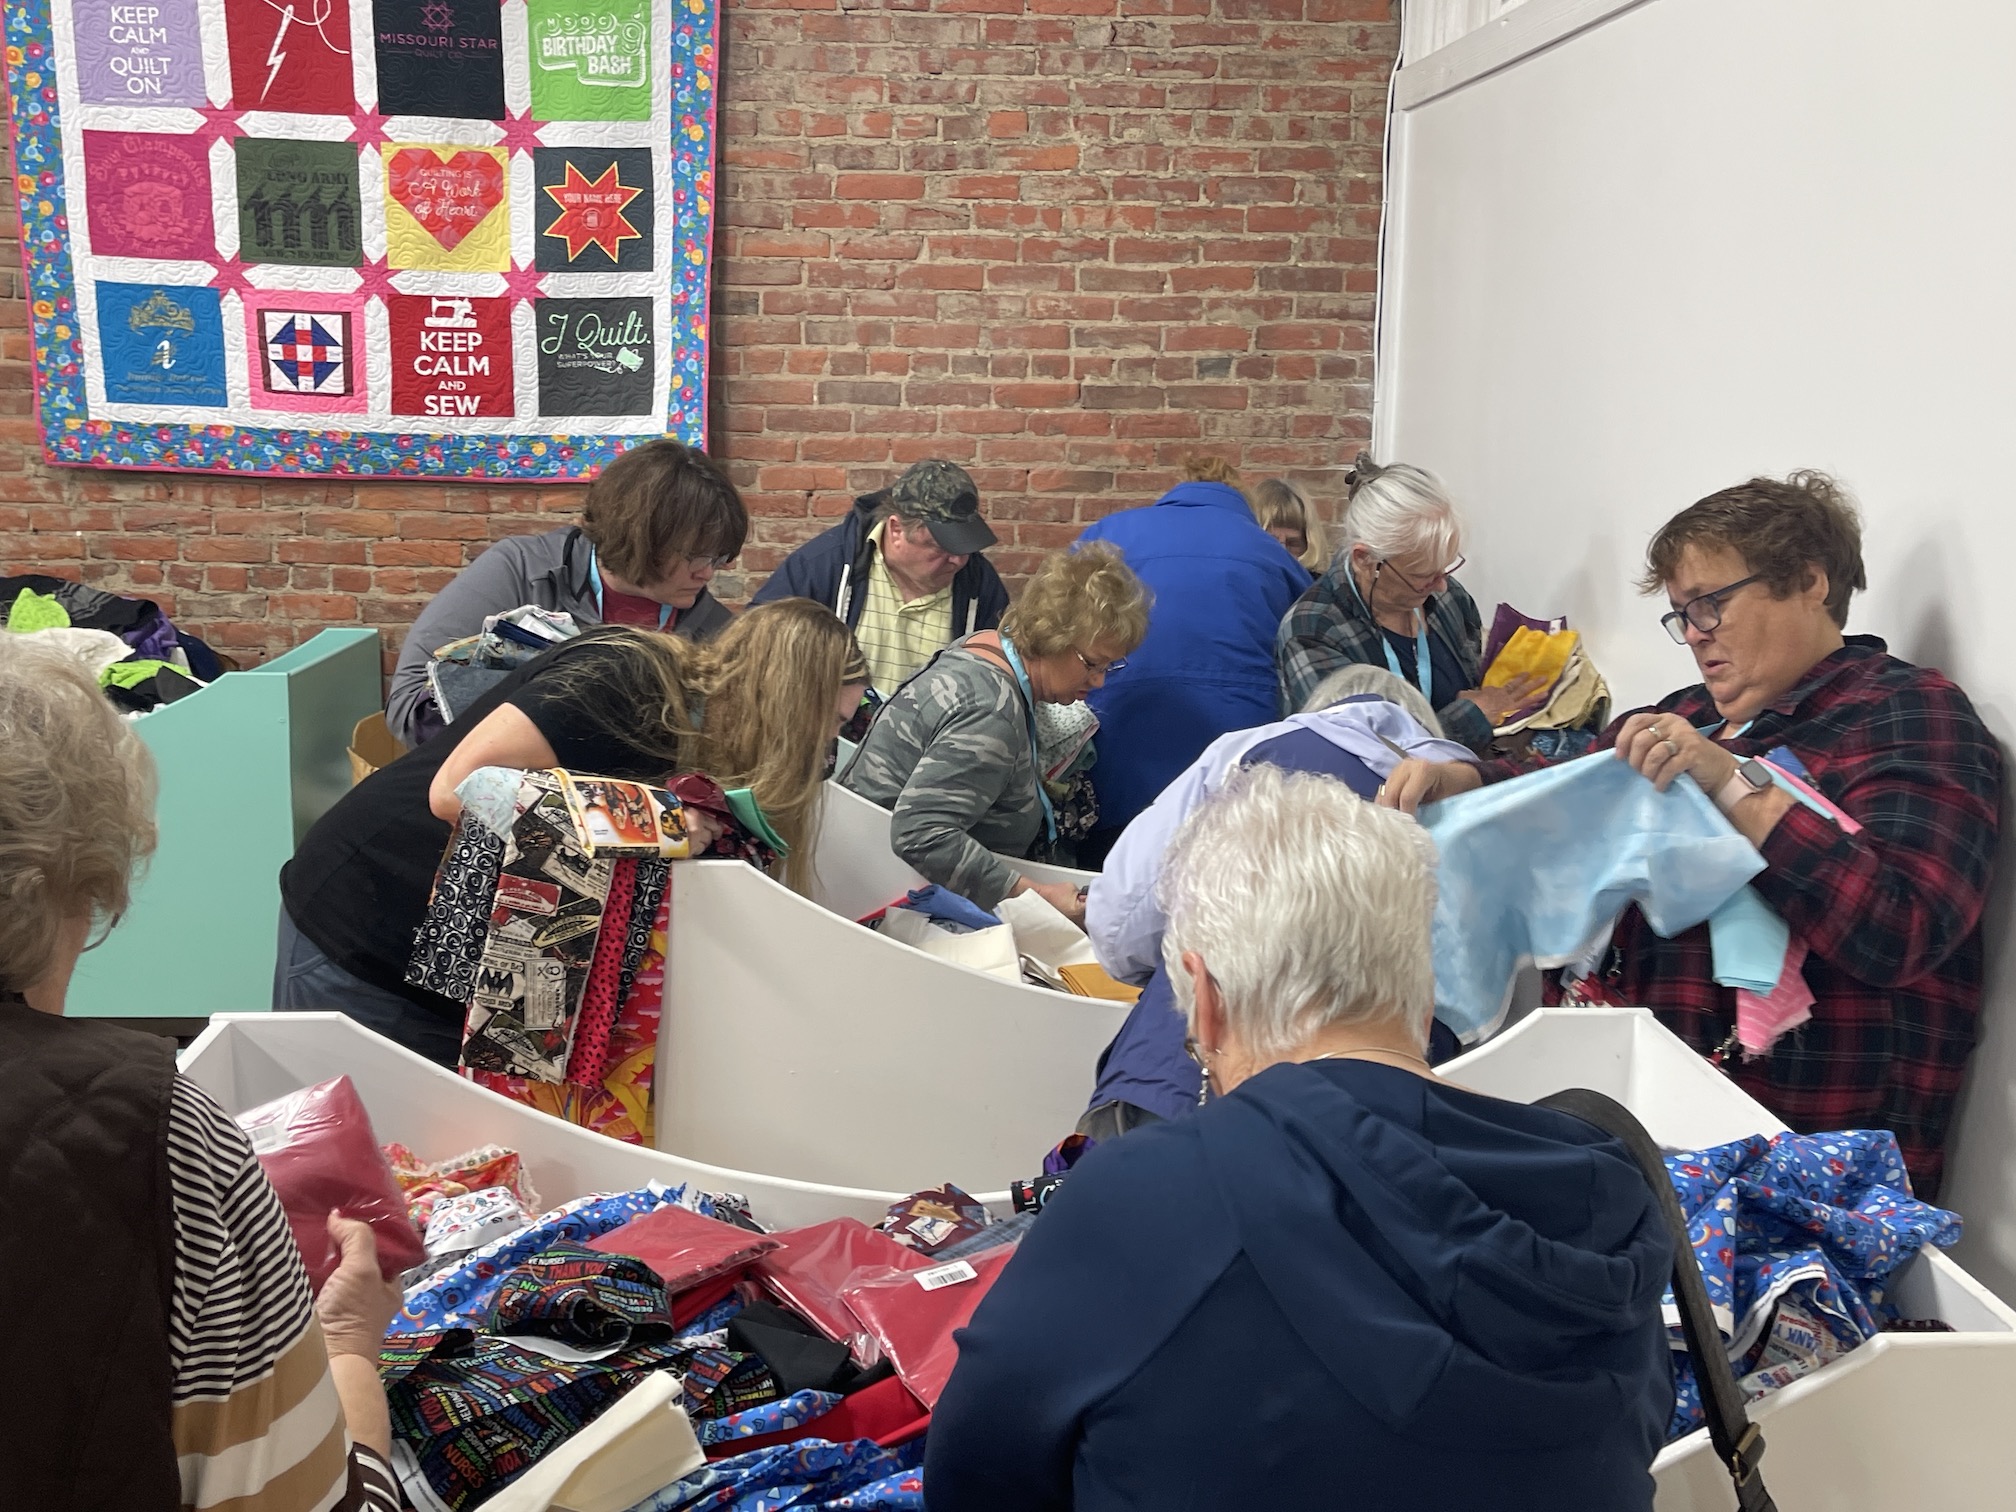
What I heard from another quilter during the feeding frenzy (photo below) was that Missouri Star will pull pieces off the bolt that are 3 yards or less and put them away for the scrap sale.
Oh my.
What you are about to see was what could be considered a “super spreader event” as no one was wearing masks, but luckily the pandemic is tapering down in my part of the world.
Here is the FEEDING FRENZY:
And yes I was right in the middle of it. I stepped out to take photos.
Actually everyone was so patient, thoughtful and kind. It was the nicest frenzy you could imagine. Quilters would yell out what they were looking for and we would pull for them and toss to them what they were looking for. I got so much Kaffe Fassett fabric this way from the bins.
Also people would take a break from being in the bins and make way for other quilters waiting in queue. Actually you had to take a break for a while as it was sort of exhausting sifting through all those yard pieces of fabric and a bit claustrophobic.
You also needed a break to stuff your bag!
Besides finding AMAZING top quality quilting fabric (of like every fabric line you could imagine) one of the most fun parts of the whole experience was laughing with everyone there as you tried to stuff your bag as full as possible.
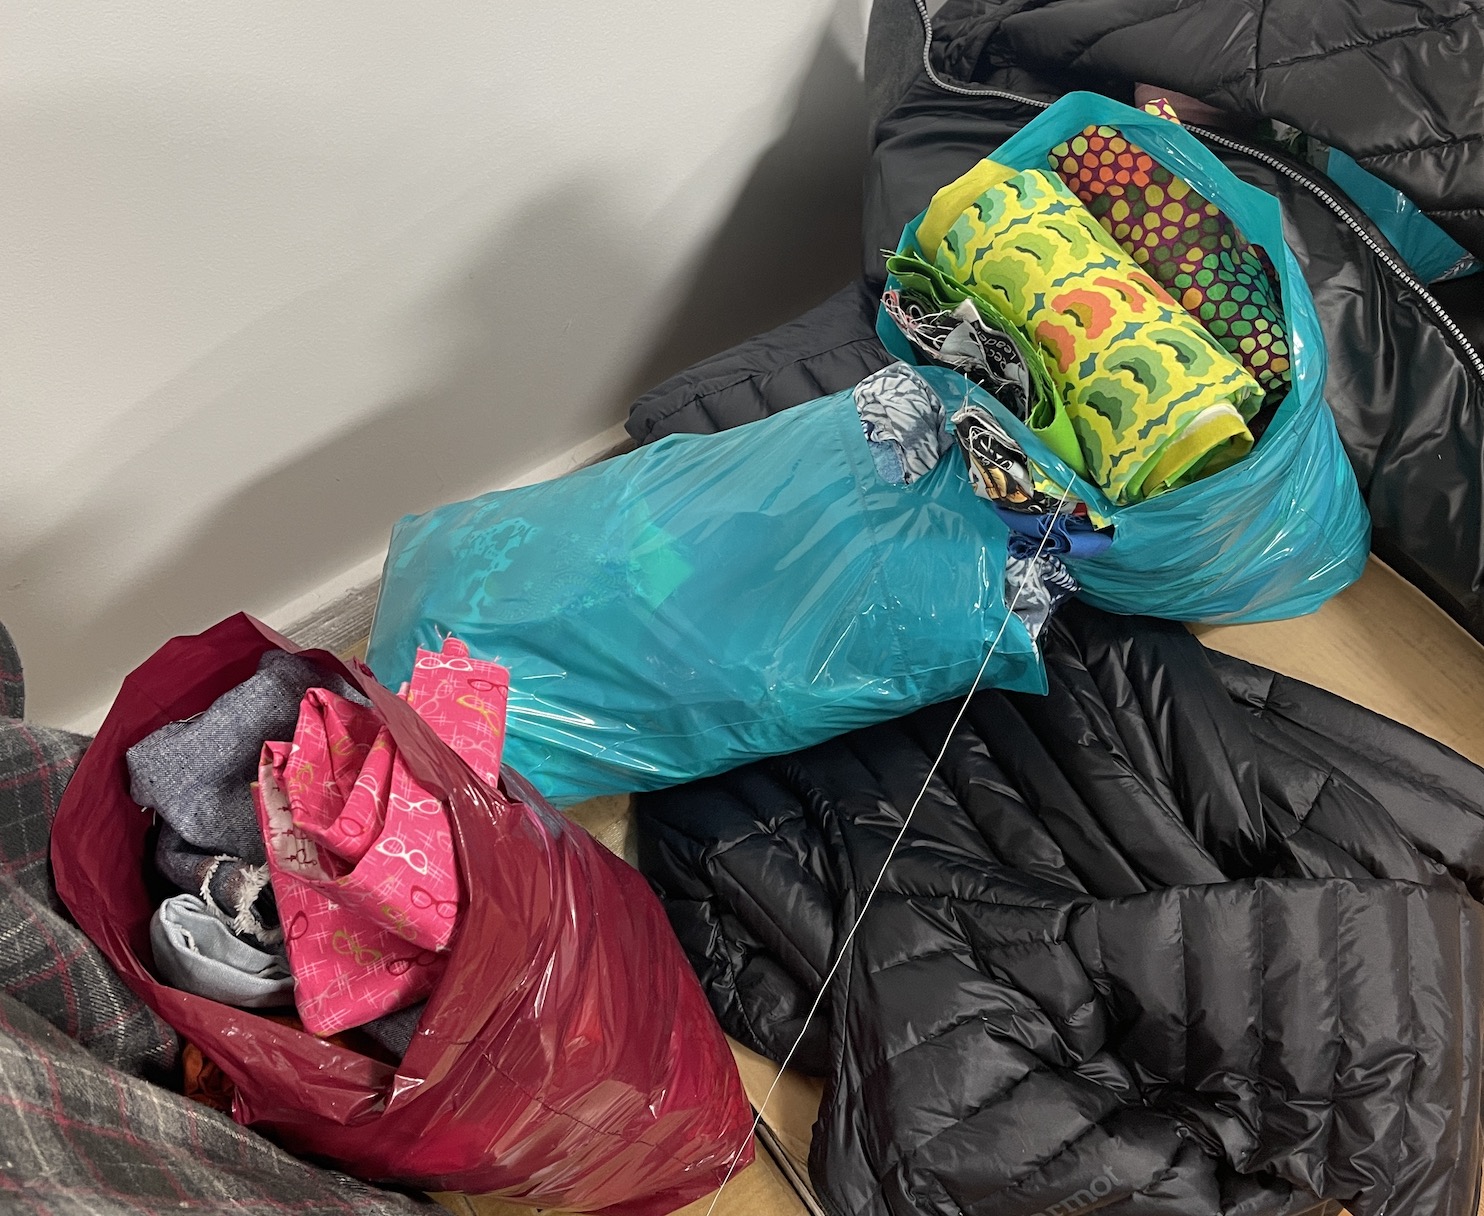
Here were the early stages of packing bags with “scraps”:
Notice how no fabric is reaching over the top of the bags.
Here is my pile of bags starting to grow (I did stop at 4 but later got one more) as I left them among the pile of coats (it was getting warm from all those people foraging through all those bins of fabric):
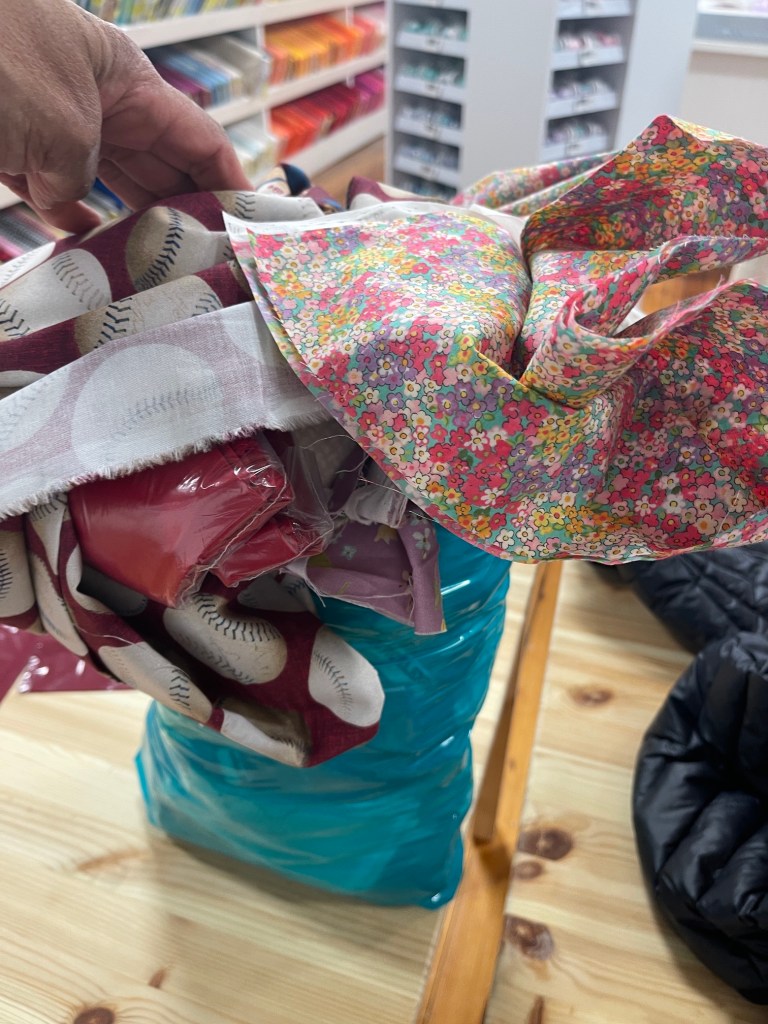
Then we heard that the shop did not really care how full you got the bag as long as all fabric was “touching” the inside of the bag. So things got creative…
Here are a series of photos on my quilting friends and I engaging in “creative scrap bag stuffing“:
We were laughing so hard! It got to be a real game of “what else can we fit in there?“
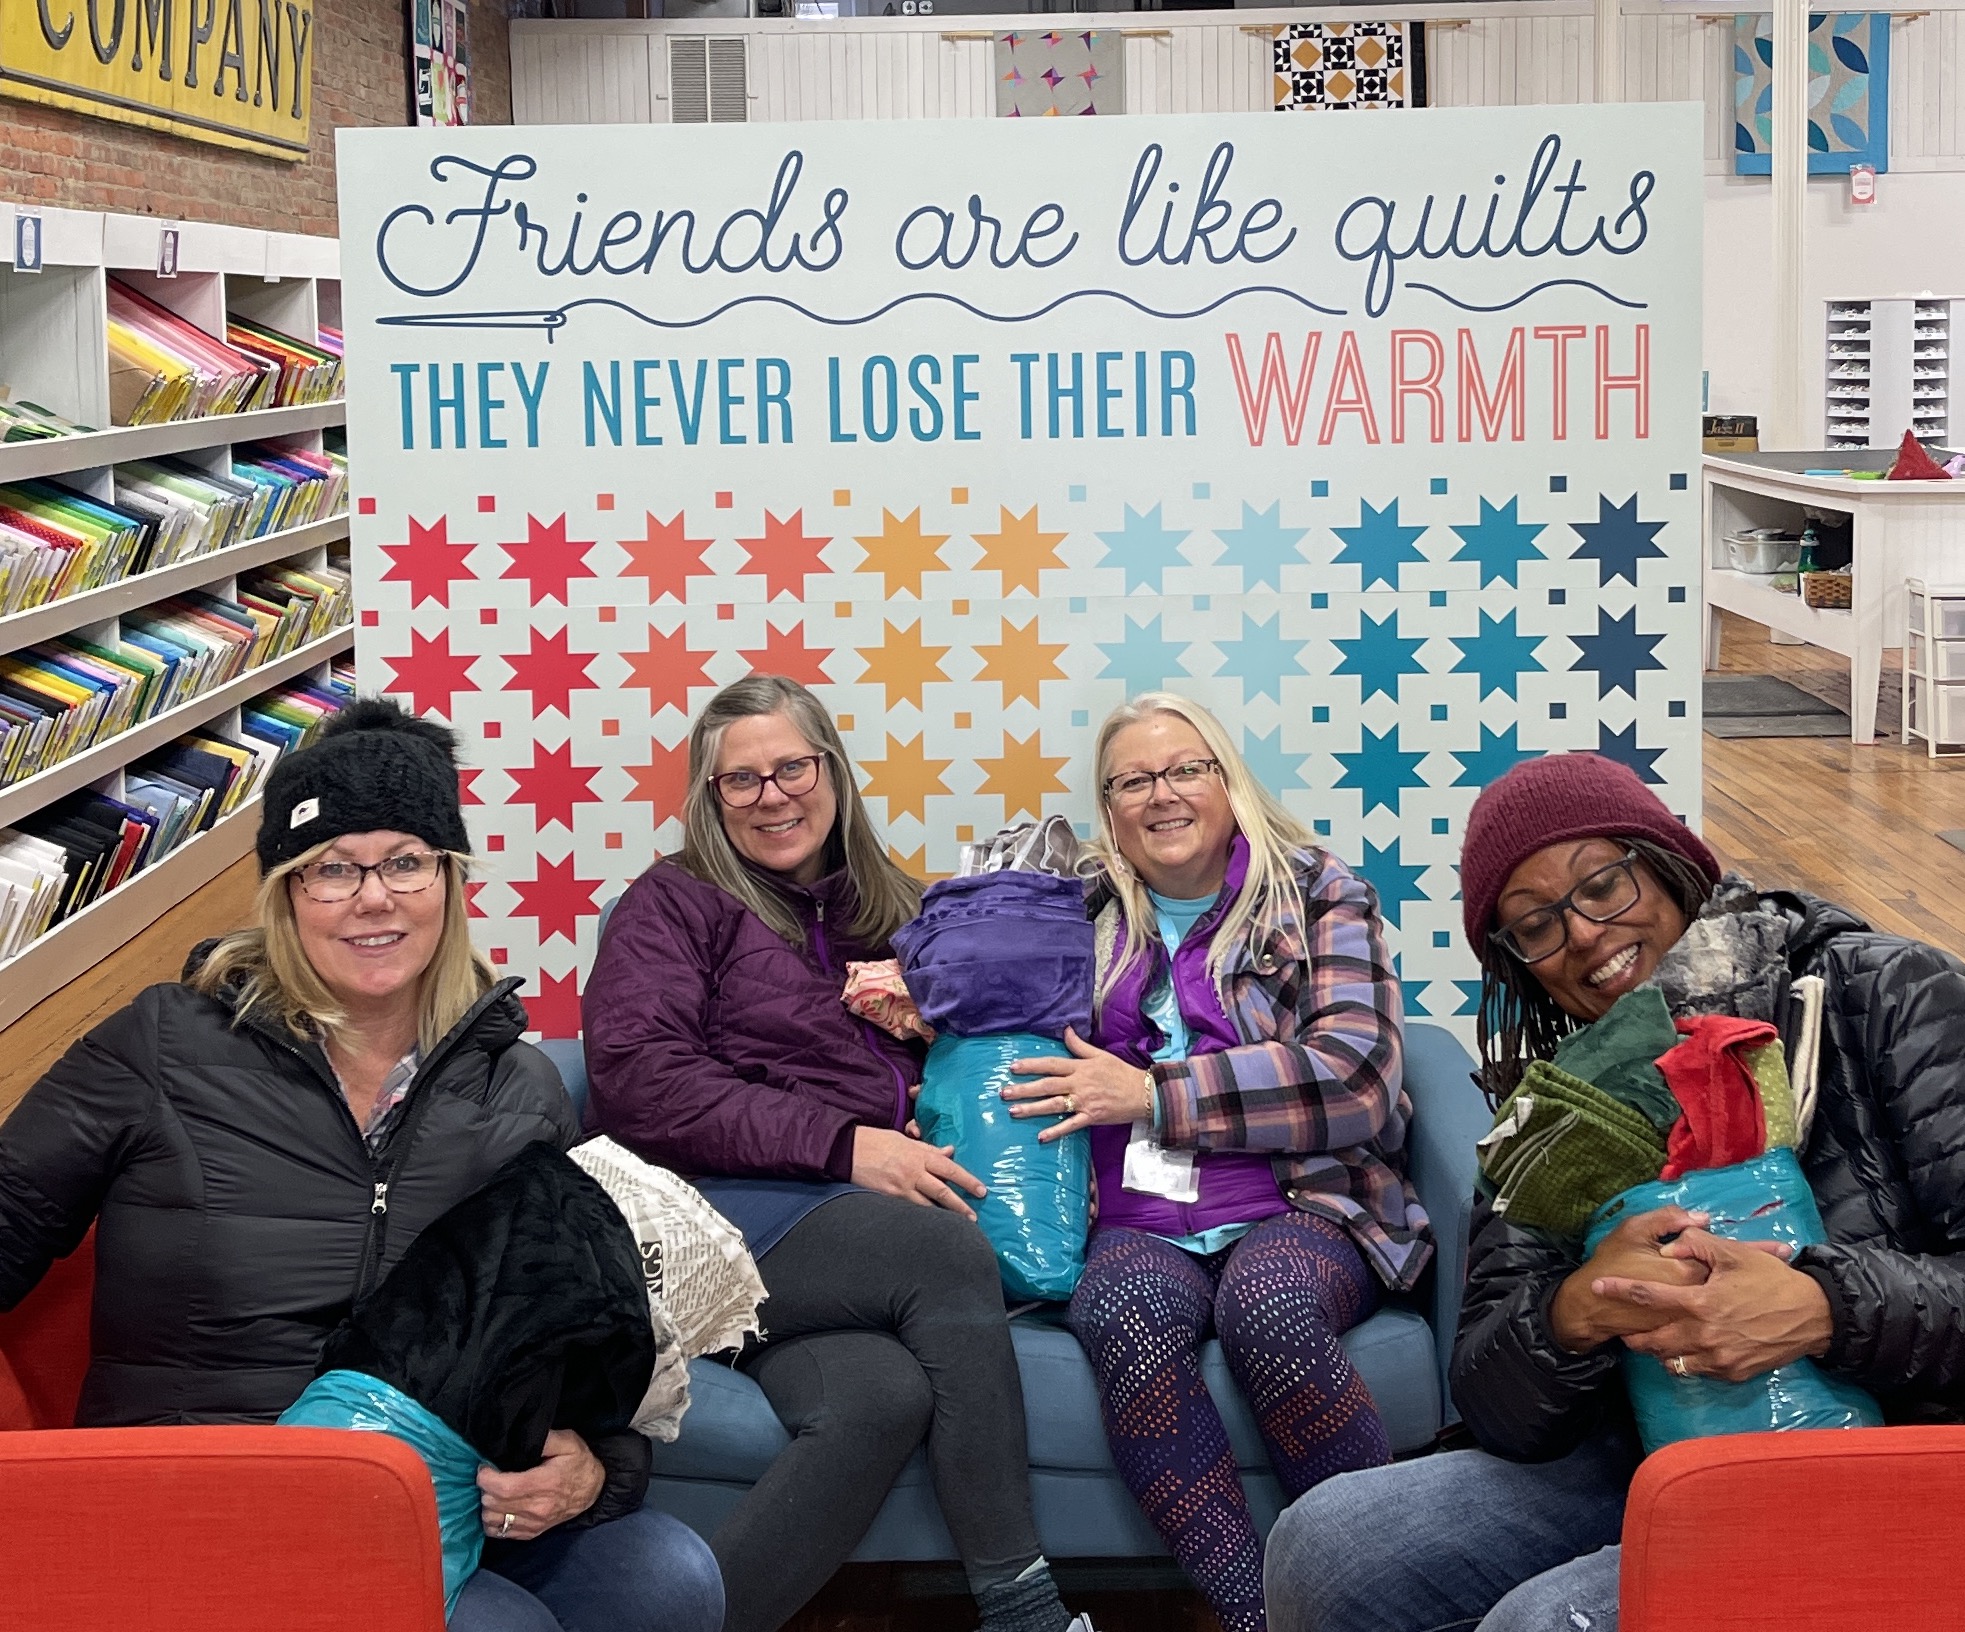
Here are a couple of my long time quilting friends and I resting after our scrap foraging. We were exhausted but happy! (Note, not all our group attended the scrap sale, some were back at the Retreat Center being productive working on their projects!)
And here I am with another expression of “pure joy” like in the previous post (and note it was not just because of the amazing deals but that I was hanging out with friends, lol):
When we returned to the Retreat Center, Jessica, one of the Retreat Coordinators, challenged us to see how much yardage we had inside one of our bags.
One person had 27 yards of fabric inside ONE of their scraps bag. Yes that was 27 yards of fabric for $10.95! Most people had between 20 and 26 yards of fabric packed into ONE scrap bag.
One of the attendees actually ironed and folded her finds (show off, ha!):
I did not. I took all my scraps from the sale to the Main Shop for packaging up to send home to me! As I mentioned in the first post in this series (I think), MSQC will ship whatever you bought or worked on for FREE to you if you are attending a retreat so you don’t have to figure out how to get it home. (Yes they are encouraging attendees to shop to their heart’s content).
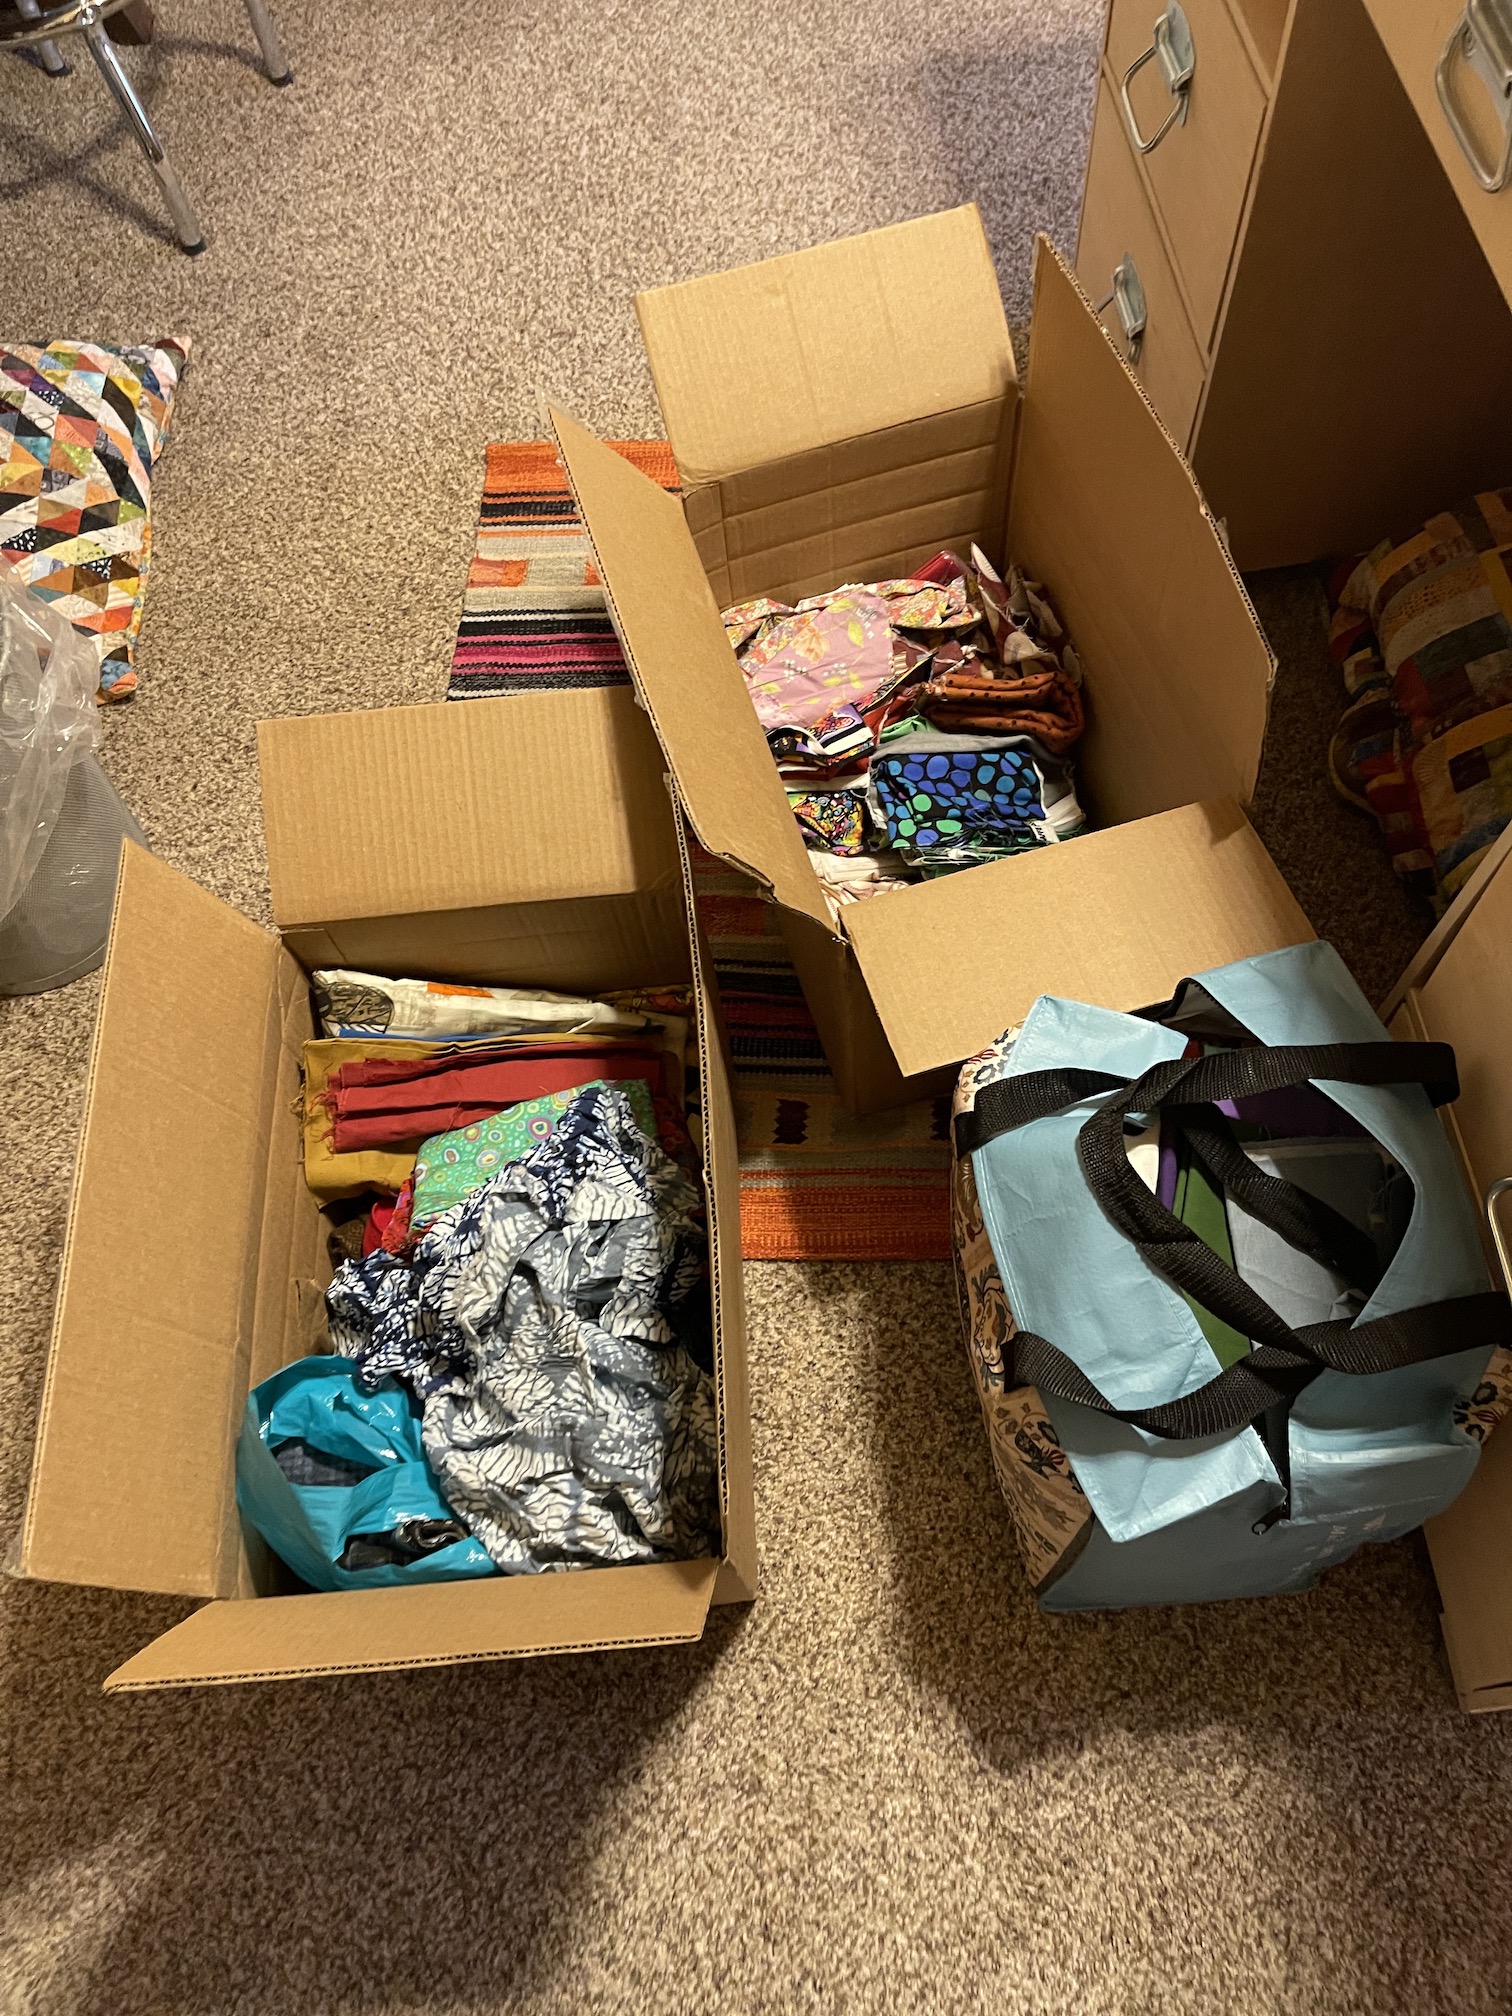
So, a couple days after I returned home from the retreat I received two boxes in the mail:
And here are the “scraps” I got from the sale:
I won’t tell you the total amount of fabric, because I did not even count the yardage.
I just ironed the fabric and incorporated it into my stash…while giggling…
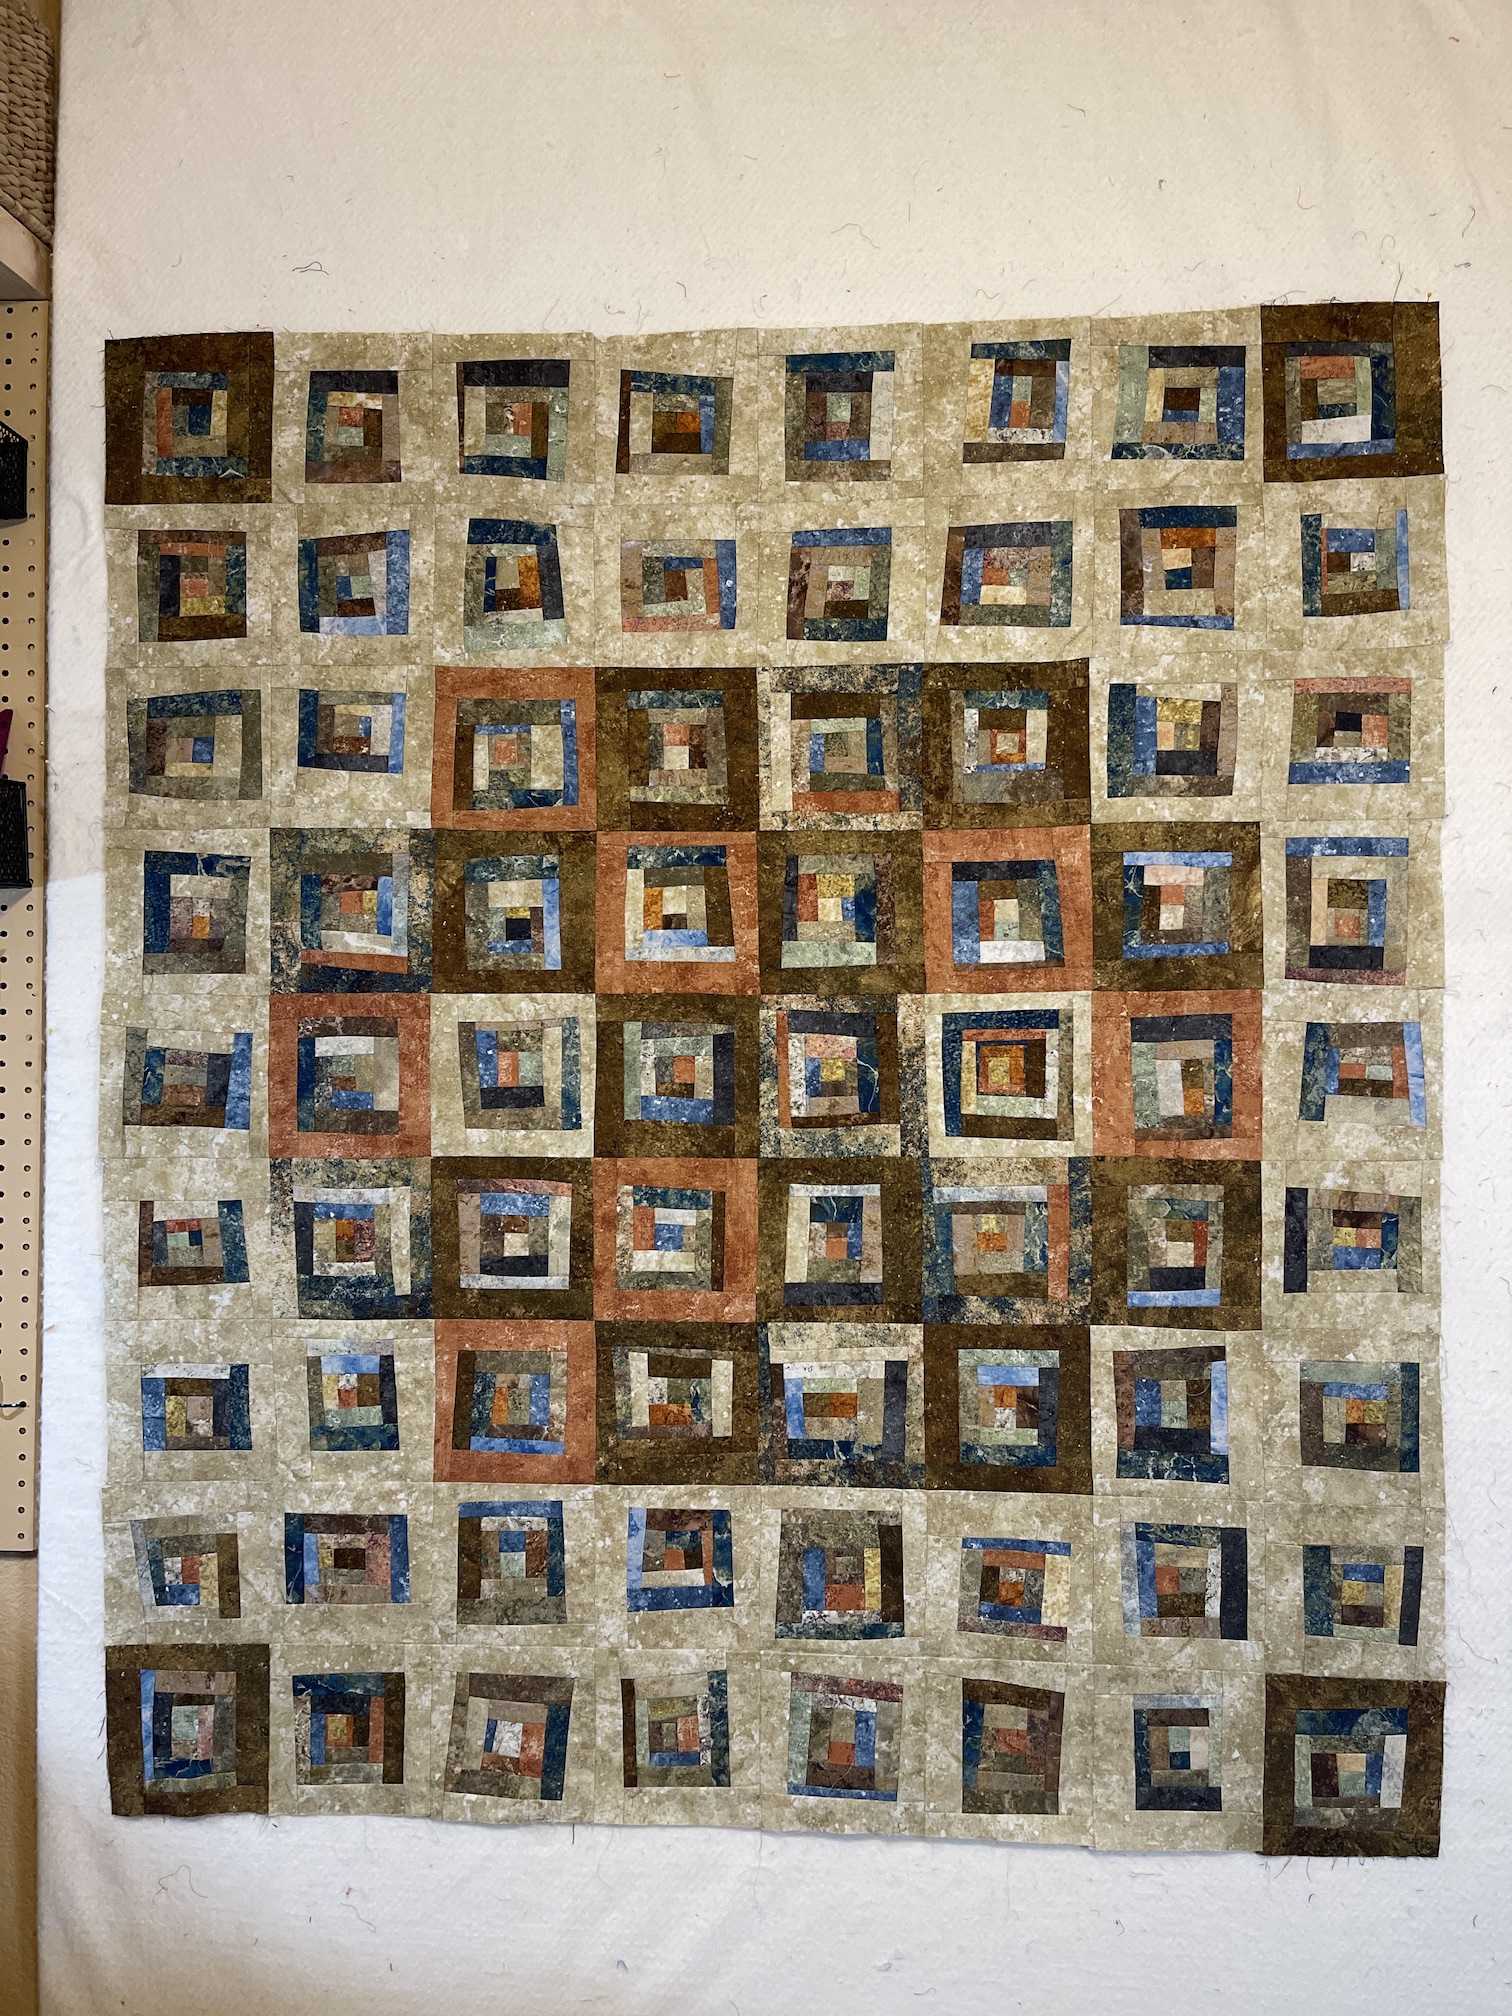
This post is a follow up to my previous post What’s On The Design Wall: Stonehenge Scrappy Freeform Log Cabin, where I was using the freeform/improvisational log cabin block piecing technique – “log jamming” – to create a scrap quilt from my Northcott Fabrics Stonehenge line scraps.
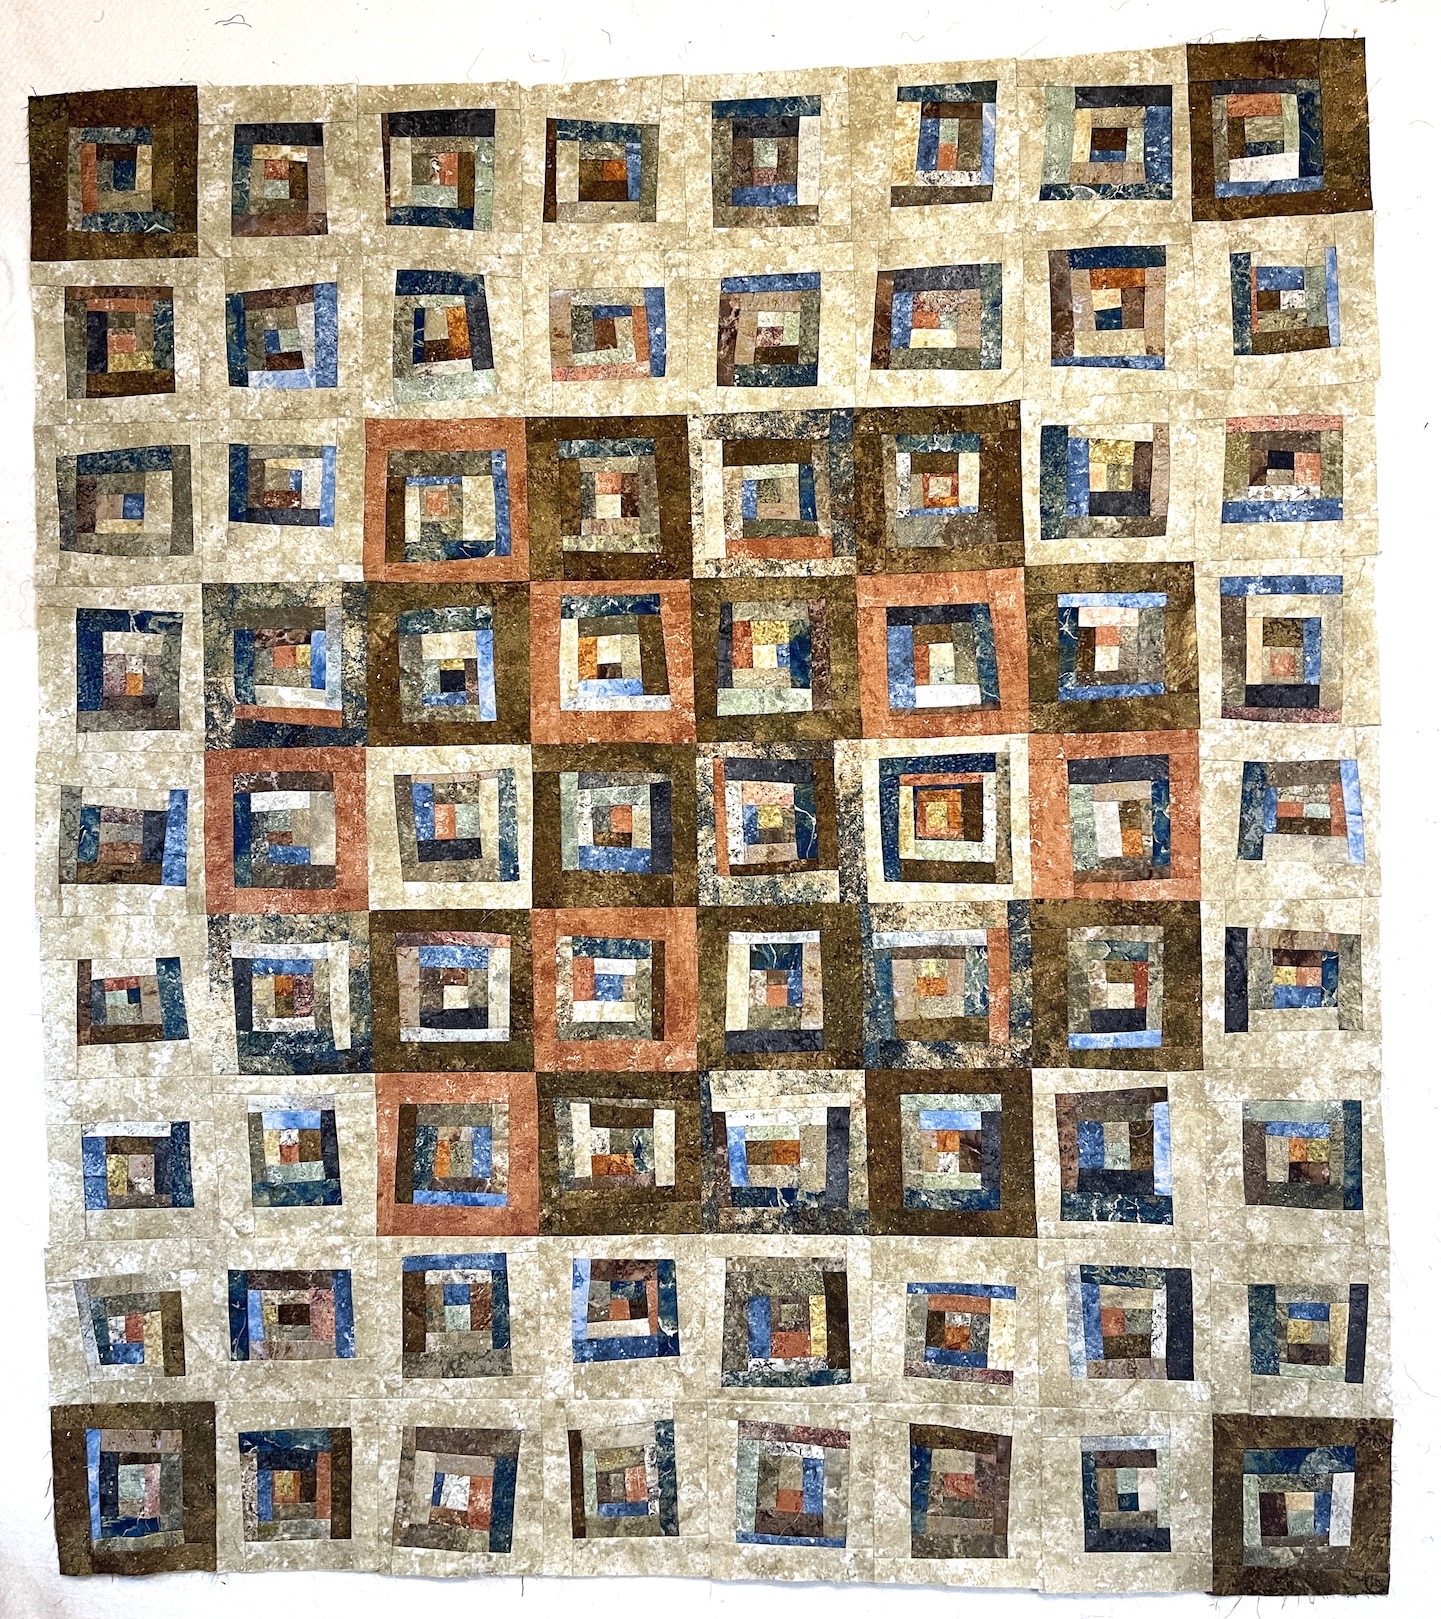
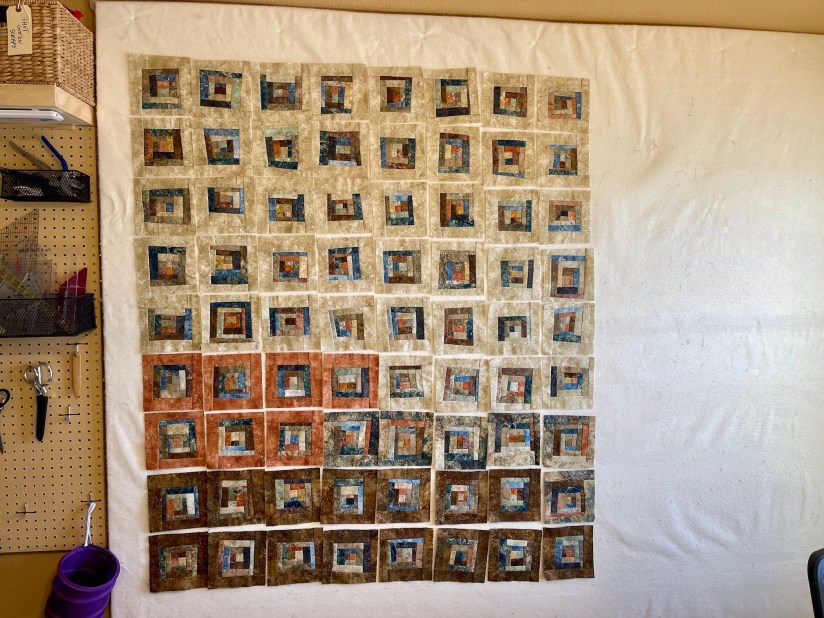
I completed all the blocks and was deciding on a layout.
The layout I came up with was one in which the blocks set in other colors besides the cream Stonehenge fabric, were set in the center of the quilt (except for 4 I saved to use as cornerstones).
I decided to name the piece “Scraphenge” since it was made from Stonehenge fabric line scraps!
It is not a very large quilt, it measures 55 inches tall by 48 inches wide (139 cm by 122 cm).
Right now I am trying to decide whether to quilt it myself or send it to a long arm quilter. However for now I am just going to leave it up on the design wall as I have other projects in queue I want to work on (smile).
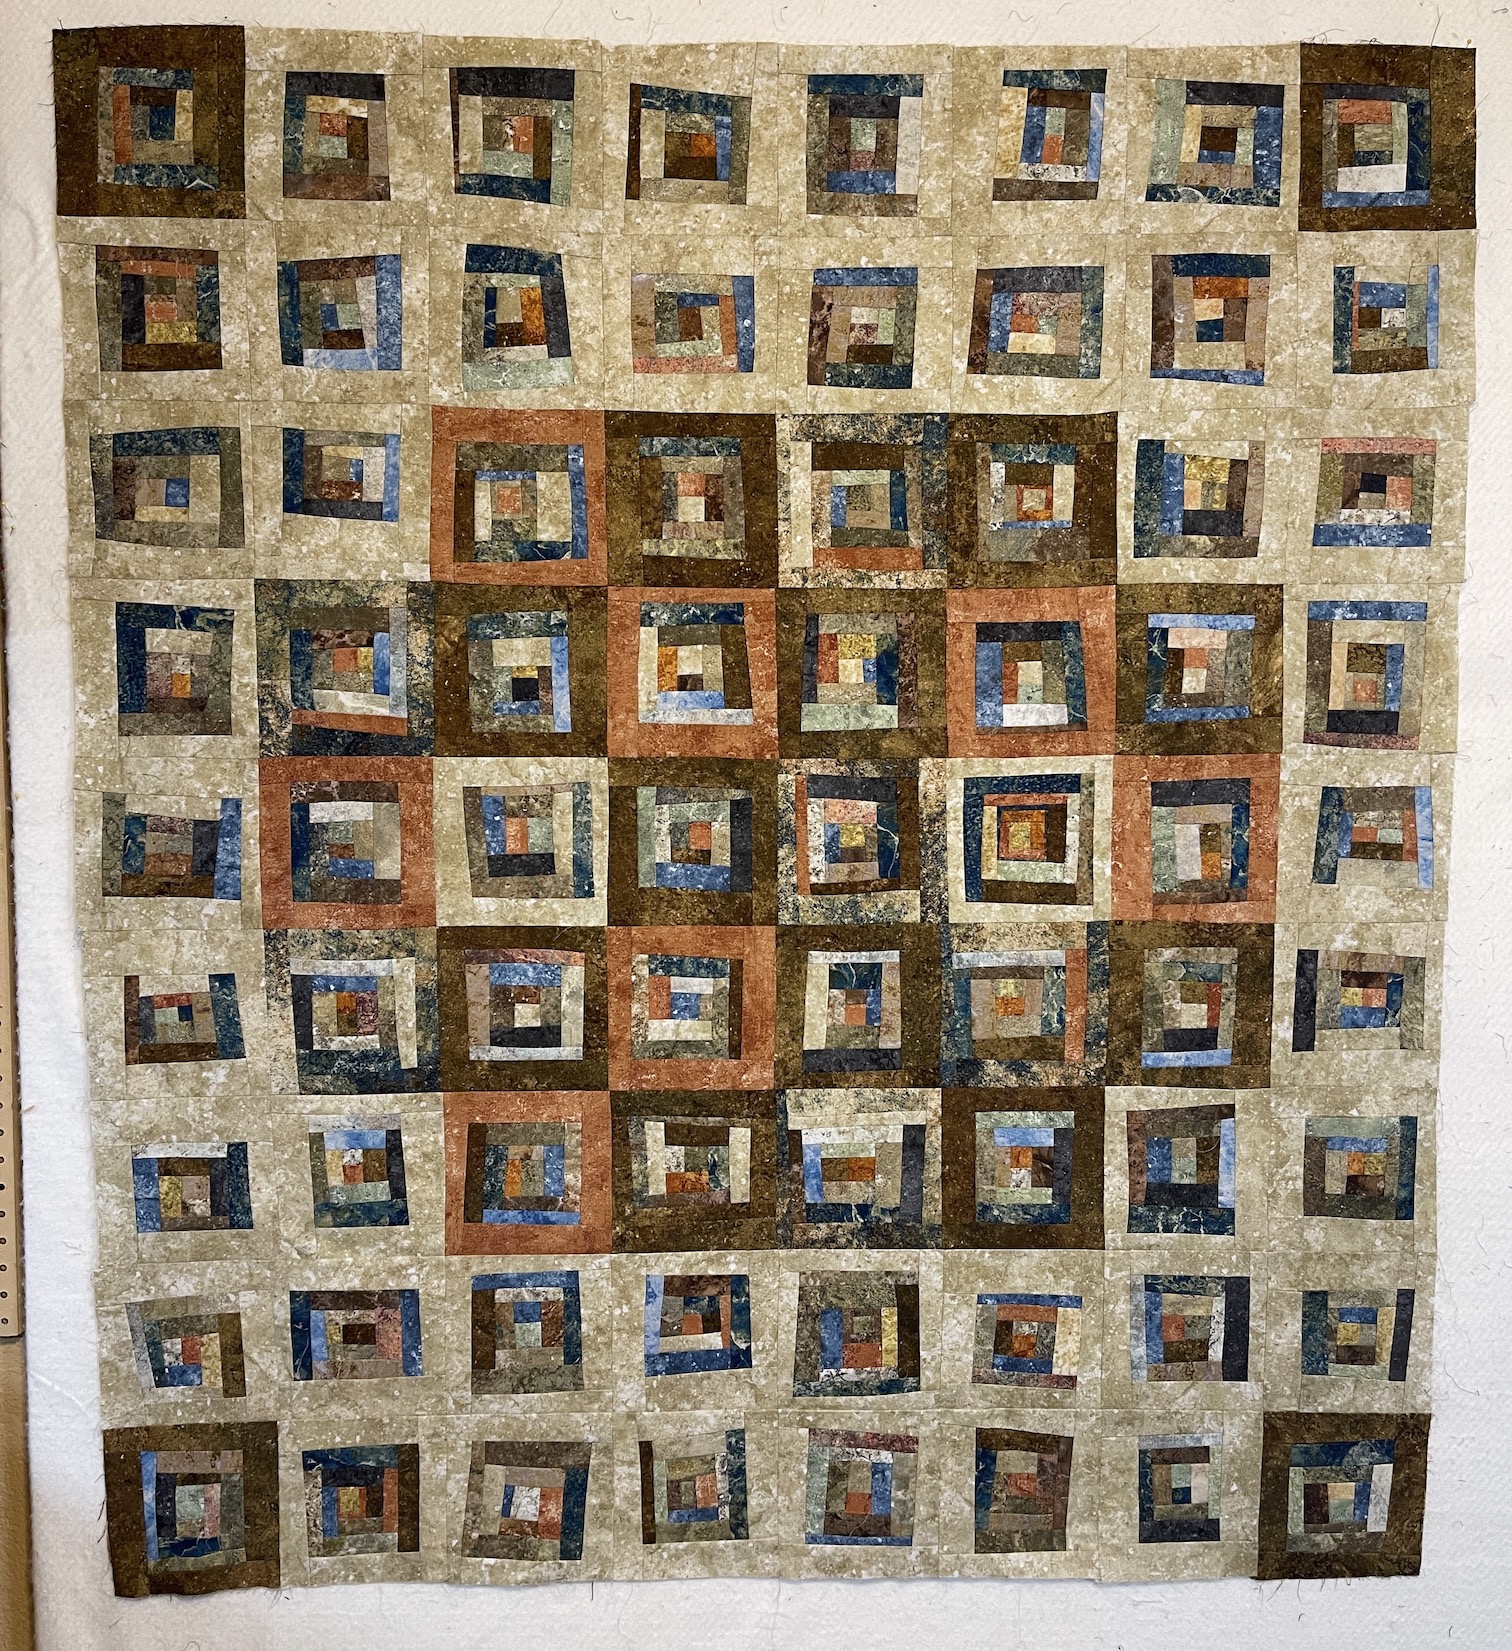
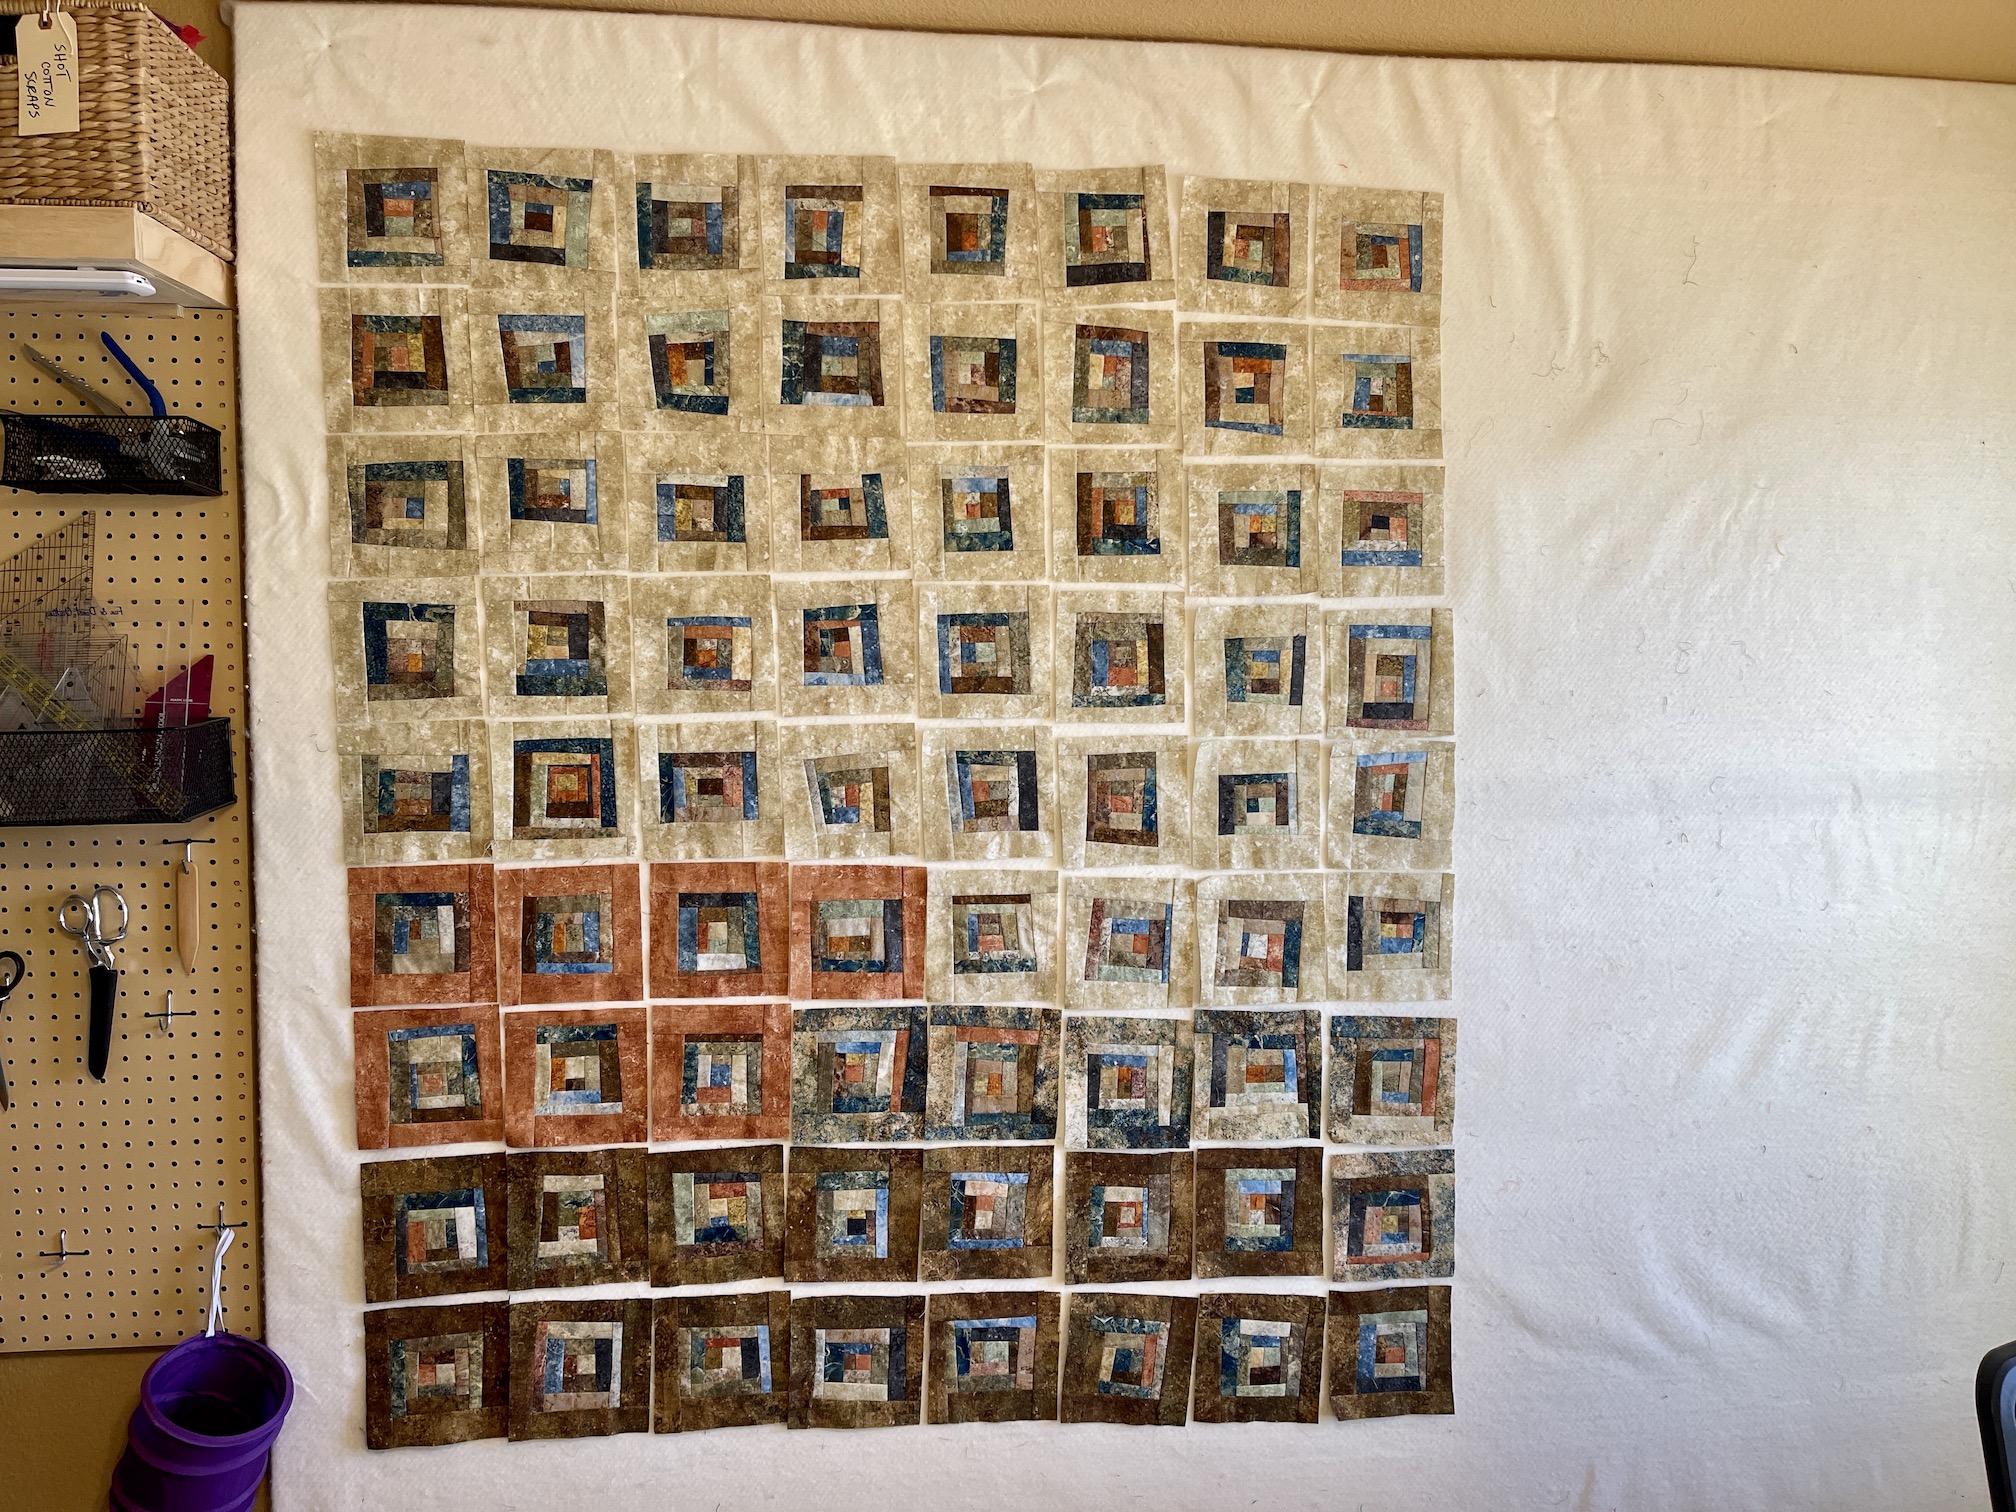
I mentioned in my post Things to Do When You Have a Bad “Cold”, that I’ve been working on a scrappy improvisational “log cabin” block style quilt. I thought I would show you my progress on the piece so far.
All I’ve done is lay the blocks out for now on my design wall, this is not the final design. I have a name in mind for the piece but I am keeping that under wraps until I see if the final design will work.
Each block is 6.5 inches x 6.5 inches and was made using scraps of Northcott Fabrics’ Stonehenge line which I love, as well as some small yardage pieces of Stonehenge I had in my stash.
The scraps primarily came from this quilt I made a couple years ago:
This was my pile of scraps that I started with for the piece currently up on my studio design wall which include scraps from the quilt above and scraps given to me by quilting friends:
Eventually I decided not to use the Stonehenge animal print scraps that someone gave me (and recently I donated a pile of them to a local charity thrift store so they can be enjoyed by another crafter).
Here are photos of me chain piecing the improvisational log cabin blocks via a technique I learned from Jackie Erickson at the Stitchin Post when I lived in Central Oregon.
Jackie told us in a class I took at the Stitchin’ Post that “log jamming” that is technique originated in Africa – the using of scraps to randomly put together fabric and create a larger piece of fabric, etc.
While writing this post I googled “log jamming quilting” to see if I could find any official history on this technique and found a VIDEO by the Stitchin’ Post about log jamming!!!
If you want to see a demonstration of the technique, here is the video – enjoy!
Jackie has a pattern she sells on making a log jam quilt and here is the link to it: Modern Log Jam.
image credit: stichinpost.com
I have used the technique I learned from Jackie on so many quilts over the years (as well as taught the late Terry the Quilting Husband to make quilts this way also – see post What’s On The Design Wall: Flannel “Log Jam” Blocks) that she holds a special place in my heart (and she is an awesome teacher!).
In her class she would use a shoppingbag of random scraps and you just pull from that bag and “jam on” while chain piecing.
Okay I went off on a tangent on log jamming, and let’s get back to the story on this current log jam quilt in progress…
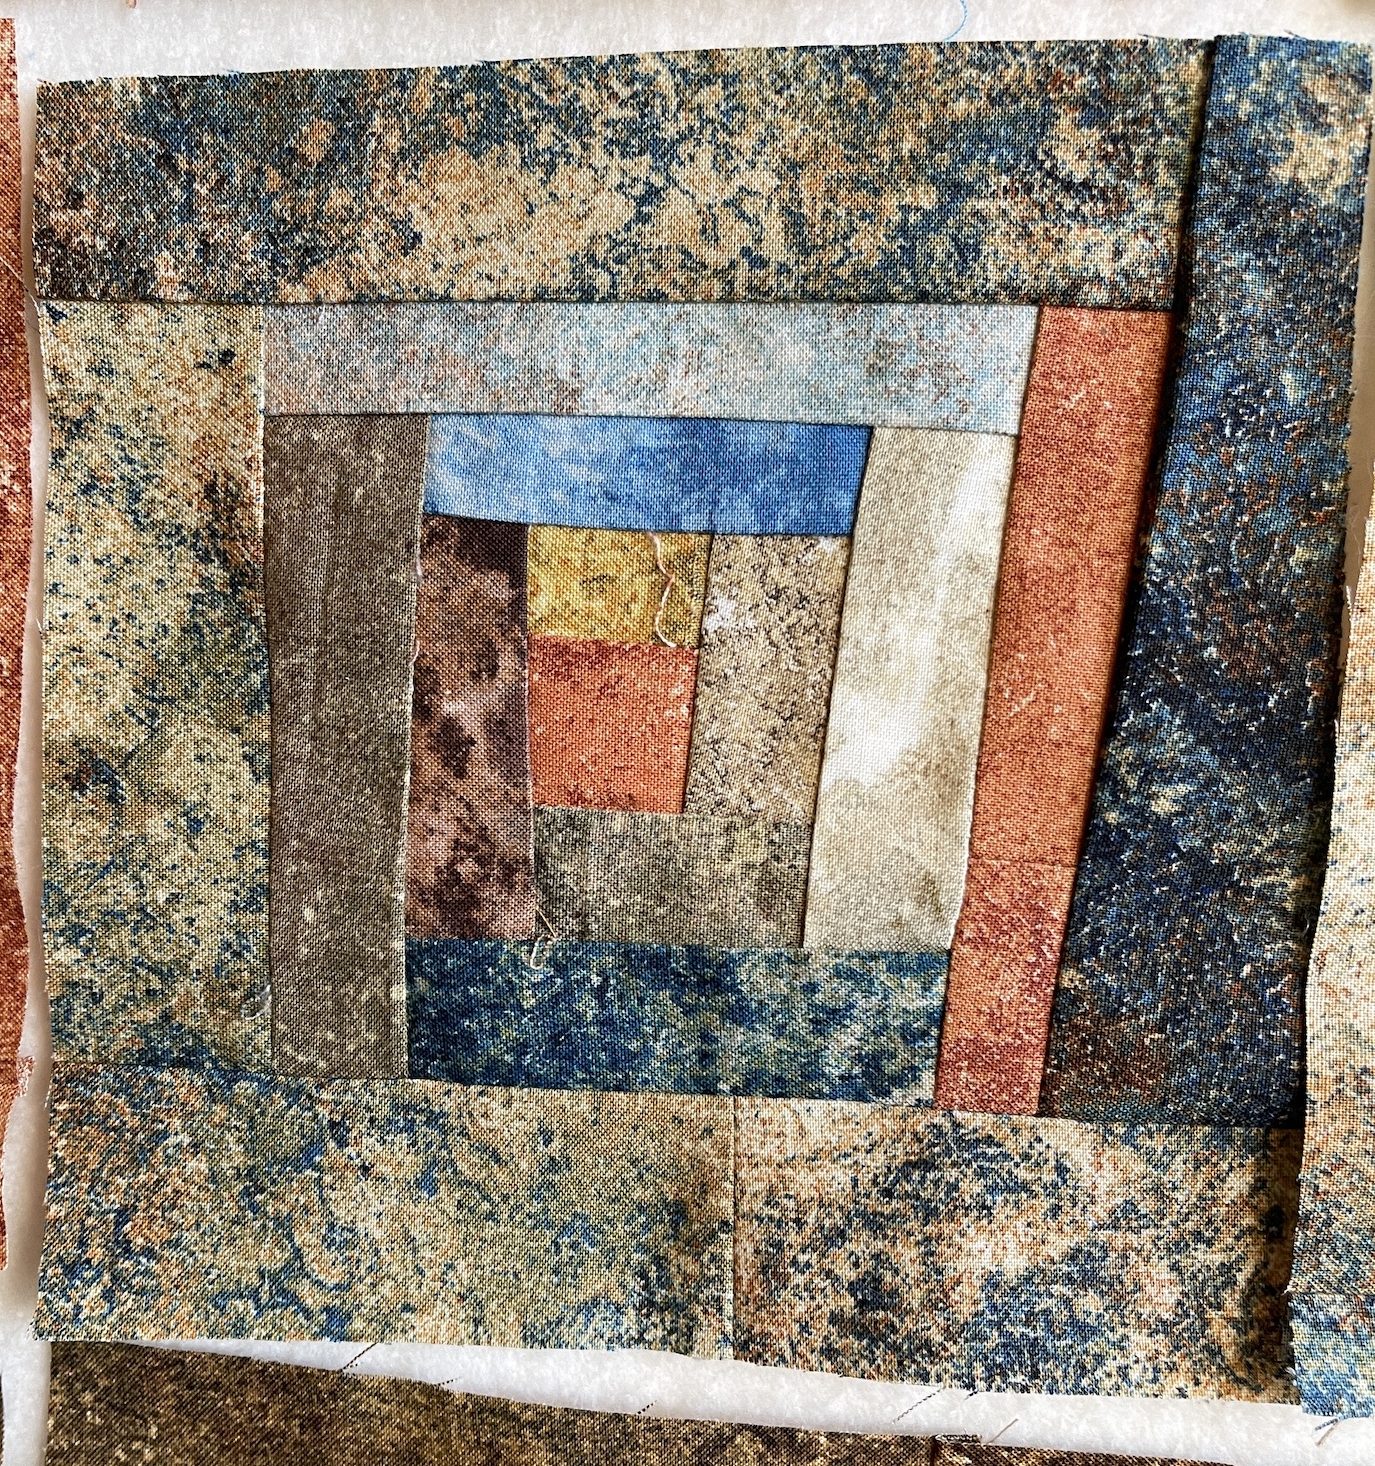
Originally I wanted to frame all the blocks in a cream colored Stonehenge fabric I had in my stash, but it turned out I did not have enough. So I used a smaller brown yardage as well as a couple fat quarters from my stash that I thought would coordinate.
Here are the resulting four (4) types of blocks:
Yes, I have not cleaned up all the loose threads from all that chain piecing I did. But I’ll do that as I sew the blocks together in whatever their final configuration.
For now they all sit on my design wall awaiting my further musings on layout…
I was going to give you the last post in the series of posts on my first Rocky Mountain Quilt Shop Hop but I thought I would just do a quick post and tell you all that “Seattle Scrappy” is done!
If you are just joining us – “Seattle Scrappy” is a quilt I pieced from my friend Dana’s scraps at a quilt retreat in early 2020 (pre-Covid pandemic) in a free form log cabin quilt style. Then I took over a year to hand quilt it. After I finished hand quilting it, I had the tierneycreates blog readers help me select the binding.
If you happen to be curious on the full story on this quilt and its journey to completion, here are all the posts:
Of course you might be thinking: “Tierney maybe you would have had the quilt completed sooner if you weren’t blogging about it so much!” – ha!
So here is quilt with the binding on, fresh out of the dryer. I like to wash and dry utility quilts after I put the binding on (I do not wash art quilts):
I gave it little pressing and now it hung in our bedroom so I can look at it each morning when I wake up!
I better get another hand quilting project started before winter starts! I was definitely fun to sit under the quilt while I was hand quilting it in the colder months.
Okay time to take a break from “tierneytravels” and get back to “tierneycreates” (smile).
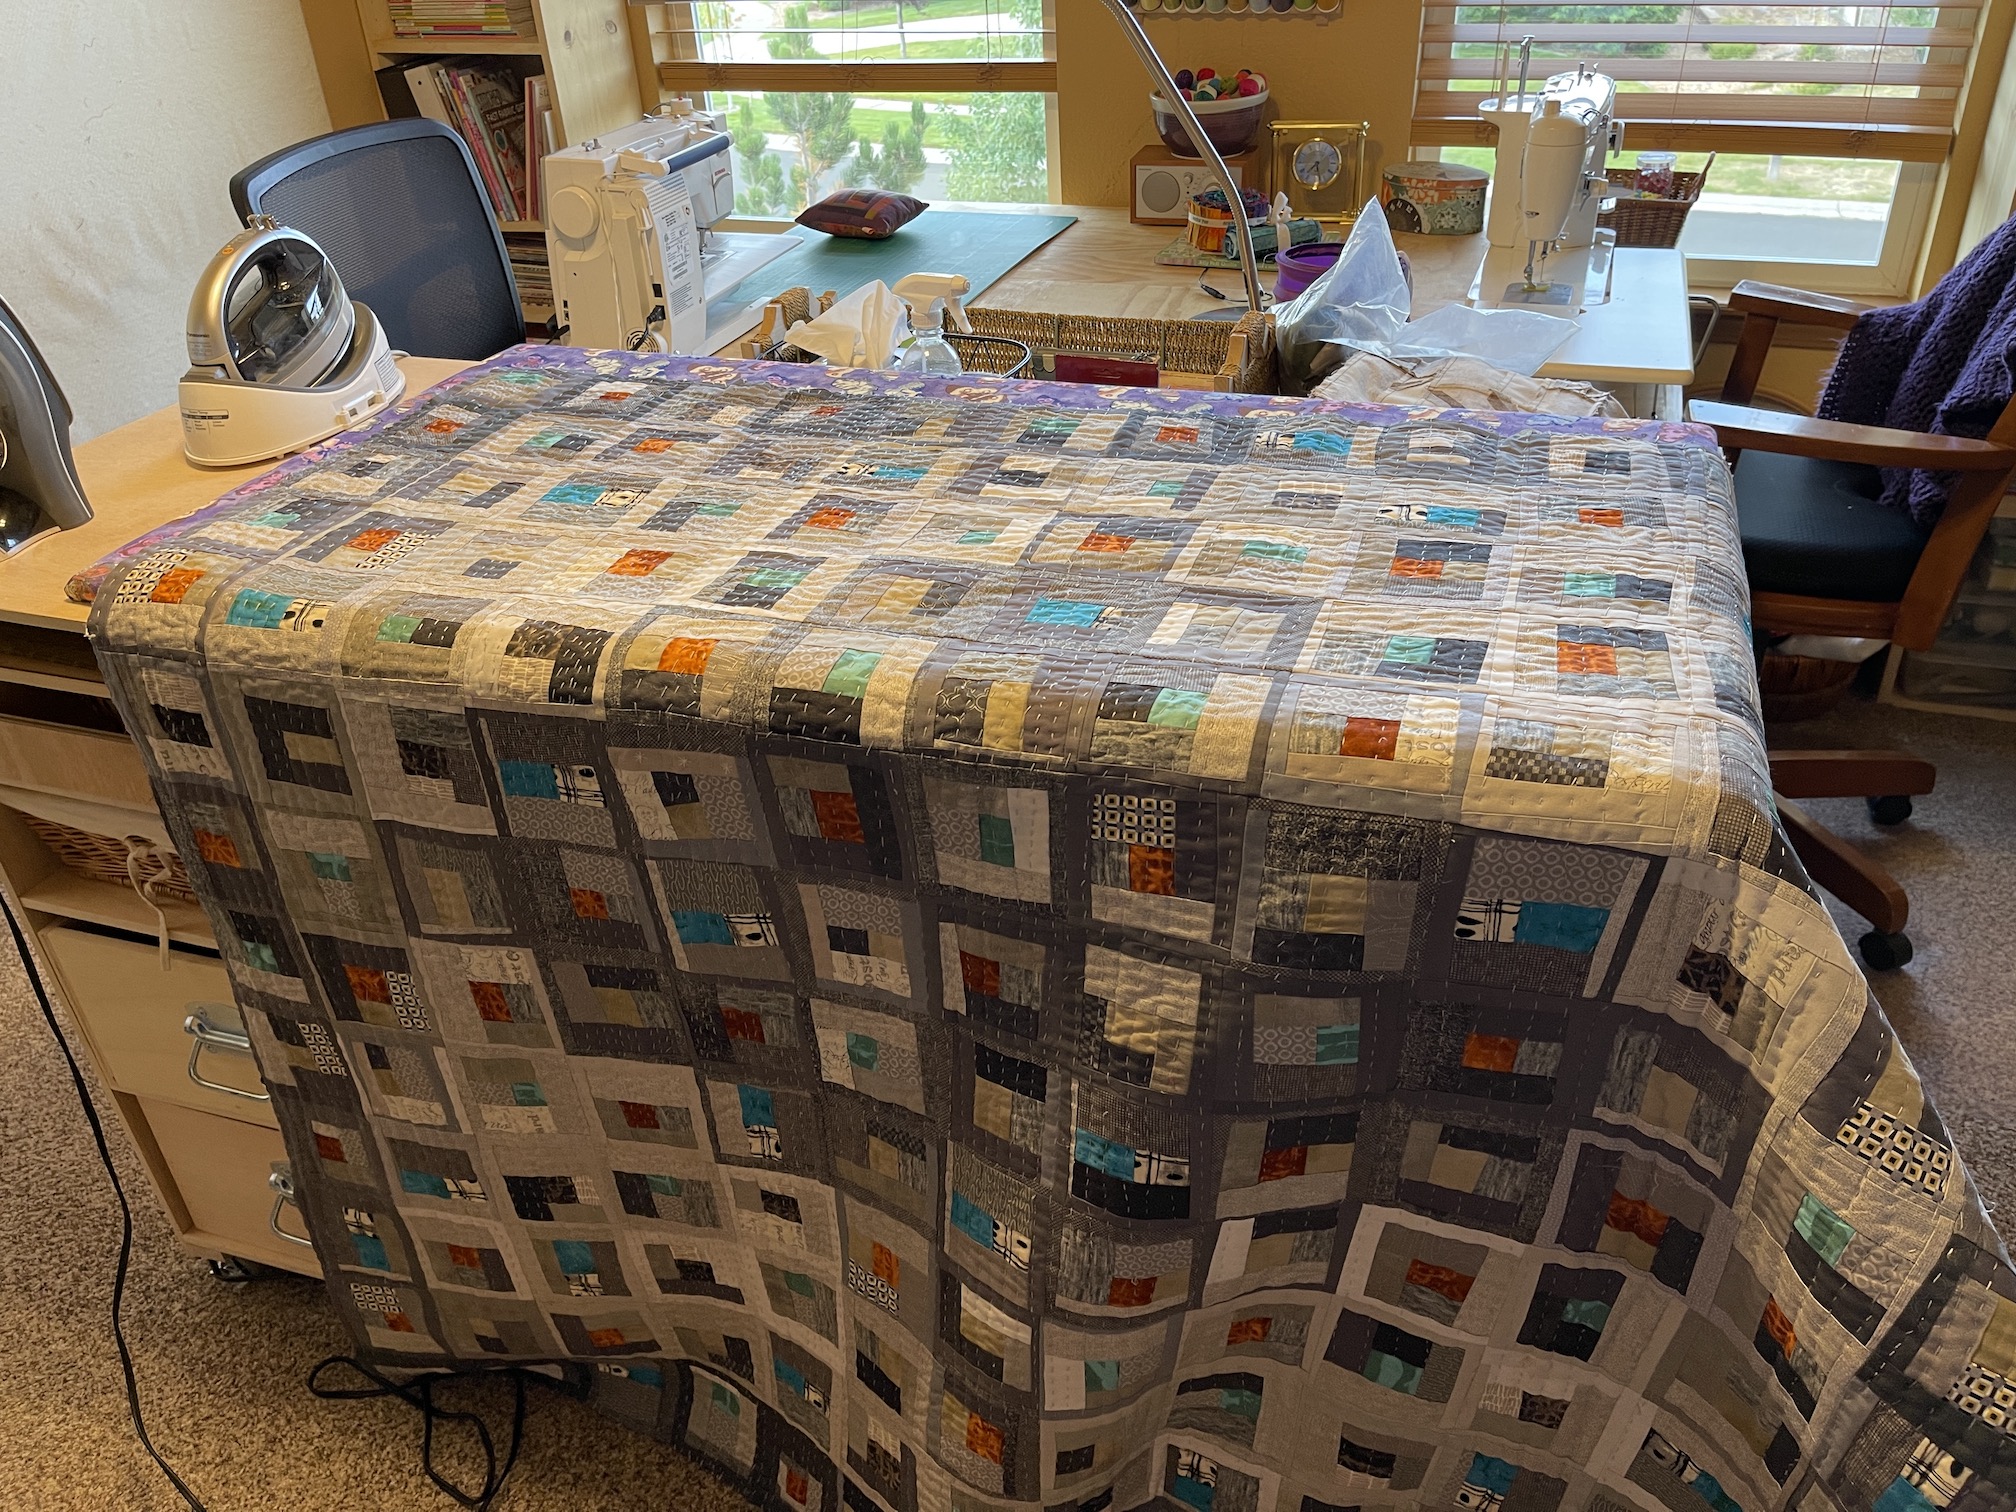
It only took like a year+ but I’ve finally finished hand quilting a lap sized free form log cabin quilt I started back in January 2020 at a quilting retreat which I named “Seattle Scrappy”. Now I need your help to decide which fabric to use for the quilt binding.
I know crafters are opinionated and like helping other crafters with their design, so I am looking for your opinions.
But firsthere is a little quick background on the piece and some additional photos.
In January 2020 (before the pandemic was a reality) I attended a mini quilt retreat with a couple quilting friends in Poulsbo, Washington. I brought a couple hand work projects and had EVERY INTENTION of only working on my hand work projects. But, my dear quilting friend Dana brought an extra sewing machine (one her her Berninas, and I love Berninas) and a BAG OF GRAY FABRIC SCRAPS for me to play with – oh no!
Out of that bag of scraps came a whole lots of free form pieces log cabin blocks and you can read about those in this post – What’s on the…Design Carpet.
Since February 2020 I’ve had a series of posts on the evolution of this quilt:
I’ve had an update or two on my @tierneycreates Instagram feed since these posts but basically I’ve just been plugging along (when I remember to work on it) hand stitching it with perle/pearl cotton thread.
Last night I finally finished stitching it; and this morning I trimmed off the extra batting on the edges!
I didn’t have the best light when I quickly took these photos this morning, but they give you a general idea of the hand quilted quilt.
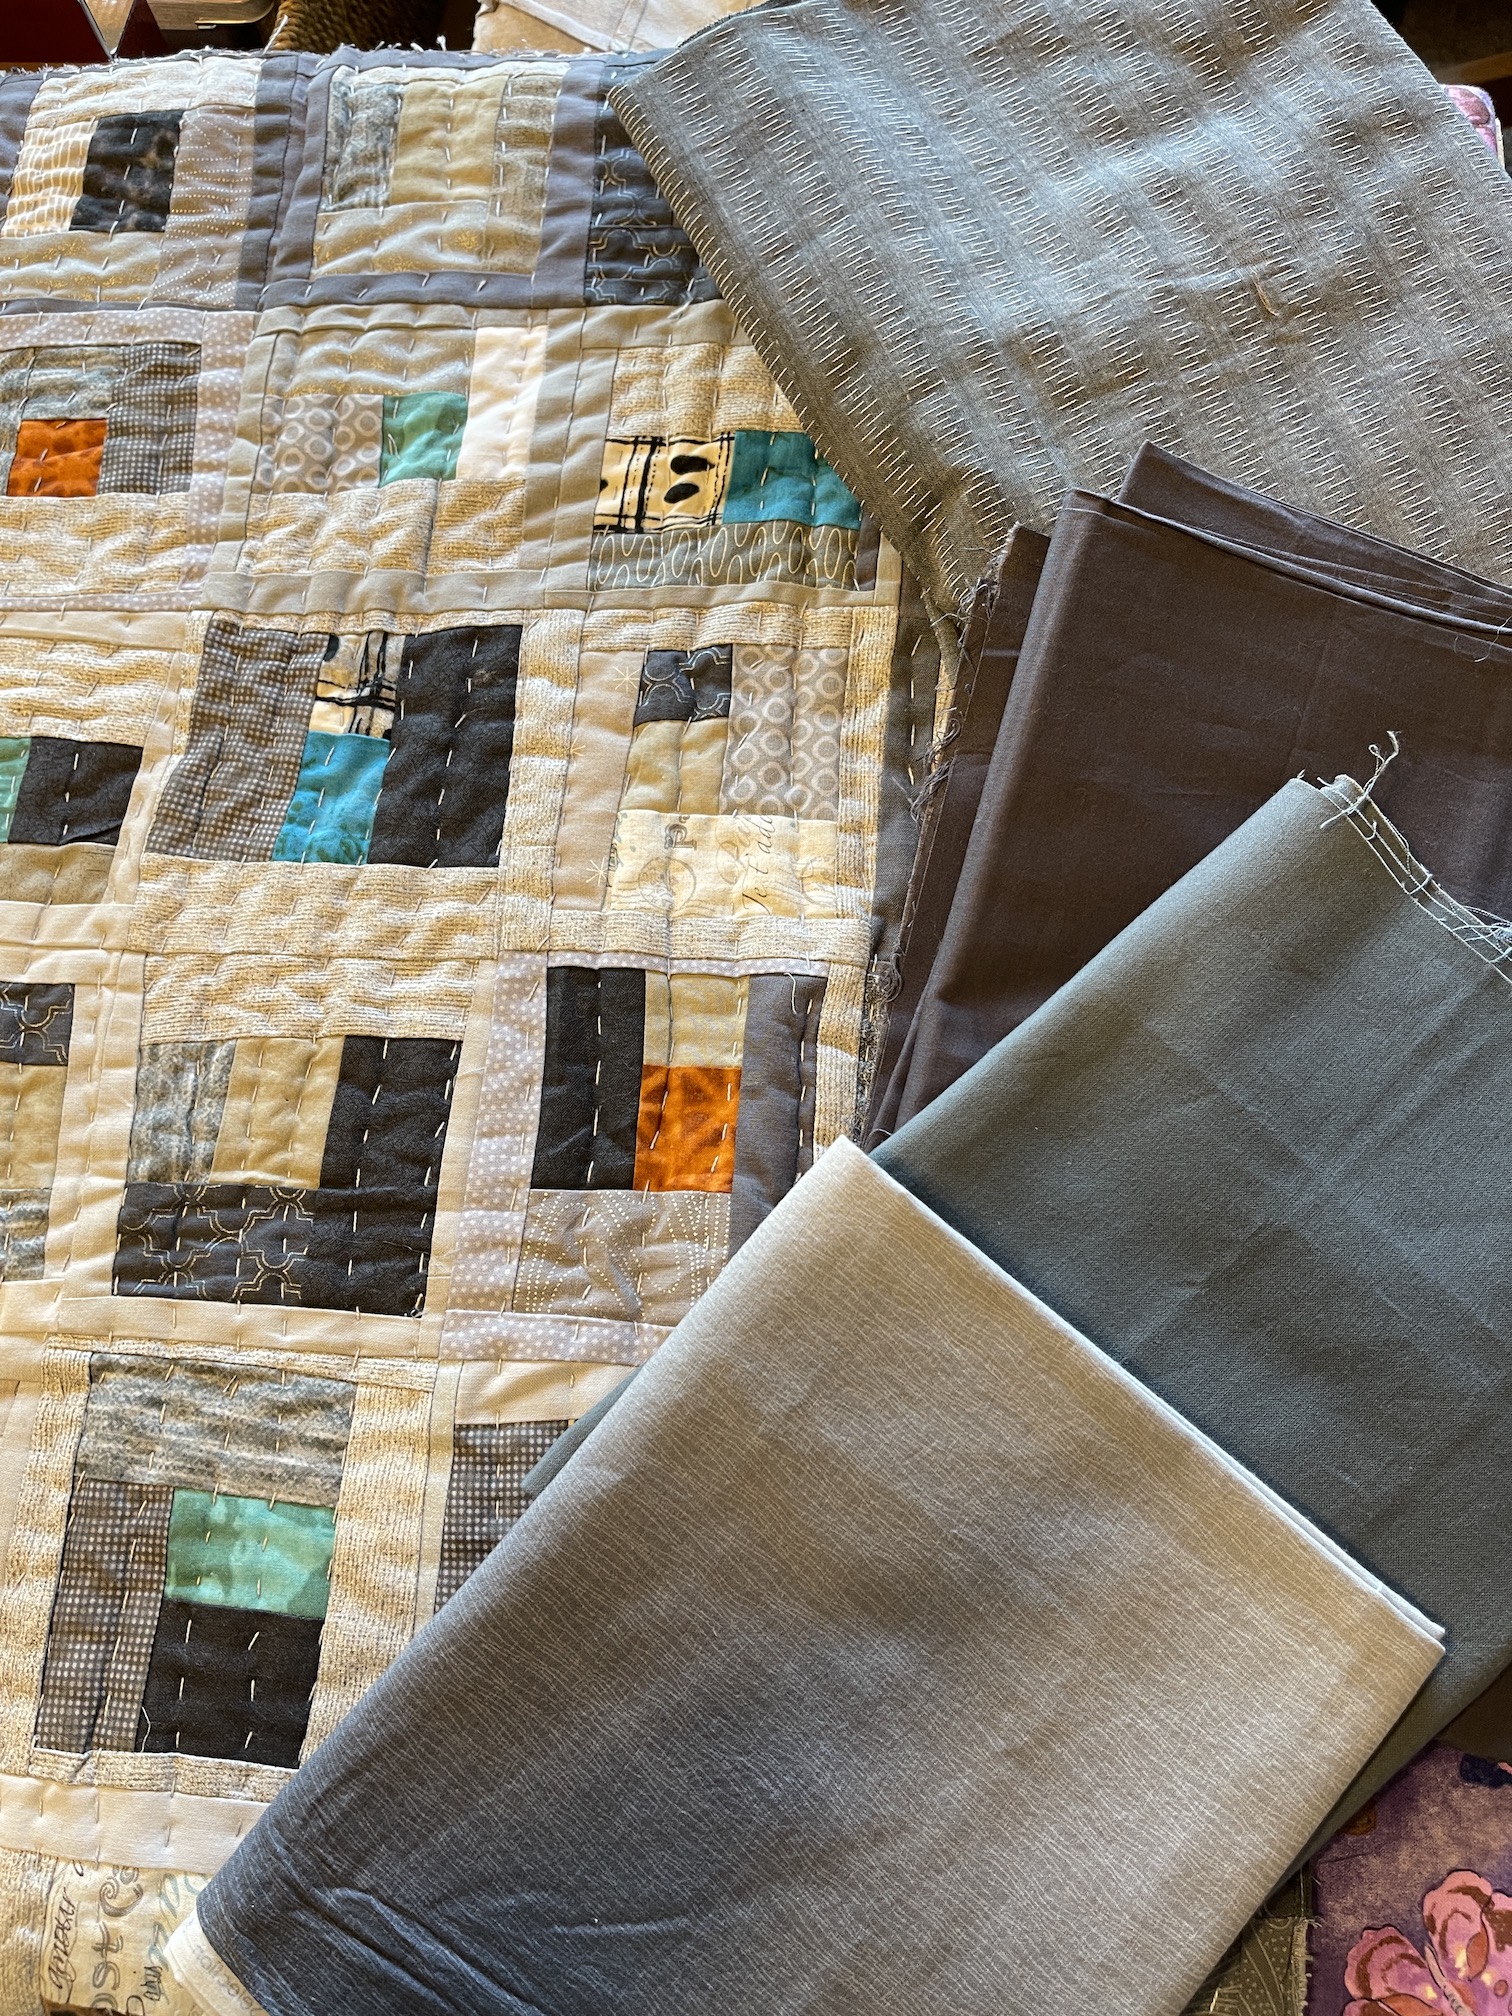
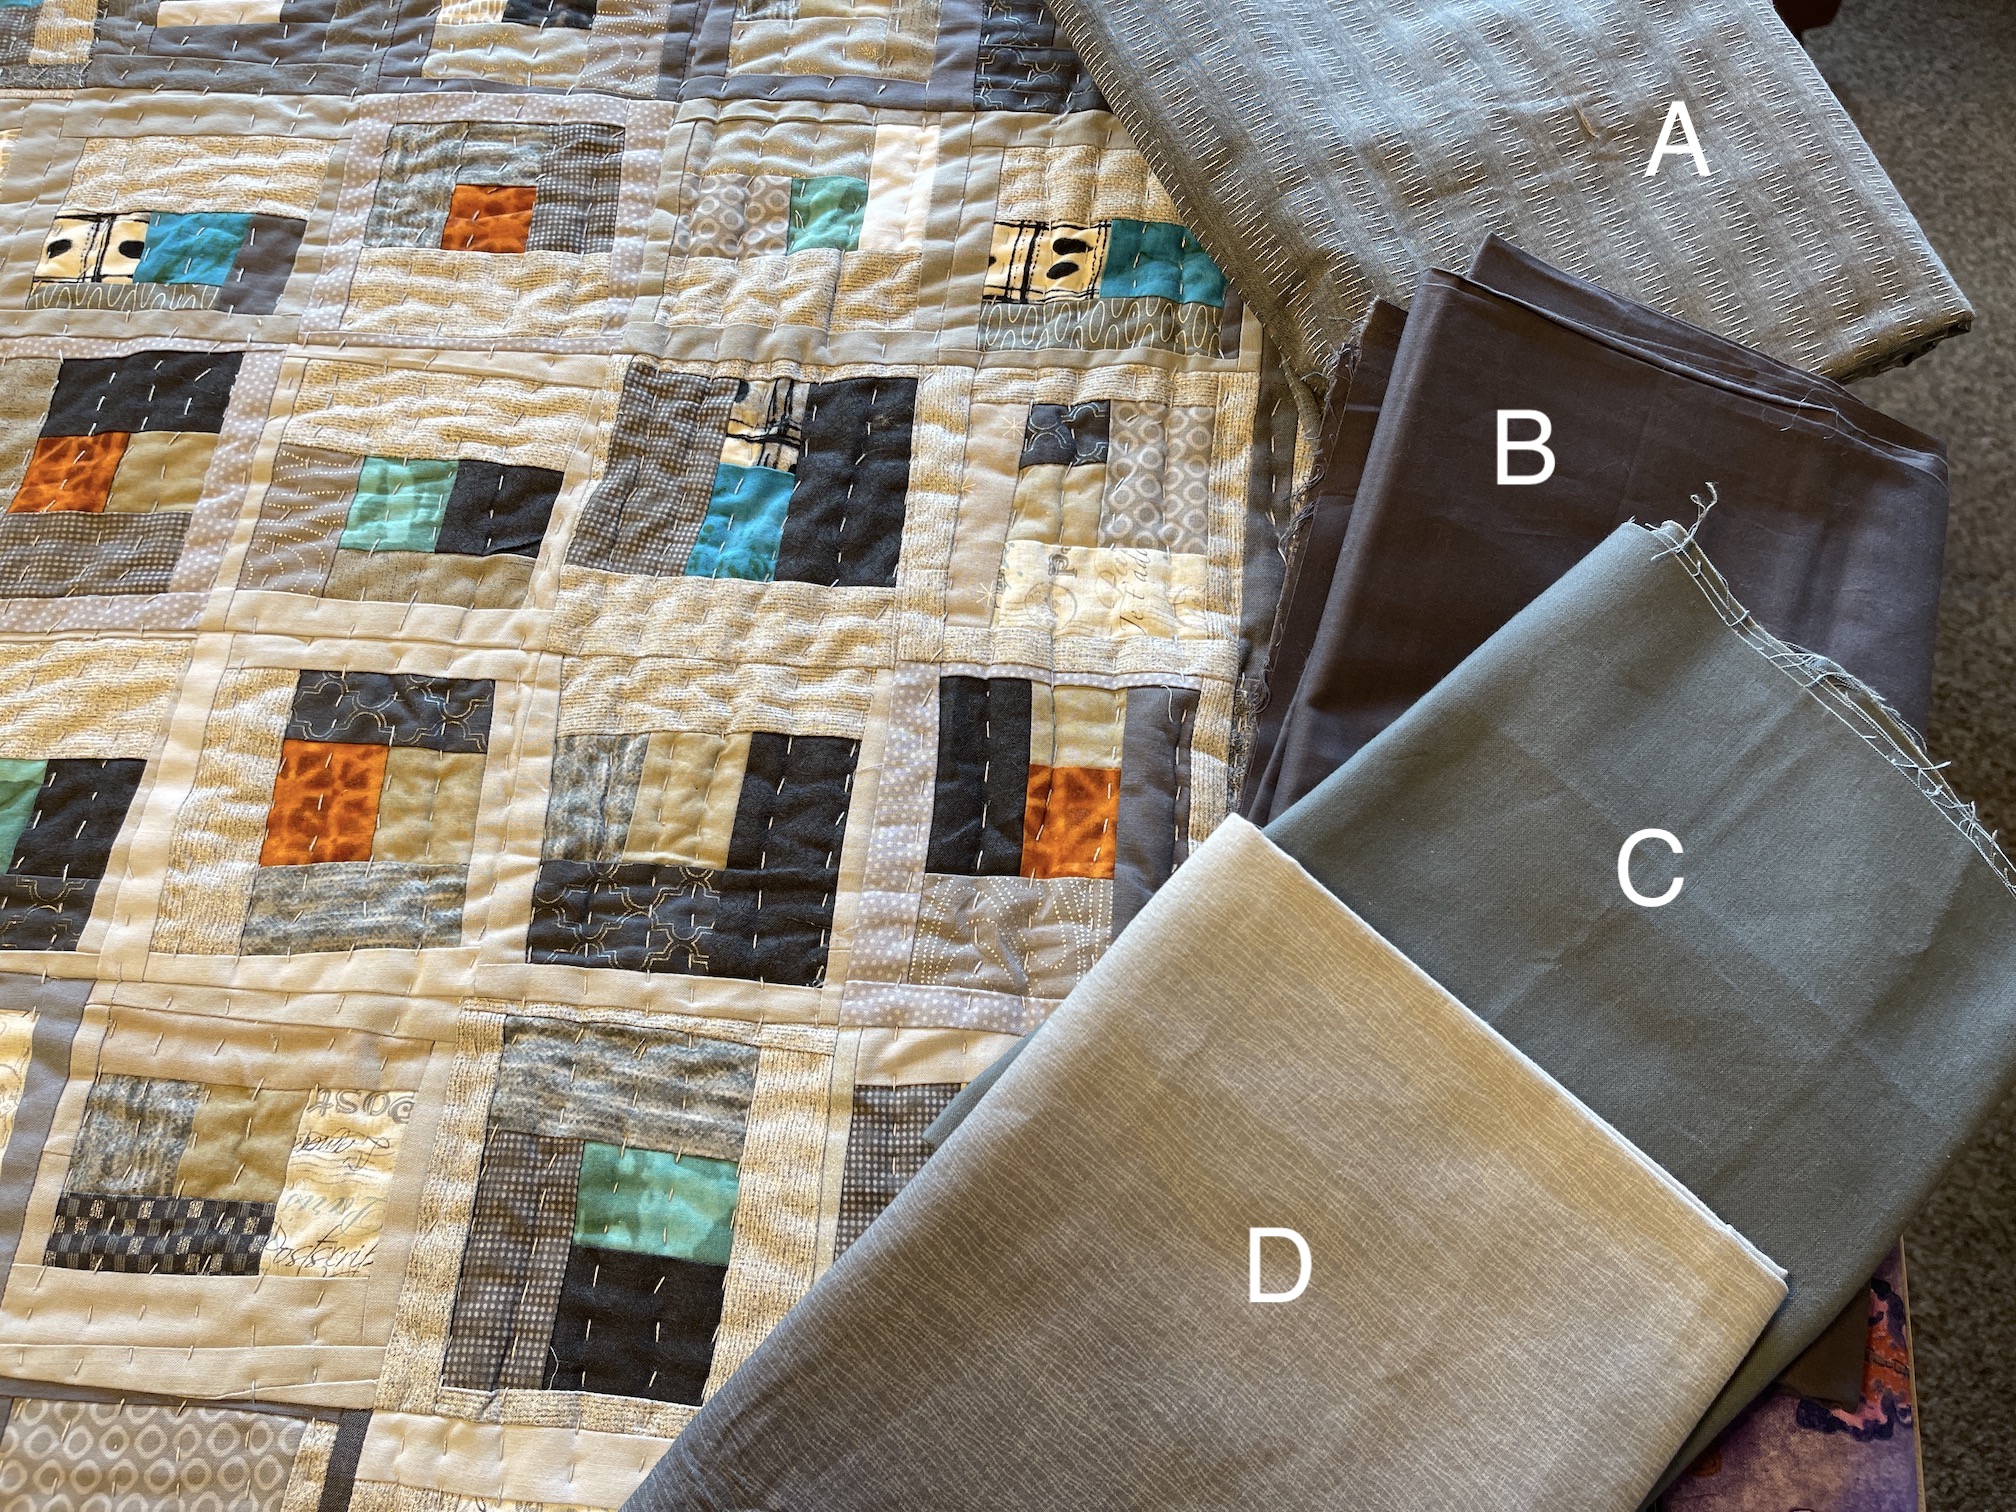
Now it’s time to choose the binding (this is where you come in) and here are the four options I am considering:
As you can see they are all some shade of gray. You might be thinking: “Well Tierney, what about the turquoise, aqua, or the burnt orange in the piece?” I did think about those for a moment but first of all I do not have enough of any of those fabrics to create a binding; and second I do not want to frame it in a strong color. I want to frame it in a gray.
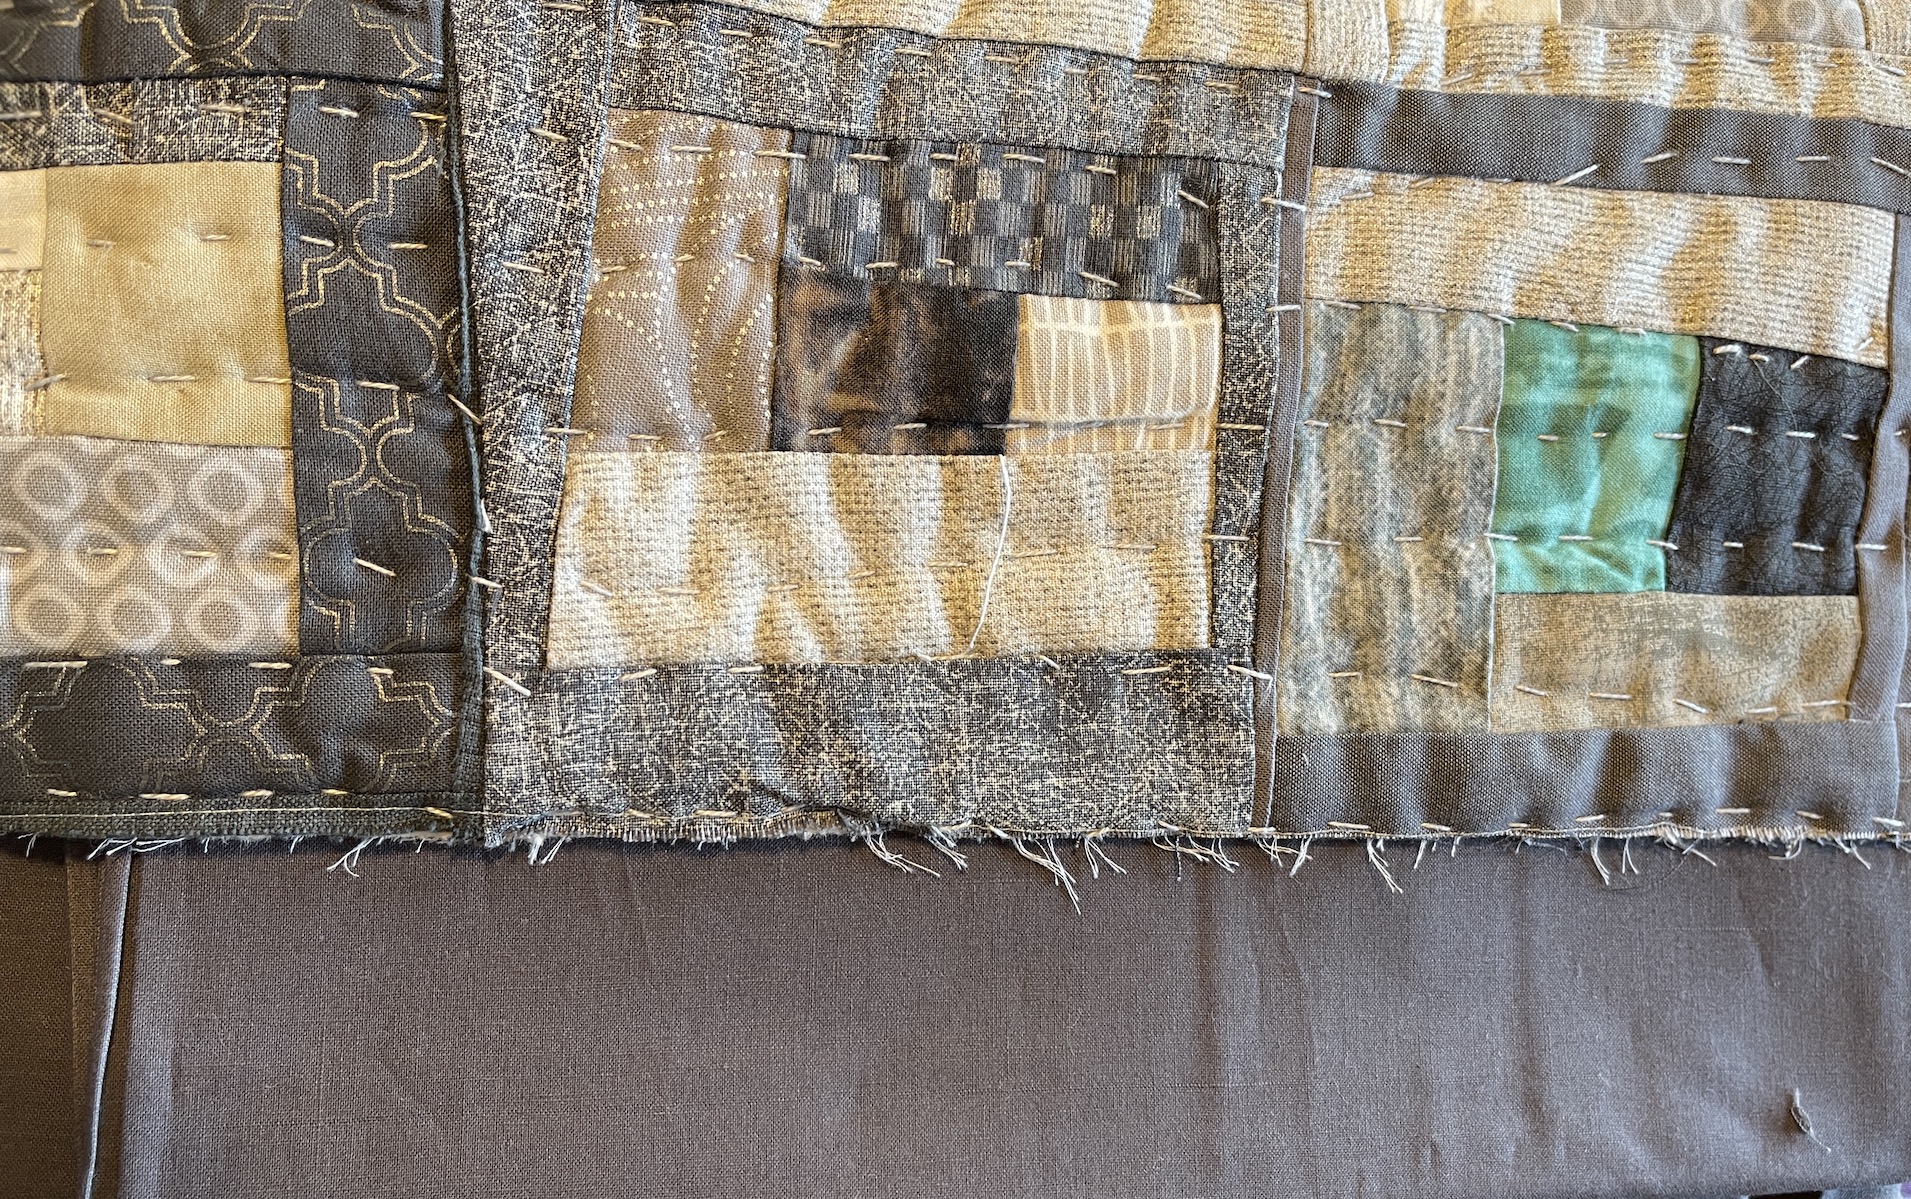
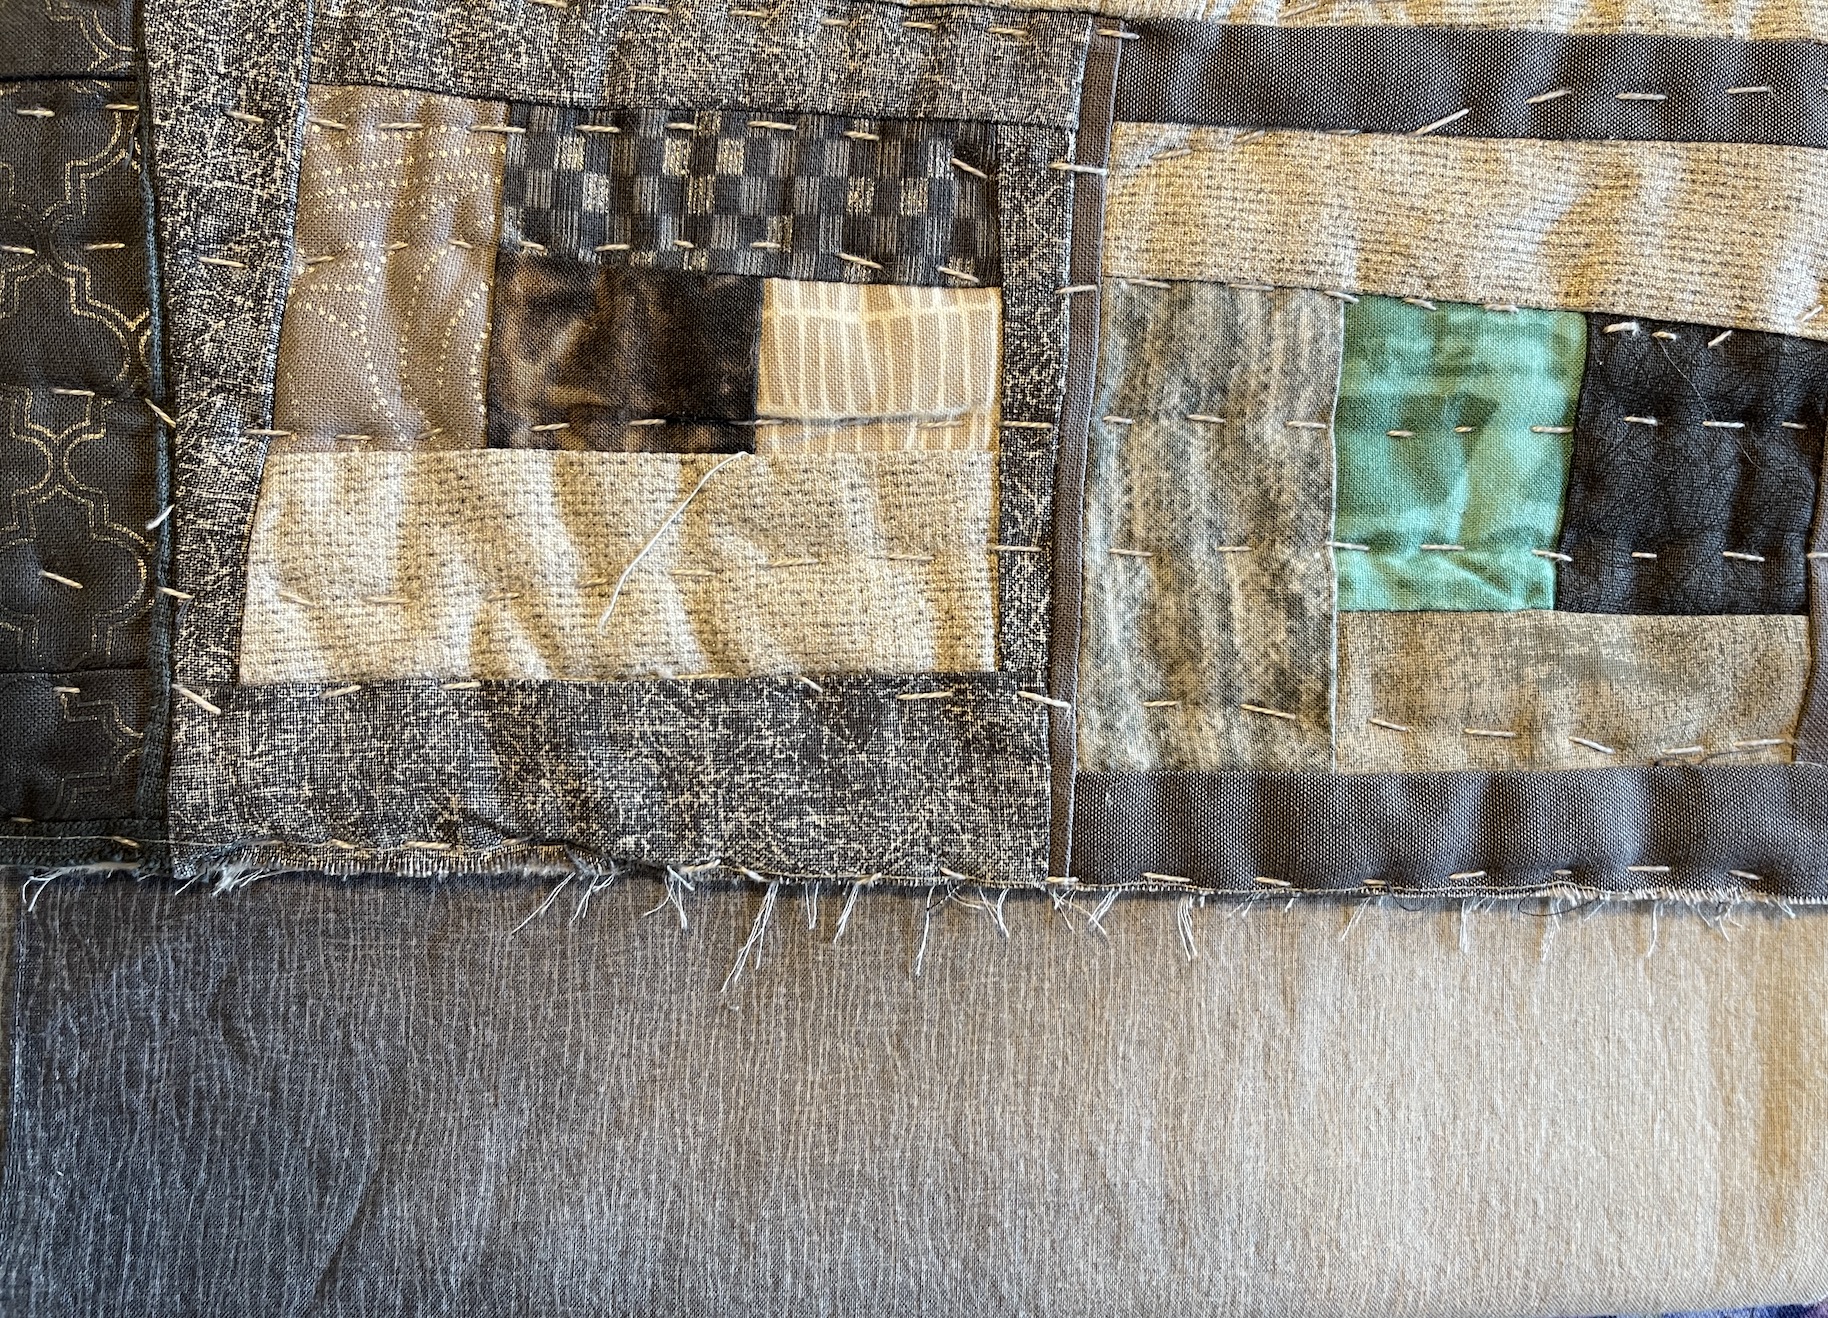
So here are the four gray fabrics up close up against the quilt for you to select from when you share your thoughts:
A – fabric with faux stitching pattern
Fabric A
B – medium-dark gray fabric
Fabric B
C– medium gray fabric
Fabric C
D – variegated gray fabric (the tone/shade of gray will change along the binding
Fabric D
Here is a poll below for you to vote and I will report back on the result of the poll and my final decision (which will likely be heavily influenced by your votes):
****If you’d like to participate in voting/respond to the poll, you have to go to my actual website. It will not show in the WordPress Reader, sorry (thanks @tammiepainter for making me aware). If you are in the WP Reader, click on “Visit Site”.****
I’d appreciate any additional thoughts you have in addition to your vote in the Comments section of this post.
Please note however, I will only tally votes through the poll above just to make sure I do not duplicate votes, thanks!
I thought I would give you all an update on the improvisationally free-form log cabin block style pieced quilt I’ve been working on since January 2020 – Seattle Scrappy. I last updated you on this piece in my March post – Update on Seattle Scrappy (though I think here and there in the Postscript section of later posts I provided a brief update…maybe).
The quilt began as a pile of scraps that my friend Dana let me play with when I attended a quilt retreat in Poulsbo, Washington in January 2020 (see posts Mini Quilt Retreat, January 2020 and A Jaunt About Poulsbo, WA). I pieced these scraps into free form log cabin blocks (no measuring, just “eye-balling” and trimming to make fit):
I made a lot of blocks and when I returned home I arranged them into this quilt top:
I decided to name the piece: Seattle Scrappy.
For the past 7 or so months, I’ve been hand stitching the quilt.
Update on “Seattle Scrappy”
In my mind I am doing something like Kantha hand stitching but actually what I am doing should be called “Drunken Kantha” (no I am not drinking while stitching – that could be disastrous since I am a “light-weight” when it comes to alcohol consumption, I would impale my finger…constantly…with the needle) as, well…it sort of looks…sloppy…
Let’s get this over with – let me show you the photos – I am nearly 1/3rd done on stitching this quilt which measures approximately 60 inches by 60 inches:
If you are gasping or just shaking your head at this point as you look at the nonuniform stitching, I have an artistic design “excuse” for the stitching. It is a weak excuse but here goes: As it frequently rains in Seattle, Washington, I wanted the stitching to capture the feeling of a rainstorm (with the wind blowing the rain sideways…).
There. That sounds quite reasonable – it was just my artistic design, not that I am a terrible Kantha-stitcherist! (smile).
But seriously, I am hopeful it will look acceptable once I get the whole thing stitched, and then trim off the excess batting and backing, do a whole lot of ironing, and bind the edges in some manner (either a traditional quilt binding or the art quilt technique of putting a “facing” on the back edges of the quilt).
I cannot believe how long it takes to hand quilt a lap sized quilt. I’ve hand quilted smaller pieces before (see post What’s on My Lap) and I found it very meditative. I think in the future I will reserve hand quilting only for smaller pieces, it was a bit too ambitious an undertaking (for a slopping hand quilter) to hand quilt Seattle Scrappy!
Till the next update, Seattle Scrappy will continue to sit on the edge of my chair in the living room, waiting for the next set of haphazard stitches!
Postscript
Hopefully I did not visually traumatize you with images of my hand stitching.
If I have, I would like to undo the damage by referring you to look at the website of one of my extremely talented blogging buddies – Mariss the Quilter: Fabrications – who is a masterful Kantha stitcher. Check out her post On Hand Stitching to see some amazing Kantha stitching!
Someday…maybe…I can get my stitching to a “less scary point”. I am not aiming for her level of talent, just not to scare myself or others – ha! I did recently actually invest in a book on Kantha stitching. So perhaps there is hope…
Well the tierneycreates Beastie would tease me that I am just using Guest Bloggers to keep up on new posts but I am very excited to share Wendy Hill’s second guest blog post on the awesome quilt she made during quarantine with the four rambunctious boys next door (aka “The Boys”) ages 2 – 8.
Quarantine Quilt Project: Life in the Time of Coronavirus
Part II: “The Boys” Make 61 Blocks!
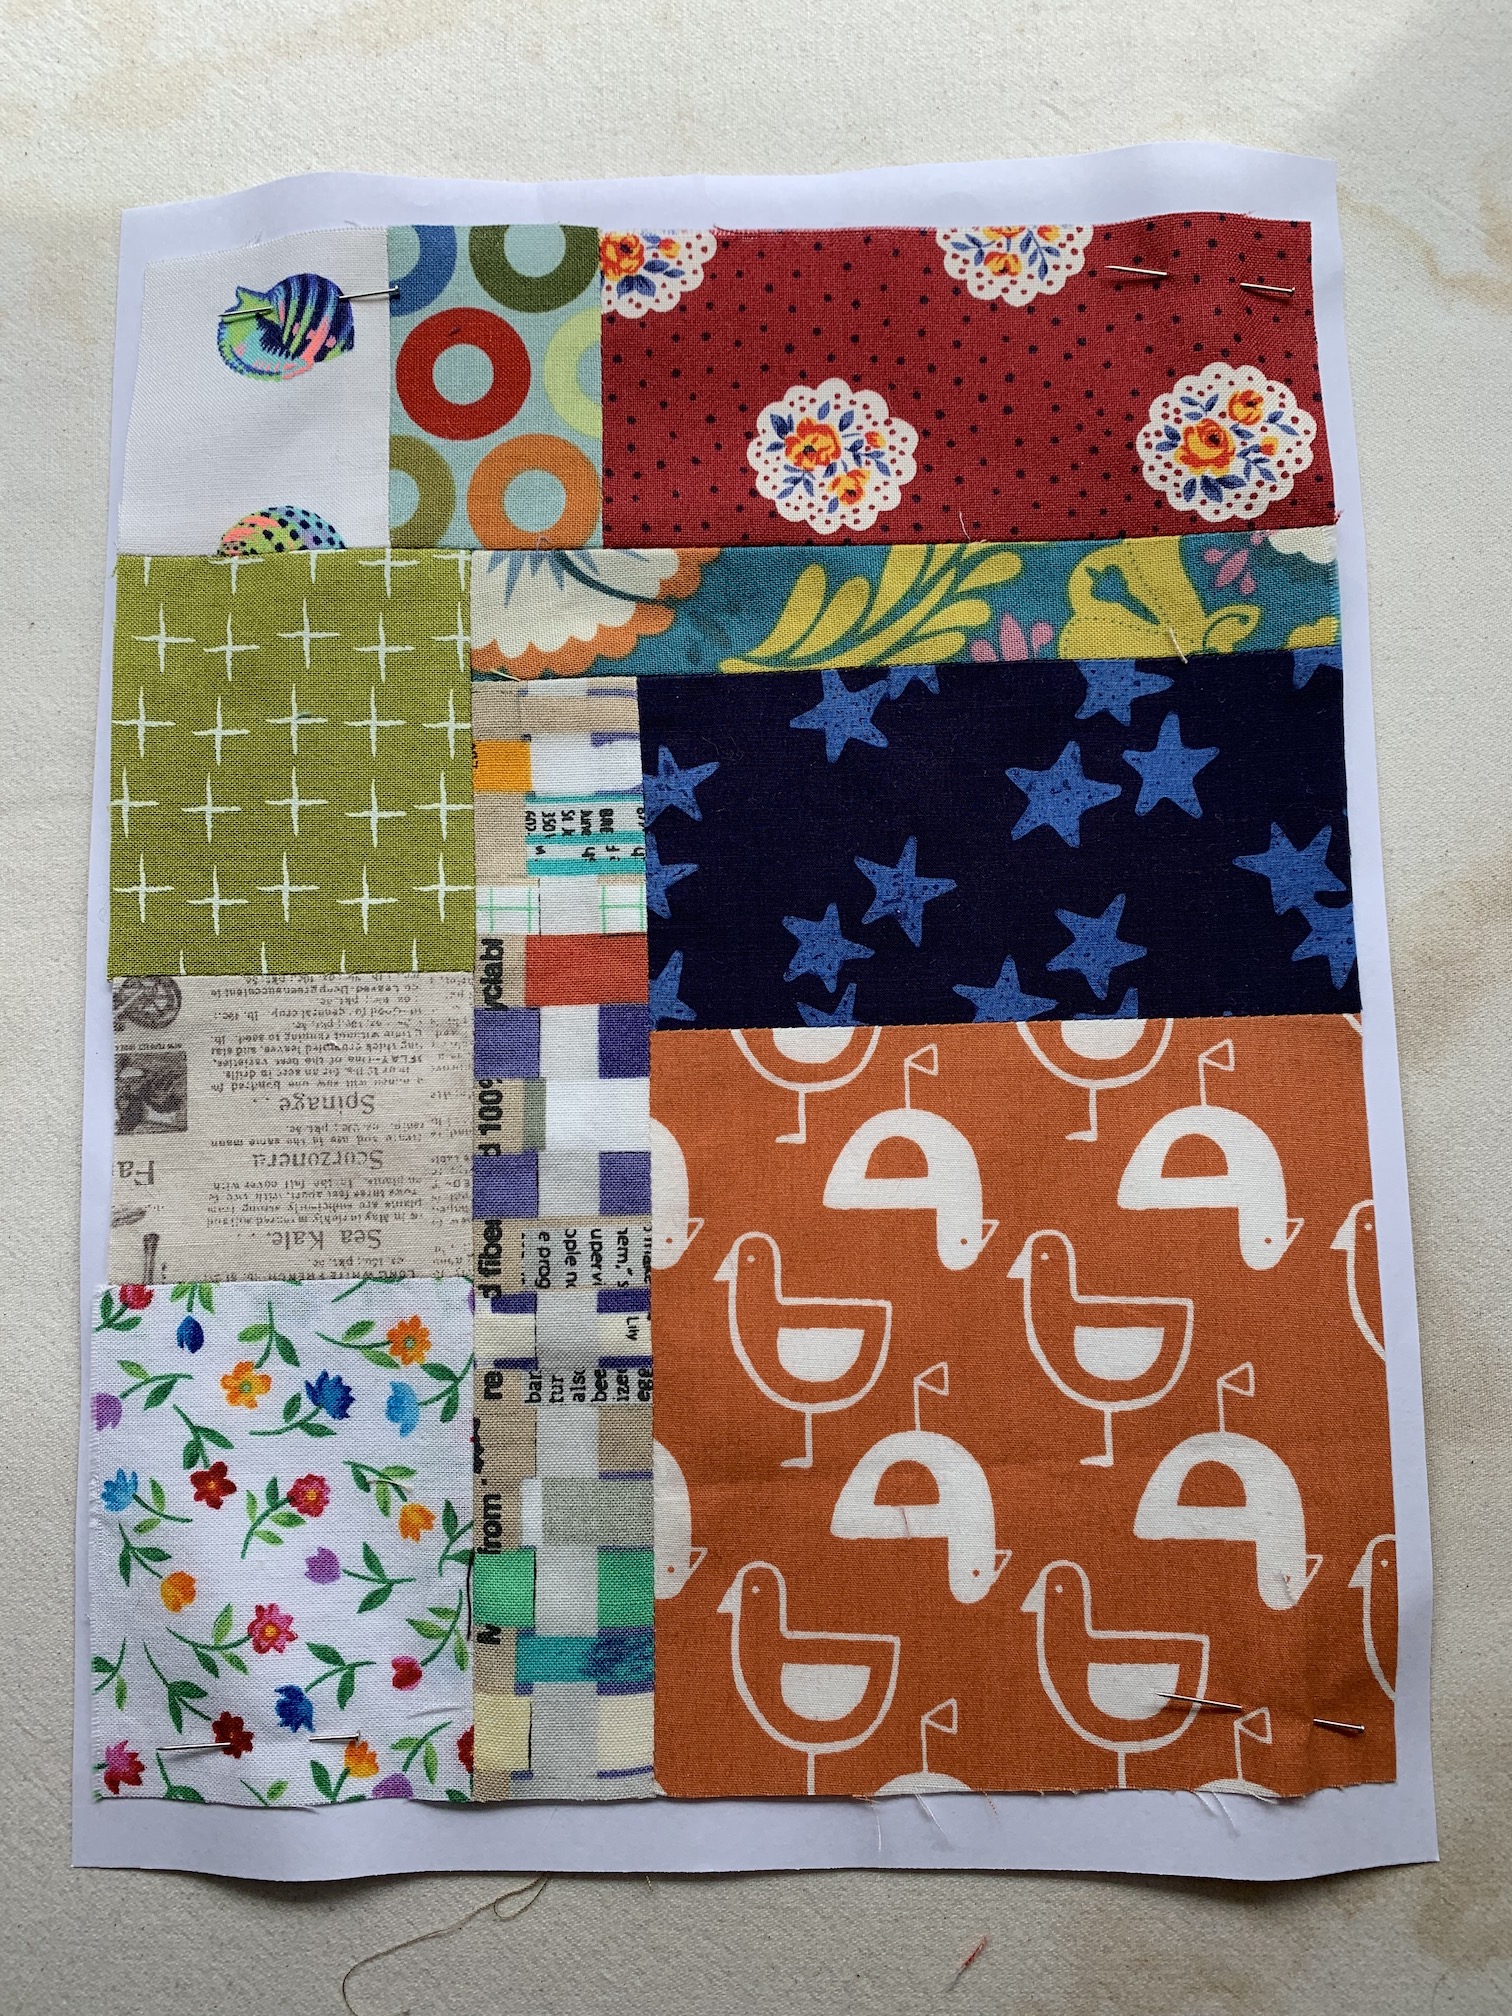
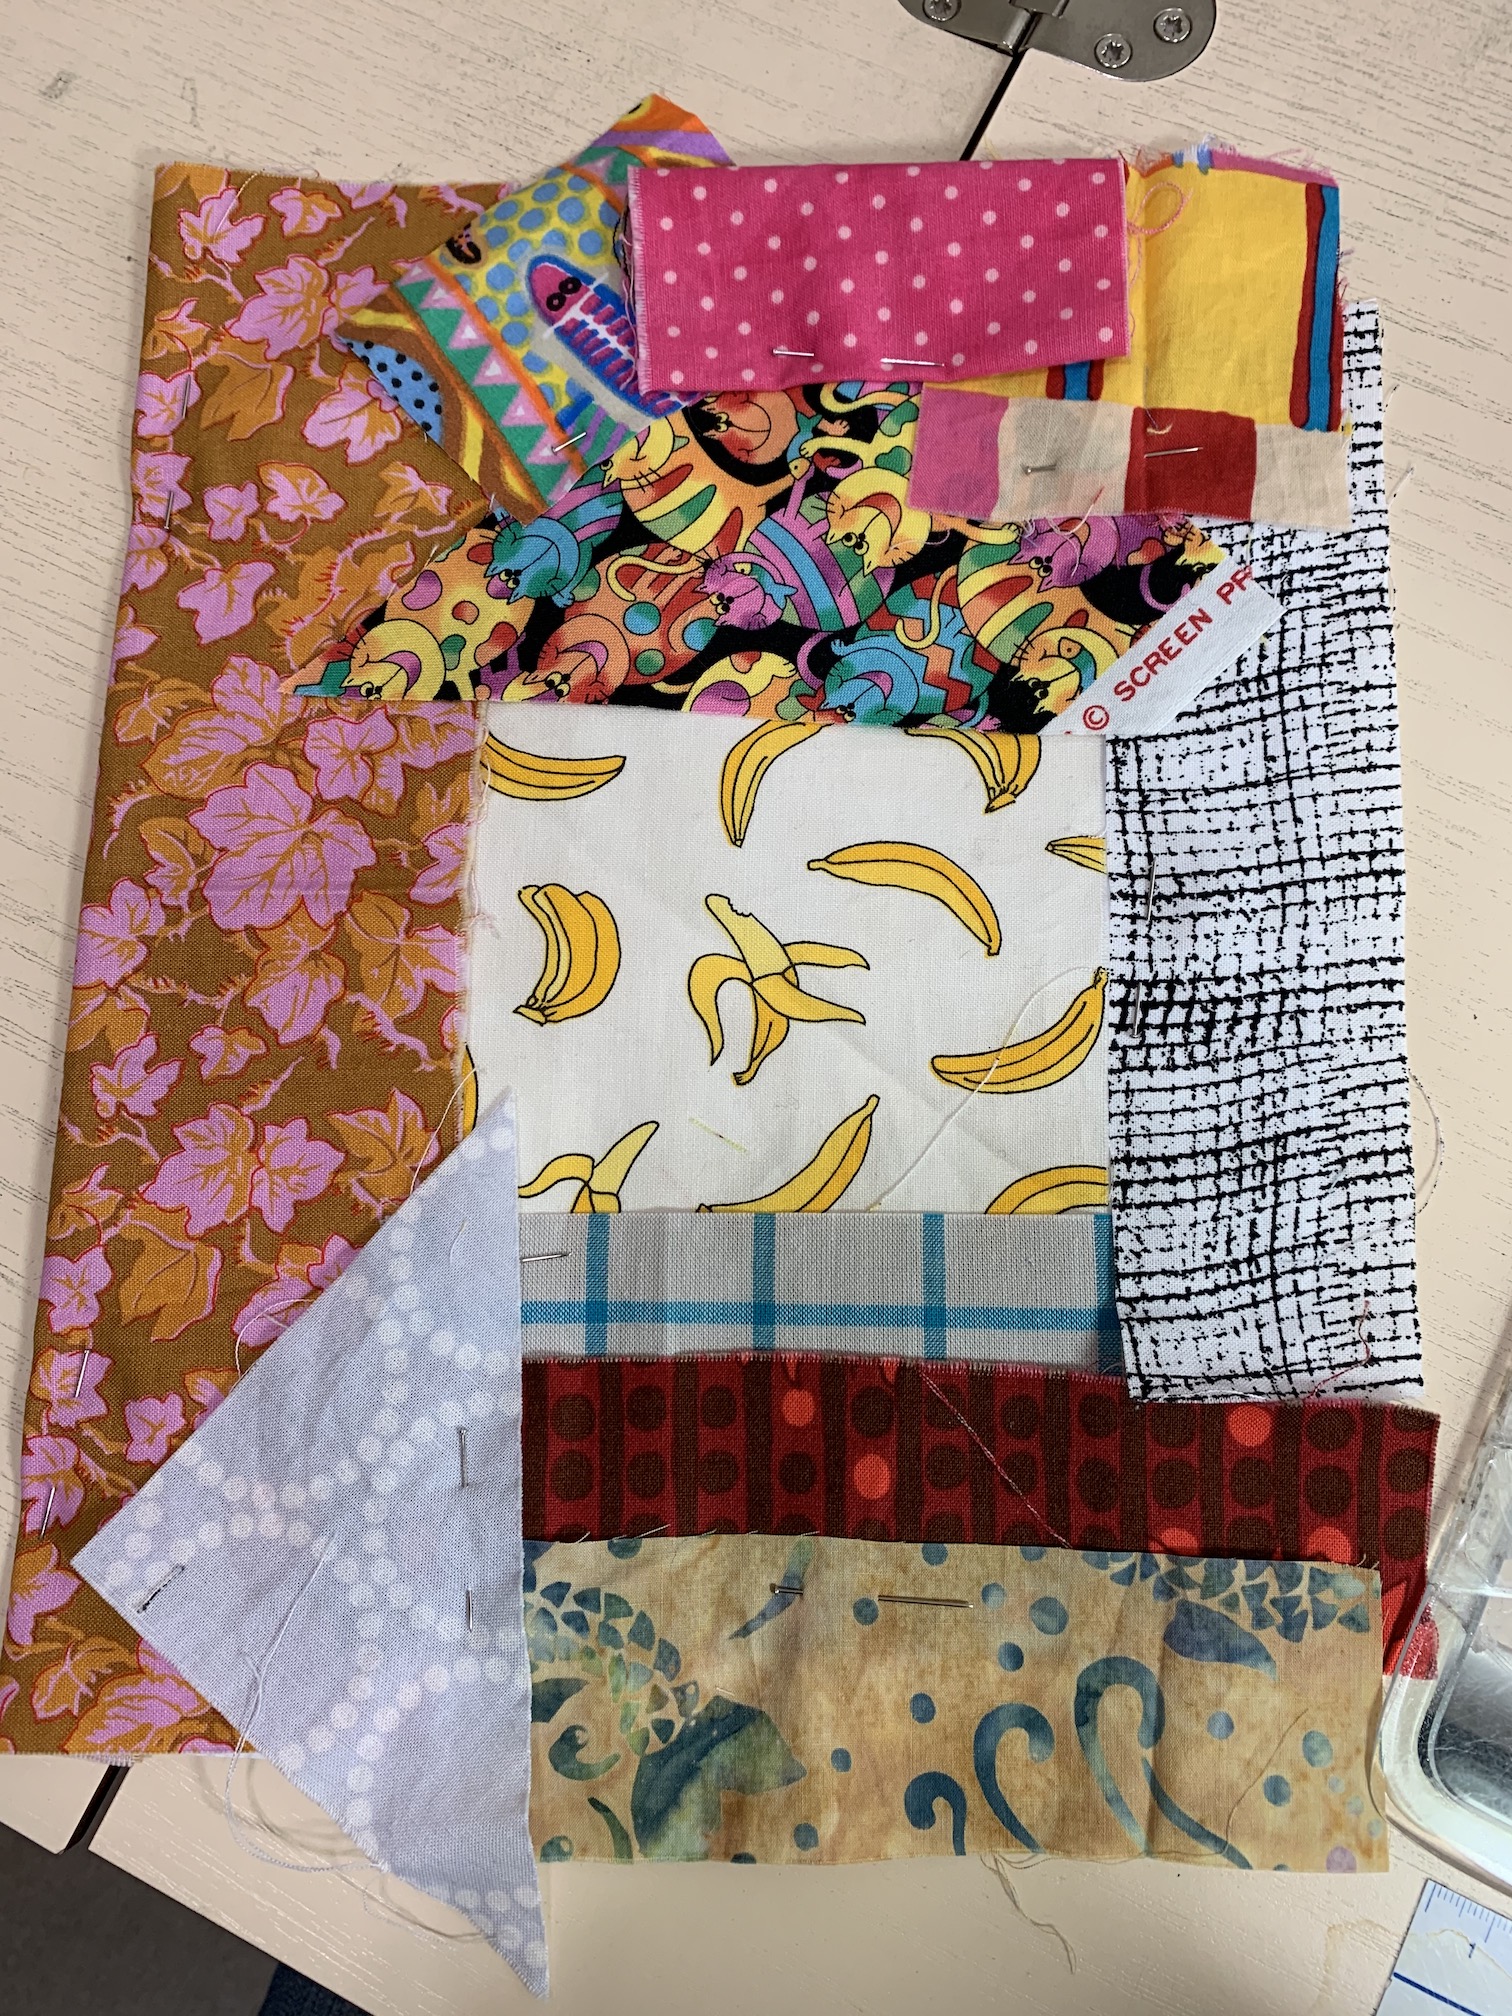
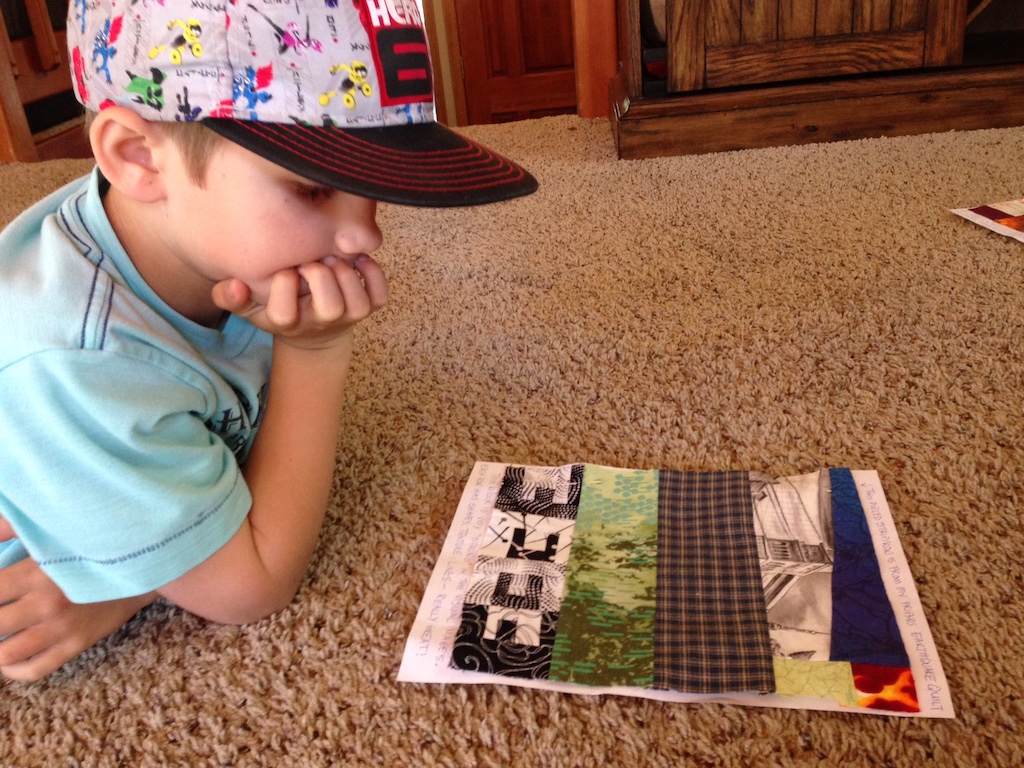
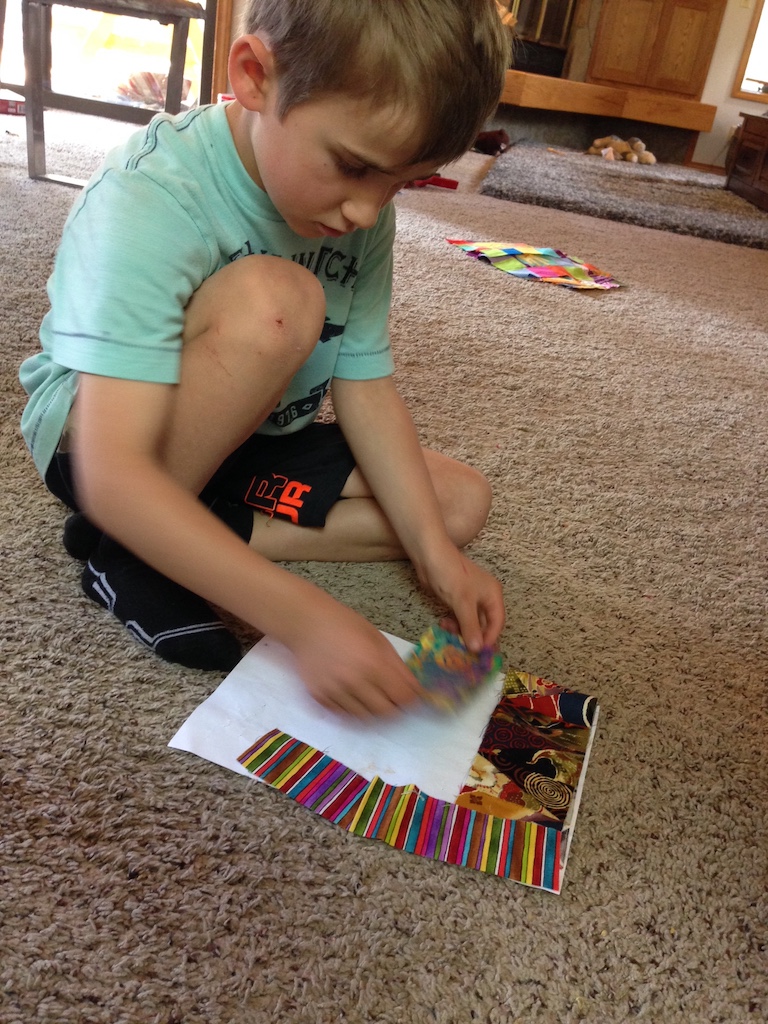
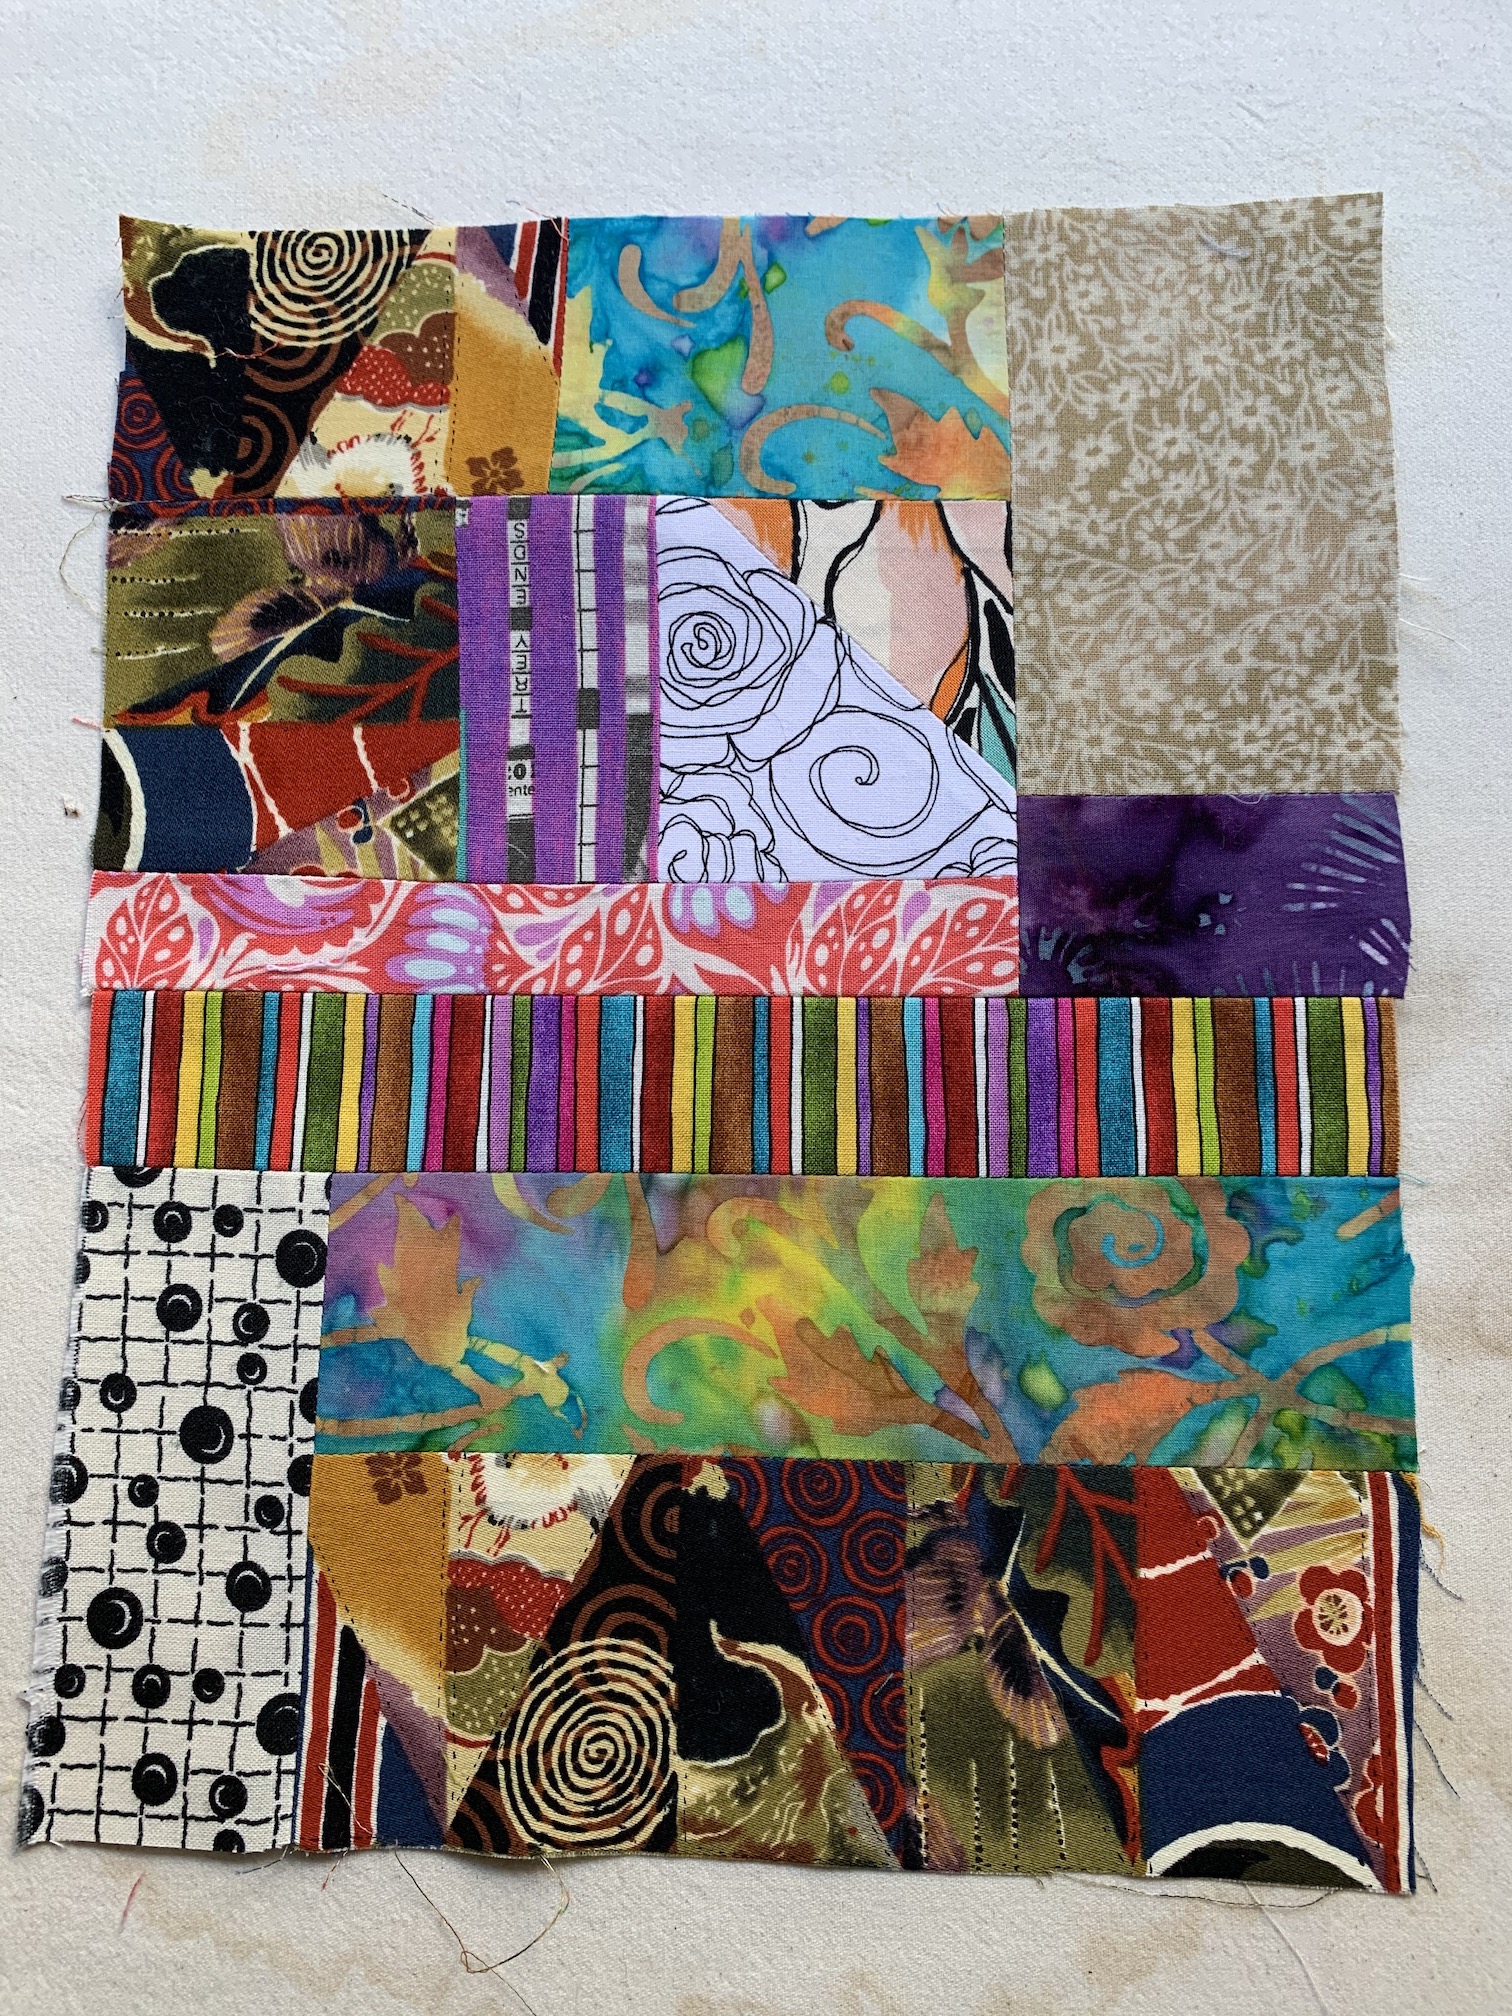
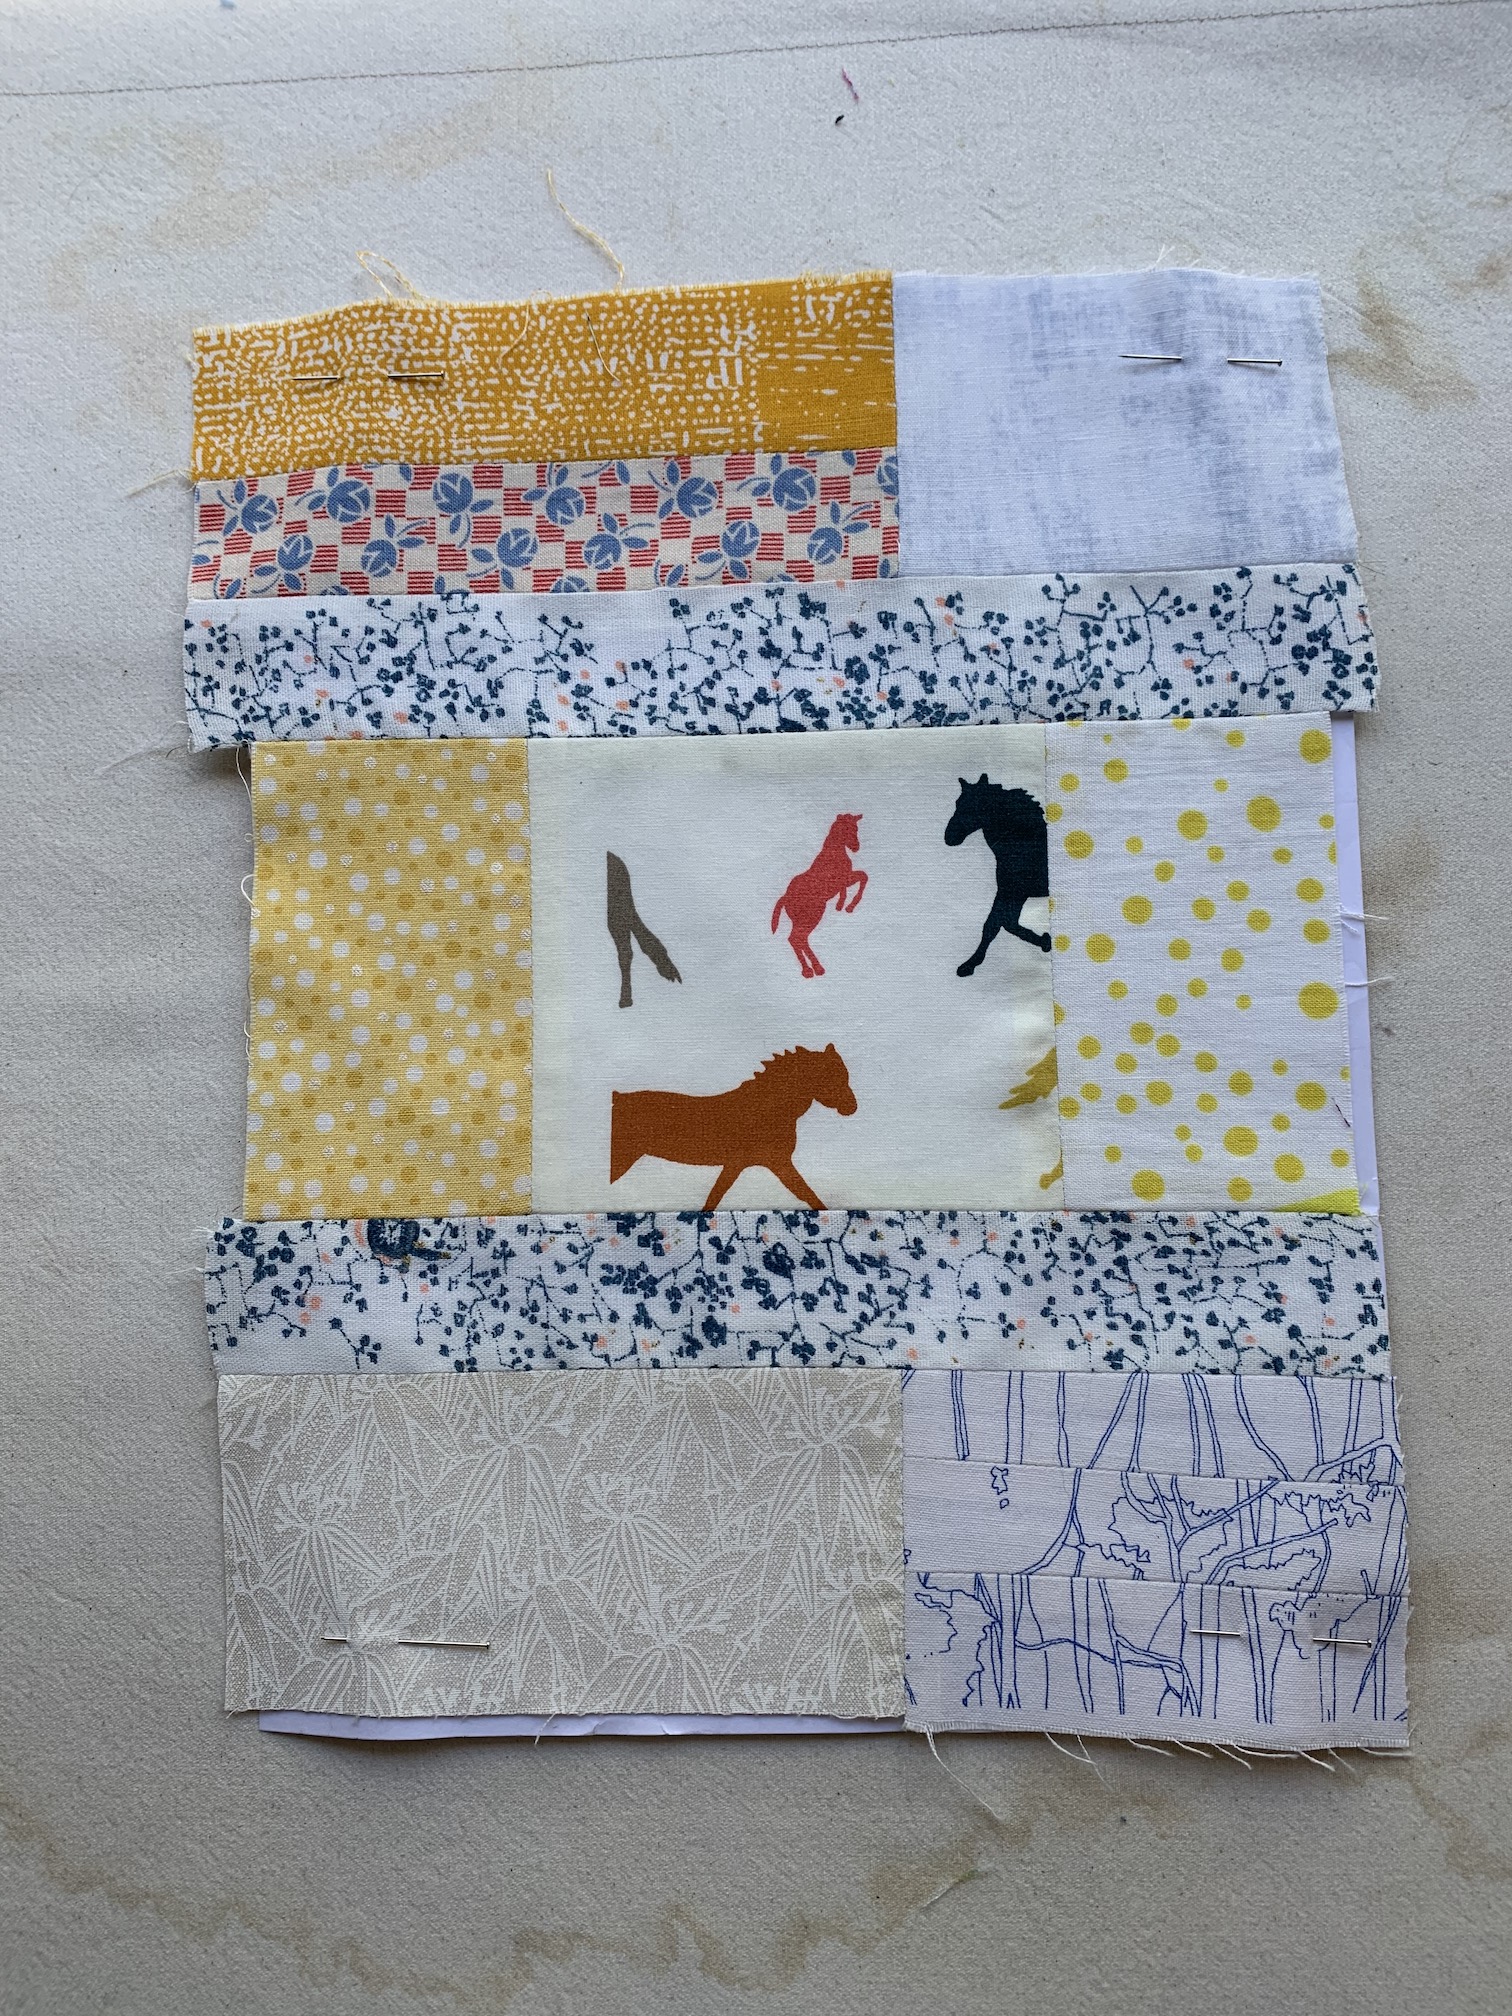
My story about two neighbors who band together (during the pandemic lockdown) left off with “The Boys” arranging fabric scraps on printer paper. We agreed to two blocks per day and soon we had a routine. “The Boys” dropped off their fabric arrangements in the morning, and I dropped off their finished blocks before dinner.
I gave simple instructions: fill a piece of 8 1/2” by 11” paper with fabric scraps. Overlaps of fabric were okay but no gaps.
One day the mother of “The Boys” tucked a note inside the bag:
This is such a fun thing for our family and it’s always a race to the door when they hear your knock.
Some arrangements were easy to sew together. I could sew pieces into smaller units, then assemble the units into a block.
Other arrangements required me to be inventive. Sometimes the seam allowances created gaps, so I had to add fabrics. I added a solid pink to this block. I looked for fabrics that would “go” with fabrics in the arrangement.
Other times I did my best to duplicate the block, always trying to keep the original intent of “The Boys” who arranged the fabrics.
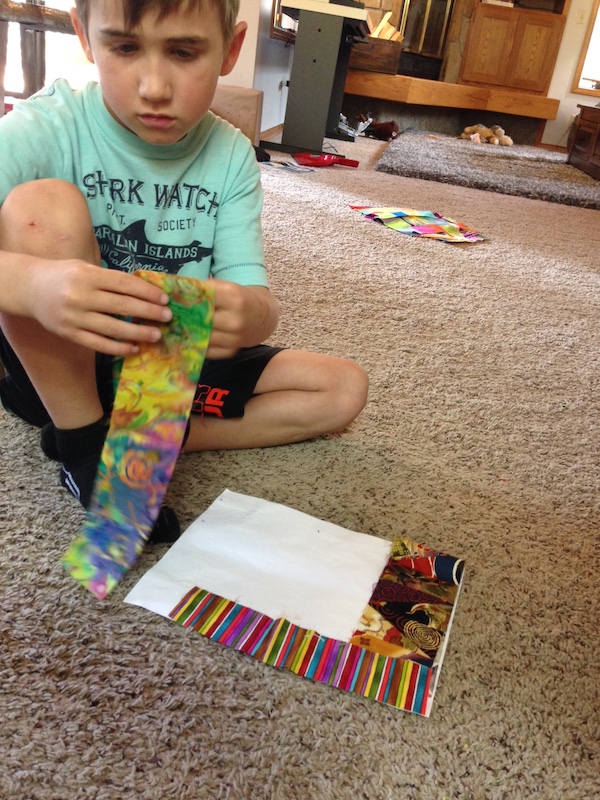
I kept adding more scraps of all sorts to their Big Bag of Fabrics. “The Boys” took time to create just the right assortment of fabrics on their page.
“The Boys” sampled everything! Just like with “quilters” everywhere, their fabric choices reflected their explorations and mood. I was always excited to see what The Boys would drop off next.
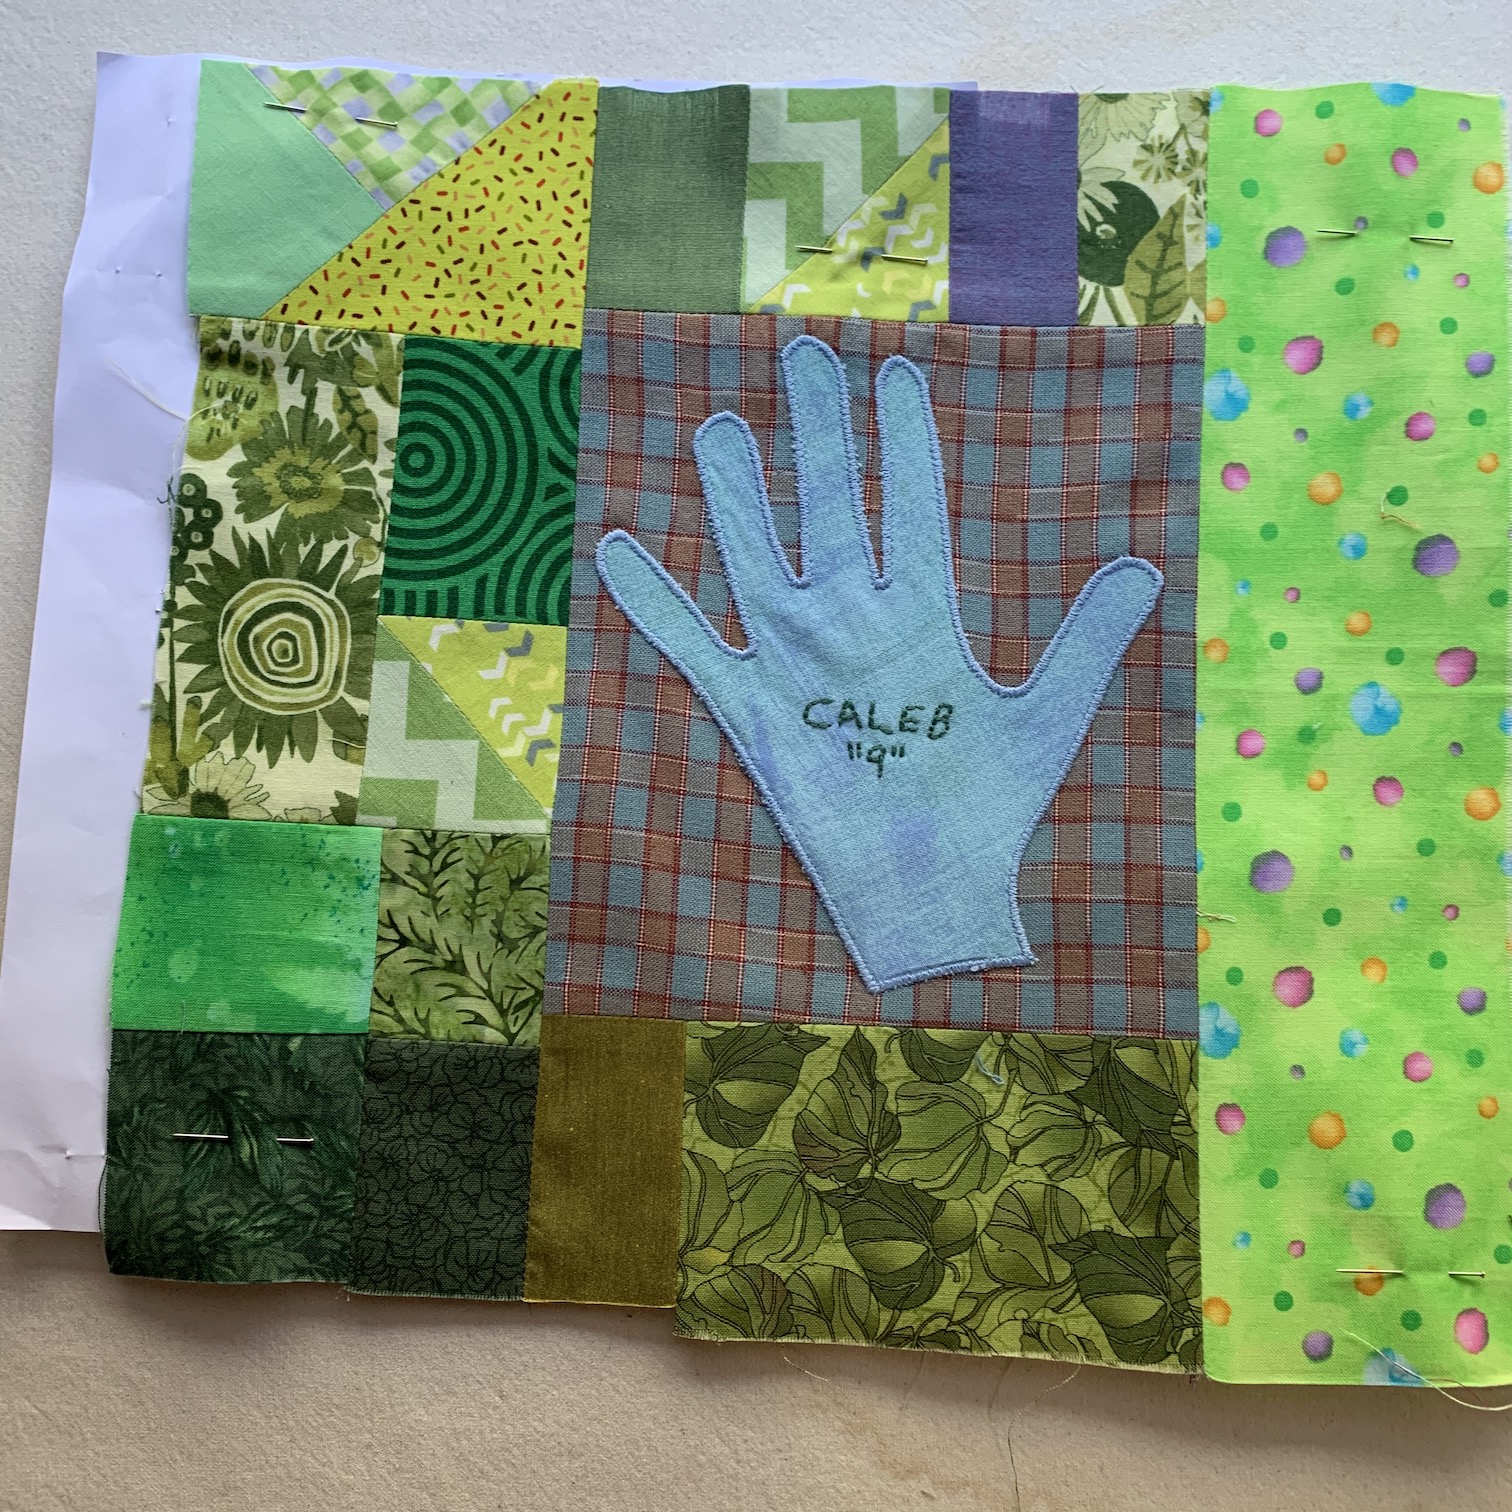
Then this happened: The Hand Blocks! I surprised “The Boys” with machine appliquéd fabric hands (from outlines of their hands taken by their parents). I embroidered their name and age on each hand.
“The Boys” filled the page around their hands with their fabric choices, which I sewed into blocks. I received another written note:
These hands were such a fun idea! The kids were amazed you could do that!
You know how it is. One thing leads to another, and now I thought the adults had to have appliquéd and embroidered fabric hand blocks too. I placed the hands on 4 pieced heart blocks leftover from 2018, which somehow seemed perfect!
The funny thing is that we became closer while we had to live separately during the lockdown. We helped each other out and we even celebrated birthdays out in the yard.
Caleb turned 9 years old around the time my husband David turned 64. We shared chocolate almond cake and sang a joyous round of Happy Birthday together! Yes, we kept our physical distance for safety, but we remained socially connected.
Wendy’s Next Blog Post: Magic! Turning 65 Blocks of All Sizes Into a Quilt Top!
I finished machine quilting my quilt created from a zillion half square triangles (HSTs), most of which were from scrap triangles collected over 15 years, most of which were triangles from the trimming of blocks by other quilters. Hence the name: All the Trimmings.
The quilt measures 57.5 inches by 72.5 inches (146 cm x 184 cm).
Here’s another photo with my partner John holding up All the Trimmings:
As I created it during the Quarantine times, I went ahead and entered it into the call for entry I linked in this post – Quarantine Quilts (call for entry).
I was limited to 50 words, but here is the Artist Statement for the quilt I submitted:
Missing my Quilting Community during Quarantine and inspired by Amanda Jean Nyberg’s pattern “All Sizes”, I created a quilt from 15 years of scrap triangles collected from my quilting friends at quilt retreats and “sew dates”. Most of the scraps in this quilt are from the trimmings of blocks by many quilters as they made their quilts. Instead of going into the trash, scrap triangles compose this cozy quilt.
I am fairly sure some pretty spectacular quilts (and art quilts) have been submitted for this international call for entry and some of the quilts will go to the Houston International Quilt Show, one of the biggest quilt shows in the world.
I have doubts my little HST quilt will be selected but as they say: “You got to be in it to win it” – ha! (and it was free to enter).
The rules say the makers of the quilts selected will be notified no later than July 10th. I will let you know the outcome.
For now, the quilt is keeping me company on my favorite chair in the living room.
You might notice that the quilt Seattle Scrappy (see post Update on Seattle Scrappy) is sitting in the chair also – I am still working on hand quilting it (and wow hand quilting a lap size quilt takes MUCH LONGER than machine quilting it!).
Postscript
Speaking of “Quarantine Quilts”, a friend of mine has been working on an incredible quilting collaboration project with some children in her neighborhood and I hope she will share with us this project in a future guest post. Every time I look at images of this quilt in progress I get a huge smile!
I thought I would start with my fabric scrap collection for my first non-mask project in my “new” studio.
I have long history of fabric scrap addiction (yes I am that person at a quilt retreat who stops people from throwing out their larger scraps in the trash and offers to “adopt” them) and so I have quite the collection of fabric scraps.
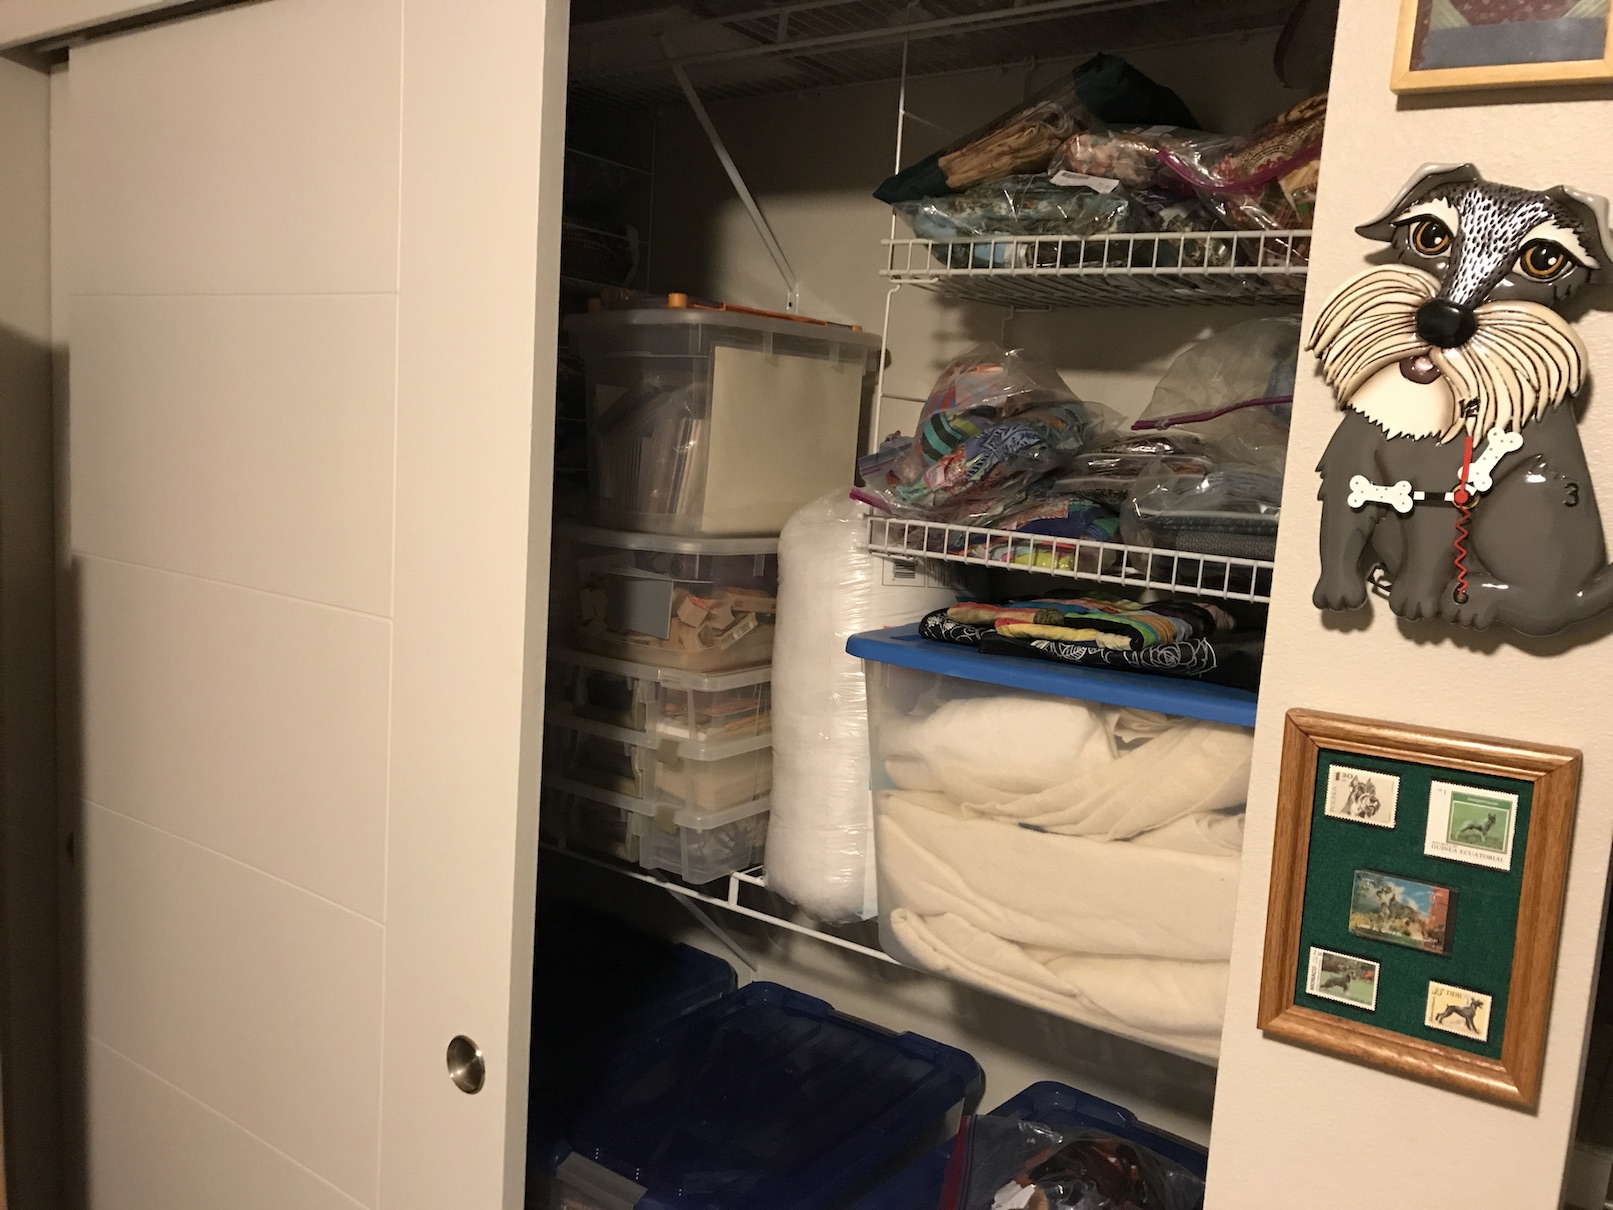
I keep them organized in bins at the bottom of the IKEA bookcases in my studio:
These bins contains scraps organized by color.
I also have them organized by themed collections of scraps in bags stored under my cutting table:
One of these collections, is a collection of scrap triangles, most given to me by other quilters when they trimmed these triangle when piecing blocks for their quilts. The triangles are in various sizes.
By sewing two scrap triangles together, I can created a scrappy “half square triangle” (HST) which provides many design opportunities. This is what I did with a bunch of scrappy fabric squares which I turned into HSTs back in Spring 2018 (see post Pillow Popping with the Untethered Soul), and created a pillow top:
I do have a basket of fabric scrap squares that I could have used to make HSTs for the project I am about to tell you about:
But I’ve decided I want to start using (and cleaning out) my ridiculous collection of themed bags of scraps (mainly given to me by other quilters) and my scrap triangle collection had gotten out of control.
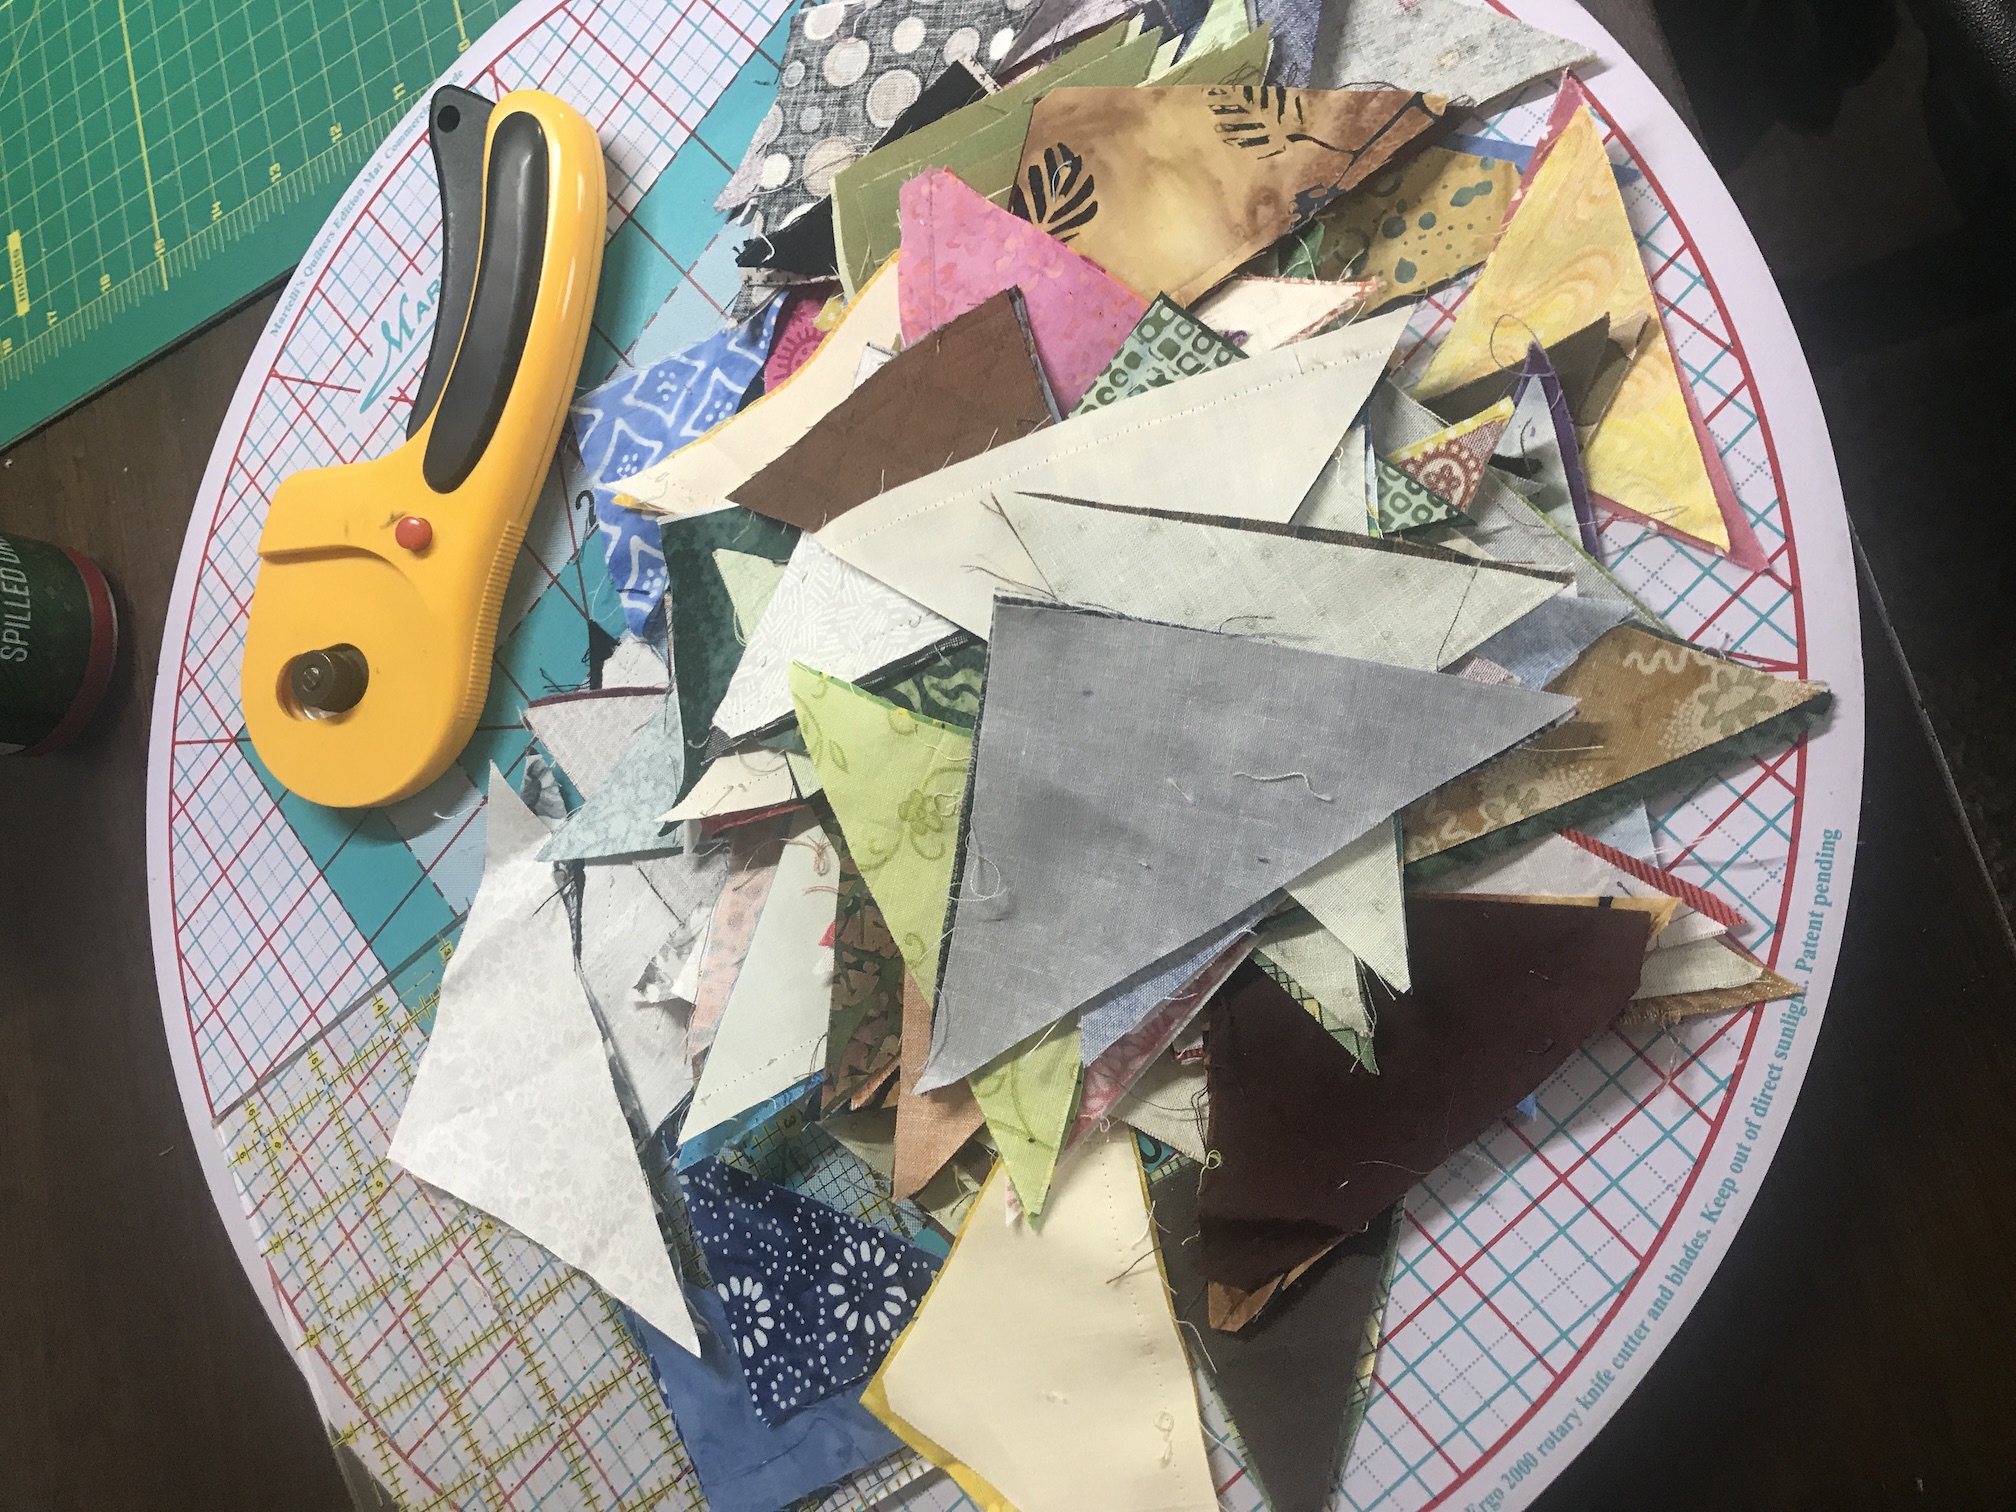
So I dumped the entire collection of fabric scrap triangles onto my cutting table:
And pulled out this awesome book by Amanda Jean Nyberg, No Scrap Left Behind, for ideas.
I found a pattern in the book called All Sizes which uses several different sizes of HSTs to create a scrap quilt with smaller HSTs progressing to larger HSTs.
I did not want to violate copyright laws by photographing the quilt pattern inside the book but I did find an image of the quilt on Pinterest:
Image credit: Pinterest
The pattern instructs you to create HSTs the standard way from two contrasting squares (if you’ve never made HSTs or are not quilter, here is a link by Blossom Heart Quilts explaining how HSTs are commonly made – HST Tutorial). However I decided to manually make HSTs by sewing two scrappy triangles together.
So to make this happen I had to sort my giant pile of scrap triangles into light and dark in order to manual create the HSTs (to get a nice contrast with a HST you use a light fabric and a darker fabric). The process was tedious but fun (I listened to great music while sorting, sewing, pressing/ironing. and trimming).
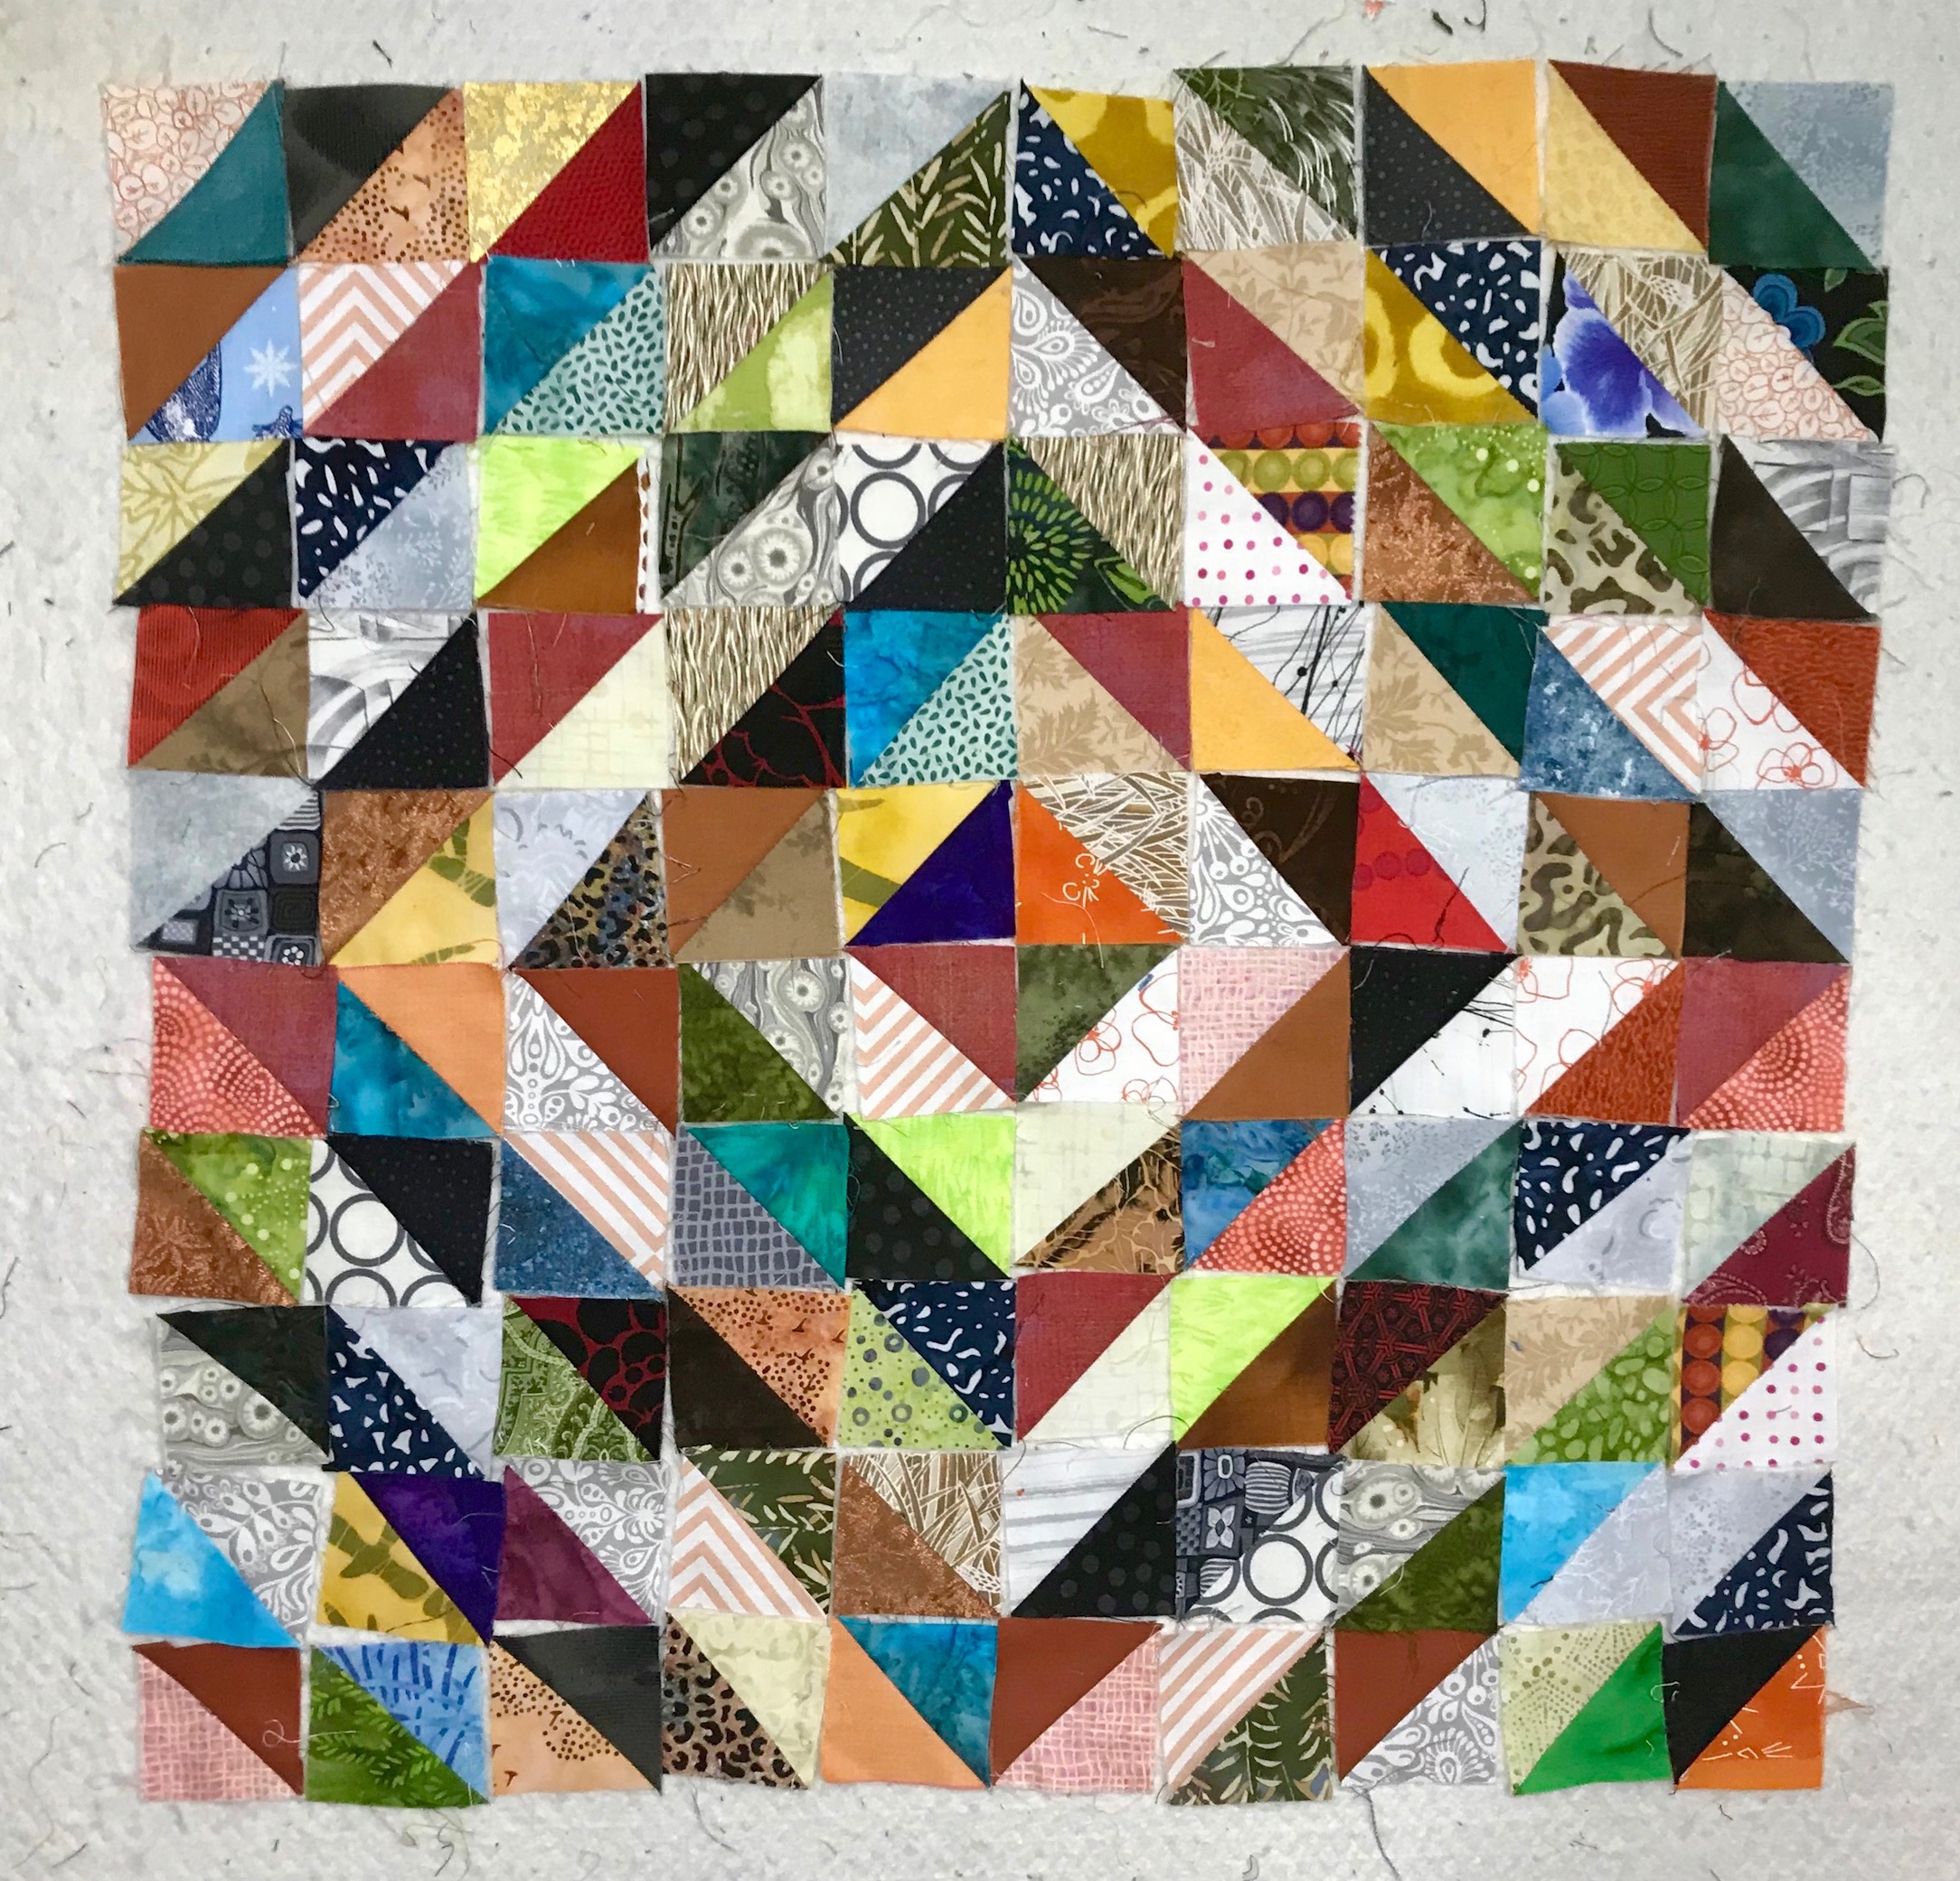
Eventually my “hot mess” of scrap triangles, turned into this on my design wall:
No it doesn’t look anything like the pattern of the Pinterest finished quilt image I shared above but it is in progress. Initially I placed the HSTs in size order on the design wall but my organization fell apart after a while of trying to just randomly get all the HSTs I’ve made onto the design wall (to get a sense of how many I’ve made so far).
Also, you might have noticed that the Pinterest finished quilt image has white as the light on the HSTs. I’ve was very loose in my interpretation of “light” to contrast with my darker triangles. I did not have many white/cream or other light colored scrap triangles. So I had to use medium fabrics often as “lights” and you will see some bold fabrics in the mix (like deep/strong yellows, etc.) as “lights”.
But hey – it’s going to be a very scrappy quilt!
When the quilt top is complete, I am going to toss any remaining scrappy triangles. They were originally headed to the trash bin before I rescued them. It is okay if some now make it to the trash.
I think there will be very few scrap triangles remaining when I am done; and I think this is a one time scrap quilt experiment with scrap triangles. (Next time I make HSTs it will be using contrasting squares)
And I plan to say “no thank you” when other quilters offer me their scrap triangles in the future!
Postscript
I am still hand quilting Seattle Scrappy (see post Seattle Scrappy (What’s on the Design Wall)) in case you wondered what became of that piece. I keep it on the stairs railing next to the recliner I sit in when watching television in the living room, so it is always handy to work on:
Hello there, thought I would give you an update on my freeform log cabin scrap quilt “Seattle Scrappy”.
First here is a quick recap.
I began piecing this quilt in early January 2020 while attending a quilt retreat, from a bag of gray fabric scraps my friend Dana shared during the retreat; and initial made around 140 blocks:
When I returned home, I trimmed these blocks to 5′ x 5″ (12.7 cm x 12.7 cm) blocks and began piecing them together and musing over how to finish the quilt including whether to machine or hand quilt it, etc.:
Last weekend I finished the quilt top and decided to hand quilt it! So I laid it out on the floor of my bedroom (also known as the “design carpet” – see post What’s on the…Design Carpet) and pinned it:
Here it is ready for hand stitching:
I bought a couple spools of gray Perle Cotton for hand stitching (I am not sure how much I need yet and did not want to over-buy):
And I’ve started stitching:
The quilt measures around 60″ x 60″ (152.4 x 152.4 cm) and it is going to take a while to hand quilt it, even with using large Kantha-like stitches.
I had so much fun piecing this quilt from scraps, I am itching to start a new scrap quilt. Although most of my fabric (yardage and pre-cuts) is packed up in anticipation of my move to a new house in the next couple of months I still have access to most of my scraps.
This book in my craft book library (which I have not completed packed) caught my eye…
And I am tempted to start something from this book…
Also I have a couple incomplete (less than 5″) freeform log cabin blocks and scraps left over from making “Seattle Scrappy” and I am trying to decide what to make with them – perhaps a pillow cover or a pot holder or something…
I’ve decided to name the freeform log cabin scrappy quilt I’ve created from my friend Dana’s scraps (see post What’s on the…Design Carpet) – “Seattle Scrappy”.
The name was inspired by the scraps coming from the Seattle area and that it is gray and in Winter it is fairly gray in the Seattle area.
Above you can see my current progress on the piece. I am nearly done with the top, I just need to frame the whole thing in rows of dark framed blocks.
This was my original concept – a center dark shape, created by freeform log cabin blocks with dark gray outside borders:
Then I would add lighter gray bordered freeform log cabin blocks around these blocks to float the center shape. However, as the black and white image I took of the quilt, the concept got a little muddled:
But you can still sort of see the concept and make out a darker shape floating in the lights blocks (I hope!)
I am hoping adding in a border all around of dark gray framed blocks will help my center pop a little more. A quilting friend said the piece looks like an aerial view of a city – I hadn’t thought of that!
More to come on “Seattle Scrappy” and I am currently trying to decide when I finish it, whether to:
Have it professionally quilted (a.k.a. “quilting by check”)
Do you remember the free large table I got from a community for sale board? Well I put risers (to make it “counter height”) on it and turned it into a large cutting and project table in my temporary studio (until I move to the new house in progress of being built some time in April):
I then snugged my sewing machine against the table to create a yummy temporary “Creation-Station” (patent pending? can I market that!??!):
Now I can comfortably watch the telly (well Netflix, ha!) while I sew.
I also added some quilts about the house. As I mentioned in a previous post, the house became sort of minimalist (and kind of sterile) when we staged it for the real estate sale photos that a professional photography came and took for the future real estate listing.
Since have delayed putting the house on the market until mid/late March, I was getting weary of living in basically a “model home”.
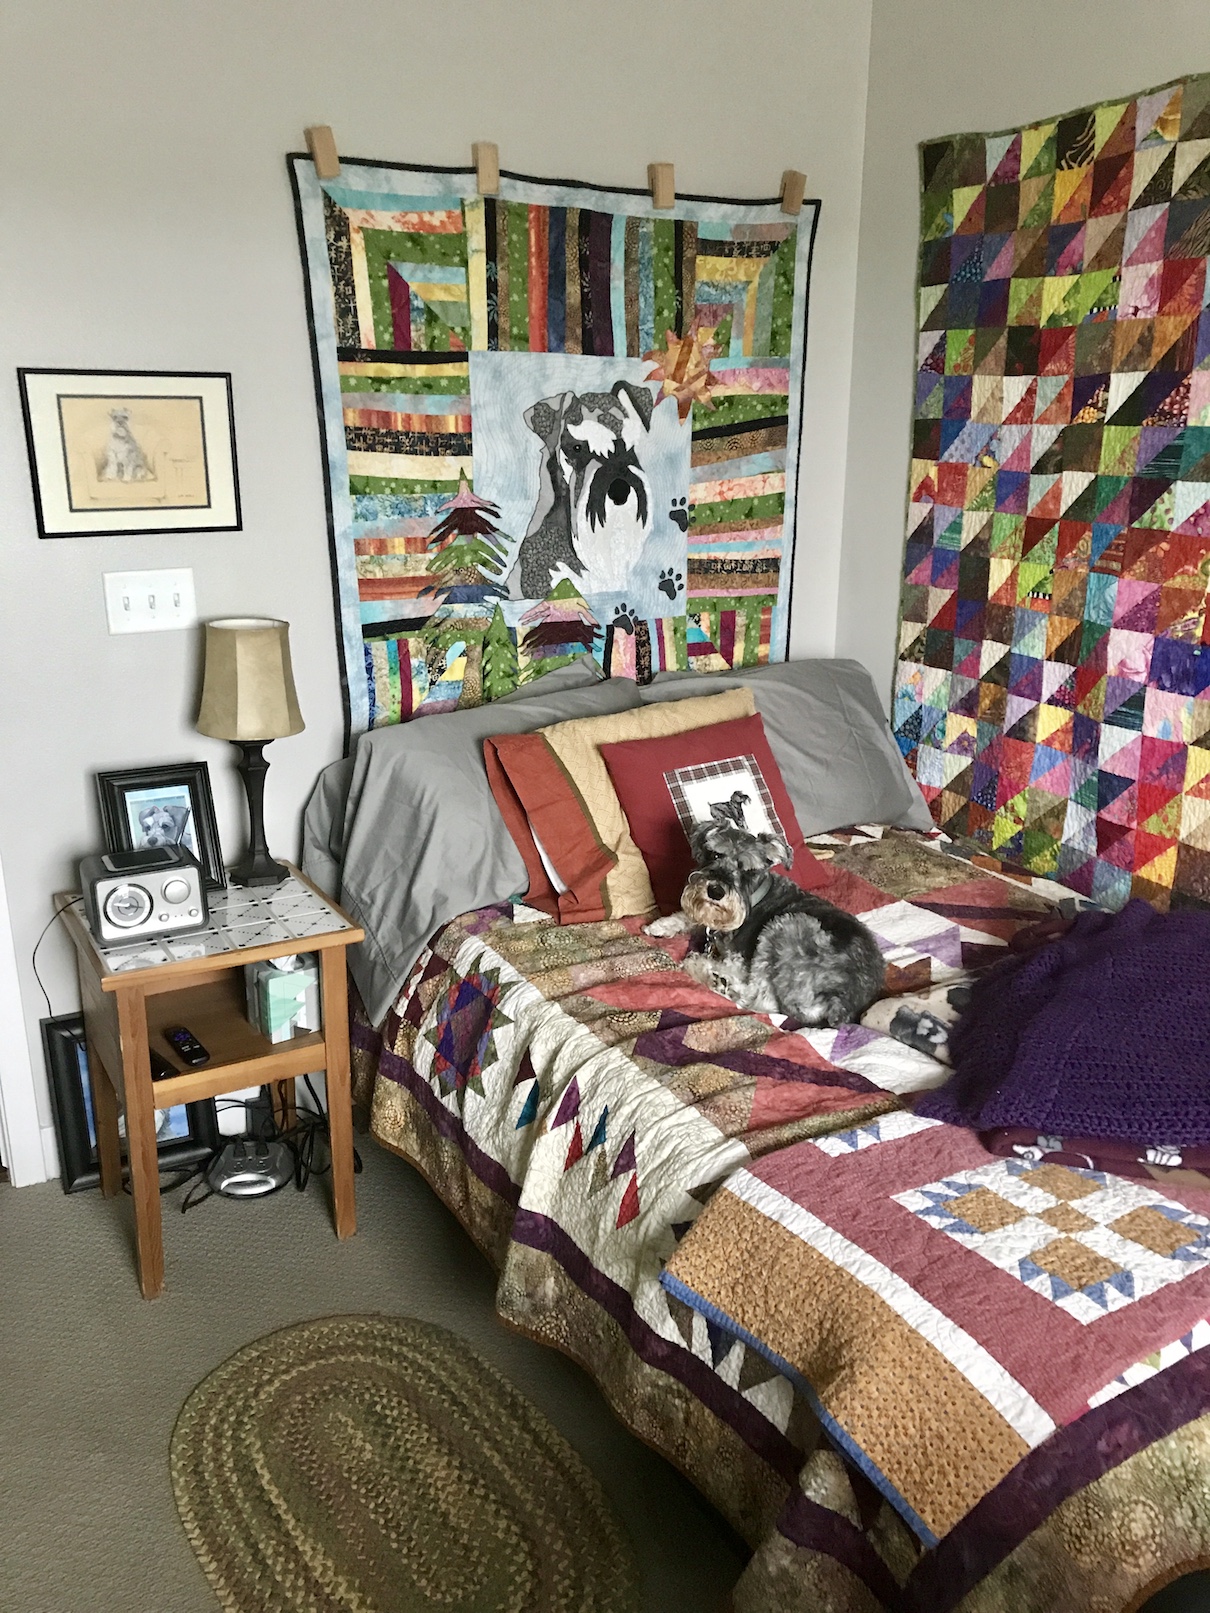
So I pulled out some of the quilts I had stored away and put them up on the wall with Command Strips!
And I placed an old quilt at the end of the bed where Mike my dog hangs out in my temporary studio while I sew:
It’s been a while since I’ve added anything to my series of posts: “What’s on the Design Wall”, about my current project up on my design wall.
However as my tierneycreates Beastie shared in the post Guest Blogger: What the heck is going on here? , my studio is packed up and turned back into a bedroom for staging the house I currently live in for sale.
Not having a design wall up on the wall has not stopped me – I’ve discovered: The Design Carpet (patent pending, ha!).
But let’s back-up a moment, and tell you how this piece began and got to this point…
I brought a couple hand work projects from my basket of hand work (see post Inside the Basket ) and had EVERY INTENTION of only working on my hand work projects.
But…
My dear quilting friend Dana brought an extra sewing machine (one her her Berninas, and I love Berninas) and a BAG OF GRAY FABRIC SCRAPS for me to play with – oh no!
As you saw in the “From the Basket” post, I did work on my English Paper Piecing rosettes, but after a while I put them aside and STARTING PLAYING WITH THE GRAY SCRAPS! (I could not resist the temptation to play with fabric scraps)
Before you know it, as I shared on @tierneycreates on Instagram, I began creating freeform pieced/improvisationally pieced log cabin blocks (also known as “log jamming”):
And before I knew it, I had a pile of 138 blocks I made!
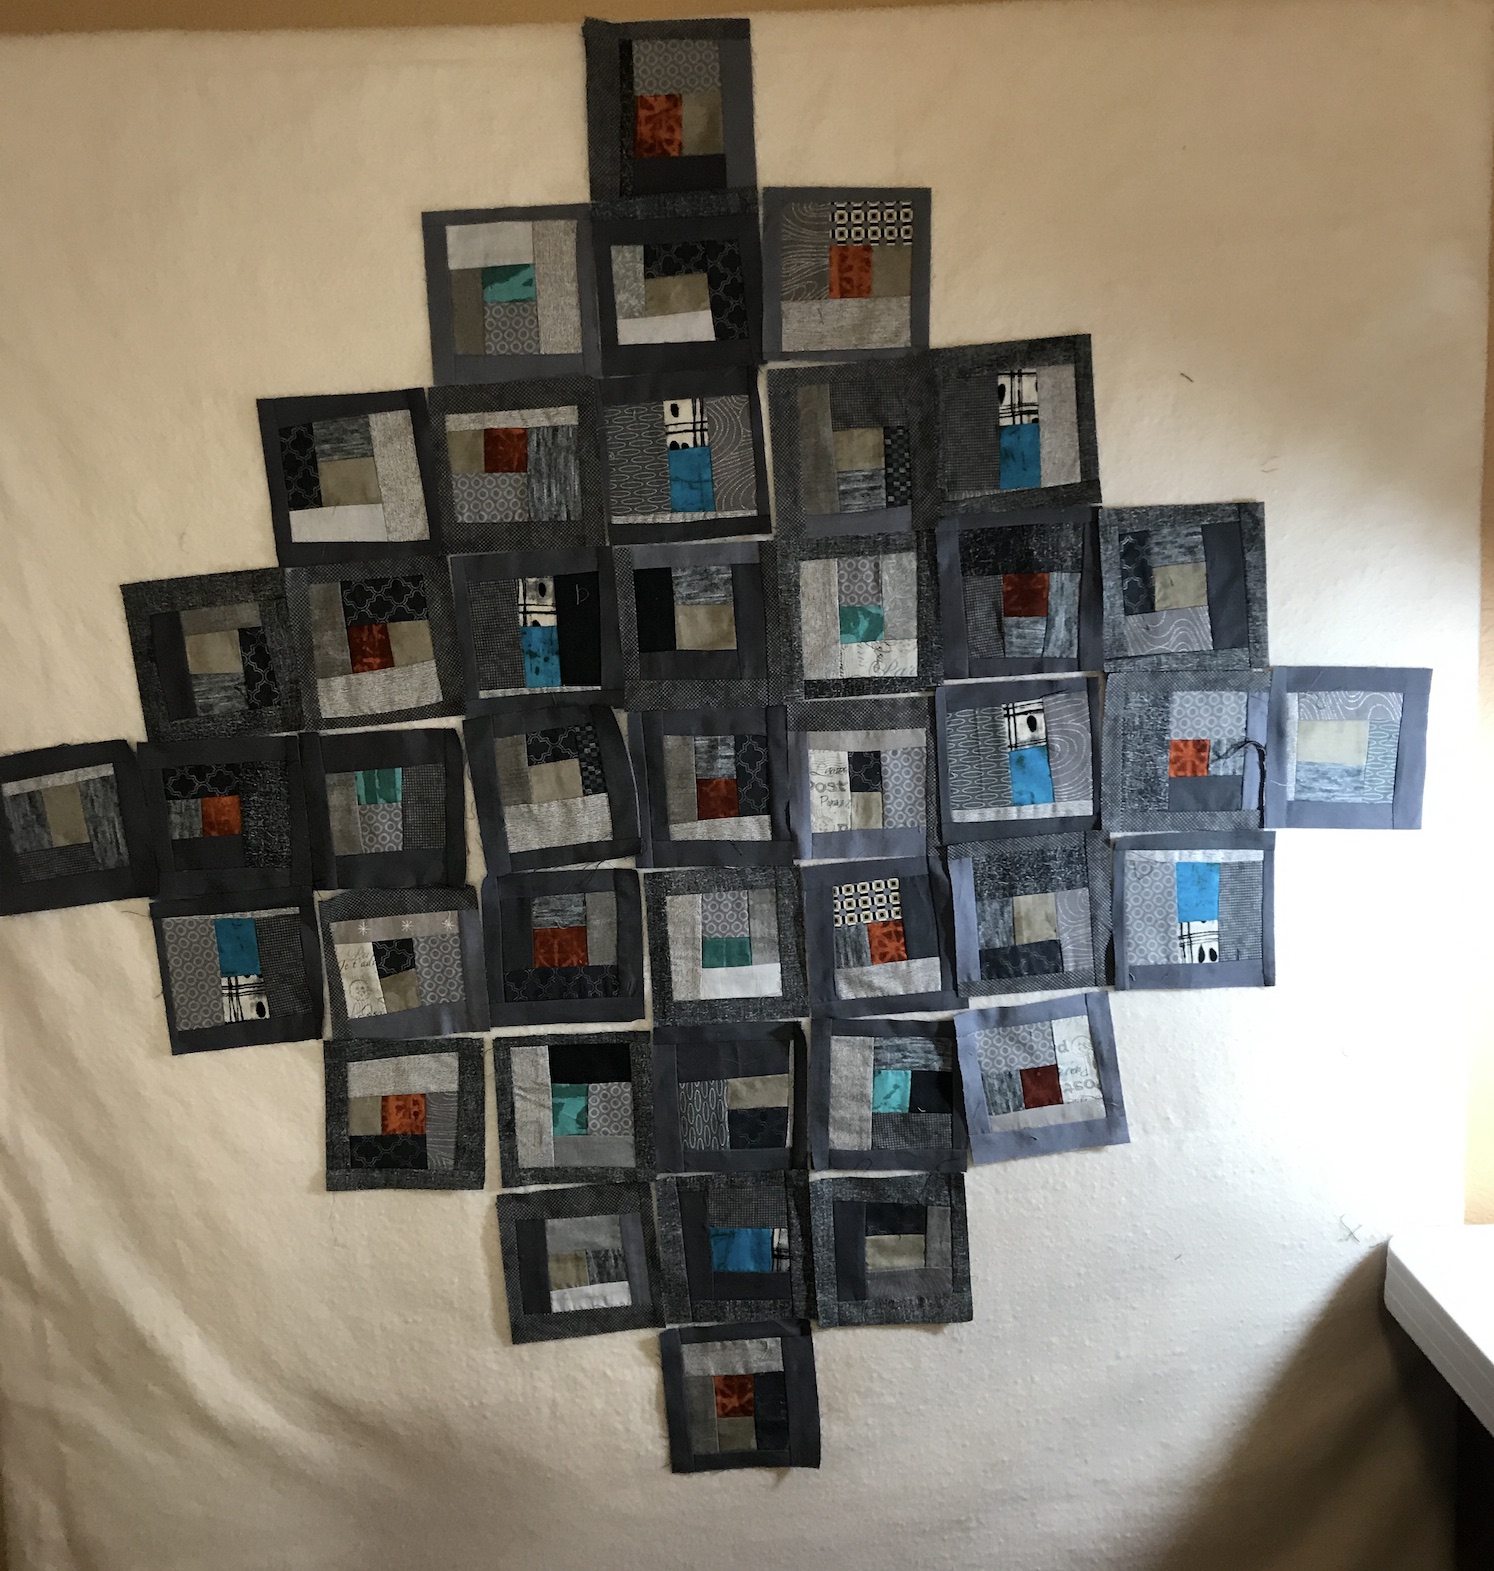
Once I got home, I could not wait to play with them and see what interesting pattern I could make with the dark gray and light gray framed blocks, So I decided to use the “Design Carpet”:
I began with creating a pattern with the dark gray framed blocks:
Then I worked on framing them with the light gray blocks:
I like the effect with the dark gray floating in the lighter gray blocks.
Since I took these photos, I’ve made additional progress and pulled out my sewing machine from the storage room (where you hide everything when staging a house for sale)!
Let me make a bit more progress on the piece and I will share in a future post!
Postscript
Let me know if you think I can patent the concept of the “Design Carpet” and make millions on my late-night infomercial selling “Design Carpets” and quit my day job and just sew all day!
“You can own your own Design Carpet for 5 easy payments of $99.99!
But wait, there’s more:
Buy one Design Carpet and get a second one for only $99.99 plus shipping and handling.”
These two topics – Oh, Scrap, Part II and New “Studio” Tour, were going to be two different posts but I decided to combine them into one post since they are sort of tied together.
I’ve been getting settled into my new apartment in the greater Denver metro area and I guess I’ve completed my series of posts “Colorado Bound” as now I am in Colorado!
I’ve never lived alone in my entire life, so it has been a huge transition now living alone, but I am trying to embrace it and enjoy that I can set up my apartment however I desire.
Those of you who’ve followed my blog for a long time (some of you for over 5+ years) might remember what my craft/quilt studio area looked like in my former Central Oregon home (which by the way has sold and is now someone else’s home). It was in a small back bedroom in my three-bedroom home, but it worked for me.
Now living in a two-bedroom apartment my best choice for a studio area was to turn my second bedroom into a guest room/studio area. I will give a little tour of that new space in this post, but first I want to share a follow up to post from January 2018 – “Oh Scrap“.
Oh Scrap, Part II
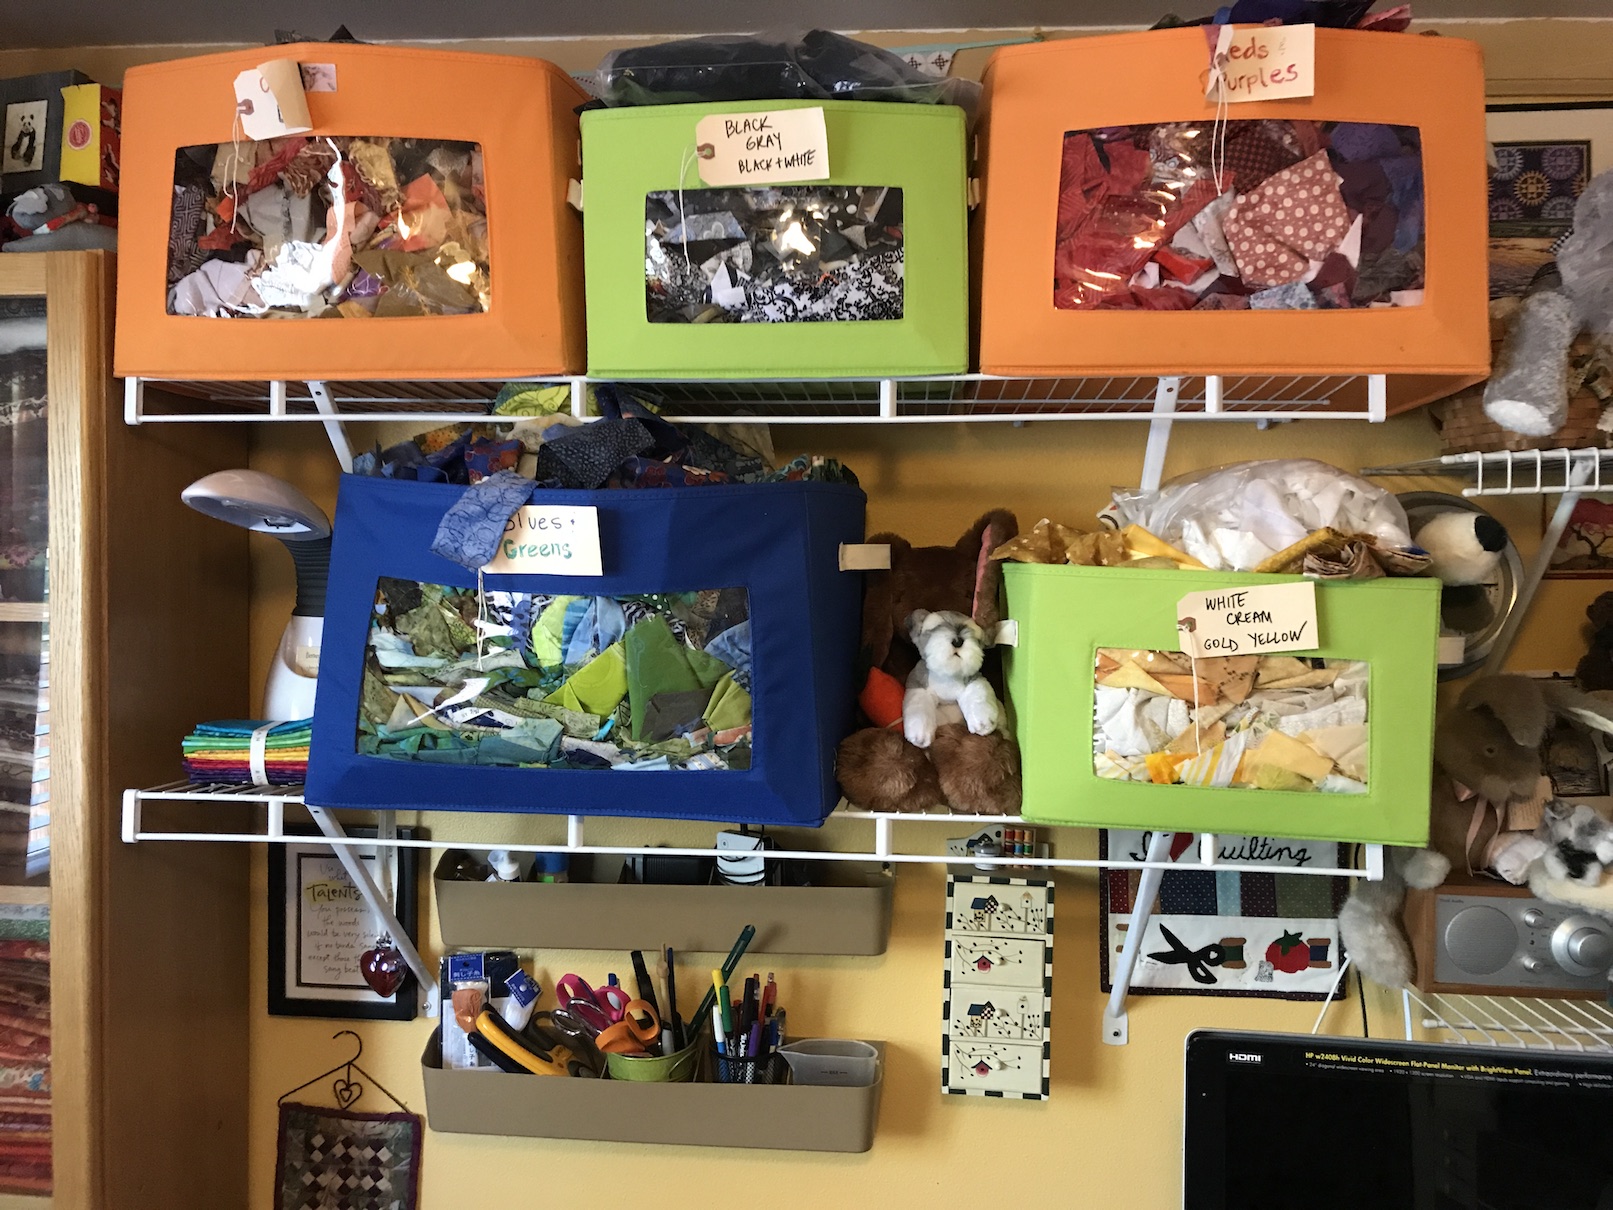
It is always an ongoing challenge to find the best way to organize my…extensive? ridiculous? pathologically large? fabric scrap collection. I’ve experimented with various iterations of fabric scrap organization including organizing them by color into boxes like these:
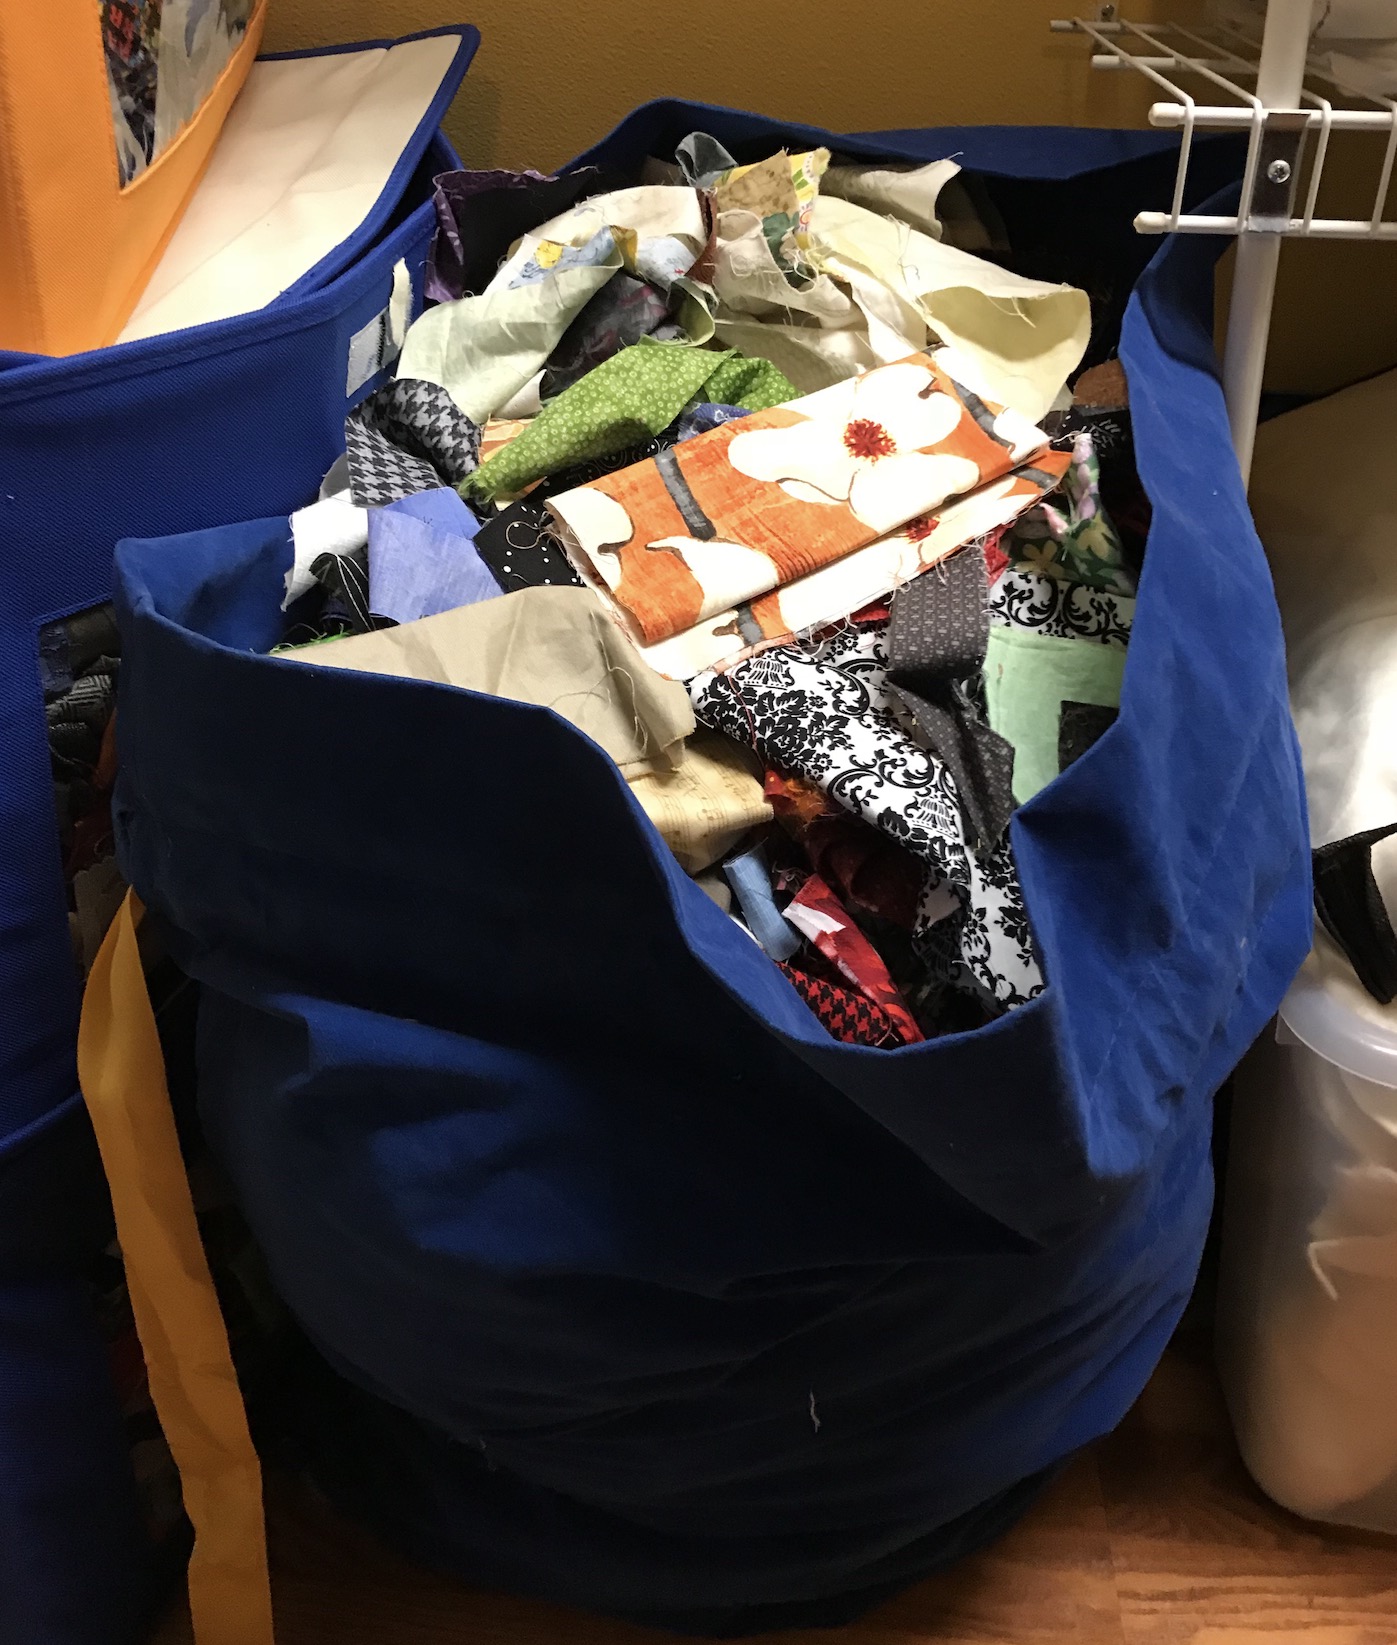
Or just throwing them all together into a large bag:
As you can imagine, unless you just want to work with random scraps, the “all in one bag” idea did not work for me.
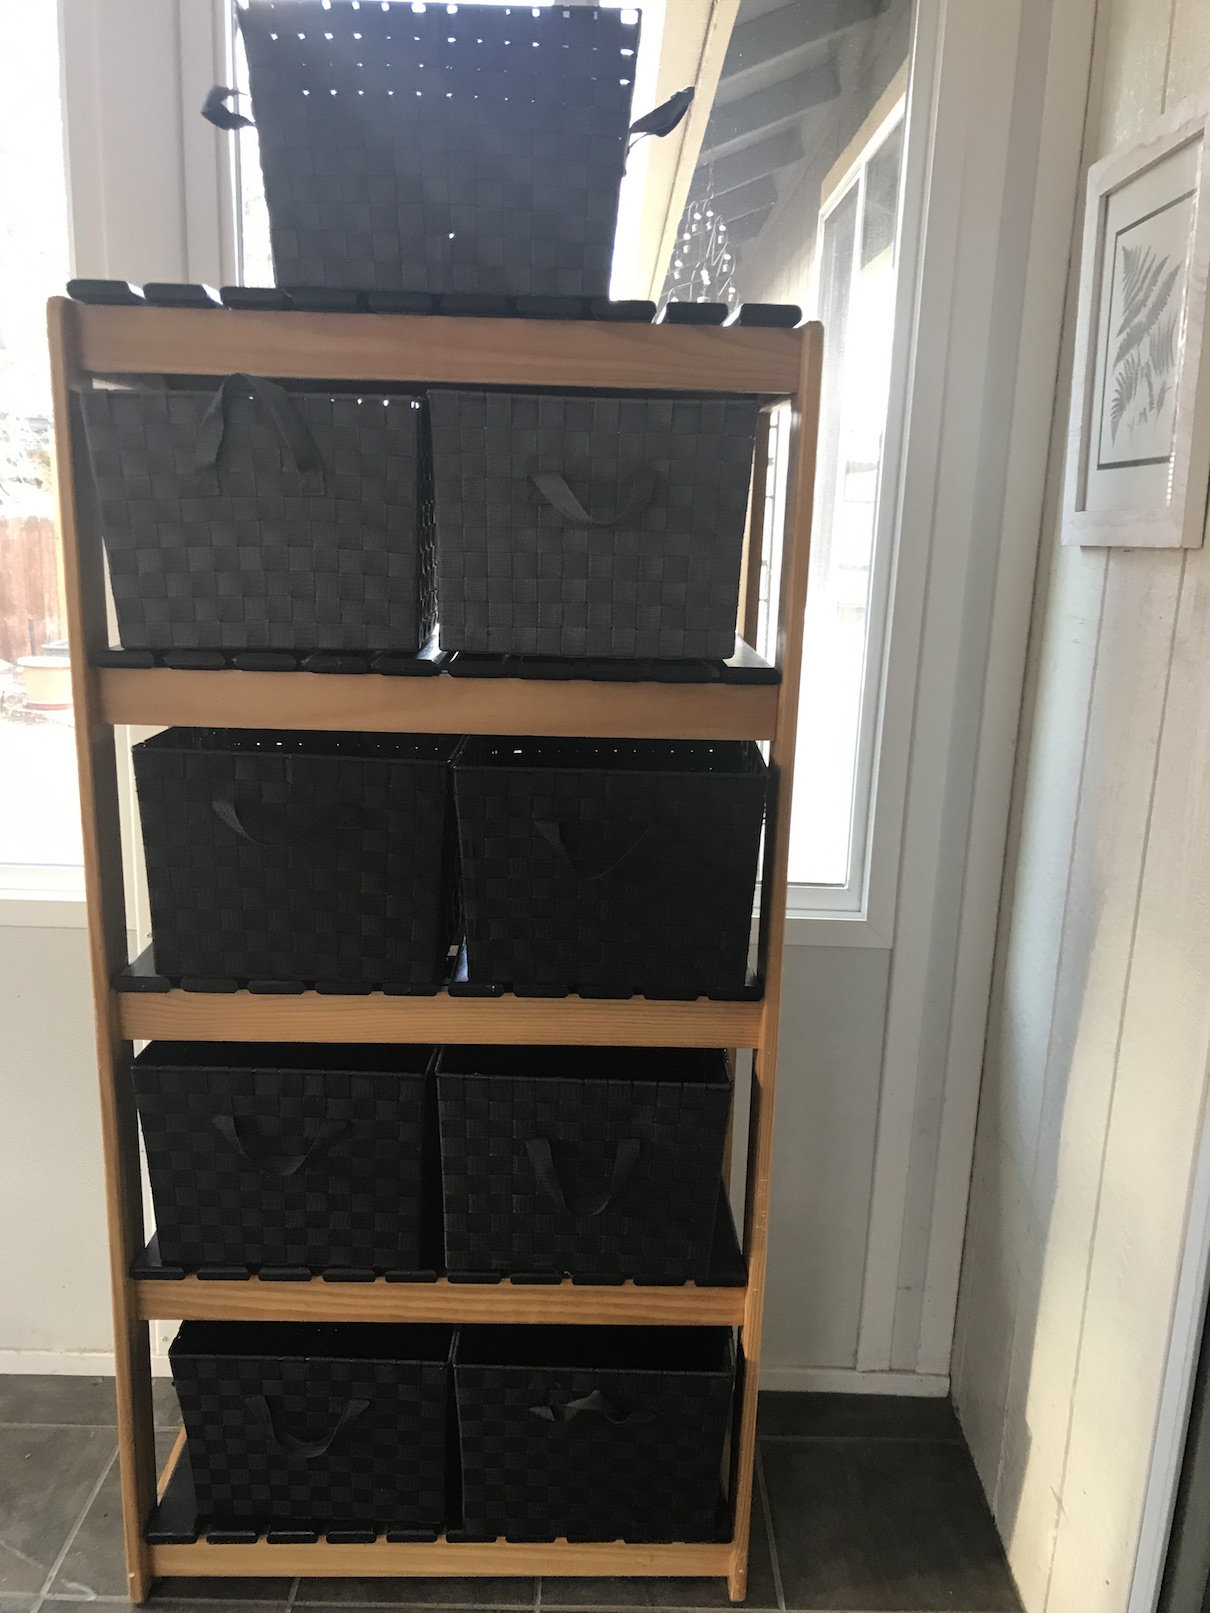
However as I was packing up for my move to Colorado, I came up with an idea: why not use this old shelf unit I had in my sun room in my former house (which easily disassembles for moving) with the baskets I used to store magazines in, to organize and easily access my fabric scraps?
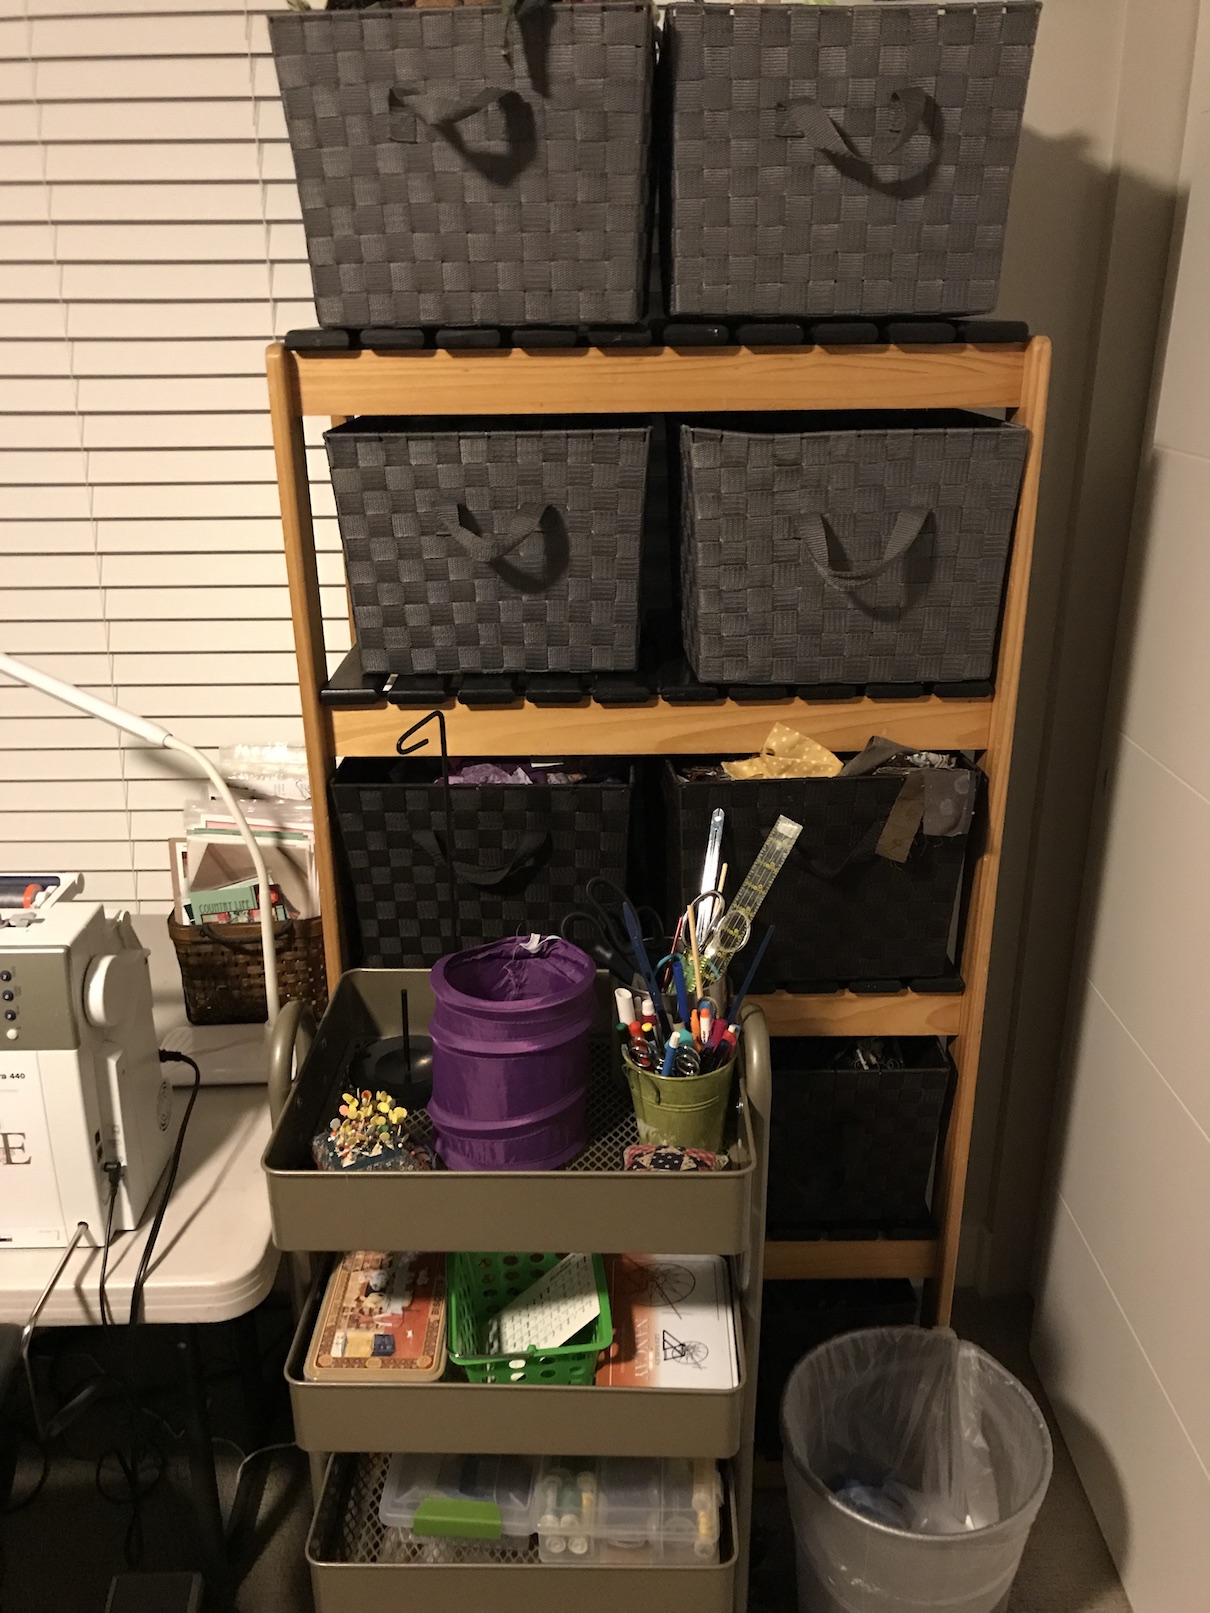
And here is the unit in the guest bedroom/studio of my new apartment:
I have my fabric scraps organized by color or theme (i.e. I have a basket of light batik scraps and a basket of dark batik scraps, etc.).
Now for the rest of the room.
New “Studio” Tour
I put the word “studio” in quotes because I am using this term loosely. It’s not really a studio per se but a place to sew in my guest bedroom, where I’ve used the guest bedroom closets to store my fabric and crafting supplies.
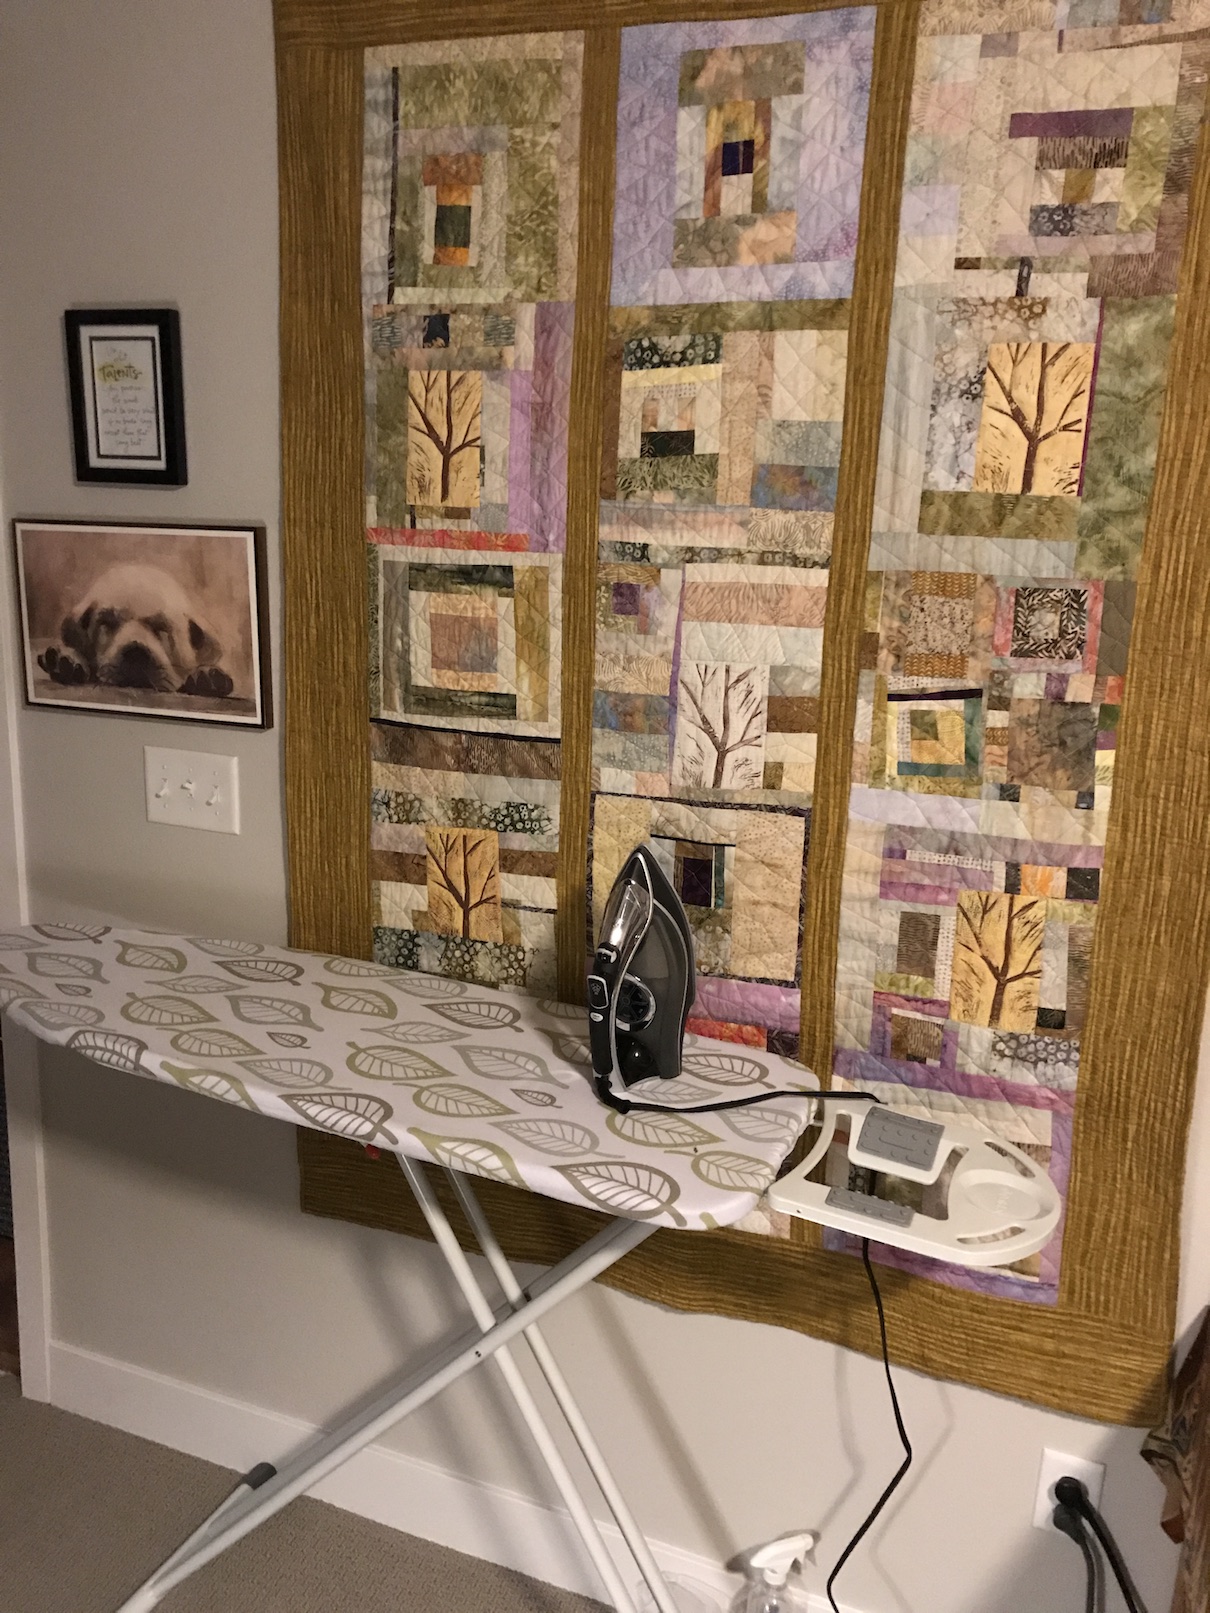
I embraced the concept of “Whole House Crafting” (which I previously discussed in the June 2016 post Whole House Crafting) and put a larger cutting area on my large kitchen island and an ironing station in my master bedroom.
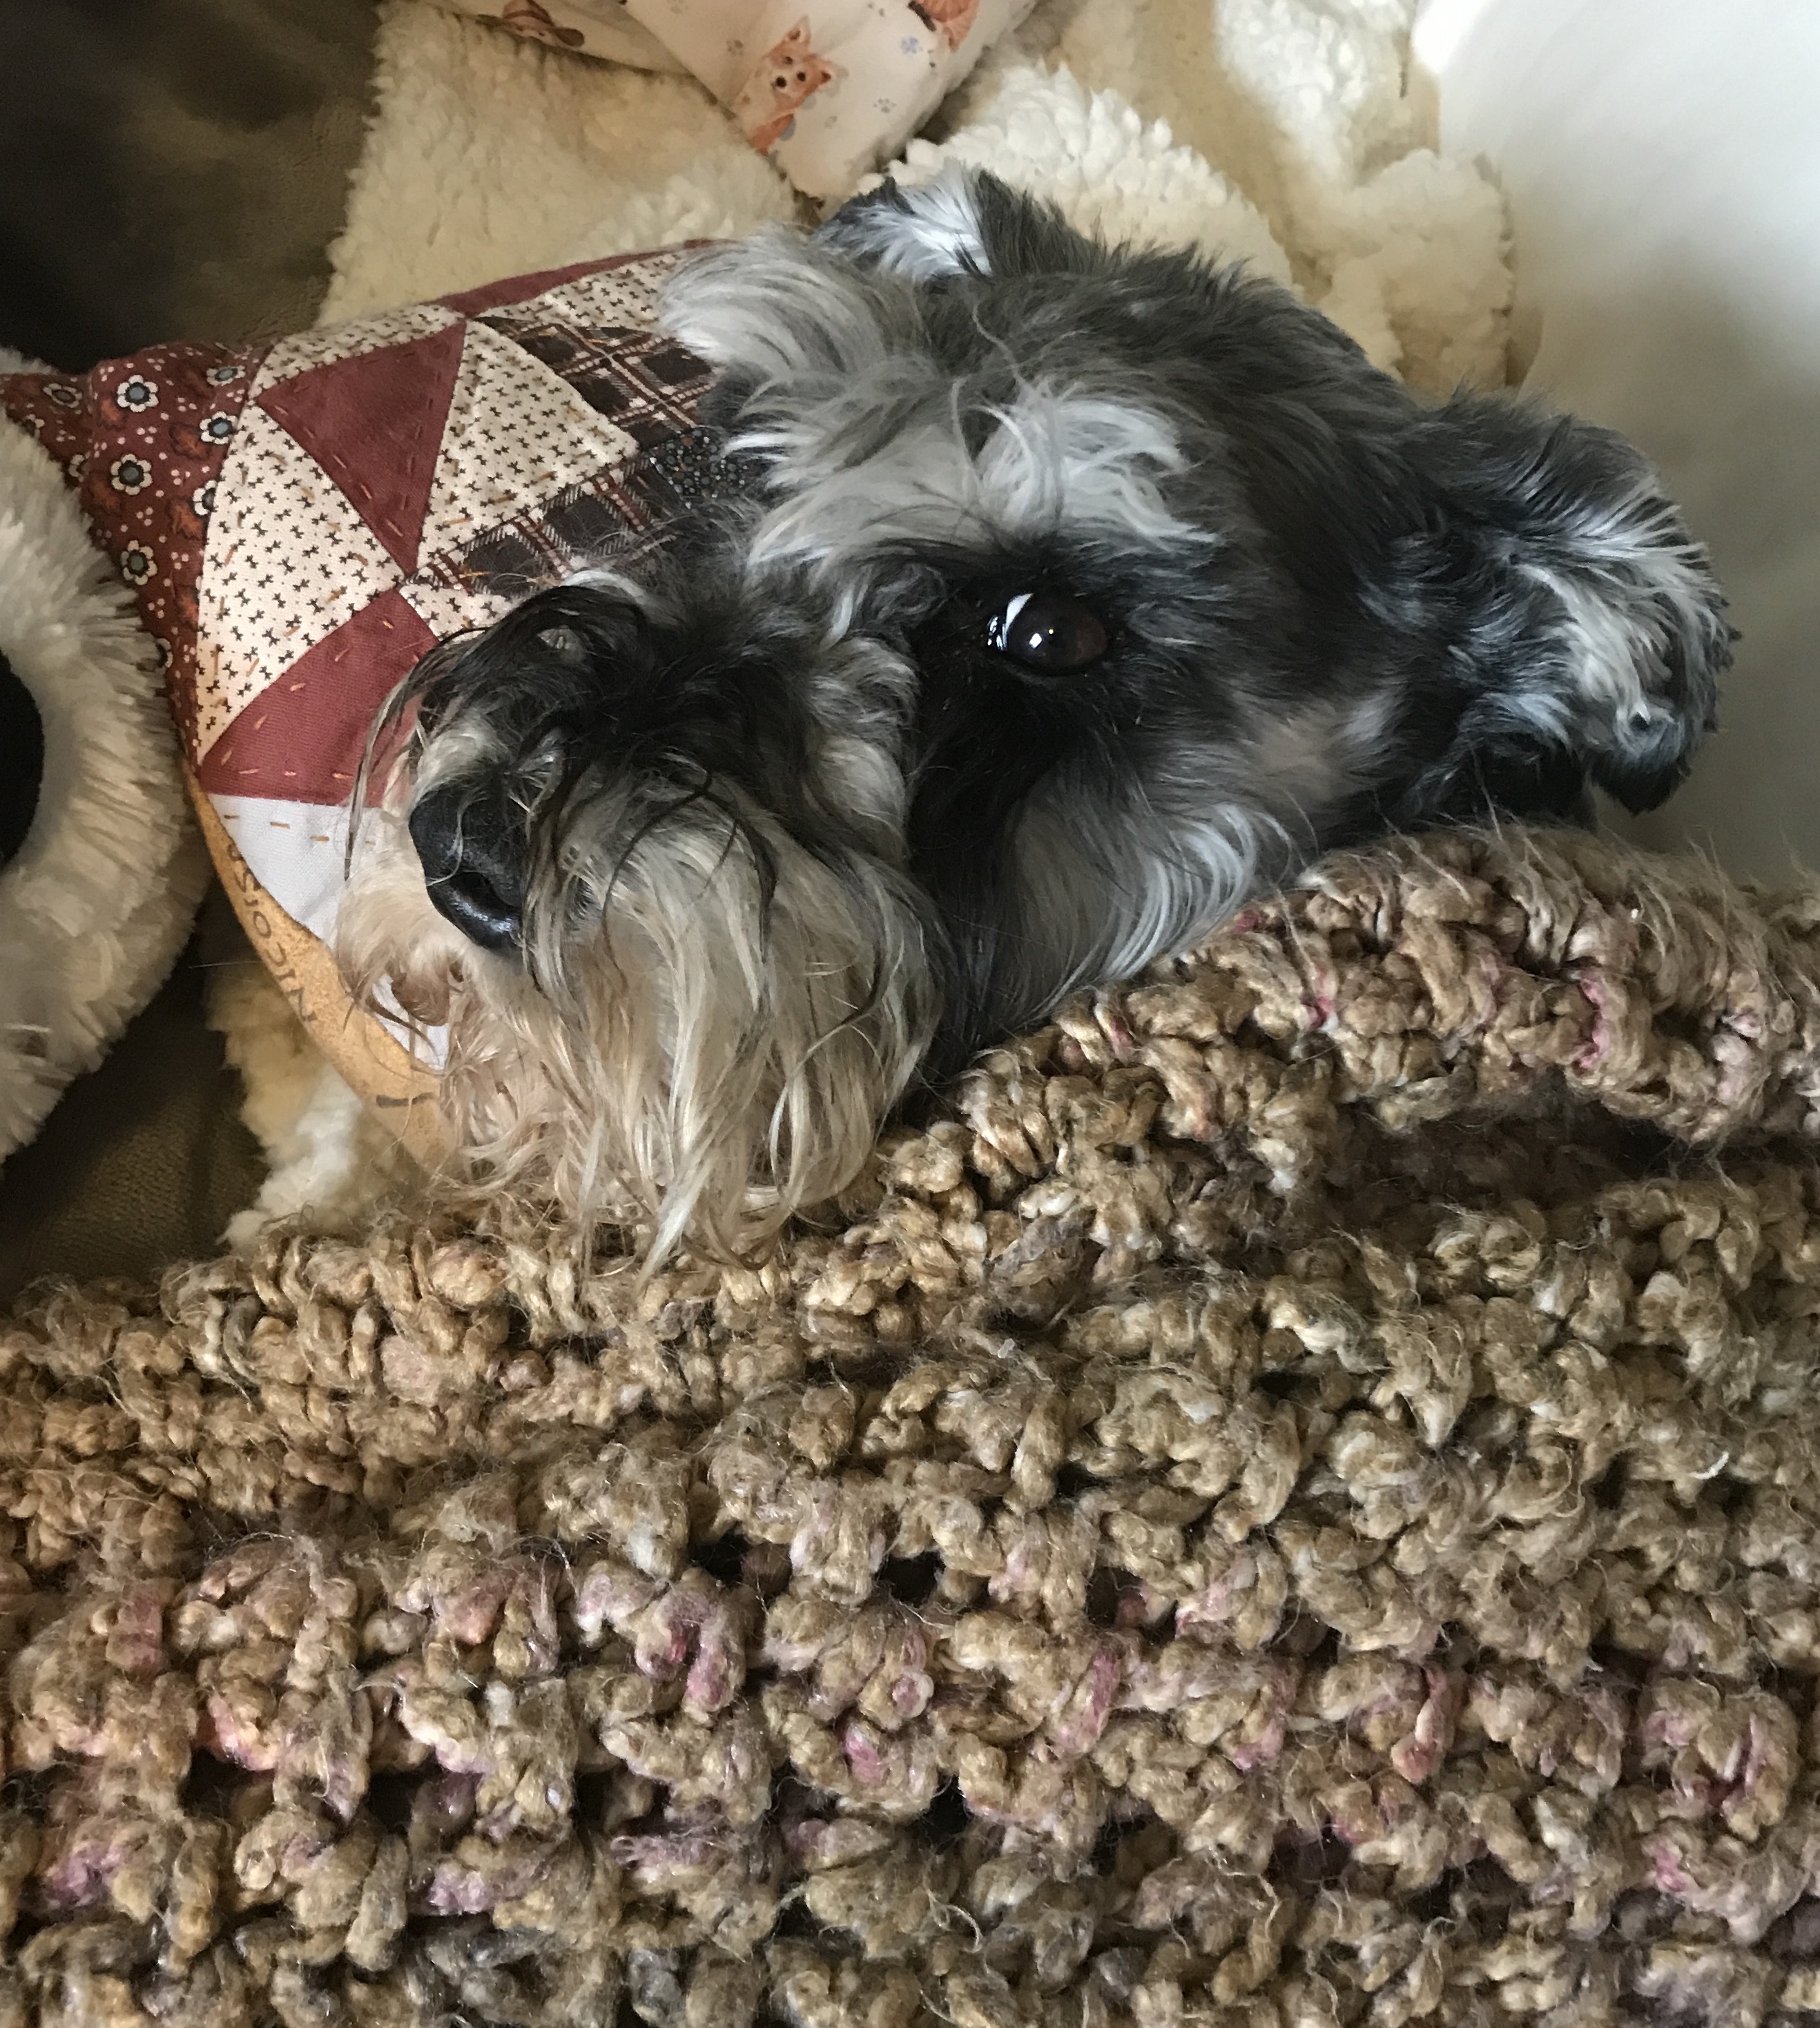
Mike the Miniature Schnauzer wanted to share that he approves of the guest room/studio space as it meets his coziness standards!
He also appreciates the schnauzer themed decor!
Postscript
Speaking of coziness (or “cosiness” for my friends on the other side of the pond), I thought I would share a little follow up to the February 2019 post From “Orphan Blocks” to Pillows.
A couple of months ago I made these two little pillows from leftover blocks from a quilt I made many years ago:
Well Mike is now enjoying one of the pillows as his napping pillow!
Not sure he wanted to be disturbed but I just had to take a photo!
Bear with me as I tie “Pillow Popping with the Untethered Soul” together!
Pillow Popping (What’s on the Design Wall)
I am working on my next art quilt for a future Women of Color Quilting Network (WCQN) exhibit but I cannot share photos on social media at this time. Unfortunately I am stalled in the progression of the piece but I want to keep myself sewing so I’ve decided to make a pillow with my collection of scraps 2.5″ x 2.5″ fabric squares.
I made a zillion (it actually seemed like a “zillion”) half-square triangles (HSTs) and Terry the Quilting Husband was nice enough to cut them apart, press and trim them (now that is true love!).
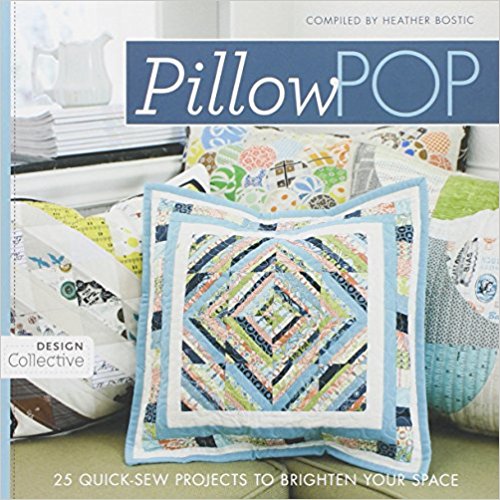
I pulled out this book from my craft book collection: Pillow Pop: 25 Quick-Sew Projects to Brighten Your Space by Heather Bostic and began laying out the pillow design per one of the patterns – Crystallized(on page 82 if you have the book).
Image credit: Amazon.com
If you remember from my post Central Oregon Quilt Shop Hop Day 1, QuiltWorks quilt shop had a wonderful Pillow Pop display with several completed pillows:
This display made me want to eventually make all the pillows in the book!
Here it is on my small design wall (the larger design wall in the hallway has the art quilt in progress I mentioned earlier):
The beauty of a truly “scrappy” piece is you can have all sort of crazy fabrics together and somehow it works (at least in my deluded mind)!
The Untethered Soul (Audiobooks)
I’ve been listening to a wonderful audiobook I borrowed from the library, The Wisdom of Sundays: Life-Changing Insights from Super Soul Conversations by Oprah Winfrey. The audiobook is read by the author and features curated sections of the actual interviews with inspirational thought leaders from Oprah’s TV series Super Soul Sunday.
Image credit: Amazon.com
I listened to this book while I laid out the pieced half-square triangles for the Crystallized pillow patter and it was very meditative.
To lay out this specific pattern where you get the effect of concentric diamonds of light and dark, I really had to quiet my mind and focus. Listening to this book was the perfect medium to do just that.
In the middle of my pillow-piecing-meditation, Oprah’s interview with Michael Singer, author of The Untethered Soul: The Journey Beyond Yourself, played.
Image credit: Amazon.com
I’ve read this book twice a couple years ago and I’ve listened to the audiobook. I’ve also given it as a gift. I was surprised to learn that it is one of Oprah’s favorite books and that she has also given as a gift (to many more people than I have).
I would say it is one of those MUST READS, especially if you are on a path of self-insight and growth with how you interact with the world.
It was amazing to listen to the author Michael Singer discuss the book with Oprah as I continued my pillow-piecing-meditation.
I will close out this post with a couple quotes from this amazing book by Michael Singer:
“You have to understand that it is your attempt to get special experiences from life that makes you miss the actual experience of life.”
“The only permanent solution to your problems is to go inside and let go of the part of you that seems to have so many problems with reality.”
“Your inner growth is completely dependent upon the realization that the only way to find peace and contentment is to stop thinking about yourself.”
“Billions of things are going on in this world. You can think about it all you want, but life is still going to keep on happening.”
“Do not let anything that happens in life be important enough that you’re willing to close your heart over it.”
“It is truly a great cosmic paradox that one of the best teachers in all of life turns out to be death. No person or situation could ever teach you as much as death has to teach you. While someone could tell you that you are not your body, death shows you. While someone could remind you of the insignificance of the things that you cling to, death takes them all away in a second. While people can teach you that men and women of all races are equal and that there is no difference between the rich and the poor, death instantly makes us all the same.”
“That which is holding you down can become a powerful force that raises you up.”
I know you’ve been waiting…and here is the follow up to my 03/30/18 post Scrap Party! , where I had a special birthday celebration play-date with my fabric-scrap-loving quilting friend.
It started with this plastic bin of my fabric scraps:
More fabric scraps crammed in here than I realized…
Dumped onto my bed (the bed has a plastic sheet from packaging material covering it):
A king size bed filled with fabric scraps (awesome or terrifying?)
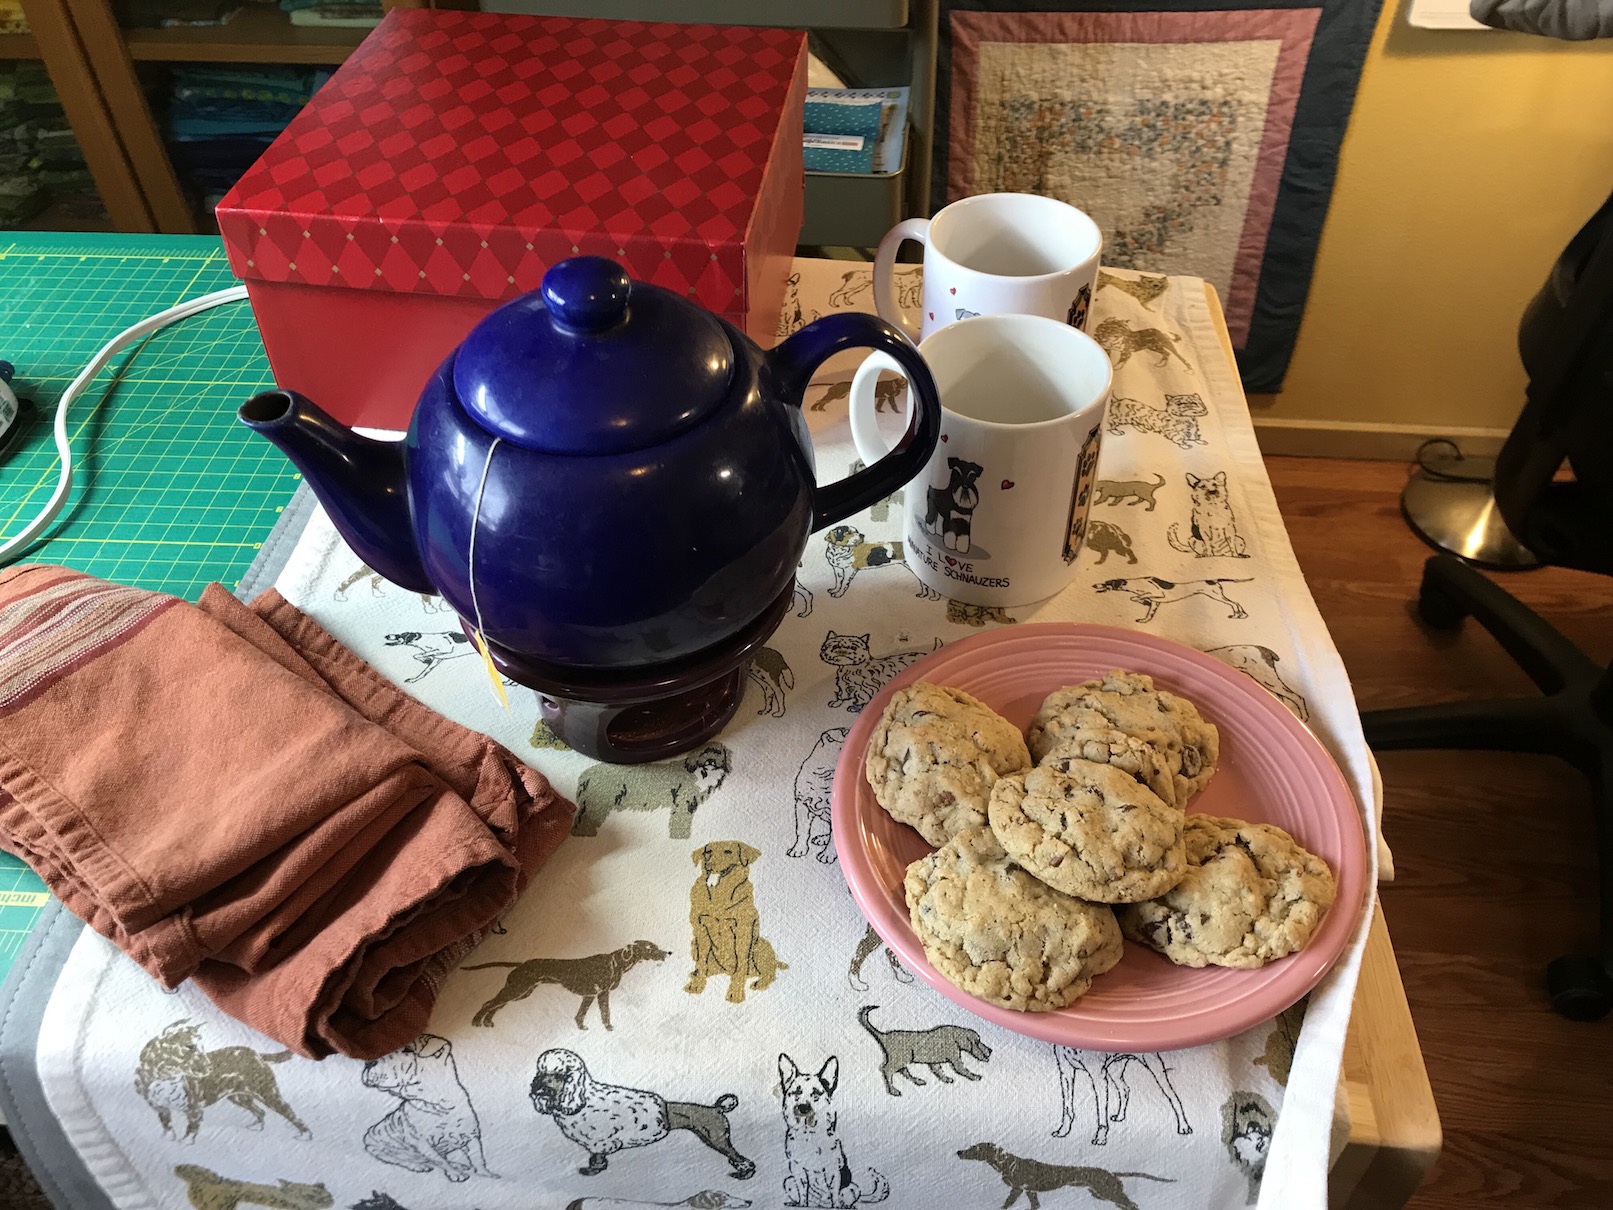
Before we dove into this delicious (or suspicious) pile of fabrics, first we needed to fortify ourselves:
I might have a small studio but I can always make room for tea and cookies (made by TTQH!).
After a few minutes of frolicking in the fabric scraps, my quilting friend pulled her initial stack and got to work on making improvisational blocks. As a challenge, in addition to access to my crazy fabric scrap collection, I assigned my friend these pieced block discards/trimmings to try and incorporate into her improvisational blocks:
During our fabric scrappy play day I thought I would also take the opportunity to practice paper-piecing (Not the fun “English Paper Piecing” type but the “flip and stitch” type of paper-piecing that I suspect is what you have to do all day in the “Underworld” if you are bad in life and go there after you die…um, I would like to choose the “fire & brimstone” instead please…).
I signed up to participate in the Sisters Outdoor Quilt Show’s 2018 Wish Upon A Card Fundraiser & FabricChallengesponsored by Robert Kaufman Fabrics. I needed to make a 4′” x 6″ fabric postcard to donate to the fundraiser, incorporating the two feature fabrics provided by Robert Kaufman Fabrics.
In general I love Robert Kaufman fabrics, but I was completely underwhelmed by the fabric pieces they sent me to make the postcard:
Um…what am I gonna make with these?!??!
Thank goodness my friend helped me pick out some coordinating fabric scraps for my postcard.
Here was my first (actually second, as the first was a legendary-paper-piecing-screw-up disaster) attempt at paper piecing a little house for the postcard:
Hated it!
Here is my second (okay actually third) attempt and the final version with my embellishments:
“Visitor Arrives” by tierneycreates 2018 (note the back of the postcard is fused blank muslin covering the stitching so that it can be used as a postcard)
I mailed it off yesterday to Wish Upon a Card and I will not be offended if they say they “never got it in the mail” or they accidentally let it slip into the trash can – ha!
Now I bet you are curious: Did we make a dent in the pile of fabric scraps? Not really. Here is the tub of fabric scraps cleaned up from the bed and put back into the closet after my friend left:
It appears I have enough for another Fabric Scrap Party (or 200+ Scrap Parties)!
It’s no secret, especially if you’ve followed my blog for a while, that I am obsessed with fabric scraps. I won’t try to link any of my numerous previous posts on fabric scraps. If you are new to my blog, you will have to just trust me 🙂
Well one of my quilting friends, actually the one who got me into appreciating the value and opportunity for unlimited creativity provided by using fabric scraps, is coming over tomorrow for a SCRAP PARTY!
She had a birthday a couple of weeks ago and we are going to do a belated celebration by going to out to lunch and then coming back to my house and spending the afternoon playing in my fabric scrap pile:
I did not post about it (as those of you who’ve followed me for a while may have grown weary of my constantly talking about fabric scraps) but last weekend I thinned out my scrap pile. I pulled out any remaining old lower quality fabric and donated more to a local charity thrift shop.
During a previous donation, a volunteer at one of our local charity thrift shops (for our local Humane Society shelter), told me that fabric scraps sell very well at the thrift shop. They cannot keep fabric scrap bags in stock, they sell out immediately! (See there are more weird obsessed people like myself in Central Oregon).
So what are we going to do at a so called “Scrap Party”? Well I am going to dump the whole box onto a plastic tarp on the floor of my master bedroom (as not to take up precious space in my tiny studio space that we will be sharing) and let my friend go wild playing with my fabric scrap collection. She is really into improvisational piecing (she is the one who helped me move from traditional quilting to art/improvisational quilting) so fabric scraps are one of her favorite textile mediums!
I’ve set up my travel sewing machine for her in my studio so we can sew together. I have two design walls (a small one on the closet door in my studio and then the big one in the hall way) so we won’t have to battle for design wall space!
I’m not sure what she is going to work on, but I plan to work on some paper piecing. I’m trying to spend more time with my extensive (ridiculous) craft book collection and rediscovered in my craft book collection – 50 Little Paper-Pieced Blocks by Carol Doak. Playing with fabric scraps seems like a great time to work on my paper-piecing skills.
My friend is bringing over her miniature schnauzer so Mike will have a furry friend visiting.
Terry the Quilting Husband (TTQH) made us chocolate chip cookies (to keep our sugar fueled energy level high for crafting!!!):
Of course I will share the outcomes of our Scrap Party!
Recently a couple of my blogging buddies, Mary at ZippyQuiltsand Claire at knitNkwilt posted about starting projects from their fabric scrap piles and “fabric scrap wrangling” (organizing a crafter’s crazy scrap pile).
As fabric scraps are my secret (well..not so secret) obsession, I want to join the conversation!
Last time I posted about my fabric scrap organization, I shared this photo of my fabric scraps organized in windowed boxes by color:
Fabric scraps organized by color
Well this organization failed. Why? Because I was not using the scraps, I was just enjoying them as “decoration” in my studio!
I knew I needed to do something and rethought how I was create with scraps I realized it was too cumbersome to pull down individual boxes by color to access scraps (my studio is small and I could only pull down 1-2 boxes at a time without serious crowding!). So I did something crazy: I pulled all the scraps out of the boxes and put them into a bag:
Yes it is a giant bag! It measures 22″ in height and approximately 22″ in diameter…and it is packed (but not too tightly…just fairly tightly, ha!). I’ve named it “Giant-Bag-O-Scraps” and I love it!
In addition to moving the fabric scraps out of their boxes by color, I also thinned out my collection of “Challenge Bags” (see post Basket of Challenges) and moved many of the scraps from these bags into the Giant-Bag-O-Scraps. I narrowed by huge “Challenge Bag” collection down to this:
Note the random “tailor ham” in this area, hoping someday to be used to make a fabric cap…
I did keep one type of fabric scraps separate from the others – batik scraps. They have their own organization into three baskets under my cutting table: 1) light and medium-light colors; 2) medium-dark to dark colors; and 3) thin strips:
Note the red arrow – this is Mike the miniature schnauzer’s ball storage in my studio
The reason for this separation is I want to make some landscape quilts using batik strips. I recently bought a book on Landscape quilts that I will discuss in a future post (once I start an actual landscape quilt project).
During this entire “scrap wrangling” project I did pull out a lot of scraps to donate to our local Humane Society Thrift Store. The thrift store has a crafting section and packages of fabric scraps sell very quickly there (other weird people like me who are also obsessed I guess..). Check out my post from October 2016 – A “Humane” Way to Eliminate FabricScraps to see how I packed up a huge donation of fabric scraps during my purging in 2016. The packages of scraps shown in that post sold within a week at the thrift shop!
Although I am not seeking out any additional fabric scraps, currently I am embracing my fabric scrap obsession. I remind myself that my quilting studio area is “my playroom” and it is okay to go in there and just play with my scraps!
Postscript
Happy MLK Day! When the political landscape feels challenging to me as a person of color and as a woman, I remember his words and I am re-inspired:
This post is actually a continuation of my ongoing series “What’s on theDesign Wall”, featuring my latest project up on either the small design wall in my studio or the large design wall my hallway. It is also a follow up to my post Can We Talk About Table Runners? on the table runners I am working on.
I had the five (5), yes five (5) table runner tops that I finished on the large design wall in my hallways but I yesterday evening I started a new art quilt and took them down. Now they are all sitting on the ironing board waiting to be completed:
They all began as yardage of my collection of Ombre fabrics and my stash of pieced strips from brightly colored fabric scraps:
I have decided to quilt each one of them.
In the previous post on these table runners I discussed my challenge of how long to make them and several of you weighed in with ideas on both length and width.
The unfinished group of five table runner tops measure anyway from 17 – 19″ wide and 44″ – 53″ long. The dimensions will decrease after I quilt them and trimmed them down a bit to straighten their lines. So I think I will end up with table runners from 16″ x 42″ to 18″ x 52″ or something like that.
I just flowed with whatever length the design took me as I progressed!
I will reveal the runners in all their glory in a future post once I get some quilted!
Postscript
The Natural Selection Convention
Whether you believe in Evolution, Intelligent Design, Creationism, or something else, you have likely heard the term coined by Charles Darwin – “Natural Selection”.
Dictionary.com defines it as “The process whereby organisms better adapted to their environment tend to survive and produce more offspring”.
Well last week I came across on my walk what I might call a Bird Natural Selection Convention!
First I noticed at the corner of an alley I turned into on my walk, an adorable cat sitting on a fence. Well that cat wasn’t just sitting on the fence, he was curled around a set of bird feeders!
“Here birdy, birdy, some nice yummy food is waiting for you…”
I stopped a greeted the cat who let me take his photo (I actually took like 10 different photos to get the right shot and the kitty just stared at me while I did it). Then I completed turning the corner and here is what I found two feet from the “bird-feeder-cat” – another kitty just hanging out on the same fence:
And then, one more foot down the fence, another kitty:
This is why I am calling this a Bird Natural Selection Convention – any bird that attempts to use the bird feeder will most likely not be having any more offspring!!!
I laughed so hard at the trio of kitties waiting for very hungry and not too bright birds!
What the Heck is This?!?!?!
Have you ever been to Costco? It is a magical place I try to stay away from (see my post BreakUp Letter to My Warehouse Club). However there was something we really needed at Costco (what Tierney, an 180 count jar of olives, triple pack?) and so we went.
While strolling the aisles (okay even if you go there for just one thing, it is mandatory that while you are in Costco you stroll the aisles), Terry and I came across this:
It looked like someone had skinned a schnauzer! We do not know if it was synthetic or some poor animal but it was a very unusual pillow. It was quite soft to the touch (you could pet it for hours) but then that added to sort of a creepy feeling I got from it.
Also – how the heck would you wash it if you got a stain on it? We had quite the laugh over it (like we did in September when they had the Christmas decorations already out in Costco) but we somehow controlled ourselves and did not buy it.
(Sassy the Highly Opinionated Miniature Schnauzer would have been quite distressed if she thought we were bringing home a skinned schnauzer pillow!)


 The quilt measures 57.5 inches by 72.5 inches (146 cm x 184 cm).
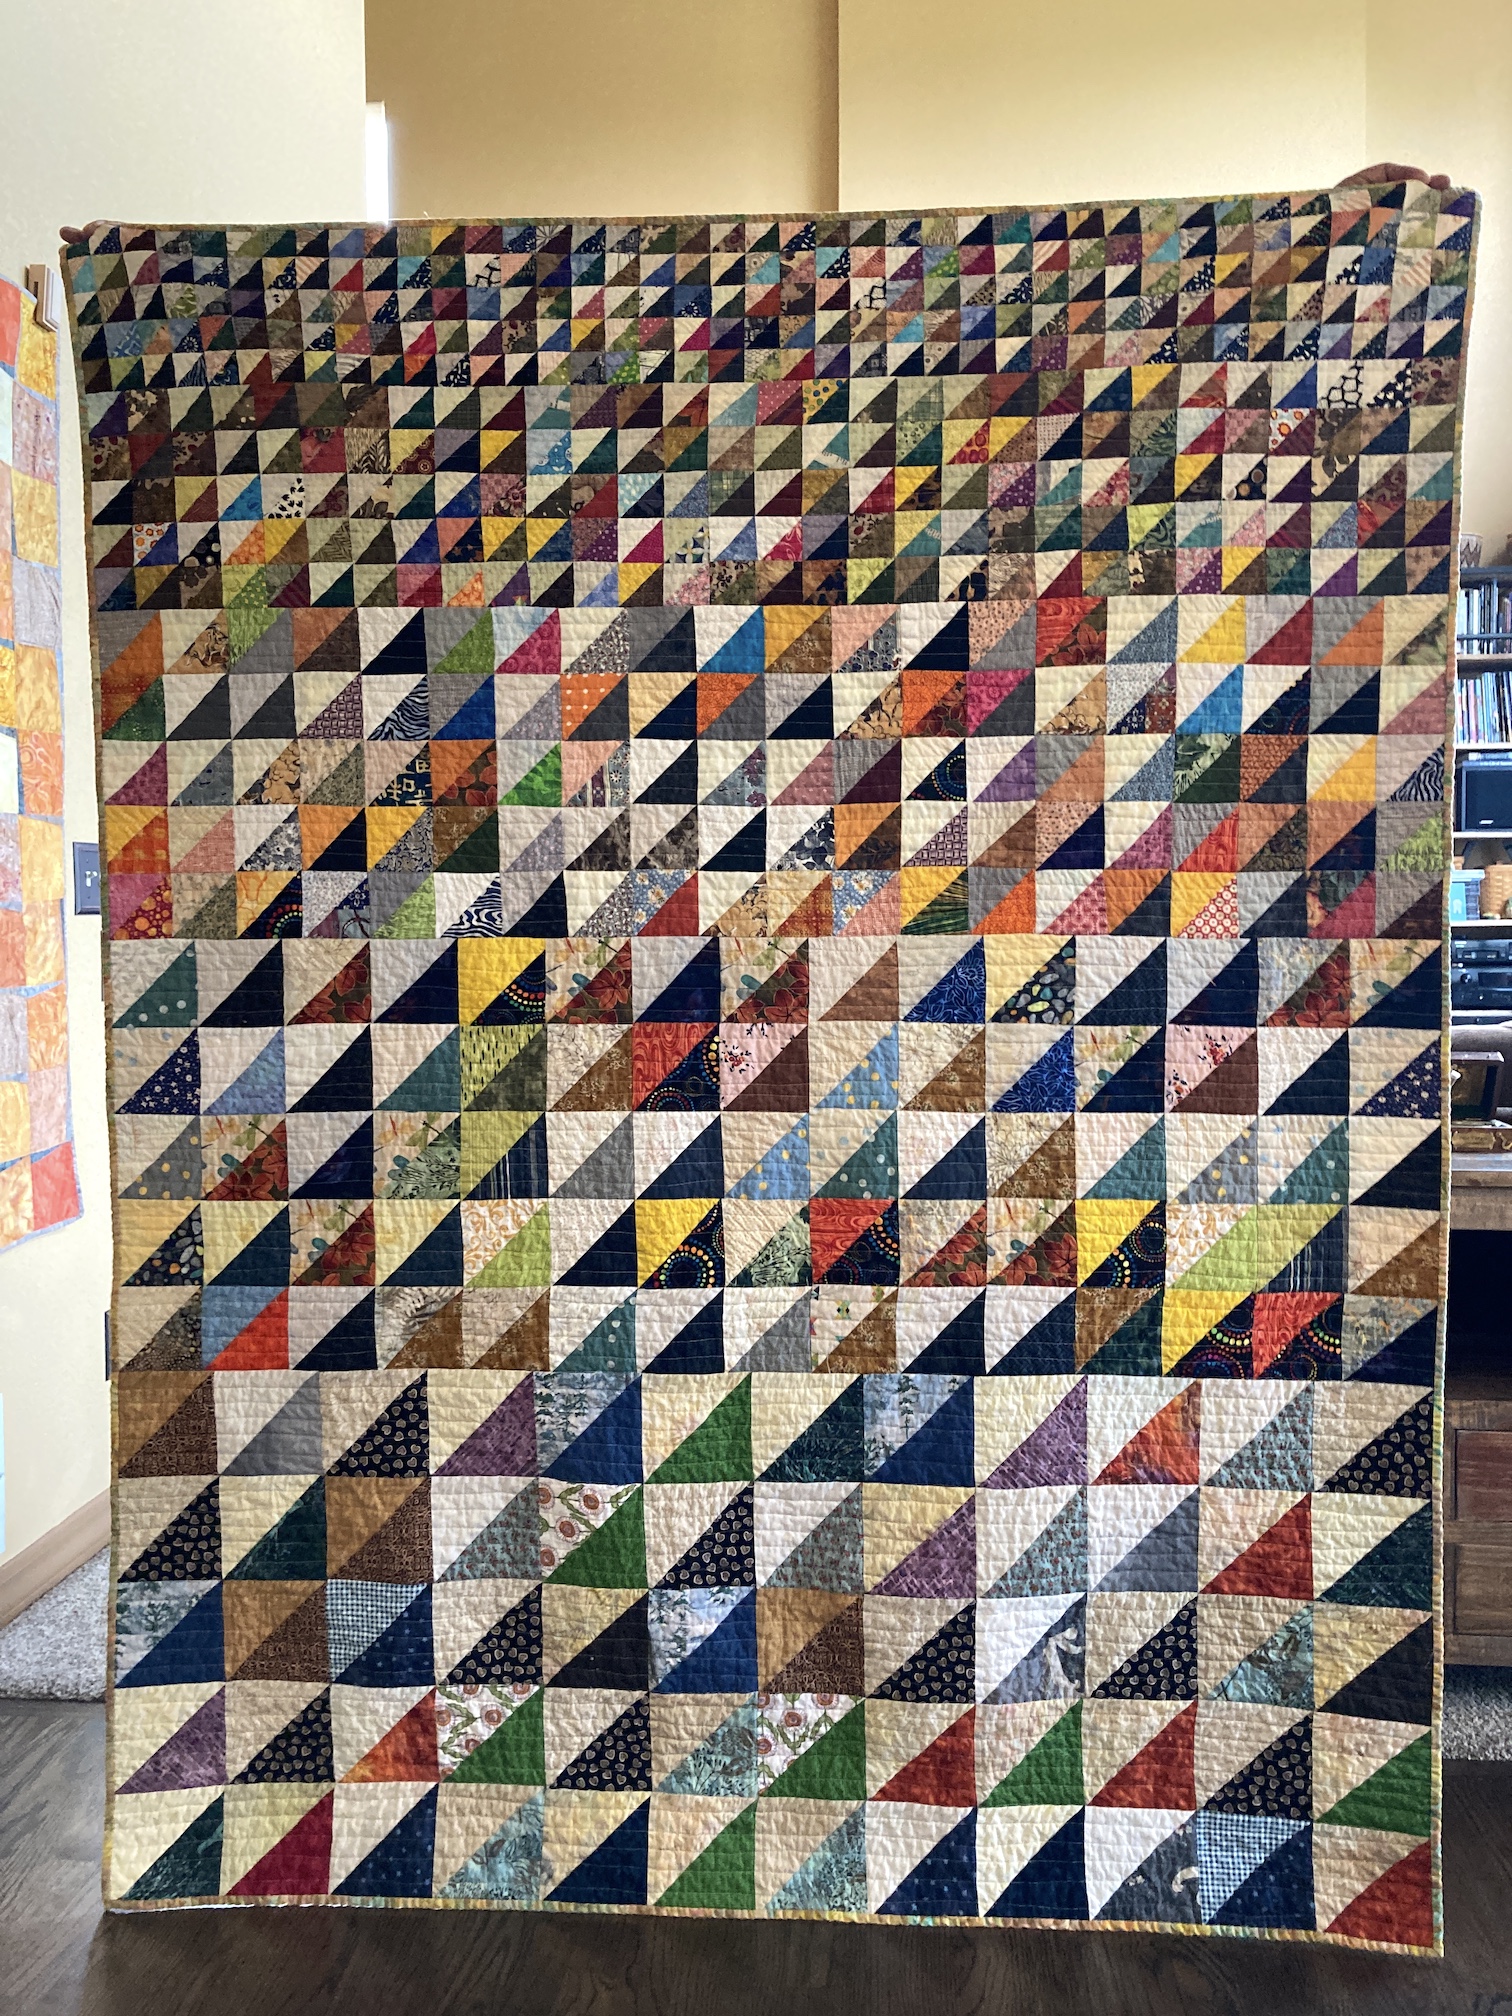


 These bins contains scraps organized by color.
 One of these collections, is a collection of scrap triangles, most given to me by other quilters when they trimmed these triangle when piecing blocks for their quilts. The triangles are in various sizes.
 But I’ve decided I want to start using (and cleaning out) my ridiculous collection of themed bags of scraps (mainly given to me by other quilters) and my scrap triangle collection had gotten out of control.
 And pulled out this awesome book by Amanda Jean Nyberg, No Scrap Left Behind, for ideas.


 Eventually my “hot mess” of scrap triangles, turned into this on my design wall:
 But hey – it’s going to be a very scrappy quilt!
 Someday it will be done…
 When I returned home, I trimmed these blocks to 5′ x 5″ (12.7 cm x 12.7 cm) blocks and began piecing them together and musing over how to finish the quilt including whether to machine or hand quilt it, etc.:
 That’s where I left off in my previous post about this quilt –
 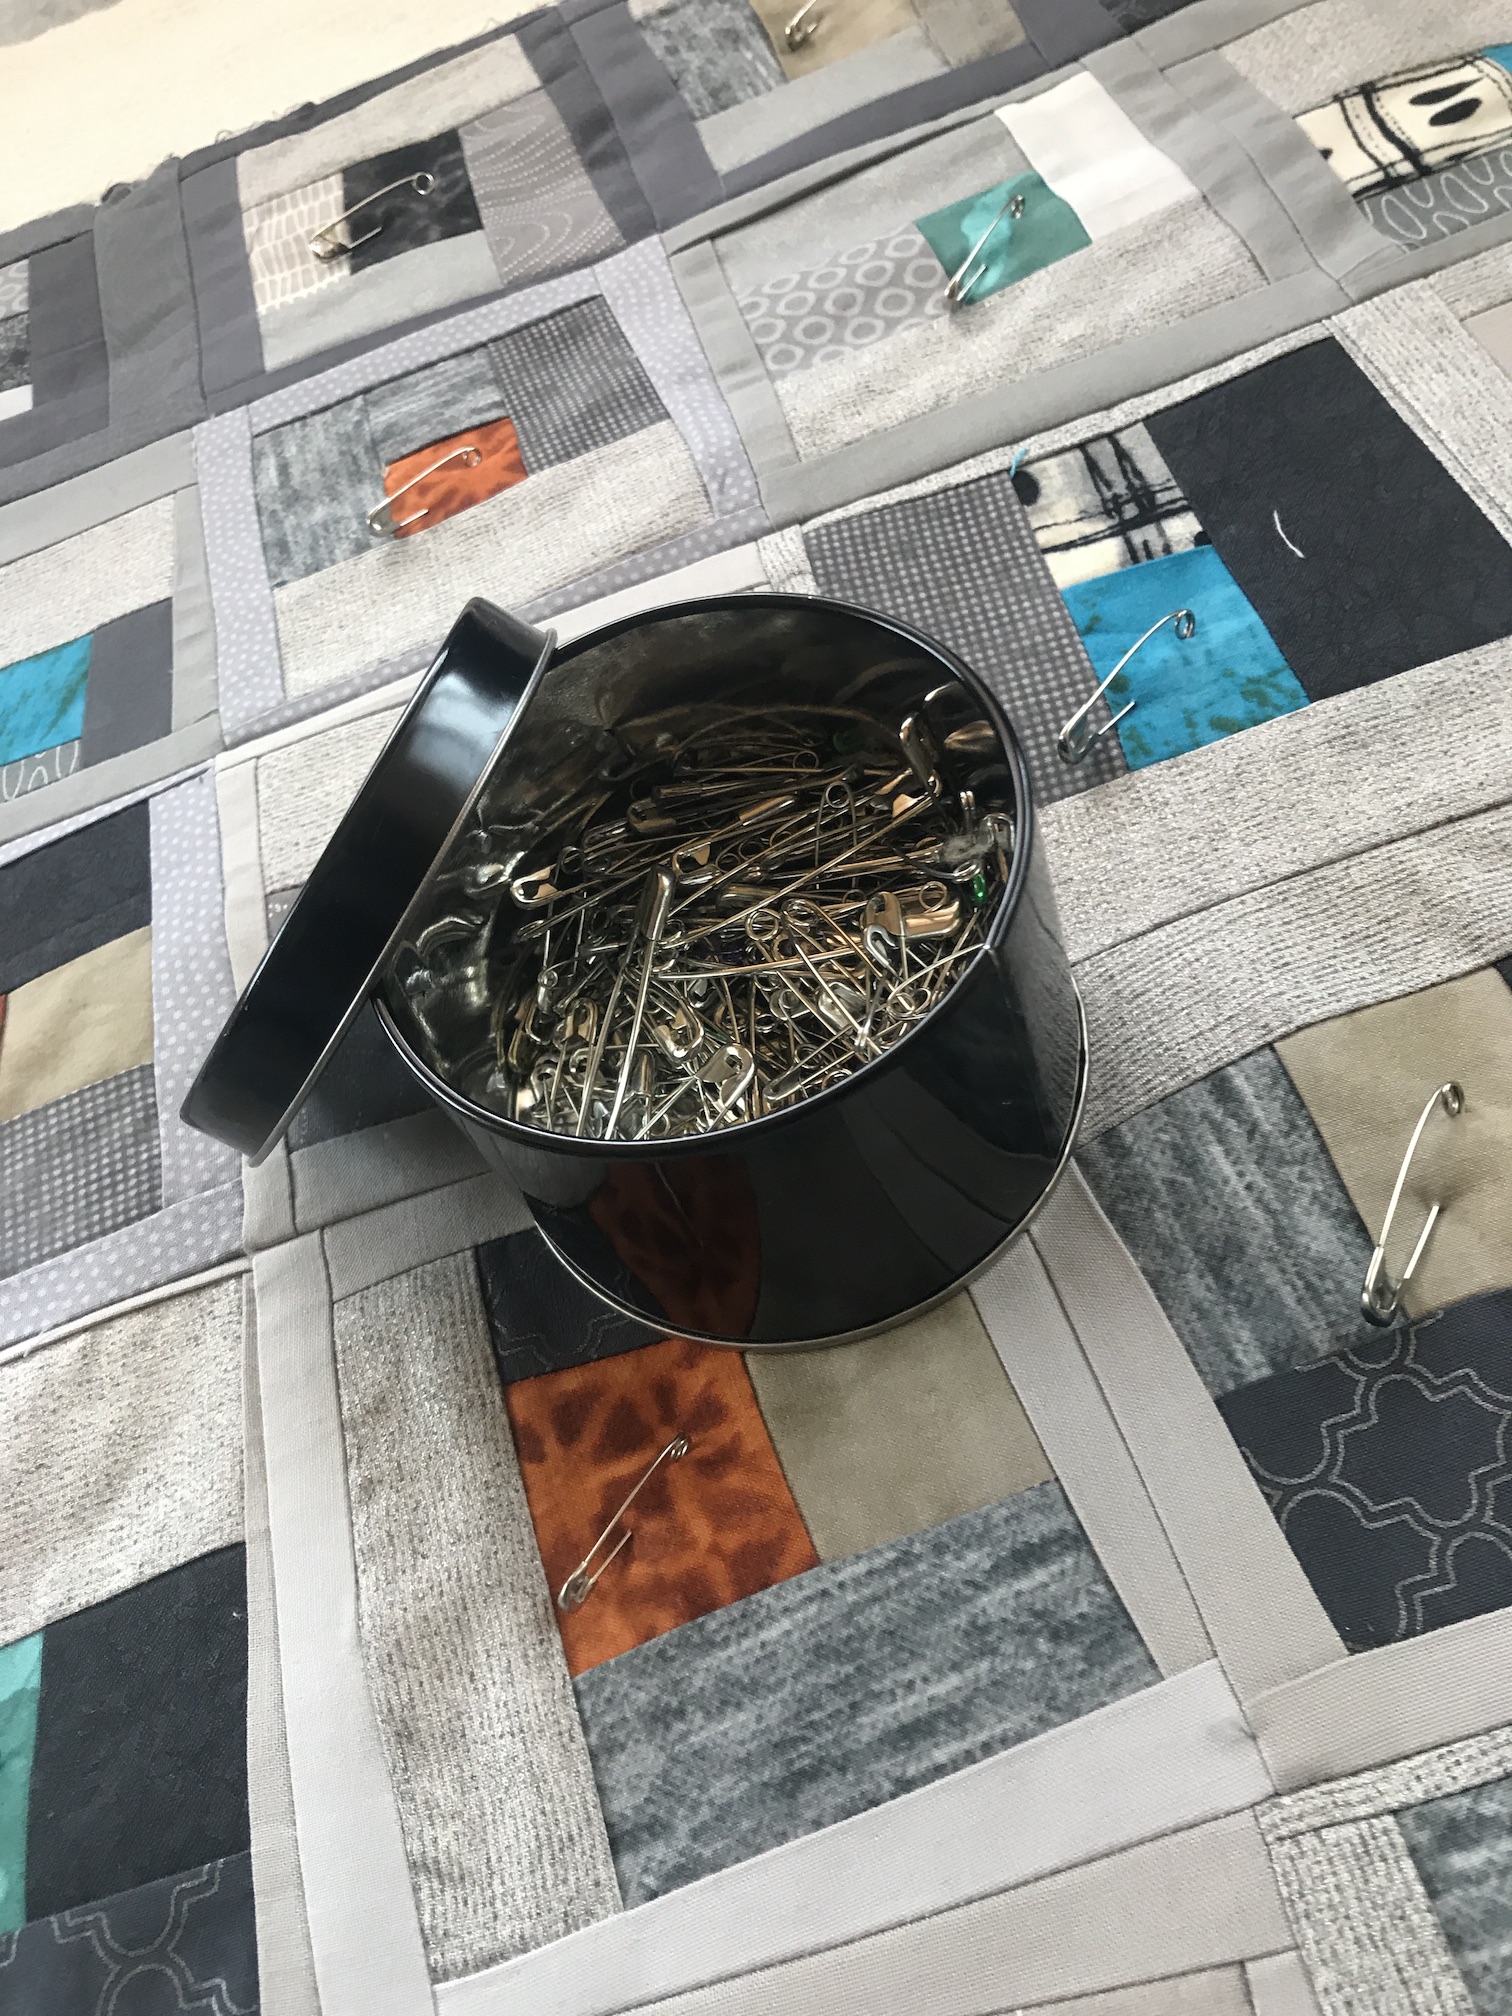 Here it is ready for hand stitching:
 I bought a couple spools of gray Perle Cotton for hand stitching (I am not sure how much I need yet and did not want to over-buy):
 And I’ve started stitching:
 The quilt measures around 60″ x 60″ (152.4 x 152.4 cm) and it is going to take a while to hand quilt it, even with using large


 But let’s back-up a moment, and tell you how this piece began and got to this point…

 I began with creating a pattern with the dark gray framed blocks:
 Then I worked on framing them with the light gray blocks:
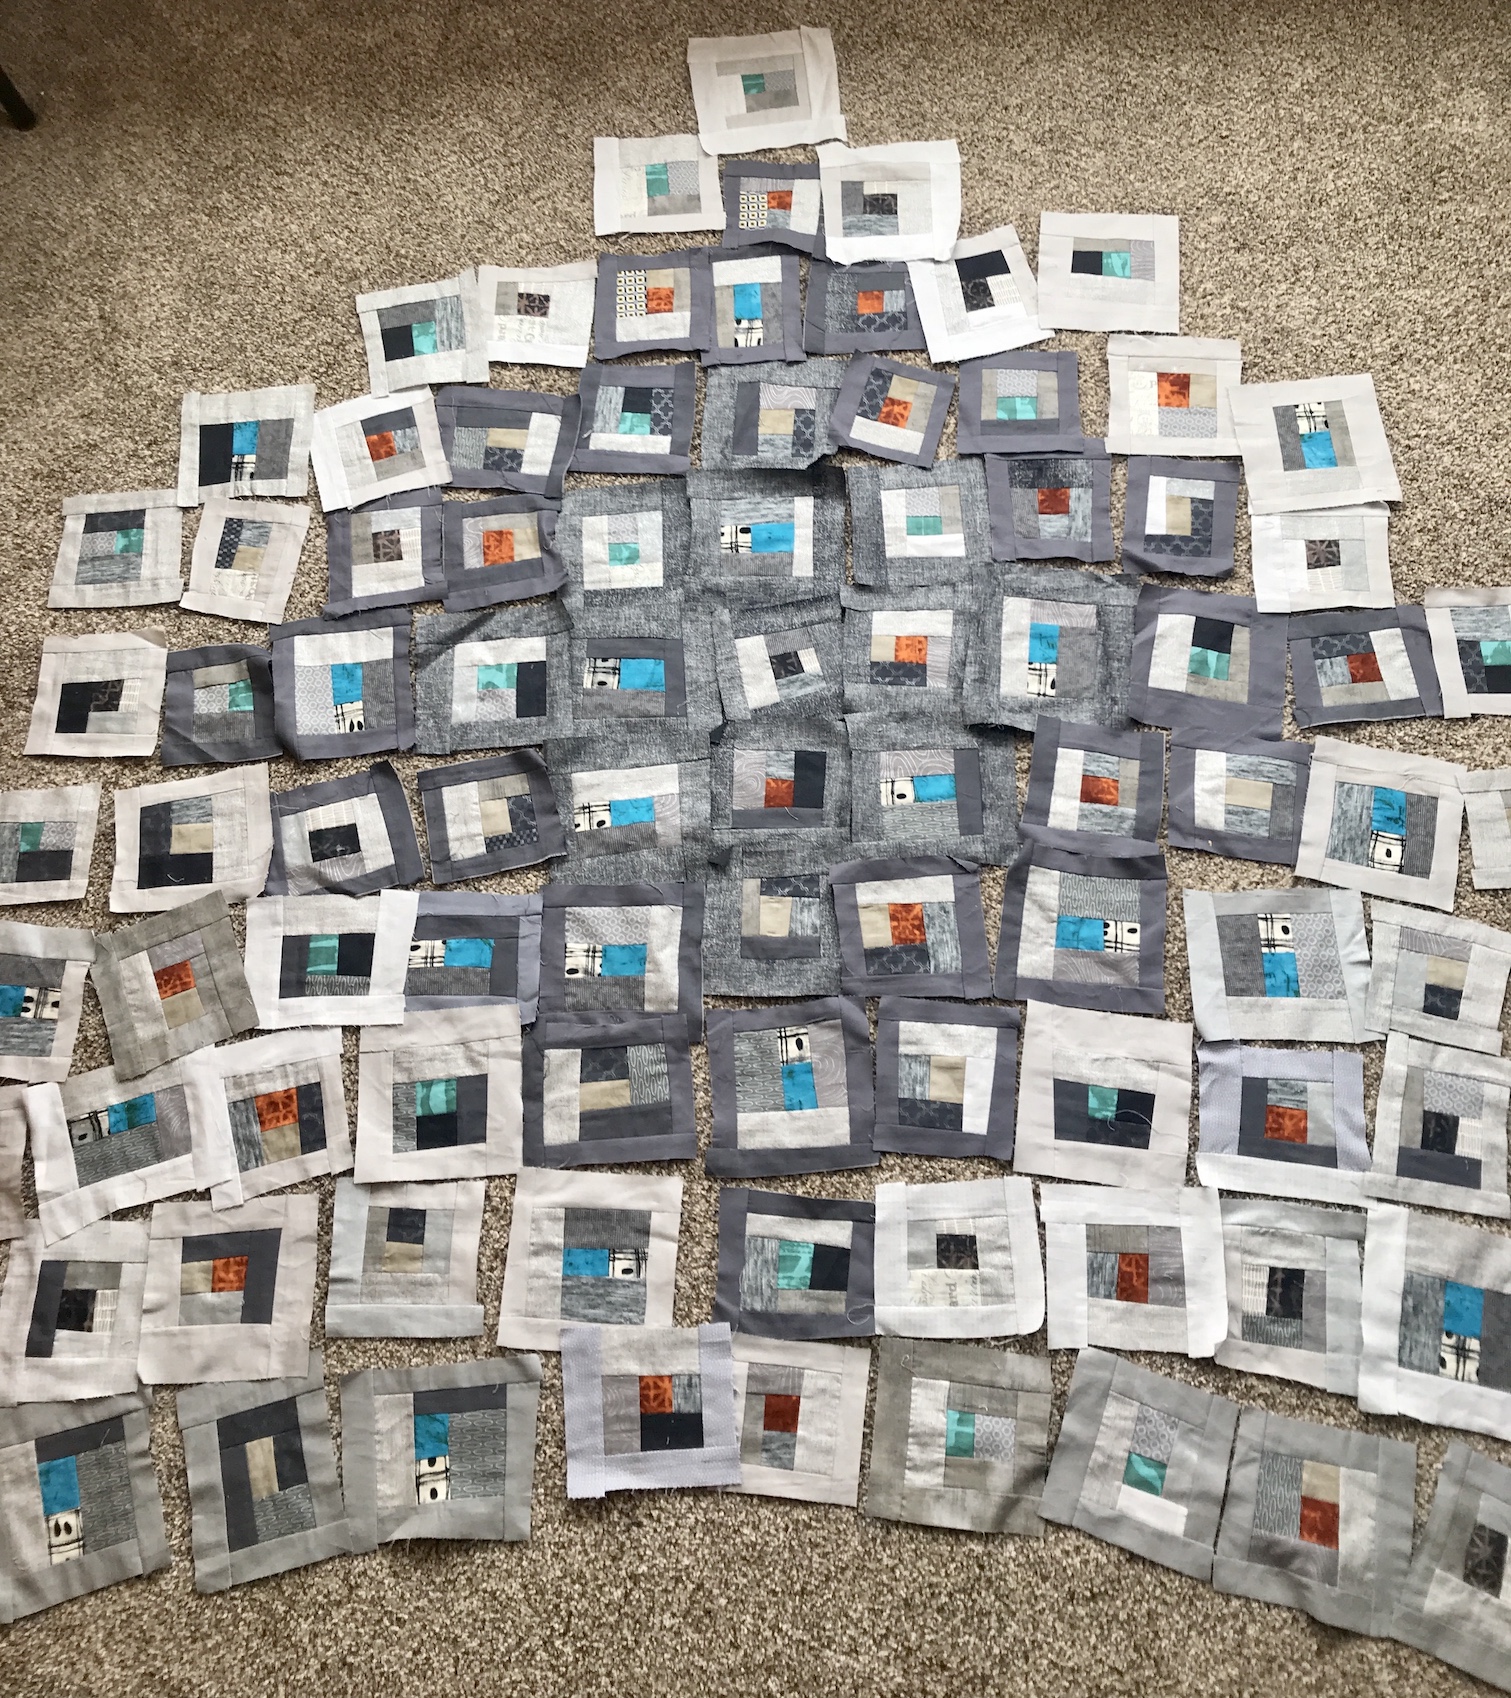 I like the effect with the dark gray floating in the lighter gray blocks.