
Rose Atkinson-Carter a London-based writer with Reedsy, reached out to me with an offer to write a guest post that tied quilting and writing together. I thought it was a fabulous idea, and here is her fabulous guest post!
How Quilting and Writing are Similar Creative Processes
by Rose Atkinson-Carter
This may surprise you, but quilting and writing are really similar. Sure, one is sewing fabric together to make elaborate designs, and the other is putting words to a page to tell a story. But, if you pick apart the steps of writing a story, they’re practically the same steps that you follow to create a quilt. I believe that if you can create a quilt from scratch, you can definitely write a book. Just follow these four quilting steps, and you’ll have a story in no time.
1. Pick a theme
Whether you love playing with colors and patterns in patchwork, or are more interested in the details of the sewing on a single-color background, you’ll want to choose an eye-catching design for your quilt. And while the technical, visual characteristics (i.e. colors, shapes, composition) are important, adding a theme to your quilt — like how this legendary quilt is focused on Bigfoot — can take your design to the next level.
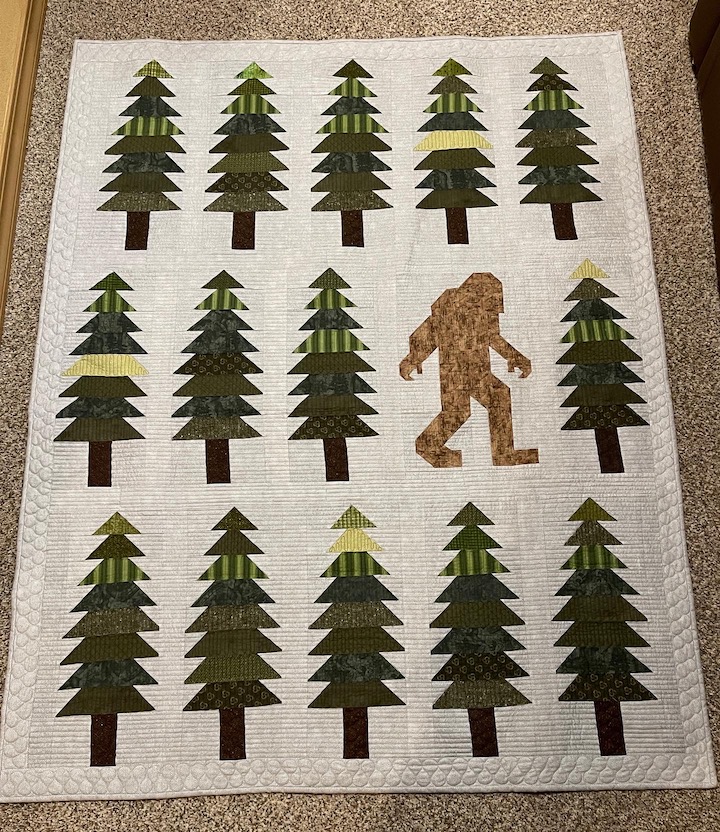
In the legendary quilt, the artist deliberately uses colors and design elements to emphasize the concept of Bigfoot and his environment. The mossy, sylvan green and brown on a contrasting white background draws the eye to the quilted Bigfoot, who is made of classic quilting shapes of triangles and squares.
When it comes to writing, the same is true. When picking a theme — the thread running through your story — you can give your technical skills a sense of purpose and direction. Just as your theme on your quilt is supported by certain shapes and colors, the theme in a story is supported by a character’s actions and thoughts, or repeating ideas and motifs. What’s more, a well-developed theme is very effective at drawing your readers in.
When your story carries a strong theme, it will be able to reflect the reader’s own experiences or curiosity, leading them to think about your work beyond just when they’re sitting with the book in hand.
So for quilting and writing both, start with an idea for a theme, something that you can build off of toward a finished product.
2. Pick out your fabric
After creating your quilt design, you’ll want to pick out the perfect fabric. This will be the canvas for your masterpiece to unravel on, the ideal characteristics of which depend on the purpose of your quilt. If you’re making a coat or blanket, you’ll want to pick fabric that’s comfortable, won’t scratch, and something that will hold stitches for a long time. If you’re making a piece of wall art, you might choose fabric that’s more of a statement — something with texture, or bold colors.

The fabric you choose can make or break your project. To make this decision, you have to take a “big picture” look at your quilt’s theme and vision so that you can choose a strong foundation to advance your product from the get-go.
The same goes for creating a story. Sure, you won’t write your story on yards of quilter’s cotton, but it is important to determine the right structure for your story. Will the theme you pick be supported by a hero’s journey plot structure, or more of a simple three act structure? If you’re able to put together an outline (it doesn’t have to be super fleshed out) before you write, you’ll have a stronger start to the project as a whole. So take the time to pick a structure that helps build the theme you’ve chosen.
This is why picking a theme that you truly care about is important. Whether you’re designing on fabric or on the page, a theme keeps you guided throughout the whole process, reminding you with every step that the aim is to create a cohesive end product.
3. Sew it all together
Once you’ve gathered the materials that will support your theme, you’ll be ready to start sewing. If you’re creating a patchwork quilt, you’ll have quite a few pieces to create and arrange in just the right way. Swapping one triangle or granny square for another of the wrong color will distort the image you’re trying to create, so you have to go through the sewing process paying close attention to the details of your design. Much like the various elements involved in book cover design, you’ll need to weave together multiple elements that communicate a cohesive story or theme.

This all will take time, as is the case with writing a novel. Even if you already have some plot points laid out, and now you just have to fill in the details, you’ll still have to pay careful attention to how it all fits together. Be mindful of plot holes or inconsistencies of character descriptions. If that sounds like a lot, the good news is that developmental editors exist to help you with these issues. Or if you can’t go pro, consider asking a writer friend to do a feedback exchange with you: creative exchanges are always fruitful!
4. Add finishing touches
After weeks of hard work, your quilt is almost ready for photos! You’ve sewn your design and everything is looking great. Now, it’s time to add any finishing touches. This might include ironing out any kinks, clipping any thread ends that have snuck through the fabric, or adding a border around the motif. At this final stage, you’re doing everything to make sure the quilt reflects your best work.
In writing, this type of editing is typically known as copy editing. You’ve gone through the hard work of getting your words down on the page and cleaning up your story. A copy editor will help clean up the prose to make sure the story shines. Now, it’s time to cut those thread ends and close the quilt. As a final safety net, a proofread will take your writing to a professional level. Any grammatical errors, typos, or weird spacing that might have slipped by you will be caught by a proofreader, making your pages spotless.
If you can put in all that time and energy in creating a gorgeous quilt, you’ll have no problem at all getting a story together. Just remember your quilting steps, and your story will come together just as beautifully.
Rose Atkinson-Carter is a writer with Reedsy, a marketplace that connects authors with the world’s best self-publishing resources and professionals like editors, designers, and ghostwriters. She lives in London, and loves writing and crafts.

I had a similar thought. When an artist starts drawing something it is a sketch. Then they flesh it out. The same follows for writing. Get the story down (rough draft) and refine it until it’s done.
LikeLiked by 2 people
Thanks for stopping by Dave and I never thought of this comparison before!
LikeLiked by 1 person
Yeah, it is the same for all art I think. It all starts on the inner and works its way to the outer.
LikeLiked by 1 person
Thanks Rose, for such an interesting article. As Dave says, there are strong parallels to creating art too.
LikeLiked by 2 people
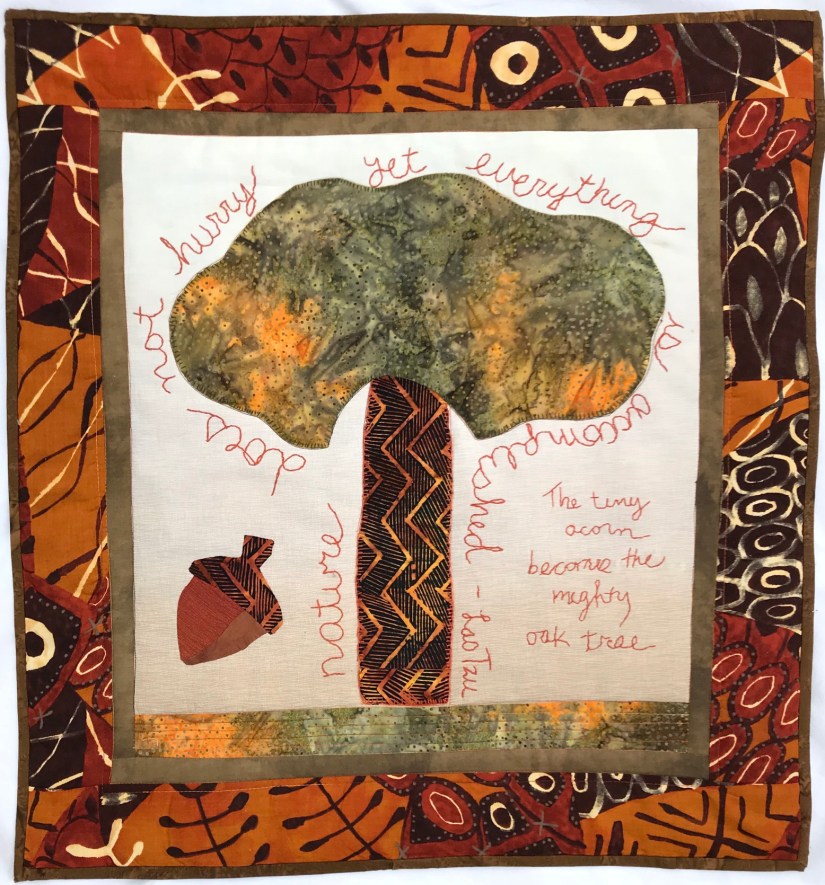
Thanks Anne I thought she did a great job on the article and I loved the comparisons (and I peppered in some photos)
LikeLike
enjoyed this post.
🙂
and nice comparison of the way book covers are similar to the way the quilt maker must “weave together multiple elements that communicate a cohesive story or theme.”
LikeLiked by 1 person
Thanks for stopping by I thought it was a great article she wrote!
LikeLiked by 1 person
🙂
LikeLiked by 1 person
Never thought of the two that way, interesting!
LikeLiked by 1 person
Thanks for stopping by 🙂
LikeLike
Super post, and filled with great infirmation. Thank you Rose and Tierney.
LikeLiked by 1 person
Thanks for stopping by and she did a great job writing it!
LikeLiked by 1 person
Did you see how I spelled ‘information’??
LikeLiked by 1 person
Darn it! I thought we could be lifelong friends but after that misspelling…ha!!! 😉
LikeLiked by 1 person
Right???
LikeLiked by 1 person
Well, that was interesting. I discovered Reedsy when I worked on a novel during NaNoWriMo. I’m working on a novel, but as I’m always overcommitted, it’s going slowly 🙂
LikeLiked by 1 person
Oh I hope I get to read your novel someday!
LikeLiked by 1 person
I second that!
LikeLike
I think this is why I called myself a “mixed artist” as everything seems to link together – be it stitching or making my objects – fast or slow – big or small. But do I have enough of anything to create a book…possibly not!
LikeLiked by 1 person
I like that – a mixed artist is perfect you are not putting yourself in any particular category!
LikeLike
Oh, I love that label! I think I’ll start calling myself a mixed artist from now on, too! 🙂 Thank you for reading!
LikeLike