Author: tierneycreates: a fusion of textiles and smiles
Quilter, crafter, obsessive tea drinker and lover of all furry creatures (especially dogs and cats) - join me on my tierneycreates blog as I share stories from "A Crafter's Life".
I hate being behind on reading my blogging buddies posts, so I wasn’t going to post again until I caught up. I haven’t caught up yet but I am only like 3 – 4 days behind now so I am allowing myself to do this quick post!
As I mentioned in the February 6, 2023 post What’s On the “Design Carpet”, I am a nervous front seat passenger in a car. My best bet is to do something to distract me while I am a front seat passenger (especially when my partner John is driving, ha!). So I’ve been taking a granny square crochet project on the road whenever I am a passenger and I’ve made a bit of progress.
Instead of the “Design Wall” in my studio, I thought I’d show you my progress on the “Design Carpet” in my living room – ha!
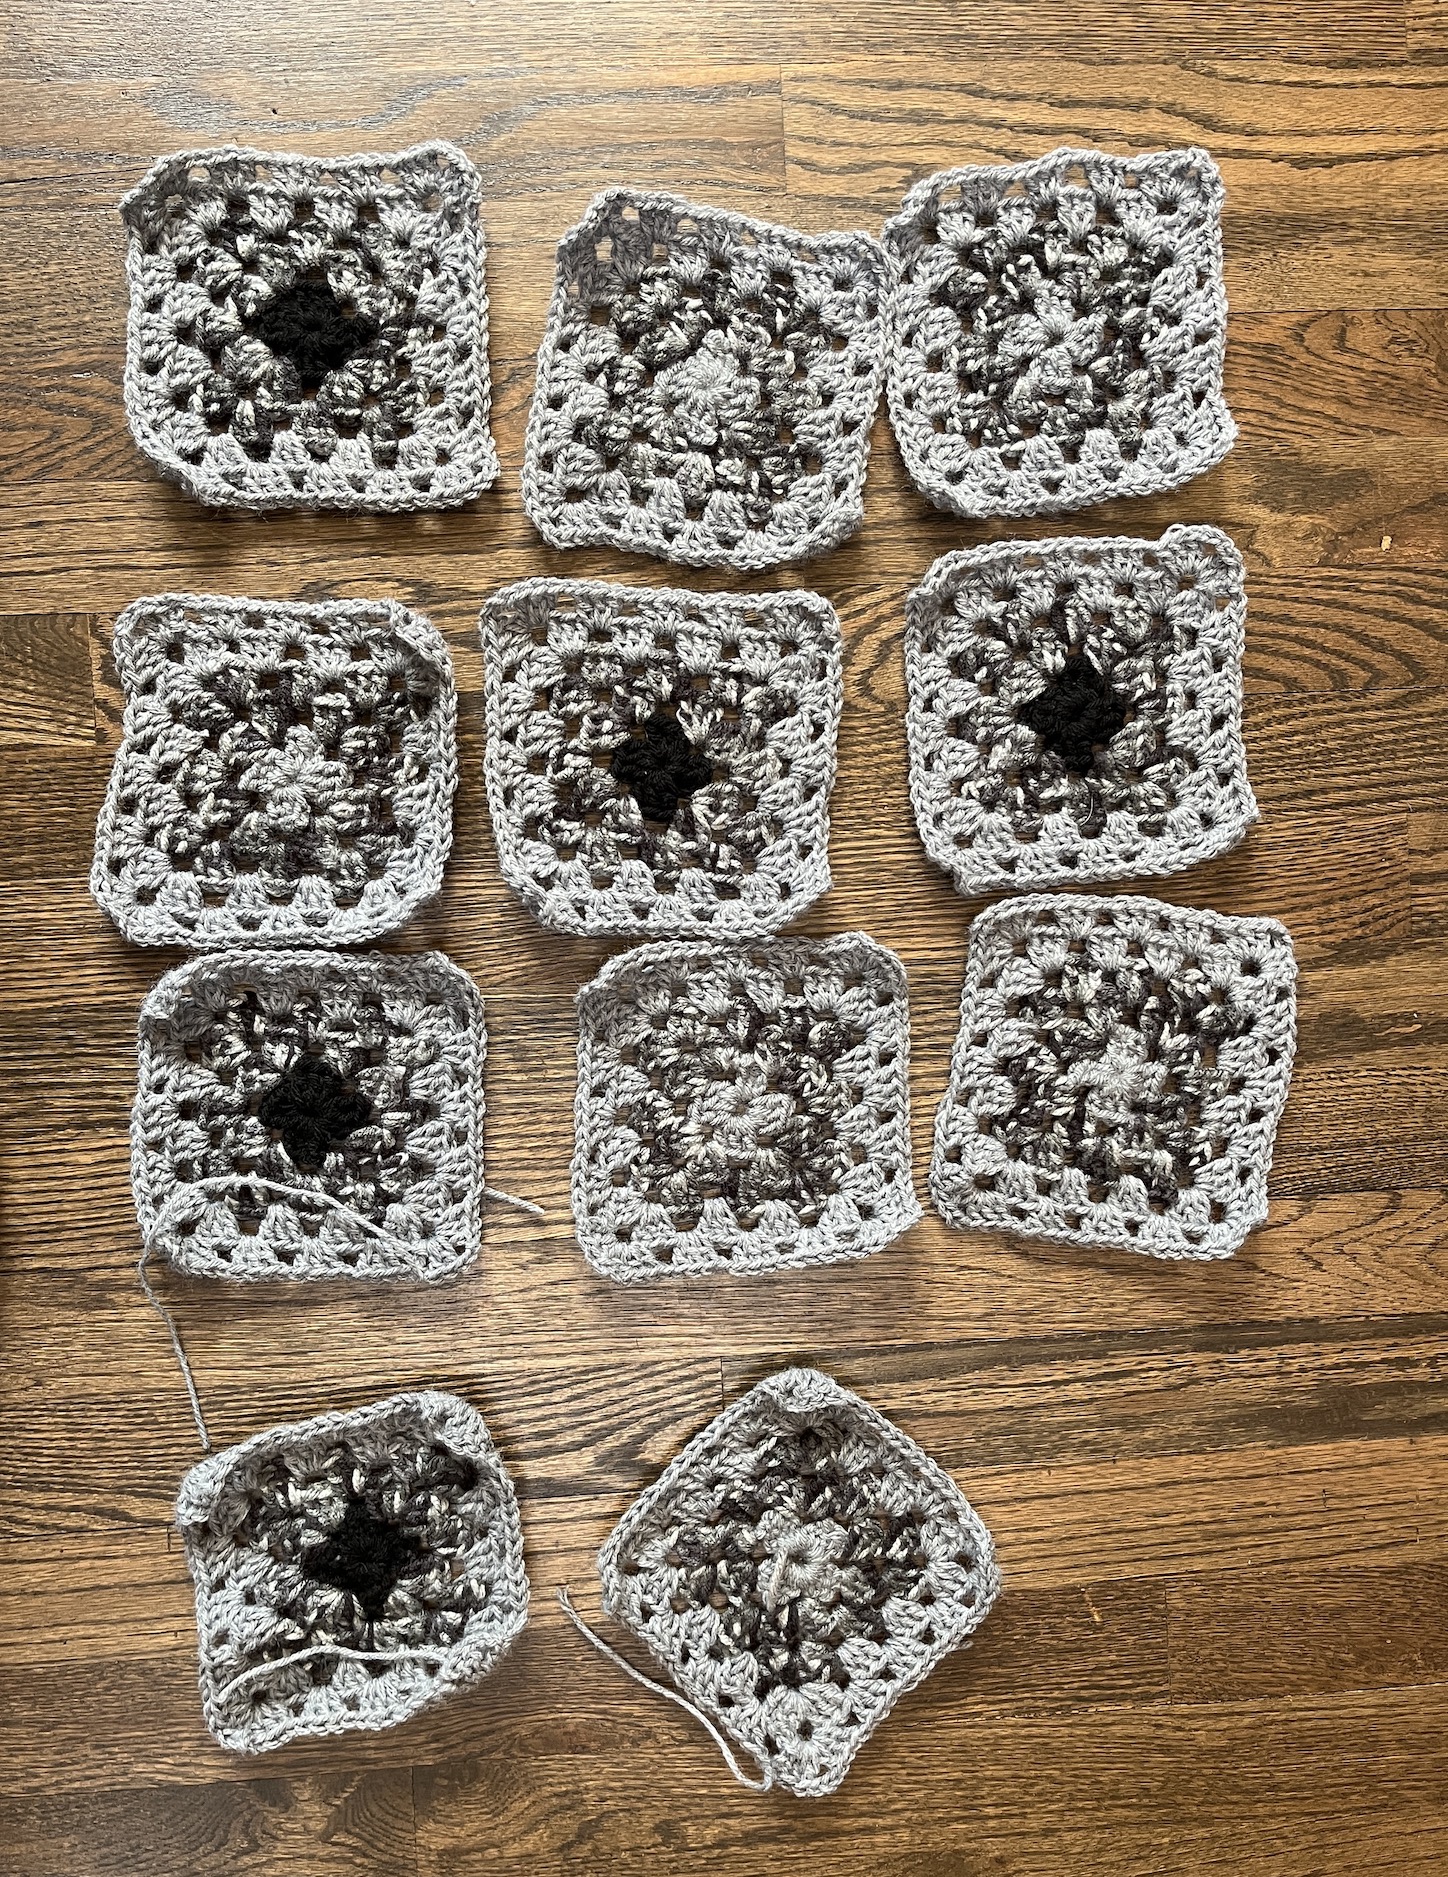
Here is what the granny squares looked like in the beginning of the project:
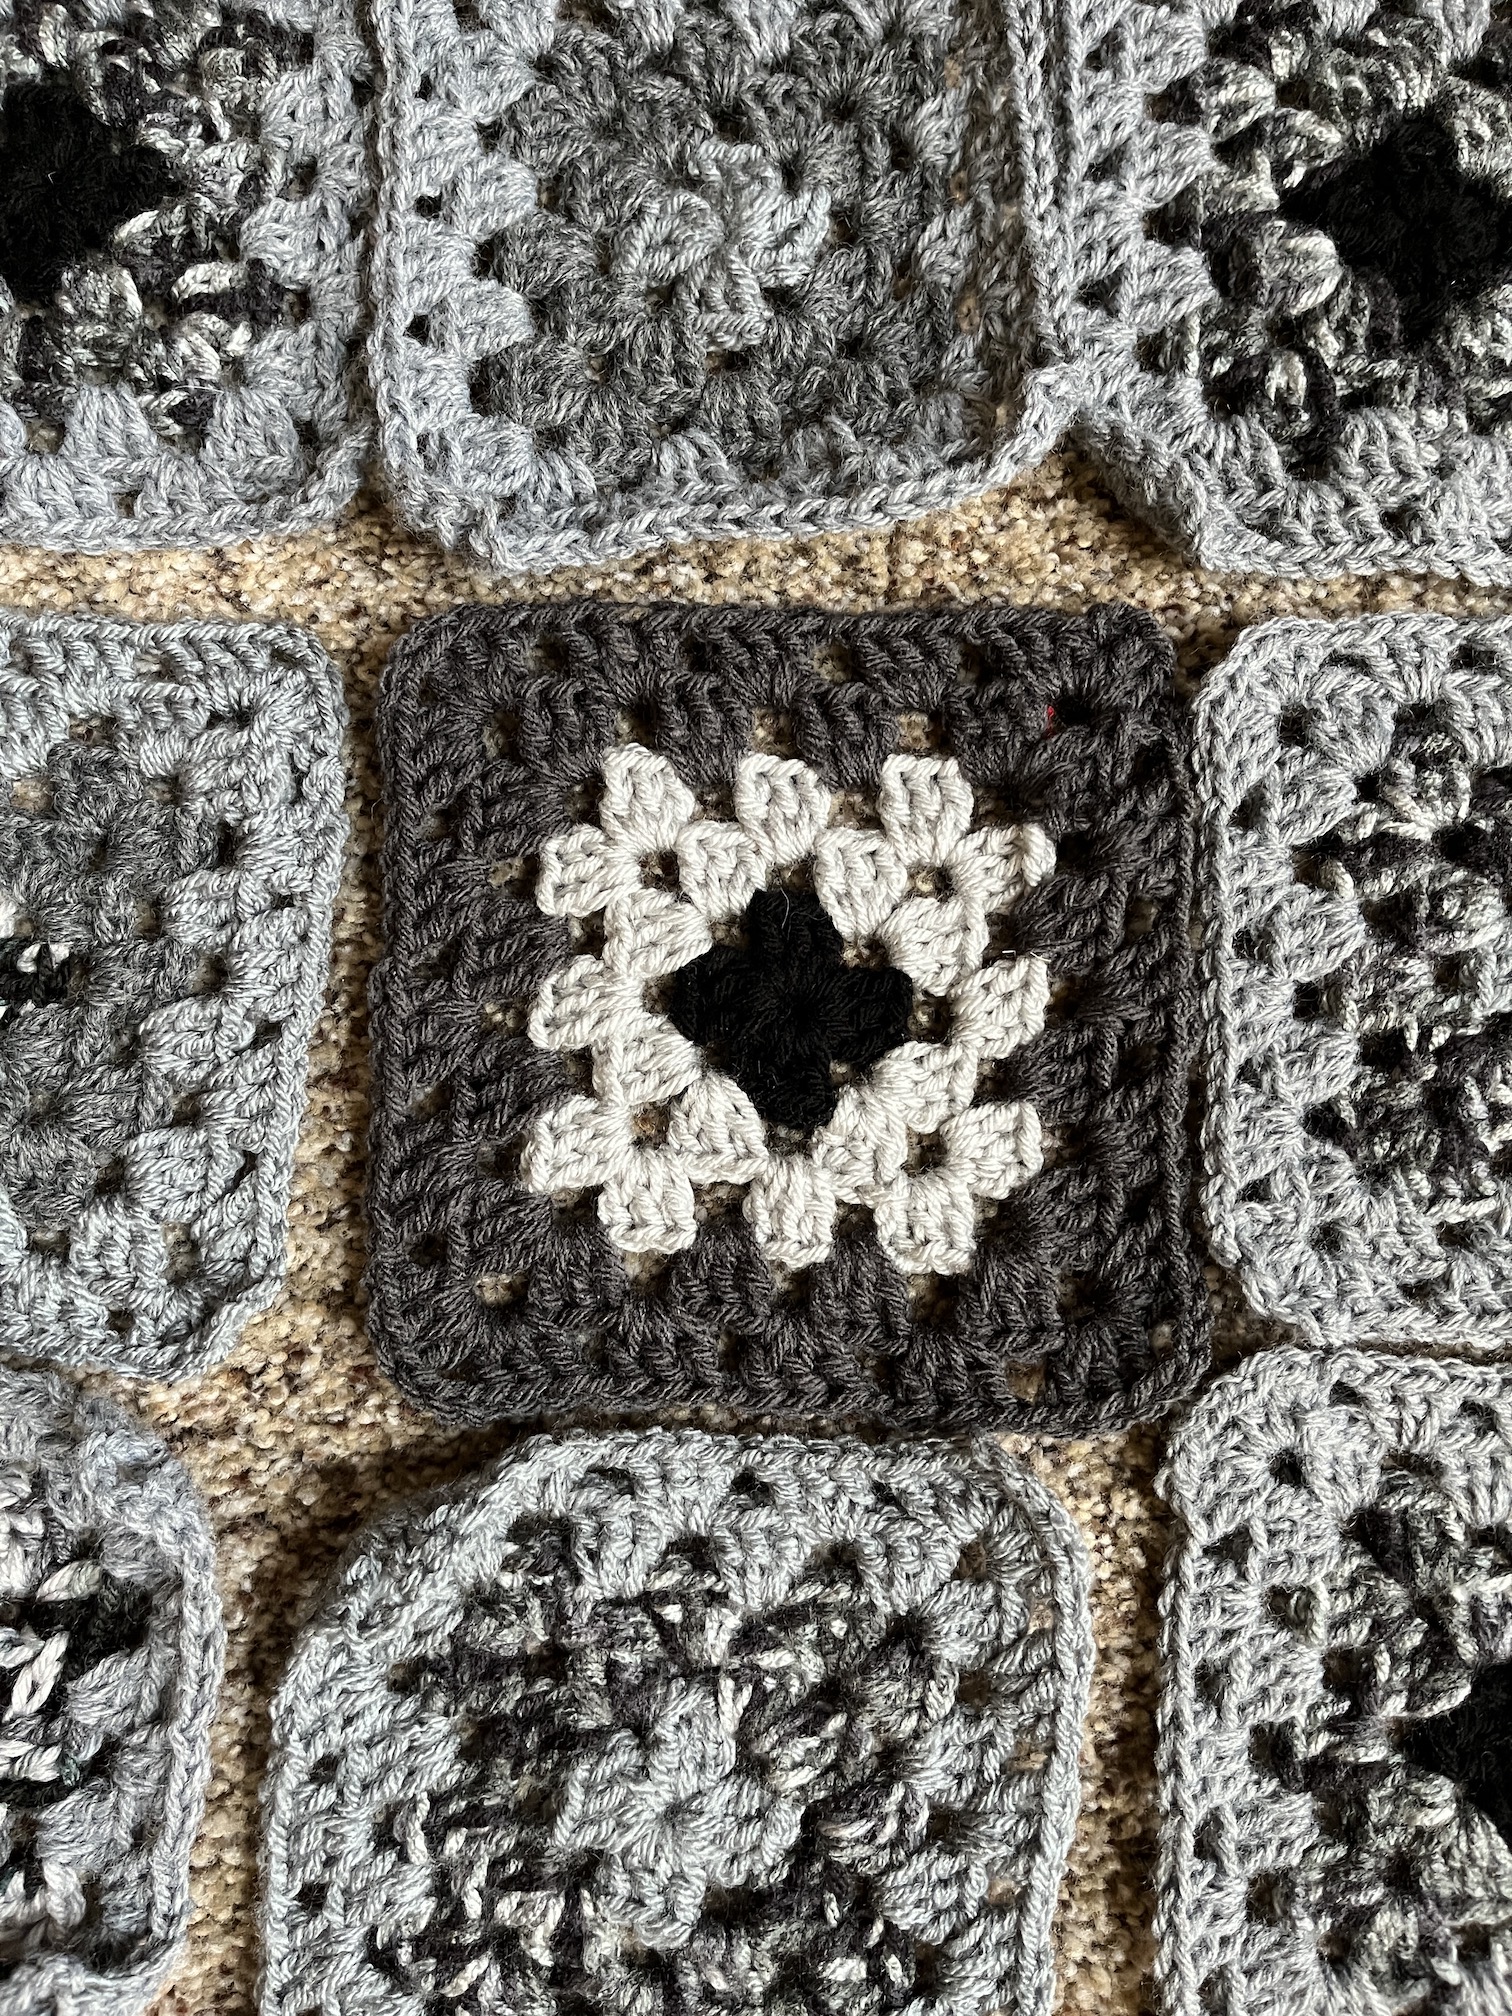
I decided to add to more rows in a different color gray to float the centers:
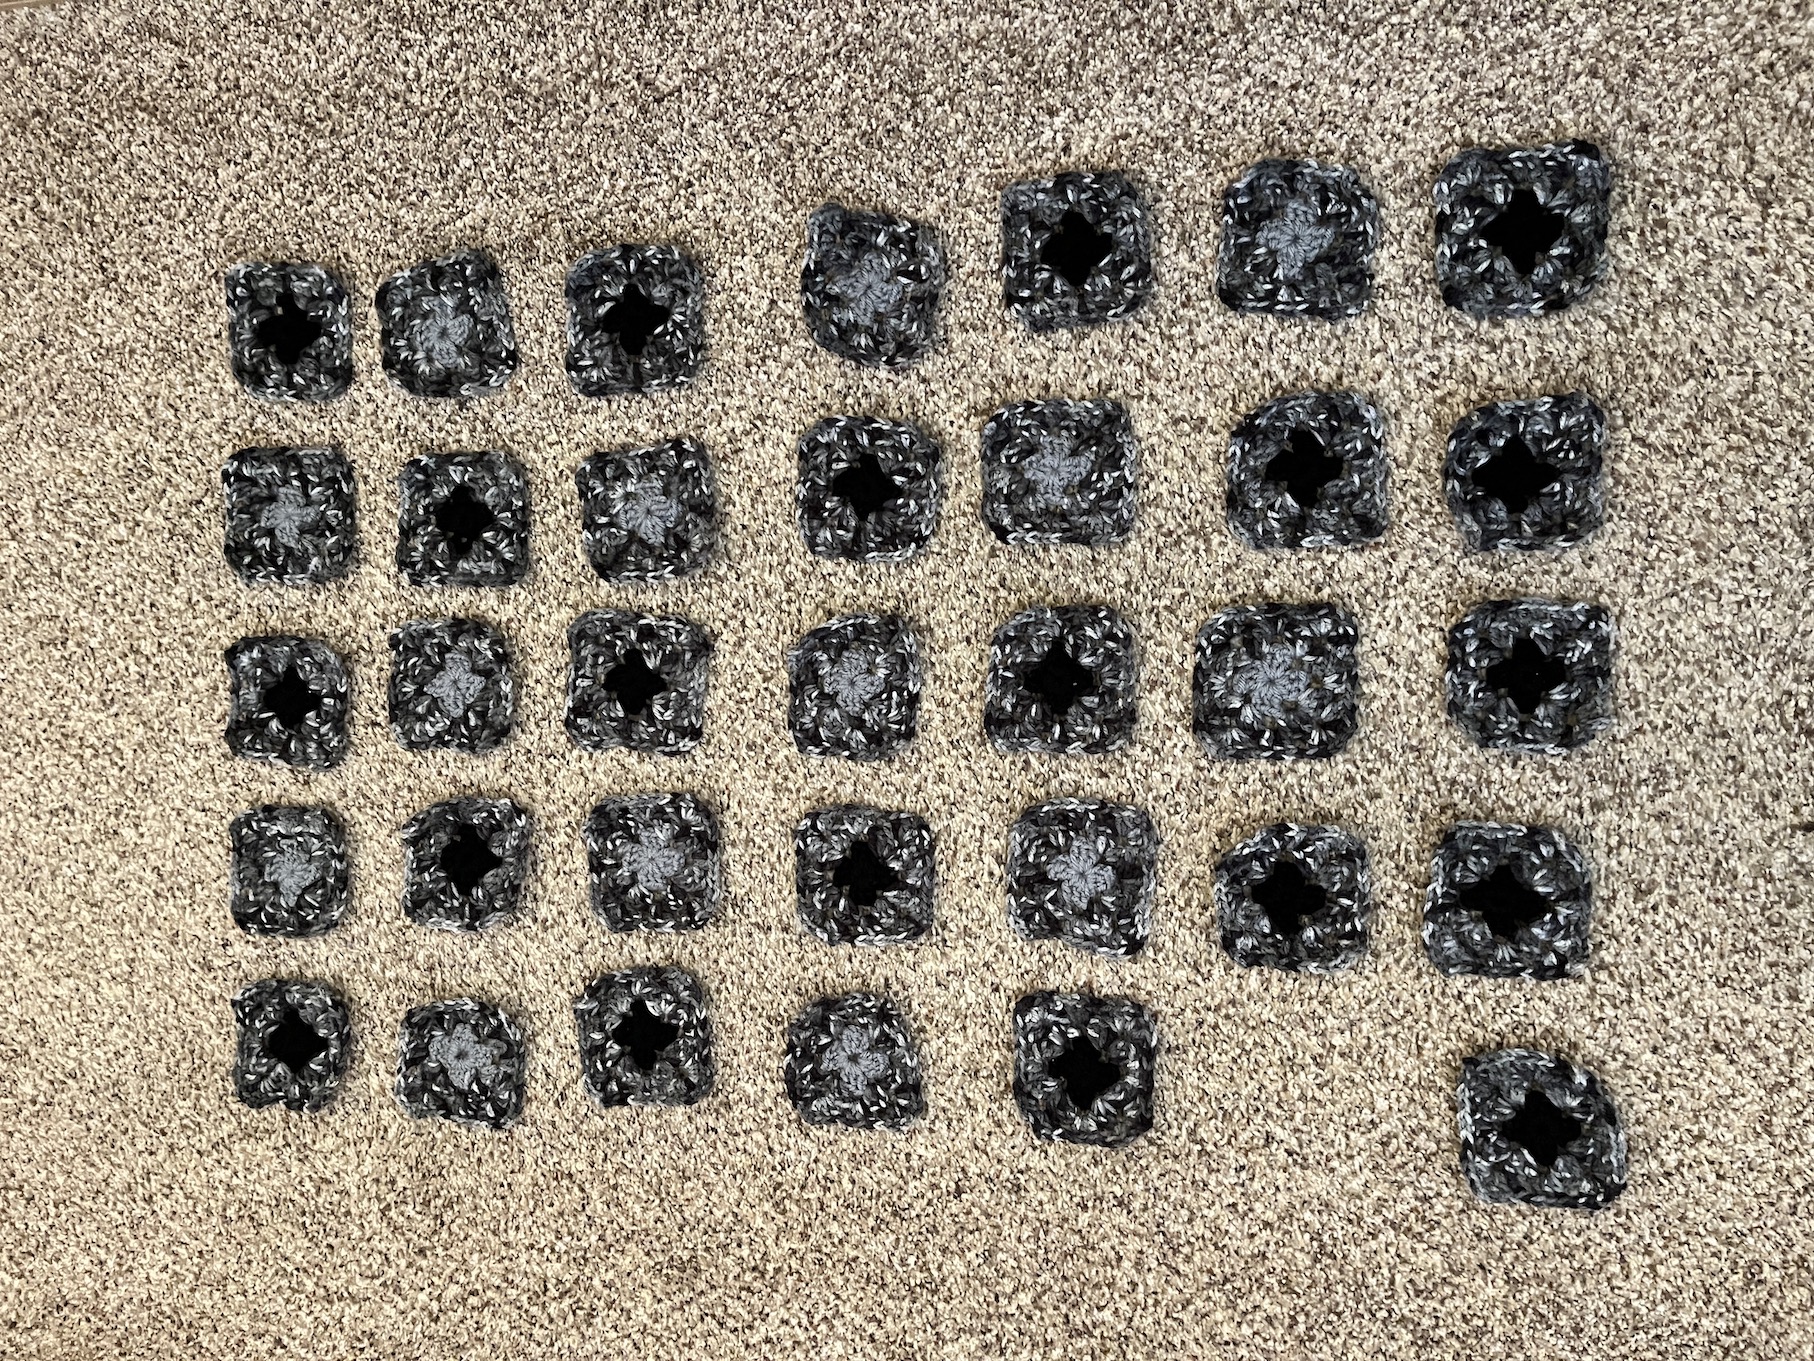
And now 5 month later, I have 50 granny squares completed:
You might notice one very dark gray bordered granny square in the image above:
Well I have 30 more granny squares to complete and I plan to make a lot of them with that darker gray yarn (Currently I plan to make an 8 by 10 granny square blanket, so I need 80 blocks to complete it).
If you haven’t guessed it, I’ve been using up my collection of random gray acrylic and acrylic/wool blend yarn, including two different variegated grays/blacks yarns from my stash. So it will be another “scrappy” granny square blanket like these two I made previously:
I seem to have a thing about gray yarn as I notice there is a lot of gray in that blanket above!
I’d love to someday make a super “scrappy” granny square afghan like the one I came across in the blog post Scrappy July by View From Our Hill. She has like 16 different yarns in each granny square block – check out the link!
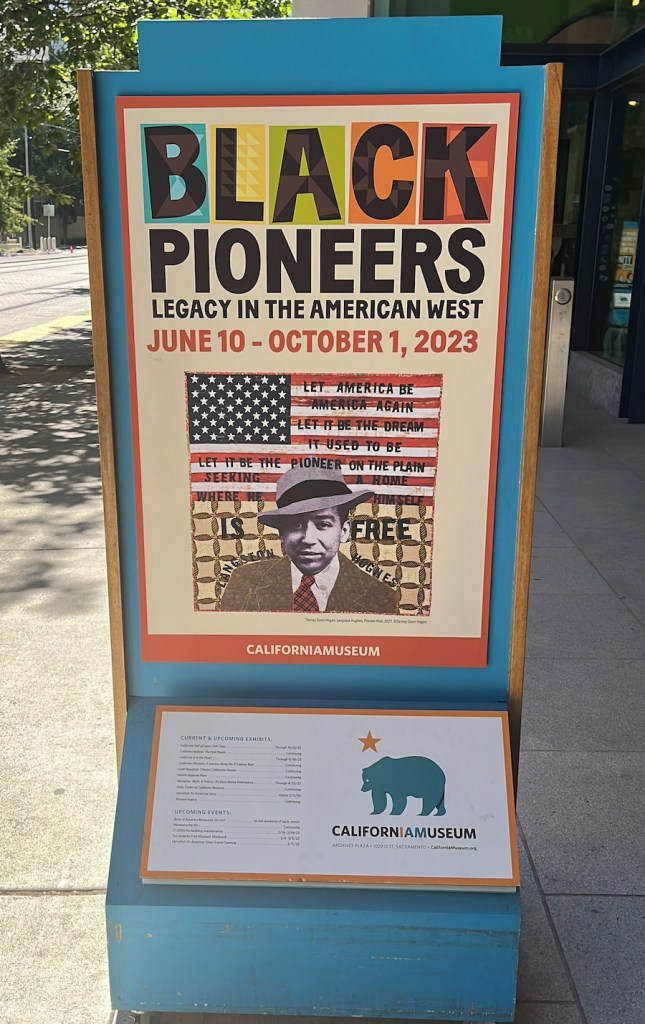
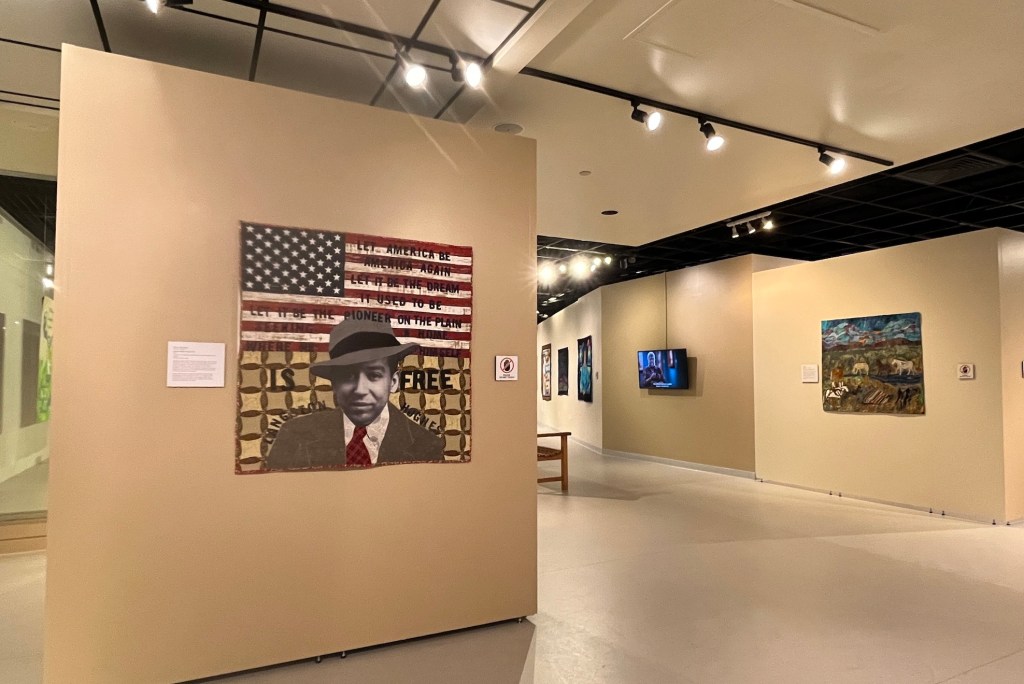
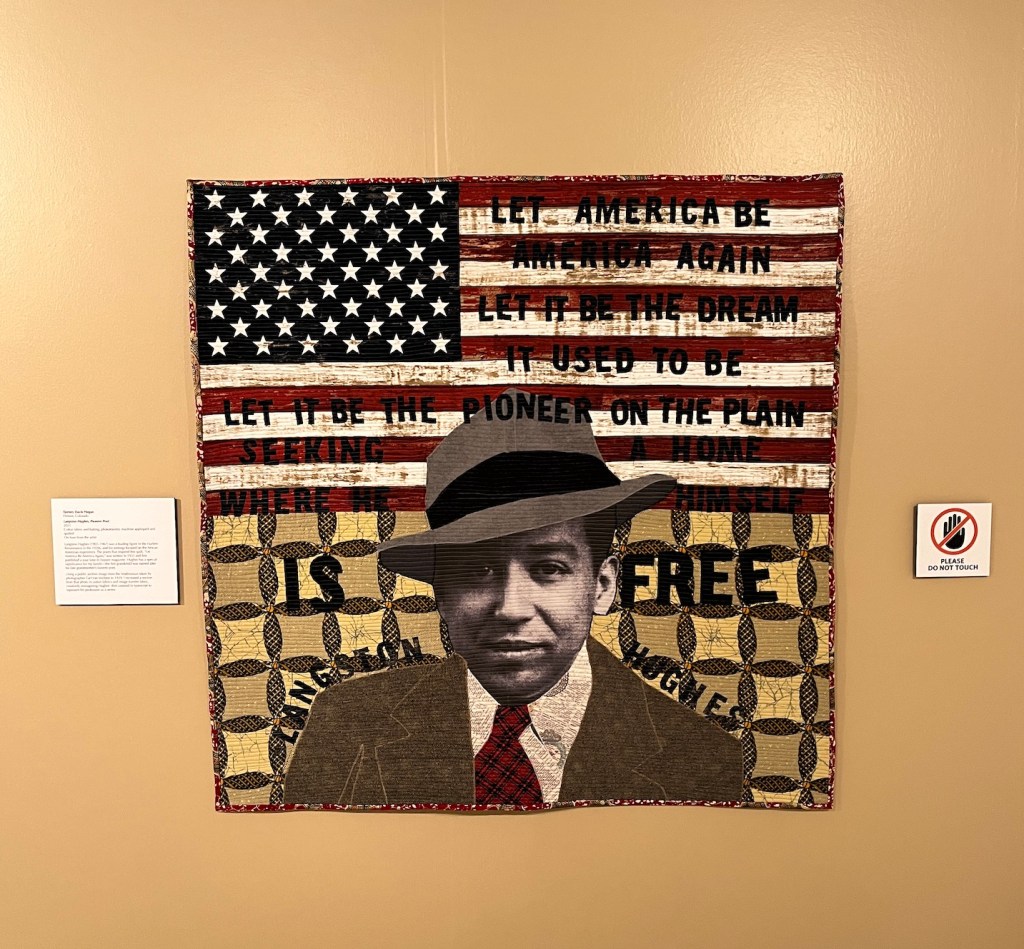
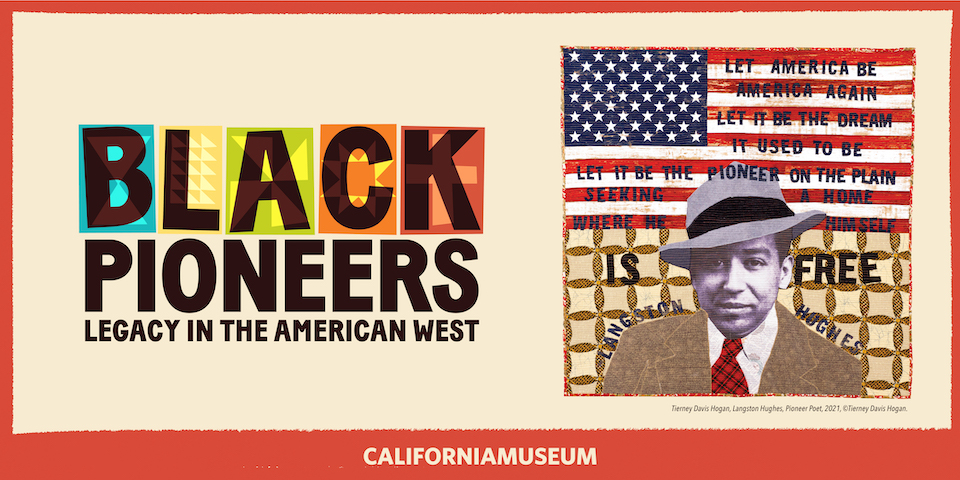
The Black Pioneers: Legacy in the American Westexhibit opened at the California Museum in Sacramento, CA on June 10, 2023 however the official exhibit opening event occurred on July 15, 2023 and I attended.
I was so surprised to discover my quilt Langston Hughes: Pioneer Poet was used as their show poster! The museum staff told me how much they loved my quilt.
Here are some of the photos I took (including the poster and my piece, see videos below to see the other quilts in the show):
This quilt has gotten a lot of mileage! I also found it posted on other online advertisement for the show:
GoodDay Sacramento morning show had a segment on the exhibit (you will see my piece toward the end of the segment):
GoodDay Sacramento
CBS News Sacramento also had a segment on the exhibit:
CBS News Sacramento
And here is the walk-through video I took while at the exhibit:
I recently returned from a long weekend in California. John and I visited family and friends in Oakland and Sacramento California. I’ll share some photos/stories from those visits in a future post.
It’s the 15th of the month and time for my monthly “ScrapHappy” post as part of the ScrapHappy group I belong. At the end of this post I have a link to the other blogs participating in this monthly event in case you’d like to check out their ScrapHappy posts.
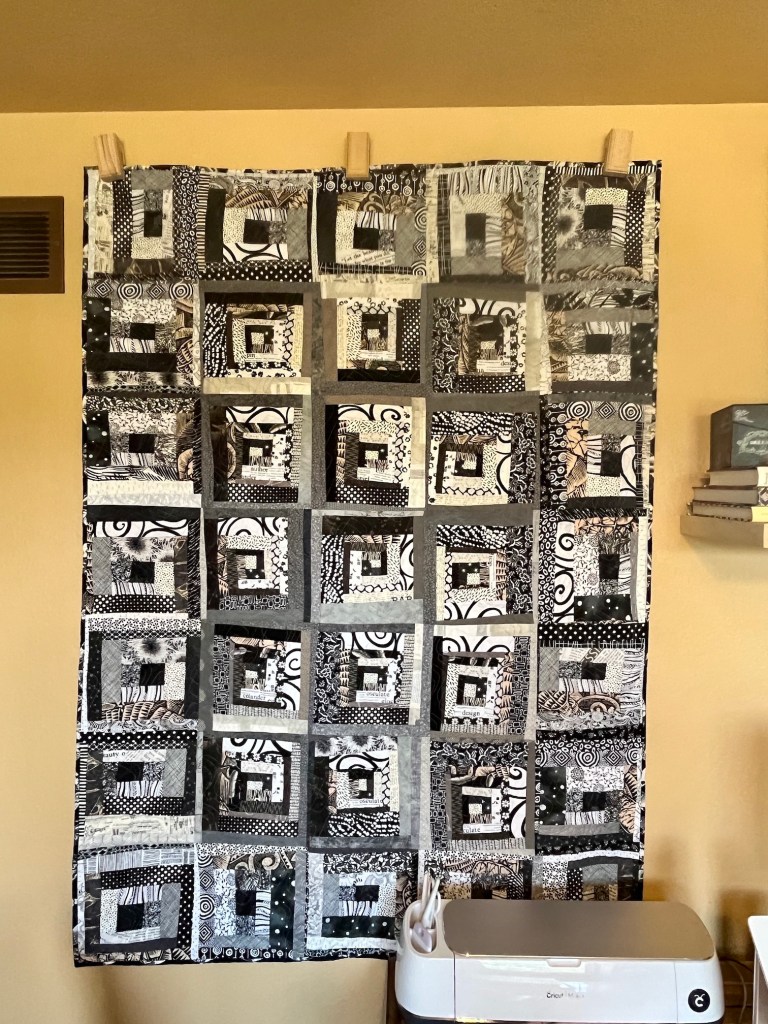
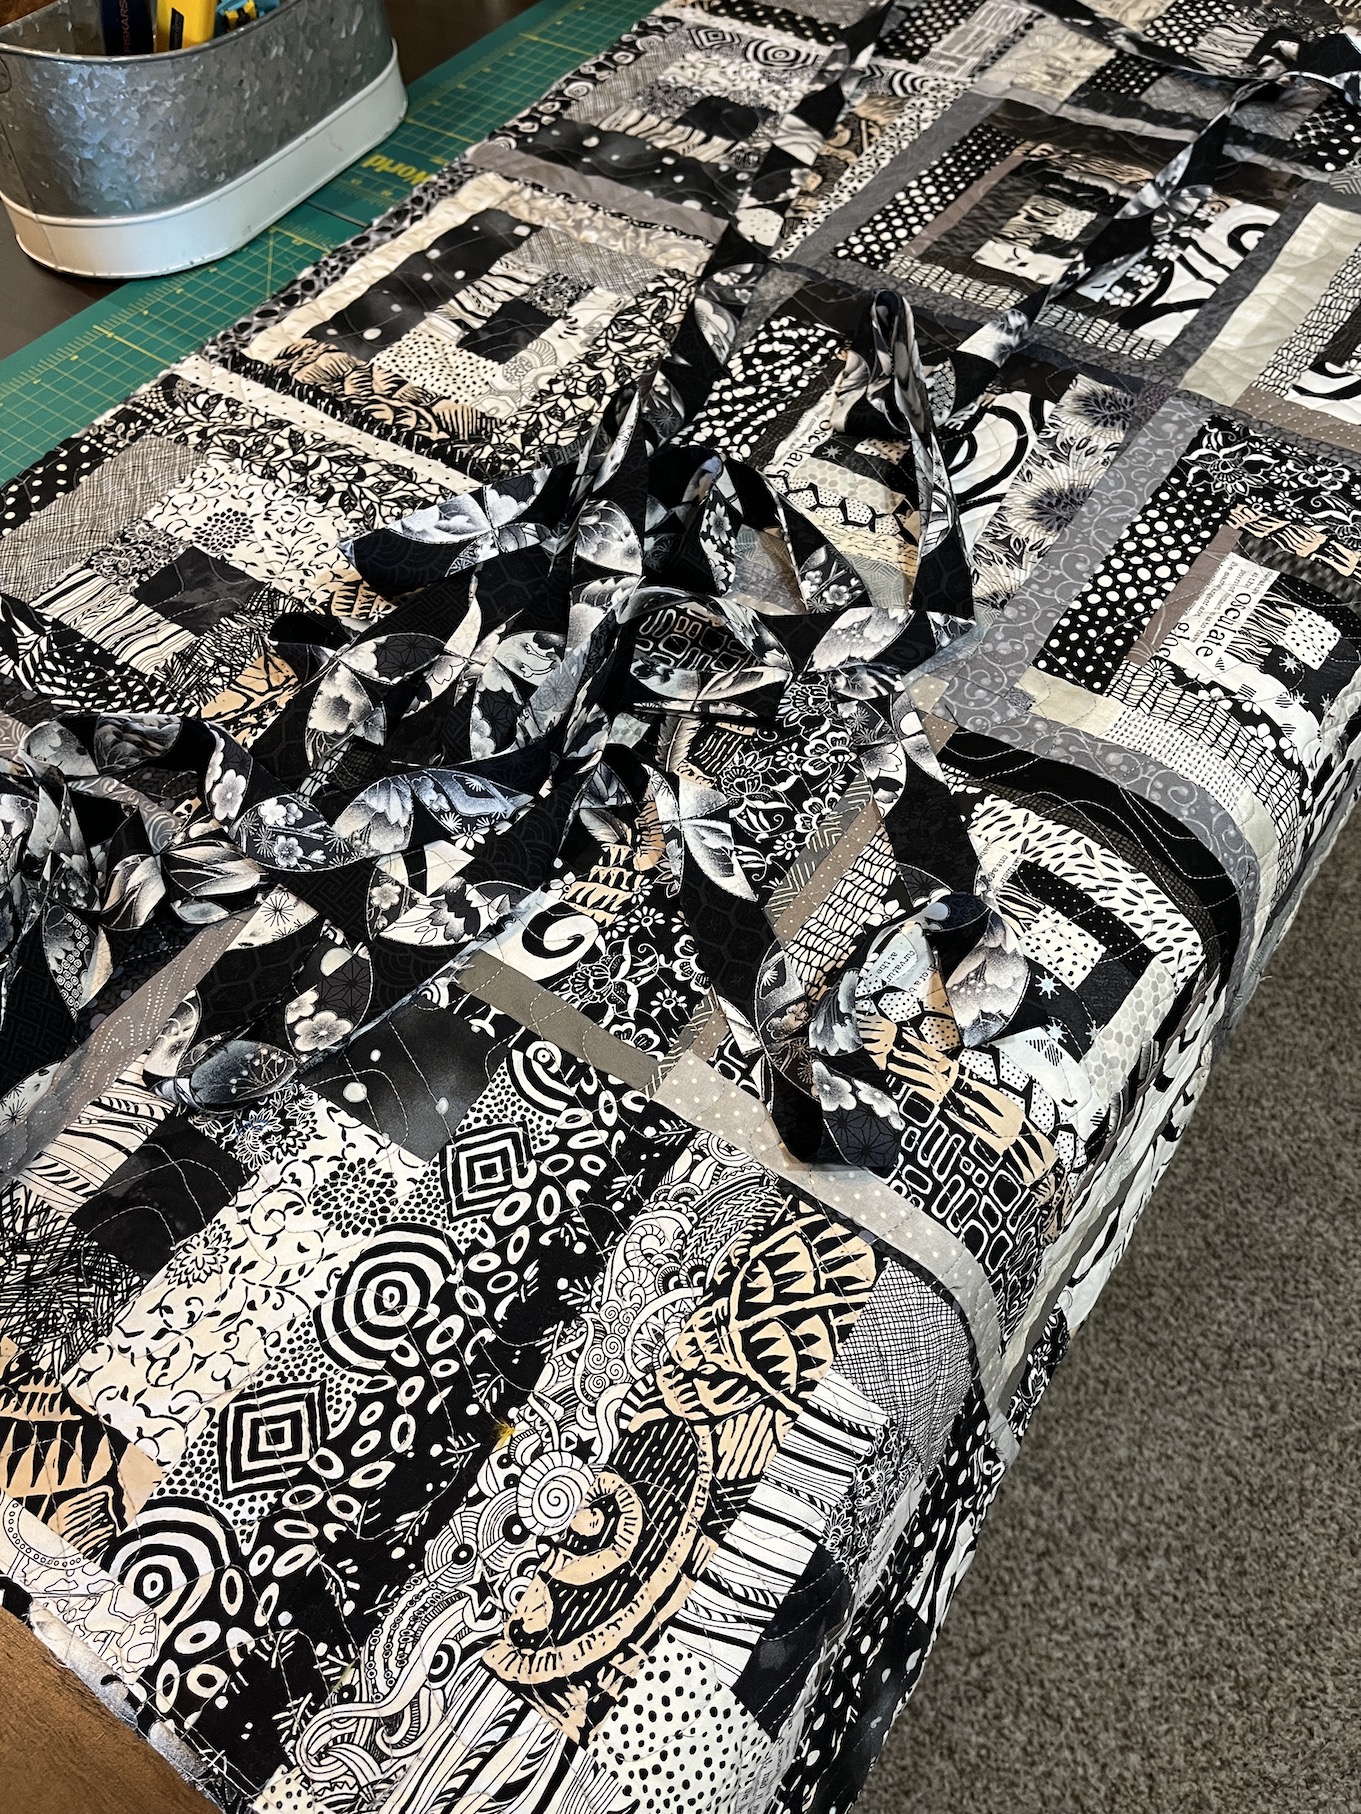
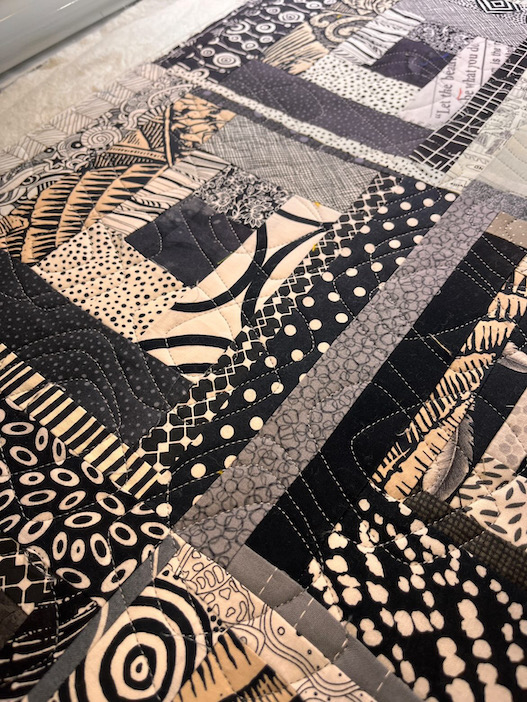
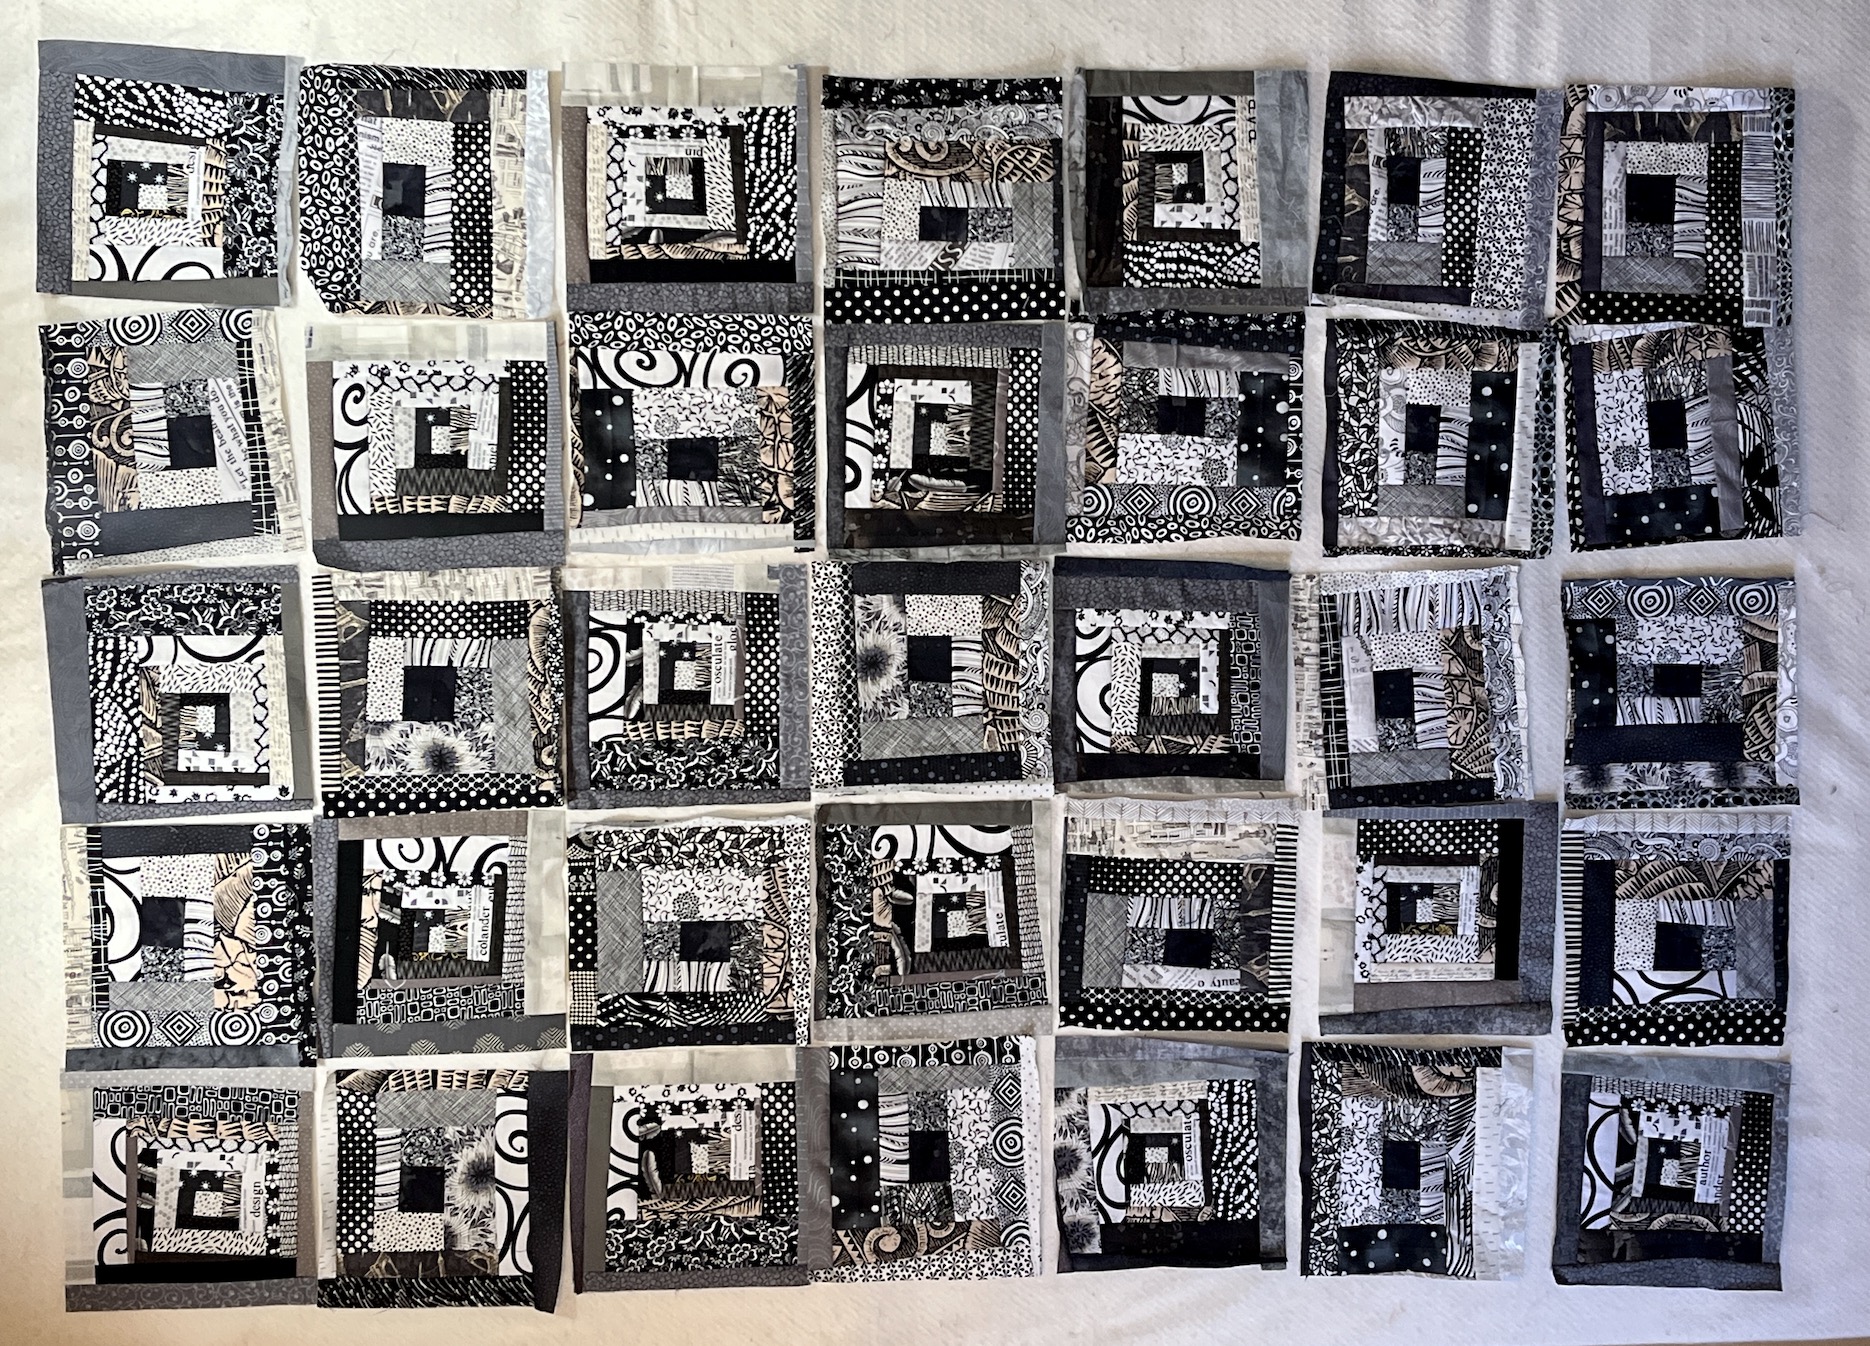
I finished the freeform scrappy log cabin quilt I first wrote about in this post – What’s on the Design Wall: Scrappy Log Cabin. I pieced the blocks as a sample for theScrap Happy Quilt RetreatI had in May. I got it back the other week from the longarm quilter, put on a binding, and earlier this week I finished sewing down the binding.
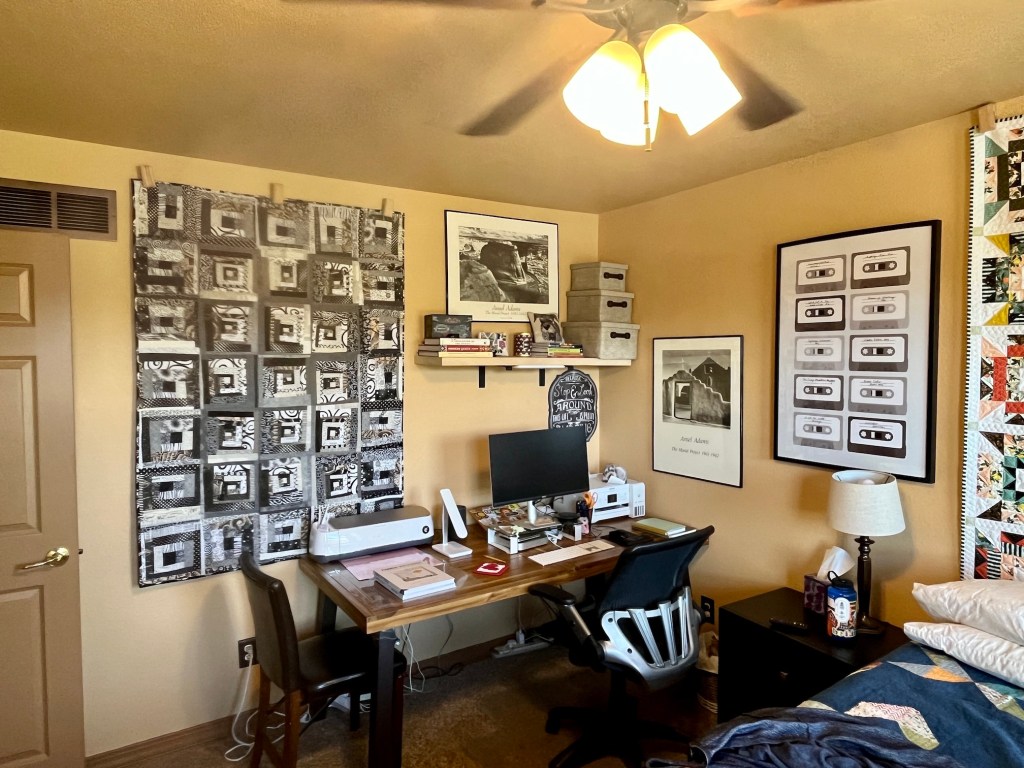
It is now hung in the wall of the upstairs guest bedroom where I have a B&W theme going on with some framed Ansel Adams posters, Black & White wall art, and B&W photos I’ve taken (on the walls not shown in the images below).
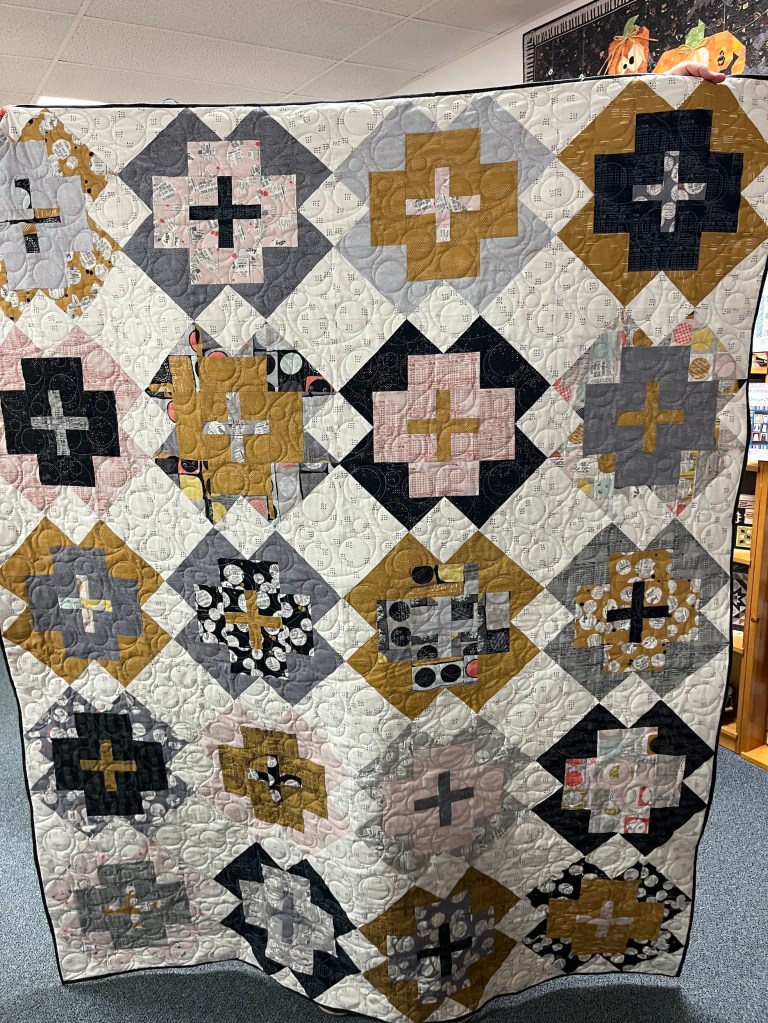
This quilt is very “scrap happy” as the quilt top was pieced entirely from my collection of black, white and gray scraps!
As promised, here are the bloggers that participate in the ScrapHappy monthly posting event, check out their blogs linked below for their ScrapHappy posts:
A month ago John and I decided to visit Fort Collins, CO for an overnight visit. We love Fort Collins and are entertaining the idea of moving there someday…perhaps.
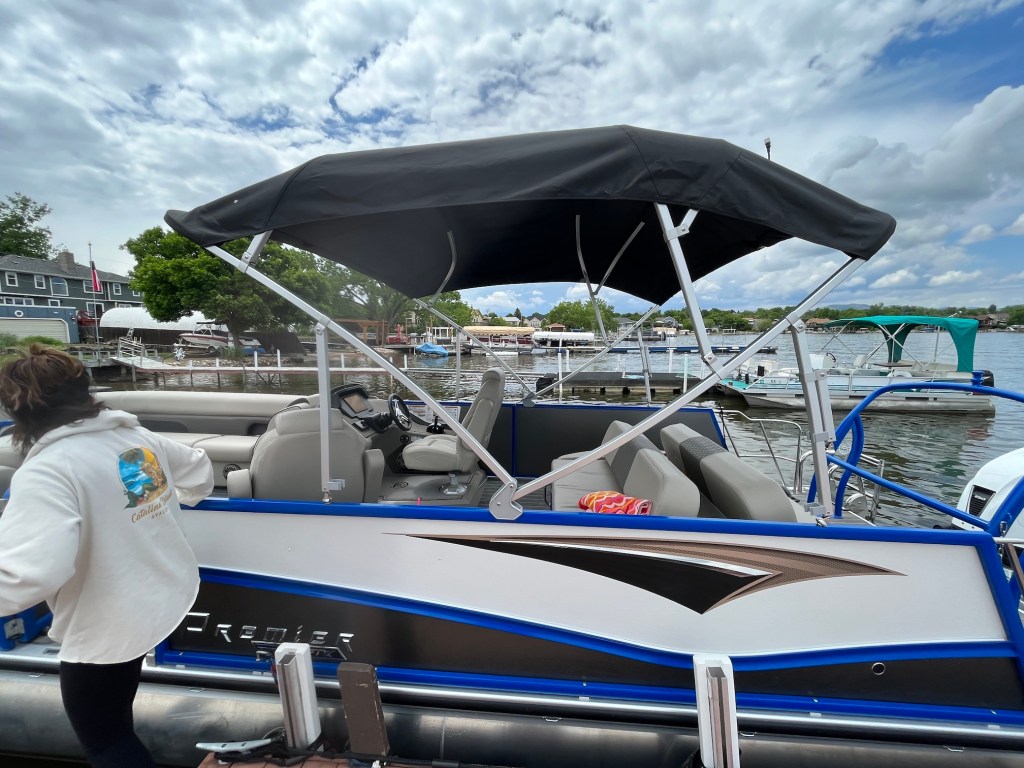
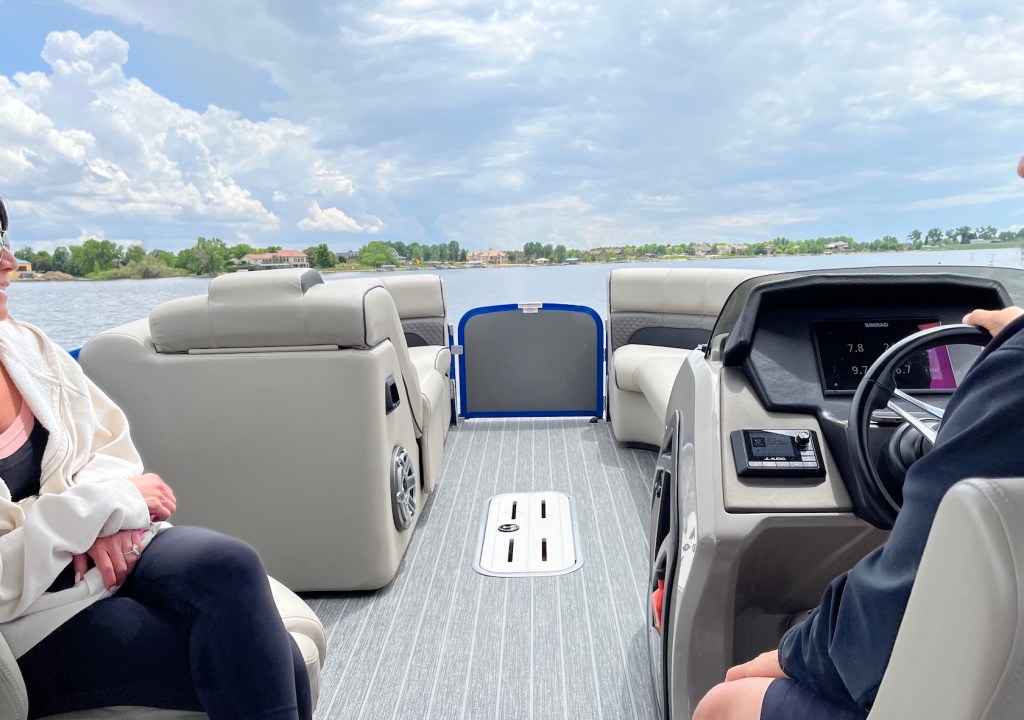
On our way to Fort Collins, we stopped in the neighboring town Loveland, CO to visit John’s sister and her husband and go on a boat ride with her and her husband.
We had a lovely boat ride around the reservoir/lake area they live in (Colorado is far from the ocean but we do have rivers, reservoirs and lakes to sail on). Their adorable little dog Lacey came on the boat ride with us and had her own little bed on the boat:
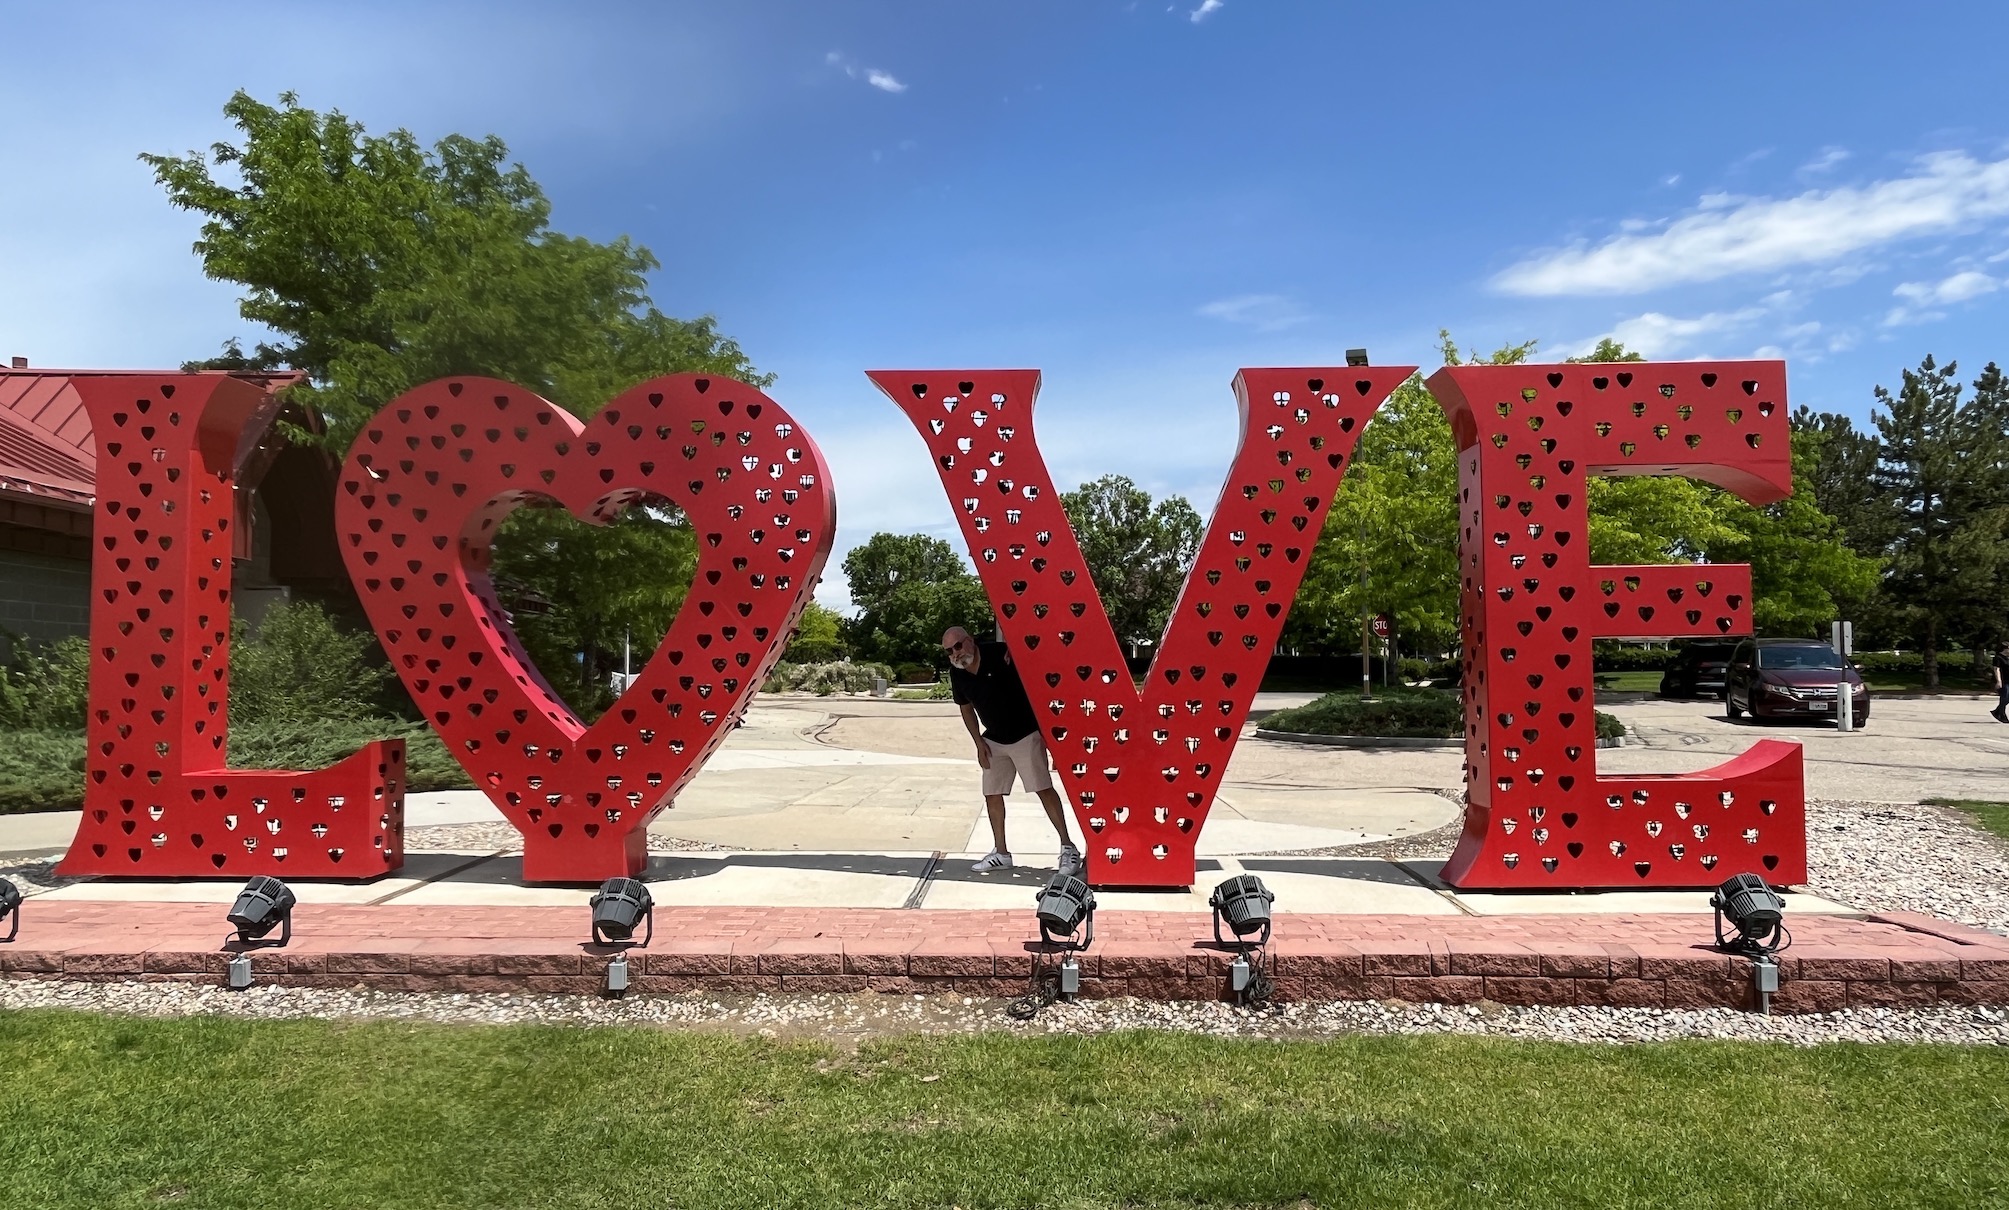
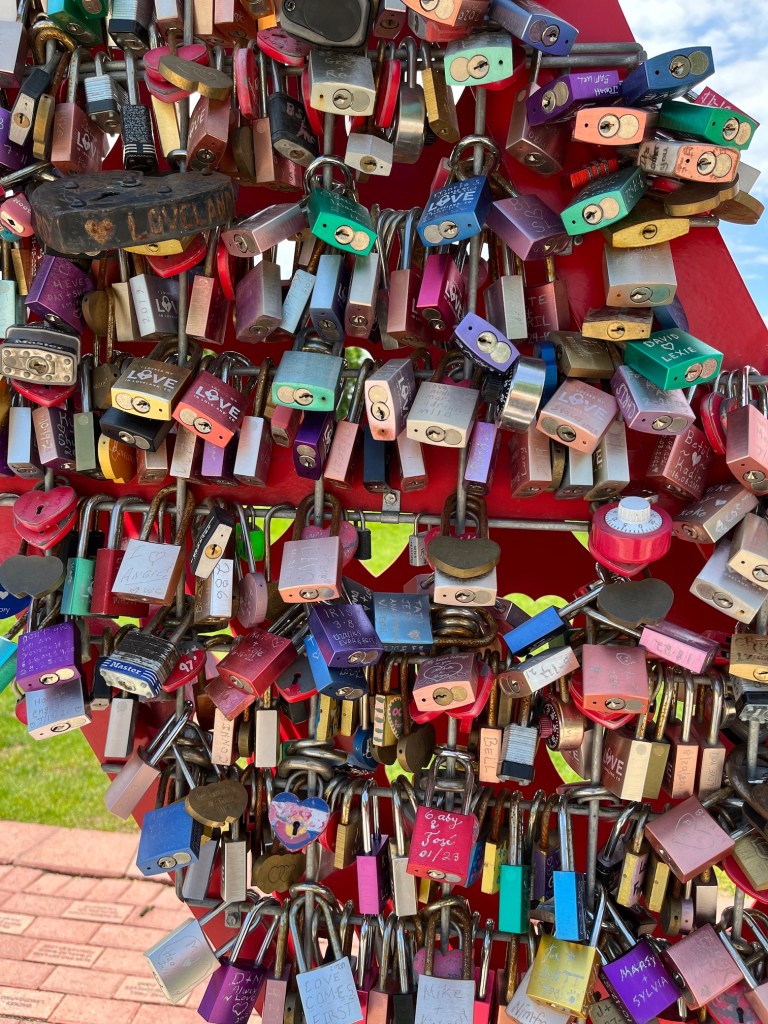
After visiting with John’s sister and her husband we stopped at the Loveland Visitor Center to get John a sticker (he collects stickers to put on his toolbox) and took some photos of the awesome “Love” sign outside the visitor center:
(Did you spot John in the photo?)
Behind the “O” of LOVE, which is shaped into a heart, are “love locks” where people promising their love to each other have left locks:
You can see the theme of Loveland is “Love” and inside the visitor center they also had this sign that you could use as a background for photos:
Postscript
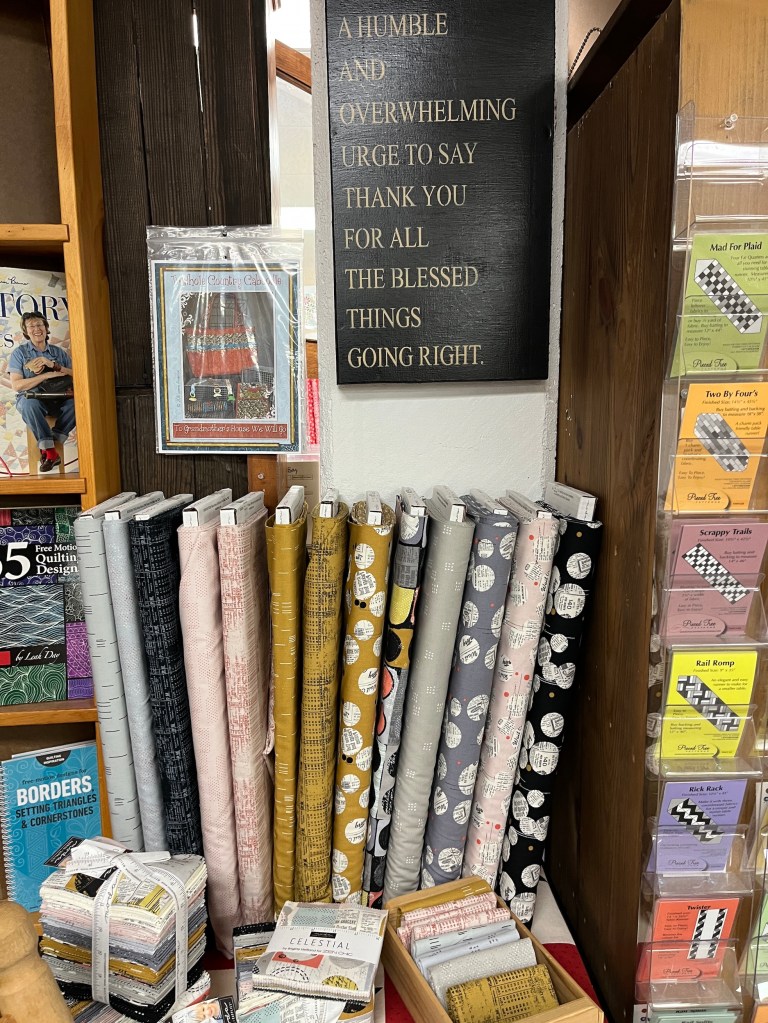
A Visit to Pink Door Fabrics
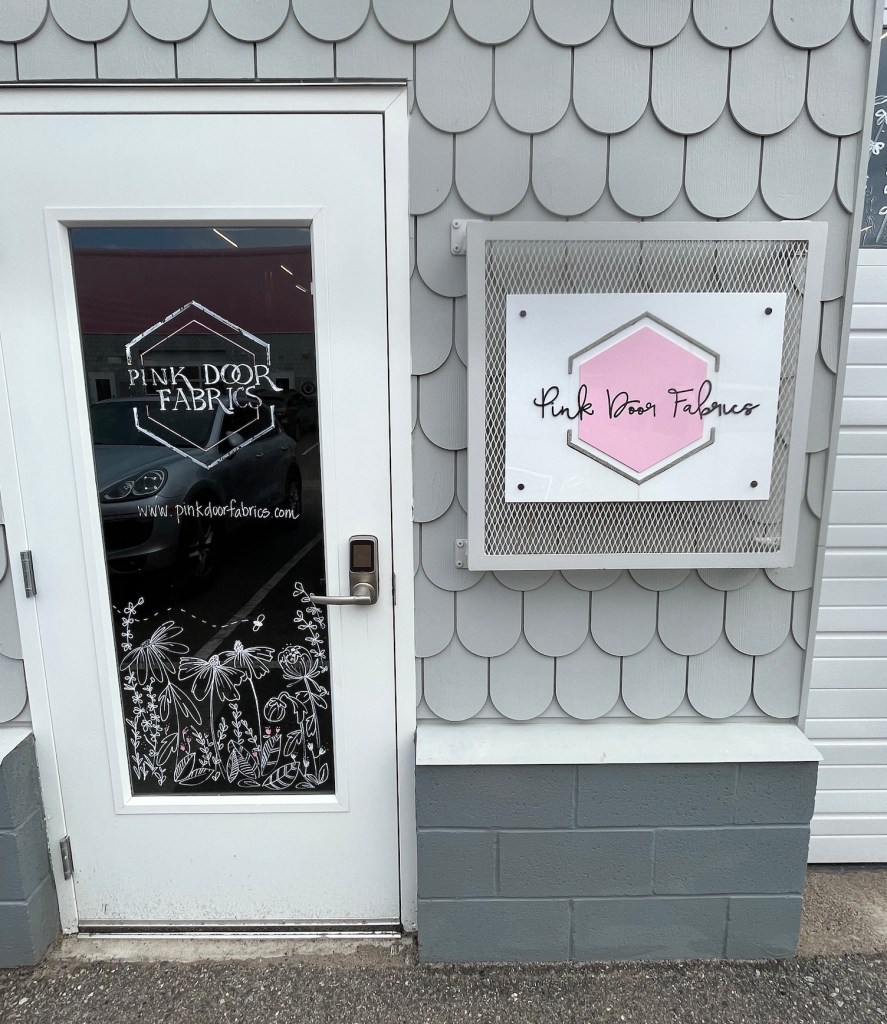
Before we got to Loveland, we first stopped in Frederick, CO to visit the retail store of Pink Door Fabrics, which is only open to the public 2 days a month.
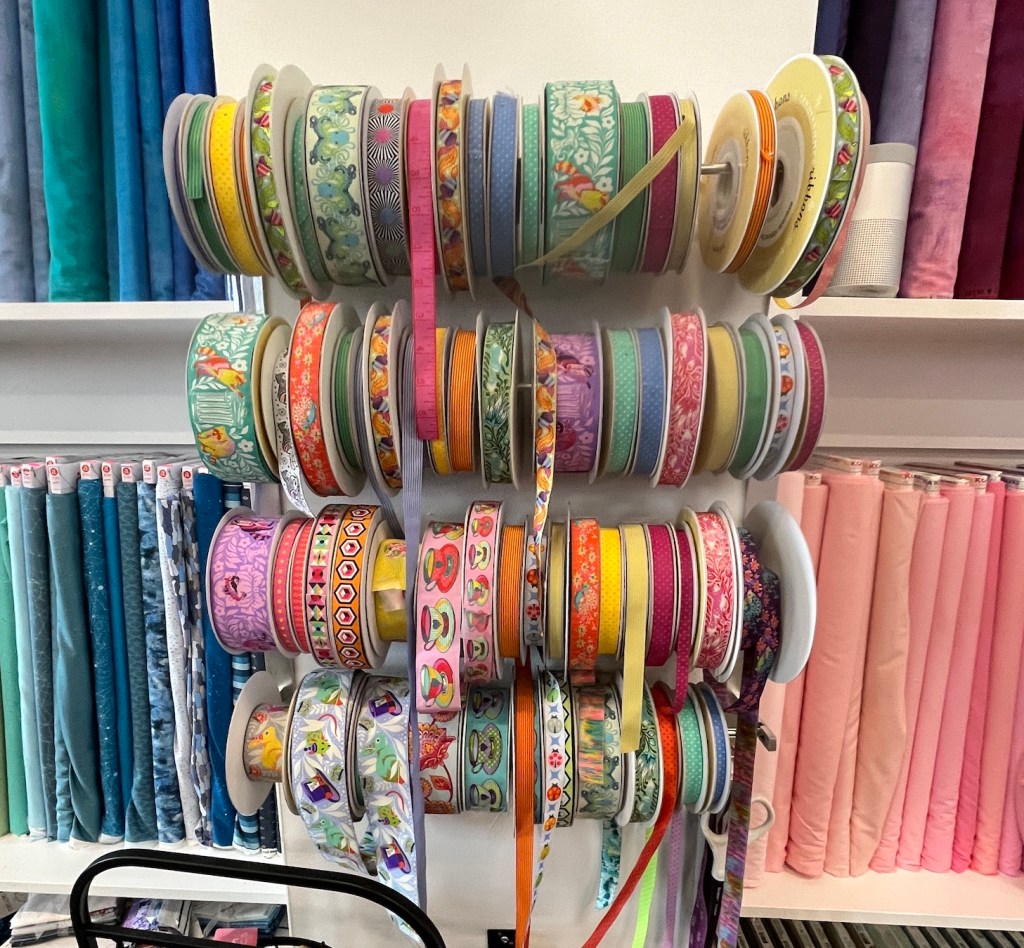
Here are some photos from my wander around the retail store of Pink Door Fabrics, which is primarily an online shop specializing in Tula Pink fabrics.
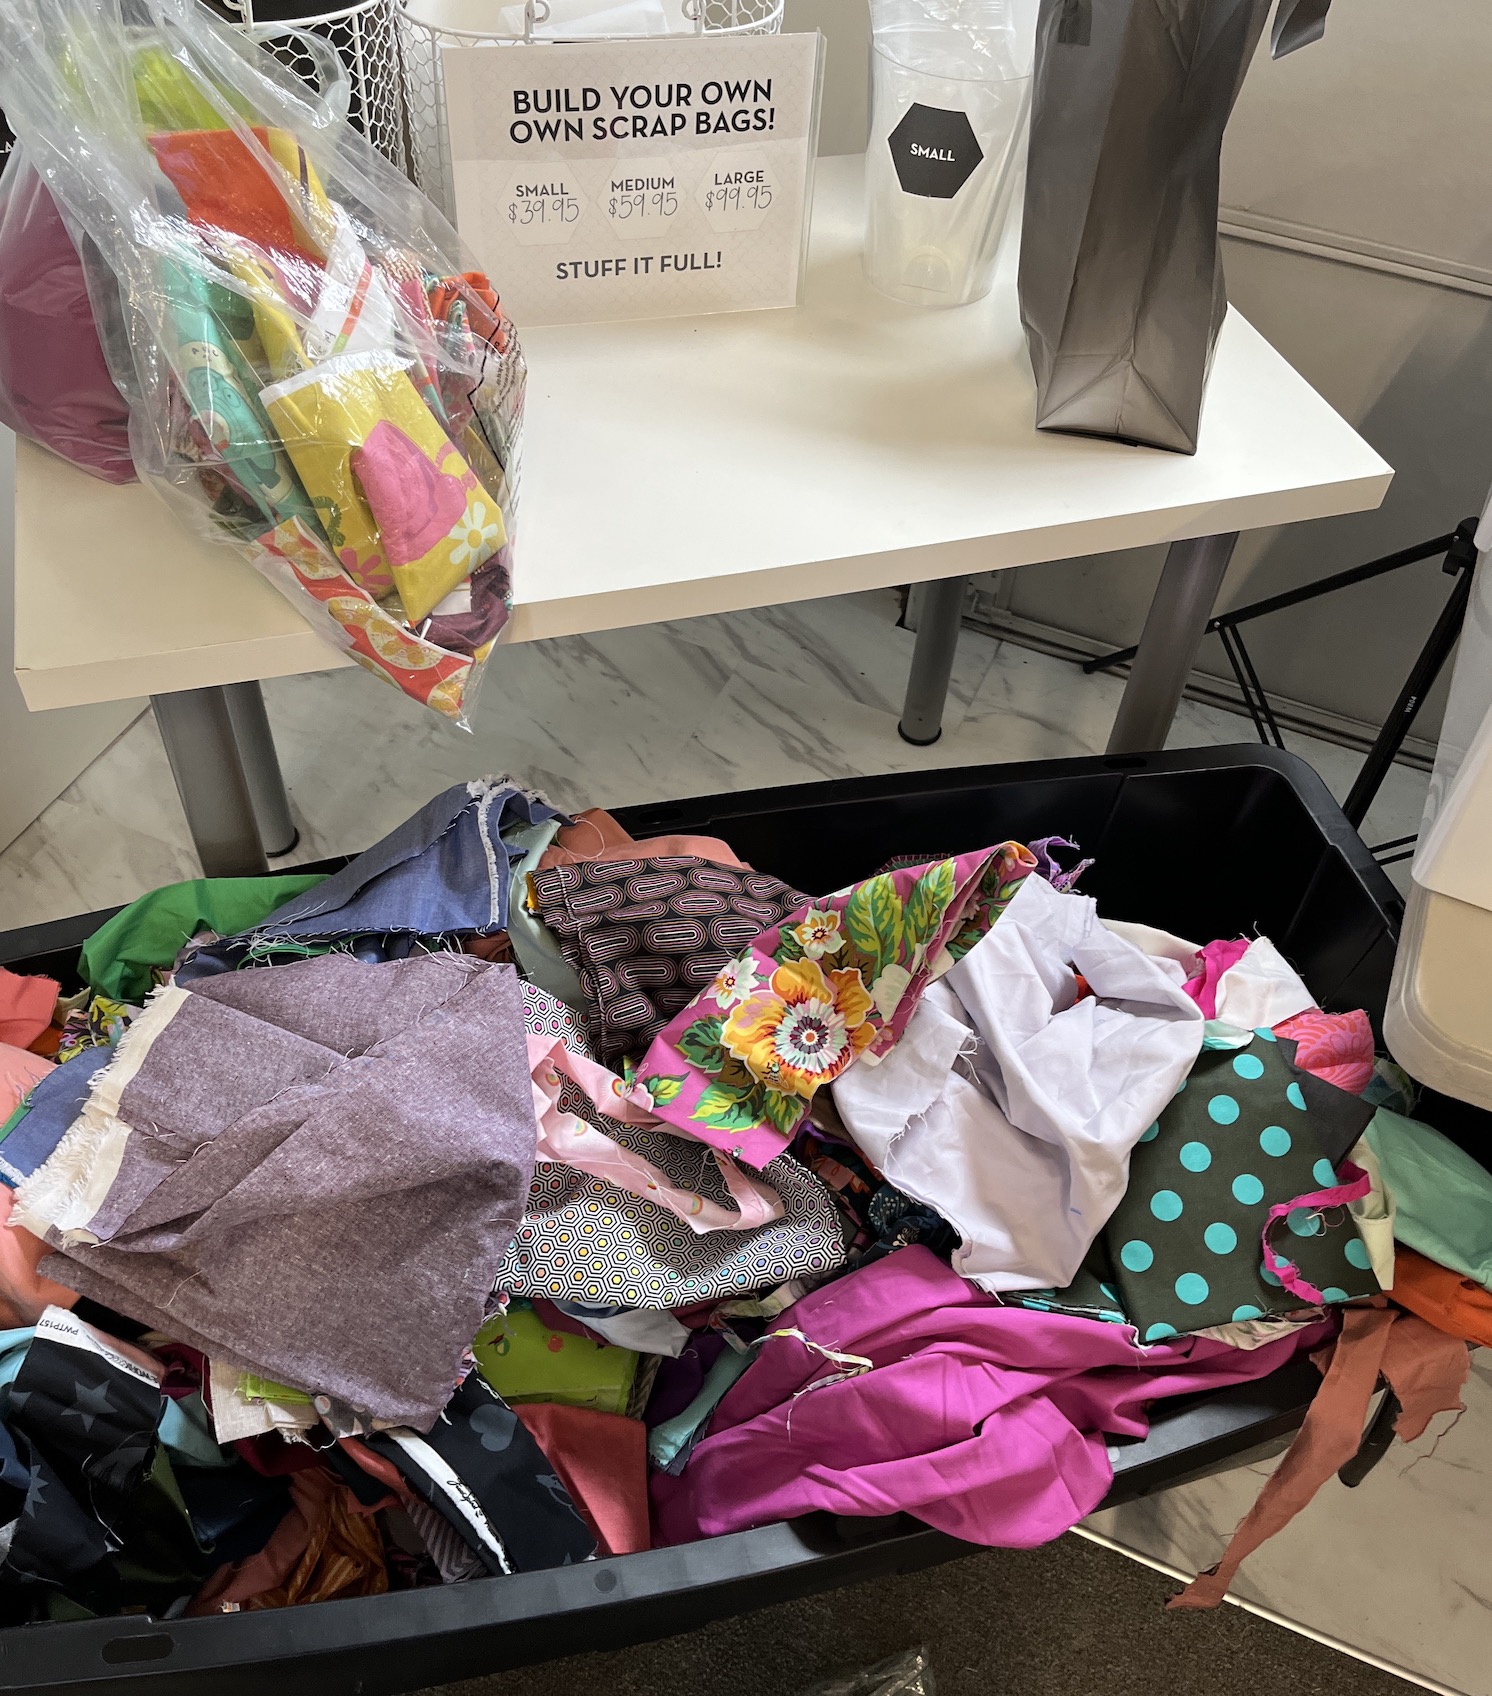
I was well behaved until I got to this section of the shop:
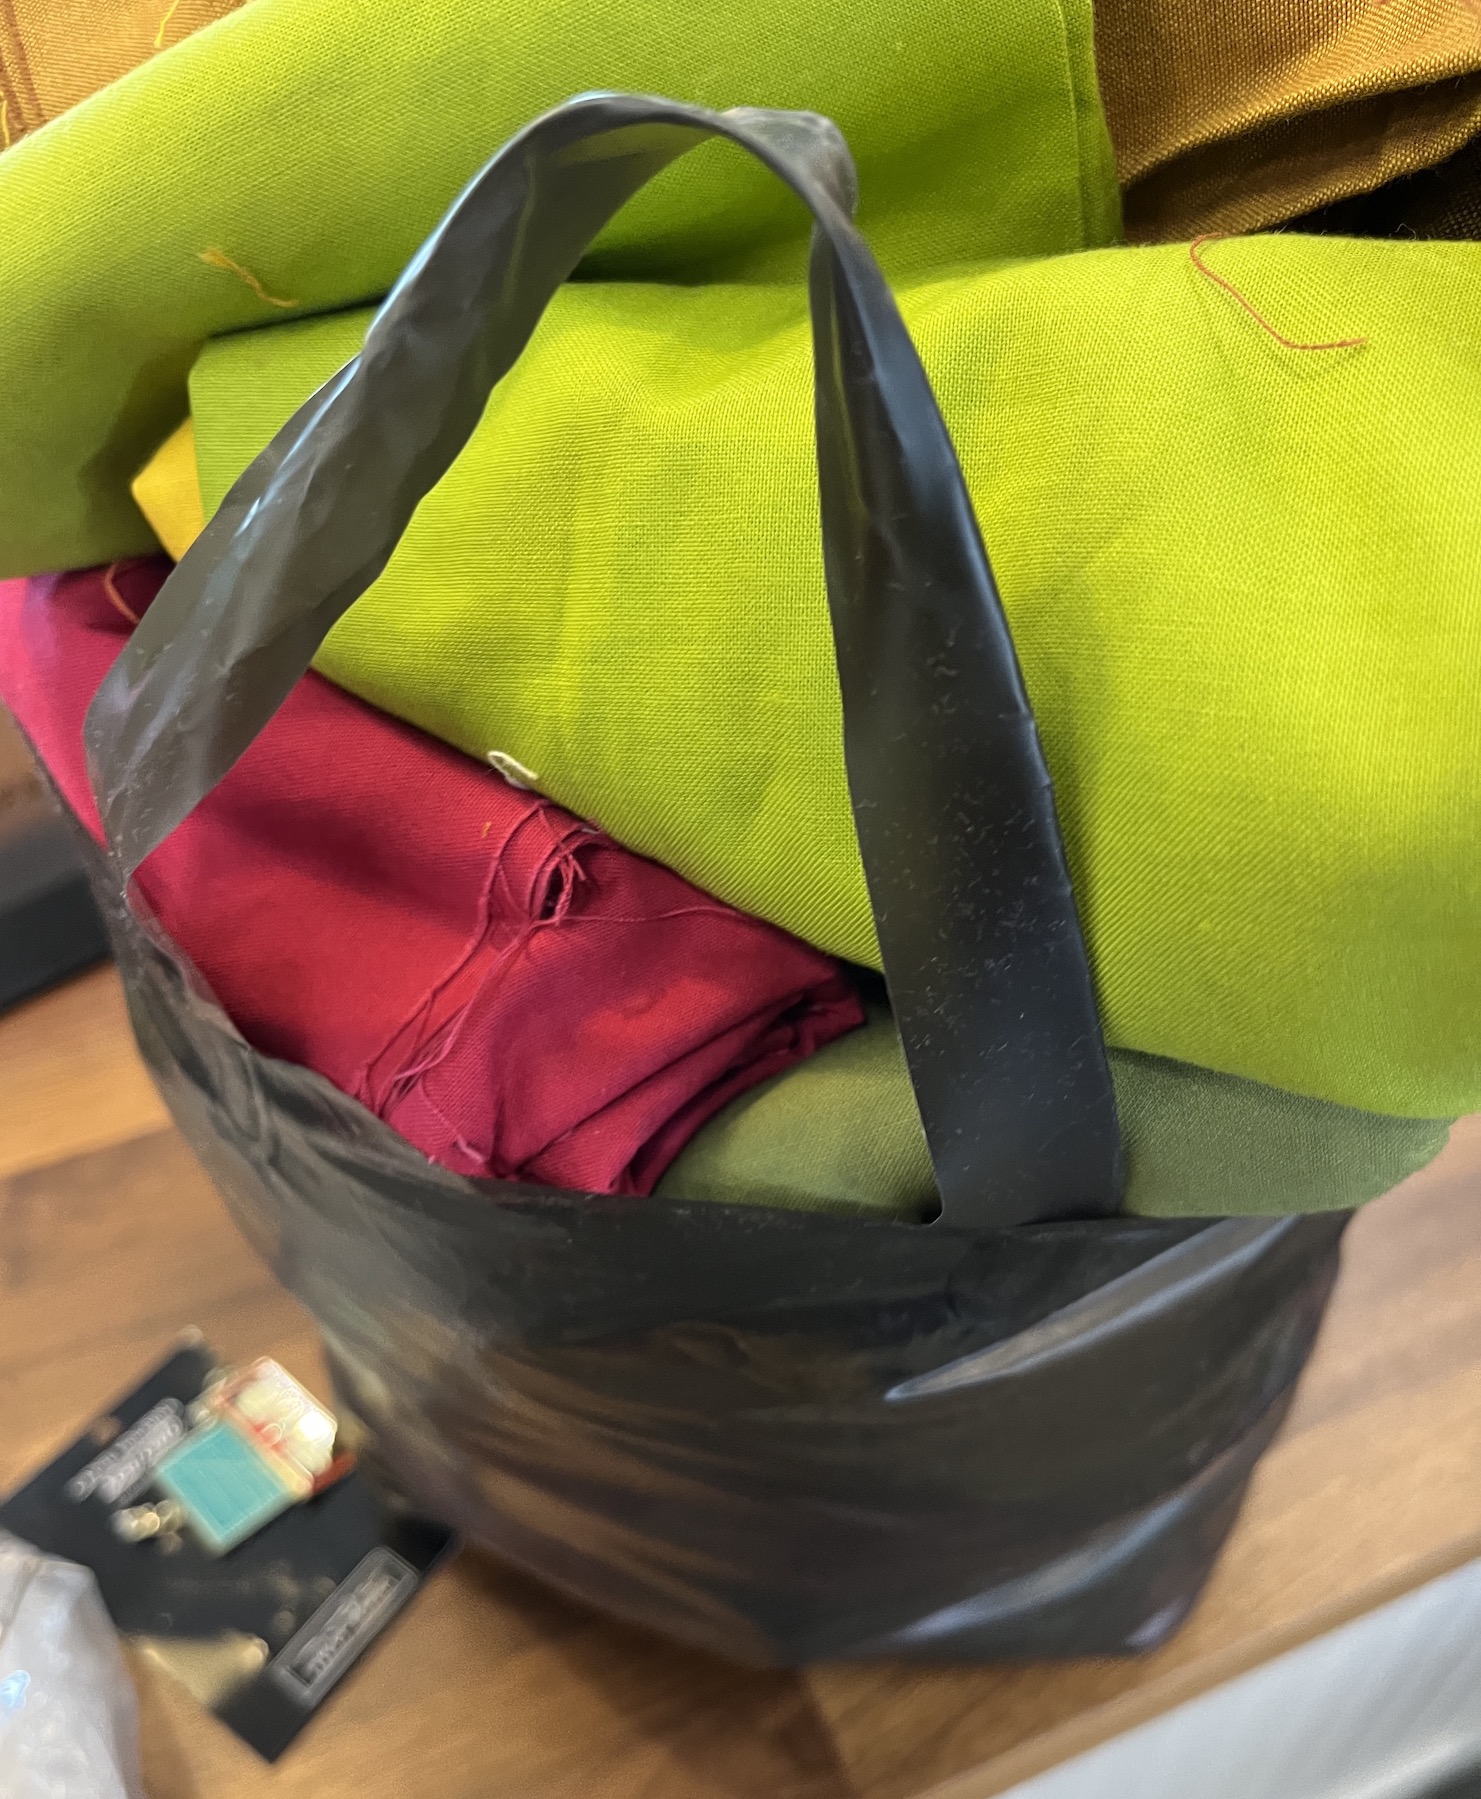
I filled my bag really full and they did not mind!
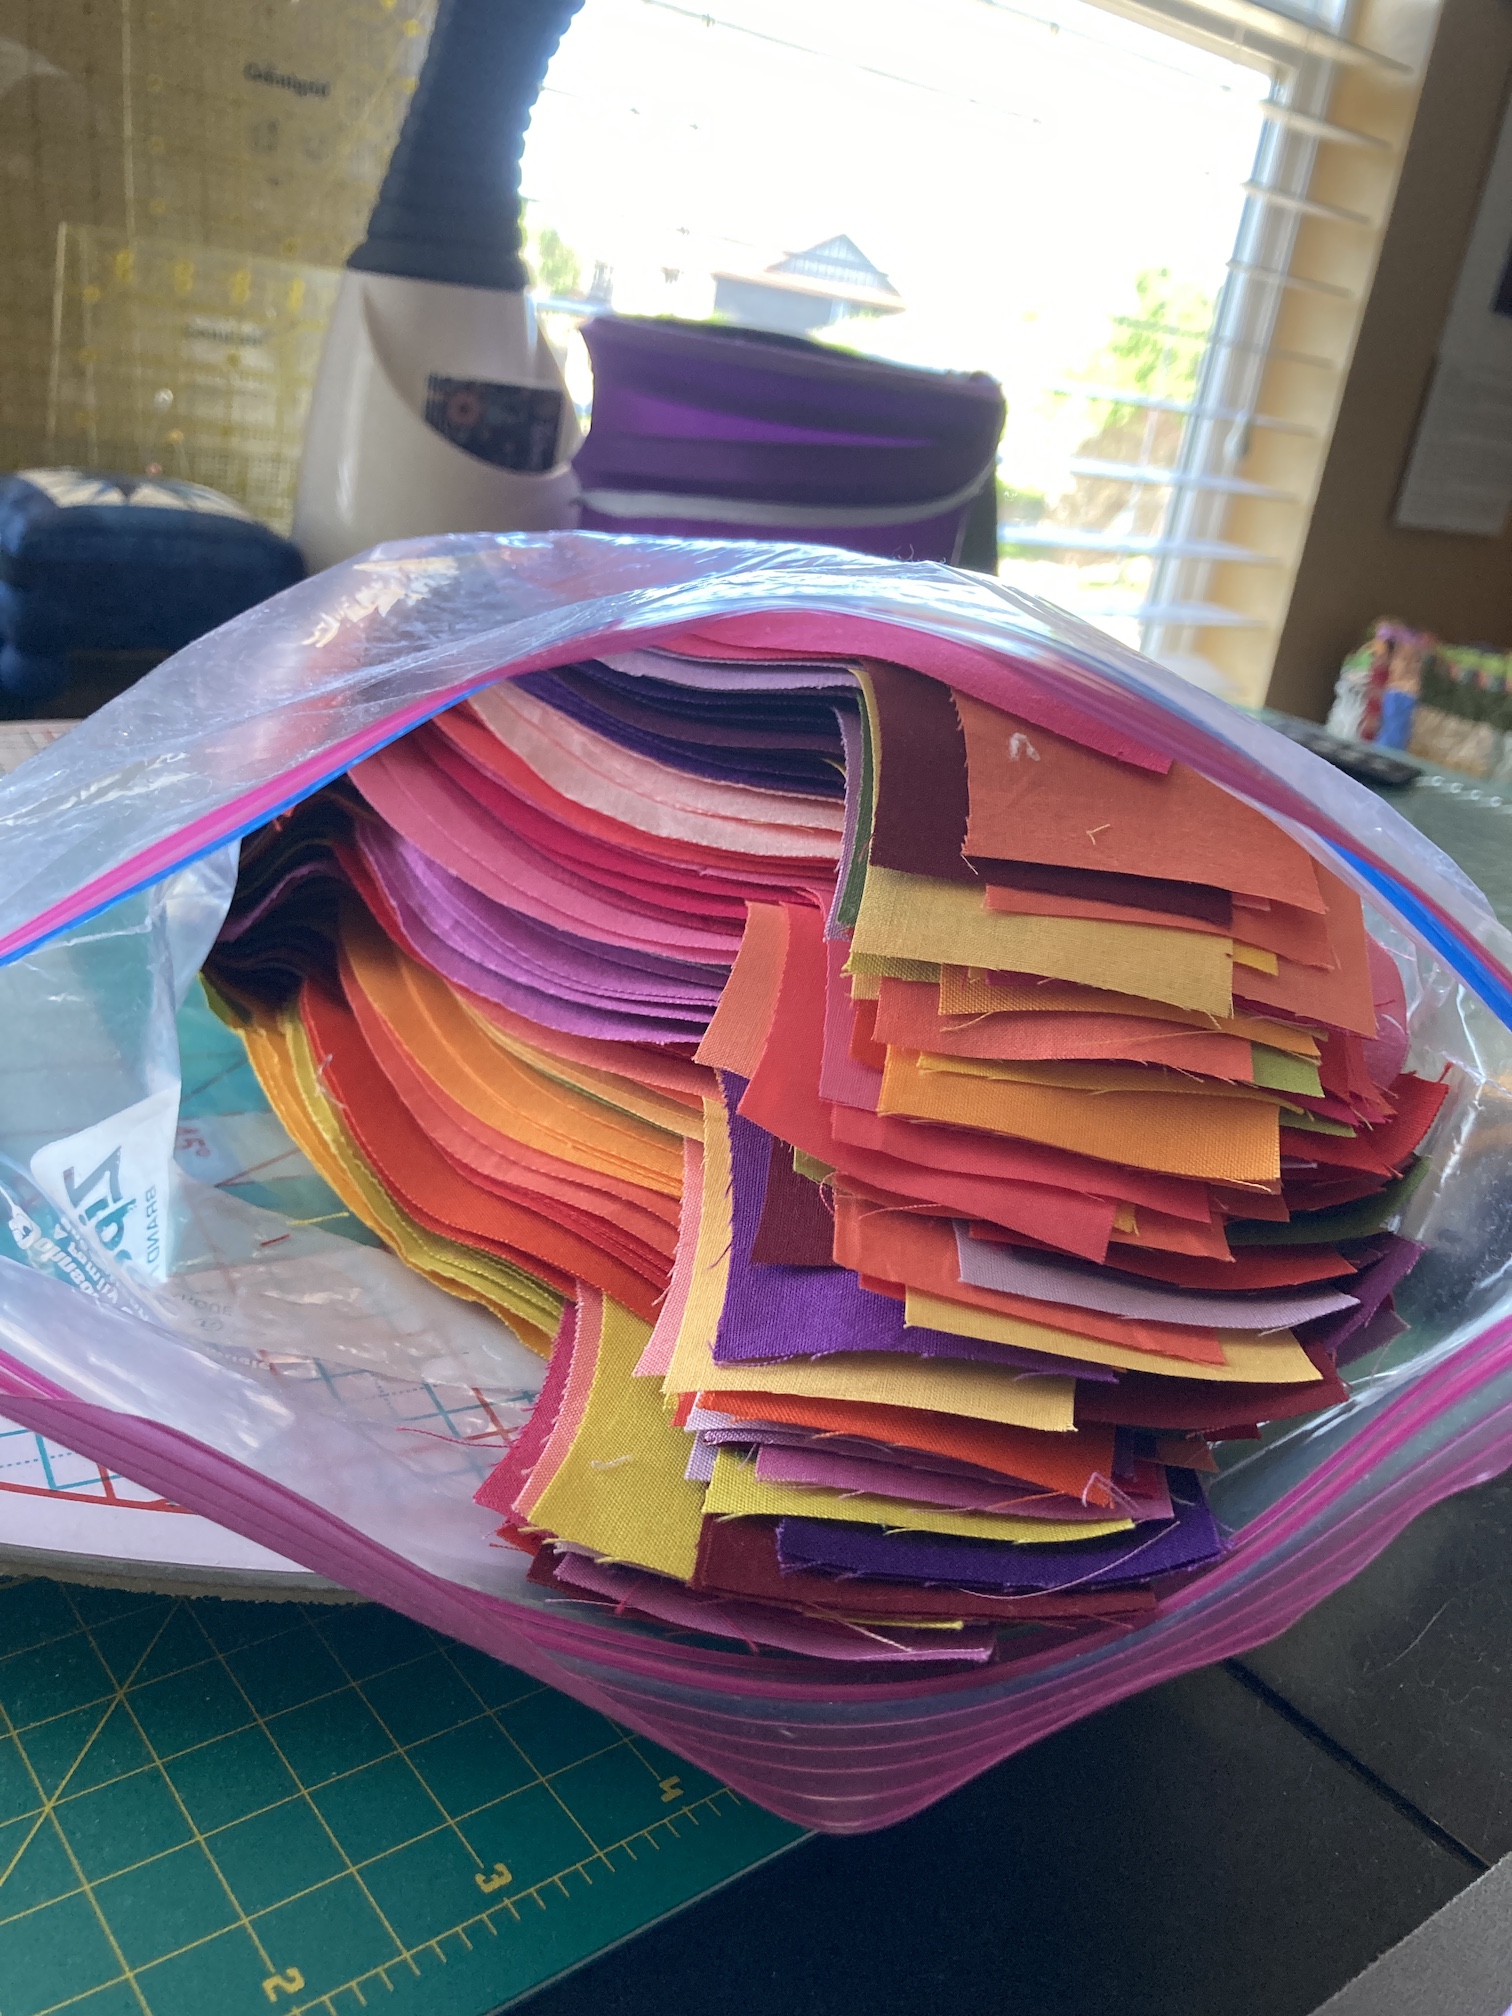
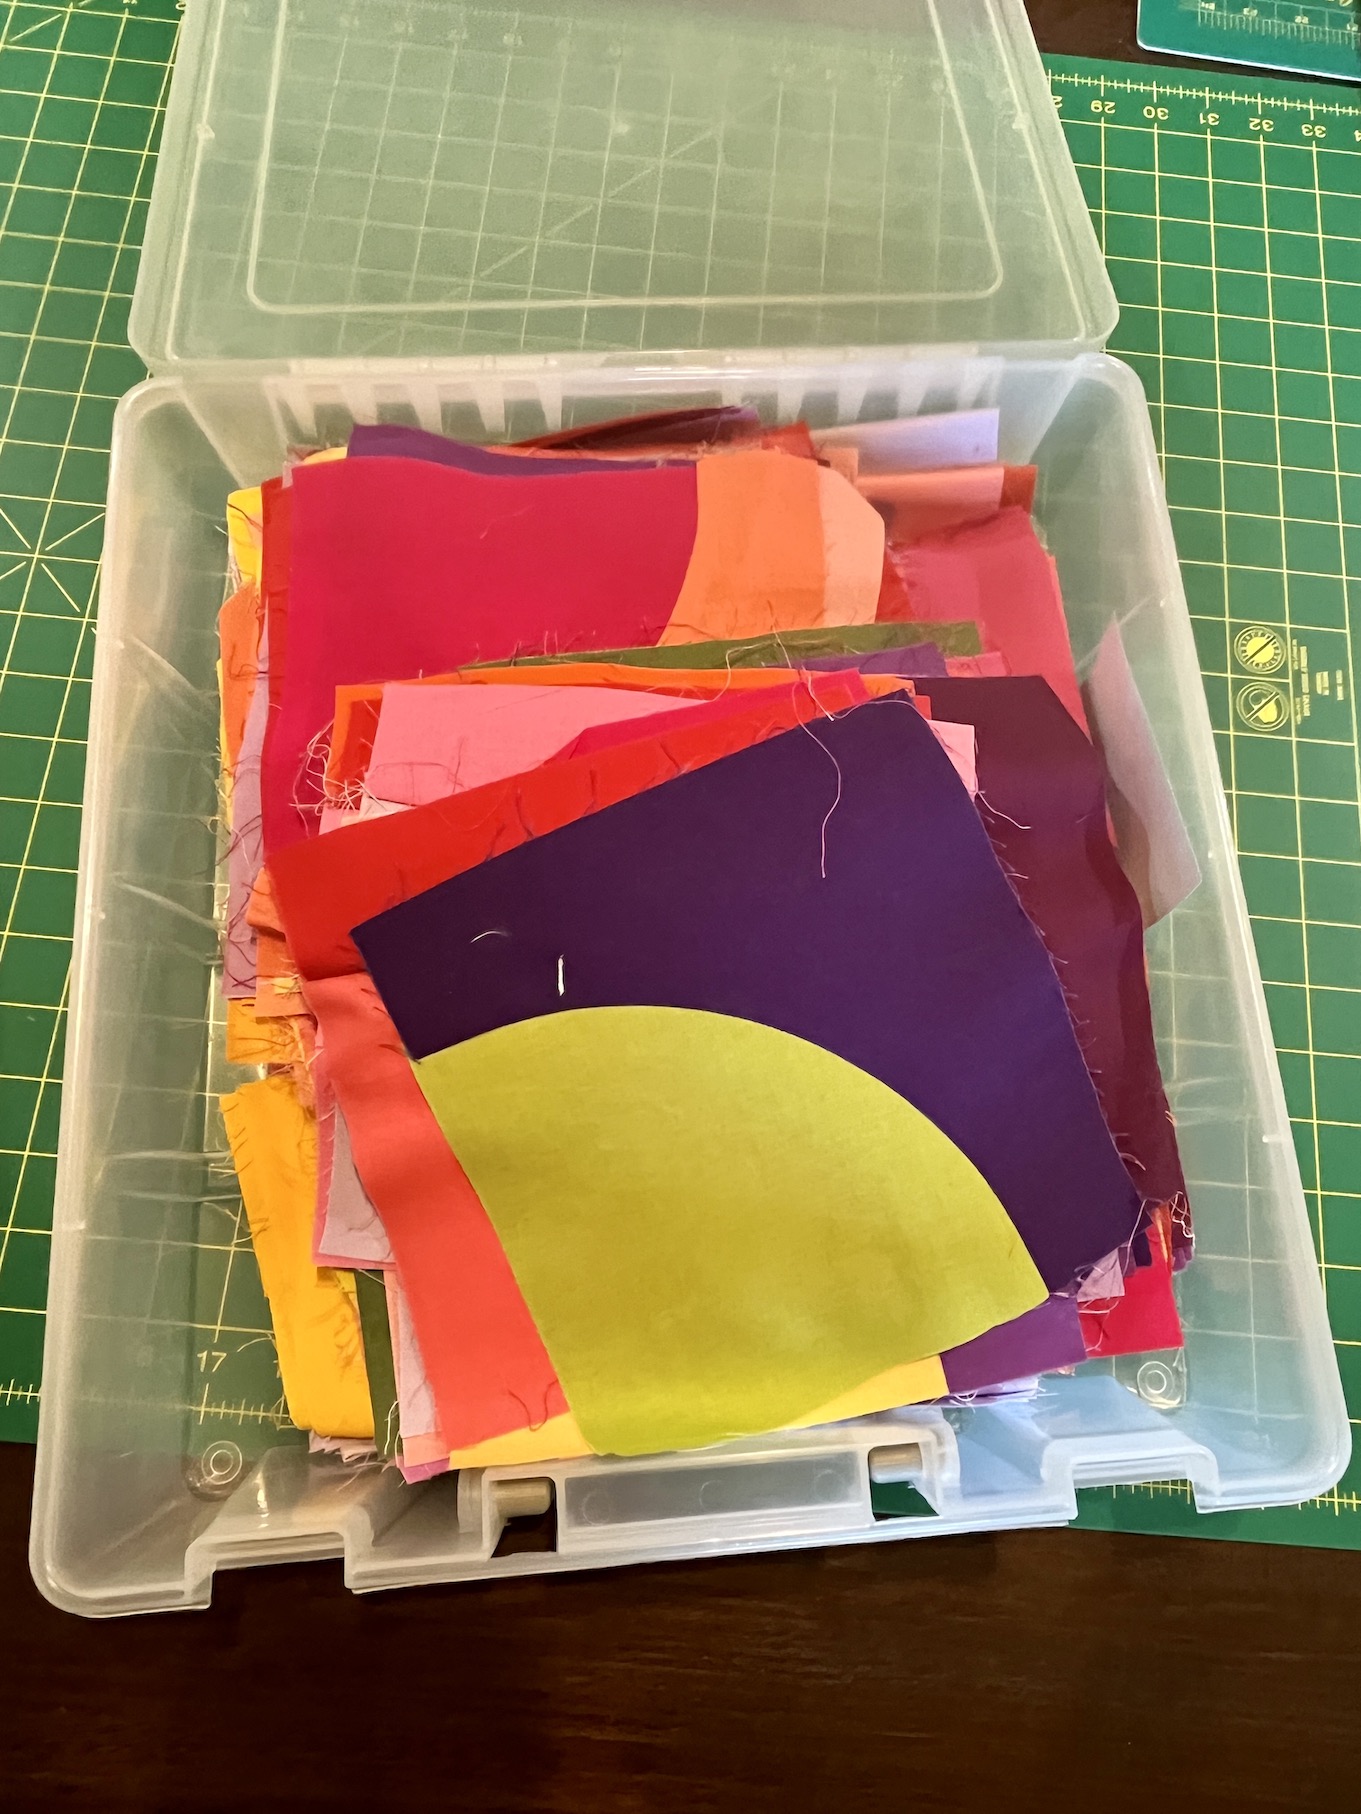
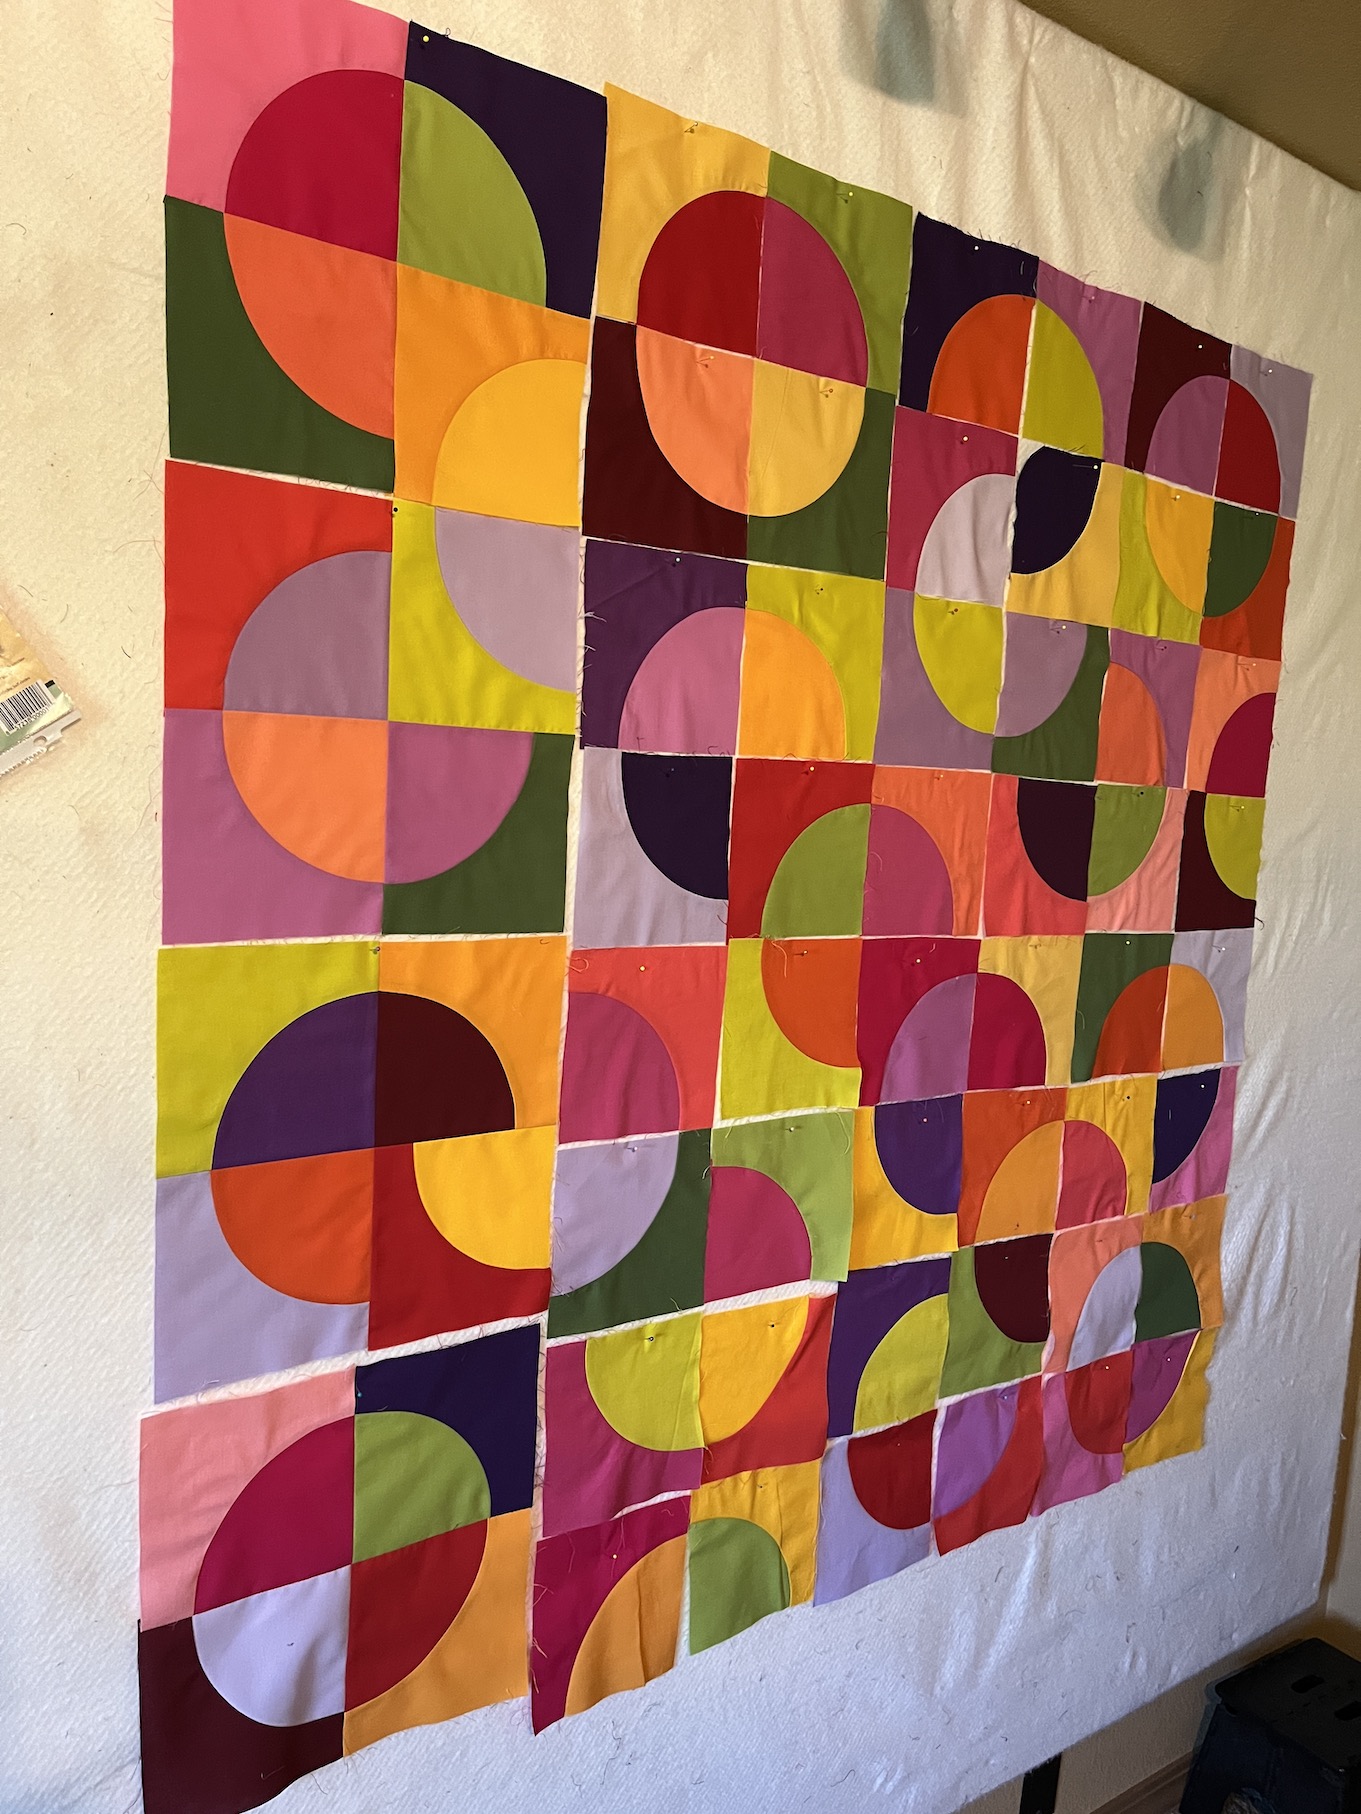
For the Quiltfolk Magazine photoshoot (see posts Quiltfolk Magazine Photoshoot, Part I andQuiltfolk Magazine Photoshoot, Part II ), I wanted to have a quilt in progress up on the wall. The magazine editor had suggested it a day prior to the photoshoot and the quilt I had in my “UFO Stash” that came to mind were blocks of brightly colored “Crazy Curve Circles” that my friend D had given me a couple years ago (see June 2020 post Tweaks to the Tierneycreates Studio).
D already pieced a lot of the blocks; and I ended up piecing the rest of the sections together that she cut from the templates but had not pieced. She also gave me fabric and I made some additional blocks using the templates she also gave me.
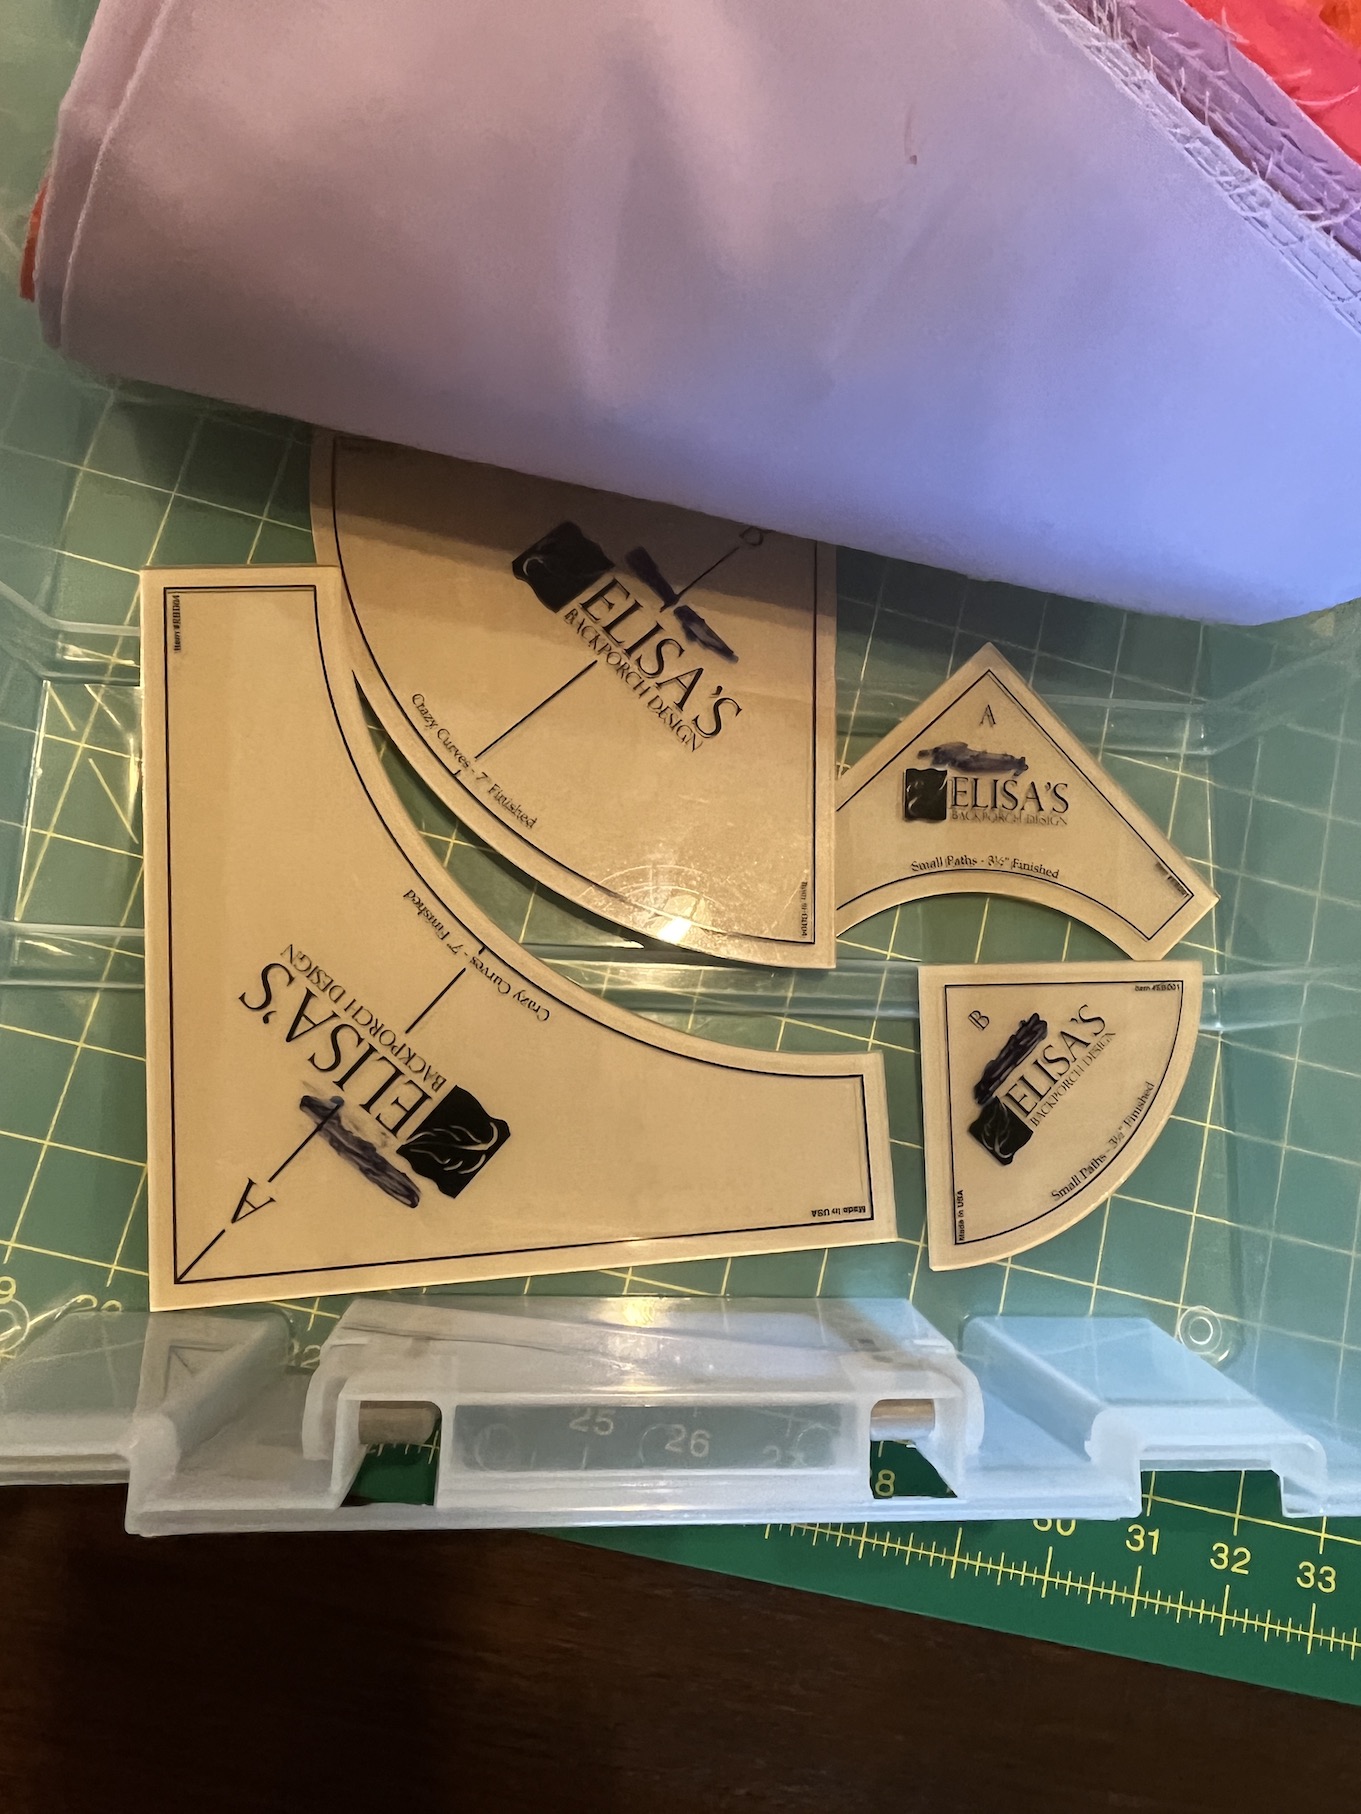
Here is what the quilt currently looks like on my design wall – I’ve made a small version of the quilt pattern designed by Elisa’s Back Porch Designs:
There was a lot of piecing to get the whole quilt together – first the individual sections into a four patch, resulting in 16 blocks; and then sewing the 16 blocks together. I thought about making a larger quilt (I am so many blocks left over) but I just wanted to get this one done and move on to my other projects.
I’ve decided to hand quilt it as a late Autumn/early Winter project, and use this dusty collection of hand quilting threads I bought at a sewing expo show in Seattle, WA early in my quilting days (2000?):
So I am taking this quilt off the design wall and putting it away until the cooler weather when I’d want to have a quilt sitting on my lap while I hand quilt it.
So what to do with all the leftover blocks?
I’ve decided to make the large version of the quilt Circle Dance which includes both the larger “Crazy Curves” blocks (the one I made) and the smaller ones:
The pattern says “63 inches by 70 inches” but I think I can make it even larger with all the blocks I have left over. I will need to make the small “Crazy Curves” from the small template from the extra fabric D gave me.
I might start that in 2024 or 2025, who knows. I have so many projects in queue!
Next up on my project list is sewing on and then sewing down the binding for my black, white and gray scrappy freeform log cabin quilt – Oh Scrap – It’s Not Just Black and White (see post ScrapHappy June 2023: “Oh Scrap – It’s Not Just Black and White!” if you’d like background on this quilt), which is back from the longarm machine quilter:
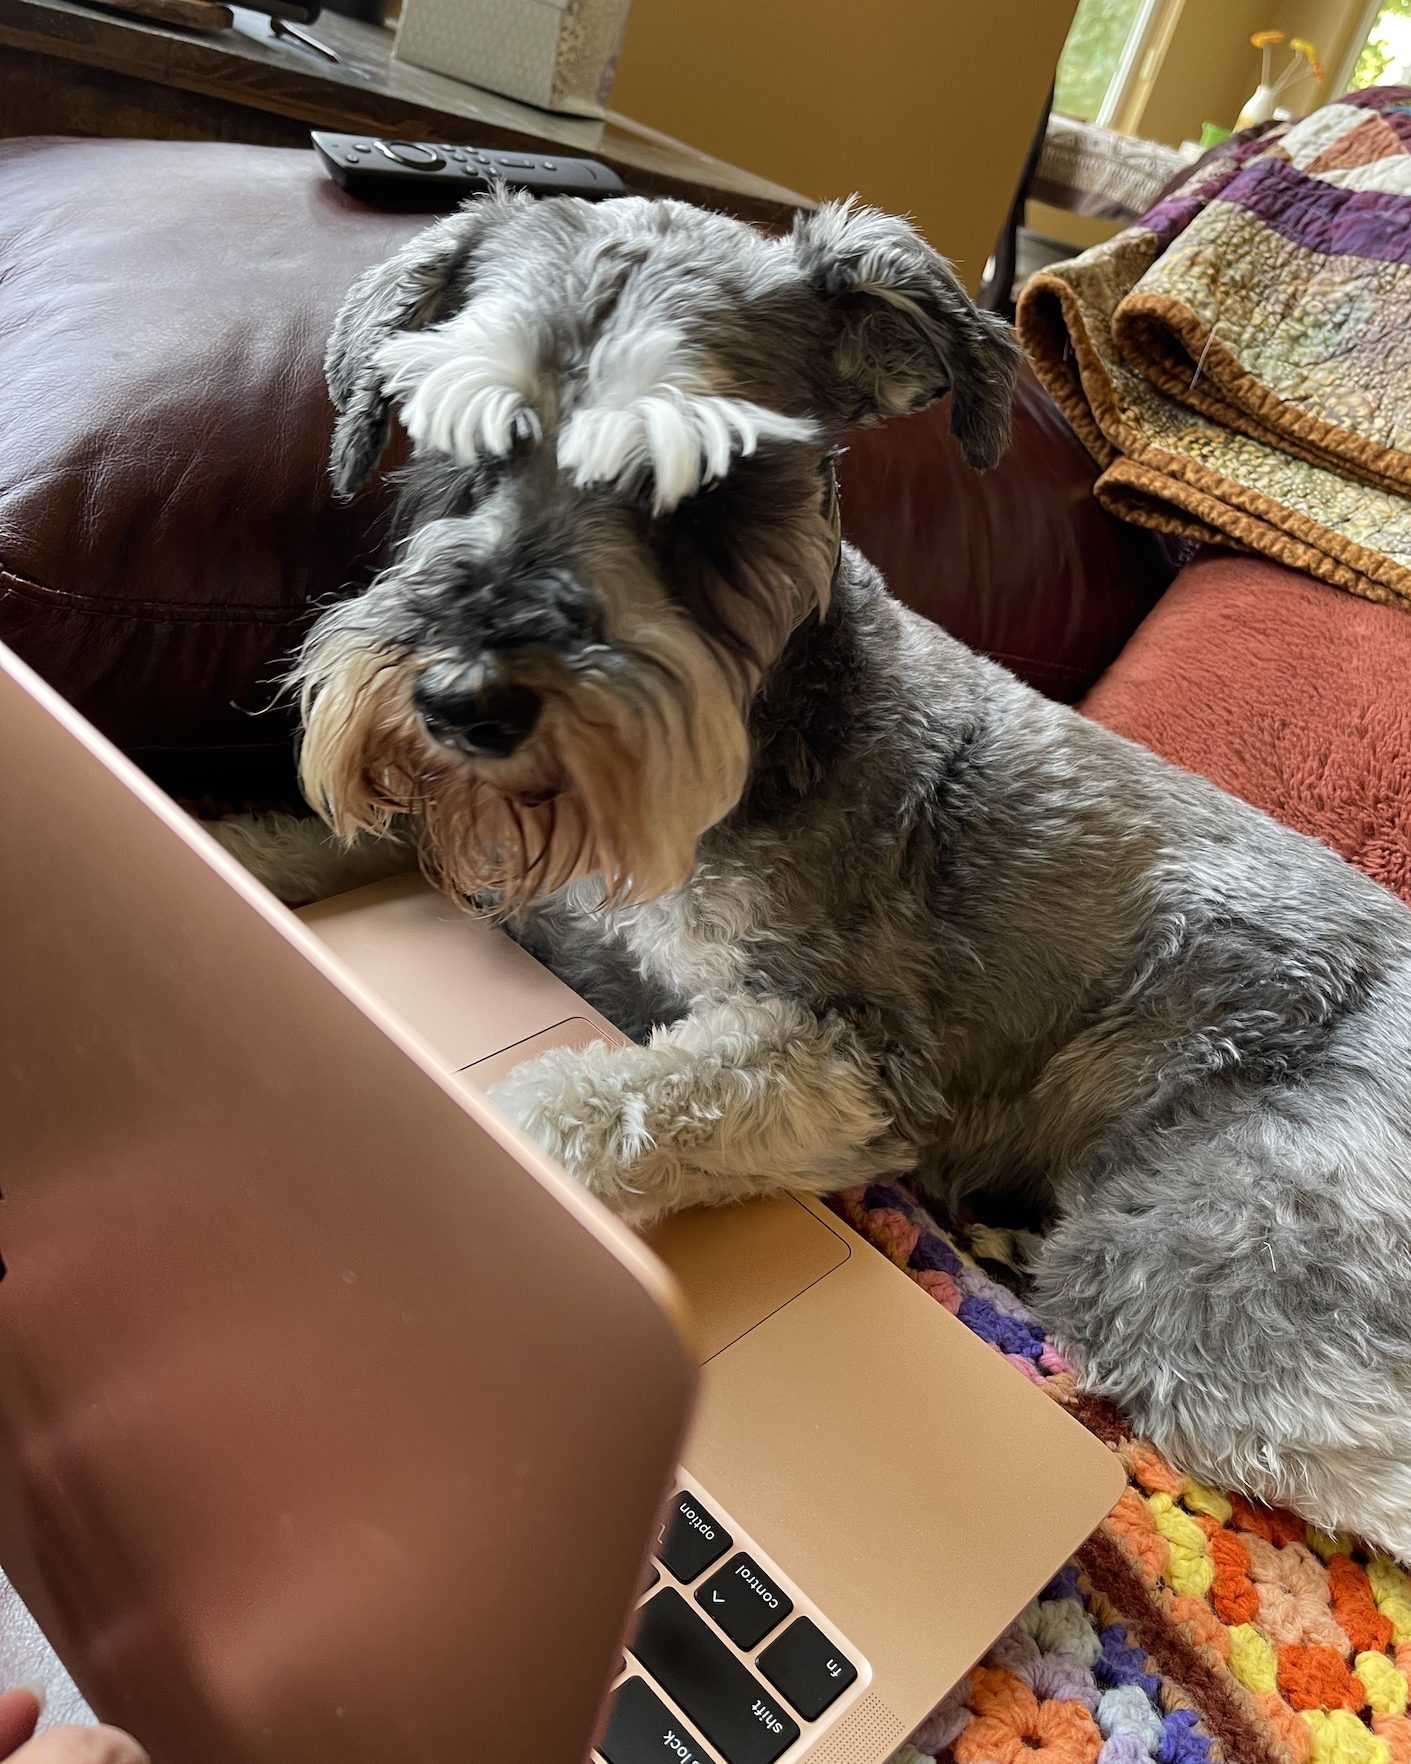
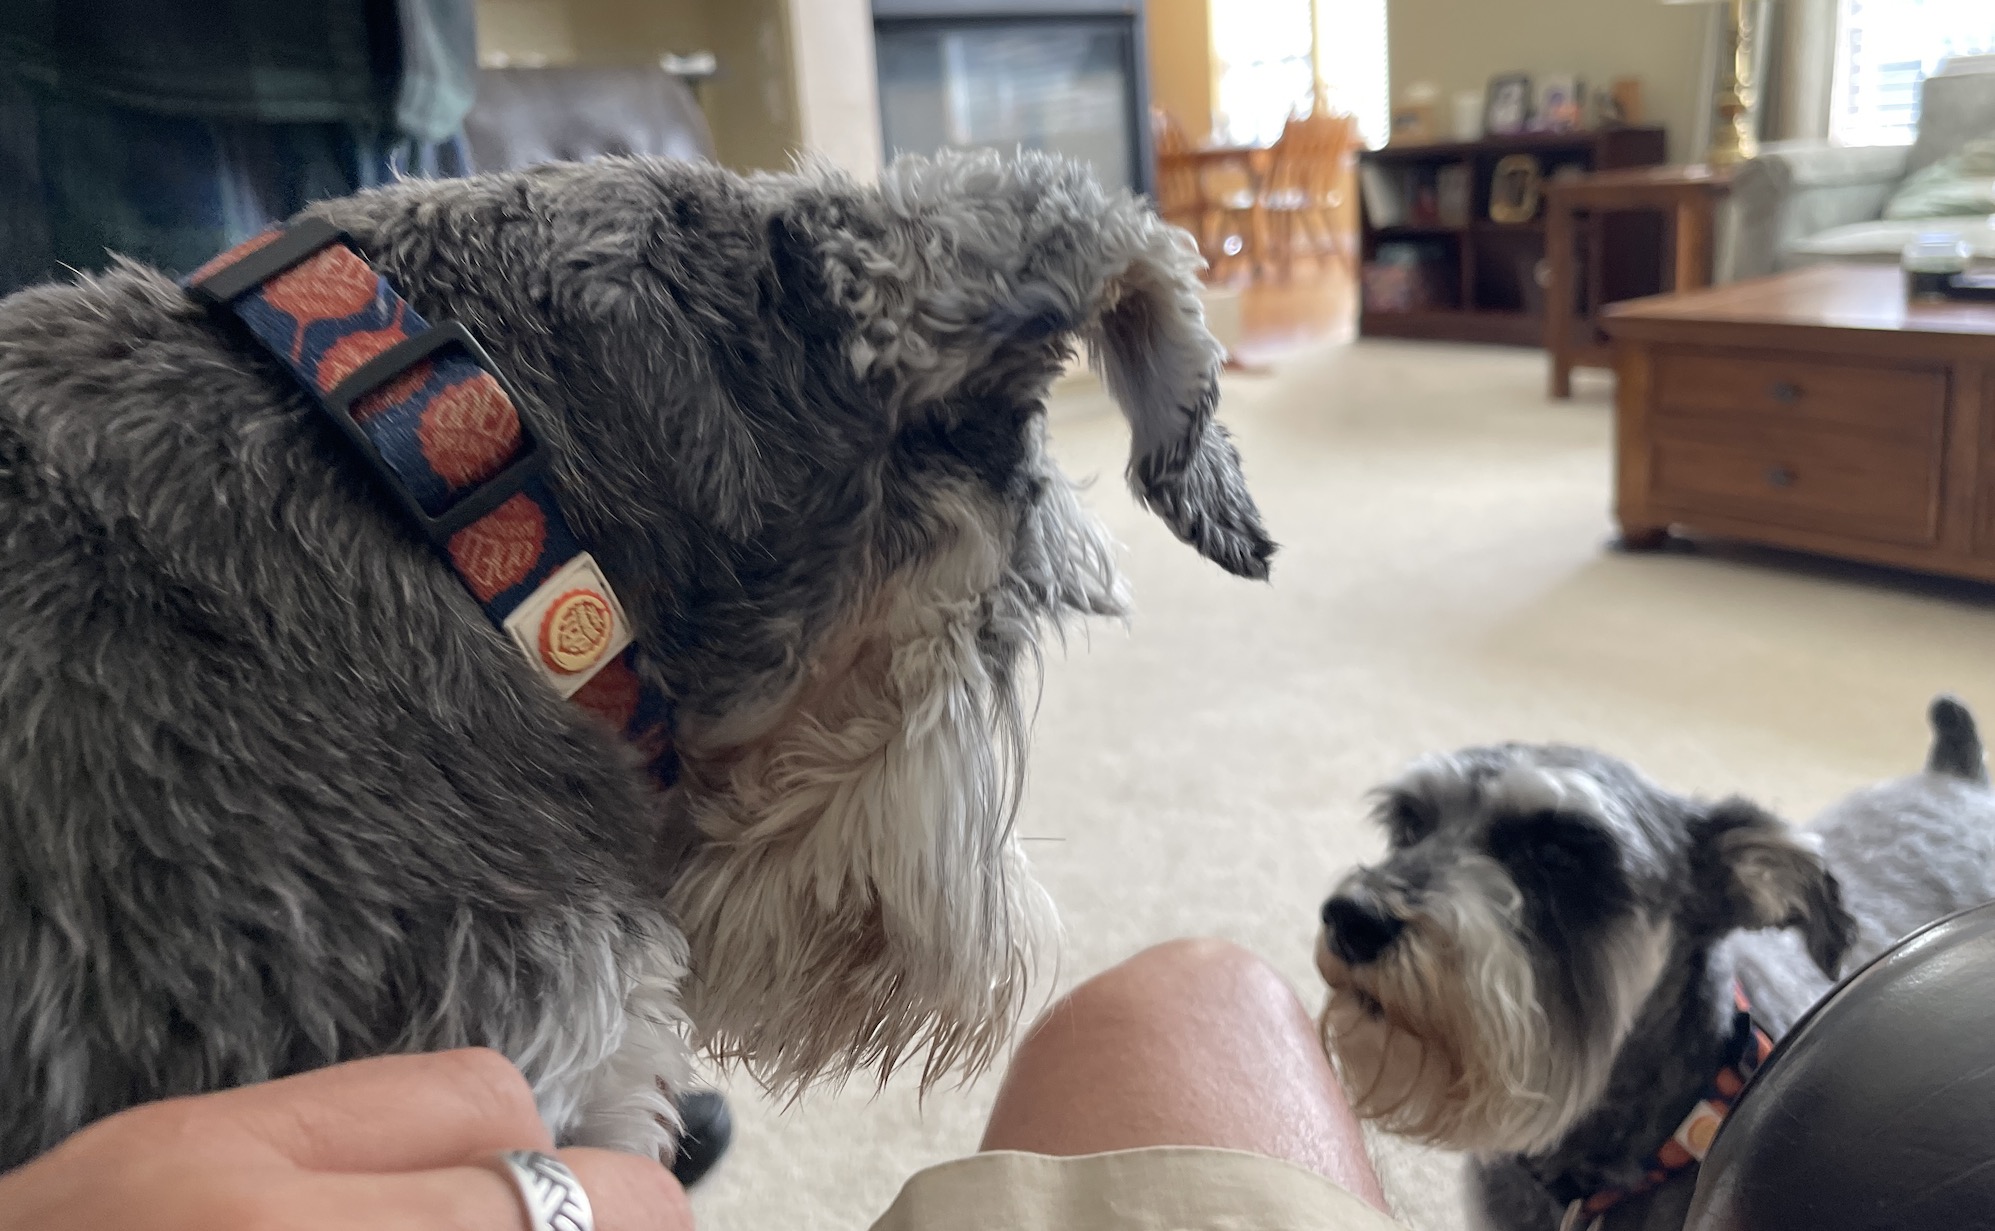
And to close out this post, here is my Human Manager, Mike (see previous post) who is irritated I was taking a photo of the quilt on my design wall and not playing with him and his bear.
This is Mike, the Miniature Schnauzer that lives with Tierney and John and provides management of their lives. I am guest blogging since Tierney has fallen off the blogging-wagon again busy with summer visitors and trying to finish up projects (that she will eventually blog about…)
I want to share with you an irritating issue I’ve been dealing with for a while: a battle between my “cousin” (or “uncle”) Goose and I over who gets to manage the humans.
First you might be confused if you’ve never lived with Miniature Schnauzers. Miniature Schnauzers are natural “Human Managers” and can help guide humans in their daily lives. My late sister Sassy the Highly Opinionated Miniature Schnauzer had her own blog Schnauzer Snips and she addressed this in a Special Service Announcement she made on her blog:
I already had John and Tierney “under my paw”; and John’s Dad Chuck was very amenable to Human Management by a Miniature Schnauzer – whenever I stayed over my “grandpa’s” house I was able to keep him easily in line.
Then everything changed…
John’s sister decided to get a Miniature Schnauzer puppy (Goose) and share custody with her father Chuck. At first I was okay with this as I know I am a role model of dog fabulousness and I figured they were just trying (and would not succeed) to find their own “Mike wannabe” that they could have regularly in their life.
Little did I know Goose had his own plans and would become my nemesis in a battle for control of the Humans!
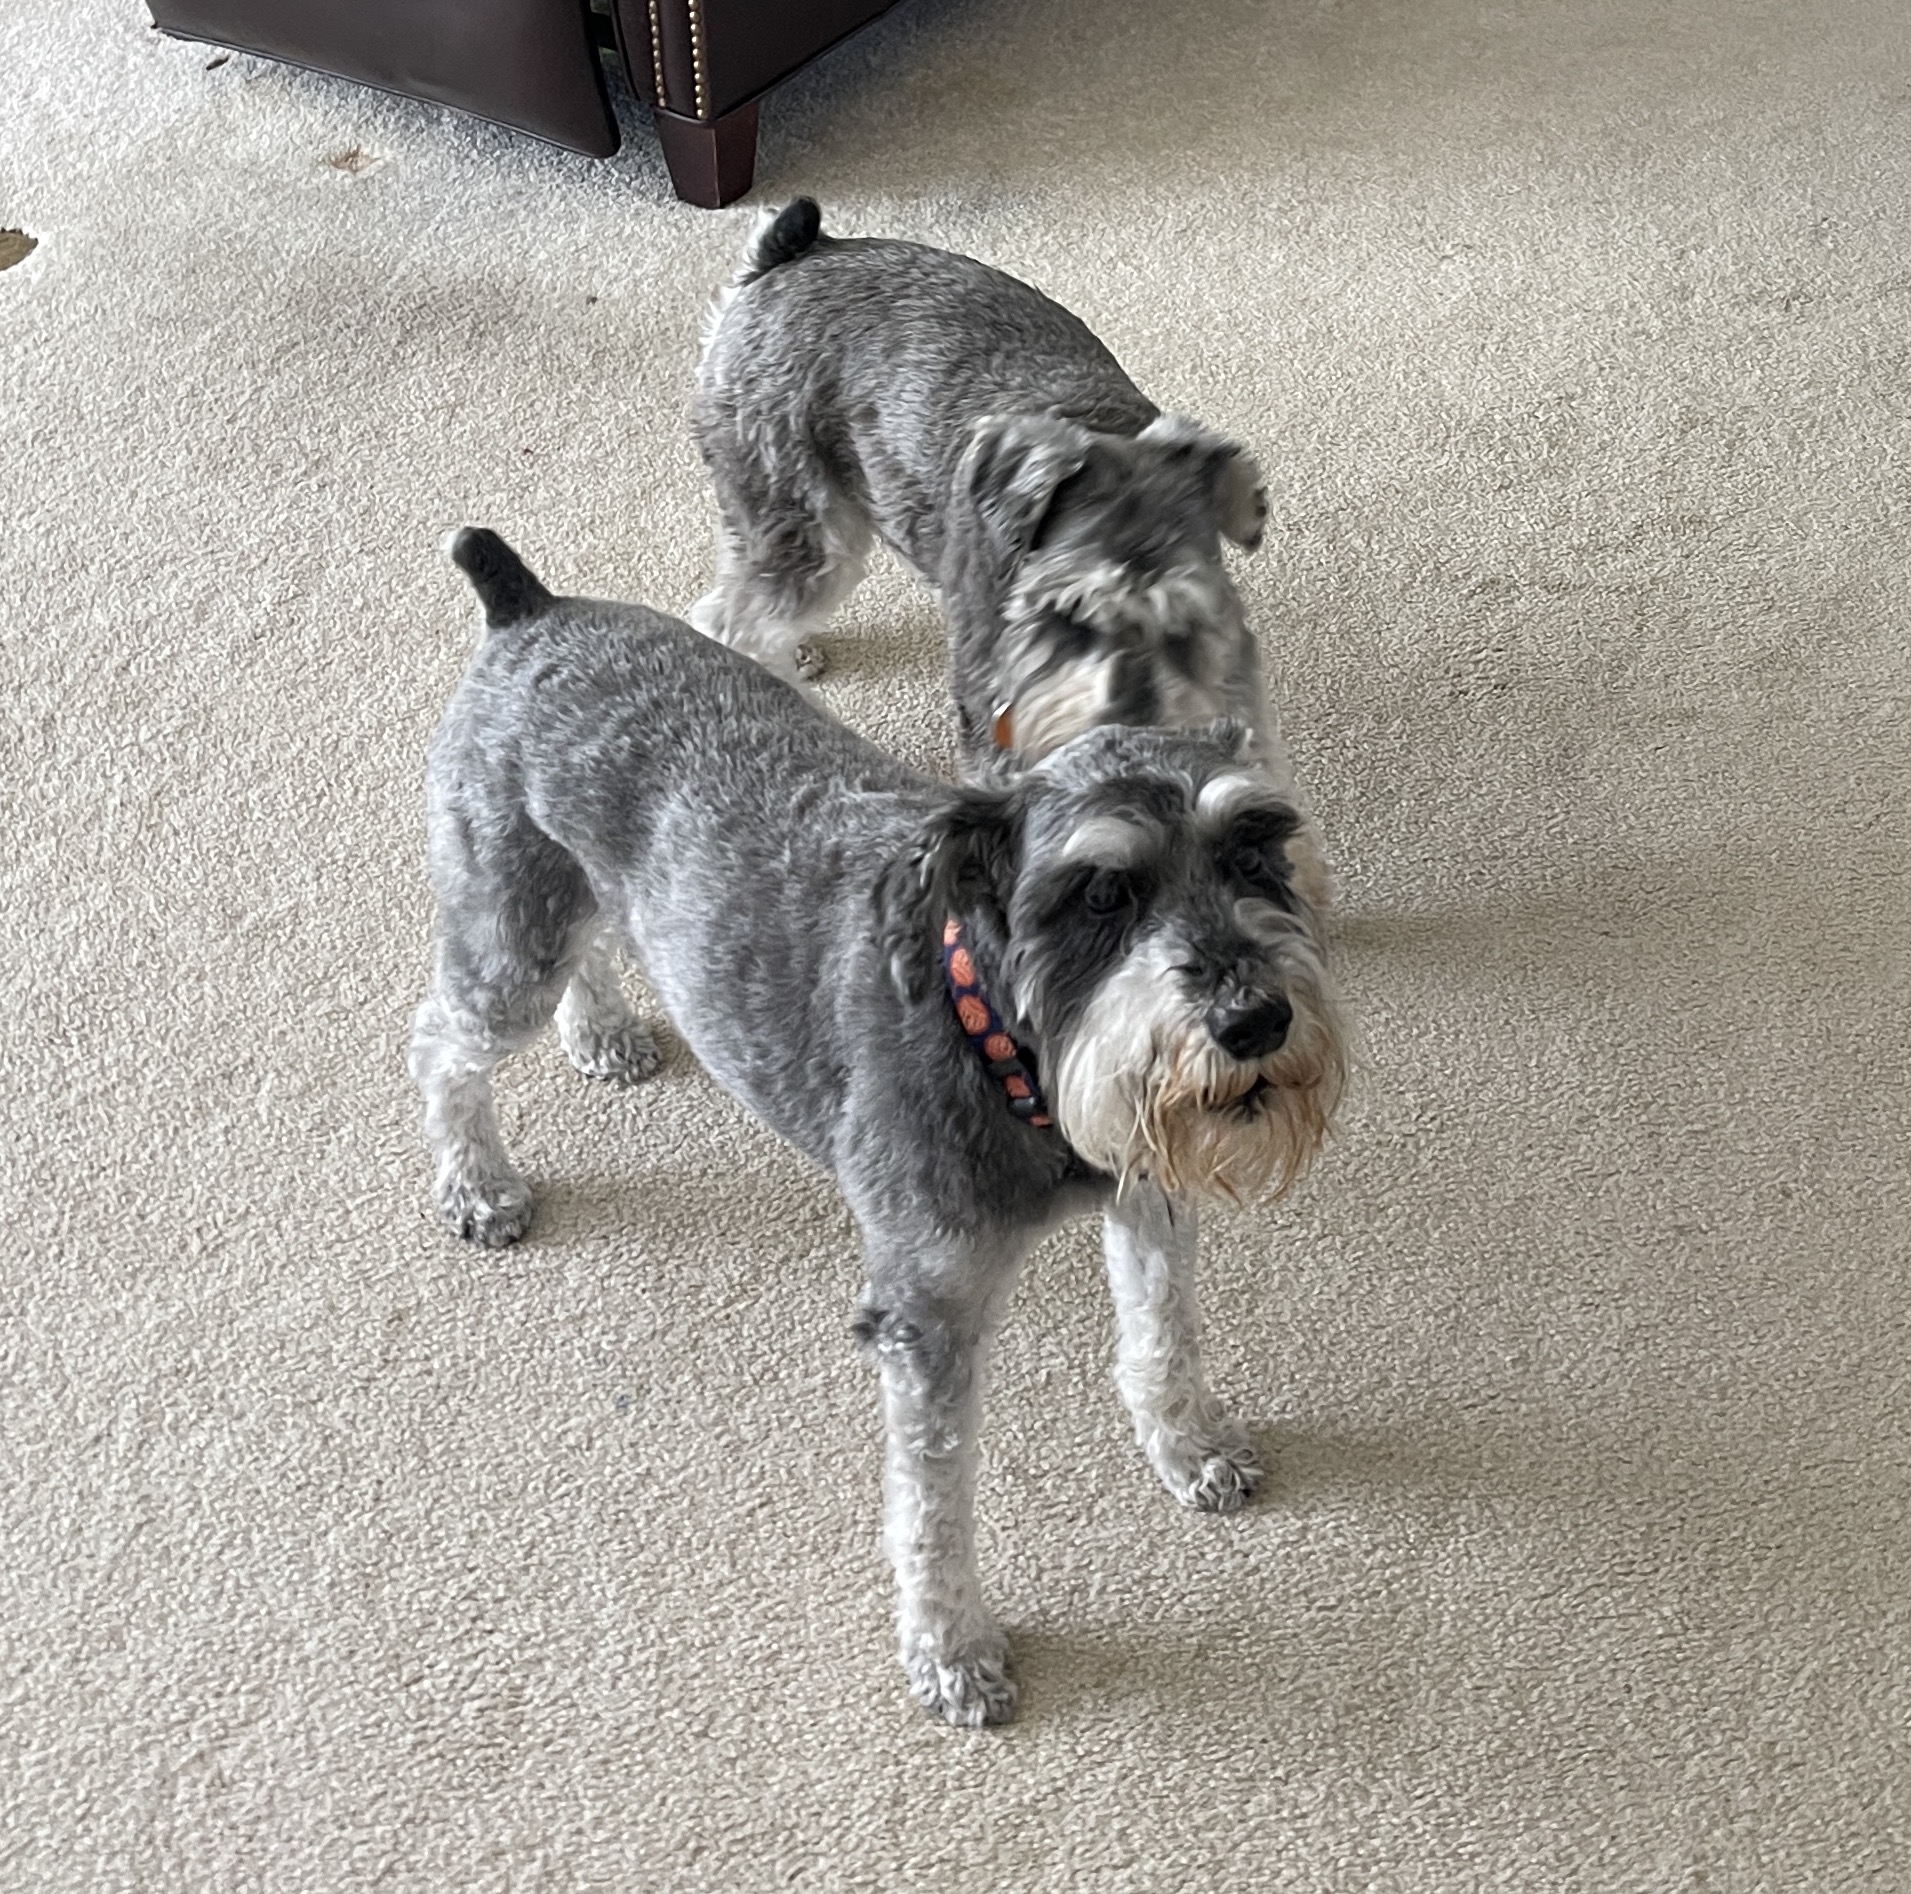
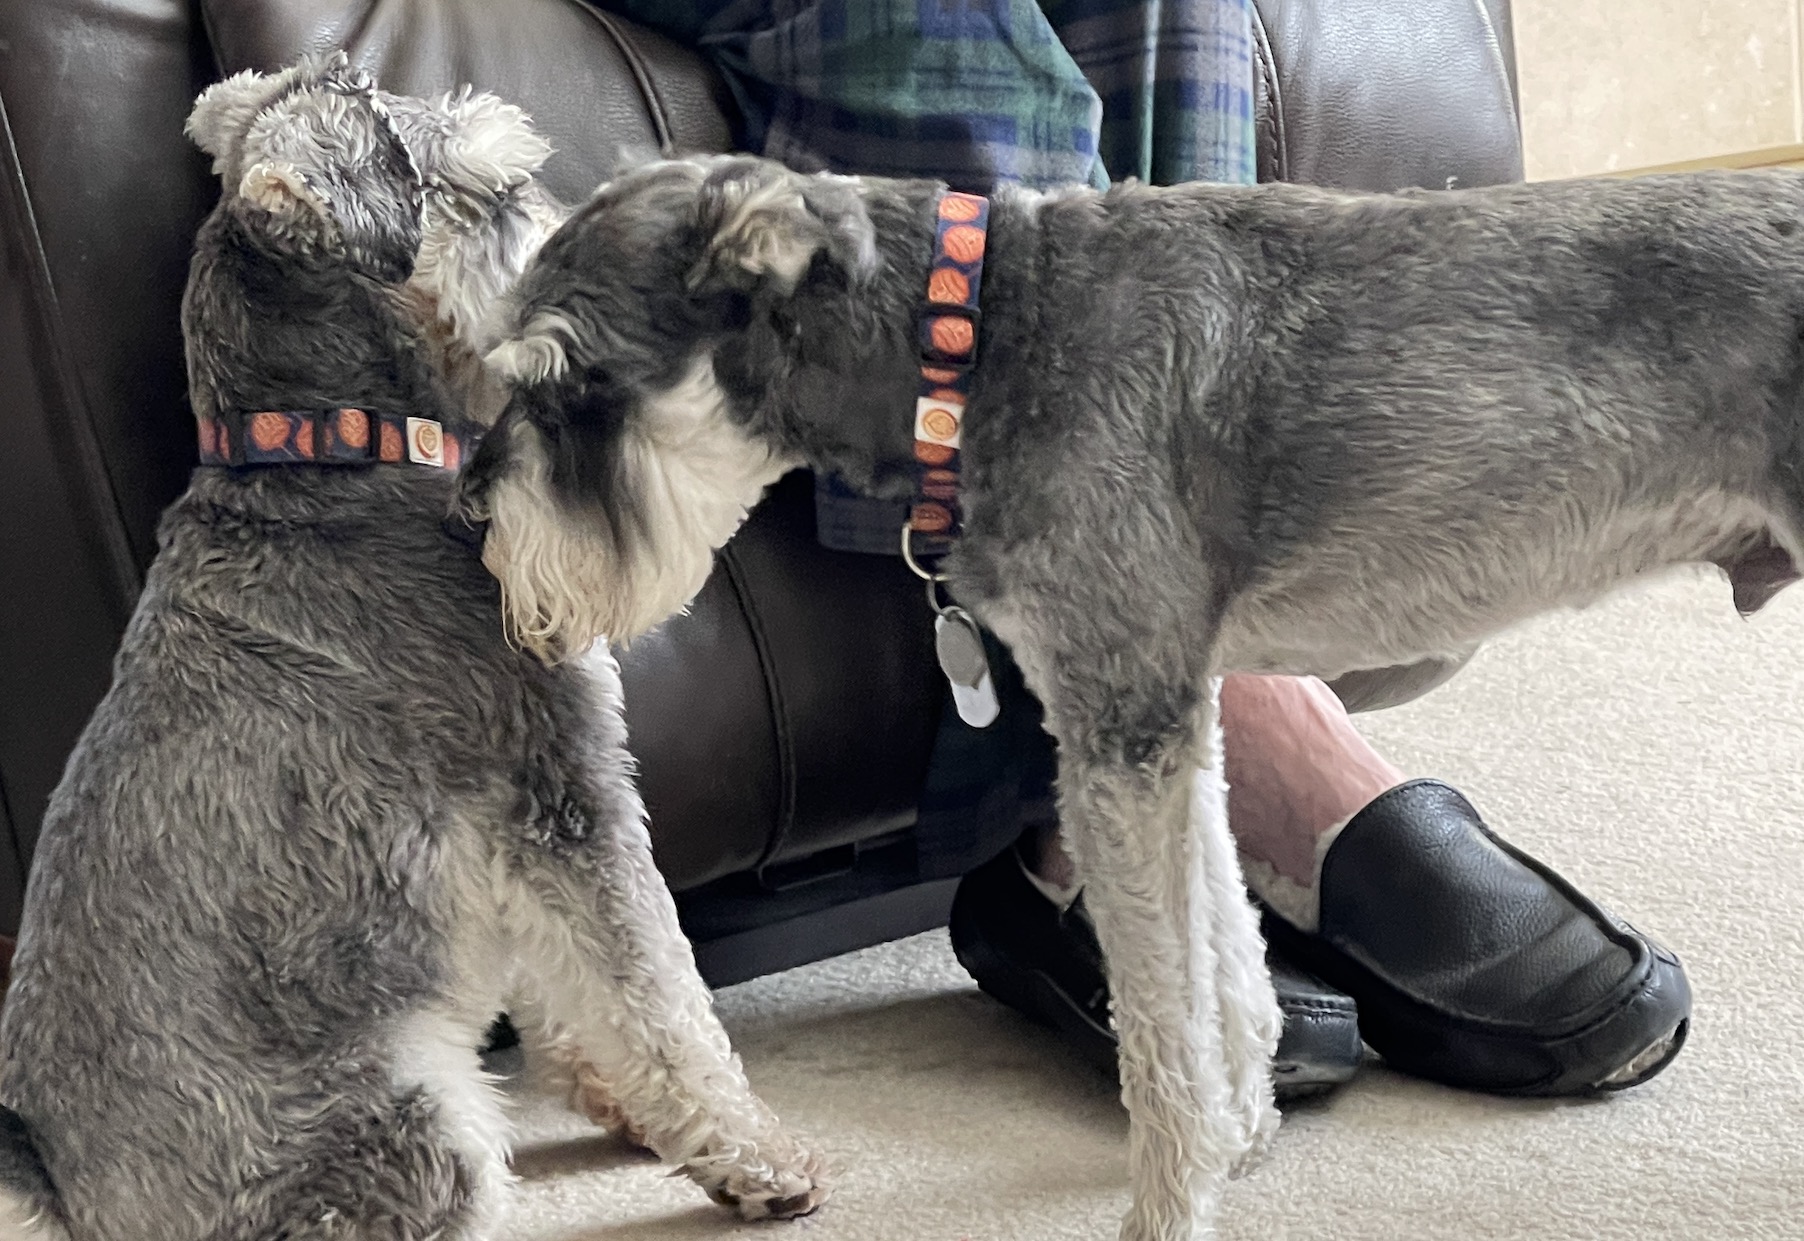
Here are some recent photos from when John and I stopped by for a visit with Chuck and Goose (I much prefer when we visit Chuck and irritating Goose is at his other home!)
Goose is whispering in my ear: “Chuck is mine and soon John will be too, I’m going to be in charge of managing the humans!”
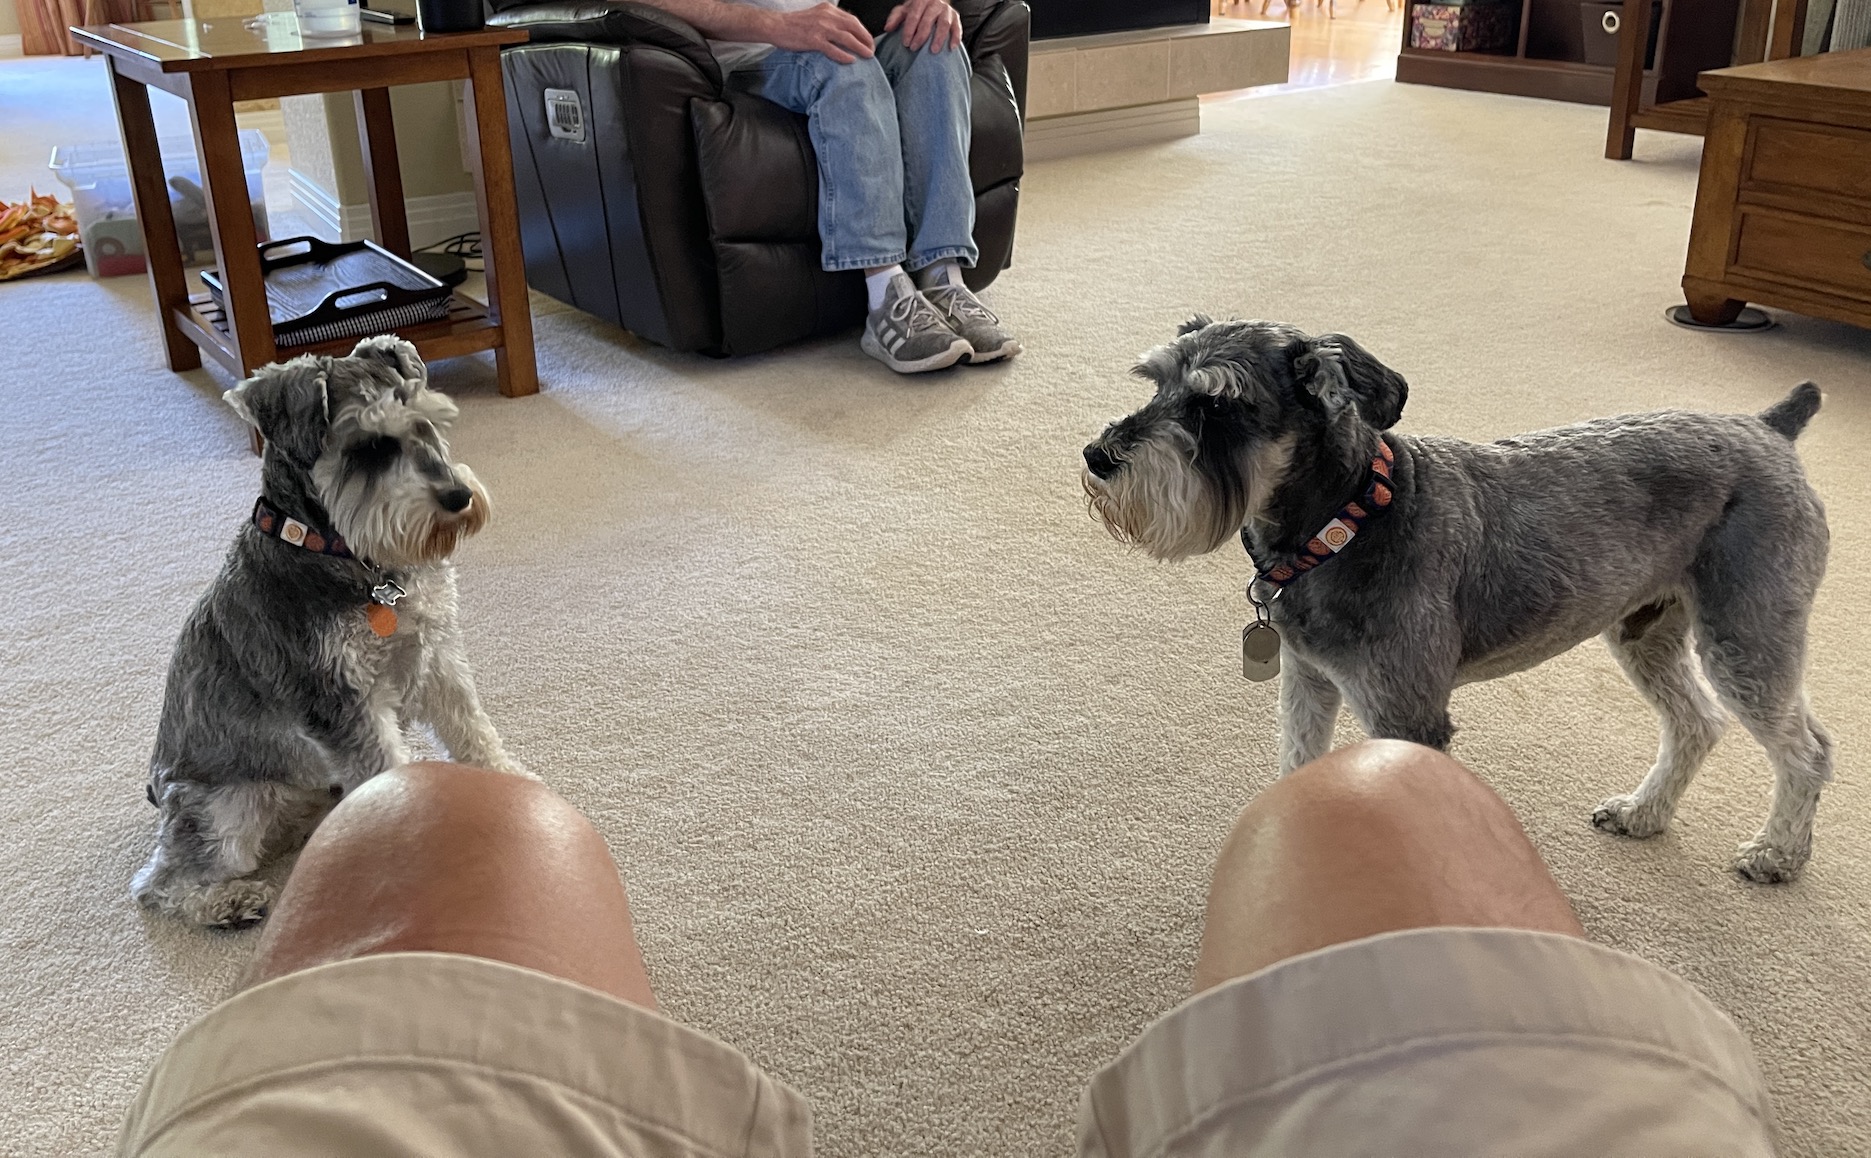
Here we are at a stand-off, each one of us wanting to get on John’s lap.
Here I am pleading to John to just ignore Goose, I am his one and only manager!
Goose succeeds in getting on John’s lap and his now mocking me.
Here I am whispering to Goose: “You might have won this one but watch your furry back. There can only be one human manager in this family!”
Hopefully Tierney will return to blogging in the future, until then I am happy to let you know about my struggles to be the primary Human Manager of John and my grandpa!
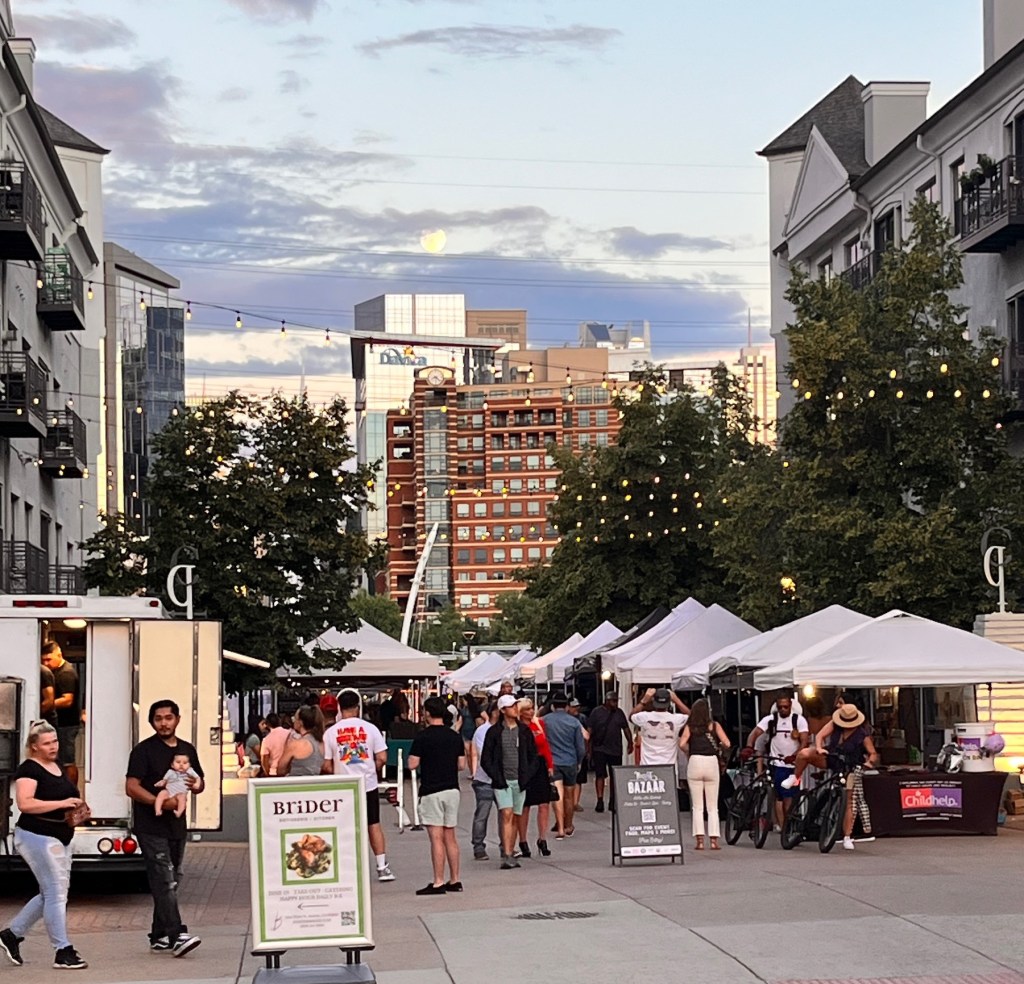
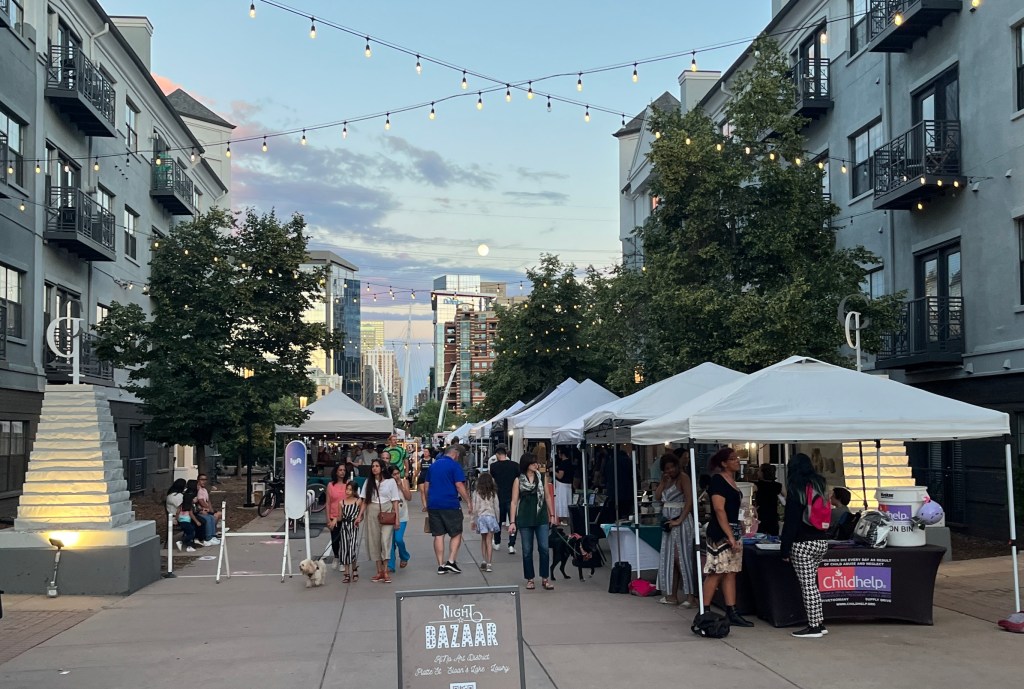
Recently my sister and my nephew visited us in Colorado for 4 days. Here are some highlights of their trip which included a visit to the Night Bazaarin downtown Denver, hiking at Castlewood Canyon, and making homemade Ramen.
THE NIGHT BAZAAR
I liked calling it “The Night Market” (it sounded more mysterious) and we stumbled upon it when visiting downtown Denver one evening.
My nephew, who likes trying out eateries he hears about on viral Tik Tok videos, asked if we could visit Dave’s Hot Chicken (which they do not have available in Virginia where they live). It is a “fast food” type of eatery but one of the founders trained at Thomas Keller’s French Laundry (one of the world’s most famous three-Michelin star restaurants) and it shows in what I would consider a masterpiece of “fast food” eatery chicken.
daveshotchicken.com
So we ventured to downtown Denver where one of the Dave’s Hot Chicken locations was located and across from that eatery was the Night Bazaar. After our visit to Dave’s we headed over to the Night Bazaar.
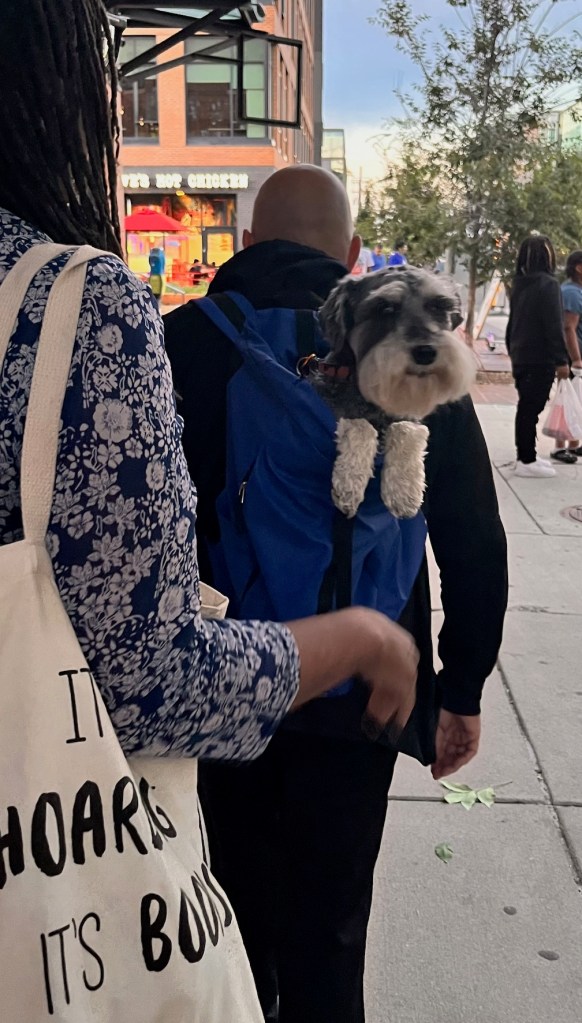
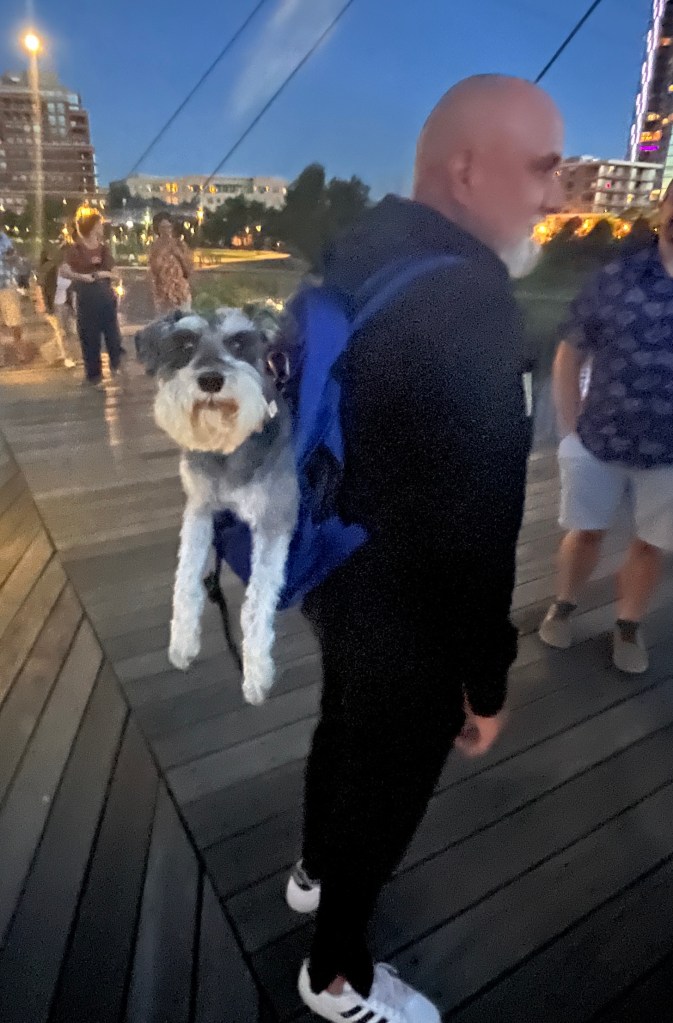
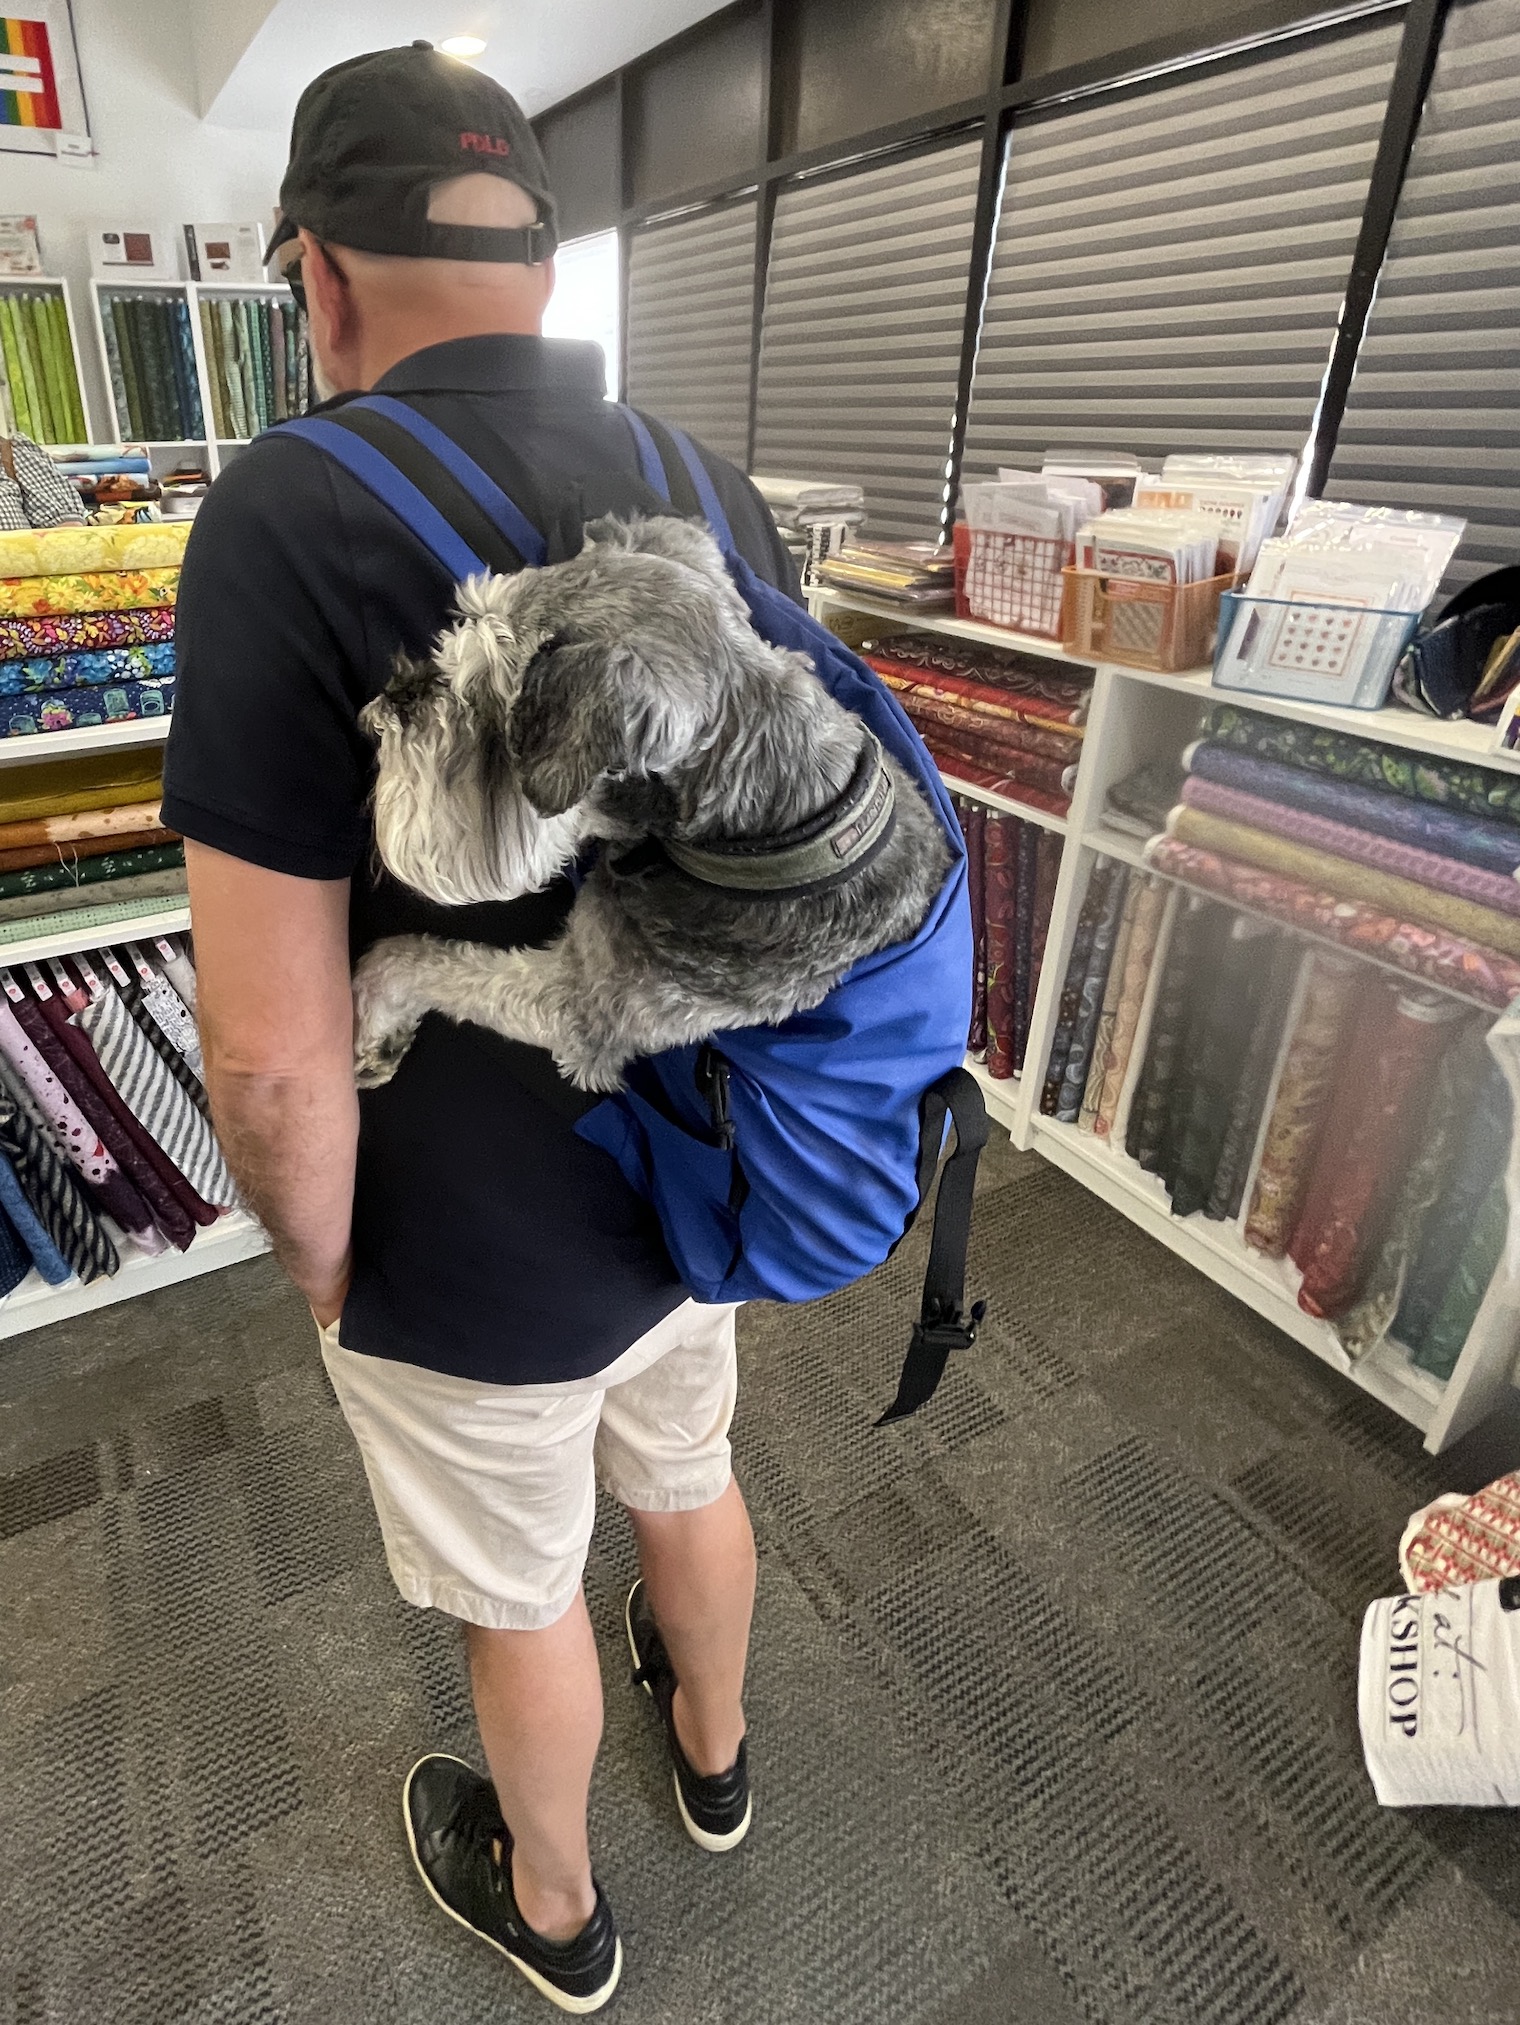
We had so much fun wandering through the vendor booths as the sun was setting. Mike the Miniature Schnauzer was in the backpack and got to enjoy some sightseeing in downtown Denver:
John was continually stopped as we wandered through the market and then the Platte River Plaza bridge area with questions about Mike in a backpack. In the photo above he is chatting with a large group of people who want to know how Mike ended up in a backpack (the other dogs were being walked on leash through the market).
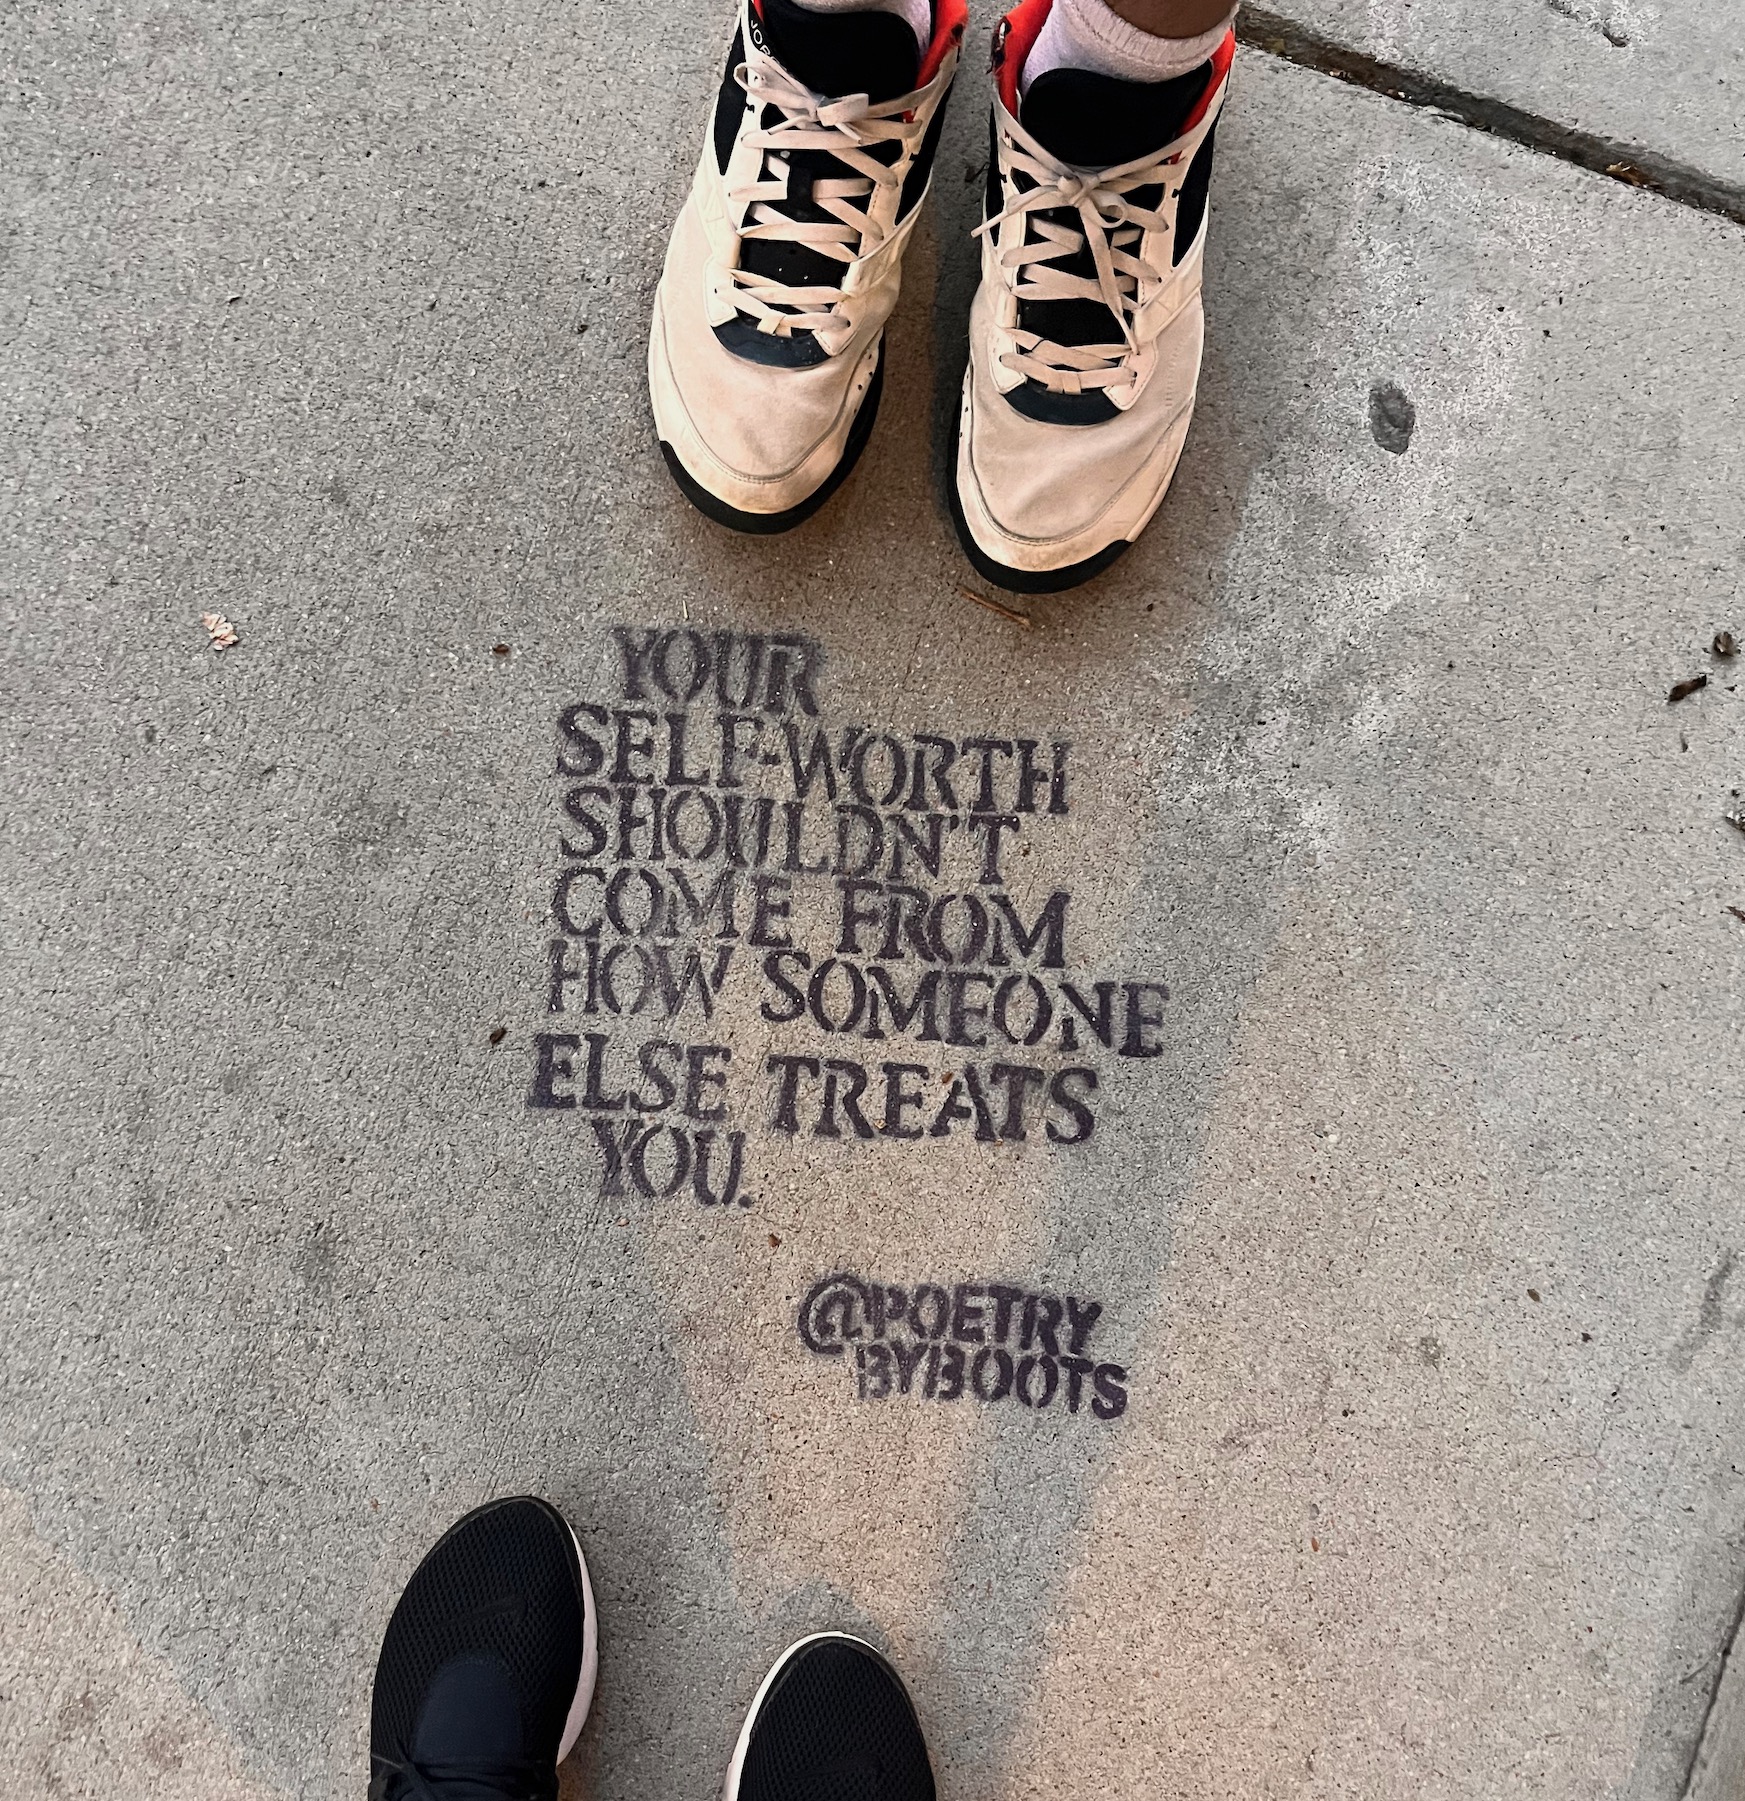
My sister and nephew found this cool sidewalk art with very wise words and took this cool photo:
THE CANYON
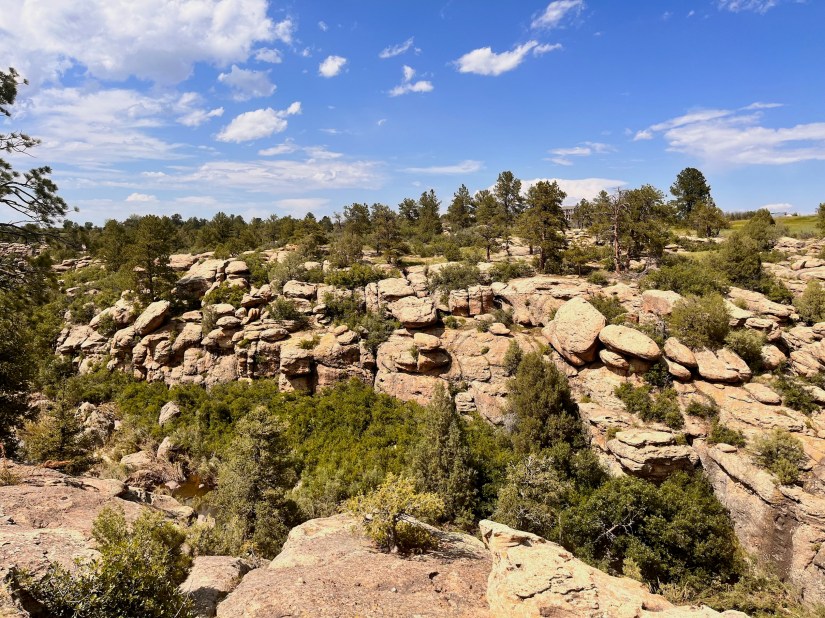
My nephew loves Colorado and wanted to go on a hike while he was visiting. We decided to take him to Castlewood Canyon which is not too far from our home and has lots of hiking options based on desired activity level. Here are a couple photos from our hike:
I’ve learned to wear a hat (I am the sister in the hat) when it’s hot and you are hiking – it helps in the Colorado sun!
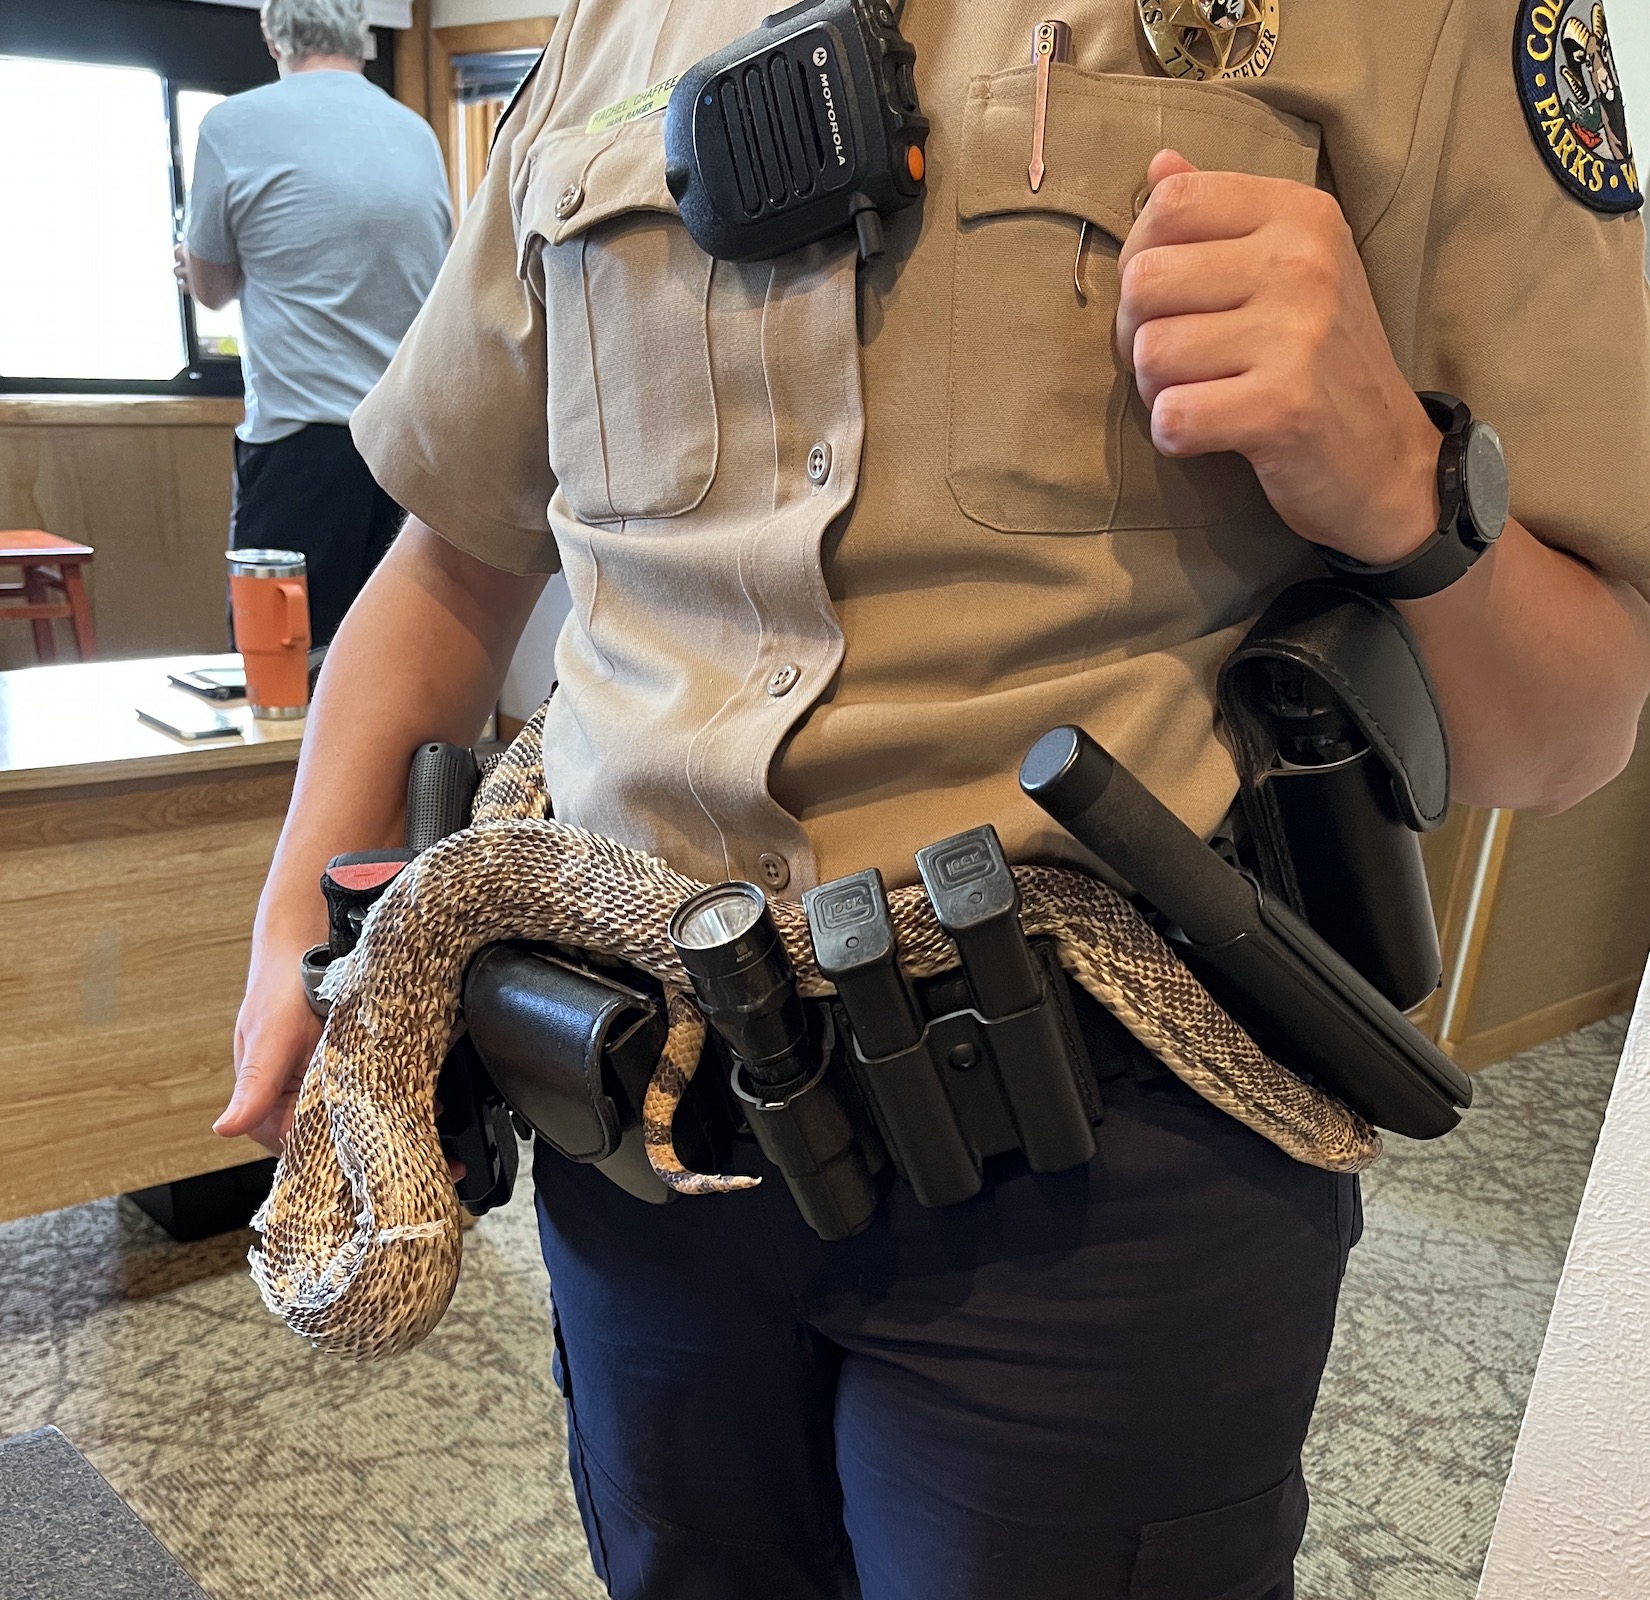
At the Visitor Center, where I stopped to use the bathroom, I met a Park Ranger that had a rescued Bull Snake wrapped around her waist. The snake was recovering from an illness and she was “babysitting” it by keeping it on her all day at work!
Now that is dedication to the park’s wildlife!
If you’d like to see more photos of Castlewood Canyon check out this post I did in April 2020 – And on the 8th Day…Part III.
THE RAMEN
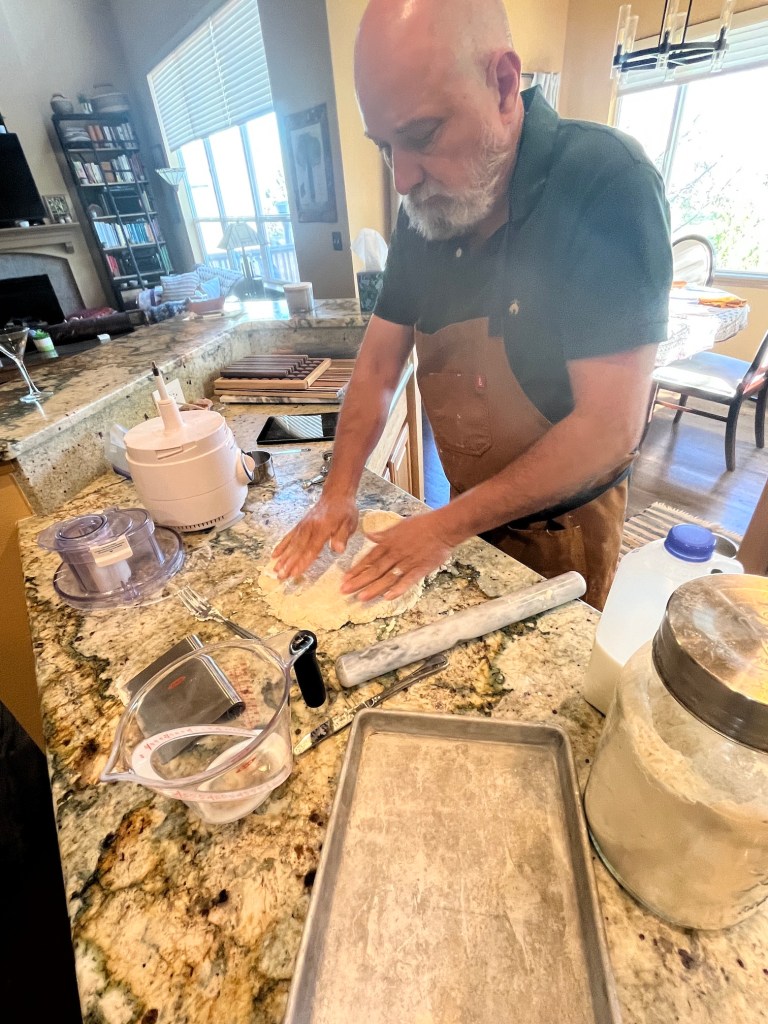
John’s loves to cook and always wants to challenge himself and experiment with making foods outside his comfort zone. A couple weeks ago, after much YouTube watching, he began making Ramen soup at home. He was using pre-packaged air-dried noodles (much higher quality than the instant ramen you eat in college) along with his fresh ingredients.
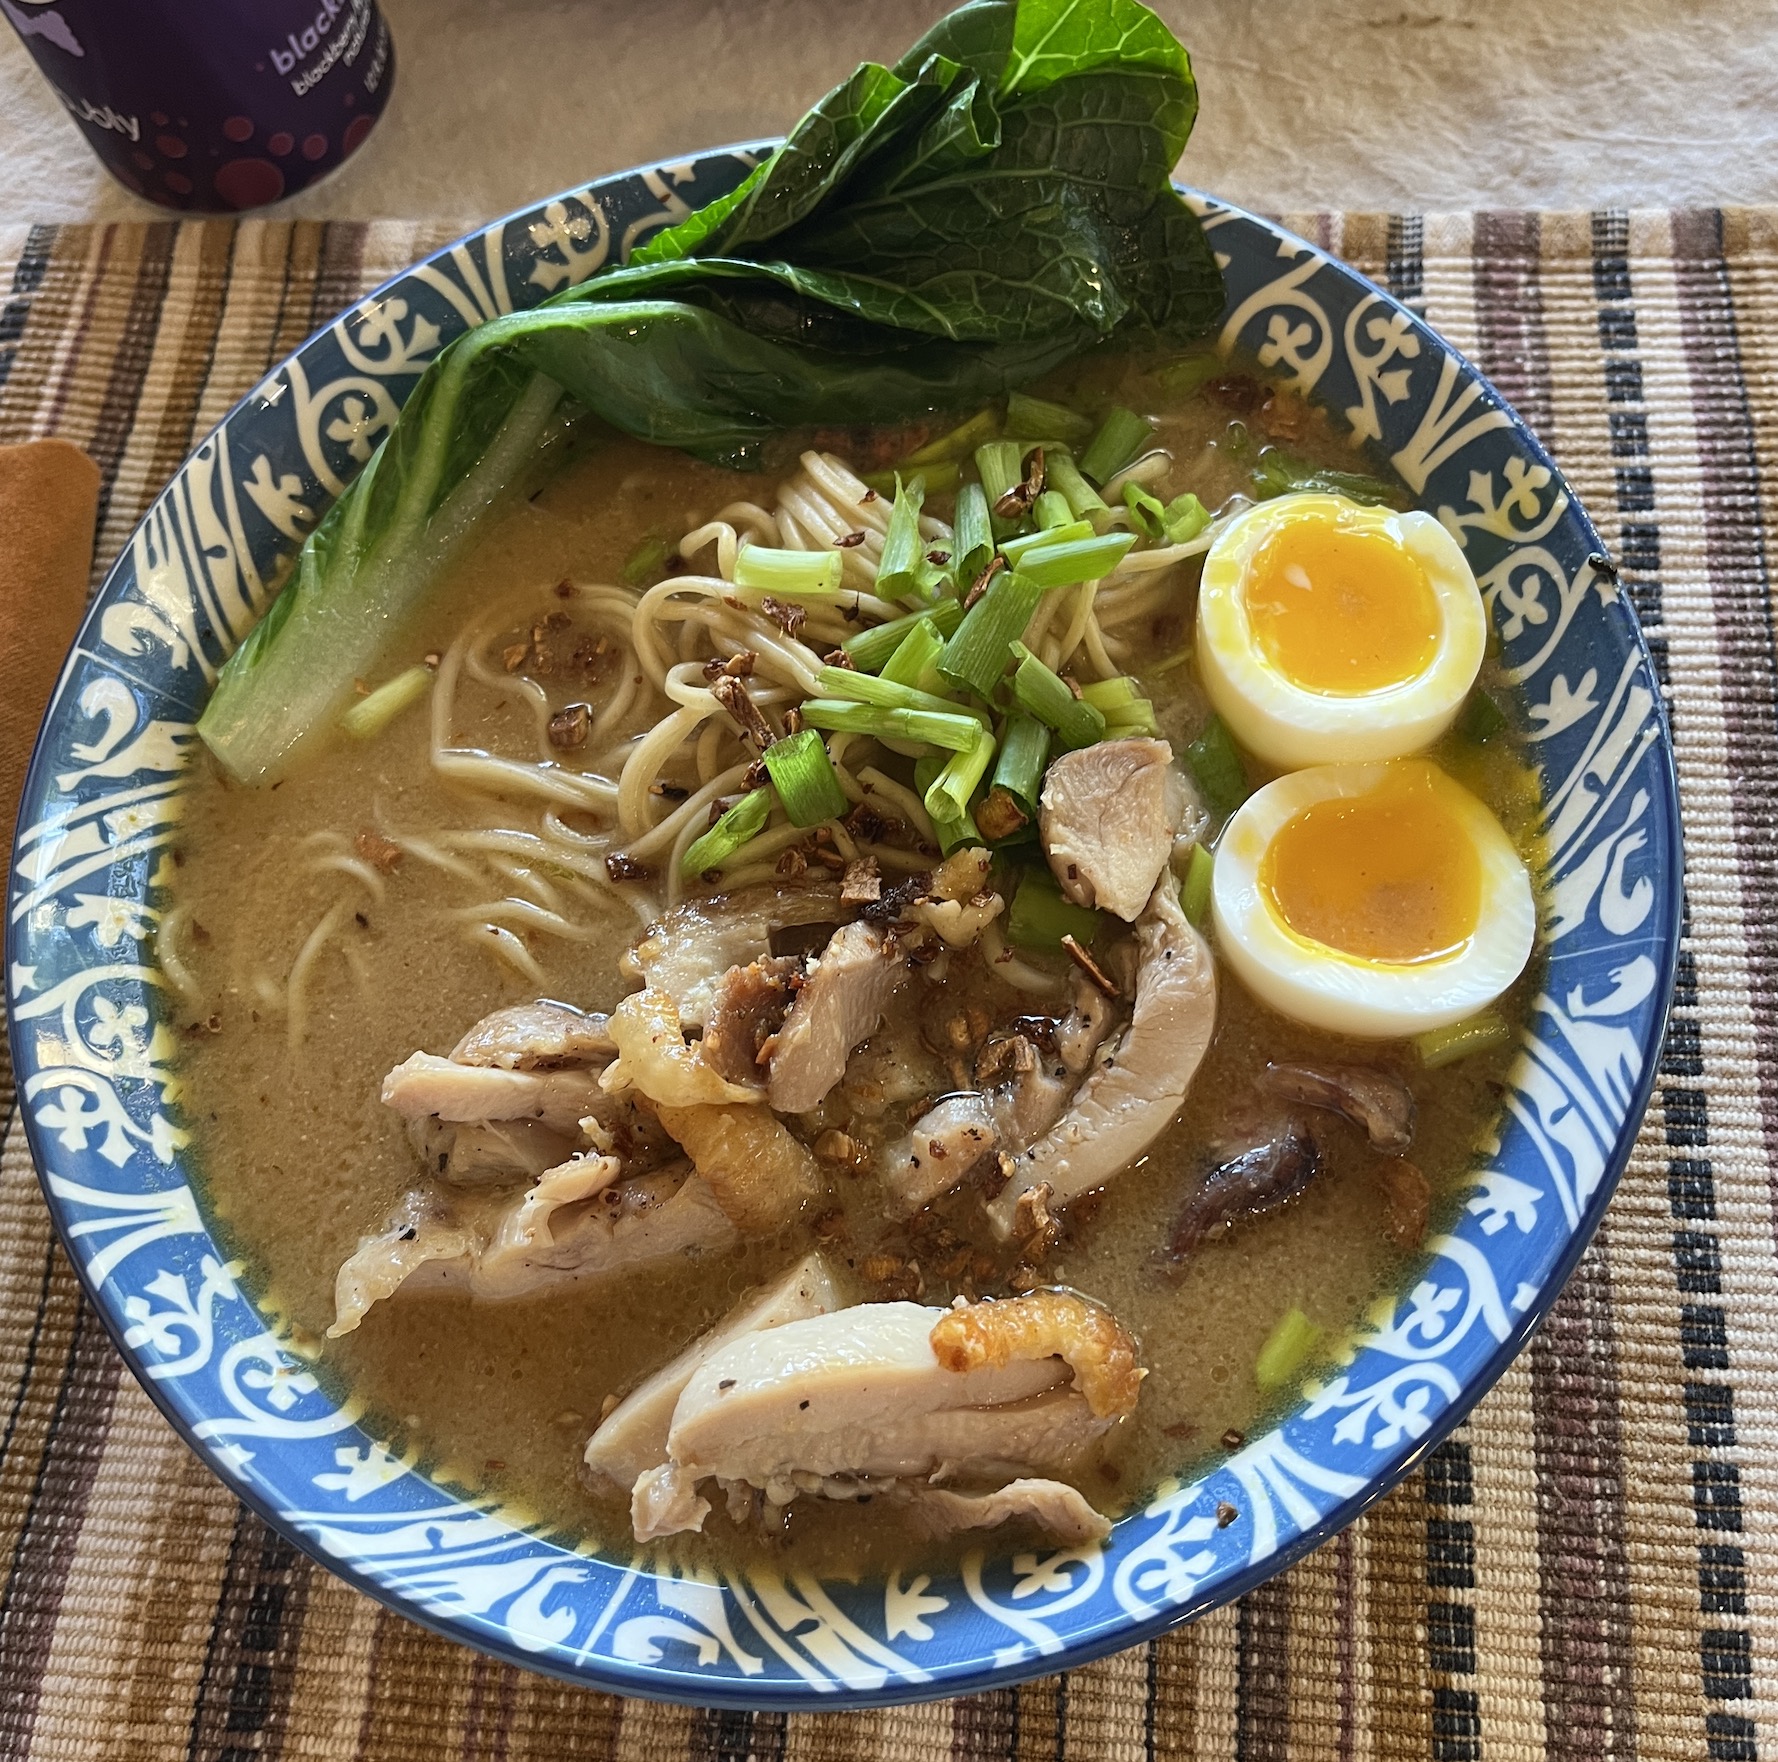
Well he wanted to take it to the next level and learn how to make his own Ramen noodles from scratch. My visiting nephew also loves to cook and was game to do a “Ramen Night” one evening for dinner and make Ramen with handmade noodles.
It took them two evenings to complete the dish – you have to let the ramen noodles sit for a day before you can use them. You also have to let the prepared chicken thighs for the ramen sit overnight before cooking the chicken so it will have a nice crust on the skin.
After all their hard work, they served us Ramen for dinner on Sunday night:
Their Miso based broth was amazing and I thought I was at an authentic ramen eatery!
So those are some highlights from their visit.
I’ll close this post with a couple bonus photos from their visit:
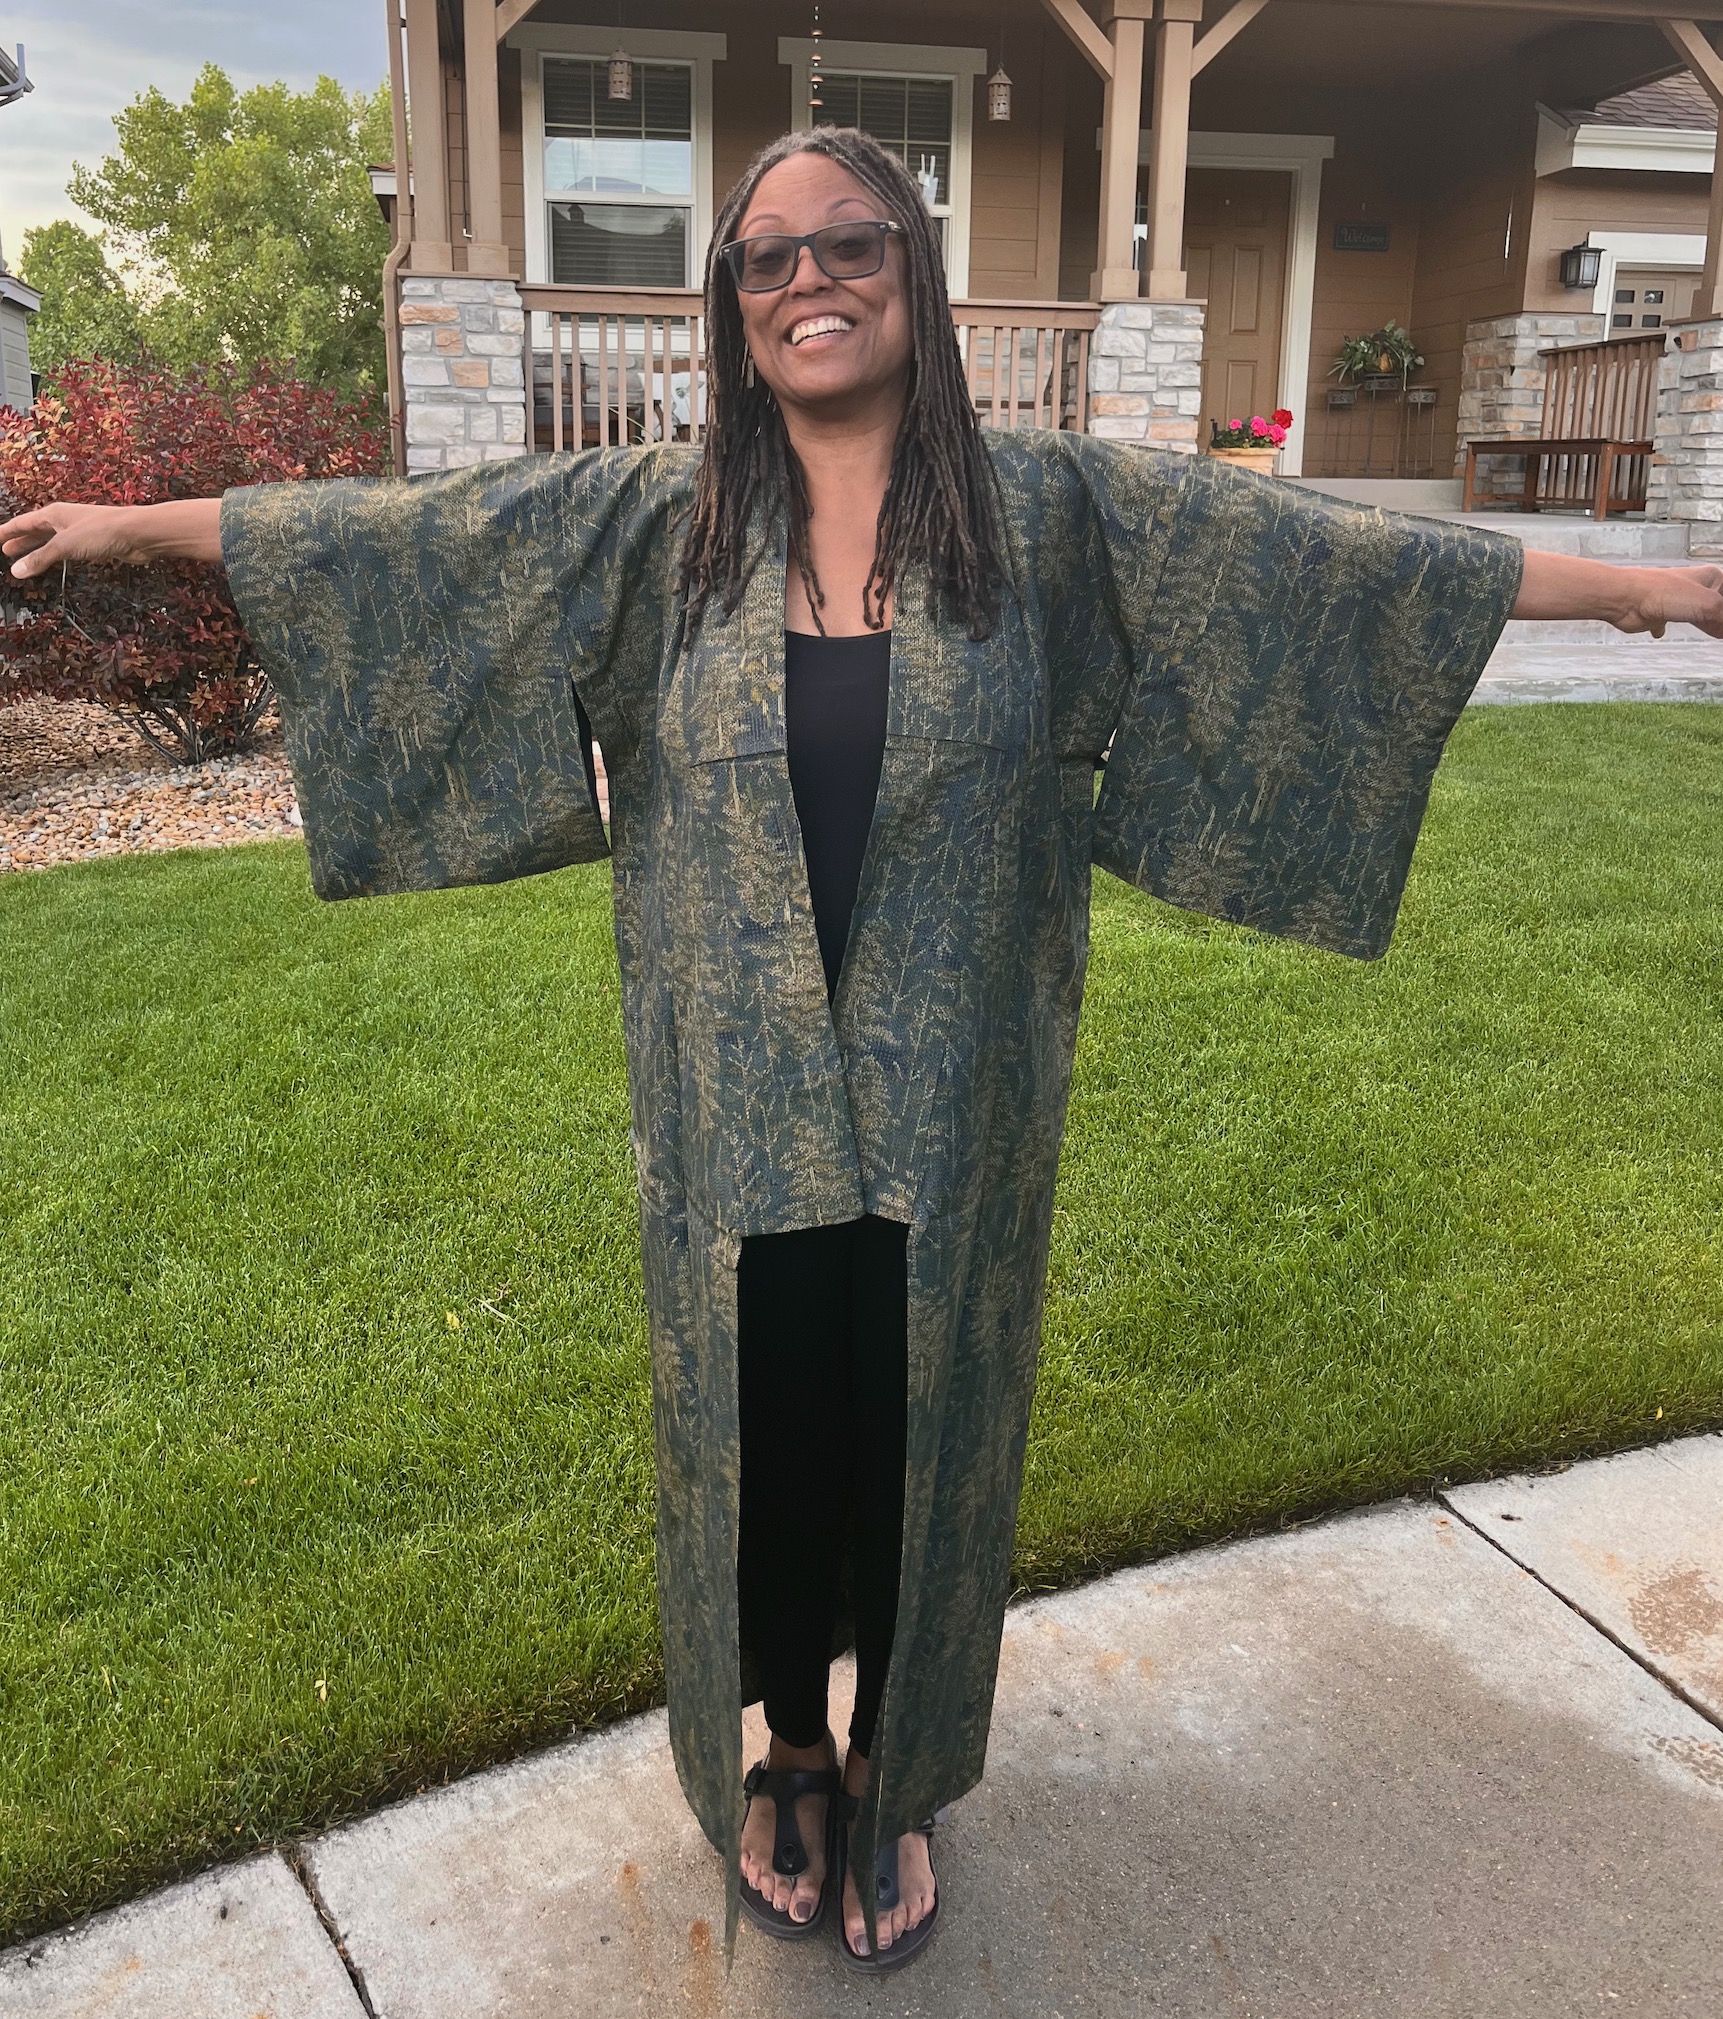
1) My sister brought a kimono for me as a belated birthday gift. She has connected with a woman with in Thailand that makes these kimonos with fabric sourced from Japan. She plans to import some of the kimonos to sell in the US. Here I am modeling the kimono she gifted me:
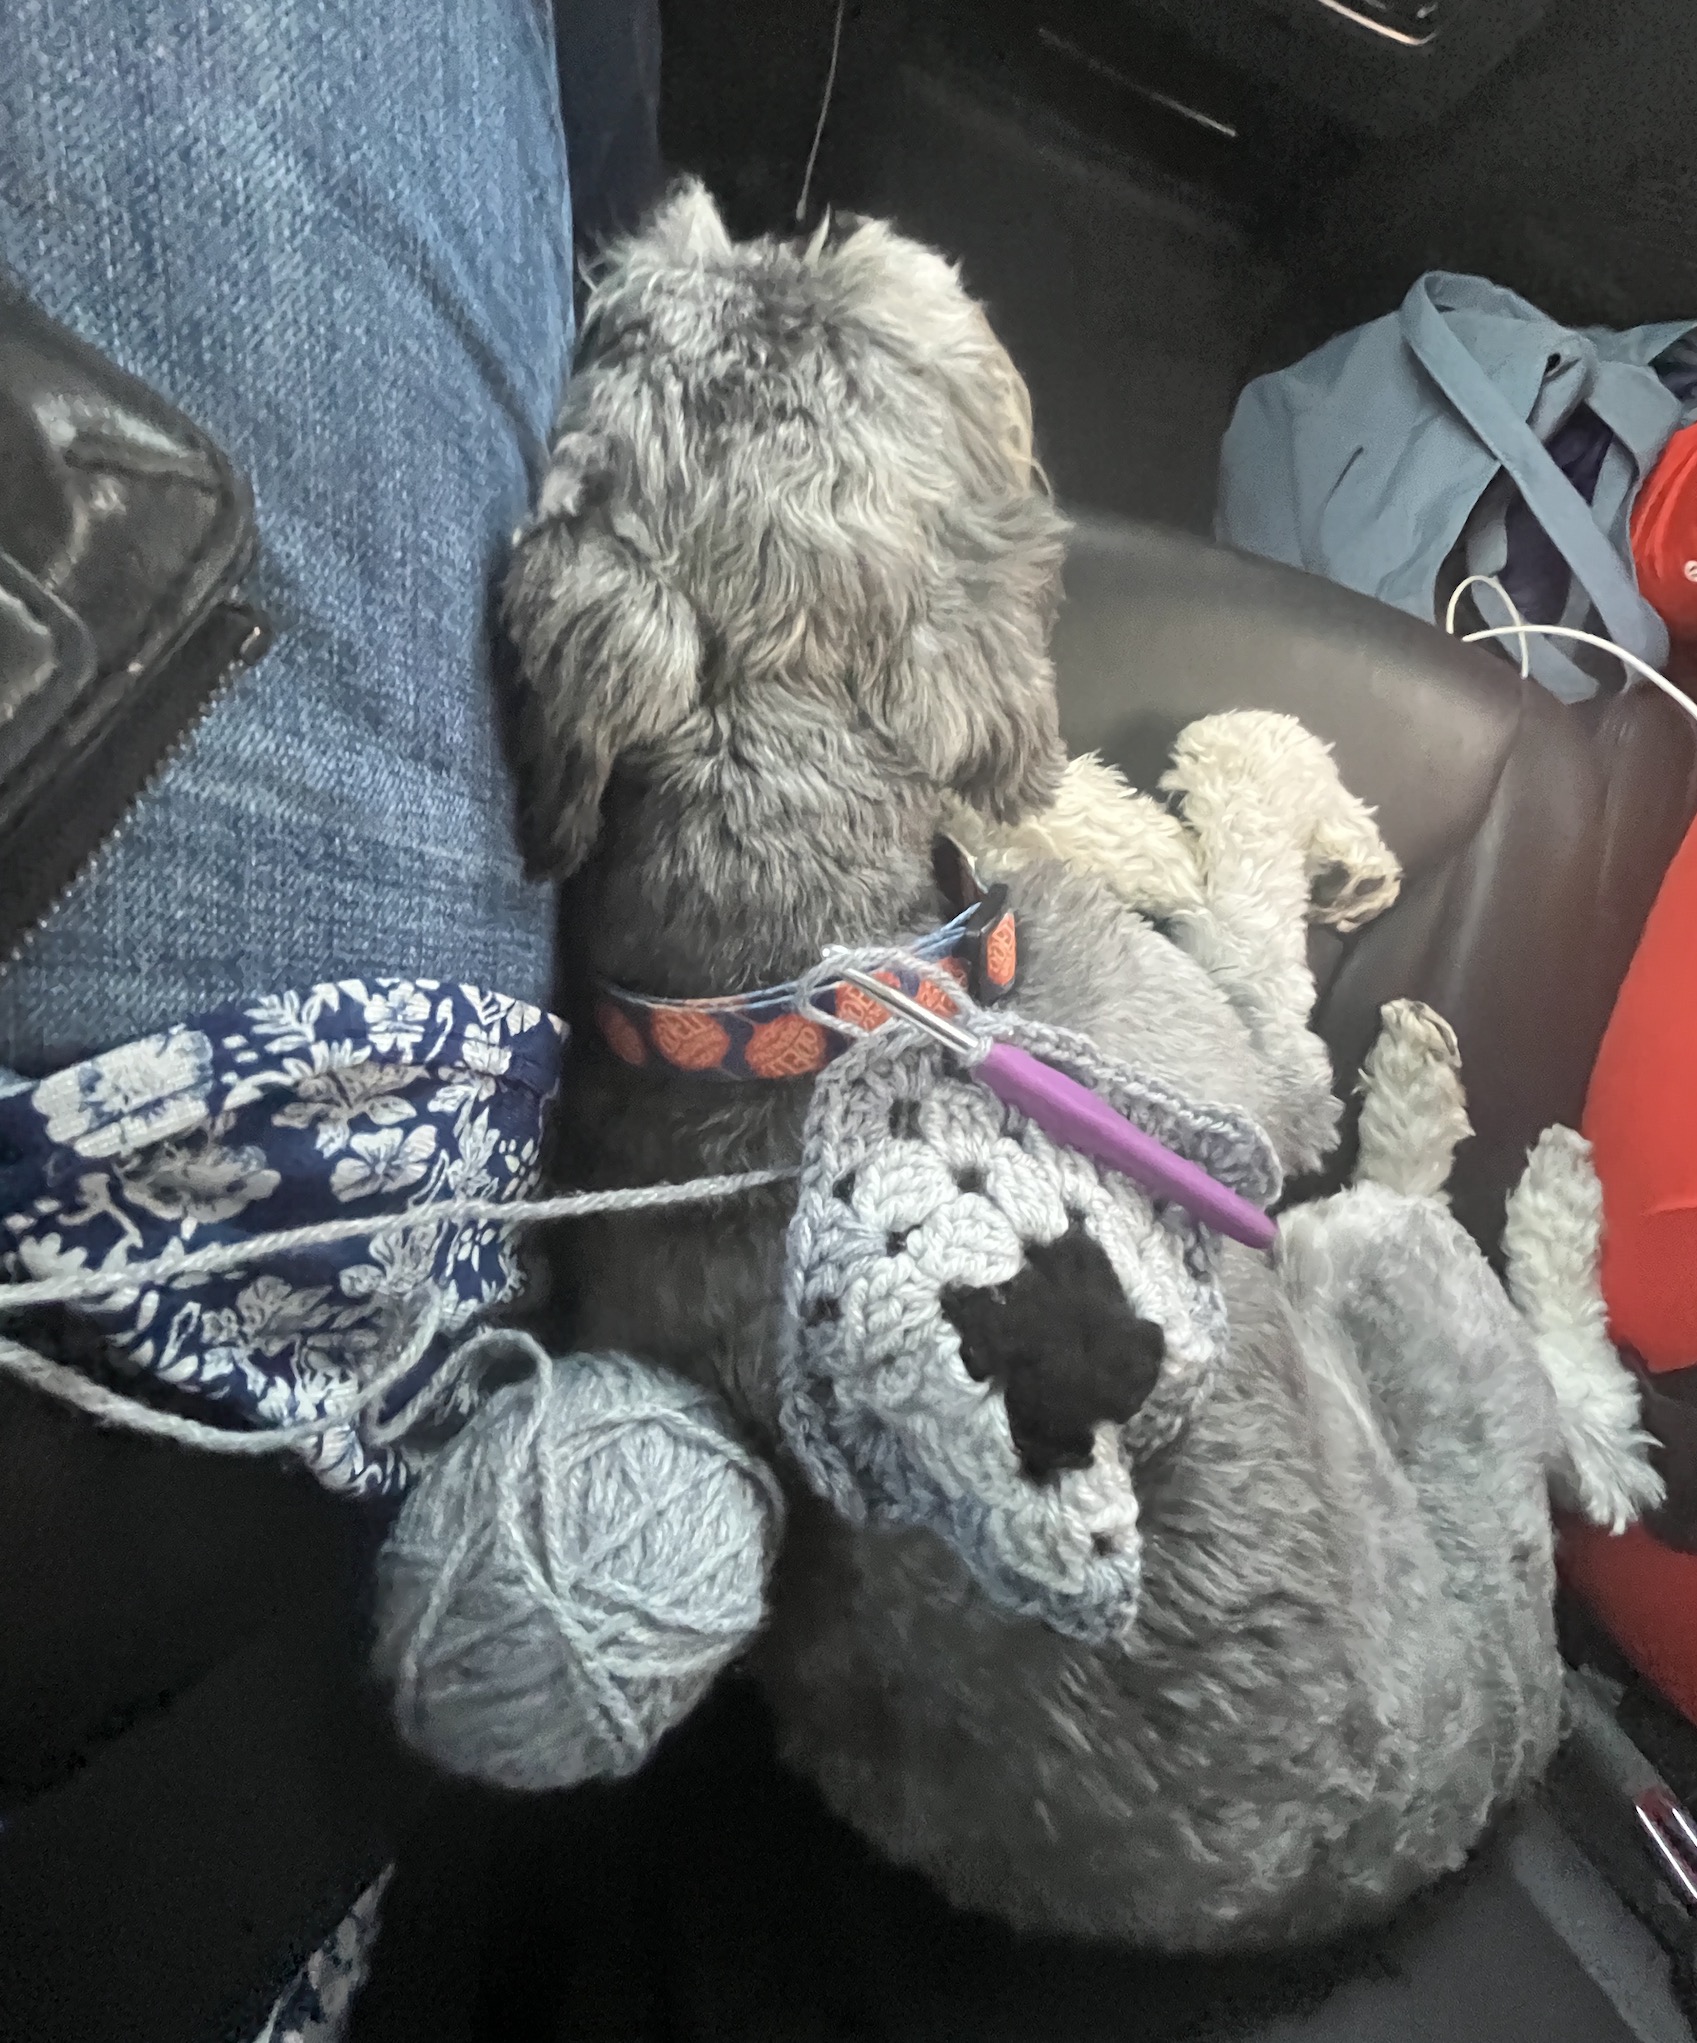
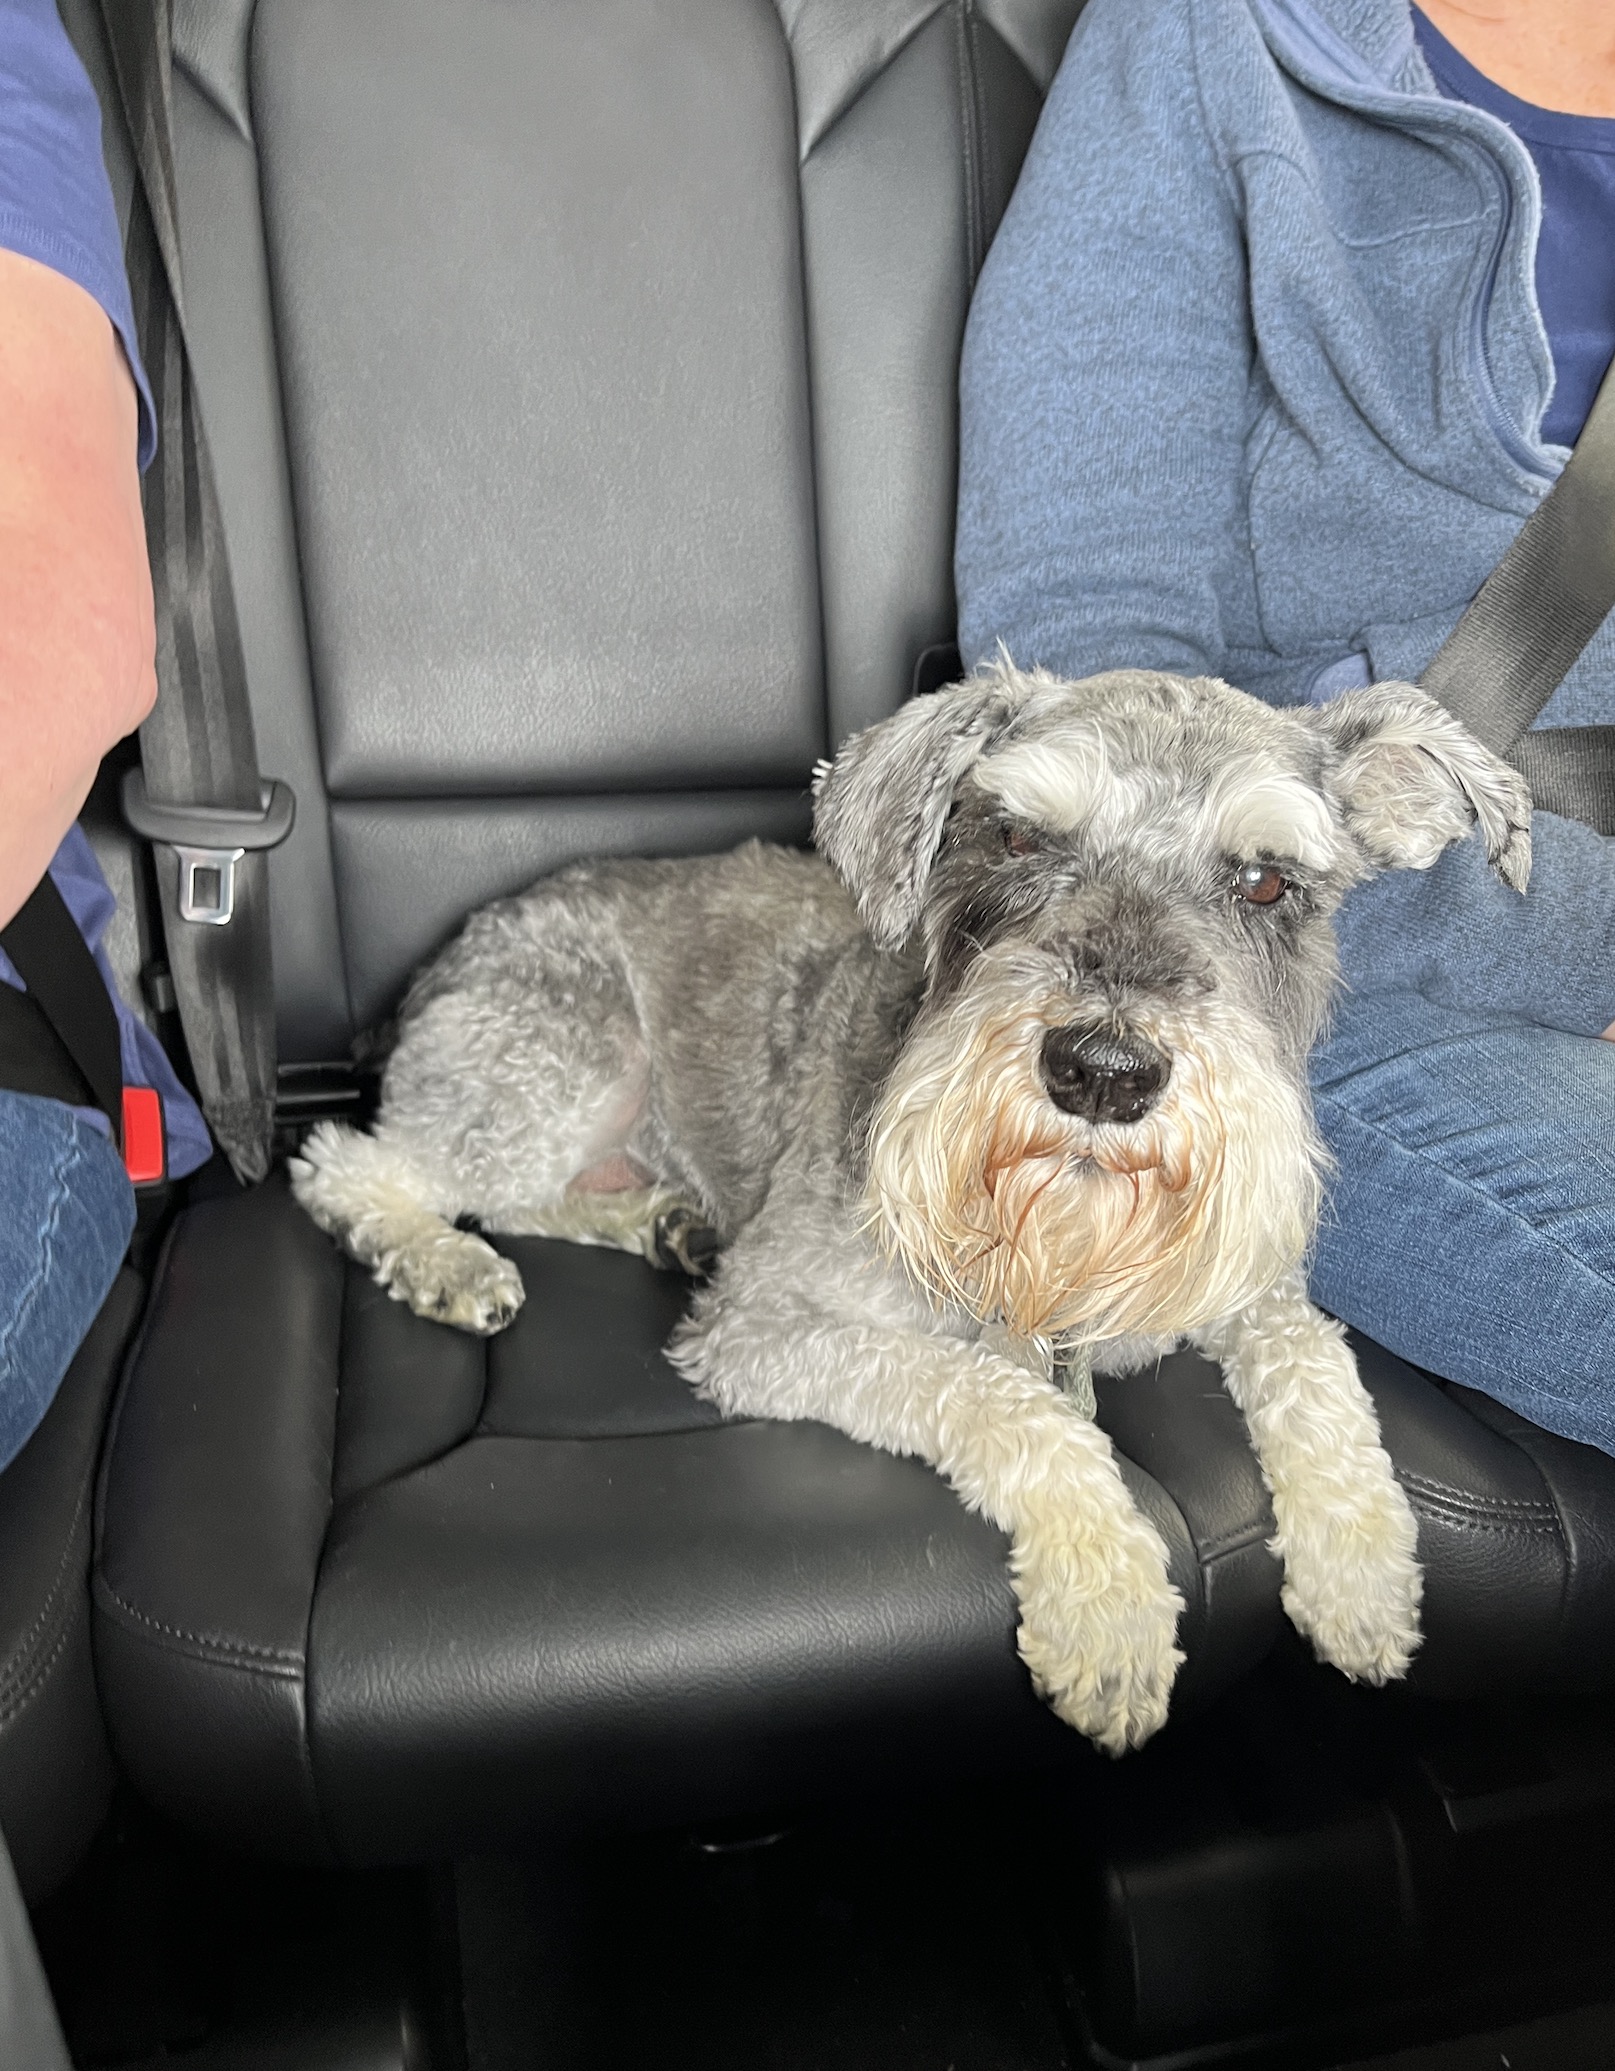
2) My sister and nephew adore my dog Mike, they are dog people…and cat people (they have two cats and two dogs) and Mike went on a lot of road trips with us. Here is Mike acting as a granny square crochet square rest as I crocheted sitting in the back seat of the car with my sister during their visit:
(I work on crocheting granny squares when I am a passenger in a car for a long car ride…keeps my passenger-in-a-car anxiety under control!)
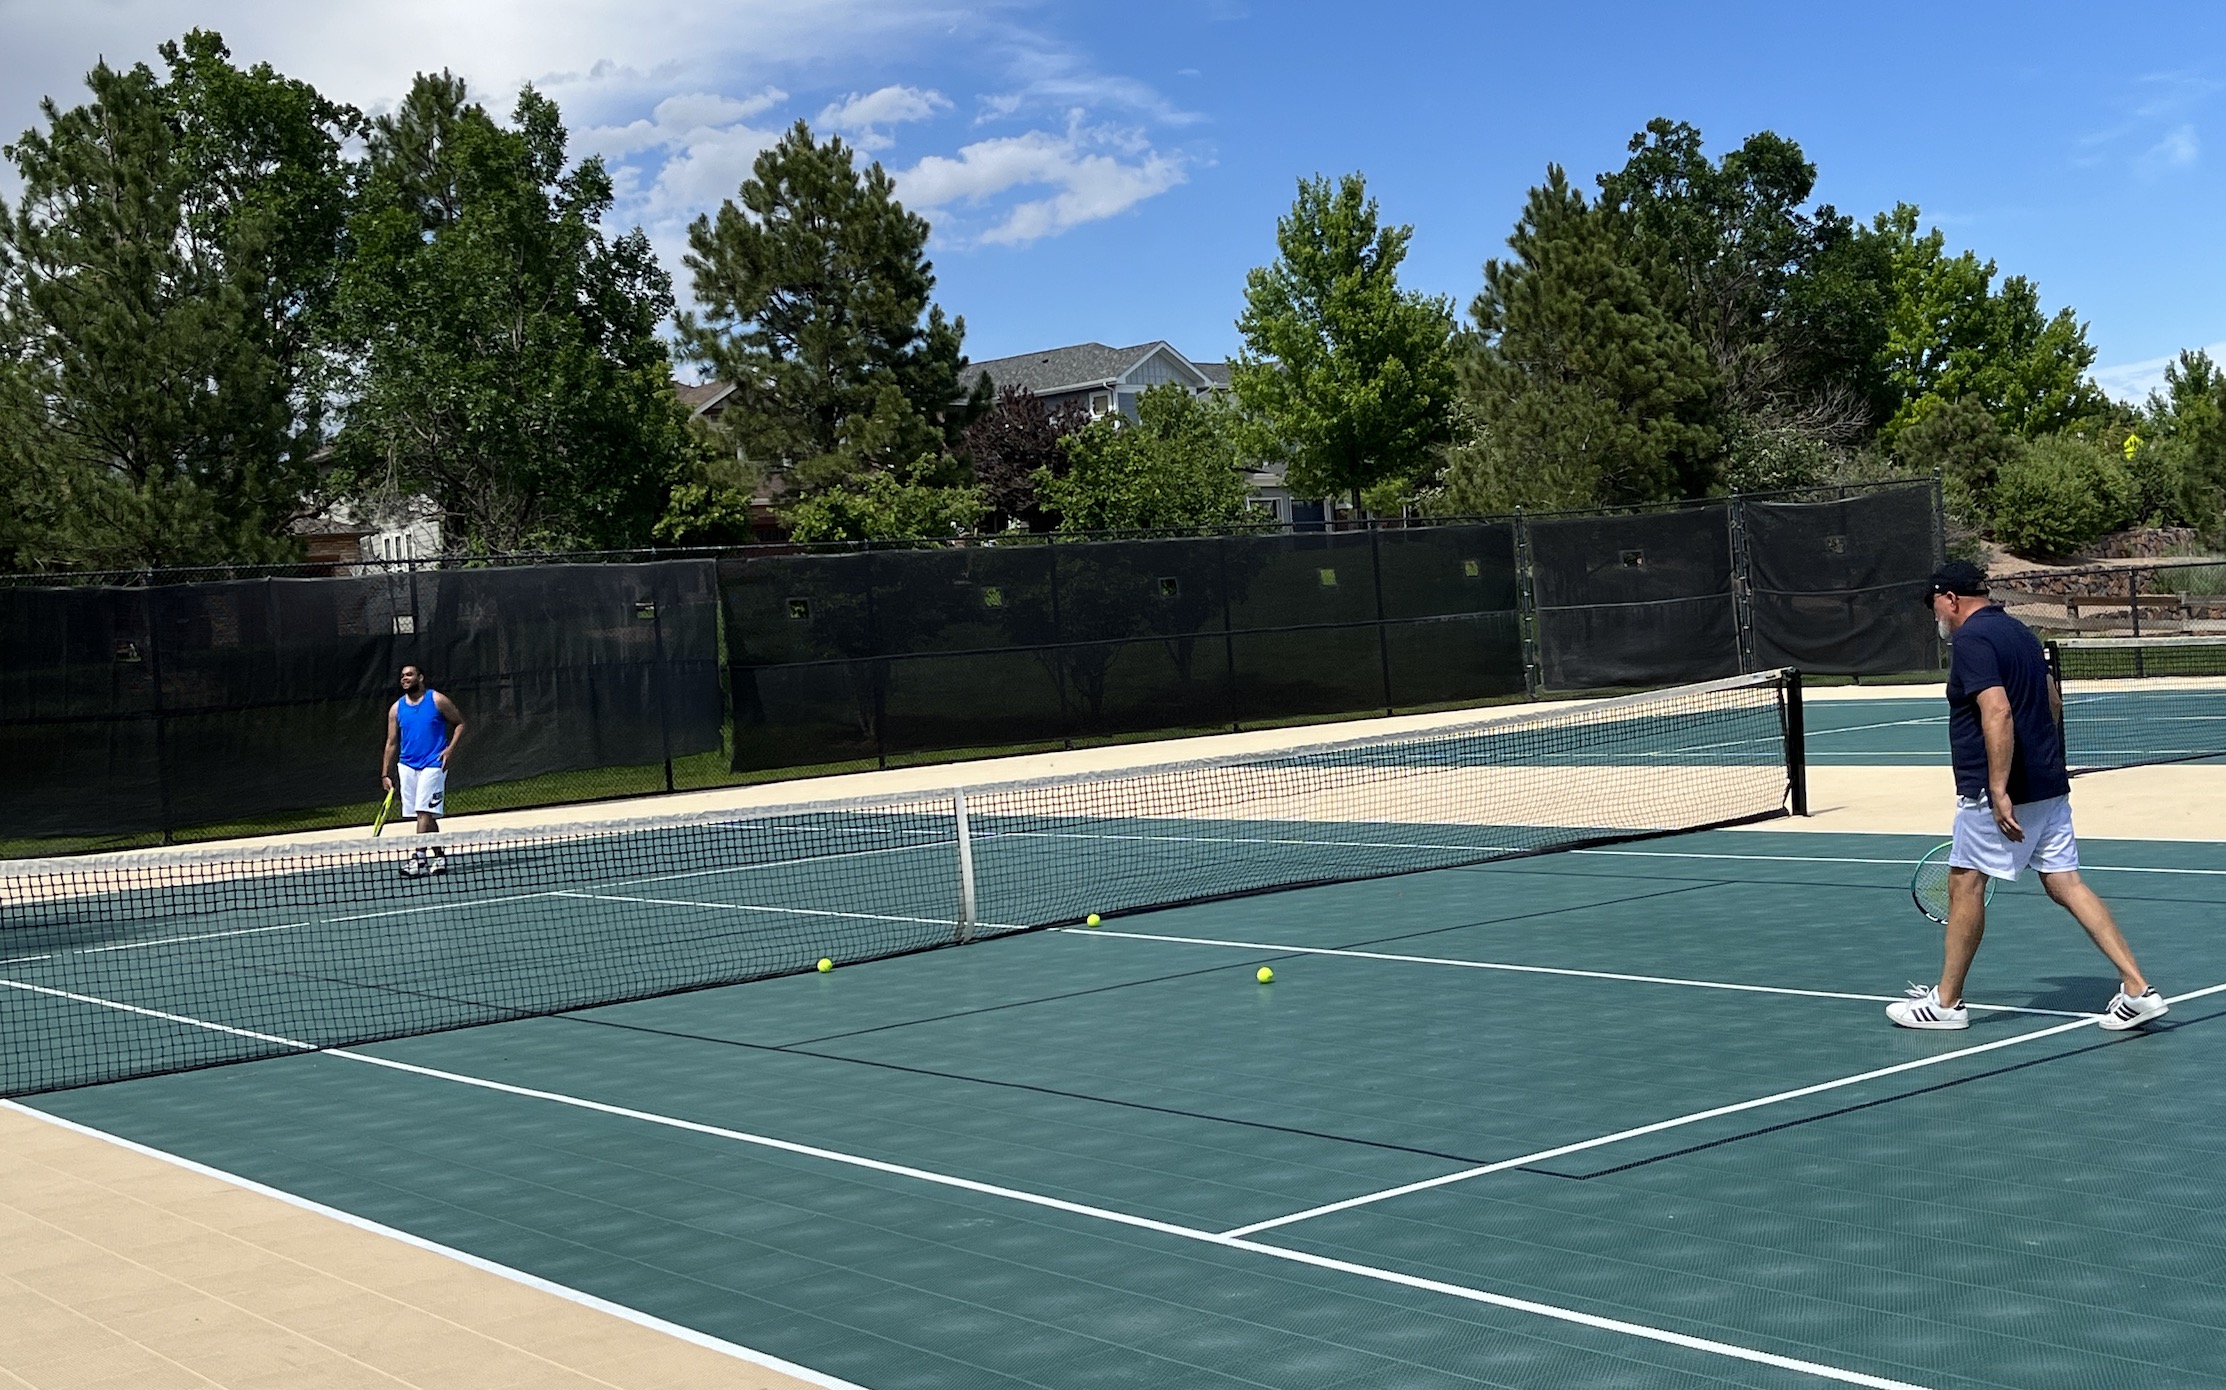
3) My nephew and John played tennis at the tennis courts in my neighborhood and had a blast.
John didn’t do too bad playing someone like 1/3rd his age. (Both had played on tennis teams in junior high school but there was quite the difference of years since those experiences!)
I was randomly thinking about this memory the other day and thought I would re-post it. If you’ve been following my blog a very long time (at least since 2016) you might remember the post – The Ladies Friendship Circle (1931).
In 2013 I facilitated the completion of a quilt started in the 1930s and given as a gift to someone 80 years later (who was alive when the quilt was first started). Here is the story:
THE LADIES FRIENDSHIP CIRCLE (1931)
82 years ago in 1931 (note this post was originally written in 2013) my friend’s MJ’s grandmother and her group of friends made a quilt top for MJ’s mother (the new baby in 1931). The quilt was never finished. MJ wanted to finish this quilt for her 82 year old mother who had kept it packed away in a chest for 80+ years and surprise her for Christmas.
After searching several quilt shops, MJ and I found the perfect backing and binding fabric at one of our wonderful Central Oregon quilt shops. Then we had the quilt professionally longarm machine quilted.
MJ and I spent an evening sewing down the quilt binding to finish it. We were both snuggled under the quilt as we each worked on sewing down one end of the binding. MJ planned to surprise her 82 year Mother with the mind blowing Christmas gift of a lifetime – a quilt top put away since 1931 that has been turned into a quilt!
Something very special about this quilt: MJ’s Mom is the only person living from this time period of this dear group of family and family friends – so when she gets the surprise quilt for Christmas she will see the names of the long-passed very dear people she grew up with.
I warned MJ – when you hand your Mom the quilt at Christmas, it is going to be a “blow out the tear ducts moment”!
MJ presented her mother with the quilt for Christmas in December 2013 and yes there were many tears of joy. Imagine receiving a completed quilt that was started when you were a child, by people who loved you and are now are long gone.
MJ’s Mom passed away in mid 80s and I am so glad she got to enjoy this quilt before she passed.
Quilts are love (as most quilters know) and this quilt contained the “spirits” of the departed loved ones entwined in the quilt’s hand embroidered stitches. I liked to imagine these “spirits” being very pleased that their quilt was finally finished and given to the intended…even if it took 82 years…
I had a couple brief updates and I thought I would spread them out into a bunch of brief blog posts but I am lumping them all together.
GO BOLDLY
An update on the quilt (which might end up more wallhanging size) that I mentioned in the post What I’ve Been Up To and What’s on the Design Wall, which I named “Go Boldly“: I am now sewing the blocks together. There are 64 blocks and each need to be sewing into blocks of 4 to make them into 16 blocks to then sew together.
I am currently debating whether to make the quilt larger (I have enough leftover blocks to make 1 – 2 additional quilts or wallhangings) or leave as it is. I think I am going to just sew the 16 blocks (4 mini sections to make a block) together and then decide.
The longarm machine quilter (Sew Colorado Quilting) has finished quilting it and sent me some photos, here is one of them.
I actually picked up the quilt today from her and will do a post on it with more photos once I get the extra backing and binding trimmed (I like to do my own trimming) and decide on a binding. I am thinking about doing a “facing” on it (like you would do with an art quilt) as I plan to hang it on the wall.
COLOUR WHEEL
A quick follow up on this post The Colour Wheel Quilt is Done, about the color wheel quilt I made to use as a teaching aid when I give a workshop next year (September 2024).
By the way I will share more information about that workshop including the venue once that venue gets ready to publish its online catalogue listing the workshop. If that doesn’t happen before October 2023, then I’ll go ahead and share as I’ve shared it with the Quiltfolk article writer for Issue 28 that comes out in October so it will be publicly revealed then anyway!
I had put the quilt away until next year for the workshop but then I decided to find a place for it in my studio so I could enjoy it before then – here it is now on a wall in my studio that I rearranged to make room for it:
VARIOUS RANDOM INFORMATION
John who loves to cook, tried making Ramen for the first time the other night and it came out pretty good!
My yellow rose bush in my front garden is finally taking off and here is one of its lovely roses:
And finally, here is Mike and his “cousin” Goose both trying to via for John’s laps (Goose won) when John was visiting his Dad the other day.
Hmm, I just realized that technically Goose is Mike’s “uncle” not his cousin – ha!
As I shared in Part I (if you are just joining us, see Quiltfolk Magazine Photoshoot, Part I), I was invited to be part of Issue 28: Colorado in the October 2023 issue of Quiltfolk Magazine.
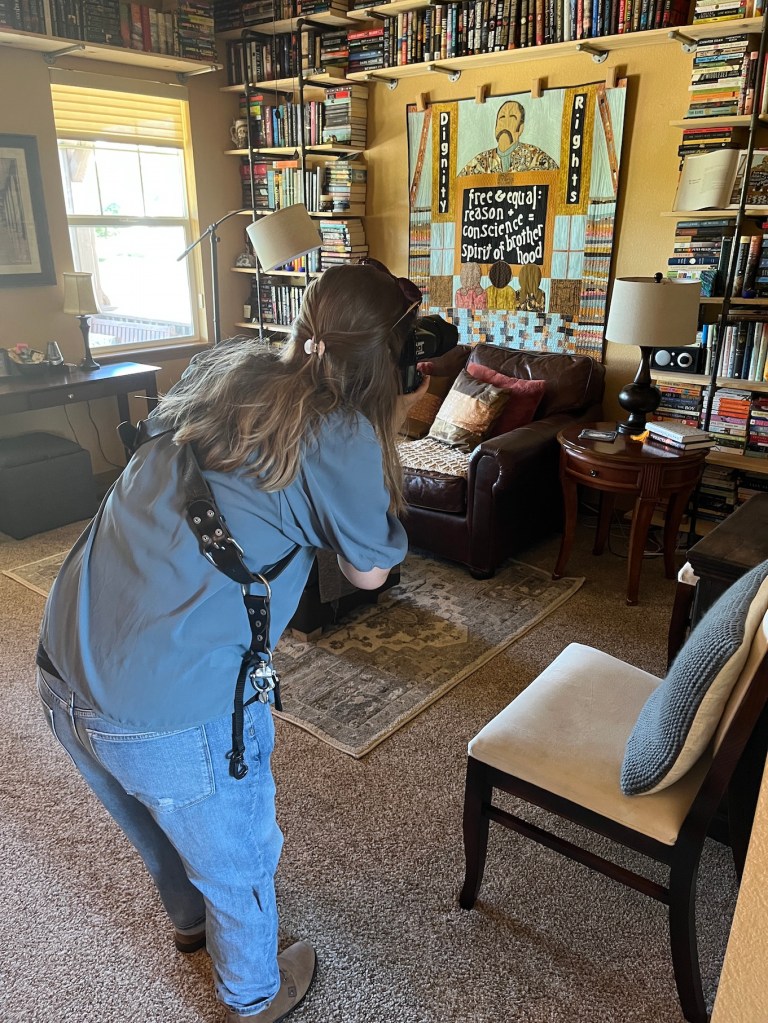
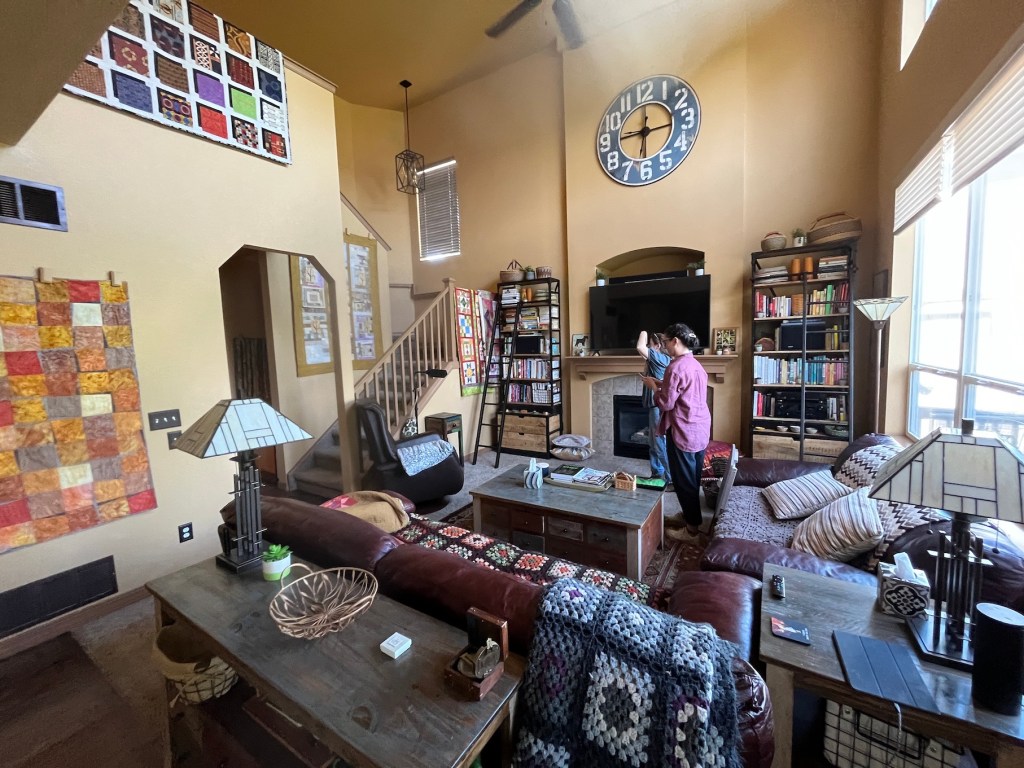
I had an amazing Zoom video chat the previous Friday with Dr. Sharbeon Plummer, one of the Quiltfolk Magazine writers who will write the article about me; and then a very fun photoshoot inside and outside my home with the Quiltfolk Magazine photoshoot team.
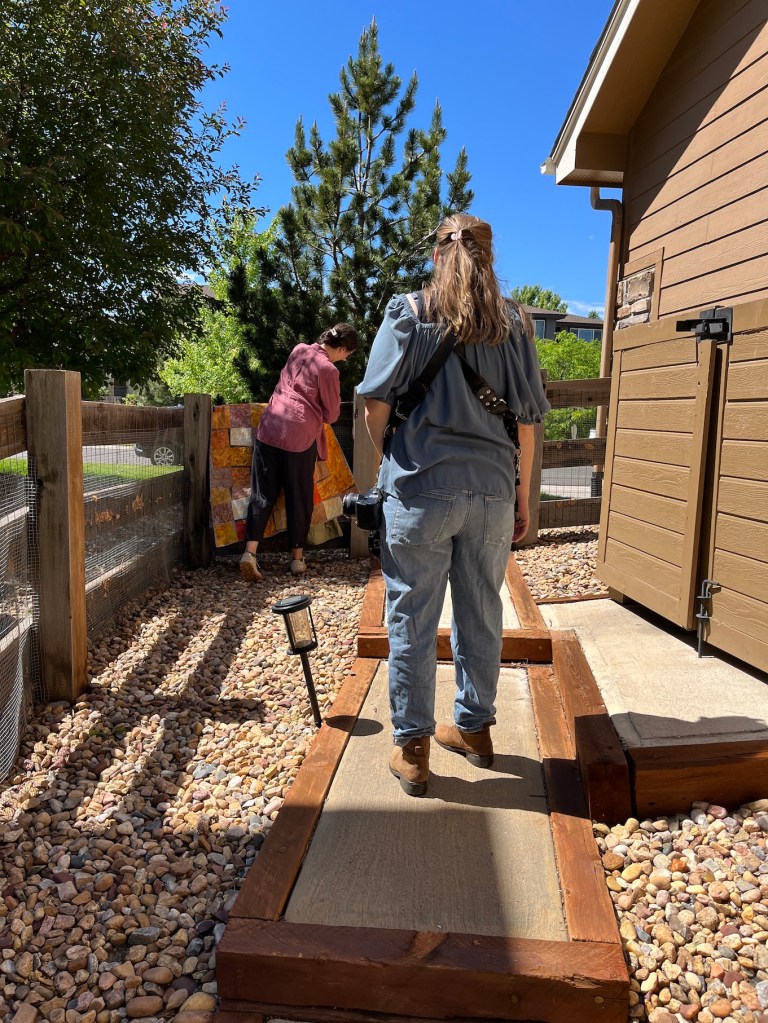
I thought I would share some “behind the scenes” photos from the photoshoot that I took while the photographer was getting set up and/or the stylist was doing her styling magic.
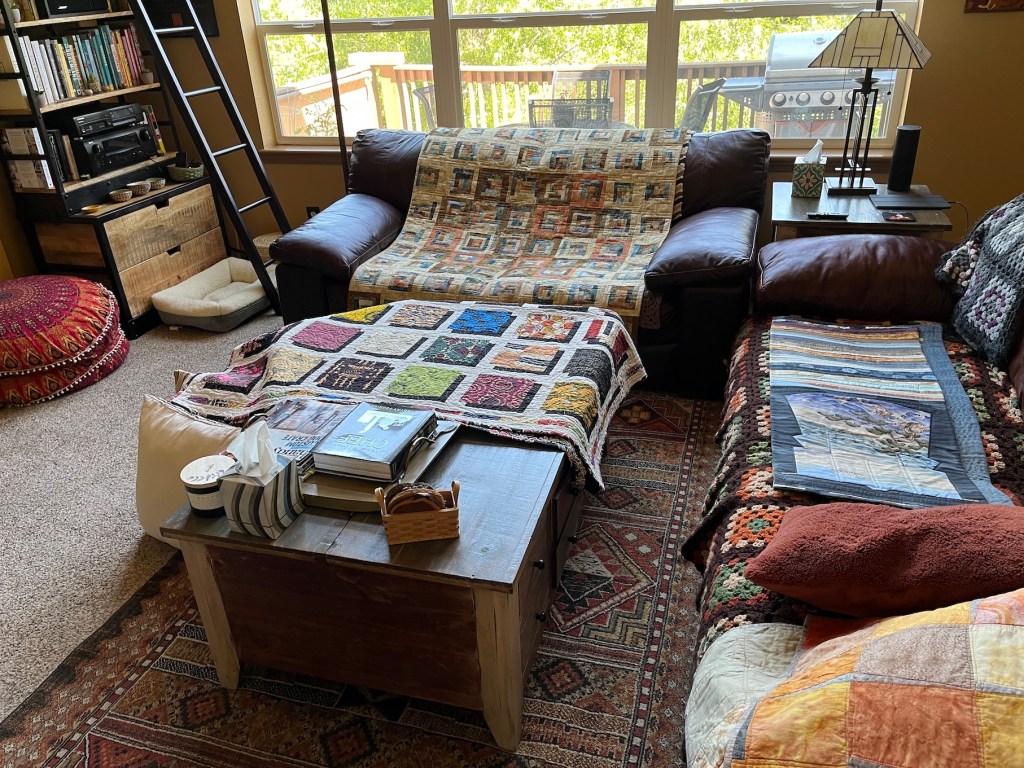
Inside My House
The photo above is not a grouping of quilts to be photographed together, but rather a selection of quilts the photographer wanted to do individual close up details on. The first photo in the series of images above shows some of the photographic equipment they unpacked for the photoshoot.
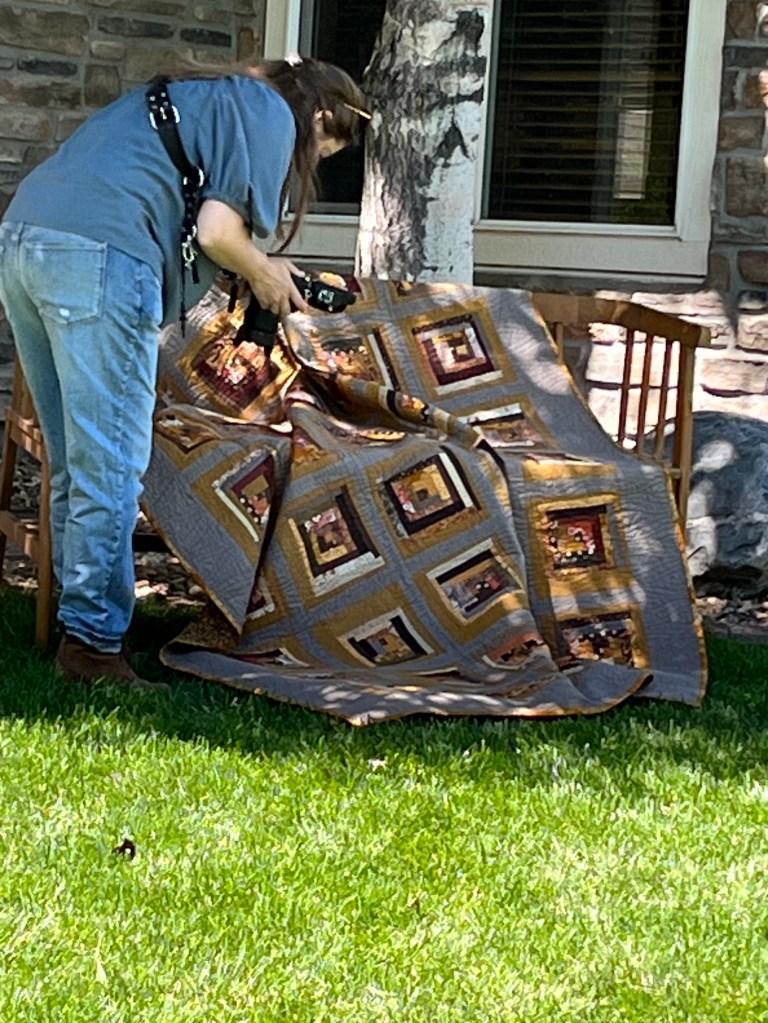
Outside My House (Front & Backyard)
So that’s about it for now about this incredible opportunity.
As we get closer to the release of the October 2023 issue of Quiltfolk Magazine I’ll have some type of “social media” package with a preview of photos from the article I can share as a teaser and a discount coupon to share on my blog and Instagram for followers who would like to purchase a discounted copy of the issue.
The photographer and stylist set up some really cool photos and I cannot wait to see the outcome of the photoshoot. I also cannot wait to read the article of course!
If you’d like to see some additional behind the scenes photos check out the Instagram feed of the stylist @kimberleezacek (see her “Quiltfolk” reel) as well as the IG feed for Quiltfolk Magazine – @quiltfolk – which has a reel called “Issue 28” showing the amazing road trip by the photographer (Melanie) and stylist (Kimberlee) as they travel through Colorado meeting with quilters and photographing their homes and studios (as well as the beauty of Colorado).
I was invited to be featured in the October 2023 issue (Issue #28) of Quiltfolk Magazine.
On Friday June 16 I had my Zoom interview with one of the Quiltfolk Magazine writers; and and on Thursday June 22 I had a photoshoot at my home with one of the Quiltfolk photographers and one of the stylists.
So where do I begin? How about with a little background/history?
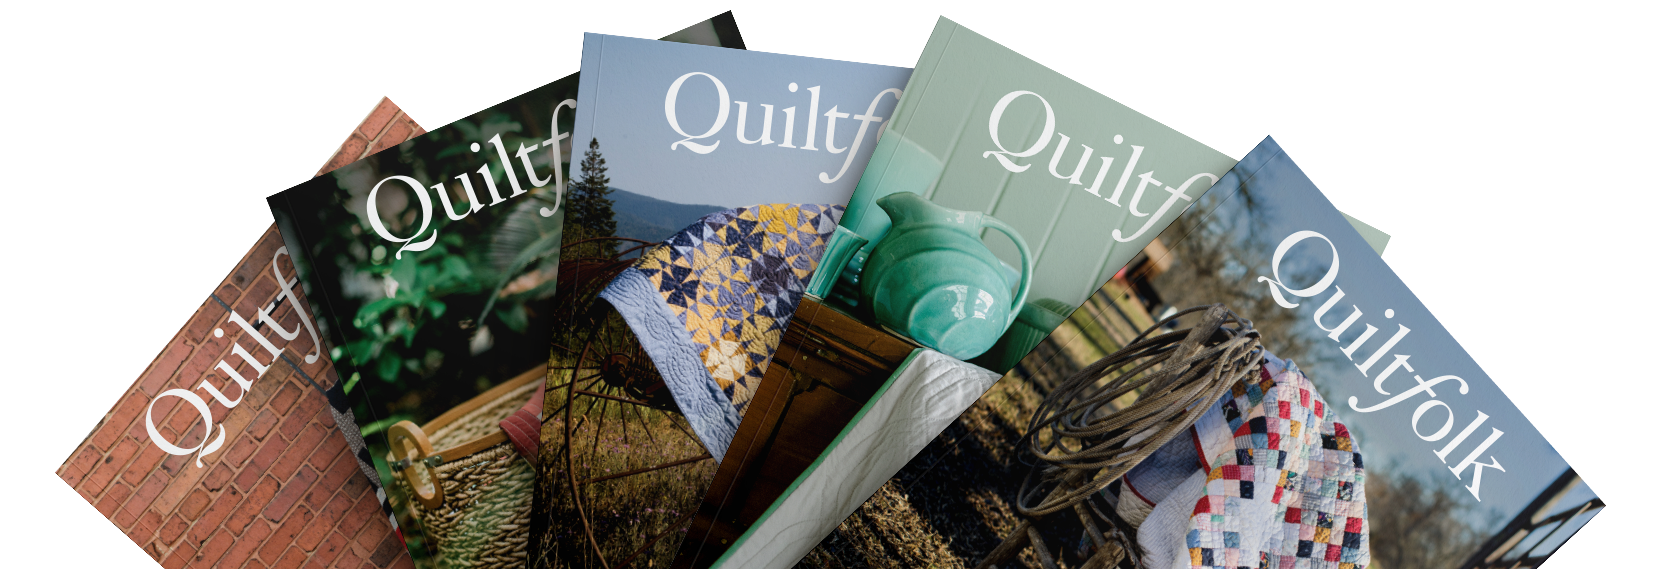
Quiltfolk Magazine is a quarterly magazine which features interviews and stories about quilters and quilting communities in a specific US state or region.
image credit: quiltfolk.com
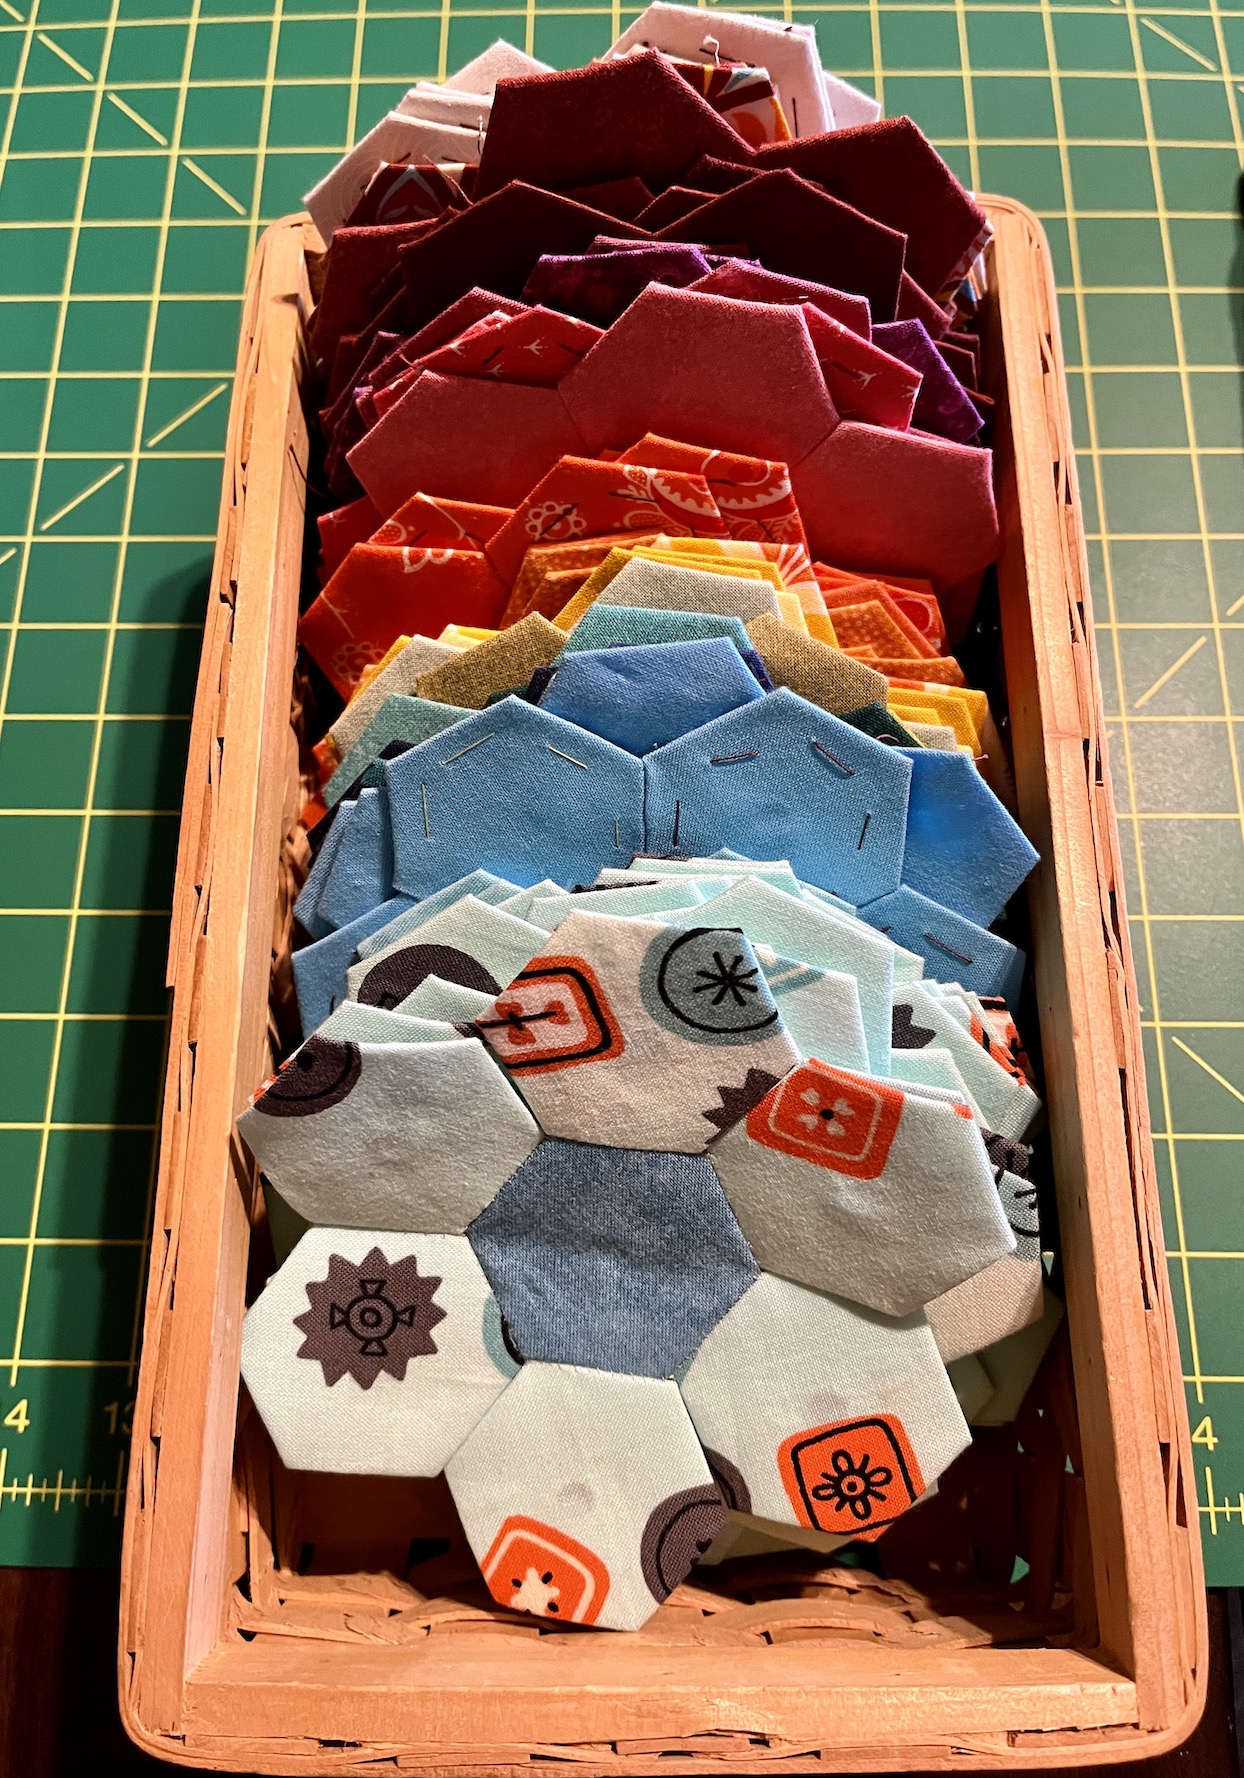
I’ve been reading it and subscribing to it (on and off when I feel inspired to pay the annual subscription fee) since it’s first publication in October 2016 – which featured quilters and quilting communities in Oregon, the state I lived for 14 years before moving to Colorado.
First issue, image credit: quiltfolk.com
And I’ve been working on a quilt similar to the one on the cover since 2016! This cover inspired me to try out English Paper Piecing (EPP).
(I now have around 68 rosettes done, so I am getting close to the 99 to finish the EPP quilt.)
I love Quiltfolk Magazine, I have collection of past issues and each one feels like a beautiful ode to the art of quilting.
Check out this link to see the beautiful covers on these issues – Archive – Quiltfolk.
Okay so with that background perhaps you can imagine my shock, surprise and honor to have received this e-mail from the Editor in Chief of Quiltfolk Magazine on May 24, 2023 (excerpted and text condensed):
I am writing to you today because our team is currently in the process of planning an upcoming release, Issue 28: Colorado, and we came across your name and amazing work. We would like to know if you would be interested in being featured in our next magazine issue? First, a little about us: Quiltfolk is a 164-page, ad-free, print-only quarterly publication for quiltmakers and quilt lovers. We are a travel magazine as much as we are one about quilts. We go on the road four times a year to find America’s quilt stories, covering one state per issue. I’ve attached a PDF of our most recent release so that you can see how dedicated we are to producing a first-rate magazine for the national quilt community that we love. We were founded in 2016 and have been steadily growing ever since, now reaching tens of thousands of quiltfolk across the country. If you are interested in being featured in Quiltfolk, Issue Issue 28: Colorado, (and we hope you are!) please confirm by responding to this email. Then, next steps are as follows: One of our writers will reach out to schedule an email, phone or Zoom interview with you within the next three weeks. We will also be in touch to coordinate an in-person, socially distanced photo shoot with our crew. (The photography team consists of one photographer and their assistant. Occasionally, a writer may join them.) We are currently planning photo shoots between June 19th – 28th.
I stared at the e-mail for quite a while before my brain fully registered all the words! Quiltfolk Magazine, friggin’ Quiltfolk Magazine, which I’ve loved and read for years is inviting me to be in it!
I’ve been behind in writing blog posts and reading blog post. I’ve been prepping for my first magazine photoshoot! For now I’ll need to keep you guessing but soon I will reveal what publication and what issue.
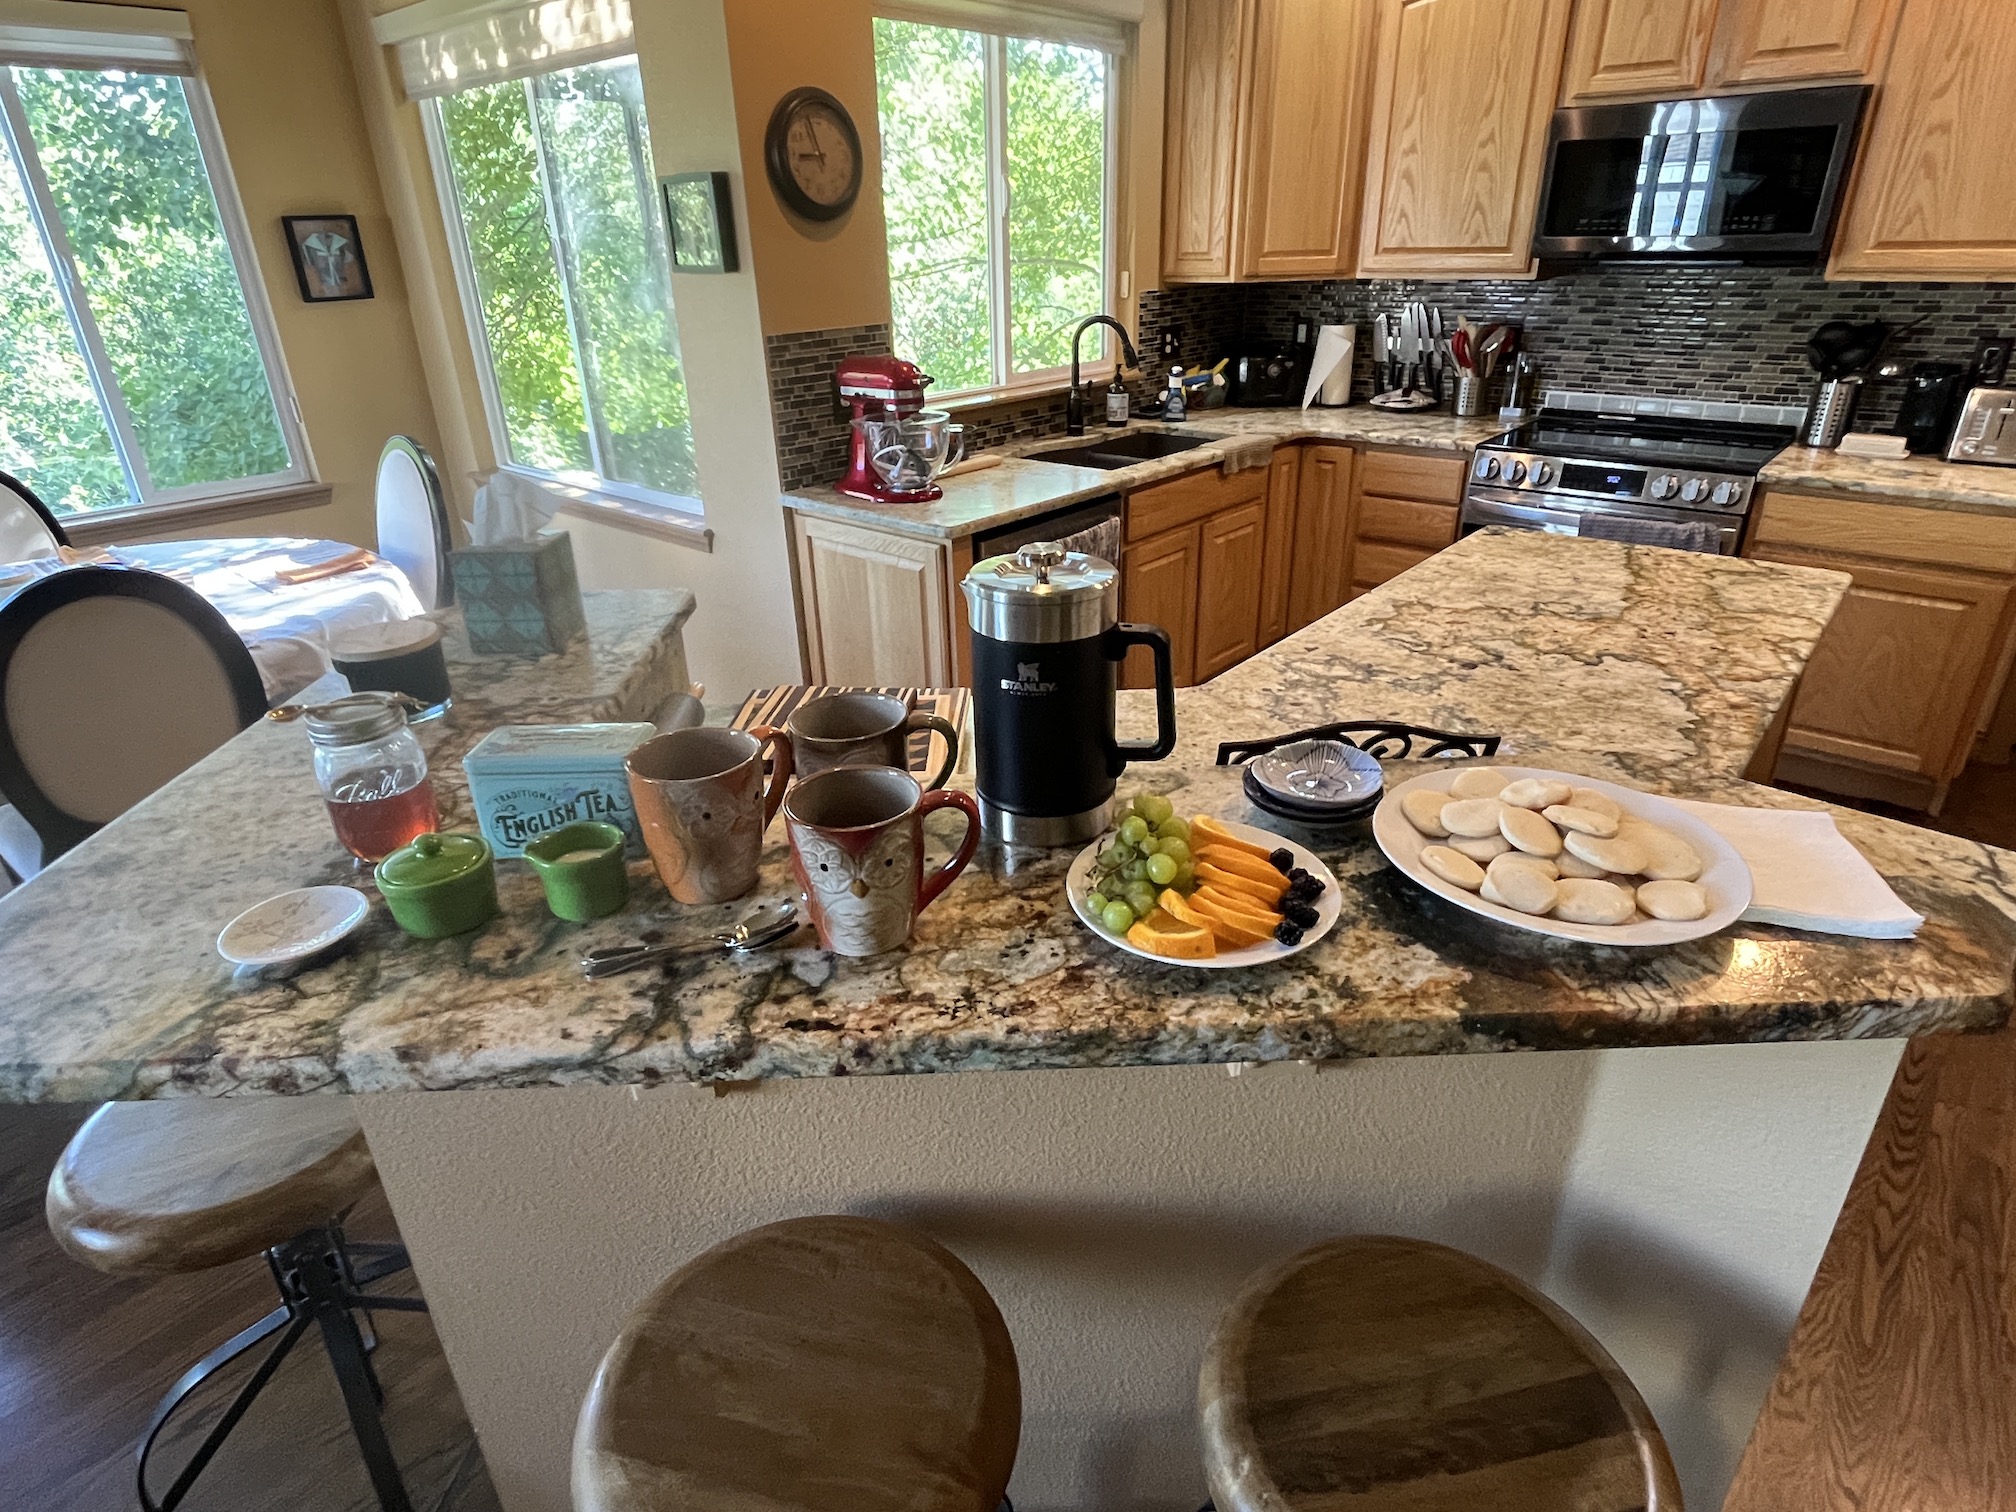
I had a Zoom interview last Friday with the article writer and yesterday (Thursday) I had a photo shoot with the photographer and stylist. I made them some homemade shortbread cookies, fruit, coffee and tea for their morning photo session with me:
The photographer and the stylist were so awesome and it was a fun (and a little tiring) morning posing for photos and helping them style what they wanted to at my home. Photos were taken inside and outside my house and lots of quilt photos. I have some “behind the scenes” of the photoshoot to share once I can reveal the publication. If you follow me on Instagram (@tierneycreates) you’ll probably find out first as I am just waiting for the stylist to post their behind the scenes photos to Instagram.
The “What’s On The Design Wall” part of this post is related to the photoshoot.
But the set of circle blocks that my friend D sent me a couple years ago (see post What’s on the Design Wall: Pride) for a colorful quilt she began in a class but decided not to finish, came to the rescue!
I started making the existing blocks into a quilt in summer 2020; and making additional blocks from the pattern and templates she gave me. I was going to name the quilt “Pride“, but I got distracted by other projects, took the quilt off the design wall and put it away.
Now it is back up on the design wall, just in time for Thursday’s photoshoot:
Yes it’s a little wrinkly but I was short on time before the photoshoot to re-iron the blocks before putting them up.
As part of the photoshoot I even sewed two blocks together, so I guess I better now work on sewing the whole thing together!
I changed the name of the quilt to “Go Boldly“. It is going to be wallhanging size and I do have enough leftover blocks to make a second wall hanging or even a quilt if I use up the extra fabric D also gave me to make more blocks (I have very generous quilting friends!)
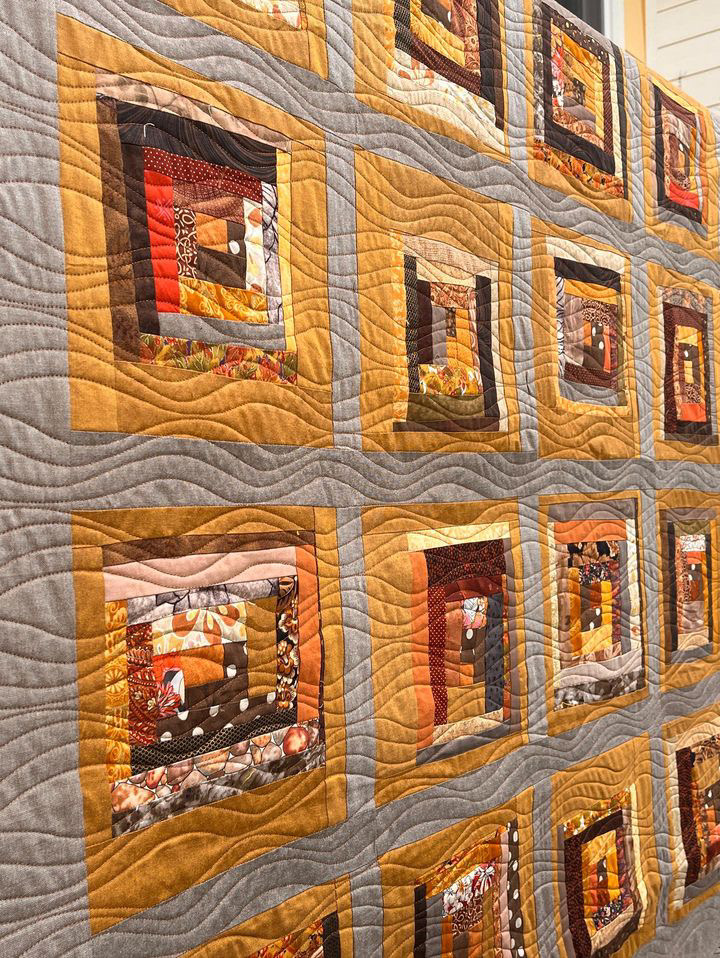
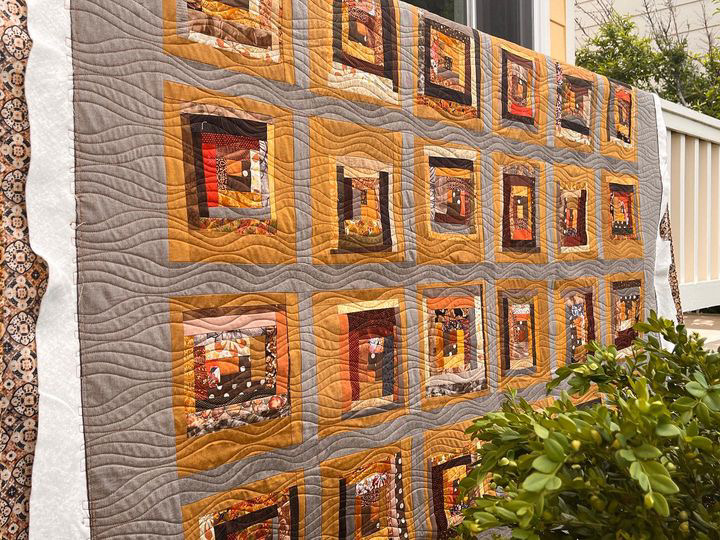
Oh a quick update on Scrappy Autumnal Splendor – the binding is on and it is sitting in its new home in my home library. I was happy to get it back from the long arm machine quilter and get it bound (or “binded”? SpellCheck tells me that is not a word, ha!) before the photoshoot.
And I will close out this post with a couple photos of John (napping) and Mike enjoying the new hammock (actually intended for camping, it is a portable and fits in a small bag) we picked up on clearance at a sporting store. We got a break from all the rain we’ve been having in the Denver Metro area and they got to enjoy some hammock time!
I picked up Scrappy Autumnal Splendor from the longarm quilter on Thursday, I’ve sewn on the binding and I am working on sewing down the binding and then the quilt will be finished!
I got a preview sent to me by Cara @sew_colorado_quilting (IG page) who did the longarm quilting. Here are the photos she sent me before I picked up the quilt:
I was beyond excited to pick up the quilt and had to take some photos on Thursday when I first got it from her (yes I was sitting in my car, opened up the package the quilted quilt was in, and posted photos to IG, ha!)
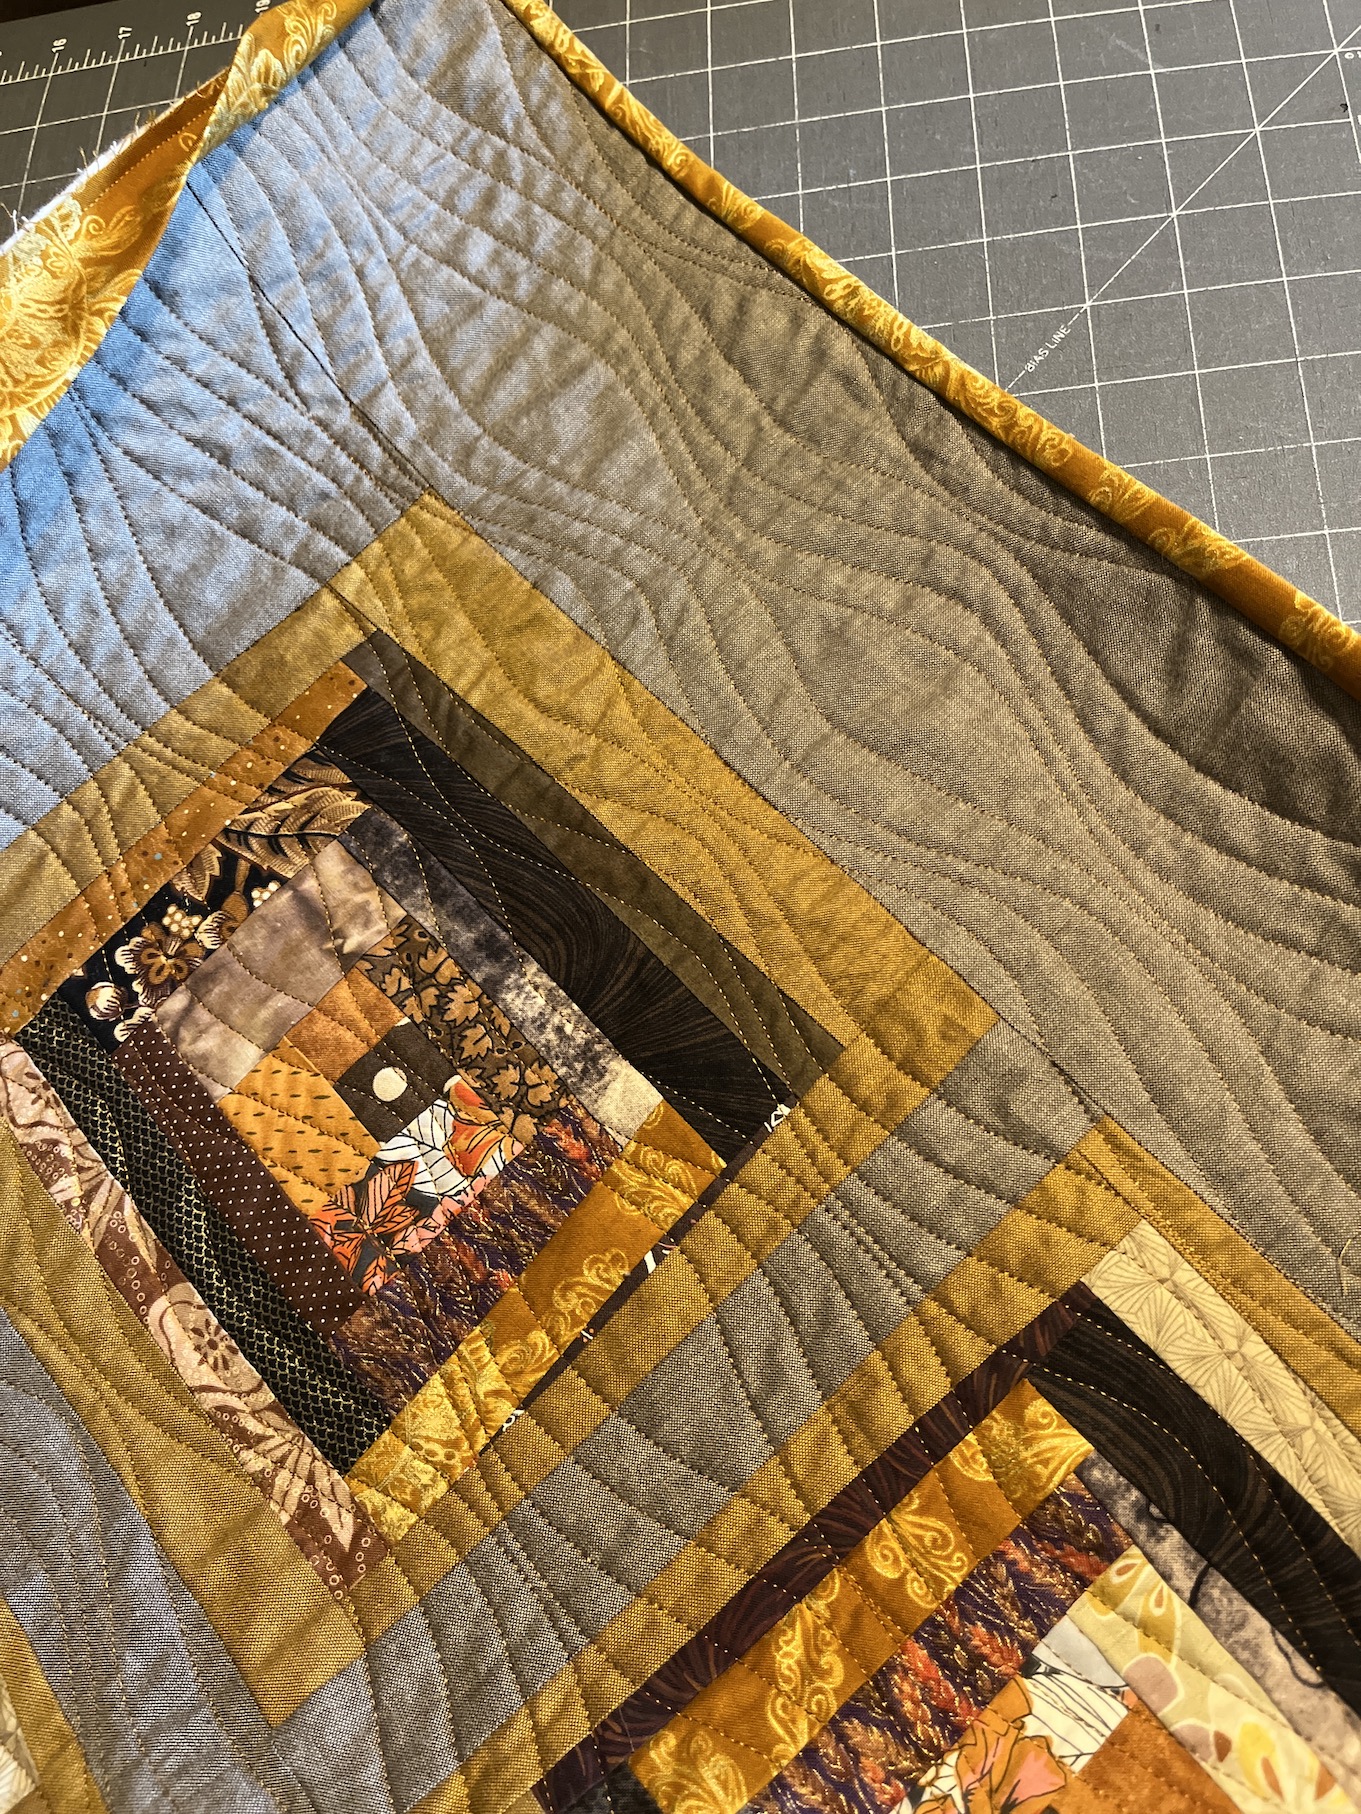
Here is the quilted quilt on my design wall and the back of the quilt draped over the chair in my studio:
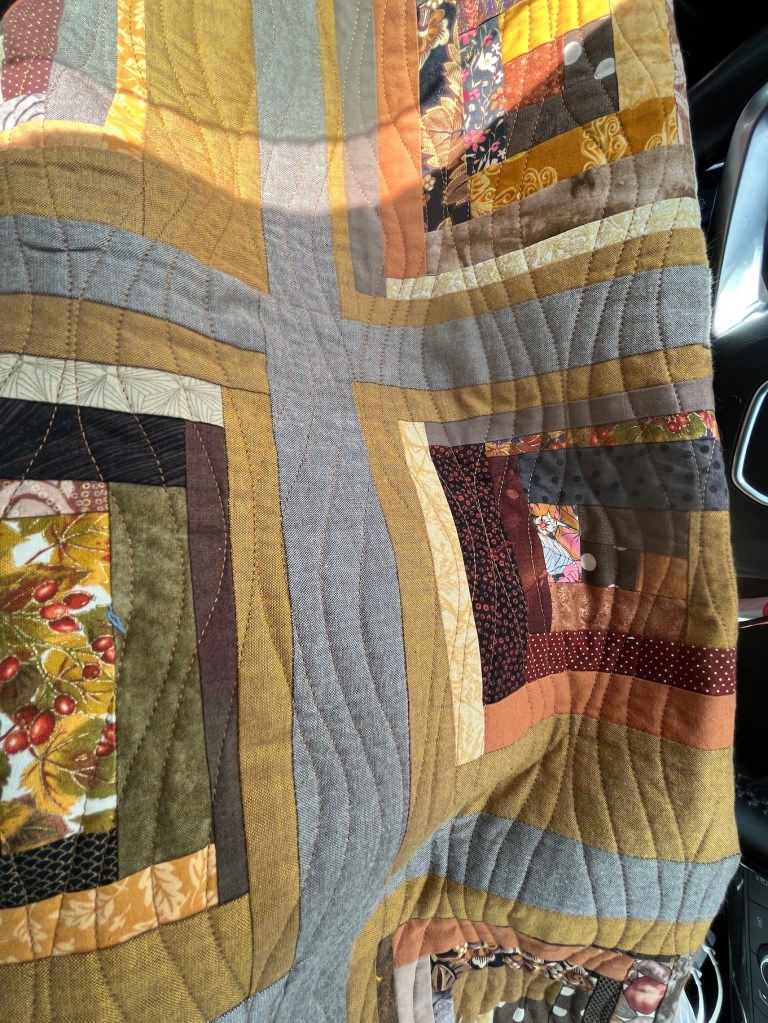
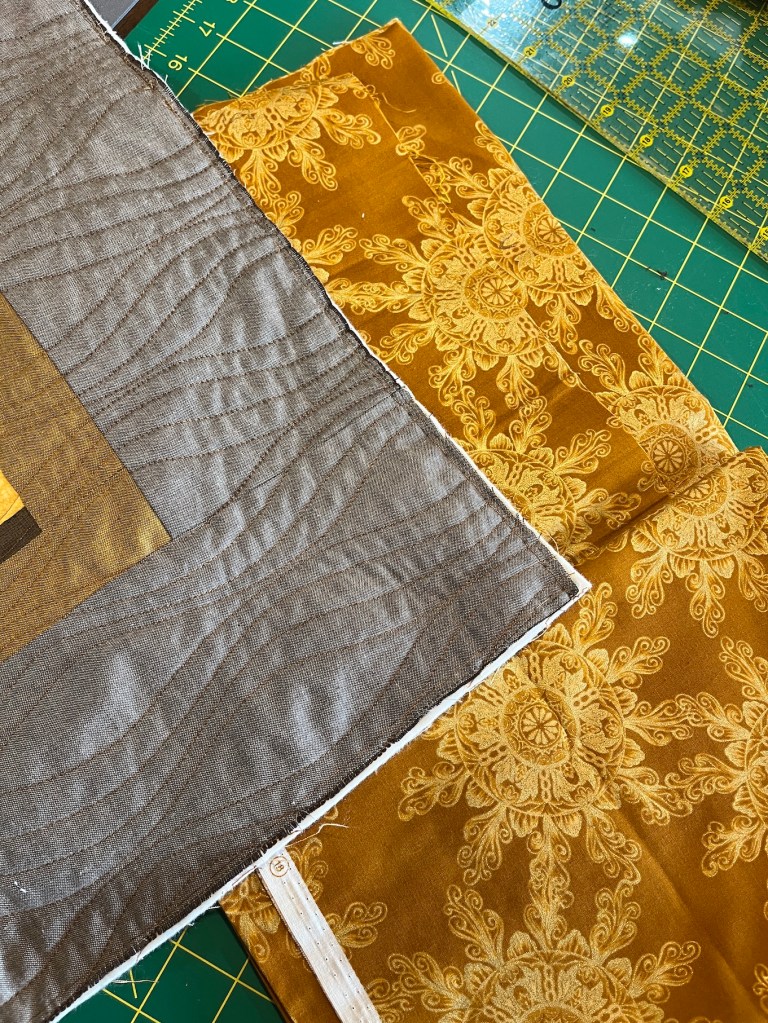
After I finished fondling the quilted quilt (ha!), it was time to finalize my decision for the binding. I decided to go with a gold fabric that had also appeared as fabric scrap pieces in the freeform log cabin blocks, but I also had some yardage of the fabric.
Then the tedious task of sewing the binding onto the quilt:
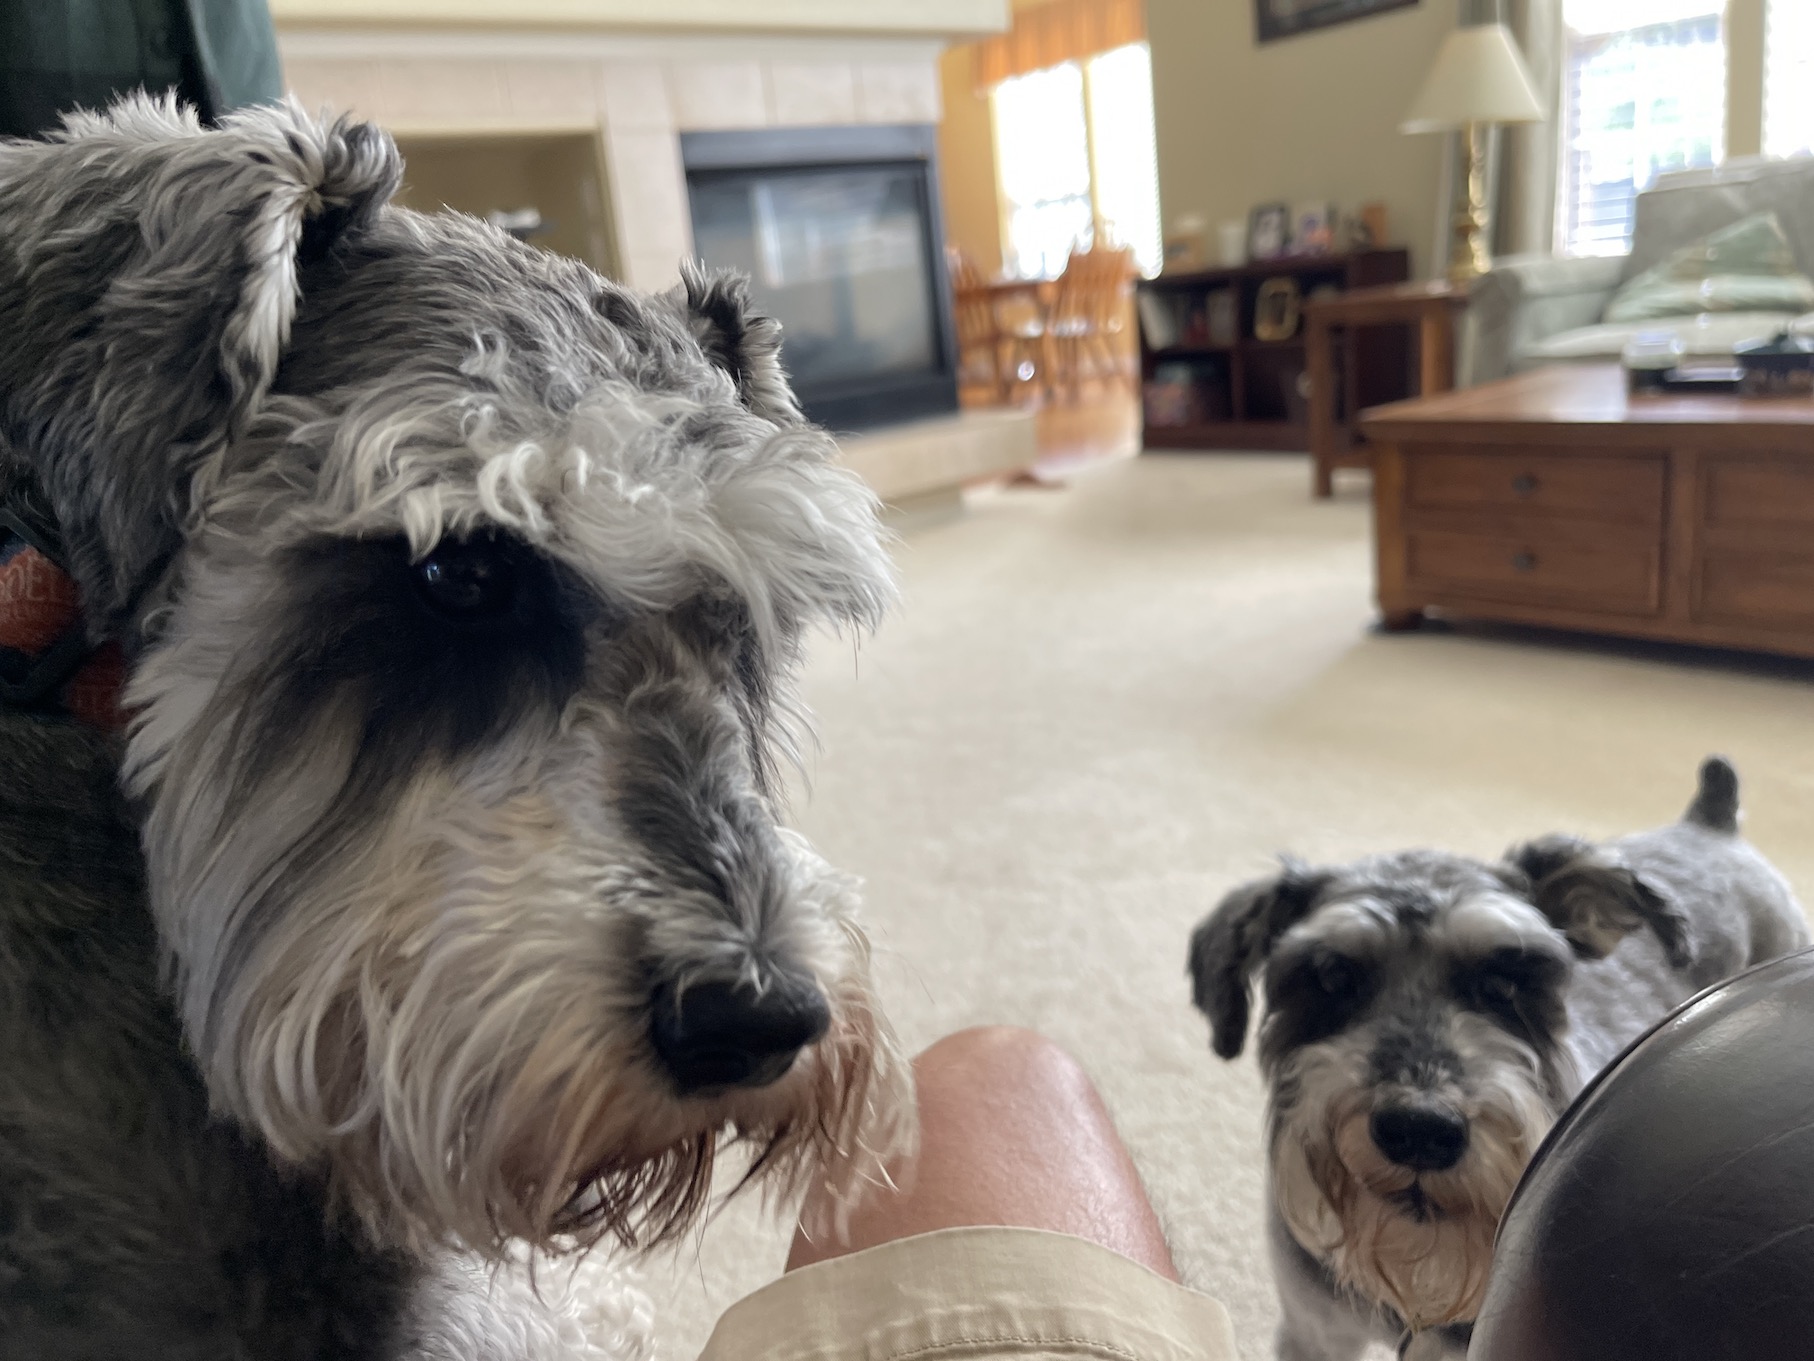
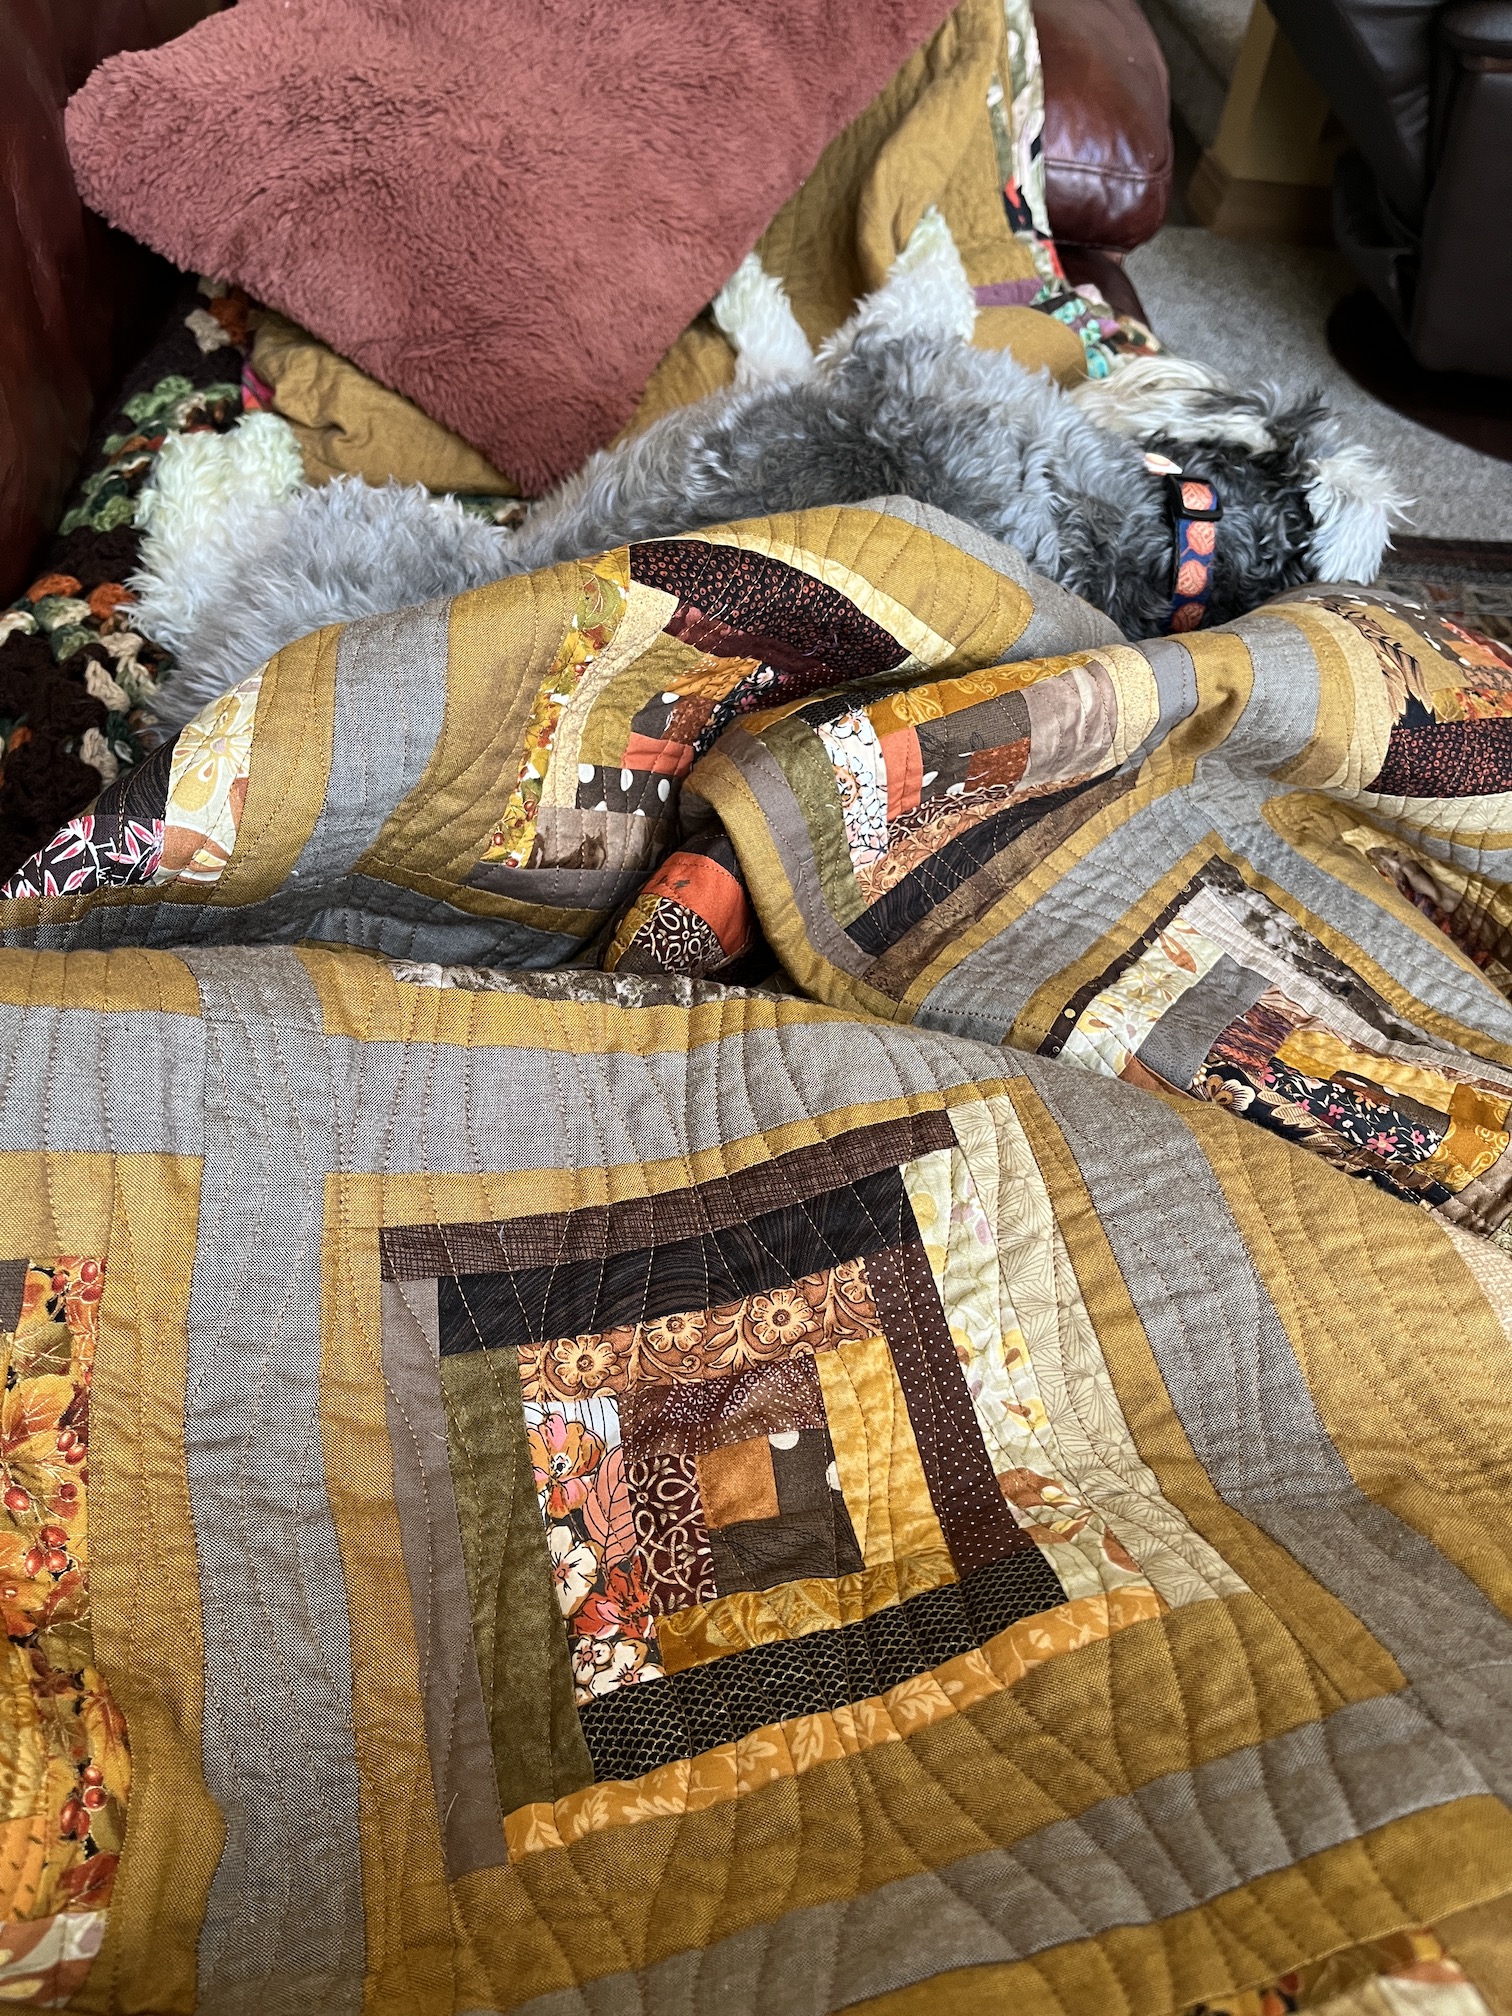
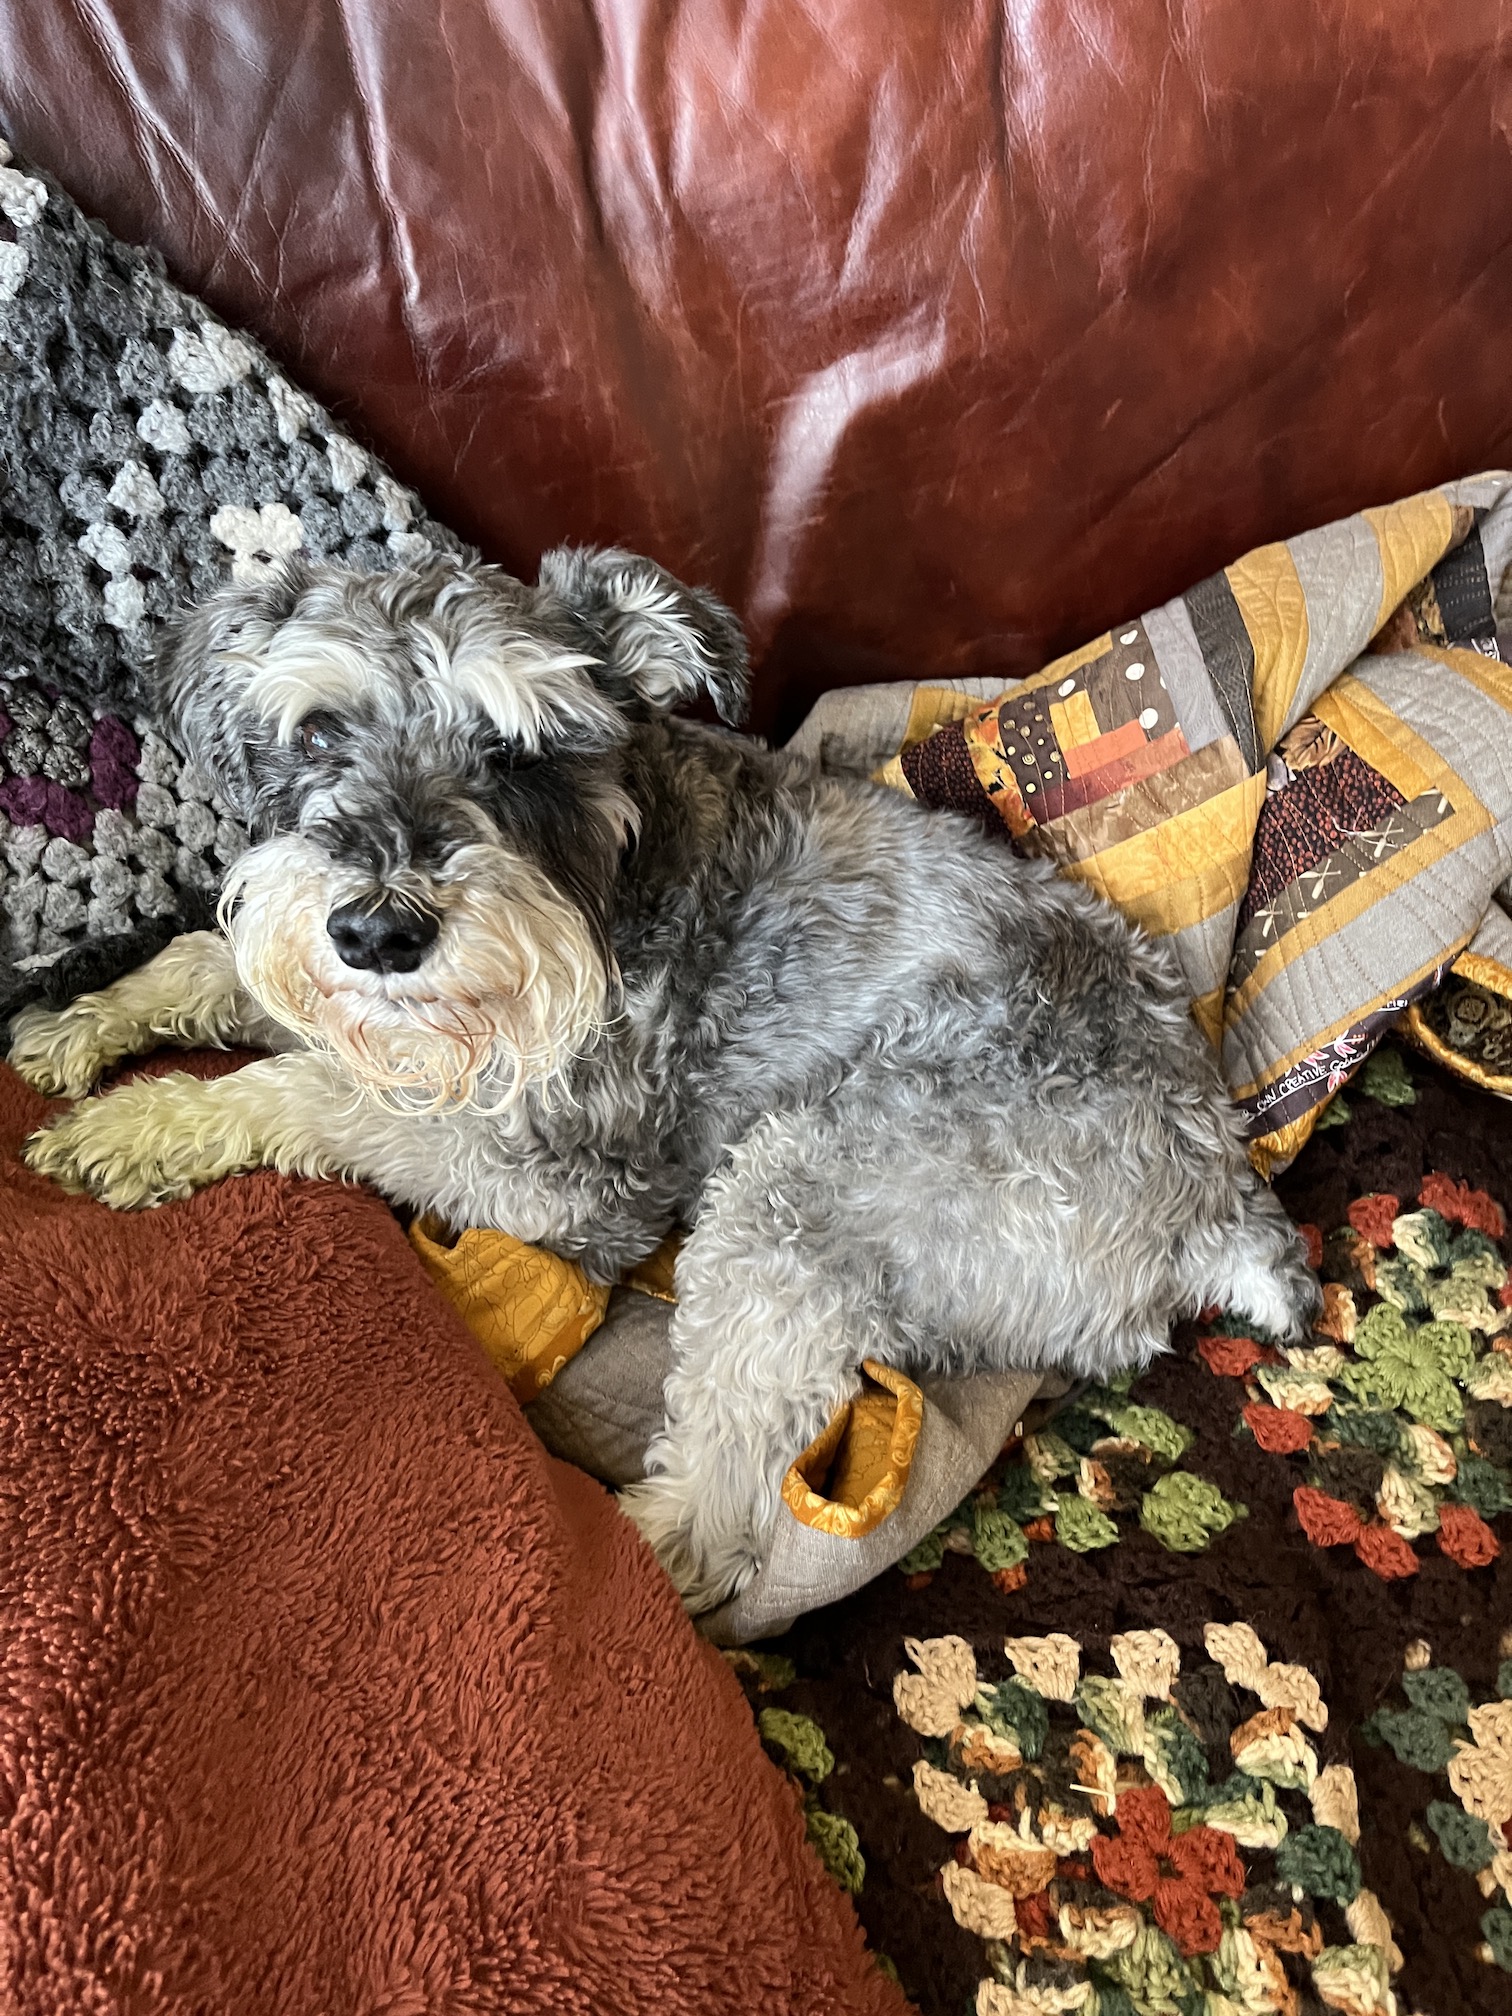
And now I am sitting around sewing down the binding to the back of the quilt. Mike the Miniature Schnauzer is keeping me company:
And moved to nest in the quilt when I took a break and left the quilt on the sofa!
Yes, Mike does need a haircut, he gets one on Tuesday; and yes his paws are green as he was playing ball today in the freshly mown backyard and “naturally dyed” his fur green!
It’s the 15th of the month and time for my monthly “ScrapHappy” post as part of the ScrapHappy group I belong. At the end of this post I have a link to the other blogs participating in this monthly event in case you’d like to check out their ScrapHappy posts.
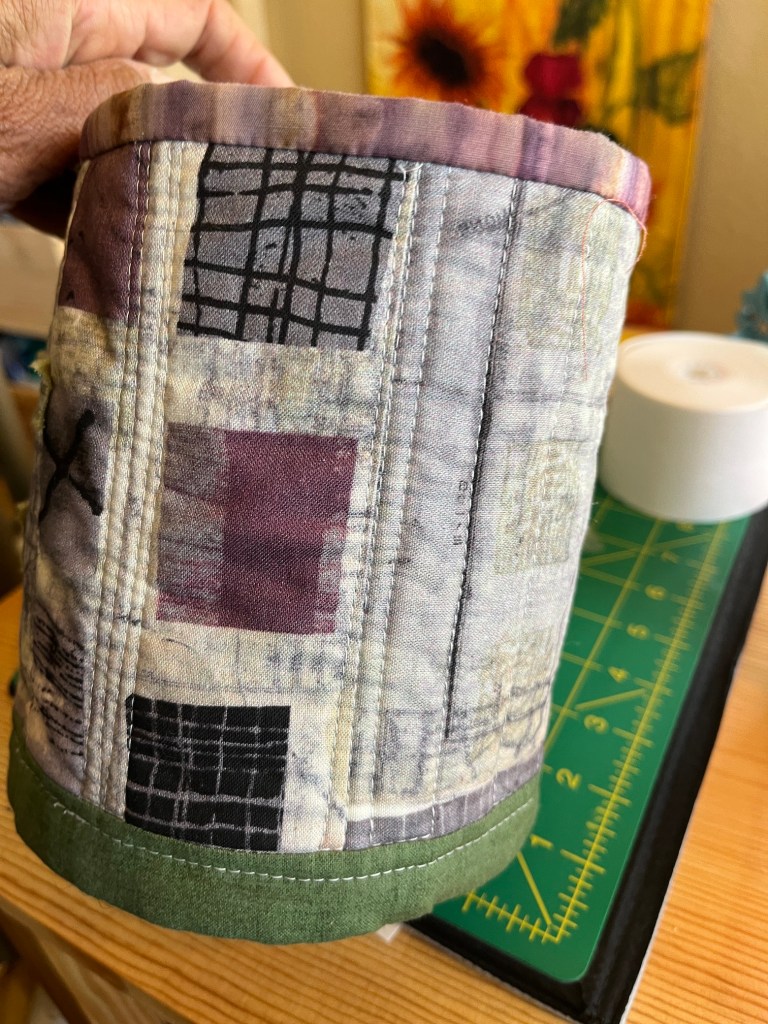
Look what is now on my design wall: a sewn together freeform log cabin quilt using my black and white (and some gray) fabric scraps that I introduced in this post – What’s on the Design Wall: Scrappy Log Cabin. As far as the name of the quilt: Oh Scrap – It’s Not Just Black and White! I’ll explain that later in this post.
So I went from this (a crazy box of black, white and gray scraps):
It was so much fun to piece this quilt and to select interesting (all over the place) scraps for the blocks. As you can see in the images above, it is just a mishmash of scraps! I had a bunch of black and white fabrics scraps with writing as part of the fabric design so I thought it would be fun to work them in.
As far as the name of the quilt (I love naming quilts): Originally the quilt was going to be created only using black and white scraps. Then I decided to work in some gray. Then on a whim I decided to use some scraps that had a khaki brown color in addition to black. I liked the effect of a little bit of light brown in the piece. A pure B&W log cabin style quilt was not aesthetically pleasing to me. The name “Oh Scrap – It’s Not Just Black and White” is a play on the saying (which there are many versions):
Life isn’t always black and white (there is some gray…)
And found these three fabrics to use as the pieced backing:
I will reveal the pieced backing when the quilt is quilted. I’ve decided to have a longarm quilter machine quilt this quilt also.
So after making two freeform log cabin quilts in a row I think I will try a different pattern when I am ready to make my next scrap quilt.
By the way here is an update on ScrappyAutumnal Splendor, the other freeform scrappy log cabin quilt: The longarm quilter is done with it and I get to pick up the quilt later this week! The longarm quilt sent me some photos and I am so excited!
As promised, here are the bloggers that participate in the ScrapHappy monthly posting event, check out their blogs linked below for their ScrapHappy posts:
One of Ireland’s favourite visitor experiences & tourist attractions, the Cliffs of Moher tower over the rugged West County Clare coast.
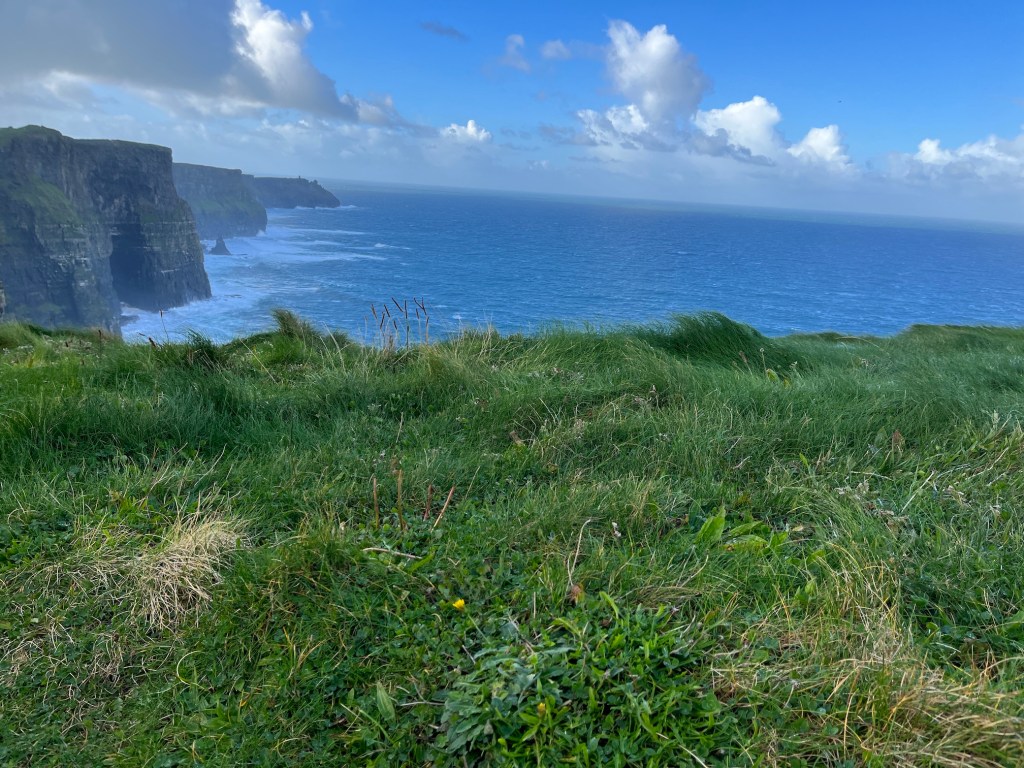
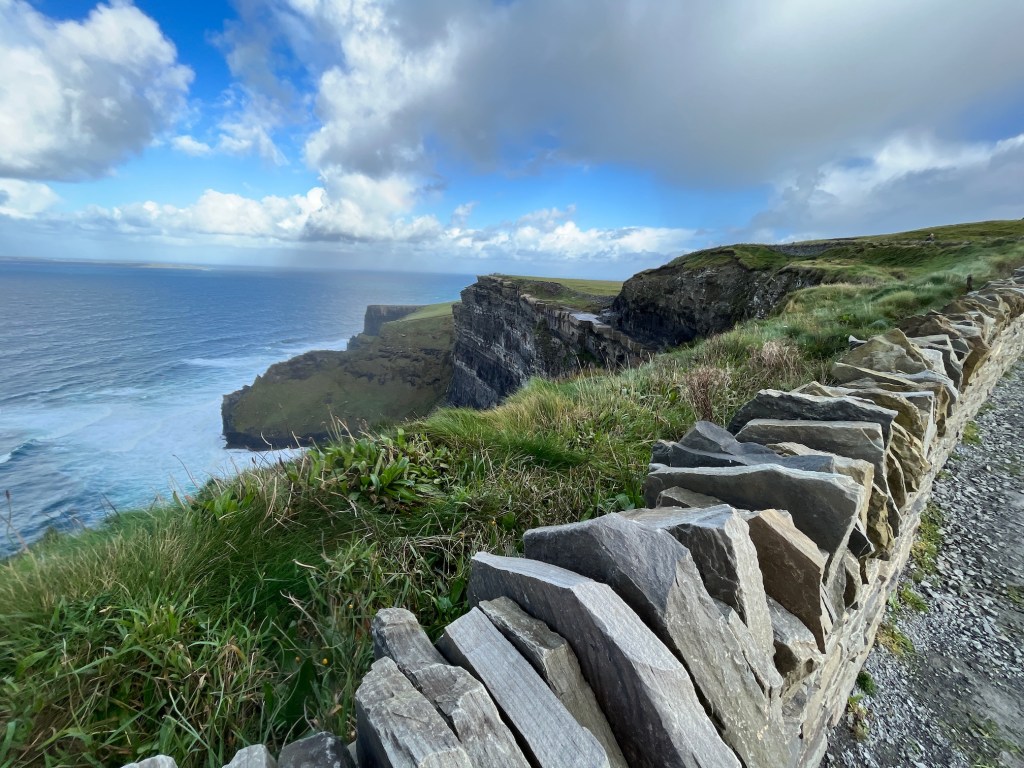
Visually spectacular, the Cliffs of Moher sit astride the striking landscape of the Burren on one side and the Wild Atlantic Ocean on the other. Rising out of the Atlantic waters to a height of over 700ft at O’Brien’s Tower and running along the coast of Clare for almost 14 kilometres, or 8 miles, the Cliffs of Moher were formed over 320 million years ago, and today form part of the Burren and Cliffs of Moher UNESCO Global Geopark. The Cliffs of Moher is in a Special Protection Area for Birds and Wildlife. The magnificent Cliffs on the Wild Atlantic Way host major colonies of nesting sea birds and are one of the country’s most important bird-breeding sites. Borrow some binoculars from our information desk and do some bird watching. Enjoy the captivating spectacle of the vast array of sea birds, a delightful way to pass the hours.
It was very very very windy on the cliffs and here are John and I braving the wind:
And here are our friends K and M. that we went to Ireland with, battling the wind at the cliffs:
K’s mother was from Ireland and she still has plenty of family there (some of which we met up with in Galway while we were visiting); and her husband M goes to Ireland all the time so they were awesome tour guides.
I took over 100 photos at the cliffs and I am certainly not going to torture you to them all (or clog up my image allotment on WordPress); so I made myself select a couple of my favorites to share with you the beauty of the Cliffs of Moher:
The photos of course do not do the beauty of the Cliffs of Moher justice – I felt like I was on the set of a movie and fully understood why the call Ireland the “Emerald Isle“.
Here is a little video I took:
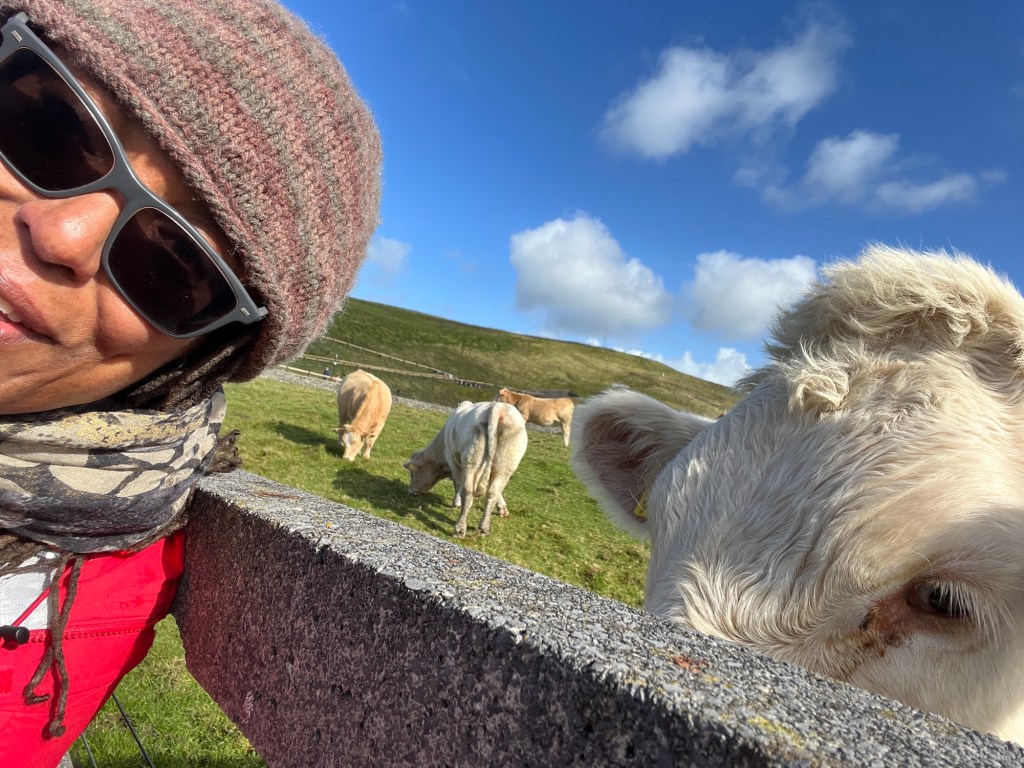
There were a lot of cattle grazing in the grasslands area of the Cliffs of Moher and one particularly friendly bovine caught my attention and we took a photo together.
Now I am considering becoming vegetarian again, ha!
Ok one more post about this quilt before it heads today to the long-arm quilter (I decided to “quilt by check” instead of do it myself!). I decided to name the free-form scrappy log cabin quilt I started during the Scrap Happy Retreat I had in June – “Scrappy Autumnal Splendor” as it reeks of Autumn in it’s color palette!
Here is what it looks like all pieced together:
The border (and lattice) is taupe Peppered Cotton which is a version of a “shot cotton” and there was potential for fraying so I stitched around the entire quilt top 1/8th inch.
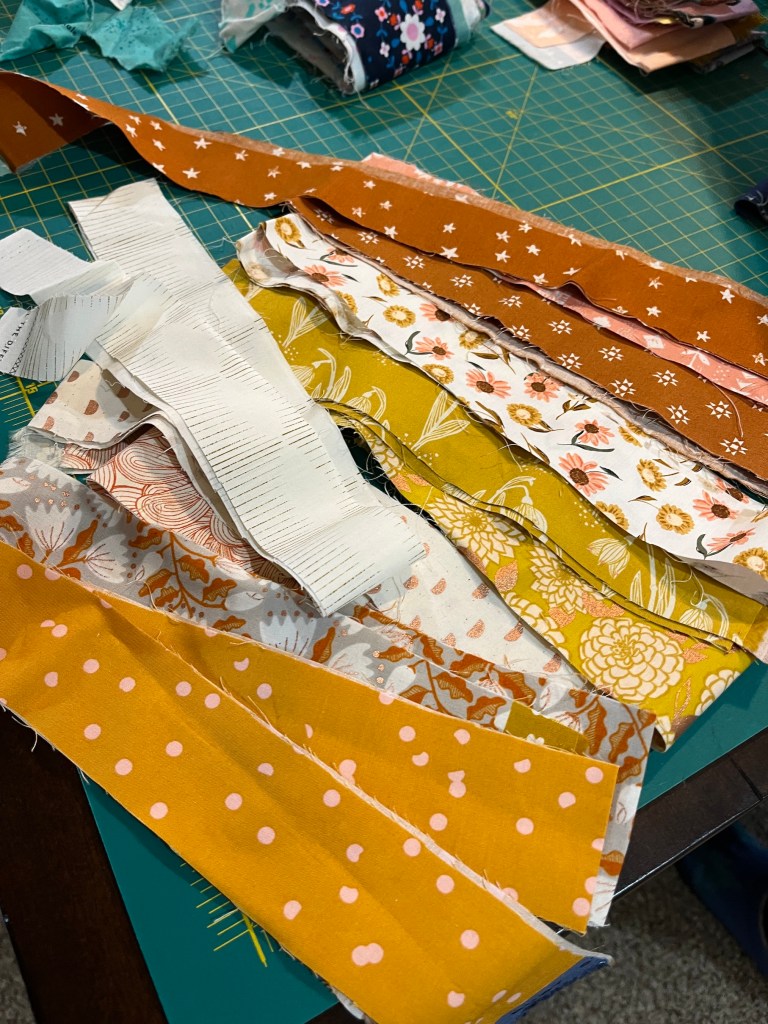
After finishing the quilt top it was time to head to my yardage stash and see what kind of backing I could piece together (I was tempted to buy yardage of a single fabric for the back but darn it I am going to use up my stash, ha!):
And here are a couple of the fabrics I found:
Here’s a little peek of the crazy pieced backing I made with bold Autumnal colored fabrics with metallic highlights!
You’ll have to wait until I get it back from the long-arm quilter to see how the back came out (anticipation…smile).
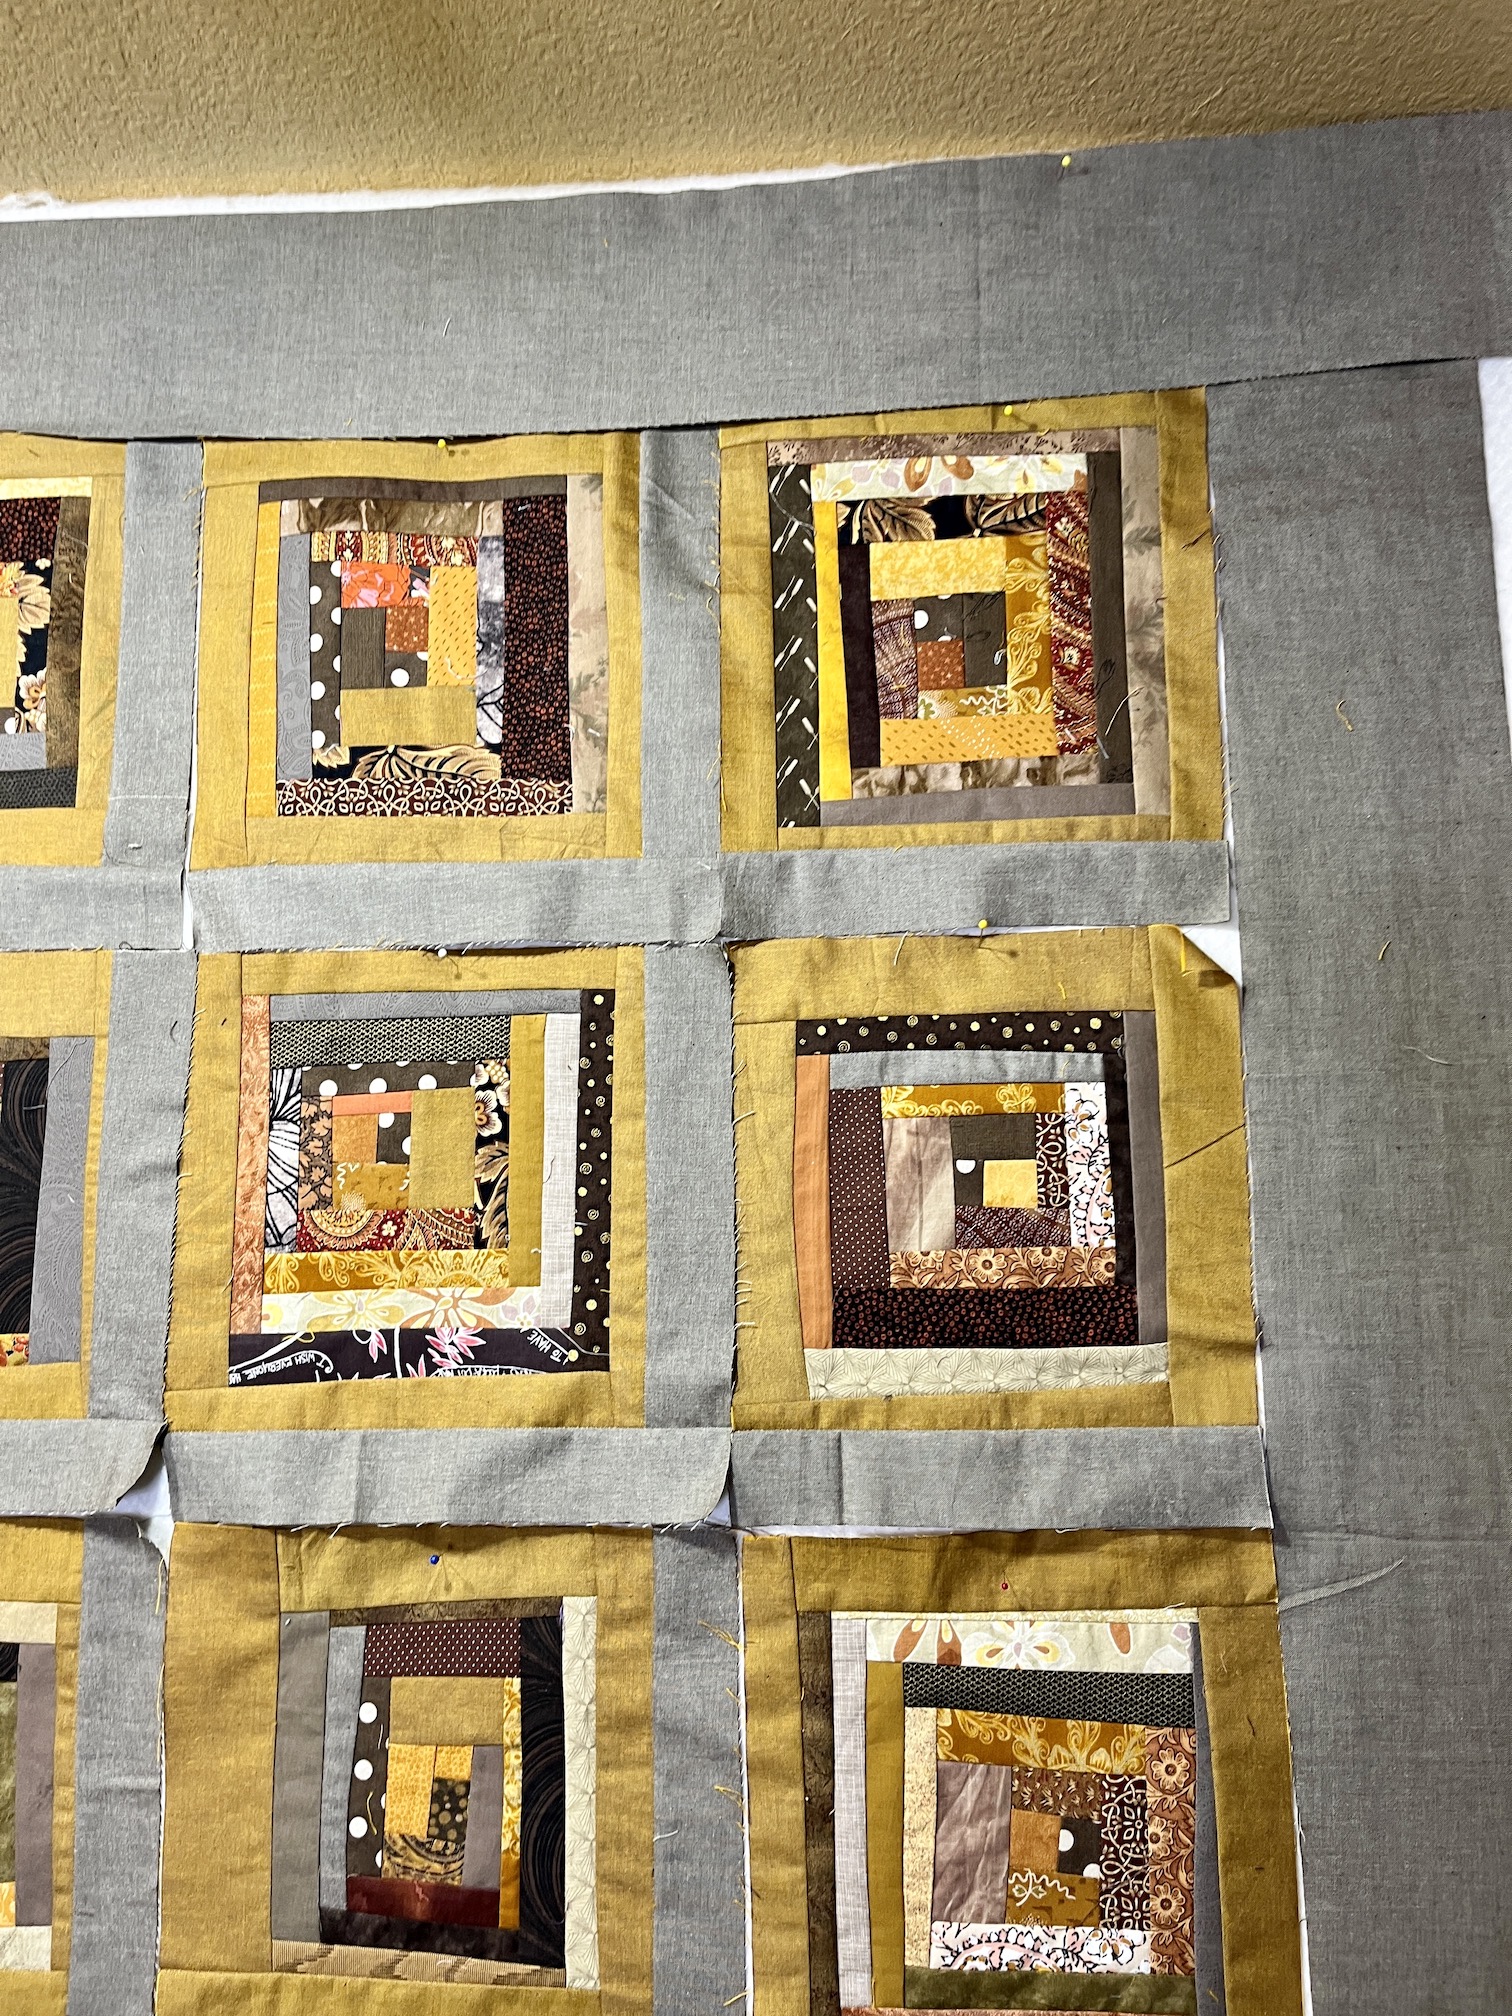
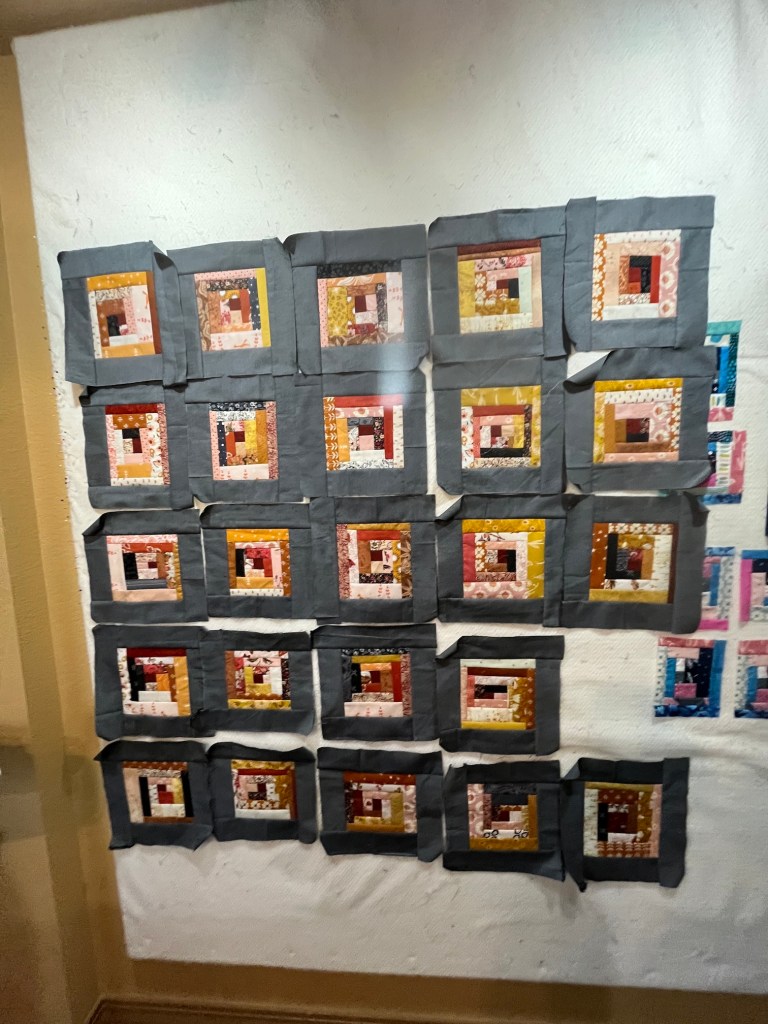
Yesterday I made some major progress on the freeform scrap fabric log cabin quilt I am making in browns and golds.
I got the blocks framed with the taupe fabric – I used 2 inch strips to frame each block. I also cut a couple 5 inch border strips to mock up the border.
Here are a couple photos (I could’t decide which one I liked better):
And here is a close up showing how the blocks will float with a 5 inch border all the way around of the taupe:
As I mentioned in that post, when making freeform (I think this is what I am going to call them from now on) log cabin blocks, you might want to mock up (or actually sew) one completed block to verify that you like where you are going with you design.
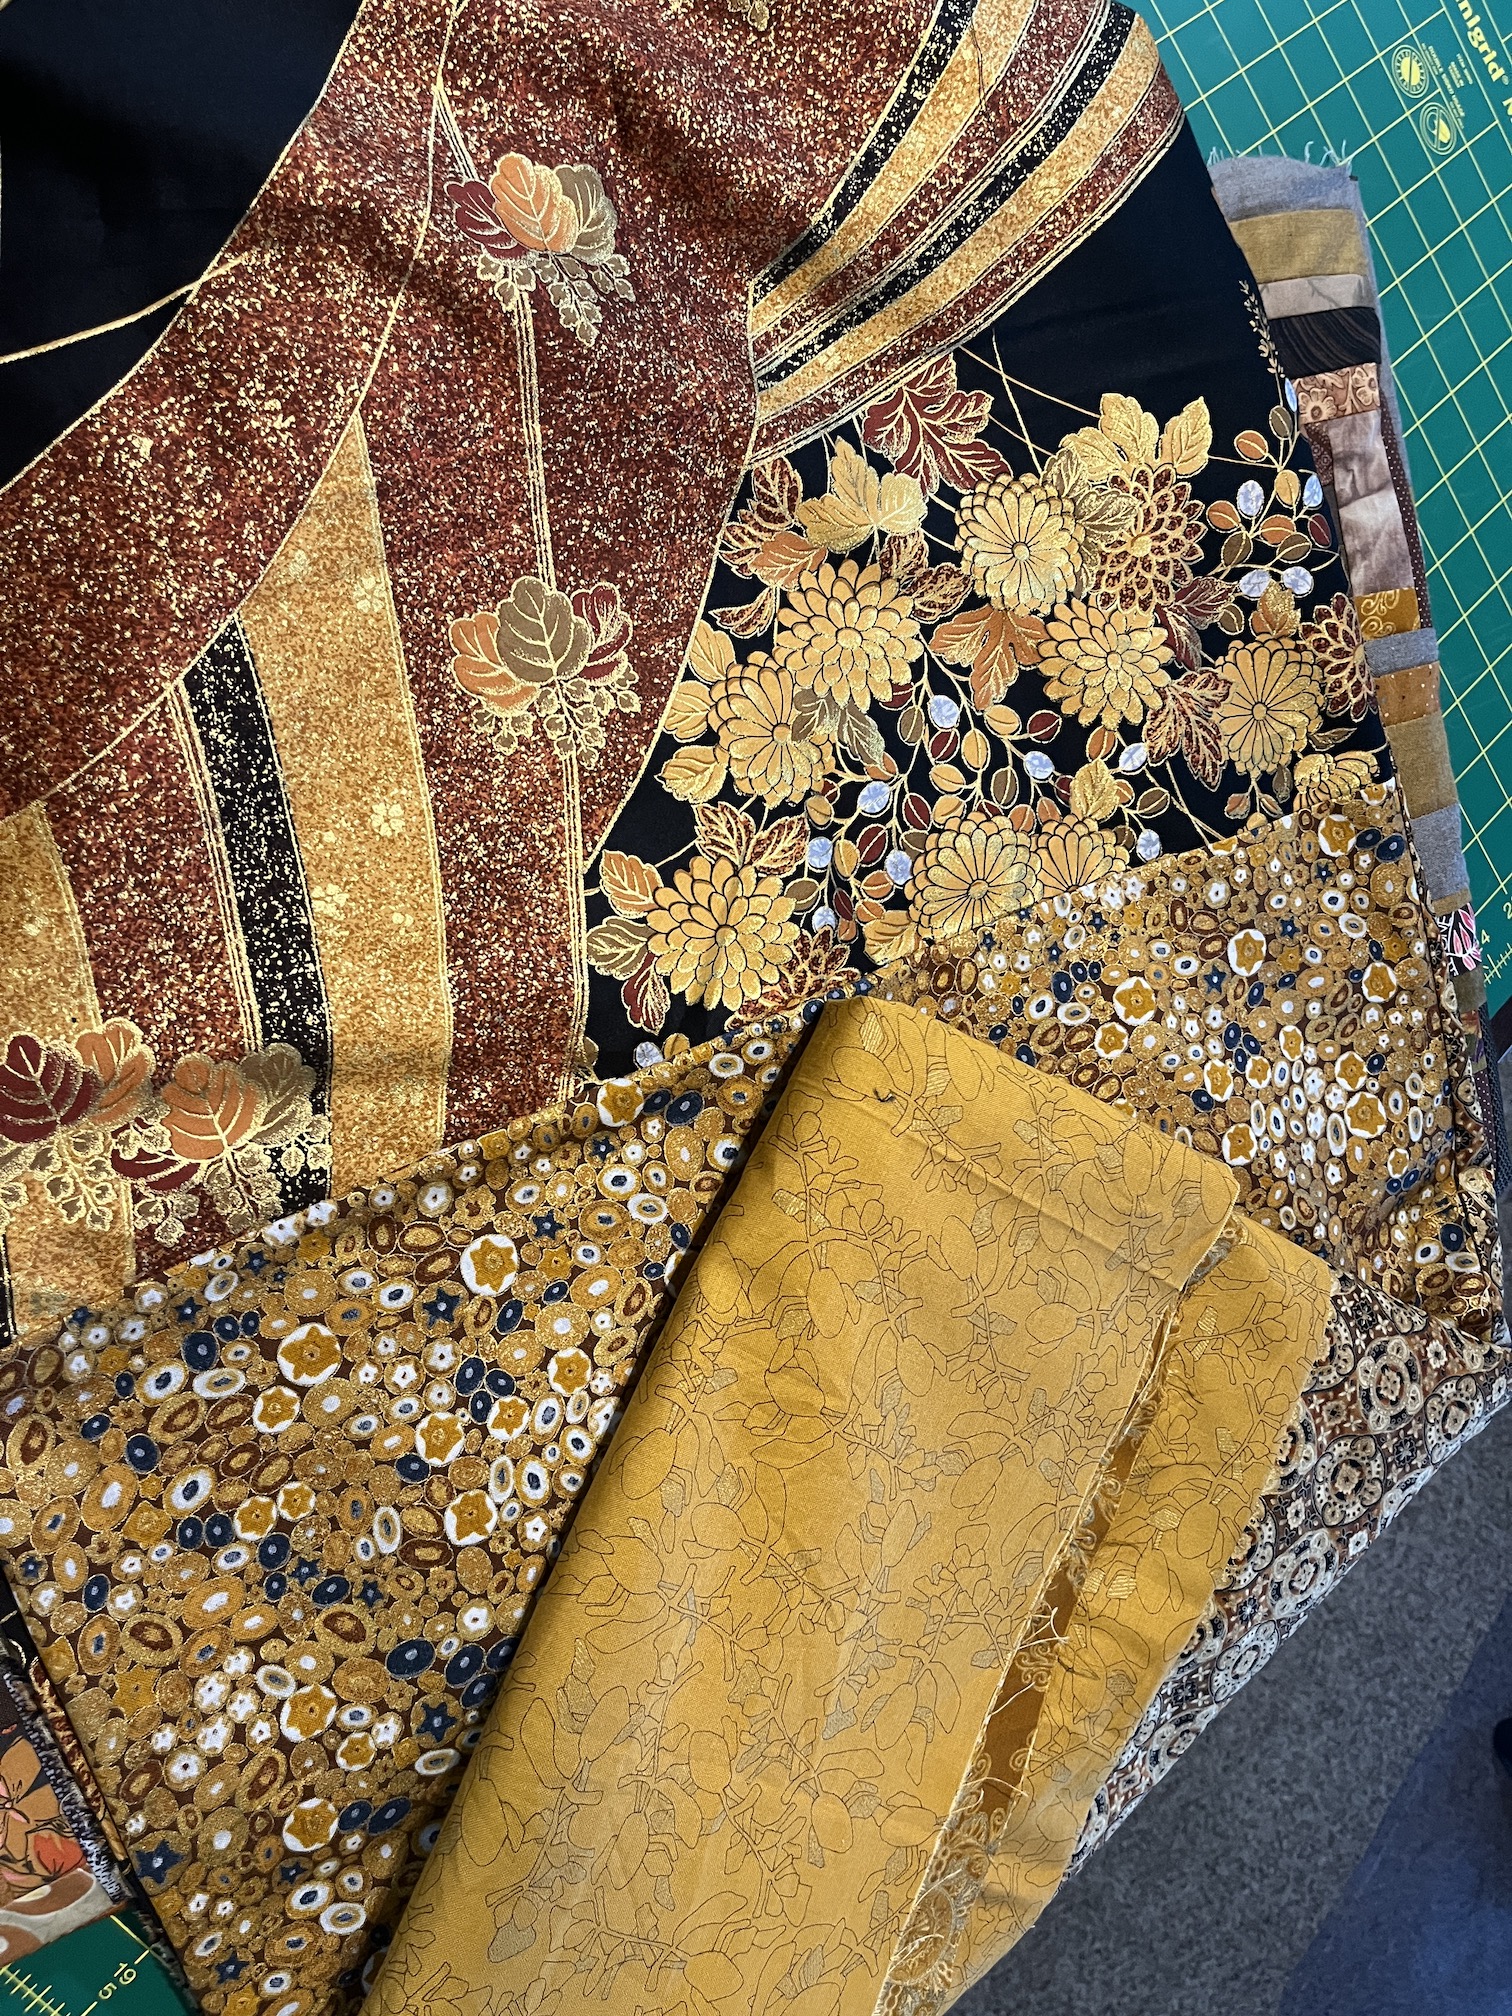
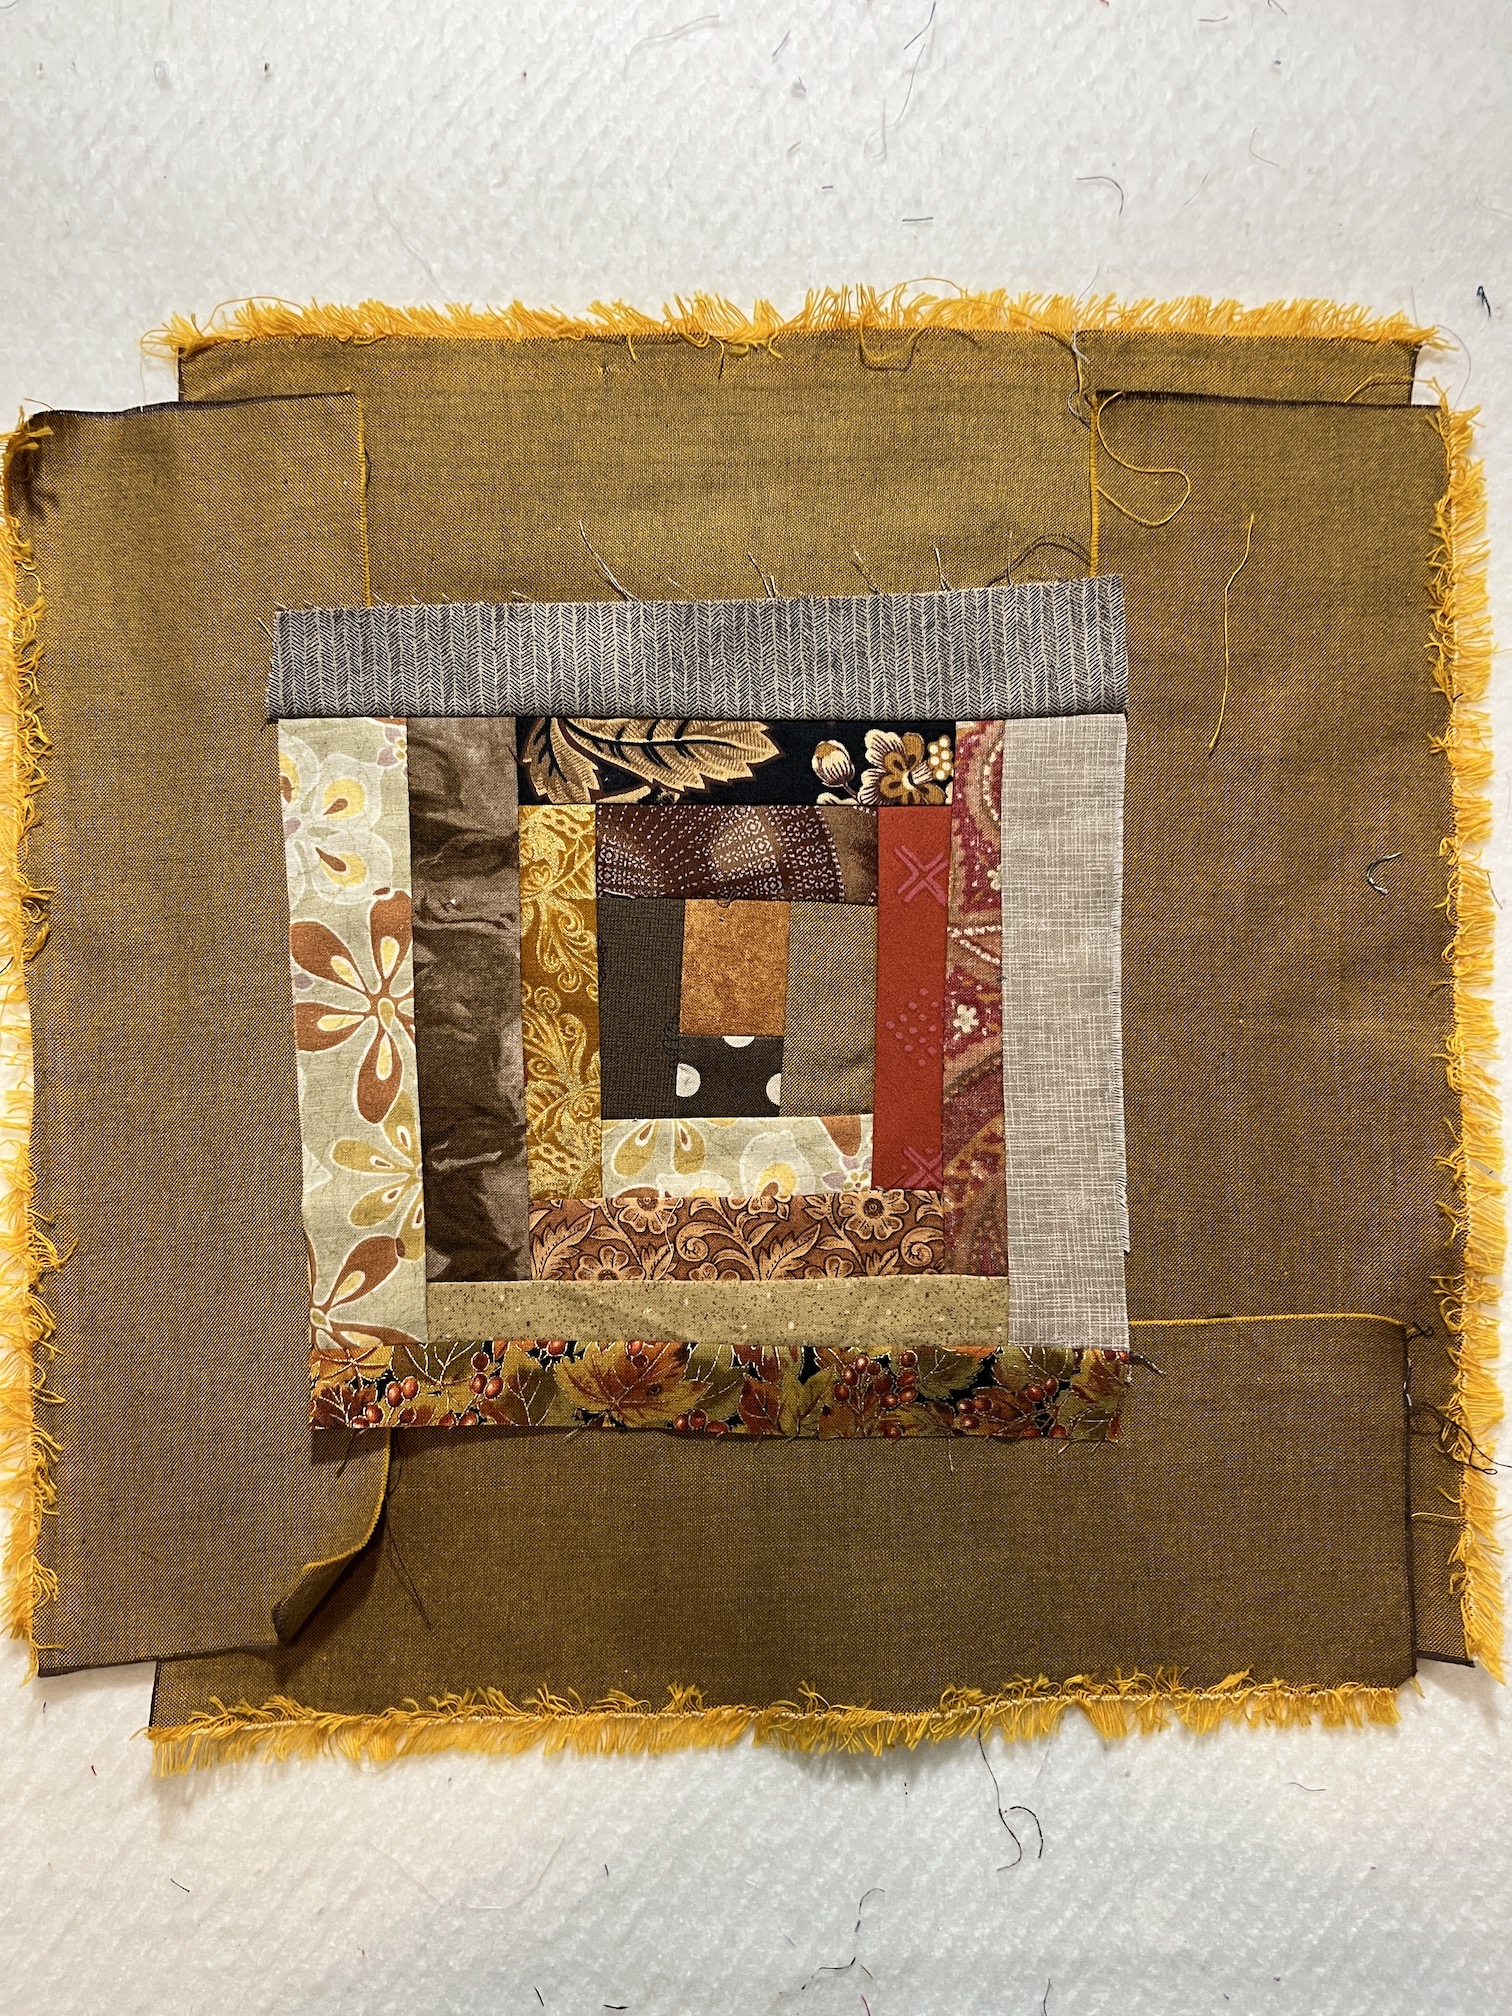
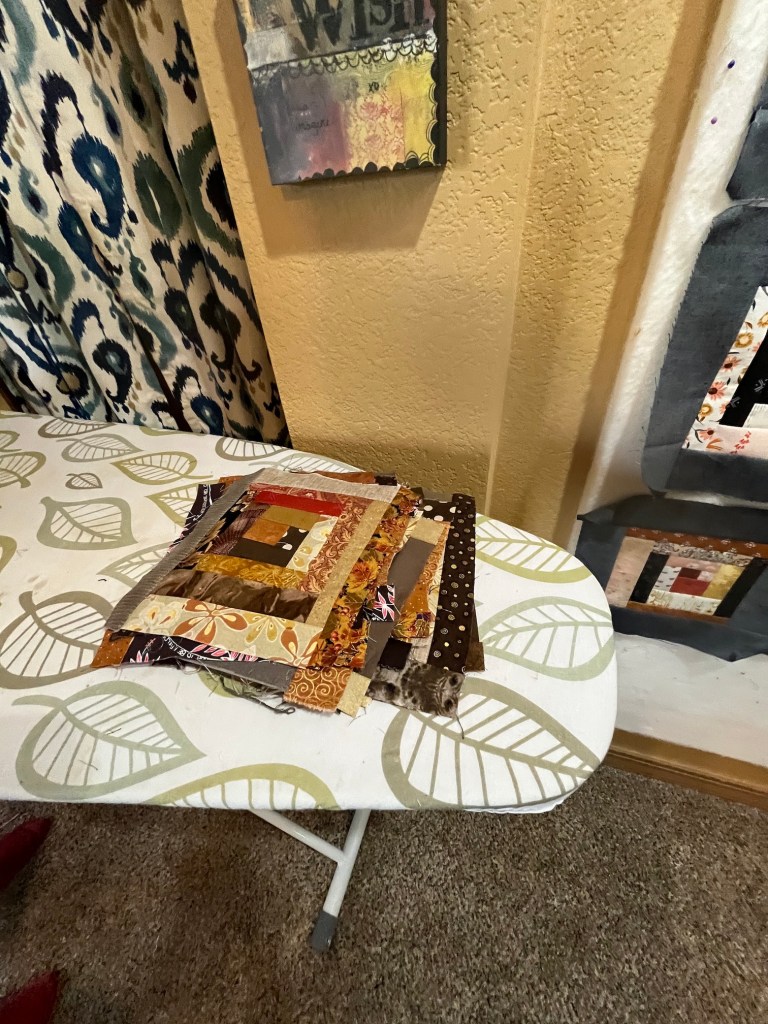
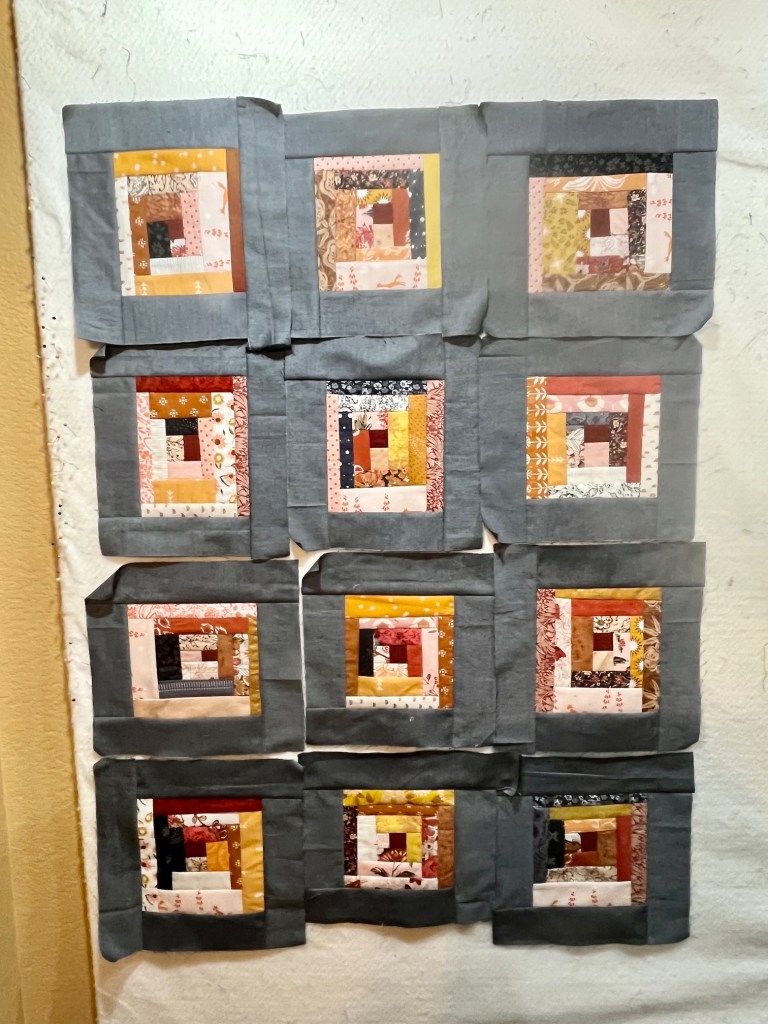
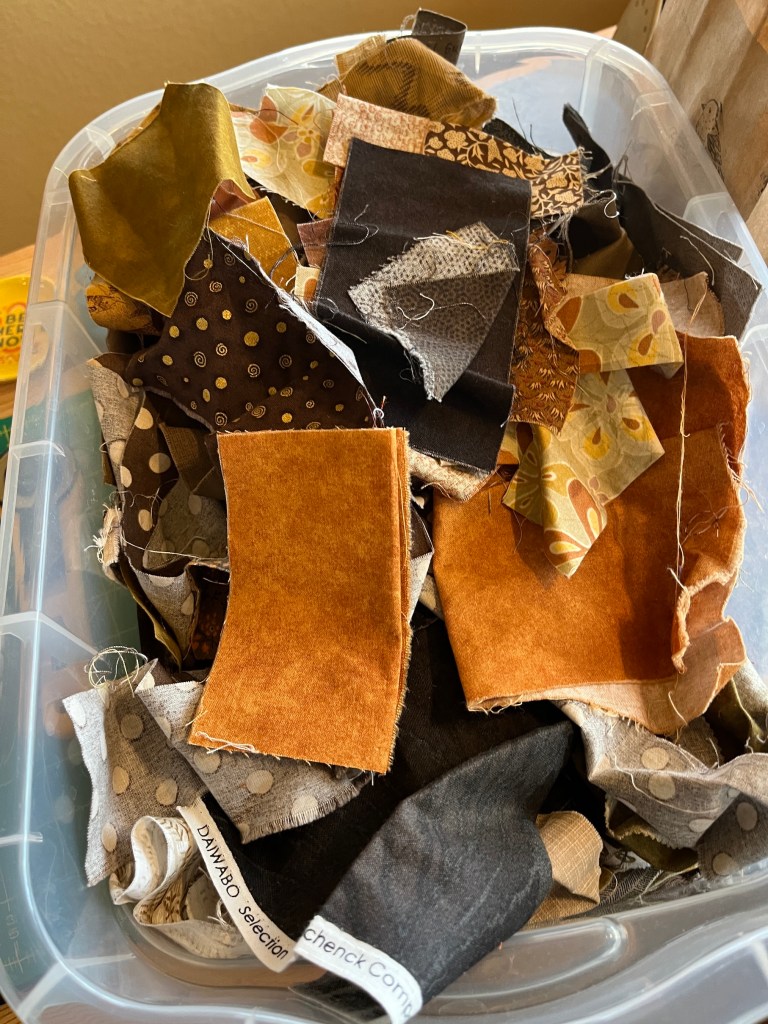
I did this with one of the 42 (well actually 43 – I made a spare one) freeform log cabin blocks I made from my pile of brown, gold and orange scraps:
I decided that I needed something to break up the gold, I did not want to place all the gold framed squares side by side, so I decided to try floating the blocks in a taupe Peppered Cotton.
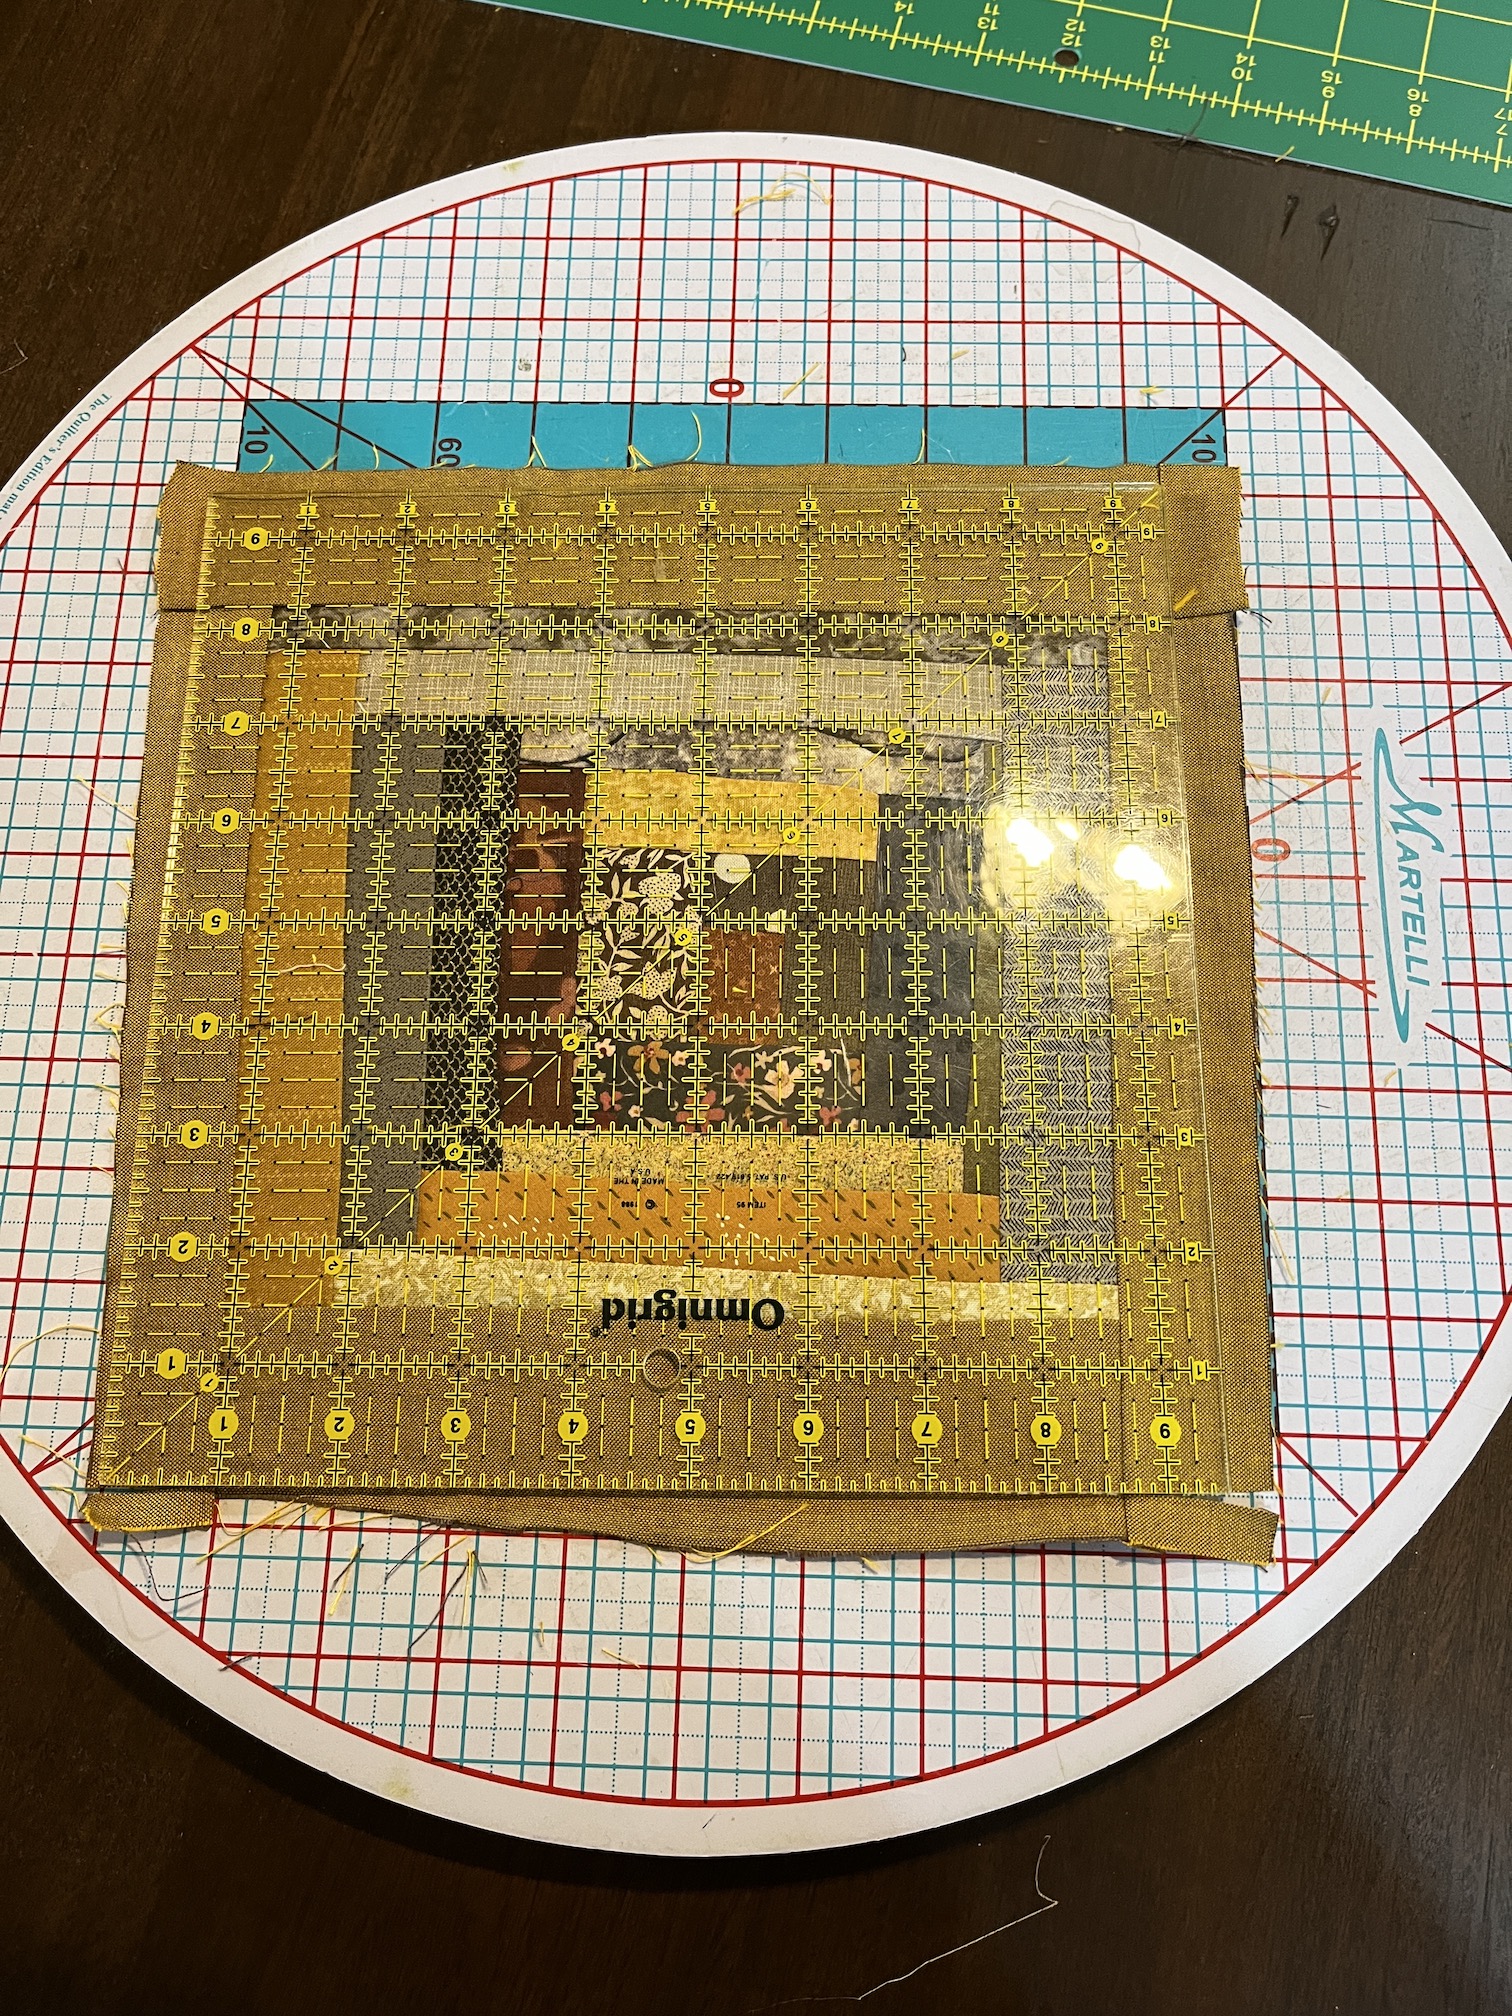
I’d originally trimmed the freeform log cabin block trimmed in gold Peppered Cotton and trimmed the block to 9.5 x 9.5 inches with my 9.5 x 9.5 inch square ruler. Then I tried framing it in the taupe and trimming it to 12.5 x 12.5 inches using my ruler of that size (the next size up ruler I own after 9.5 x 9.5 inch).
(By the way, I highly recommend some type of rotating cutting surface if you are trimming your freeform log cabin blocks to a uniform size with a square ruler – I have the Martelli Round Cutting Mat).
I realized a problem after I made the demo block: I have 42 blocks and my plan was to make a quilt for my home library for snuggling under while reading that is 6 blocks by 7 blocks.
At 12.5 x 12.5 inches each (12 x 12 inches finished) it would become a bed size quilt…oh no – let me try some fake math – the quilt would end up around 72 inches by 84 inches…actually larger if I added a little border around the quilt to make the blocks “float”.
I did revisit just sewing the gold framed blocks together and it does not make a large enough snuggle quilt. You might be thinking: what about just adding more of the gold fabric on the edges of the quilt as a border to “float” the blocks? Well I’ve run out of the gold fabric! I have less than a 1/4 yard left.
I was pondering my quandary when John asked about latticing instead of floating each block in the taupe – to use the taupe as a “lattice” instead. So I tried it out:
I like it! The taupe quiets the gold and it will all go nicely with the colors in my home library.
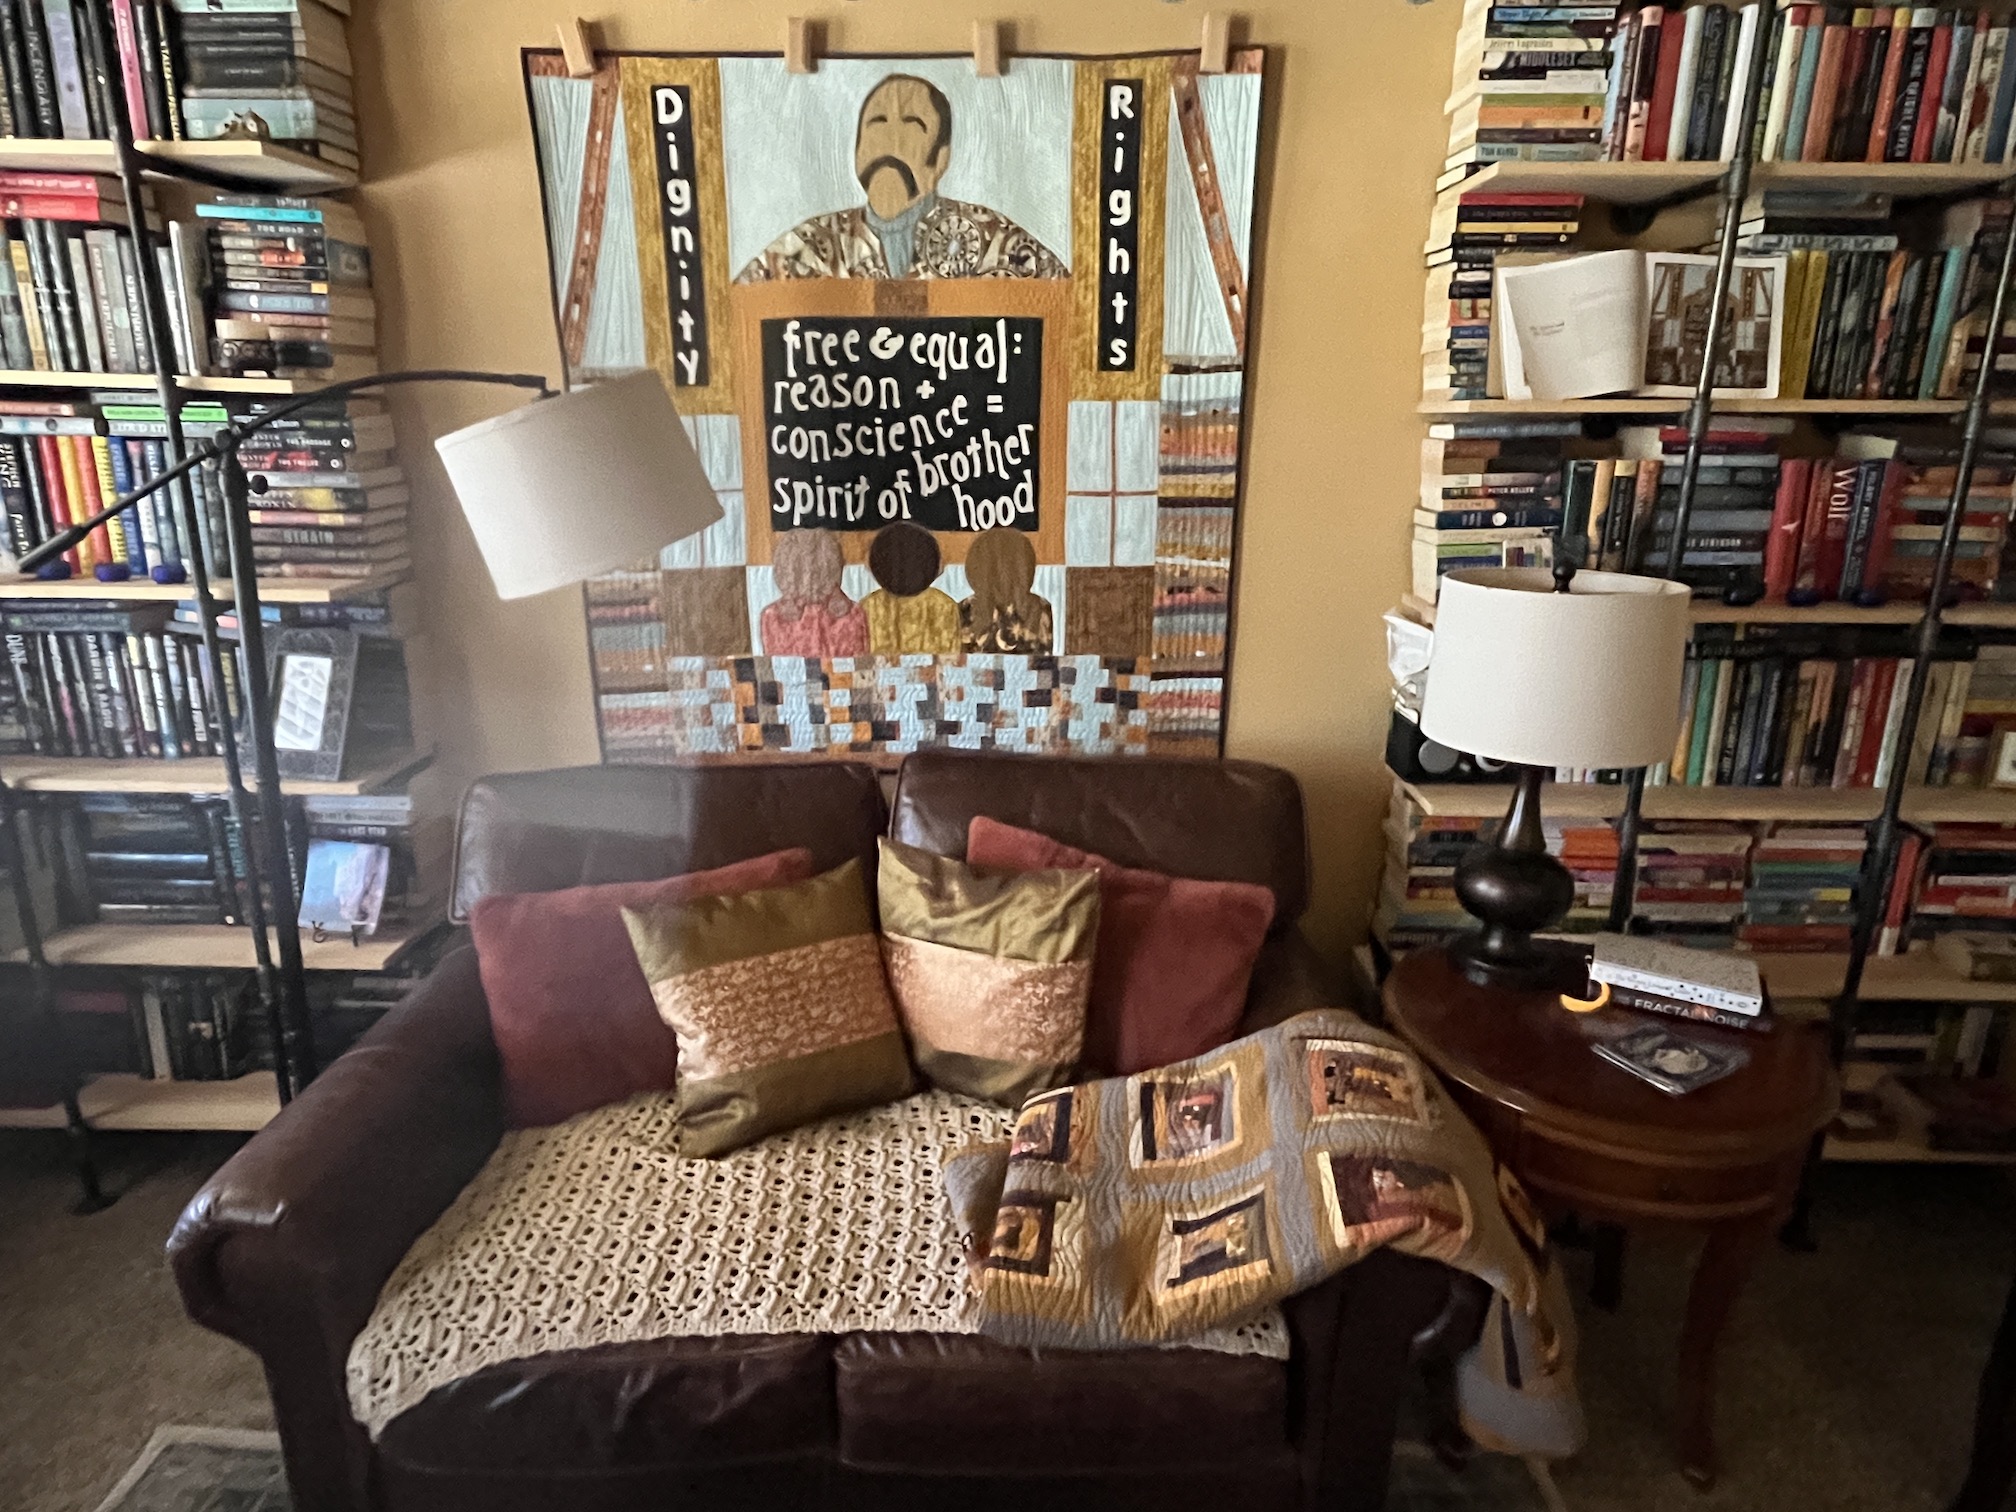
(The quilt currently on the loveseat and two little matching pillows, from orphan blocks, I plan to sell on my Etsy shop someday as they are not really my style and I want someone else to enjoy them.)
So that is where I am at in my design process.
Here are the 42 completed 9.5 x 9.5 inch blocks awaiting their lattice:
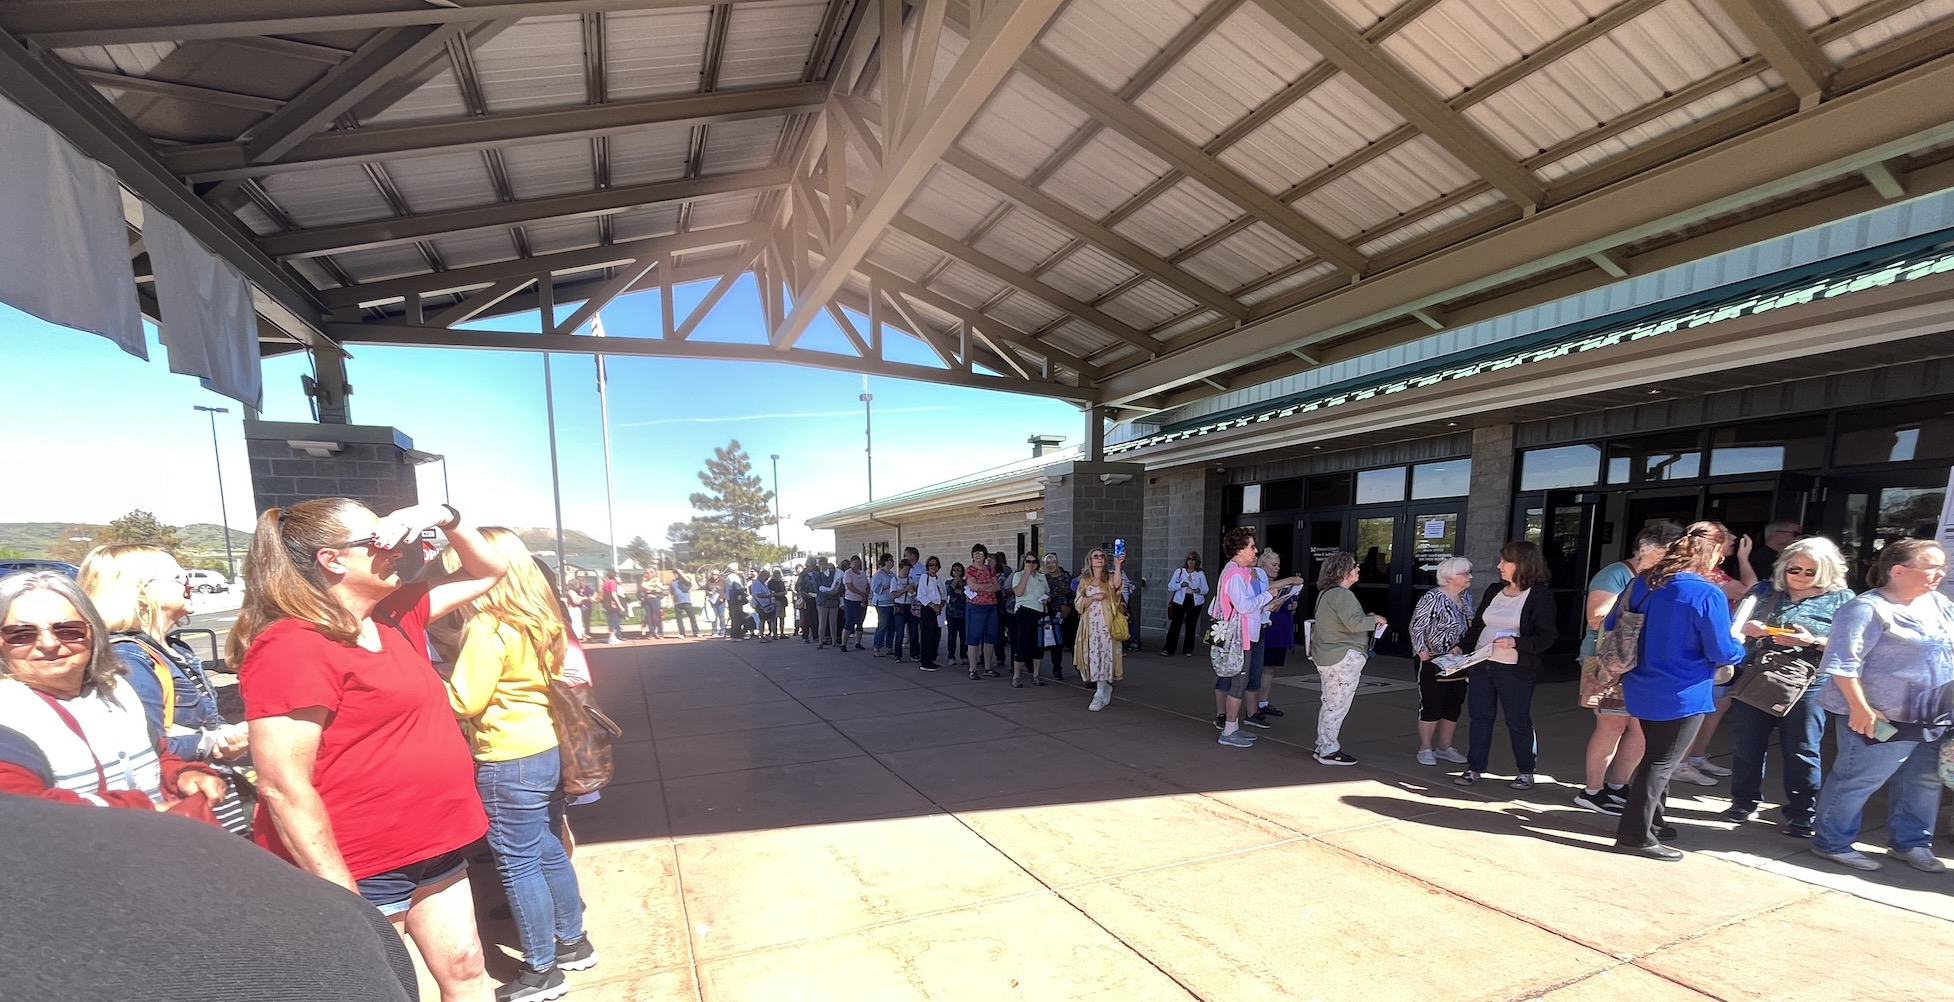
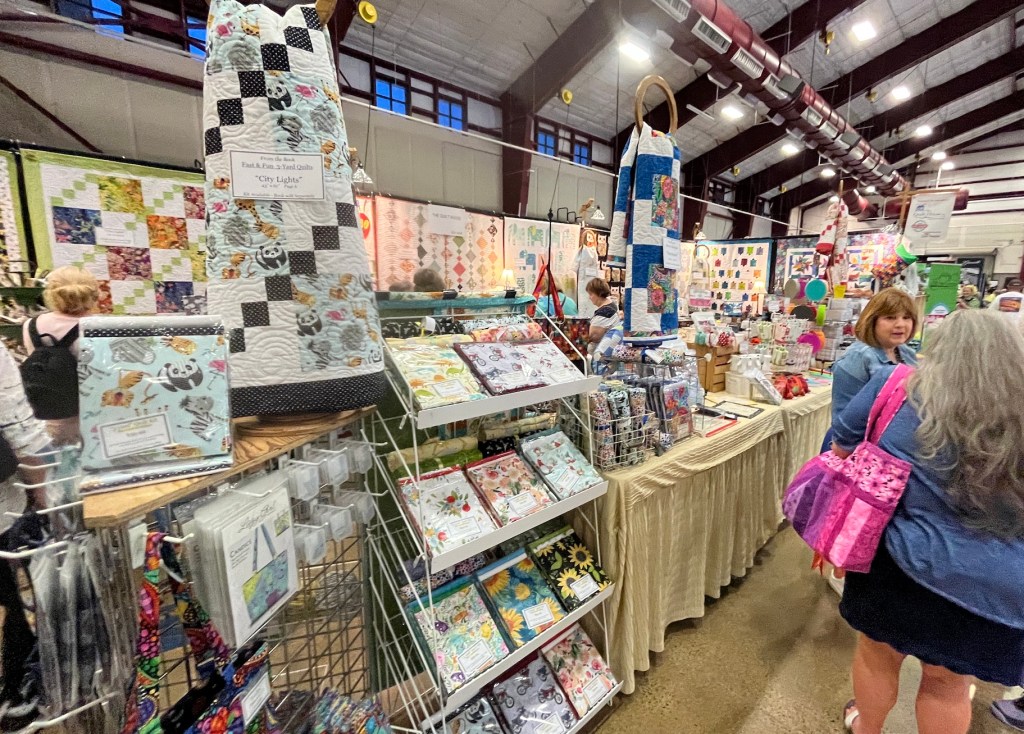
We got there a little bit before the show opened at 10 am to see a bunch of show attendees/crafters waiting in line to get in.
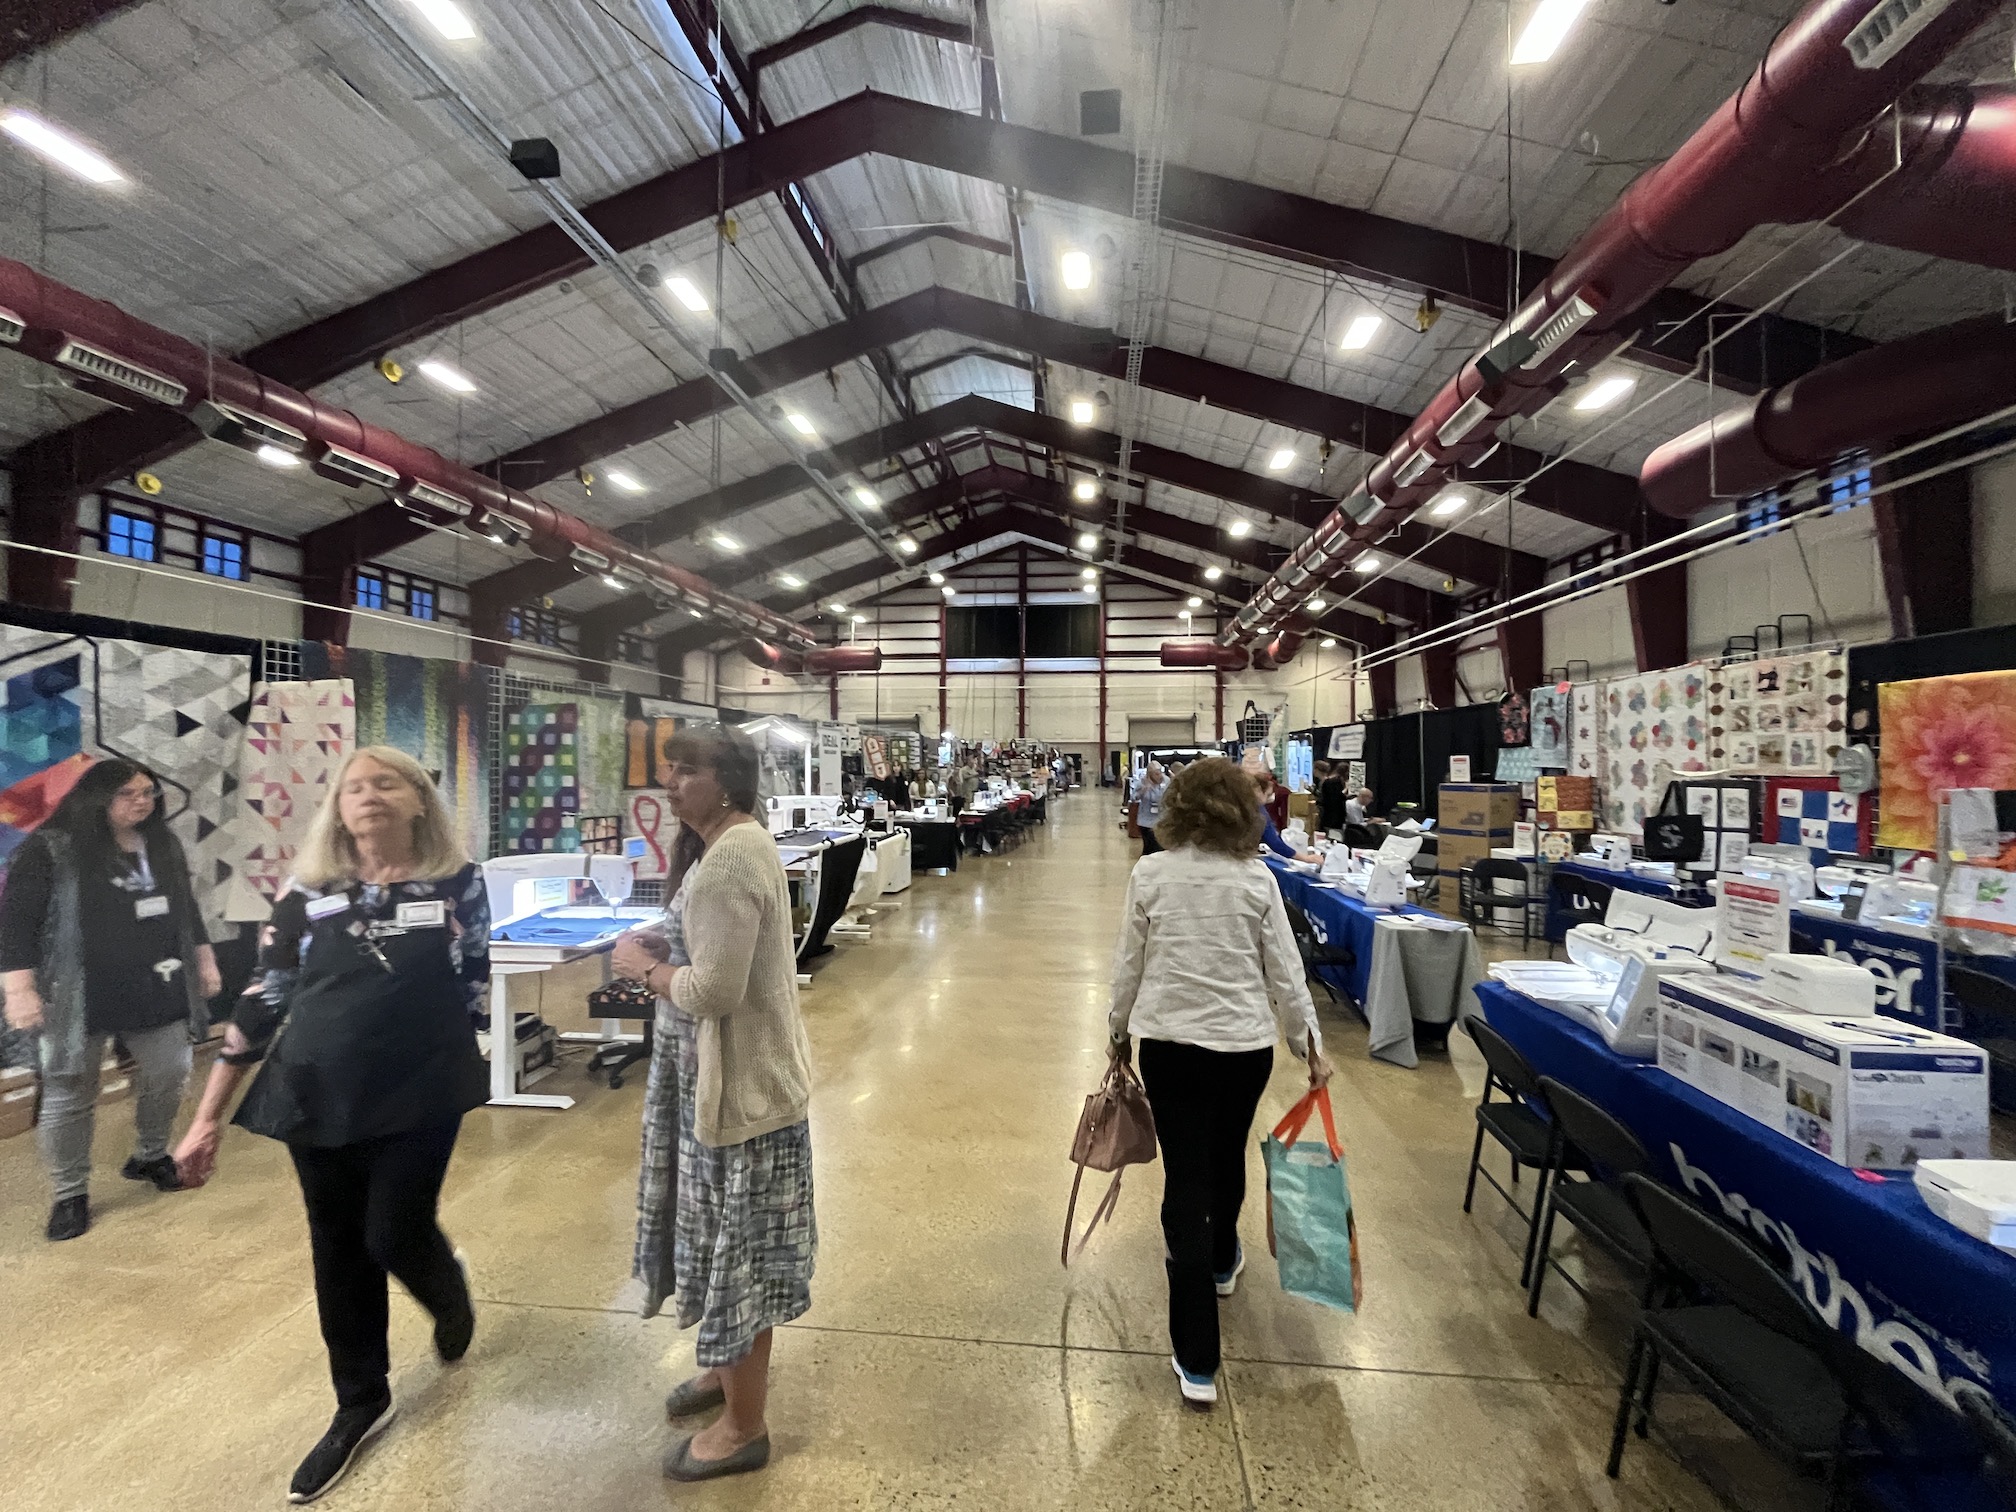
We learned these were people without advanced tickets. Luckily we had advanced tickets and were able to get into the shop as soon as it was 10 am. It was empty at first inside…
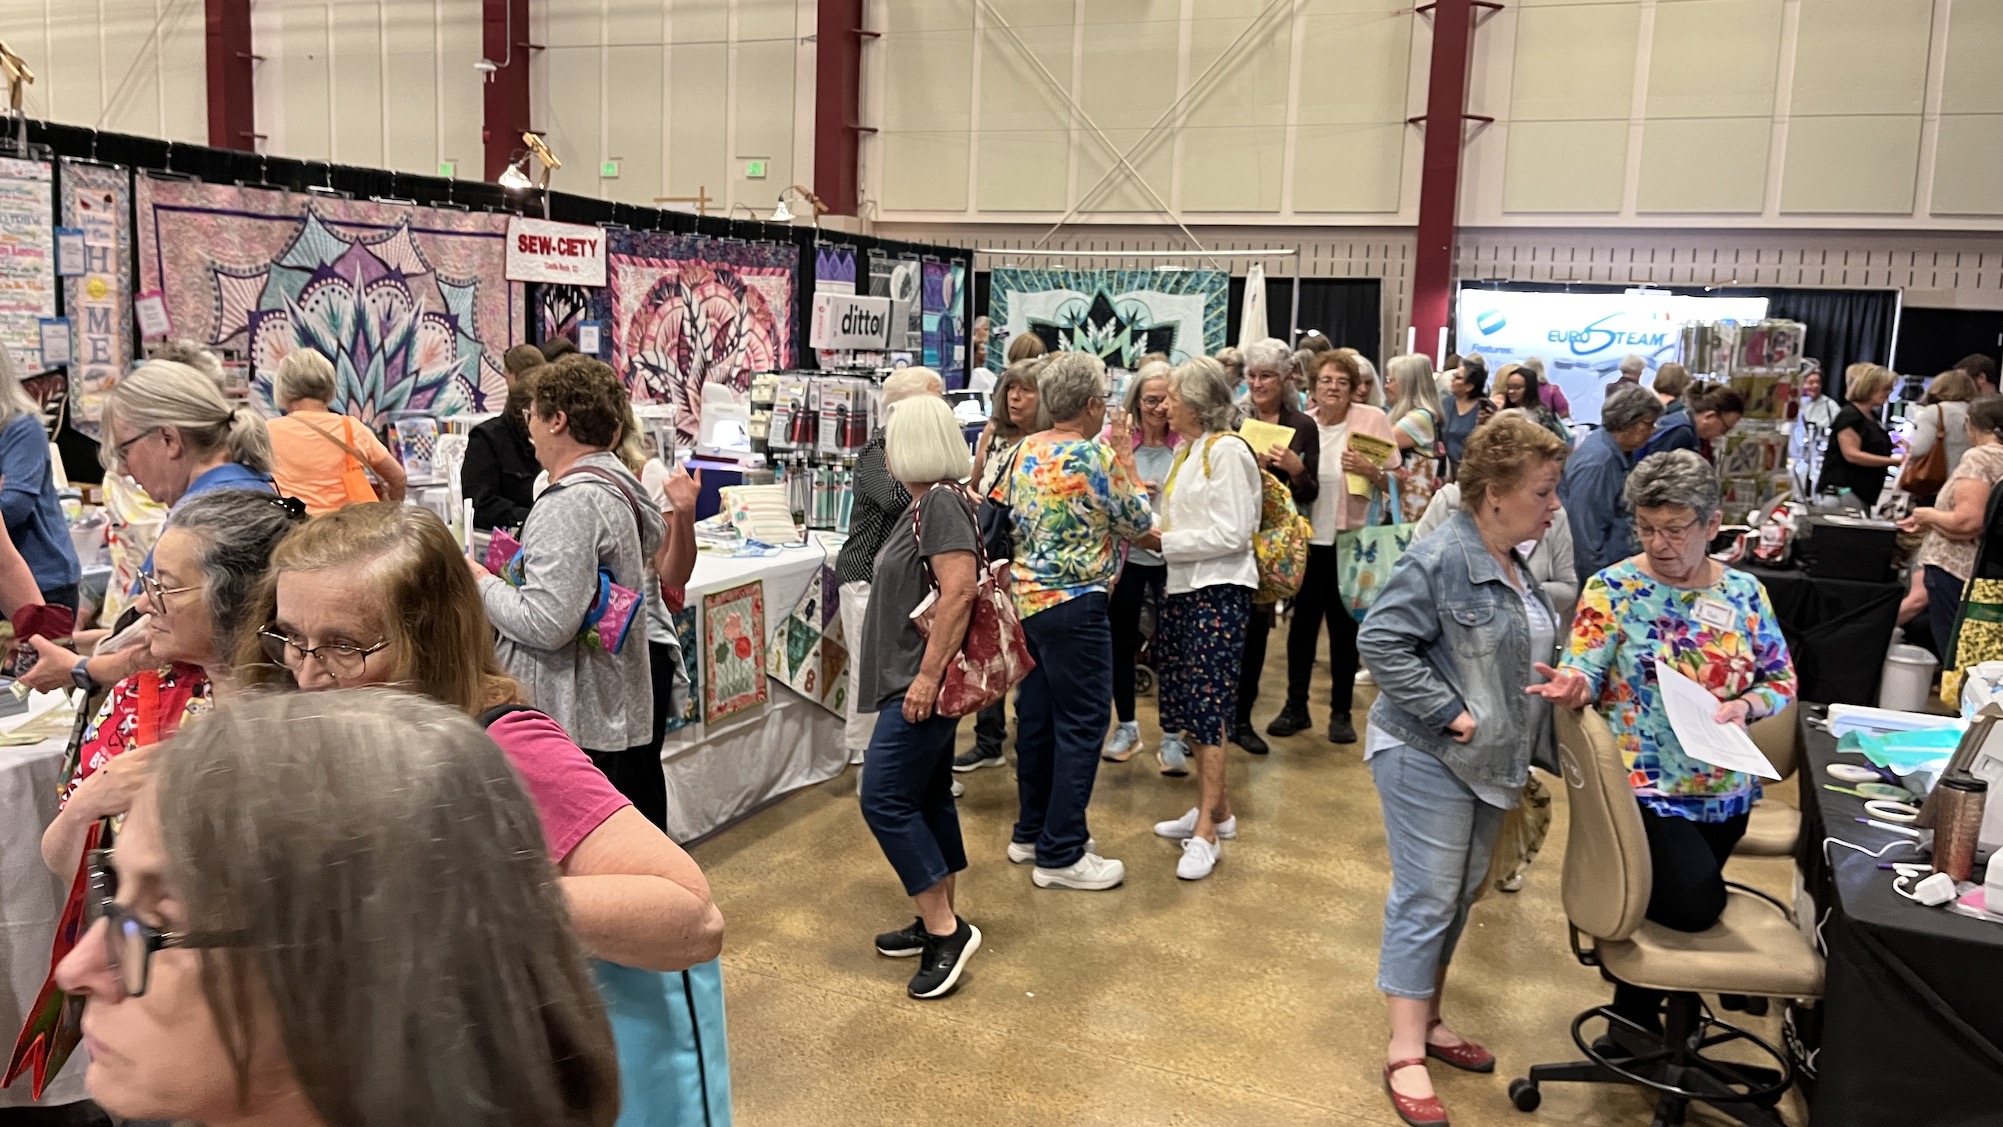
But then it got really busy!
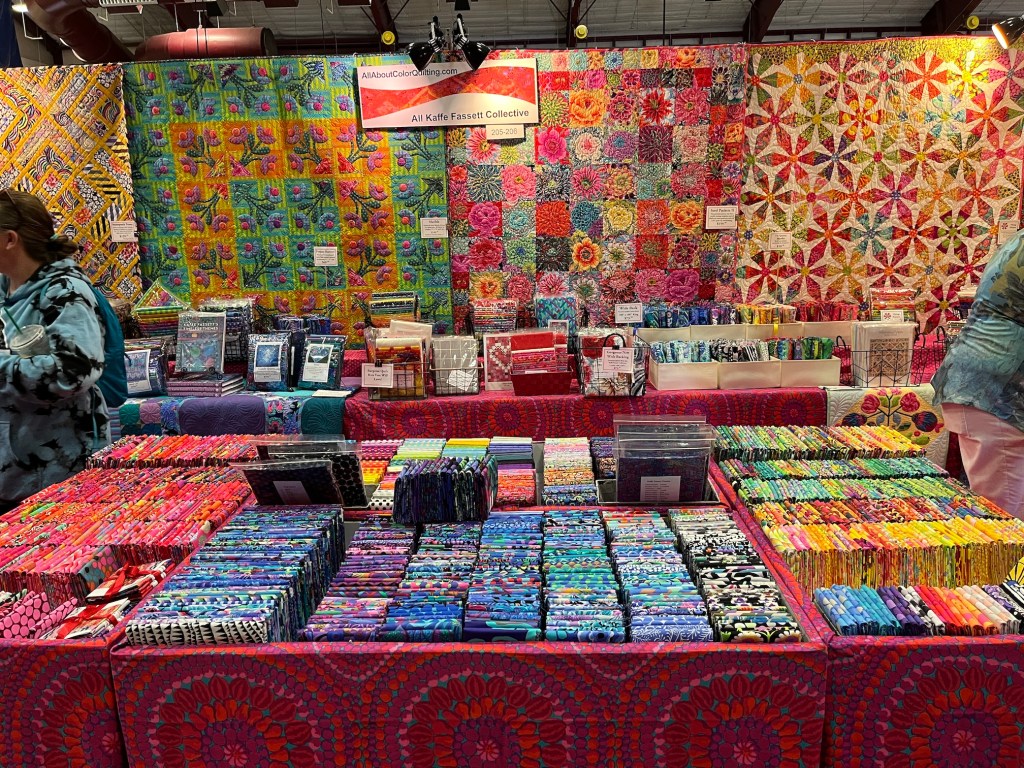
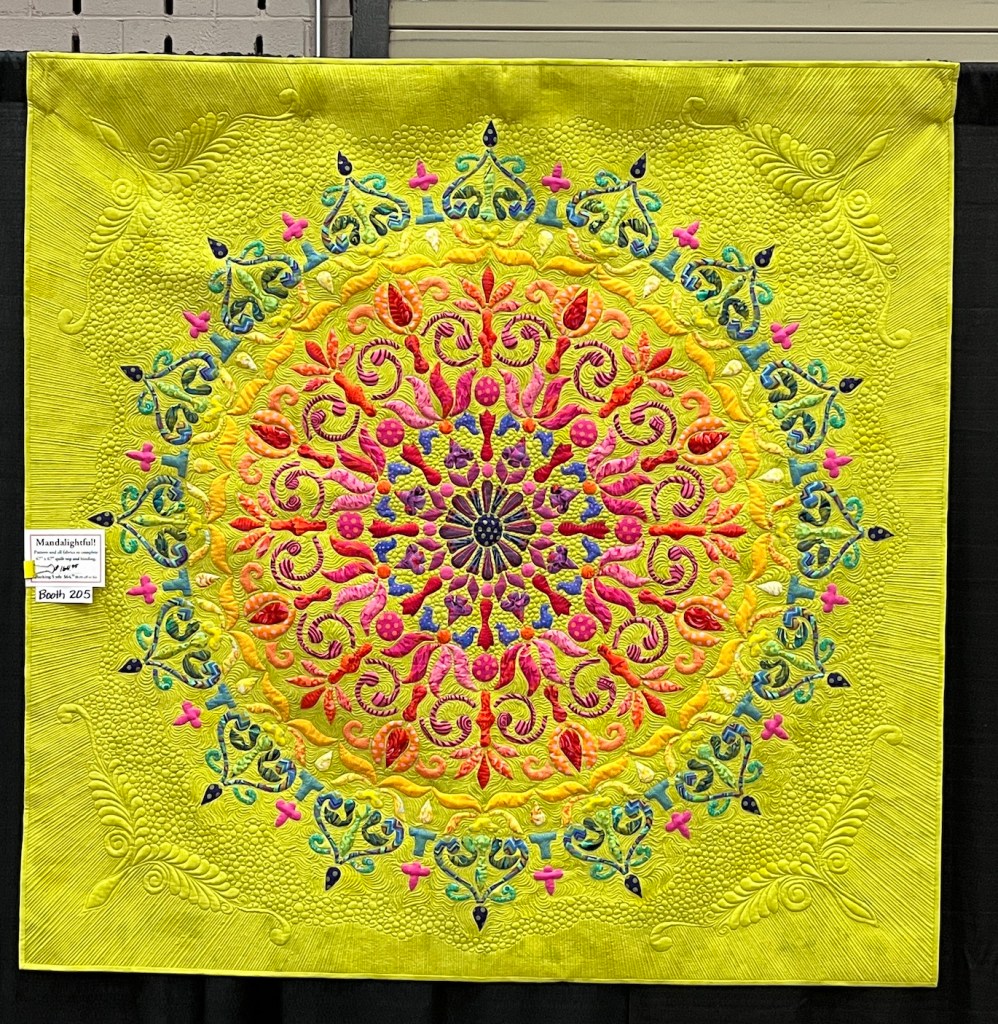
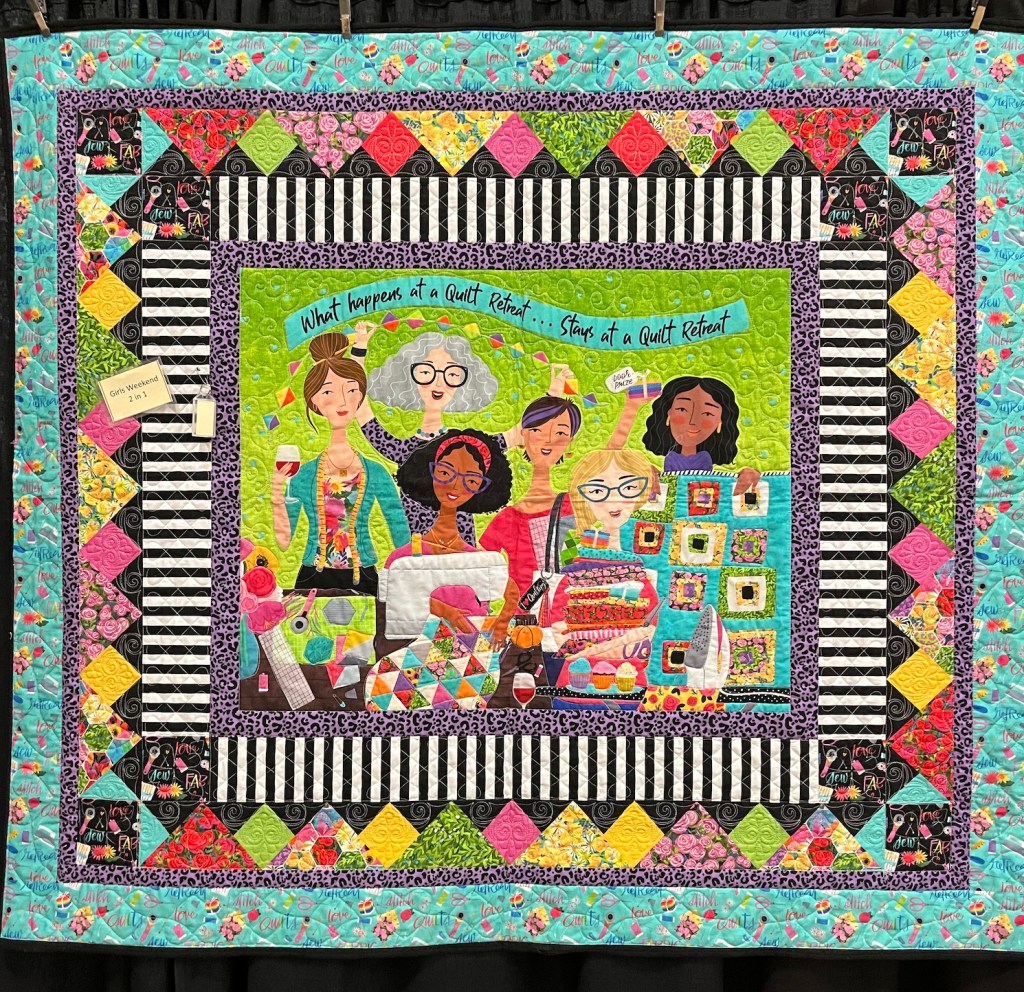
Here are some images of some of the vendor booths as well as a couple quilts they had on display that I liked:
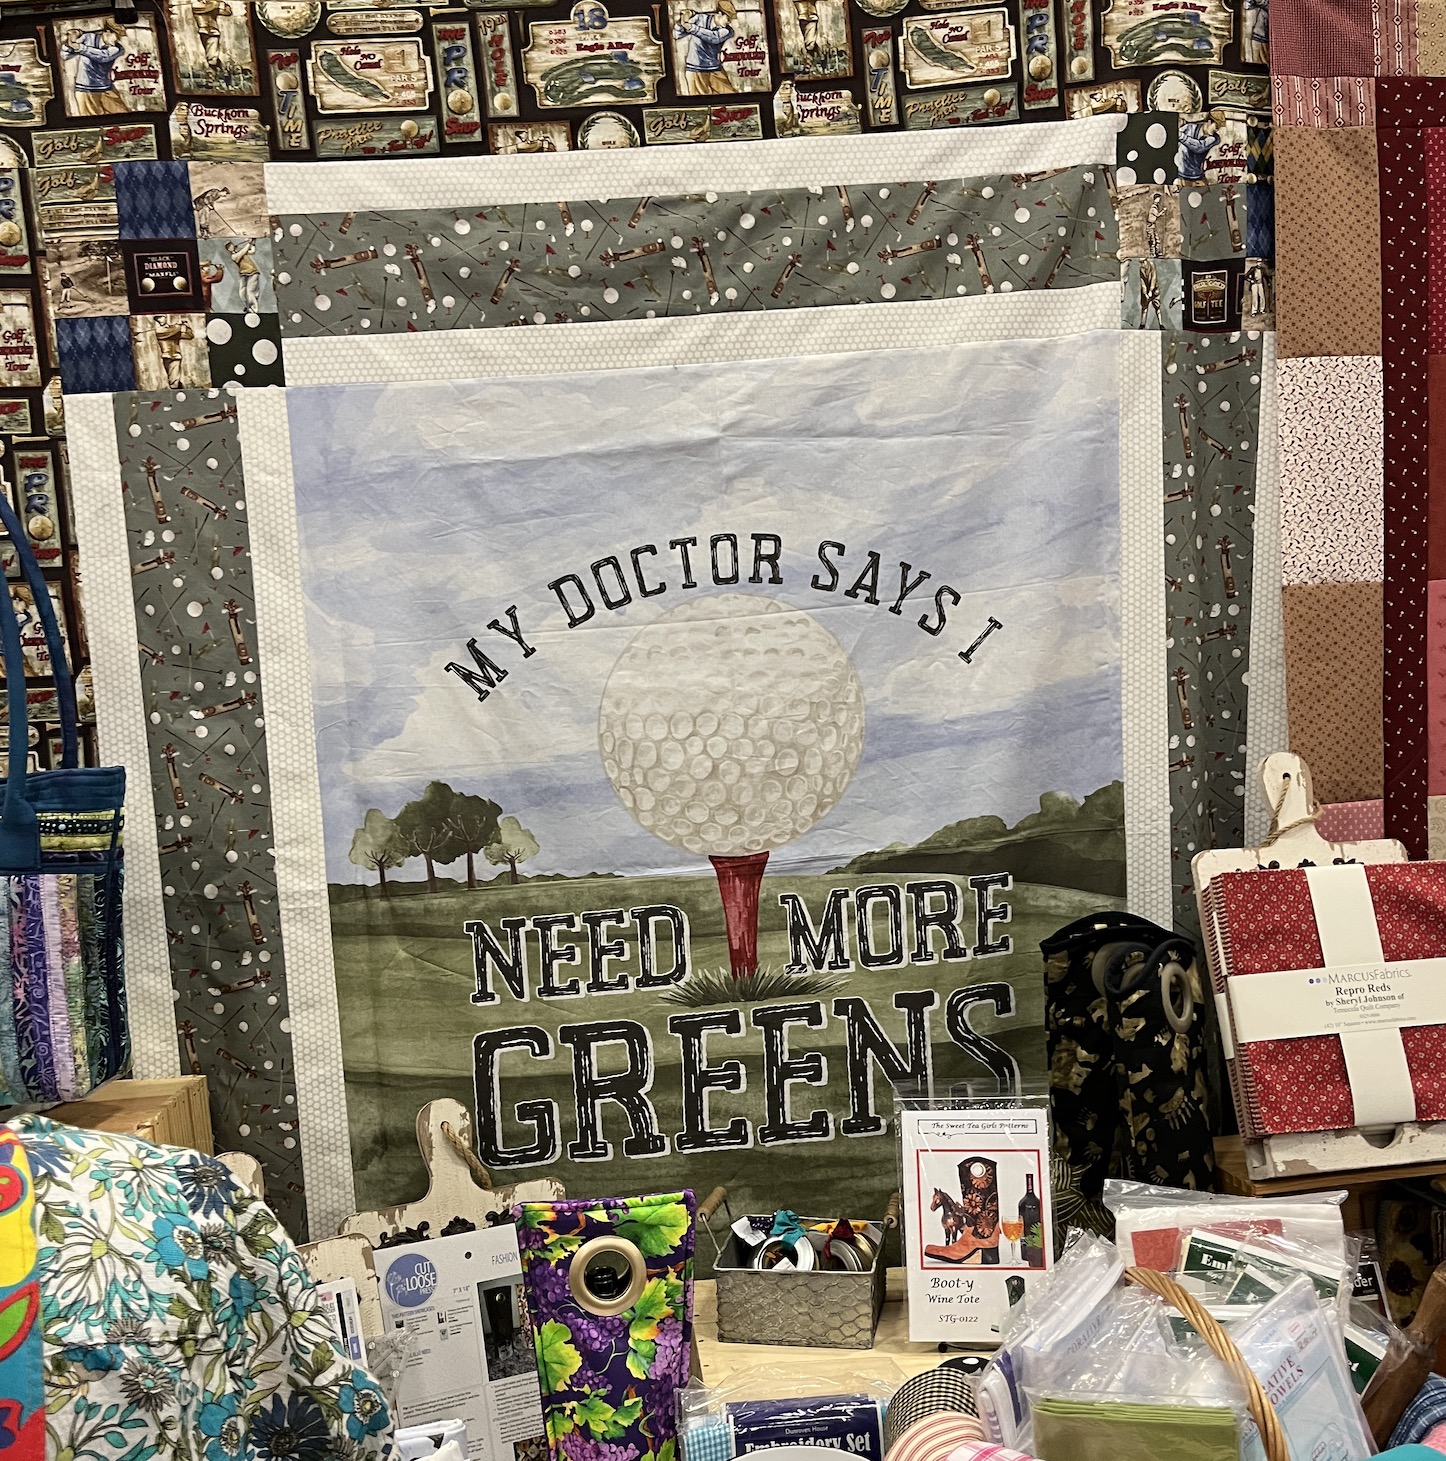
And here is a quilt top that John really liked (he is a golfer) but I have too much a backlog of projects at this time to make it for him!
Perhaps someday! The booth was very busy and we could not find the panel to buy and put away for a later time. I’ll have to find it online or perhaps come across it at a quilt shop someday.
I didn’t buy anything at the show, I couldn’t find anything I really needed but I did enjoy wandering around. It was not as good a quilting/craft show as the one I attended in July 2021 – the Denver Quilt Craft and Sewing Festival (the tierneycreates Beastie did a blog post about it – Guest Blogger: Denver Quilt Craft and Sewing Festival). The Castle Rock one was much smaller.
But I appreciate going to local sewing and crafting festival!
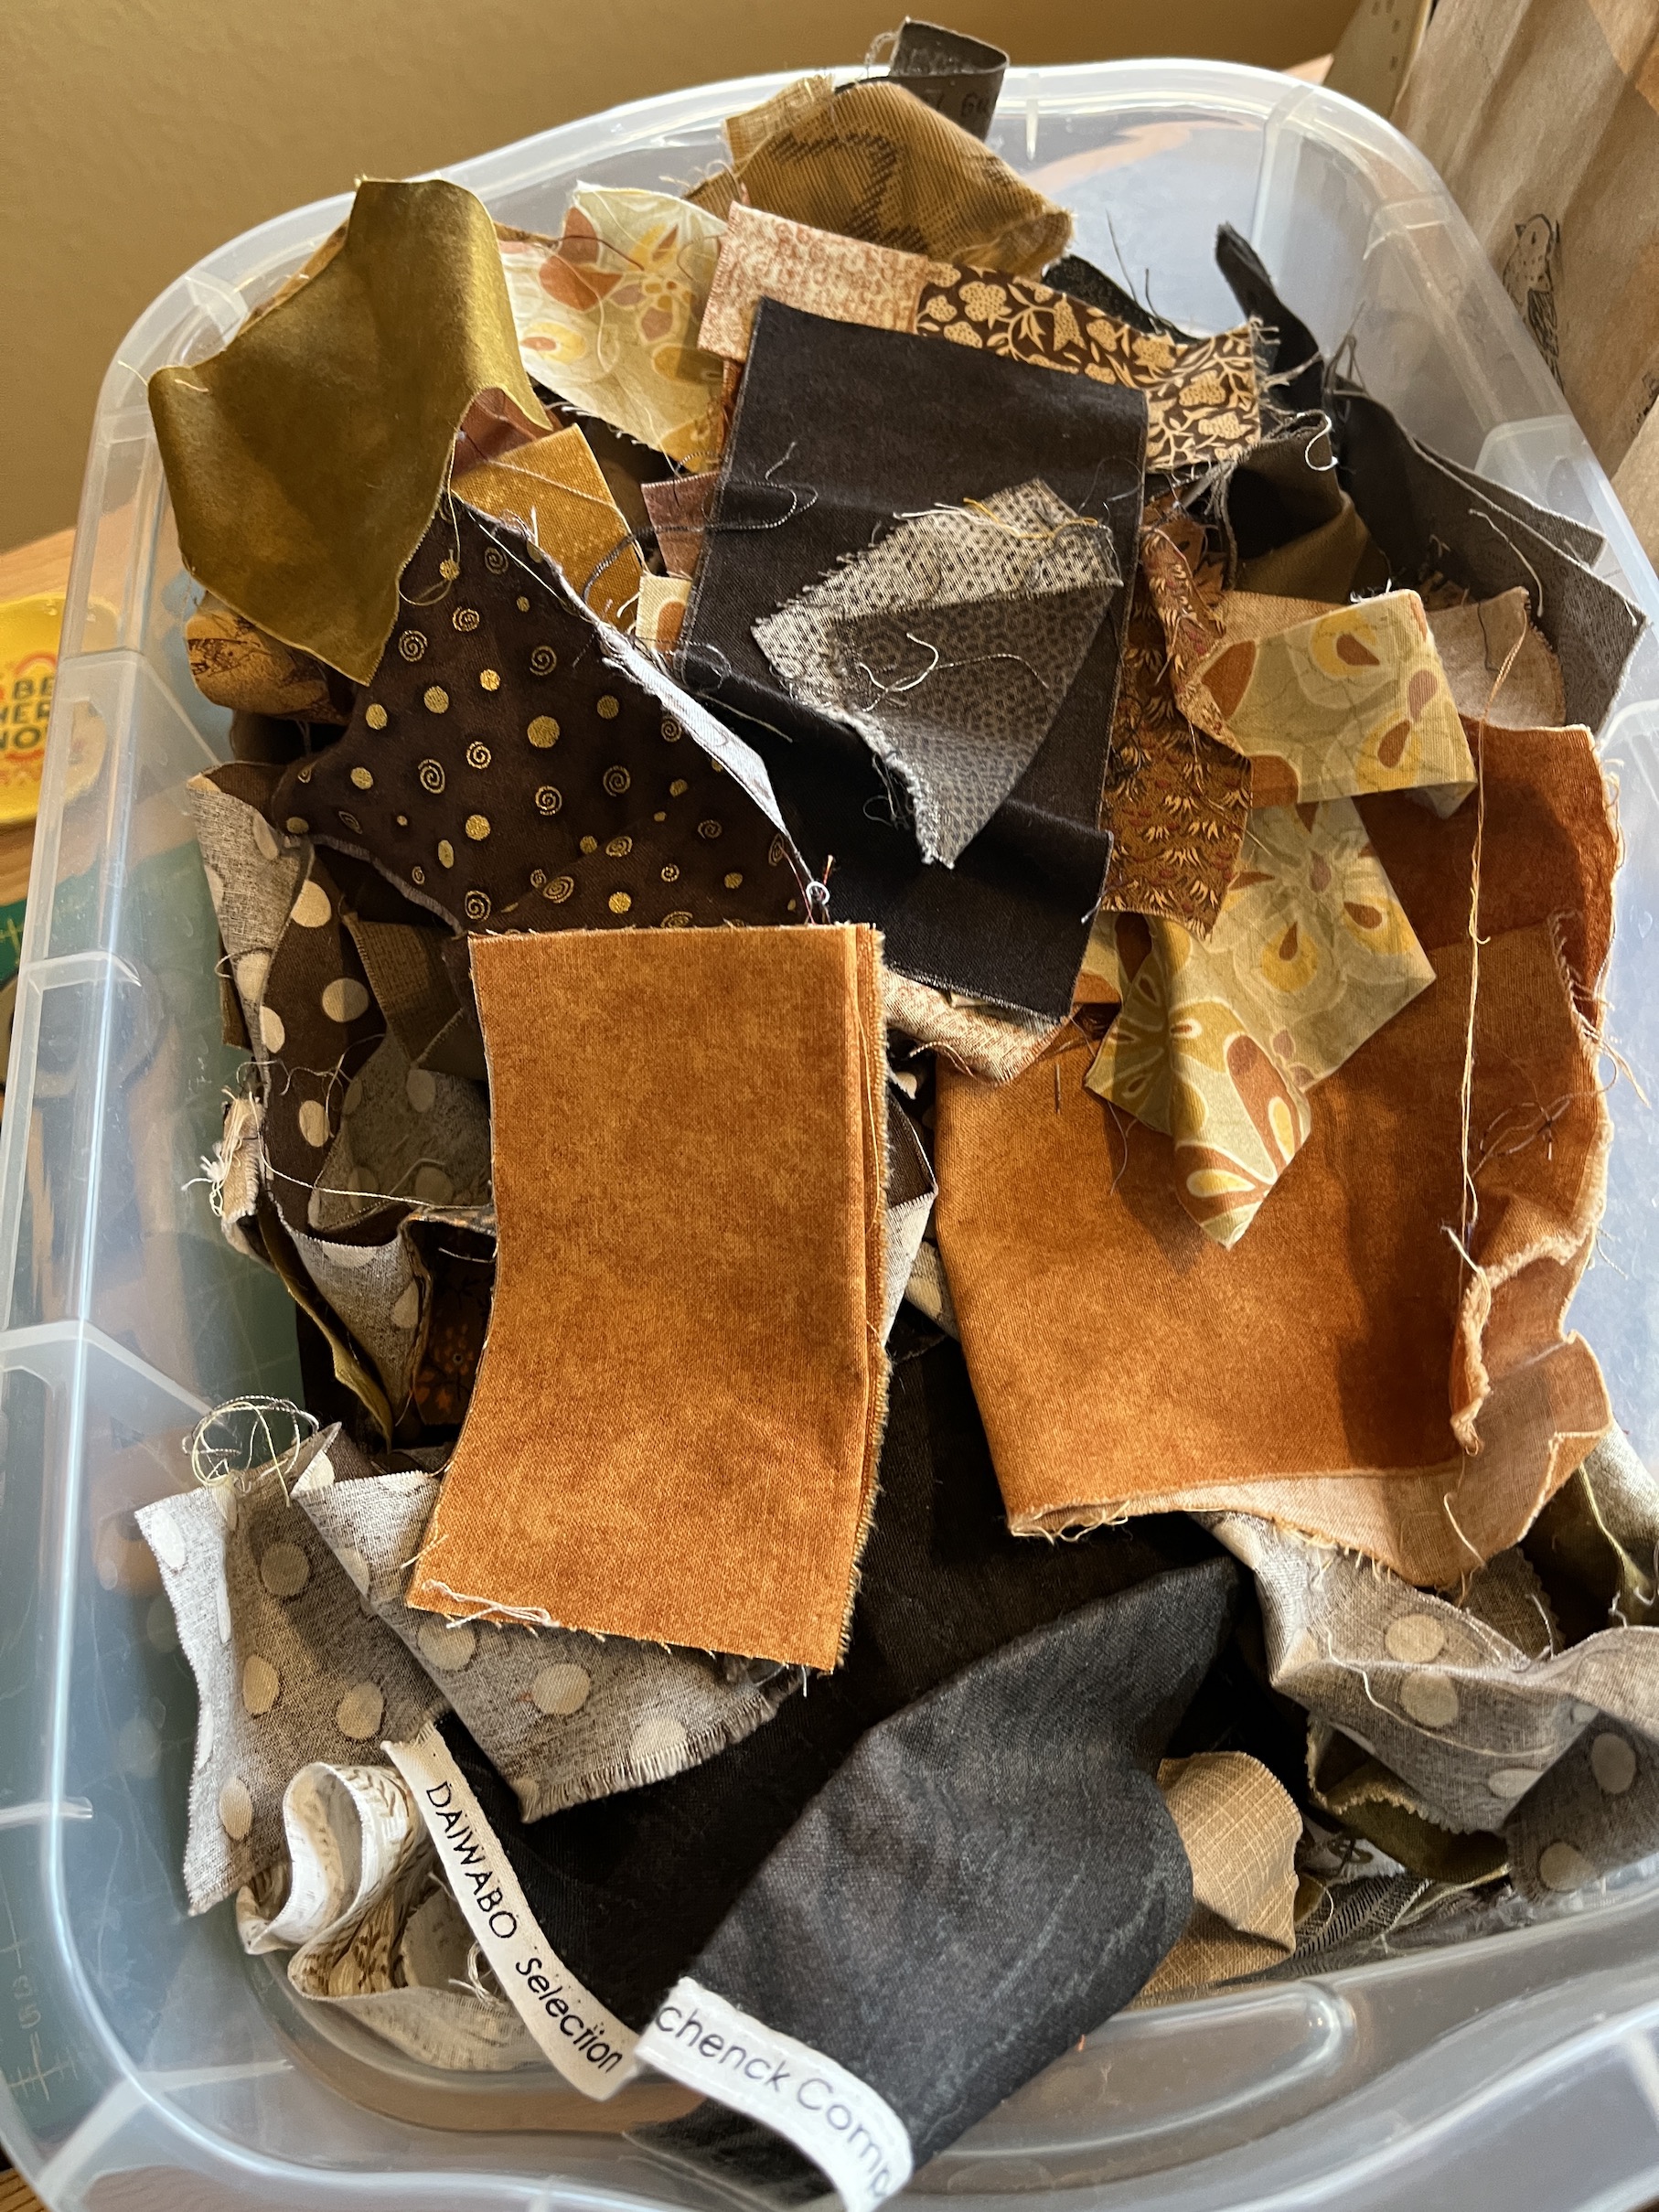
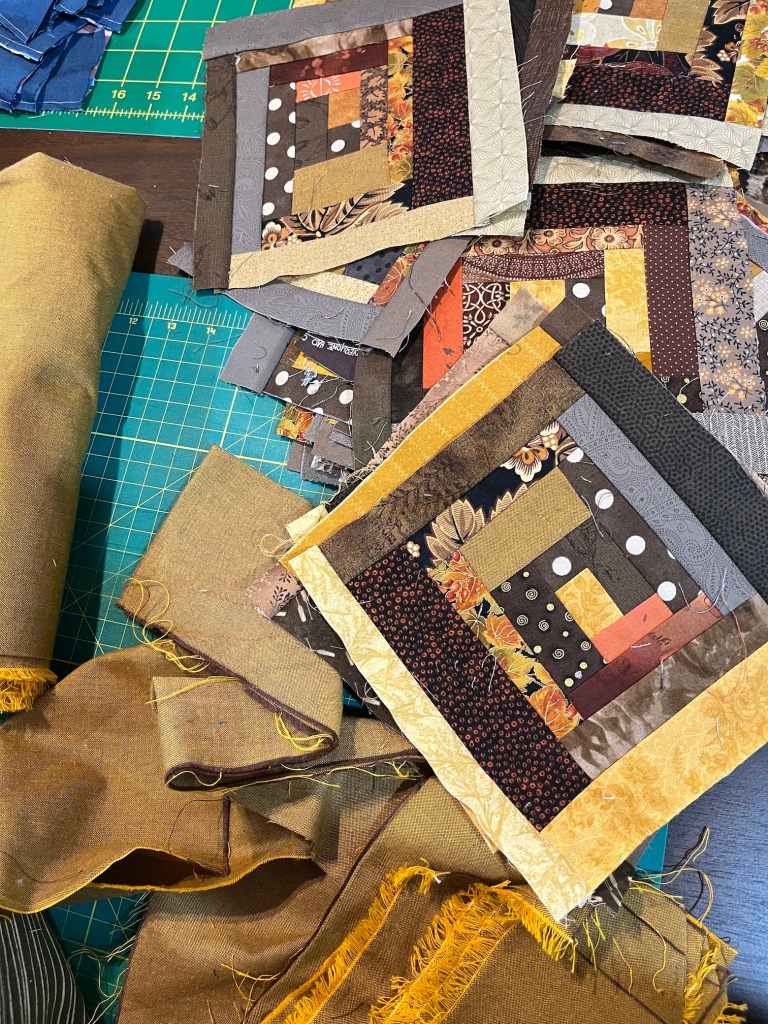
I realized didn’t share very many photos or details about the scrappy improvisational log cabin blocks I made at the Scrap Happy Quilt Retreat (link to all the posts related to this 5 day retreat) last week.
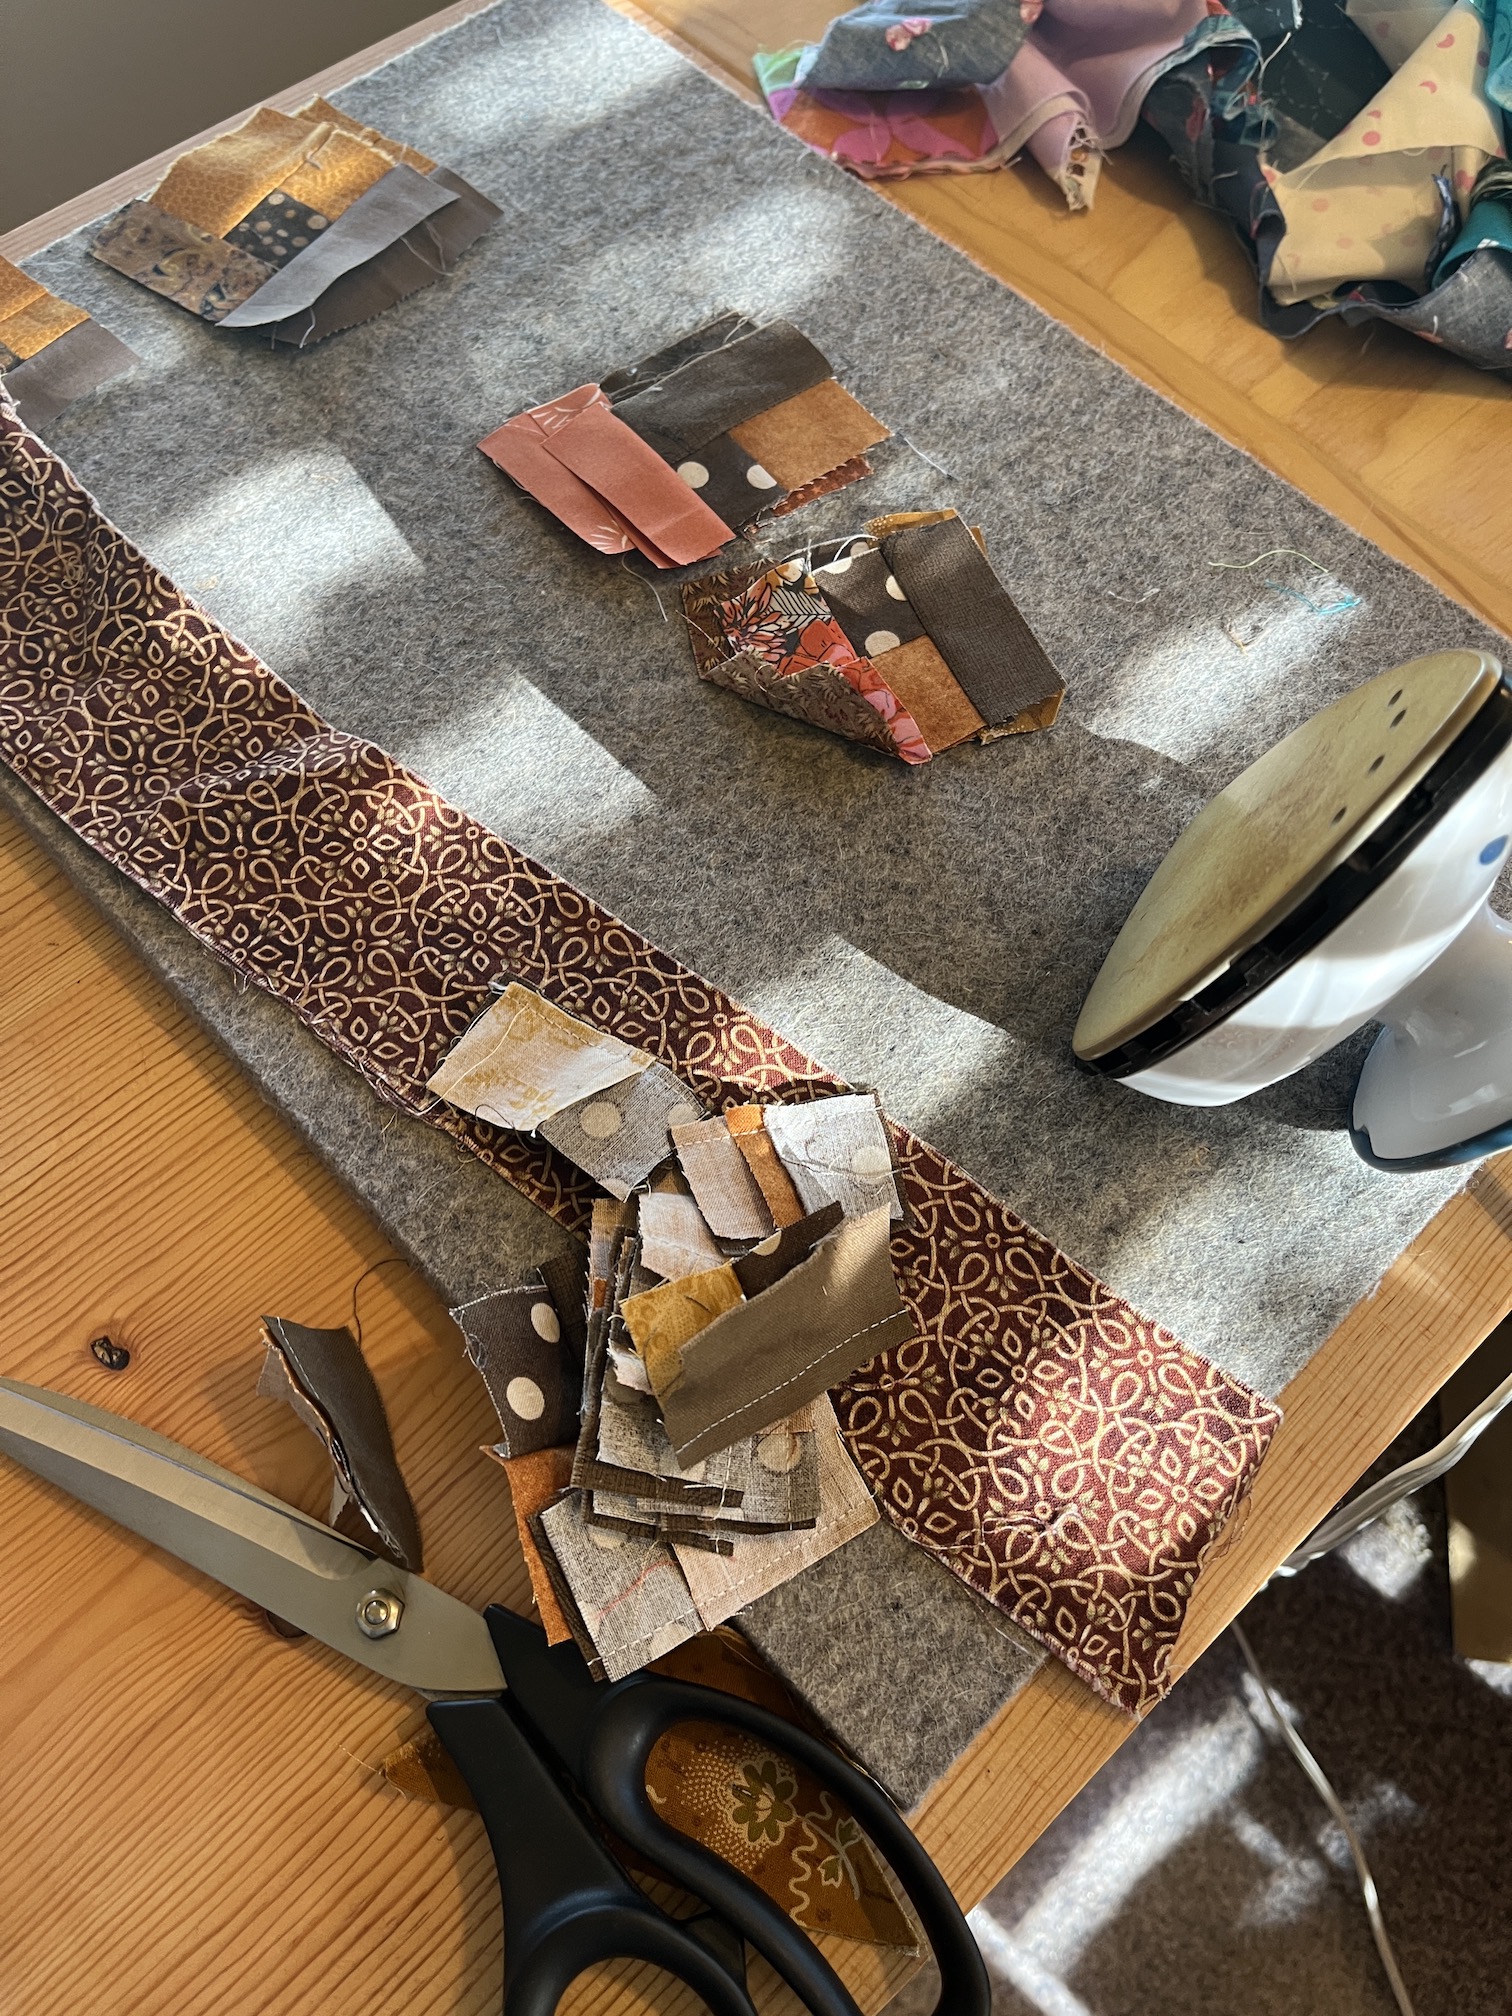
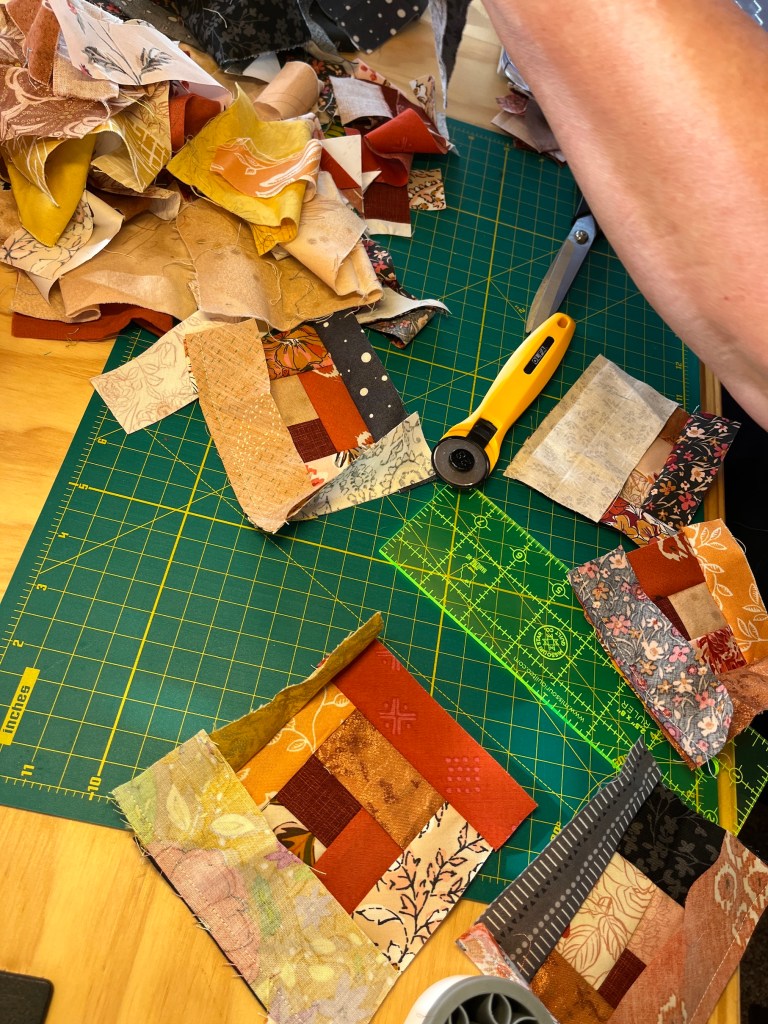
During the retreat I “shopped” from my collection of brown, cream, yellow and gold scraps and selected this collection of scraps to which I also added a couple orange-brown scraps and some scraps D brought to the retreat:
I ended up piecing 46 blocks, which I narrowed down to 42 blocks plus one spare (I recycled into the scrap pile 3 blocks that were pieced too wonky).
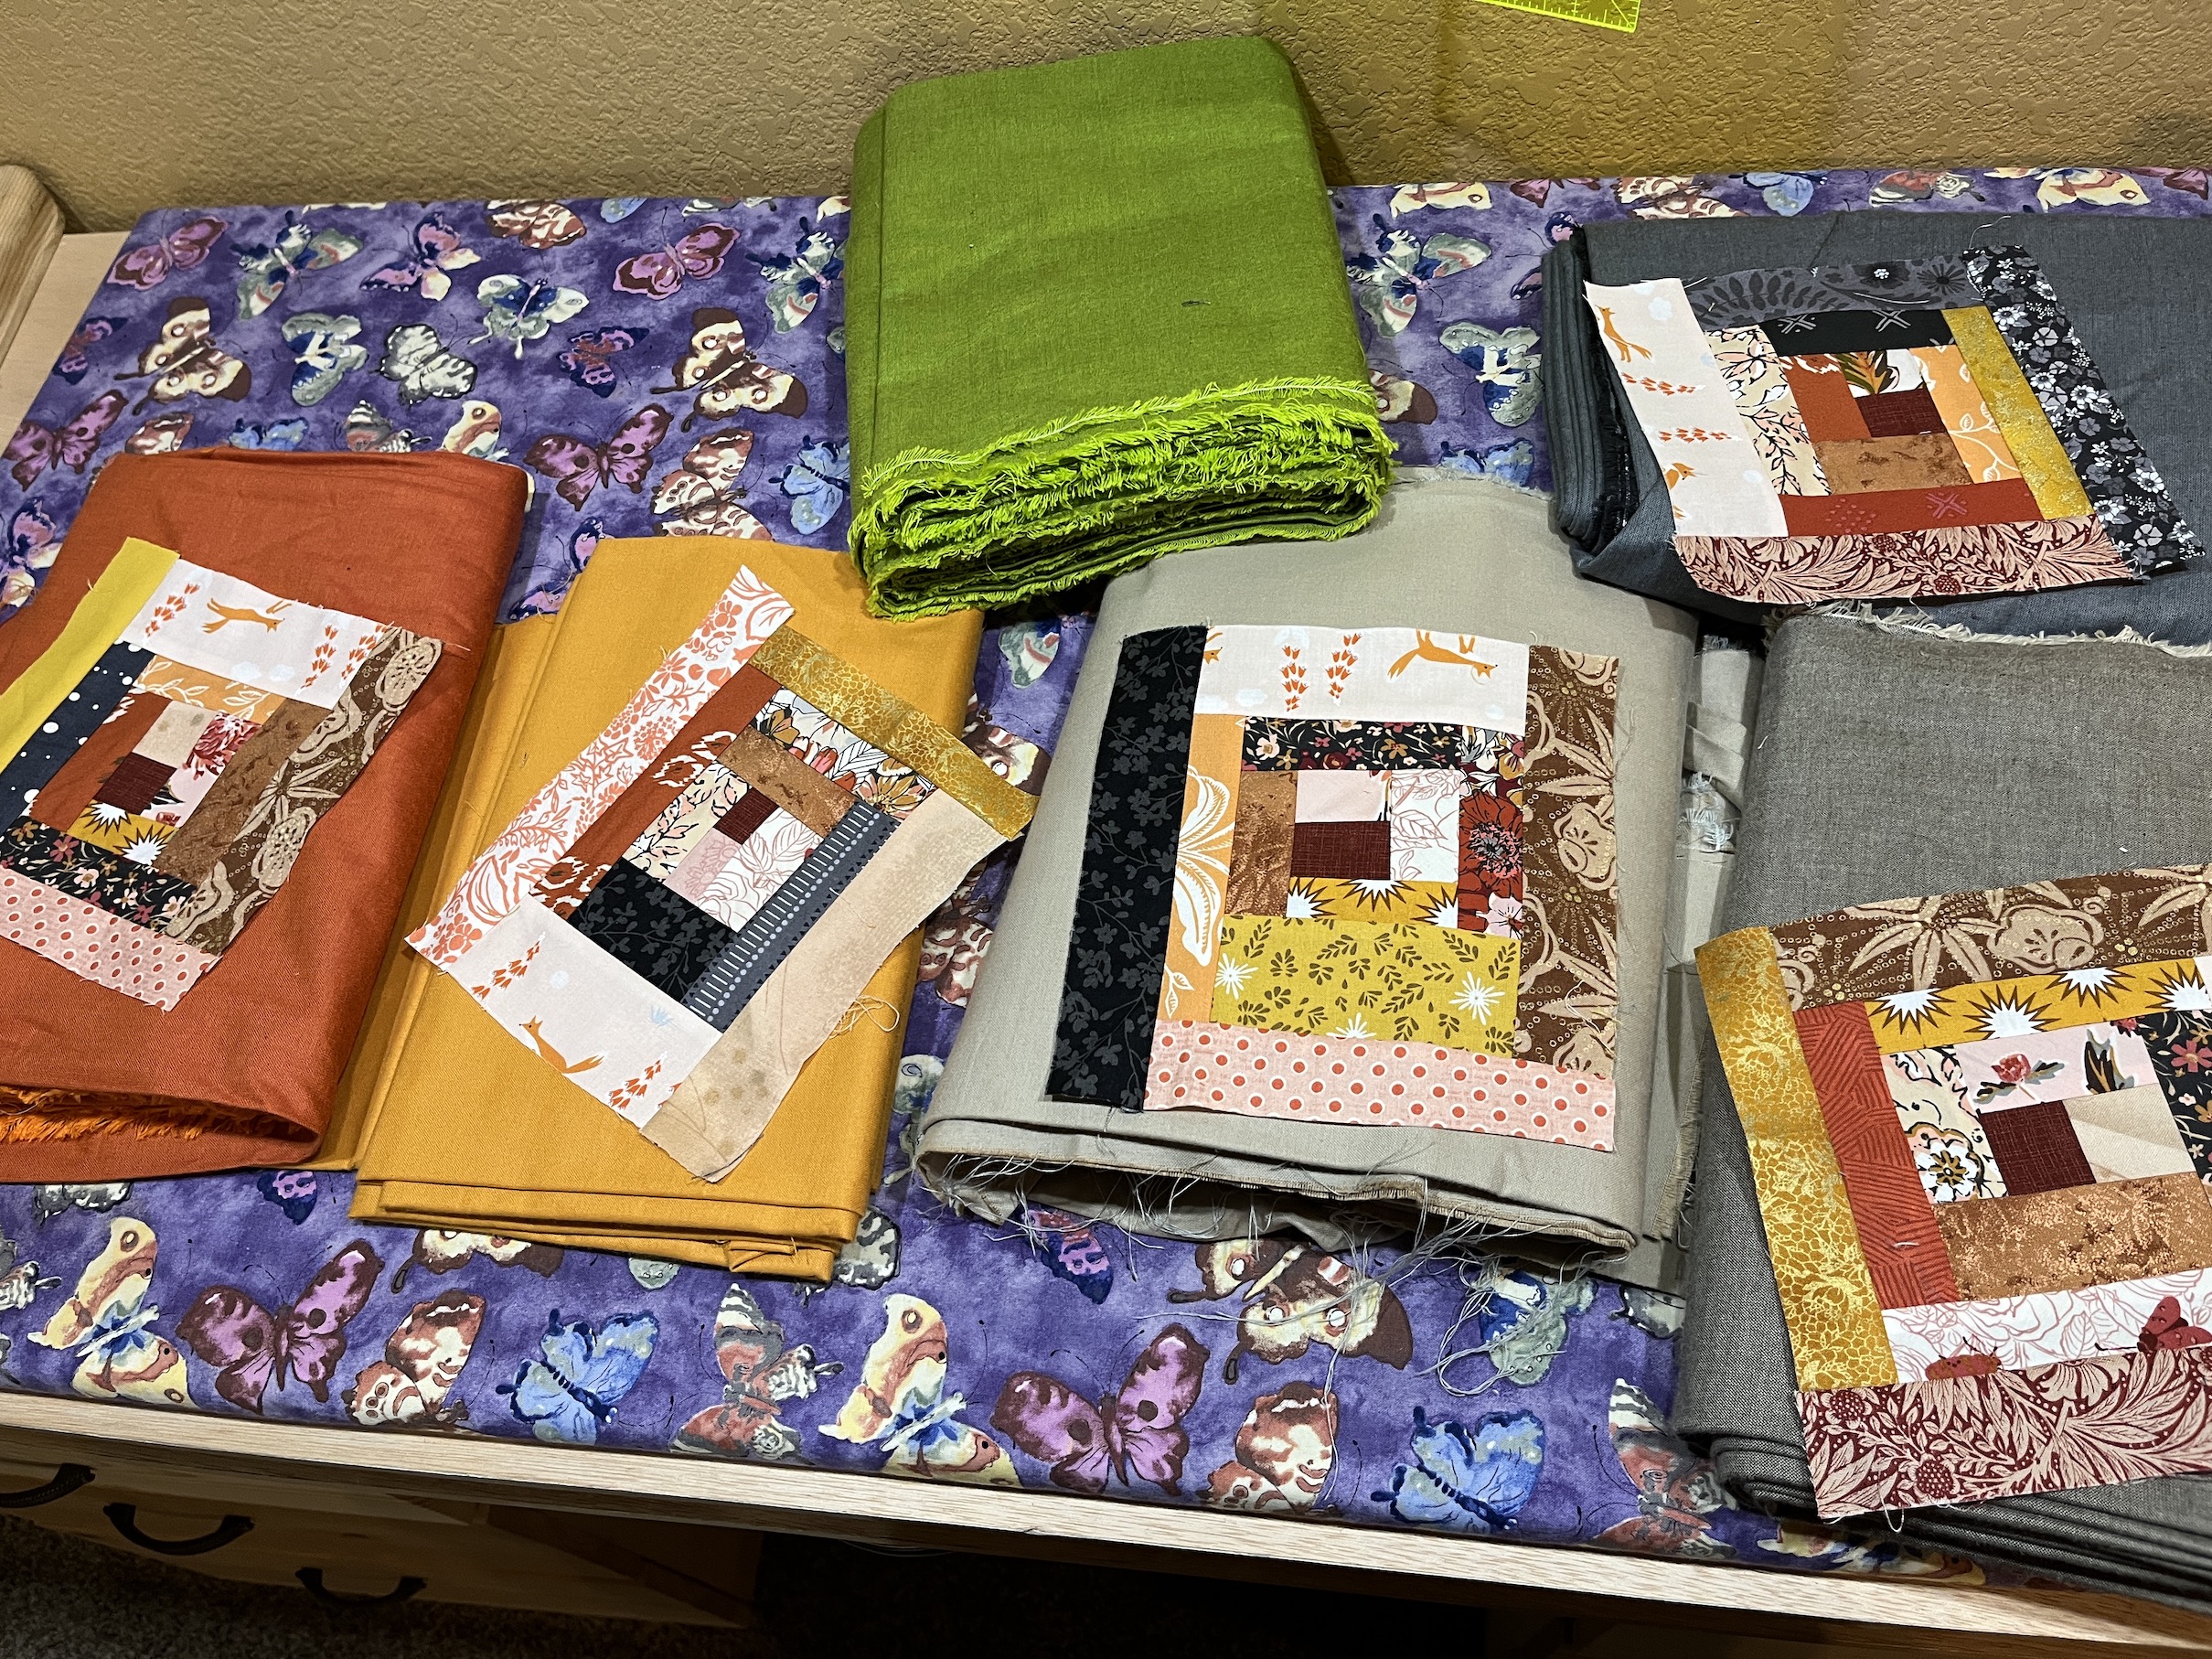
At first I decided to float the blocks (but framing them) in some coppery-gold-ish Peppered Cotton fabric I had in my stash:
Yes it looks cool and the framing fabric really compliments the fabrics in the blocks, but I decided it would just be too much as an entire quilt.
So I pulled out this brown-taupe-ish Peppered Cotton fabric I had in my stash:
And I decided I would first frame each block in the coppery-gold-ish fabric and then set that block in the taupe-ish fabric:
It might be difficult to visualize as I have it laid out in the images above but I will share more images after I try out some sample final blocks. Creating some sample final blocks will also let me confirm that this combination actually works.
We used this method during the retreat – I suggested (and they listened) to K and D that they actually sew a sample final/completed block to decide if they really like a framing/border/lattice color for their block. Just laying the block on the fabric doesn’t already give you the true feeling of the final version. You can always rip it out the framing and reuse the core block if you don’t like the sample.
Here is an example below of what D did during the retreat with her two finalists – the khaki colored fabric vs. the gray fabric – to help herself make the final decision:
A friend who read the posts related to the retreat ask for some overall instructions on making scrappy improvisational log cabin blocks (which I also call “log jamming” or “free form” log cabin blocks).
Here is a quick overview of how I do it, there are several different approaches and in the post ScrapHappy May: Scrap Happy Retreat! I shared links to YouTube videos from the Stitchin’ Post where I first learned how to do it.
IMPROVATIONAL/FREE FORM SCRAPPY LOG CABIN BLOCKS
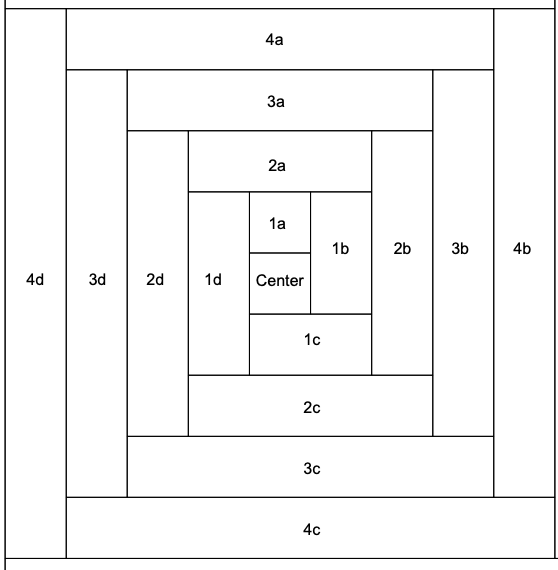
First you need to understand the concept of Log Cabin Block piecing where you start with a center square and build around it. Below is a screen shot from Generations Quilt Patterns on How to Make a Log Cabin Blockthat illustrates the Log Cabin Block piecing concept:
It really helps to have pieced traditional log cabin blocks before you go improvisational.
Next you need to decide what size you want your final block to be. I decide my final size based on existing square rulers I have as the easiest way to trim the block is using a square ruler on a rotating cutting mat. I have the following square rulers in my collection – 6 inch, 6.5 inch, 9.5 inch, and 12.5 inch, so I make my final blocks one of those sizes. D & K used my 9.5 inch square ruler for the final size on their blocks. I plan to use my 12.5 inch ruler for the final size on my blocks.
Then it is time to go shopping in your fabric scraps. You need to decide on a color palette (though you could do all random colors but your piece will not look cohesive if that is what you want, but it will look colorful!) for your quilt blocks. As you can see from the pictures from our retreat – K went with pinks and blues, while D went for autumnal colors. You are going to need more scraps that you think so at least initially put together a large pile of scraps.
Audition your scraps and see how well they work together by laying out a demo block (no need to sew together yet but try and simulate a log cabin block).
To start you can either 1) sew two strips together, one of the strips being your center fabric; or 2) sew different little pieces of centers to a long strip.
Cut them apart using scissors to create your first two pieces – if you look at the graphic above this would be Center + 1a.
From there you can create using log cabin piecing techniques a sample block to see how you like it, or just jump into chain piecing blocks starting with your fabric for 1b.
Don’t worry about 1/4 inch seams, just do what seam allowance works to piece the fabric to the next fabric – for example if you are using thin scraps you can use 1/8 seam allowances, especially when you are working on rows towards the center, it will end up stable when the entire block is sewn together.
Using log cabin piecing techniques (working from a center around and around) keep adding scrap strips until you get your block a little larger than the final size you want to achieve.
Trim your blocks using the square ruler of your choosing to their final size.
I might write an actual pattern of how I do it with lots of images/photos and detailed instructions and sell it as a digital download on my Etsy shop someday. Then I can add in all the tricks I’ve learned over the years of making these blocks. My process does differ from the one I originally learned from Jackie at the Stitchin’ Post.
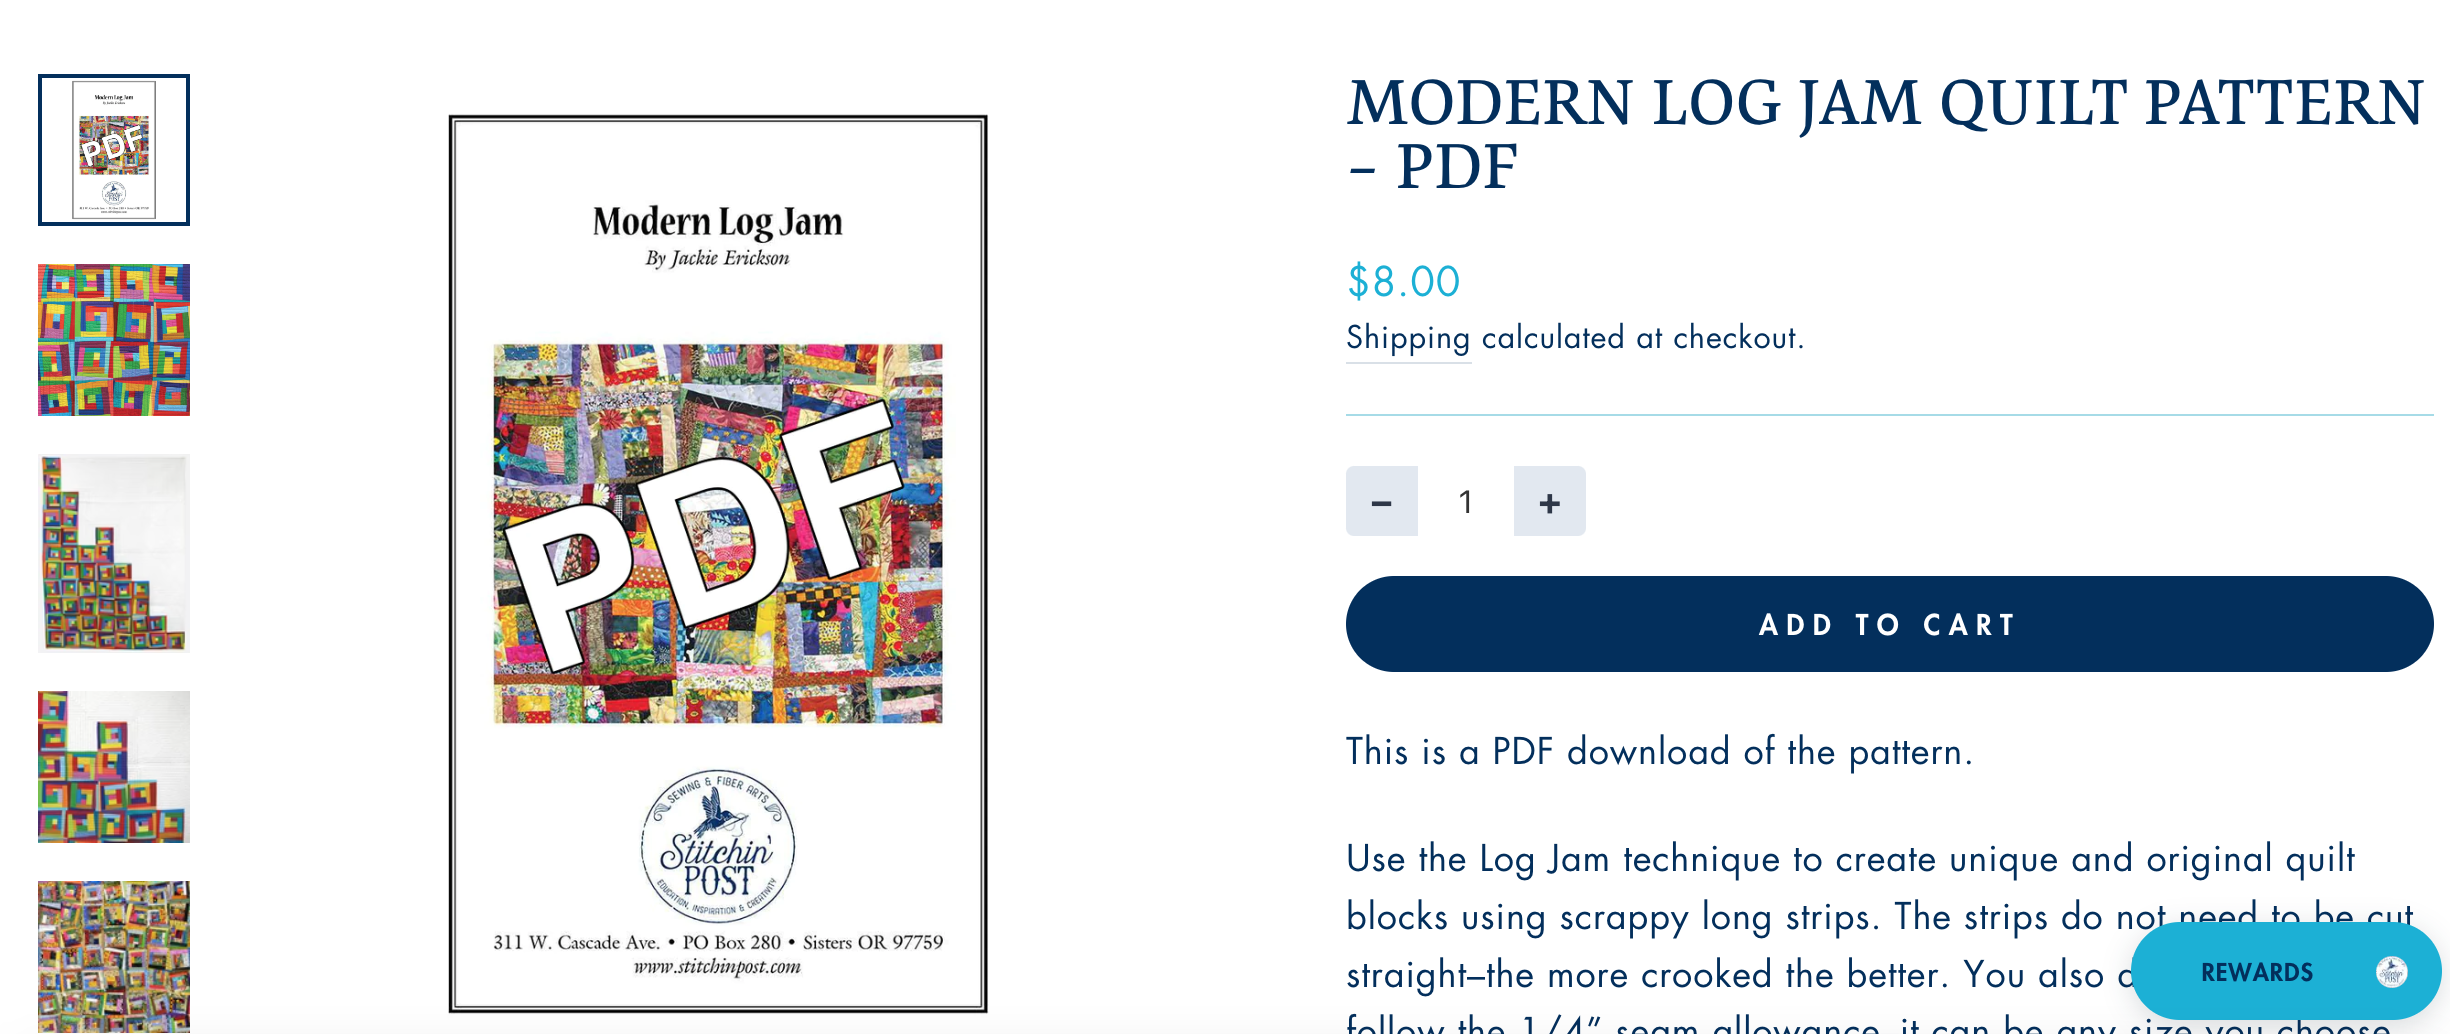
The Stitchin’ Post does sell a pattern for making these blocks called Modern Log Jam Quilt in case you want to try their pattern. It was written by the person (Jackie) who originally taught me (before I created my own process) – I’ve linked it here – Modern Log Jam Quilt.
Stitchinpost.com
There are so many options of what you can do with these types of blocks made from scraps. You could do something straightforward like what D made:
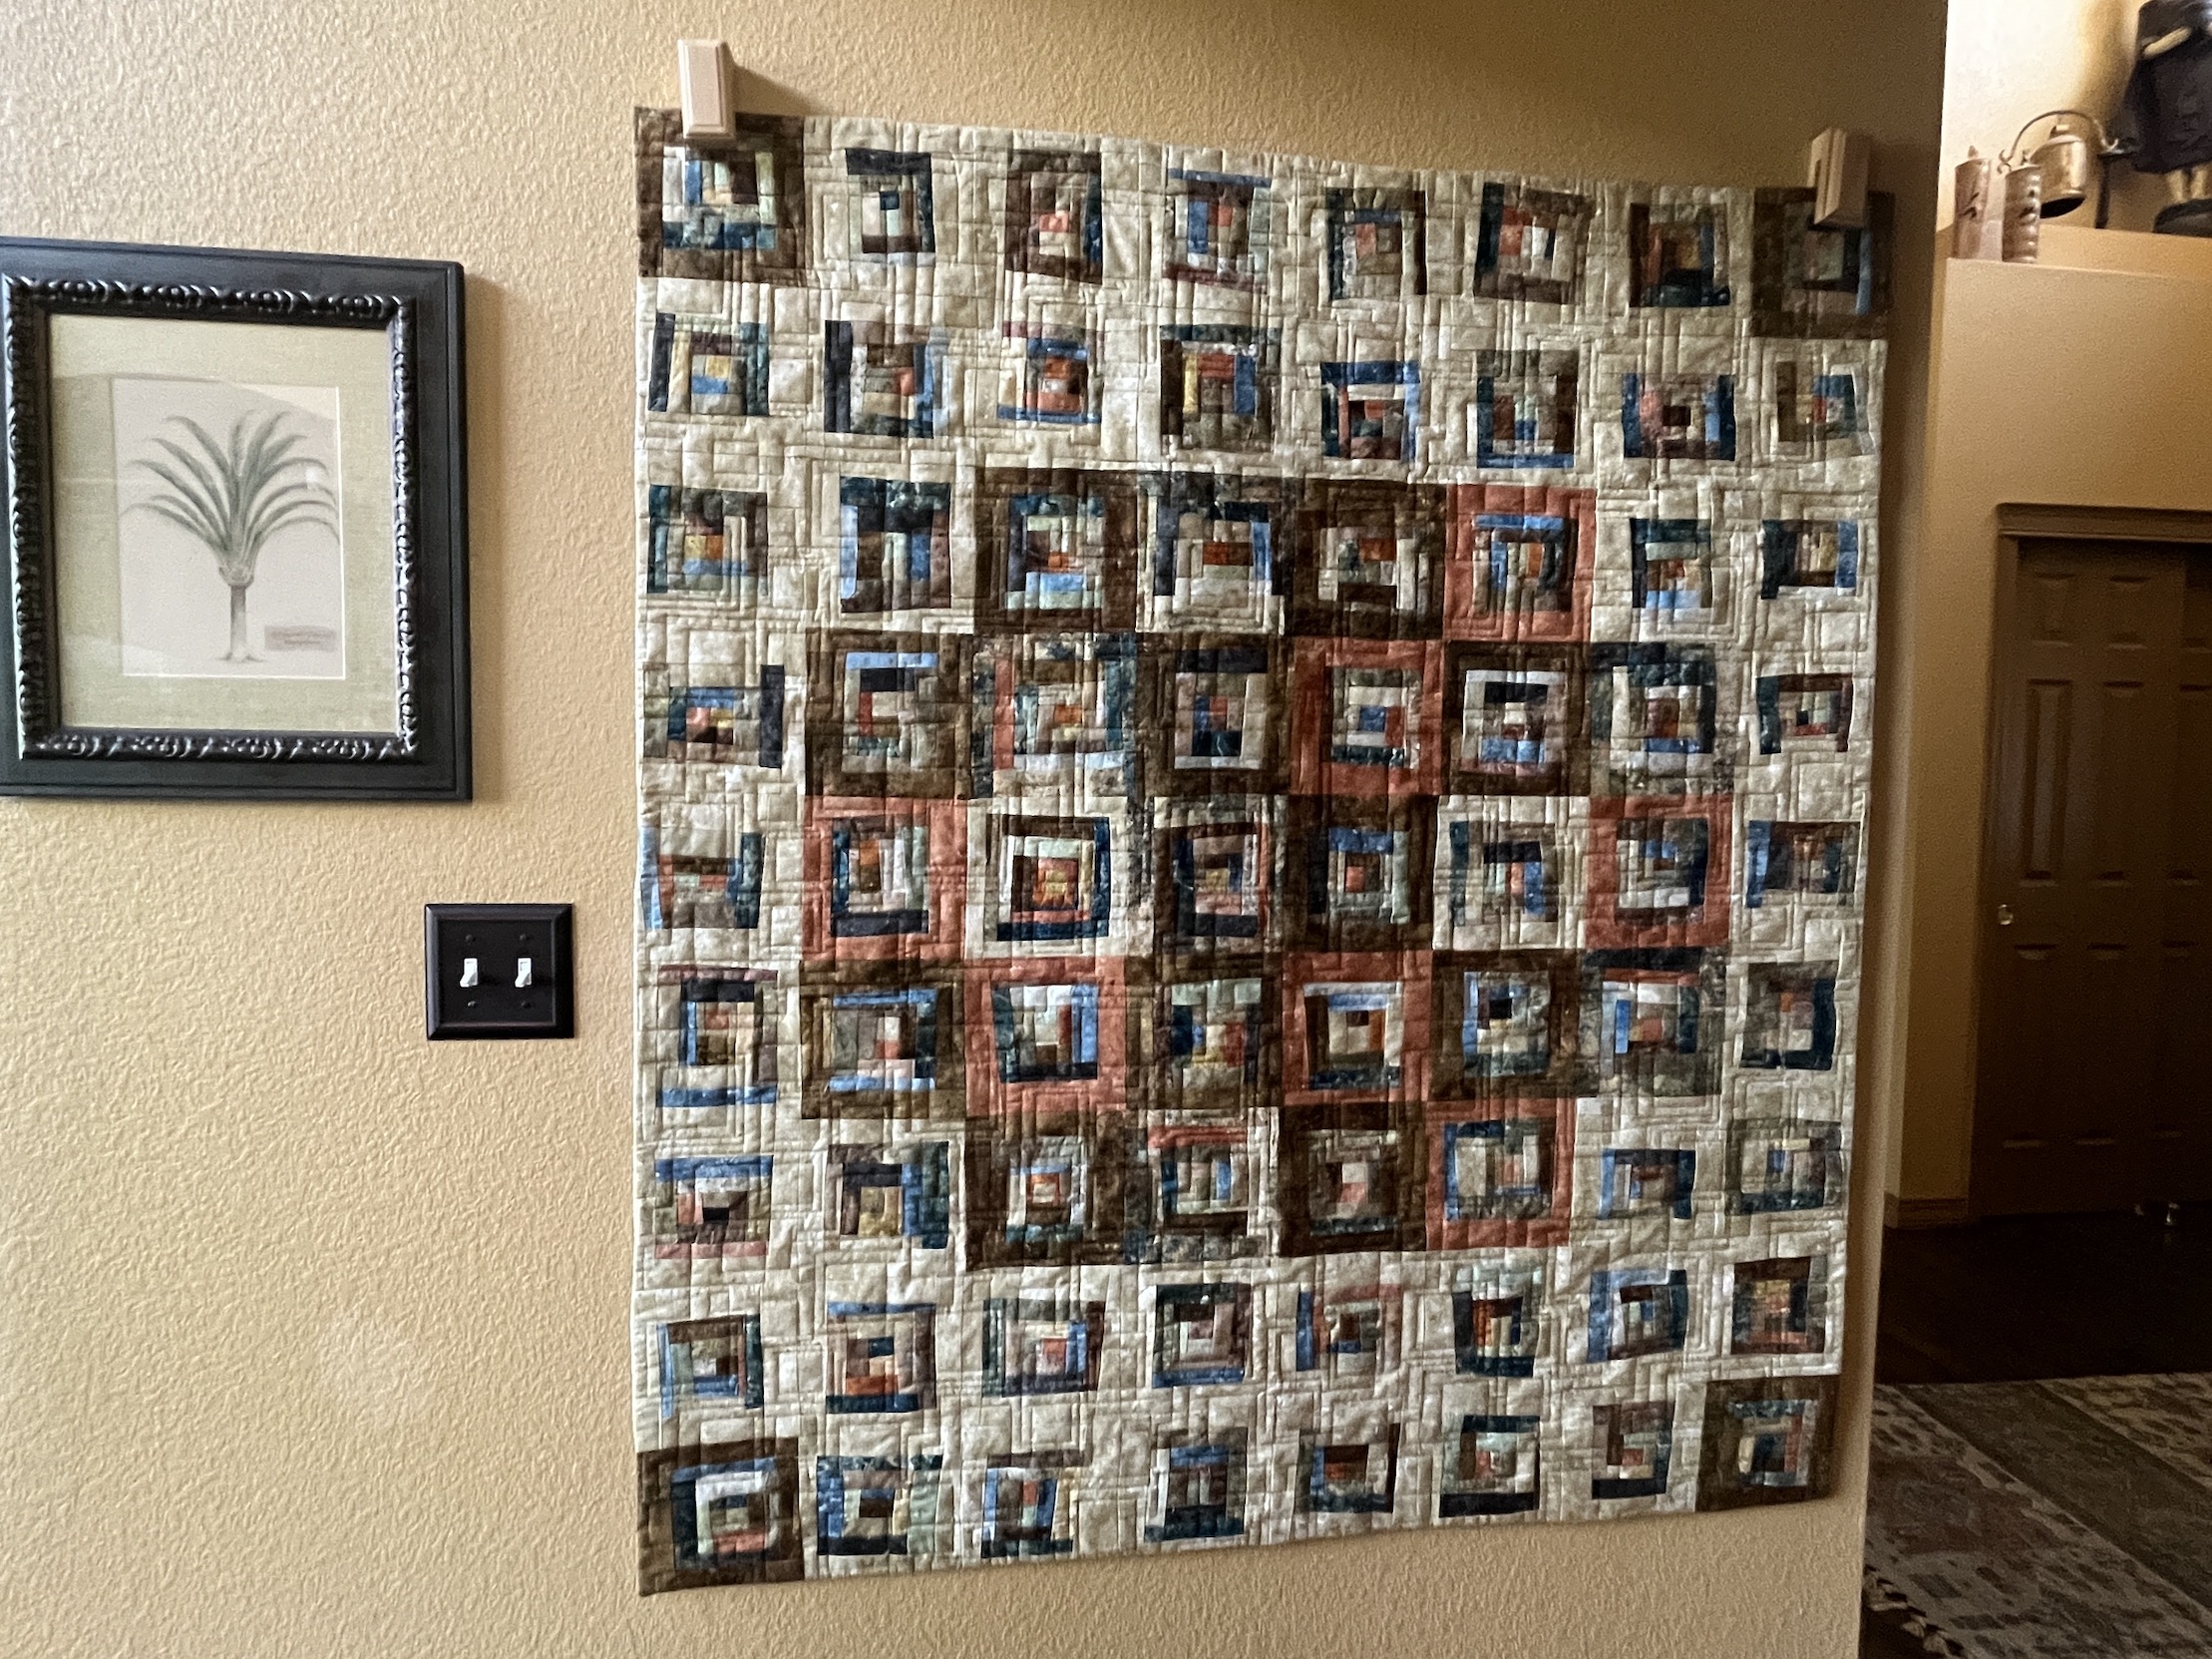
Or you could play with using different framing colors and create additional patterns like this one I made out of Stonehenge fabric scraps:
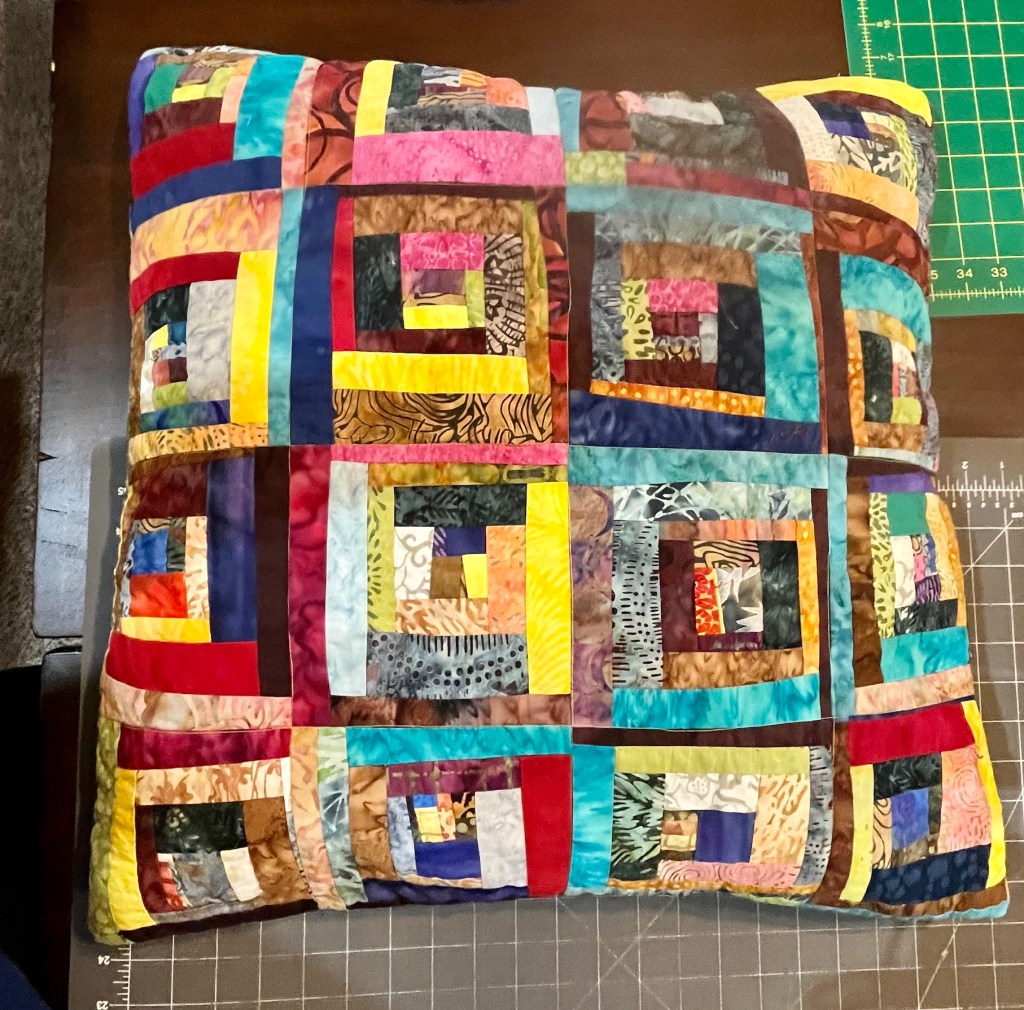
Or you can skip the “framing” of the blocks in a solid color and just sew the blocks directly together like I did for these two pillows I made out of batik scraps:
I’ve made numerous free form log cabin quilts this way.
I decided not to drag out the rest of the story of the 5 day quilt retreat I held at my house last week with two long time friends who are quilters, so I am combining days 4 and 5 into one post.
If you are just joining us the other three blog posts on days 1 – 3 are under the blog category Scrap Happy Quilt Retreat.
We continued working on our improvisational log cabin quilt blocks or “log jamming” which I was originally introduced to during a class I took at the Stitchin’ Post in Sisters, Oregon (I also remember that I’ve previously referred to this type of piecing as making “free form” log cabin blocks).
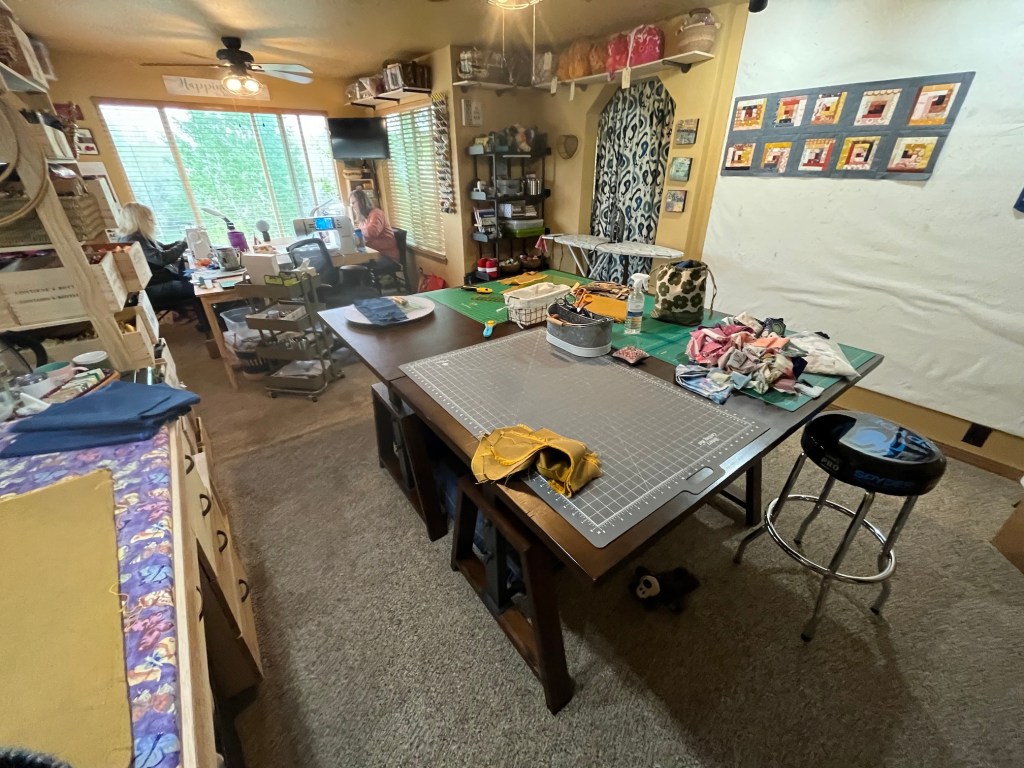
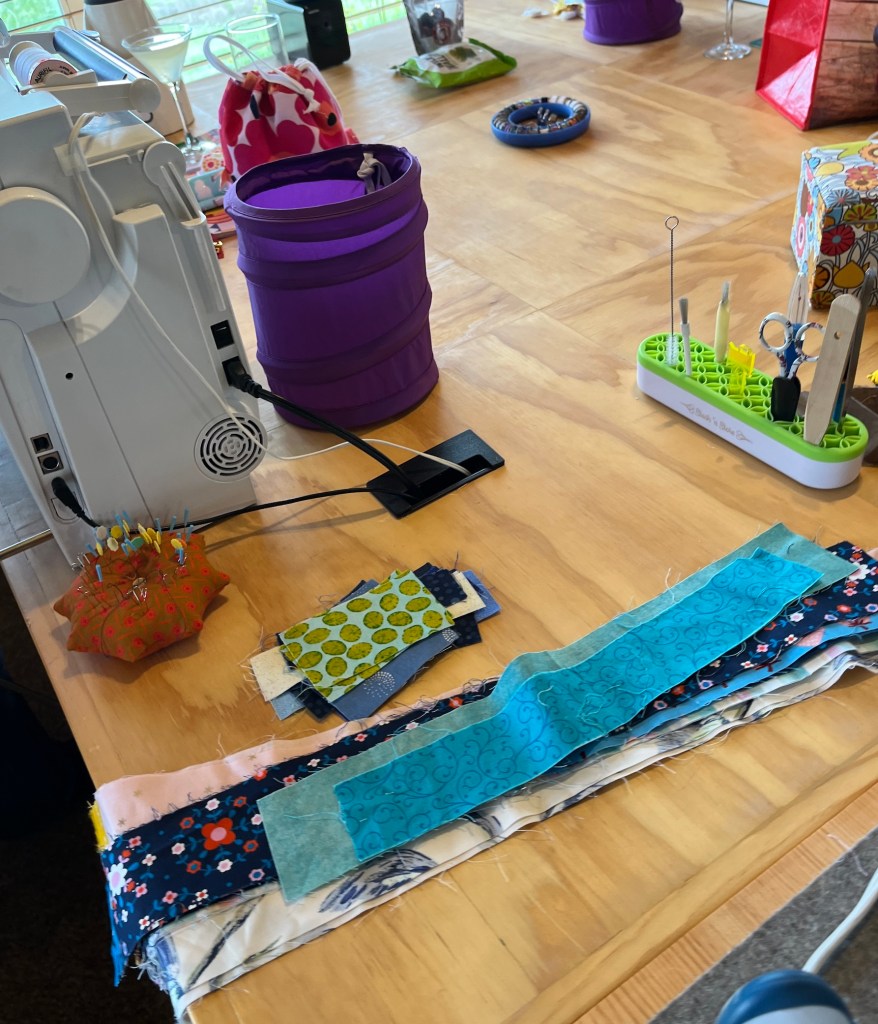
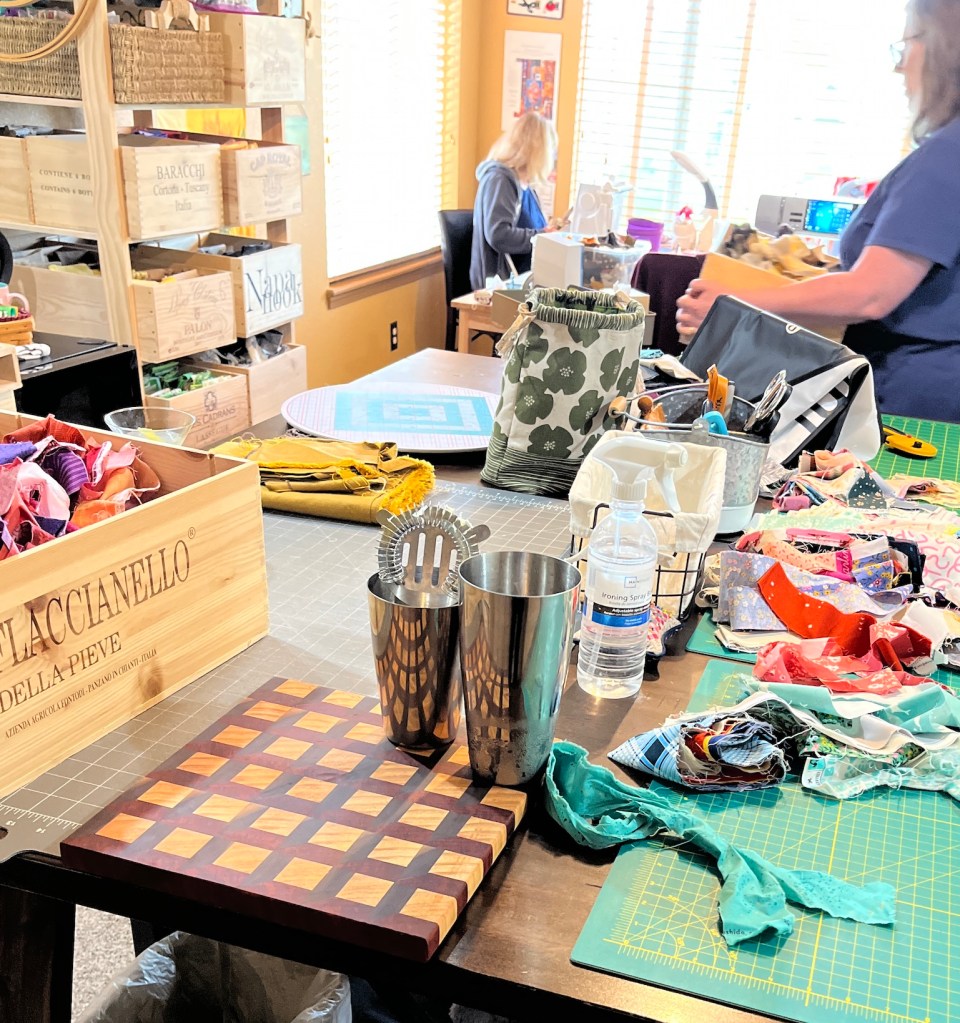
Here are a couple photos of my studio while the retreat was in progress from Days 4 and 5:
And here are the photos of the evolution of D, K, and my blocks:
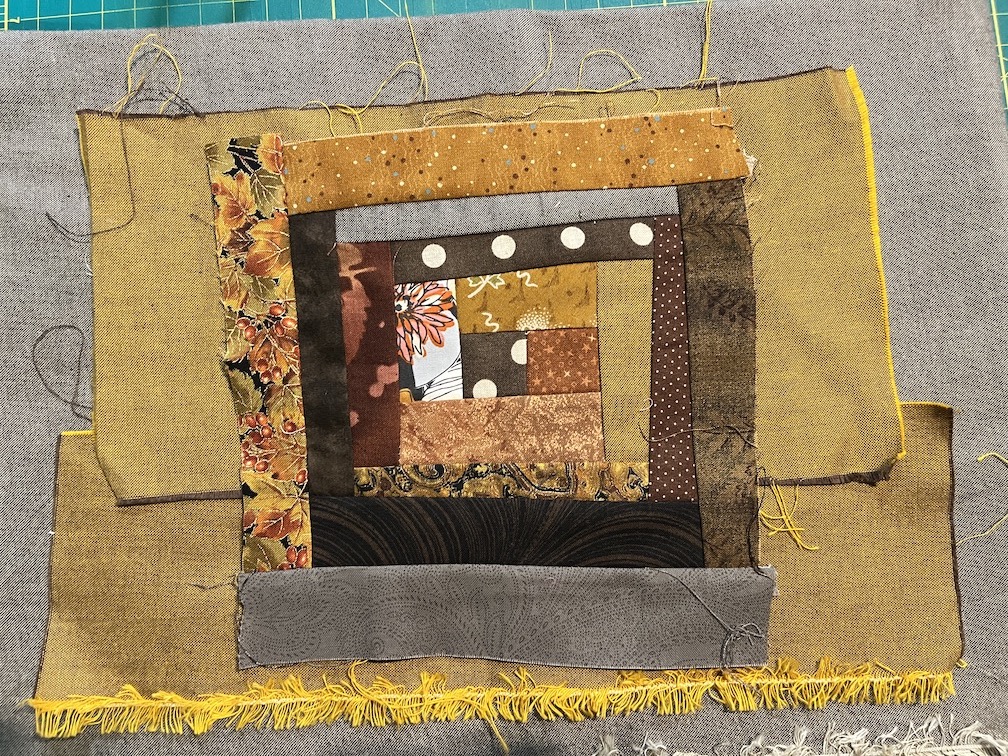
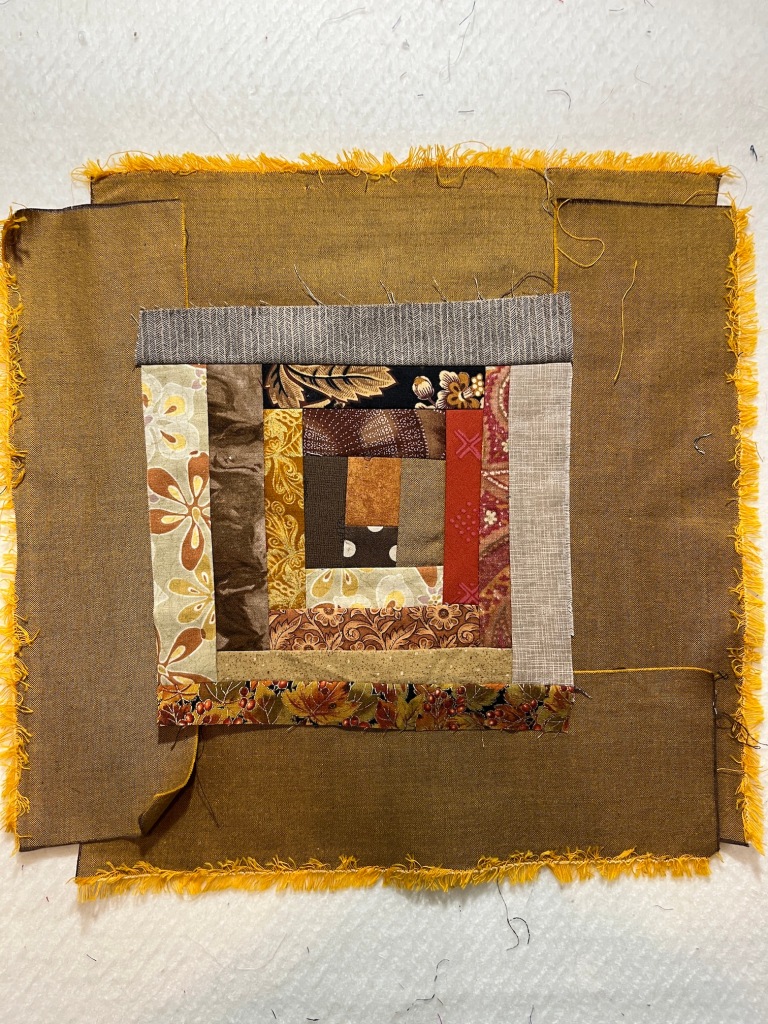
The photo above is of one of the blocks I pieced with the collection of brown, gold, orange, and copper scraps I put together, set in the coppery color Peppered Cotton I selected.
D was a bit of an overachiever, ha, and actually finished her quilt top (but I think she is also going to add a 3.5 inch border of the gray around it to make the blocks “float” even more and she took some extra fabric home with her) and plans to hand quilt it.
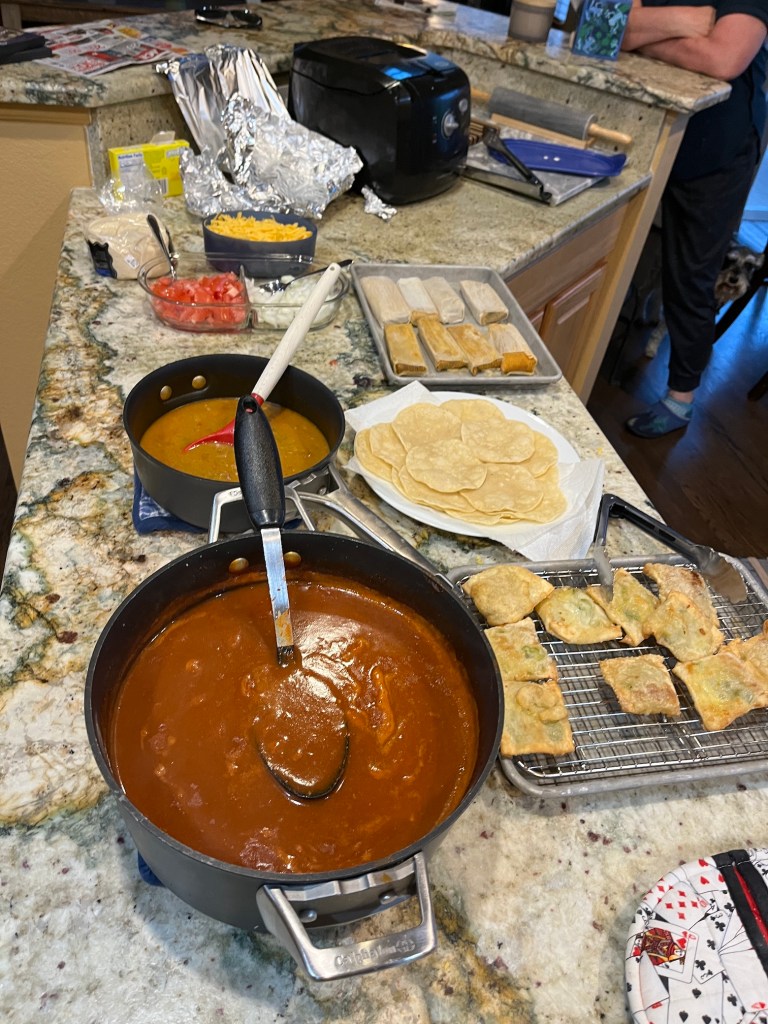
John continued to make us yummy meals and our evening meal on Day 4 was a Mexican Food Feast like the one I shared in the post A Mexican Feast.
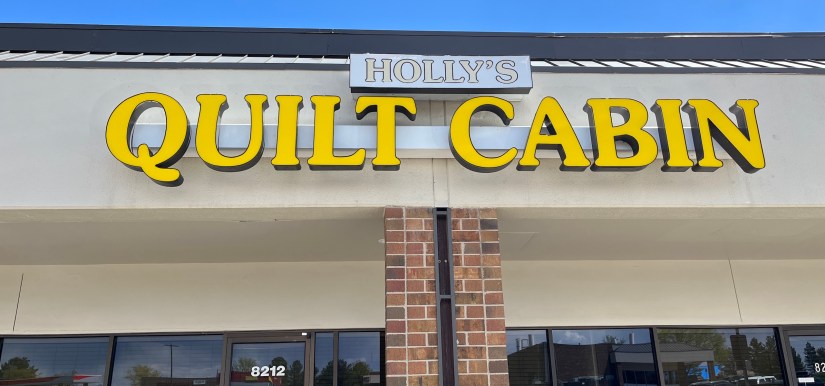
On Day 5 D and K surprised John and I with some fantastic hosting gifts. They gave John a gift certificate to his favorite woodworking shop Woodcraft; and they gave me a fat quarter set of the fabric I was drooling over at Holly’s Quilt Cabin during our shop hop on Wednesday May 17th – Celestial by Moda Fabrics:
I just need some yardage of solids (I will probably use the Peppered Cottons that coordinate with the fat quarter set) and I will likely have enough fabric to make the quilt I fell in love with at the quilt shop:
John and I were very pleased with our hosting gifts!
Friday we returned quilters to “Human Storage” (also know as the Denver International Airport, see post “Human Storage” and Airport Lore if you are just joining us); and an exhausted John and Mike the Miniature Schnauzer passed out on the sofa when we got back home.
While cleaning up my studio from the retreat I realized it was a pretty awesome and successful retreat.
And there was a lot of Scrap Happy Happiness over the 5 days (smile)!
By Wednesday May 17th, the 3rd day of the Scrap Happy Quilt Retreat at my house, we were read to get out of house and explore some Denver Metro area quilt shops! (Note: we didn’t stay in the house the whole time on the first two days – we did go on daily long walks in the fields and woodlands near my home)
John was kind enough to chauffeur and we brought Mike the Miniature Schnauzer along for the road trip.
But first I gave John a break from cooking and made a blueberry pancake breakfast to start our day. I forgot to take photos so just use your imagination that you see a plate of scratch made blueberry pancakes with a touch of cinnamon and juicy caramelized blueberry bursting from each bite…
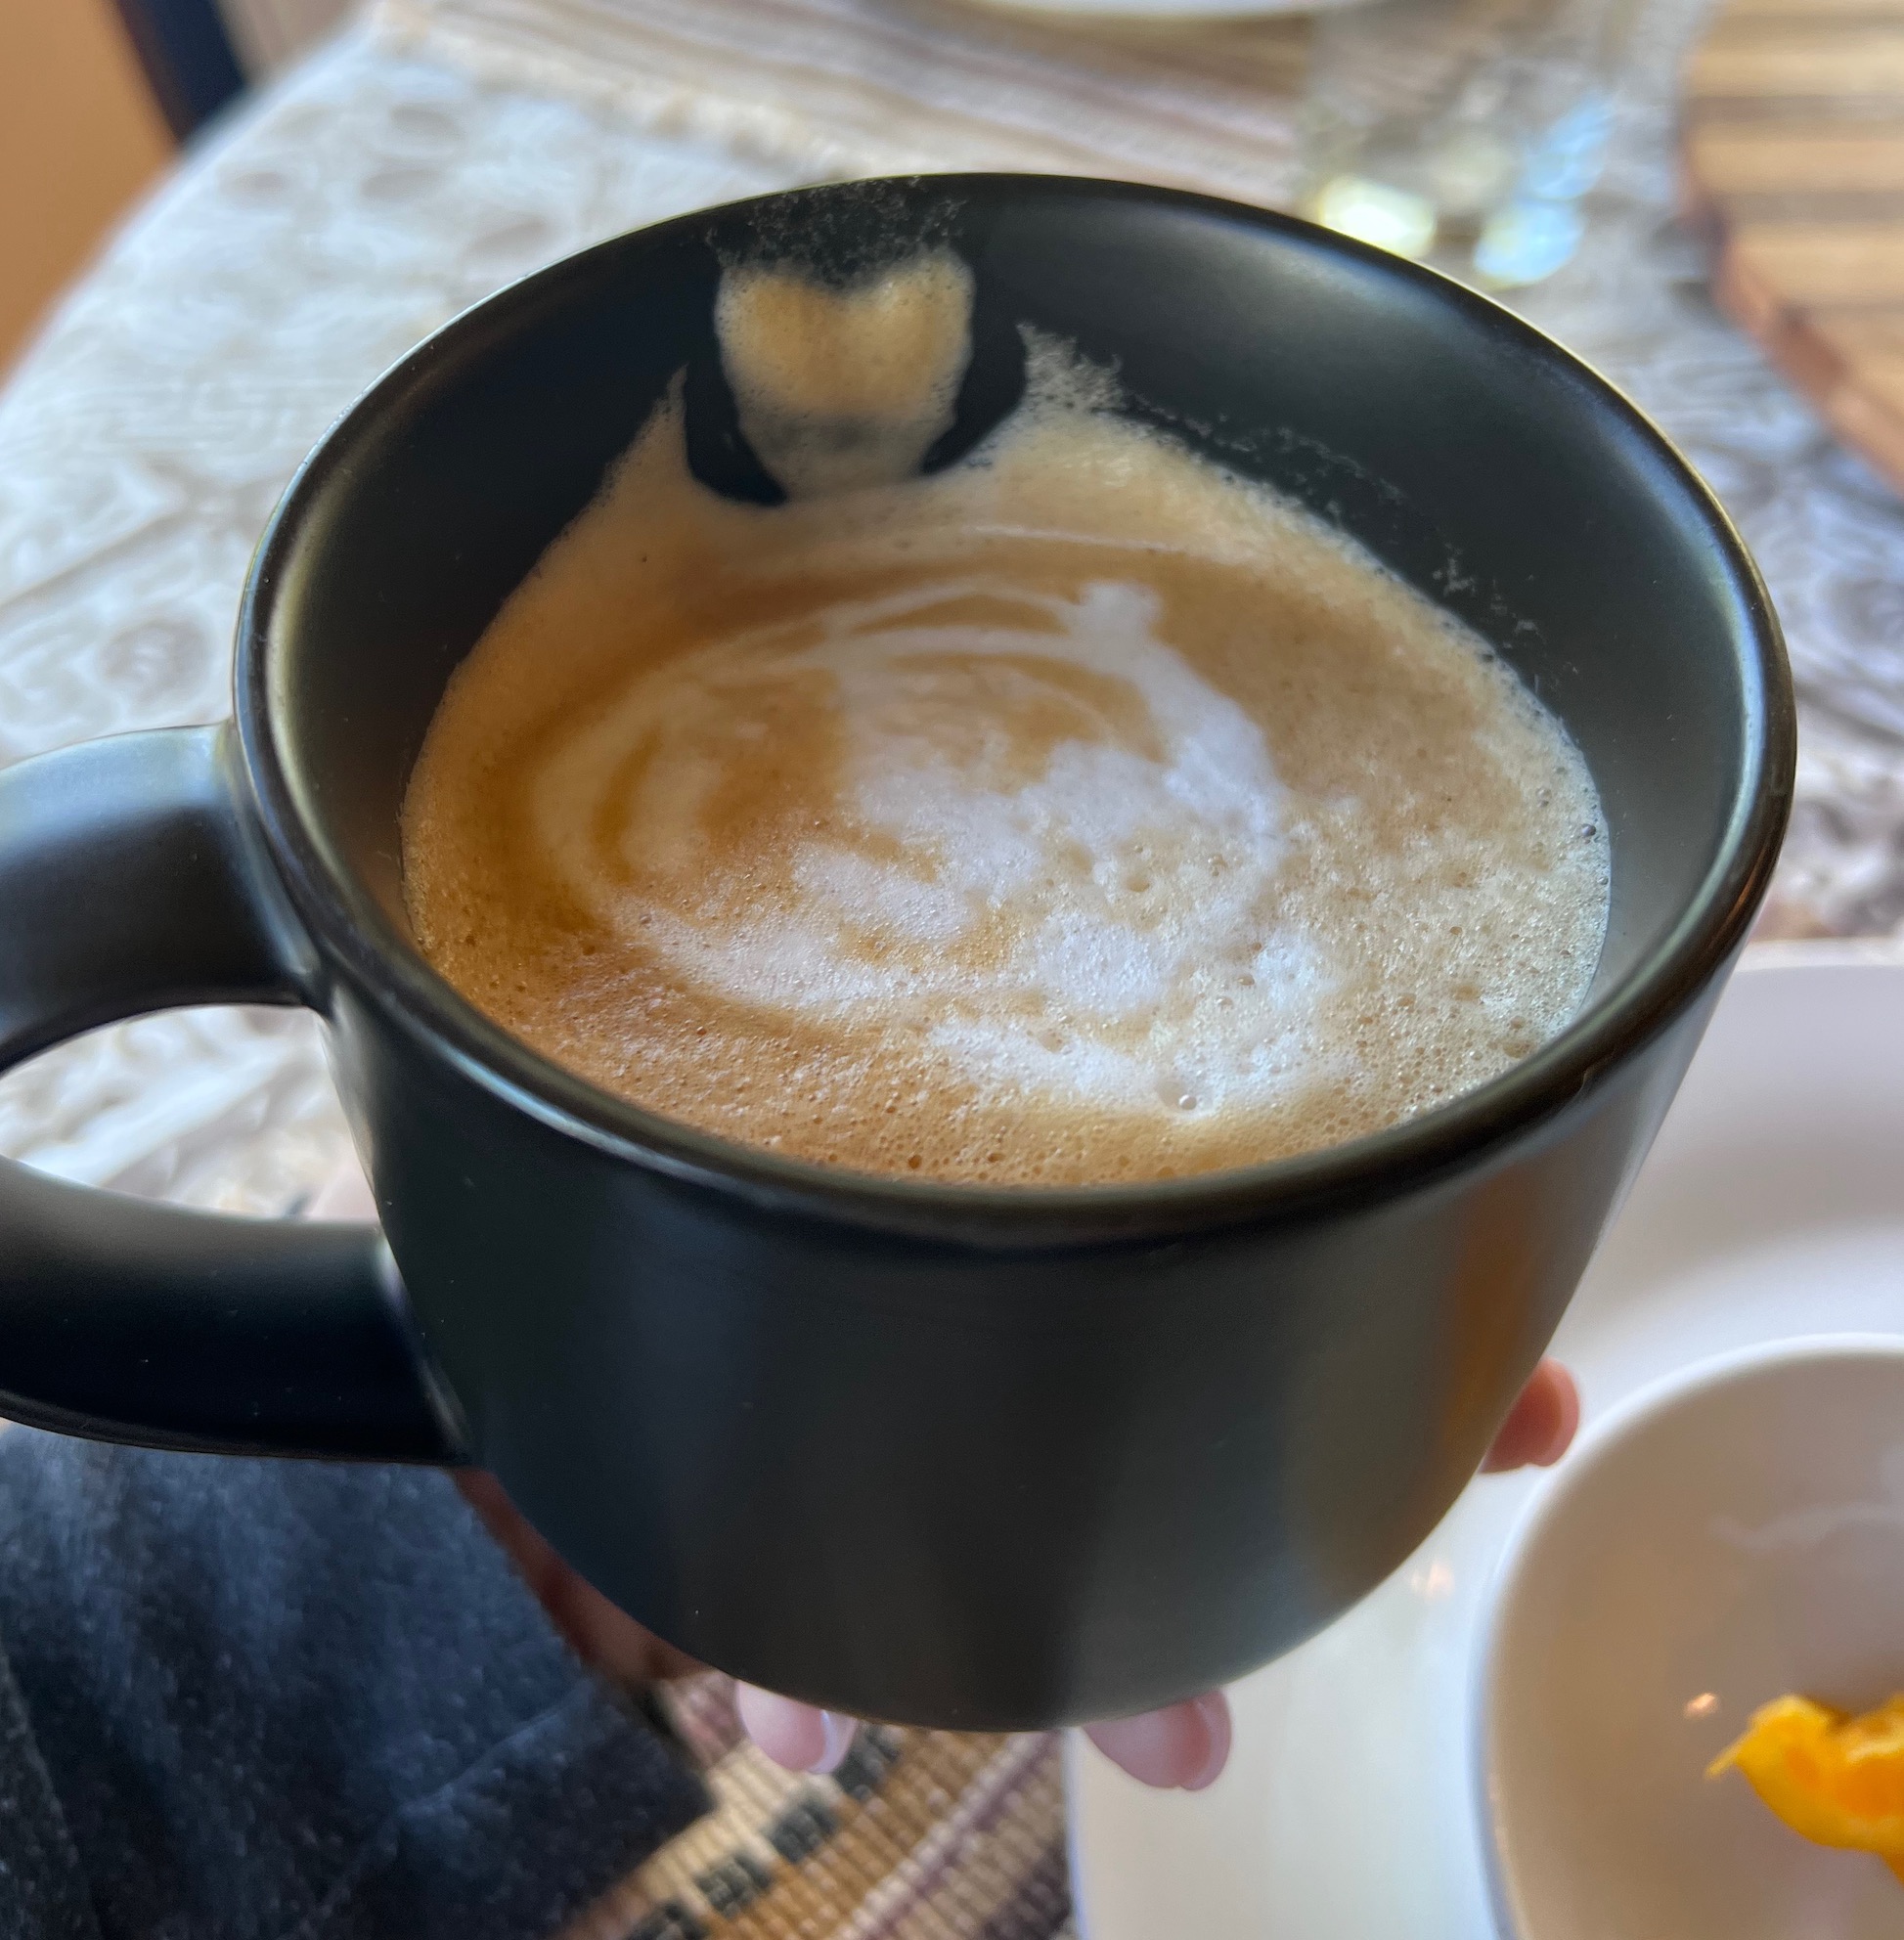
John has been playing with our new espresso machine we got earlier this year to celebrate our one year anniversary (see post New Coffee (and Tea) Station and Some Big News), and he continues to try to channel his “inner barista” and do designs in the foam. He made a latte for one of the retreaters K – we aren’t sure what the design can be interpreted to be – but K noticed there was a heart (unintentional) along the upper edge of the cup!
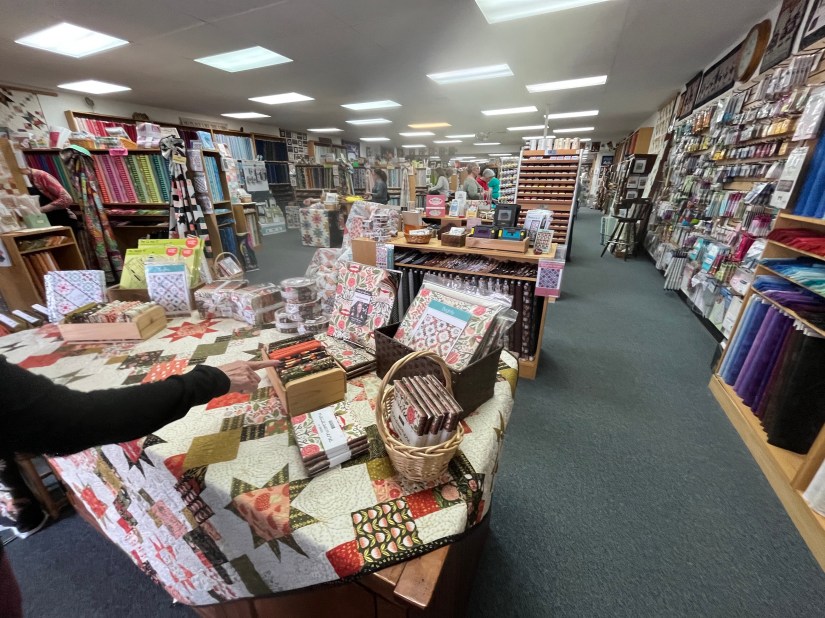
After breakfast we headed out on our roadtrip to visit 3 quilt shops – Holly’s Quilt Cabin, Treelotta and Fancy Tiger Crafts (this shop is not actually a quilt shop, they sell a variety of fiber products including beautiful yarn but they have an amazing curated collection of modern fabrics).
I love this shop and my quilting friends and I found many delights!
I ended up buying the pattern for this quilt I fell in love with; and I was tempted to buy the fabric used in the quilt (gorgeous line by Moda Fabrics called “Celestial“) but I need to shop in my stash not add to it:
By the time we got to Treelotta it was time to let Mike the Miniature Schnauzer out of the car for a pee (we spent a ridiculous amount of time in Holly’s Quilt Cabin) and to put him in the backpack so he could get a break from sitting in the car. John took Mike in the backpack to a nearby army surplus supply shop for a wander, and then back to the quilt shop to see what kind of trouble we were getting into with all the lovely fabric choices!
Mike does look like he is concerned about some of our fabric choices (or perhaps the damage some of us were inflicting on our pocketbooks!)
I didn’t take many photos in Treelotta but if you’d like to see more of this awesome shop (where I’ve also taken bag making classes), see the post Rocky Mountain Quilt Shop Hop 2021, Part IV.
I didn’t take any photos at Fancy Tiger Crafts but you can check out this post to see what the shop looks like – Fancy Tiger Crafts, Denver CO. Or more what it used to look like, it has remodeled a little bit since then but you can get the general feel of the shop.
After our roadtrip we headed back to my house to work our of improvisational scrappy log cabin blocks for a while until John made us a delicious hamburger dinner with homemade french fries and Mexican Street Corn!
We skipped movie night after dinner as we had been away from our sewing all day. Instead worked on our scrappy log cabin blocks late into the evening!
By Day 2 of the Scrap Happy Quilt Retreat at my house, Mike the Miniature Schnauzer was getting plenty of pets from visiting quilters (who are lounging about in their pajamas before breakfast):
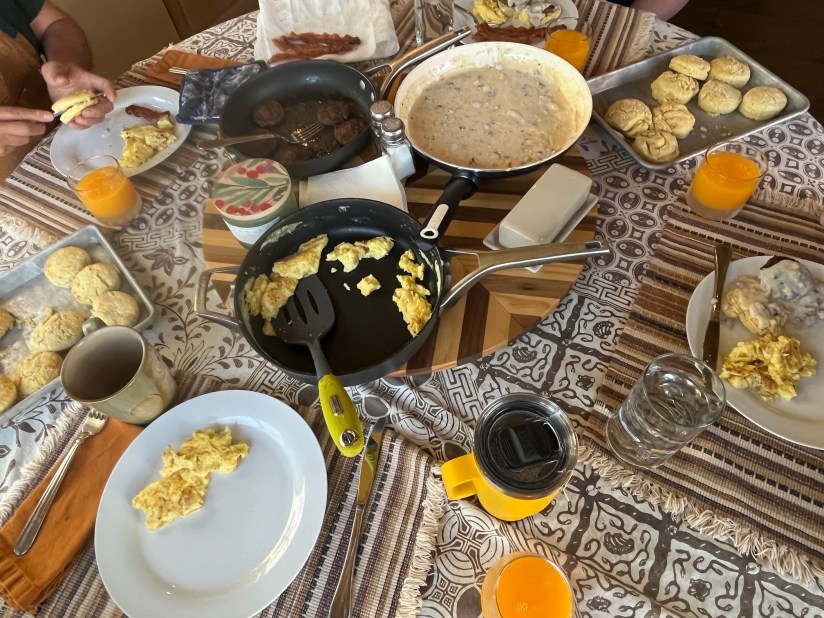
John made us his famous (and amazing) biscuits & gravy breakfast to start our day:
The breakfast includes his sausage patties with caramelized brown sugar (not vegan, ha!) and flaky scratch made biscuits.
After breakfast it was back to work in the studio. I worked on my log cabin blocks – I decided to use brown, brownish-orange, copper and gold fabrics for my blocks:
K and D worked on their blocks and began trying out solid fabric settings for their sample blocks:
K decided to set her blocks in the blue Peppered Cotton and D (after trying out 4 different options) went with the gray Peppered Cotton.
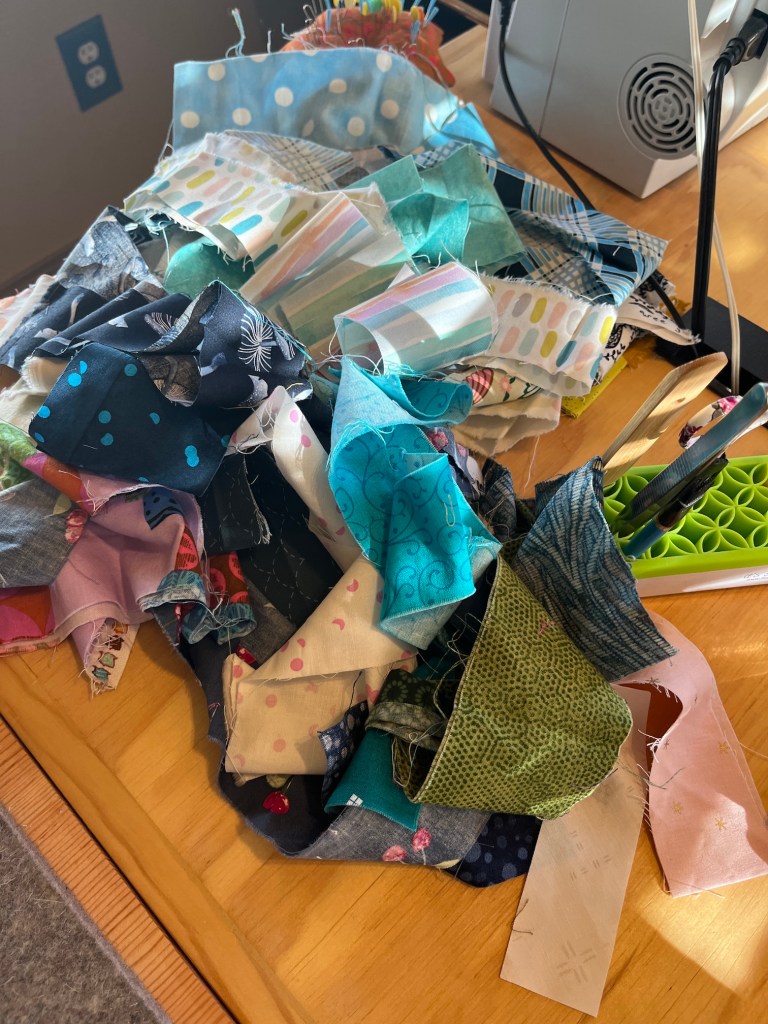
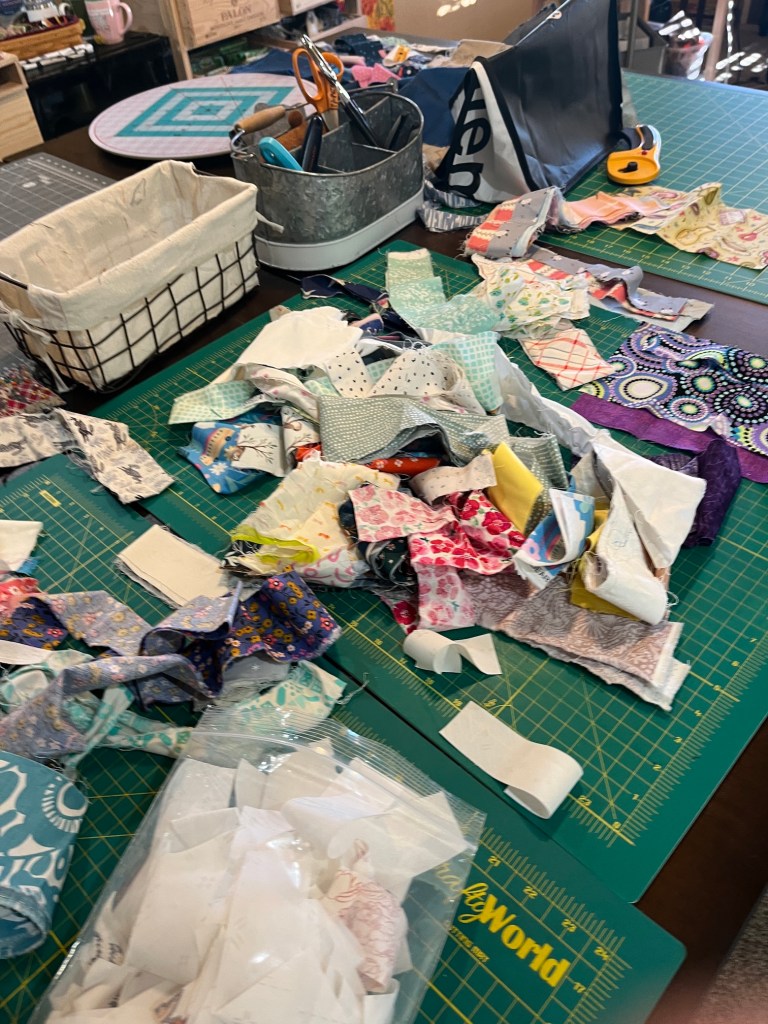
My whole studio looked like there had been a fabric scrap explosion – scraps everywhere!
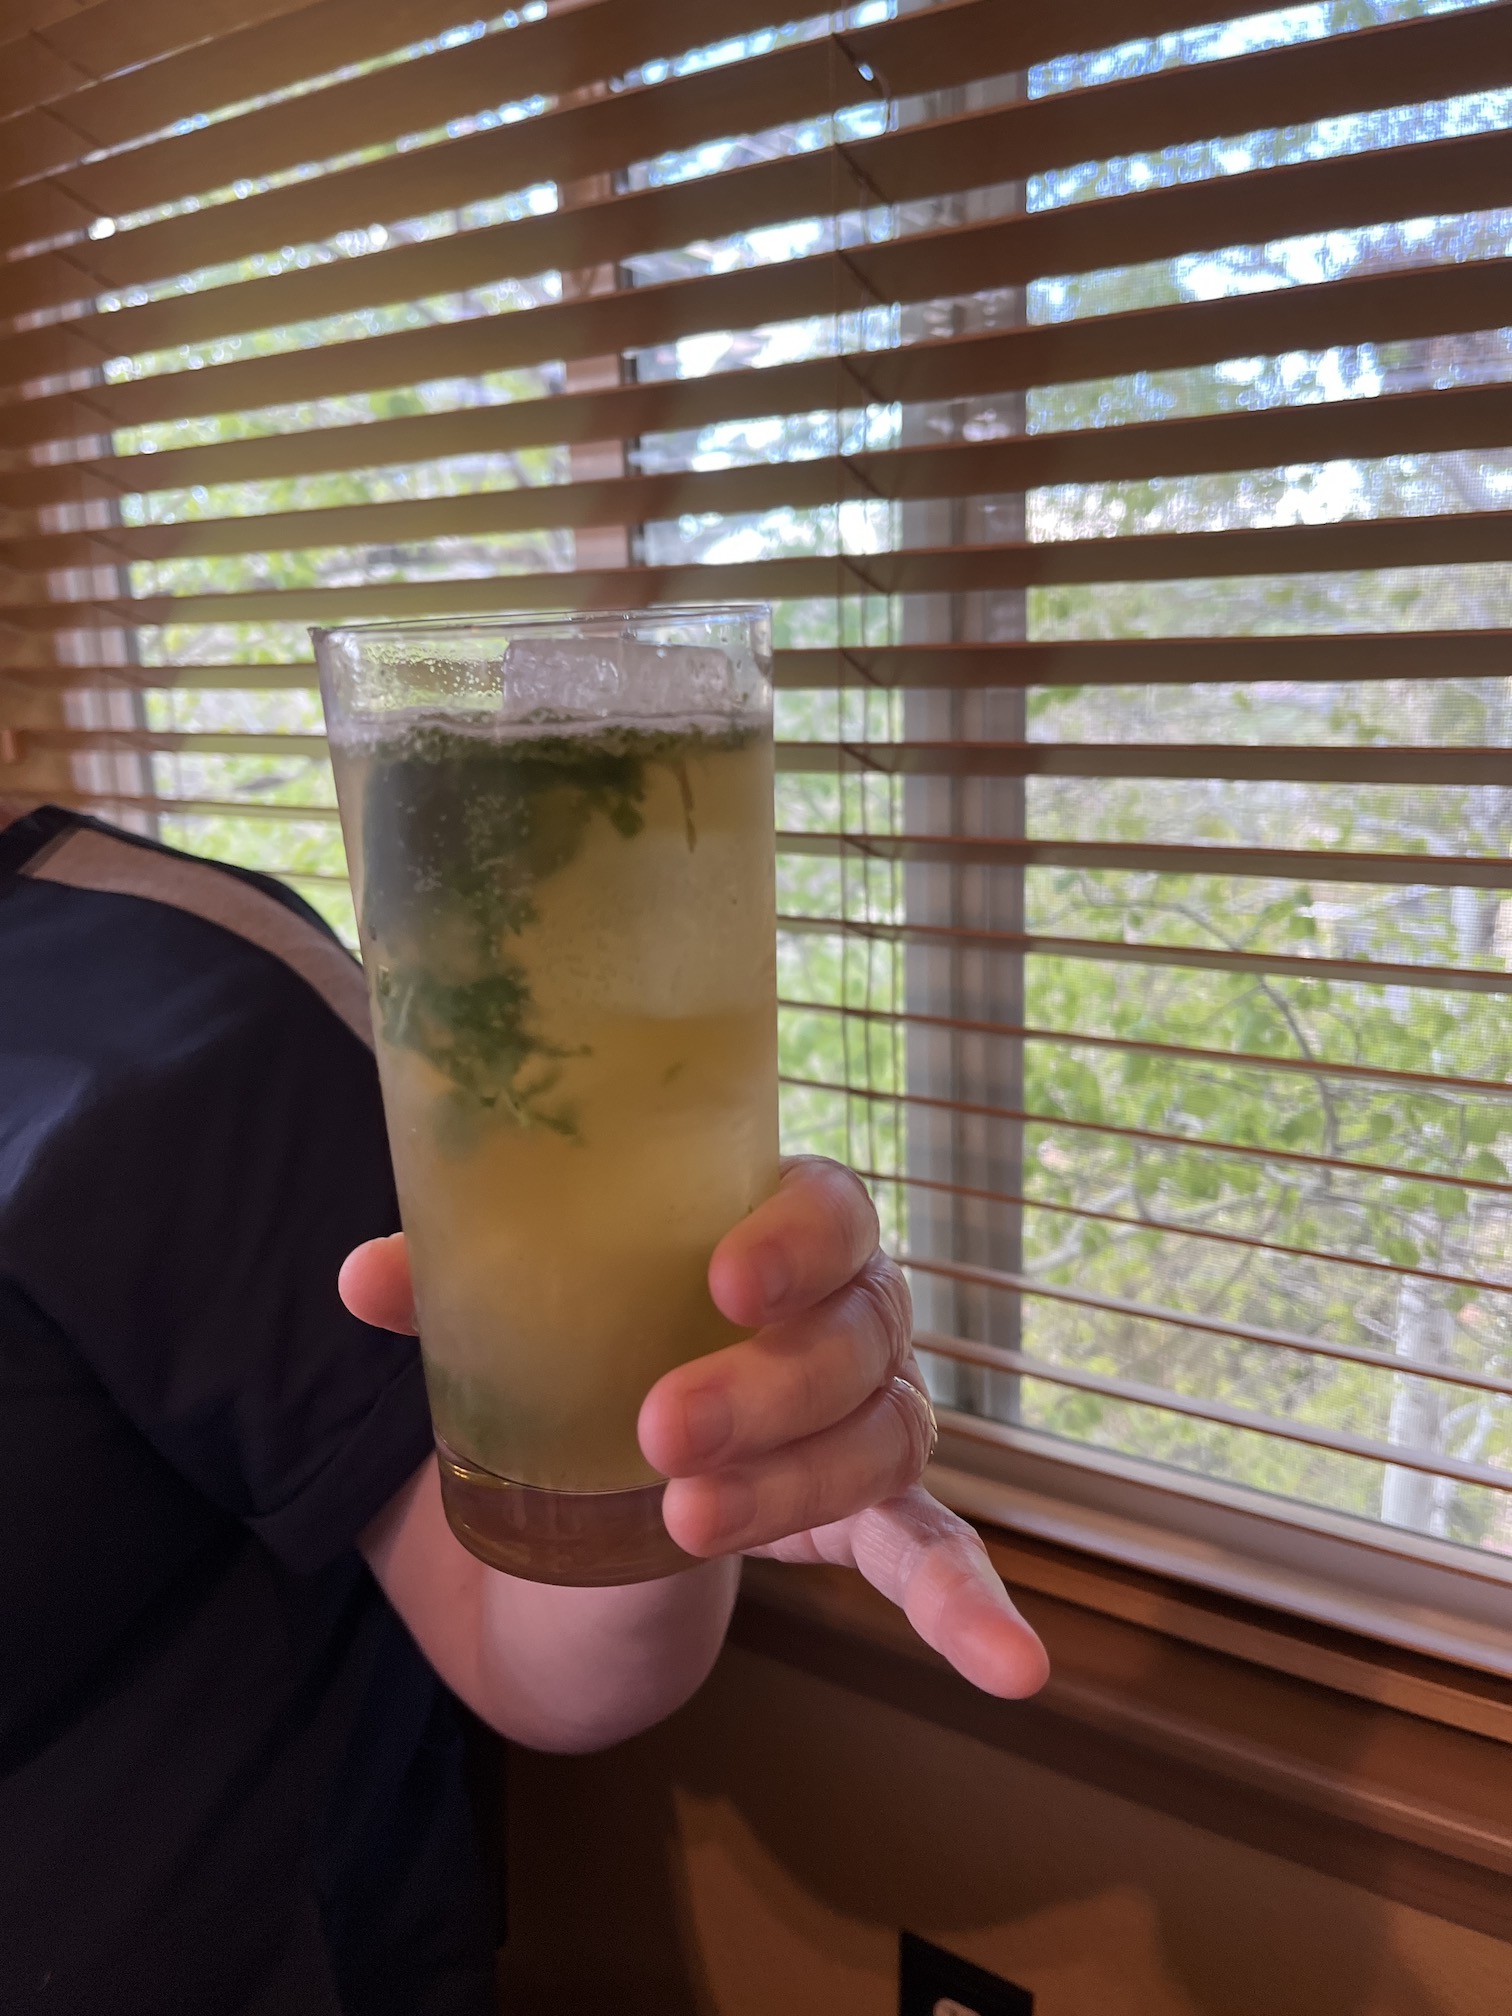
Before you knew it, it was afternoon cocktail time again and John stopped by the studio with Mojitos and Moscow Mules.
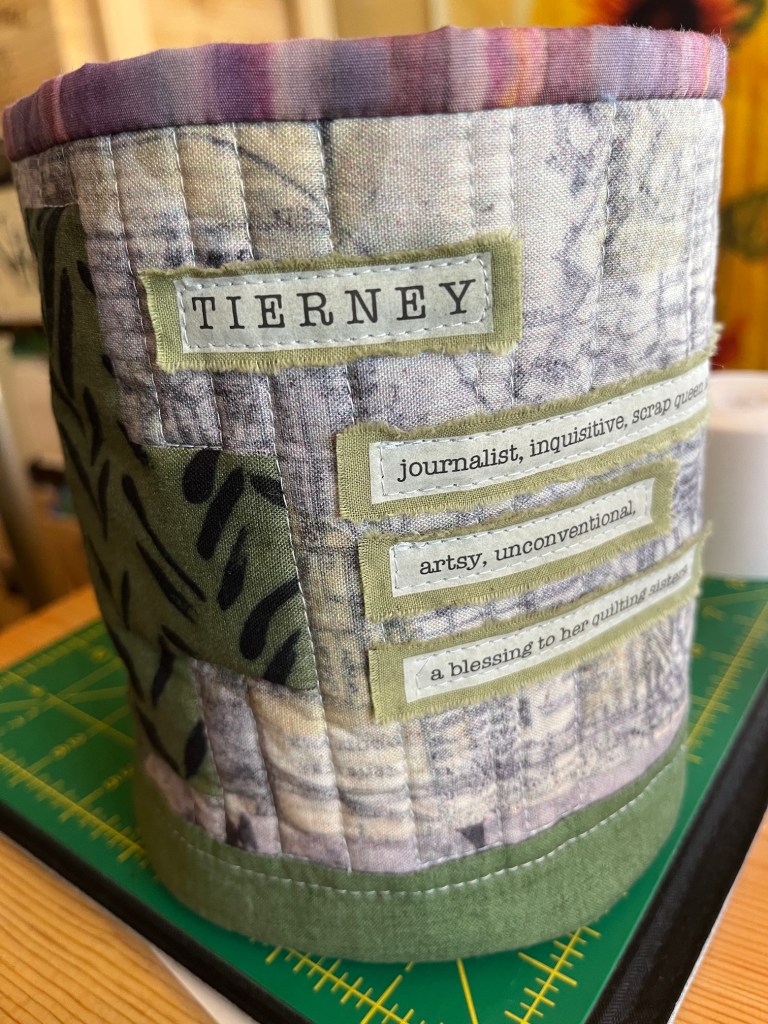
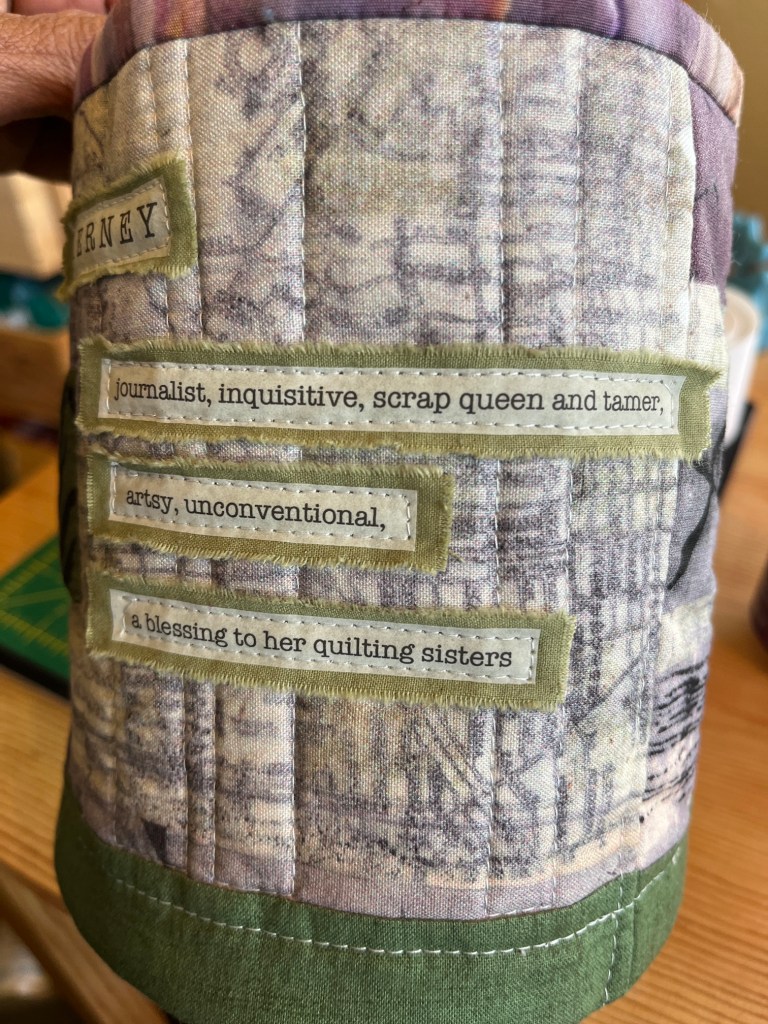
I enjoyed putting my trimming scraps in the amazing handmade custom scrap basket that D made me (her own design, no pattern used!) with Marcia Derse fabric (my favorite):
Mike the Miniature Schnauzer had to go to pick up quilting friends from the airport as he does better when he goes to pick up visitors from “Human Storage”, see blog post “Human Storage” and Airport Lore, instead of them just suddenly arriving to the house through the garage while he has been home alone!
Mike sitting between the house guests (for the next 5 days) on the way back from the airport.
We decided not to try out the scrap piecing using adding tape that I discussed in the post ScrapHappy May: Scrap Happy Retreat!and just focusing on making scrappy improvisational log cabin blocks (“log jamming”) like the the 35 blocks I recently completed as the “class sample”:
After John and I provided our guest with a tasty late lunch (fried chicken strips, orzo pasta salad, and chocolate chip cookies), the retreat started out with the three of us pouring through my scrap collection and scraps that D and K brought with them to map out colorways/themes for our improvisational log cabin blocks.
I did a demo of how to piece the log jam blocks, well at least how I like to do it as there are several different methods and strategies. Then everyone got to work:
At one point John came by the studio to visit and to bring us our late afternoon cocktails (lemon drops) as our reward for all that hard work selecting scraps and beginning to work on our blocks!
Only one cocktail per person so we did not end up sewing our fingers into the blocks or something disastrous like that!
After everyone made a couple of sample blocks with the fabric scrap groupings we selected, we decided we wanted to set the blocks in a solid color fabric. I pulled out my collection of Peppered Cottons, and we tested out blocks on the different color options (photo below is D’s blocks).
(I used to sell Peppered Cottons in my Etsy shop so I still have a bit of yardage left over.)
That was the end of the first day in the studio.
We did end Day 1 of the Scrap Happy Quilt Retreat with homemade popcorn and movie night in the basement where we have the largest TV in the house.
It’s the 15th of the month and time for my “ScrapHappy” post as part of the ScrapHappy group I belong. At the end of this post I have a link to the other blogs participating in this monthly event in case you’d like to check out their ScrapHappy posts.
It starts today with two of my friends attending and runs to Friday where they will fly home. I only have enough space for two other quilters at the table in my studio and in the accommodations in my home (unless I install bunk beds, ha!).
My sew table is set up for the retreat, I pulled out my other Bernina sewing machines – my QE 440 with 7 million stitches (see post7 Million Stitches+) and my little 215 that I take to classes.
In case you are wondering what the zippers are – I have a lot of red zippers and thought I would share in case we want to make any scrappy zipper bags during the retreat.
I am calling our retreat a “Scrap Happy Retreat” because we are going to work on projects using my fabric scraps (though they are threatening to bring some of their own to unload).
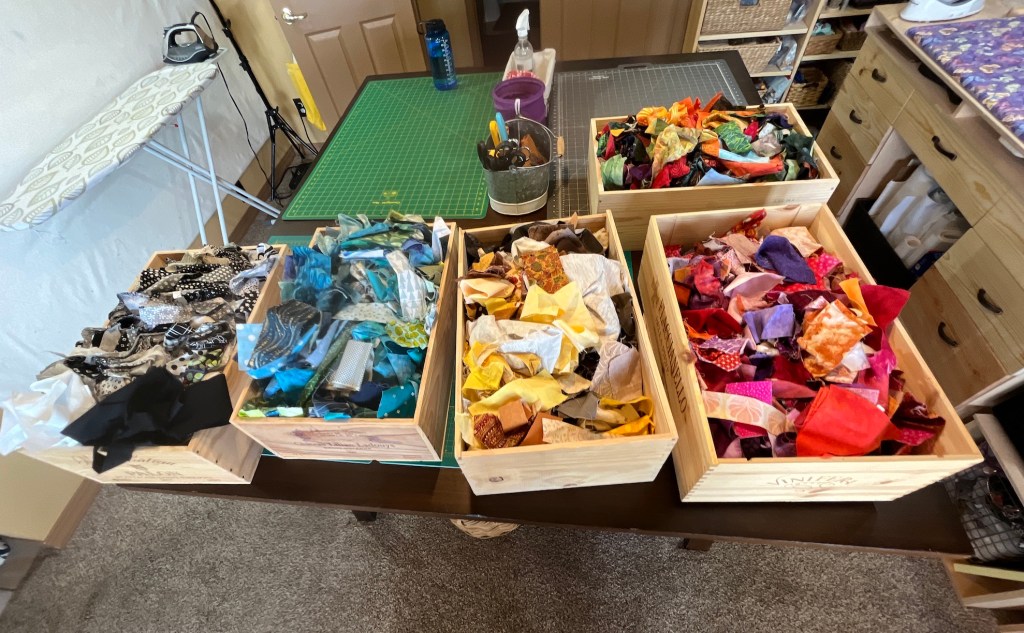
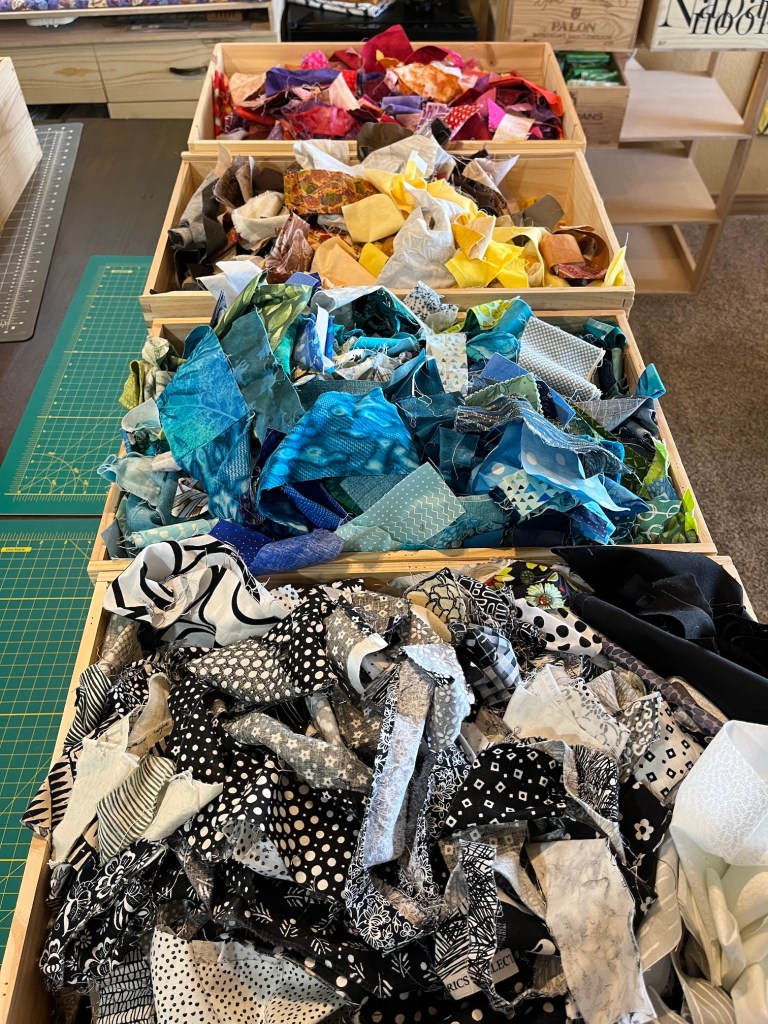
I got my scraps already sorted by color (or type as I keep Batik fabric scraps separate) and they are ready in their wine crates:
I’ve sorted my fabric scraps into these color groupings:
Next year when I teach the 6 day workshop I am slated to teach (more on that later when the venue complete the class catalogue and I can officially announce) I am going to bring this whole lot of scraps with me to let the workshop participants use them if they like. I just have too many fabric scraps, even after donating several bags of them to charity thrift shops.
At the retreat this week, which runs Monday to Friday, we are going to work on improvisational piecing log cabin quilts (I will review the “log jamming” technique I first learned in a class at the Stitchin’ Post many years ago) like the one share in yesterday’s post:
Here is a YouTube video on “log jamming” by the Stitchin’ Post if you’d like to see the technique. I’ve adapted the original technique to a process that works better for me but it is still essentially the same concept.
And here is the fabulous Jackie who taught the class I attended and has a pattern she’s published on Modern Log Jam (I miss the Stitchin’ Post so much, a lot of wonderful creative memories while living in Central Oregon happened there):
In addition to working on improvisational log cabin quilts, we are also going to try our hands at piecing scraps onto adding machine tape. I have a bunch of adding machine tape I bought from a thrift store for $2:
Here is the YouTube tutorial we are going to use (I have a small TV in my studio and we can watch and try it together on our machines):
Wish us luck on this new technique for us!
I’ll update you on the progress on our projects at the retreat!