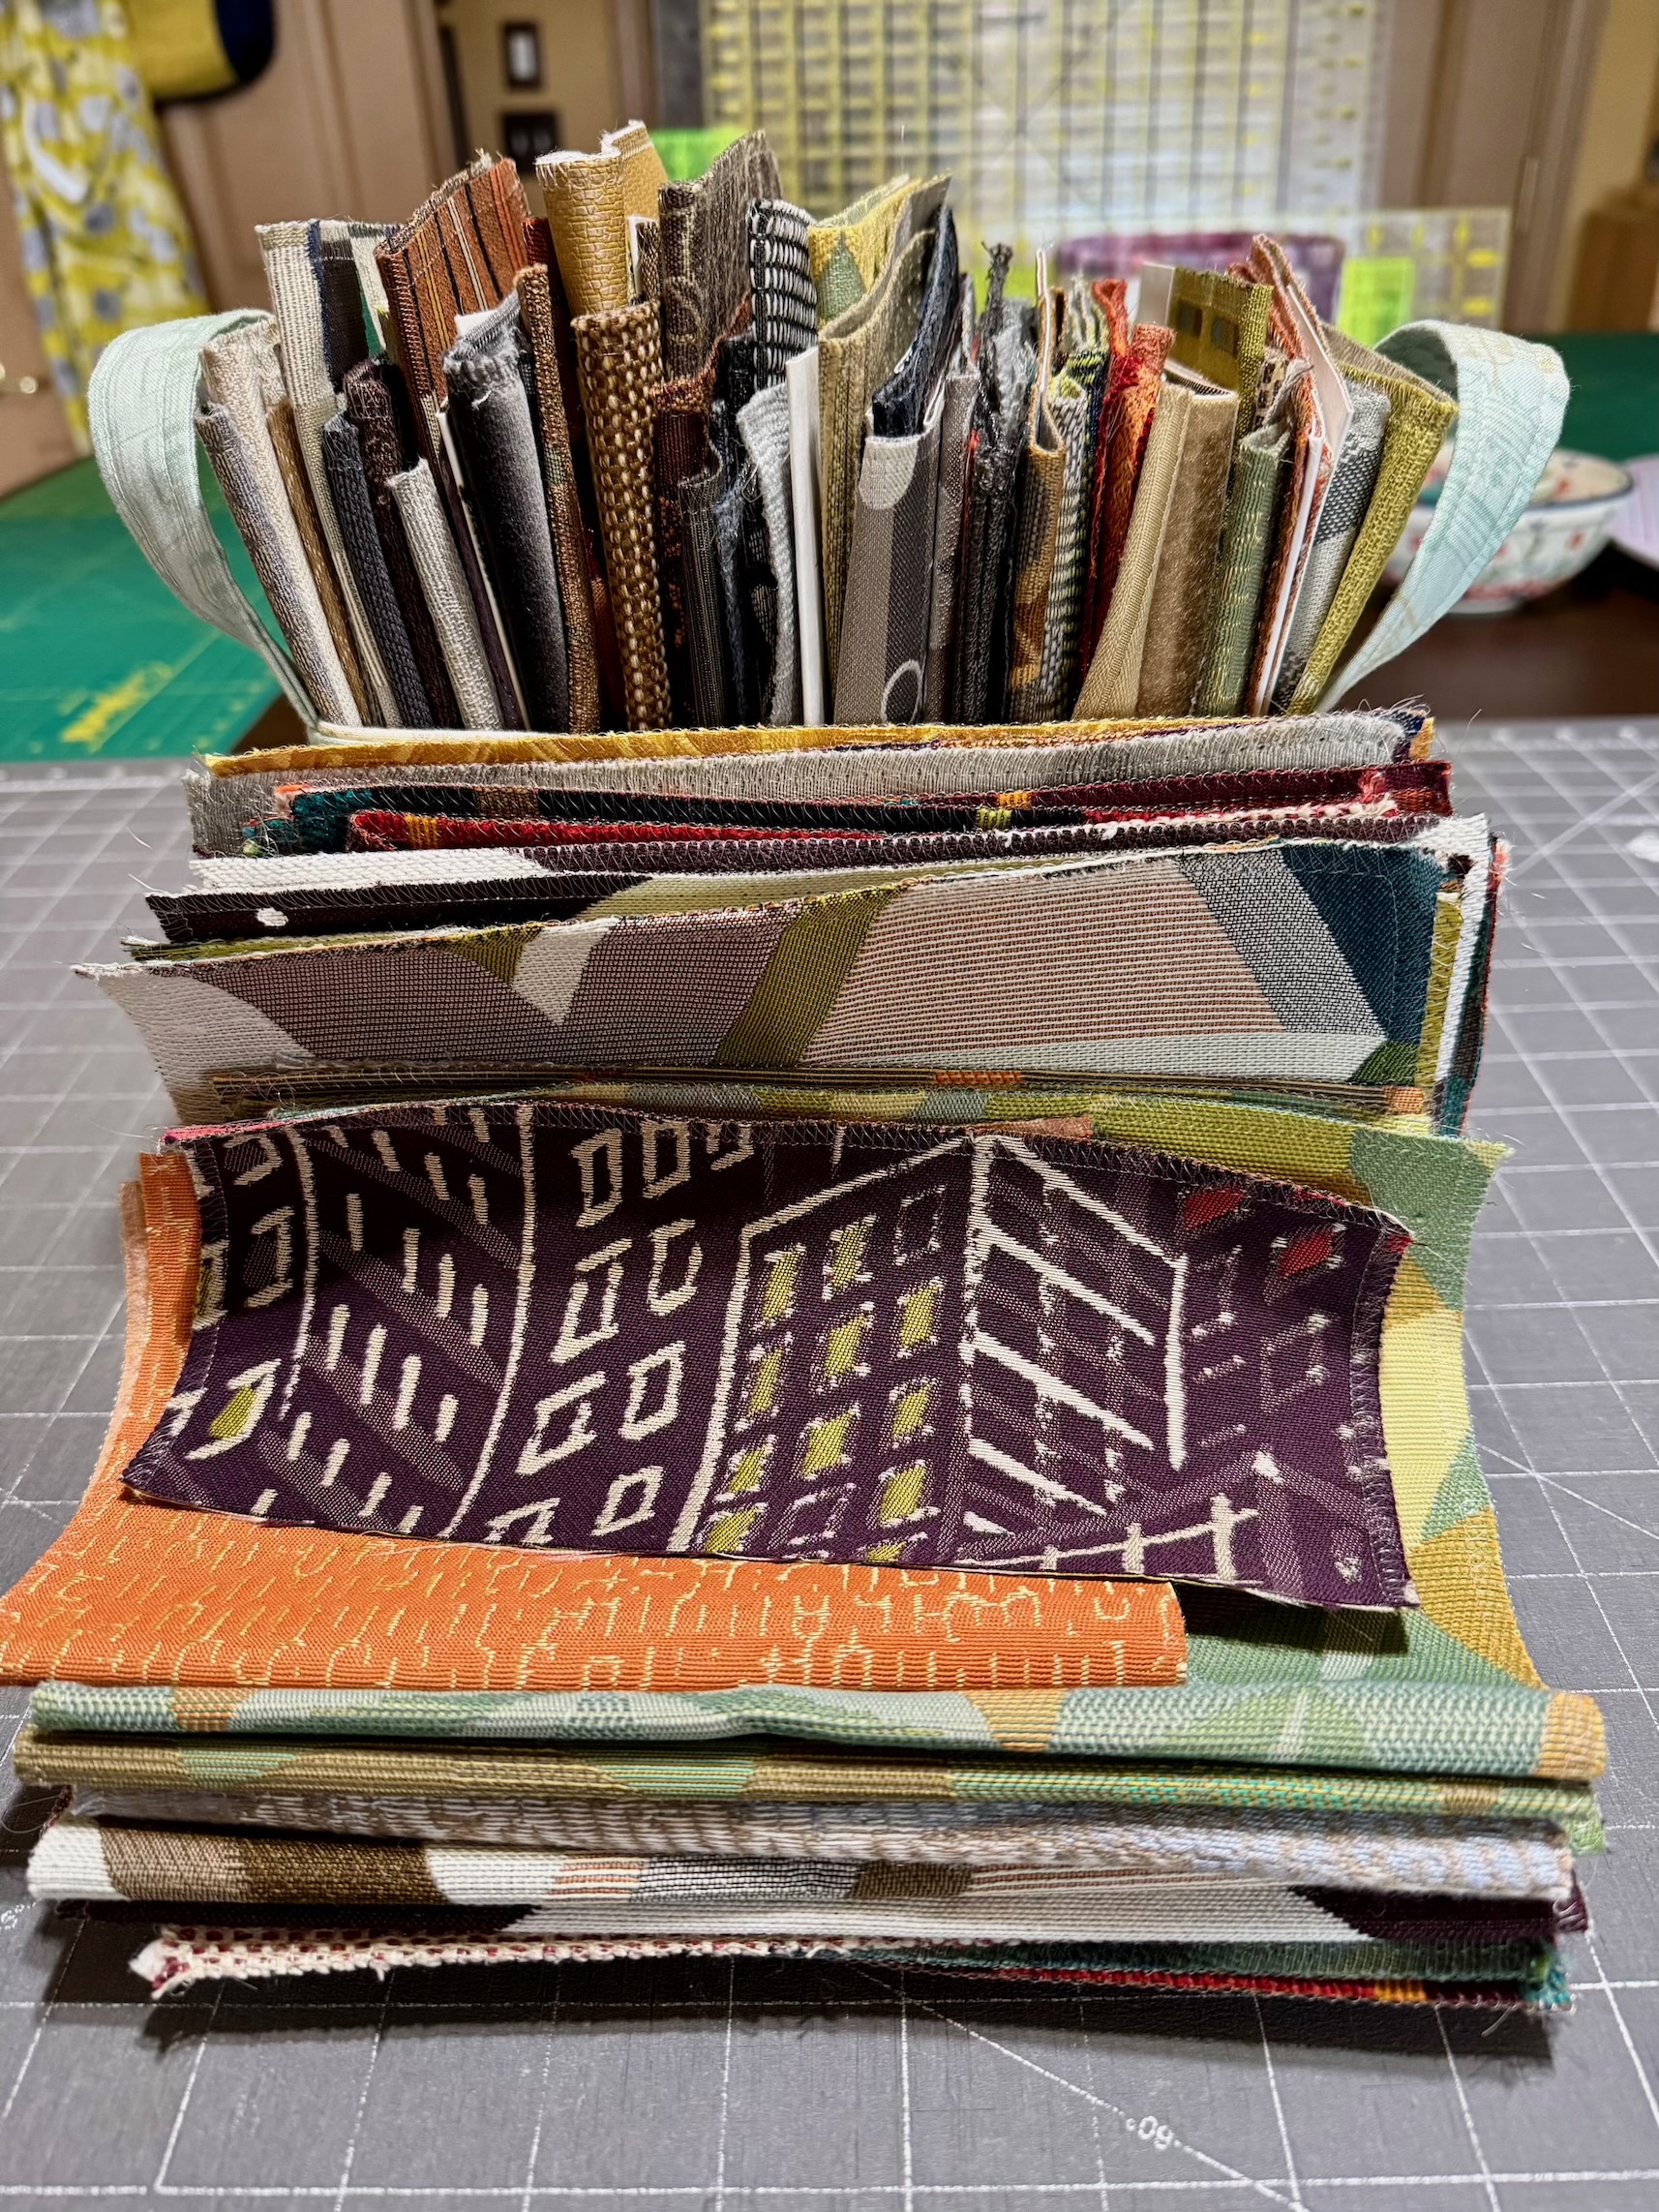
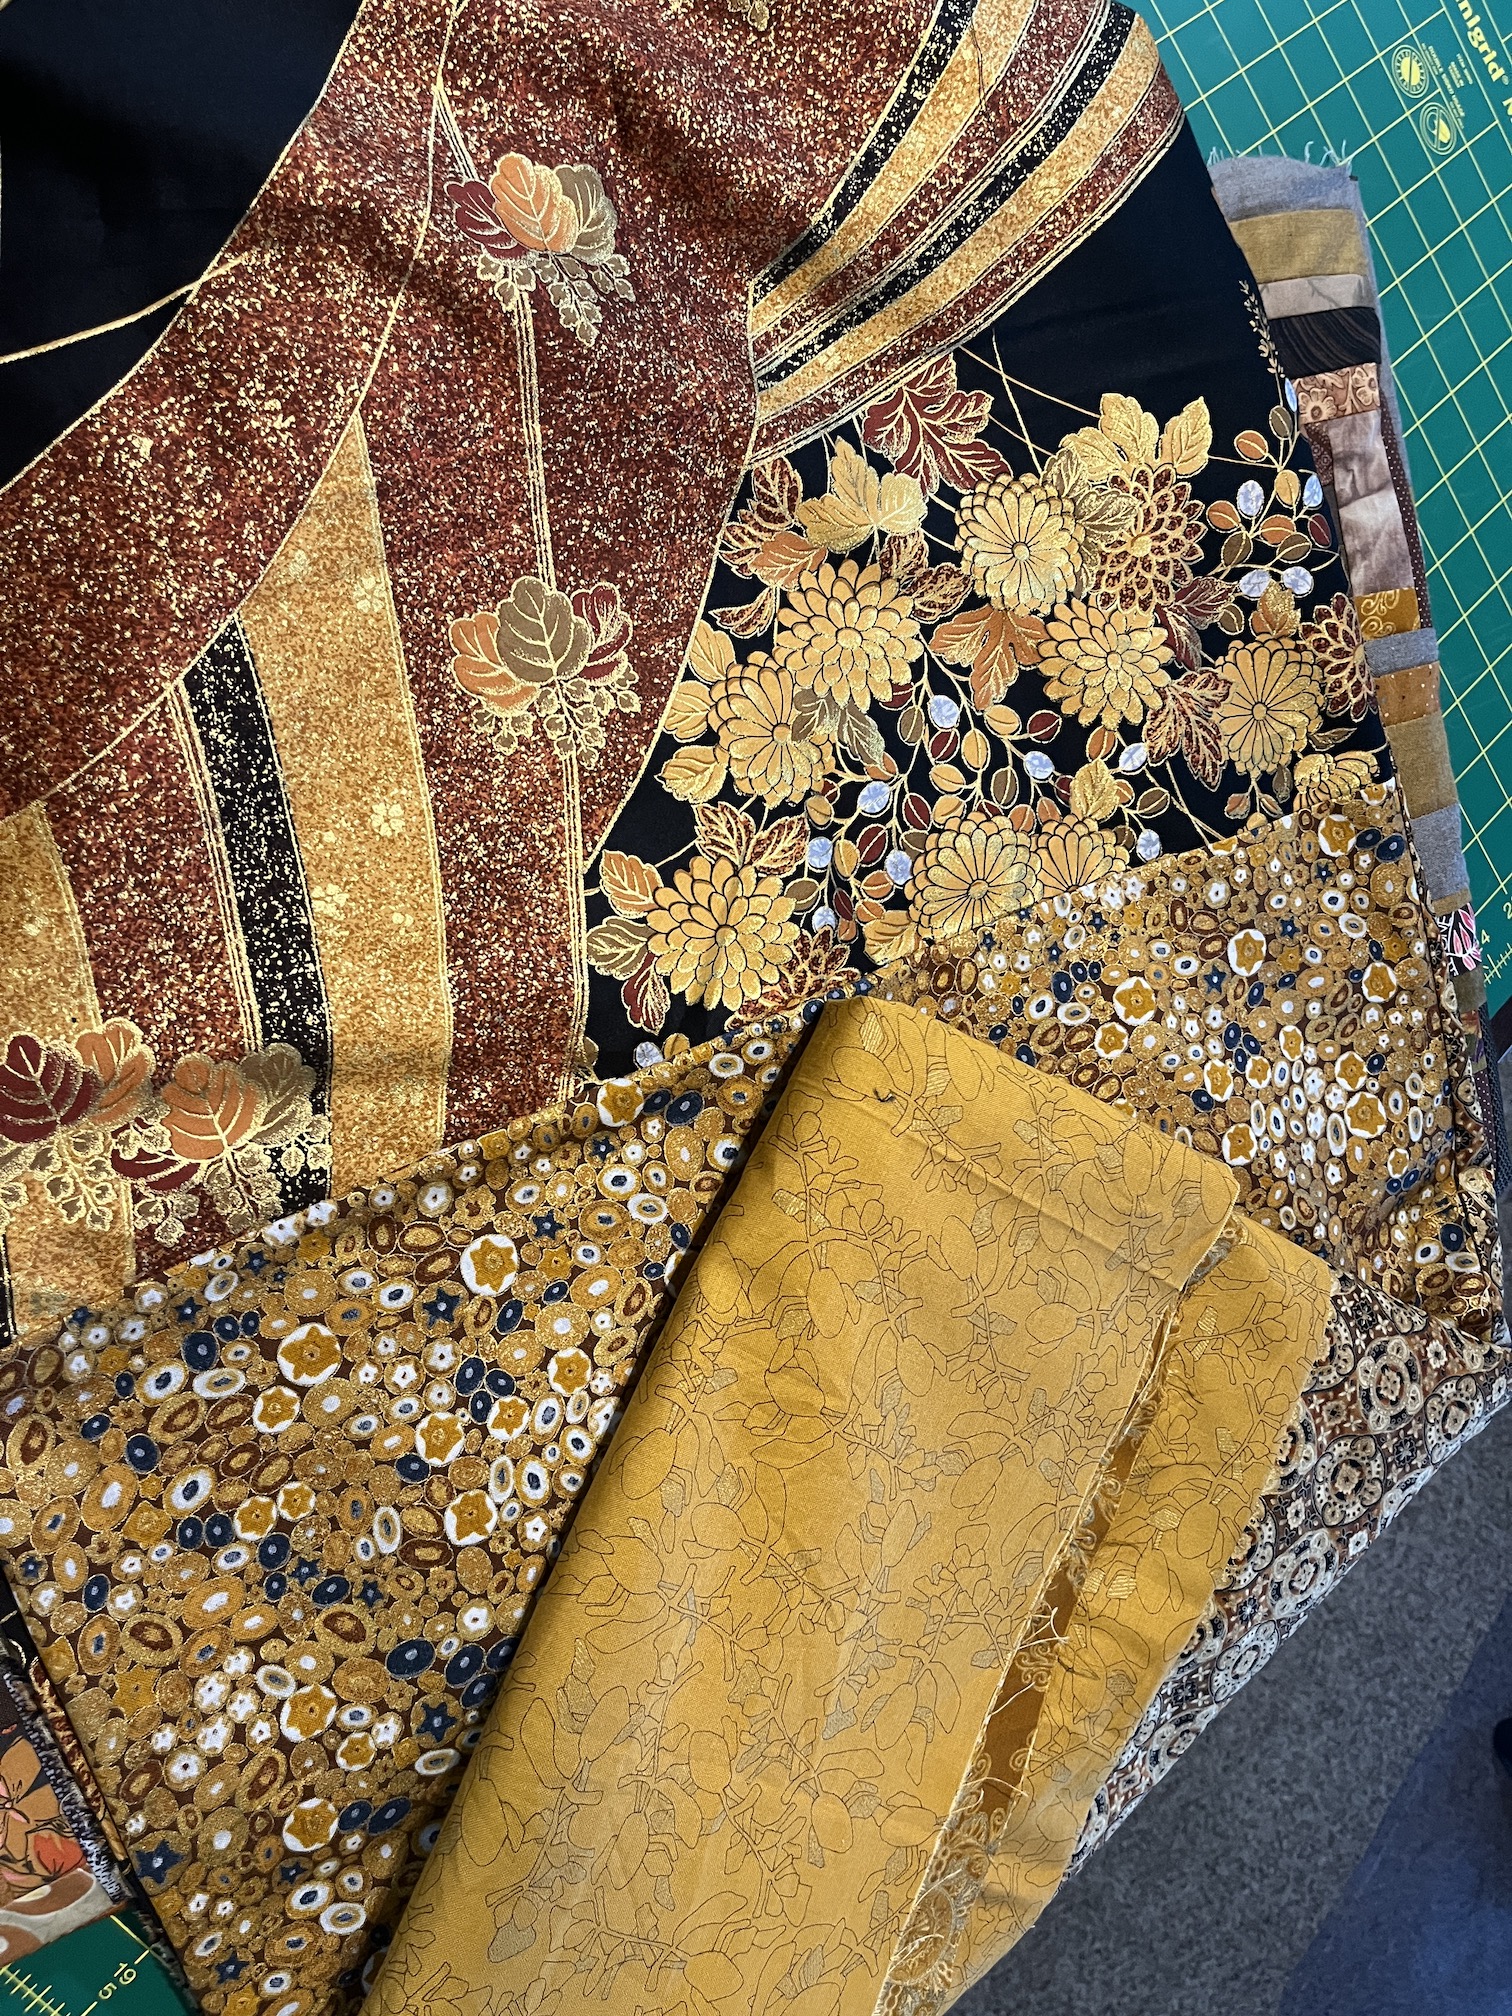
As part of my birthday gift, my sister sent me a collection of upholstery fabric samples.
My sister is the Sr. Construction Project Manager for a university and the Interior Design team she works with had a collection of upholstery samples that they were going to put in the trash. My sister knows I love working with upcycled fabrics so she rescued them and sent them to me.
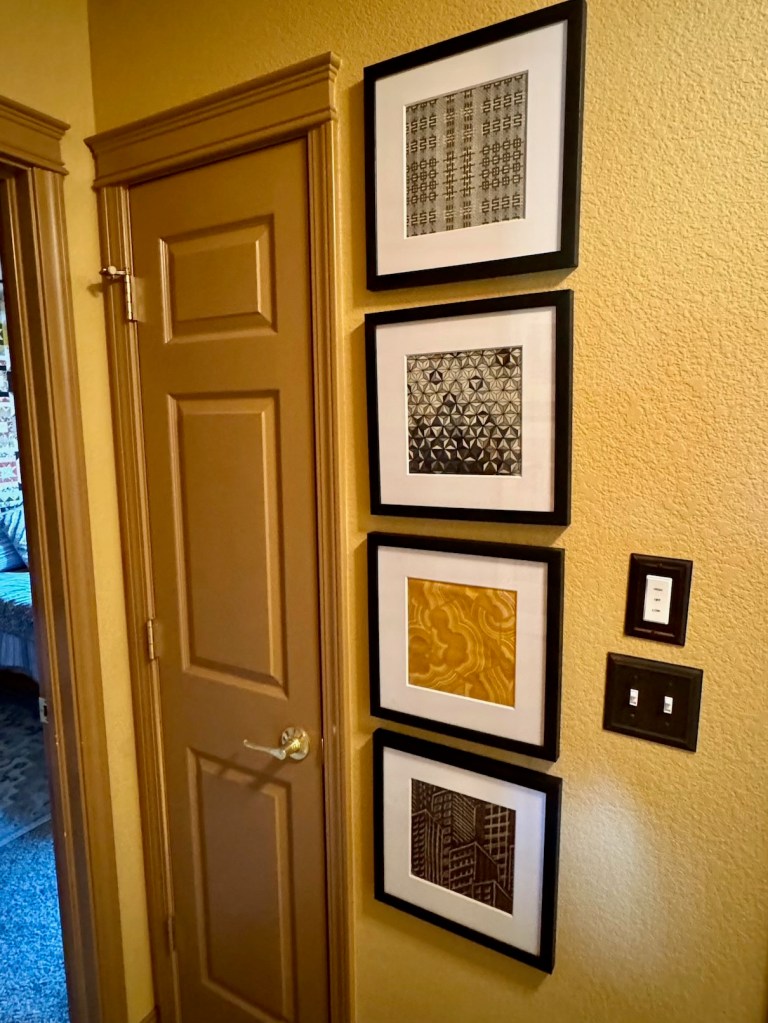
The collection of samples were beautiful and I decided to experiment and frame four that really caught my eye to hang on the wall across from my studio.
They look even better in person, the hallway is a little dark even with the light on so it was challenging to photograph.
I haven’t decided what I am going to do with the rest of the samples butI’ve been collecting ideas on one of my Pinterest boards.
It’s the 15th of the month and time for my monthly “ScrapHappy” post as part of the ScrapHappy group I belong run by Kate and Gun. At the end of this post I have a link to the other blogs participating in this monthly event in case you’d like to check out their ScrapHappy posts.
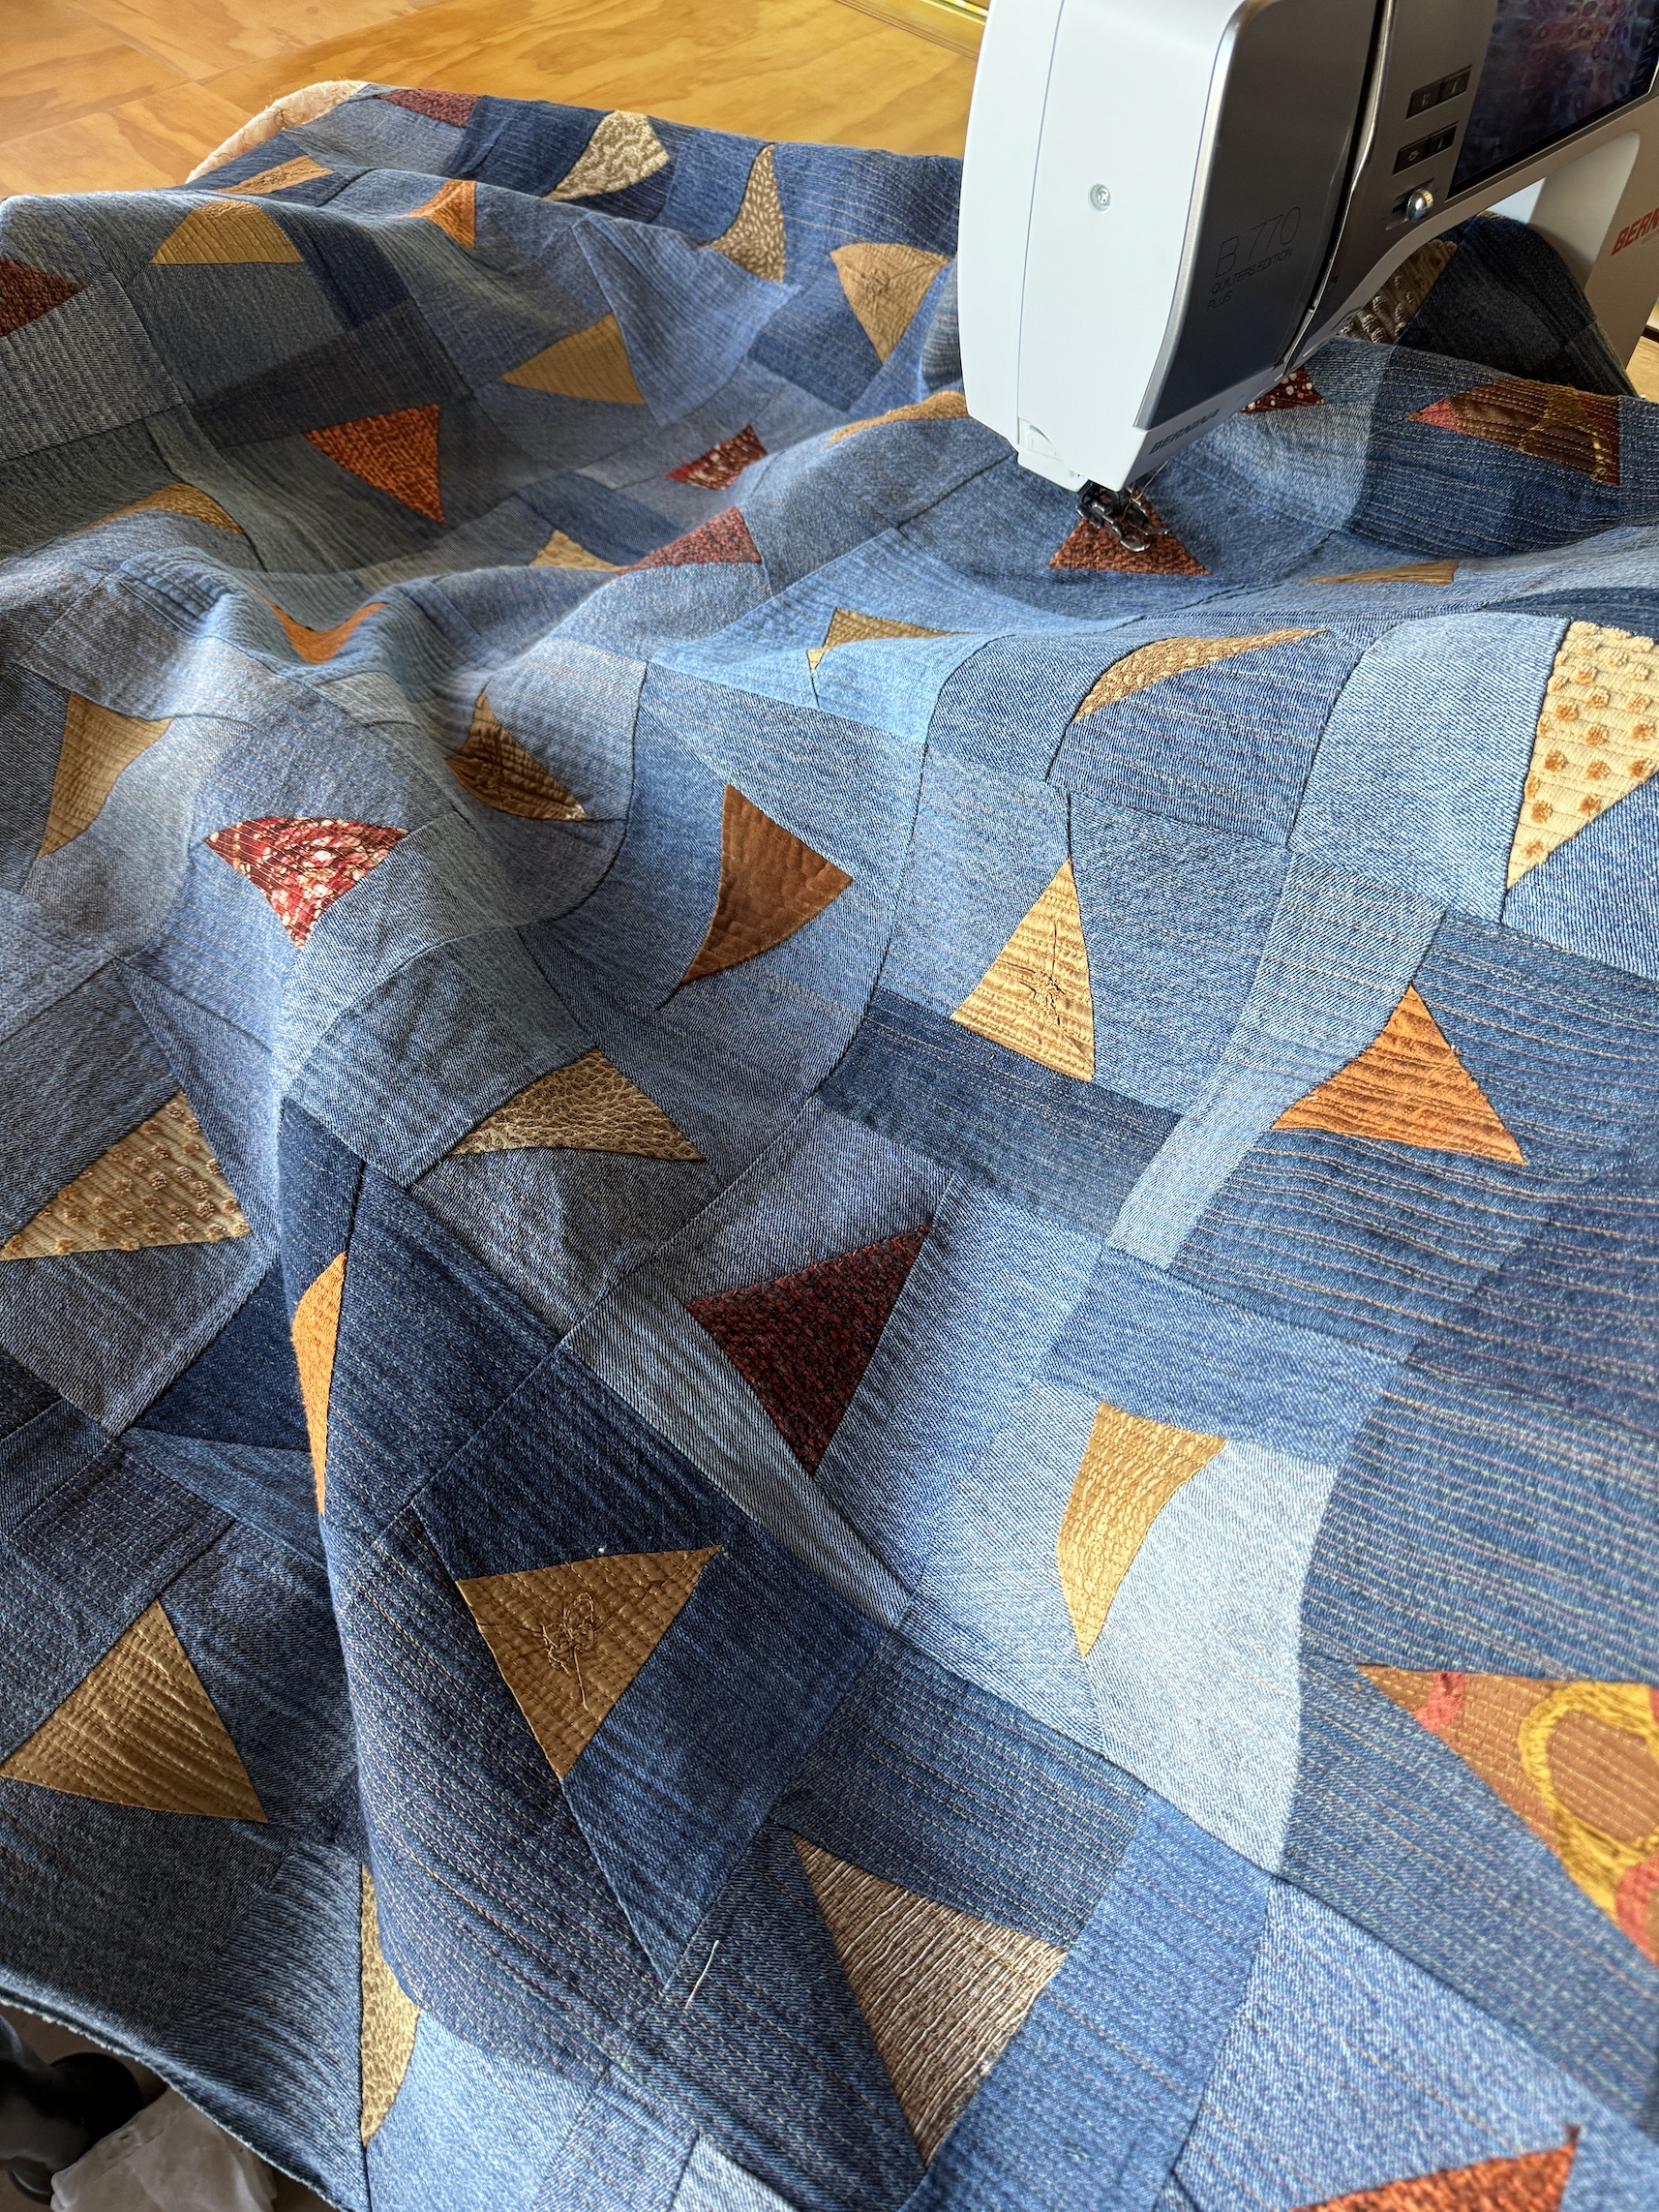
Update on the Denim Quilt
For this month’s ScrapHappy post, I am updating you on my post Now Quilting the Denim Quilt! on beginning the quilting the denim quilt I pieced from denim scraps (recycled old jeans) and home decorating/upholstery fabric samples scraps.
I finished quilting the quilt using an “organic matchstick” pattern and two different threads.
I decided to put a “facing” on/”face” the quilt instead of adding a binding on the edges. If you are unfamiliar with the concept of “facing” a quilt, here is the handy YouTube video I used to remind myself on how to do a facing as it seems like years since I added one!
Here is the newly faced quilt on the ironing table in my studio getting a good press:
Here is the back of the quilt showing the thrifted cotton tablecloth I used as the backing:
And finally, here is the quilt (still needing the facing edges sewn down) nearly completed:
Thanks to my friend Rick G. on photographing this quilt using his equipment.
So what name did I finally decide on for the quilt and what is my Artist Statement? The answer is below:
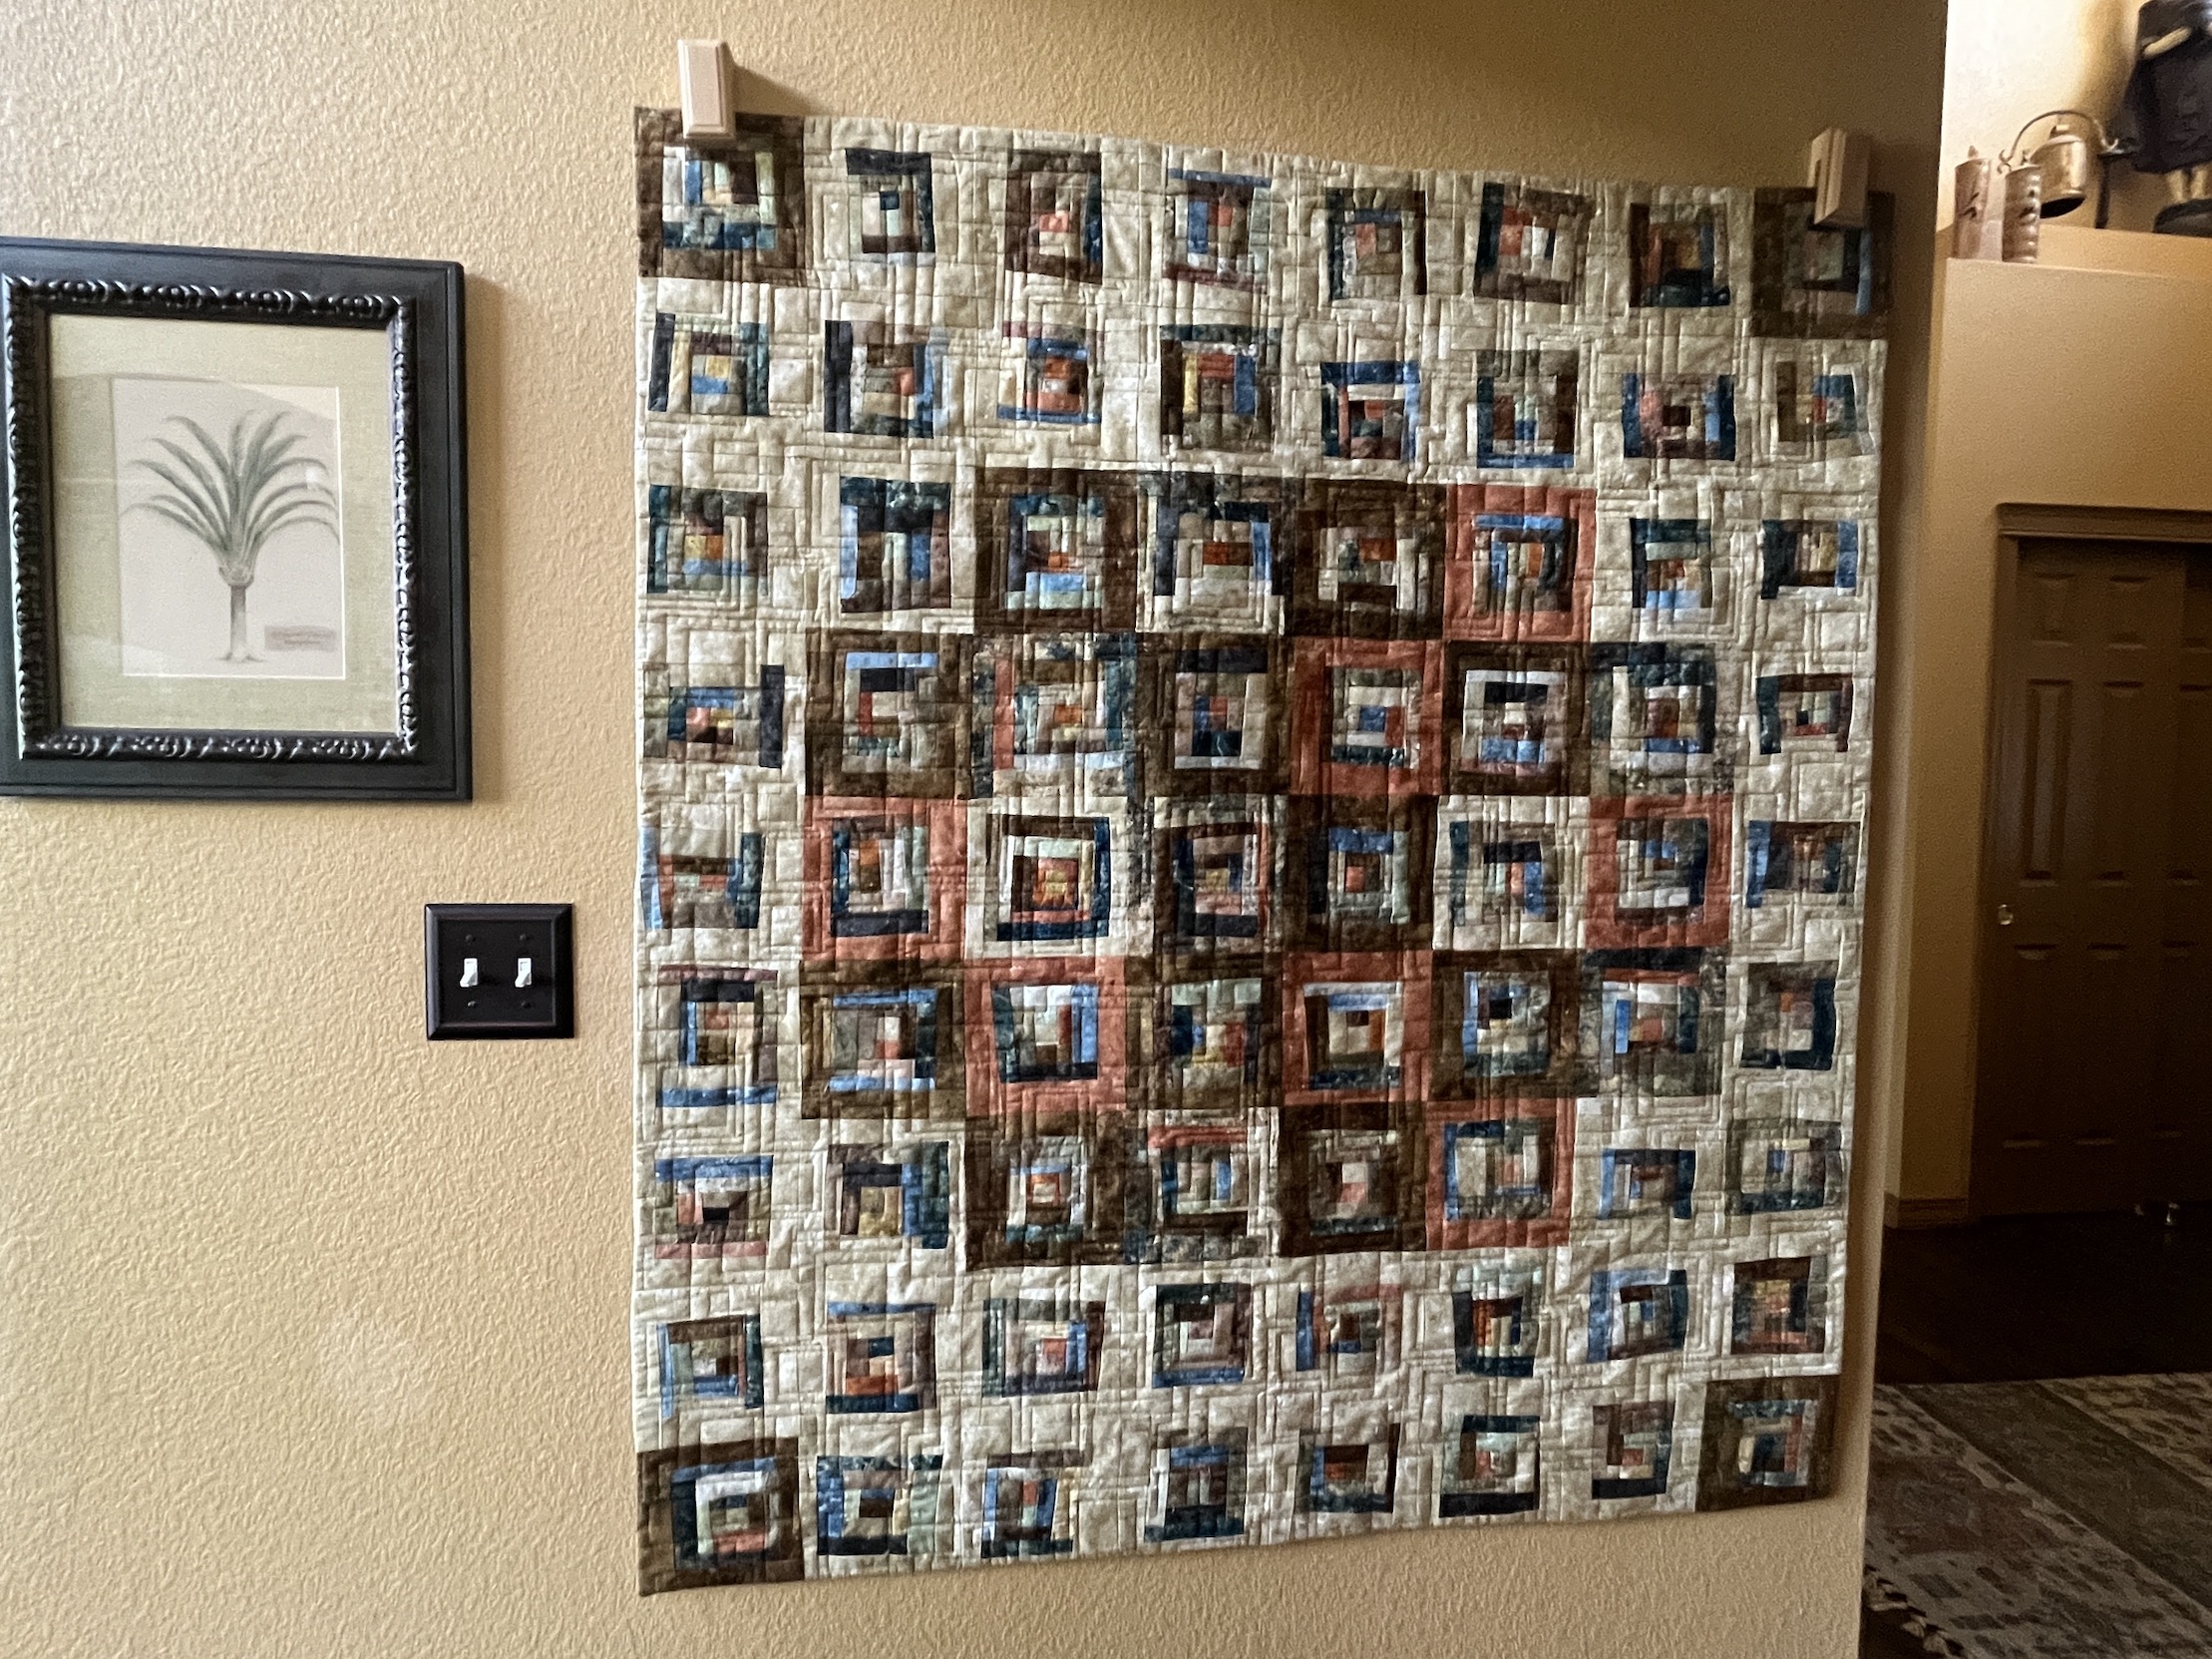
What Direction Do I Go?
54 inches by 53 inches
In my early 50s the direction of my life radically changed with the sudden passing of my husband who’d been part of my life since I was 20 years old. Part of my identity and all the direction of my life evaporated and I was left with the following life question: What Direction Do I Go? Made entirely with recycled fabrics including the batting, this quilt reflects my struggle to find a new direction.
I decided to stick with my original concept for the quilt that I discussed in an earlier post when I was piecing this quilt.
Here are the other bloggers that participate in the ScrapHappy monthly posting event, check out their blogs linked below for their ScrapHappy posts:
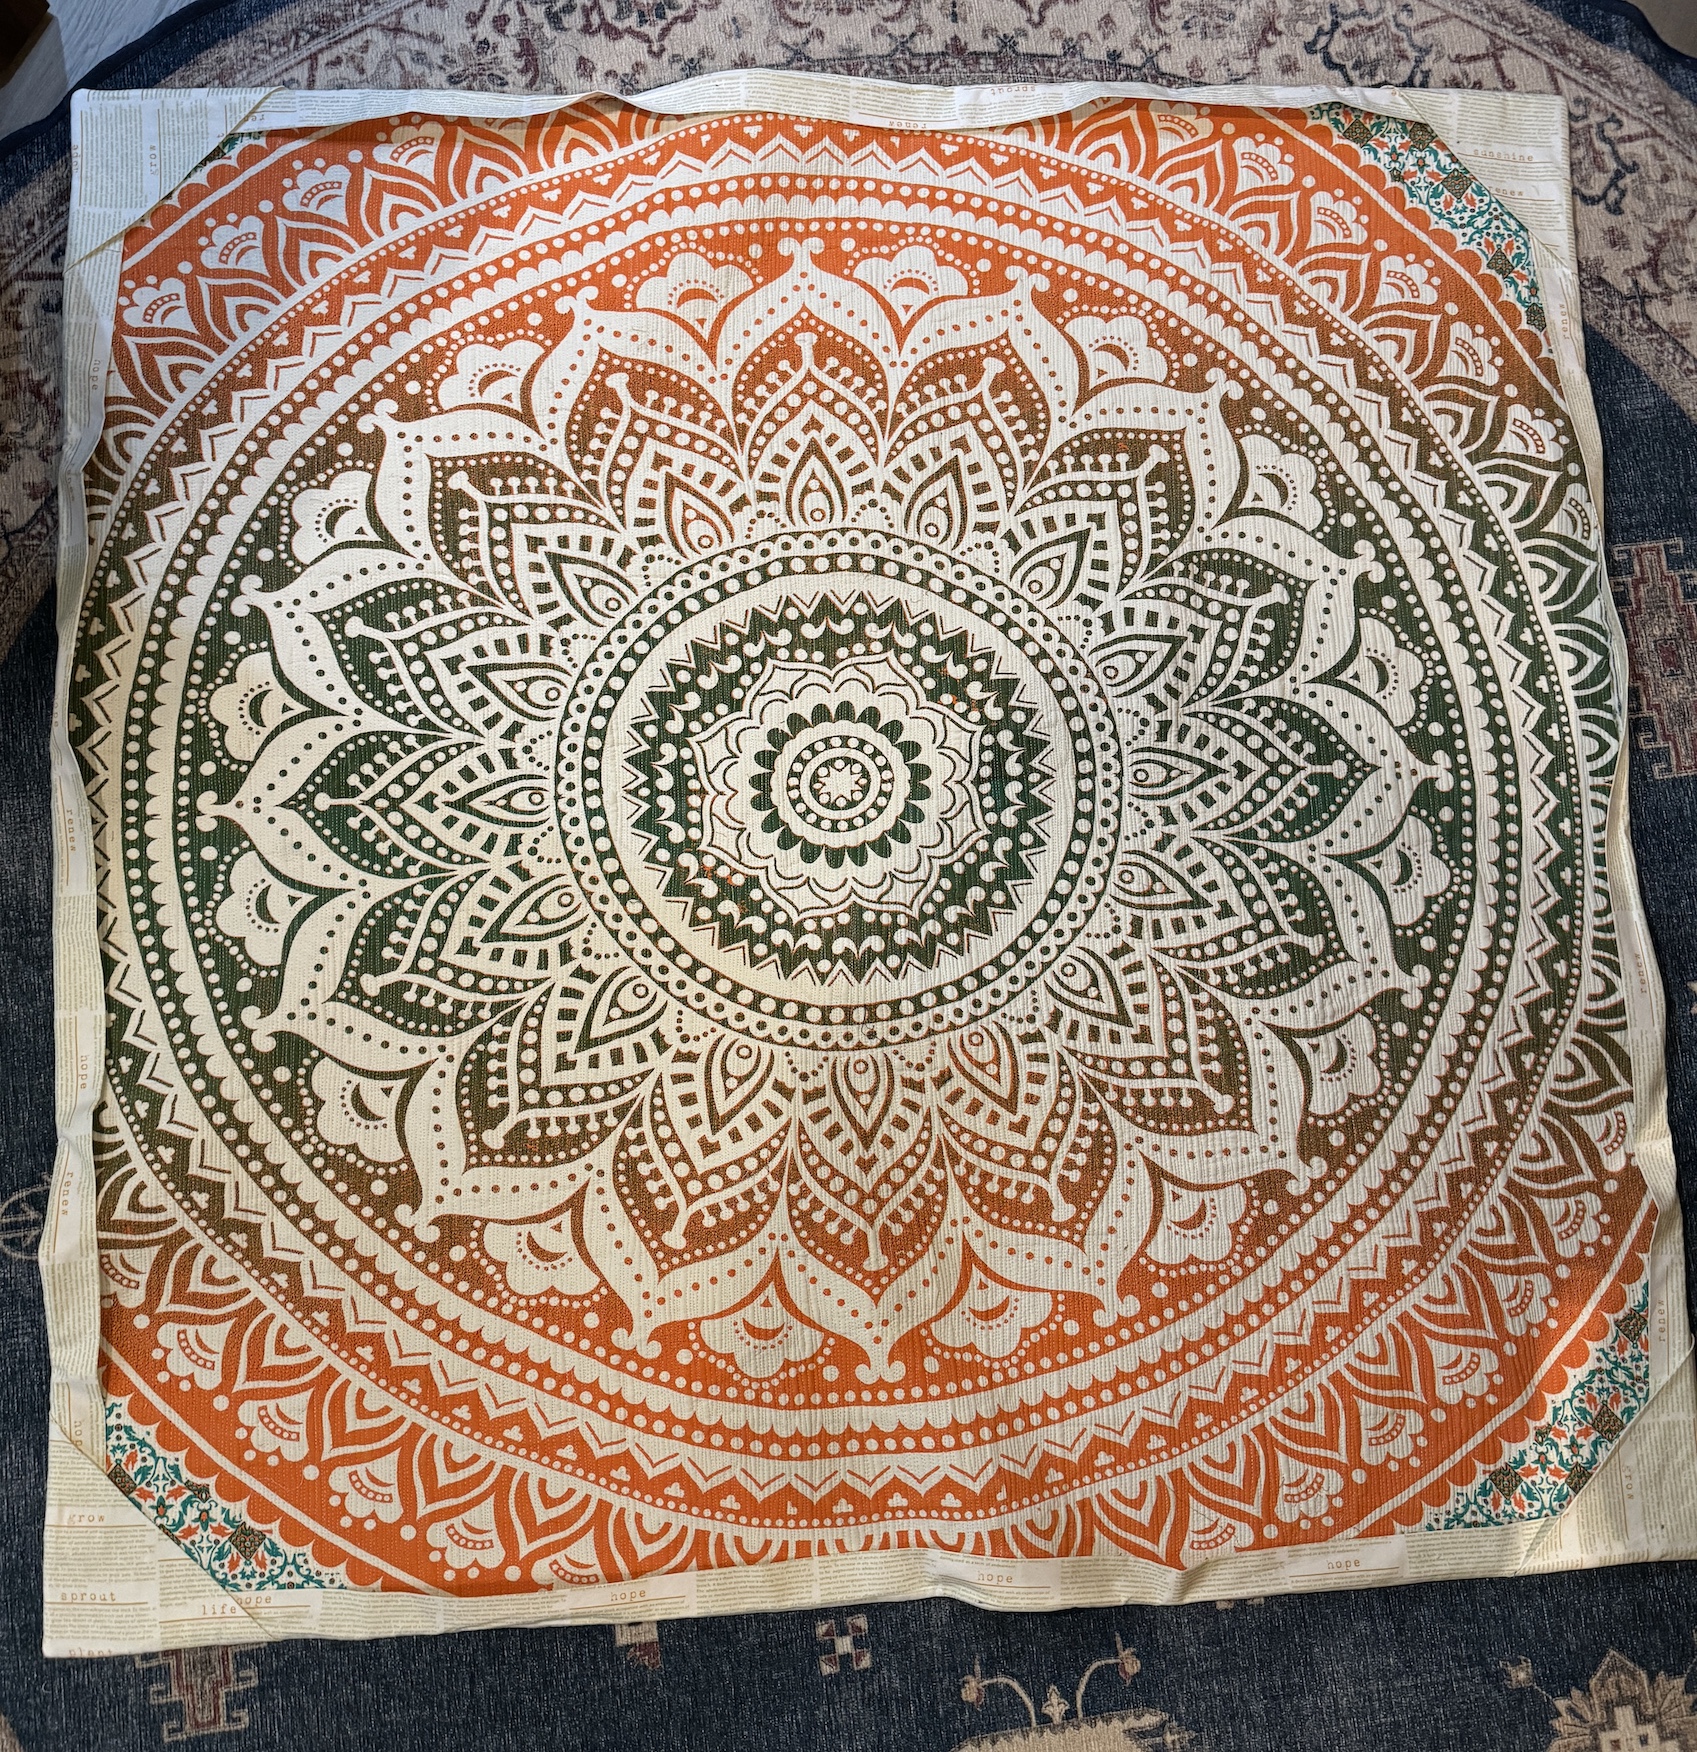
Pausing my series of posts about my September trip to the California Coast to share my conversion of a journal cover to a pillow.
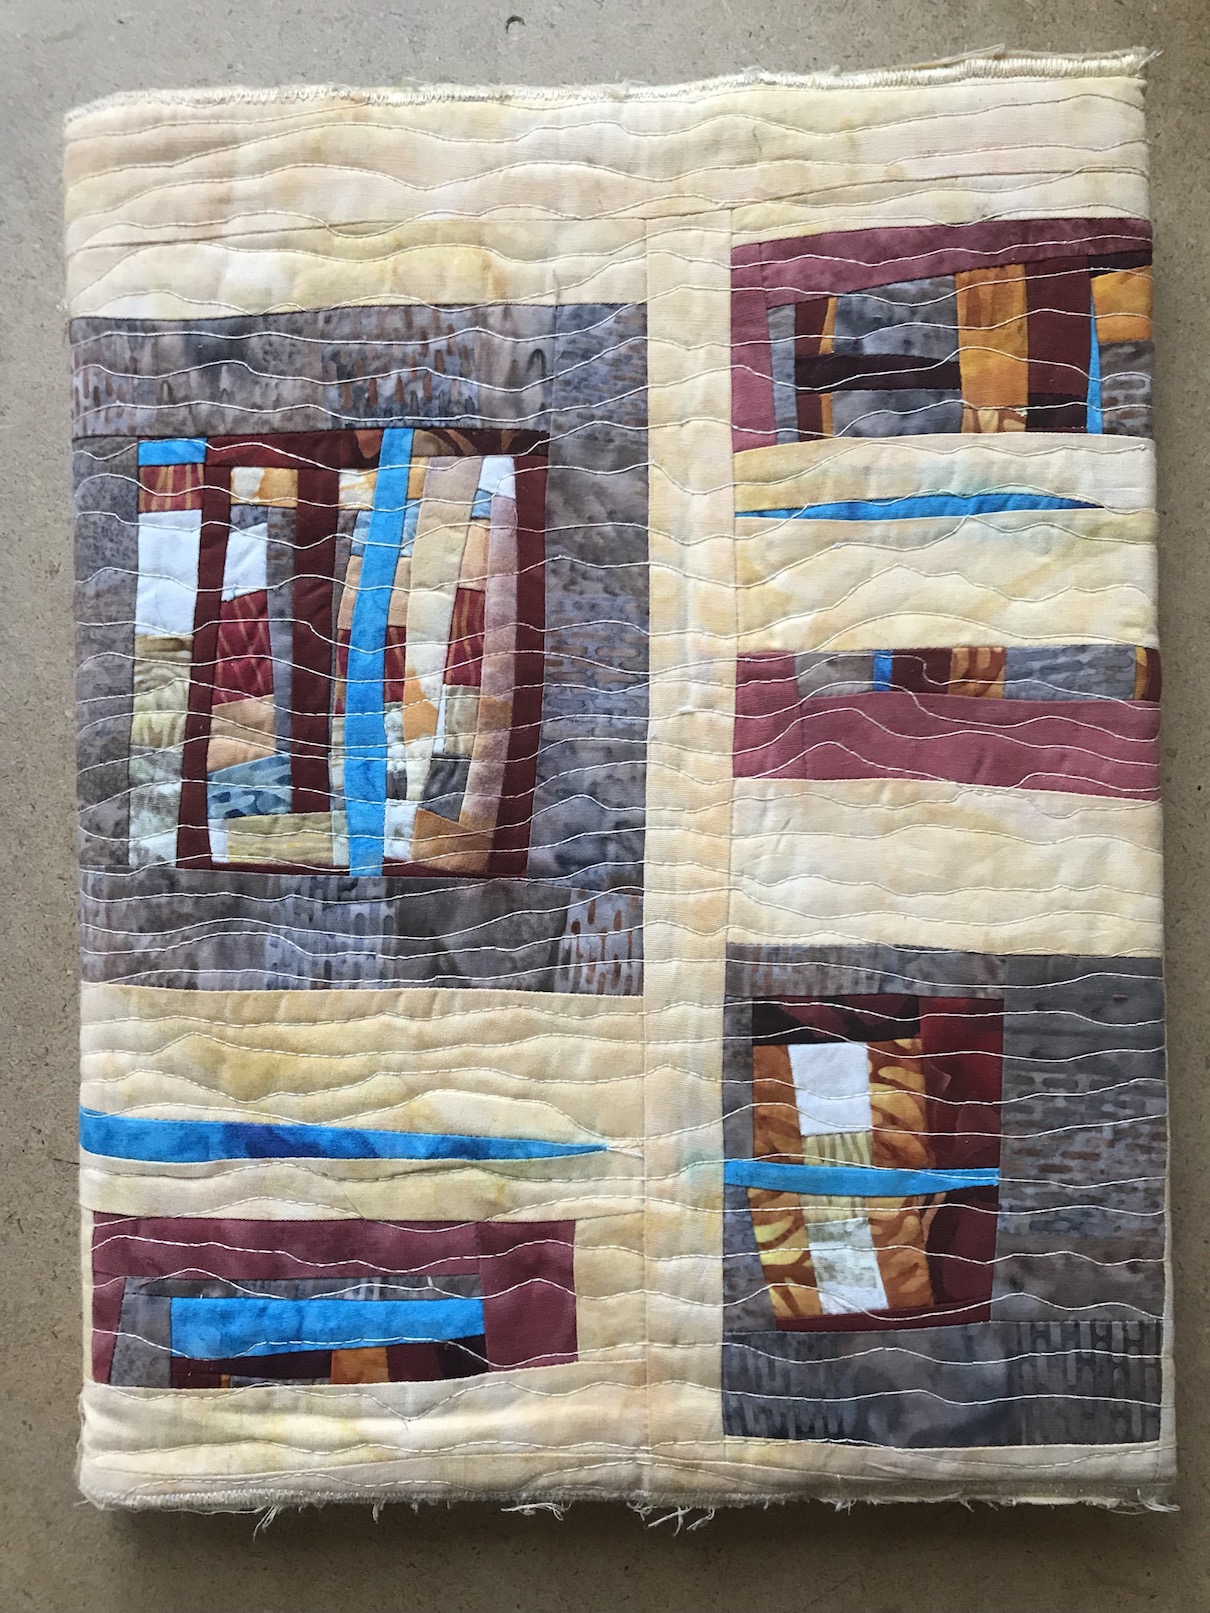
I made this journal cover from fabric scraps in the first Journey to Art Quilting class I took with Jean Wells at the Stitchin’ Post in Sisters, Oregon, likely around 2013 or 2014.
We were working on improvisational quilting exercises; and I remember I added the turquoise in because Jean said your piece needs a “surprise”, something unexpected, and she called it “a poison”.
For some reason I just just feeling tired of this journal cover and no longer wanted to use the journal it covered, I wanted to fresh start for creative journaling. However I didn’t want to get rid of the piece.
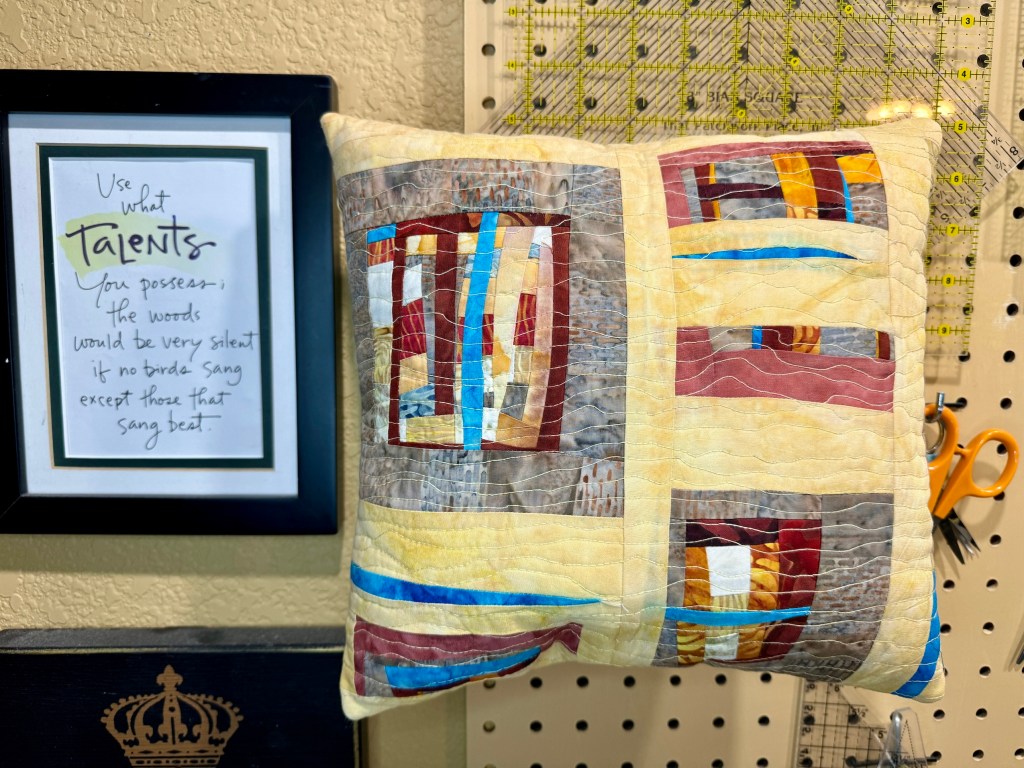
So I decided to make it into a pillow!
The class with Jean was very memorable, it was actually a workshop series where we met monthly (or it might have been bi-weekly). The piece which eventually because Abandoned Water Structure and was sold to the City of Seattle’s Portable Works Collection was started in this workshop:
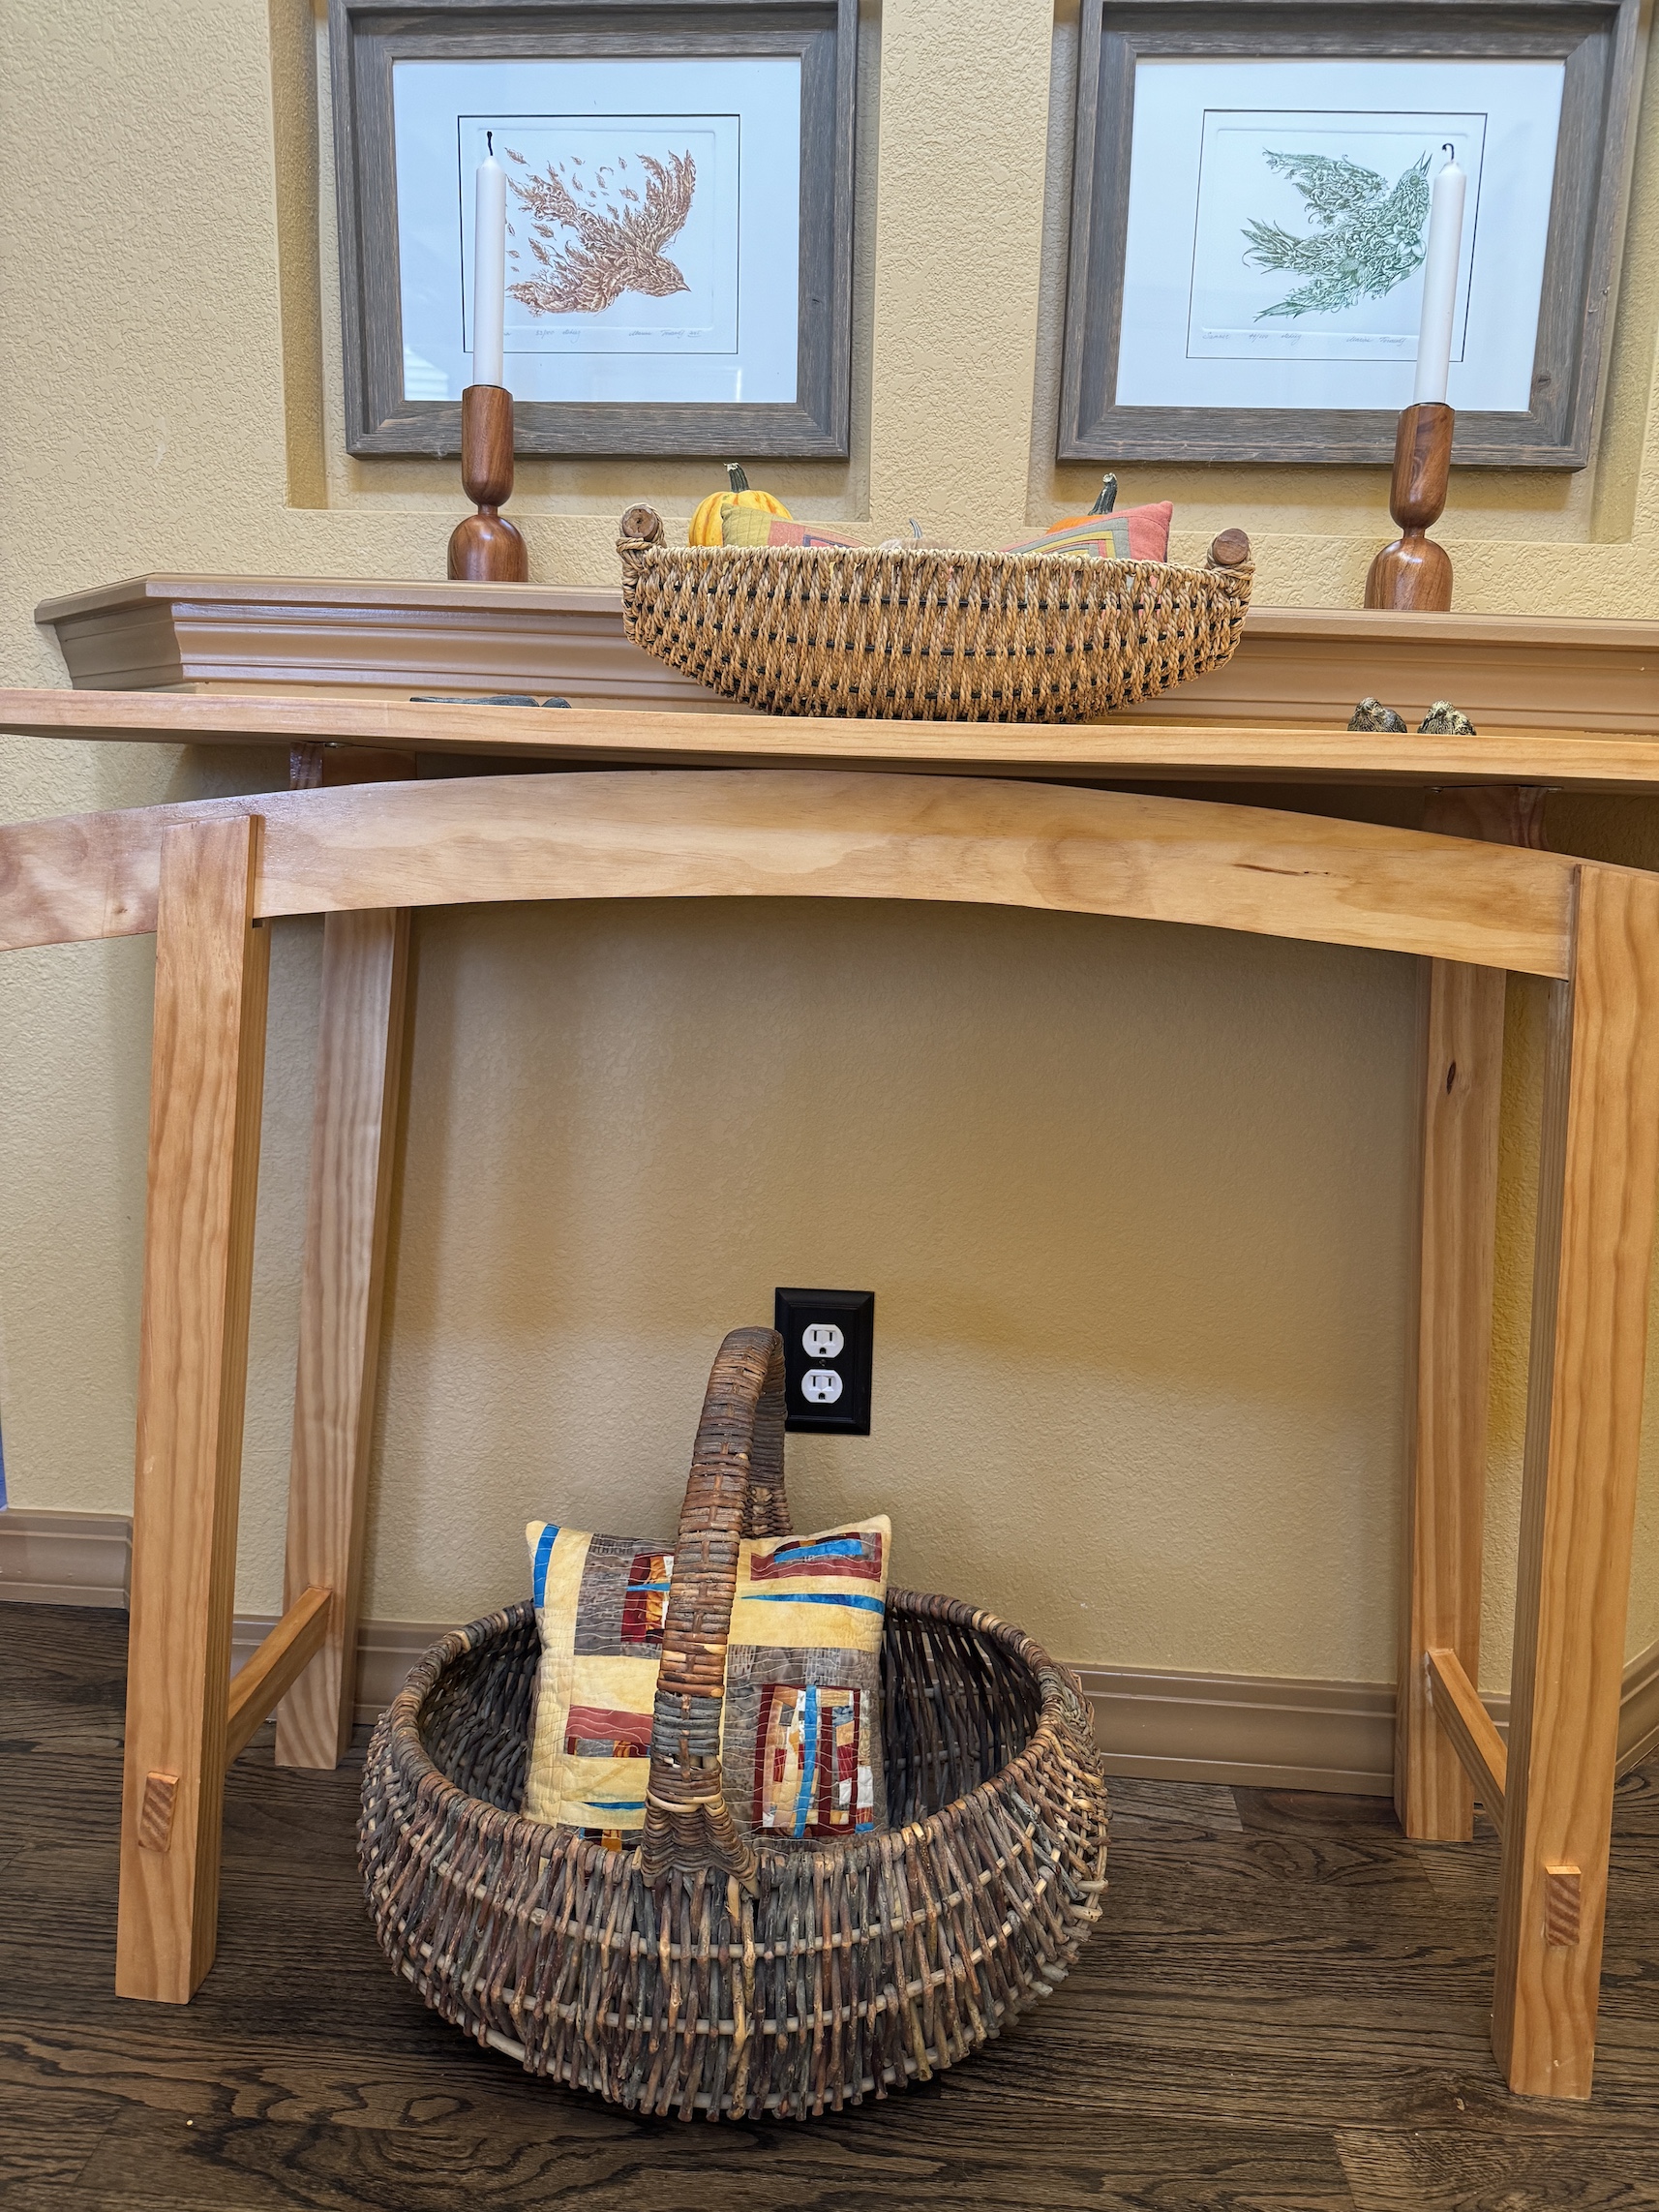
Oh and back to the pillow – for now I am keeping the pillow in the basket in the entry to our home in a basket under a table John built (see post From the Woodshop: Floating Top Hall Table).
Postscript
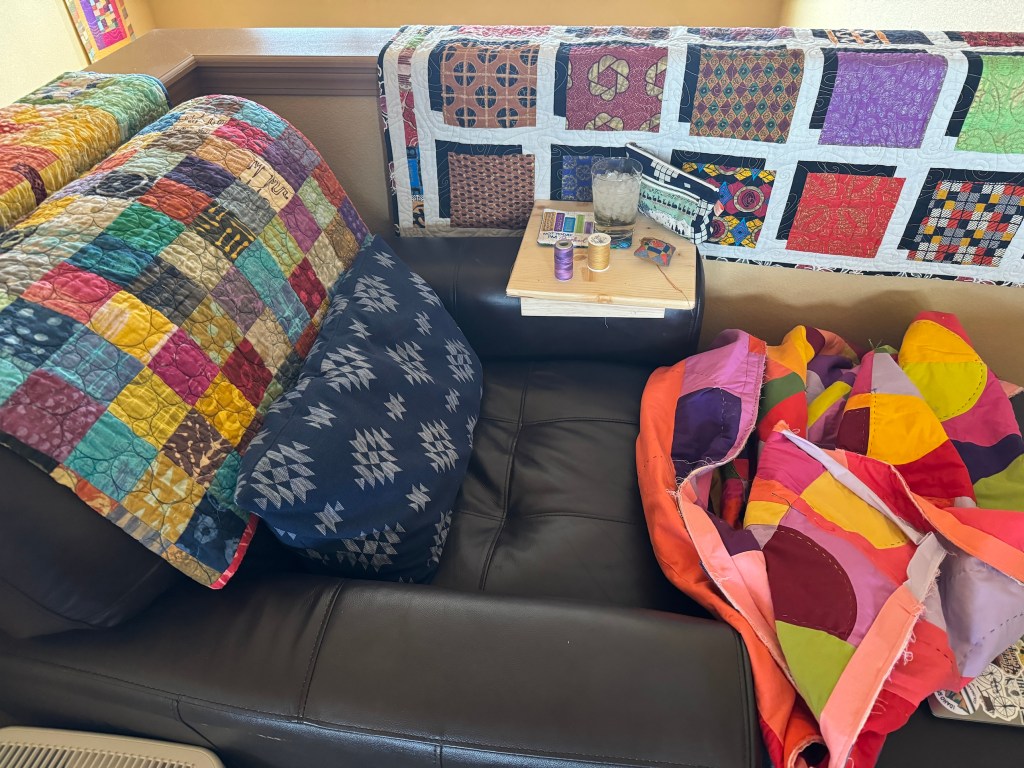
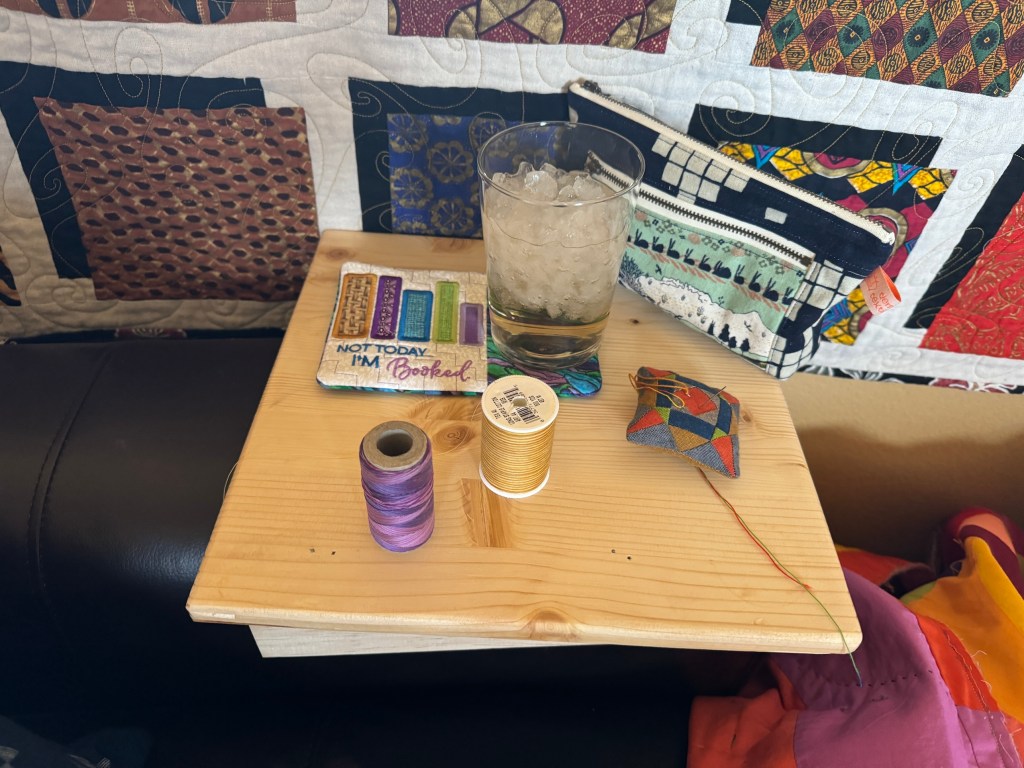
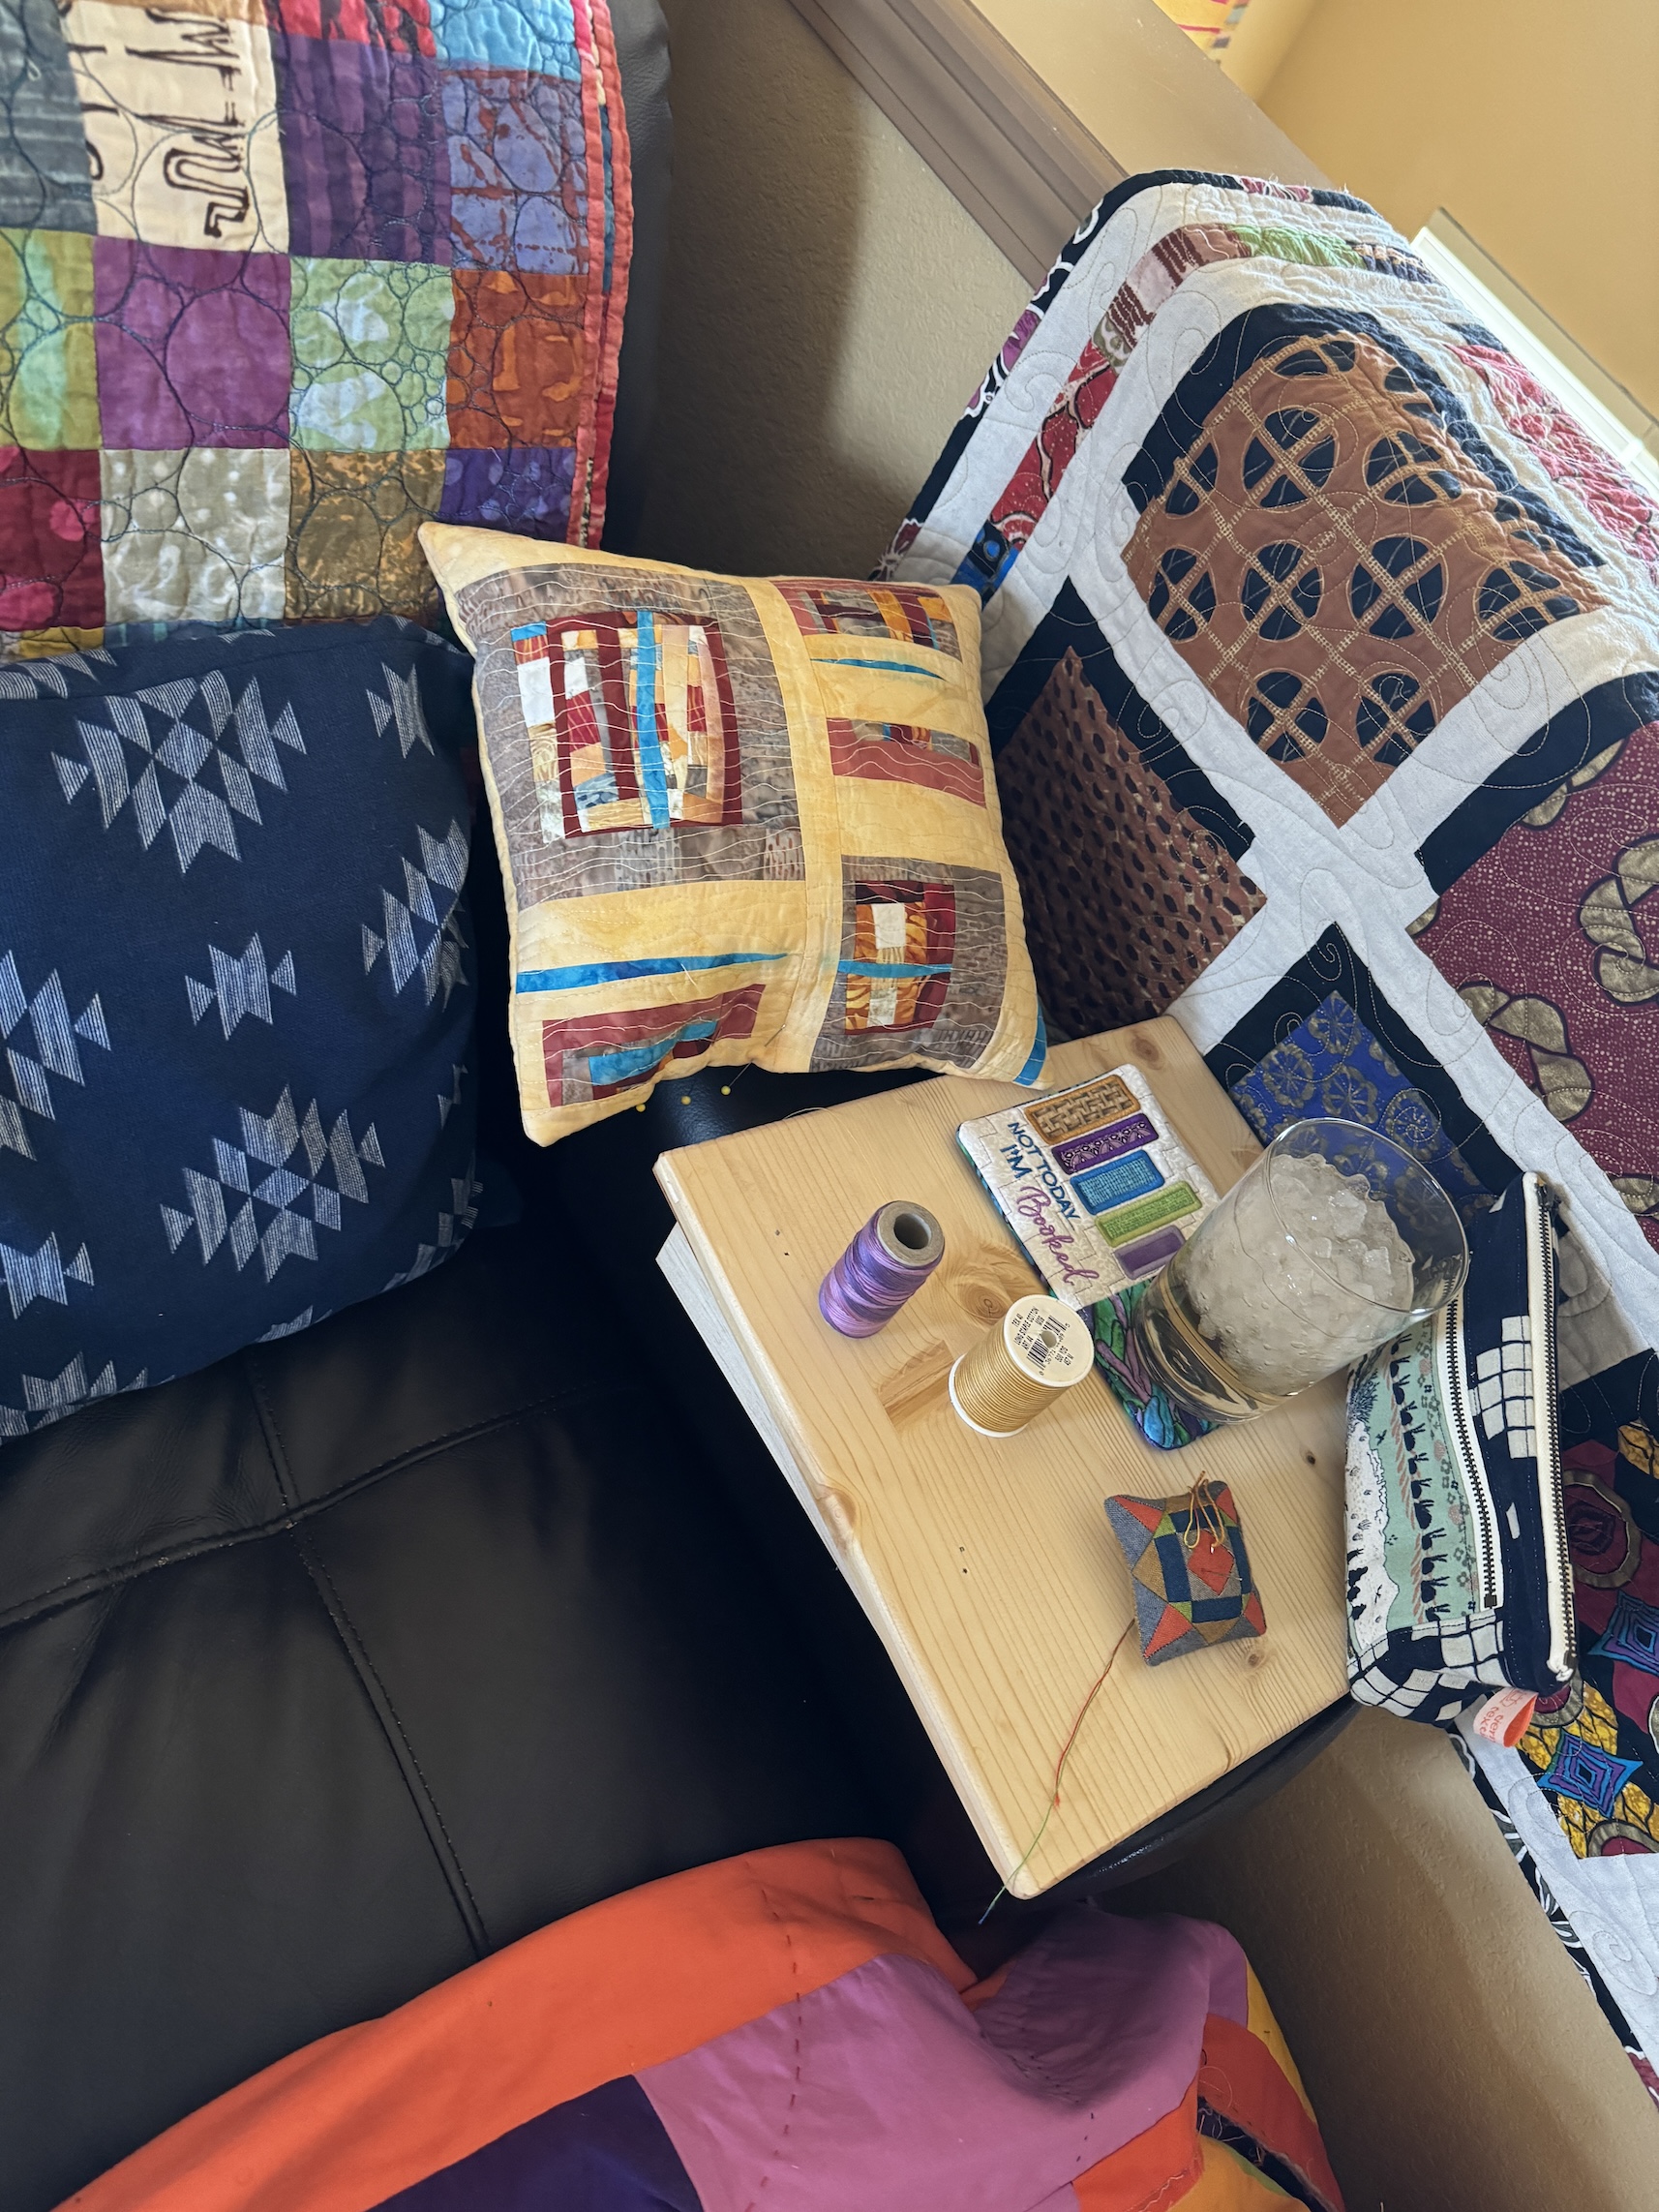
We had a chair at the top of the top floor stairs landing that I like to sit in and stitch. The other day John the Woodworker made me a little table to hang over on of the chair arms so I would have a table there.
It’s the 15th of the month and time for my monthly “ScrapHappy” post as part of the ScrapHappy group I belong run by Kate and Gun. At the end of this post I have a link to the other blogs participating in this monthly event in case you’d like to check out their ScrapHappy posts.
The 15th of the month came around quicker than anticipated and I already blogged about the 22nd block I made for the very scrappy Farm Girl Vintage quilt I am working on September 26 (see post I Sewed Something!) so I couldn’t use that for my October ScrapHappy post, sigh.
So instead I will discuss my series of art quilts made from scraps of recycled denim, clothing and home decorating fabrics – Recycled Hope; and update on you that latest quilt I am working on in that series.
The Recycled Hope Series
Recycled Hope an ongoing series of improvisational art quilts using recycled materials to include denim as the primary fabric on many of the pieces, combined with other recycled materials.
“Hope” and the interpretation of the word “hope” is the primary theme of infused into these pieces. Most of the fabrics were not reusable as clothing or home decor and were destined to end up in a landfill. Reimagining recycled clothing and other materials into art quilts satisfies my hopeful desire to honor the environment and make art that is eco-conscious. Ending up in an art quilt is a better outcome than ending up in a landfill.
My first quilt in the series, Recycled Road, was made for annual art quilt show for the local SAQA (Studio Art Quilt Associates) group I belonged while living in Central Oregon:
This quilt was made using my late husband’s clothing that he no longer wanted, several recycled jeans, a little recycled scrap home decor fabric and this awful pair of orange corduroy pants someone gave me to use in an art quilt. The pants were too hideous to donate to be work as clothing but worked in a quilt! The quilt measures 18 inches by 40 inches which was the required dimensions for the art show which was titled “Pathways”.
I no longer own this quilt, it was purchased by a friend who wanted to support my art.
The second quilt I made in the series was also for an annual art quilt show for the local SAQA (Studio Art Quilt Associates) group I belonged while living in Central Oregon and titled Recycled Door:
This quilt is composed of recycled denim, recycled home decor fabric, and a little of those awful orange corduroy pants (I got a lot of use out of those pants, fabric wise). It also measures 18 inches by 40 inches which was the required dimensions for the art show which was titled “Doors”. This quilt was purchased by a private collector.
The third quilt in the series was also for an annual art quilt show for the local SAQA (Studio Art Quilt Associates) group I belonged while living in Central Oregon and titled Recycled Love:
Made from recycled jeans and home decor fabric, the Artist Statement for this quilt is as follows:
The first law of thermodynamics states that the total amount of energy in a system cannot be created nor destroyed, it can only be changed from one form to another.A quilt is made from changing the existing “love energy” from the quilt maker’s heart into a pieced textile; ultimately recycling that love energy into the quilt’s recipient heart.
It also measures 18 inches by 40 inches which was the required dimensions for the art show which was titled “The Threads That Bind”.
I have this quilt hung in my hallway next to my studio to remind me that “Quilts are Love”.
Here are the rest of the quilts in this series which were not created for a specific show.
Recycled Windows of Conversation:
This quilt measures 55” W x 59” L; and is made from recycled jeans, various recycled clothing, and recycled home decor fabric. It was the largest recycled denim quilt i’d made to date.
It was purchased by an art dealer on behalf of their client, and it now sits in the common area of an upscale apartment complex in downtown Seattle, Washington (see post Oh So That’s What Happened to It!).
Recycled Windows:
This quilt measures 18” W x 39″ L, and is made from recycled clothing, recycled denim, and recycled home decorating fabric. It was juried into the New Mexico ArtsArt in Public Places Program but was not selected by any of their public buildings for purchase. So it hangs in my bedroom and I enjoy looking at it everyday!
Recycled Business Casual:
Somewhere in this series of quilts I made this quilt from recycled jeans, recycled wool blankets and menswear wool suiting scraps (this is where I got the name “Recycled Business Casual“. It was more of an experiment than an actual art quilt but it did show along with many of the other quilts shown above in my first solo show: The Wardrobe Meets the Wall in April 2019 at the Seattle Municipal Tower in Downtown Seattle, Washington.
Current Project Update
And finally let’s get to my current project in progress to add to the Recycled Hope series – a denim quilt made with lots of recycled jeans and recycled home decor fabric scraps:
The tentative name for this quilt is “What Direction Do I Go?” but I am rethinking the name as my head is in a different space now than when I first started the quilt in October 2023 (What’s on the Design Wall: An “Upcycled” Work).
I have it back up on the design wall and it is set up for quilting with the backing and batting attached.
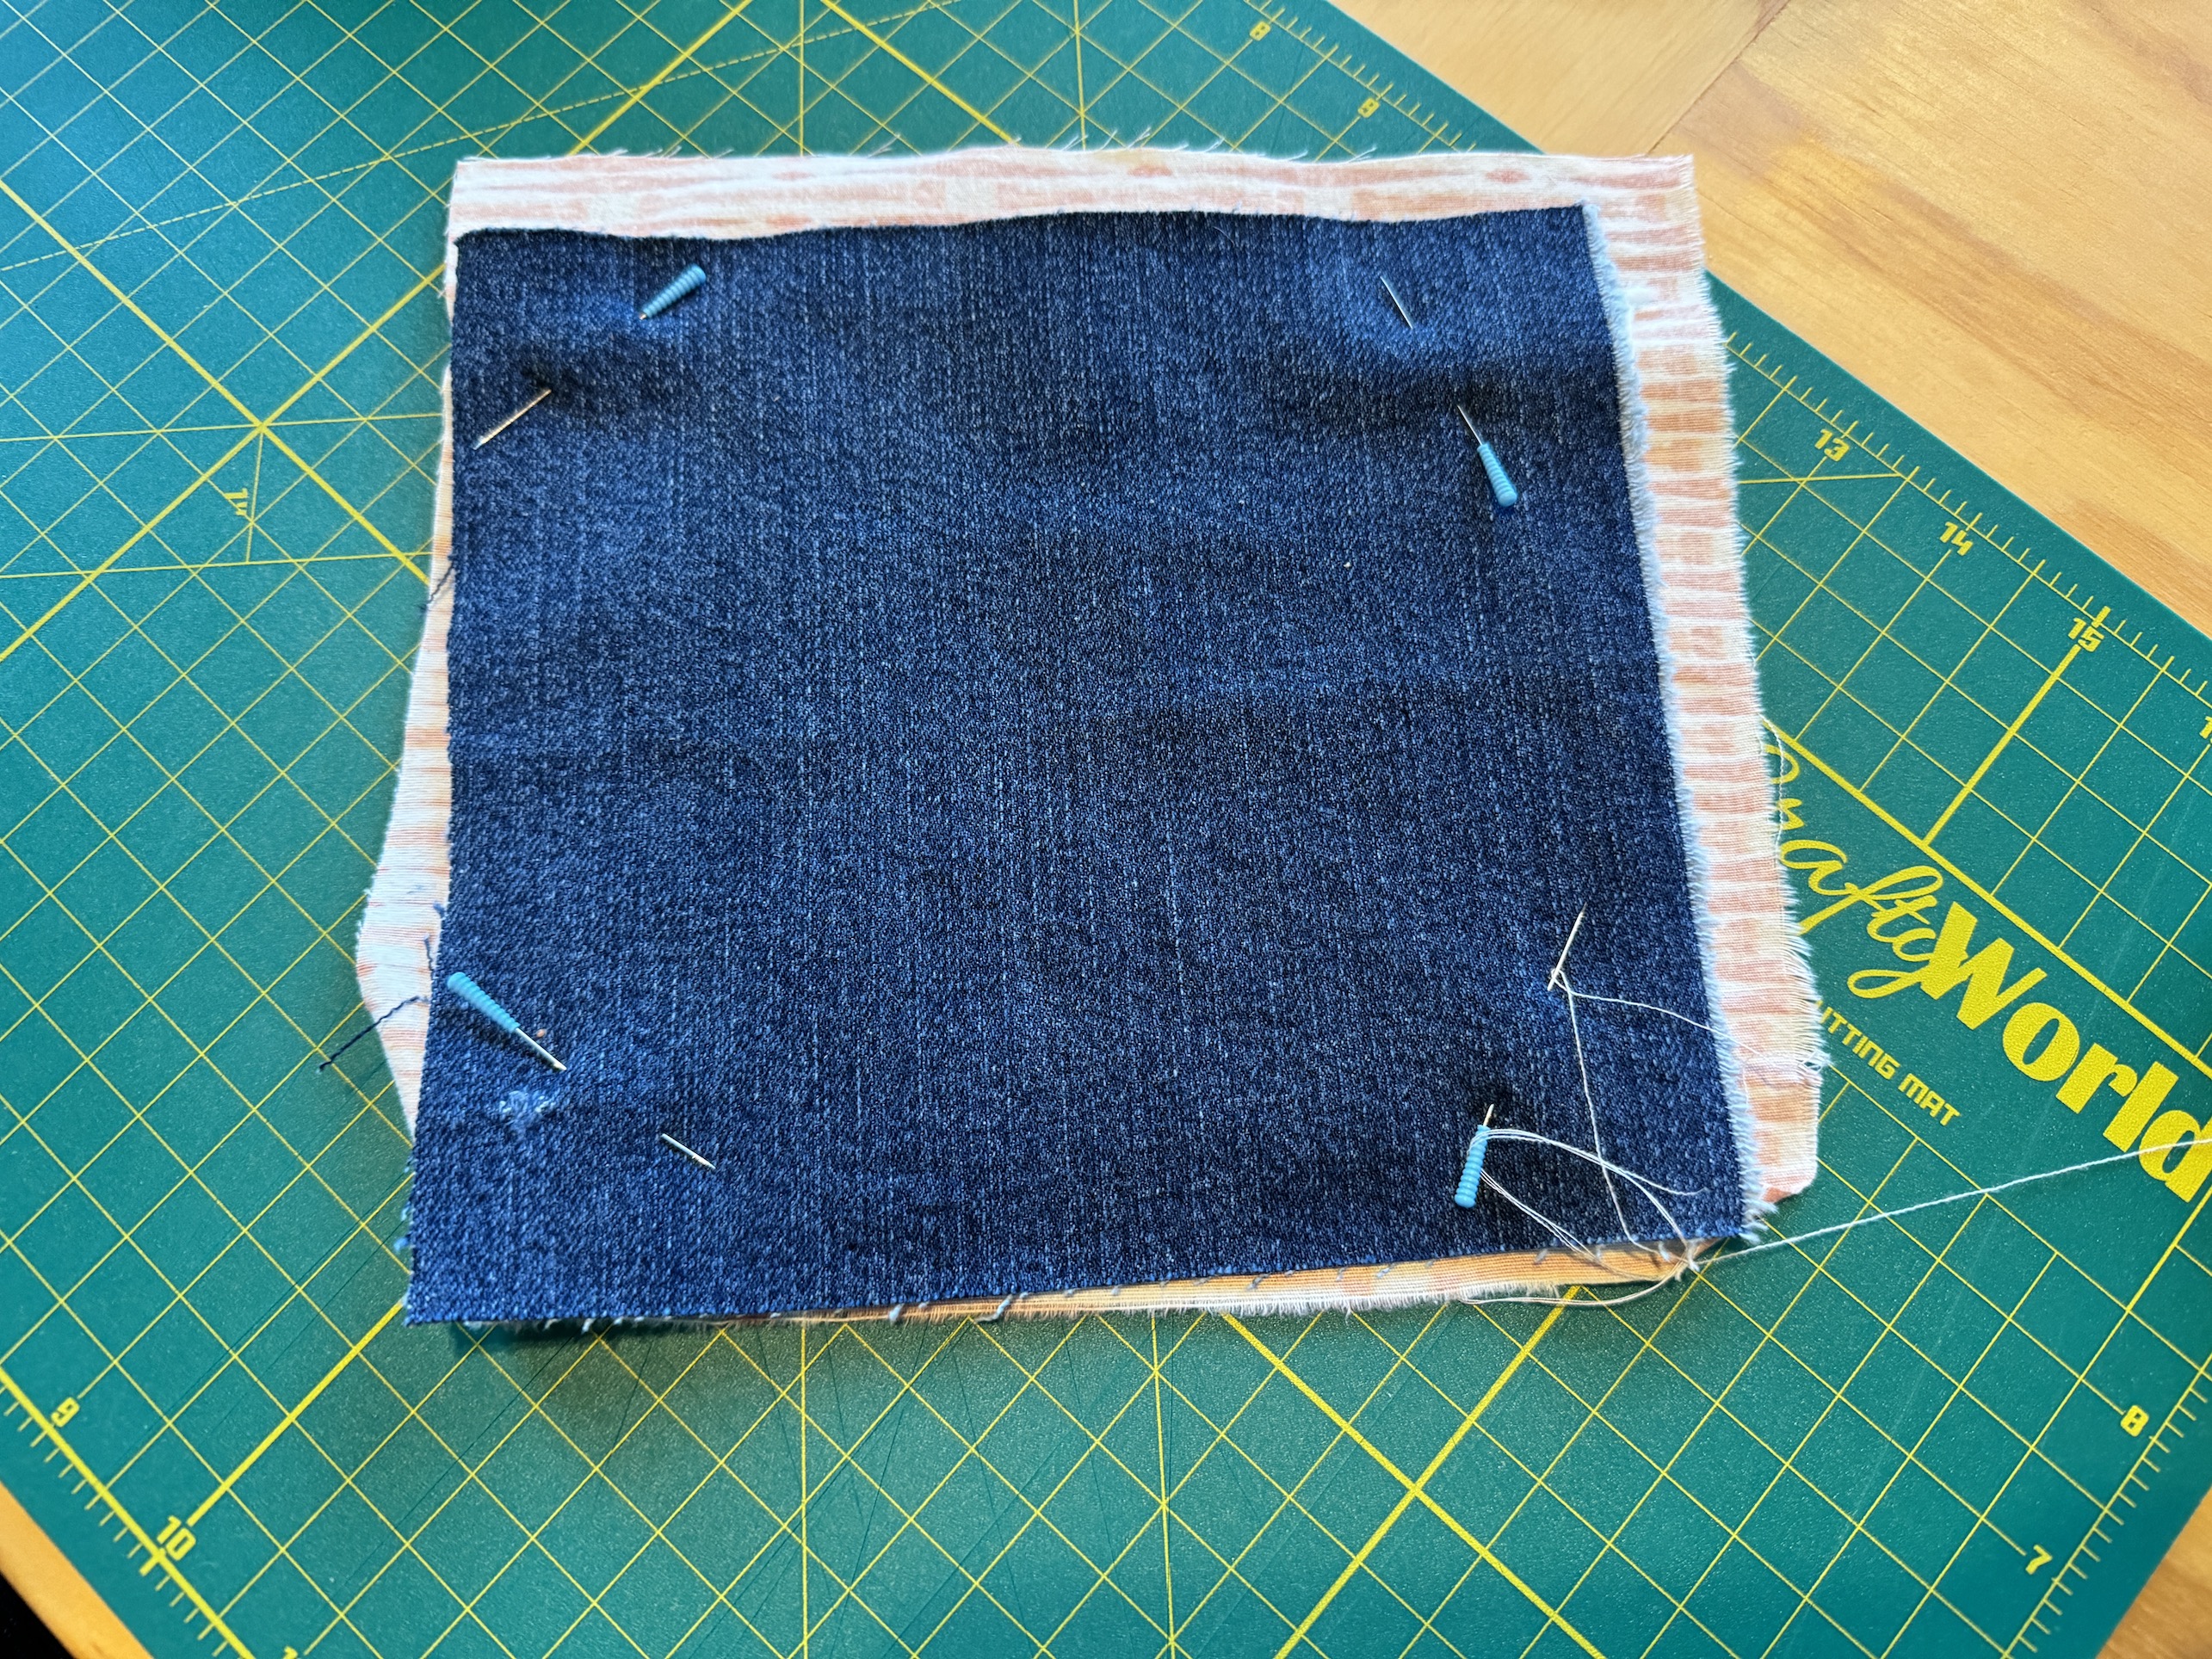
I am working out what quilting design I want to use. I created a sample square of scrap denim, backing and batting to try out some designs:
I am really looking forward to completing this quilt and I have a place on my living room to upstairs stairway reserved to hang this approximately 55 inches by 55 inches quilt.
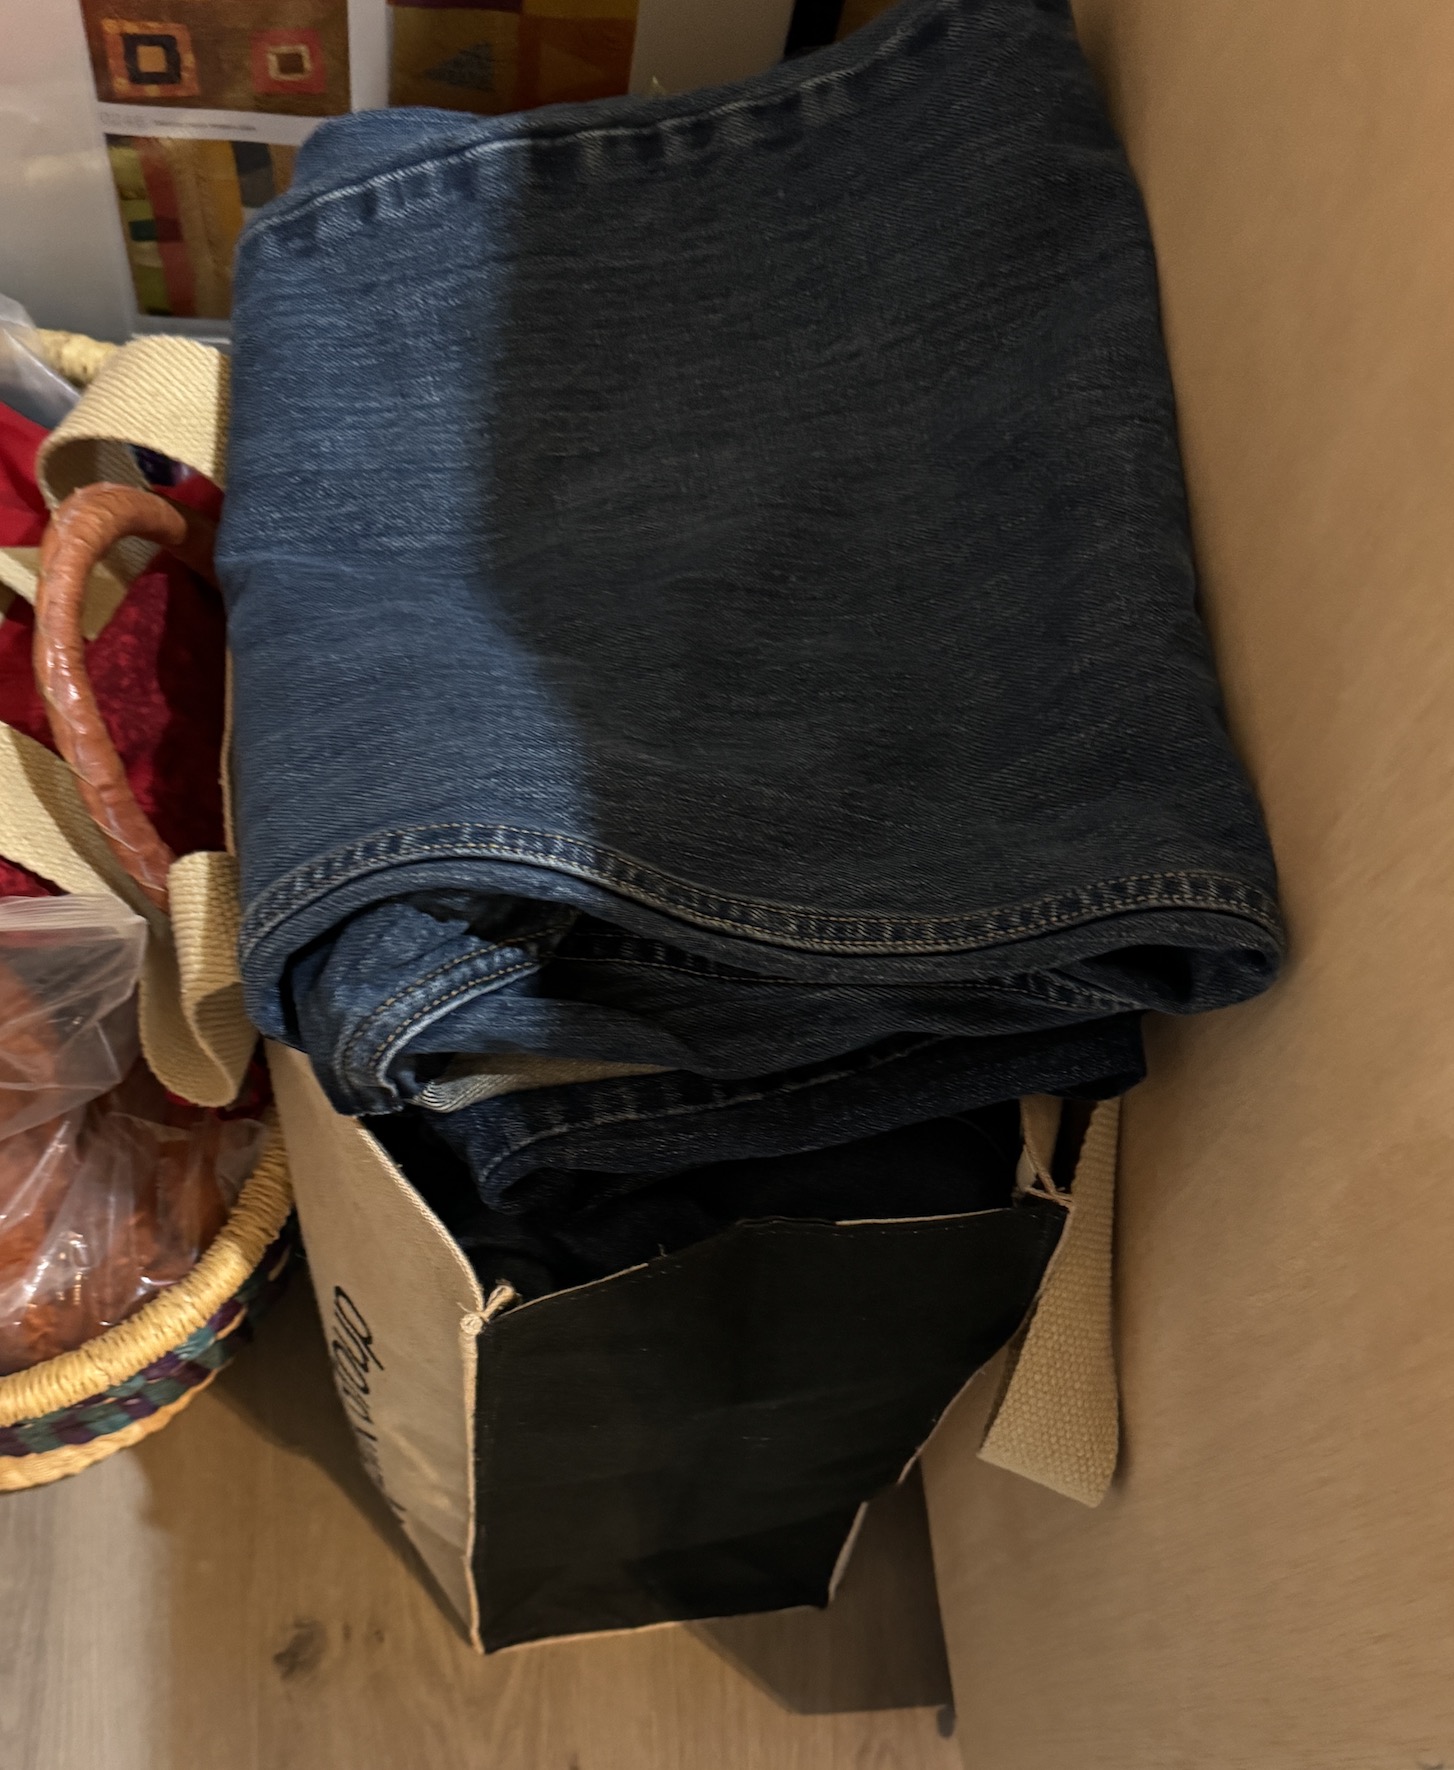
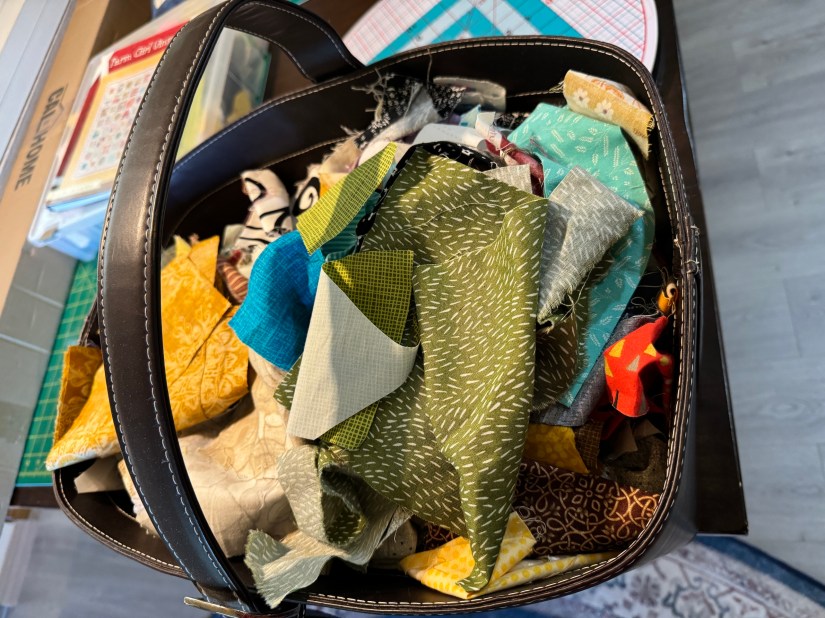
After I finish this quilt, there will likely be more recycled denim quilts in the future as I have a nice stash of recycled jeans in my studio:
Earlier this year a local charity thrift shop had an “All Jeans $2” sale and I stocked up!
Here are the other bloggers that participate in the ScrapHappy monthly posting event, check out their blogs linked below for their ScrapHappy posts:
It’s the 15th of the month and time for my monthly “ScrapHappy” post as part of the ScrapHappy group I belong run by Kate and Gun. At the end of this post I have a link to the other blogs participating in this monthly event in case you’d like to check out their ScrapHappy posts.
This month’s ScrapHappy post will be sort of lame because I’ve been doing everything but working on textile projects it seems! By the time you read this post (yes I am writing this ahead of time while on vacation with my sister in Virginia) I will just be returning home from another trip. We’ve also been working on some house projects and life has just been busy.
Okay so onto my lame post – ha!
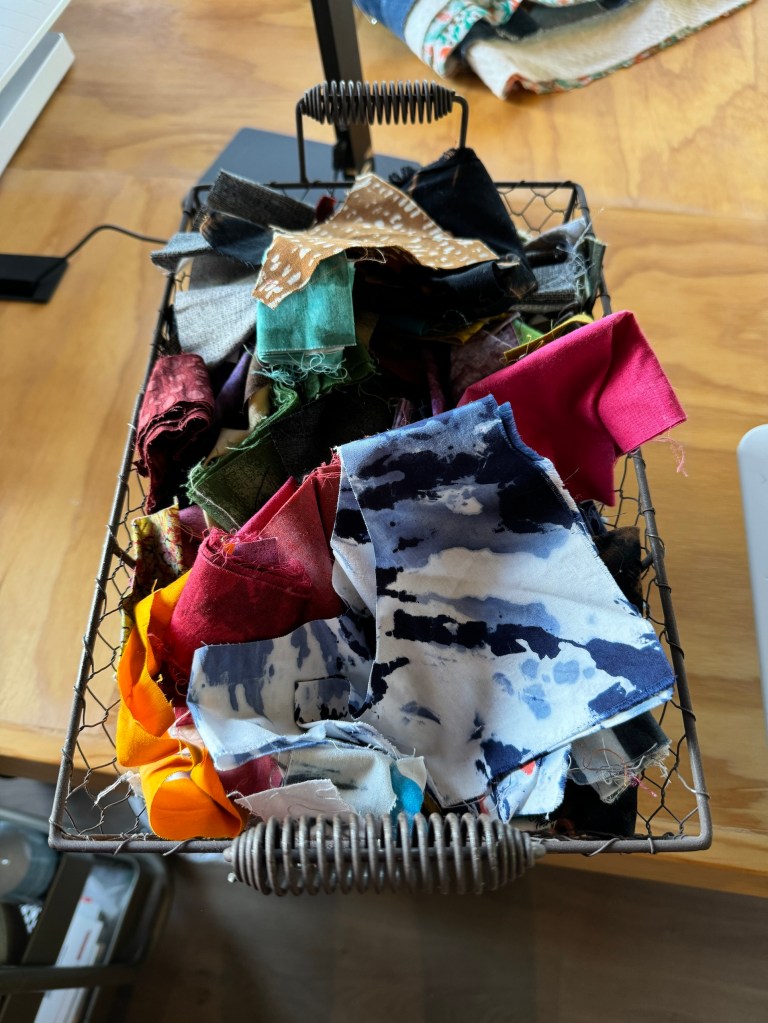
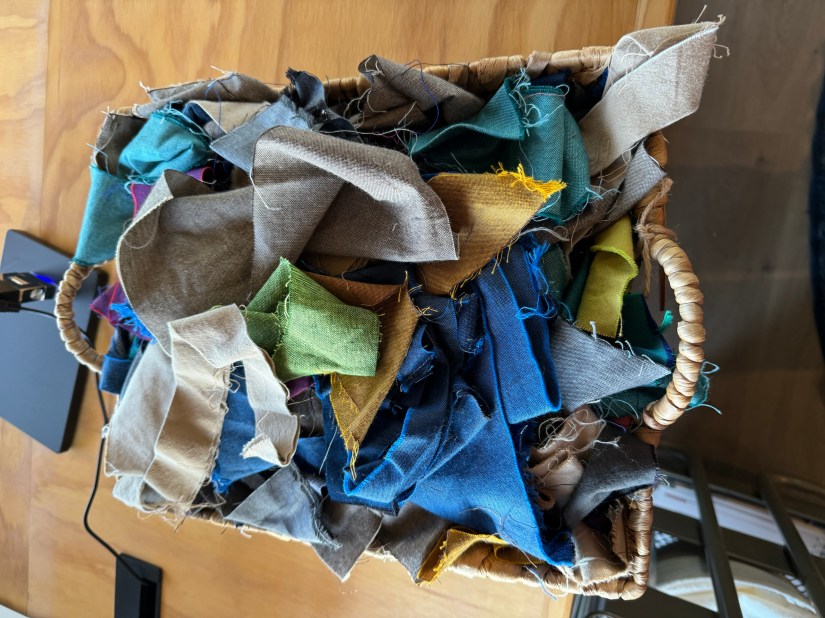
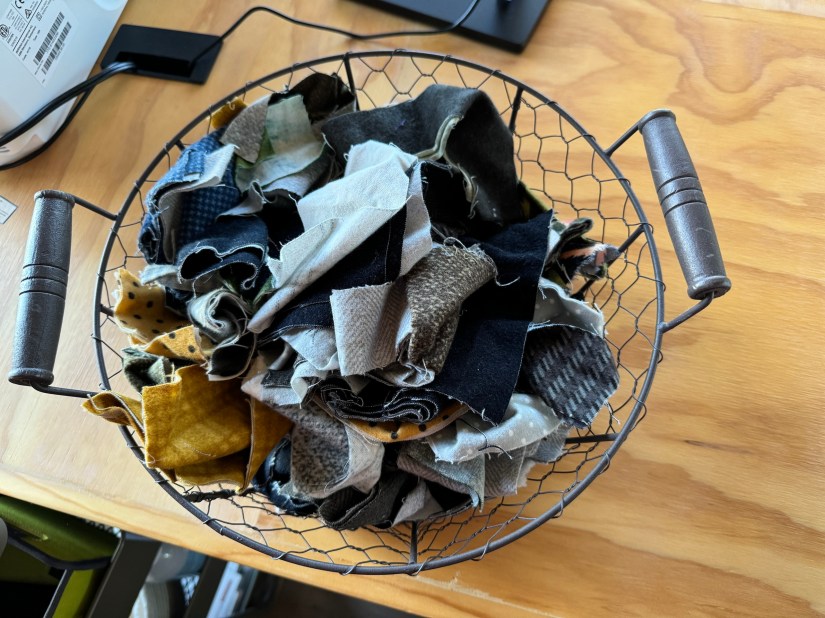
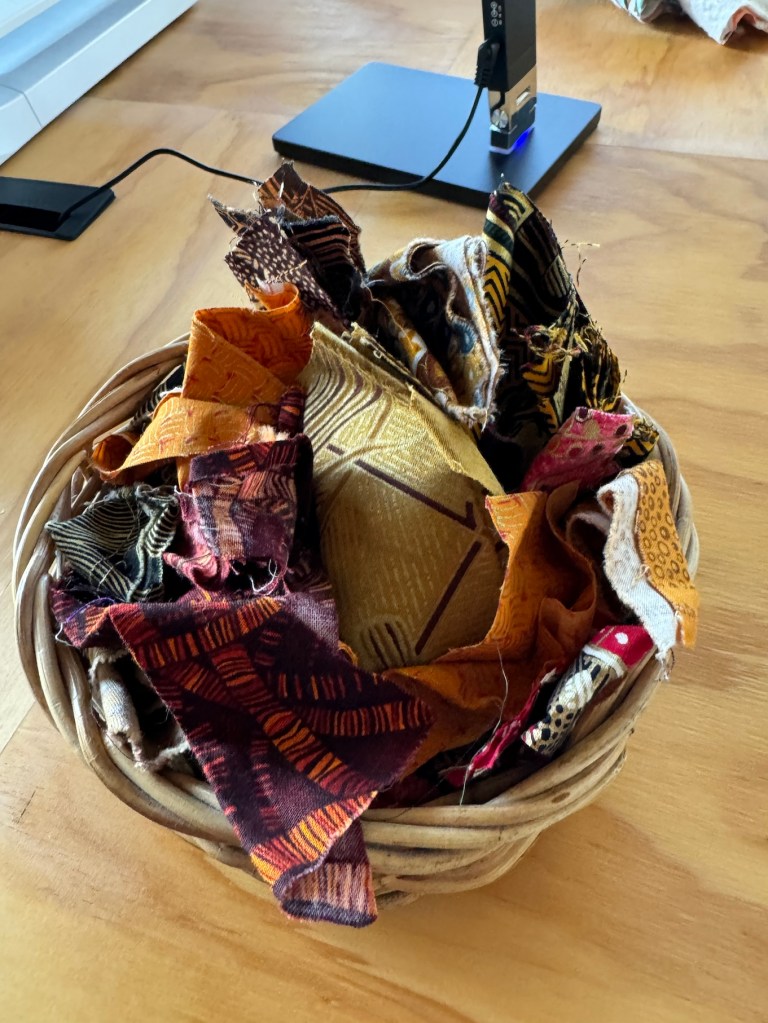
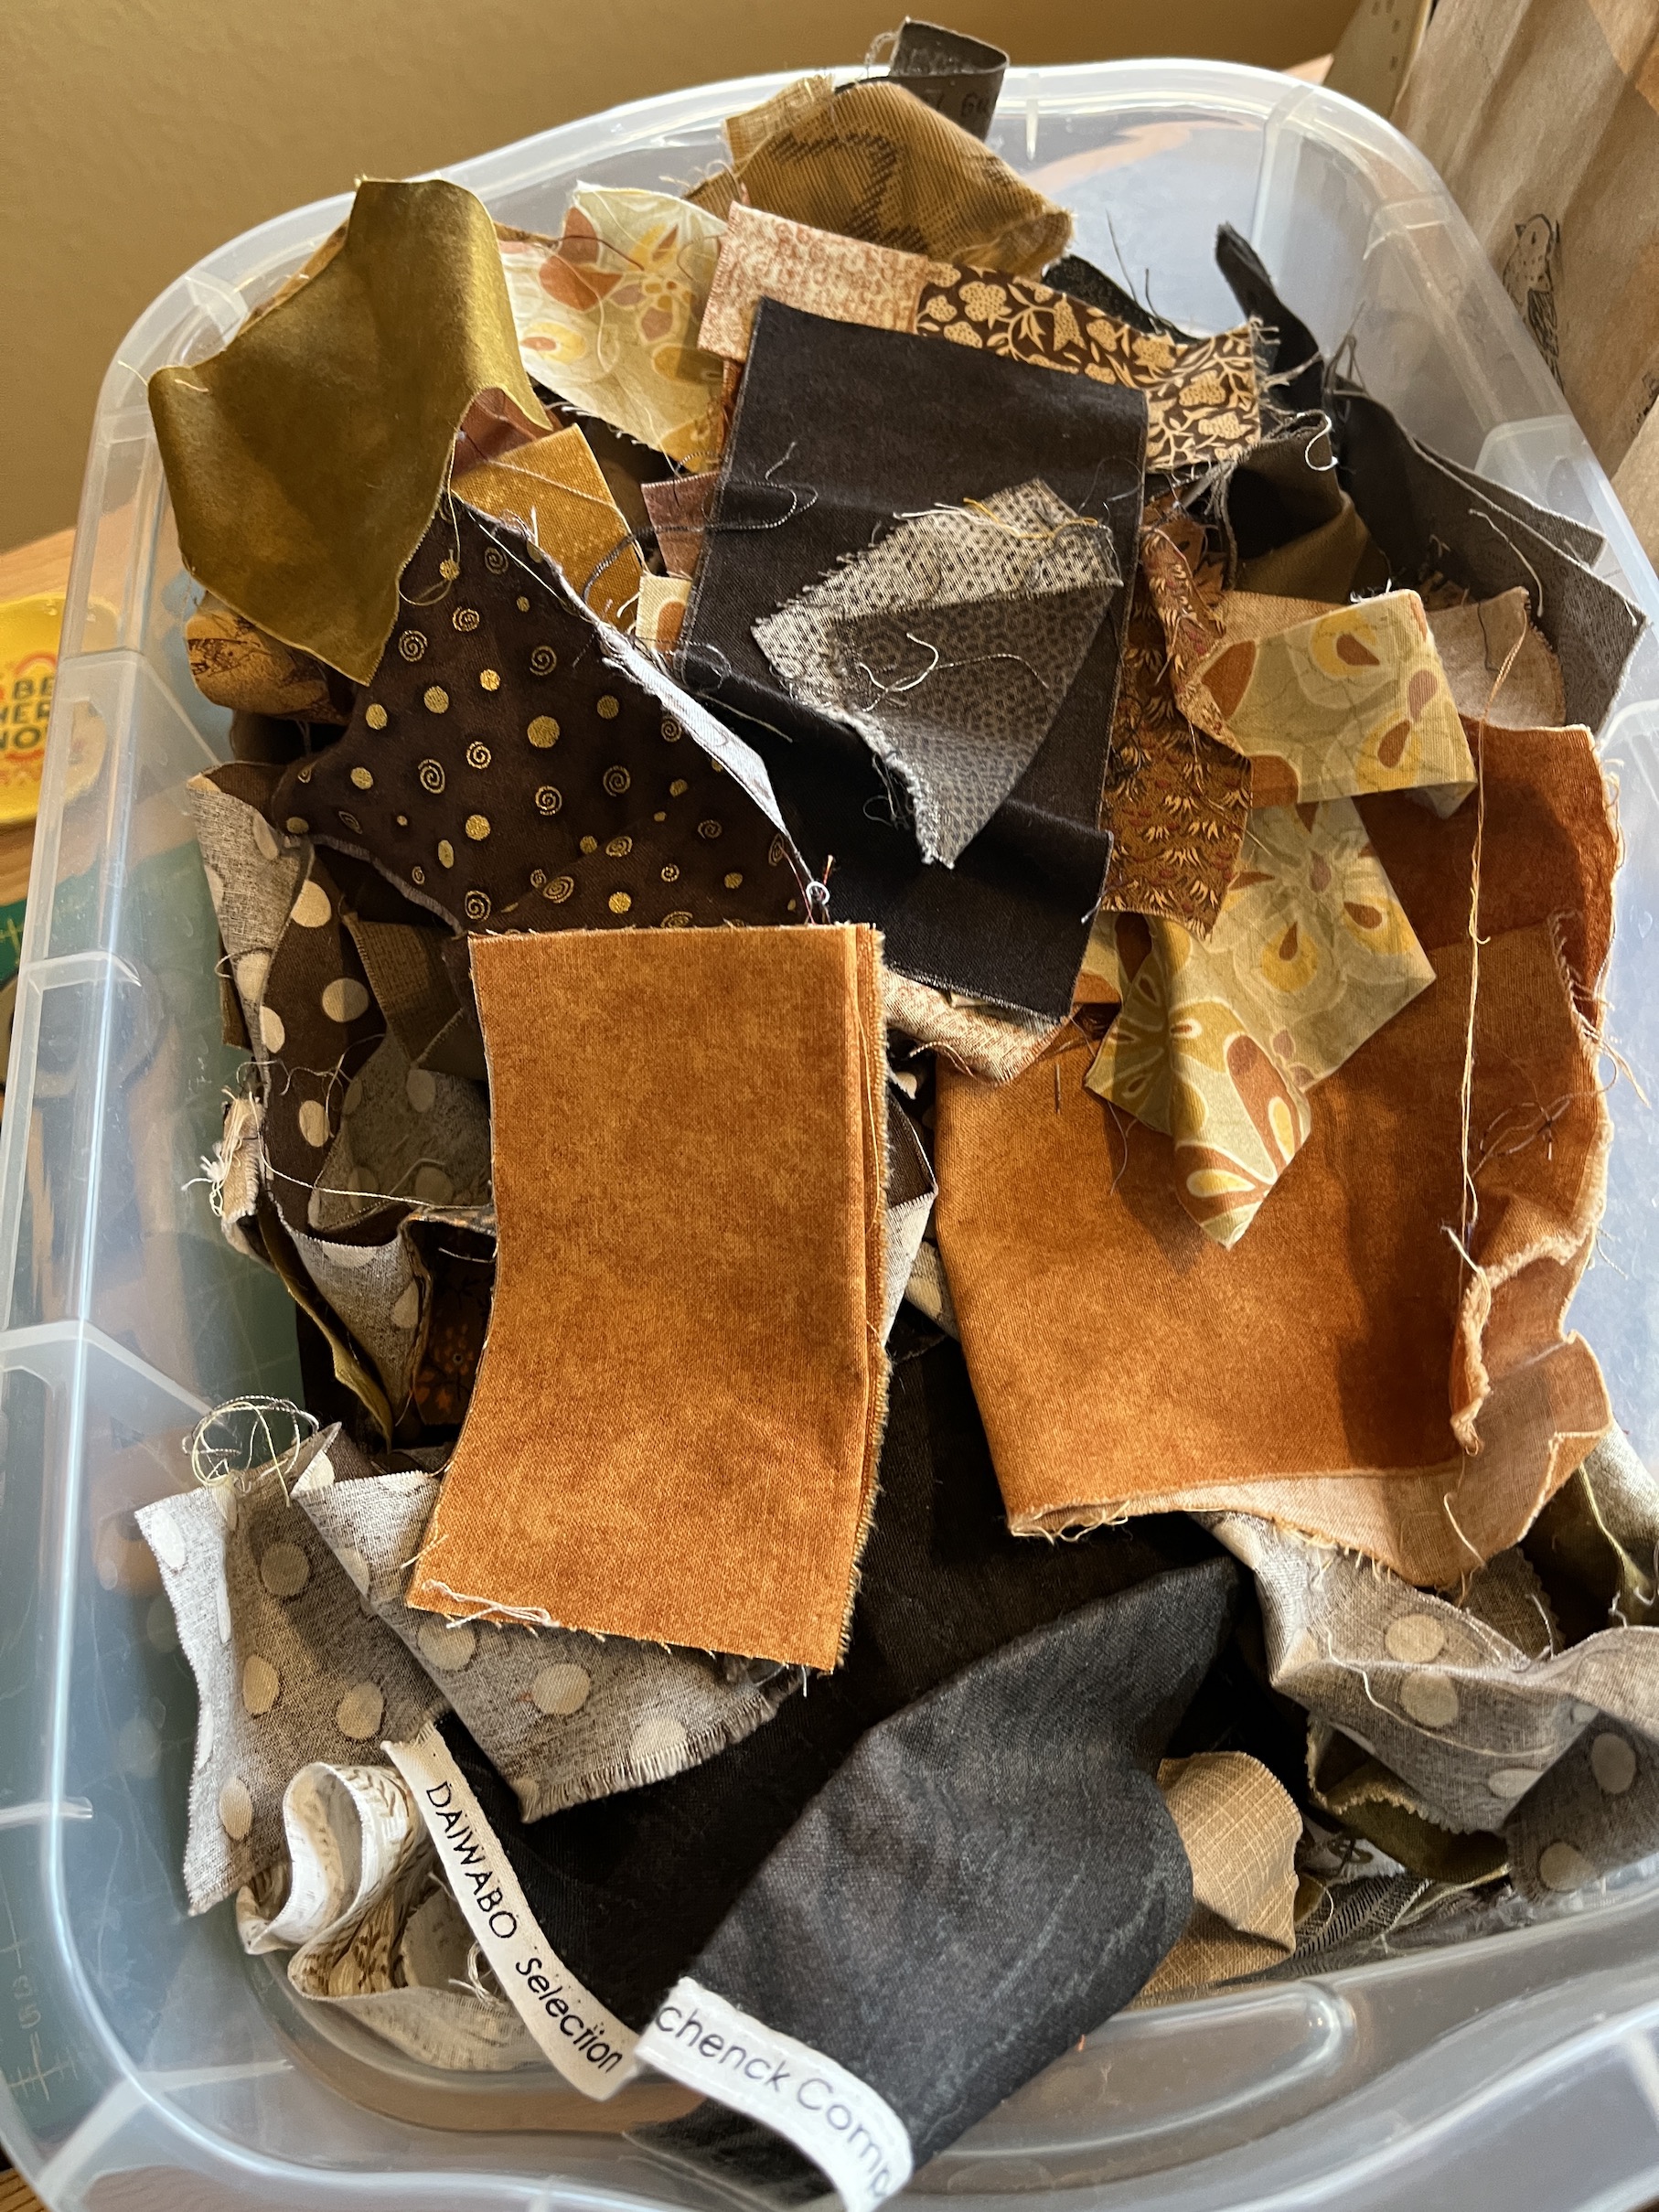
The Curation of Fabric Scraps
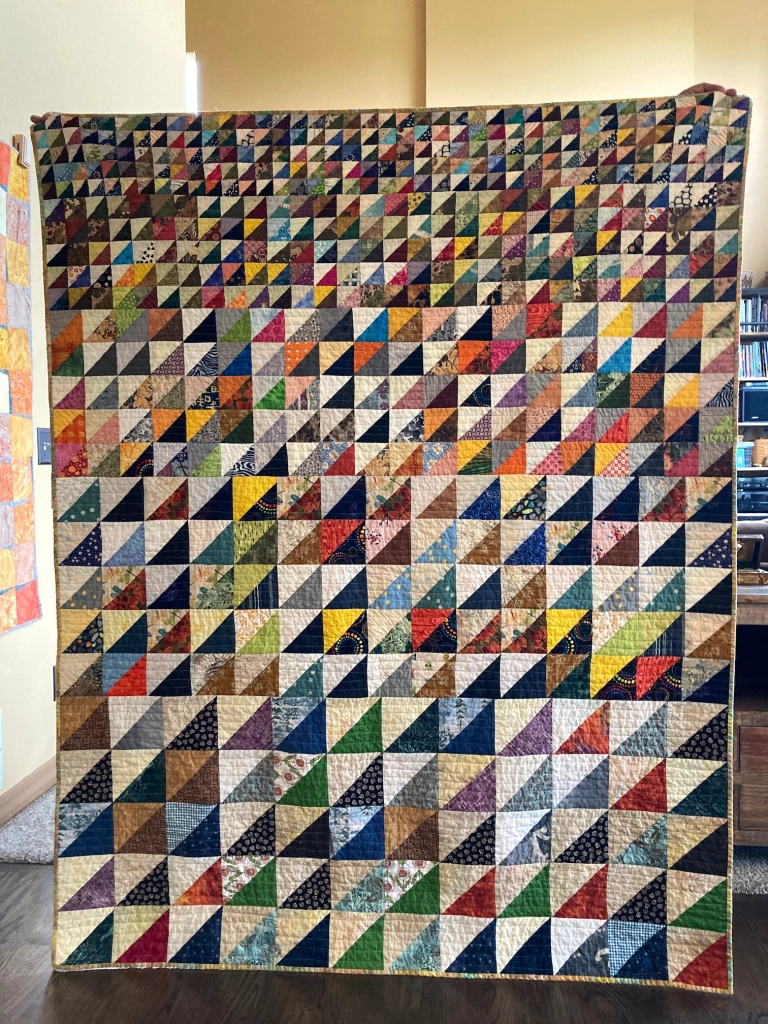
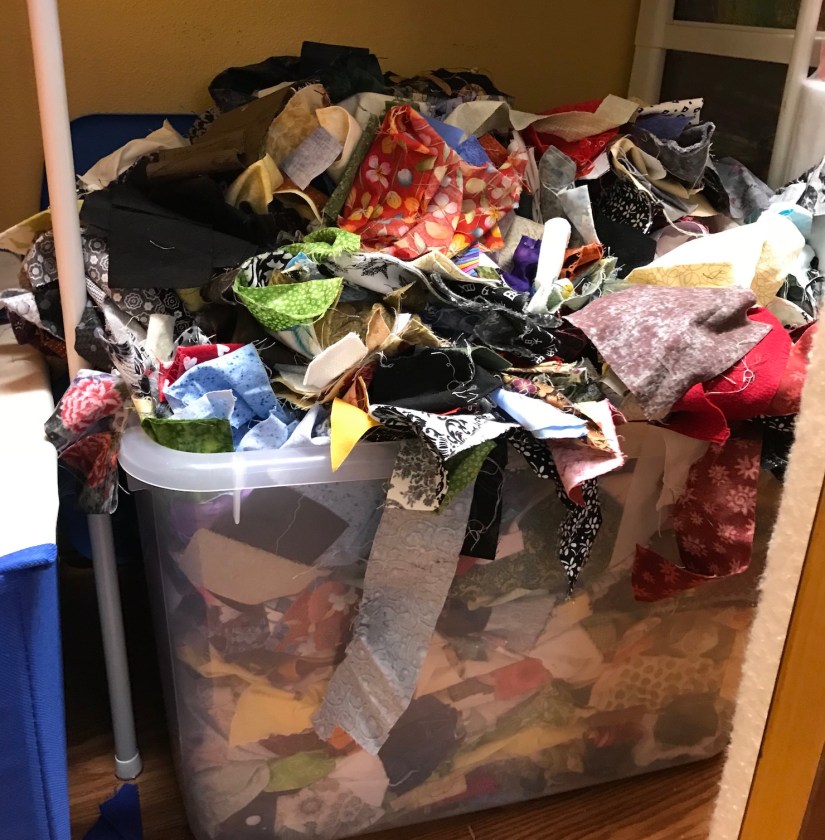
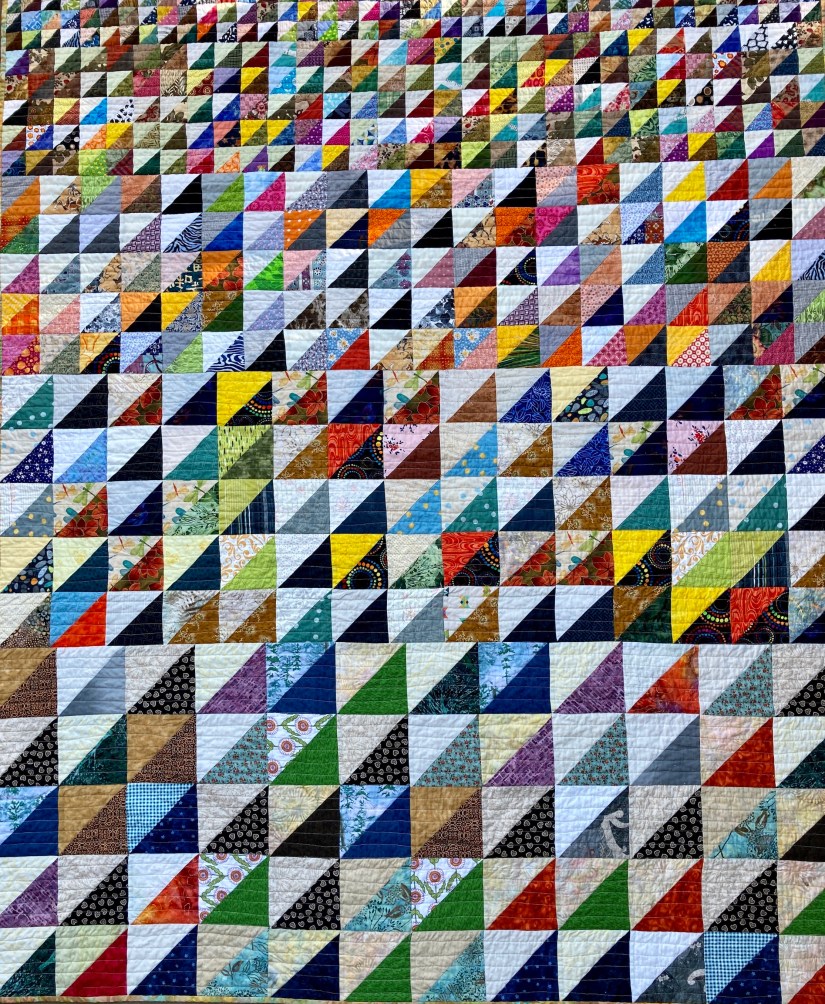
Over the past several years I’ve been working on curating my crazy fabric scrap collection. In my earlier days of quilting I would indiscriminately accept any decent fabric scrap from fellow quilters as evidenced by the quilt (see post “All the Trimmings” is all done) that was made entirely with scraps from fellow quilters, most aquired at quilt retreats:
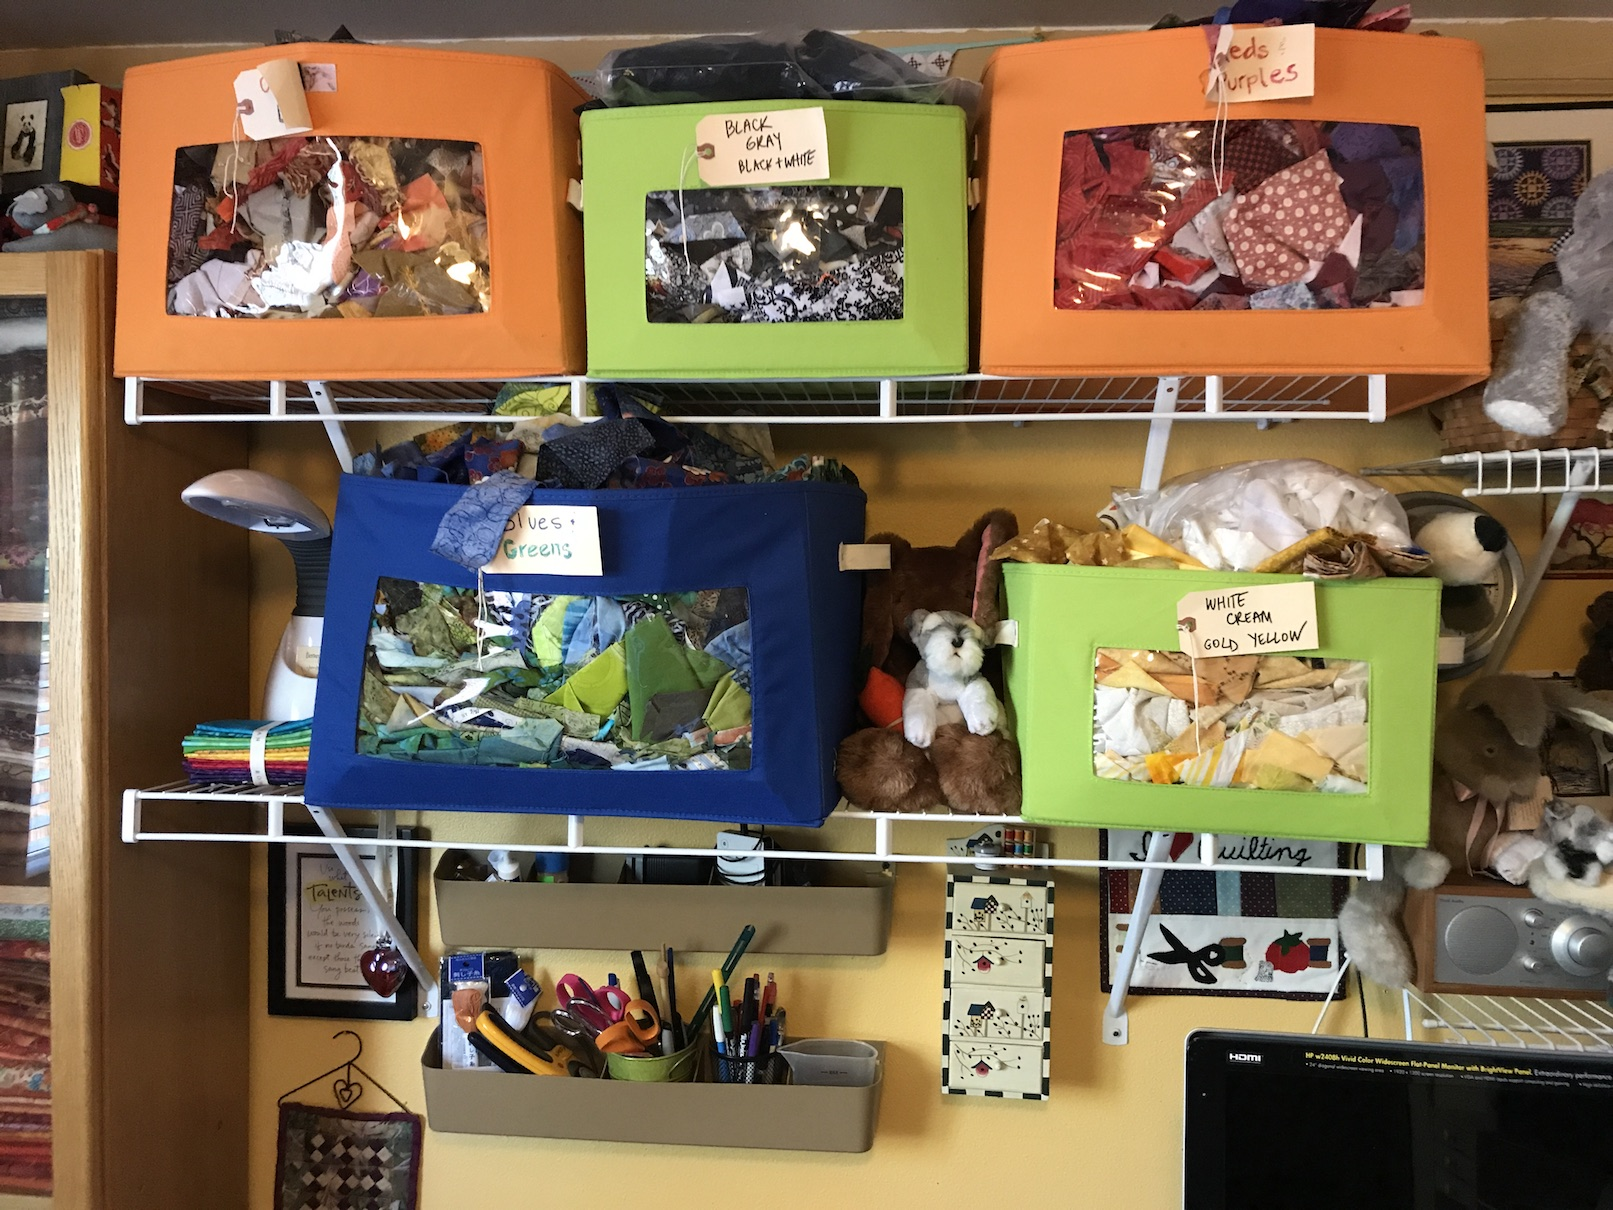
I used to have all my scraps in a HUGE bin, then I organized them by color into various bins:
Then I organized them by collection/type of fabric.
Then I gave a lot of them away and significant reduced my collection.
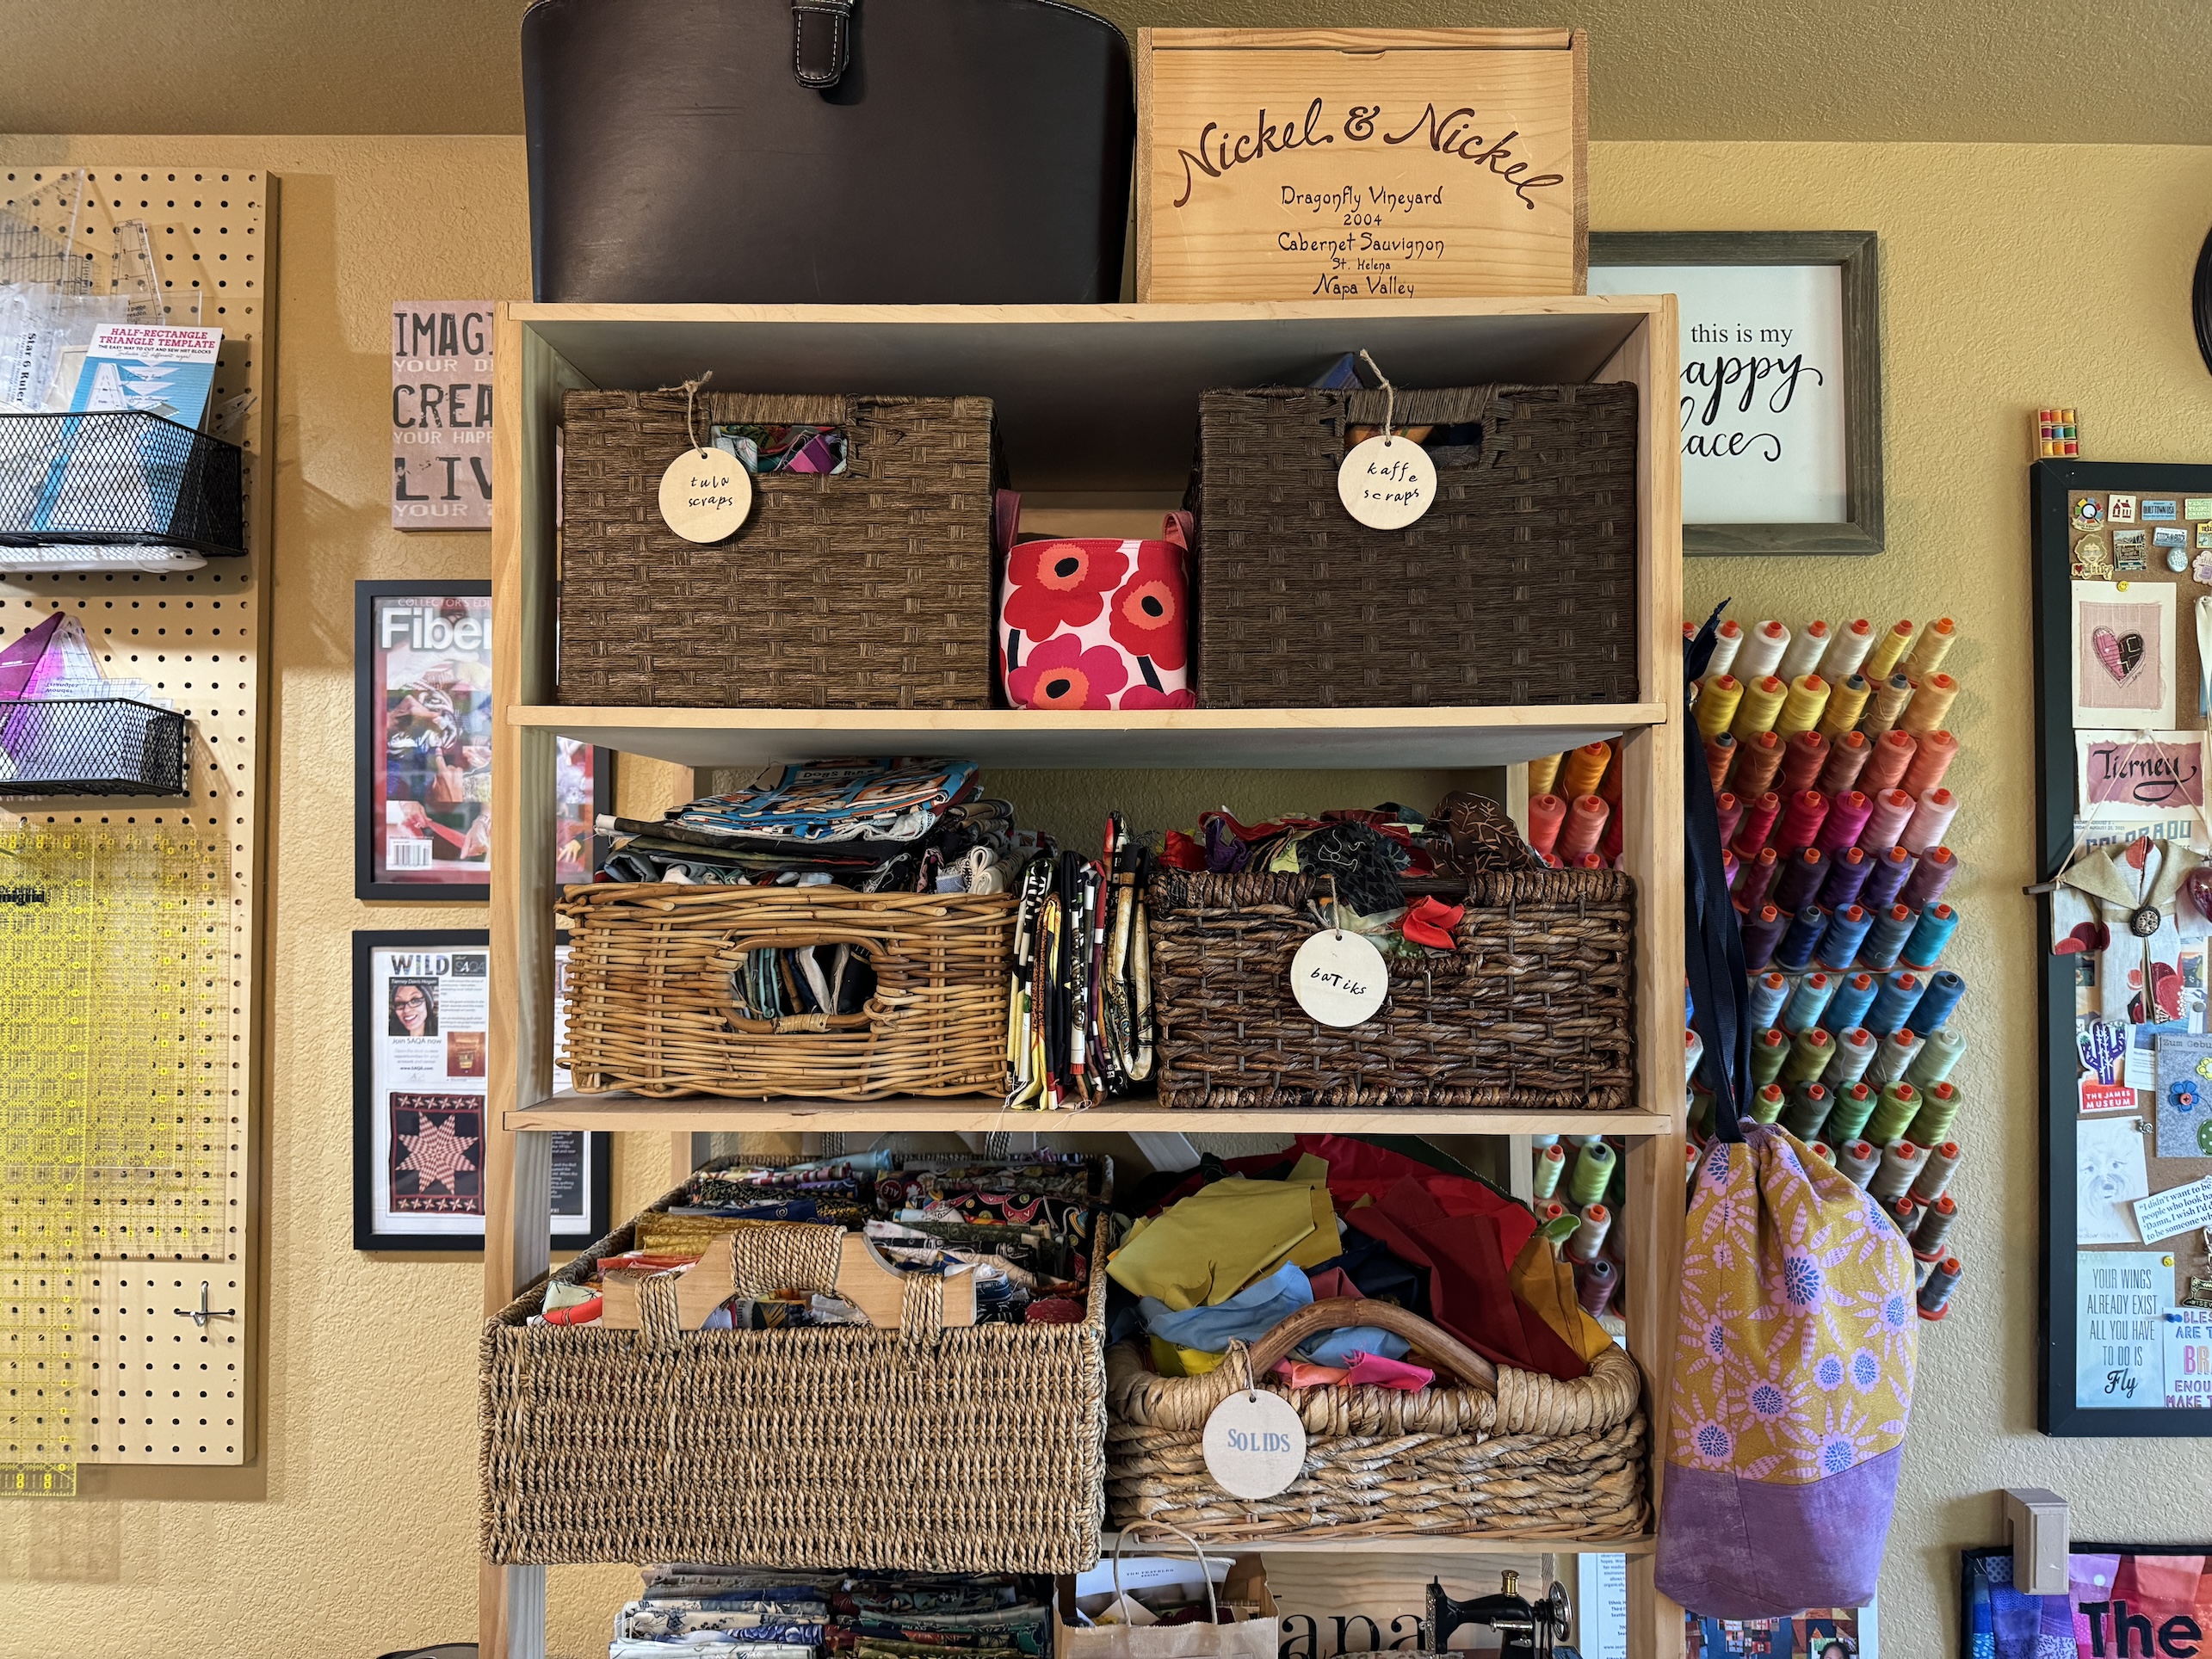
Now I have them in a series of baskets, organized by collection or type of fabric in a couple areas of my studio.
A couple months ago I bought some little wooden tags to label some of the baskets.
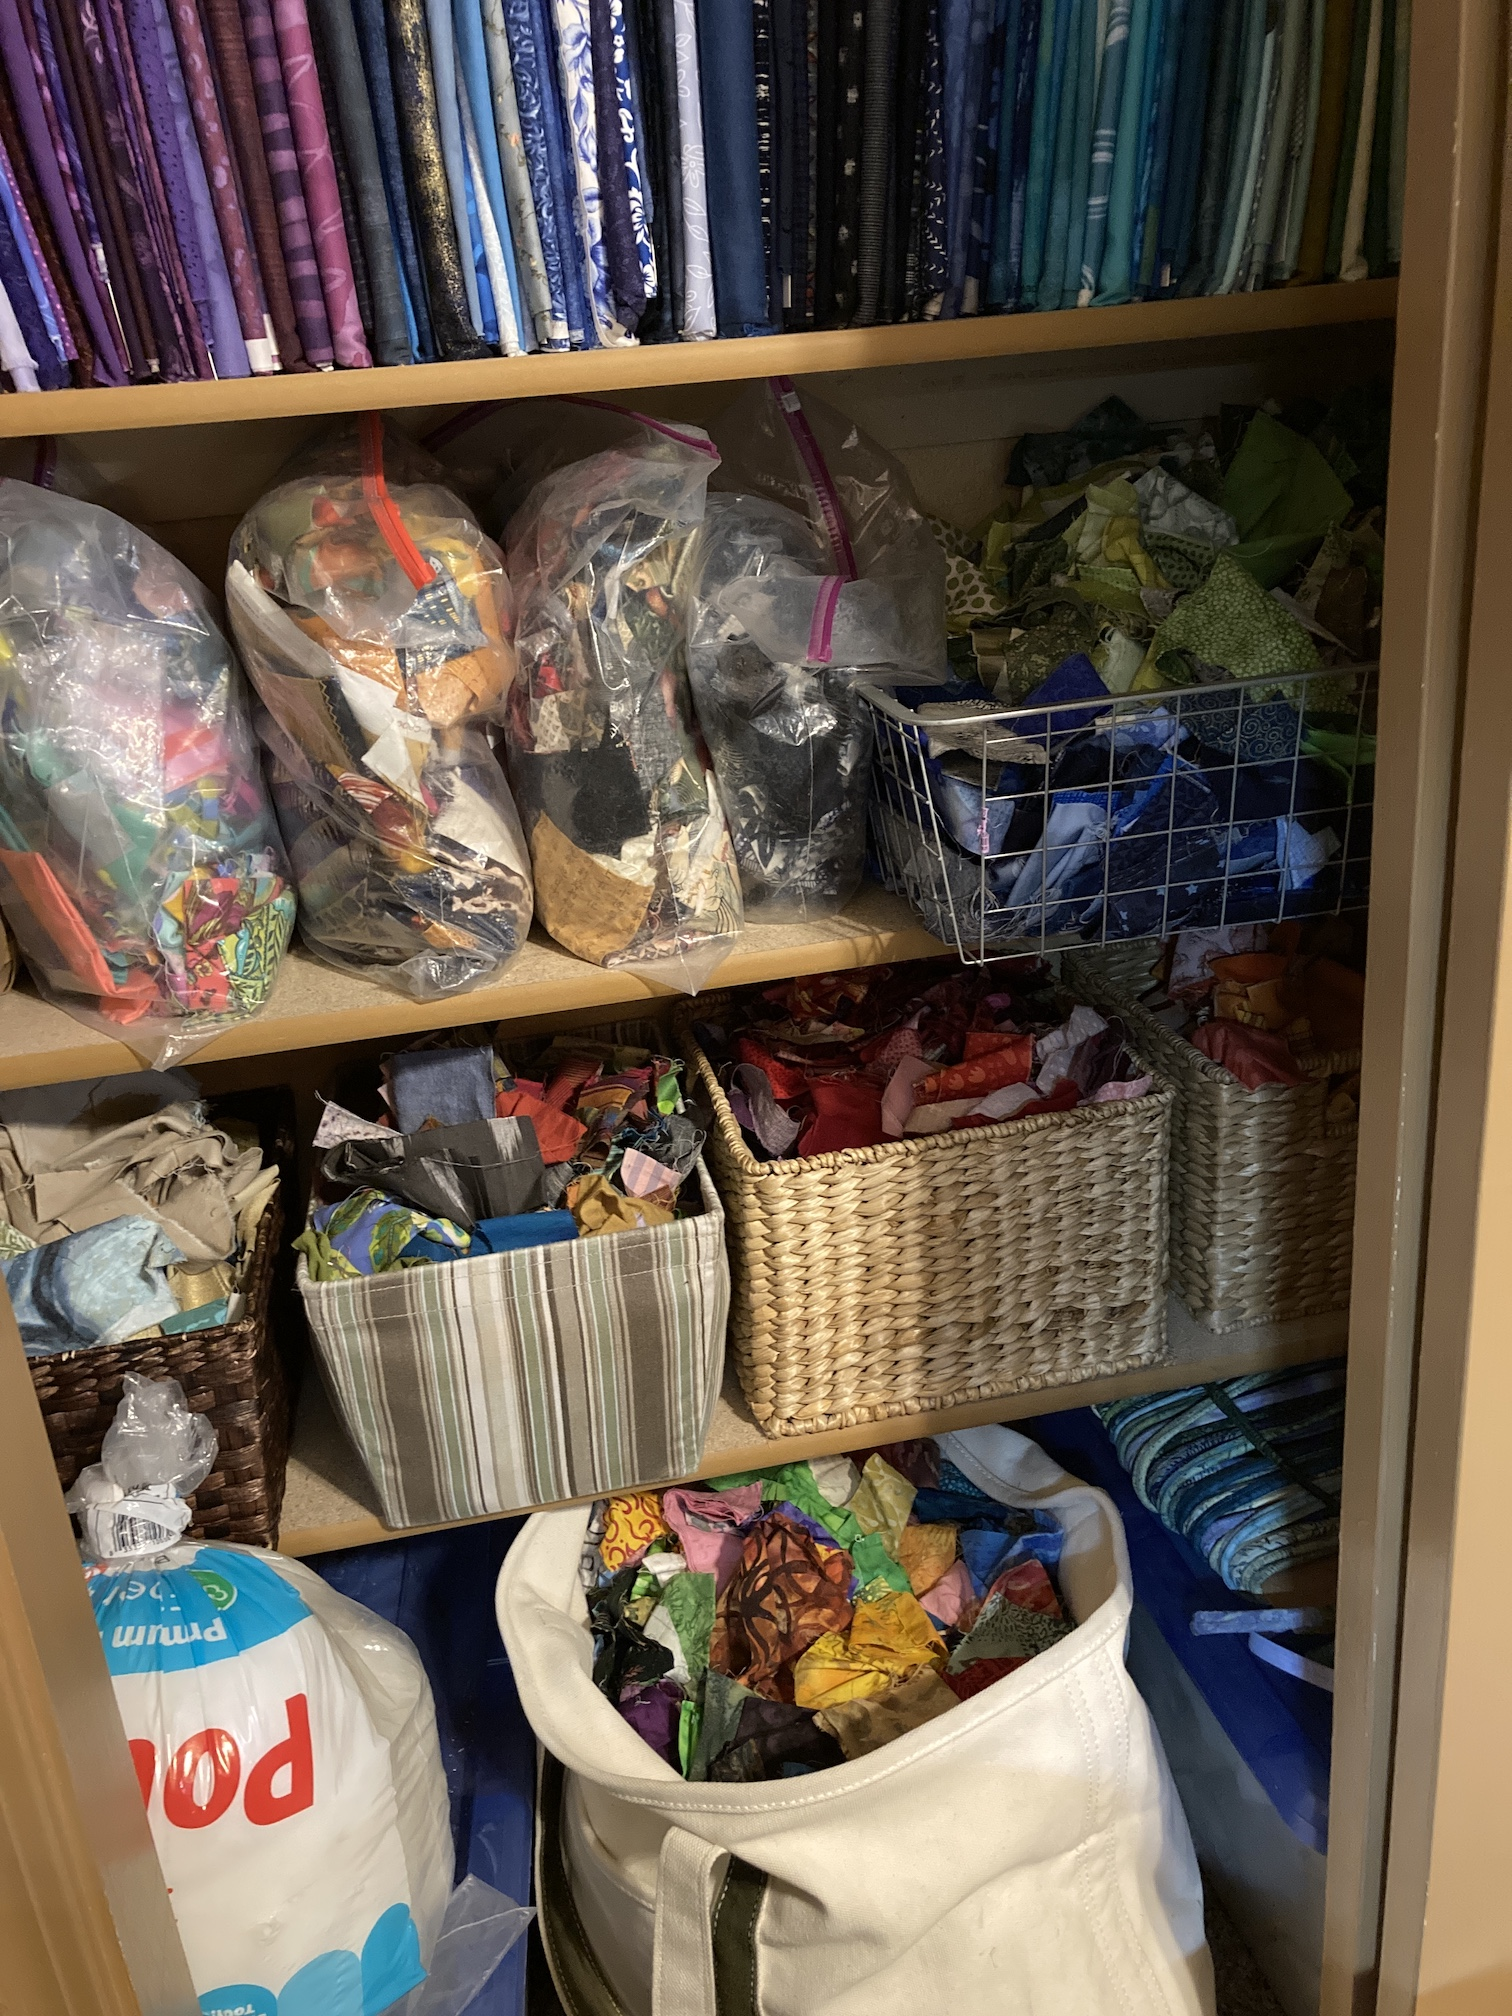
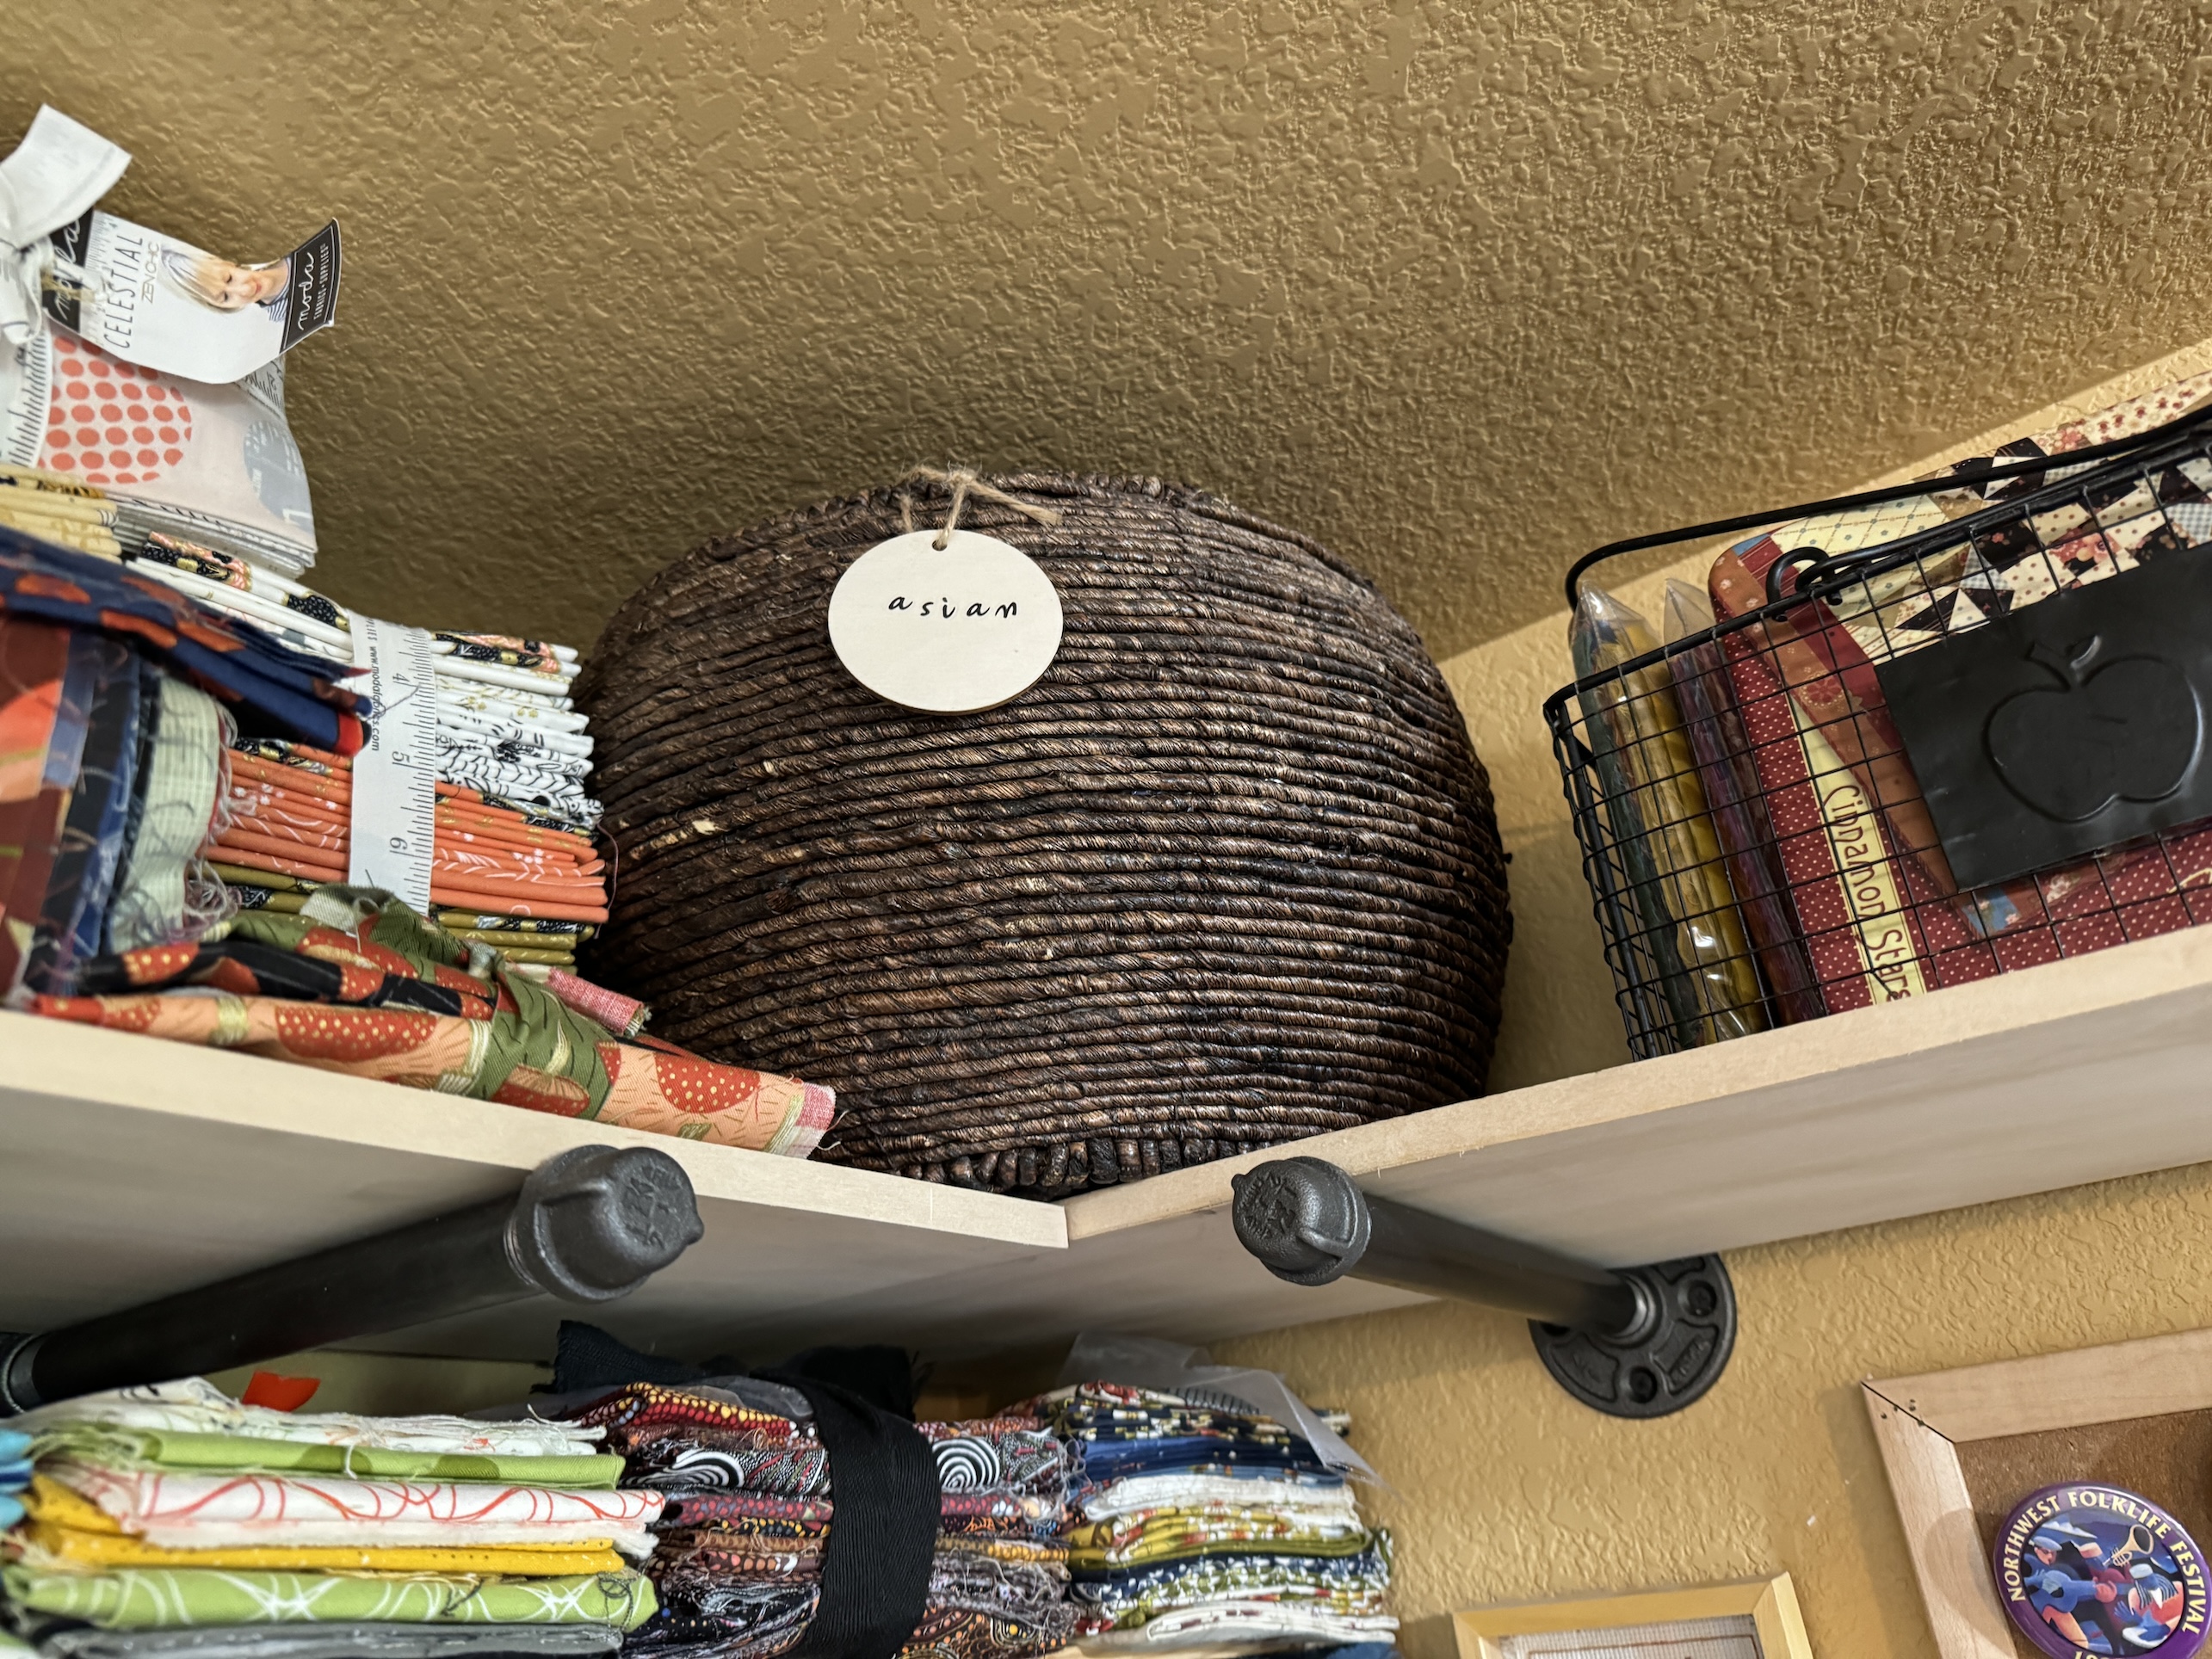
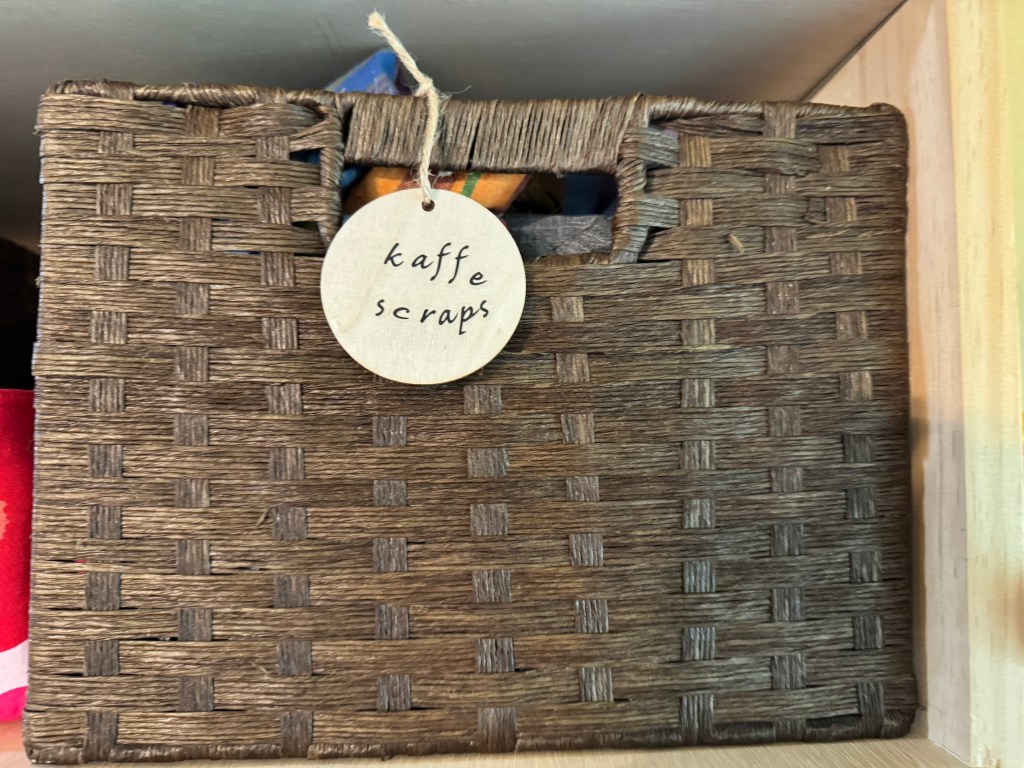
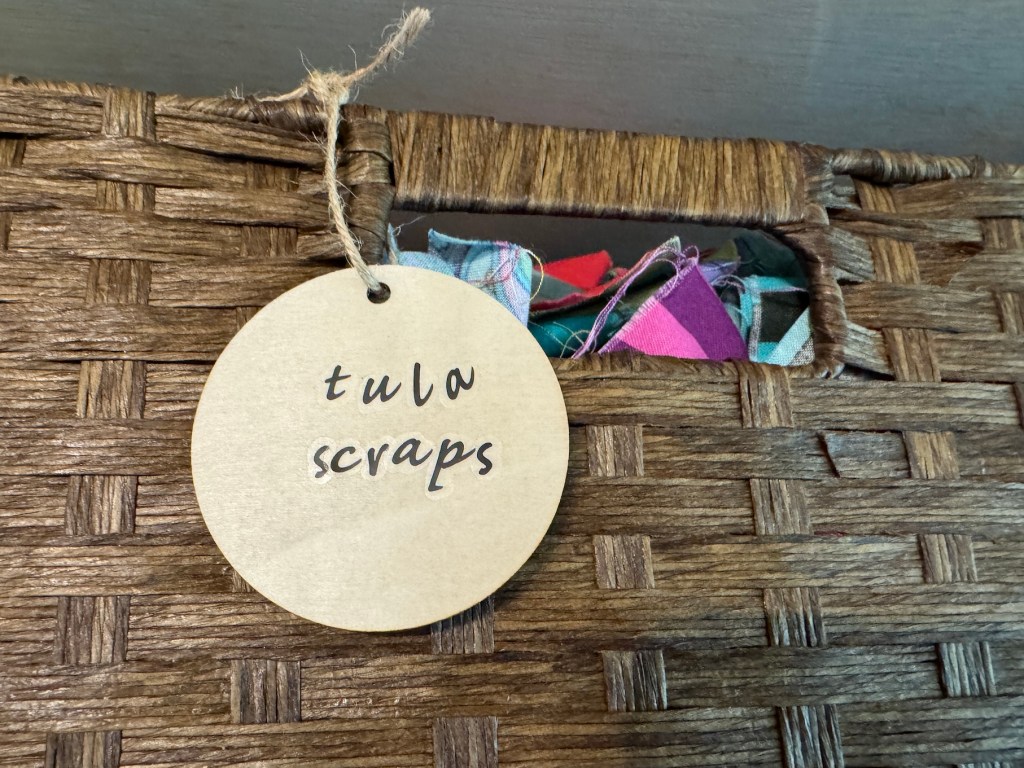
In addition to those type of scraps labeled above, I also have a collection of “art quilting fabric scraps”, shot cotton scraps, flannel scraps, ethnic fabric scraps, and “general” fabric scraps (doesn’t fit into any category):
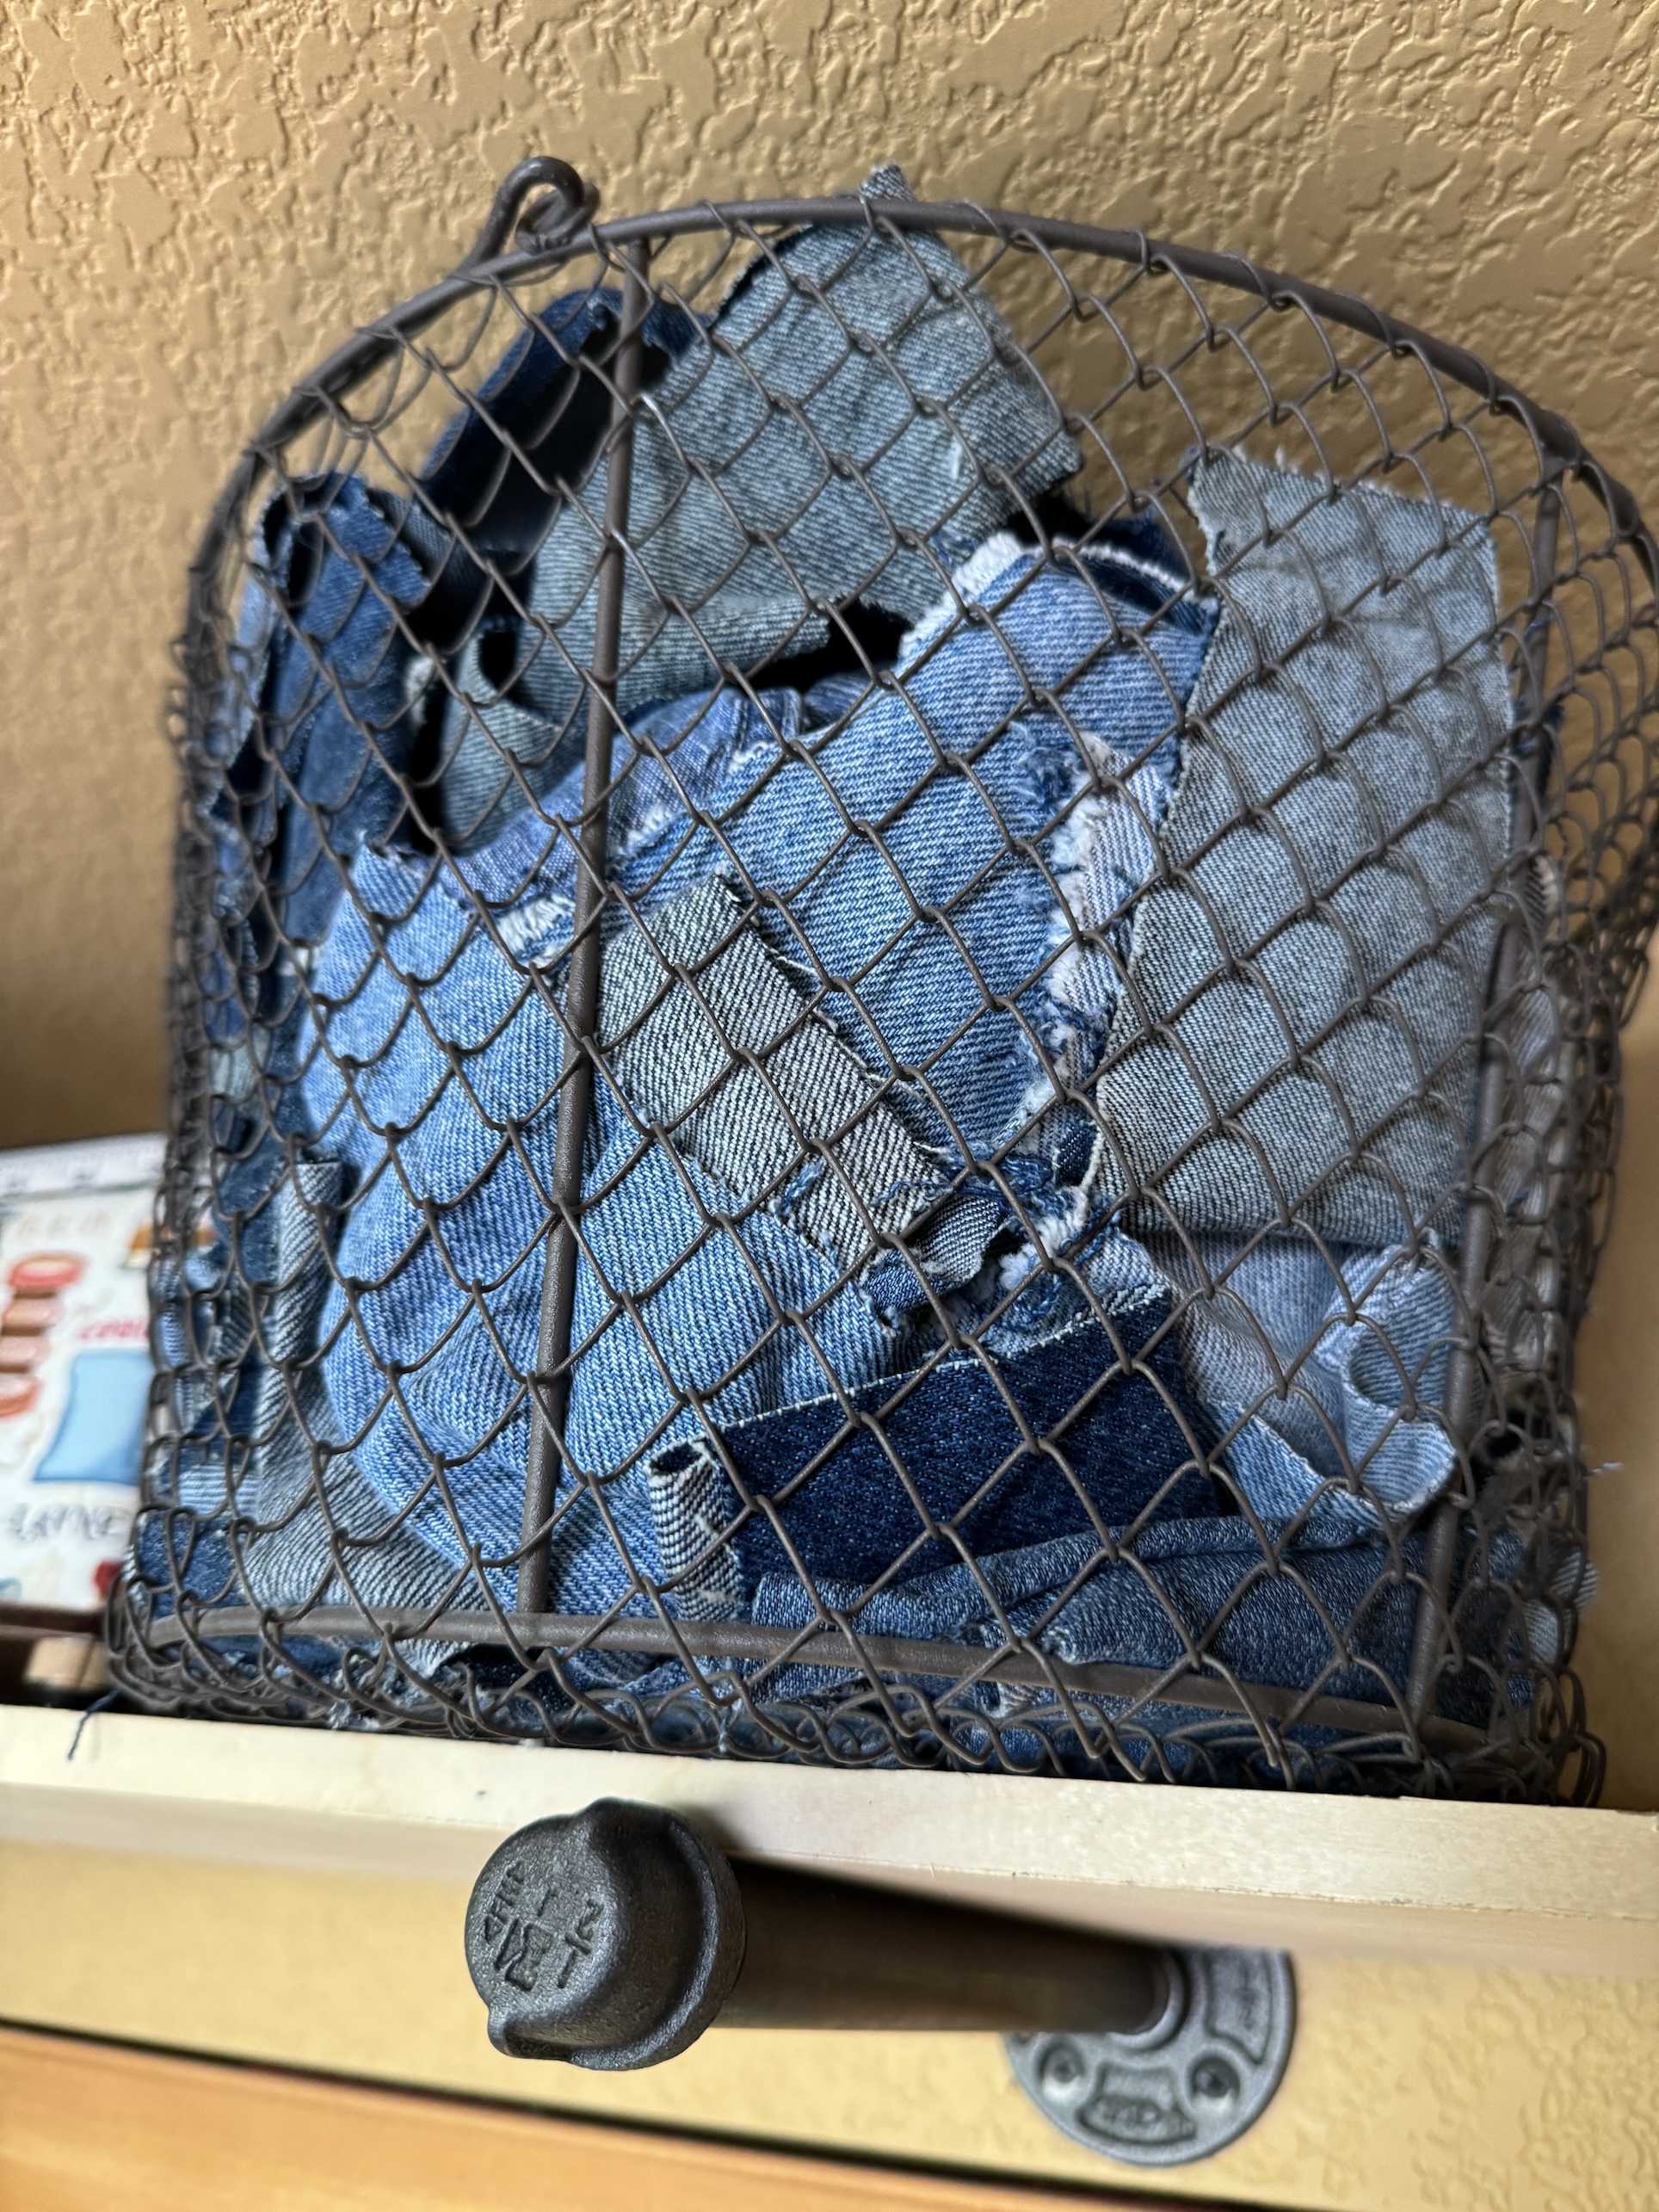
And denim scraps:
So that’s my current collection of fabric scraps and I am looking forward to making projects with them. I probably have 1/3 the amount of fabric scraps I used to – yay!
Next month my ScrapHappy post will be about me actually making something again with fabric scraps!
Here are the other bloggers that participate in the ScrapHappy monthly posting event, check out their blogs linked below for their ScrapHappy posts:
It’s the 15th of the month (ok it’s really the 17th but I have back dated this post, ha!) and time for my monthly “ScrapHappy” post as part of the ScrapHappy group I belong run by Kate and Gun. At the end of this post I have a link to the other blogs participating in this monthly event in case you’d like to check out their ScrapHappy posts.
I’ve had a very busy summer so far and I recently returned from a trip to the Philadelphia area to visit my brother (and I spent time with one of my long time blogging buddies that some of you know…but that is a separate post coming later this week). Currently we are hosting three different sets of out of town visitors over the next 2 months. So crafting is sort of on the back burner, but I didn’t want to miss out on the monthly ScrapHappy post.
I’m in my 11th year of blogging with lots of posts in my archives. I looked through my blog category Fabric Scraps Obsessionand found a couple of posts from early 2018 to share about a “Scrap Party” I had with a quilting friend, to celebrate the love of fabric scraps!
From the Archives:
Scrap Party!(03/30/2018)
It’s no secret, especially if you’ve followed my blog for a while, that I am obsessed with fabric scraps. I won’t try to link any of my numerous previous posts on fabric scraps. If you are new to my blog, you will have to just trust me 🙂
Well one of my quilting friends, actually the one who got me into appreciating the value and opportunity for unlimited creativity provided by using fabric scraps, is coming over tomorrow for a SCRAP PARTY!
She had a birthday a couple of weeks ago and we are going to do a belated celebration by going to out to lunch and then coming back to my house and spending the afternoon playing in my fabric scrap pile:
I did not post about it (as those of you who’ve followed me for a while may have grown weary of my constantly talking about fabric scraps) but last weekend I thinned out my scrap pile. I pulled out any remaining old lower quality fabric and donated more to a local charity thrift shop.
During a previous donation, a volunteer at one of our local charity thrift shops (for our local Humane Society shelter), told me that fabric scraps sell very well at the thrift shop. They cannot keep fabric scrap bags in stock, they sell out immediately! (See there are more weird obsessed people like myself in Central Oregon).
So what are we going to do at a so called “Scrap Party”? Well I am going to dump the whole box onto a plastic tarp on the floor of my master bedroom (as not to take up precious space in my tiny studio space that we will be sharing) and let my friend go wild playing with my fabric scrap collection. She is really into improvisational piecing (she is the one who helped me move from traditional quilting to art/improvisational quilting) so fabric scraps are one of her favorite textile mediums!
I’ve set up my travel sewing machine for her in my studio so we can sew together. I have two design walls (a small one on the closet door in my studio and then the big one in the hall way) so we won’t have to battle for design wall space!
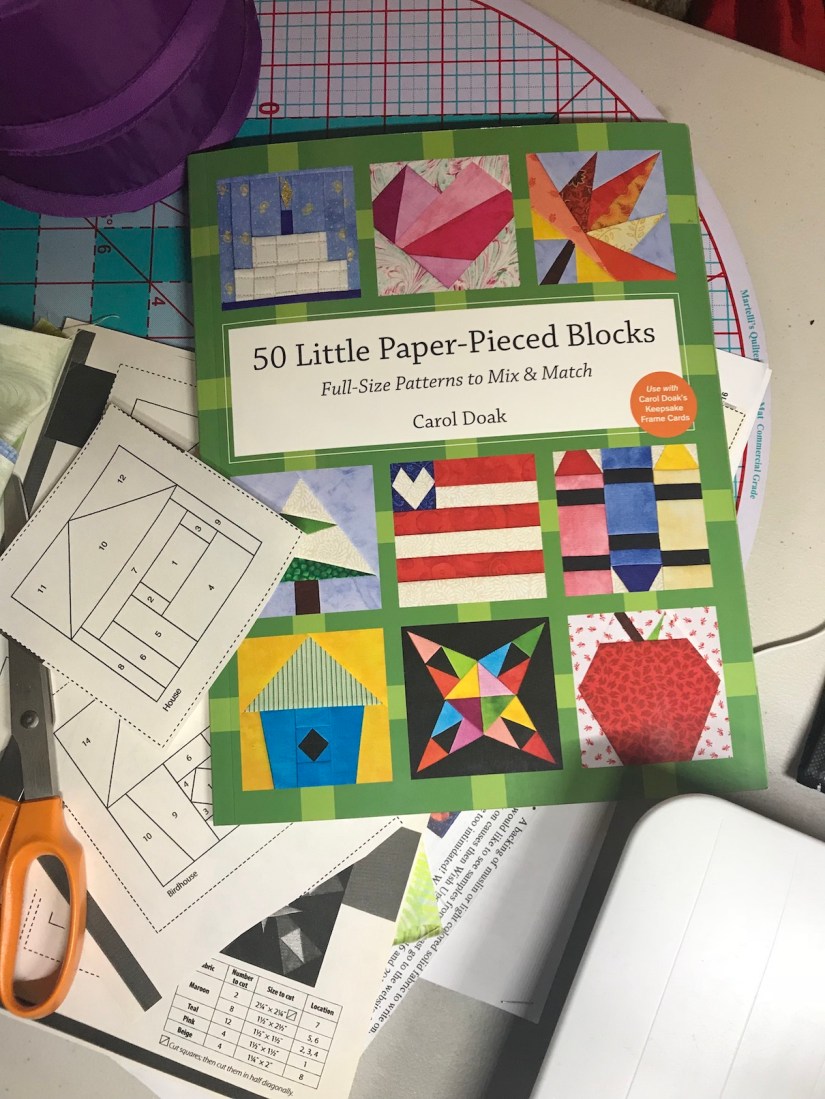
I’m not sure what she is going to work on, but I plan to work on some paper piecing. I’m trying to spend more time with my extensive (ridiculous) craft book collection and rediscovered in my craft book collection – 50 Little Paper-Pieced Blocks by Carol Doak. Playing with fabric scraps seems like a great time to work on my paper-piecing skills.
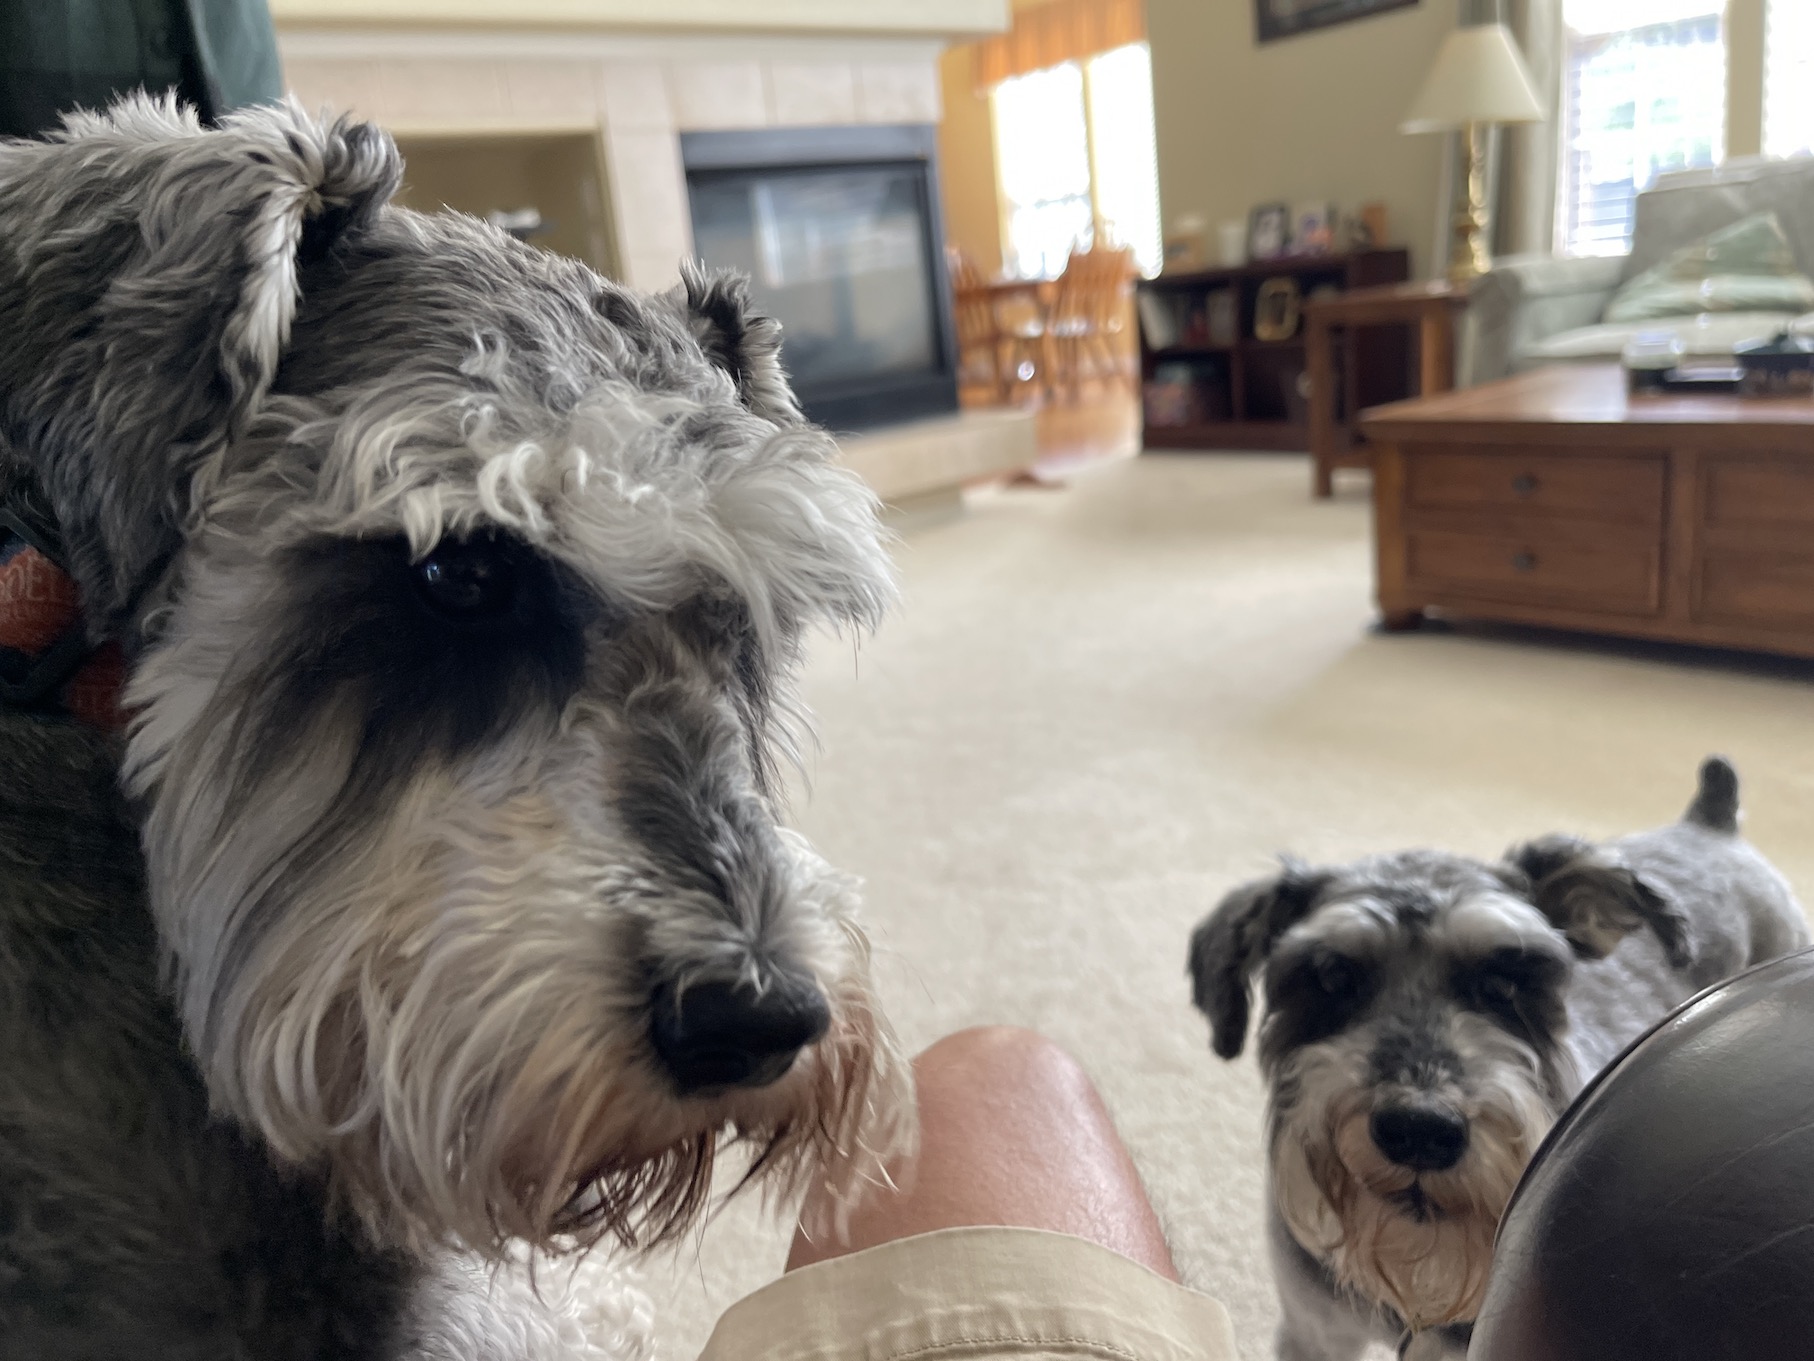
My friend is bringing over her miniature schnauzer so Mike will have a furry friend visiting.
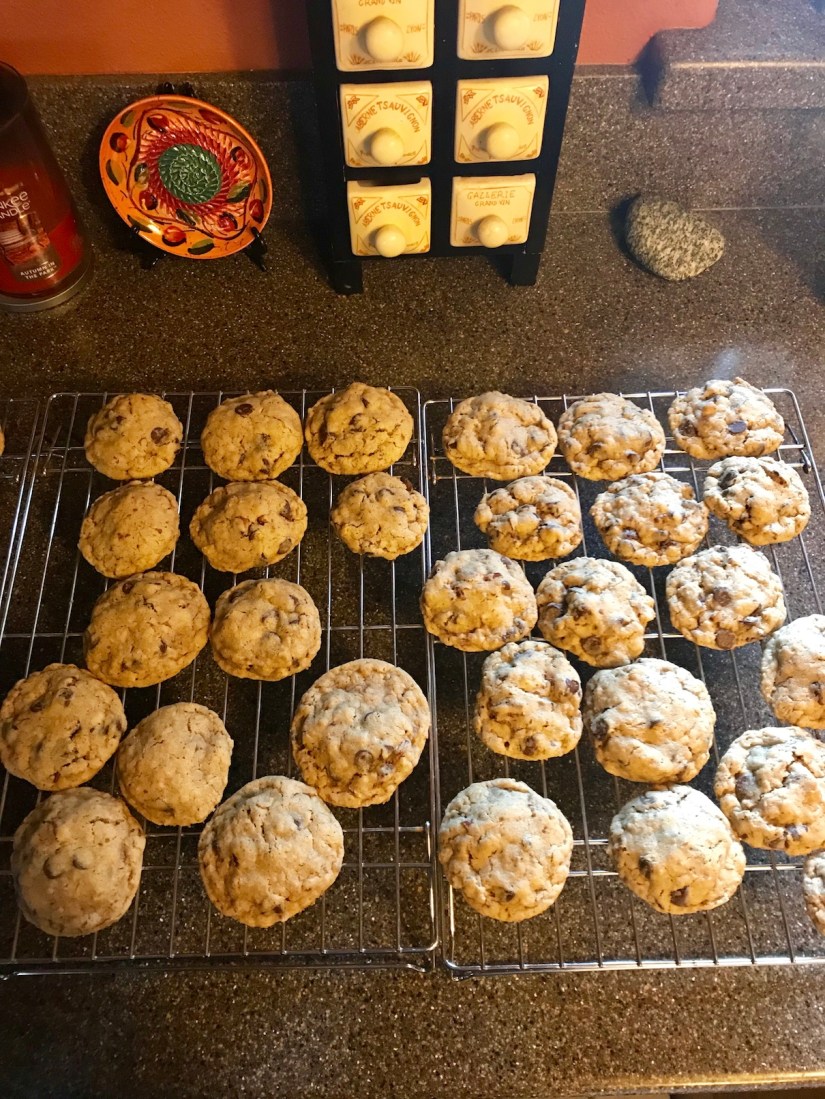
Terry the Quilting Husband (TTQH) made us chocolate chip cookies (to keep our sugar fueled energy level high for crafting!!!):
Of course I will share the outcomes of our Scrap Party!
Two Quilters and a Bed Full of Fabric Scraps (04/03/2018)
I know you’ve been waiting…and here is the follow up to my 03/30/18 post Scrap Party! , where I had a special birthday celebration play-date with my fabric-scrap-loving quilting friend.
It started with this plastic bin of my fabric scraps:
More fabric scraps crammed in here than I realized…
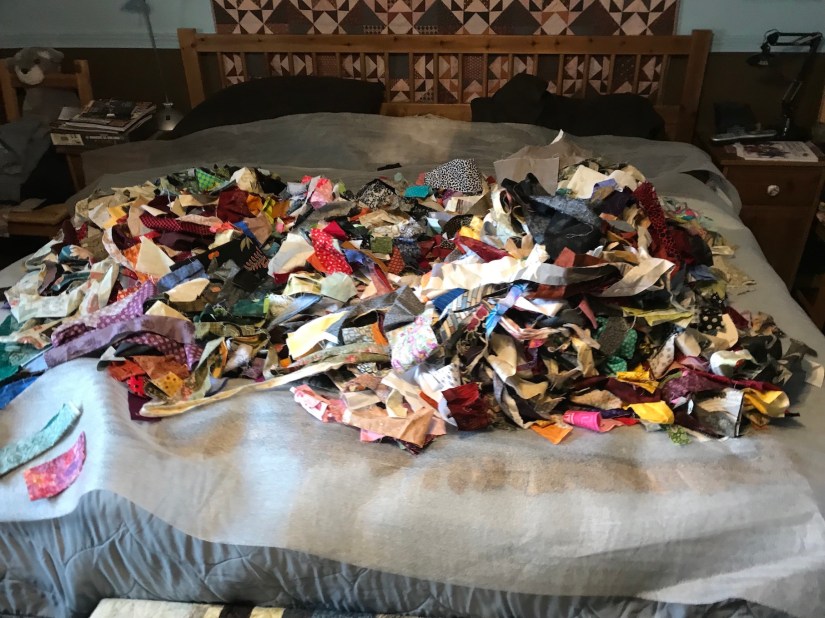
Dumped onto my bed (the bed has a plastic sheet from packaging material covering it):
A king size bed filled with fabric scraps (awesome or terrifying?)
Before we dove into this delicious (or suspicious) pile of fabrics, first we needed to fortify ourselves:
I might have a small studio but I can always make room for tea and cookies (made by TTQH!).
After a few minutes of frolicking in the fabric scraps, my quilting friend pulled her initial stack and got to work on making improvisational blocks. As a challenge, in addition to access to my crazy fabric scrap collection, I assigned my friend these pieced block discards/trimmings to try and incorporate into her improvisational blocks:
During our fabric scrappy play day I thought I would also take the opportunity to practice paper-piecing (Not the fun “English Paper Piecing” type but the “flip and stitch” type of paper-piecing that I suspect is what you have to do all day in the “Underworld” if you are bad in life and go there after you die…um, I would like to choose the “fire & brimstone” instead please…).
I signed up to participate in the Sisters Outdoor Quilt Show’s 2018 Wish Upon A Card Fundraiser & Fabric Challengesponsored by Robert Kaufman Fabrics. I needed to make a 4′” x 6″ fabric postcard to donate to the fundraiser, incorporating the two feature fabrics provided by Robert Kaufman Fabrics.
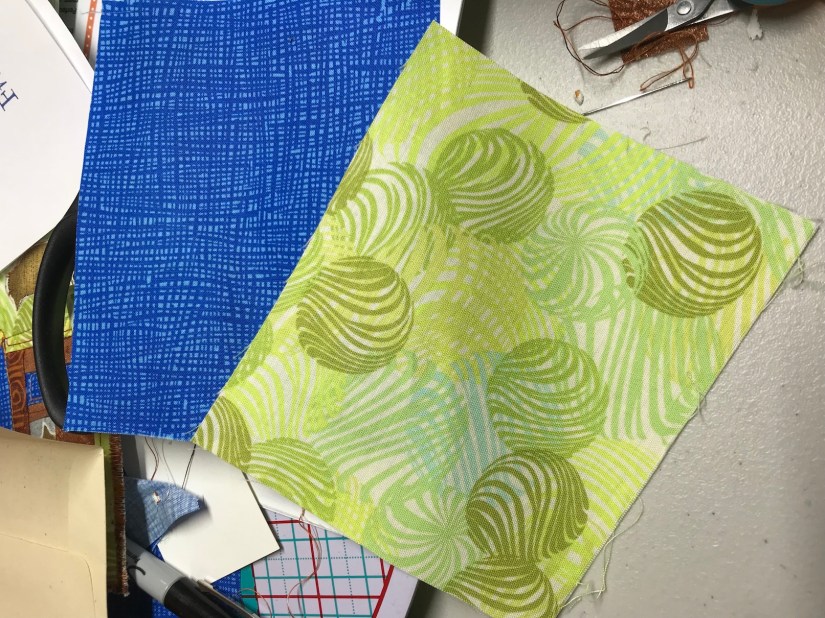
In general I love Robert Kaufman fabrics, but I was completely underwhelmed by the fabric pieces they sent me to make the postcard:
Um…what am I gonna make with these?!??!
Thank goodness my friend helped me pick out some coordinating fabric scraps for my postcard.
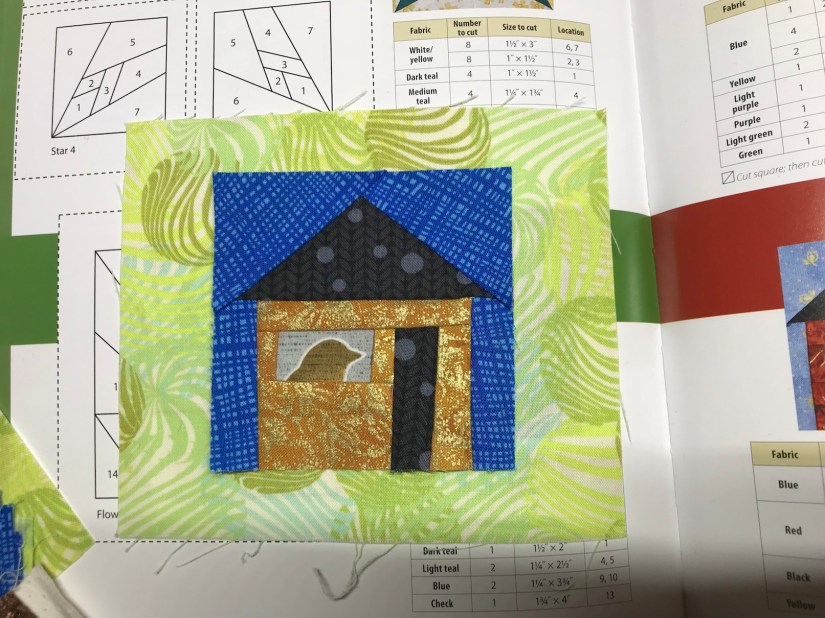
Here was my first (actually second, as the first was a legendary-paper-piecing-screw-up disaster) attempt at paper piecing a little house for the postcard:
Hated it!
Here is my second (okay actually third) attempt and the final version with my embellishments:
“Visitor Arrives” by tierneycreates 2018 (note the back of the postcard is fused blank muslin covering the stitching so that it can be used as a postcard)
I mailed it off yesterday to Wish Upon a Card and I will not be offended if they say they “never got it in the mail” or they accidentally let it slip into the trash can – ha!
Now I bet you are curious: Did we make a dent in the pile of fabric scraps? Not really. Here is the tub of fabric scraps cleaned up from the bed and put back into the closet after my friend left:
It appears I have enough for another Fabric Scrap Party (or 200+ Scrap Parties)!
Here are the other bloggers that participate in the ScrapHappy monthly posting event, check out their blogs linked below for their ScrapHappy posts:
I’ve been blogging about this quilt for 7 years, it is my oldest UFO. I won’t even bother linking previous posts as there are a lot of tierneycreates posts about this English Paper Pieced quilt, I will just give you the history and bring you up to speed.
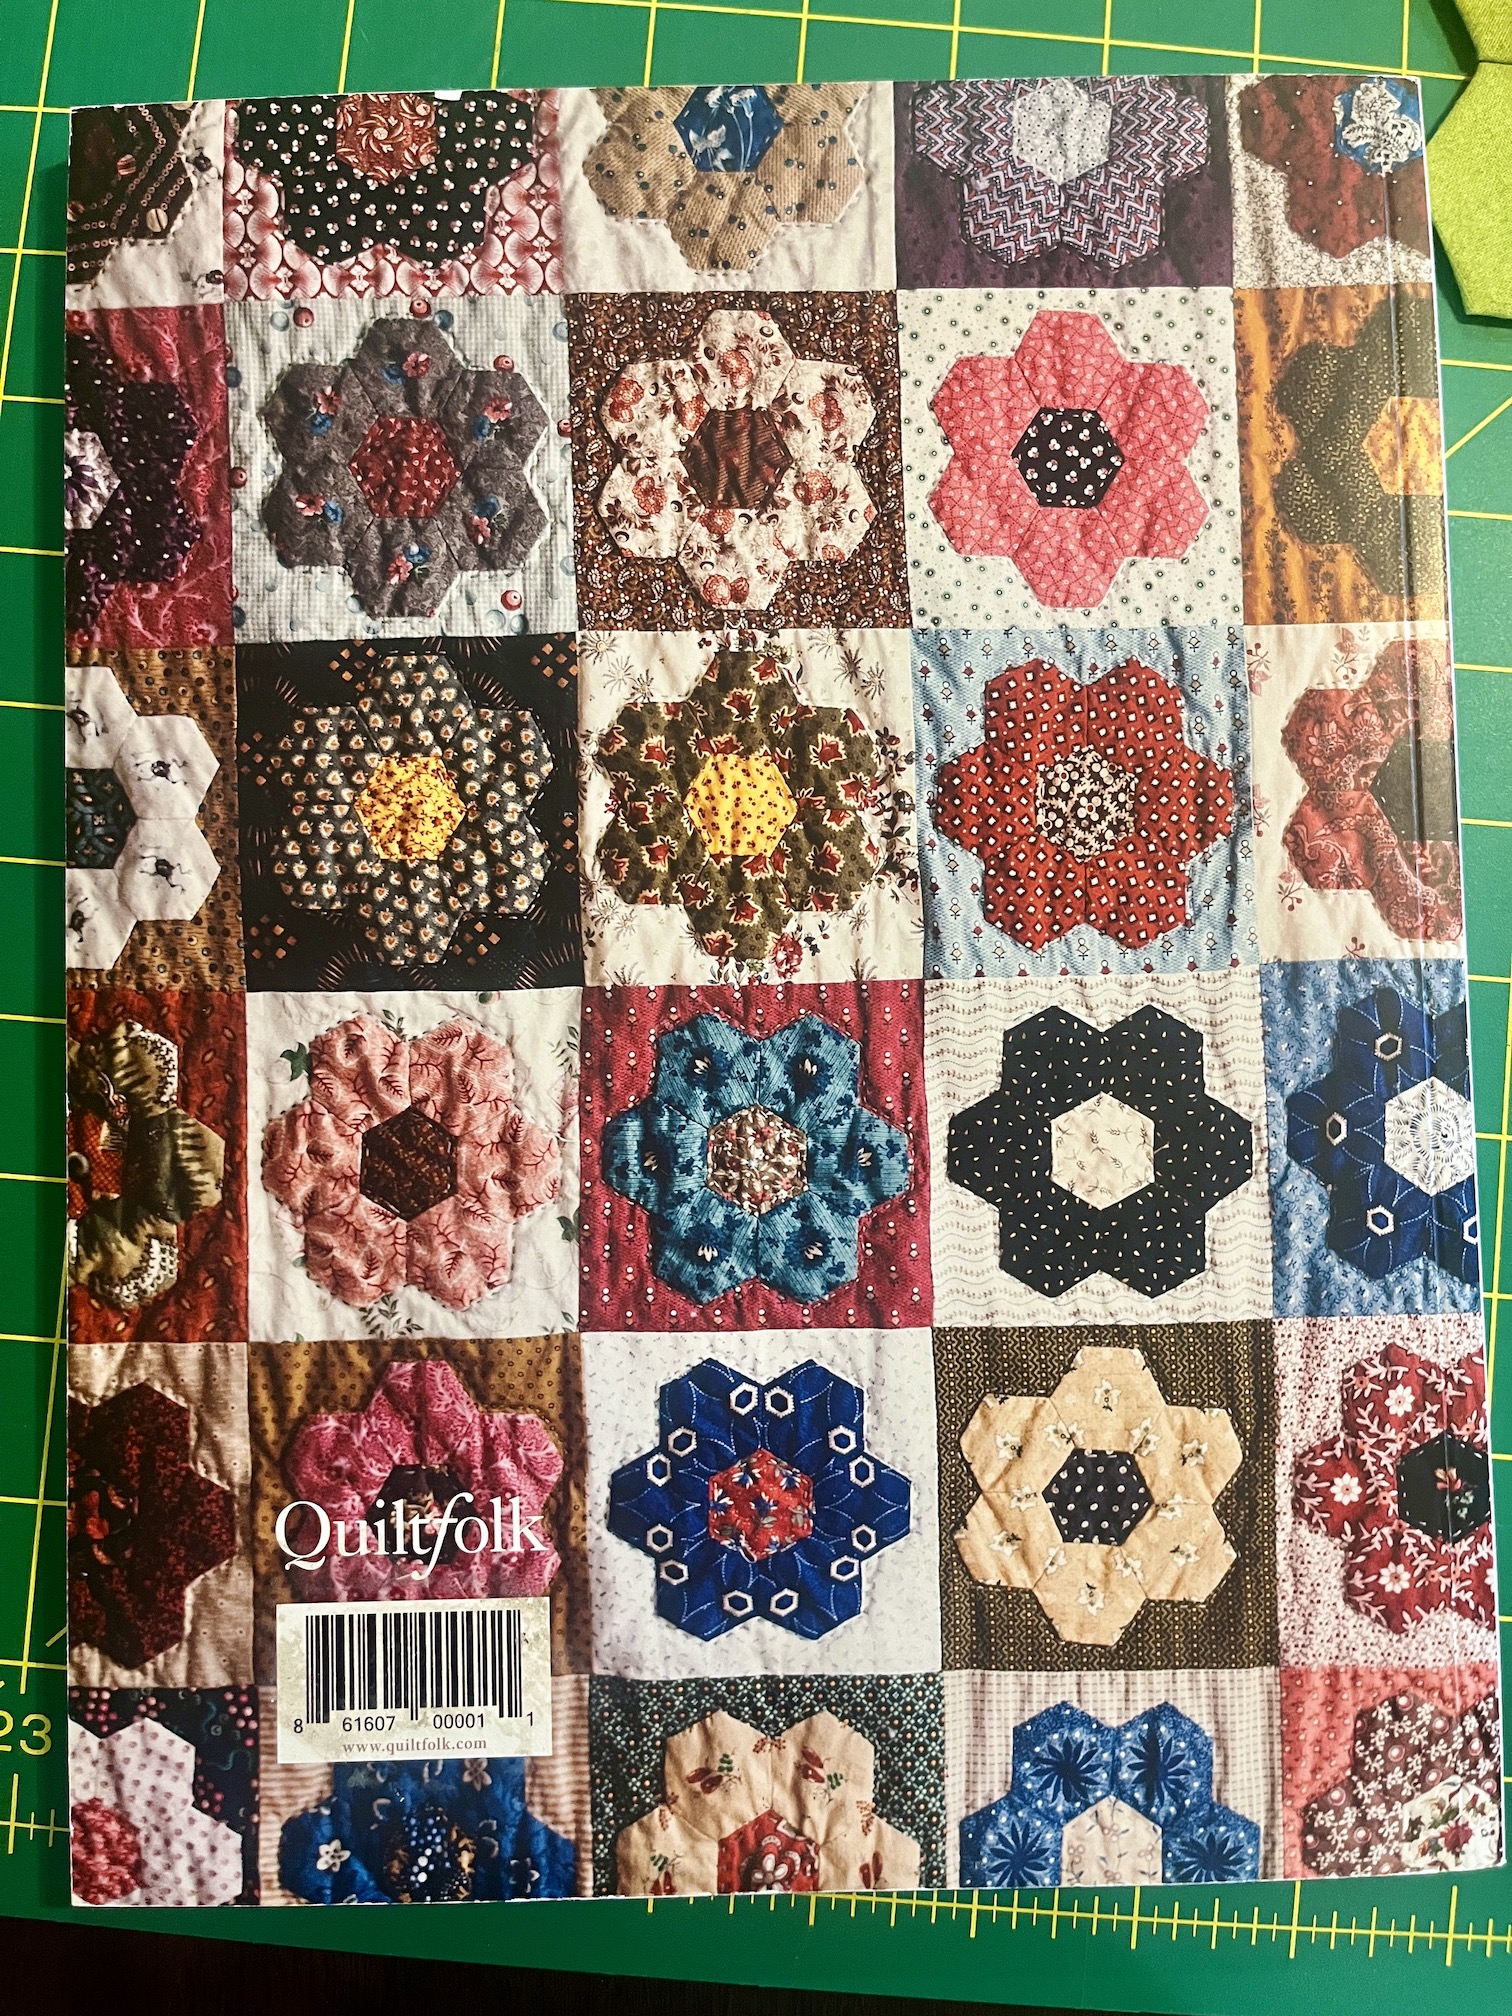
In October 2016 the first issue of Quiltfolk Magazine (which was about Oregon quilters and I lived in Oregon at the time) was published and I fell head over heels in love with the quilt on the magazine’s cover:
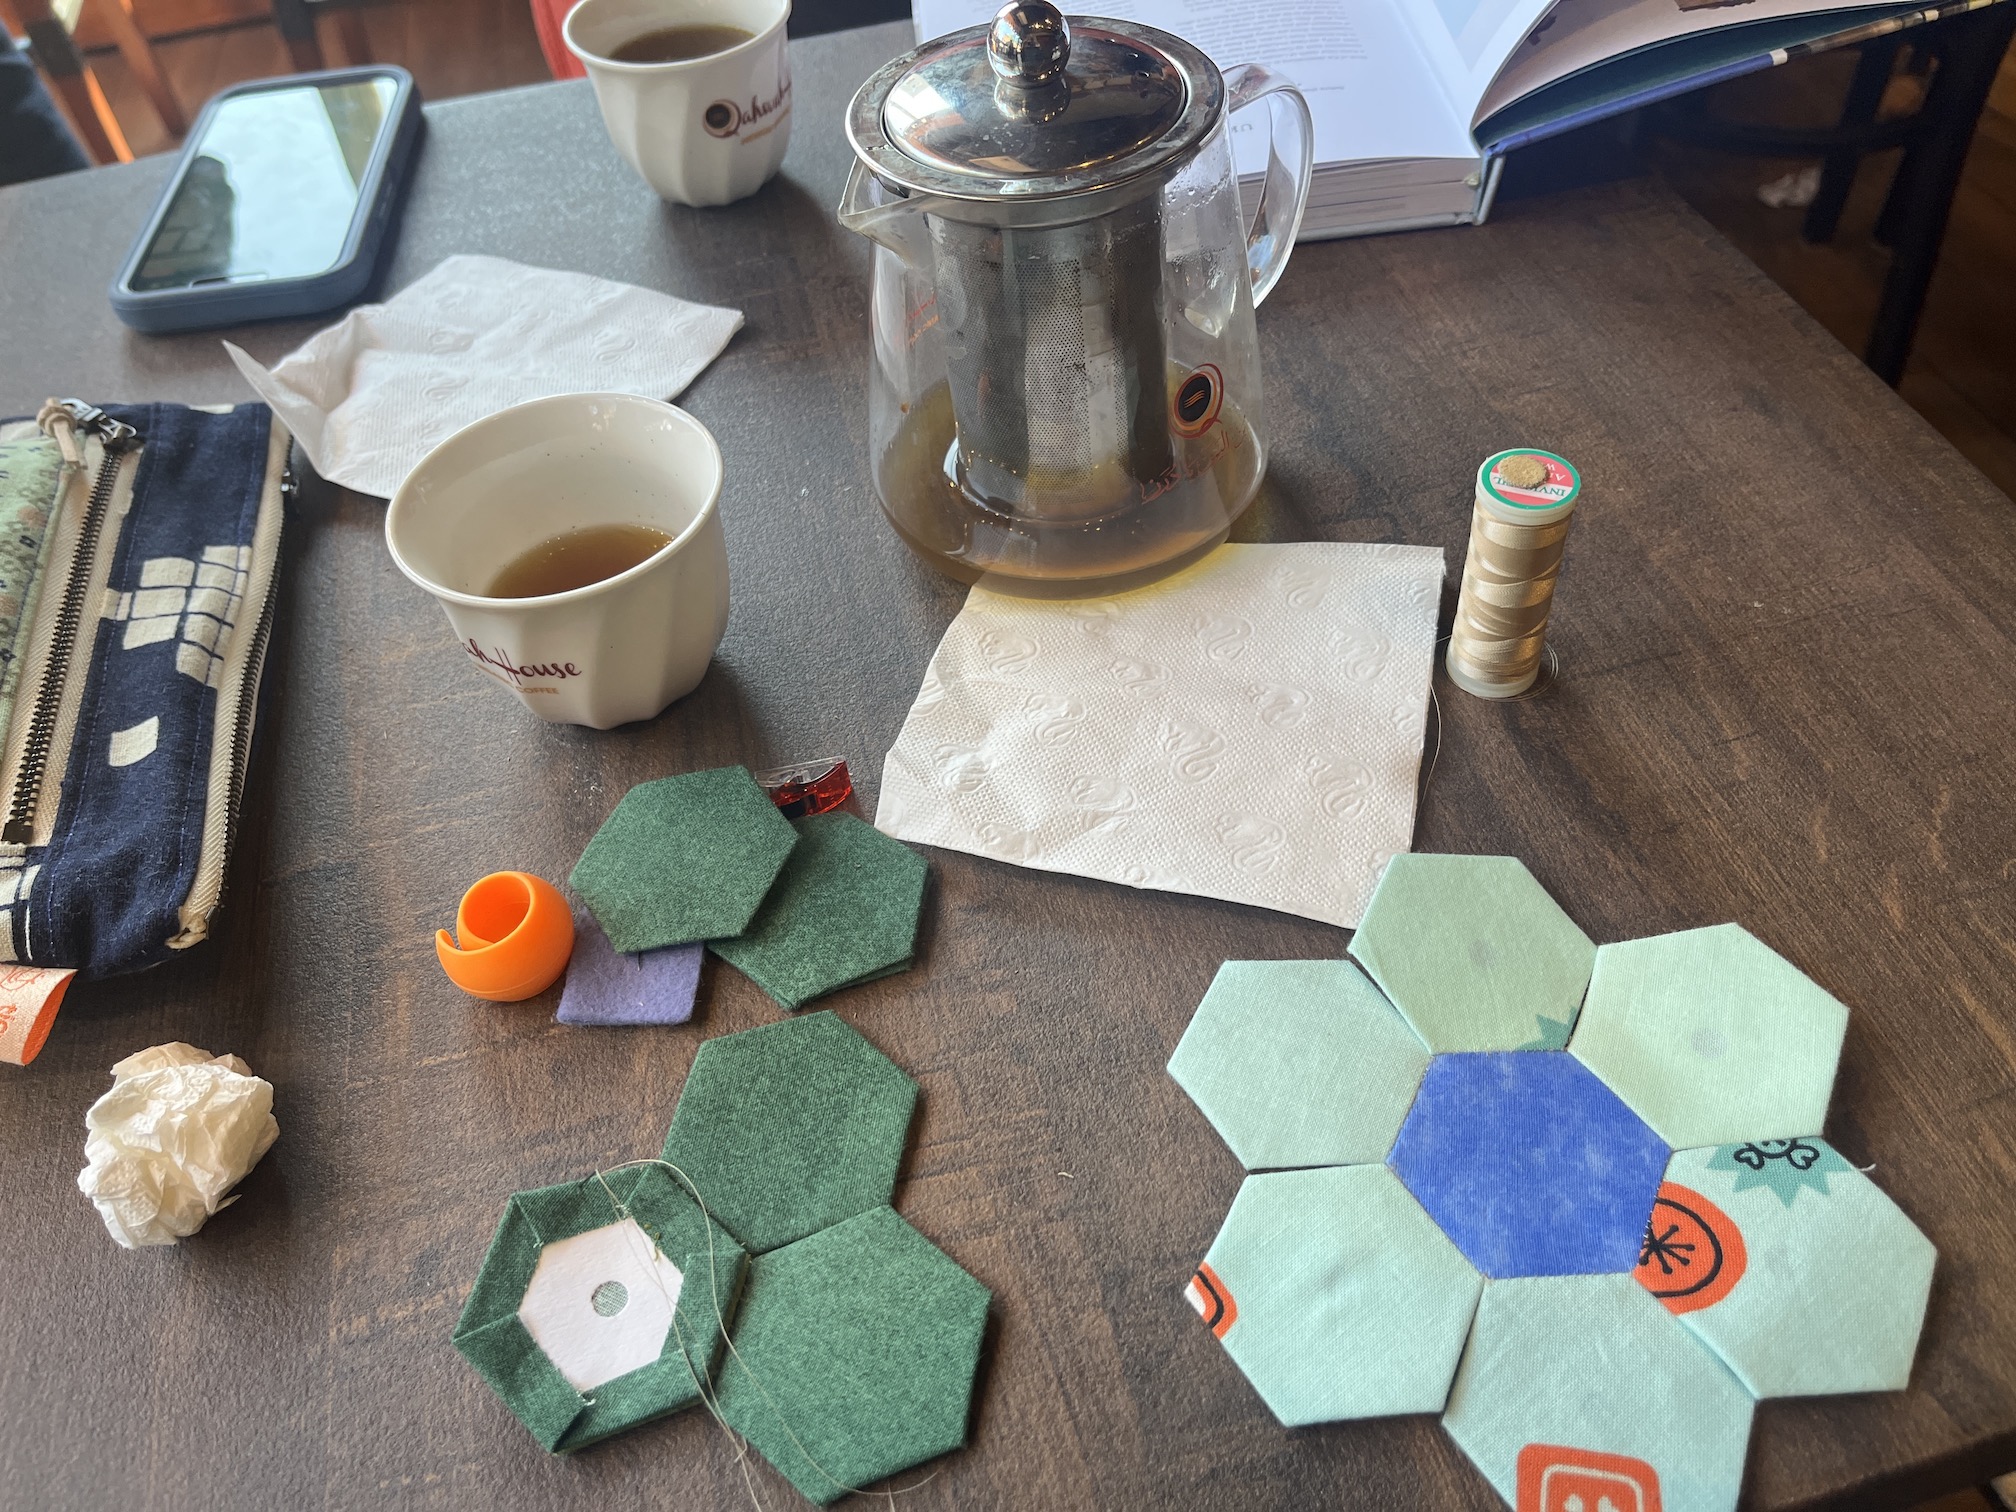
I was determined to learn English Paper Piecing (EPP) so I could make this quilt and I purchased a book about how to do and enlisted the help of several quilters with EPP experience. My late husband Terry helped me punch out the hexagon templates from scrap card stock paper and in 2017 I began the journey to make 99 hexagon flowers (each one has 6 EPP hexies, so 594 hexies were needed) to make this quilt. I primarily used fabric scraps to make the hexies.
After a while I became proficient at making the hexagons or “hexies” to build the hexagon flowers for each block, and assembling the hexagon flowers. Over the next 7 years I would sporadically work on this very portable project. This project has been around the U.S. as well as to Ireland in various little project sacks I’ve stored it in.
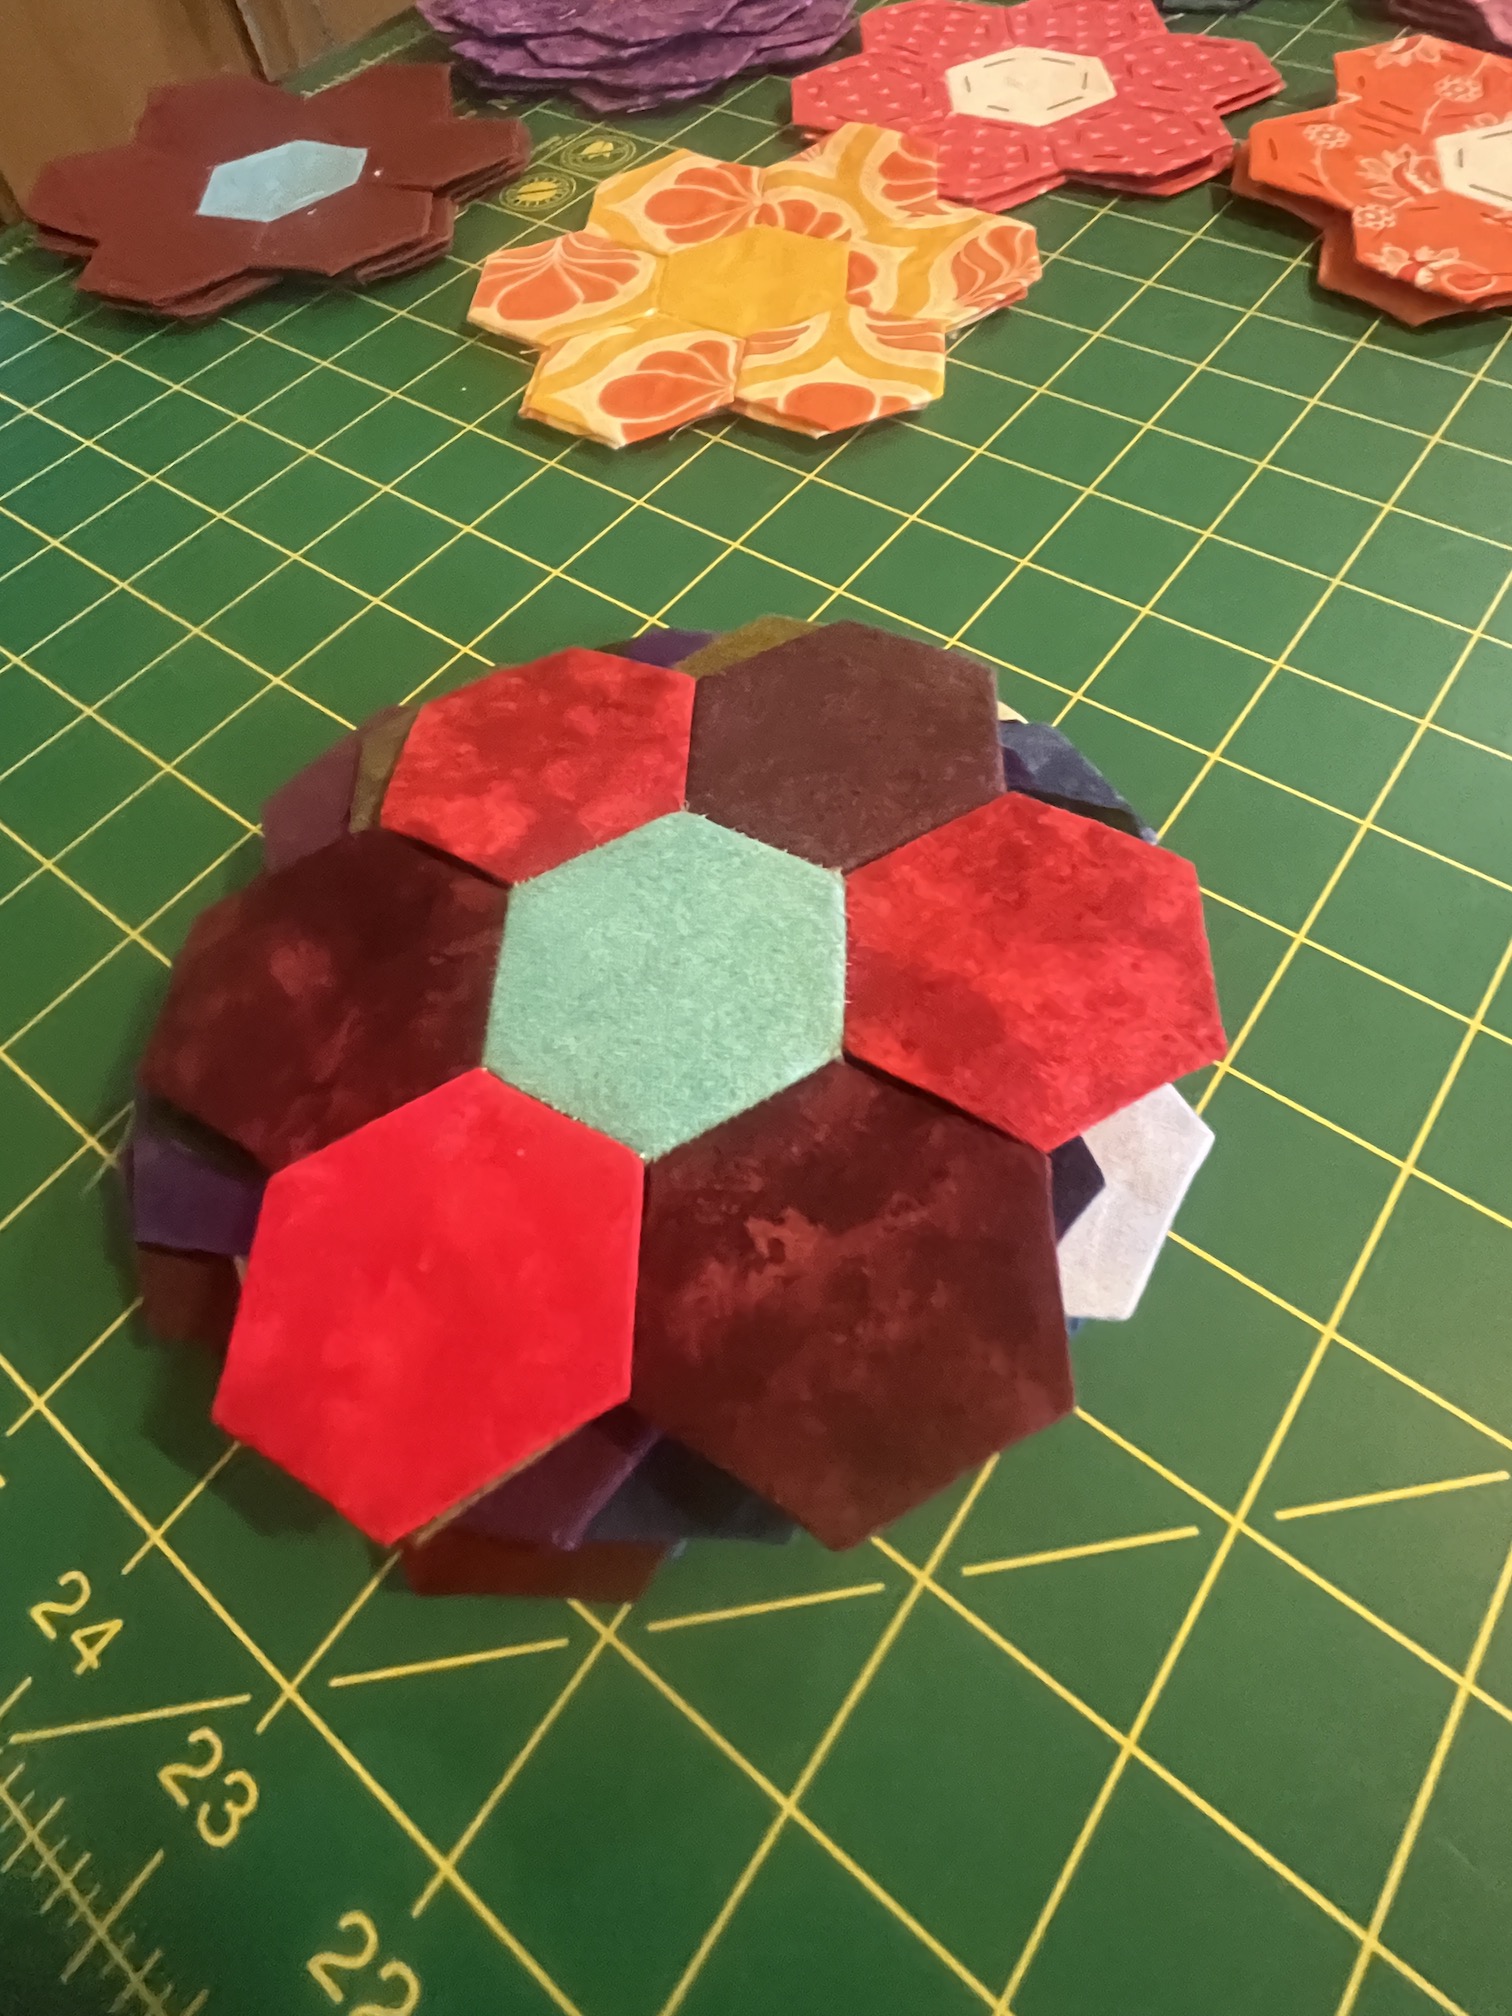
In late April I went on a trip to New York City with my sister (separate post to follow) and finished the last of the 99 hexagon flowers at a tea house in Brooklyn that we frequented during our trip.
Tea and Hexiesin Brooklyn
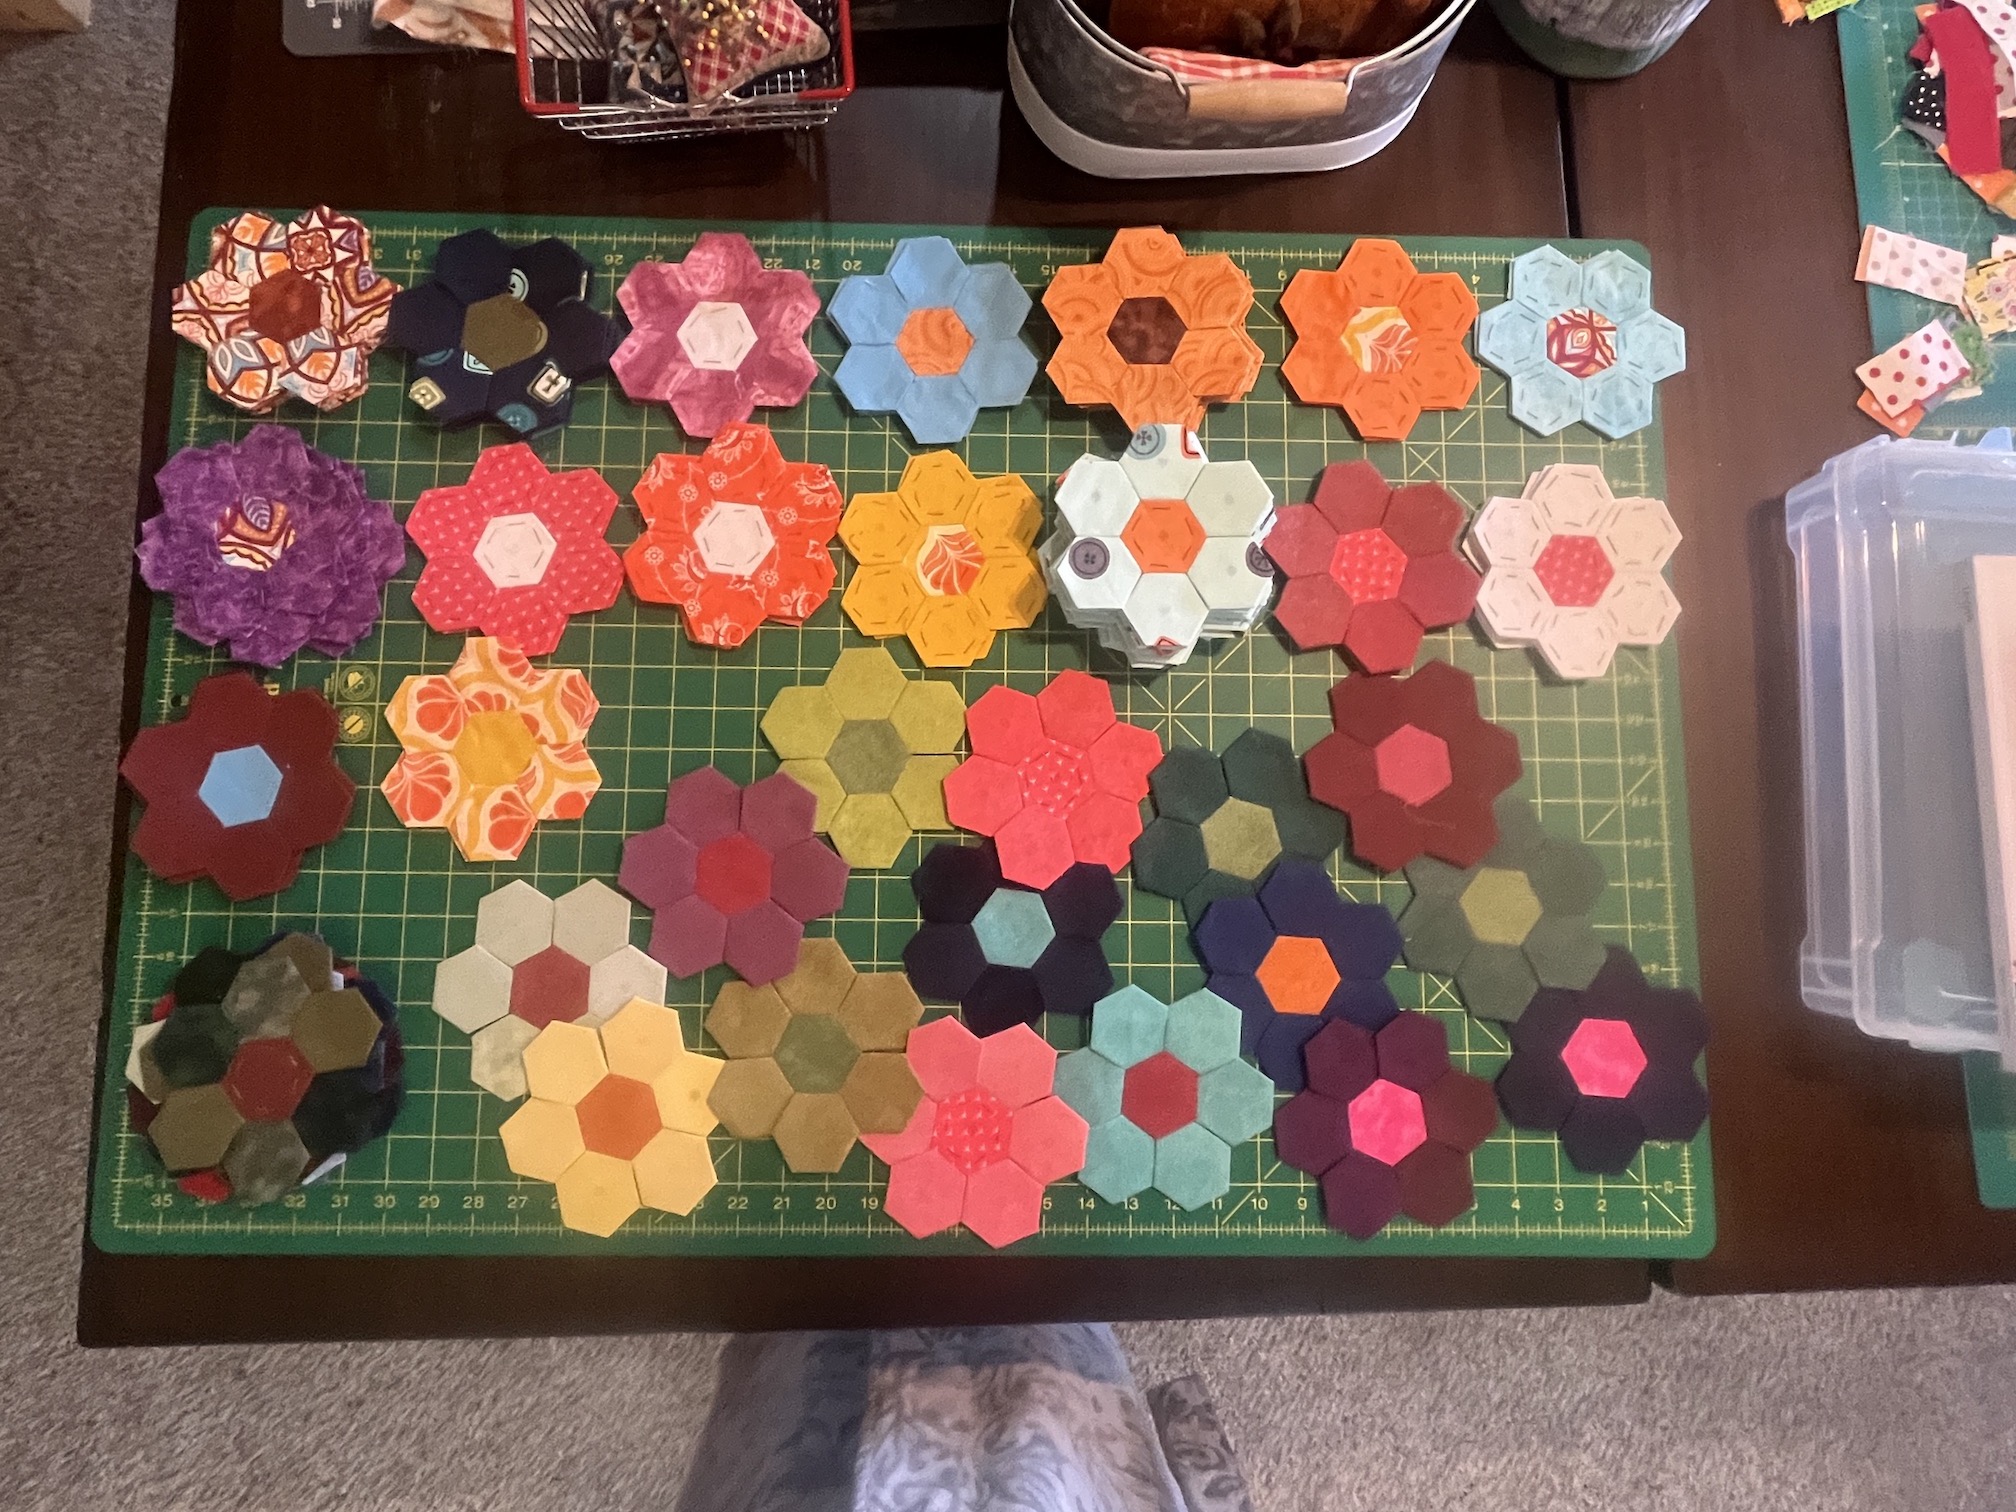
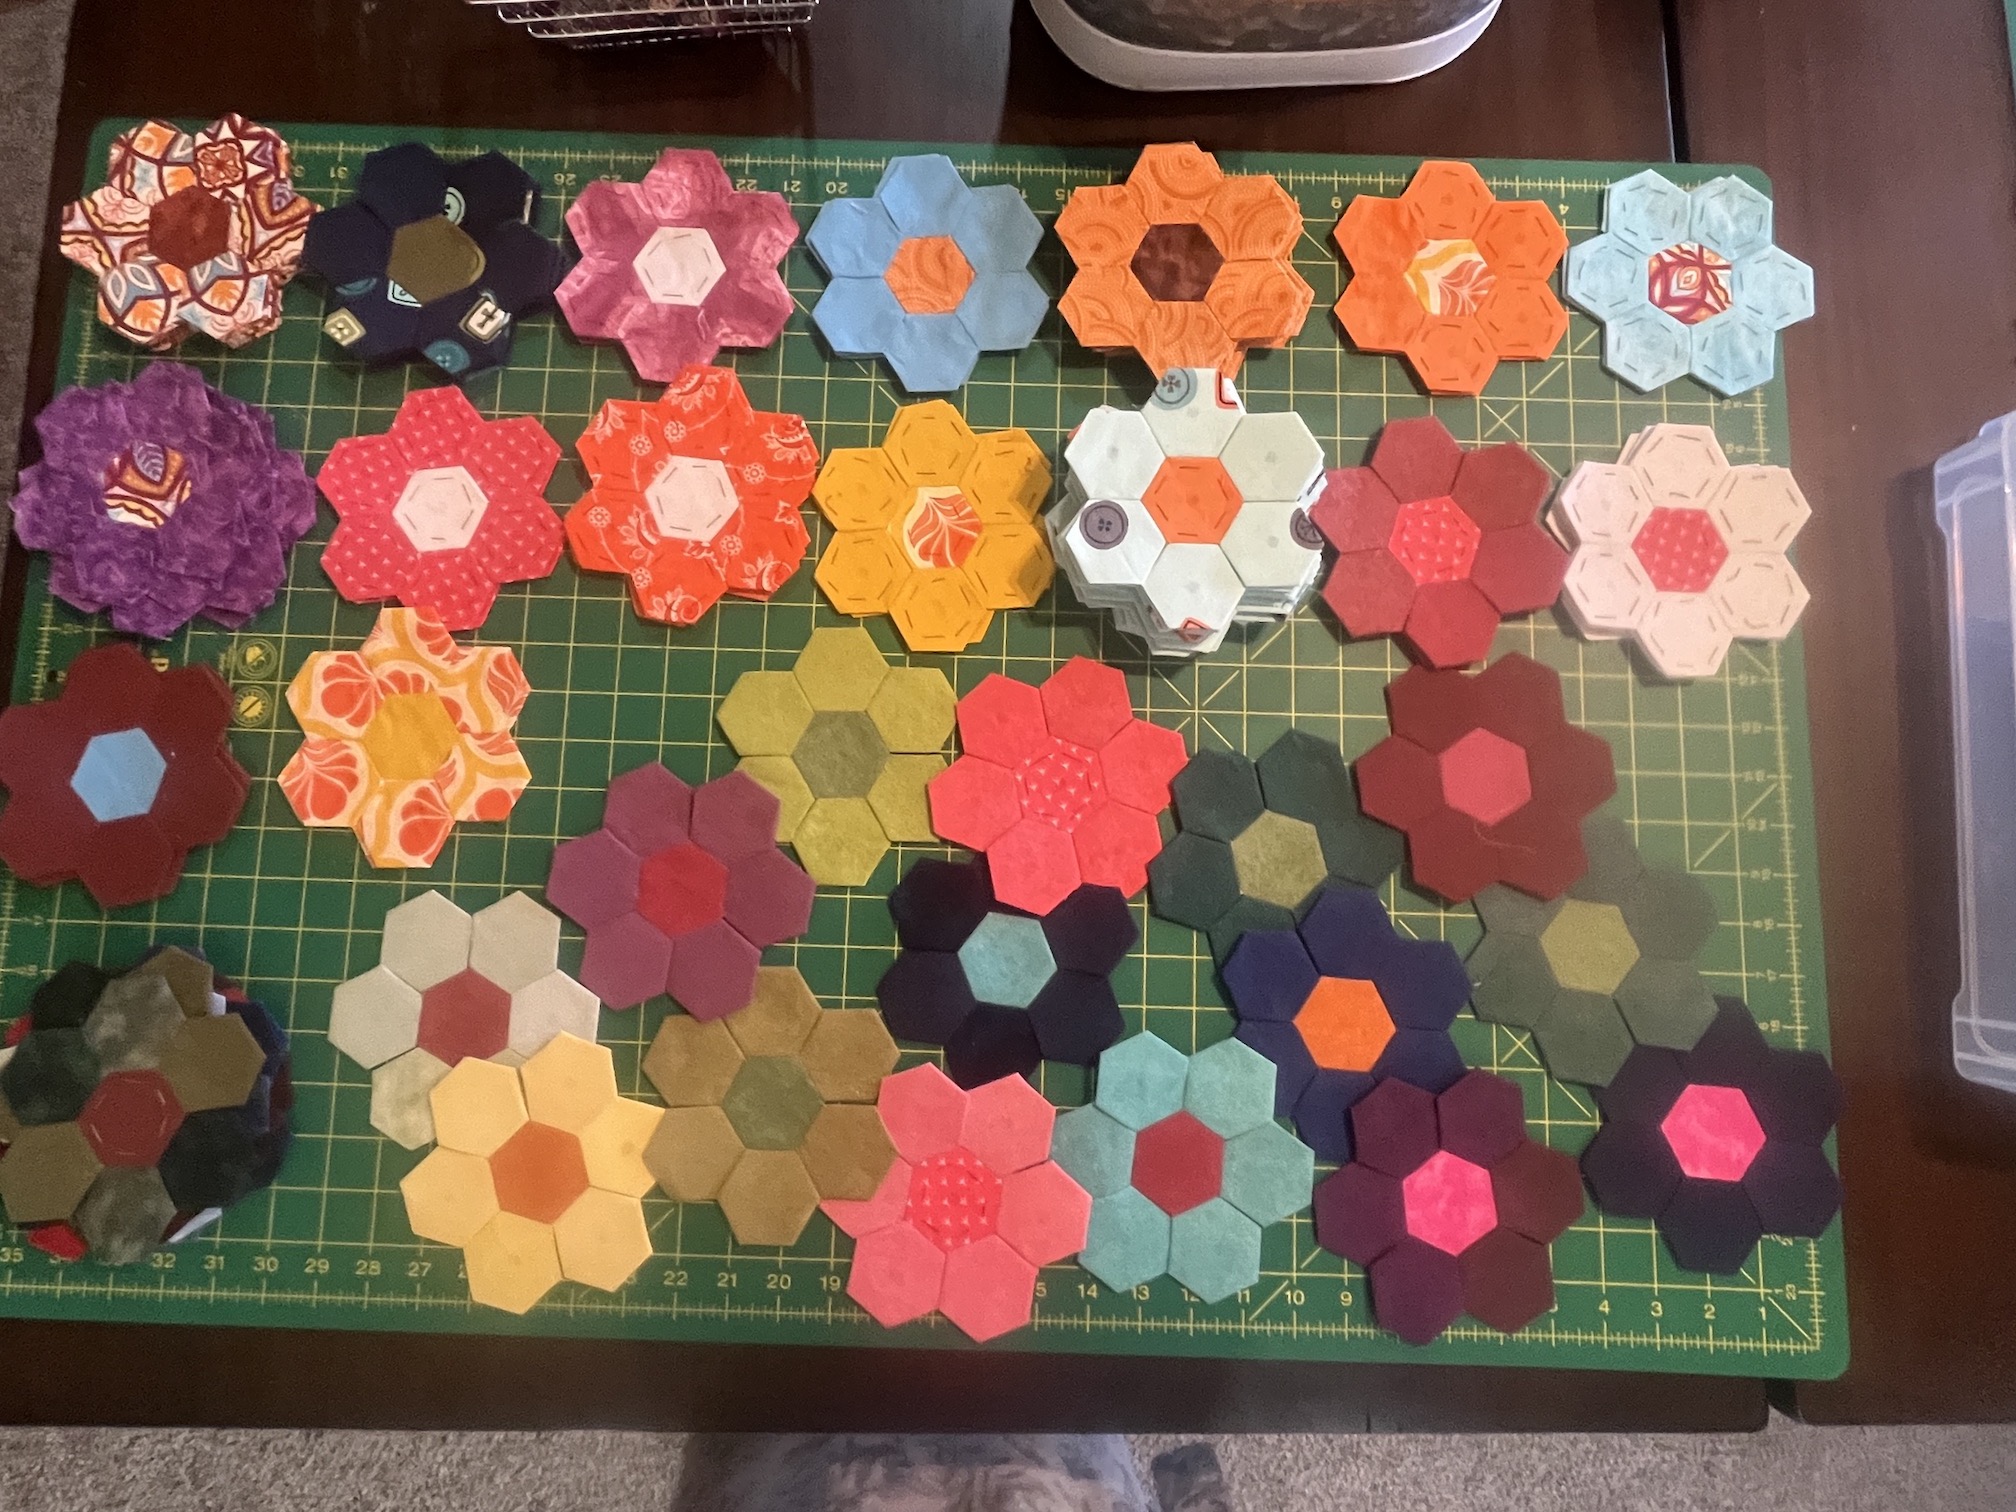
Here are the 99 completed hexagon flowers:
Some of the hexagon flowers configuration are repeated because I had a lot of those scrap fabrics to work with such as the piles at the top of this image below:
And some have few to no repeats such as these solid color hexagon flowers at the bottom of the image below:
And finally I used up the left over hexies in various colors of solid color scrap fabrics to finish up the hexagon flowers (see the bottom of the image below):
So now that the 99 are done, I will use fat quarters to put together coordinating background fabrics to each hexagon flower.
If you are interested in learning EPP there are lots of free instructional website and videos online like this one:
It’s the 15th of the month and time for my monthly “ScrapHappy” post as part of the ScrapHappy group I belong. At the end of this post I have a link to the other blogs participating in this monthly event in case you’d like to check out their ScrapHappy posts.
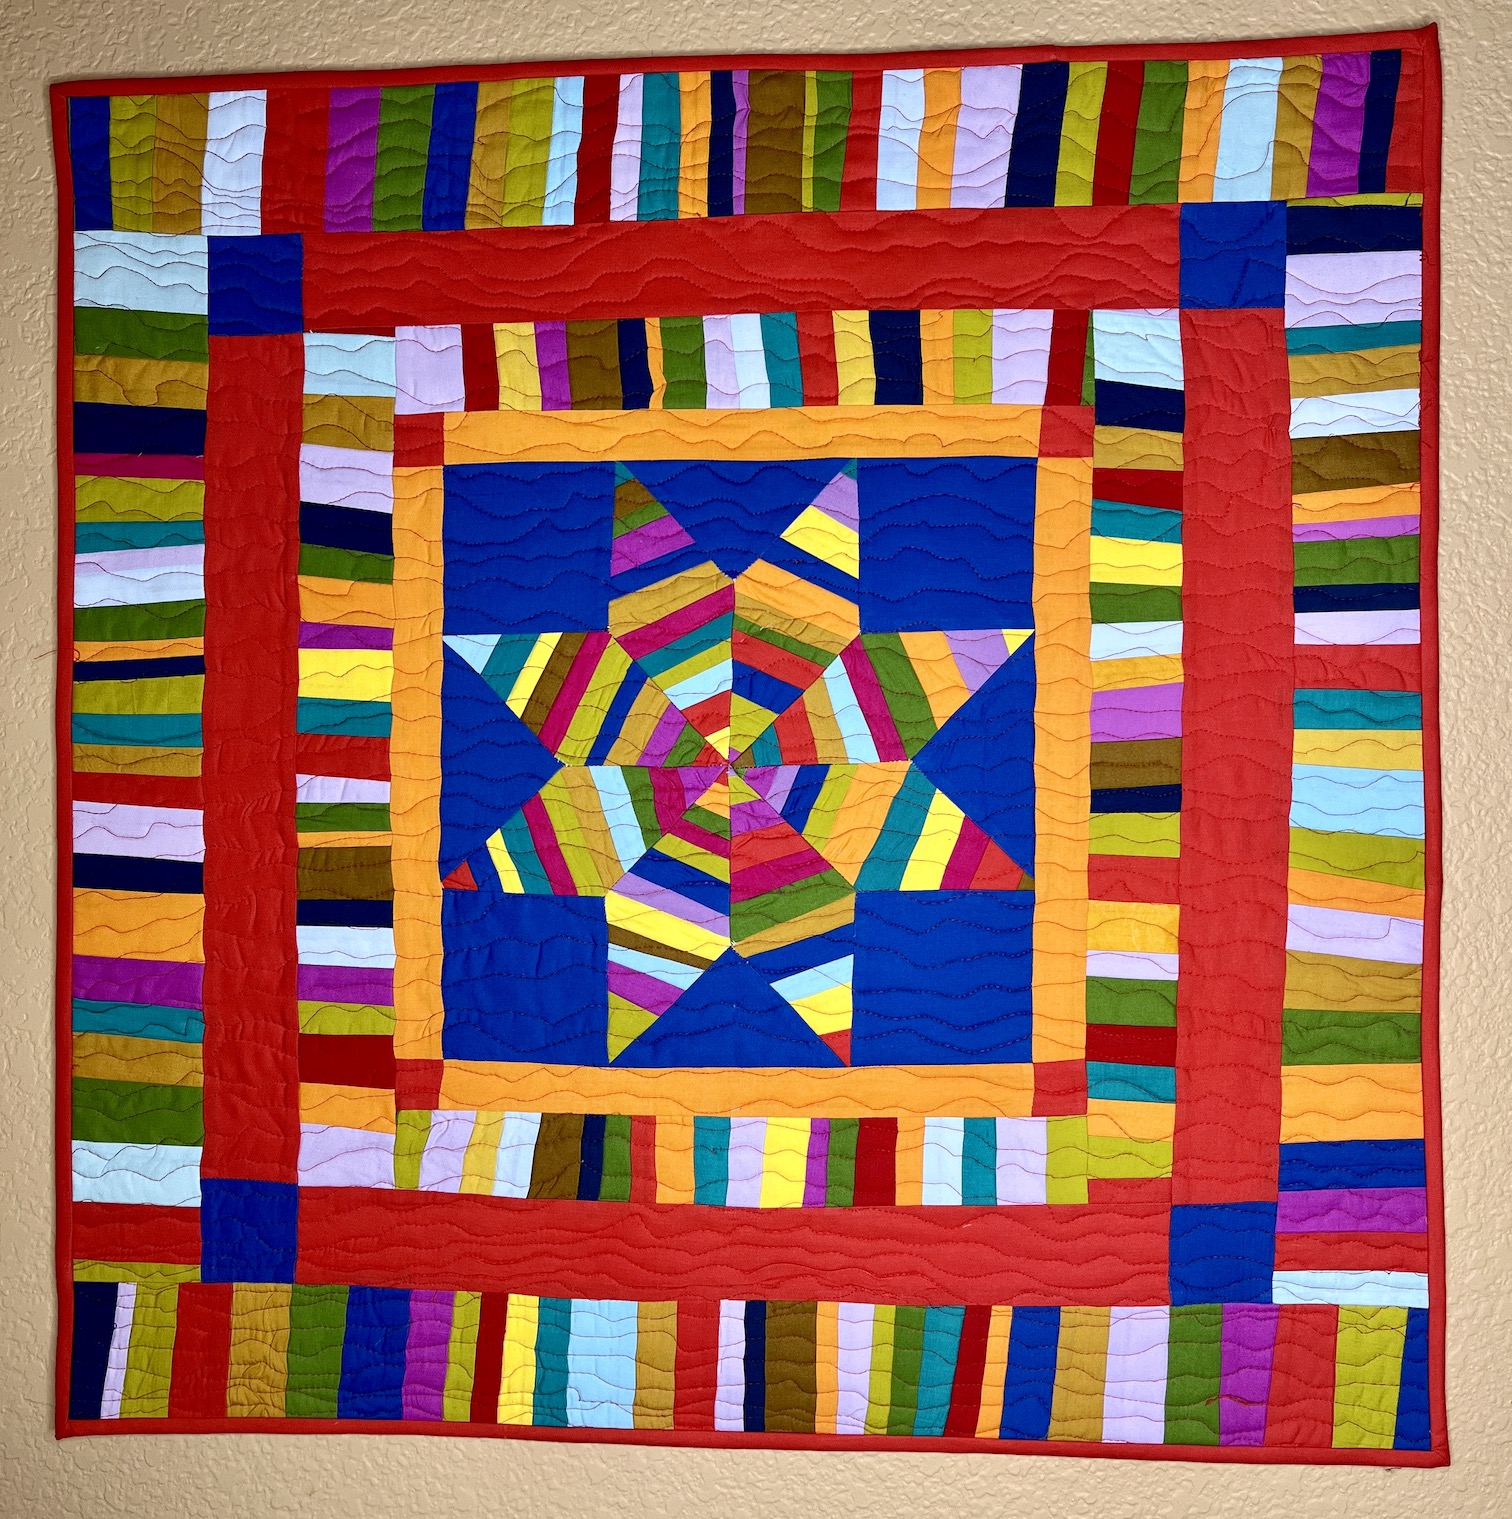
For this month’s post I am happy to report that my little wallhanging (measuring 28 x 28 inches/71 x 71 cm) Strings Attached, pieced from my stash of solid color scraps, is done and hung on the wall:
I quilted it with bright red thread and let’s see if it shows up better in this second photo I took:
Not really but use your imagination that you see bright red thread 😉
The pattern for Strings Attached is from August 2021 issue of AmericanQuilter Magazine, pattern by Lori DeJarnatt. I tried to mimic the color selections of the sample in the magazine as much as I could as I really liked it! (My quilting is denser than the sample in the magazine as I made a mistake on my first row of machine quilting when my hand slipped…so I made just repeated my mistake to make it consistent, ha!)
As promised, here are the bloggers that participate in the ScrapHappy monthly posting event, check out their blogs linked below for their ScrapHappy posts:
It’s the 15th of the month and time for my monthly “ScrapHappy” post as part of the ScrapHappy group I belong. At the end of this post I have a link to the other blogs participating in this monthly event in case you’d like to check out their ScrapHappy posts.
I completed piecing the table runner per the piecing instructions from her pattern SuperSymmetry, and discovered I needed to make more blocks in order to make it long enough for the table as well as finish each end (more on that later). Unfortunately Y seams were involved in the piecing (shudder) but I made it through.
I ended up making 14 additional blocks.
I floated the pieced SuperSymmetry blocks in taupe-brown Peppered Cotton (a heavy duty linen like shot cotton). Here is a little photoshoot I did of the completed table runner top on the new dining room/library table:
In the last two photos you can see the new rug that arrived that I mentioned in a previous post. It is one of those Ruggable rugs that can be laundered in the washing machine (in case there is “The Great Spaghetti Sauce Spill” during a meal someday).
And in case you are curious here is how I finished the ends of the table runner with all those triangle blocks in the piece:
Thank goodness for a good steamy iron as there was a lot of pressing involved to get it looking like I hadn’t been on mind altering substances while piecing…
In addition to the SuperSymmetry orphan blocks and fabric scraps, Wendy also sent me 7 traditional quilt blocks orphan blocks for a taupe quilt she was working on. I’ve decided to use these blocks as part of the back for the table runner.
I am going to float each of them in the taupe Peppered Cotton and then add in enough length in side borders as well as a bottom and top to meet the length. I am getting ready to start working on floating each block by doing some “log cabin” style piece around each block:
AND MORE
We’ve had a run of sub-zero Fahrenheit (colder than -17 Celsius) temperatures in the Denver metropolitan area and we’ve been spending a lot of time inside. John got addicted to watching cooking/culinary themed videos on YouTube and this weekend decided to try and make a copy of the famous Chick-fil-A (very popular fast food eatery in the US) chicken sandwich and the accompanying sauce after watching a video on how to do it.
He made enough for his father, sister, son and son’s family (who all live nearby) and then delivered them to their homes! You might have heard of the popular food delivery service DoorDash – well we named John – “DadDash”!
The sandwiches were a hit and included the famous pickle like the original. Here is a little photo spread from yesterday to close out this post.
Oh and if you’d like to try and make them yourself, here is the video John used:
As promised, here are the bloggers that participate in the ScrapHappy monthly posting event, check out their blogs linked below for their ScrapHappy posts:
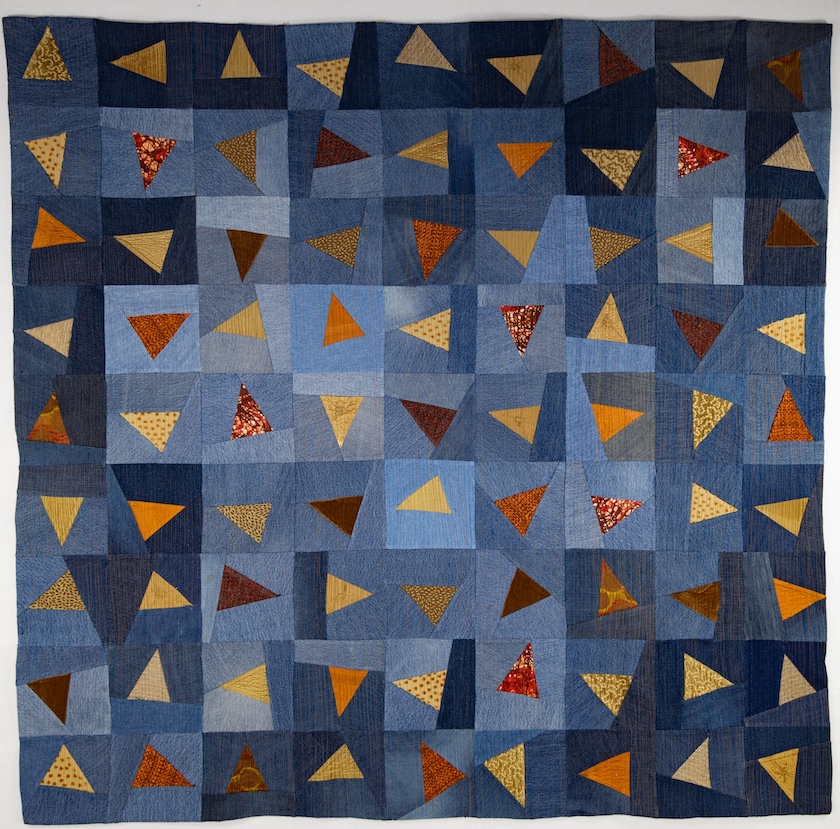
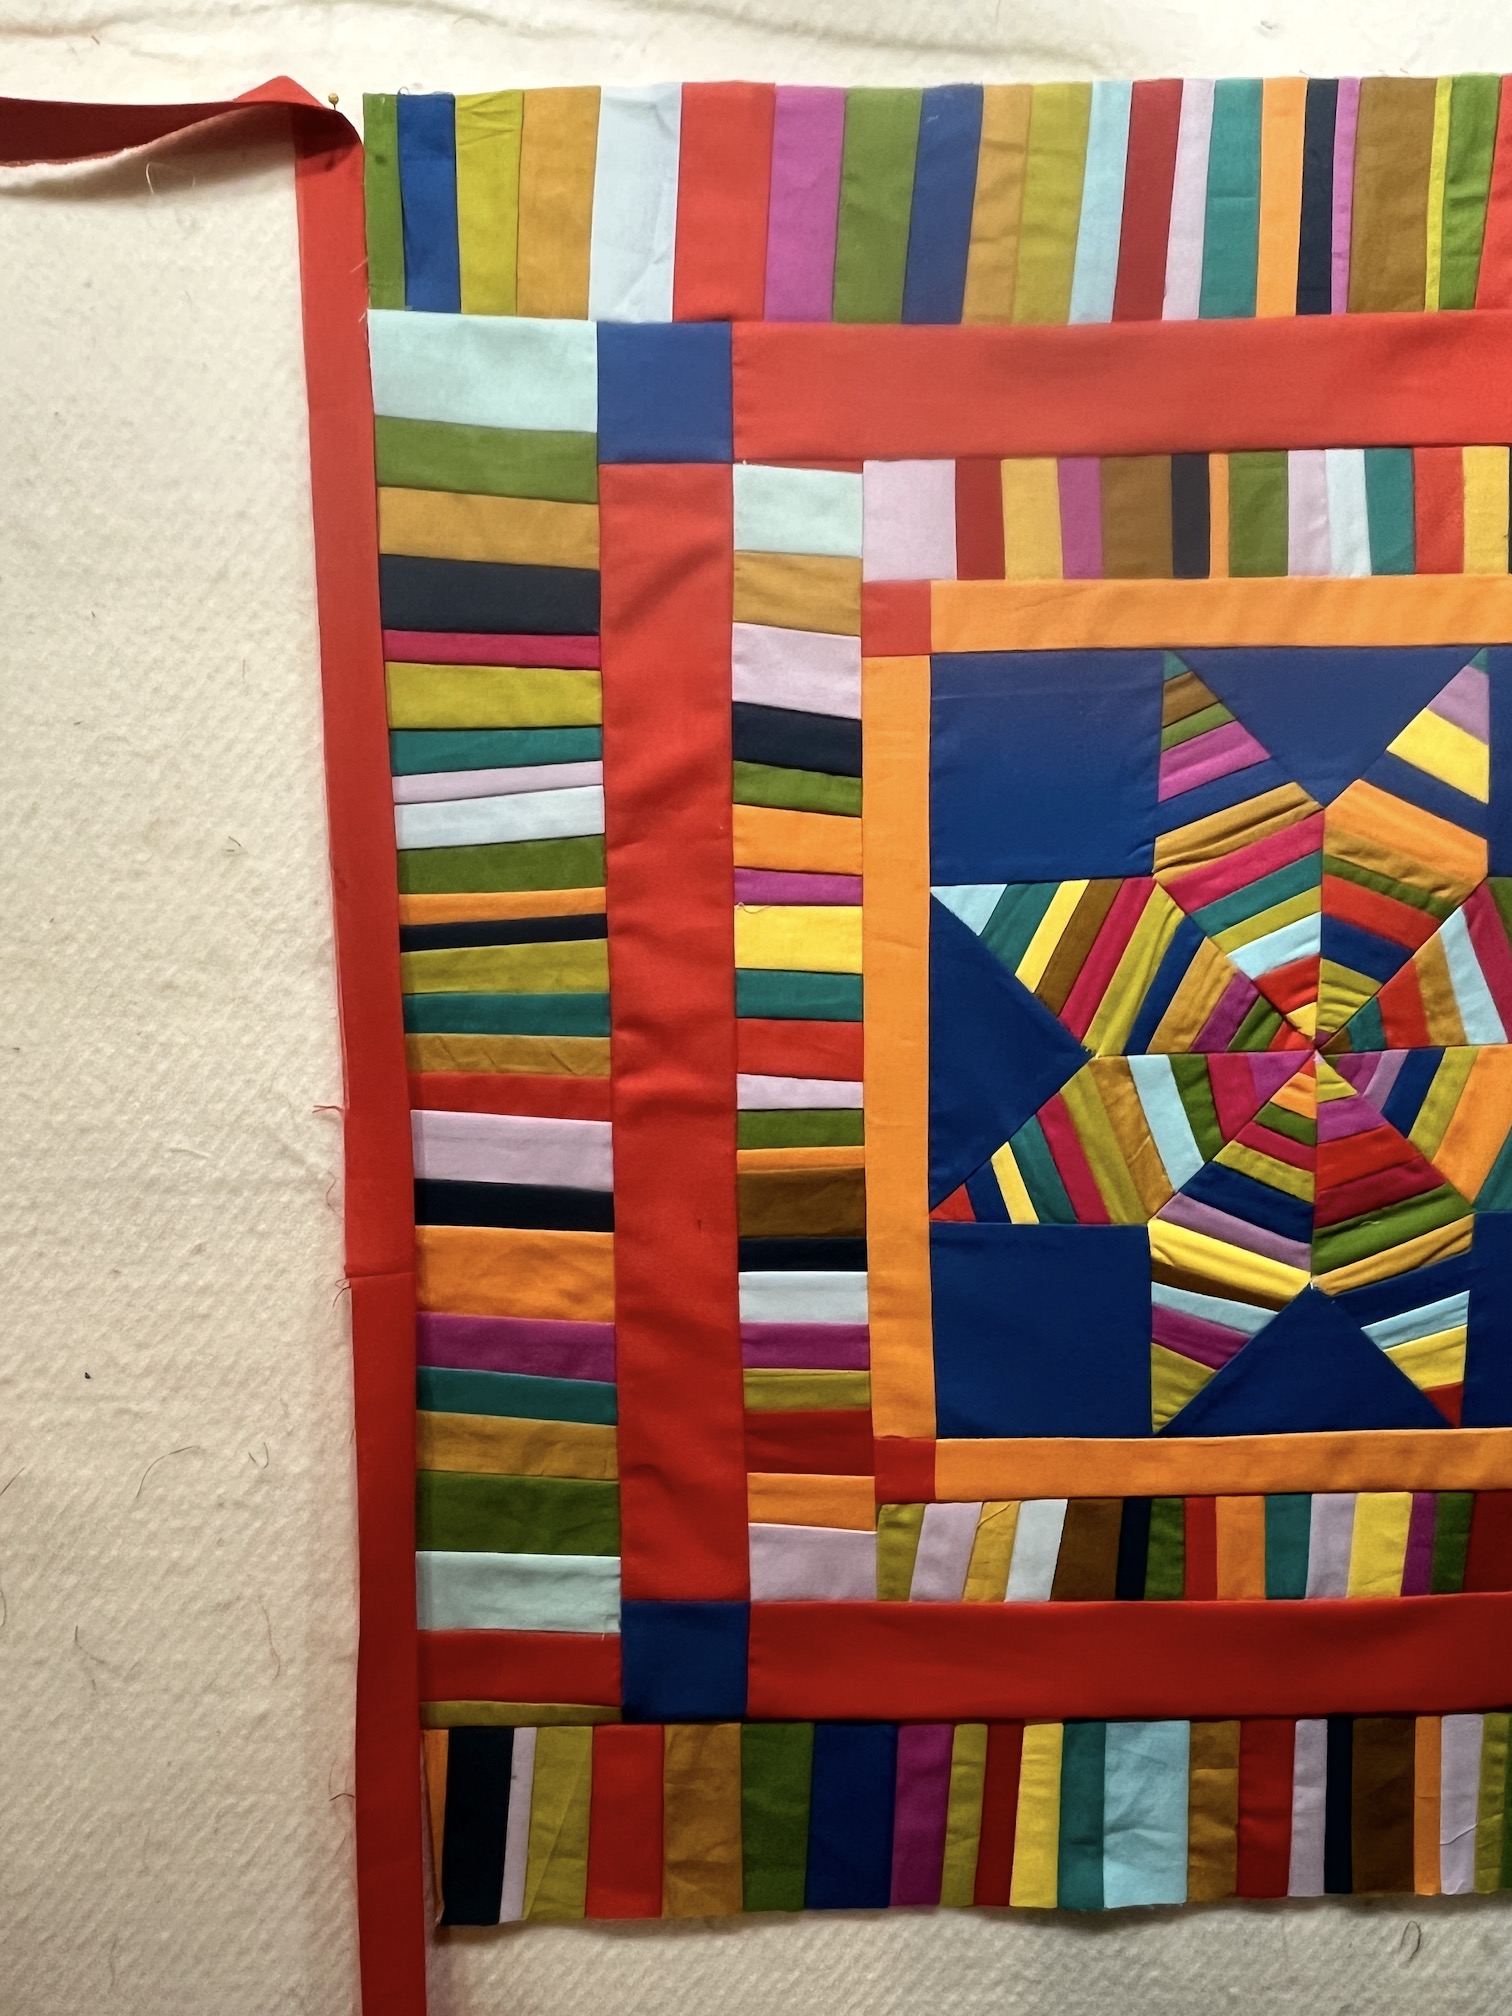
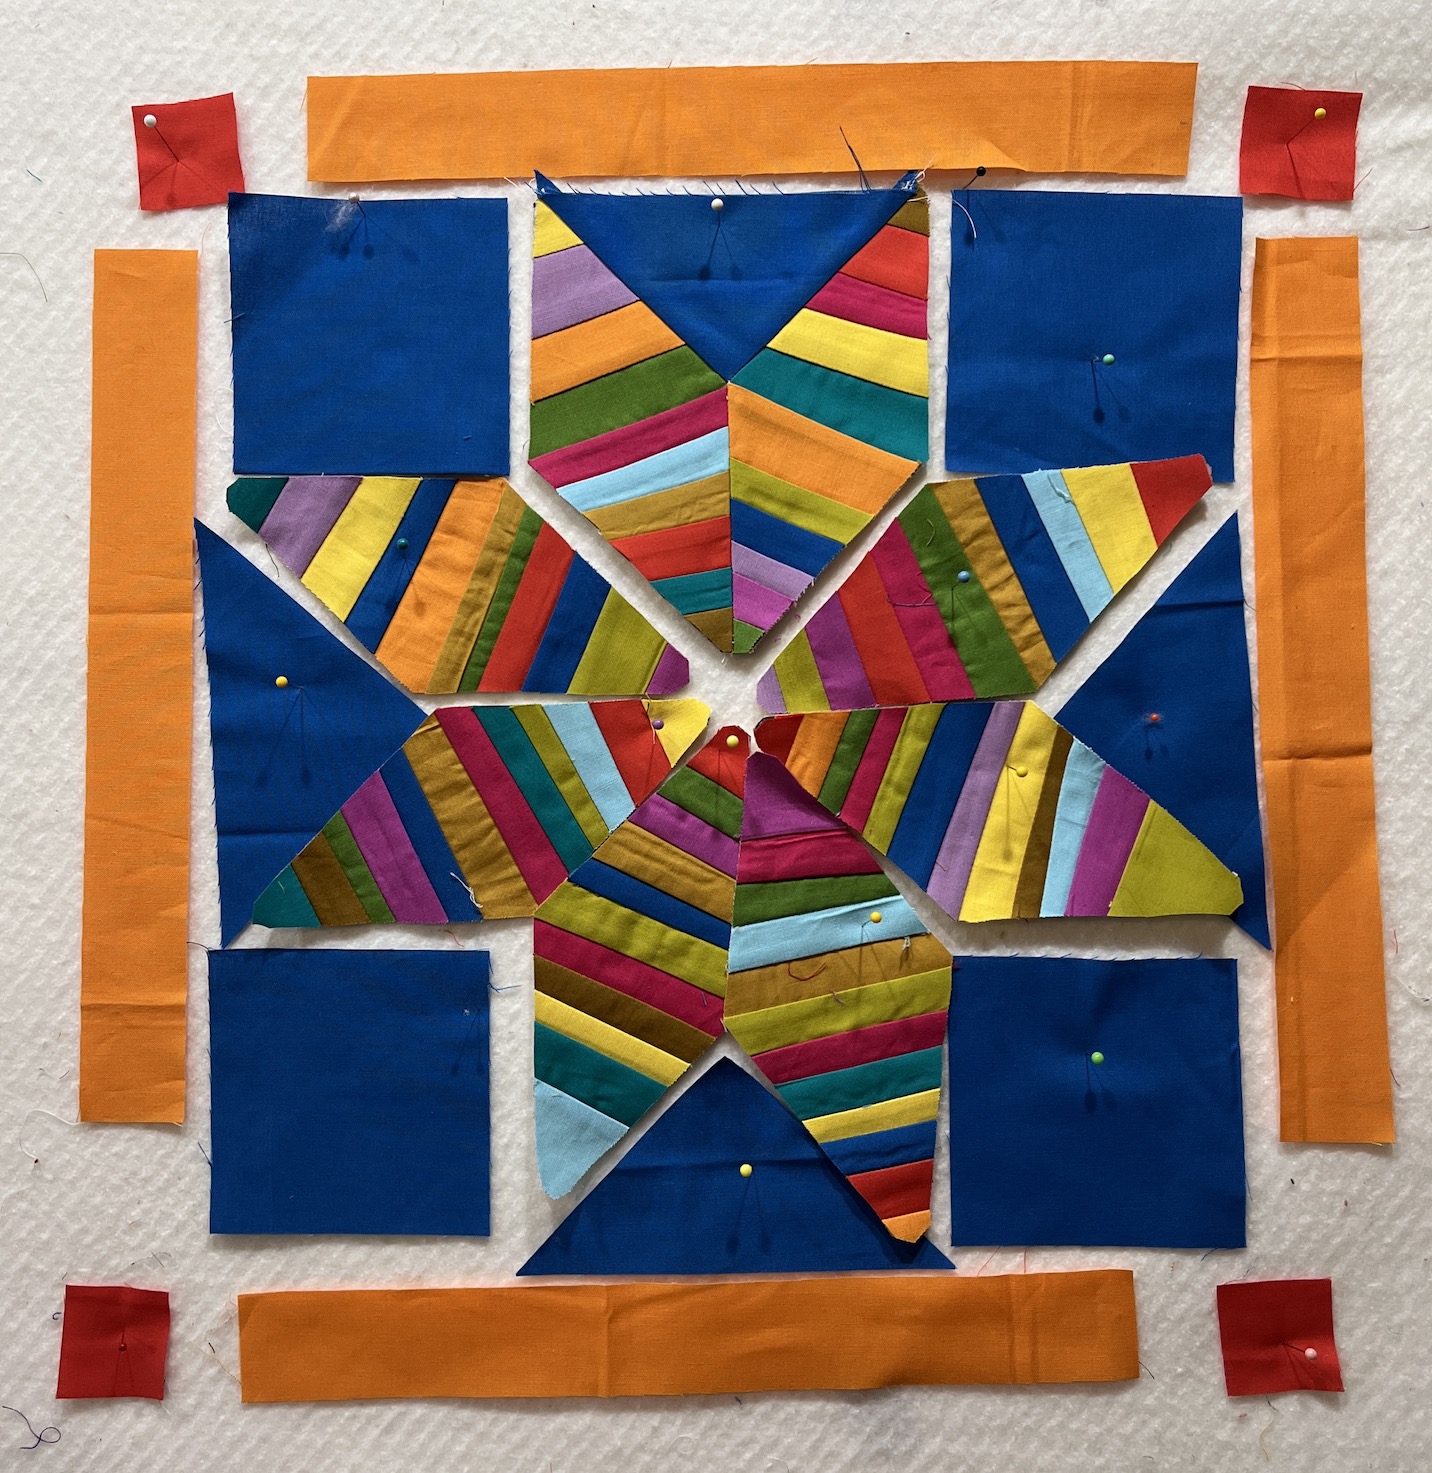
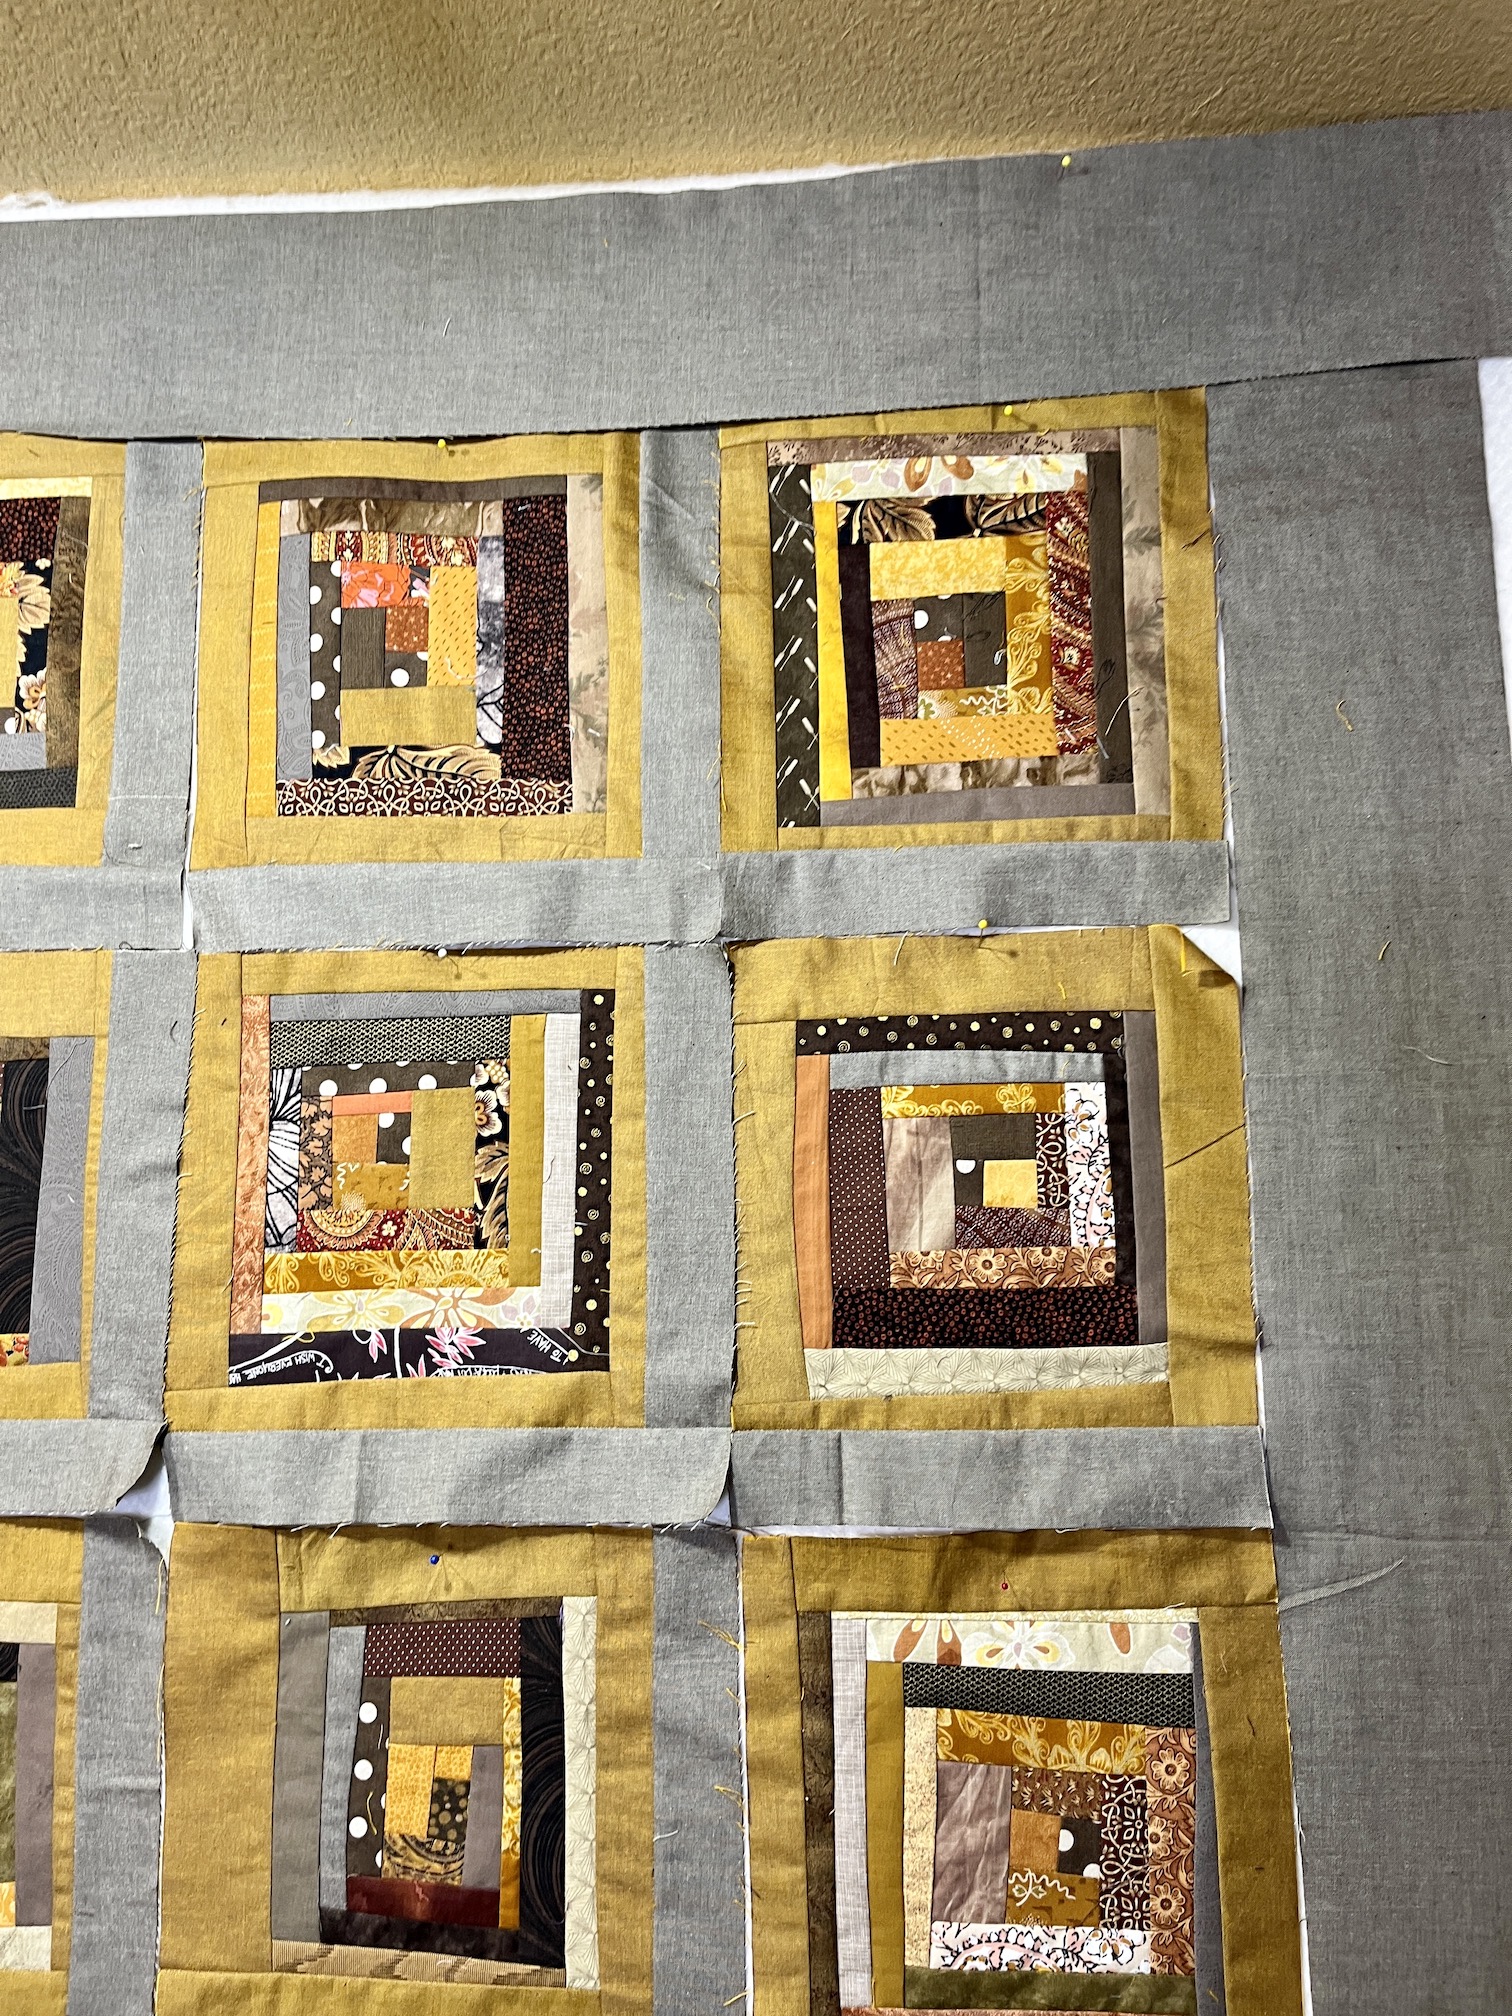
Finally I’m sewing together the blocks on my recycled denim and home decor fabric quilt “What Direction Do I Go?“
I am trying something new to sew the 81 blocks together by working on 9 blocks at a time, numbering them and then semi-chain-piecing them into a square:
So far I have three squares, which is 27 blocks total, sewn together:
I really like the look of the individual blocks sewn together:
In the postBlocks Completed for “What Direction Do I Go?”, I mentioned I was trying to figure out the layout for the blocks on this quilt. Well I decided to make it look as if light was coming from the center and radiating out…sort of…well as best I could with the blocks I made. I put the blocks with the lighter or more faded denim in the center and the darker ones on the outer areas:
It is a fun project to work on while watching TV and hopefully soon it will cover more of my lap (photo above) than it does right now (because it’s cold now in Colorado – 28 degrees!)
PANTRY UPDATE
A couple years ago John redid the pantry and built in shelves. Recently he repainted the pantry to a white with gray undertones and added a new butcher block shelf. He also added a motion sensor light that will turn out when you enter the pantry and turn off after a while when there is no motion; and 4 outlets so we could keep a couple appliances in the pantry and use them in there.
It’s the 15th of the month and time for my monthly “ScrapHappy” post as part of the ScrapHappy group I belong. At the end of this post I have a link to the other blogs participating in this monthly event in case you’d like to check out their ScrapHappy posts.
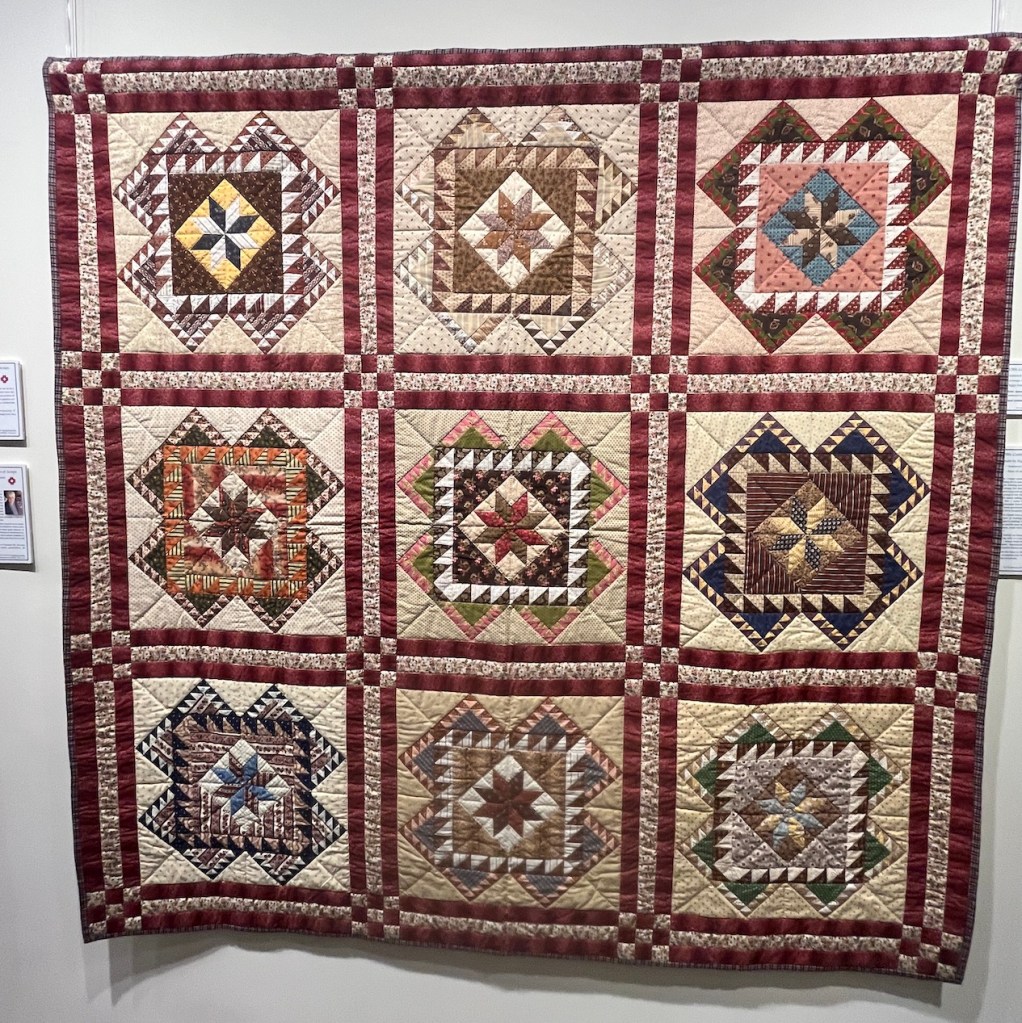
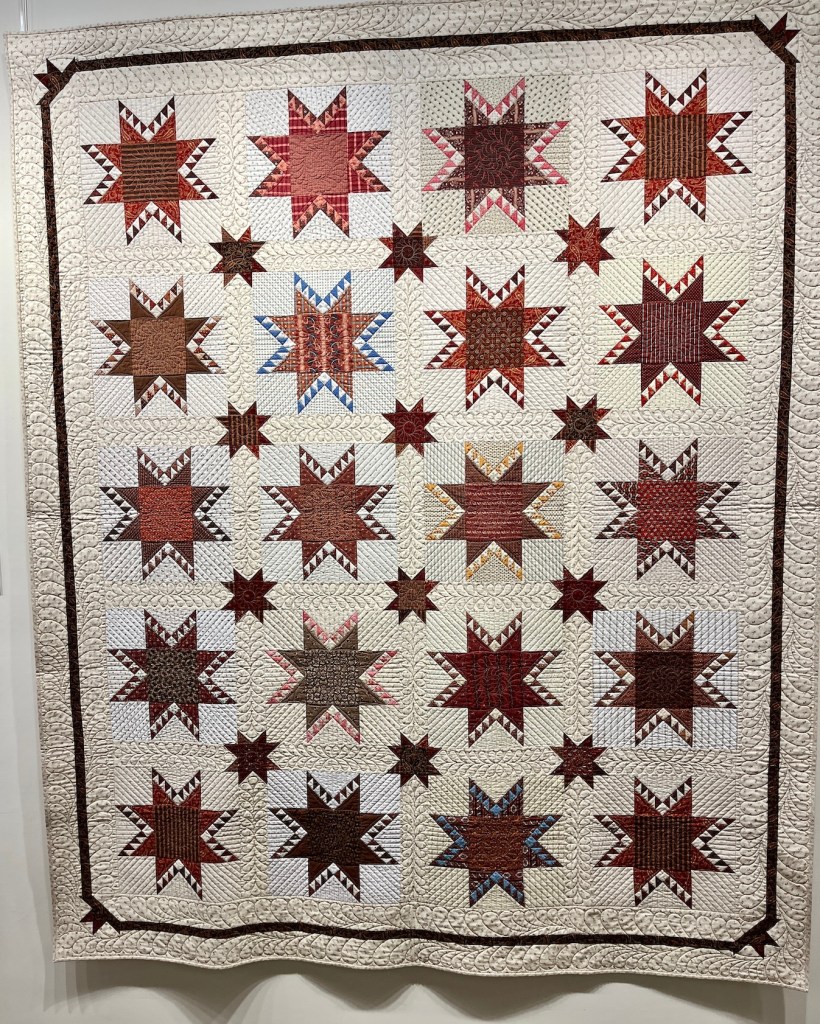
What better way to celebrate our love of fabric scraps (what keeps us “Scrap Happy”) than to share some images of a wonderful exhibit I saw at the Rocky Mountain Quilt Museum on Scrap Quilts?
While I was at the reception for Colorado quilters featured in Issue 28 of Quiltfolk Magazine: Colorado (see postRocky Mountain Quilt Museum Reception) I viewed and photographed some of their current exhibit: 25 Years of Scraps by the 19th Century Patchwork Divas.
Below is the placard on the exhibit if you want to read the background on this show:
There were so many wonderful scrap quilts at this exhibit, it was difficult to select which photos to share.
But here are my favorites – enjoy!
Scrap quilts are awesome, eh?
As promised, here are the bloggers that participate in the ScrapHappy monthly posting event, check out their blogs linked below for their ScrapHappy posts:
I’ve been taking a break from blogging after my push to do a daily blog post for the 31 days of October, my 10th anniversary month of blogging. Additionally recently I had a wonderful visit with out of town family that of course kept me from sitting down and blogging.
Here are some updates on my current adventures in creativity.
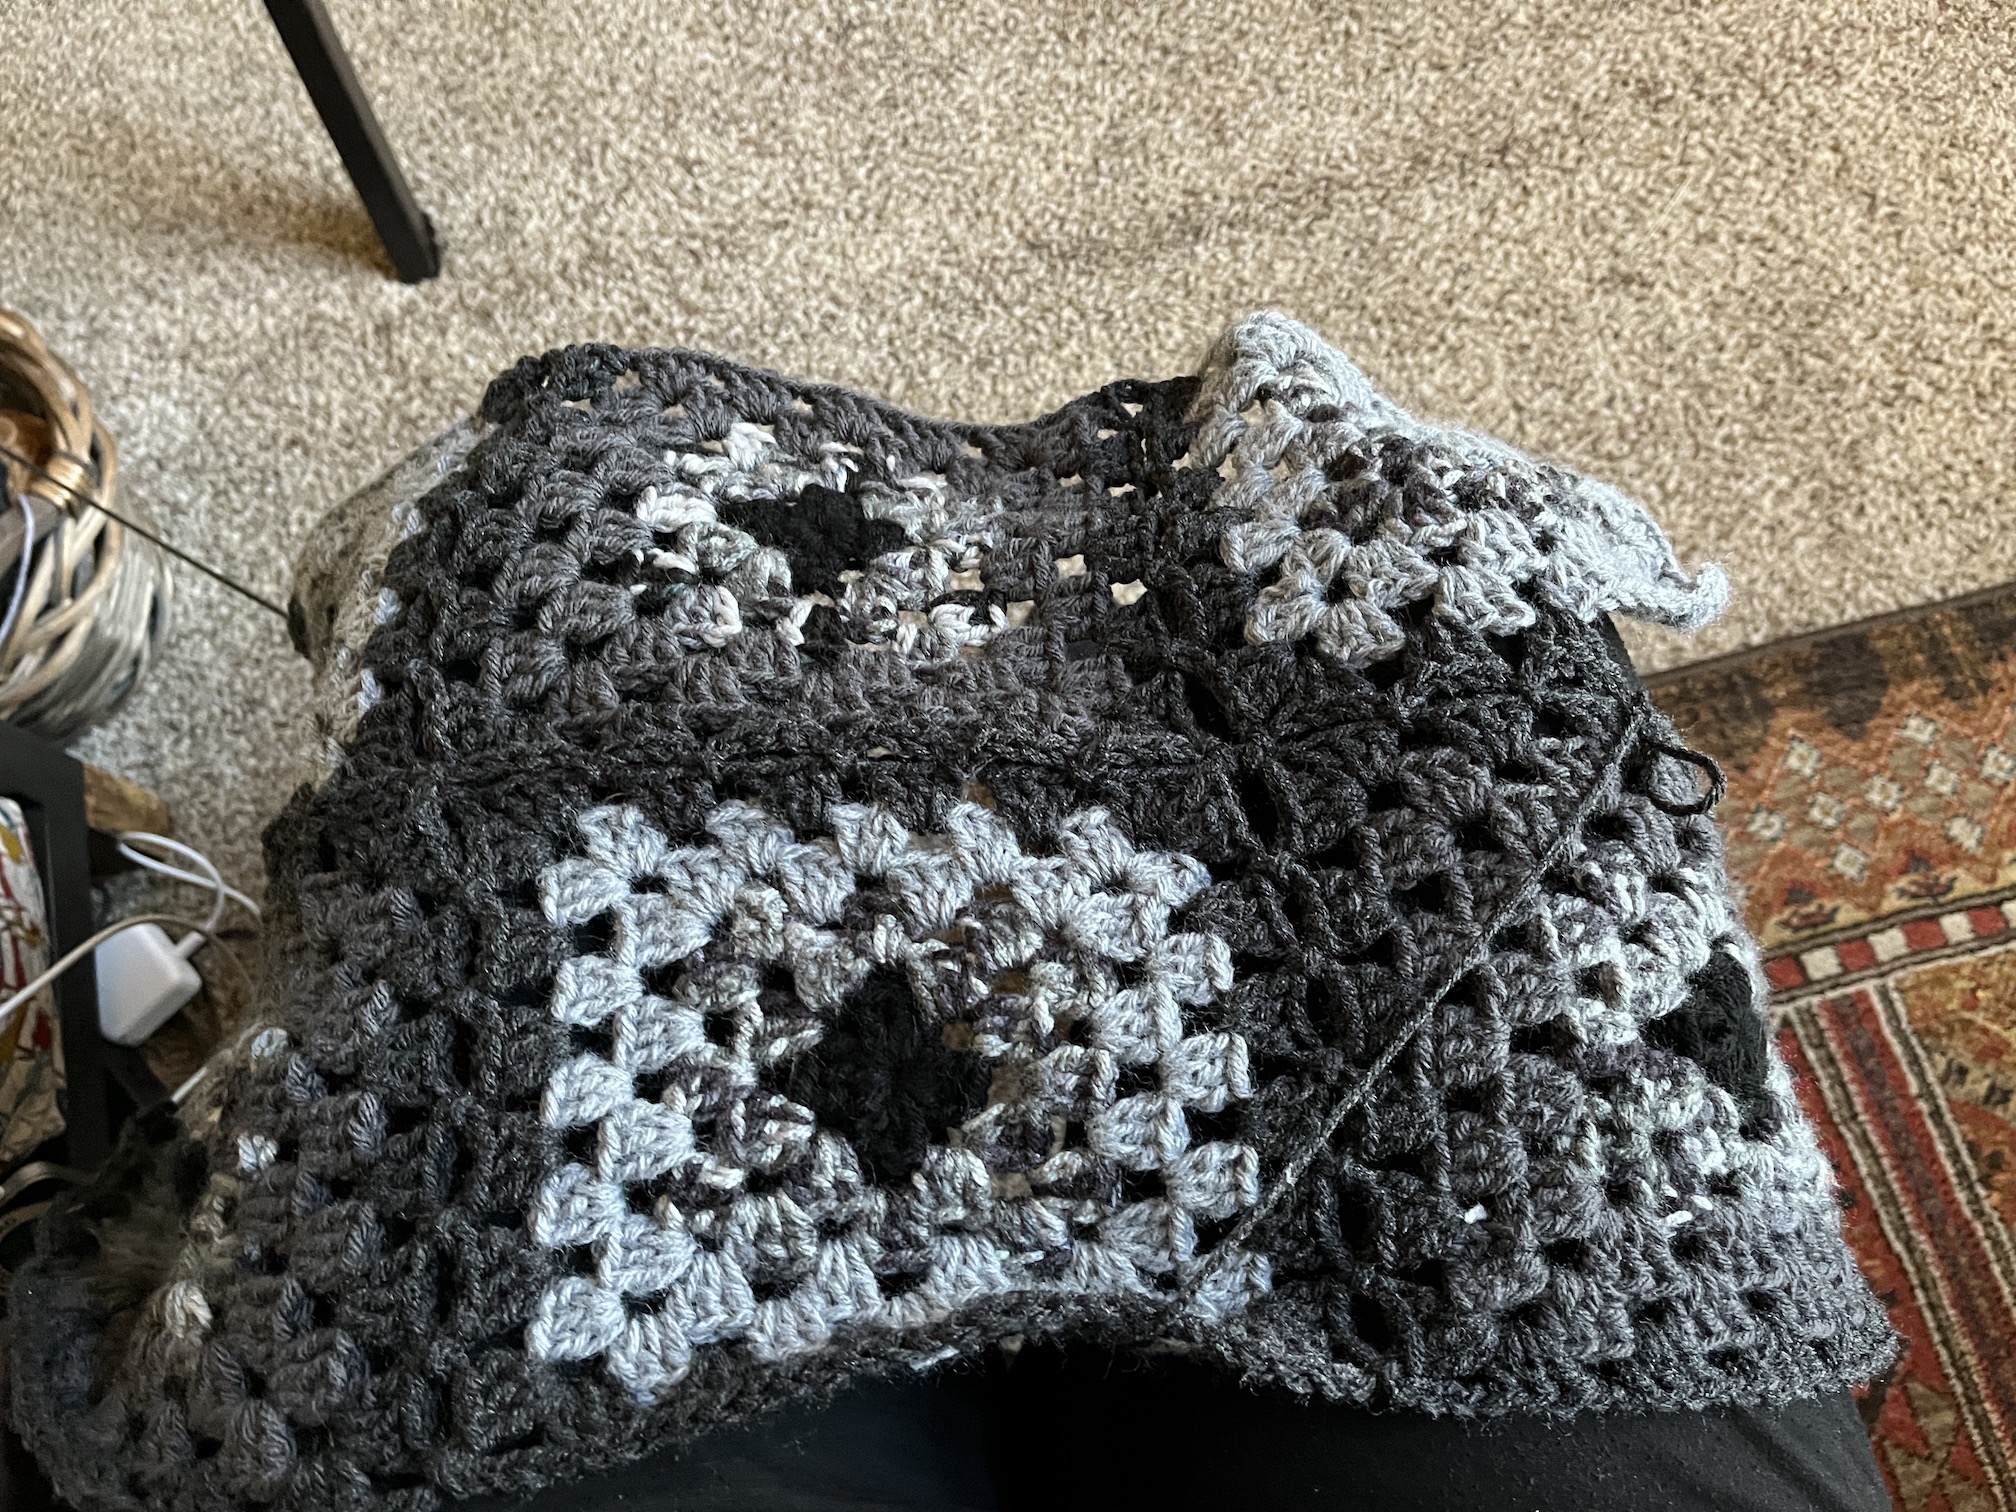
I now have 66 blocks completed and 15 more to go to make 81 blocks for a 9 by 9 layout:
This is not even close to the final layout, just blocks put up on the design wall to track my progress. I have a lot of cleaning to do on my sewing machine after all that lint from sewing denim and home decor fabrics!
I’ve completed the 80 crocheted granny square blocks for the next granny square blanket I am making. I am doing a 8 by 10 layout of the blocks and will set them in dark gray yarn as the lattice.
Mike the Miniature Schnauzer couldn’t wait to lay on the laid out blocks as soon as I moved away from them!
This also is not the final layout, just a general layout to show all the blocks (and a Miniature Schnauzer, ha!).
I used the pages she sent me to make a display in my studio of the article I am in using these cool 11 inch by 17 inch frames I found. John did a great job helping me hang them.
I’ll close this post with a cute meme my sister sent me the other day as we all struggle with Daylight Savings Time (setting the clocks back 1 hour in the Fall and 1 hour forward in the Spring); that is US states that agree to play along with it (Hawaii and Arizona do not participate).
It’s the 15th of the month and time for my monthly “ScrapHappy” post as part of the ScrapHappy group I belong. At the end of this post I have a link to the other blogs participating in this monthly event in case you’d like to check out their ScrapHappy posts.
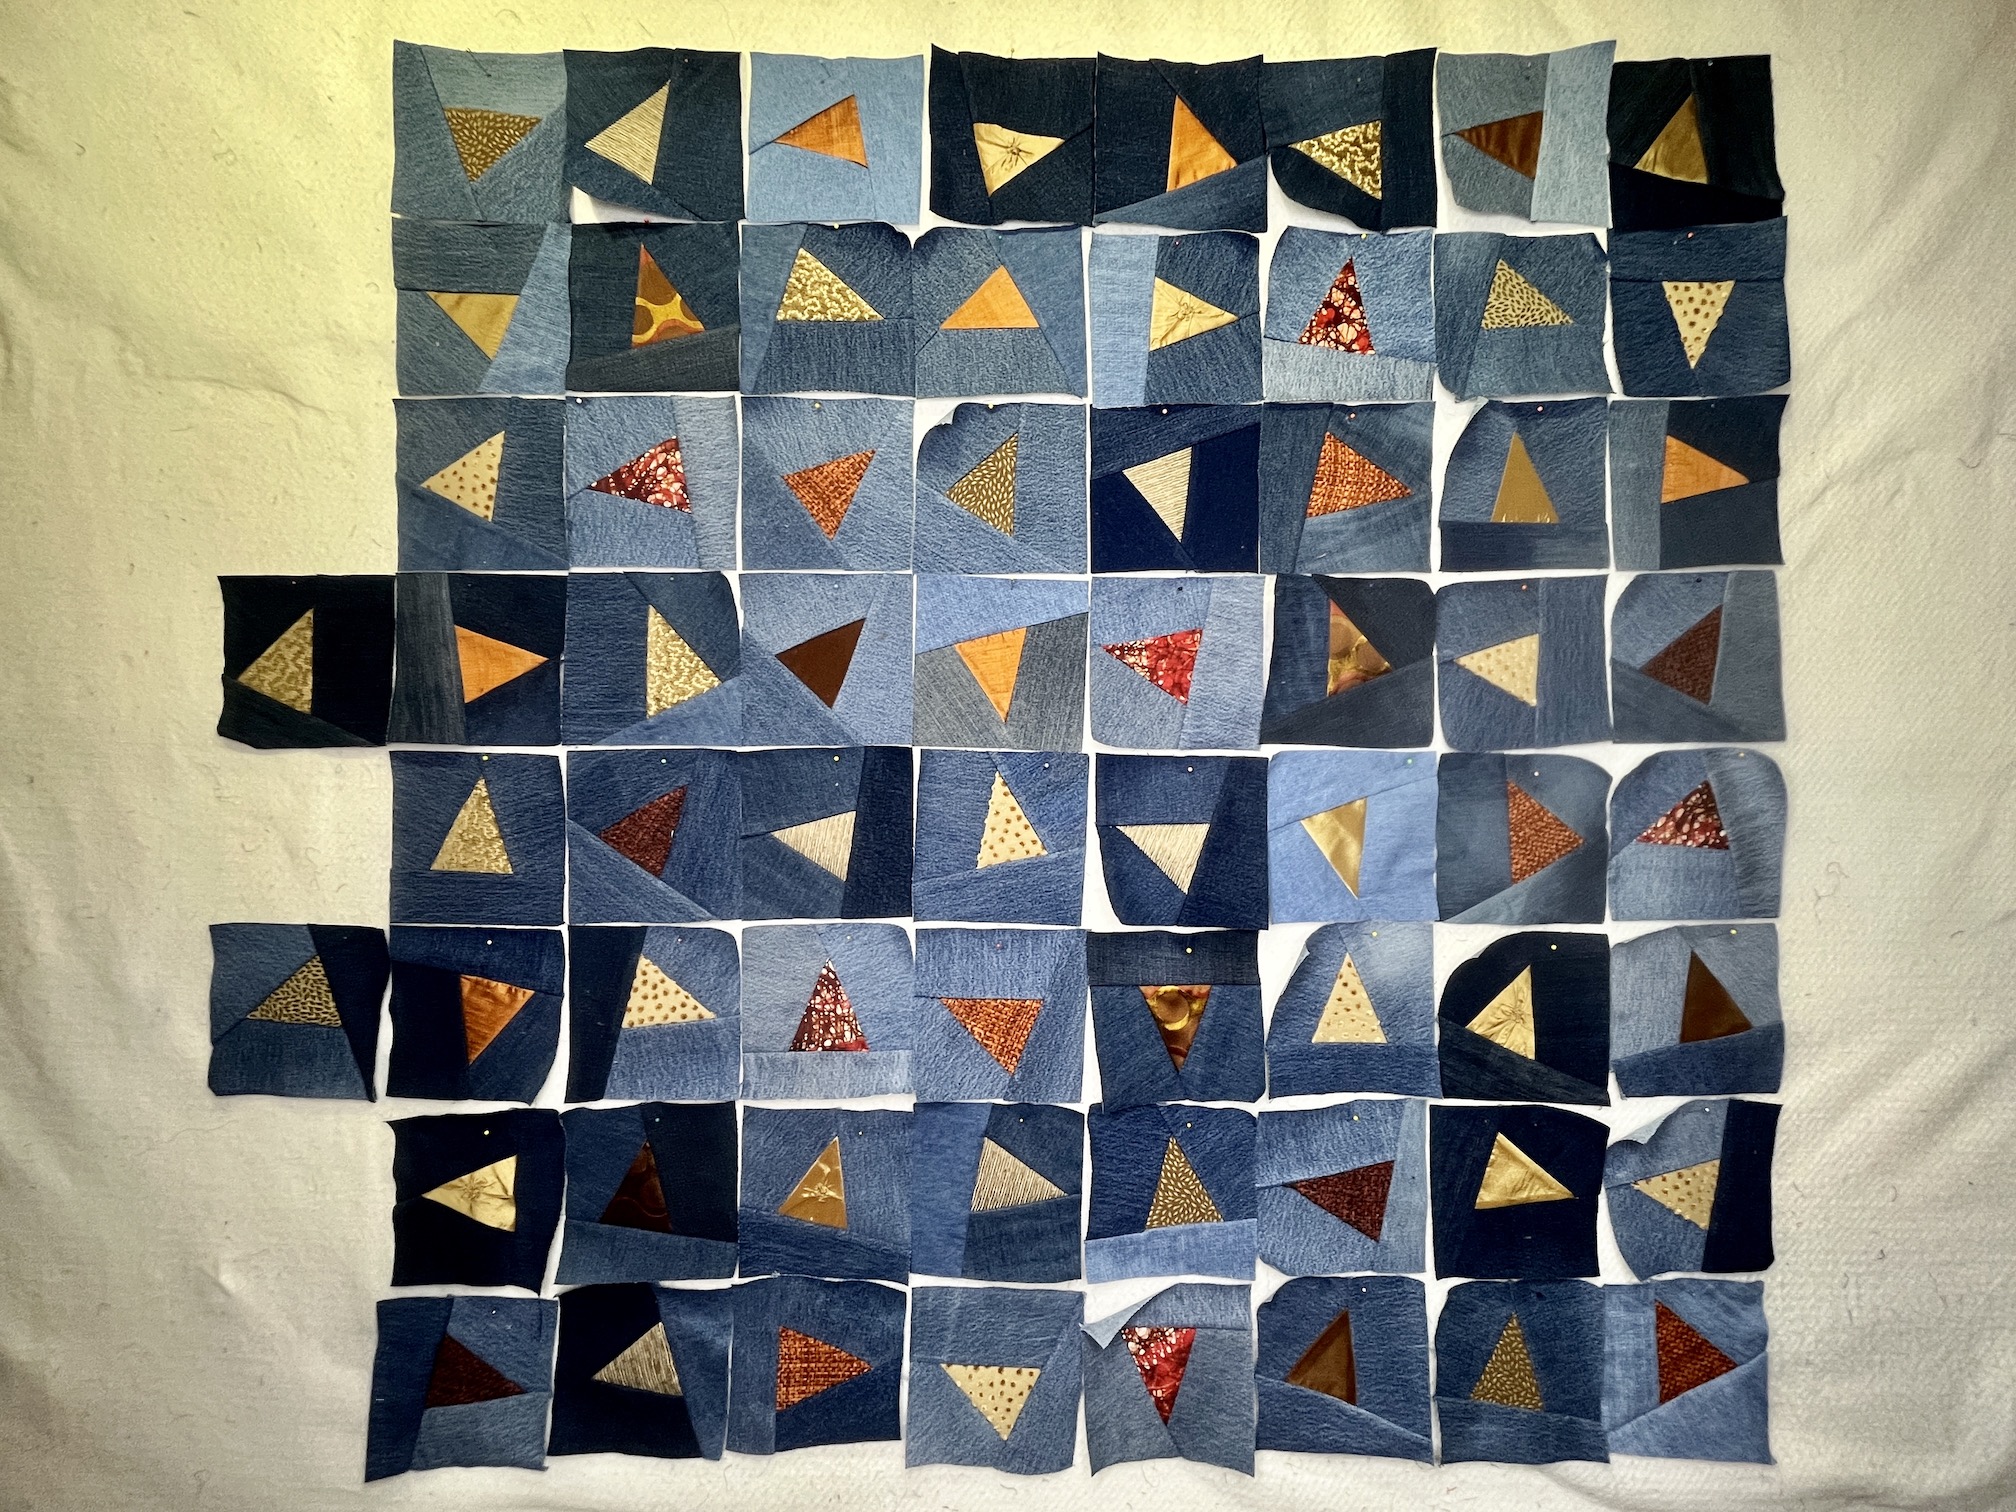
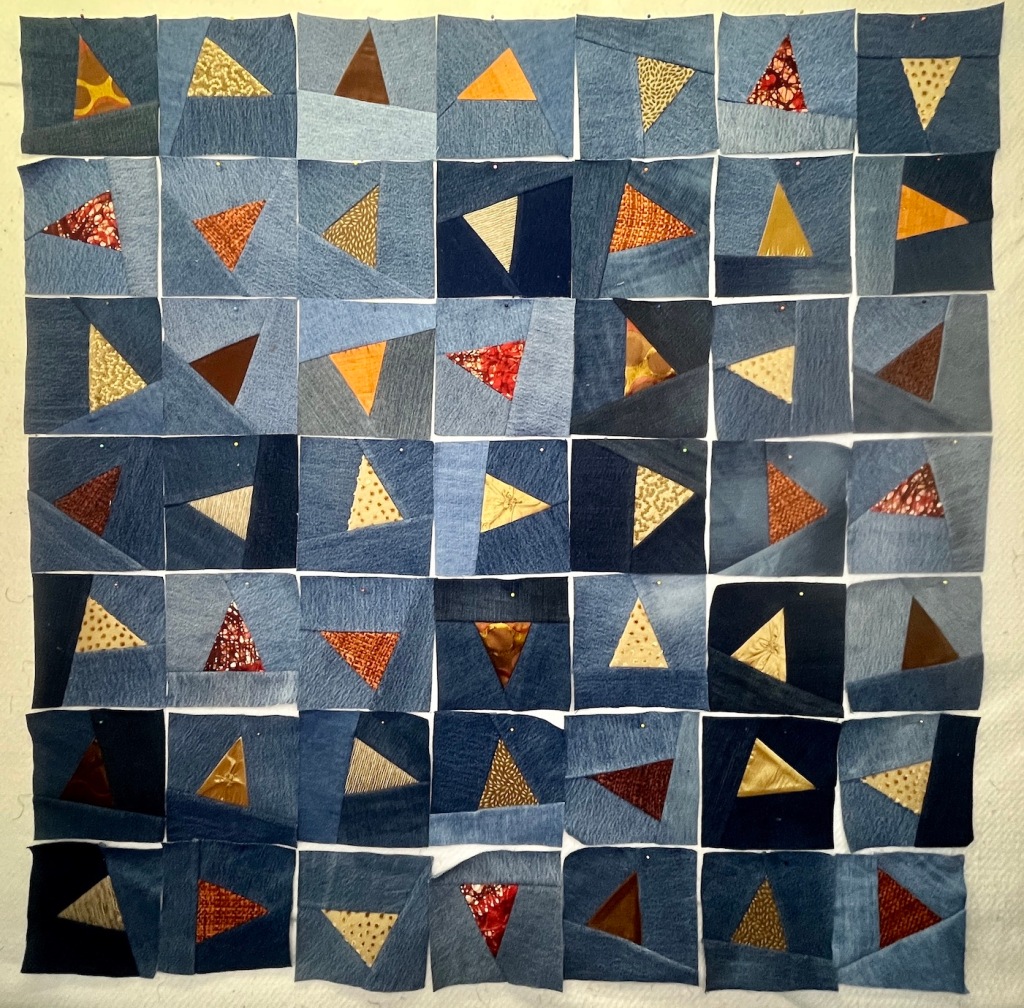
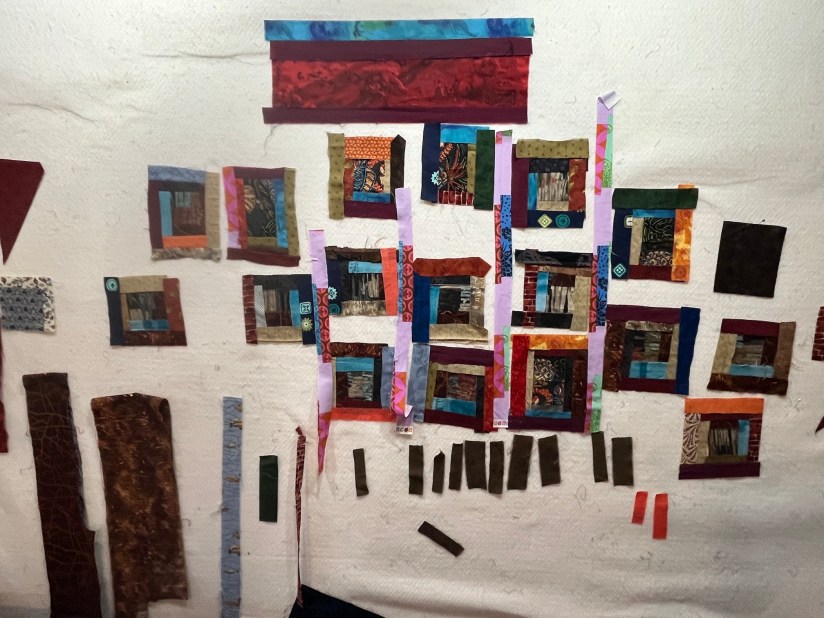
I’ve completed 51 blocks piecing recycled denim/jeans and home decor fabric scraps; and I put 49 of them in a 7 by 7 square so you could see a sample of a layout:
Yes I couldn’t decide which photo to use so I included all three!
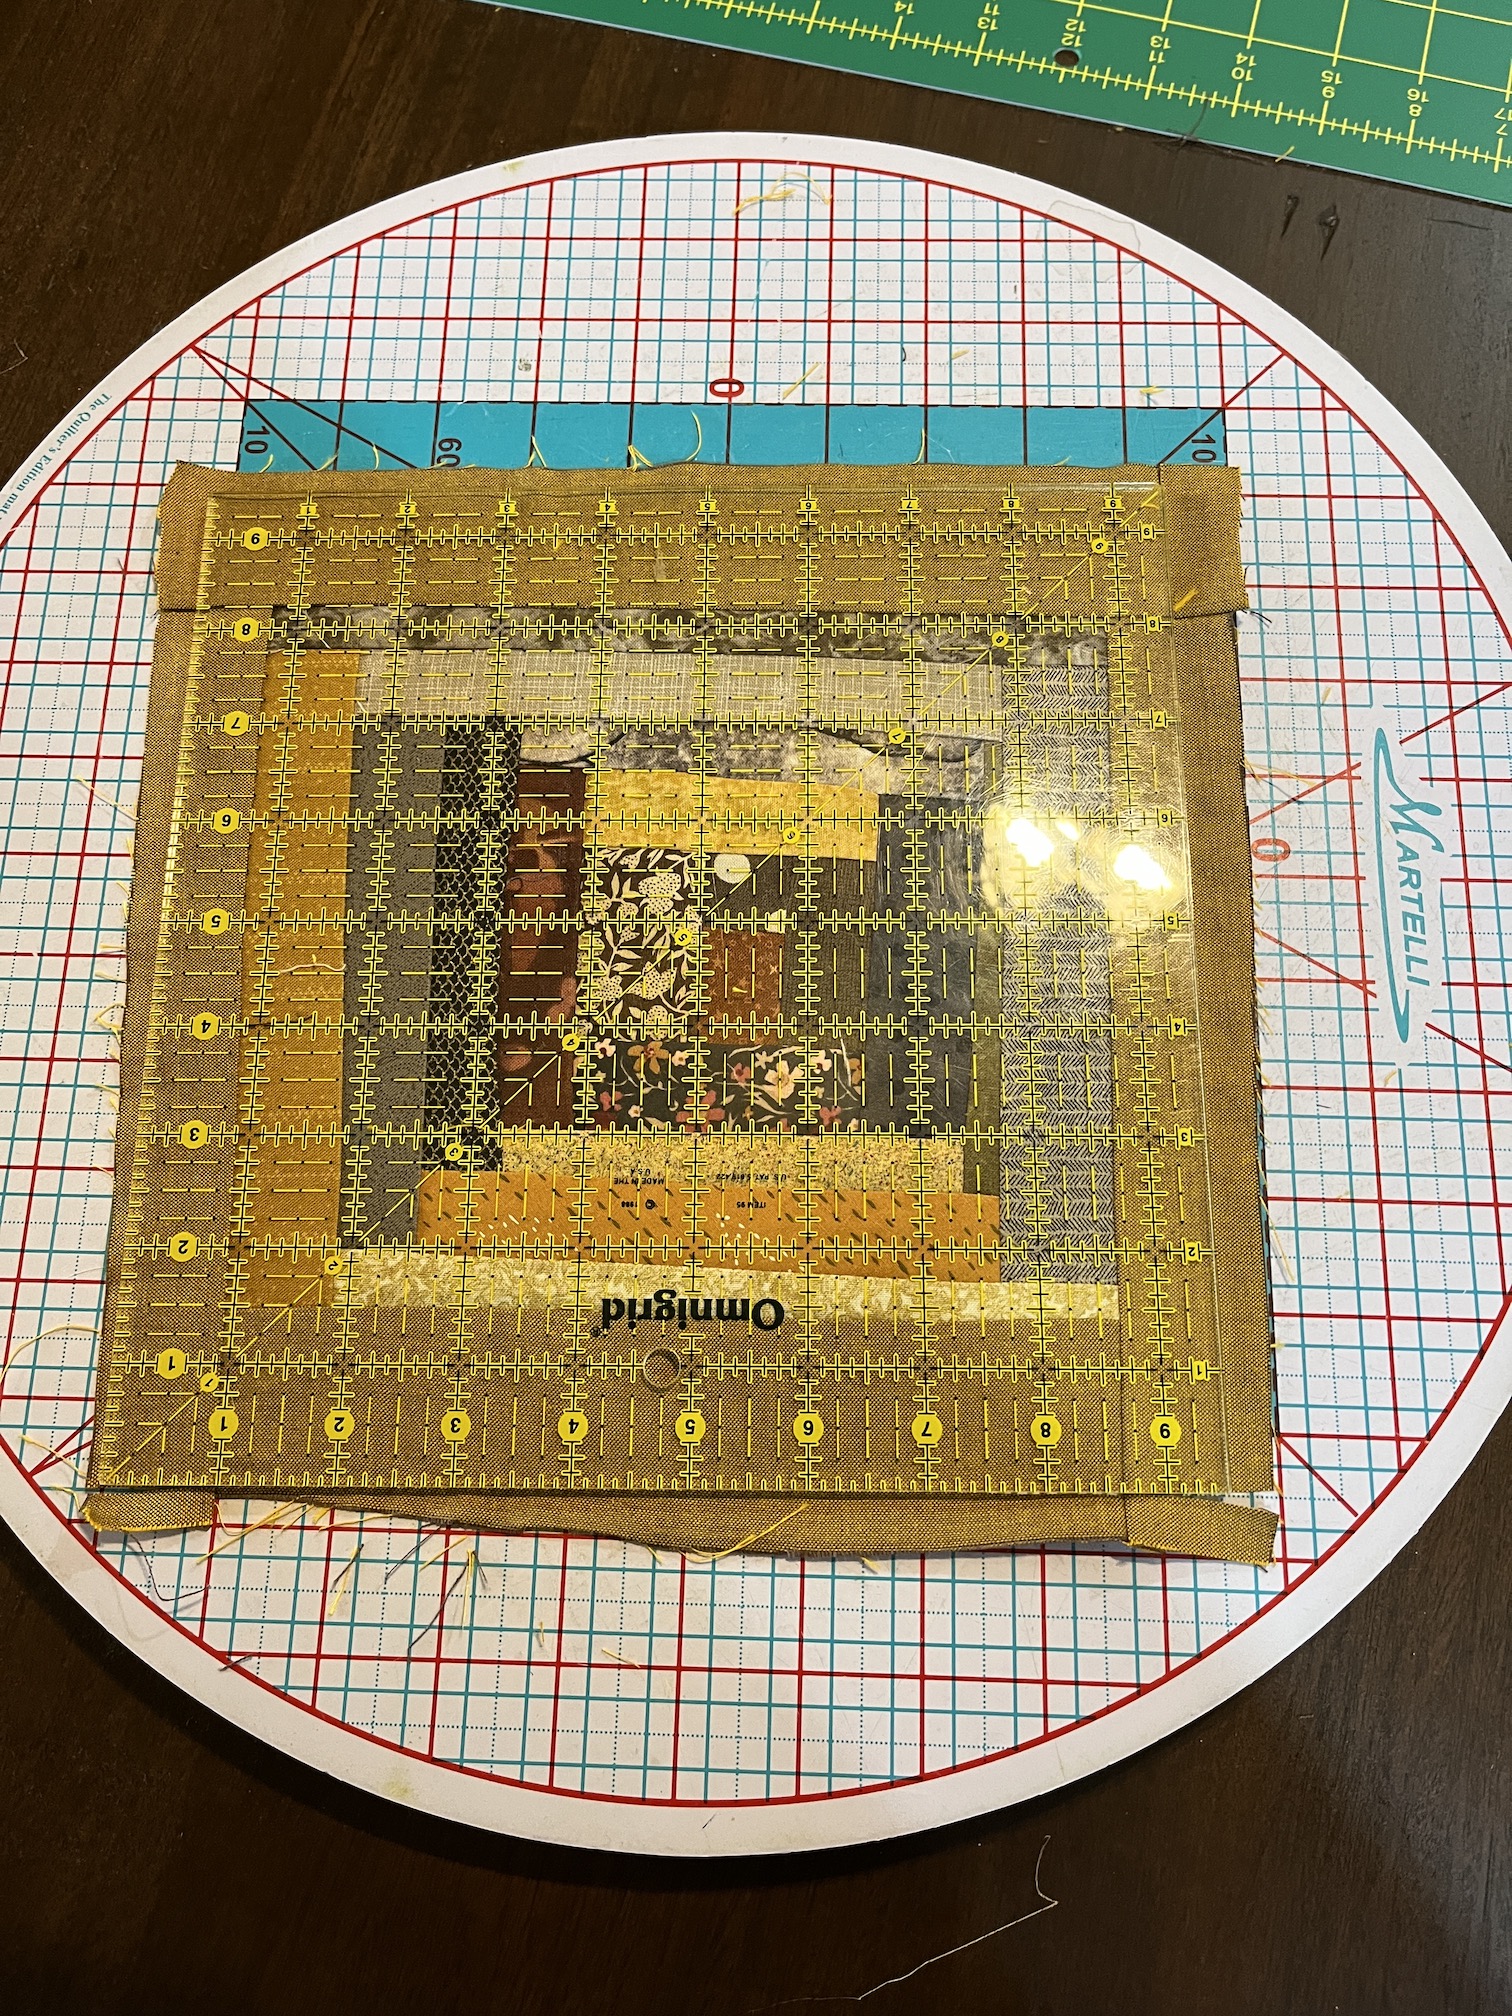
I want the piece to be sort of large, and definitely square and I’ve decided to make a total of 81 blocks for a 9 by 9 square piece. I might hand quilt it, I haven’t decided but I am going to try some sample designs with scrap denim to see how the stitching would look.
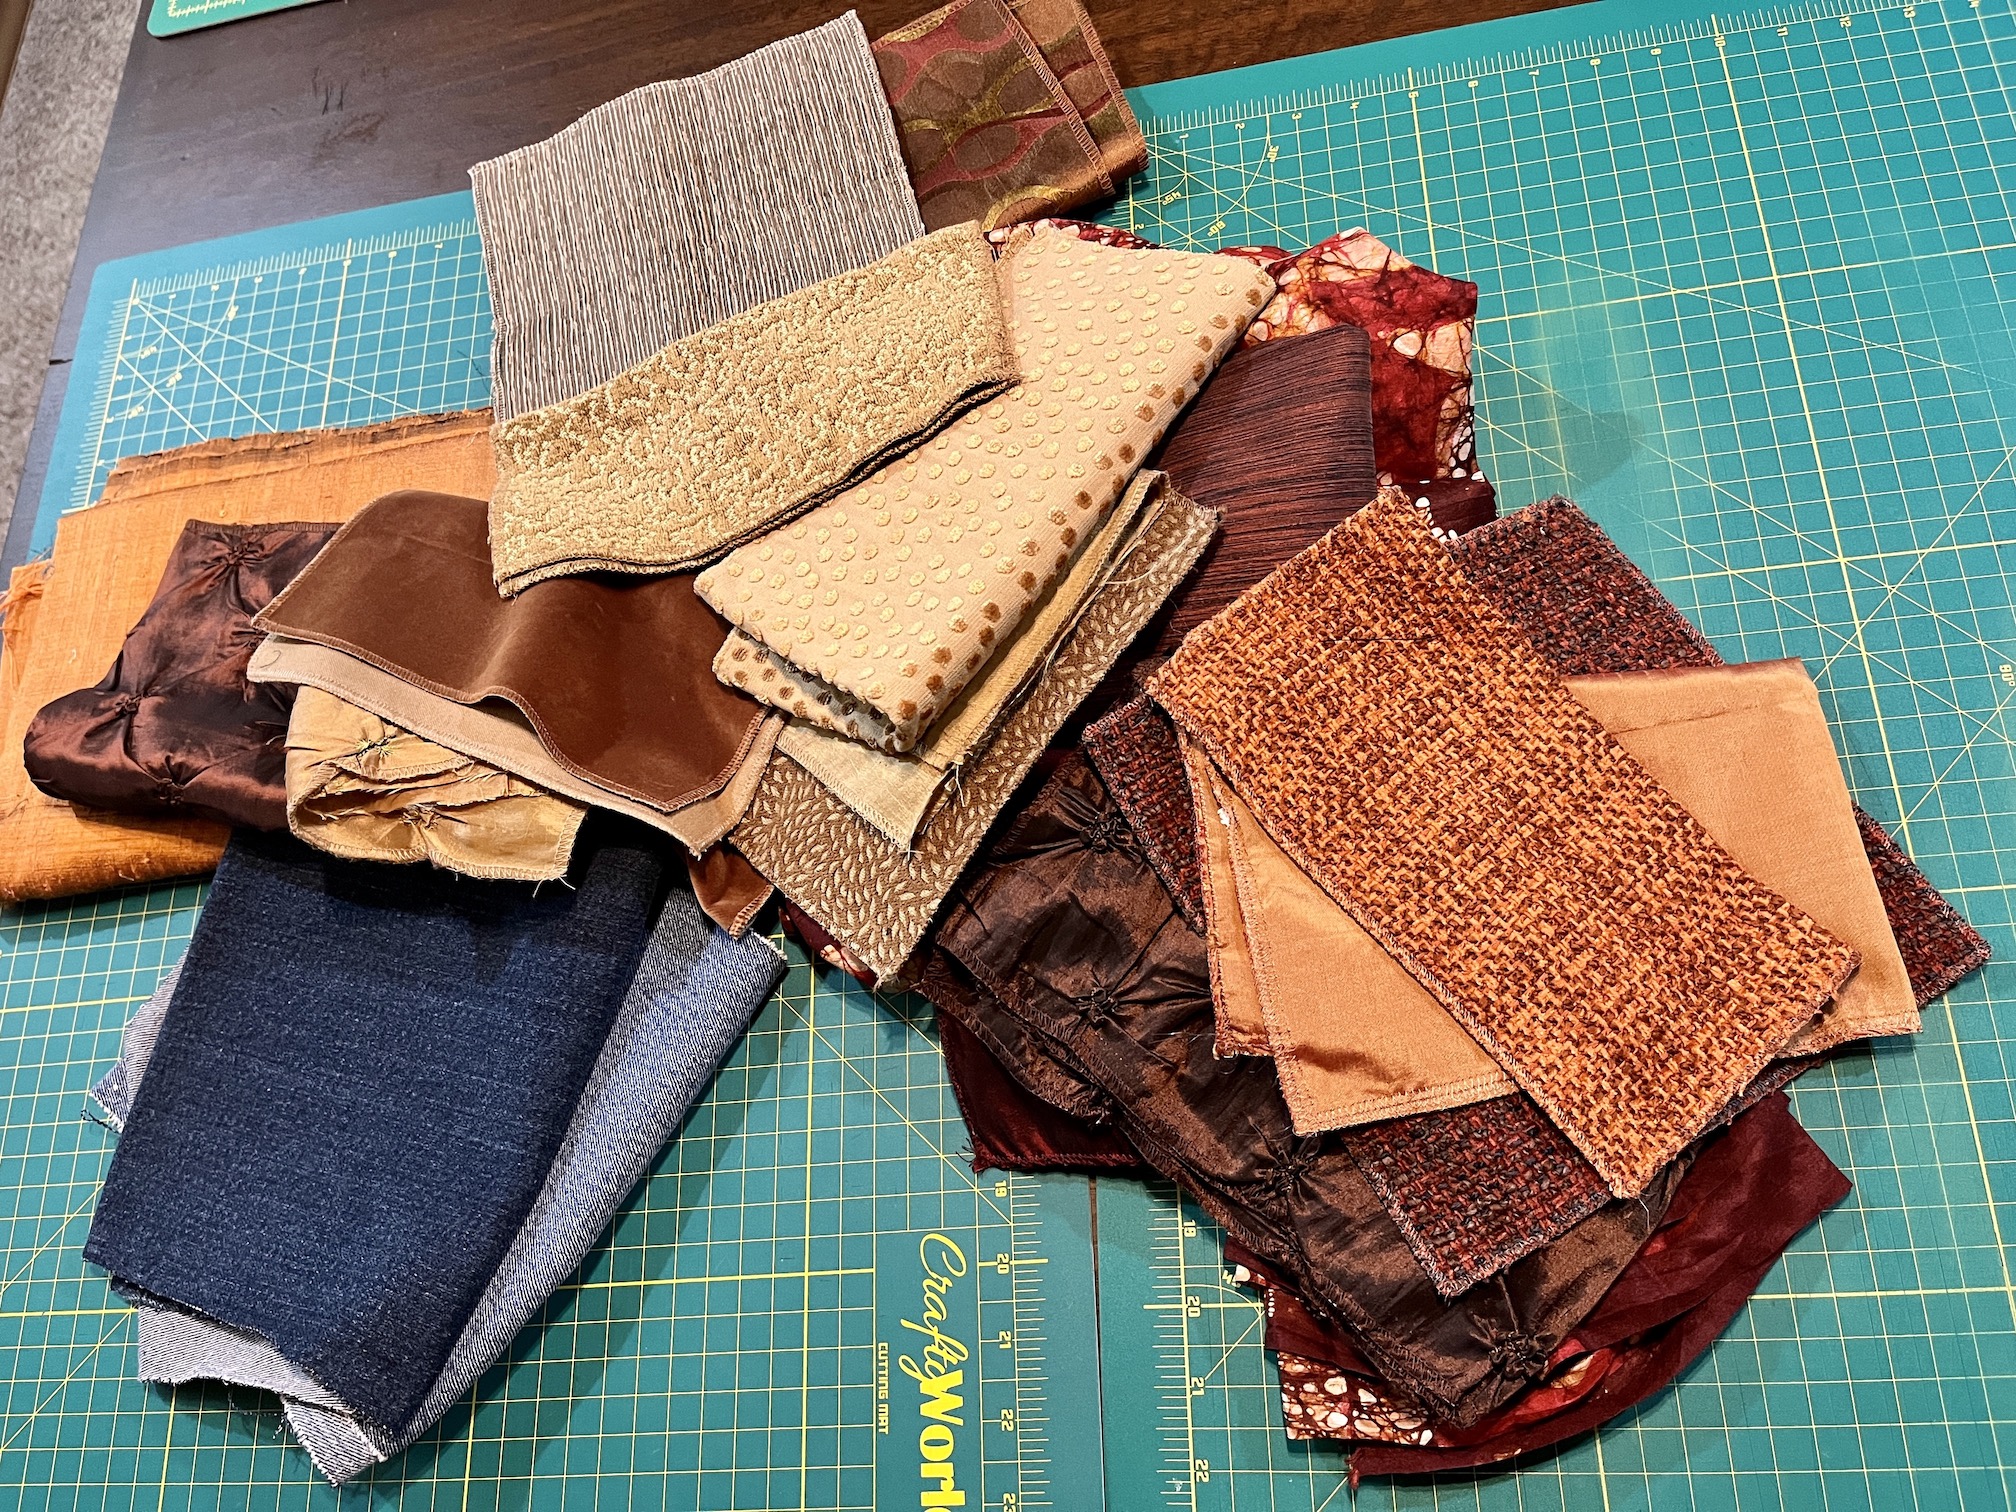
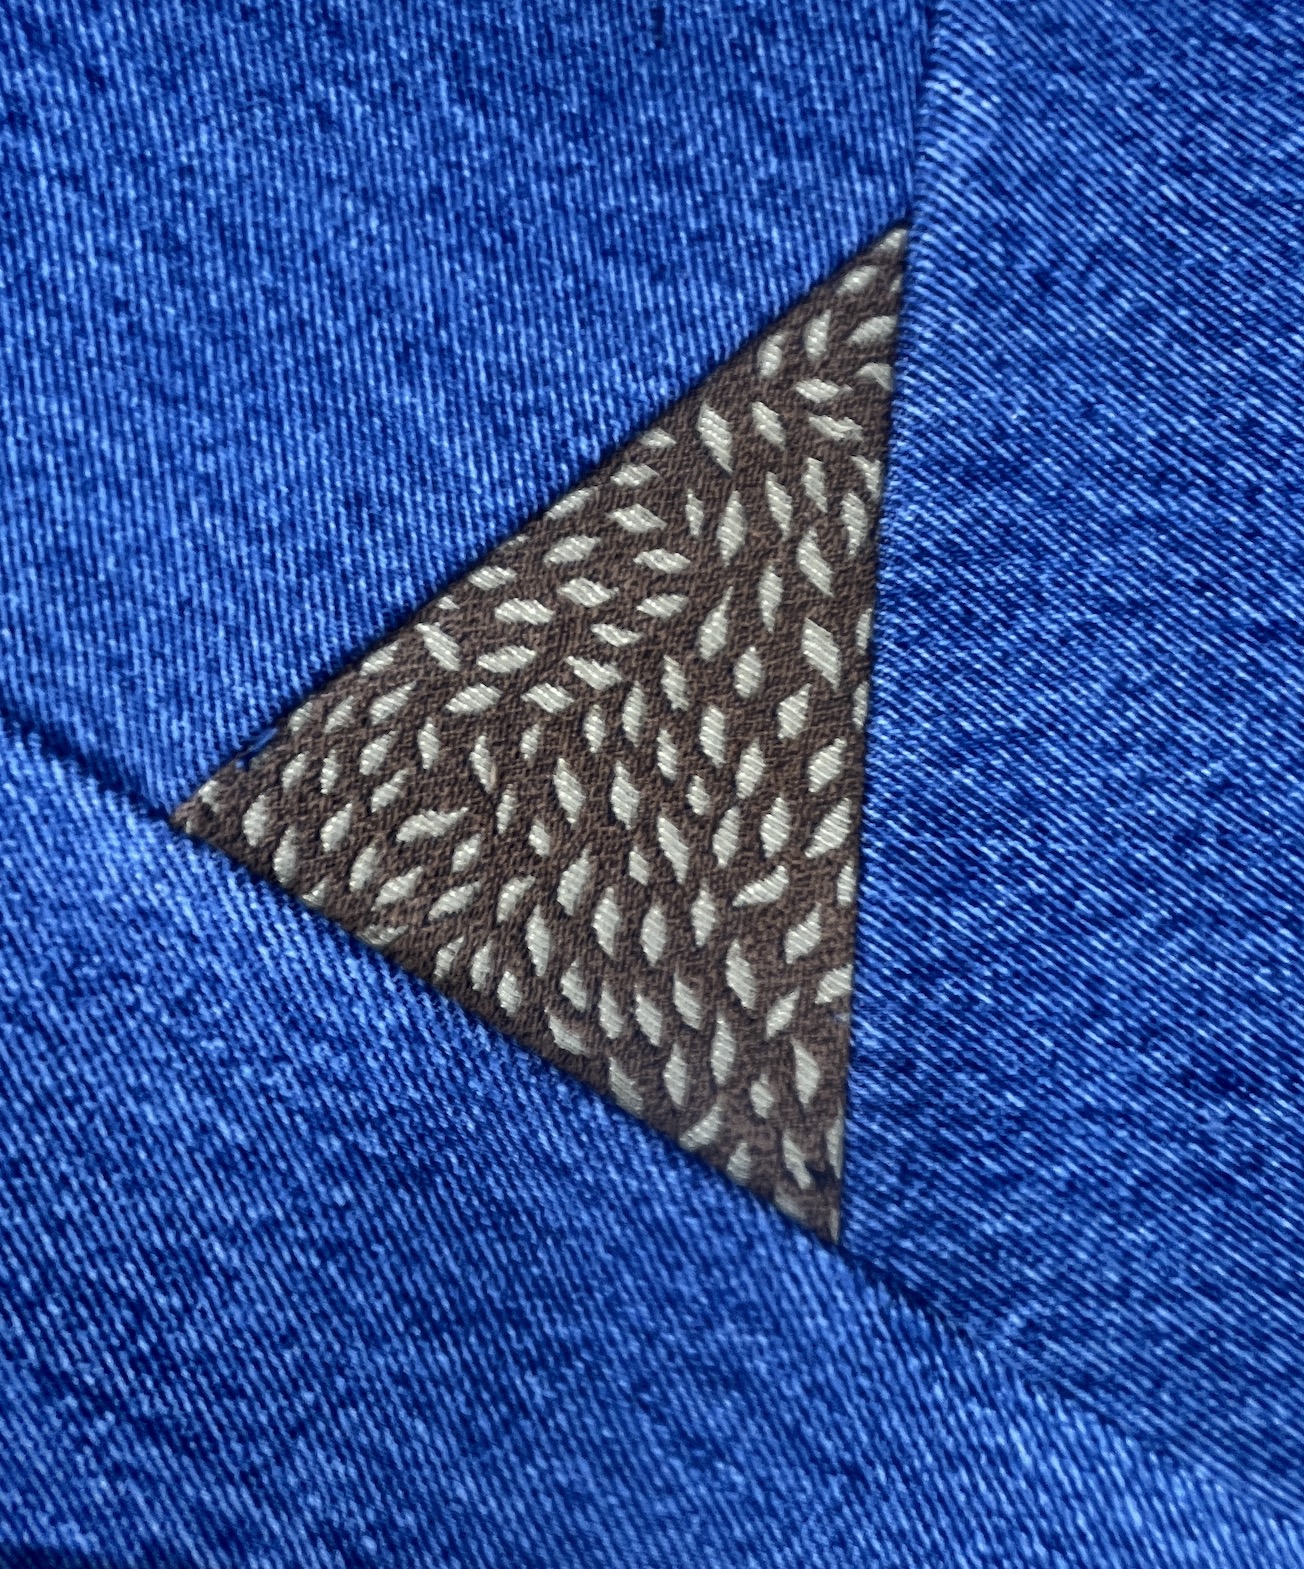
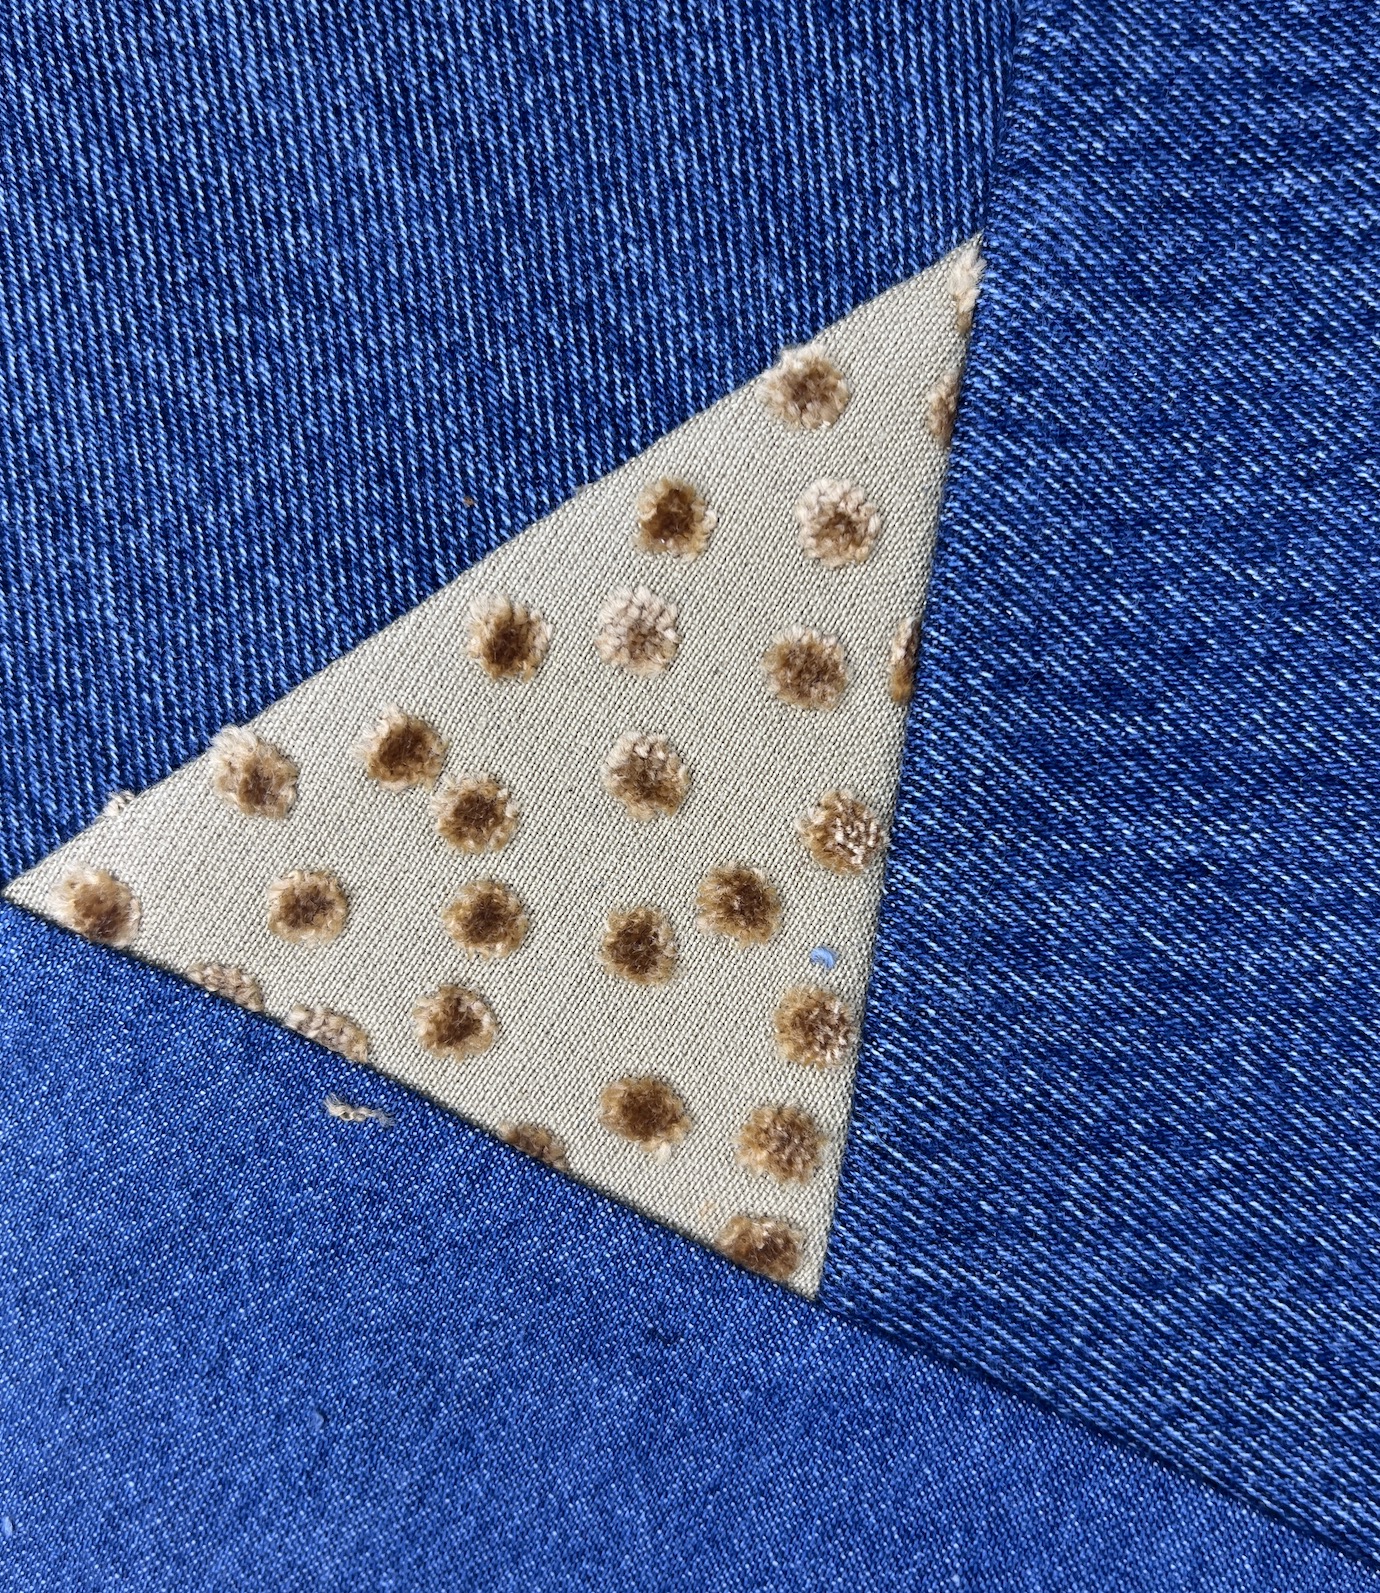
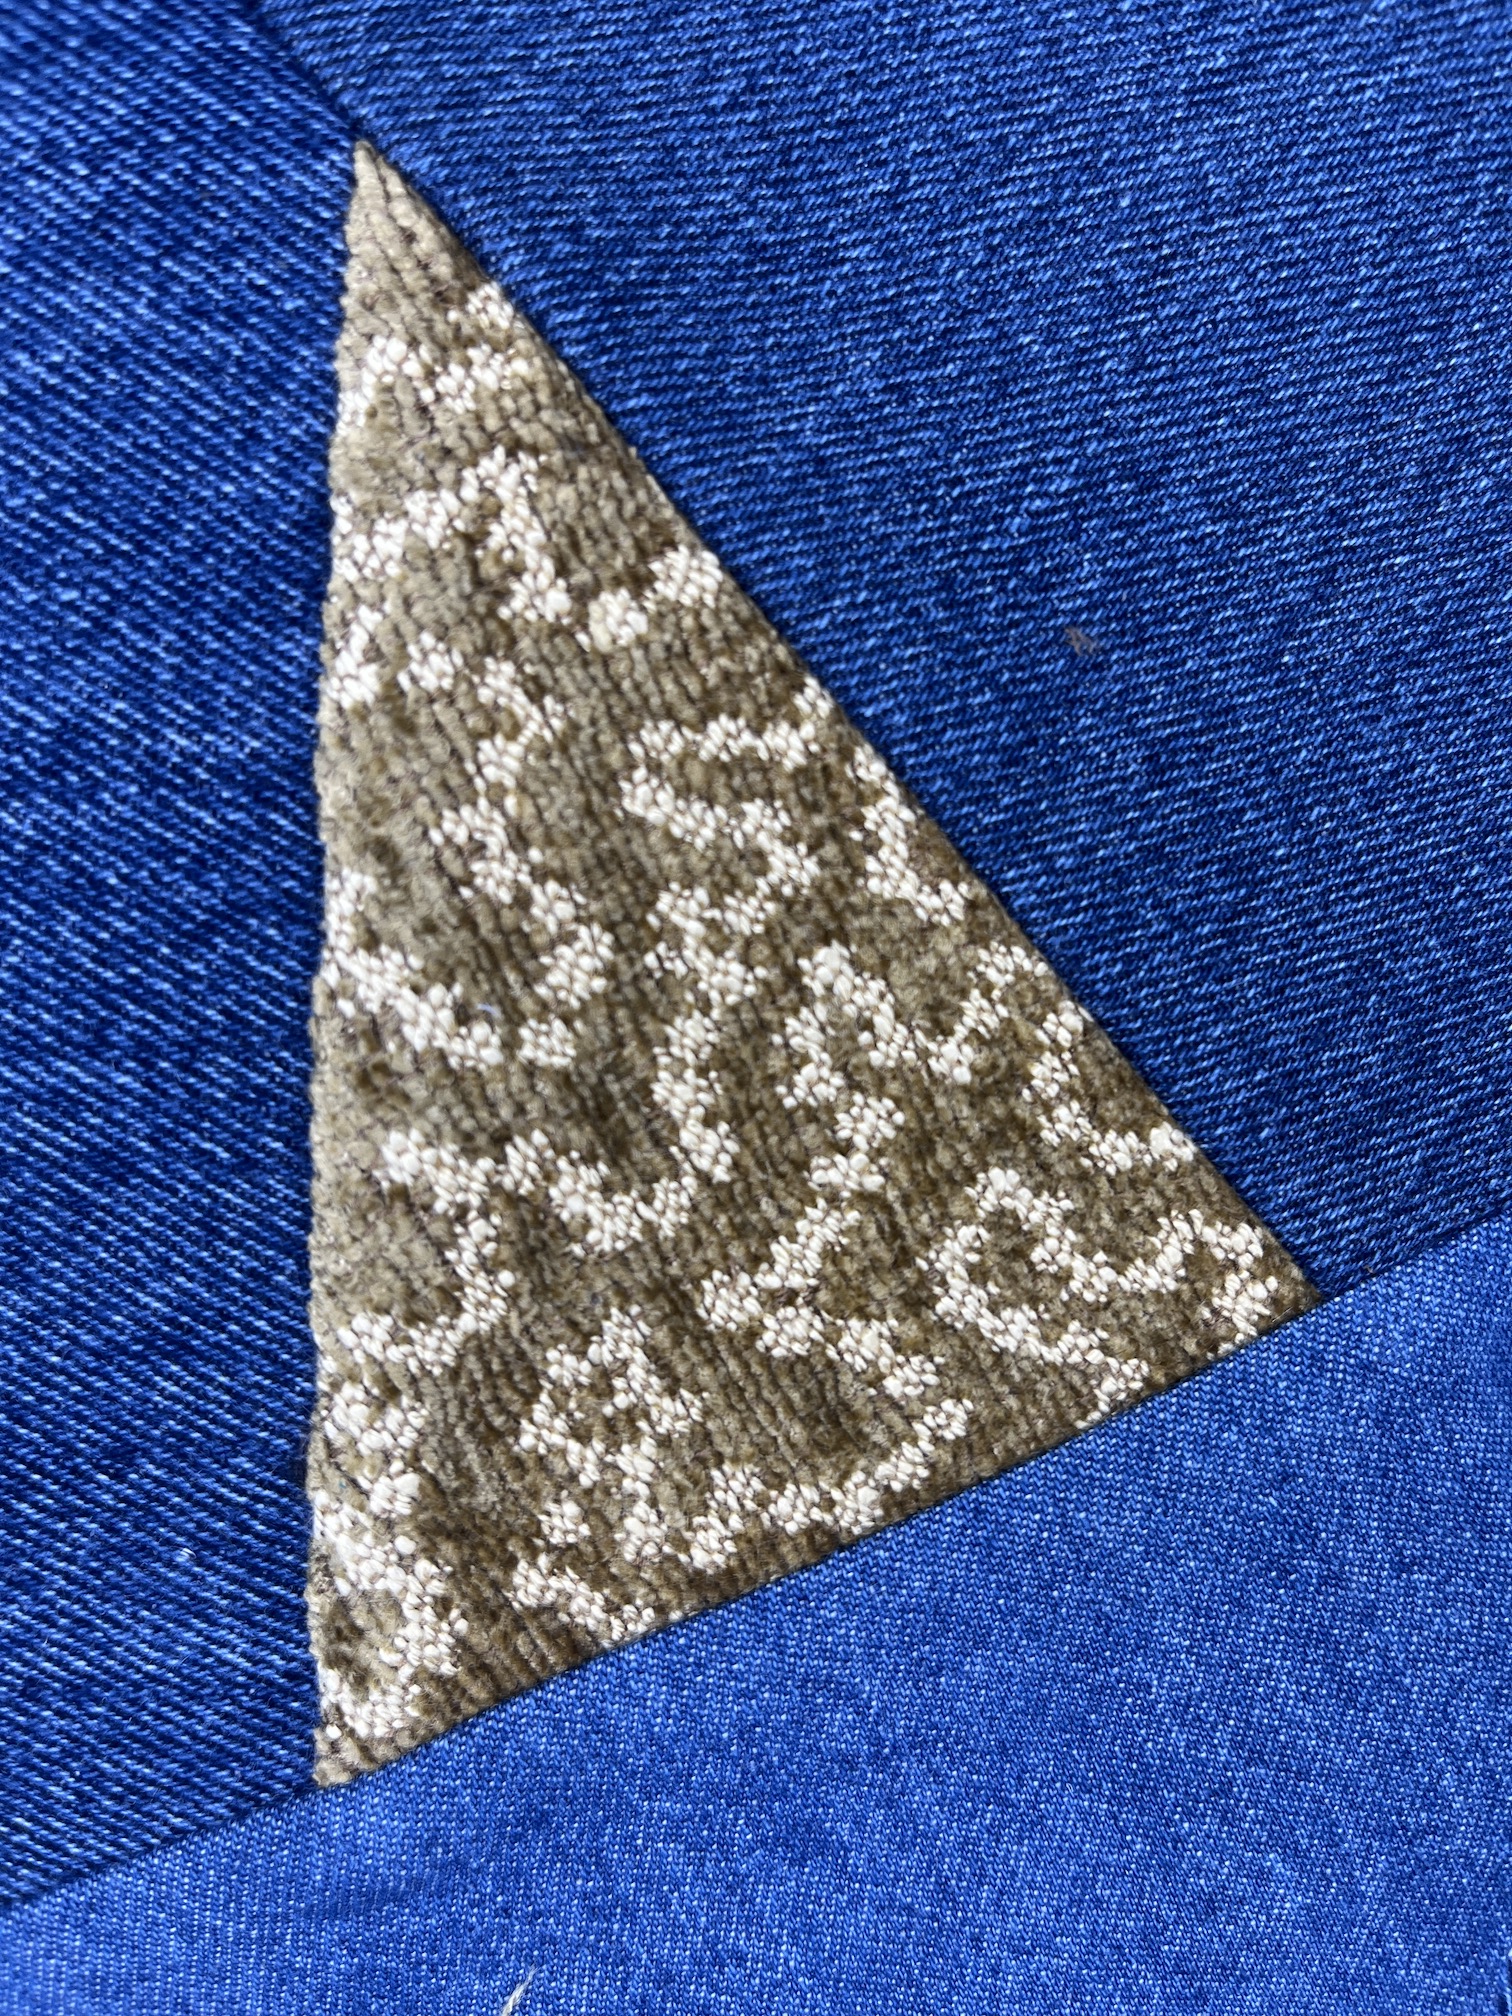
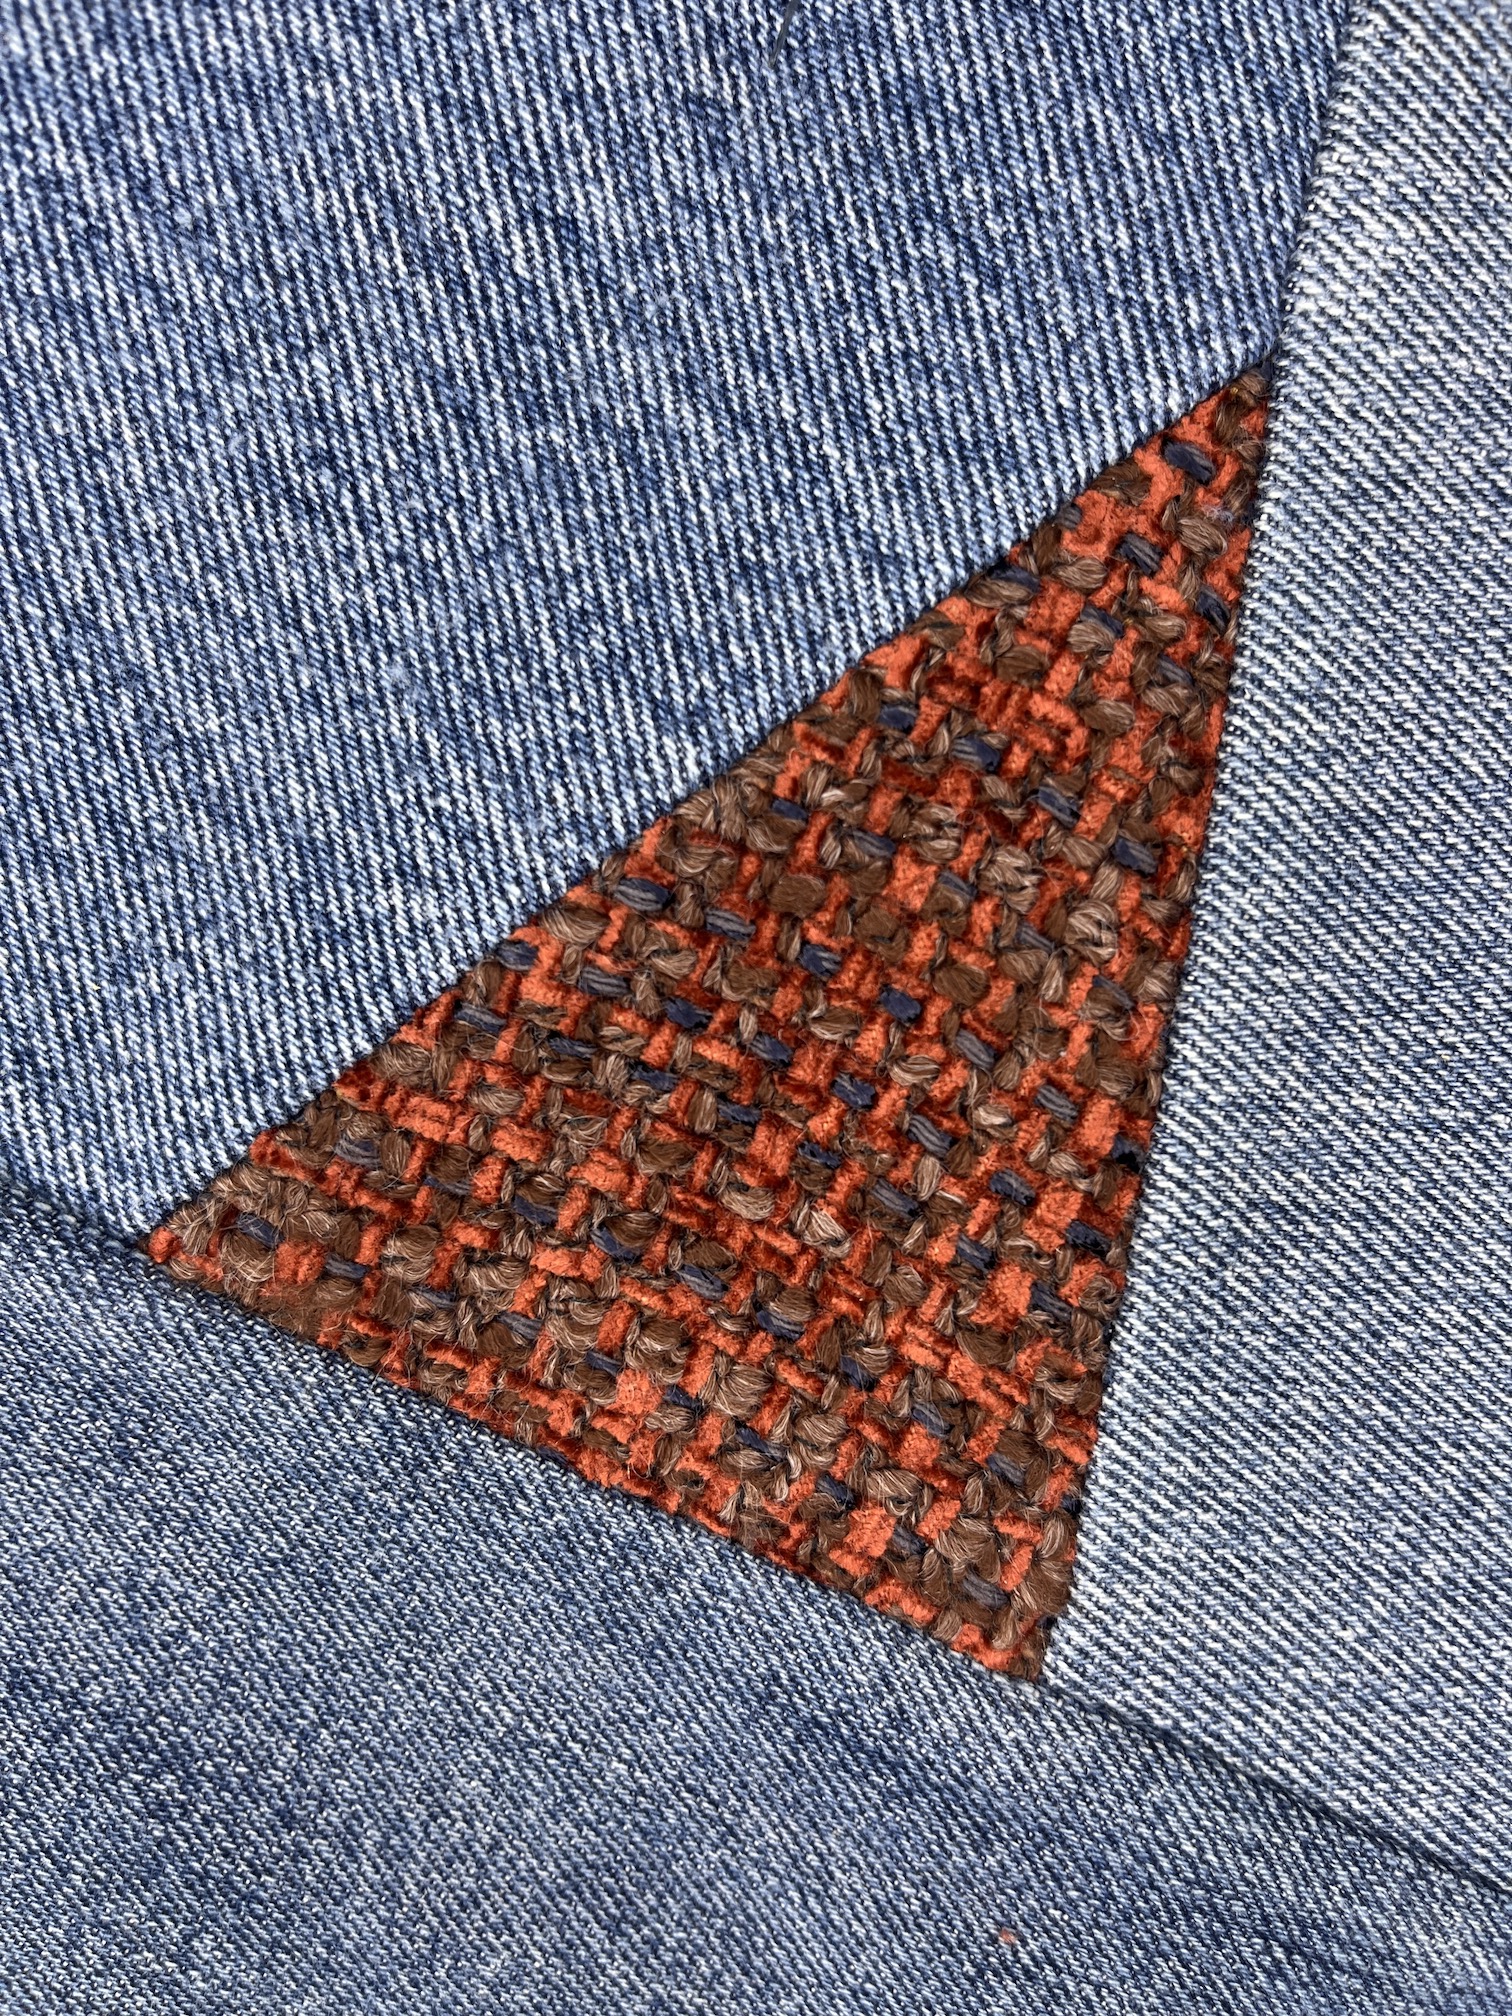
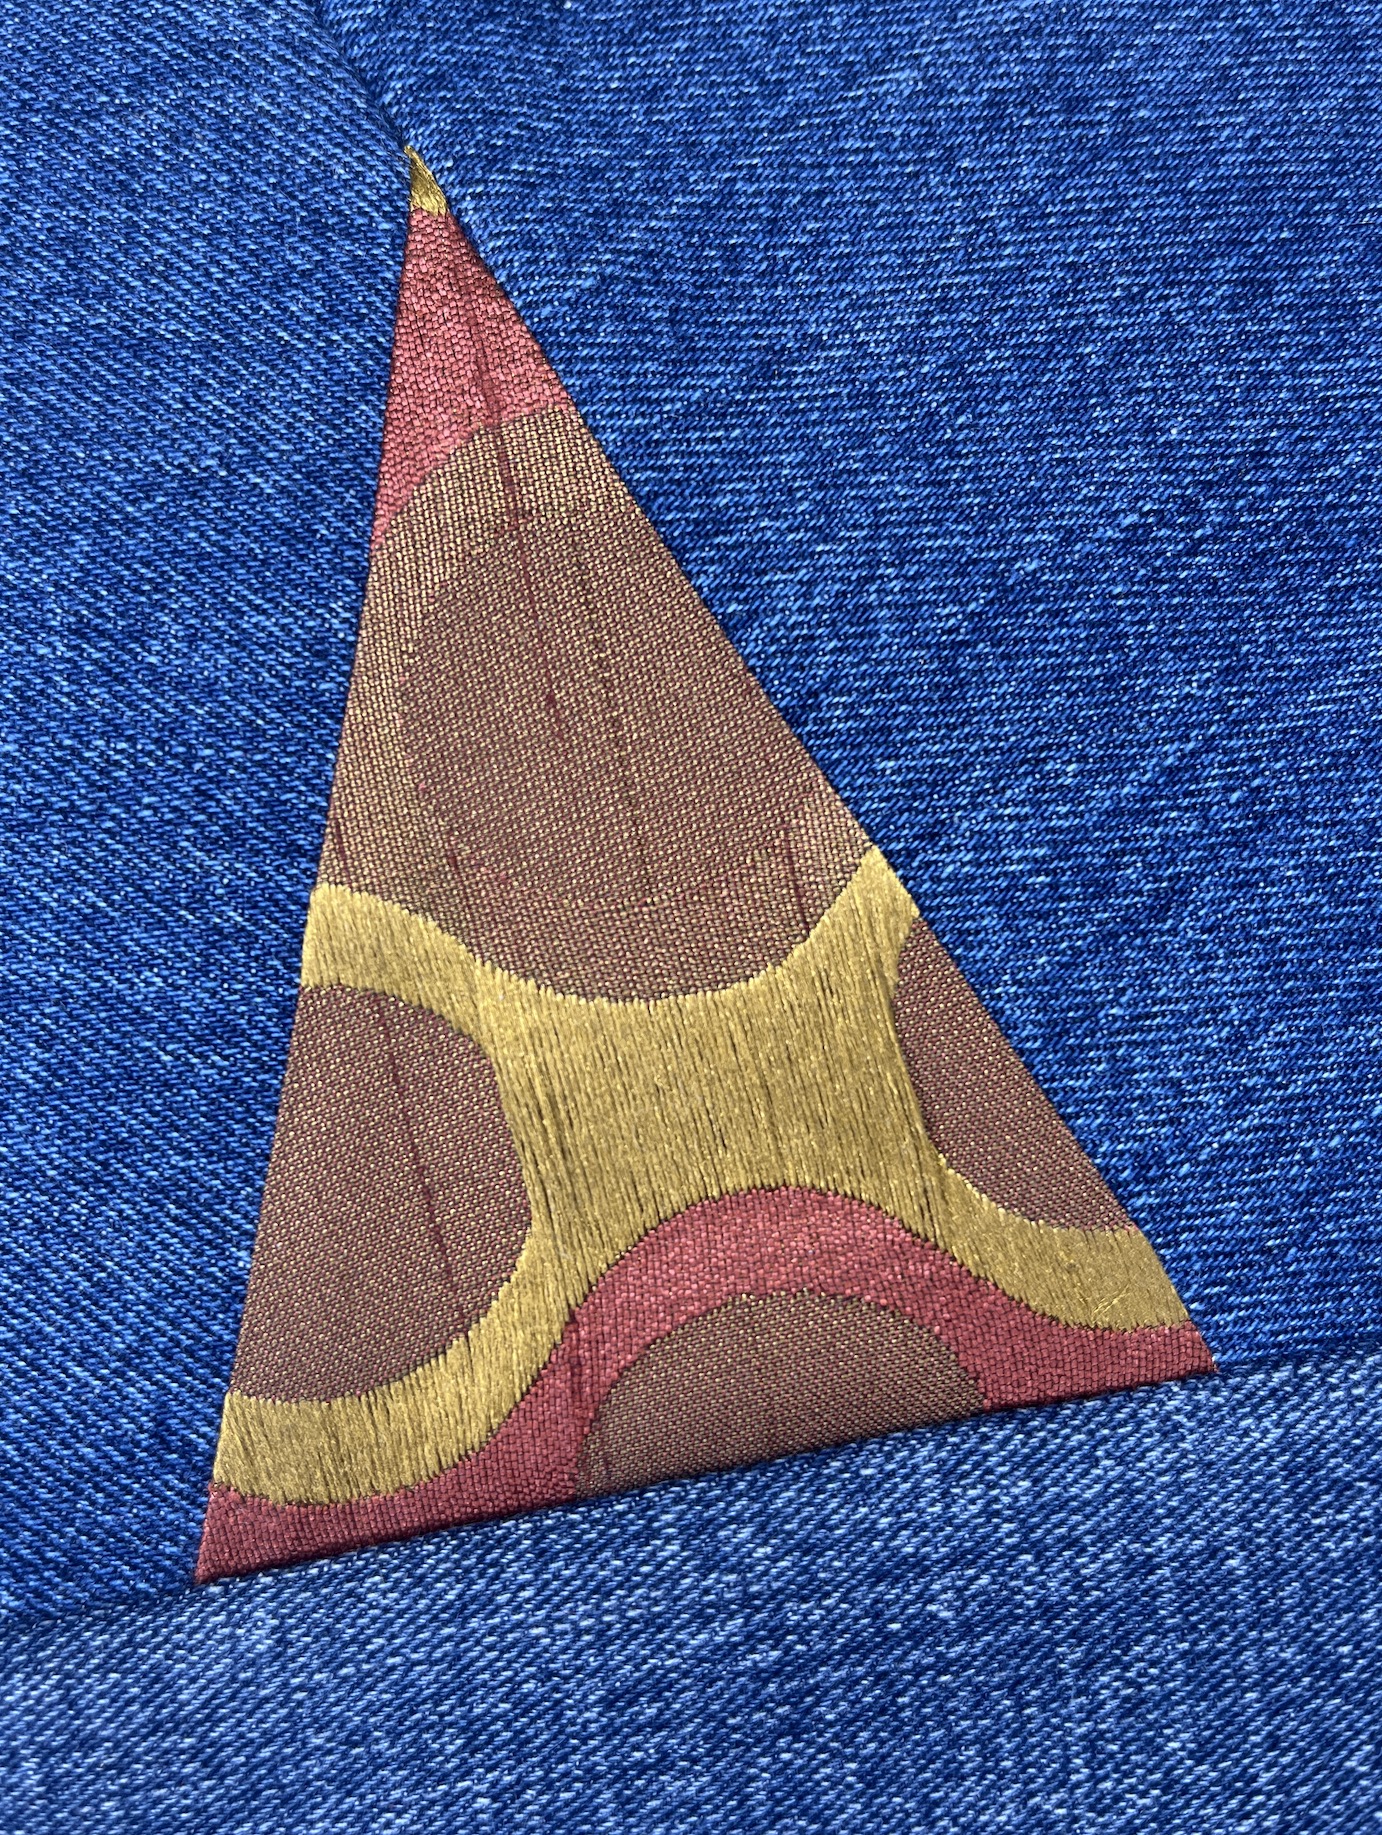
There is going to be lot texture in this quilt, primarily from the recycled home decorating fabric samples I used:
Here is a collection of close up blocks to show you the textures:
There are more fabrics I haven’t cut yet that I will be adding/using for the additional 30 blocks I need to make.
The layout you see on my design wall is not the final layout, just a sample layout. When I finish all the blocks and go to layout the quilt, I realized I need to pay attention to secondary patterns that I might want in the piece.
For example I noticed this secondary pattern, from how the blocks lay together, in one of the sections on the design wall and I like it:
I want to make sure the final layout has a lot of “movement” in it.
My tentative name for this piece is What Direction Do I Go?
It is a deeply personal piece, inspired by my first recycled fabric random triangle piece Flying Triangles (2012); but about my struggles for the past 5 years since becoming a widow, selling my beloved house, moving to Colorado (leaving all I knew there), starting the 2nd relationship in my life, quitting my job, trying to focus on textile art, etc. (Yes I like to lump a lot of life changes and drama into one time period, ha!).
It should prove to be an interesting Artist Statement on the piece when I am ready to write it (not until the piece is done of course).
And you thought it was just some recycled denim and home decor fabric sewn together (wink).
As promised, here are the bloggers that participate in the ScrapHappy monthly posting event, check out their blogs linked below for their ScrapHappy posts:
In honor of the 10th anniversary month of my blog, I am going to attempt blog everyday for the month of October. I’ll be catching up on adventures I’ve not yet shared. Perhaps eventually I’ll share my latest textile project(s) when I get back to working on them…
ANOTHER QUILT RETREAT IN MY HOME (SORT OF)
Back in May I had a “Scrap Happy Quilt Retreat” at my home for my friends D and K, who are both quilters – see series of posts in this blog category Scrap Happy Quilt Retreat, if you’d like to read about our “fabric-scrap-wrangling adventures.
My friends MJ and J got interested in “retreating” at my house – J is a quilter and MJ is not. I met J through MJ and MJ is a long time very dear friend of mine that I met when I lived in Bend, Oregon 2005 – 2018. We planned the retreat for late August 2023.
I thought it would work – MJ and J would come for 5 days and J and I would working on scrappy freeform log cabin quilts while MJ did some other craft and just hang out with us. MJ joked that we were going to give her macaroni, non-toxic glue, popsicle sticks and fingers paints (like in Kindergarten) to work with – ha!
I’ll share what MJ actually ended up doing later in this post (she creatively made her own retreat!) when our retreat in August happened.
But first I will share the huge fabric scrap pile J and I had to work with during the 5 days in August we had the retreat: it was a combination of my scrap pile and scraps that J brought:
I helped J find some type of inspiration fabric scrap in the pile that had a color palette (as how else to you start sifting through that “hot mess” to design a scrap quilt?). Once she found an inspirational scrap, she started pulling from the scrap pile fabric scraps that coordinated with the scrap to create a palette.
J took off and ran with the concept and before I knew it she was covering my design wall with her improvisational combinations:
Which evolved into these blocks:
I’ll share her pieced quilt top someday in a follow up post when she completes it (if she doesn’t mind me sharing the photo).
What did I work on? I started a new freeform scrappy log cabin but I didn’t like the direction it was going; and after a couple days working on it I recycled it into the scrap pile (and didn’t take any photos of it).
So what did MJ work on? Well not any crafts, ha! She abandoned us in my studio and ended up having a cooking retreat with my husband John.
Like the retreat I had in May with my friends D and K, John did all the cooking. MJ helped John do all the cooking and got cooking lessons from him on some of his specialities. Here they are in a lesson:
She also enjoyed hanging out with Mike our dog (MJ is a “dog person”) and binge watching Netflix shows. Here life is very busy back in Central Oregon and she enjoyed just relaxing and helping cook as her “retreat”, while J and I were upstairs in the “quilters sweatshop” working on our scrappy projects!
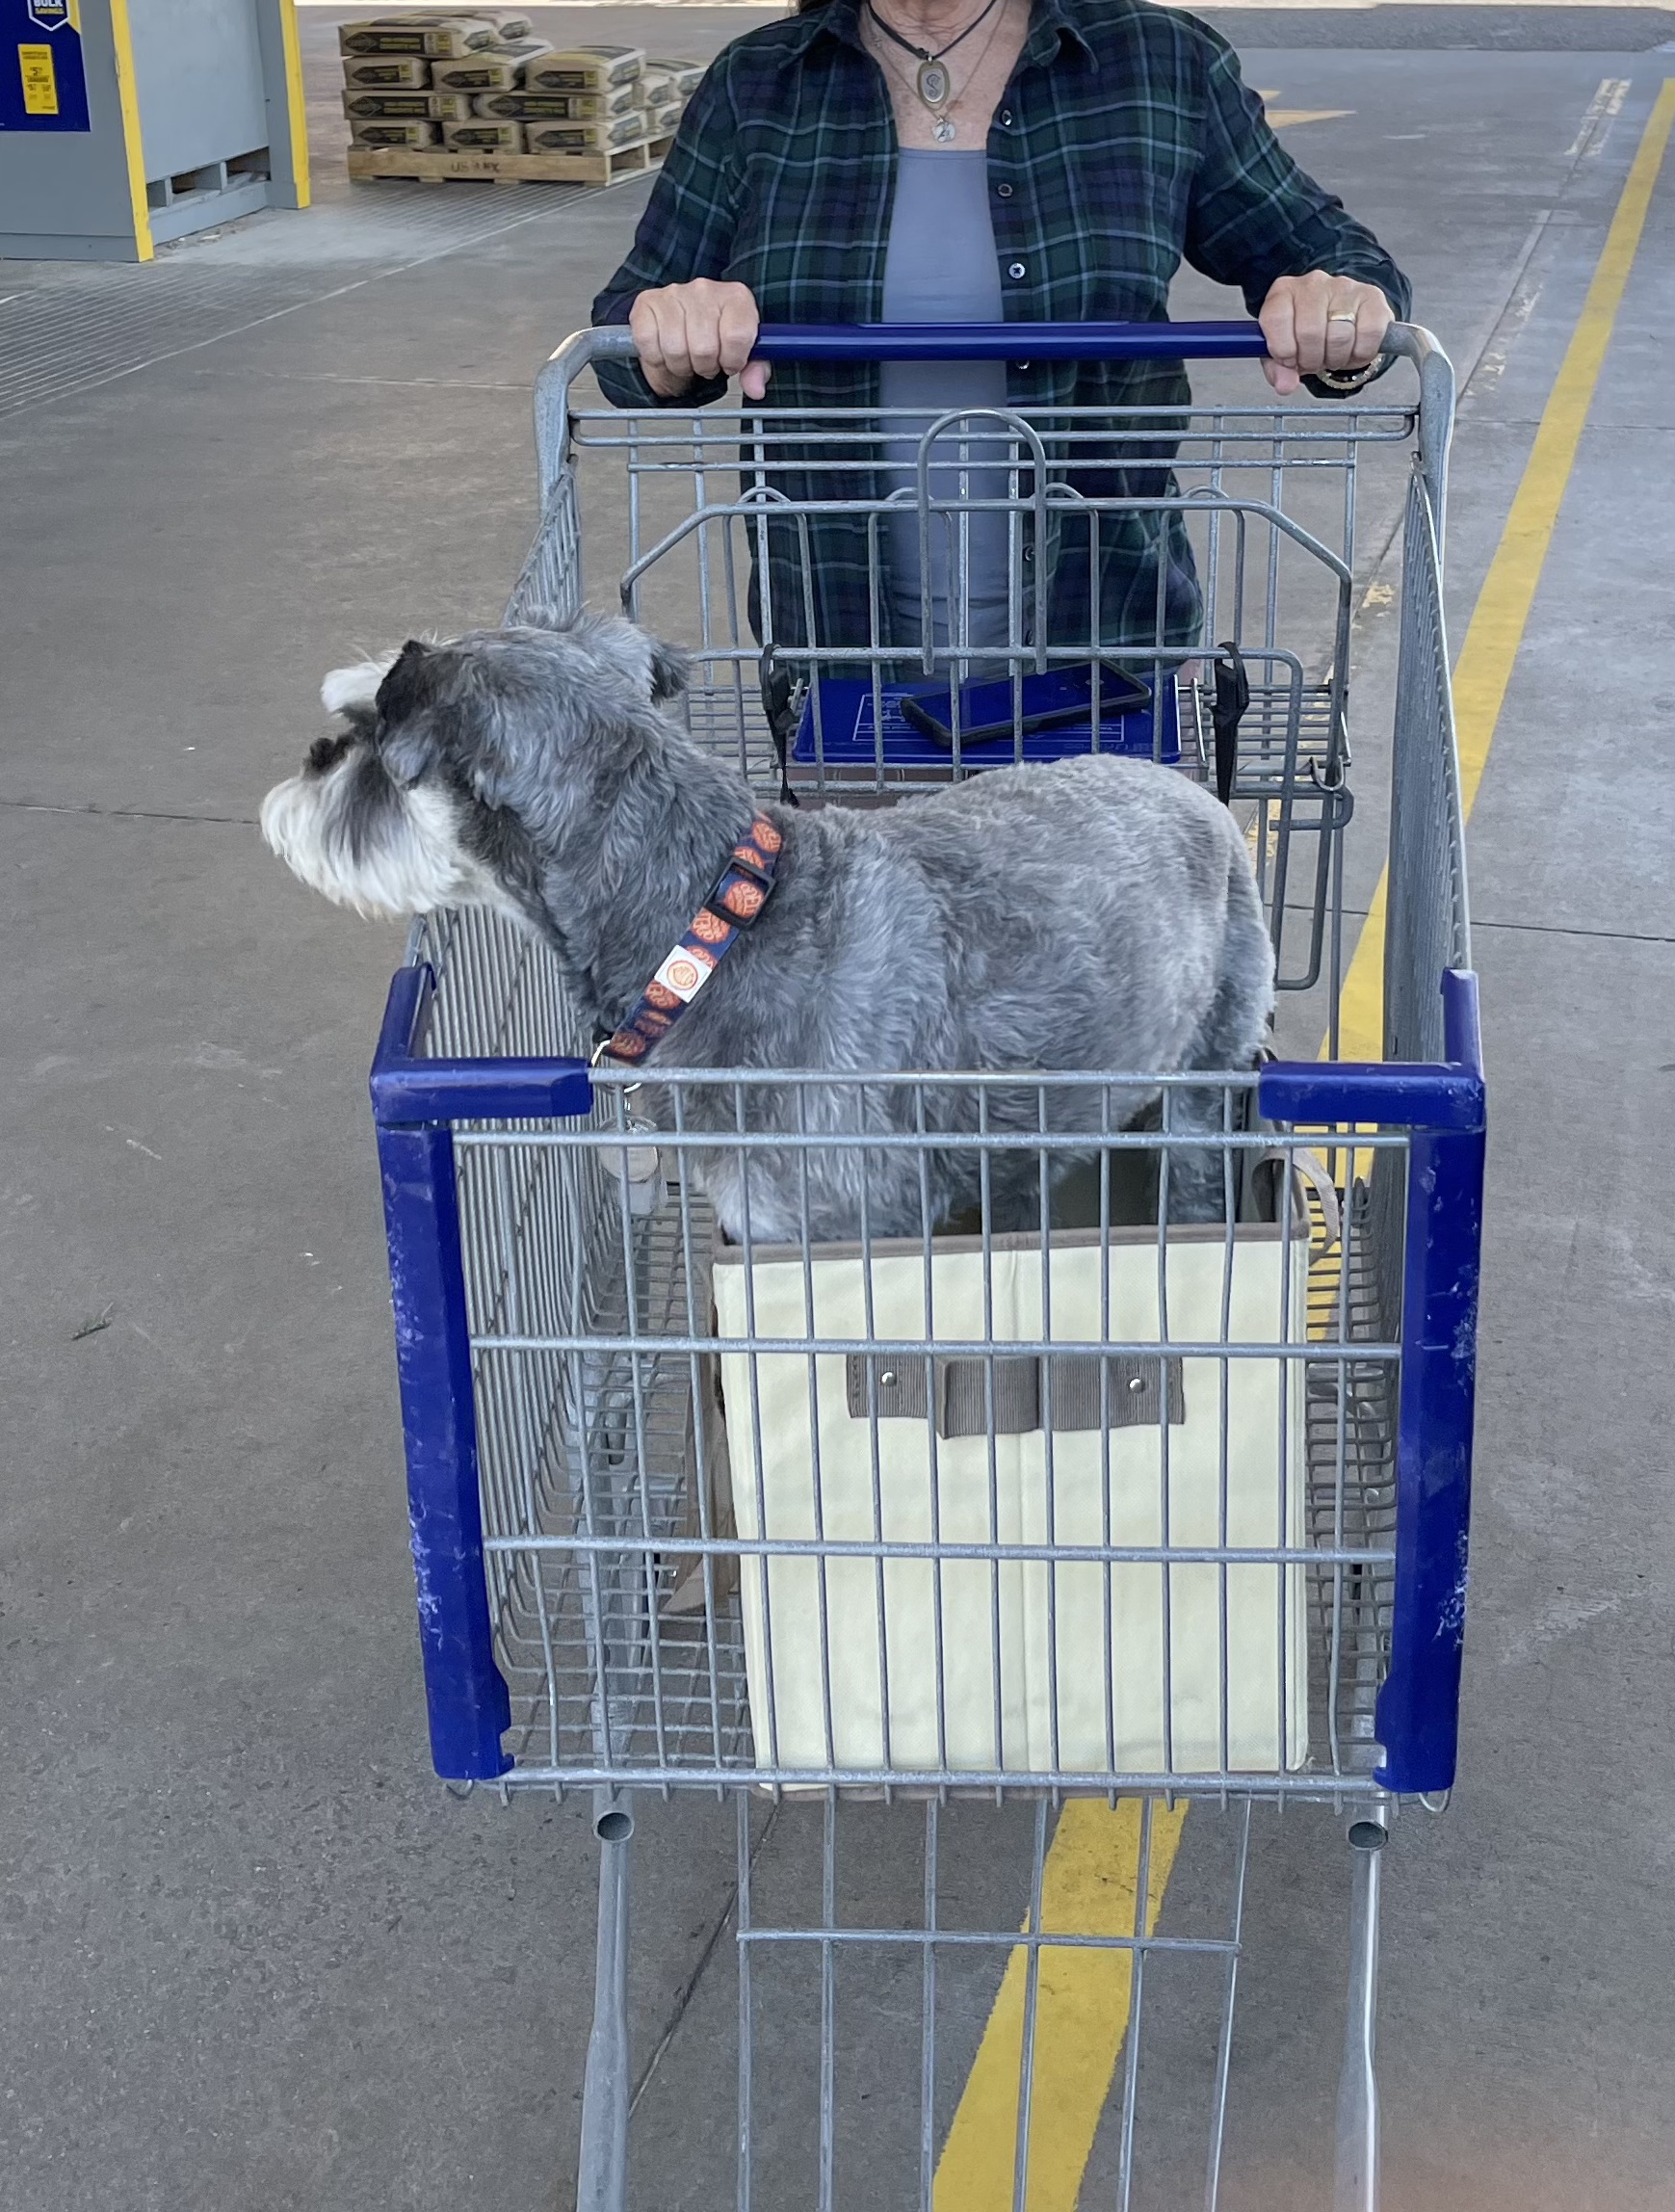
MJ also ran errands to the home improvement store with John and Mike, and she got trained on how to push Mike around in his box in the shopping cart as John does!
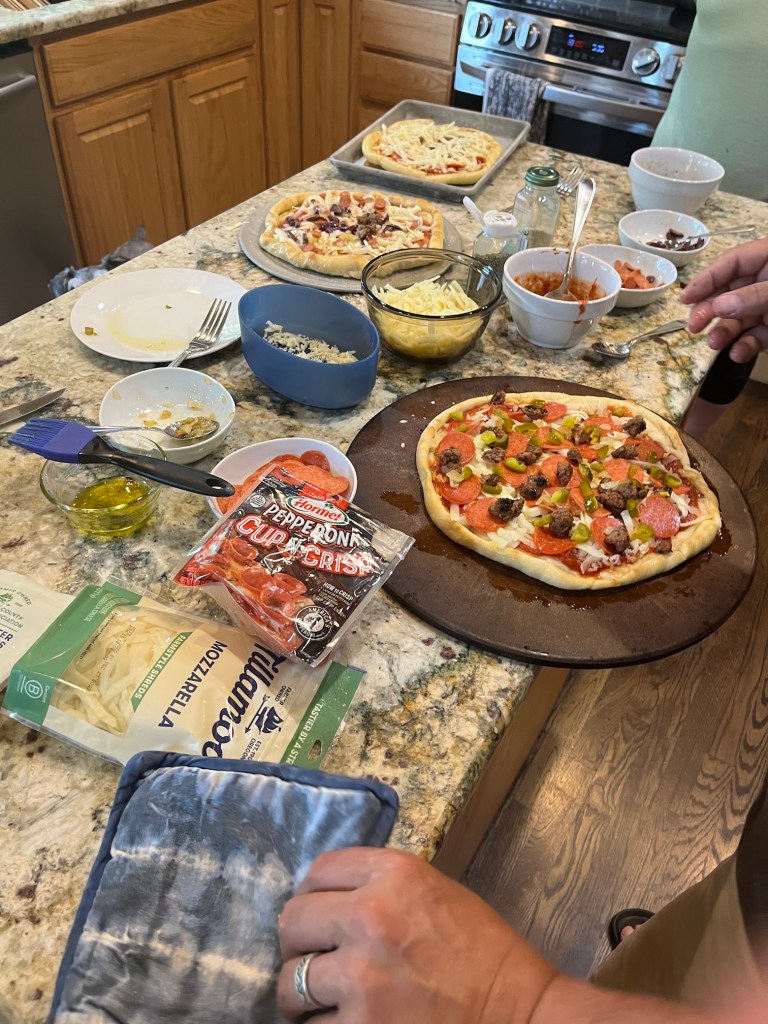
We had a “make/top your own pizza night” for dinner one night, it was so fun. John and MJ pre-baked the pizza crusts and we got to add our own toppings and hang around the oven waiting for our delicious combinations!
We got out of the house and spent a couple hours or a 1/2 day on various adventures.
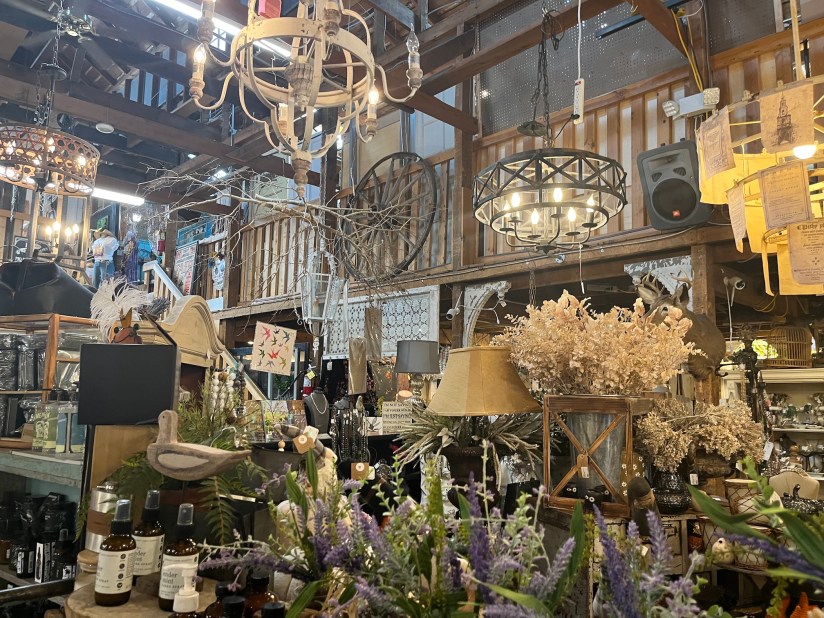
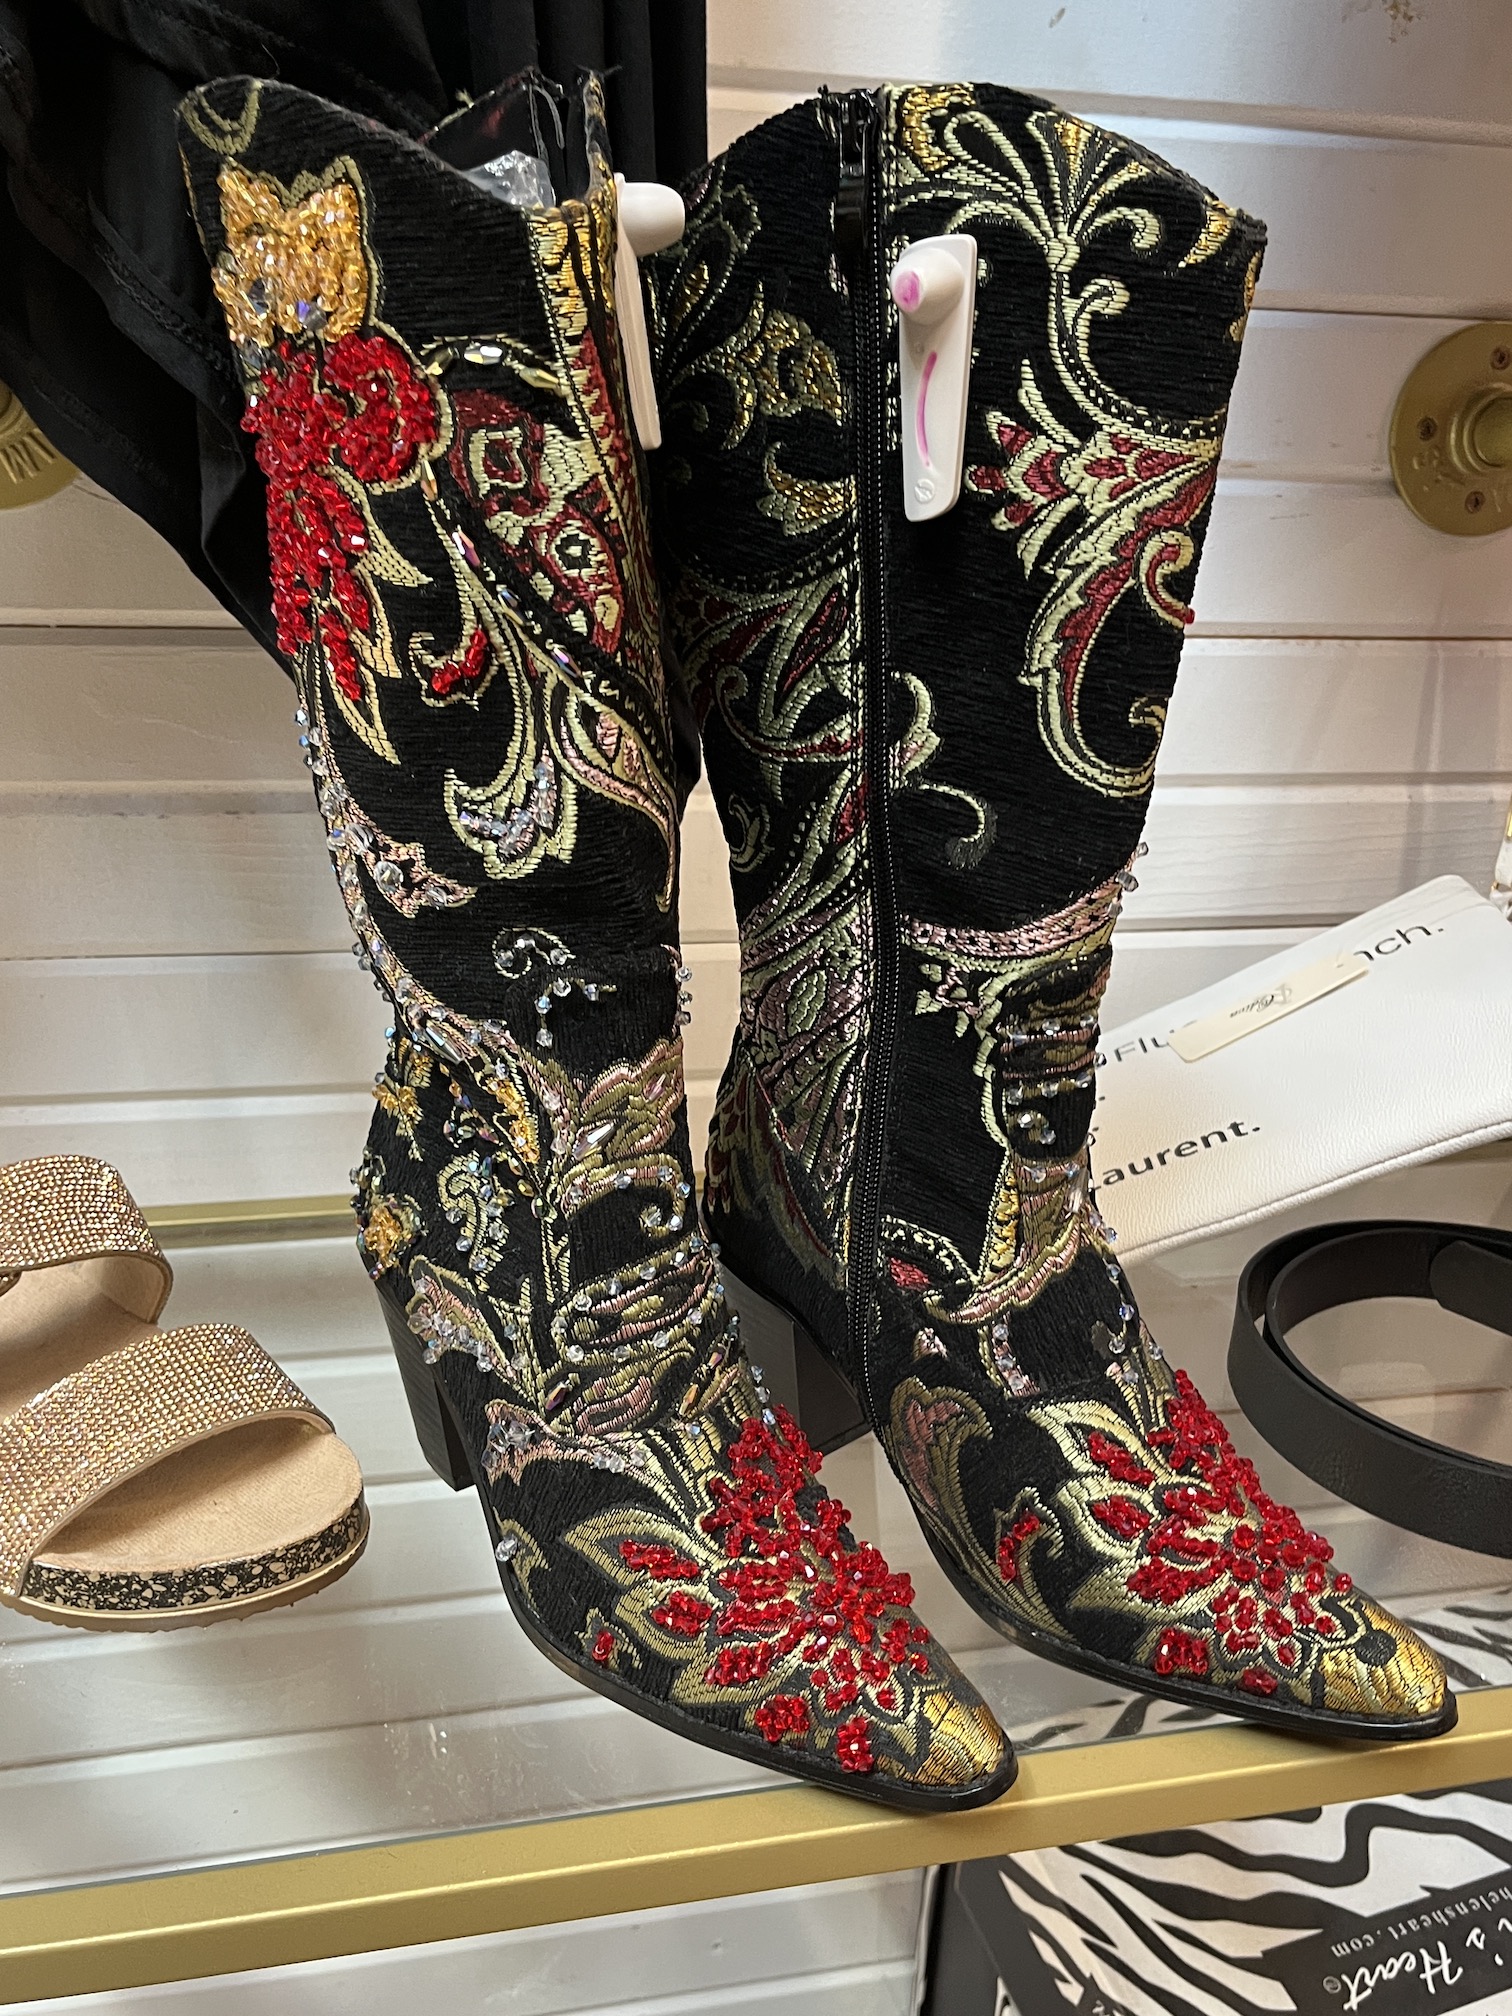
One day we went to Castle Rock, CO and visited The Barn, a consignment/antique venue (sort of like a nicely curated flea market), that I love and is so fun to wander.
Here are some boots at The Barn I just could not live without (just kidding, definitely not my style):
It is such a fun wander to meandering around The Barn; and as mentioned on their website: “When you walk into The Barn you may feel many things. Among these feelings could be a sense of comfort…..like you have come home. Many customers express these sentiments…it has come to be known as ‘Barn Therapy’.”
After The Barn we had cocktails and delicious appetizers at the Ecclasia Marketacross the street, sitting in the Sinners & Saints/Gluttony & Graze area of the market on the comfy sofas.
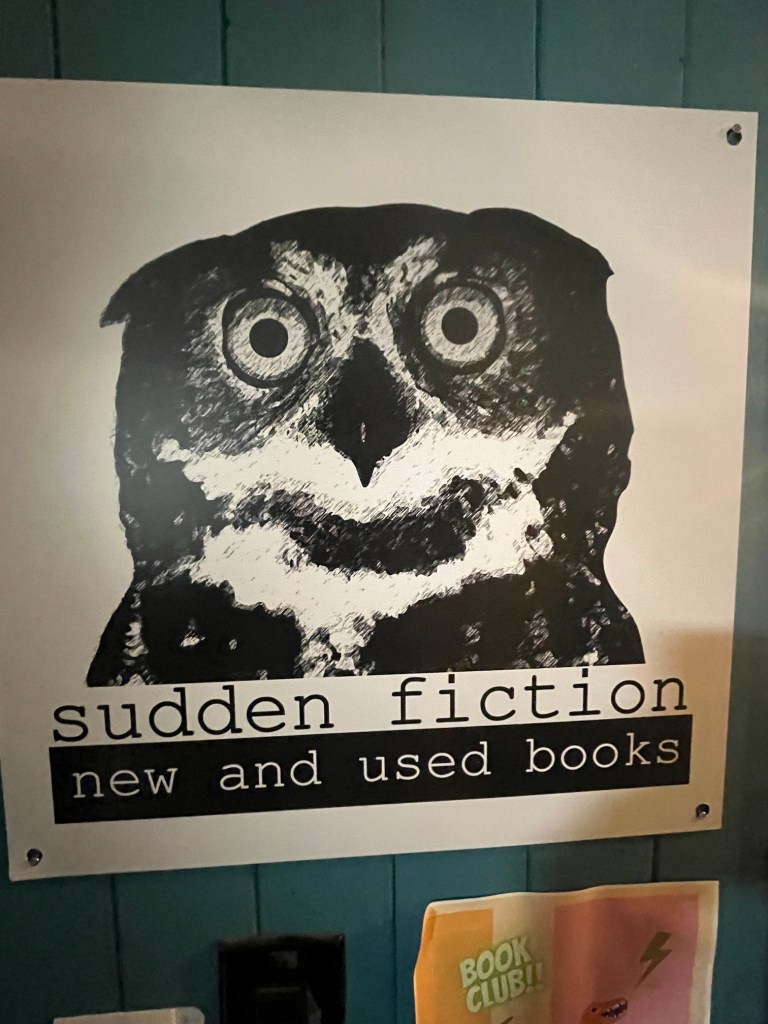
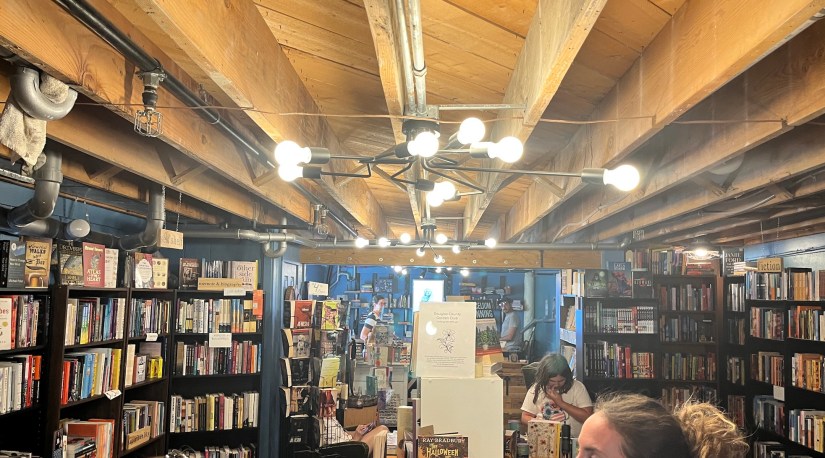
We also stopped at my favorite indie bookstore in Castle Rock – Sudden Fiction Books.
All of us brought books and J bought so many books we wondered how she’d get them all in her suitcase (she did ship them home), especially some amazing Children’s books for her grandkids. This little bookshop has an amazing curated collection.
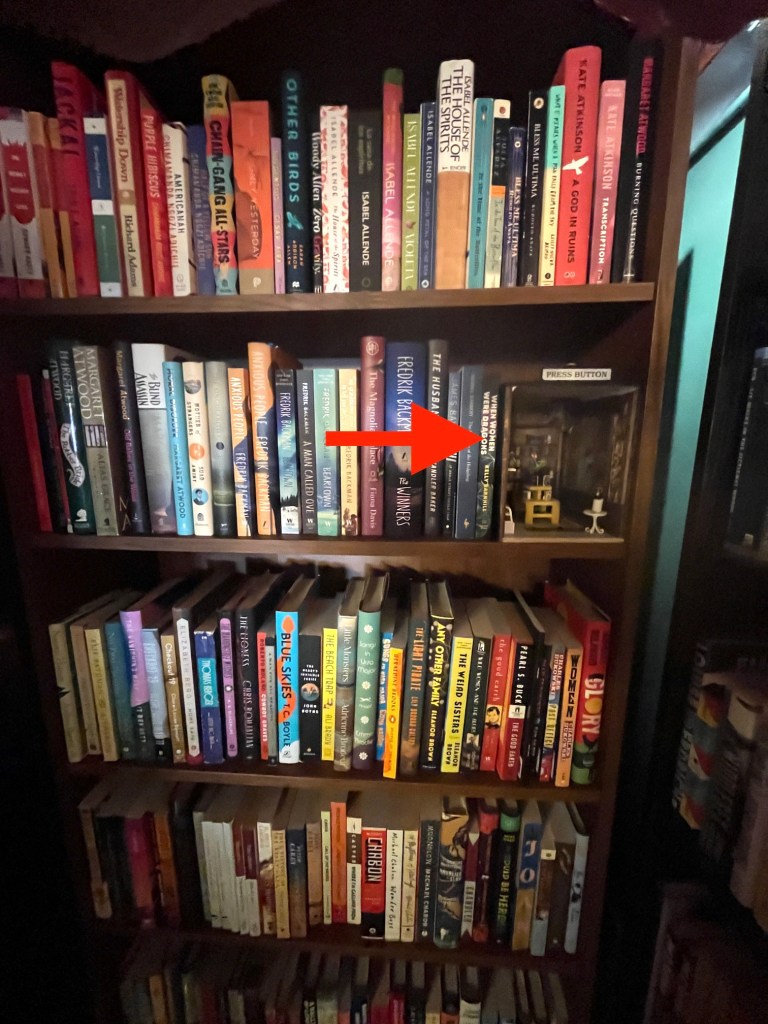
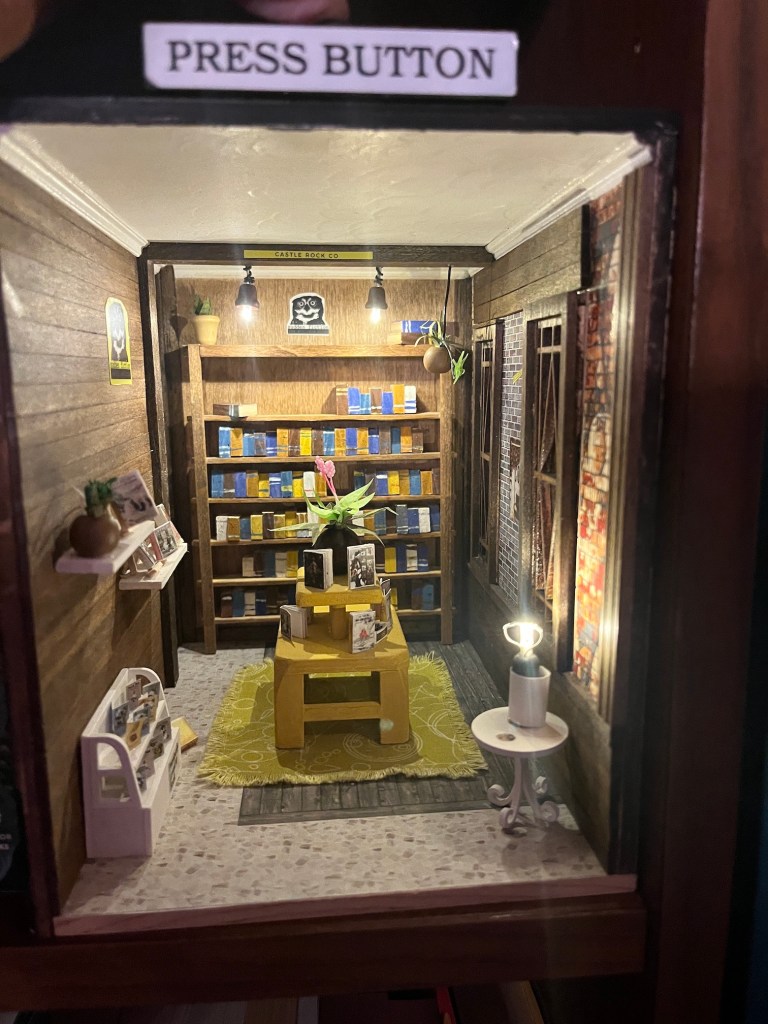
They also had this adorable little miniature room display (that lit up) inside one of their bookcases!
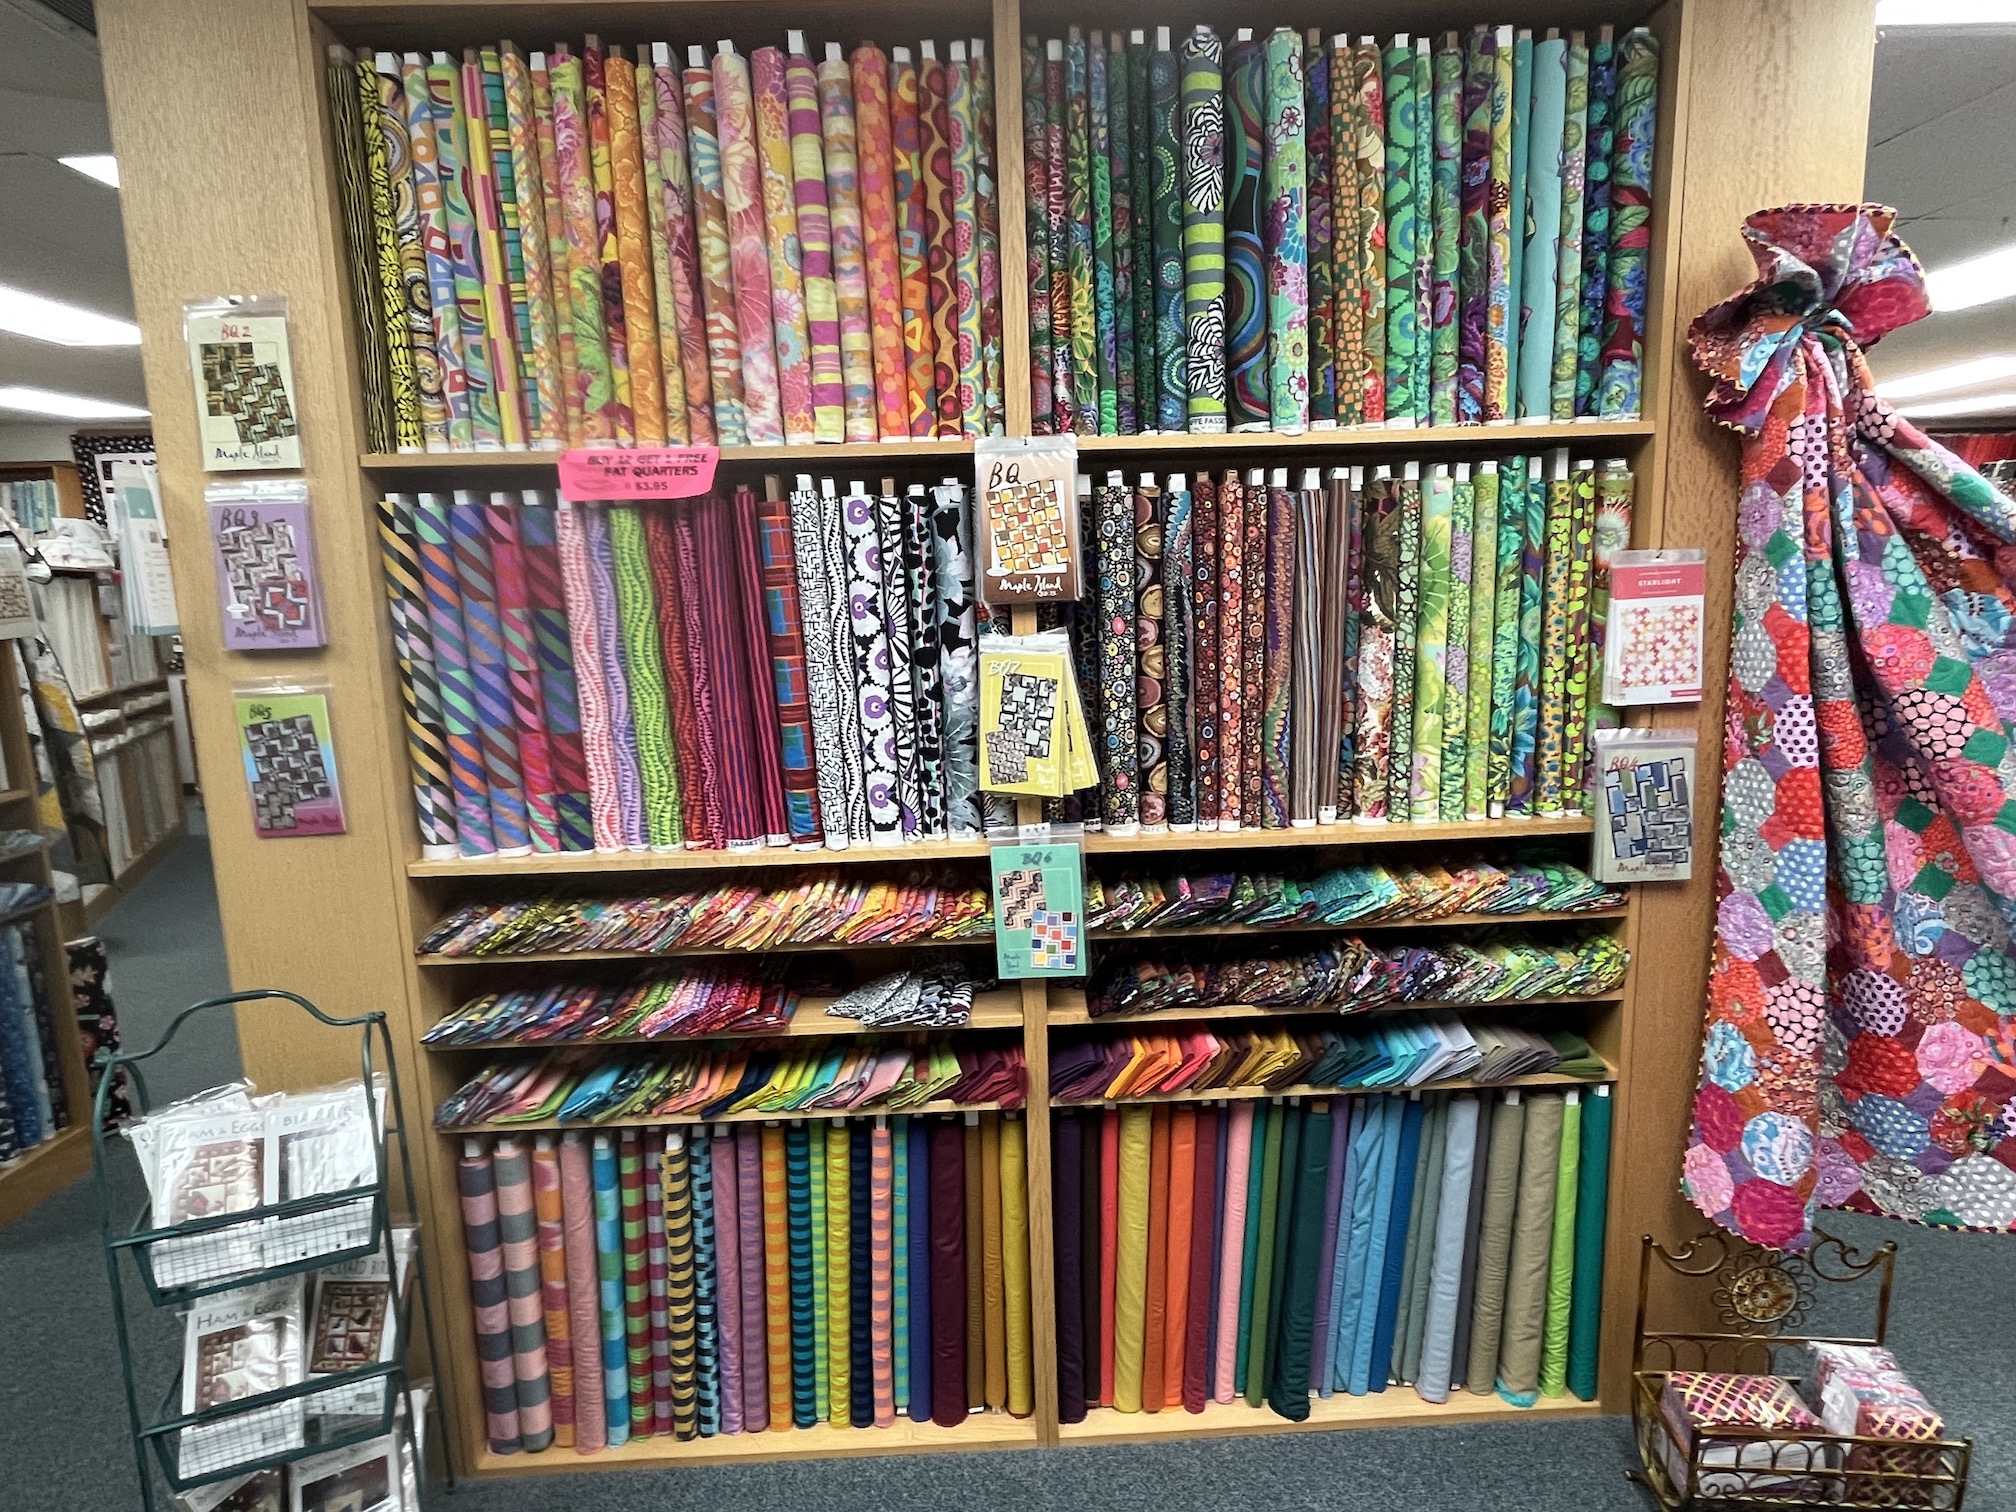
One day I did take J to a quilt shop – we visited Holly’s Cabin quilt shop and J was amazing by their extensive collection of curated Kaffe Fassett fabrics on display:
We had beautiful weather (though a little warm in the afternoons) while MJ and J visited. Every morning MJ (who loves to walk like I do) and I took Mike on a couple mile stroll around my neighborhood. John introduced me to what we call “the nature hike” near our house – miles and miles of wooded trails surrounding and connecting different neighborhoods. I’ll share photos from my new favorite daily walk/hike someday.
It’s the 15th of the month and time for my monthly “ScrapHappy” post as part of the ScrapHappy group I belong. At the end of this post I have a link to the other blogs participating in this monthly event in case you’d like to check out their ScrapHappy posts.
For September’s ScrapHappy post I am going to reveal my completed quilt top for the wall hanging Strings Attached, which I previously posted about in late August – Made Some Progress on “Strings Attached” .
Last week on Instagram (@tierneycreates) I shared the nearly completed quilt top (one more border to go):
And here is the fully completed quilt top!
It will have a thin red binding after I quilt it – here is the binding next to the quilt top:
It took a while to string piece on muslin the 4 last border strips – a lot of fabric scraps were used!
Here are the completed strips – front and back images (so you can see how they were sewn onto muslin):
I noticed when I was moving the quilt top around to position it for piecing on the borders, it looked cool when in was backlit with sunlight. The sunlight was fading when I took the photos below but it sort of gives you the feeling of what I was seeing:
I am going to quilt it on my machine in similar way to how the sample quilt from the pattern is quilted (eventually…for now need to set it aside and move onto other things…):
As promised, here are the bloggers that participate in the ScrapHappy monthly posting event, check out their blogs linked below for their ScrapHappy posts:
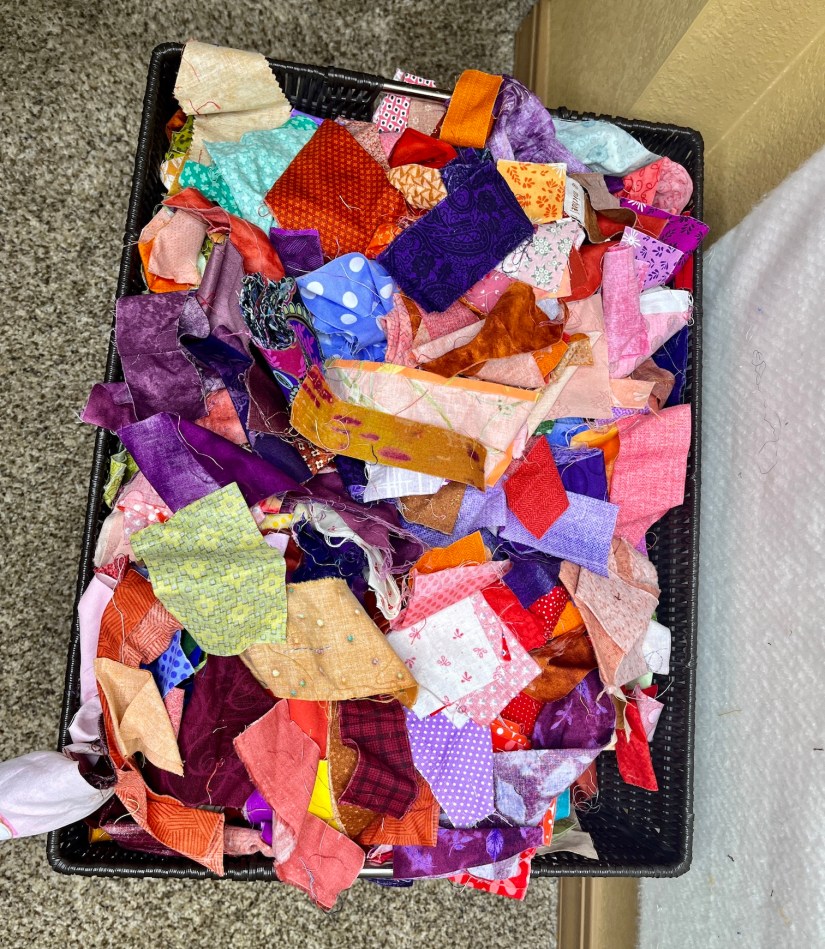
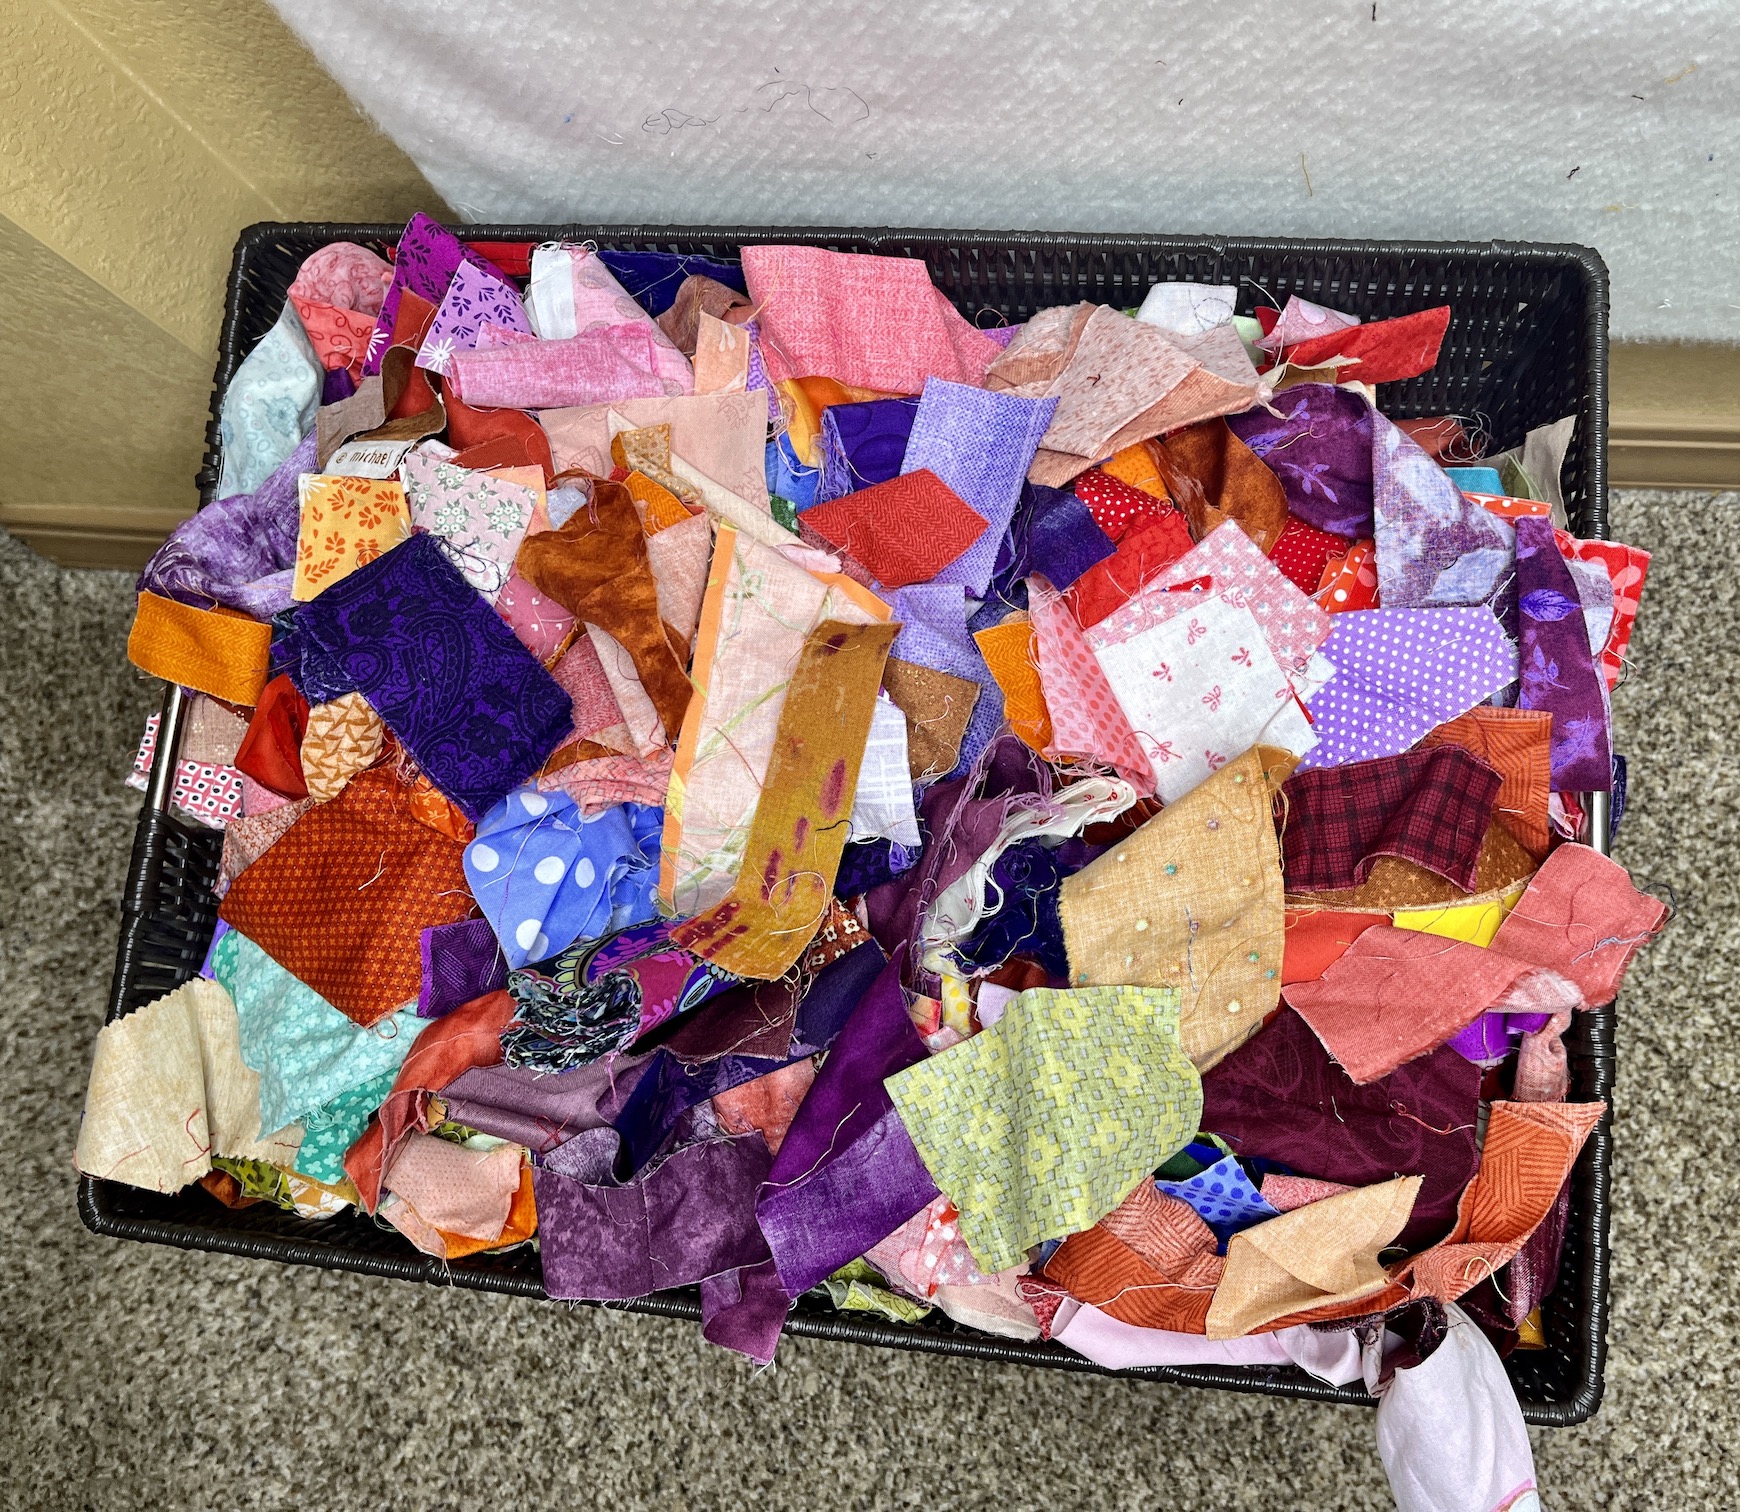
I’ve been busy preparing to restock by Textiles & Smiles Etsy shop and getting ready for another scrappy fabric quilting retreat at my house, I am having with a different set of friends. Below is the basket of scraps they can work from:
In between that, some road trip adventure with John, and the completion of a home renovation project (well John did most the work), I’ve managed to make a little progress on the scrappy solid color medallion wallhanging I’ve been working on – Strings Attached.
Since my previous post What’s on the Design Wall: Strings Attached, I’ve sewn all the section of the center medallion string pieced star together and done the first border:
There were so many Y-seams! It seamed like every seam (smile) was Y-seam – yikes! I got a little more proficient on Y-seams after doing so many in a row but I don’t have any great insight, tips or wisdom to impart, sorry.
Here is a reminder of what the completed quilt will sort of look like:
It’s the 15th of the month and time for my monthly “ScrapHappy” post as part of the ScrapHappy group I belong. At the end of this post I have a link to the other blogs participating in this monthly event in case you’d like to check out their ScrapHappy posts.
On August 15th, ScrapHappy Day, I’d hope to share the completed quilt top for the VERY SCRAPPY wallhanging quilt I am currently working on – “Strings Attached” from August 2021 issue of AmericanQuilter Magazine, pattern by Lori DeJarnatt (see post What’s on the Design Wall: Strings Attached), but alas, I’ve gotten no further than what I shared on August 9th when I last posted about it.
So instead for ScrapHappy August I am going to share the story behind this VERY SCRAPPY quilt – Recycled Hope VII: All the Trimmings
I made this quilt during the COVID pandemic and it holds a lot of meaning, and I will share the “Artist Statement” on this quilt in a moment for the full background. First I want to tell you about my “Recycled Hope” series of quilts:
The Recycled Hope an ongoing series of improvisational art quilts using recycled materials to include denim as the primary fabric on many of the pieces, combined with other recycled materials. “Hope” and the interpretation of the word “hope” is the primary theme of infused into these pieces.Most of the fabrics were not reusable as clothing or home decor and were destined to end up in a landfill. Reimagining recycled clothing and other materials into art quilts satisfies my hopeful desire to honor the environment and make art that is eco-conscious. Ending up in an art quilt is a better outcome than ending up in a landfill.
Okay now that you know the background on this series of quilts (if you want to see the rest of the quilts in the series, check out my Portfolio page) here is the story behind this SUPER SCRAPPY quilt which measures 72.5″ L x 57.5″ W:
Missing my Quilting Community during the 2020 Coronavirus Quarantine and inspired by Amanda Jean Nyberg’s pattern “All Sizes”, I created a quilt from 15 years of scrap triangles collected from my quilting friends at quilt retreats and “sew dates”. Most of the scraps in this quilt are from the trimmings of blocks by many quilters as they made their quilts. Instead of going into the trash, nearly 600 scrap triangles from the trimming of quilt blocks compose this cozy quilt. This piece gave me hope that someday I can return to attending quilt retreats.
Hopefully for next month’s ScrapHappyDay post I can share newly completed work (smile).
HAPPY SCRAPPING!
As promised, here are the bloggers that participate in the ScrapHappy monthly posting event, check out their blogs linked below for their ScrapHappy posts:
It’s the 15th of the month and time for my monthly “ScrapHappy” post as part of the ScrapHappy group I belong. At the end of this post I have a link to the other blogs participating in this monthly event in case you’d like to check out their ScrapHappy posts.
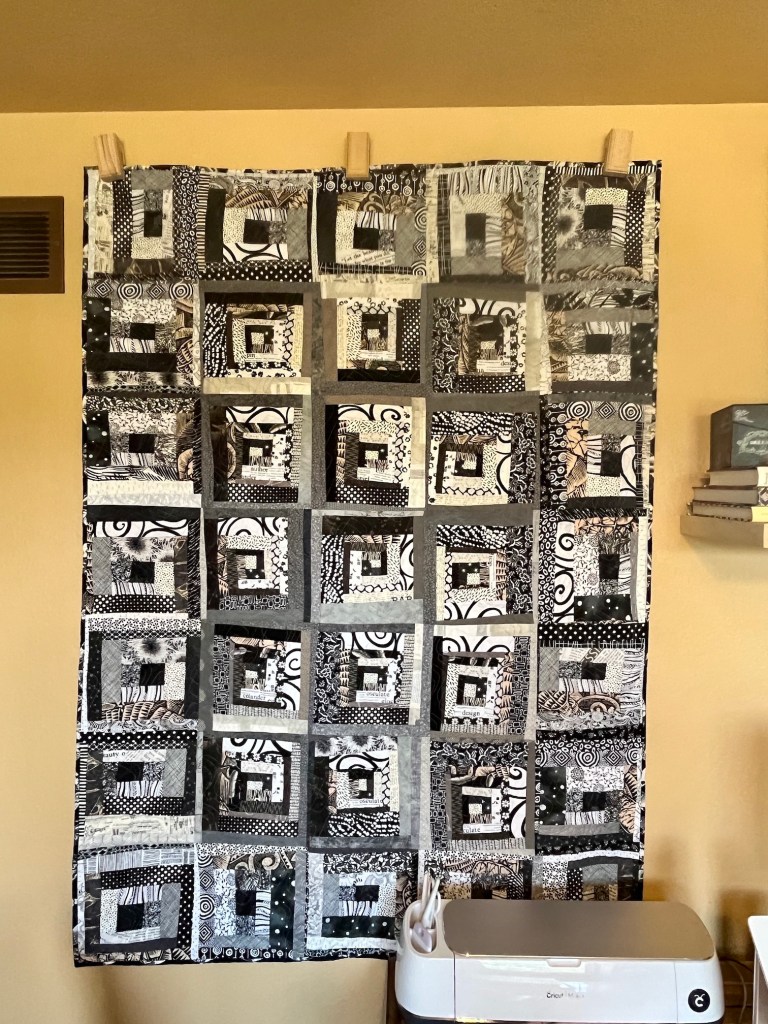
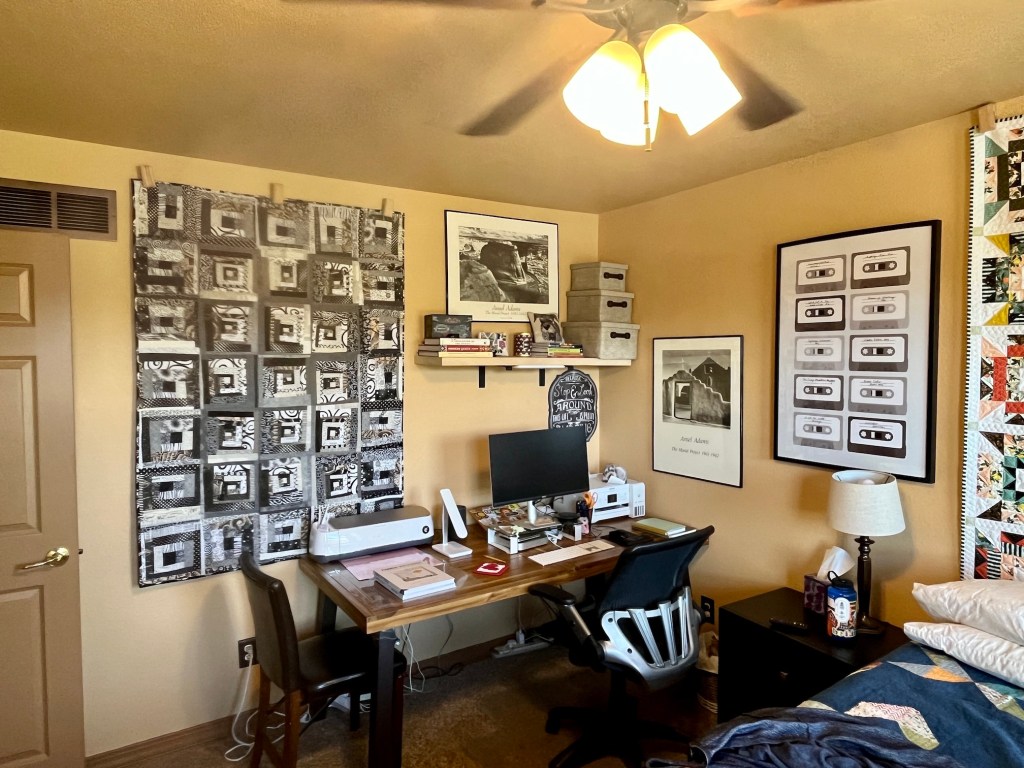
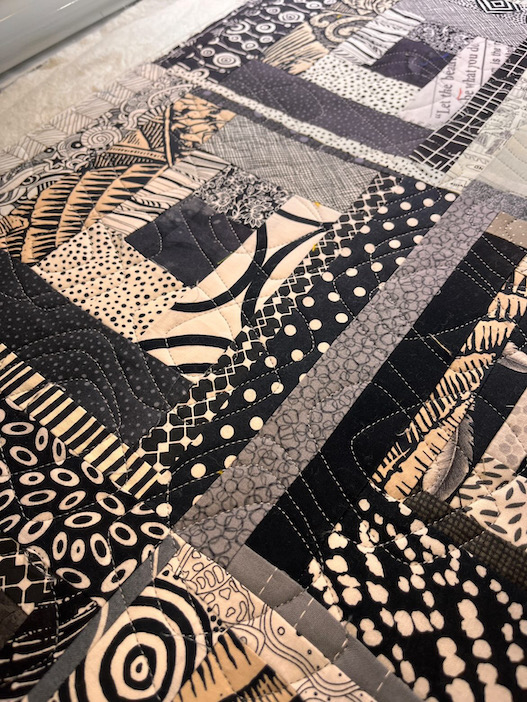
I finished the freeform scrappy log cabin quilt I first wrote about in this post – What’s on the Design Wall: Scrappy Log Cabin. I pieced the blocks as a sample for theScrap Happy Quilt RetreatI had in May. I got it back the other week from the longarm quilter, put on a binding, and earlier this week I finished sewing down the binding.
It is now hung in the wall of the upstairs guest bedroom where I have a B&W theme going on with some framed Ansel Adams posters, Black & White wall art, and B&W photos I’ve taken (on the walls not shown in the images below).
This quilt is very “scrap happy” as the quilt top was pieced entirely from my collection of black, white and gray scraps!
As promised, here are the bloggers that participate in the ScrapHappy monthly posting event, check out their blogs linked below for their ScrapHappy posts:
I had a couple brief updates and I thought I would spread them out into a bunch of brief blog posts but I am lumping them all together.
GO BOLDLY
An update on the quilt (which might end up more wallhanging size) that I mentioned in the post What I’ve Been Up To and What’s on the Design Wall, which I named “Go Boldly“: I am now sewing the blocks together. There are 64 blocks and each need to be sewing into blocks of 4 to make them into 16 blocks to then sew together.
I am currently debating whether to make the quilt larger (I have enough leftover blocks to make 1 – 2 additional quilts or wallhangings) or leave as it is. I think I am going to just sew the 16 blocks (4 mini sections to make a block) together and then decide.
The longarm machine quilter (Sew Colorado Quilting) has finished quilting it and sent me some photos, here is one of them.
I actually picked up the quilt today from her and will do a post on it with more photos once I get the extra backing and binding trimmed (I like to do my own trimming) and decide on a binding. I am thinking about doing a “facing” on it (like you would do with an art quilt) as I plan to hang it on the wall.
COLOUR WHEEL
A quick follow up on this post The Colour Wheel Quilt is Done, about the color wheel quilt I made to use as a teaching aid when I give a workshop next year (September 2024).
By the way I will share more information about that workshop including the venue once that venue gets ready to publish its online catalogue listing the workshop. If that doesn’t happen before October 2023, then I’ll go ahead and share as I’ve shared it with the Quiltfolk article writer for Issue 28 that comes out in October so it will be publicly revealed then anyway!
I had put the quilt away until next year for the workshop but then I decided to find a place for it in my studio so I could enjoy it before then – here it is now on a wall in my studio that I rearranged to make room for it:
VARIOUS RANDOM INFORMATION
John who loves to cook, tried making Ramen for the first time the other night and it came out pretty good!
My yellow rose bush in my front garden is finally taking off and here is one of its lovely roses:
And finally, here is Mike and his “cousin” Goose both trying to via for John’s laps (Goose won) when John was visiting his Dad the other day.
Hmm, I just realized that technically Goose is Mike’s “uncle” not his cousin – ha!
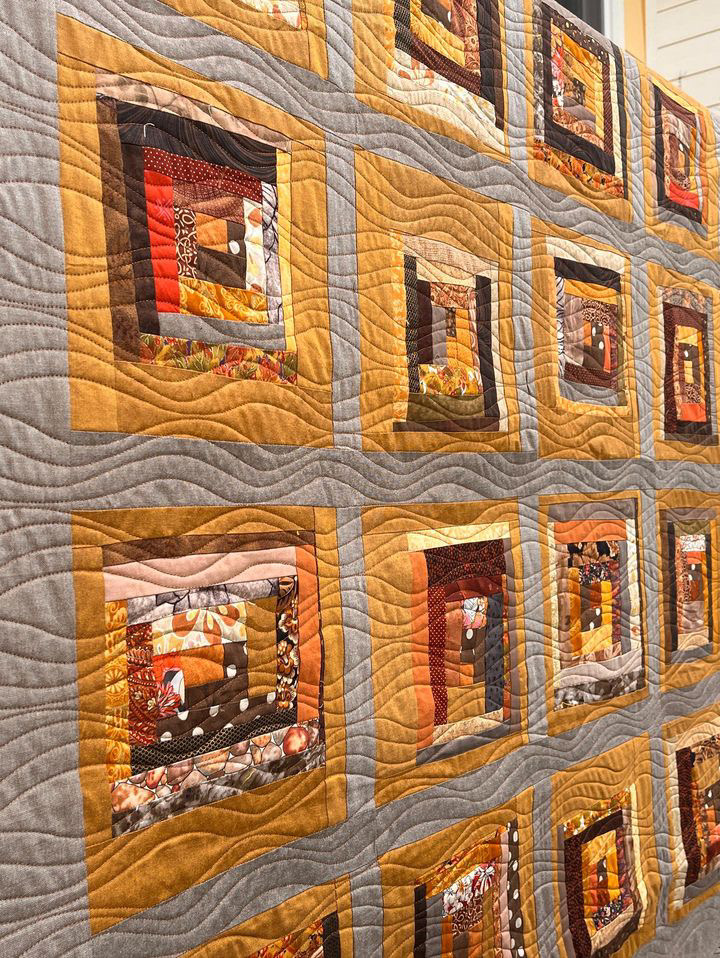
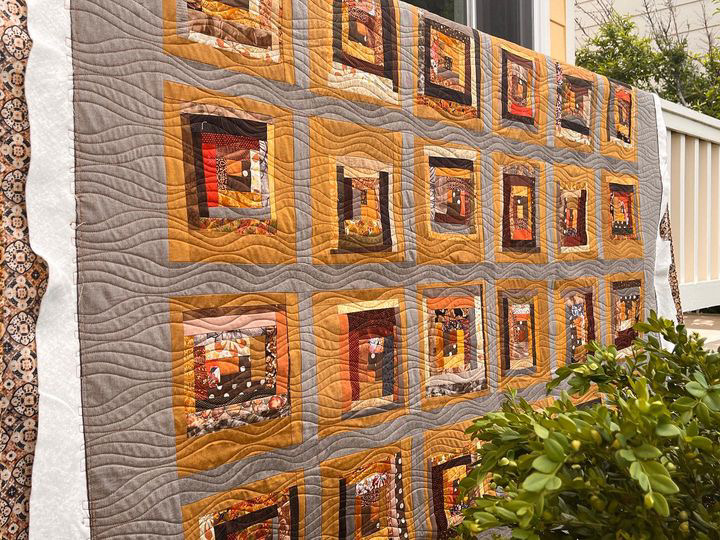
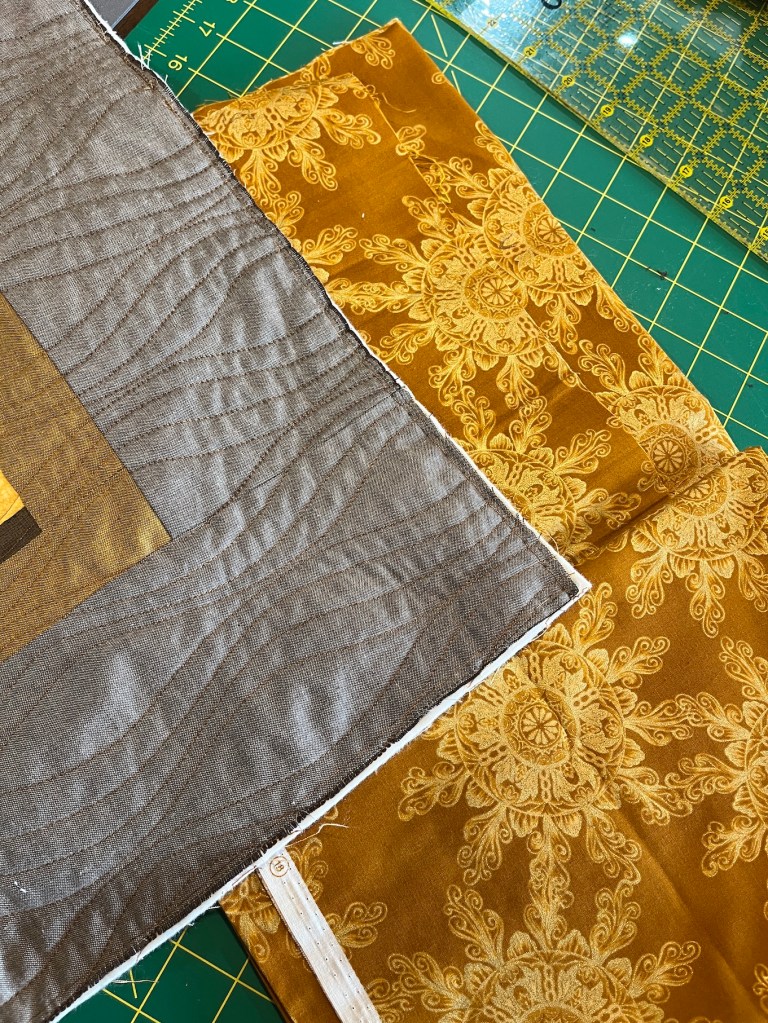
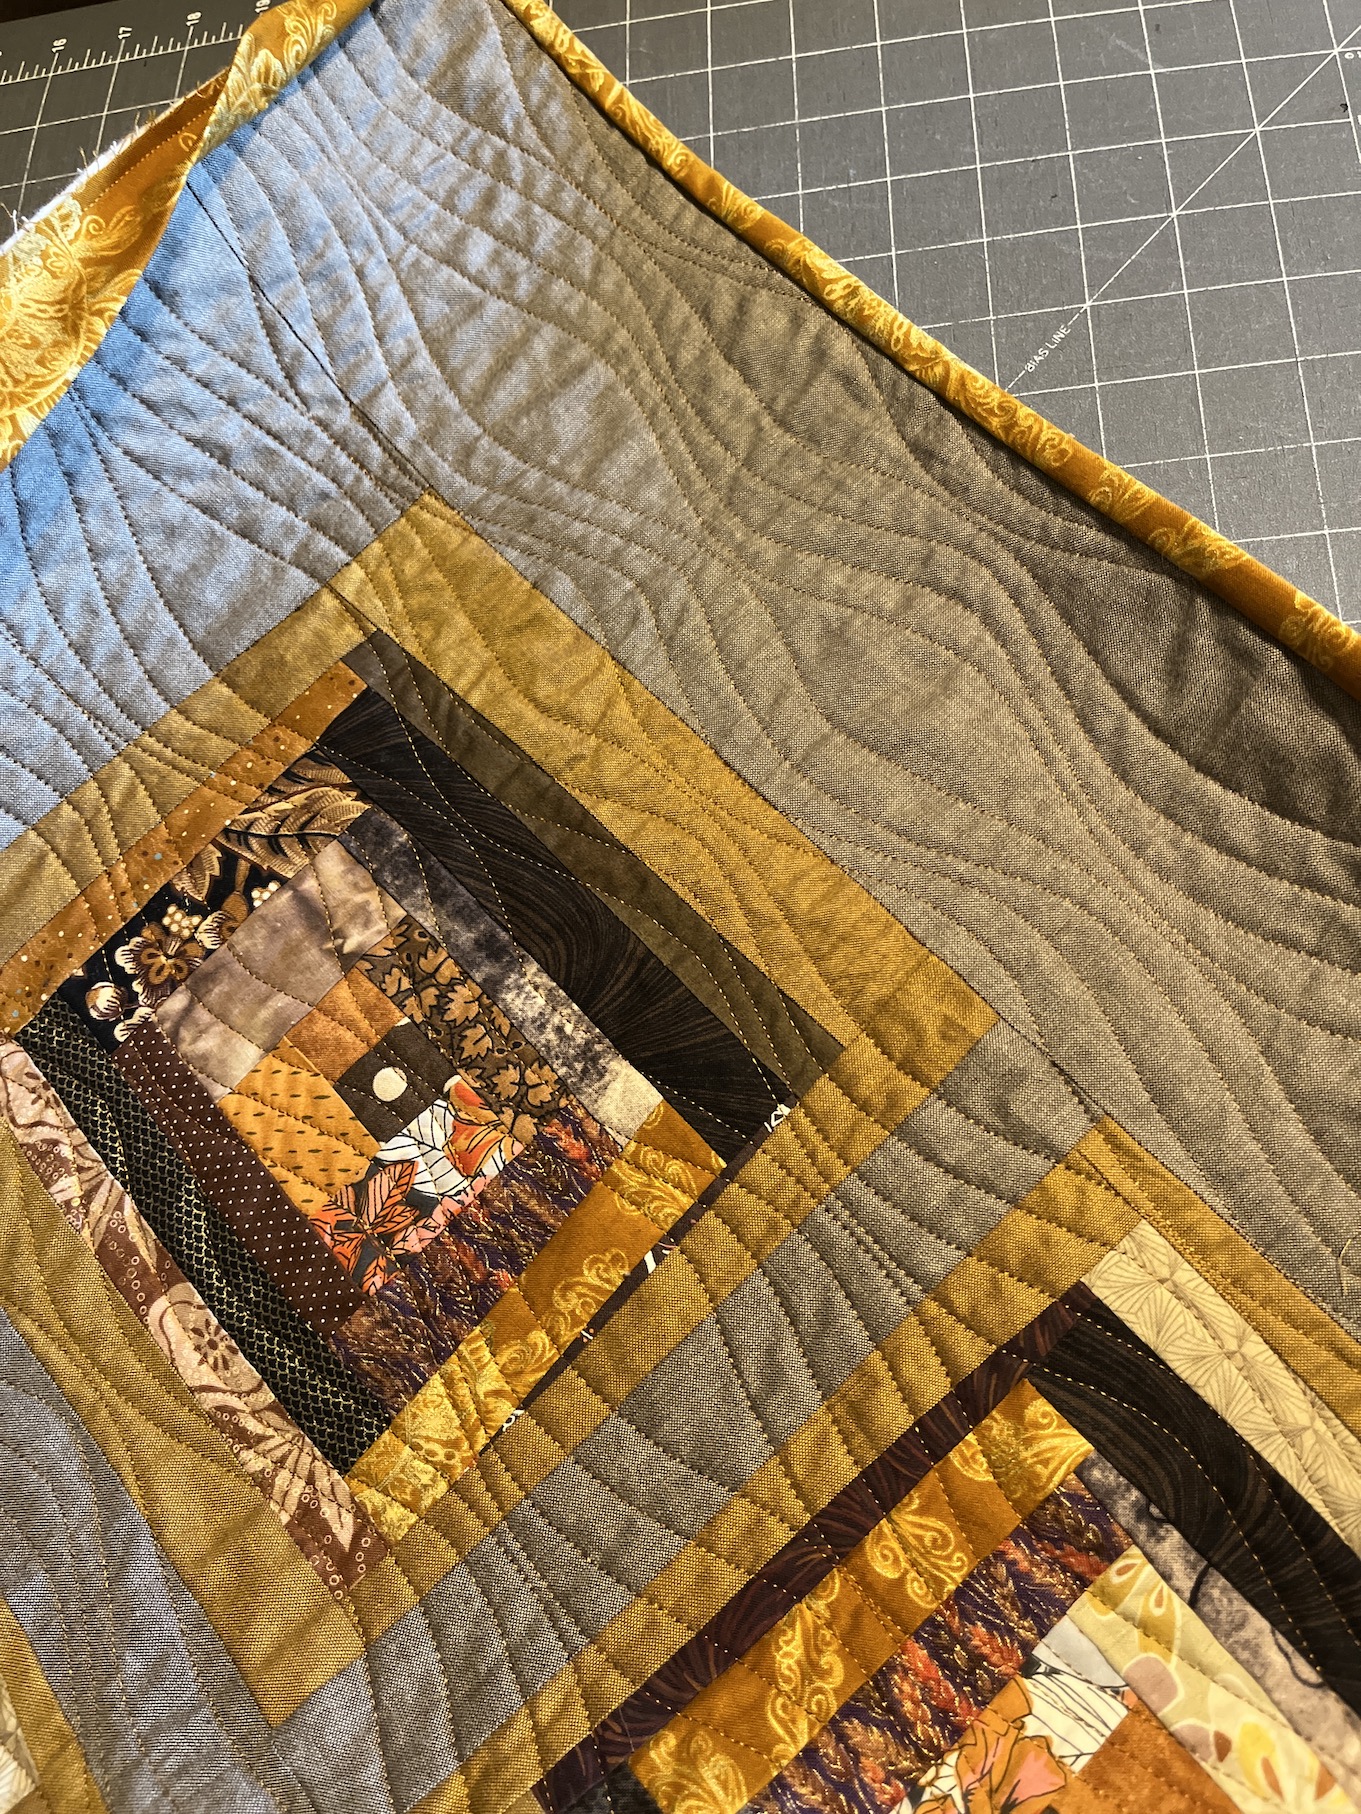
I picked up Scrappy Autumnal Splendor from the longarm quilter on Thursday, I’ve sewn on the binding and I am working on sewing down the binding and then the quilt will be finished!
I got a preview sent to me by Cara @sew_colorado_quilting (IG page) who did the longarm quilting. Here are the photos she sent me before I picked up the quilt:
I was beyond excited to pick up the quilt and had to take some photos on Thursday when I first got it from her (yes I was sitting in my car, opened up the package the quilted quilt was in, and posted photos to IG, ha!)
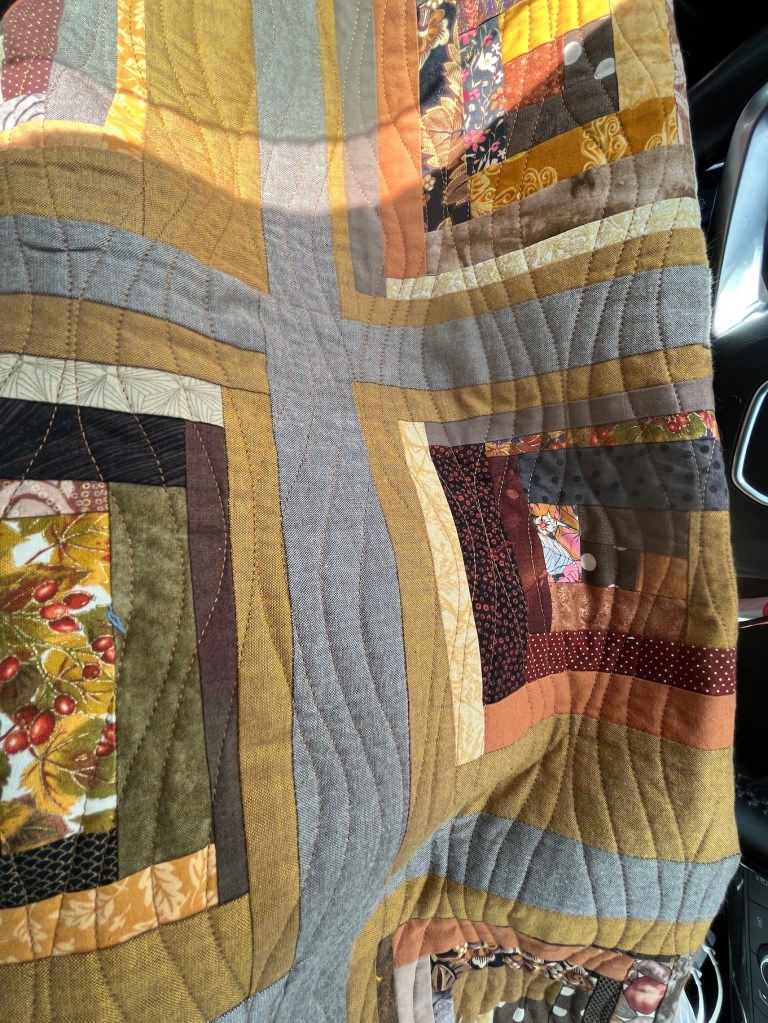
Here is the quilted quilt on my design wall and the back of the quilt draped over the chair in my studio:
After I finished fondling the quilted quilt (ha!), it was time to finalize my decision for the binding. I decided to go with a gold fabric that had also appeared as fabric scrap pieces in the freeform log cabin blocks, but I also had some yardage of the fabric.
Then the tedious task of sewing the binding onto the quilt:
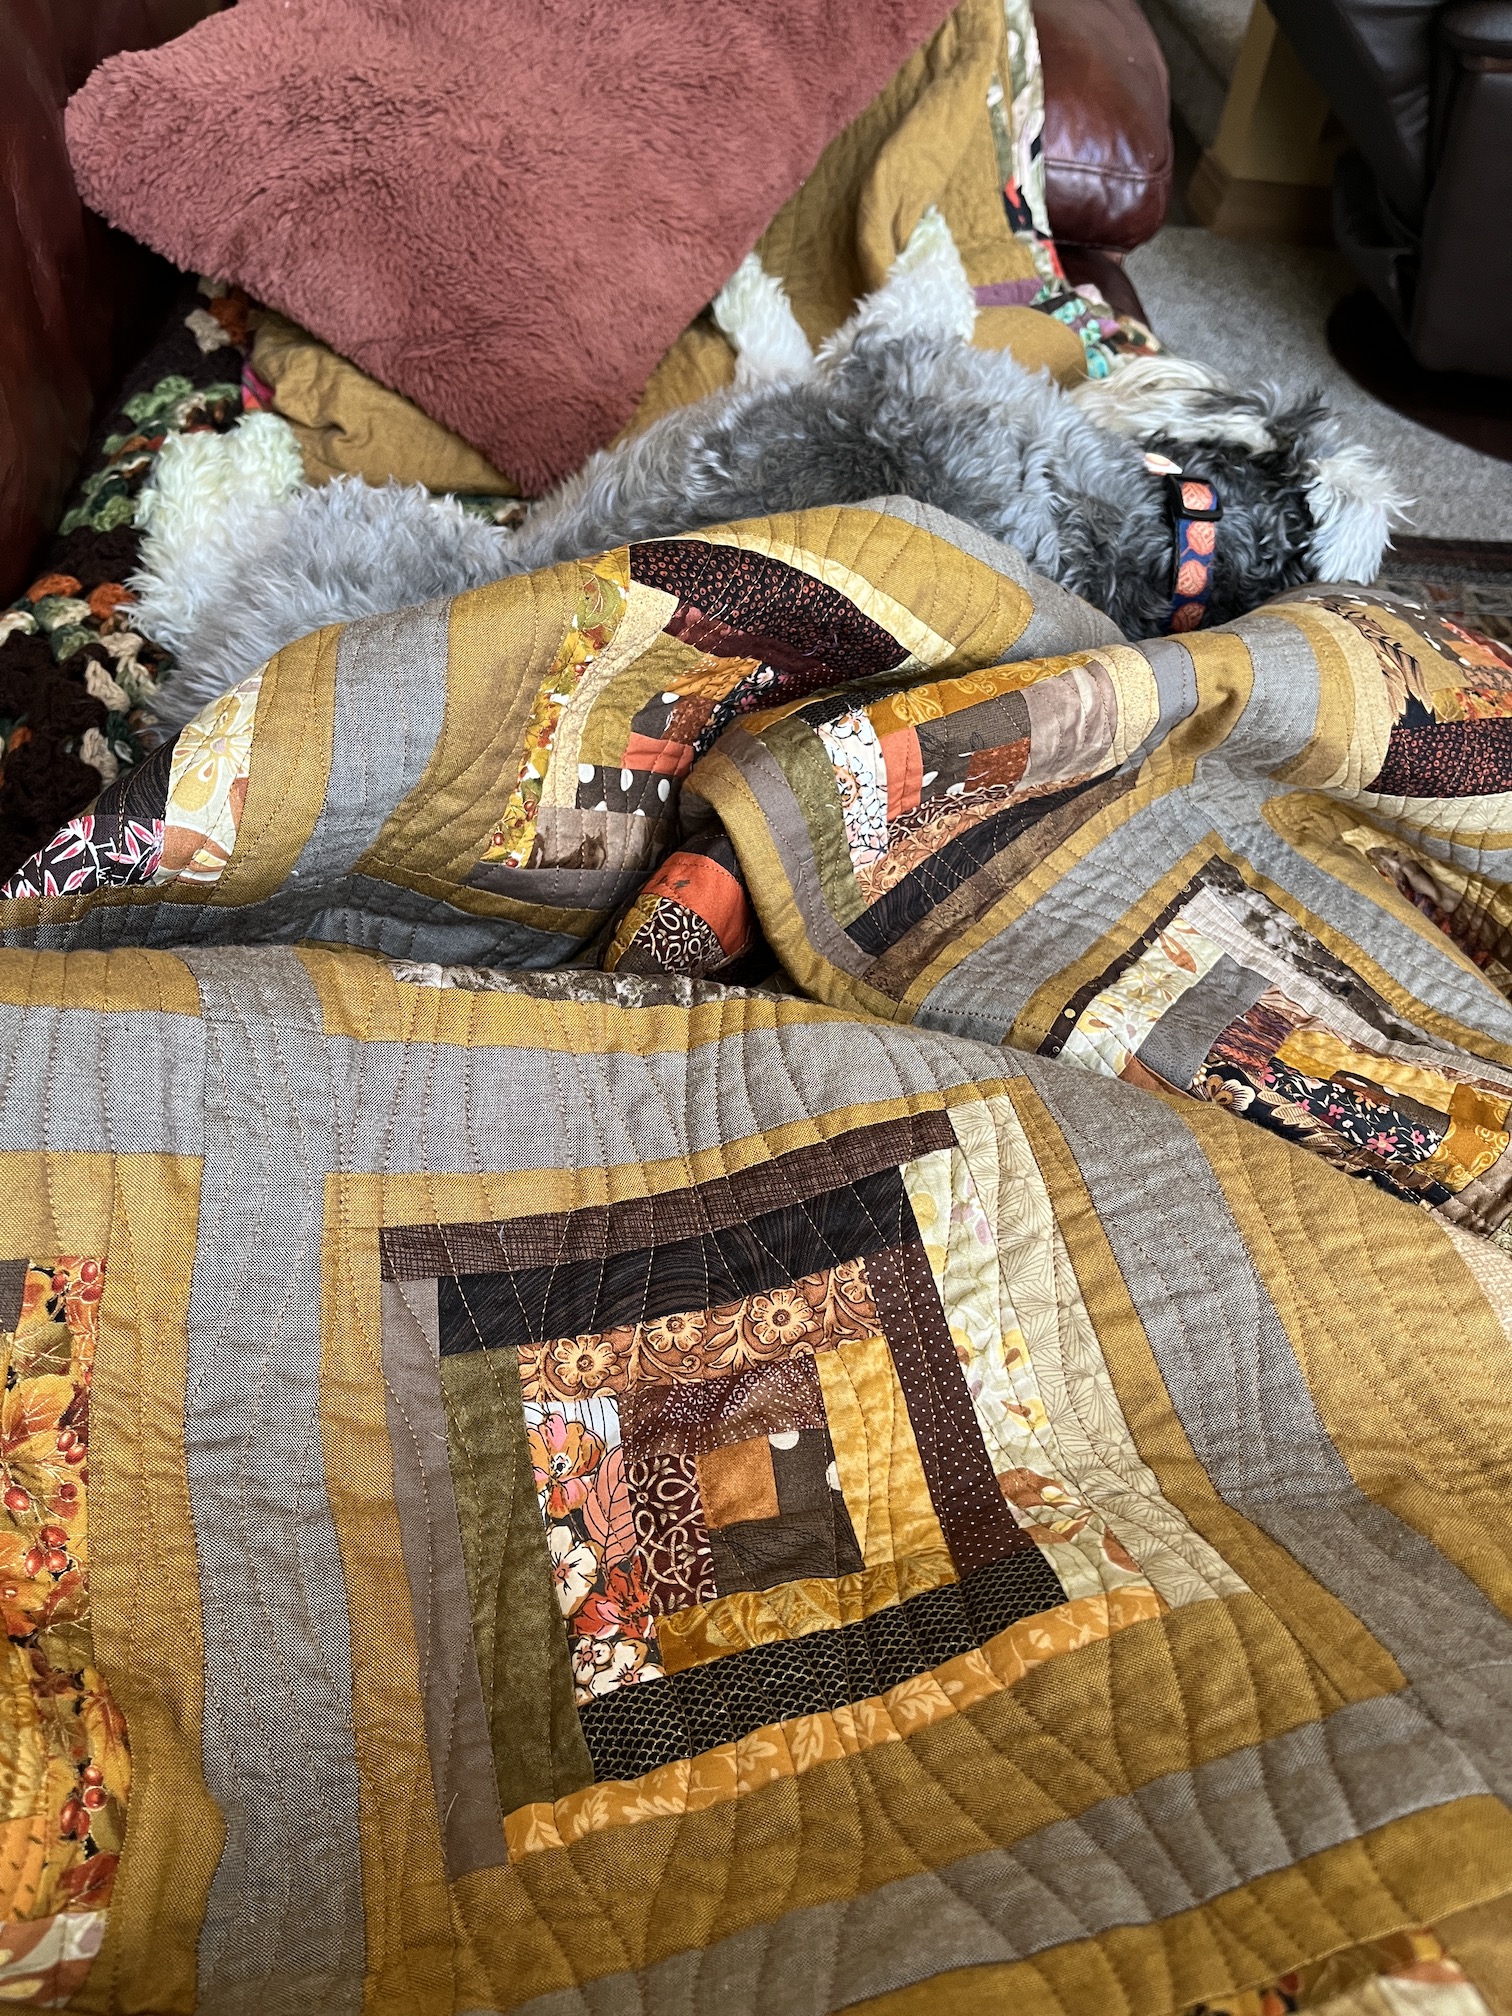
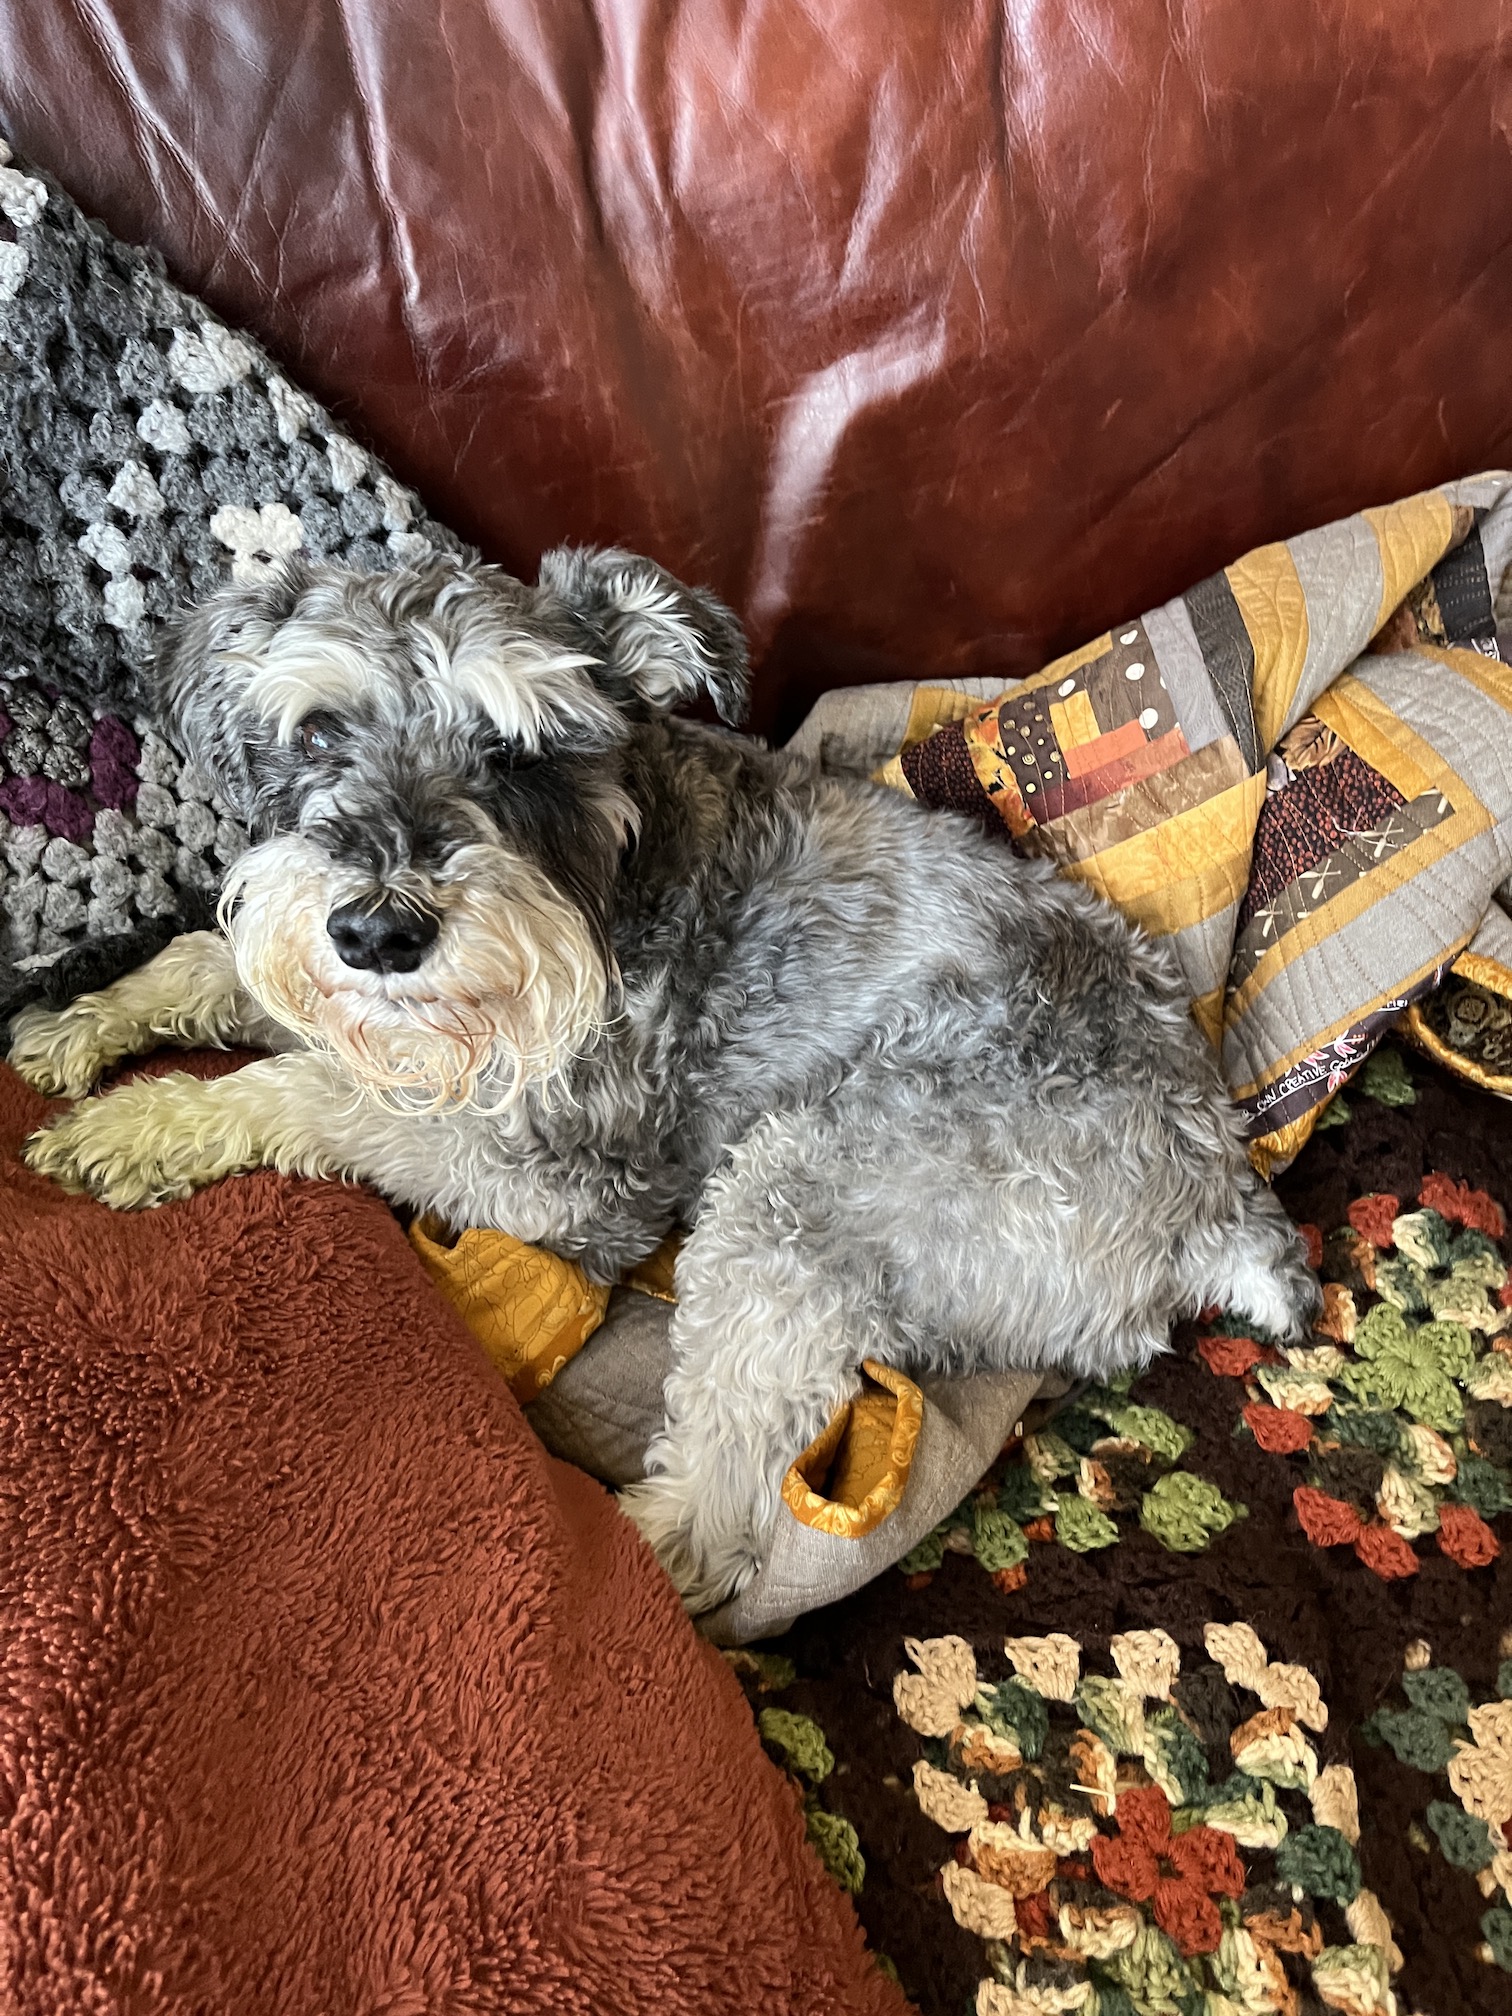
And now I am sitting around sewing down the binding to the back of the quilt. Mike the Miniature Schnauzer is keeping me company:
And moved to nest in the quilt when I took a break and left the quilt on the sofa!
Yes, Mike does need a haircut, he gets one on Tuesday; and yes his paws are green as he was playing ball today in the freshly mown backyard and “naturally dyed” his fur green!
It’s the 15th of the month and time for my monthly “ScrapHappy” post as part of the ScrapHappy group I belong. At the end of this post I have a link to the other blogs participating in this monthly event in case you’d like to check out their ScrapHappy posts.
Look what is now on my design wall: a sewn together freeform log cabin quilt using my black and white (and some gray) fabric scraps that I introduced in this post – What’s on the Design Wall: Scrappy Log Cabin. As far as the name of the quilt: Oh Scrap – It’s Not Just Black and White! I’ll explain that later in this post.
So I went from this (a crazy box of black, white and gray scraps):
It was so much fun to piece this quilt and to select interesting (all over the place) scraps for the blocks. As you can see in the images above, it is just a mishmash of scraps! I had a bunch of black and white fabrics scraps with writing as part of the fabric design so I thought it would be fun to work them in.
As far as the name of the quilt (I love naming quilts): Originally the quilt was going to be created only using black and white scraps. Then I decided to work in some gray. Then on a whim I decided to use some scraps that had a khaki brown color in addition to black. I liked the effect of a little bit of light brown in the piece. A pure B&W log cabin style quilt was not aesthetically pleasing to me. The name “Oh Scrap – It’s Not Just Black and White” is a play on the saying (which there are many versions):
Life isn’t always black and white (there is some gray…)
And found these three fabrics to use as the pieced backing:
I will reveal the pieced backing when the quilt is quilted. I’ve decided to have a longarm quilter machine quilt this quilt also.
So after making two freeform log cabin quilts in a row I think I will try a different pattern when I am ready to make my next scrap quilt.
By the way here is an update on ScrappyAutumnal Splendor, the other freeform scrappy log cabin quilt: The longarm quilter is done with it and I get to pick up the quilt later this week! The longarm quilt sent me some photos and I am so excited!
As promised, here are the bloggers that participate in the ScrapHappy monthly posting event, check out their blogs linked below for their ScrapHappy posts:
Ok one more post about this quilt before it heads today to the long-arm quilter (I decided to “quilt by check” instead of do it myself!). I decided to name the free-form scrappy log cabin quilt I started during the Scrap Happy Retreat I had in June – “Scrappy Autumnal Splendor” as it reeks of Autumn in it’s color palette!
Here is what it looks like all pieced together:
The border (and lattice) is taupe Peppered Cotton which is a version of a “shot cotton” and there was potential for fraying so I stitched around the entire quilt top 1/8th inch.
After finishing the quilt top it was time to head to my yardage stash and see what kind of backing I could piece together (I was tempted to buy yardage of a single fabric for the back but darn it I am going to use up my stash, ha!):
And here are a couple of the fabrics I found:
Here’s a little peek of the crazy pieced backing I made with bold Autumnal colored fabrics with metallic highlights!
You’ll have to wait until I get it back from the long-arm quilter to see how the back came out (anticipation…smile).
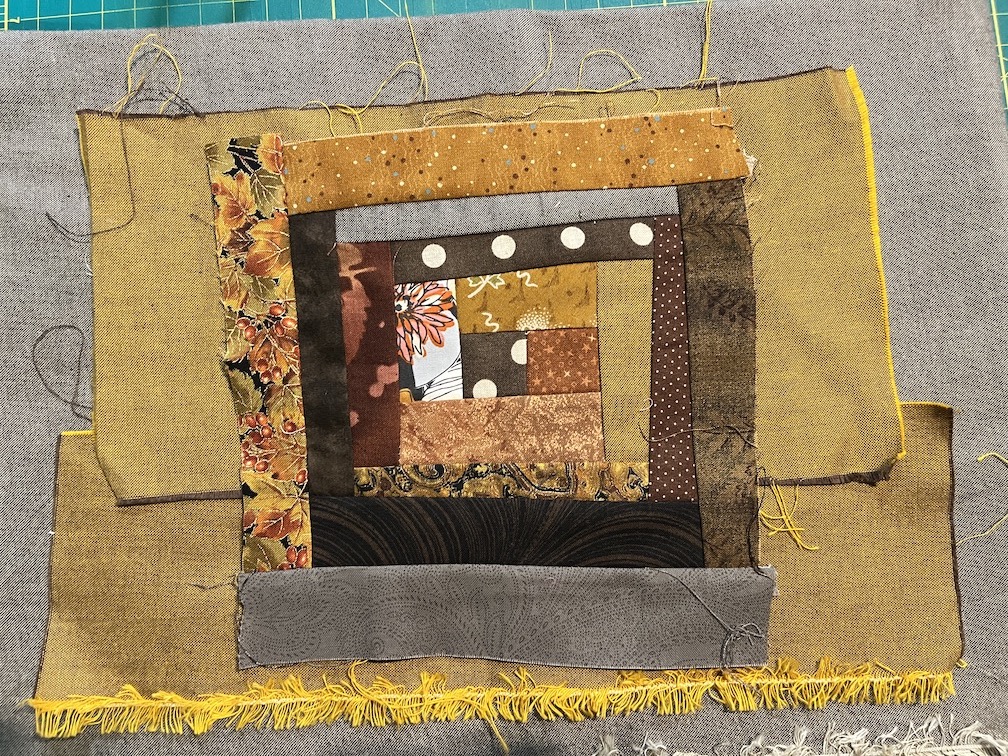
Yesterday I made some major progress on the freeform scrap fabric log cabin quilt I am making in browns and golds.
I got the blocks framed with the taupe fabric – I used 2 inch strips to frame each block. I also cut a couple 5 inch border strips to mock up the border.
Here are a couple photos (I could’t decide which one I liked better):
And here is a close up showing how the blocks will float with a 5 inch border all the way around of the taupe:
As I mentioned in that post, when making freeform (I think this is what I am going to call them from now on) log cabin blocks, you might want to mock up (or actually sew) one completed block to verify that you like where you are going with you design.
I did this with one of the 42 (well actually 43 – I made a spare one) freeform log cabin blocks I made from my pile of brown, gold and orange scraps:
I decided that I needed something to break up the gold, I did not want to place all the gold framed squares side by side, so I decided to try floating the blocks in a taupe Peppered Cotton.
I’d originally trimmed the freeform log cabin block trimmed in gold Peppered Cotton and trimmed the block to 9.5 x 9.5 inches with my 9.5 x 9.5 inch square ruler. Then I tried framing it in the taupe and trimming it to 12.5 x 12.5 inches using my ruler of that size (the next size up ruler I own after 9.5 x 9.5 inch).
(By the way, I highly recommend some type of rotating cutting surface if you are trimming your freeform log cabin blocks to a uniform size with a square ruler – I have the Martelli Round Cutting Mat).
I realized a problem after I made the demo block: I have 42 blocks and my plan was to make a quilt for my home library for snuggling under while reading that is 6 blocks by 7 blocks.
At 12.5 x 12.5 inches each (12 x 12 inches finished) it would become a bed size quilt…oh no – let me try some fake math – the quilt would end up around 72 inches by 84 inches…actually larger if I added a little border around the quilt to make the blocks “float”.
I did revisit just sewing the gold framed blocks together and it does not make a large enough snuggle quilt. You might be thinking: what about just adding more of the gold fabric on the edges of the quilt as a border to “float” the blocks? Well I’ve run out of the gold fabric! I have less than a 1/4 yard left.
I was pondering my quandary when John asked about latticing instead of floating each block in the taupe – to use the taupe as a “lattice” instead. So I tried it out:
I like it! The taupe quiets the gold and it will all go nicely with the colors in my home library.
(The quilt currently on the loveseat and two little matching pillows, from orphan blocks, I plan to sell on my Etsy shop someday as they are not really my style and I want someone else to enjoy them.)
So that is where I am at in my design process.
Here are the 42 completed 9.5 x 9.5 inch blocks awaiting their lattice:
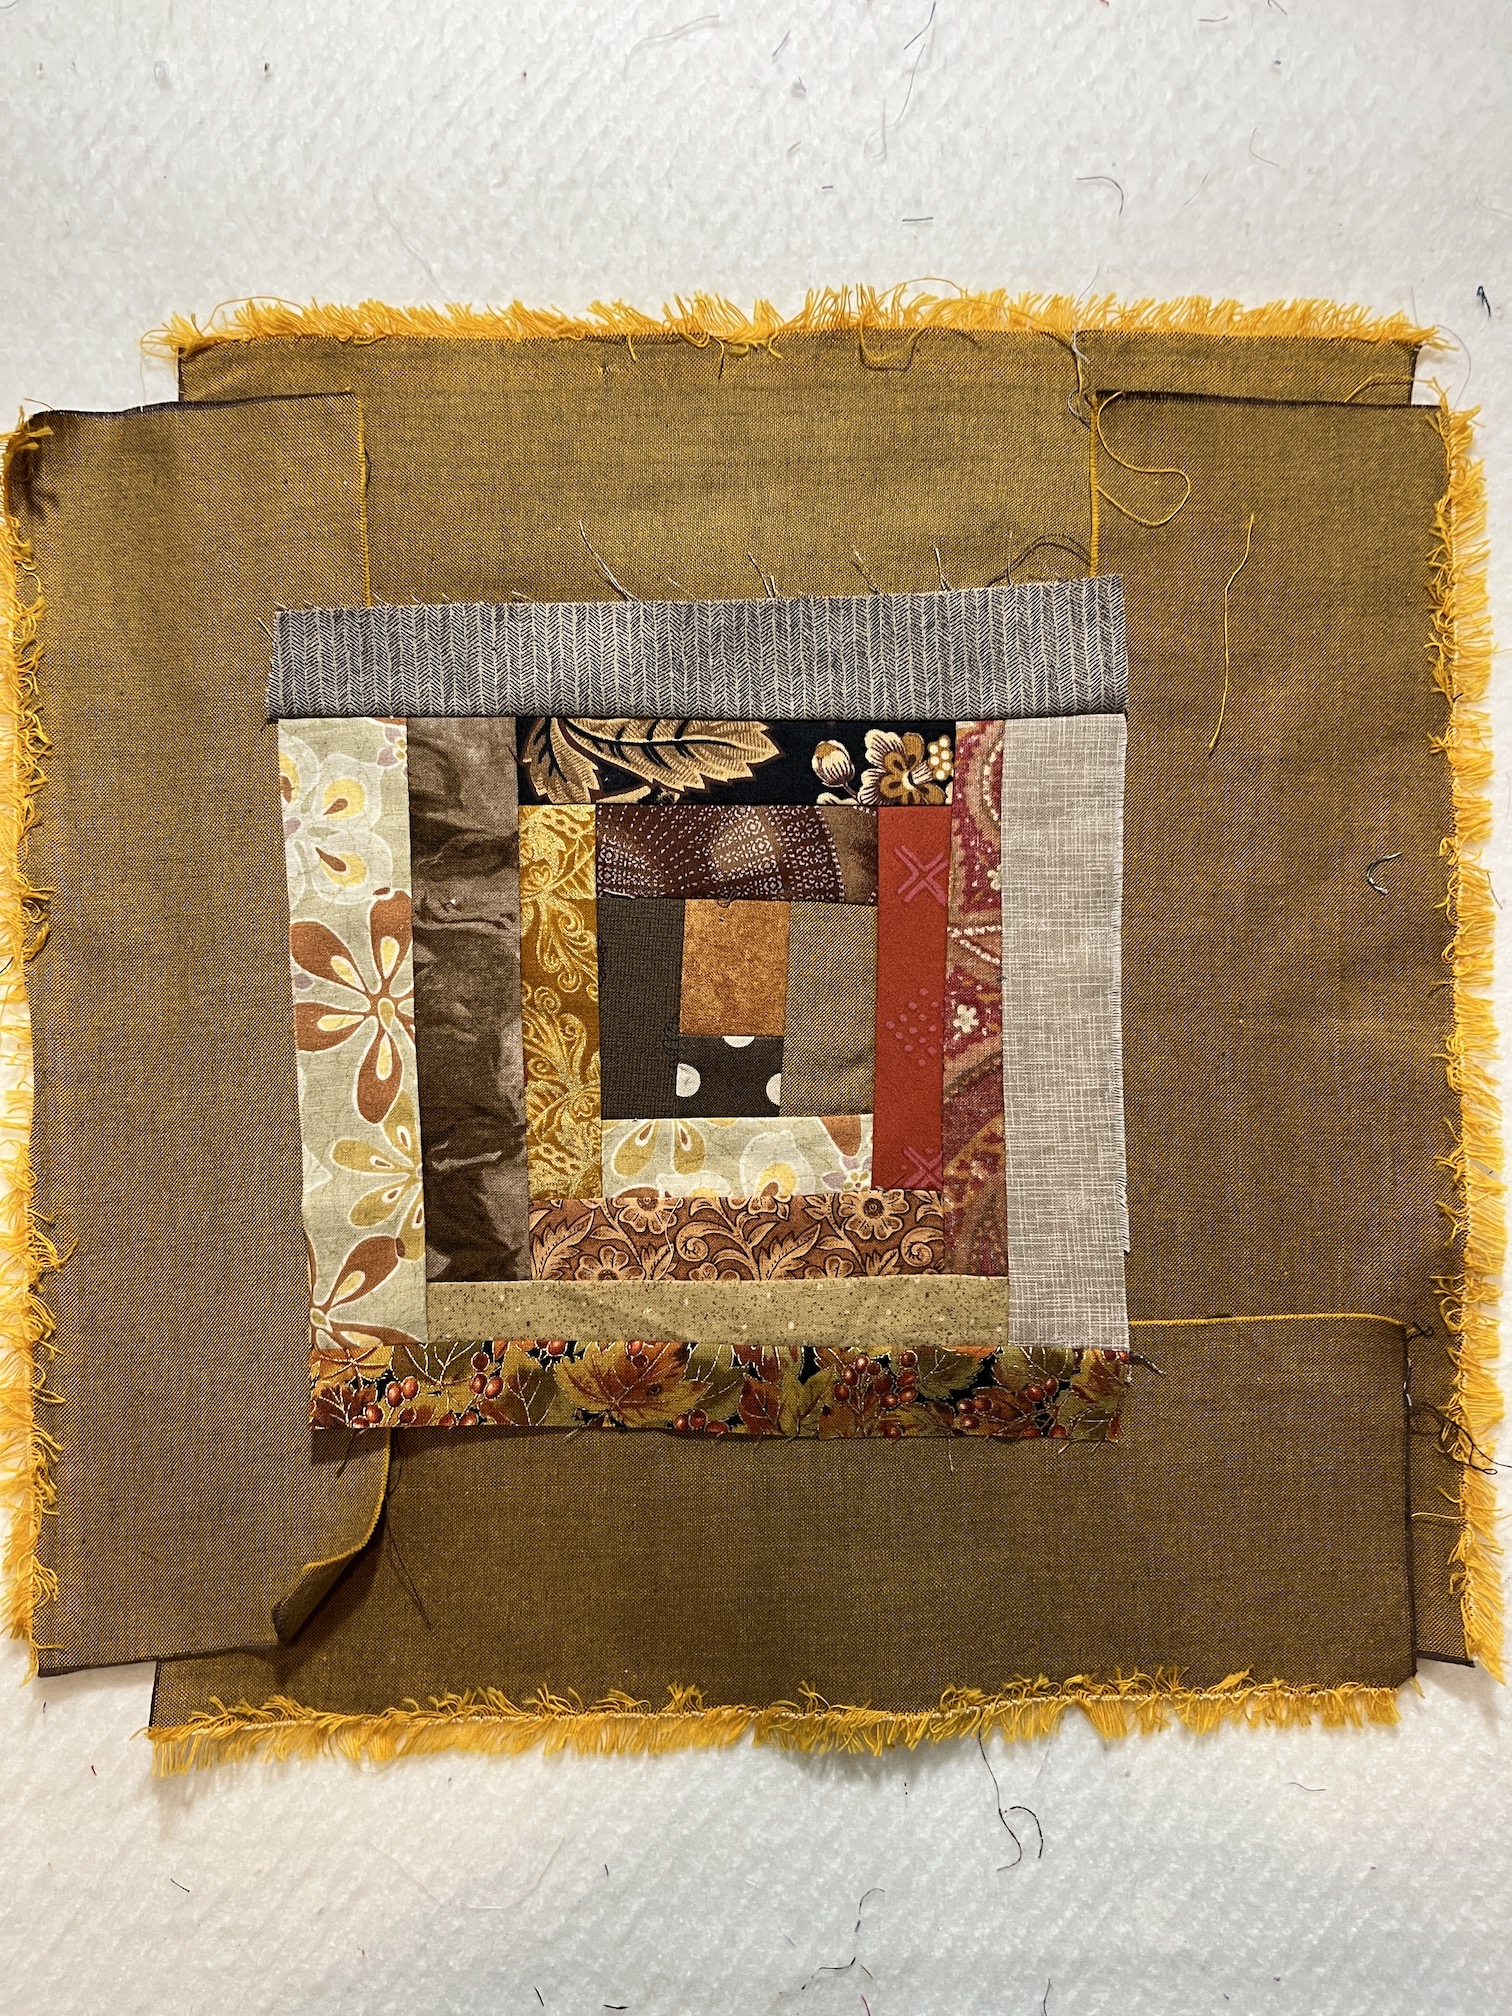
I realized didn’t share very many photos or details about the scrappy improvisational log cabin blocks I made at the Scrap Happy Quilt Retreat (link to all the posts related to this 5 day retreat) last week.
During the retreat I “shopped” from my collection of brown, cream, yellow and gold scraps and selected this collection of scraps to which I also added a couple orange-brown scraps and some scraps D brought to the retreat:
I ended up piecing 46 blocks, which I narrowed down to 42 blocks plus one spare (I recycled into the scrap pile 3 blocks that were pieced too wonky).
At first I decided to float the blocks (but framing them) in some coppery-gold-ish Peppered Cotton fabric I had in my stash:
Yes it looks cool and the framing fabric really compliments the fabrics in the blocks, but I decided it would just be too much as an entire quilt.
So I pulled out this brown-taupe-ish Peppered Cotton fabric I had in my stash:
And I decided I would first frame each block in the coppery-gold-ish fabric and then set that block in the taupe-ish fabric:
It might be difficult to visualize as I have it laid out in the images above but I will share more images after I try out some sample final blocks. Creating some sample final blocks will also let me confirm that this combination actually works.
We used this method during the retreat – I suggested (and they listened) to K and D that they actually sew a sample final/completed block to decide if they really like a framing/border/lattice color for their block. Just laying the block on the fabric doesn’t already give you the true feeling of the final version. You can always rip it out the framing and reuse the core block if you don’t like the sample.
Here is an example below of what D did during the retreat with her two finalists – the khaki colored fabric vs. the gray fabric – to help herself make the final decision:
A friend who read the posts related to the retreat ask for some overall instructions on making scrappy improvisational log cabin blocks (which I also call “log jamming” or “free form” log cabin blocks).
Here is a quick overview of how I do it, there are several different approaches and in the post ScrapHappy May: Scrap Happy Retreat! I shared links to YouTube videos from the Stitchin’ Post where I first learned how to do it.
IMPROVATIONAL/FREE FORM SCRAPPY LOG CABIN BLOCKS
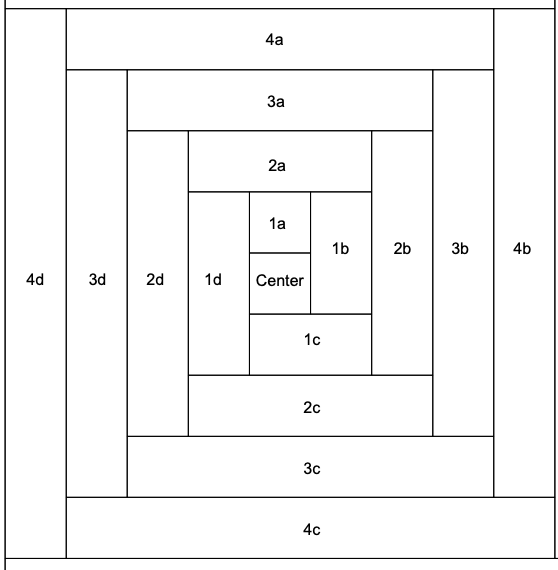
First you need to understand the concept of Log Cabin Block piecing where you start with a center square and build around it. Below is a screen shot from Generations Quilt Patterns on How to Make a Log Cabin Blockthat illustrates the Log Cabin Block piecing concept:
It really helps to have pieced traditional log cabin blocks before you go improvisational.
Next you need to decide what size you want your final block to be. I decide my final size based on existing square rulers I have as the easiest way to trim the block is using a square ruler on a rotating cutting mat. I have the following square rulers in my collection – 6 inch, 6.5 inch, 9.5 inch, and 12.5 inch, so I make my final blocks one of those sizes. D & K used my 9.5 inch square ruler for the final size on their blocks. I plan to use my 12.5 inch ruler for the final size on my blocks.
Then it is time to go shopping in your fabric scraps. You need to decide on a color palette (though you could do all random colors but your piece will not look cohesive if that is what you want, but it will look colorful!) for your quilt blocks. As you can see from the pictures from our retreat – K went with pinks and blues, while D went for autumnal colors. You are going to need more scraps that you think so at least initially put together a large pile of scraps.
Audition your scraps and see how well they work together by laying out a demo block (no need to sew together yet but try and simulate a log cabin block).
To start you can either 1) sew two strips together, one of the strips being your center fabric; or 2) sew different little pieces of centers to a long strip.
Cut them apart using scissors to create your first two pieces – if you look at the graphic above this would be Center + 1a.
From there you can create using log cabin piecing techniques a sample block to see how you like it, or just jump into chain piecing blocks starting with your fabric for 1b.
Don’t worry about 1/4 inch seams, just do what seam allowance works to piece the fabric to the next fabric – for example if you are using thin scraps you can use 1/8 seam allowances, especially when you are working on rows towards the center, it will end up stable when the entire block is sewn together.
Using log cabin piecing techniques (working from a center around and around) keep adding scrap strips until you get your block a little larger than the final size you want to achieve.
Trim your blocks using the square ruler of your choosing to their final size.
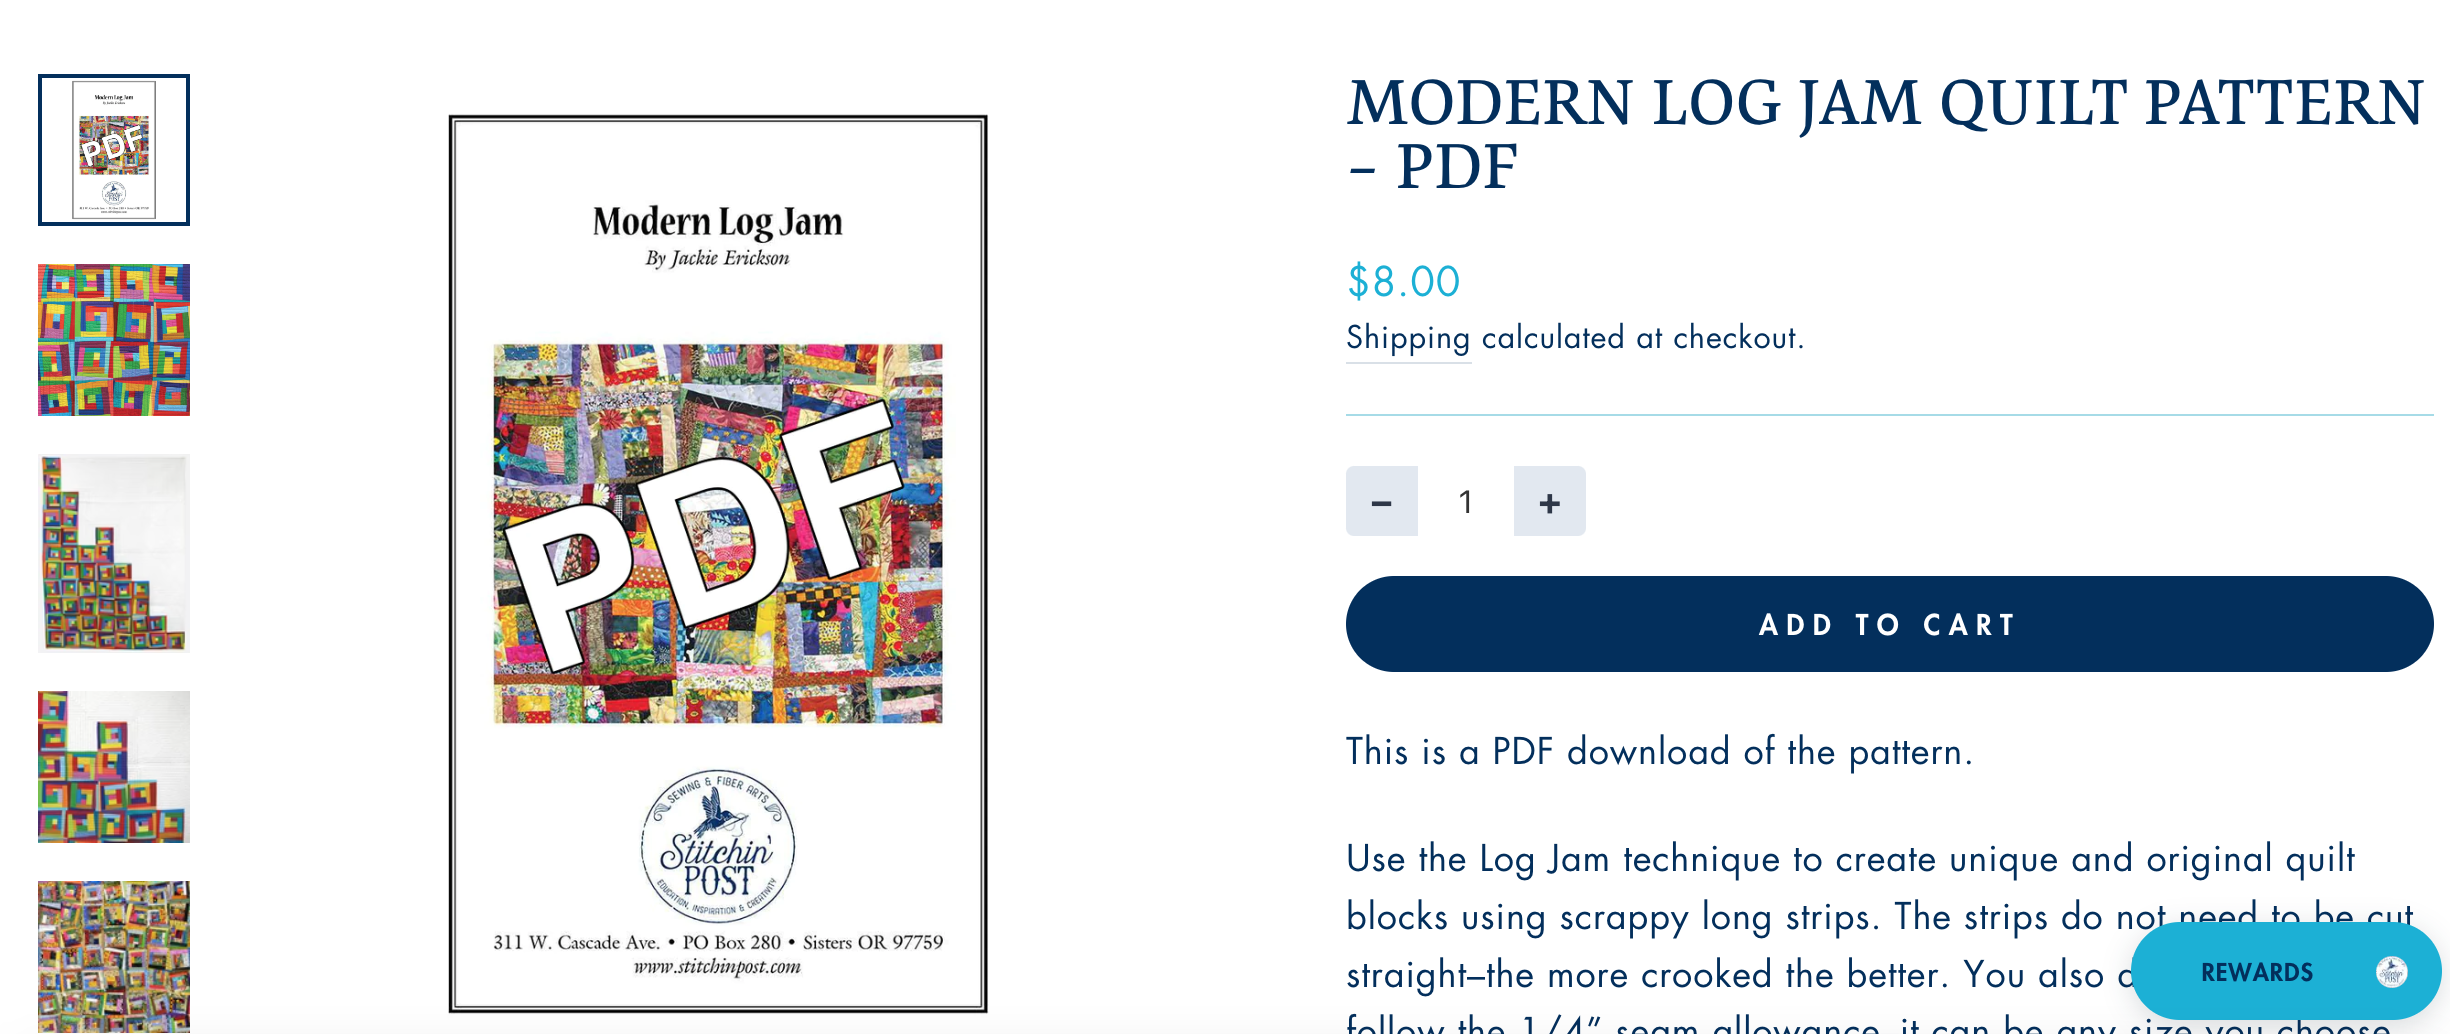
I might write an actual pattern of how I do it with lots of images/photos and detailed instructions and sell it as a digital download on my Etsy shop someday. Then I can add in all the tricks I’ve learned over the years of making these blocks. My process does differ from the one I originally learned from Jackie at the Stitchin’ Post.
The Stitchin’ Post does sell a pattern for making these blocks called Modern Log Jam Quilt in case you want to try their pattern. It was written by the person (Jackie) who originally taught me (before I created my own process) – I’ve linked it here – Modern Log Jam Quilt.
Stitchinpost.com
There are so many options of what you can do with these types of blocks made from scraps. You could do something straightforward like what D made:
Or you could play with using different framing colors and create additional patterns like this one I made out of Stonehenge fabric scraps:
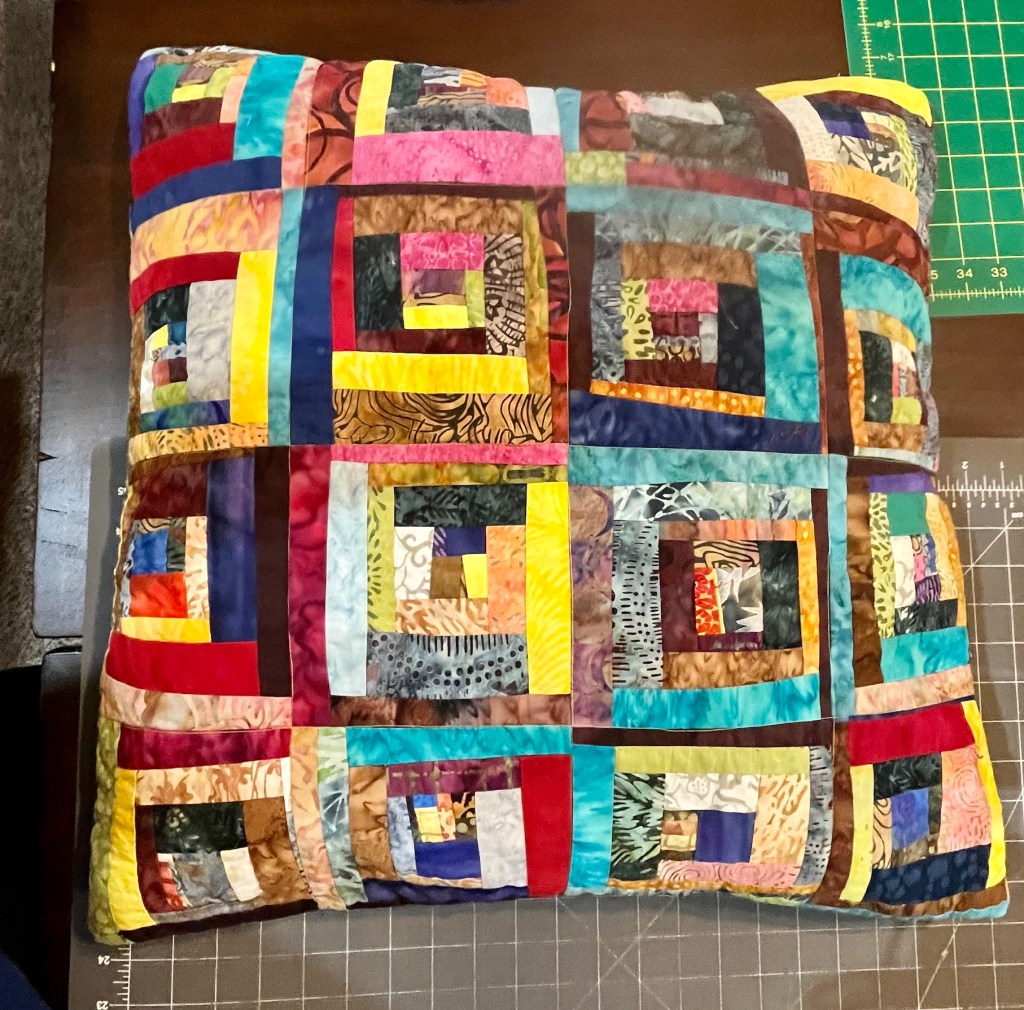
Or you can skip the “framing” of the blocks in a solid color and just sew the blocks directly together like I did for these two pillows I made out of batik scraps:
I’ve made numerous free form log cabin quilts this way.