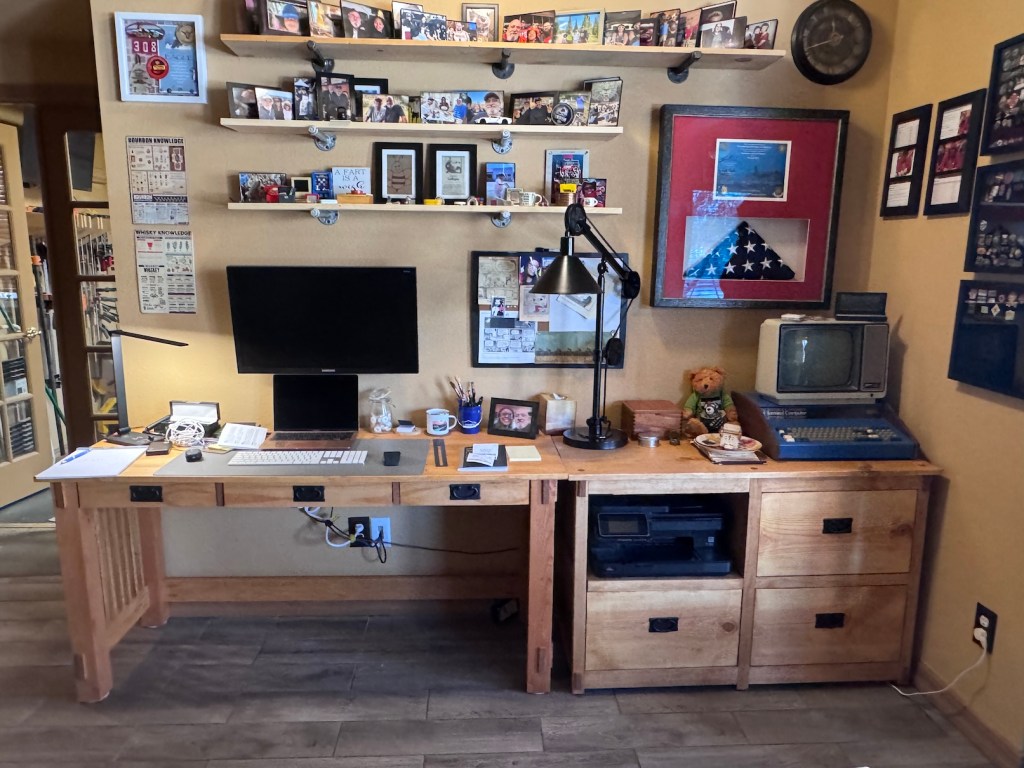
I shared in the post John Builds Himself a Desk that John, the self-taught woodworker living in my house (ha), built himself a Mission-style desk using images from the web to inspire him.
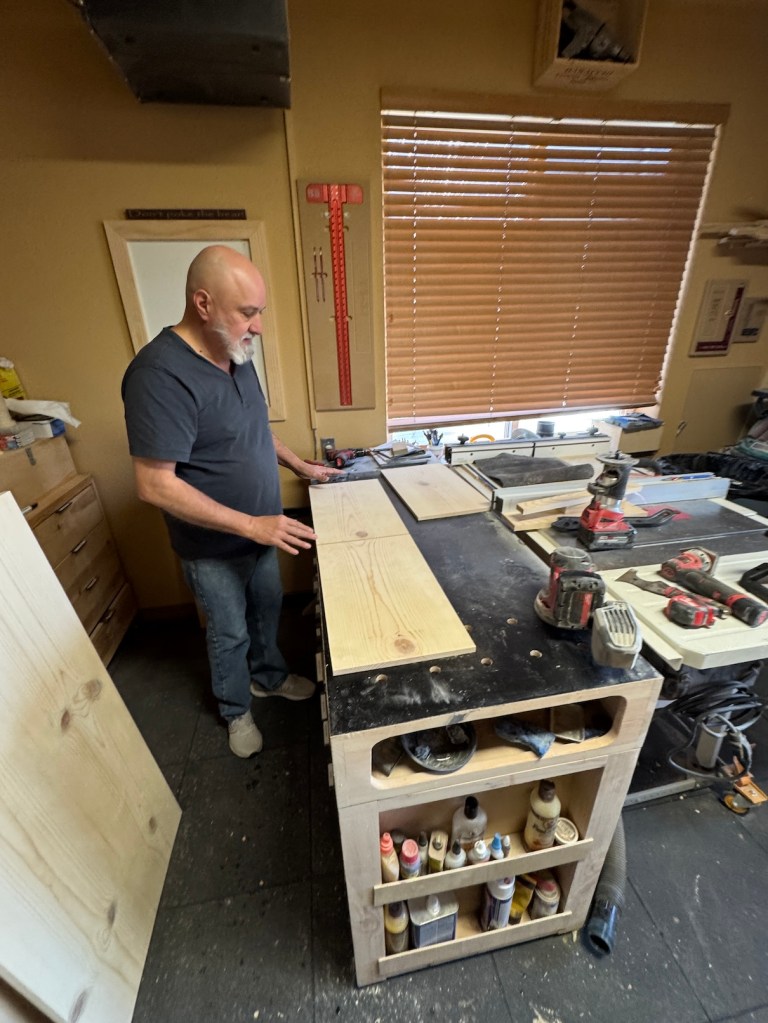
Well John decided he wanted to replace our existing file cabinet, that we got for free secondhand, with a printer stand/file cabinet combo piece.
So he developed a design and went to work building it:
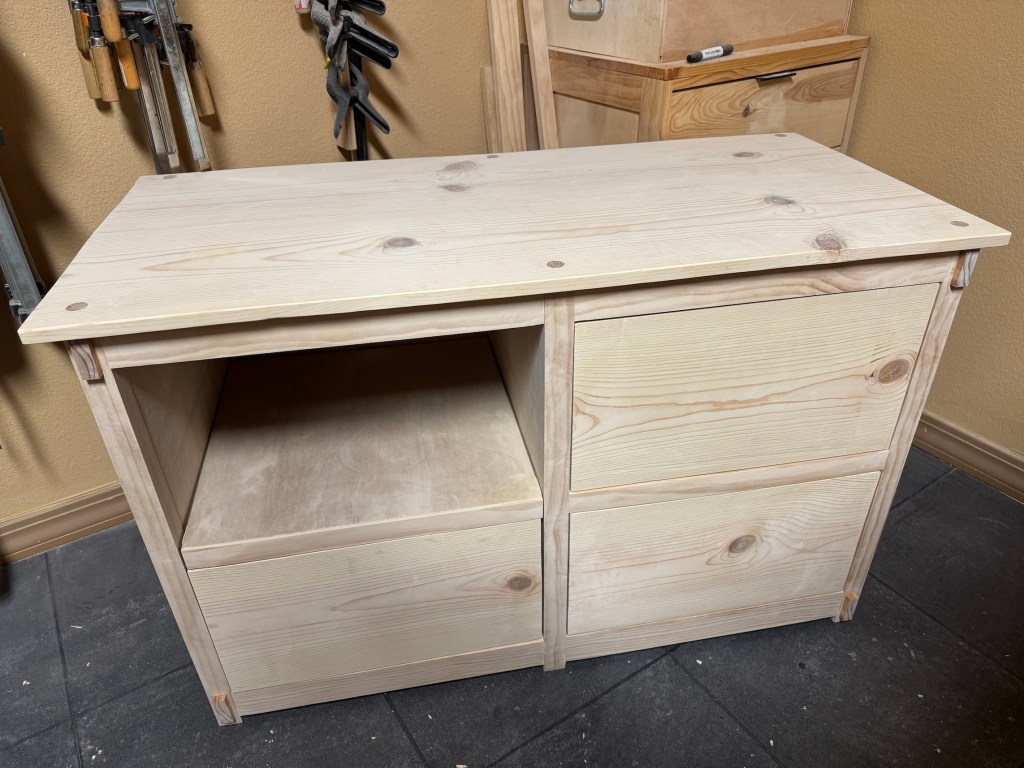
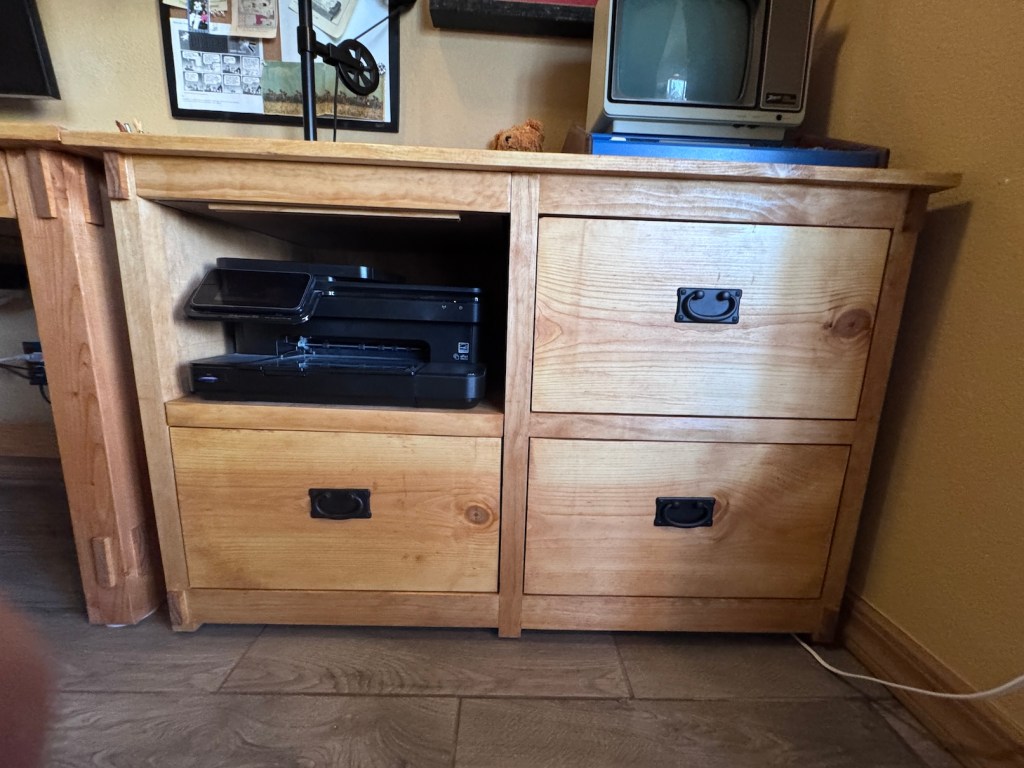
And here is the resulting piece!
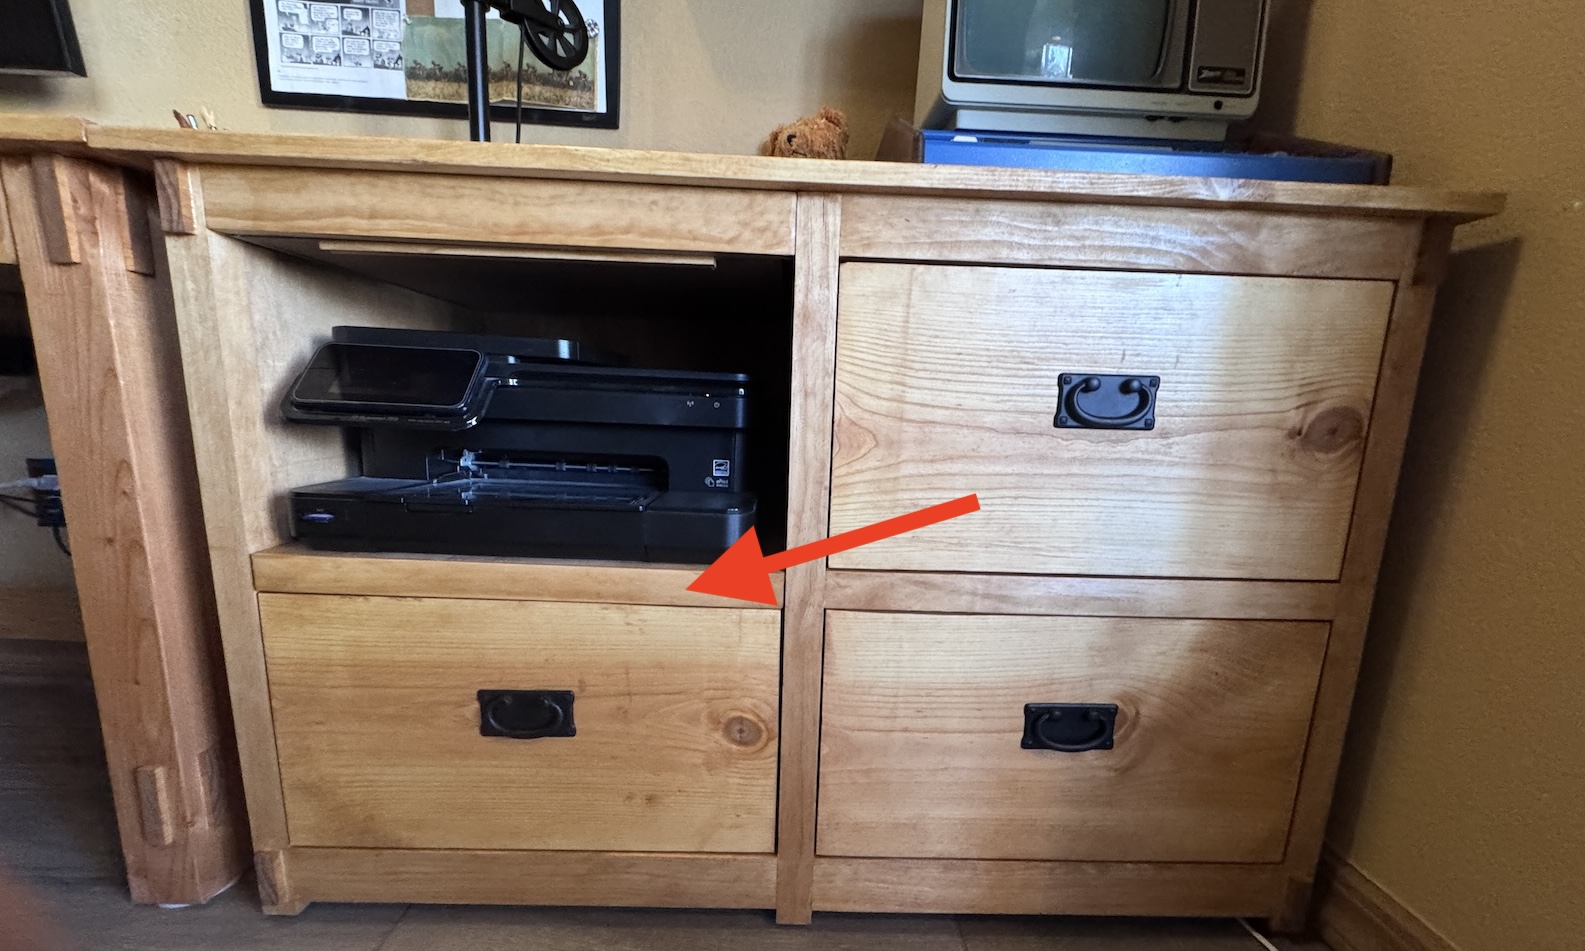
The two drawers on the right of the piece are set up as file cabinet drawers, while the drawer under the printer is a storage drawer. I forgot to take a photo of it but the area under the printer pulls out for easier access to the printer!
We are pretty excited about it and we had fun purging old files and arranging our files in the new file cabinet drawers.
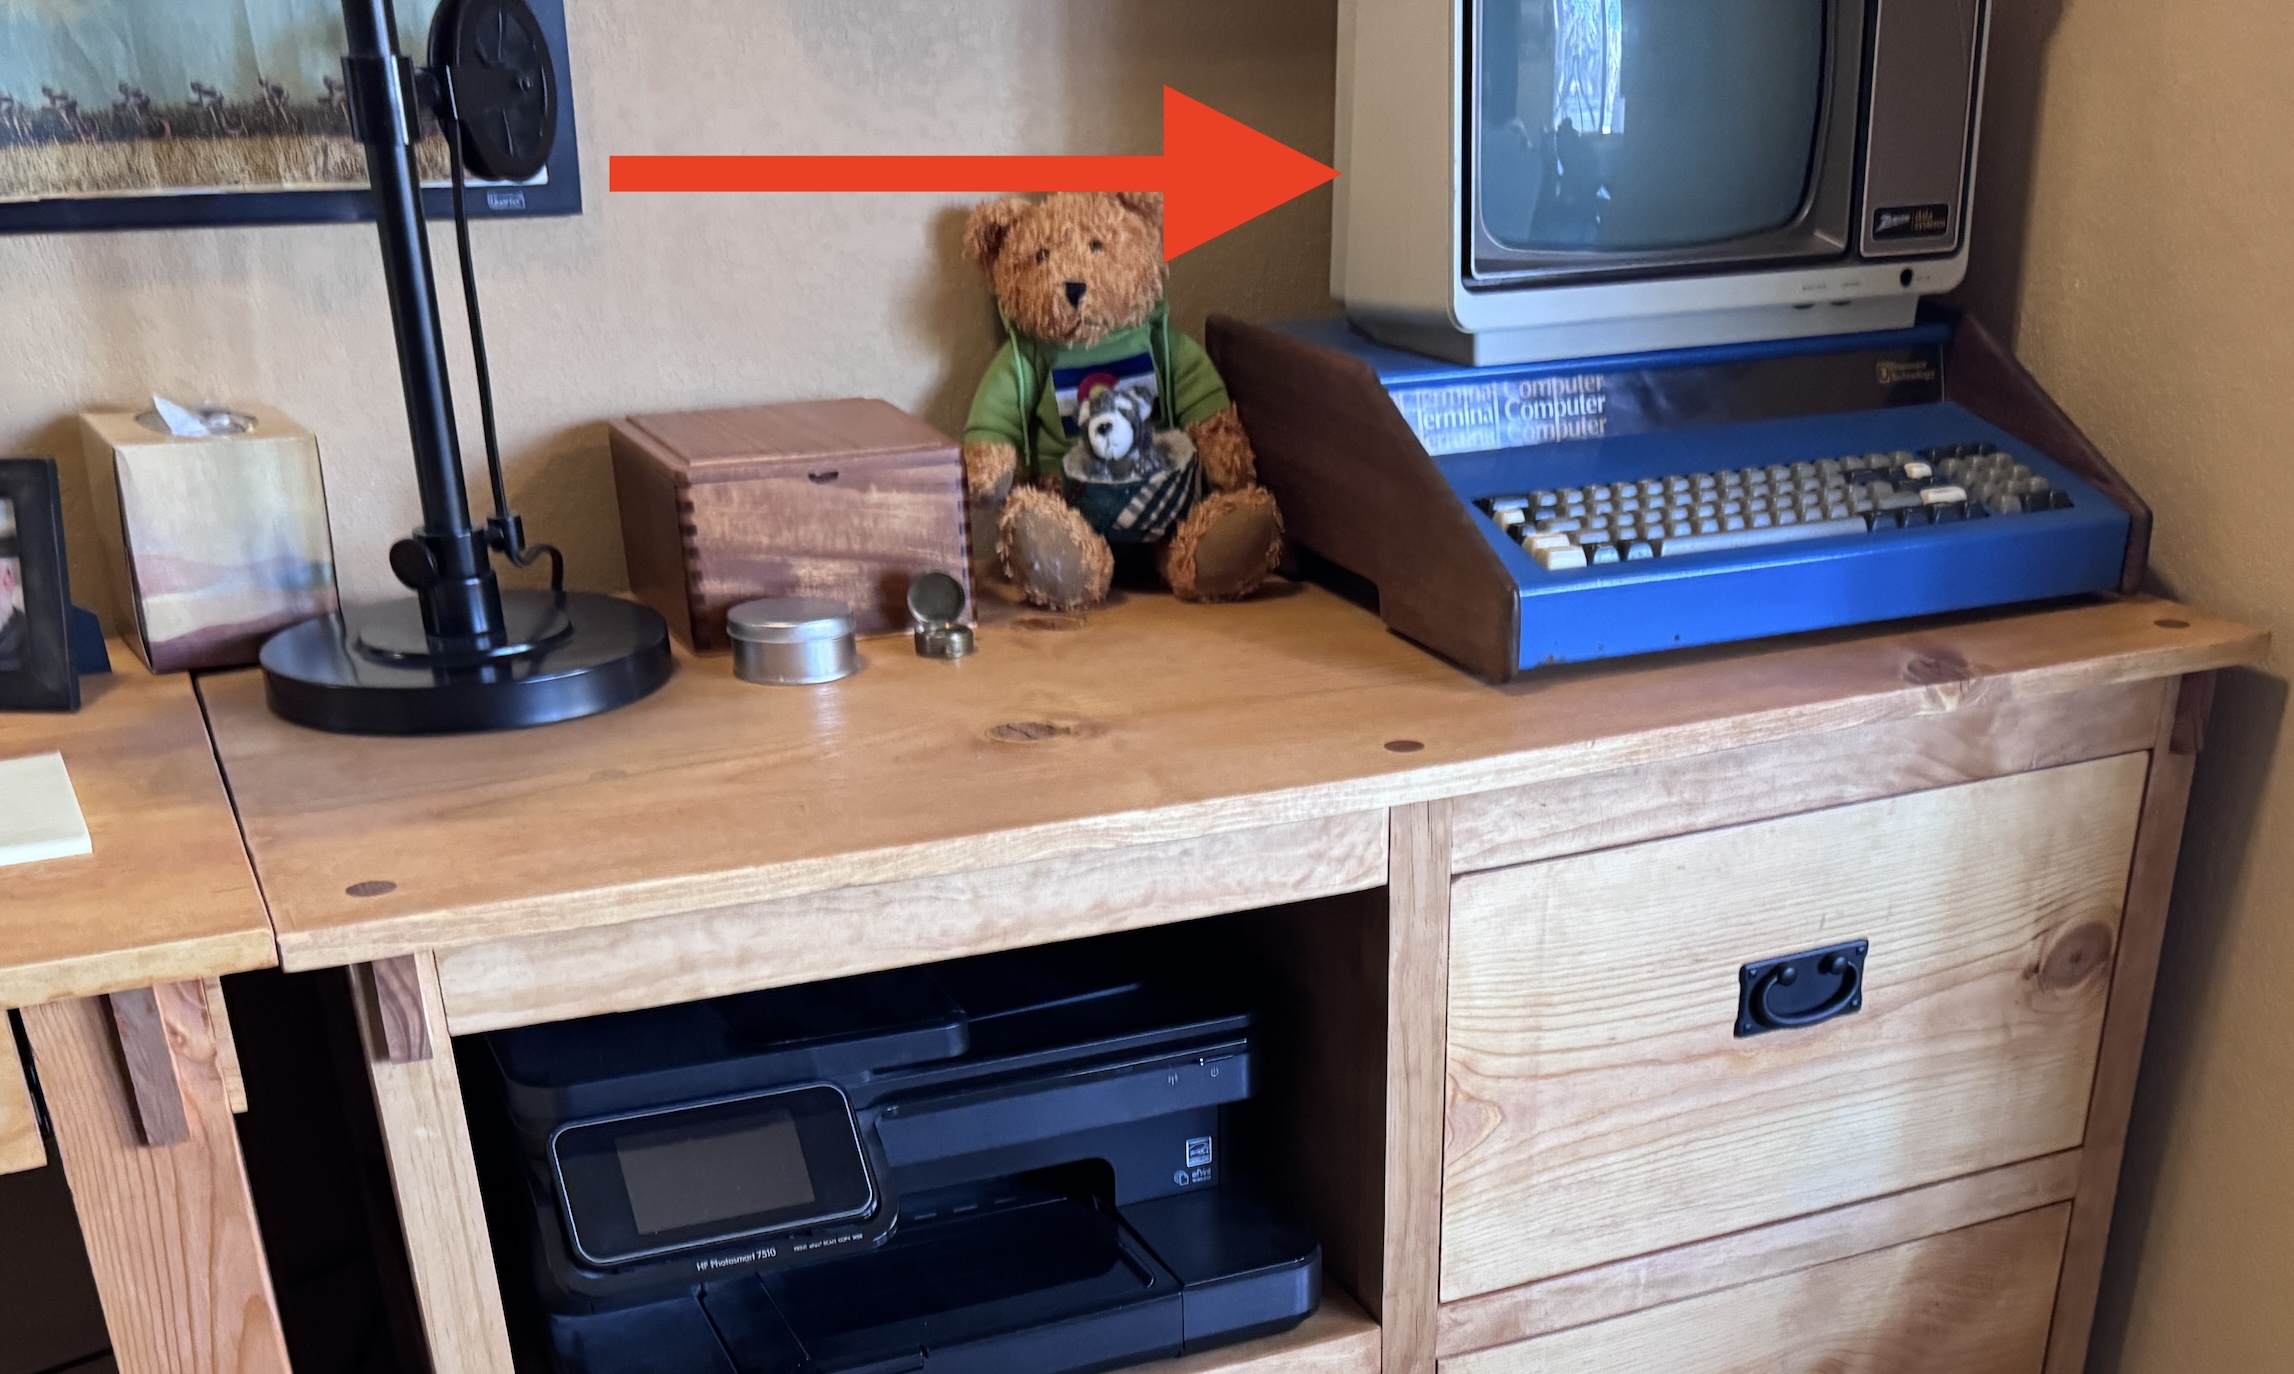
Did you notice the old computer sitting on the new printer stand/file cabinet? Well that’s the computer that John built with his Dad when he was 10 years old. John spent a career as a computer software architect and it all started with him learning to build a computer with his father as a kid.
Oh and what became of the secondhand file cabinet we no longer needed? Well serendipitously we discovered our neighbor across the street, a new father trying to keep up with life, desperately needed a file cabinet!
So John brought it over to his house and made him very happy!
Yes – because I have exciting news! John (Human John that is, not John Beastie my knitted life partner) built me a new tower to live in.
Here are my previous accommodations in Tierney’s studio (in a box John made during his earlier days of woodworking):
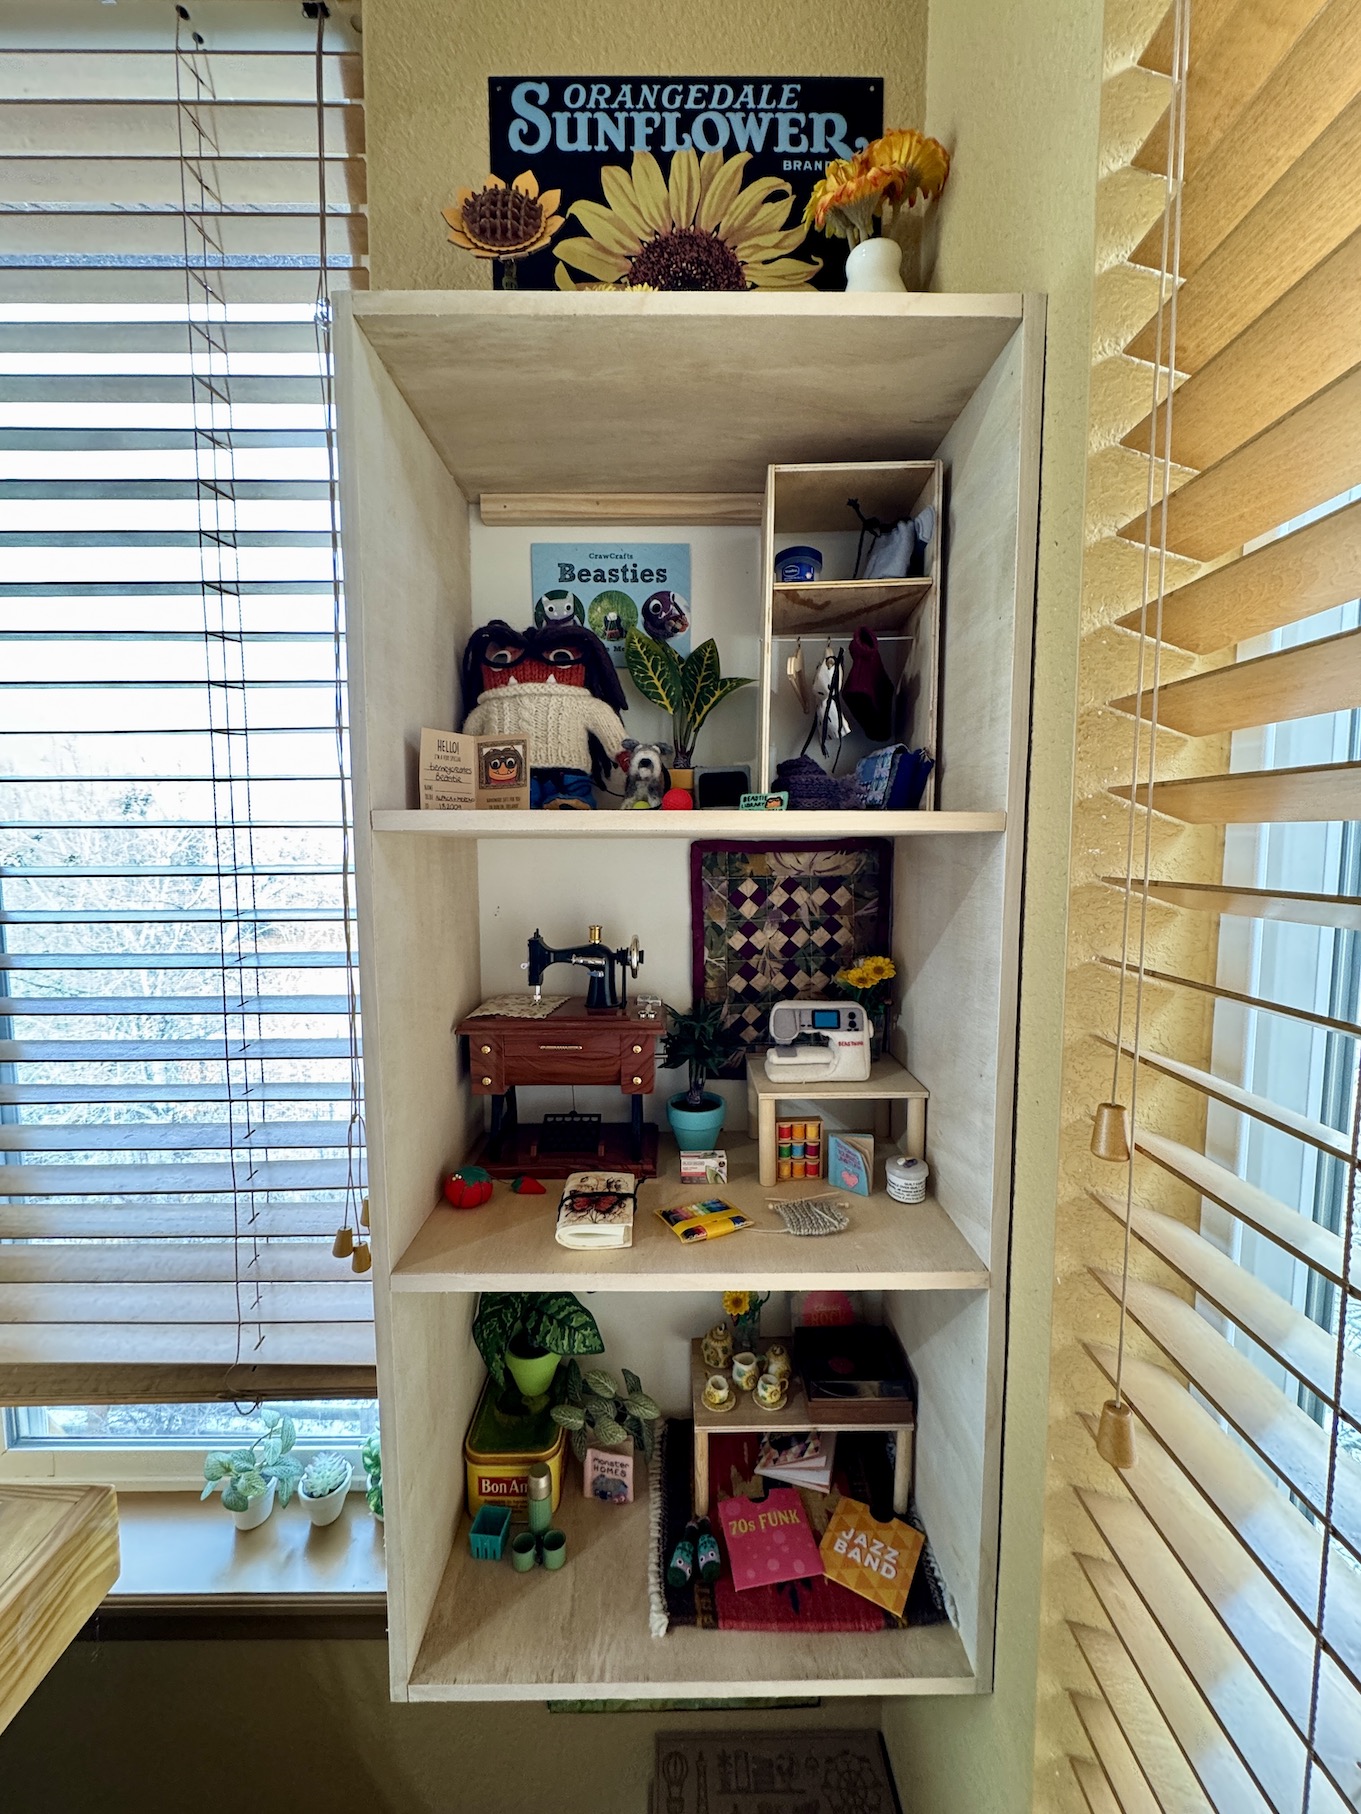
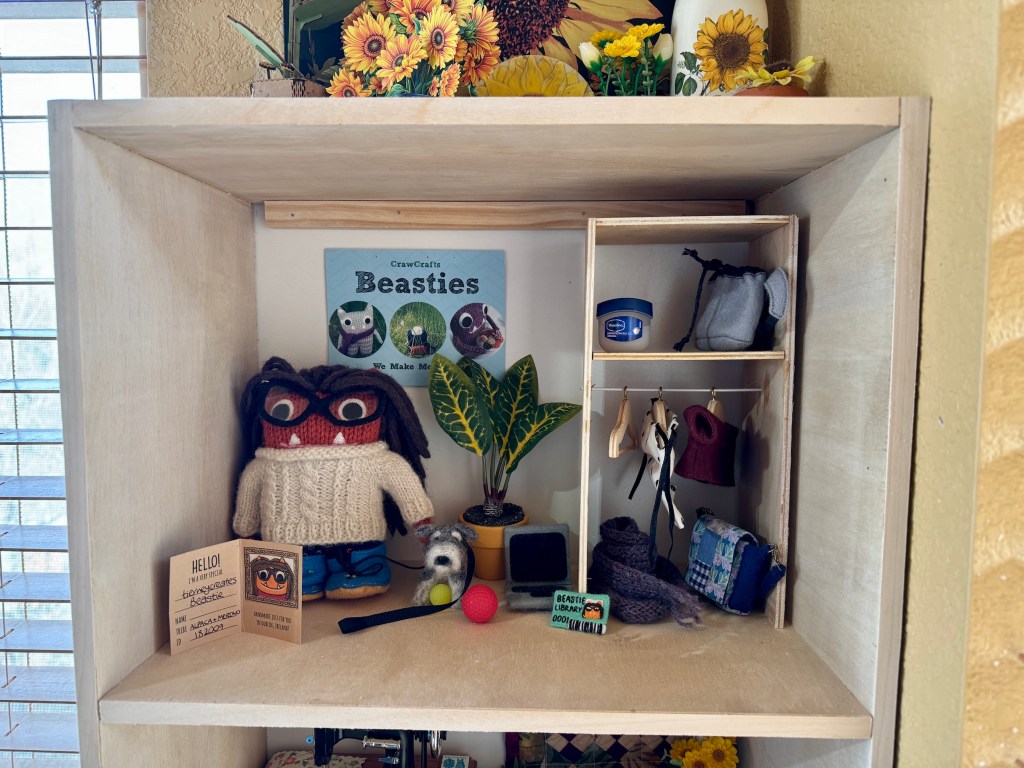
And here is my new home – a three story tower!
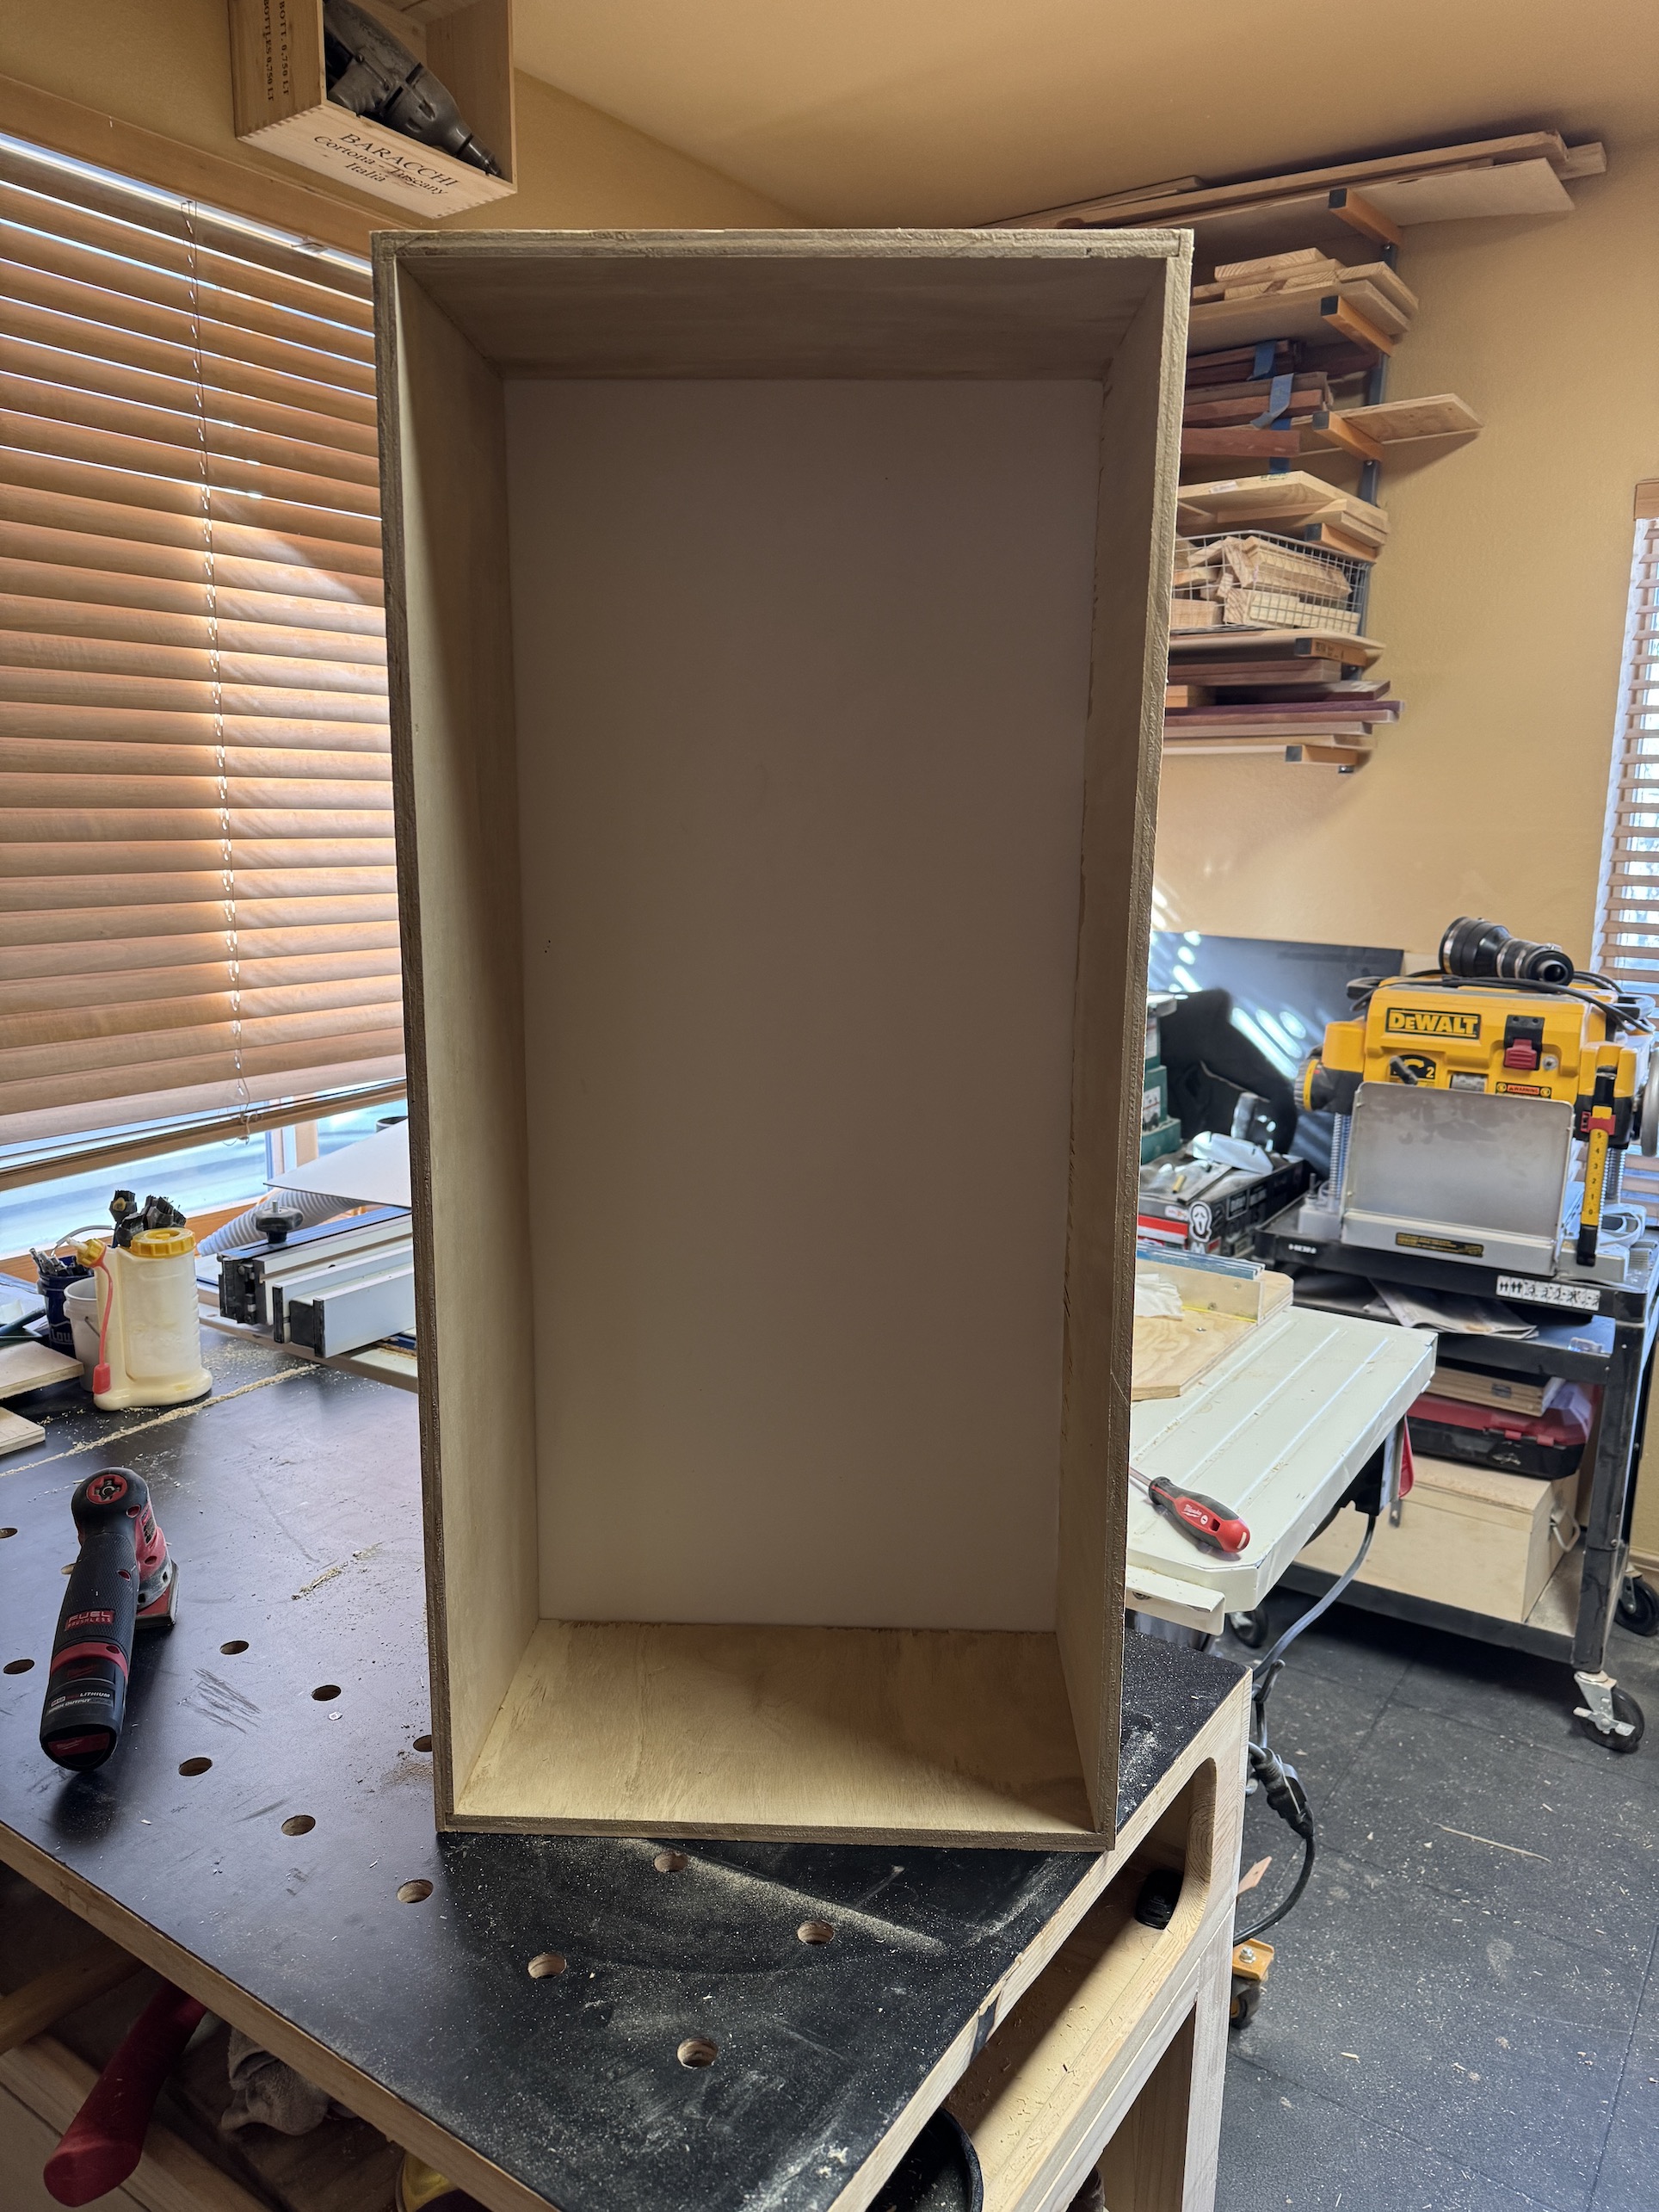
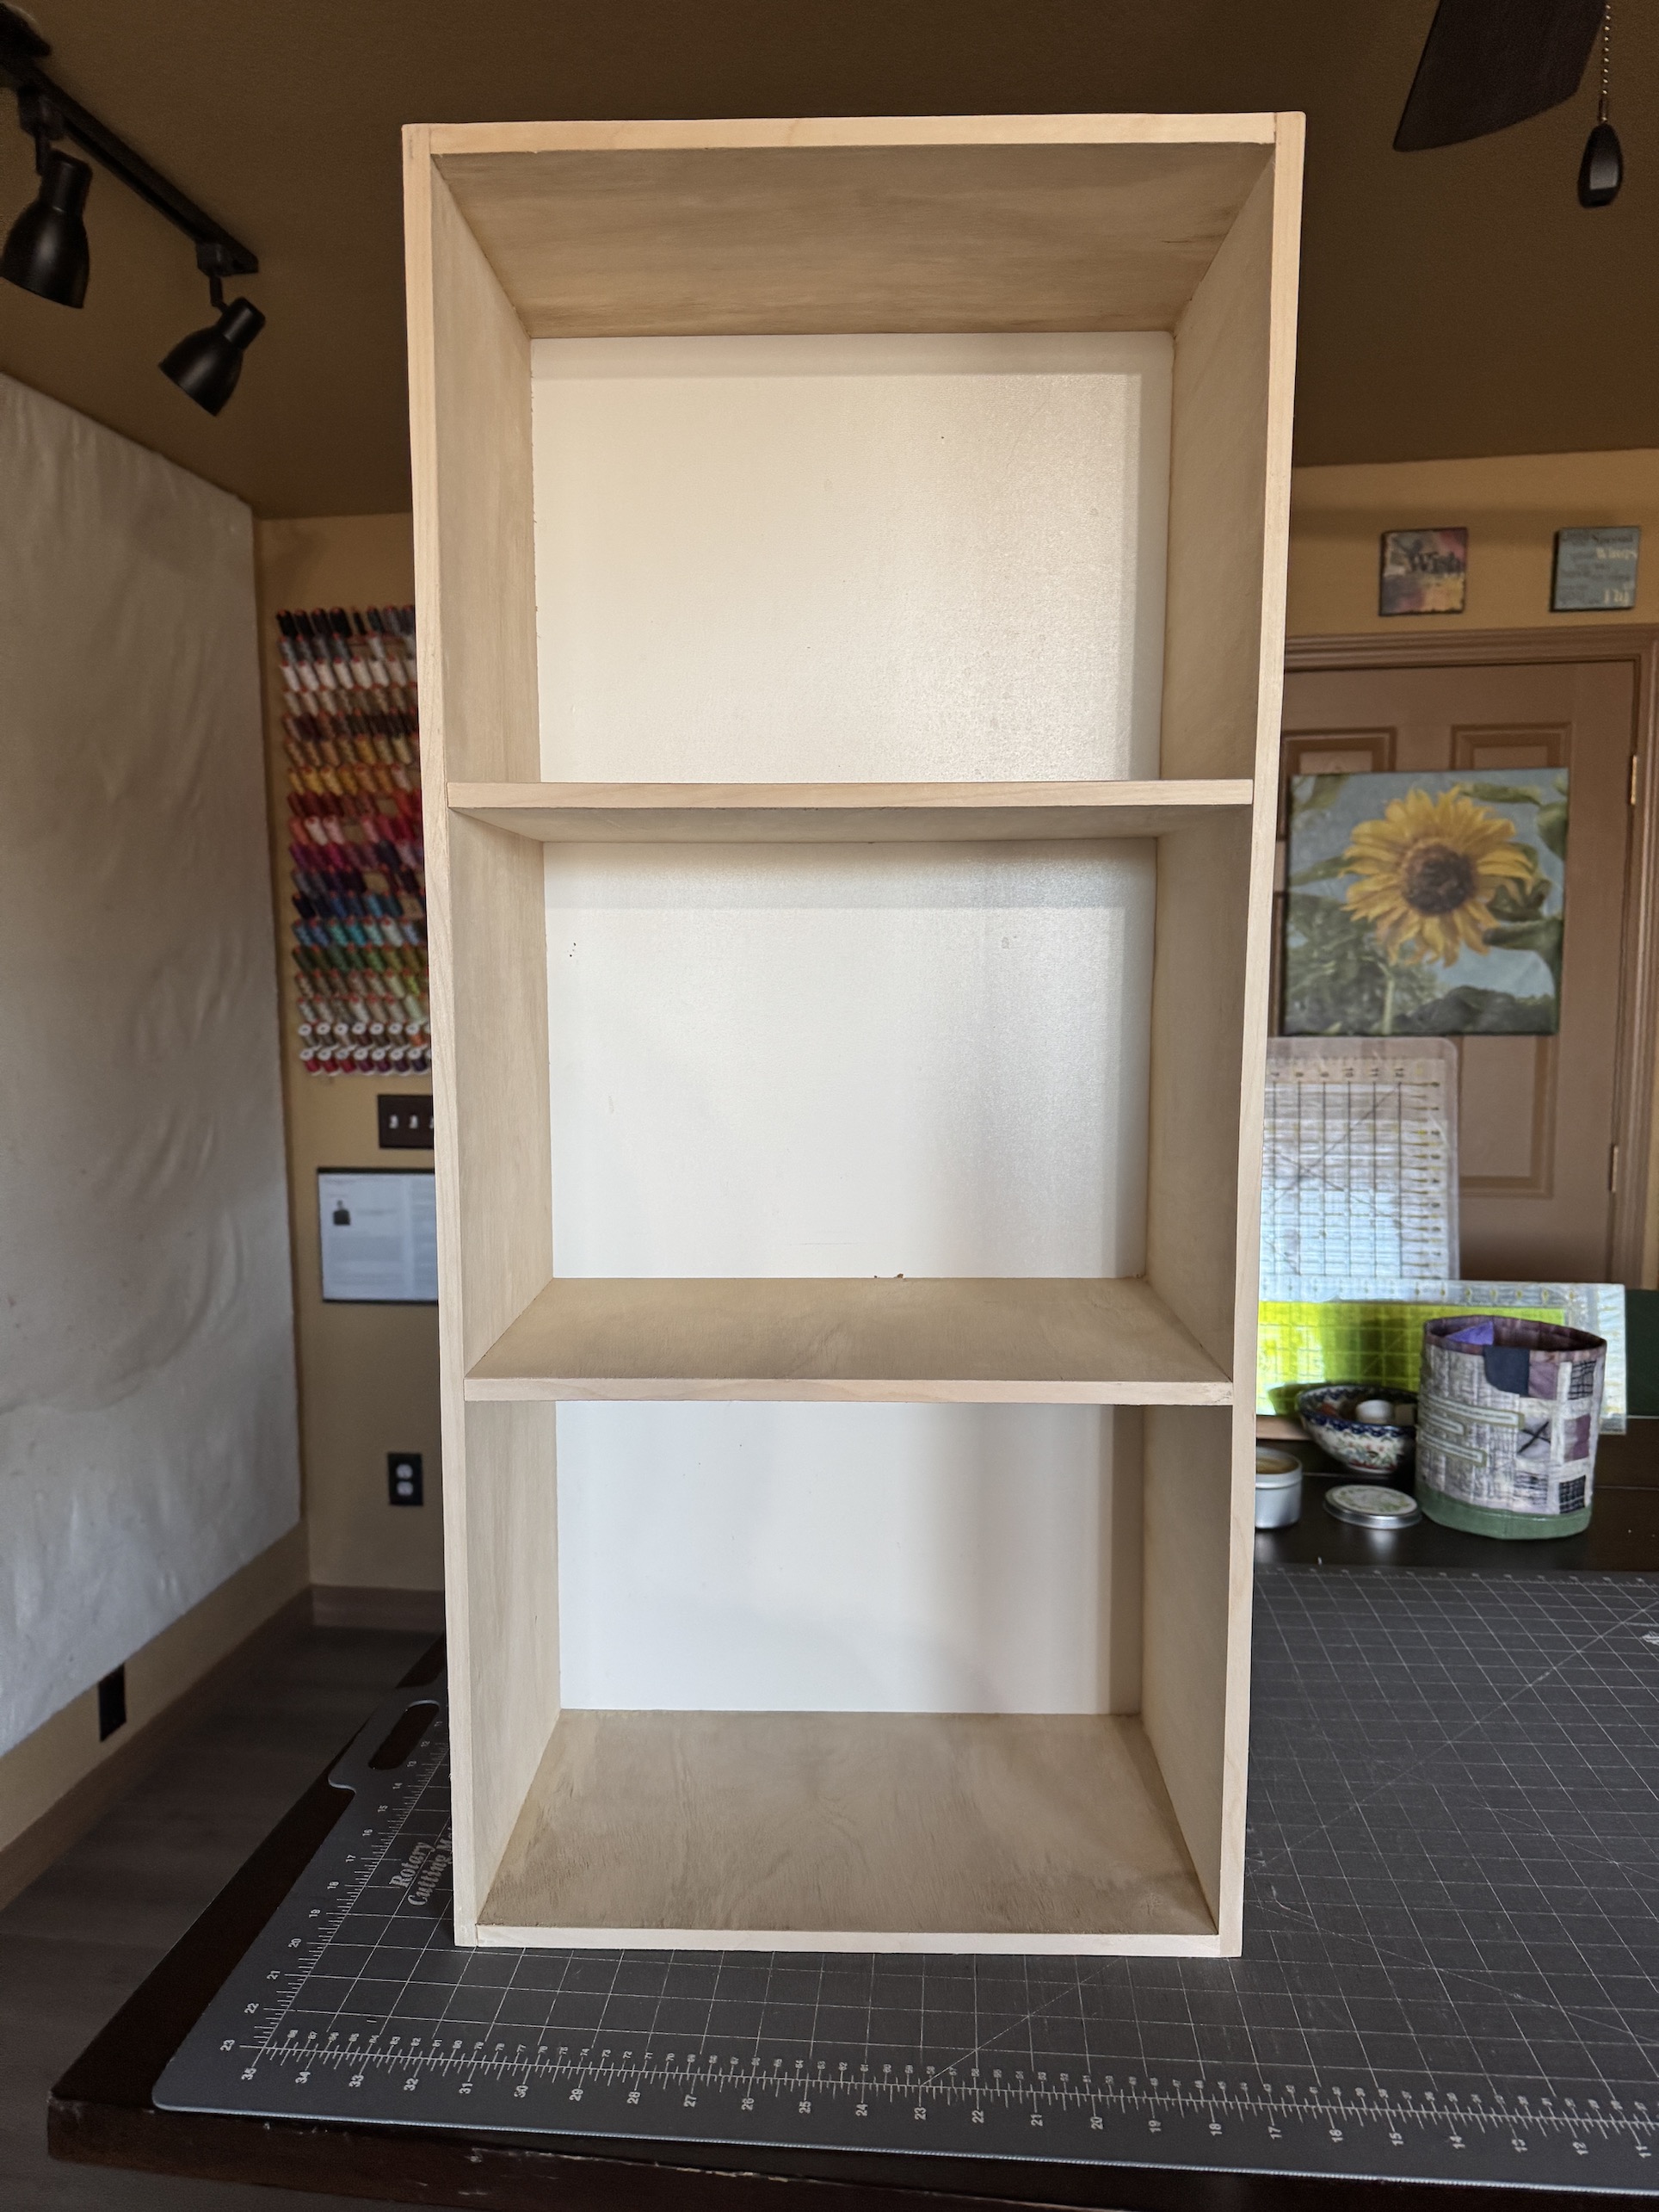
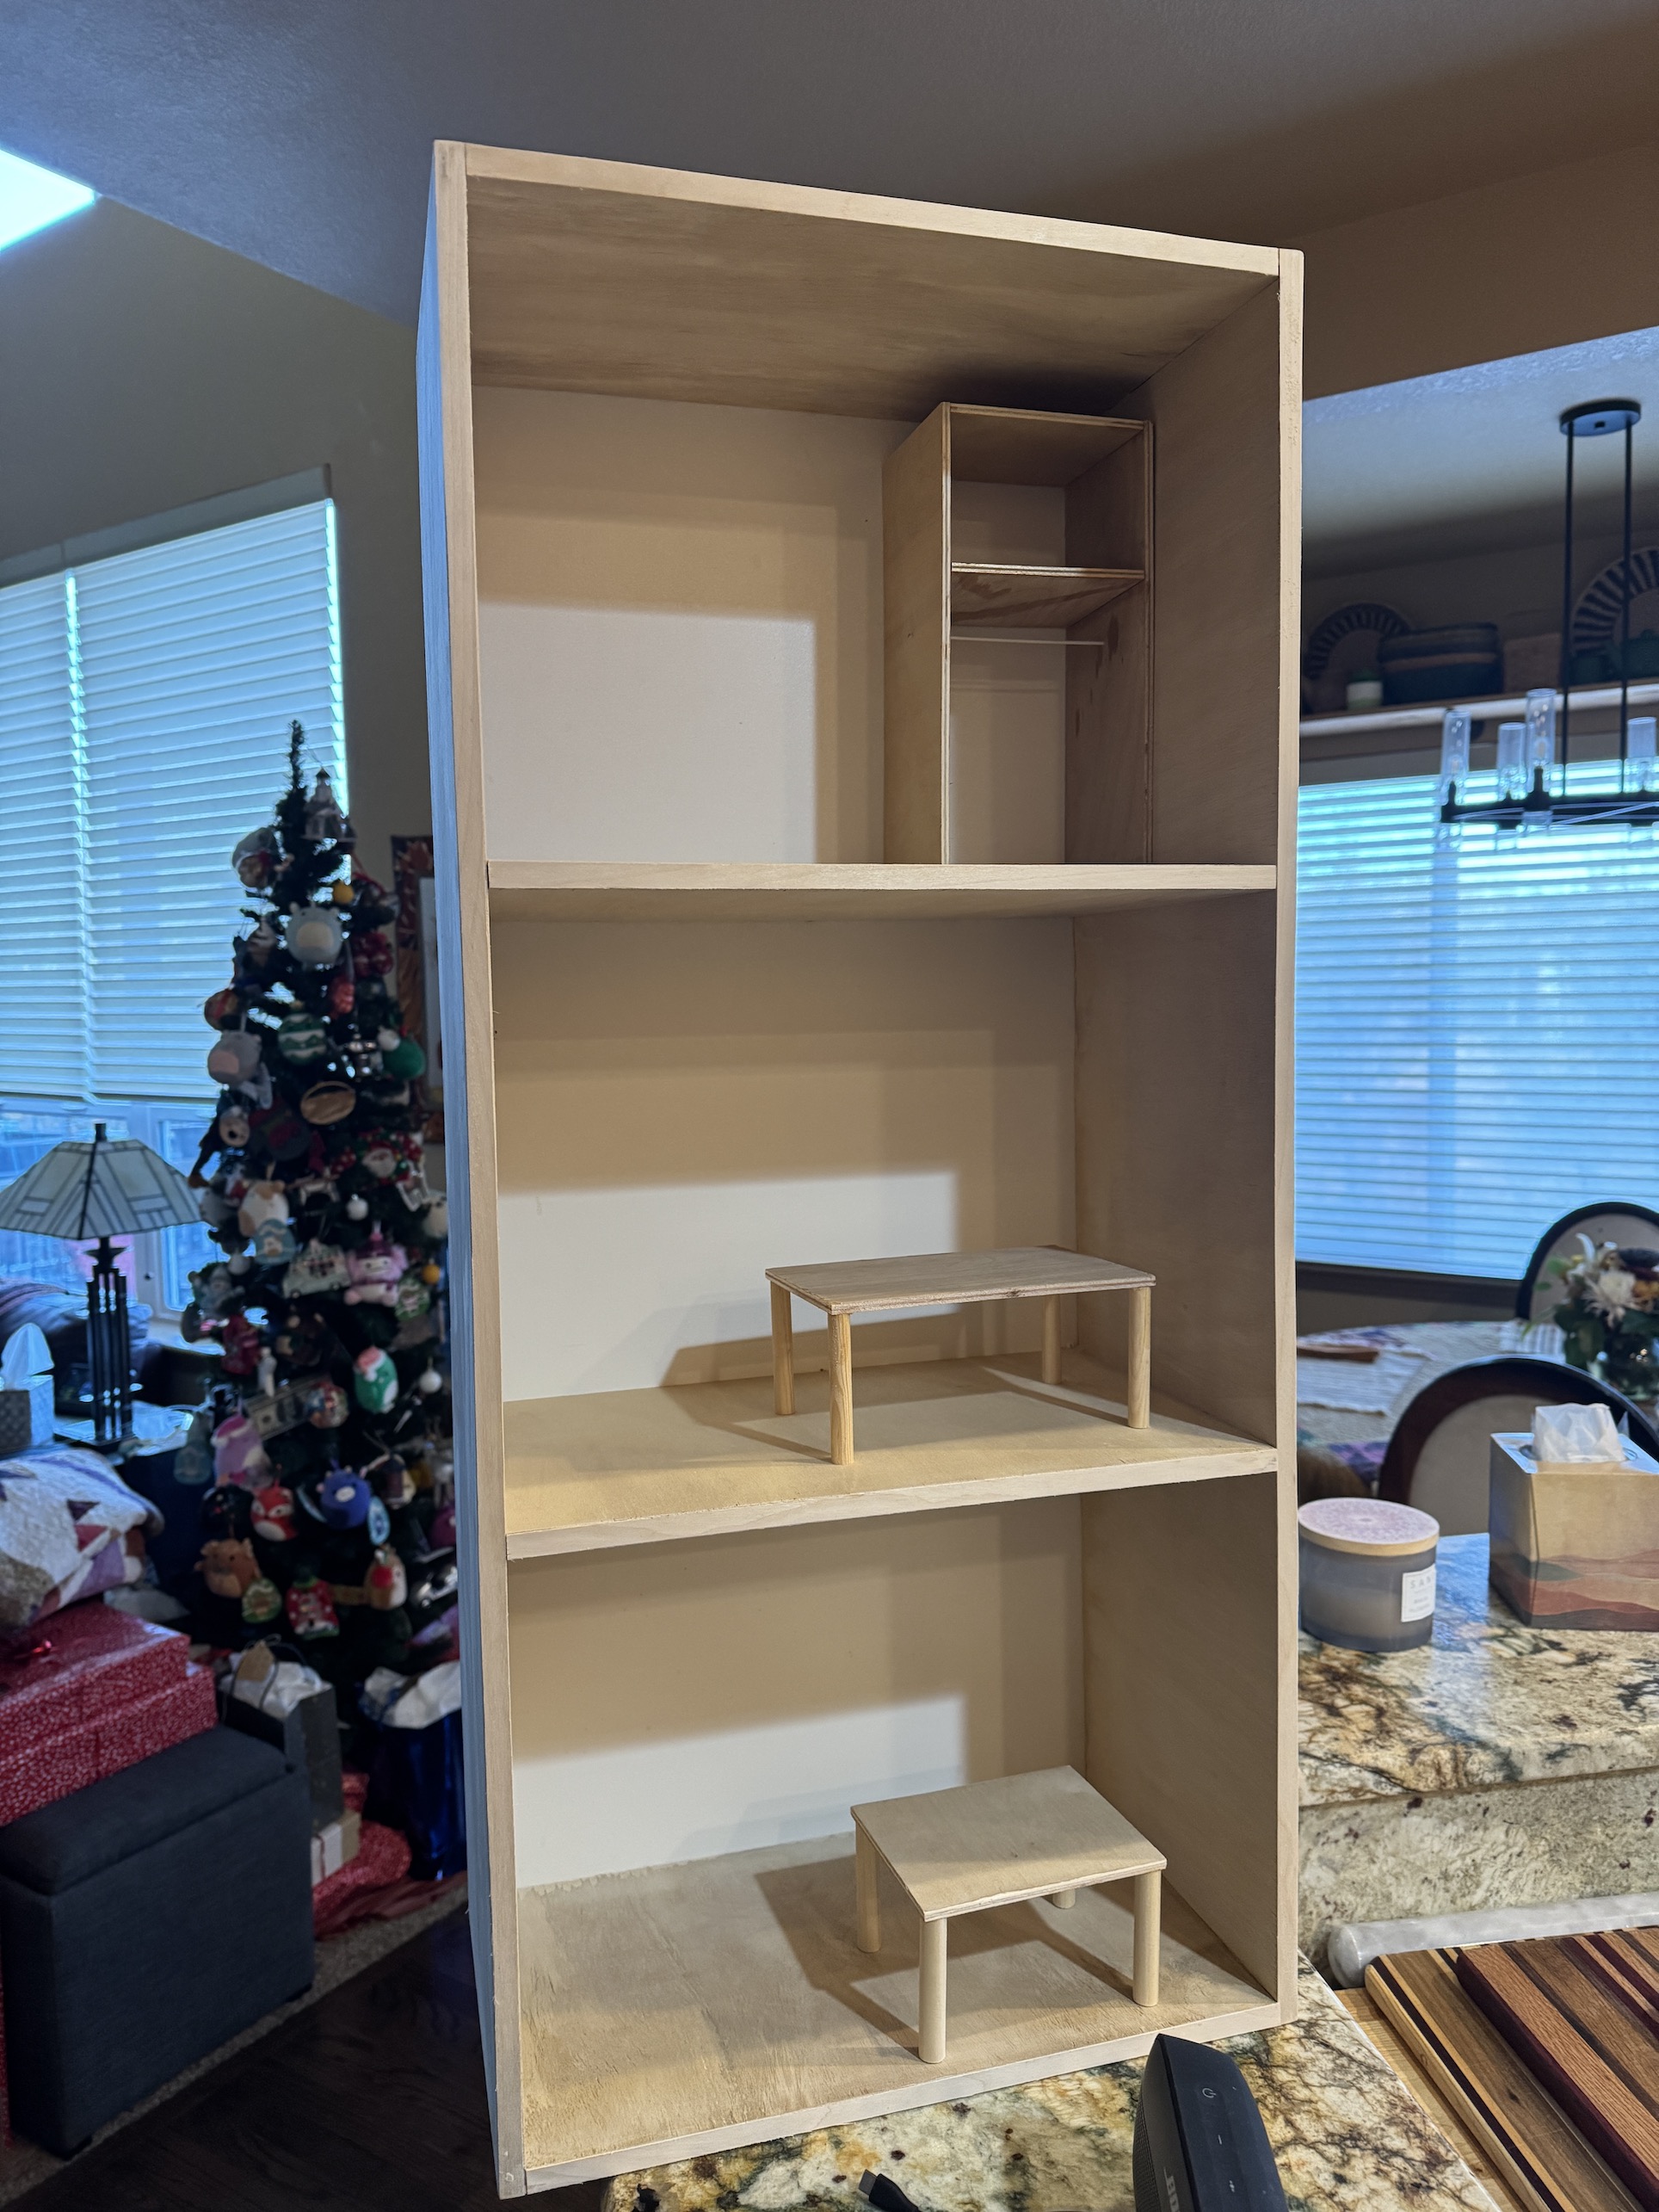
Before I show you a closer tour, here are a couple photos from the build of my new tower home:
Here are close ups of each floor and my roof garden 😉
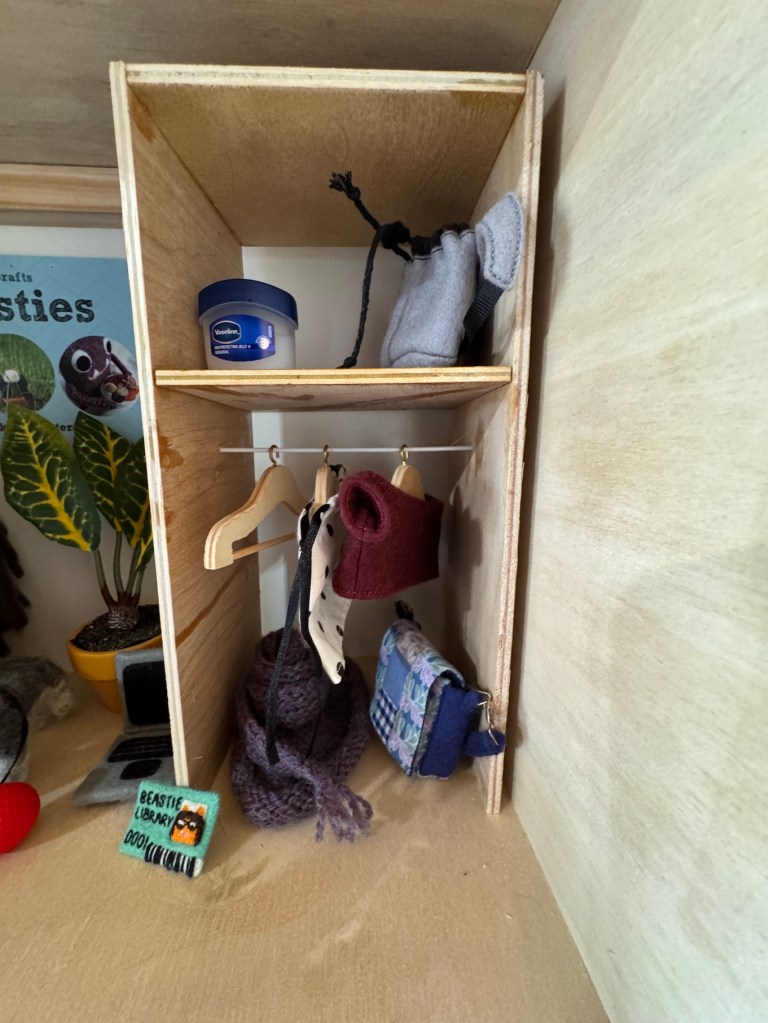
Top floor – my dressing room and closet:
John built me a freestanding closet that can be moved; and Tierney found at gift shop this summer during her travels tiny hangers that she put away hoping someday I would be able to use them! (You might be curious about the container of Vaseline on the top shelf of my closet – Human Tierney and John also found that traveling this summer and thought it was very cute – a Beastie sized personal care product!)
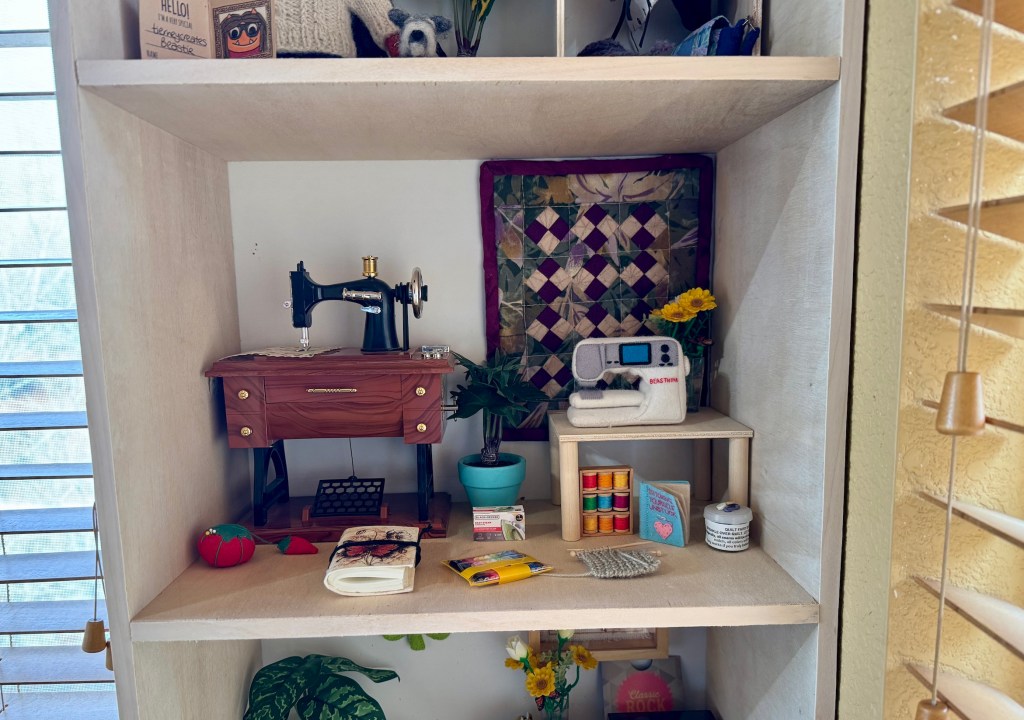
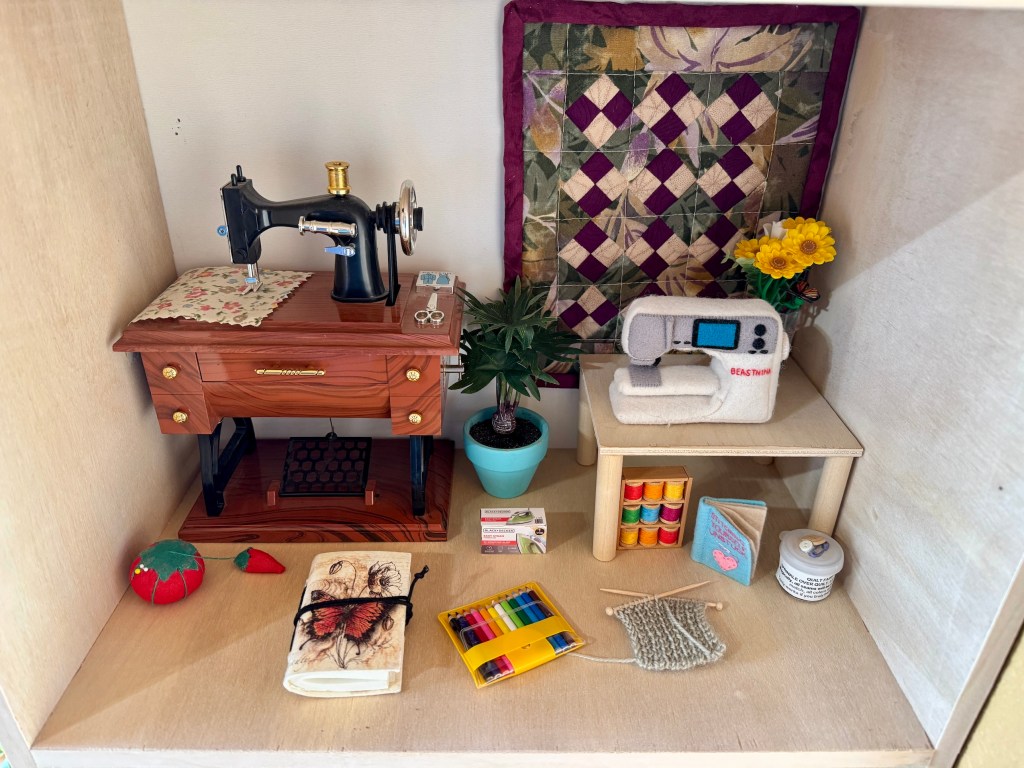
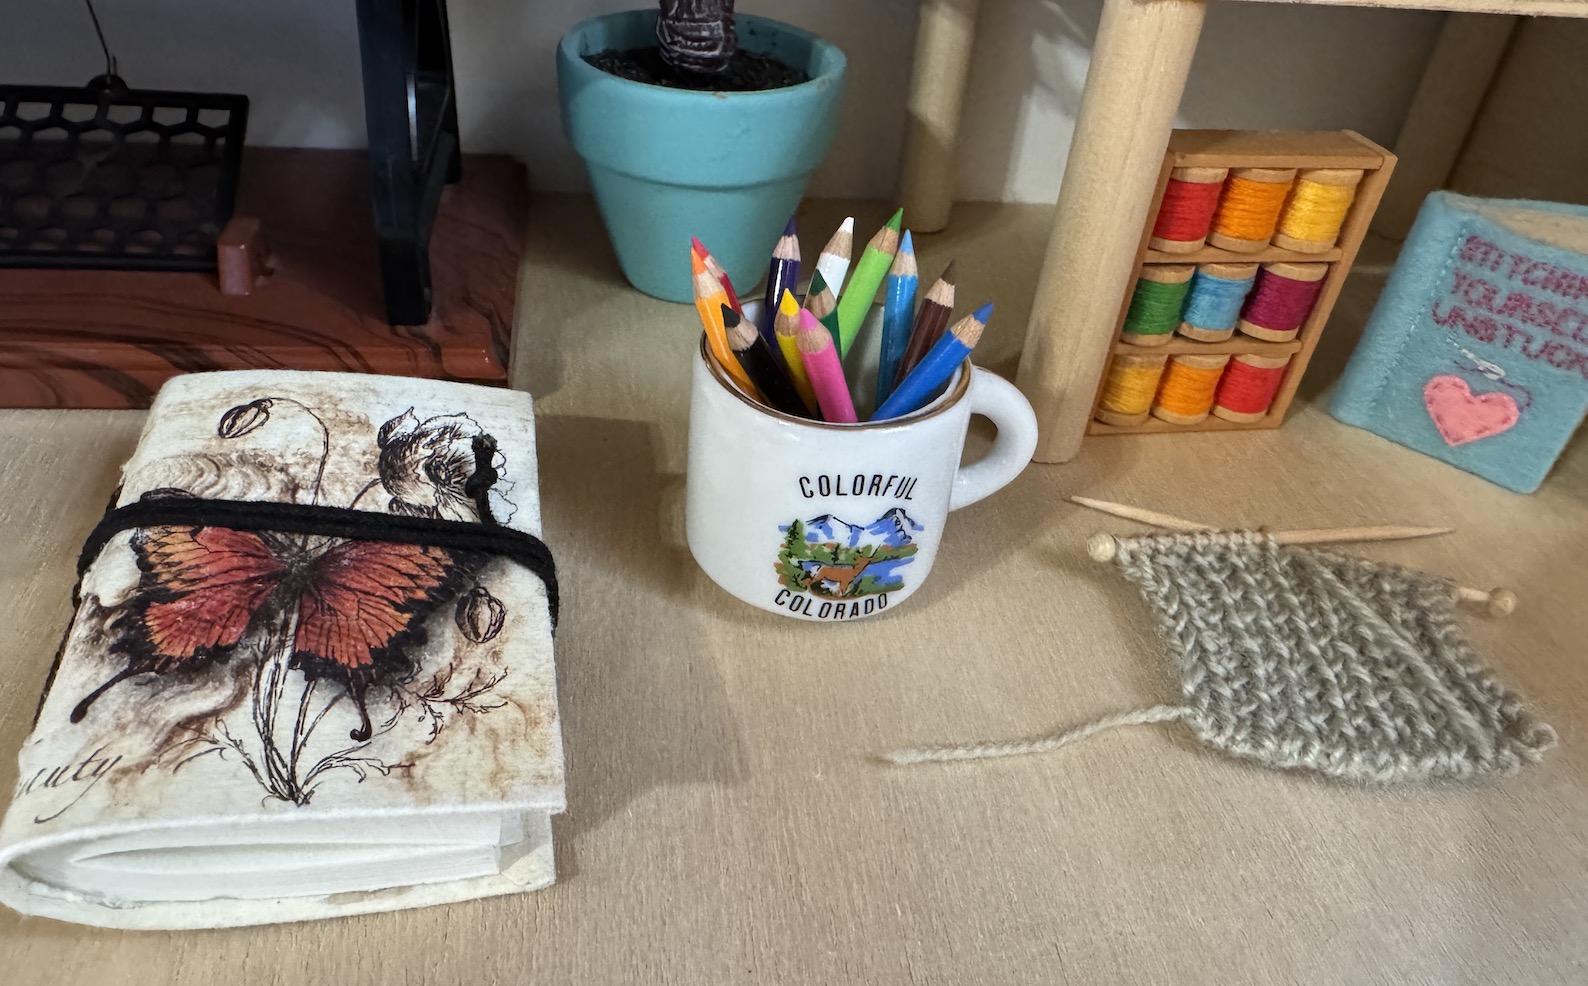
Middle Floor – My Craft Room!
Beside sewing/quilting, Tierney found miniature versions of the other crafts for that she enjoys like drawing/coloring and knitting.
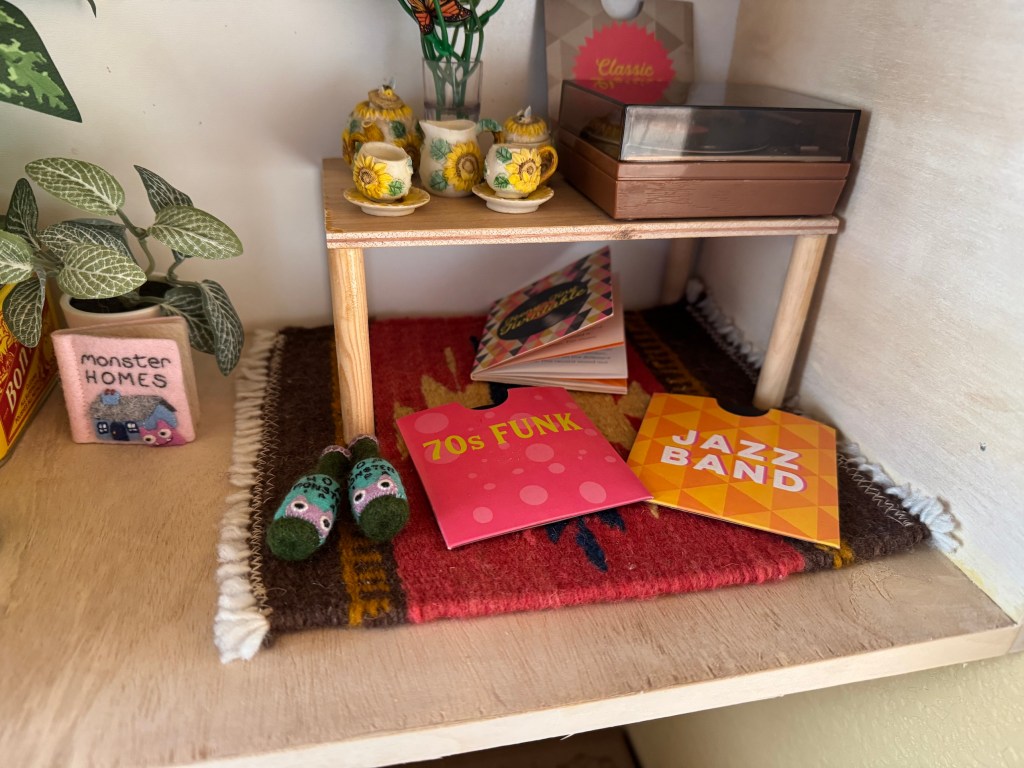
Lower Level – the Living Room
Now I have a room to hang out with John Beastie in and listen to music on my new turntable (see yesterday’s post), have tea and drink some Hop Monsters IPAs (my favorite craft beer).
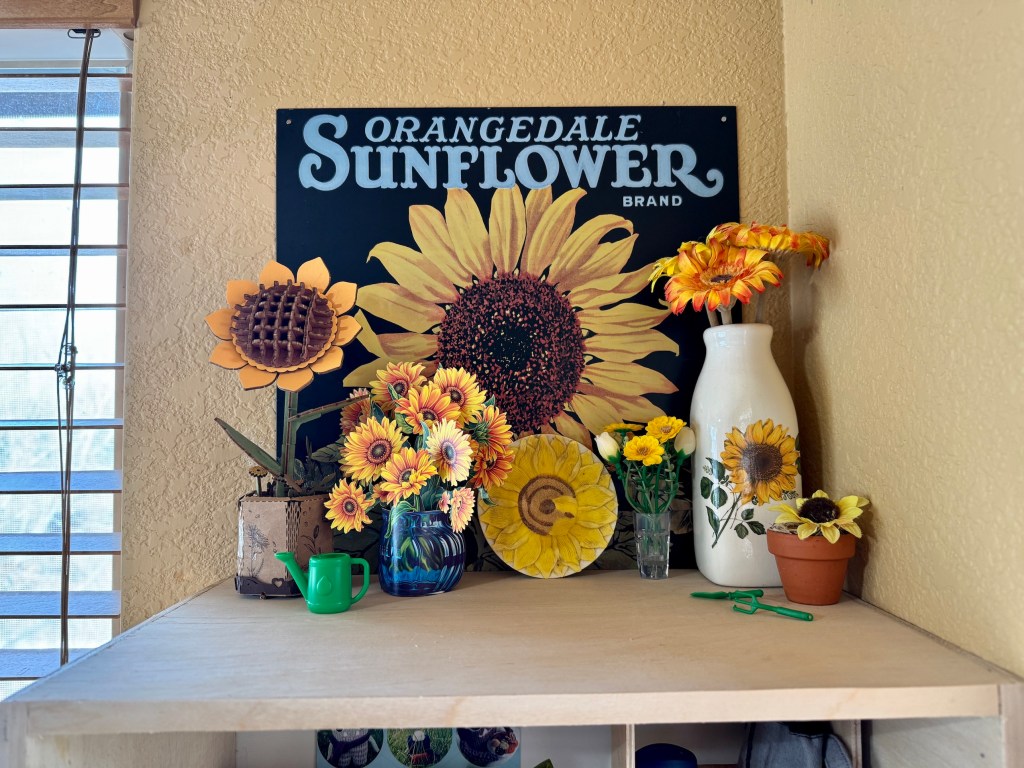
Rooftop Garden
I might have been influenced by Tierney but for some reason I really love Sunflowers...
So I am very pleased with my new home, what do you think?
Postscript
Tierney thought I should store my colored pencils like she keeps hers – upright in containers for easy access, so she just now put mine for me in a little Colorado mug!
It’s been a while since I posted about one of my husband John’s woodworking projects.
I set up a website/blog for him for his Mighty Moe Creations – but I never got the posts from my tierneycreates blog on his woodworking transferred over so it is not really a functioning blog yet.
So for now I will continue to share his crafts on my blog 🙂
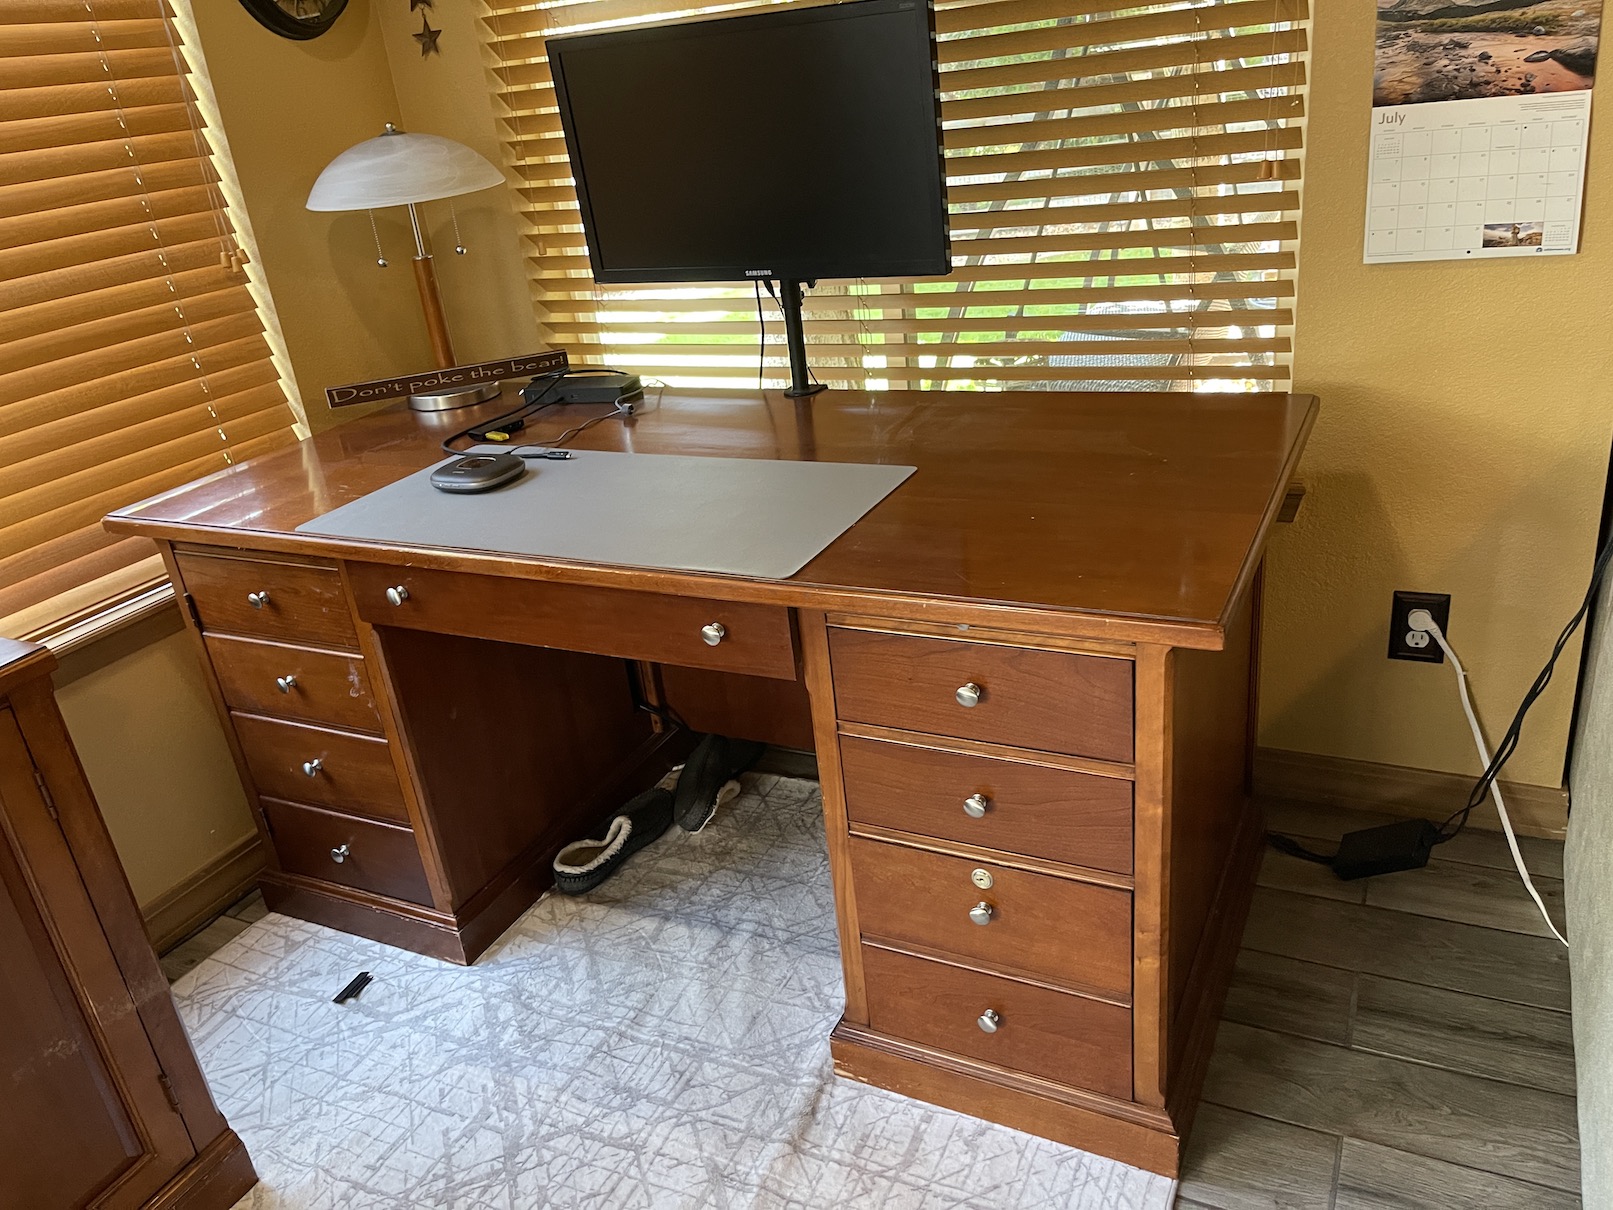
John was tired of his desk which he bought used like 15 years ago from a neighbor:
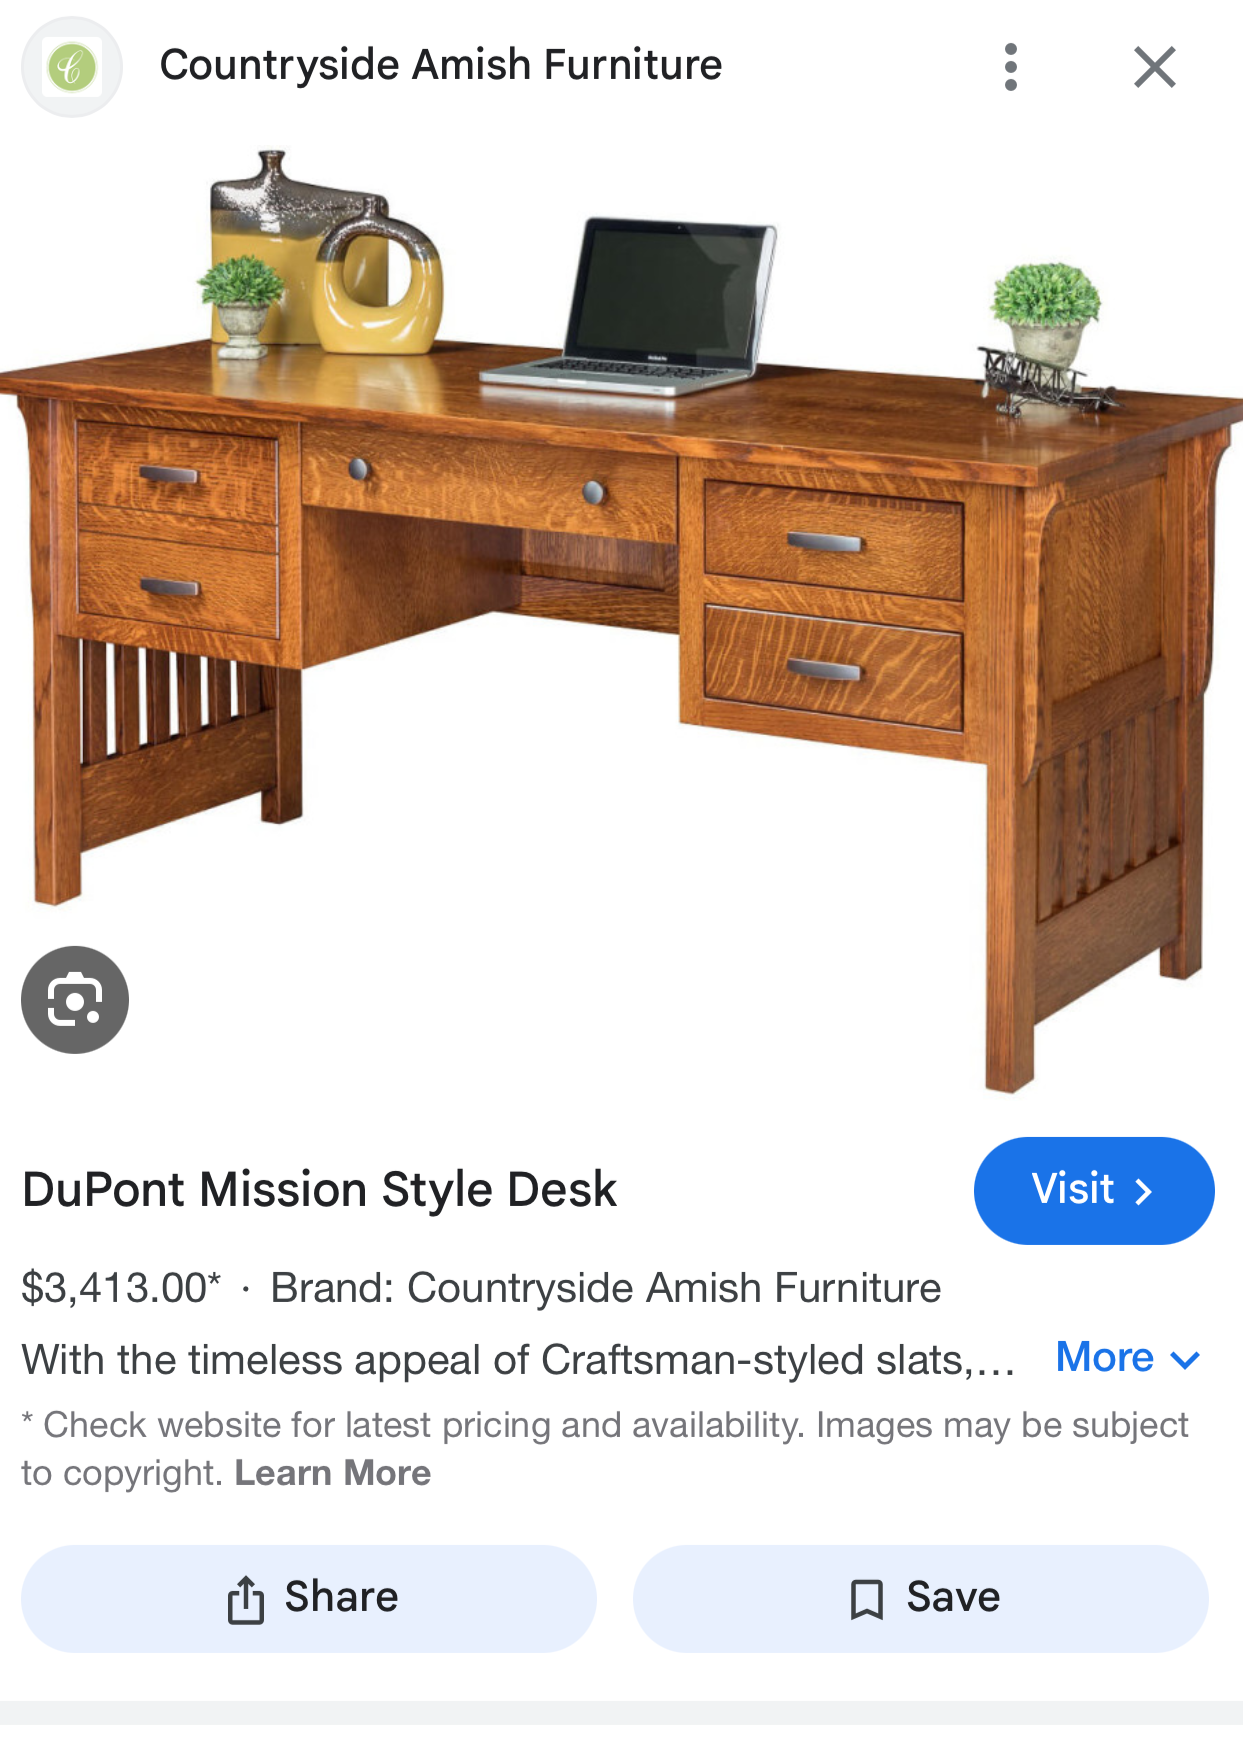
He wanted a smaller profile “Mission” style desk and found images like this one on line to inspire him:
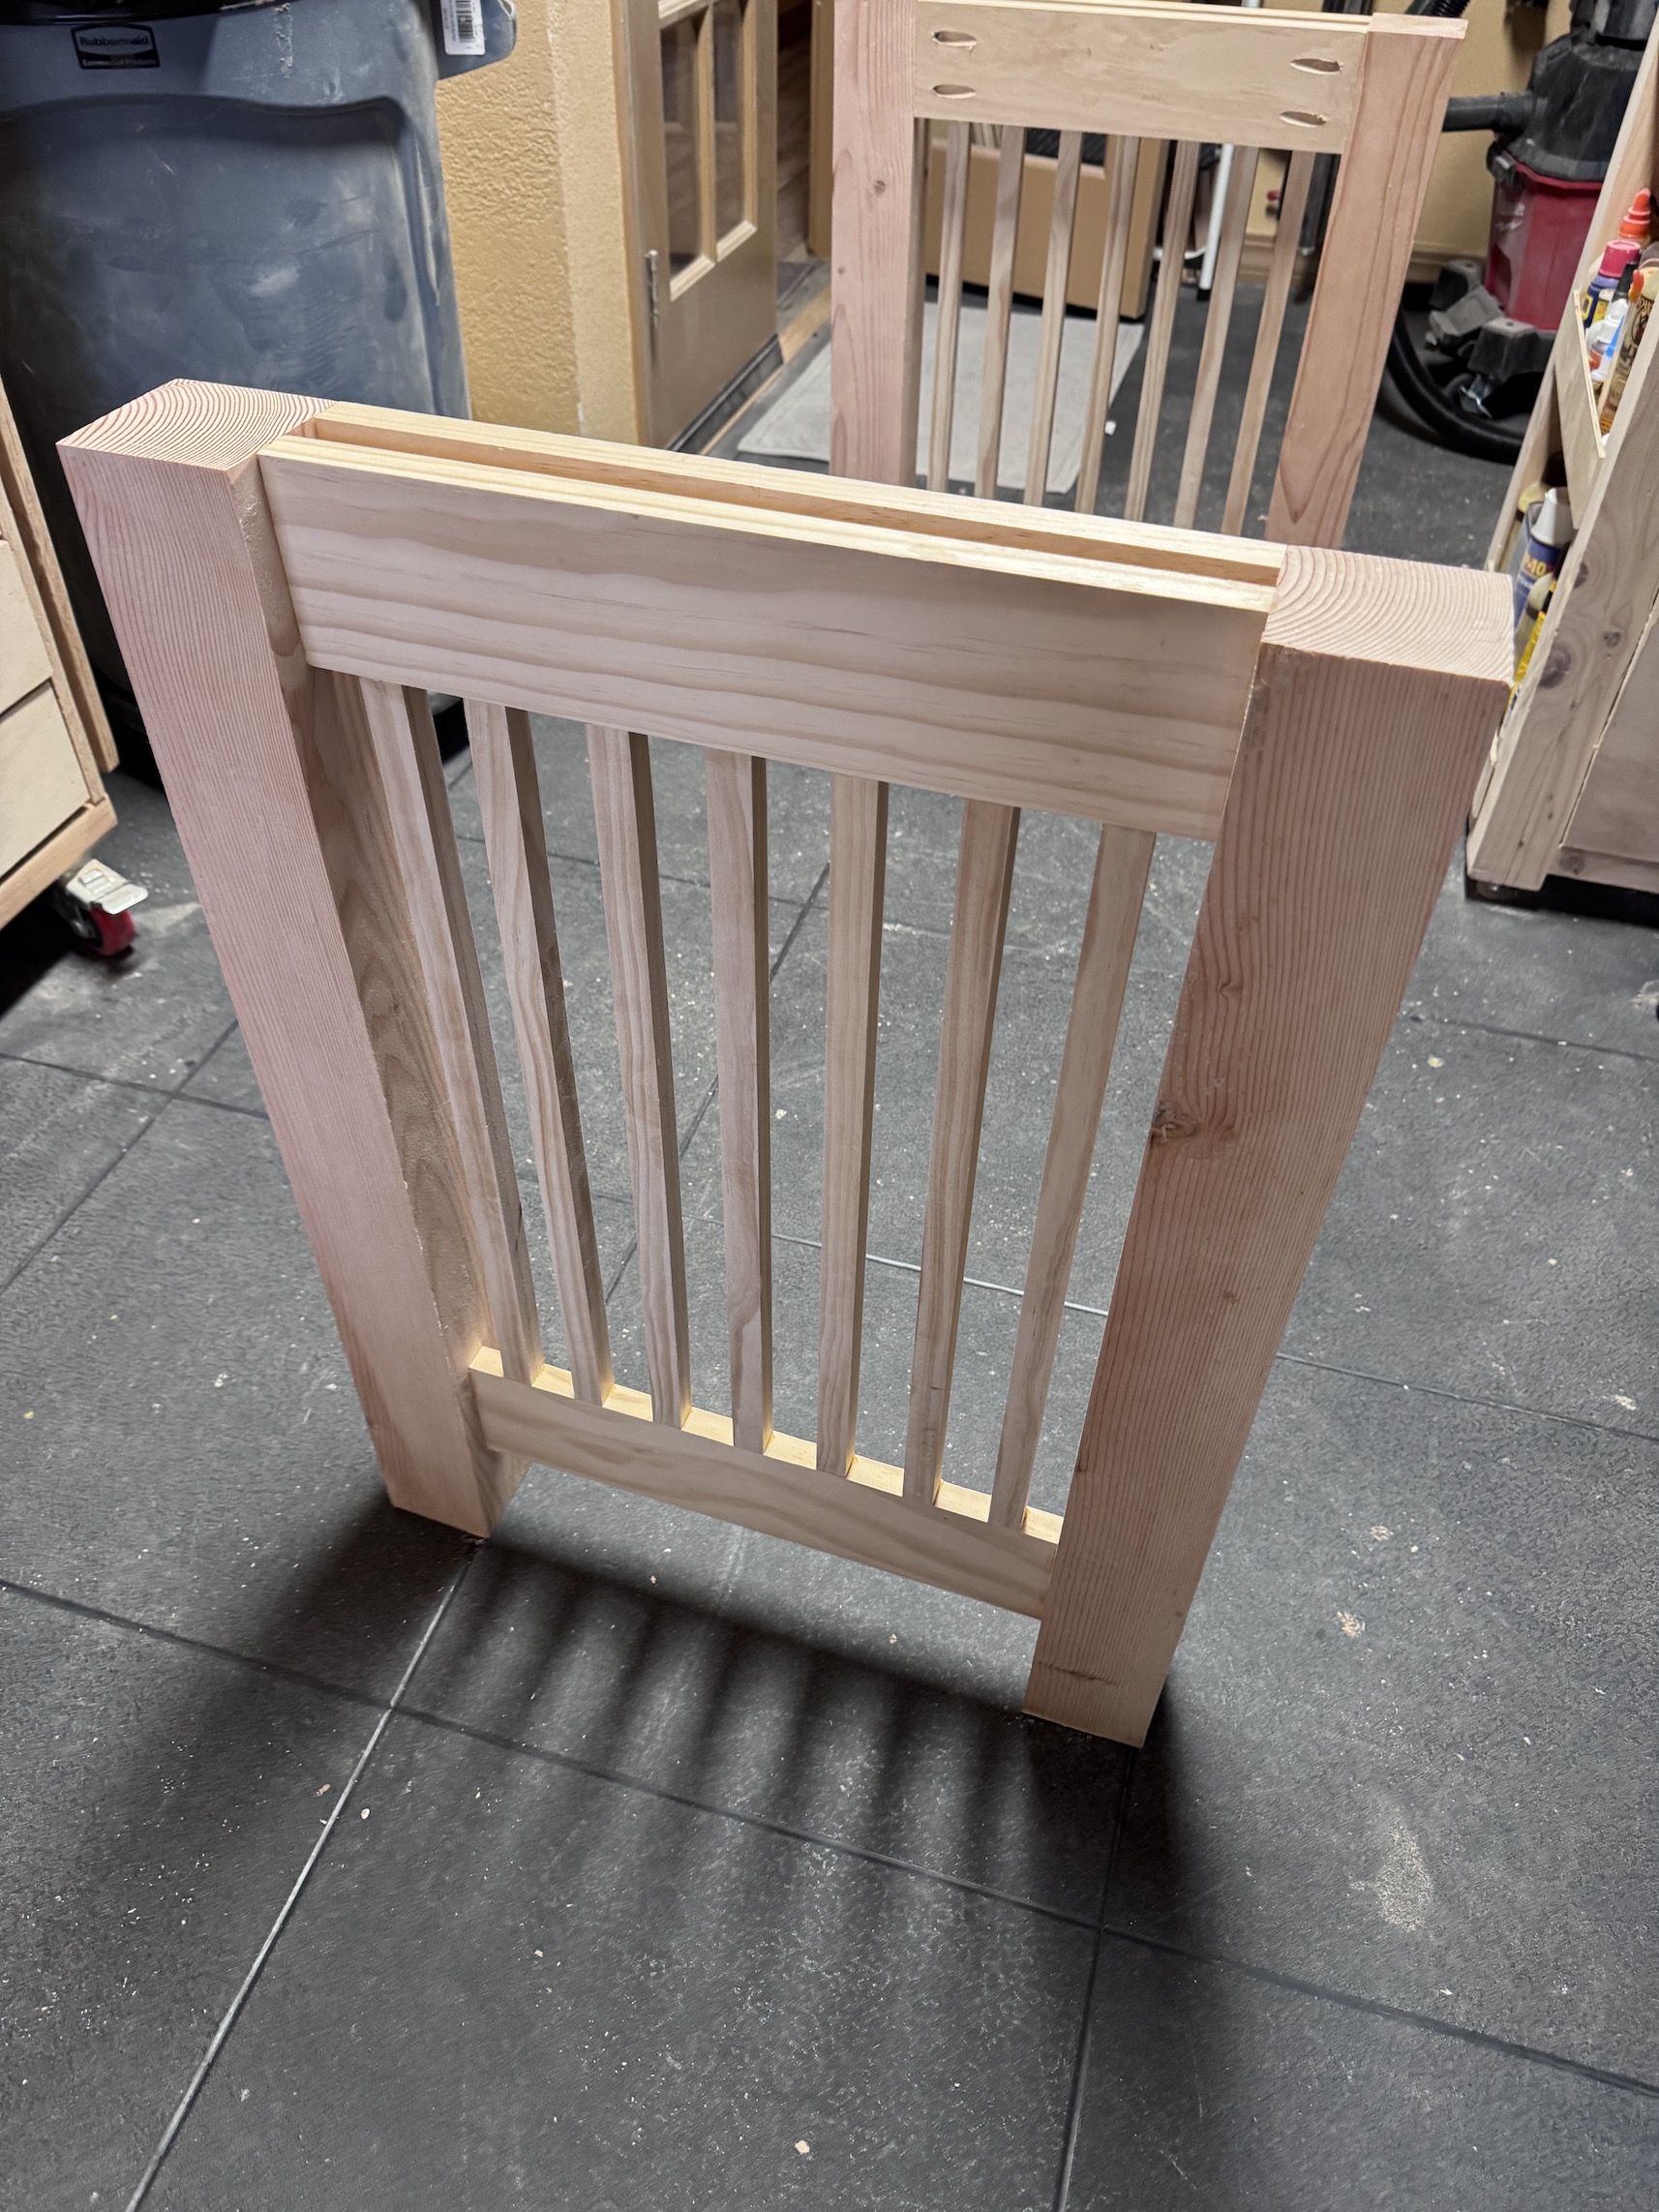
With no formal project plans or any instructions, John figured out how to build himself a desk. First he had to learn a new skill – using little dowels for joining the railing on the side pieces of his desk:
He was pretty proud of himself for making it through that which was the most challenging part of the build.
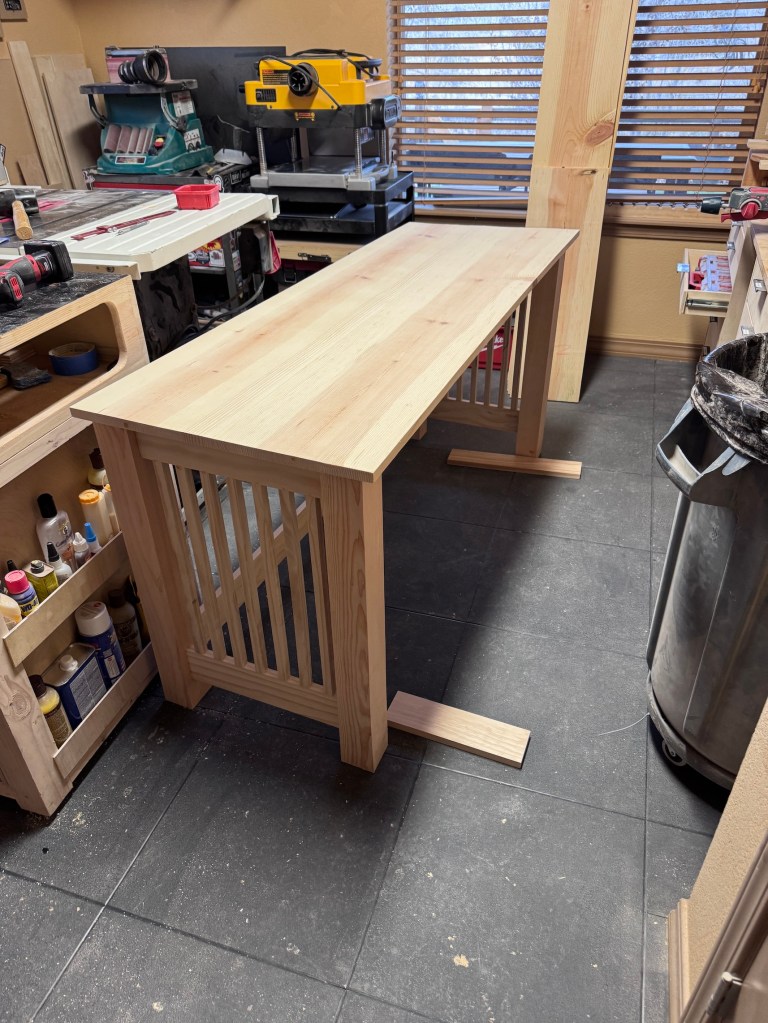
From there he went on to build the rest of the desk:
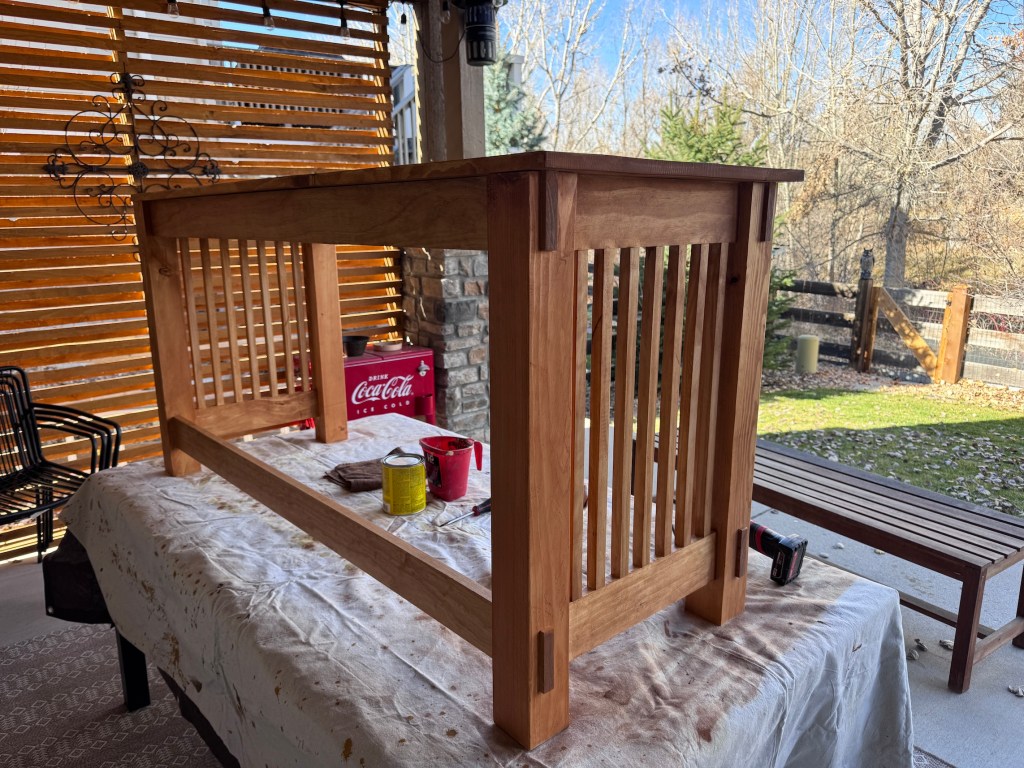
Then stain and polyurethane it:
And finally to add era/style specific handles to the drawers that he had to special order:
Here is John very happy at his new desk!
Now he plans to build a coordinating station for his printer with an attached 2-drawer file cabinet.
(In case you are wondering what the sign behind John in his bar “Pog Mo Thoin” means, it is Gaelic for “Kiss My Arse” – we picked it up in 2022 while in Ireland. John’s nickname is “Moe” and so he got a kick out of the sign!)
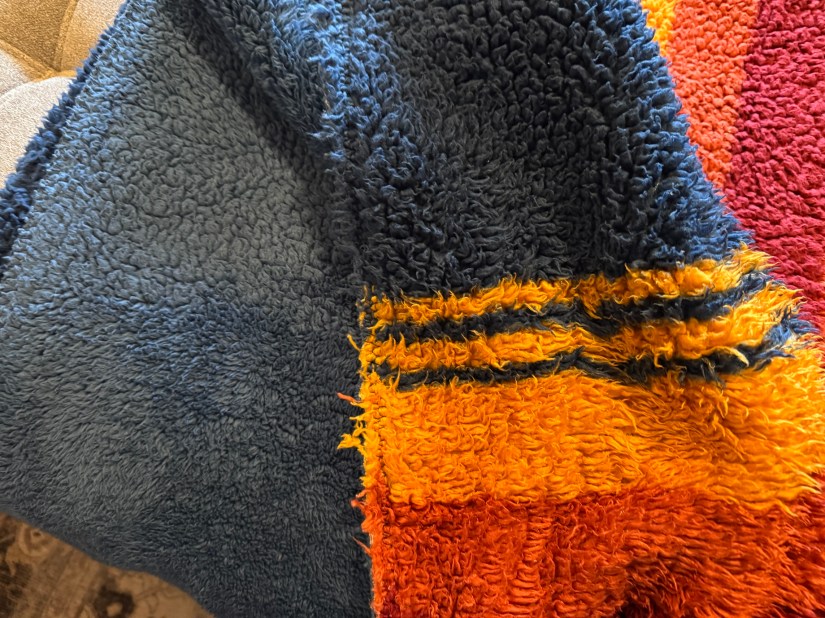
I’ve enjoyed the posts some of you have written showing how you’ve reinvented, remodeled, revitalized, refurbished, rescued, etc. an item that was headed to the rubbish heap/landfill; and made it useable again. I wanted to share how I rescued/remodeled a blanket that was not working.
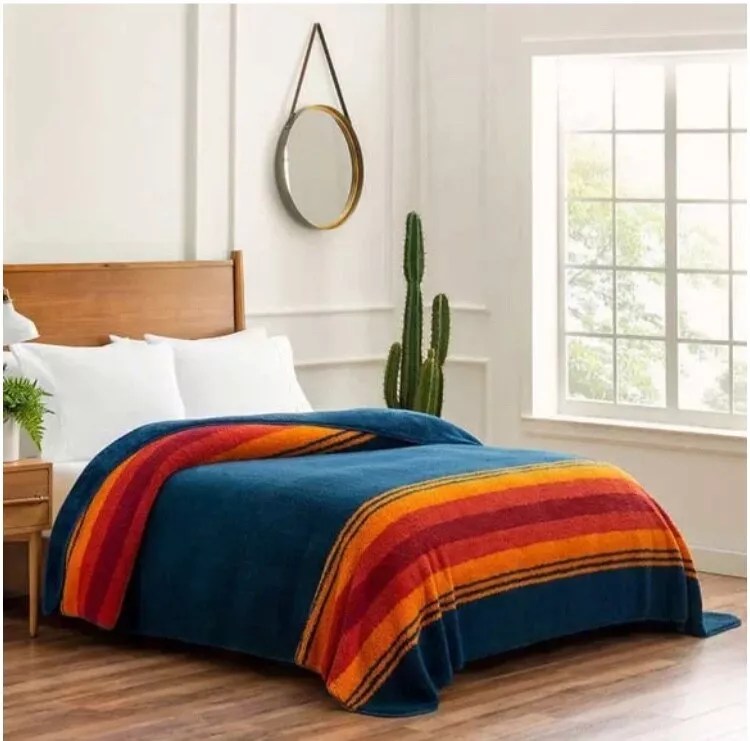
During the pandemic I discovered at Costco these magically soft and cozy blankets: Pendleton Sherpa Fleece Blankets. They were on sale and I bought it in King size.
Found this photo on eBay, I bought the King size version
Photo credit – eBay
Well the blanket has become worn out and I ended up buying a newer one a couple years ago. It is still a super fleecy cozy and I was using it as a blanket in the basement, however it was cumbersome to use to snuggle under on a sofa as it was king-sized blanket (meant for a king-sized bed).
My initial options were to 1) keep using the huge bulky blanket; or 2) donate the blanket. I was leaning towards option 2 but then I realized that the charity thrift shop I donated it too would like throw it own as it the blanket was worn down in several areas and it might not be resellable.
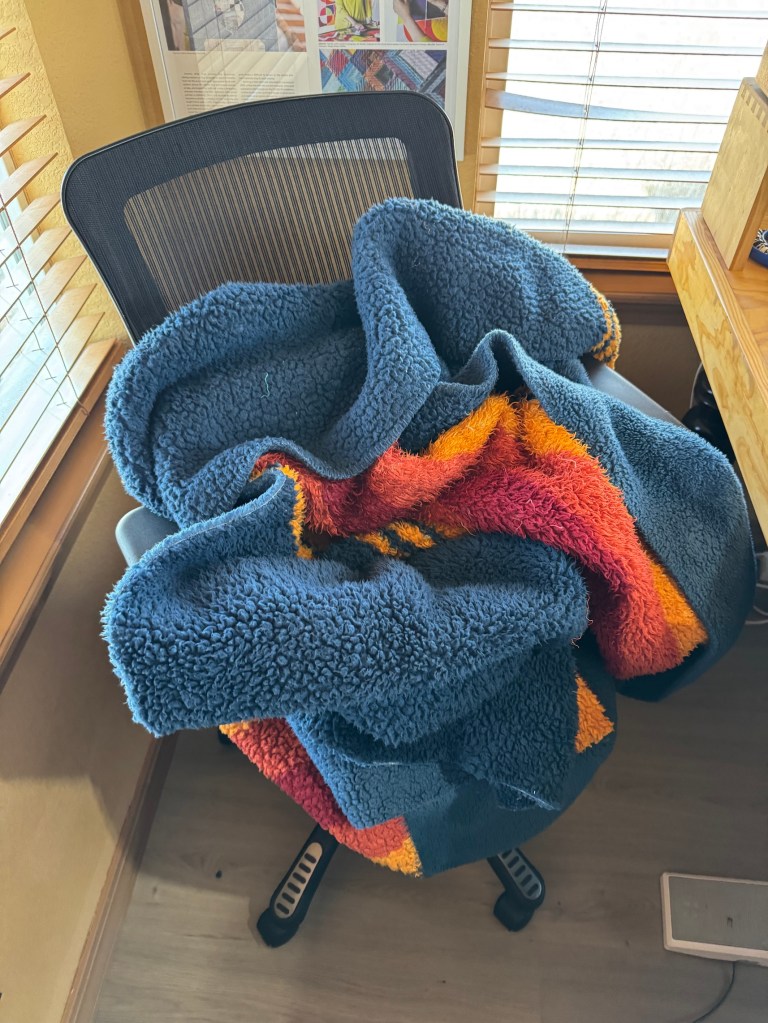
So I decided to cut the king-size blanket in half, overlocked stitch the edge and turn it into TWO blankets!
I don’t have a serger so I had to overlock stitchthe blanket and then I trimmed as close to the edge as I could to clean up the fibers (I didn’t take a photo).
John and now each have a cozy large lap-sized fleece blankets to snuggle under when watching TV in the basement!
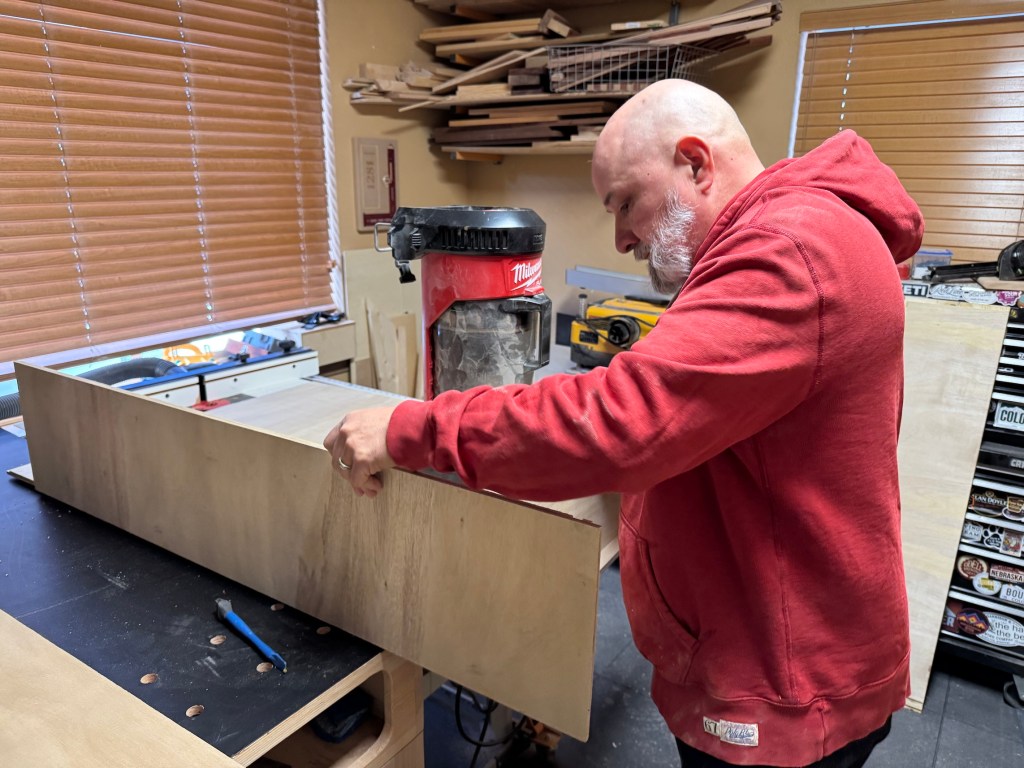
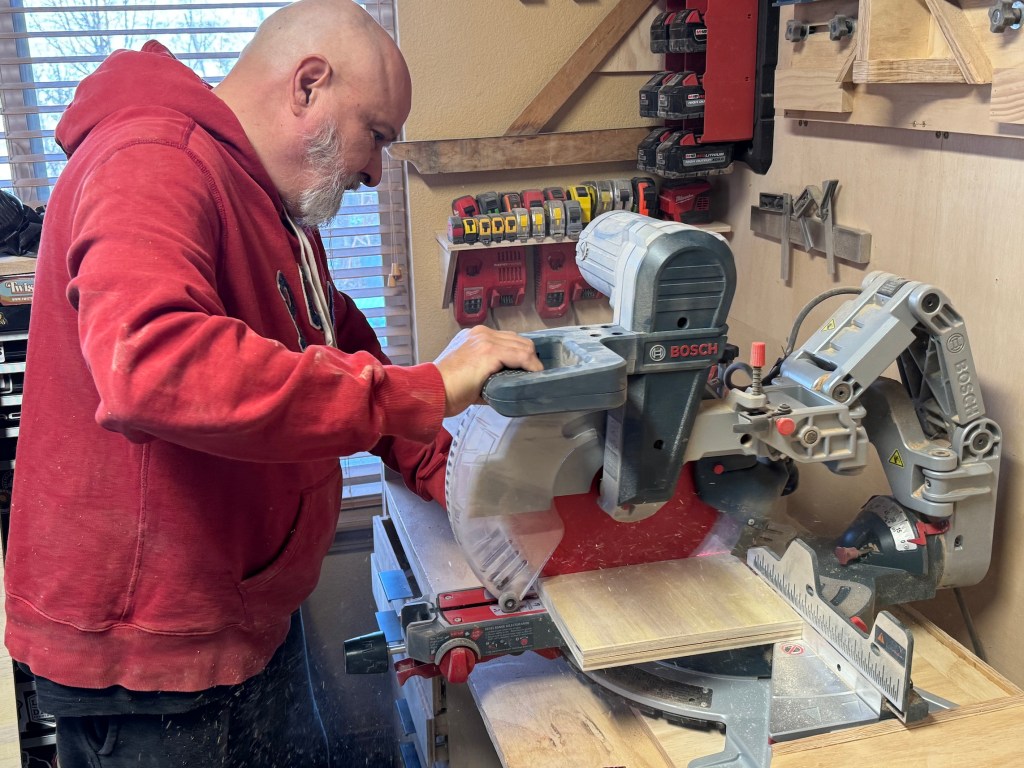
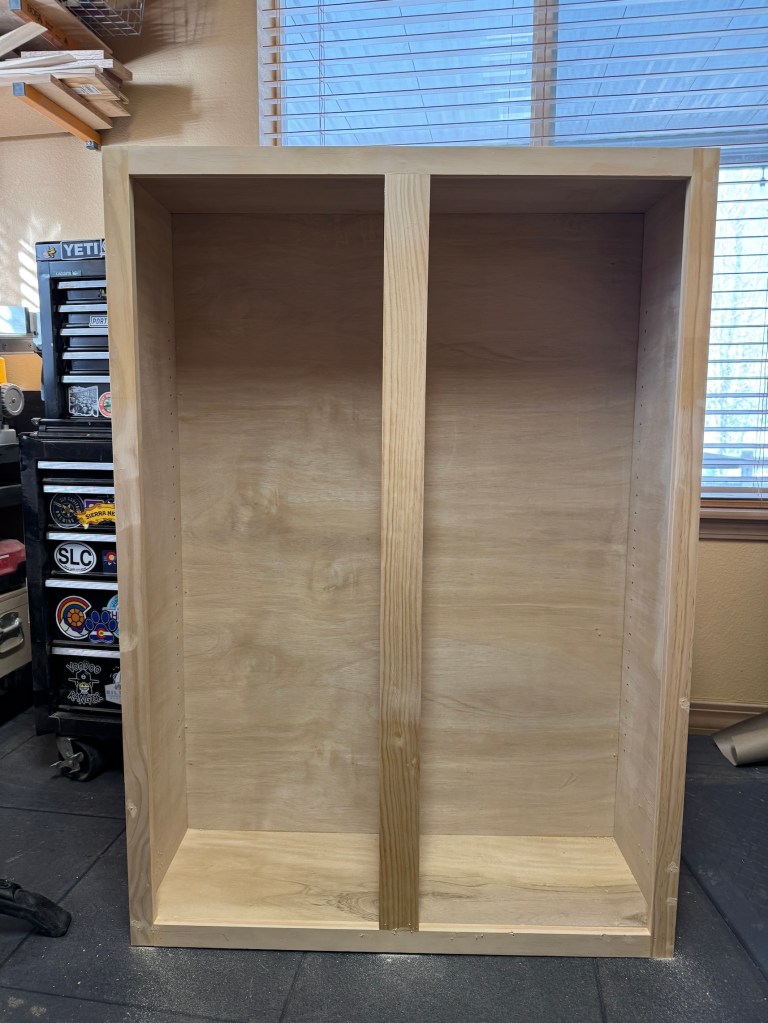
Cabinet Building in Progress
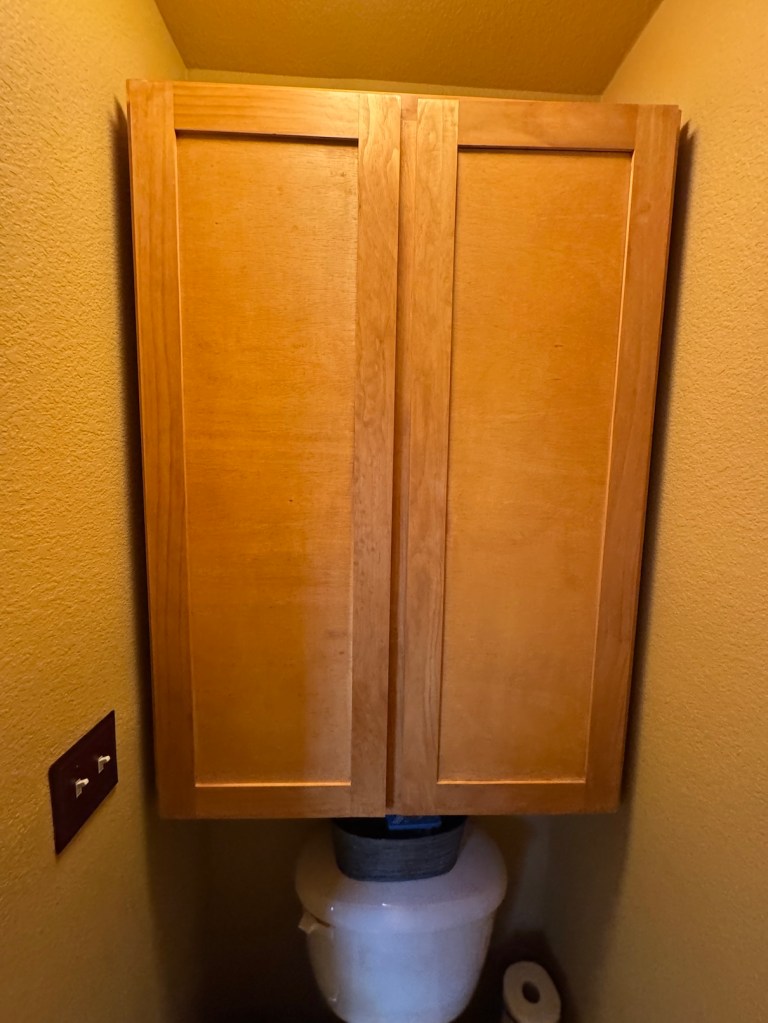
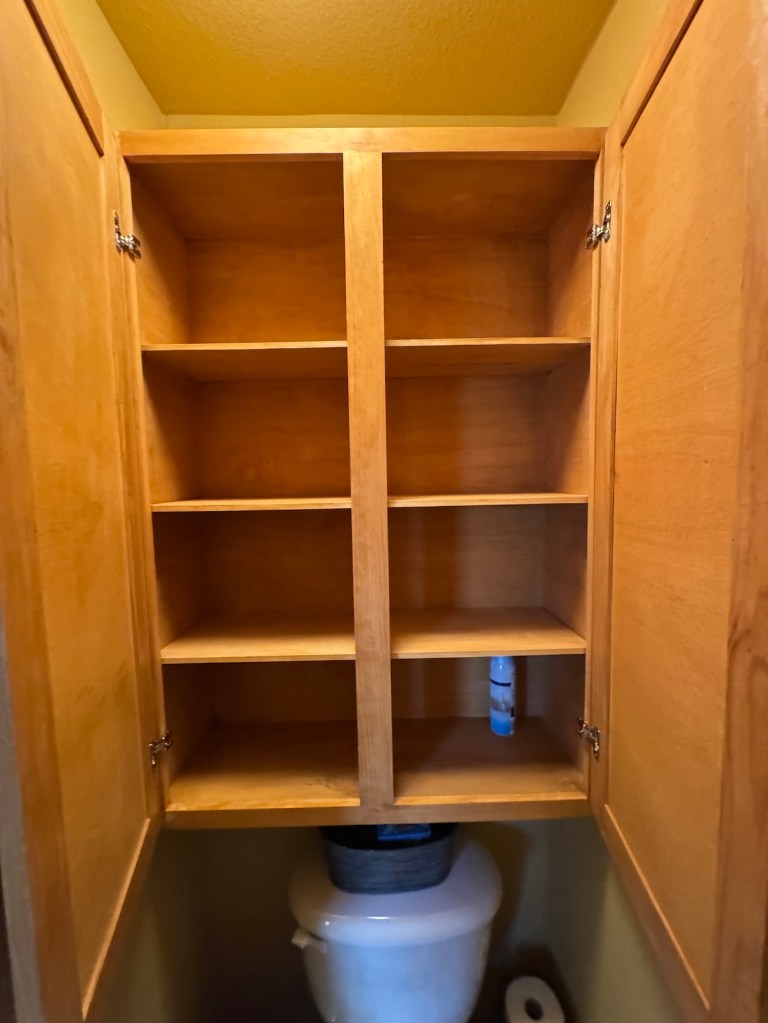
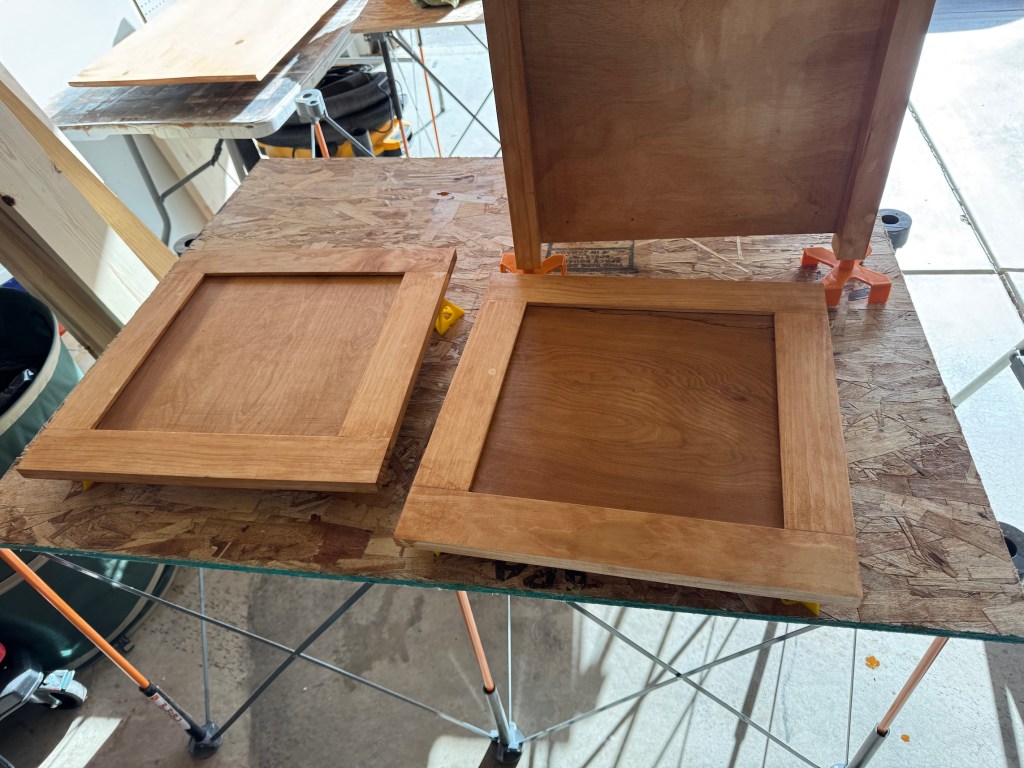
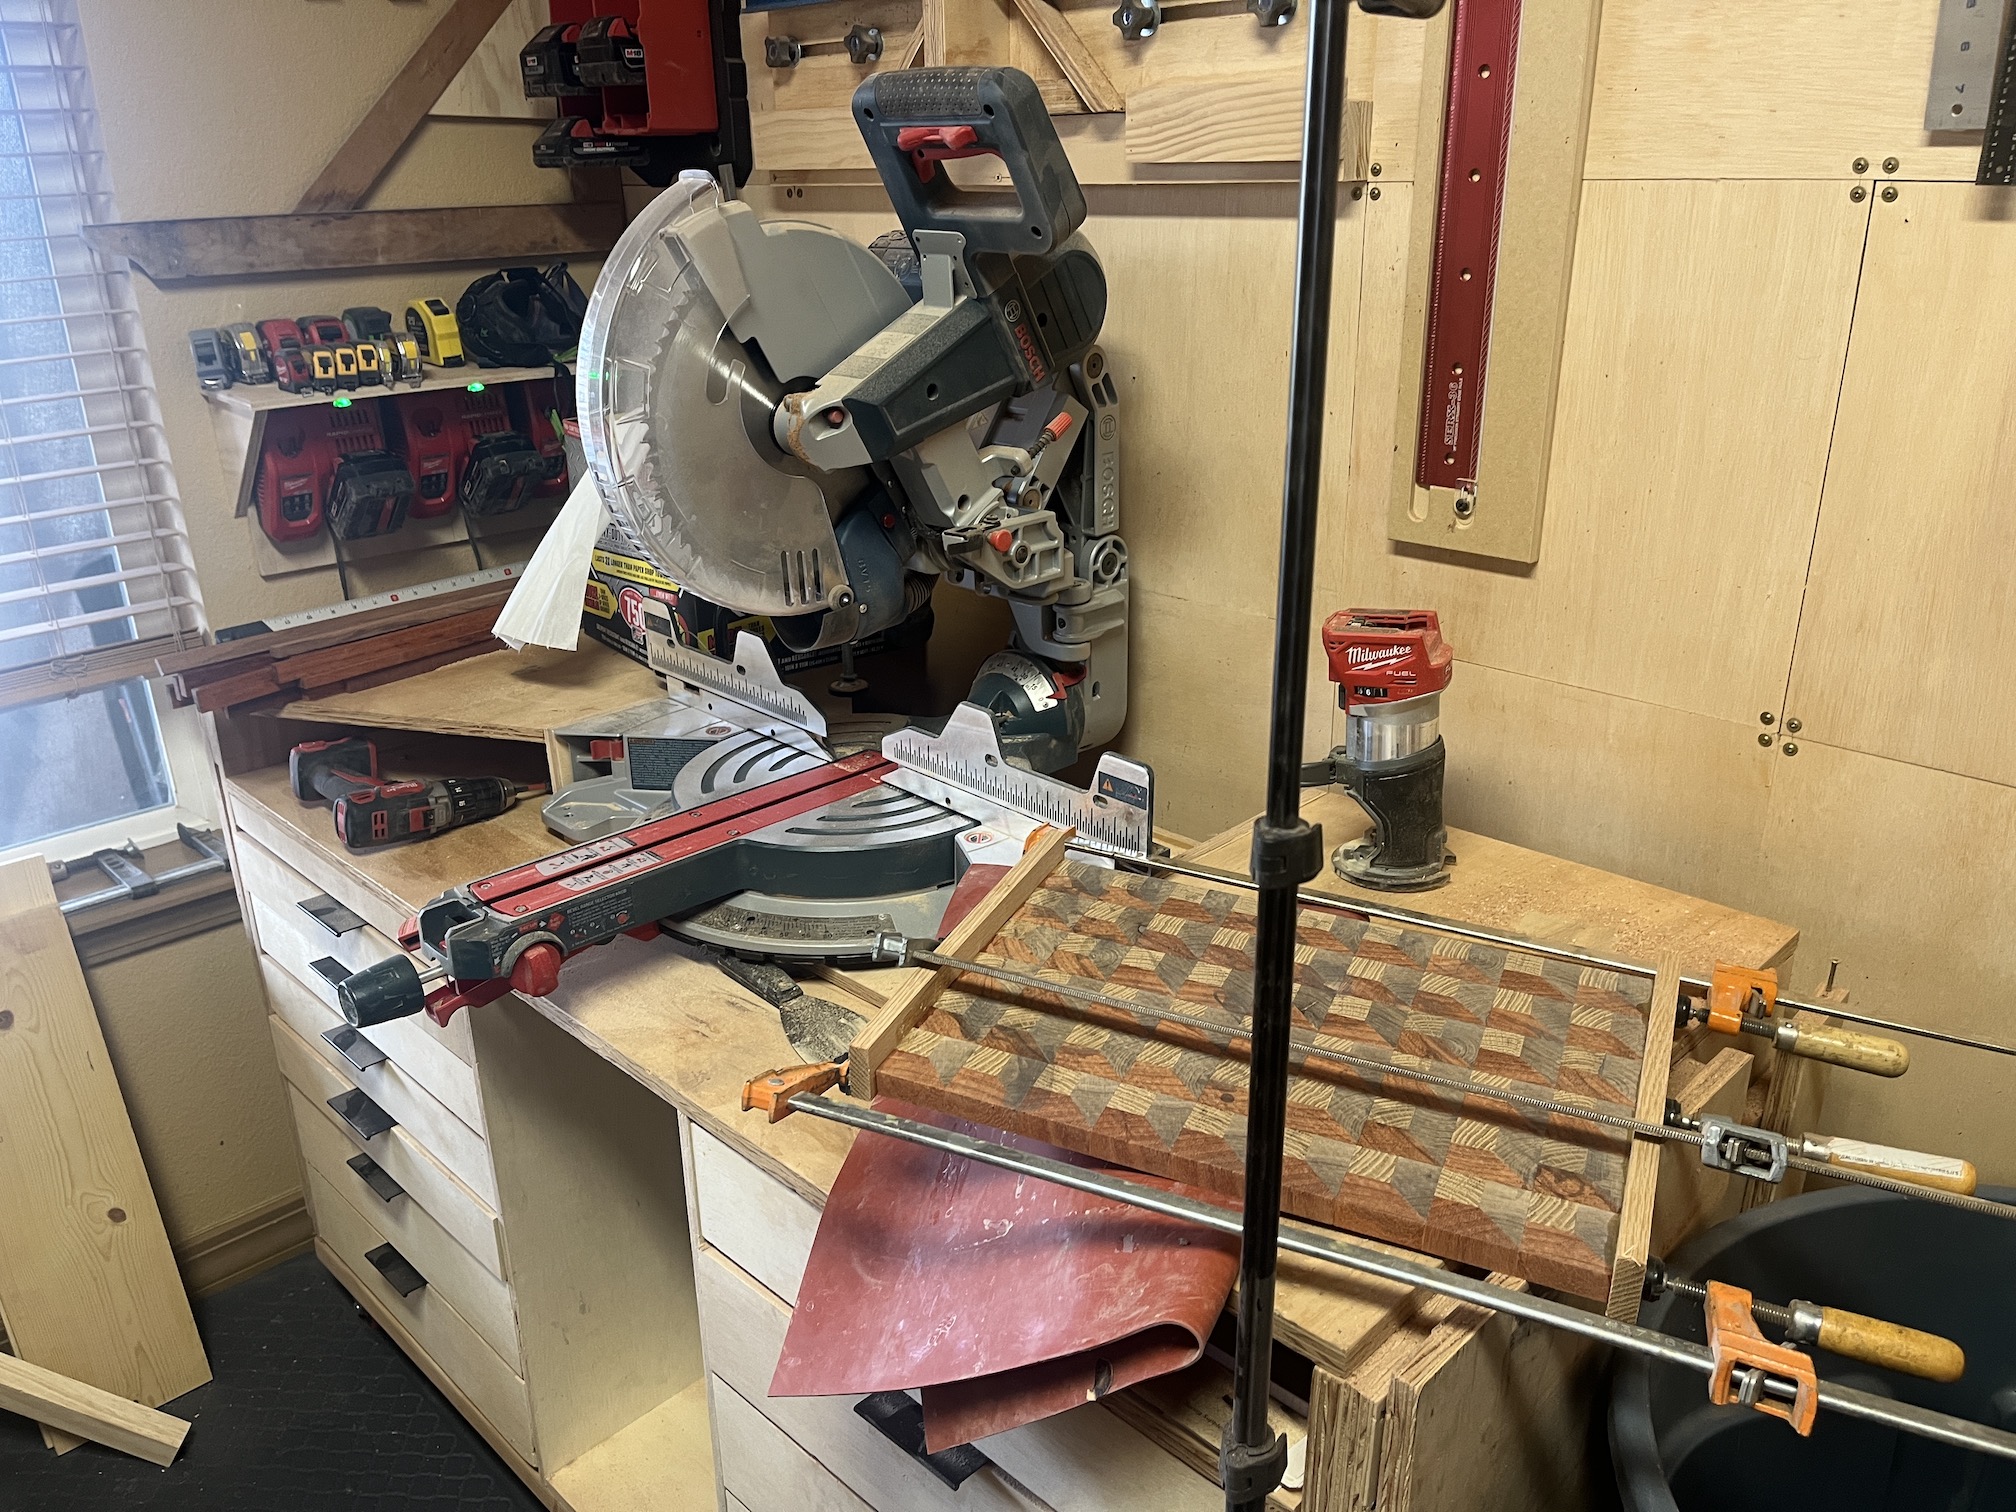
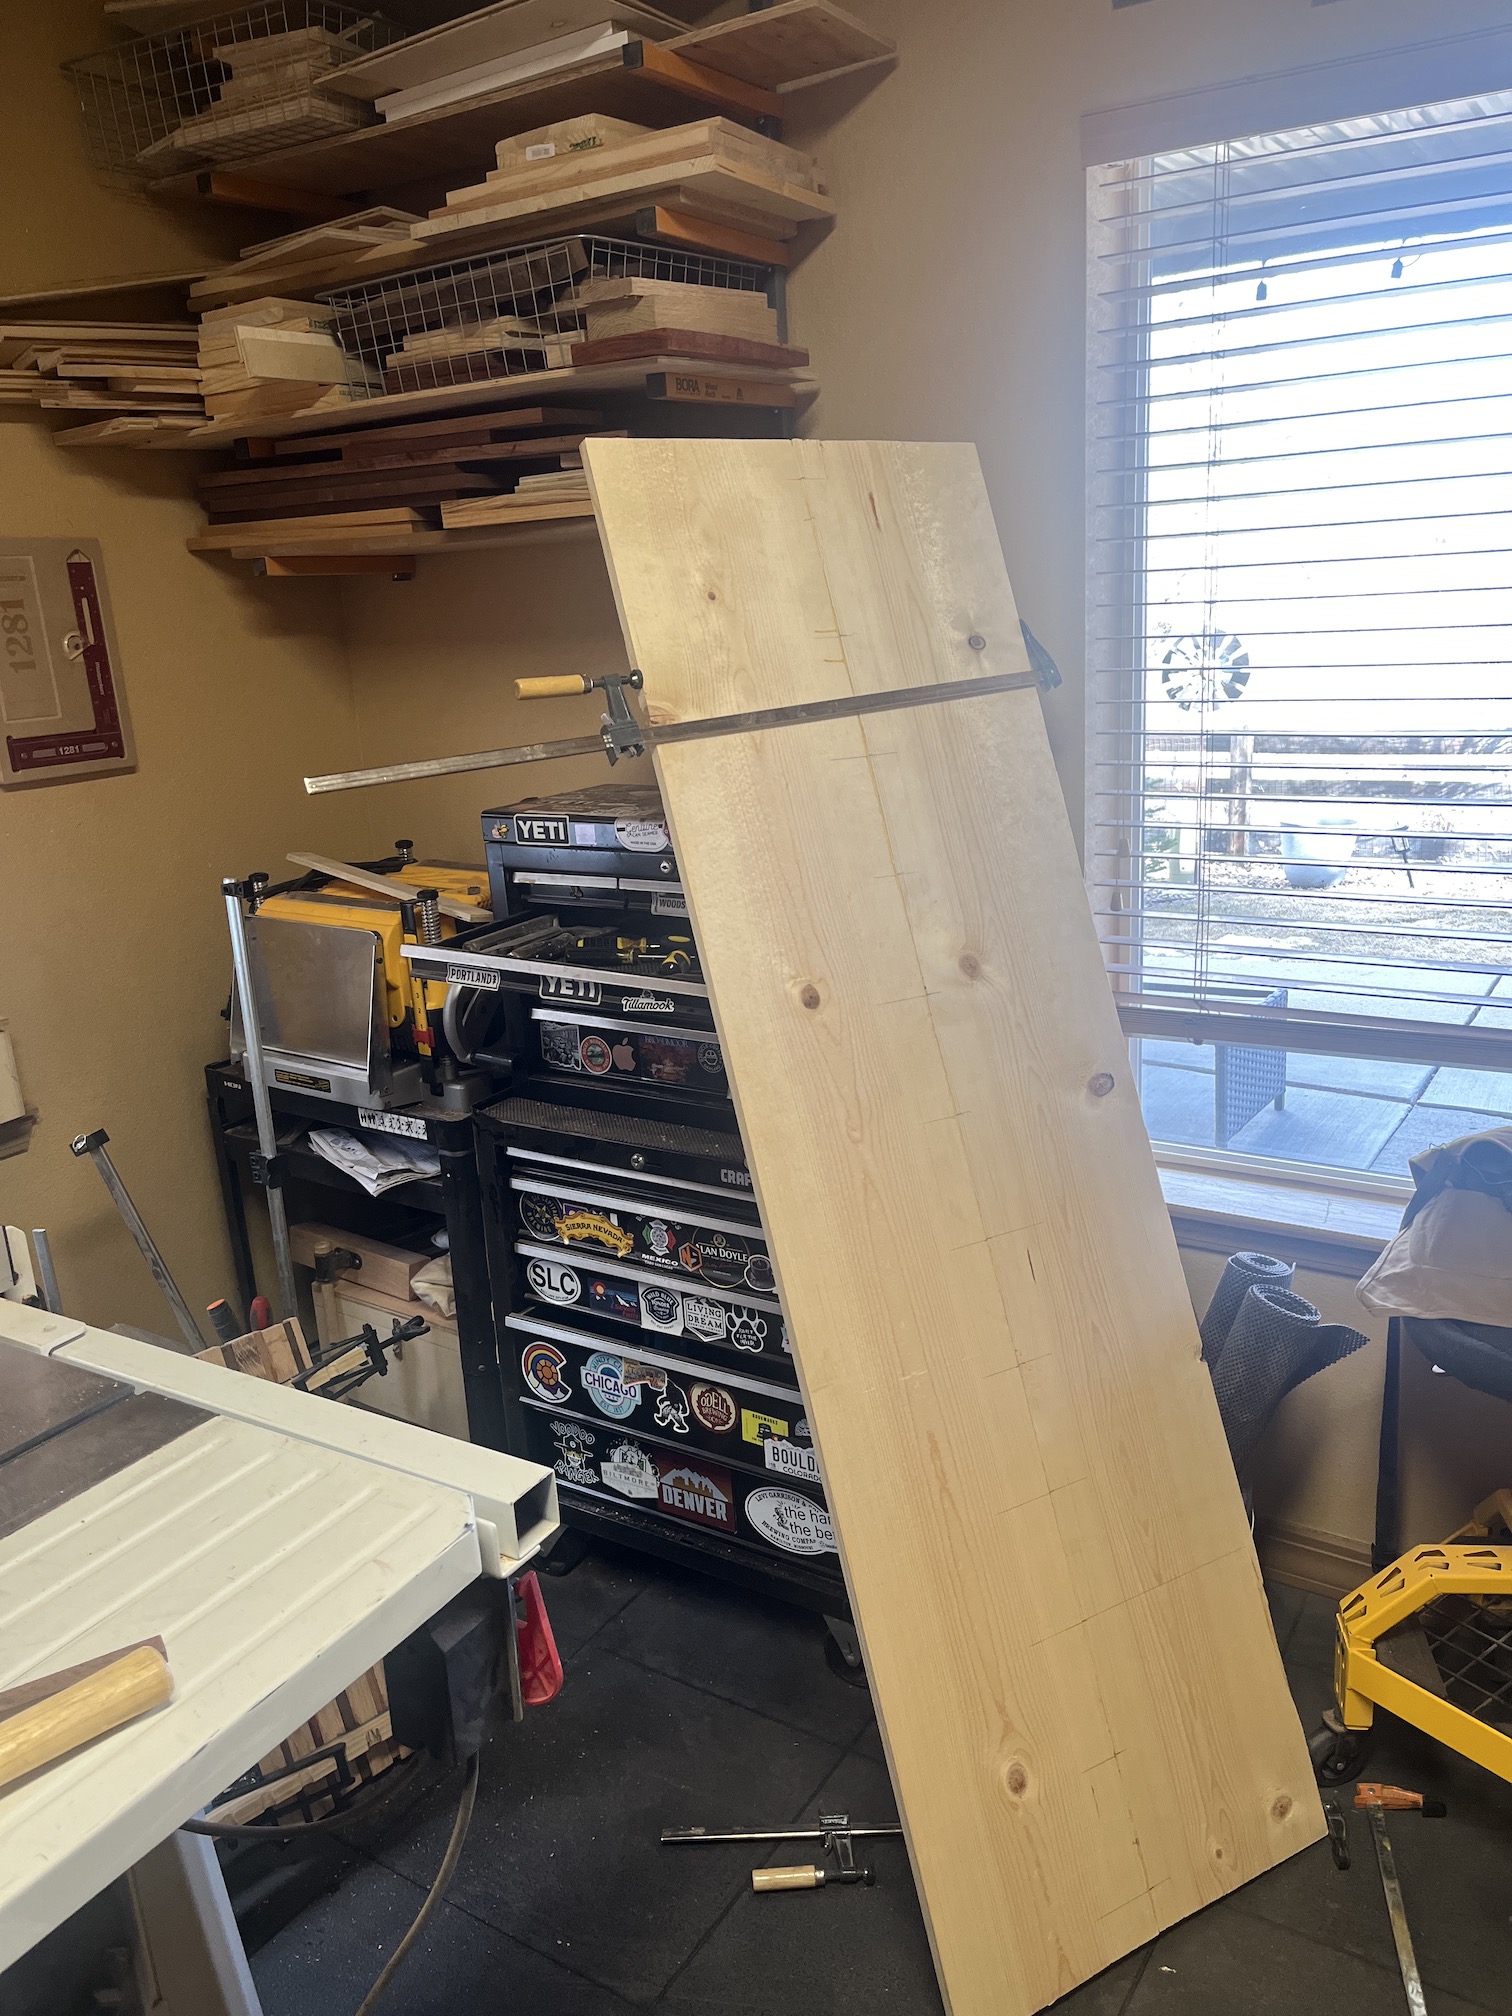
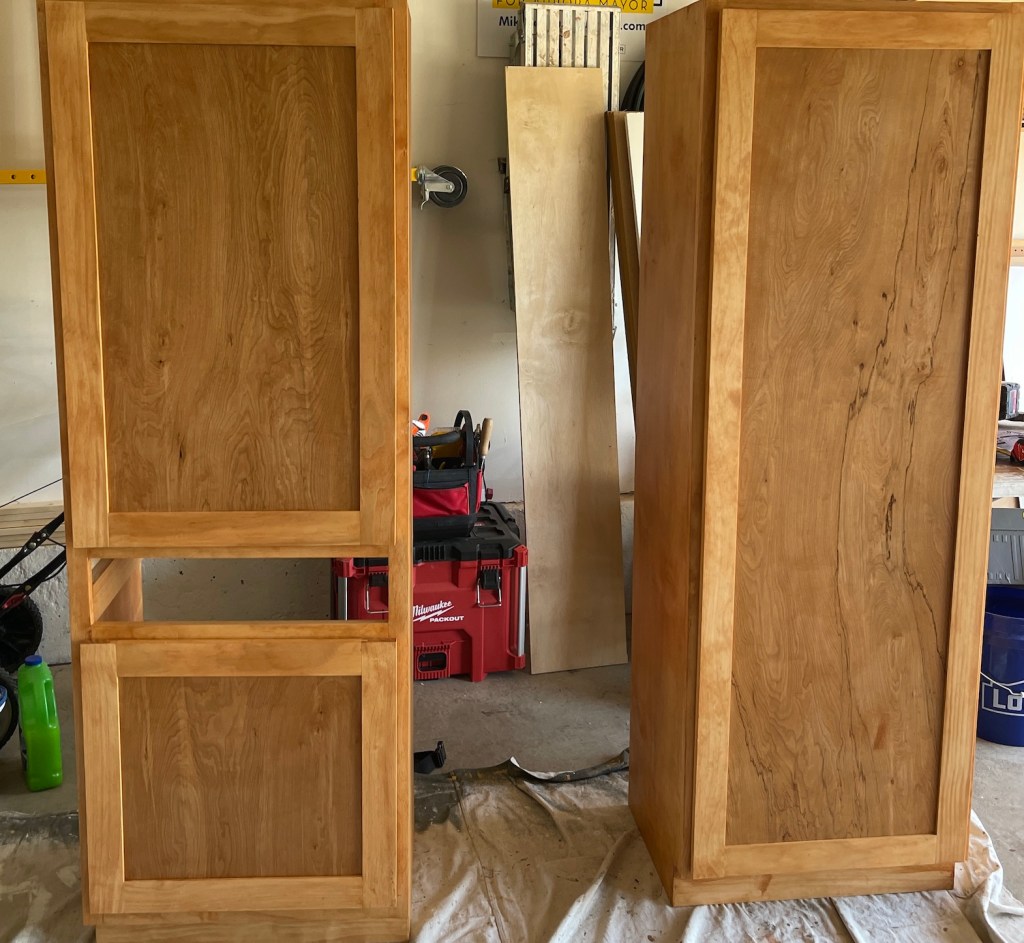
While I was remodeling a blanket, John has been busy in his workshop making a cabinet for the upstairs primary bathroom. For years I’ve just had shelves about the “water closet” room the toilet in the primary bathroom resides in, and finally John is adding a cabinet.
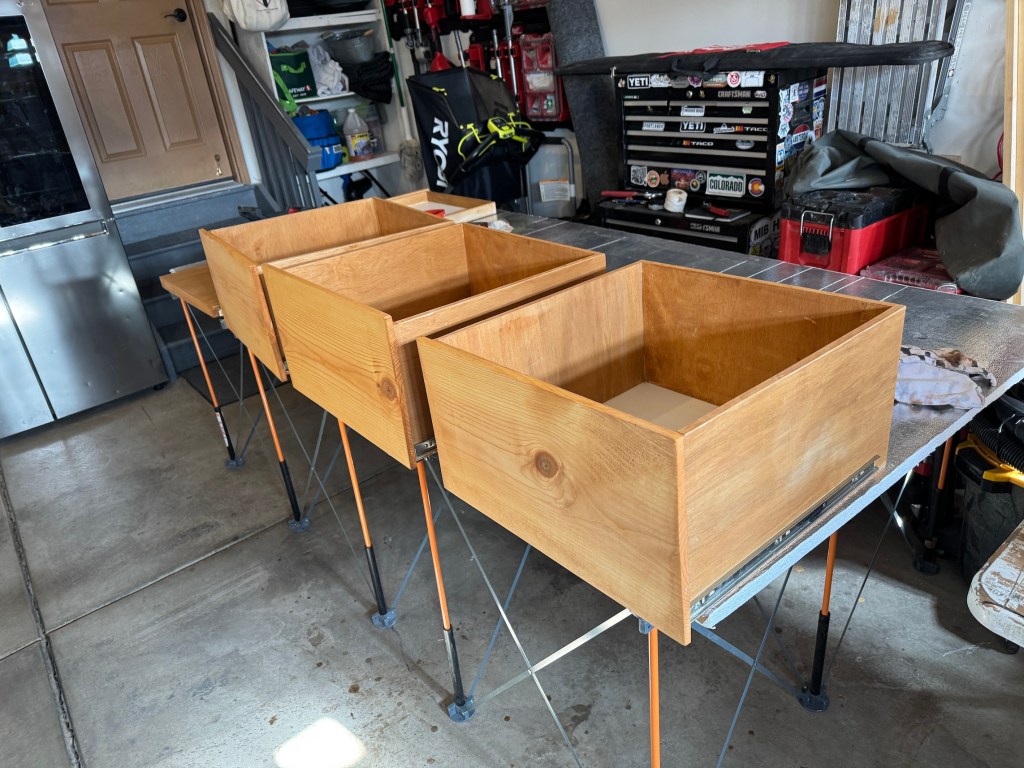
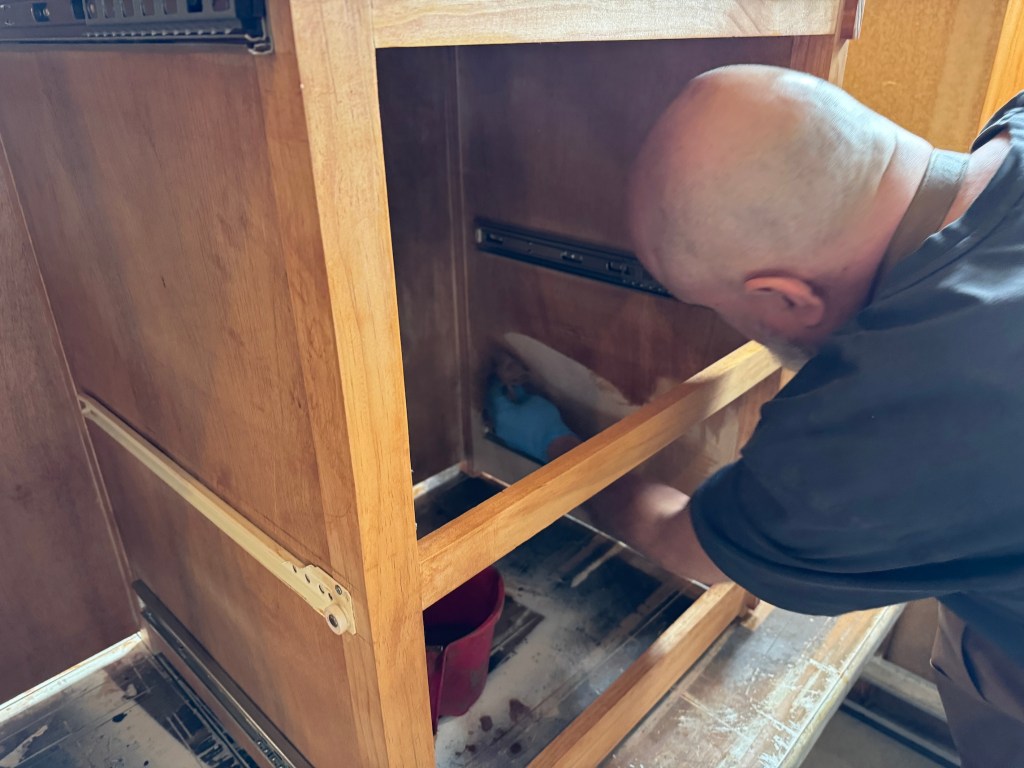
Here are some images of his project in progress:
When he finishes the cabinet I’ll share the completed piece in its own future blog post.
I mentioned in my one of my recent previous posts that I was working on some last minute Christmas gifts.
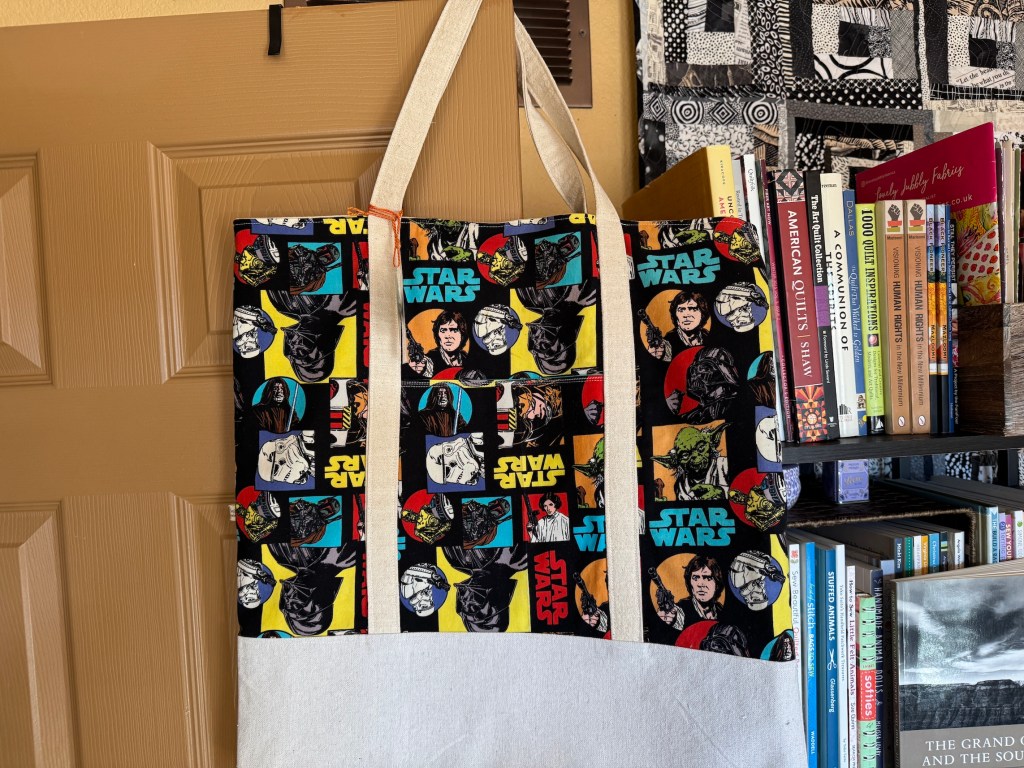
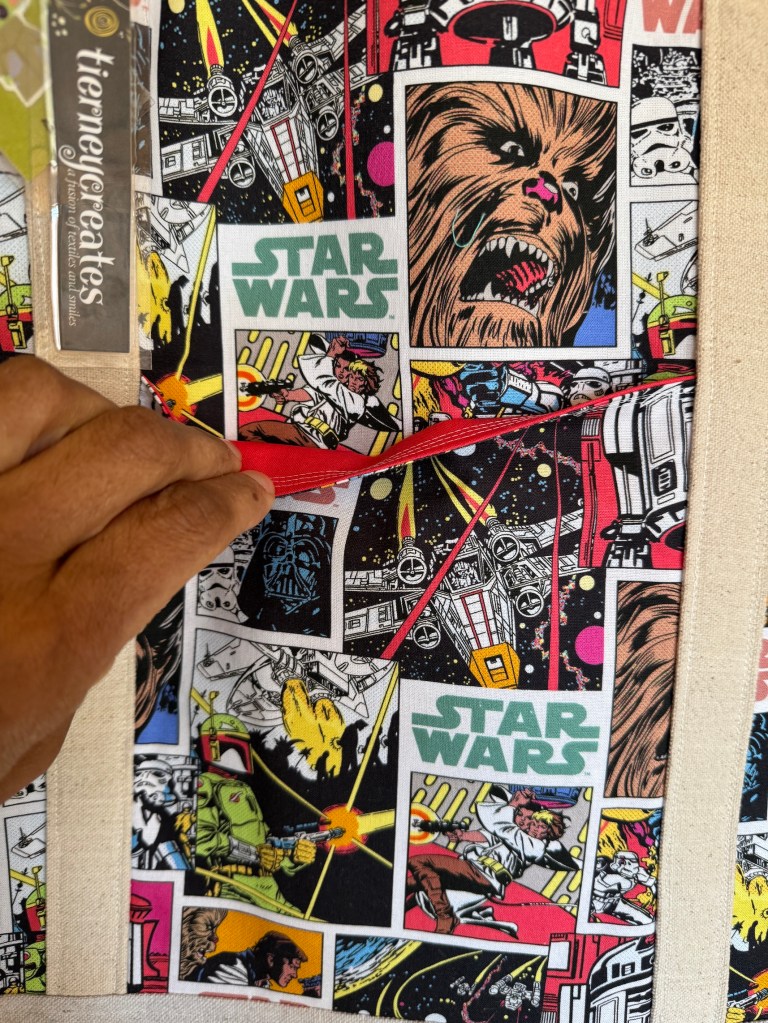
Well I finished the gifts last night – two tote bags for two people in my life who love the Star Wars saga:
They have roomy interiors:
And both external sides of the tote bags have pockets. I used coordinating solid fabric for the inside of the pockets for some contrast.
Now all I can do is see if the tote bag recipients like them!
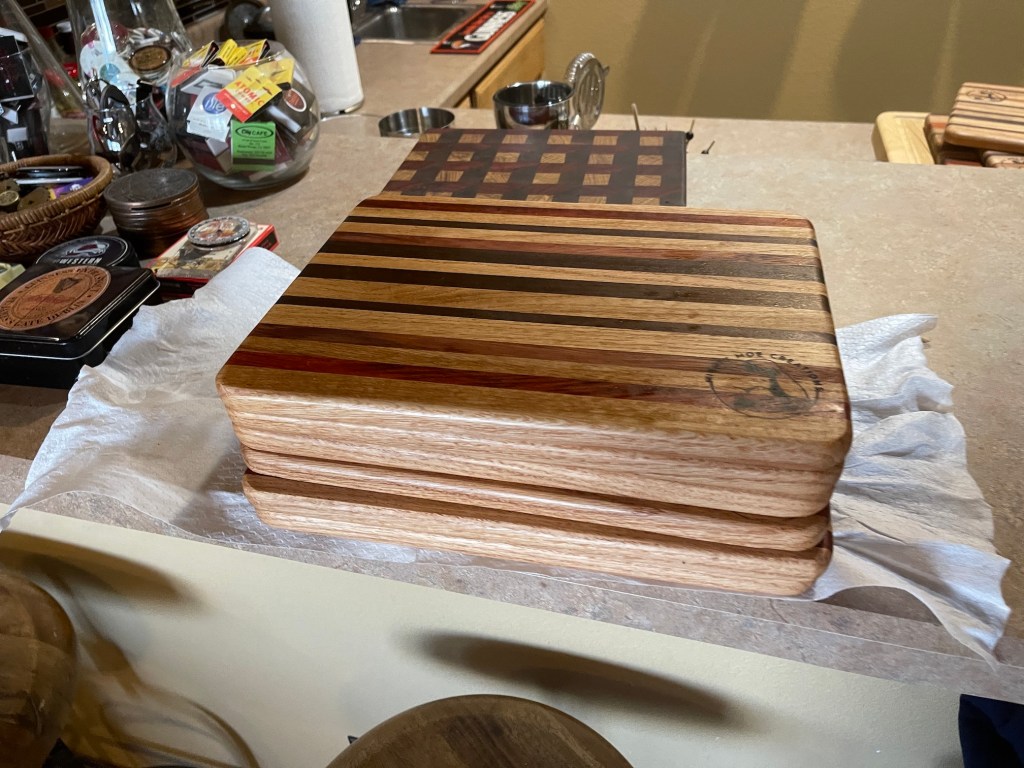
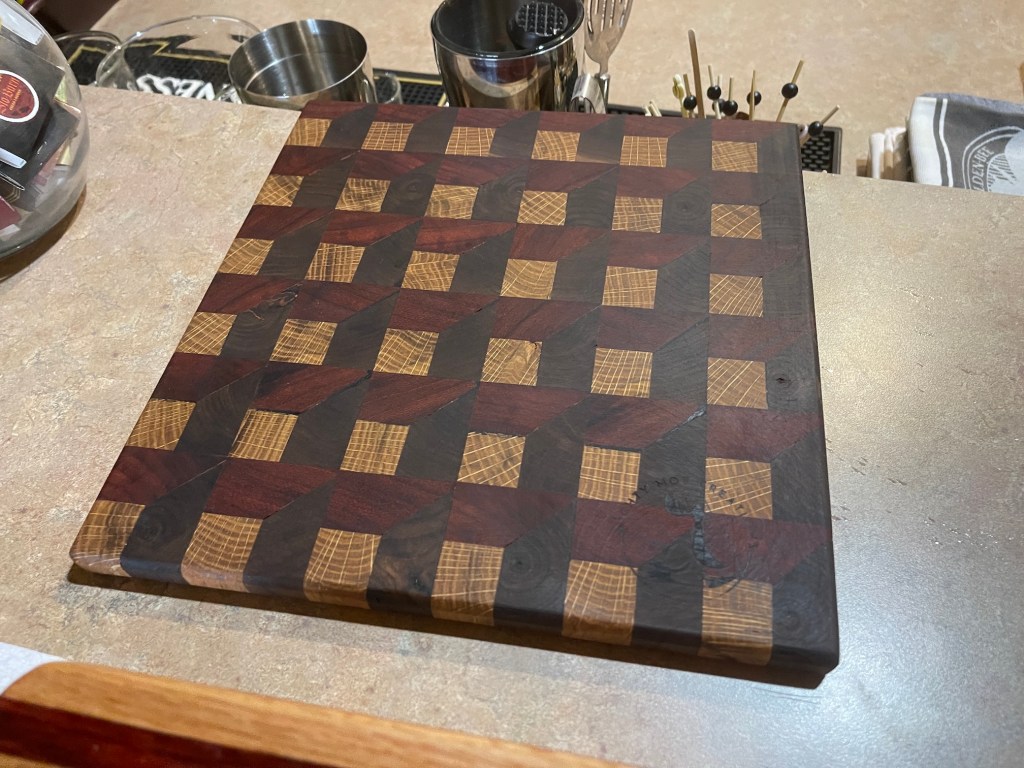
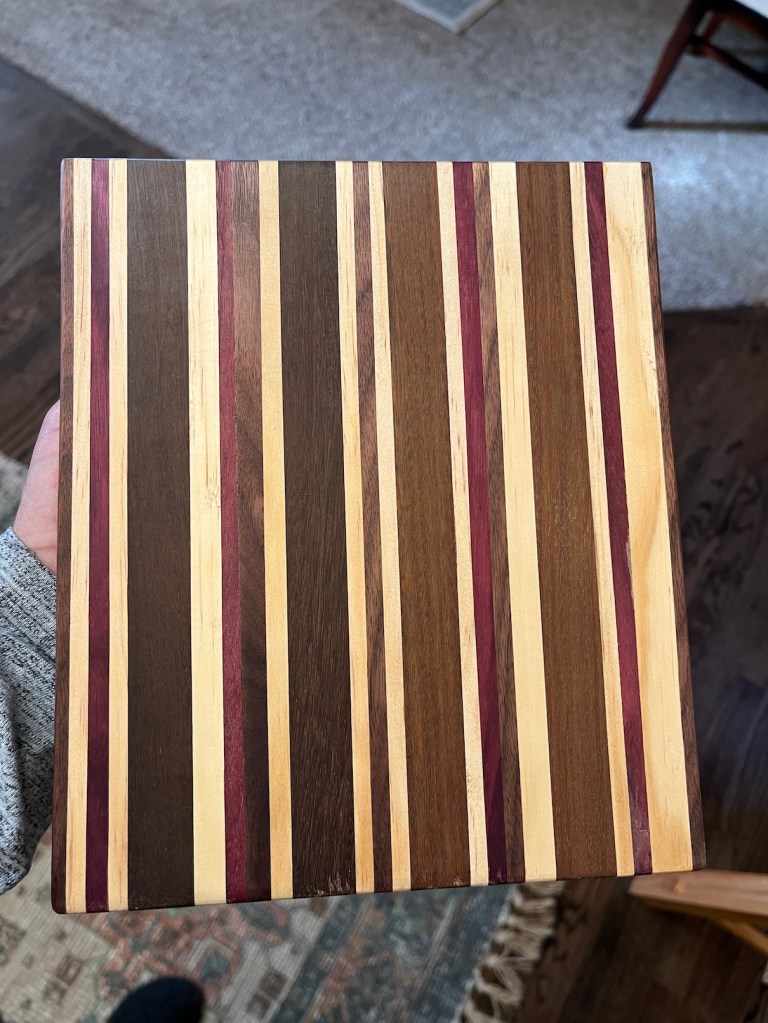
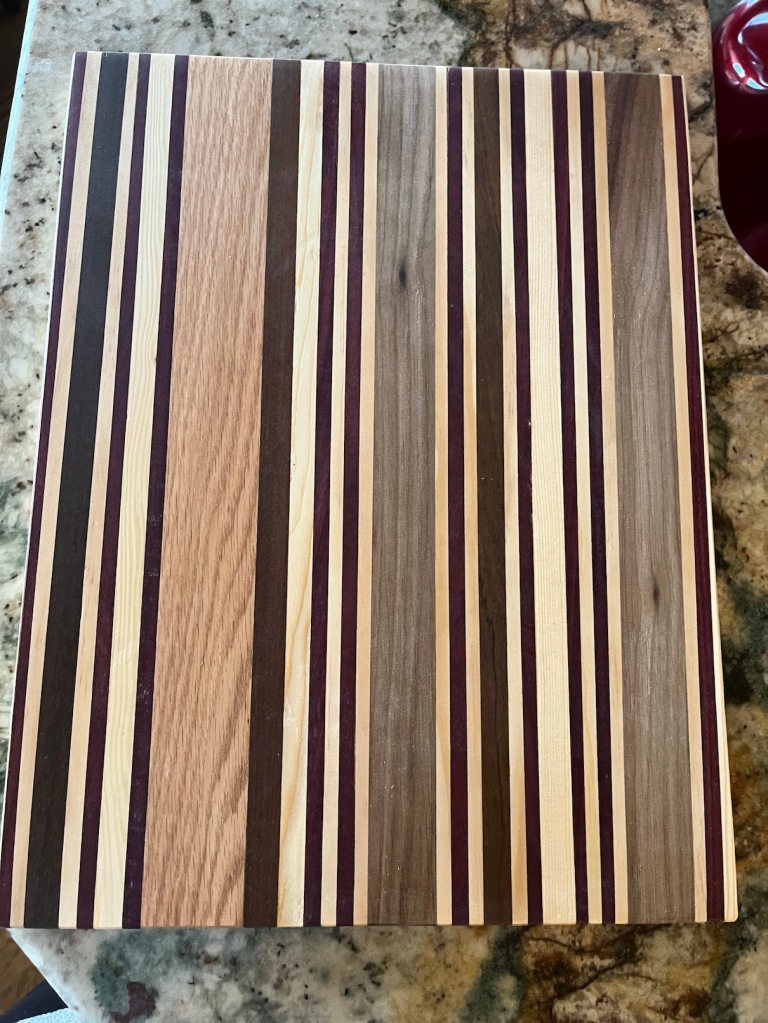
Oh and John worked on a last minute gift too – a set of cutting boards make from the scraps that his friend gave him of their new wood floors. I think they will be pretty pleased when they see the offcuts/scrap wood from installing their floors turned into something useful!
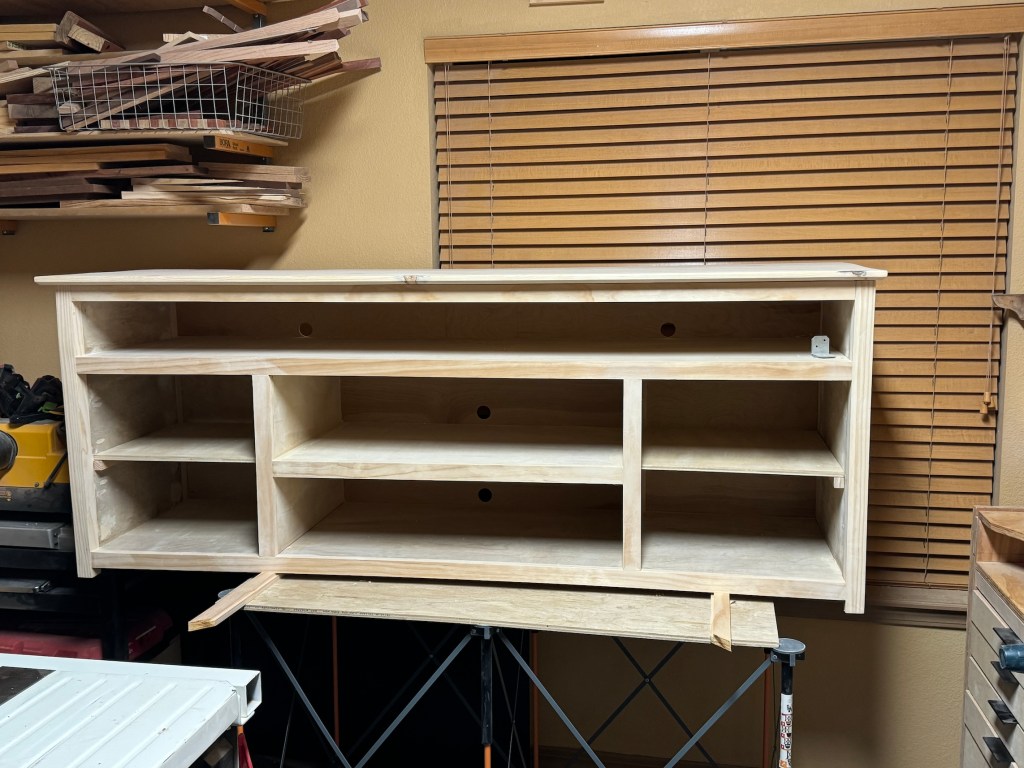
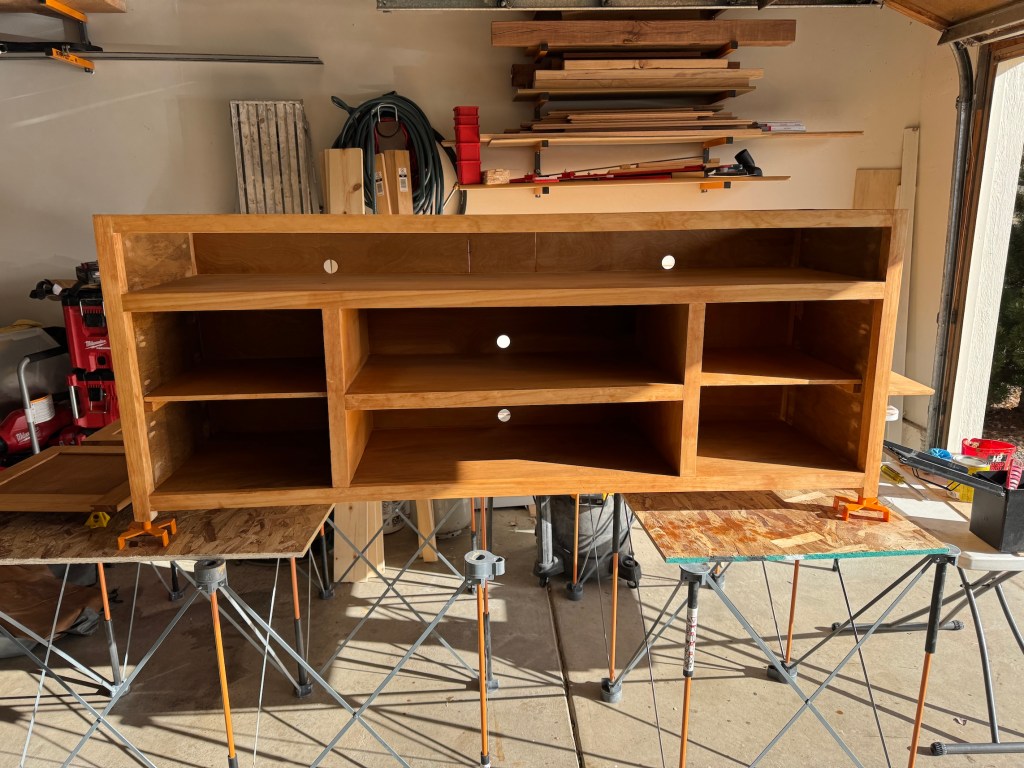
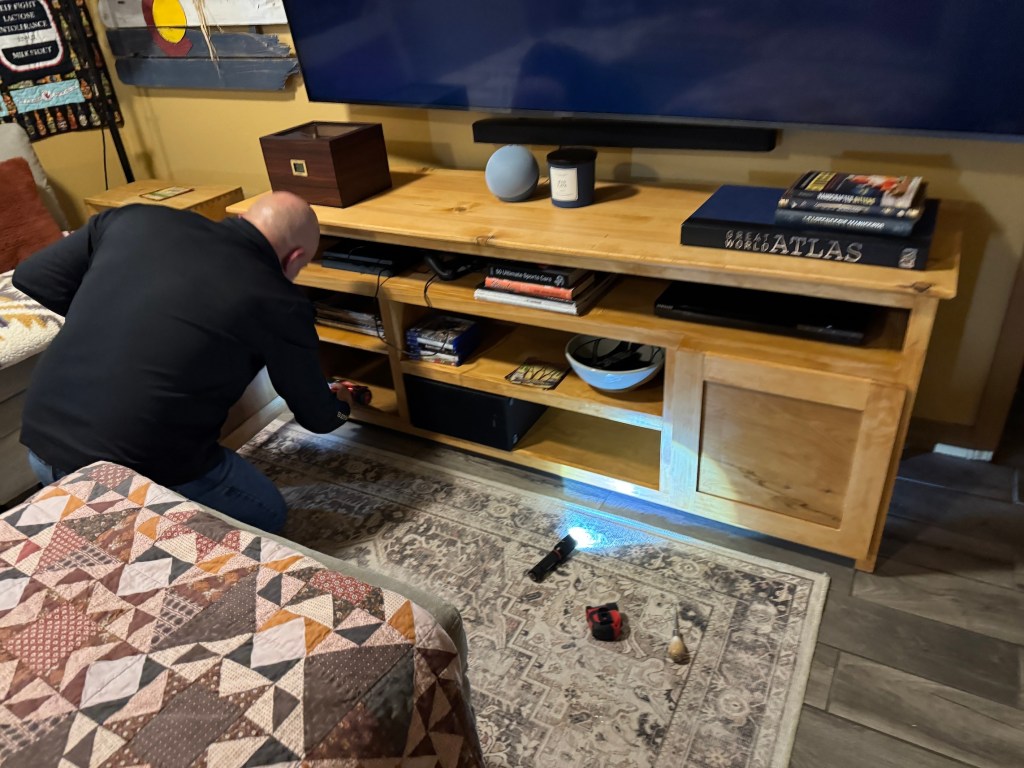
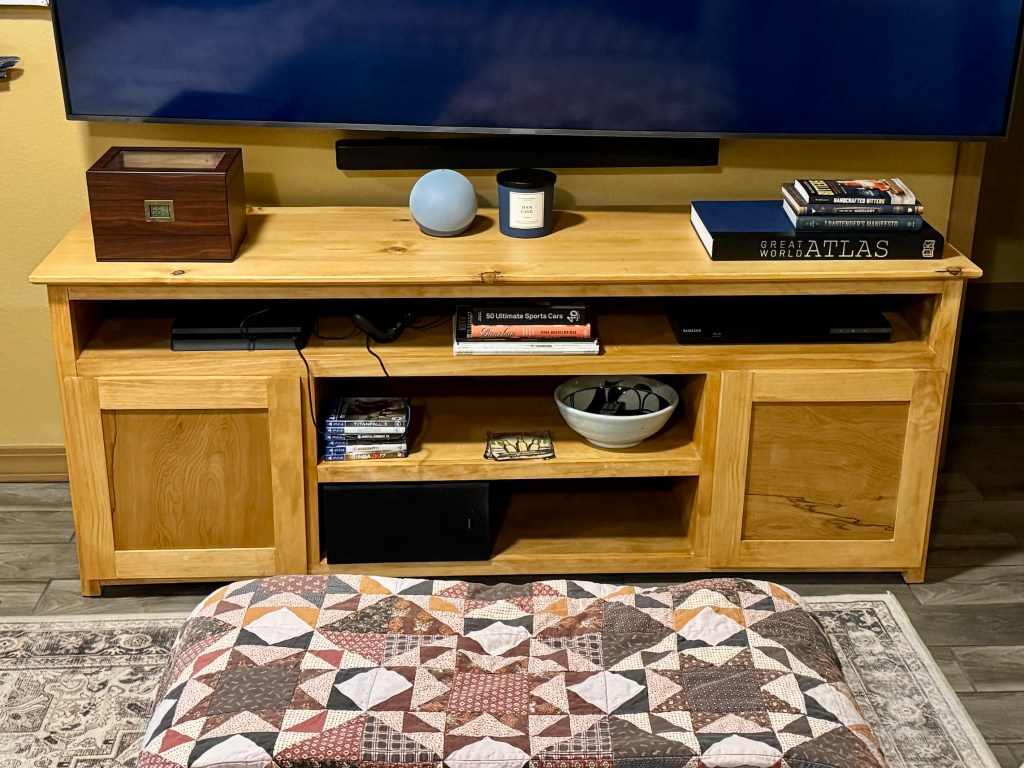
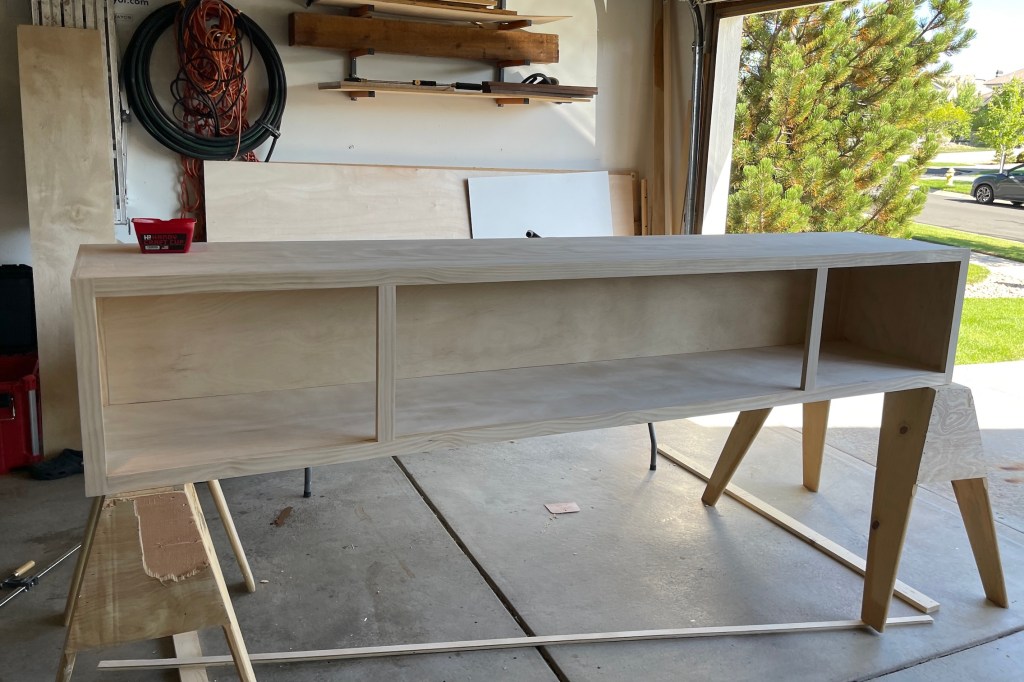
I’m not sure what the proper name is but I am going to call it an “entertainment console”…
John recently finished making us a new entertainment console for under the television in the basement den area. Thought I would share some photos from his build to completion:
John designed it from scratch and I continue to be impressed with his work as a self-taught woodworker! He put holes larger enough for cords at several locations in the back so we had space for the DVD player and gaming console cords!
Postscript
John got a new flat top grill this summer and even though the weather is very late Fall/early Winter-ish he is still trying to occasionally use it. He made his first attempt at shrimp friend rice on the outdoor griddle and it came it out awesome!
Oh and I got obsessed with these pumpkin muffins this season and I highly recommend them. I’ve made a couple batches of them so far and they freeze well:
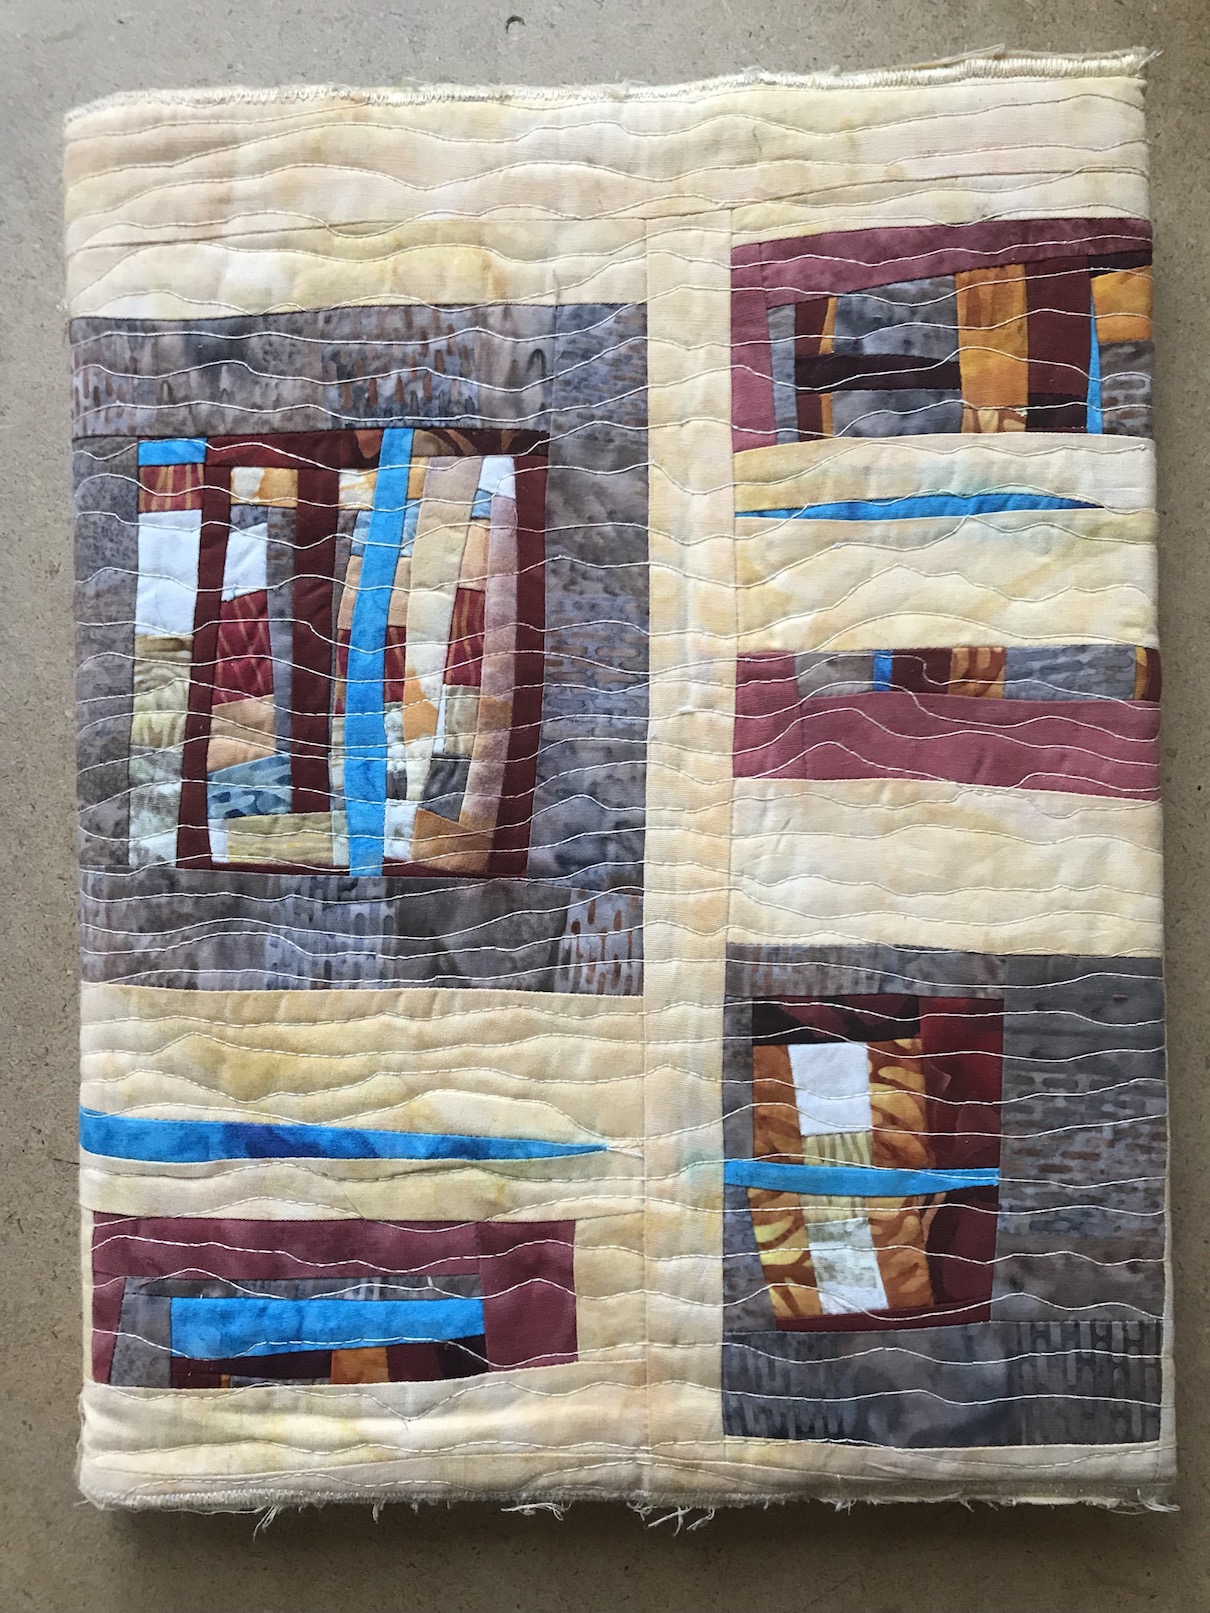
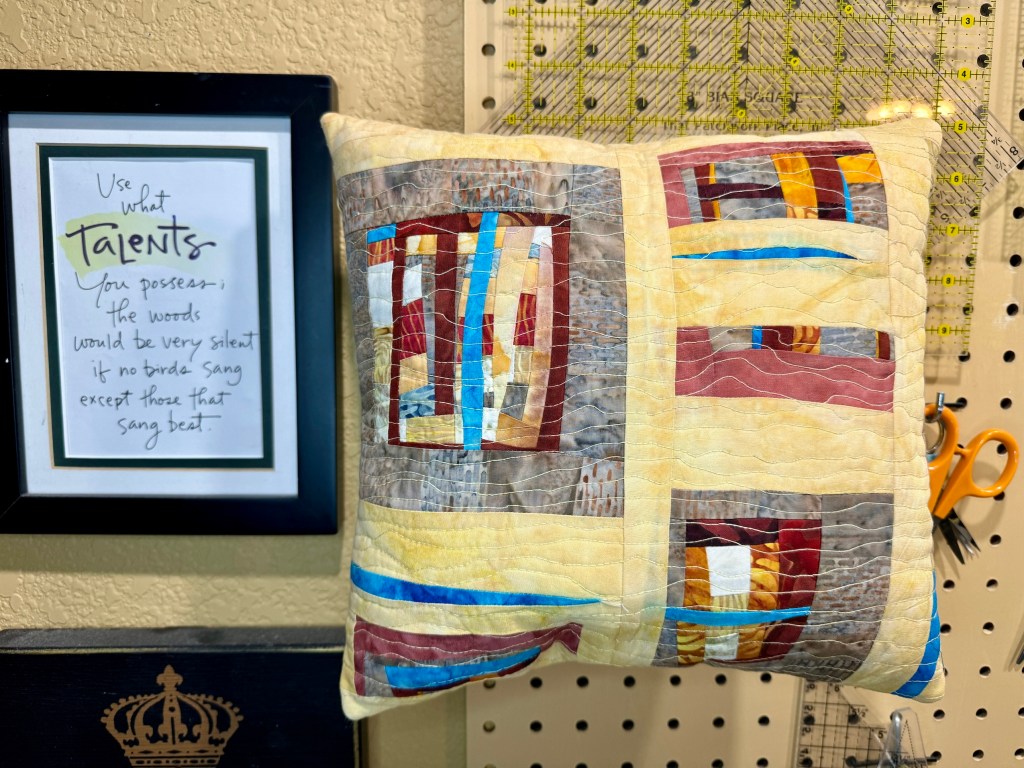
Pausing my series of posts about my September trip to the California Coast to share my conversion of a journal cover to a pillow.
I made this journal cover from fabric scraps in the first Journey to Art Quilting class I took with Jean Wells at the Stitchin’ Post in Sisters, Oregon, likely around 2013 or 2014.
We were working on improvisational quilting exercises; and I remember I added the turquoise in because Jean said your piece needs a “surprise”, something unexpected, and she called it “a poison”.
For some reason I just just feeling tired of this journal cover and no longer wanted to use the journal it covered, I wanted to fresh start for creative journaling. However I didn’t want to get rid of the piece.
So I decided to make it into a pillow!
The class with Jean was very memorable, it was actually a workshop series where we met monthly (or it might have been bi-weekly). The piece which eventually because Abandoned Water Structure and was sold to the City of Seattle’s Portable Works Collection was started in this workshop:
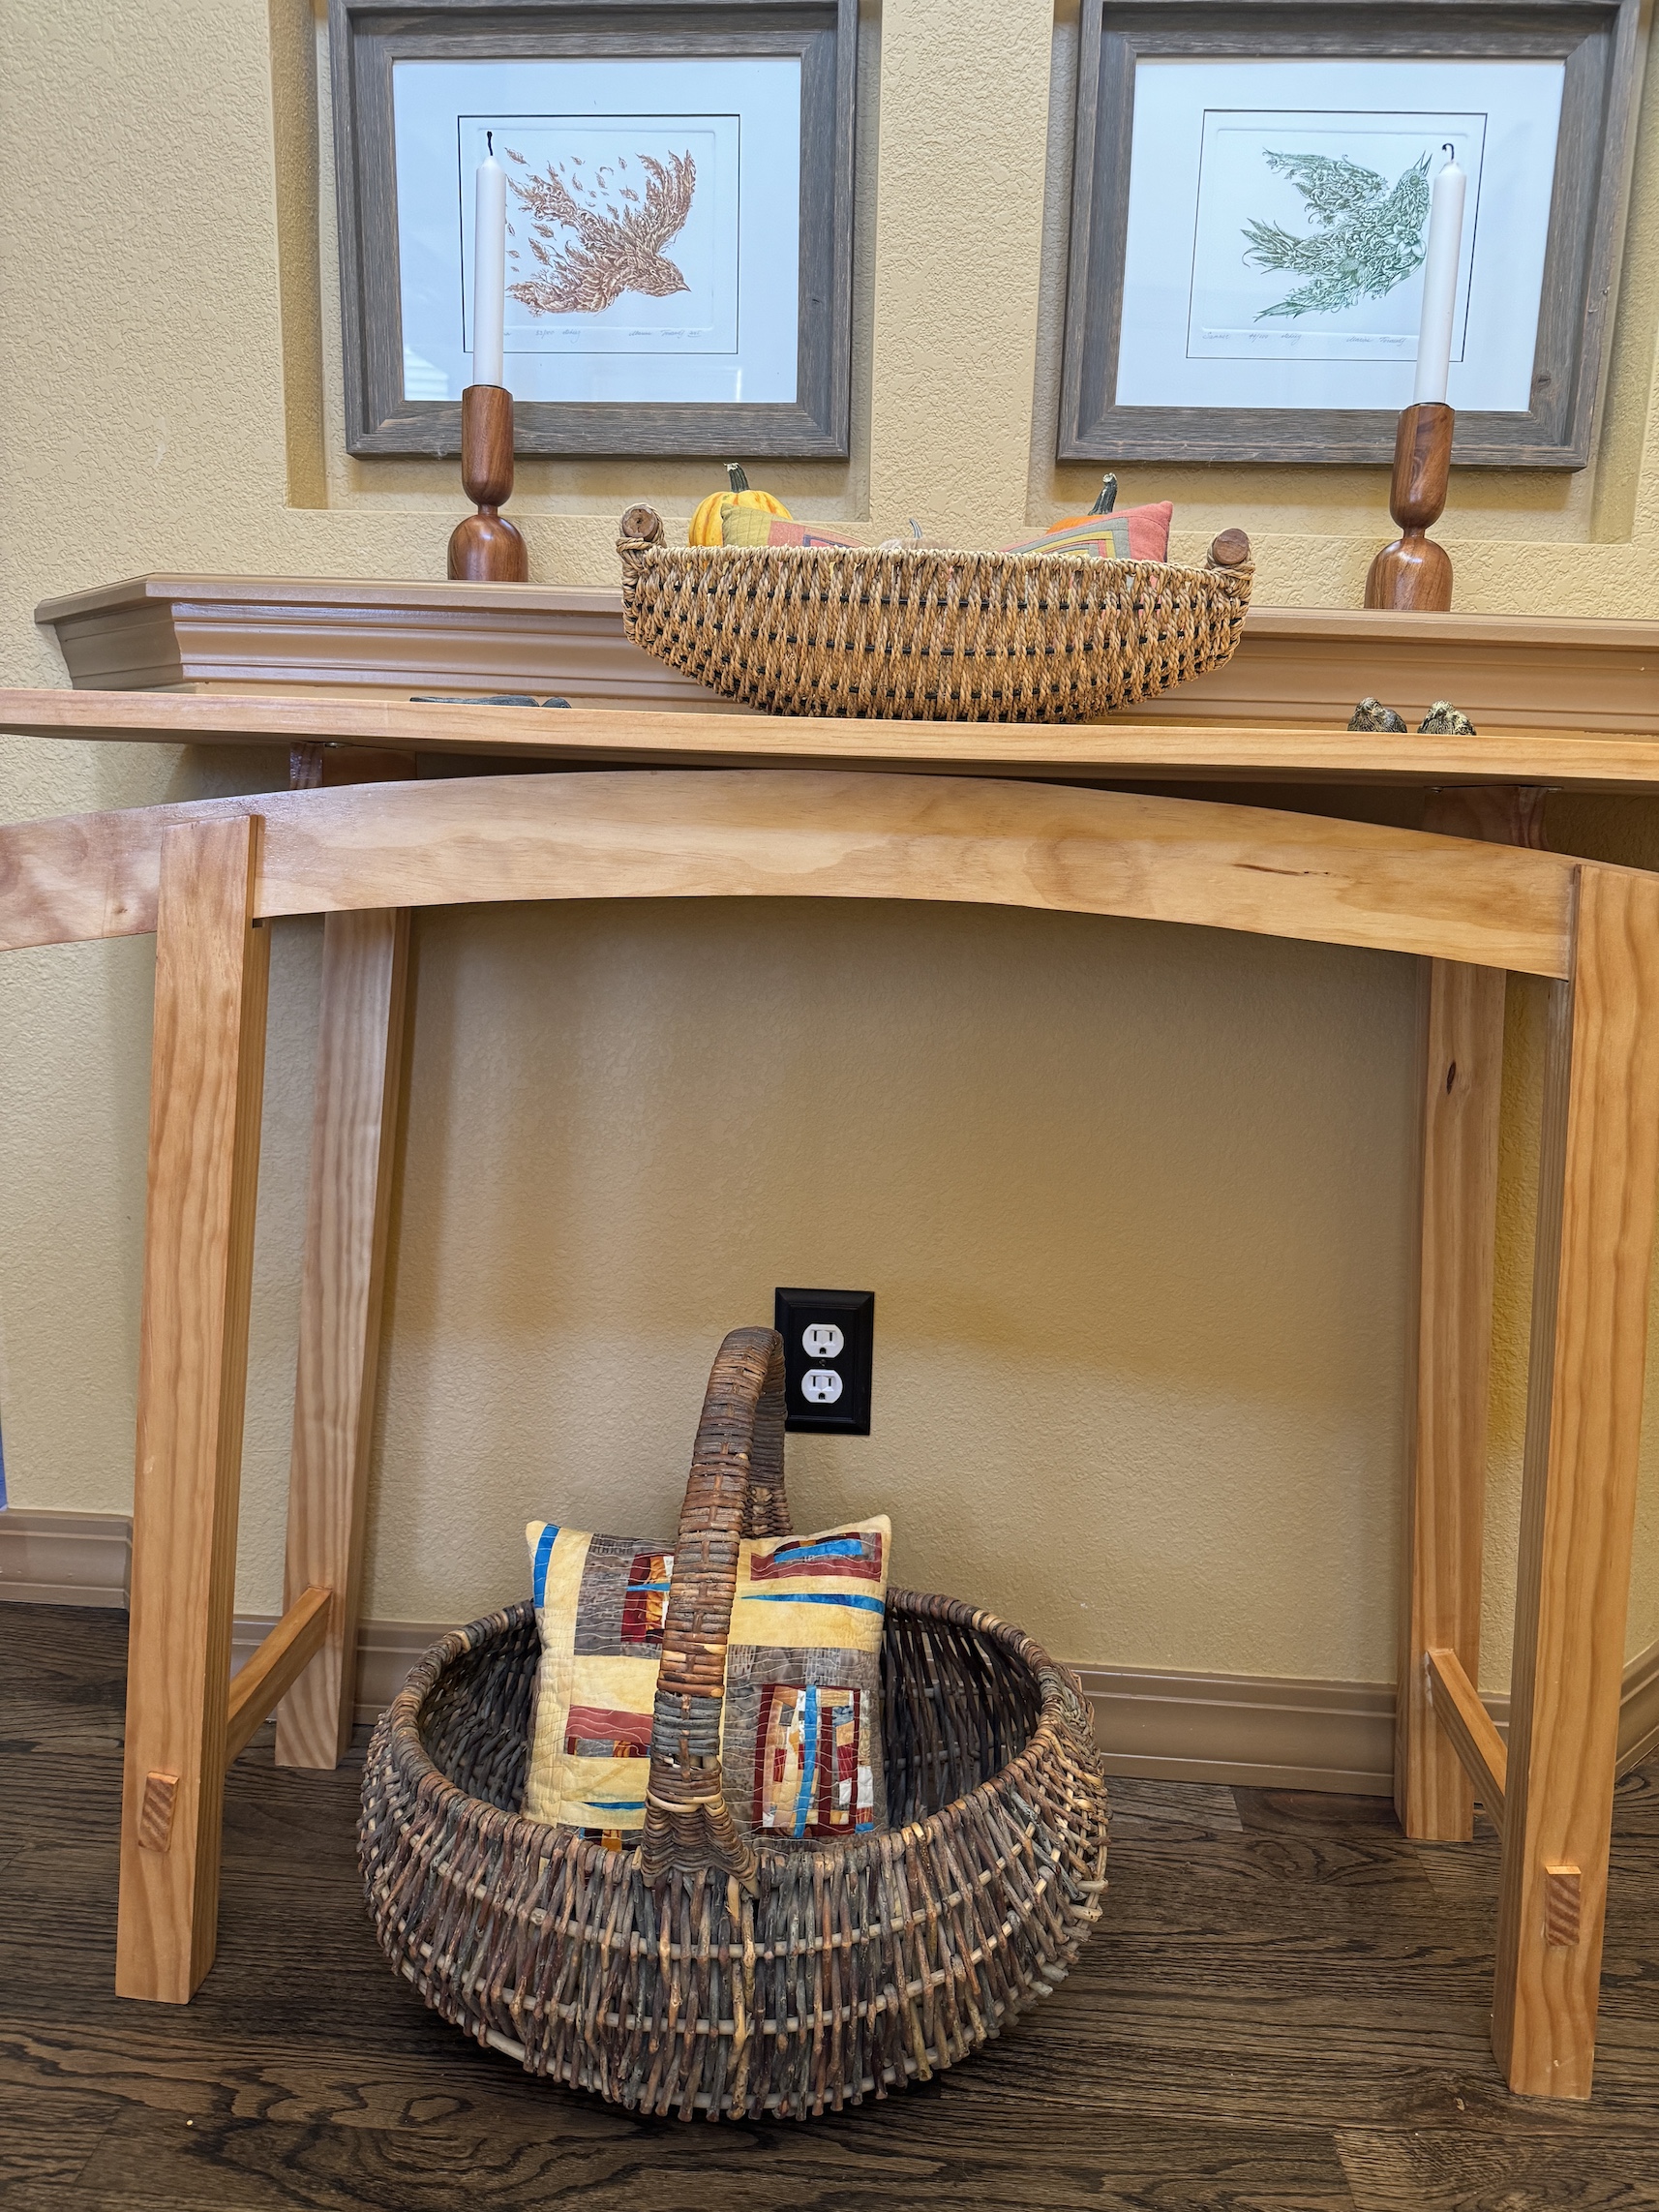
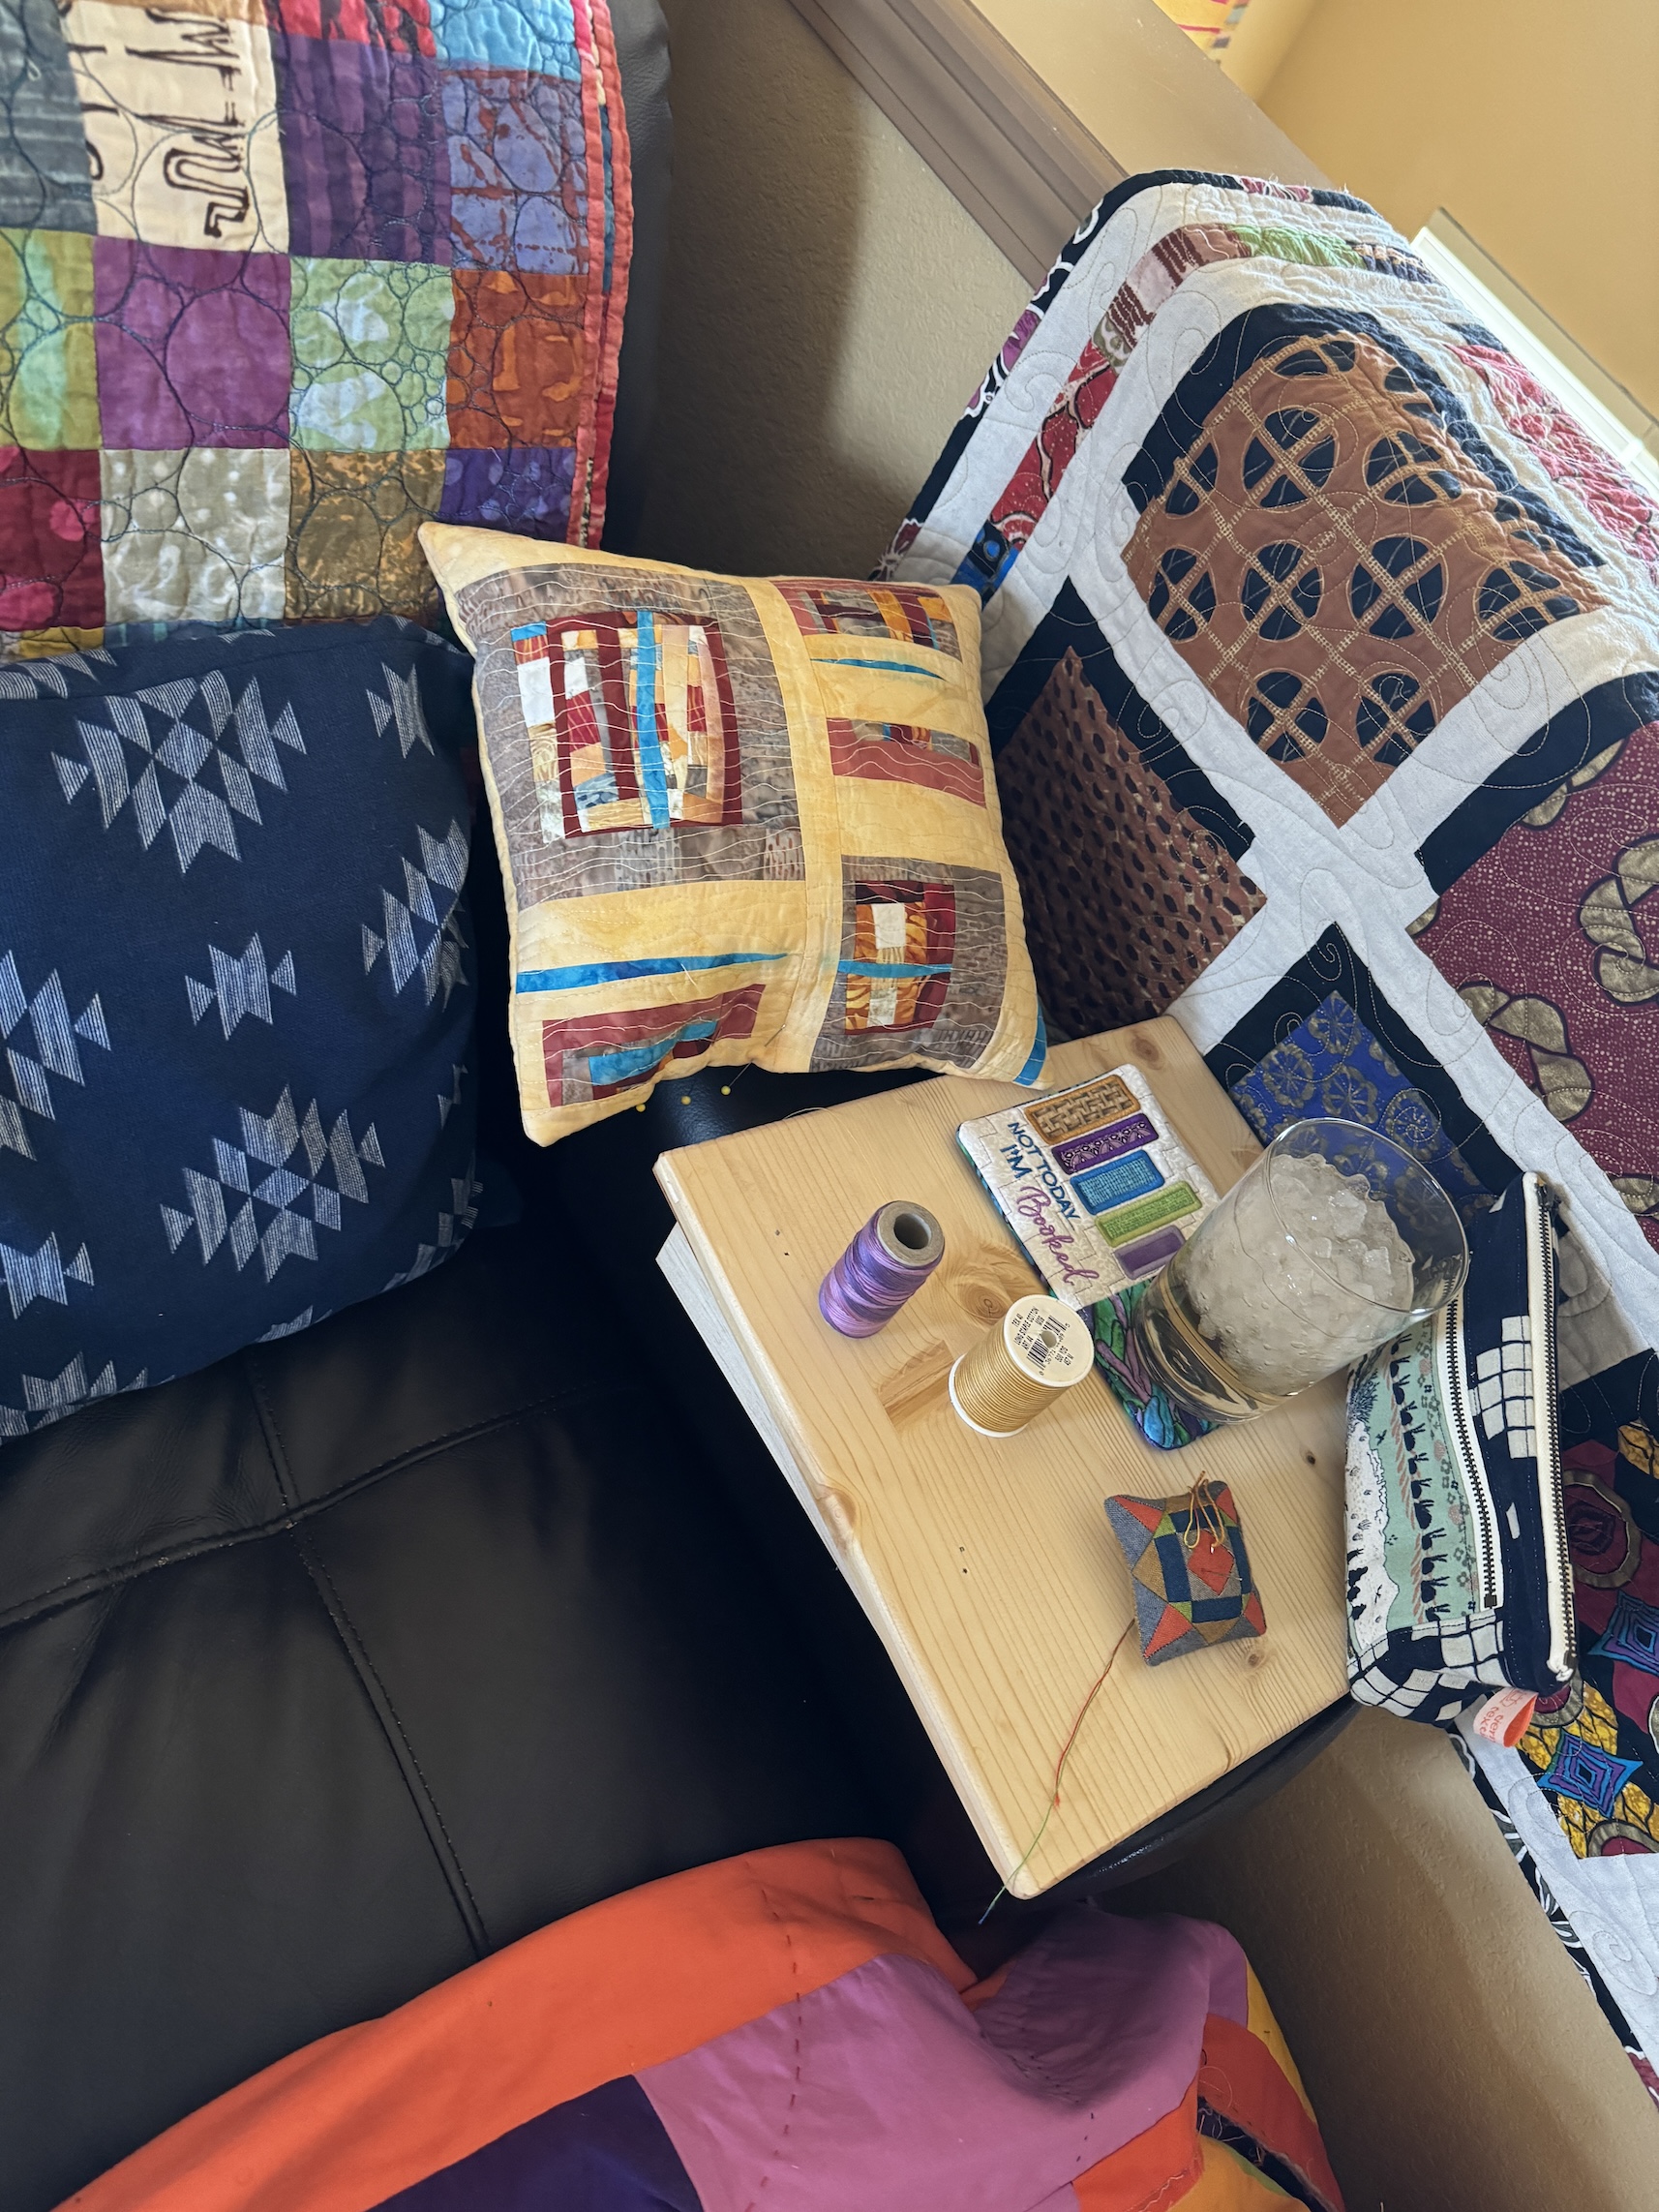
Oh and back to the pillow – for now I am keeping the pillow in the basket in the entry to our home in a basket under a table John built (see post From the Woodshop: Floating Top Hall Table).
Postscript
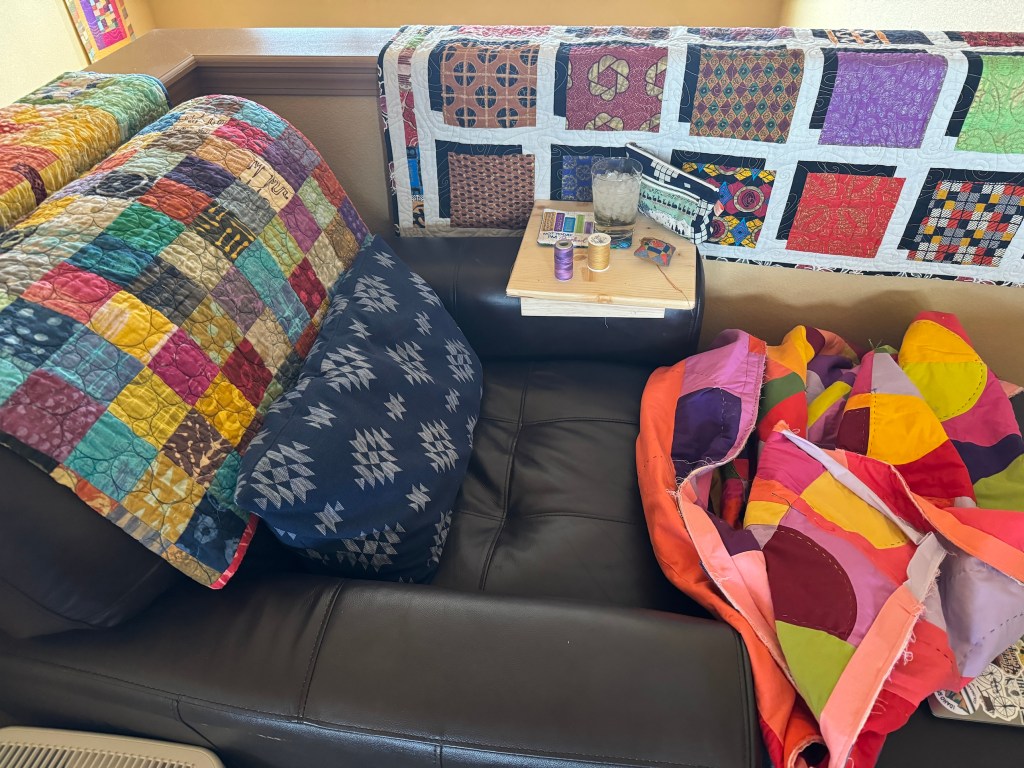
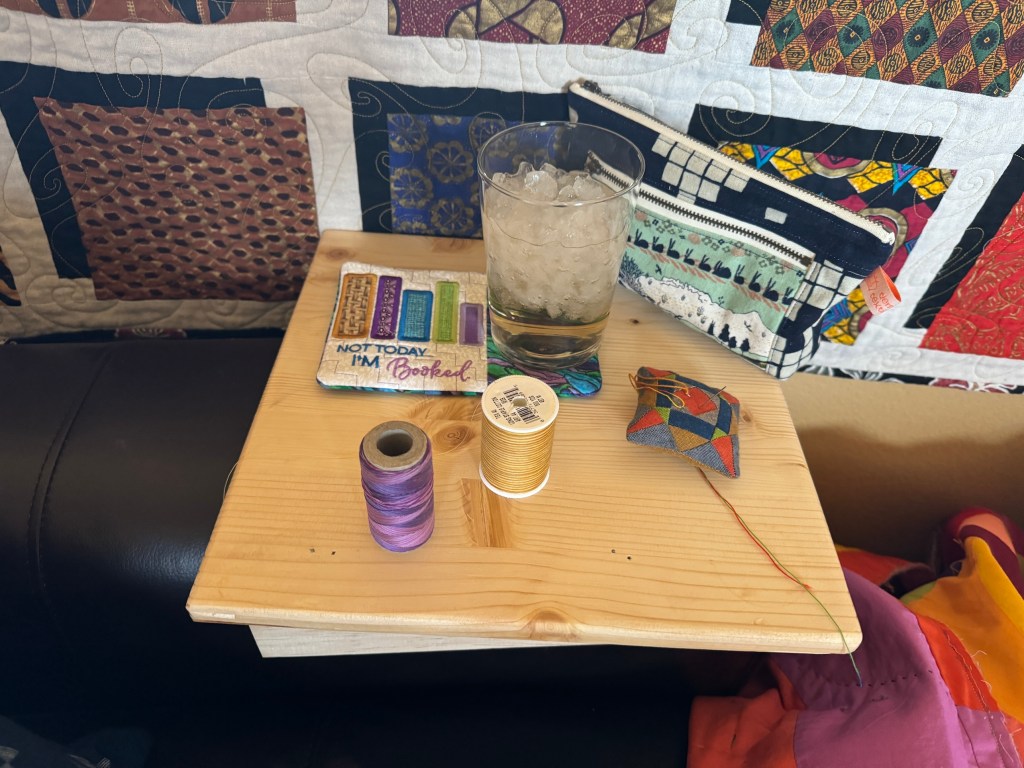
We had a chair at the top of the top floor stairs landing that I like to sit in and stitch. The other day John the Woodworker made me a little table to hang over on of the chair arms so I would have a table there.
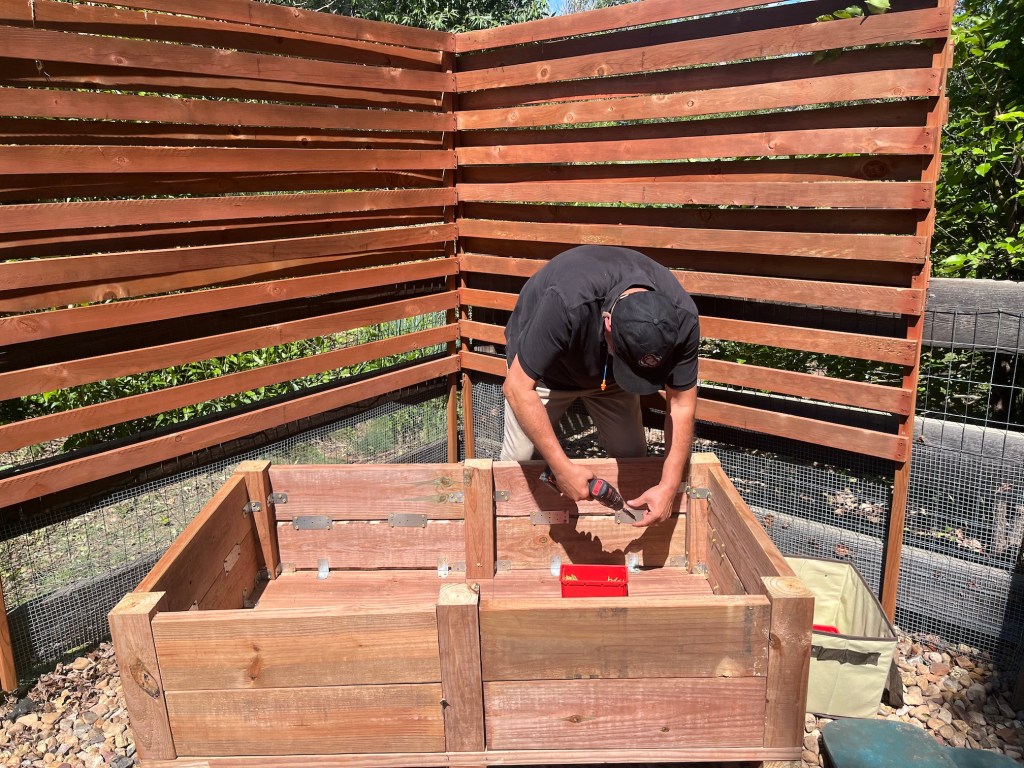
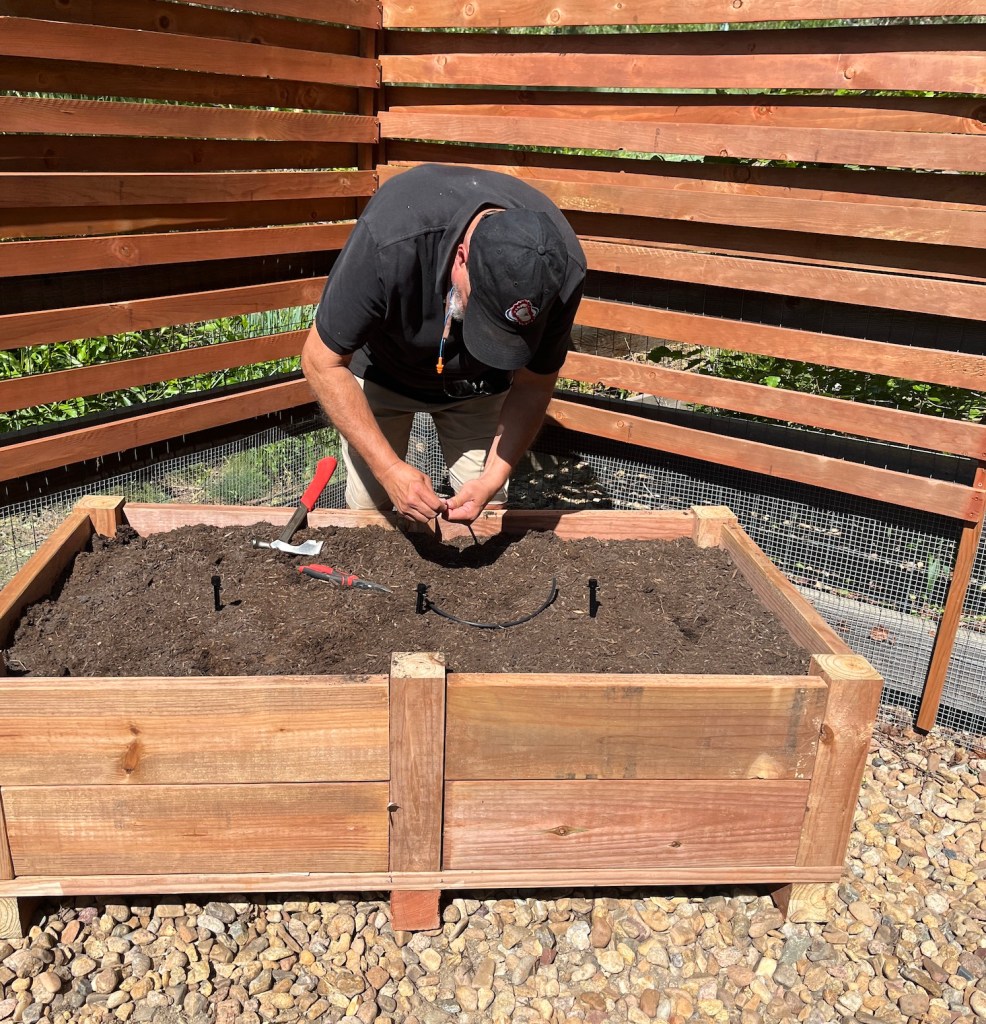
Here are photos of him building the raised bed in our backyard and setting up the automatic irrigation:
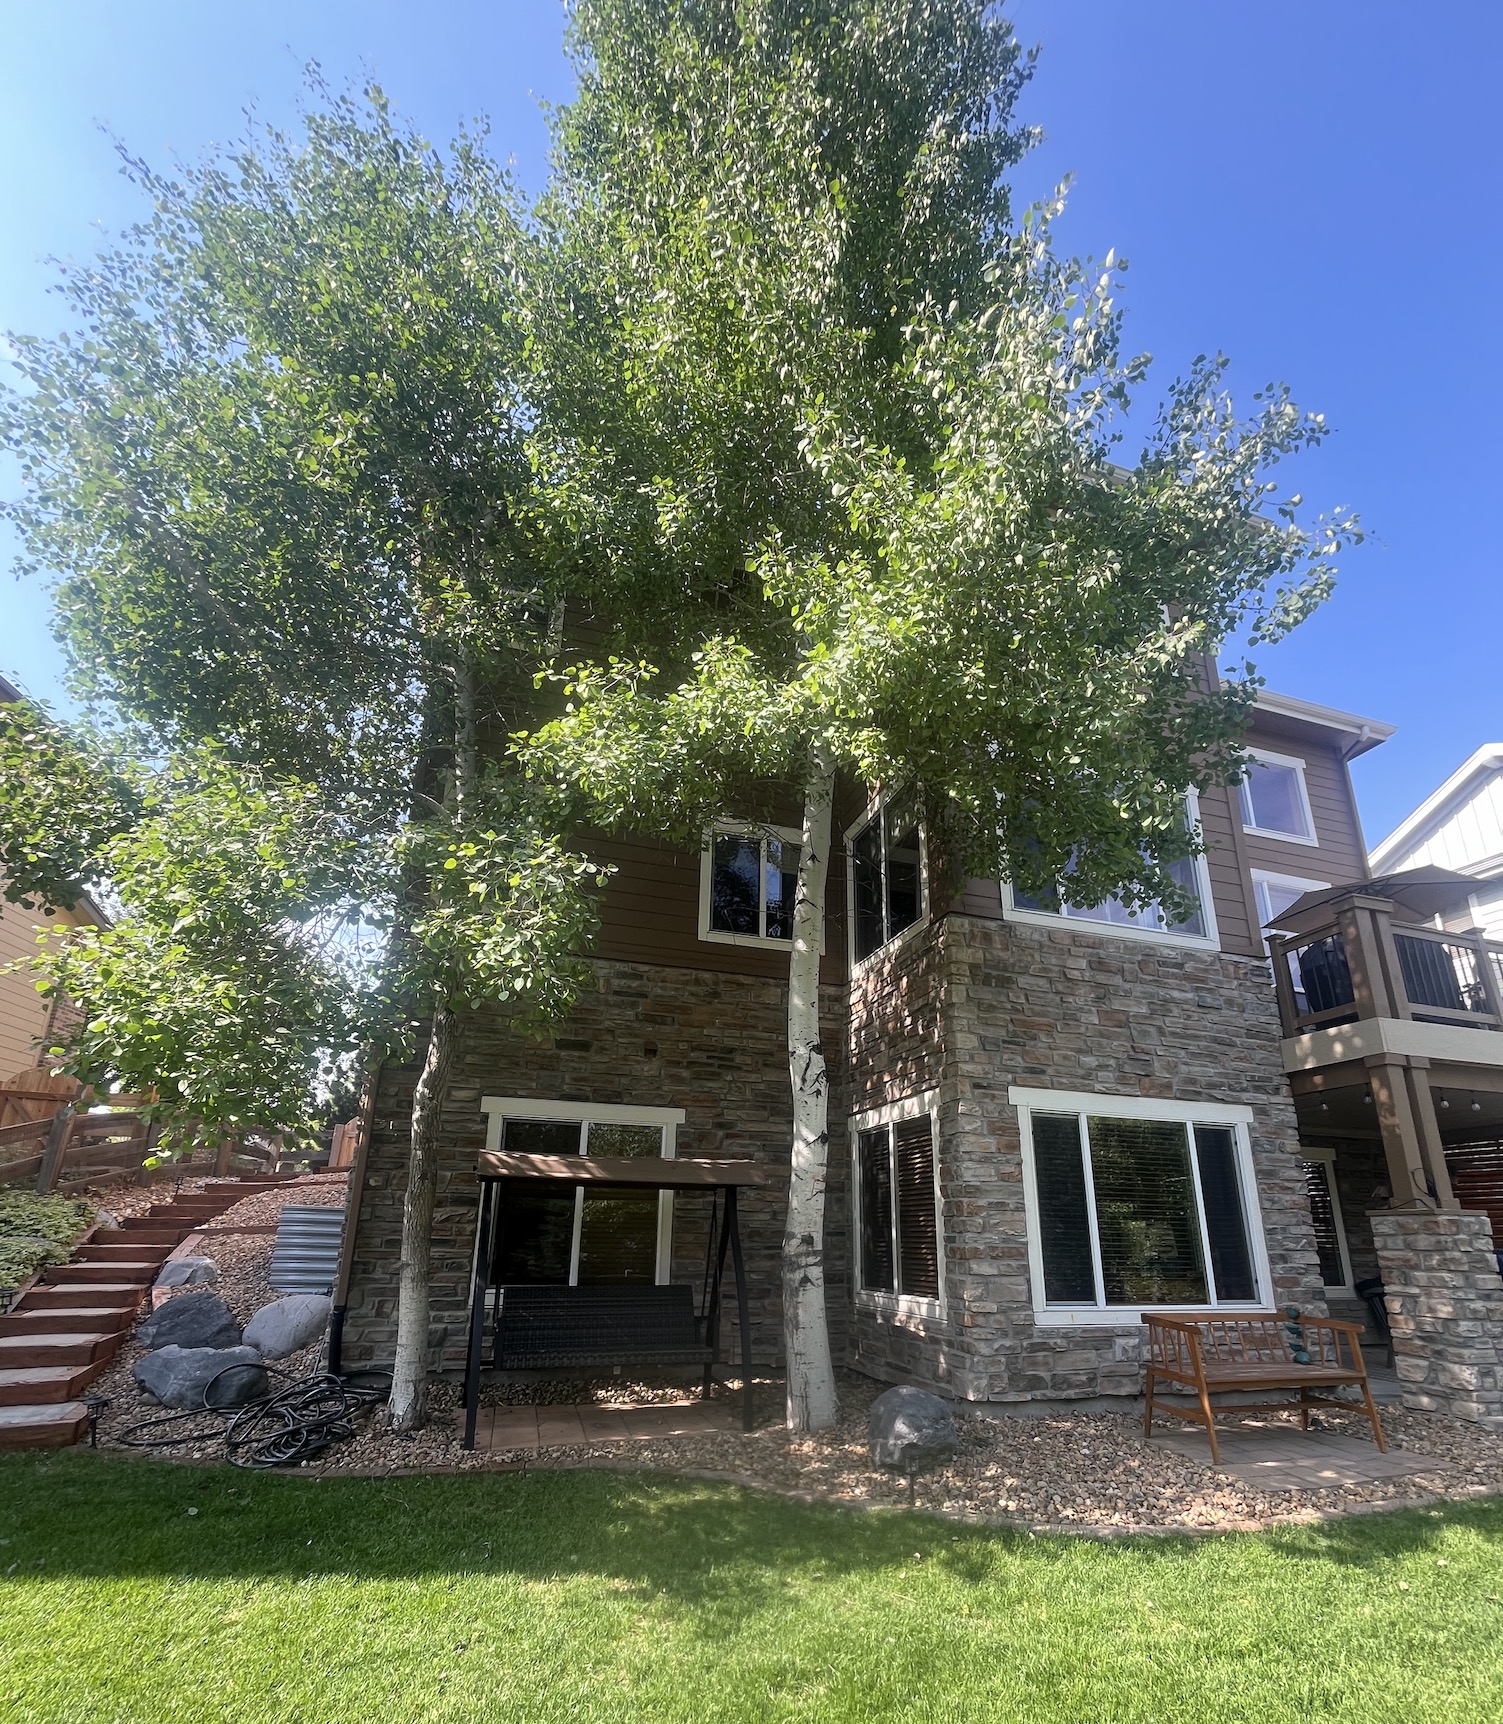
We originally had our backyard swing in this spot and John relocated the pavers and the swing to under the two large Aspen trees in our backyard:
Here’s the raised bed with the netting we added to hopefully protect our planting from the critters (animal and bug) that live in the open space behind our house:
I am pretty excited about the raised bed as now I can (perhaps) grow things like squash and greens where I needed a larger and deeper space than my upstairs deck garden allows.
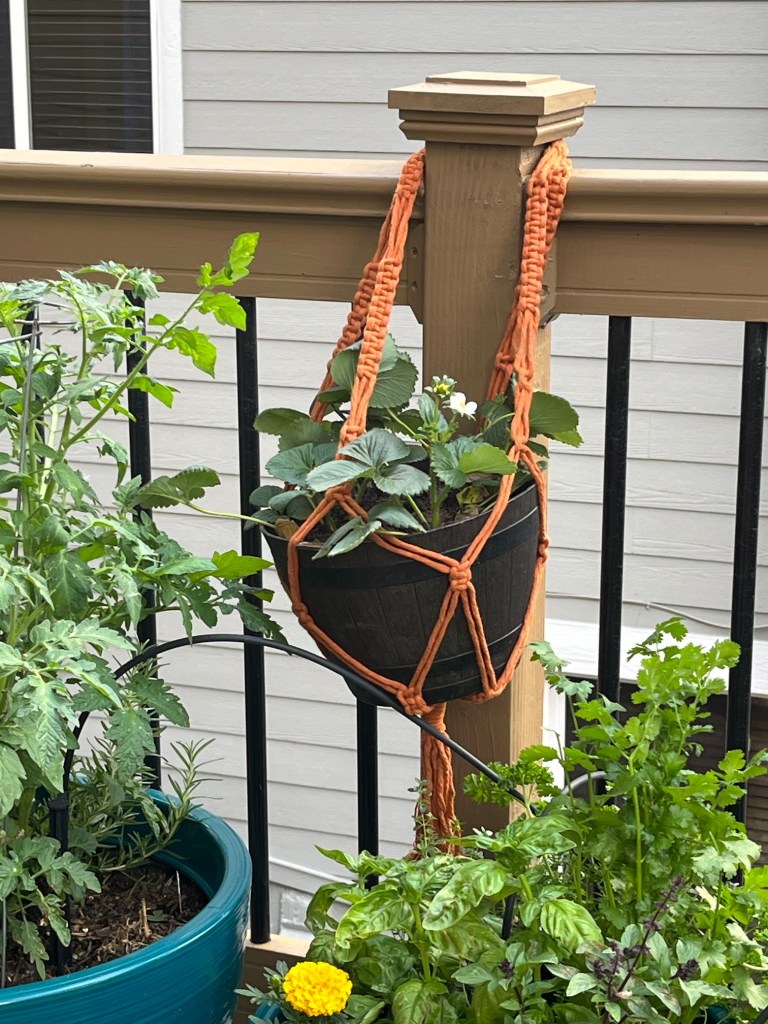
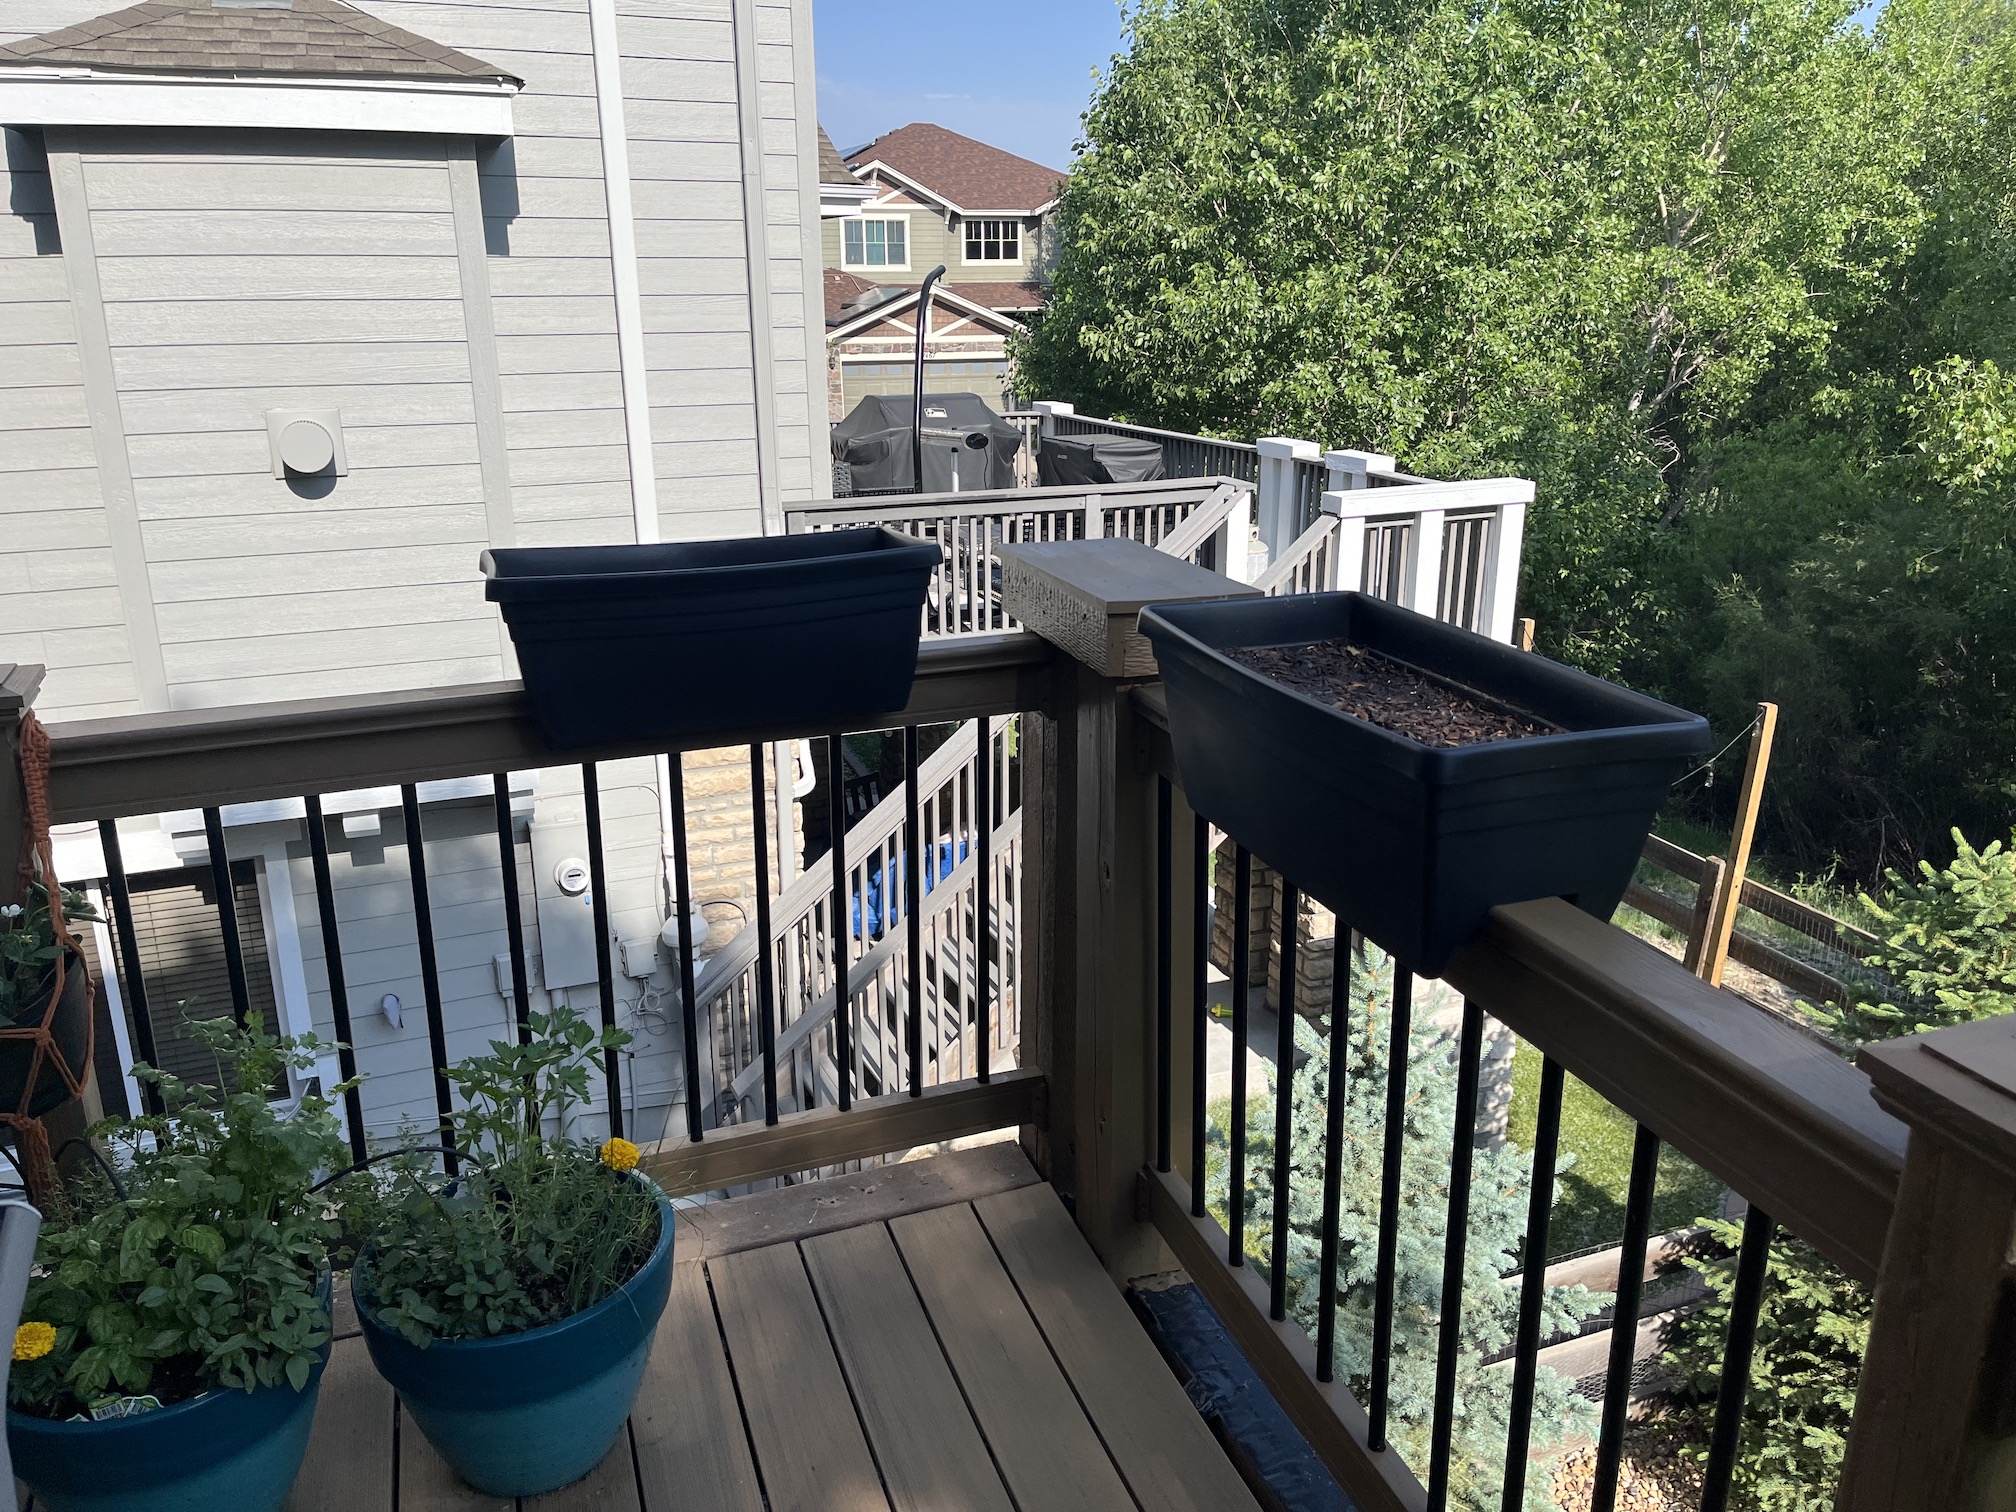
Speaking of the upstairs deck garden, my container garden pots are filling out nice with foliage from the tomatoes, peppers, and herbs I am growing. I also added a pot of strawberries using a macrame hanger that my friend K made me.
We also added to planters that rest on the deck railings to the mix and for now I have seed starts there which I will transfer eventually to the raised bed. Then I will put some type of trailing flowers in those planters.
John set up automatic irrigation (watering) for all the pots and planters on the deck so it we are out of town they will get watered!
I’ve been away from blogging for a little while because of travel. I celebrated my birthday at the end of May and John and I recently returned from a 4-day road trip around Colorado that I will post about in the future. Before that we were in Estes Park and Fort Collins for a couple days (will post about that trip too). I look forward to getting caught up on my blogging buddies’ posts in the near future.
My husband John is a good man and he continues to reinforce this fact all the time.
Our homeowner’s association (HOA) can be rather strict at times (and rather lax at other times when you want them to reinforce the rules), and our neighbor was in danger of getting fined for not finishing a fence he started on this property (our neighbor only got around to putting in two fence posts to start the fence).
Our neighbor is a busy father of two young children and commutes over an hour to work each way, Monday to Friday. He’s exhausted by the weekend and most of his energy goes to time with his kids.
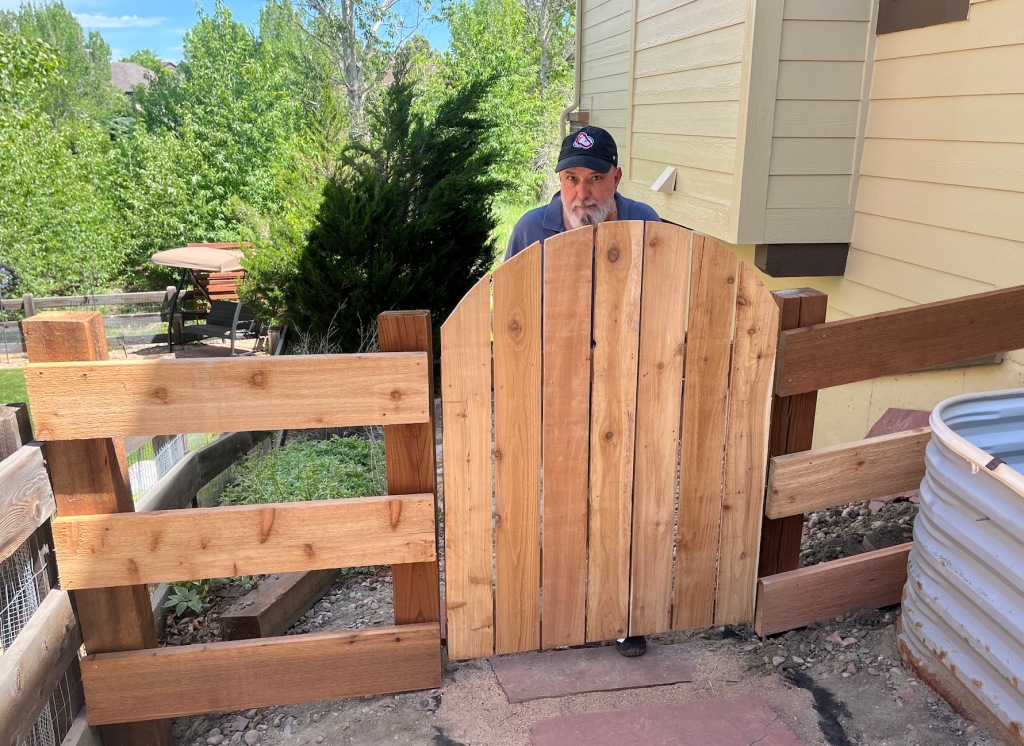
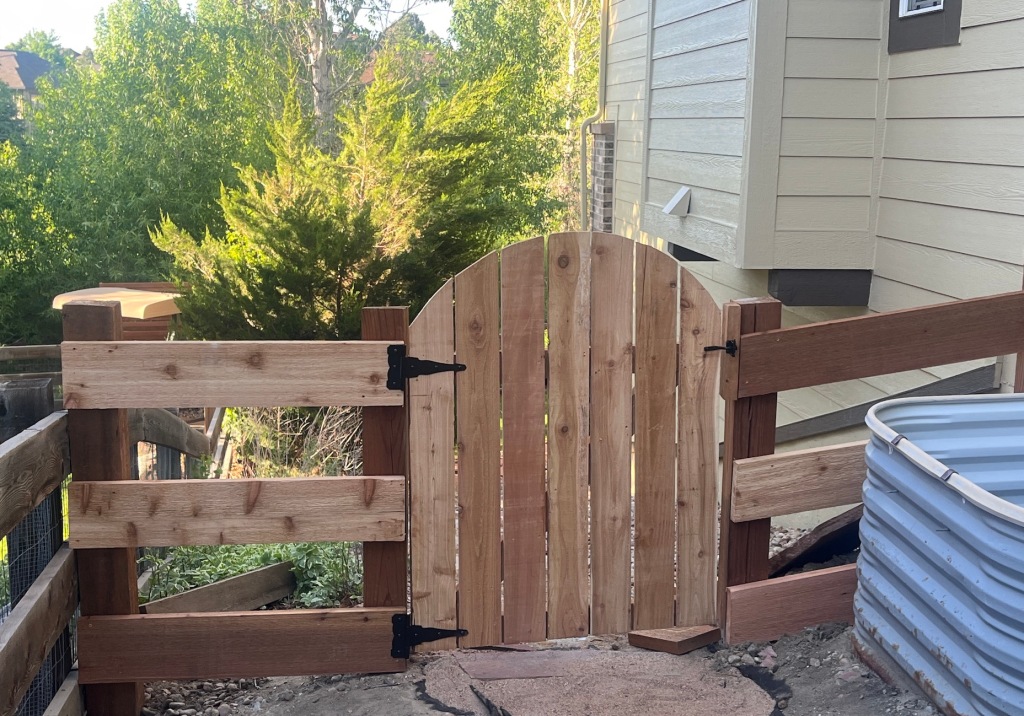
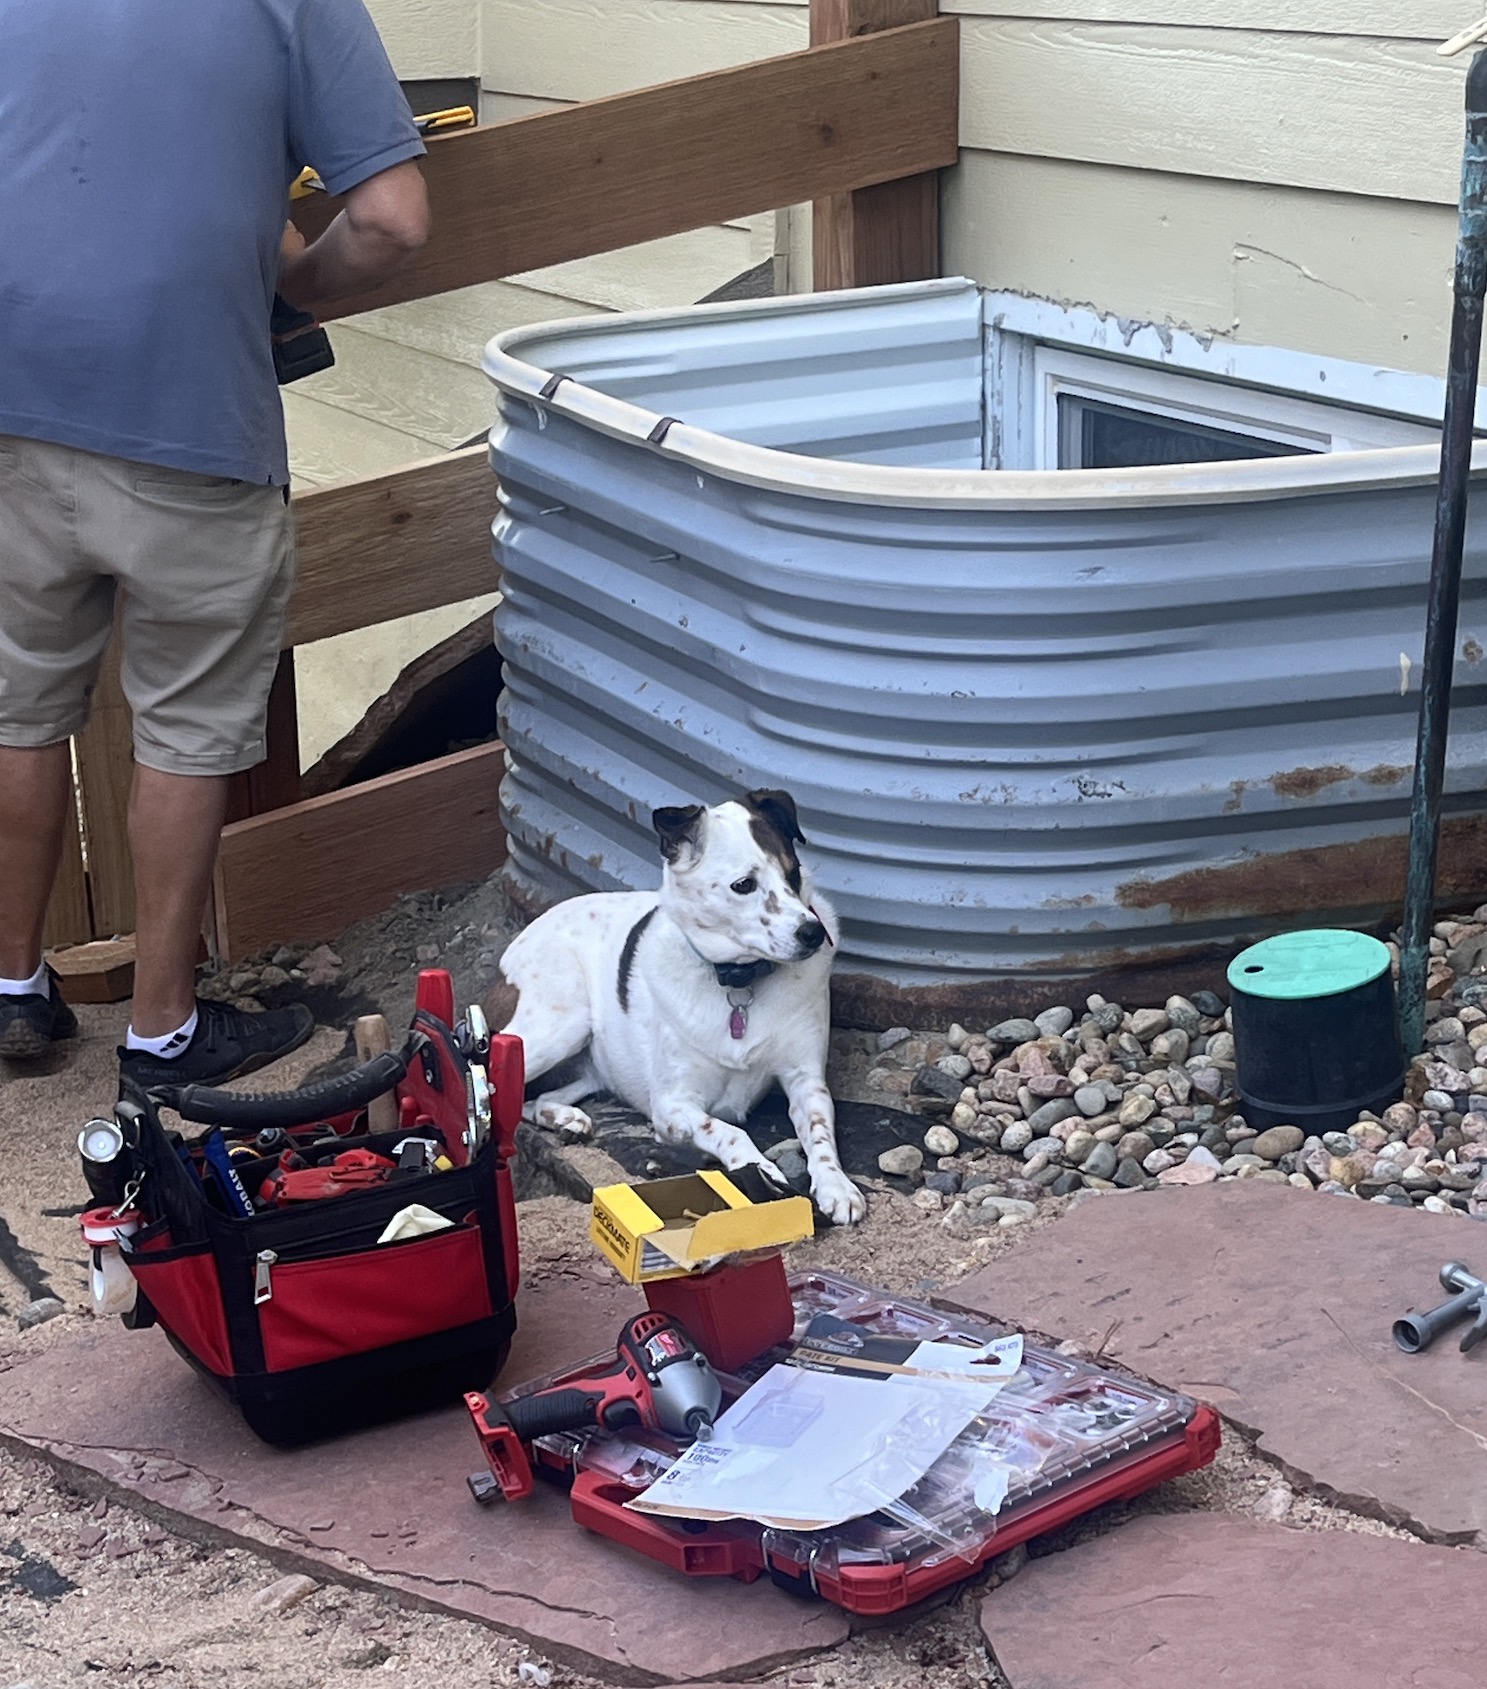
So John offered to help him complete the fence and ended up purchasing for the neighbor (who paid him back of course) all the fencing materials, AND building the fence and gate on his own for the neighbor!
Here is the neighbor’s dog waiting for John to finish the fence so she can now have a fenced yard:
I got some cool gifts for my birthday including a lovely home decor book and collection of stickers (I love stickers) from my friend J. My brother and family sent me the cutest schnauzer themed T-shirt inspired by a Van Gogh painting:
The Starry Schnauzer?
John got me a new iPad (I think my previous iPad belonged in the Apple Museum as it was many many iPad generations old); and my awesome stepsons were very generous for my birthday. One got me a gift card to my favorite used bookstore, and another got me some very yummy books!
I can’t wait to dive into this pile. But first I have to finish the two books I am currently reading The Water Knife by Paolo Bacigalupi; and Fairy Tale by Stephen King.
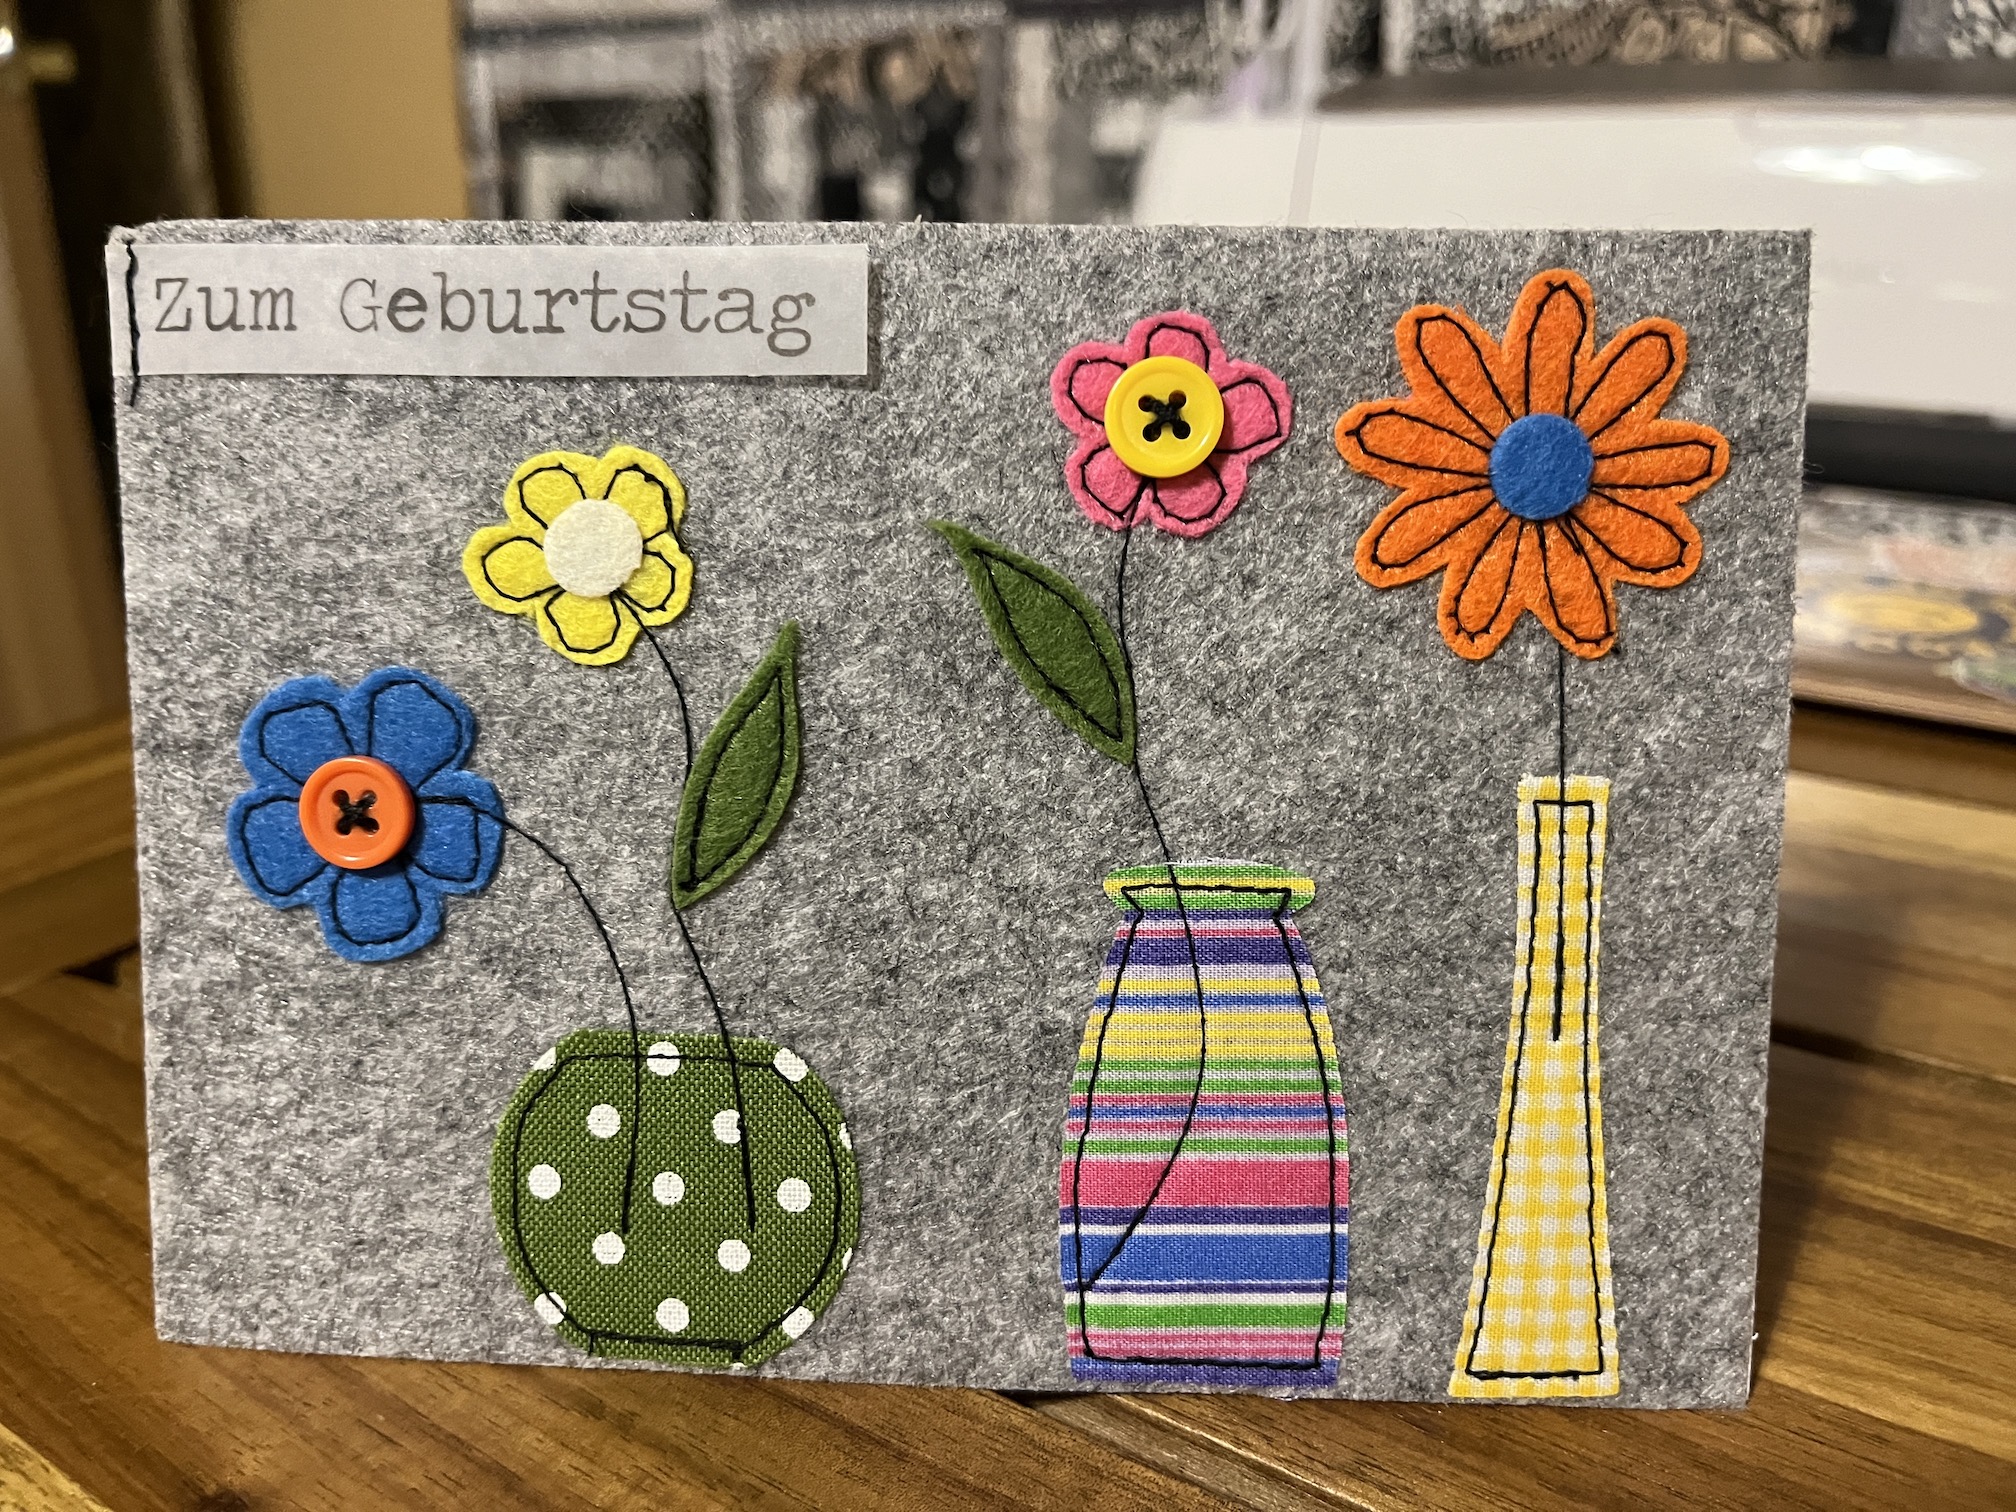
I have some surprises on the way from my sister for my birthday still, and I just received the most beautiful fiber art card from my longtime friend in Austria (my “Danish Brother”, I spent part of my summer in 1998 in Denmark with him and his parents) today in the mail:
Now here’s a quote to close out this post from the amazing (so far) book Fairy Tale I am currently reading, that make me think of John:
Well you haven’t heard from Tierney in a while so I figured it’s time once again for me to step in and update you on what we’ve been up.
This is Mike the Miniature Schnauzer who lives with Tierney and John, who despite not having opposable thumbs is able to write a guest blog post from time to time.
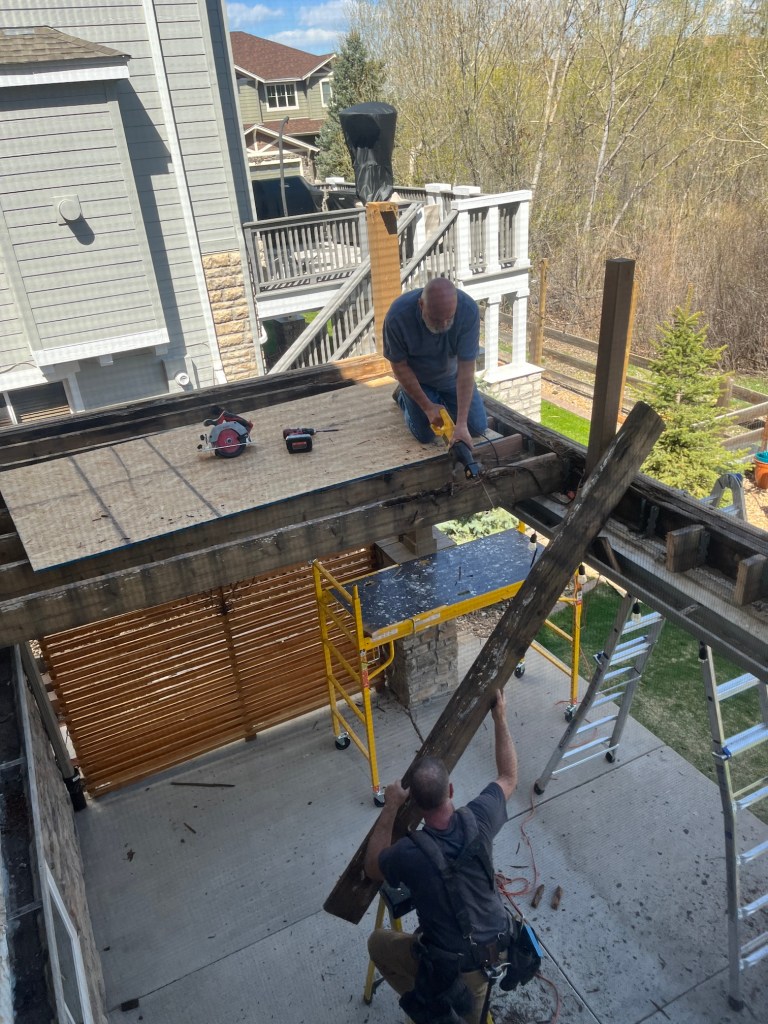
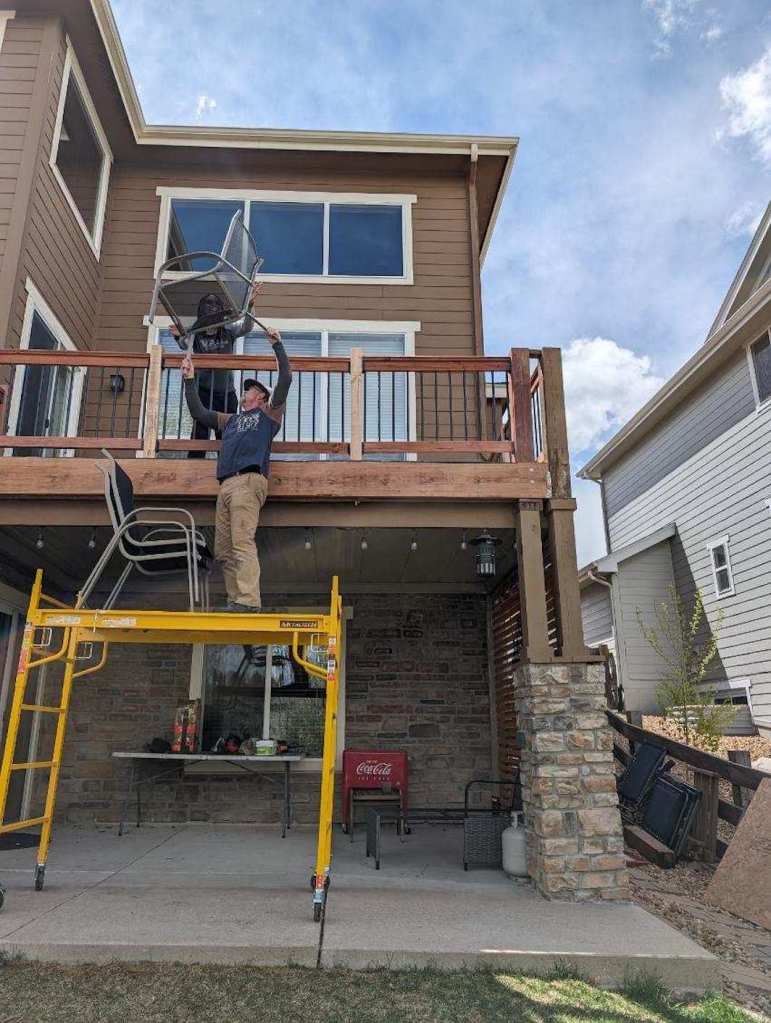
Tierney and John had an upstairs deck that was on the verge of collapse. John had tried bracing some of the rotting sections a couple years ago but they were one crazy human-deck-dinner-party (you know if the humans started jumping up and down on top of the deck while dining) from a total deck disaster!
Their awesome friends from Bend, Oregon (where Tierney and I used to live) MJ and J (J has a lot of deck building experience) came and visited us last week; and thus began 4 days of deck demolishing and rebuilding.
MJ and Tierney documented the whole 4-day long project with photos; and I am going to share some of their photos (it’s impressive enough that I can write without opposable thumbs, taking photos with a smart phone would be nearly impossible…but with the right dog treats offered, I could try…) in this post.
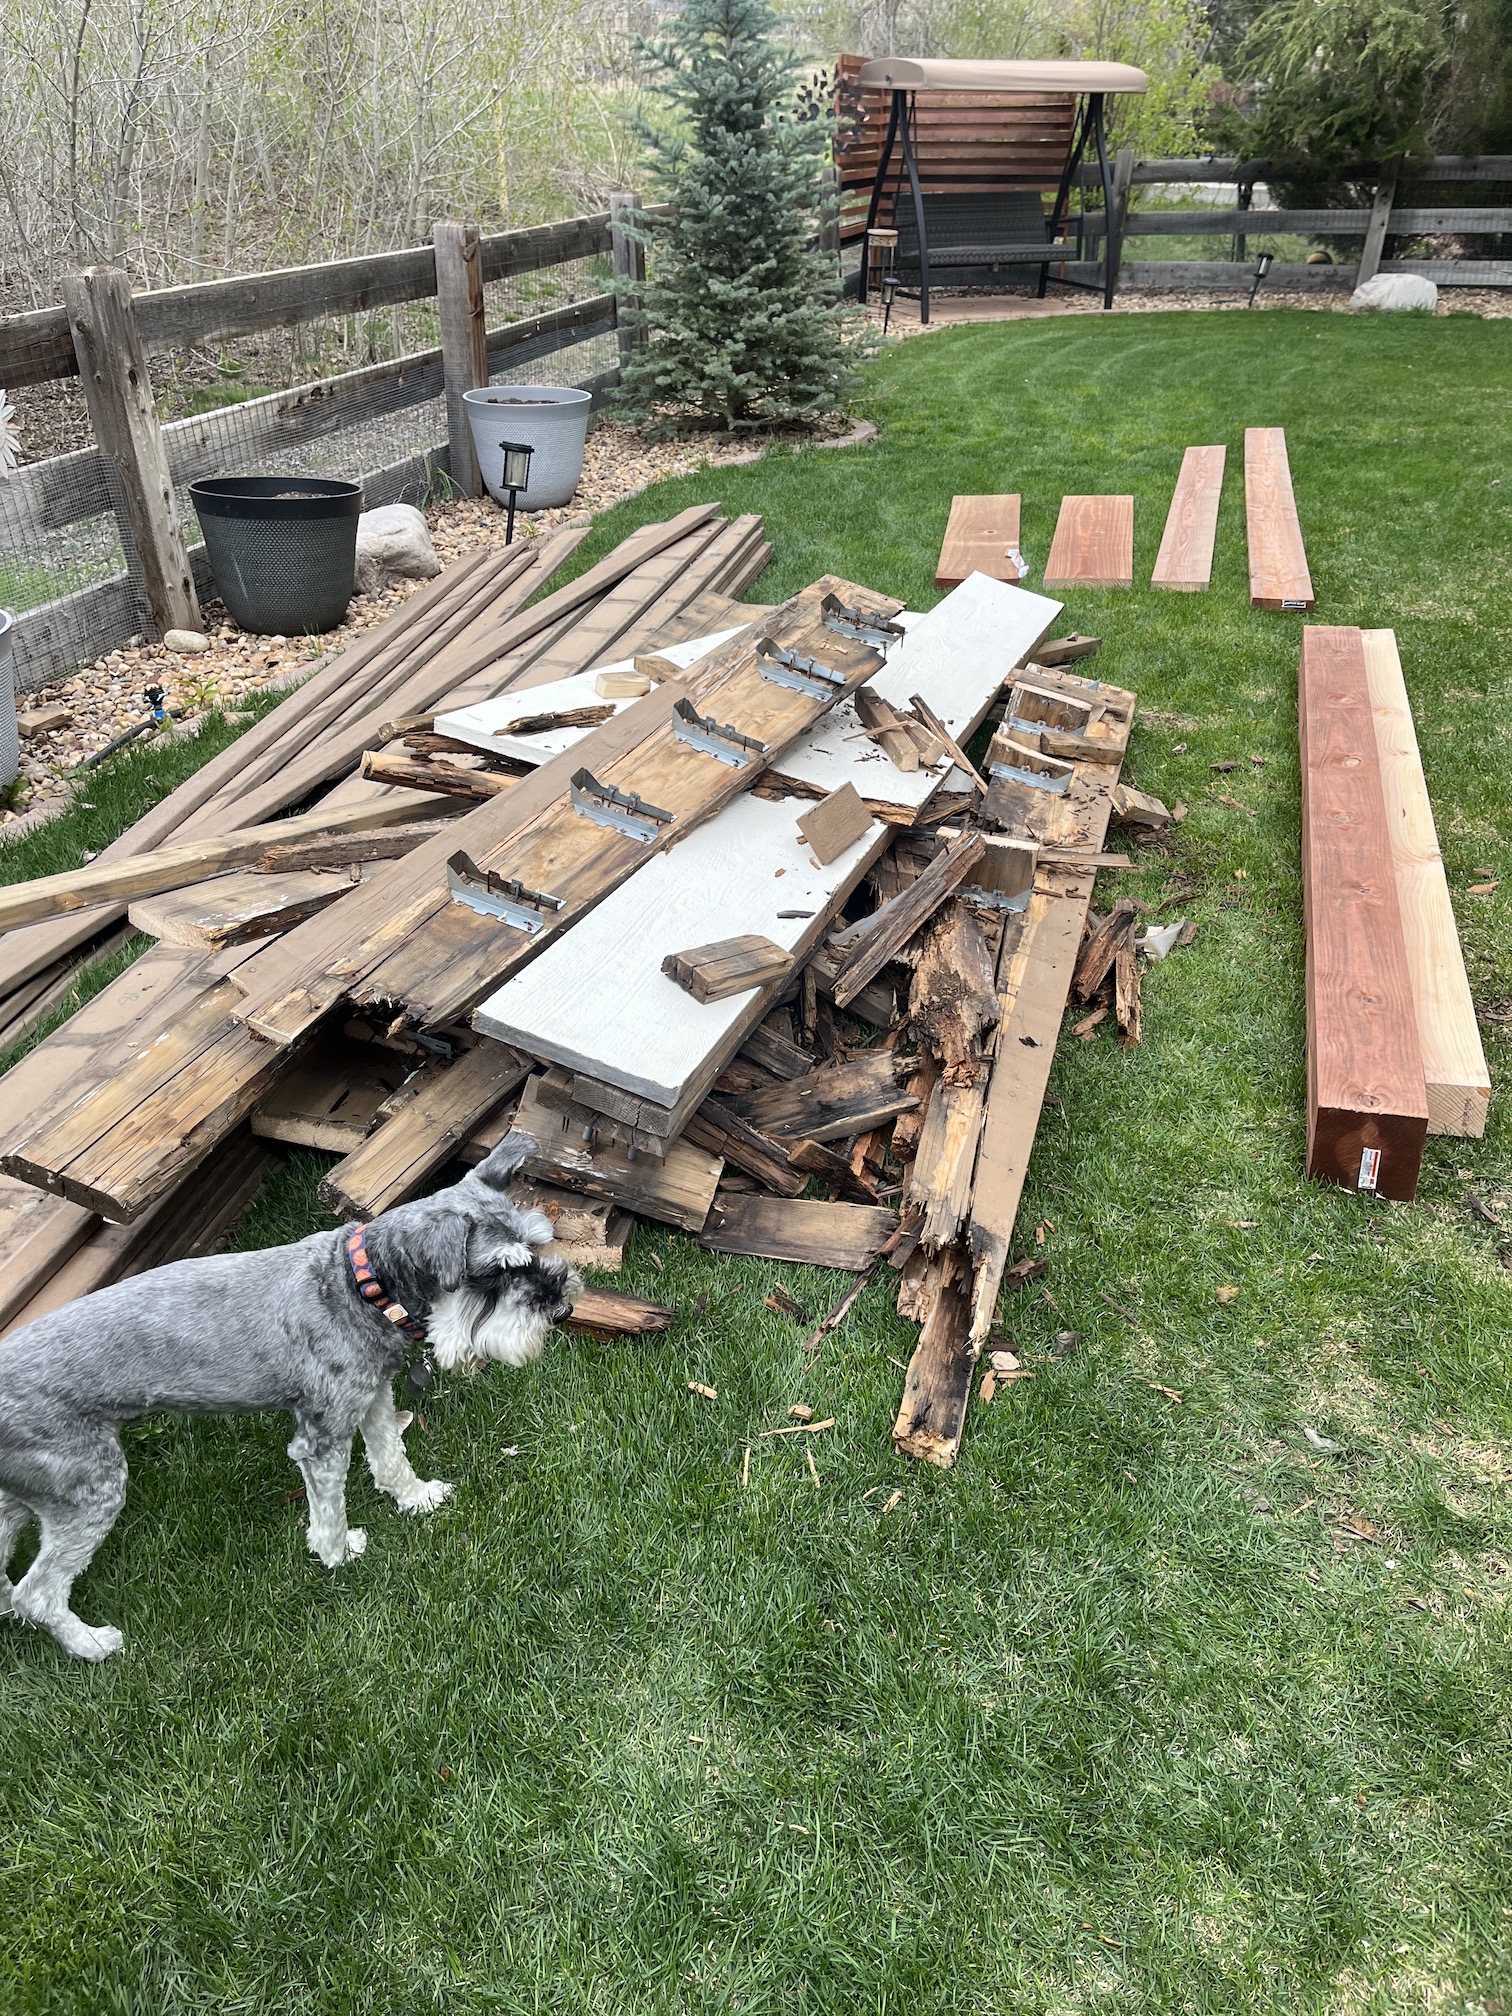
First they had to take the existing deck-of-terror down:
The backyard got to looking crazy and there was no place for them to play ball with me (humans are thoughtless)!
Plus they kept chasing me back inside because they didn’t want me to get any splinters in my paws (perhaps that was thoughtful…but I wanted to play ball!!!)
Luckily and I had Tierney and MJ (the female humans) hostage in the basement den binge watching television shows and eating snacks while paying attention to me:
Here I am with MJ, one of my favorite humans in this world (she is lucky I love her!)
John and Tierney made sure the visiting humans ate well, making what looked like delicious breakfasts each morning; and what looked like tasty dinners in the evening like the Chicken Piccata with homemade pasta and Caesar Salad they served one night:
I did get nervous while they were working on the deck as it looked like the humans working on it could fall at any time. They of course made sure I was safe (which is what is most important).
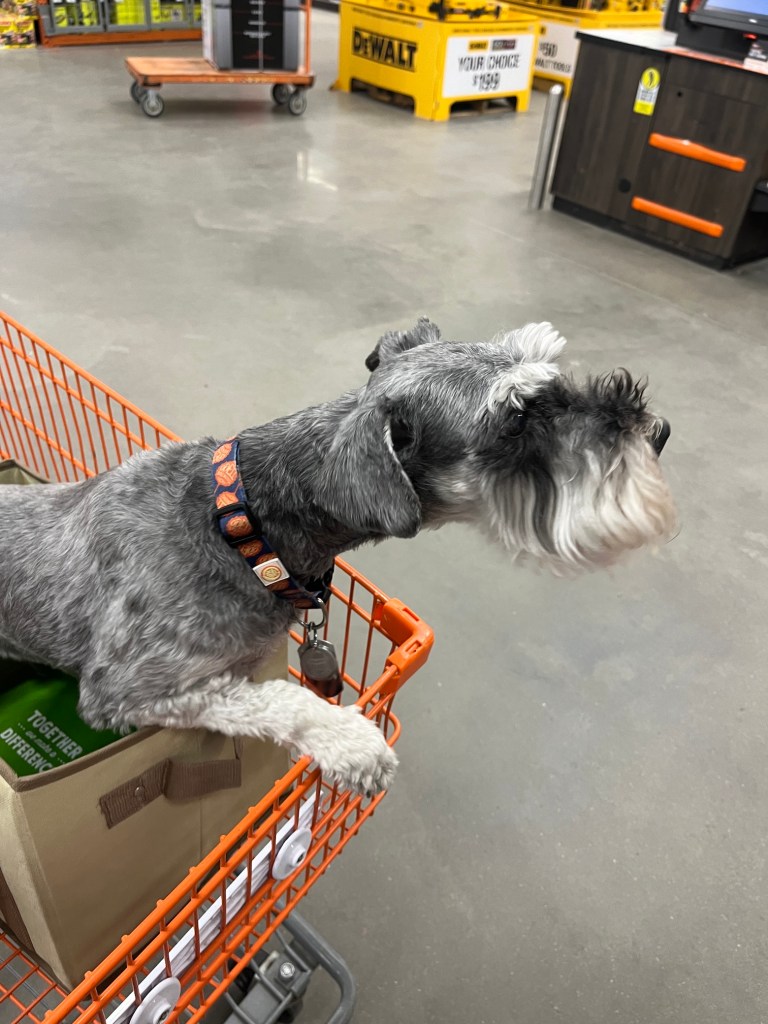
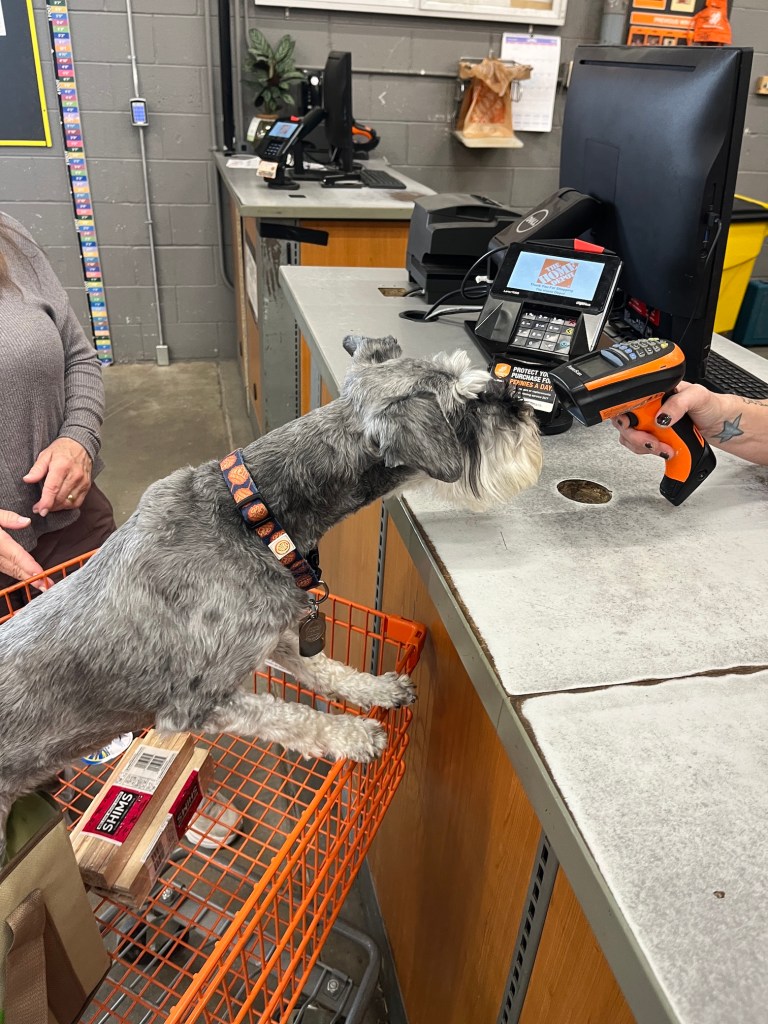
Tierney and MJ helped out the male humans John and J by running some errands including a trip to Home Depot for something called “shims”. Of course Tierney and MJ took me with them and I had to help them find the shims:
You might notice Tierney has a bandage on her thumb – it’s not from working on the deck but carelessness while chopping carrots…
I was concerned when there was an attempt to scan me twice while we were in Home Depot – don’t they know the cash value of me would break a price scanner?!?!?!
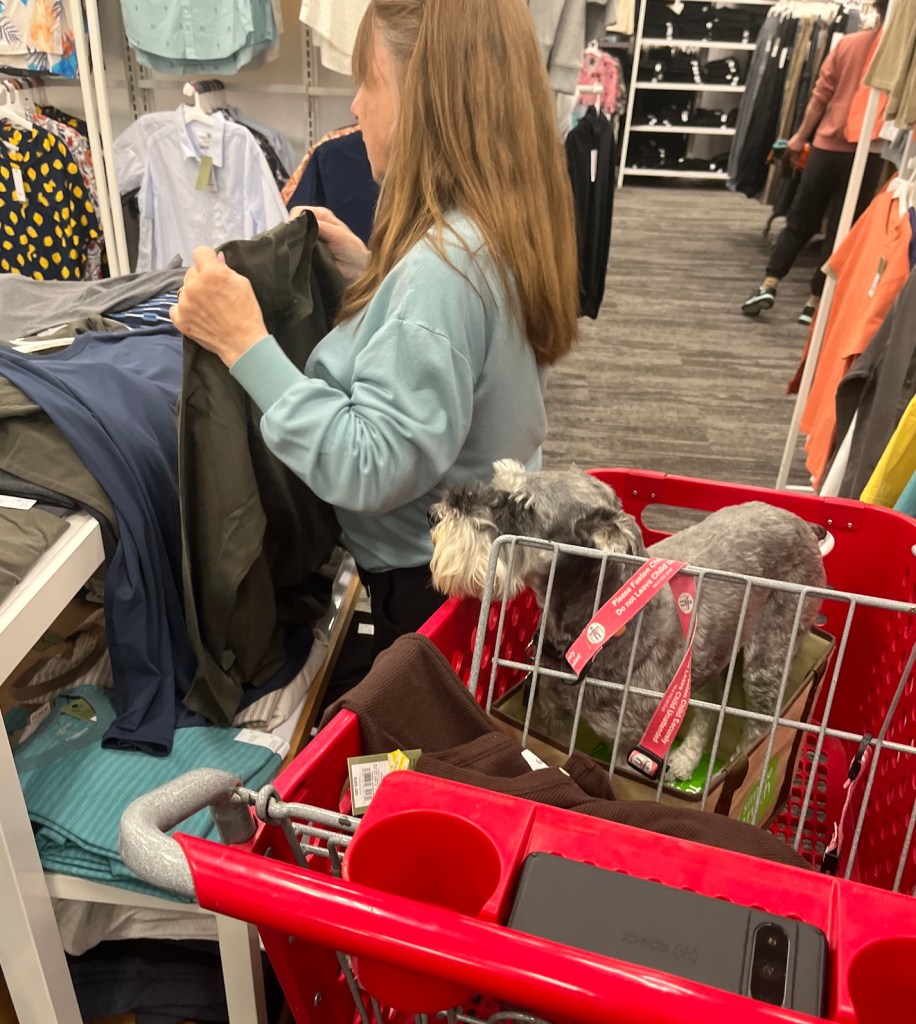
We also took a trip to Target to buy J some additional clothes as he had “Man-packed” where he forgot to pack all the clothes he needed for the trip. Little did MJ and Tierney realize that there was a “Service Dogs Only” sign in the entry of the store (oops!)
No one said anything to MJ and Tierney about how I didn’t belong in there as they wandered around the store except to say “cute dog”. Well I guess that was my one and only trip to Targetunless I pursue a career as a Service Dog (but I am too grumpy to do that).
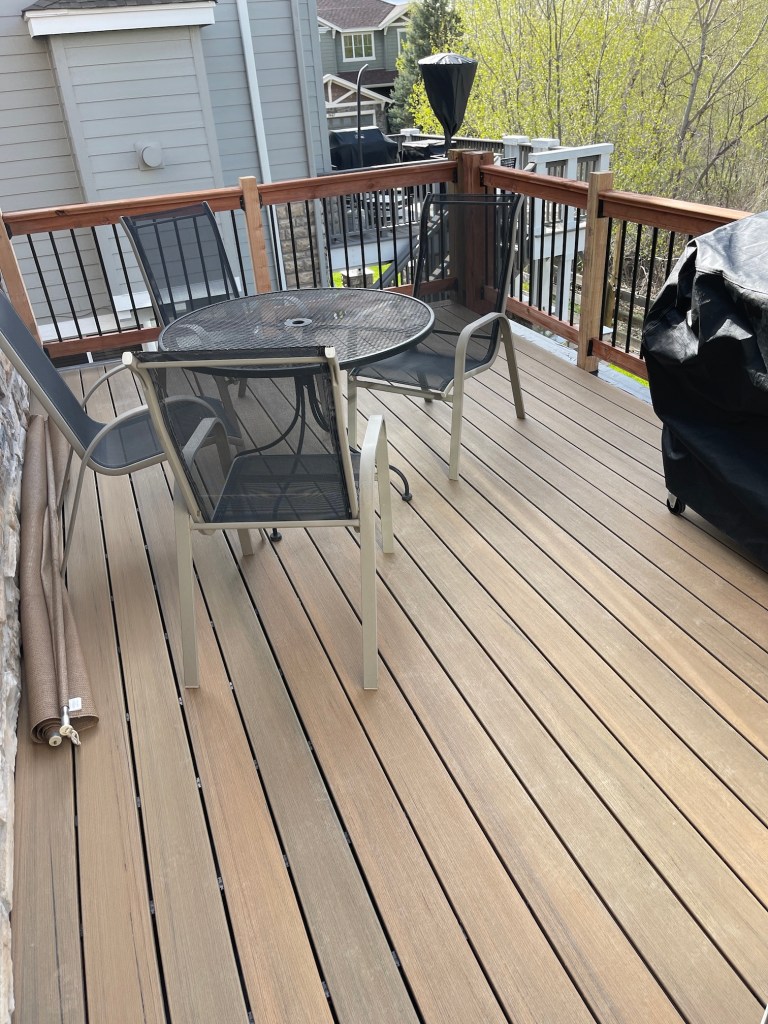
By the 4th day the male humans finished up the deck and they were so happy! Here are photos of the last stages of putting the deck together and making it livable again:
The deck is not completely done. John has to order something called “matching trim” for the deck, add post caps (whatever those are), and do some painting. But the deck is now very usable! The humans could even have a crazy human-deck-dinner-party if they wanted.
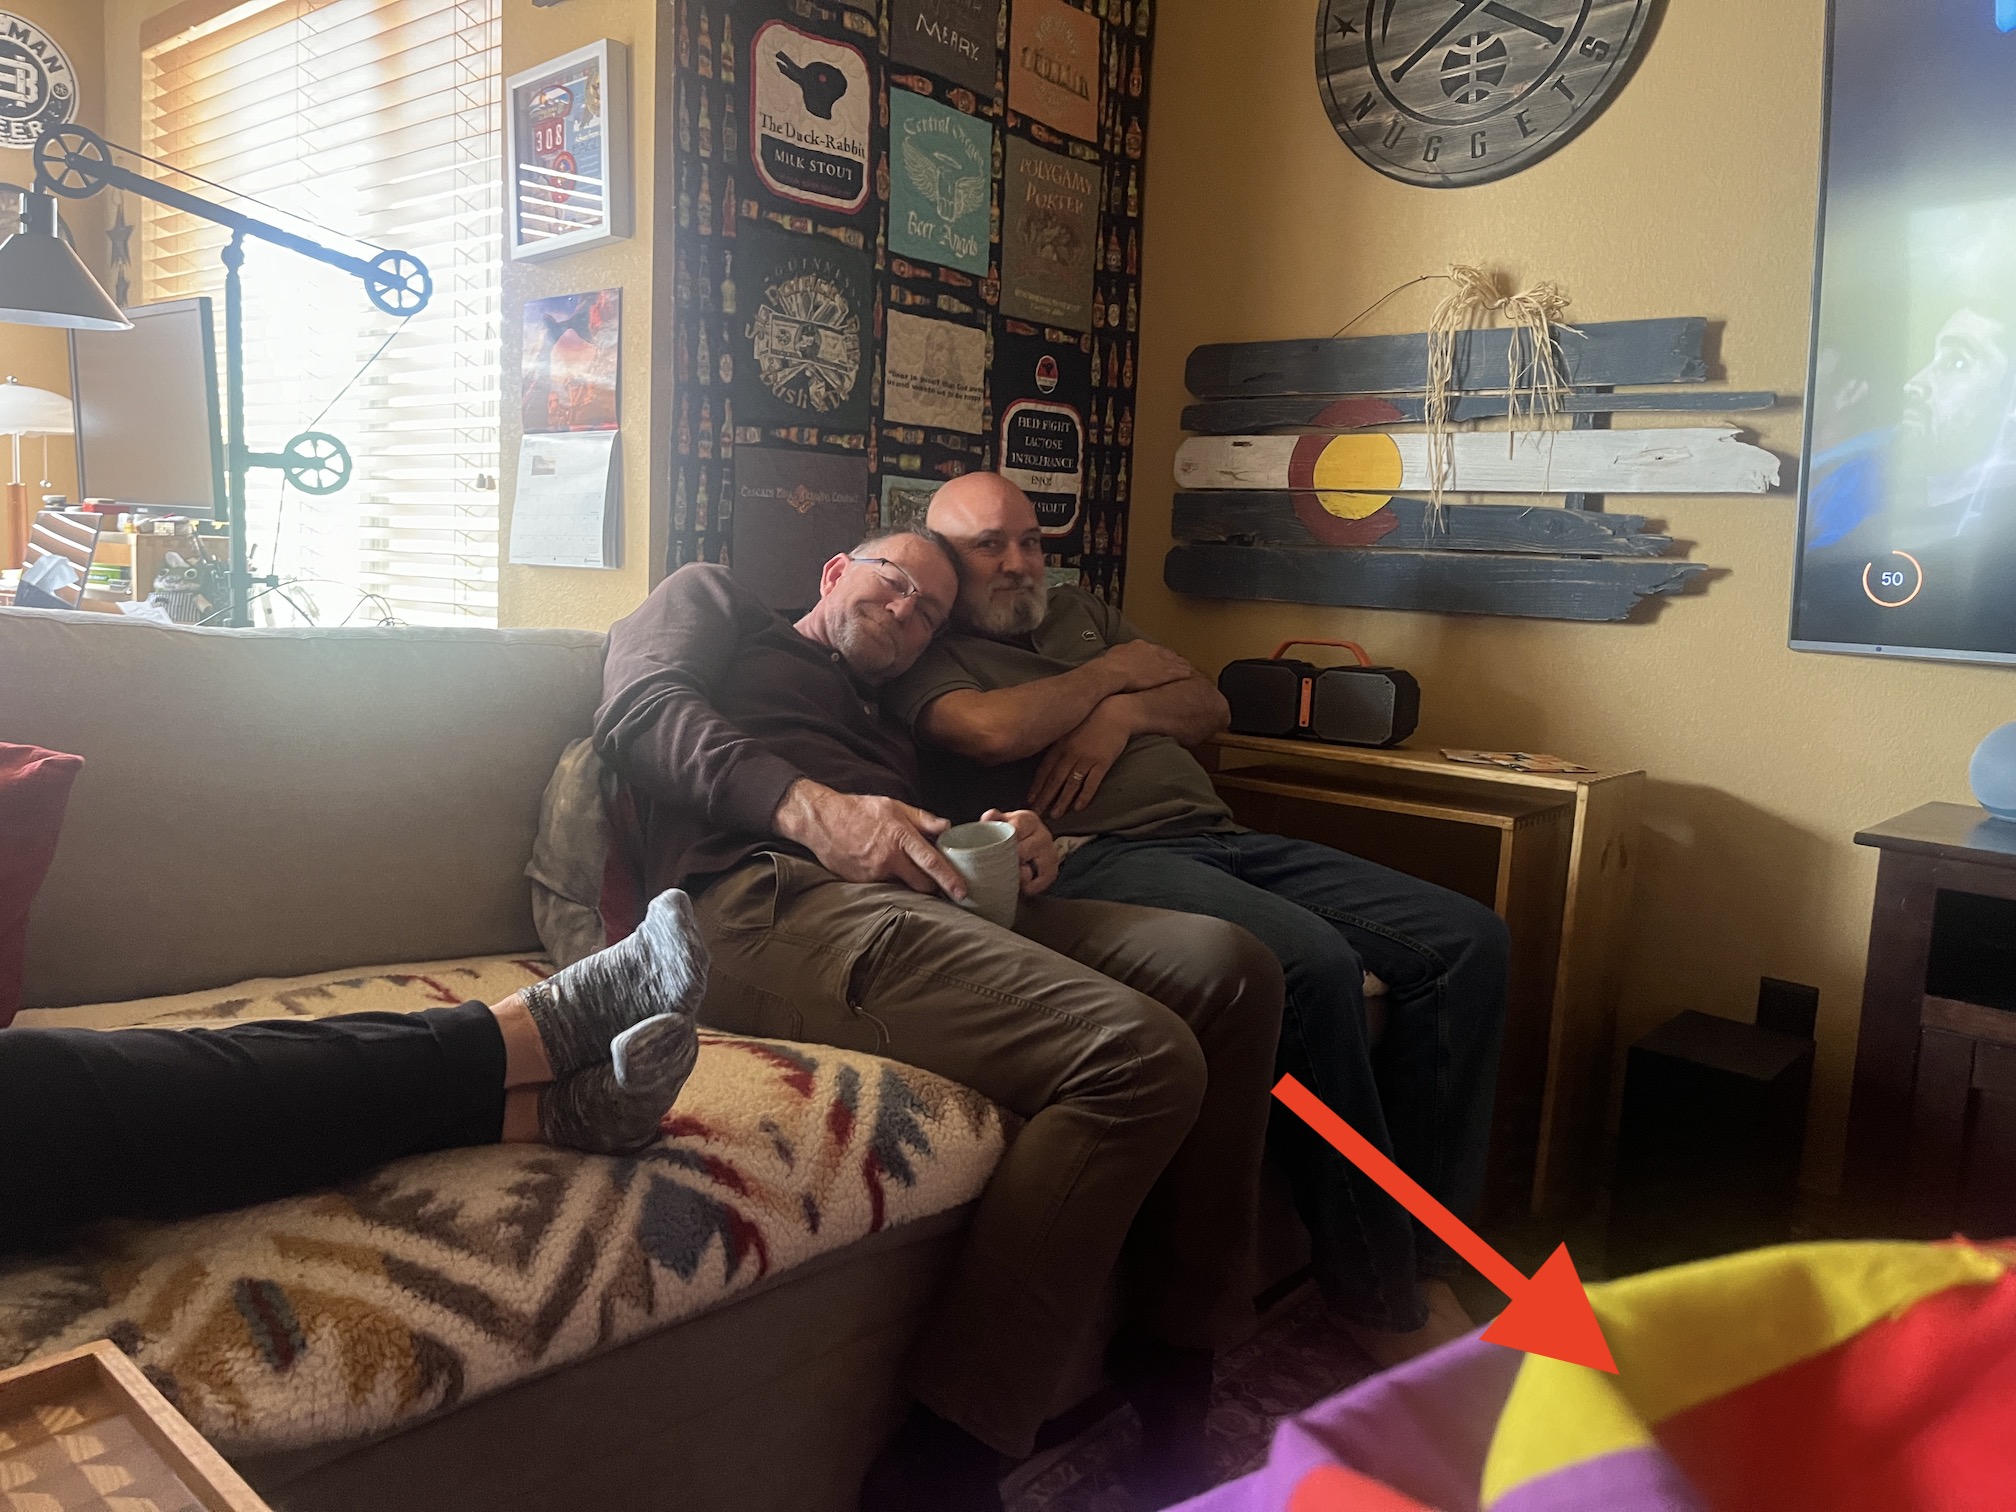
The last day of the project, the humans went out to dinner and then relaxed in the basement den for a movie night. If you look closely at the lower right hand section of the photo below, Tierney is actually working on the quilt she is hand quilting (see her post Hand Quilting Go Boldly) and perhaps sometime this year she will finish it!
Note: J and John are only snuggled as a joke for the photo, they did spend the 4 days working hard, not snuggling.
By the time we took MJ and J back to Human Storage aka “the airport” as humans call it (see the blog post “Human Storage” and Airport Lore) I was pretty tired because managing humans is so exhausting!
On the way to drop them off in Human Storage and then when I returned home
Well that catches you up on major recent events in my life. I will work on getting Tierney to blog on what she has been up to (before the deck project she had just returned from a trip to New York City with her sister) and to have her work on catching up on all her blogging buddies posts!
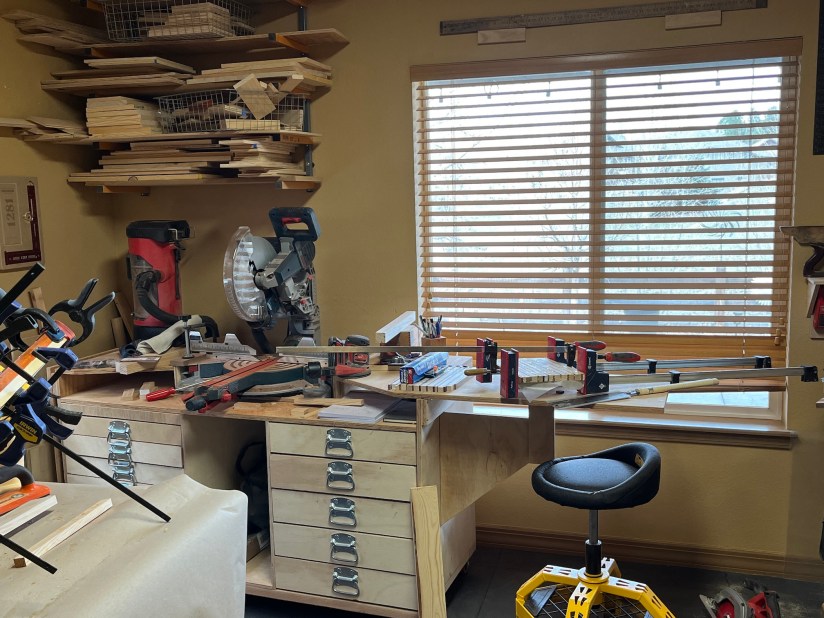
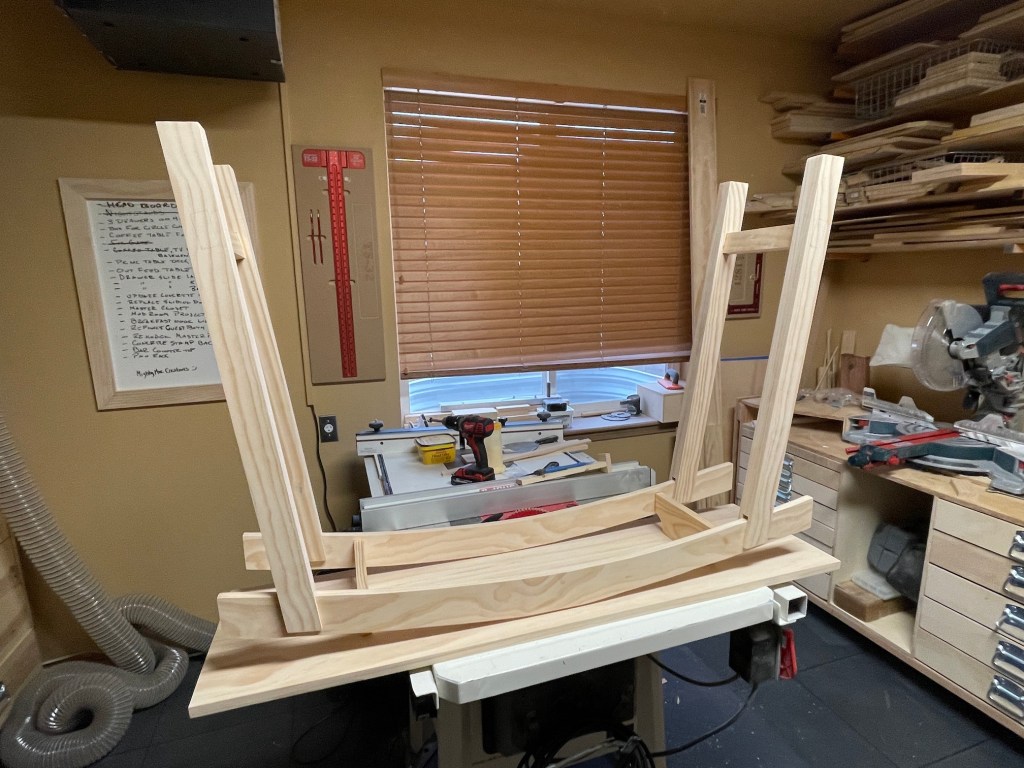
It’s been a while since I’ve shared what my husband John has been working on in his woodshop in our basement.
Recently he finished an Outfeed Table to butt up against his Table Saw. According to Fine Woodworking: “A good outfeed table is essential for safe woodworking, because it allows you to control the workpiece as it moves past the blade and off the back of the table saw. Without it, you’ll have to push down hard on the back of long boards, which makes it difficult to guide them safely past the blade.”
That sounds like a good idea! I want John to keep all this fingers so anything that makes woodworking safer I support 🙂
So John watched a bunch of YouTube videos and then set about designing an Outfeed Table that worked for him and his small woodshop.
He laminated the top of the Outfeed Table to make it easier for the wood to glide on it. It was his first time laminating and it seemed a little scary but we watched YouTube videos together (I provided moral support) and it was easier than he thought it would be!
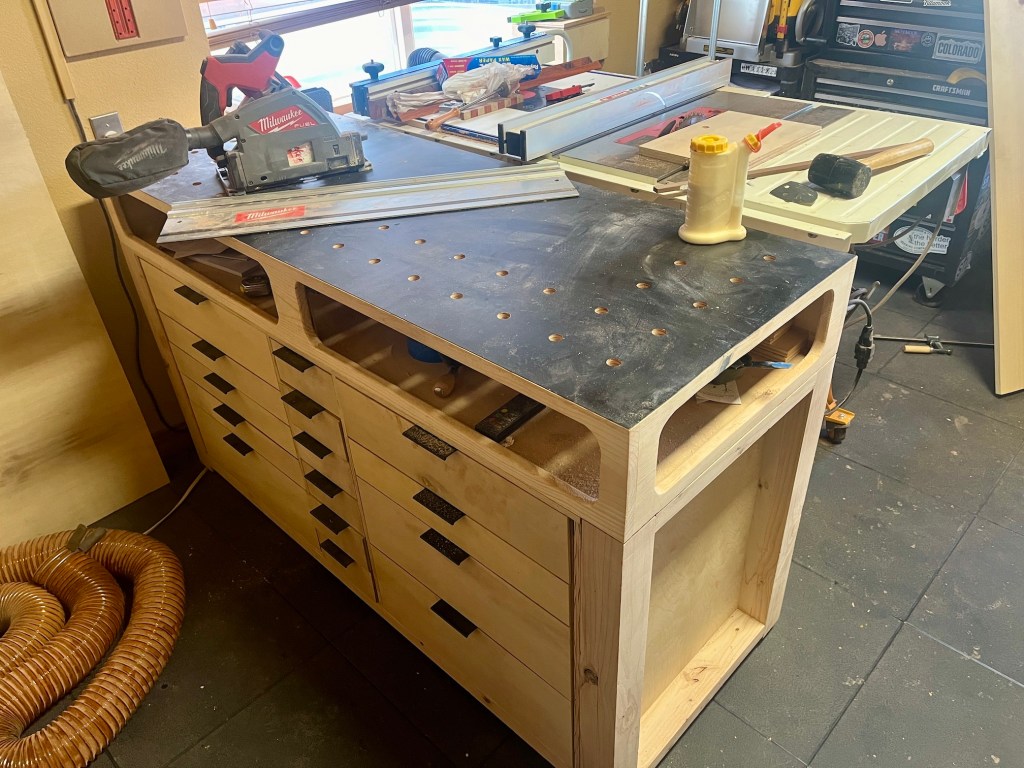
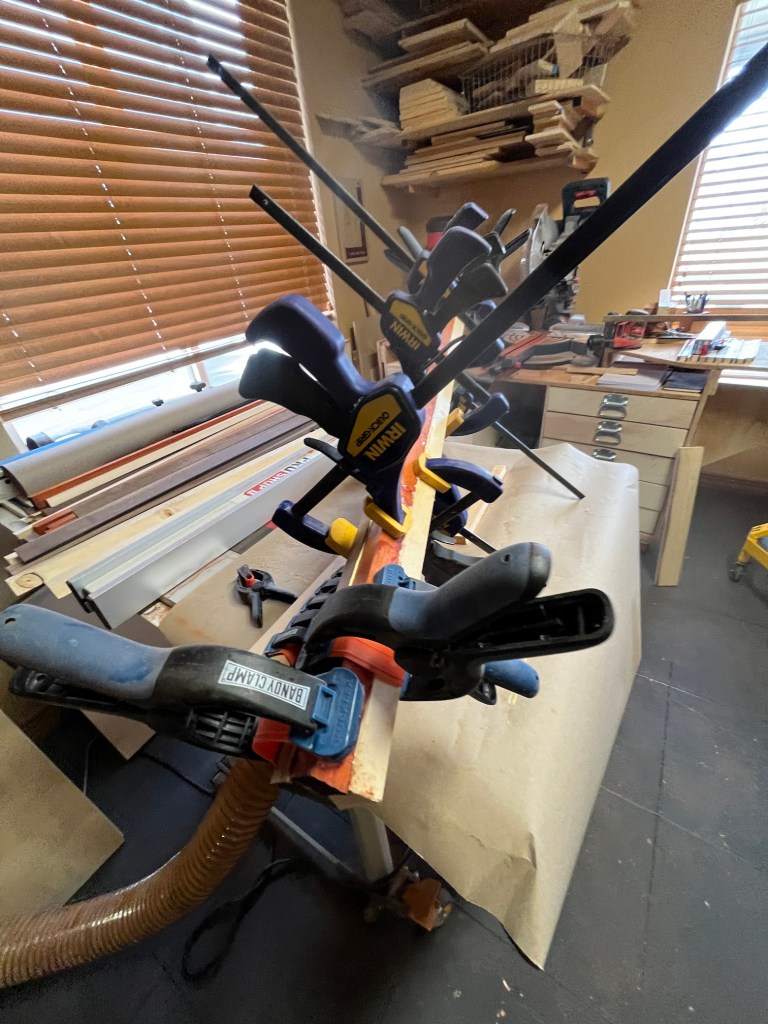
The final stage was to add “bench dog holes” that allow you to clamp pieces on the Outfeed Table while woodworking. He used a special template to do this and he was pleased with the results:
It looks a little messy because this is the woodshop in use – I forgot to take photos when he first made the holes.
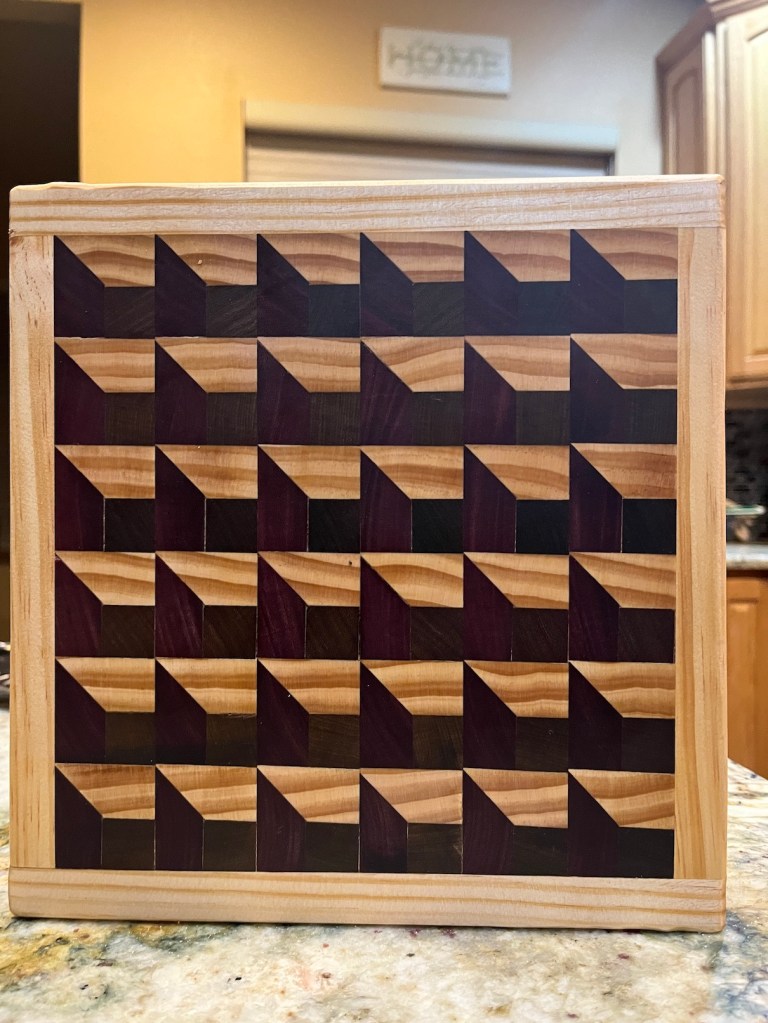
Speaking of the “woodshop in use”, John has been teaching his eldest son to woodwork starting with making cutting boards. They get together once to twice a week afterwork and on Sunday afternoons. They’ve made a lot of cutting boards so far including a 3D cutting board.
It’s been a great father-son bonding time!
They’ve also been working on a serving tray to replace an old store bought serving tray that is on its last leg.
They have another side to add and then handles.
And they’ve started their first big project together: a new entertainment console for the basement movie area. So far they’ve made the top of the piece.
It’s going to have a Scandinavian furniture flare, like our bedroom dresser that John made a couple years ago:
(By the way, someday John will be selling his cutting boards online through his shop Mighty Moe Creations, we just have to figure out what platform that will be besides Etsy.)
Finally I’m sewing together the blocks on my recycled denim and home decor fabric quilt “What Direction Do I Go?“
I am trying something new to sew the 81 blocks together by working on 9 blocks at a time, numbering them and then semi-chain-piecing them into a square:
So far I have three squares, which is 27 blocks total, sewn together:
I really like the look of the individual blocks sewn together:
In the postBlocks Completed for “What Direction Do I Go?”, I mentioned I was trying to figure out the layout for the blocks on this quilt. Well I decided to make it look as if light was coming from the center and radiating out…sort of…well as best I could with the blocks I made. I put the blocks with the lighter or more faded denim in the center and the darker ones on the outer areas:
It is a fun project to work on while watching TV and hopefully soon it will cover more of my lap (photo above) than it does right now (because it’s cold now in Colorado – 28 degrees!)
PANTRY UPDATE
A couple years ago John redid the pantry and built in shelves. Recently he repainted the pantry to a white with gray undertones and added a new butcher block shelf. He also added a motion sensor light that will turn out when you enter the pantry and turn off after a while when there is no motion; and 4 outlets so we could keep a couple appliances in the pantry and use them in there.
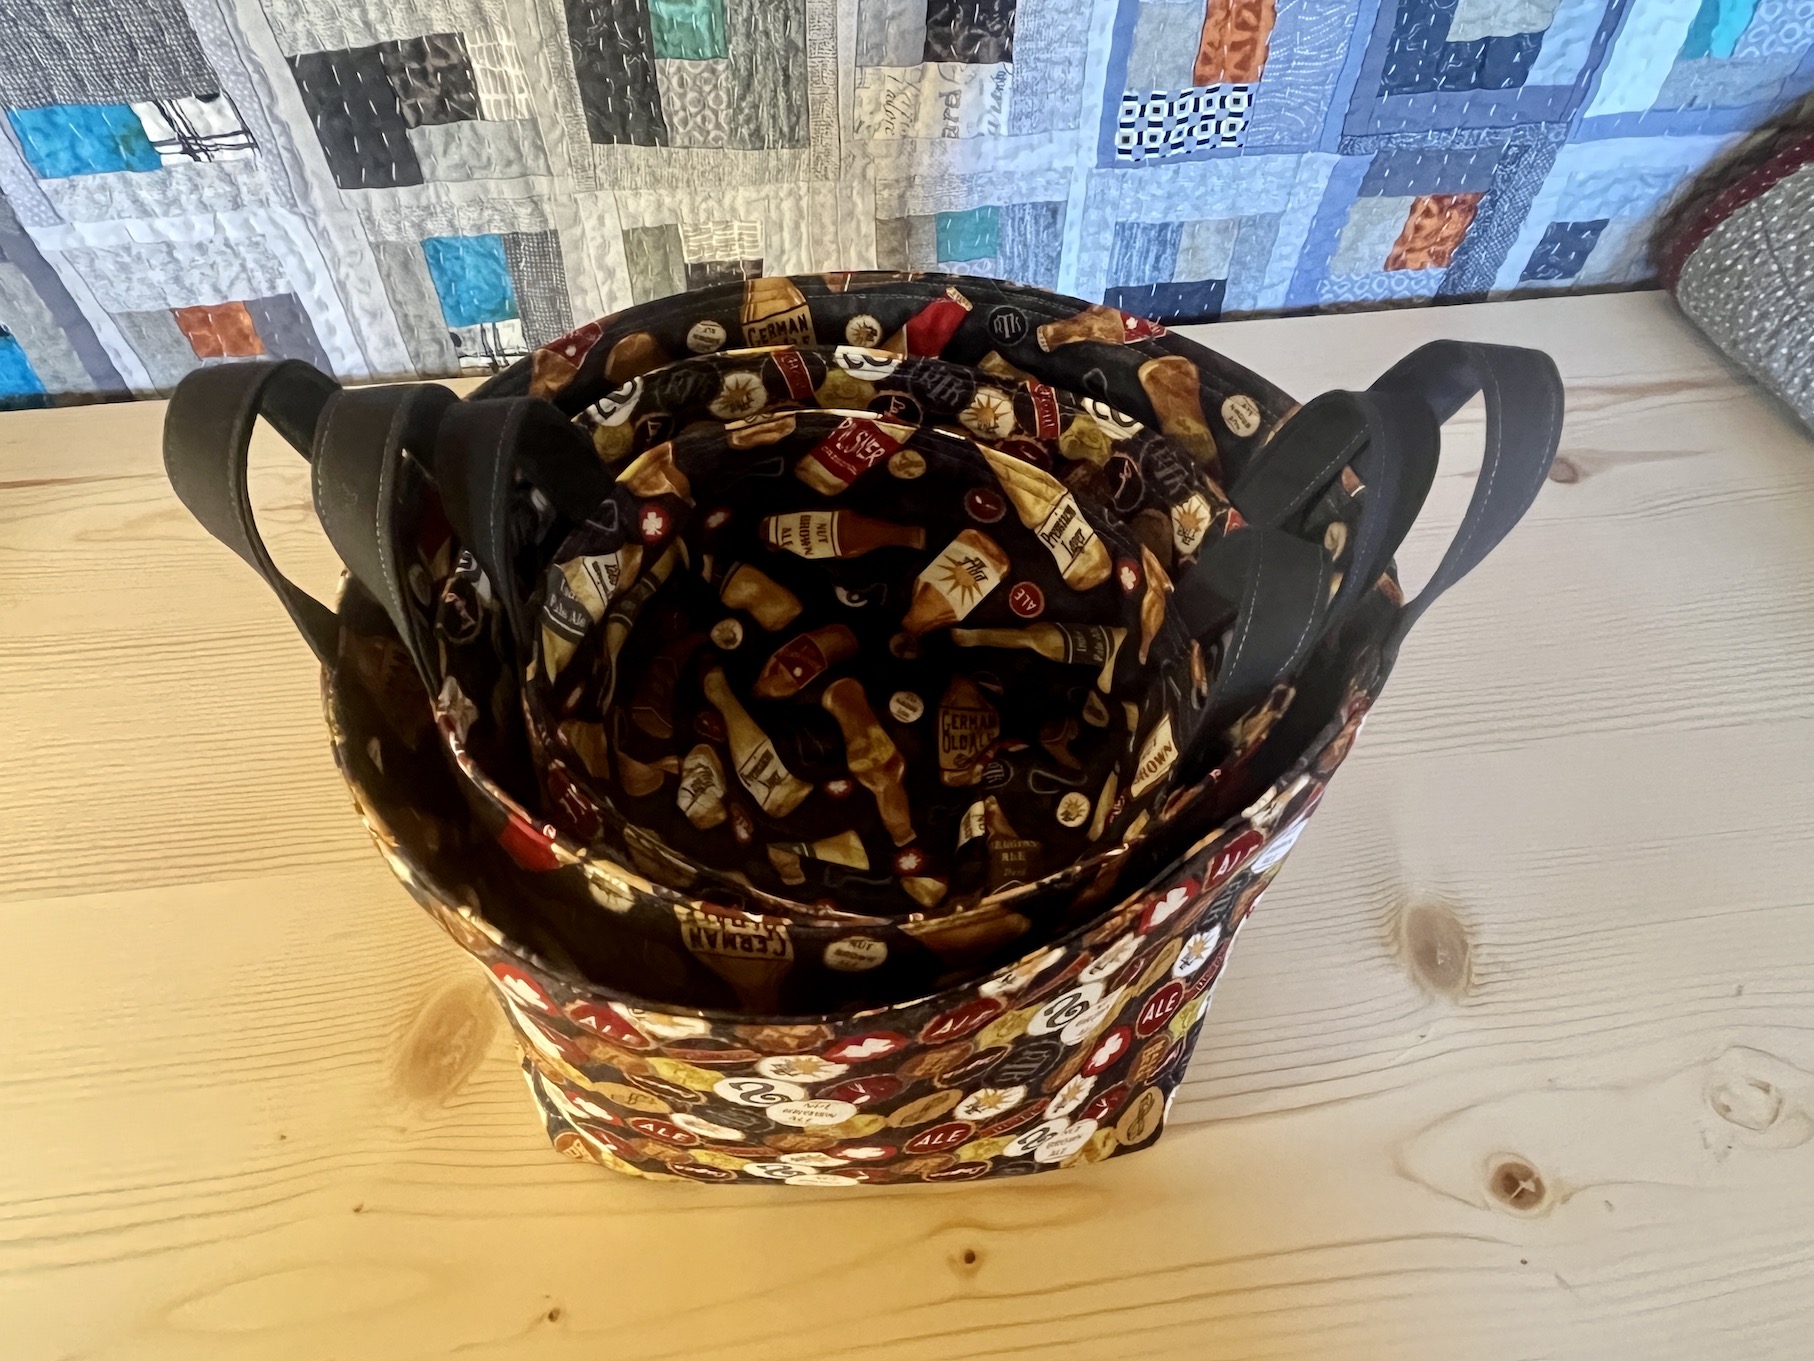
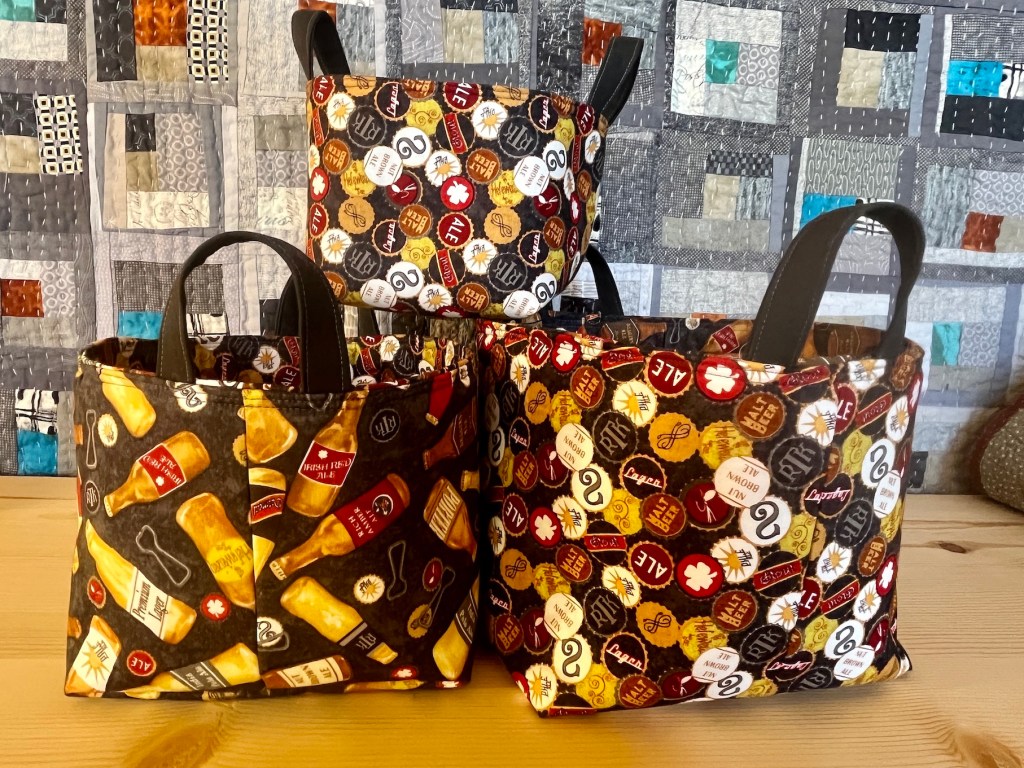
John and I are going in the near future to visit his childhood friend and his wife. We are staying their home and I never show up as a guest as someone’s home without a gift (nor does John); and with some Instagram snooping I discovered they love craft beers and so I made them a set of Lagom Storage Bins, pattern Sotak Handmade.
These are the same bins I made a couple months ago for some friends (see postLagom Storage Bins). After I made them the first time I was not sure I was going to make them again as they use two different types of interfacing (SF 101 and Fusible Fleece) and they seemed sort of tedious to make (but the pattern is well written).
But on second round of making these bins they are growing on me. I did discover that with the larger sizes you would be better off making them with a cotton canvas/linen canvas for more strength. I used quilting weight fabric and the largest one I made seems slightly “floppy”.
The first time I made them I only made the smallest size “X-small”). Here are the sizes they come in per the pattern designer’s Etsy shop:
This time I made them in three sizes – X-Small, Small, and Medium.
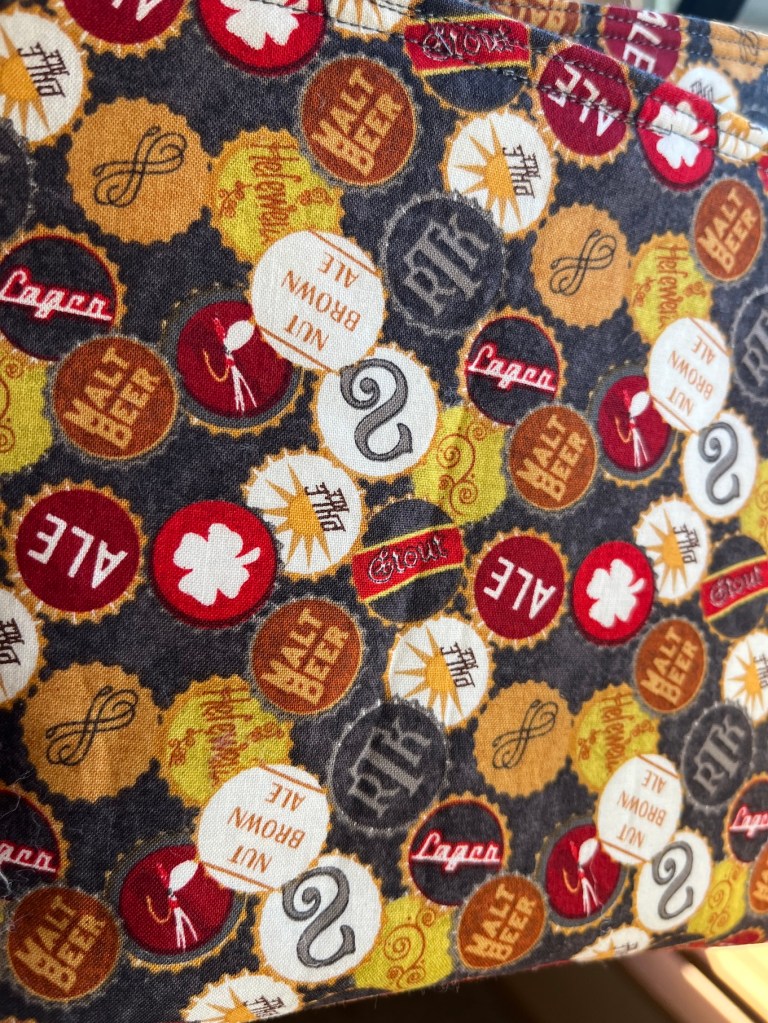
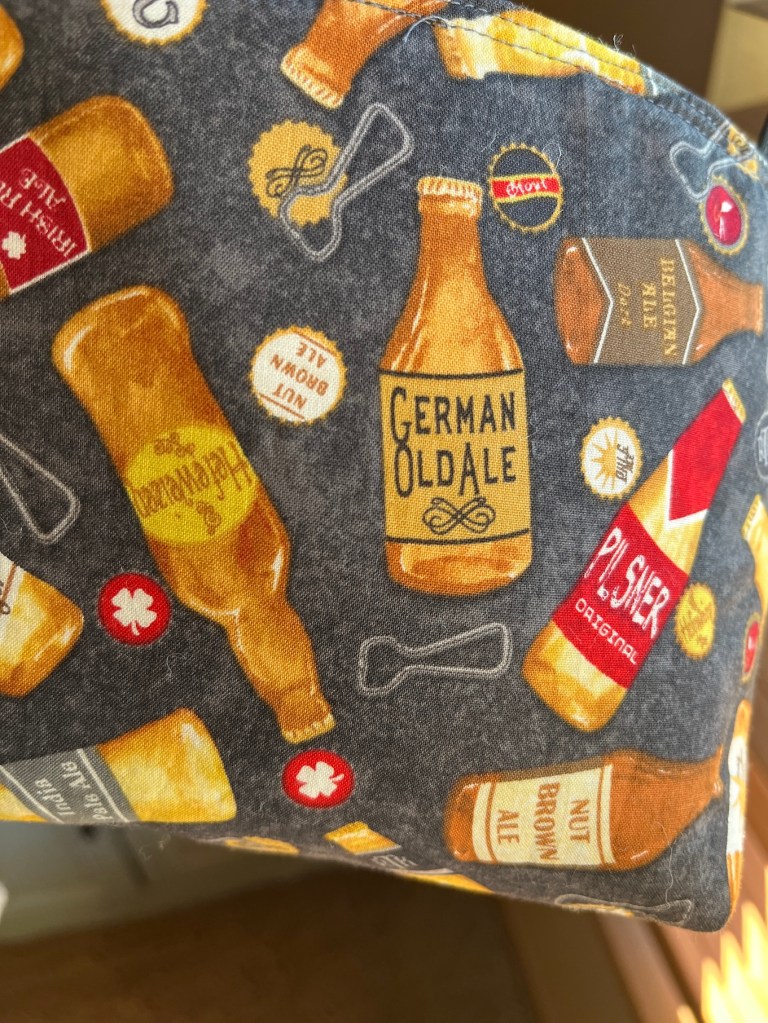
I found some cool craft beer themed fabric that my late husband Terry had selected (he loved craft beer, dogs, and flannel fabric; and a lot of his fabric stash as a quilter was in these themes):
Here are photos of the bins (and I love how nicely they stack together!):
I hope they like them! I have no idea how their home is decorated as I am visiting them for the first time; but I thought using the theme of something that interests them might be safe…
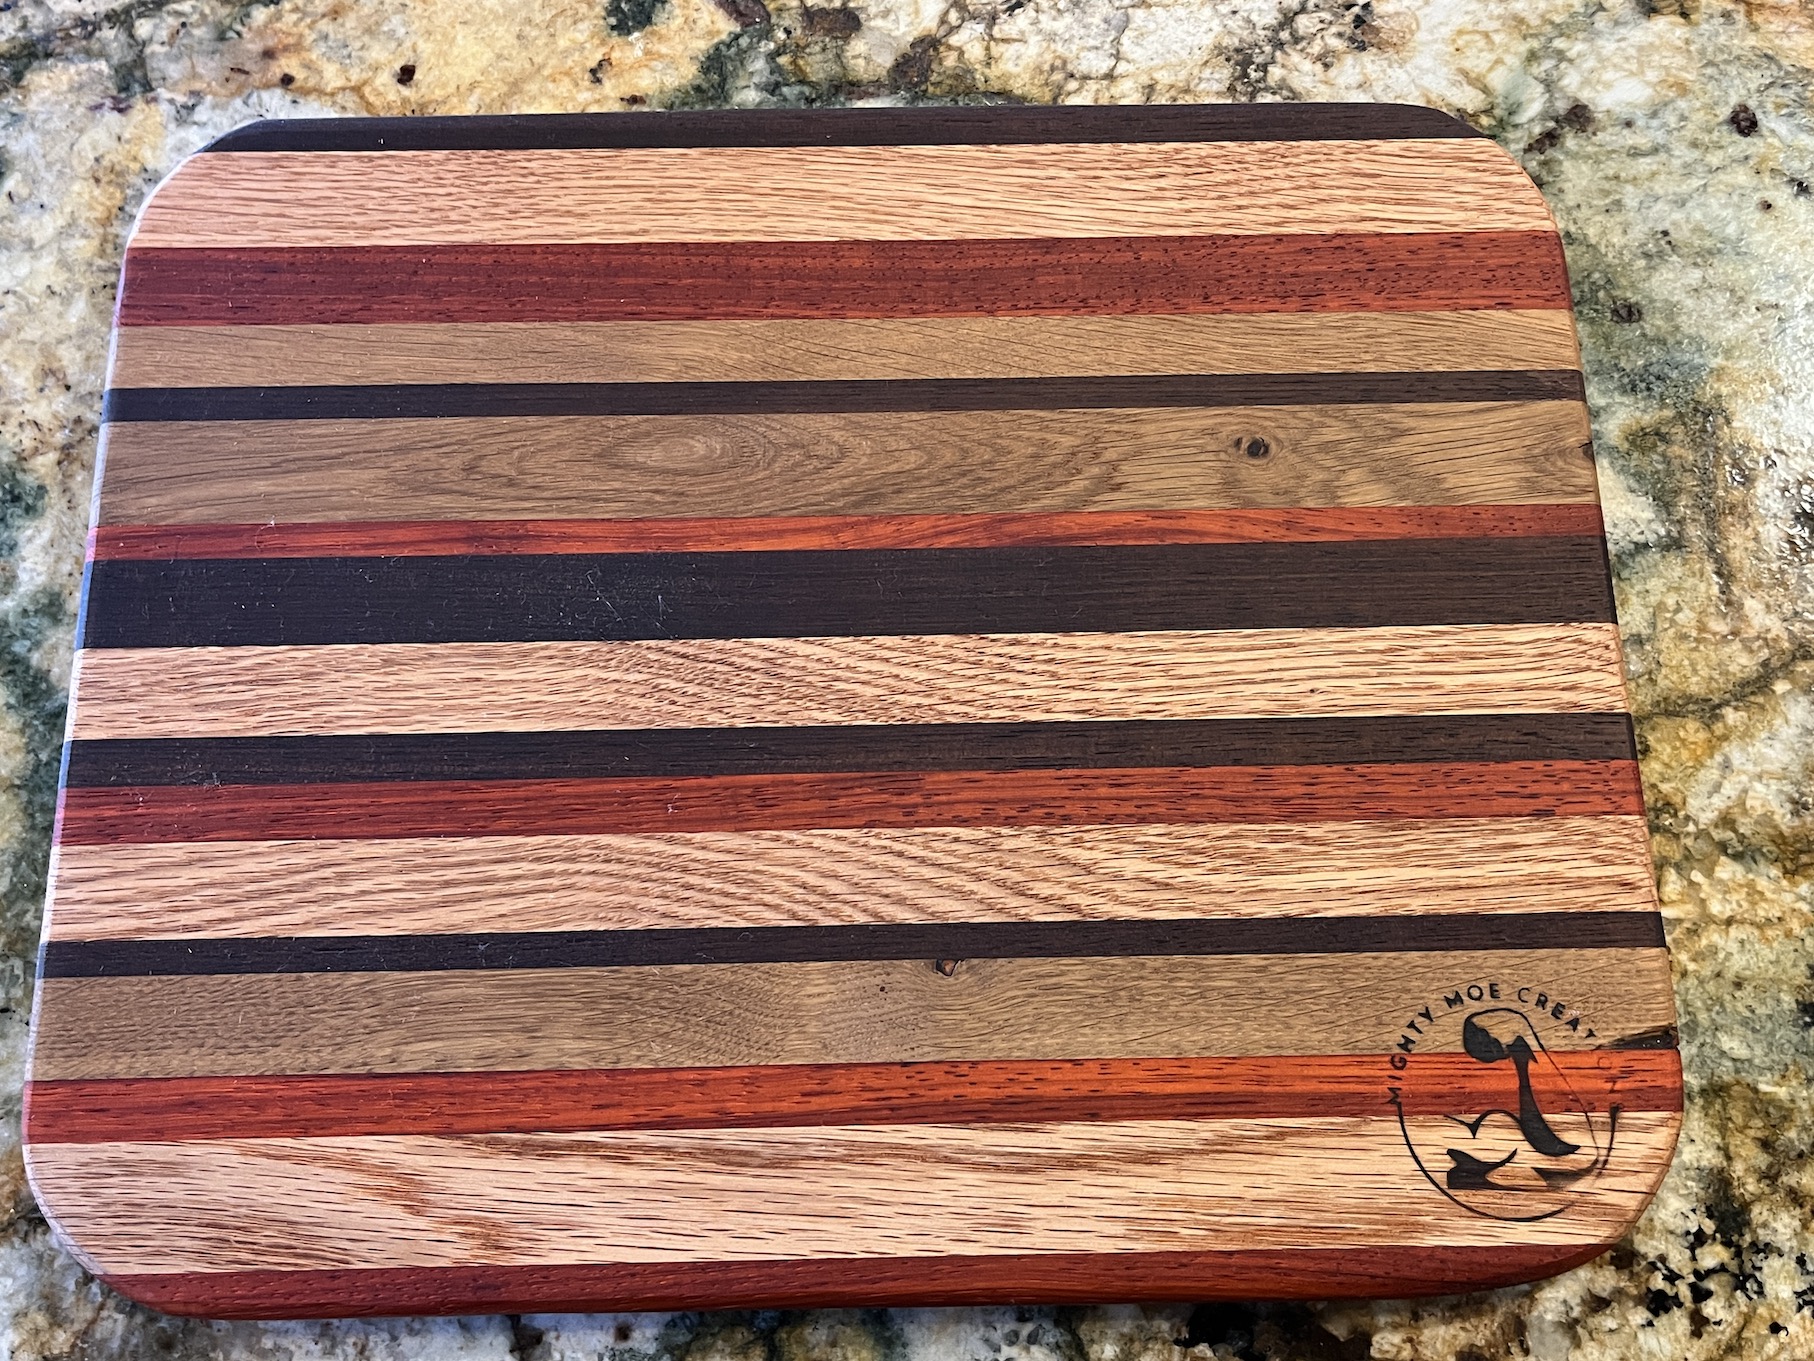
John also made a host gift – a cutting board for them:
Rounded corners is a new thing he is trying on his cutting boards.
We are feeling pretty proud of ourselves as we didn’t wait until the last minute to make these gifts!
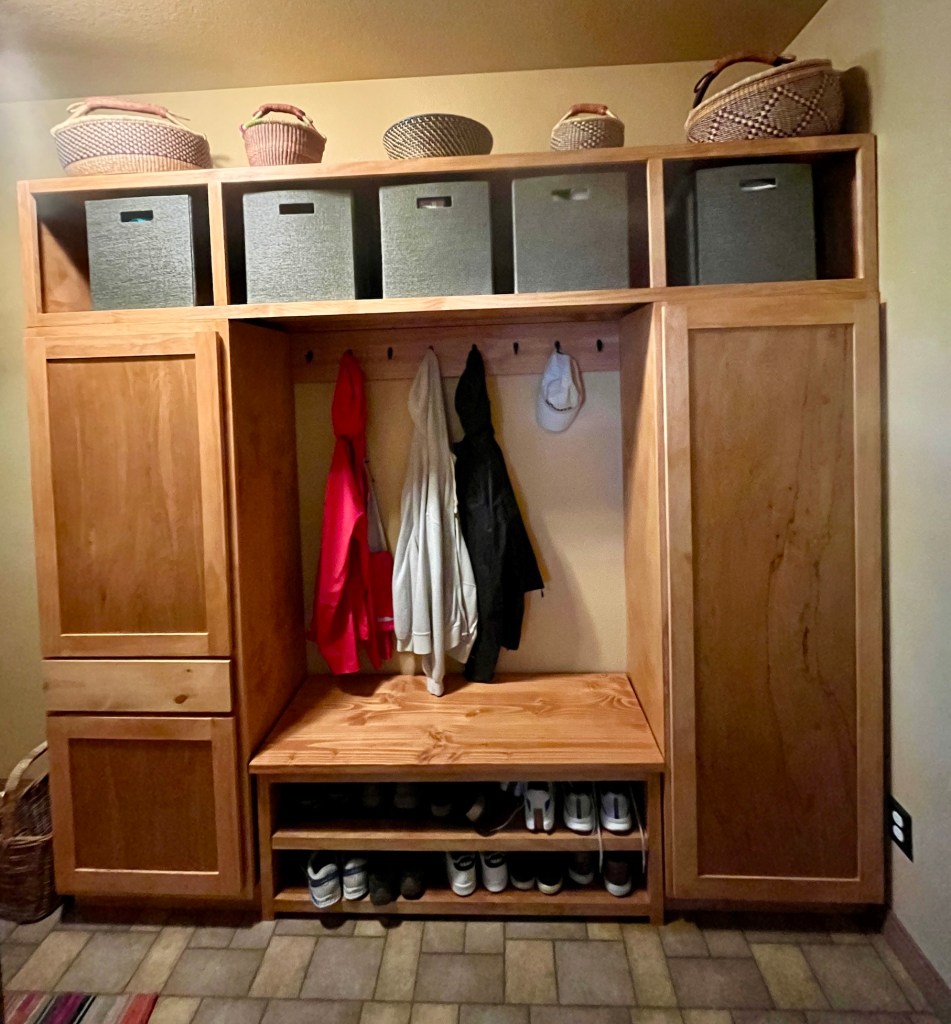
Our mudroom (please see link if you are outside the U.S. and unfamiliar with this term), was fairly generic – a place to do our laundry, use the utility sink, store some shoes, and to hang clothes as they dried. It had generic white metal racks from a home improvement store.
It is the way you enter our home from the garage and the first area of our home visitors might see if we bring them in through the garage (i.e. if we pick them up from the airport in our car, etc.)
John decided to make our mudroom a lot more interesting by building storage and adding convenience items.
You can see a little of the white metal shelving we had before and the hideous brown old storage unit to the right that we had.
After the bench was complete, he worked over the past 6 months (sporadically), to complete the rest of the mudroom storage build out. Here are some photos of John’s work in progress:
And Mike the Miniature Schnauzer had many trips to the home improvement stores to get supplies!
Mike loves being in his box riding around in a shopping cart!
And finally here is the completed mudroom!
Definitely worth the wait!
John designed the entire storage piece himself not using any formal plans, just inspiration from images online and YouTube videos!
My husband John is a self-taught woodworker (so many YouTube videos watched) as many of you know. I’ve featured some of his projects on my blog post category: From the Woodshop.
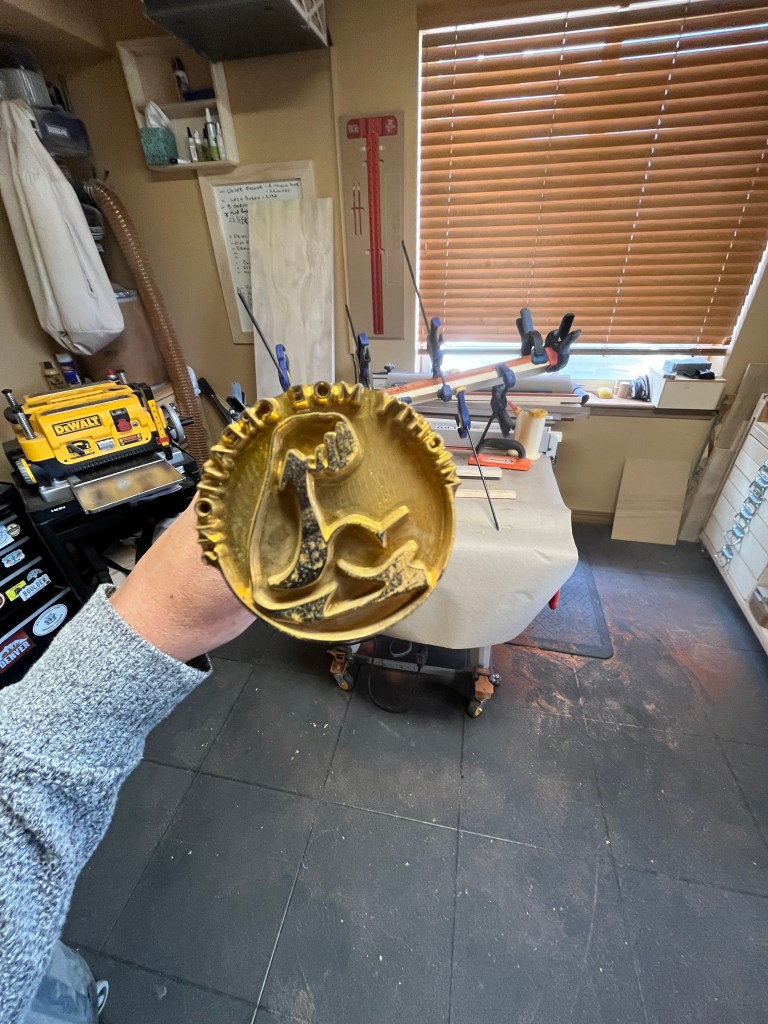
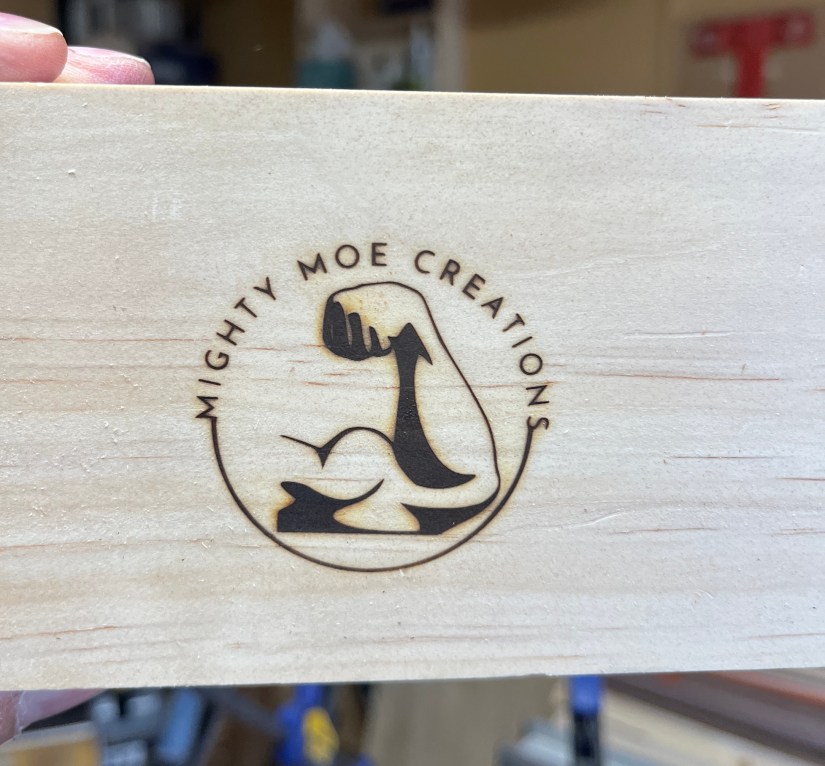
Recently he decided to take on some commissions and make a little money on the side with his woodworking. We figured he needed a business name and we came up with Mighty Moe Creations, as his nickname is “Moe” (a childhood nickname adapted from his middle name which he used as his first name when he was younger).
He wanted to have a wood branding iron to burn/emboss his name on wood items he creates and so we created a logo for Mighty Moe Creations using Canva:
I am new to using Canva but I was proud of myself of being able to draft a logo which he and I finalized.
Earlier this week the branding iron he ordered came in the mail and he has been practicing branding scrap wood until he perfects his technique and is ready to brand pieces he makes.
We were pleased how crisp the image comes out from the branding iron compared to the original logo we created and sent to the company that makes wood branding irons!
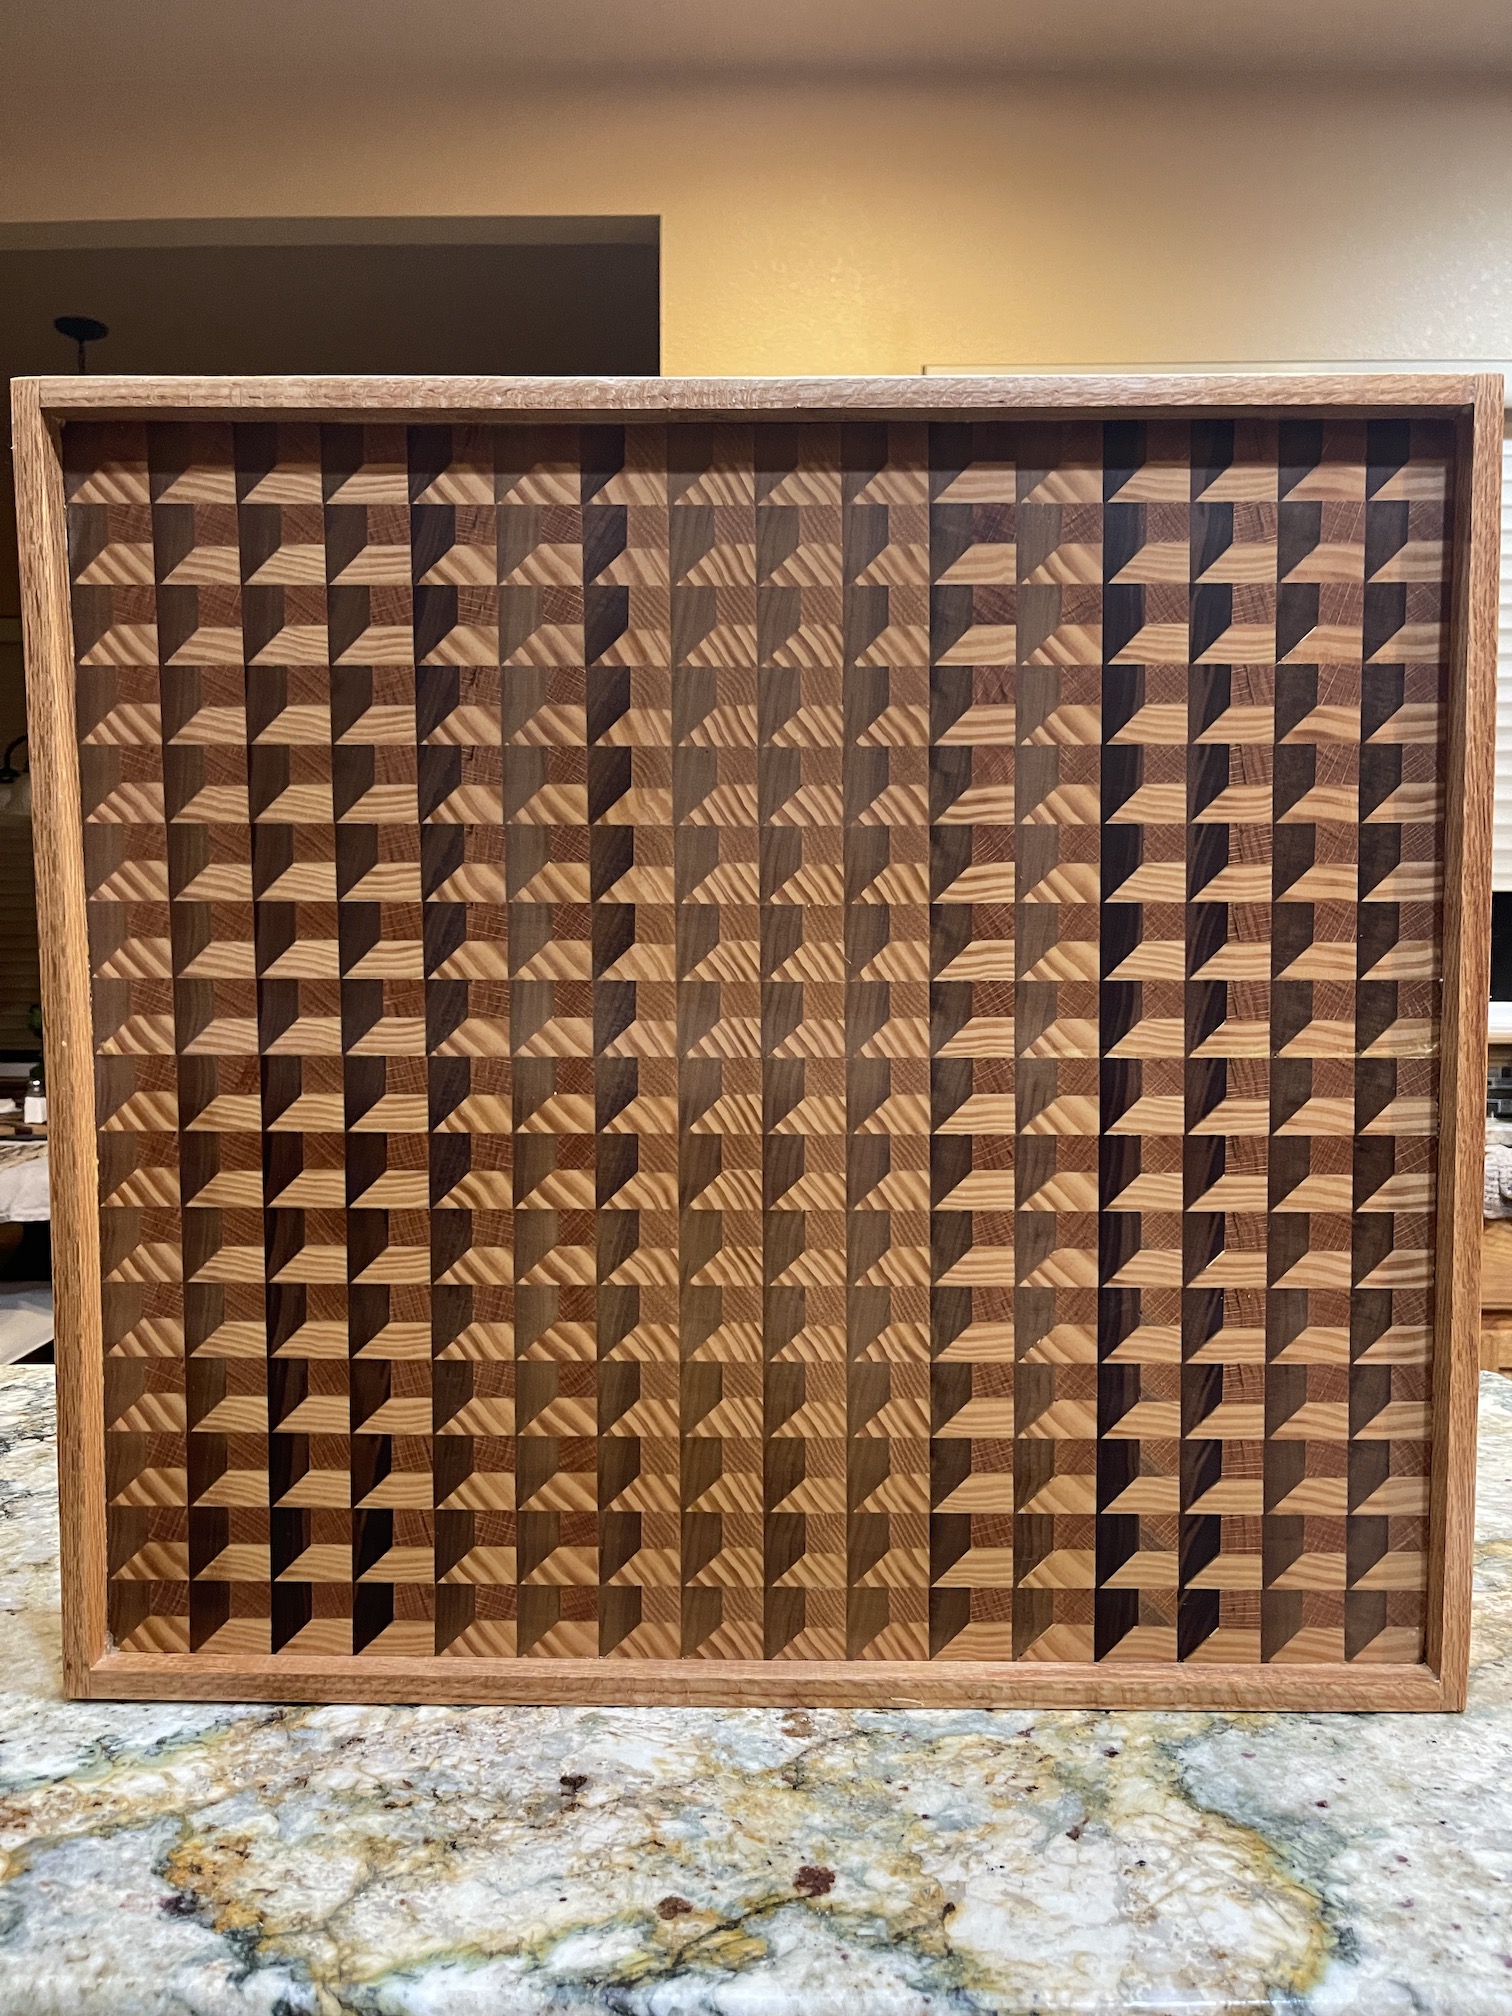
John’s been busy working on his commission piece in his workshop, a large 3D looking custom serving tray similar to the one in this post – From the Woodshop: Tray for our Ottoman.
John’s studio/woodshop in our basement is a “hot mess” right now but he’s making progress on his commission:
I can’t wait to see the finished commission with his new logo branded onto it!
Oh and here is Mike the Miniature Schnauzer peeking into the woodshop (he is never allowed inside the shop as we are worried about wood splinters getting into his paws) to see what his humans are up to!
John, my resident woodworker, was working on a remodel of our mudroom/laundry room beginning with a new bench (see post From the Woodshop: A New Bench and Beginning of the Mudroom Remodel ) but he is waiting on a new toy (a track saw) before he starts on the next part, the broom closet.
So he’s kept himself busy on the weekends instead with a couple projects for my quilting studio.
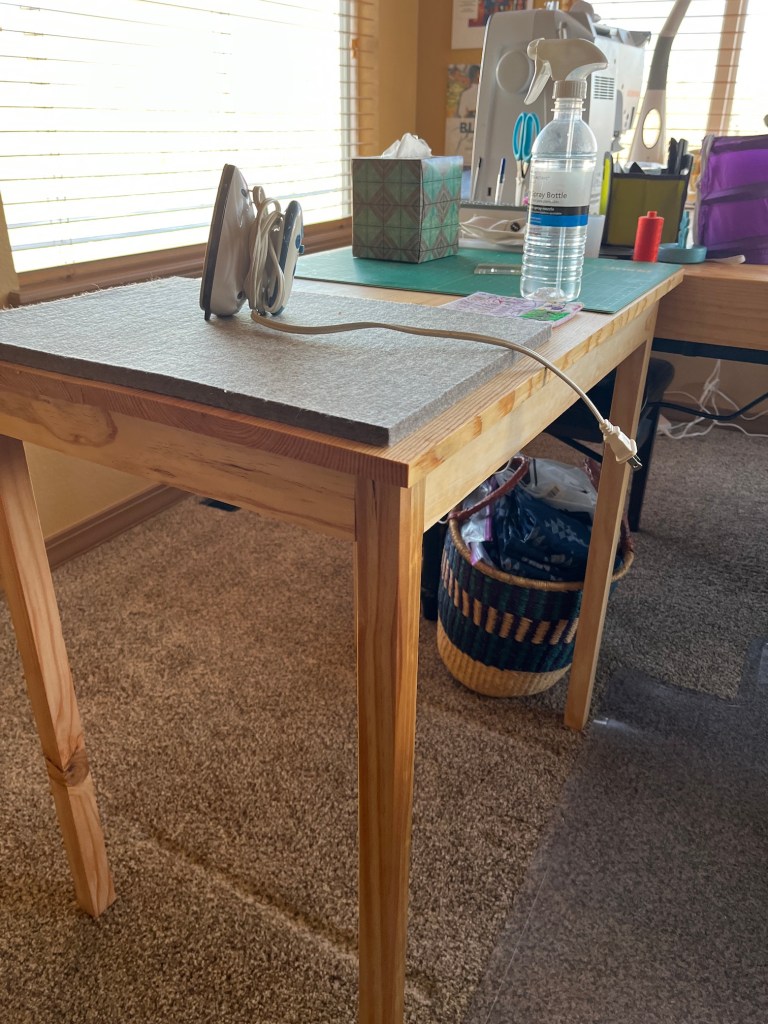
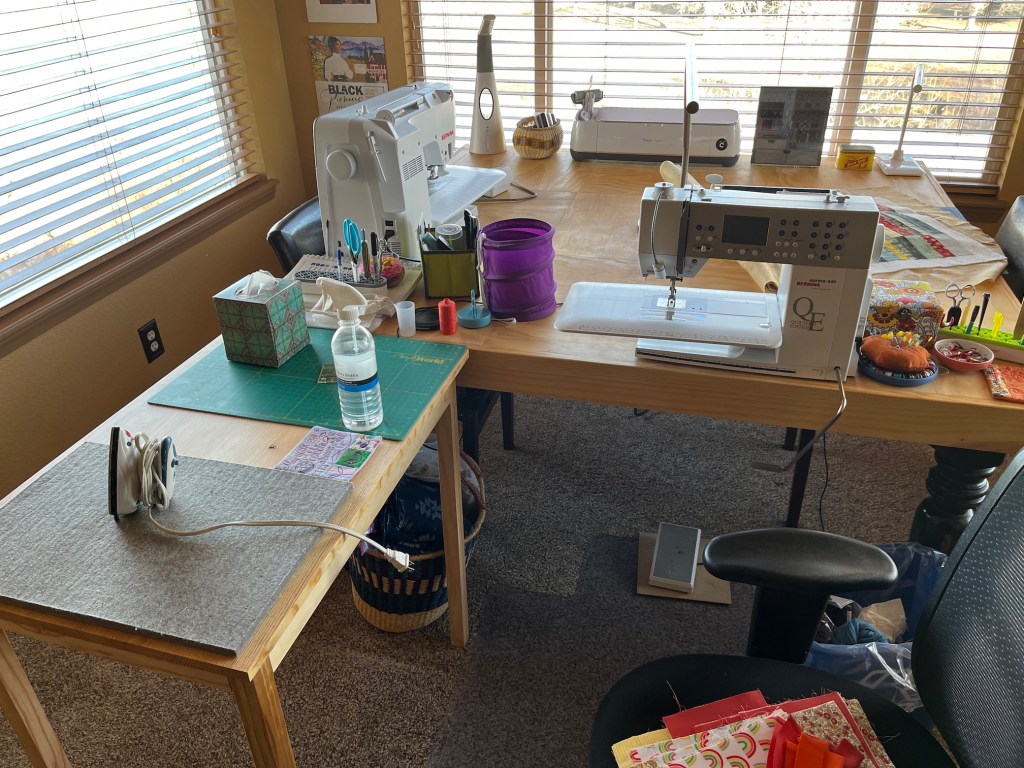
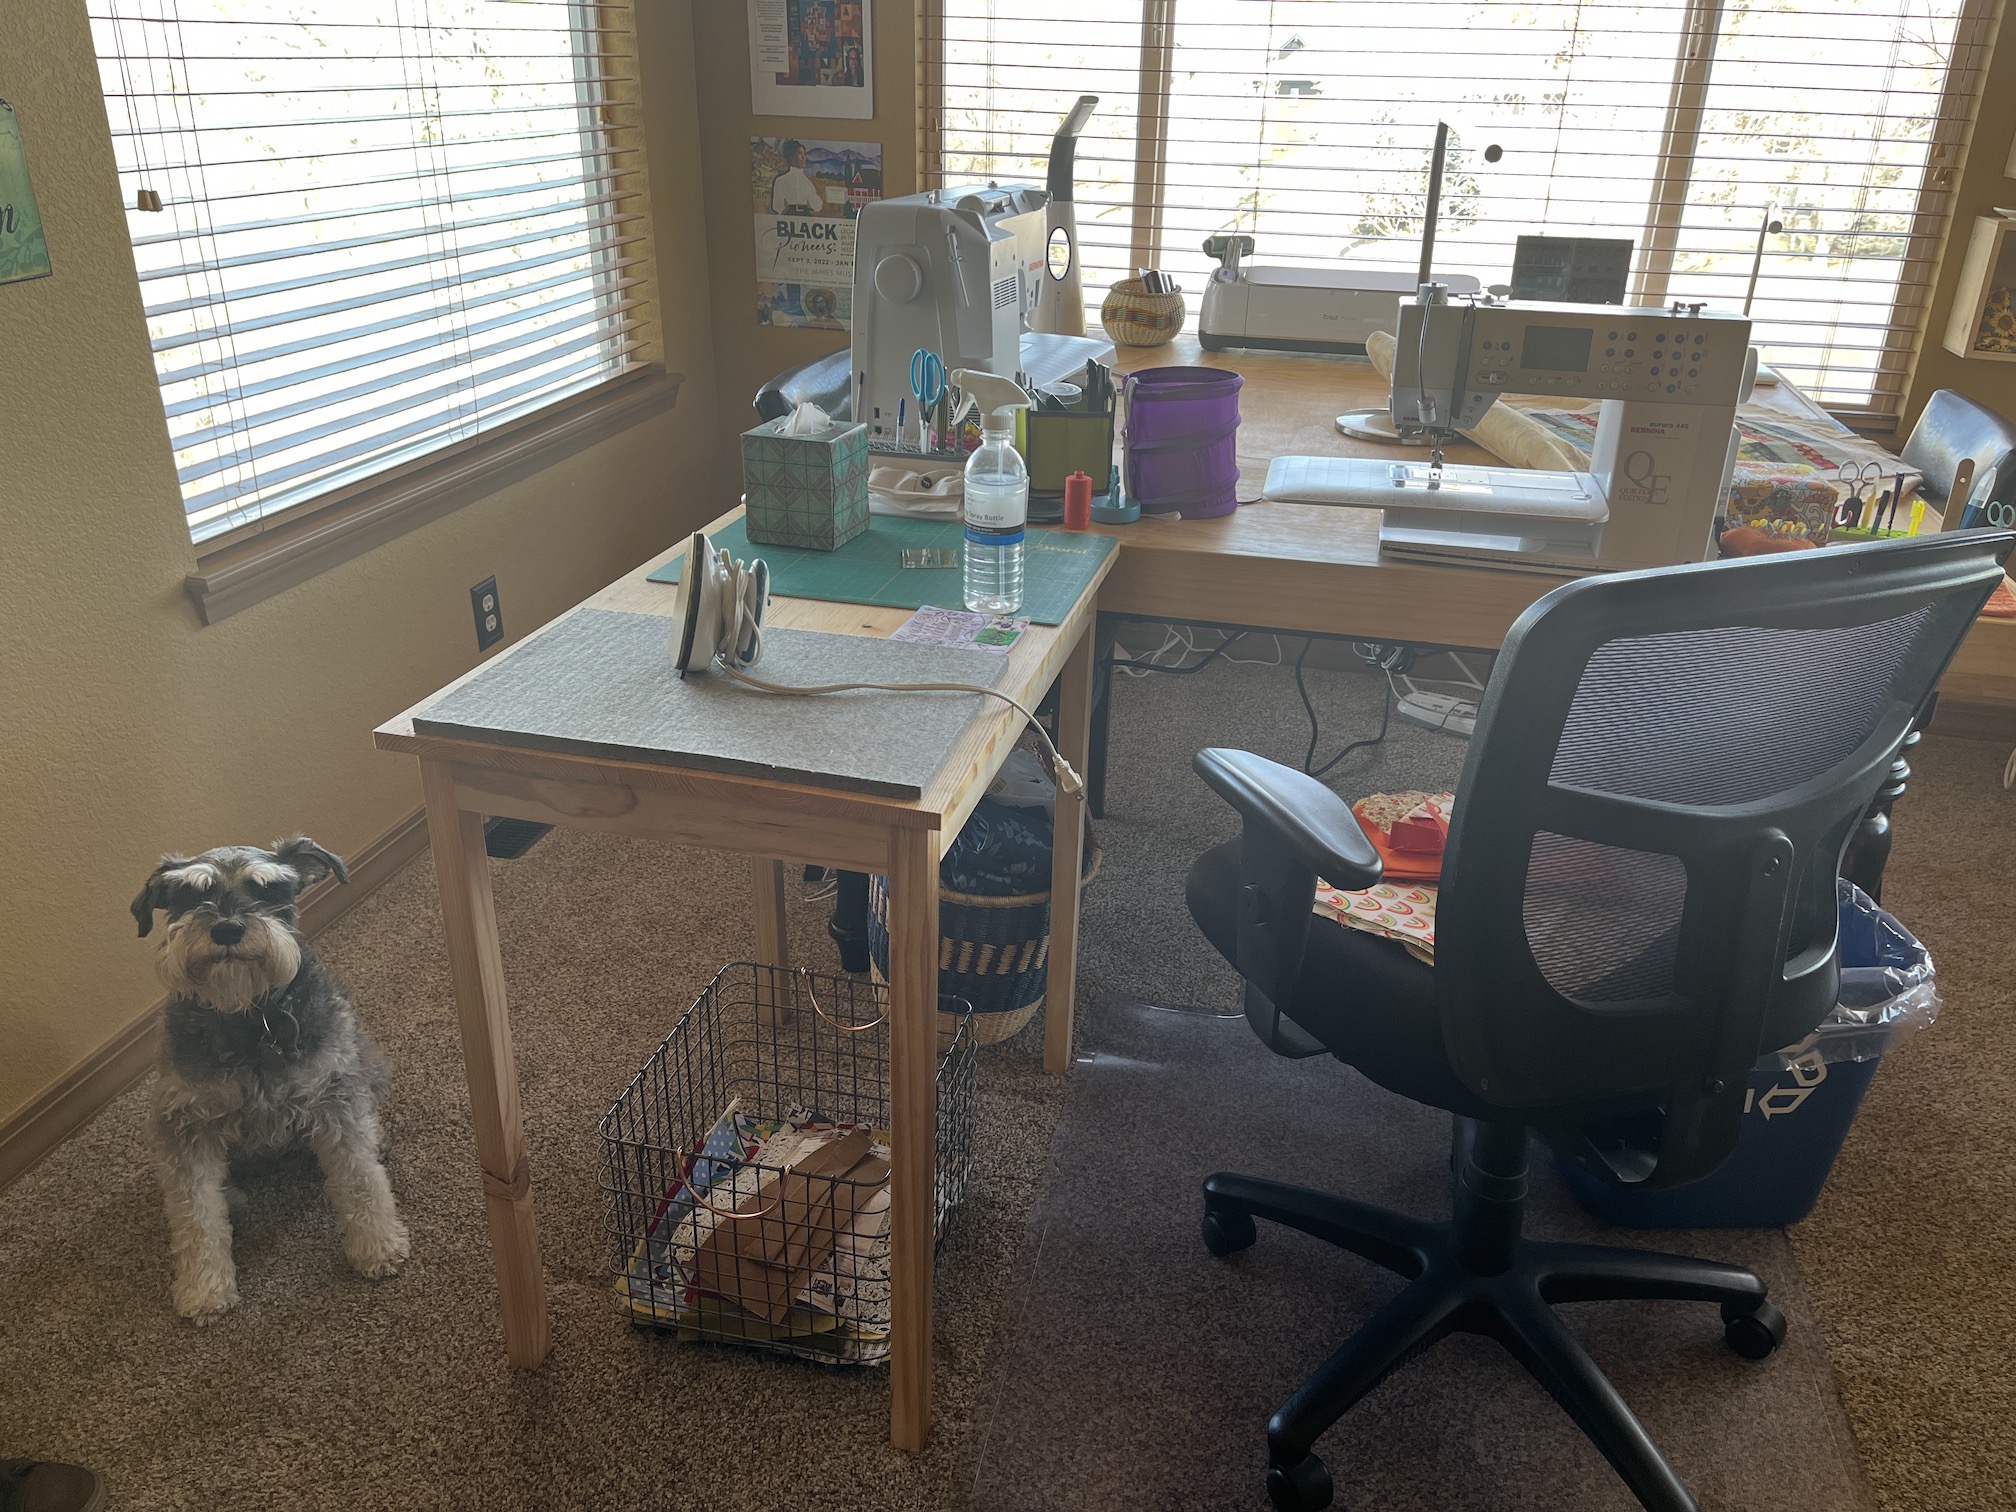
NEW EXTENSION TABLE
First he replaced the small plastic extension table with a pine slab on top that I was using next to my sewing/crafting table, with an actual table:
Here is Mike the Miniature Schnauzer checking out the new table:
The table has the schnauzer-stamp-of-approval!
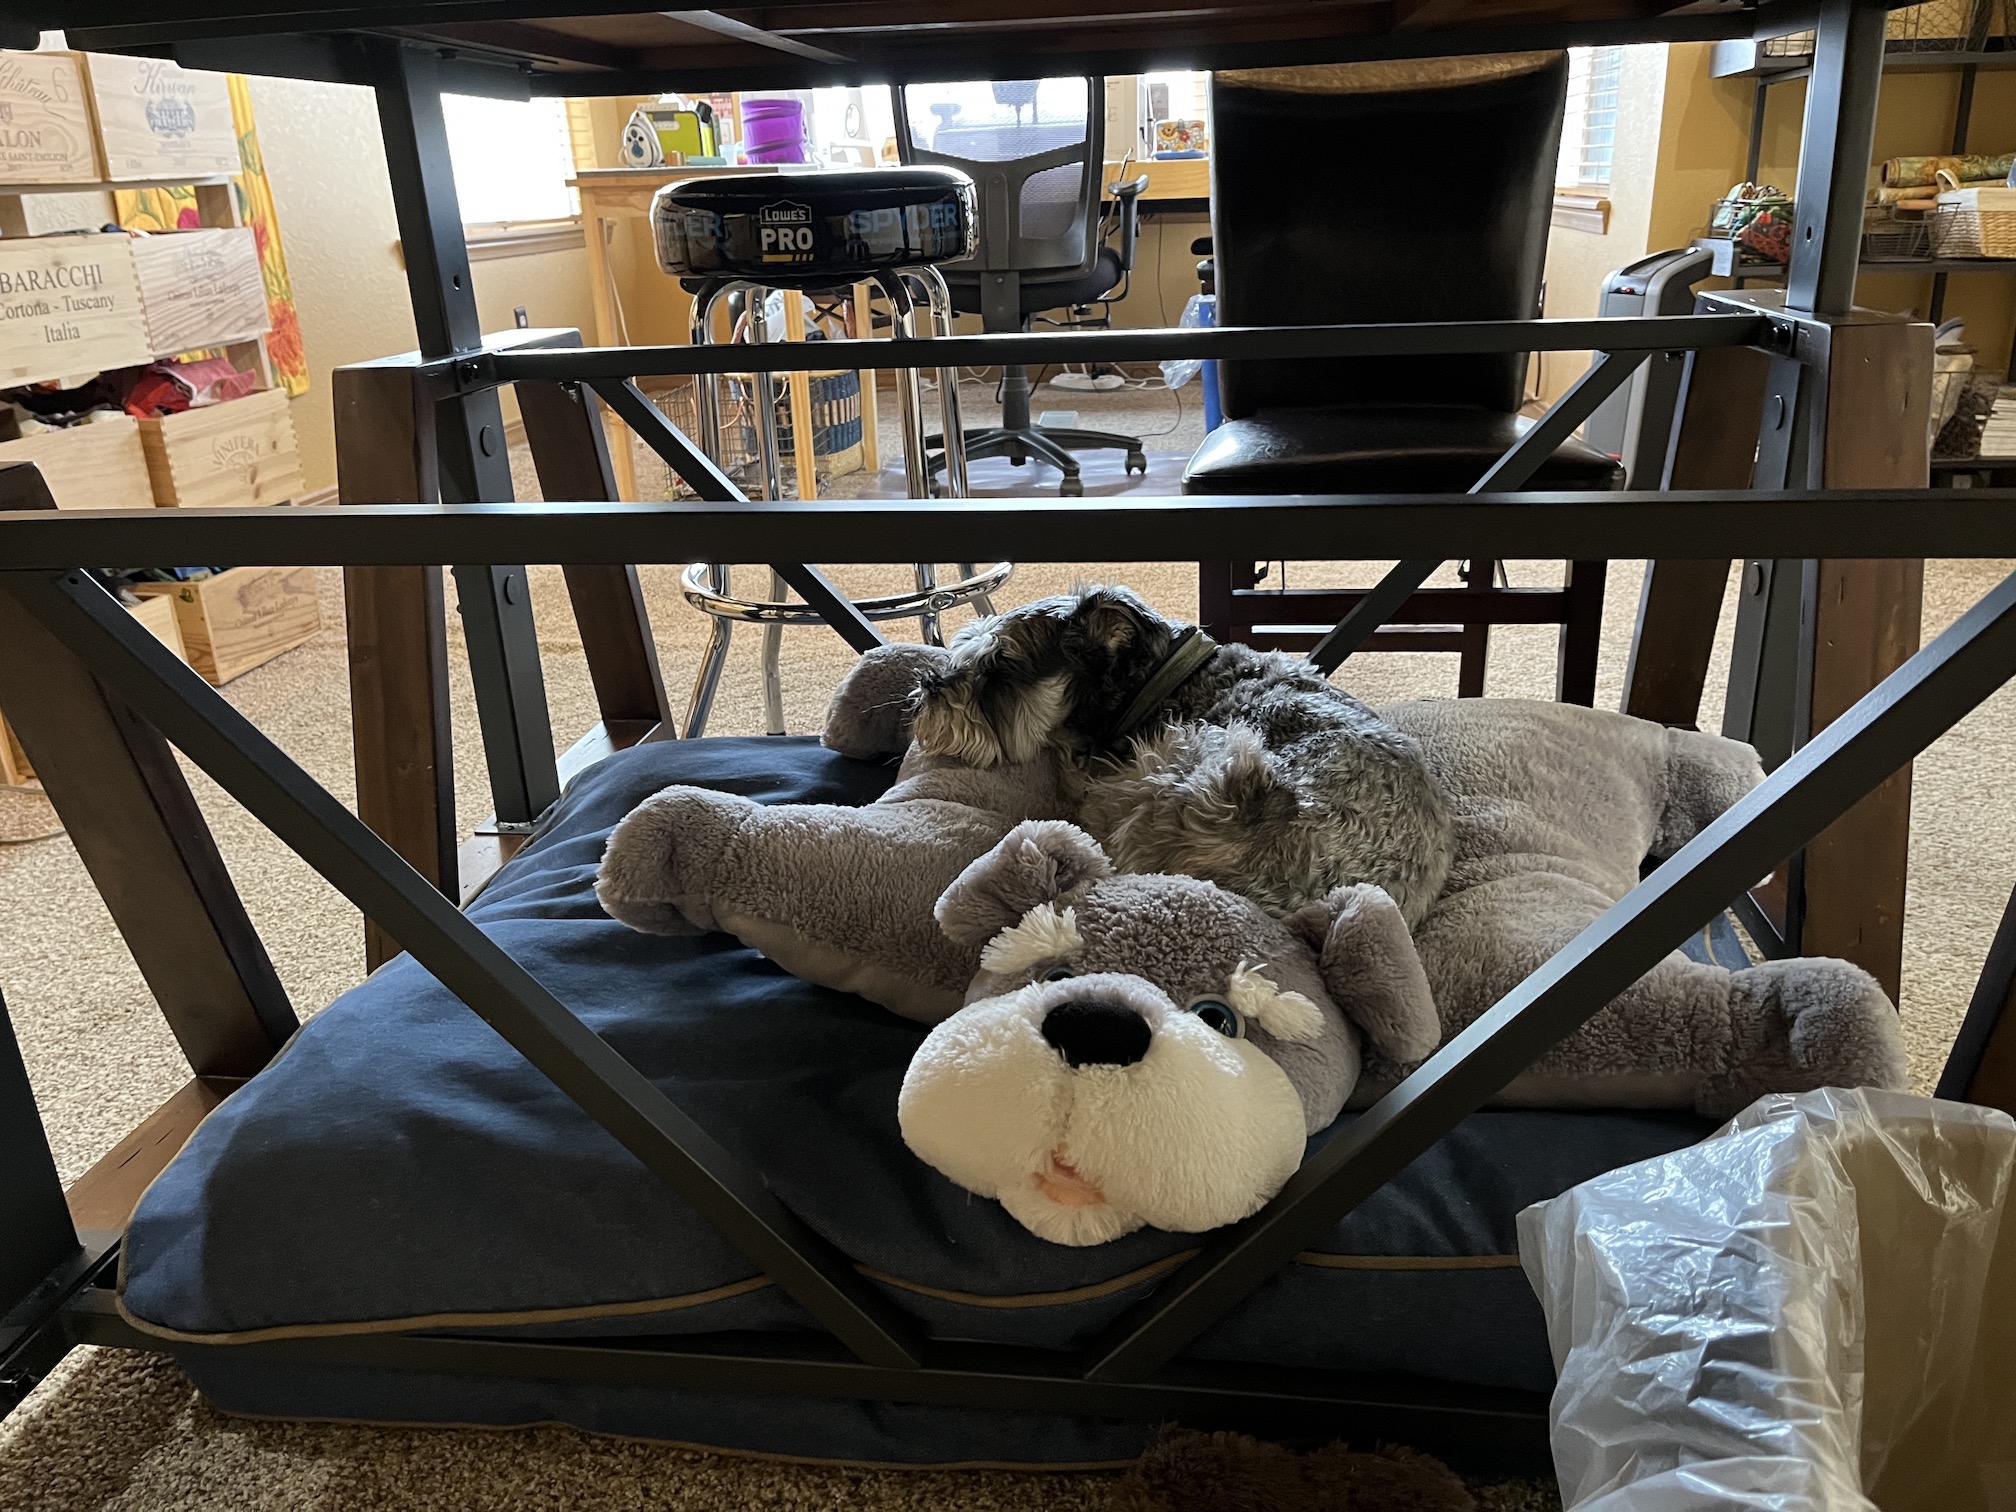
Mike reviews the quality of John’s work (ha!) when he isn’t napping under the cutting table in the center of my studio:
Hopefully you can spot Mike somewhere in the schnauzer pillow…
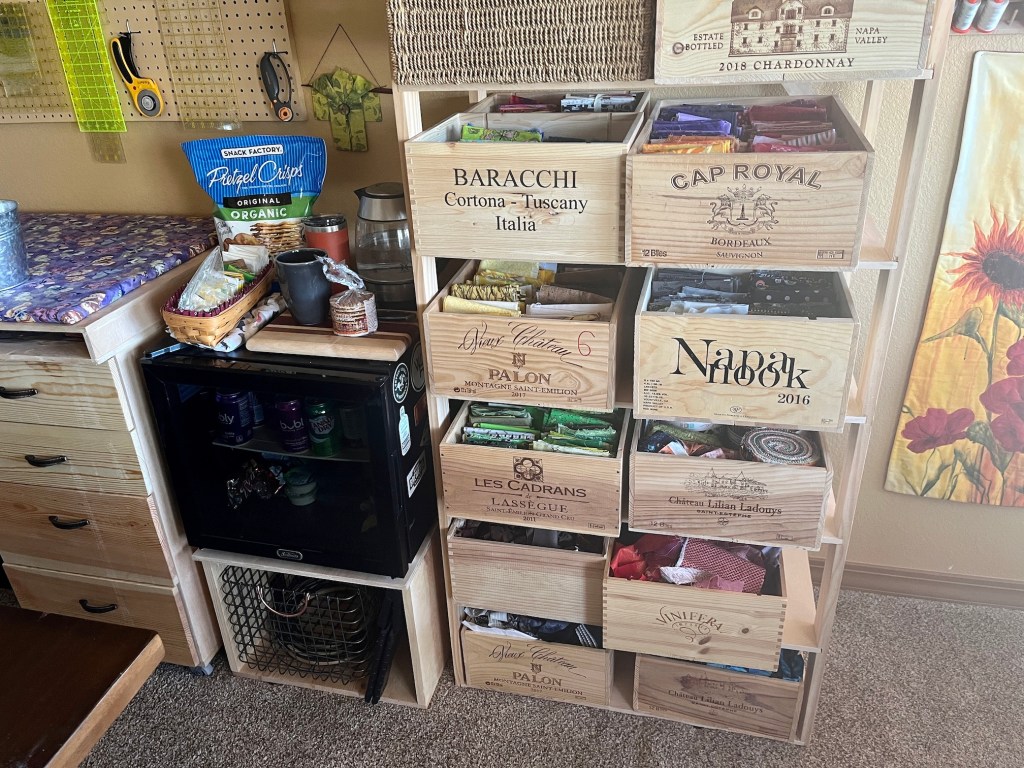
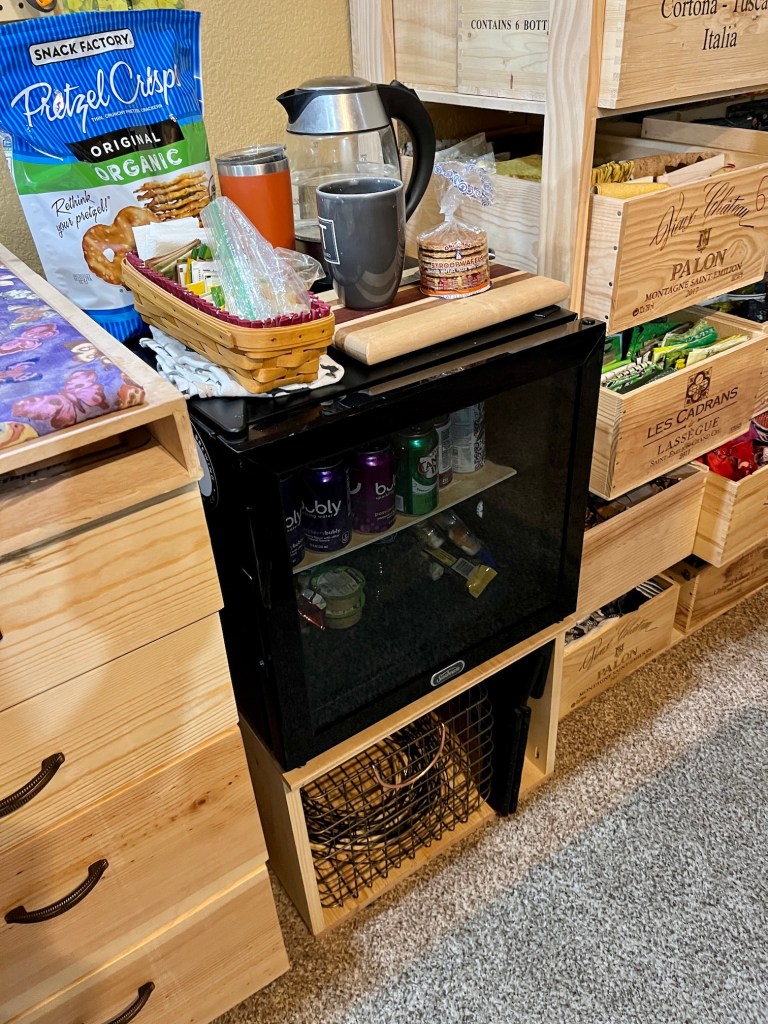
MINI FRIDGE STAND
In the post The Horizontal Diaries, February 8, 2023, I shared that John had set up a breakfast station in the upstairs guest room when I was spend a lot of time resting (being “horizontal”) with my left leg elevated after breaking my ankle and having surgery.
Well I am spending less time horizontal these days and more time up and about; and I returned to coming downstairs for breakfast each morning. So we decided to move the small refrigerator (or “mini fridge”) out of the guest room and into my studio!
John built a stand for it and now I have a drink and tea area in my quilting studio:
I think John is encouraging me to spend as much time creating in the studio I can with beverages and snacks…
DECORATIVE STORAGE
When John was first teaching himself (via books and YouTube videos) on how to make drawers, he made a lot of practice boxes to start. He recently repurposed a couple of those practice boxes as some additional storage for my studio:
I think we’ve run out of projects for my studio for now, so John is probably going to return to making cutting boards (see post Never Bored When Making Boards (From the Woodshop)) until his track saw shows up!
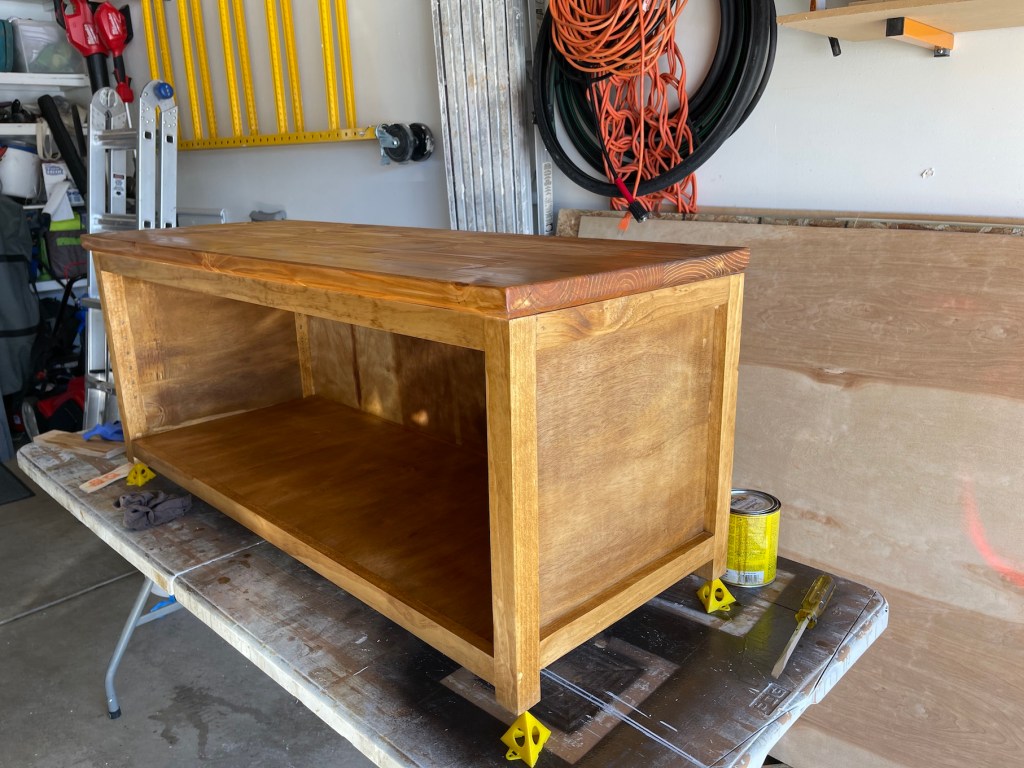
John’s been up to it again in his workshop, this time making the bench/shoe storage that is Stage 1 of the long awaited MUDROOM REMODEL.
When you enter our home from the garage you enter immediately into the laundry room which is allegedly supposed to be also like a “mudroom” where you could take off your shoes, etc. But ours instead has sort of been a “hot mess”room.
John did try and spruce up the laundry room/mudroom by building a topper/board for the washer and dryer a couple months ago (see post Never Bored When Making Boards (From the Woodshop)), as well as putting in a shelf above them. But still when you first walk into the area from the garage there is no place to sit and take off your shoes…plus it is kind of messy and cluttered there with Mike the Miniature Schnauzer’s dog food, our reusable bag collection, clothes that are hanging dry, and various random crap.
John’s been wanting to turn the laundry into a real mudroom/laundry room for a long time (and no longer dread whenever we need to bring in people through the garage into the house); and he decided the best way to start was to make the mudroom in a modular fashion – beginning first with a bench that you can sit on and take off your shoes.
Here is the bench in progress in his workshop and then in the garage being stained (John designed the bench without formal plans/pattern from watching YouTube videos and looking at online ideas for benches!):
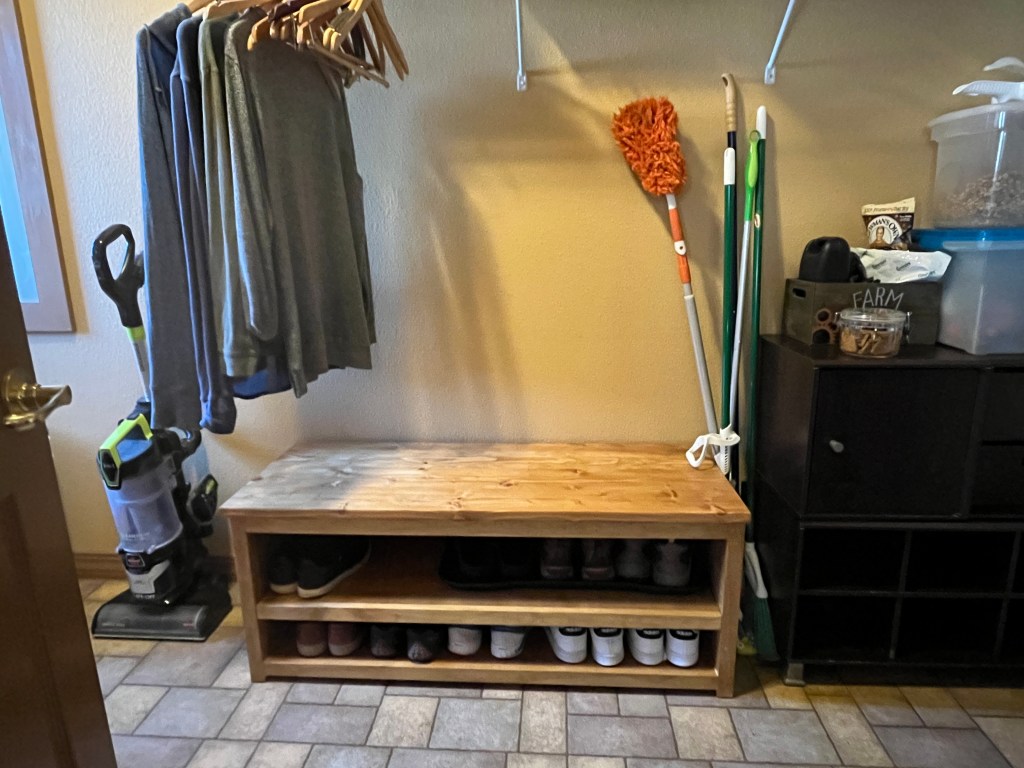
And here is the completed bench in place in the (someday to be) mudroom/laundry room and John happy with his handiwork:
Next he will be working on building a “broom closet” to store the brooms, mops, and vacuum cleaner, as well as some cleaning supplies.
Yes, one of my New Year’s Goals is to post on my blog more frequently. We’ll see how this goes…
It’s been a while since I’ve shared what my partner John, whose main hobby is woodworking, has been making.
Lately he’s been making boards.
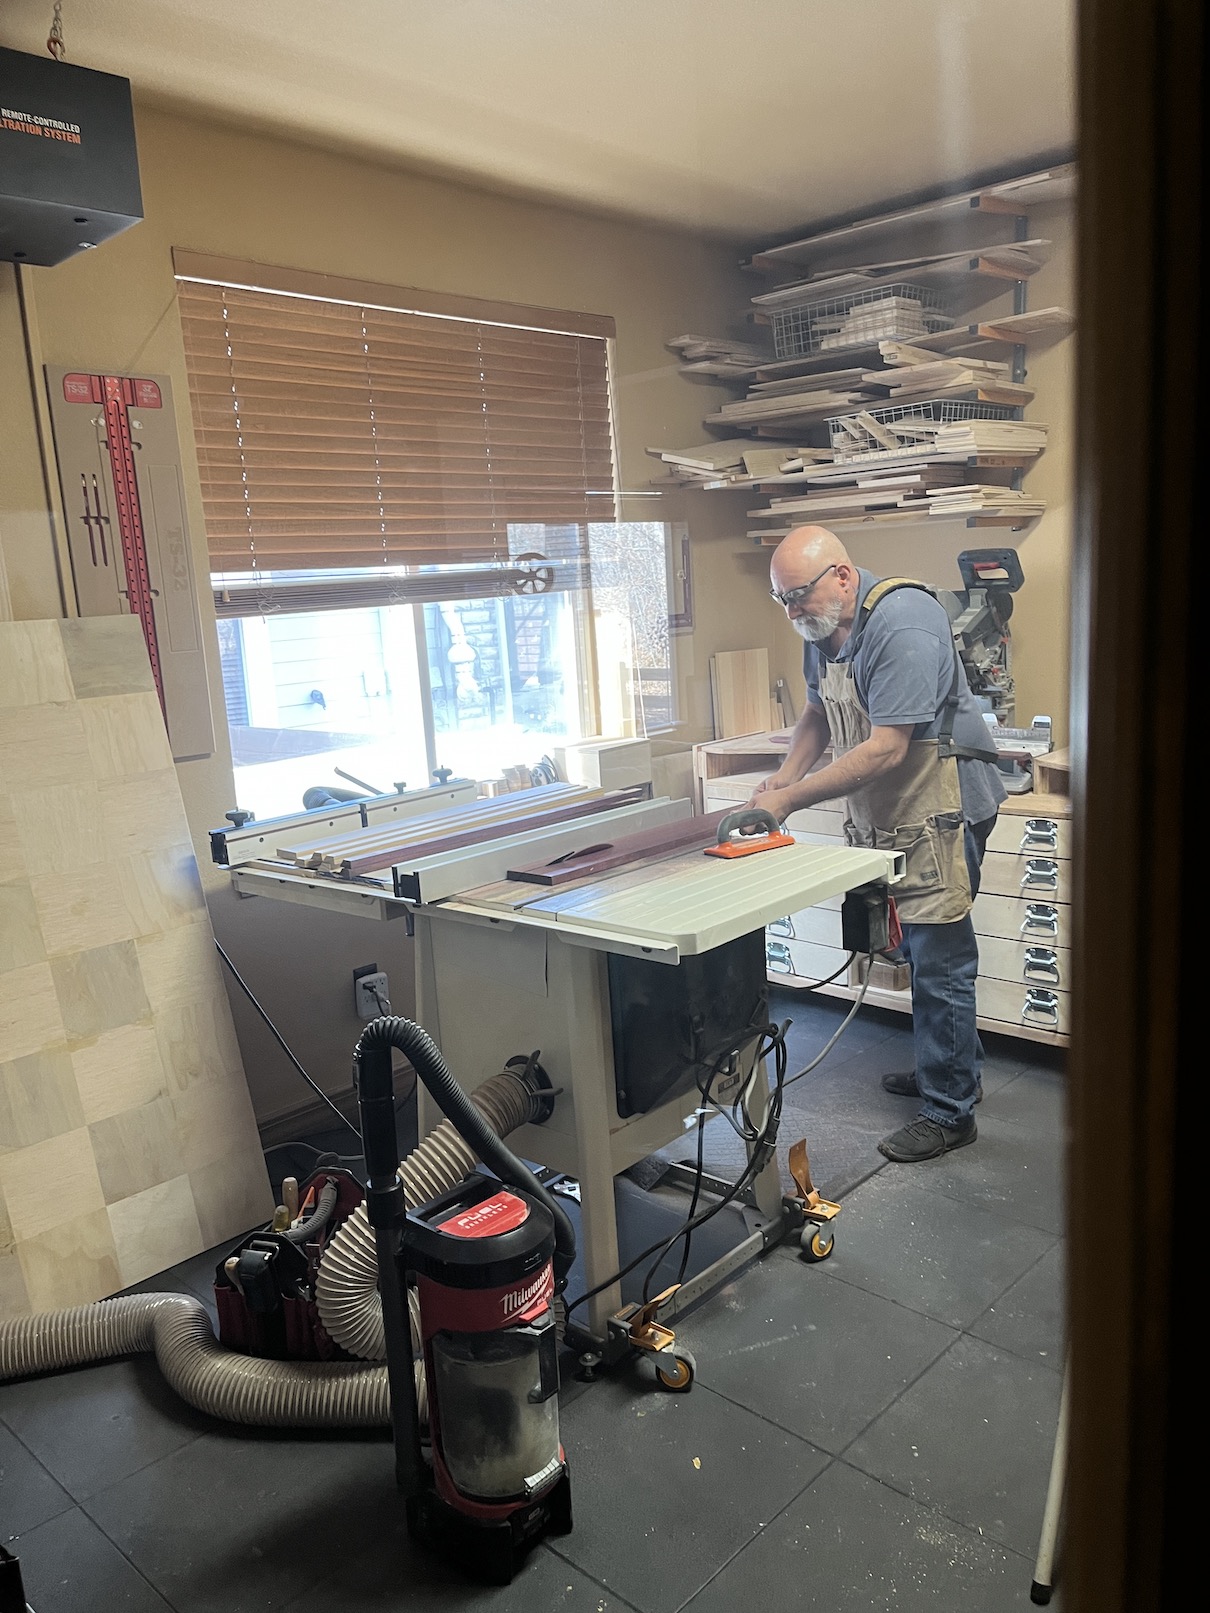
Here is John in his workshop in our basement where he made cutting boards for our home and as holiday gifts; and a “laundry machine/dryer topper” board (I made the name up but you’ll see what I mean in the photos below) in November and December:
CUTTING BOARDS
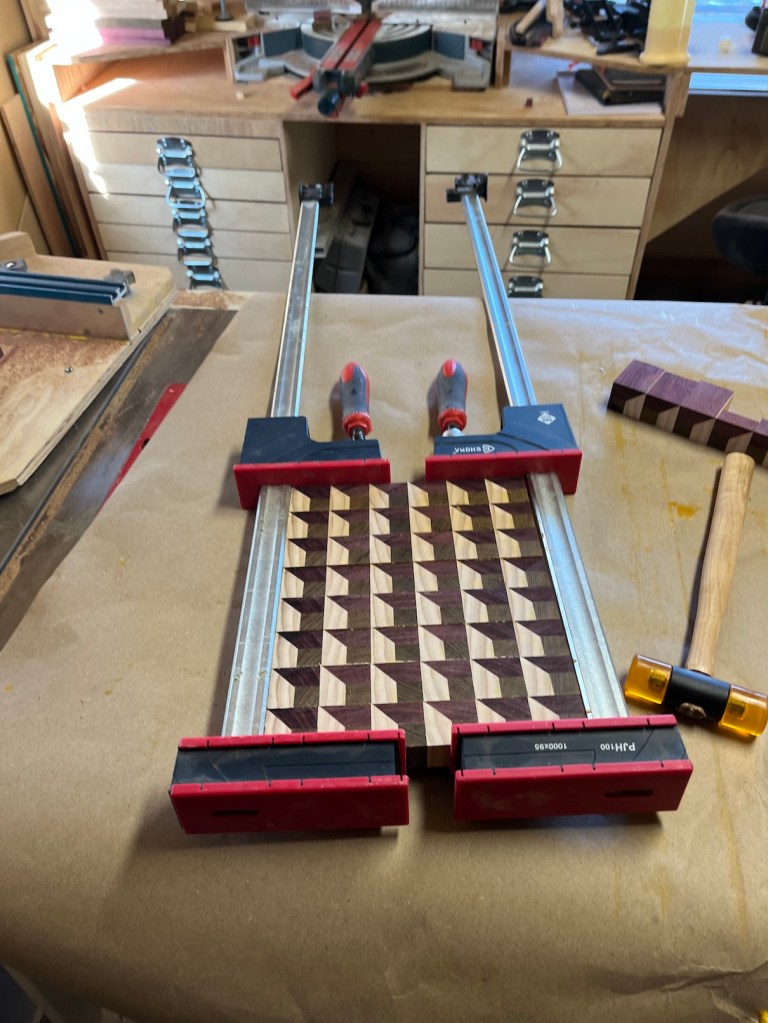
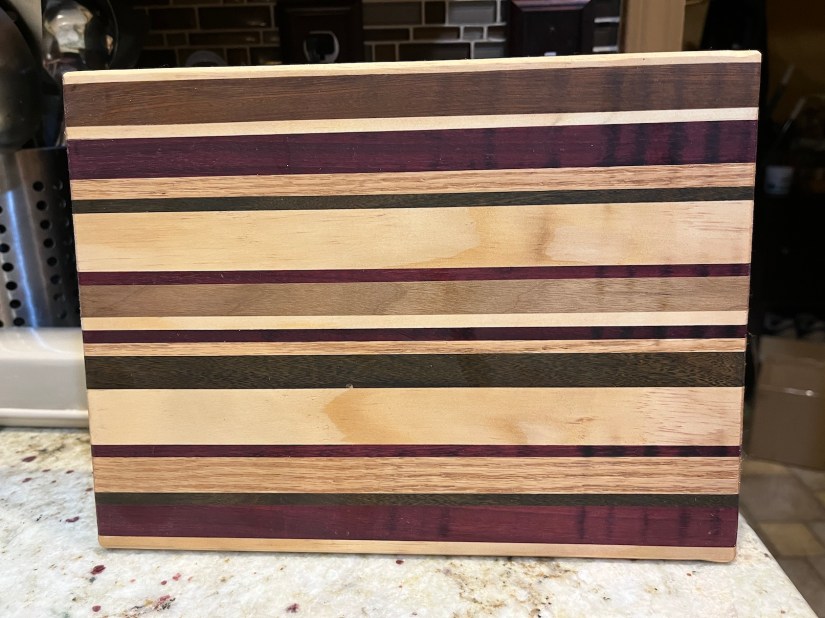
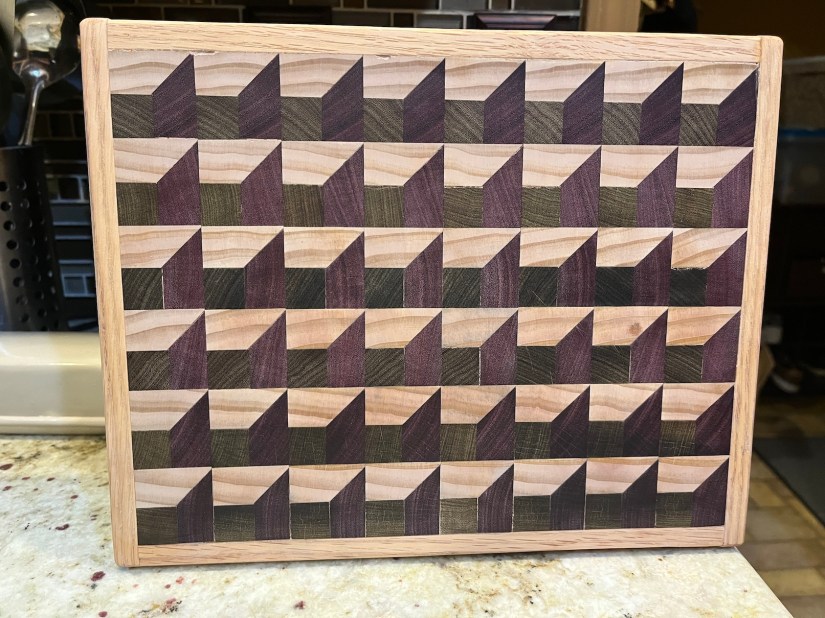
John used a combination of scrap wood and newly purchased speciality woods/exotic lumber samples to create cutting boards in two styles: 1) 3D design (like he did in the post From the Woodshop: Tray for our Ottoman); and 2) Scrappy slices (I totally made up this name).
And here is a gallery of the lovely cutting boards he made which were quite the hit as holiday gifts to family and friends:
The 3D boards look more “3D” in person, it was difficult to capture the right camera angle to give you the full 3D effect.
He also made 3 boards for our kitchen and we’ve enjoyed using them over the past month:
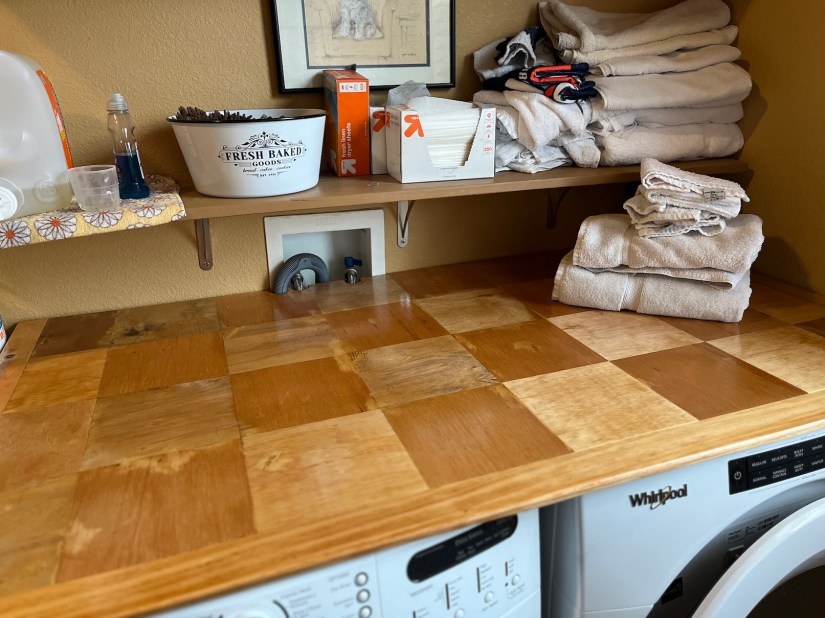
LAUNDRY TOPPER BOARD
In addition to the cutting boards, John also made a washing machine and dryer topper board for the laundry room. This allows us to fold and stack laundry without worrying about that mysterious sock slipping behind or in between the machines!
He used scrap wood and created a patchwork effect in honor of my quilting! He also cut holes for the washing machine hose and connections so the board would fit flush to the wall – nice job!
My partner John has been busy with a bunch of home improvement projects (I have helped a tiny bit) and I thought I would share. I have nicknamed him “Project Man” because he loves staying busy with projects (though I’ve been working with him on just relaxing and not always being busy).
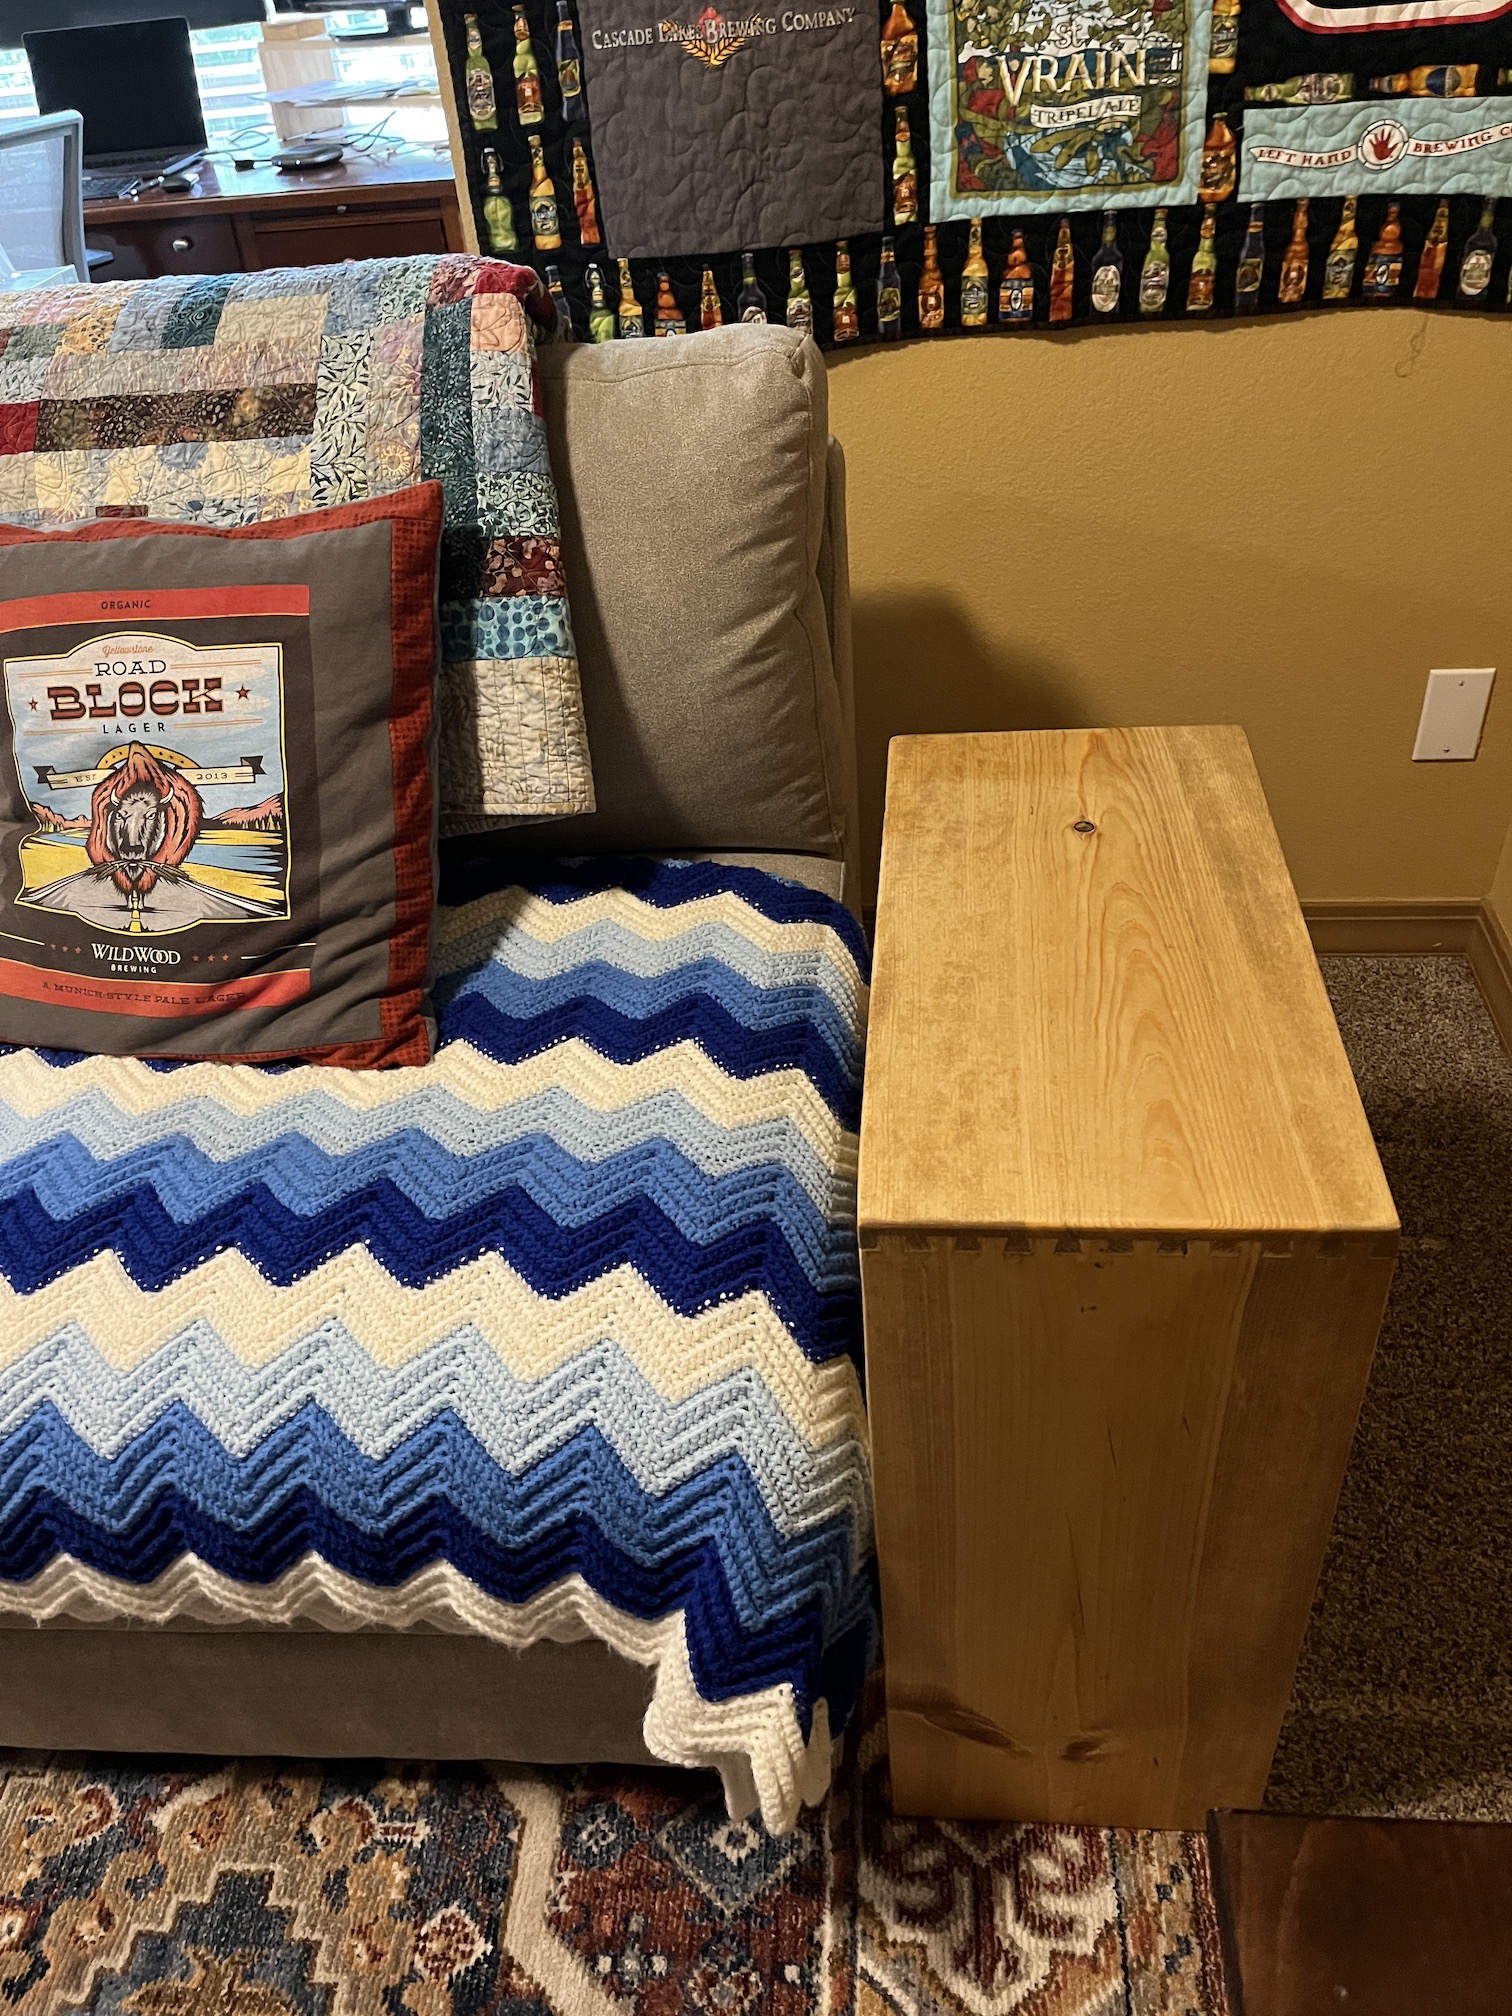
SOFA TABLES
We like to hang out and watch movies on the sectional sofa in our basement (and it is right near John’s bar so easy access to cocktails too!) but we needed some additional options on where to put our popcorn and drinks.
But we constantly had to lean over to access our snacks and beverages while movie watching.
So a little research online and John and I found a style we liked for a table that would slide under the sofa and make our snacks and drinks quickly accessible.
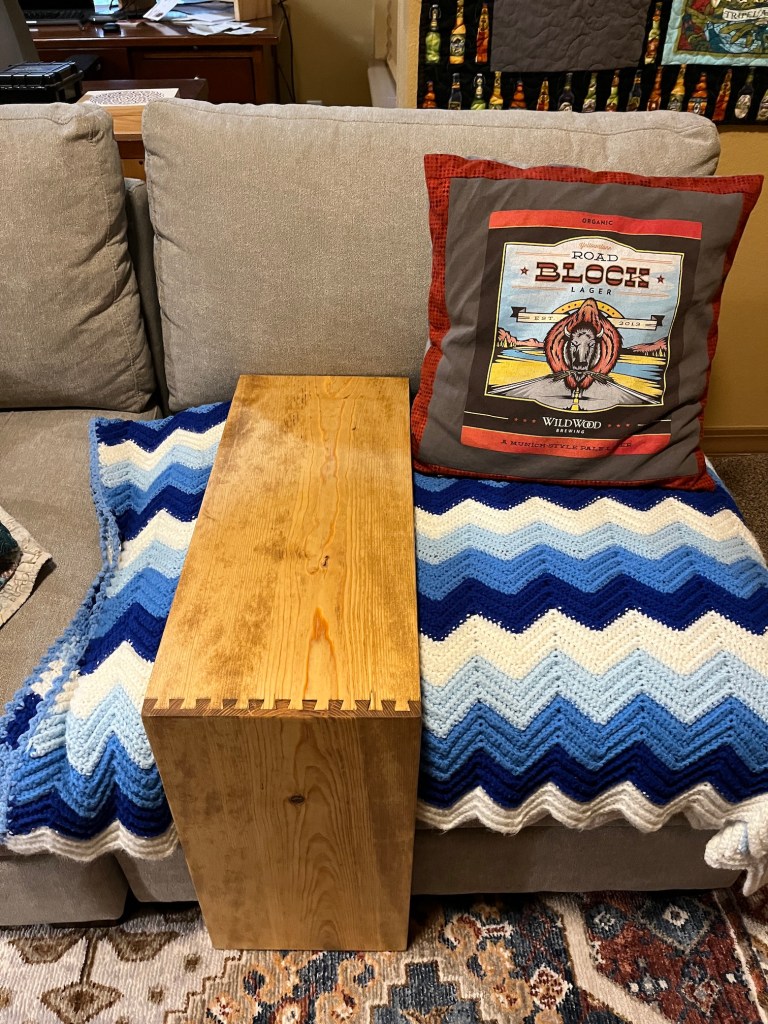
Here is John working on the first of the two tables he ended up making, it was his first time making “dovetail joints“ for furniture:
Here is the first table in use:
Sometimes we set that table between us and sometimes John just uses it on his side of the sectional sofa (we each have our own areas that we “nest” on the sofa).
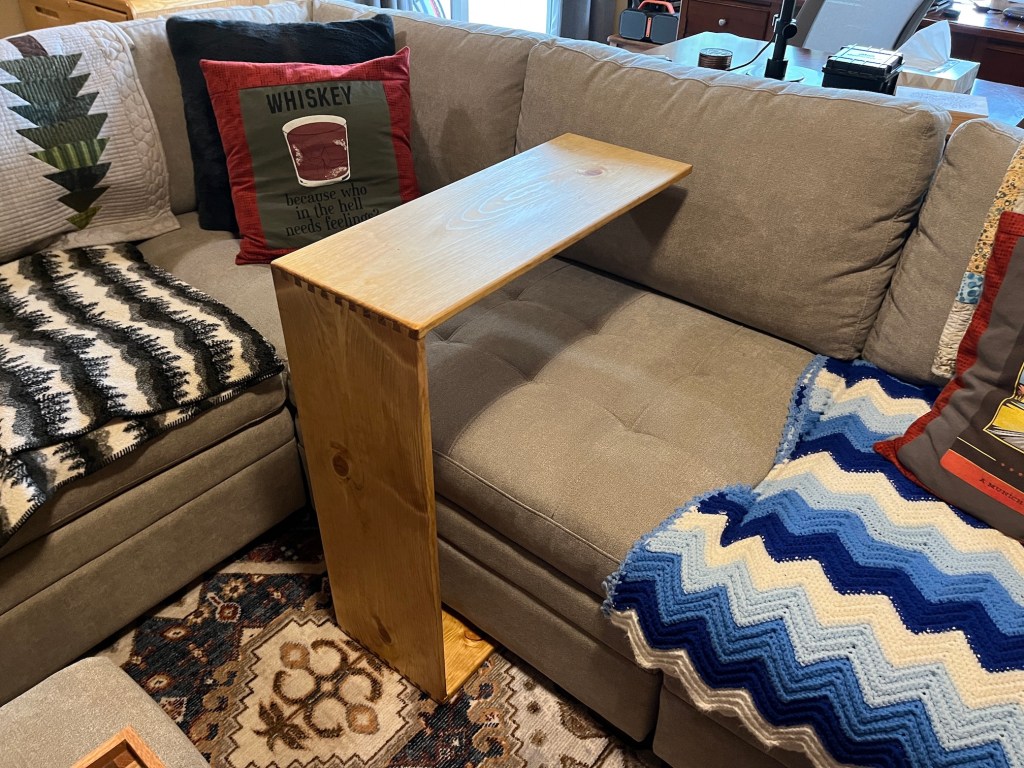
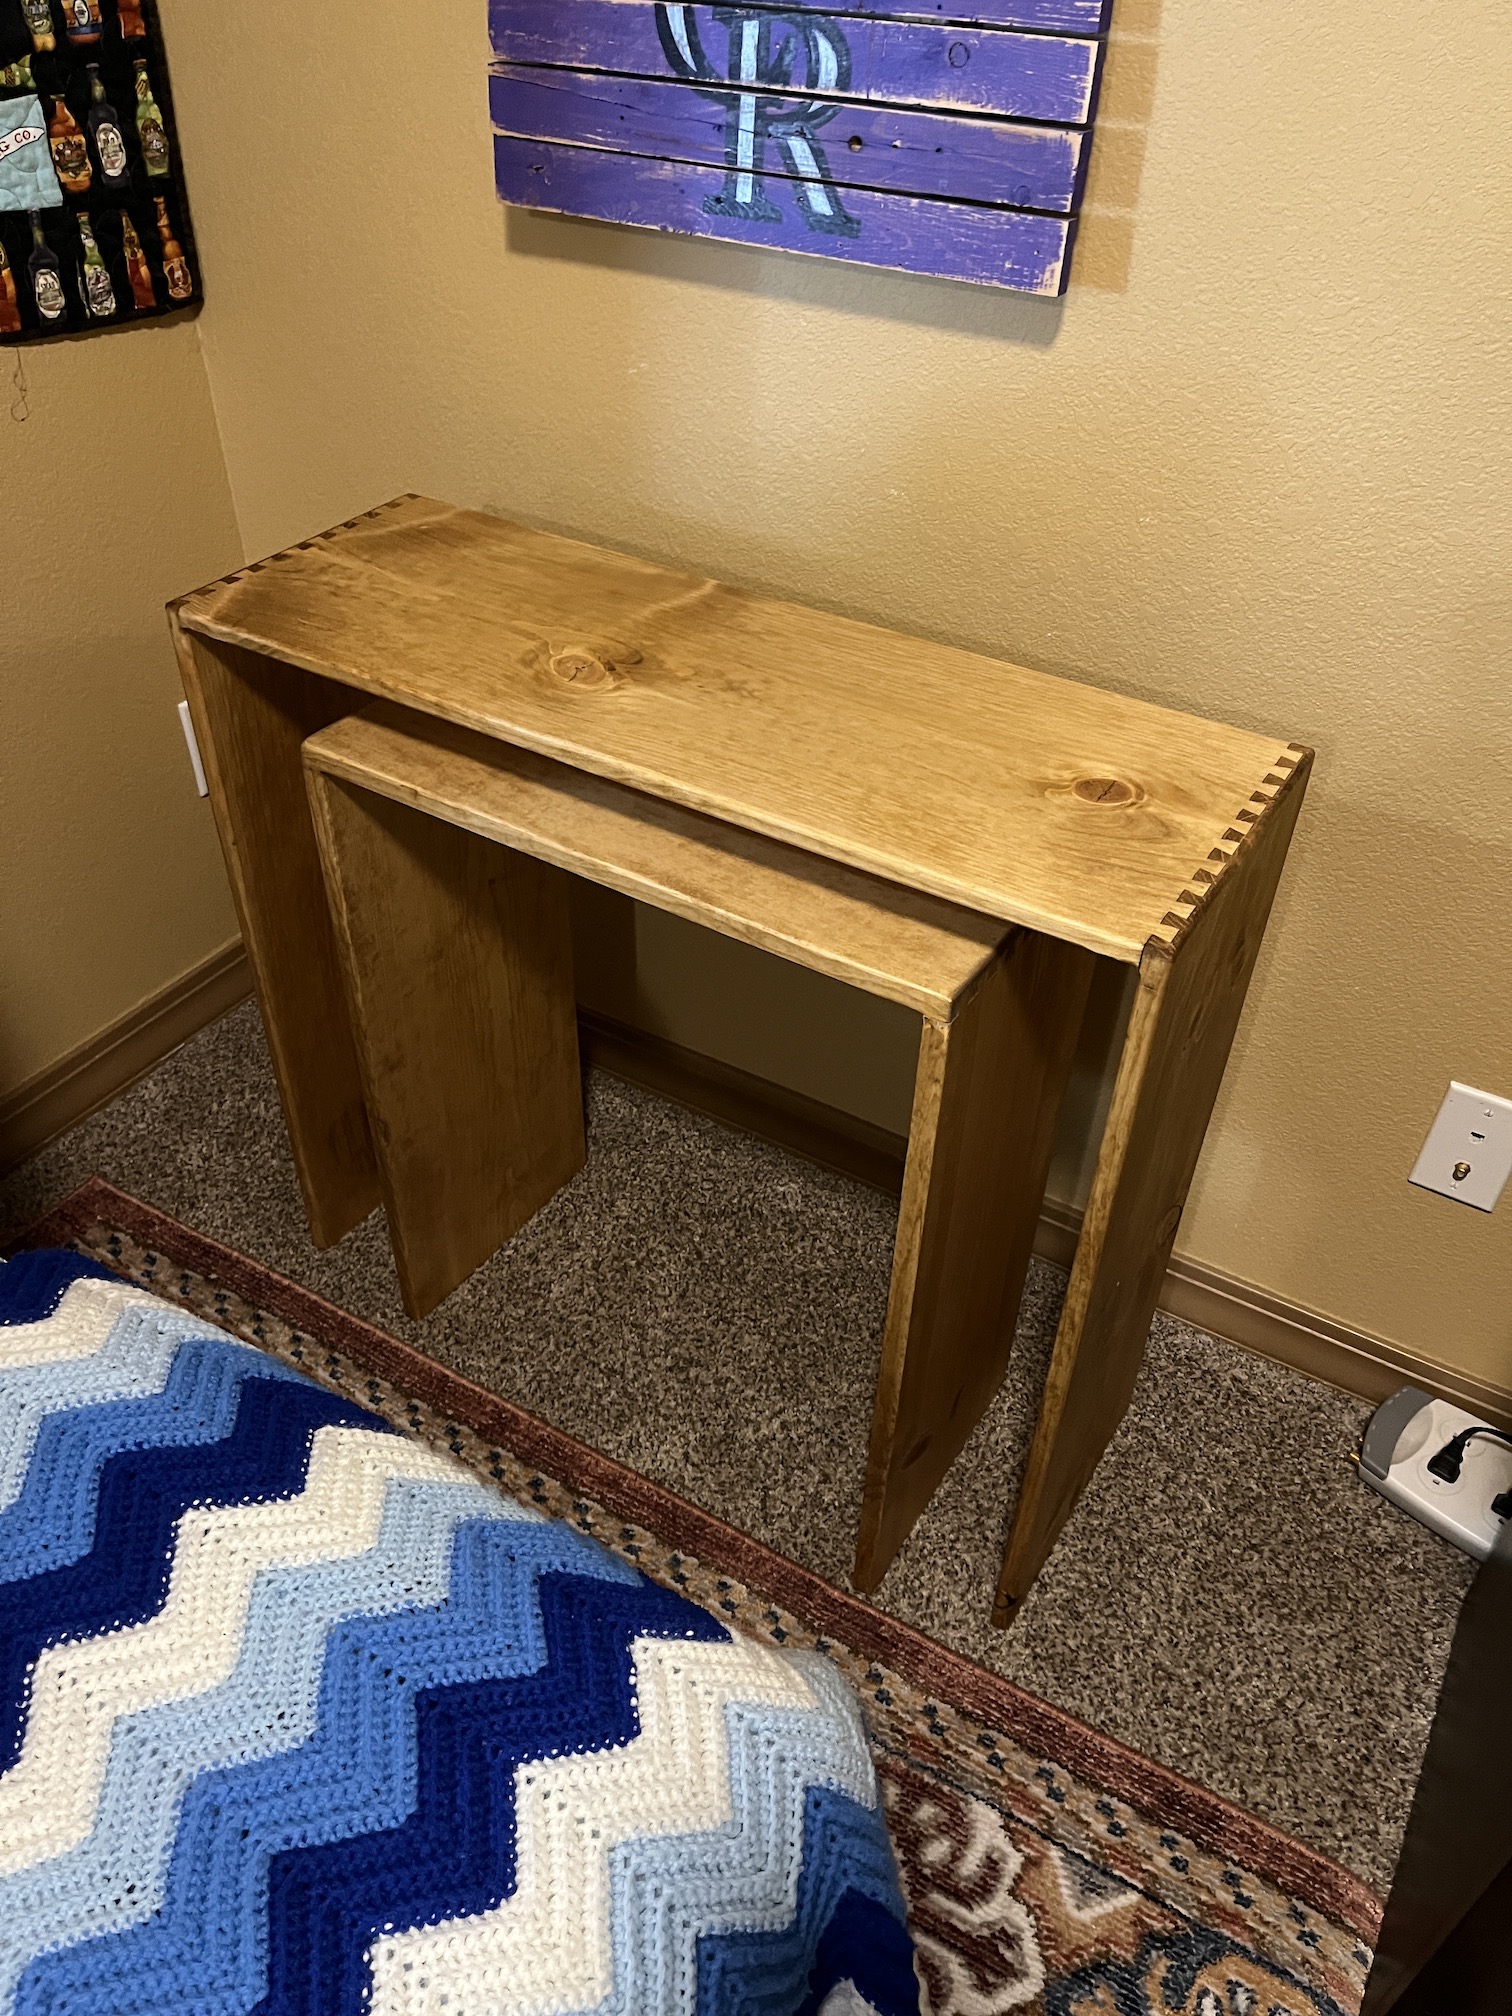
After that table I was made, I thought – “what about a bigger version of that table that I could sit under and working on my laptop or eat a meal on?”. So John made a bigger version and here it is in use:
It also works well as an end table:
John made sure the two tables could nest together out of the way when we are not using them:
We’ve definitely enjoyed them on a couple recent movie nights!
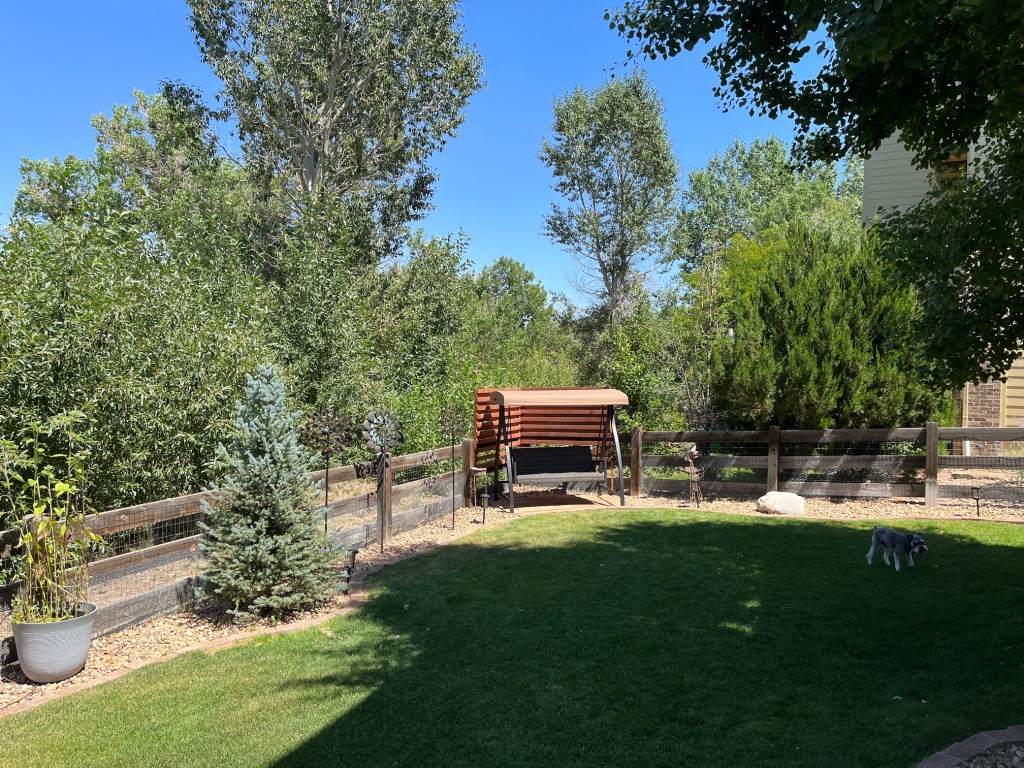
SCREEN FOR SWING
One of the things I loved about my backyard in my previous life in Oregon was my backyard swing. Last year we found a lovely swing on sale and installed it in the backyard.
Last summer (2021) John made a screen for the backyard patio area to make it more cozy:
Recently, I asked John if we could repeat the concept he used last year for the patio screen, for the section of the backyard with the swing. So a couple weeks ago, John made a screen for the swing so you can feel super cozy when relaxing on it:
It is now a wonderful place to read a book! (And if I bring a couple pillows over from the patio seating, it is a great place to take a lazy afternoon nap!)
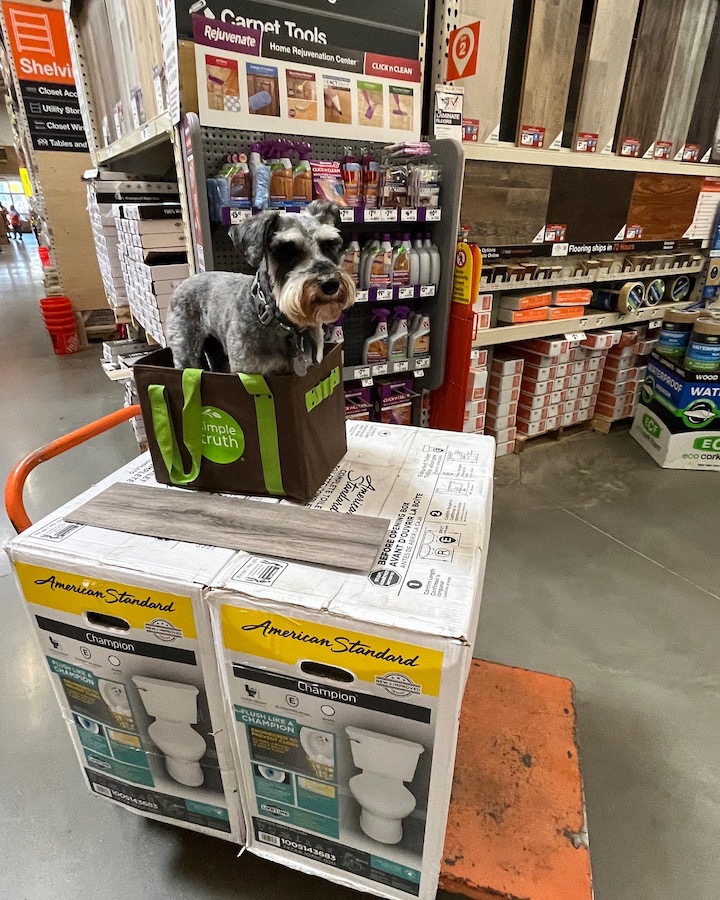
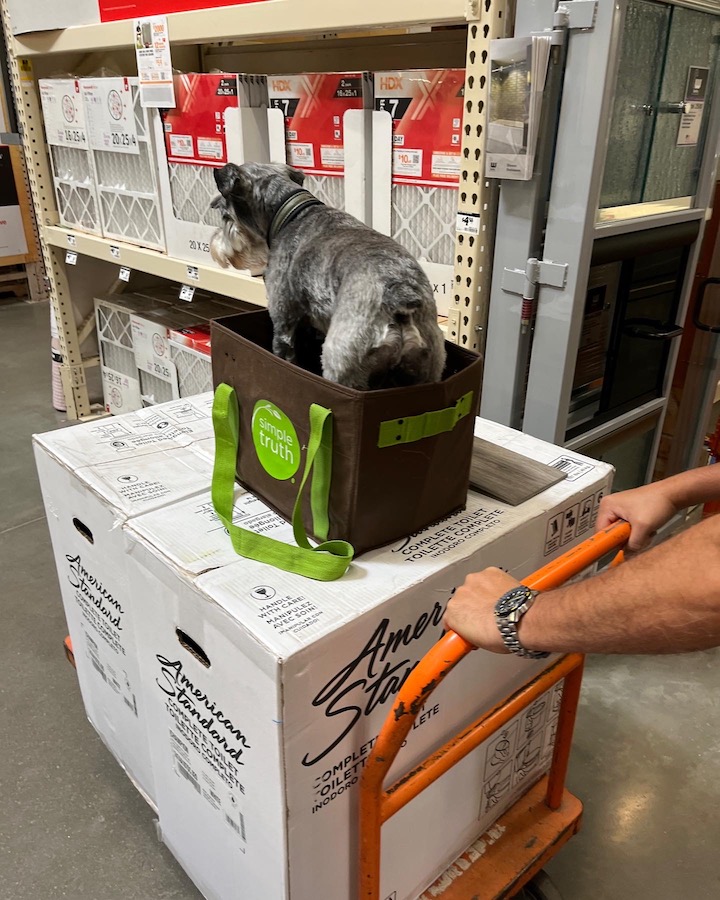
I continue with more projects in Part II of this series of posts, but let me close the post with pictures of Mike the Miniature Schnauzer at one of his favorite places – a home improvement store. He loves to ride around in the cart (we call him “Mike in the Box”).
He was helping us buy toilets for the projects I will share in the next post.
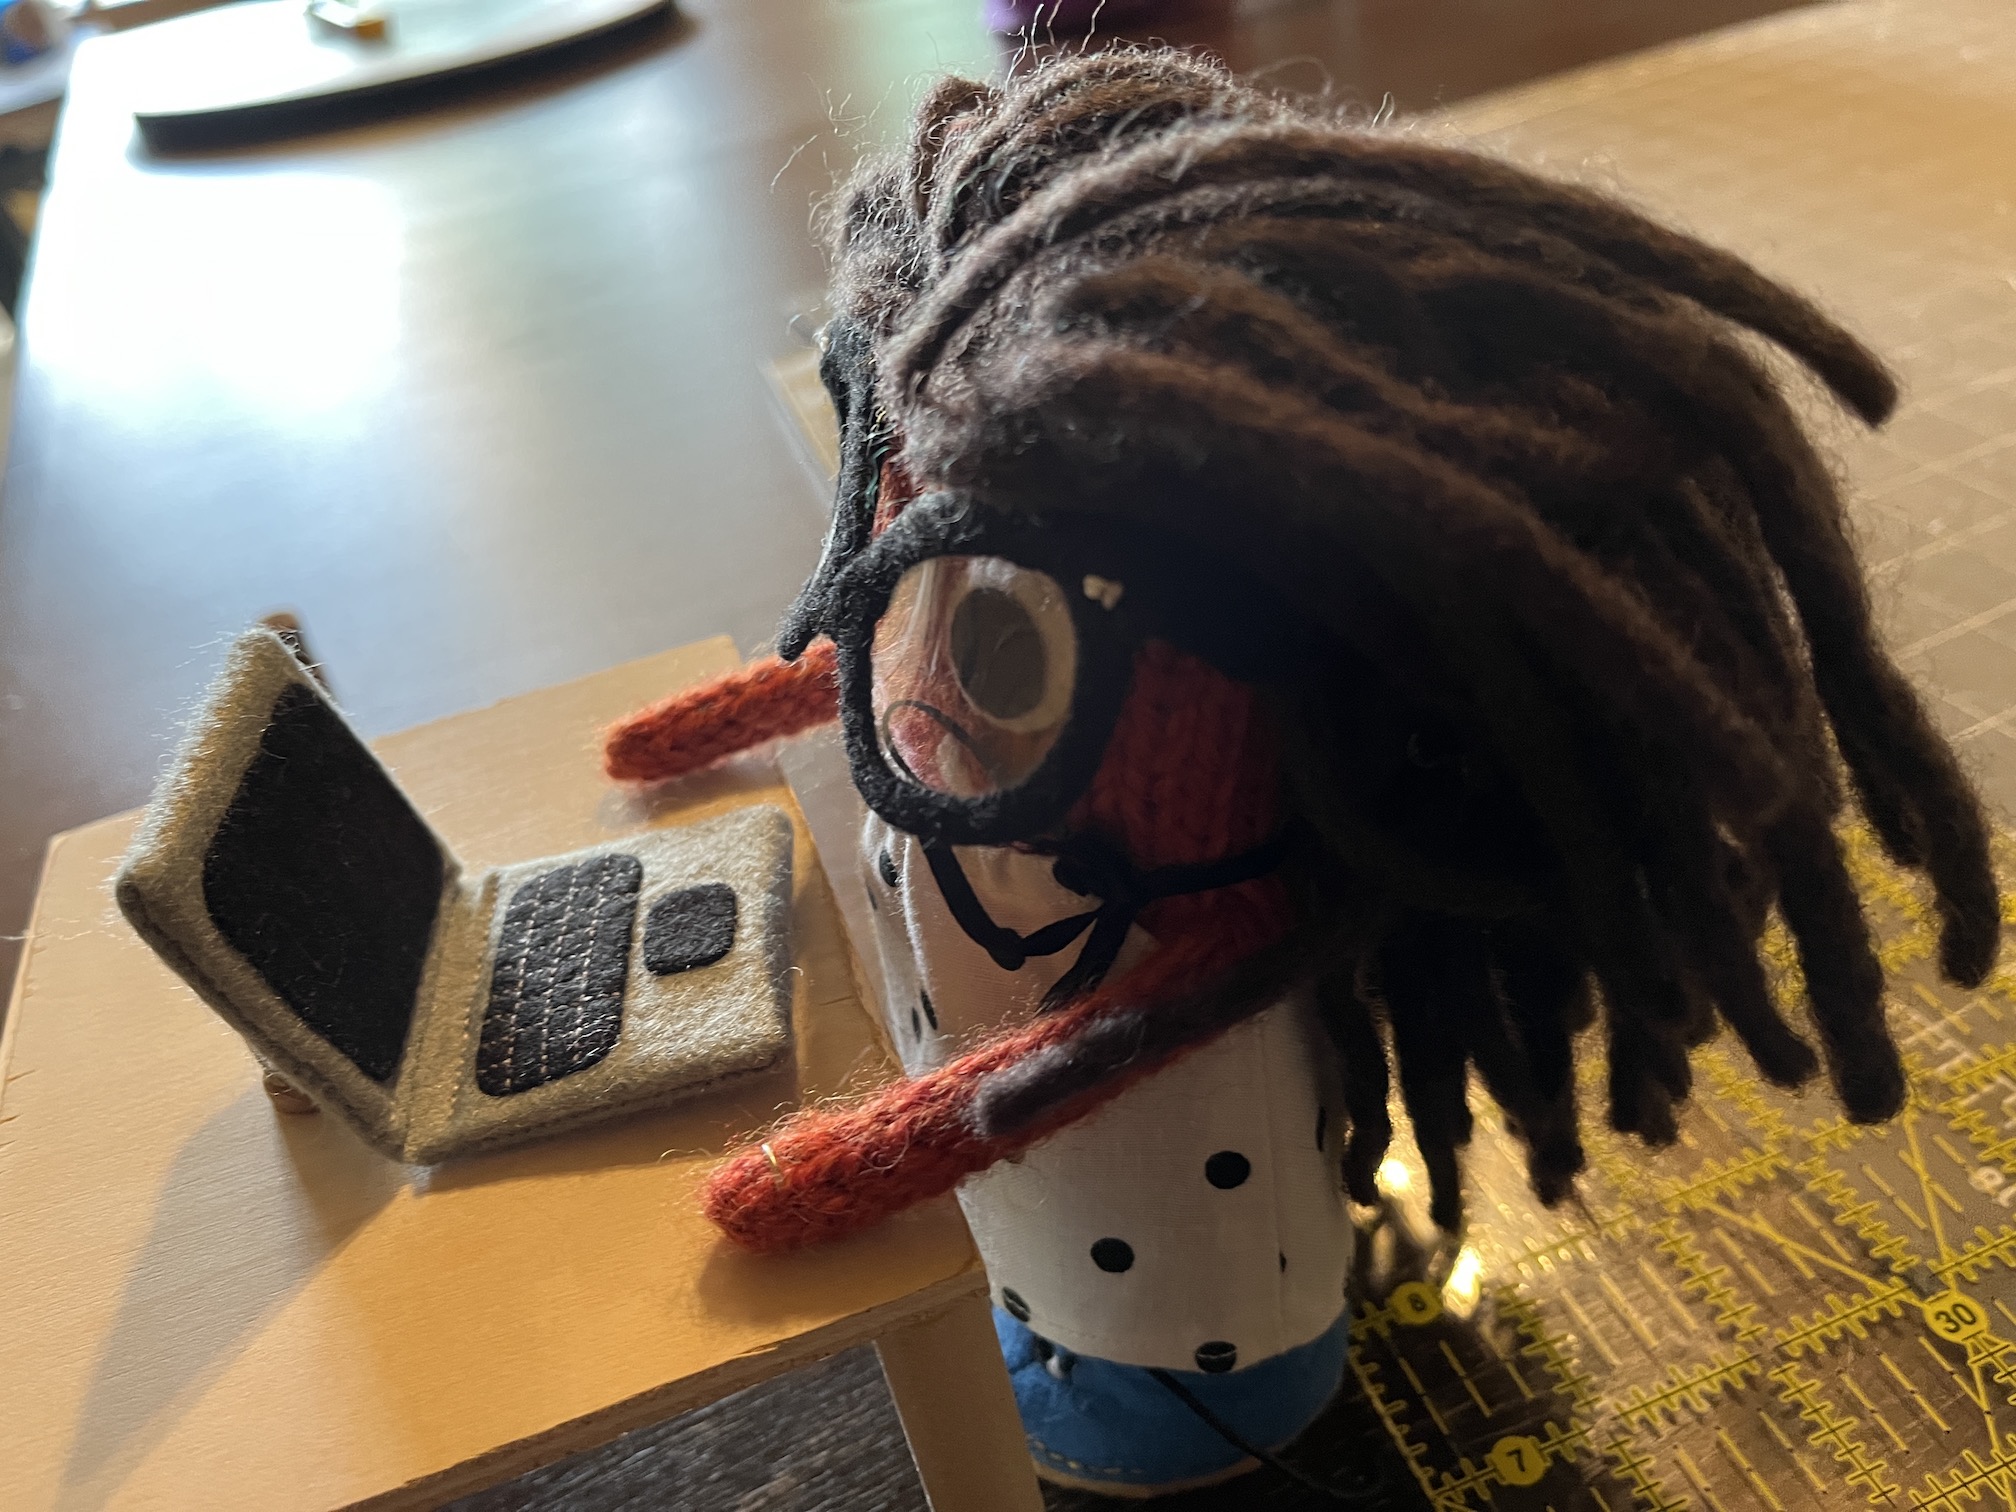
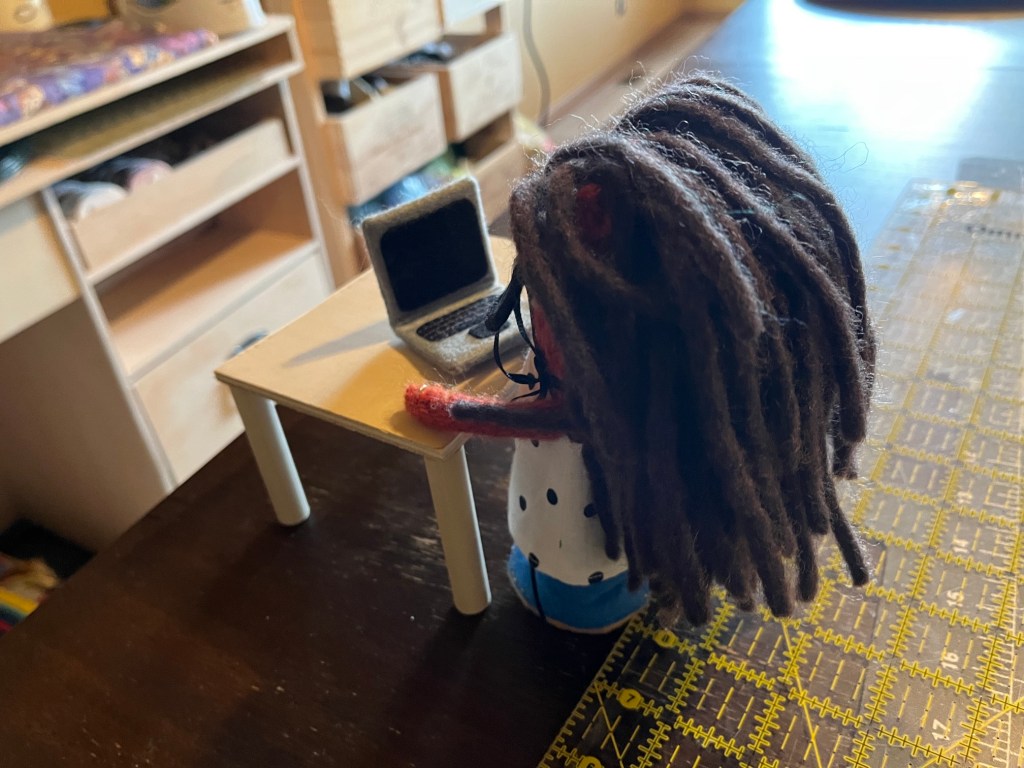
I bet you are surprised to hear from me again so soon! This is the tierneycreates Beastie, and I am sneaking in for a post about my new desk that Tierney’s partner John built for me yesterday.
Tierney had a post planned today on Black & White photos she took in Chicago (my monster eyes are rolling) but I asked her to delay your boredom a day while I shared news about my new desk (which I am writing you from right now!):
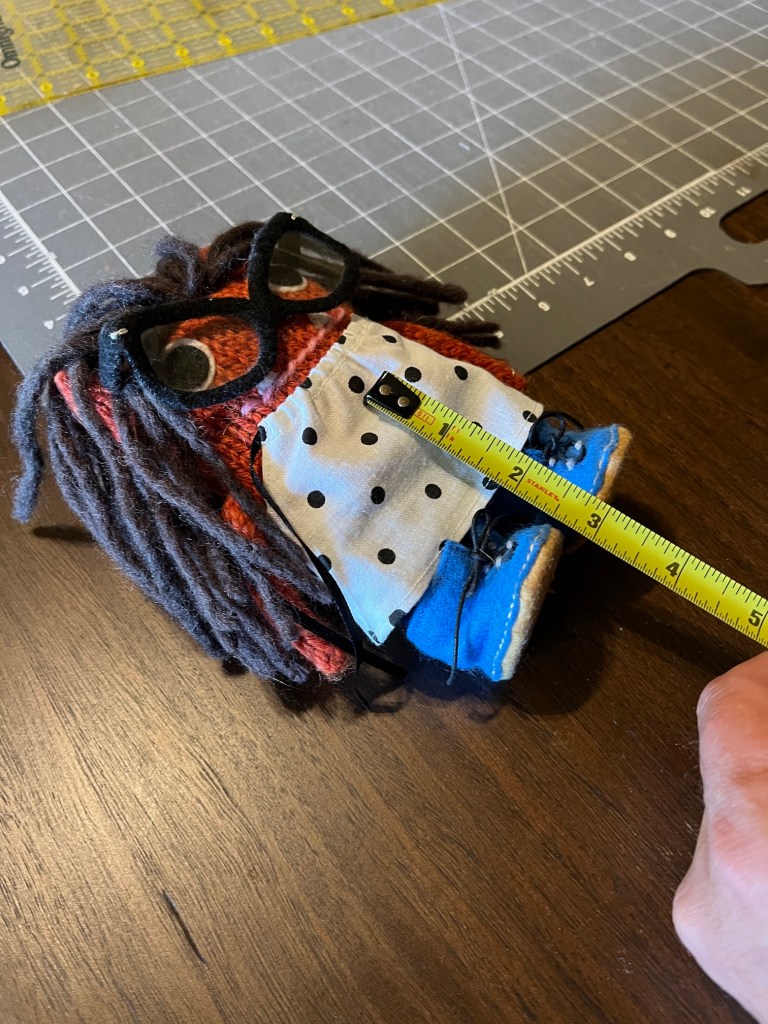
First John came up to Tierney’s studio (which is also the home of my dog Mikelet and me) to take my measurements for the desk:
He went down to his woodshop in the basement (where my partner John Beastie lives, yes we stay in separate sections of the house its a long story – but it best not to let two Beasties hang out continuously, trust me…).
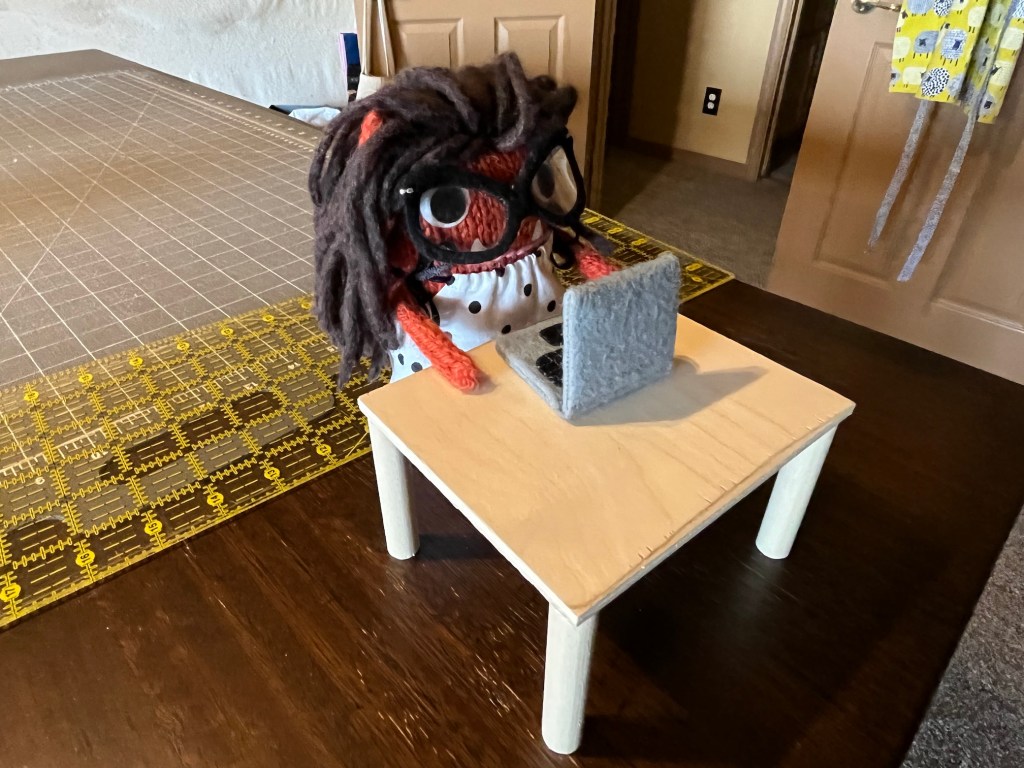
An hour later John returned with my new desk:
Then Tierney and John did a photoshoot (and I am not sure why they were giggling so loudly during the photoshoot, it was quite rude) of me at my new desk:
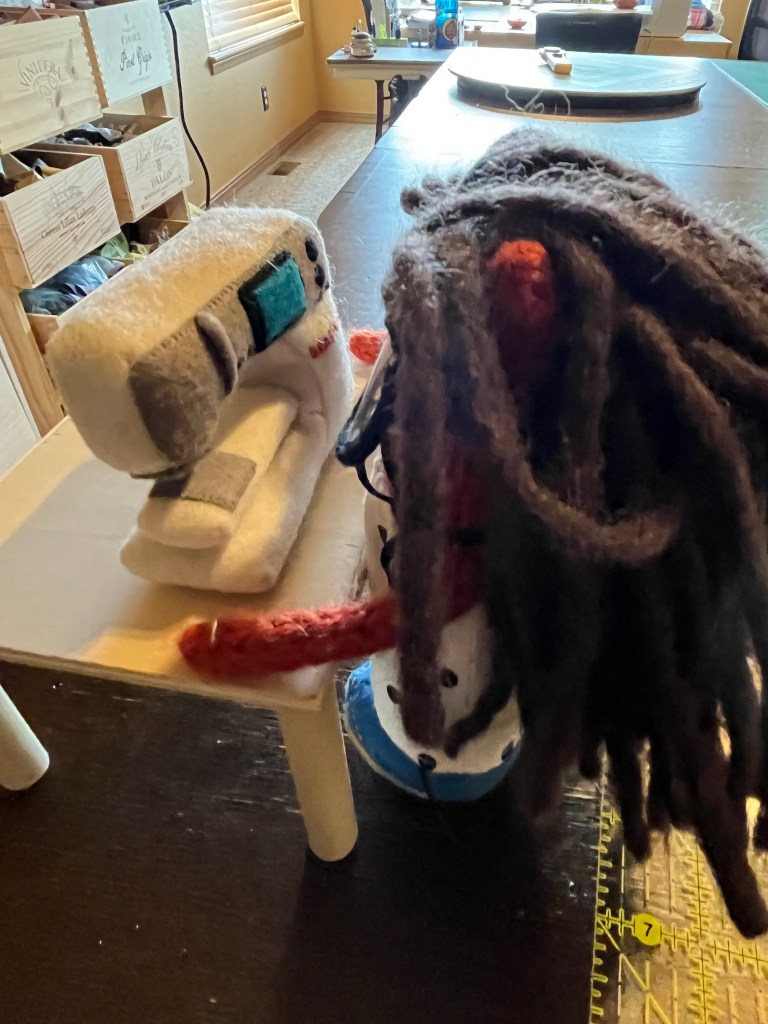
We also discovered the desk is great for me to sew on my Beastnina, so I can help Tierney out with her backlog of UFOs (unfinished objects for the non-quilters reading):
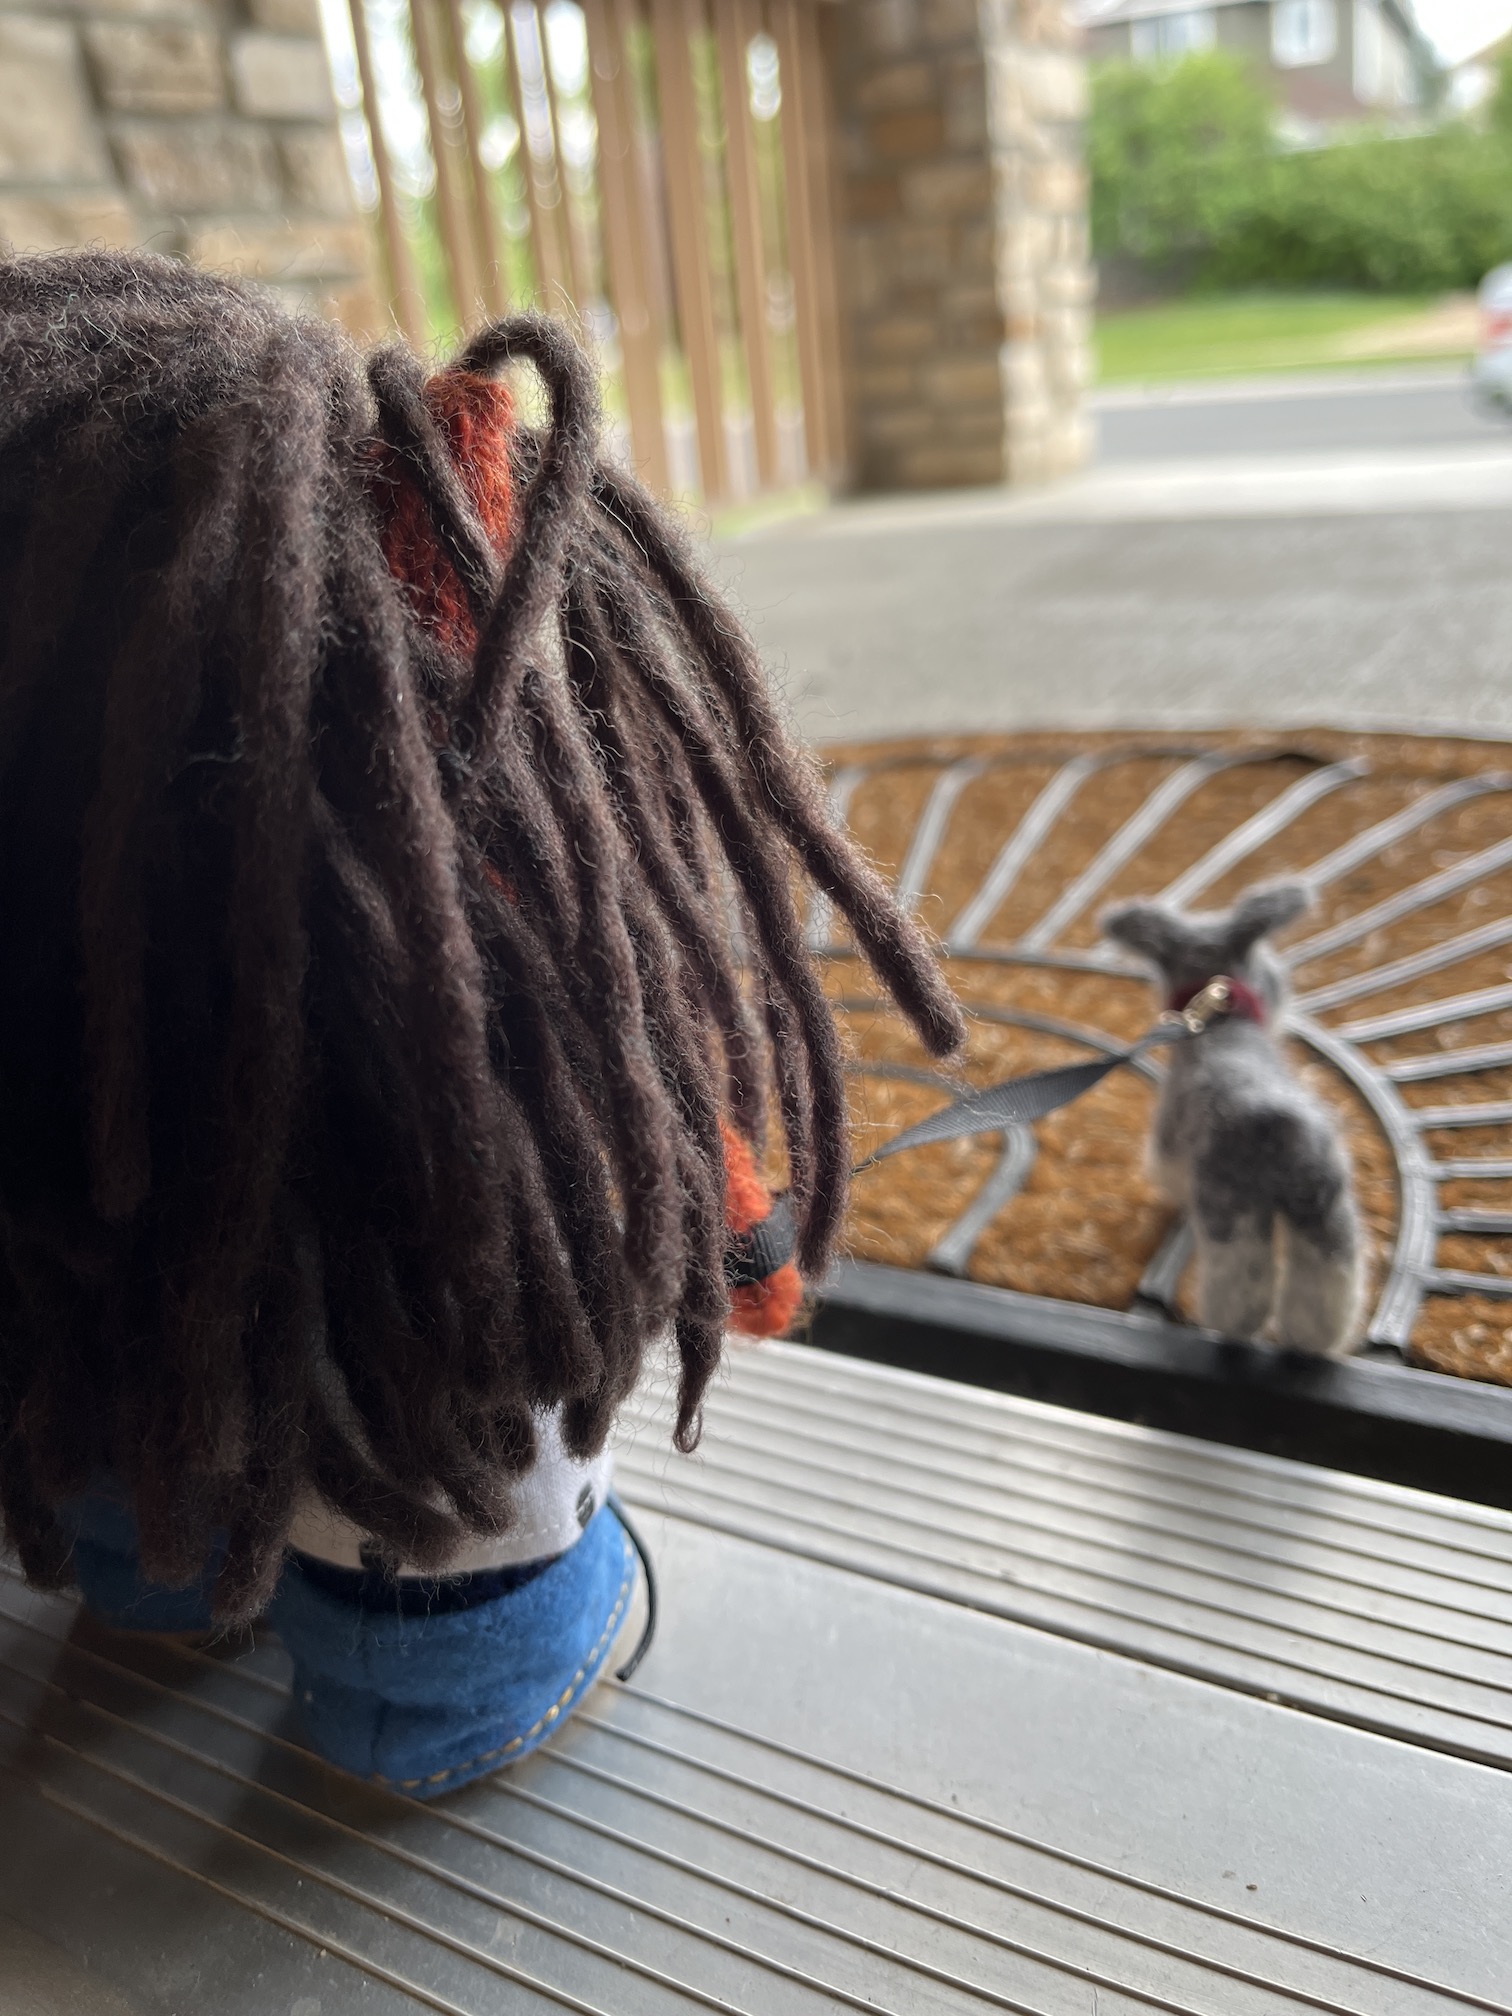
My dog Mikelet was getting impatient during the photoshoot because it was time for his after dinner walk:
So I stopped playing with my new desk, and took Mikelet out for his walk:
So that’s my new desk story. Now that I have a great place to write I might pop in more frequently with blog posts.
And don’t worry Tierney will be back tomorrow to bore you to tears with more of her B&W photography from her delusion that she is a photographer (but just keep playing along).
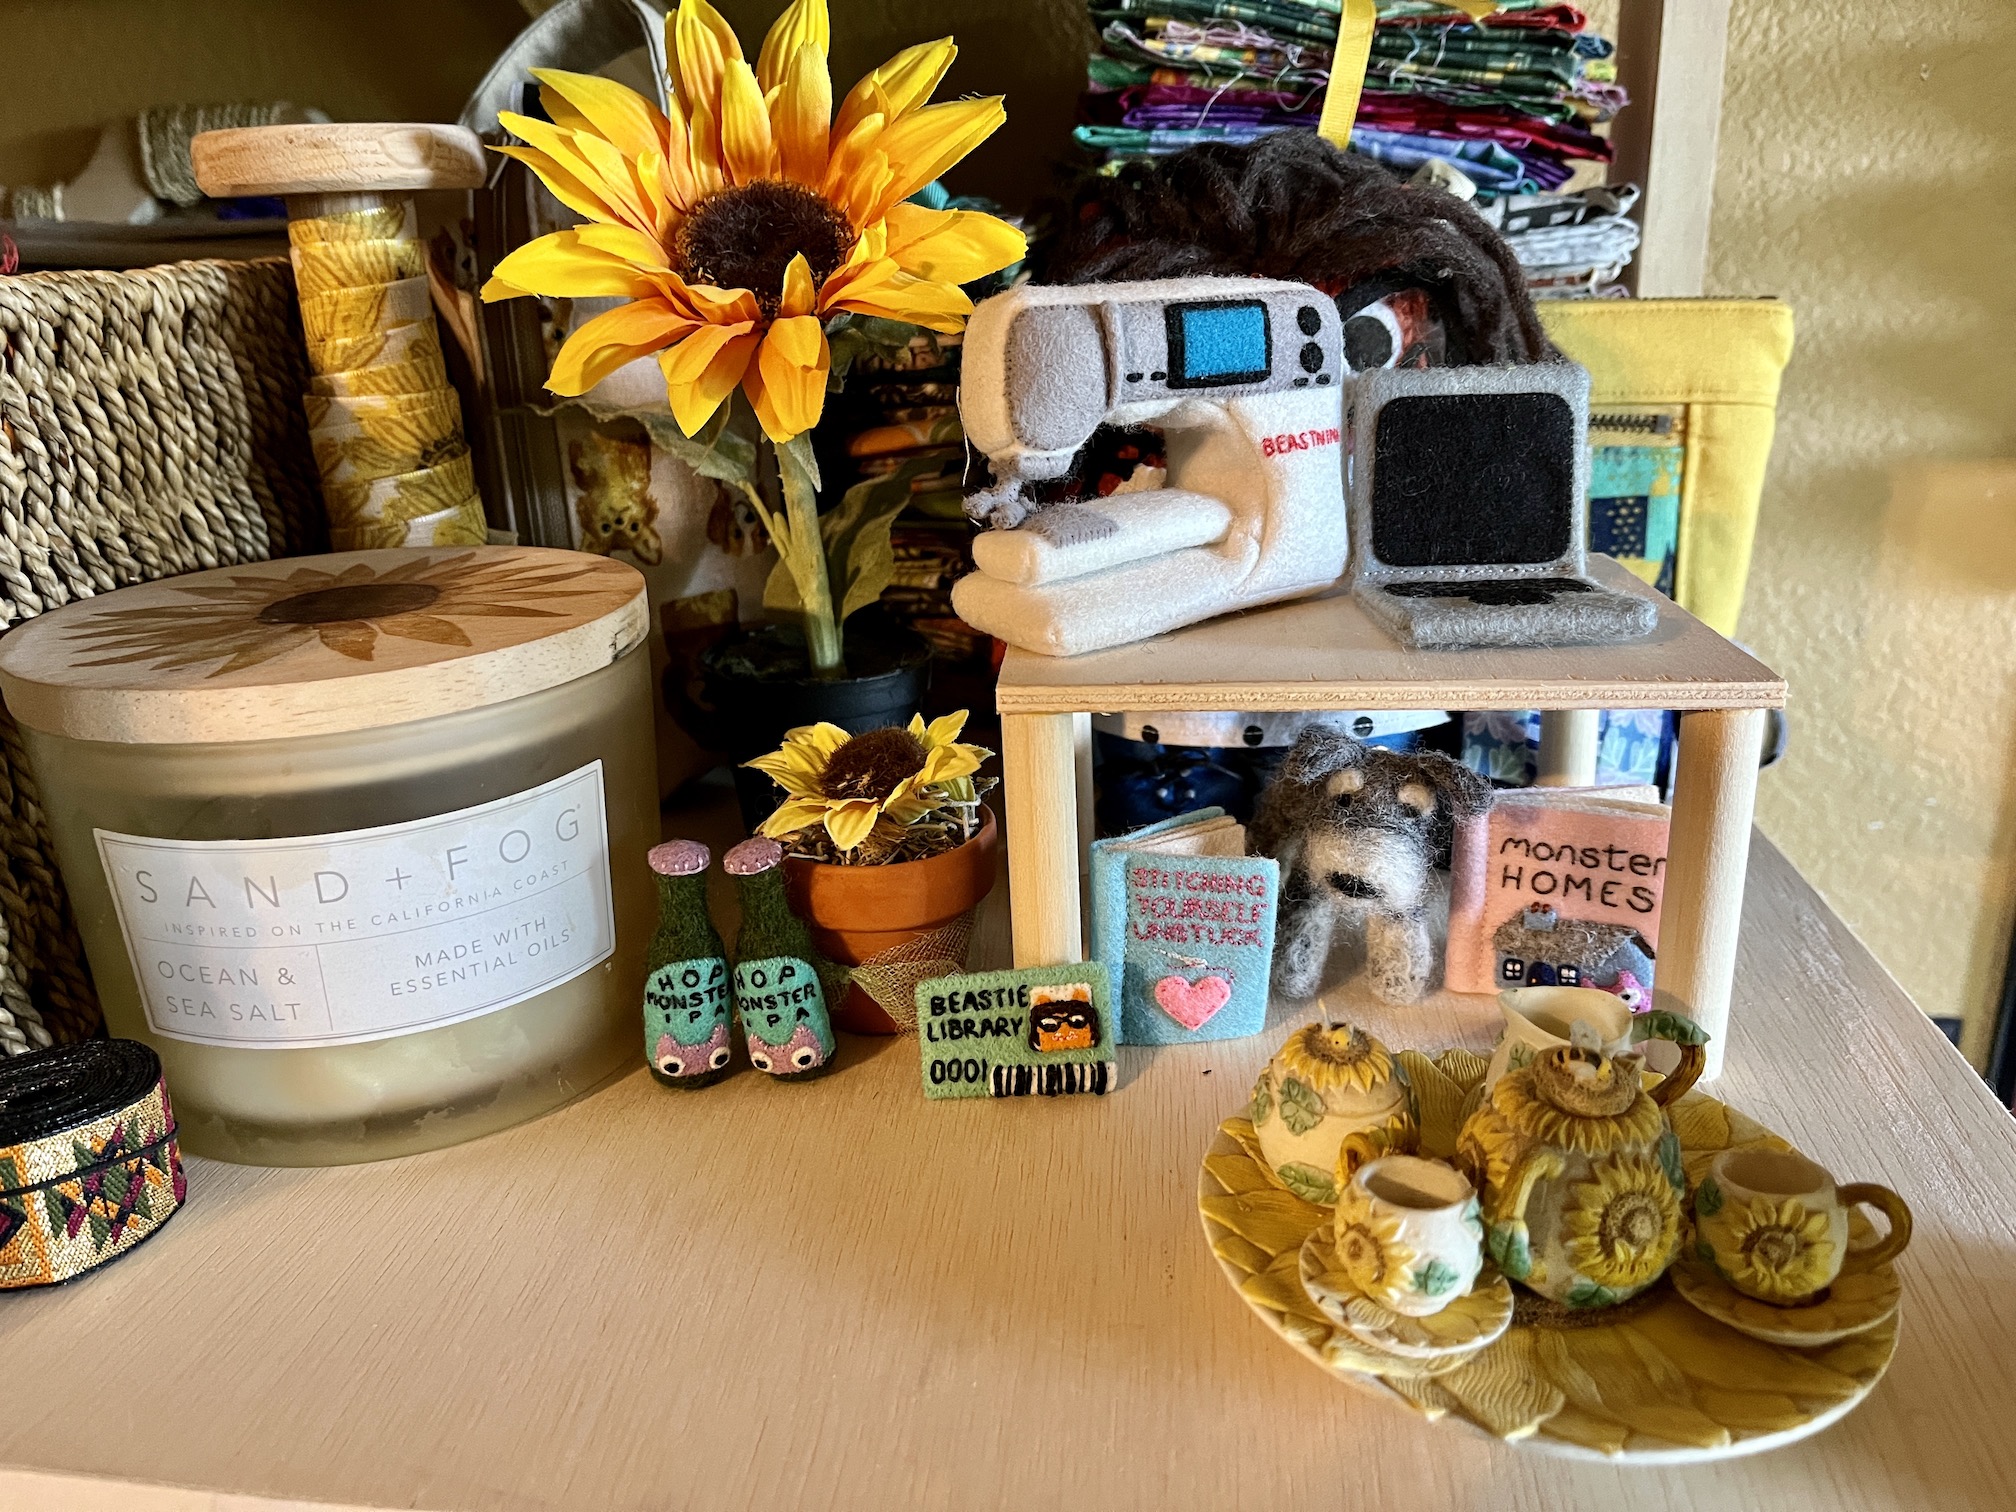
Oh and to close this post – here is a photo of me back in my area of Tierney’s studio, with all my accessories made by Helen of Crawcrafts Beasties (crawcraftsbeasties.com):
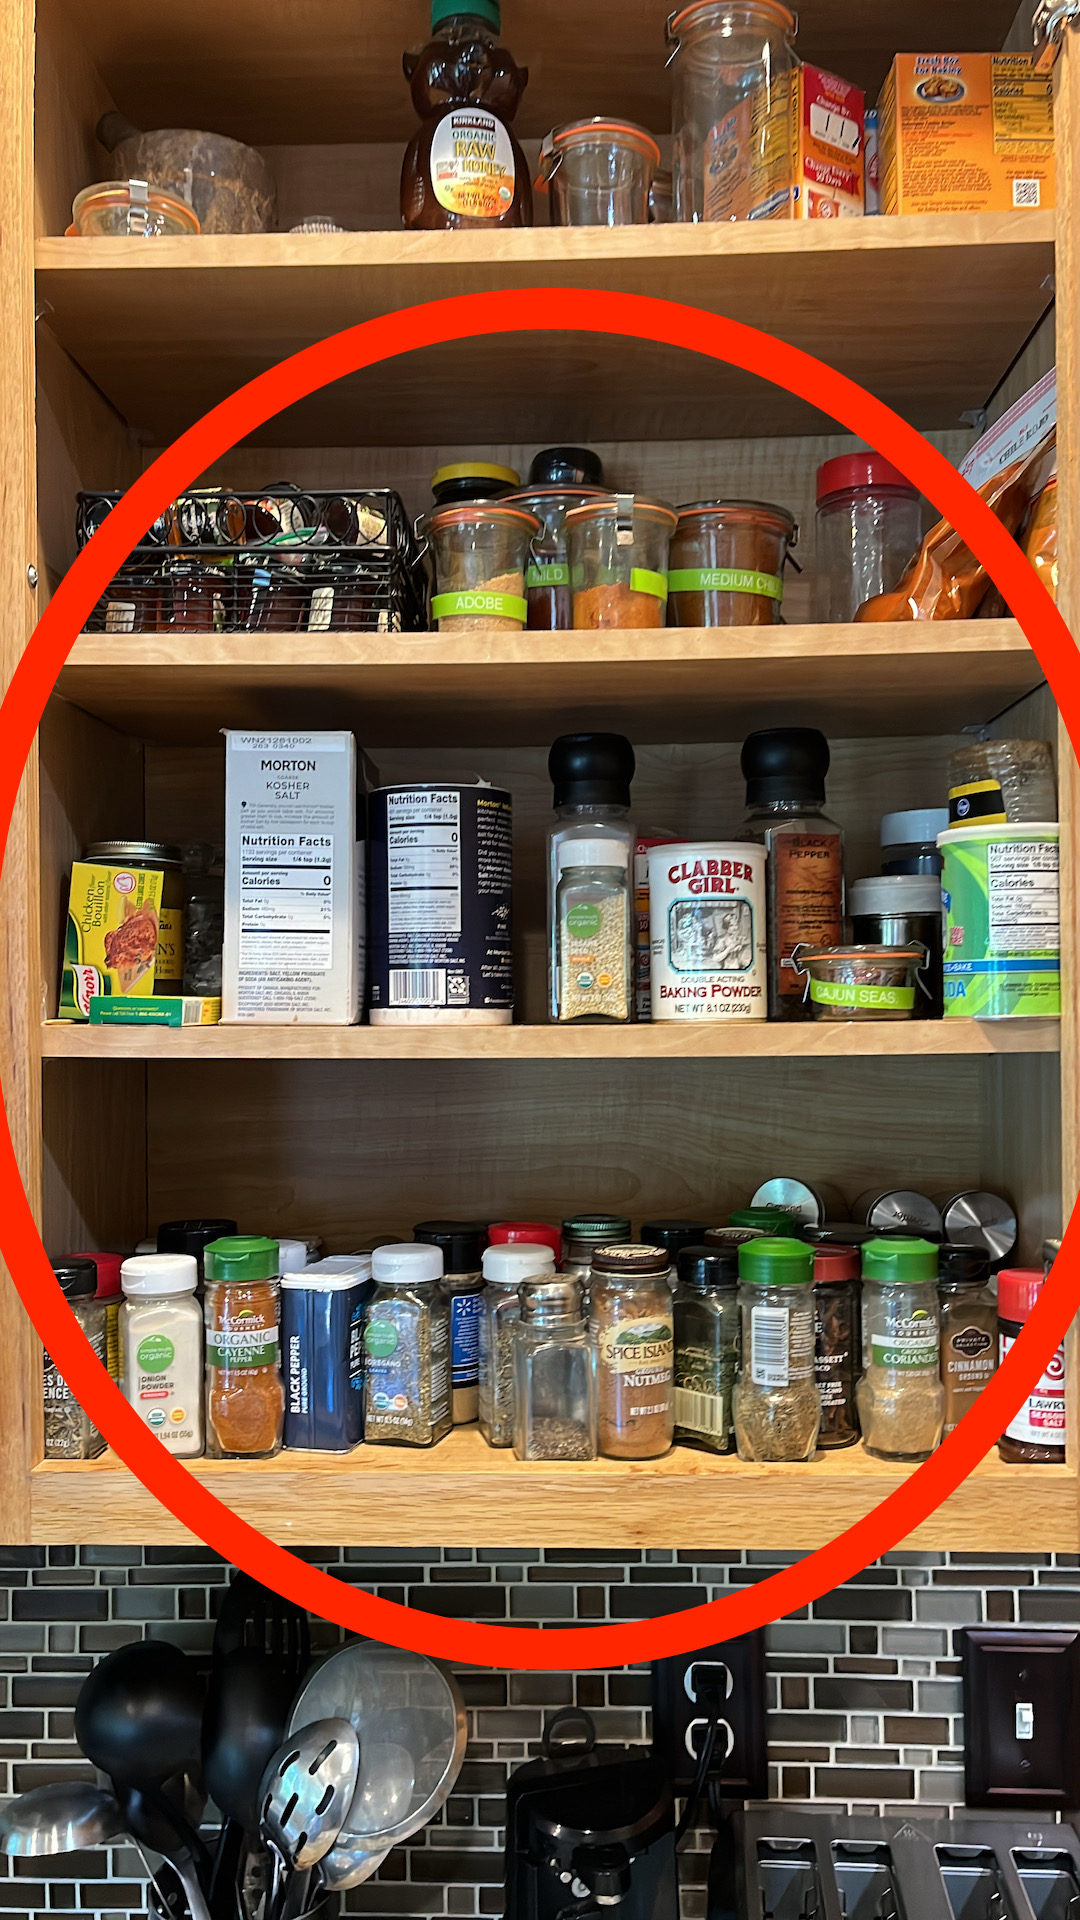
My partner John and I enjoy cooking and trying new recipes. As a result we have a large collection of spices in our kitchen. We call our collection of spices “Spicetopia”.
Lots of spices, however the “organization” (= none) of our spices was not working to find the spices we needed in an efficient manner (like under 10 minutes, ha!).
Exhibit A – the state of the cabinet where “Spicetopia” was stored:
Cabinet of Curiosities
John is a woodworker and figured he could come up with a simple solution to organizing the spices but every option we discussed still gave us a cluttered or semi-cluttered cabinet.
Then we thought: what about putting the spices in an entirely different area – in a drawer!
So a couple Fridays ago, we began with purging and consolidating our spices. Why organize stuff that is expired or that we never use?
Yes, we had cocktails while purging spices, it was our wild Friday night!
After seeing what was left to find a new home for in a drawer, we purged one of our kitchen drawers and consolidated our cooking utensils (sorry no photos of this exciting event, ha!).
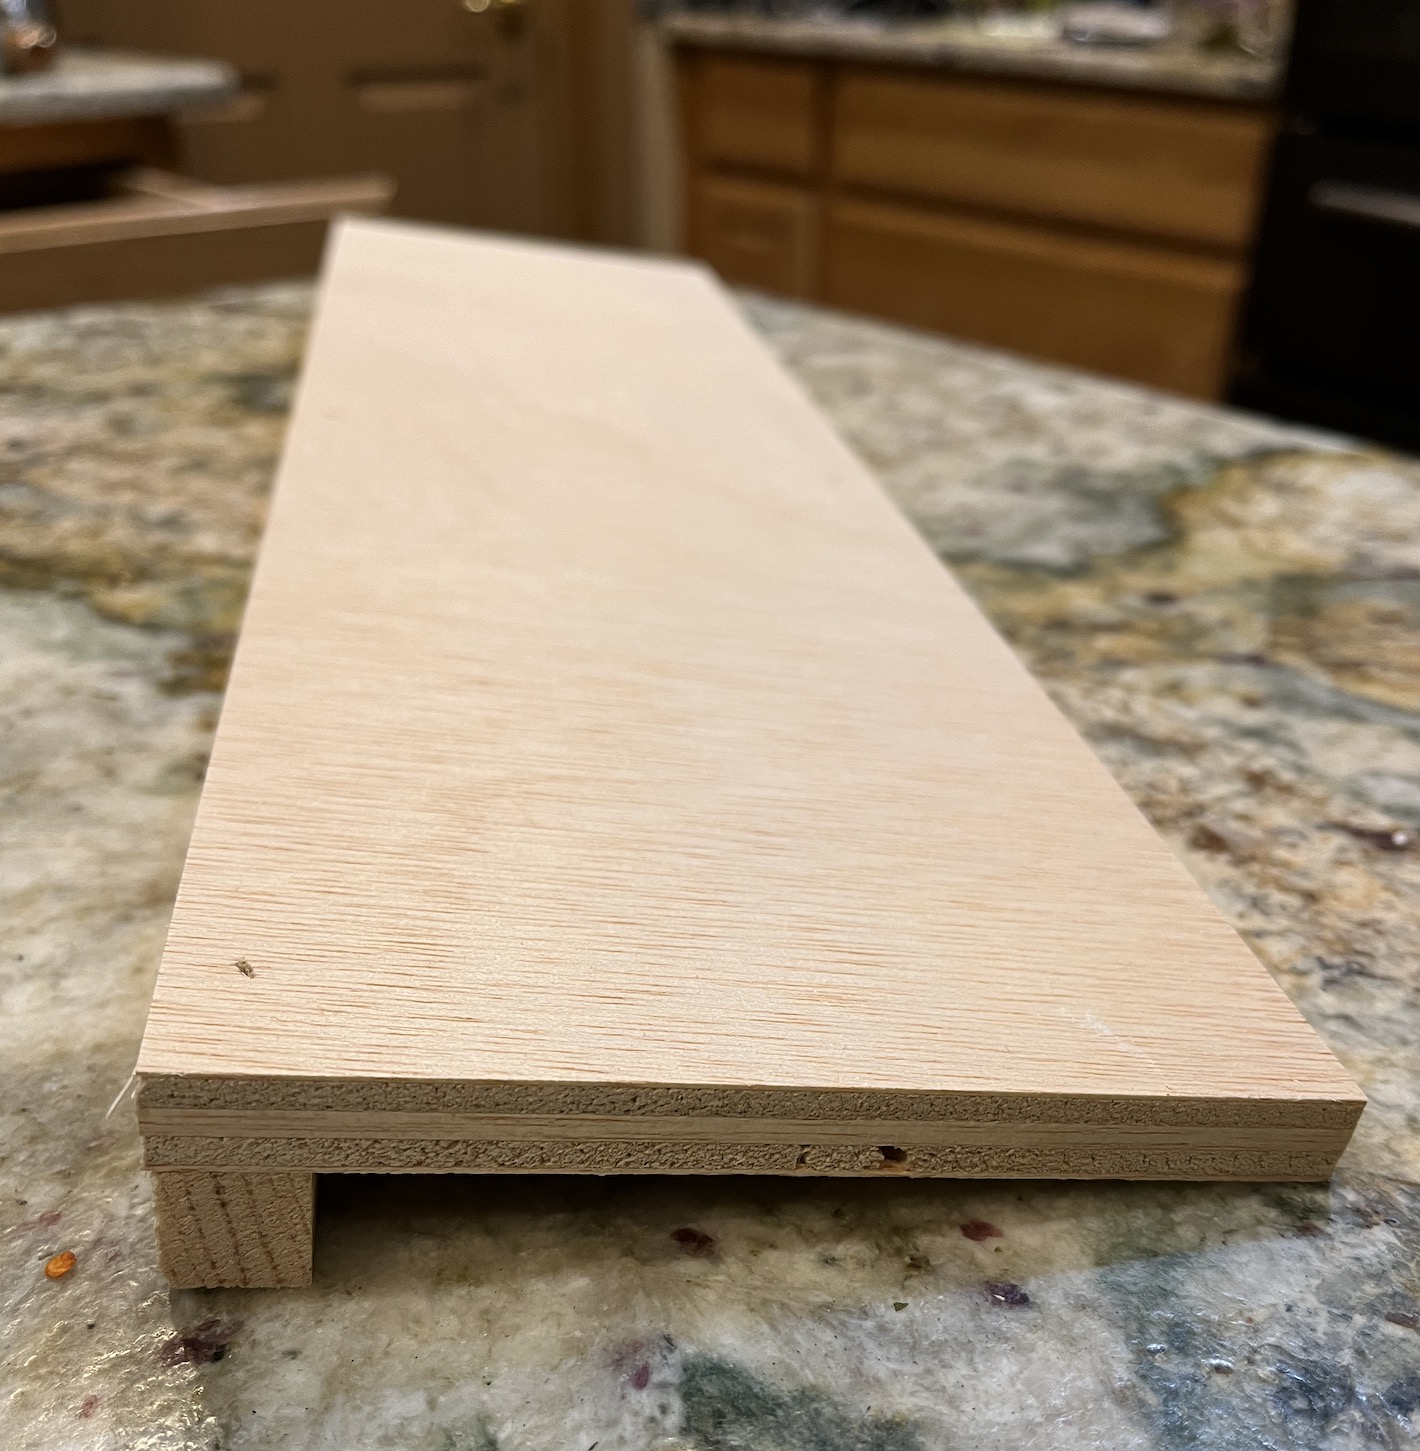
Then John built drawer organizers which were a series of slopped risers for the spices, out of scrap wood:
Slightly raised and ready to hold some spices!
And here is our new “Spicetopia” drawer:
Oh look, I can now easily find/identify our spices in “Spicetopia”
We put the spices in alphabetical order for even more ease of use! We did get challenged with things like “Cayenne Pepper”, “Black Pepper” and “Red Pepper” – do you file them under “P” for Pepper or their first name?!?!? But we figured out these complex life decisions…
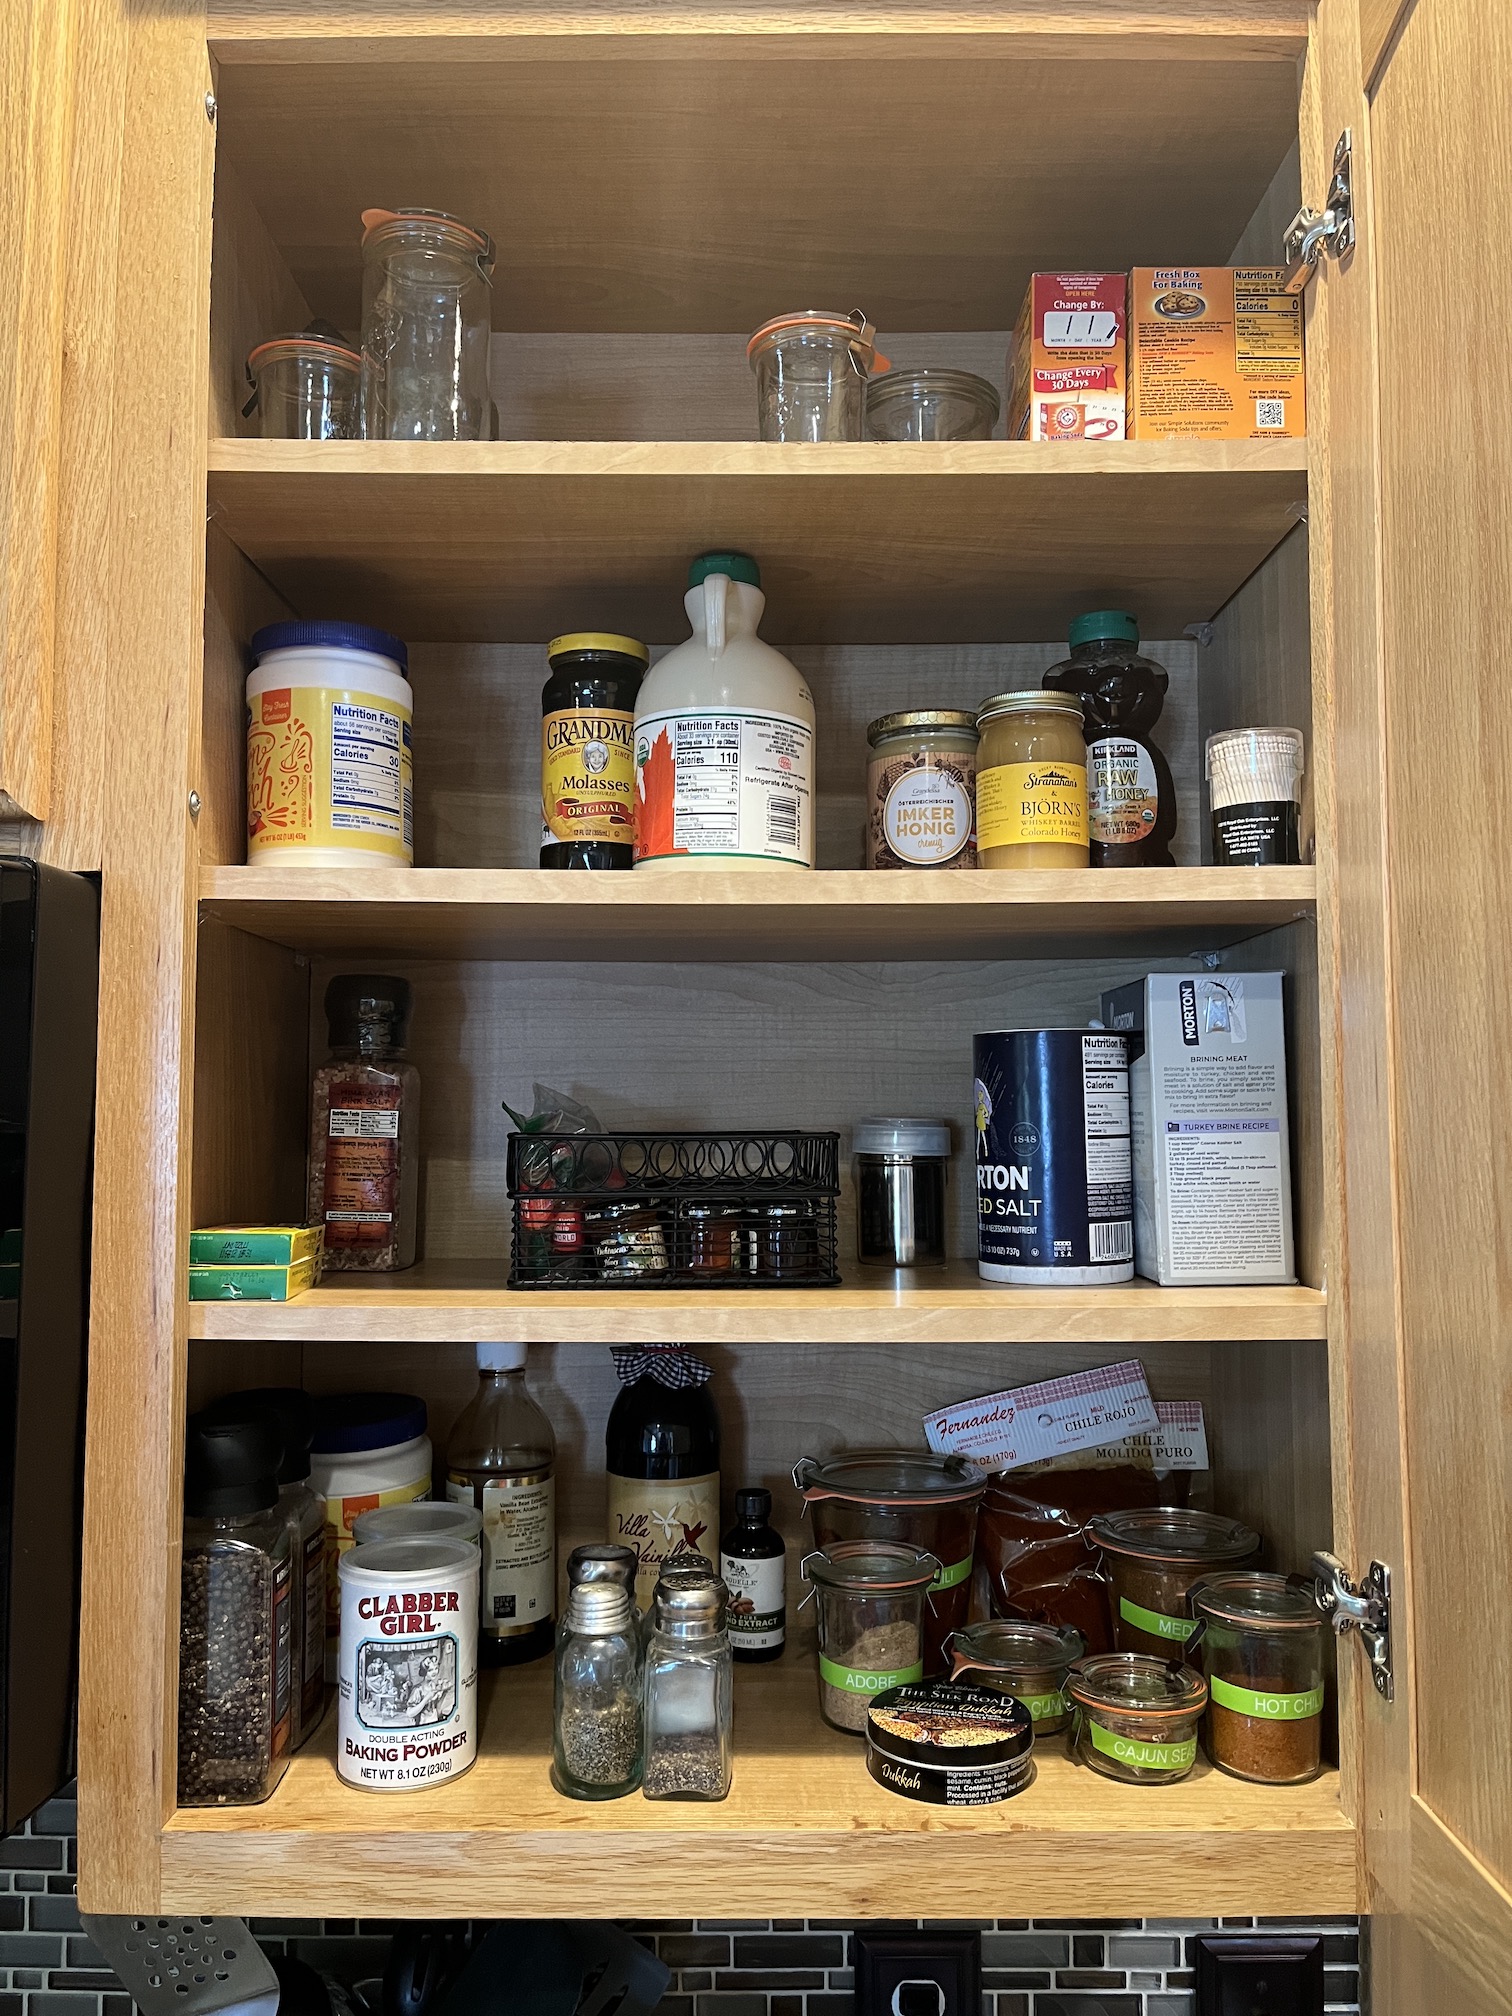
And here is the cabinet without all those spices cluttering it (we also did some purging and organization of the entire cabinet):
Much better!
John and I are weird, we find organizing our kitchen a fun thing to do on a Friday evening!
I haven’t posted any new pieces by my partner John, a self-taught hobbyist woodworker, as he has been super busy with his job.
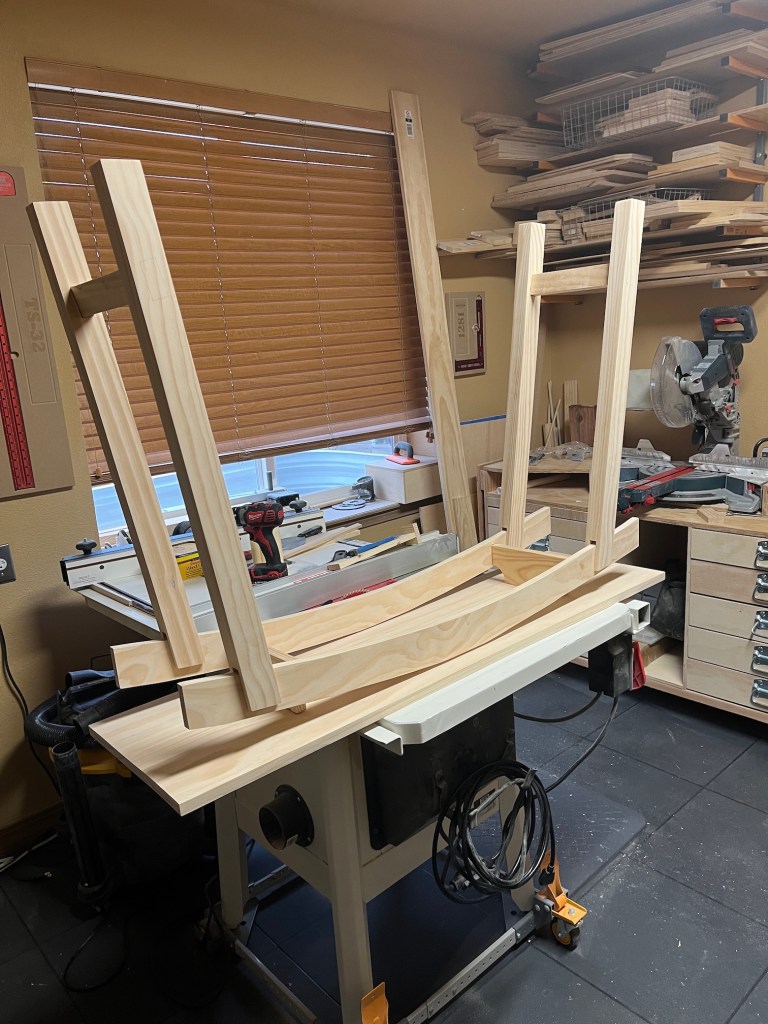
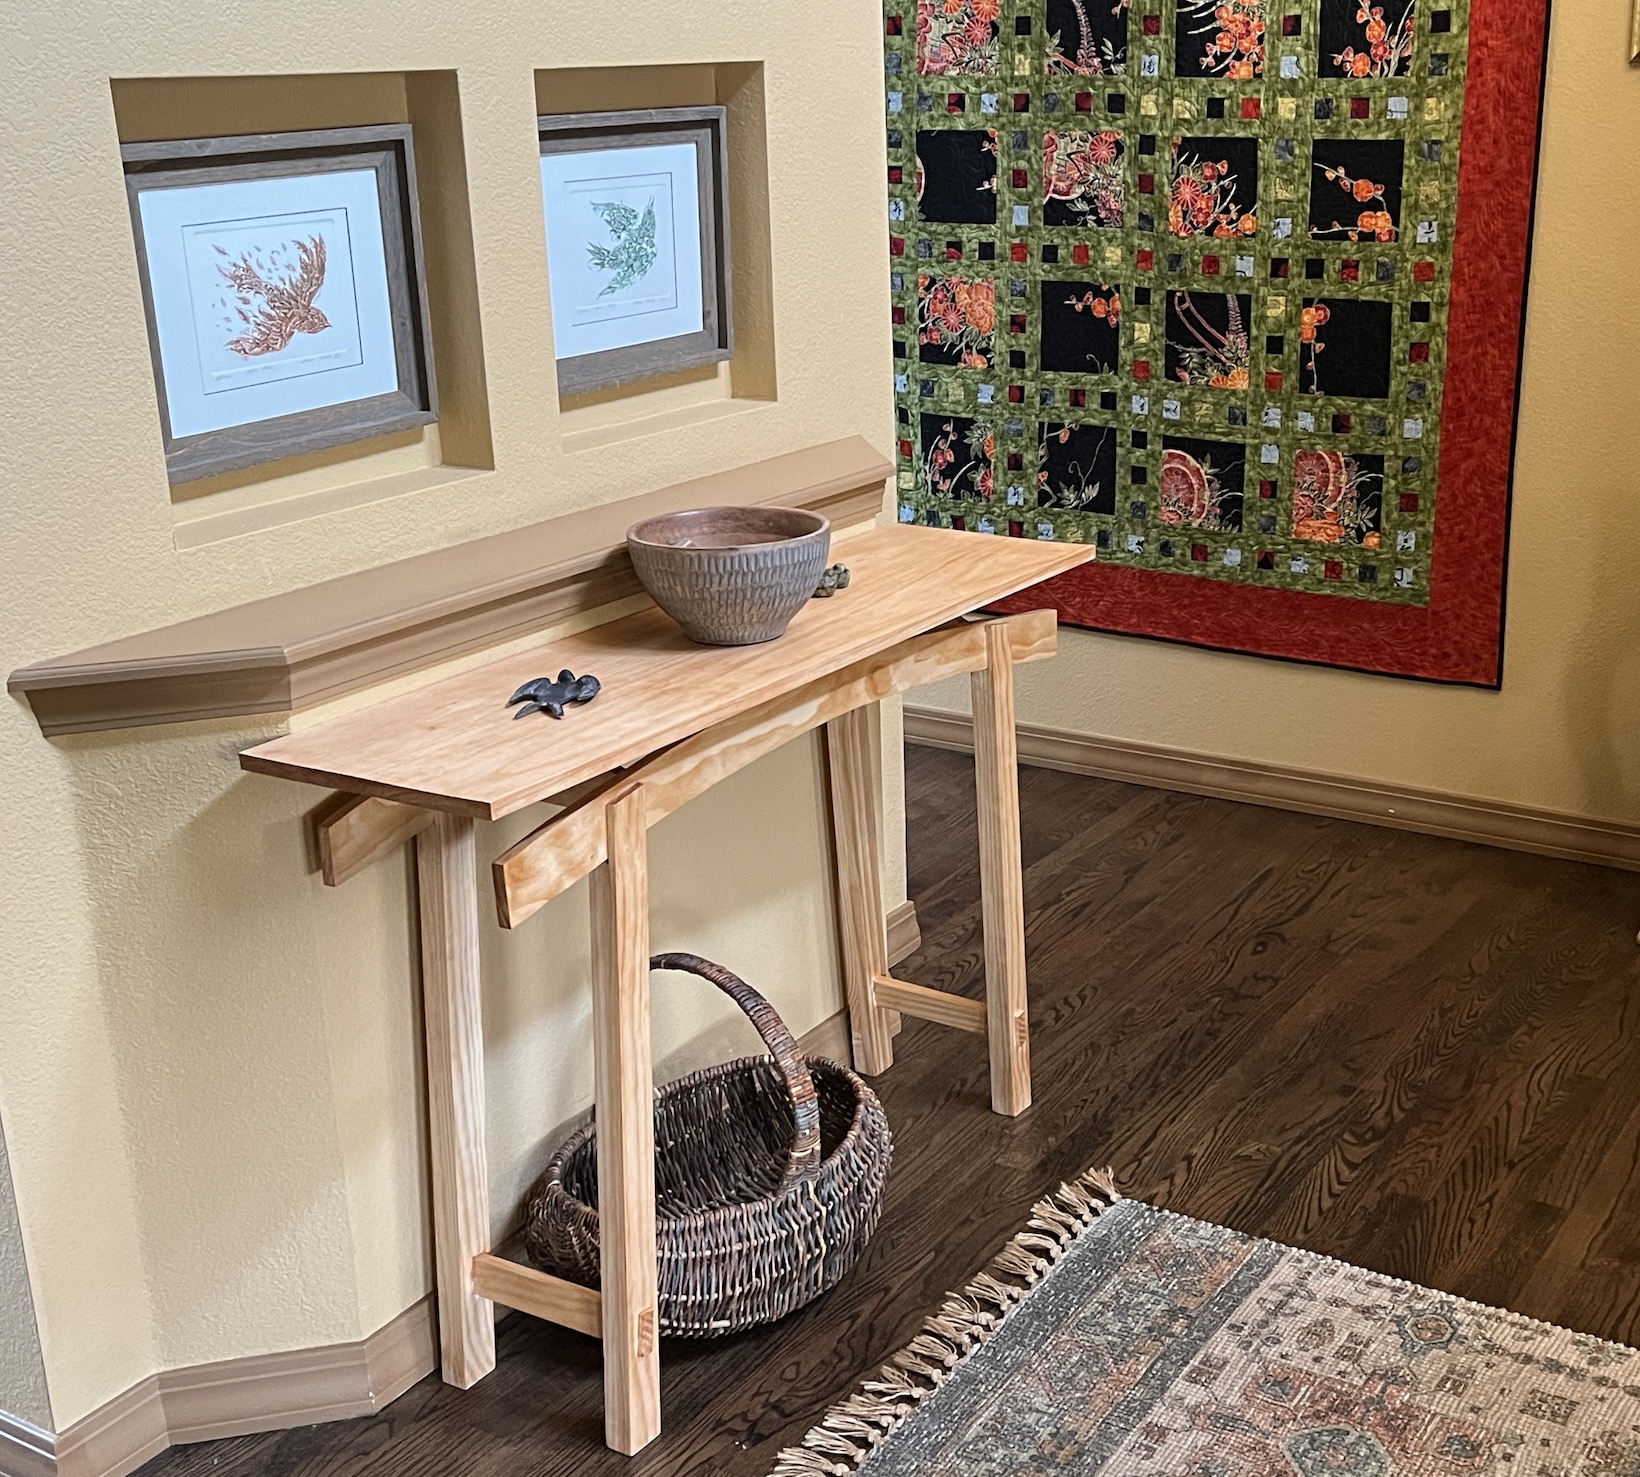
Recently he found time to work on a new woodworking piece, and has recently finished a pine floating top table. The table was originally to be used as sofa table in our basement but it came out so cool, we decided to put it in the entryway.
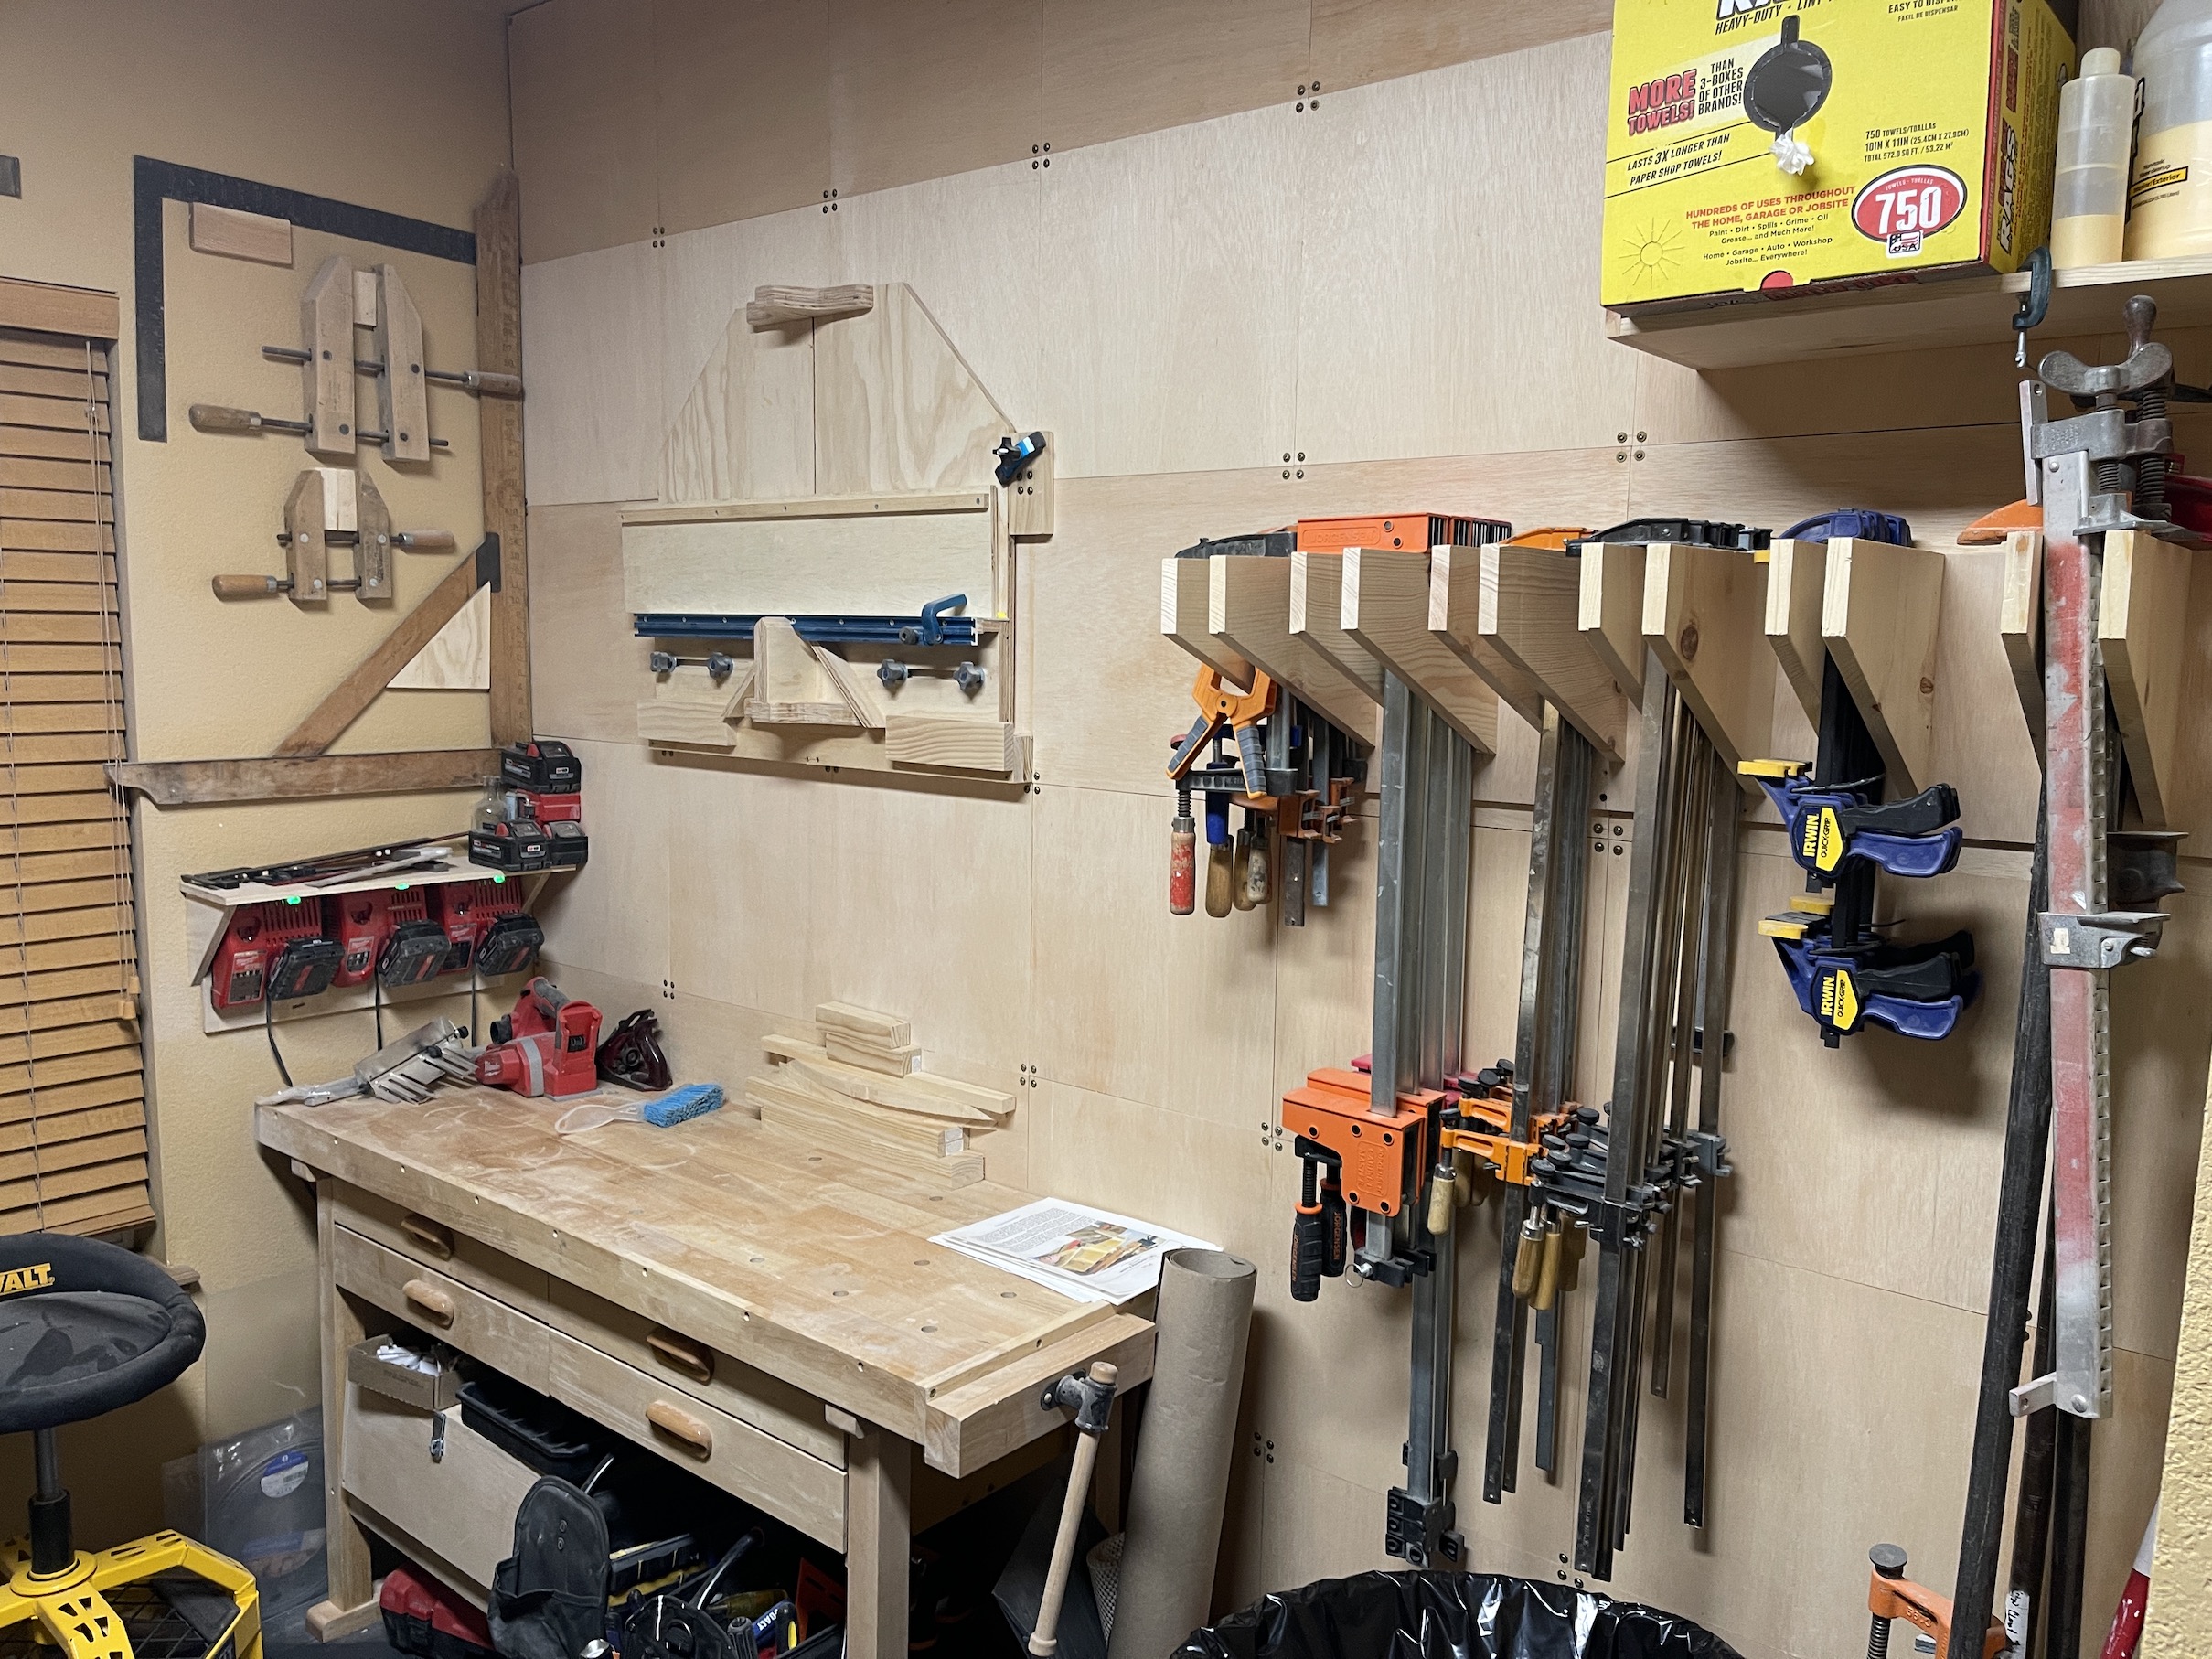
Here is the piece in progress in his woodshop in our basement:
Here he is staining it in the garage after he finished building it:
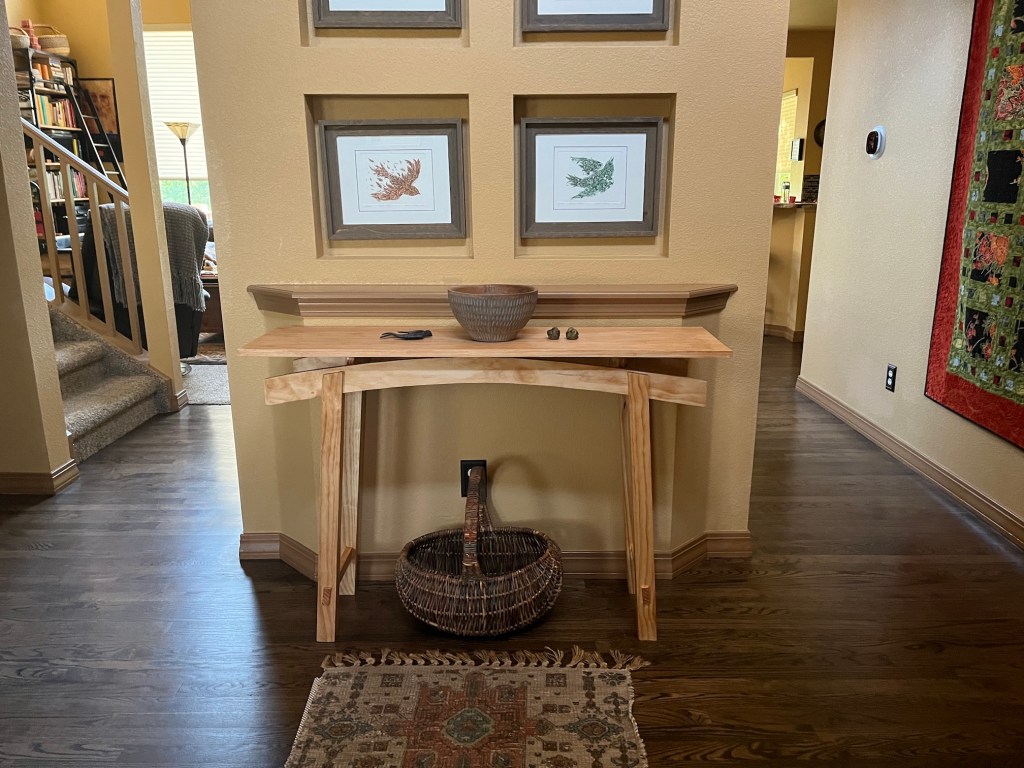
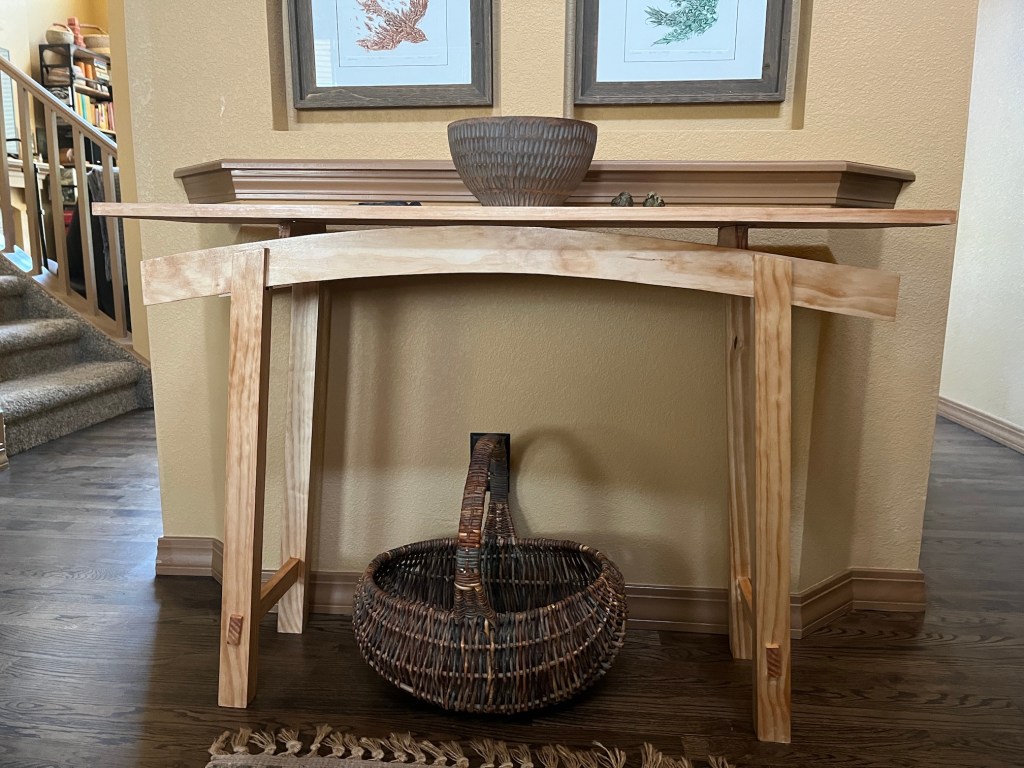
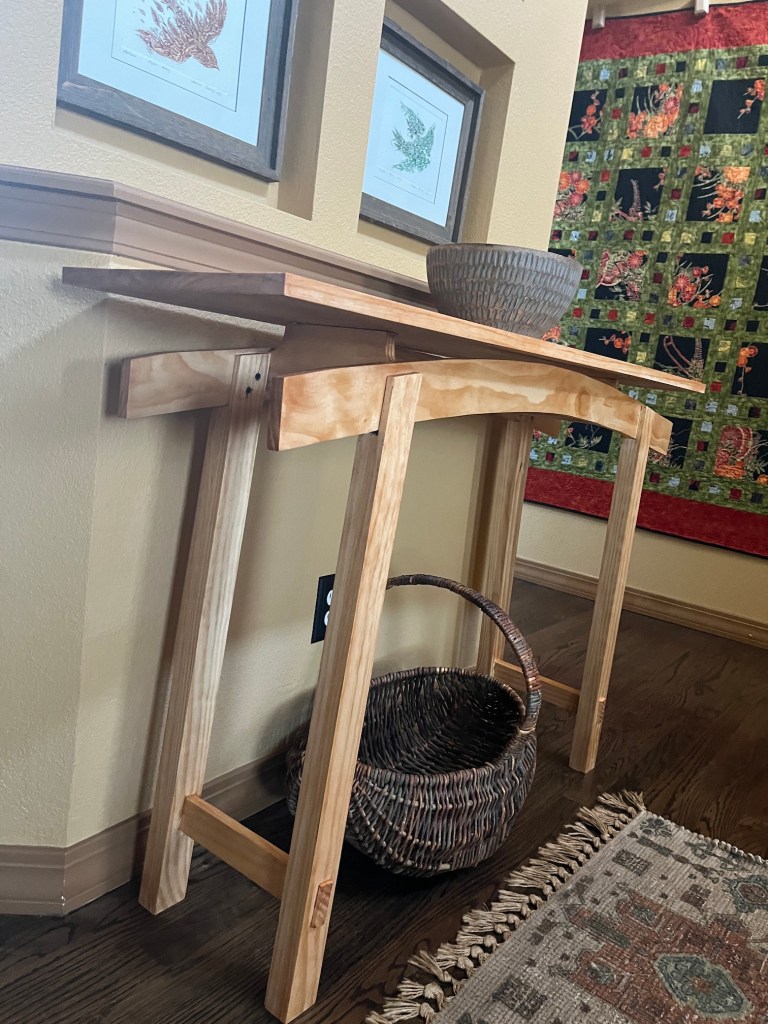
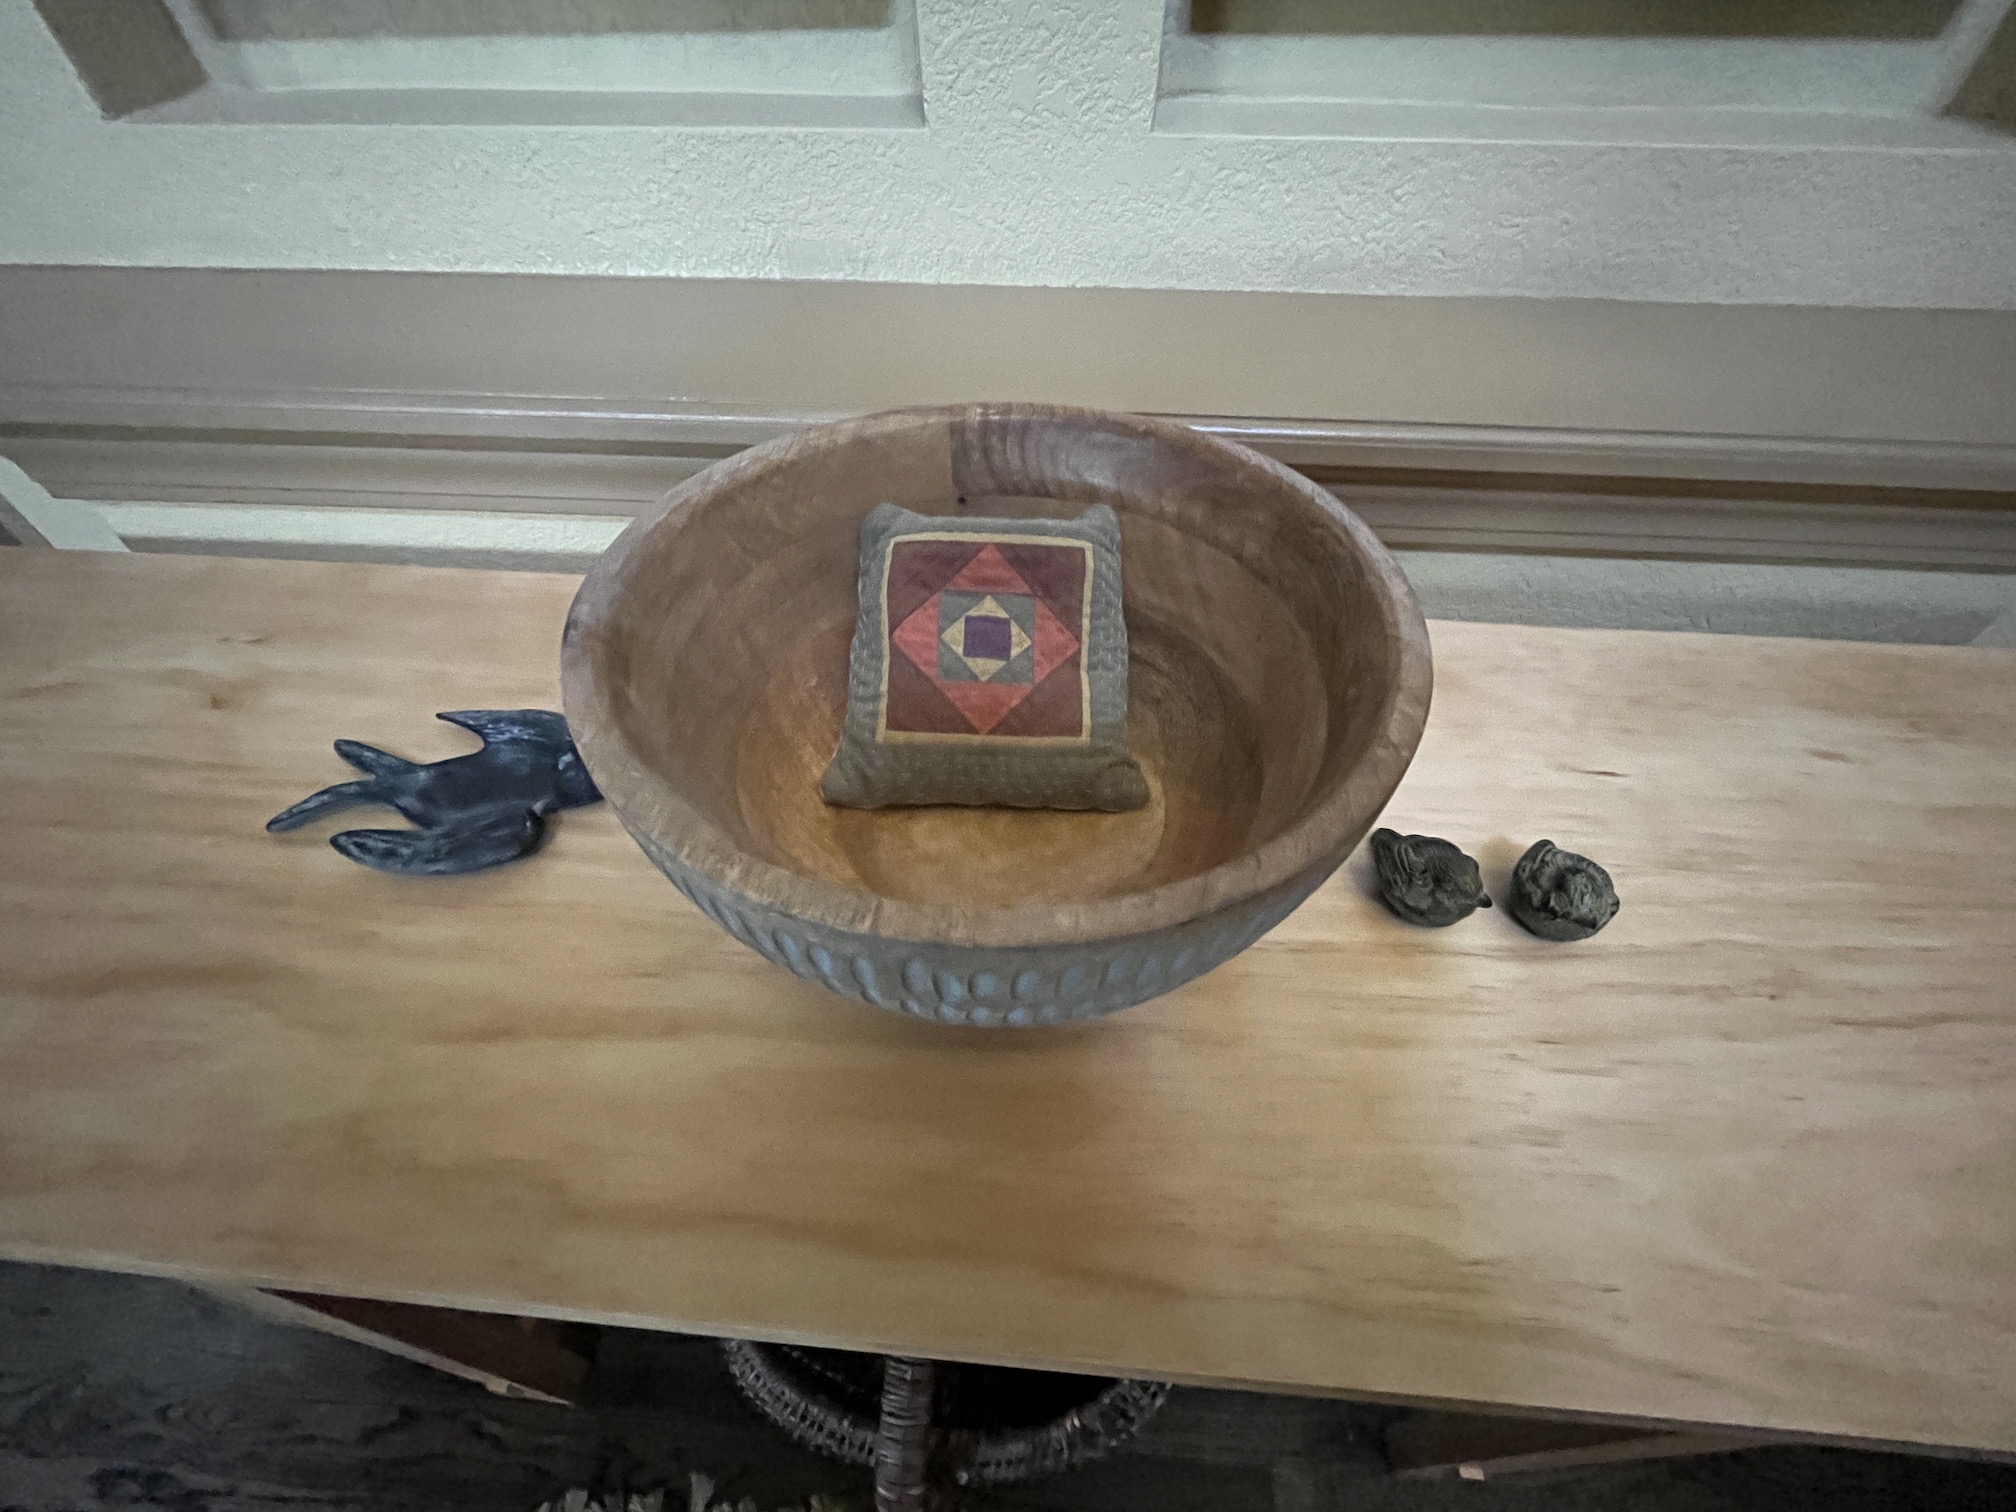
And finally the finished piece, now in our entryway!
I put a bowl I found last year at a second hand store with a little pillow I made on the top of the table. There are bird illustrations on the wall behind the table, so I also placed a little bird dish my friend Kathy got me and two little birds that were a favorite of John’s late wife.
With this table complete, John is now planning his next project.
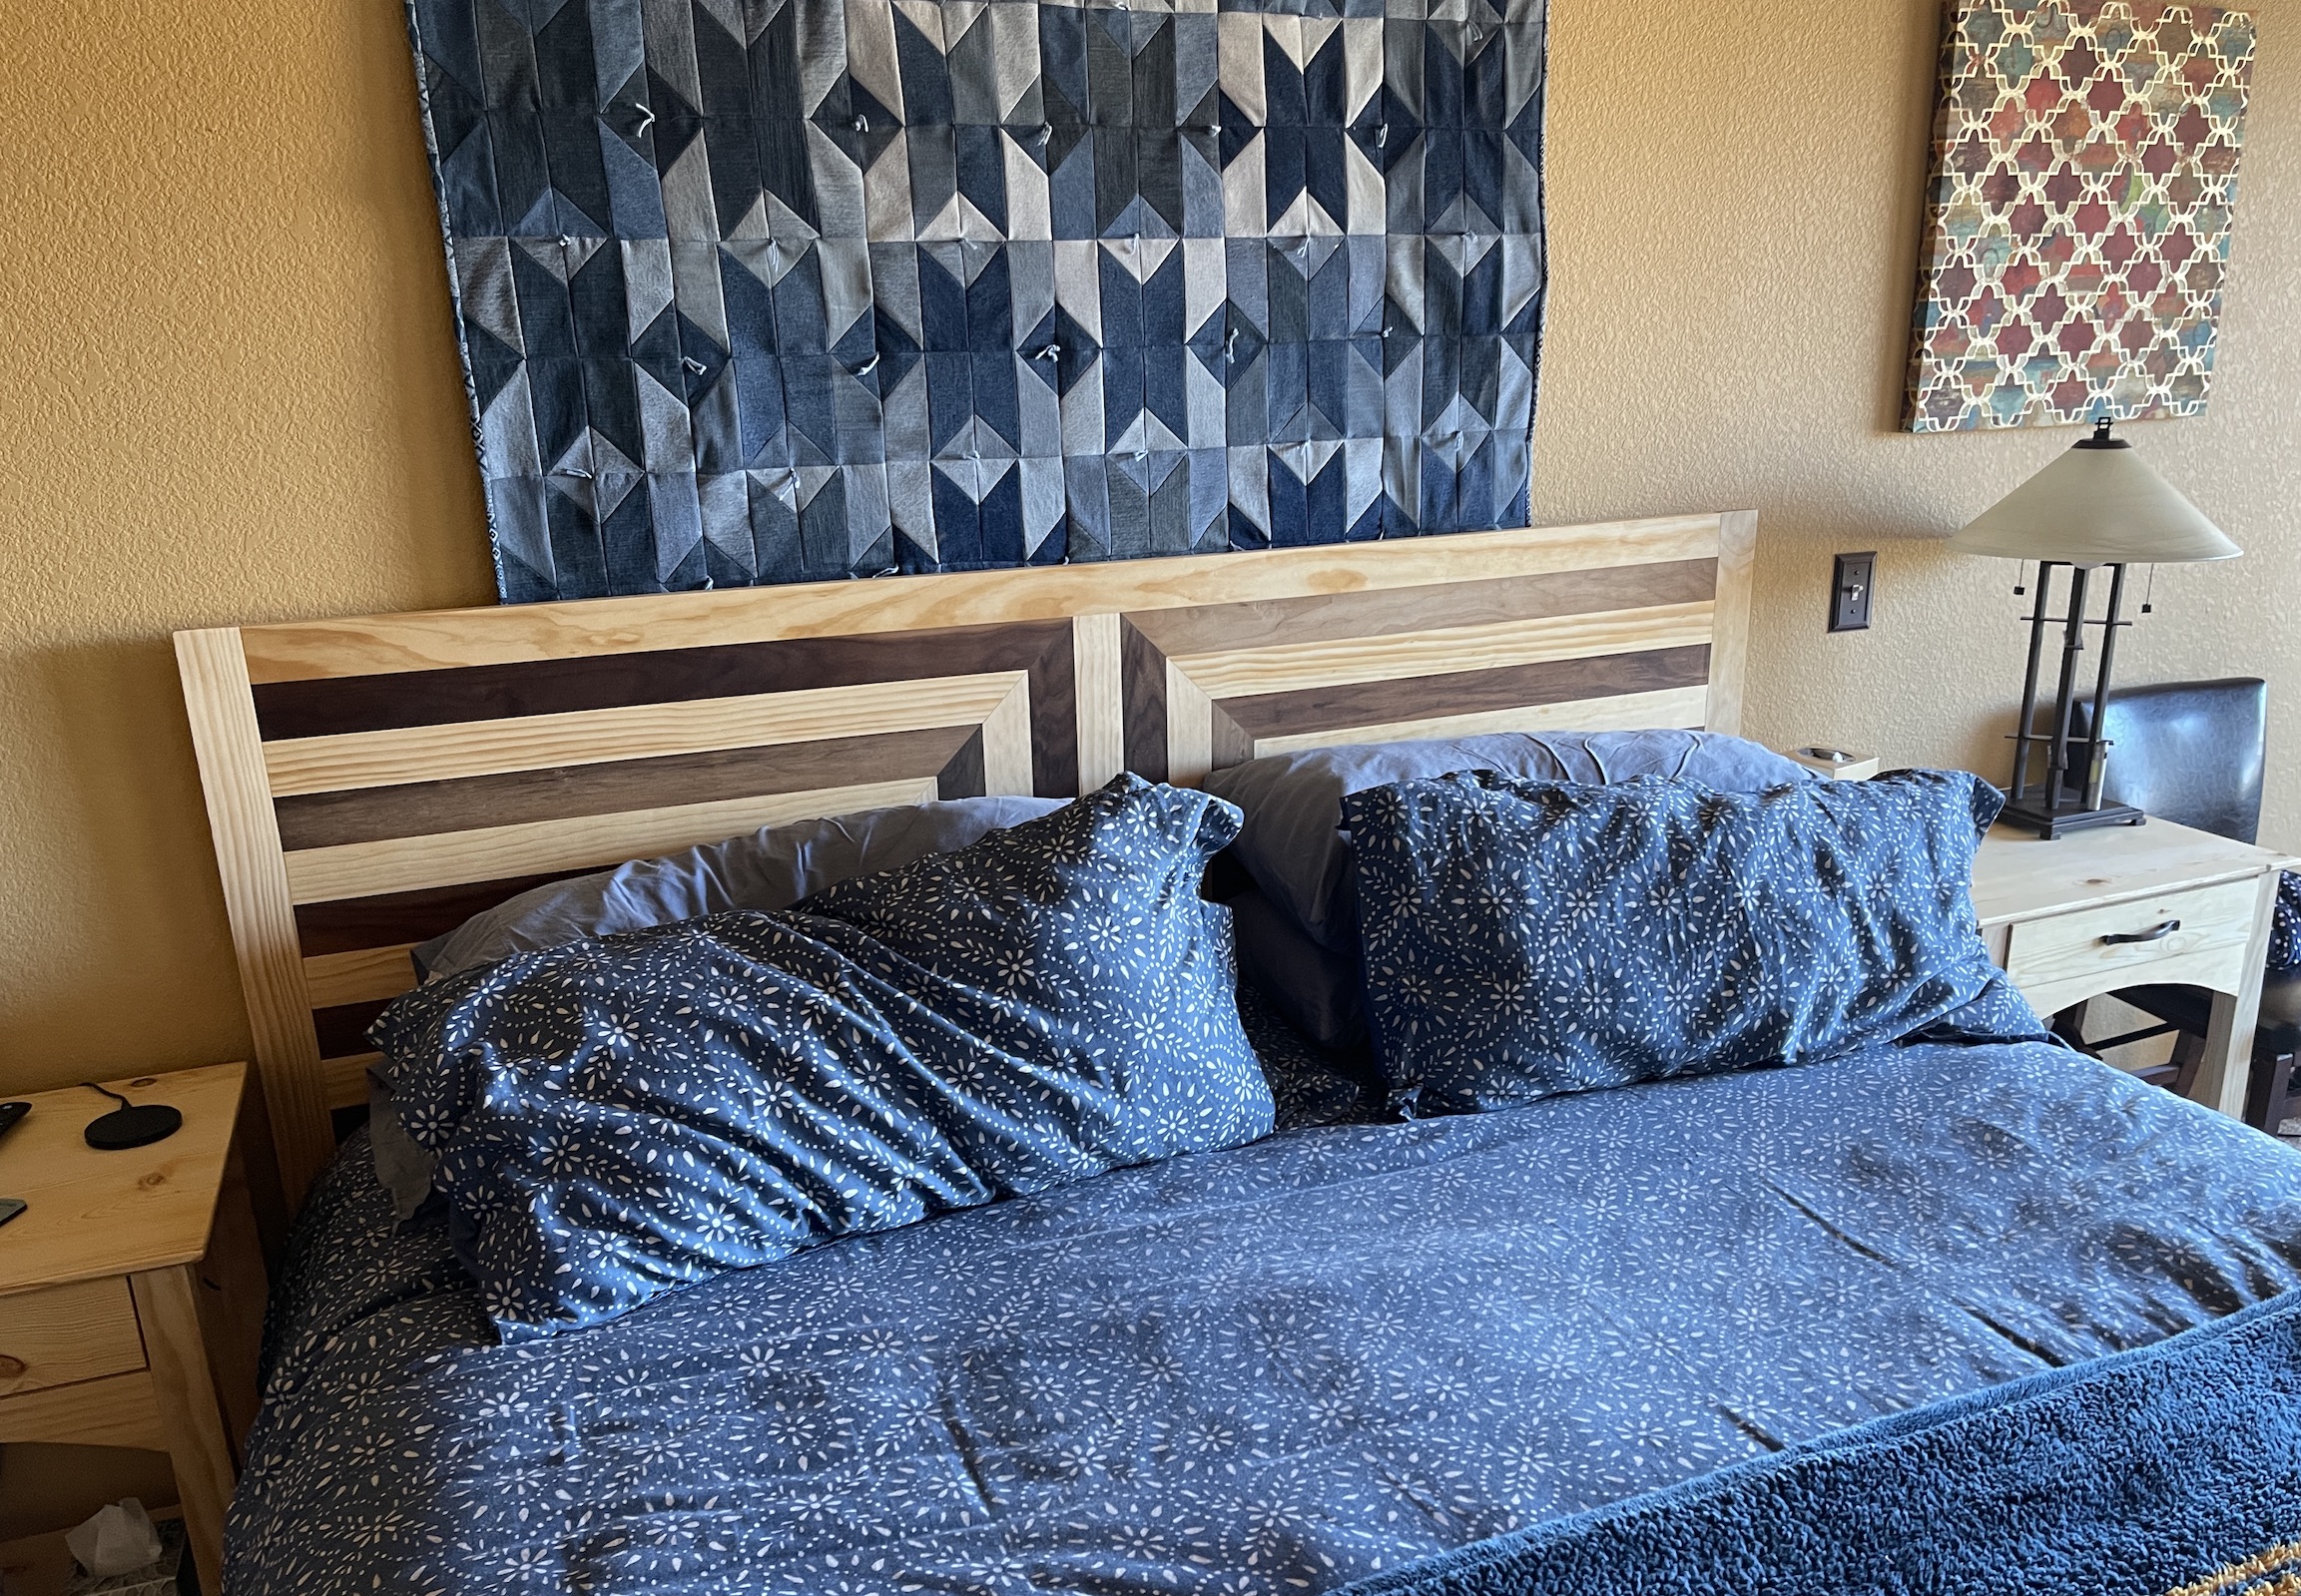
Recently my partner John made two matching nightstand tables to coordinate with the dresser and headboard he made. He made them in a weekend!
Here are the tables in progress:
And if you want to peek a little more around the current version of his woodshop, here are a couple more photos I took at the same time:
And here are the finished products:
Can you tell which side of the bed is mine? Hint: not the one with the Handyman magazine – ha! I always keep a basket of quilting magazines that I’ve picked up at thrift stores next to my side of bed. I like to daydream about projects I likely won’t make right before going to sleep – ha! I re-donate the magazines to the thrift shop when I am done so they can sell them again.
Here are the coordinating pieces – the headboard and dresser – that complete the “suite”:
I am amazed. That is all I can say!
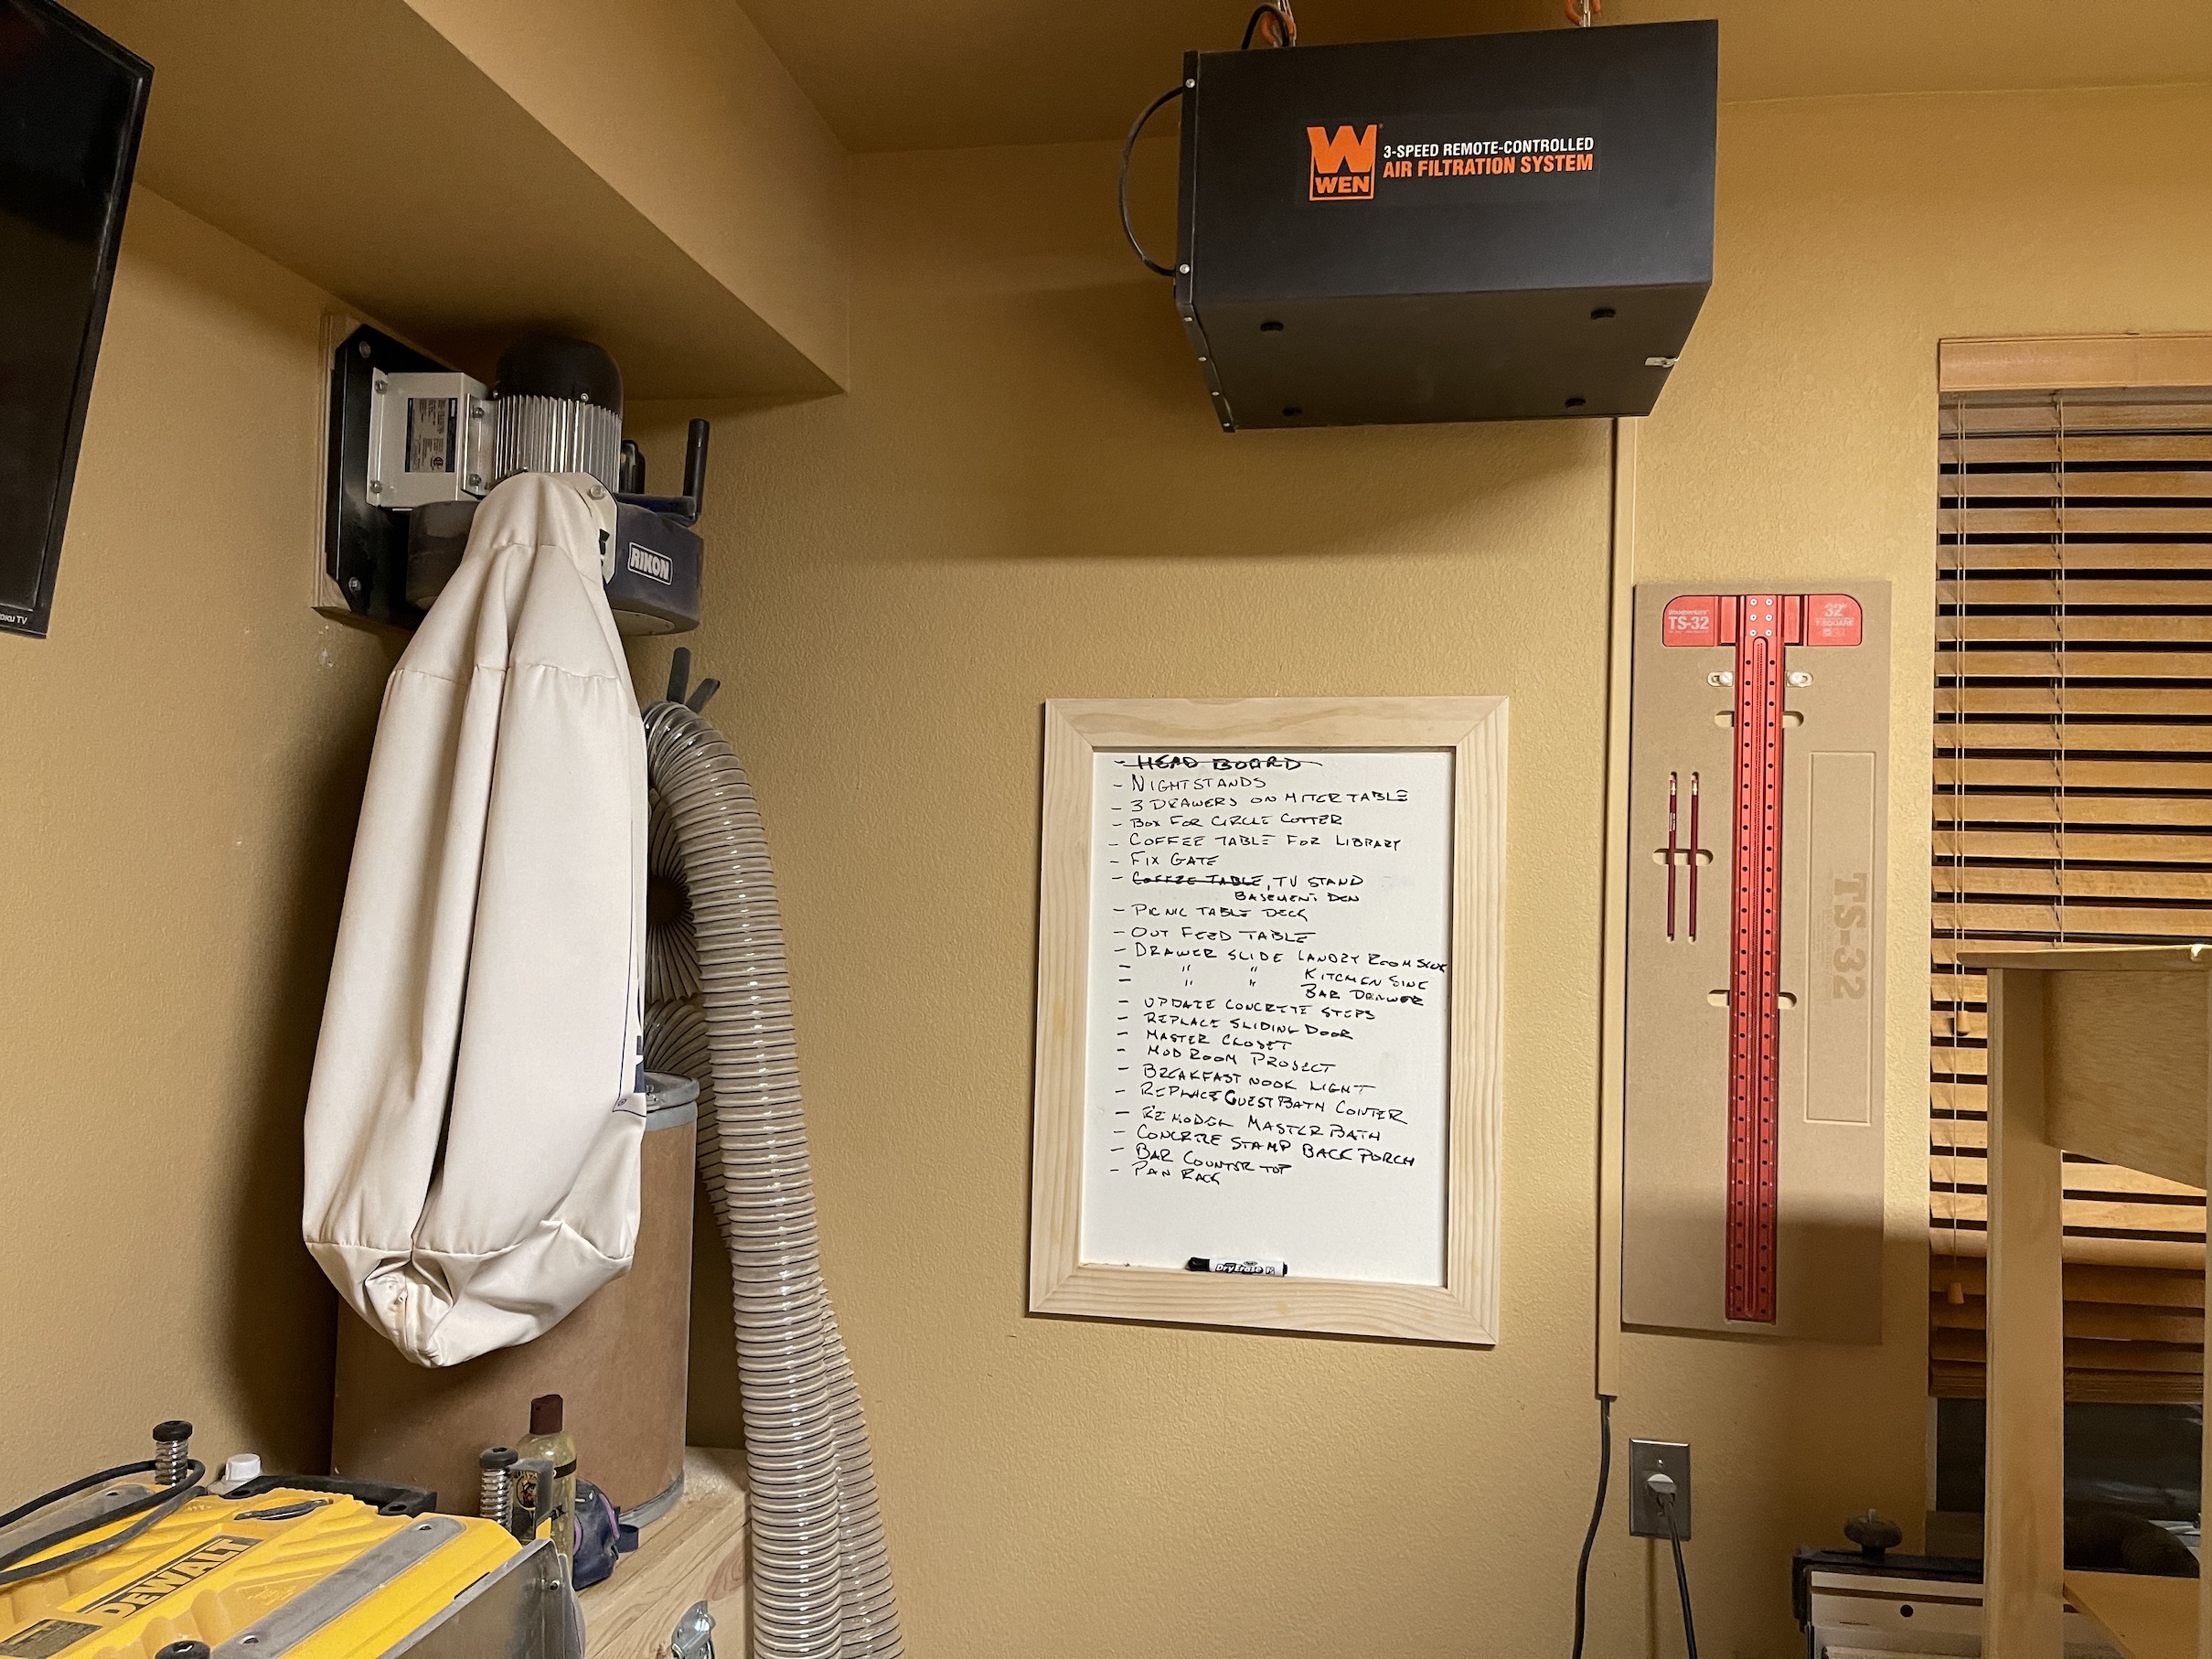
You might have noticed a “project list” in one of the photos above in his workshop. Well he has many more projects planned. He makes me look lazy, I should have finished like 5 quilts by now – ha!
My partner John, who only took up woodworking a couple years ago, has been busy crafting up a storm in his woodshop in our basement.
Our basement serves several purposes: a den, John’s home office, our bar, John’s woodshop, and the guest bedroom/guest bathroom.
Recently we bought a new sectional sofa with a storage ottoman set to replace the old sofa and loveseat in “den” area of the basement.
In order to make the sectional and ottoman work, we had to give away the old coffee table and end table along with the old sofa and loveseat (we gave them to our neighbor’s son who needed furniture for his first apartment).
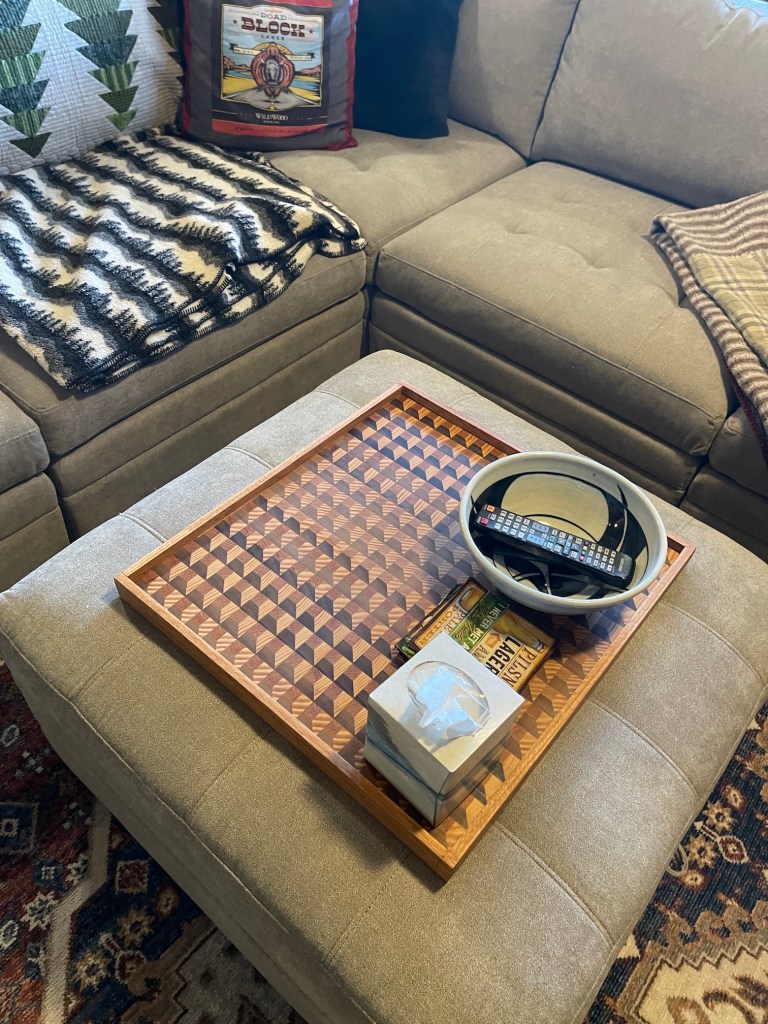
We decided to use the ottoman like a coffee table and I found an old tray to put on it so we could stabilize any food or drinks we wanted to put on it when we have “movie night” in the basement.
John was not happy with using that old tray and decided to make a custom tray for the ottoman. And not just a simple designed tray, he decided to try and make one with a 3D effect that he found on YouTube (where he watches endless woodworking videos).
Here is the tray in progress in his woodshop:
Here is the finished tray:
Here is the tray on the ottoman!
And here is our miniature schnauzer Mike who did not like I was taking photos of the ottoman and not of him on the sofa – ha!