No there is not a word missing in the title -.this post is about what is on an actual wall (house wall) not the design wall in my studio (as I normally post on).
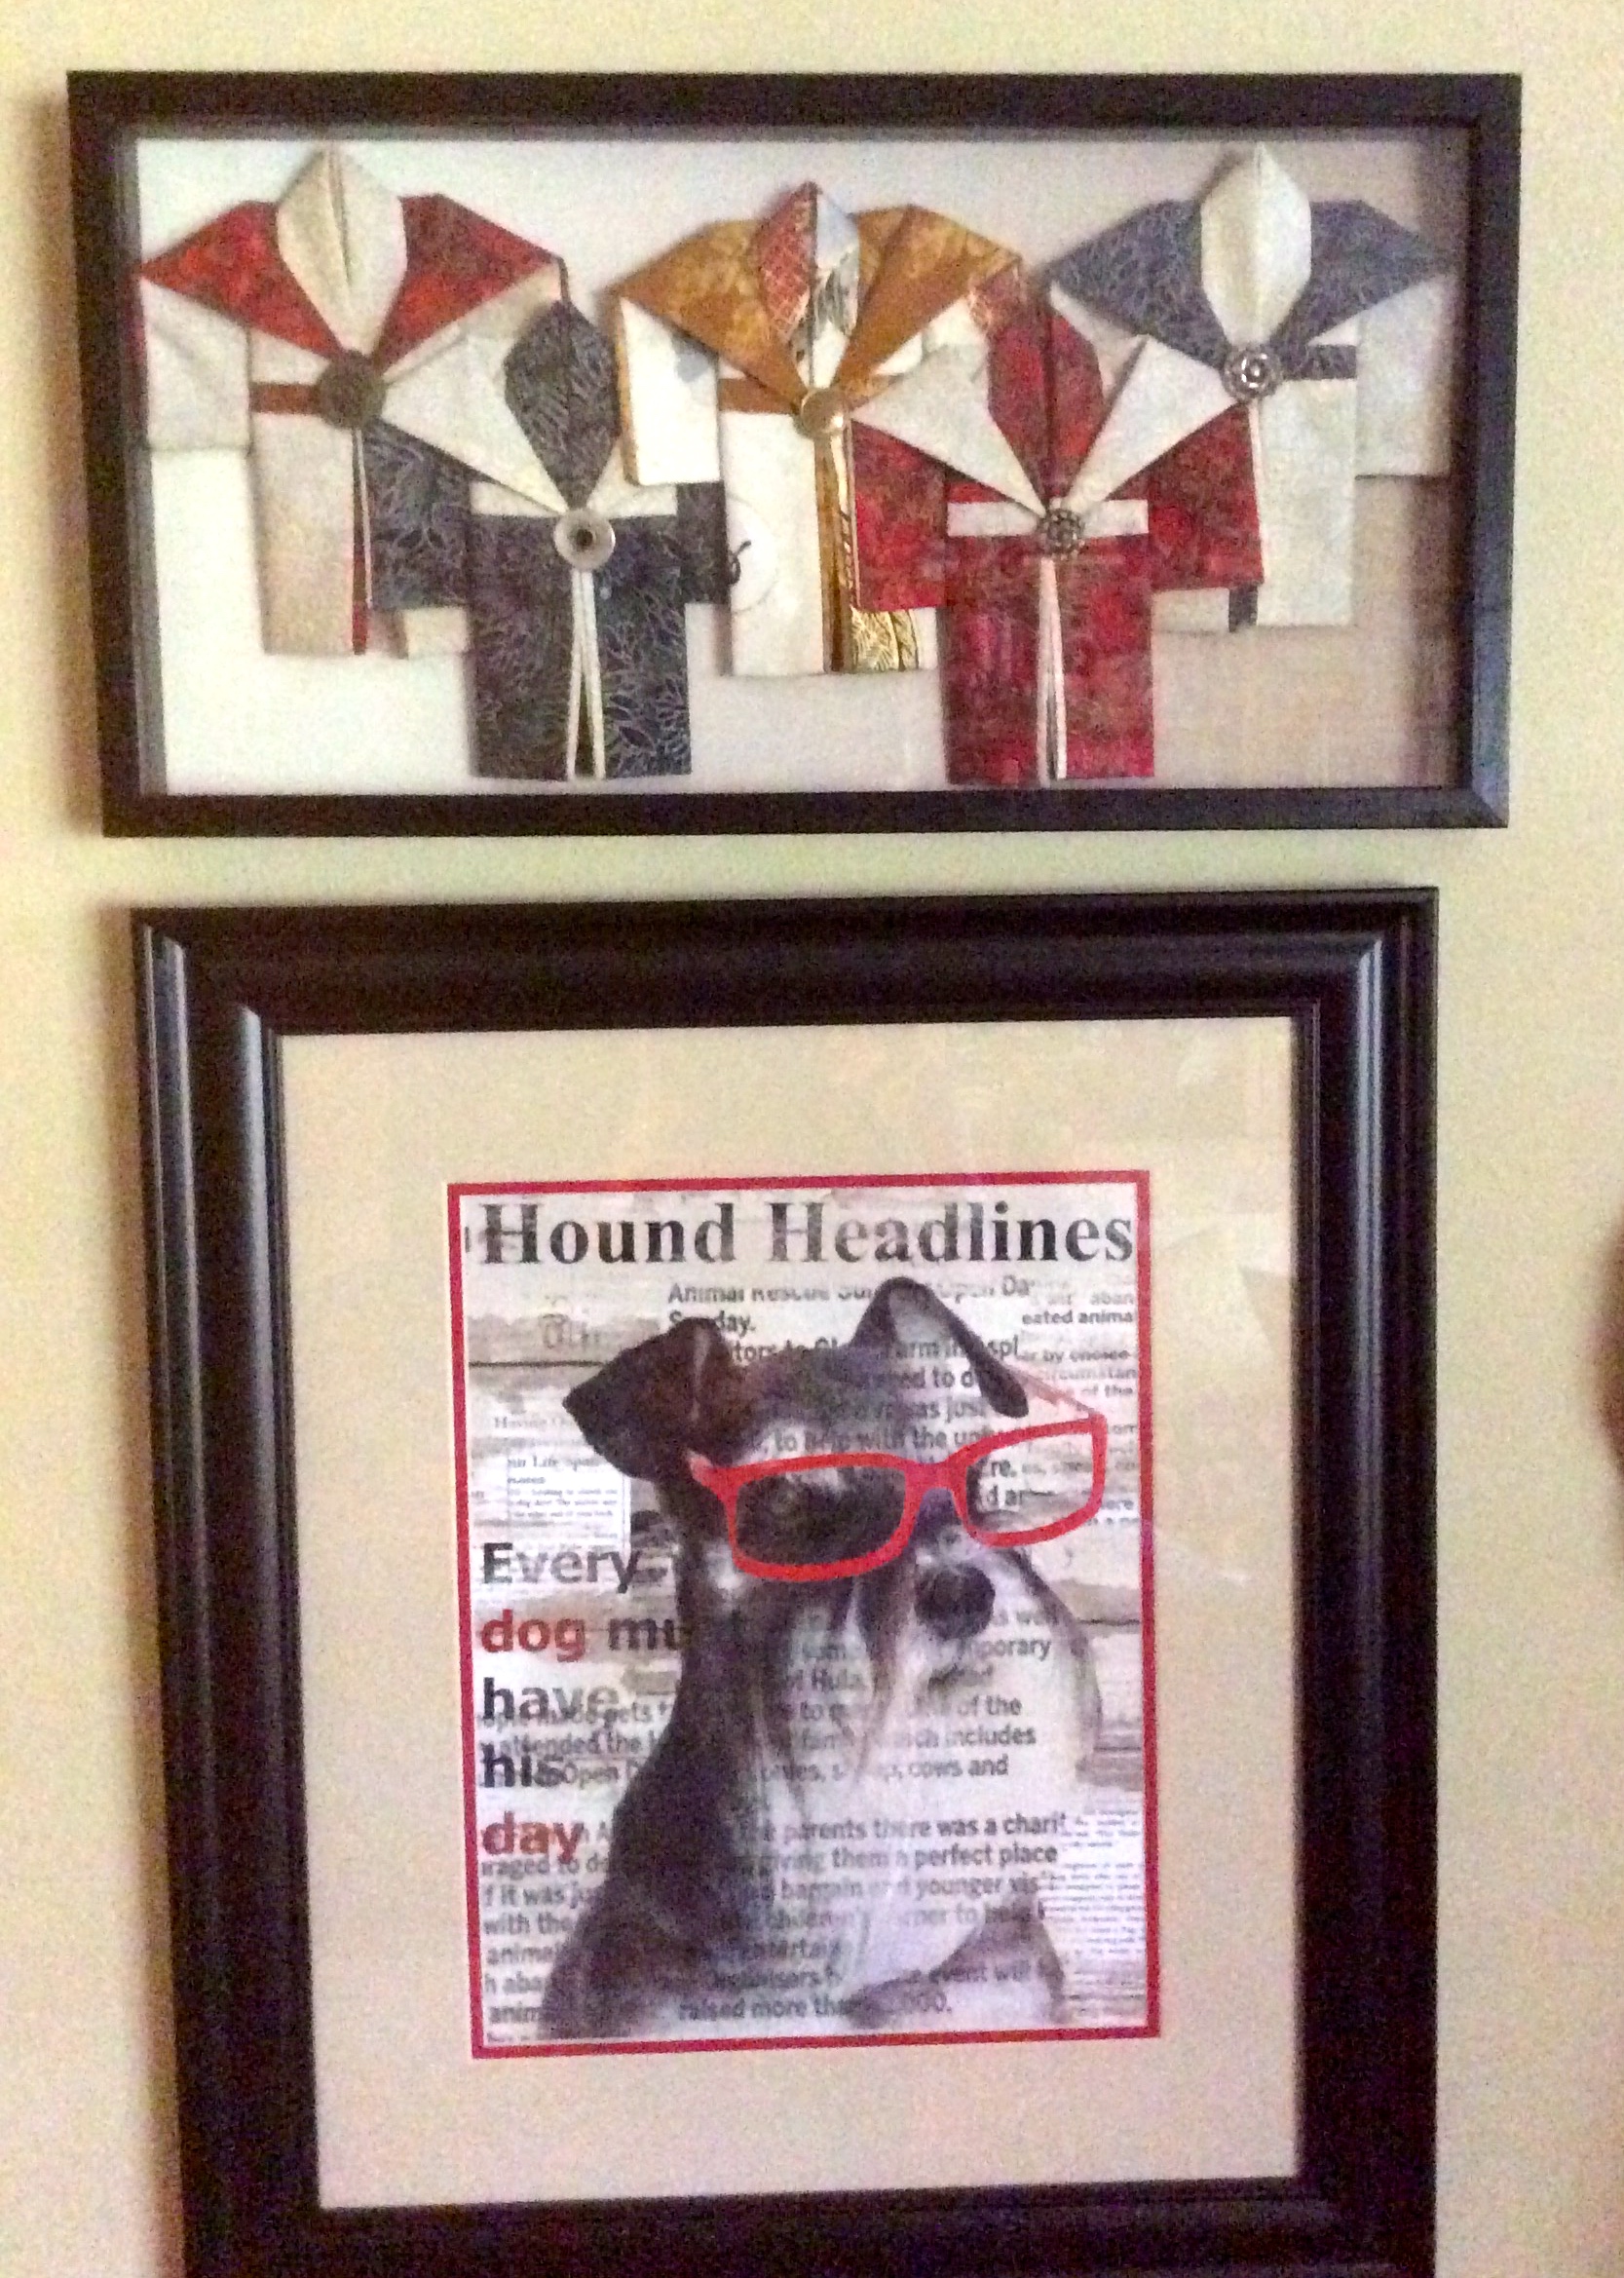
New Wall Art: Miniature Kimono Shadowbox
I have been making miniature kimonos for years – they involve an origami-like folding of fabric to create a kimono shape and measure about 6″ x 7″. Miniature kimonos make great little gifts and I have given them as gifts to friends and family for years. I have also framed a single kimono alone in a shadowbox or in coordinated set of 2-4 kimonos, as gifts.
They were the first items I made for my tierneycreates Etsy shop. Then one day, I abruptly burned out on making them. It has been many months since I thought about making a miniature kimono.
Until the other day: On a whim, I decided to make myself a shadowbox set of kimonos. I chose red, black, cream and gold Asian fabrics to coordinate with a fun schnauzer print I have on the wall where I wanted to hang the kimono wall art.
I made myself a set of 5 miniature kimonosAnother viewAuditioning buttonsFinalized buttomsPreparing the inside of the shadow boxMounting on the shadowbox background with small pins at top and bottom of each kimonoOn the wall in the entryAbove the whimsical schnauzer print
I love making gifts for family and friends as well as items for the Etsy shop, but sometimes you need to just make something for yourself!
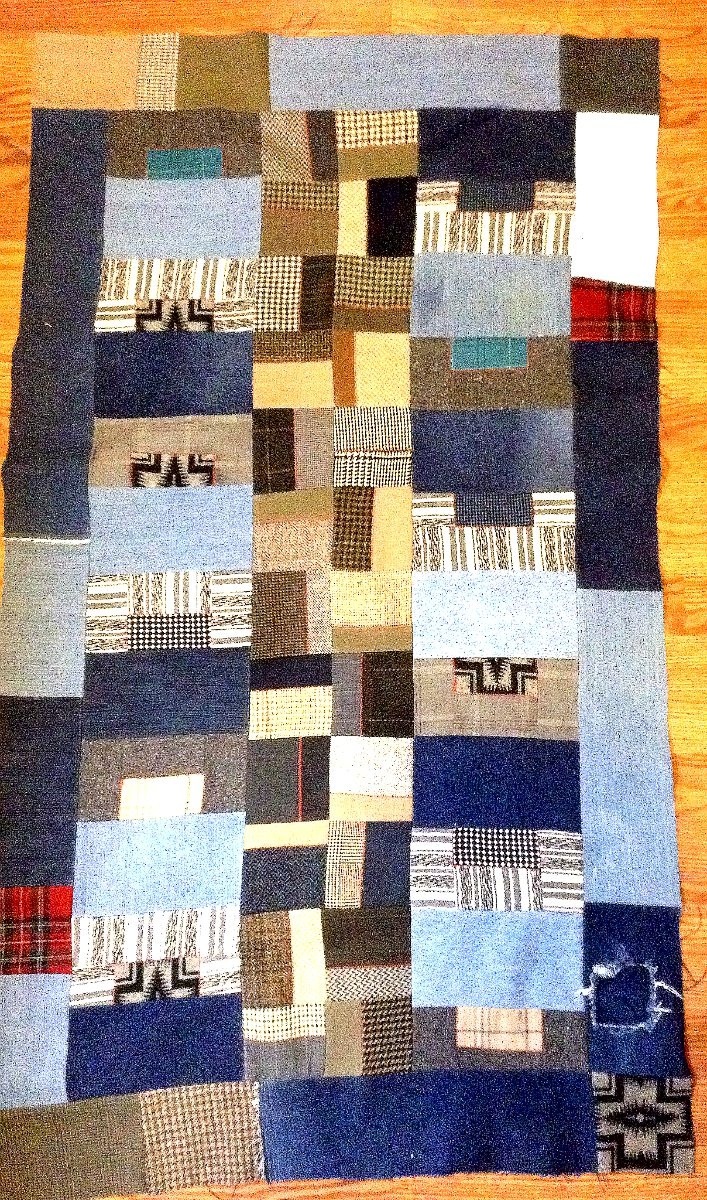
Usually I post about what’s on the design wall – what I am currently working on. I was looking through some digital photos and came across photos from when I was working on the 1930’s Block Quilt, made from rescued blocks. So this is sort of a “design wall retrospective” post!
I am fascinated with recycling fabric, especially fabric intended for other purposes (clothing, blankets, upholstery, etc.). I also enjoy finding abandoned blocks and rescuing them!
What are “abandoned blocks”? They are quilt blocks leftover from making a quilt (when too many blocks were made than needed), or when a quilt was started but not finished and the quilter just gave up on the blocks. You can rescue sets of abandoned blocks from thrift stores, friends, and even inside your own stash! Betty Anne had a friend who found a set of block from the 1930s in her attic and did not want them. Betty Anne rescued them and then let me adopt them!
Originally these rescued blocks did not fit together and were in a strange pattern (so strange that no matter what I did I could not make them fit together). So I redesigned the blocks, cutting off the left and right corners (which I recycled into the quilt’s border). After trimming down the blocks they fit well together into a small lap size quilt (41″ x 44 1/2″).
The abandon blocks are now rescued and part of a quilt (I bet they are a lot happier than they would be just sitting around an attic all alone!)
1930’s Block Quilt – pieced by Tierney Davis Hogan, quilted by Betty Anne Guadalupe
Check out Sassy’s page Schnauzer Snips for her latest adventures!
Last Thursday I took the day off from work and participated in a Fabric Surface Design Workshop (actually more like a play day!) through my local SAQA (Studio Art Quilt Associates) chapter. There were four workstations set up for the participants to watch demos on the following surface design techniques:
Fabric printing (using fabric ink and stamps)
Fabric painting (using special fabric paints to achieve a structured or an abstract watercolored-like designs)
Using decolorant to achieve unique surface designs (by removing color from different areas of a fabric in specific patterns)
Mono printing (one time printing using unique found items and special textile techniques)
All the techniques demonstrated were wonderful but I was most drawn to the fabric printing using fabric ink and stamps. The demo involved using manufactured stamps or designing and carving your own. After the demos were complete we had time to play with the new techniques. I ended up carving my own custom stamp with a with a special carving block and a linoleum cutter/carving tool. On SAQA member had a beautiful hand carved tree stamp I fell in love with so I tried to model my hand carved stamped after it.
Below are some photos from my play day! I have an idea already on the piece I am going to design around these printed squares…eventually…
Pre-cuts Wrangling!?!?! What does she mean? Has she been sniffing her fabric glue sticks (normally used for appliqué, not as recreational substances)?
“Pre-cuts” = Those addicting beautifully coordinated collections of pre-cut fabrics in common sizes such as 2 1/1 inch strips, 2 1/2 inch squares, 5 inch squares (aka “charm squares”), 10 inch squares, fat quarter (18 x 22 inch sections of fabric) bundles, and various other tempting configuations.
Wrangling = “To tend or round up” (Dictionary.com)
I have a lot of precuts, more than I need. Likely more than any human needs. I appear to use them to decorate my crafting studio.
Decided to do something crazy – actually USE them instead of just decorate with them!
In my post What’s on the Design Wall: Rediscovering my Charms I discuss delving into my charm pack (5 inch squares) collections and using them to make quilts and wallhangings. Taking a break from charm packs, I have moved to a smaller size of pre-cut – the 2 1/1 inch square pack. I wrangled up my collection of 2 1/2 square pre-cut packs and selected several colorful Rowan/Westminster Fabric packs to create a series of “16 patch” blocks to turn into a quilt. I pieced the 16 patch blocks into a scrappy “postage stamp” style quilt.
I provide some very general simple directions for wrangling your 2 1/2 inch pre-cut packs into a scrappy quilt below the photos.
2 1/2 Pre-Cut Quick Quilt (Wrangle & Design As You Go)
Wrangle a couple packs of 2 1/2 squares (approximately 42 squares in each pre-cut pack) – I think I used 2 or 3 to start
Chain piece non matching pairs of the squares – you will end up with a series of 2 patches
Chain piece the pairs (2 patches) to another set of pairs (2 patches) – you will end up with a series of 4 patches
Chain piece the 4 patches to another 4 patch – you will end up with a series of 8 patches
Chain piece the 8 patches to another 8 patch and finally you will have a series of 16 patch blocks
You can be careful and match your seams, and press between each patch construction or throw caution to the wind and not press until you complete the 16 patch
Sew the 16 patch blocks into rows and then the rows together in to a quilt top
Wrangle and Design As You Go – you might discover you need another 2 1/2 pack to get the size of quilt you want or you might have to save some 8 patches and use them on the side or bottom of the quilt to even out the rows. I used my design wall to decide what block “mathematical configuration” to use. I started with 4 x 7 (4 blocks in a row, 7 rows) but that seemed too narrow. I finally decided on a 5 x 6 quilt (5 blocks in a row, 6 rows of 5 blocks) and will take the row of blocks off the bottom of the design wall, add a couple more and add 1 additional block to each row.
If you are a new quilter or a future quilter and are unfamiliar with how to “chain piece”, check out numerous free online instruction videos available on YouTube or other sources.
In my posts Look Look I am in a Book and Oh Wow! I shared my excitement of having several of my quilts selected to be in a book about quilting inspiration called 1000 Quilt Inspirations: Colorful and Creative Designs for Traditional, Modern, and Art Quilts by Sandra Sider. Well the other day my copy of the book arrived in the mail and I was…overwhelmed. Quilt images from 300 artists from 20 countries were selected for this book – and I am one of them!
I am a wanna-be art quilter and I dream someday of “quitting my day job” or at least moving to a part-time version of my health care industry day job and focusing most my energies on tierneycreates and creating. Being in this book feels like a step towards that dream. One of important things I did to advance on this path is to join SAQA (Studio Art Quilt Associates). Through SAQA I found about the call for entries for this book as well as call for entries for other shows I have entered (and been accepted to). I was also very inspired by an article in the SAQA Journal by Carol Ann Waugh on “Becoming a Professional Artist”. I wrote Ms. Waugh to thank her for this incredible article which outlines the steps to become a professional art quilter!
After the initial “intense floating” around the house (and around town on my errands) over seeing sections from five of my quilts in this book in person, I settled back to earth and thought about: “why am I really excited to be in this book?”
I am fortunate to know and interact with several real professional art quilters who have authored their own art quilting and/or traditional quilting books, been in endless shows as well as featured in many books. I greatly admire them and their art, however I realized that is not my goal and not why I was primarily excited about being in this book.
What is most exciting about being in this book is that something that I created might inspire someone else to create. A quilter in Des Moines, Iowa who is looking for color or design inspiration might be leafing through the book and come across my pieces in the book and go – “Aha – that is it!”. What an honor to provide inspiration to someone you never met and will likely never met. I am fortunate to have been inspired by so many talented people I have never met. It is all about sharing our inspiration and hopefully inspiring someone else to take chances, risks and be bold & fearless in their quilt creations!
Below are photos of the quilts that are in the 1000 Quilt Inspirations book. Much thanks to Betty Anne Guadalupe of Guadalupe Designs for her wonderful professional long arm quilting on four of the five quilts that got accepted!
Random not so Random, Flying Triangles, Silk Landscape and Color Changes – images from these quilts (#0246 – #0249) are featured in the book 1000 Quilt Inspirations
A couple of weeks ago I was scheduled to take a quilting class called “Log Jam“. Log Jam is an innovative way to rapidly create scrappy log cabin quilt blocks. If you are a new quilter or not a quilter, a “log cabin” block is a quilting block made by starting with a small center square and building consistent standardly sized strips of fabric around the center square. The log jam concept throws the requirement of consistency sized strips out the window. “Log jamming” makes the log cabin style quilt block construction process laid back, casual, scrappy and fun! When making a log jam quilt you can use a specific palette of scraps, solid colors, or random scraps to make the piece very scrappy.
Unfortunately only three people registered for the class (myself and two of my friends) and it this did not meet the threshold to hold the class. The quilt shop was so wonderful and let us use their classroom anyway and hold our own class (two of my friends had taken the class before). So we spent 6 hours having a blast “log jamming“. The “log jam” method involves the kind of quilt block making you can do while chatting and giggling with friends – it is fun and less structured. We ended up being very silly and singing songs while we were working on our log jams. I even modified Bob Marley’s song “Jamming” to “Log Jamming”!
Now the 27 blocks I made log jamming are sitting on my design wall. I am trying to decide what I want to do with these blocks: maybe a table runner for my series of my Modern Quilt Table Runners on my Etsy shop or maybe one quilt with the blocks set into a solid background or floated. Every quilter should find space for a design wall – it helps to lay your pieces out to see where you want to take them!
If you live in the Central Oregon area, the Stitchin’ Post has a wonderful Log Jam class that my friends and I highly recommend you take!
Our library has a community wide book club book once a year called A Novel Idea. In the fall, our library unveils the selected novel and everyone in the community is encouraged to read the book. In spring the book’s author is invite to town to speak for the ultimate book club meeting. As part of the Novel Idea celebration in the spring the library has an art show to feature art inspired by the community read novel.
I read the book, A Tale for the Time Being by Ruth Ozeki as soon as it was announced as the selected book and loved it. I was determined to enter the art show and create a piece of fiber art inspired by this wonderful novel.
But where to start…
I have a collection of pre-printed fabric panels that I have collected over the years. Some panels in the collection, that I bought long ago, I look at and go “what was I thinking?” Others I look at and think: “what am I going to do with that?” Some quilters look down on using panels and think they are cheating because you are not piecing the entire piece.
Remembered in my collection of panels I had a lovely kimono panel printed with images of the sea and sky – that seemed like the right place to start as part of the novel took place in Japan. I mirrored the palette of the panel to create a flowing extension of the panel’s scene.
Here are photos” from my design wall to completed piece just hung in the downtown branch of our library for the upcoming show
On the design wall
Just hung for the library show
On the back of the finished piece I put a label about my inspiration:
Jiko’s Secret Robe (2015)
Quilt inspired by Ruth Ozeki’s novel A Tale for the Time Being: Nao’s great grandmother, Jiko, is a humble and wise 100+ year-old Buddhist nun who wears simple robes and lives a simple life. This quilt represents Jiko’s secret robe – a robe not visible to the eye but visible to the soul – representing the complexity and depths of Jiko’s spirit, experience, wisdom and compassion for all beings and the earth.
“For the time being, the entire earth and the boundless sky.”– Ruth Ozeki
If you would like to see what is on my design wall in regards to new pieces for The Wardrobe Meets the Wall Collection, check out the post In Progress on The Wardrobe Meets the Wall blog. To stay up to date on Sassy the highly opinionated miniature schnauzer’s check out her page Schnauzer Snips.
CHARM PACKS
If you are quilter you know exactly what I am talking about – those addicting little charm packs. If you are not a quilter – charm packs are collections of precut 5 x 5 in. squares in coordinating fabrics. They are a great way to sample a new fabric collection – they usually come in packs of 40 squares and have at least one of each fabric in a collection. They can also come in solid fabric collections.
I fortunately or unfortunately have acquired quite a stash of charm packs over the years.
You go into a quilt shop and see a new fabric collection and daydream of a yard of each of the new 20 fabrics. Then you remember you need to eat and keep a roof over your head so you don’t give into the temptation of such a glorious shopping spree. Walking away from the collection you were coveting, you spy over in the corner the charm packs sets for the new fabric collection! You now think – “Yes! I can have a taste of the new collection (and still be able to pay my mortgage)!”
You bring them home, with no particular plans in mind for them and put them with the rest of your impulse buy charm packs…
Examples of 5 inch charm packs
A year ago I decided to stop hoarding charm packs and to actually use them. There are many wonderful books with charm pack specific patterns – patterns designed to start with 5 in. squares and go from there. I made a couple quilts from these pattern books, but quickly burned out of this structured traditional quilt making. So I put the rest of the charm packs back in their display (gather dust) area and forgot them.
I was reorganizing my fabric a week ago and came across my stash of charm packs again and thought: Why do I have to use a pattern? Why can’t I just do something initiative and “modern quilting” style? So I took two charm packs of collections of various solid color batik fabrics and randomly sliced each 5 x 5 in. square into three sections. Then I reassembled this huge pile of charm pack sections into random columns. I experimented and sliced up one of the columns to make thinner columns and alternated the columns.
I am still experimenting and plan to create table runners out of these columns. Below are photos of “playtime” on my my design wall.
Experimenting with charm packs
Charm pack table runner in progress
I think they are on their way to becoming quite CHARMING. I am glad I rediscovered my CHARMS!
I am addicted to “Studio Porn” – photos of artists’ and crafters’ studios. At least once a week I settle in with a cup of tea, in a cozy chair, and leaf through publications such as Studios and Where Women Create or various books on craft/art studio organization. These publications are filled inspirations on how to organize, design, and decorate your studio.
My studio is small, but I feel lucky to have a place in my home that I can dedicate to my crafting. It was designed as a bedroom and I removed the traditional bifold closet doors to open the space to organize and store supplies. I thought: “who needs closet doors when you can have more open space?”
Then I saw the studio of Jean Wells in the Better Homes and Gardens book Studio Spaces: Projects, Inspiration & Ideas for Your Creative Place (2011) and I saw what a closet can be in a studio! Ms. Wells turned one side of a closet door into an inspiration board and the other into a design wall. Her closet doors became my dream closet doors! Thanks to a generous gift from my mother-in-law, my dream studio closet doors have become a reality!
Cindi and Rob of CR Construction did an excellent job designing my new closet doors based on the photos from the book. They put sheet metal on the left door and wrapped Warm & Natural cotton batting on the right door. They designed a unique floating track system that allowed the doors to float over each other without touching when opened. This allows pieces on the design wall side not to be disturbed (who wants to redo their design wall every time they open their closet?). Cindi and Rob added strong bright lighting inside the closet – previously I had no light and would aim a lamp in the studio towards the closet to illuminate it in the evening.
My home studio is very simple and a mishmash of furniture and shelves thrown together, but my closet feels really special and inspires my creativity!
In 2012, thanks to my friend Betty Anne, I expanded my love of fabric scraps from cotton quilting fabric scraps to silk and linen garment scraps. If you check out the Gallery you will see examples of quilts made solely from silk and linen scraps from garment construction.
Recently I have expanded to experimenting with creating pieces from denim and wool scraps.
I have collected denim scraps for a couple years from old jeans in anticipation of a future ‘upcycling’ project. In early 2013 Betty Anne shared her stash of men’s wool suiting scraps and Pendleton wool scraps and samples given to her by a friend. My first experiment with these scraps was making wool pincushions as gifts for fellow attendees at a quilt retreat last year. I was nervous to expanded working with wool scraps beyond making pin cushions.
It took until early 2014 to get the courage to create a piece/art quilt/wall hanging using the wool scraps. I combined them with denim scraps to create a piece I named ‘He Dresses Up, He Dresses Down’. The center of the quilt is constructed from wool suiting scraps (He Dresses Up) which have a luxurious texture. The center is framed on each side with a combination of Pendleton wool scraps and denim scraps (He Dresses Down…slang for comfortable, casual dress).
‘He Dresses Up, He Dresses Down’, designed & pieced by Tierney Hogan, 2014
Piecing wool scraps can be a bit challenging. The seams between wool scraps are bulky when wool pieces are sewn together. Instead of pressing seams to one side as you would normally do with cotton fabric quilt construction, you have to press the seams open AND anchor them down to reduce the bulk. I used a red thread zig zag stitch (for contrast) on the front of wool pieced sections to anchor the seams and reduce the bulk.
The quilt is currently awaiting long-arm quilting and I will post the completed piece to the Gallery.
Now – what category of fabric scraps to experiment with next? Probably upholstery scraps – my friend Cindy gave me a box of upholstery samples. I have seen cool bags made from upholstery fabric – I am thinking either a functional item (like a purse/bag) or a wall hanging. Upholstery fabric scraps would not not make for a cozy quilt!
So imagine me in a white lab coat, with crazy-mad-scientist-hair, beakers of fabric scraps in hand, ready to the next wild experiment!
Please see the Textile Adventures page for info on my new line of Flannel Yum-Yum Quilts!
The final step to completing a quilt, whether you have quilted it yourself or sent it out to be professionally long-arm quilted, is to put on the binding. The challenge with binding is that you need to make it long enough (but not too long) to go around your entire quilt and allow for you to properly pivot the binding in the four corners of the quilt.
Quilt bindings (for the non quilters reading) are traditionally made from folded in half 2 1/4 or 2 1/2 inch strips of fabric that coordinate with the quilt. The the binding is sewn to the edge of the quilt with a 1/4 inch seam. Then it is time to put on a movie, plop down in your favorite chair with needle and thread and hand sew down the other edge of the binding to the back of the quilt.
My collection of quilt bindings ENDS
If you are a quilter you know of the challenges of sewing enough strips together (but not too many, ha!) for your binding. If you are like me, then you always have extra binding left over! Occasionally (ok frequently) I have shocking lengths of binding leftover. It is like I was planning to go around the quilt TWICE with the binding!
I could never bring myself to just put the leftover binding back in my fabric scrap stash, so I came up with the idea of saving any leftover quilt binding ENDS to use on small quilts, potholders, wall hangings, etc. I have also pieced together binding ends from previous quilts to make a scrappy binding for my current quilt. I love using the ends – “waste not, want not”!
If you are a quilter you are very familiar with the term UFO (Unfinished Objects). Quilters and other crafters are plagued by them, many UFOs carrying over year to year until they fester into a large stash/backlog of projects to finish. I once attended a quilting retreat which focused solely on working on UFOs, but I also brought new projects and worked on them!
Why do we have all these UFOs – why do we start projects, put them down to start something else, or just put them away (like in the back of the closet)? We would not live the other aspects of our lives this way: imagine only brushing a couple teeth once a month and coming back to your mouth say 4 months later when you stumble across your toothbrush under a pile of fabric scraps? (of course then you discover you are out of toothpaste, so you put the toothbrush away for a couple weeks until you have time to find the perfect toothpaste to finish the rest of your mouth…)
A couple weeks ago I talked to a friend who belongs to a quilting guild which has decided to help their guild members focus on knocking out UFOs in 2014. Each guild member had to list 8 outstanding UFOs. Throughout 2014, the guild leadership will randomly pick a number and you have to work on completing the UFO you listed under that number or pay some type of penalty (like a $10 donation to charity) and bring it finished the following month to the guild meeting. I decided to unofficially participate and my friend gave me a copy of the form to list your UFOs. There is no real penalty to me if I do not finish them but I wanted to participate in that kind of “pressure” to clean out my stack of UFOs and squelch the alien invasion in my craft area.
Yes, you read correctly – my “stack” of UFOs. I have them all organized in plastic containers and they include the fabric, the pattern and the progress to date. Stacked, quite high. While trying to decide on which 8 of the 17 or so in the corner (some containers had 2 or more UFOs in them!) to list, I thought: “If something has been a UFO for say 5-10 years, maybe you are not really interested in finishing it. Maybe it is time to let it go”. So I did. I whittled down my extraterrestrial clutter down to just 8 UFOs! Many of the UFOs that were not started I just reintegrated the fabric back into my general fabric stash and returned their pattern to my pattern binder or folder. One UFO that was partially finished I donated to the Humane Society Thrift Shop which has a nice craft section. It was quite a freeing to let them go!
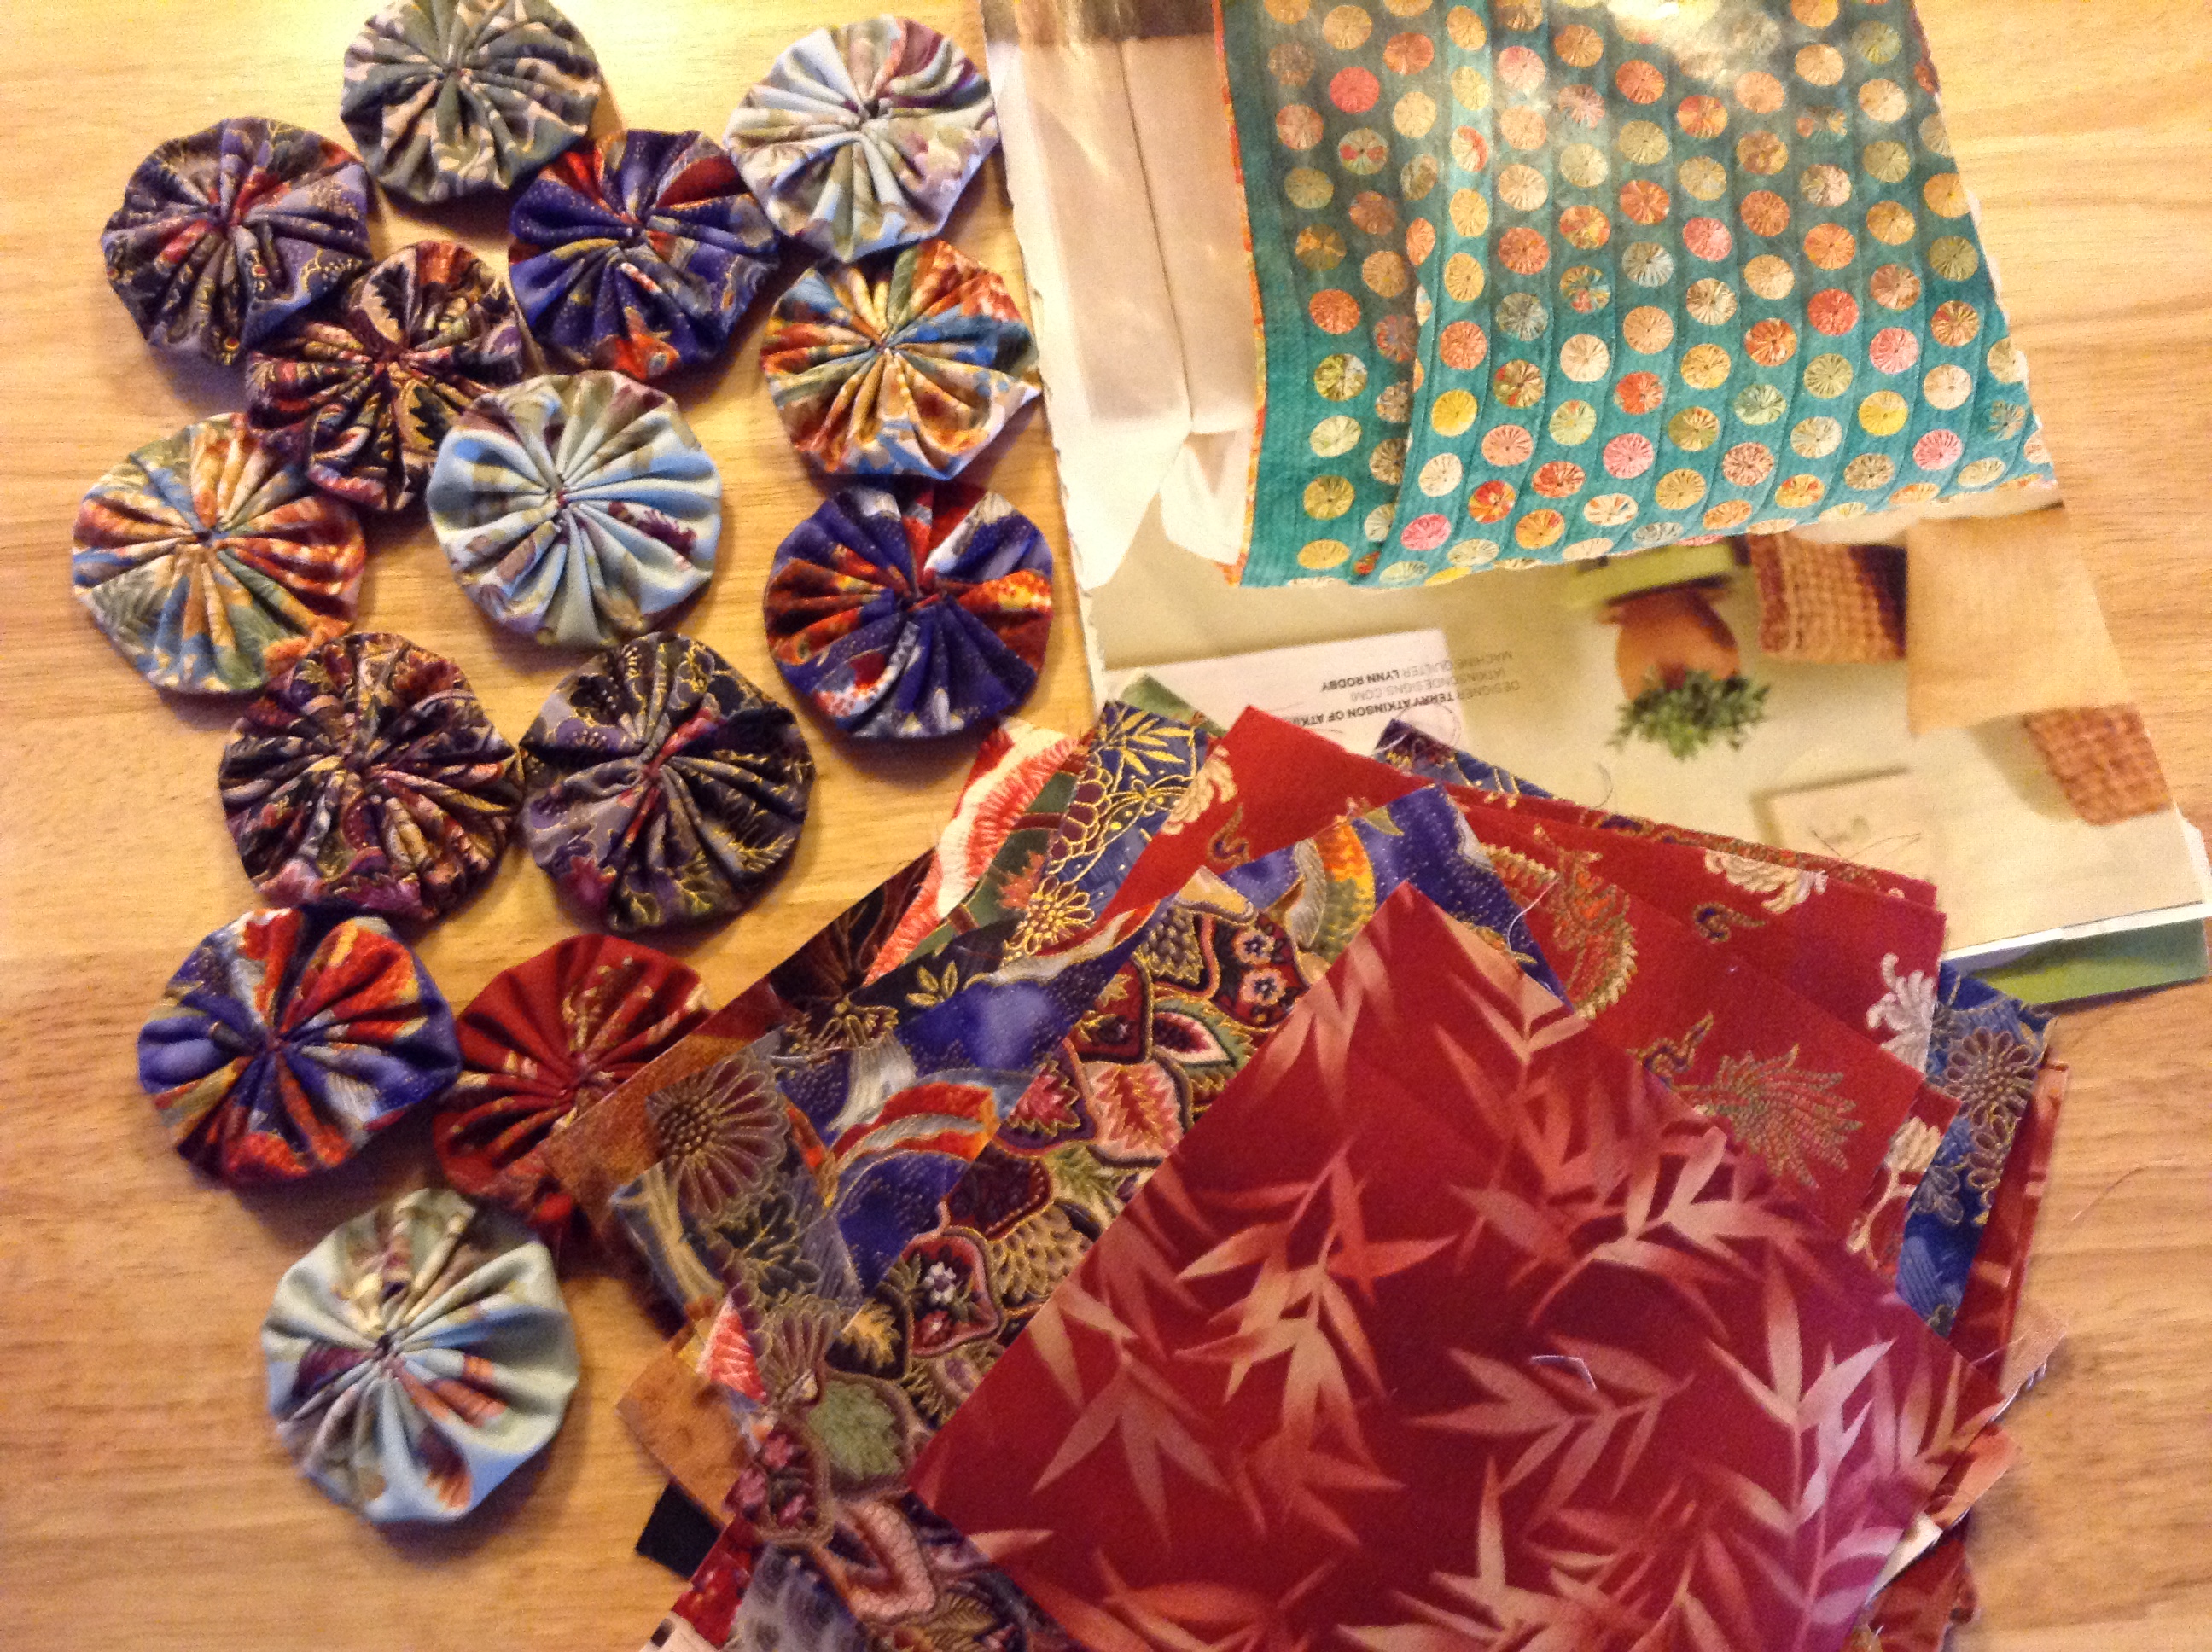
Pattern calls for 409…14 are done…
So I thought I was safe. I now had 8 UFOs that I actually wanted to finish and I was ready to find out which number would be selected first by my friend’s quilt. Of all the numbers they could have selected, they chose the number that corresponded to my most tedious UFO of all – a yo-yo quilt UFO made with 409 yo-yos! To be finished in a month! Guess how many of the 409 yo-yos I had done already? Three. So I have been slowly working on yo-yos made from pretty Asian fabrics in the evenings and I am now up to 14….only 395 more to go. I am seriously considering only making a small wallhanging and calling it good. I think the pattern was too ambitious and was for someone with a lot (I mean a lot) of free time on their hands!
I have not posted anything in a while as I have been focused on getting my new Etsy store up. I thought I would never master taking decent digital photographs but I think I figured out some decent lighting for the mini kimonos. I added 24 handmade items to the shop (including 22 mini kimonos!) to get it started, more to come…
It it thanks to my wonderful sister that I finally got my Etsy store up – she kept pushing me to follow my dream through achieving special milestones (she “project managed” me!)
NEW QUILT BACK FROM QUILTER
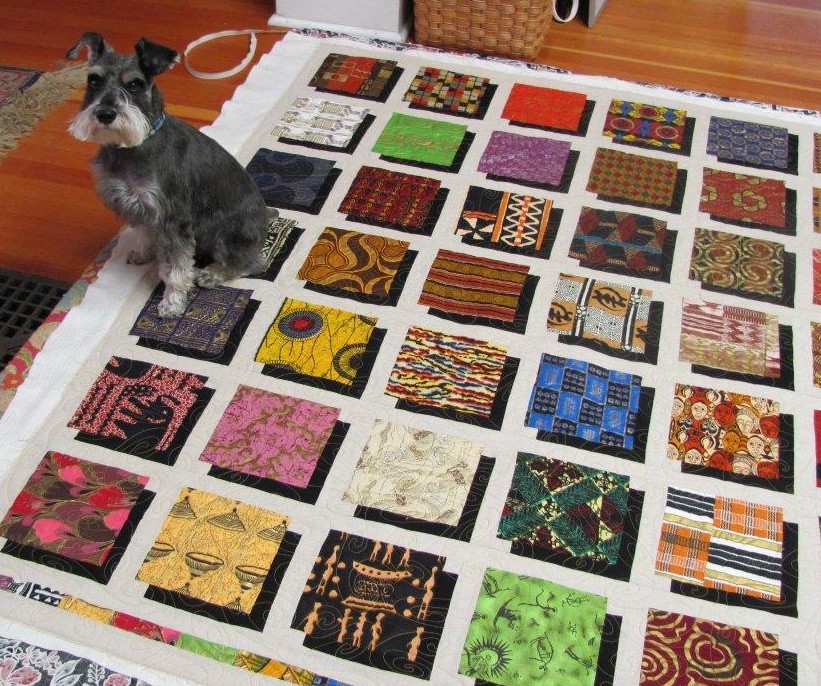
One of my favorite things – to get a quilt back from my long-arm quilter and complete the binding and enjoy the quilt. The name of pattern is “Aussie” and I came across it many years ago from the French quilting magazine Quiltmania. The quilt featured in the magazine was made from Aboriginal prints, but I made mine from African fabrics.