I guess I’ve officially turned this in to a series: posts about what my woodworking partner John has made in his woodshop!
If you want to see other posts on what he’s made they are all under this link – From the Woodshop (it will include this post; after you click on the link, scroll down to see earlier posts).
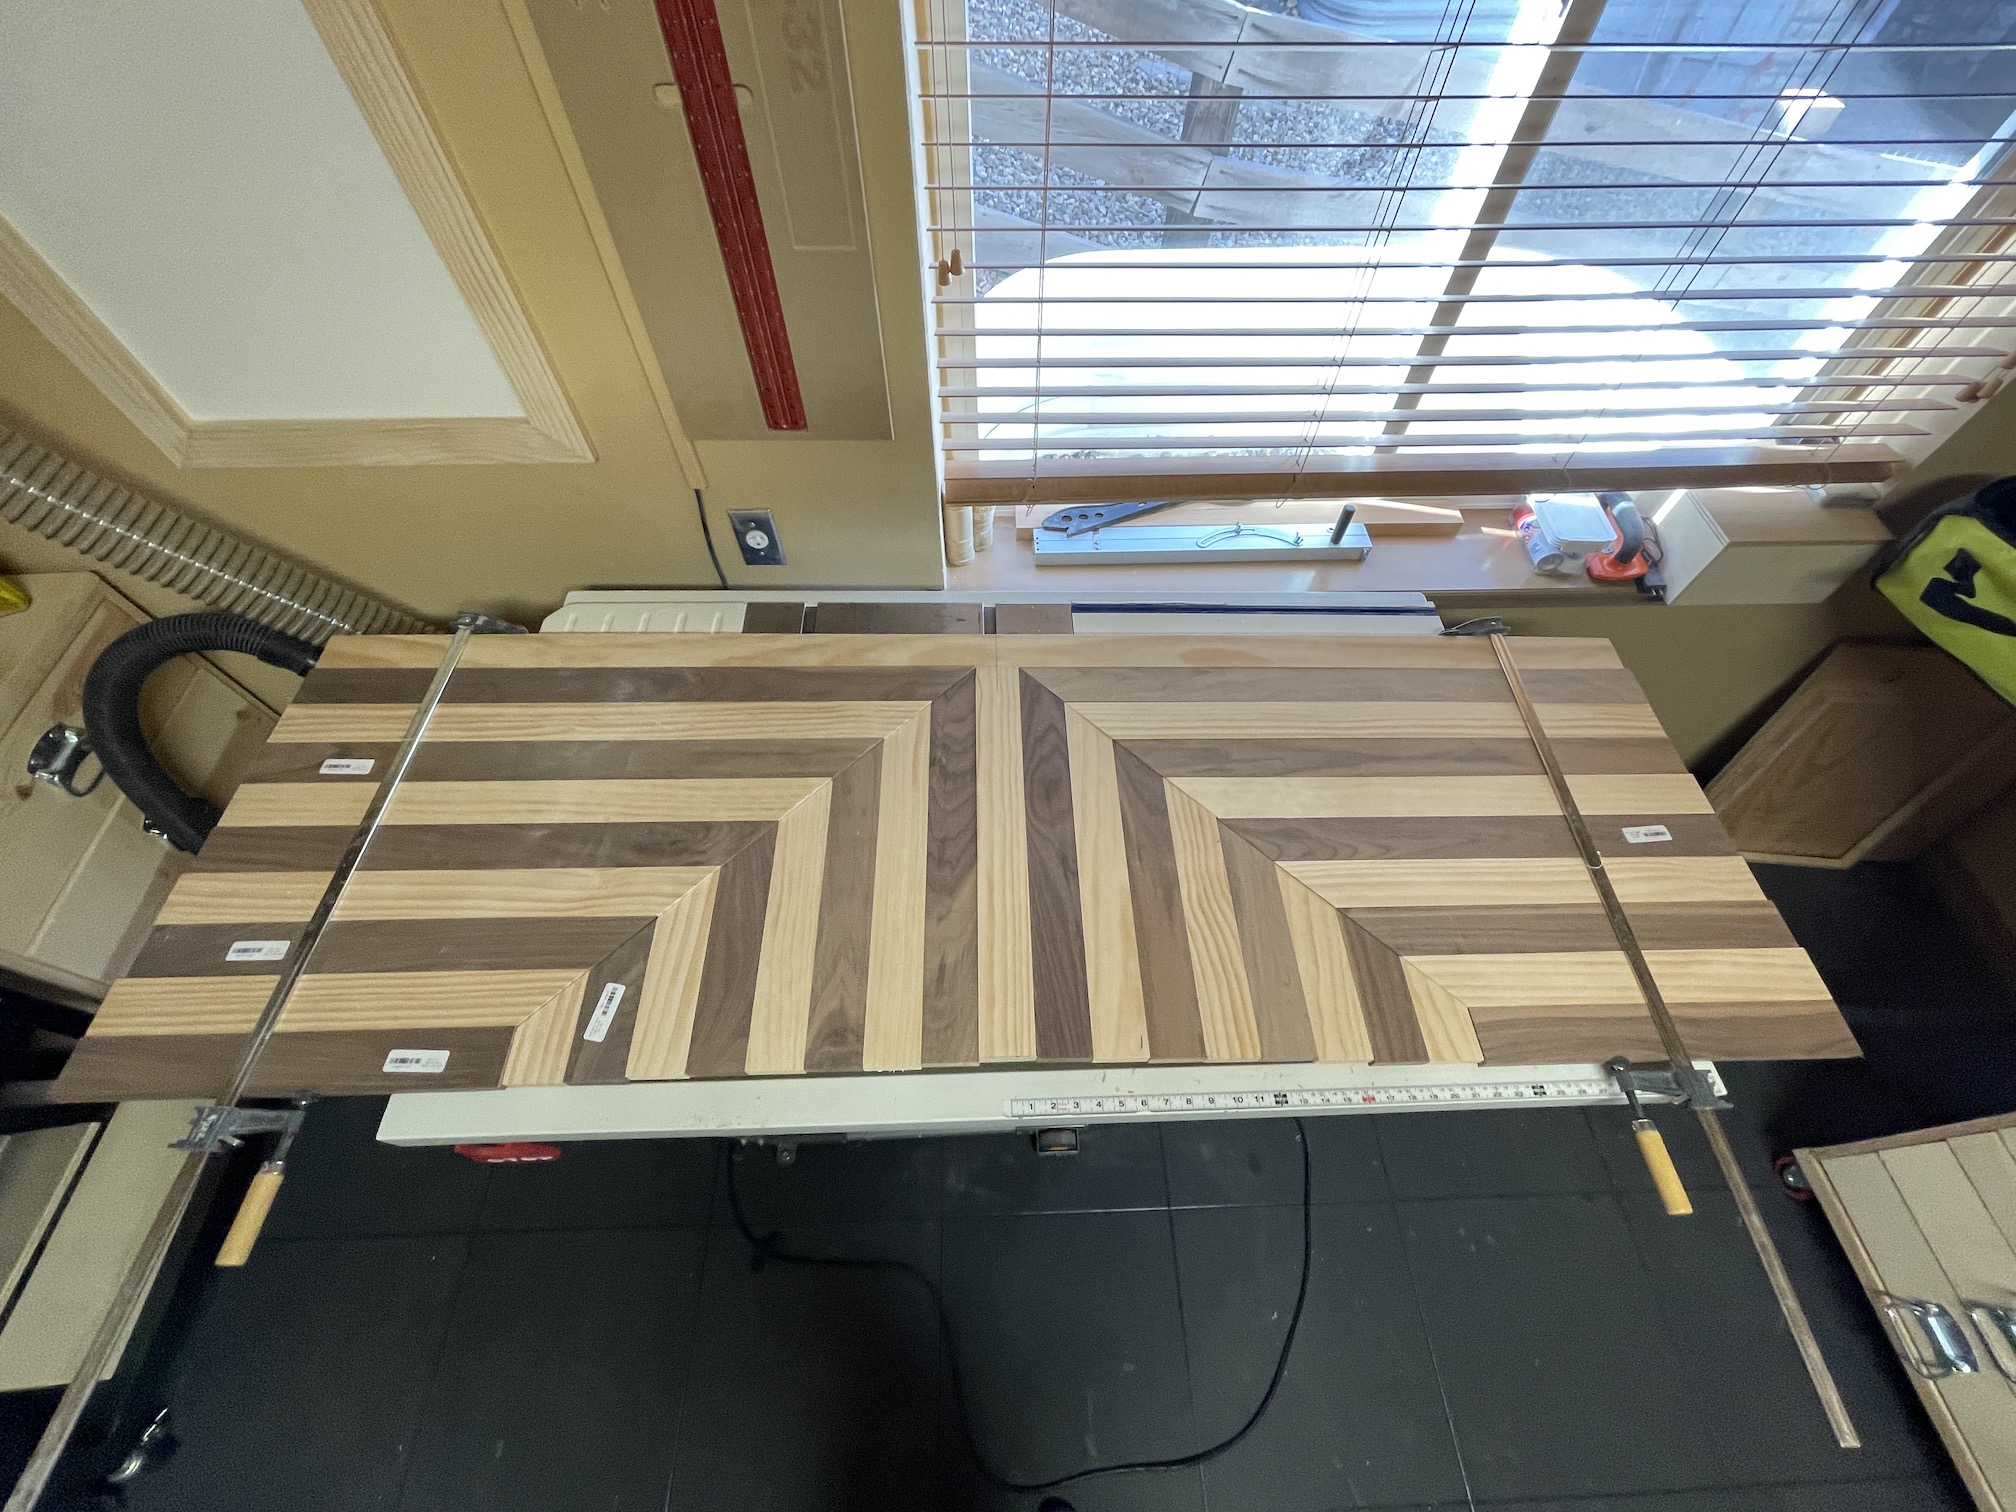
We did not have a headboard on our bed, we just had a platform on which our mattress rested. John decided to make a headboard for our bed using a design similar to the one he used for making Lazy Susans (see post From the Woodshop: No “Lazy” in the Making of a Lazy Susan):
Here is the headboard in progress in his woodshop:
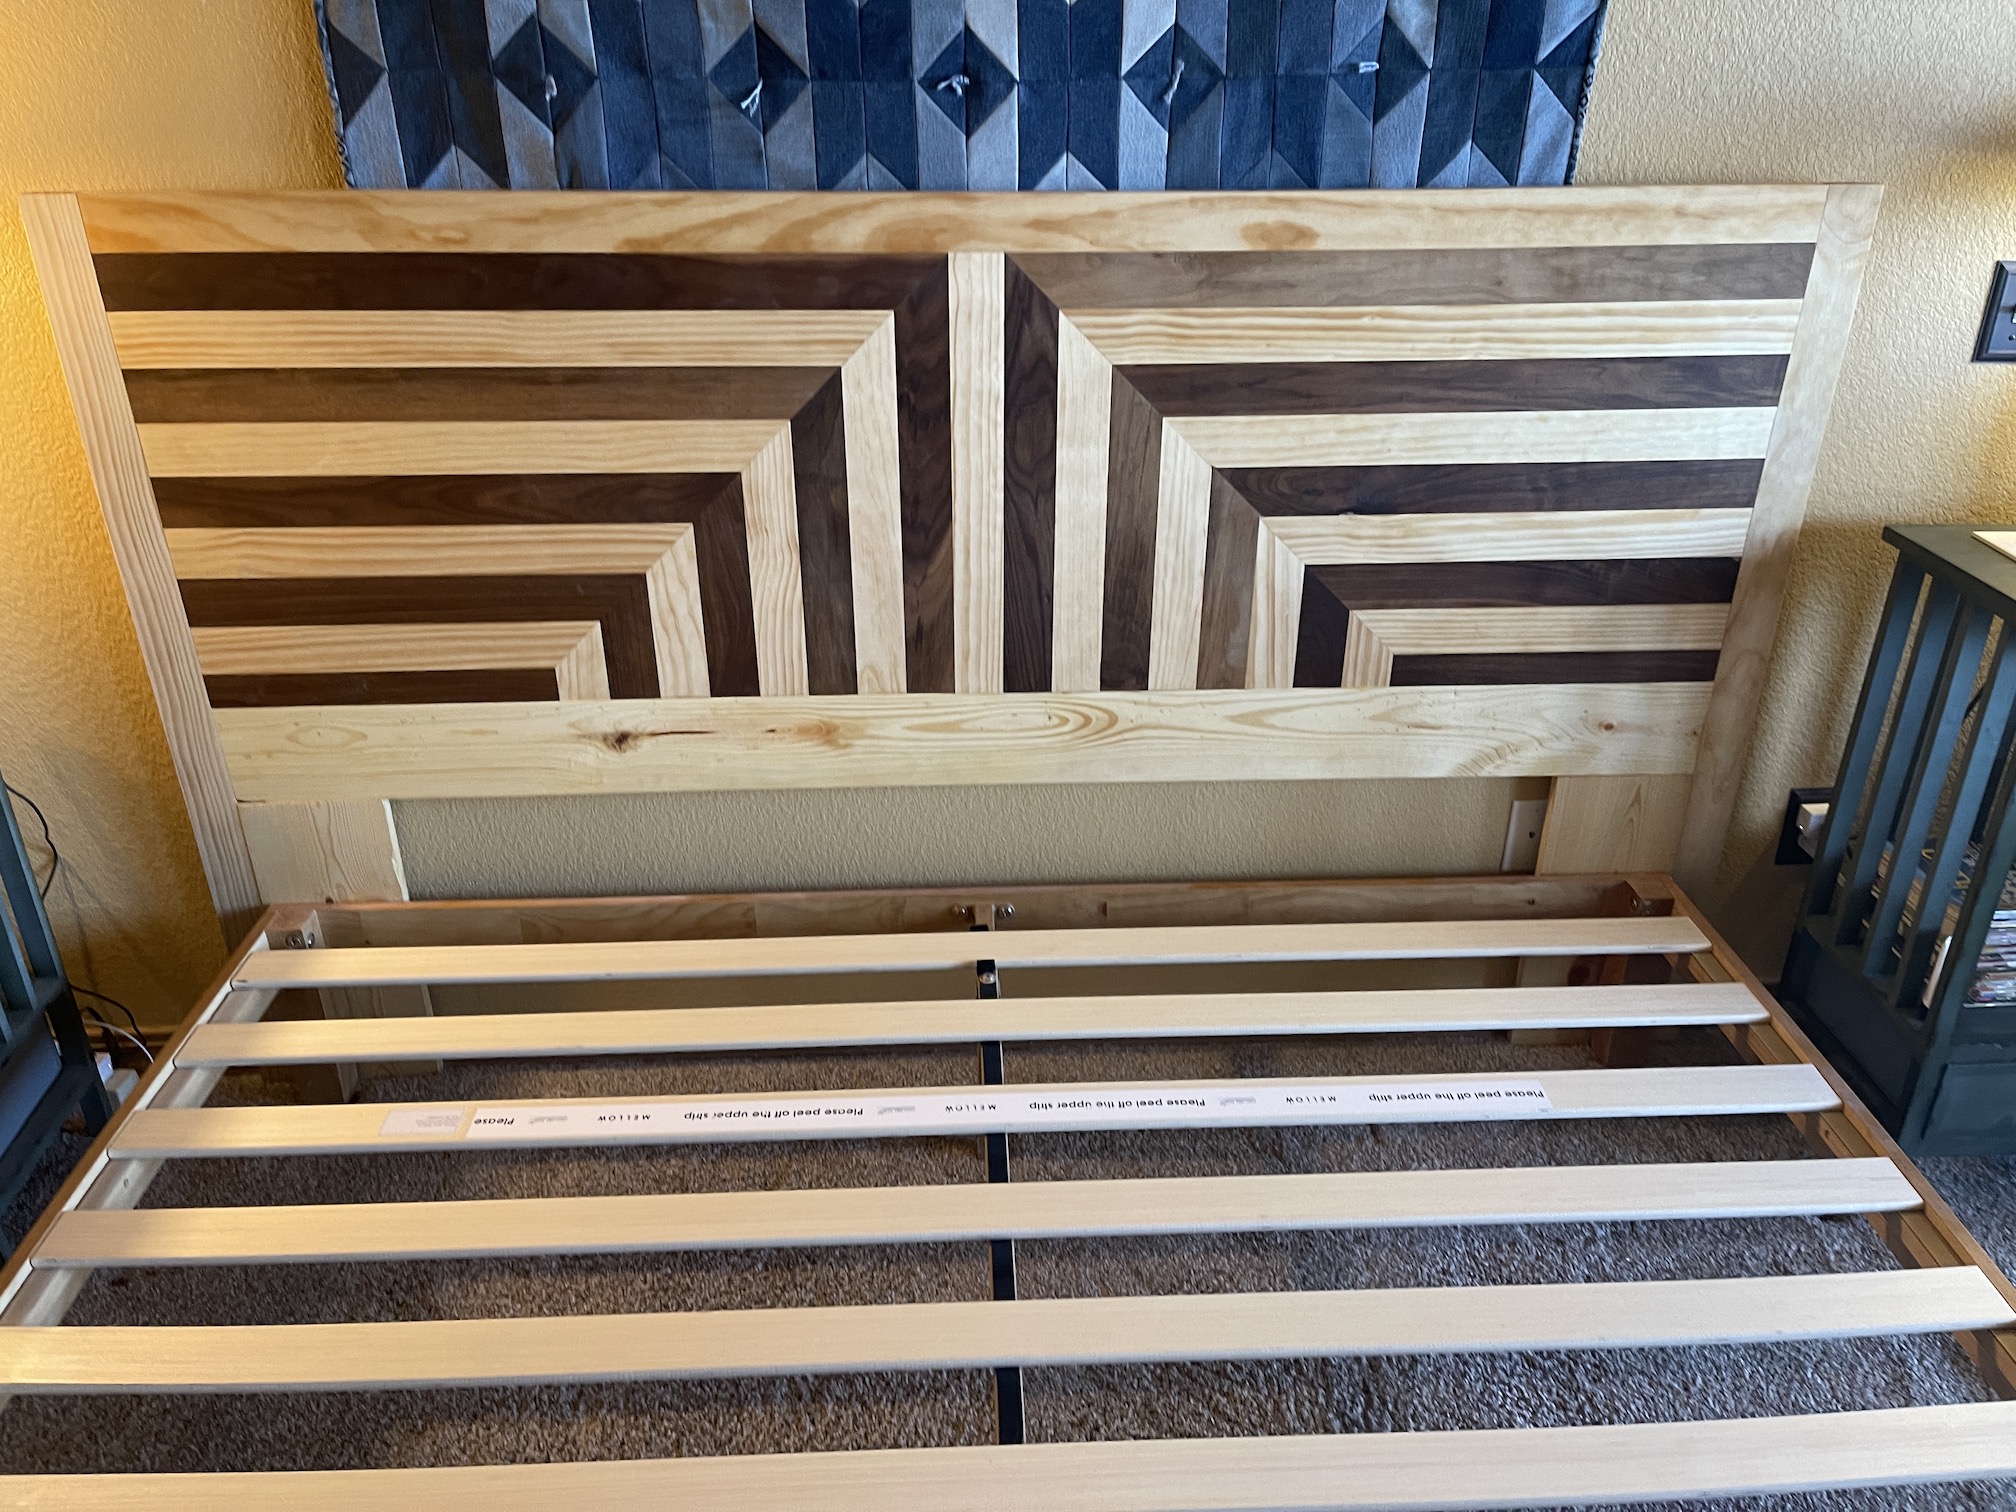
And here are some images of the completed headboard:
It’s amazing how he keeps progressing on his woodworking journey, all self taught using YouTube videos!
In this post I’ll share a gift my partner John made from wood scraps in his woodshop and then we’ll have a little New Years Day fun!
I love to save and use fabric scraps for my crafting and quilting projects, and my woodworking partner John does the same with his wood scraps. He is always trying to decide just how small a wood scrap to save.
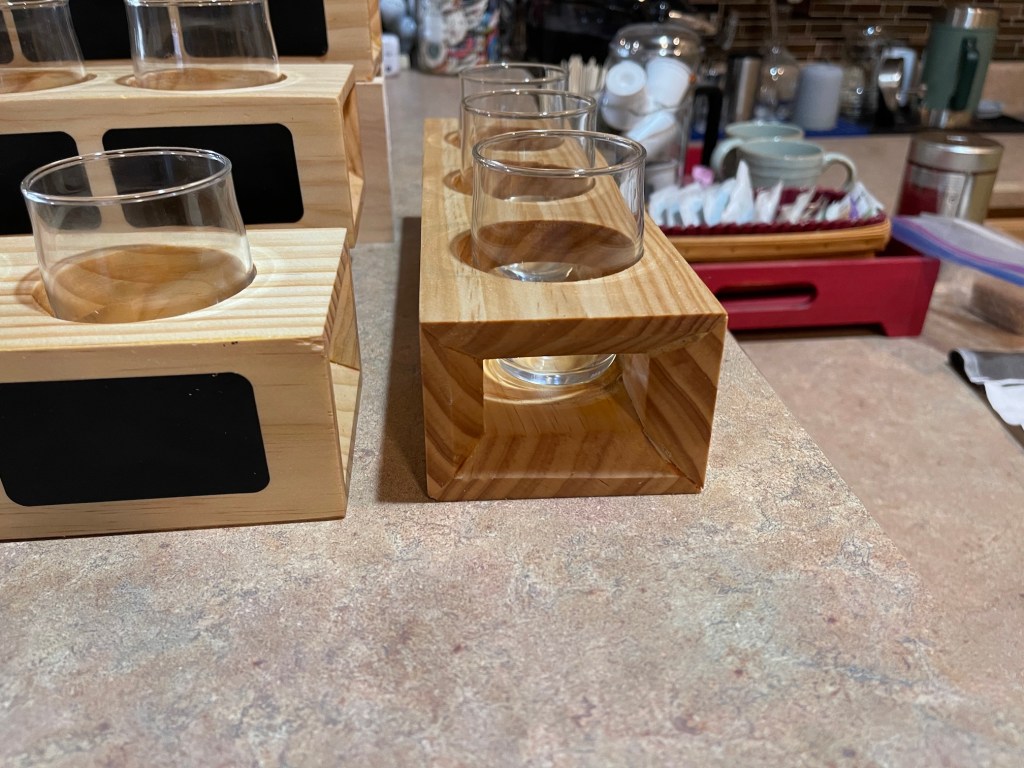
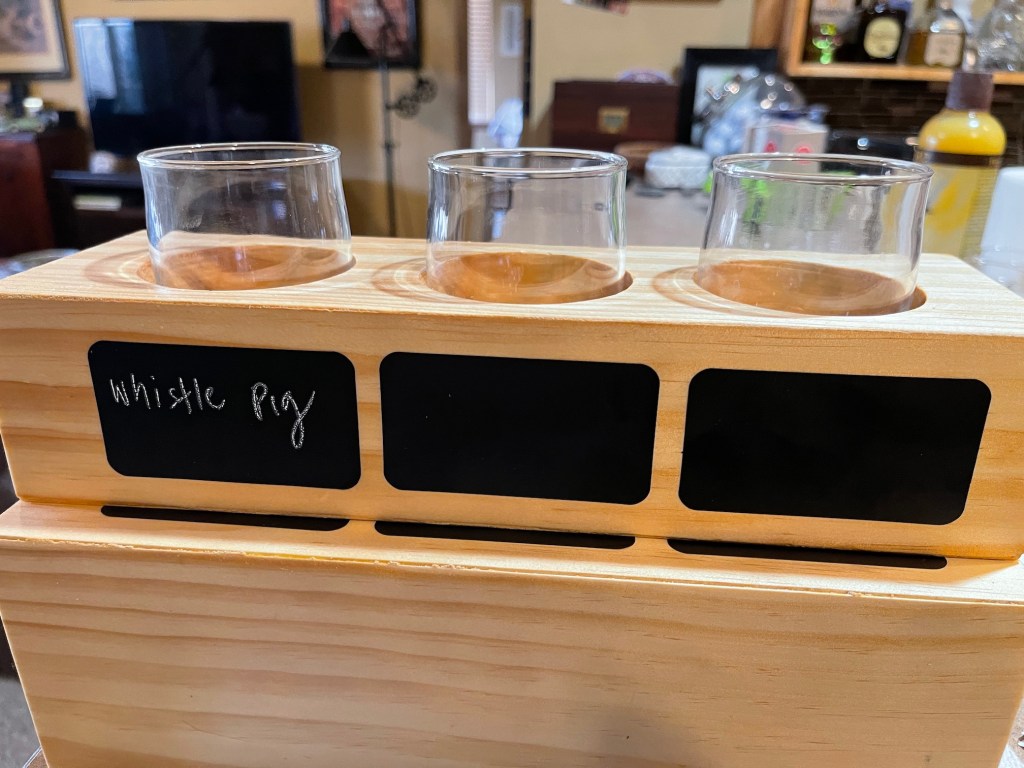
Well for our friends who enjoy whiskey and bourbon tasting, he made a set of tastingtrays from the wood scraps in his shop and put cool beveled edges to each tasting set.
We found chalkboard stickers at one of the home improvement stores and put a sticker/label on each taster-section along with some chalk, so they could mark what is in each taster glass. We also gave them extra stickers in case the originals wear out.
I think it was a pretty creative use of woodworking scraps and John designed the set himself!
Okay now for the fun, and WARNING: You will not be able to “unsee” what you are about to see.
My partner John has had a receding hairline for many years, and has a good sense of humor about it. One of his sons would tease him that he had a “cul-de-sac” on top of his head!
image of a cul de sac in case you are not familiar with this term
I came across a smartphone app called HairStyleLite where you can try on different hair styles. John being such a great sport and having a wonderful sense of humor, let me play with one of his photos to see what he might look like with a full head of hair.
Here is the original photo:
And here are some short hair options for John – ha:
There were a lot more hairstyle options, and I tried both female and male hairstyle options, so there was a lot of hysterical laughter. But here is my favorite one – John as an aging Rock and Roll Star (think of the lead singer of the band Aerosmith or something…):
I warned you that you would never be able to “unsee” it!
Well that was some New Year’s Day Hair fun for you!
I was going to post about my Etsy shop but I thought I would share what my woodworking partner has been up to instead.
Yesterday my partner John and I met up with our friends for dinner and gave them a handmade Lazy Susan for Christmas!
Sometime earlier this year (2021 is a blur for me) they mentioned they’ve been struggling to find a Lazy Susan for their large round table for quite a while. They have 3 kids and passing things about the table at dinner can get quite tedious.
My partner John, whose hobby is woodworking, never made a Lazy Susan before, felt he should put himself up to the challenge of making his first Lazy Susan and gift it to them for Christmas!
The first one he made came out 26 inches in diameter and he was not completely pleased with it as there were tiny mistakes (ones I did not even notice), and we decided to keep it for our table:
The Lazy Susan is his own original design. So not only did he make his first Lazy Susan but he did not use a published pattern, he just created the design and his own pattern!
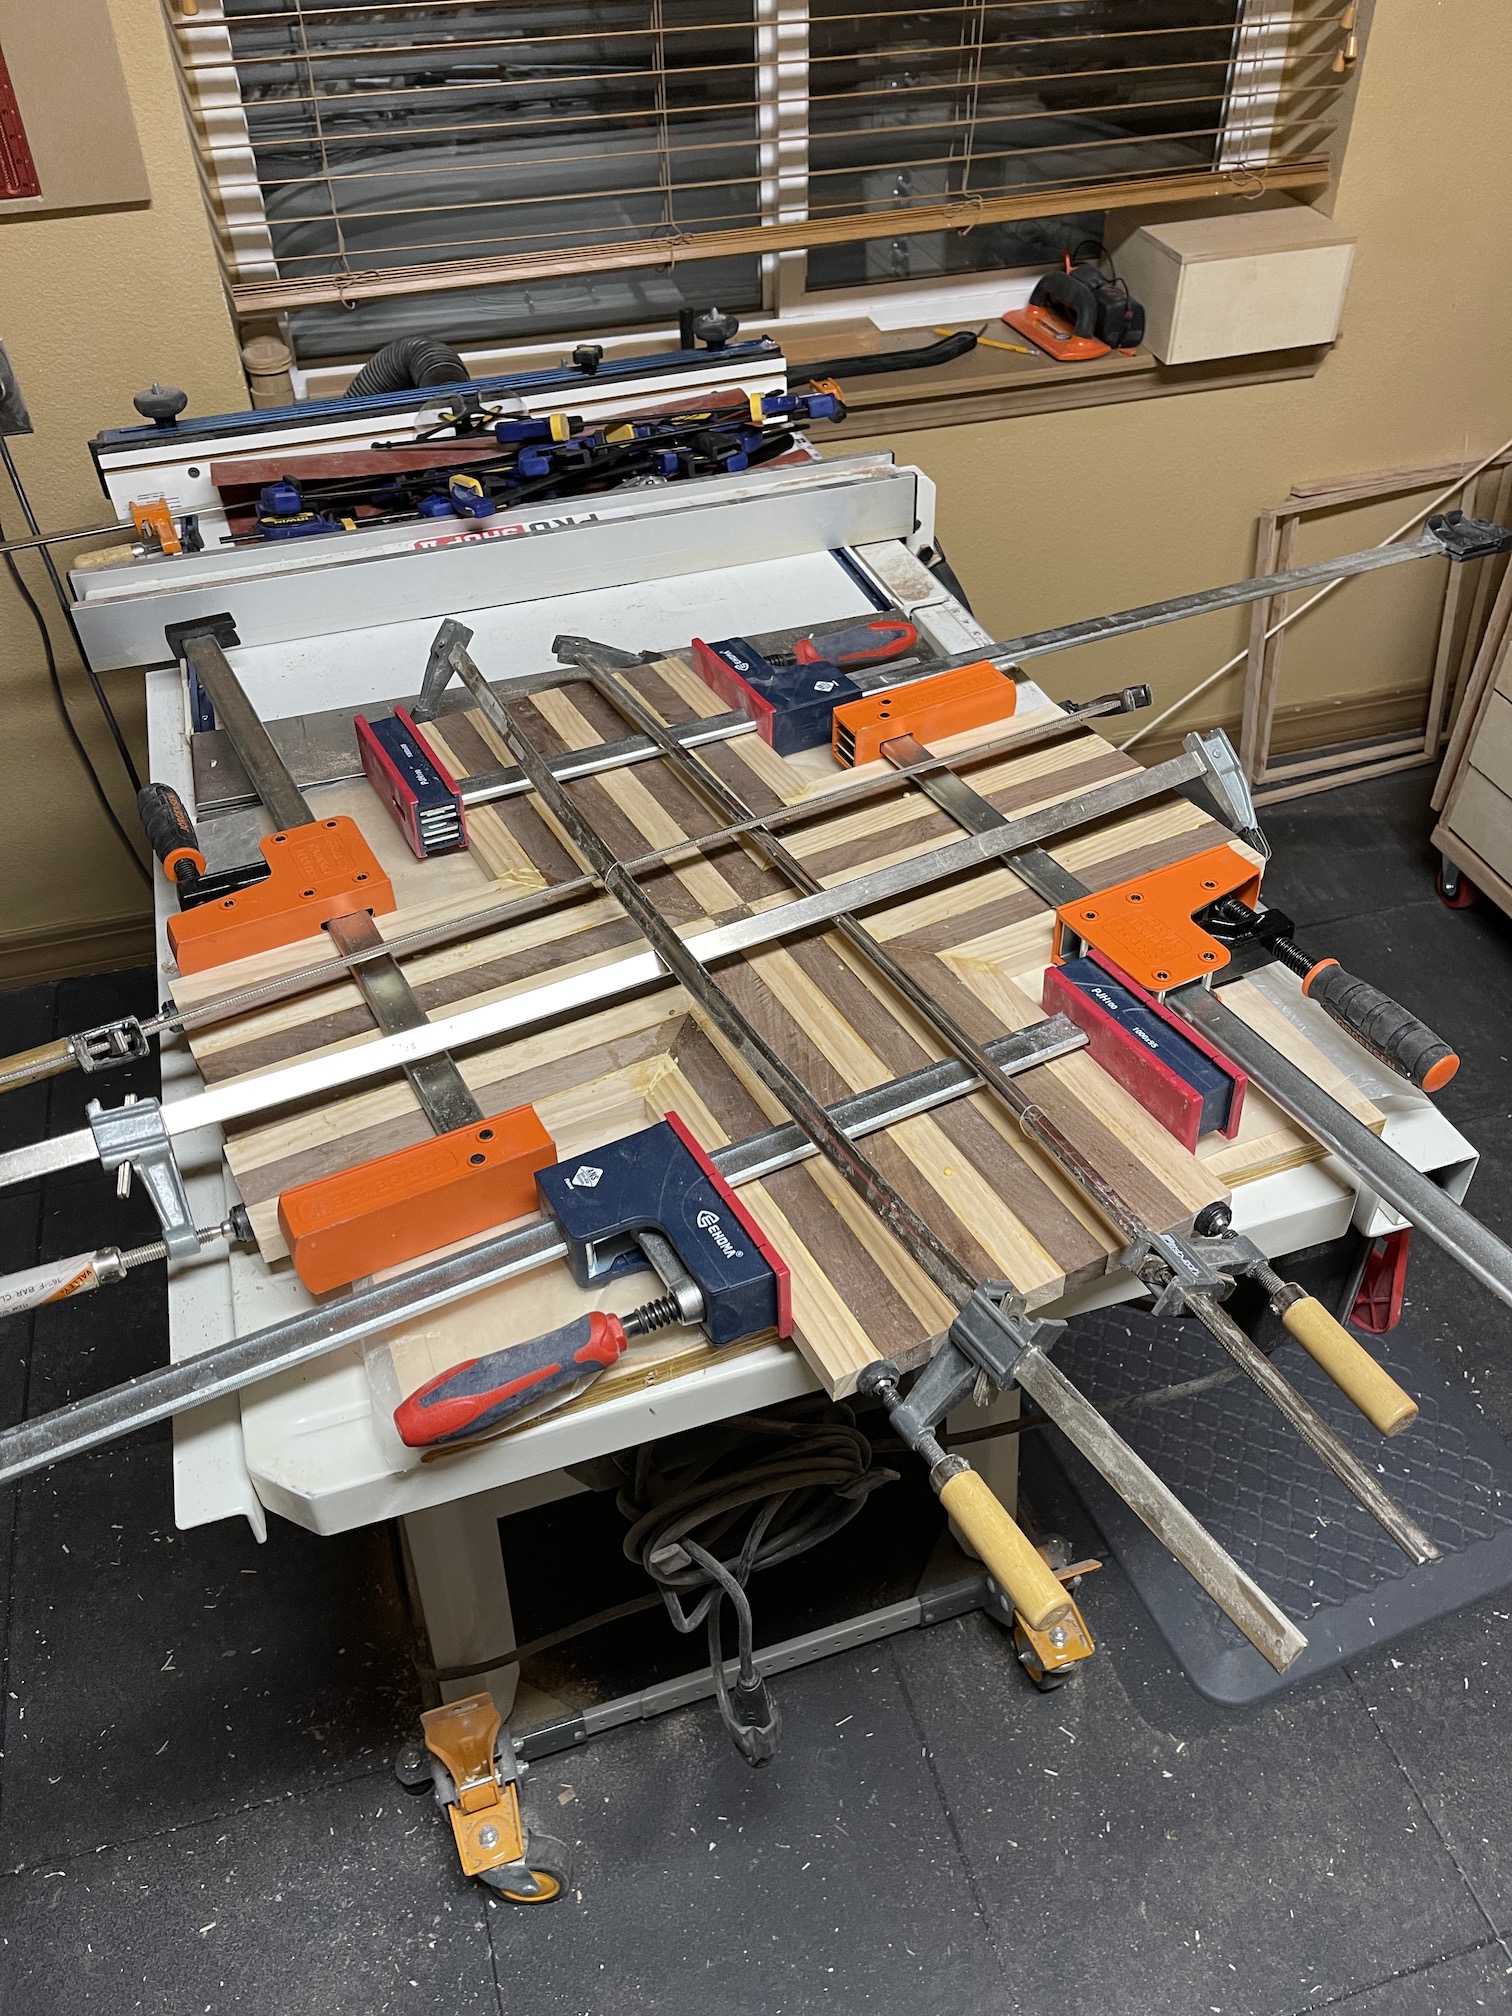
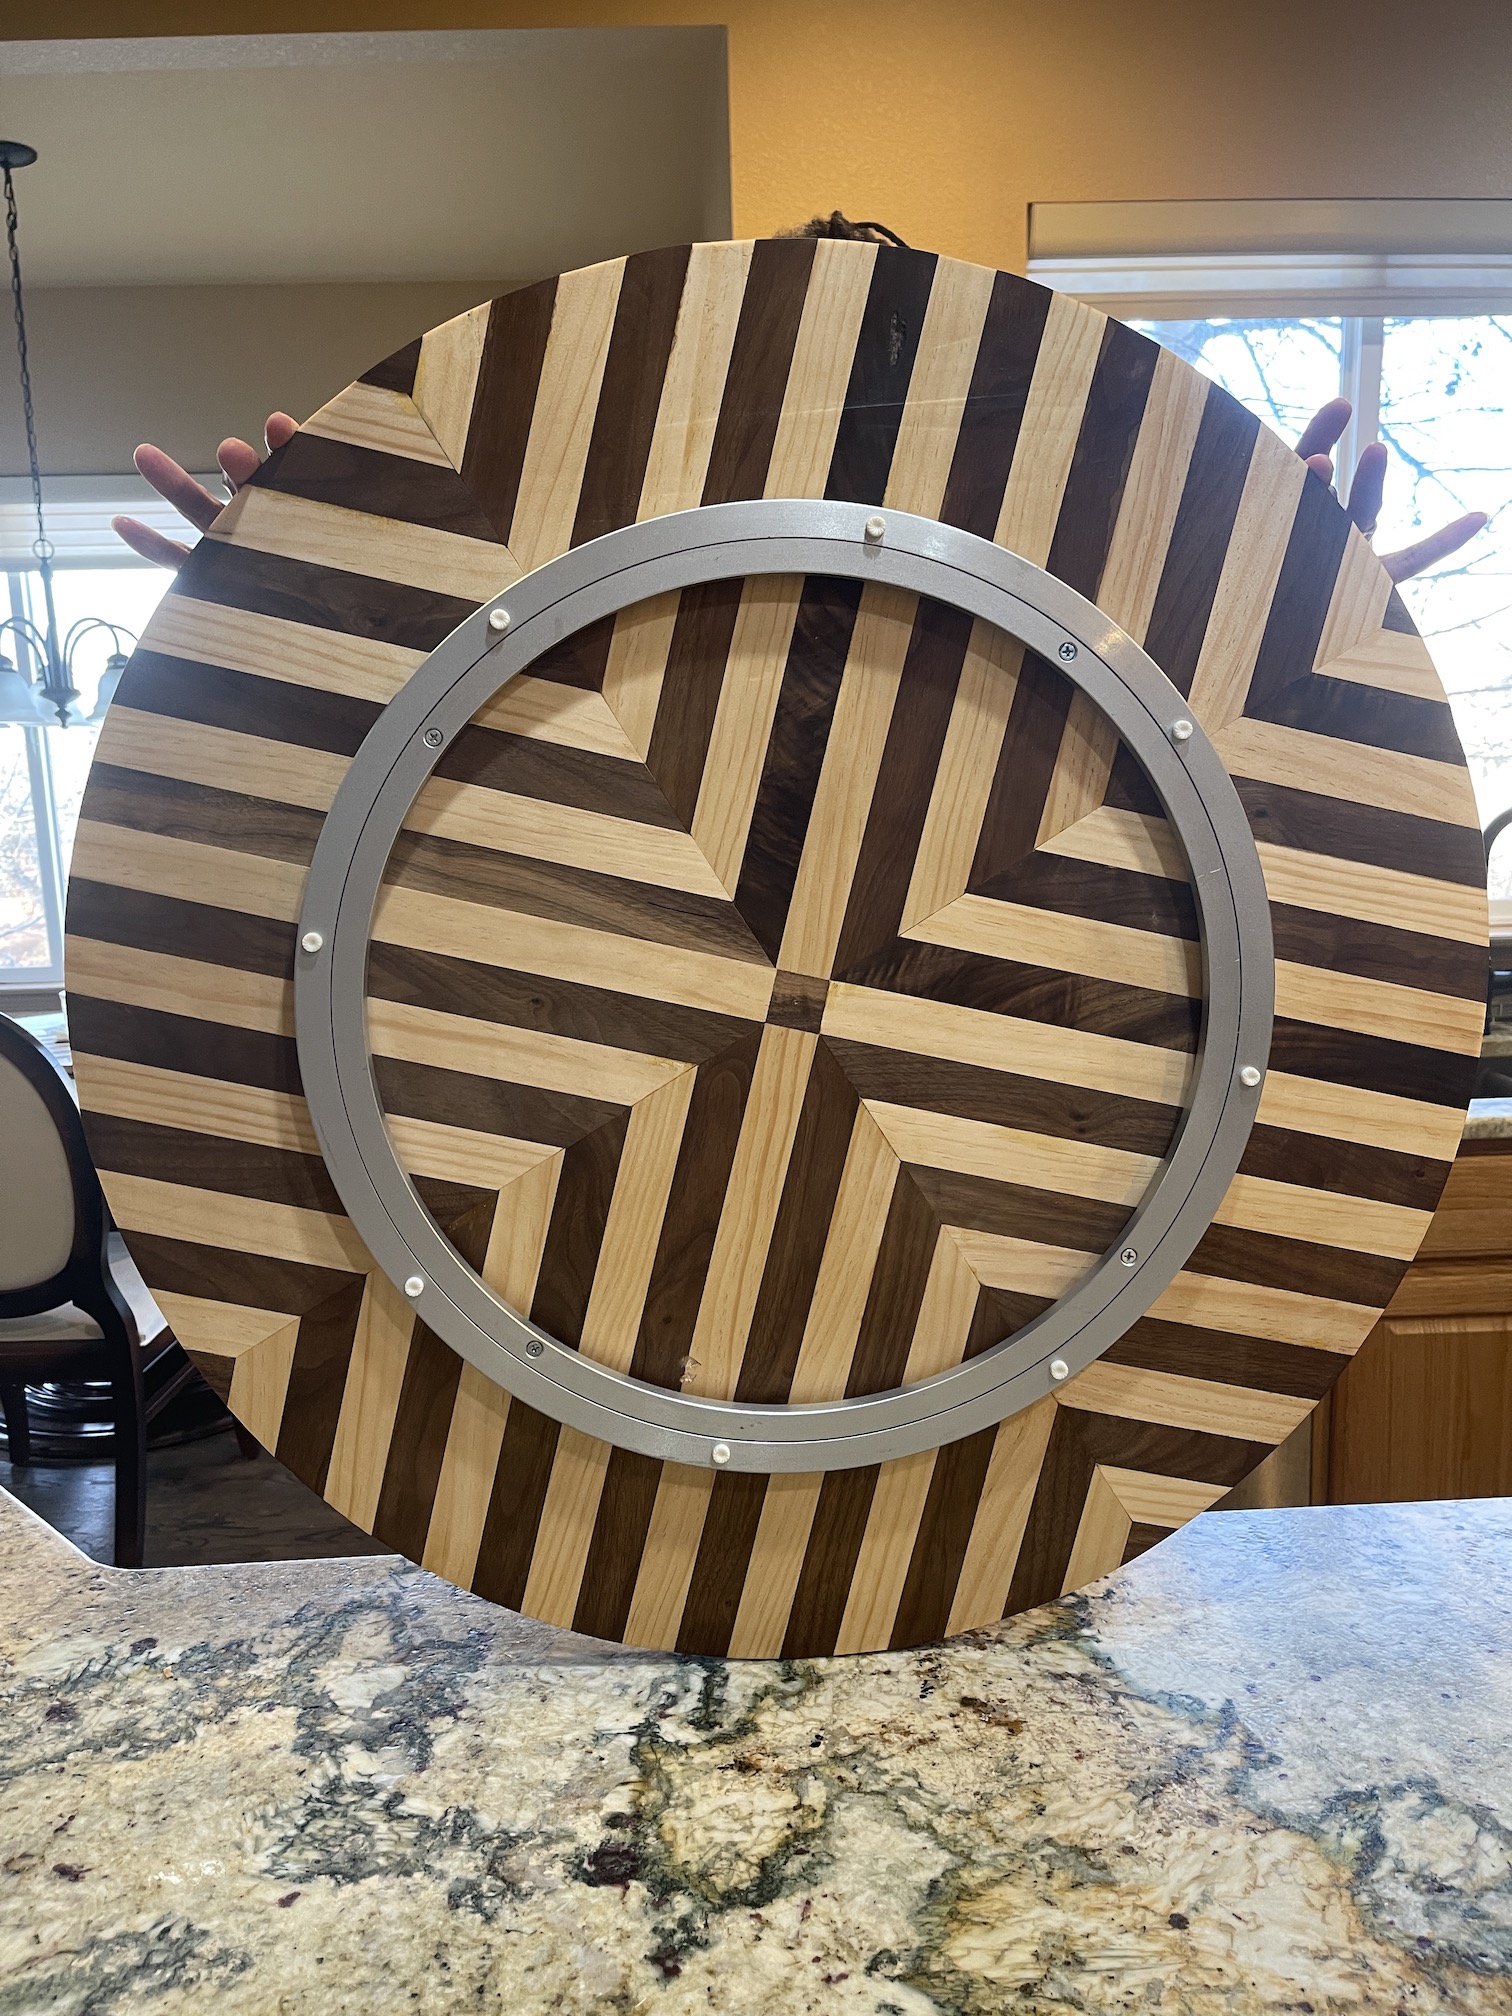
For his next Lazy Susan, he made it 29 inches in diameter which was a better size for our friends’ large round table.
Here are some images from the creation of the second Lazy Susan:
Here are photos of the completed Lazy Susan (it is so beautiful in person, he did an amazing job with sanding the piece and finishing it off with layers and layers of a bees wax protectant):
While I’ve been busy making endless drawstring/project bags, my partner John has been busy building his first barrister bookcase to replace the shelves in his bar in our downstairs entertainment area.
John has always been handy but he got into woodworking a couple years ago and really started focusing on it during the early days of the COVID pandemic. He also had a section of our basement framed out and removed the carpet to have walls and a door put up to create a workshop for himself (see post From the Woodshop to see how it looked when first built..he has since done a lot of upgrades and added in an air filtration system and sawdust collection system). Part of our basement was rarely used so it was a much better use of the space to make a “studio” for John!
A lot of good things have come out of John’s woodshop such as a remodel to my sewing studio:
Our bedroom dresser:
If you’d like to see posts I did on his projects, see my blog category – From the Woodshop for links to the related posts.
For a quite a while, John has been fascinated with barrister style bookcases. If you’ve never heard of them, here is a little background on them from Apartment Therapy:
This old staple, also referred to as a lawyer’s bookcase, comes in many shapes and sizes. However, all barrister bookcases feature glass panes to protect books and trinkets from dust. I think what I like about them most is that they offer both old-school charm and a sense of regality.
John found plans online to create barrister bookcases and taught himself via YouTube videos and online resources how to make them!
Here are photos from his building of the bookcases:
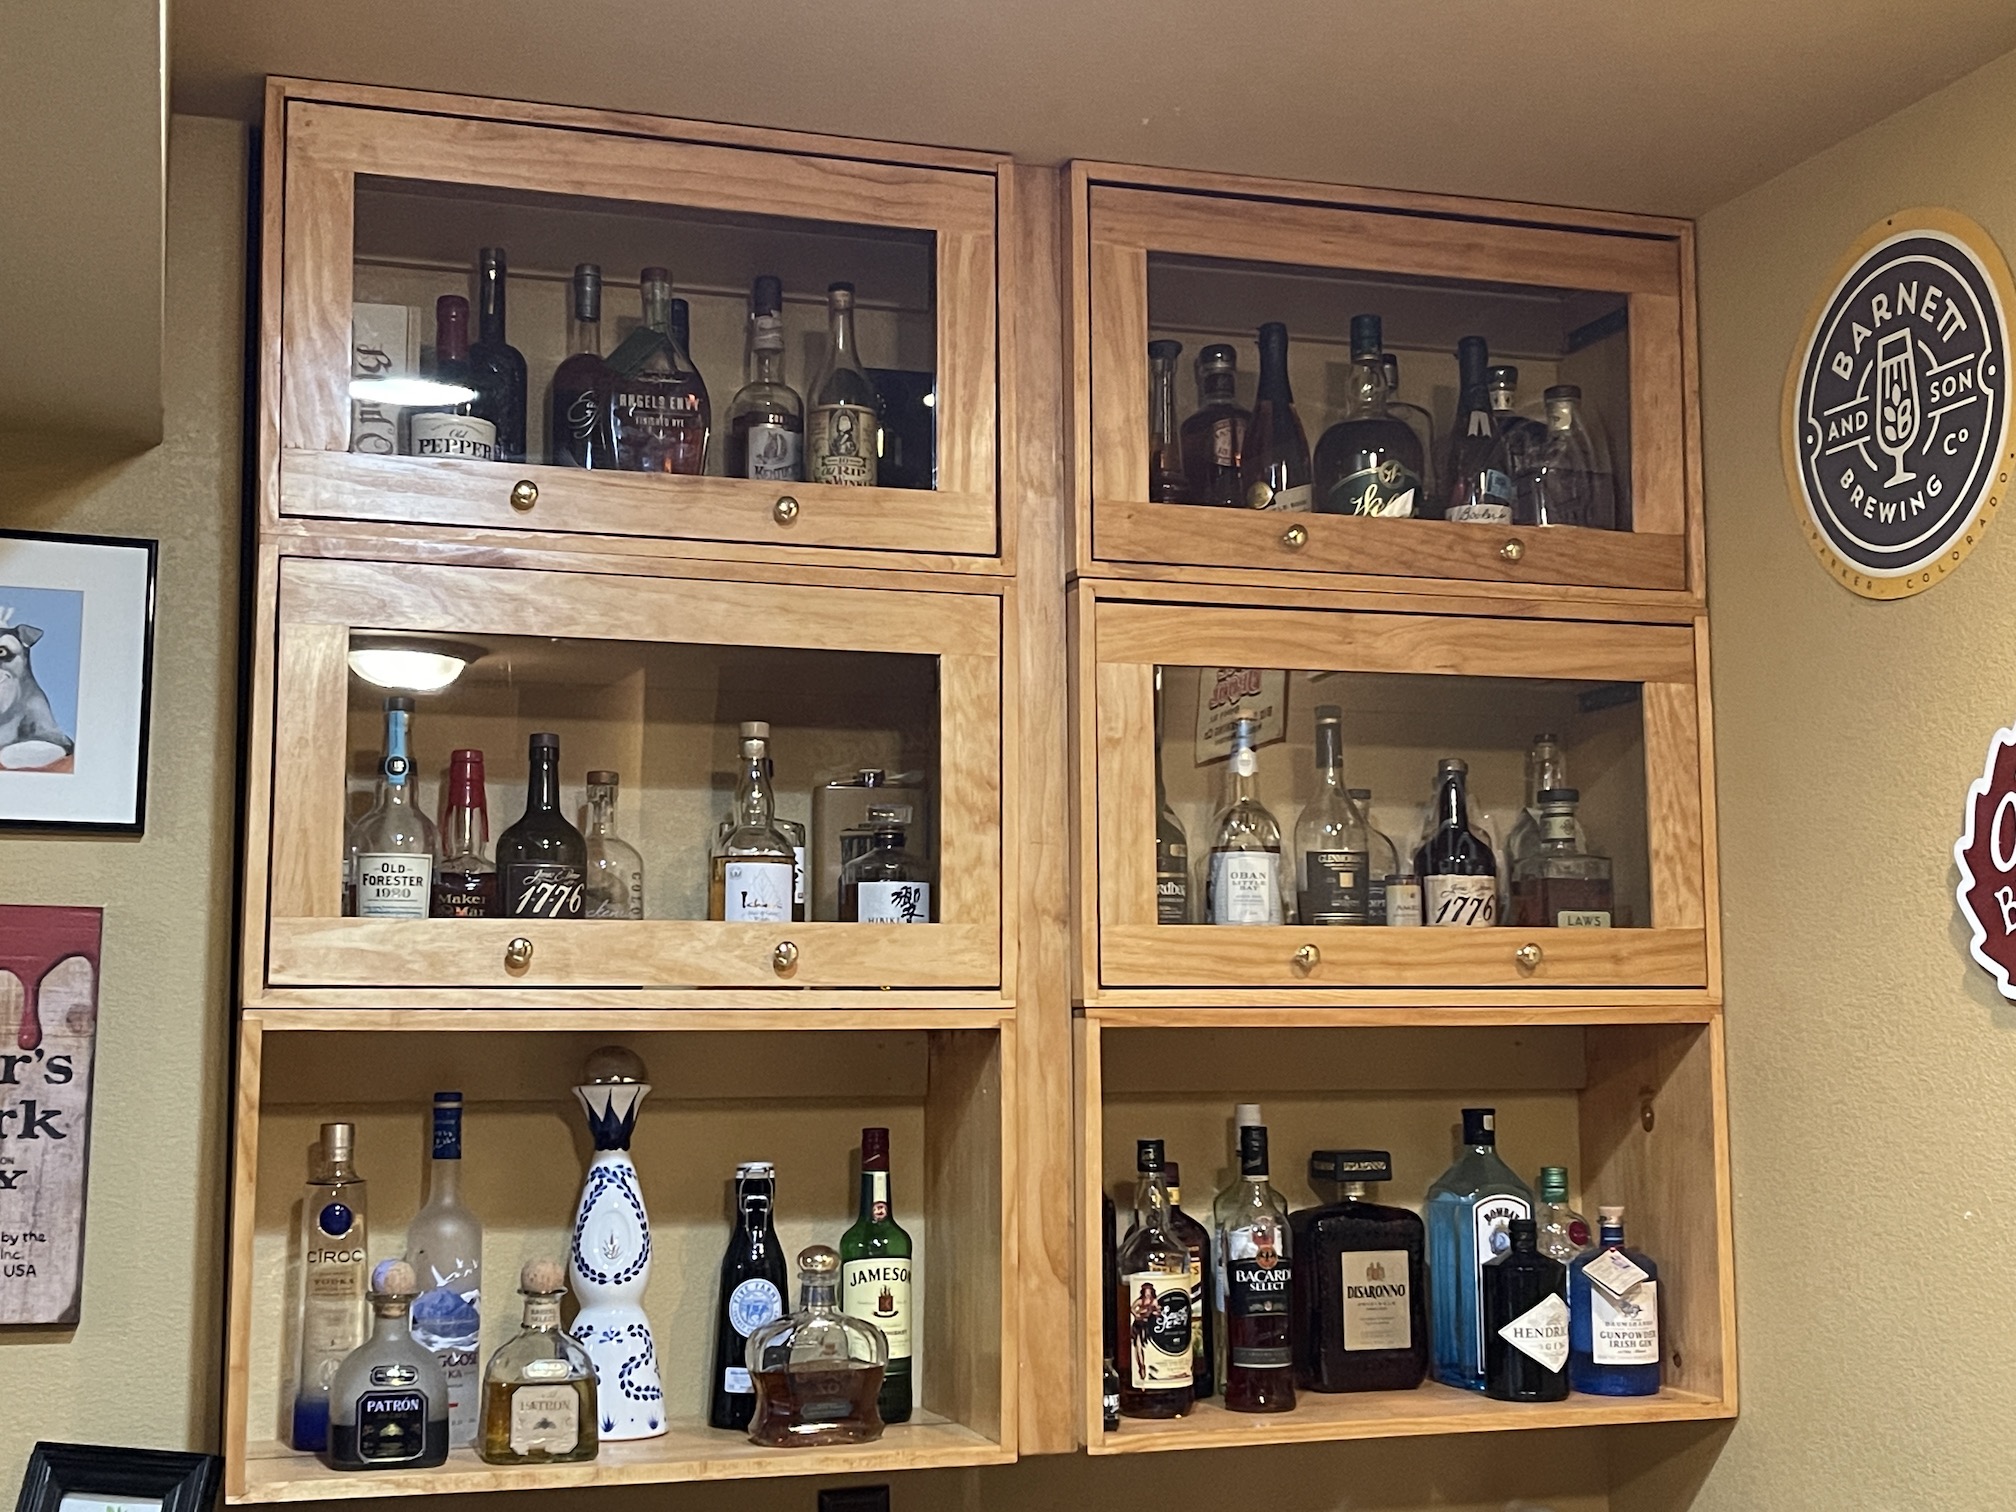
And here are the completed bookcases mounted as his new liquor cabinet in our bar:
To add an extra feature to the bookcases, he installed lights into the first two rows of cabinets:
Here is what they look like with the doors open (the doors lift and glide into the top of their section:
John has curated a nice collection of Whiskeys, Bourbons, Ryes, and Scotches including those he purchased during a Bourbon Tour of Kentucky he went on with his friends a couple years ago. Now he has a nice place to display them!
I tease John that after a while he will run out of things to build and he will just have to build us a new house!
You can’t have your guest visiting from out of town just hanging out at your house and relaxing. And you absolutely do not want them expecting you to take them sight-seeing or anything like that while they visit!
Instead, you need to put them to work on home remodeling projects! (smile)
April was a busy month. Besides visiting Orlando, Florida (see post Oh Orlando), we also had two sets of out of town guests visiting.
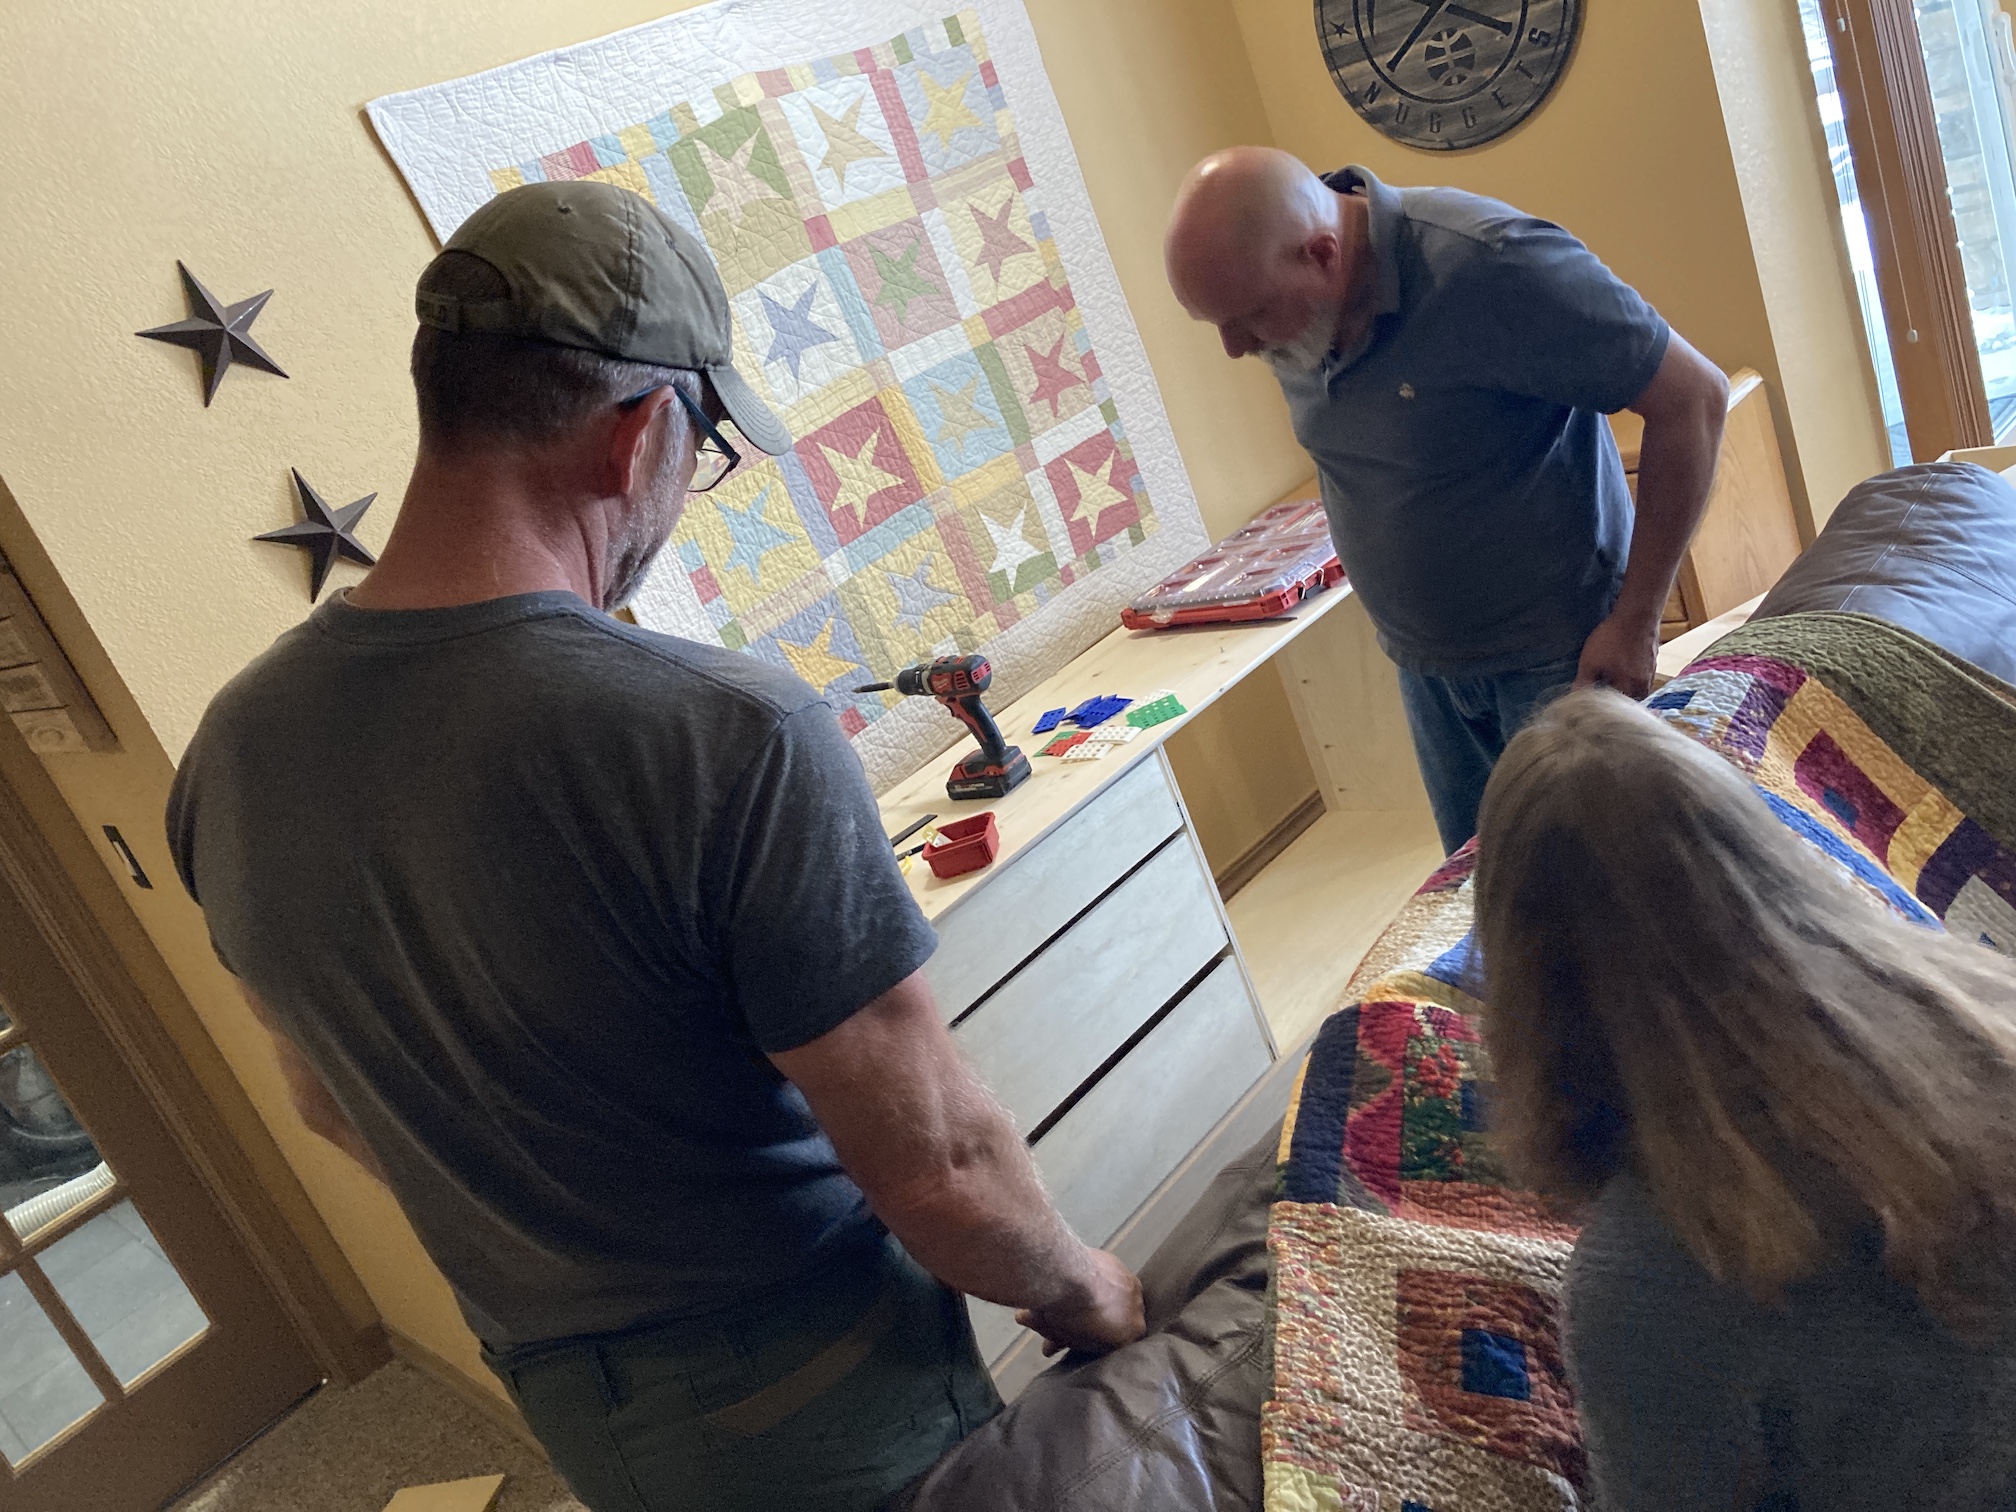
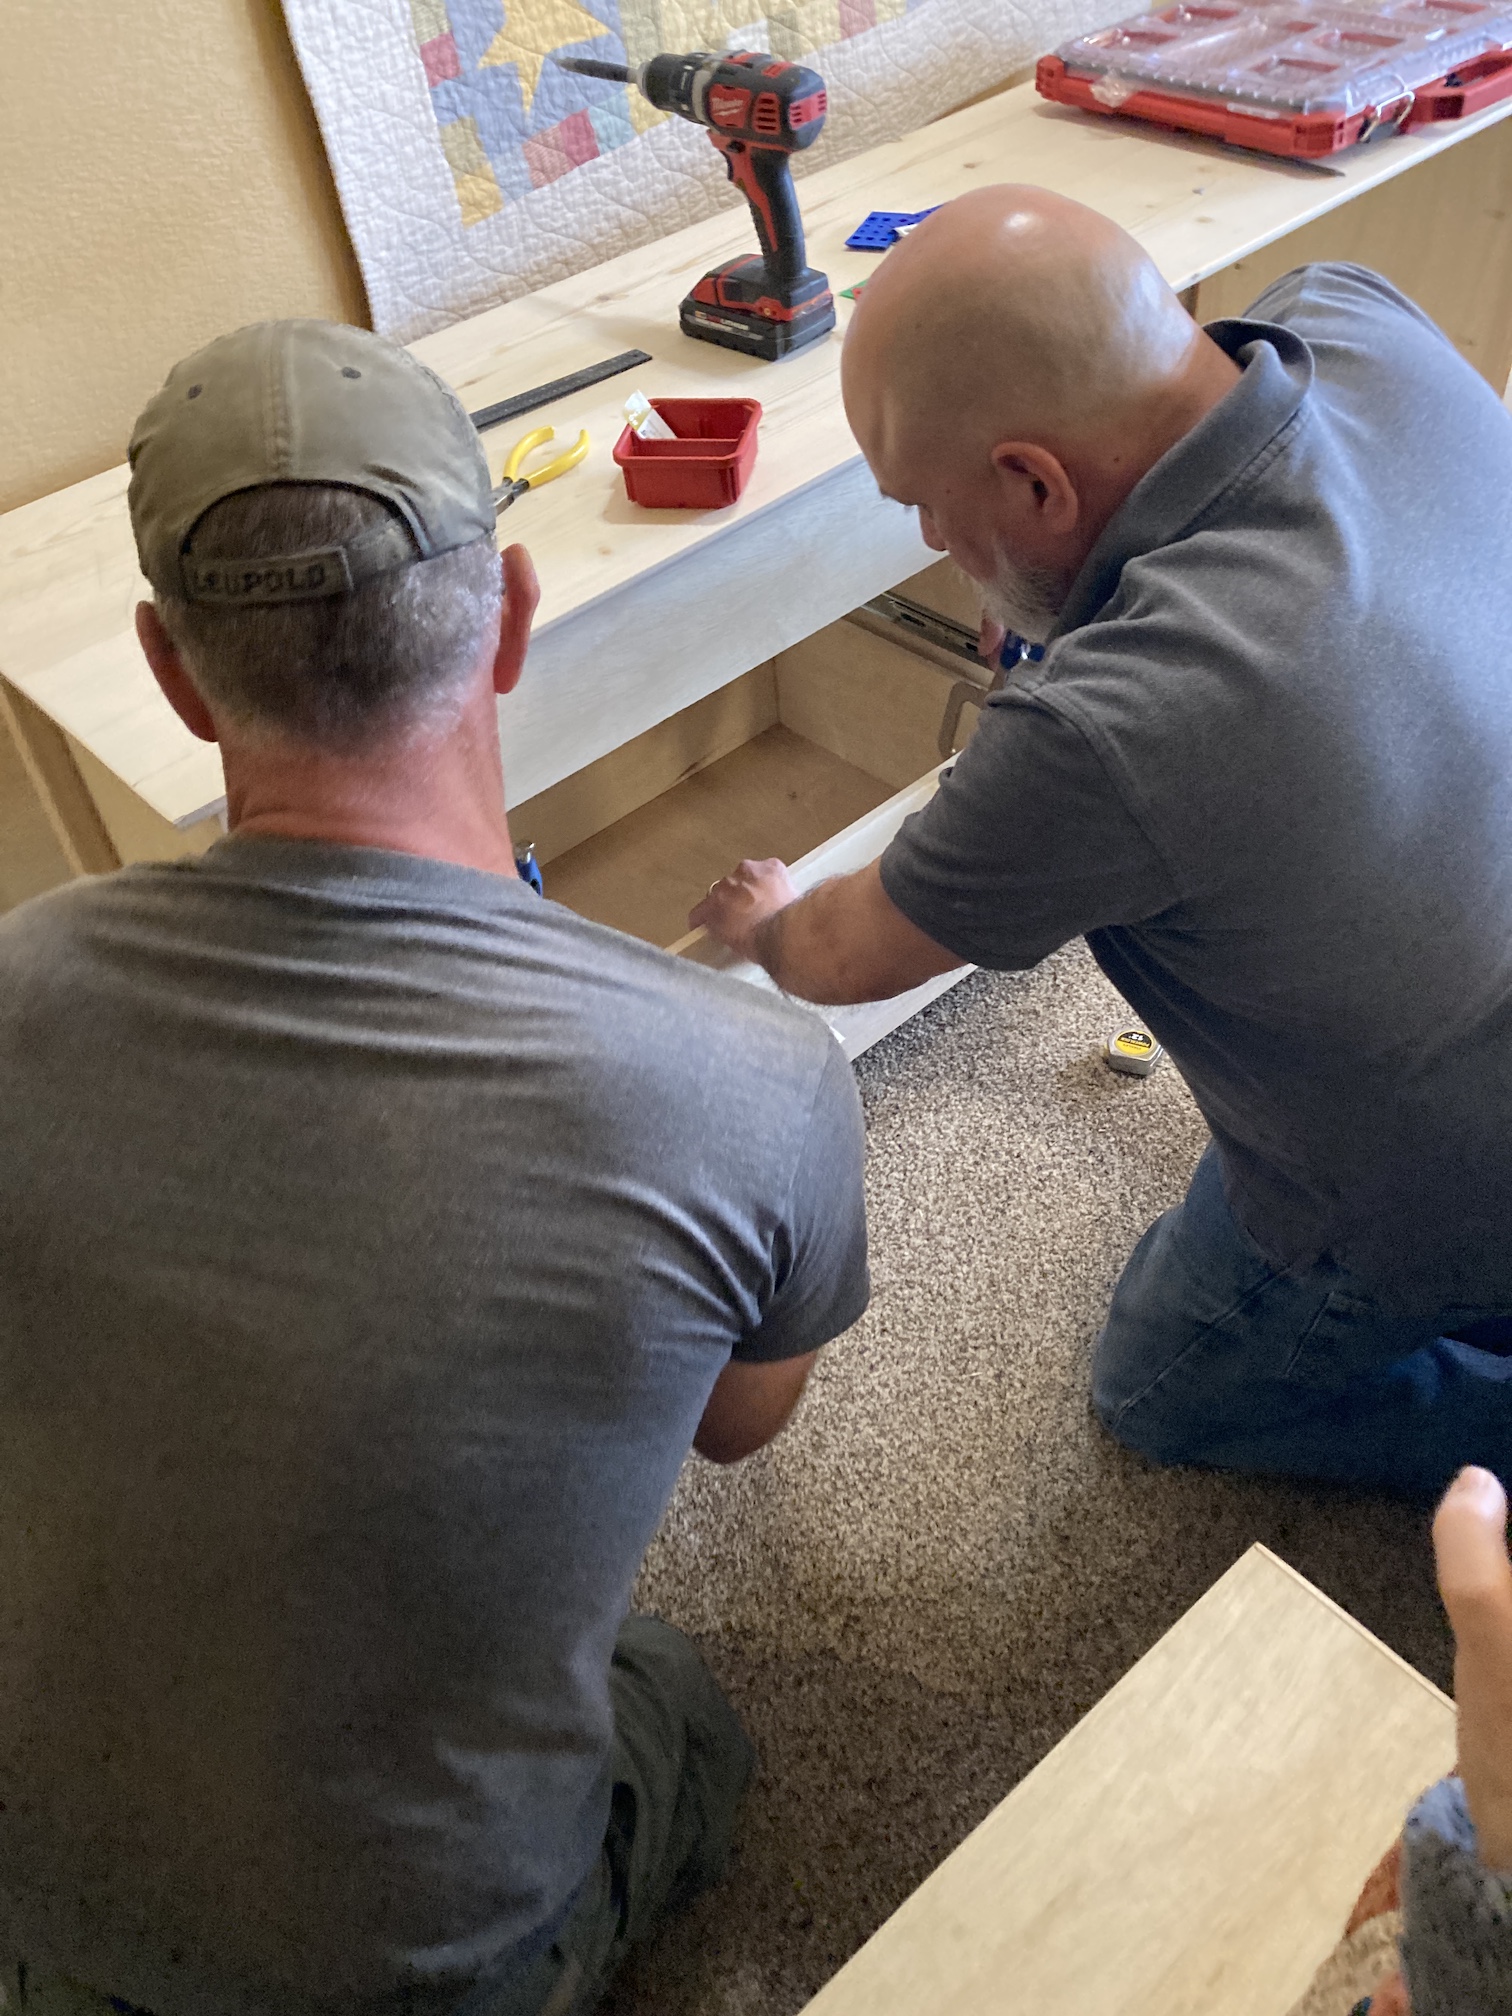
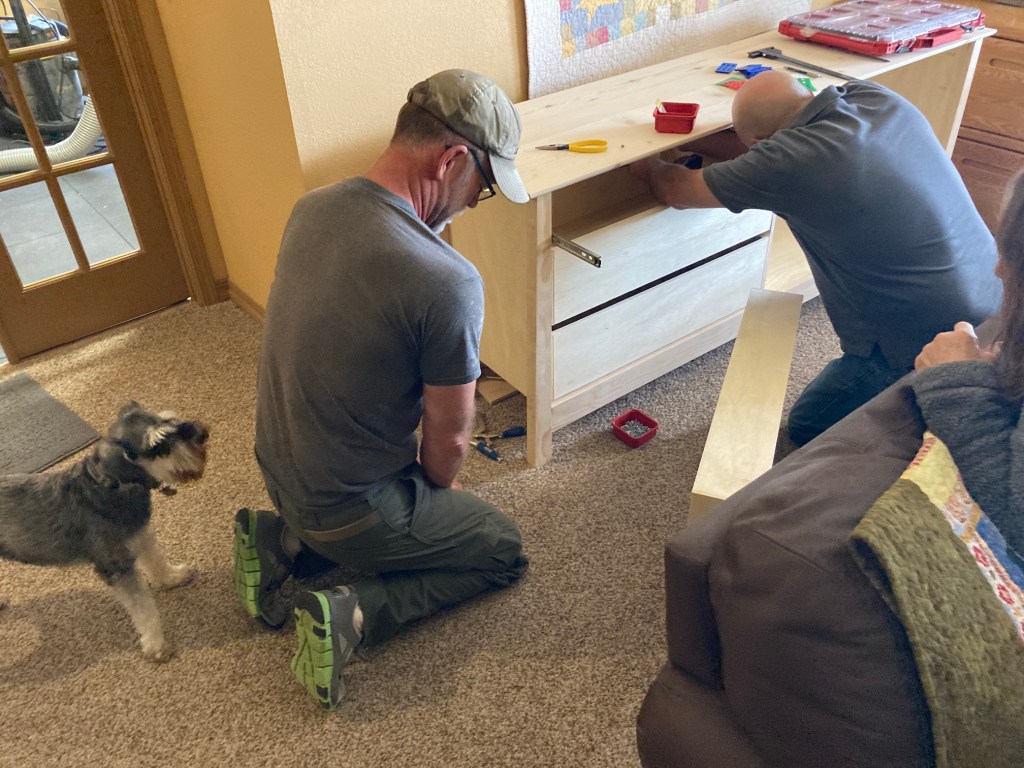
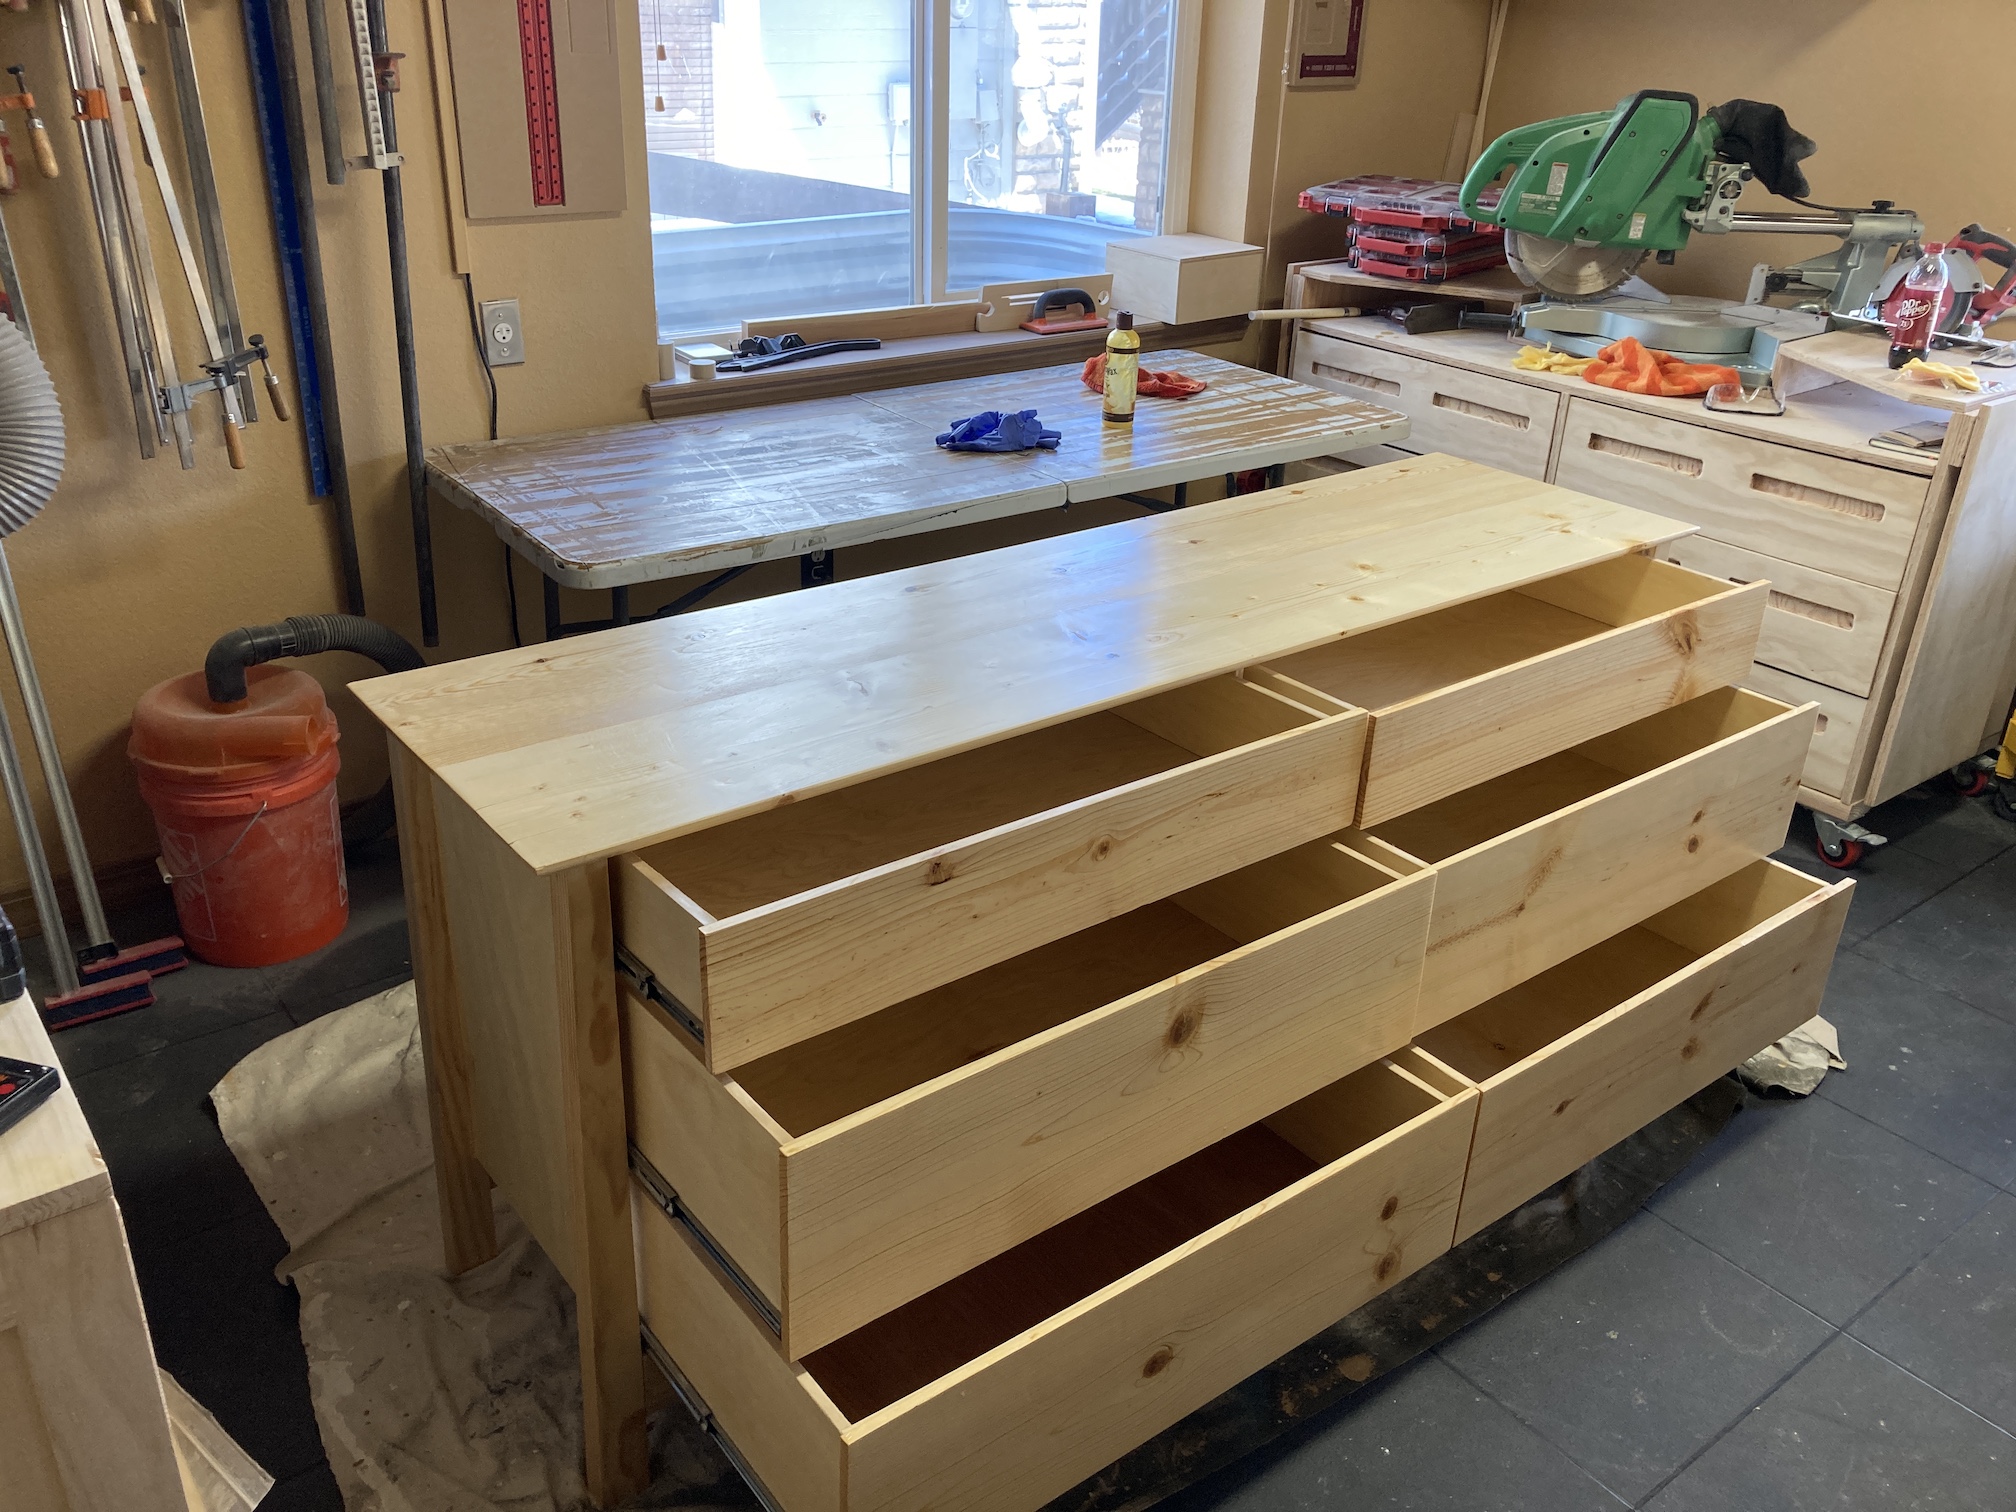
The first set of guests (Marla Jo and Jason) we used to help build a new dresser for our master bedroom. Actually Jason and my partner John worked on the dresser while Marla Jo and I sat around and binge watched television shows, snacked and chatted (yes, that was exhausting work!)
No we don’t just invite people to visit us and then use them for home projects. Jason is very handy (he does amazing builds and remodels) and enjoys working on projects. Also he wanted to learn how to make drawers and John has become very good at making drawers over the past year.
Here are photos from Jason and John working on our new dresser:
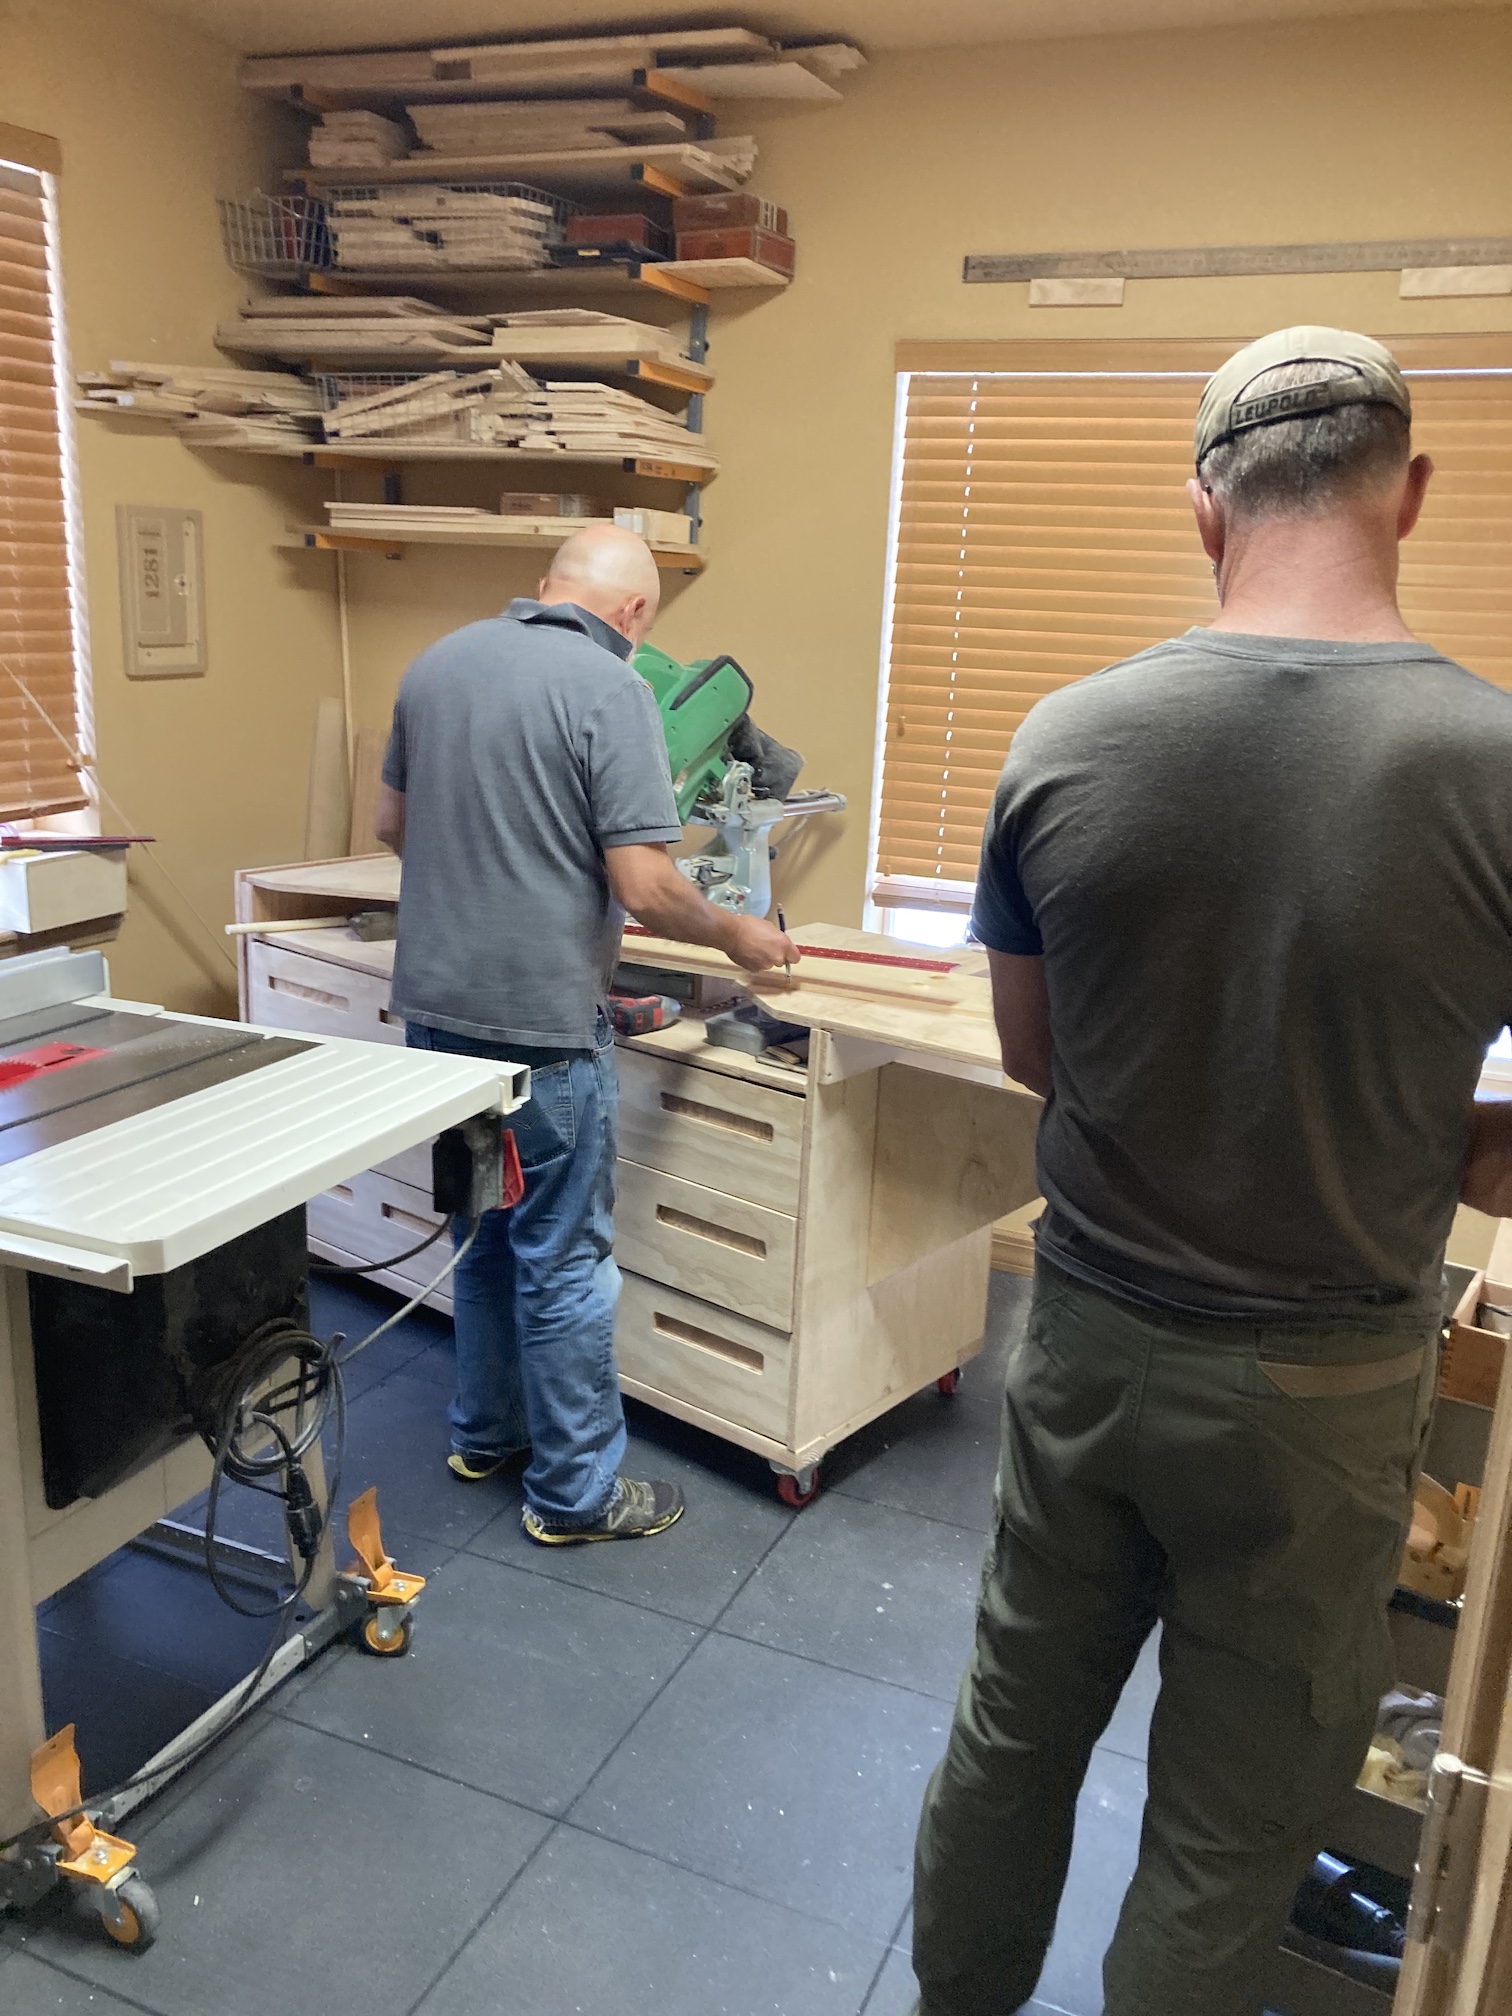
The boys had fun playing in John’s workshop in our basement:
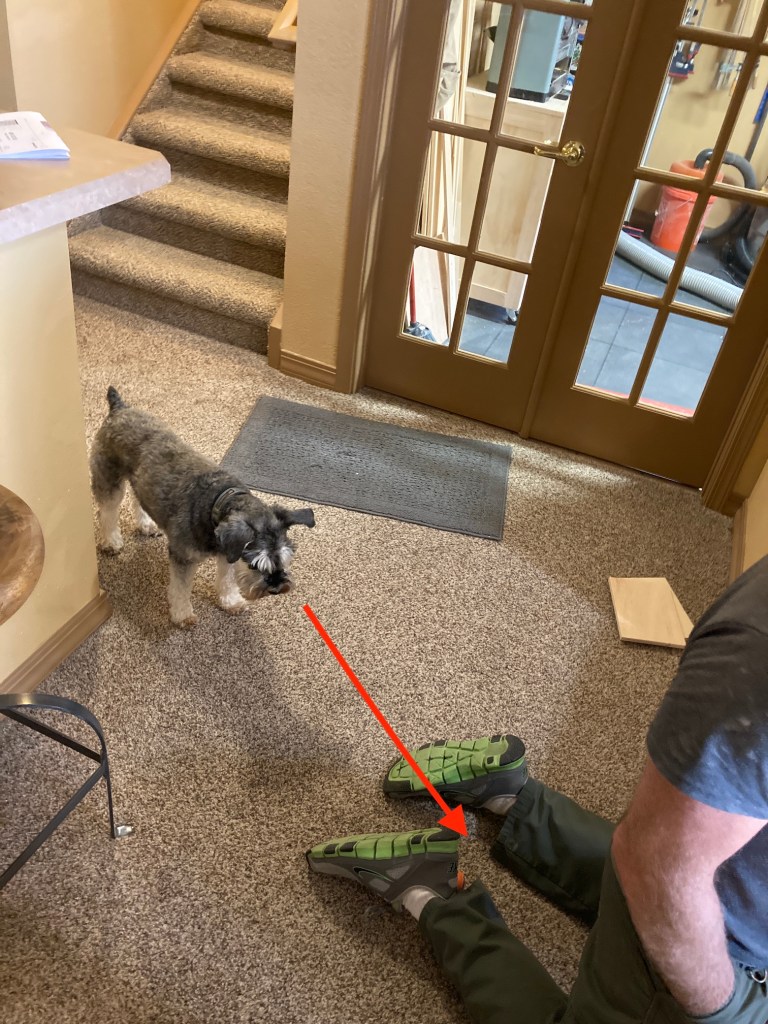
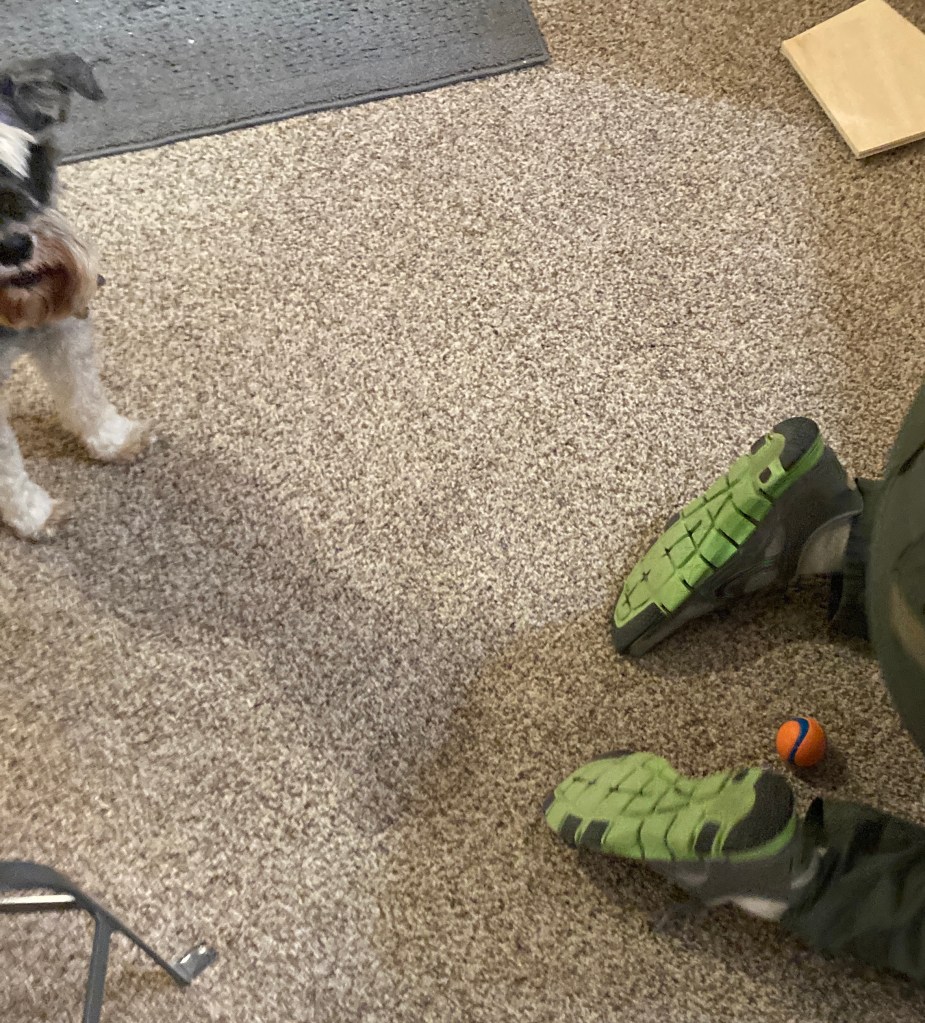
Mike the Miniature Schnauzer grew impatient as his Jason (Marla Jo and Jason used to be Mike’s babysitters when I lived in Oregon and went out of town) was ignoring him and not playing ball with him (Mike felt Jason should have been able to multitask, ha!)
So Mike kept tossing his ball between the back of Jason’s legs while Jason worked on the dresser.
We did actually take them sightseeing as well as out to a nice meal during their visit; and even visited with them. But most of their visit the boys did work on the dresser.
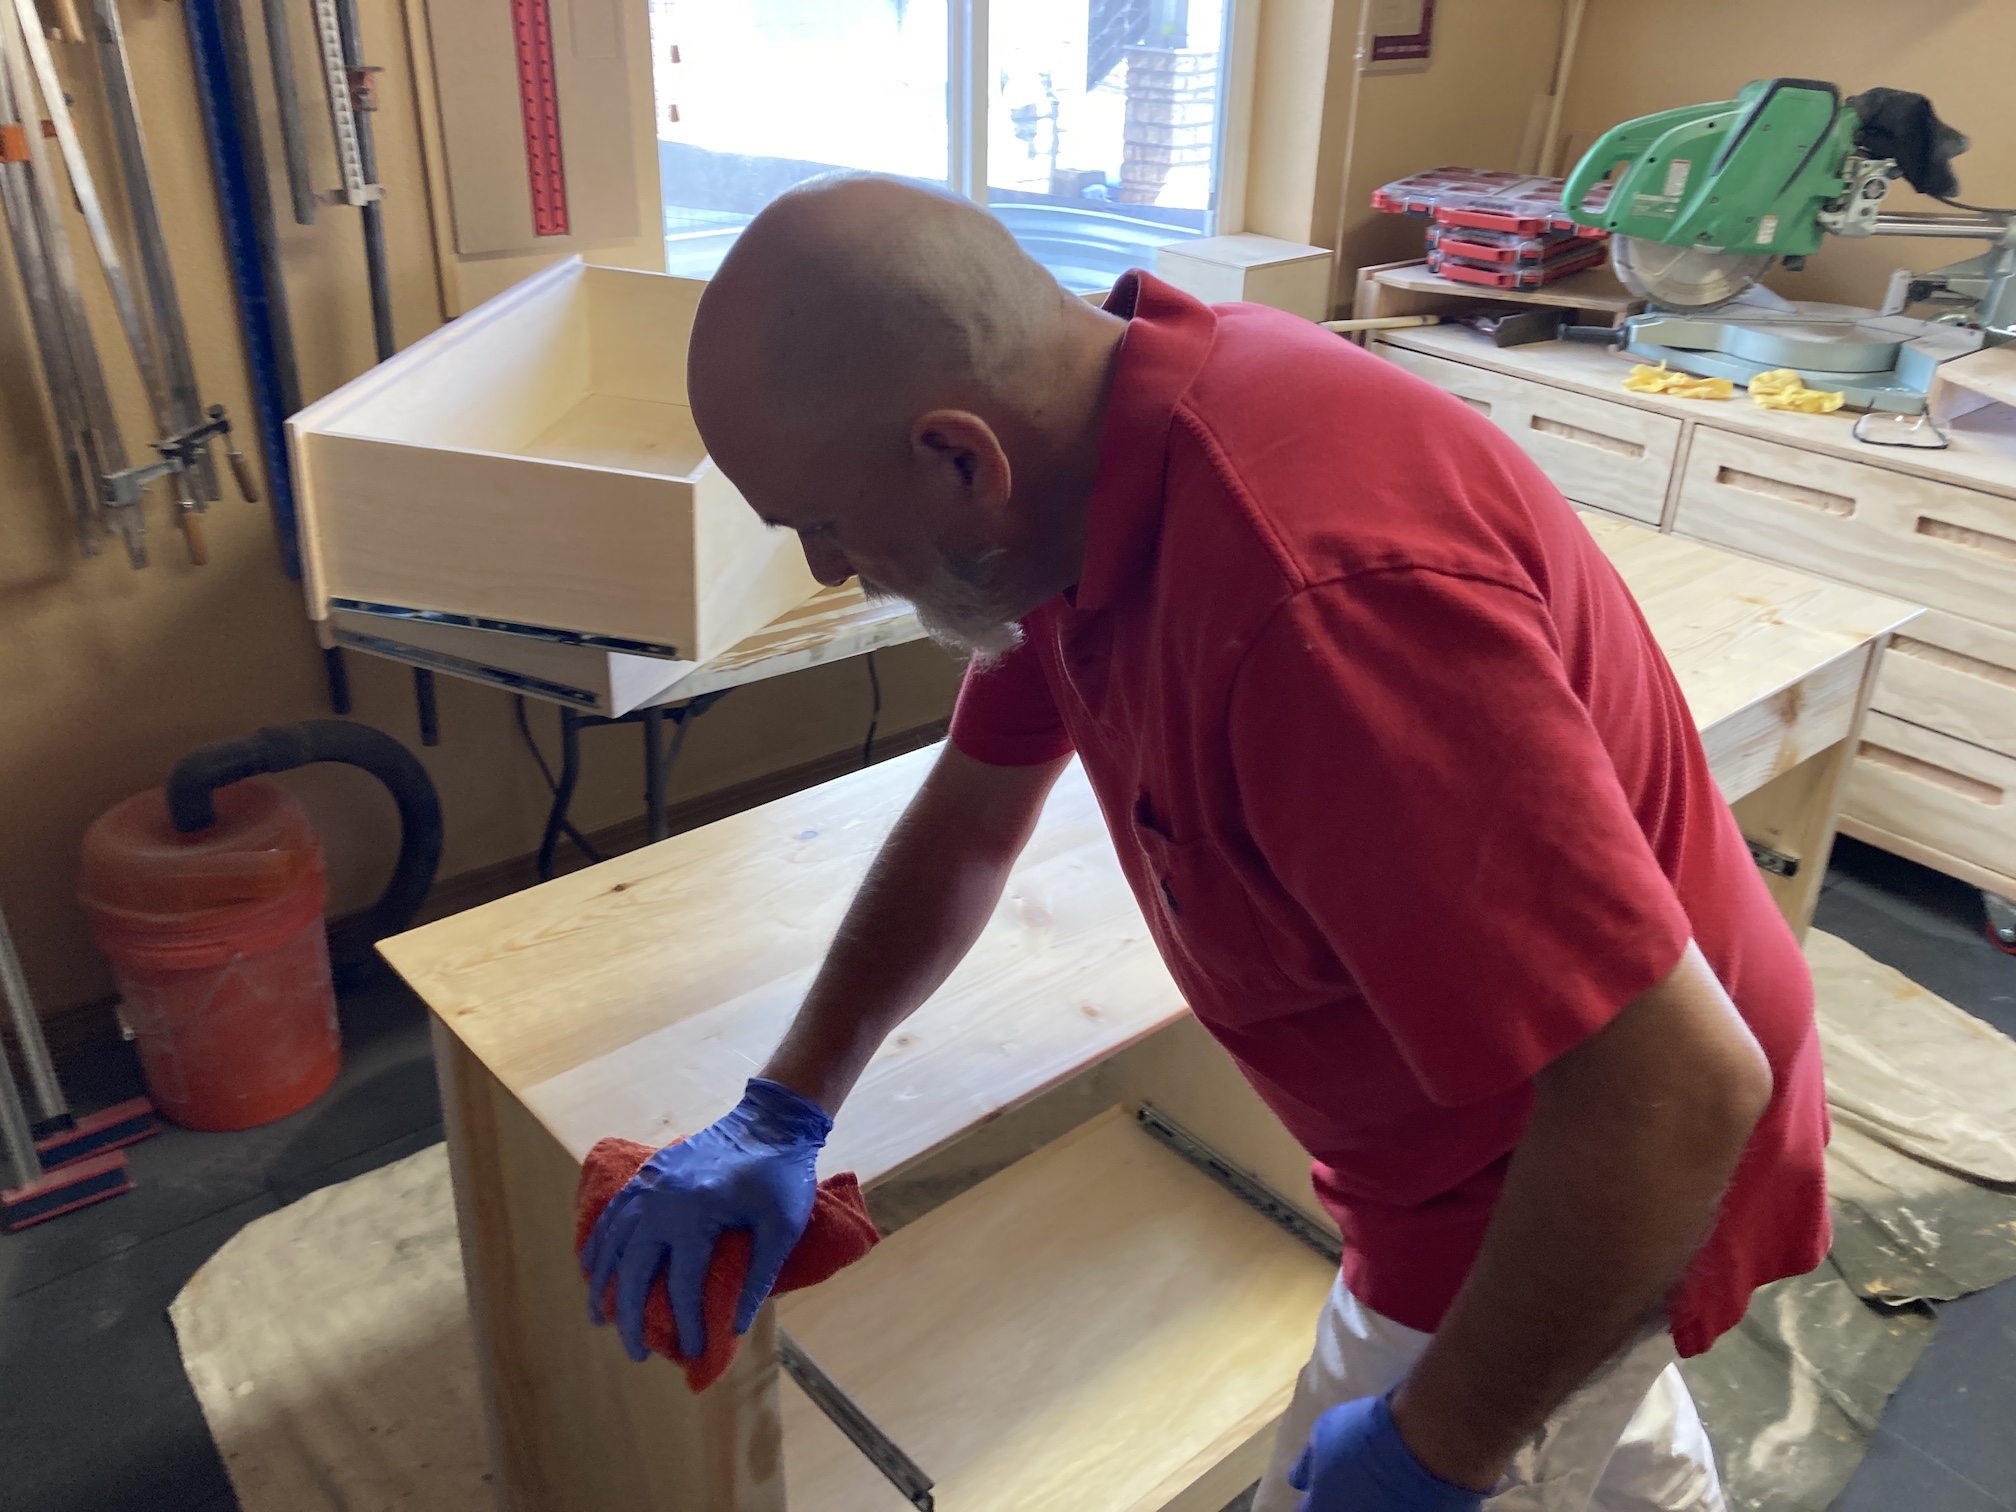
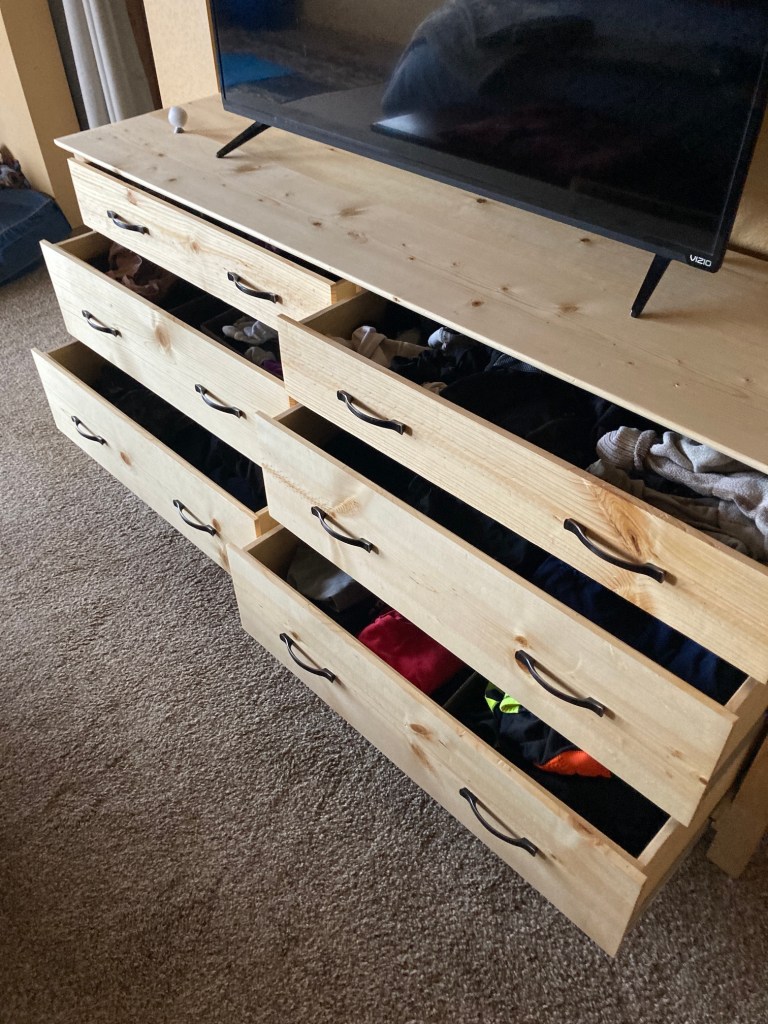
After they left to return to Oregon, John completed the dresser on his own and finished it with a beeswax and mineral oil mix that Jason recommended.
And here is the finished dresser in our master bedroom that two important men in my life worked on:
It was very exciting to put my clothes in it!
Postscript
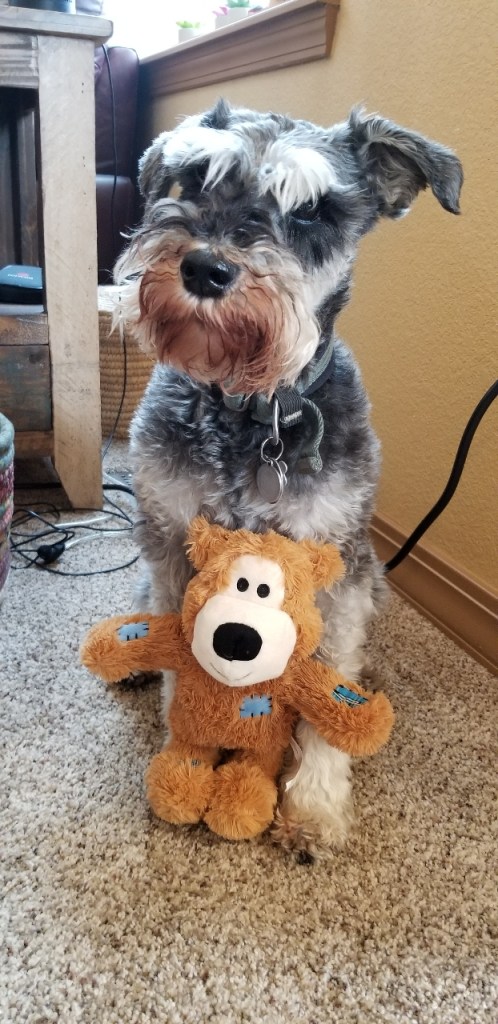
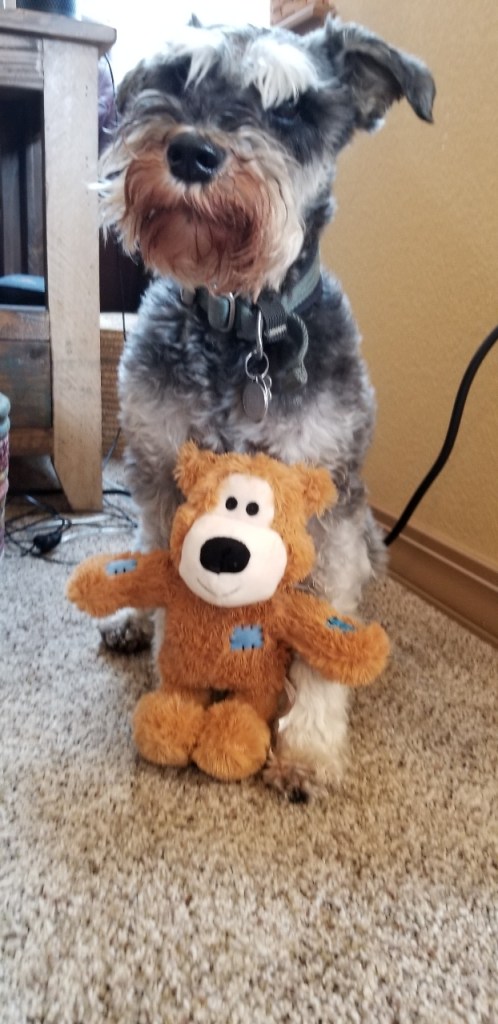
Marla Jo and Jason are family to me and they have embraced my partner John. Jason drove my stuff 1200 miles from Oregon to Colorado when I relocated in April 2019 after my husband died in December 2018. They were both there on the most awful day of my life and watched my dog Mike when I traveled to see family and friends after my terrible loss.
They are very happy to see me in my life now and to also see that Mike the Miniature Schnauzer is doing so well. Jason took these adorable photos of Mike, posed with his favorite toy – “Beary”- during their visit:
Tierney is on vacation and she’ll tell you about her trip when she gets back. So I am going to step in and be the guest blogger so she does not go too long without having a new post on her blog (I know, I know, I am so awesome for helping her!).
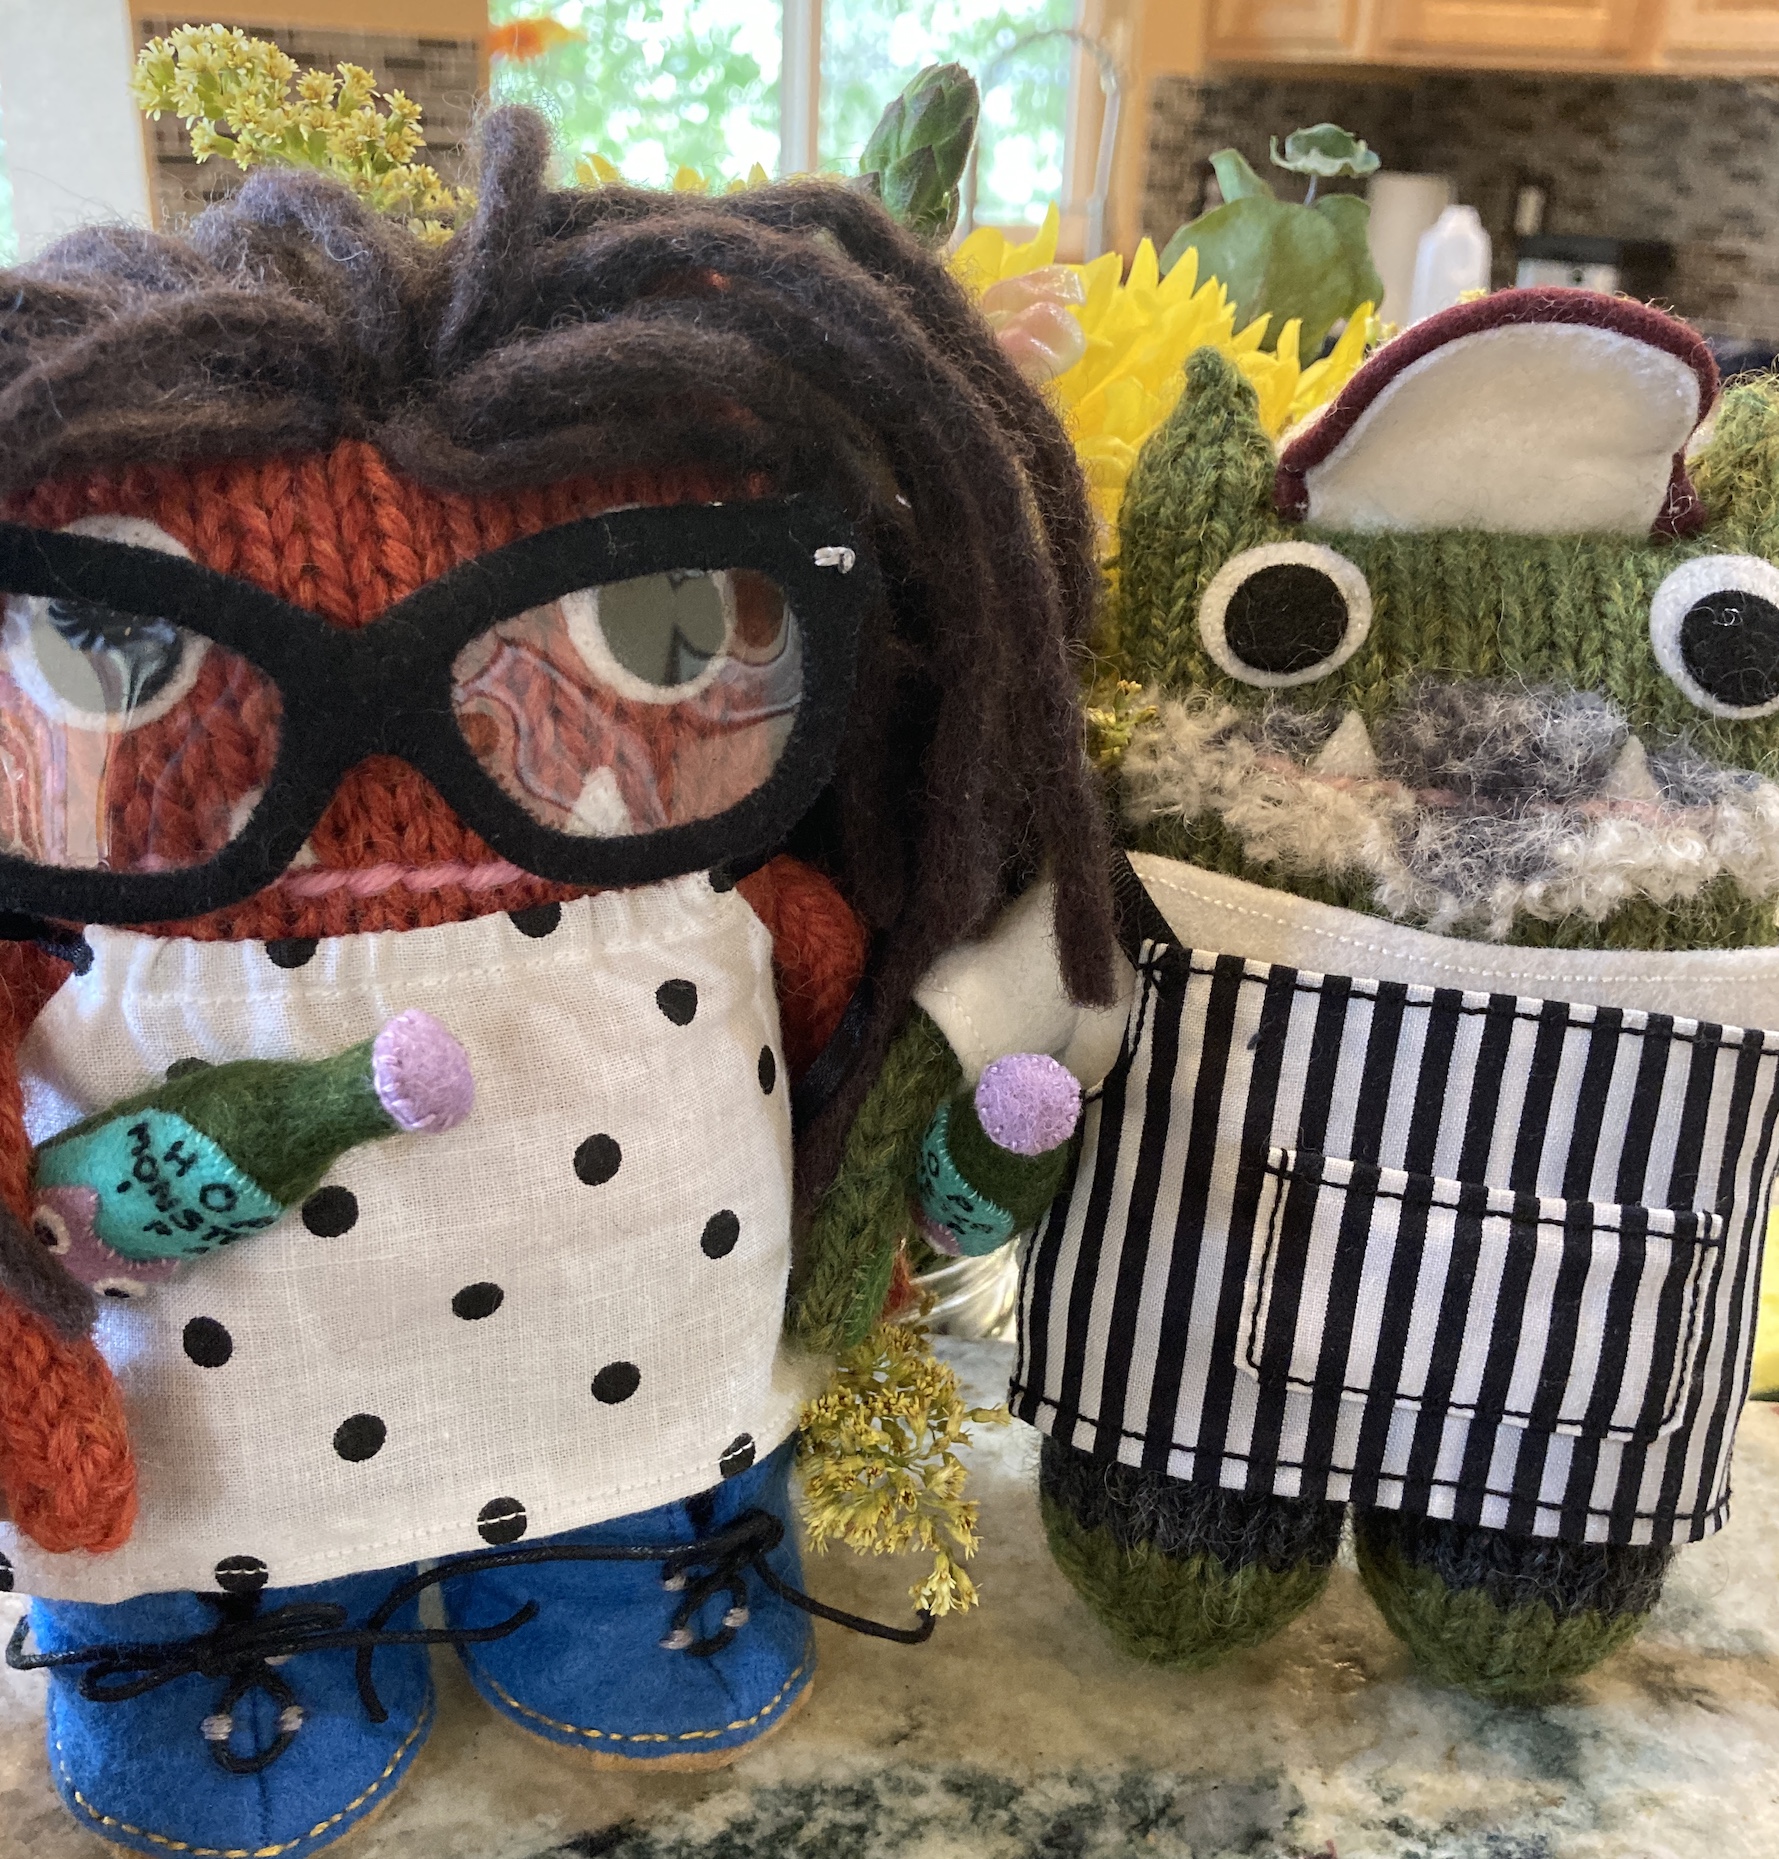
Oh in case you are new to this blog: my name is tierneycreates Beastie and I am a Monster, but the good kind of Monster. I was made by Helen of CrawCrafts Beasties in Dublin, Ireland. You can read my story at I’m A Monster!!!. You can also check out the other posts I’ve had to guest blog on (i.e. when the human Tierney falls off the blogging-wagon and I have to help) in the series of posts: Beastie Adventures.
A photo from last year of me writing a guest blog post
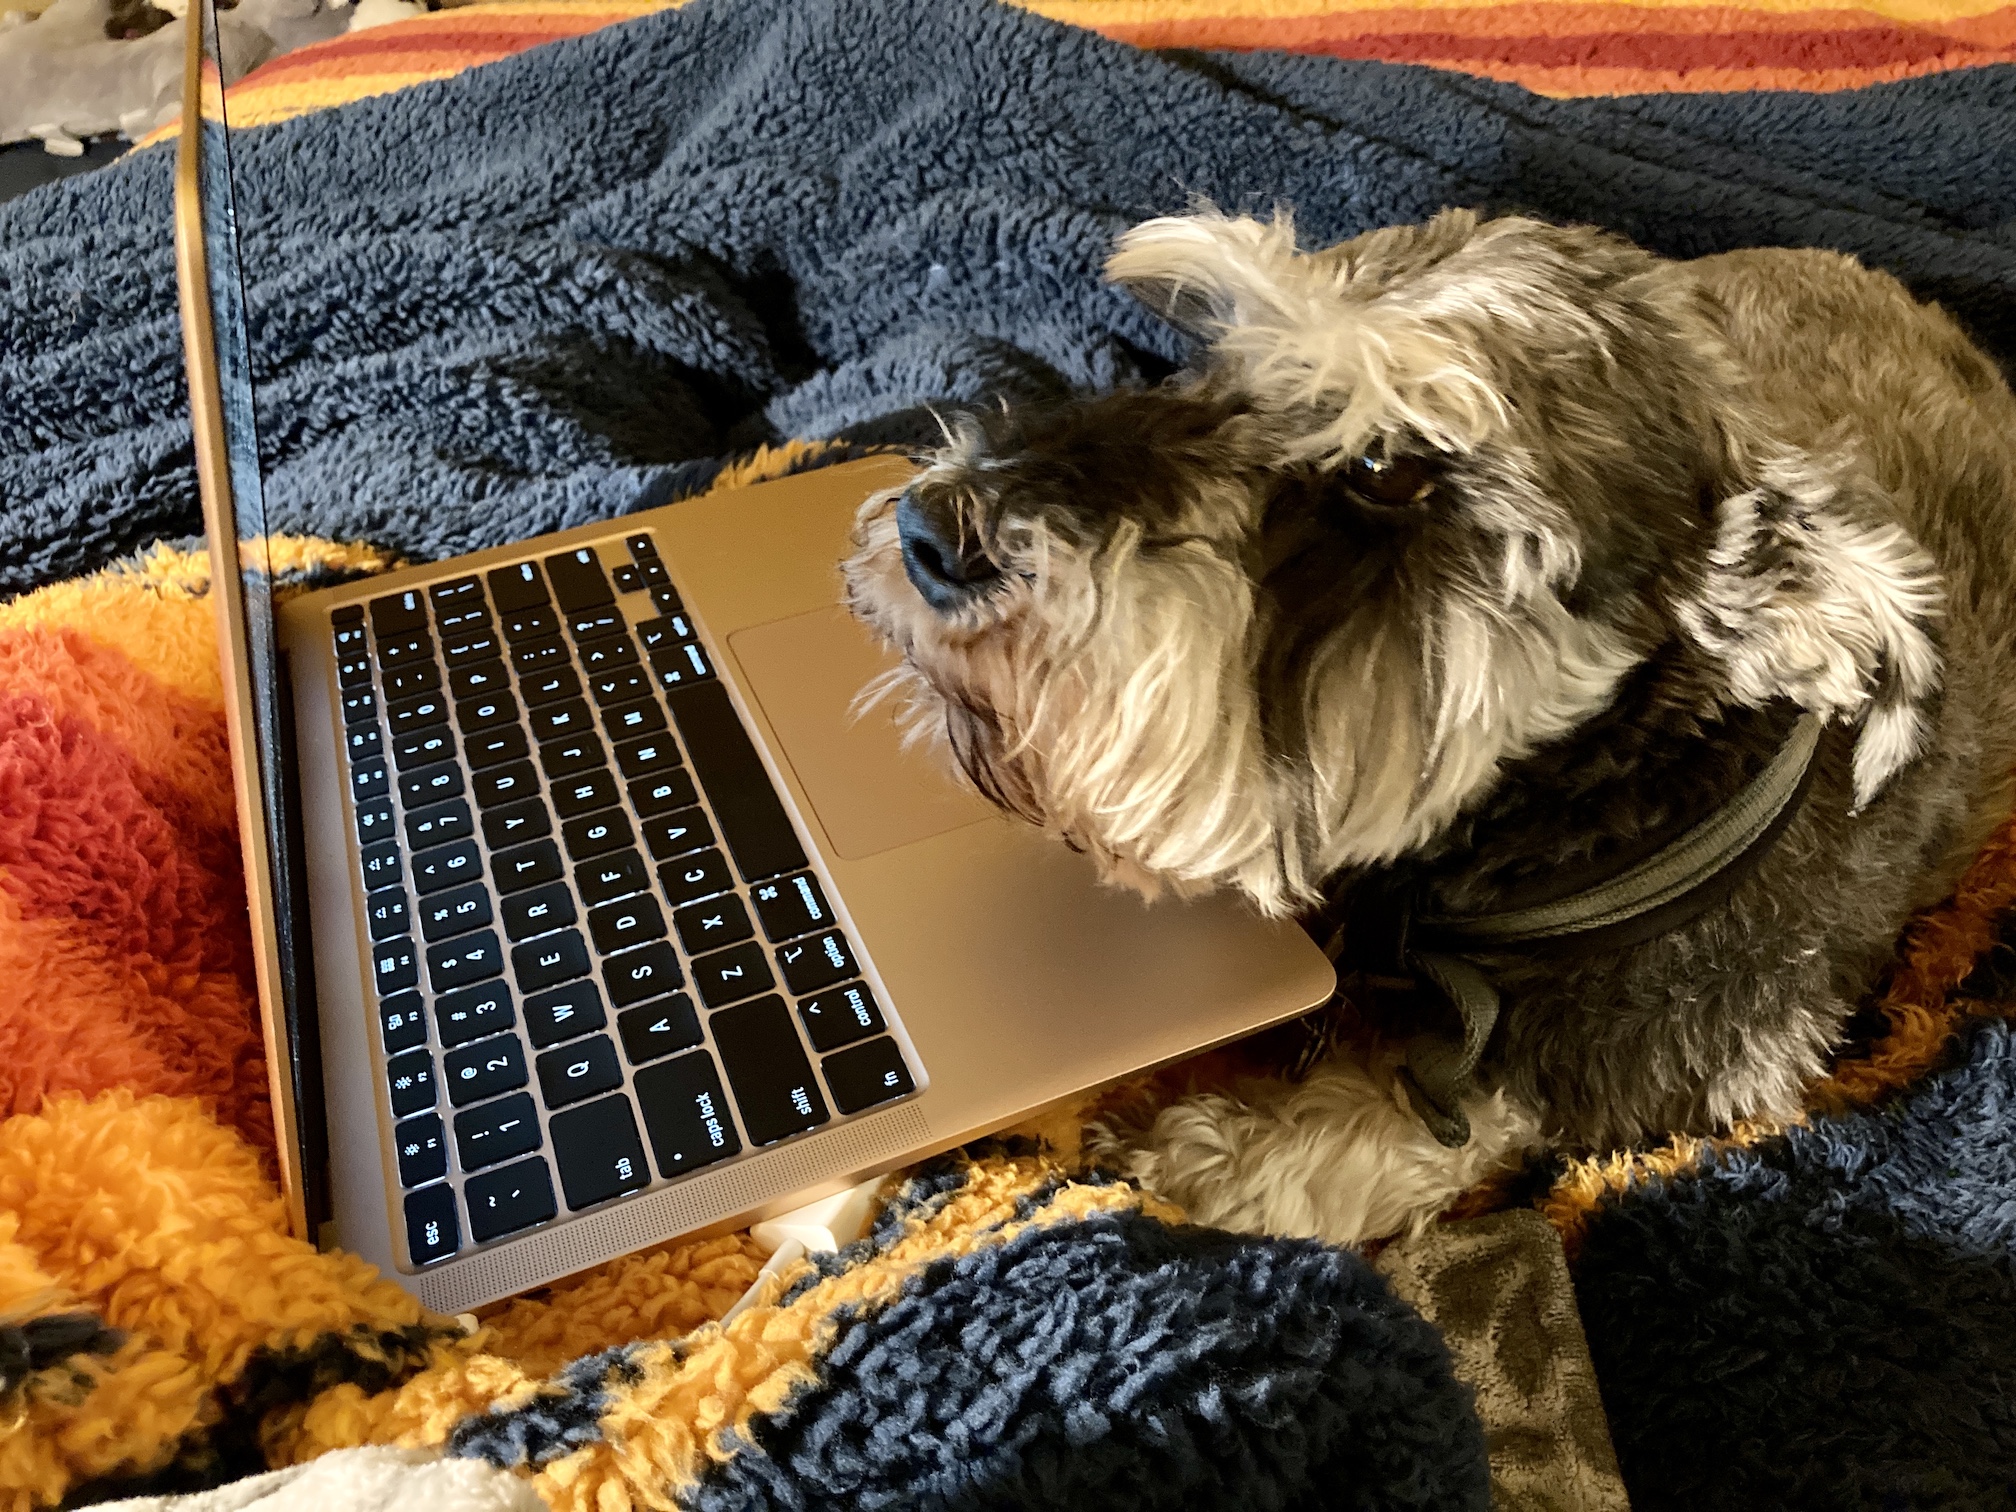
When I am not guest blogger posting, then Mike the Miniature Schnauzer has to guest blog post:
Someone else Tierney uses to do her work: Mike reviewing the draft of his guest post before posting…
Oh and now the subject of this post (which is not to just show how Tierney falls of the blogging wagon and we have to rescue her…) – I wanted to show you the recent updates to my home, which is also Tierney’s crafting studio.
Tierney’s partner John (human John, not to be confused with my Beastie fiancé “John Beastie”, see post Guest Blog Post: Mail Order Groom) has been busy in his Woodshop making things for her studio.
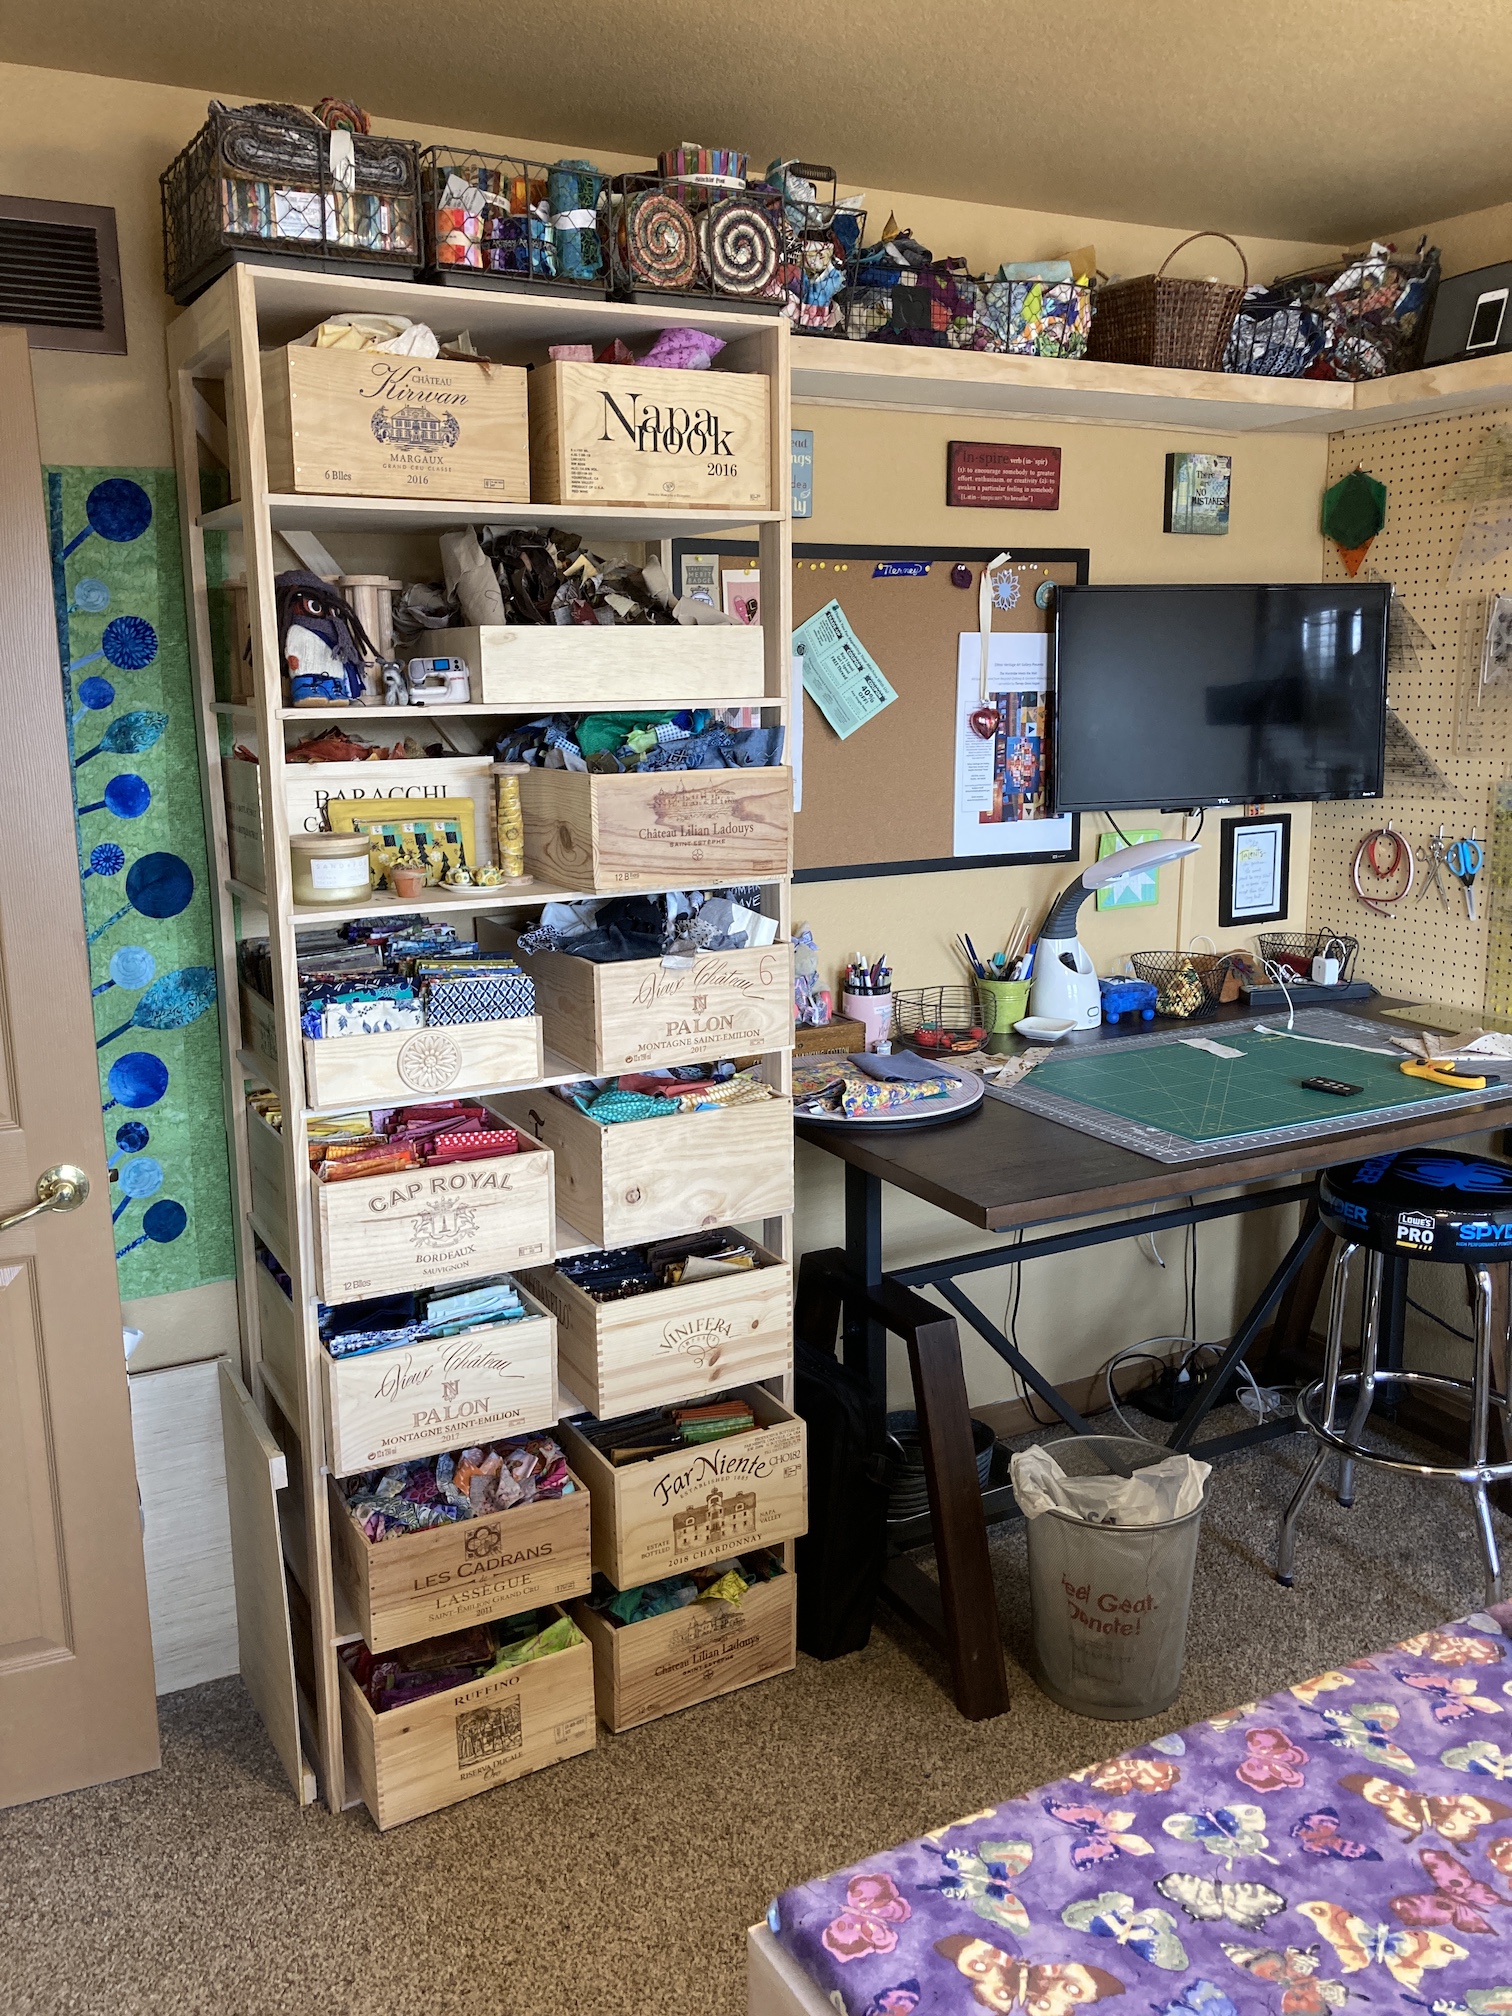
MY NEW “HIGH RISE“
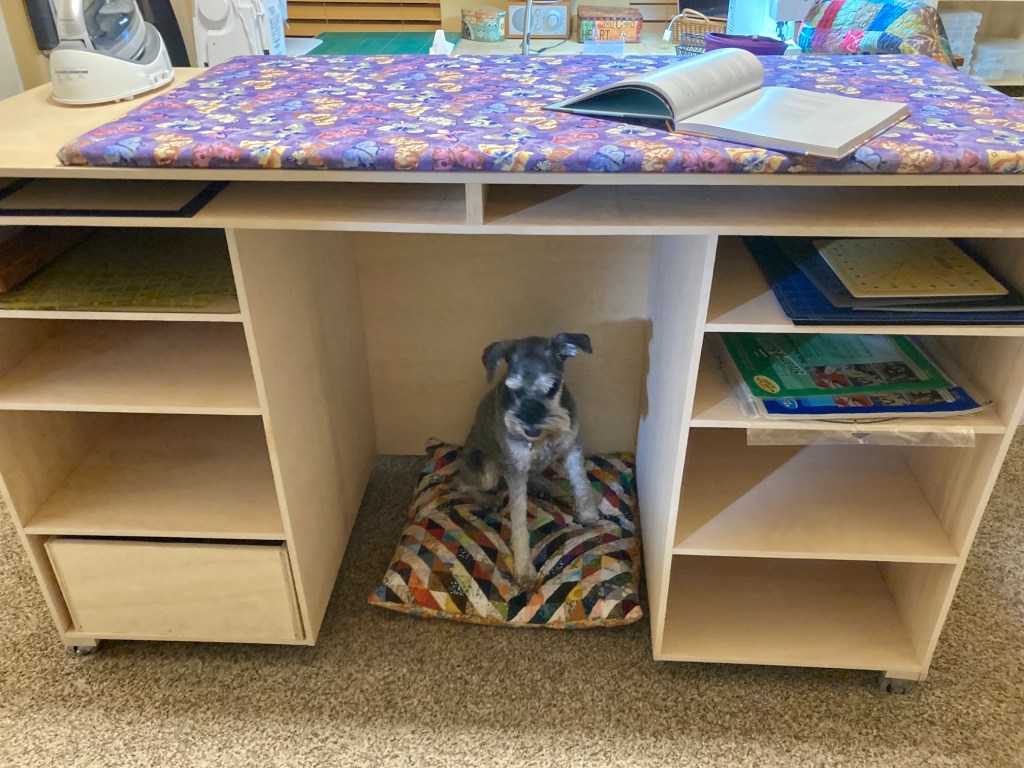
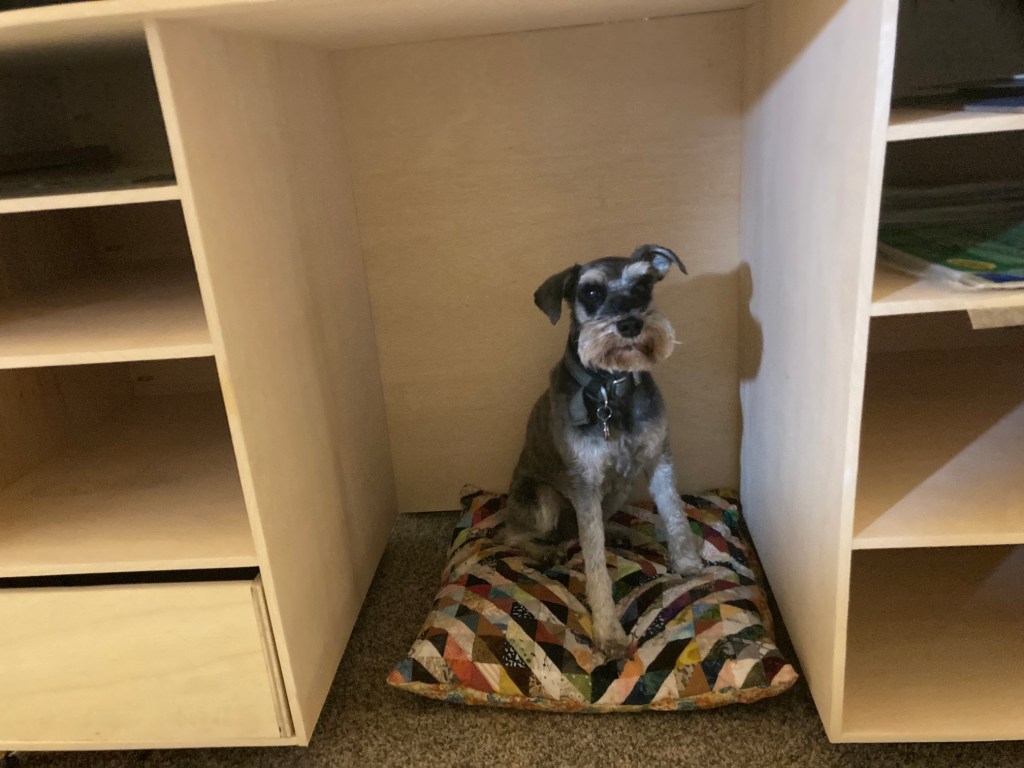
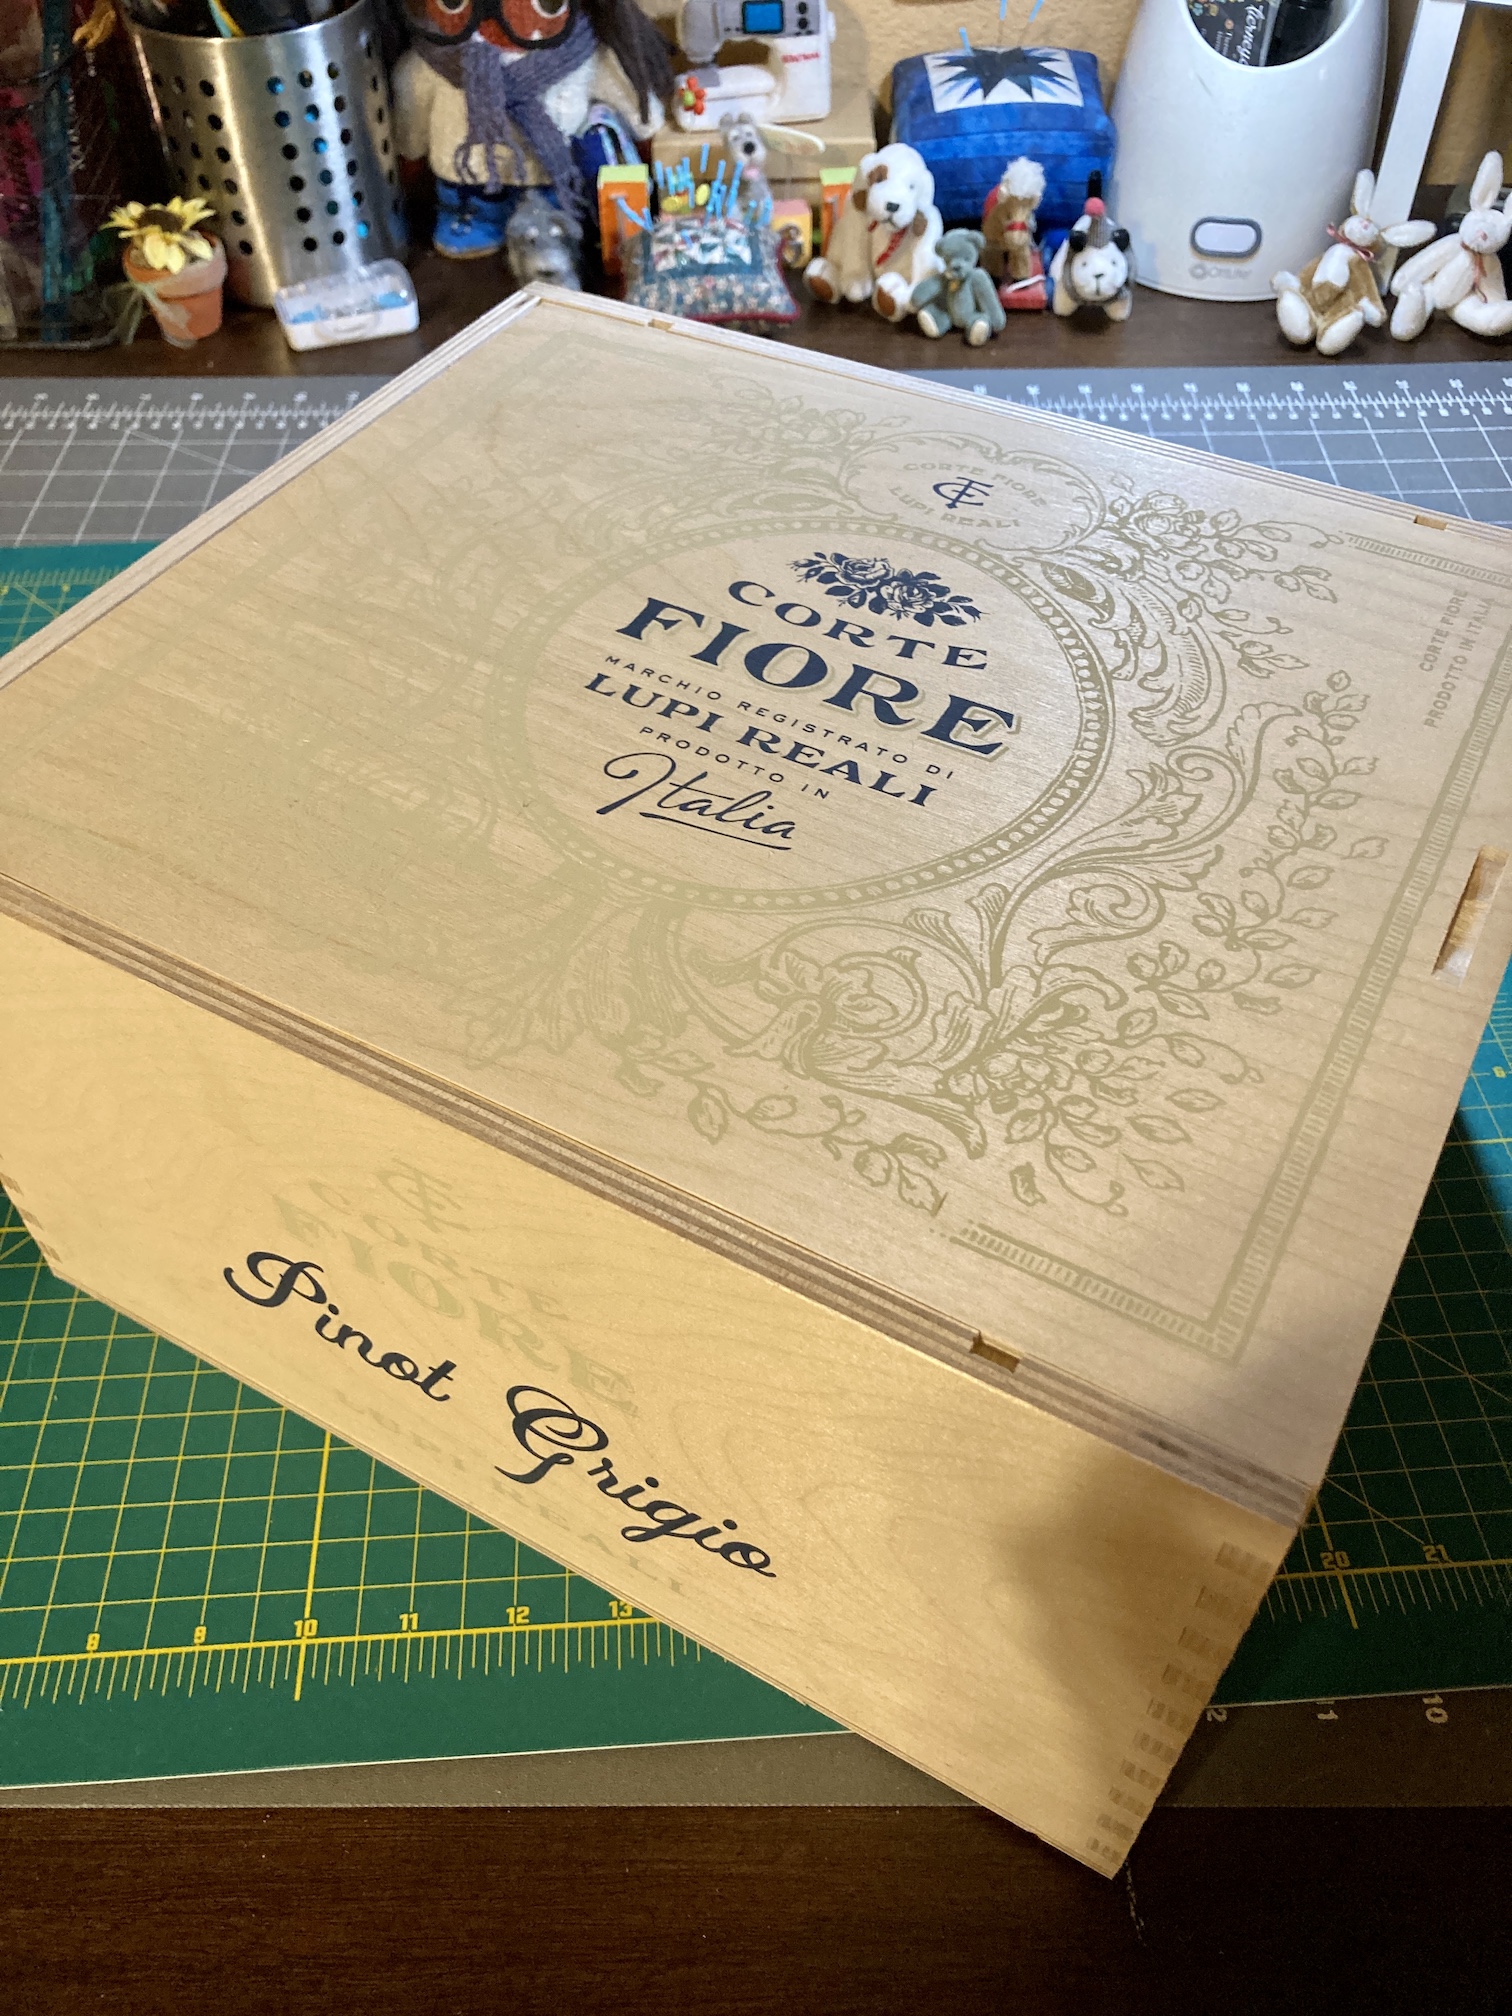
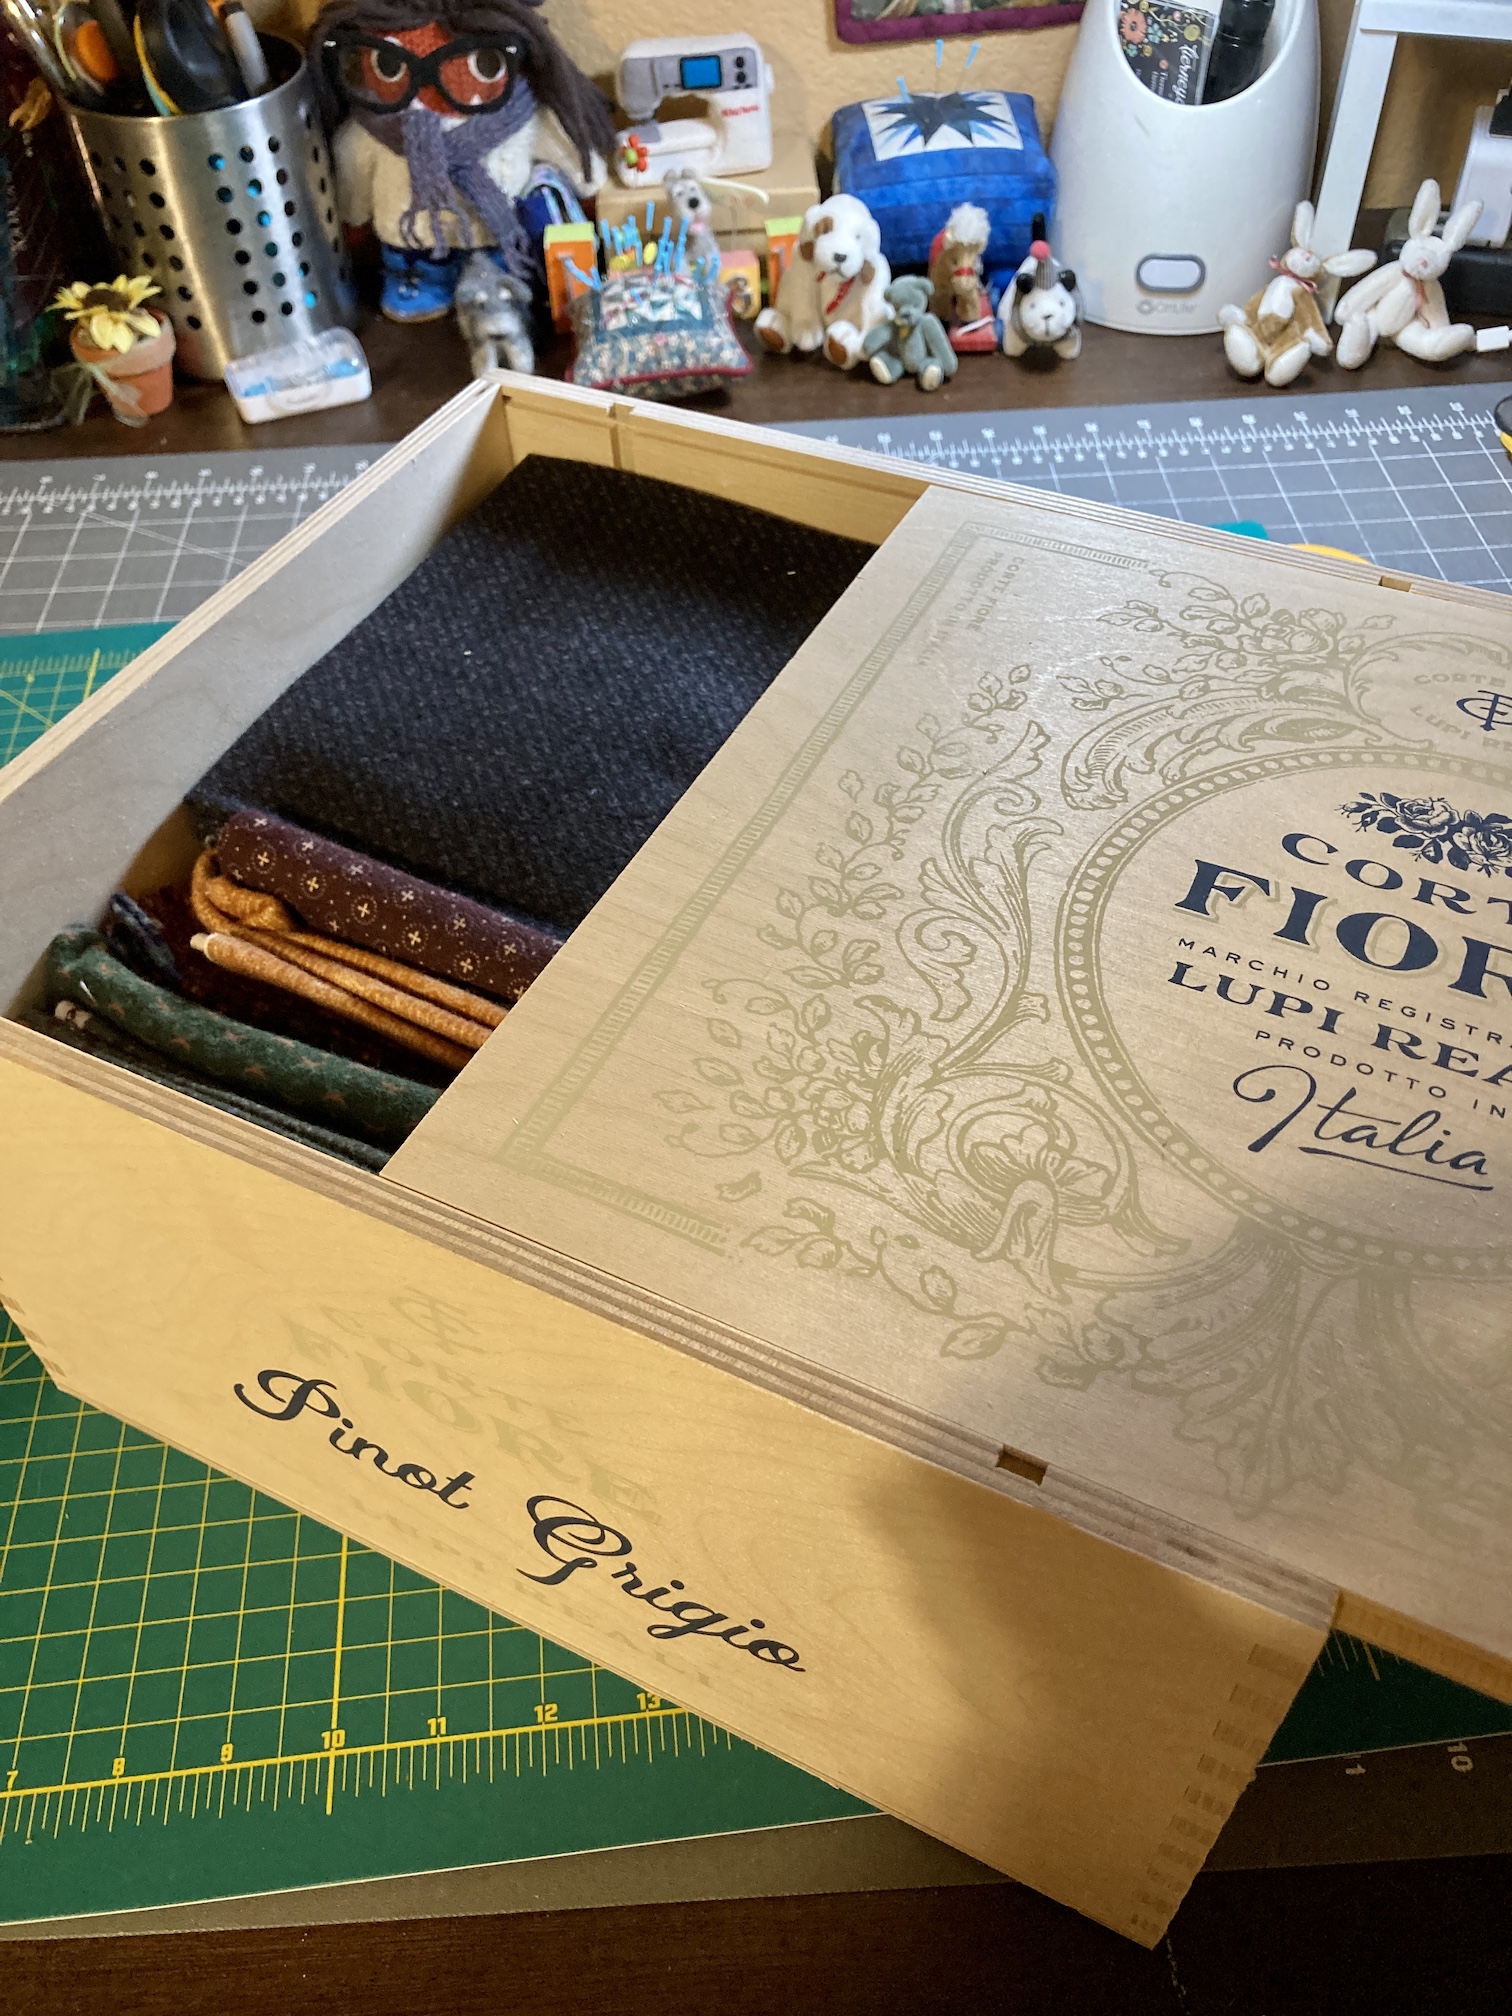
Human John built Tierney a storage unit for her fat quarter collection and fabric scraps which she keeps in wine crates:
She’s also been known to store a Miniature Schnauzer in there:
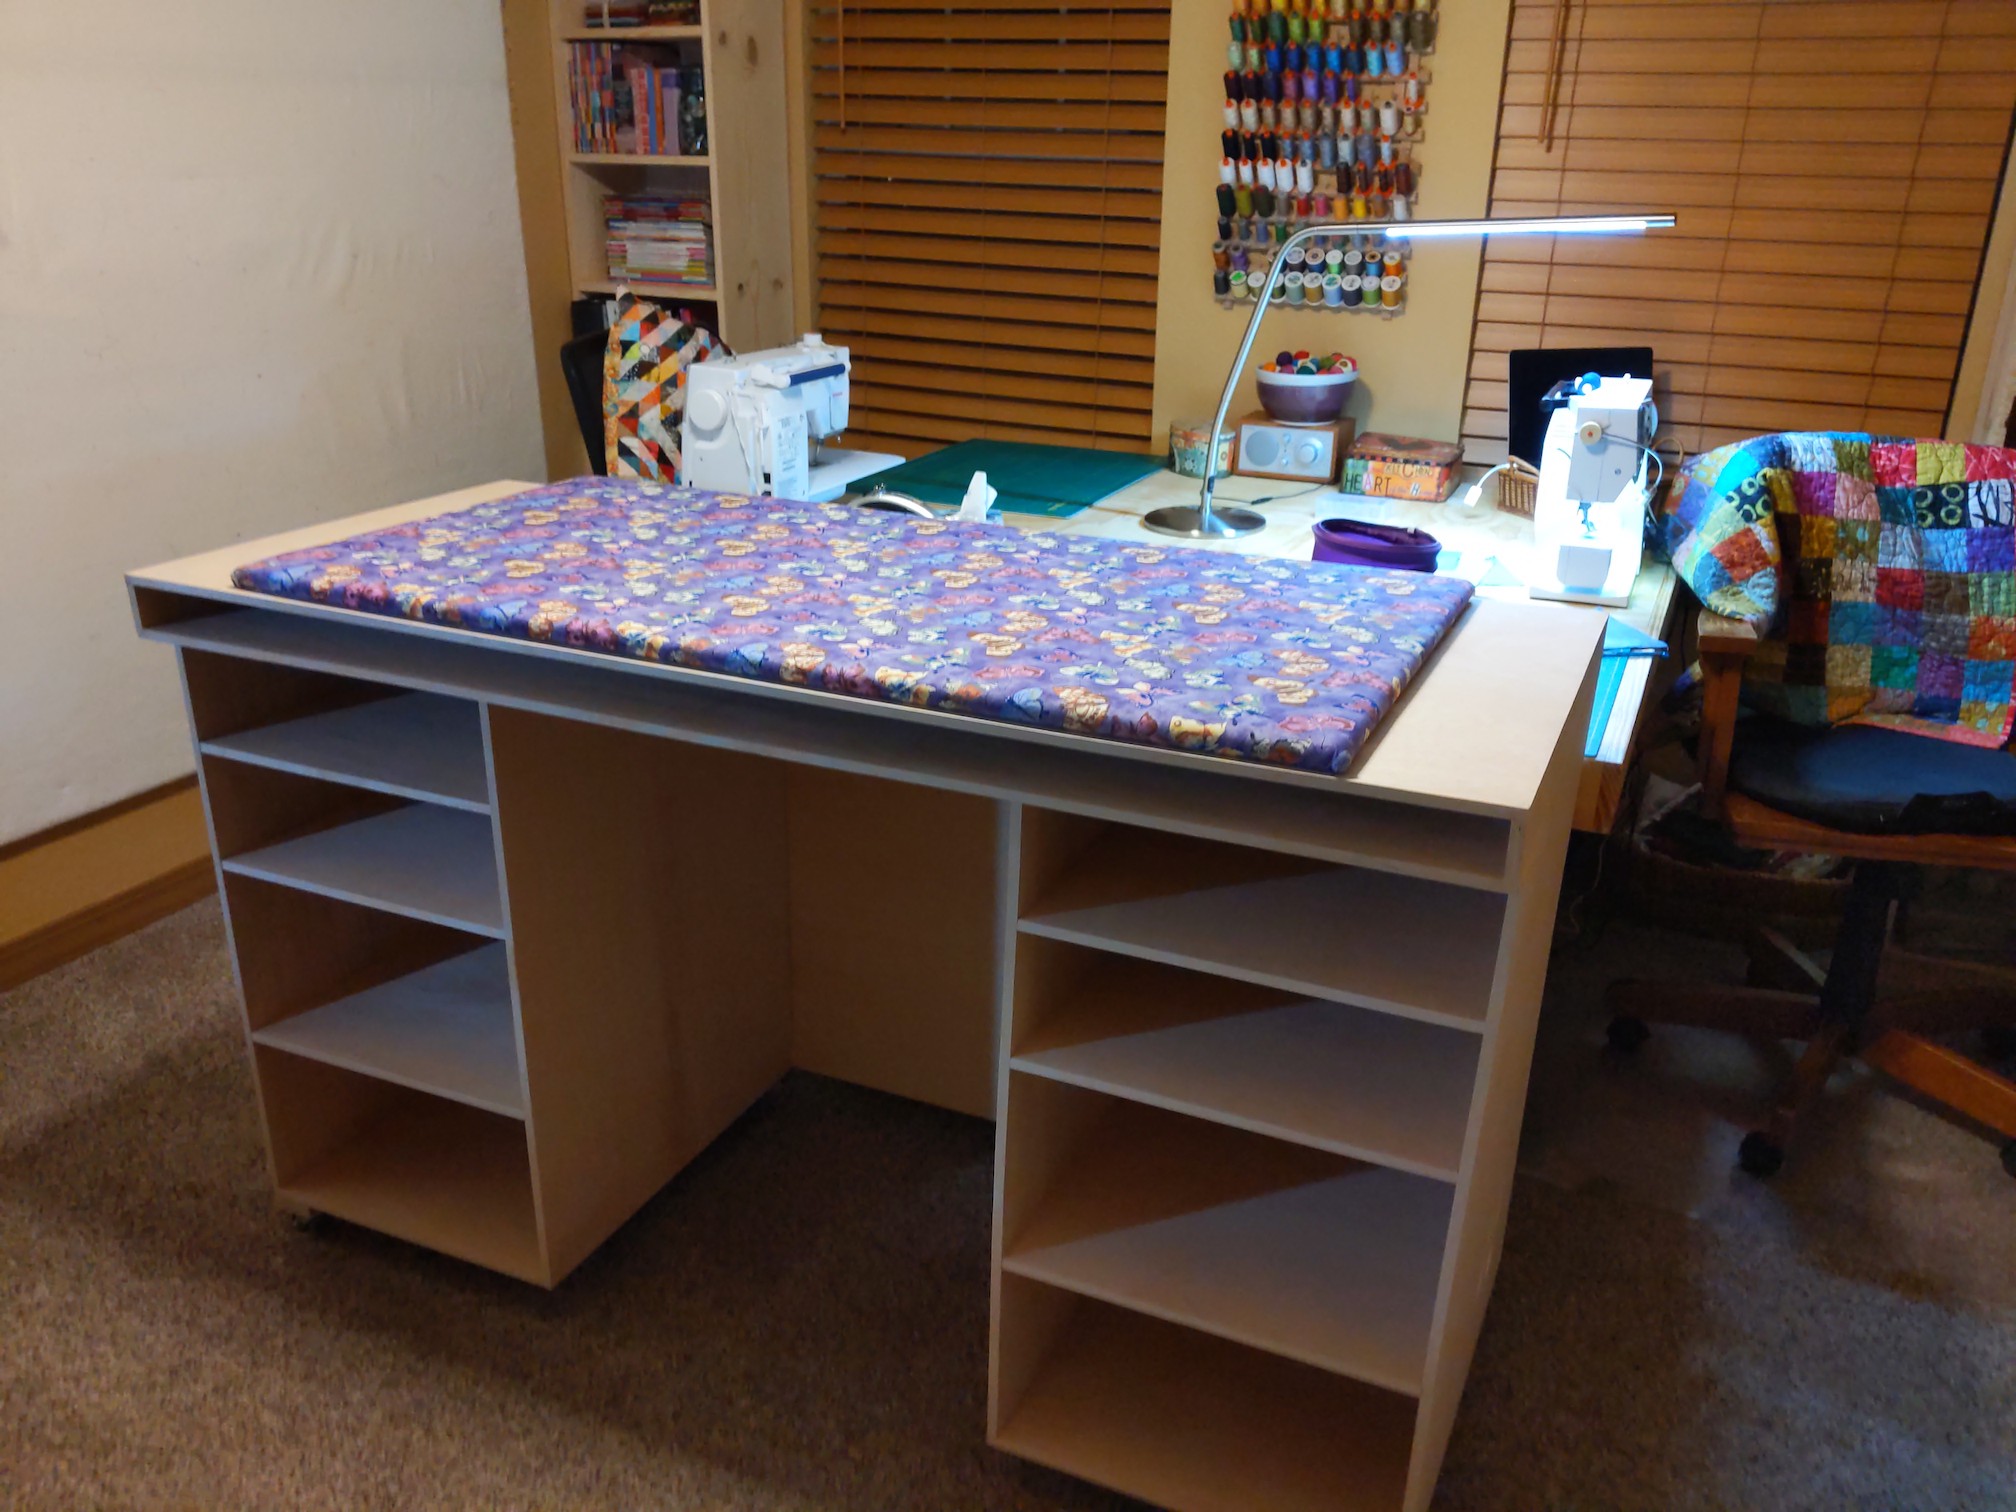
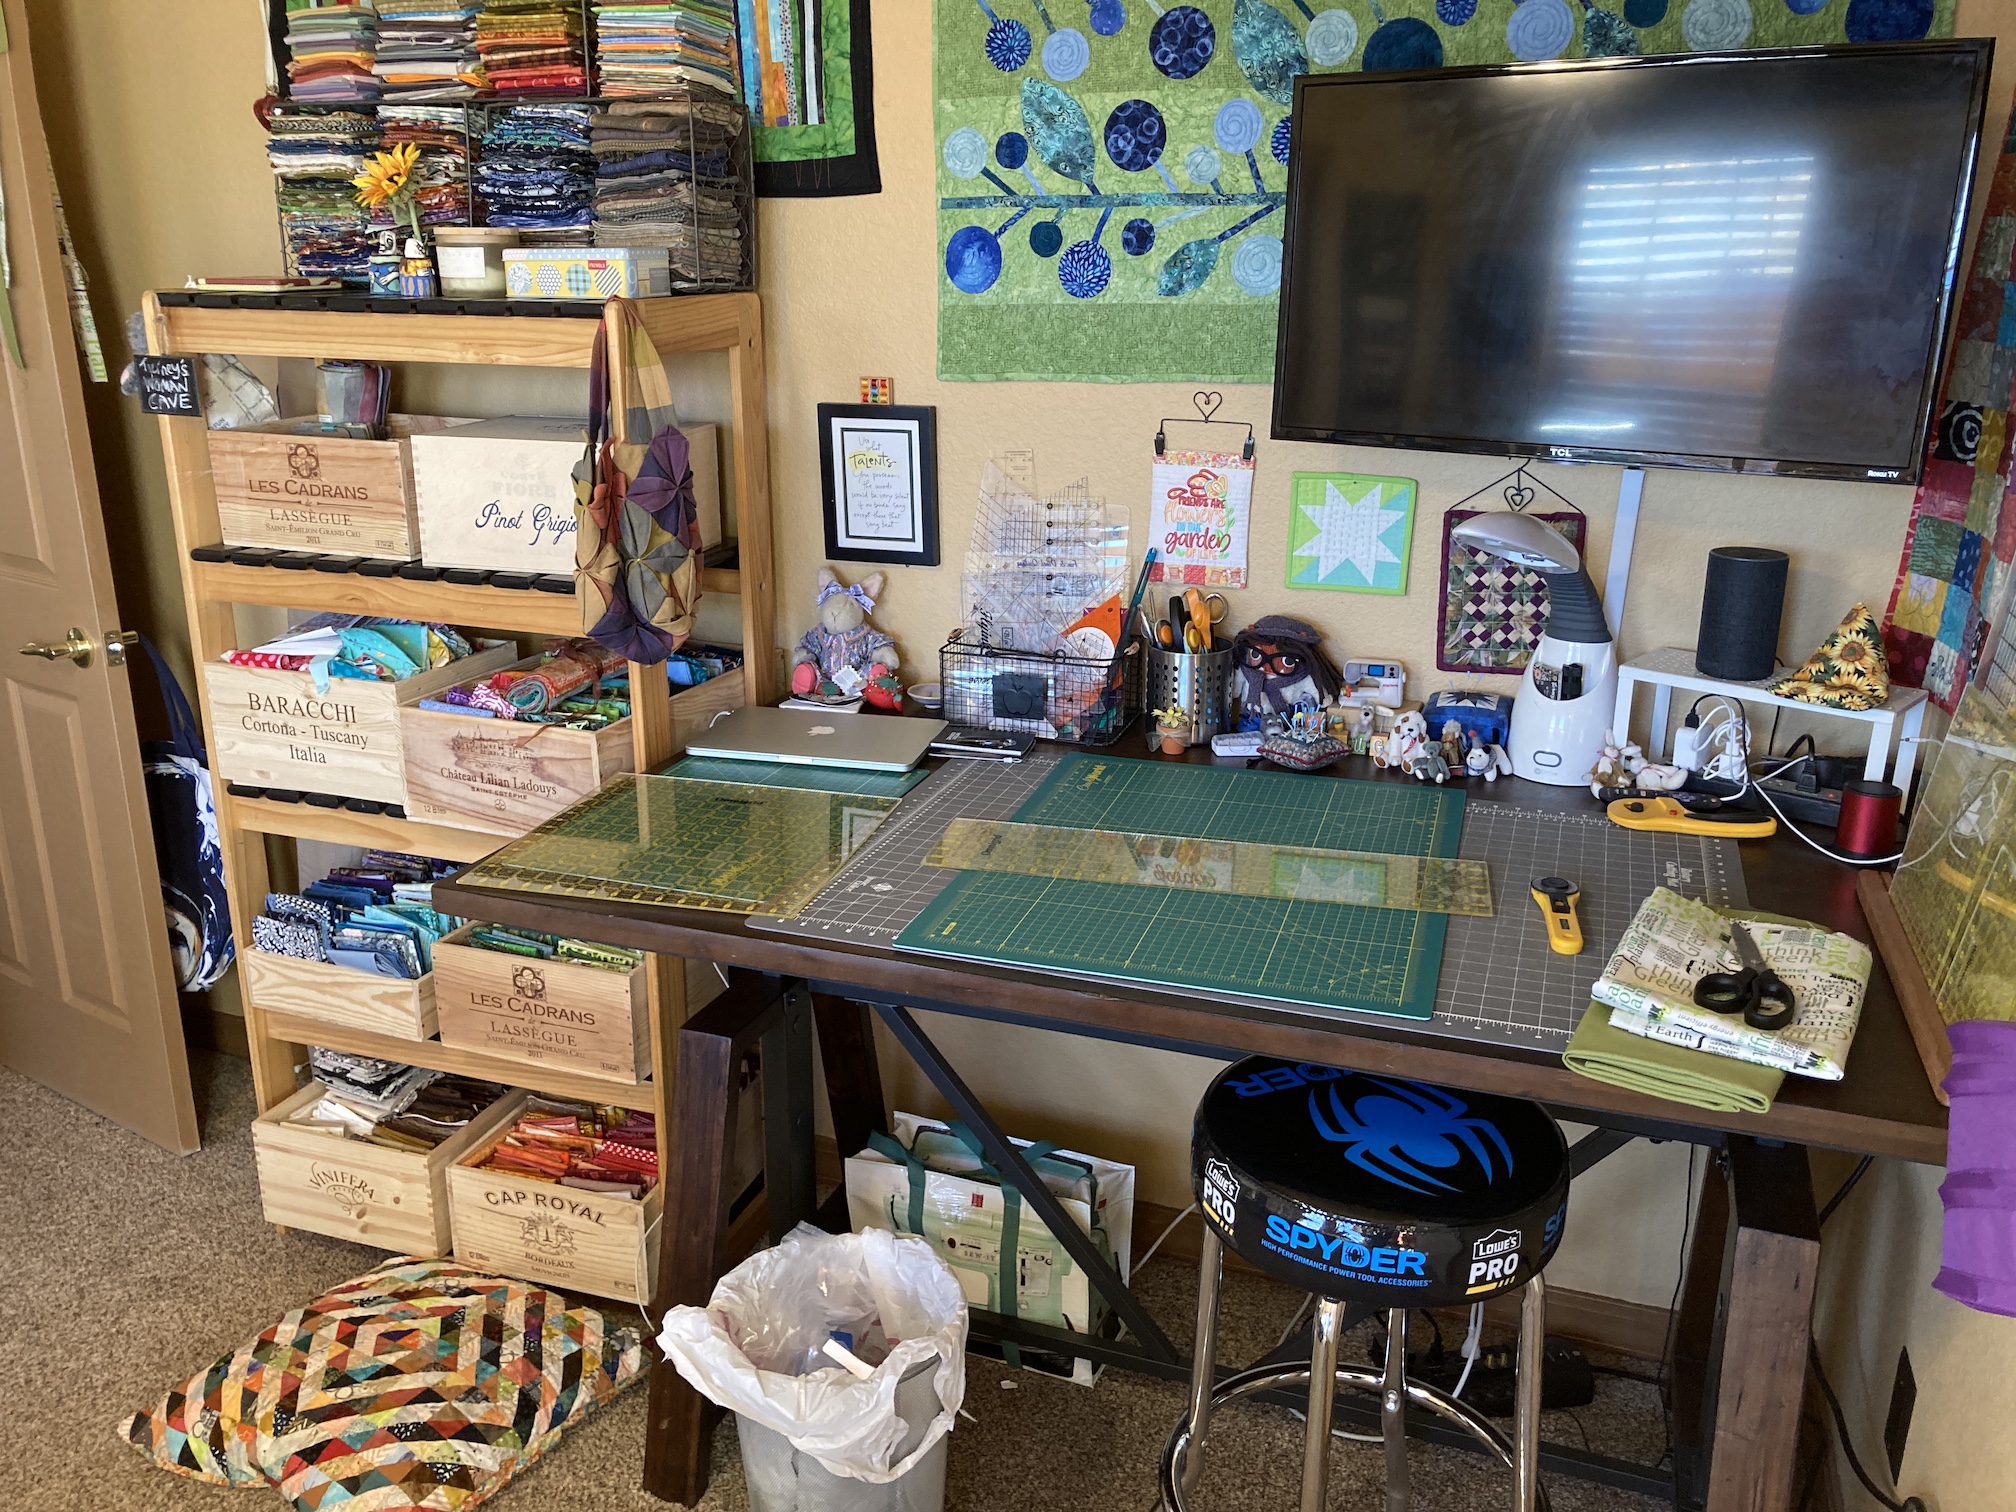
THE TABLE
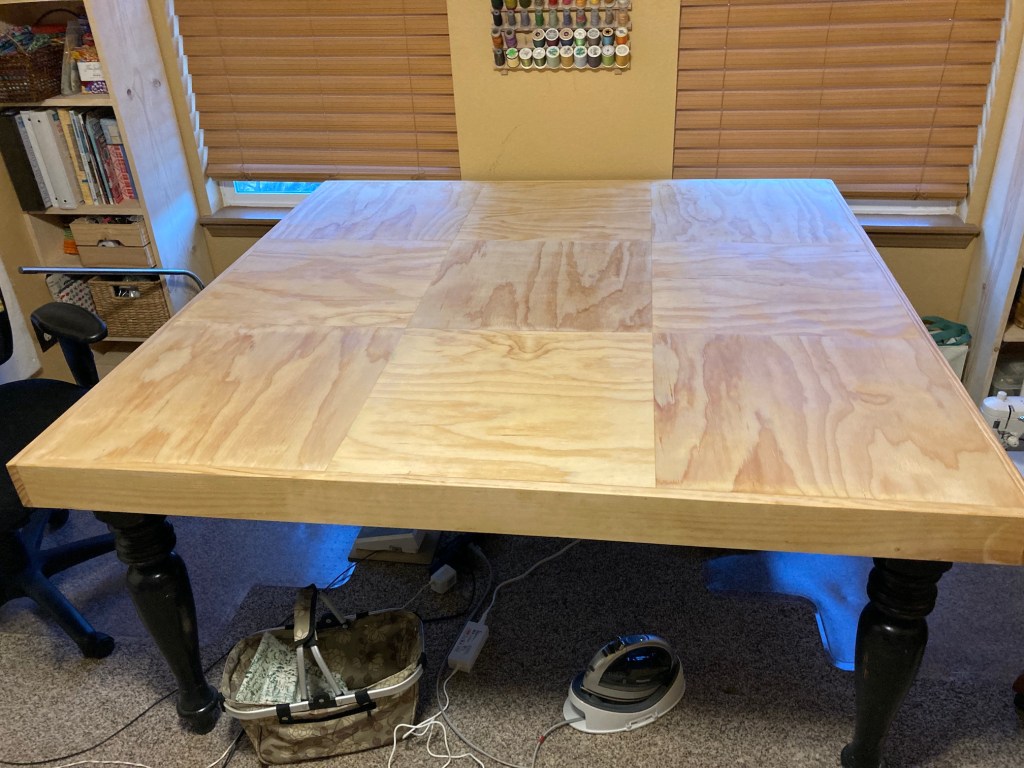
Last year from her local community board for free stuff, Tierney picked up a large black table to use for crafting. It was scuffed up but it worked:
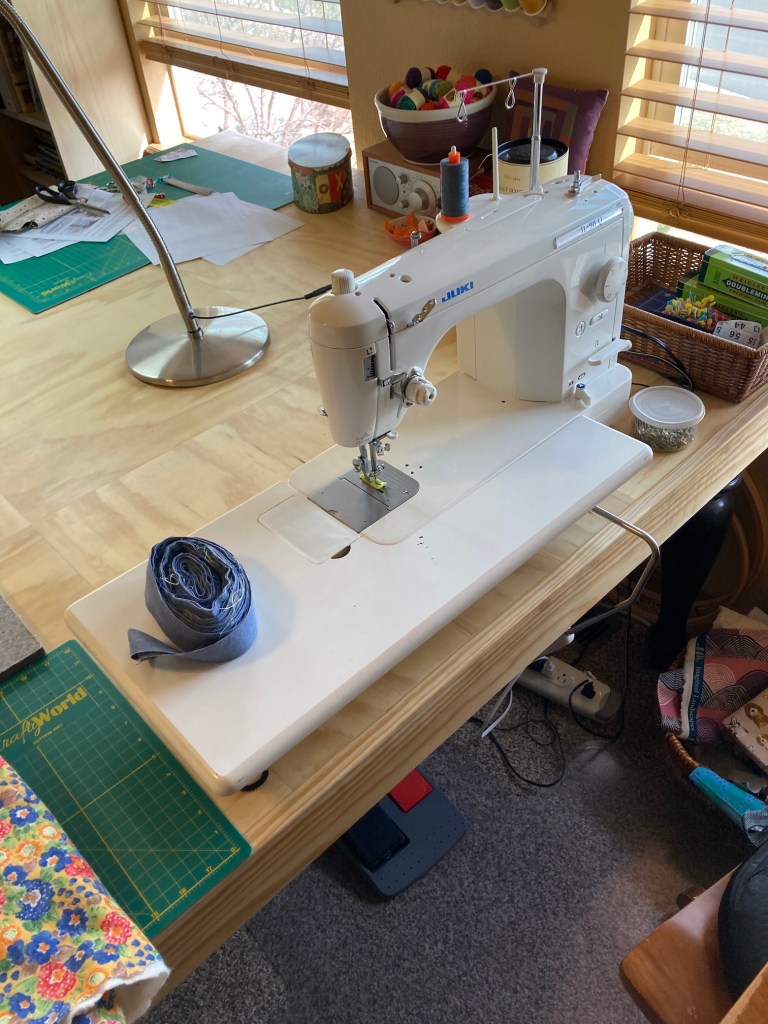
Tierney was “making-do” with the table and covered up the scuffs with an old table cloth but John wanted her to have a decent looking table in her studio so he created a new tabletop for it! John created a pattern with wood like a “nine-patch” quilting block.
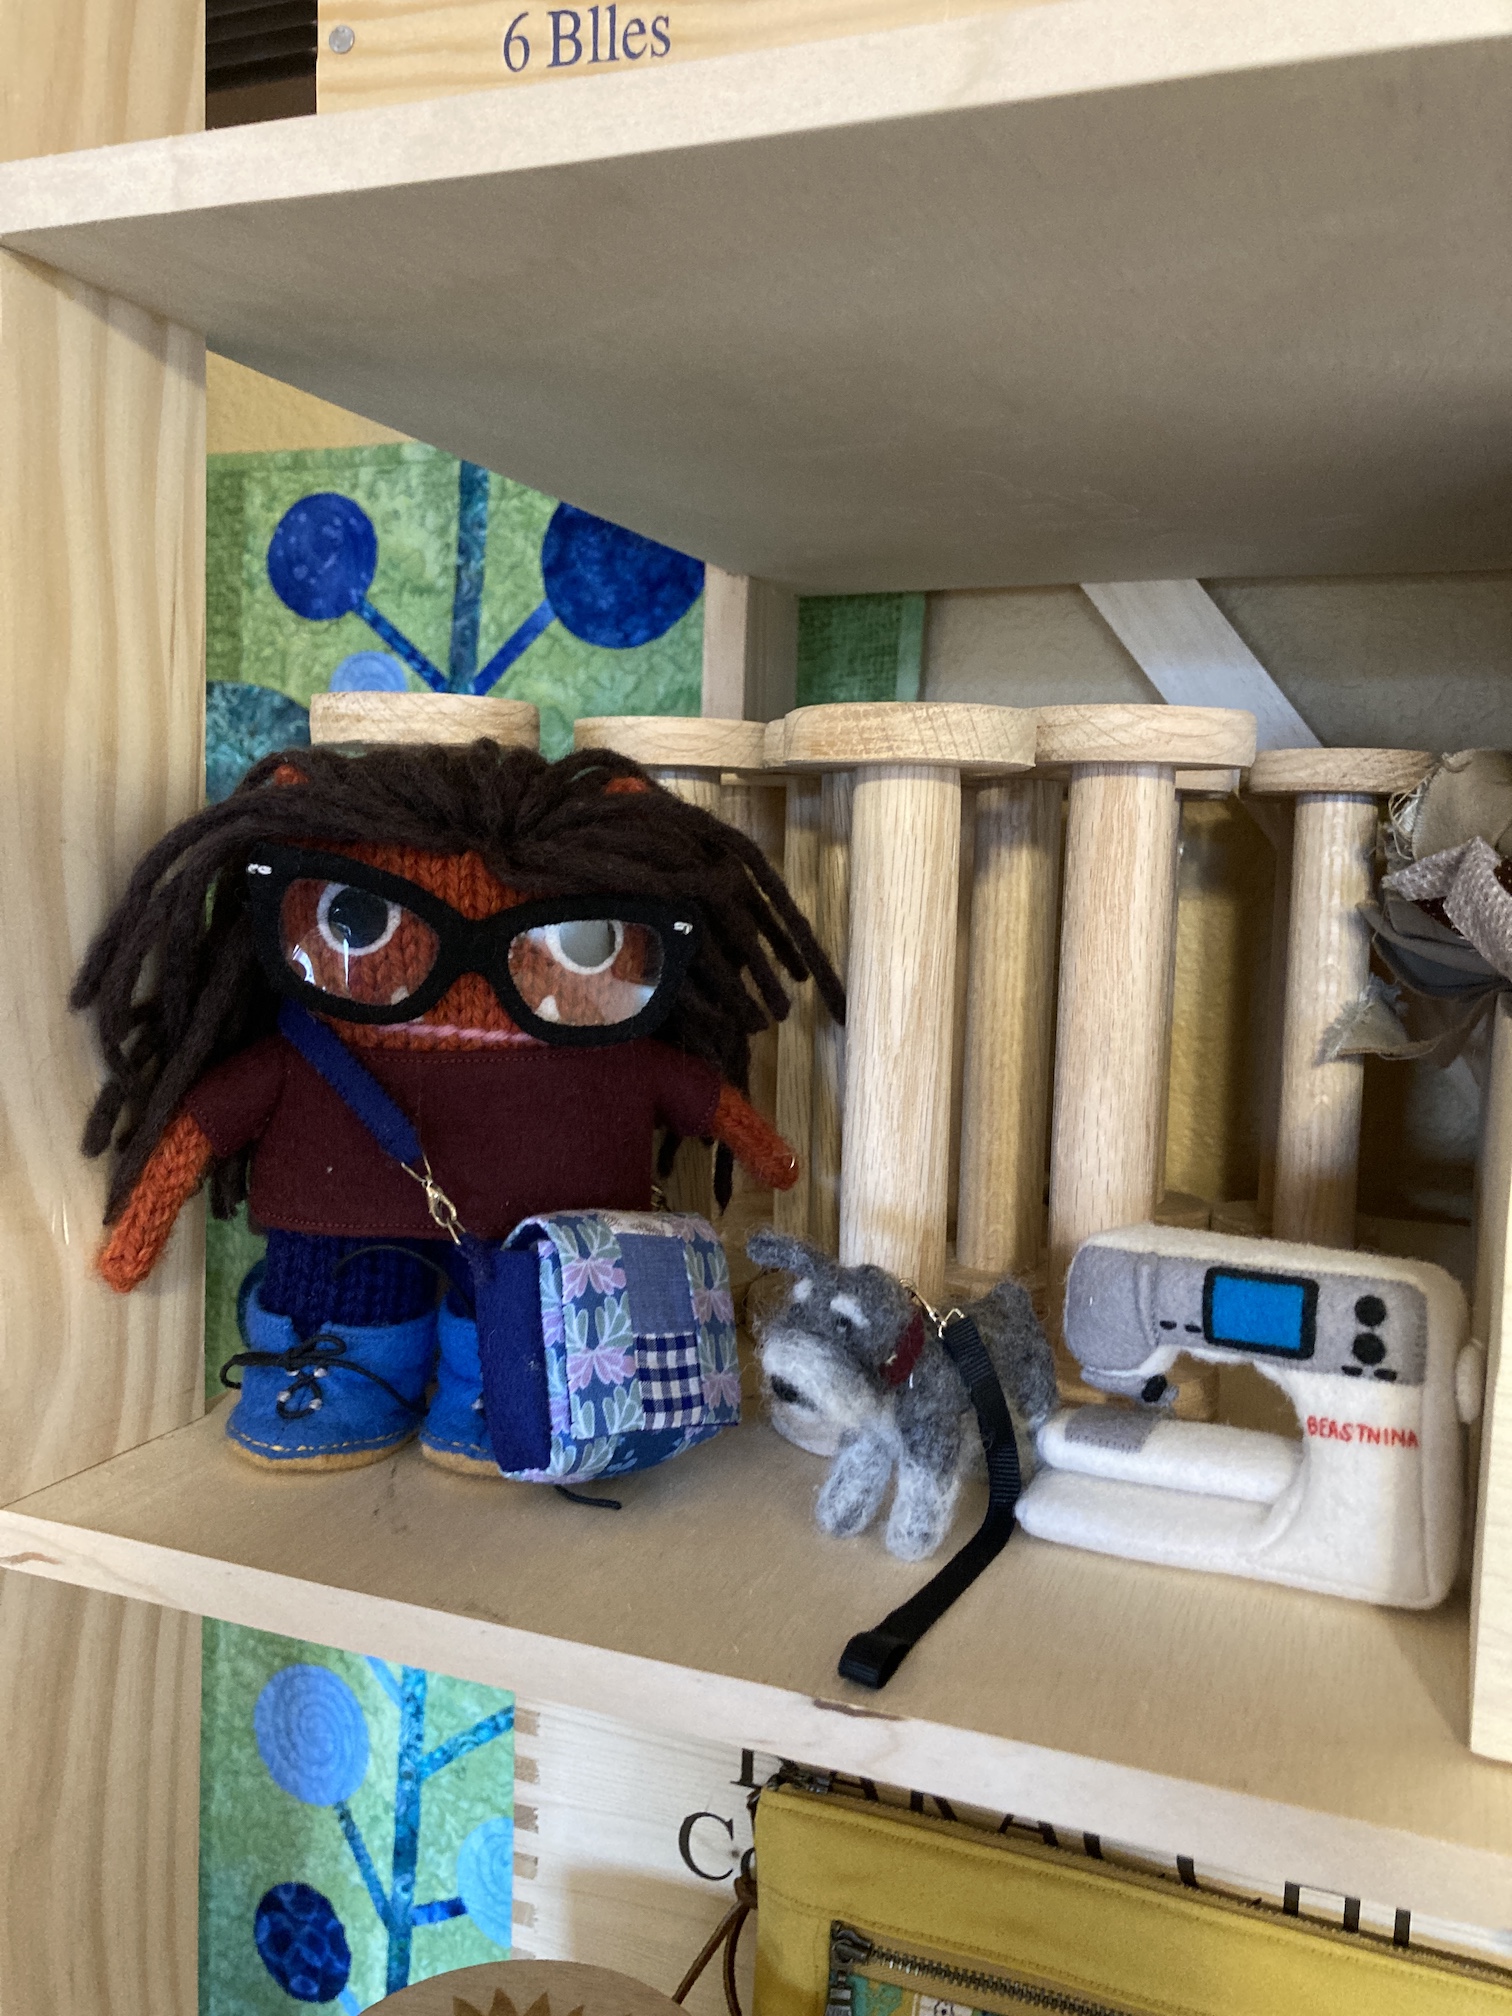
A month ago Tierney bought herself a used Juki sewing machine which is in the image above.
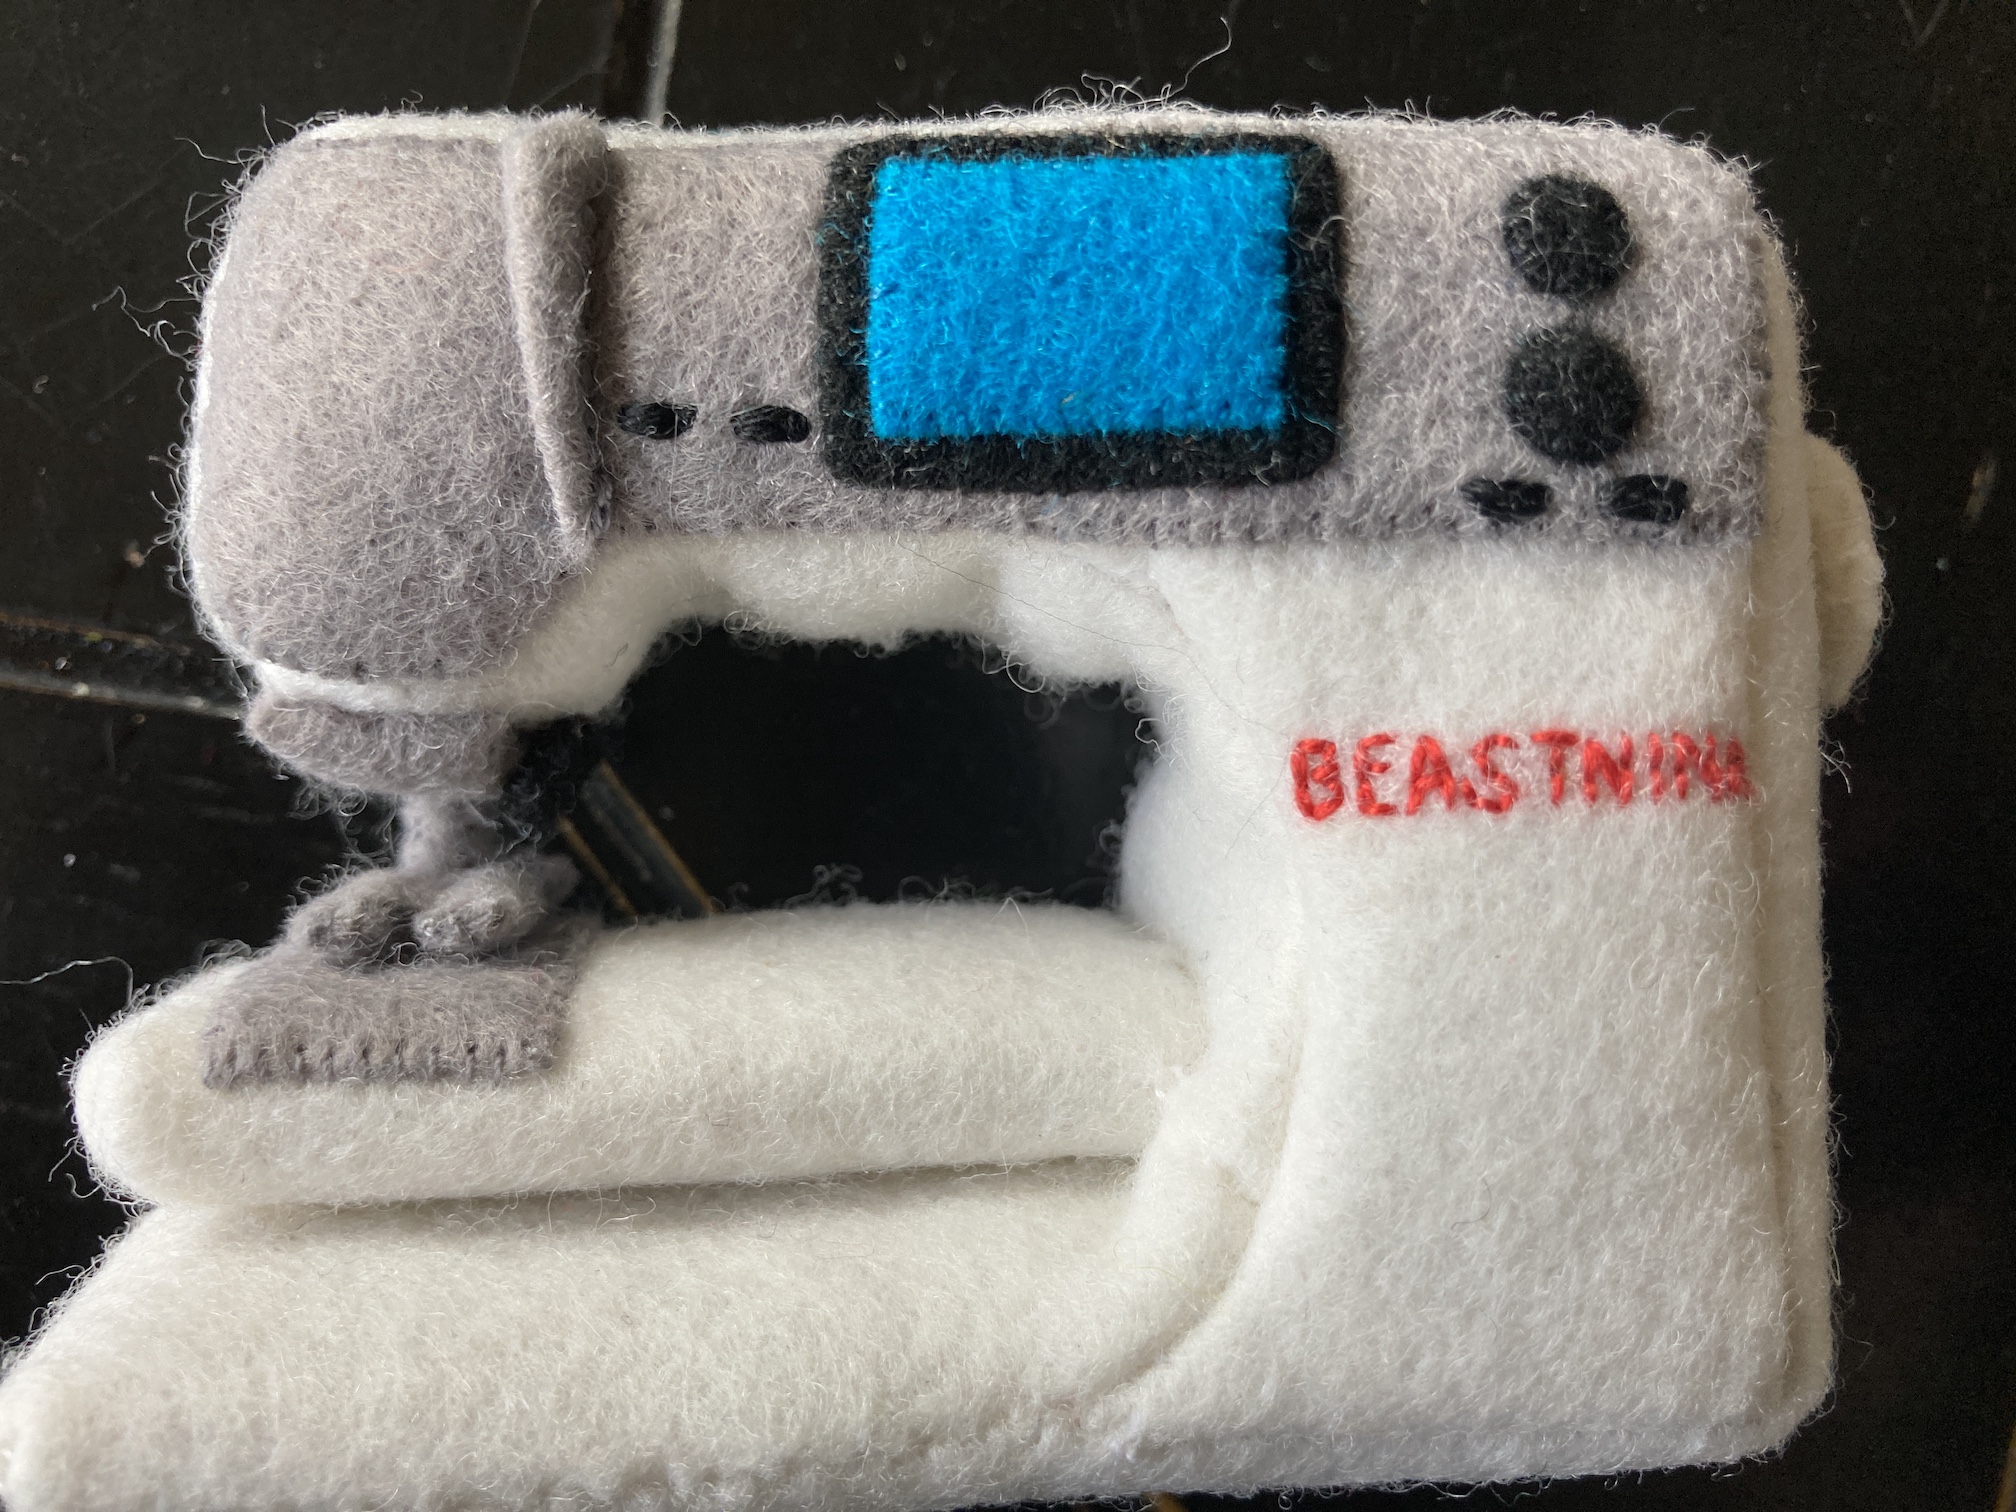
Alas, she did not buy ME another sewing machine, I have to just be happy with my Beastnina:
So those are the changes to my home, the tierneycreates studio!
Tierney will be back on the next post telling you about her trip and she might even catch up with reading her blogging buddies posts and responding to comments.
Until then, here is a sign she saw a couple months ago to give you some inspiration:
My friend Dana* (@chambersdalix) is always inspiring me to stretch my sewing/craftingskills and try new things. These new things in the past have included such techniques as English Paper Piecing (see post From the Basket – English Paper Piecing), and using fabrics I would usually never select on my own (see post The Tale of Three Tulas, Part I).
*Note – Dana is one of those people who can merely look at an image of a handmade item on Pinterest and figure out how to make it from the image…and then make it perfectly!
So when she talked her daughter, me, and our mutual friend Kathy into working on an Instagram based “bag of the month” project to build our bag making skills I was excited. For February the bag was the Devon Pouch by s.o.t.a.k. handmade. You make the pouch and then post the image to Instagram.
If you go to the hashtag #devonpouch on on Instagram you will see some GORGEOUS versions of the pouch:
I was like: “Wow! I want to make this pouch!”. Sure I have not made very many things with zippers but I can follow a pattern; and the designer has a time lapsed YouTube video of her making the bag so you can see all the steps demonstrated in addition to have the pattern.
So I thought I was safe.
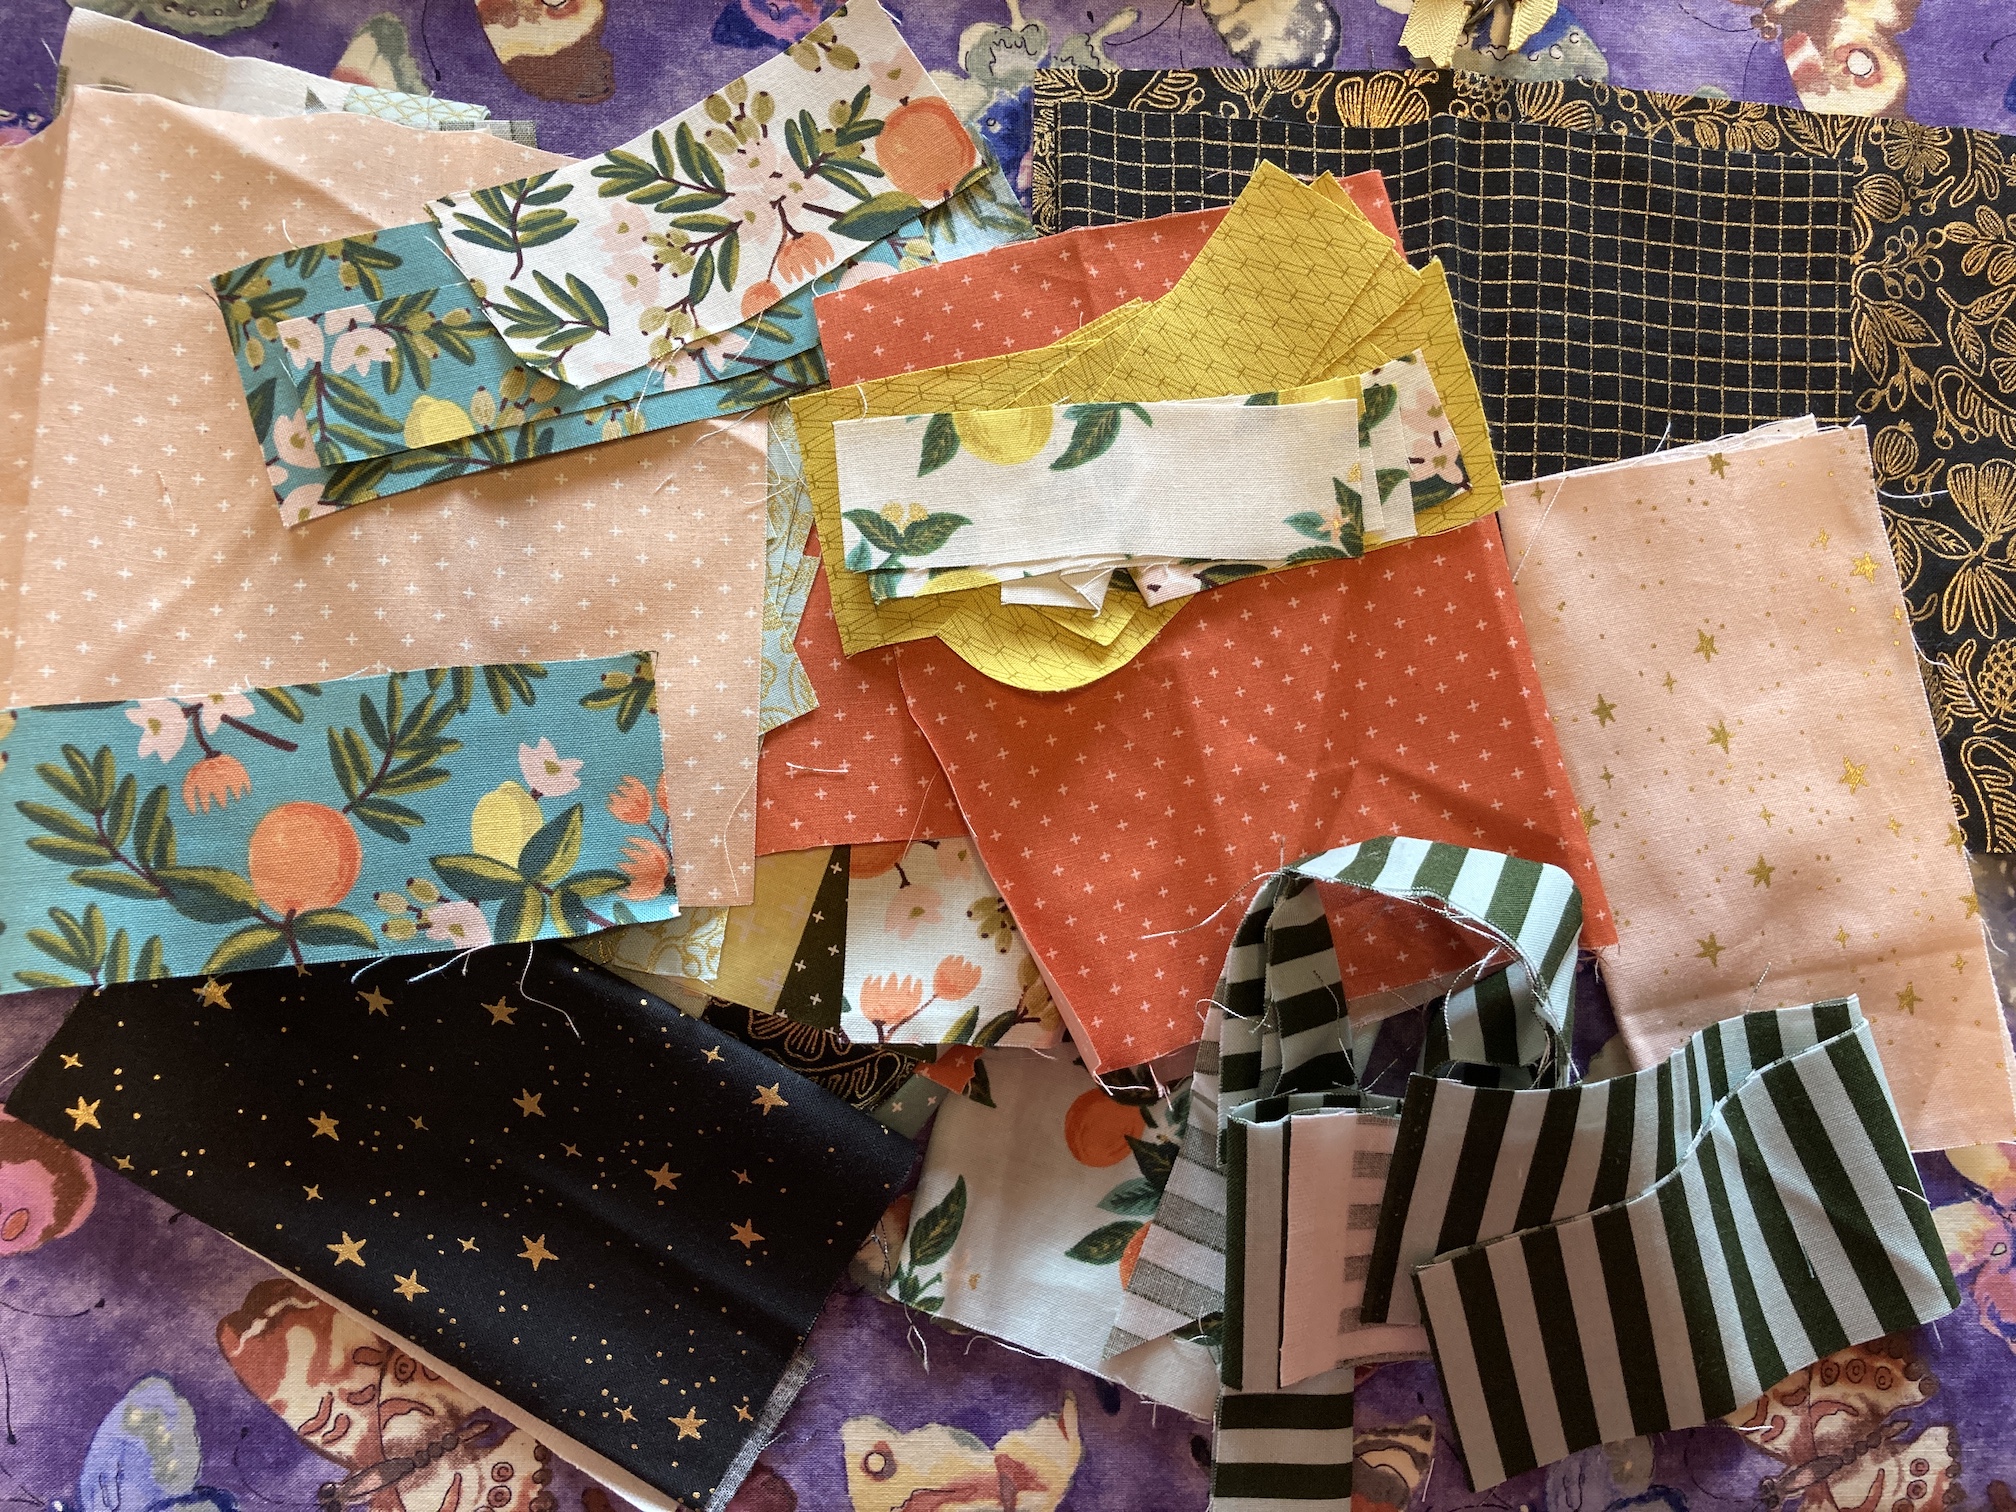
Plus Dana was so sweet and sent me cute fabric from her stash and some zippers to make 2 of the pouches. So what could go wrong….?
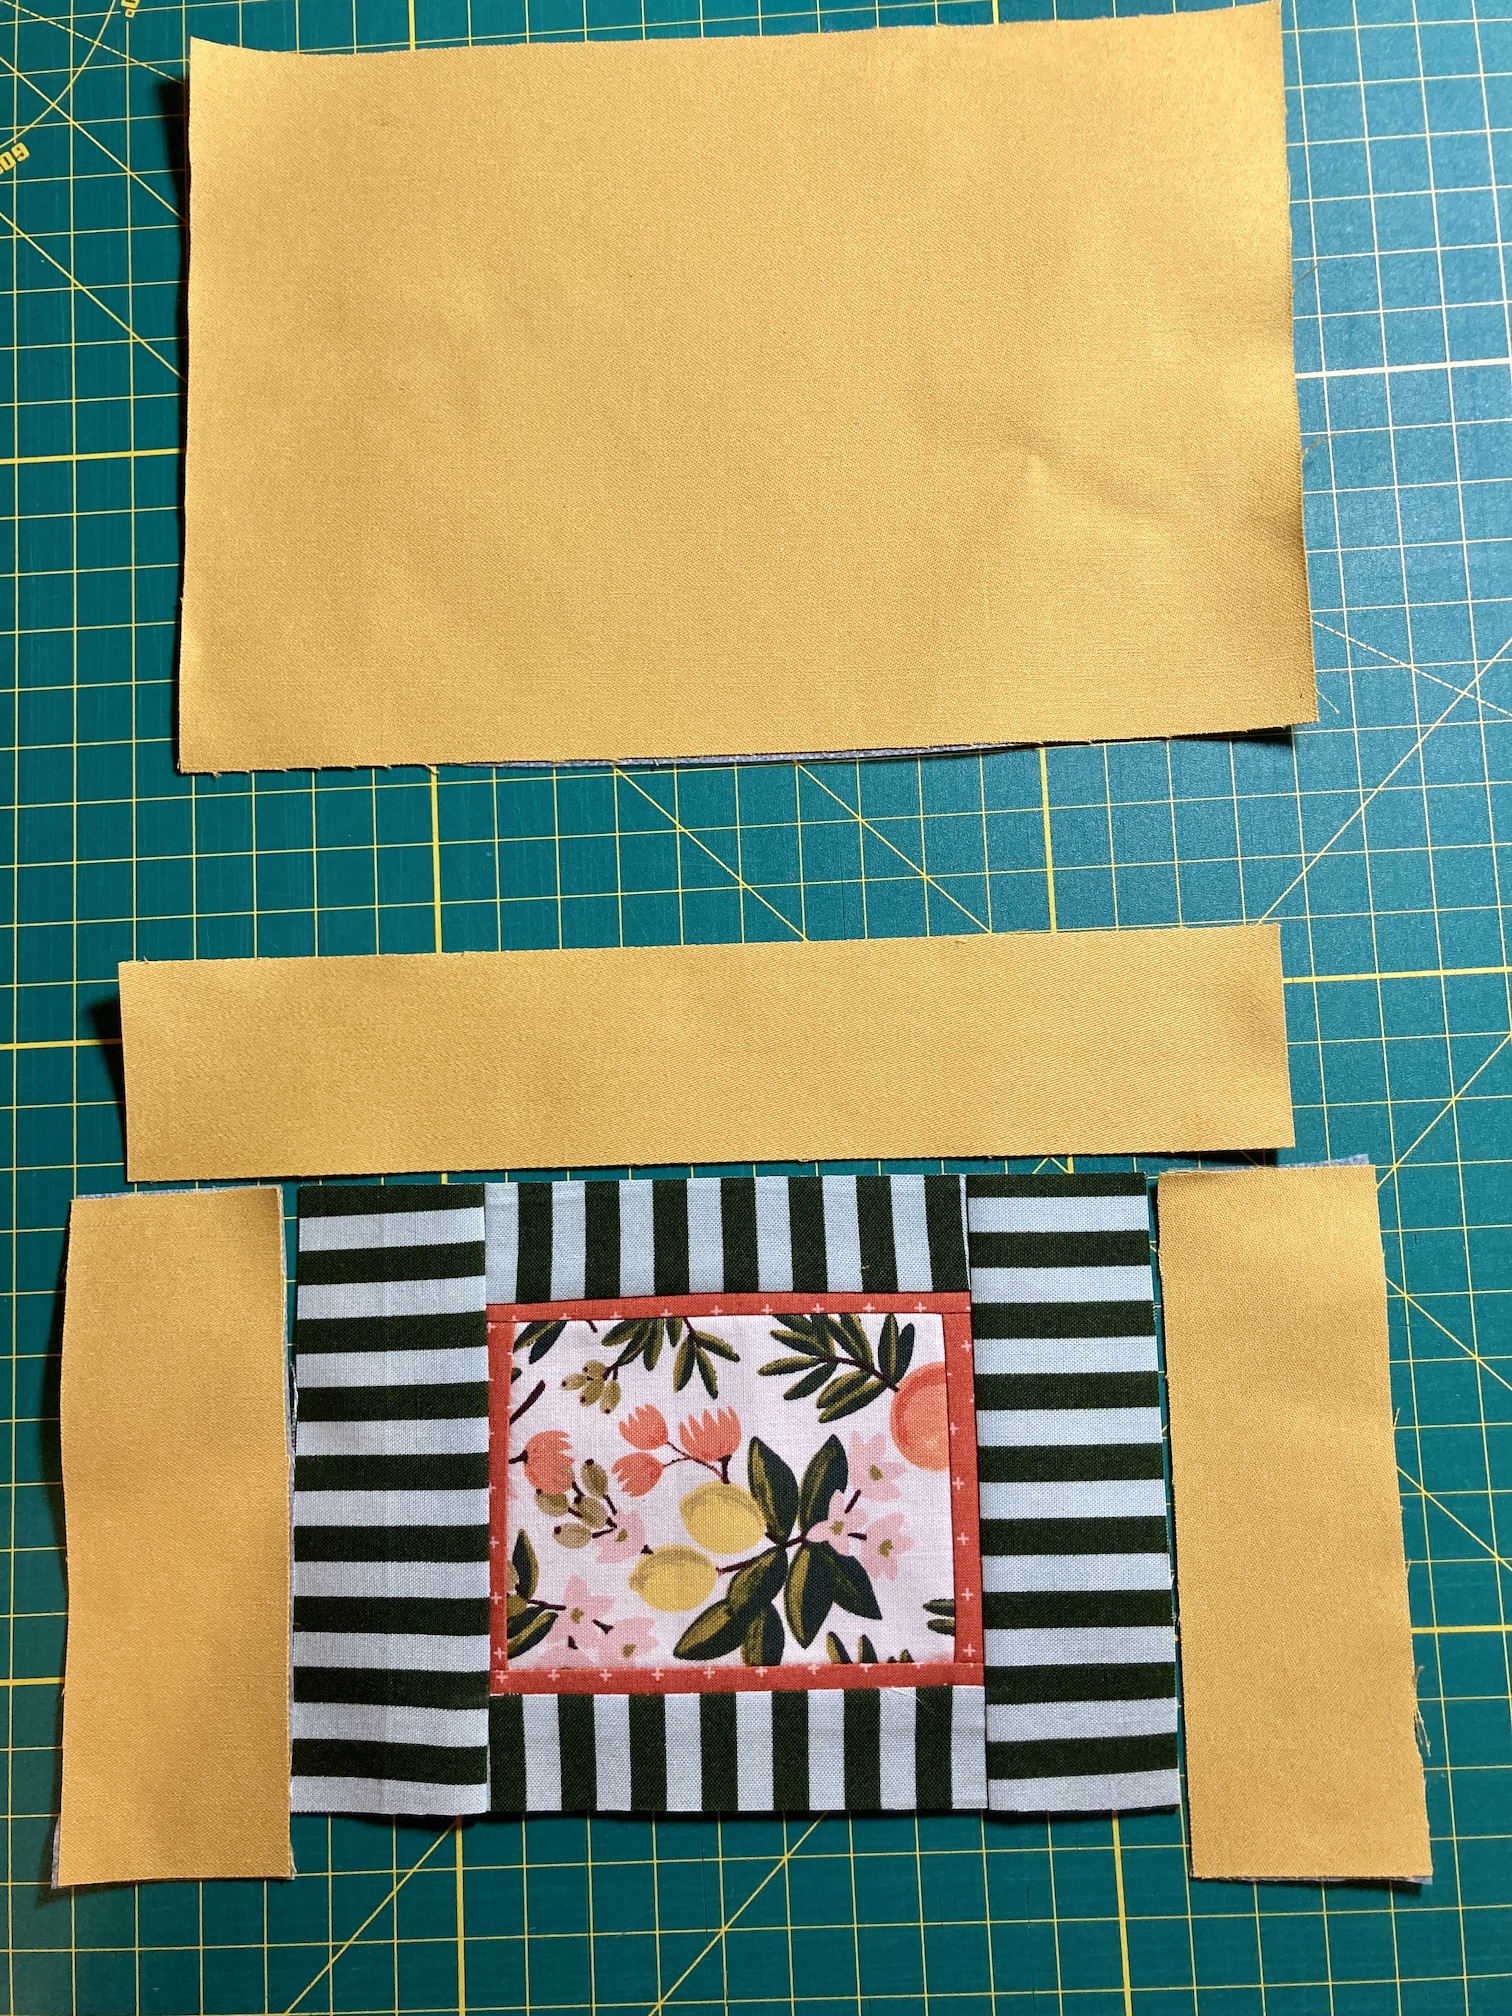
Excited to get started, this past Saturday I cut out the pattern pieces, applied the interfacing and prepared to make two pouches:
The elements of a wild Saturday night
I put on some yummy music (my favorite Denver radio station KUVO which is also a streamable Public Radio Station from kuvo.org), opened my laptop to the video of the designer making the pouch, sat down at my sewing machine and got to work.
Ready to sew!
In addition to materials to make the pouch, my friend Dana had also sent me scraps from when she made me a quilt (see post Mind Blowing Mail) and I incorporated some of these scraps into the front zipper pocket for my first pouch that I worked on.
Yummy scraps!
I was feeling very clever.
A couple hours later, I was not feeling so clever.
The written pattern stated to change to a “zipper foot” whenever you were working on the two zippers in the pouch. I found the zipper foot to my Bernina, which I’ve only used once before and I think that was in 2006 in a class when I first bough my Bernina sewing machine.
The pattern told me to switch between my regular foot and my zipper foot. Problem: I am very inexperienced using a zipper foot. Wait let’s just say it plainly: I did not know what the heck I was doing.
I will spare you the full saga, but my seams were off and once multiple seams are off in a pattern you know you are in the middle of a serious freaking sewing misadventure!
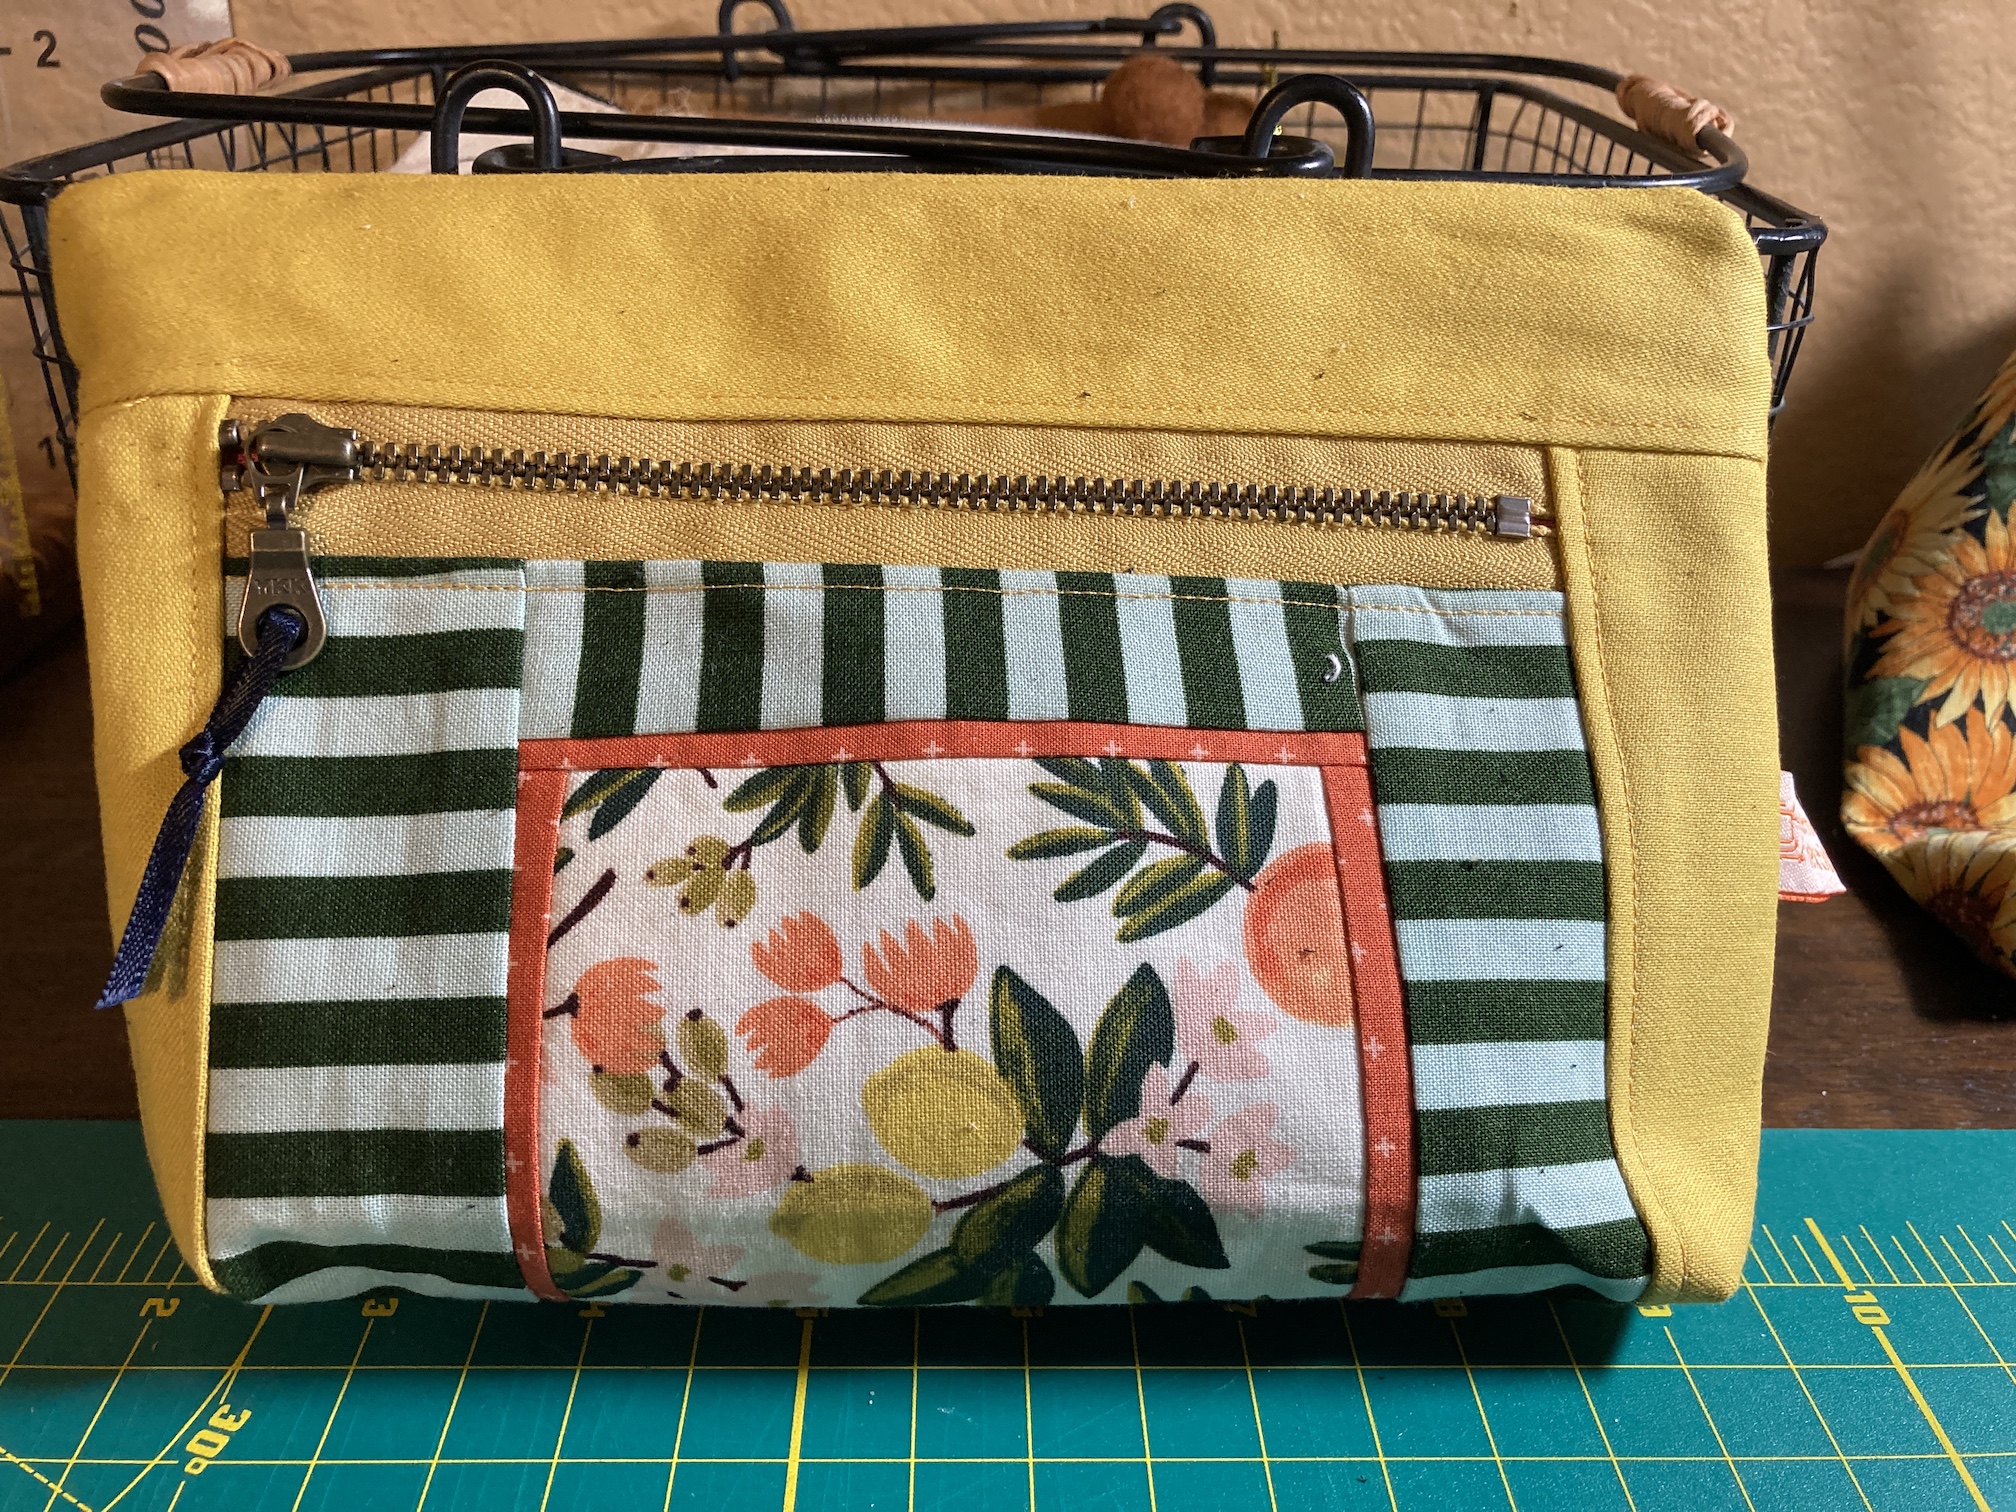
Here is my quite ugly version of the finished pouch:
Ugh
Here’s an even better image that might make you suspect I was under the influence of mind altering drugs while sewing (Nope, the bottom of the pouch is NOT supposed to look like that):
Gasp
Please look away if the image above is too grotesque. My version of the pouch does not appear to even be remotely related to the examples of the beautiful pouches on #devonpouch that I shared earlier in this post.
I did post the completed bag to Instagram and people were very kind but I was quite embarrassed over how lopsided and poorly constructed it was (the photo actually does not do justice to the sewing abomination!)
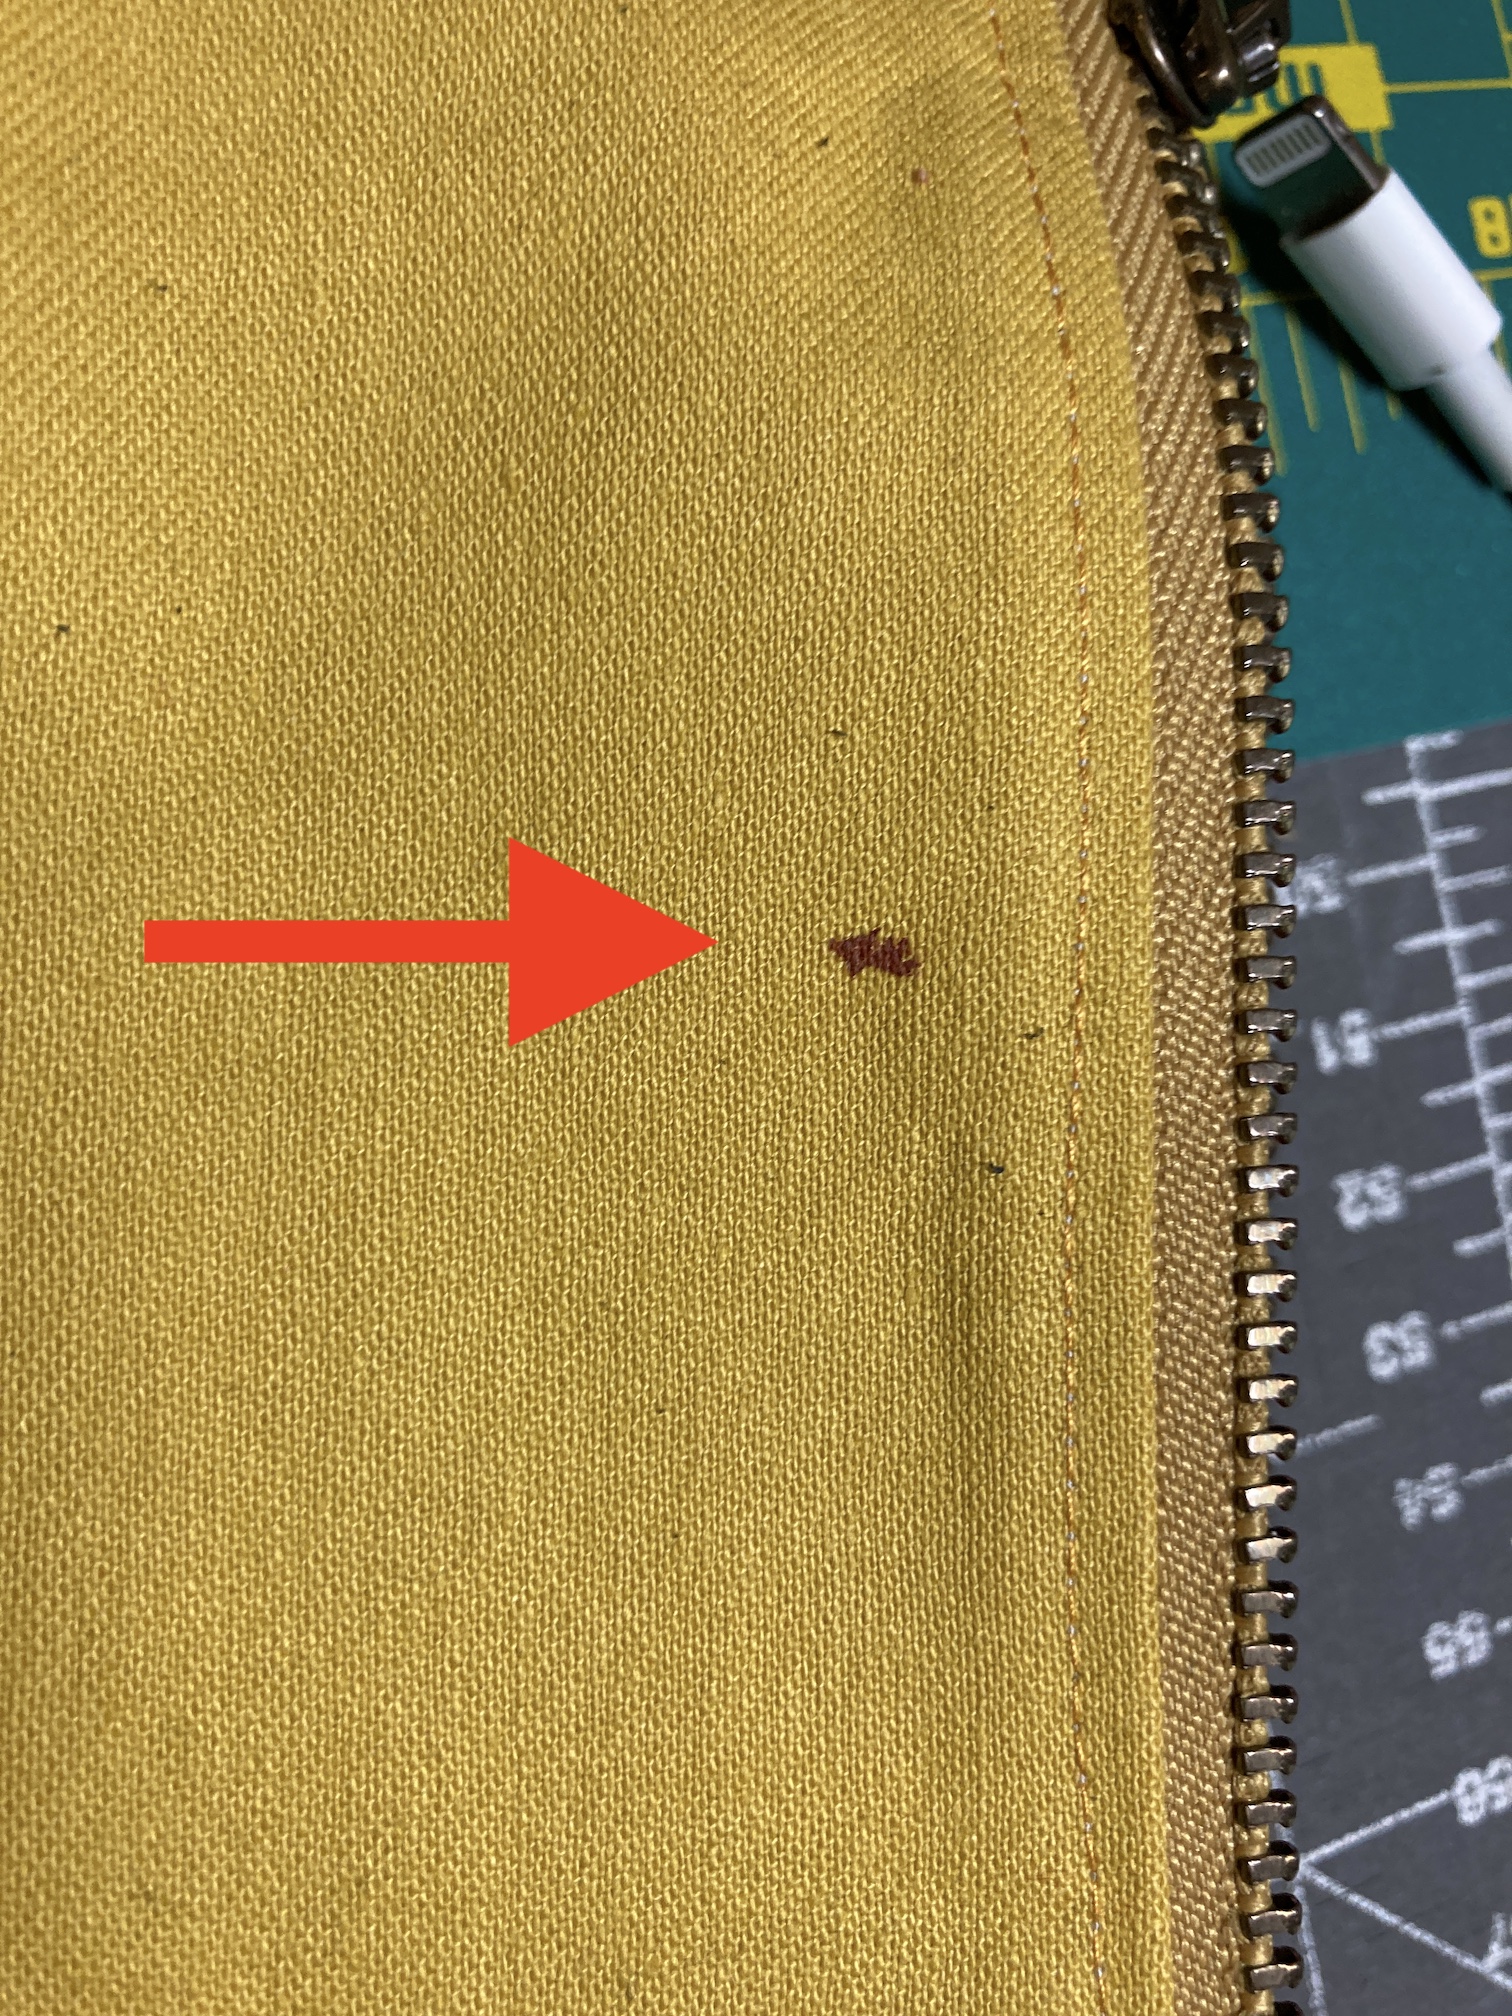
As a bonus, I accidentally stuck myself with pin (yay, that is always so pleasant) during final construction and bled on the back of the bag. I did not catch the spot of blood of course until I pressed/ironed in the blood (is this pouch doomed or what?):
A little of me permanently ironed into the pouch…
At first I decided to just keep the pouch and use it to store the fabric scraps Dana sent me:
Trying to create a purpose for the abomination made
But finally I decided to un-assemble it and salvage the nice zippers that Dana sent me; and reuse the zippers in my next attempt.
So when I feel up to it, I am going to start over again and make my first pouch again, before moving on to the second one. I am going to stay away from the zipper foot this time as I discovered towards the end I could sew the zipper just fine with a standard foot.
Postscript
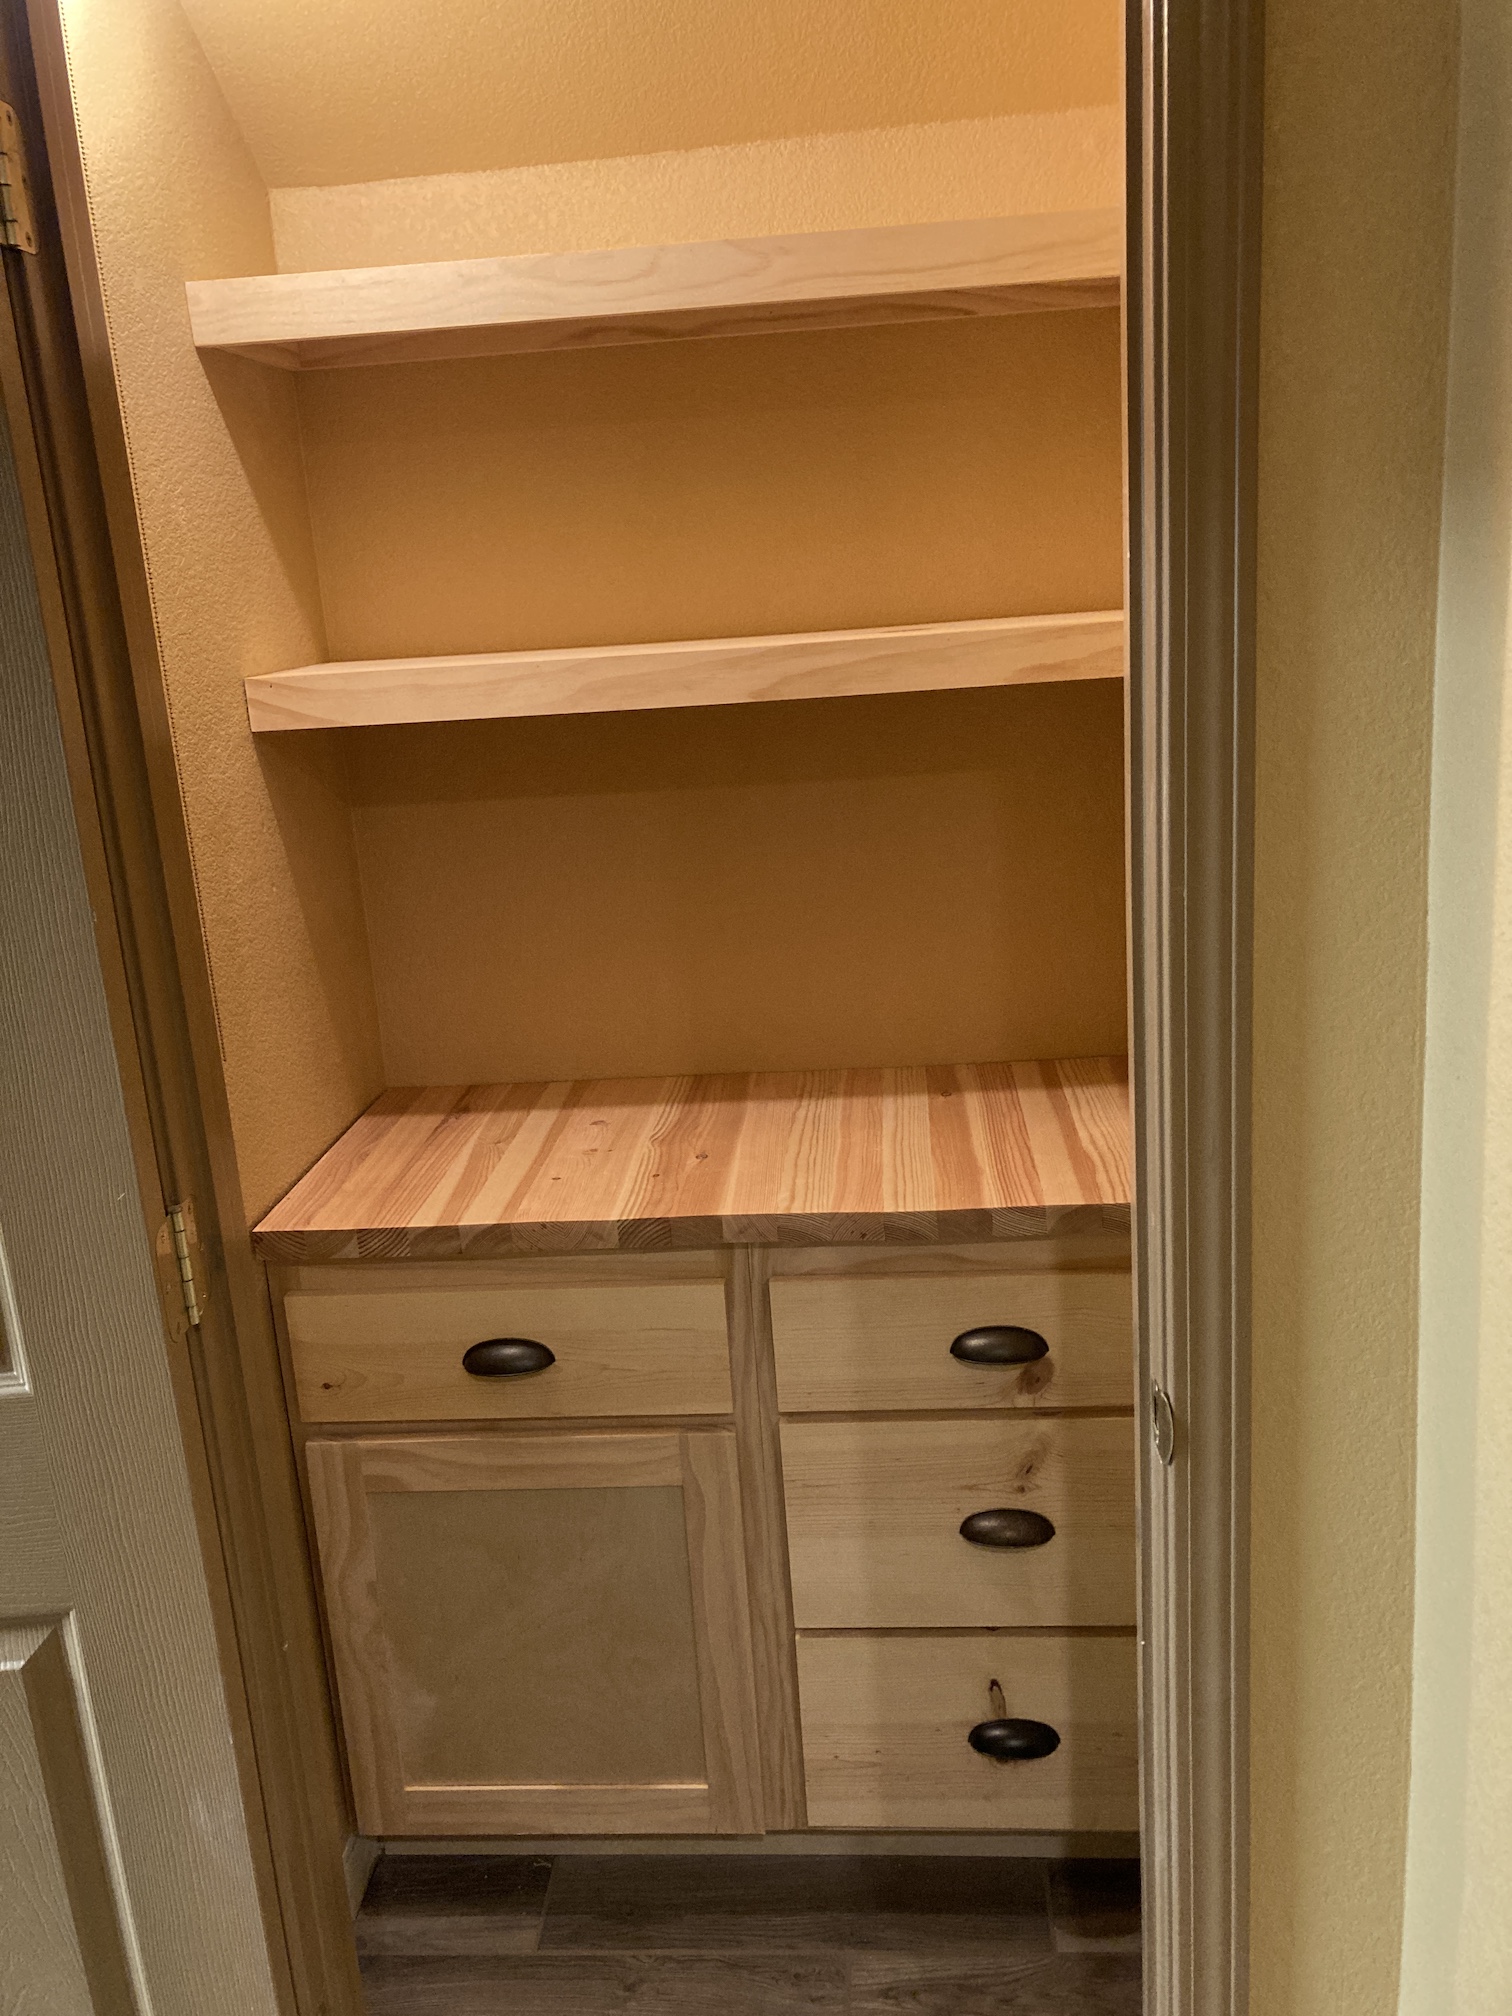
In more successful crafting news, Mr. Woodworker (my partner John) recently finished a remodel of one of our basement closets to become an entertaining supply storage closet with cabinet and coordinating shelves:
Much more successful crafting
This was the first real cabinetry he’s made. He also made a butcher block style counter top of the cabinet!
Oh and John is going to take the advice several of you left in the comment section of the post Handmade Spools, and make more wooden spools for me to sell on either my Etsy shop (if I ever get it reopened) or a craft fair or something.
Yup. So much for my plans to do daily postings to my blog. I even asked Mike the Miniature Schnauzer, who guest blog posted on Sunday 2/21/21, to fill in like he did in the post Guest Blogger: Obsession with Making Crocheted Dishcloths, but he was busy napping and still seems irritated over some dishcloth-crocheting-while-riding-in-the-car incident… (I have a hashtag I use on Instagram sometimes for posted pictures of Mike: #miniatureschnauzerfirstworldproblems).
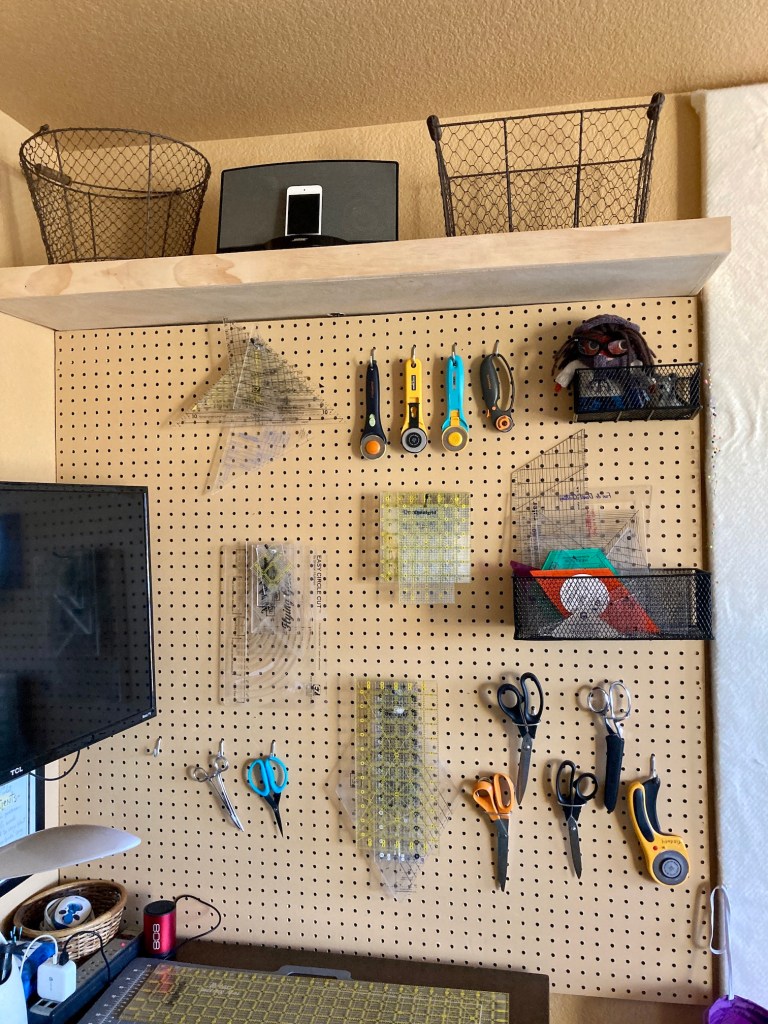
Rulers Gone Awry
This is probably not unusual but as a quilter I have a lot of different rulers and templates. I have the standard cutting rulers and then I have special rulers and templates I’ve collected over the years for various projects (or being lured by a demo at a quilt shop into buying a ruler/template I thought I might need someday!).
My organization of these rulers and templates was sort of haphazard and irritating to me. I thought that adding pegboard to my crafting studio would help resolve this – so I consulted with my partner John, aka “Mr. Woodworker” and he figured out a solution.
First he installed a floating shelf he built above where the pegboard was to be placed:
Then he cut the pegboard to fit the area of wall; and painted the pegboard to match the wall:
And then he installed the pegboard. Here is my original set up with the pegboard hooks and pegboard baskets were bought:
At first I tried giving tierneycreates Beastie and her dog Mikelet (see series of post Beastie Adventures) their own little balcony on the pegboard wall but they did not like it.
So I moved her to another area on my studio (she will probably do a guest post in the future to show you her new home and other changes to my studio) and repurposed that “balcony”:
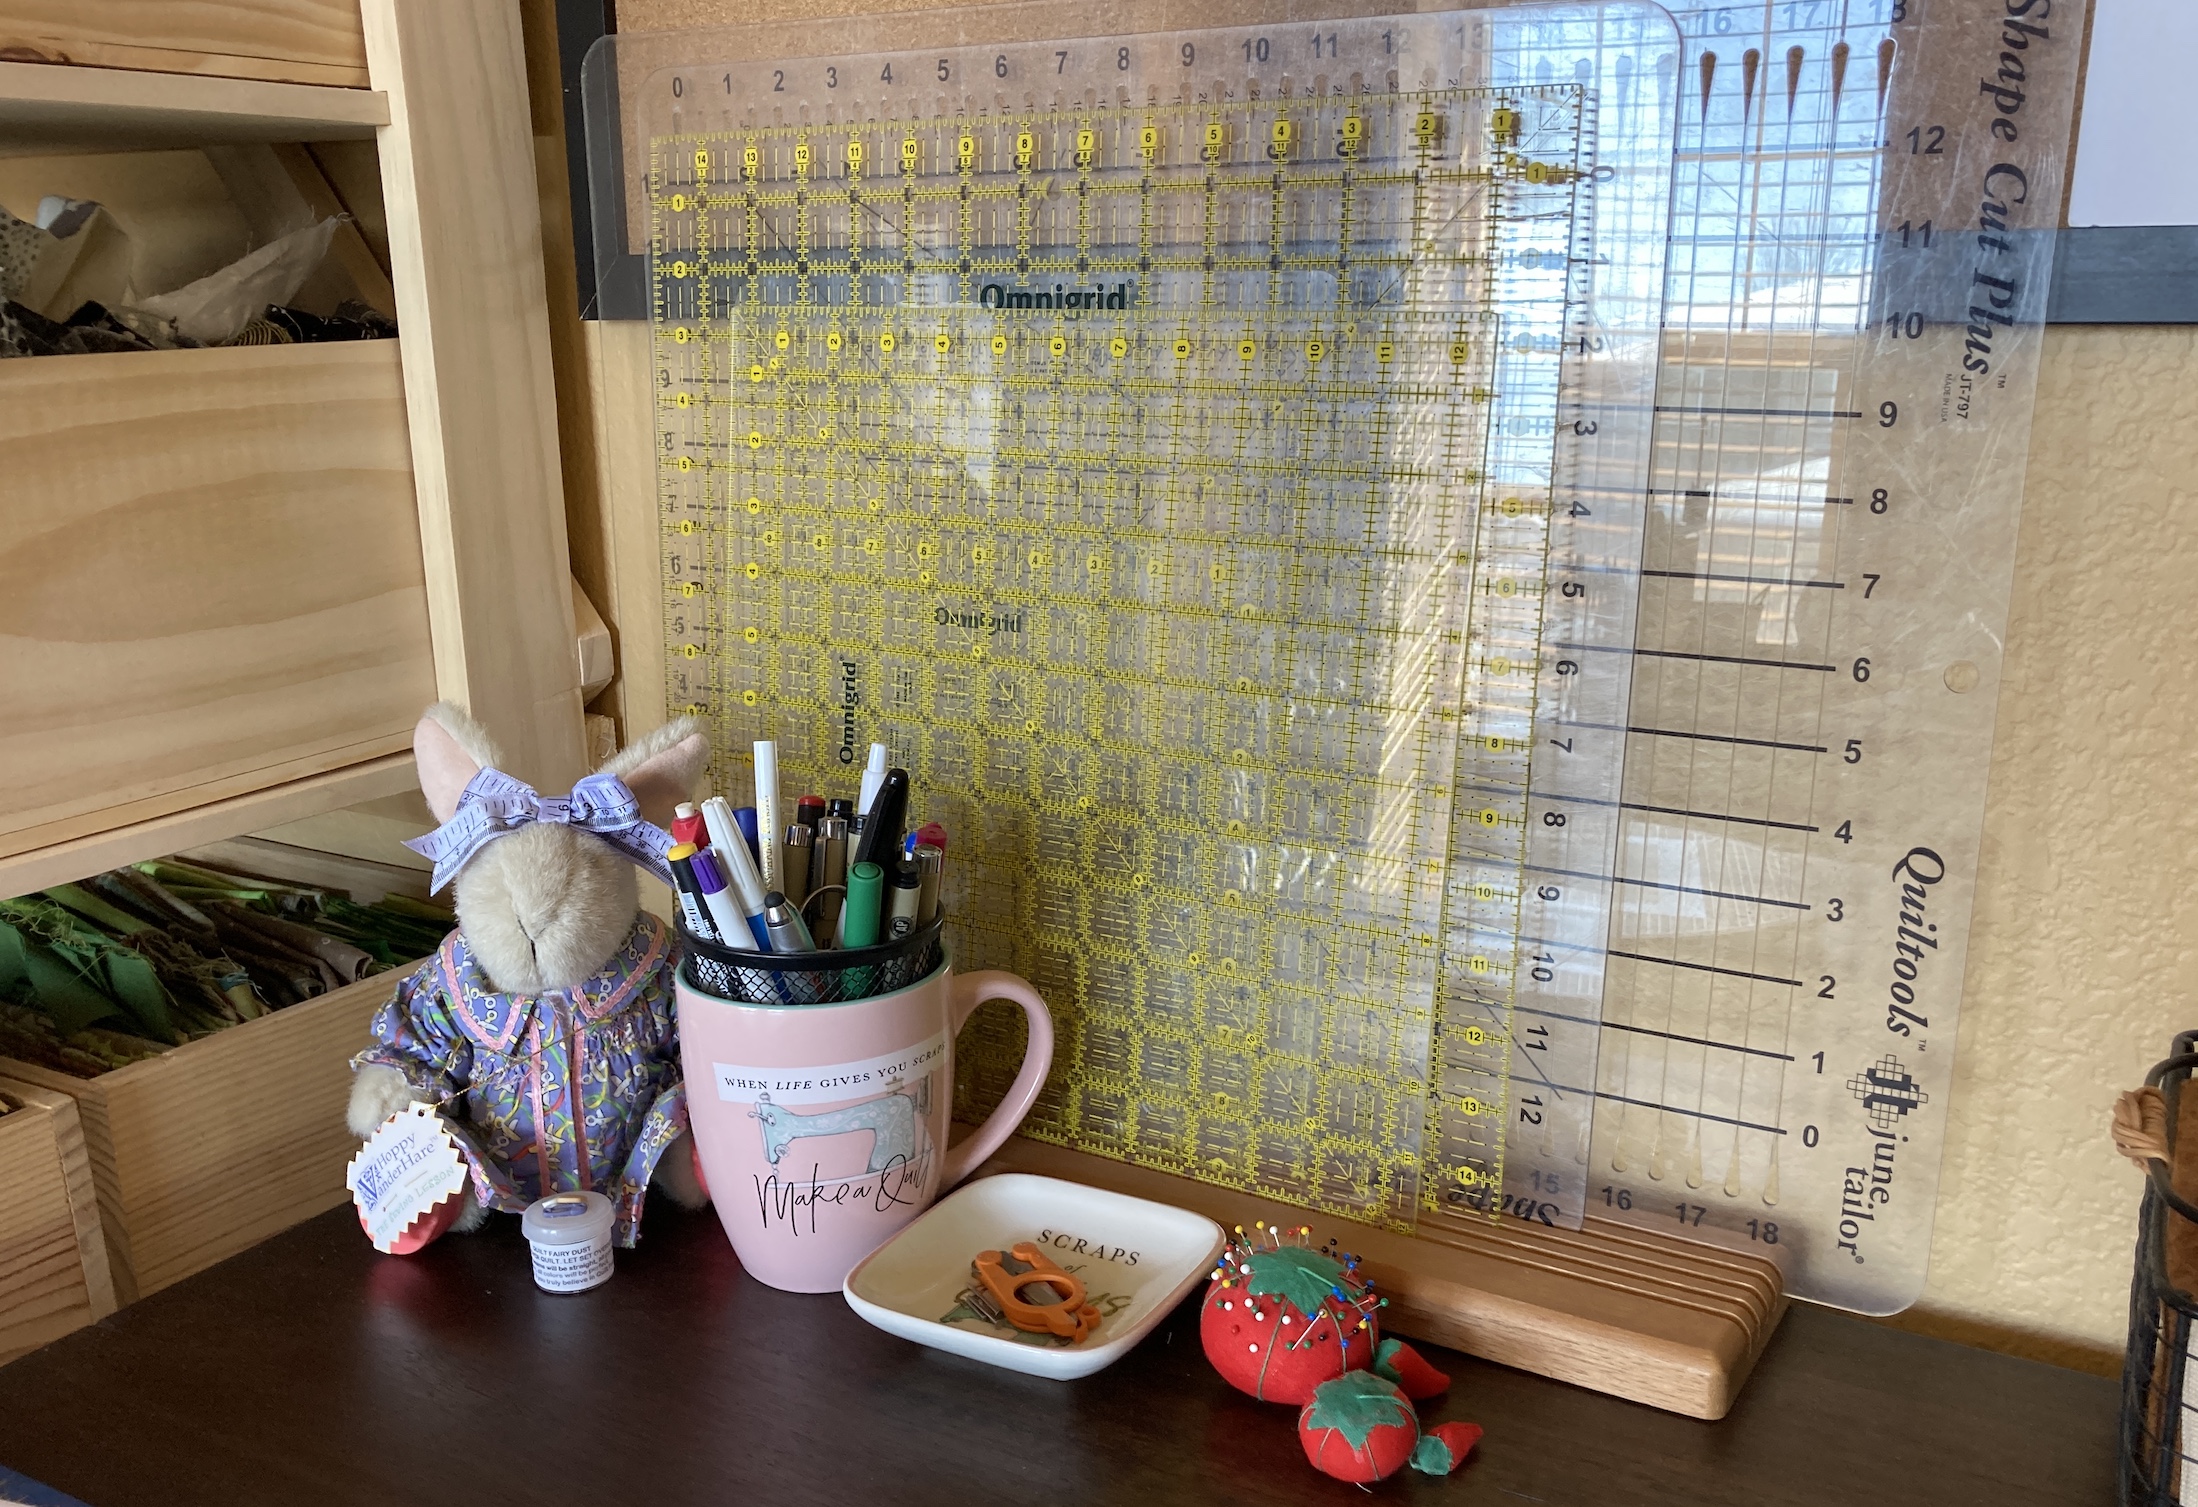
The pegboard has been wonderful to organize my commonly used and miscellaneous rulers. For now I still keep my very large rulers (like my 15″ x 15″ ruler) on my cutting table:
“Mr. Woodworker” is building me a new cutting table in the future which will have slots for my large rulers underneath the cutting surface!
Postscript
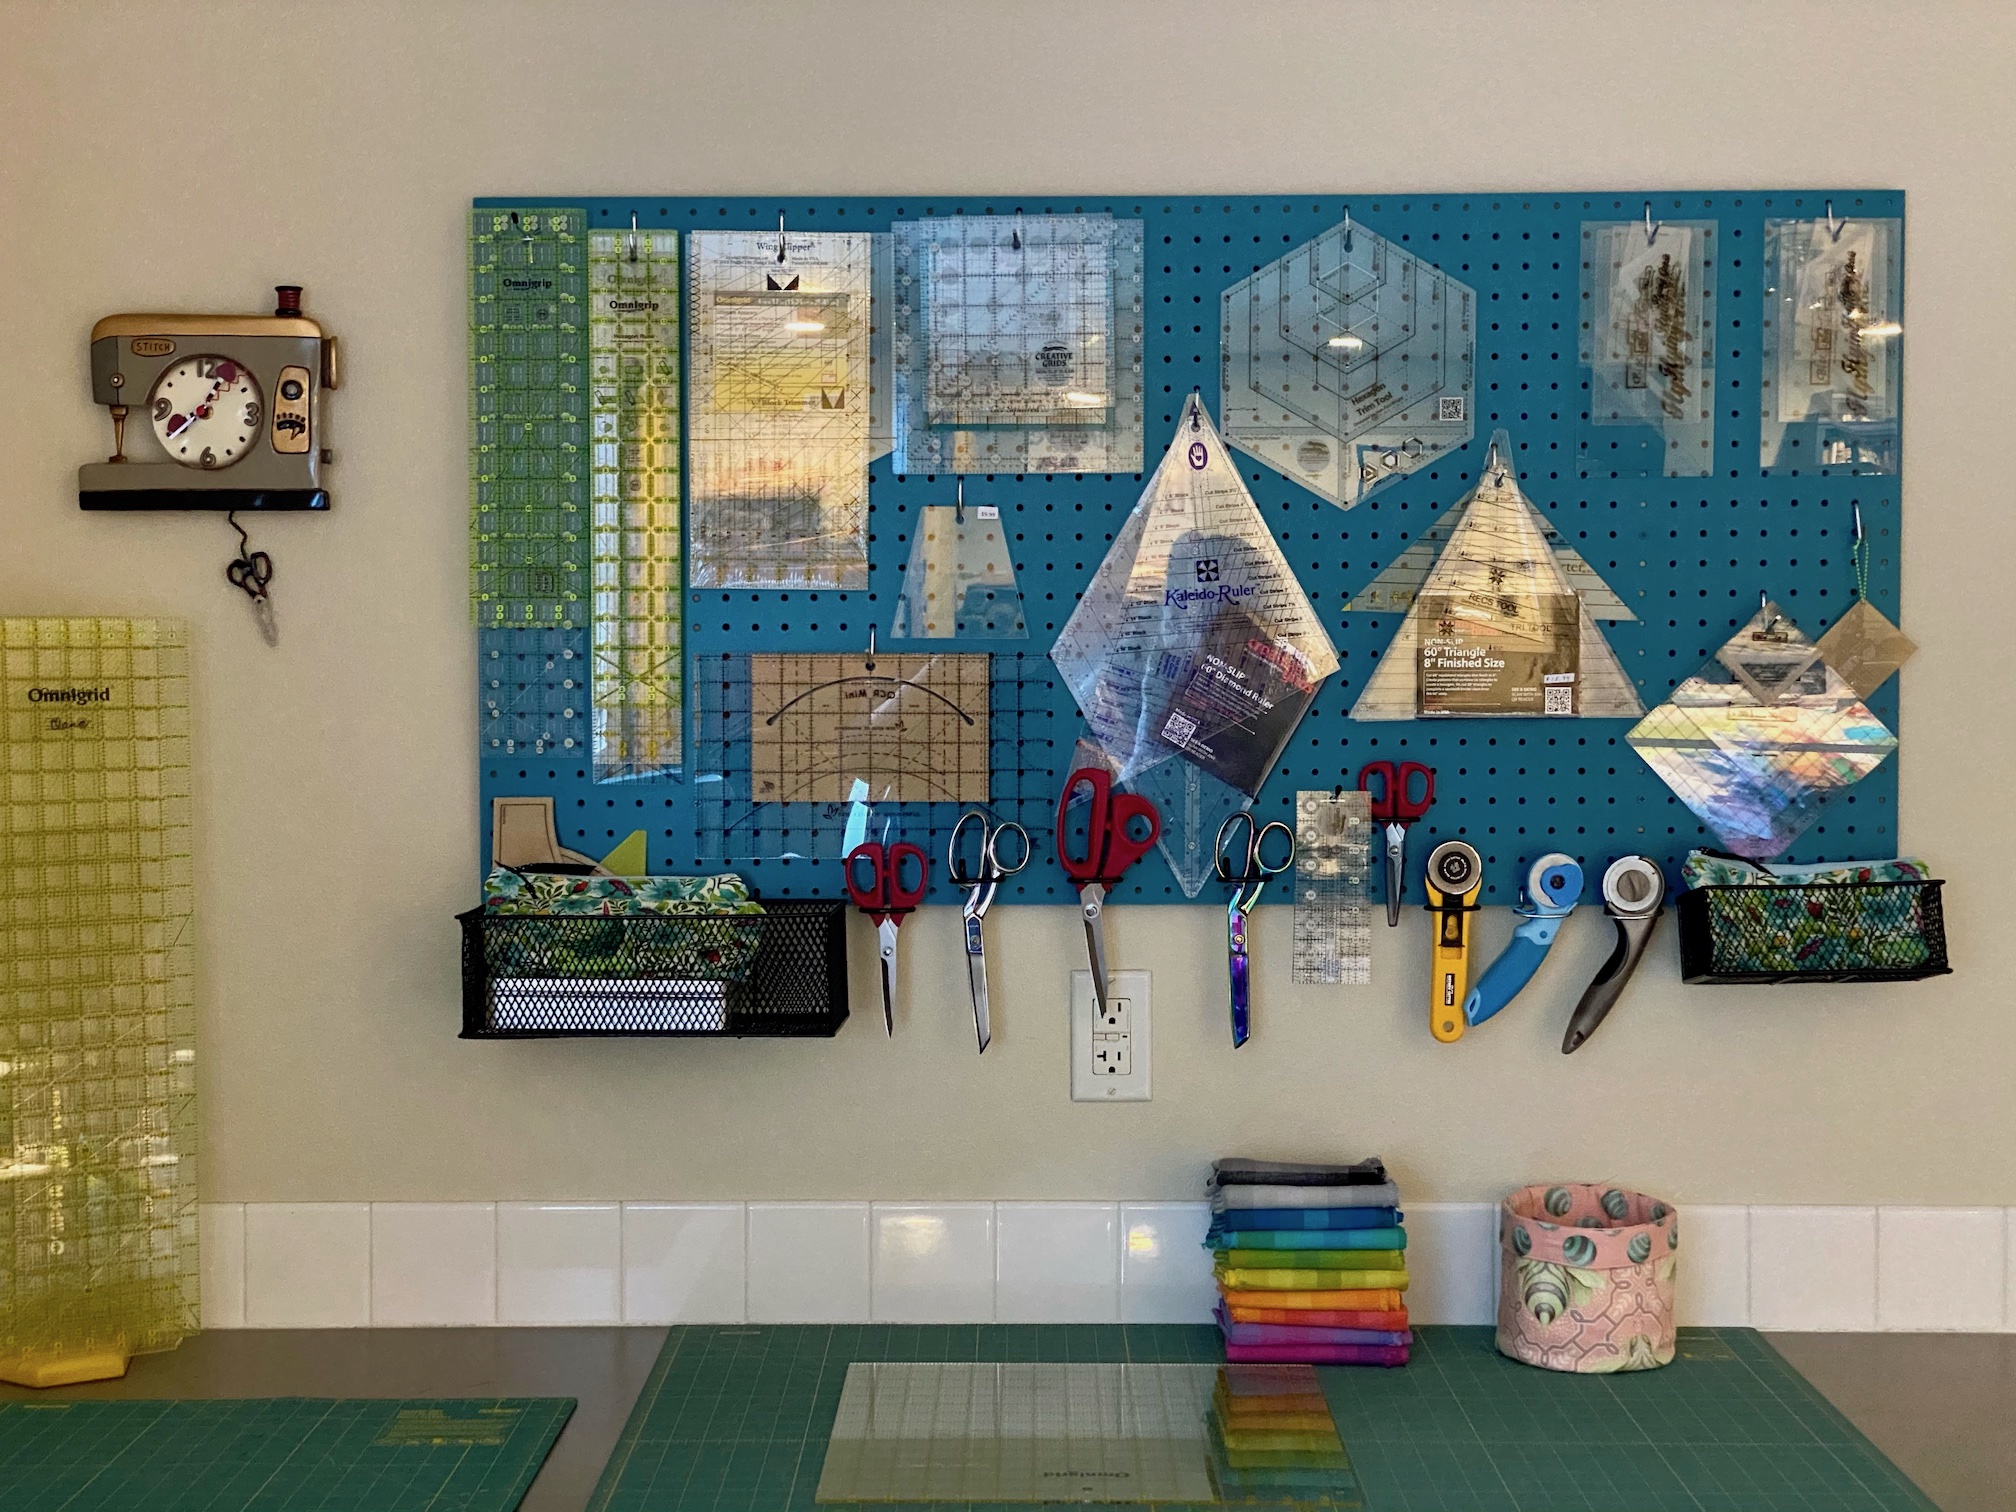
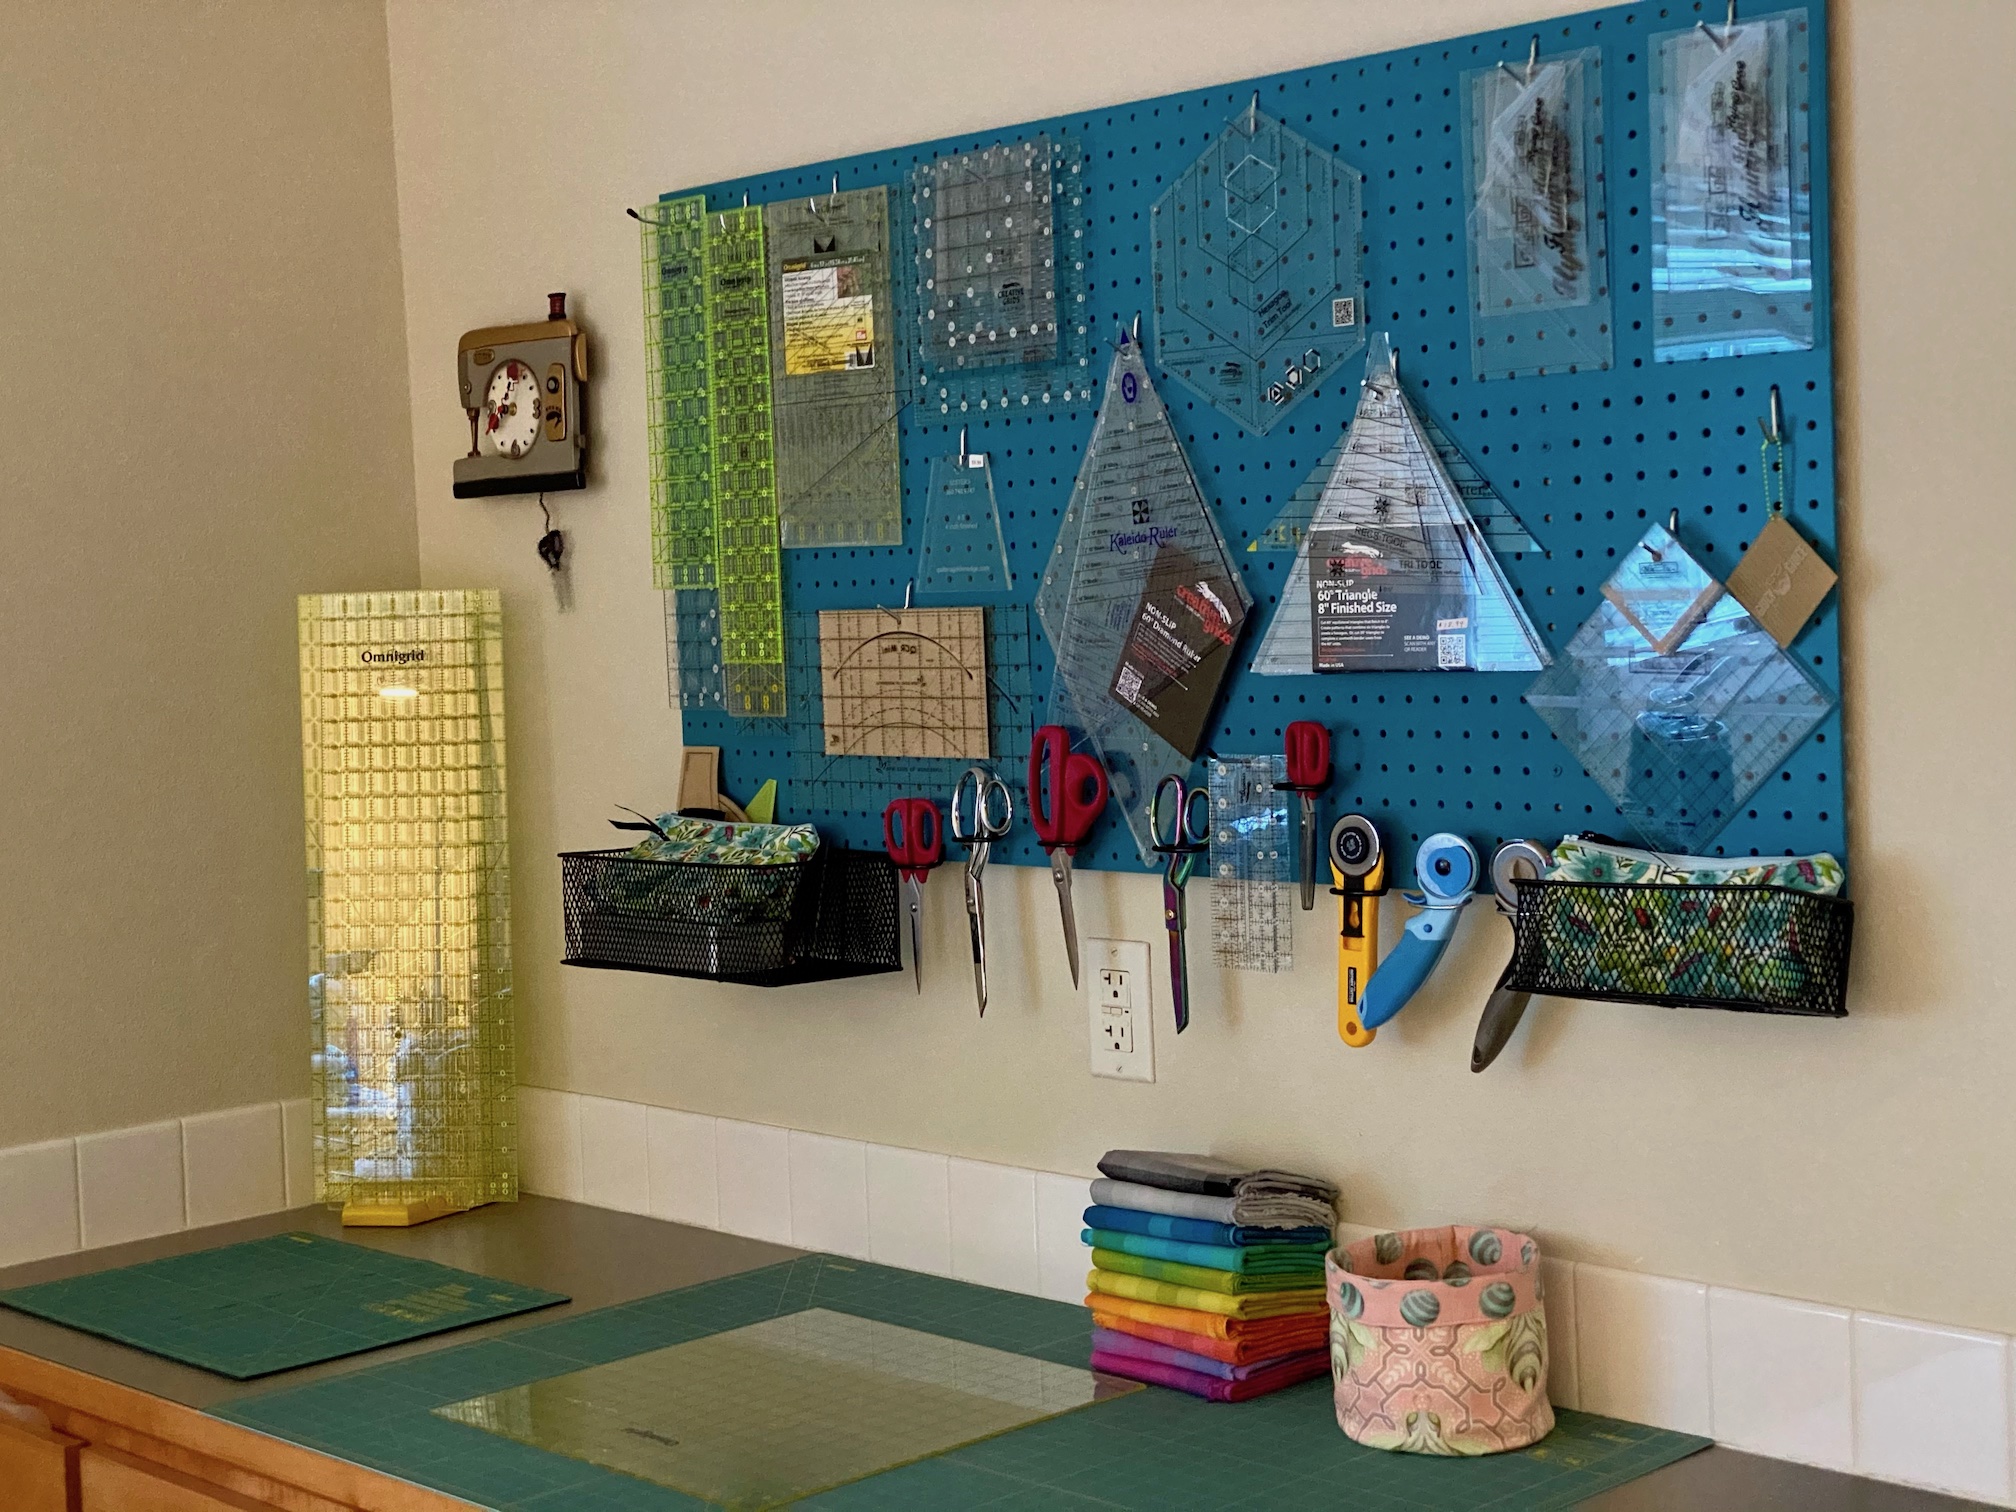
My friend Dana was inspired by my new pegboard and recently she had her husband install one in her studio!
At first she was going to have the pegboard painted a neutral color like the color of her studio walls, but then she decided she wanted a pop of color:
I think she did an amazing job organizing her pegboard! Thanks to Dana for sharing images of her new pegboard.
My partner John (“Mr. Woodworker”) has been busy in his workshop. In the next several weeks I will have some new improvements to my studio to show you.
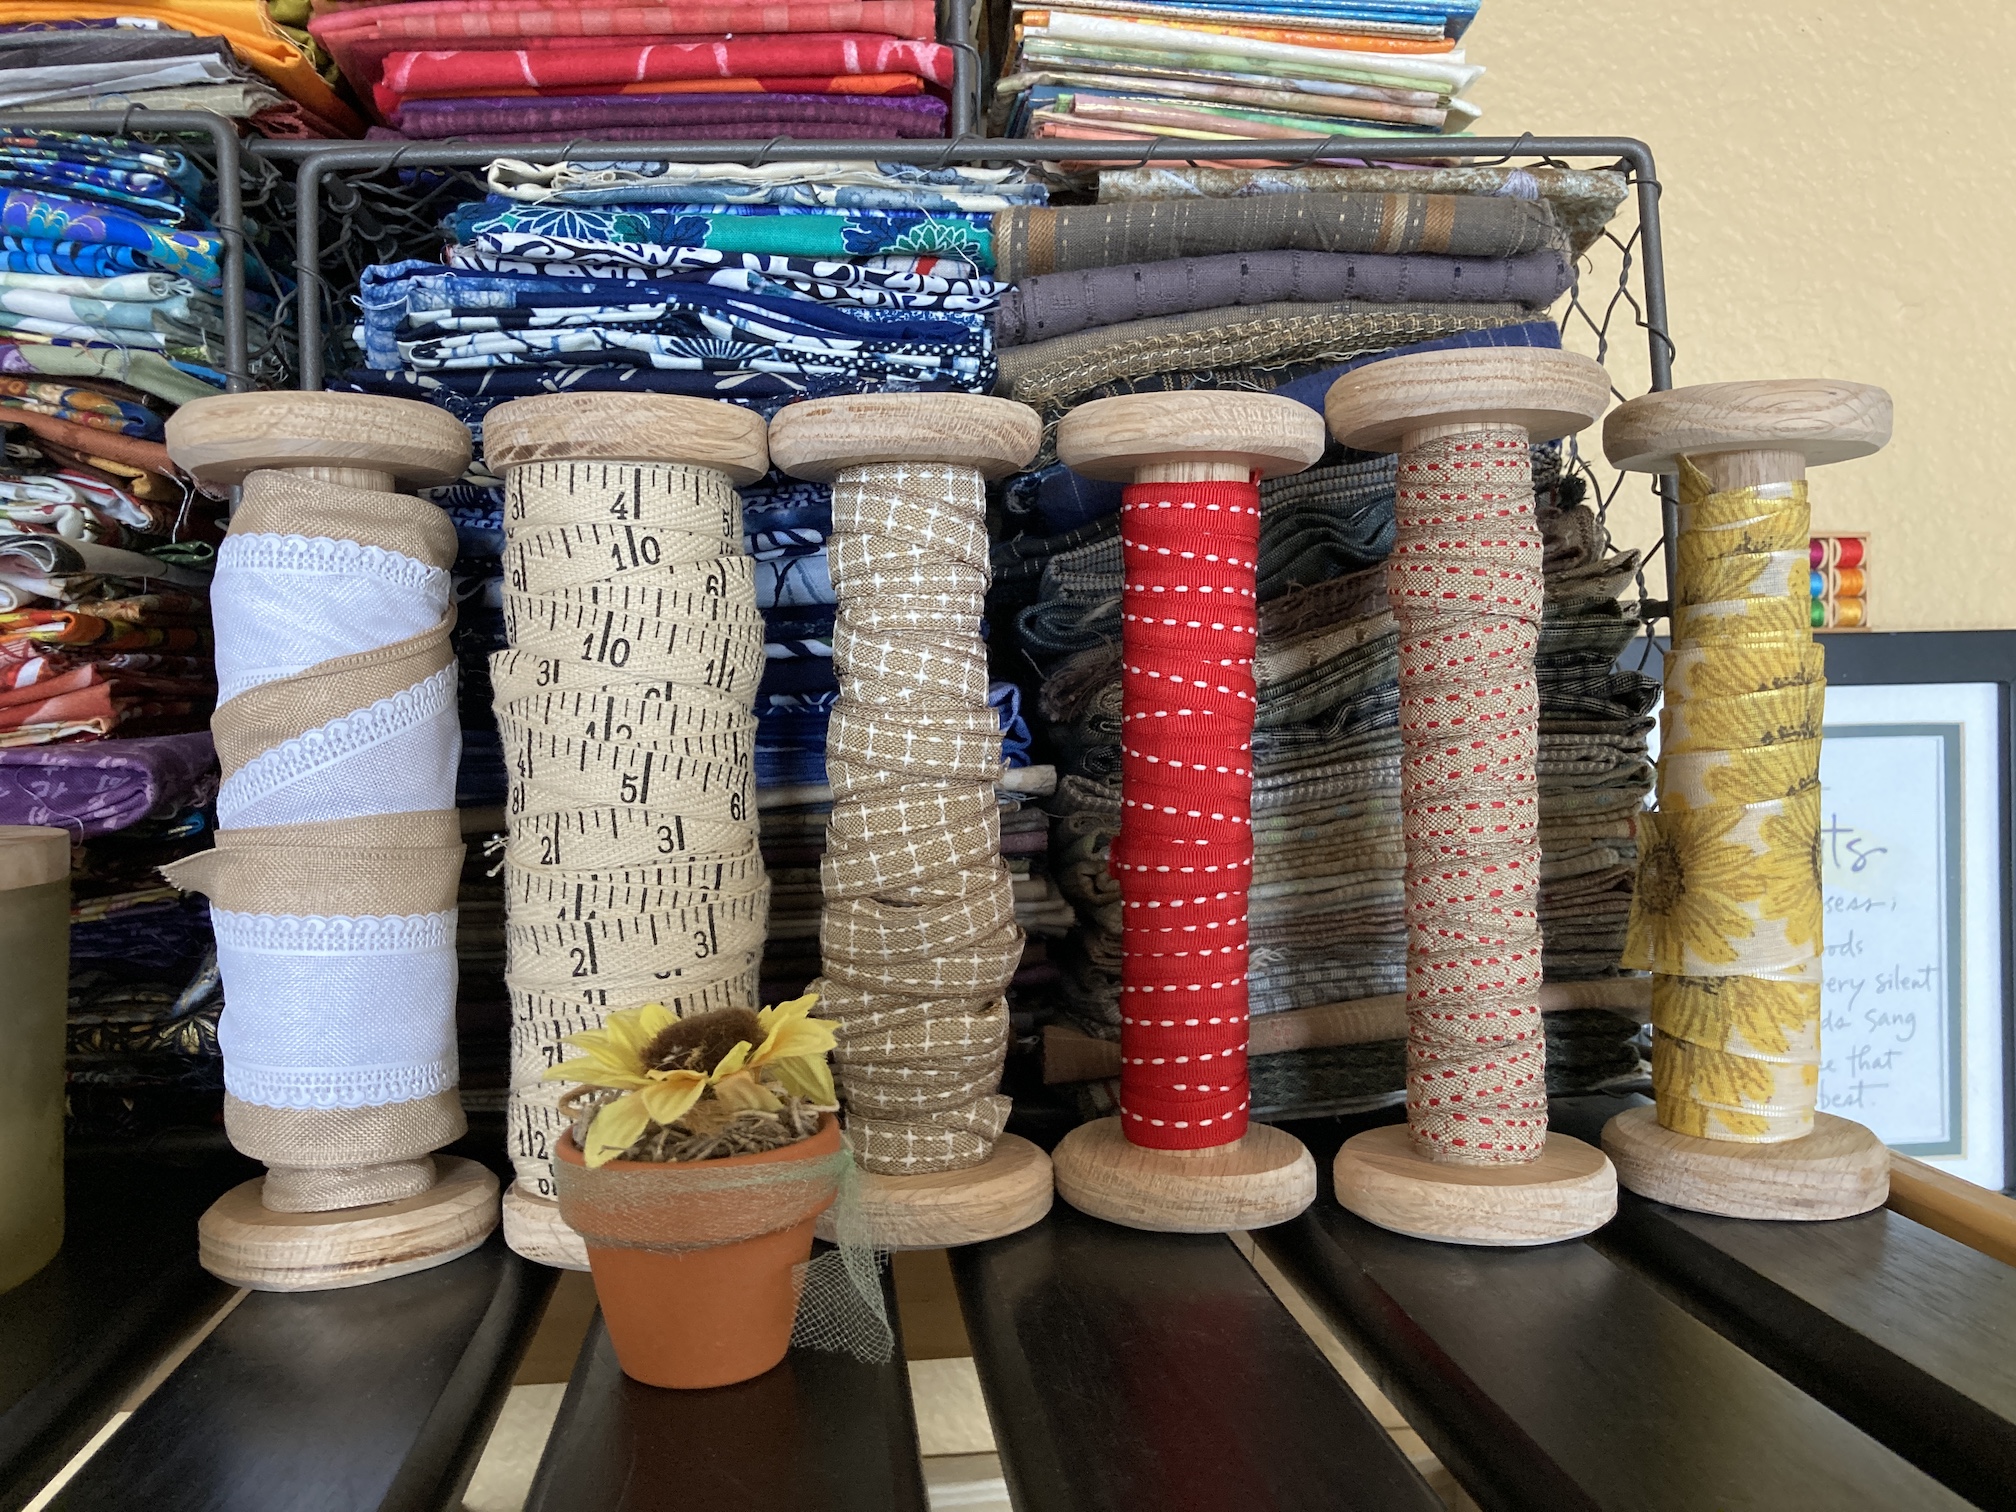
For now I thought I would show you that he has taught himself to make wooden spools, which I can use for my decorative ribbon.
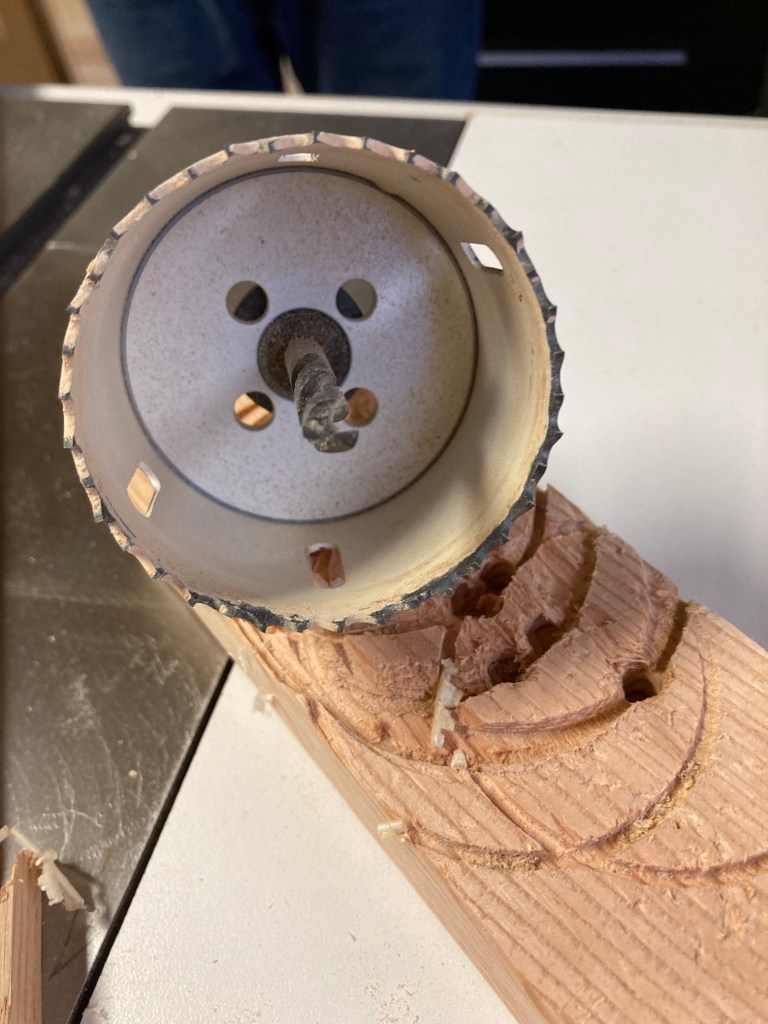
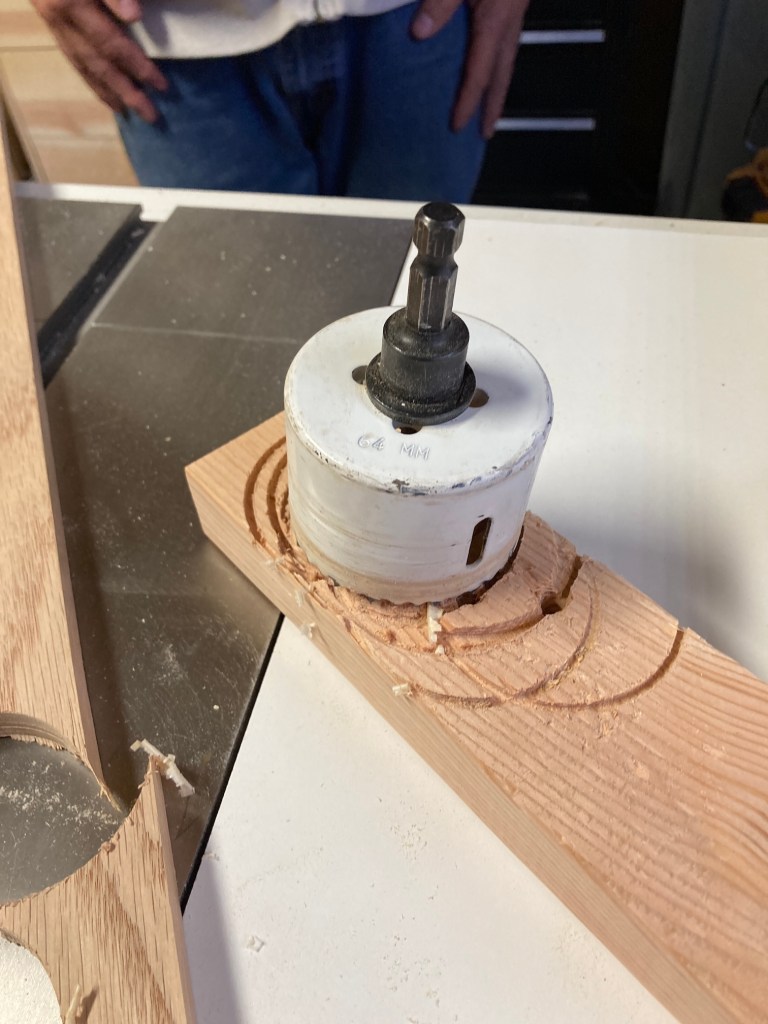
He has a special drill-thingie (I guess I could ask him the official name but what would be the fun in that) which he used to create the top and bottom of each spool:
And he attaches the top and bottom discs to an oak dowel to create the spool.
The spools are around 5.5 to 6 inches in height and I think they add a decorative touch to my studio!
It’s been a while since I guest blogged. Hi there – it’s tierneycreates Beastie and I wanted to share some changes to my home (Tierney’s studio).
I’ve titled my post “From the Cutting Table…” because my dog Mikelet and I now live on the cutting table in Tierney’s studio:
In case you are new to this blog, here is a little background on me:
My name is tierneycreates Beastie and I am a Monster, but the good kind of Monster. I was made by Helen of CrawCrafts Beasties in Dublin, Ireland. You can read my story at I’m A Monster!!!. You can also check out the other posts I’ve had to guest blog on (i.e. when the human Tierney falls off the blogging-wagon and I have to help) in the series of posts: Beastie Adventures.
I like the cutting table, I have plenty of room and it is not too scary like it was when Tierney had me next to all those creepy giant schnauzers (see January 2020 post Guest Blogger: What the heck is going on here?)
Can you see the look of sheer terror in my eyes??!?!
Whew, glad those days are over! Oh you might wonder what became of my fiancé John Beastie (see post Guest Blog Post: Mail Order Groom), well he spends most of his time in John the Human’s office downstairs. Tierney and John Human feel it is best not to let a couple of Beasties spend too much time together as mischief is certain to happen! (Just wait until we get married, they’ll never keep us apart!!!)
Here we are in July 2020 celebrating our engagement
Oh I think I am getting off track on my post…
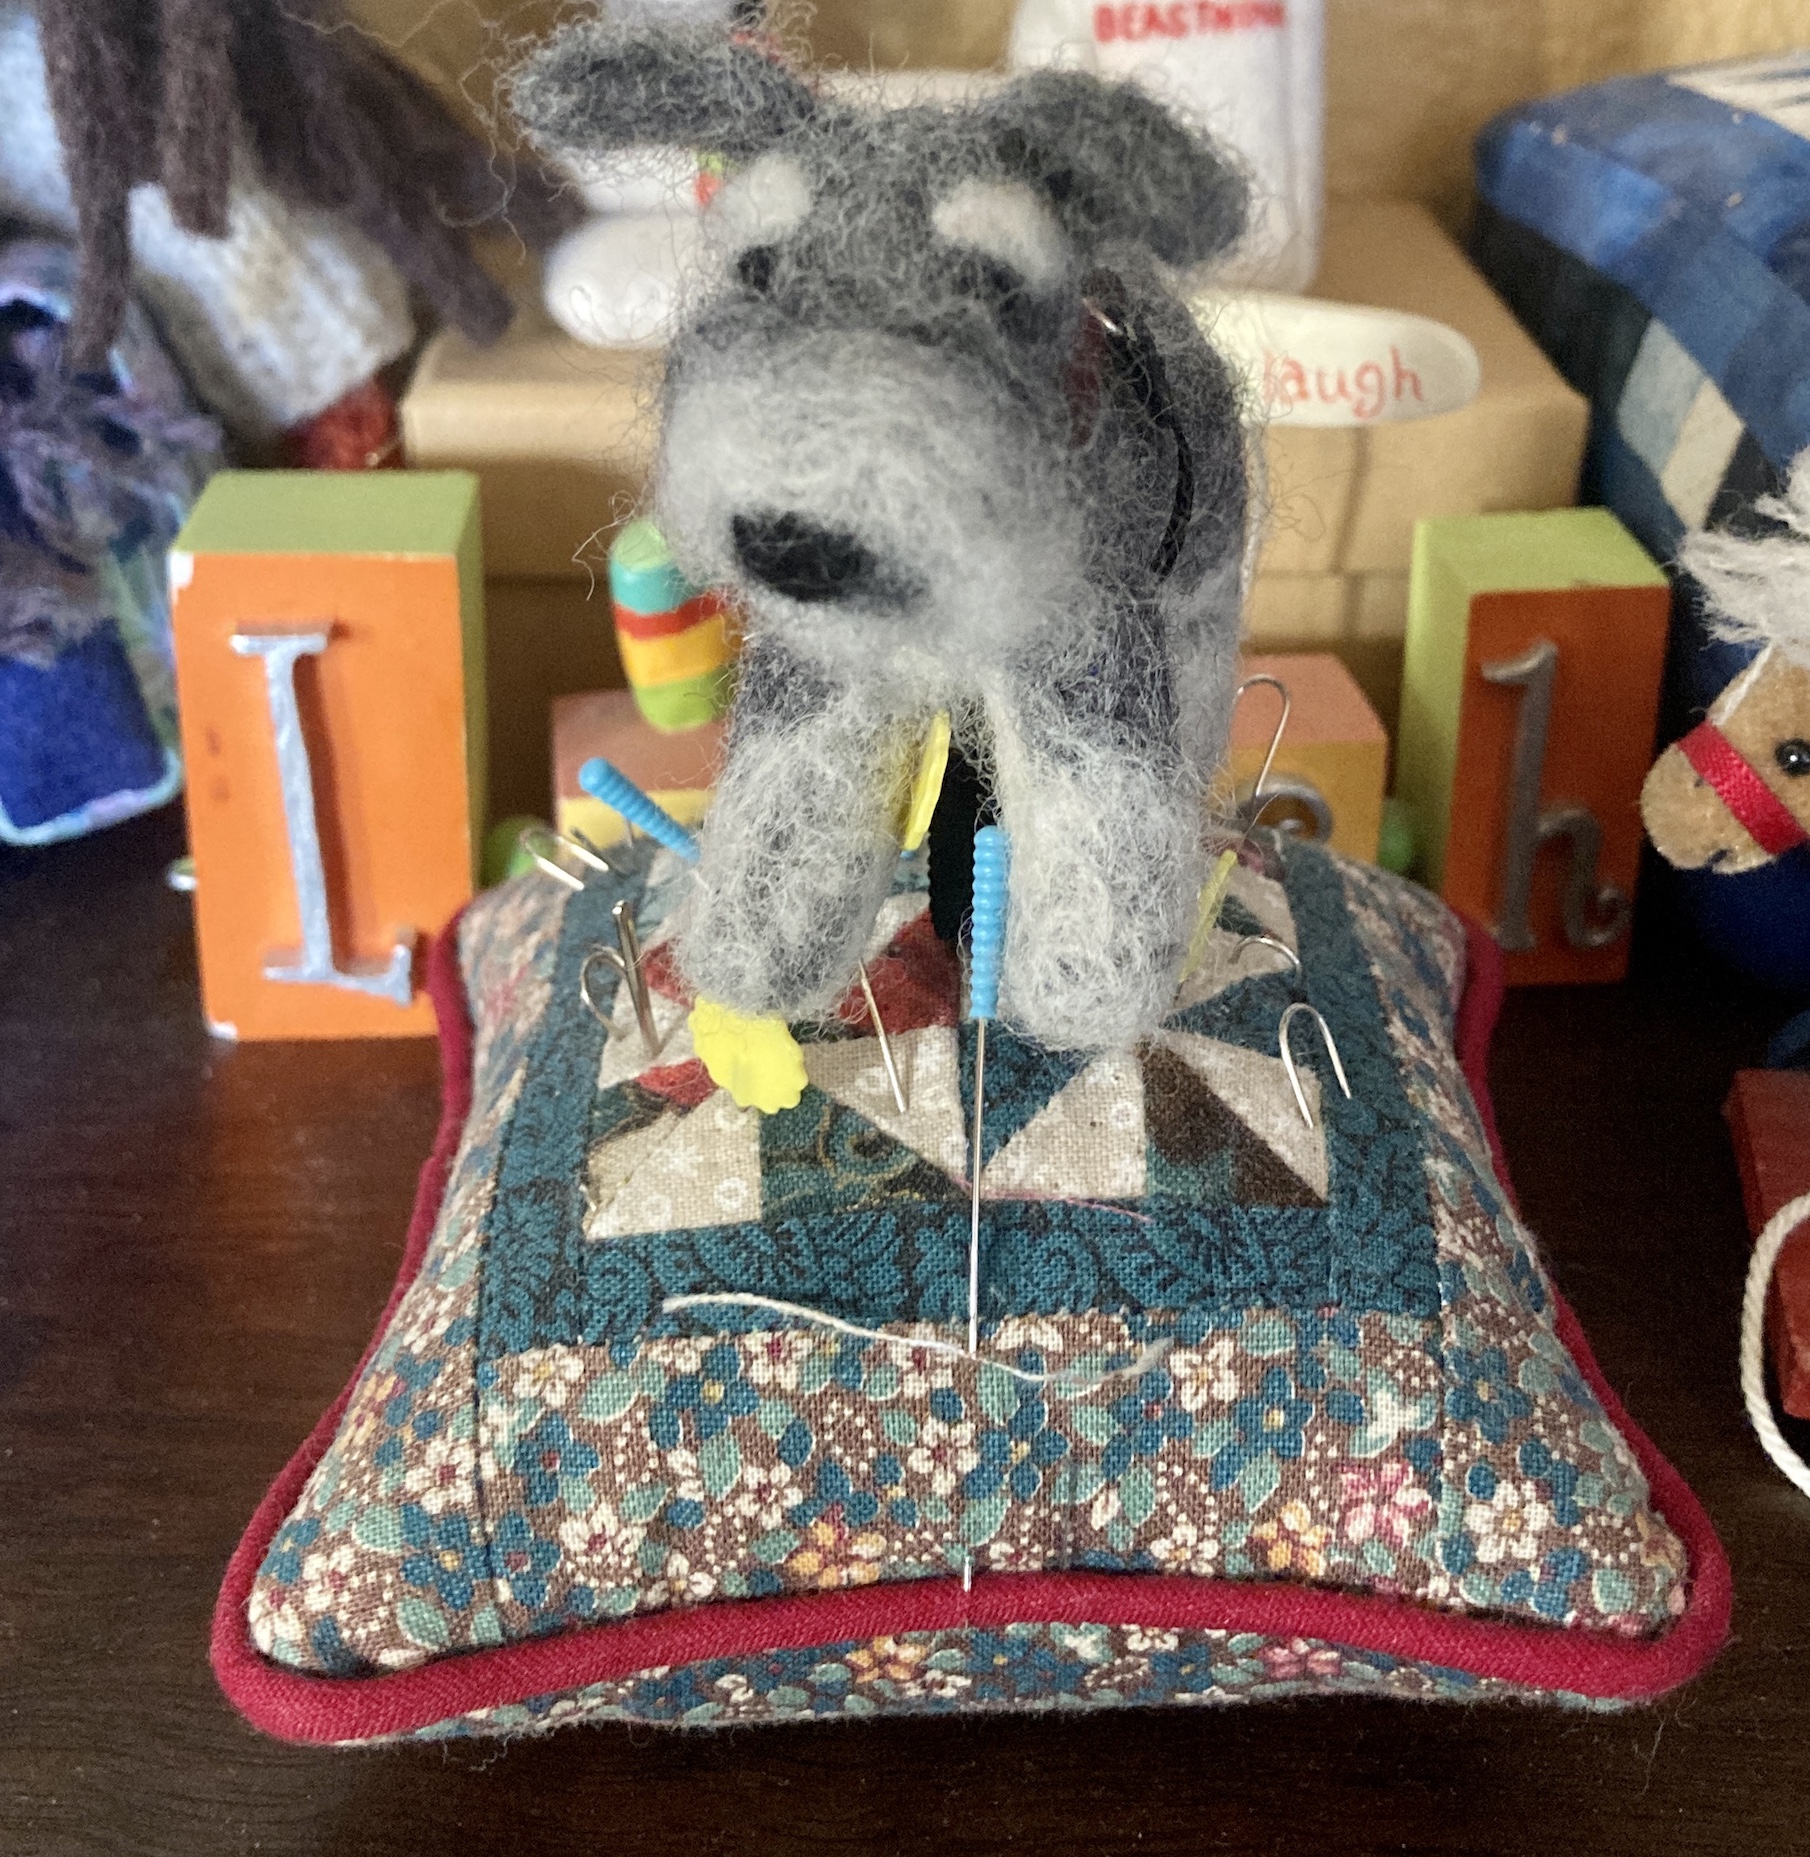
So yes my dog Mikelet and I spend most of our time on the cutting board in Tierney’s studio and we like it, though I have to keep an eye on Mikelet because sometimes he plays in the pincushion and I think that might be dangerous.
By the way my maker Helen of CrawCrafts Beasties made me my own sewing machine so I could help Tierney sew projects and once I figure out how to use it maybe I will have a guest post about my projects instead of Tierney’s!
Now what I was I originally planning to tell you? Beasties are easy distracted. Oh yes, I wanted to tell you about a recent change to my home the tierneycreates Studio.
John, Human John not Beastie John, Tierney’s partner, recently made an ironing board table for the studio. Before the new ironing board table, Tierney was using a traditional ironing board and iron.
What started this change was for Christmas John got Tierney a cordless iron:
Perhaps you wanted to see a full image of the iron but isn’t the iron much cuter with me in front of it?!!?!?
Okay here is the iron:
Image from Amazon.com
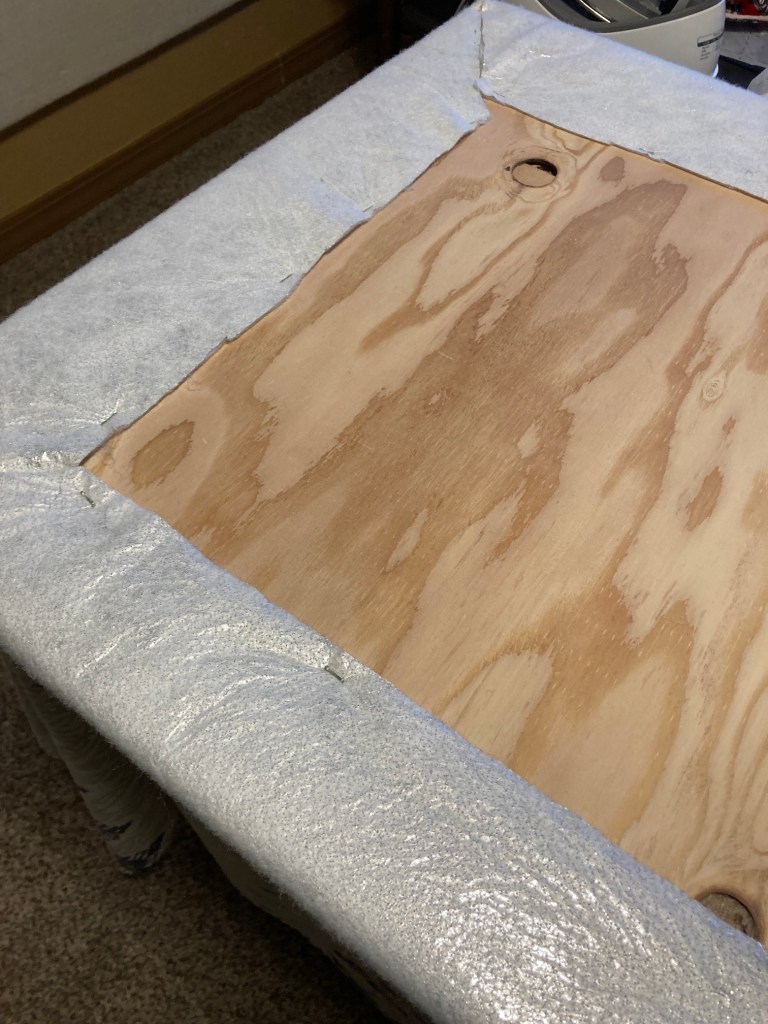
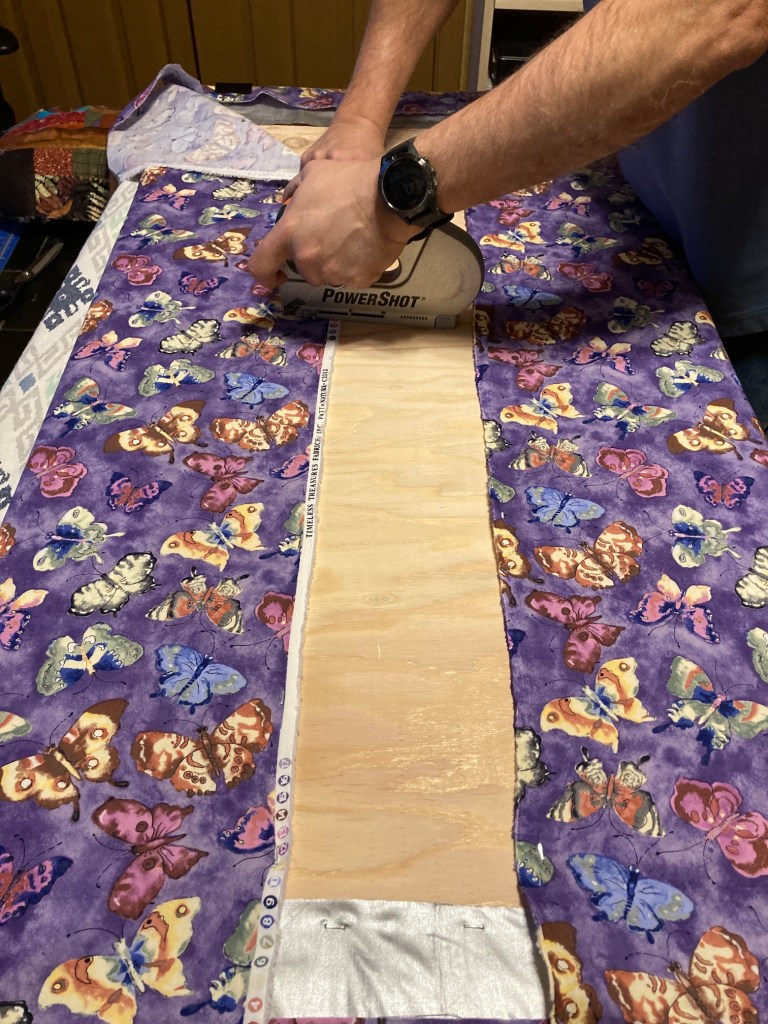
Now that Tierney had cordless iron she had more flexibility on where her iron could be located, so John (again I mean Human John as Beastie John could not have handled the tools involved which are bigger than him…) built her a 2 foot by 4 foot ironing table for her studio.
First John cut a piece of plywood the same size as the table base being used (an old counter height folding table). Then John and Tierney wrapped and stapled four (4) layers onto the plywood base:
Batting
Insul-Brite heat resistant batting
Heat resistant fabric (like the type used for old ironing board covers)
Cotton fabric
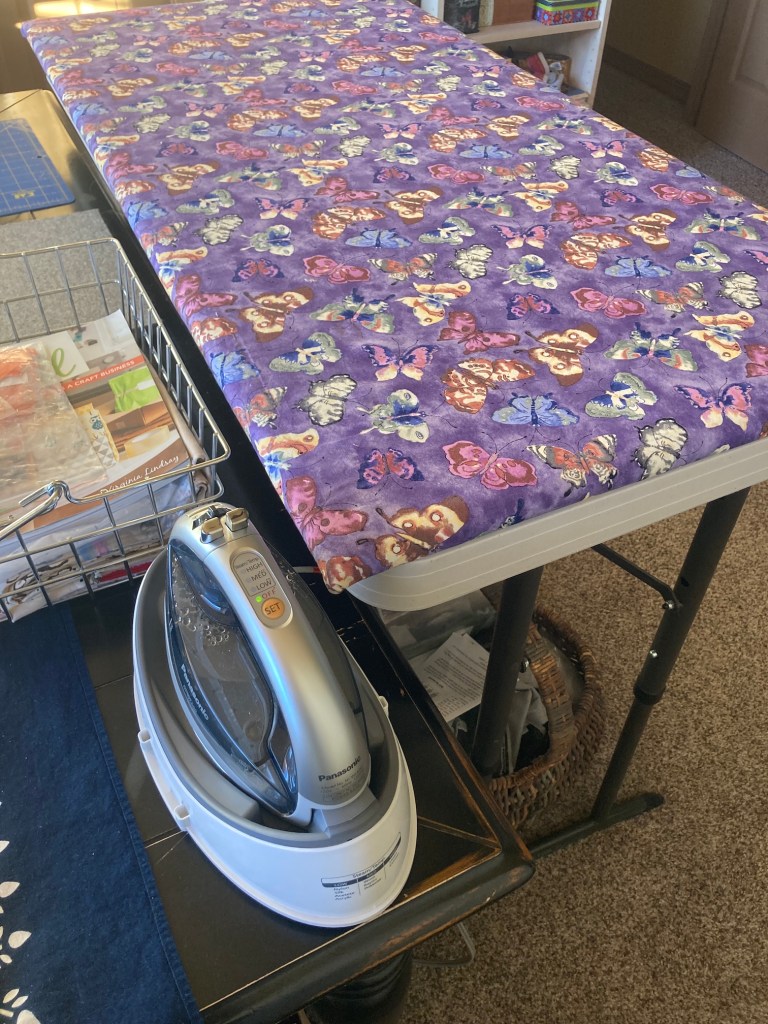
Tierney is really pleased with her new ironing table and she used it while making all those tote bags she talked about in her recent post (see post Tote, Tote, Tote Bags).
So that is the big change to the studio.
Somedays I get tired of the studio and miss the days when I used to go on adventures with Tierney. The pandemic has slowed down my adventures. Tierney promises that soon we will resume our adventures, I just need to be patient.
For now Mikelet and I will wistfully stare out the studio window…
Postscript
I am going to close this guest post by sharing a secret: Tierney is sort of a slob in her studio.
Look at these mini Toblerone candy bar wrappers she left on the cutting table!
I caught Mikelet sniffing them, luckily there was no candy in them as chocolate is bad for dogs.
I hope she will be more respectful of my space and clean up her wrappers!
Just a quick(ish) post as I try to catch up on reading all my dear blogging buddies’ posts that happened while I was away from blogging for a little while.
This is an unexpected continuation of my previous post – In the Studio.
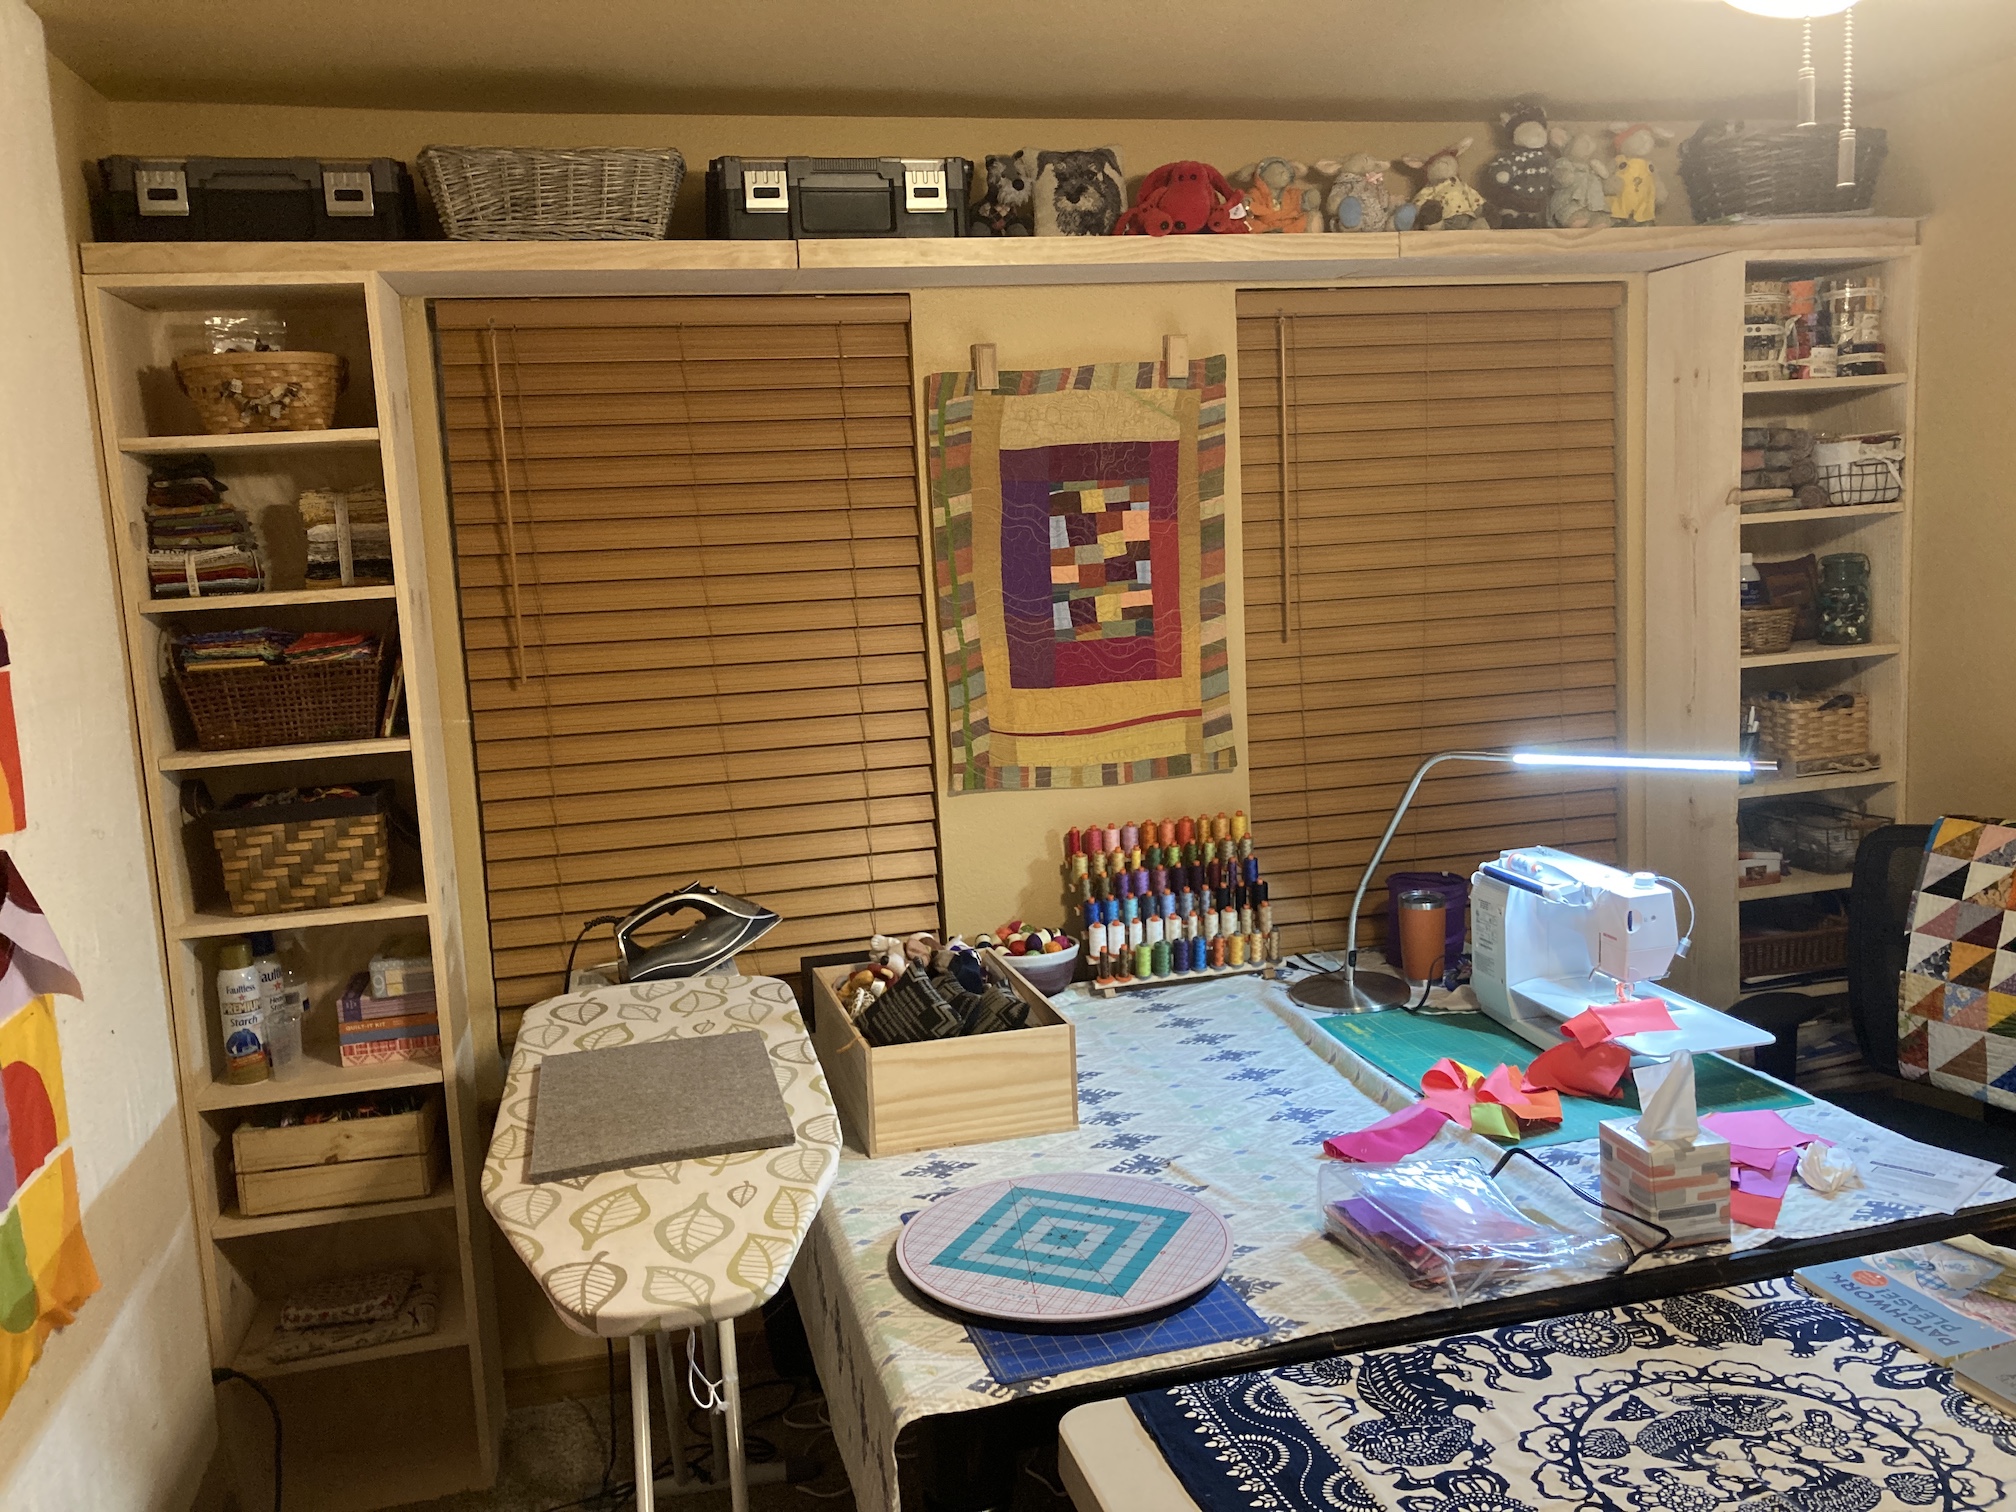
“Mr. Woodworker” (my new nickname for my partner John) is a little obsessed with getting my sewing studio in shape for maximum-creativity-efficiency (or he is just looking for more pandemic projects and we continue to primarily be stuck at home).
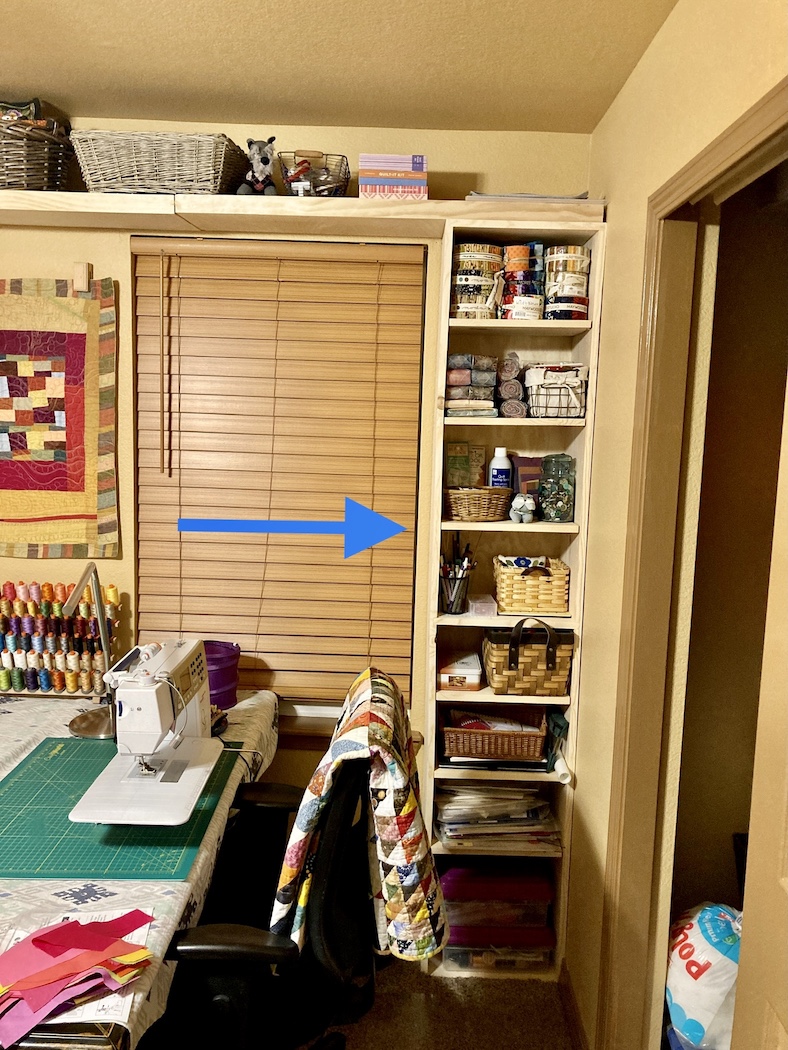
He and I came up with the idea of adding some shelving on each end of my new floating shelf he just installed:
Before the additional shelves
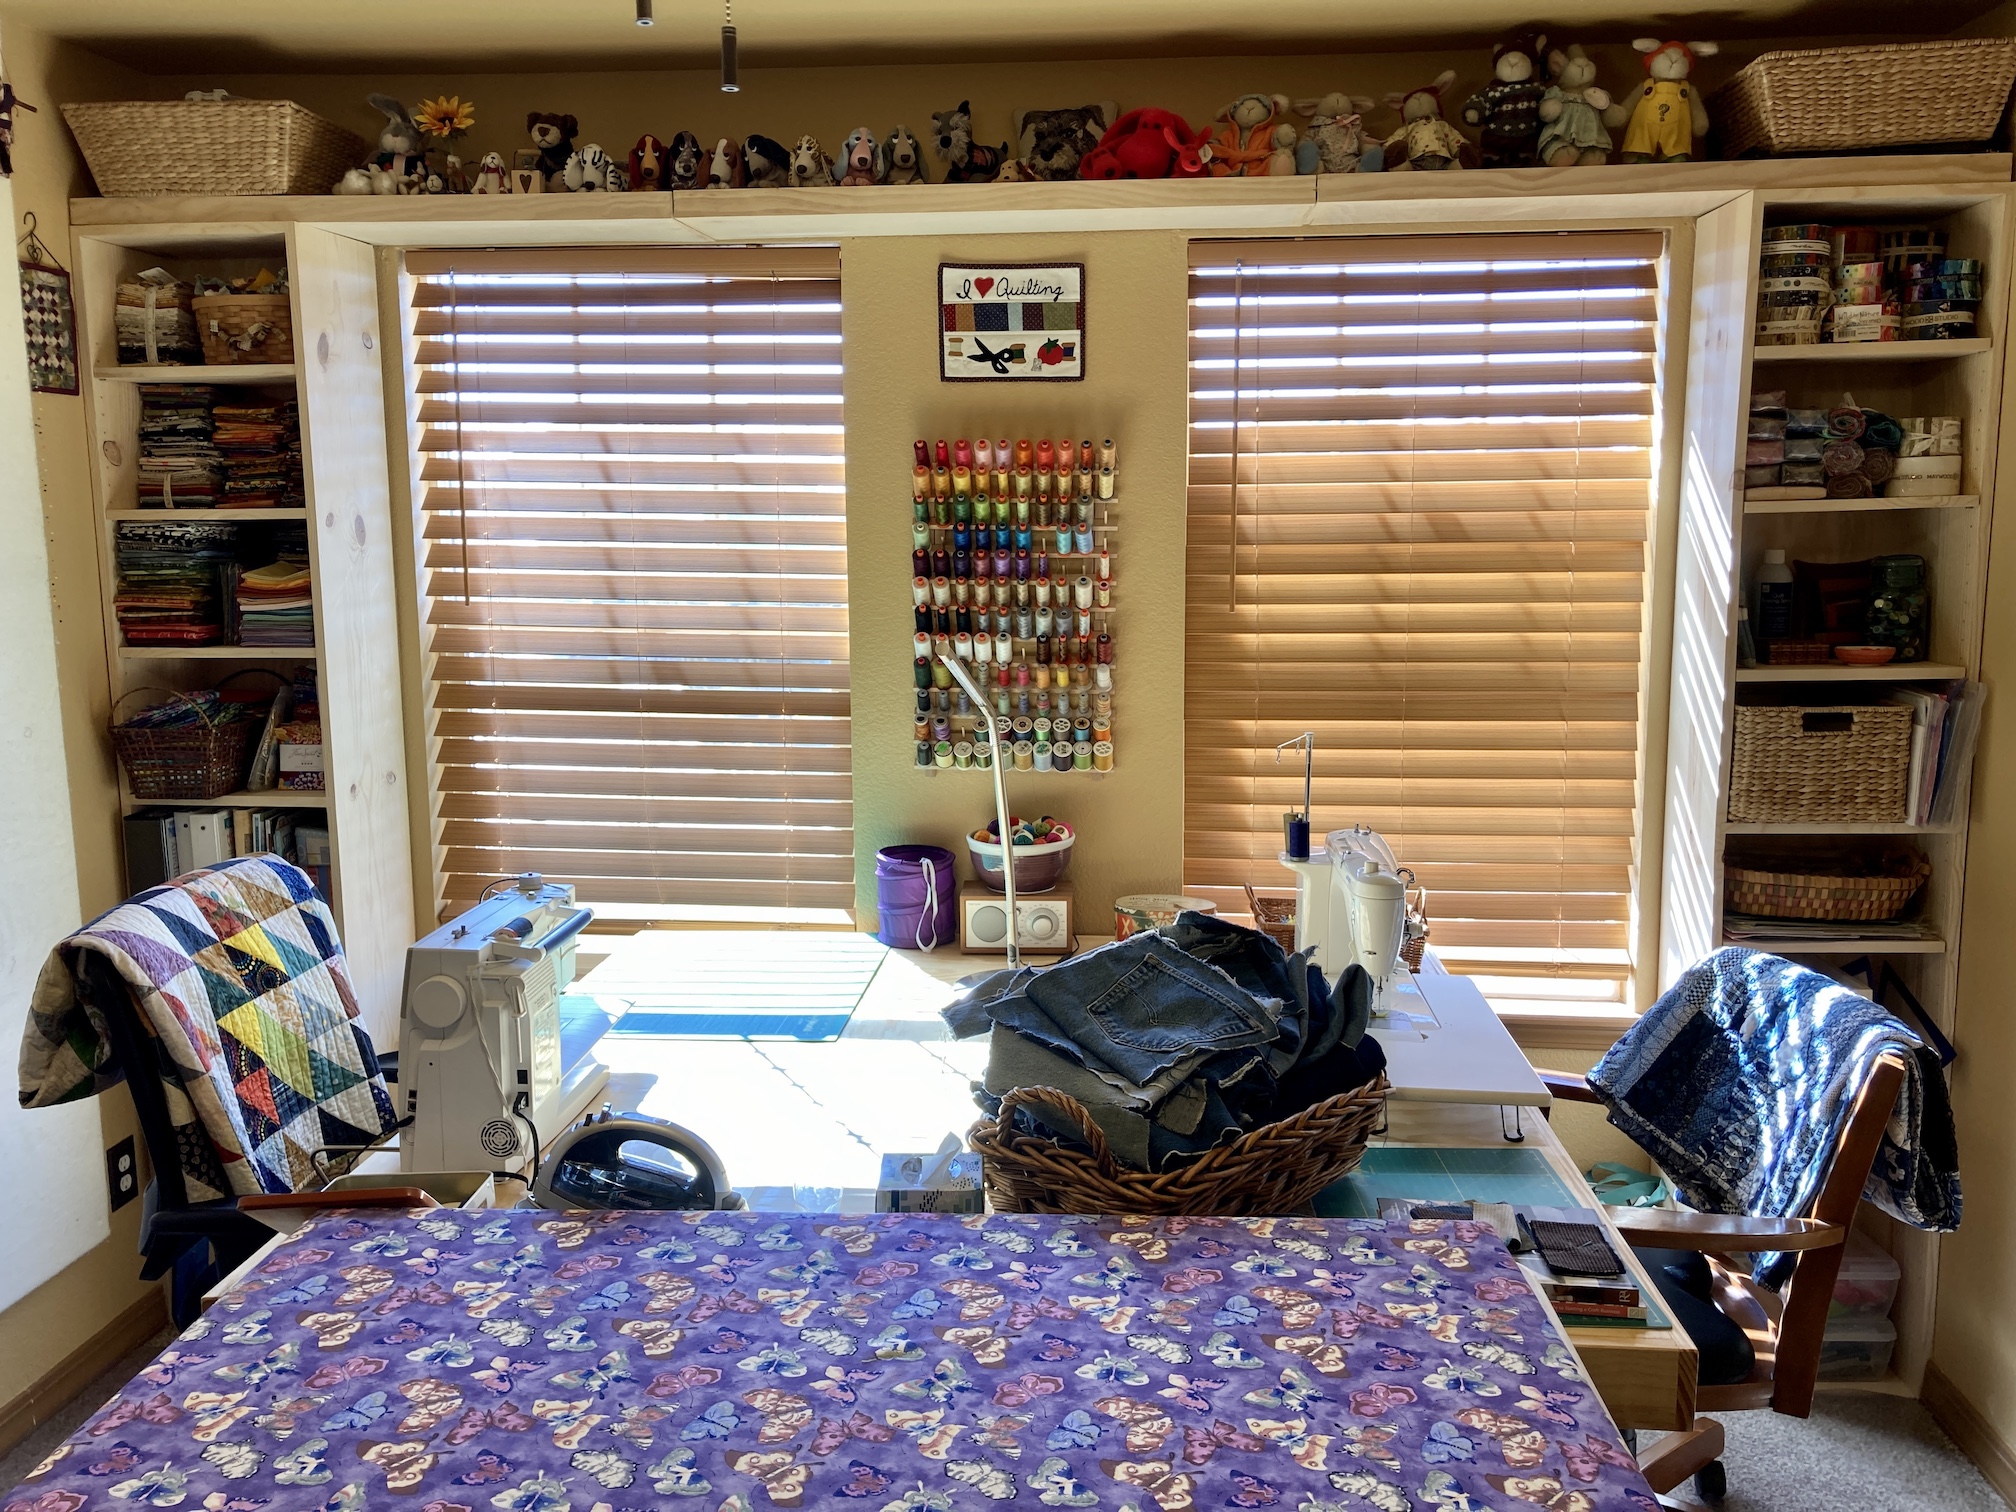
Here are the new shelves (just installed yesterday) – one on each side of the window in my sewing studio!
I cannot begin to tell you how pleased I am with my two new bookcases/shelving on each end of the new floating shelf. These bookcases are things I did not even realize I needed until we spontaneously came up with the idea and Mr. Woodworker whipped them up!
I now feel really organized!
What does Mr. Woodworker have planned next for my sewing studio? Well he wants to build me a matching cutting table, a sewing table and one additional bookshelf area. I asked him to hold off for now as I need to focus on using my studio to keep making stuff for my tierneycreates Etsy shop I hope to reopen in January 2021.
Postscript
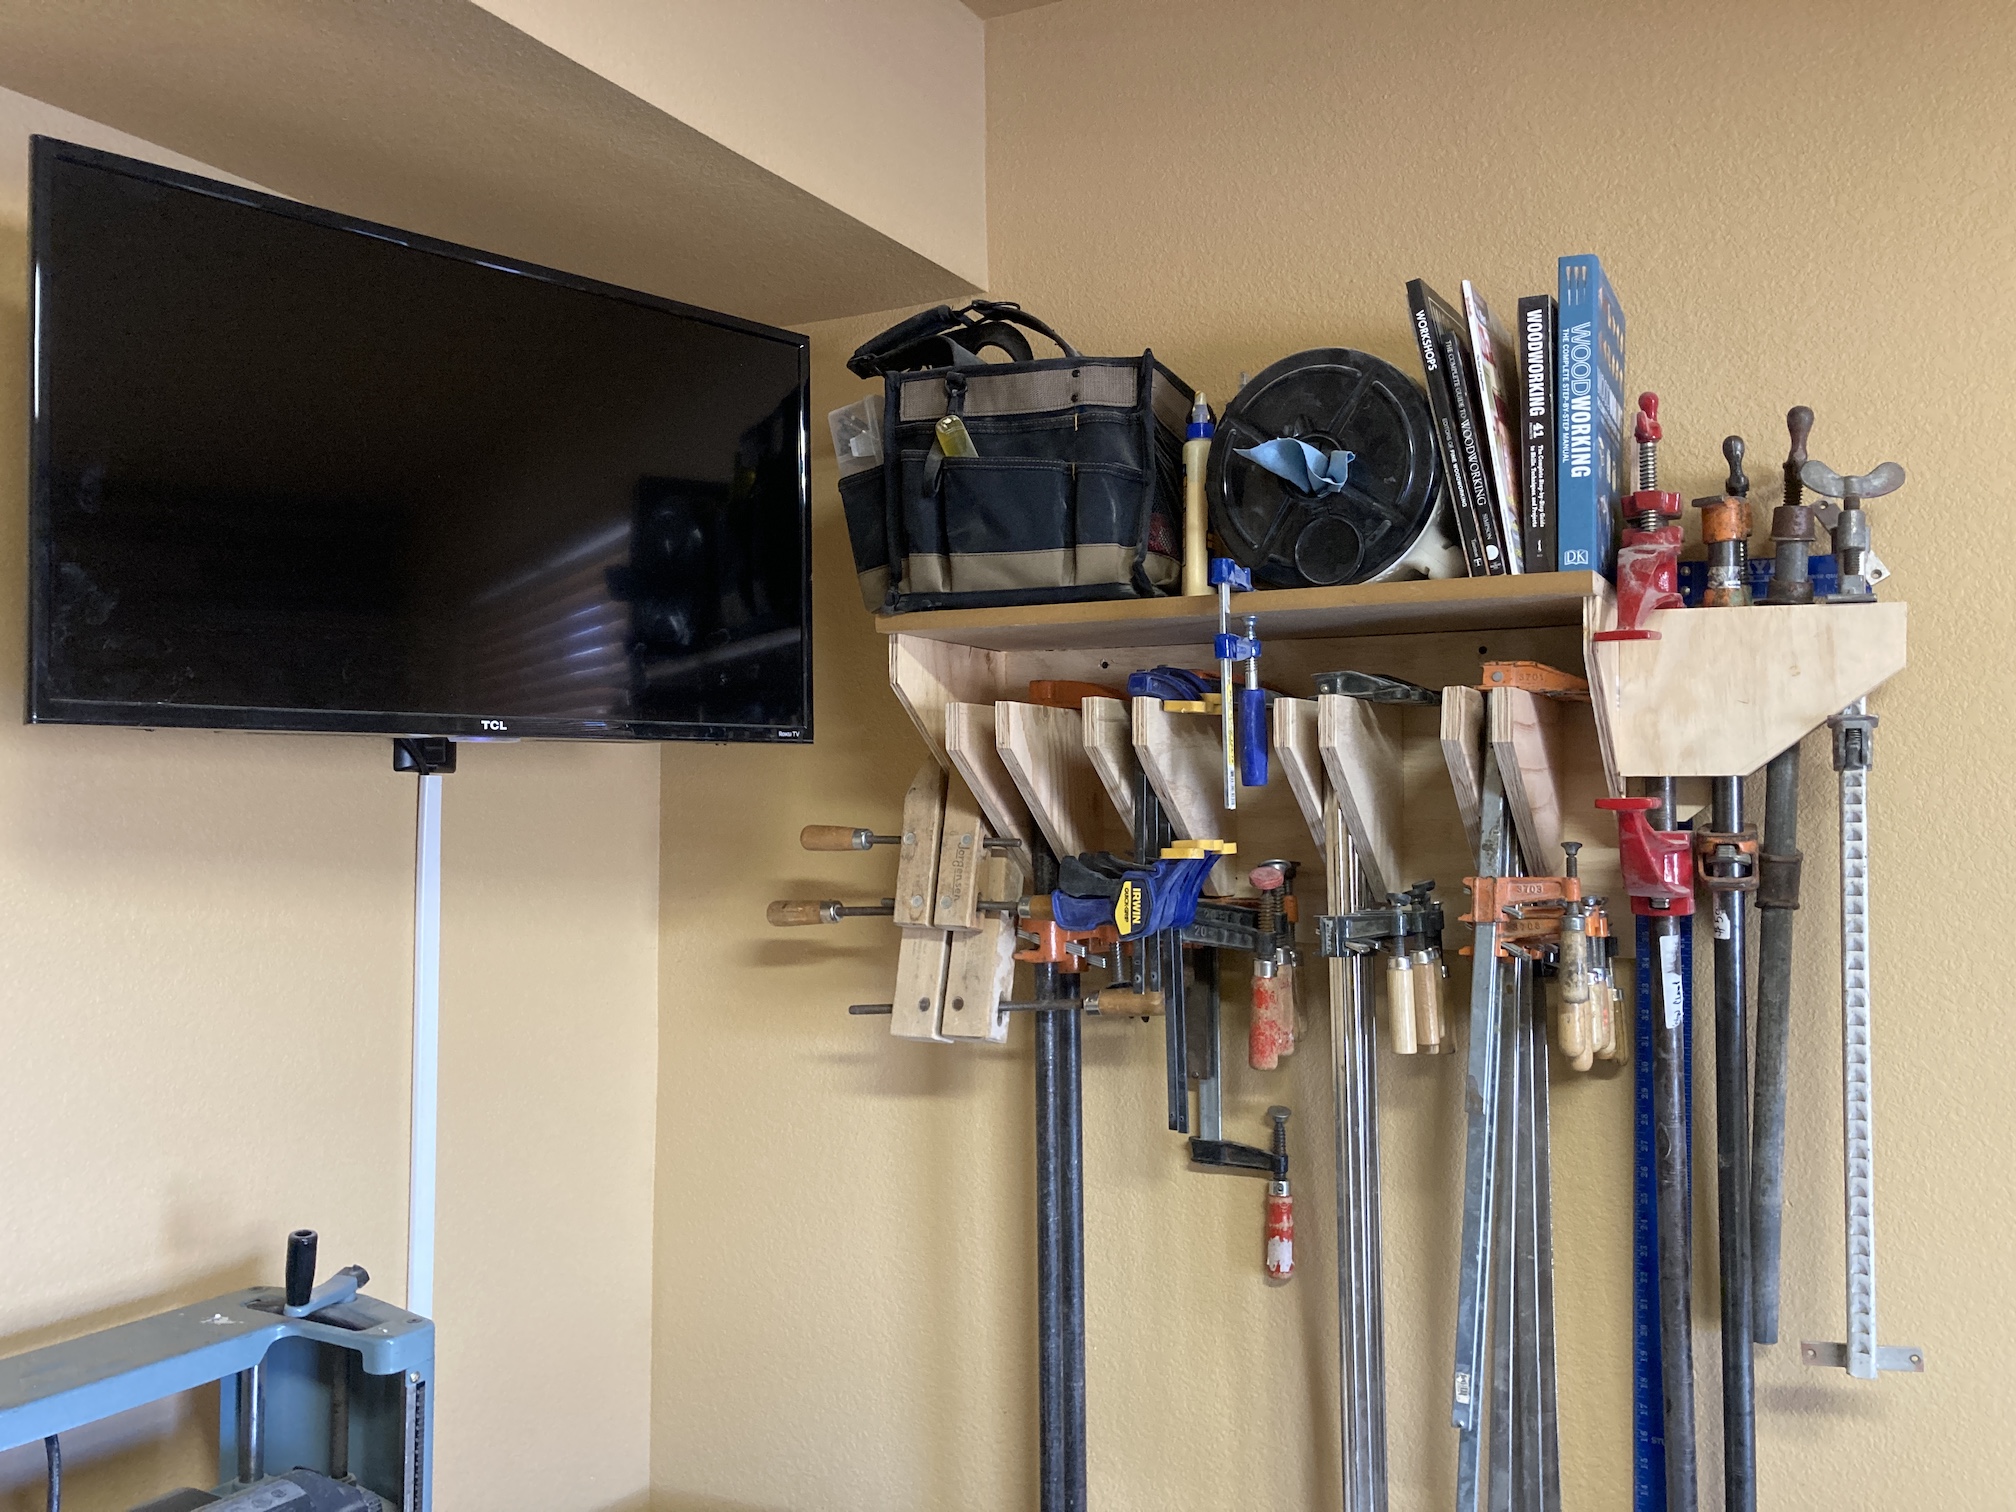
Mr. Woodworker has been working on his own studio too, which is located in the basement. He built himself a clamp stand for his woodworking clamps:
Functional – yes. As cute as my sewing studio area – no – ha!
It seems like it’s been a bit of a while since I posted.
To get myself through December (see Postscript section of the post Pillow for a Kitty) I’ve been spending a lot of time in my sewing studio working on various projects. I will share these projects over the next several posts.
Some of the projects have to do with preparing to re-open my tierneycreates Etsy shop after taking a hiatus for 4 (?) years (it appears I last sold something in my shop in 2016).
I’ll talk more about my decision to re-open my shop and the offerings I am working in some future post, but my studio currently shows evidence of my progress to eventually stock my shop.
My sewing studio has really been an oasis and making things has made me feel centered and peaceful. My partner John has been supporting my studio time and progressing with his new hobby woodworking by sprucing up my studio with some new handmade furniture.
New Bookcase
He made a bookcase for my studio (his first bookcase). The first image is of the bookcase being built in his studio in the basement:
New Floating Shelf
He also built a floating shelf across the wall of windows in my studio to add extra storage:
(By the way, my studio is a mess because I’ve been busy making things and not always tidying up between projects…)
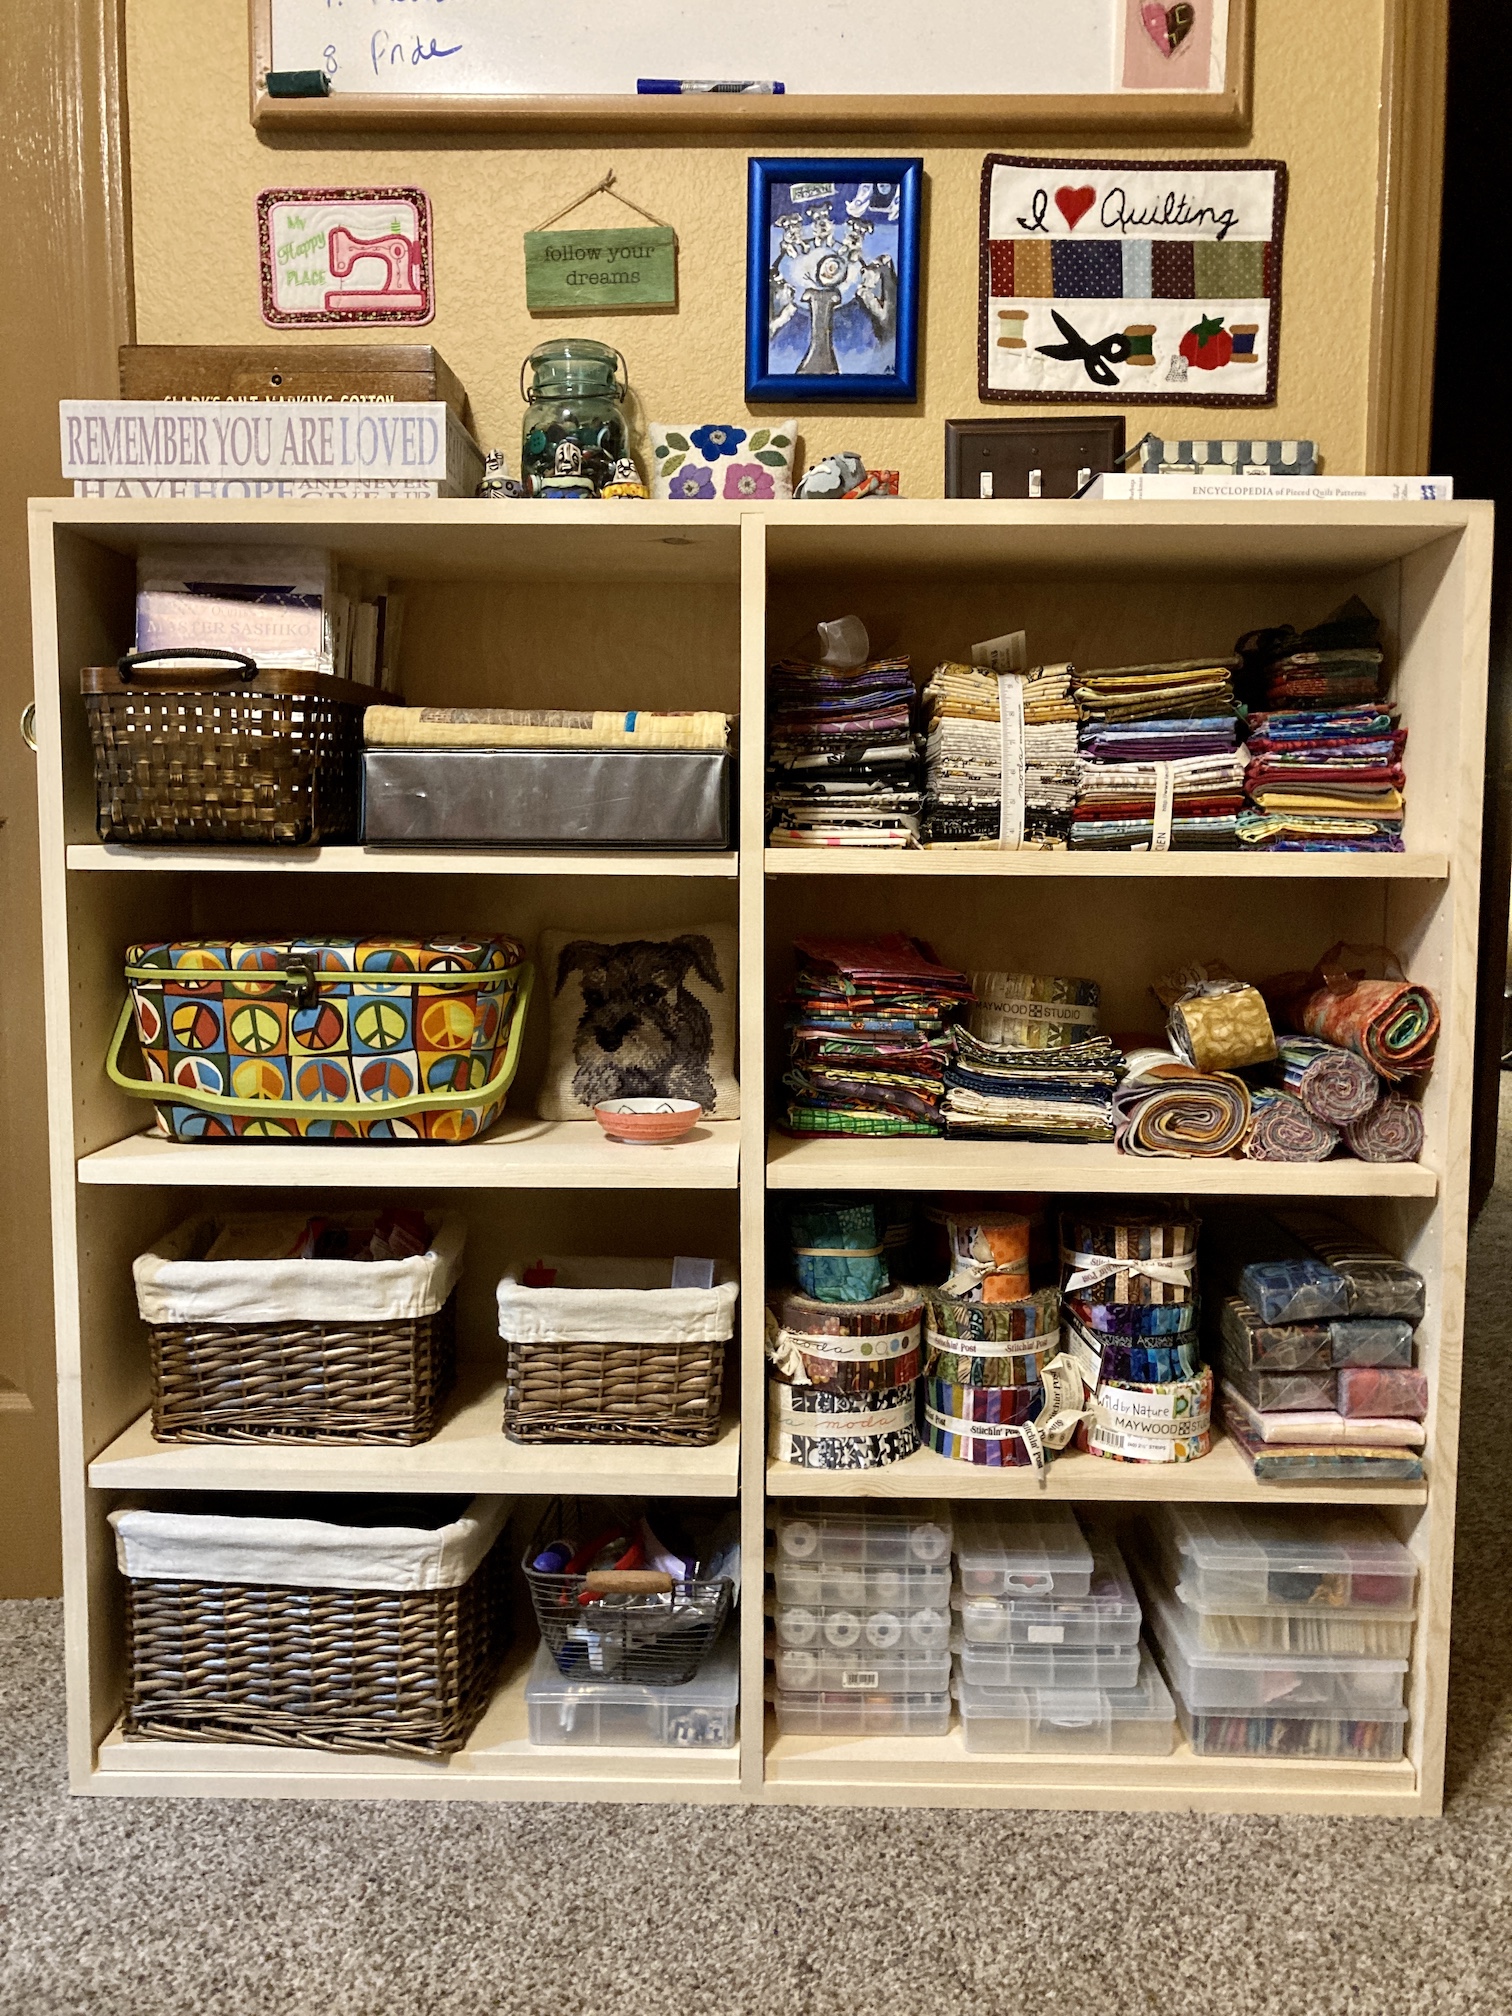
In addition to making many things over the past several weeks, I’ve also added in some additional organizational touches to include re-organized my fabric scraps into baskets in my sewing studio’s closet and getting additional wine crates to organize fat quarters.
Re-organizing Fabric Scraps
Here is what I did with the fabric scraps:
It looks messy but it is a much better way for me to access my fabric scraps which are organized by color groups:
Black, white and gray
Cream and yellow
Orange and brown
Red and purple
Green, blue, and all the blue-greens
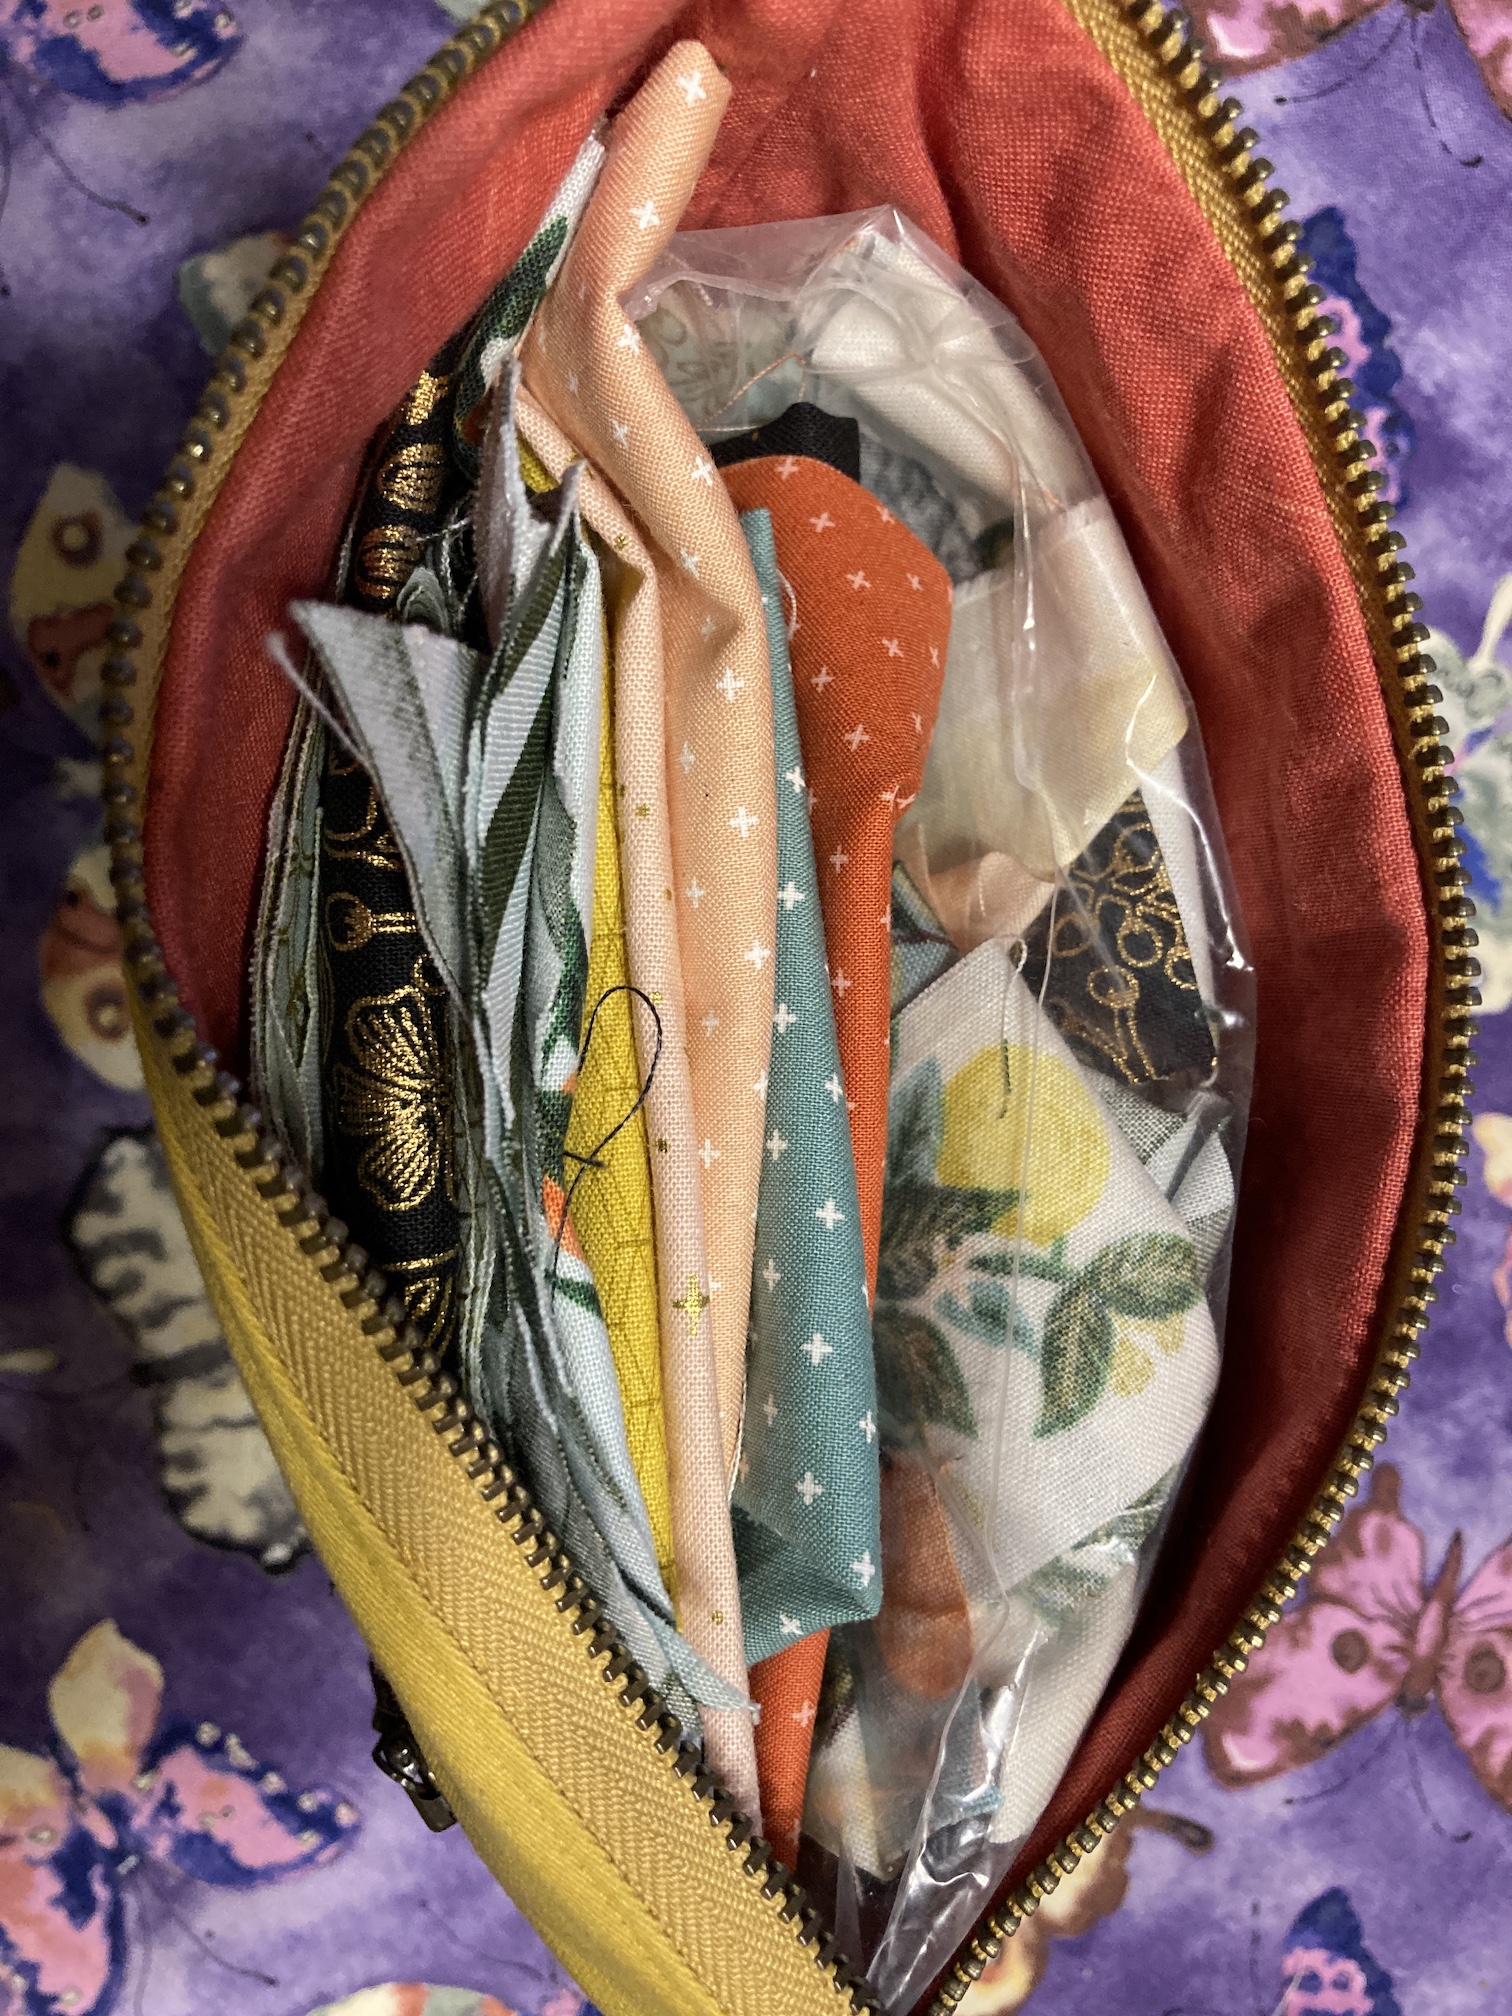
I have batik scraps in their own separate bucket and I have speciality fabric scraps in their own basket.
The plastic bags are scraps for special projects.
While organizing my scraps I purged a lot of small pieces. I decided to finally let go of the small/tiny pieces as well as any scraps that “did not bring me joy”.
Fat Quarter Wrangling
I’ve collected a lot of fat quarters over the years and it feels like I am always searching for the best way to store them. A couple months ago I came up with the idea to organize them in wine crates that I got from local liquor stores. Some stores will give you 1 or 2 for free while others charge $5 a wine crate.
Using an old bookshelf (that I’ve had for like 20 years), I organized the fat quarters by color groups into crates, which I keep next to my cutting table:
A week ago I added one more crate – the prettiest crate I’ve picked up to date and it was given to me for free by a local liquor store. It even came with a lid:
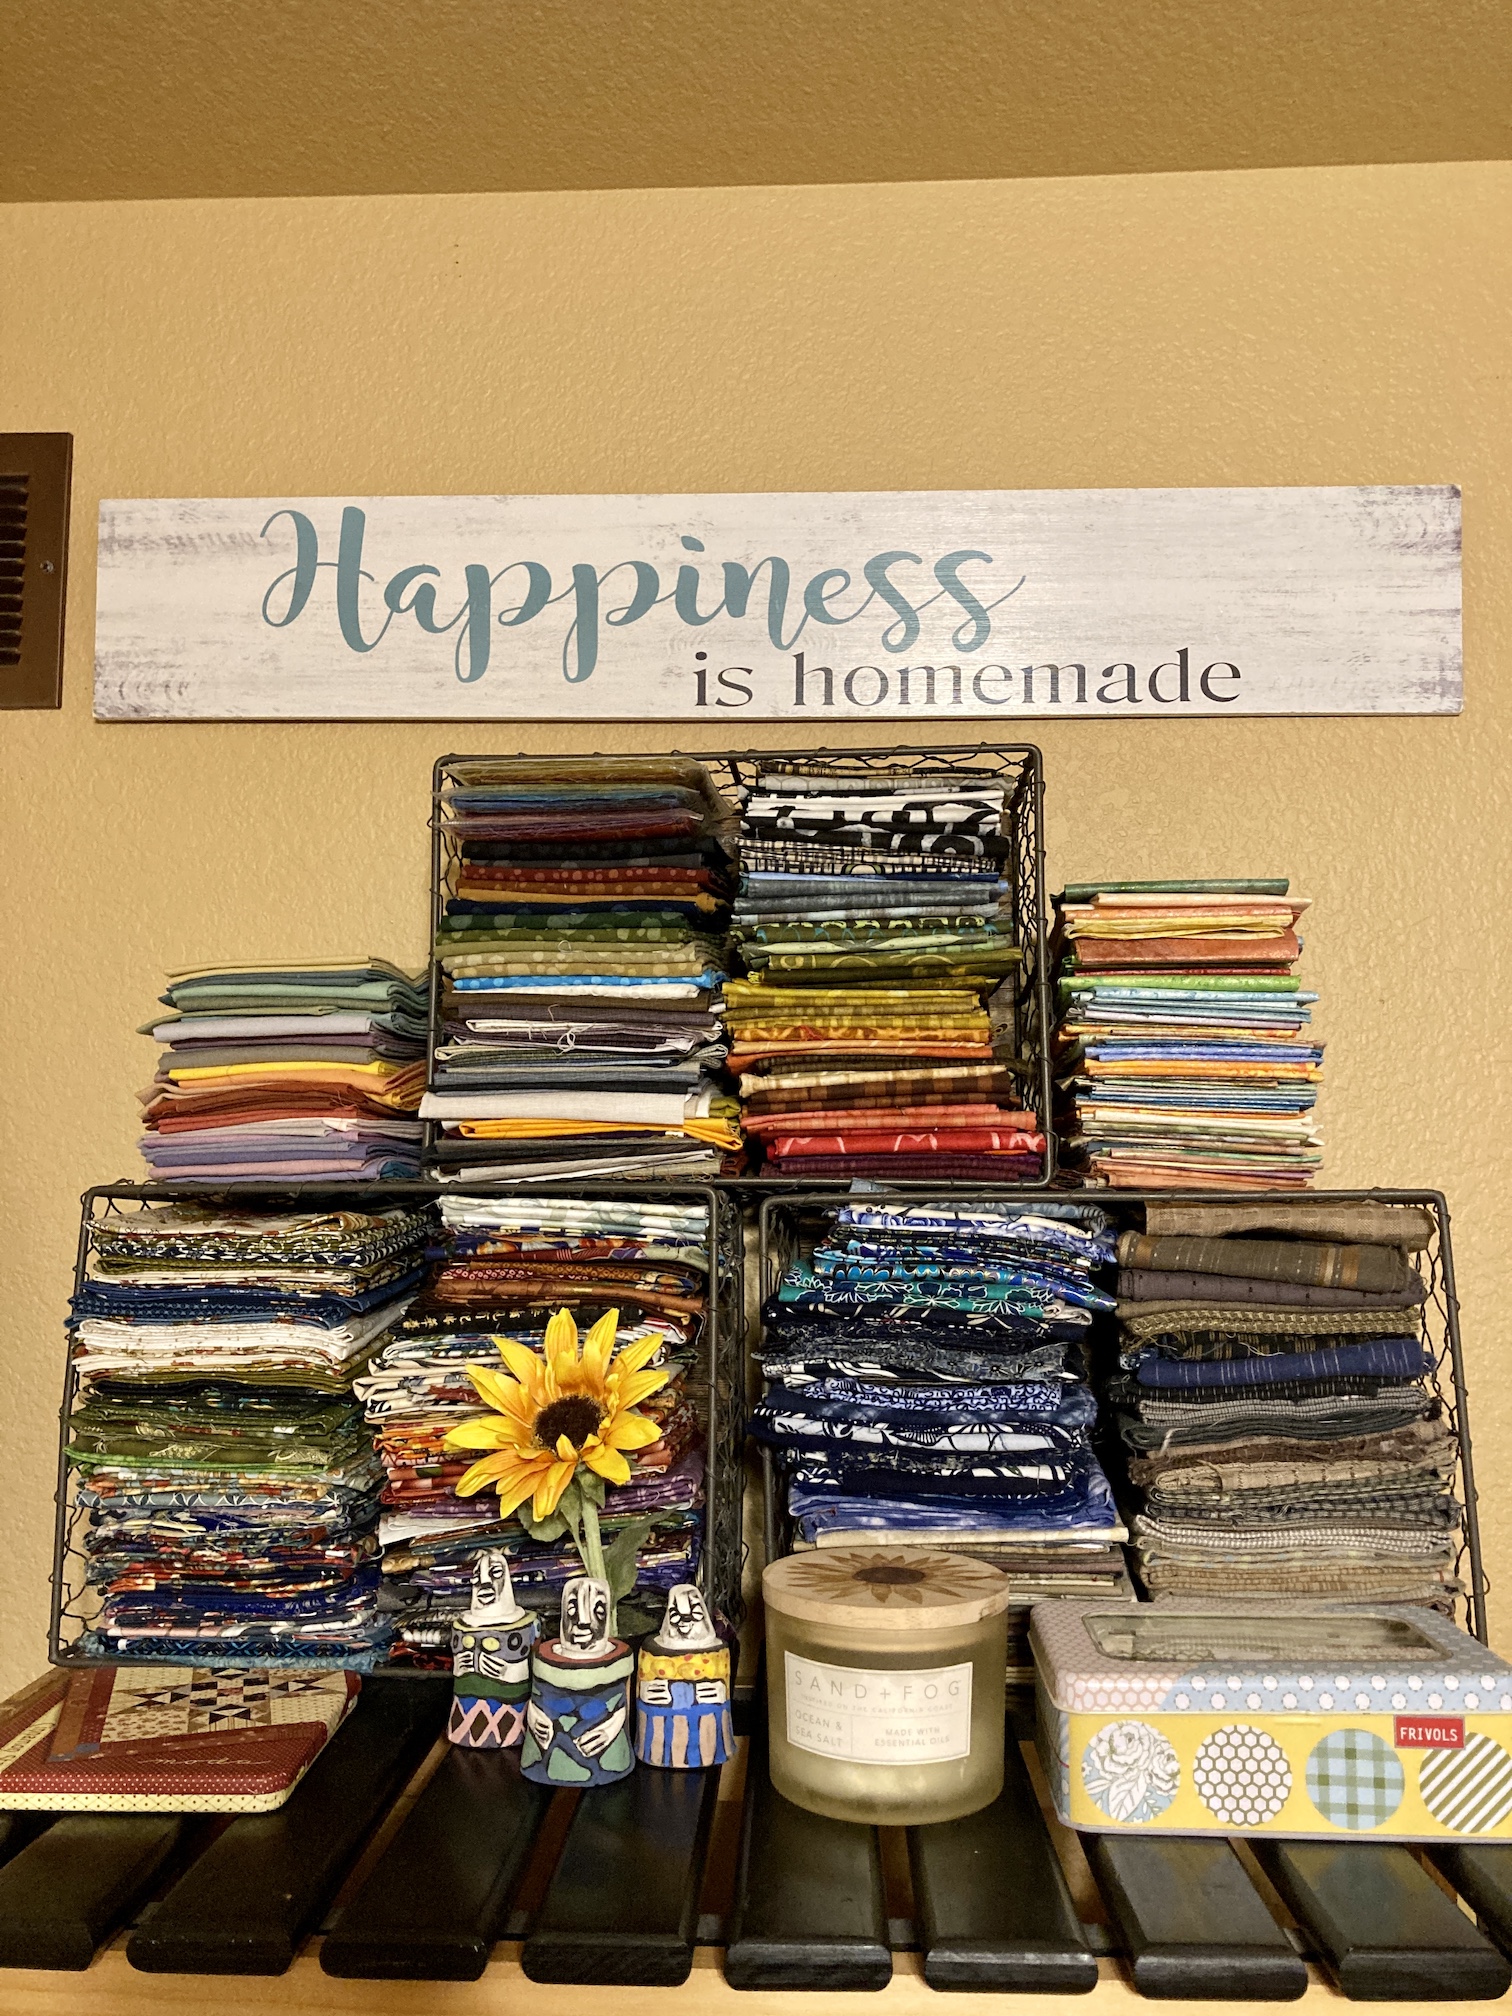
I keep my beloved collection of Asian and Japanese woven fat quarters as well as a couple other special fat quarter fabric sets (like my Marcia Derse fat quarter collection, see post Fabric Fangirl Frenzy for the story of when I met Marcia and went a little “fabric designer fan girl” on her… ) on the top of the bookshelf with the wine crates:
I love the sign I found at a thrift shop: “Happiness is homemade”. It feels like a lot of my recent happiness (or at least breaks from grief) is tied to working on handmade items!
As I mentioned earlier in the post, my next group of posts will be what I’ve been working on in my studio over the past couple of weeks.
Postscript
In case you are wandering what Mike the Miniature Schnauzer has been up to – he is back riding the aisles of home improvement stories and his continues to provide emotional support to his male human working on woodworking projects!
He actually loves going to home improvement stores and does not like John to leave the house without him!
So I am going to take this opportunity to share what the other crafty person in the house, my partner John has been working on.
A couple months ago we turned part of our basement into his woodshop (we had it professionally drywalled as well as electrical added, while John put in the floor and did all the finishing work), so he could have his own “craft room”.
His workshop is a work in progress and evolving. For the first time in his life he has his dream of having his own dedicated woodshop beyond just tinkering in the garage.
John and I met in mid-2019 after suddenly each losing our long time spouses/life partners in 2018. We decided that since how long you have to live your life is unknown (when you become a widow/widower you think a lot about your own mortality in addition to grieving the loss of your spouse) we would not hold back from having our dreams (within reason and within financial possibilities of course!). One of his lifelong dreams was to have his own woodshop!
(One of our shared dreams is travel and pre-COVID pandemic we had many plans for travel in 2020, but you all know about “best laid plans” when it comes to 2020…)
Mike the miniature schnauzer did a guest blog post a couple weeks ago (yes, yes, stop your disbeliefs that my dog writes blog posts, ha, ha) on some of the projects John has been working on – Guest Blog Post: A Whole Lot of Remodeling Going On , but I thought I would share some of the projects since that post.
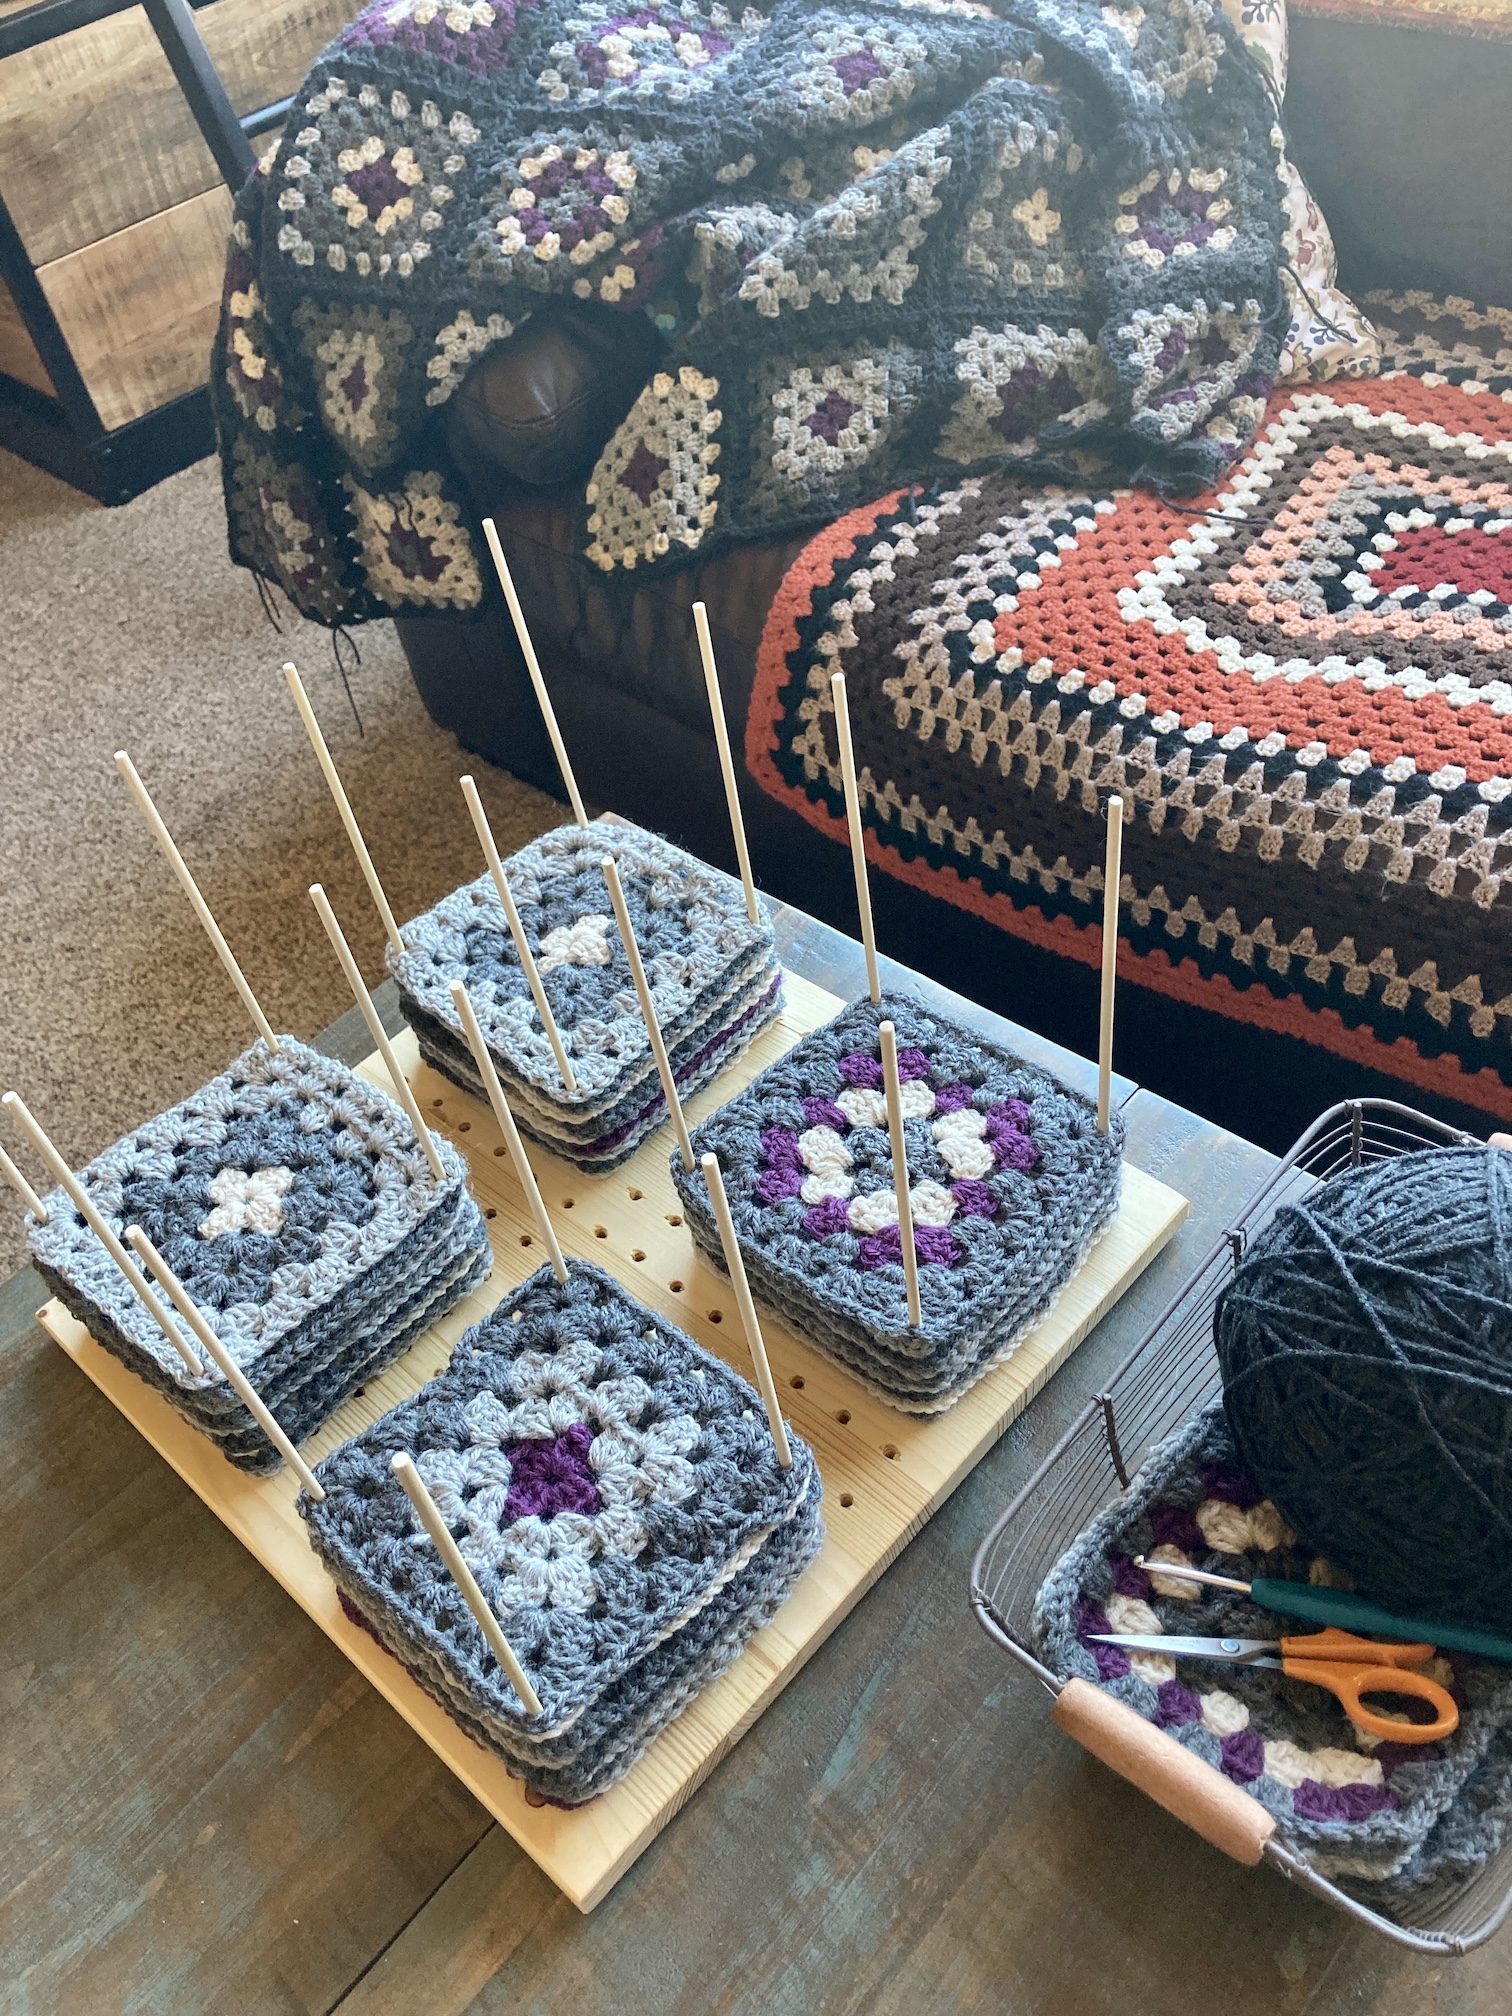
Wood Blocking Board
I saw on Instagram wood blocking boards for granny squares and asked John if he could make me one – and he did!
Here is an image of one I found online and texted him the image:
He watched a couple YouTube videos and checked out some on Pinterest and figured it out how to make me one:
It’s going to be great to use for making my next granny square blanket – I can stack my blocks pretty high with the long pegs.
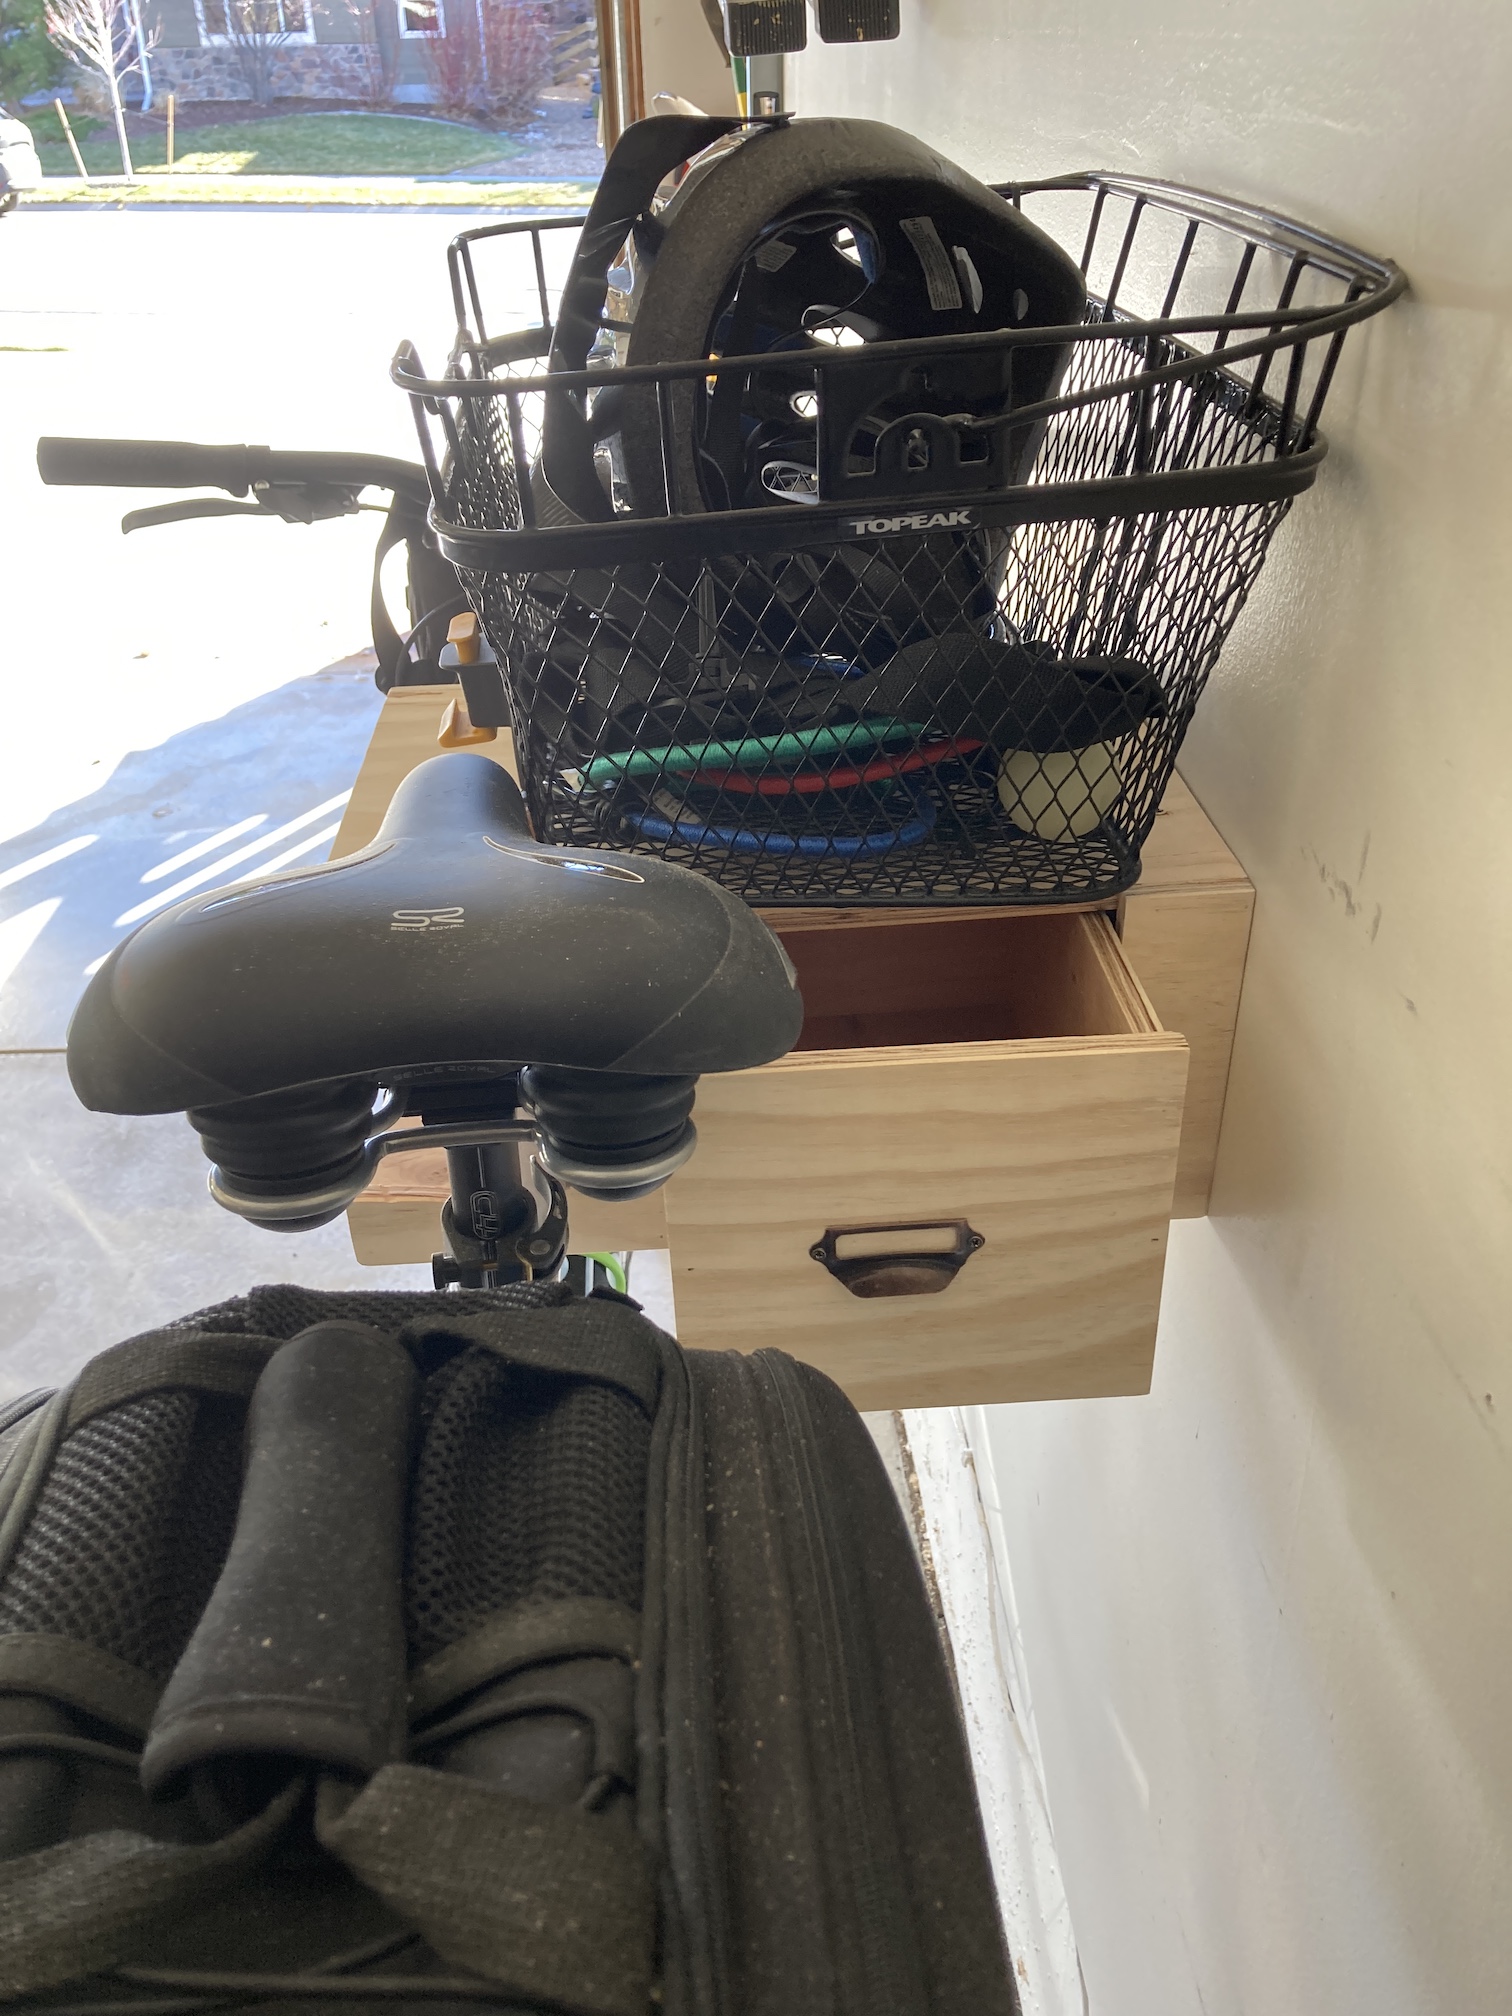
Bike Holders/Storage
John loves Pinterest as a great source of ideas. He wanted to get our bikes off just sitting on the ground of the garage and found a cool design for a bike rack and made one for each of our bikes!
He made mine first so most of the images are of mine with some detailed images of the rack to include the little drawer he built for it also.
The little drawer is perfect to keep your biking gloves and other small items related to cycling. It is very easy to lift our bikes out of the holders.
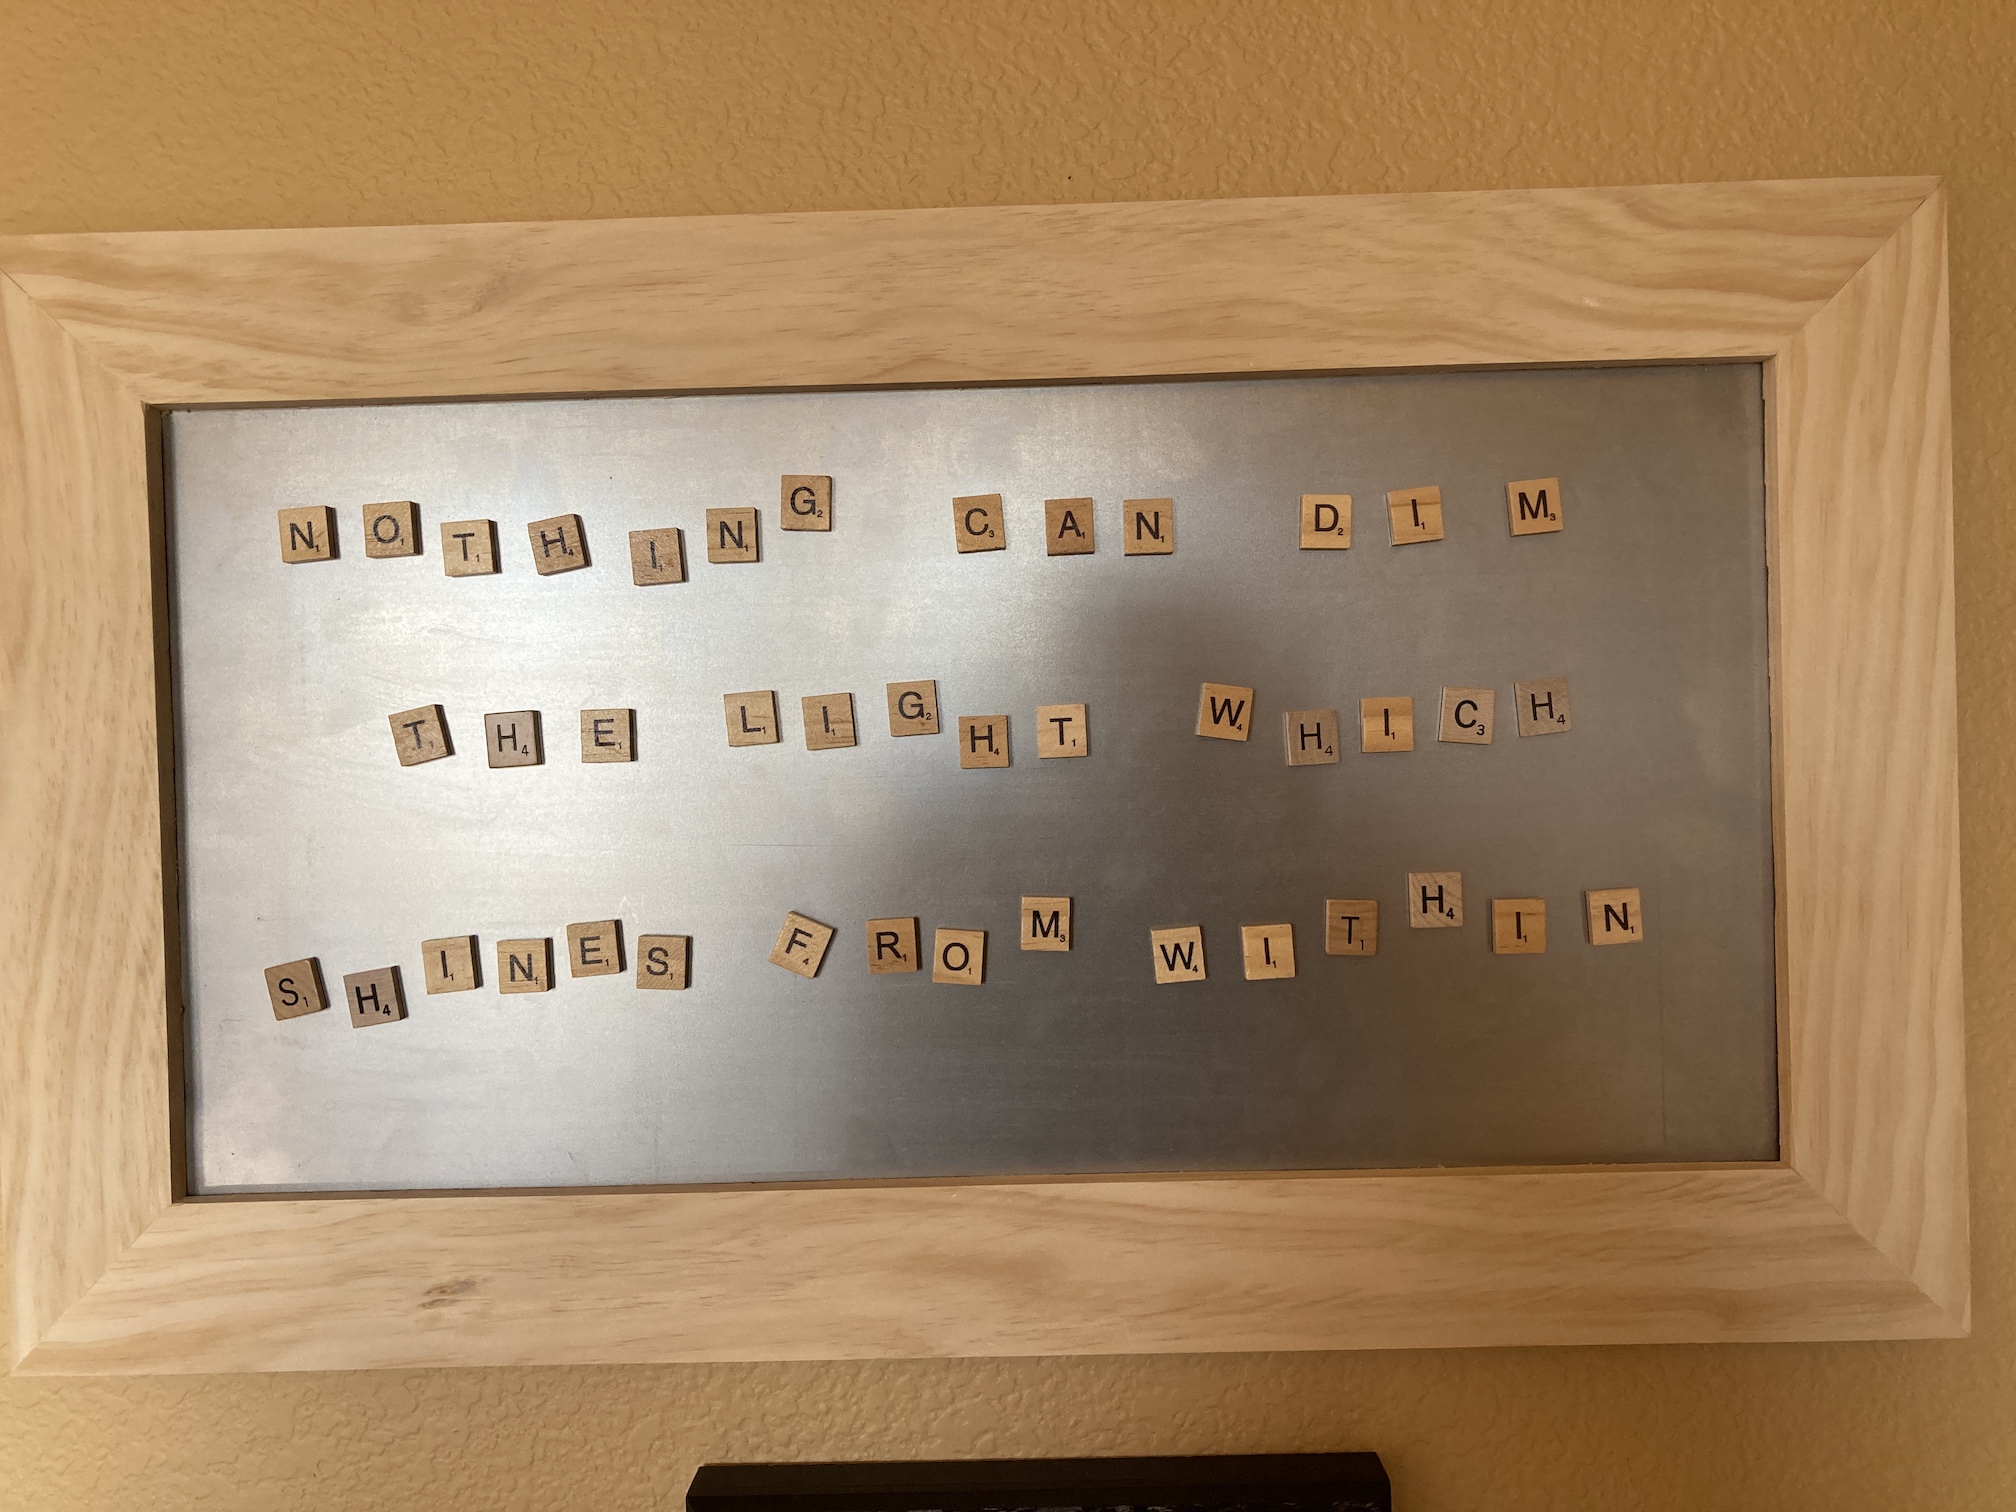
Magnetic Board
I am obsessed with Scrabble letters. I have a collection of Scrabble letters from thrift stores and old Scrabble games. I’ve made gifts from them in the past like friend’s names spelled in Scrabble letters affixed to a magnetic strip. Recently while at a thrift shop I found a bag of Scrabble letters with individual thin magnetic strips attached.
This led to the idea of creating a magnetic board for my home office where I could write inspirational messages for myself with Scrabble letters! I asked John and he made it happen!
Currently up on the board I have the Maya Angelou quote:
Nothing can dim the light which shines from within.
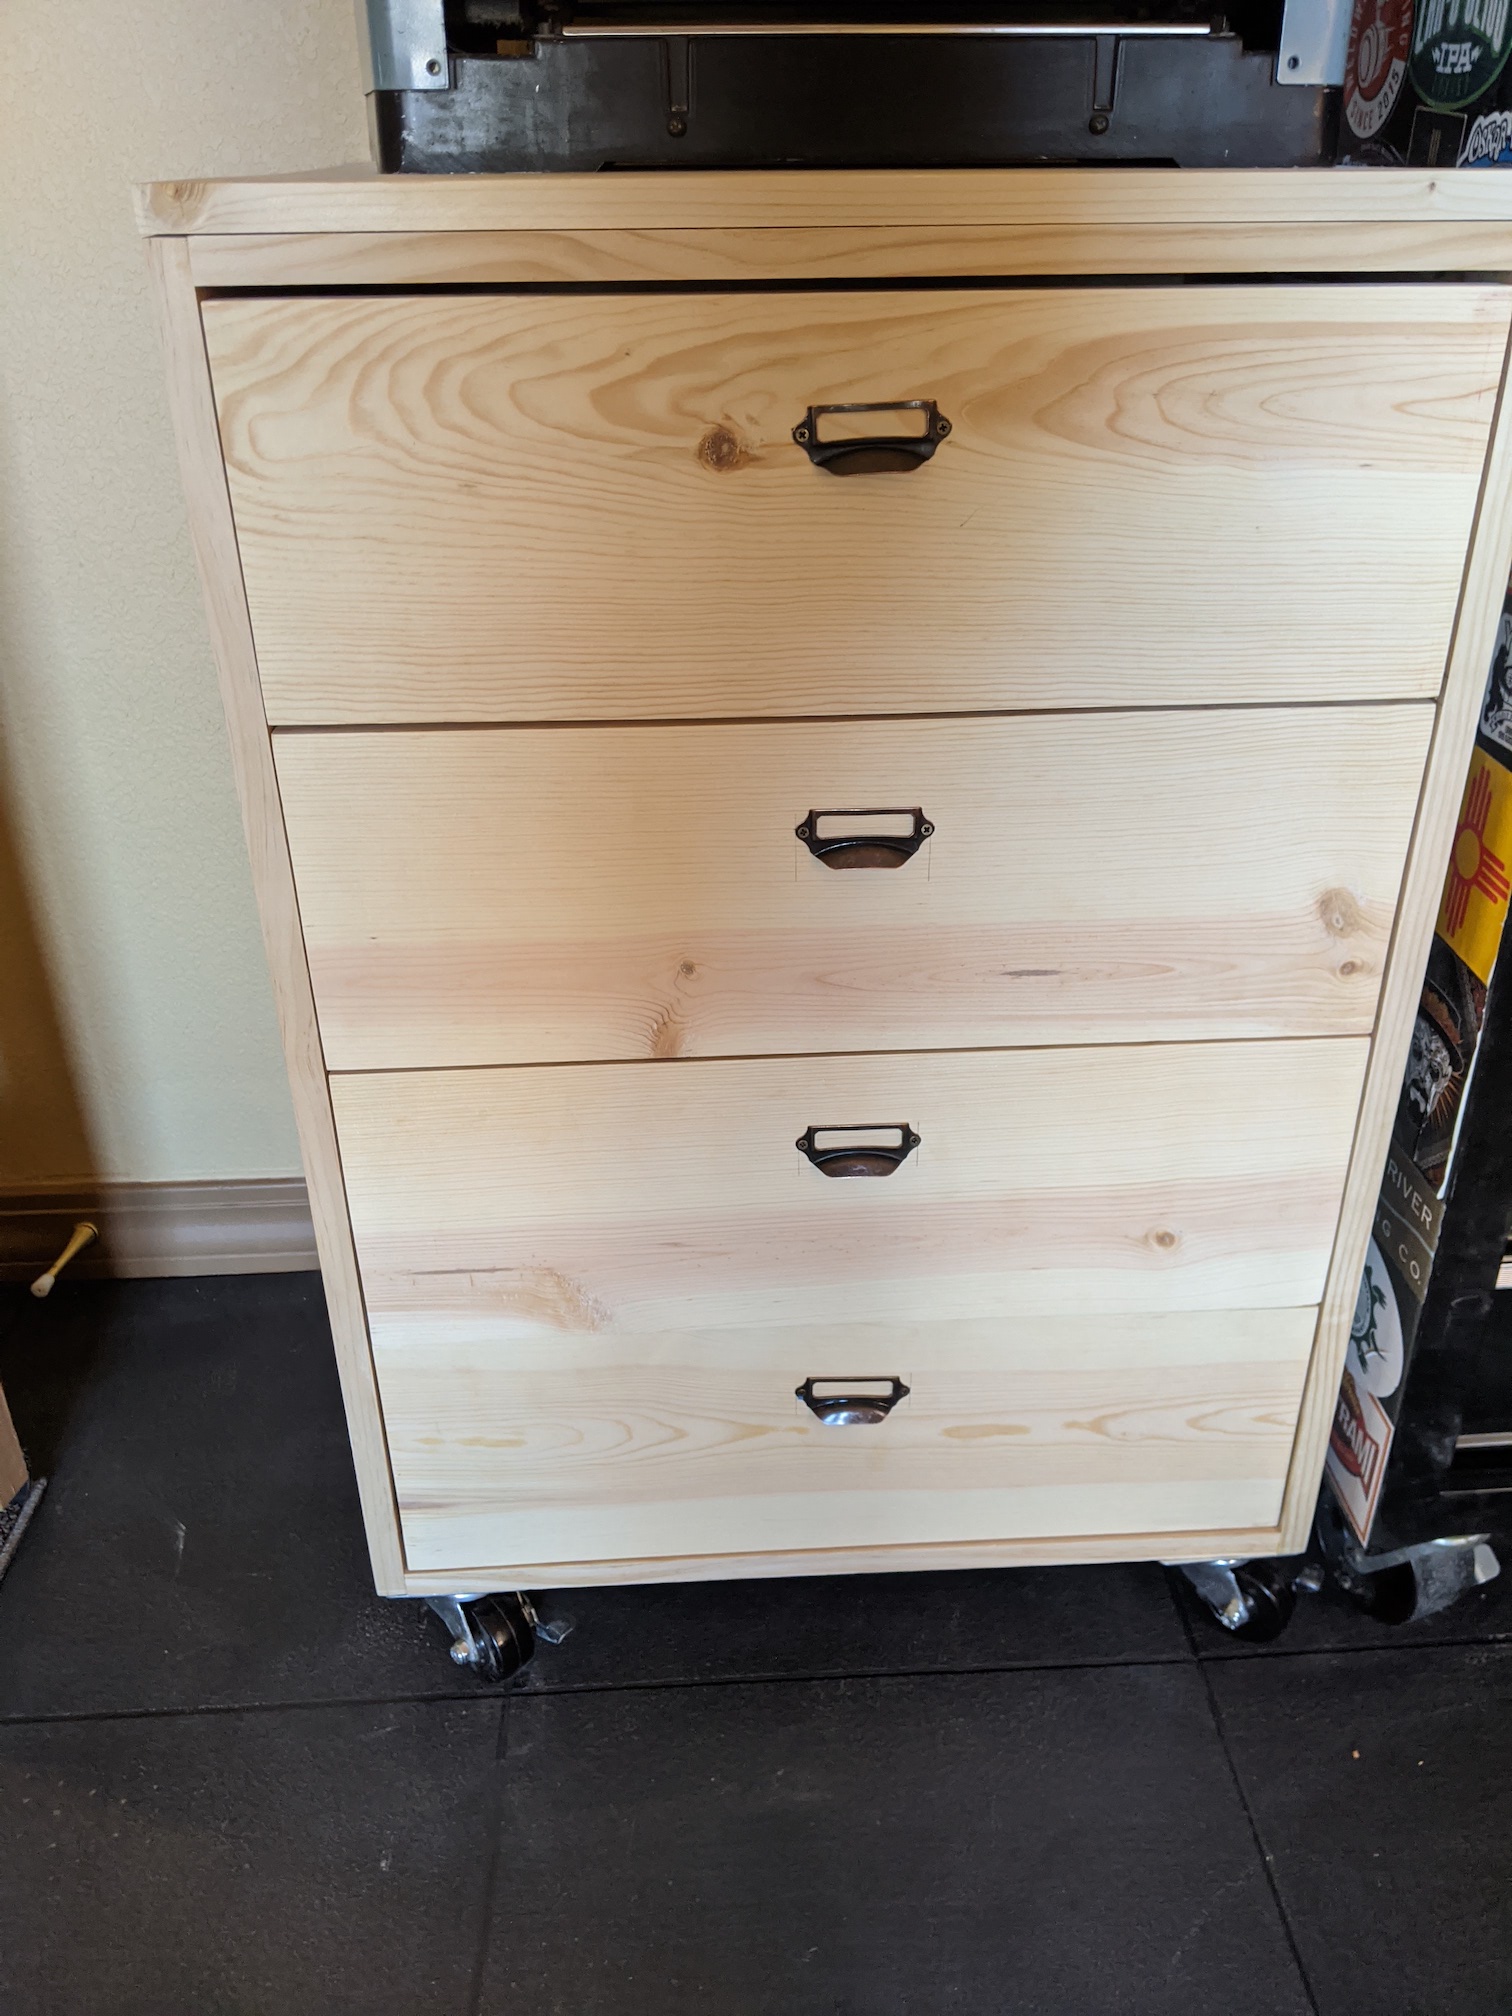
Custom Tables for his Woodshop
The first table John made for his woodshop was a table/stand/storage for his Miter Saw:
He used purchased plans he downloaded online to make this table and then made some adjustments for his needs.
Recently he made himself another table/stand/storage, this time without pre-purchased plans! He designed a table for his Planer with storage drawers with cool pulls he ordered online:
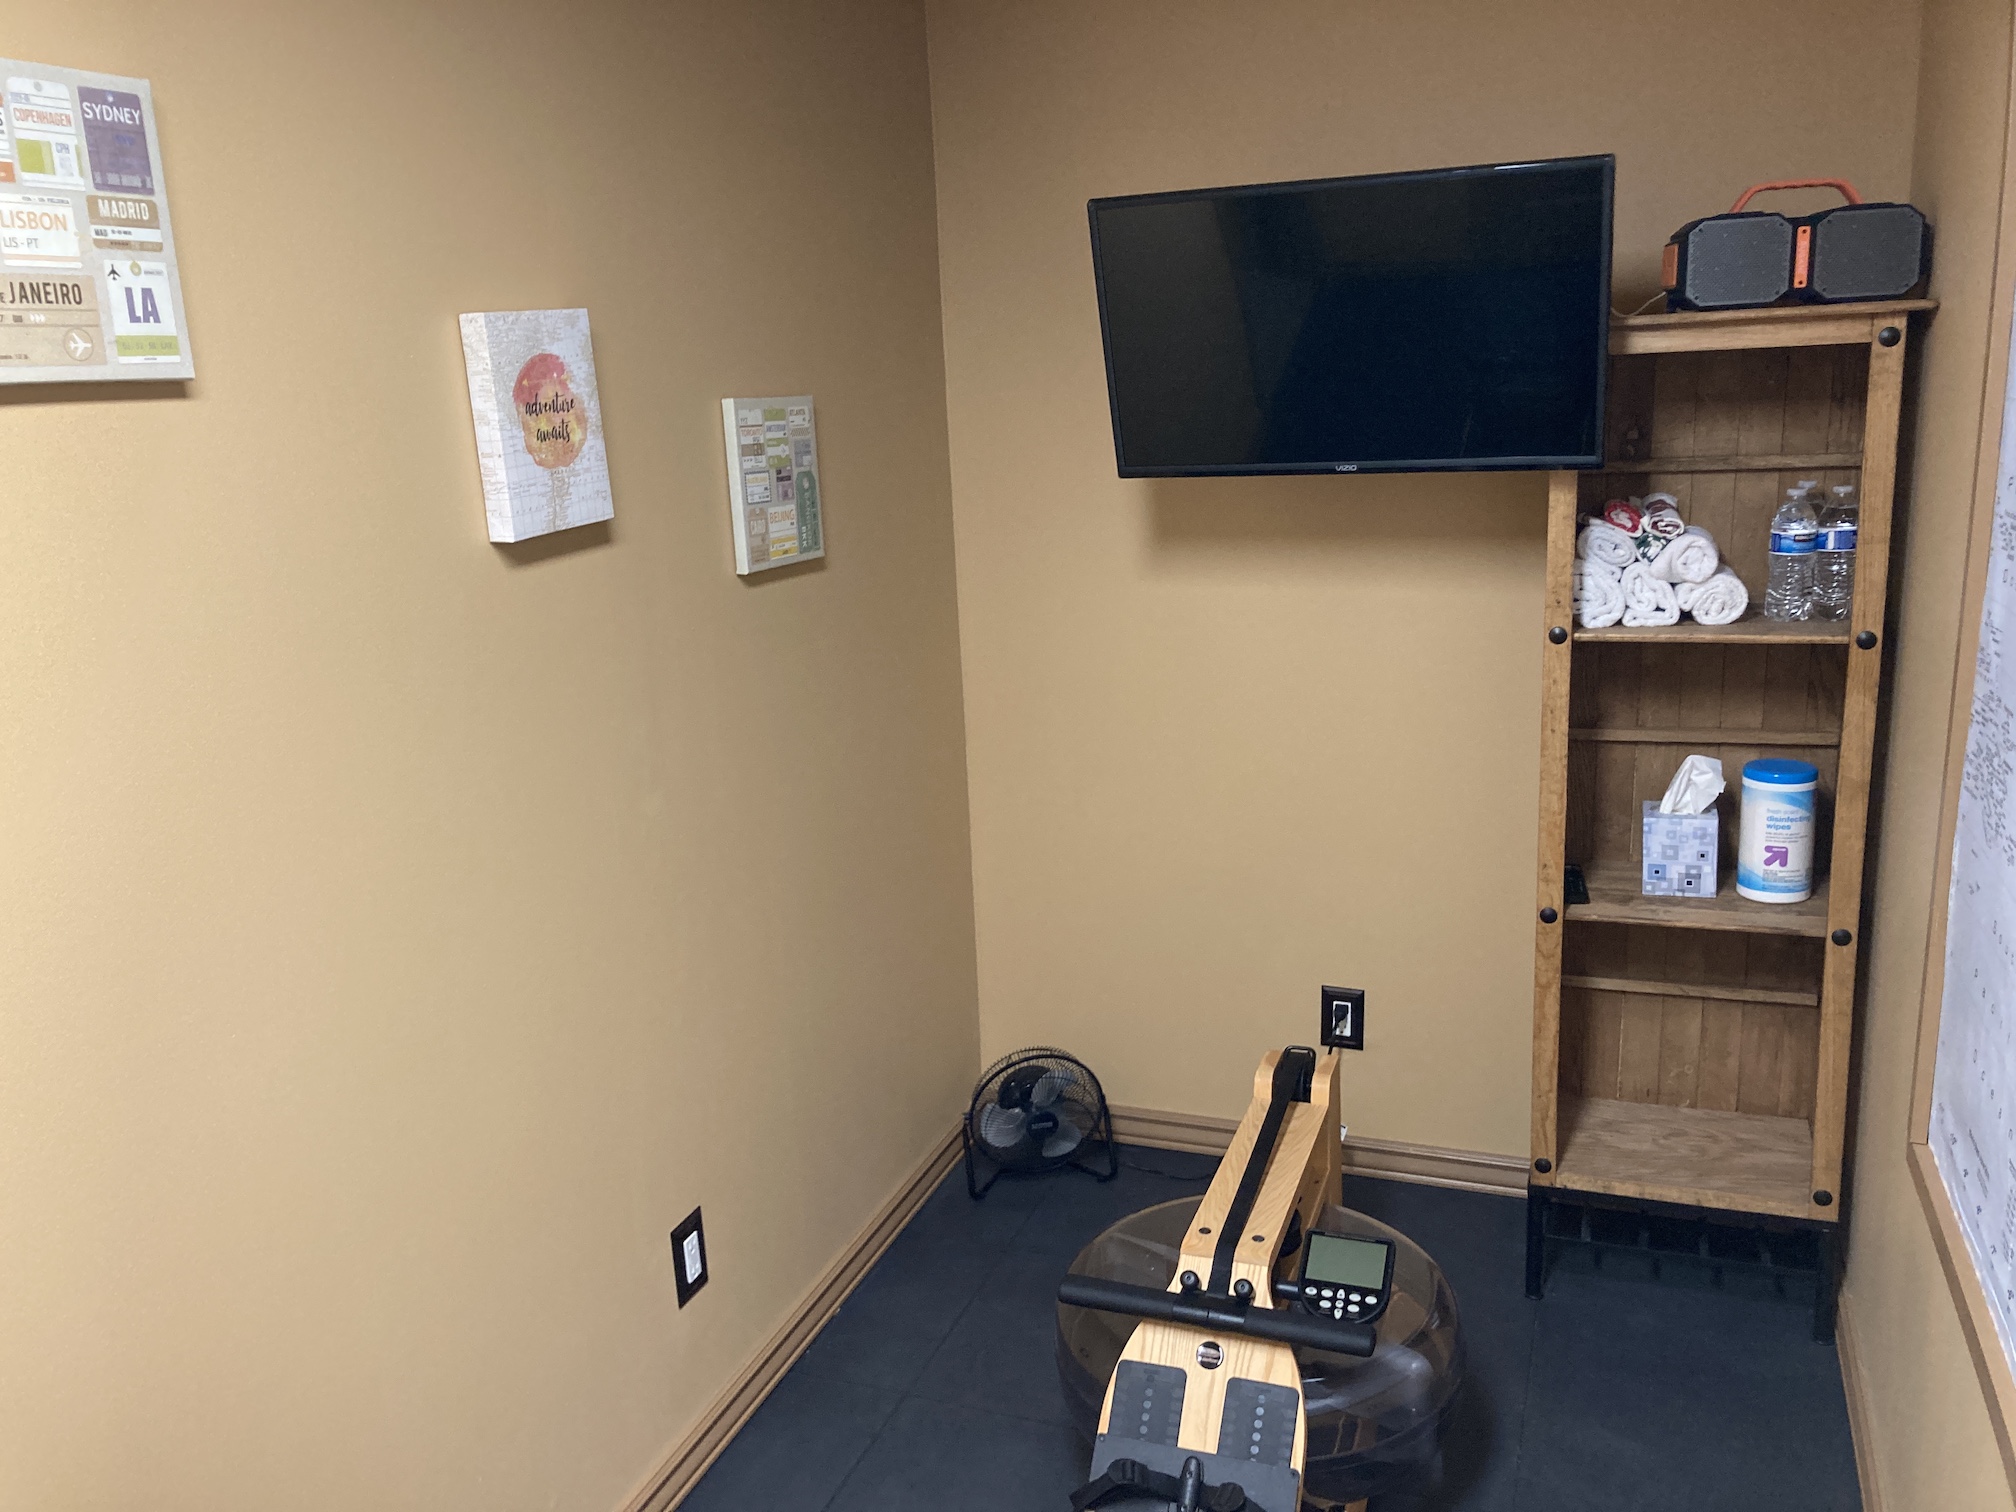
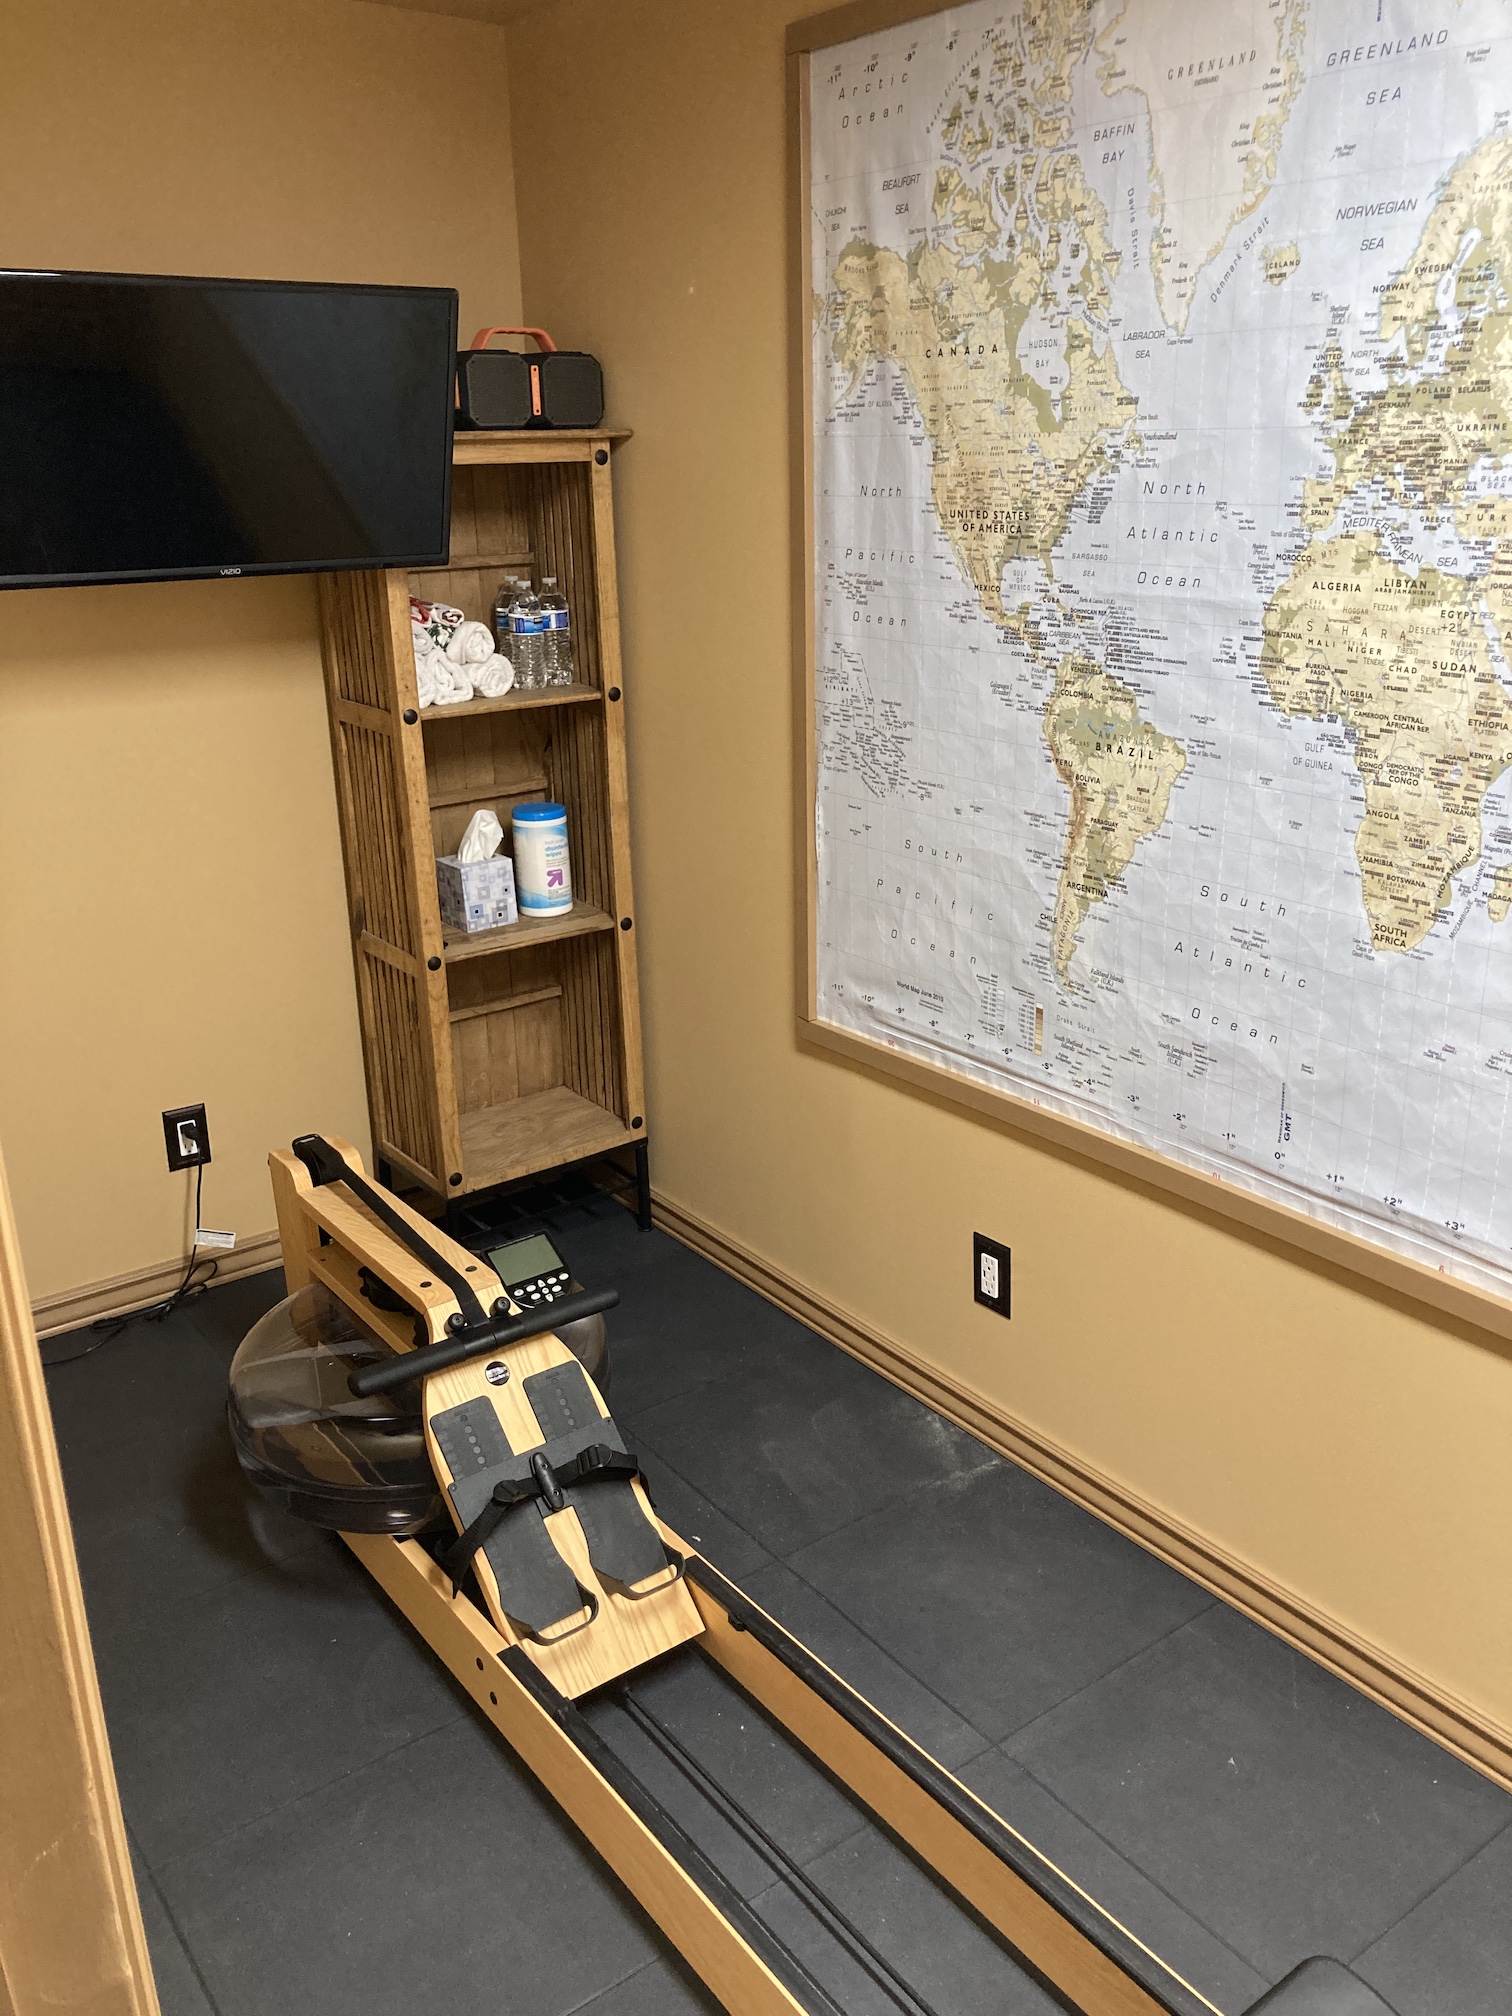
Exercise Room for Water Rower
And the big project that John recently completed did not technically involve his woodshop as he did much for the work in the garage – he converted part of our unfinished storage roomin the basement into an exercise room for our new Water Rower. This involved framing out and dry walling the room. A wonderful friend helped him with a lot of the initial labor related to framing, installing the drywall, and pulling electrical for lighting and wall outlets.
The artwork in the room was my idea and I found it at a thrift shop. John created the frame around the world map. I figured we can daydream about travel while we row. We found a television on sale and an inexpensive TV mount online so we can watch rowing instructional videos (or Netflix) while rowing.
We repurposed an old bookcase for our “gym” towels and water bottles like they would have at a real gym. John also put in a vent for the room for ventilation while we break a sweat.
Well I better go work on my hand stitching so I can have something to show you in the future – John makes me look pretty lazy!
He is now in love with a new fleece blanket we recently picked up and has become inseparable from it!
I guess schnauzers are fickle!
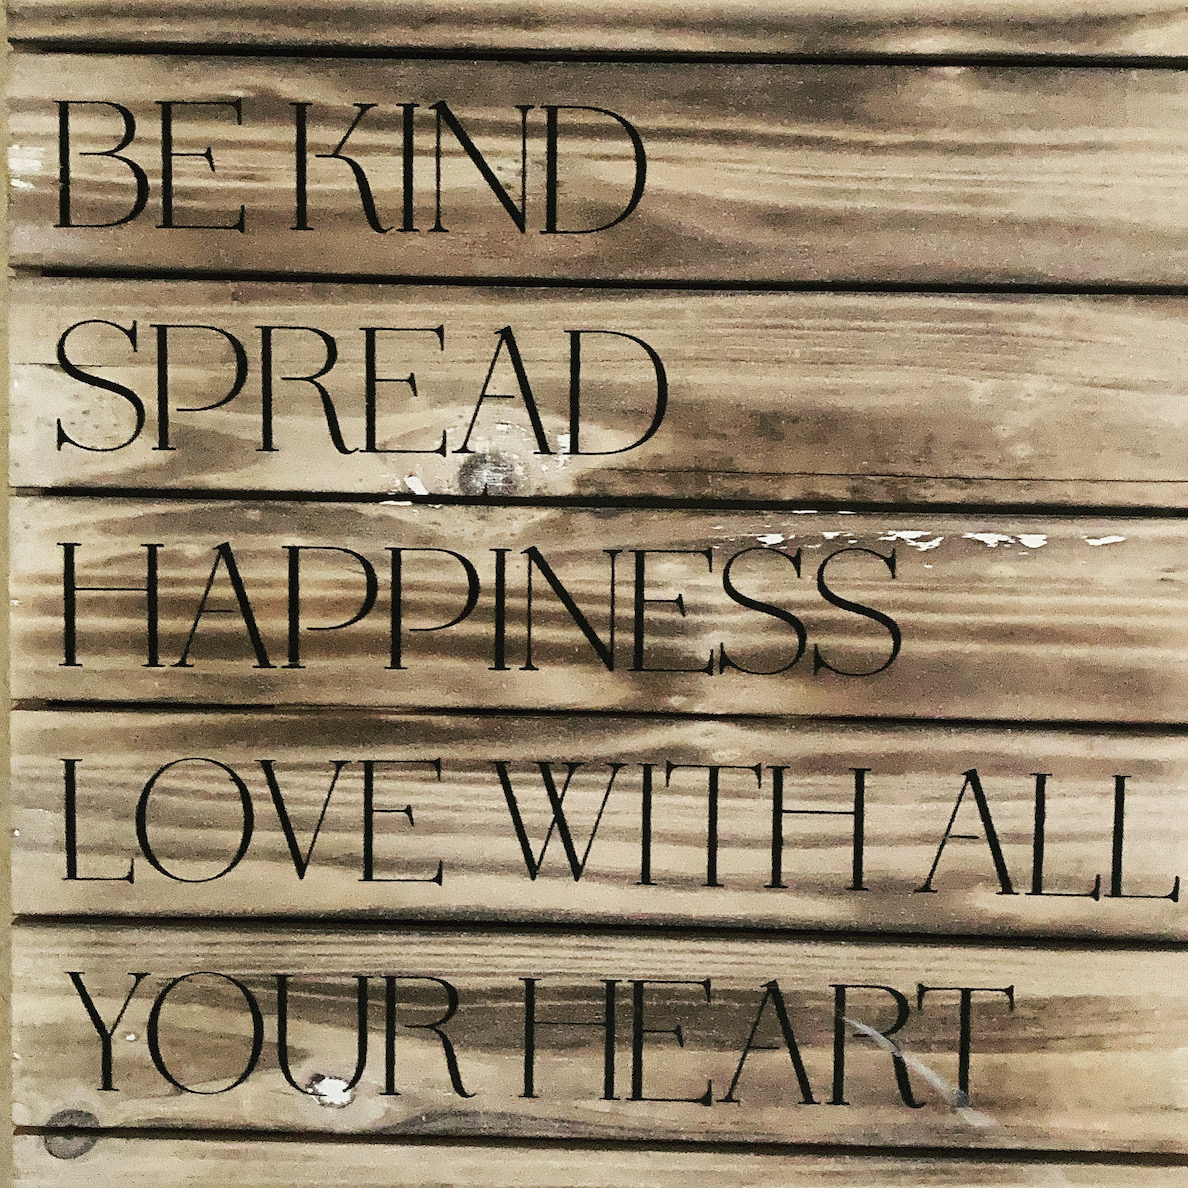
Let me close this post with a sign/piece of artwork I discovered while thrifting that I put up outside John’s woodshop door. I think it goes with the aesthetic of a woodshop and also embraces how we are hoping to live our lives:
I love public libraries and as my series of posts The Library Stack shows, I am always browsing them and borrowing books when I can. A couple of years of ago I studied and embraced Minimalism trying to live a simpler lifestyle and letting go of things that I thought cluttered my life. I decided to stop buying books and just borrow them from the library.
Then in December 2018 my husband suddenly died and things shifted in my life on a large scale. And in early 2020 the pandemic hit and more shifting occurred to include examining how I could redefine a “simpler lifestyle” and have the physical things I enjoy in my life.
Our local libraries closed for what seemed like endless months during the early days of the pandemic and when they reopened it was only for curbside pickup. Currently they have fully reopened but have many strict protocols (beyond mandatory masks) and there are not that many patrons in the library anymore. It feels like something is lost from whole public library experience (and it is strange to see the librarians behind glass).
Pre-pandemic I was really in to audiobooks. Something shifted in me during the pandemic and I began to crave reading physical books rather than listening to them. I also remembered my secret dream of having an extensive home library like the ones I see in the home decorating books I borrow from the public library.
Like this one below:
Image credit: insidehook.com
With all the above things in the background of my mind, a couple of months ago I decided that I wanted to proceed with curating my own home library. Nothing as extensive as the image above but a nice collection with books that I’ve read and loved (and want to read again) and books I want to read (and might read again).
So how to do this and not “break the bank”? Well I used the following sources to find books for my home library:
Thrift Stores
Garage Sales
Thriftbooks.com
Independent bookstores selling used books
I was able to buy books from 50 cents to $5.00 from these four sources. Most books I paid between $1.49 and $4.99.
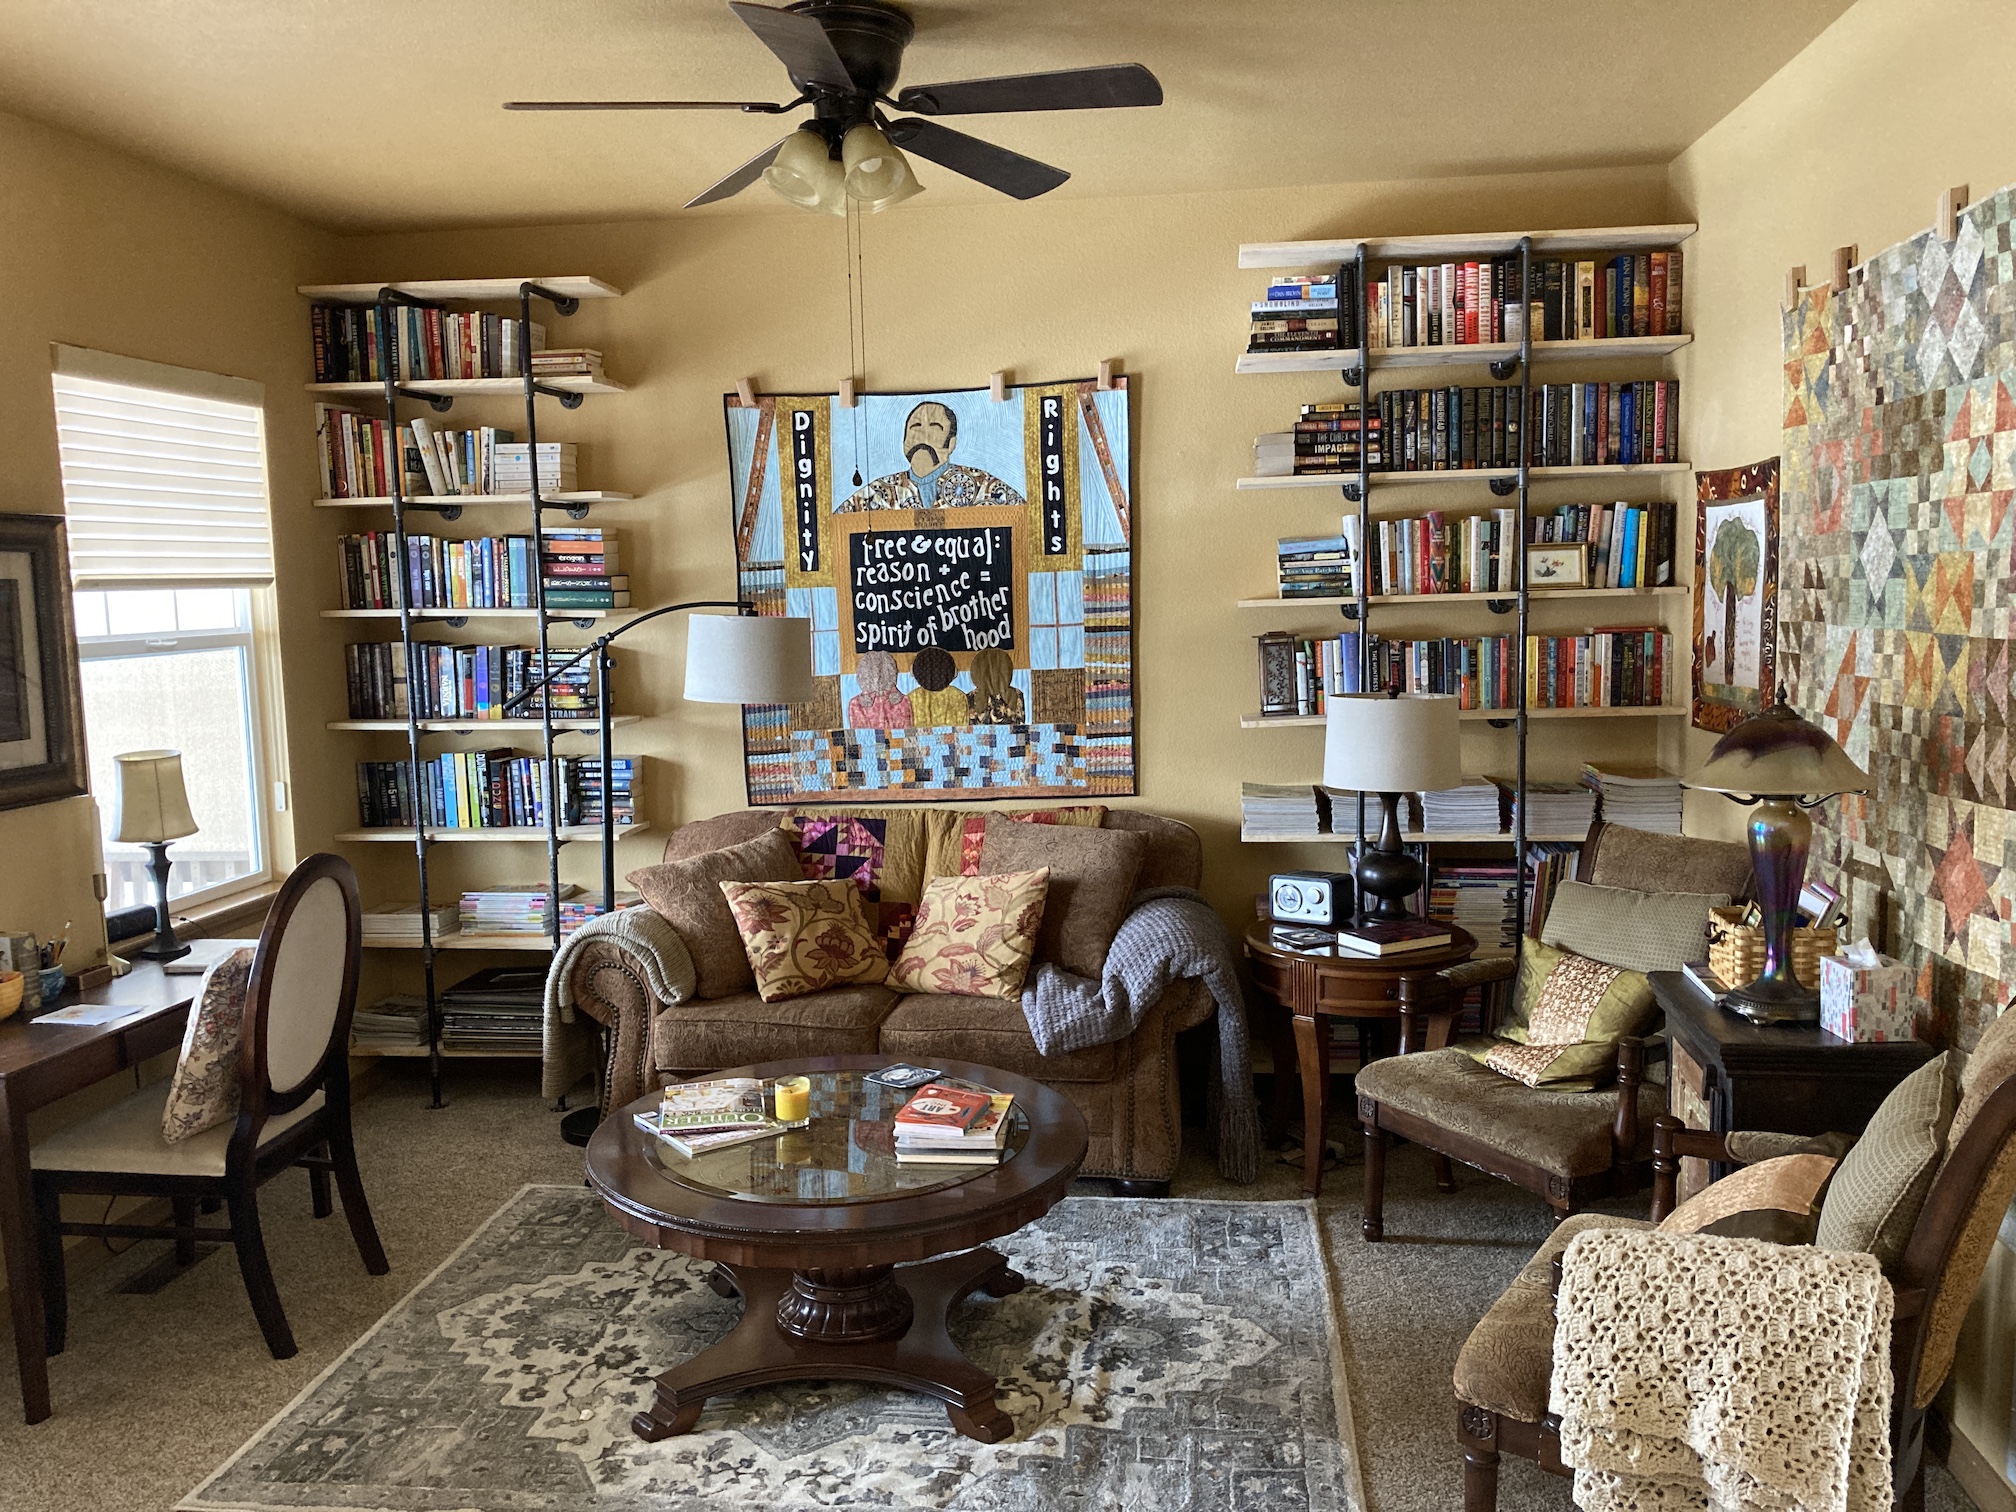
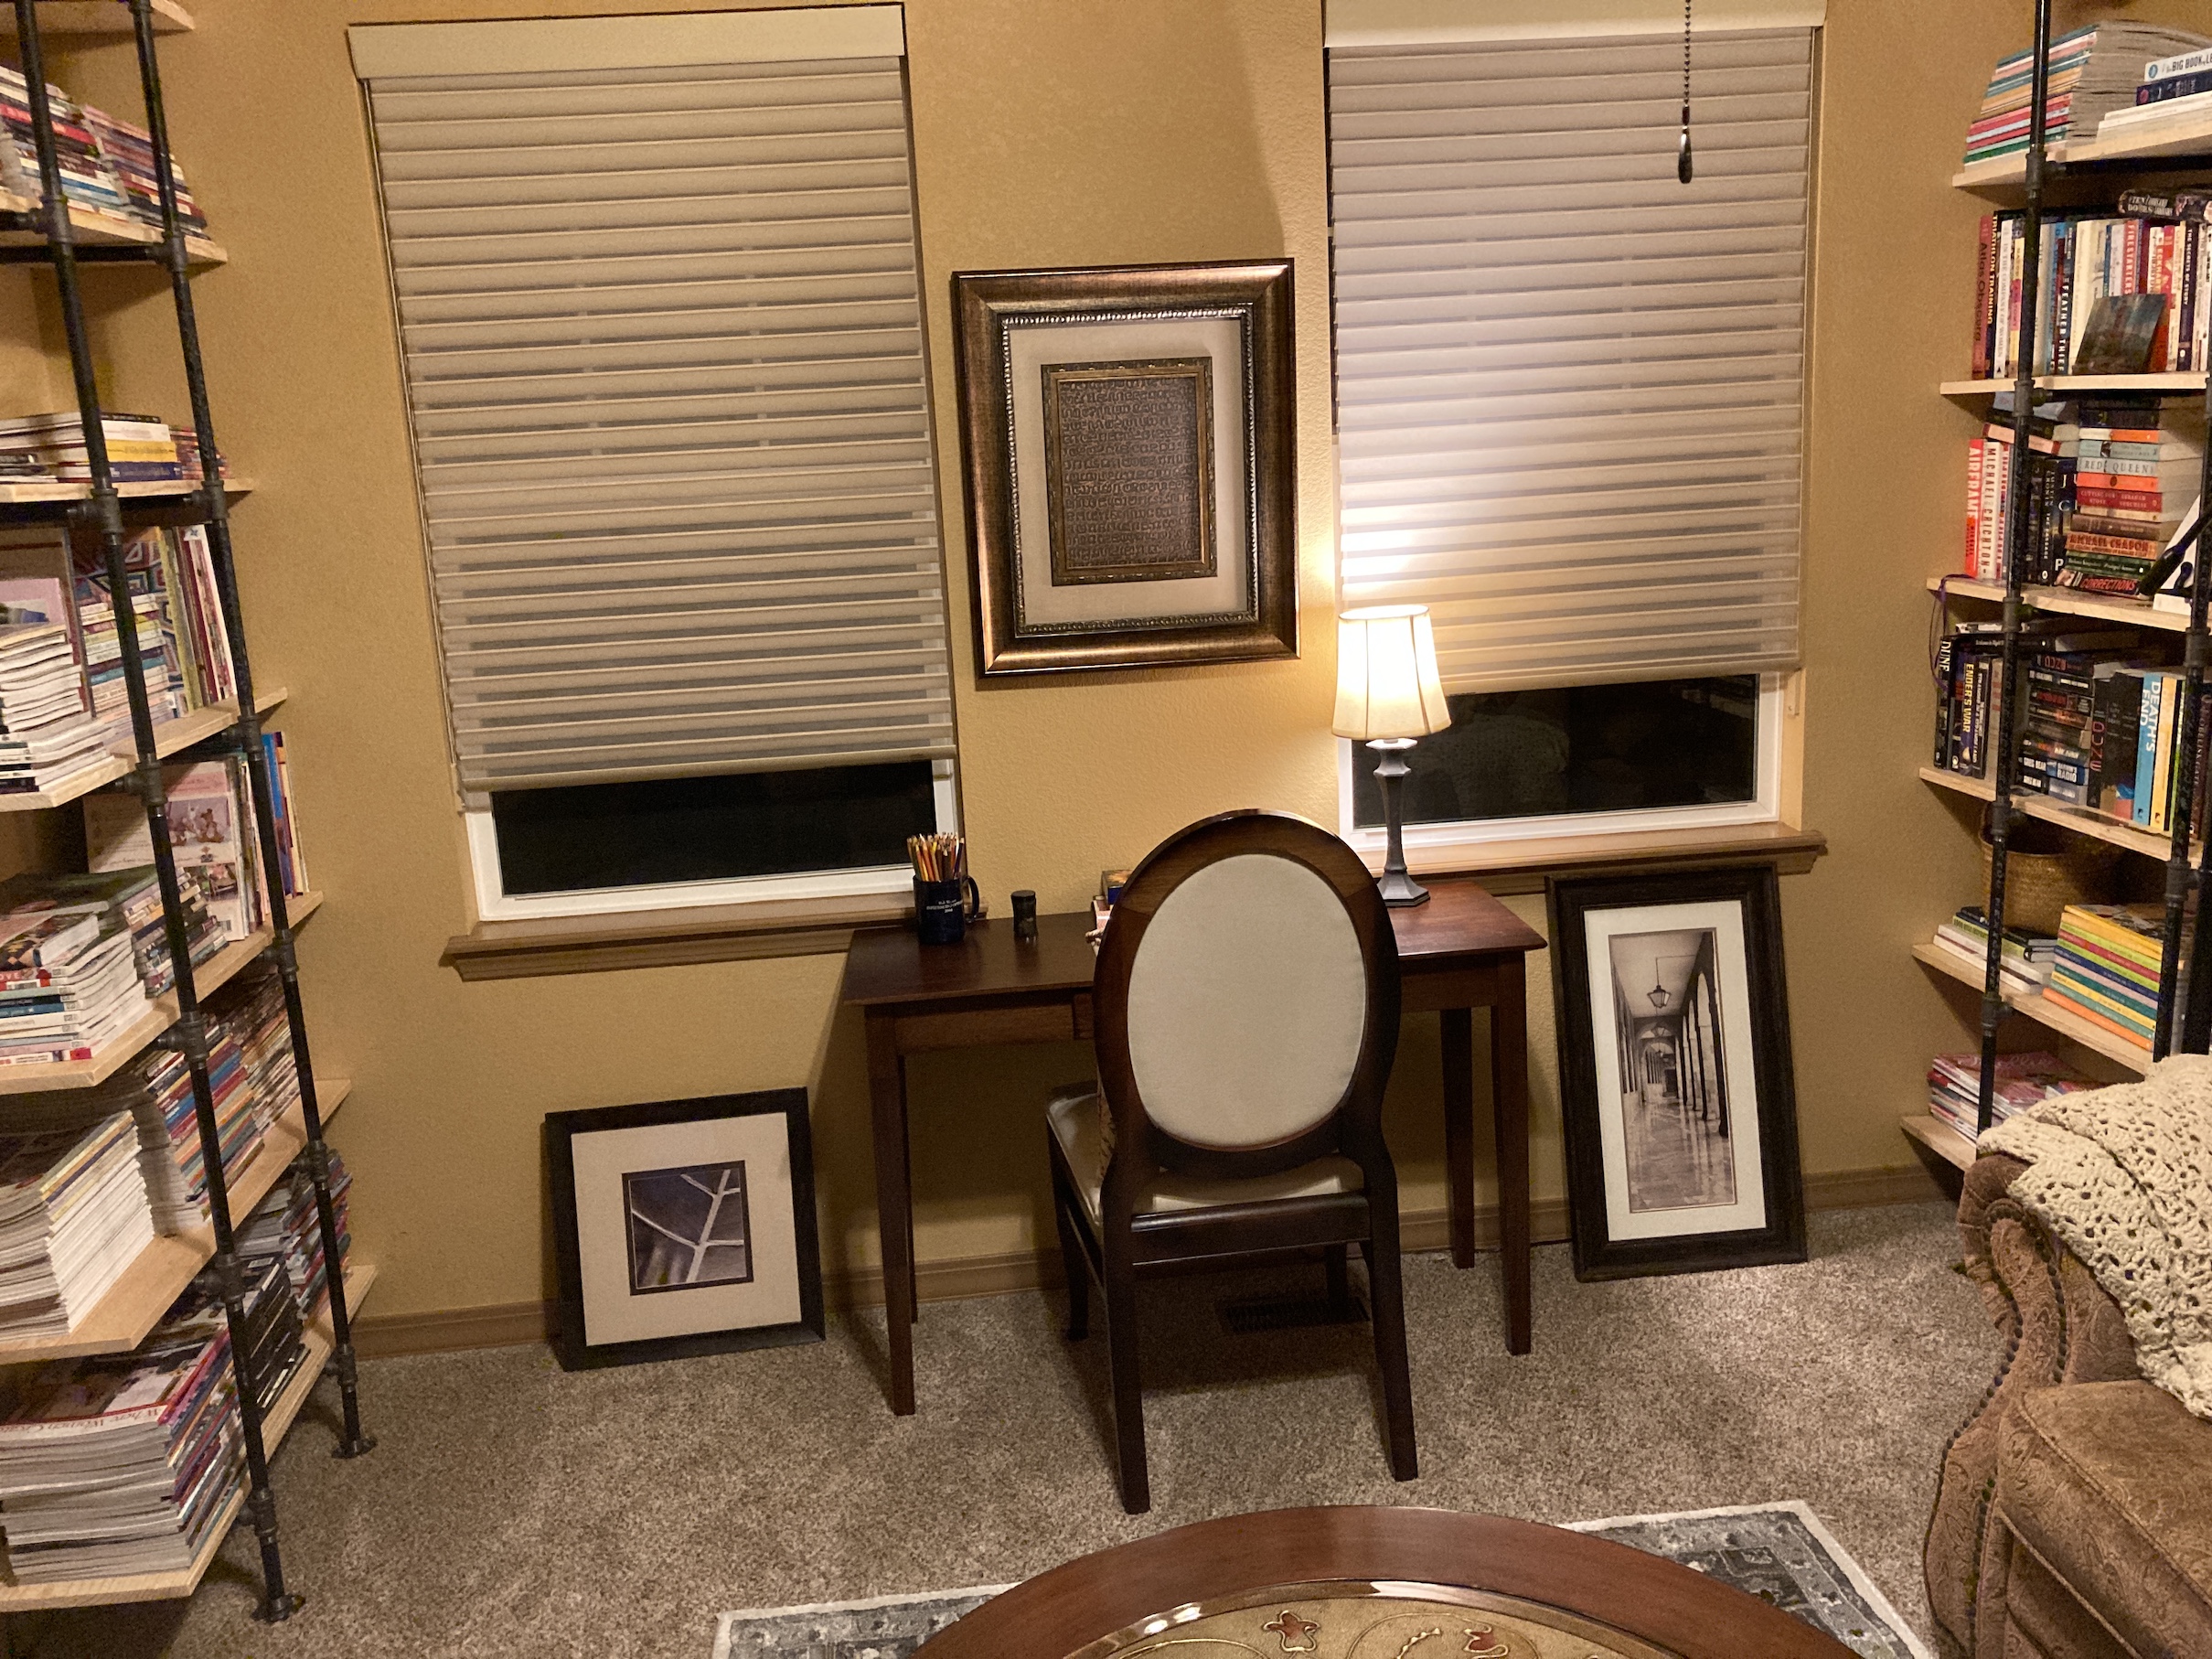
In addition to amassing a collection of second hand books over the past couple of months, my partner John also added an additional bookcase to the front room beyond the two he already built for me.
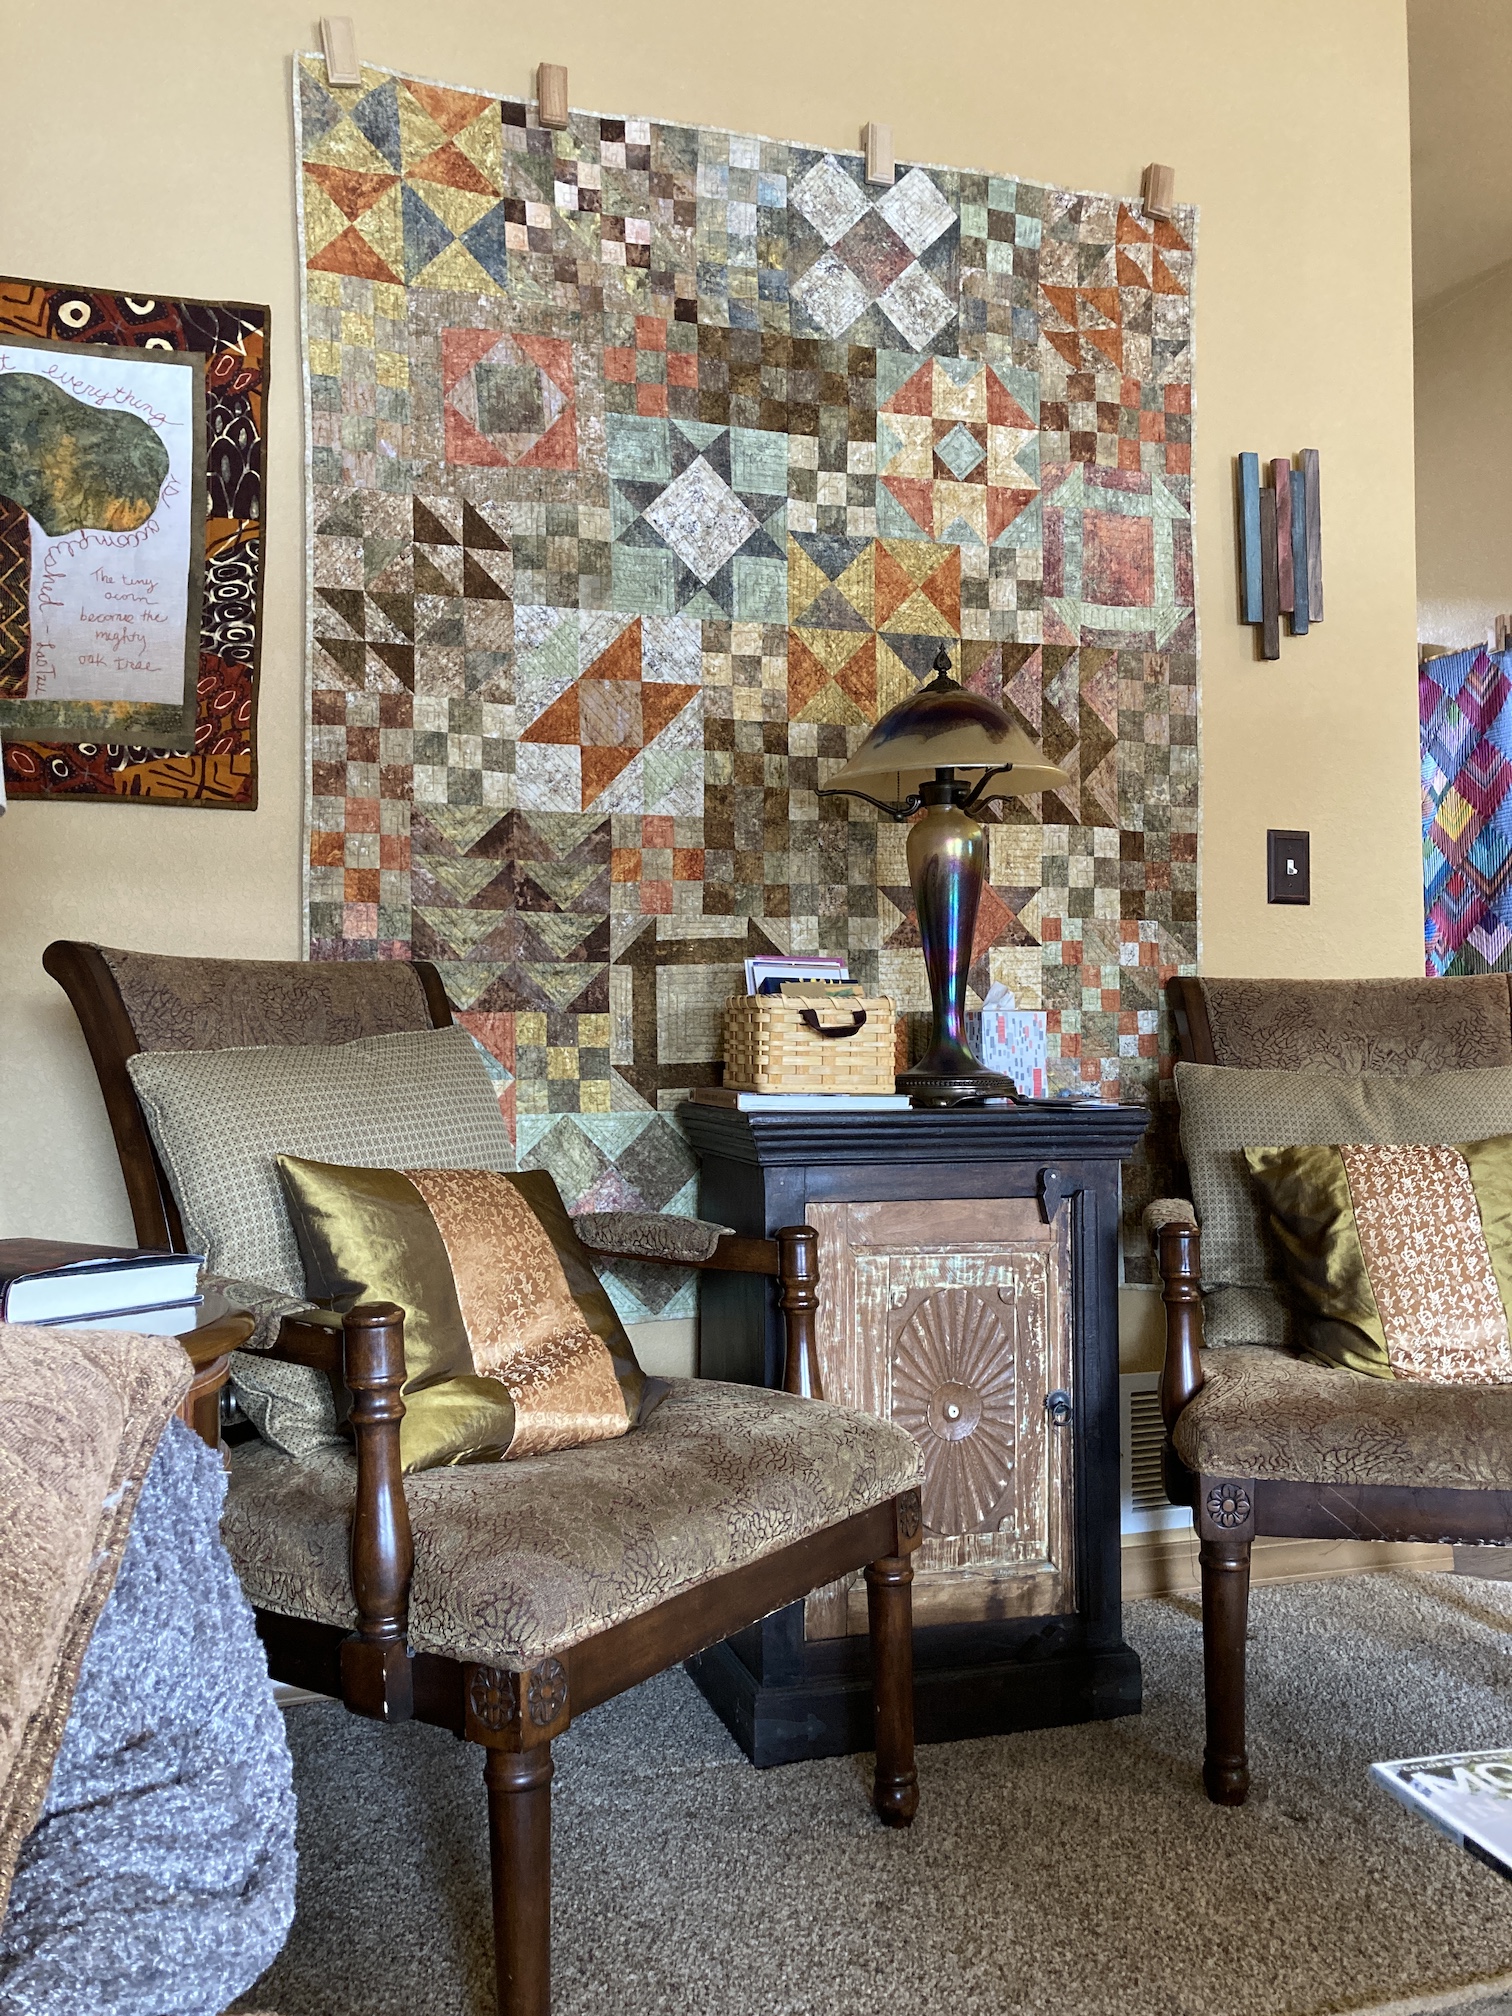
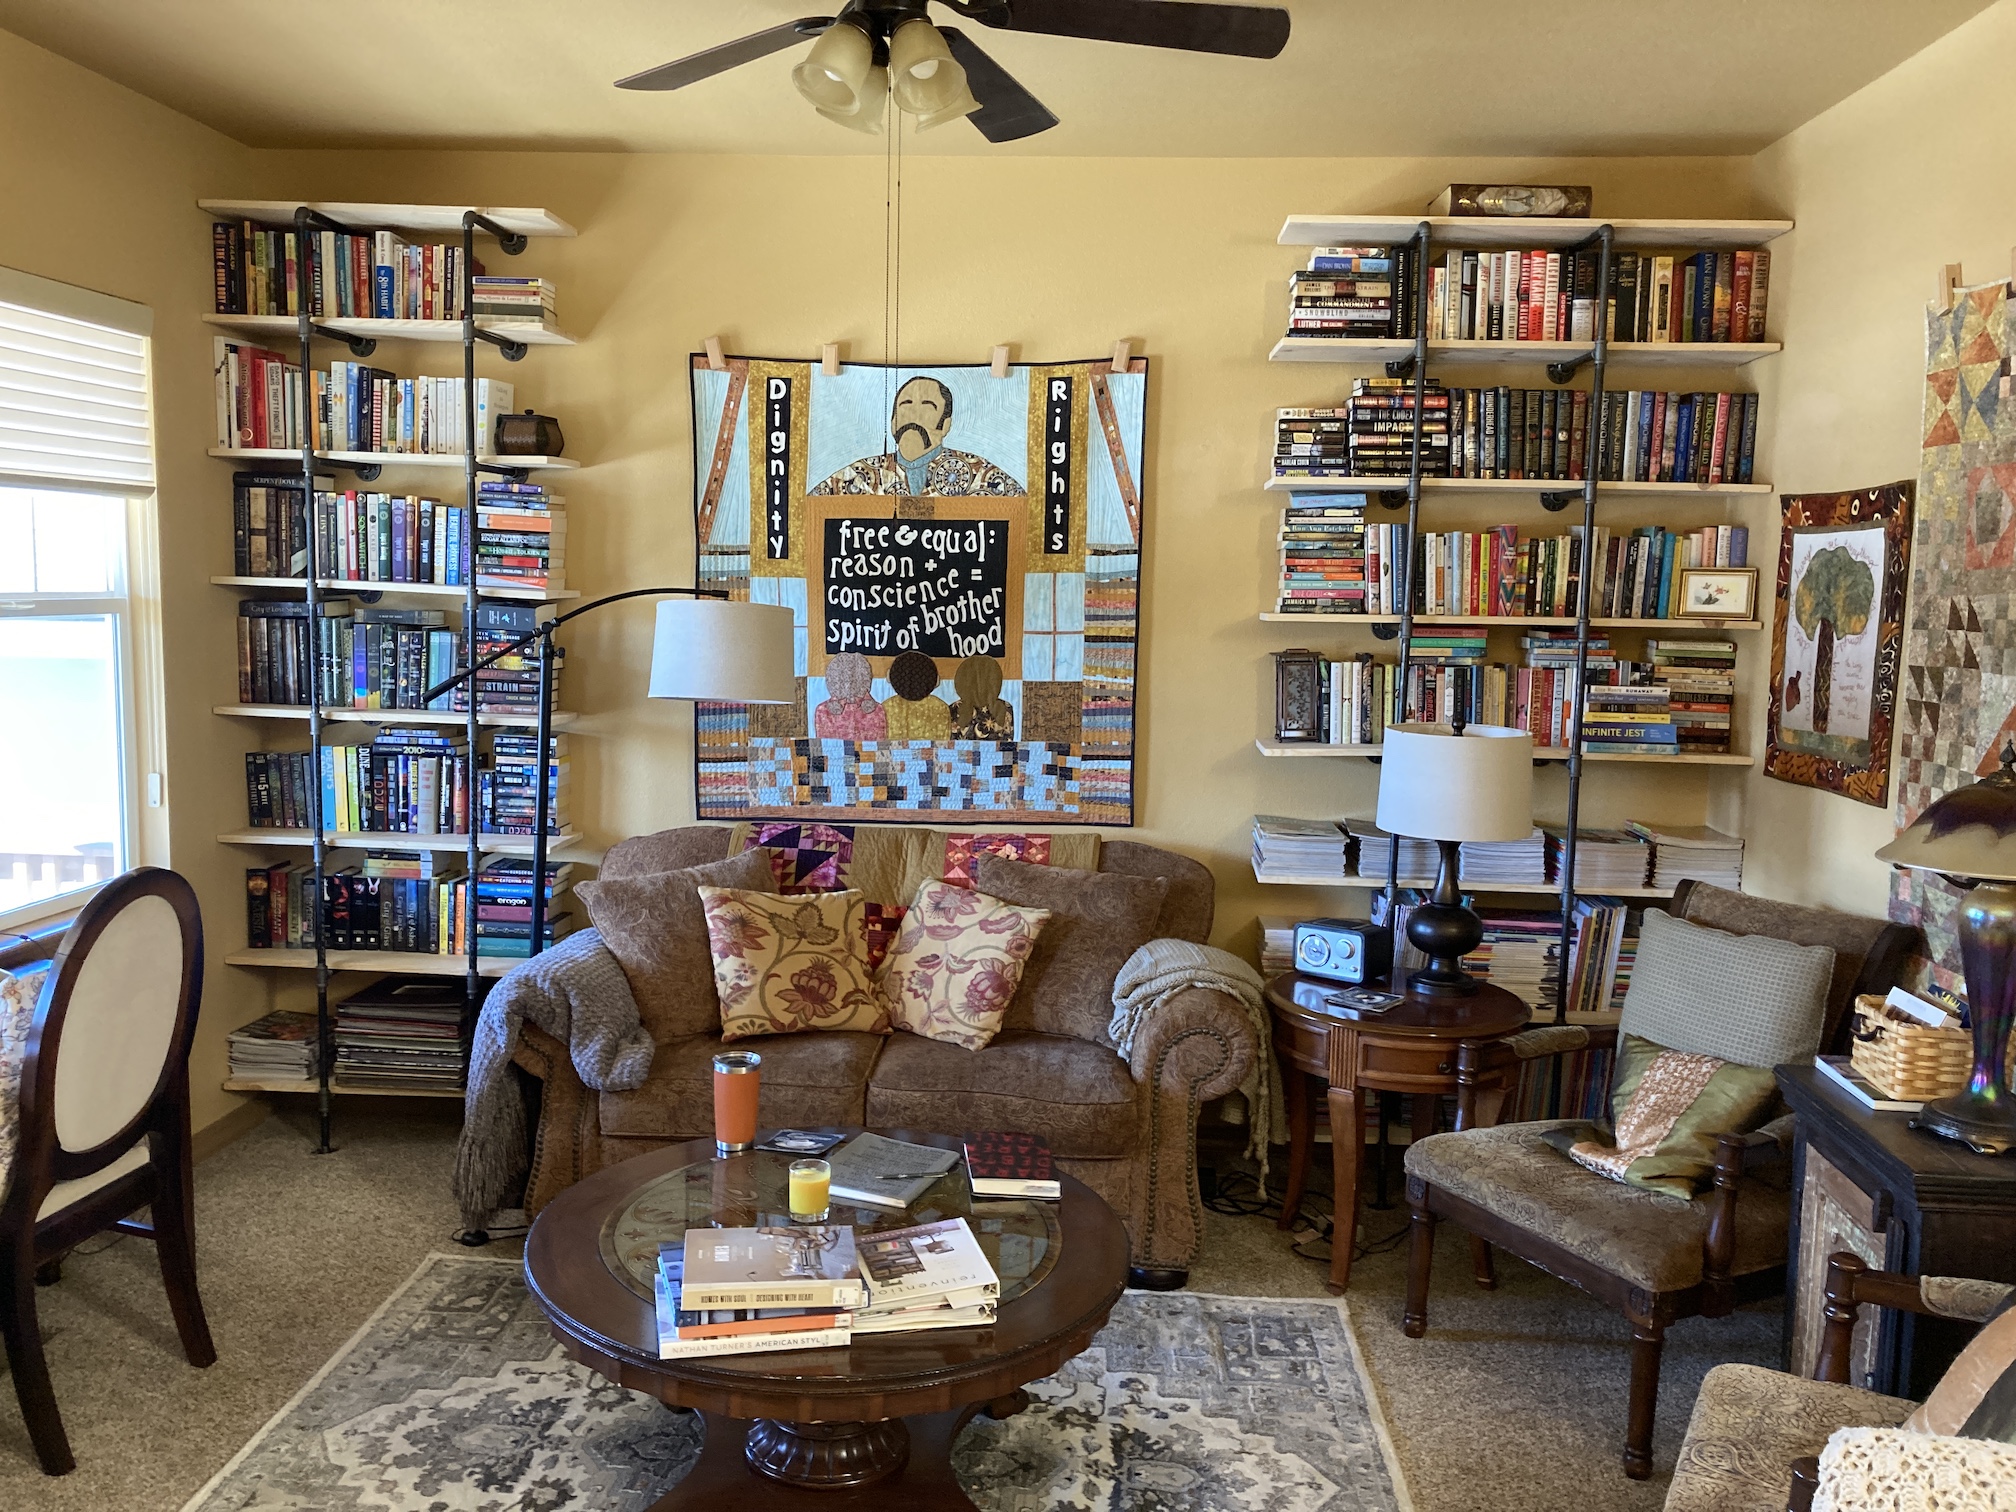
So here is the current version of my home library which used to be the front room/sitting room in my house:
I had so much fun hunting for books at thrift shops (one local thrift shop has 1/2 priced Saturdays).
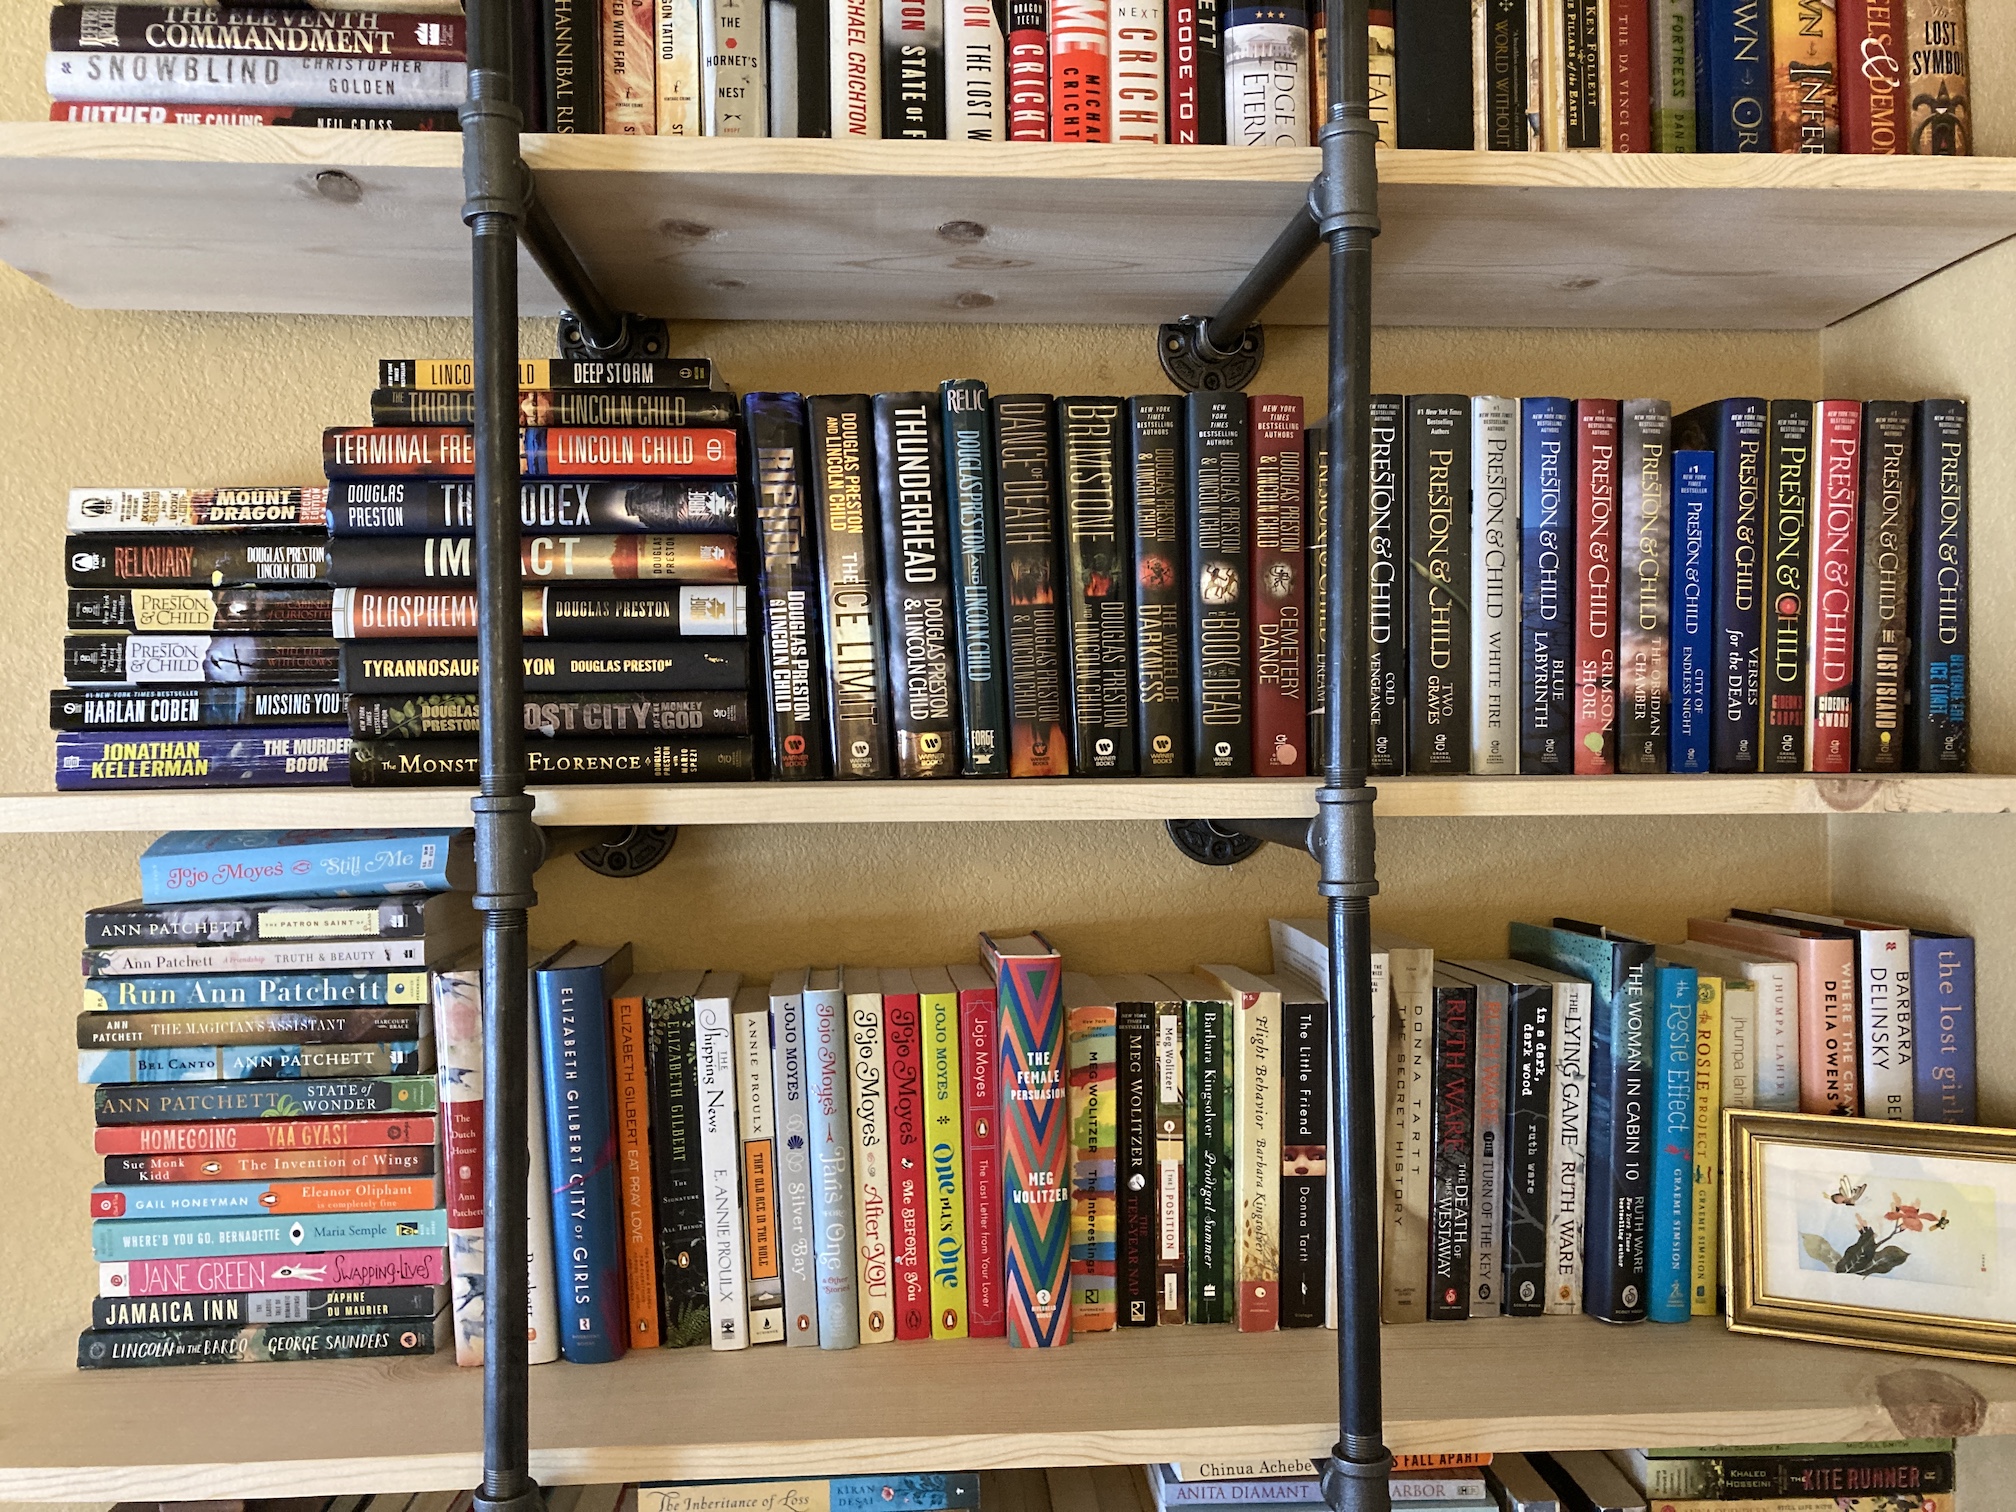
I’ve loved the books by the authors Douglas Preston & Lincoln Child and I’ve read at least 85% of their entire catalogue of books. So I put together a collection of their books of my very own (previously I had borrowed them from the library):
I do not have their latest books as those are not at thrift stores yet or reasonably priced on Thriftbooks.com but it was so fun finding each book one at a time while hunting at thrift shops.
At the beginning of my home library book curation process I thought about filling part of my home library with classic novels and books that might impress a book collector. But that thought lasted only a couple seconds. I have no need to impress anyone with my home library except myself. It is only filled with the kind of books I will read (and my partner too).
Like lots of Science Fiction and Fantasy (especially Young Adult Fantasy, I love it):
You might wonder what I did with my craft book collection. Well it is on the opposite wall organized by craft or topic (like art quilting):
All those books – got to have a cozy place to read, right? Here is Mike the Miniature Schnauzer sitting in my favorite reading spot:
And here is Mike and I snuggled cozy under a warm blanket on a cold Saturday reading (it was quite a delicious morning with my pot of tea next to me). I rediscovered the joy of reading a while, napping, waking up and reading some more!
Note these images were taken before my partner put up the third bookcase last week.
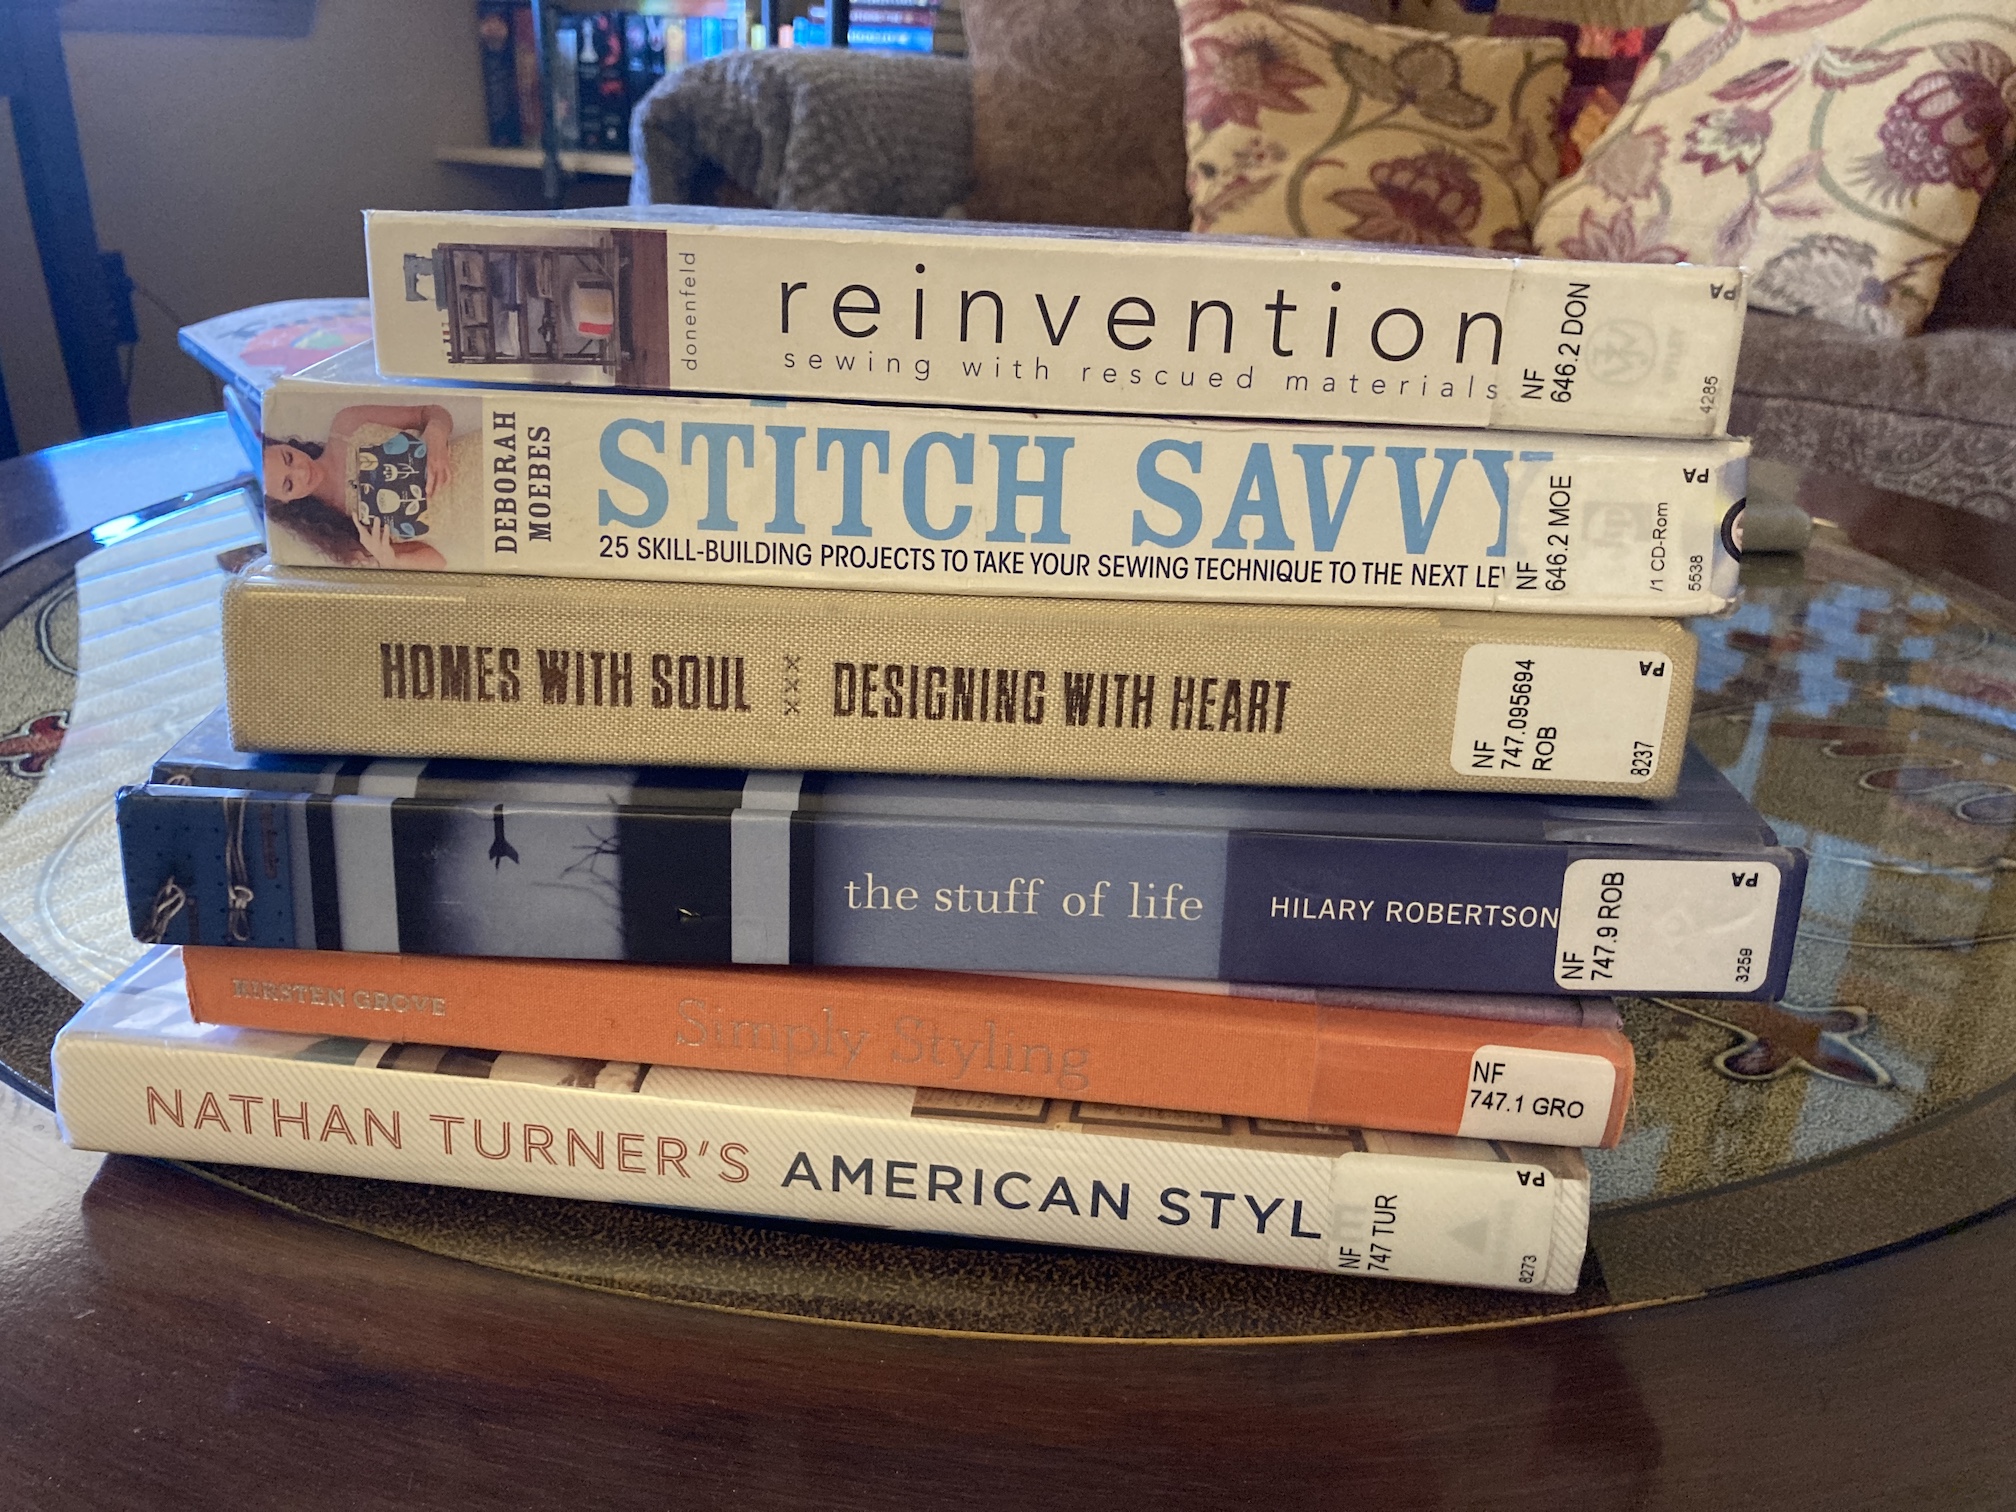
In case you are curious, I am still occasionally getting a “Library Stack” from my local public library, though not as big as the ones I was getting (the ridiculously large stacks like in the post The Library Stack Is Back!) when the library first reopened. Here is my current linrary stack:
Speaking of libraries, some of the second hand books I’ve purchased over the past several months are former library books! I’ve gotten pretty good at removing the library’s plastic dust cover with all their library specific stickers so the books sitting on my home library shelves does not look like I stole them from a library – ha!
As I mentioned earlier in this post I used to listen to a lot of audiobooks. Current I am only listening to podcasts now, taking a break from audiobooks. I am currently enjoying holding a book in my hand and reading it. Quite a different experience. I am taking a break from multitasking in life and just enjoying a solitary task of reading a book!
Postscript
Over the past several months of going to thrift stores to find books for my home library, I’ve come across many curious items for sale at thrift shops.
Here are my top 5 favorite finds that gave me the chuckle (and I promise you I did not buy any of them):
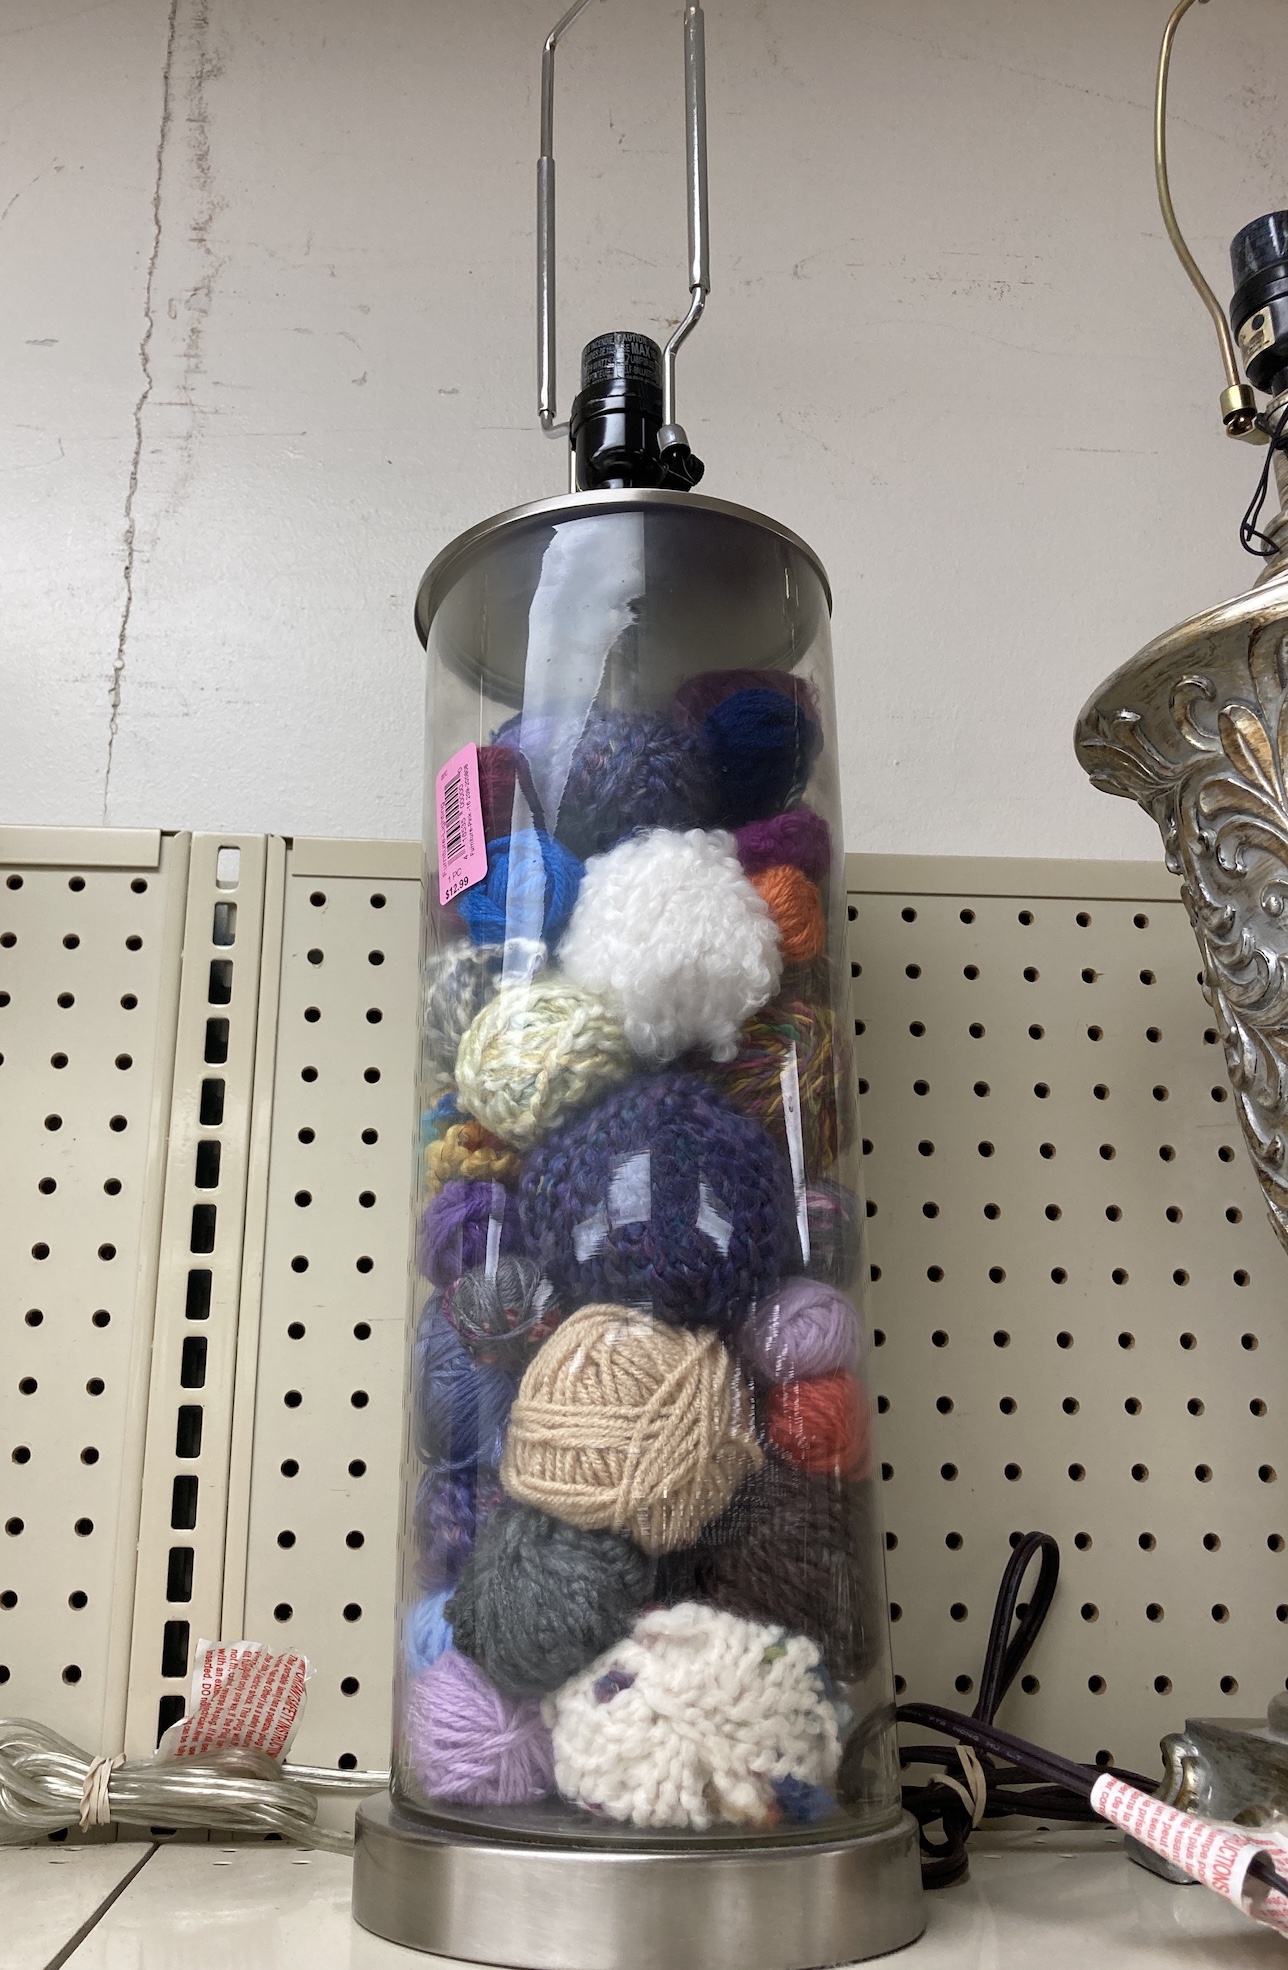
Number 5: If you need a lamp and a place to store your leftover yarn, would this not be the perfect solution?
Yes it’s – YARN LAMP!
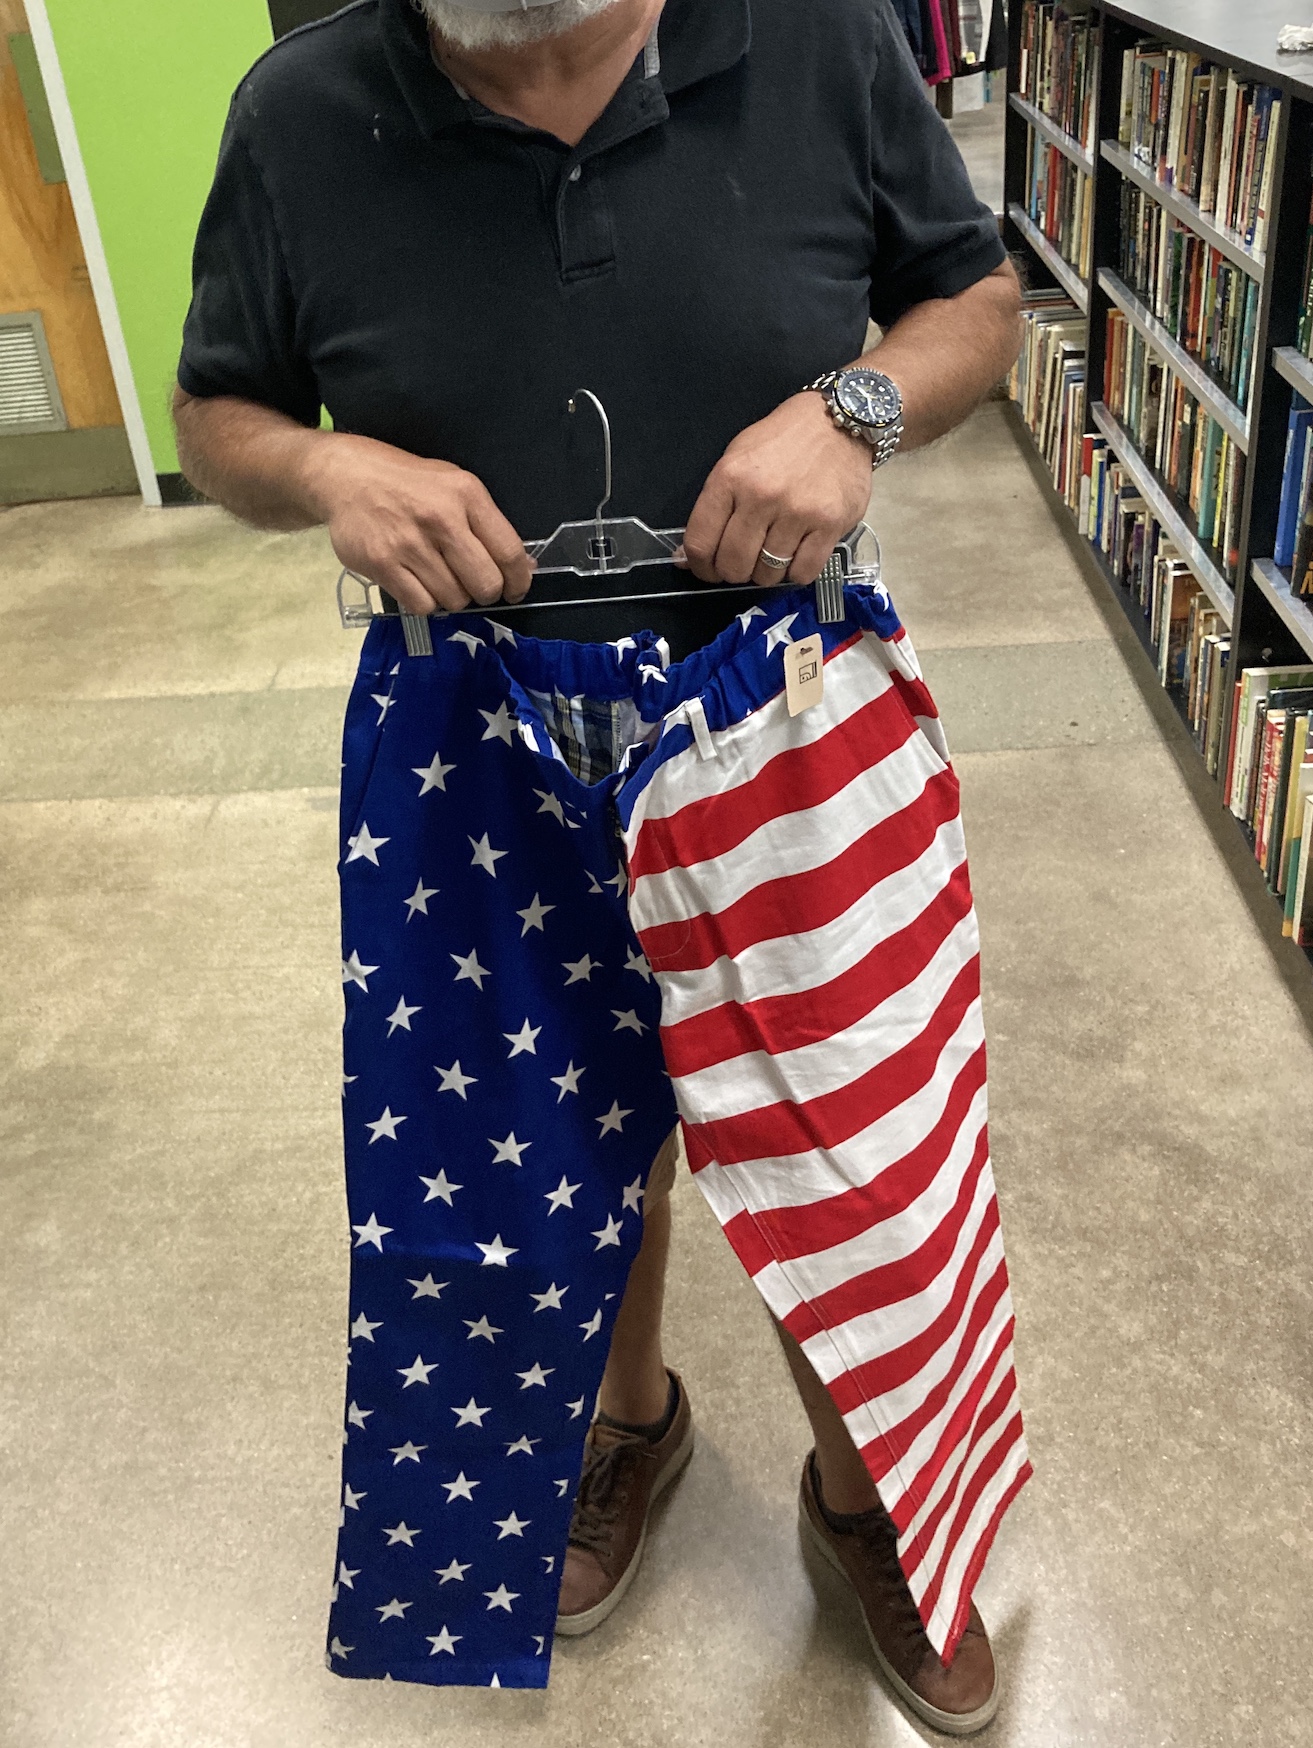
Number 4: Patriotic pants – they defy any further comment (but my apologies to you if you happen own these…)
My partner John is modeling them
Number 3: Donated photo frames with family photos still in them.
I could not believe how many donated photo frames I came across with family pictures still in them at various thrift stores, like the example below. Wouldn’t you perhaps remove your family photos before donating?!?!?
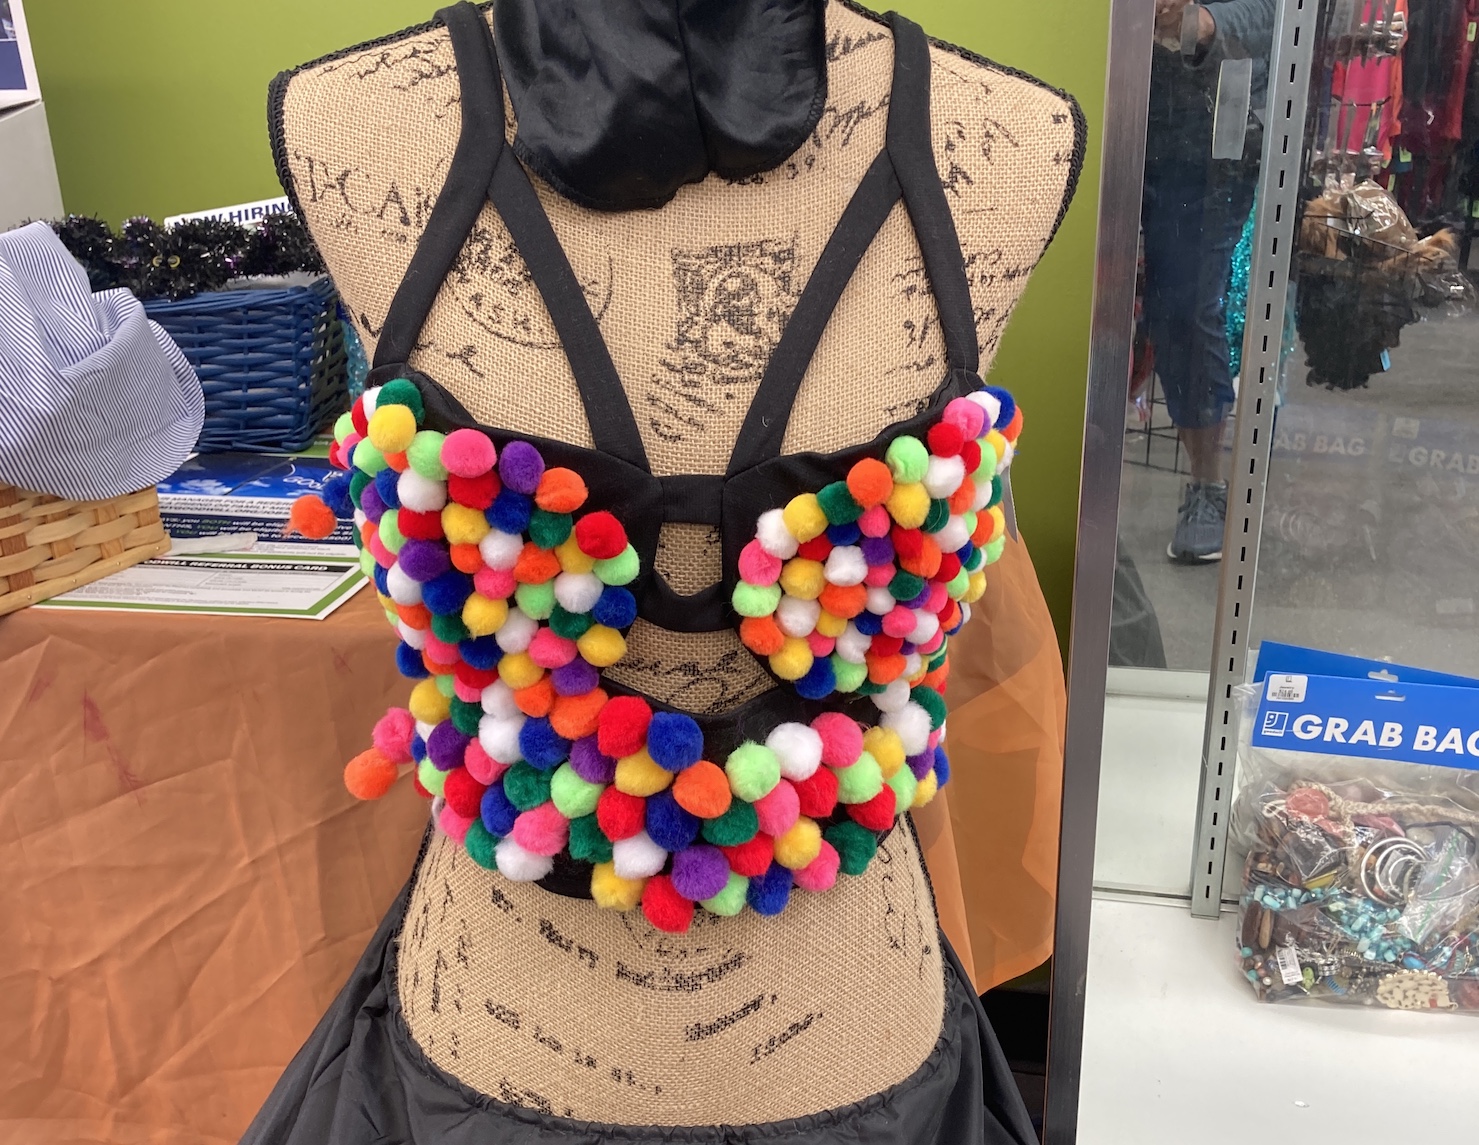
Number 2: An outfit for a very adventurous and crafty person.
Though it was on display way before Halloween, I think this was supposed to be a suggested Halloween outfit (hopefully as you would get a lot of stares should you select it for a cocktail party…)
And Number 1 is…
Something that you absolutely cannot imagine living without…
A cattle leg (yes real cattle leg) with hoof attached Barometer!
Yes, now you can remember the favorite steer you raised on your farm and know the current barometric pressure!
My regret is I did not buy it and put it away as the ultimate future “White Elephant” Christmas gift! (Could you imagine the look on someone’s face when they opened their gift!)
I am off work on Fridays and last Friday I had a former work colleague over for a card making playdate!
This colleague got me into card making back in the late 1990s when we worked together at a company in Seattle, Washington (in the Queen Anne area if you are familiar with Seattle). Along with another colleague our we would make cards in the conference room during our lunch break.
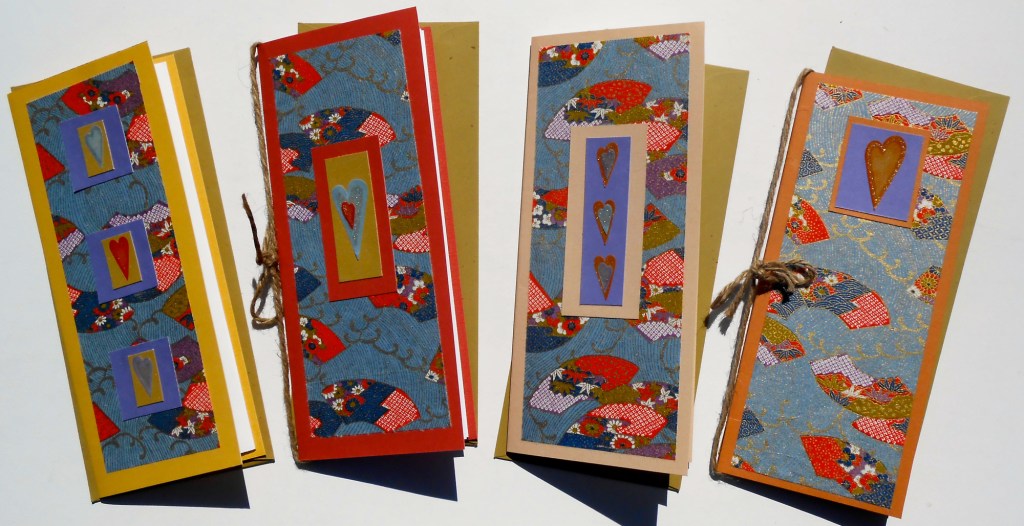
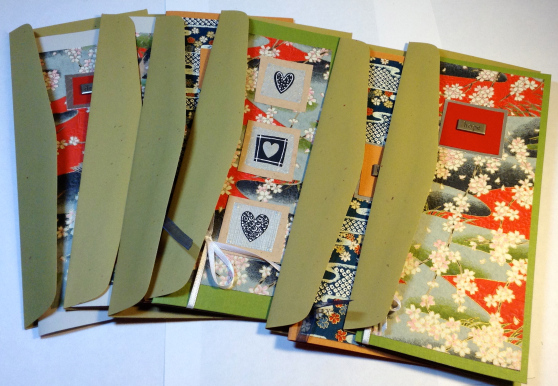
I’ve not make cards for a couple years, not since I made them for my tierneycreates Etsy shop (which I still daydream about reopening someday). Here are the sets of cards I sold on my Etsy shop years ago:
I lined the inside of the cards with a white folded sheet of paper to make it easier to write inside the card (instead of trying to write a greeting on deep colored card stock.
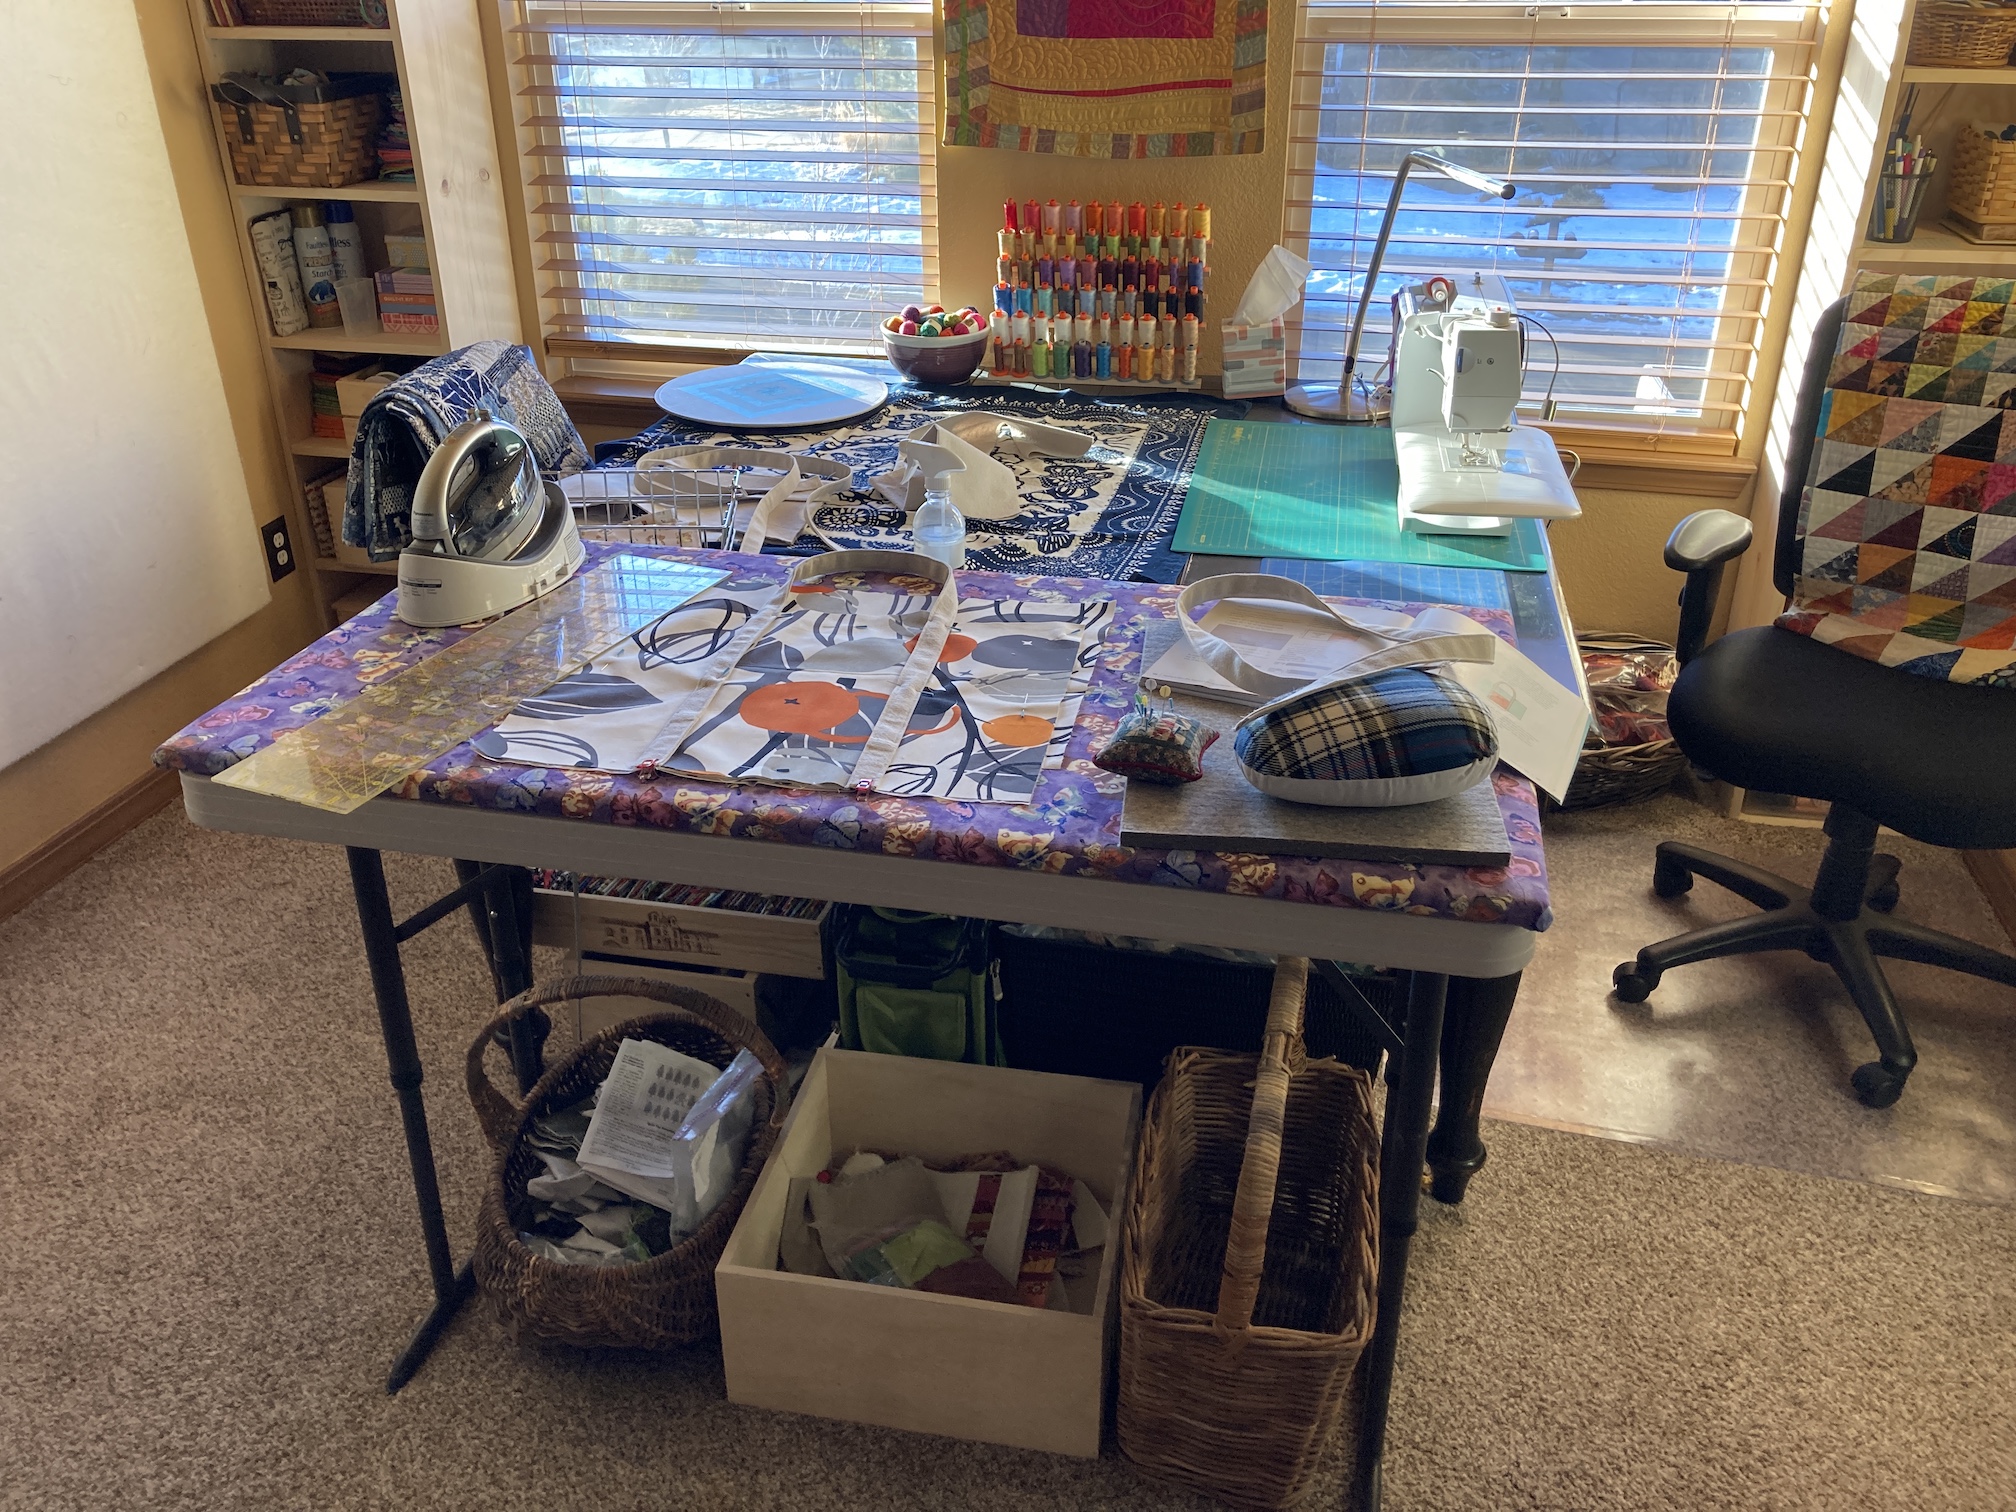
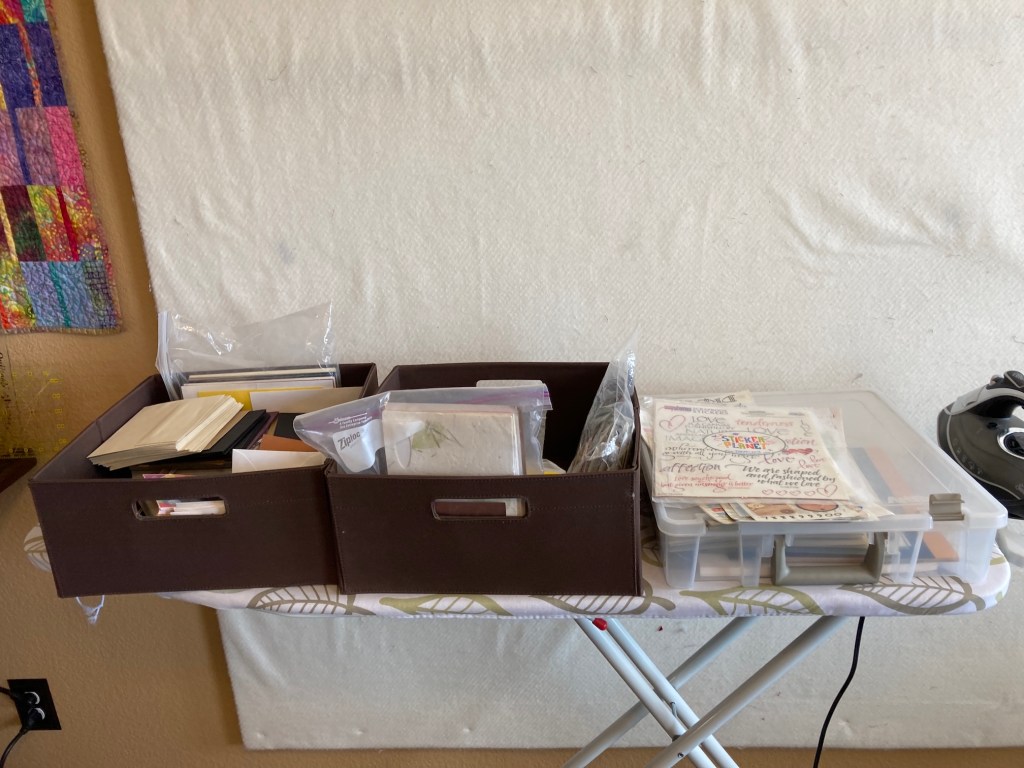
I converted my studio/sewing room into a “paper crafting emporium” for the day, putting away my sewing machine and current project in progress (which I will share in a future post) and dusted off my old paper crafting supplies and set them up around the room.
Here is my studio table all set for card making (with snacks of course!):
And the paper crafting supplies spread around the room:
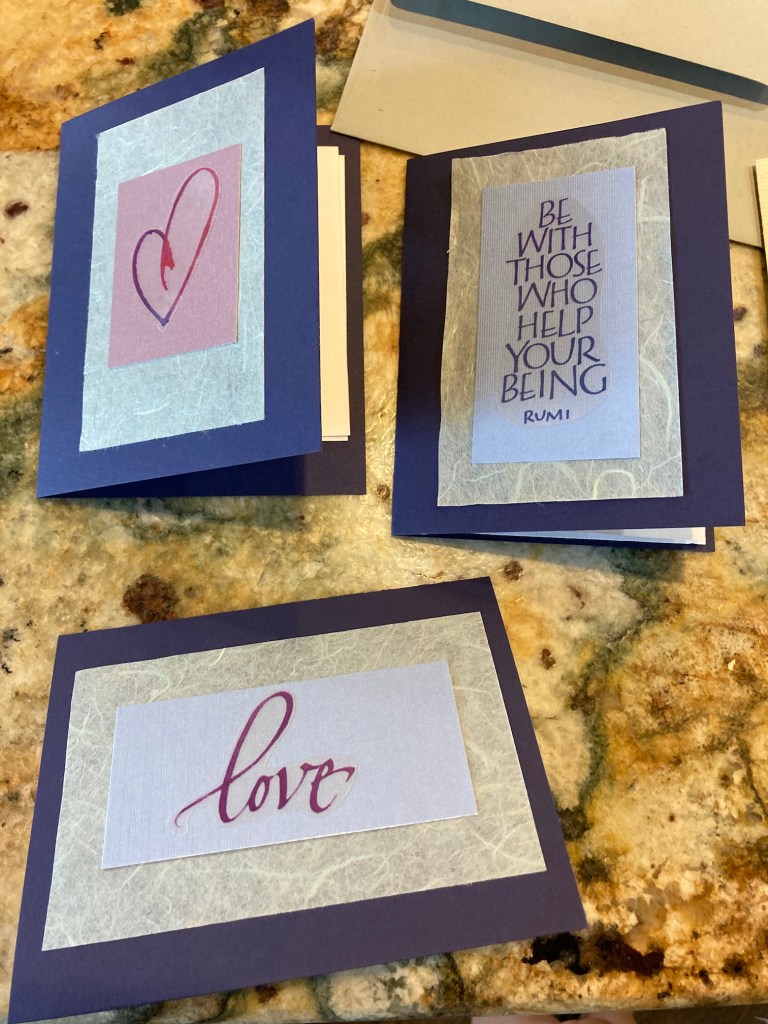
Here is our work in progress and the cards we made:
I tried to recreate the style of the cards I made previously for my Etsy shop that I featured earlier in the post but I was struggling with my paper cutter (old dull blade, etc.) in order to make larger cards from card stock, so I settled on using pre-made and folded smaller card stock I found in my paper crafting stash (likely 15+ year old!).
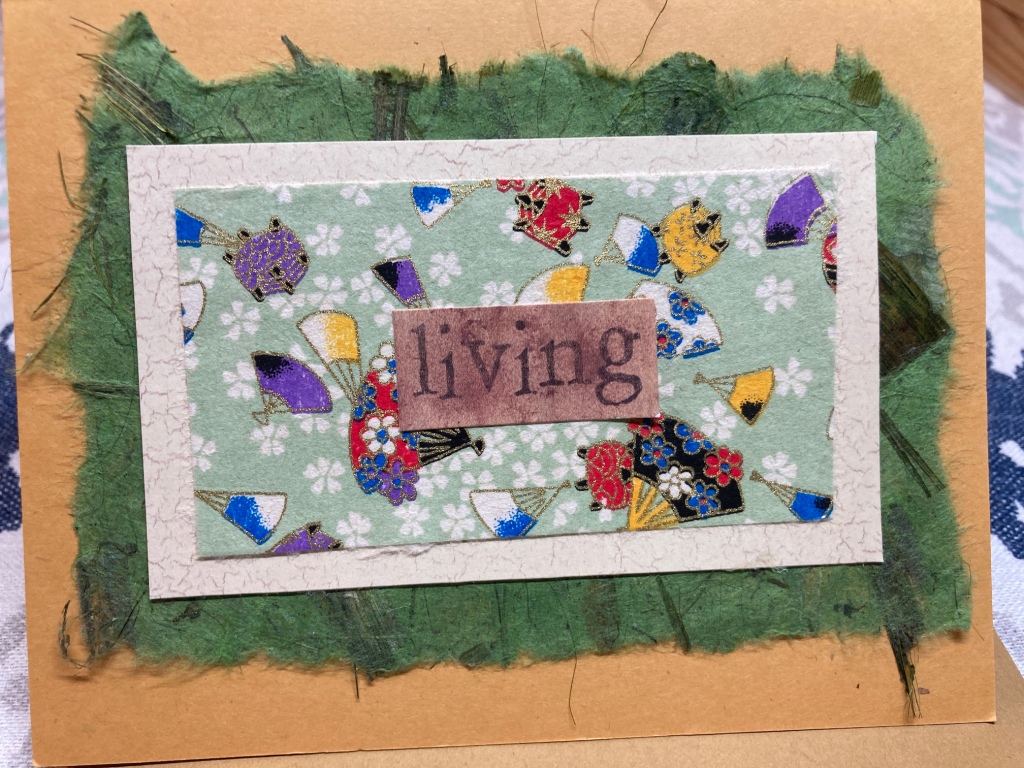
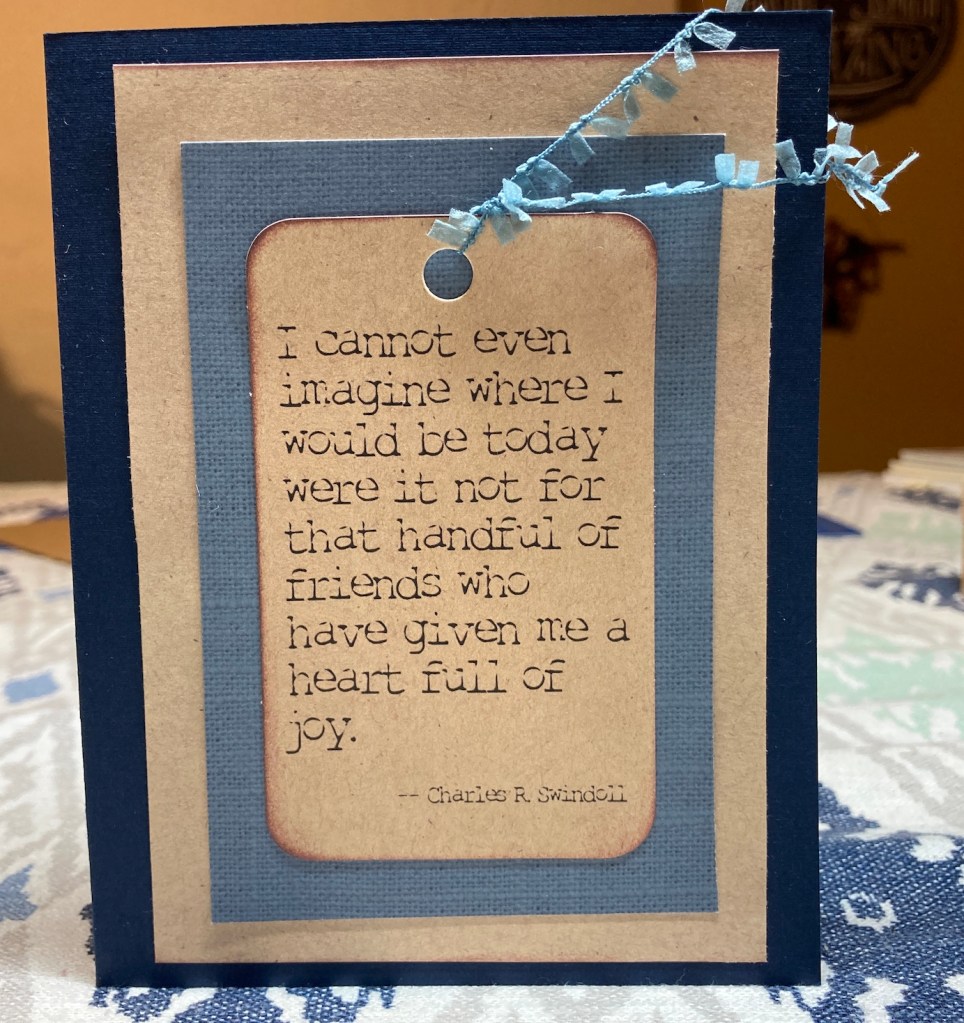
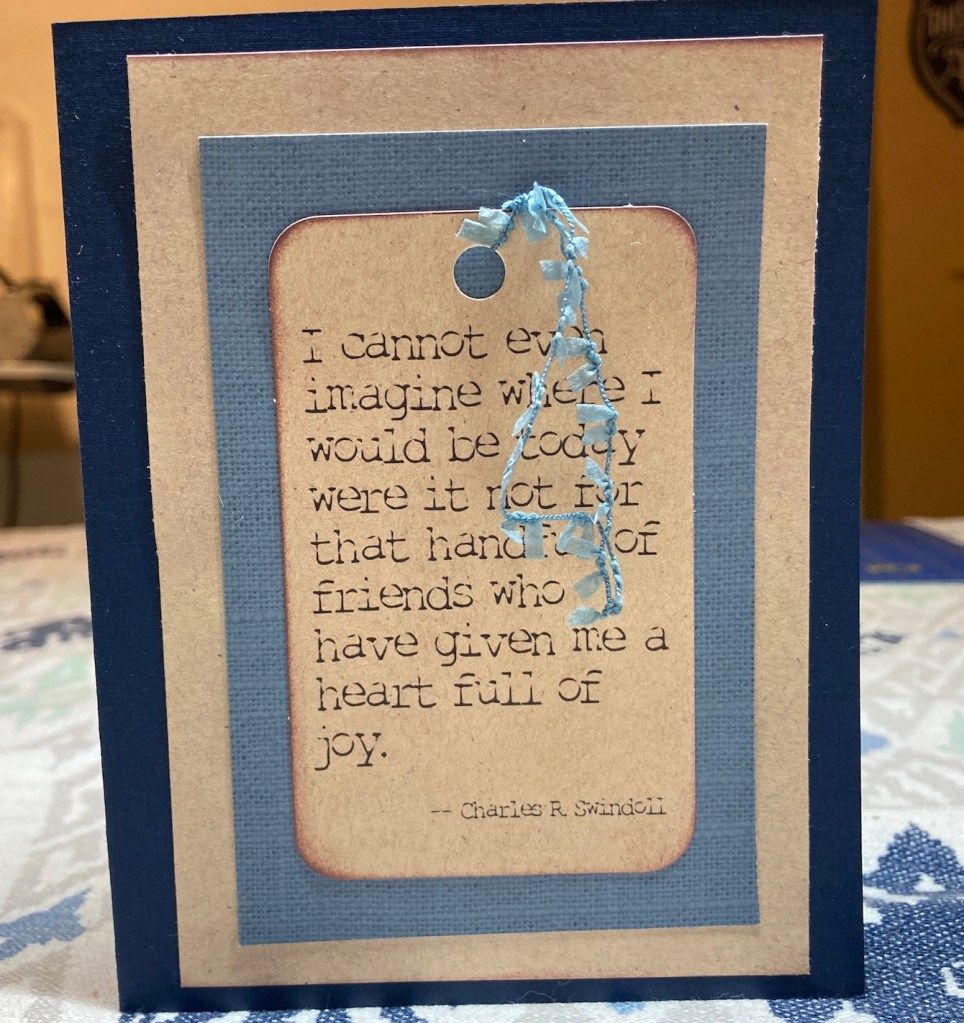
I also made these cards (some of the cards have 2 images – one with the ribbon in place and one with it moved so you can read the text):
Most of cards we added an inner liner of folded white paper glued into the crease to make it easy to write a note inside the card.
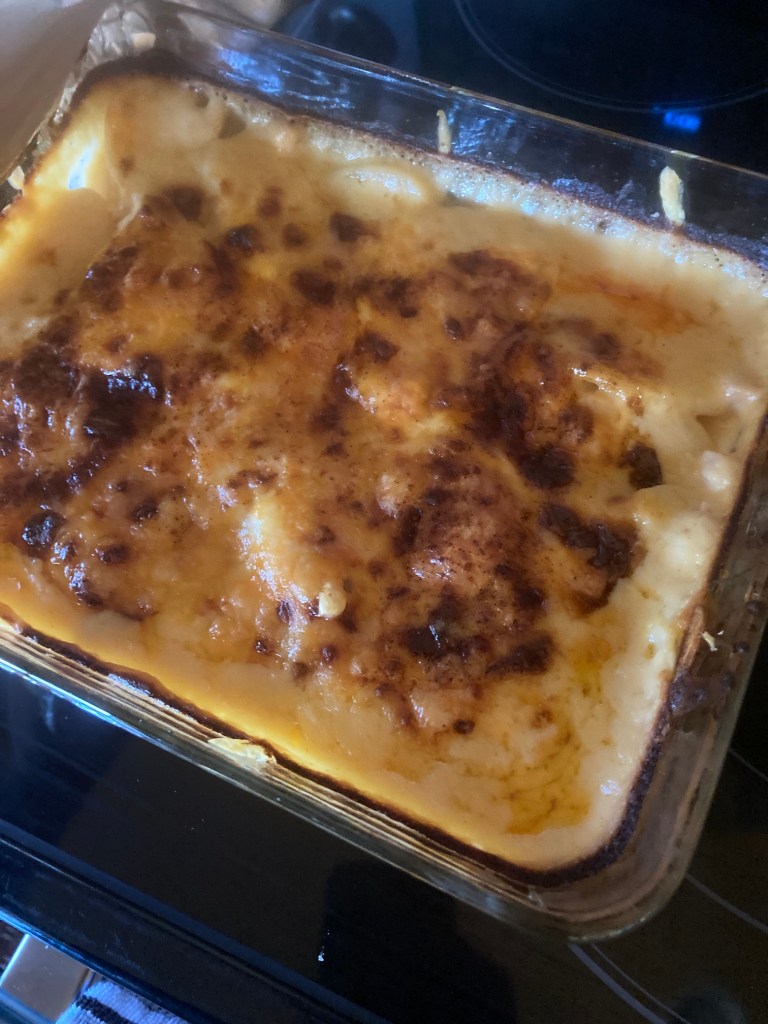
We had a wonderful lunch prepared by my partner John (who full time telecommutes during the pandemic) of scalloped potatoes, honey ham, and sautéed broccoli.
We also went on a walk around the green space/park behind my house.
It was a lovely way to spend a Friday and we plan to paper craft again in the near future.
Postscript
Speaking of crafting, my partner John, who has since the pandemic started and we became homebound, has been studying woodworking and continuing working on projects. I shared the tables he made in the Postscript section of the post – Making My Own Granny Square Afghan.
Well recently he completely a bench/table with drawers for his Miter Saw which in my opinion is pretty impressive for a new woodworker! He bought plans online for the bench/table and improved upon those plans to better reinforce the table.
He’s been having a lot of fun in his studio since we converted part of the daylight basement to his woodworking shop!
Recently I’ve had several guest bloggers on my tierneycreates blog – Wendy Hill (a human) with her series on her Quarantine Quilt collaboration (see link Quarantine Quilts for all the posts); and the tierneycreates Beastie (non human, monster) announcing her new Beastie partner (see link Beastie Adventures for all her posts).
Well Mike the Miniature Schnauzer (non-human, canine) was feeling a little irritated that he had not been invited to guest blog. So I guess it is his turn…
A Whole Lot of Remodeling Going On
Hello Bloglandia.
This is Mike the Miniature Schnauzer. I am dictating this post as although I might secretly have opposable thumbs that would allow me to type for myself, I like to keep certain things secret from my humans.
I am Mike and I am a Miniature Schnauzer the smartest dog breed imaginable (maybe)
It’s my turn to do a guest blog post! My adopted sister Sassy (who passed in December 2017) used to have her own blog, Schnauzer Snips: Musings from a Highly Opinionated Miniature Schnauzer. I am not asking for my own blog, just to be invited to guest blog once in a while so you can read about life from a Miniature Schnauzer’s perspective.
I am a rescue (I rescued my humans from life without me) and if you’d like to read my story it is on this post –Taking Chances: The Mike Hogan Chronicles (re-post). I lost one of my humans (male human, Terry) suddenly in December 2018 but my female human (Tierney) and I have been making the best of our new life in the metropolitan Denver Colorado area since April 2019 (see series of posts Colorado Bound).
I now have the new male human in my life (John) nearly fully managed as you will see later in this post.
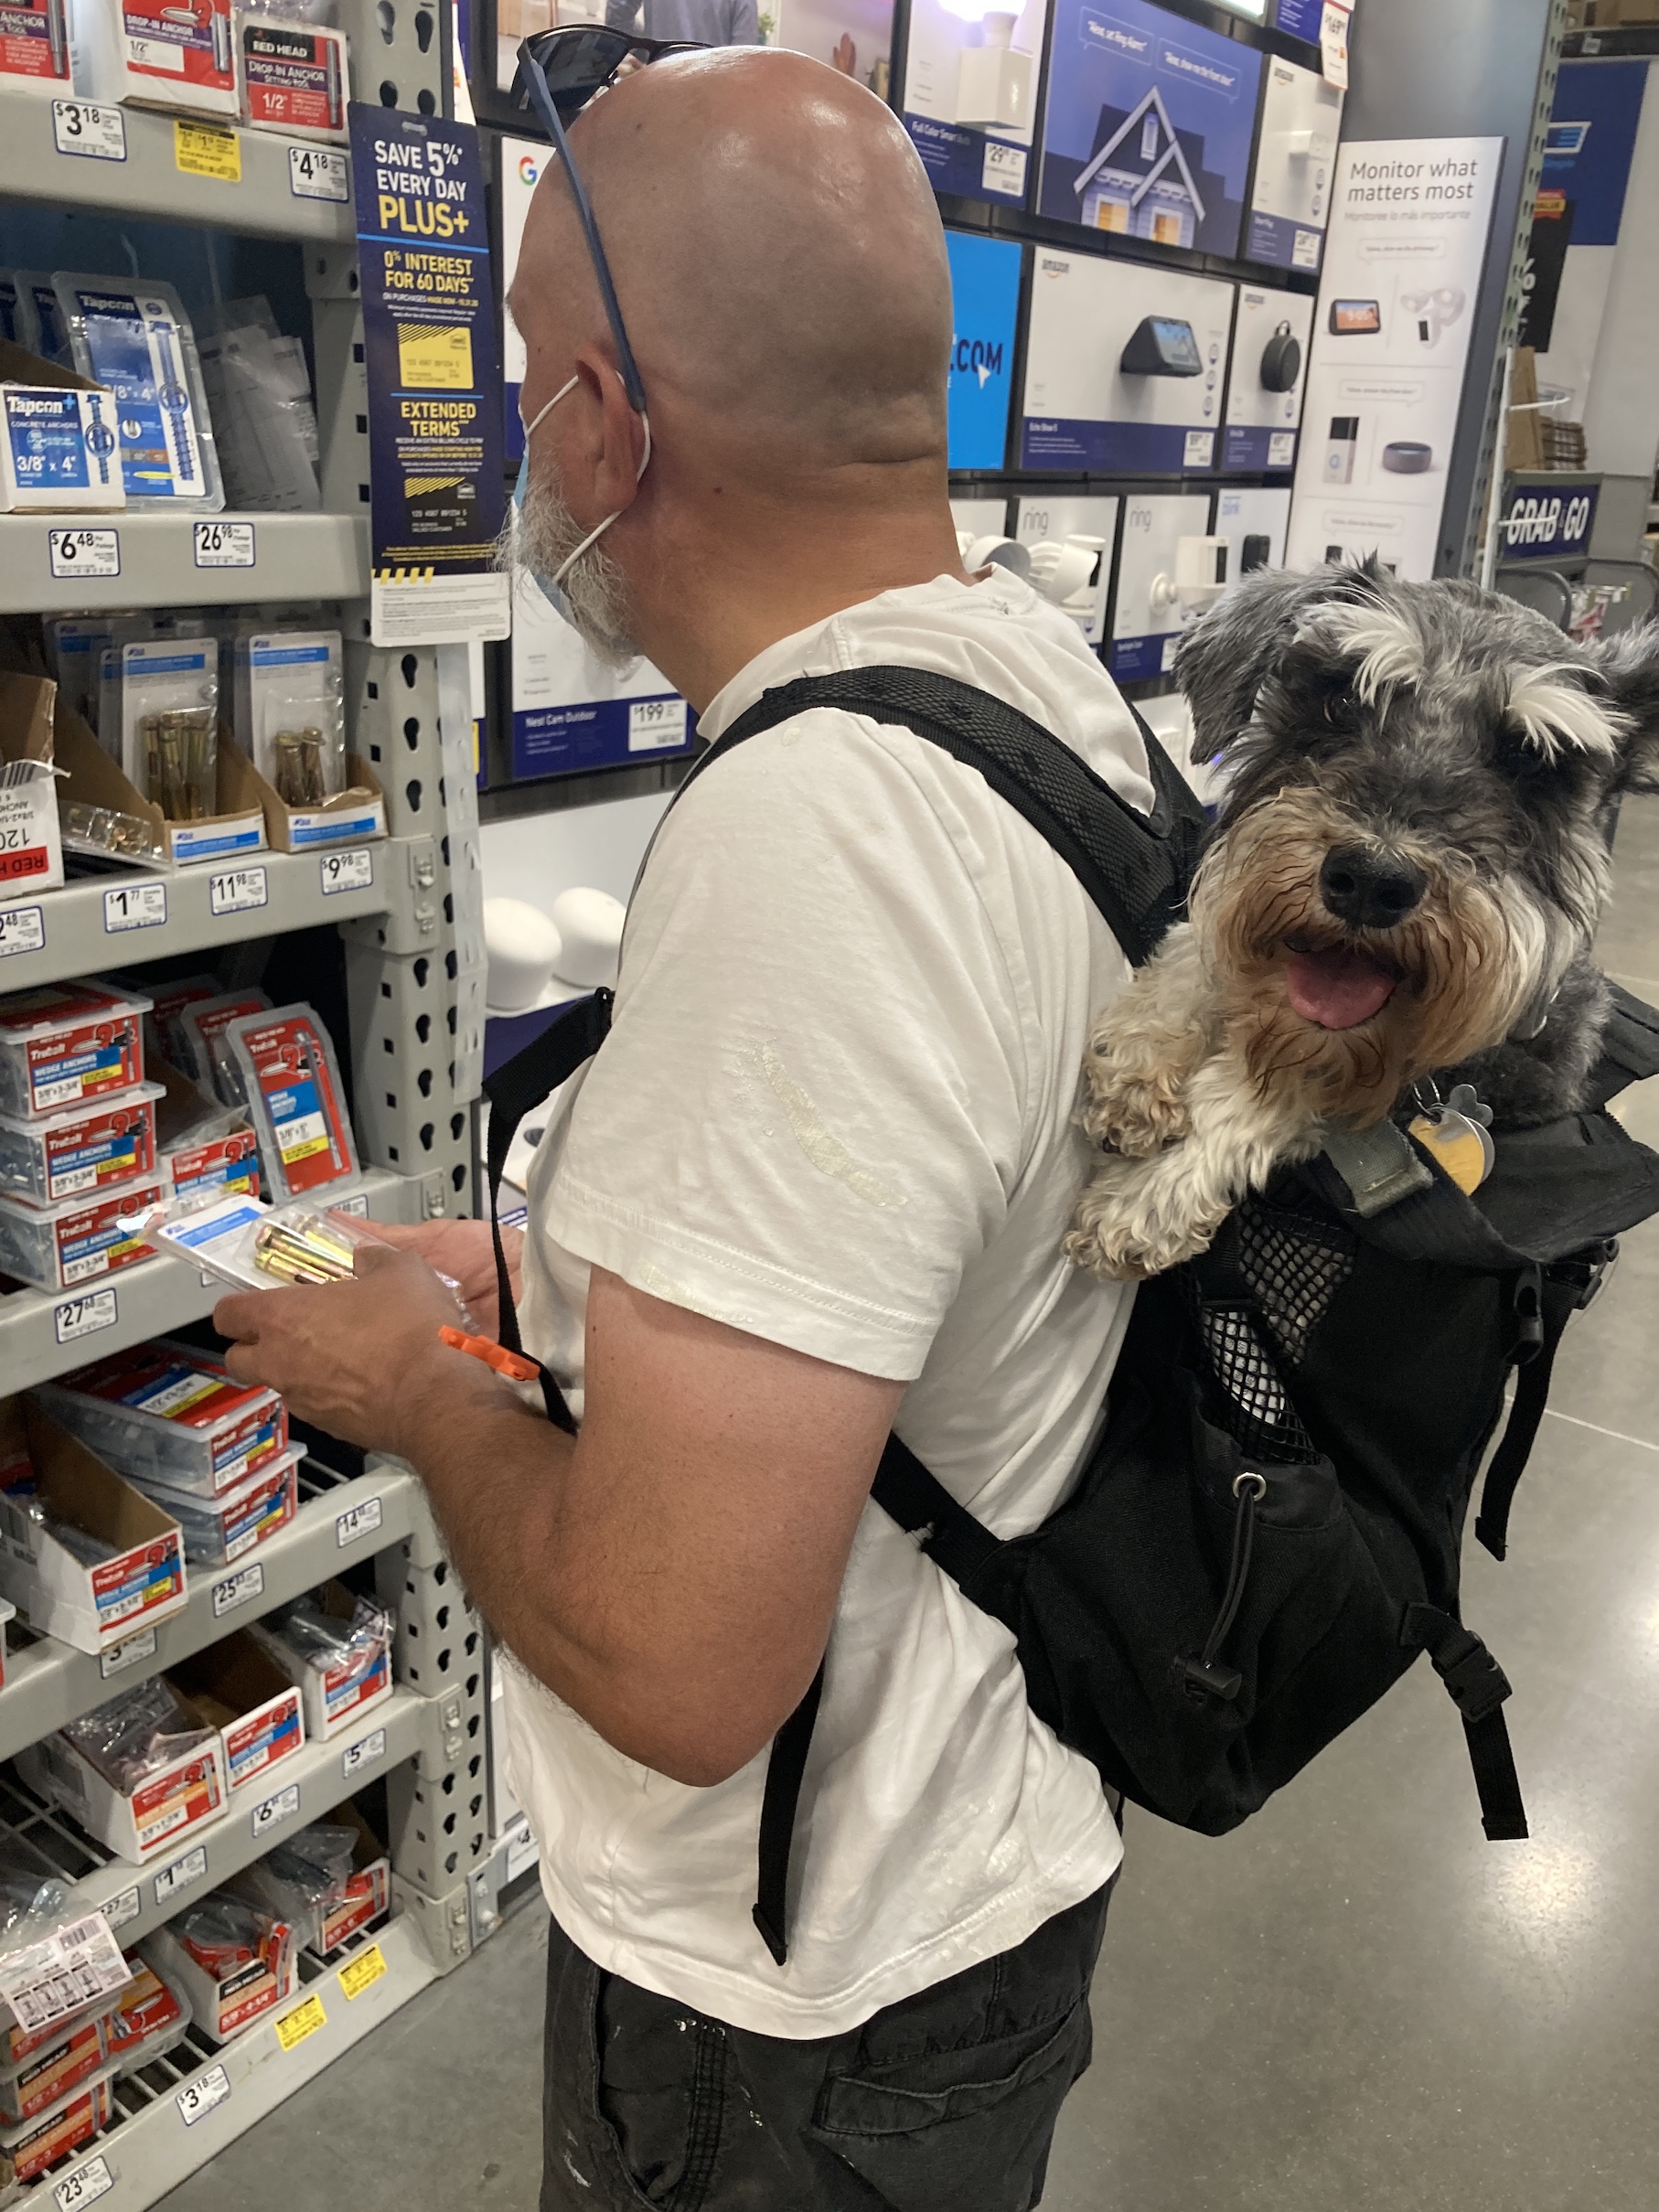
I’ve been spending a lot of time at home improvement stores during the pandemic. My humans have been working on a lot of remodeling projects and I am trying to supervise them as best I can.
Back in late March/start of April 2020 my humans made the decision not to move to a new house they were going to buy and instead to stay in their current abode (see post Perspective) due to the initial financial crisis in the early days of the pandemic.
Staying in their current residence meant fixing it up so that both humans were happy with it and it met their needs.
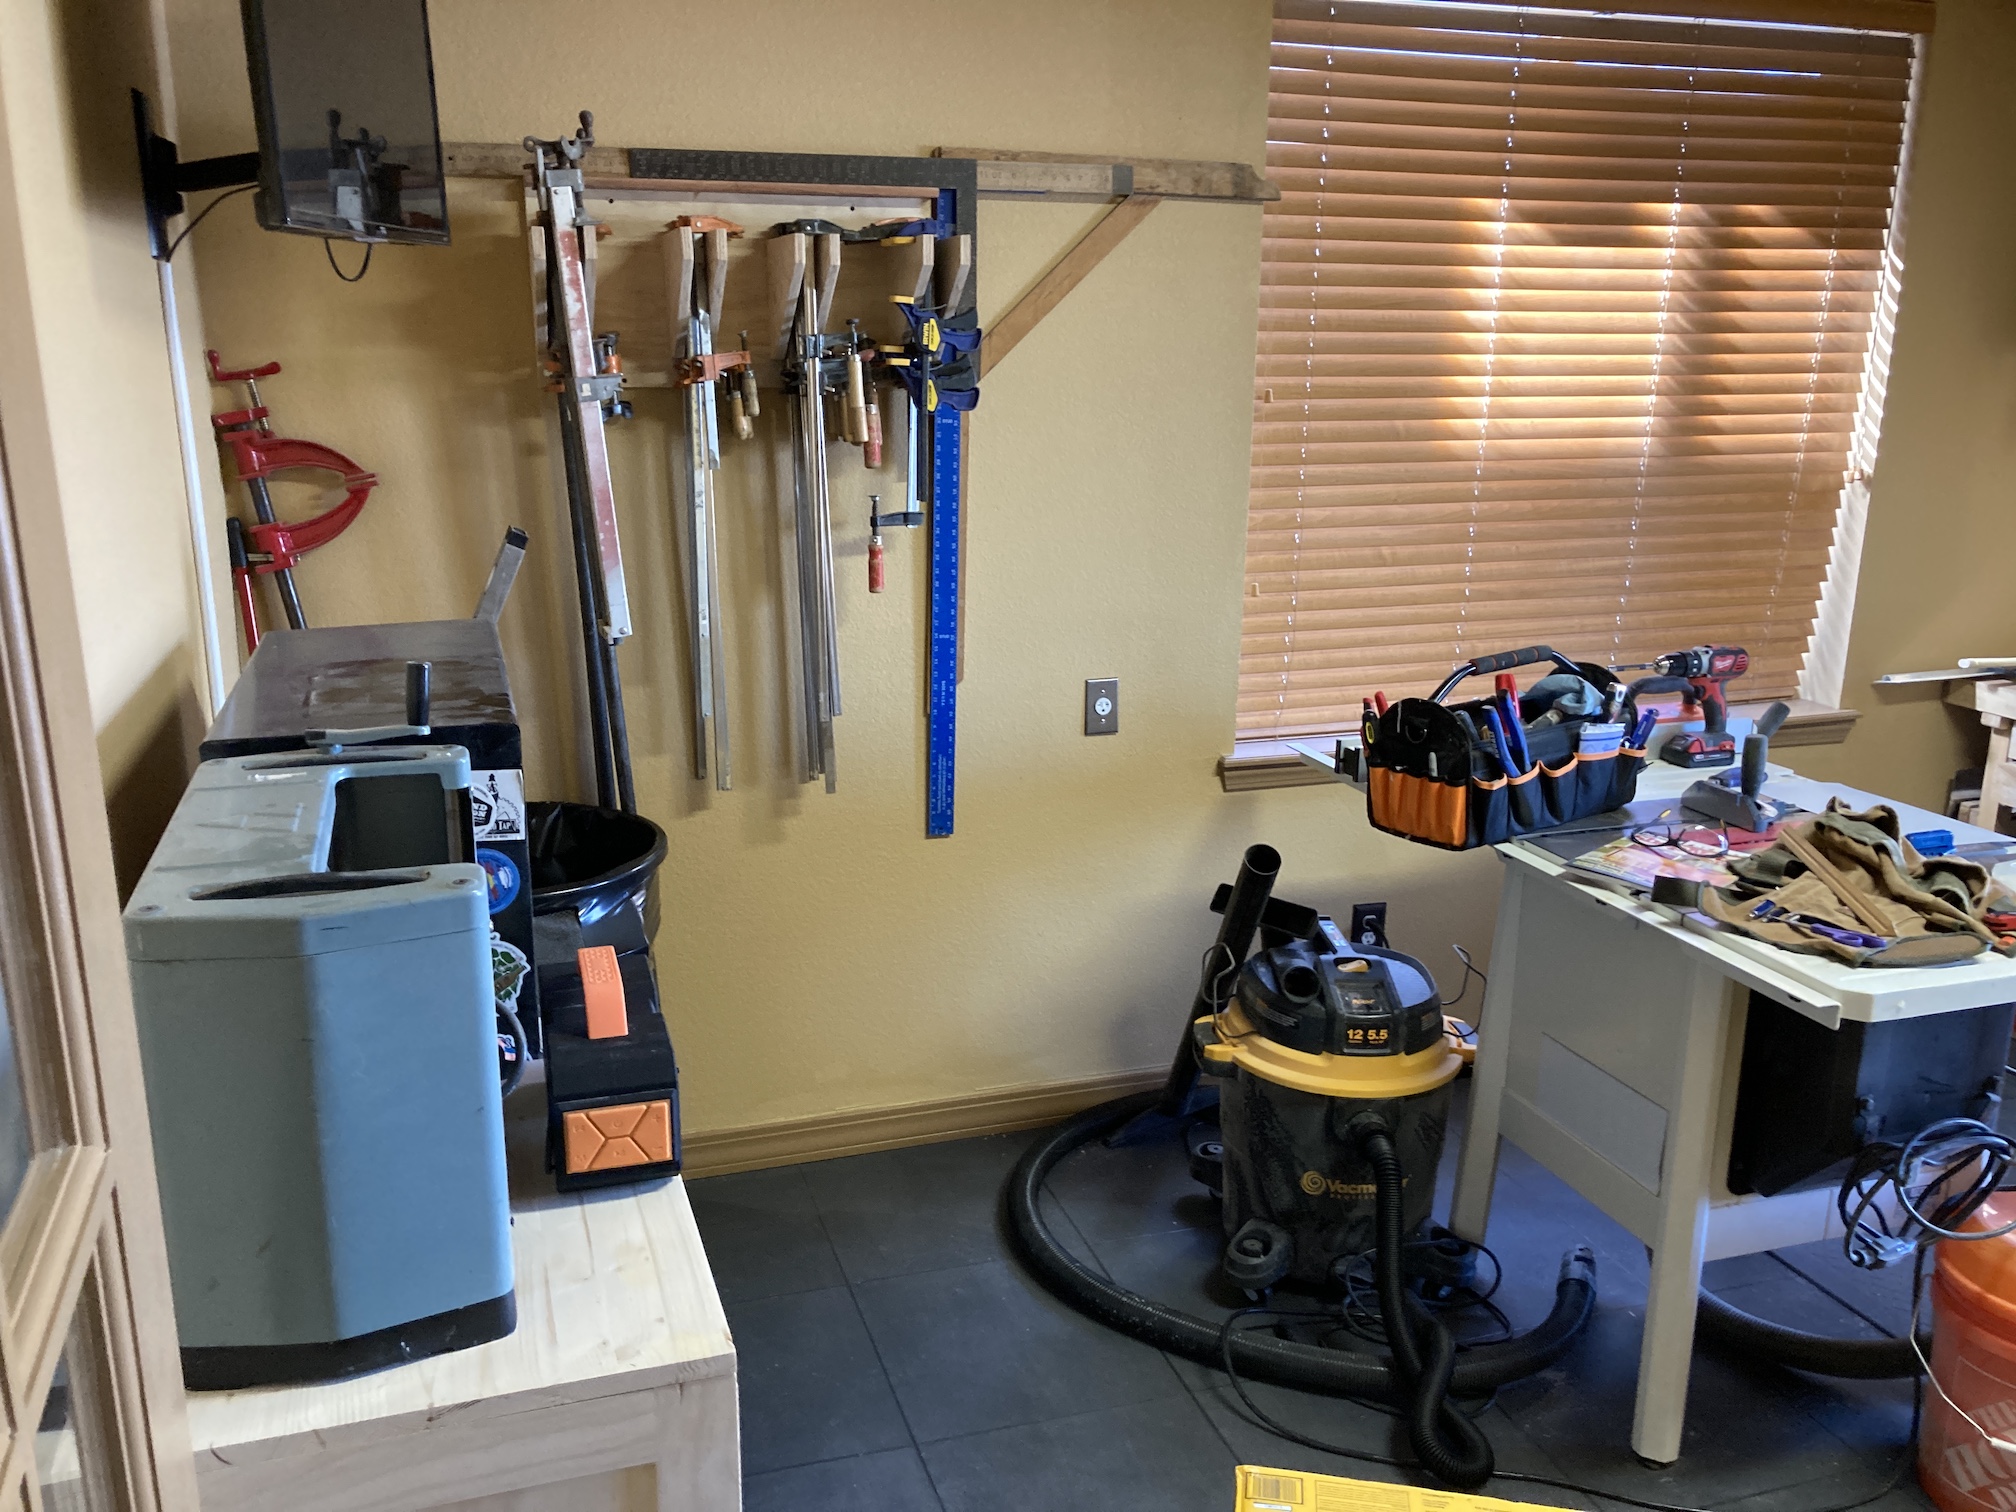
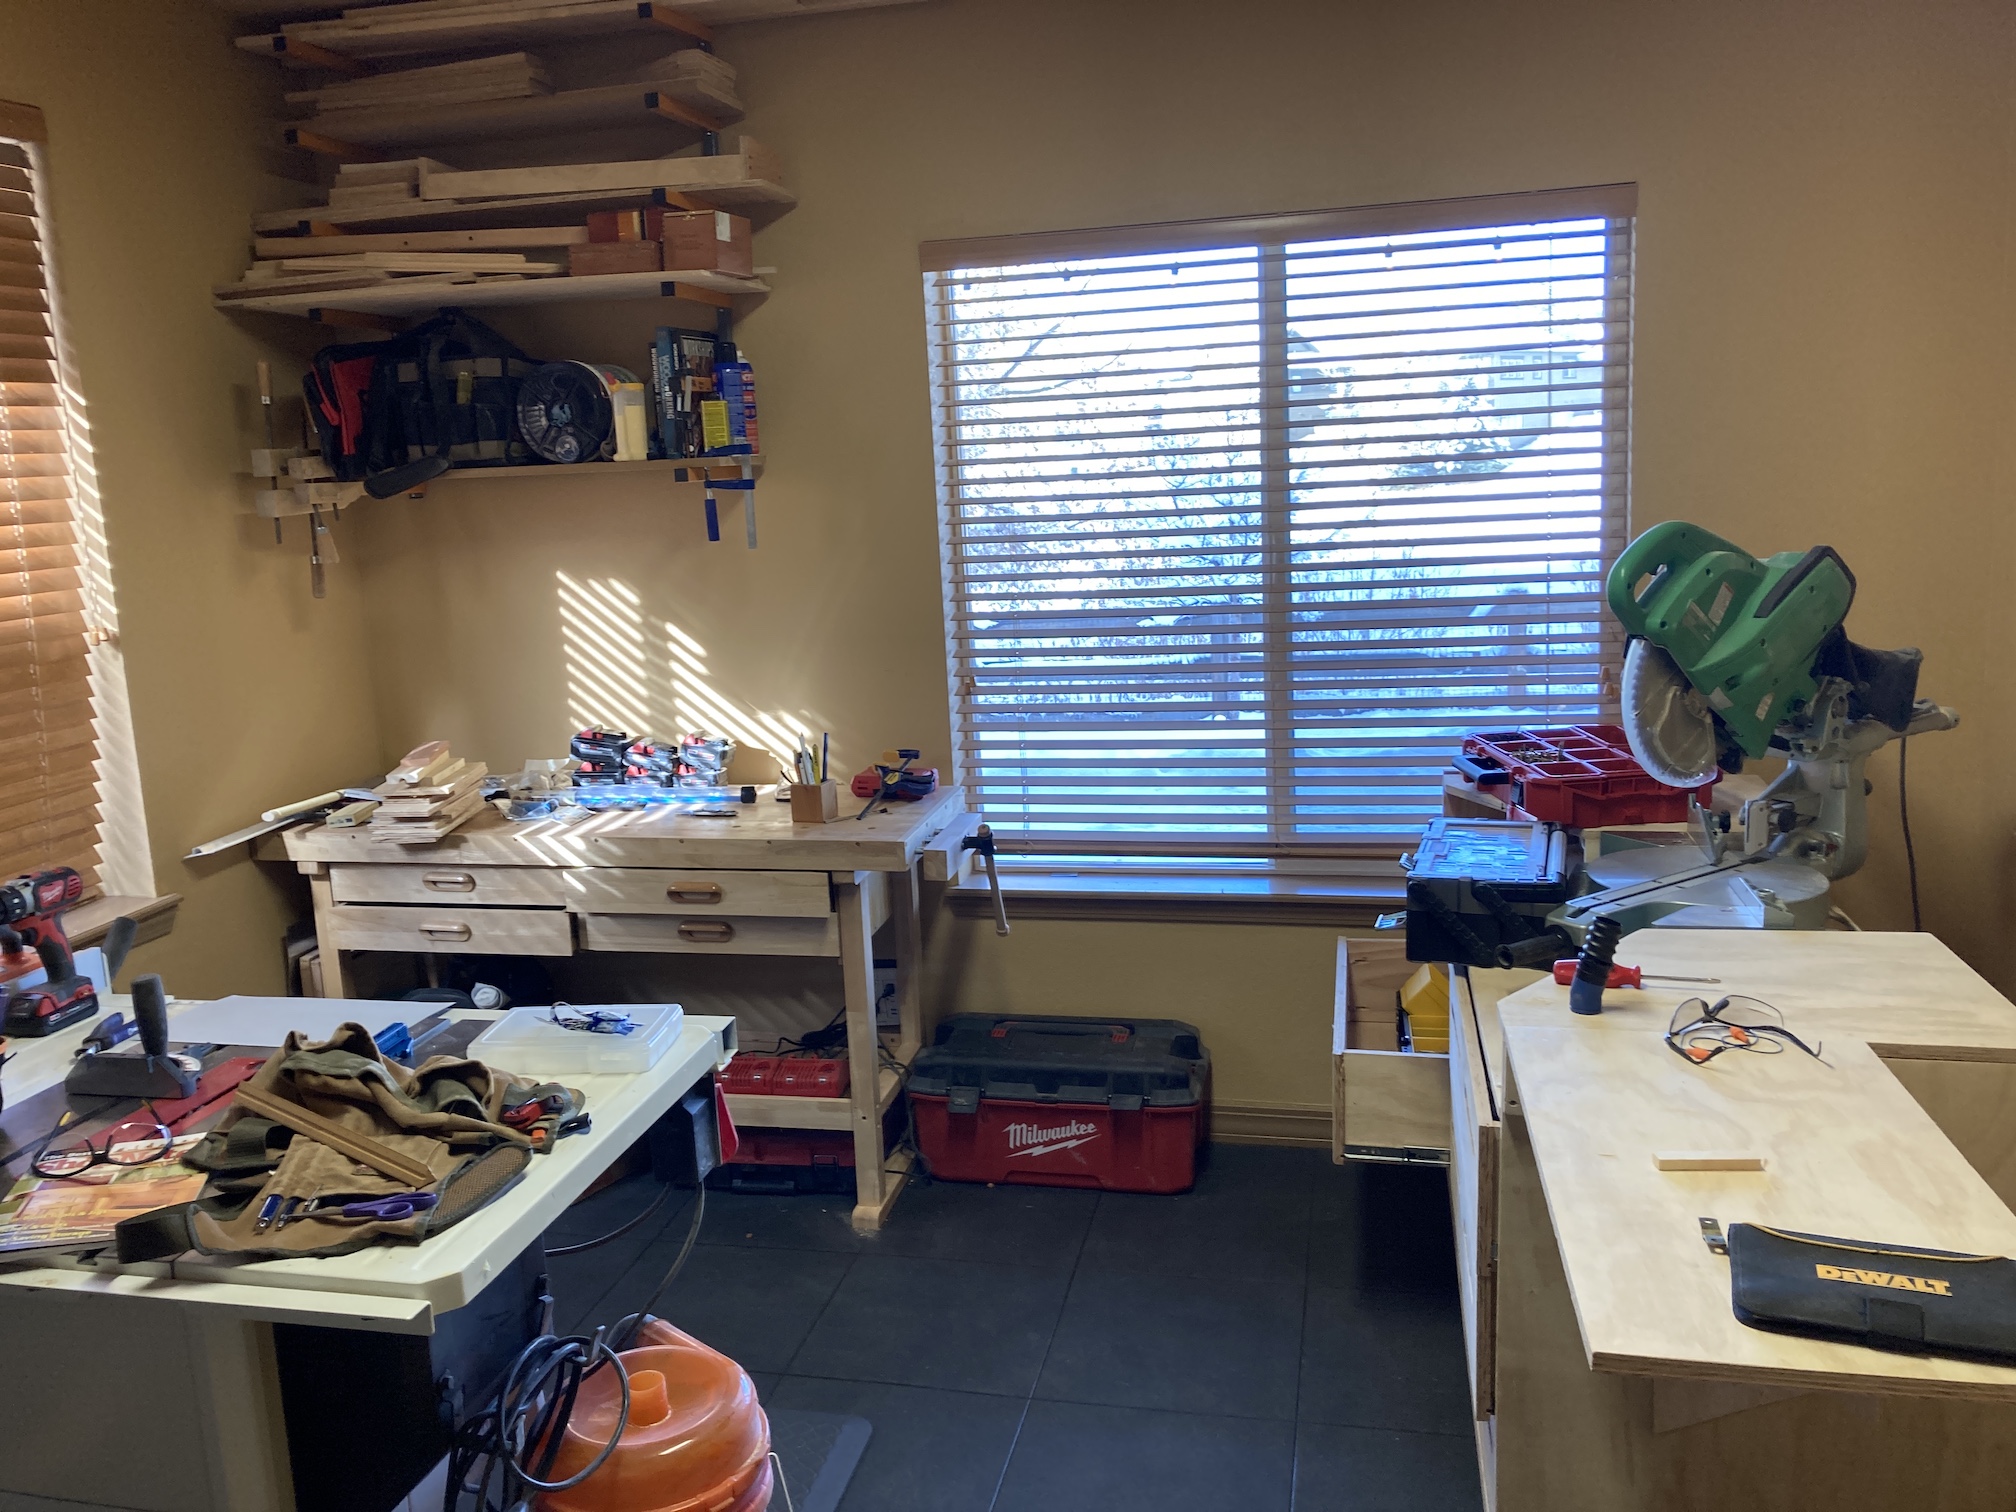
For my female human, that meant redoing her studio (see post Guest Blogger: tierneycreates’ “New” Studio Tour); and for my male human it meant building a workshop for his woodworking in the daylight basement:
His workshop is still a work in progress but he is very happy to now have his own “playroom” like my female human!
So you might ask – what did it mean for me? Well it meant lots of trips to home improvement stores for supplies.
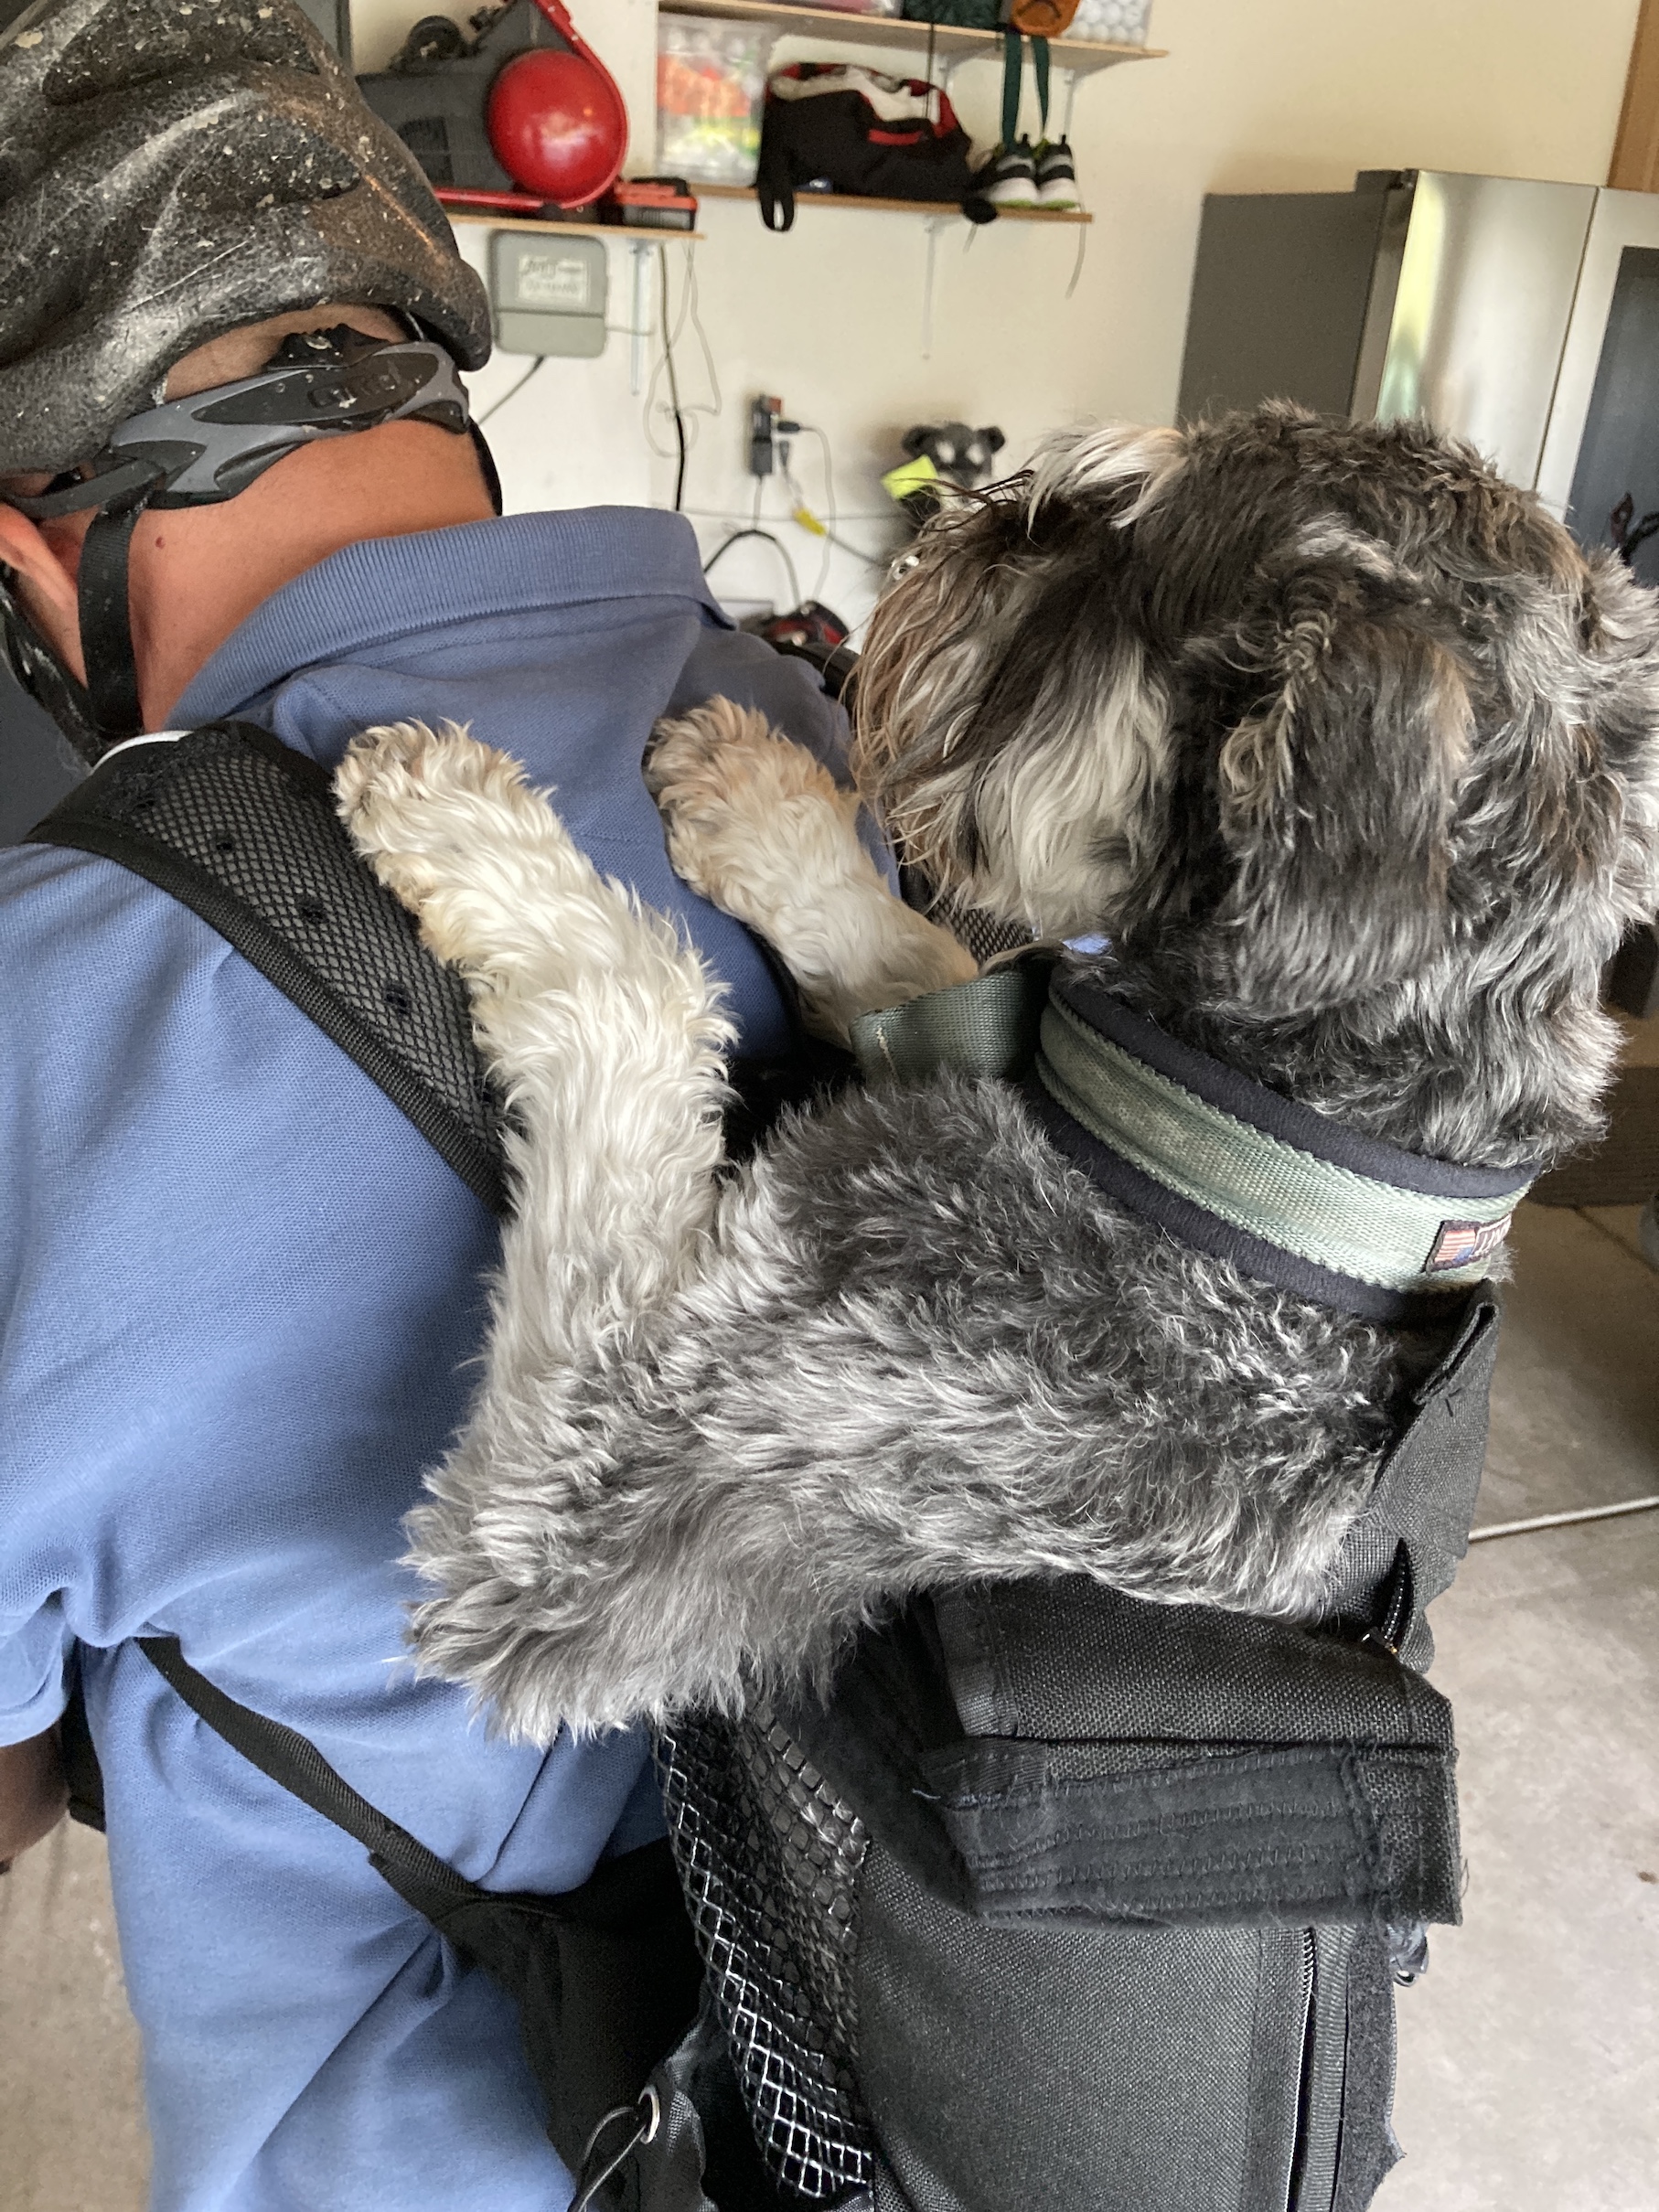
Sometimes on my male human’s back:
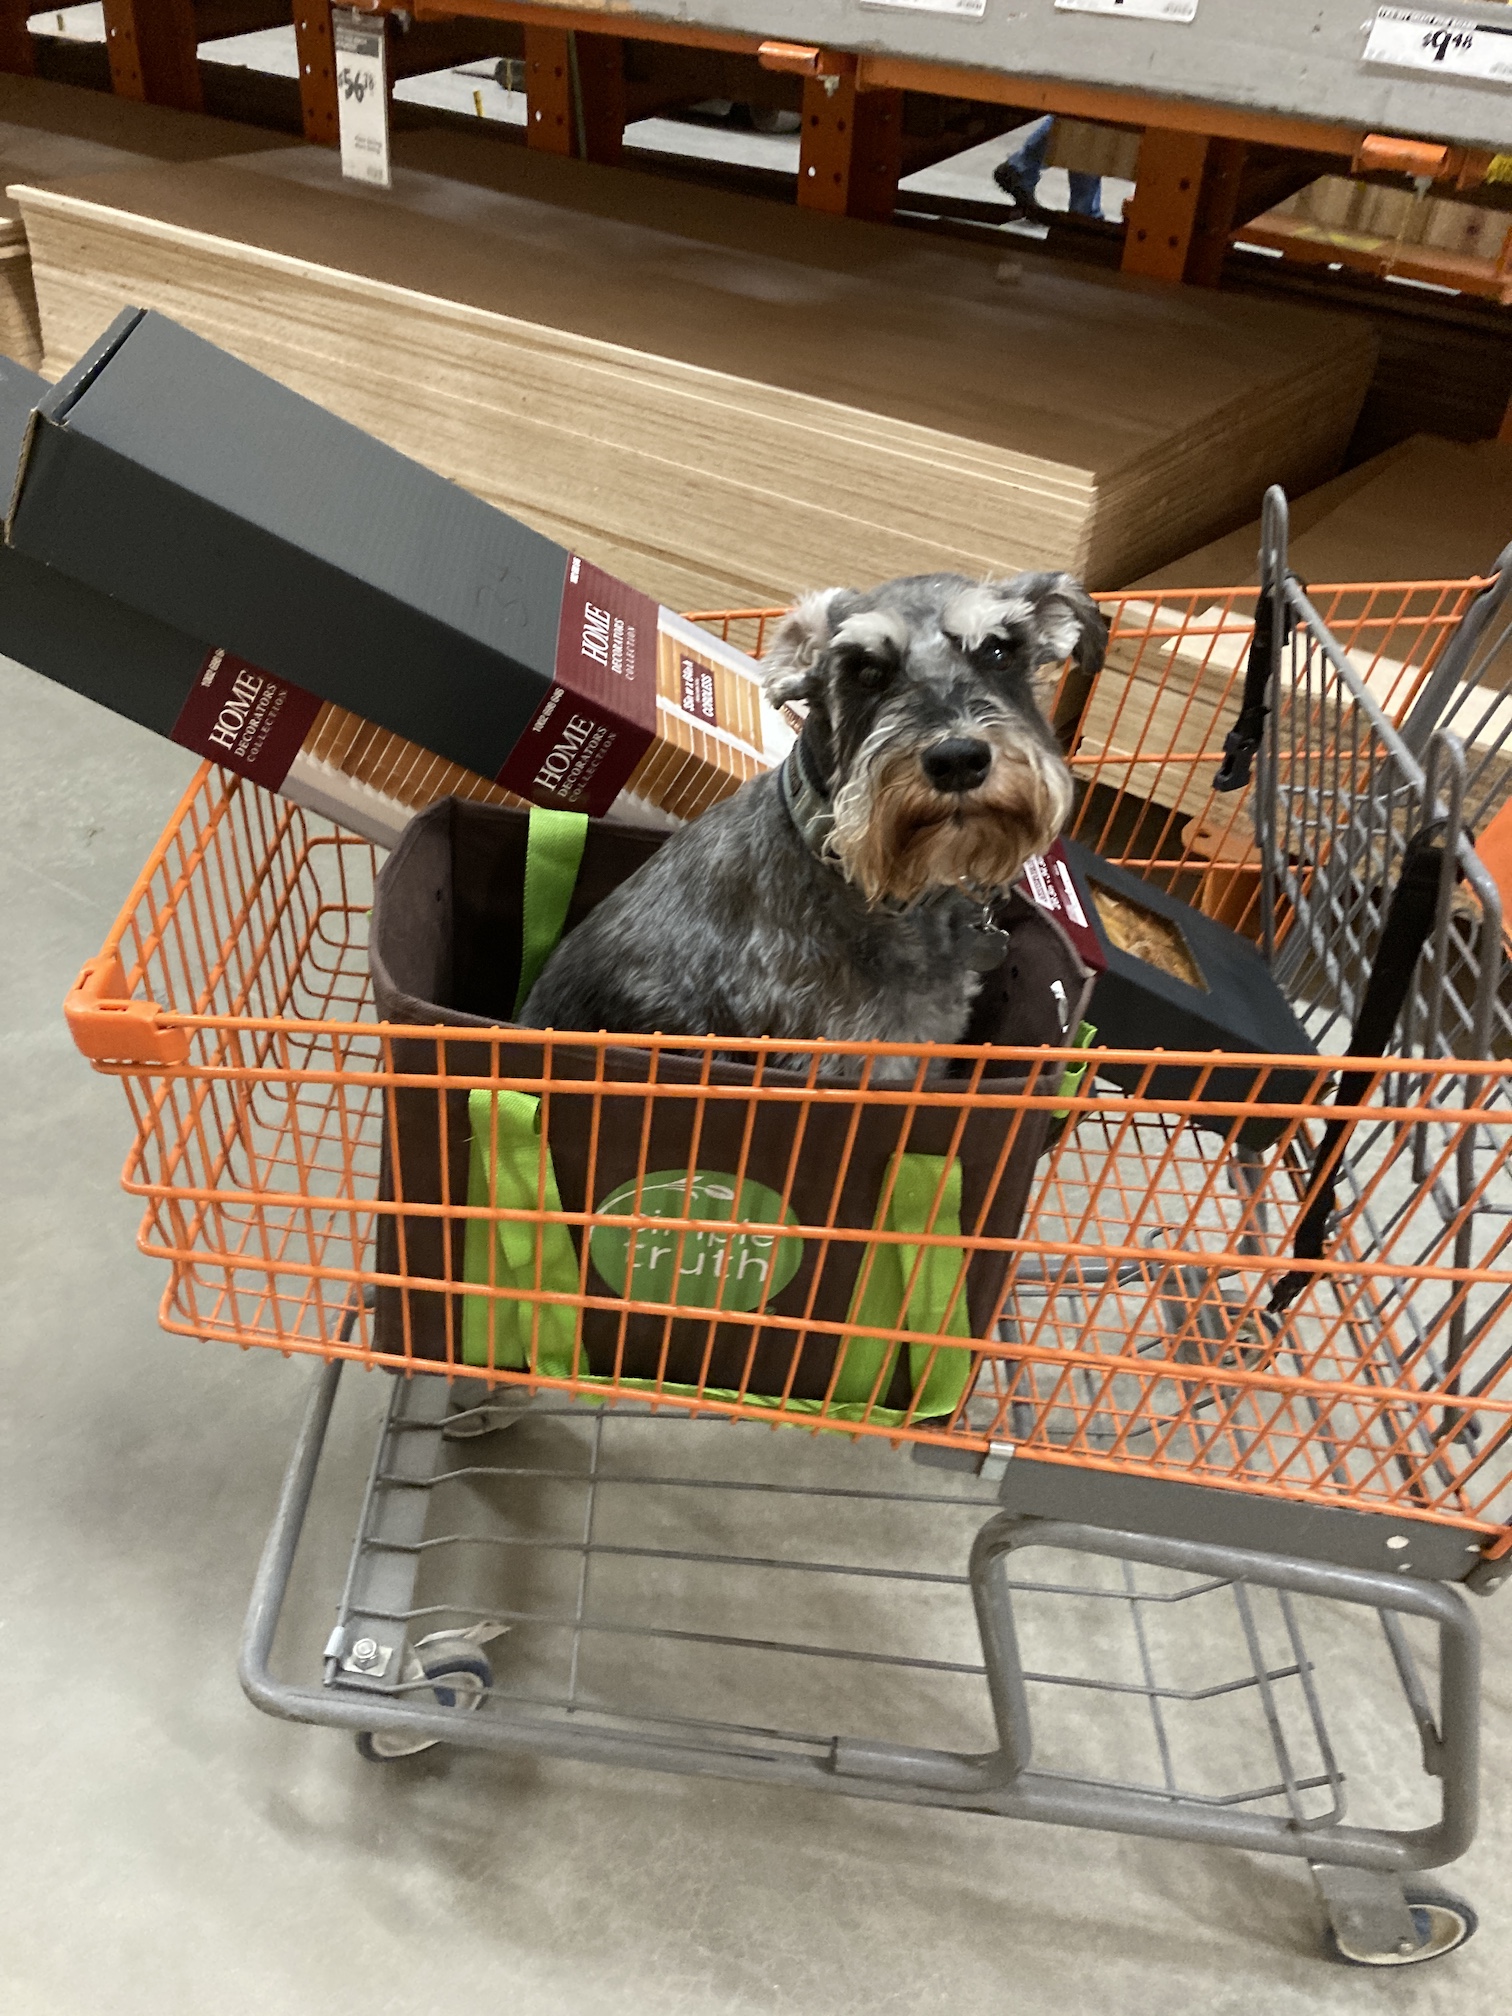
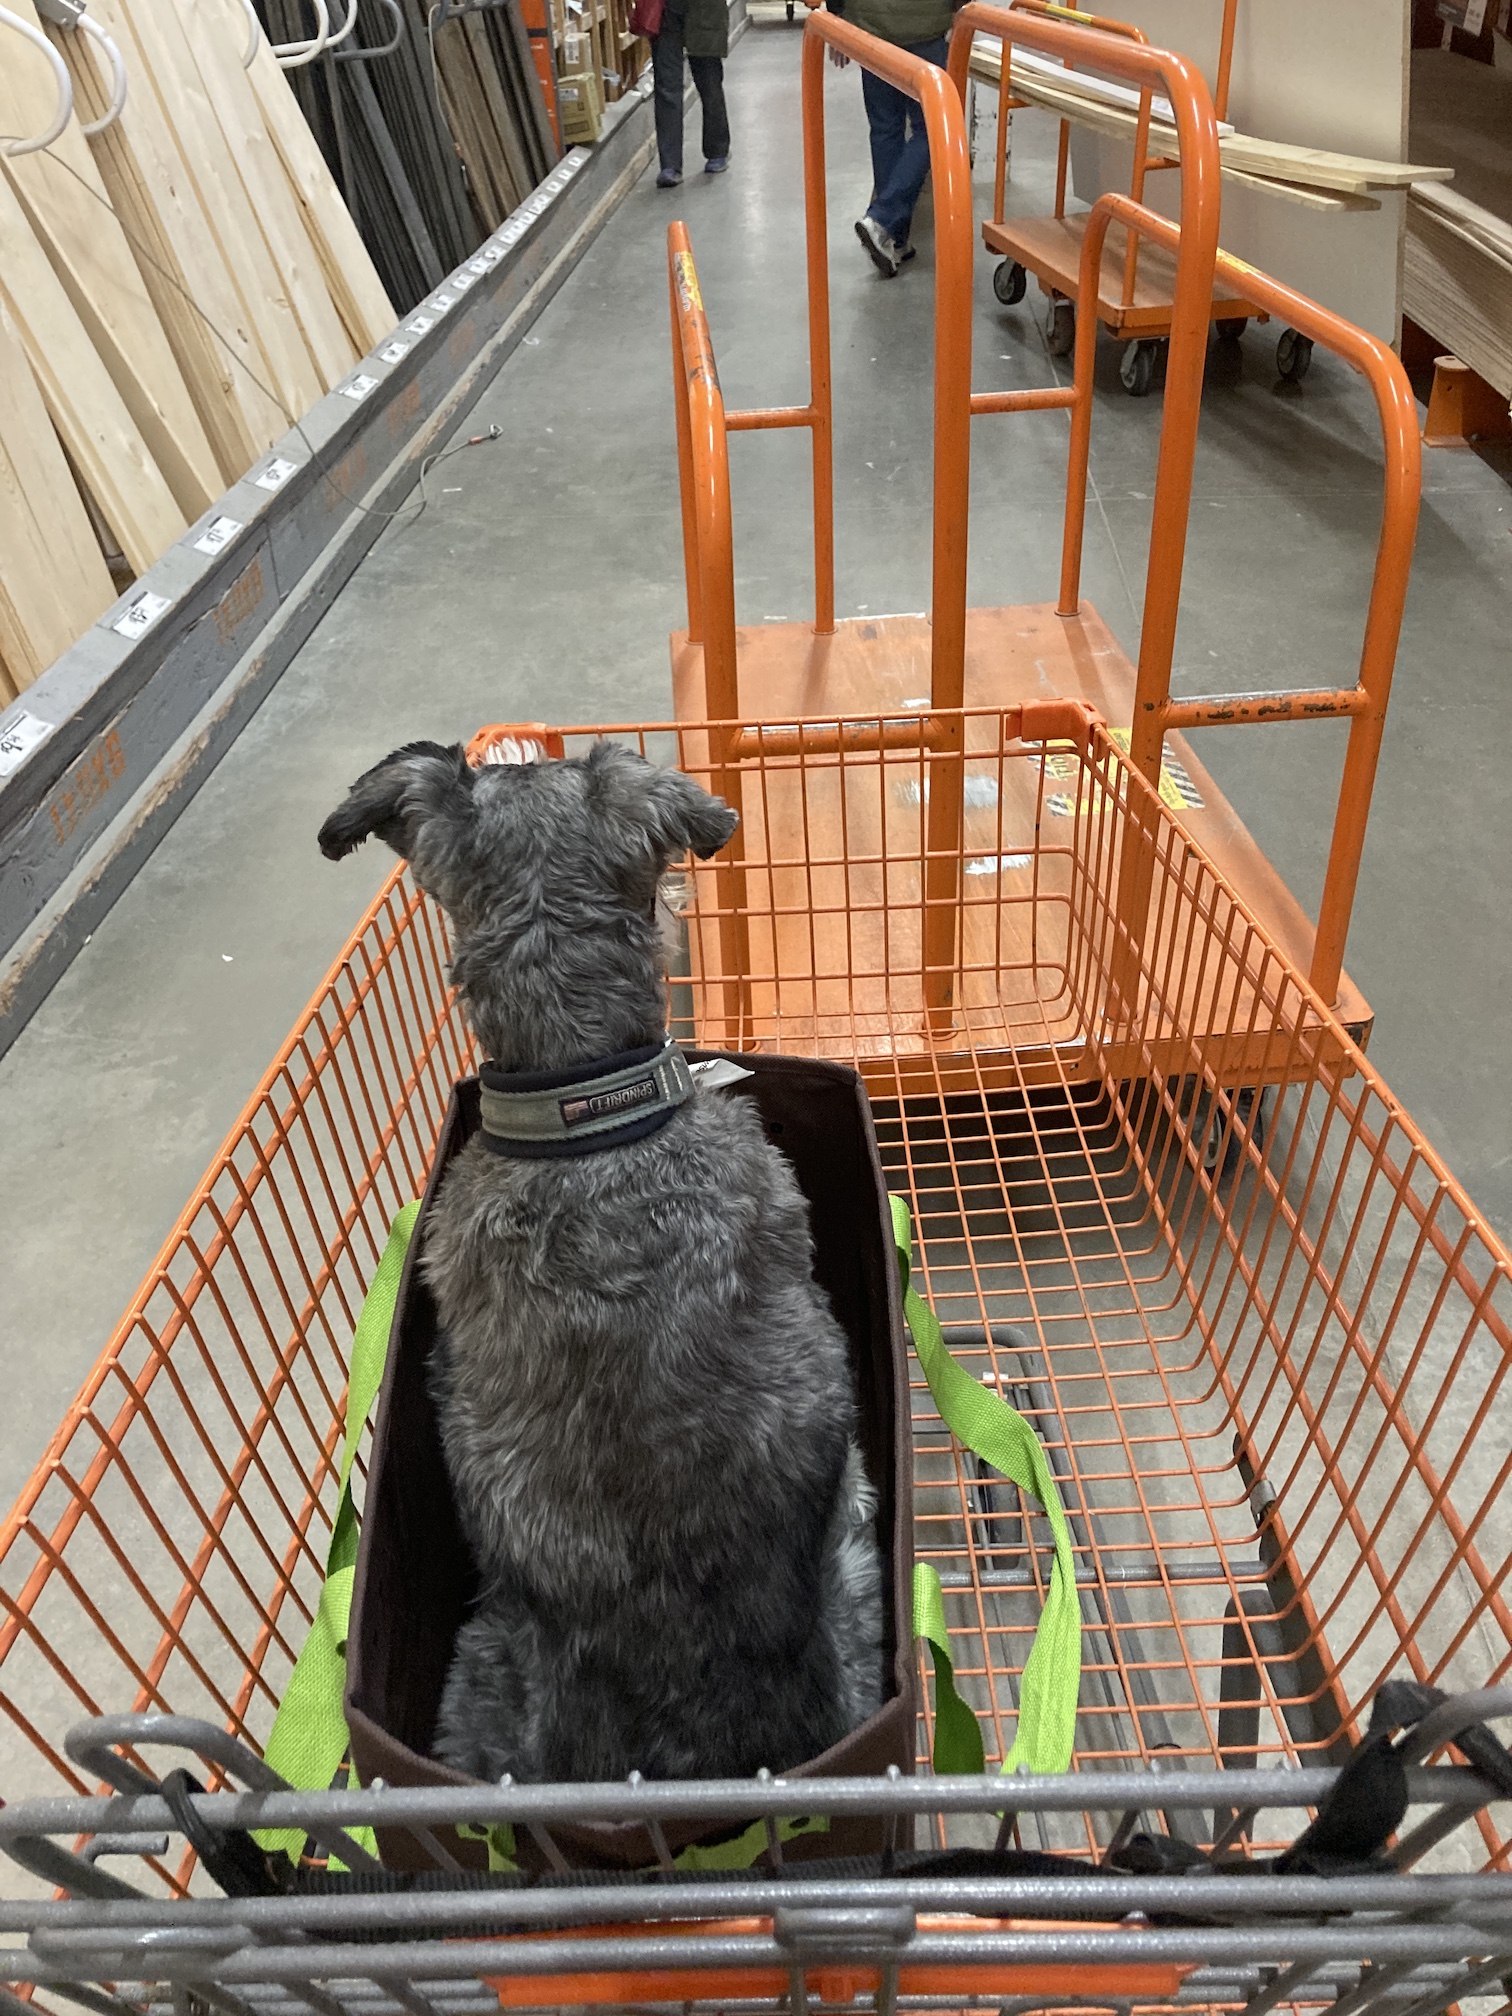
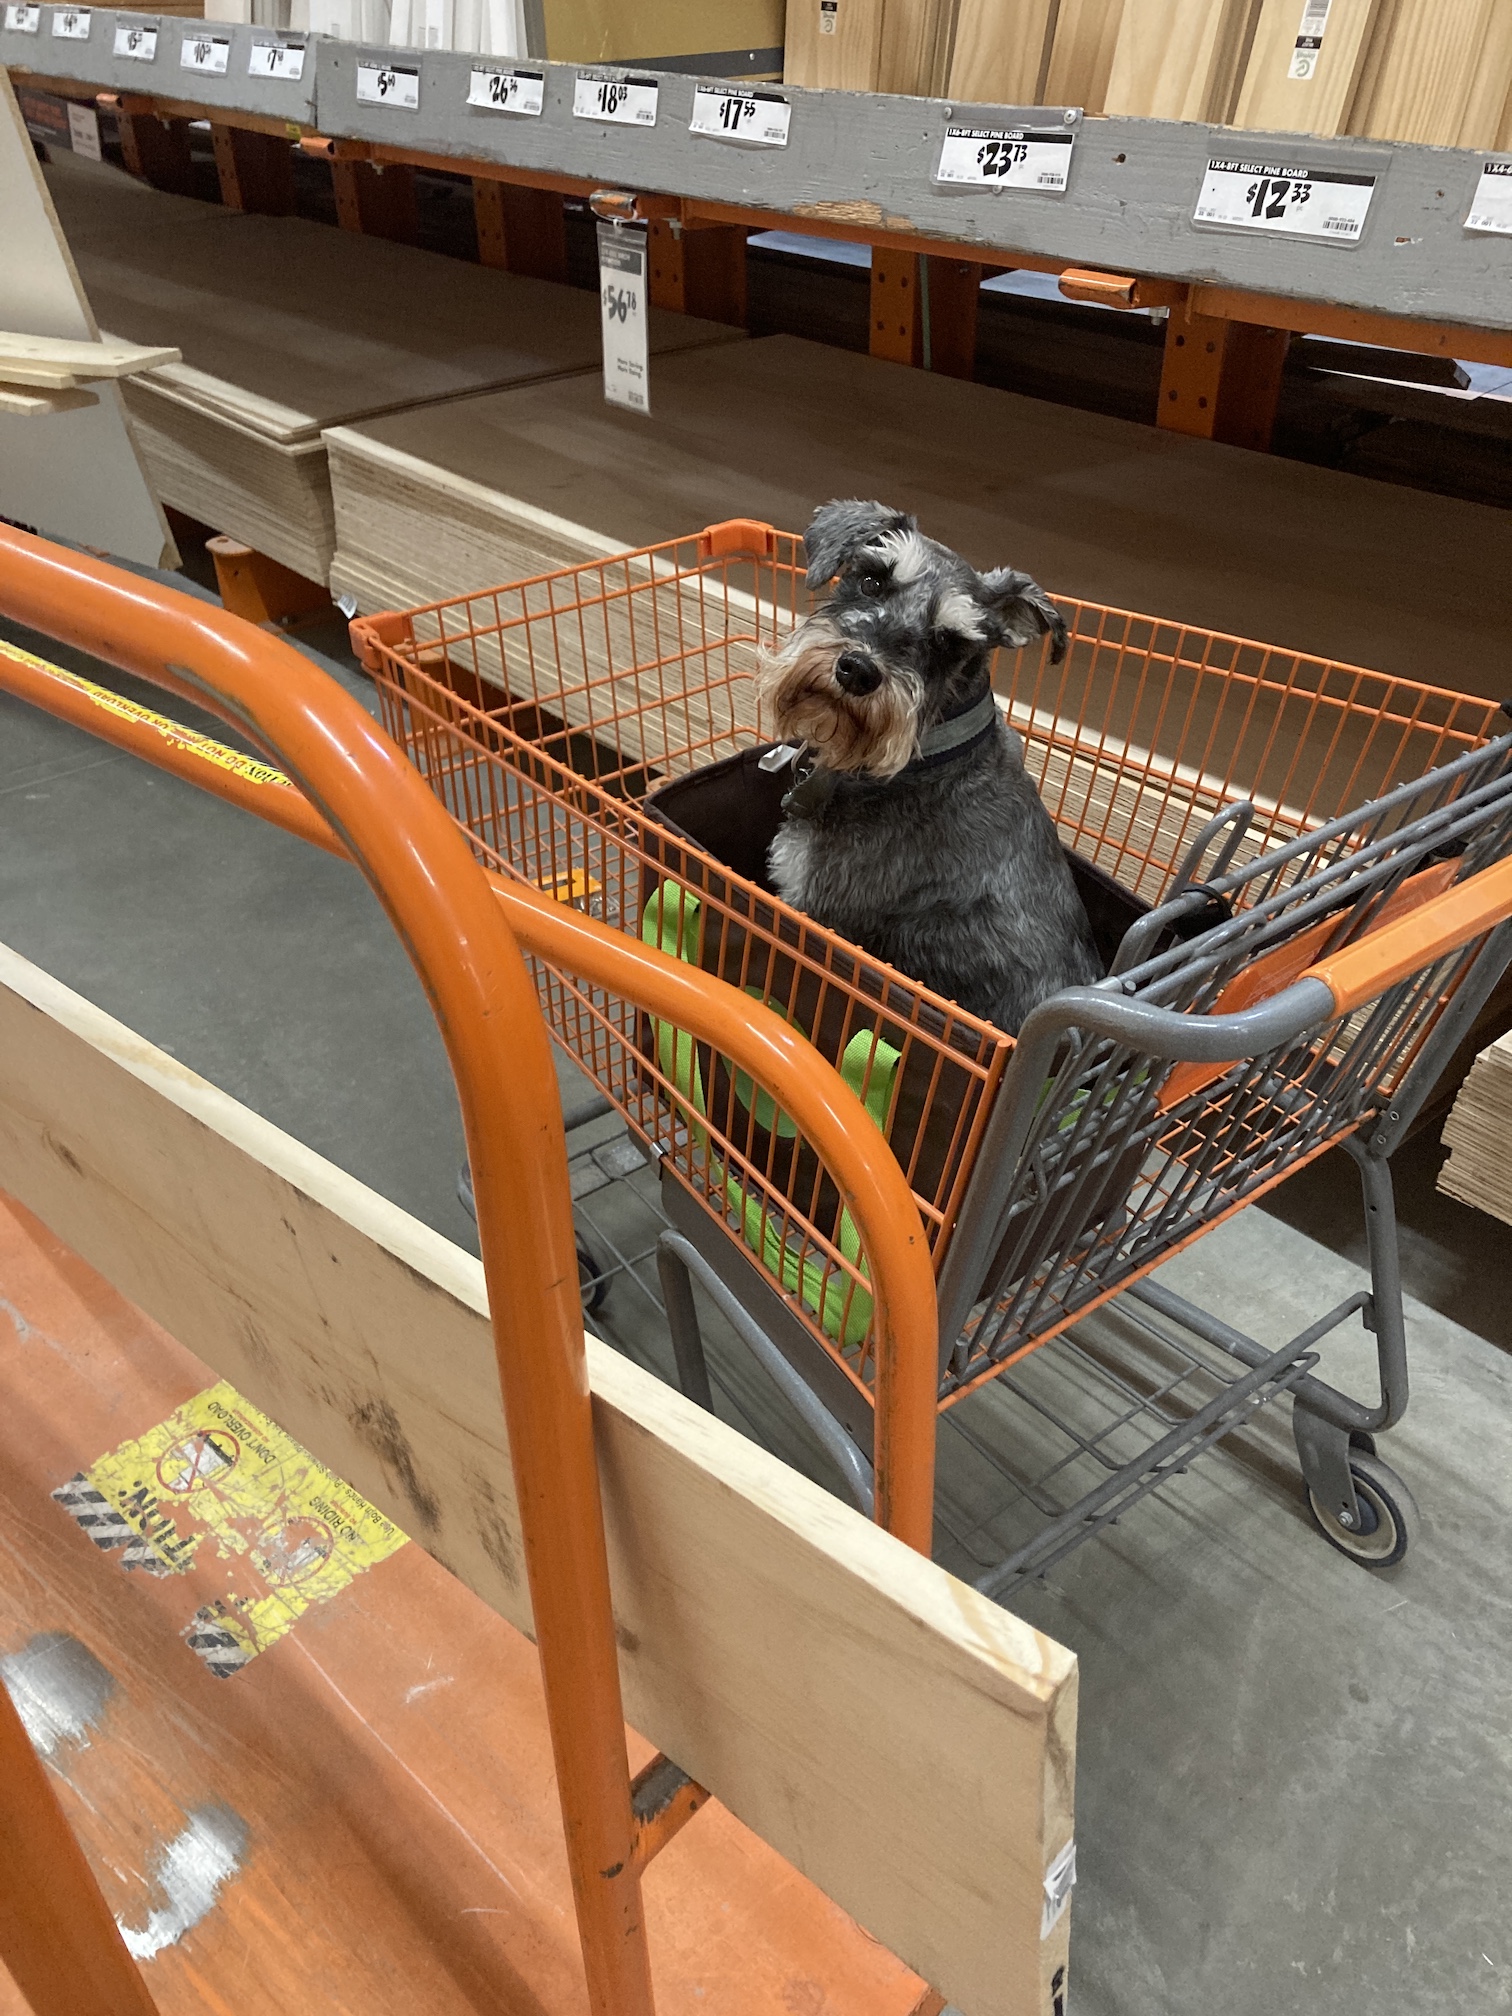
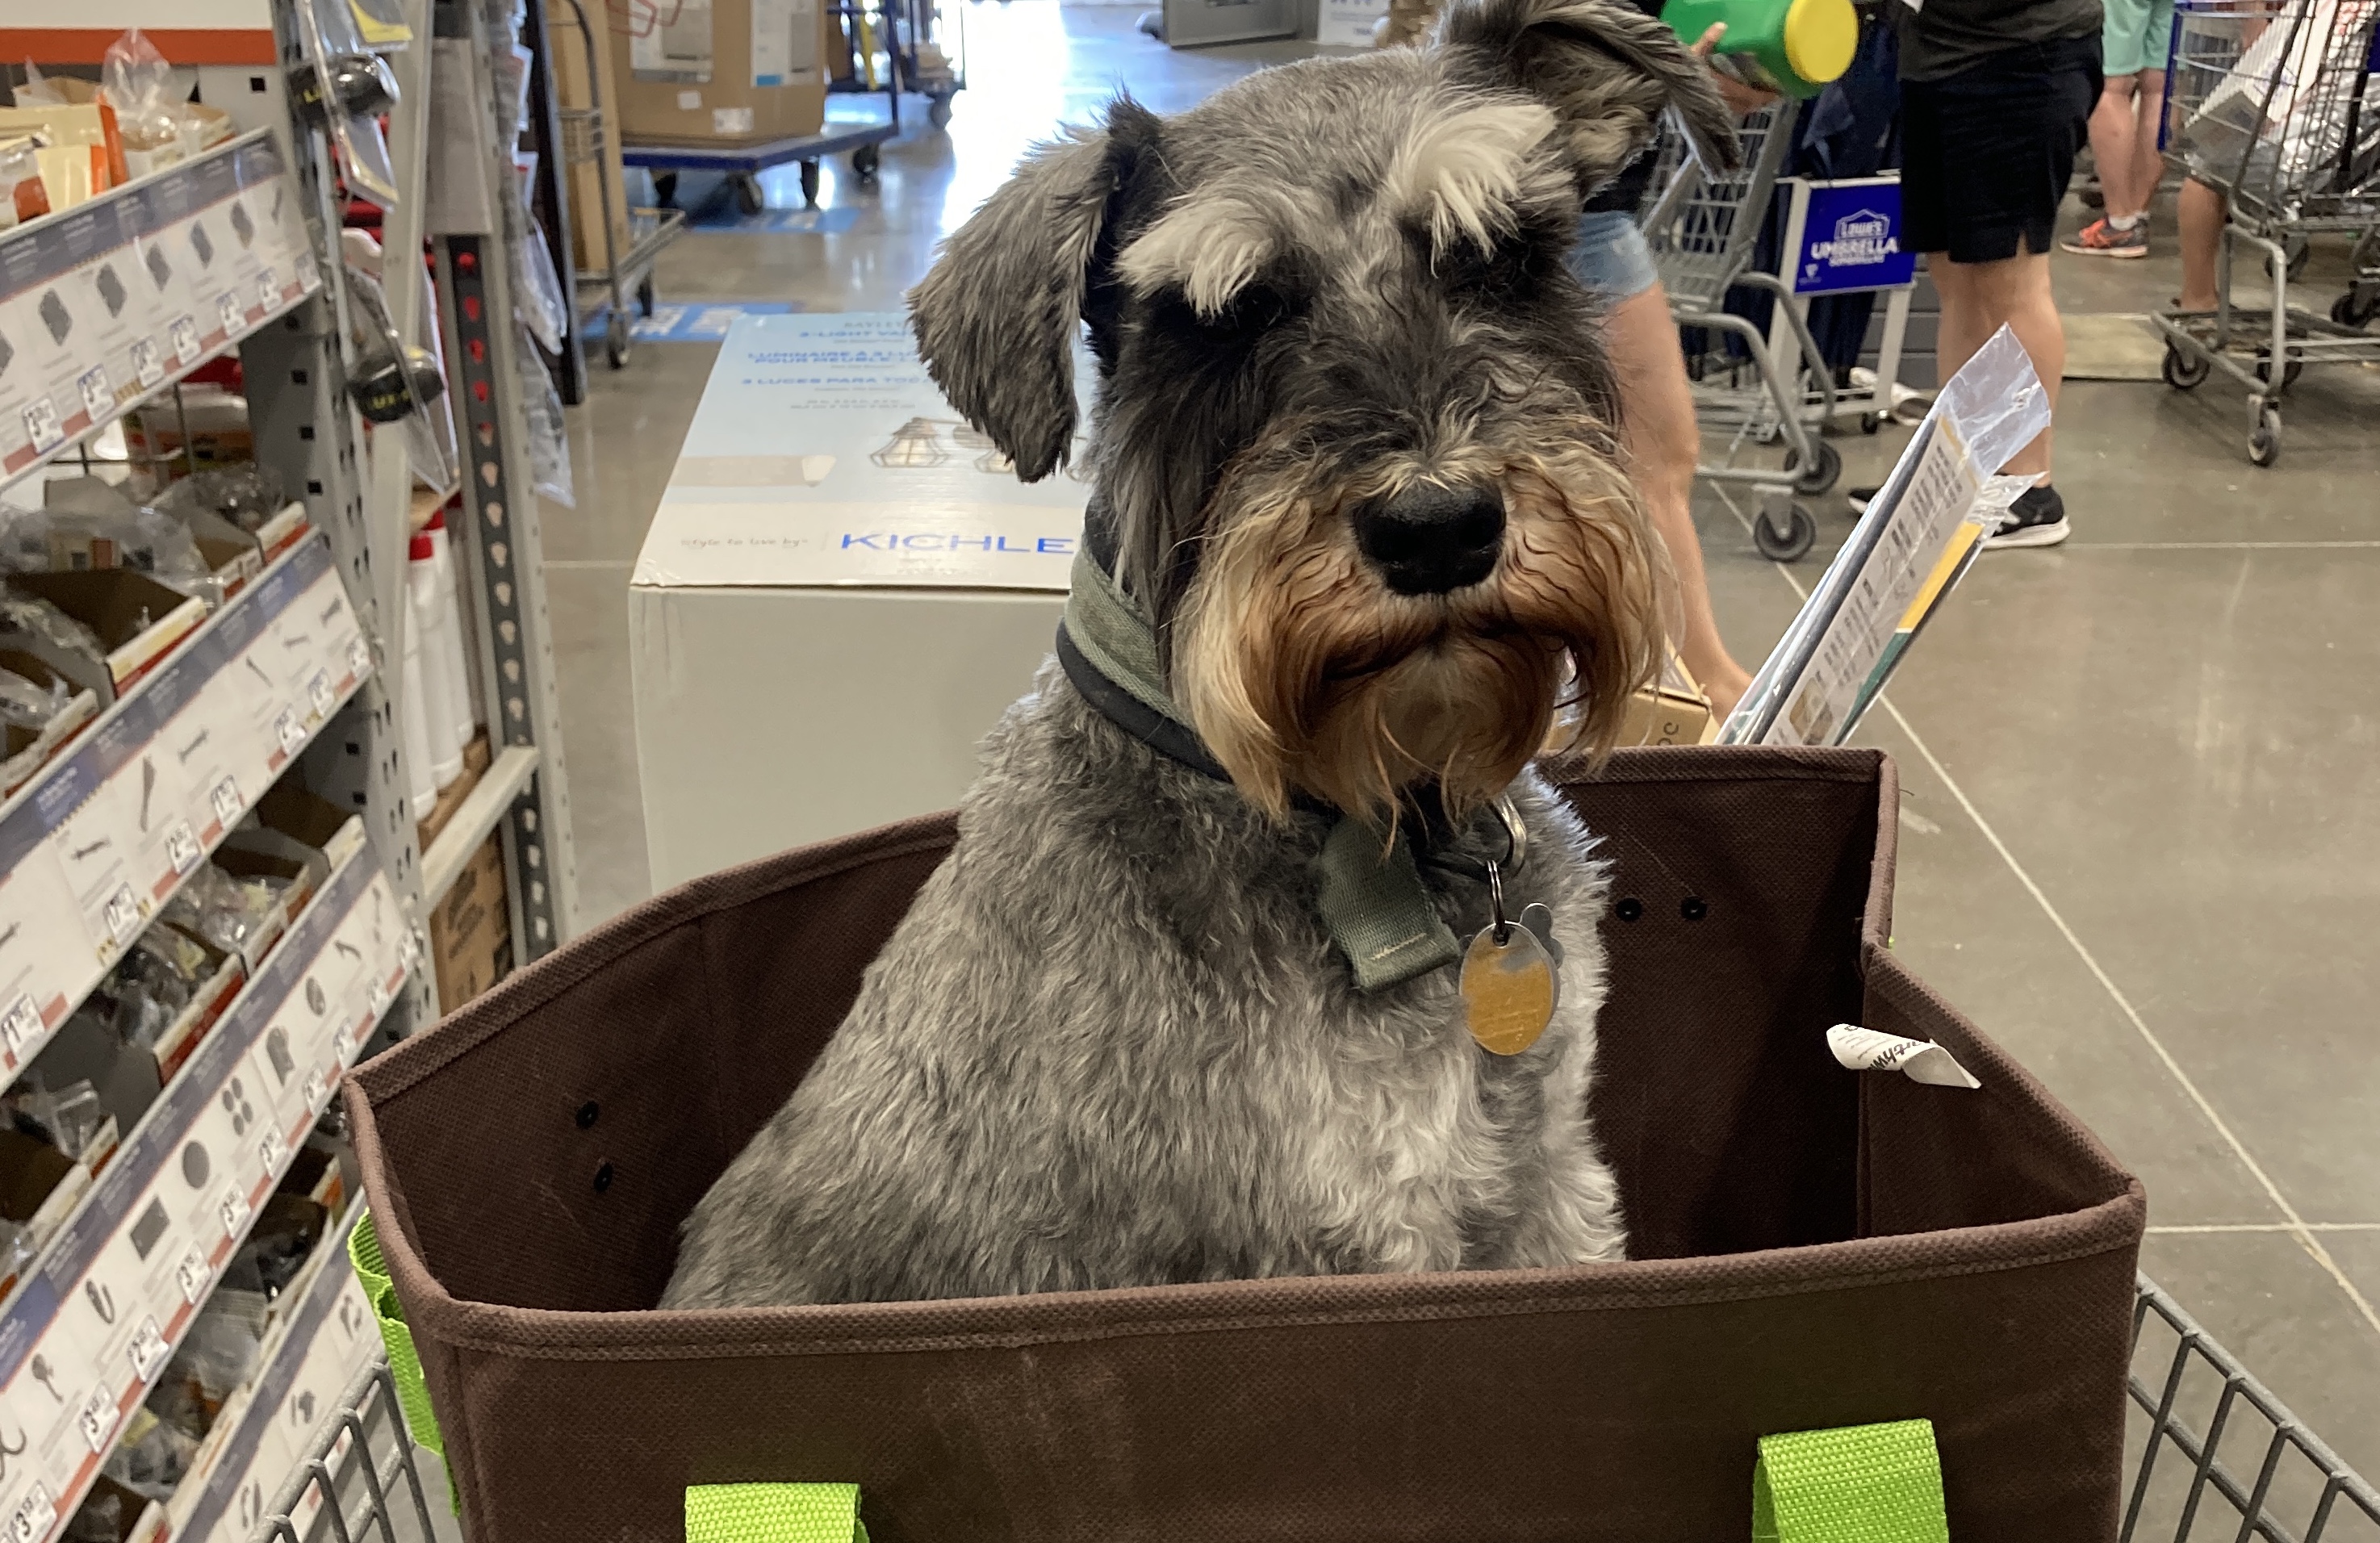
And sometimes in the shopping cart:
I know, I know, you just can’t get enough of the cute photos of me in a shopping cart. Unfortunately my female human said we have to limit the photos to only four (4) because she has to protect her digital storage allotment on her blog (sigh).
The humans also did a lot of “fixing things” in the house to include dangerous high altitude ceiling fan installation:
Yes that is a ladder, on top of scaffolding. Looks pretty safe to me (NOT!)
My male human even figured out during the early days of the pandemic how to fix their dryer himself by watching YouTube videos and ordering parts:
He also completely redid the garage, drywalling it in, painting it and installing shelves:
He also built bookcases in the front room to create our “home library” as my female human mentioned in this post – The Library Book and the Home Library. In this post she promised to share updated photos (and forgot), so I guess it is up to me to make sure you see how the room turned out:
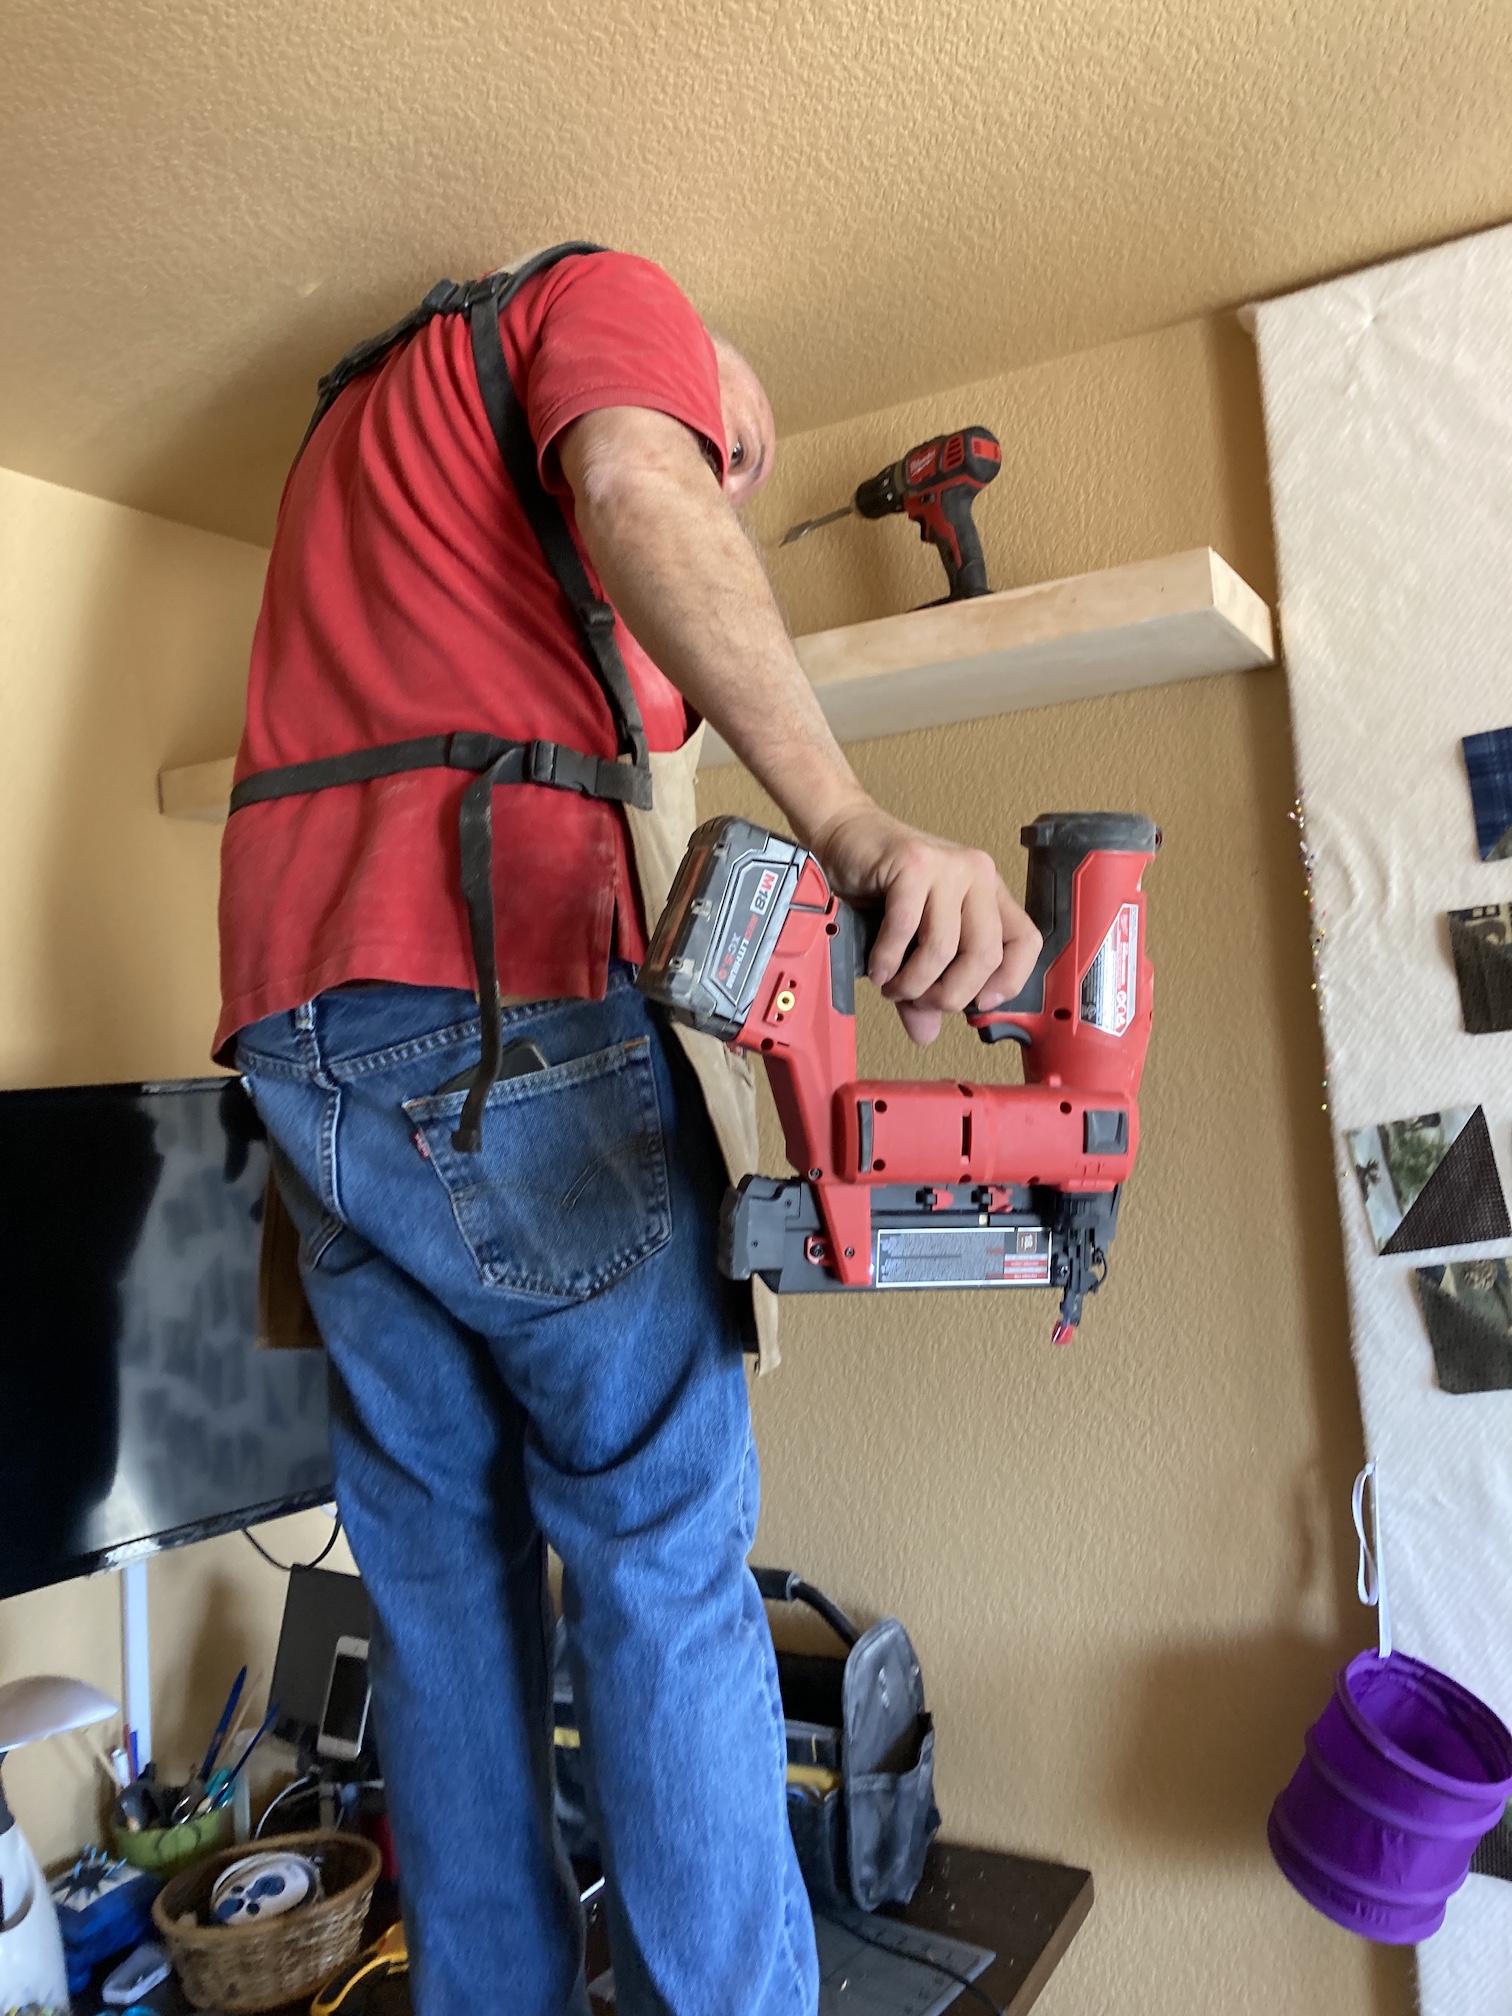
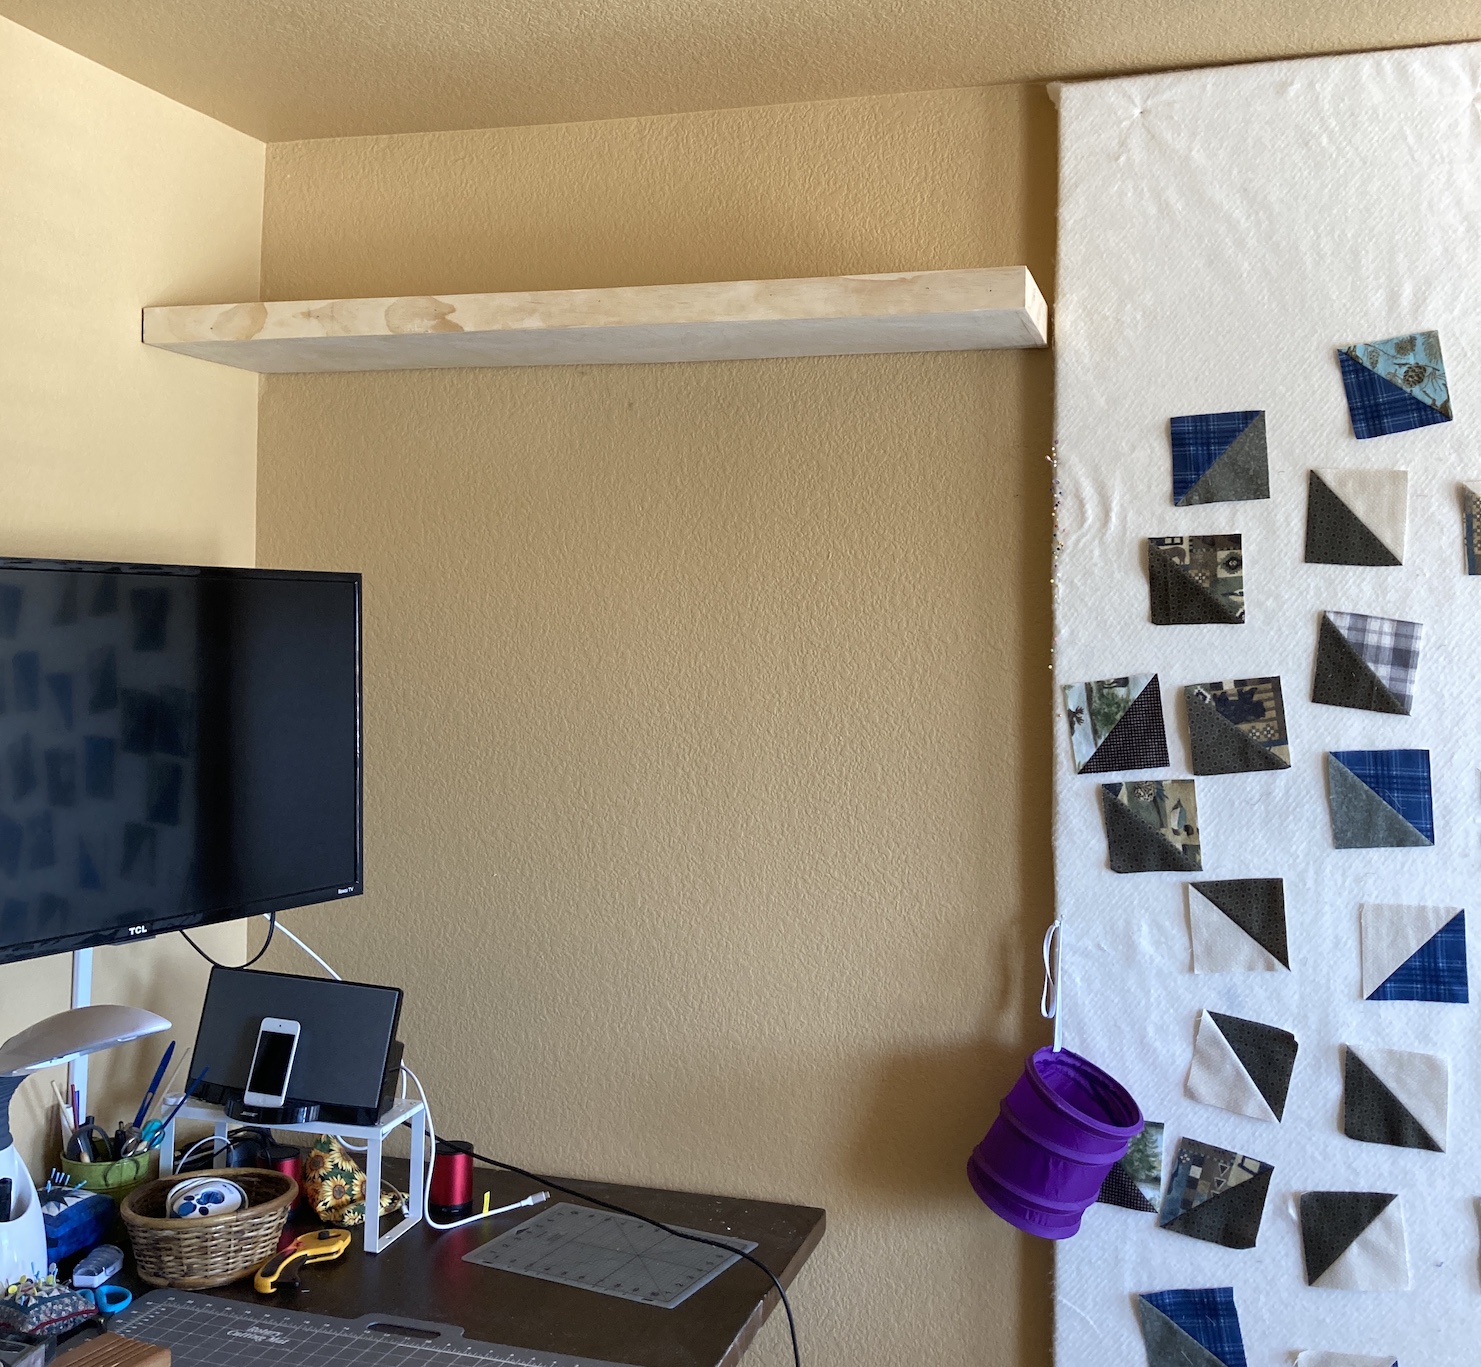
Most recently he added in a shelf behind our living room TV to distract your eye from the fact the flat screen TV is in front on an alcove (circa early 2000s) for a large deep TV. This was my female human’s idea from looking at too much Instagram home decorating feeds!
I am sure there were a lot more home remodeling projects that occurred over the past four (4) months but this is all I can remember since I was sleeping through many of them.
Trying to block out all the remodeling noise and get some sleep!
Postscript
When I am not overseeing the humans while they complete their home remodeling projects, I am going on bike rides. I appear to have convinced my human John to ride me around on his back in addition to carrying or shopping-cart-driving me around stores!
Here we are headed out for a bike ride and then on a bike ride (in the second photo my female human Tierney is behind us dangerously taking photos while bike riding…)


 Back in late March/start of April 2020 my humans made the decision not to move to a new house they were going to buy and instead to stay in their current abode (see post
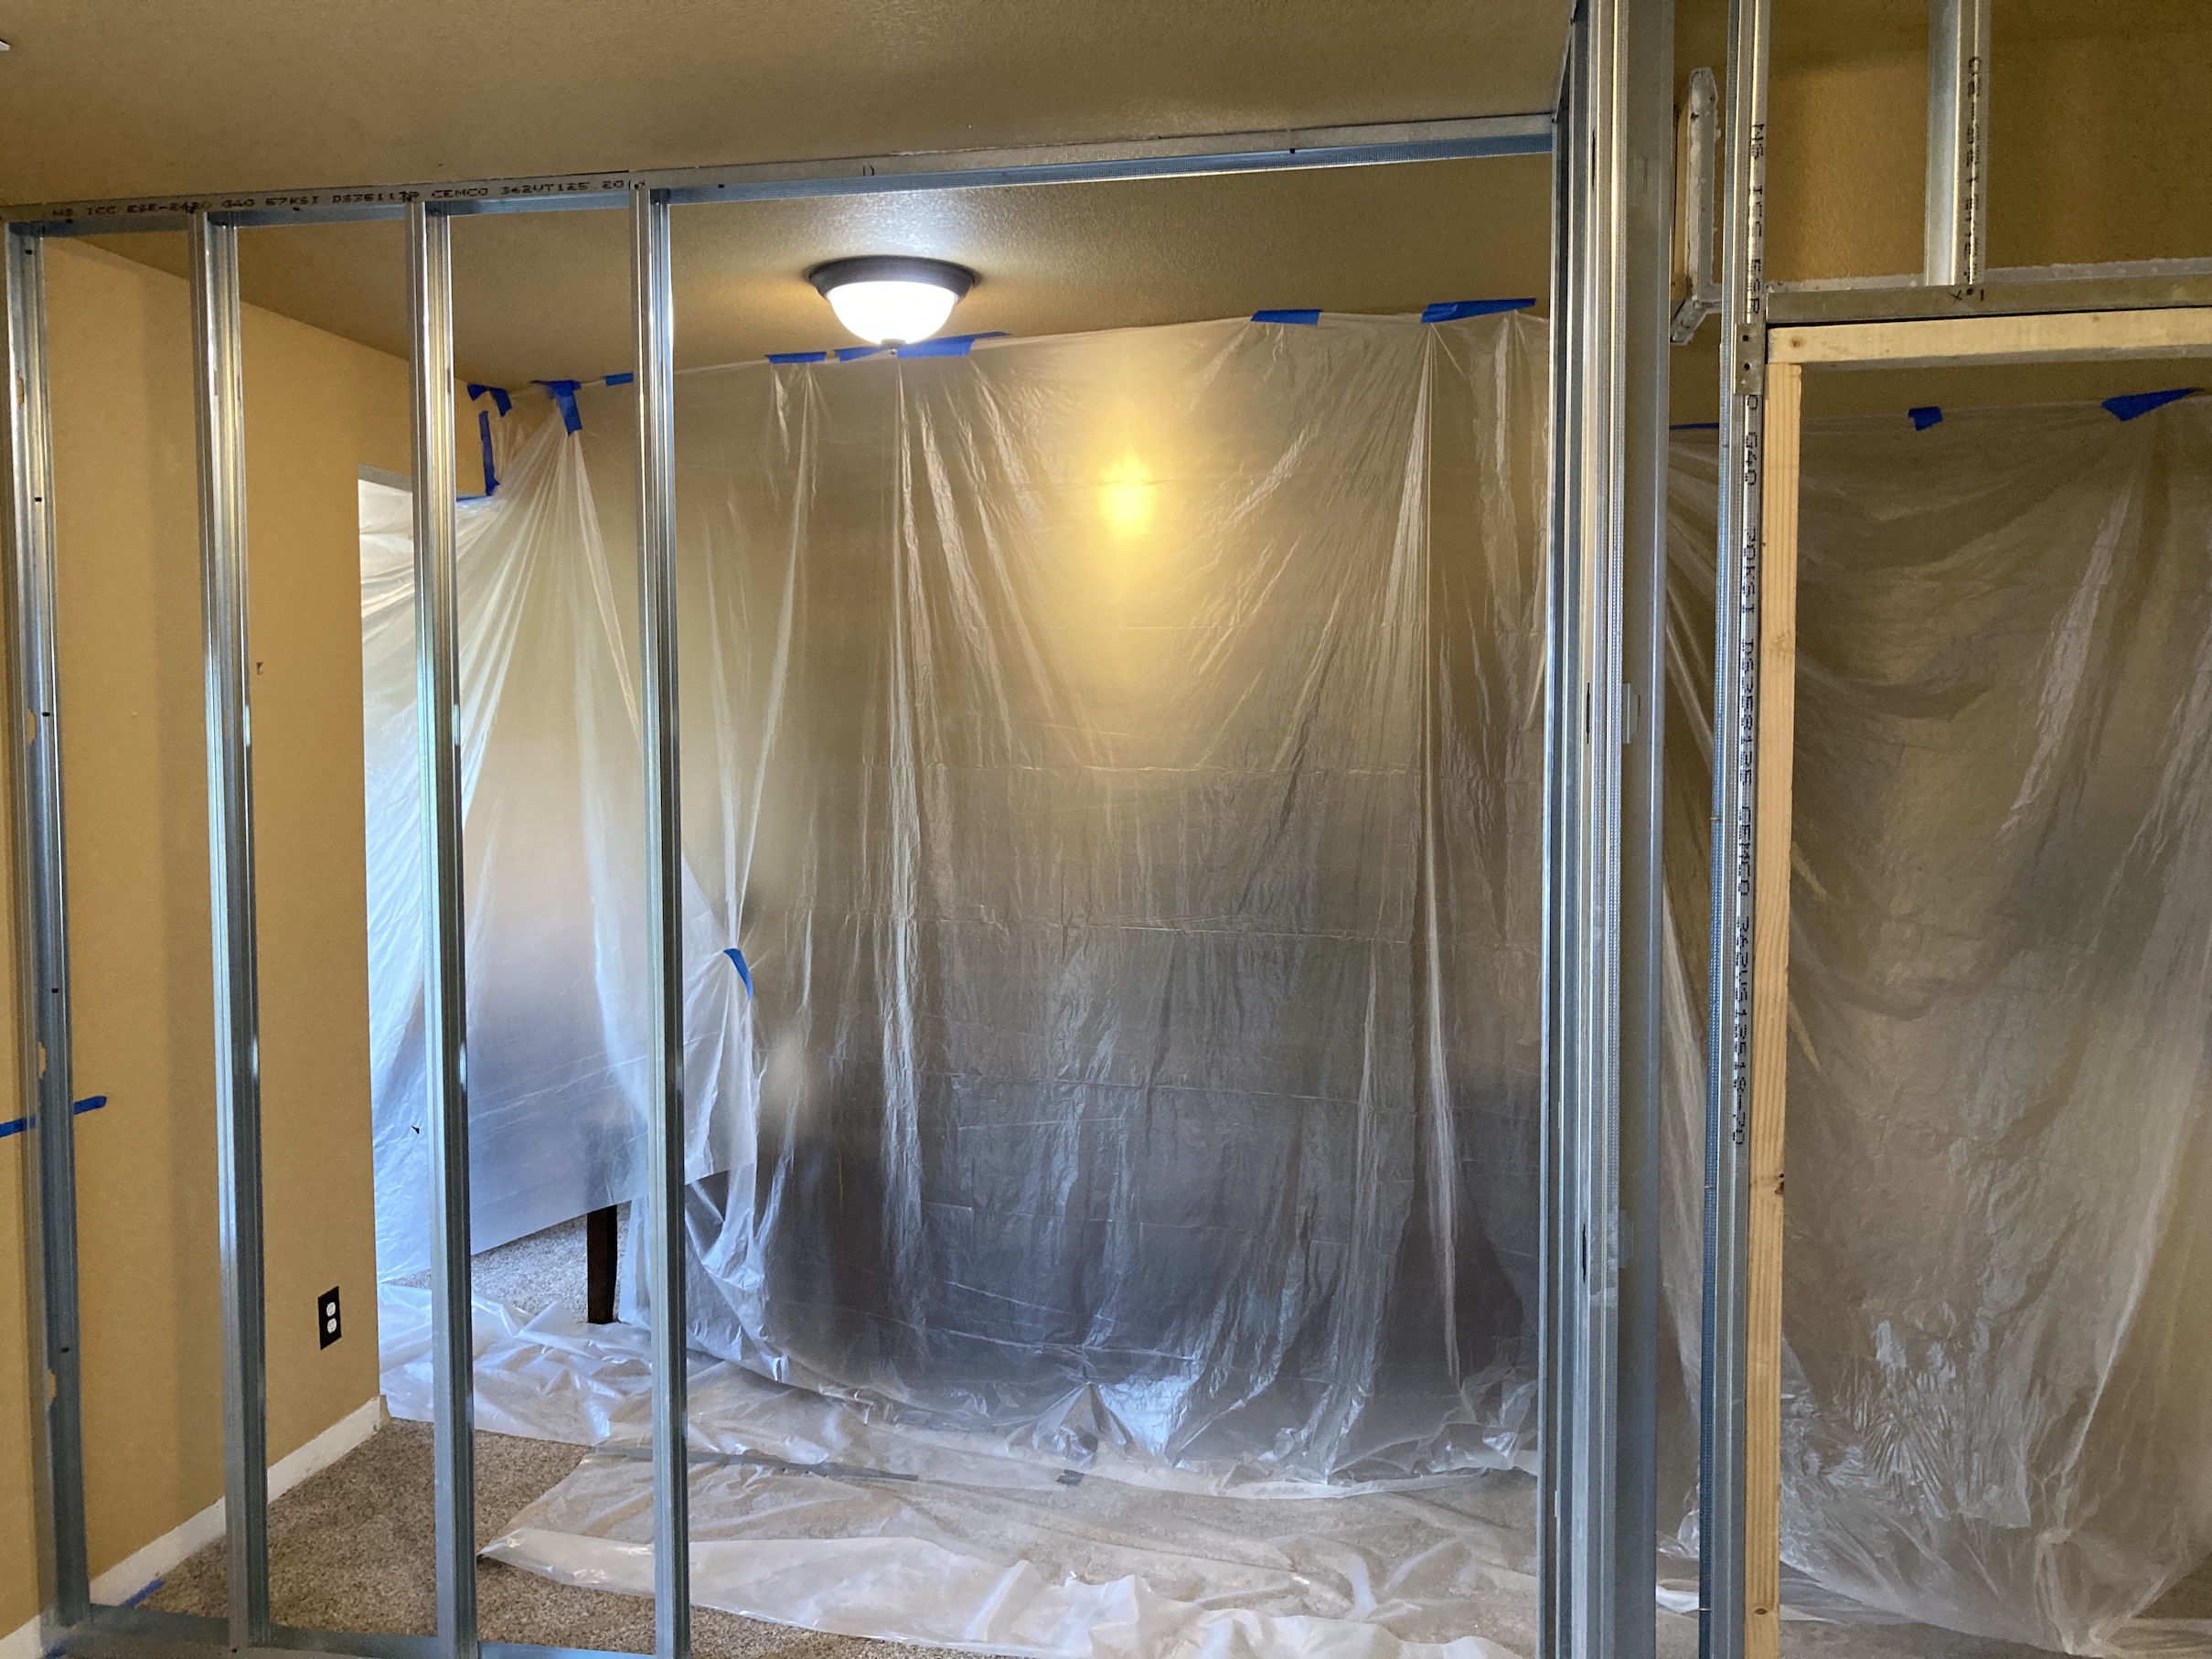

 His workshop is still a work in progress but he is very happy to now have his own “playroom” like my female human!
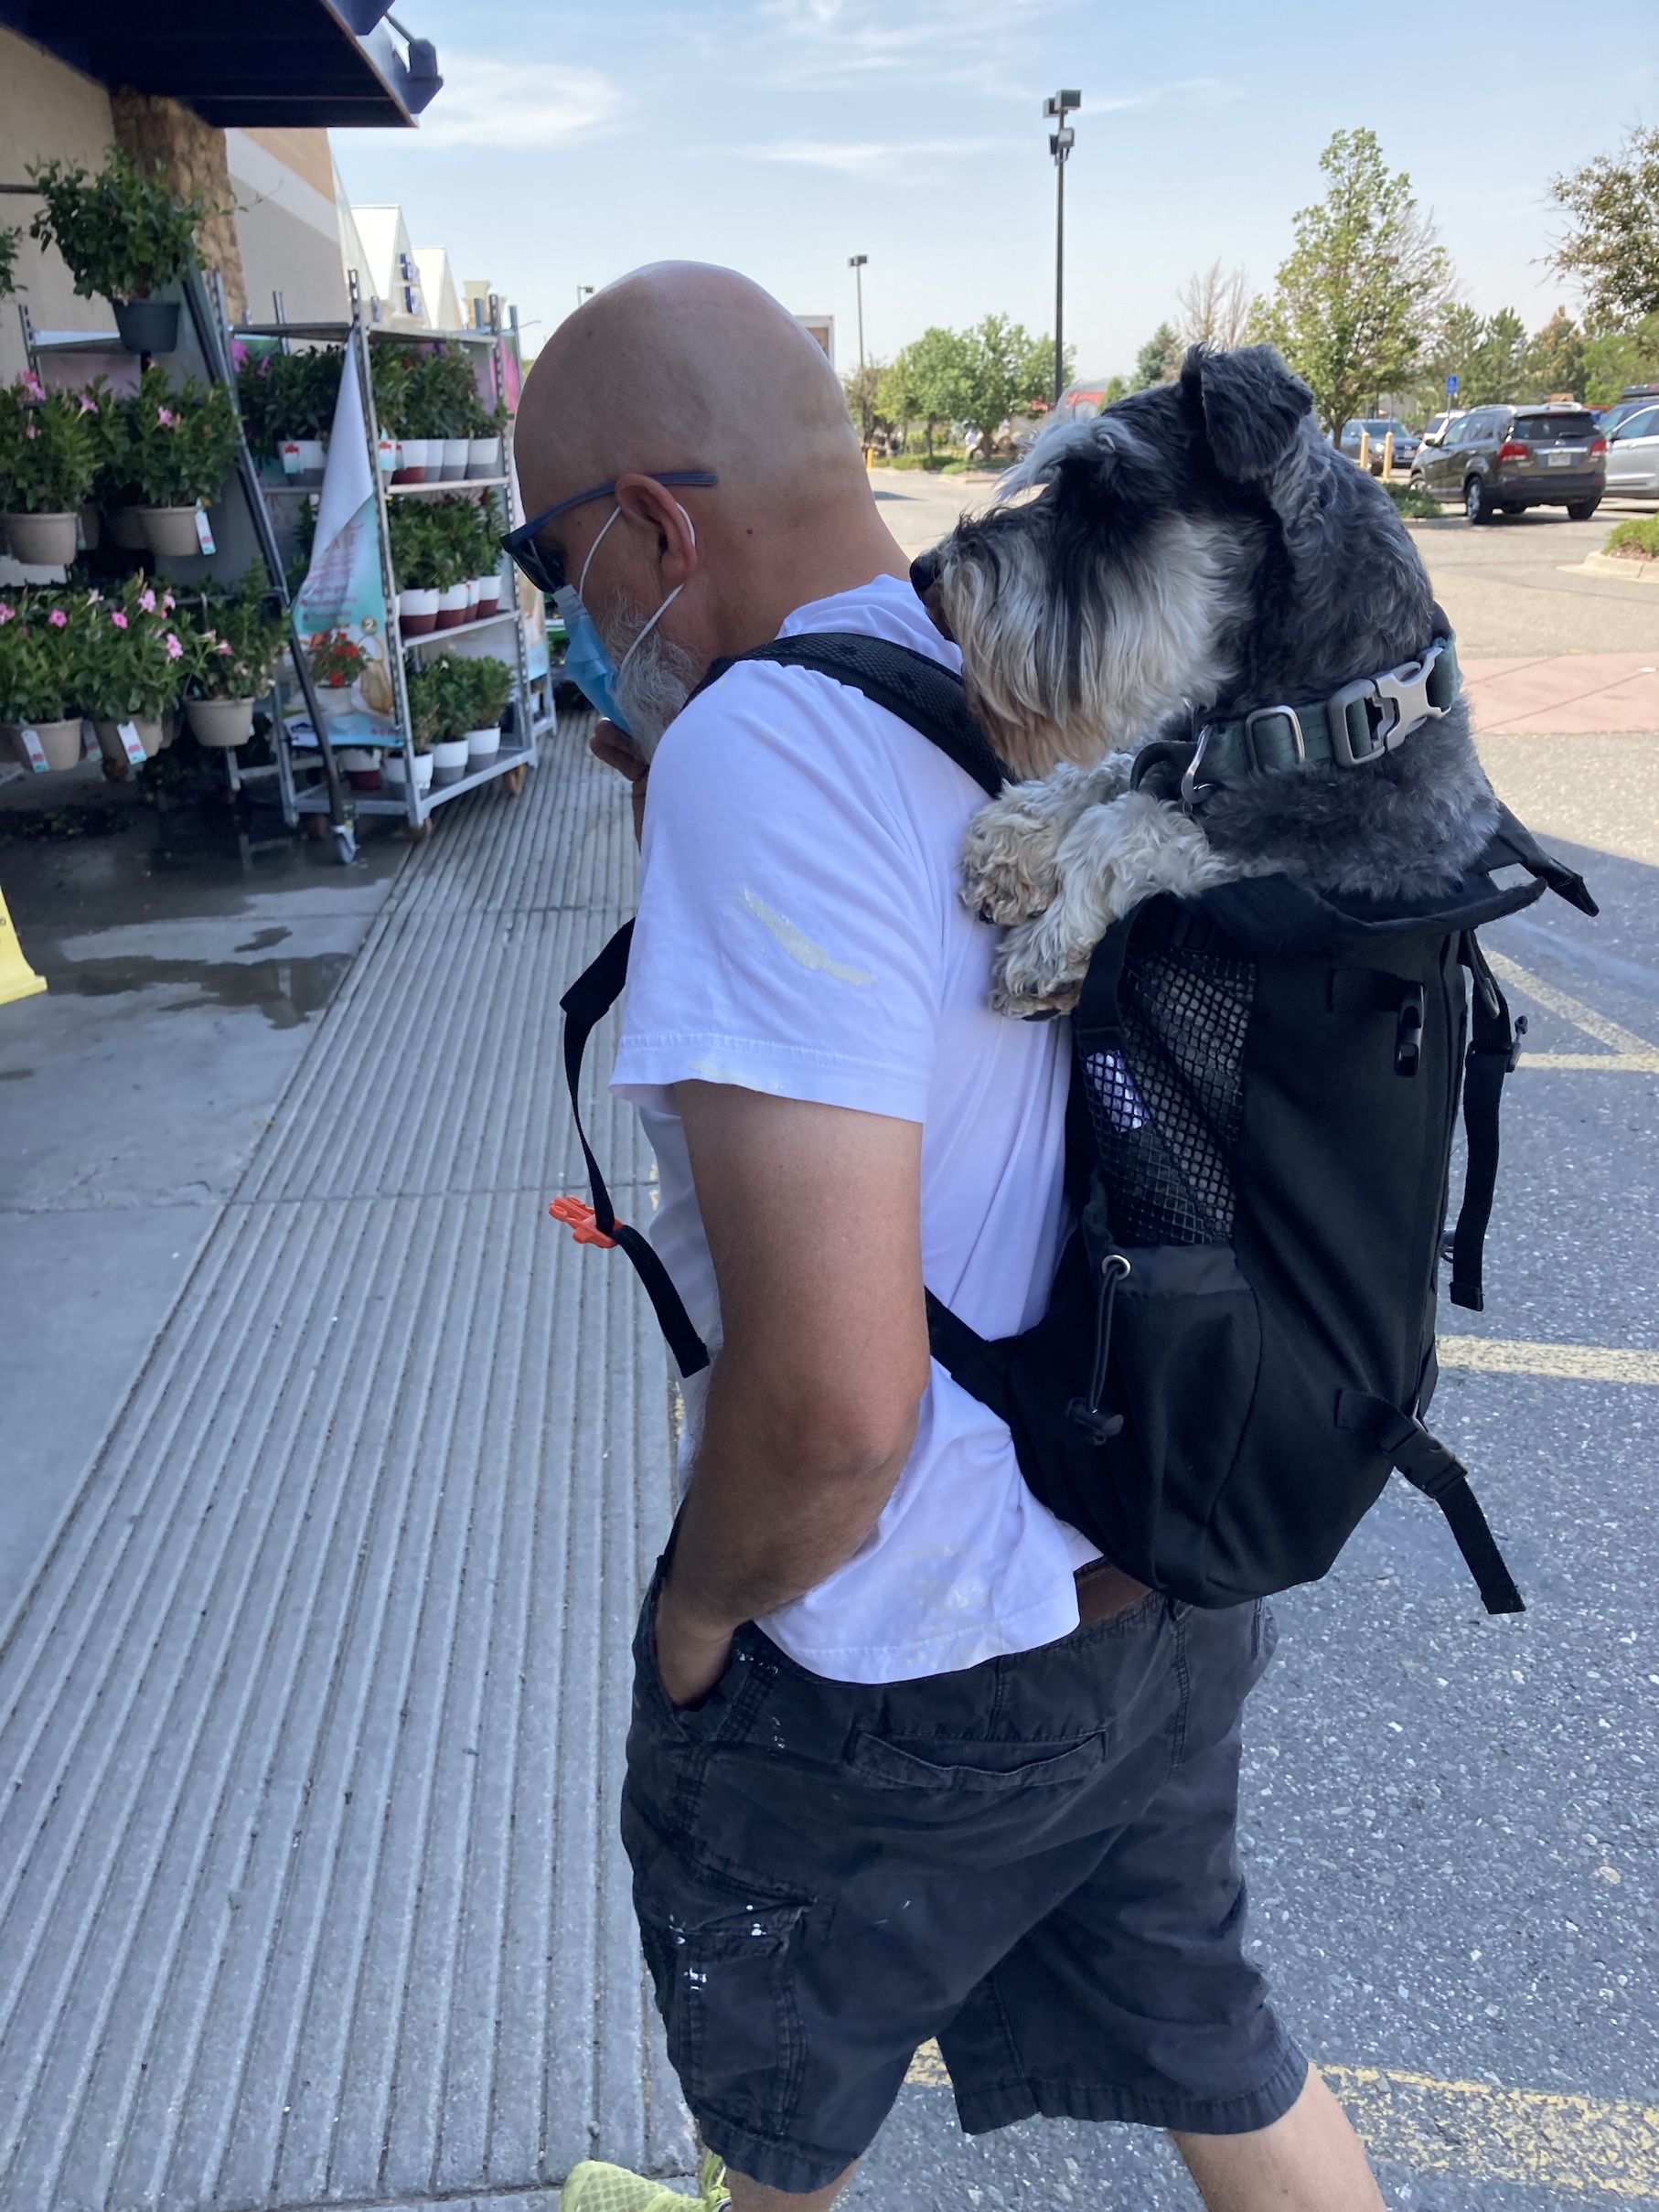

 And sometimes in the shopping cart:

 I know, I know, you just can’t get enough of the cute photos of me in a shopping cart. Unfortunately my female human said we have to limit the photos to only four (4) because she has to protect her digital storage allotment on her blog (sigh).
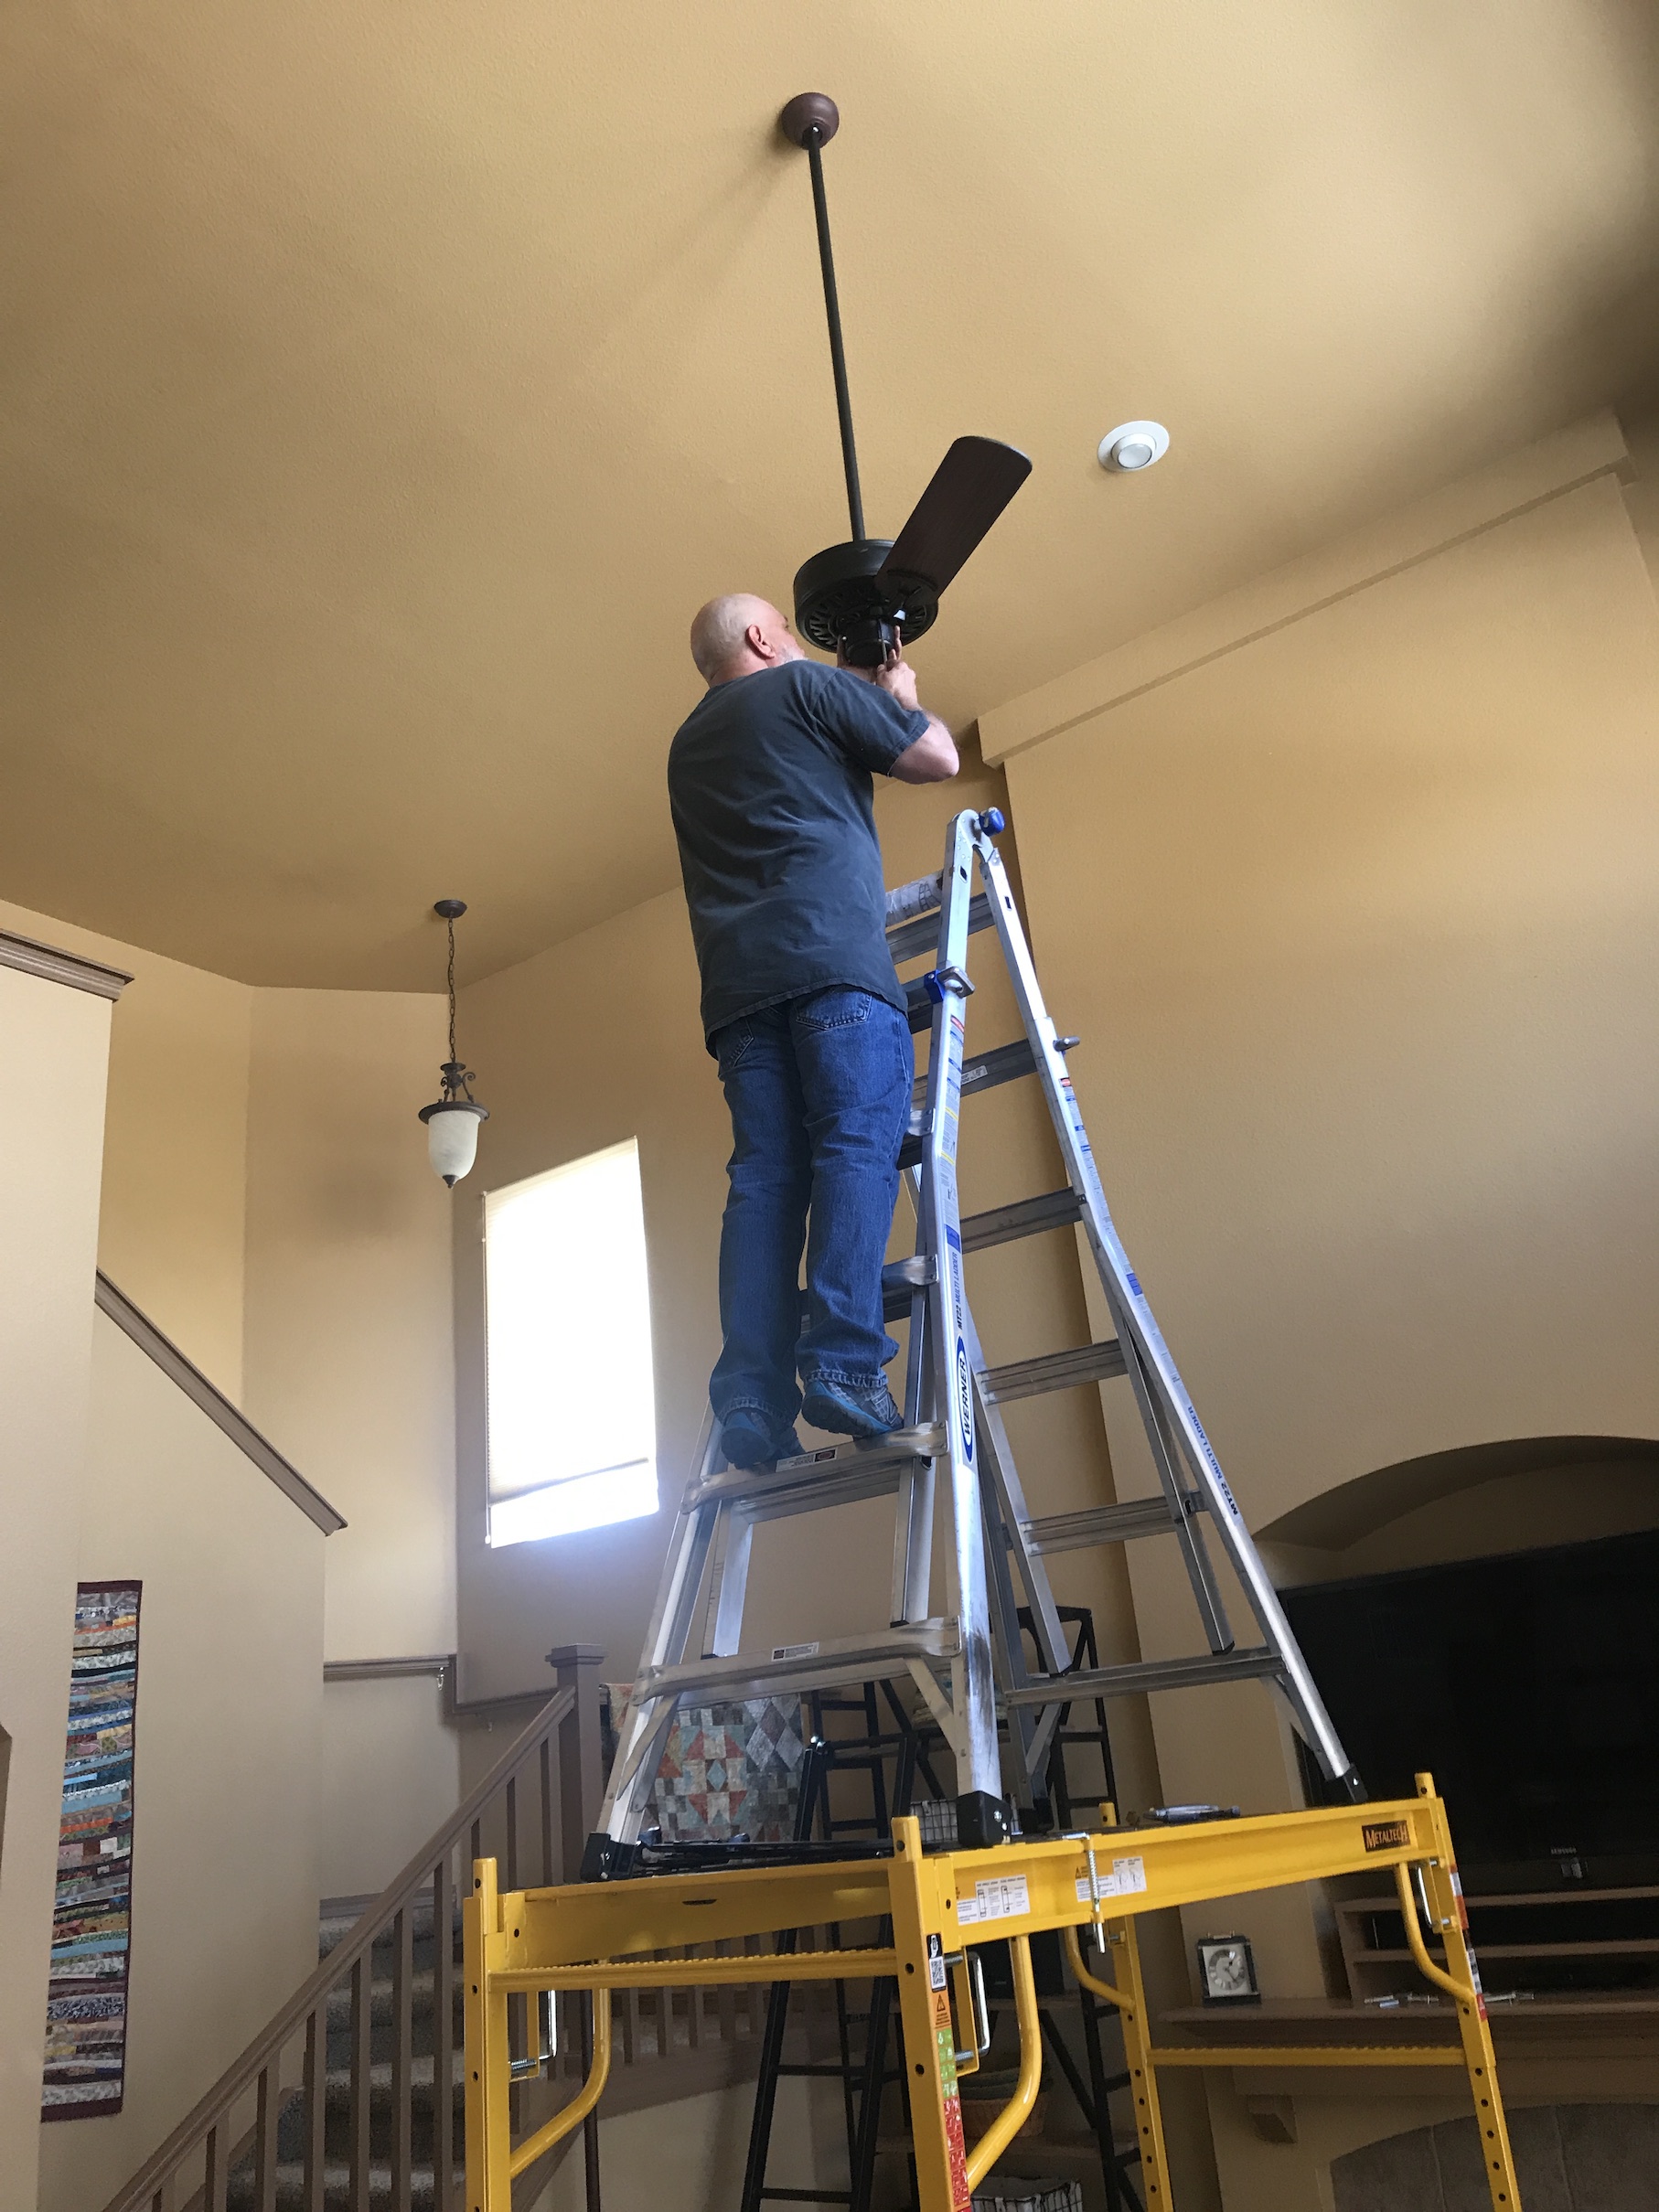 Yes that is a ladder, on top of scaffolding. Looks pretty safe to me (NOT!)
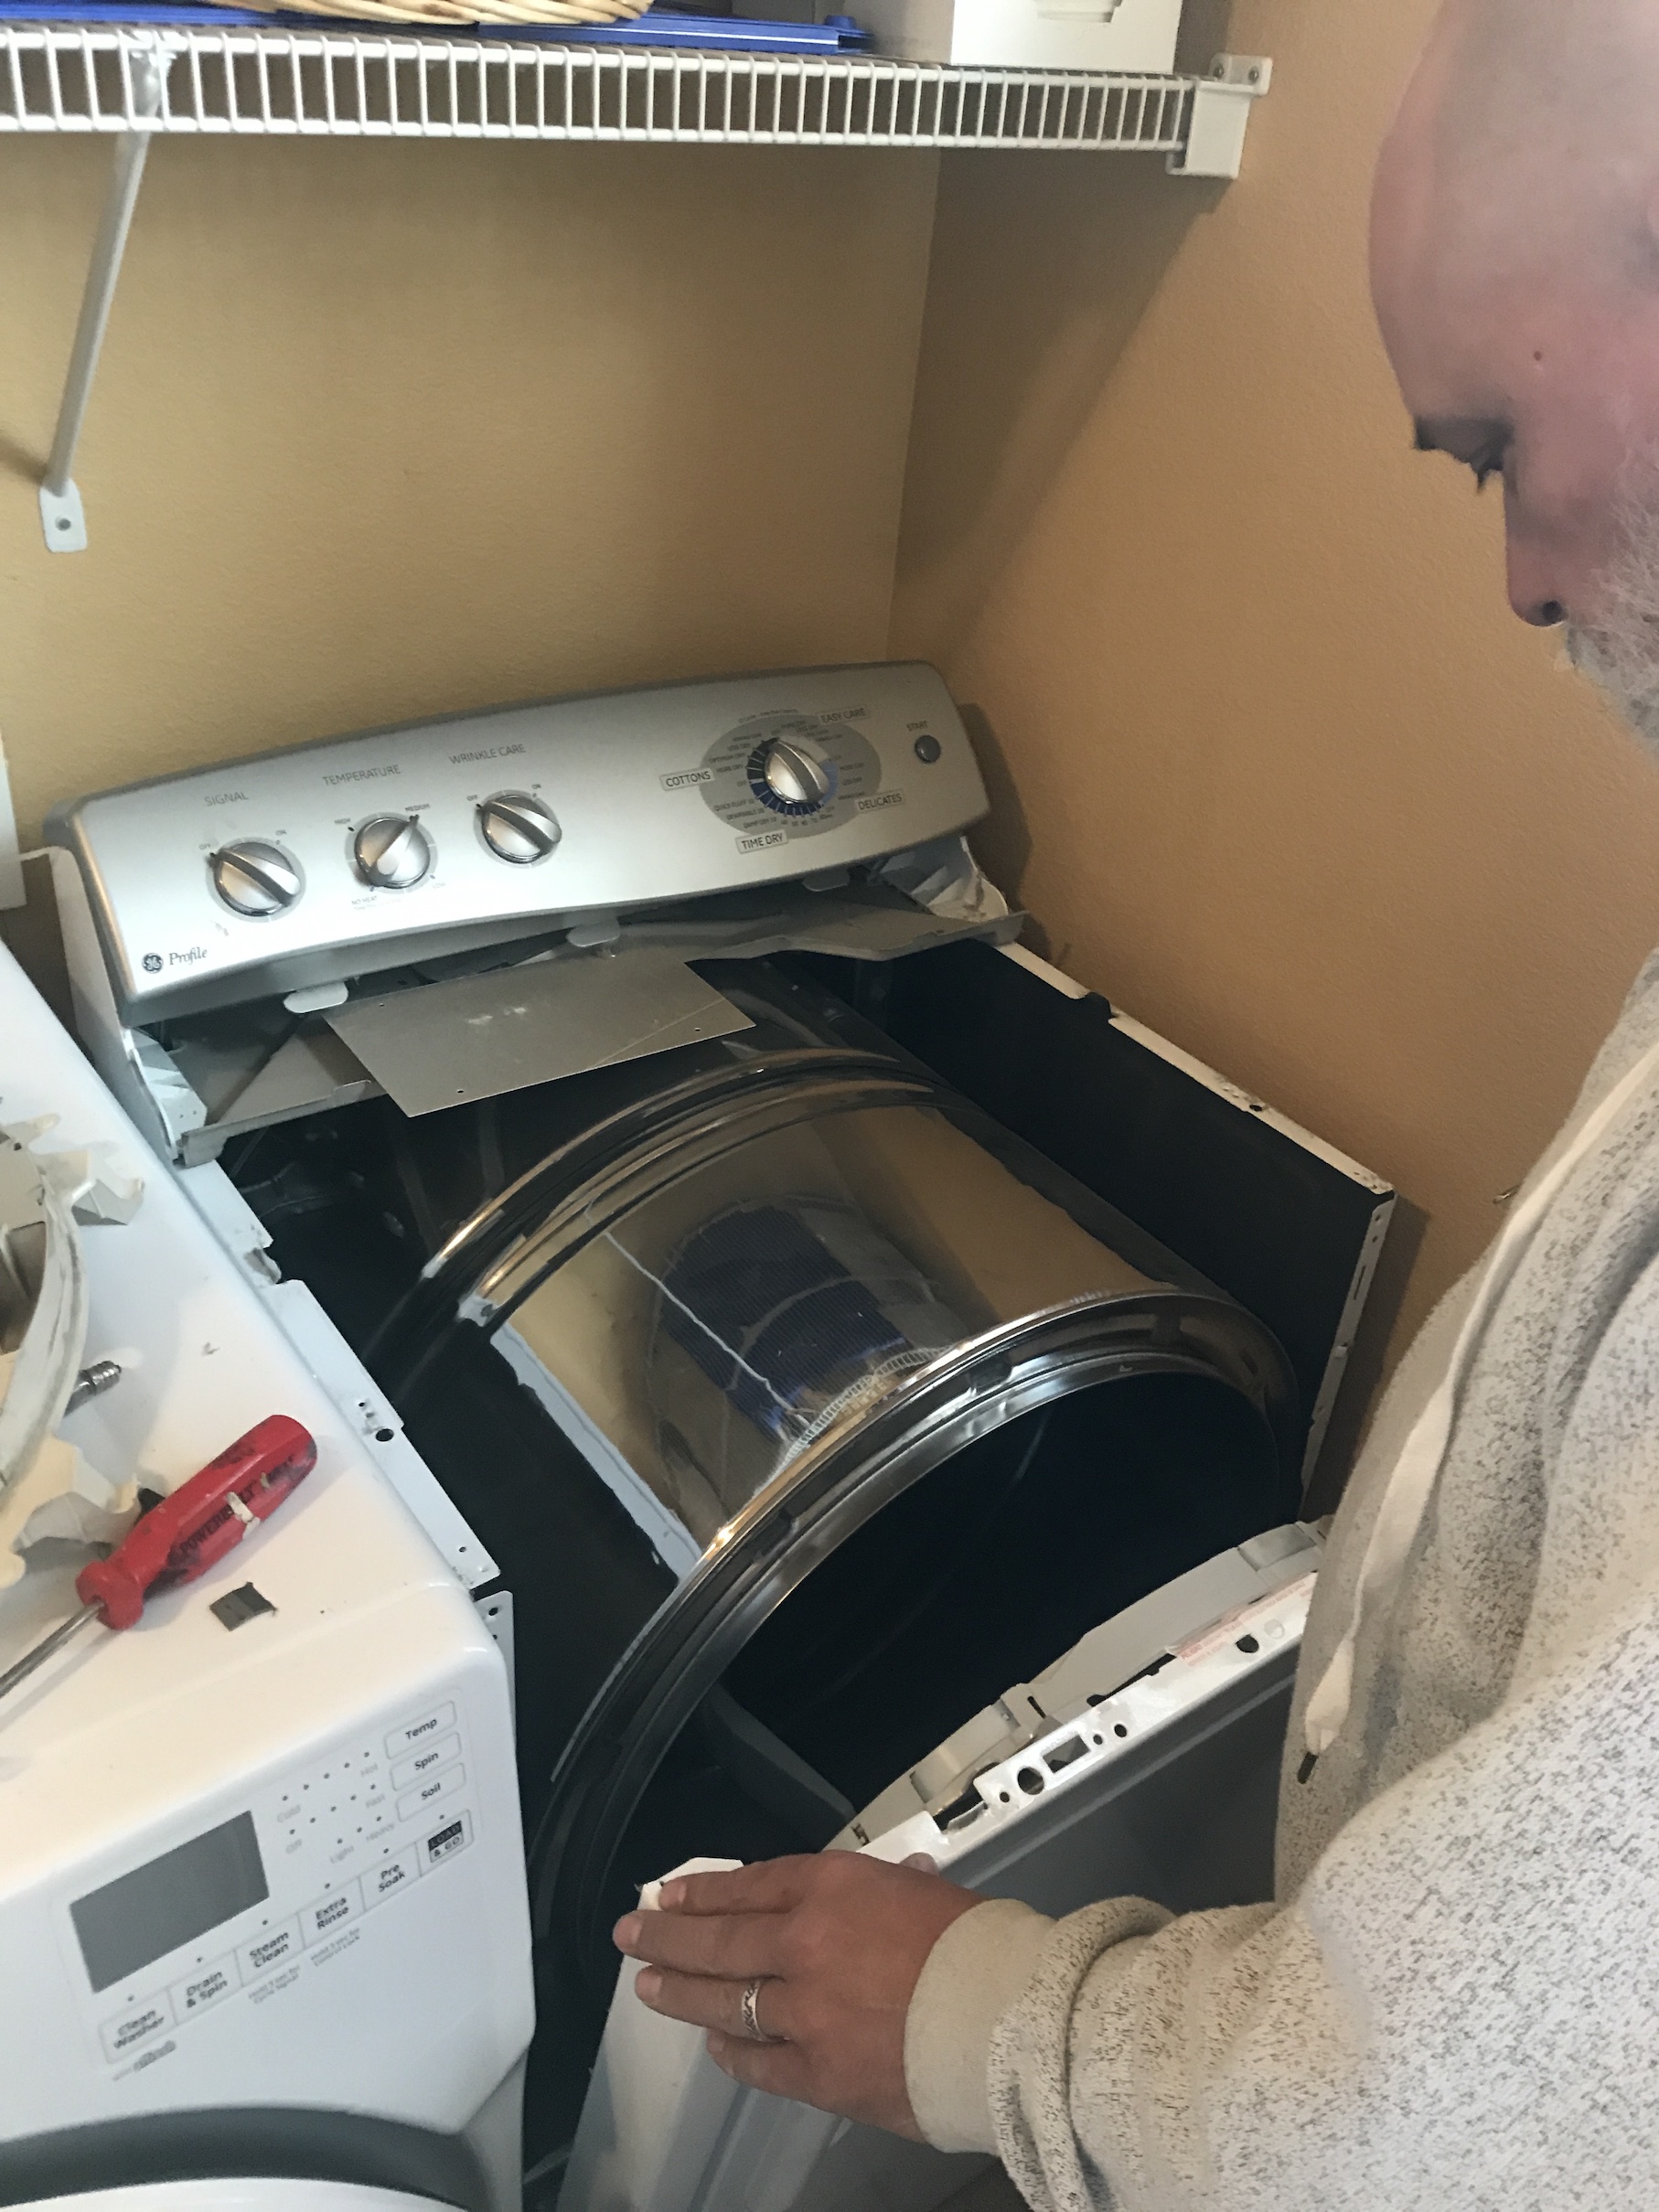 He also completely redid the garage, drywalling it in, painting it and installing shelves:
 He also built bookcases in the front room to create our “home library” as my female human mentioned in this post –
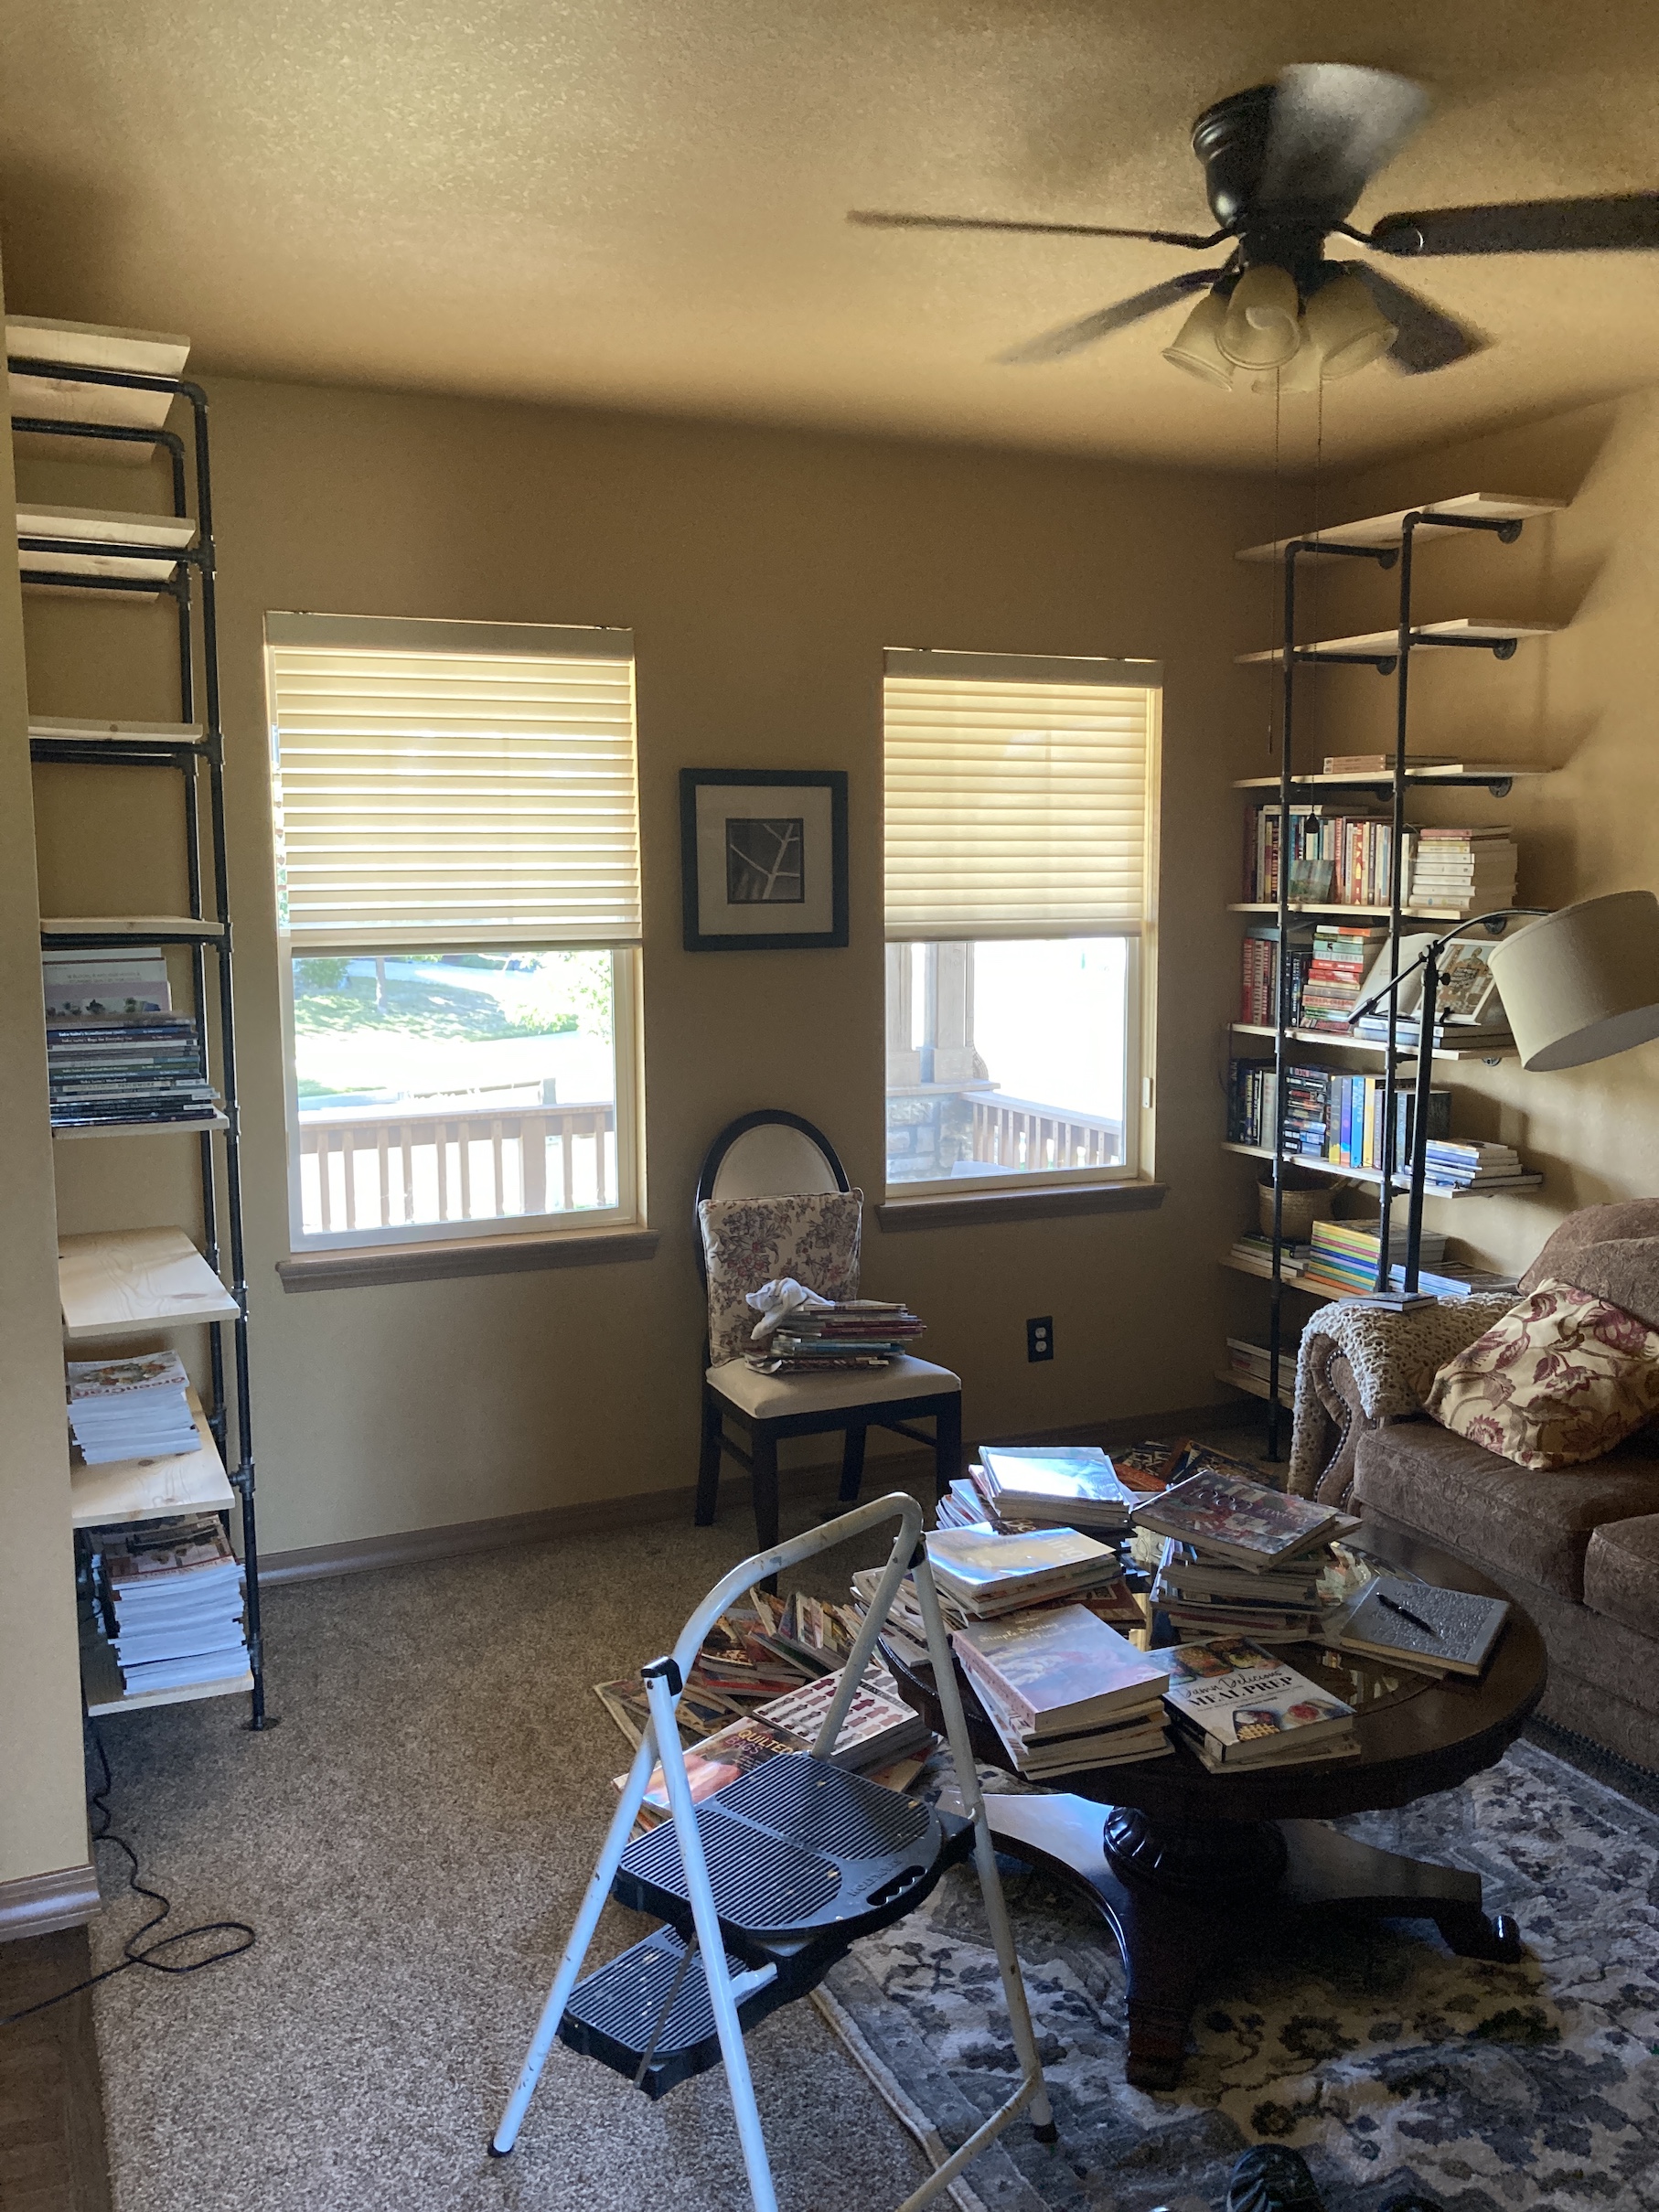
 Most recently he added in a shelf behind our living room TV to distract your eye from the fact the flat screen TV is in front on an alcove (circa early 2000s) for a large deep TV. This was my female human’s idea from looking at too much Instagram home decorating feeds!
 I am sure there were a lot more home remodeling projects that occurred over the past four (4) months but this is all I can remember since I was sleeping through many of them.