I have been working on assembling the blocks designed from discards, from another quilter’s block piecing, and a solid coppery-rust fabric, into a piece called “We Will Not Be Discarded”.
I am playing with the block arrangements and looking at two different arrangement options for the 15 blocks in progress:
OPTION #1 – All blocks pointing the same way:
OPTION #2 – Blocks pointing opposite ways:
I am leaning towards Option #2 as it makes the piece appear to have more “movement”. Once I finish all 15 blocks, I will play again with the final arrangement.
We Still Will Not Be Discarded!
I am playing with the idea of making a second piece (“We Still Will Not Be Discarded!”) from the discards/trimming of the original discards! (And the scraps from the solid fabric they are set in)
That would be taking recycling to the extreme, right? The challenge does seems interesting…
Trimmed discards from the “trimmed discards” in my little trash basket – tempting!
If you have followed my blog for awhile, then you know about my addiction to fabric scraps. This addiction seems to be incompatible with my desire to downsize and minimize my possessions.
The fabric scrap addiction began innocently enough – friends would give me their fabric scraps at quilting retreats. I would go for a “sew day” at a fellow quilter’s house and leave with some of her fabric scraps. As if that was not enough, I began to actually BUY scraps.
Yes, BUY FABRIC SCRAPS, you read correctly. There is a wonderful quilt shop in Central Oregon called The Stitchin’ Post and occasionally they would sell scraps bags of their beautiful high-end quilting fabrics. I bought numerous bags from them.
Beautiful scraps or not, still I was buying fabric scraps.
In my post “Creative Inspiration: Organization???” I shared my new organization of my favorite fabric scraps by color. Although I had organized scraps by color I still had a GIANT box of remaining fabric scraps.
I knew I had to do something. I needed to let go of the fabric scraps I did not completely and absolutely love. However, I did not want to throw them away or try to convince another quilter to adopt them.
So I packaged them up into 30 bags and organized them into two baskets and DONATED them to our local Humane Society Thrift Store to sell! (How do I know that the Humane Society Thrift Store sells fabric scraps? Do you want to take a guess? Yes, because I have bought fabric scraps also from several thrift stores include the Humane Society Thrift Store in the past).
The Humane Society Thrift Store Volunteer accepting my donation seemed pleased that I had packaged them up for sale. I like to imagine if they sell each bag for a couple dollars or more each that could be over $90 – $150+ profit for a wonderful local animal shelter! Some of the bags are packaged by color and some are random – so many options for the Humane Society Thrift Shops’ customers!
A “Humane” way to let go of excess fabric scraps!
When I buy fabric from quilt shops in the future, it will be actual whole fabric (fat quarters or yardage). I still have plenty of fabric scraps and my fabric scrap collection contains only scraps I truly love and plan to use…eventually.
POSTSCRIPT
I am still working through the lessons from the book The Life-Changing Magic of Tidying Up: The Japanese Art of Decluttering and Organizing by Marie Kondo that I discussed in the post “The Space in Which We Live“.
Check out Sassy the Highly Opinionated Miniature Schnauzer’s latest musings on the Schnauzer Snips page; and check out the latest updates on the Textile Adventures page.
Terry, the “Quilting Husband” really got into making “log jam” style free form log cabin blocks. He ended up making over 100+ 6.5 inch x 6.5 inch blocks. We set them in 10 x 10 rows to create a quilt top. Betty Anne Guadalupe of Guadalupe Designs professionally quilted the top.
Log Jam by Terry (2015). Quilted by Betty Anne Guadalupe.
The plan was to list it on the tierneycreates Etsy Shop but I fell in love with it and decided – IT’S A KEEPER! So now it is displayed on our dining room wall.
I have pieced many 6.5 inch by 6.5 inch log jam blocks myself (they are a fun and meditative way to use up fabric scraps) and I am thinking of making a Queen size (yikes) quilt with them for sale at the 2016 Sisters Outdoor Quilt Show. First I will have to see how many I have done and then do some math (yikes, again) to figure out how many I will need (hint: 100 blocks only made a lap size quilt…).
POSTSCRIPT
I am not sure how it happened, but my previous post Because Nice Matters, was my 100th blog post! I remember when I started the tierneycreates blog in October 2013, I did not imagine getting to my 100th post (I was just happy to be at 5 posts!). It has been so fun so far connecting with other bloggers and I so appreciate my readers and followers!
I found an organic branch-like/wood grain-like tone on tone fabric from my collection of Marcia Derse fabrics and placed it between the columns and then as the border.
So now the quilt top is done!
I am looking forward to seeing what it looks like once the machine quilter works her magic!
Some photos below…
NOTE: In the last photo, the quilt top looks a little askew, that is just because The Quilting Husband is trying to hold it still for the photo while the wind is blowing.
A close up of one of the blocks with the setting fabricThe Tree Outside My Window under a tree outside my window!Quilt Top completed on The Tree Outside My Window
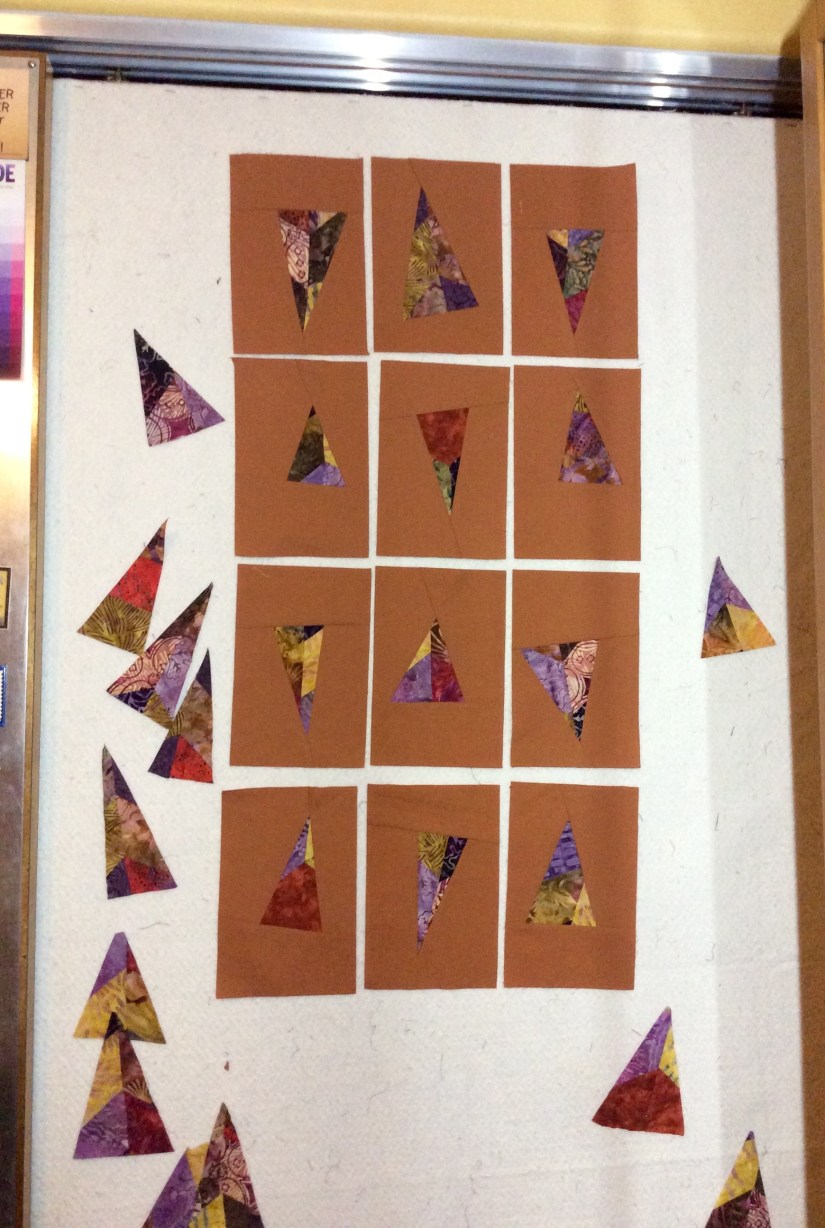
Continuing my series “What’s On The Design Wall” with an update on where I am in my design and piecing of a new piece that I first introduced in the post: “What’s on the Design Wall: Rescued Blocks II“.
Recently, the name for this piece came to me – “The Tree Outside My Window” as I completed 15 blocks to create this art quilt.
As you will see in the photos below, this piece has FIVE images of trees in it (the post “What’s on the Design Wall: Fabric Surface Design Experimentation” discusses how these trees were created) but “The Trees Outside My Window” did not sound right on my tongue. I believe when naming a piece, it has to sound right to you when you say the name aloud.
After creating fifteen 12.5 inch by 12.5 inch blocks from: 1) 4 inch – 10 inch blocks originally pieced by a friend (“Rescued Blocks”): 2) scraps from my friend; and 3) five printed trees from a surface design workshop, I decided to piece the blocks into 3 columns of 5 blocks each.
Now I am deciding what I want to do next with my design. I am leaning towards putting a strip of solid (or solid like) fabric in between each row and then floating it in the same color as a border. Originally I was going to use a cream batik but it did not look right. Next I thought: “Ah a brown batik with texture would work”, but alas, I only had brown batik scraps in my stash.
Then my fabric stash spoke to me (which is good because I did not want to go out and buy more fabric as I am trying to use my stash)! I spotted the perfect fabric – mono color textured design yardage from my collection of Marcia Derse Riverwoods Collection from Troy Corporation. (At one point I was addicted to this amazing collection and tried to be a sample of all fabrics in this line from The Stitchin’ Post in Central Oregon.)
I am going to leave it a mystery for now which fabric from this beautiful collection I selected for the strips between the three rows and the border. You have to wait until the next post on this piece!
Here are photos from my design wall to include some close-ups:
An update to my post Progress and Fear about the 5 quilts awaiting completion:
Finally, I finished binding all 5 quilts back from the long-arm quilter! I have listed 4 of them for sale on the tierneycreates Etsy shop.
I still need to master photographing quilts as they are much prettier in person than my photos seem to reveal.
Designed by Tierney Hogan, pieced by Terry Hogan, quilted by Betty Anne Guadalupe
Designed and pieced by Terry Hogan, quilted by Betty Anne Guadalupe
Designed by Tierney Hogan, pieced by Terry Hogan, quilted by Betty Anne Guadalupe
Designed and pieced by Terry and Tierney Hogan, quilted by Betty Anne Guadalupe
The 5th one, the “Ugly Sunflower Fabric Quilt” I wavered on and was going to keep, then was going to sell on Etsy, and now I am completely undecided.
I might just hold onto it until the Sisters Outdoor Quilt Show entry time next year to decide.
Perhaps I will put the sunflower quilt in the Sisters Outdoor Quilt Show as I am guessing bed size quilts are easier to sell at the show than lap size quilts (of the 5 quilts I had in the 2015 Sisters Outdoor Show, only the bed size quilt sold).
The plan is for next year’s Sisters Outdoor Quilt Show, I put in 5 quilts again and Terry “The Quilting Husband” put in 5 of his quilts!
Continuing my series of posts on what is on the design wall…
THE QUILTING HUSBAND IS BUSY AGAIN
I had some of my blocks up on the design wall and Terry “The Quilting Husband” was getting impatient. He kept giving me subtle hints (and not too subtle hints) about moving my stuff off the design wall so he can put his blocks up on the design wall (we have a small house and can only make 1 shared design wall work).
The Quilting Husband is working on a new “Log Jam” quilt (see my other posts on “Log Jamming” and “Log Jams” which are free form pieced log cabin style blocks) made with flannel scraps. I have a large box of flannel scraps from making flannel quilts and flannel quilt backs, and Terry came up with the idea of trying to use of the scraps making flannel log jam quilts.
As his confidence grows as a quilter, he gets comfortable with making his own design decisions. He found a stash of dog and cat themed flannel scraps and used them as the center so each block would feature a dog and/or cat face. Very creative!
I taught “The Quilting Husband”, Terry a couple months ago how to make log jam blocks. If you would like to know more about log jam blocks and “log jamming”, see these posts:
Terry, loaded with a box of color coordinated scraps I pre-selected, made endless 6 1/2 inch log jam blocks (120+) and put a dent in my scraps (a small dent but any dent is appreciated!).
Then he took a 100 of the 6 1/2 inch block and created a 10 x 10 quilt. It was a collaborative process as he completed ten – 10 block rows, and I did the final sewing of the ten rows together to make the quilt top. Terry, The Quilting Husband, is not much for matching seams to sew rows together, but that is okay – look at how much he accomplished!
Now I am working on putting the back of the quilt together so it can go to the long-arm quilter!
Then comes the decision – keep it or list it on the Etsy site for sale. We will likely list it for sale…we’ll see…
I love sunflowers and years ago (maybe 10) I bought some sunflower fabric I found on sale. I never used this fabric and it ended up in the back of my stash, forgotten.
A couple of months ago I was purging the fabric that I no longer loved to donate to a charity thrift store (see blog post The Fabric Purge!) and came across the sunflower fabric again. I do not have a photo of the original fabric, but 10 years later, looking at it I thought “what was I thinking?!?!?”
It was…well…quite ugly fabric. Little sunflower images with a very cheesy looking patterns and other images surrounding the sunflowers. No wonder it had been on sale 10 years ago!
A quilter friend of mine suggested a Challenge: Don’t get rid of the fabric – cut out the sunflowers and use them as centers in a log cabin style quilt. She offered to give me some coordinating fabric that she was purging from her stash!
I took on the challenge and made the quilt! I just gave to my long-arm quilter the 88″ x 66″ quilt top made with just the sunflower sections of the ugly fabric and coordinating fabric from a friend’s stash! I set the 9.5″ by 9.5″ inch blocks in a Moda paper bag colored fabric. I cannot wait to see what it looks like quilted!
Continuing my series of posts on sources of Creative Inspiration…
HOW ORGANIZING MY SCRAPS GOT ME INSPIRED
Sounds like a testimonial, right?
“At first my life was empty of direction and meaning and then I organized my fabric scraps and suddenly everything was much much much better!” – Anonymous Scrap Hoarder
Not exactly. However organizing my fabric scraps last evening did inspire my creativity!
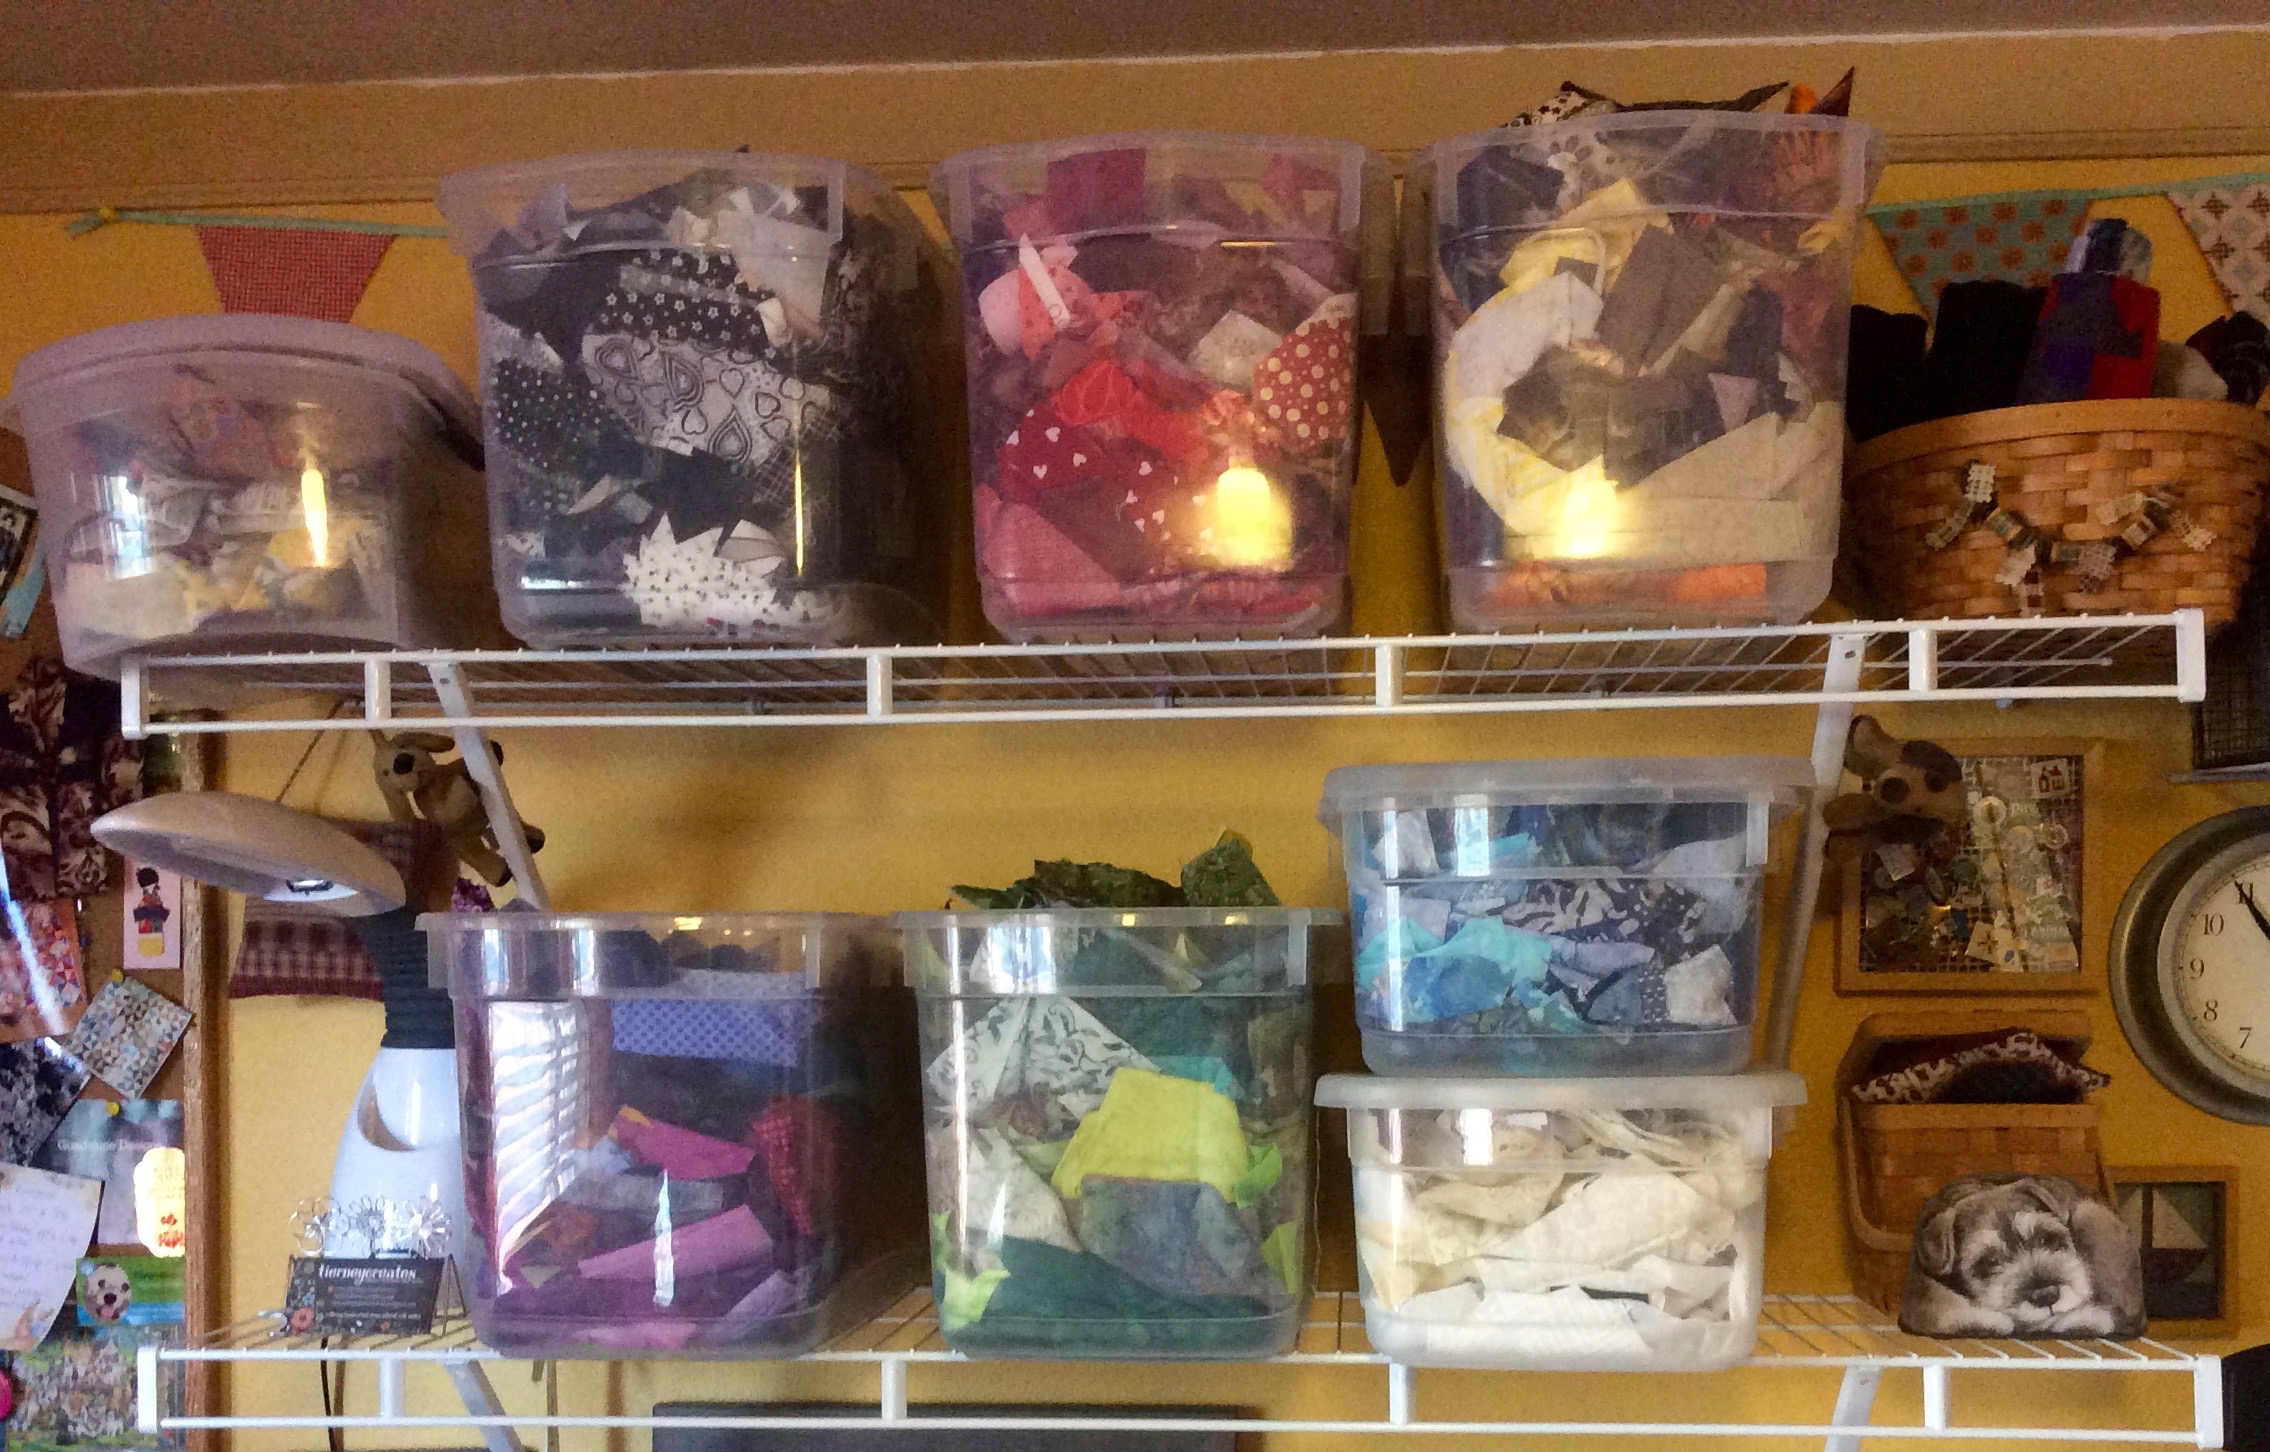
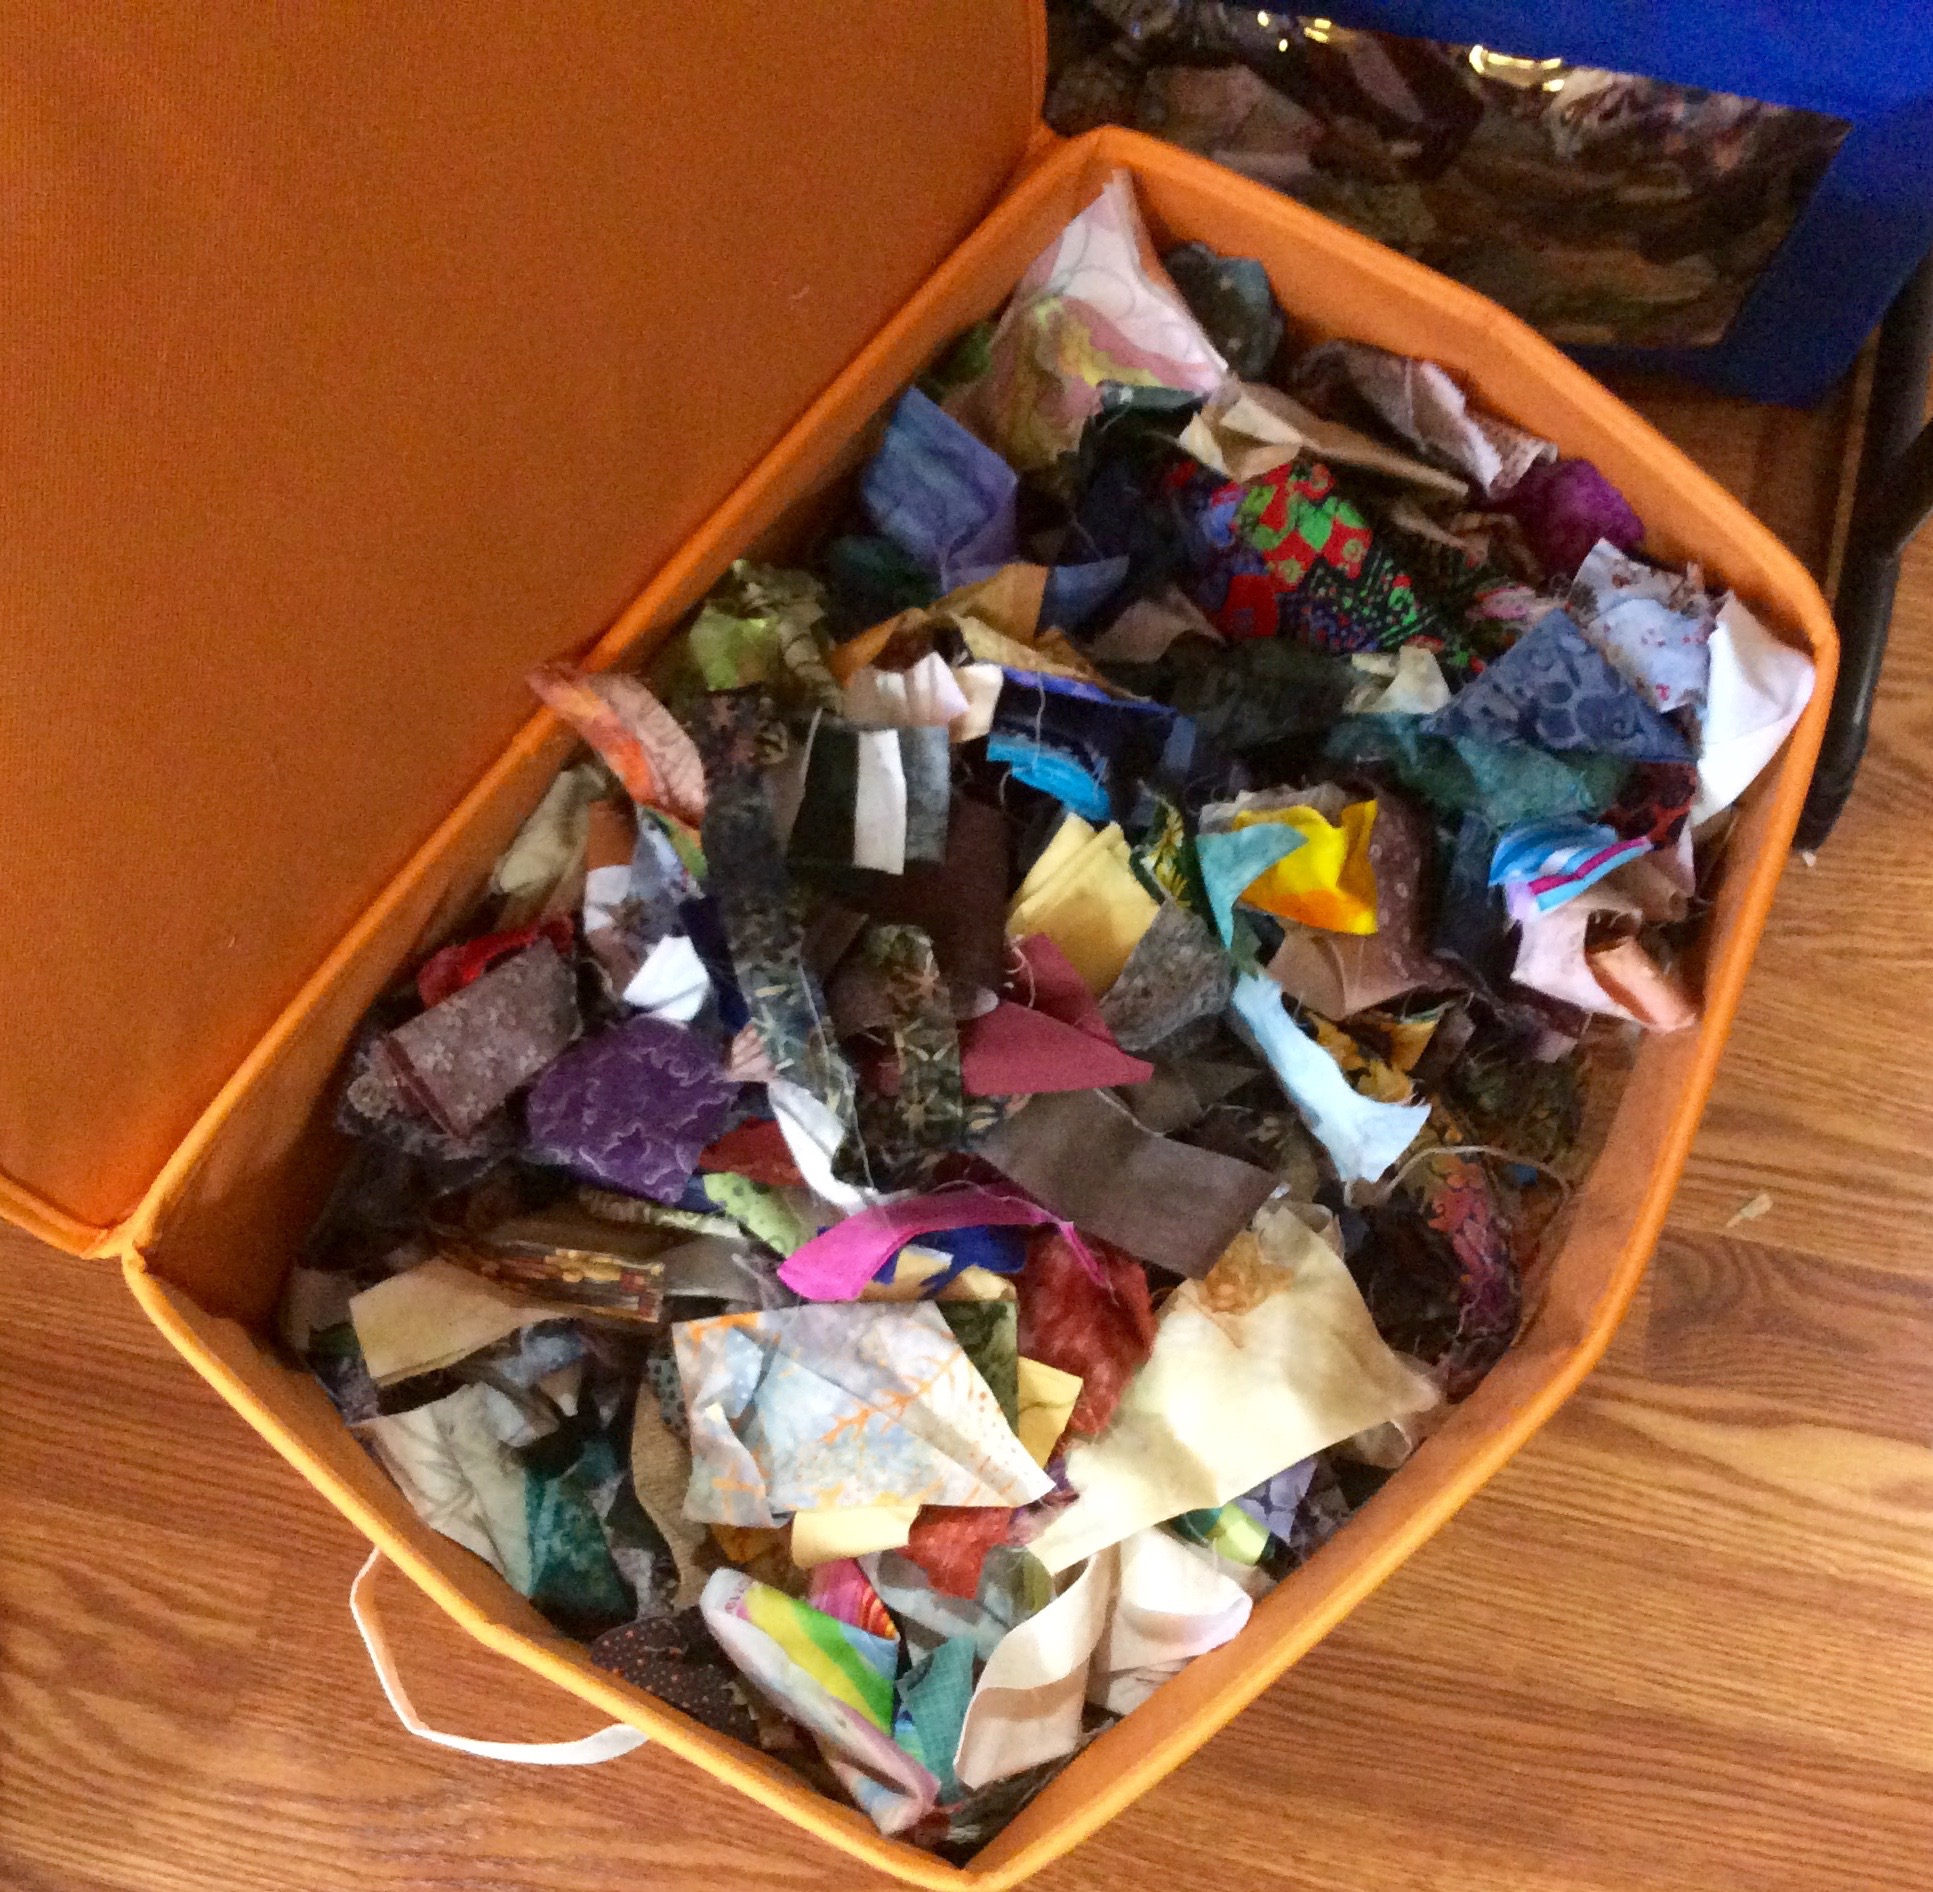
I love fabric scraps and I have quite a collection. I have several blog posts about my love of scraps. My fabric scraps were getting out of control and were in two fairly large boxes. I enjoy the “hunt” for the right fabric scraps when creating a scrappy quilt, but found I grew irritated with not being able to easily find the colors I want.
So I decided to organize my fabric scraps in two ways, to give me flexibility of how I create with fabric scraps:
By color
All thrown in a box (random)
This new system allows me to create fabric scrap pieces (quilts, pillows, wallhanging, table runners, etc.) based on my “creative mood”. I might want to work on a piece that it focused on oranges, yellows and reds; or I might want to work on a piece that is very scrappy and more random. Now I have two options!
I am interested in working on some pieces in the future that are more monochromatic but with fabric of different patterns and textures in the same general color. Having fabric scraps organized by color will make this design process easier.
As I was organizing my fabric scraps I got very excited as ideas for new pieces ran wildly through my head!
Check out Sassy’s related post on her blog Schnauzer Snips about her time napping in flannel shirt material Okay, I promise – no more posts about log jamming for a while after this post…maybe. The log jamming continues and now I have a new recruit: If you read the post This is the Story of a Quilting Husband, you read that my husband Terry recently learned to quilt. This past weekend I taught him to log jam (see posts What’s on the Design Wall: “Log Jamming” and “Log Jamming”: The Sequel). On the Design Wall are his first batch of log jamming blocks, made from Flannel Shirt Flannels!*
First set of shirt flannel log jam blocks by Terry, the Quilting Husband
*The shirt flannels were rediscovered during part two of my purge of fabric (see post The Fabric Purge!). This time I worked through my flannels and weeded out those no I no longer needed and rediscovered my tucked away collection of shirt flannels.
Last Tuesday evening I took the Log Jam Class at the Stitchin’ Post quilt shop, this time with the actual instructor, Jackie. Jackie is the Queen of the Log Jam (and a wonderful and fun instructor) and I picked up a couple tips I missed when my friends and I made our own class up earlier this year (when our instructor had to cancel so my friends taught me how to “log jam” as discussed in the post What’s on the Design Wall: “Log Jamming” ).
Taking the class again (well taking it for real with the official instructor), got me even more addicted to log jamming. I also learned that the log jamming technique is based on an old African sewing process. I thought it was something the quilt shop had developed, I did not realize it had so much history. Log jamming is such a great way to work through your fabric scrap collection!
So far I have completed 56 – 6 1/2 inch log jam blocks and I have another 30 some in progress. Not sure when I am going to stop working on the blocks and make them into something. Maybe I will just create a huge pile of log jam blocks enough for a couple King-size quilts. But, alas, that will still not put a dent in my fabric scrap collection…
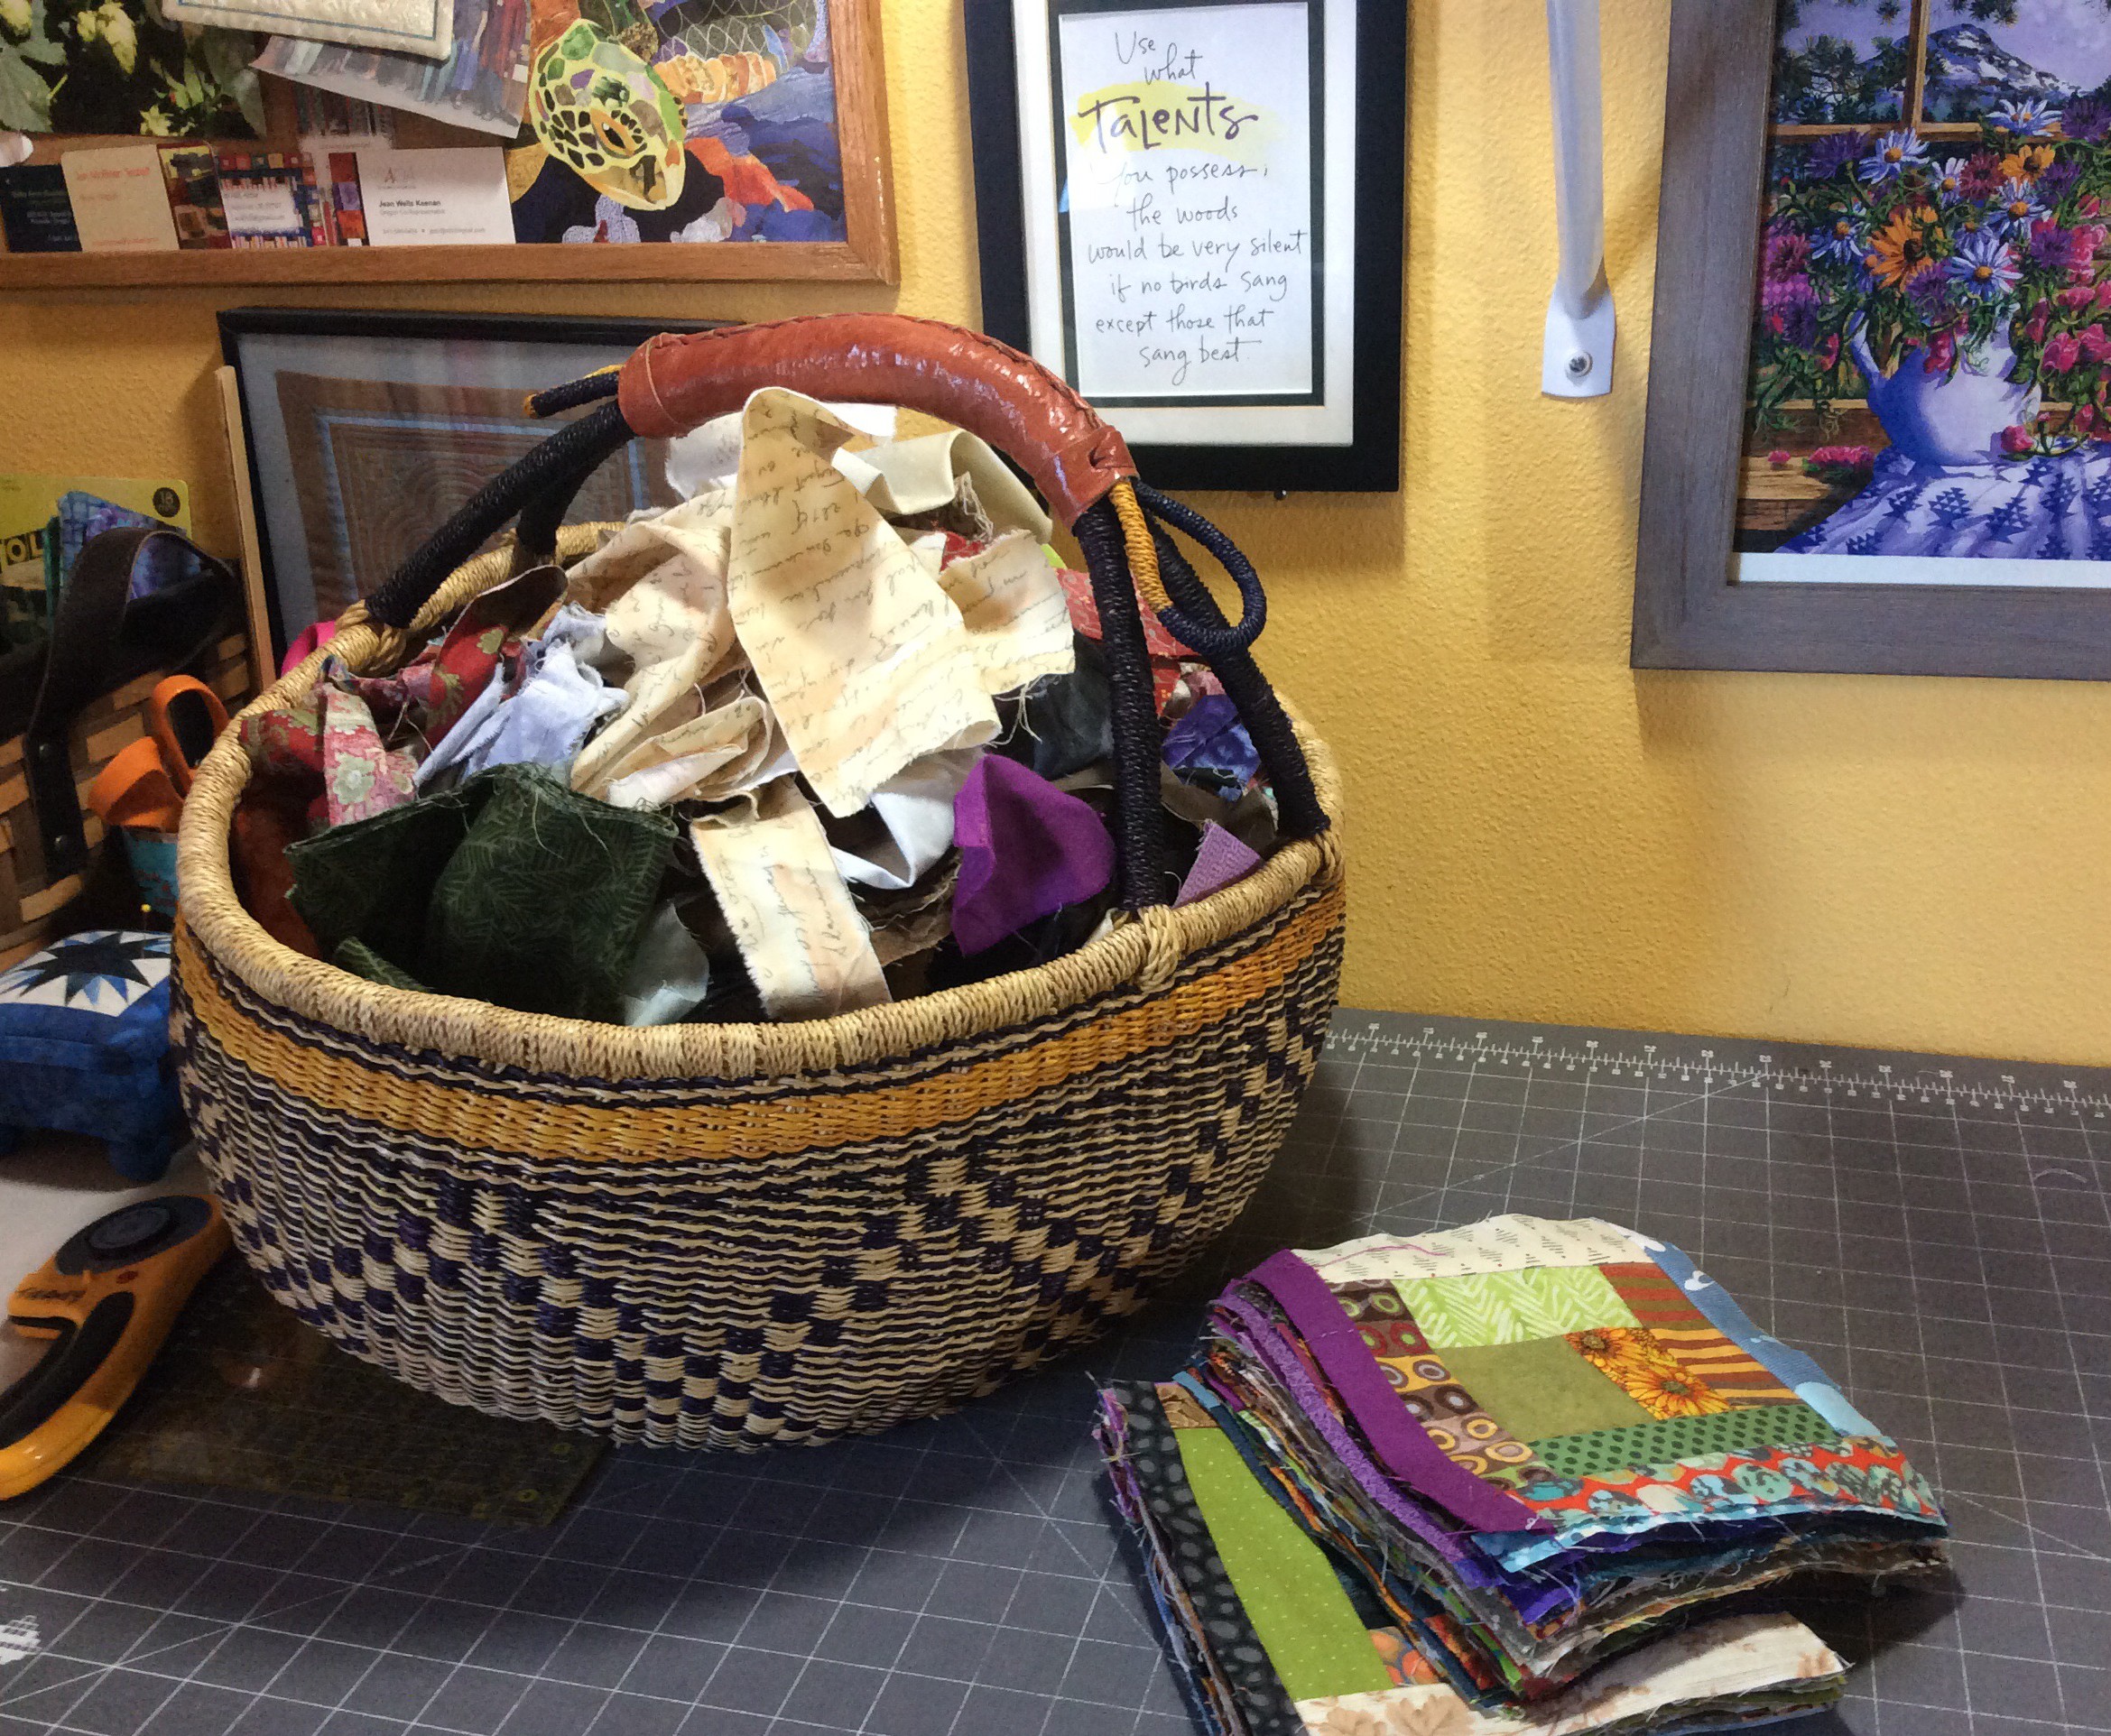
Below is a photo of the basket of coordinating scraps I use while log jamming and my current stack of blocks. My plan is to keep log jamming with this palette until I exhaust this palette of scraps (or I become exhausted from using the same palette!)
Basket of scraps for log jamming and stack of completed blocks
Pre-cuts Wrangling!?!?! What does she mean? Has she been sniffing her fabric glue sticks (normally used for appliqué, not as recreational substances)?
“Pre-cuts” = Those addicting beautifully coordinated collections of pre-cut fabrics in common sizes such as 2 1/1 inch strips, 2 1/2 inch squares, 5 inch squares (aka “charm squares”), 10 inch squares, fat quarter (18 x 22 inch sections of fabric) bundles, and various other tempting configuations.
Wrangling = “To tend or round up” (Dictionary.com)
I have a lot of precuts, more than I need. Likely more than any human needs. I appear to use them to decorate my crafting studio.
Decided to do something crazy – actually USE them instead of just decorate with them!
In my post What’s on the Design Wall: Rediscovering my Charms I discuss delving into my charm pack (5 inch squares) collections and using them to make quilts and wallhangings. Taking a break from charm packs, I have moved to a smaller size of pre-cut – the 2 1/1 inch square pack. I wrangled up my collection of 2 1/2 square pre-cut packs and selected several colorful Rowan/Westminster Fabric packs to create a series of “16 patch” blocks to turn into a quilt. I pieced the 16 patch blocks into a scrappy “postage stamp” style quilt.
I provide some very general simple directions for wrangling your 2 1/2 inch pre-cut packs into a scrappy quilt below the photos.
2 1/2 Pre-Cut Quick Quilt (Wrangle & Design As You Go)
Wrangle a couple packs of 2 1/2 squares (approximately 42 squares in each pre-cut pack) – I think I used 2 or 3 to start
Chain piece non matching pairs of the squares – you will end up with a series of 2 patches
Chain piece the pairs (2 patches) to another set of pairs (2 patches) – you will end up with a series of 4 patches
Chain piece the 4 patches to another 4 patch – you will end up with a series of 8 patches
Chain piece the 8 patches to another 8 patch and finally you will have a series of 16 patch blocks
You can be careful and match your seams, and press between each patch construction or throw caution to the wind and not press until you complete the 16 patch
Sew the 16 patch blocks into rows and then the rows together in to a quilt top
Wrangle and Design As You Go – you might discover you need another 2 1/2 pack to get the size of quilt you want or you might have to save some 8 patches and use them on the side or bottom of the quilt to even out the rows. I used my design wall to decide what block “mathematical configuration” to use. I started with 4 x 7 (4 blocks in a row, 7 rows) but that seemed too narrow. I finally decided on a 5 x 6 quilt (5 blocks in a row, 6 rows of 5 blocks) and will take the row of blocks off the bottom of the design wall, add a couple more and add 1 additional block to each row.
If you are a new quilter or a future quilter and are unfamiliar with how to “chain piece”, check out numerous free online instruction videos available on YouTube or other sources.
A couple of weeks ago I was scheduled to take a quilting class called “Log Jam“. Log Jam is an innovative way to rapidly create scrappy log cabin quilt blocks. If you are a new quilter or not a quilter, a “log cabin” block is a quilting block made by starting with a small center square and building consistent standardly sized strips of fabric around the center square. The log jam concept throws the requirement of consistency sized strips out the window. “Log jamming” makes the log cabin style quilt block construction process laid back, casual, scrappy and fun! When making a log jam quilt you can use a specific palette of scraps, solid colors, or random scraps to make the piece very scrappy.
Unfortunately only three people registered for the class (myself and two of my friends) and it this did not meet the threshold to hold the class. The quilt shop was so wonderful and let us use their classroom anyway and hold our own class (two of my friends had taken the class before). So we spent 6 hours having a blast “log jamming“. The “log jam” method involves the kind of quilt block making you can do while chatting and giggling with friends – it is fun and less structured. We ended up being very silly and singing songs while we were working on our log jams. I even modified Bob Marley’s song “Jamming” to “Log Jamming”!
Now the 27 blocks I made log jamming are sitting on my design wall. I am trying to decide what I want to do with these blocks: maybe a table runner for my series of my Modern Quilt Table Runners on my Etsy shop or maybe one quilt with the blocks set into a solid background or floated. Every quilter should find space for a design wall – it helps to lay your pieces out to see where you want to take them!
If you live in the Central Oregon area, the Stitchin’ Post has a wonderful Log Jam class that my friends and I highly recommend you take!
In the post “Creative Inspiration: Family” I introduced a series of posts exploring my resources for creative inspiration. This post discusses another important source of creative inspiration for me: Nature.
There is so much beauty around us. Whether you live in beautiful Central Oregon like I do or whether you live in a busy urban environment. You just have to stop for a moment and look around. A solitary tree on a city block can be a wonderful source of nature based inspiration for your creativity as well as a panoramic vista in a national park.
Jean Wells in her inspirational books Intuitive Color & Design: Adventures in Art Quilting (C&T Publishing, 2009) and Journey to Inspired Art Quilting: More Intuitive Color & Design(C&T Publishing, 2012), explores in depth how nature and the environment around you can be a significant resource for creative inspiration. I will talk more about Jean Wells and her influence on my creative inspiration in a future blog post on “Creative Inspiration: Mentors”. Check out Jean Well’s publications for inspirational ideas on your fiber art or just walk around and really see the beauty and inspiration around you!
To demonstrate Nature’s Inspiration, below are photos from a wonderful trip with a friend to Red Rock Canyon State Park a couple years ago. I used the colors in the photos from this trip to inspire a batik art quilt I made.
“Nature does not hurry, yet everything is accomplished.”
In 2012, thanks to my friend Betty Anne, I expanded my love of fabric scraps from cotton quilting fabric scraps to silk and linen garment scraps. If you check out the Gallery you will see examples of quilts made solely from silk and linen scraps from garment construction.
Recently I have expanded to experimenting with creating pieces from denim and wool scraps.
I have collected denim scraps for a couple years from old jeans in anticipation of a future ‘upcycling’ project. In early 2013 Betty Anne shared her stash of men’s wool suiting scraps and Pendleton wool scraps and samples given to her by a friend. My first experiment with these scraps was making wool pincushions as gifts for fellow attendees at a quilt retreat last year. I was nervous to expanded working with wool scraps beyond making pin cushions.
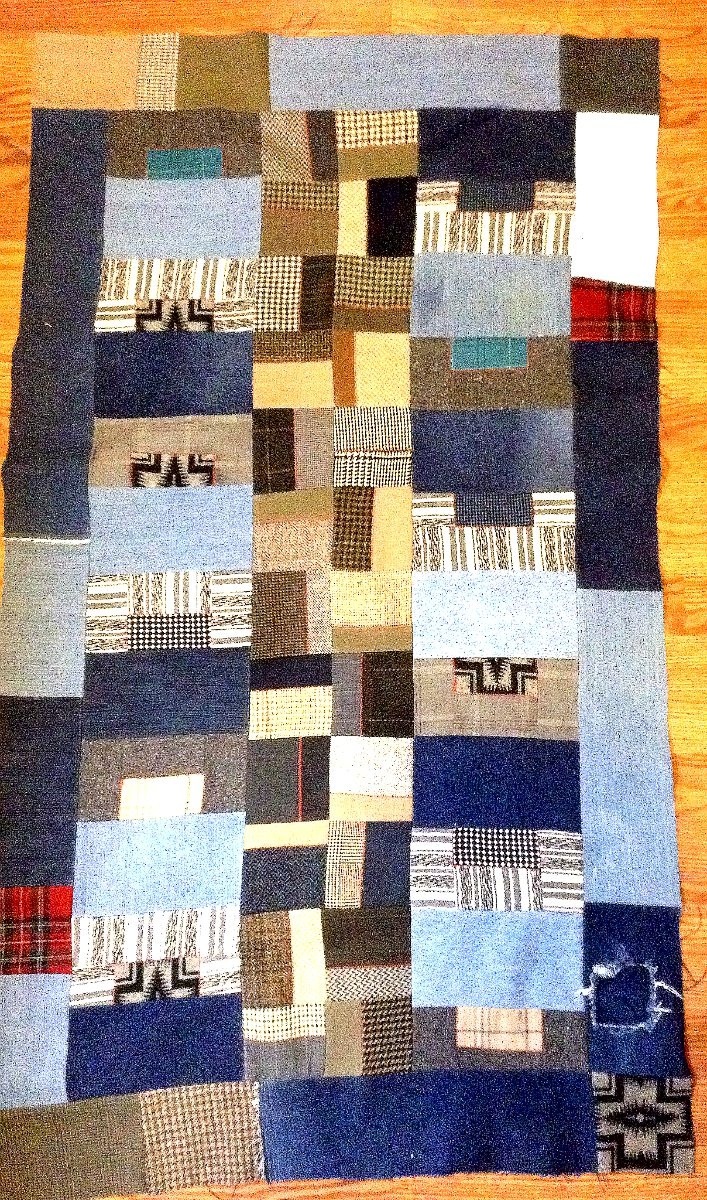
It took until early 2014 to get the courage to create a piece/art quilt/wall hanging using the wool scraps. I combined them with denim scraps to create a piece I named ‘He Dresses Up, He Dresses Down’. The center of the quilt is constructed from wool suiting scraps (He Dresses Up) which have a luxurious texture. The center is framed on each side with a combination of Pendleton wool scraps and denim scraps (He Dresses Down…slang for comfortable, casual dress).
‘He Dresses Up, He Dresses Down’, designed & pieced by Tierney Hogan, 2014
Piecing wool scraps can be a bit challenging. The seams between wool scraps are bulky when wool pieces are sewn together. Instead of pressing seams to one side as you would normally do with cotton fabric quilt construction, you have to press the seams open AND anchor them down to reduce the bulk. I used a red thread zig zag stitch (for contrast) on the front of wool pieced sections to anchor the seams and reduce the bulk.
The quilt is currently awaiting long-arm quilting and I will post the completed piece to the Gallery.
Now – what category of fabric scraps to experiment with next? Probably upholstery scraps – my friend Cindy gave me a box of upholstery samples. I have seen cool bags made from upholstery fabric – I am thinking either a functional item (like a purse/bag) or a wall hanging. Upholstery fabric scraps would not not make for a cozy quilt!
So imagine me in a white lab coat, with crazy-mad-scientist-hair, beakers of fabric scraps in hand, ready to the next wild experiment!