Books, Music, Podcasts, Creative Inspiration

Creative Inspiration: Lying in Bed

It’s Sunday, a day (like Saturday) when many people have the opportunity to sleep in (or at least sleep in a little later than on a workday).

Continuing my series on sources of my creative inspiration, I realize that lying in bed and quietly thinking can be a source of much creative inspiration!

A very creative friend of mine told me a couple of years ago that she could will herself to dream quilt designs while she sleep; and when she needed it, inspiration would arrive while she slumbered.

I do not remember many of my dreams, and those I remember are not necessarily sources of creative inspiration, but I do have moments of intense inspiration when I am laying in bed preparing for sleep or lingering in bed upon waking.

Worrying and reviewing the day used to fill my mind before going to sleep until learning to  essentially “chill out” a couple of years ago. Now I can bring my mind into focus before going to sleep on a quilt design or other crafting project. It is amazing how what was a challenge to me in my studio during waking hours, now has a clear resolution as I quietly ponder it in bed.

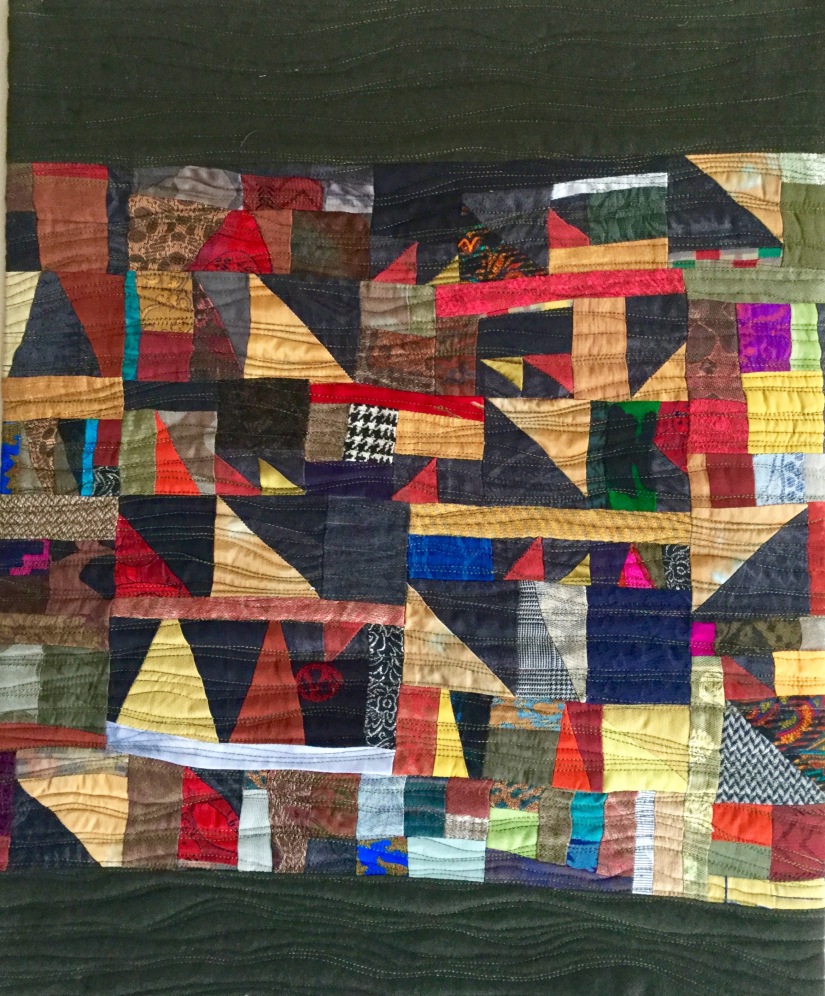
My first experience with idea was at the end of 2014 while I was making a piece for our public library’s Novel Idea Book (all of Central Oregon is encouraged to read the same book and then the book’s author speaks at the annual Novel Idea book event). That year’s book was A Tale for the Time Being by Ruth Ozeki. I loved the book so much I wanted to make a small art quilt inspired by this thought provoking novel.

I was stuck for weeks on the design of this piece until one night, while lying in bed and before falling asleep, I focused all my mental energy on the what I wanted for this piece. It is difficult to put into words – I did not force myself to think about the piece, rather I relaxed and asked for inspiration to come to me.

Hope I do not sound too “New Age” or mystical here, but it was like what the piece needed to be just flowed into my mind and through me. It was a wonderful feeling – as if the Universe was telling me how I could translate what moved me in this book into textile art. When I woke in the morning, I had a clear vision of what the piece would look like and felt tremendous relief and a sense of peace.

And it all happened lying there in bed. Since that experience I have used the time lying in bed before falling asleep or upon waking to explore options in creative design. Bed can be a good place – keep those worries out of your mind and invite the creativity in!

DSCN3134
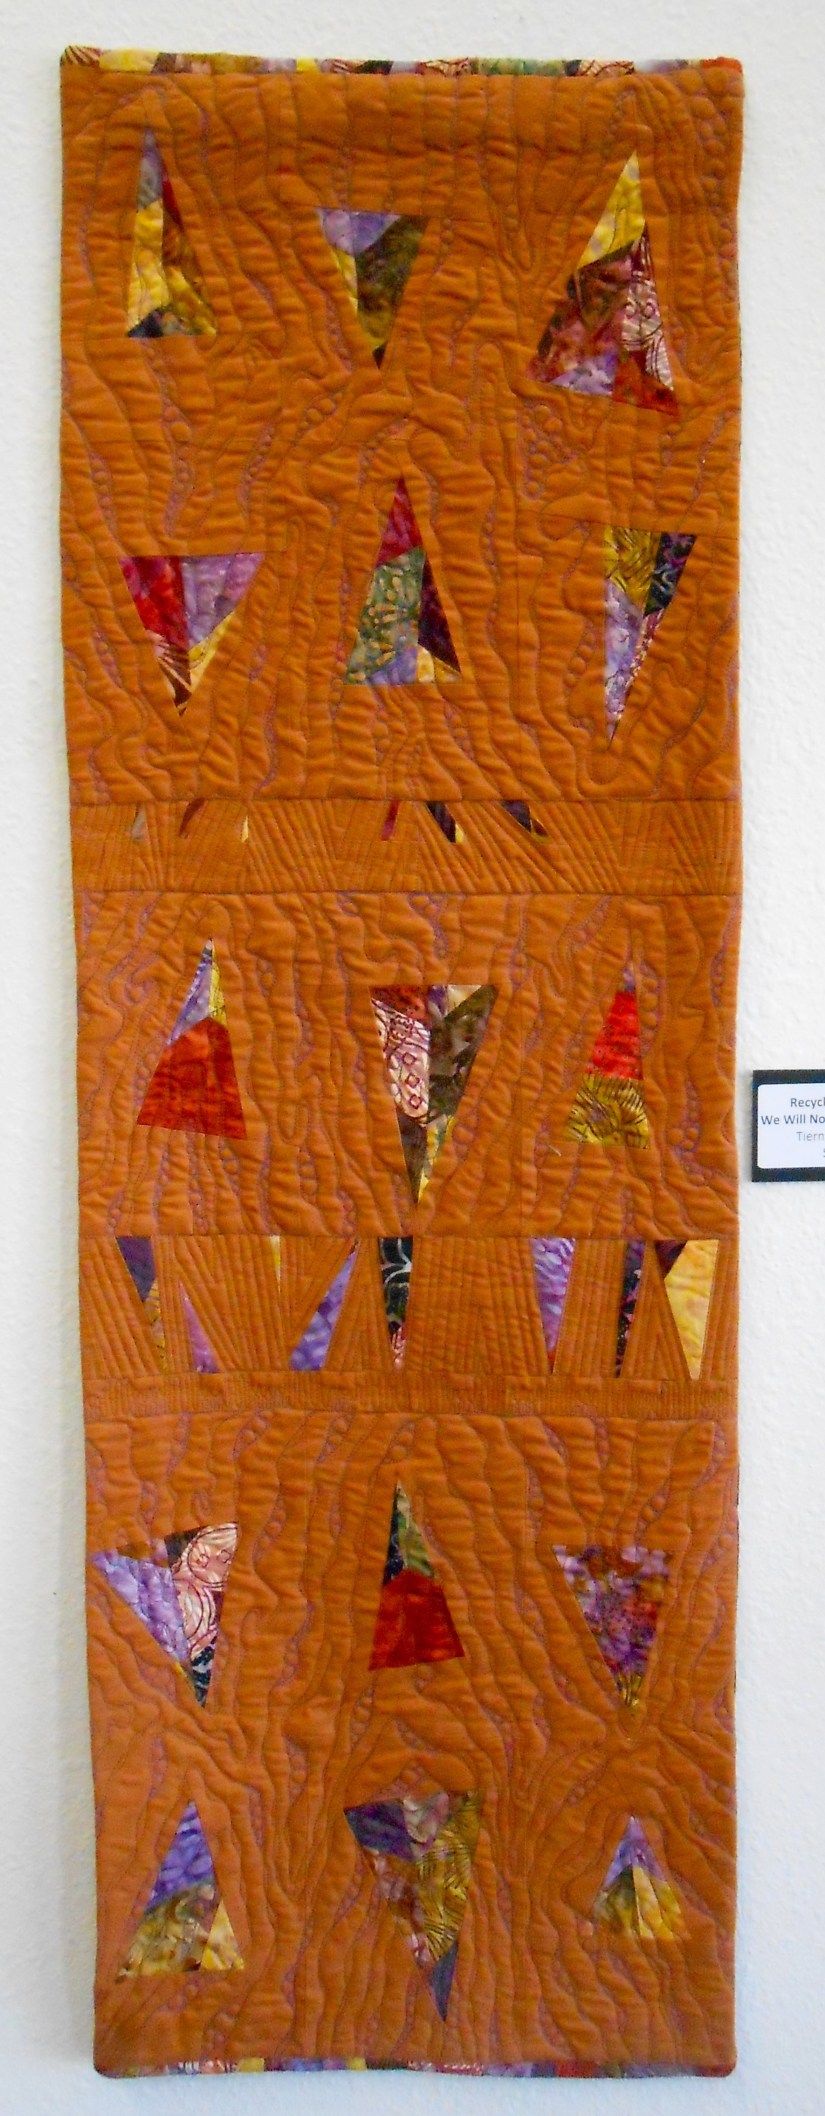
Jiko’s Secret Robe (2015) – inspiration for this piece arrived while lying in bed

Postscript

For more on “clearing your mind of worry before you fall asleep” see my post Monday on the “Butte” in which I briefly discuss Arianna Huffington’s audiobook – The Sleep Revolution: Transforming Your Life, One Night at a Time and share this Ralph Waldo Emerson quote:

Finish each day and be done with it. You have done what you could. Some blunders and absurdities no doubt crept in; forget them as soon as you can. Tomorrow is a new day and you shall begin it well and serenely. – Ralph Waldo Emerson

Studio, tierneycreates

Saved by the Internet

A friend of mine and I have an ongoing joke that we are going to write a book called “An Idiot’s Guide to Being an Idiot”. Over the years we have shared and collected humorous mistakes, miniature disasters and cosmic foibles.

Today I created a new chapter in our imaginary book. The chapter would be titled “How to screw up your iron when you really need it work”.

In addition to handmade items on my tierneycreates Etsy shop I also sell some carefully curated fabric (fabric I want to use but needed an excuse to buy the entire bolt…hey – I can share it with my customers!).

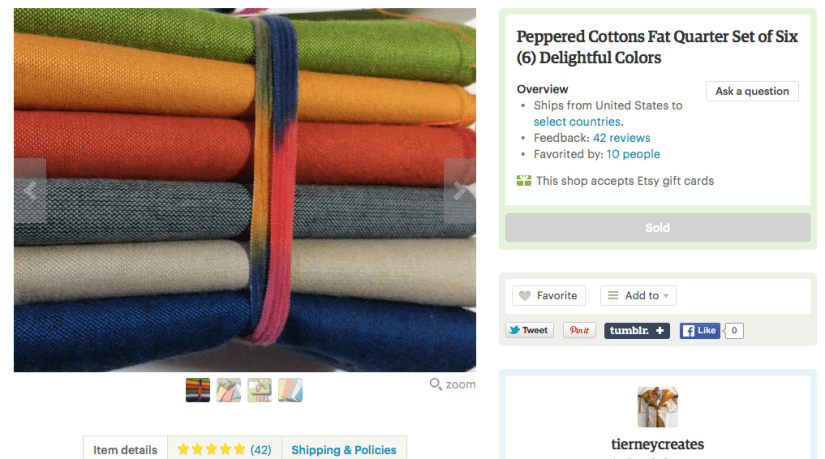
I created a fat quarter set from the collection of the solid color Peppered Cotton (“shot cotton”)  yardage that I sell.

Screen Shot 2016-06-25 at 2.04.45 PM.png

The fat quarter packs have been a great seller, and yesterday I sold another set and today I needed to prepare it to send to my customer. However, what I did not realize was that I was one set short and needed to cut new  fat quarter sets.

Luckily, I recently replaced some of the yardage/bolts I ran out of (the blue, grey, green and tan were very popular). So I needed to open new bolts wrapped in plastic and cut some yardage into fat quarters (18″ x 22″ sections of fabric).

Trying to work efficiently, I warmed up the iron and put it on the floor in the corner so it would be ready for me to nicely iron each fat quarter before packaging them into sets.

The new bolts were wrapped in plastic and here is where my complete “Idiot Moment” began – I accidentally threw the plastic covers for the new bolts on top of the hot iron on the floor.

Are you ready for a huge life lesson (this will be life changing, hold onto your seats):

HOT IRONS AND PLASTIC ARE NOT FRIENDS. DO NOT ATTEMPT TO MAKE THEM FRIENDS. KEEP IRONS AND PLASTIC SEPARATE AND AS FAR AWAY FROM EACH OTHER AS POSSIBLE. 

So here I am needing to package up a fat quarter set to mail to an Etsy customer and my iron is now completely out of commission.

I yelled down the hall to “Terry the Quilting Husband”, and he immediately ran in (as he thought perhaps I had sewn through my hand or had rotary cut off several fingers by the way I screamed for help) and we began to troubleshoot the disaster.

I will not review the painfully ineffective steps we tried. Then I thought: it is likely that someone else has made such a silly mistake in the past and maybe there is something on the internet about how they fixed it.

Yes the internet came through for me. A brief search revealed many tips on how to remove plastic from irons (there must be whole communities of people accidentally melting plastic on their irons everyday!). We thought this one was the best resource on removing plastic from the doityourself.com website:

How to Remove Melted Plastic from a Clothes Iron

We are now at the step of placing the plate of iron in ice water (yes, of course we unplugged the iron first, we do not want to create an additional chapter to the “Idiot’s Guide”, ha!) after scraping off the plastic with a metal spatula. Wish me luck. I must now return to my disaster..

IMG_2120.jpg


Postscript

It worked! (HAPPY DANCE). I am now ironing the fat quarters and making them into bundles.

While working on these fat quarter sets/bundles I remembered I had posted about my adventures in starting to sell fabric in 2015 in this post: Adventures in Retail. If you read that post you will wonder why I am still making up these fat quarter sets. The answer is I love this fabric and I am happy to share it at a reasonable price with  my fellow crafters out there (so I can justify buying more bolts of it…).

Sisters Outdoor Quilt Show, Studio

“P” is for Persistence

This is a follow up to Sunday’s post Putting the “P” in Procrastination.

Instead of “P” being for “Procrastination” and “Panic” –  “P” is now for “Persistence” and “Progress”! All 10 labels are done, thanks everyone for the encouragement. Sunday to Monday (I am off work on Mondays) I was the focused, focused, focused quilt label sewing quilter. 

In case you are curious, and in case you happen to be attending the Sisters Outdoor Quilt Show, here are the names of the quilts we will have in the show and their measurements (I will take photos at the show and share):

Terry the Quilting Husband (he will be in the Special Exhibit “Made by Men“):

  1. Colorful Modern Squares – 53″ x 59″
  2. Squares Gone Wild – 48″ x 60″
  3. Charming You – 45″ x 61″
  4. Cozy Flannel Shirts – 53″ x 61″
  5. Cozy Flannel Snuggle – 58″ x 67″

Tierney (tierneycreates):

  1. Splendid Splendor – 74″ x 62″
  2. Modern Bedtime – 63″ x 72″
  3.  Scrappy Modern Delight – 53″ x 53″
  4. Cozy Sunflower Log Cabin – 64″ x 80″
  5. Desert Winds – 56″ x 64″

I will also have one more quilt, “Recycled Door” in a Special Exhibit – “Central Oregon SAQA: Doors Exhibit” which I have mentioned in previous posts.

So we are ready to drop our quilts off at the Sisters Outdoor Quilt Show Office on time!

IMG_2116.jpg
Bag-o-Quilts ready to roll…
Sisters Outdoor Quilt Show, Studio

Putting the “P” in Procrastination

Once upon a time there was a quilter who was also married to a quilter. The quilter and her husband-the-quilter decided to each put five (5) quilts into the 2016 Sisters Outdoor Quilt Show, for a total of ten (10) quilts. They finished their 10 quilts and had them all back from the magical long-arm quilter by April 2016. The quilts needed to be labeled and ready for the show by June 24, 2016.

The quilter and her husband knew they had plenty of time to get those labels on the quilts…


I think this tale will have a happy ending, but right now I am in the “moral lesson” part of the tale. Like in the “Ant and the Grasshopper ” from Aesop’s Fables (the ant spent the summer planning for winter and the grasshopper spent the summer goofing off and we know how that ended…).

We have a stack of 10 quilts needing labels (see photo above!) and Terry the Quilting Husband does not hand sew (he actually hates needles and has no desire to hand stitch anything). So I need to get all the labels on by 06/23/16 to deliver the quilts on 06/24/16 to the Sisters Outdoor Quilt Show Office.

“P” is not just for Procrastination. “P” is for PANIC.

Creative Inspiration

Advance your Art

Unlikely Artistic Inspiration in a Business Publication

There is a professional publication that arrives every month in my mailbox – Healthcare Business Monthly. It comes as part of a professional membership I have in the healthcare industry.

I appreciate all the work that goes into this publication but many times the articles are fairly dry and technical; however an article by Tara Cole in the June 2016 issue (page 58), really caught my attention.

The title of the article is “Advance to the Career You Want”. In this article the author provides tips on how to develop yourself professionally and move into the career you want.

I thought the author’s tips in this article could translate into how to “Advance to Where You Want to Go with Your Art”, “Artist Development”, “Advance Your Creative Journey” or something like that.

Here is a listing of the author’s eight (8) tips which I am going to apply to advancing my creative journey:

  1. Get comfortable with being uncomfortable
  2. Be open to change
  3. Be curious
  4. Stay connected
  5. Get technical
  6. Challenge yourself
  7. Be honest
  8. Use your time wisely

I embrace all these tips! Lately I have been working on #5 – Get technical: taking classes, talking to mentors, reading up on new quilting techniques, etc. I have definitely been challenging myself (the secret quilt I am finishing for the by invitation exhibit – I have been quilting this quilt myself – gasp!)


Time for a Random Photo

And now here is a random photo: Recently I returned from a long weekend visiting a friend in the Denver, CO area (see post Creative Inspiration: Travel). During on weekend together, we went on lovely walks on nature trails. One of the trails had many gopher or prairie dog holes along the path and I was fascinated looking at the prairie dogs popping up and talking to one another.

I was not fast enough with my smartphone camera to capture the adorable prairie dog that was popped up from its hole, but here is a photo of one of the holes, right after the prairie dog seeing my camera disappeared into:

IMG_3891.jpg

But wait – I will connect this photo to this post:

  1. Sometimes on your creative journey you have to retreat into a metaphorical hole and focus alone on your art.
  2. Sometimes on your creative journey you have to venture into an unknown hole to move forward in your art.
  3. Sometimes on your creative journey, you have to follow someone into a hole and see where it leads (but I was too big to follow after the prairie dog!)

Please share any thoughts you have on how this photo could relate to an artist’s creative journey (or how you are concerned that I obviously need my “special medication” adjusted! Ha!)

Studio

Whole House Crafting


Not a Tiny House, but a Smallish House

Terry “the Quilting Husband” and I live in a relatively small house. Not as small as the houses I looked at during my “tiny-house obsession” period (oh you should have seen my Pinterest board followings) but our house is around 1300 square feet.

A small house, means a small quilting studio space. I have in previous posts, such as “I will not be discarded” & studio refresh shared photos of my quilting studio.

I do not mind the small quilting studio but I do struggle occasionally with having a small design wall. It it not really a traditional “design wall” but more of a “design wall closet door” (see post Inside the Studio to see my mini design wall mounted on a sliding closet door).


Wait a Minute, I Have Options

Last year, I moved my paper crafting supplies to our sunroom, to make my studio less cluttered. (Oh yes there are many other crafts in my life besides quilting: knitting, crochet, paper crafting, beading, etc.):

IMG_2054.jpg
Inside the Sunroom – paper crafting table, equipment and supplies.

My rationale on this move was “why not” – why would anyone care that I have my paper crafting supplies in another room besides my studio?

Recently, the paper crafting supplies in the sunroom gave me an idea: why do I have to keep my quilting related activities confined to JUST ONE ROOM?


Whole House Crafting

We have a long hallway. In the past I have hung quilts on both side of the hallway but recently one side was empty (I burned out on all those quilts hanging everywhere in the house). Why couldn’t that become a MEGA DESIGN WALL?

IMG_2057.jpg
I may be the only blogger in the history of blogging to post a photo of a blank hallway wall!

We have occasions in the past where Terry “the Quilting Husband” and I were battling for design wall space when working on separate quilts, and this would give us a very large space to work on quilt designs. (See the Postscript section below for the trial run I had on using this space to design a quilt).

A challenge might be that anyone coming over the house will think we are weird as we are designing quilts on our hallway wall, but then who cares – it is our house and if it disturbs them, well they can go back to their house – ha!

Ultimately I would like to have a professional made design wall/design wall sections (like my friend Betty Anne has in her lovely studio) but I need to save up for that to happen. So for now I have purchased a queen size Warm & Natural piece of pre-cut batting to mount on the wall myself.

IMG_2059.jpg
Purchased on sale!

I did not stop there with my ideas on using the whole house for crafting. I would like a bigger cutting area for working on large projects – what about using my dining room table?

So I did, I used my dining table this past weekend for a large scale quilt trimming project (see the Postscript section) and for other cutting projects such as trimming my Recycled Door quilt and creating the binding (I will discuss my finishing decisions on this piece in a future post) for the upcoming Central Oregon SAQA Doors Exhibit at the Sisters Outdoor Quilt Show July 2016 (see post Update: Recycled Door).

IMG_2076.jpg
Cutting binding on the dining room table!

Note, I would not use my dining room table for everyday cutting as it is not ergonomically correct for cutting (not waist height). Also it is not convenient for when you are working on a piece and doing small batches of cutting as you progress on a piece.

I am not sure why I did not think of expanding my crafting areas before. I guess I was brainwashed by all those beautifully illustrated organizing your art studio magazines and books. These publications seem to insist that all your crafting items be confined to one highly organized space!

Now I am a rebel (or now I am just behaving like normal people who do not impose so many rules on them).


Postscript

You may have noticed, if you have been following my blog for a while, that I had not post anything related to my What’s On the Design Wall Series. So it may look like I am not doing very much actual crafting these days.

Actually I have been doing MAJOR crafting. For the past couple months I have been working on a by invitation only exhibit I was honored to be invited to participate in. I cannot reveal any specifics the exhibit curator is ready to unveil the show. I am nearly done with the piece (putting on my label) and will send it off to the exhibit soon.

The parameters of this exhibit/show were very precise and I was required to create a quilt a specific size. Also I wanted this quilt to be a story quilt. In order to accomplish these two things I needed a bigger space than my little closet door design wall. So that was my first experience in using the hallway as a design wall. It worked very well!

Also I had to trim the quilt to a specific size and my cutting table in my studio would not work, so this was my first trial run as the dining table as a large cutting table.

Here is a little peek of the piece, and as soon as I am able to reveal the details and the full piece I will:

IMG_2067.jpg
Just a little hint, it is technically the first piece in my series “Stories My Father Told Me” (see related blog post: Creative Inspiration: Stories My Father Told Me)


Creative Inspiration

Creative Inspiration: Travel

Continuing my series on my sources of Creative Inspiration, I share in this post photos from a recent trip that inspire my creativity.


Let’s Begin with a Disclaimer

If you have followed my blog for a while or if you are new to my blog, it is apparent I am not a very good photographer. Reading books on improving my photographic skills has not helped. So I thank you in advance, for accepting me as I am, bad quality photos and all.

Traveling, and photos taken while traveling are sources of creative inspiration for me. They may not inspire a specific piece, but they do inspire to me to create – especially when they are photos of the works of other artists (if I dare refer to myself as an “artist”) that stimulate my creativity!

Recently I returned from a long weekend visiting a friend in Denver, Colorado. I took many photos, primarily with my smartphone camera. Below are photos from the Denver Chalk Festival, the Seattle Airport’s Ship in a Bottle Exhibit, and the Redmond-Bend Airport’s Chris Cole kinetic fish art exhibit.


Denver Chalk Festival

We attending on Saturday 06/04/16 and the sidewalk chalk art pieces were still in progress (my apologies to all the talented chalk artists who I am not individually crediting in the photos):

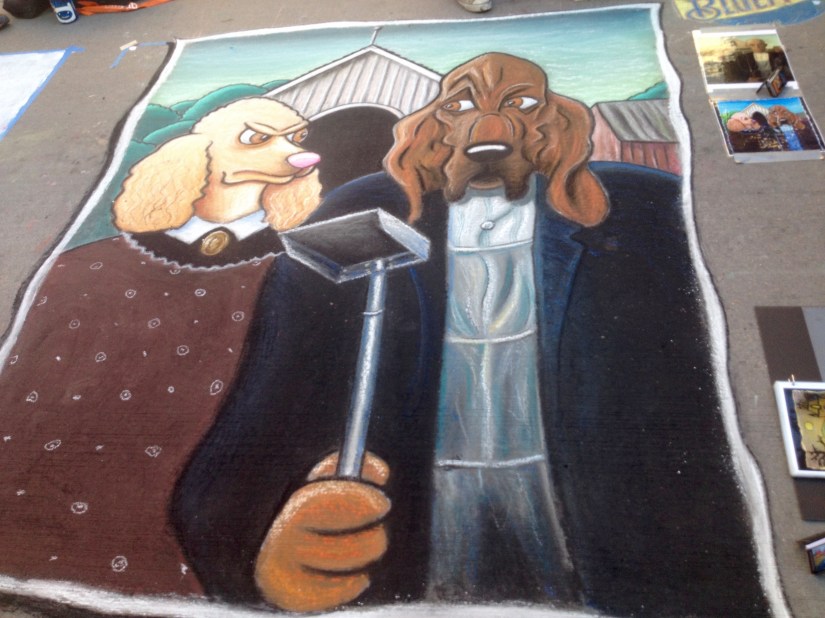
Here was my favorite piece: a canine interpretation of the famous painting American Gothic (which I once got to see in person at the Art Institute of Chicago). Poop scooper instead of pitch fork!

IMG_3994.jpg

Although the one above was my favorite, the most impressive piece was the one below (imagine what it looked like completed!):

IMG_3927.jpg


Seattle-Tacoma (SeaTac) Airport Ship in a Bottle Exhibit

As a kid I was fascinated with ship-in-a-bottles. I thought they were magical. Seeing the exhibit at SeaTac airport (a layover on my way back to Central Oregon) really inspired my imagination and creativity:


Redmond-Bend Airport’s Chris Cole Kinetic Fish Art Exhibit

Awaiting my flight to head to Denver, Colorado (via a connection at SeaTac), I enjoyed looking at Chris Cole’s Kinetic Fish Exhibit. The Redmond, Oregon City News website has information on this exhibit: Redmond Municipal Airport Adds New Art.

The two fish sculptures had motors and various parts of the fish moved inside the glass exhibit enclosure. Very cool!


Postscript

Now it is time for an example of higher quality inspirational photography. You guess it – it is not by me, and it is not from my trip. My friend Miles quit his job and is traveling the world, going to all kinds of awesome exotic and historic locales.

He is a skilled photographer and here is one of his photos, from his travels to Dubrovnik, Croatia:

13235489_10154173511209717_2733020660321183969_o.jpg
Photo Credit: Miles G.

Now that is a truly beautiful photograph and the colors and composition may inspire a future quilt!

Books, Music, Podcasts

Embracing the “Yes”

I just returned from a four day weekend visiting a friend in Denver, CO. Later this week I will share some photos I took during the trip which creatively inspired me.

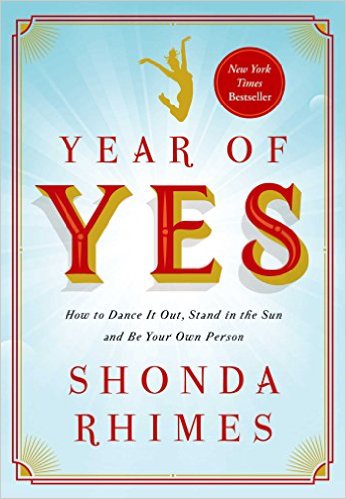
I just wanted to share in this quick post the latest nonfiction audiobook I have started – Year of Yes: How to Dance It Out, Stand In the Sun and Be Your Own Person by Shonda Rhimes.

519M5lbusyL._SX344_BO1,204,203,200_.jpg

As you probably know, Shonda Rhimes is the creator and producer of TV shows such as Grey’s Anatomy and Scandal.  A couple months ago I watched her TED Talk: My year of saying yes to everything, and I found it deeply inspirational.

I am early in the audiobook and I am enjoying it; and it is read by the author (I love when audiobooks are read by the author!).

So far 2016 has been a year of serendipitous opportunities for me artistically and I am glad I keep going against my natural instinct to say “no, thank you” and instead say “yes, thank you”!

The book opens with a quote from Maya Angelou:

“The need for change bulldozed a road down the center of my mind.”


Books, Music, Podcasts, Library Adventures

The Library Stack

This morning I continue my ongoing series of posts on books I have borrowed from my local public library.

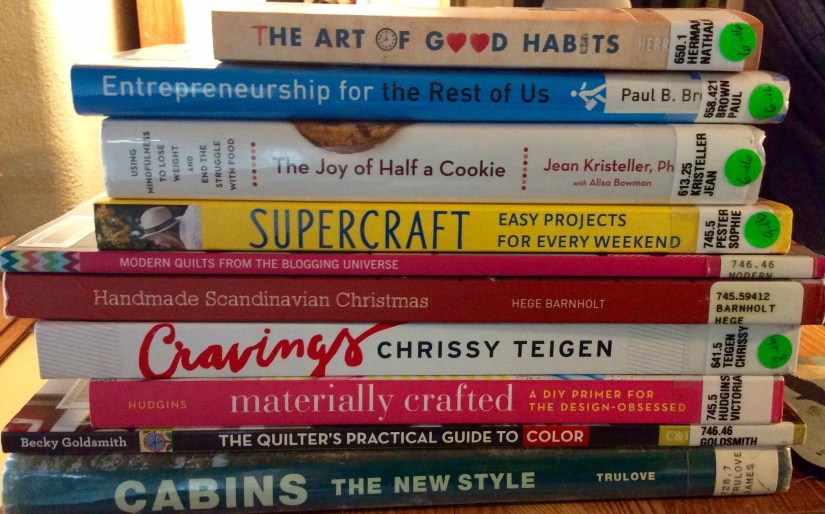
Here is the latest stack:

IMG_1978.jpg

I have already begun nesting with a pot of tea in my favorite chair with some of these books! I usually start with the lighter “picture” book first, and I have already finished Cabins: The New Style by James Grayson Trulove. It is a book of obviously very wealthy people living in very beautiful large cabin like homes, in very picturesque settings!

The second book I am delving into, The Art of Good Habits by Nathalie W. Herrman, is rather thought provoking. Here is a passage from early in the book that really captured my attention:

The trouble with not accepting responsibility for ourselves is that we feel helpless, and that makes us grabby and greedy. It empowers the “more” mentality. We don’t realize our ability to be patient and trusting, so we push to the front and demand our share first, or demand more than our share. And the people we meet on this path are doing the same thing. We are all pushing and grabbing and trying to get there first, wherever ‘there’ might be.

I think she is spot on about human behavior.

After this book, I will move to something lighter like Materially Crafted: A DIY Primer for the Design-Obsessed by Victoria Hudgins.

Quilt Retreats

Quilt Retreat May 2016: The Tools & The Stories

In my 4th and final post in the series of posts on the 4-day quilt retreat I attended at Sew N Go Quilt Retreats in Vancouver, WA, I want to share some of the new tools I got while at the retreat and a couple of the stories.

Naturally –  “what happens in quilt retreat, stays in quilt retreat” – but I think my Quilt Sisters would be okay if I publicly shared a couple stories (maybe, ha!).


THE TOOLS

During quilt retreat I picked up a Martelli Round-a-Bout 17″ rotating cutting mat. Another quilter friend has one and I saw how wonderful it worked!

Screen Shot 2016-05-21 at 7.54.01 PM

In addition to the Martelli spinning cutting mat, I got a set of Bloc Loc Flying Geese rulers. I saw these demonstrated and one of my quilting sister had access to a wholesale set (they are usually fairly “spendy”if you buy them individually. If you would like to read more about Bloc Loc Rulers, check out their website: Flying Geese Square Up Rulers.

IMG_1984

A very neat device I picked up during quilt retreat was the Electric Seam Ripper. Another quilter demonstrated this device and makes seam ripper a breeze (not that I would ever need any seam ripping, I never make sewing mistakes, ha!). A couple other quilt retreat attendees also purchased them and there was no stealth seam ripping at the retreat: we could hear the whir of the battery powered seam ripper motor whenever seam ripping was occurring!

Screen Shot 2016-05-21 at 7.54.26 PM

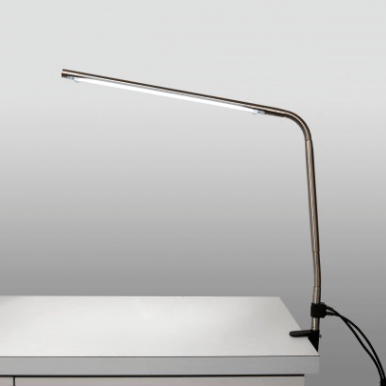
I thought a sewing light, was a sewing light, until a quilting friend introduced me to the Slimline Table Lamp. It provides full spectrum light for a daylight effect. I picked one up the day of the retreat and used it for the entire retreat. It is a pretty darn awesome light to have over your sewing machine! It also doubles as an imaginary device (see THE STORIES).

Screen Shot 2016-05-21 at 7.55.02 PM


THE STORIES

“I’ve Had the Time of My Life”

When quilters are quilting late into the evening, and “special beverages” have been involved throughout the evening, and the quilters are long-time friends, occasionally very silly things can happen.

Such a very silly thing happened on the Saturday night of the quilting retreat.

Another quilter, who had also purchased a Slimline Table Lamp for the retreat and I thought these lamps looked like microphones. We thought it would be fun to put on a “floor show” for the other quilters and the quilt retreat host.

My floor show partner located the main song from the movie Dirty Dancing – “(I’ve Had) The Time of My Life” and put it on her smart phone speaker. We stood up at our tables and began singing into our imaginary microphones, at the top of our lungs, a poorly ad libbed (but fairly hysterical) version of the song “(I’ve Had) The Time of My Life”.

We even threw in a little dance during the instrumental interlude to the song. We nearly kept “straight faces” during our performance…nearly.

Our silliness was rewarded with laughter and applause. (Perhaps the other retreat attendees and hosts were just being polite and hoped we get “our meds adjusted” as soon as possible!).

Yes, to answer your question, photos were taken. They will not be shared. I do not even want to see them (smile).

“Adventures in Spanx”

Are you familiar with Spanx, the body shaping wear (shapewear) that squishes any “jiggling bits” into a smooth format (like a modern girdle)?

Well one of the quilters was preparing to attend an upcoming family wedding and wanted to find a special dress to wear. She told us the story of her first time putting on Spanx and proceeded to pantomime the whole experience.

She shared her story of going  to a department store, finding the perfect dress and while trying on the dress, the sales clerk suggesting she enhance the look of the dress by wearing a full Spanx bodysuit underneath to flatten any “jiggling bits”.

My dear Quilt Sister, then proceeded to pantomime and explain the whole experience of slowly putting on full body Spanx for the first time and how the Spanx moves the “jiggling bits” around to places you never imagined them moving on your body, especially on a middle-aged body (placing the jiggling bits in odd places at first as you slowly wriggle into the bodysuit).

It was like a brilliant stand-up comedy show performance. I have not laughed that hard in a long time and worried that my bladder control might fail me at any moment. The whole room was filled with laughter and at least one quilter had tears in her eyes from laughing so hard!

Well that is it for posts on this quilt retreat. I am looking forward to the next time I reunite with all my Quilting Sisters! 

Quilt Retreats

Quilt Retreat Weekend: The Projects

This is post #3 about my recent 4-day quilt retreat long weekend at Sew N Go Retreat in Vancouver WA. See posts The Road to the Retreat and Sew N Go Quilt Retreat, in Pictures for more on this retreat.

Why do quilters go to quilt retreats? Yes of course to spend time with quilting friends or meeting new quilting friends. Quilters also attend retreat to relax; to see what others are working on and get new ideas; and to work on our BACKLOG of projects!

At a quilt retreat you have the opportunity to focus on getting those quilting projects D-O-N-E! (While not having to cook, clean, or even get dressed out of your PJs.)

Here is what some of the “busy bees” were working on during this year’s annual Sew N Go Retreat:


Tula Pink Would be Proud

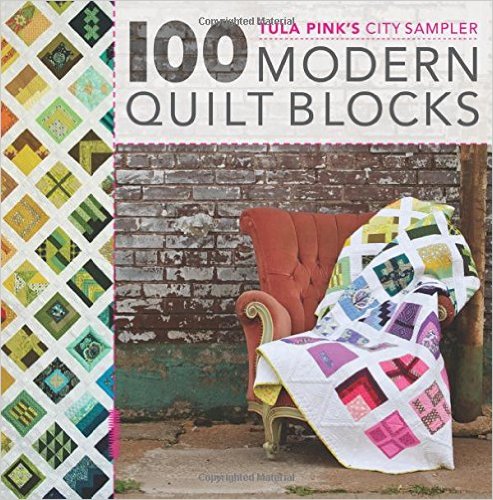
Tula Pink is a very talented fabric designer and I had the opportunity to meet her at the Sisters Outdoor Quilt Show 40th Anniversary celebration last summer (she is absolutely lovely in person). She has several publications but one of her most popular publication is Tula Pink’s City Sampler: 100 Modern Quilt Blocks.

Tula Pink.jpg
Photo credit: amazon.com

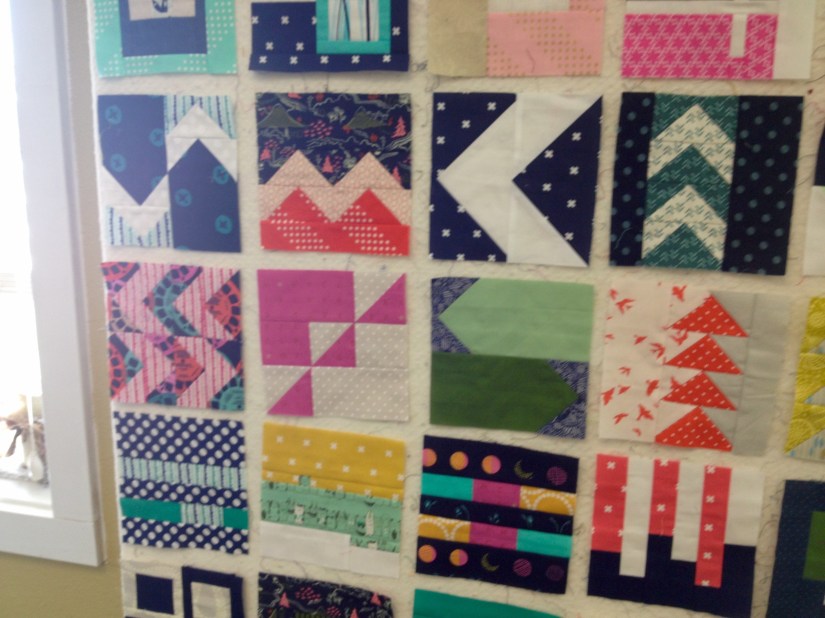
One of my Quilt Sisters at the retreat has been working (for many months) on a sampler of all 100 blocks! Below is a photo of initial block layout on the design wall at the quilt retreat (she is still deciding the final layout):

IMG_3606.jpg

IMG_3622.jpg

Here are a couple of my favorite blocks on the design wall:

IMG_3617.jpg

What patience to complete 100 blocks for a sampler!  I own this book, but I have not completed one block to date from this book (but I am now inspired to consider completing a block – ha!).


Study in Black and Gray

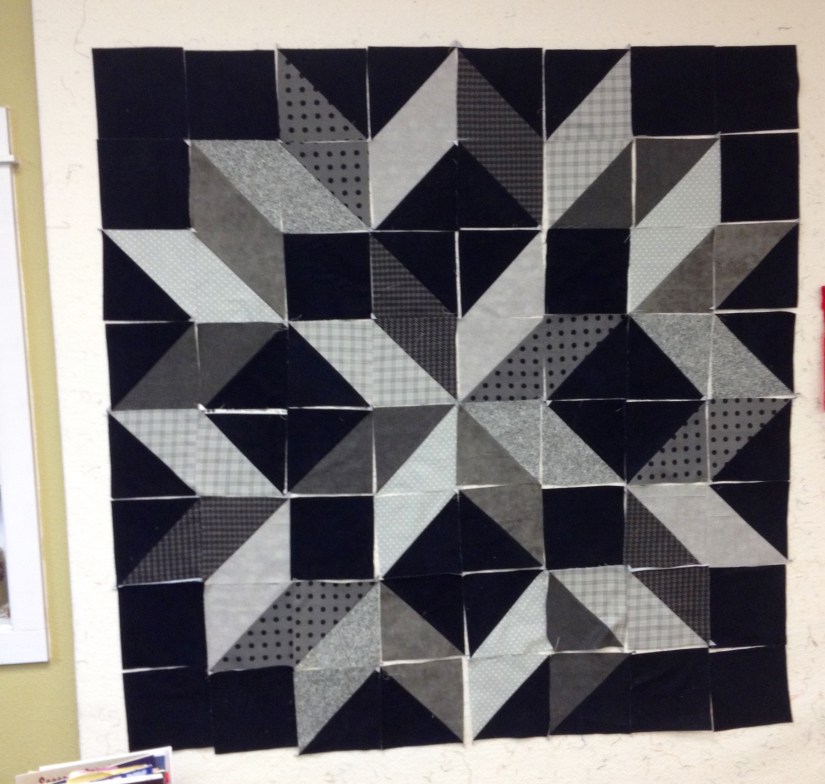
Another amazing quilt different Quilt Sister worked on quilt retreat weekend was a star block in black and gray flannels that had a 3-D effect due to the placement of the colors.

Here it is in progress:

IMG_3639.jpg

Completed with the borders added (she is going to put beautiful special gray and black Minky fabric on back!):

IMG_3669.jpg


The Mother of All Embroidery Machines

One quilter and her daughter worked on a major embroidery project with their fancy embroidery machine – an embroidered doll house for their great granddaughter/granddaughter! They had to make each panel separately and then assemble it into a house. They got 3 – 4 panels finished but unfortunately I only took a photo of one of the panels, darn!

The Machine!

IMG_3611

One of the doll house sections (the courtyard):

IMG_3637.jpg

Pretty amazing!

Other Wonderful Projects

I did not capture a photo of all the projects, but here are some of the other wonderful projects in progress or completed by other Quilt Sisters during quilt retreat weekend:


Tierney, Where are Your Projects?

Well…

I had good intentions. I brought 5 – 6 projects to quilt retreat including some vintage style beer label fabric coasters to work on for my tierneycreates Etsy shop. My stock of offerings in the tierneycreates Etsy shop is dwindling due to sales (which is good); due to being busy and stressed at my pay-the-bills healthcare job (and not wanting to face a sewing machine after a long day of work); and due to focusing my extra time on art quilting projects.

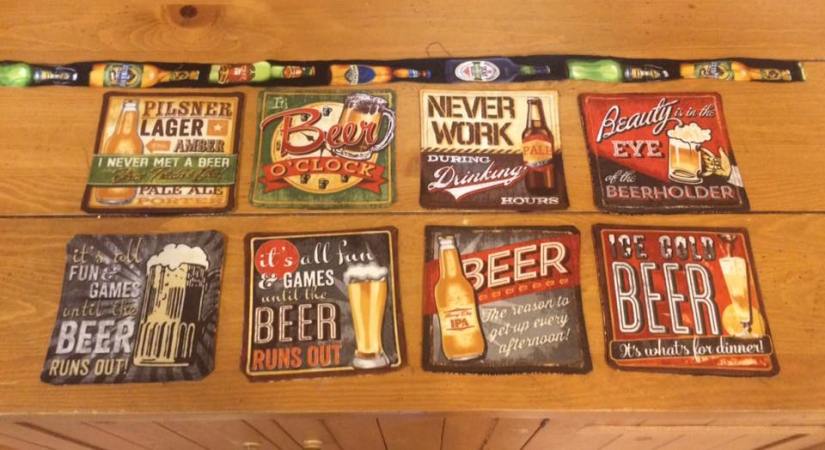
So I brought several projects related to items I wanted to make for the tierneycreates Etsy shop. I ended up making nine (9) sets of vintage style fabric beer coasters during the quilt retreat weekend.

What happened to those coasters? Well they never made it to the Etsy shop, all 9 sets were purchased by quilt retreat attendees and the quilt retreat owner to give as gifts or keep for their own home. I cannot complain – I made stuff and sold it at the retreat.

I call it “fleecing my friends”!

Here is a photo taken by a Quilt Sister’s husband after he got his coasters she brought back from the retreat:

coasters.jpg

Next post: Tools & Stories from Quilt Retreat

Quilt Retreats

Sew N Go Quilt Retreat, in Pictures

This week I am sharing experiences and photos from the 4-day quilt retreat I attended this past Thursday to Sunday at Sew N Go Quilt Retreat.

Yesterday in post #1 I focused on The Road to the Retreat. Today I am sharing photos from outside and inside the retreat.

The rest of the week I will share quilts and projects (in progress and completed) during the retreat; new tools from the retreat; and stories from the retreat (although “What happens at retreat, stays in retreat”, ha!).


Sew N Go Retreat: From the Outside

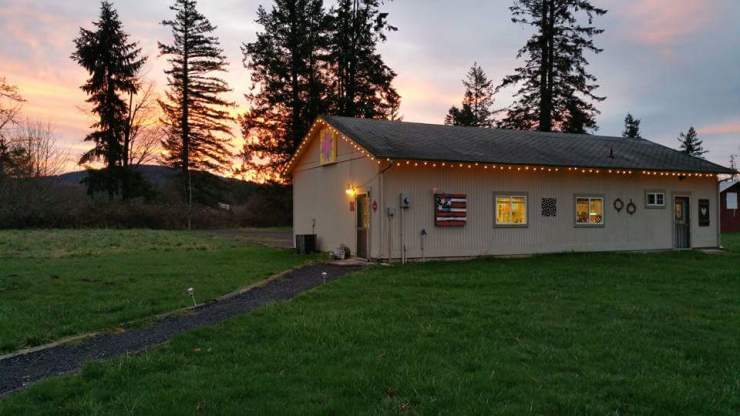
The Sew N Go Retreat, in Vancouver, WA (outside of Portland, OR) is located in a private and serene setting on a couple acres of land. There is a main house,  a barn, and several cool outbuildings from the main house to include the Retreat Center.

The main house has many comfortable bedrooms for quilters (some are dormitory style with up to 4 beds in a room), several bathrooms, a large dining room area, and a cozy living room for hanging out and reading with a kitty to cuddle  (optional) if you like.

The Retreat Center which has plenty of room for sewing; its own bathroom and kitchenette; and additional sleeping areas (in case you get sleepy while sewing, ha!).

The first two days of the retreat it was sunny and in the 70s in the Portland area. Of course I did not think of taking photos while it was sunny. I waited until it was a normal Portland rainy day to take photos on the 3rd day of retreat!

IMG_3654.jpg
The main house where quilters sleep, shower, lounge in the cozy living room, and where meals are served
IMG_3655.jpg
The property and the barn in the distance
IMG_3643.jpg
Some of the outside seating areas (it was overcast when I took these photos)
IMG_3658.jpg
A shed decorated with flowers
10400255_464226527117949_3115082384993268744_n
The Retreat Center, Photo credit: Sew N Go Facebook page

Sew N Go Retreat: From the Inside

THE MAIN HOUSE (What a quilt retreat really looks like while quilters are staying there):

IMG_3645.jpg

IMG_3647.jpg

IMG_3648.jpg

Abby the Quilt Retreat Kitty 

IMG_3651.jpg
I am ready to snuggle with any quilters that are interested. Come read your book on the sofa with me and these quilts!

THE RETREAT CENTER (What a quilt retreat center really looks like while quilters are making a mess working on projects in there!):

And…as I discussed in the post My New Quilt Retreat Gadget – the battle for power strip/surge protector outlet spots:

IMG_3679
Look there are still some empty spots (but not for long…my table mate pulled out her other numerous electronic devices and that was it for the outlets!)

Postscript

One of the tierneycreates readers asked more about xeriscaping related to the post Tuesday…an update, in which I share photos of my xeriscaped (low water, native plant, no grass) front yard landscape.

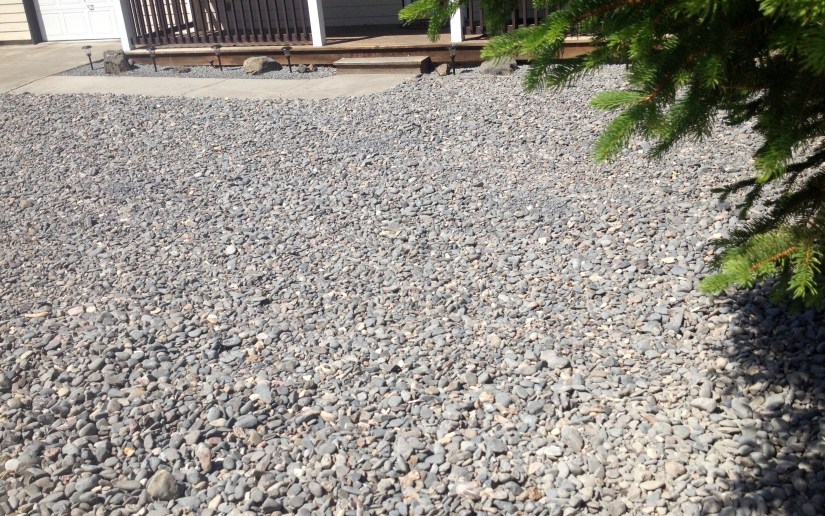
I wanted to share a photo of a house I came across during my walk in my neighborhood which recently engaged in EXTREME XERISCAPING. They removed their front yard grass and all plants and replaced them with rocks.

IMG_3750.jpg
No water required!

Perhaps the correct term is “NON-SCAPING”!

Quilt Retreats, tierneytravels

The Road to the Retreat

Last Thursday 5/12/16 I “hit the road” to Vancouver, Washington for a four-day annual quilt retreat with my ” Quilting Sisters” from California, Oregon and Washington. We gather at least once a year for a retreat, at Nancy’s Sew N Go Retreat.

This is post #1 of a series of posts about my quilt retreating experience!

ROAD TRIP!

Car loaded up with sewing machine, quilting paraphernalia, fabric and various projects, I got on the road early in the am on 5/16/16. Driving from Central Oregon to Vancouver Washington I found many “car buddies” along the way (see my post Repost: Road Trip for an explanation of “car buddies”).

My favorite “car buddies” were a brown Mercedes wagon and a gray Subaru that I followed for many miles on my road trip to the quilt retreat. If only they knew they had been my “car buddies” (they would have been very frightened by a wacky woman following them and making them her imaginary friends?!?!).


Music Time!

Solo road tripping is an opportunity to listen to wonderful music, rather loudly, and sing along at the top of your lungs! I had my iPhone with the “Tierney Mix” playlist loaded and hooked up to a FM transmitter that sent the music to my car radio. (Yes the classic 2001 Saturn 4-door sedans do not come with a jack for your iPhone or any modern amenities…).

The “Tierney Mix” is a very eclectic mix of music. Here is a sampling of 20 songs that played in order while I drove:

  1. Third World Man – Steely Dan
  2. Lovesick Blues – Hank Williams
  3. Your Love is King – Sade
  4. Annie’s Song – John Denver
  5. How Soon is Now – The Smiths
  6. Black is the Color – Nina Simone
  7. How Deep is Your Love – The Bee Gees
  8. Tom Sawyer – Rush
  9. Tennessee Waltz – Patti Page
  10. Don’t Break My Heart – UB40
  11. Gravity – Jon Mayer
  12. Heartbreaker – Pat Benatar
  13. Okan Bale – Angelique Kidjo
  14. Dancing Nancies – Dave Matthews Band
  15. Chan Chan – Buena Vista Social Club
  16. Nights in White Satin – The Moody Blues
  17. Like a Star – Corinne Bailey Rae
  18. Cozza Frenzy – Bassnectar
  19. Sultans of Swing – Dire Straits
  20. That’s the Way of the World – Earth Wind & Fire

As you can see my musical tastes are all over the place!

I am glad my “car buddies” and other vehicles could not hear me singing along!


The Road Trip Scenery

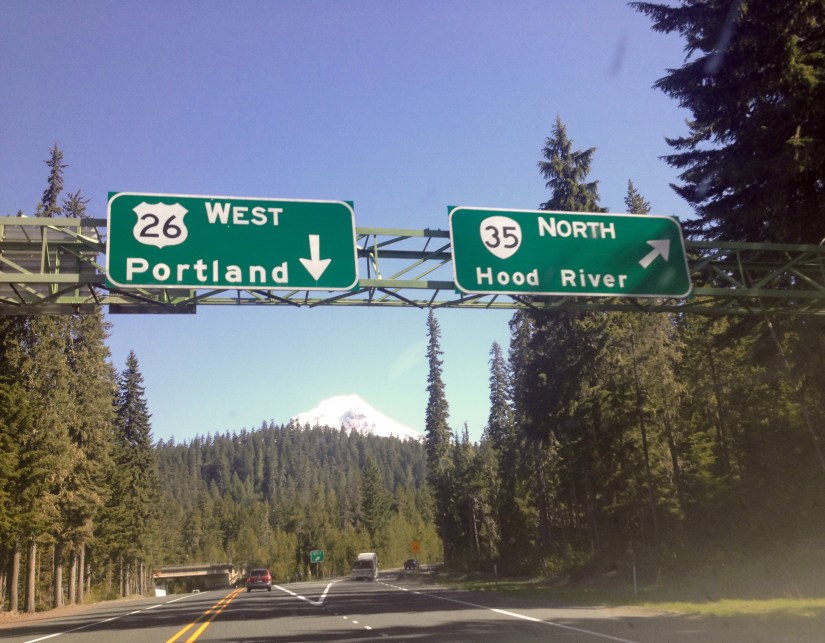
I know you are not supposed to be engaging in DWP (driving while photographing) but I assure you I only took photos while it was safe. Also there was some construction on Highway 26 (the road from Central Oregon to the Portland Oregon area) and I was stopped for awhile and took photos.

IMG_3580.jpg

IMG_3559.jpg

IMG_3561.jpg

IMG_3536.jpg


IMG_3585.jpg

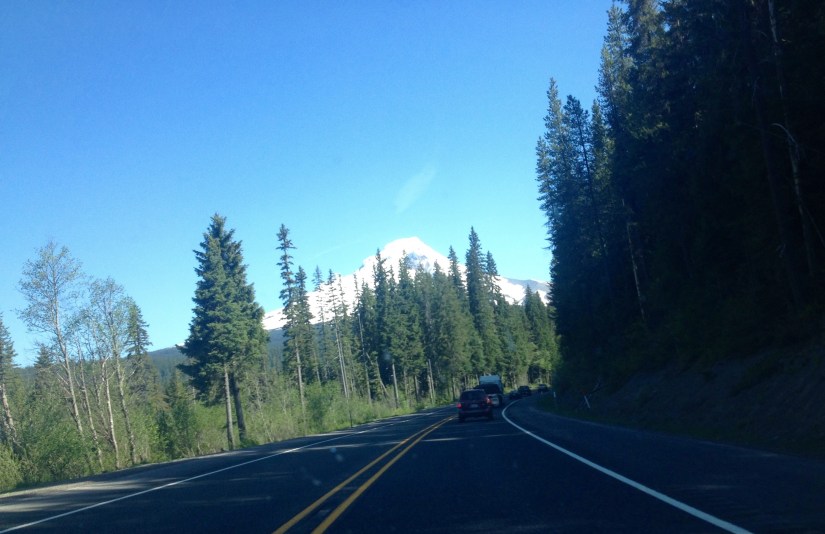
The landscape is filled with the Cascade Mountains, especially Mount Hood; lots of high desert brush; and endless farms. There is quite a climb in elevation from Central Oregon to the Portland Oregon area through the Mount Hood pass.

Mount Hood itself rises to 11,240 feet (Wikipedia) at its summit. The elevation from Central Oregon to the Mount Hood/Timberline Lodge region climbs from 3500+ feet above sea level to 6000+. Occasionally my ears “pop” on the drive from the change in elevation (but that does not stop me from continuing to sing at the top of my lungs).

It is a winding mountain road and in the winter some times it is not passable. I never drive from Central Oregon to the Portland area in the winter, though many Central Oregonians have family in Portland (and are originally from the Portland area) and drive to Portland for Thanksgiving or other “winter holidays”. Winter begins at the end of October or early November in the Mount Hood pass area due to the elevation!

Finally I arrived at Sew N Go Quilt Retreat!

10400255_464226527117949_3115082384993268744_n.jpg
Photo credit: Sew N Go Facebook page

NEXT POST: Sew N Go Retreating! 

A Crafter's Life, Outside Adventures!

The Monday, Post “Yard Bark Mulching”

This morning I read in a WordPress blogging forum, that you should always have an engaging title to your  blogpost. An engaging title will entice existing readers and potential new readers to click on the link and read the post.

What could be more exciting and engaging to read about than yard bark mulch? I am bristling with excitement just typing these thrilling words:

Y-A-R-D  B-A-R-K  M-U-L-C-H.

No. There is nothing even remotely exciting about putting mulch in your yard.

No worries, this post is not about yard bark mulch; it an update on what happened with this week’s visit to Pilot Butte for my weekly hike (see my previous post Monday on the “Butte”). Okay I do provide a little background on the yard bark mulch situation just so you can understand why I chose a different Pilot Butte experience today.

WALKING AROUND THE BUTTE (NOT UP THE BUTTE)

We had 6 yards of hemlock bark mulch delivered on Thursday. We were convinced (or deluded) that we could,  by Saturday, get all that mulch spread around the front and back yards of our house (and still be able to walk). I guess we thought our bodies had suddenly become the bodies of athletic 18 year olds with extensive recent manual labor experience…

Several years ago we “xeriscaped” – removed our front lawn and planted native plants and grasses.

In the Central Oregon’s high desert, if you want to grow anything, you have to use irrigation. Xeriscaping allows you to use less water/irrigation to keep up your yard. We receive little rainfall in Central Oregon (hence the beautiful blue skies). This limits what will grow in Central Oregon without irrigation/watering.

Bark mulching our xeriscaped yard helps it to maintain moisture (and look more aesthetically pleasing). Every couple of years we have to refresh the mulch.

If you would like to learn more about xeriscaping and creating a low water consuming landscape you can check out Oregon.gov’s online publication: Introduction to Xeriscaping in the High Desert. (Central Oregon is known as the “high desert” as we are at 3600+ ft above sea level elevation and we have a low average yearly rainfall).

When we lived in Seattle, Washington, where there is plenty of rainfall, I never appreciated gardening. Now I live in a land where growing anything is challenging and I am fascinated with gardening and landscaping.

As a bonus to the challenge of growing plants in Central Oregon, we are a geologic volcanic landscape (No, no, no – NO live volcanos – my blogging won’t suddenly be cut off by lava flow…but we do have many extinct volcanos here).

Our soil is coarse, has a sandy texture and tends to be very sterile with minimal organic matter (OSU “Central Oregon Climate”). Central Oregon is not for “gardening sissies”!

So where am I going with all this information? Well this is all relates to what happened today during my weekly hike on Pilot Butte. I was extremely sore from laying down bark mulch over the past 3 days, that my knees told me I may not hike up Pilot Butte today.

With some tedious negotiation I was about to convince my knees (and my sore back) that they could WALK AROUND Pilot Butte.

I didn’t want to just abandon my weekly Pilot Butte experience (every Monday for the past 4 weeks) so I thought “as long as I walk around the base of Pilot Butte that would still count as doing the Butte”!

Here are photos from the ground level of Pilot Butte as I walked approximately 2.5 miles in a loop at the base of Pilot Butte. My knees are not speaking to me right now but I think by tomorrow we will make up with each other.


The Loop – I did 8+ laps around the path while listening of course to an audiobook! Nearly 2.5 miles.

IMG_3503.jpg

The Day – another beautiful blue sky day with a couple solitary clouds here and there.

IMG_3500.jpg

The Walk – photos from walking around the loop to give you a feel of the view from the base of Pilot Butte.

IMG_3497.jpg

IMG_3499.jpg

IMG_3498.jpg

BONUS – some of our beautiful volcanic rocky and pumice soil that I get to try and grow things in!

IMG_3505.jpg

Enjoy your week!


A Crafter's Life

The “Downsized” Quilt

Today a thought popped into my head: “tierneycreates is a quilter’s blog, perhaps I should post something about quilting!”


The Original Plan

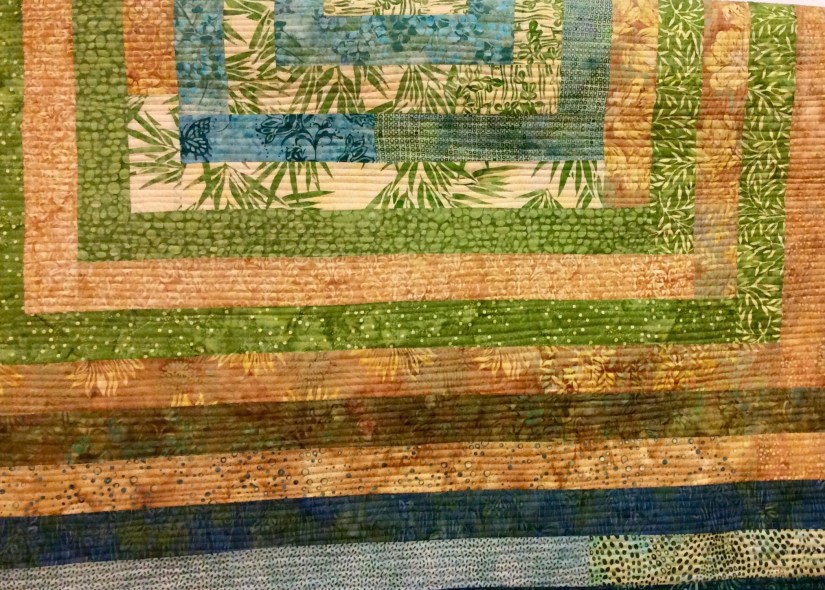
I completed the binding on a “log jam” (free form log cabin block piecing) quilt I am putting the in the July 2016 Sisters Outdoor Quilt Show (SOQS) called Modern Bedtime.

IMG_3426.jpg

It measures 63″ x 72″ which is short of a Twin size quilt and more like a large Lap size quilt.

This quilt was meant to be a King size quilt. I originally made its dimensions 98″ x 100″. I worked within the limit of the dimensions of acceptable quilts for entry into the SOQS (a maximum of 104″ on any side).

Last year the quilt I sold at the 2015 SOQS was a large Queen size quilt and I thought I would have a better chance of selling another quilt in the show this year if it were also bed size. I thought: “Maybe there won’t be a lot of large Queen/King size quilts in the show; so if someone attending the show was looking for a large bed size quilt my quilt would be available for consideration!”

Below is a photo of how the quilt started out. The original design had the log jam pieced center floating in a large khaki border. It is draped over a King size bed and you can see there is a nice drape (which I trimmed down to meet the less than 104″ on each side limit for SOQS).

10015116_10205293686281299_6169077372690663022_o.jpg

The Universe however did not want this quilt to be King size (or Queen size, or Full size, or Twin size…).


Disaster Strikes!

Something very bad occurred when I pieced the border, I am not sure what exactly as I have been piecing/sewing borders on quilts for many years.

The long-arm quilter discovered that the borders where extremely uneven when she loaded it on her professional quilting machine. Not just uneven, they were “majorly wonky”! She tried to fix it but the borders were so strangely pieced she could not fix it without disassembling a large amount of the quilt.

Additionally, there were several other strange and embarrassing quilt piecing errors (I am too embarrassed to mention these).

What the heck happened? I do not make mistakes like this! I do remember that I was in a hurry to finish up the quilt to get it to her to put it in her queue of customer quilts for the SOQS (she gets very backlogged with customer quilts prior to the SOQS). I was always working long hours on a challenging work project and very tired at the end of the workday.

Perhaps I should not have engaged in “Piecing While Tired” (PWT).


Downsizing

I had a painful phone conversation with the very kind and patient long-arm quilter as we tried to figure out what could be done about this quilt. She had tried removing one of my borders and trying to fix it for me. I kept thinking: “I am so disappointed in myself, I so wanted to sell this quilt at SOQS as a King size quilt”. I wanted so badly for this quilt to work out as I had planned.

Then suddenly I decided to just let it go. I asked the long-arm quilter to just cut off the offending borders and finish quilting the quilt.

IMG_3435.jpg
Modern Bedtime (2016) by Tierney Davis Hogan, quilted by Betty Anne Guadalupe

I trimmed off the left over borders, put on the binding and have embraced the quilt as it. I am still showing it/listing it for sale at the SOQS.

Life is a balance of holding on and letting go – Rumi

Warning: Never work on a quilt while tired and stressed from work! Lesson learned!


Postscript

I am working on something exciting right now but it is a secret. It is a piece for an invitation only special juried exhibit. More to come!

Outside Adventures!, tierneycreates

Monday

As you can see, I am playing with my blog template again. Why does WordPress give me so many interesting options for my blog template? How can I ever be happy just sticking with the same template, ha! I welcome your feedback on the latest look to the tierneycreates blog: “Chalkboard” template.


Happy Monday to you all! A couple photos and updates to share with you as follow ups to various previous posts:


Creative Inspiration: The Scents of Spring

The flowering crabapple tree is in full bloom in front of my house and unbelievably, deliciously, inspirationally fragrant. When I step out from front door I am immediately enveloped with this incredible scent of Spring and the sounds of busy bees buzzing around the crabapple tree blooms!

IMG_3344.jpg


Update: Ohio

I appreciate all the feedback on this post. I did decide to orientate the piece vertically.

It is now with Betty Anne Guadalupe to work her quilt magic.


Twigs Gallery Show Photos

I recently learned that my piece, made from discards from another quilter’s project, We Will Not Be Discarded, has sold in the Twigs Gallery Collaboration show!

Very exciting – this is my first time selling my quilting art at a gallery show!

DSCN3356.jpg

If you would like to read more about the story behind this piece, please see the post What’s on the Design Wall: “We Will Not Be Discarded!”.


You Got to Start Somewhere

I walked Pilot Butte again today, this time it took me 46 minutes to go up to the summit and back down, 4 minutes off my time last Monday (when I returned hiking our “mini mountain” in town for the first time after an 8 month hiatus after my foot injury).

The 360 degree views of Bend, Oregon and Central, Oregon continue to be breathtaking on another impossibly blue sky day here (we have a lot of impossibly blue sky beautiful days).

IMG_3355.jpg

In the post You Got to Start Somewhere I shared that I listened to the audiobook Become Who You Were Born to Be by Brian Souza while hiking Pilot Butte. Today I continued my listen of this inspirational audiobook while hiking the Butte.

I wanted to share a wonderful quote by Ralph Waldo Emerson from this book which brought a smile to my face and a small tear to my eye from its beauty and truth.

What is Success?

“To laugh often and much;

To win the respect of intelligent people and the affection of children;

To earn the appreciation of honest critics and endure the betrayal of false friends;

To appreciate beauty, to find the best in others;

To leave the world a bit better, whether by a healthy child, a garden patch, or a redeemed social condition;

To know even one life has breathed easier because you have lived.

This is to have succeeded.” 

– Ralph Waldo Emerson

Enjoy the rest of your week!

I am sure before the end of the week I will have more thoughts to share with you from all the thoughts that constantly swirl around in my head. Perhaps they will even have to do with quilting! (Smile).

Studio

Update: Ohio

This is a quick follow up to my post from earlier this week: In Progress: Ohio.

My new recycled silk garment scrap piece is done and ready to go to Betty Anne Guadalupe  to work her art quilting magic. It measures approximately 24″ x 14″.

I have not decide if I want the piece to orientate this way:

IMG_1885.jpg

Or this way:


IMG_1893.jpg

I welcome any thoughts and comments you have on the orientation – thanks!

Studio, What's on the Design Wall

What’s on the…Table

Congratulations to Beth T. who won the free copy of Creative Quilt Challenges from the random drawing of names from those who left comments on my Creative Quilt Challenges Blog Tour post – BLOG TOUR DAY 4: Unlikely Materials. Thank you to every who visited the tierneycreates blog for Day 4 of the tour and thank you to those who commented. I so enjoyed reading the comments and they got me inspired to keep experimenting with “unlikely materials”!

What’s on the…Table: “Ohio”

This post is a continuation of my ongoing series: What’s on the Design Wall.

However, this time I am going to share what is laid out on the table in my Studio, instead of up on my Design Wall. This post also demonstrates another example of using “Unlikely Materials” (recycled silk garment scraps) discussed in my Blog Tour post on 03/31/16.

Yesterday I posted about being inspired to create after a walk on a beautiful Spring day and inhaling the delightful fragrances of neighborhood Dogwood trees (Creative Inspiration: The Scents of Spring). Well later that day I pulled out the piece had I started a month or so ago (see post What’s on the Design Wall: Silk Squares) and got creating!

Here is the piece in progress, I am going to name it “Ohio“:

IMG_1831.jpg

What do a bunch of miniature log cabin style patches (2″x2″ and 2.5″ x 2.5″) have to do with the State of Ohio? Absolutely nothing, but they are part of a story. An ongoing story. Here is a visual summary of that story:


1) The piece started out as my attempt to create an Ohio Star (a traditional quilt block) from recycled silk

IMG_2895
Ohio Star, recycled silks (in progress)

2) I was very unhappy with the accuracy of the points on the star (although I interfaced the back of the silks, I had some challenges with accurately piecing the points). So I attempted to save the piece by reimagining the piece, slicing up the Ohio Star and sewing it into a new configuration. I was still not pleased with it.

IMG_3097


3) I gave the piece and the coordinated recycled silk pieces I have selected to a friend. She reimagined it into a completely new piece, while integrating all the elements from the original Ohio Star into the piece.

IMG_0120
Ohio Star (2016). Designed, pieced and quilted by Betty Anne Guadalupe.


4) My friend gave me the leftover scraps from this piece which included scraps from my original piecing and new scraps from additional recycled silks she used in the piece. She challenged me to make something from those scraps!


IMG_3178


5) So, I started working on this piece over a month ago, and I am calling it “Ohio”

IMG_1474

Right now I am just continuing to make tiny blocks (2″ x 2″ and 2.5″ x 2.5″) and enjoying the challenging of using up small pieces of recycled silk. I find it to be meditative to quietly work on small slow piecing.

Will post about this piece again when it is nearly complete.

A Crafter's Life, Studio, tierneycreates

Various Updates!

QUILTED IT MYSELF 

In the post The “Basted” Quilt, Dilemma, and Temptation I bemoaned about my dilemma of wanting to just let the large basting stitches on a quilt suffice as the quilting. Well I put on my “big girl panties” and made it through quilting it myself, using just straight stitches, 1/4 inch apart. So glad it is done! (BTW the whole I time I quilted it I was groaning “why didn’t I just let the long-arm quilter quilt this for me?!?!)

IMG_1321.jpg

NEW “FURNITURE” ADDED TO THE STUDIO

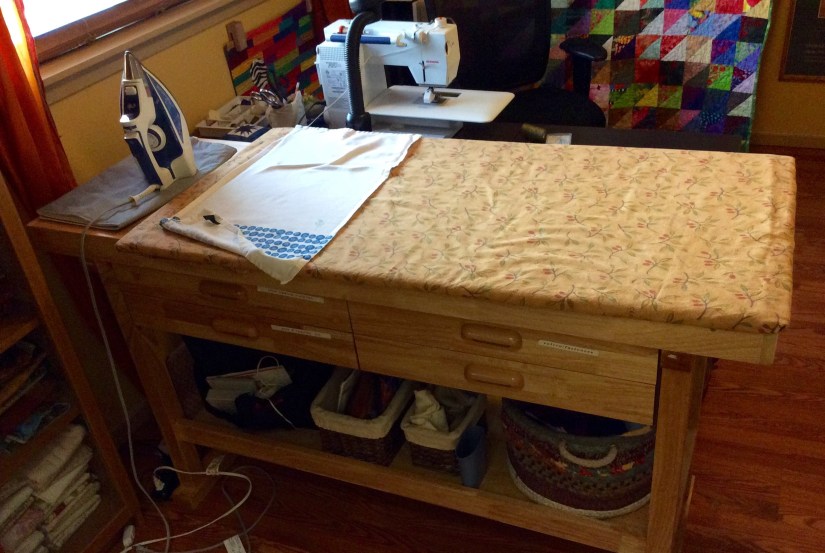
In my recent post Inside the Studio I shared photos of my tierneycreates studio layout. This weekend I added another item to the studio – I pulled the sad ironing board out of the room and added a workbench table from Harbor Freight Tools. This table was on sale this past weekend for an excellent price. One of my Quilt Sisters gave me a heads up on this wonderful find. Terry “The Quilting Husband” got it assembled and we made a removable wide ironing board top for the table.  I love it!

IMG_1313.jpg

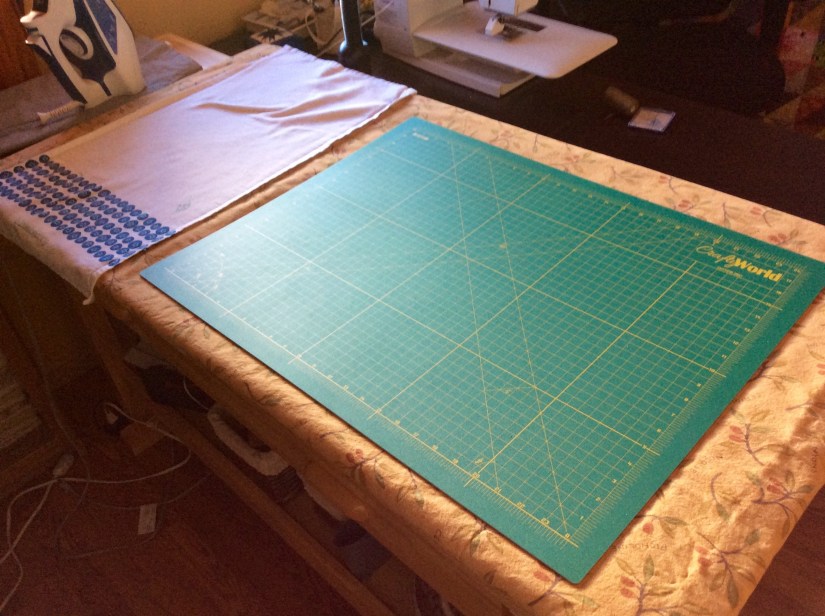
My younger brother surprised me with a new cutting mat for Christmas and I discovered the cutting mat fits nicely on top of the removable ironing board. I can cut and press small pieces on the same surface area. My brother has been very supportive of my quilting adventure (and he and his family has benefited from various quilts I have made them!)  Past Christmases he has surprised me with quilting books I do not have! (I suspect he has a secret inside quilting connection, ha!)

IMG_1314.jpg

MISC UPDATES

Handmade at Amazon

I shared in several prior posts how I was looking at listing items on Amazon’s new platform for crafters to sell their handmade items  –Handmade at Amazon. I was accepted to become an “artisan” on this platform but I have decided to just stick with Etsy. I love the experience of working with Etsy customers and I think I would be stretching myself too thin with my full-time healthcare job, my tierneycreates Etsy shop, and the Amazon shop.

Terry the Quilting Husband’s Future Exhibit

Terry, the Quilting Husband, is going to submit 5 quilts to the Sisters Outdoor Quilt Show for consideration to be in the show. They will be having a special Male Quilter Exhibit. More details later this year!

Also Terry is looking at working on Quilts of Valor quilts to be donated to local Veterans, in the future. A Veteran himself and a military history hobbyist, this would be a wonderful was to combine quilting and his deep respect/wanting to honor those who served. There is currently a local project trying to get red, white and blue quilts to the oldest of the local Veterans, primarily WWII Veterans.

Upcoming Show

My The Wardrobe Meets the Wall collaborator and beloved long-arm quilter and friend, Betty Anne, and I are having an upcoming show at Twigs Gallery in Sisters, Oregon, opening the end of March. More details in the future.


Studio

Inside the Closet

This is technically Part II of yesterday’s post “Inside the Studio“. A friend suggested I share what is inside the closet in my studio.

Here are photos of the left and right side of the closet, which has  sliding doors so I cannot fully open the closet to expose both sides at once.

The Left Side

IMG_1304.jpg

The Right Side

IMG_1302.jpg

I like to think I am organized. I know I am more organized than I used to be and I can find things fairly quickly. I bought a label maker a couple of years ago and have fully embraced its use!

Postscript

A friend shared a wonderful quote with me today that I have been mulling it over the entire day:

c044221d95af964b2456275bd350fac2.jpg
Photo credit: letslassothemoon.com
Books, Music, Podcasts, Studio

Quilter True Confessions

Binding.

Sloppily sewn down binding.

There, I have confessed.

Sigh…

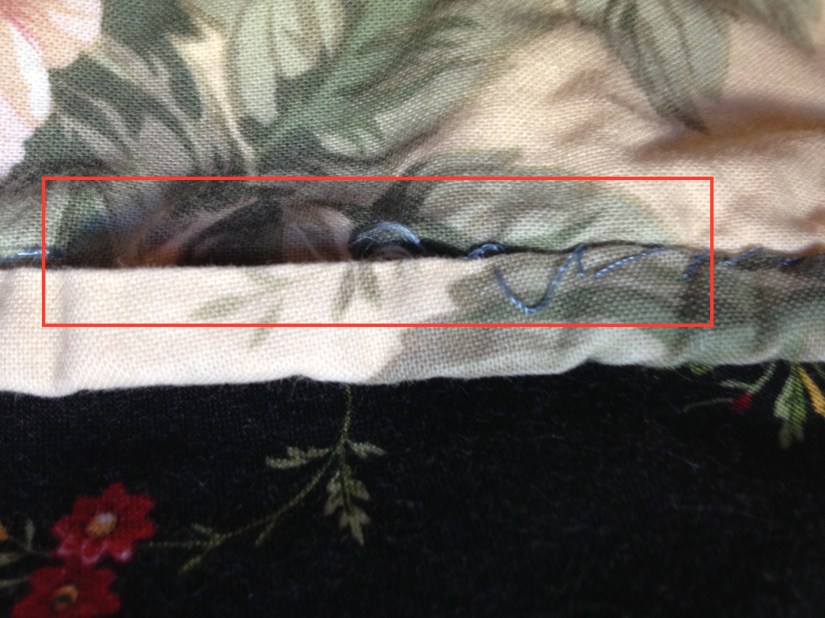
In my early days of quilting, I was rather impatient with the last stage of completing a quilt – “sewing down binding”. In my mind I was quickly sewing down the binding to the back of the quilt. In reality I was sloppily sewing down the binding to the back of the quilt.

Recently I went to wash an old (my early days of quilting) quilt, and discovered the binding was loose and missing in some areas.

I took a good and honest look at the stitches in the back of this old quilt, and I was APPALLED. Yes that is appalled in all caps because that is how I felt.

As you can see in the image below – on the left side of the rectangle is where the thread left the binding; and on the right side is an example of my sloppy stitching. (Yes, it looks like I was under “some chemical influences” with one eye closed, while I was sewing).

IMG_2962
Gasp.

I am going to remove the old binding and redo the entire binding. This time I will carefully sew it down.

I did not realize I had an issue with being sloppy with sewing down binding until a couple of years ago when a friend asked me to help her sew down binding on her quilt. We were at a quilt retreat and in the process of taking a break from sewing and doing the local “quilt shop hop” near the retreat center.

I was sitting in the backseat with a couple other quilters (two were up front and one of the them was driving of course, as we have yet to afford the special QUILTER AUTOMATED VEHICLE that drives you around on its own to quilt shops while you visit with your friends and sew). My friend had a lovely quilt for her son that she was trying to finish and brought along to work on in the car, as it only needed its binding sewn down. So she gave me one end of the quilt to work on while she worked on the other.

She tried to be polite, but she had to remove and redo all the stitches I had done. This is when I realized (as the truth was now starring me in the face): that I need to take sewing down binding more seriously. Binding a quilt deserve the same level of care and patience that goes into piecing a quilt.

I committed to becoming a better “quilt binder” and my quilts over the last couple of years and had high quality binding stitching.

Interesting: once you get into the habit of doing something correct, sometimes you forget what you used to do in the past. I was in shock when I saw what I had done on the old quilt!

POSTSCRIPT

Originally when writing this post I was going to title it: “Quilter’s Hall of Shame: Binding”. However ever since listening to the audiobook of Brene Brown’s book Daring Greatly (2015) I have no time for the concept or feelings of “shame”. I figure life is a learning and growing experience (for a summary of key insights I gained from reading this book, see my post Life is Nonfiction Part II) and I am not going to fill it with any feelings of shame.

Creative Inspiration

Creative Inspiration: Where I Started…

We shall not cease from exploration, and the end of all our exploring will be to arrive where we where we started and know the place for the first time. 

– T.S. Elliot

This post continues my series of posts on Sources of Creative Inspiration.

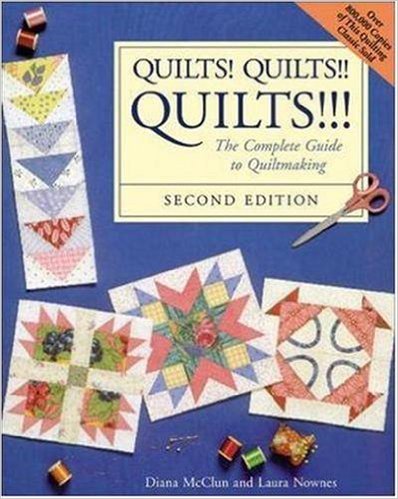
I was wandering a thrift shop today with some friends, and came across the first official quilting book I ever owned: Diana McClun and Laura Nownes’ book Quilts! Quilts!! Quilts!!! The Complete Guide to Quiltmaking (1998). I bought this book in the late 1990s, I still have this book in my personal collection, but I have not looked at it for years.

I have been struggling to find a new source of inspiration for my next art quilt made from recycled clothing scraps/manufacturing samples for The Wardrobe Meets the Wall Collection. Since completing Abandoned Structure, I have been “bereft of creative inspiration” for my next piece (and if you see my previous post Terry the *Not* Quilting Husband, I am thinking about letting the sewing machine rest awhile and working on paper craft projects!)

Seeing the book Quilts! Quilts!! Quilts!!! The Complete Guide to Quiltmaking (1998) suddenly creatively inspired me!

IDEA: I am going to do a series of small quilts made from recycled clothing based on patterns from this book.

I am going to return where I started for awhile, traditional quilt making, but with my art quilting medium: recycled clothing and silk samples from garment manufacturing (which is ironically, the true traditional medium: utilitarian quilts were made from worn clothing in the old days!)

I will post pieces from this series, more to come…

Photo credit: Amazon.com

Check out Sassy the Highly Opinionated Miniature Schnauzer’s Schnauzer Snips page for her updates…

Studio

Completion!

An update to my post Progress and Fear about the 5 quilts awaiting completion:

Finally, I finished binding all 5 quilts back from the long-arm quilter! I  have listed 4 of them for sale on the tierneycreates Etsy shop.

I still need to master photographing quilts as they are much prettier in person than my photos seem to reveal.

The 5th one, the “Ugly Sunflower Fabric Quilt” I wavered on and was going to keep, then was going to sell on Etsy, and now I am completely undecided.

I might just hold onto it until the Sisters Outdoor Quilt Show entry time next year to decide.

Perhaps I will put the sunflower quilt in the Sisters Outdoor Quilt Show as I am guessing bed size quilts are easier to sell at the show than lap size quilts (of the 5 quilts I had in the 2015 Sisters Outdoor Show, only the bed size quilt sold).

The plan is for next year’s Sisters Outdoor Quilt Show, I put in 5 quilts again and Terry “The Quilting Husband” put in 5 of his quilts!

Quality of Life

Creativity Before Consumption

I see a red door and I want it painted black

– The Rolling Stones, Paint it Black

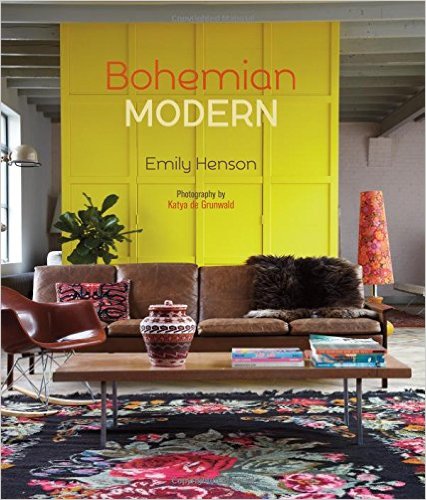
Bohemian Modern by Emily Henson, photo credit: amazon.com

 One of my favorite things to do on a Saturday morning it to sit with a cup of tea and look through decorating books (and crafting books of course).

I usually have a large stack of decorating/interior design books from the public library right next to my chair where I sit by the window with my tea.

I recently finished an awesome interior design book called Bohemian Modern by Emily Henson.

Contained in its pages was a wonderful title to one of the book’s chapters: “Creativity Before Consumption”.

This quote has resonated with me and I want it incorporate it into my general philosophy of life.

I think I do already with how much I enjoy working with recycled materials and fabric scraps.

I did recently implement this concept in regards to my front door. I have disliked my plain white front door for a long, long time. I priced at the home improvement stores what it would cost to replace it and the cost has discouraged me from changing it out.

The white door was just not aesthetically pleasing and I have been looking at it everyday for the 10 years we have been in the house and it does not make me happy.

A radical (but simple idea) fell upon me – what about painting it another color?!?! (and why did I not think of this years ago?!!?). So I bought a can of black paint and painted it today! Below are the before and after photos. I hope you agree the black looks better. I am very pleased with my “new” front door!

A $8.95 can of paint was a much lower expense than a new front door (whose costs would have included the door plus professional installation!).

Yes, I think this is my new motto: Creativity Before Consumption!

(Be sure to check out Sassy the Highly Opinionated Miniature Schnauzer’s Schnauzer Snips page for her latest adventures and musing)

Creative Inspiration

Creative Inspiration: Encouragement from Others

As John Donne said: “No man (or woman) is an island”. I guess one could live as a hermit somewhere, locked away, working on your art,  encouraging yourself creatively. That would not work for me. I appreciate and I am inspired by encouragement from others. 

Continuing my series on sources of Creative Inspiration, this post is actual inspired by a surprise I found that last evening.

We all have those precious items from our past that we keep tucked away somewhere. One of my most precious items was a book of William Shakespeare’s Sonnets from my 9th Grade English teacher. I have not seen it in many years and I thought that for some reason during a move it got lost; or I accidentally donated it to a thrift shop in a stack of books for donation.

I mourned its loss.

Last night I was checking the far recesses of my nightstand cabinet, which I store books I am going to “read someday in bed each night before I fall asleep”, but never get around to reading. I was curious what I had way in the back and found my old beloved book!!! I had not opened it in 8 or more years and forgot exactly my teacher had inscribed inside the cover.

My eyes flooded with tears when I read her inscription which included the words “in recognition of her excellent writing ability”. I have always loved writing (and have written a lot in my professional pay-the-bills RN career) and I forgot how much I loved it when I was in grade school through high school. (Disclaimer: I may not have mastered grammar or proofreading but I still love to write!)

Just reading these words again from my 9th grade English teacher made me feel as inspired in that moment as I did all those years ago. Her words of encouragement from the past resonate with me now, like she is right here with me saying: “Tierney, keep writing, I believe in you“.

IMG_1004

IMG_1005

As far as quilting projects, I am so inspired creatively when I receive encouragement on a piece I am working on or one I have completed. I am encouraged creatively when I am uninspired to work on an art quilt and a friend encourages me to just start playing with the fabric and the inspiration with come in no time. One of my favorite silk art quilts I have made, Color Change, came out of sitting around with a friend having her throw fabric scraps at me for fun, saying “Here, why not try putting this combination together”, when I was feeling too intimidated to work on another silk scrap quilt.

Creative mentors who encourage you to do your art are important and wonderful to have in your life. See my old post Creative Inspiration: Quilting Mentors, for more on mentors.

So let’s all go out and encourage someone, you never know what lasting impression it will make.

“A word of encouragement during a failure is worth more than an hour of praise after success.”

– Author Unknown