Author: tierneycreates: a fusion of textiles and smiles
Quilter, crafter, obsessive tea drinker and lover of all furry creatures (especially dogs and cats) - join me on my tierneycreates blog as I share stories from "A Crafter's Life".
My late husband Terry (aka “Terry the Quilting Husband) was a quilter and a crafter. He also helped me on numerous projects such as making binding for my quilts, cutting fabrics, making hexagon templates for my English Paper Piecing projects; and being an all around “sous chef” for my quilting/crafting endeavors.
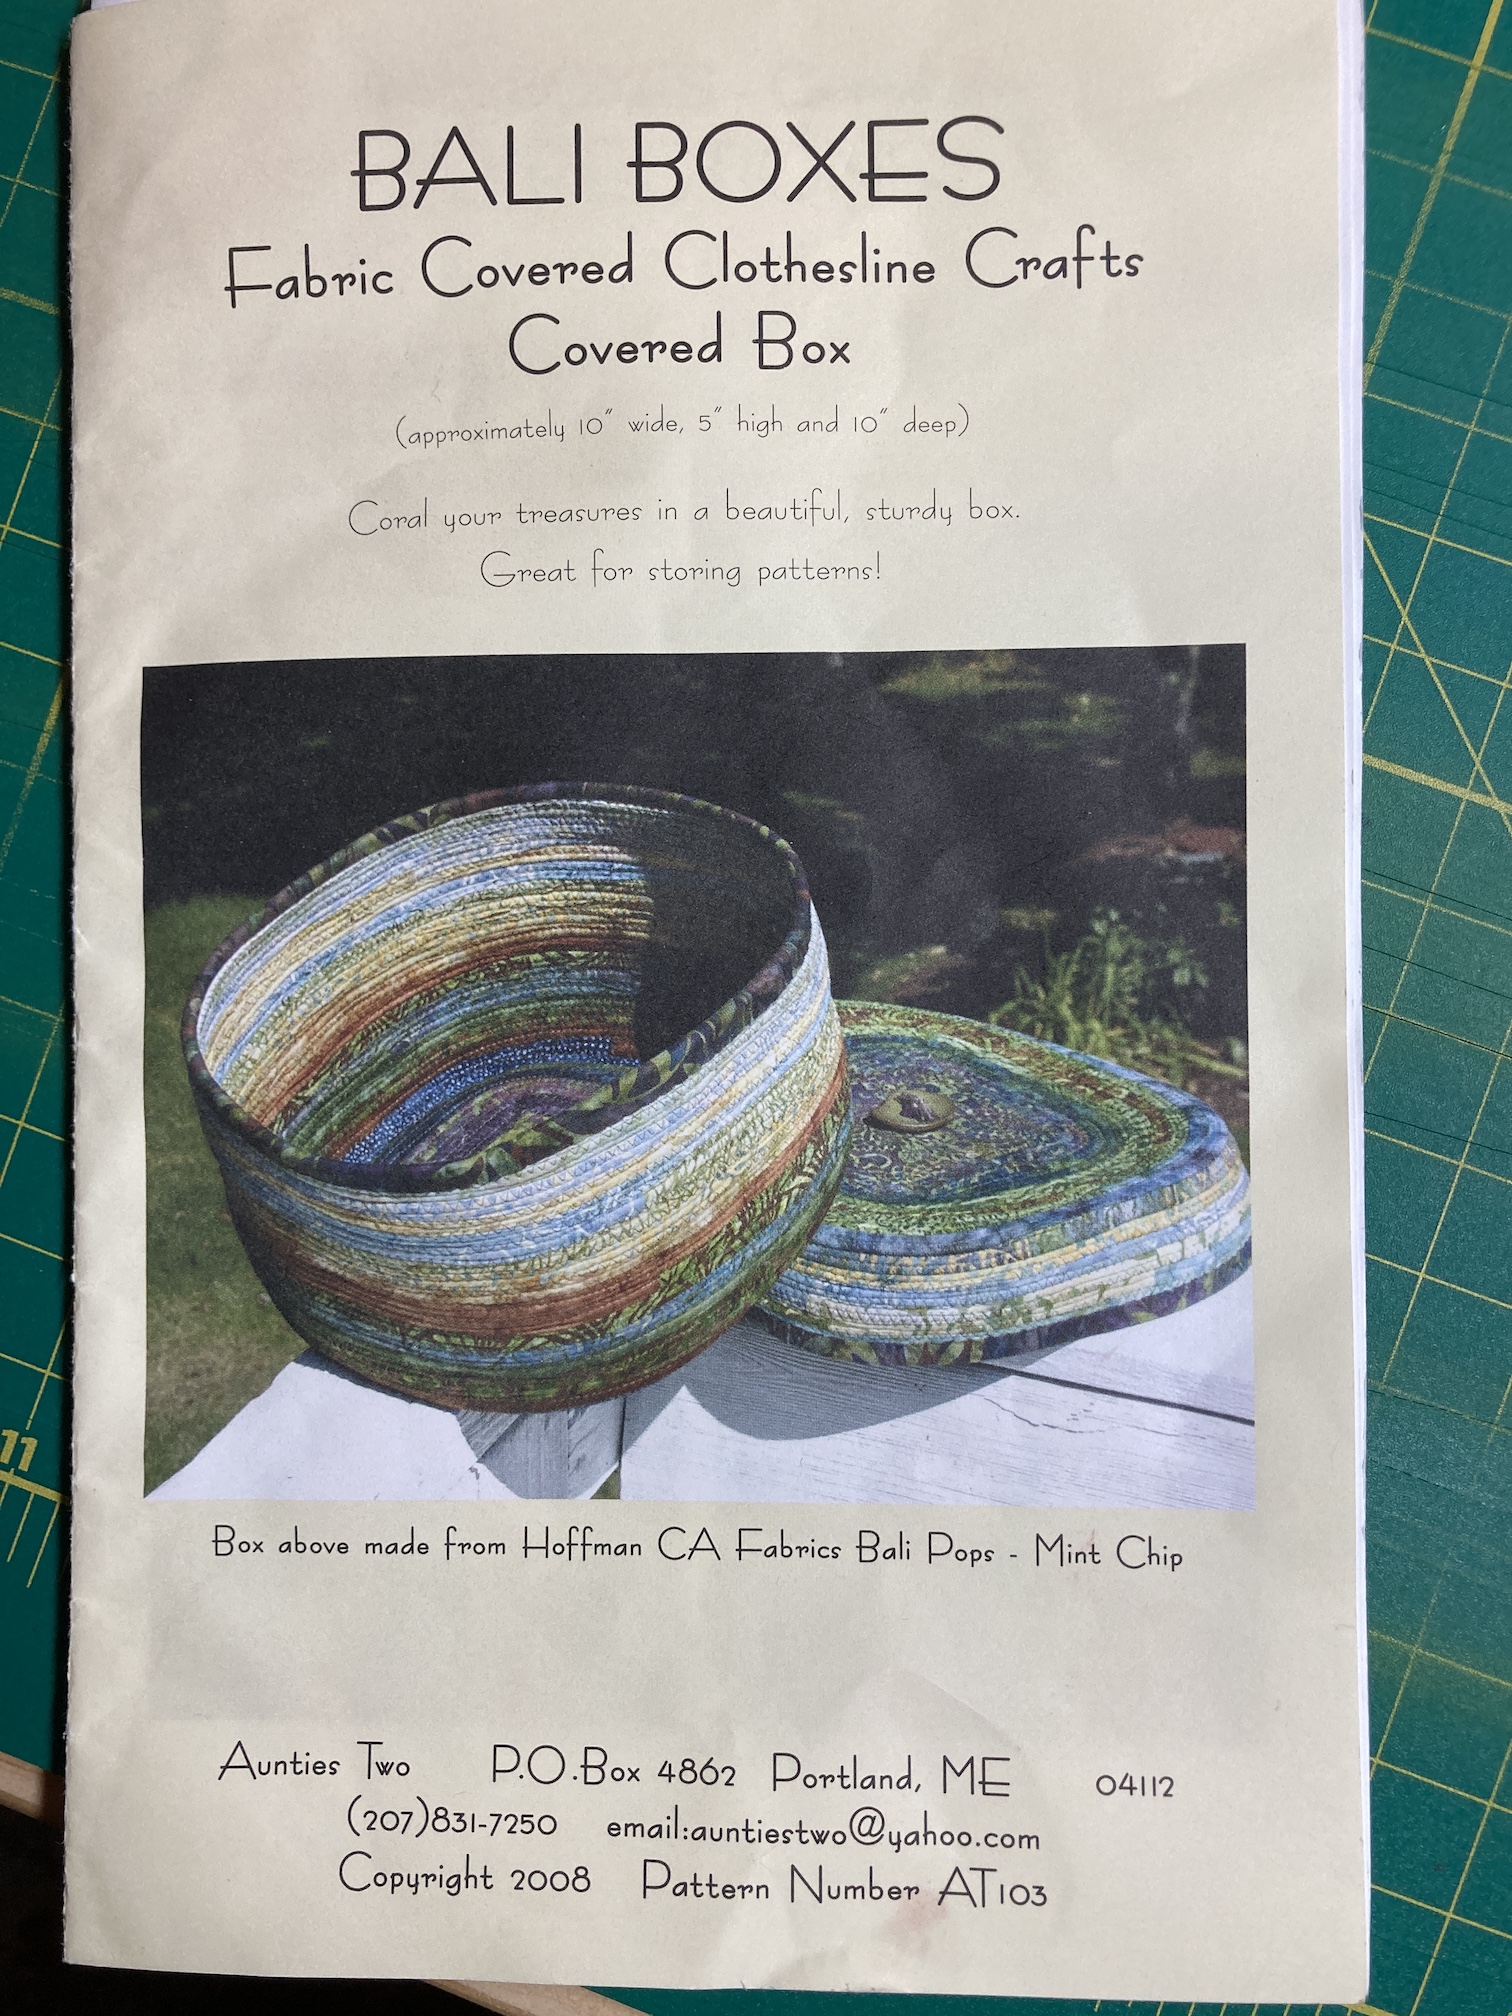
One of the projects he worked on prior to his passing in December 2018 was covering clothesline with batik jelly roll strips (40 – 2.5″ x 42″ strips) to make Bali Boxes (actually “bowls” as I do not make the boxes) from the pattern by Aunties Two:
As a result of his efforts I had a roll of batik covered clothing line rope, but we got busy on other projects and I put it away:
Over the past nearly 2.5 years since his passing, I’ve slowly worked on completing projects he began and did not finish; or projects he helped me with and we did not finish. An example of one of these projects was a quilt for his eldest brother Andy (he came from a family with 7 kids and I sent one of his completed quilts to most of his siblings when Terry passed, except I did not have a completed quilt for Andy) that I discussed in the post – The Last Quilt.
(Trying to write this post without breaking into tears, but I want to share this experience with you as perhaps there is someone out there that wants to find the strength to complete projects started by a loved one who passed…)
So continuing my journey to complete anything he started before he passed, I realized it was time to make something with the clothesline he covered in batik strips. I decided to make two baskets: one for his sisters Diane and Susan, and one for me.
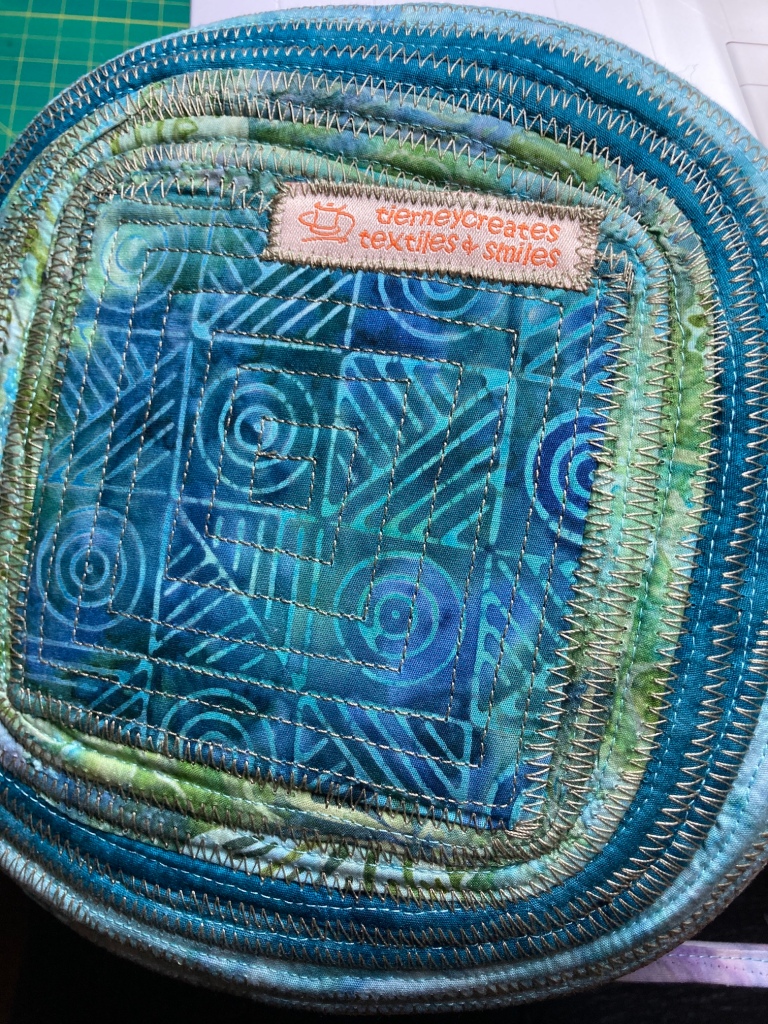
Here are images from my recent creation of these baskets – I like to call the process “throwing pottery on the sewing machine”:
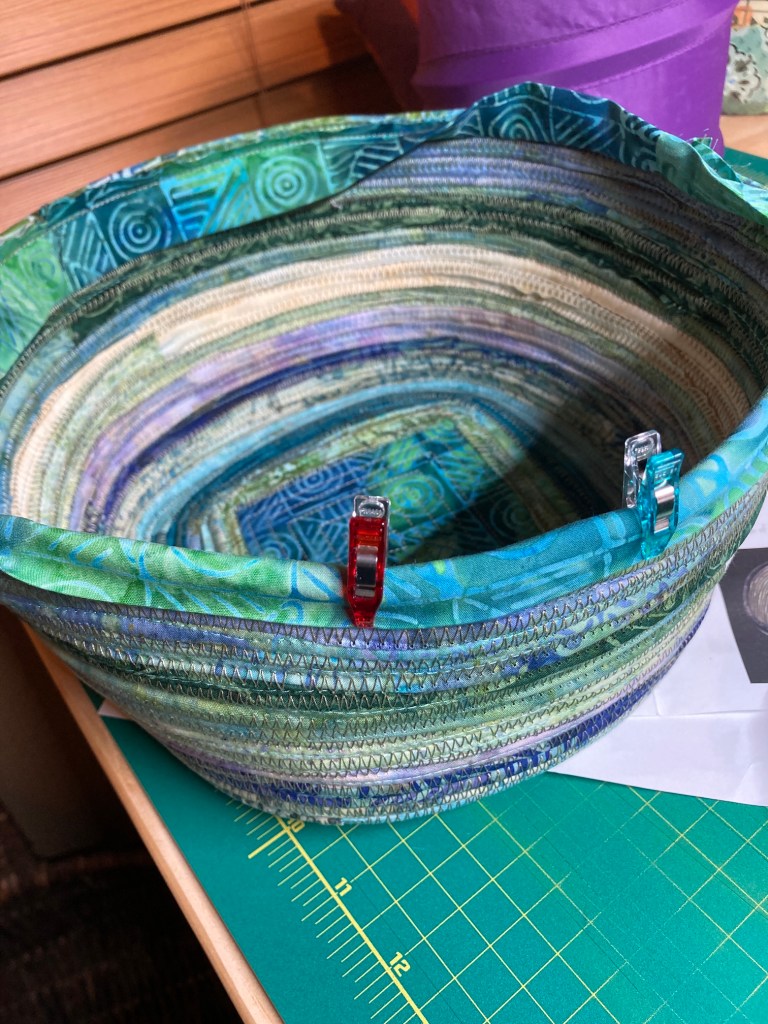
Here is the basket for Terry’s sisters fresh off the sewing machine and then an image of the binding for the top being put on:
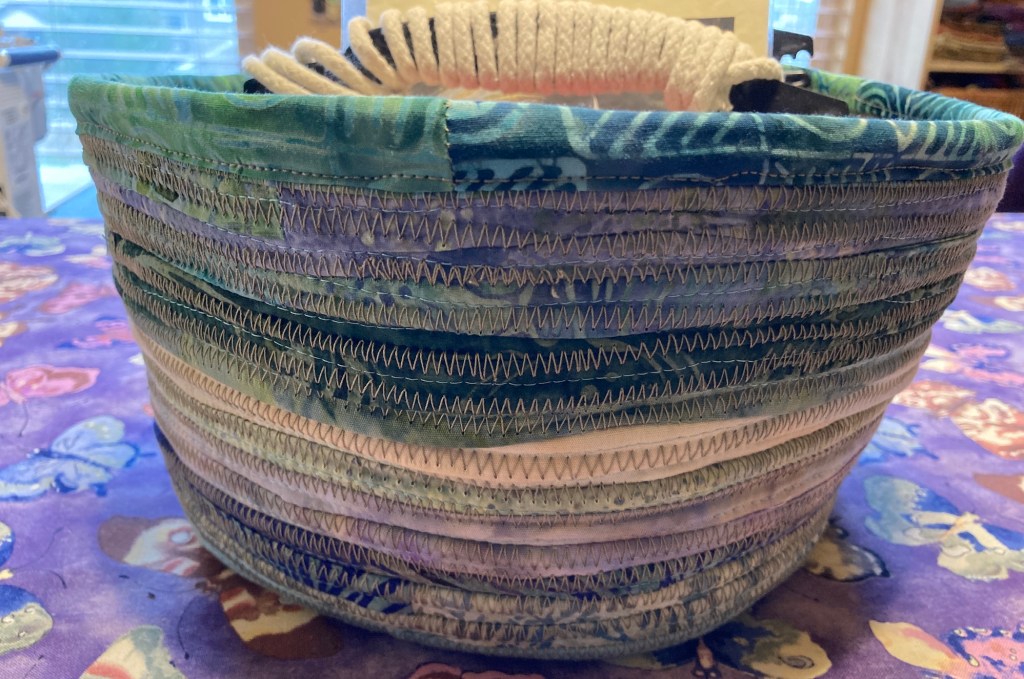
Here is the completed basket and the view of the bottom of the basket:
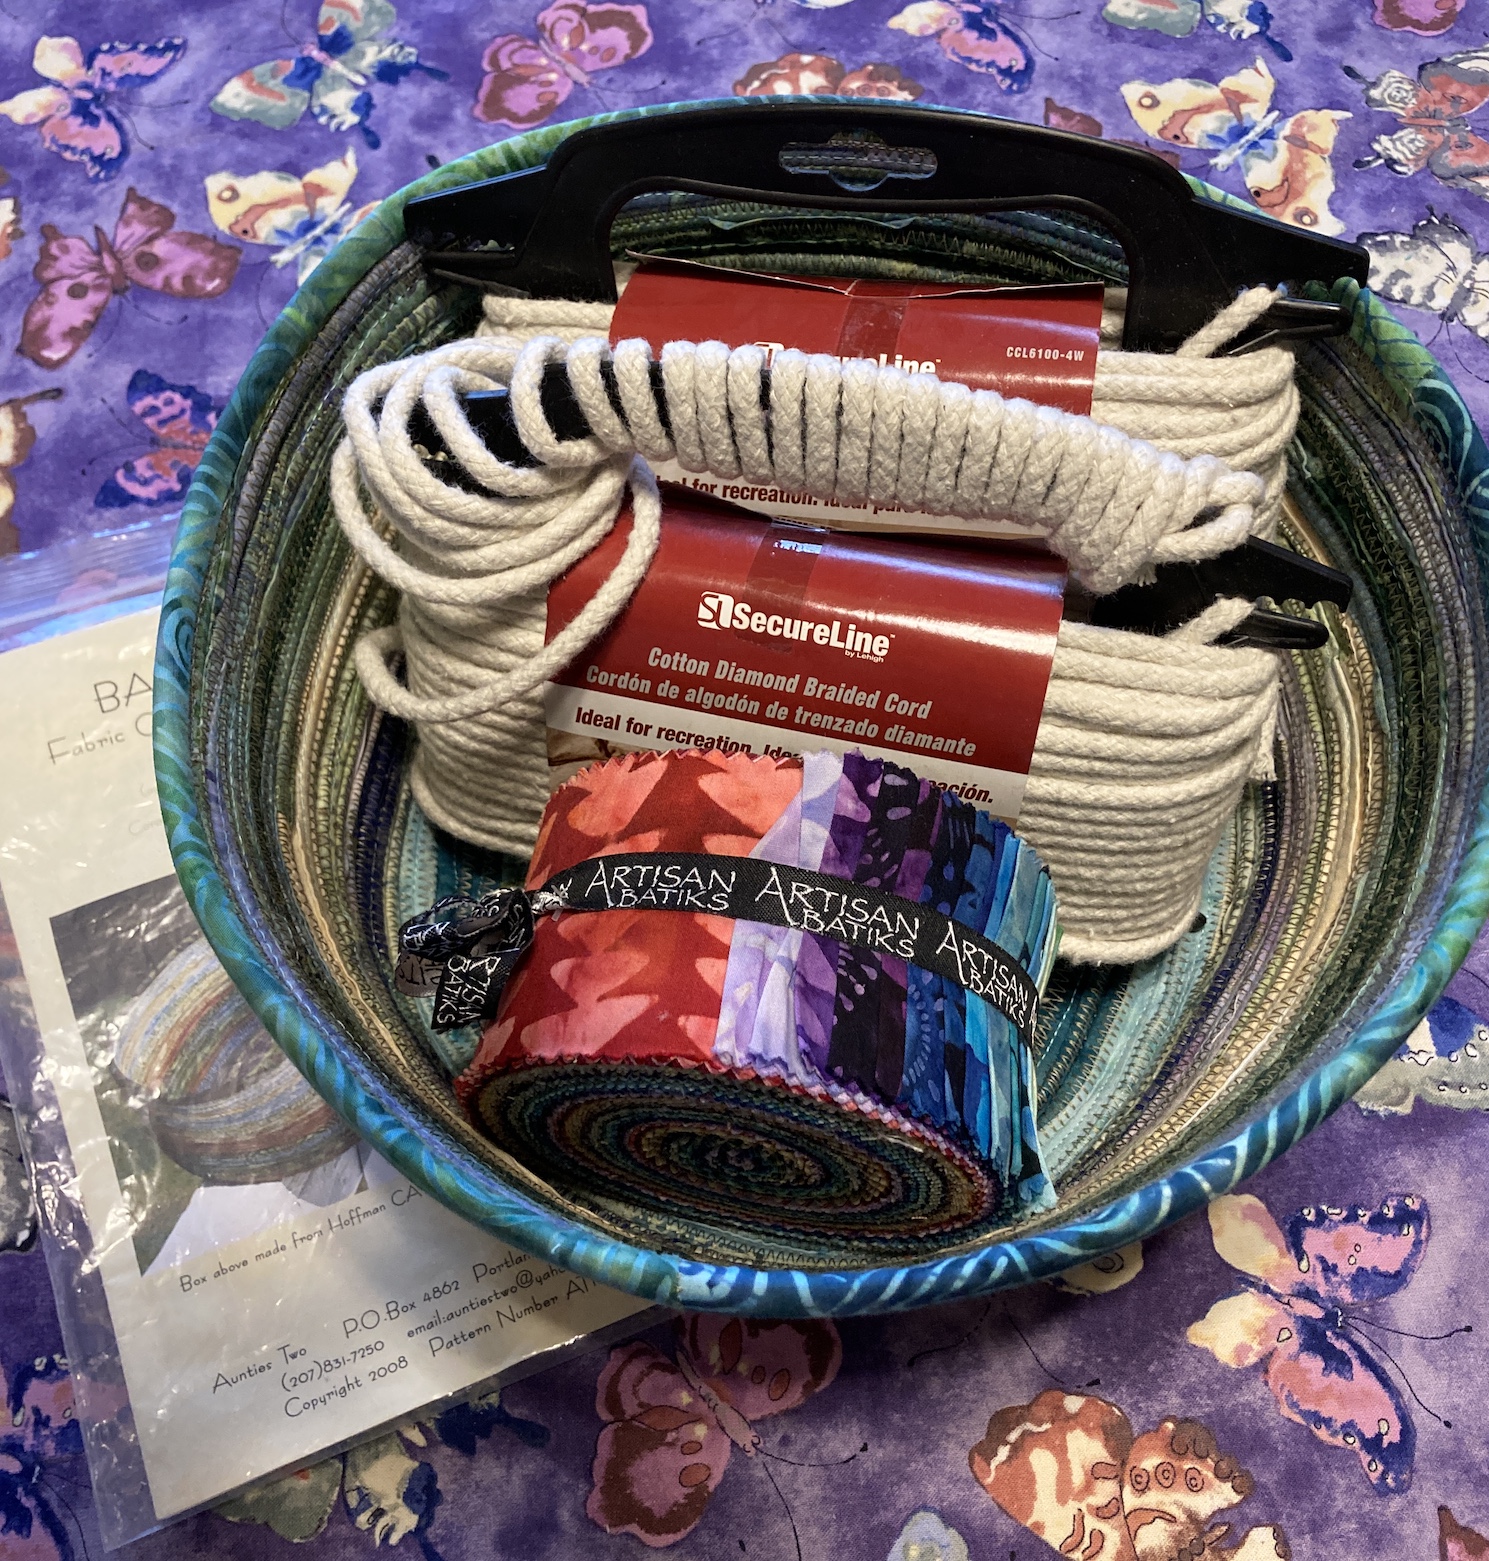
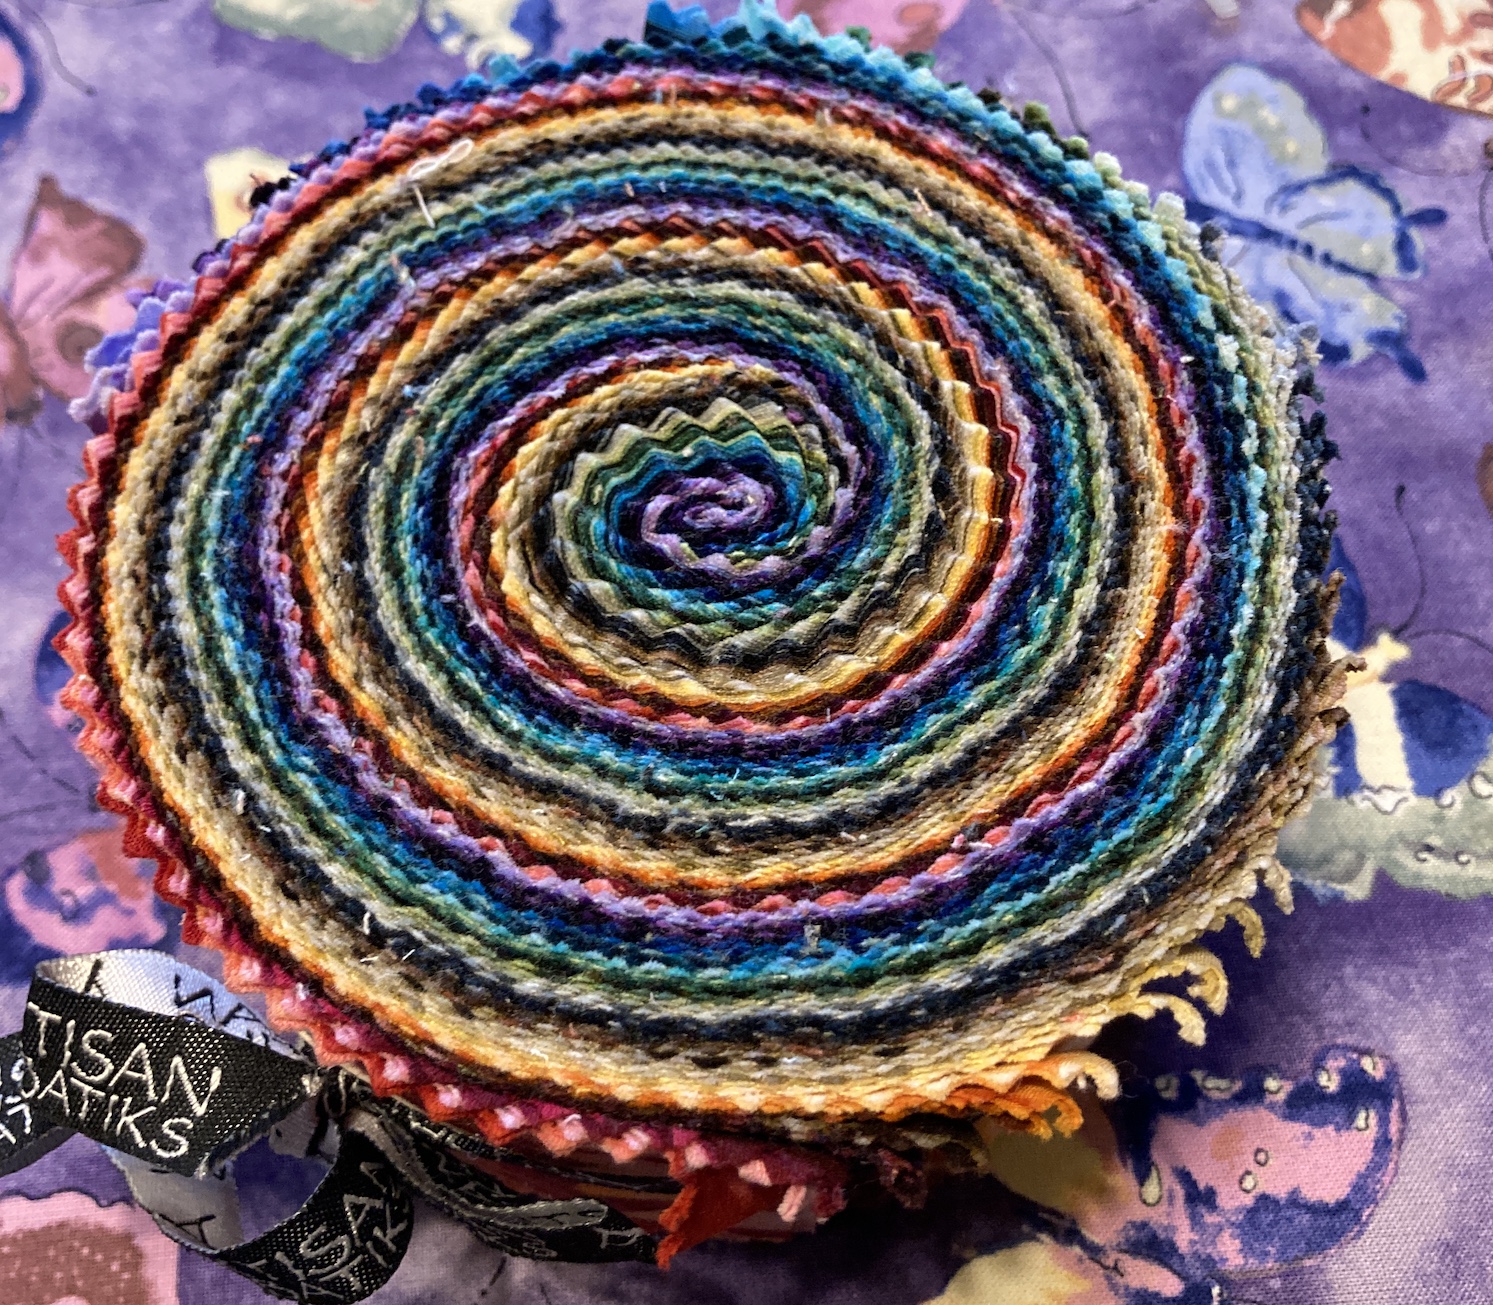
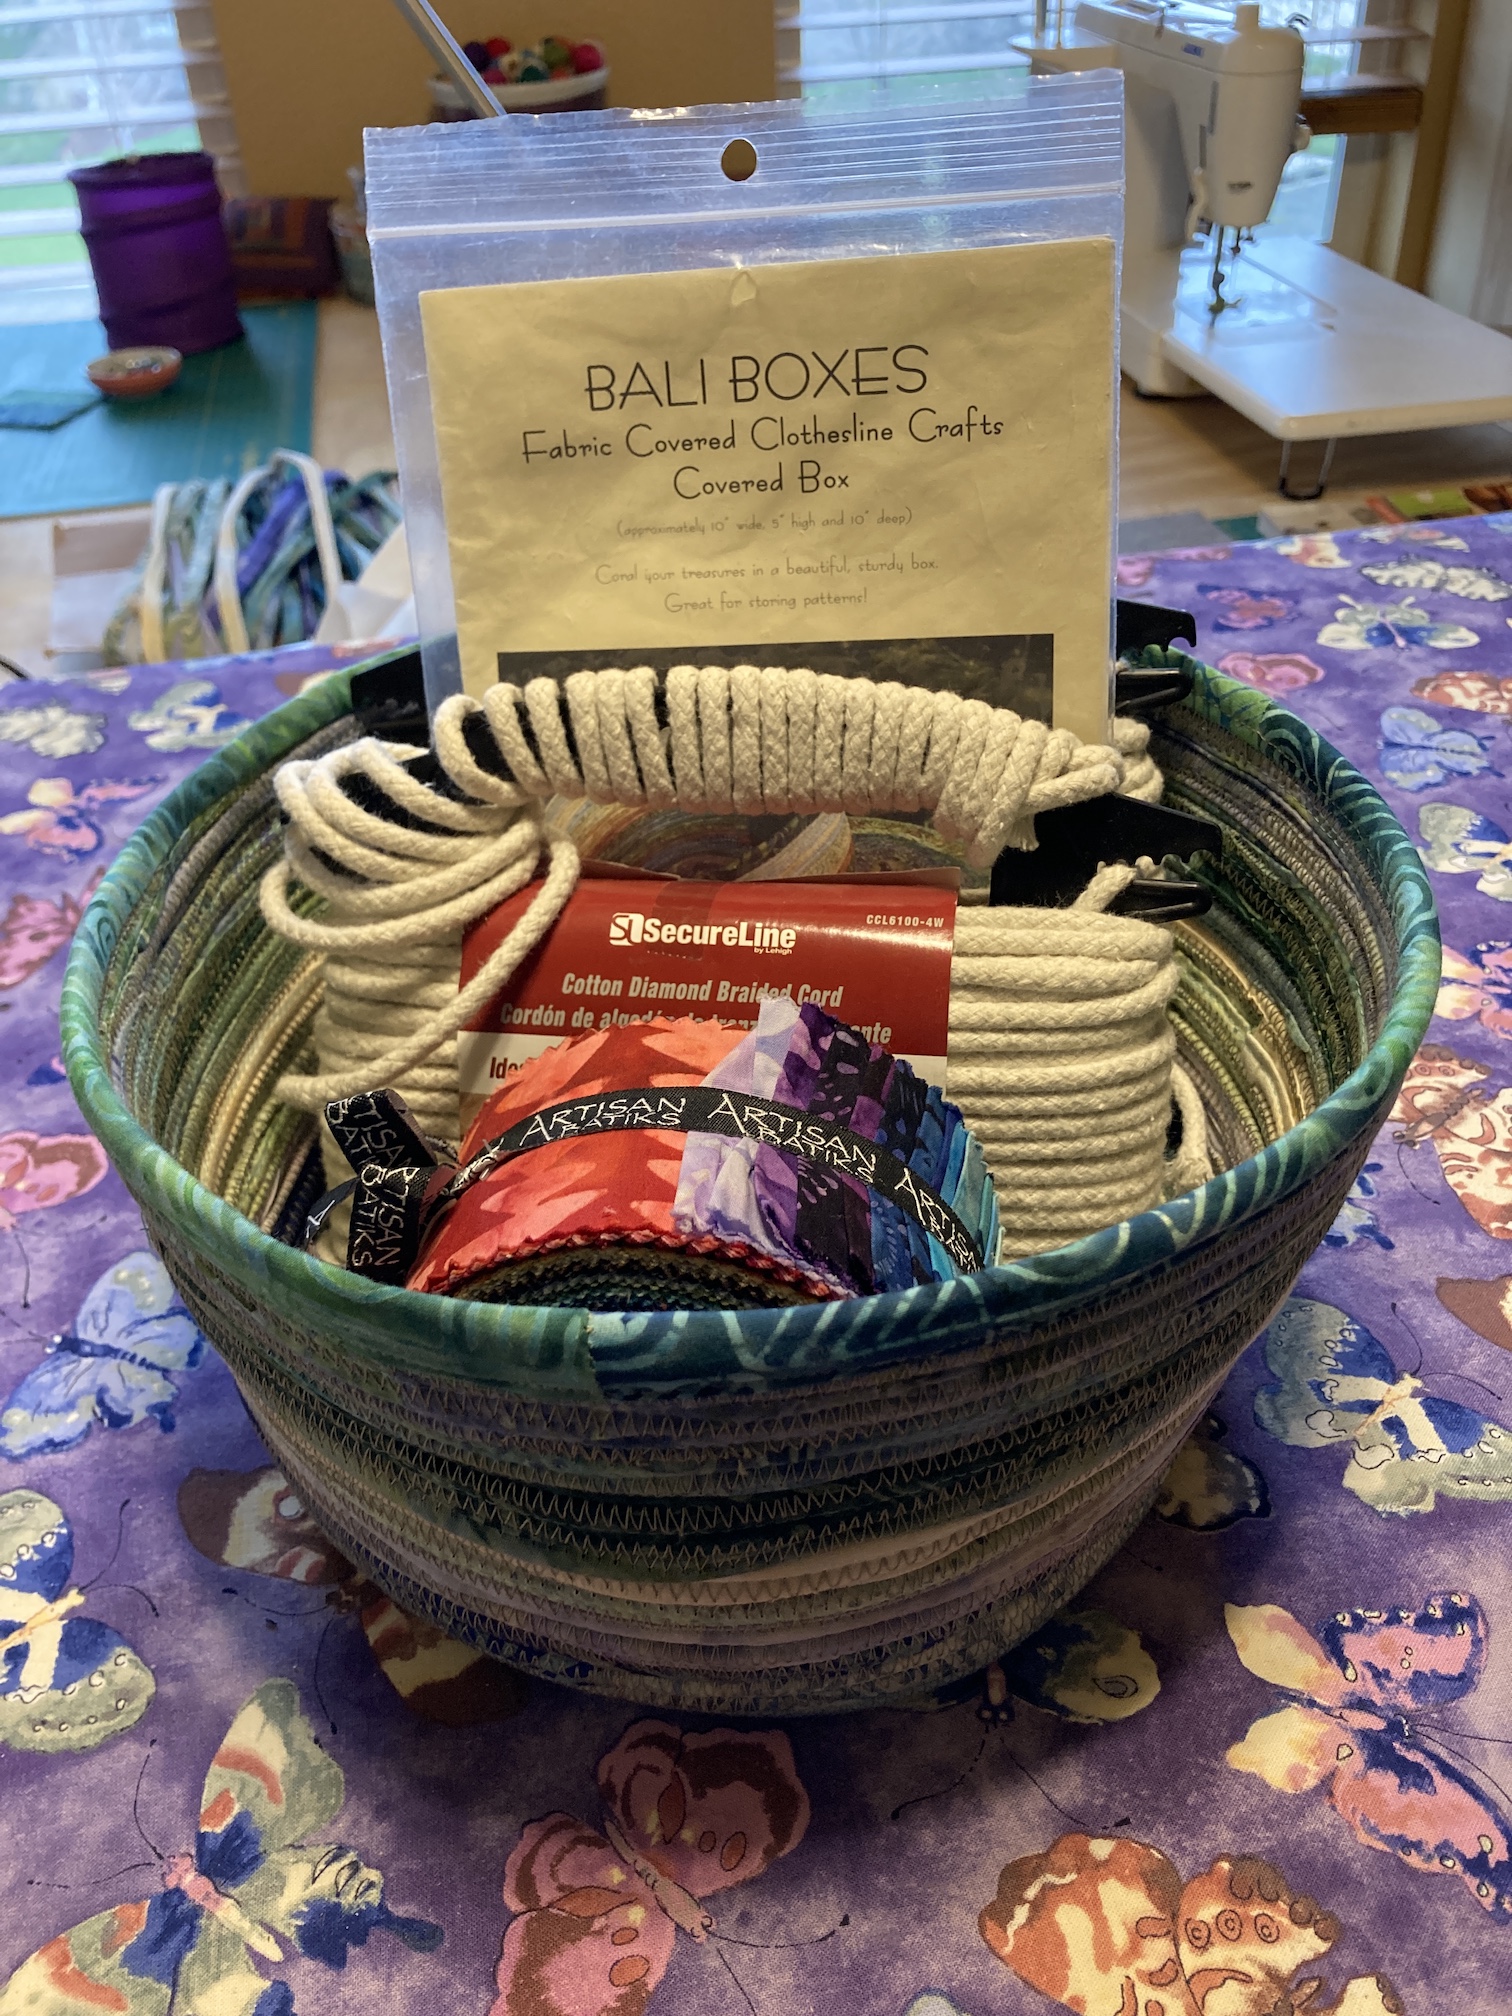
You might wonder what is peeking out of the top of the completed basket. Well I decided that my era of making baskets was done for now and I put together a kit for Terry’s sisters to make their own baskets to include: 1) a batik jelly roll; 2) the pattern; and 3) several packages of clothesline rope:
Here is the second basket which I made for myself with the remaining batik strip covered clothesline. It came out bigger than I anticipated and I am using it to store batik scraps:
Last week I shipped the basket to Terry’s sisters in New York and they have received the package.
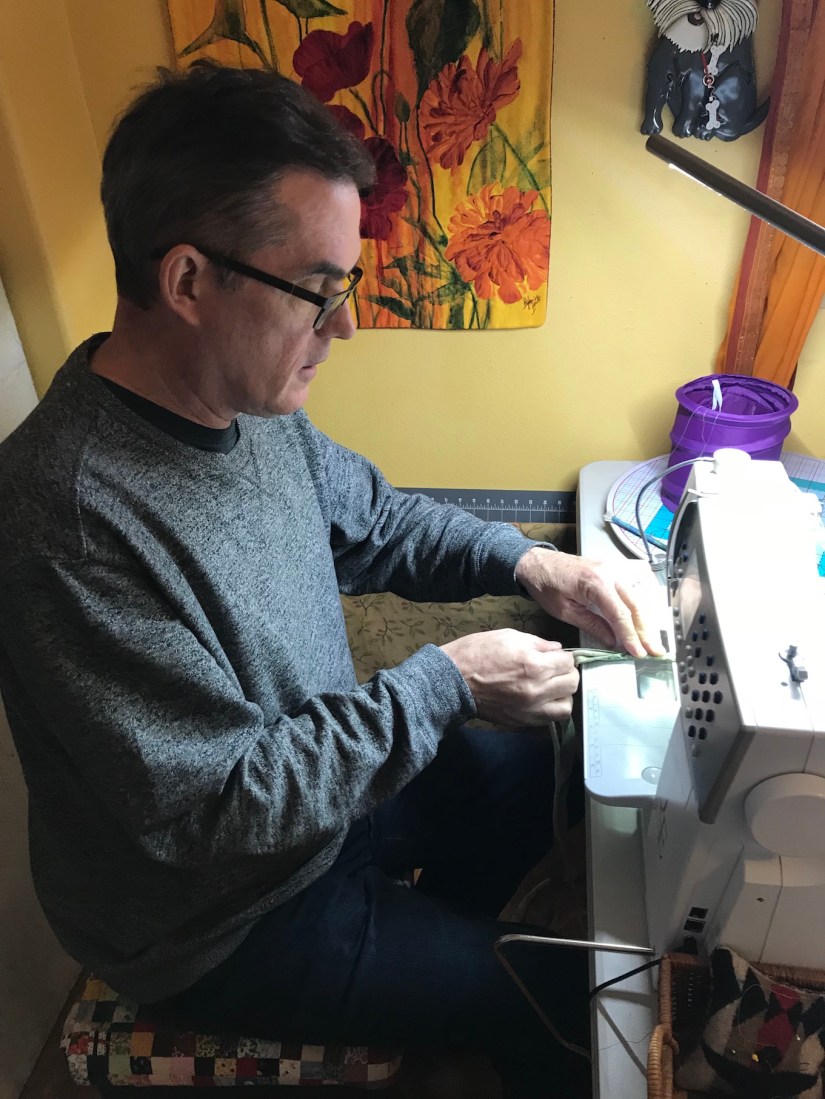
Along with the basket and basket making kit I included a printed photo of Terry working on covering the clothesline for the basket.
As I did in the quilt I sent to Terry’s brother Andy (The Last Quilt) I said that the gift was from Terry and me – from this life and the next…
And now I am going to piece the back of the quilt. Nothing too fancy but I do want to include the tree I made from the leftover piecings from my friend Kathy’s quilt to honor where I got all the material from to make the quilt:
Then I need to find a local long-arm quilter to quilt it. Now that the pandemic is sort of subsiding I need to start connecting with my local quilting community.
I am going to pause working on this quilt for a bit as I have two things I really need to work on: 1) a sort of emotional piece that I need to make for two important people (more on a future post); and 2) an art quilt for a WCQN show I’ve been invited to participate in. The second one is time sensitive so I really need to get it started. Unfortunately I will not be able to share the quilt images until the show opens next year.
Oh but speaking of art quilts, one of my remaining recycled silk art quilts has been accepted into an upcoming show at a local gallery. I’ll post more about that in the future.
Tomorrow another out of town guest arrives, this time for a week’s visit. It is funny we went nearly a year during the pandemic with few visitors (just a set of out of town guests in October 2020) to what seems like a constant stream of (and vaccinated) visitors! (My sister comes to visit in June next).
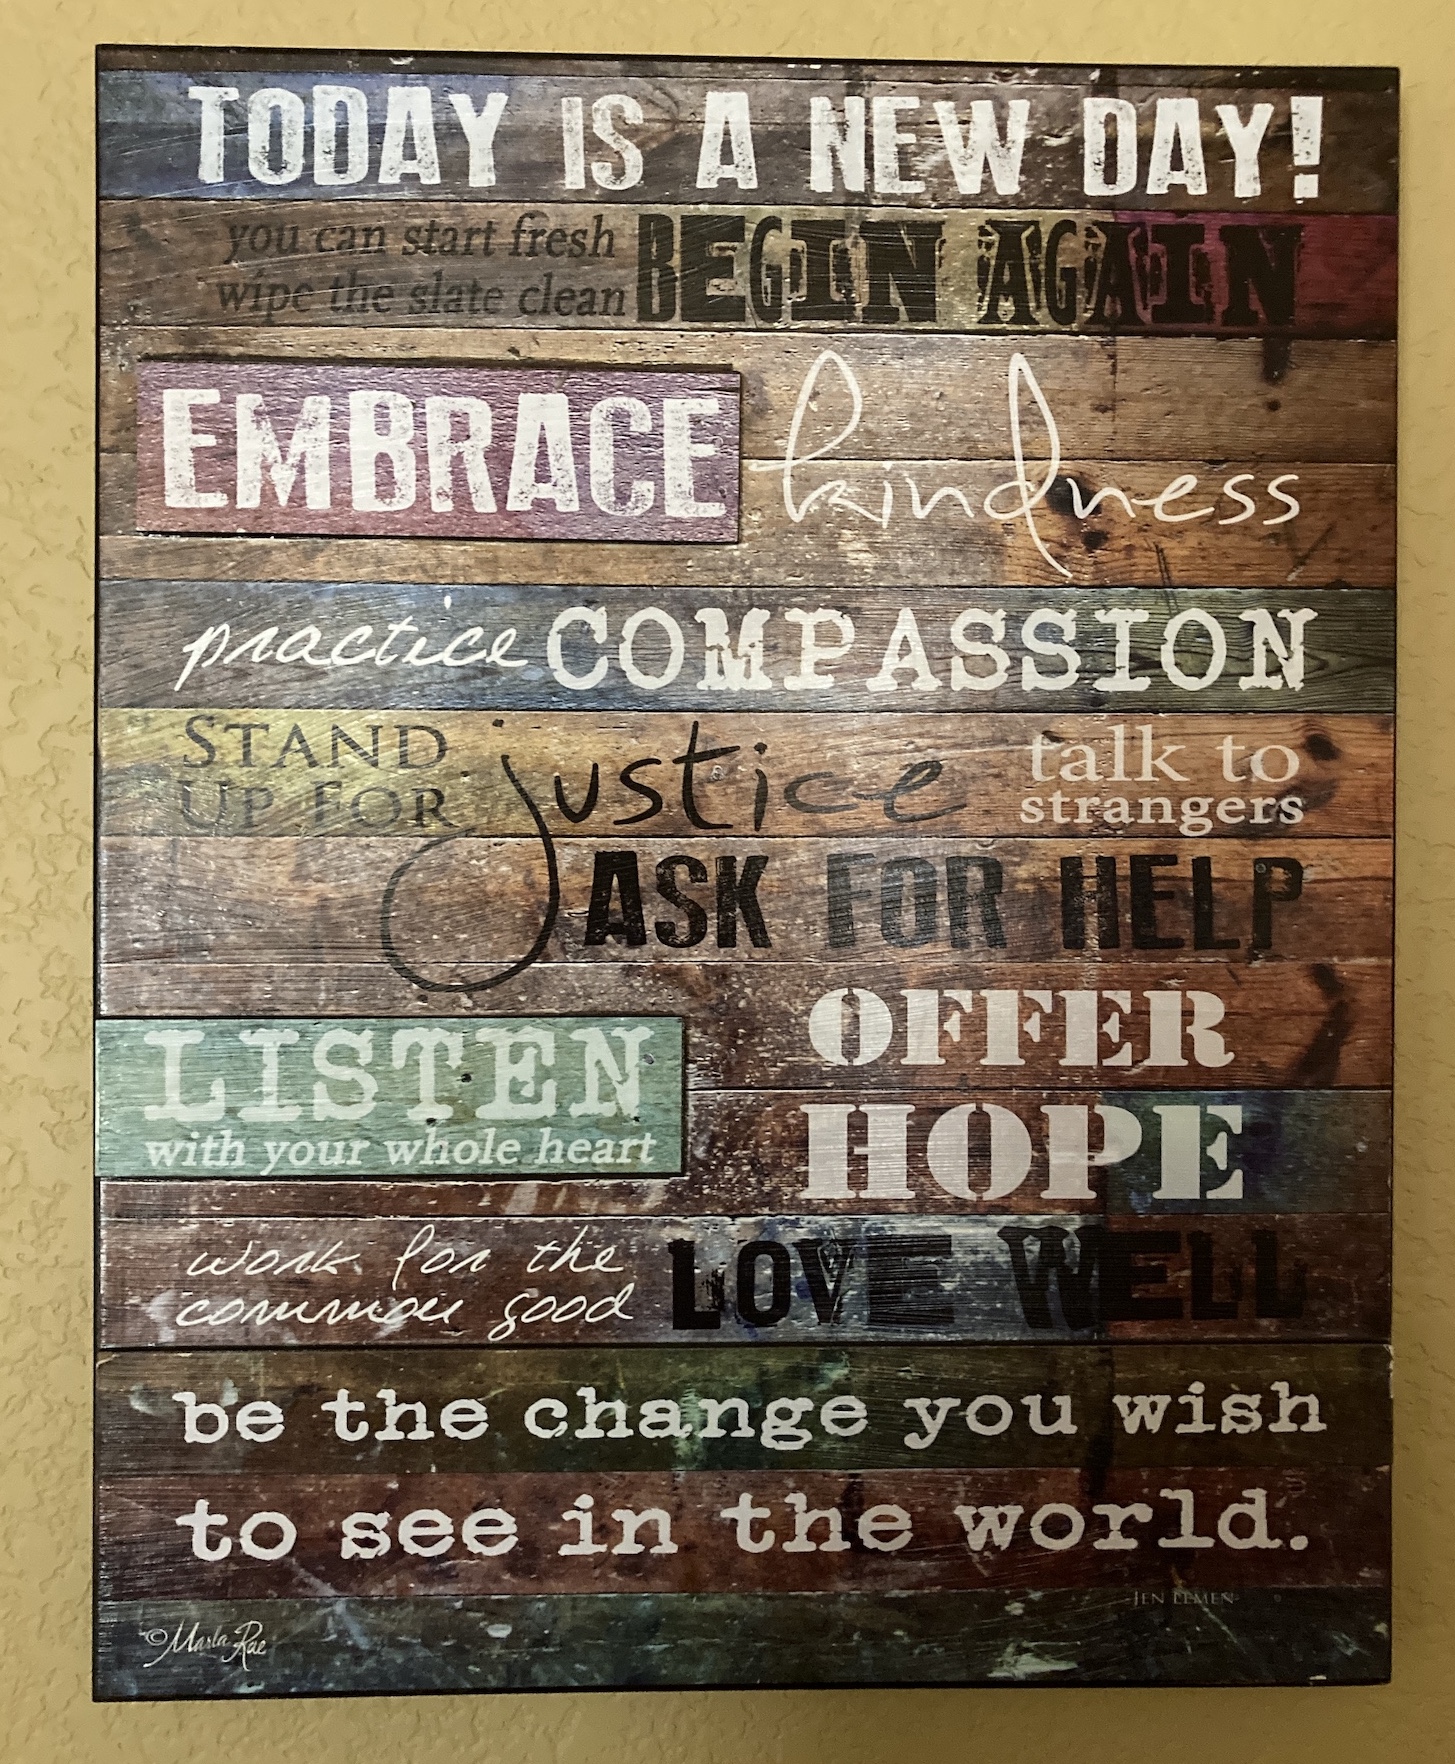
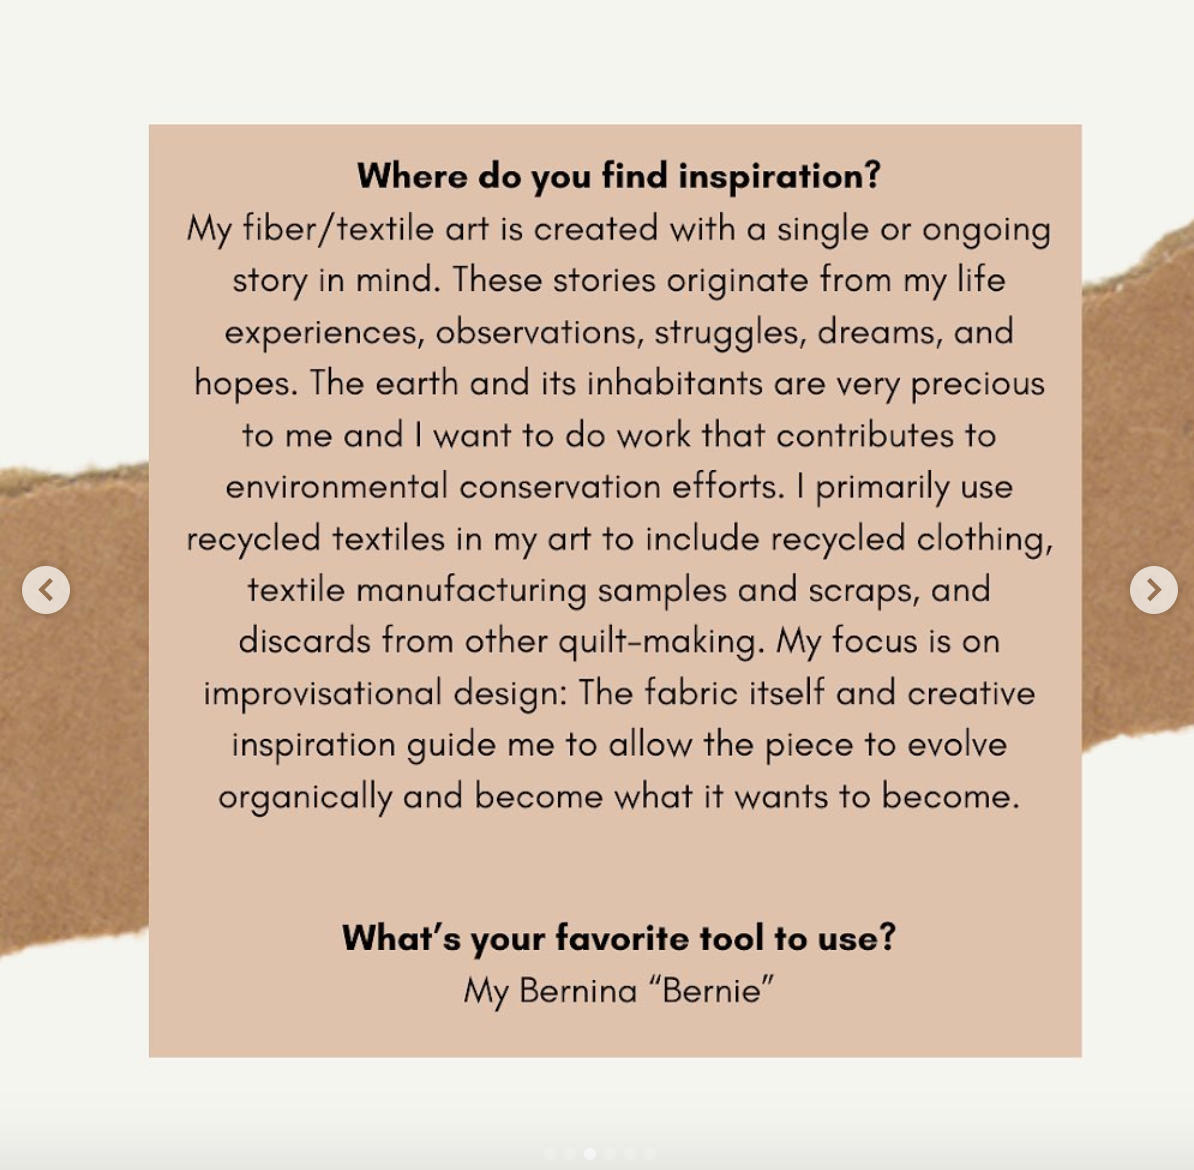
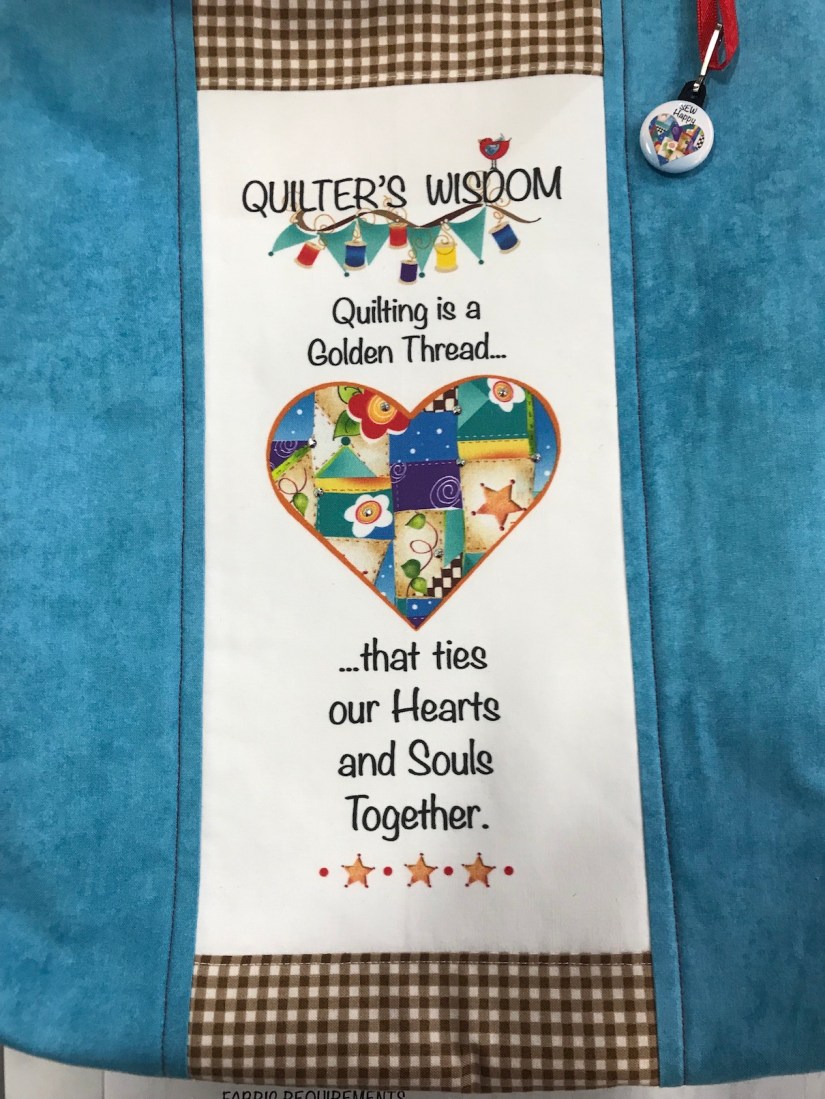
I will close this post with an inspirational sign I recently picked up while thrifting at a local charity shop. I’ve put it on my bedroom wall so I can see it each morning when I wake up and be inspired!
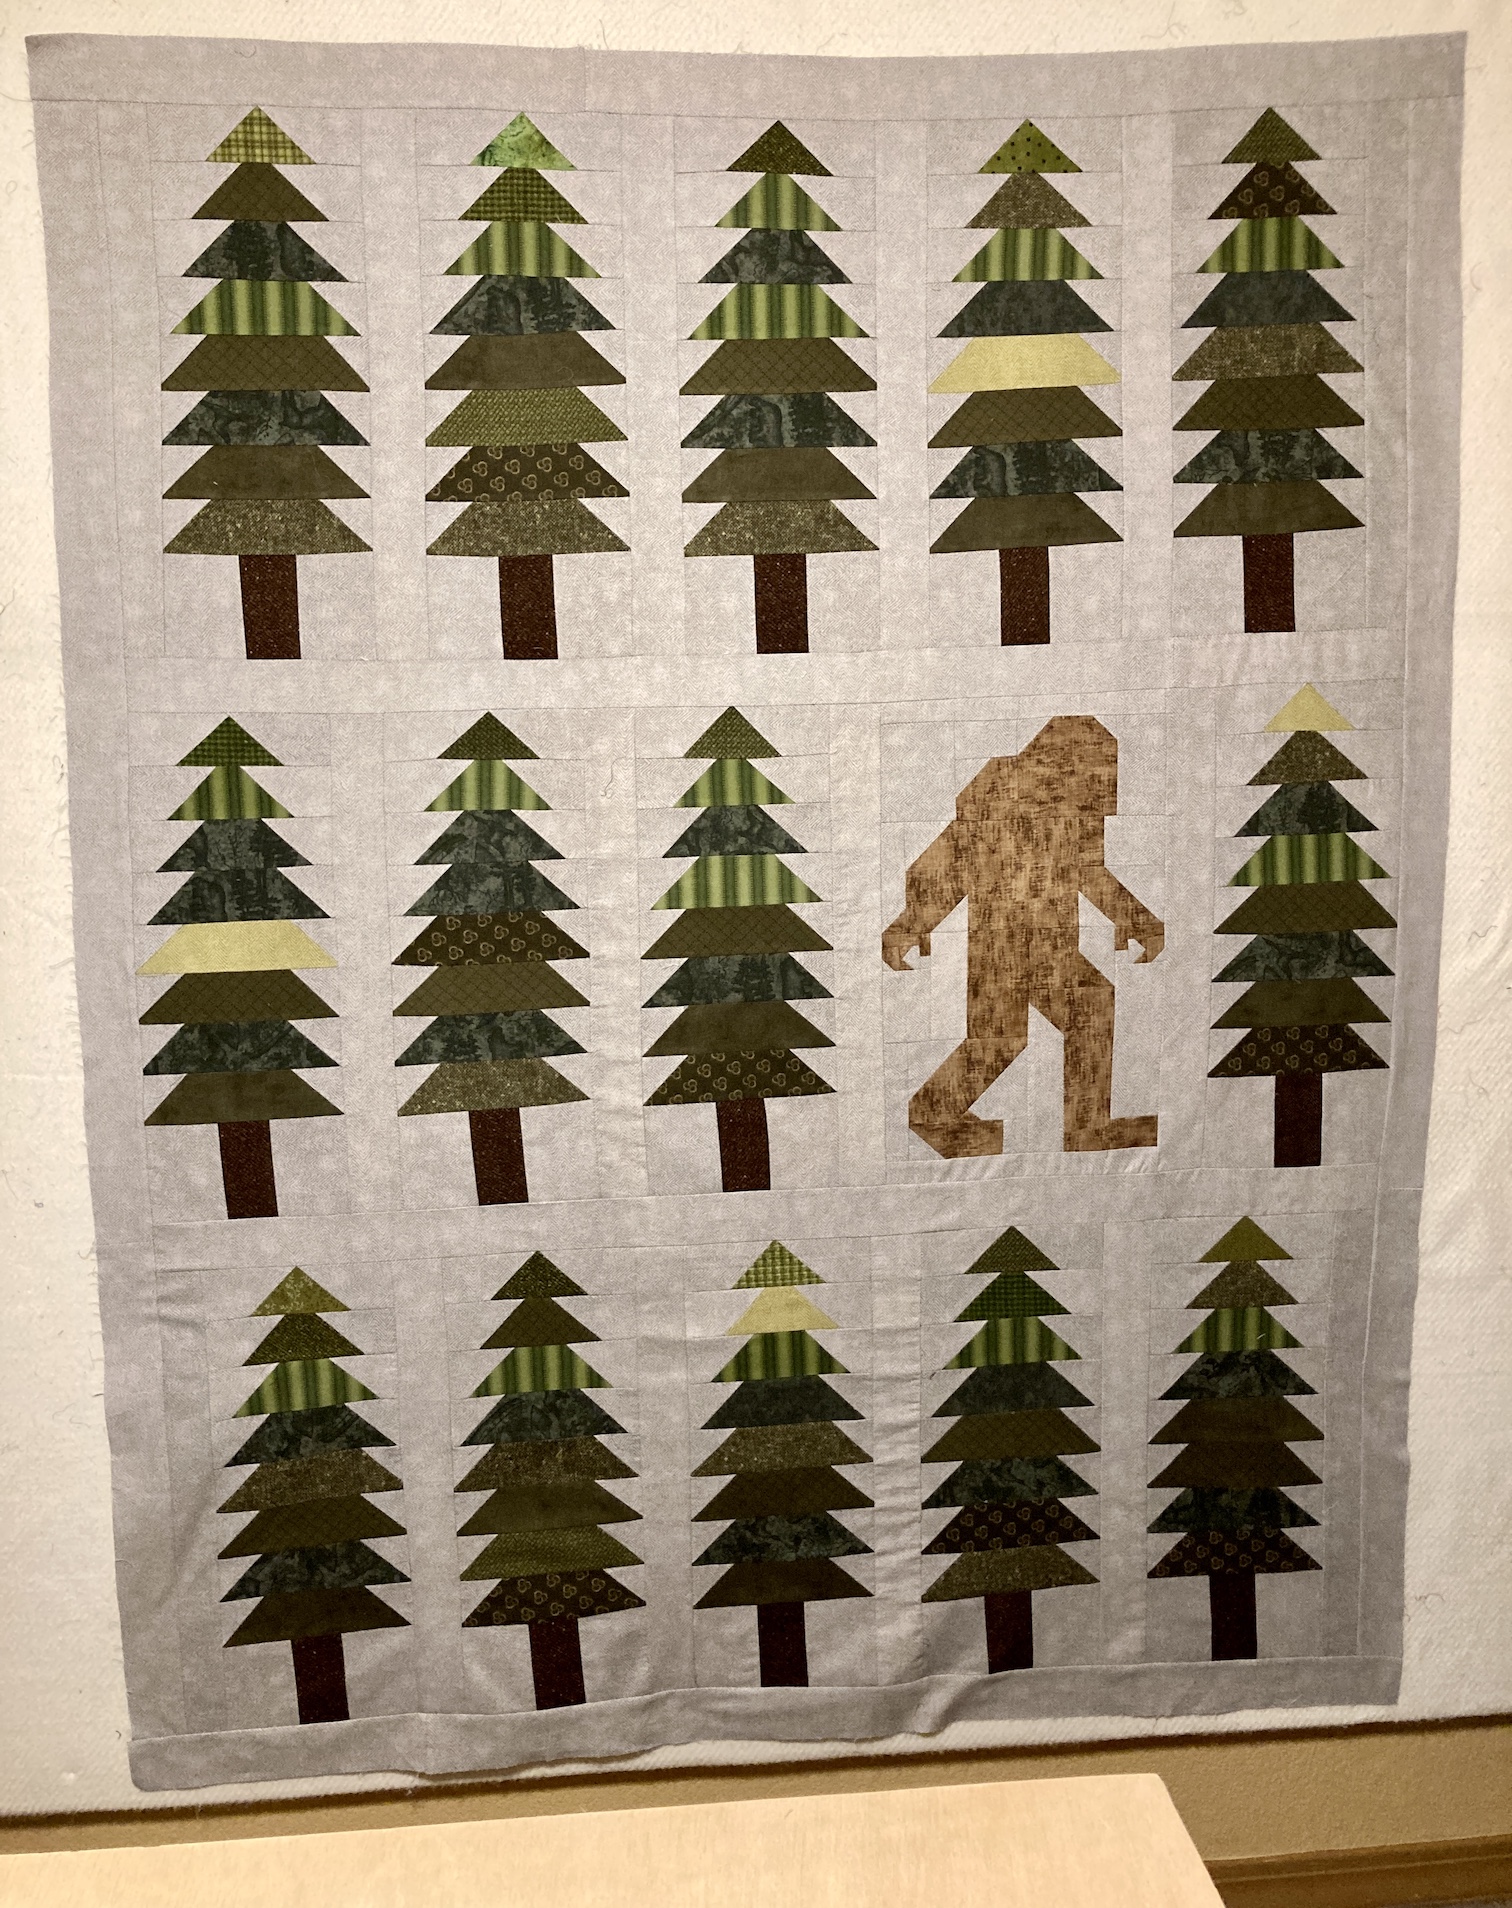
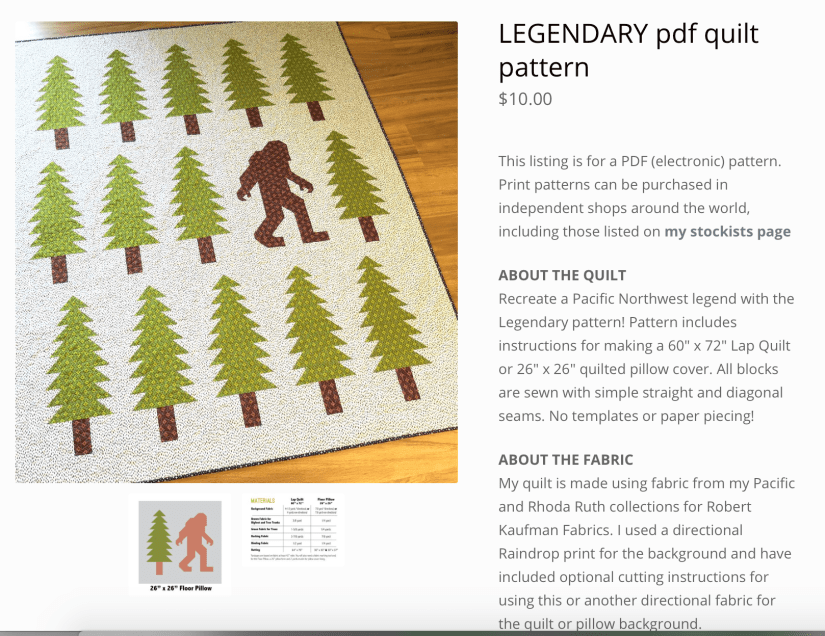
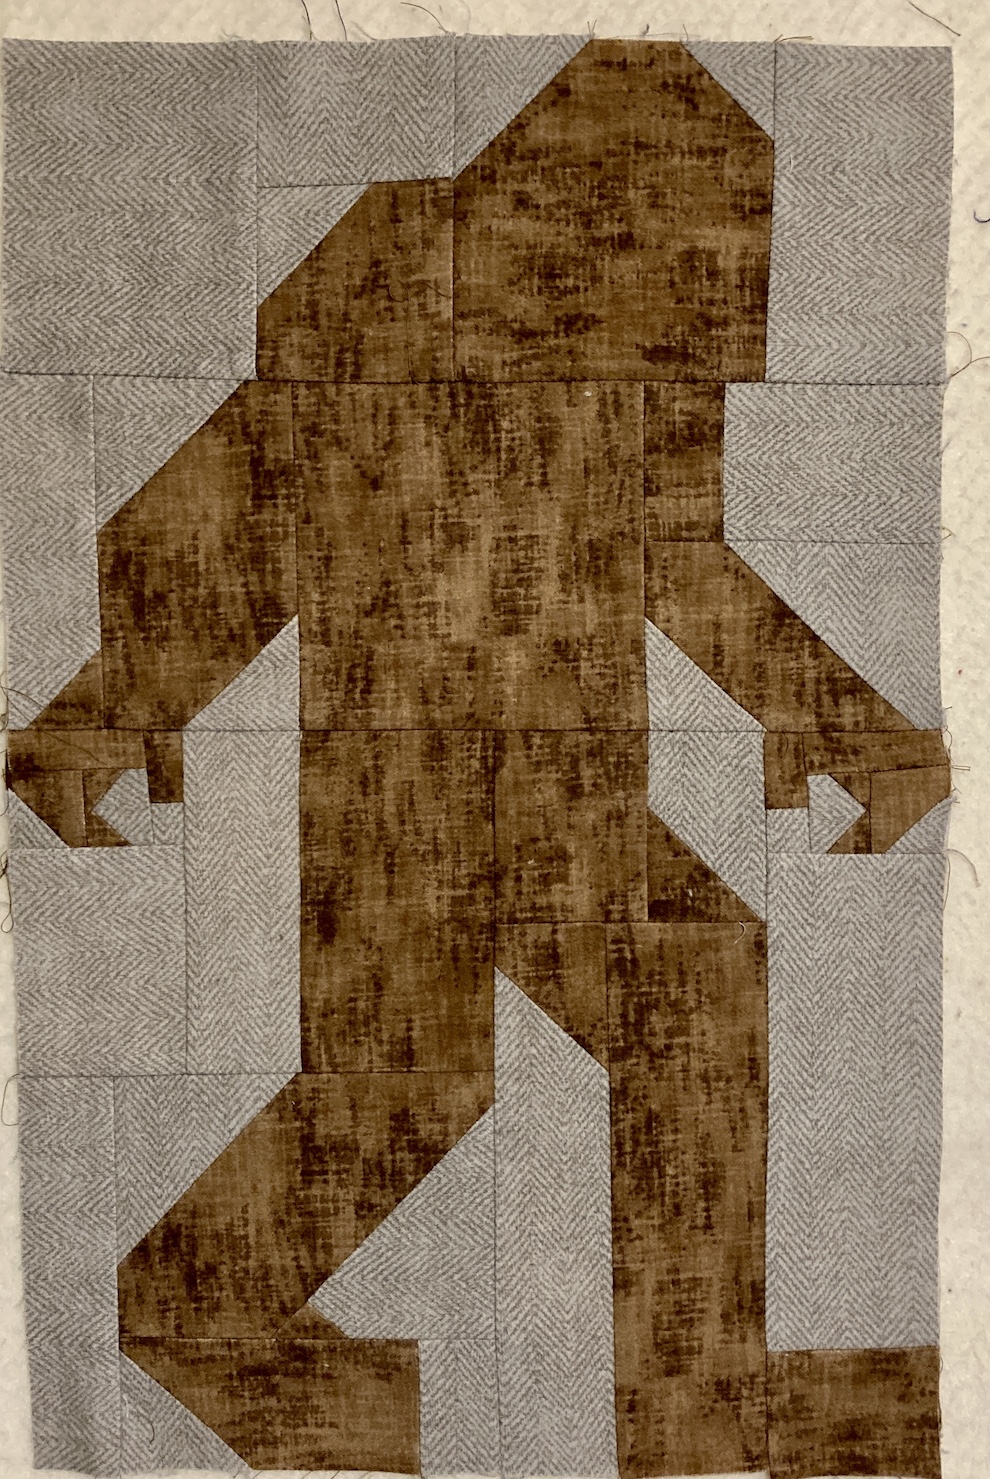
Back in 2018 several of my quilting friends were working on Elizabeth Hartman’s Legendary pattern, which featured a Sasquatch (“Bigfoot”) wandering through the woods.
I did a blog post about those quilts in progress (and completed quilt) in the post Sasquatch Sightings.
Back in 2018 my friend Kathy gave me the leftover flannel scraps and yardage from her Legendary quilt, some of which came from our friend Dana who also made the quilt.
Nearly three years later I am finally making my own Sasquatch quilt and discovered that Kathy gave me enough flannel fabric to make the entire quilt! And I might even have enough to piece a back for the quilt!
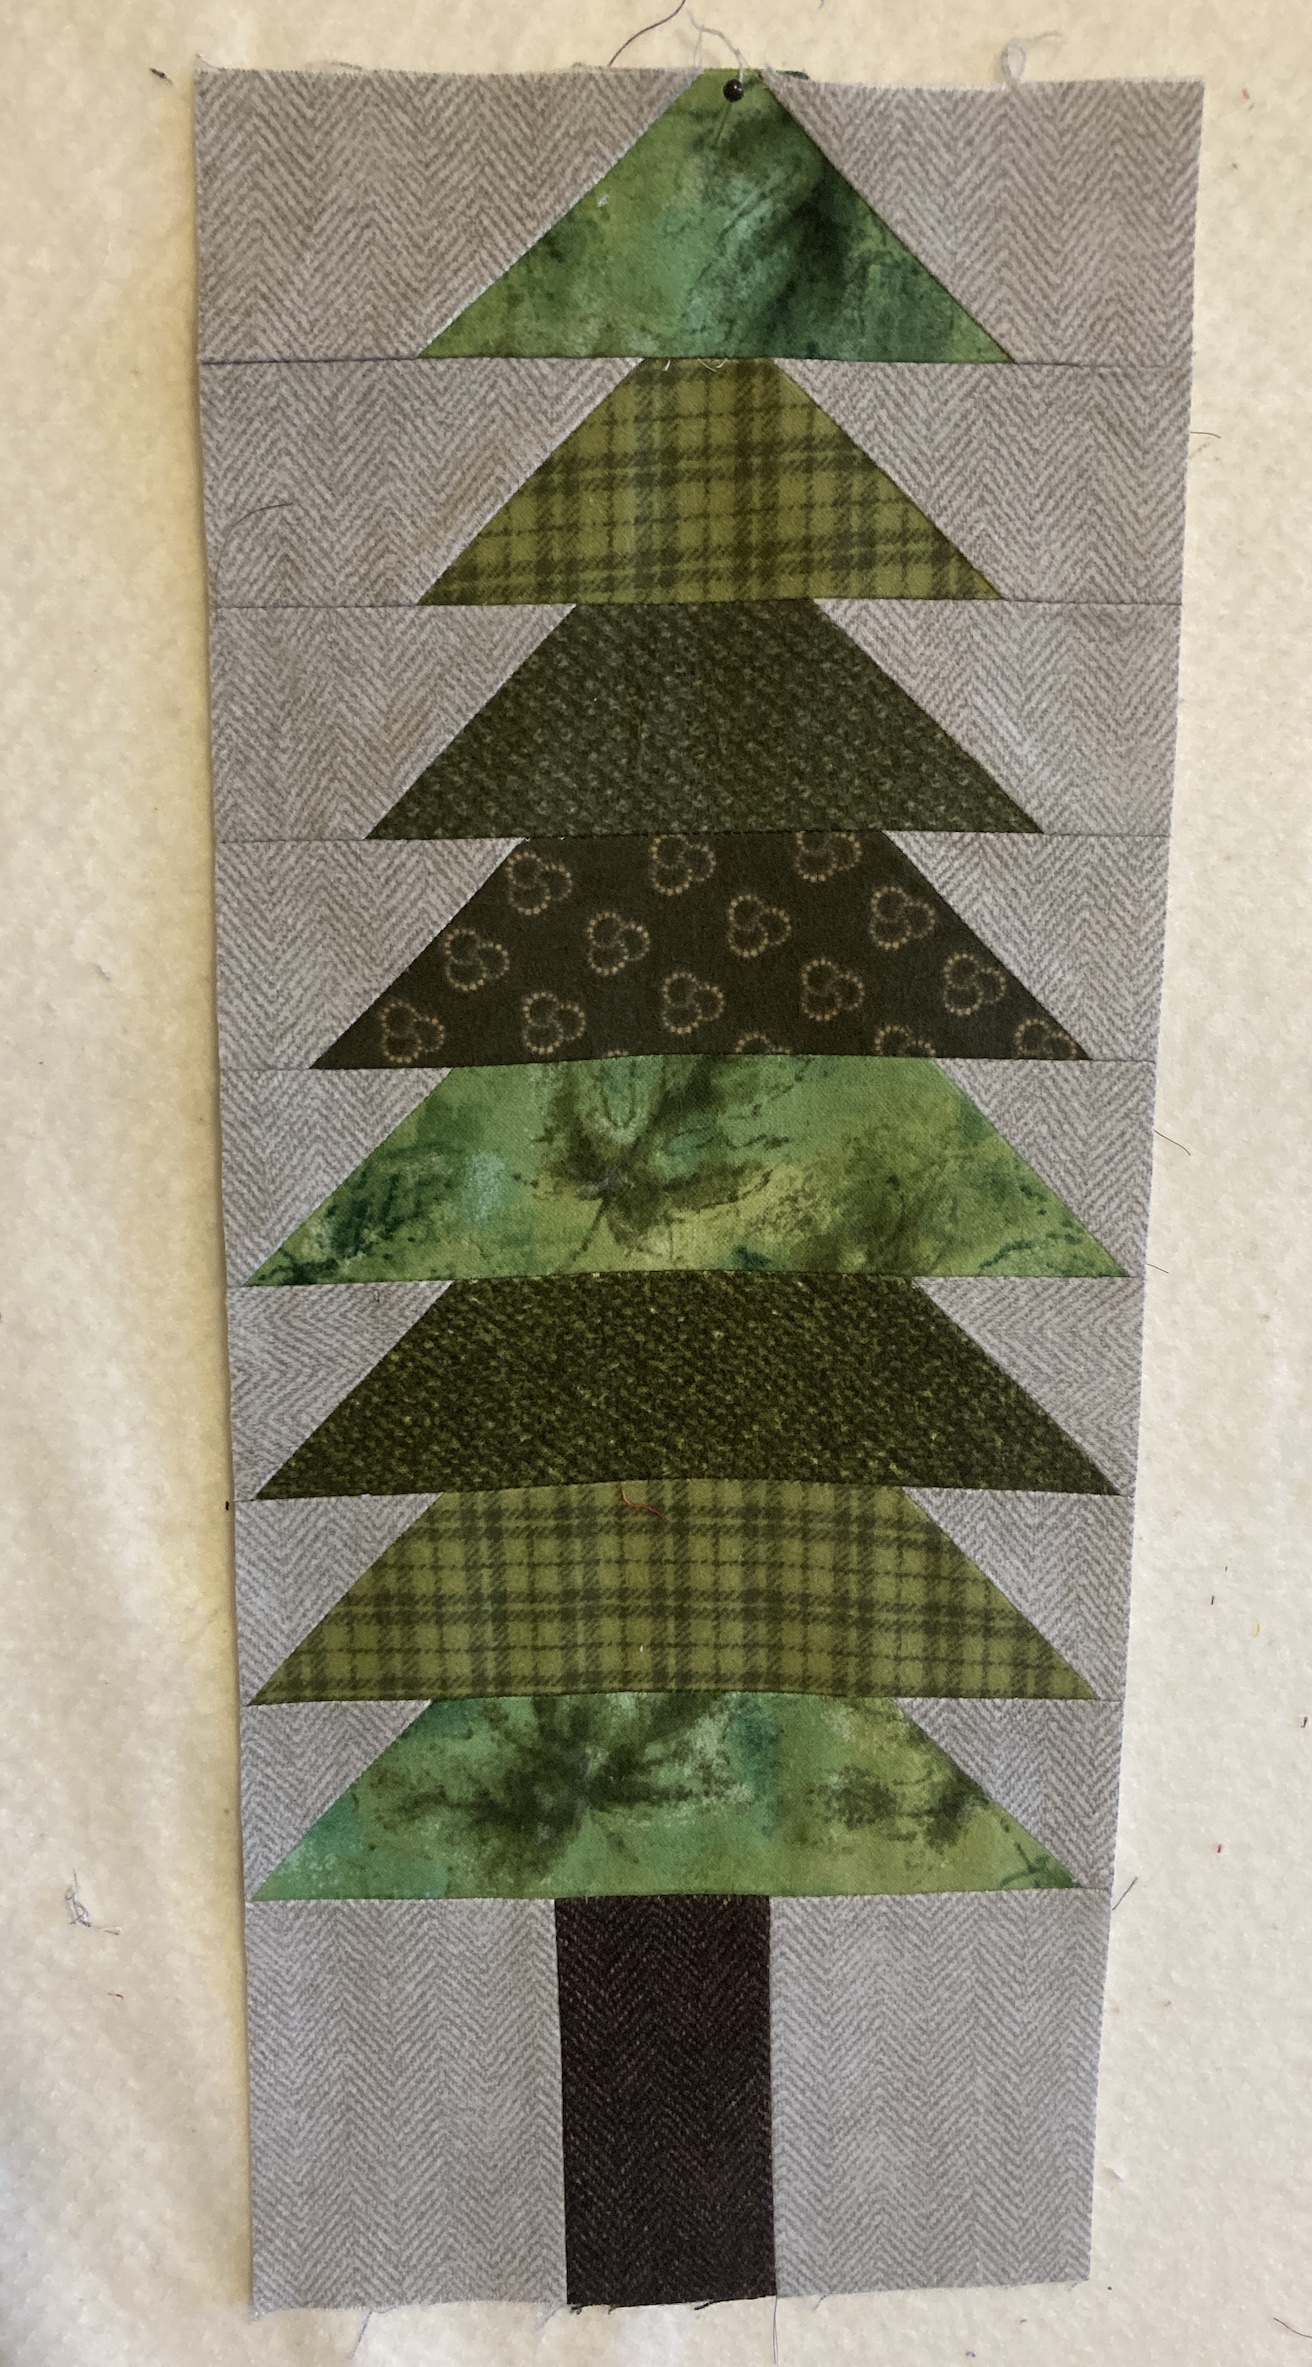
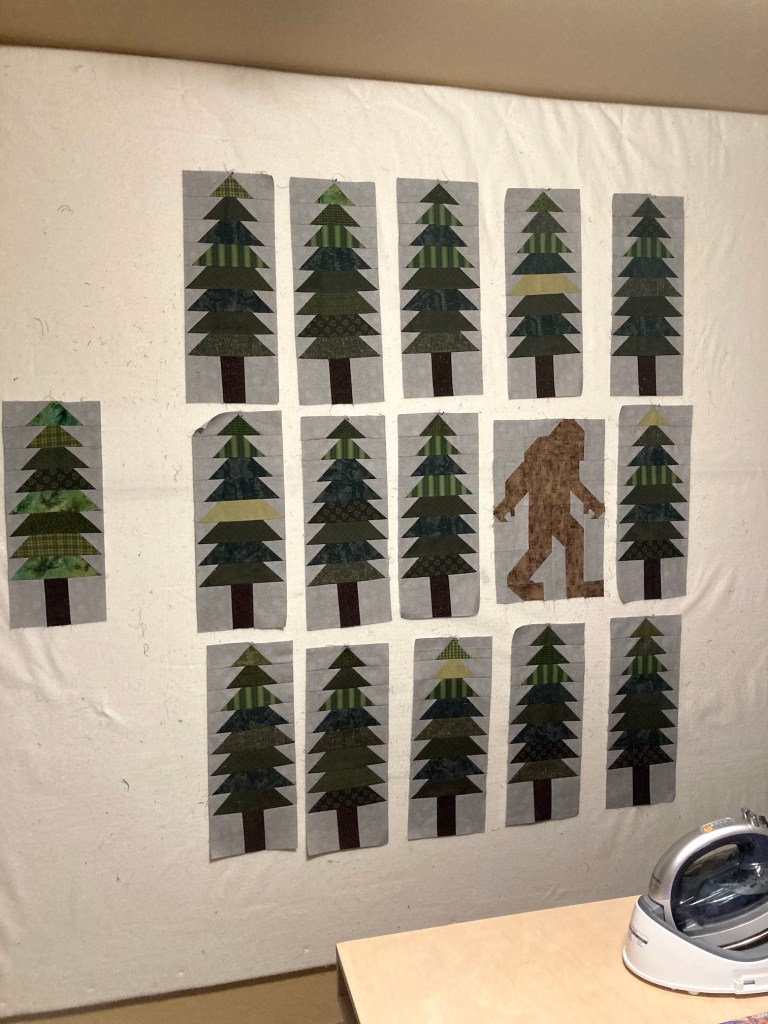
First I made the flannel trees:
The tree on the far left is made from leftover piecings from the quilt Kathy made. I am going to put it on the pieced back of the quilt to honor her generosity!
Once I made 14 flannel trees it was time for the challenging part of the quilt – making the pieced Sasquatch which involves over 36+ pieced sections.
I worked on the hands first, which involved the smallest pieces, to get through that first:
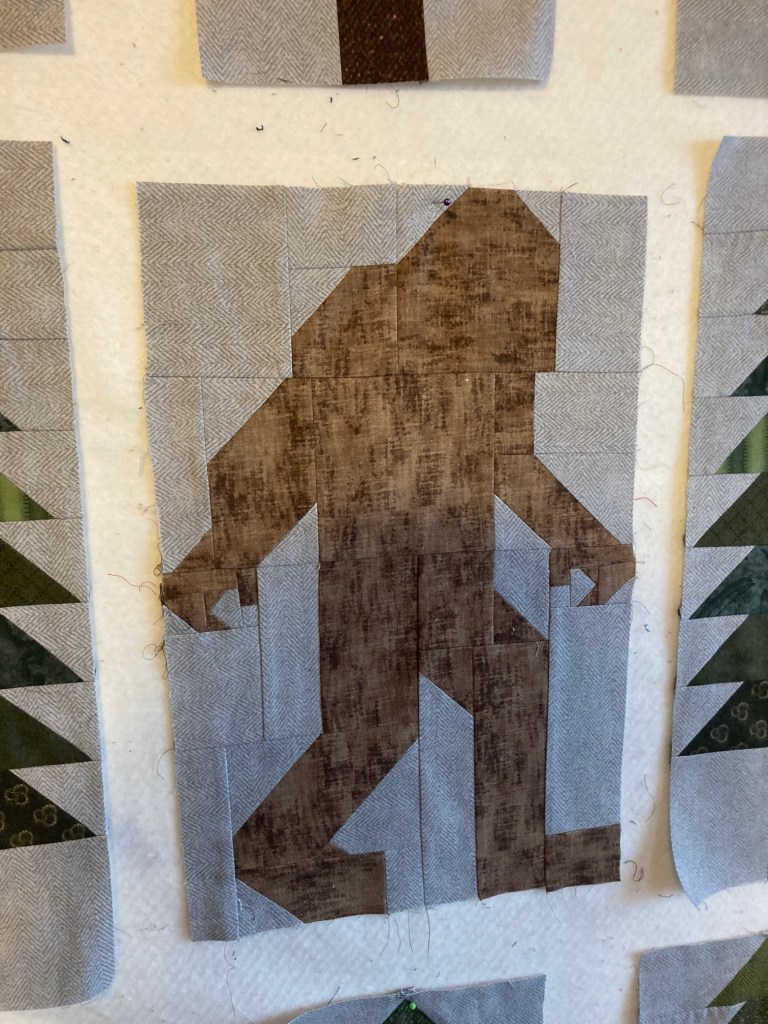
It took a couple sessions to get Sasquatch done but finally he was complete!
And now he is on the design wall with the rest of the blocks awaiting for me to cut the sashing that goes between the blocks:
I am going to send this quilt out to be professionally quilted once I finish piecing the front and the back.
It will be awesome to have my own “Sasquatch Sighting”!
This is sort of part 2 of the May 6th post Out of town guests? Put them to work!. We didn’t just make our friends visiting from Oregon work on home remodeling projects, we did actually take them sightseeing.
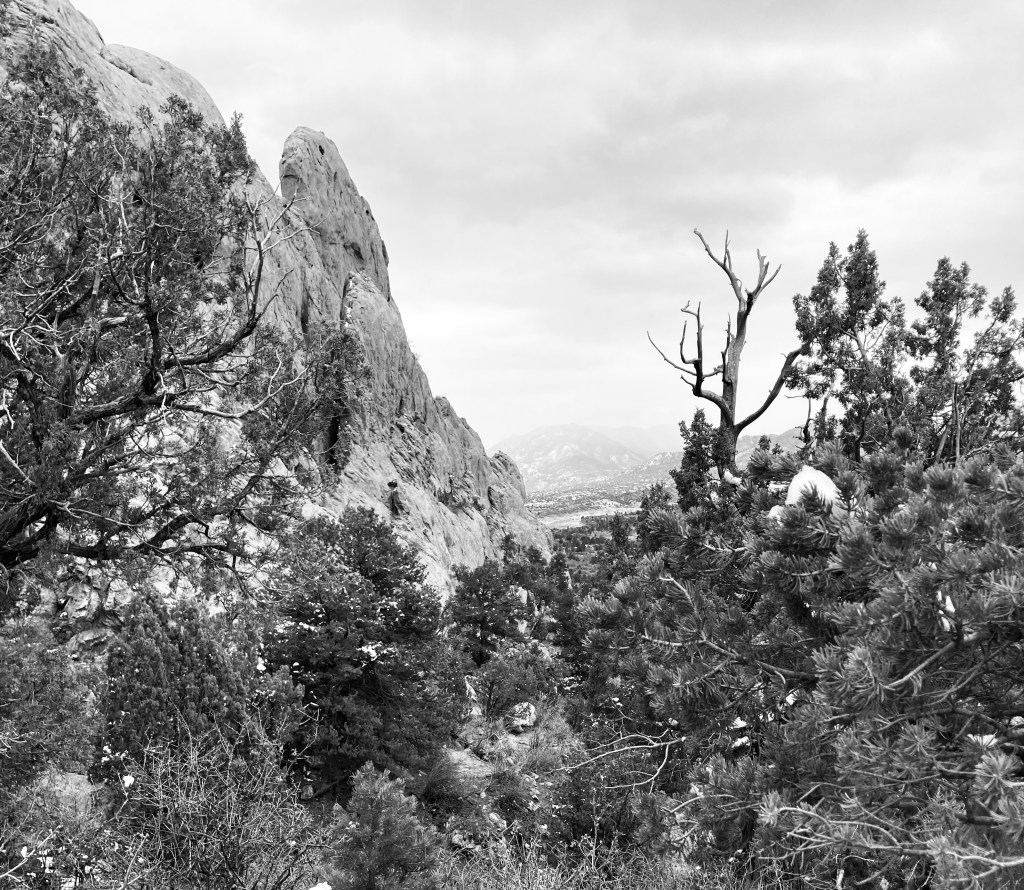
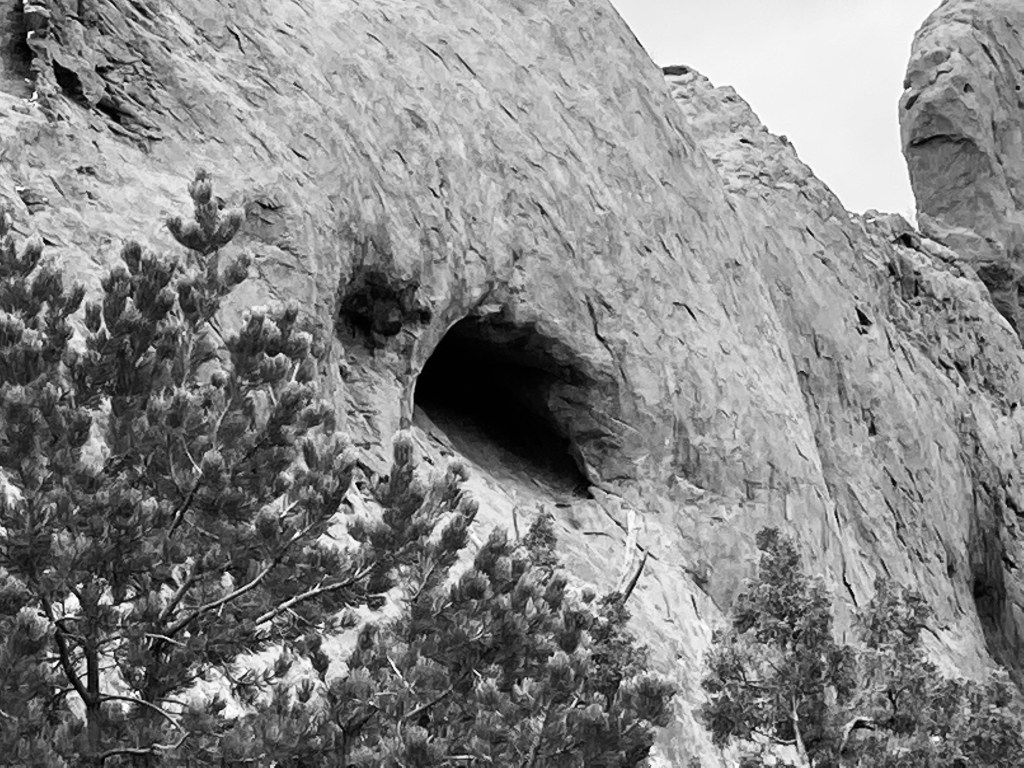
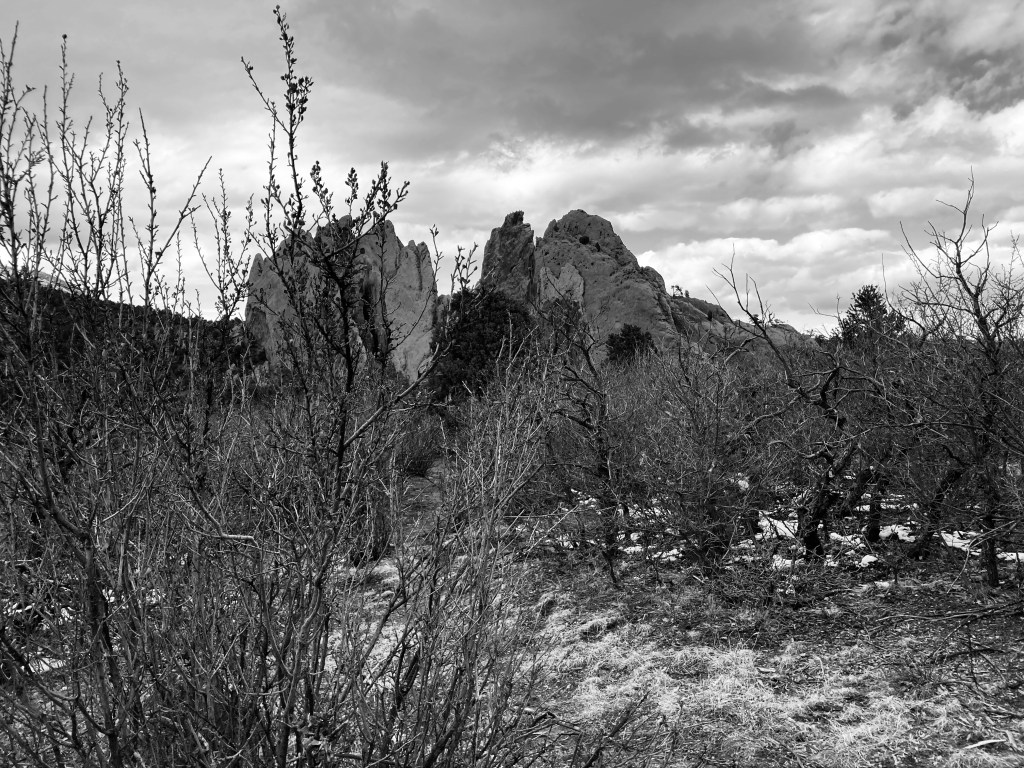
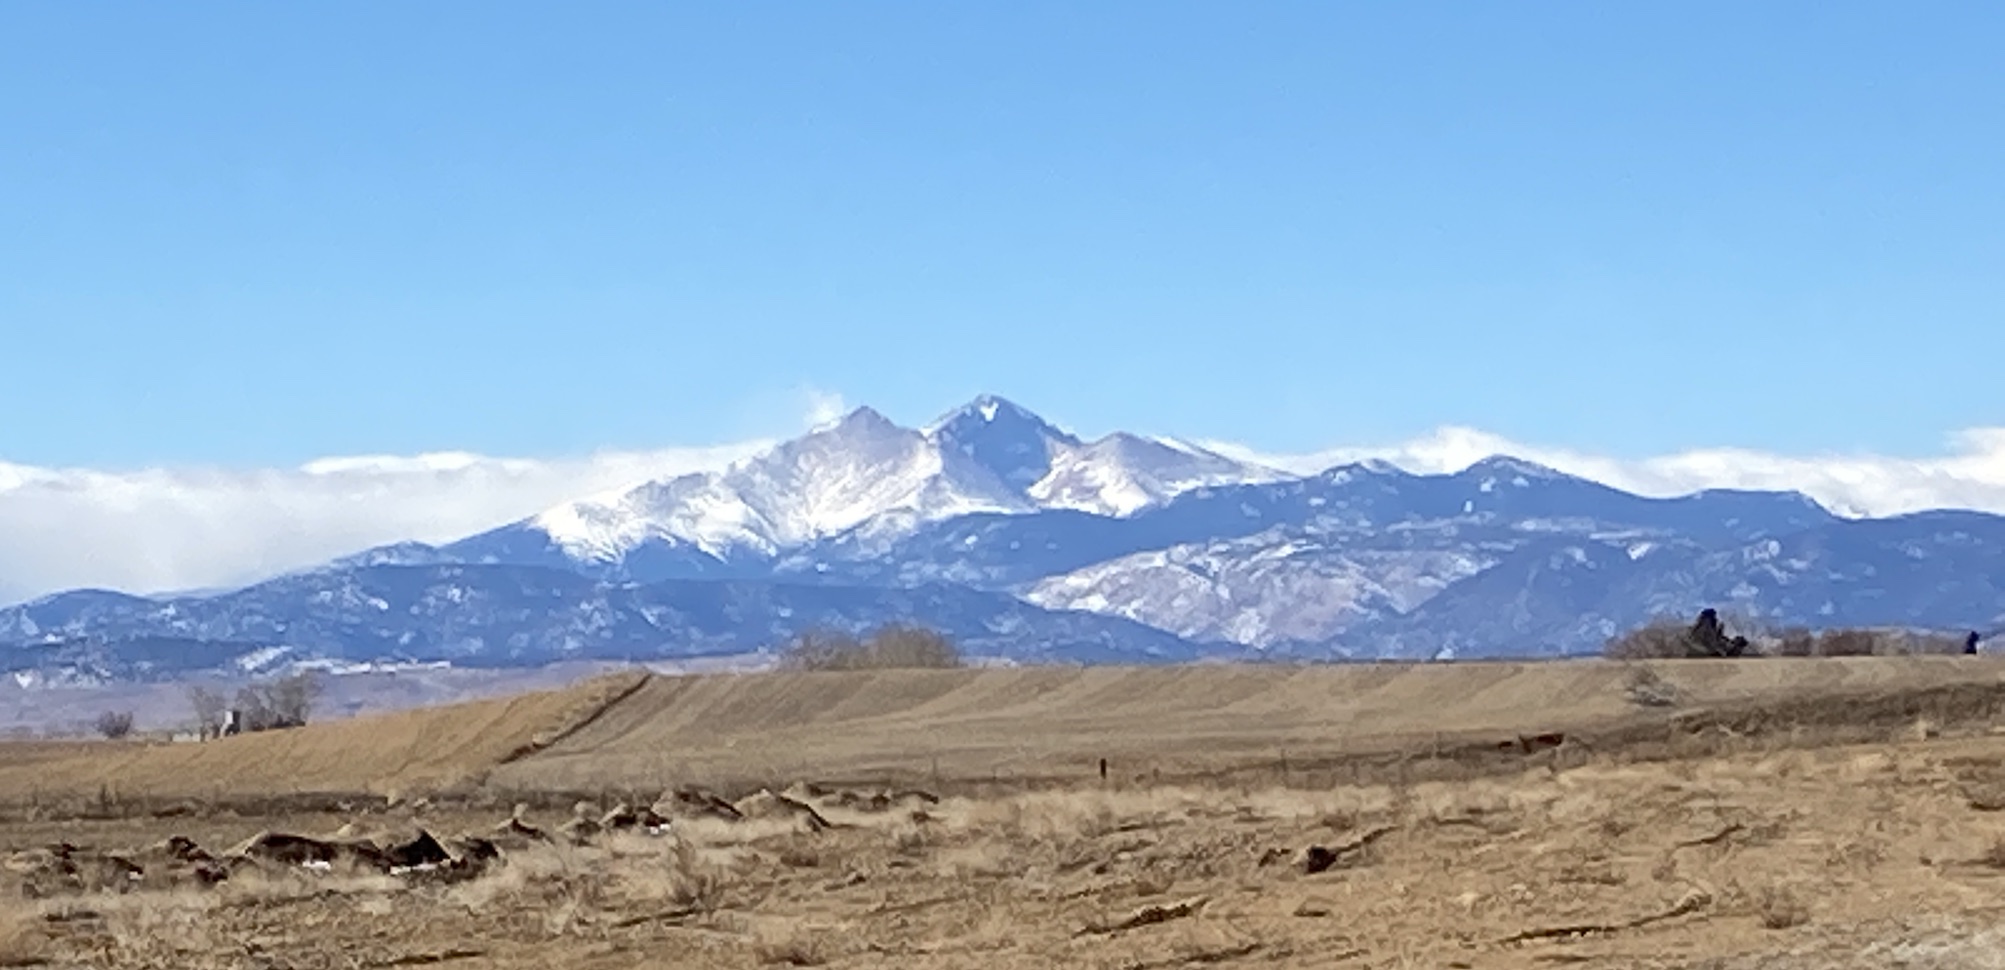
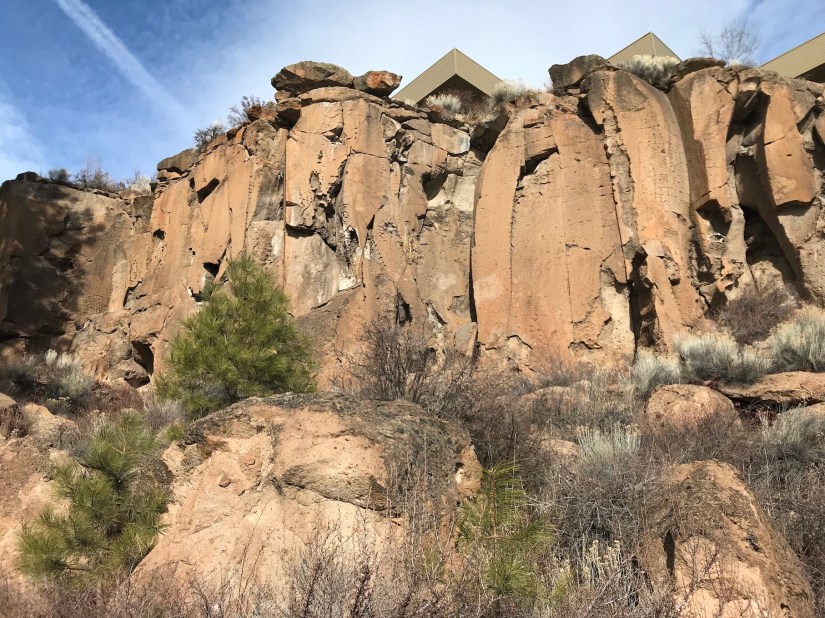
The weather was cold and a bit snowy during their visit but they really wanted to see the Garden of the Gods in Colorado Springs, Colorado. According to Wikipedia, The Garden of the Gods is comprised of “red rock formations were created during a geological upheaval along a natural fault line millions of years ago”.
This was my second time there and very different from my first visit in August 2019 when we took my visiting sister and nephew there (see post And on the 8th Day…Part I). It was much sunnier and much warmer in August.
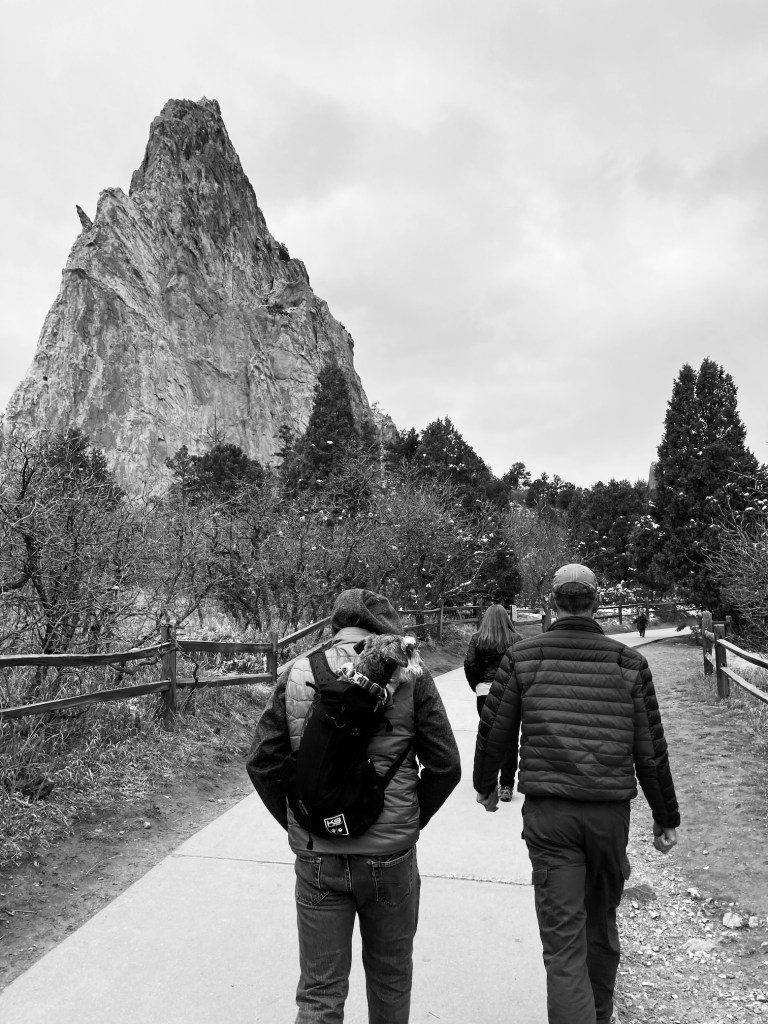
In honor of the difference between the warm August and cold/snowy early April visit, I took photos in Black & White instead of color.
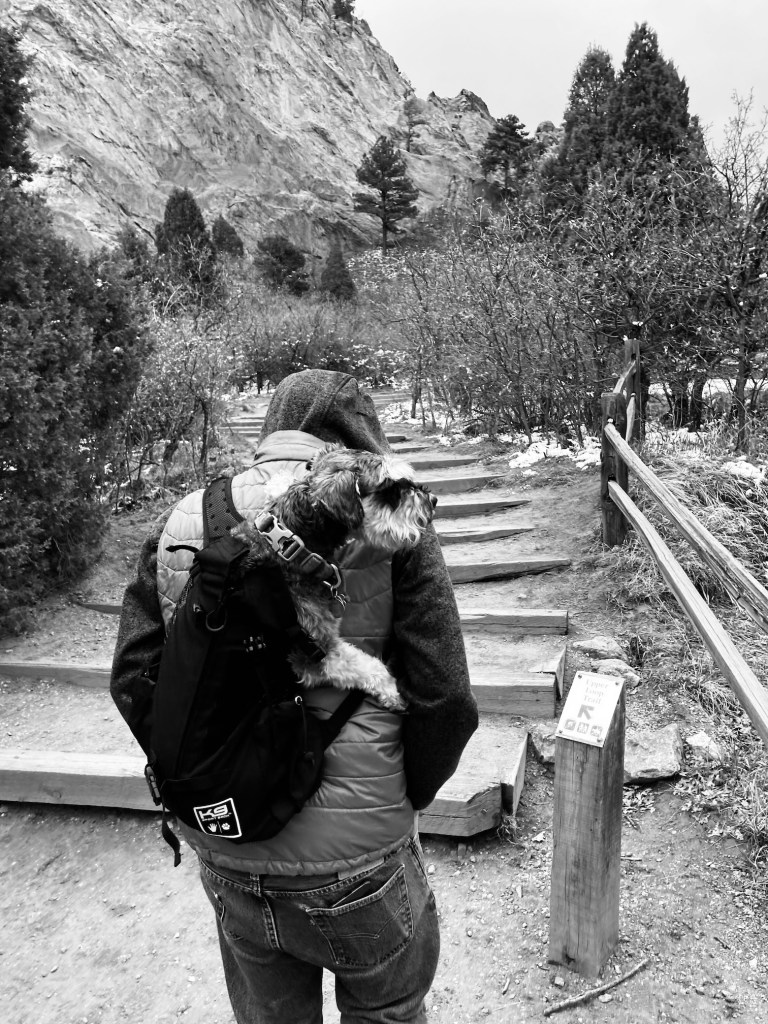
Here is a photo journal of the day – enjoy (or cringe at my attempt to be a B&W photographer, ha!):
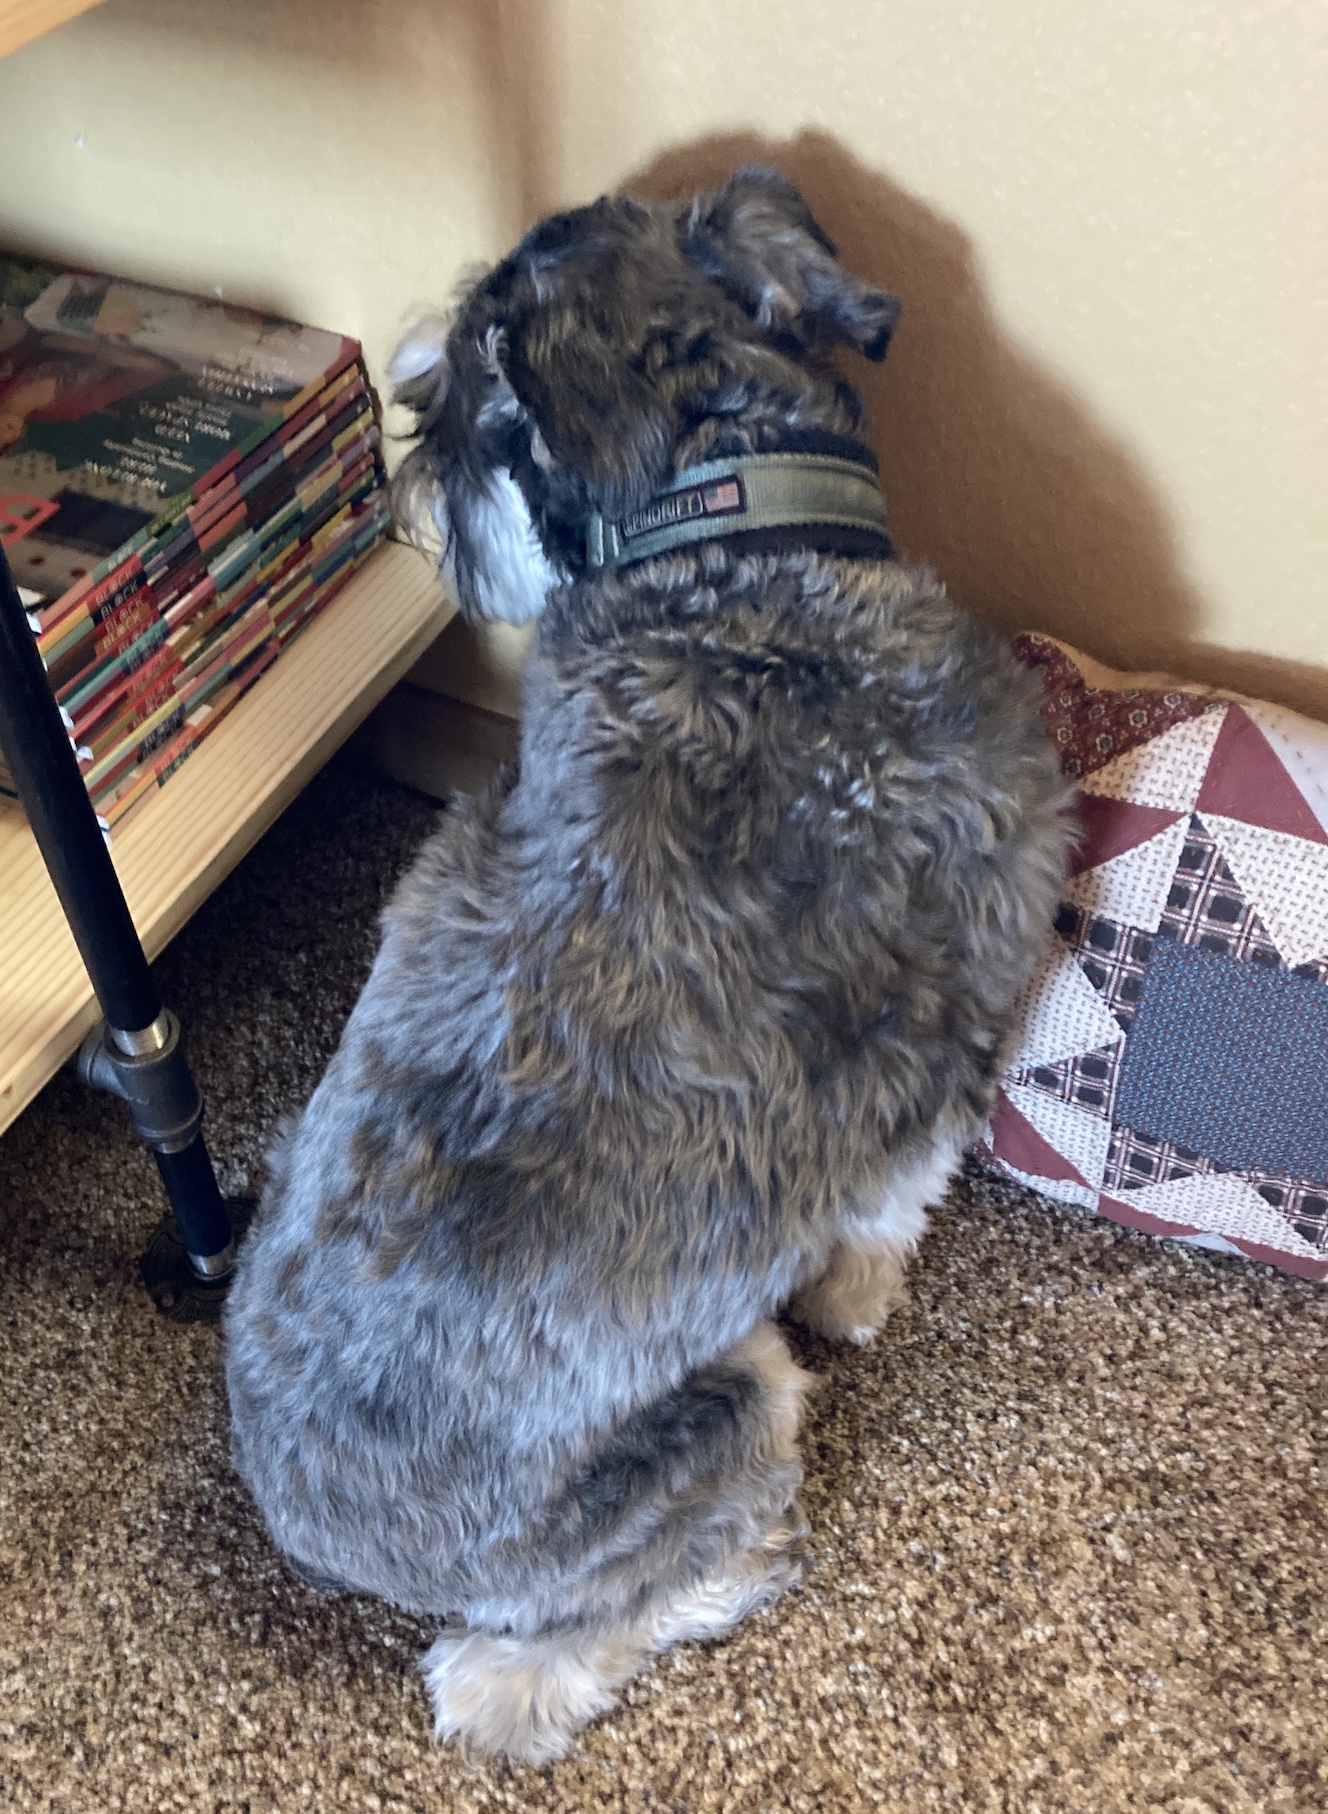
And yes, Mike the Miniature Schnauzer joined us in the backpack.
You can’t have your guest visiting from out of town just hanging out at your house and relaxing. And you absolutely do not want them expecting you to take them sight-seeing or anything like that while they visit!
Instead, you need to put them to work on home remodeling projects! (smile)
April was a busy month. Besides visiting Orlando, Florida (see post Oh Orlando), we also had two sets of out of town guests visiting.
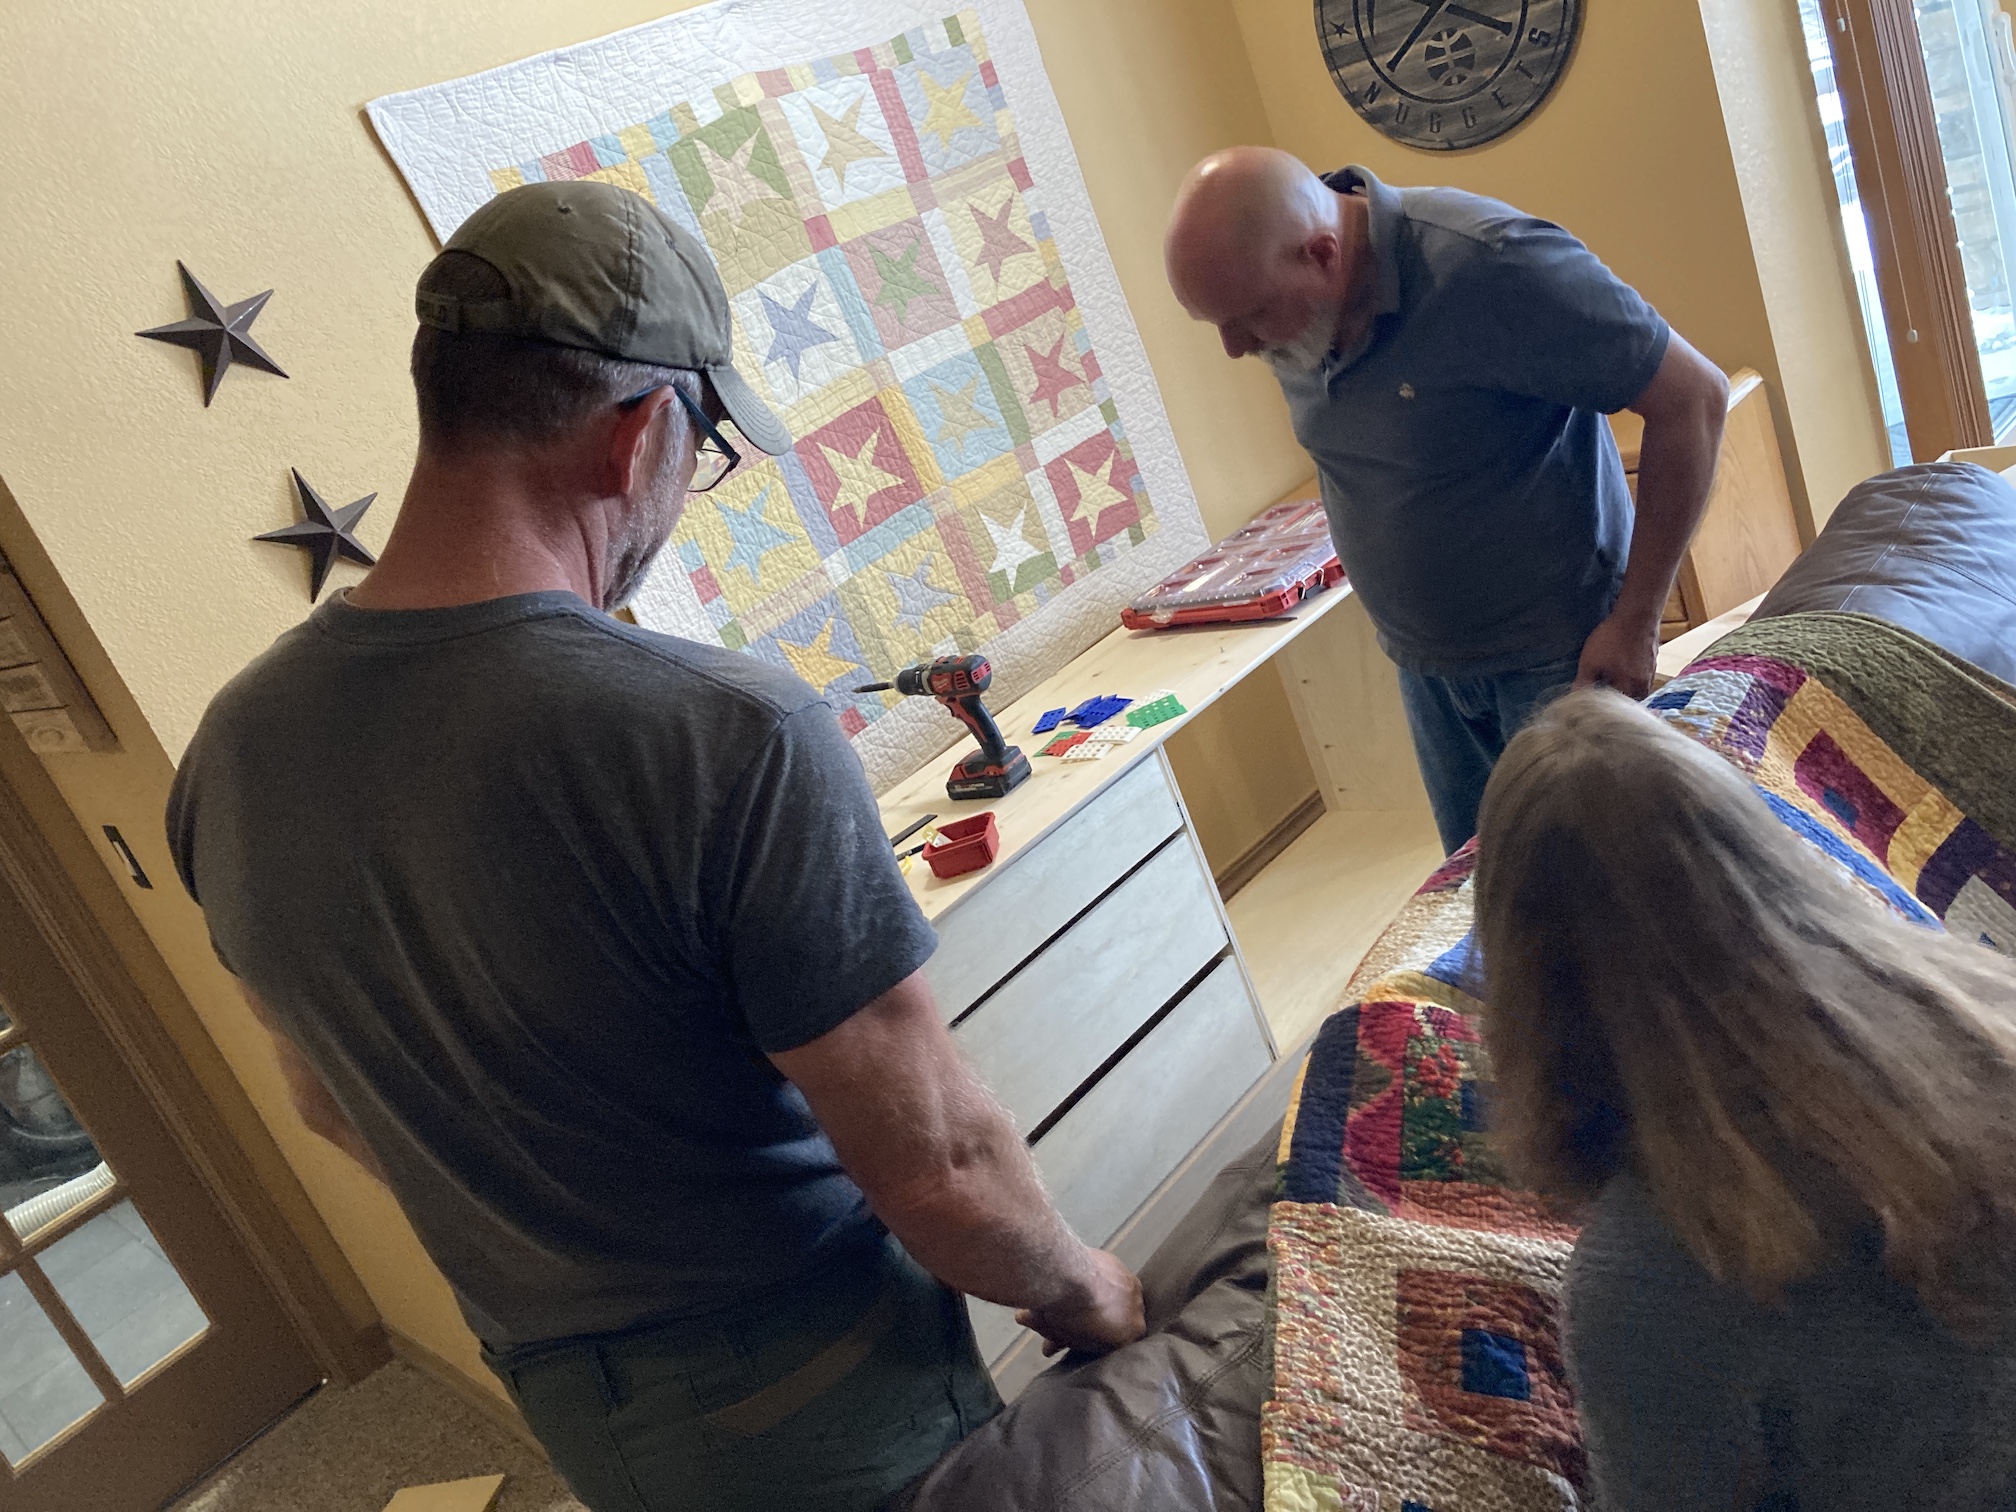
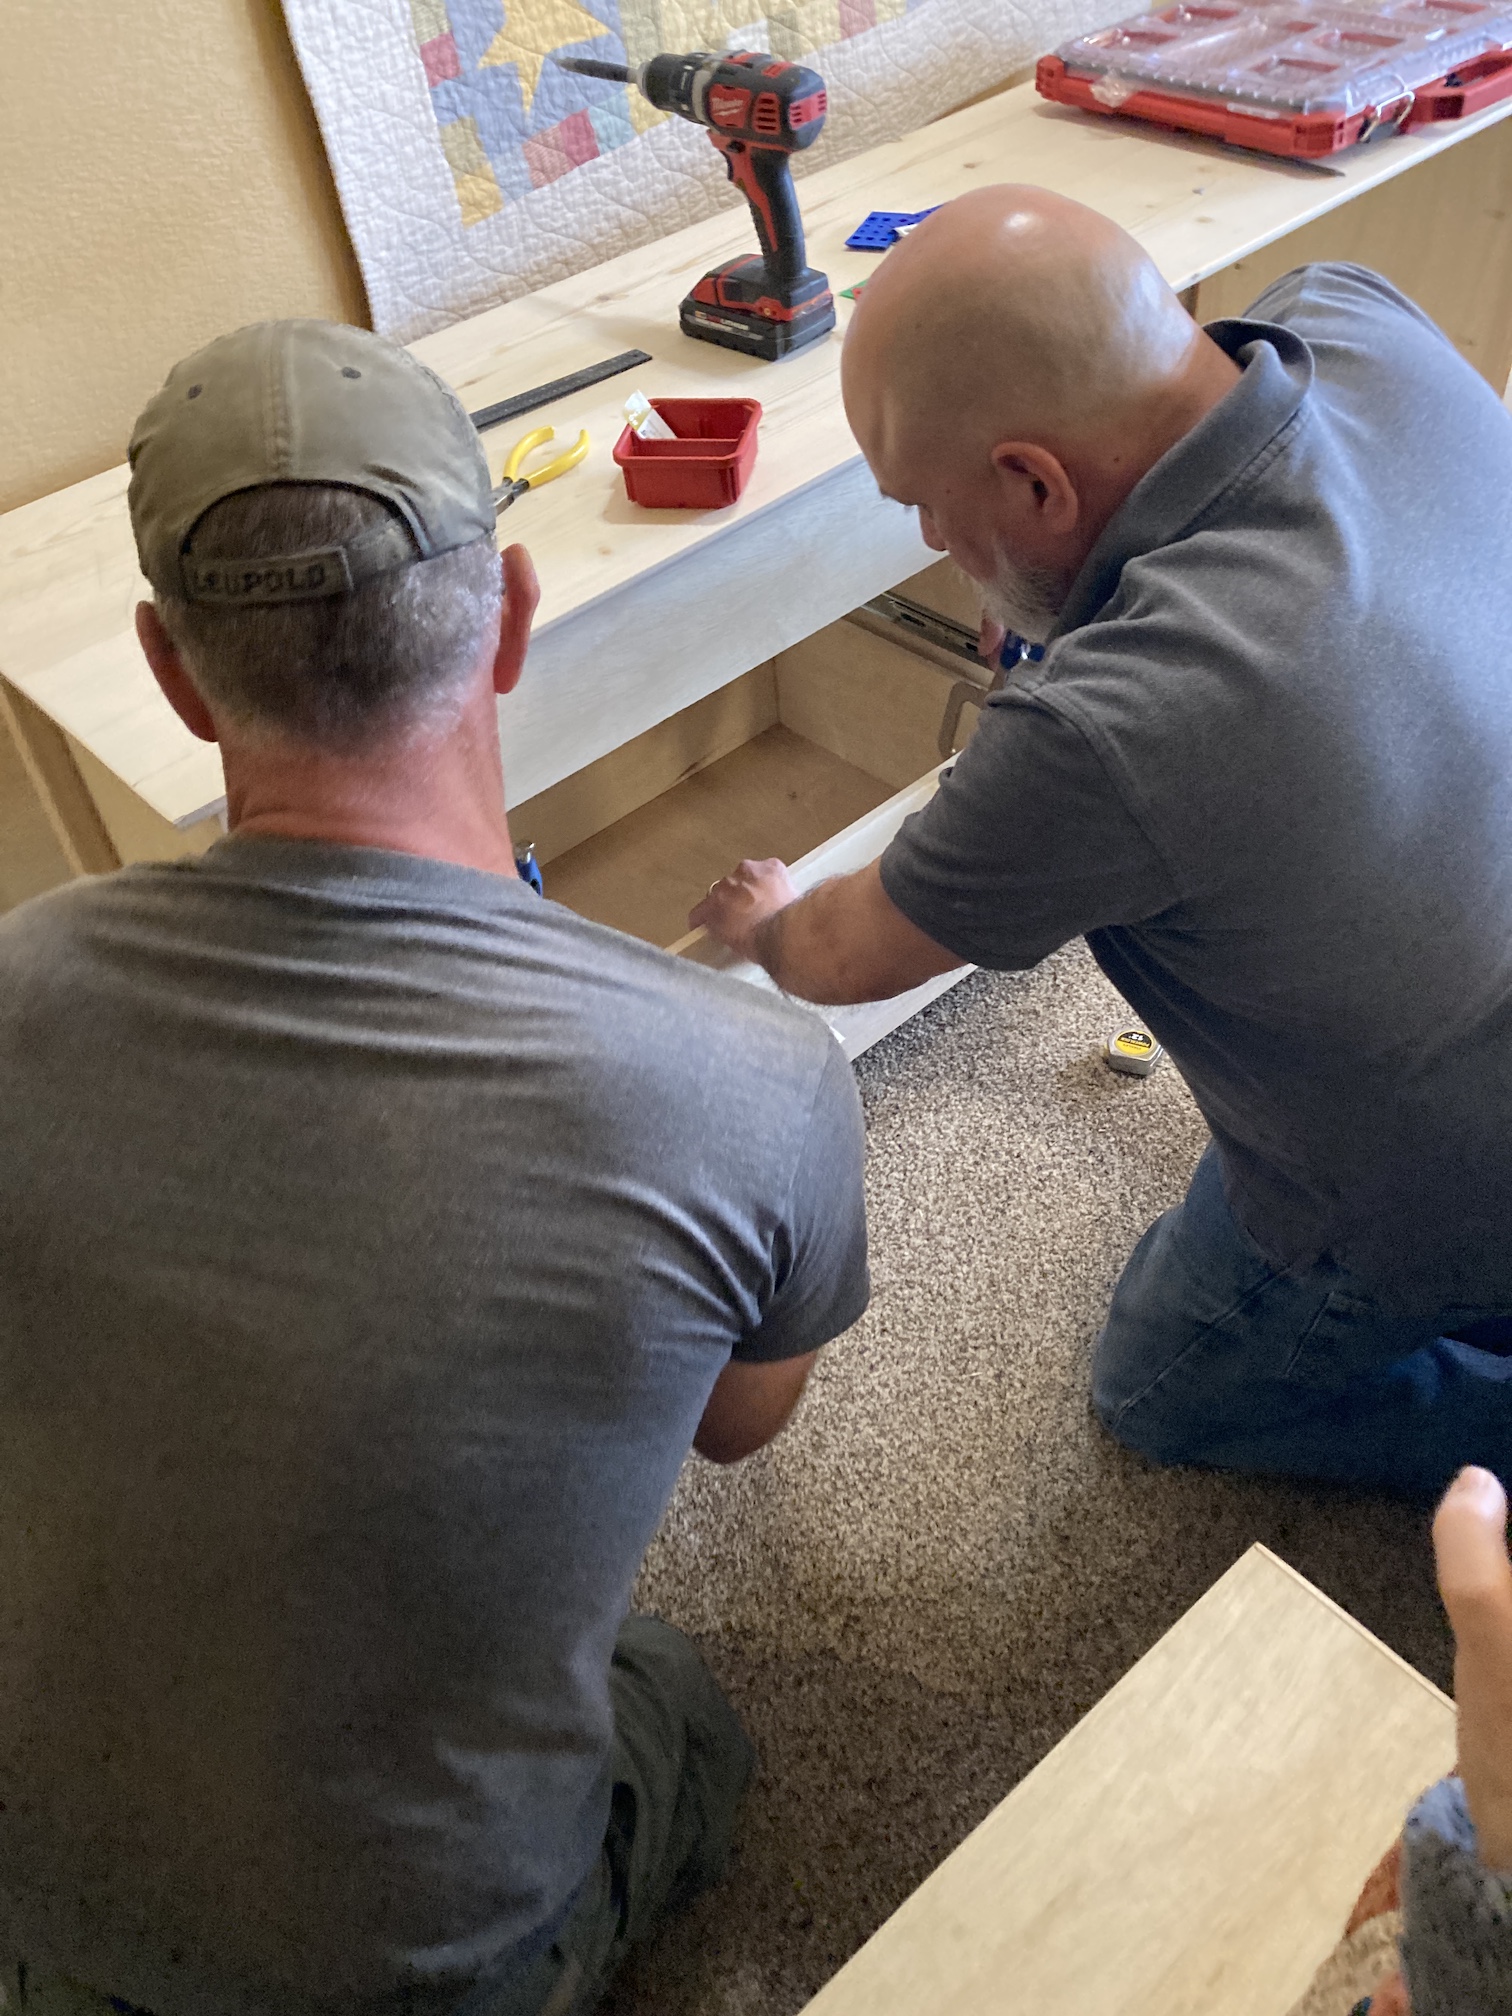
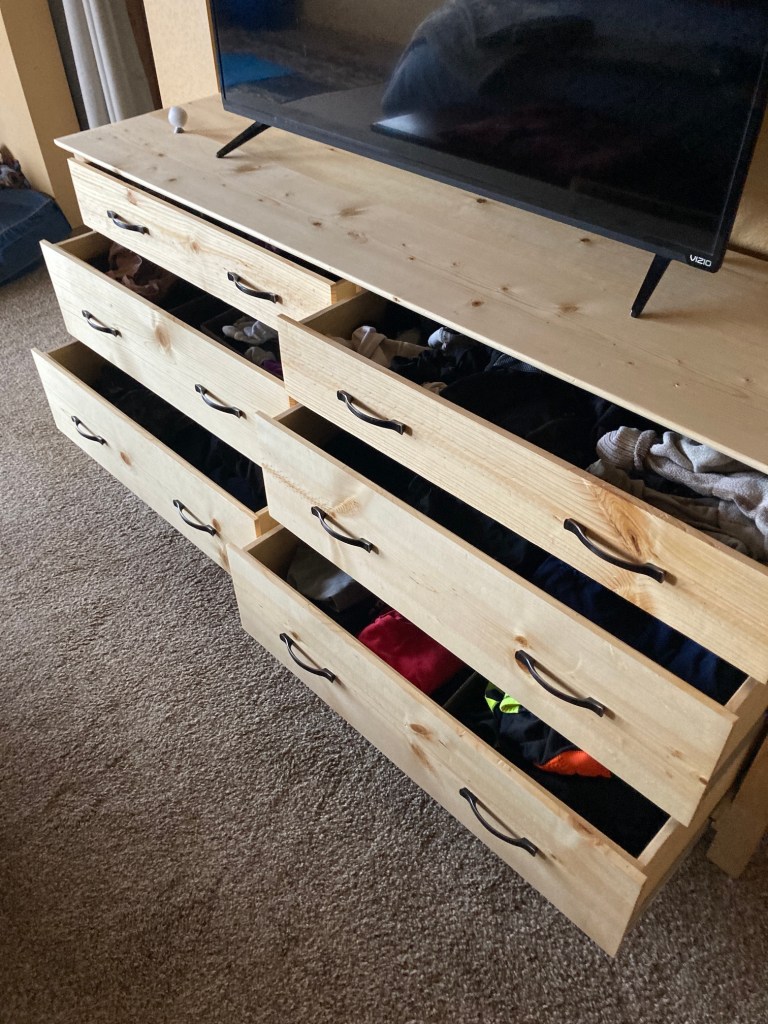
The first set of guests (Marla Jo and Jason) we used to help build a new dresser for our master bedroom. Actually Jason and my partner John worked on the dresser while Marla Jo and I sat around and binge watched television shows, snacked and chatted (yes, that was exhausting work!)
No we don’t just invite people to visit us and then use them for home projects. Jason is very handy (he does amazing builds and remodels) and enjoys working on projects. Also he wanted to learn how to make drawers and John has become very good at making drawers over the past year.
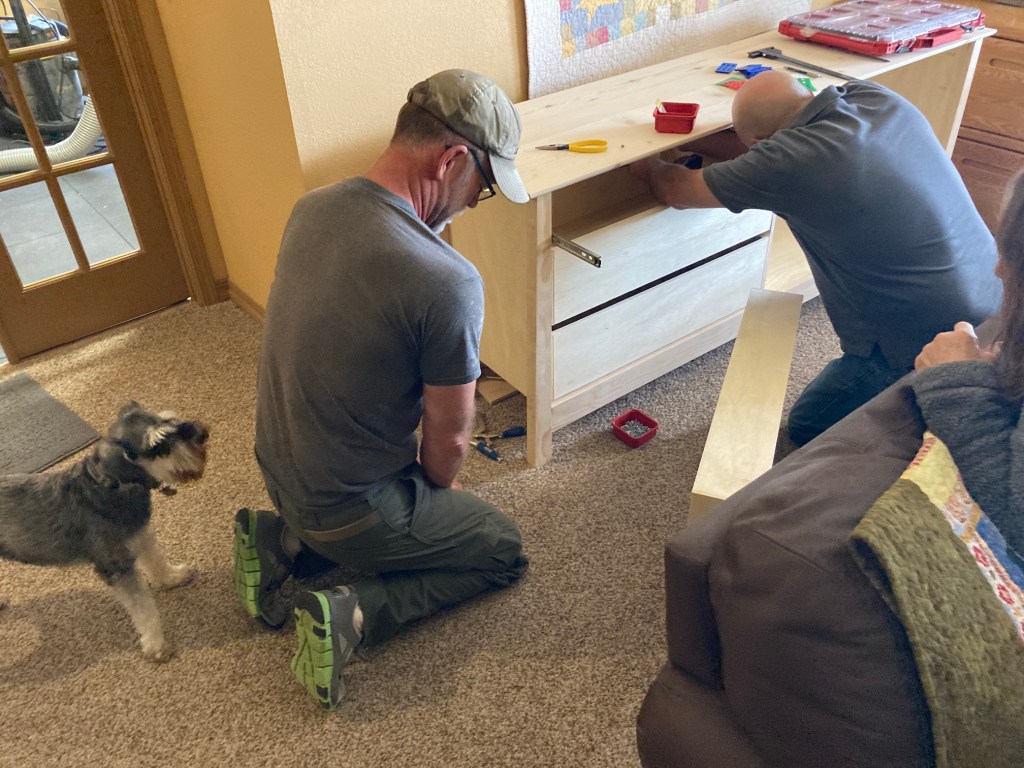
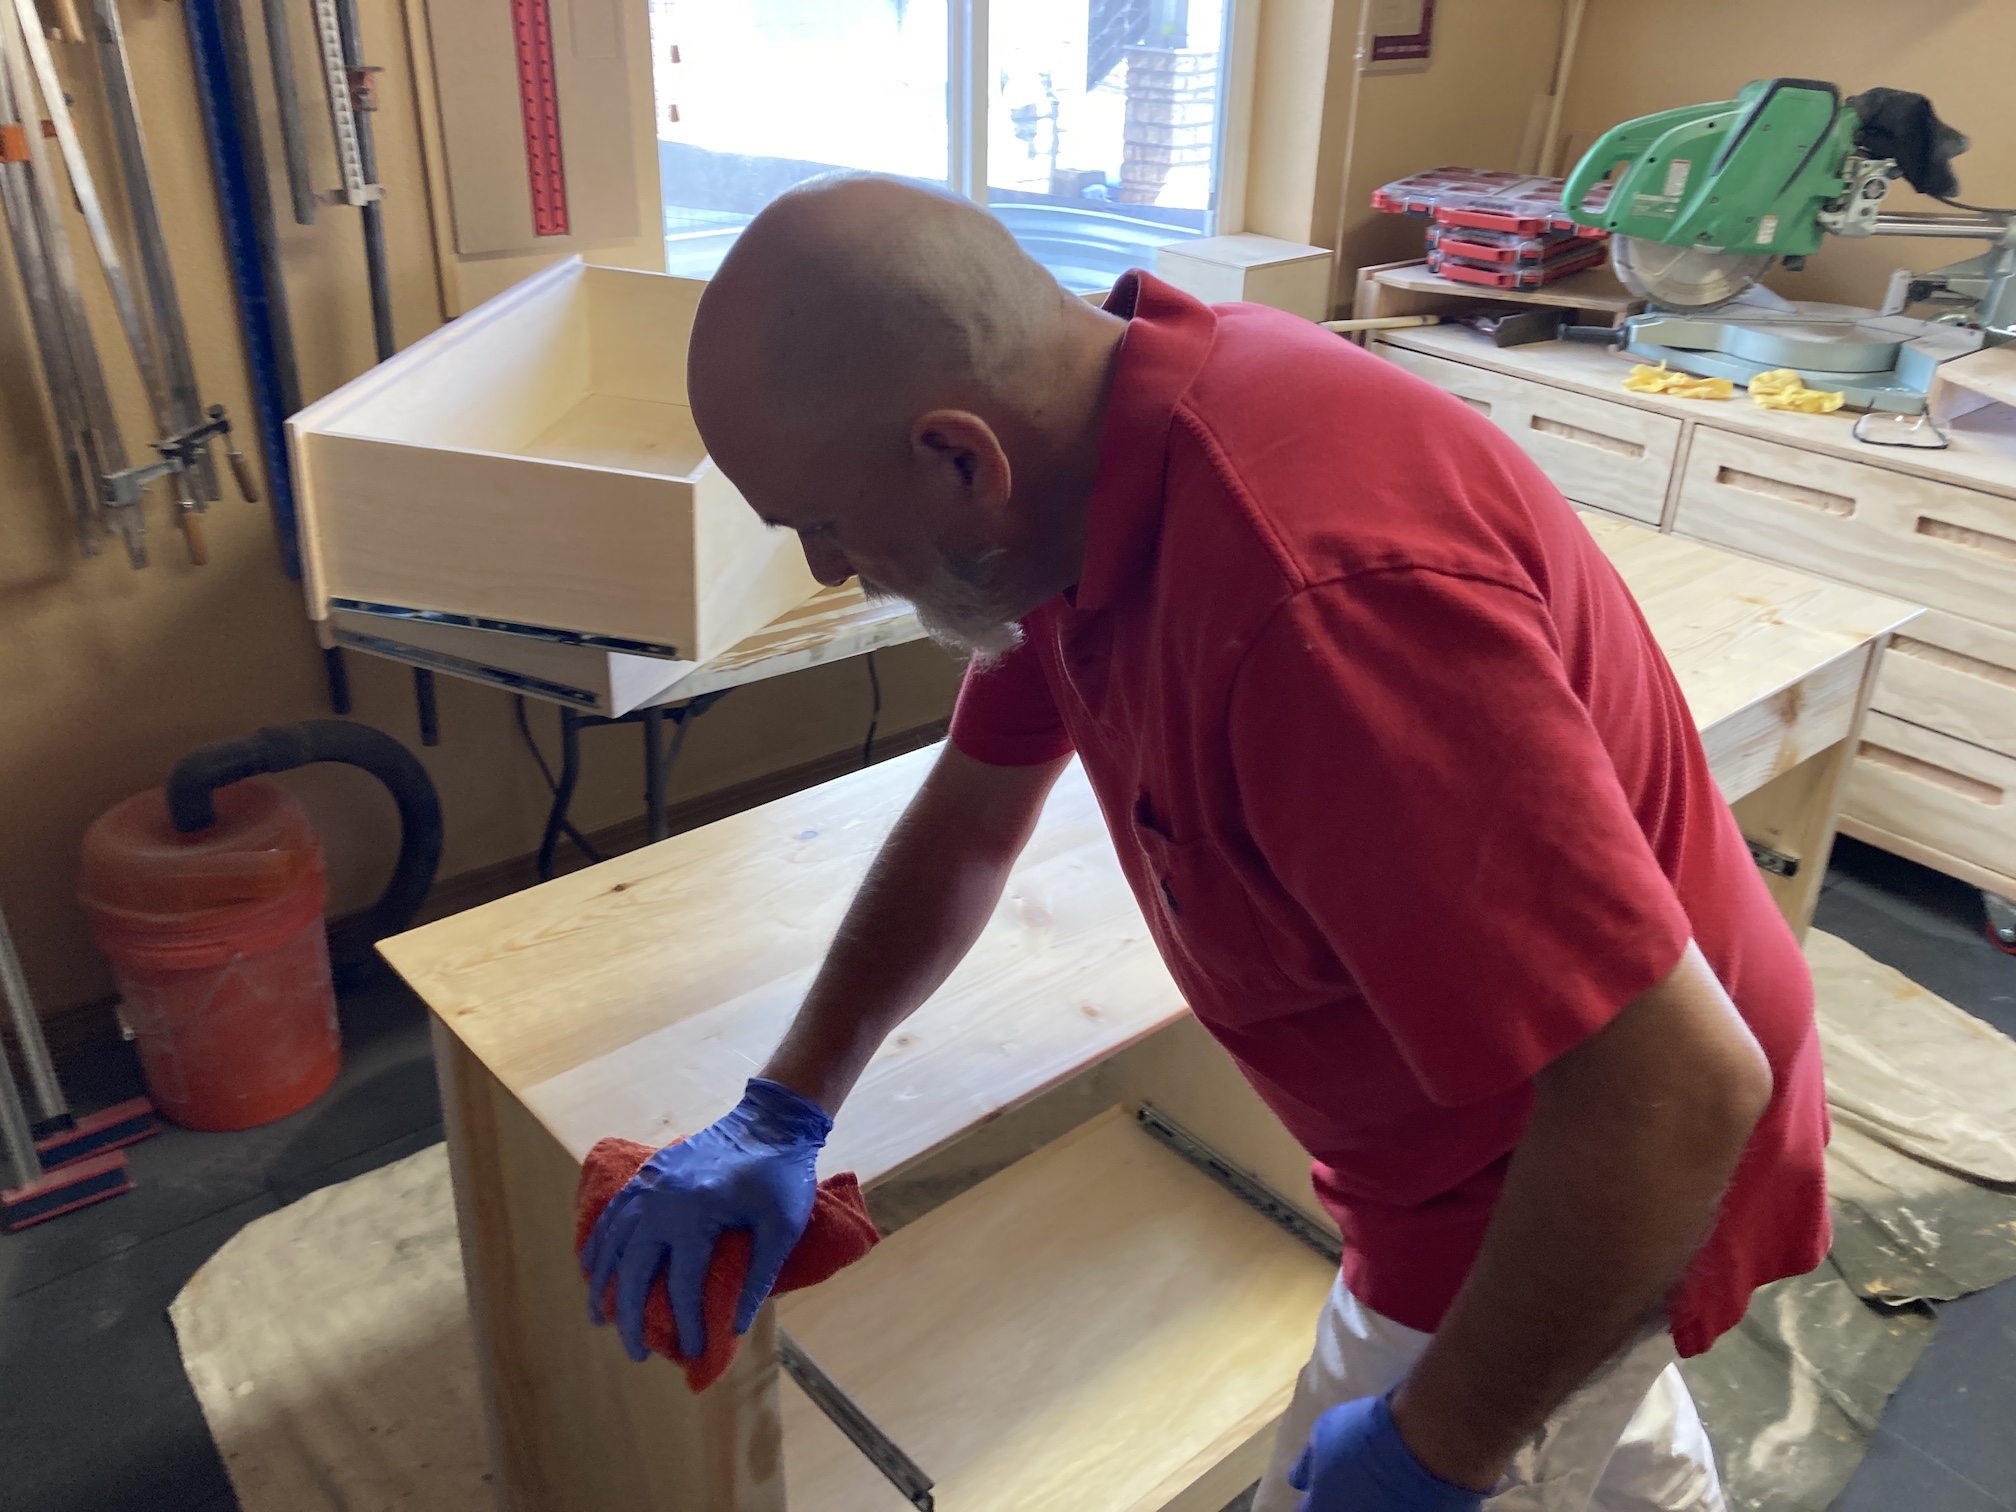
Here are photos from Jason and John working on our new dresser:
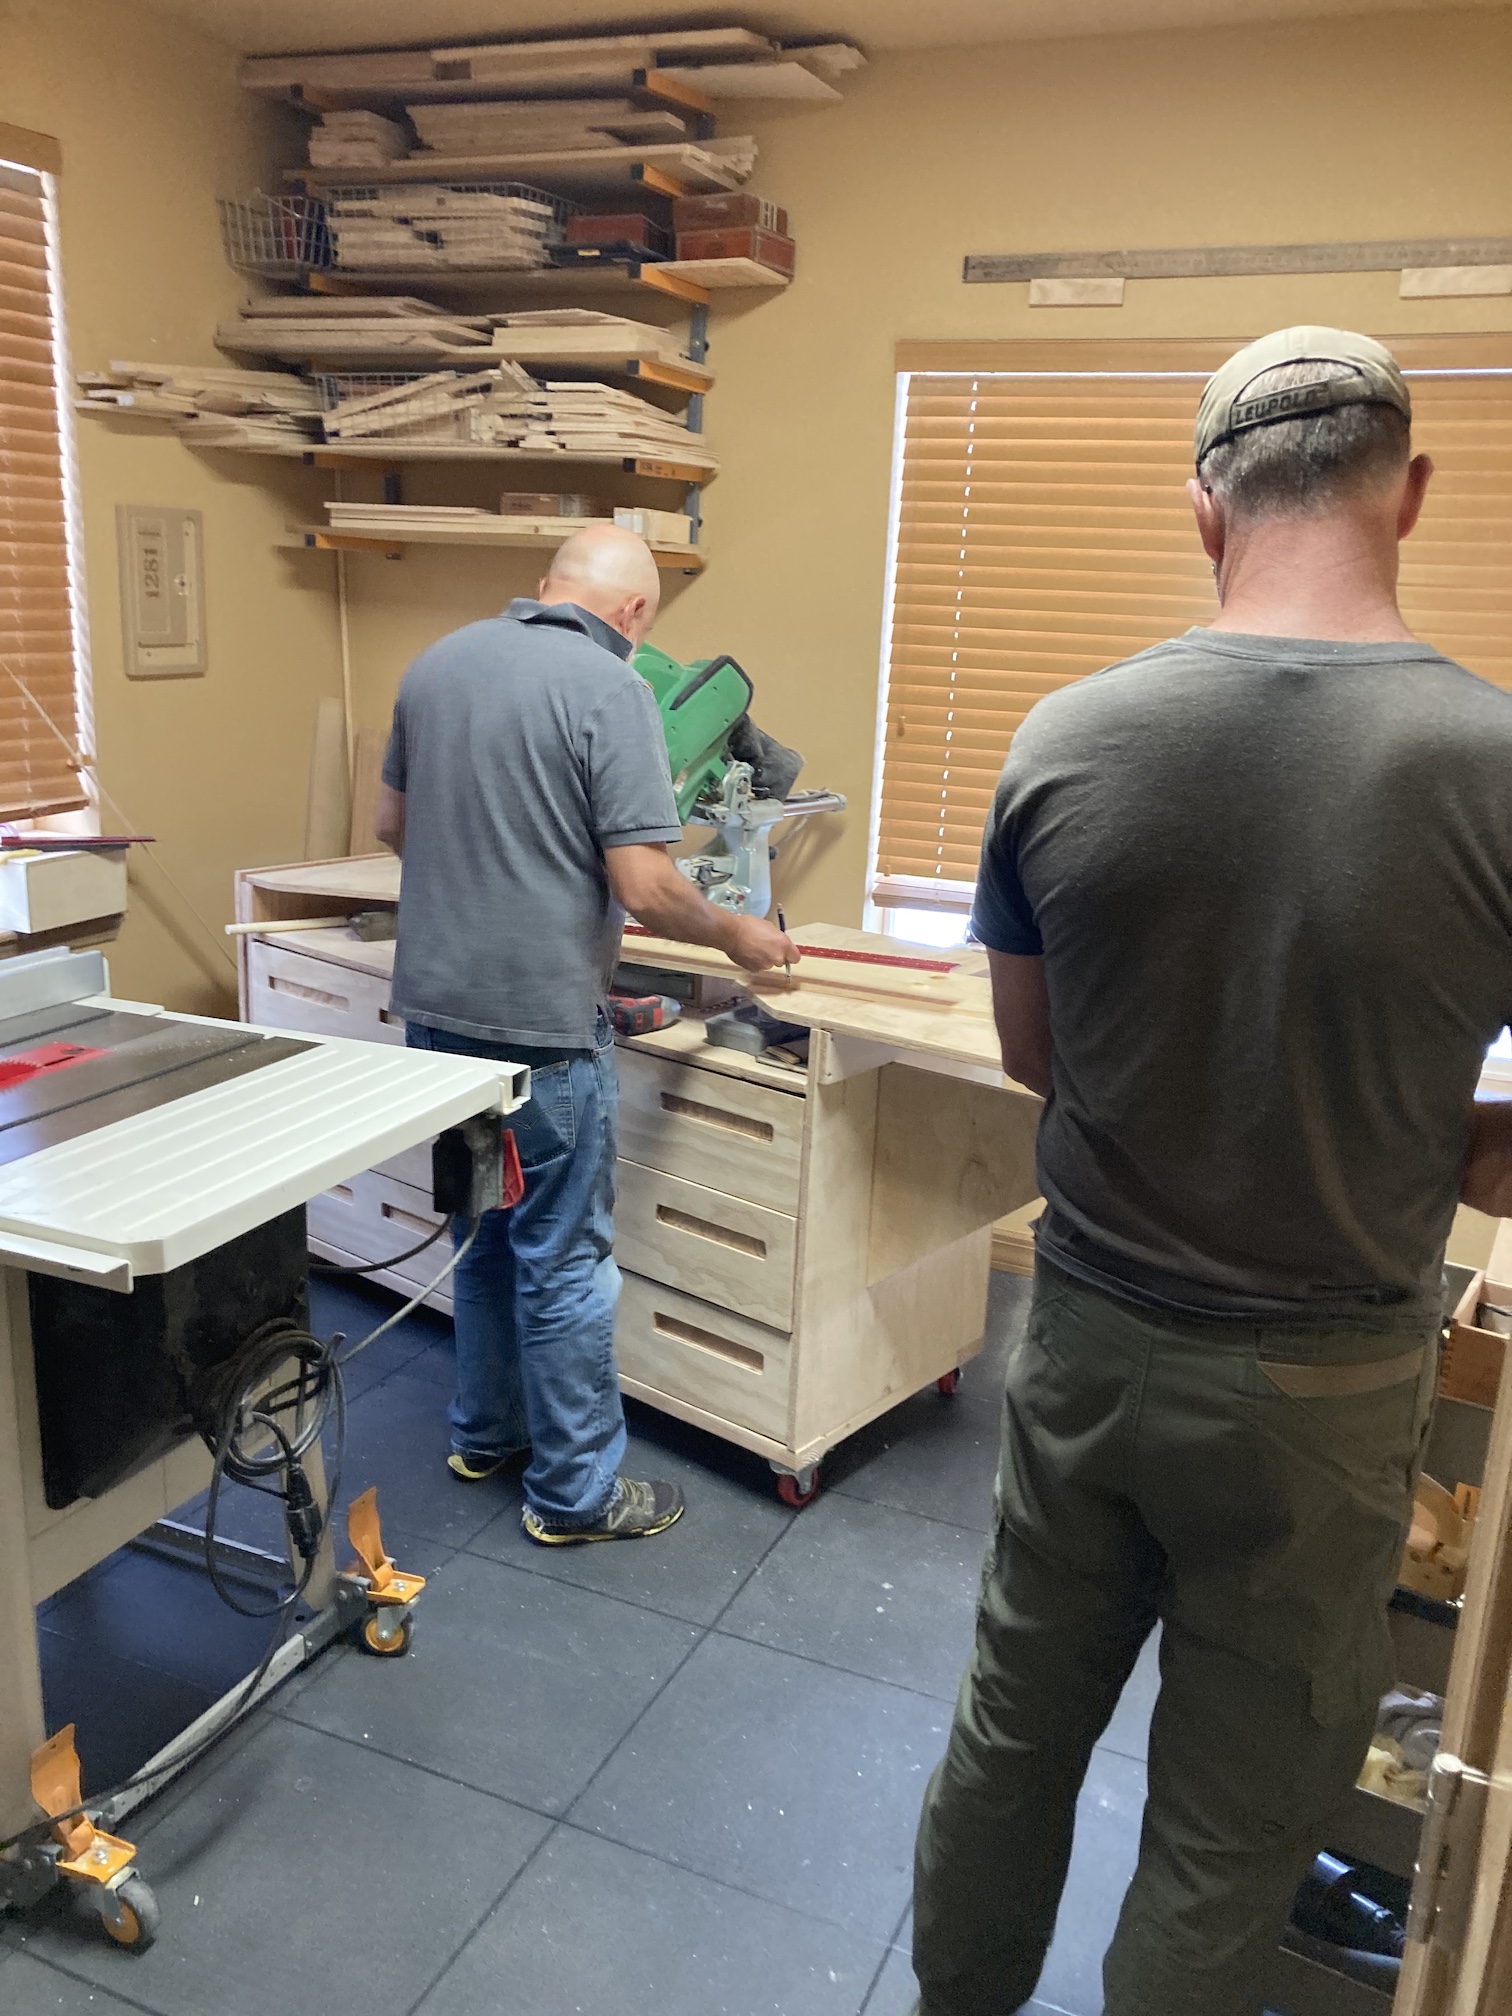
The boys had fun playing in John’s workshop in our basement:
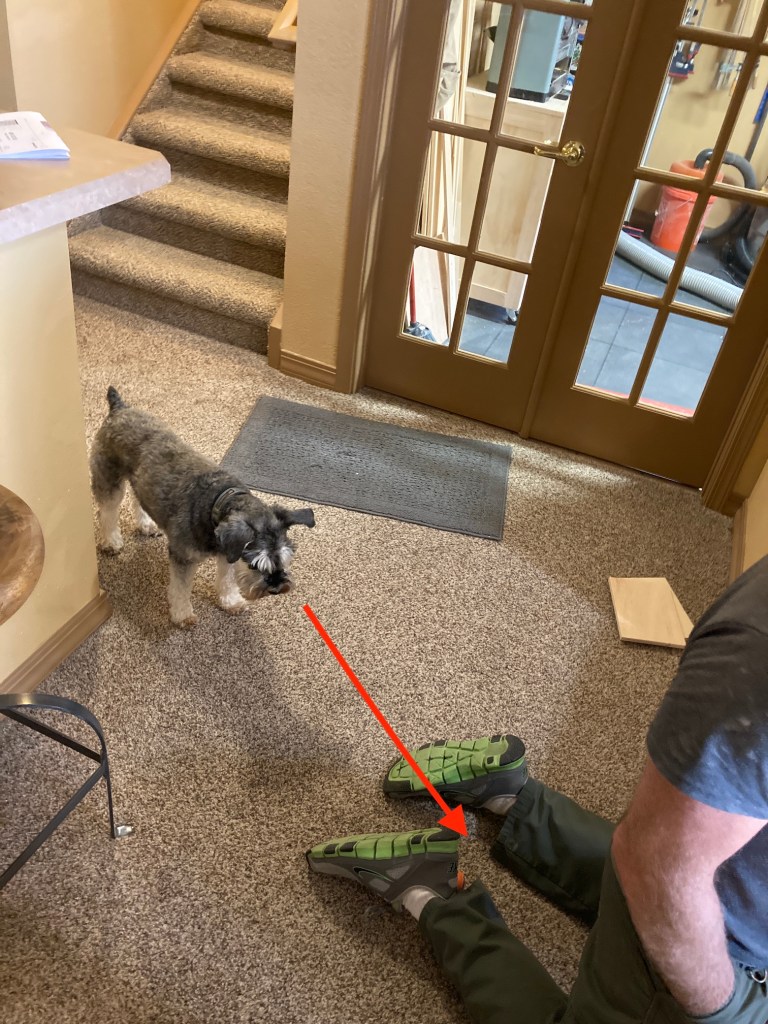
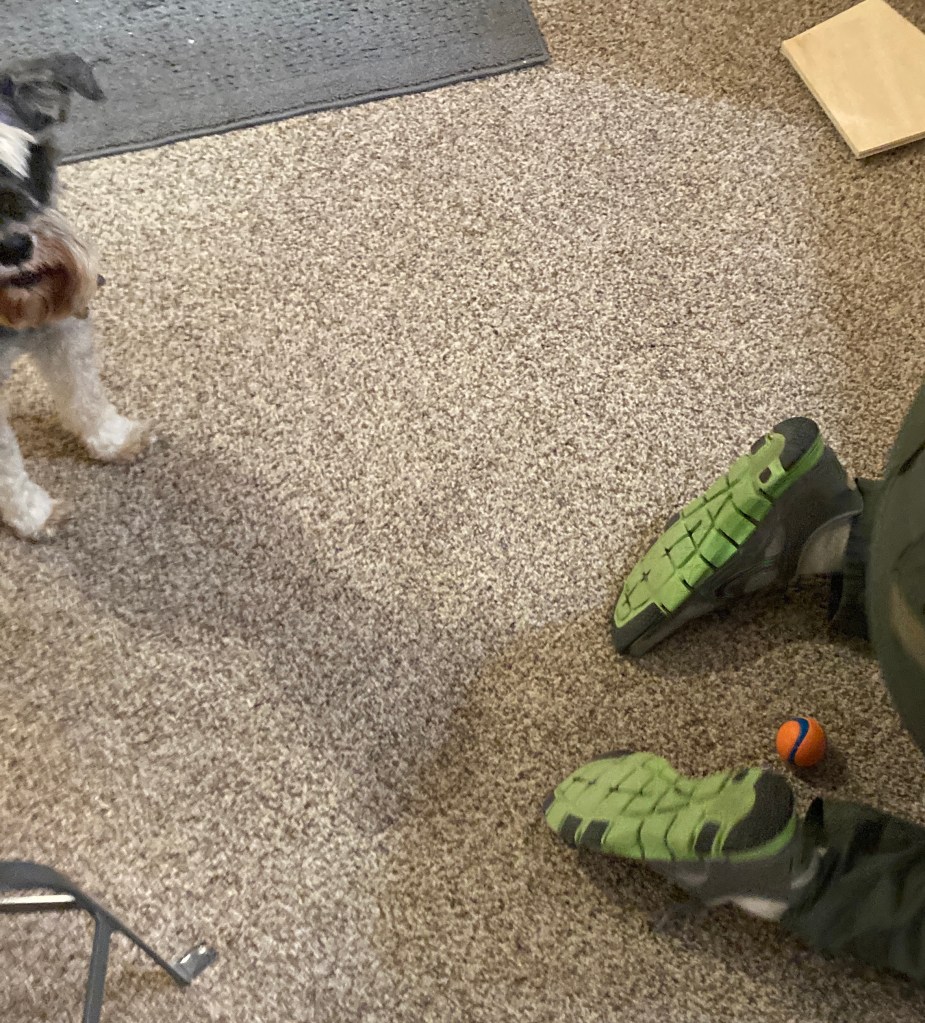
Mike the Miniature Schnauzer grew impatient as his Jason (Marla Jo and Jason used to be Mike’s babysitters when I lived in Oregon and went out of town) was ignoring him and not playing ball with him (Mike felt Jason should have been able to multitask, ha!)
So Mike kept tossing his ball between the back of Jason’s legs while Jason worked on the dresser.
We did actually take them sightseeing as well as out to a nice meal during their visit; and even visited with them. But most of their visit the boys did work on the dresser.
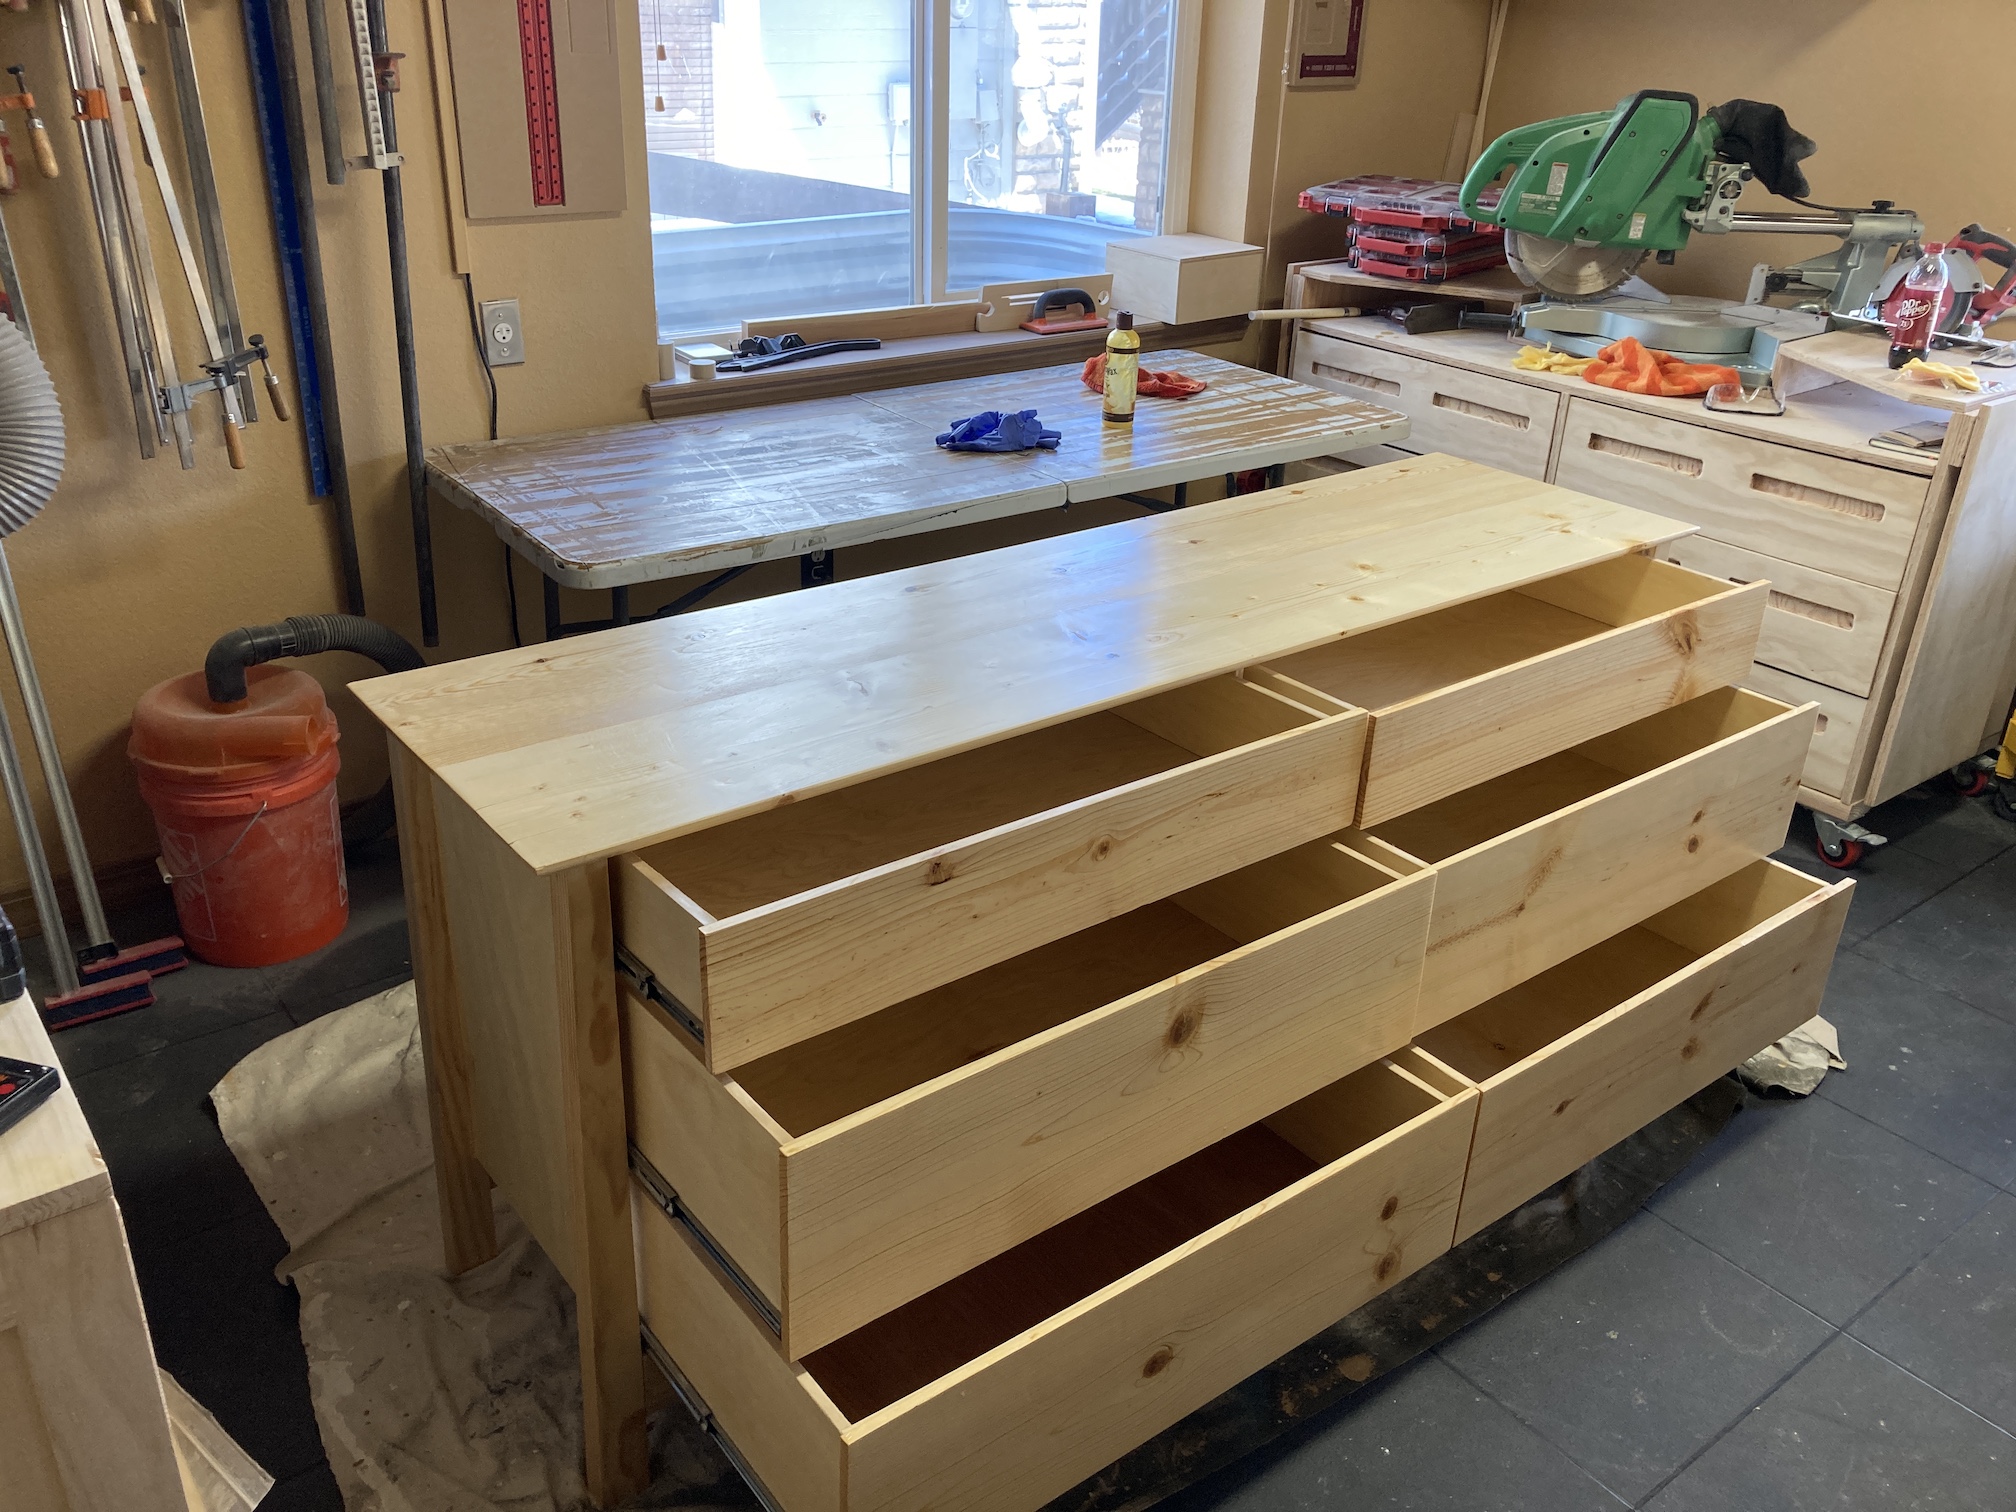
After they left to return to Oregon, John completed the dresser on his own and finished it with a beeswax and mineral oil mix that Jason recommended.
And here is the finished dresser in our master bedroom that two important men in my life worked on:
It was very exciting to put my clothes in it!
Postscript
Marla Jo and Jason are family to me and they have embraced my partner John. Jason drove my stuff 1200 miles from Oregon to Colorado when I relocated in April 2019 after my husband died in December 2018. They were both there on the most awful day of my life and watched my dog Mike when I traveled to see family and friends after my terrible loss.
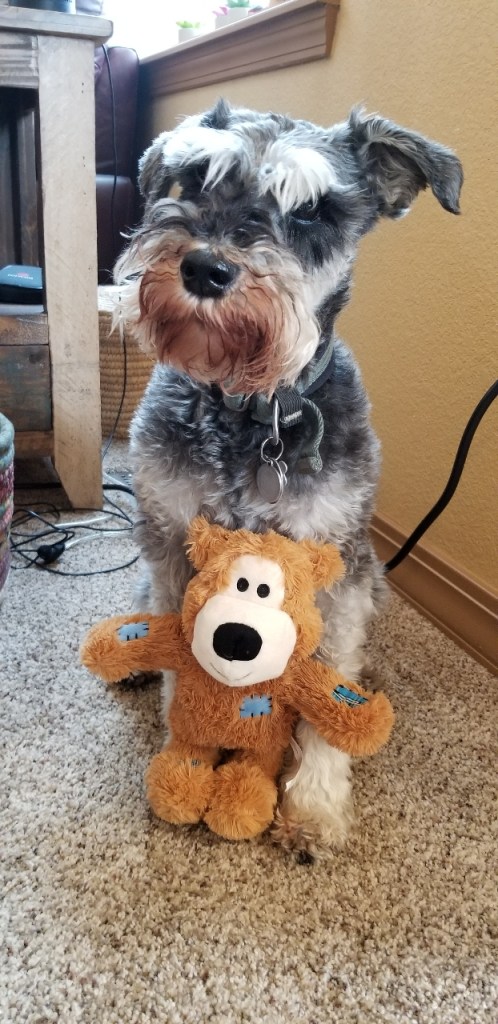
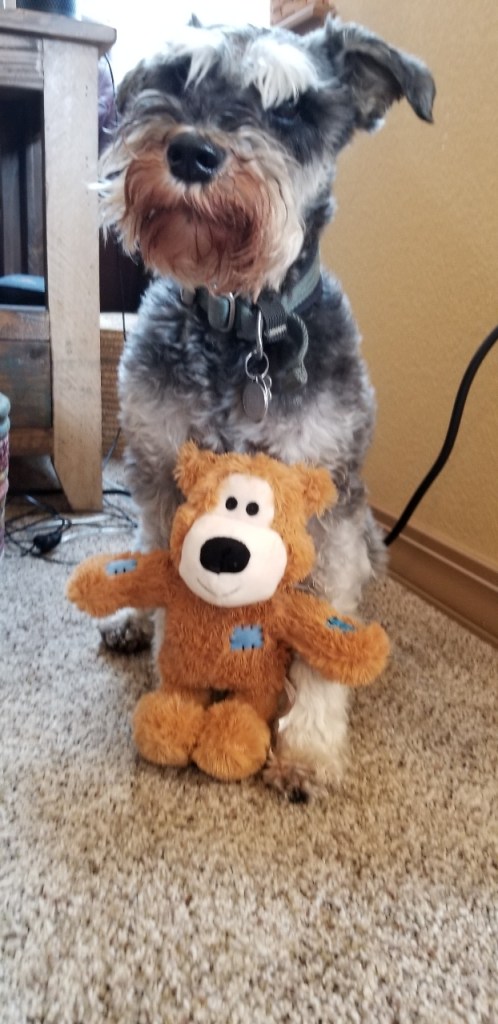
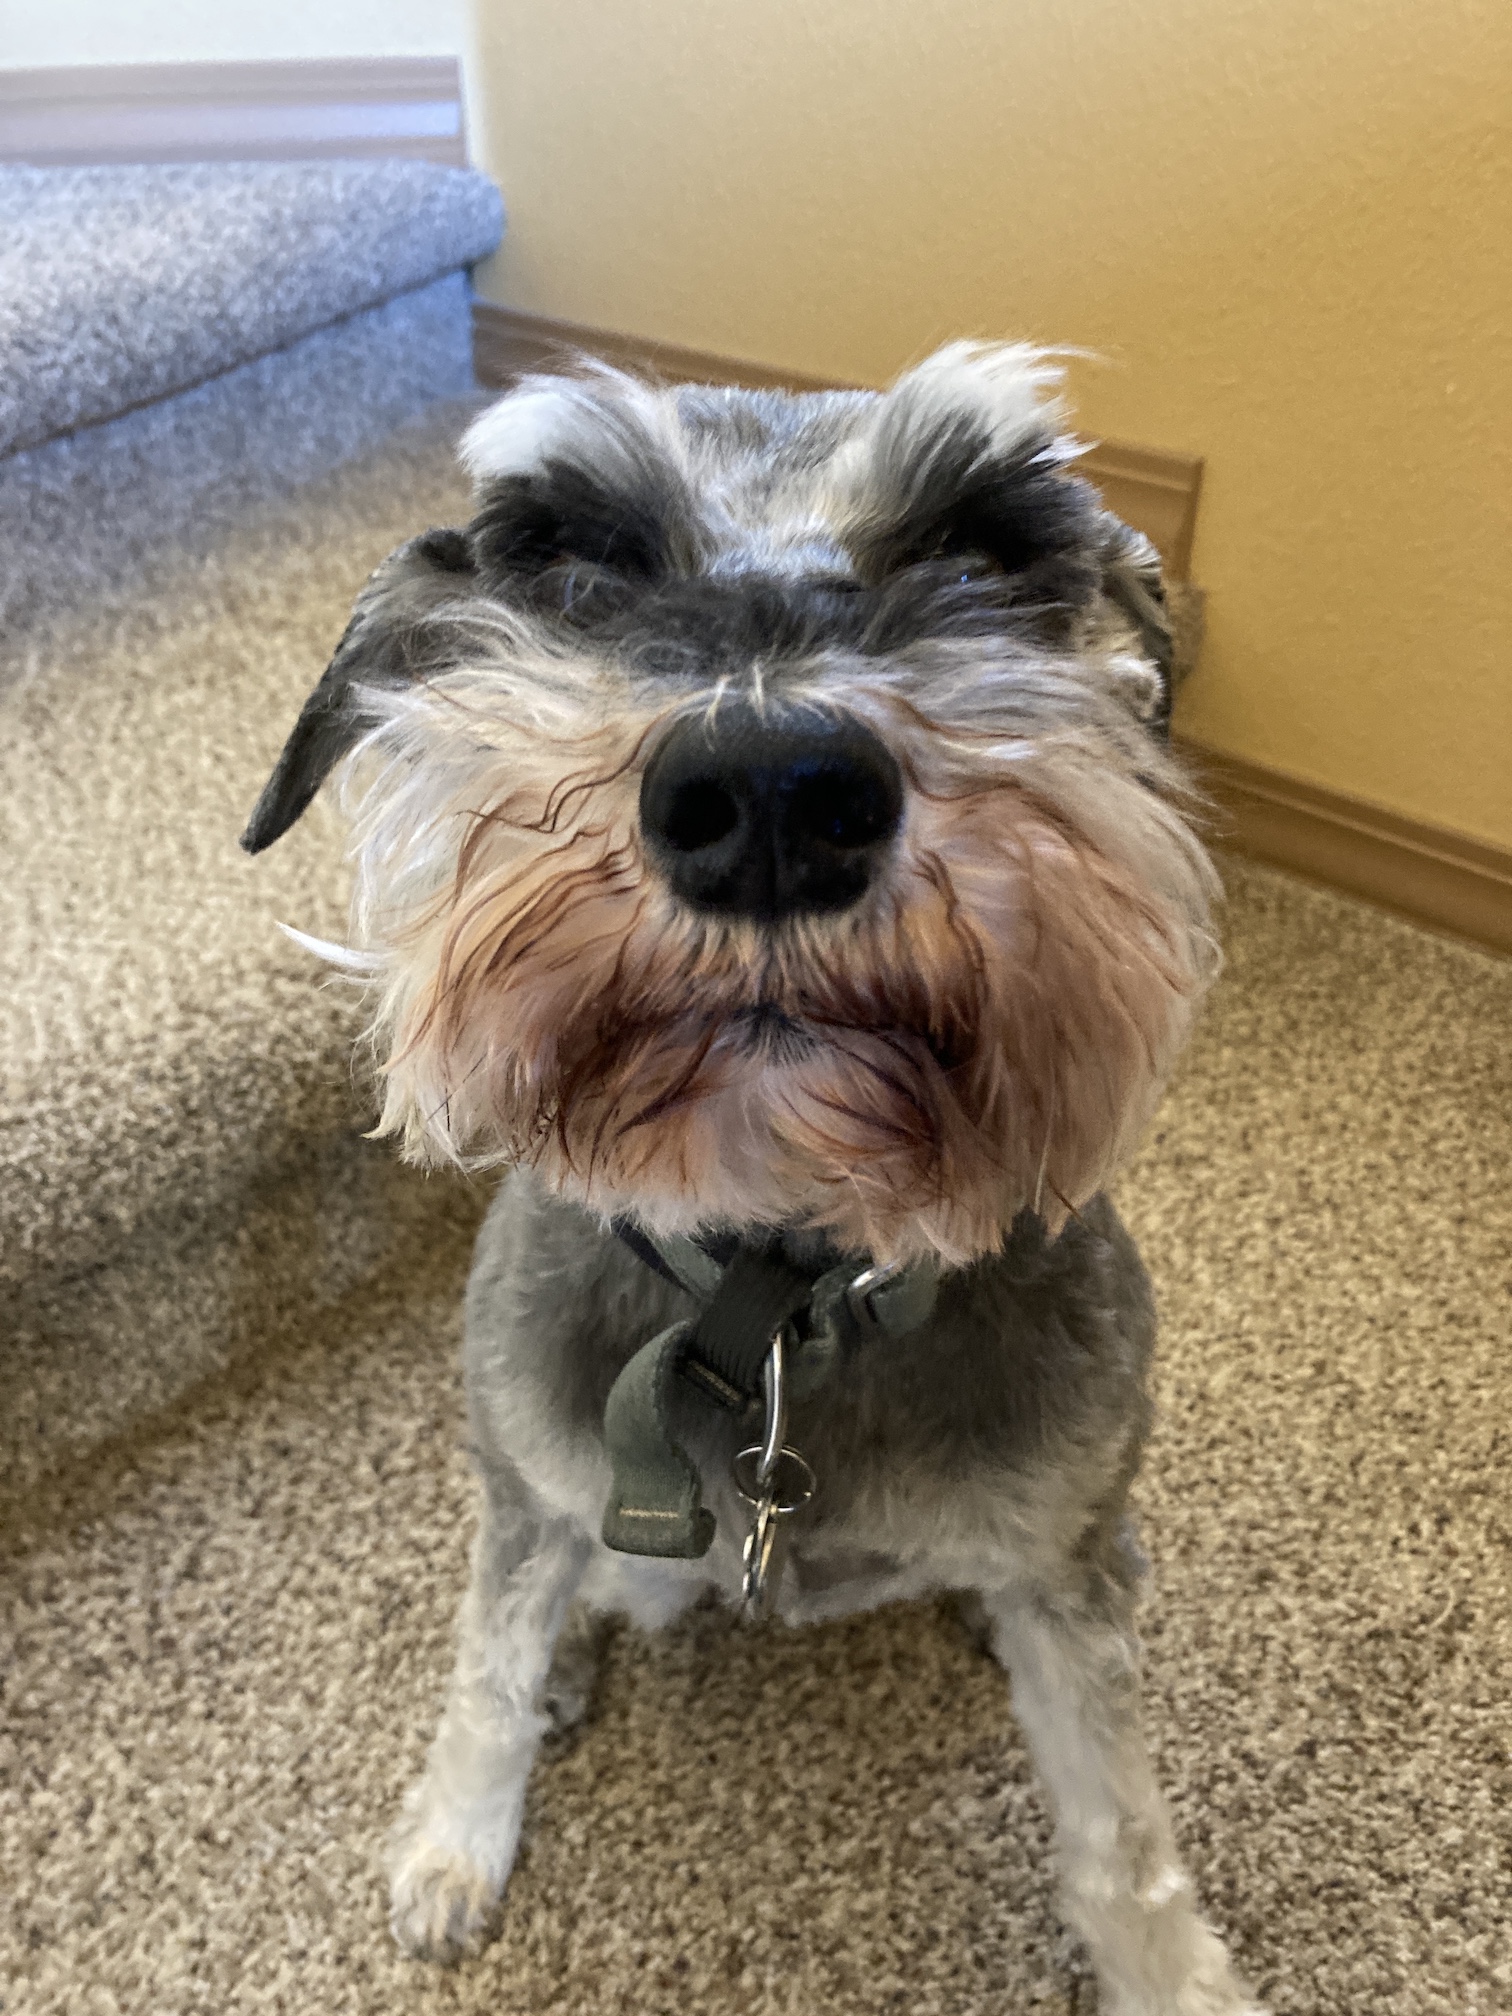
They are very happy to see me in my life now and to also see that Mike the Miniature Schnauzer is doing so well. Jason took these adorable photos of Mike, posed with his favorite toy – “Beary”- during their visit:
There is something so satisfying as a quilter in seeing a quilt you made being used by a baby (a new person on earth!). Like in the post Baby Quilt for An Adventure Baby, I was fortunate enough to be provided with photos of a new person in a quilt I made.
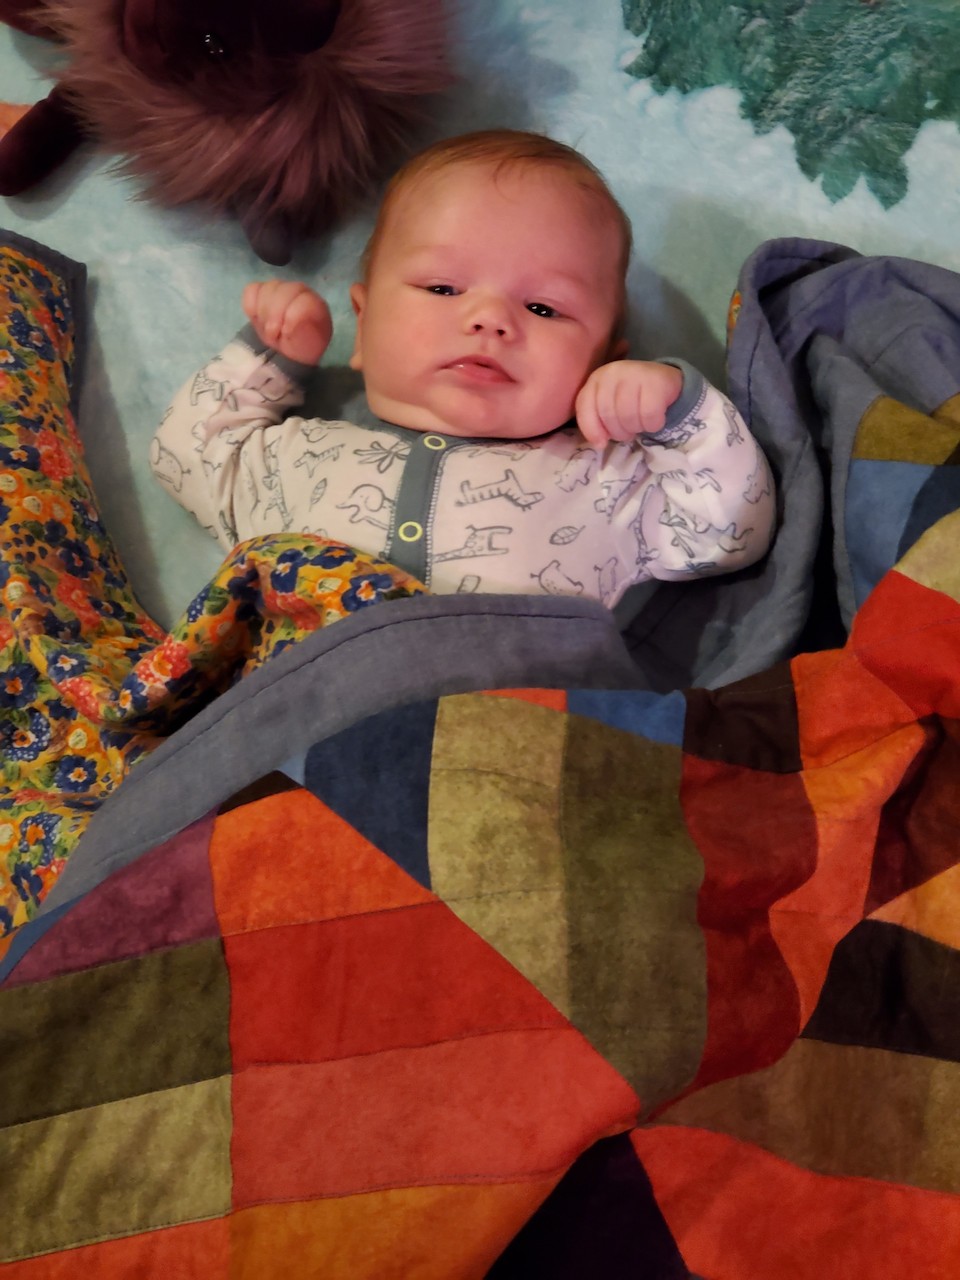
Well the baby quilt got completed and given to my friend Marla during her visit a couple of weeks ago and she delivered the quilt to the new parents in Portland, Oregon. Marla was kind enough to take photos for me of the new baby, Azzy, in his new quilt!
First here is the completed quilt in my studioafter I did basic straight line quilting and pre-washed it for the new parents:
And now here is little Azzy in his new quilt (thanks Marla for the photo!):
I think I just want to make baby quilts as my new career and have a wall of photos of babies snuggled in the quilts I made (smile).
Postscript
At the end of April I was honored to be featured on Maker Mondayon the Instagram page of @blkmakersmatter.
We been “on holiday” and have had several sets of visitors (as well as more to come over the next several months). You give people vaccines and they just go crazy – ha! (Speaking of vaccine, we did get our one dose Johnson & Johnson COVID vaccine at the beginning on April – yay!!!!)
So now it’s back to some blogging for me and I was torn between first catching up on reading my blogging buddies posts from the past several weeks versus writing a post myself. But if I don’t go ahead and start writing posts it well it might be a couple more weeks before you hear from me (smile).
OH ORLANDO (FLORIDA)
Not sure why I added the “oh” in front of “Orlando” but I do love alliteration in blog post titles (one of the small pleasures in life).
On April 9th my partner John and I headed to Orlando, Florida for a 4 day vacation which included a visit to Universal Studios Florida.
Here we are in the obligatory photo in front of the Universal Studios Theme Park globe:
I am a notoriously bad group selfie photo taker but at least 75% or so of John’s head got in the photo!
Tierney here, writing to you from the “Snowpocalypse” in Colorado, buried under quite a bit of snow. Any of my blogging friends live in Florida or anywhere warm? May I move in with you?
Well none of you invited me to come live with you in Florida (ha); somehow I got Florida stuck in my mind (warm, sun, no snow); and I read an article somewhere that that Orlando theme parks had excellent COVID protocols.
In retrospect I think I would have enjoyed visiting a Florida coastal town and enjoying the beach but I’ll save that for my next trip to Florida.
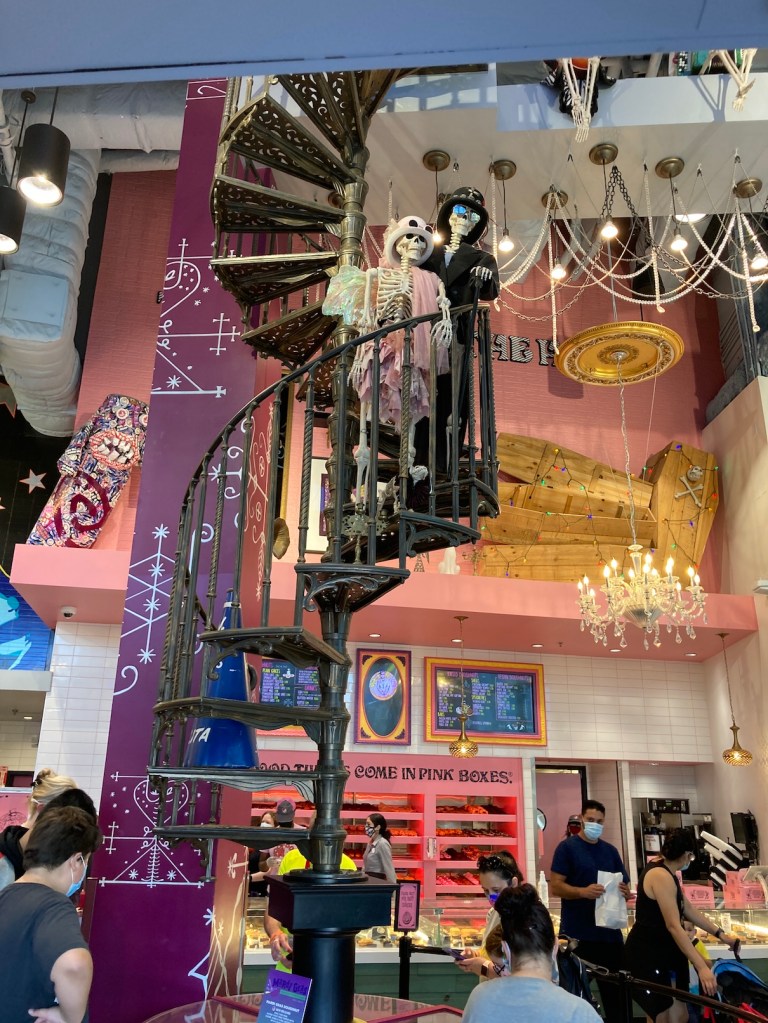
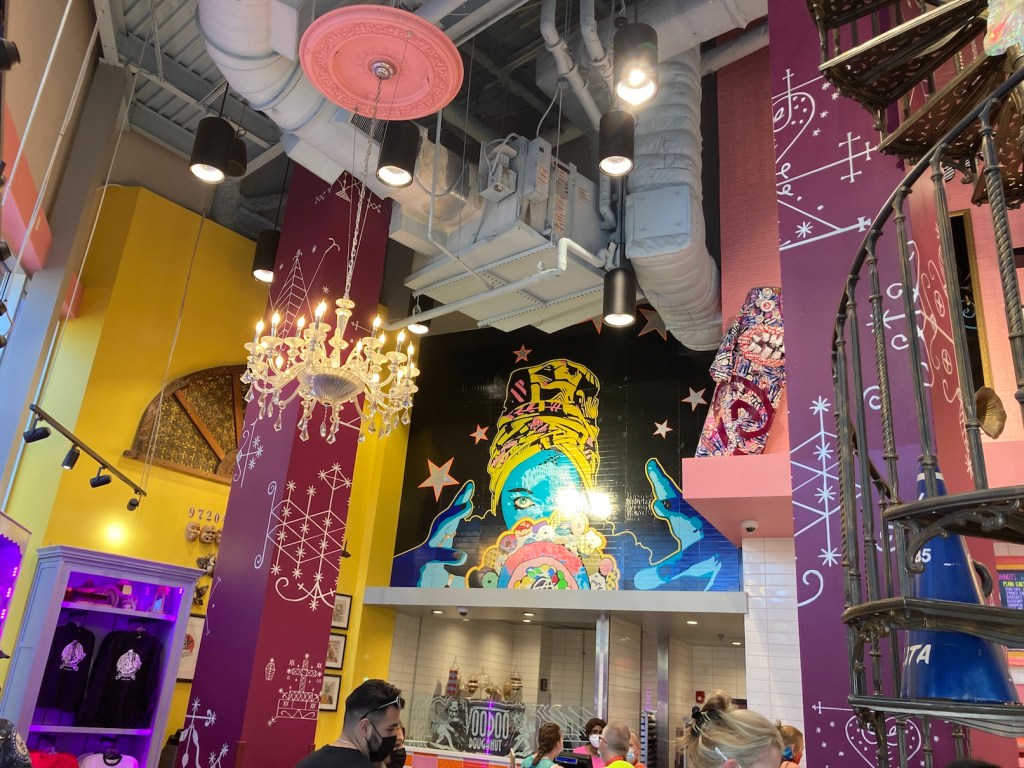
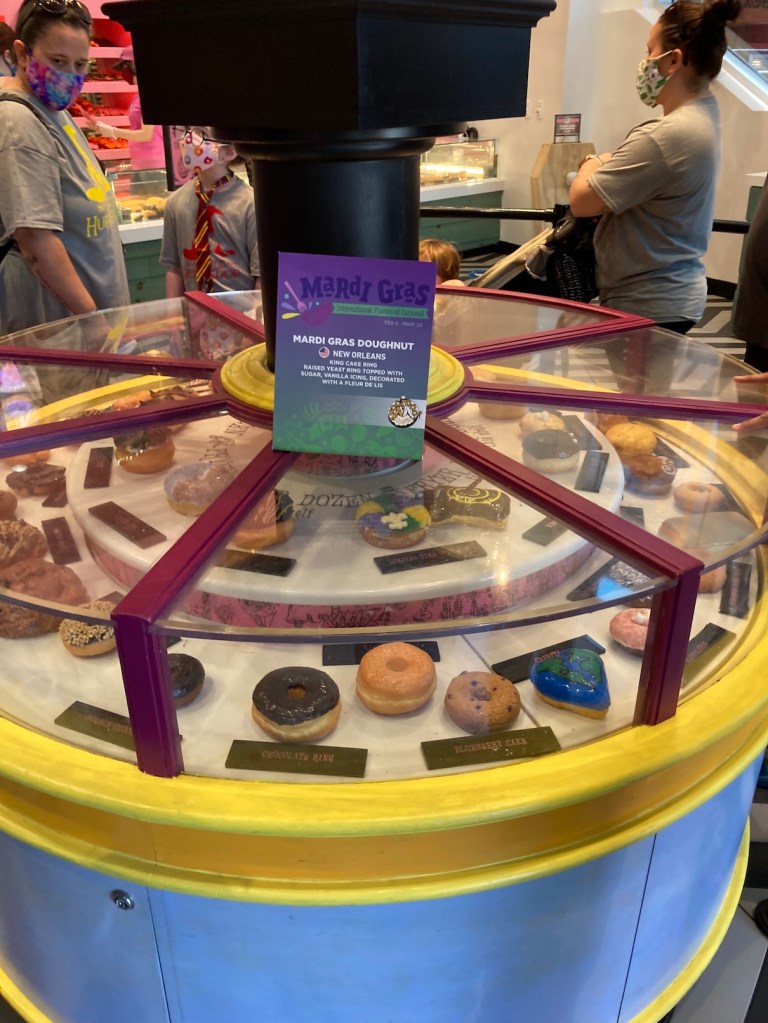
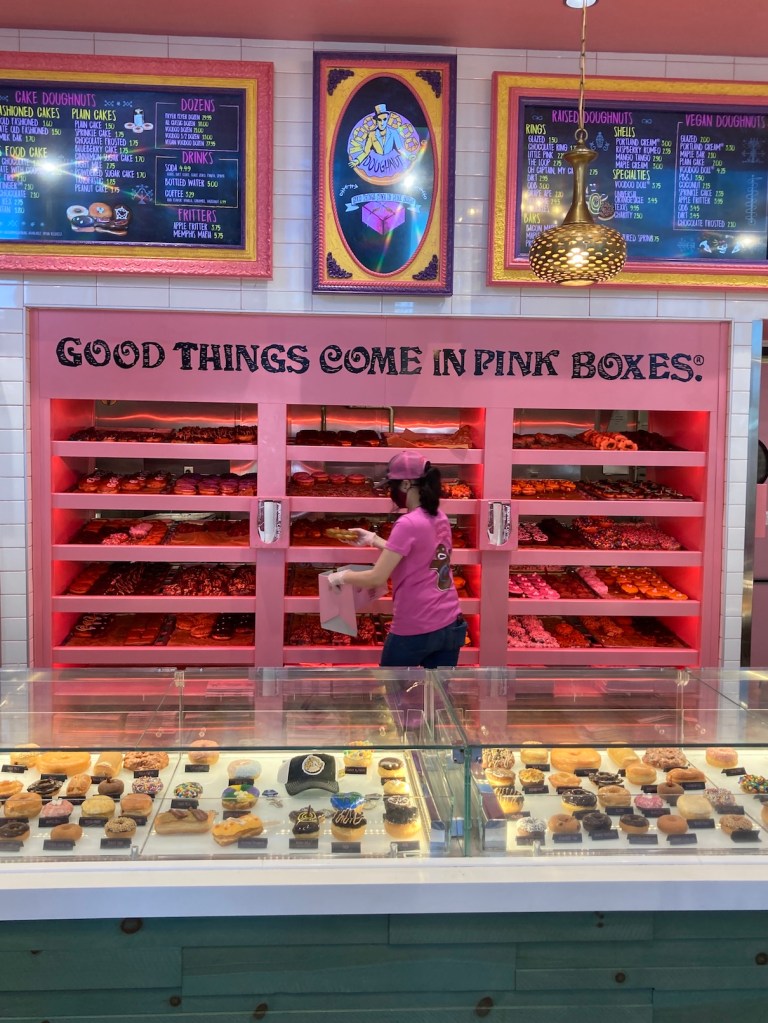
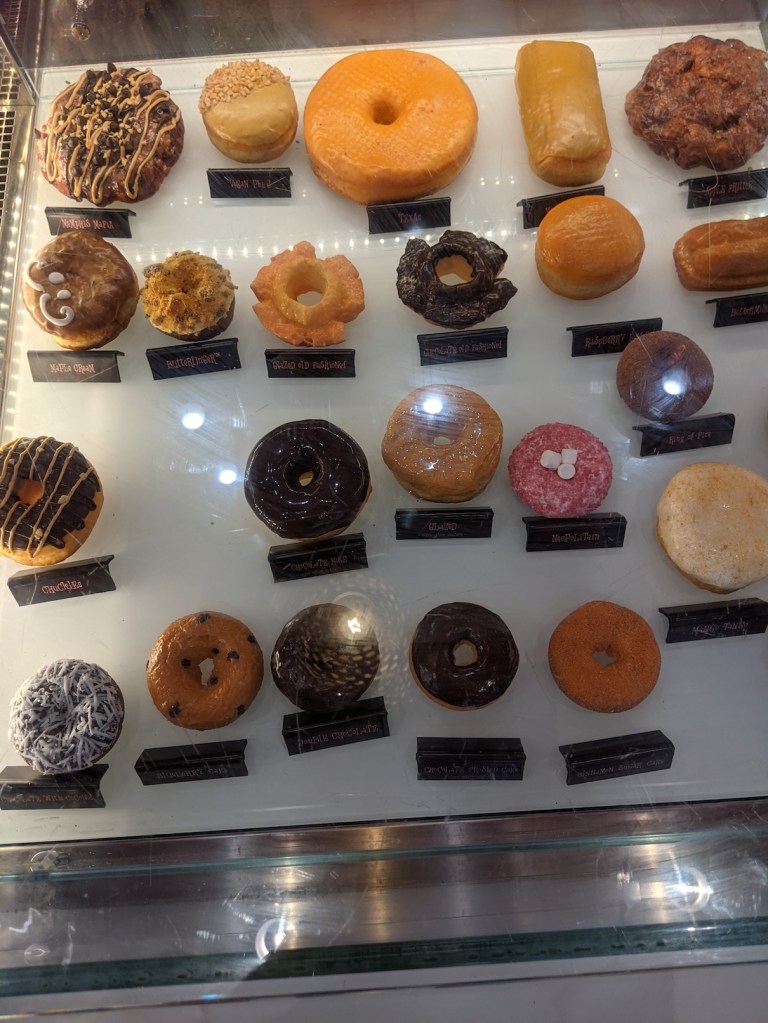
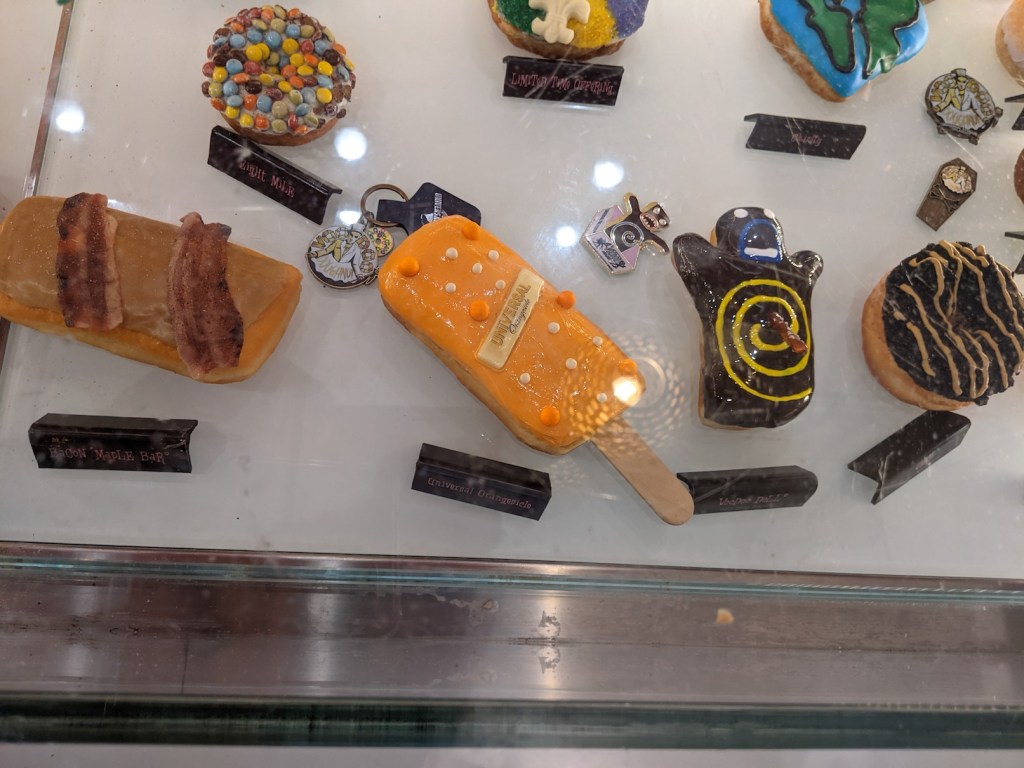
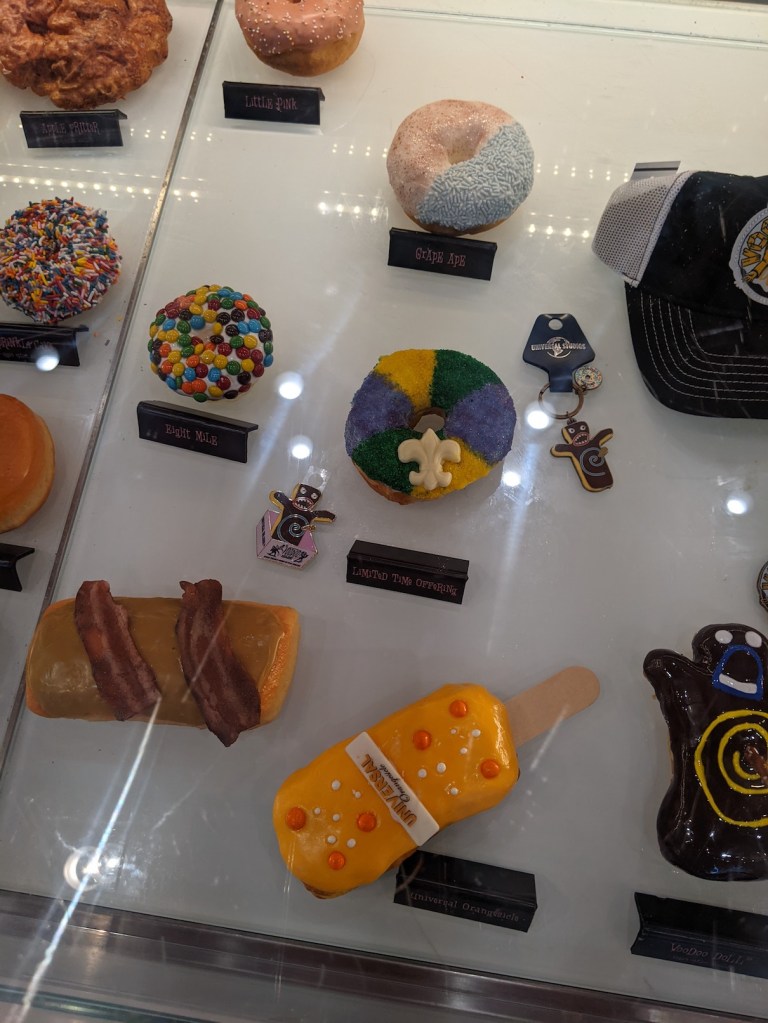
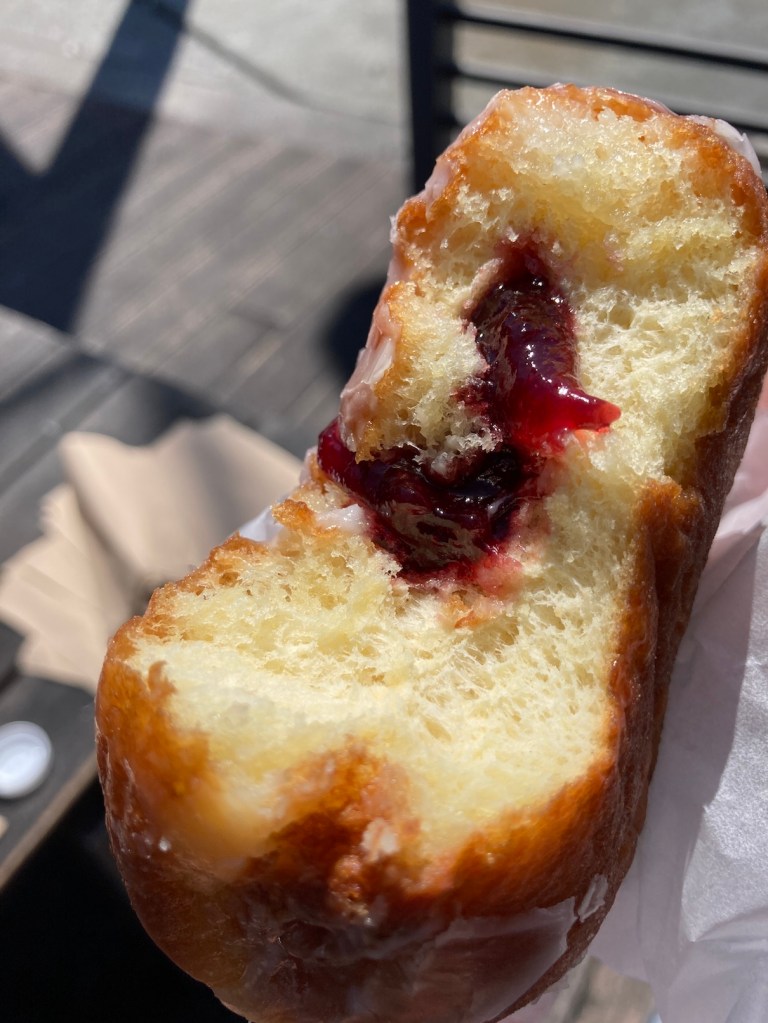
When we first arrived at the Universal Studios Resort area which a shopping and eatery area before you get to the theme park entrance, we were very naughty and began our day with a Voodoo Donutstreat:
I had a crazy sugar rush after my exceptionally delicious jelly donut but I worked it off (and hopefully the 10,000 calories) from walking 13,000+ steps per my phone around Universal Studios theme park.
We went on a Monday and were surprised how many people were there. The lines were long to get on each attraction because they had COVID protocols and could not fill each line. We also discovered we were there during a “Spring Break” time (we thought we had bypassed “Spring Break”).
We did not go on as many rides as we planned but here were our favorites:
I could not take any photos but it was based on the Jason Bourne movies and was a mind blowing mix of live action and 3D effects. Definitely worth seeing.
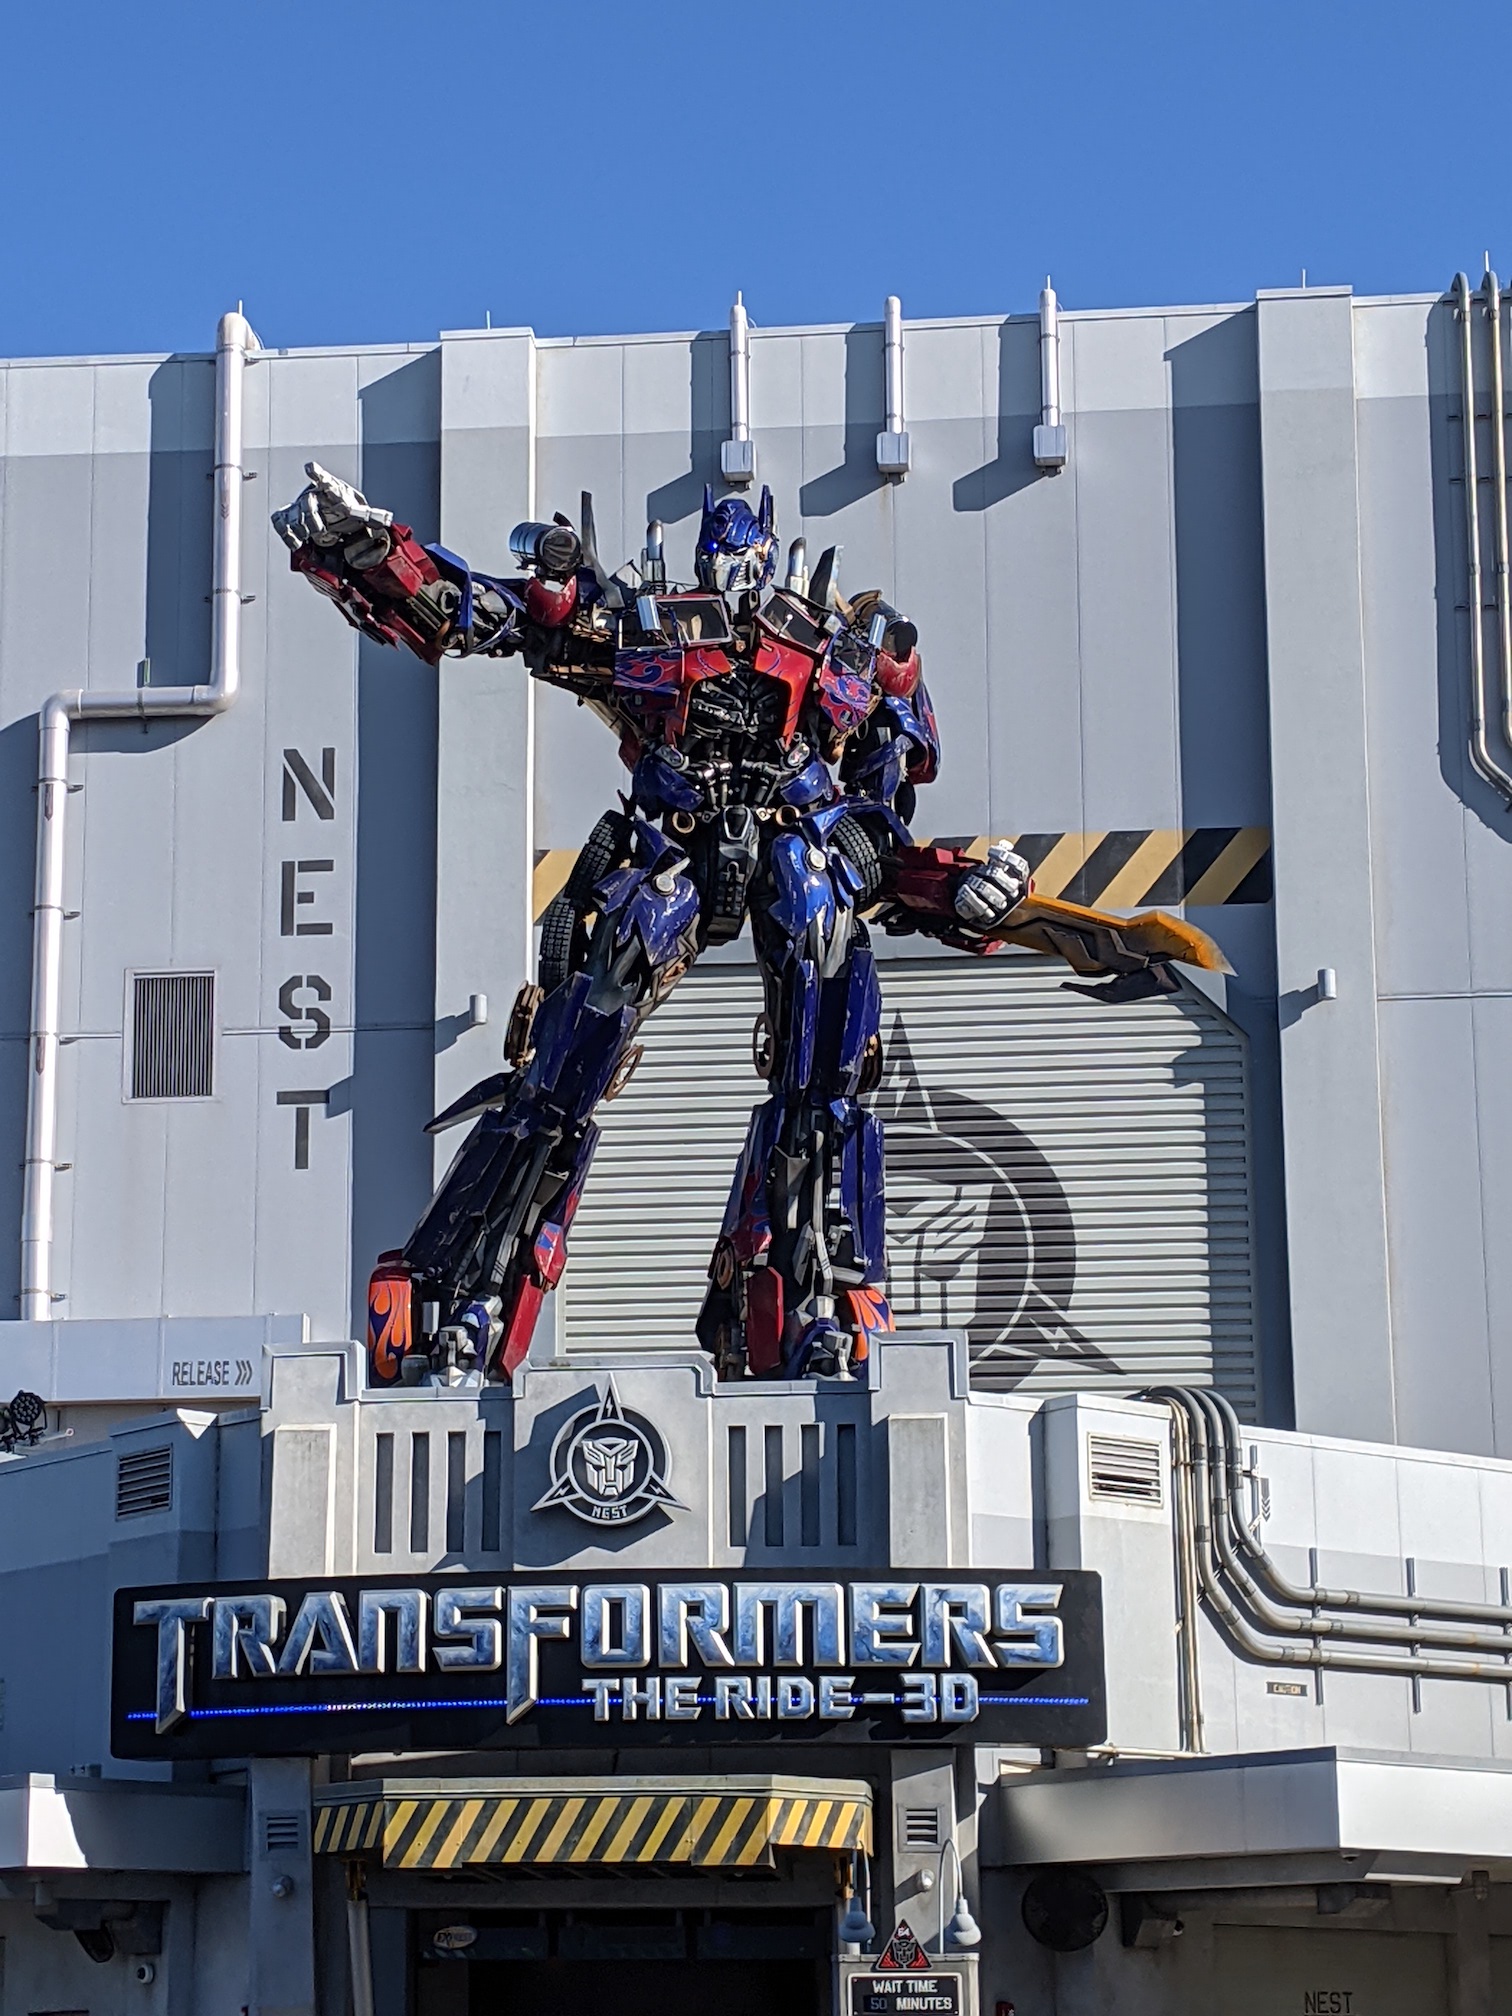
Transformers 3D
I screamed the entire ride as the 3D was super realistic and I thought I was actually plummeting down a skyscraper!
Race Through New York Starring Jimmy Fallon
This ride was so fun as it was a virtual race through NYC and being a native New Yorker (grew up in Long Island and Update NY), I’ve spent a lot of time in NYC (pre-COVID my sister and I would go a “girls trip” at least once a year there).
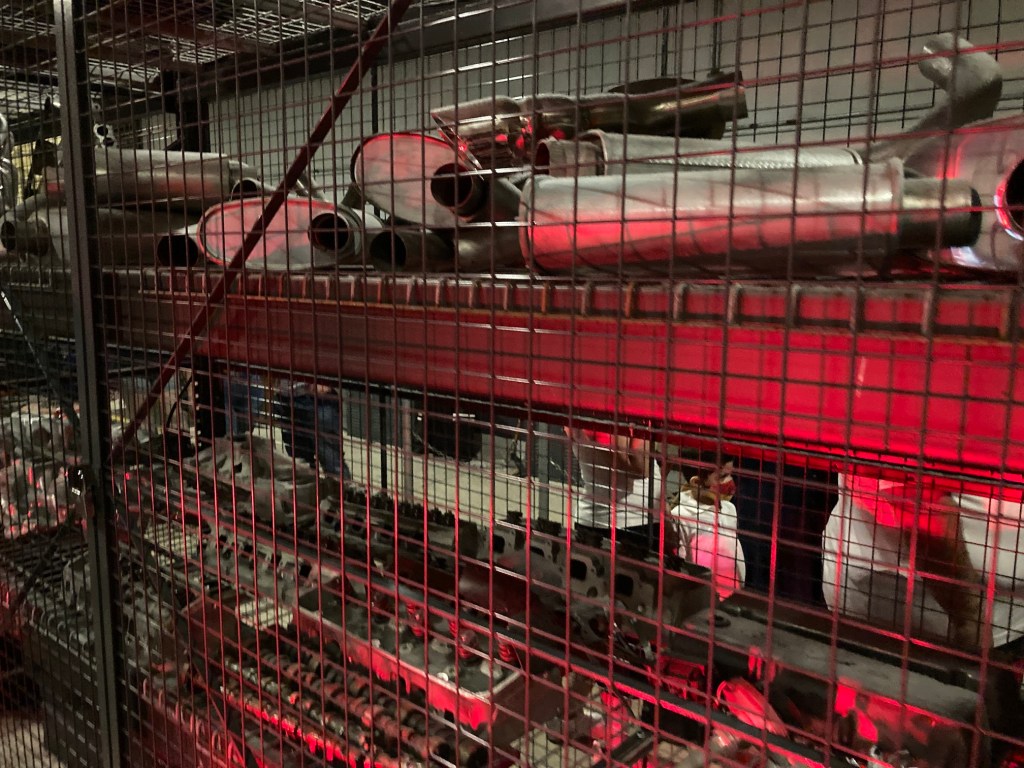
Note: none of the rides allowed you to take photos in the actual ride, so any photos I am sharing are from the attraction’s wait queue line or the front of the attraction.
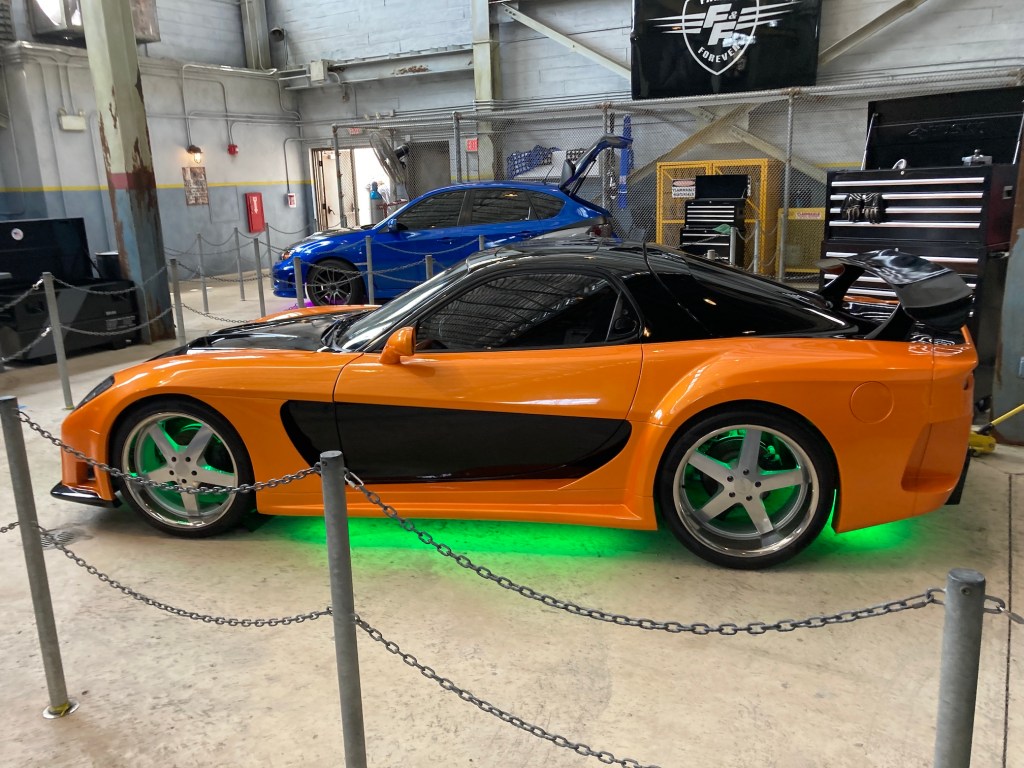
The Fast & Furious Ride
I’ve see all the Fast and Furious franchise movies and the ride itself was an amazing 3D experience but what was really amazing was the extremely detailed recreation of the garage from the movies where the built and services their racing high performance cars. We really enjoyed waiting on/moving through the line on this attraction and seeing the recreation of the garage.
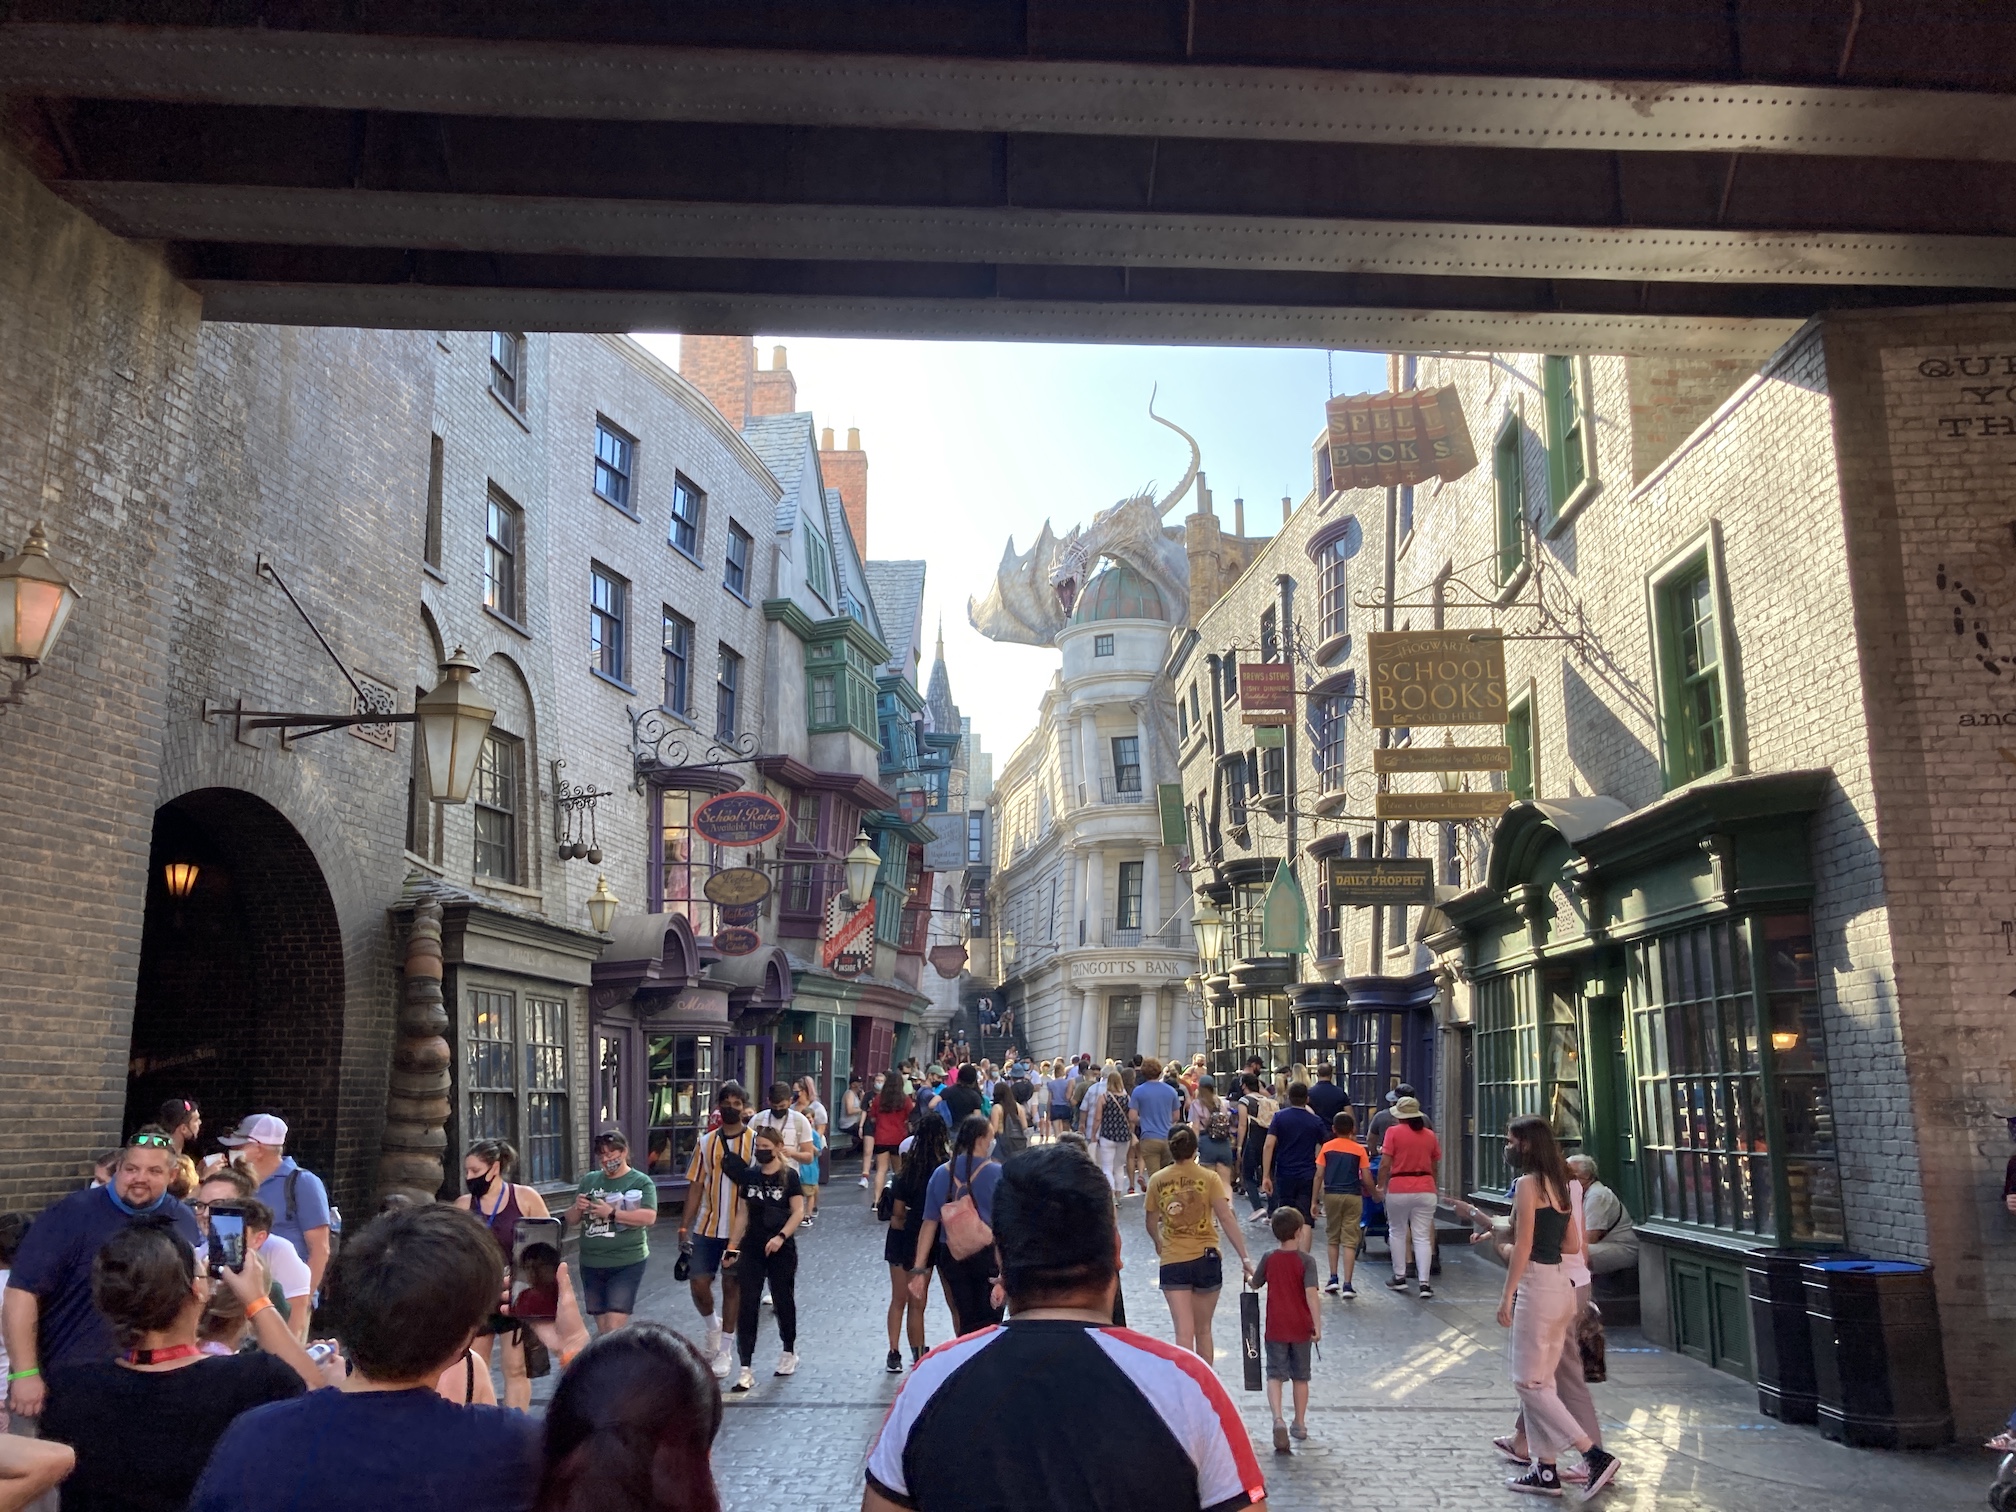
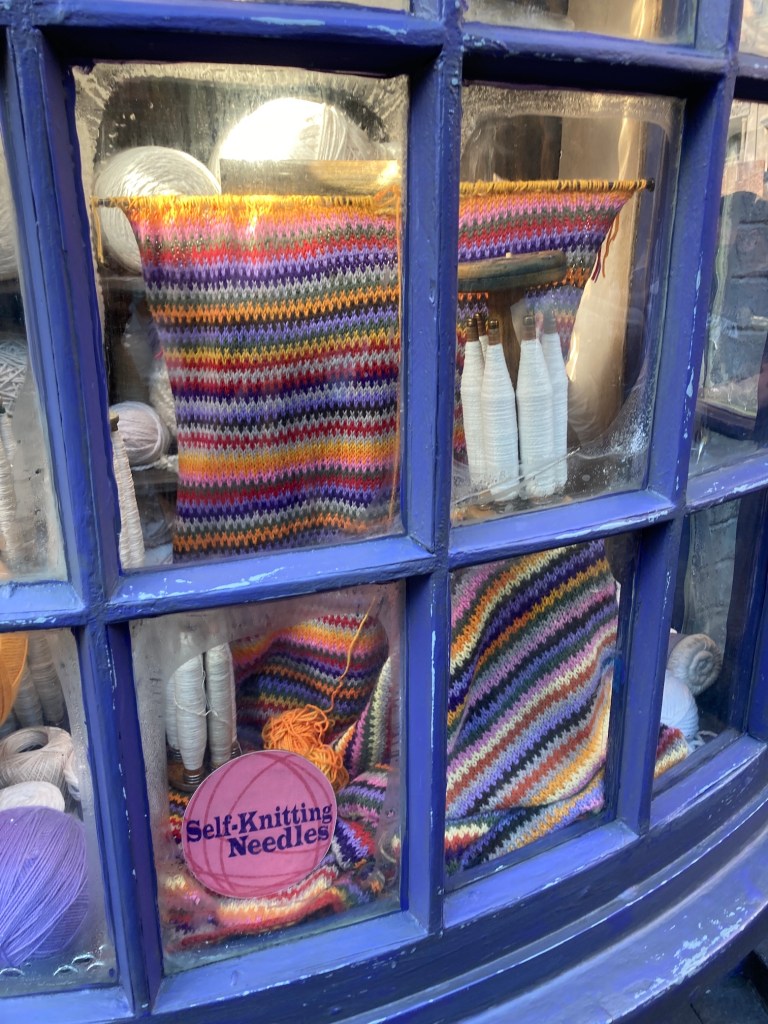
In addition to going on rides, we also went to Diagon Alley at The Wizarding World of Harry Potter. It was pretty amazing and if I’d been a kid currently reading the Harry Potter series by J.K. Rowling it would have blown my mind.
You can look at the images on the link I provided above and I am just going to share some of my favorite things from Diagon Alley:
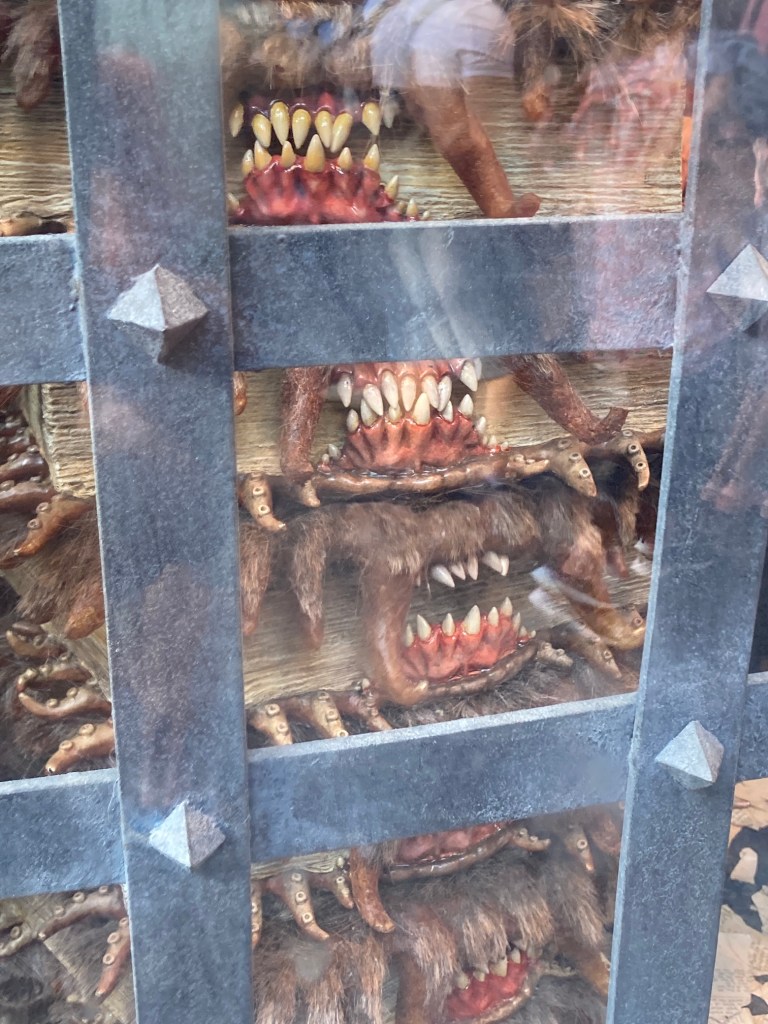
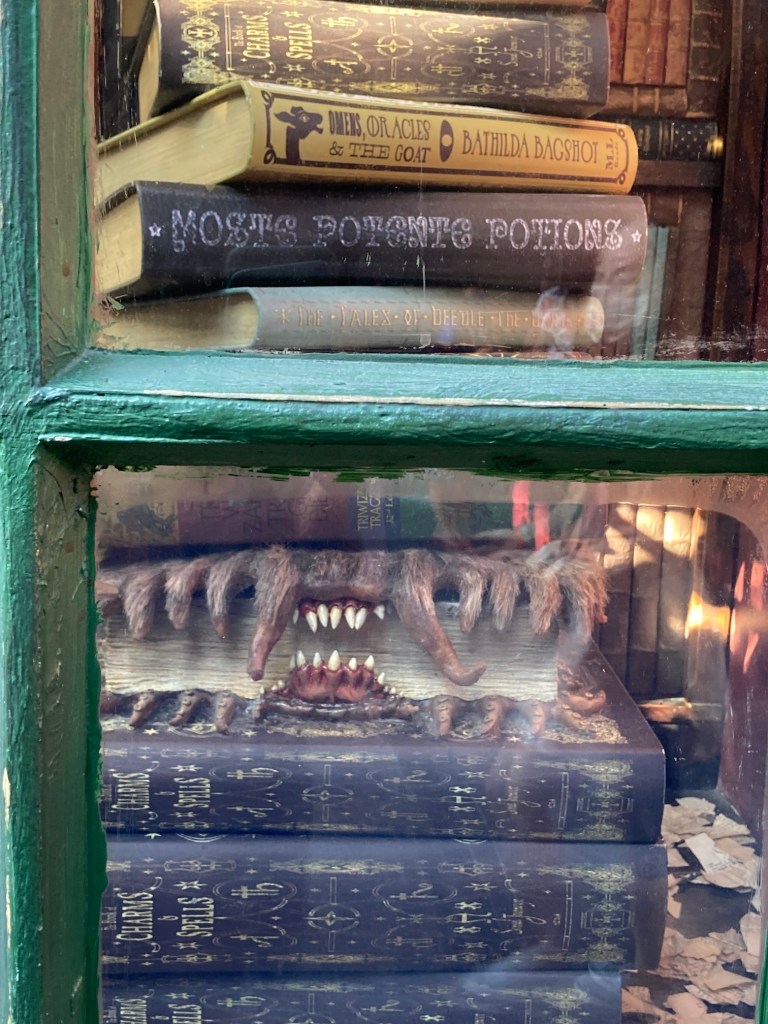
Books that can eat you from the bookshop:
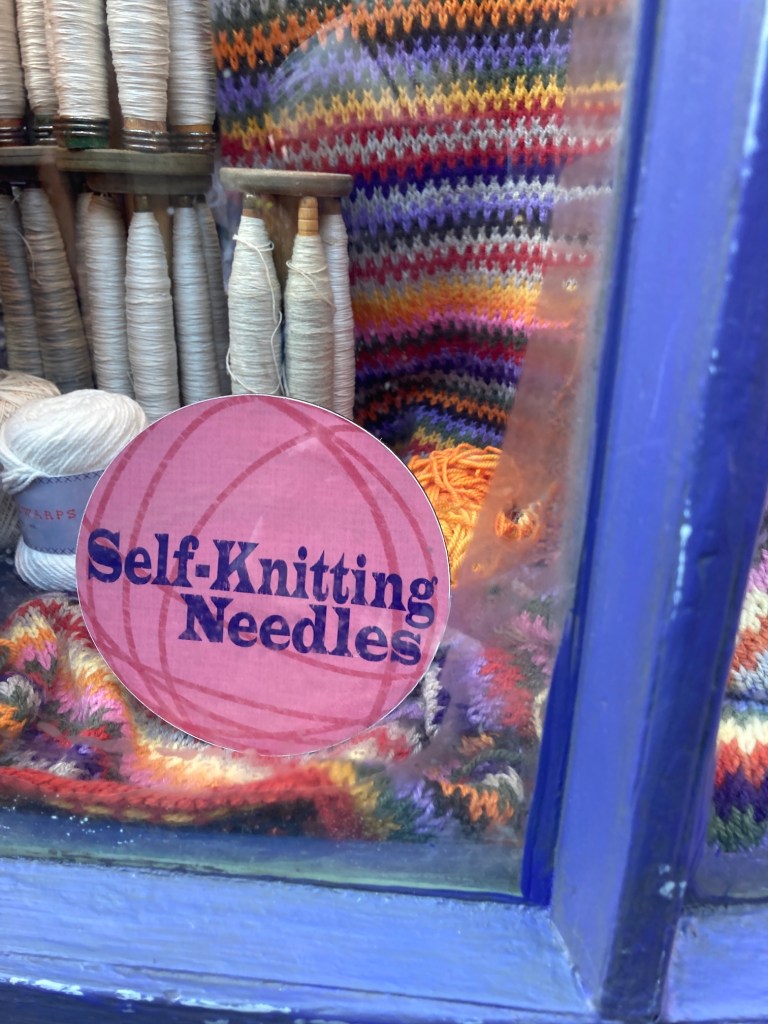
And Self-Knitting Needles (wouldn’t that save a lot of time!):
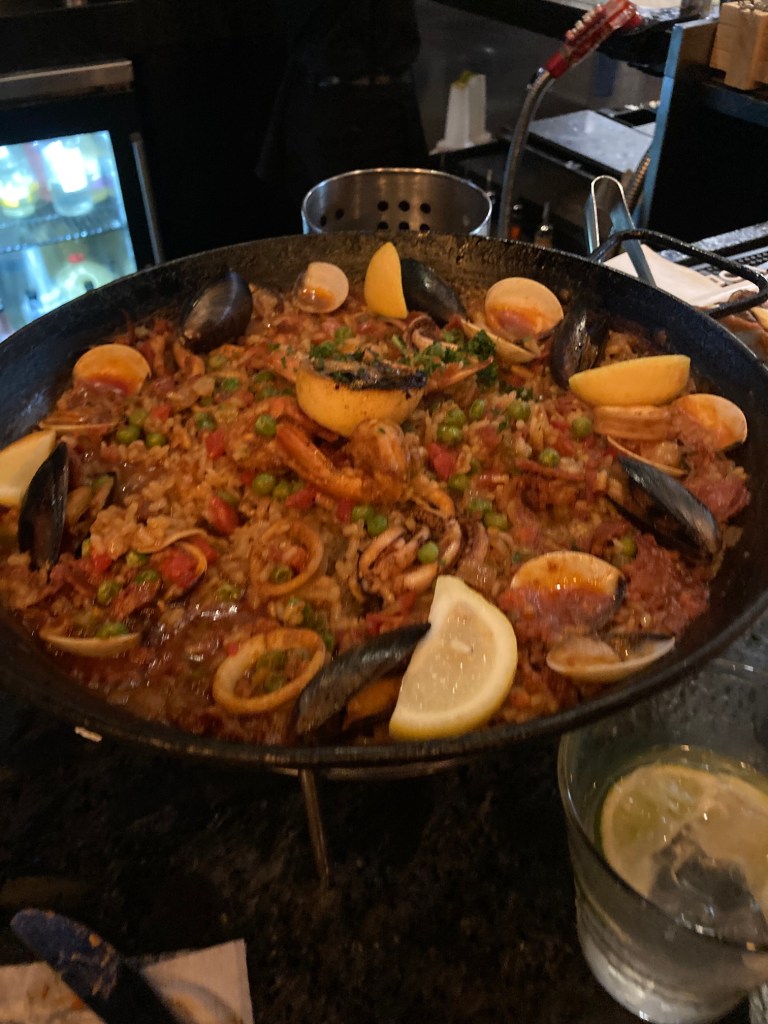
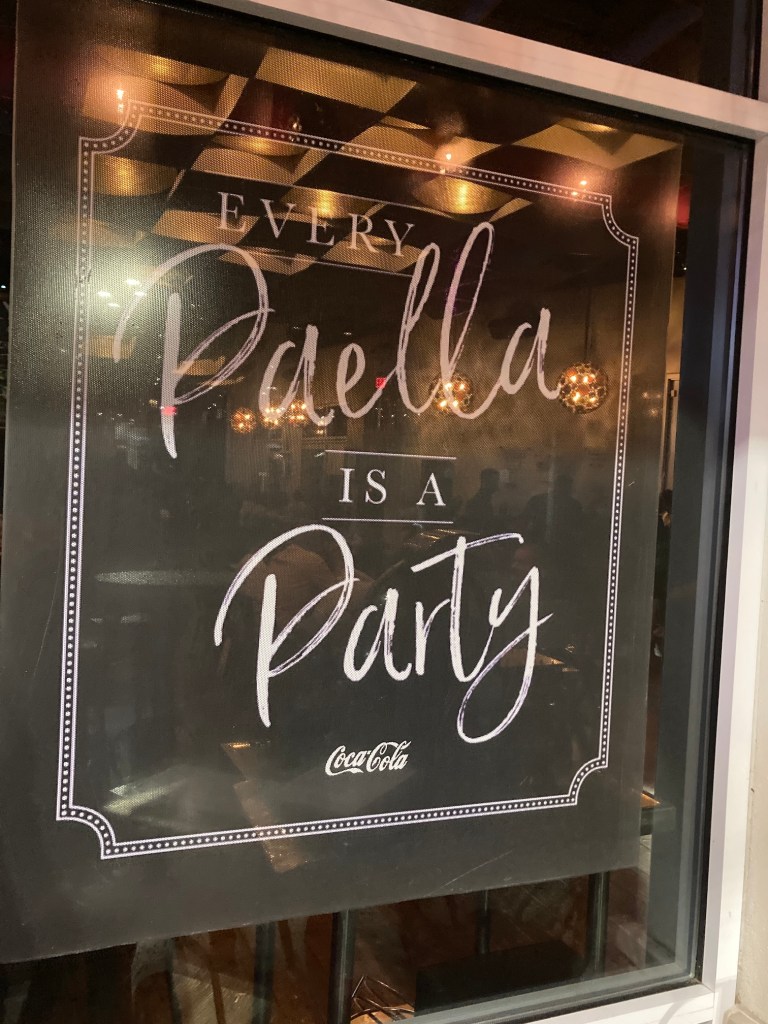
In addition to Universal Studios we stayed in Orlando near a collection of shops, restaurants and attractions called Icon Park. We ate several meals at restaurants at this park and had an especially memorial and delicious meal of paella at Tapa del Torowhich also featured flamingo dancers while you ate.
It was a lot of paella and luckily our hotel room had a refrigerator and microwave so we could enjoy our leftovers the next day. John did go golfing with his colleague who lives in the Orlando area one morning while I binged watched a Netflix show (you got to have some downtime/chill out time on vacation).
So that was our Orlando trip, more stories of recent adventures (and even some about crafting) to come!
Tierney is on vacation and she’ll tell you about her trip when she gets back. So I am going to step in and be the guest blogger so she does not go too long without having a new post on her blog (I know, I know, I am so awesome for helping her!).
Oh in case you are new to this blog: my name is tierneycreates Beastie and I am a Monster, but the good kind of Monster. I was made by Helen of CrawCrafts Beasties in Dublin, Ireland. You can read my story at I’m A Monster!!!. You can also check out the other posts I’ve had to guest blog on (i.e. when the human Tierney falls off the blogging-wagon and I have to help) in the series of posts: Beastie Adventures.
A photo from last year of me writing a guest blog post
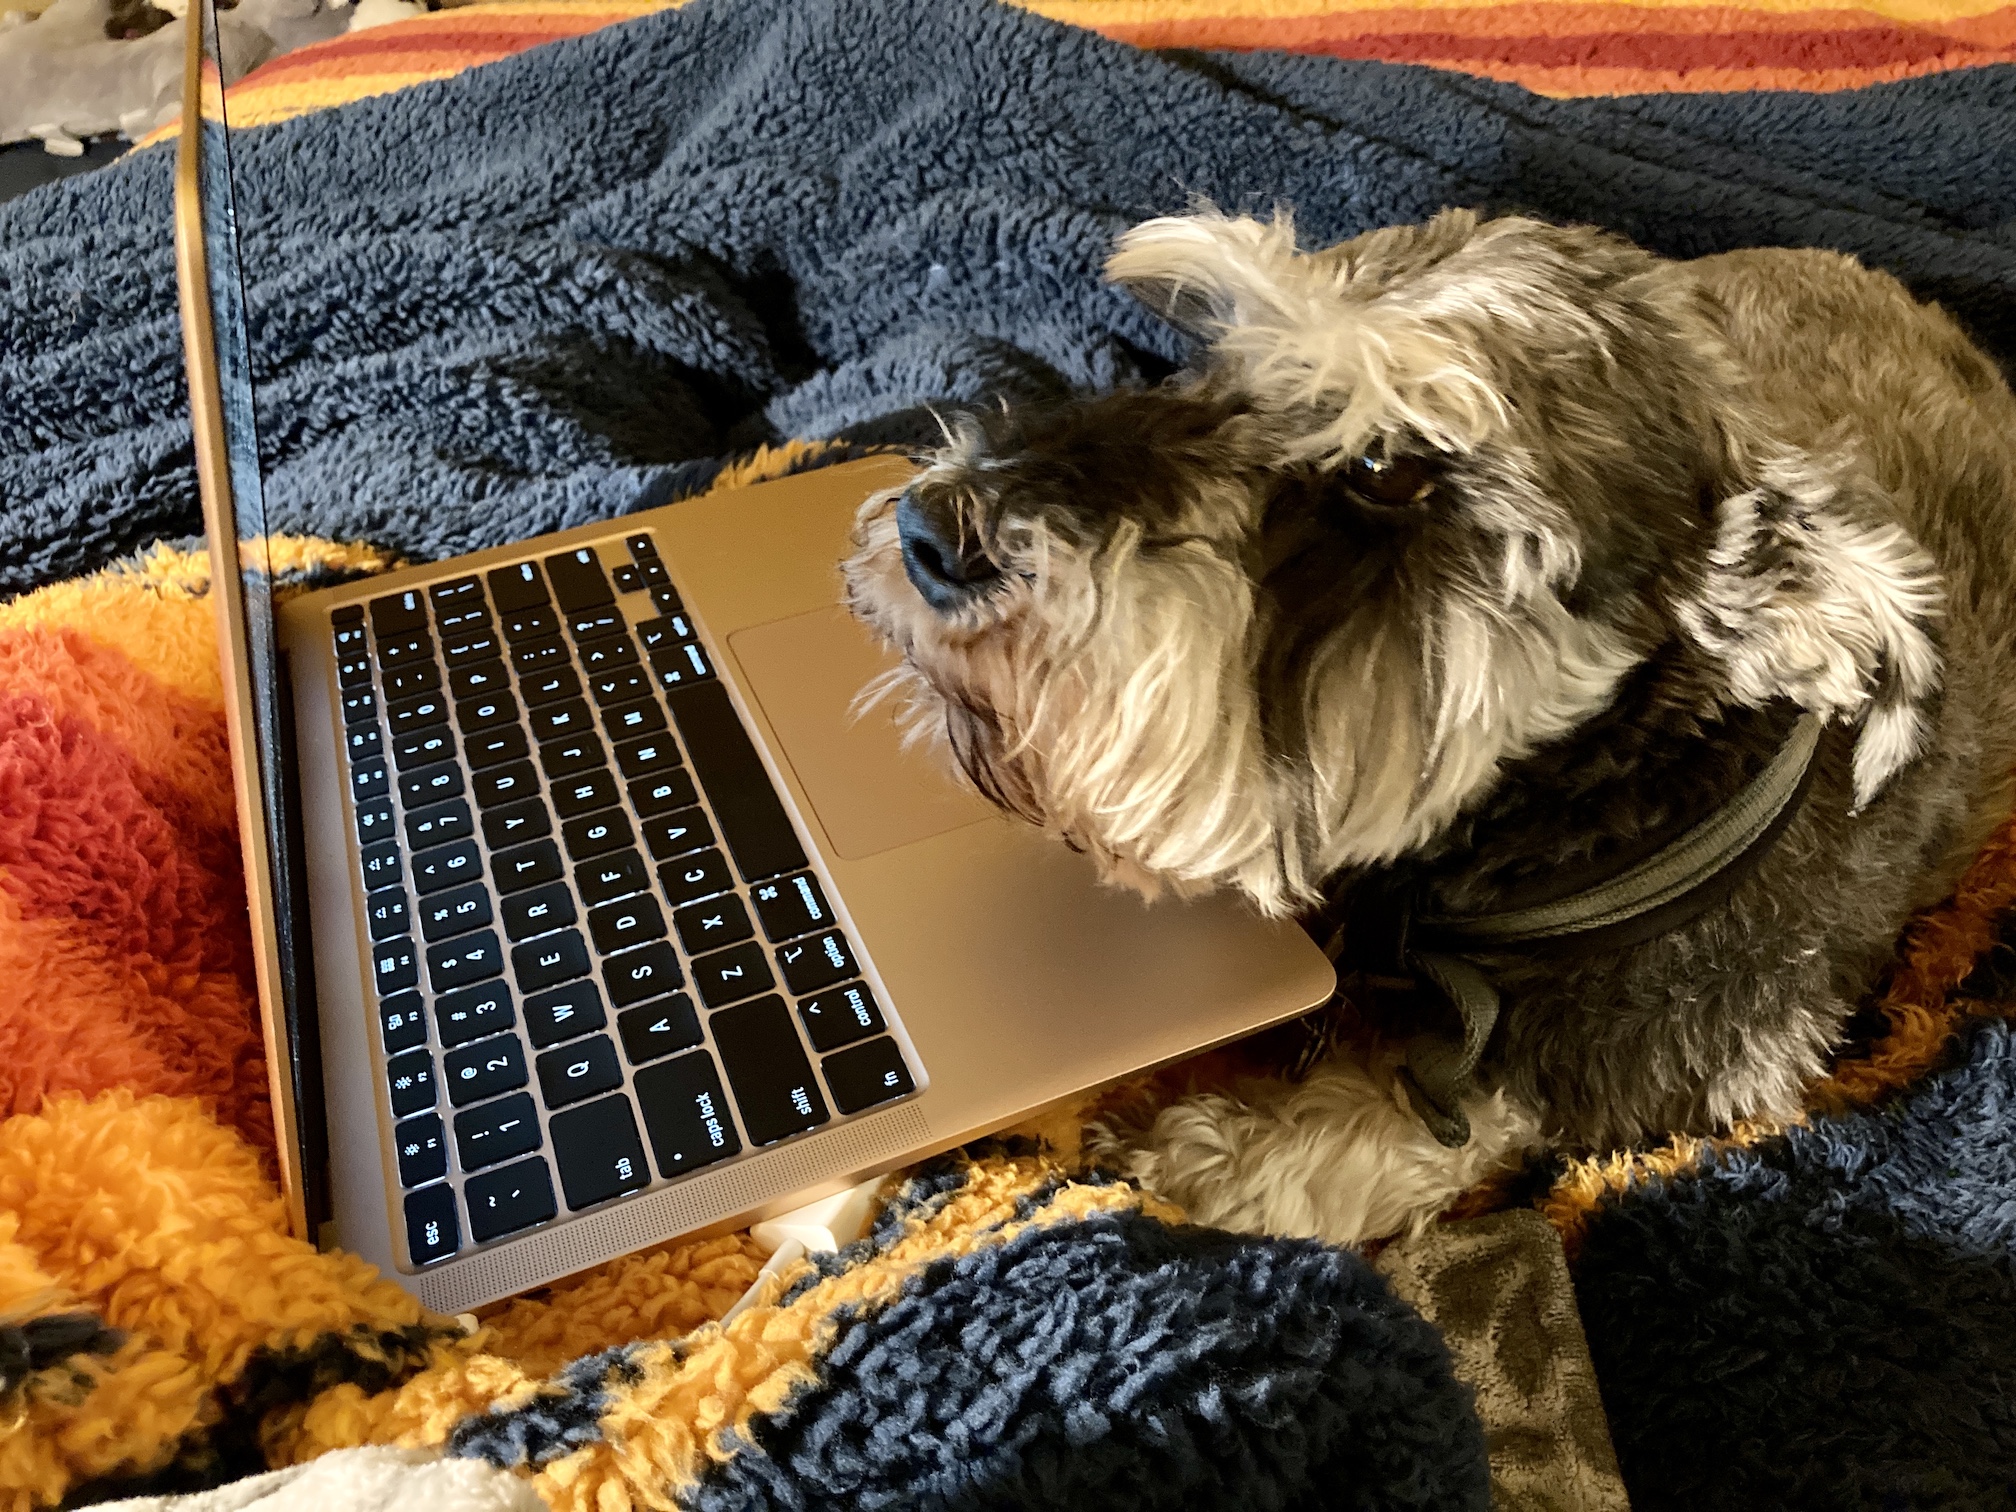
When I am not guest blogger posting, then Mike the Miniature Schnauzer has to guest blog post:
Someone else Tierney uses to do her work: Mike reviewing the draft of his guest post before posting…
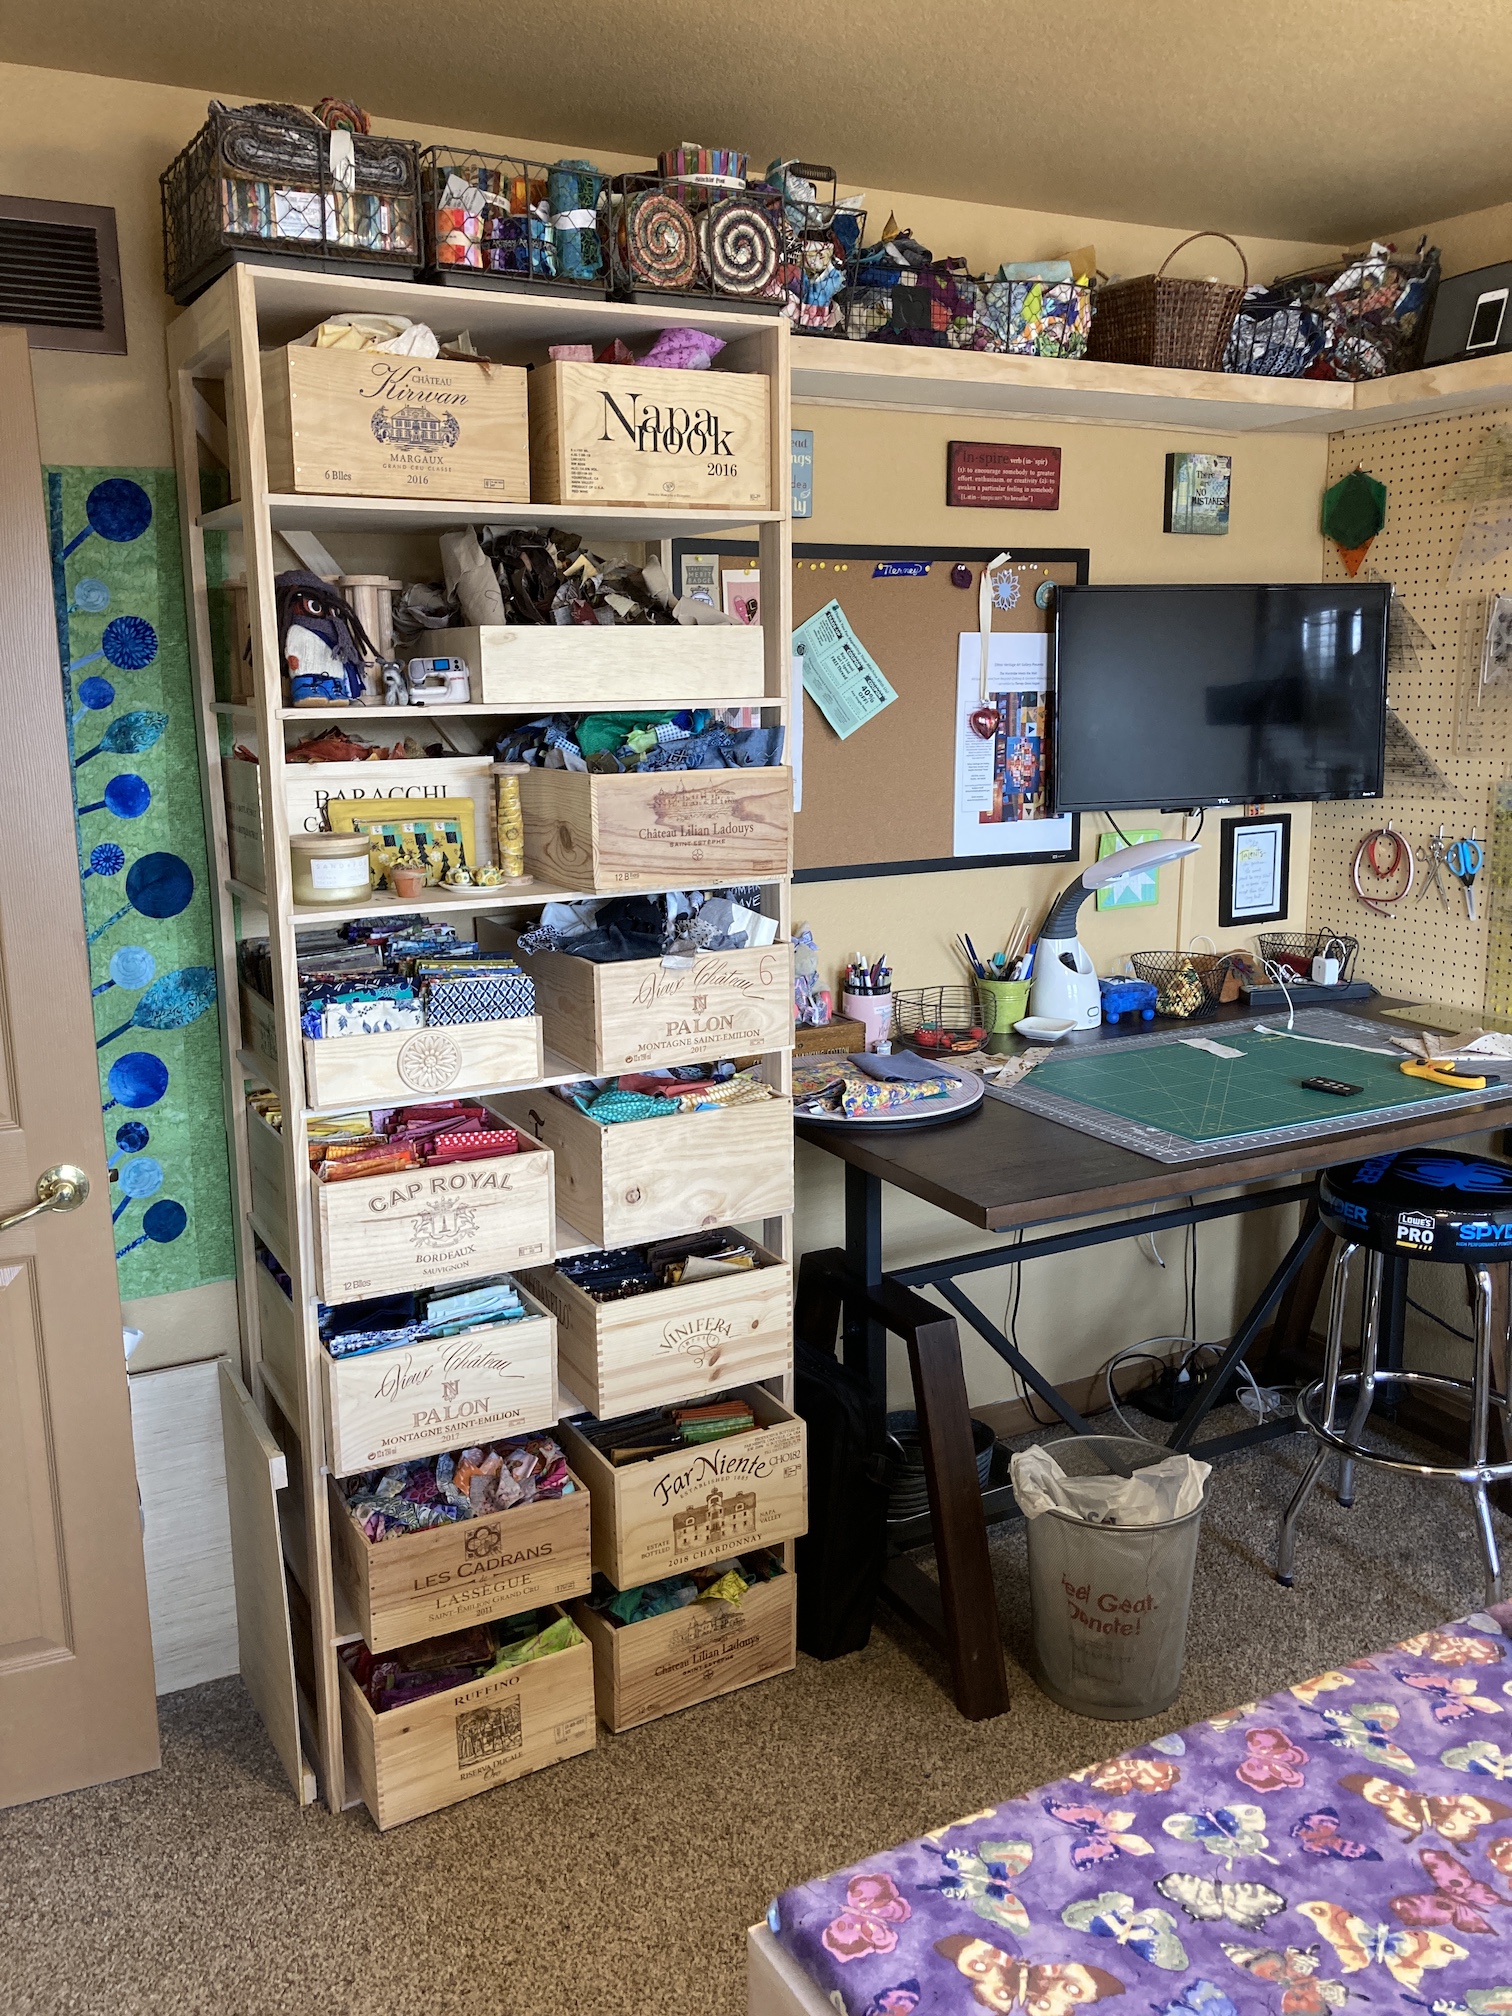
Oh and now the subject of this post (which is not to just show how Tierney falls of the blogging wagon and we have to rescue her…) – I wanted to show you the recent updates to my home, which is also Tierney’s crafting studio.
Tierney’s partner John (human John, not to be confused with my Beastie fiancé “John Beastie”, see post Guest Blog Post: Mail Order Groom) has been busy in his Woodshop making things for her studio.
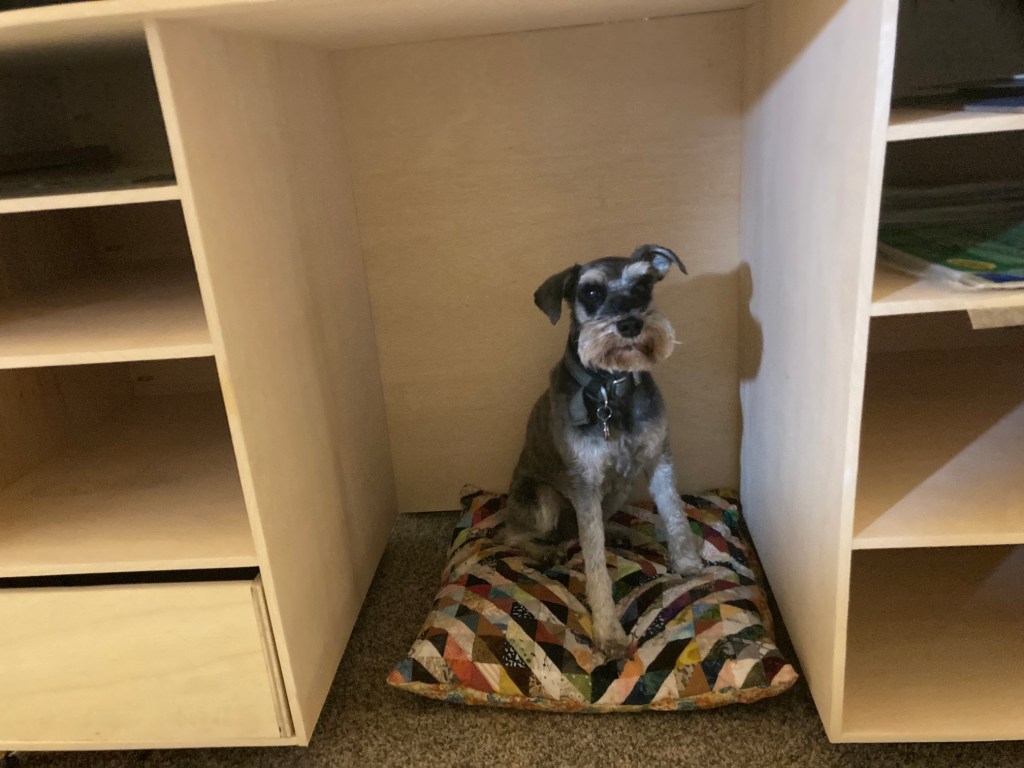
MY NEW “HIGH RISE“
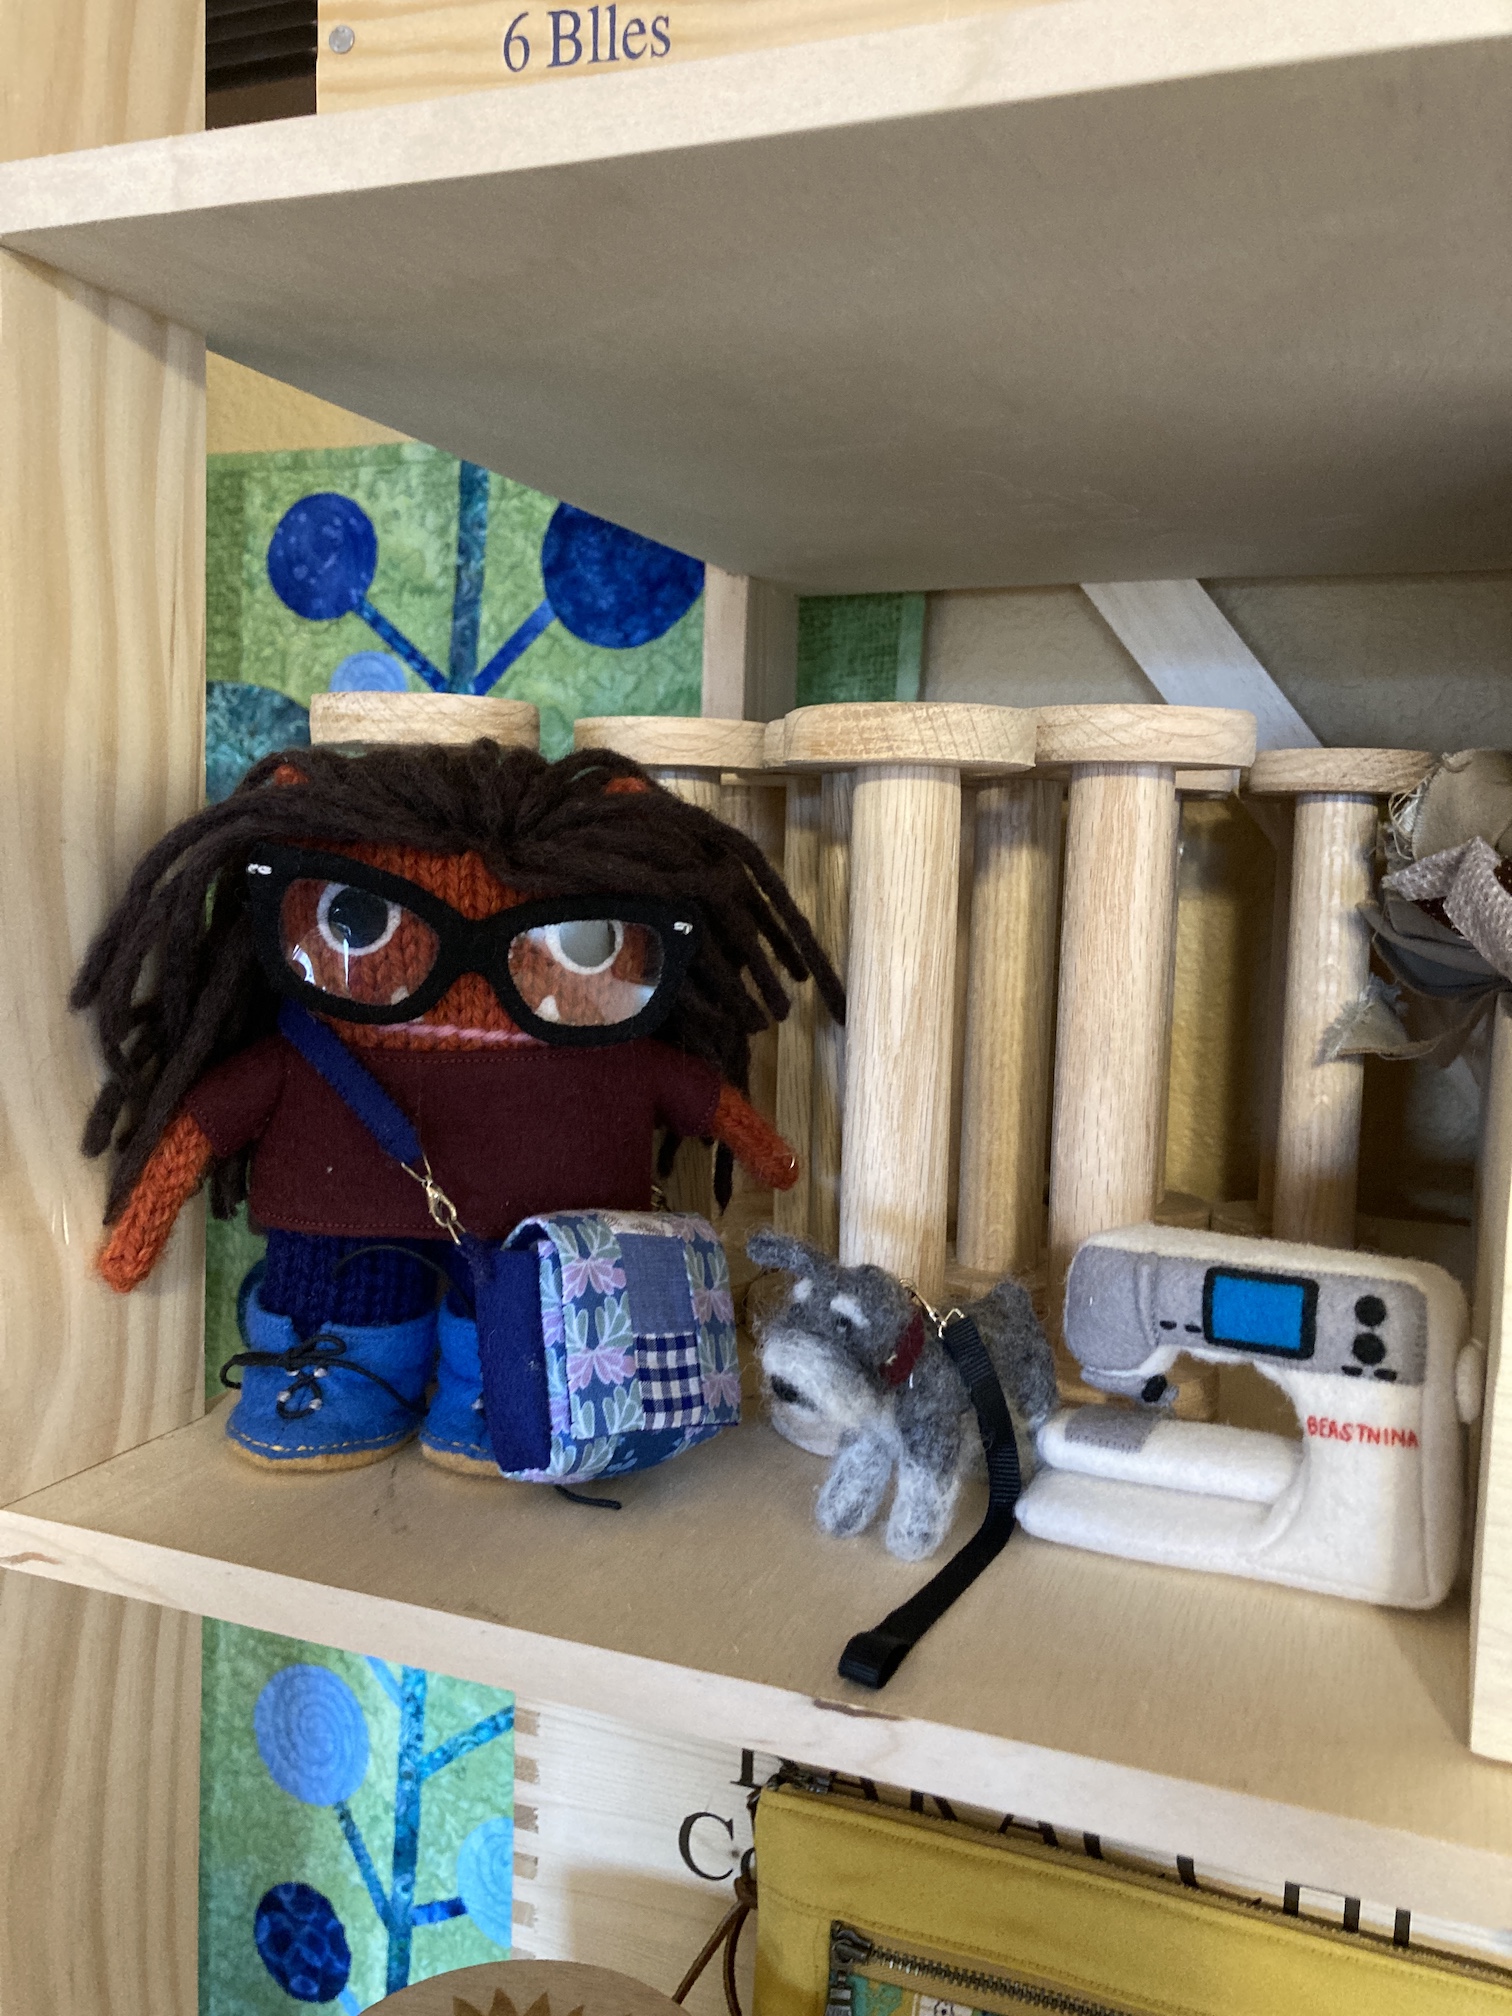
Human John built Tierney a storage unit for her fat quarter collection and fabric scraps which she keeps in wine crates:
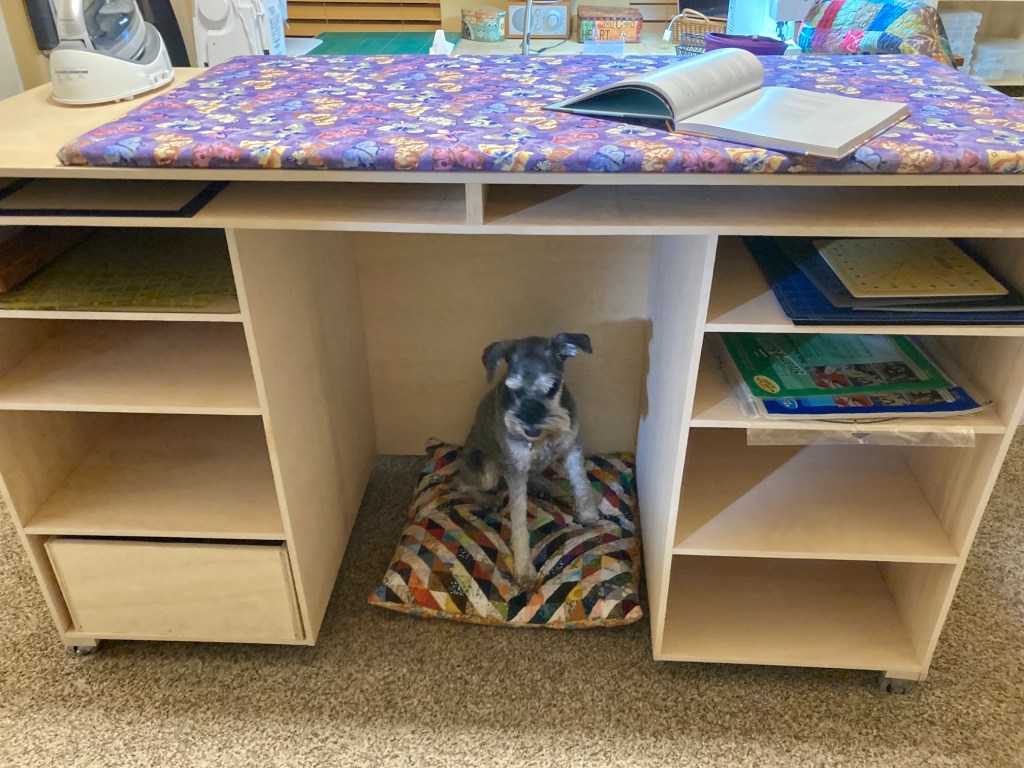
She’s also been known to store a Miniature Schnauzer in there:
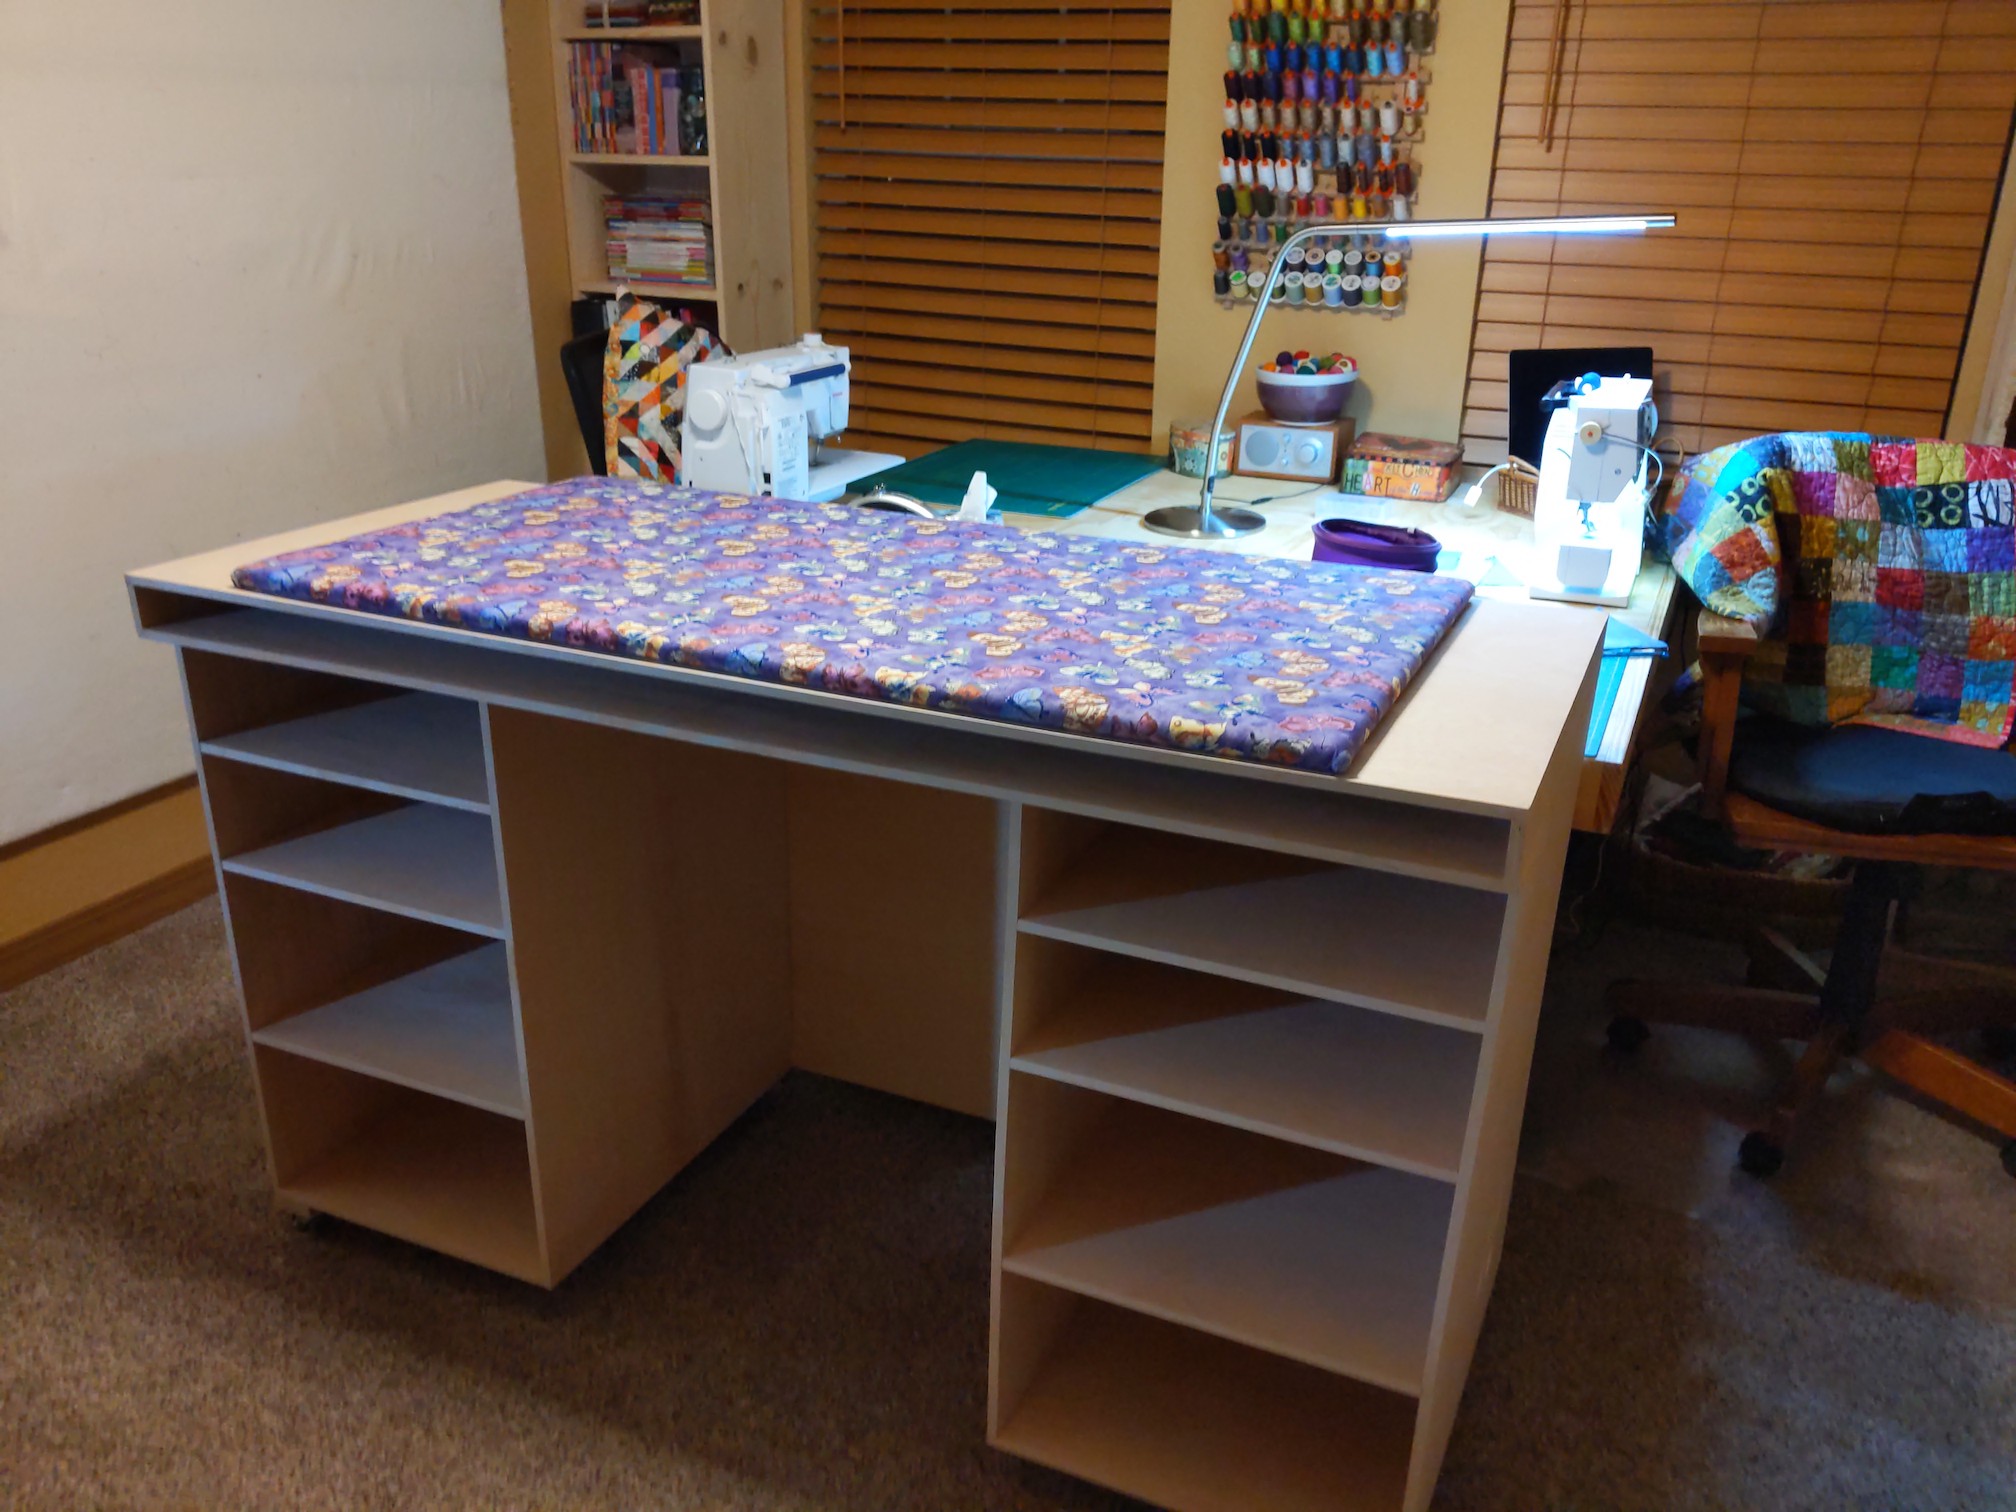
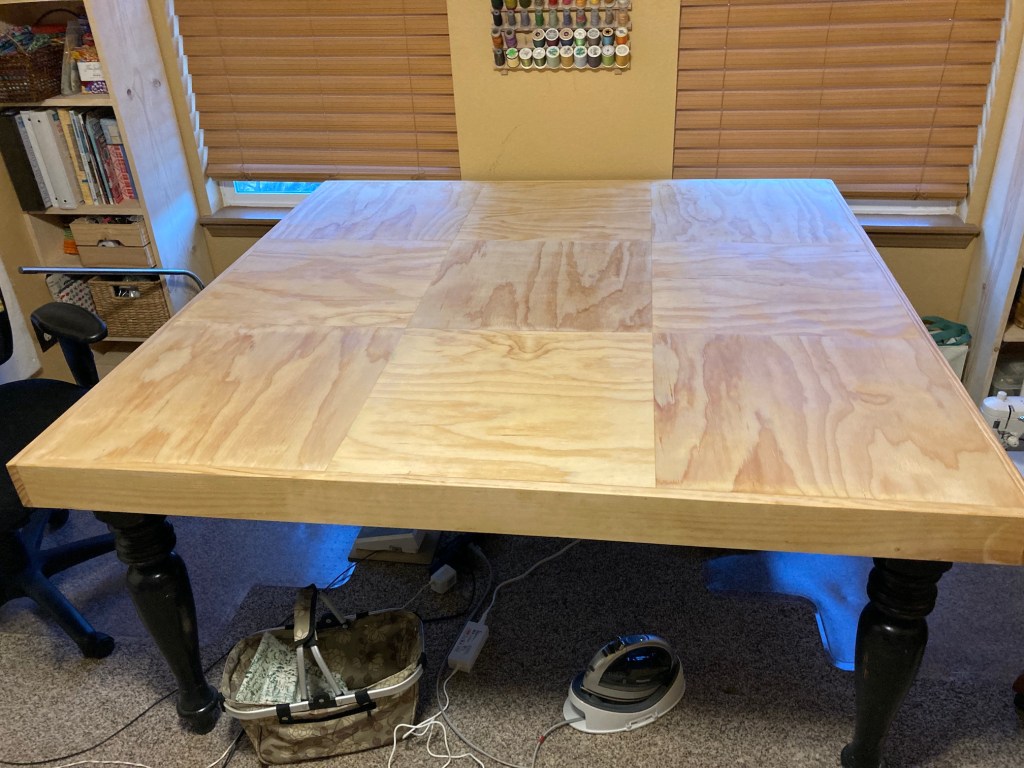
THE TABLE
Last year from her local community board for free stuff, Tierney picked up a large black table to use for crafting. It was scuffed up but it worked:
Tierney was “making-do” with the table and covered up the scuffs with an old table cloth but John wanted her to have a decent looking table in her studio so he created a new tabletop for it! John created a pattern with wood like a “nine-patch” quilting block.
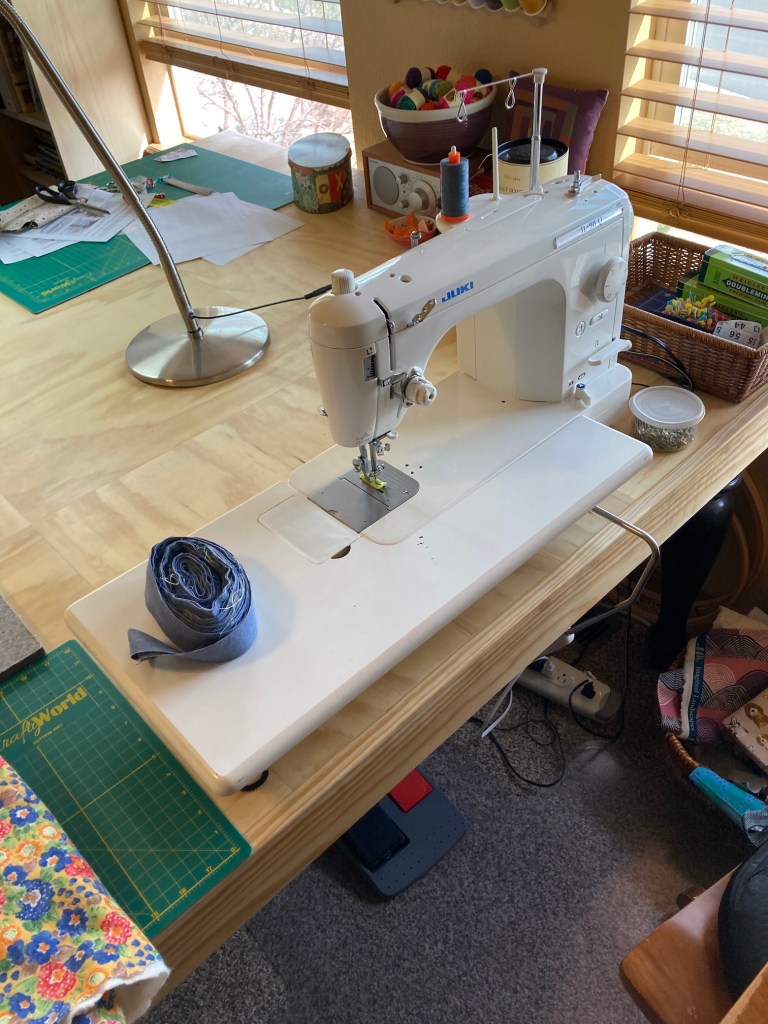
A month ago Tierney bought herself a used Juki sewing machine which is in the image above.
Alas, she did not buy ME another sewing machine, I have to just be happy with my Beastnina:
So those are the changes to my home, the tierneycreates studio!
Tierney will be back on the next post telling you about her trip and she might even catch up with reading her blogging buddies posts and responding to comments.
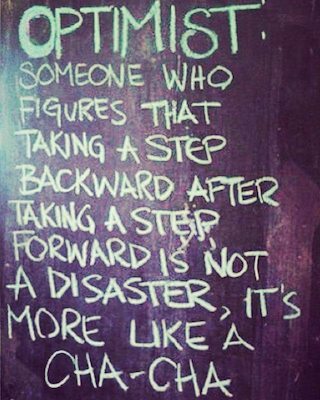
Until then, here is a sign she saw a couple months ago to give you some inspiration:
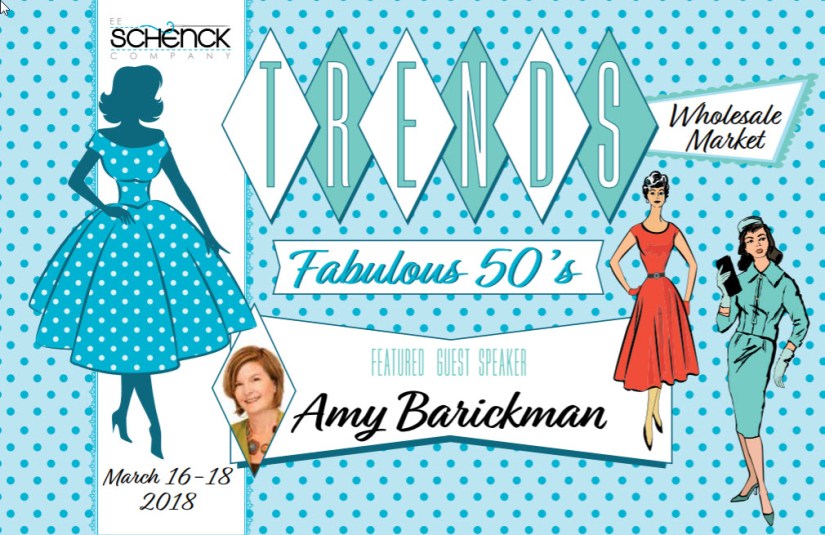
I am in my 8th year of blogging and I thought throughout this year I would occasionally and randomly share posts from my 7 years archives. Here are two posts combined into one for this post about attending the EE Schenck’s Trends show in Portland, Oregon in March 2018.
It is quite bittersweet to share this post (and any posts pre-December 2018) as my partner in life and crafting, Terry the Quilting Husband passed on December 2018. But we did not know that was going to happen and we were fully enjoying life together before his unexpected passing.
Trends Show Part I and II
Trends Show Part I: The Unexpected Roommate (originally posted March 21, 2018)
They Invited Me So I Went
Terry the Quilting Husband (TTQH) and I attended EE Schenck’s Trends show this past weekend. This post is part one of my two-part series on my experience at the Spring 2018 Trends show.
I signed up for an EE Schenck wholesale account when I had the tierneycreates Etsy shop and for a brief time thought I would supplement my handmade items sales with some fabric sales.
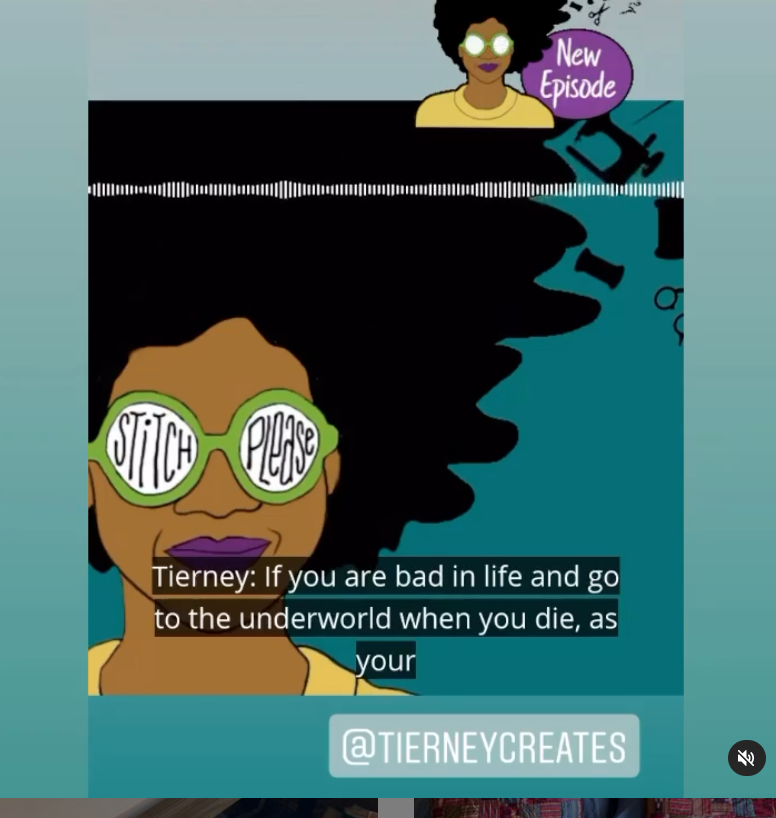
My ‘adventures in retail” were challenging (see my old post from June 2015, Adventures in Retail) and I quickly discovered that I greatly disliked cutting yardage and making up fat quarter packs (I believe this is what you have to do all day in the “Underworld”, if you are bad in life and go there after you die; to me that is a big enough incentive to be good in life!).
I did however meet my lovely quilting friend Martha through one of my Etsy shop fabric sales so I figured that was the good thing that came out of that experience!
Additionally, as I discussed in previous posts, I did not want to compete against “brick & mortar” quilt shops (though absolutely no quilt shop could have been threatened by my meager attempts to sell fabric) and become part of the “online fabric sales world” that threatens our beloved community quilt shops.
I did eventually temporarily close my Etsy shop (it’s been over a year so it has been an extended “temporary” closure) to rethink my strategy and handmade offerings.
My Etsy shop is temporarily closed but EE Schenck still has me listed as a wholesaler and they continue invite me each year to their Spring and Fall Trends show for now.
I attended my first show in September 2016 (see the post Ladies Friendship Circle) and got to hang out with my friend Joan H. as well as the lovely Marie Bostwick (a mutual friend of my friend Joan) and Mary Fons (a friend of Marie’s).
Mary Fons and Marie Bostwick, Trends September 2016
So when I received the invite from EE Schenck to the Spring Trends show and saw what classes were offered, I asked TTQH if he would like to go to Portland, Oregon for the weekend (it is only a 4 hour drive from my house) and attend Trends.
image credit: eeschenck.com
Beside the opportunity for a nice weekend getaway to Portland, one of the reasons I attended the Trends show was for a very reasonable price I could take “Take n’ Teach” classes from wonderful authors/teachers/designers such as Latifah Saafir, Kathy Cardiff, and Jody Houghton.
I was especially excited to take Jody Houghton’s class, Fabric Art Panels, because her work holds a special place in my heart. As a matter of fact I gaze at one of her panels nearly everyday: my very dear friend Judy (who got me into quilting and I consider my “Quilt Momma”) made me this wall hanging a couple years ago from a Jody Houghton panel:
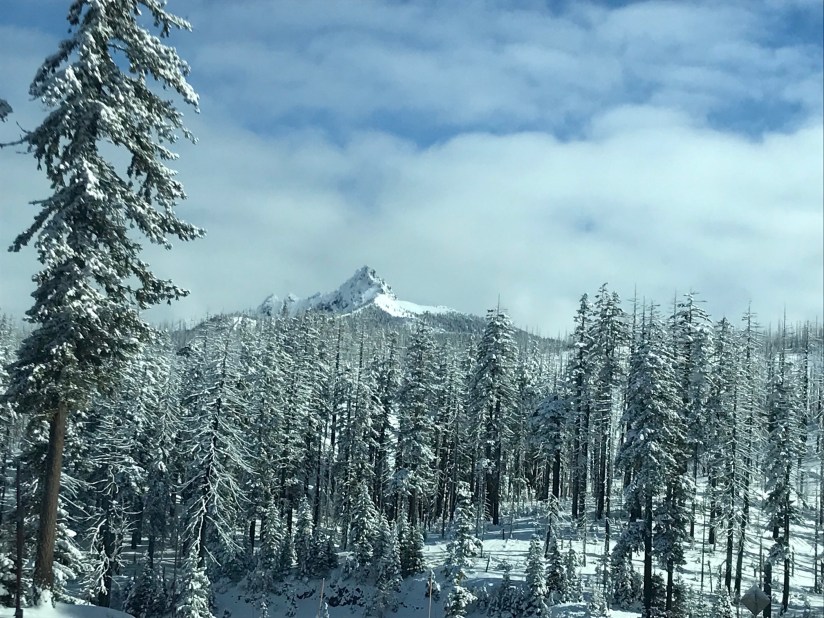
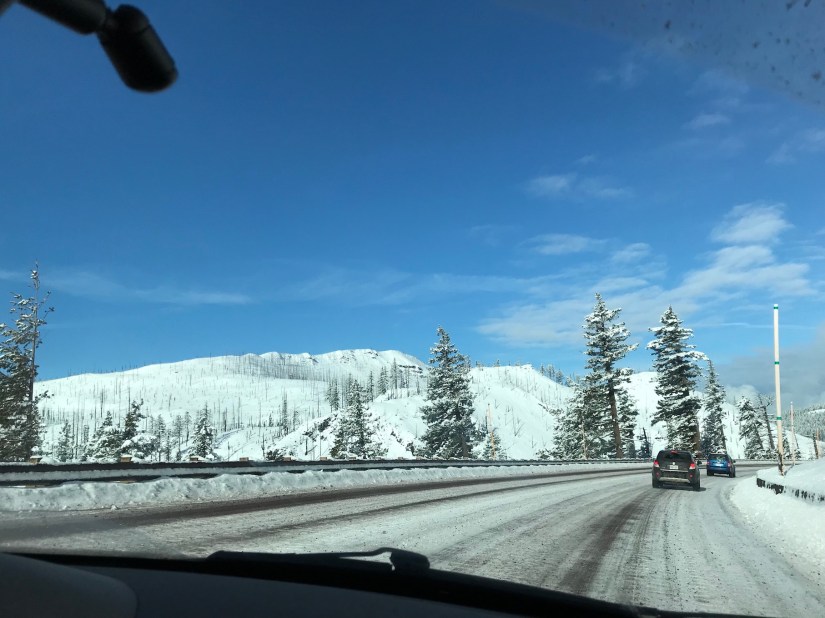
The Drive to Portland
There are generally two ways to get from Central Oregon to Portland: Santiam Pass or Mount Hood Pass. Until late April (or later) both are at mountain elevations, are ski areas, and both are usually covered in snow. Sometimes the snow is packed on the road and most times until late Spring, chains or traction tires can be required. You always see tractor trailers at the lowest part of the elevation pulled over and putting on their chains to make it through the pass in the late Fall, Winter and early-mid Spring.
We decided to take Santiam Pass to Portland and below are photos from our snowy drive (from inside the car with the windows rolled up). I was glad TTQH was driving! (Actually is wasn’t that bad, we only 30 minutes or so driving on pack snow, the rest of the drive was just wet/snow dusted highway).
The Unexpected Roommate
Arriving in Portland we first stopped at Powell’s Books, the mega independent bookstore and a mandatory stop so TTQH could load up on more military history books (his other hobby besides quilting).
Image credit: powells.com
After that we headed to our hotel and checked into our room.
It had been a long drive from Central Oregon to Portland and we had spent a long time in Powell’s books, and I was eager to get into comfy clothes and relax. TTQH was in the bathroom and I was getting undressed and suddenly the door opened to our hotel room and a woman was backing into our room with her suitcase!
I exclaimed: “Hello there!” and startled her as I quickly pulled my pants back up. She was a well dressed congenial woman who graciously stated: “Oops, the woman at the front desk was new and I think she assigned me the wrong room.” We briefly laughed about it (though I was in utter shock and yelled to TTQH not to come out of the bathroom unless he was fully dressed) and she said she would go downstairs and sort it out. She also said she was there for the Trends show so I knew she was likely a quilter/crafter and therefore a wonderful person (in general, crafters are wonderful people – smile)!
Shaken (and feeling rather vulnerable as they obviously we handing out card keys to our room to others!) I immediately called the front desk and told them what happened. I then went down to the front desk in person and requested to have a new card key made up. The front desk staff apologized profusely and got everything fixed. The nice woman who had backed into our room was also there getting things sorted out and we laughed about it again.
When I got back to the room, I had calmed down and TTQH were able to have a laugh about it. I said to TTQH, “Well she seemed nice and I guess she could have slept between us if the hotel is completely out of rooms, ha!”
I figured I would run into the “unexpected roommate” at some point at the Trends show on Saturday and we would have a more relaxed laugh about it.
The Unexpected Teacher
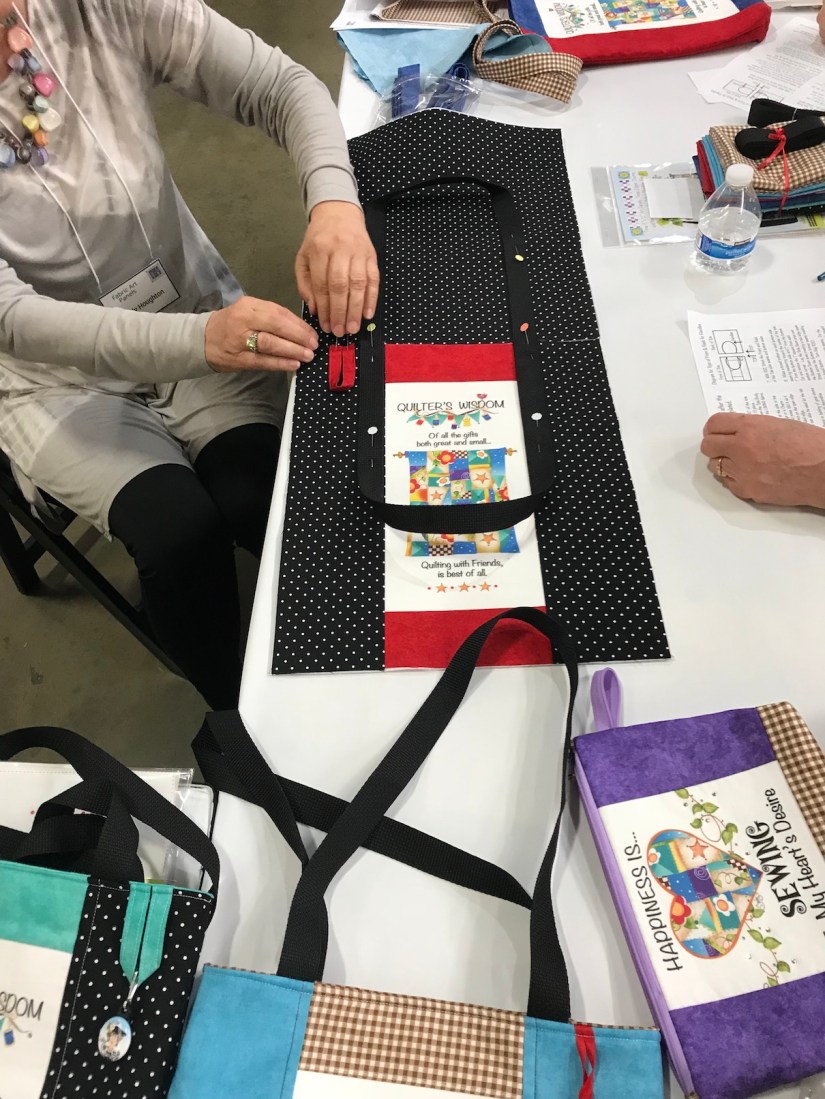
Saturday, September 17th, after the Trends keynote speaker’s, Amy Barickman of Indigo Junction, I headed to the “Take n’ Teach” series of classes, my first class being with Jody Houghton.
And guess who was Jody Houghton? My Unexpected Roommate!!!!
We had quite the laugh about it when I first arrived at her booth for the class! Jody and I also shared the story with the other class participants who got a laugh out of it too!
Her class was wonderful and we learned how to make quick tote bags using her panels. Here are photos from the class and photos of some of the cool samples she had on display:
Jody is an absolutely lovely woman and a very talented designer and teacher.
Check out her panels and notions on her Etsy Shop: Sisterhood of Quilters by Jody Houghton Designs. I hope you will support her shop (or convince your local quilt shop to carry her items) as in my opinion she really captures the heart of the friendships and bonds that come from quilting together. I hope I get to connect with her again the future (but perhaps not as an unexpected roommate…ha!).
It is sort of like the Universe brought us together – how random that the woman who created the panel in the wallhanging that means so much to me, “broke” into my room!
Next post I will continue with more stories from the Trends show (though none involving potential roommates!)
Postscript
Our first time to Trends in September 2016 we took Mike and Sassy (who passed in December 2017). TTQH only briefly attend Trends (leaving the dogs in the car outside for 1/2 hour) as he was in charge of the dogs (who did not like to be left in a hotel room alone).
We decided to leave Mike with some fellow schnauzer people and be “child-free” in Portland this time so we could enjoy the weekend together. TTQH was not interested in taking any classes but he had fun wandering around EE Schenck looking for dog themed fabrics and talking to other husbands (usually the husbands of quilt shop owners, etc.) at the show.
Here is a photo of Mike with his schnauzer buddies Chopper and Frieda, taken by their people and texted to us during the weekend so we knew Mike was having a good time. They labeled this photo “The Three Amigos”.
Trends Show Part II: More Class (originally posted March 24, 2018)
Happy Saturday and here is part two of my two part posts on attending the EE Schenck’s Trends show last weekend in Portland, Oregon.
She demonstrated her brilliant method for piecing curves using pieces cut from The Clammy, her giant clamshell maker template. Below are photos from the class (including some yummy fabric she used for her demo):
Later that day I was fortunate enough to share a shuttle bus ride (EE Schencks provided a free shuttle to and from the hotel to the Trends show) with Latifah and hear more about her transition from scientist to quilting guru!
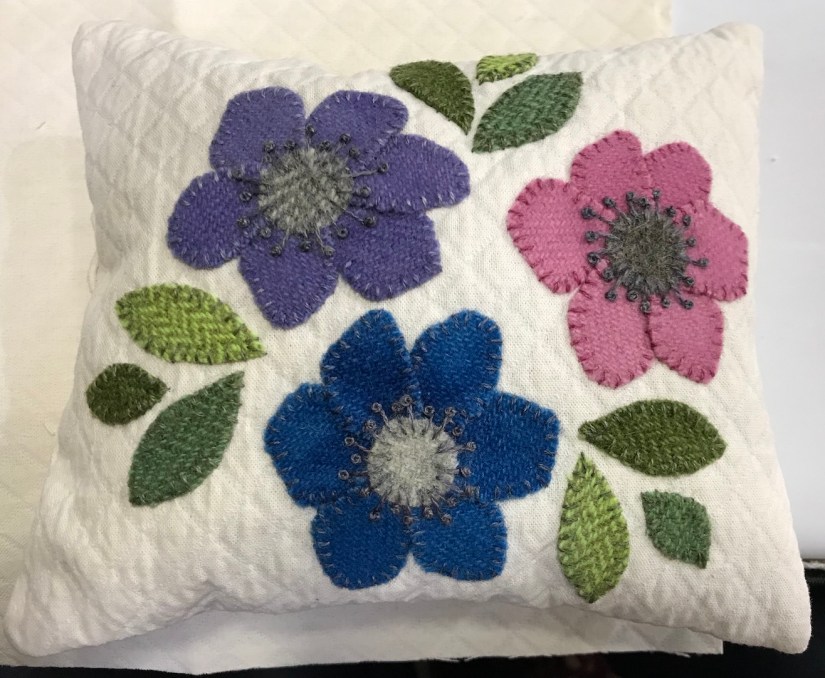
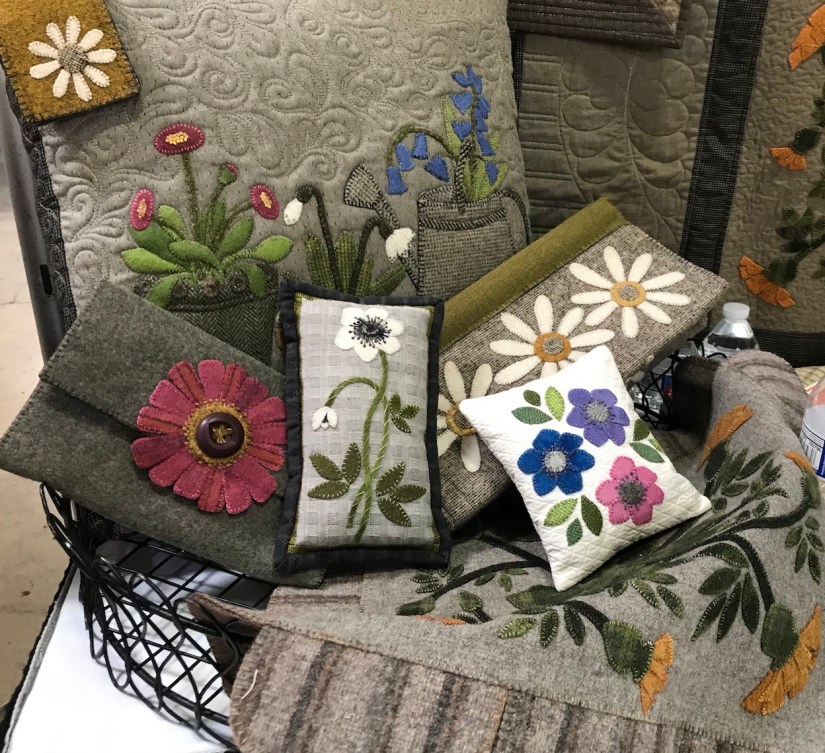
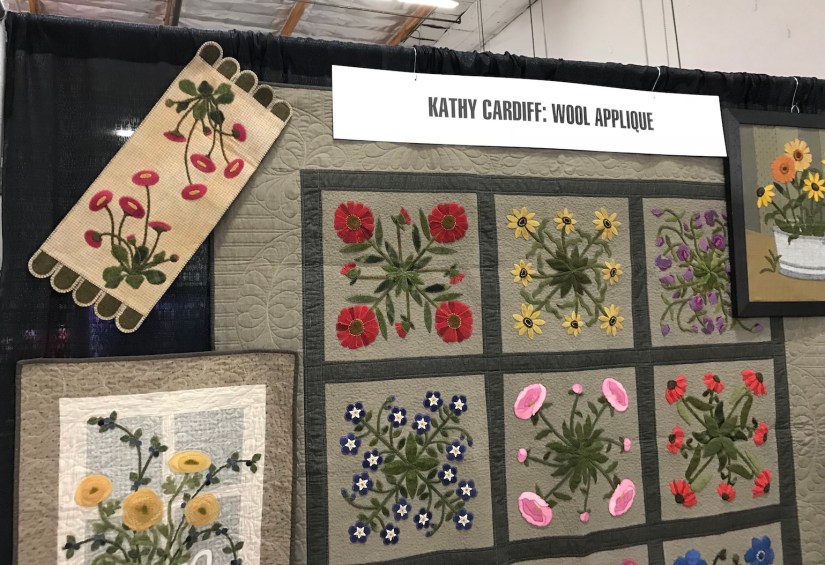
Kathy Cardiff: Wool Appliqué
Kathy Cardiff is a Washington state based designer, author and teacher who specializes in wool appliqué. Check out her website – The Cottage at Cardiff Farms.
She taught a hands on wool appliqué class in which she prepped our little wool appliqué pieces with fusible backed paper, we just needed to cut the little pieces out to make this (her sample):
She also prepared templates for us to use to press the pieces together onto freezer paper before peeling them off to place the fabric for the little pillow:
Her work is amazing, here are so additional photos from the class and her booth:
She definitely took the fear out of wool appliqué for me like Latifah Saafir took the fear out of curved piecing for me!
Here is my wool appliqué piece currently in progress from the class:
The funny thing is I’ve had a The Cottage at Cardiff Farms sunflower wool appliqué pillow pattern and supplies for many years but I was too intimidated to get started on it. It no longer seems scary – especially now that I have learned a quick way to put the appliqué pieces together and fuse them!
I told Kathy about the pattern I’ve had for years (purchased at the Stitchin’ Post in Sisters, OR); she knew which one I referenced and gave me tips after class on how to complete it!
There’s No Place Like Home
We had fun in Portland but I was also happy to return home again. My heart always soars when we drive from the Mount Hood pass area into Central Oregon. It is so interesting how the climate and the landscapes change from Portland to Mount Hood to Central Oregon.
The moment I saw my beloved “high desert” landscape, blue skies and Cascade Mountains everywhere – I knew I was home!
View from inside the car window before Madras Oregon (still too cold to roll the window down!)
Postscript
Recently I read an article online (oops I do not remember the website) that strongly recommended you do not store your thread out in the open because of dust, etc. In a previous post,Aurifilia, I discussed my beloved collection of AURIfil thread (actually obsession).
Well I decided to take down my mounted thread racks and store my thread collection instead in bins to protect the thread.
So I went from this:
To this:
Note the AURIfil is neatly stored in the top 4 containers and the “non-AURIfil” thread is casually strew about in the bottom container – ha!
I also decided to put up more quilted art/gifts from my Quilting Sisters in my Studio.
Here is a quilt made for me a couple years ago by my Quilting Sister Kathy when our group did a quilt exchange:
If you read Monday’s post Zip Zip Zippers!, you saw that I now have a lot of zippers for bag making thanks to my generous friend Wendy.
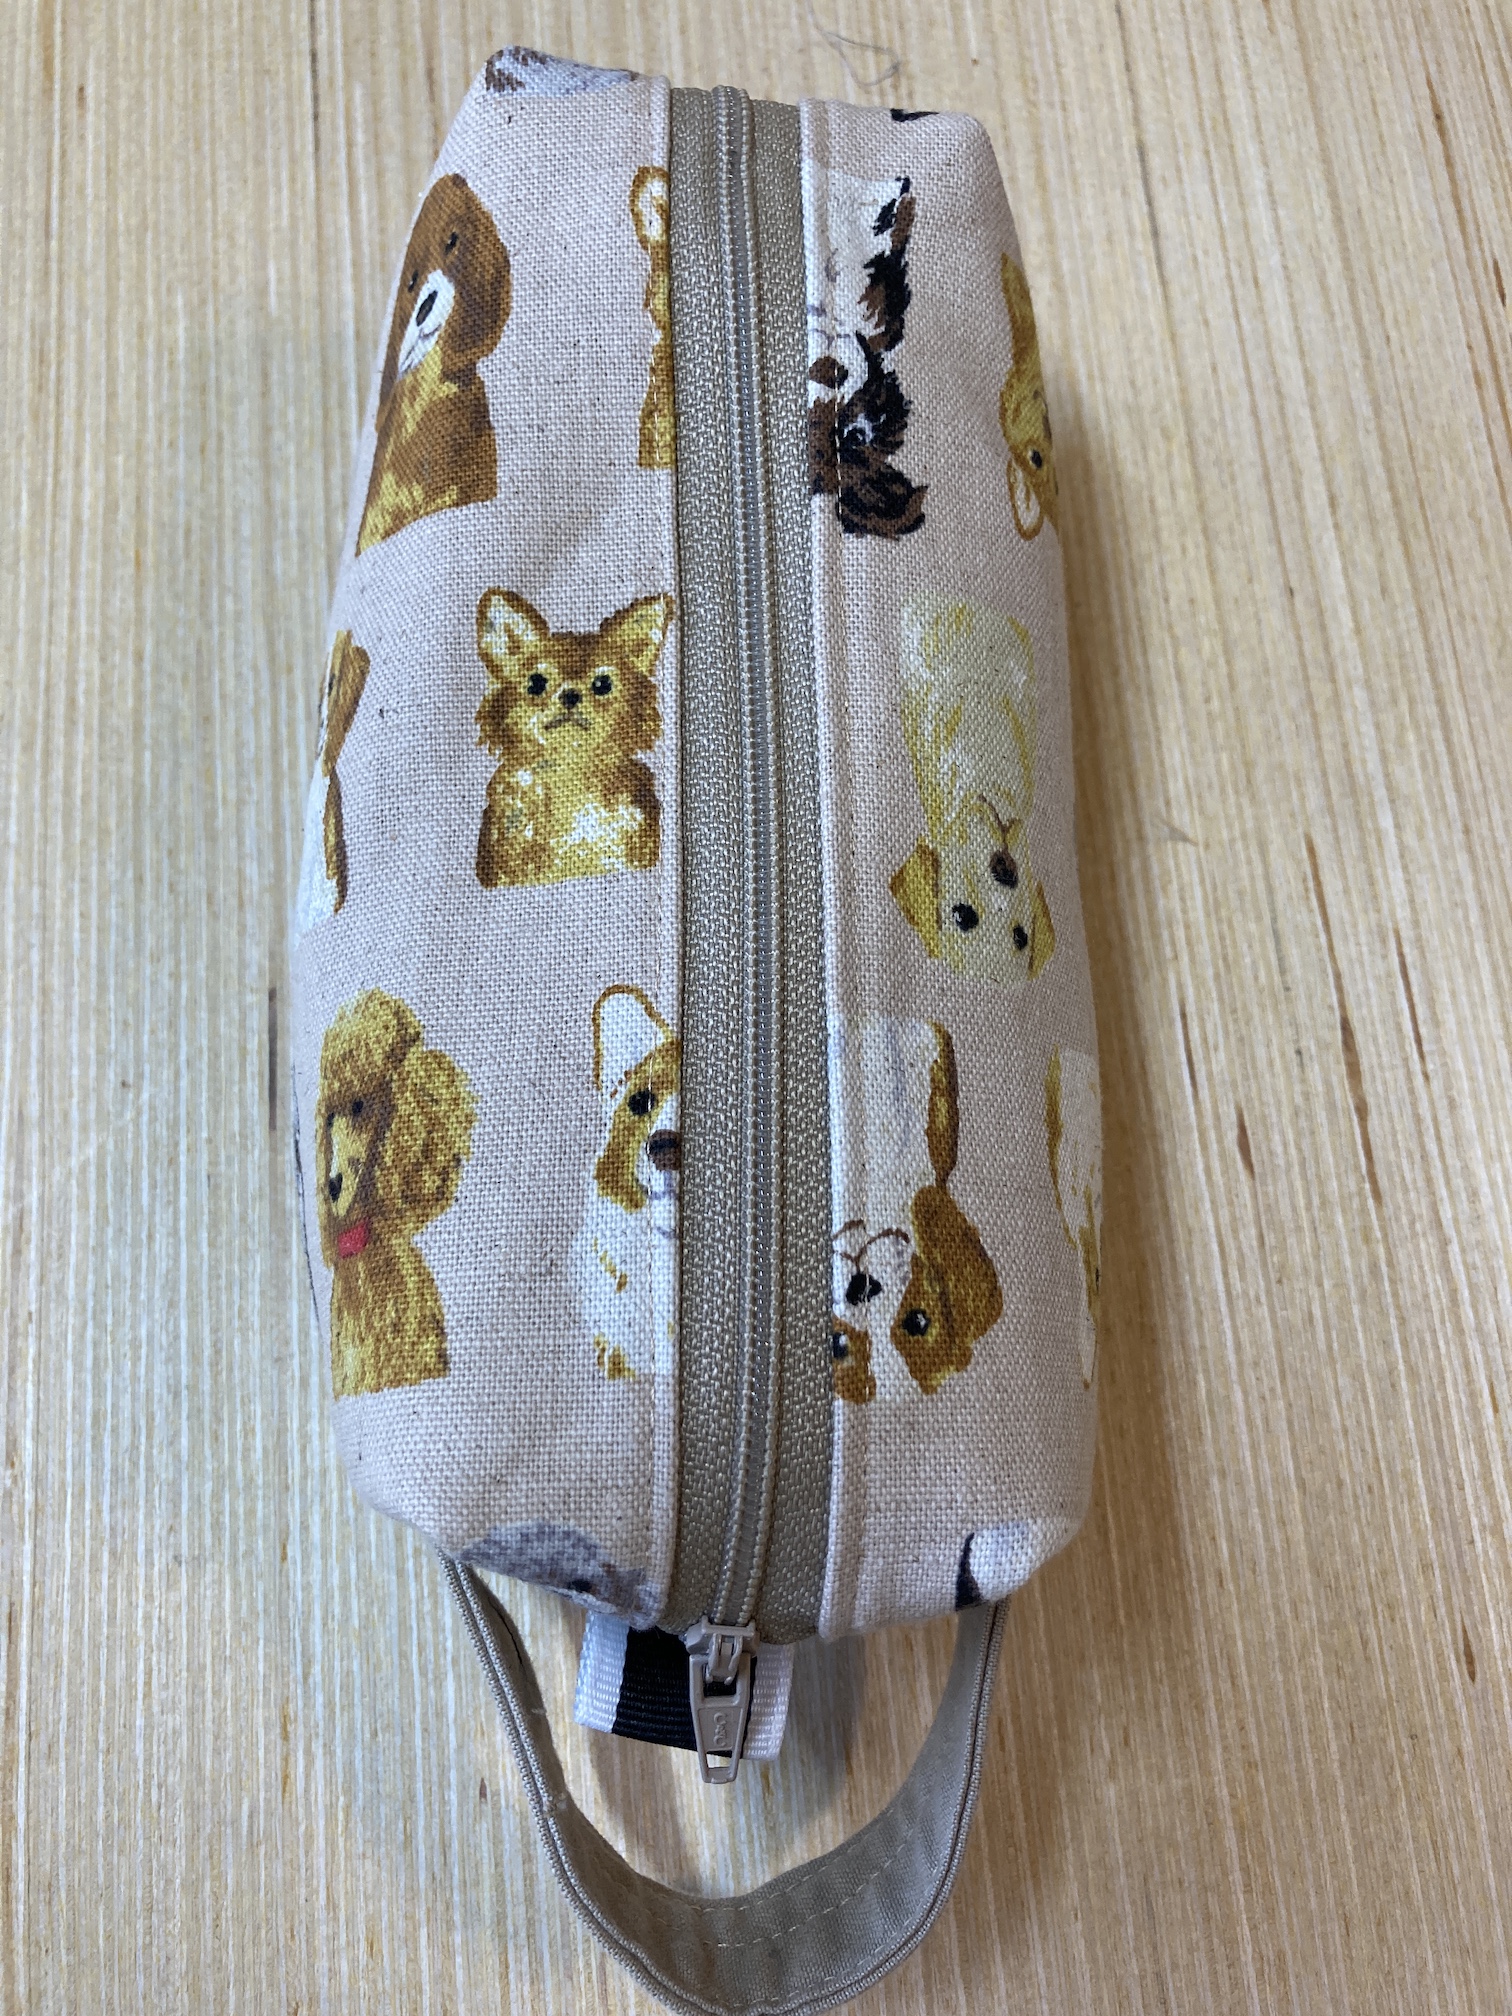
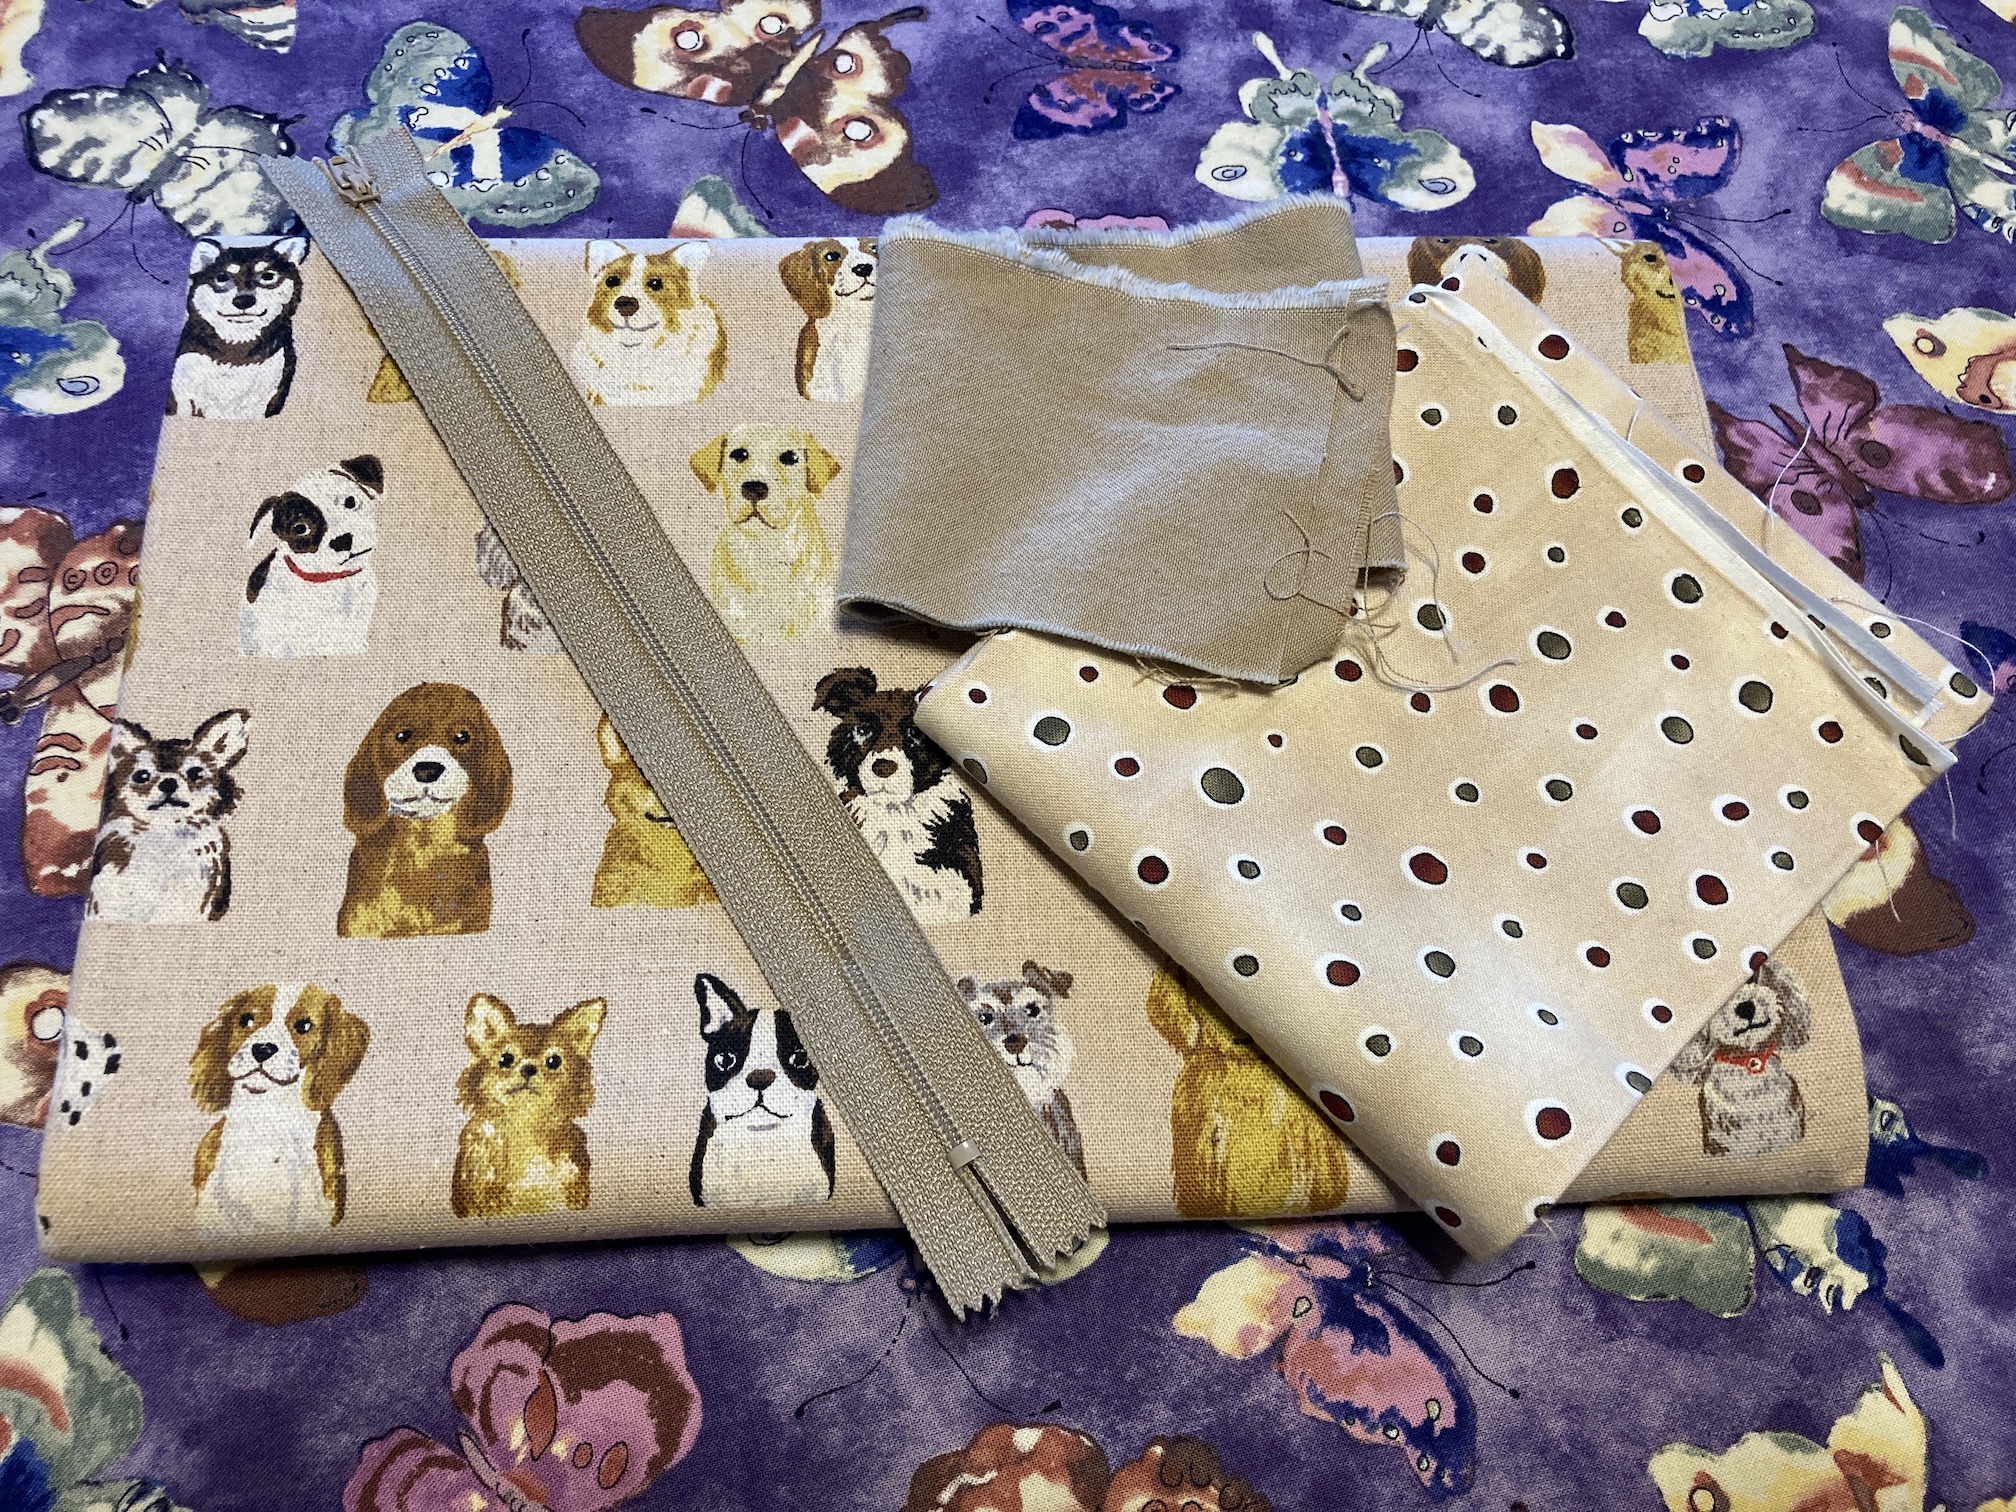
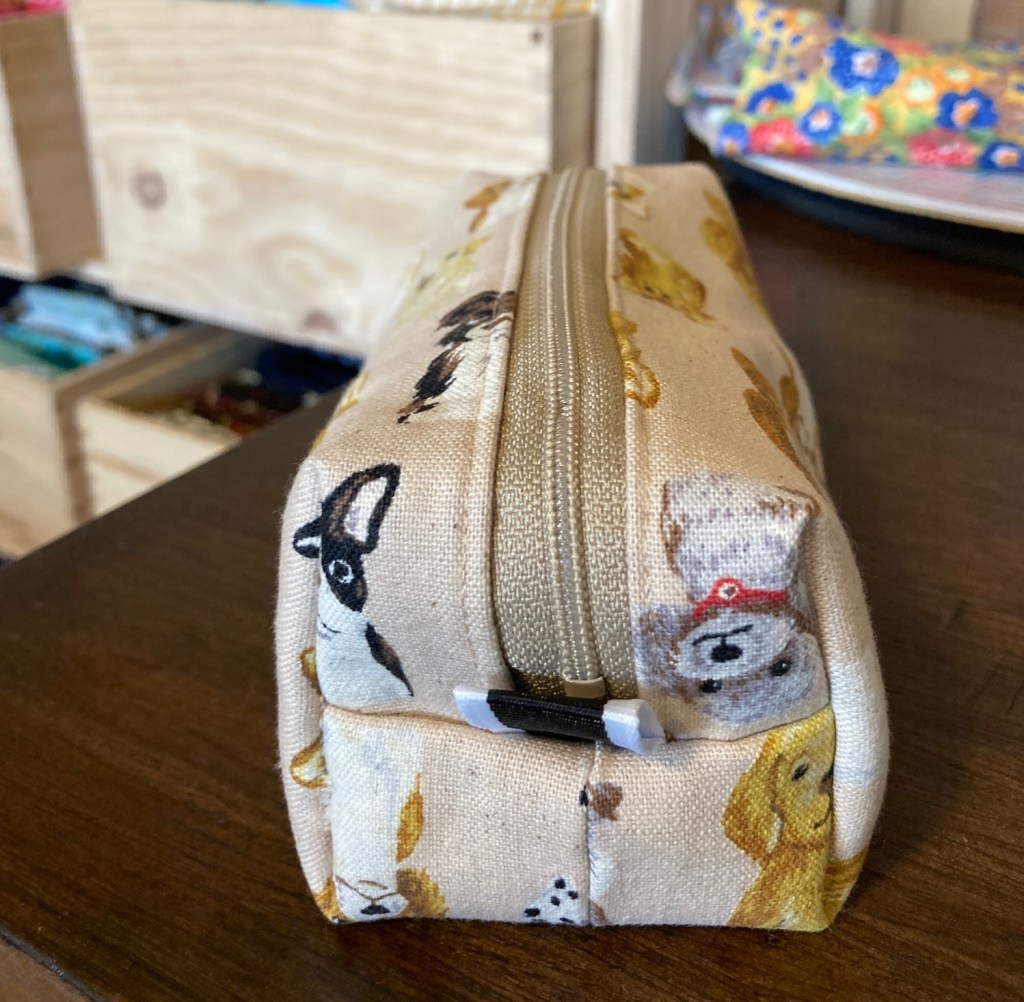
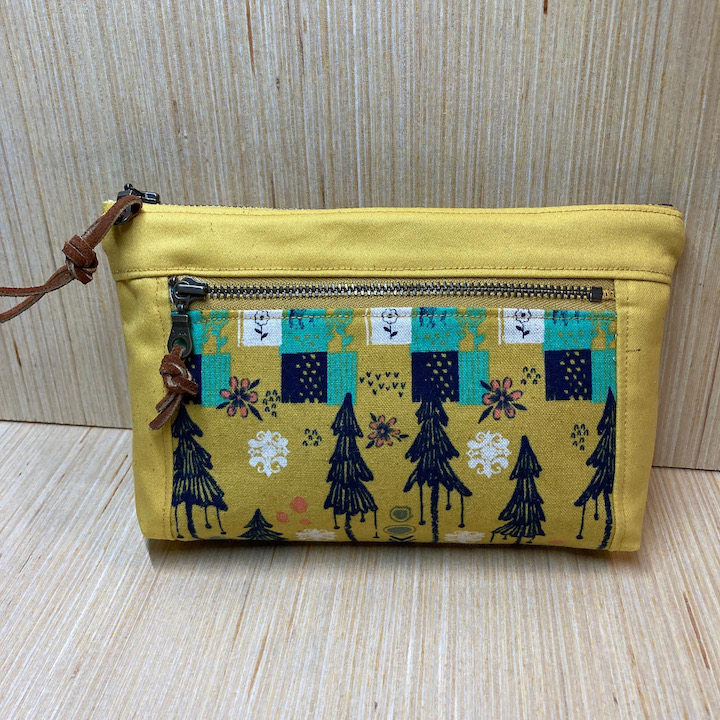
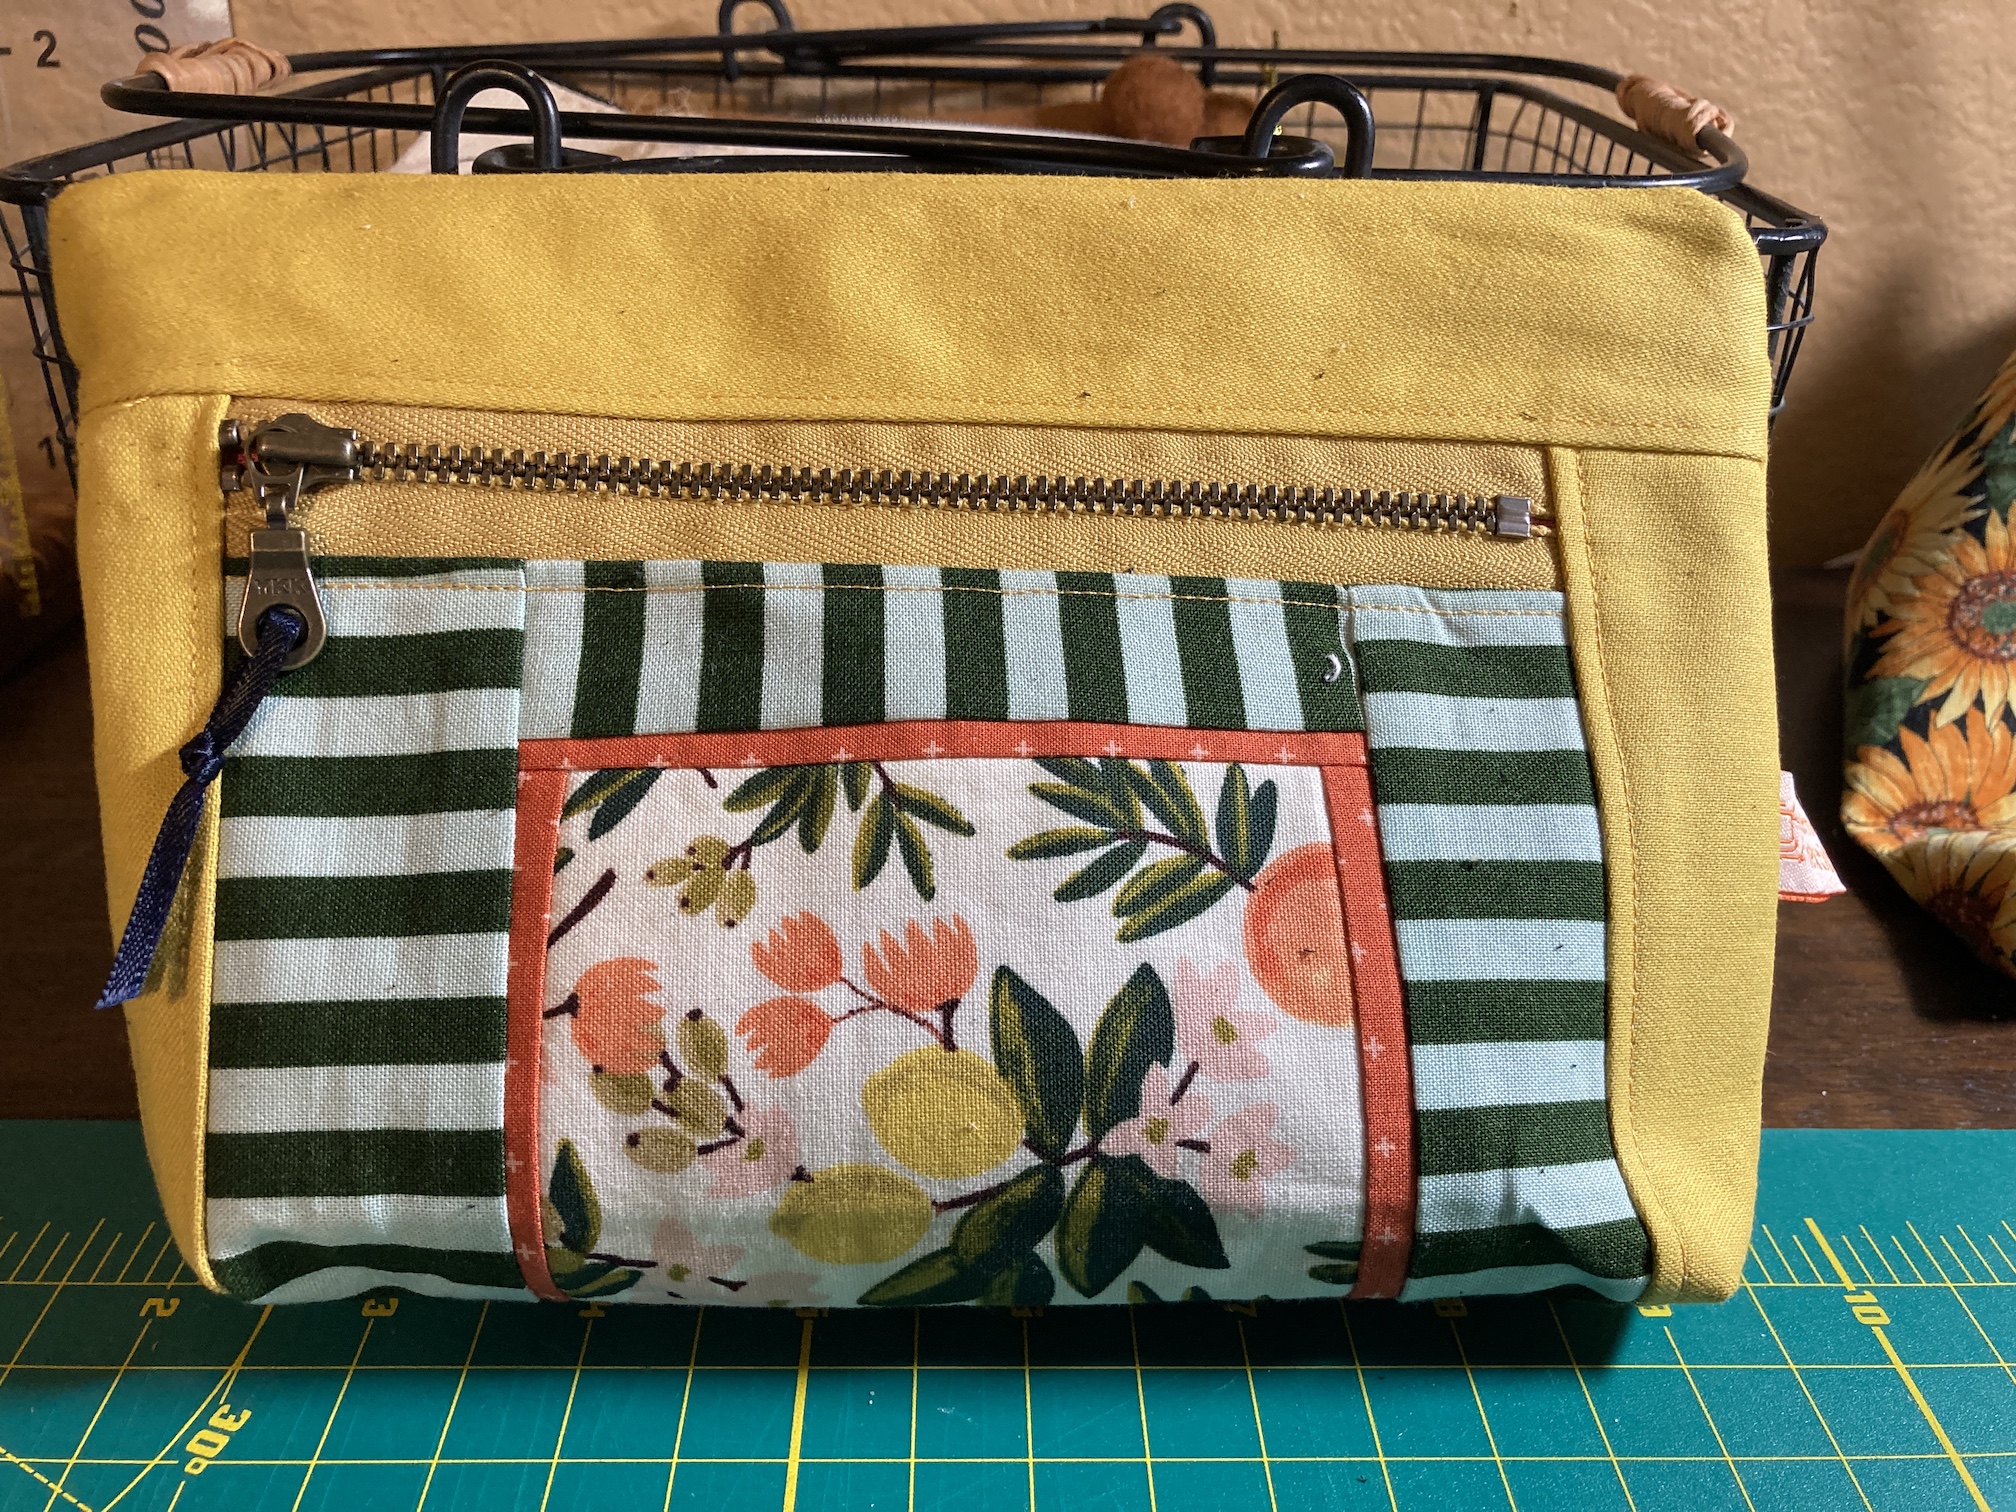
Well I used one of those zippers to make another bag from a pattern by The Netherlands based designer s.o.t.a.k. handmade – Boxy Tool Pouch.
The pattern comes in three sizes and I made the medium sized one:
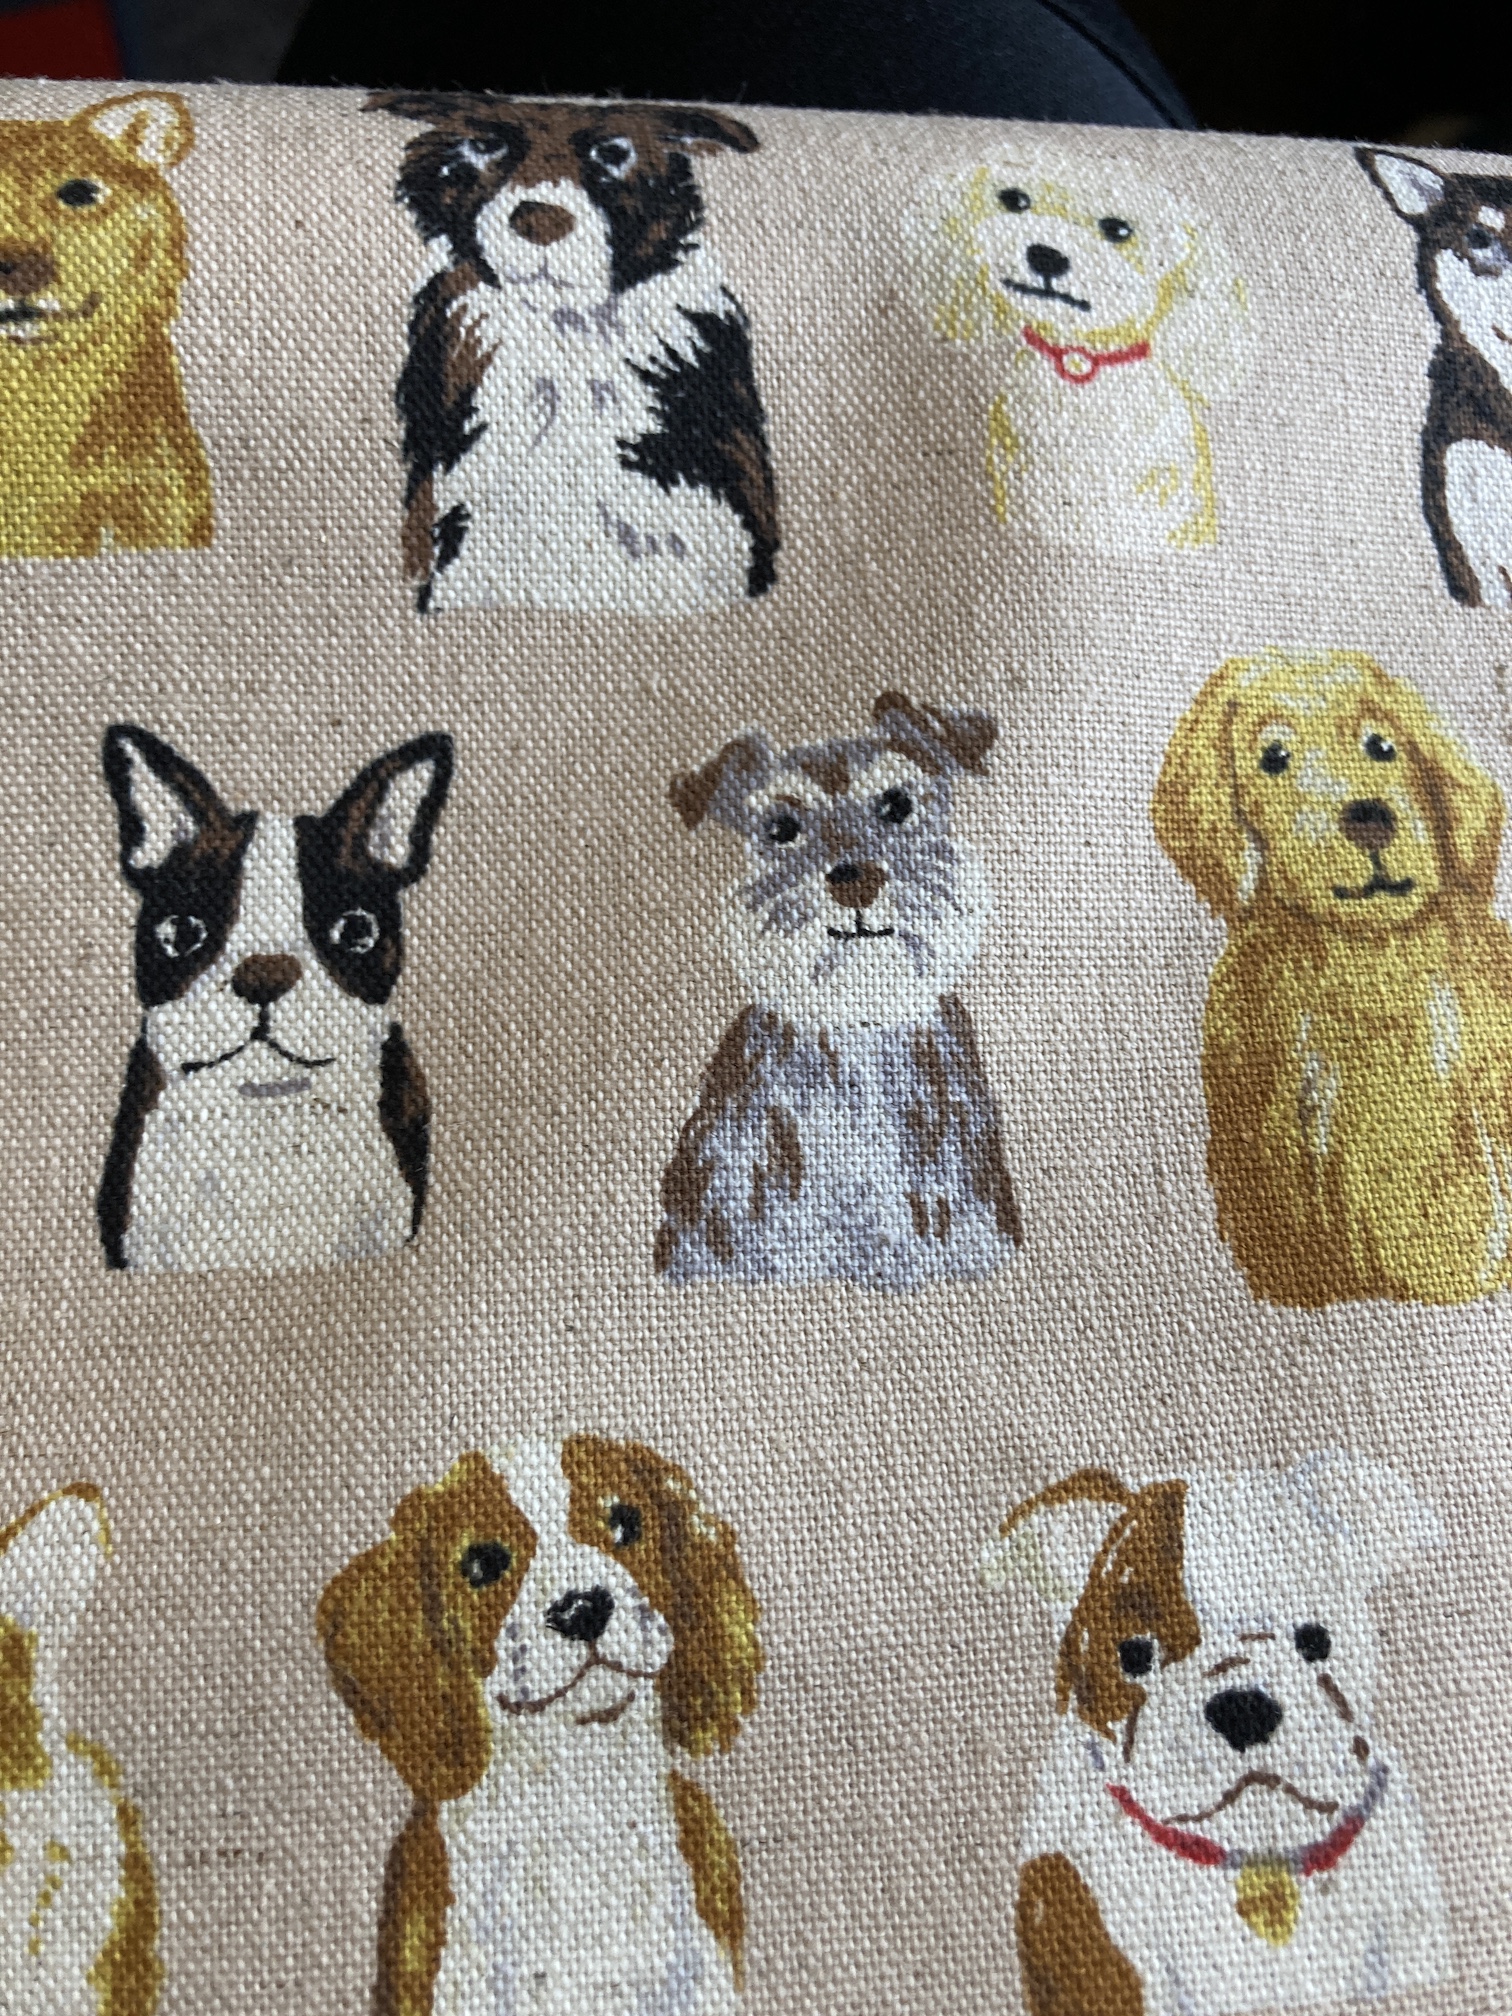
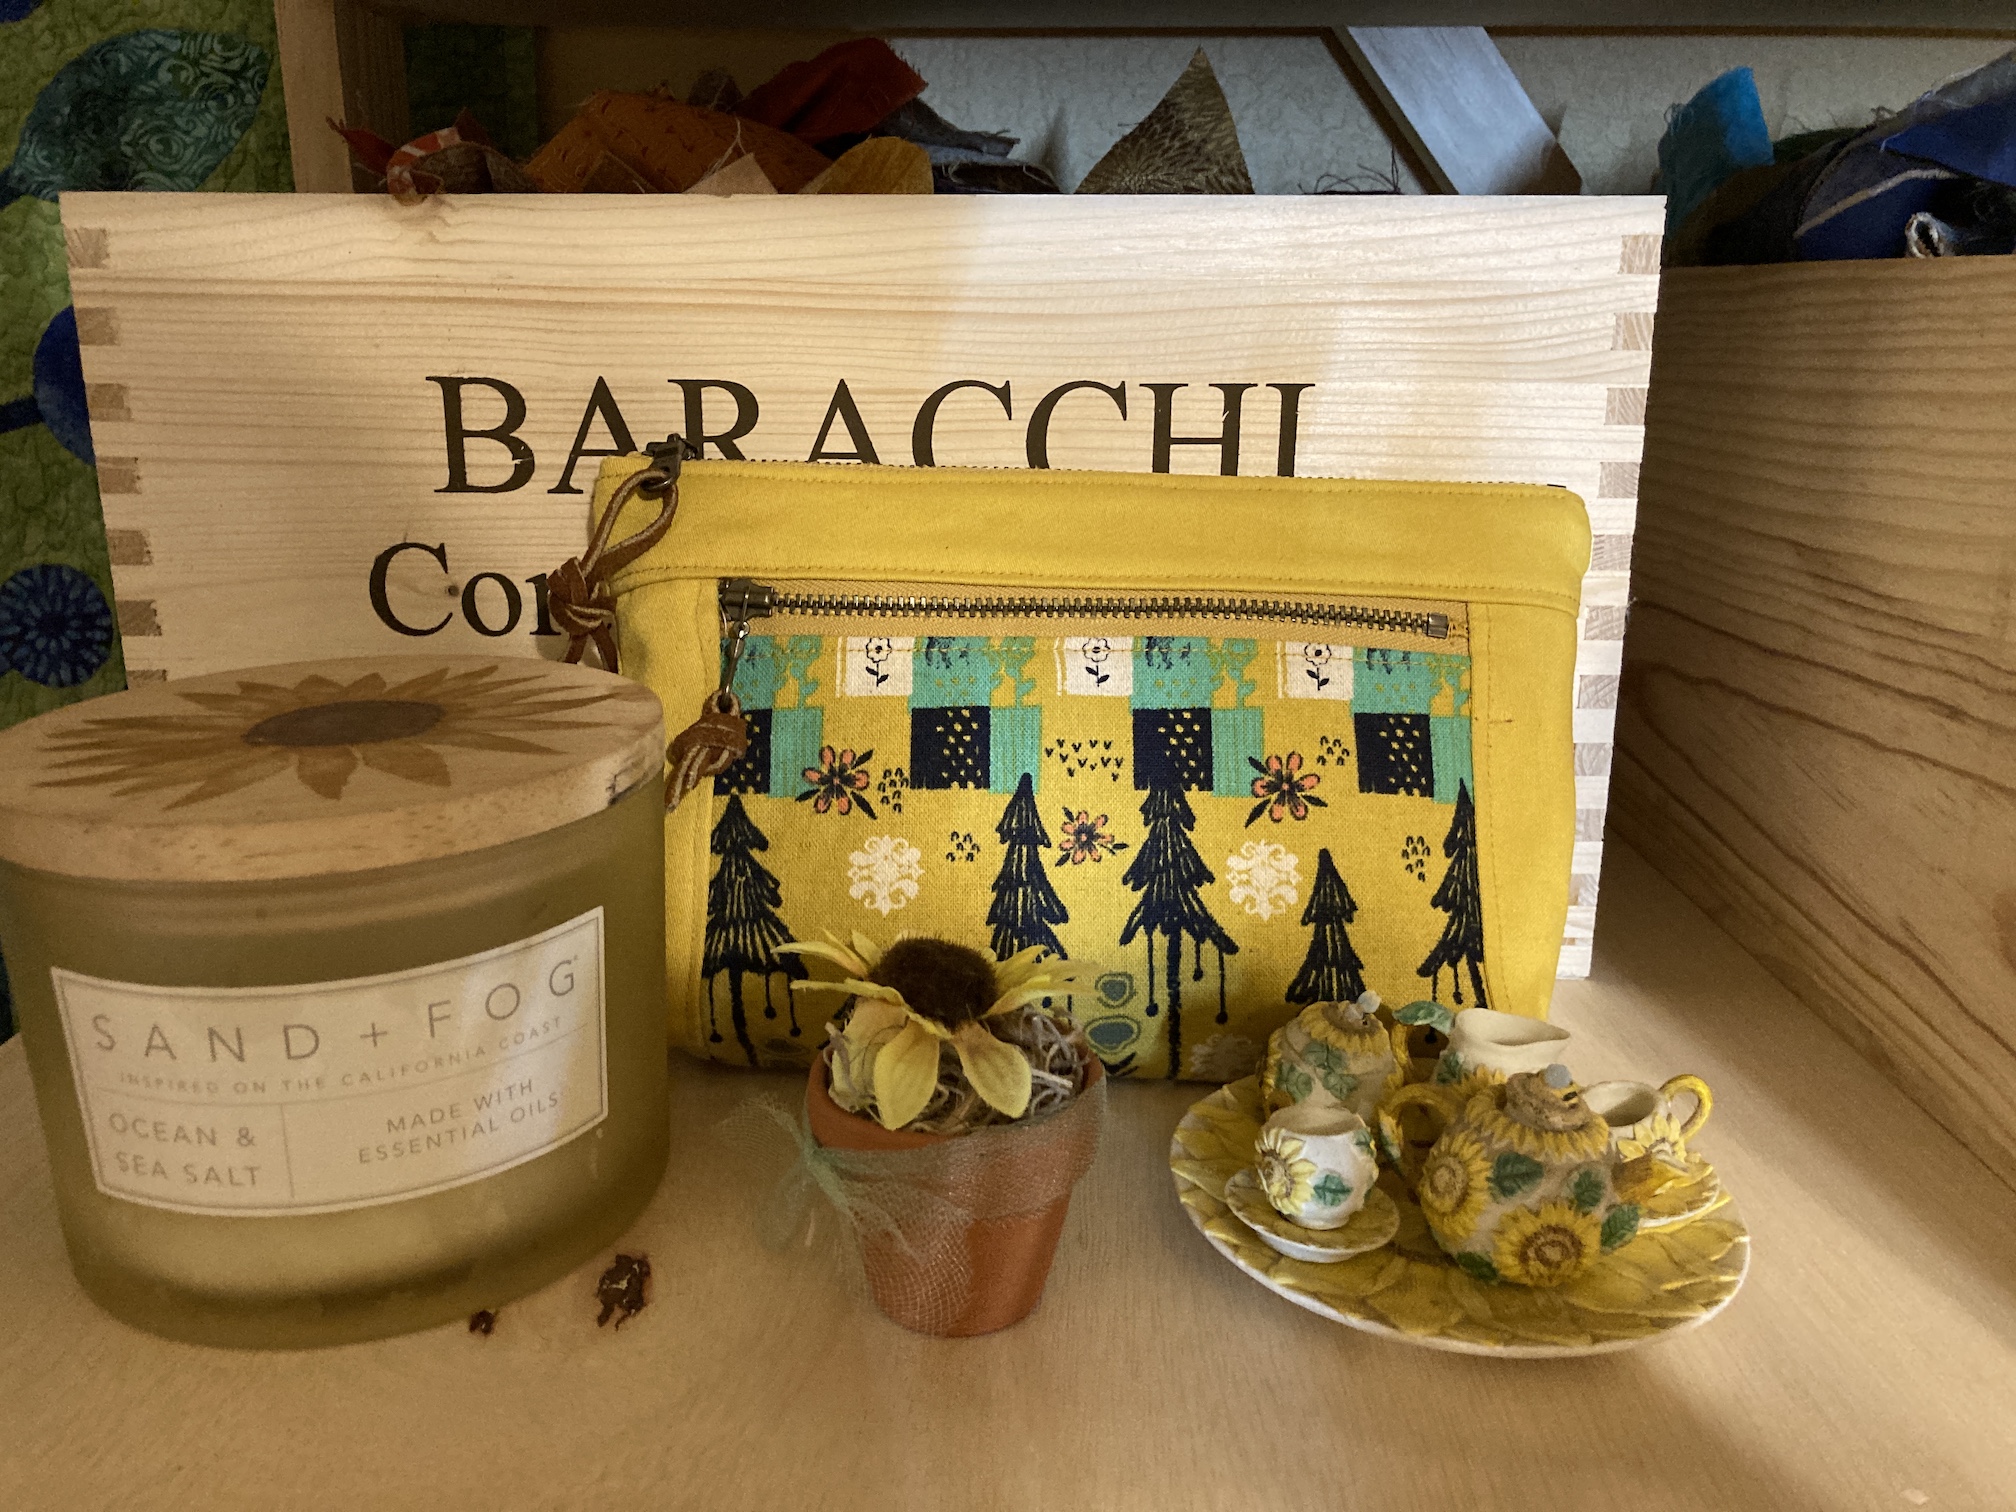
The fabric is a printed in Japan canvas which I bought years ago because it had a schnauzer in the print:
However I accidentally cut out the schnauzer while making the bag! (Don’t tell Mike my Miniature Schnauzer, ha!)
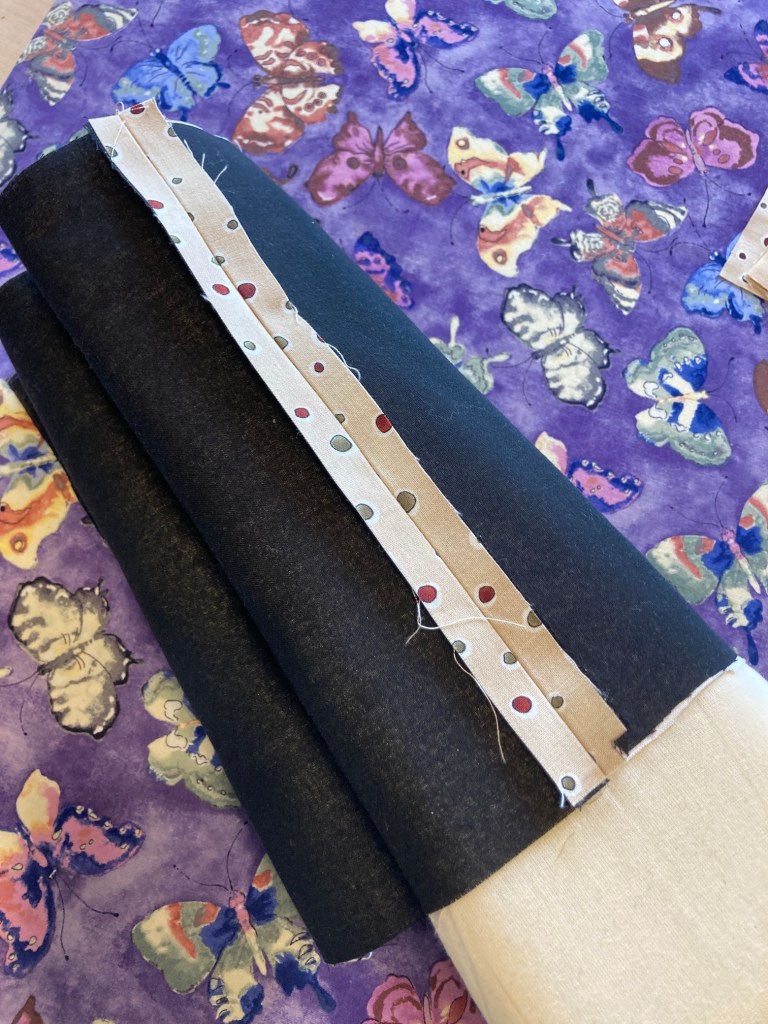
Here are my supplies to make the bag (minus the ribbon tape I discovered I needed for the side tabs later while working through the pattern):
Here is her YouTube video on making the pouch:
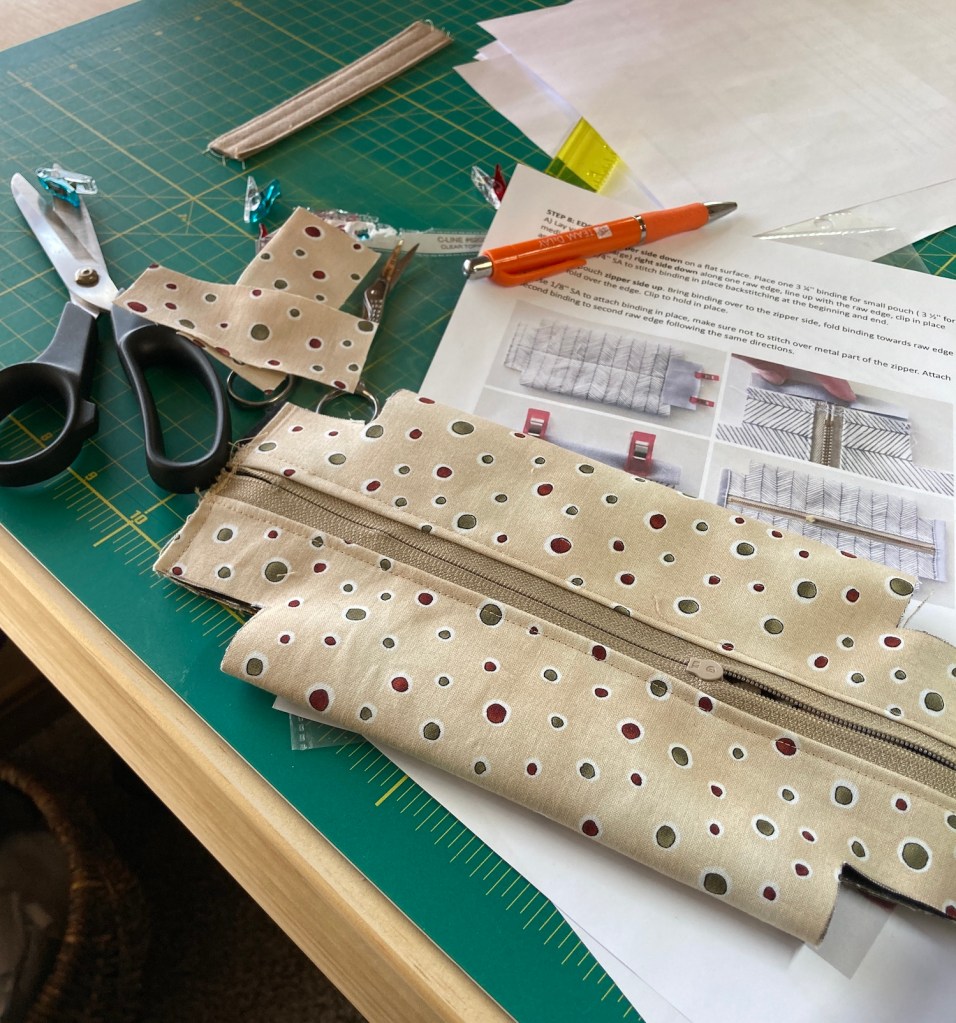
Here are some photos from my bag making process:
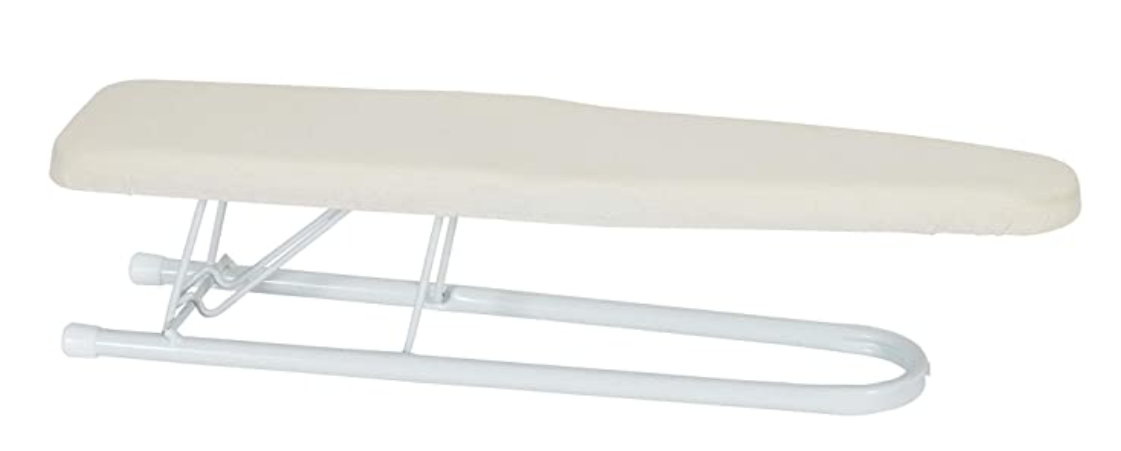
In the first of the images above you will see that I am pressing on a sleeve board, which I recently bought online after seeing the pattern designer Svetlana Sotak use it in several of her YouTube videos she has on bag making. It’s one of those things I never knew I needed until I got it!
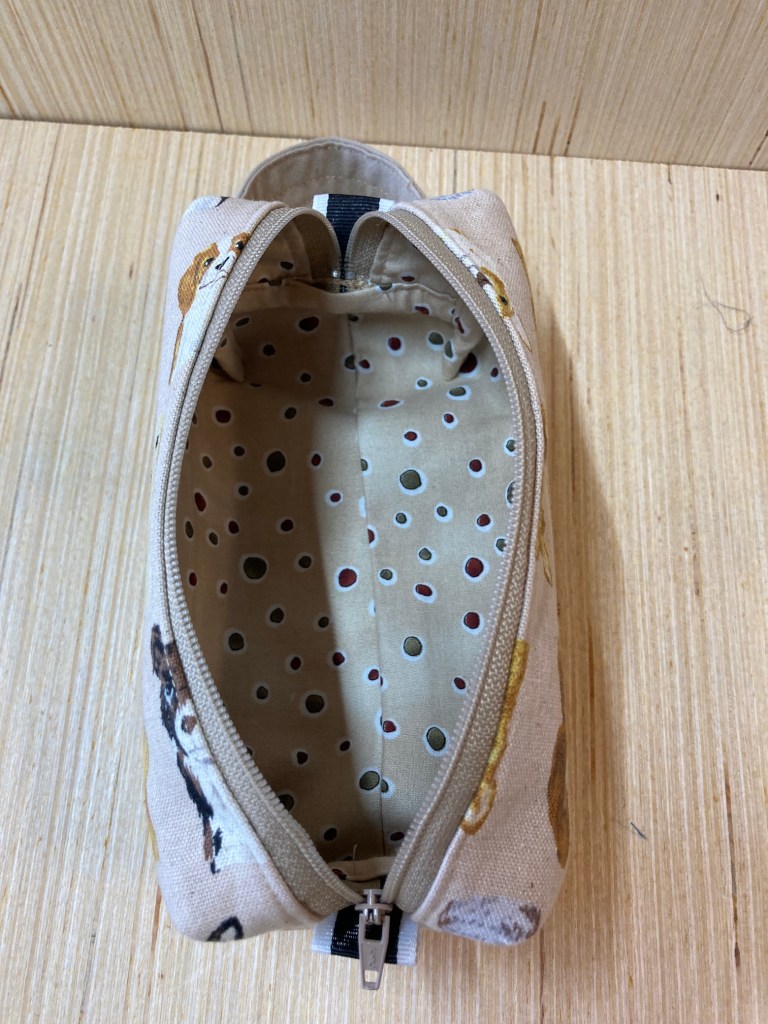
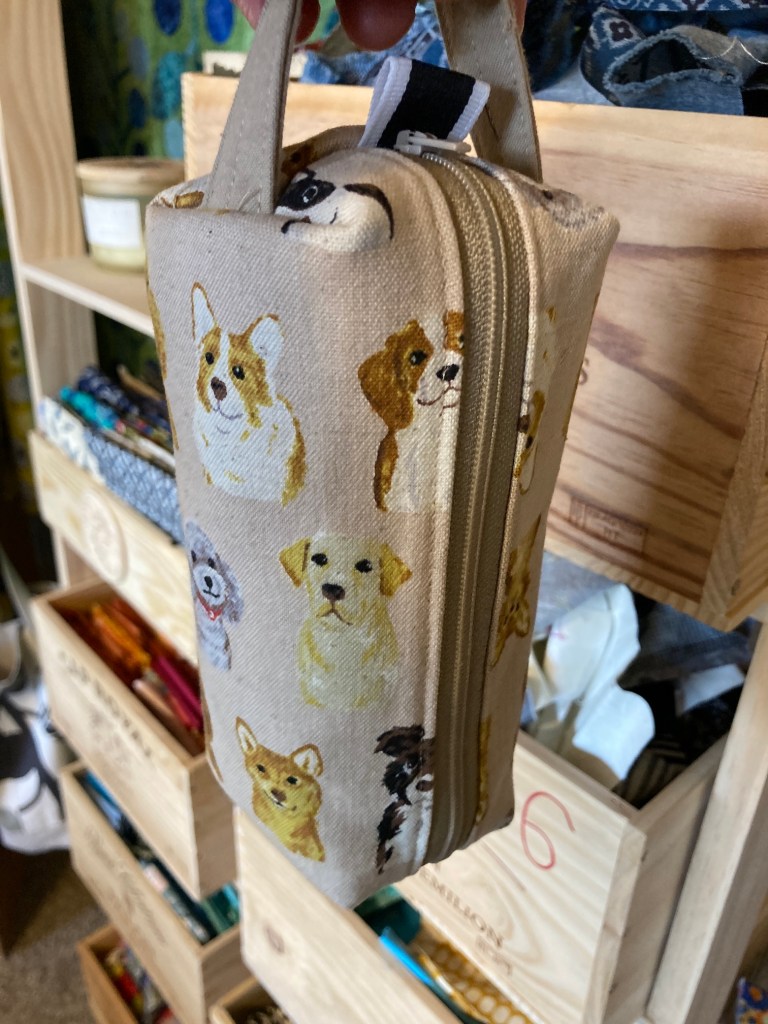
Here are images of my completed boxy tool pouch:
It did not come out perfect but I was pretty pleased. At least it was not a “Misadventure in Bag Making” (see post Misadventures in Bag Making).
So what to do with the completed pouch?
Well tierneycreates Beastie changed from her Winter wear of her sweater, hat and scarf:
To her Spring wear of her t-shirt:
So I needed a place to store her clothes as well as her accessories:
And now her accoutrements are easily accessible on my bookshelf in my studio!
Next post the tierneycreates Beastie will guest blogger post and tell you about her latest accommodations in my studio as well as some other changes (“Mr. Woodworker” has been busy!)
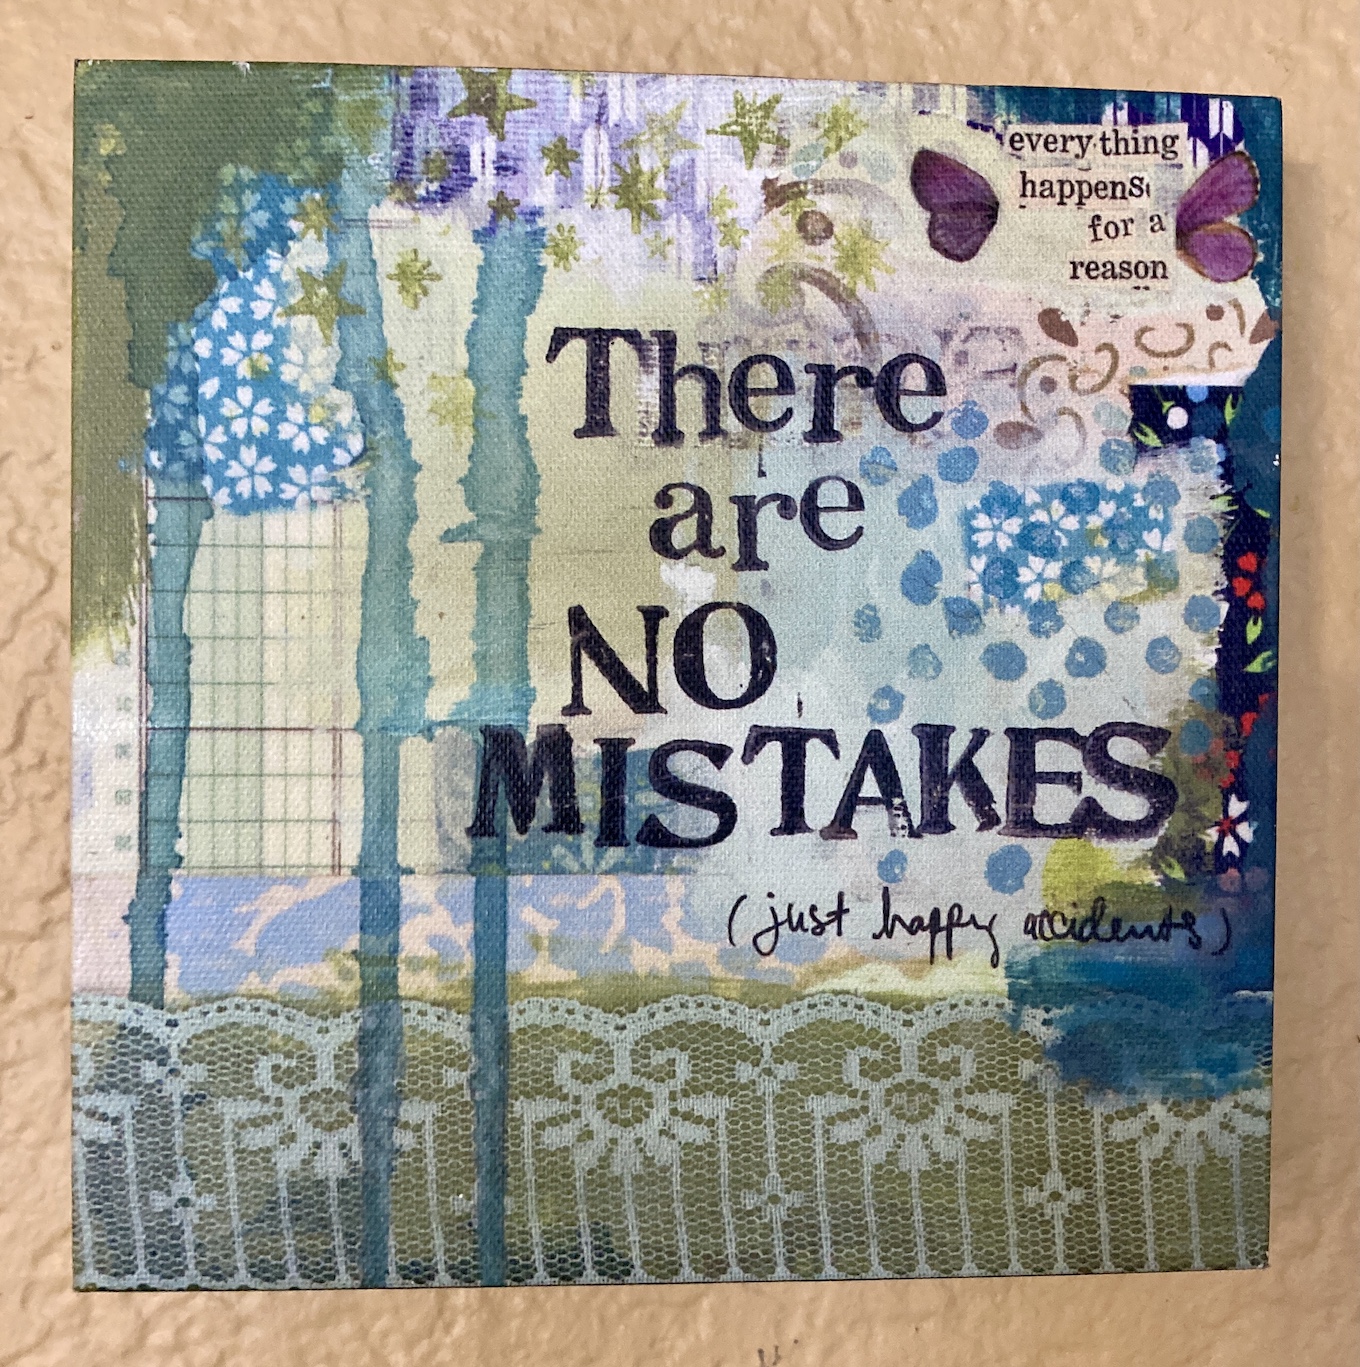
An awesome find I discovered during a recent thrift shopping adventure and immediately put up on my studio wall!
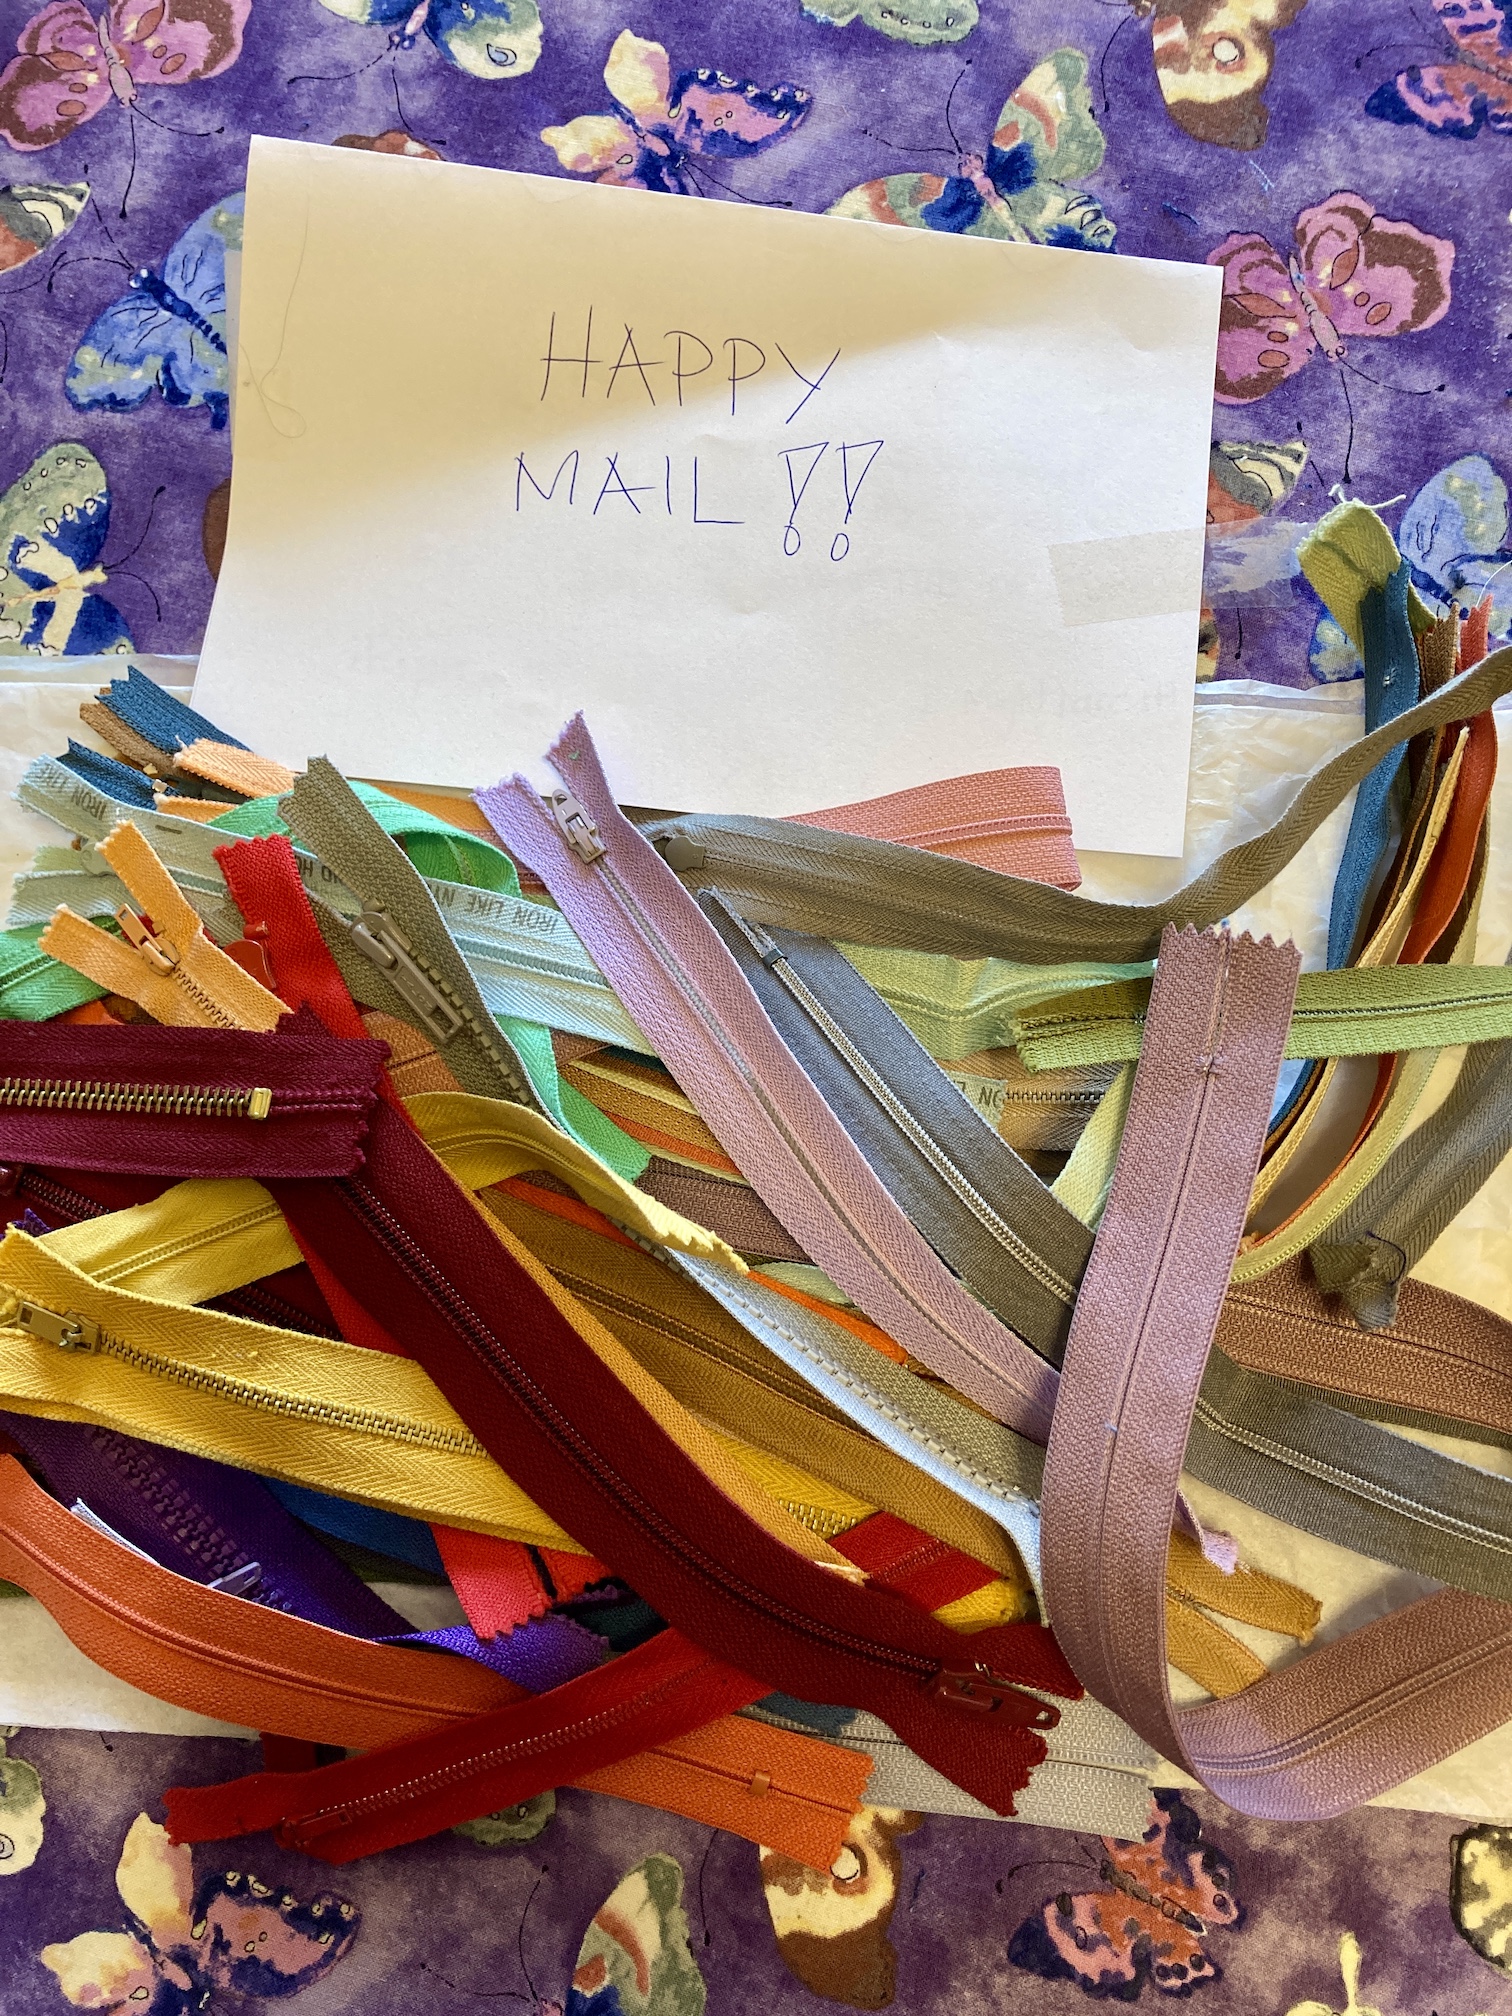
After reading my posts (Misadventures in Bag Making and If at first you don’t succeed…) my wonderful friend Wendy Hill (IG – @wendyquilter) offered to send me some of her HUGE collection of zippers to support my future adventures (or misadventures, ha!) in bag making. I of course took her up on her offer!
So a couple of weeks some “GOOD MAIL” arrived – a bag of zippers in various sizes from Wendy!
So how did Wendy come to have all these zippers in her stash and what had she done with all these zippers in the past? Well she was kind enough send photos and a summary of the story so I could share with you in this post.
“Zipper Mania” by Wendy Hill (edited by tierneycreates)
Around 2007 I wanted to make things with zipper but they too expensive to even buy used at a thrift store considering how many I needed.
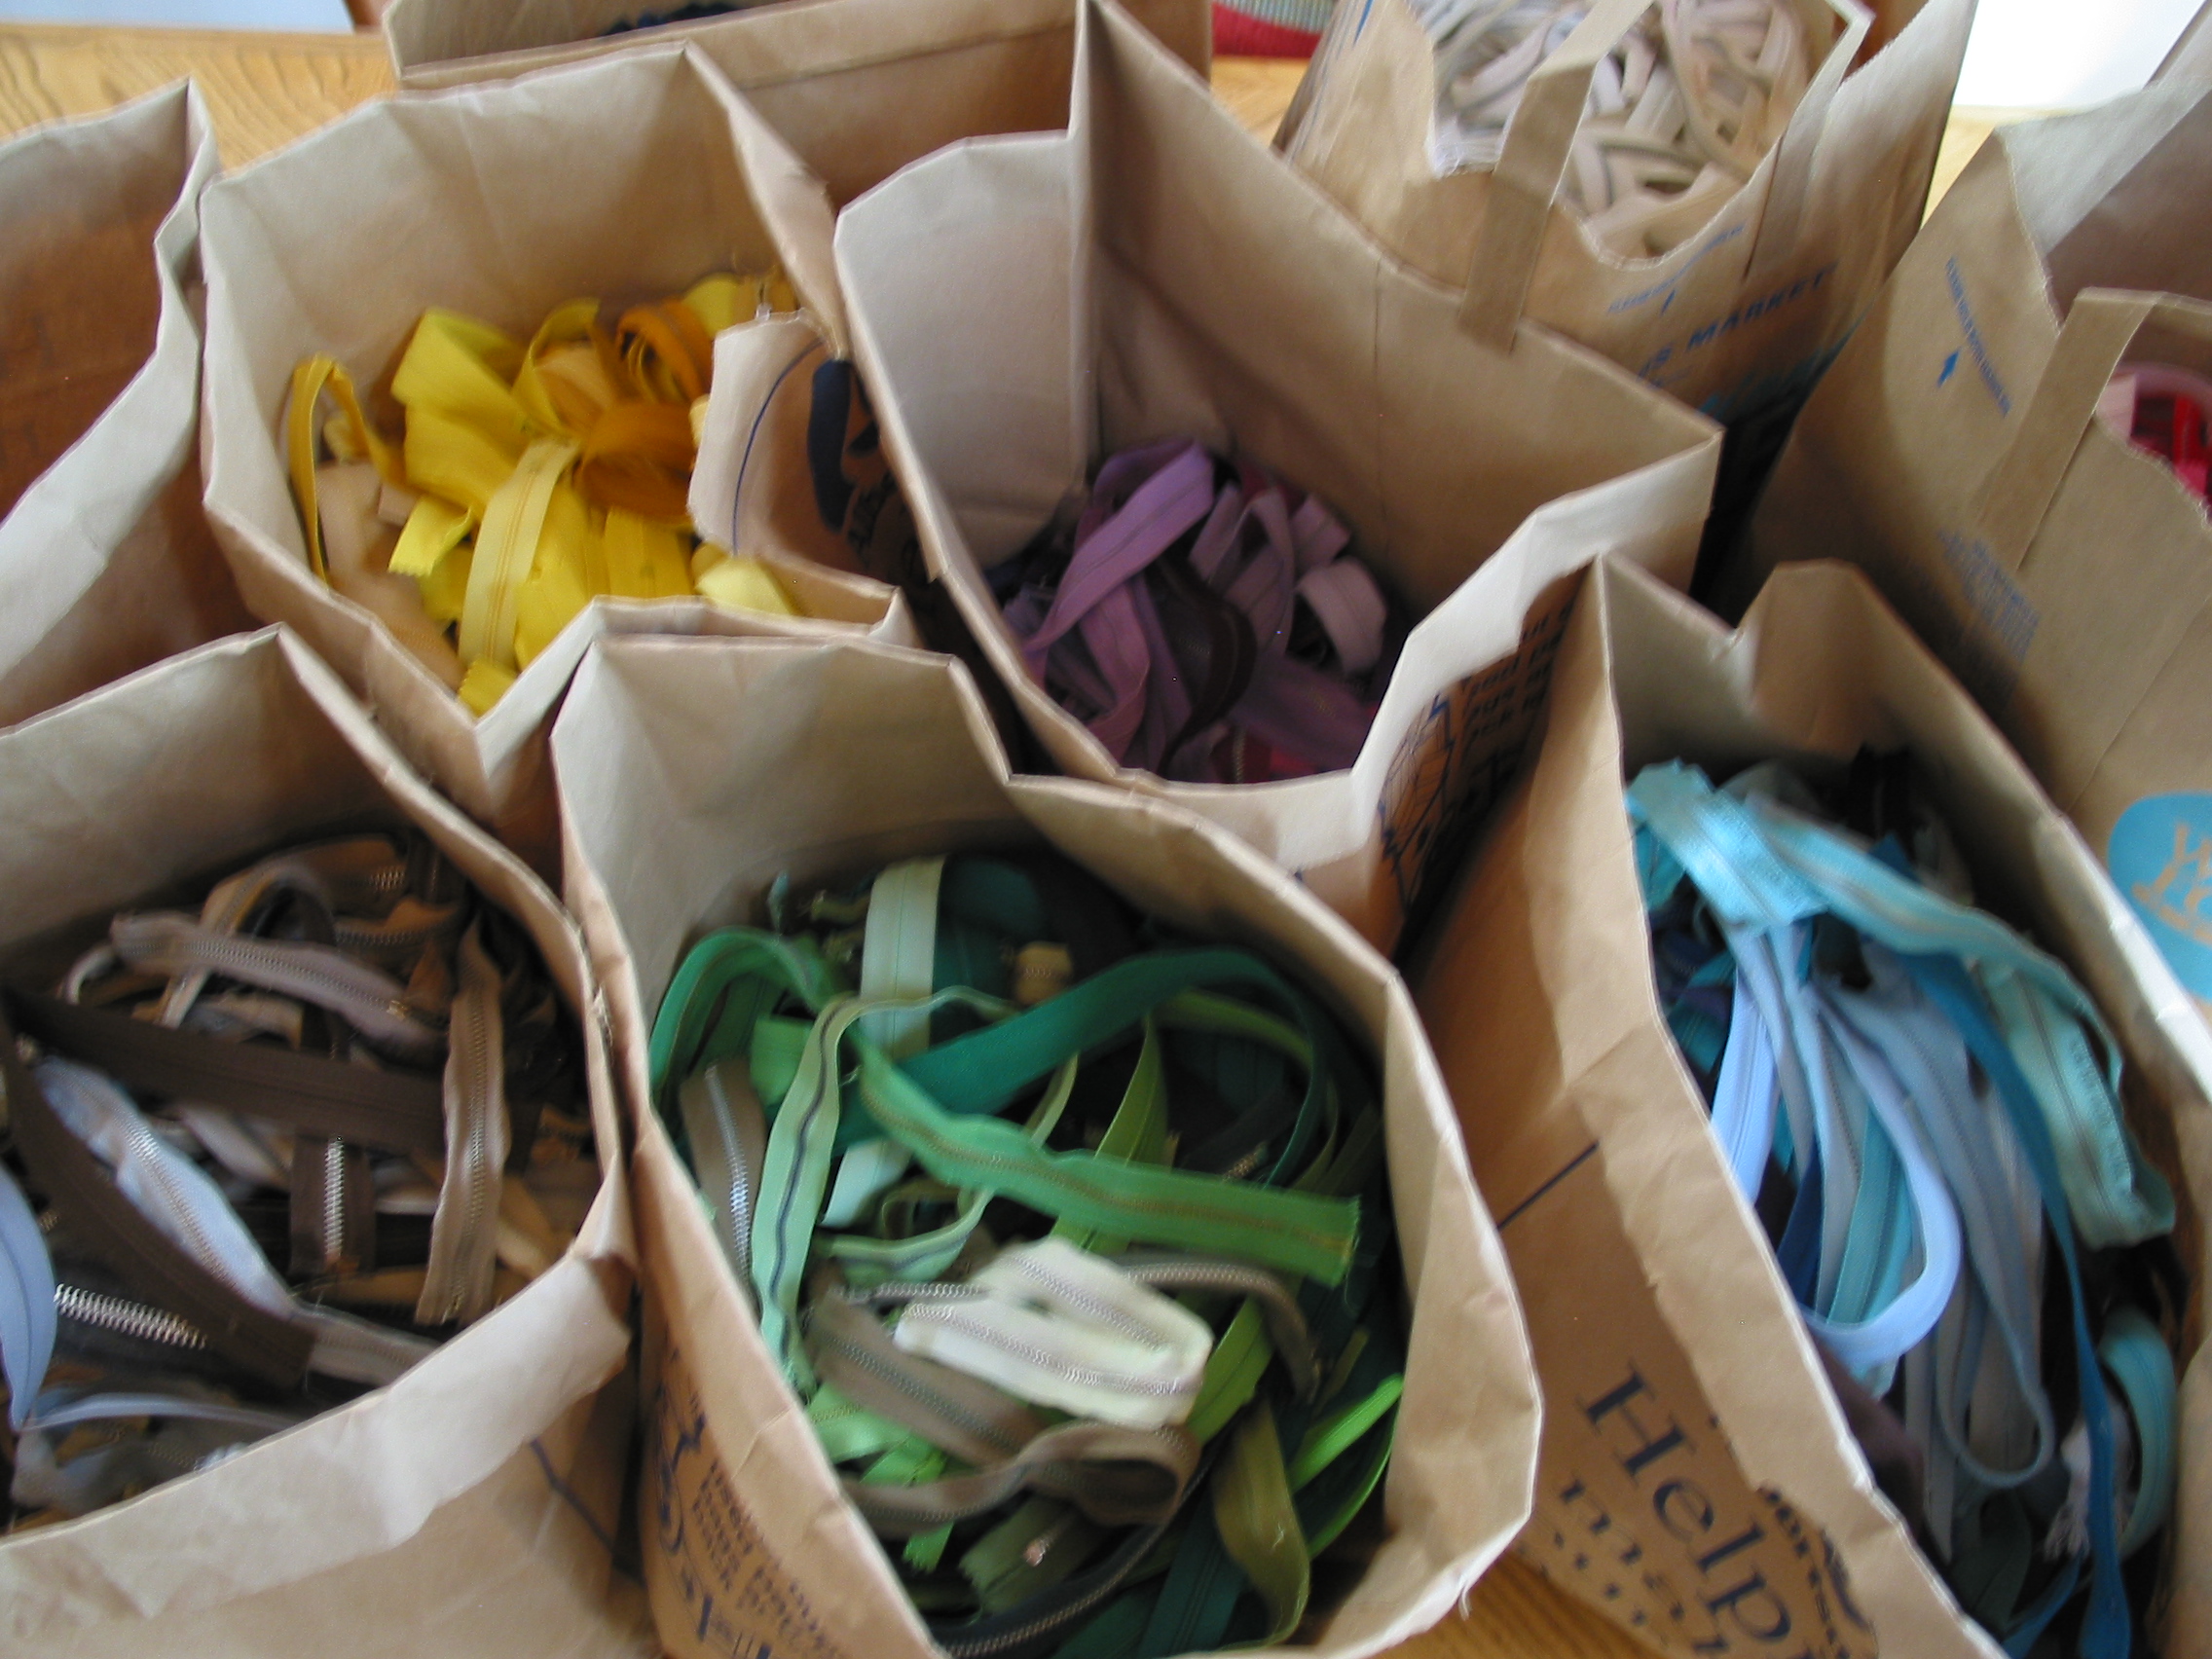
So I put out a request for zippers in the Ruralite Magazine (Western USA, Midstate Electric Co-op) and many zippers arrived to my home!
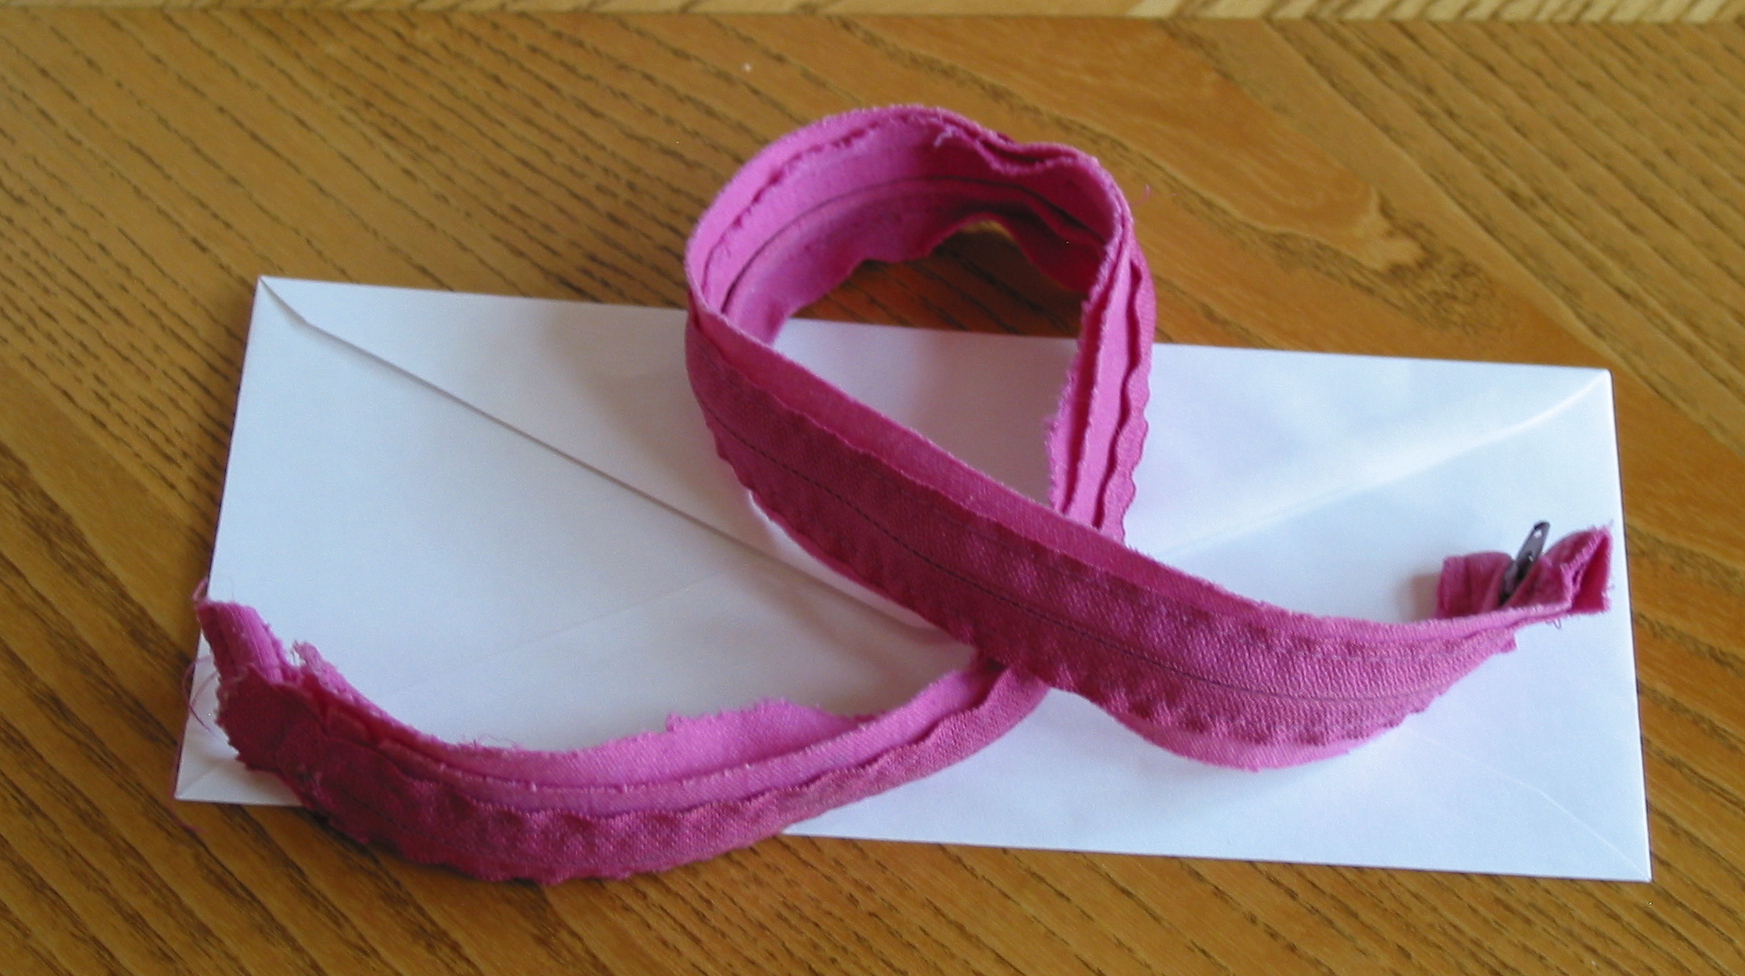
The smallest package I received: 1 zipper
And I received many zippers in the mail which I sorted by color into bags – it looked like a spice bazaar!
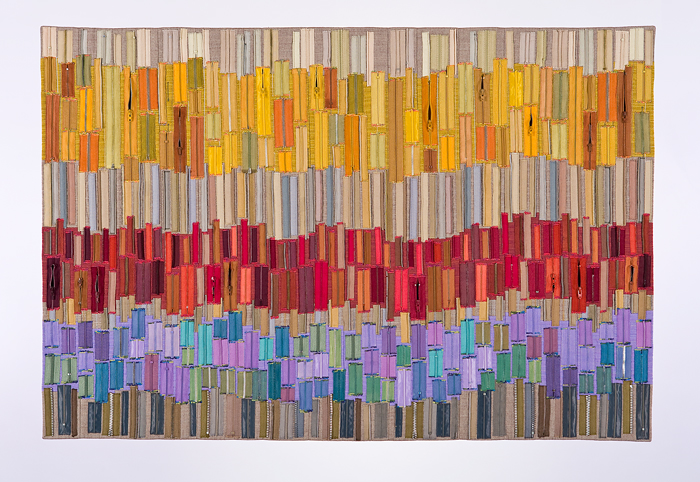
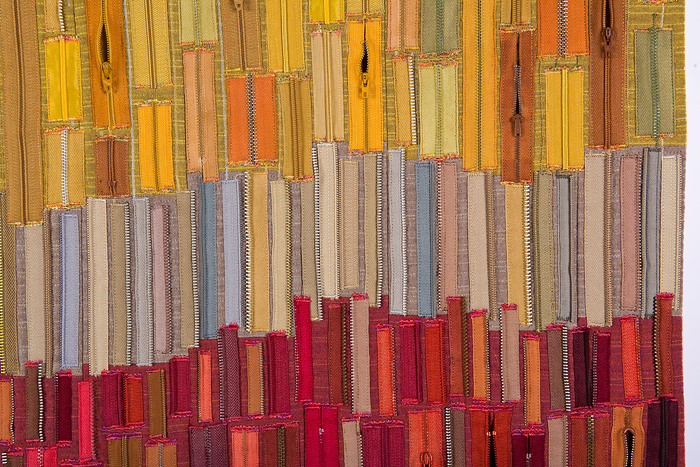
I thought of all these zippers as a “material” for my art projects. Here is what I made below.
String piecing using flat zippers
“Autumn Textures” is my favorite. It has been in exhibits.
I did make several quilts with flat zippers between 2008 and 2011)
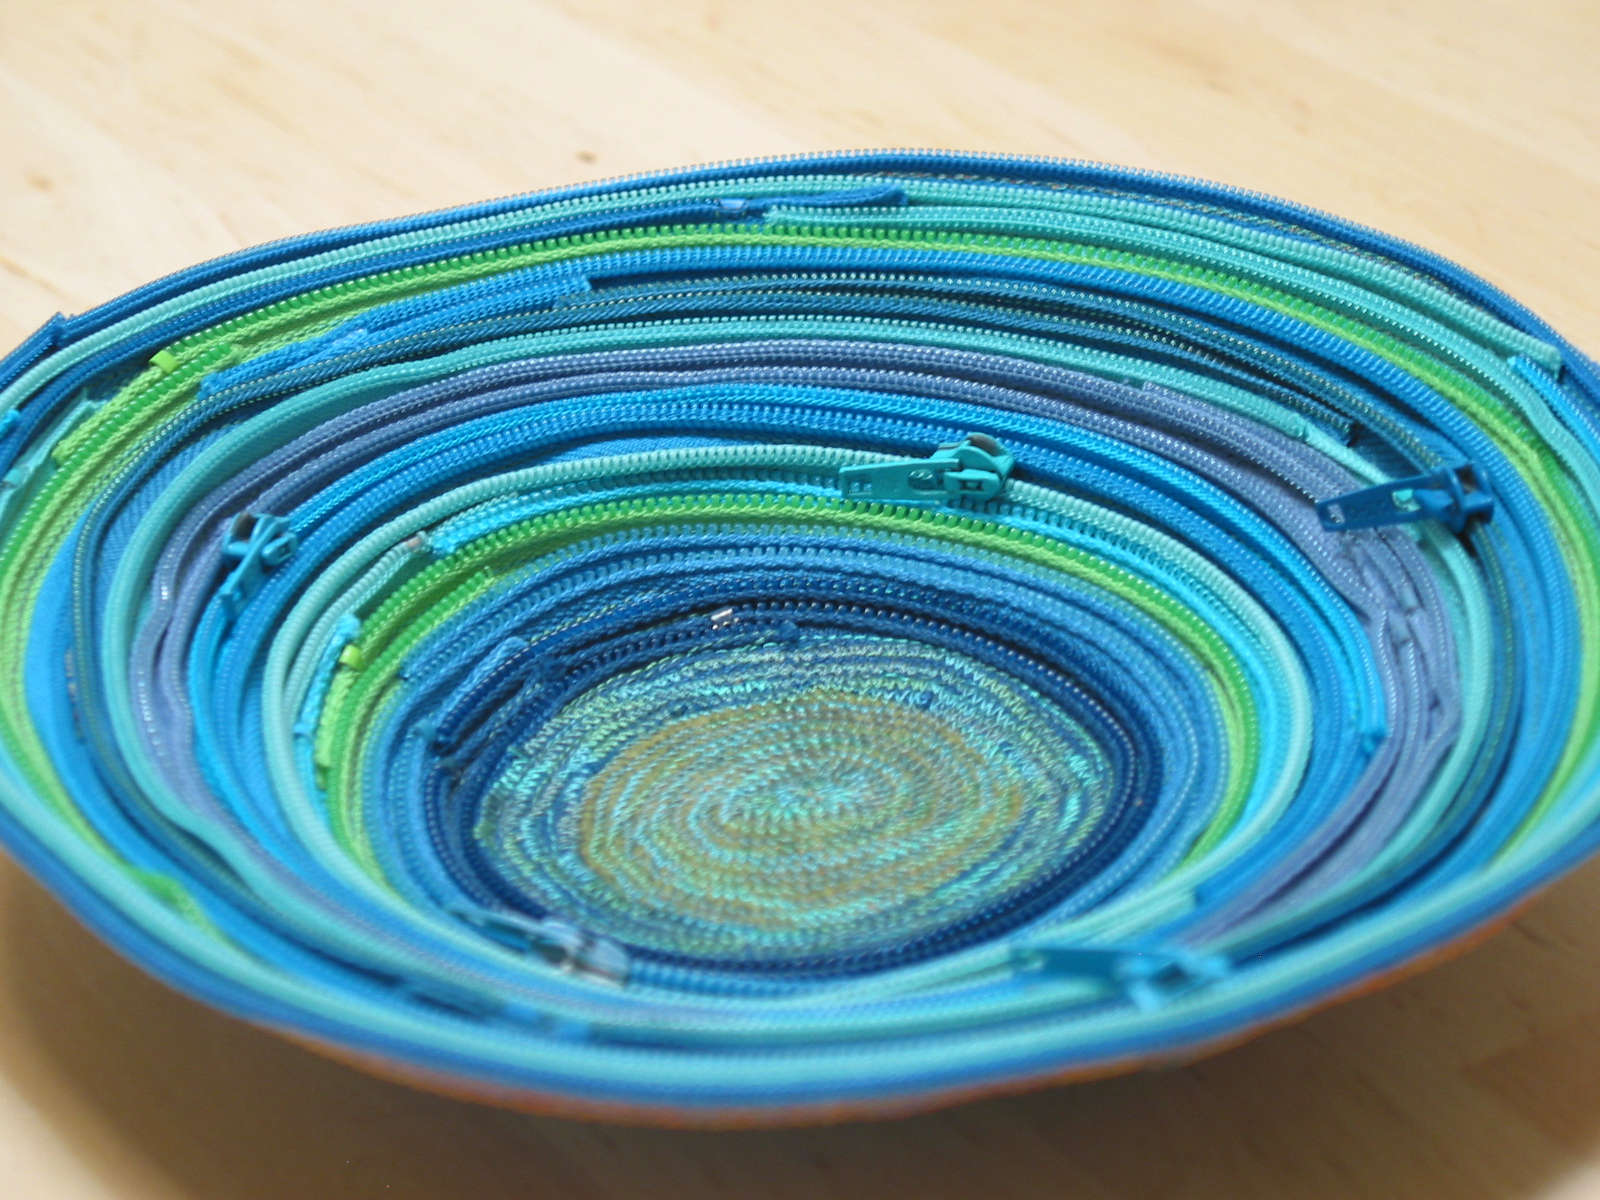
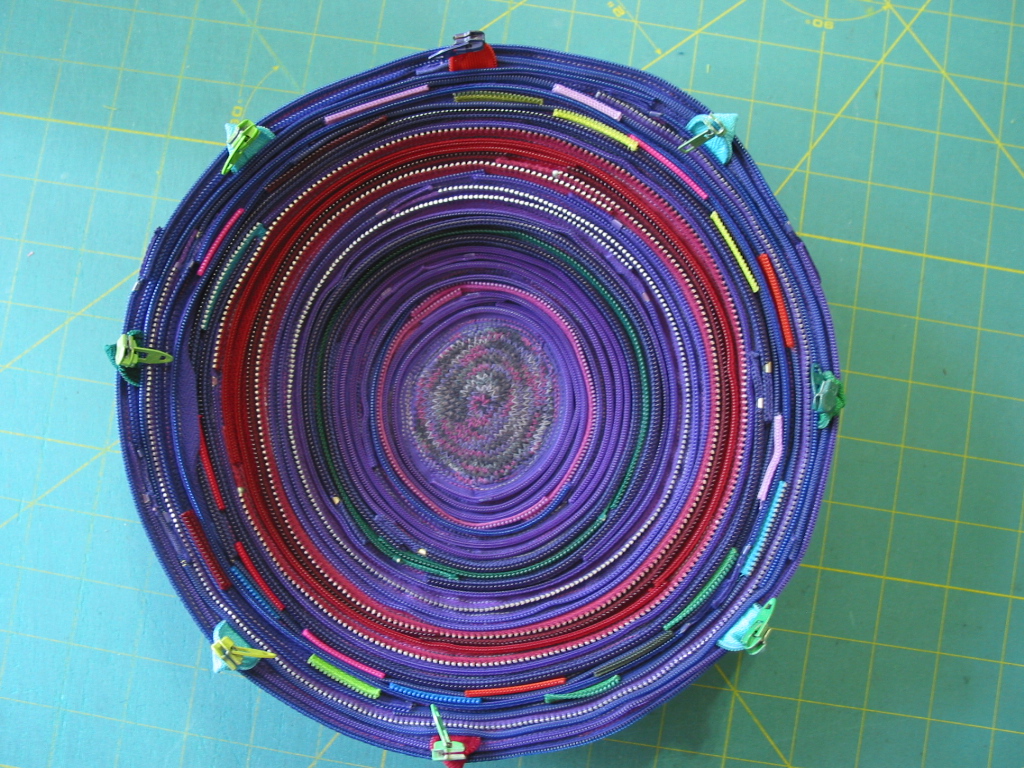
Coiled Bowls using half zippers
In the photos below are two different bowls- left zip pulls in as decorative elements)
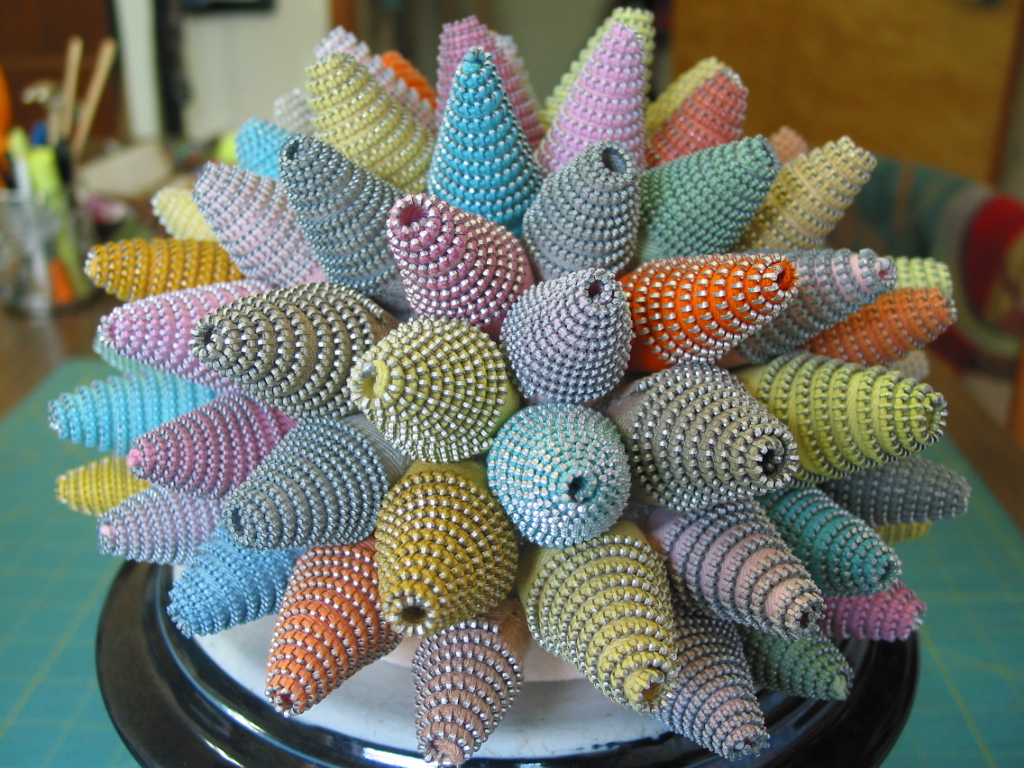
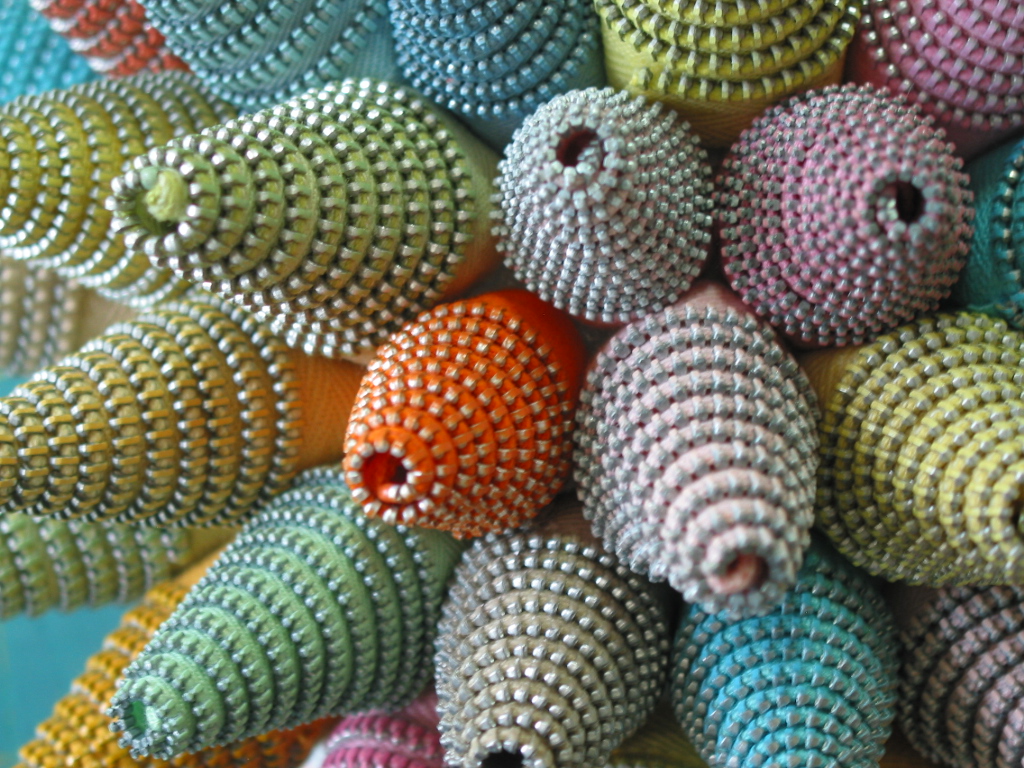
3D Art – Zipper Cones – Sea Anemones
I have more zipper ideas— but I have not followed up on them in a long time.
Postscript
Thanks to Wendy for sharing her story and art related to her donated zipper collection. And thanks to Wendy for sharing some of her collection with me. I am pretty sure there will be some “GOOD MAIL” in her future when I send her a little something I’ve made with one or two of the zippers she sent me.
Next post I will show you the project I just finished using one of the zippers she sent me – another bag – this time a different pattern by s.o.t.a.k. handmade.
If you do not want to listen to the entire podcast, you can catch a snippet of what I had to say on a blurb from the podcast episode on my Instagram feed – @tierneycreates.
image credit: screen capture from IG, from Lisa Woolfork
I have not made baby quilts in many years and now I am making baby quilts back to back (see post Baby Quilt for An Adventure Baby!)
On my studio’s design wall is a colorful baby quilt in progress for a special baby who lives in Portland, Oregon, who has recently joined us on earth (new Earthling!)
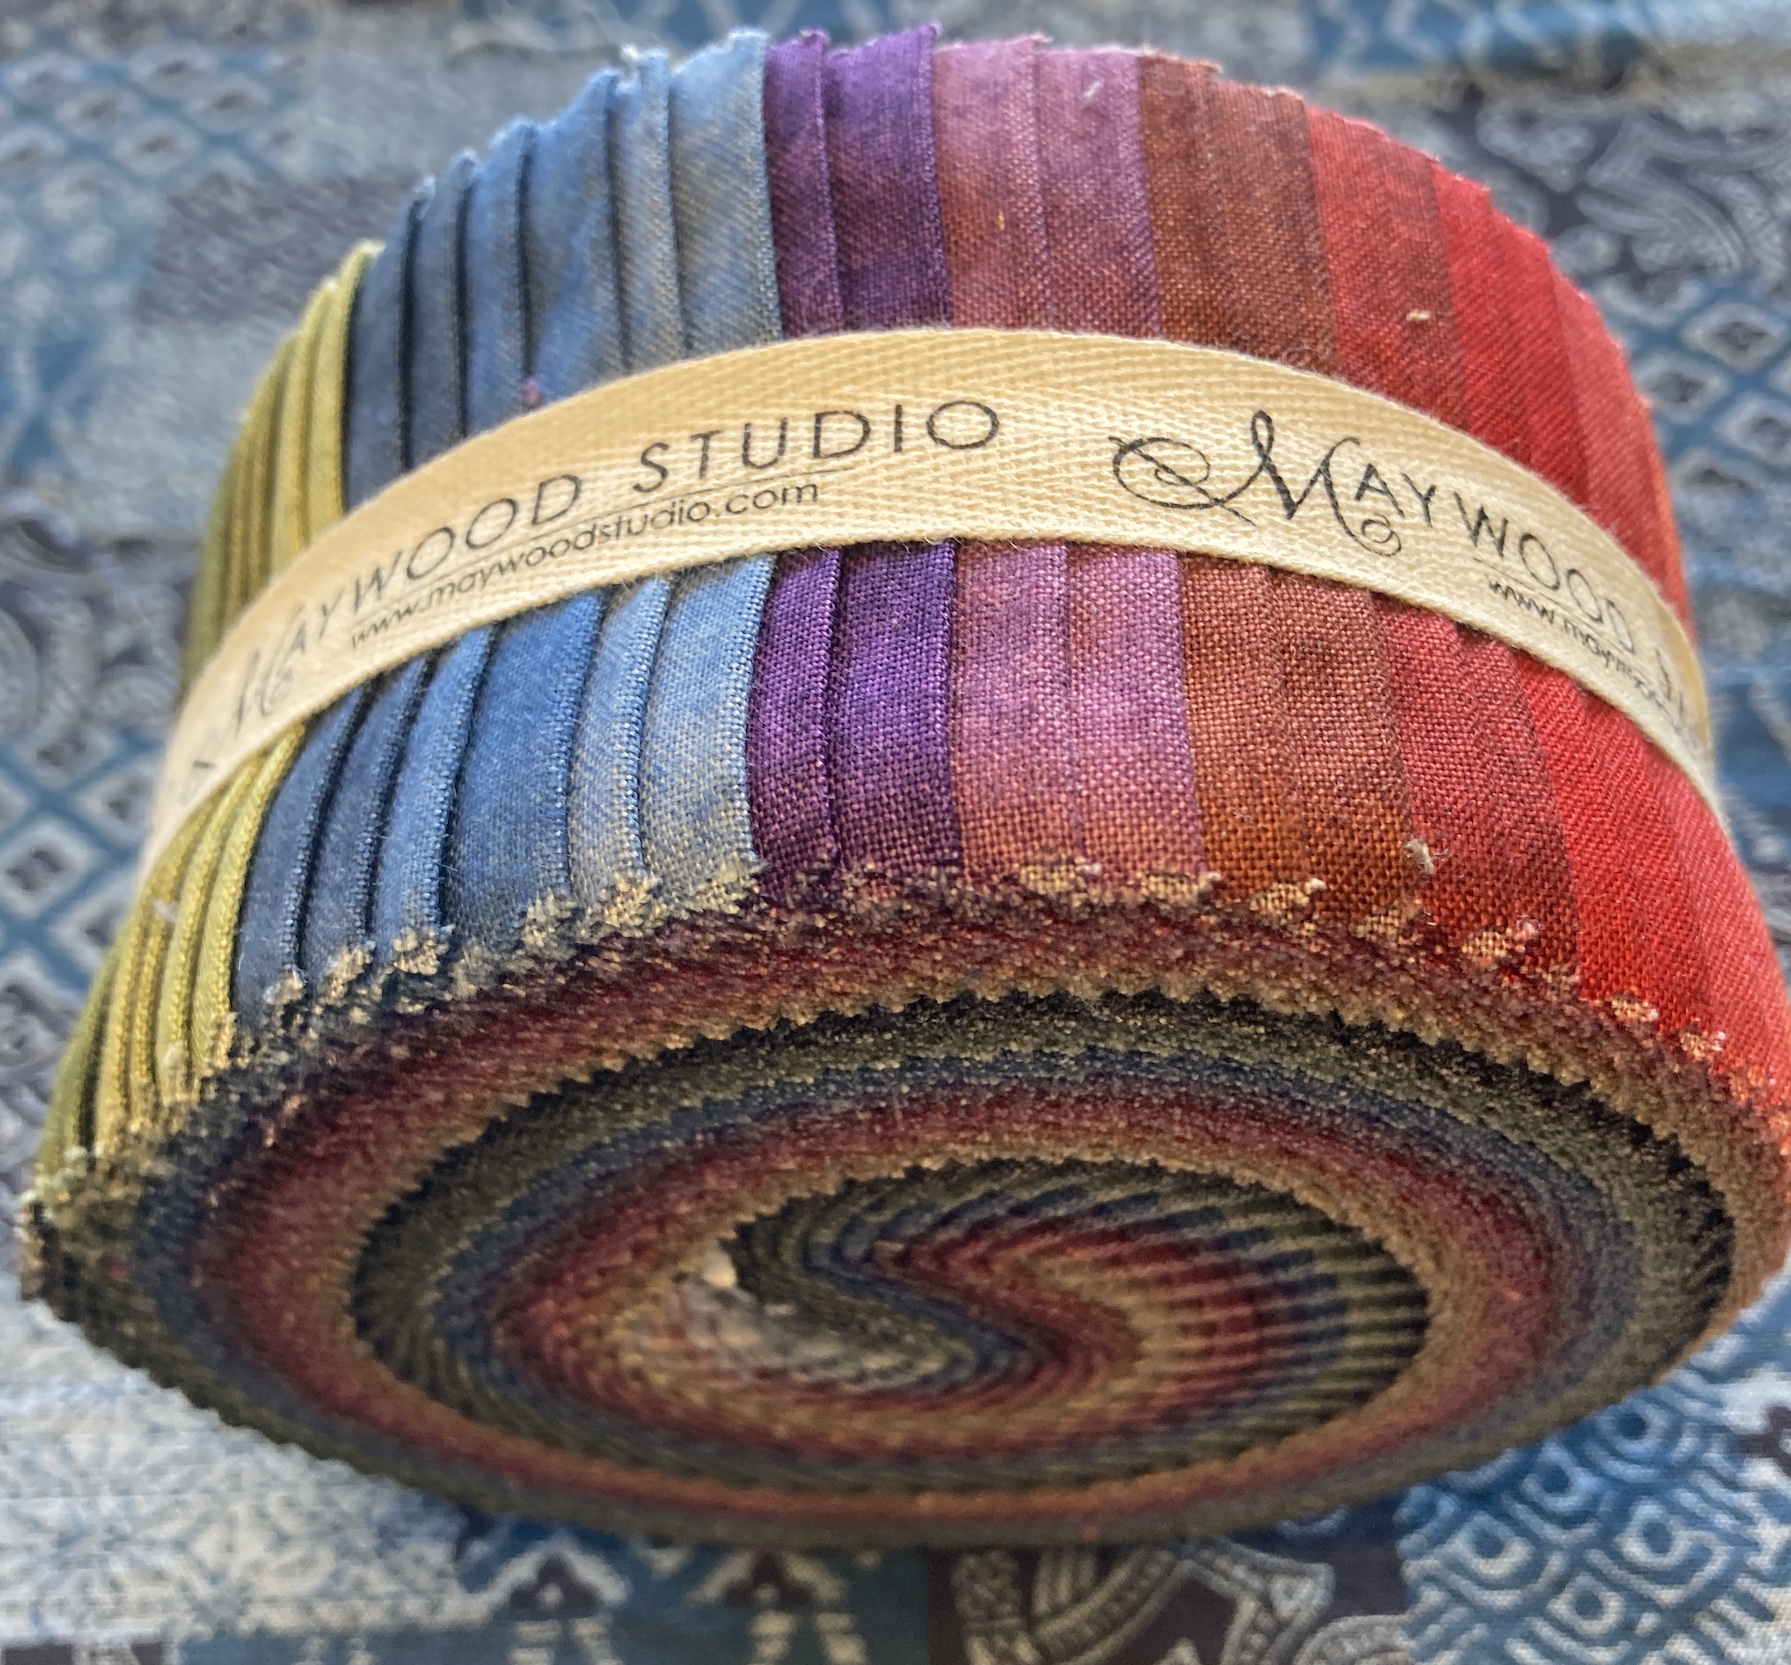
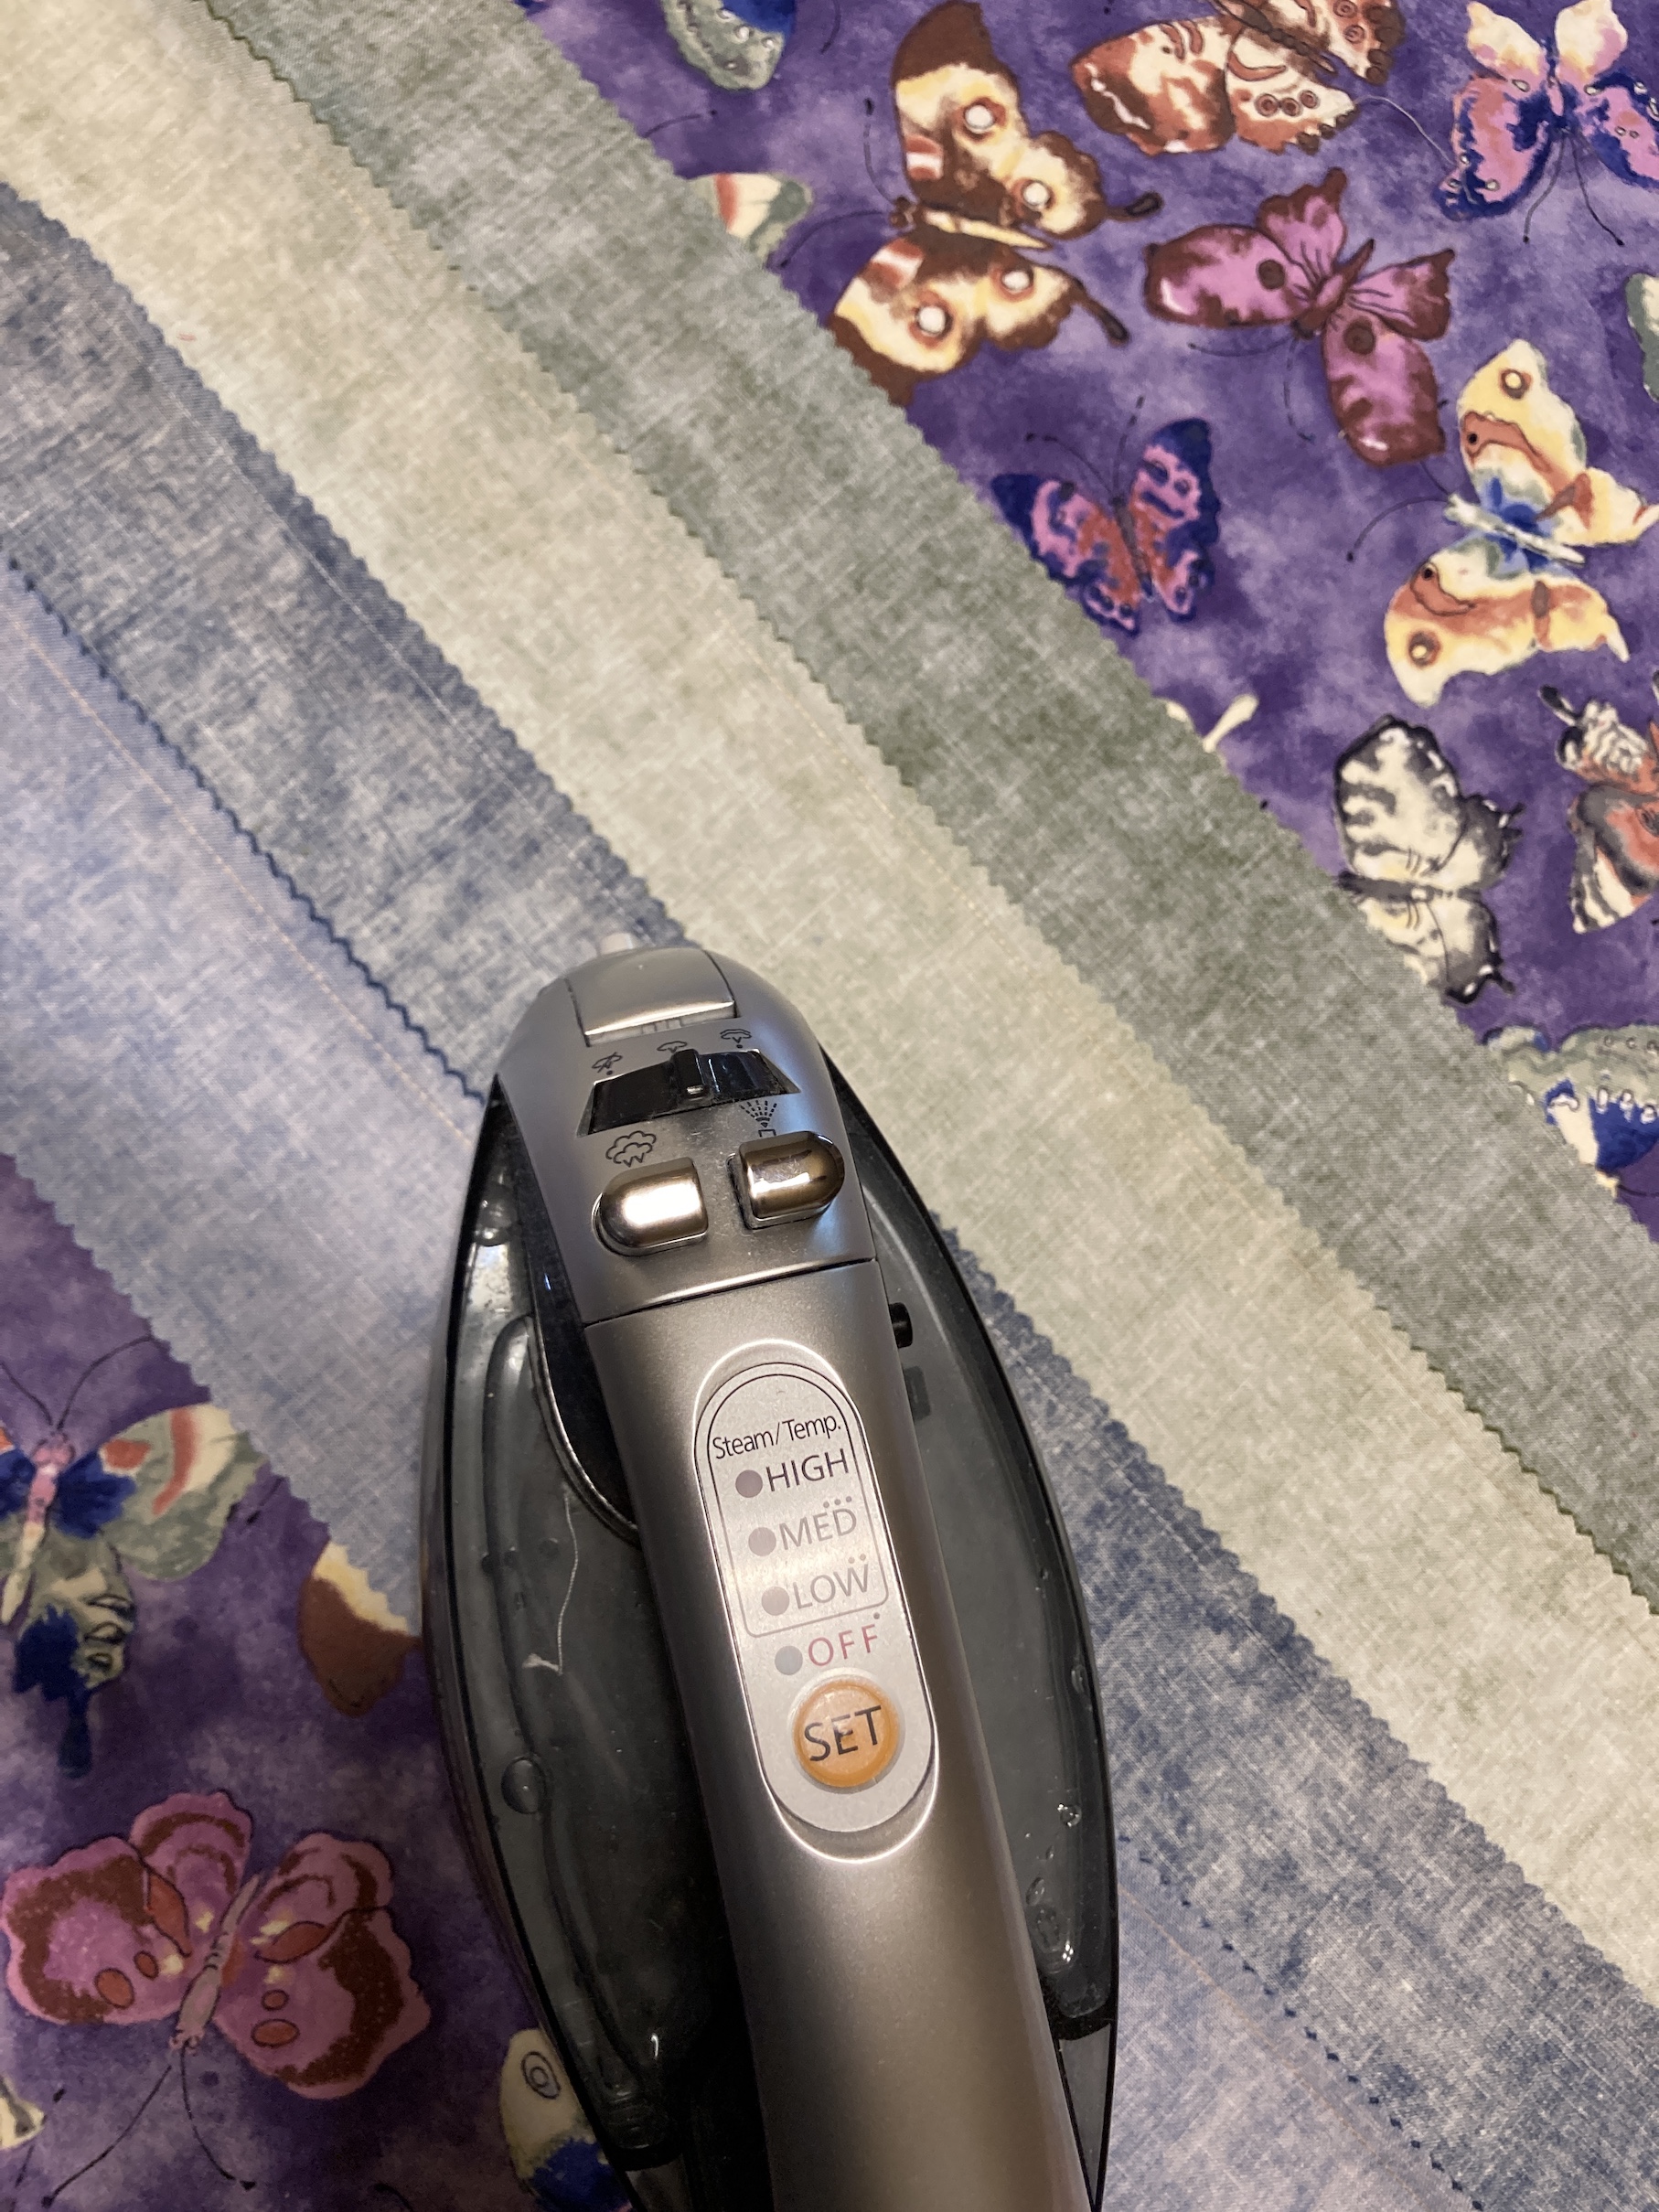
As Spring is sort of here (at least it is teasing us in the Denver metro area with periodic snow vs. 60+ degrees F days) I decided not to make a flannel quilt with flannel backing quilt like I did with the previous baby quilt. Instead I searched through my ridiculous collection of jelly rolls and found this colorful jelly roll from Maywood Studios:
In case you are not a quilter, “jelly rolls” are collections of 40 precut 2.5 inch strips that run about 42 – 44 inches long, are color coordinated (usually from the same fabric line) and can be used to make a small to larger quilt (if you add additional fabrics).
For a while, in my earlier quilting days, I was obsessed with jelly rolls and amassed quite the collection. I also had a collection of quilting books with quilt patterns using jelly rolls.
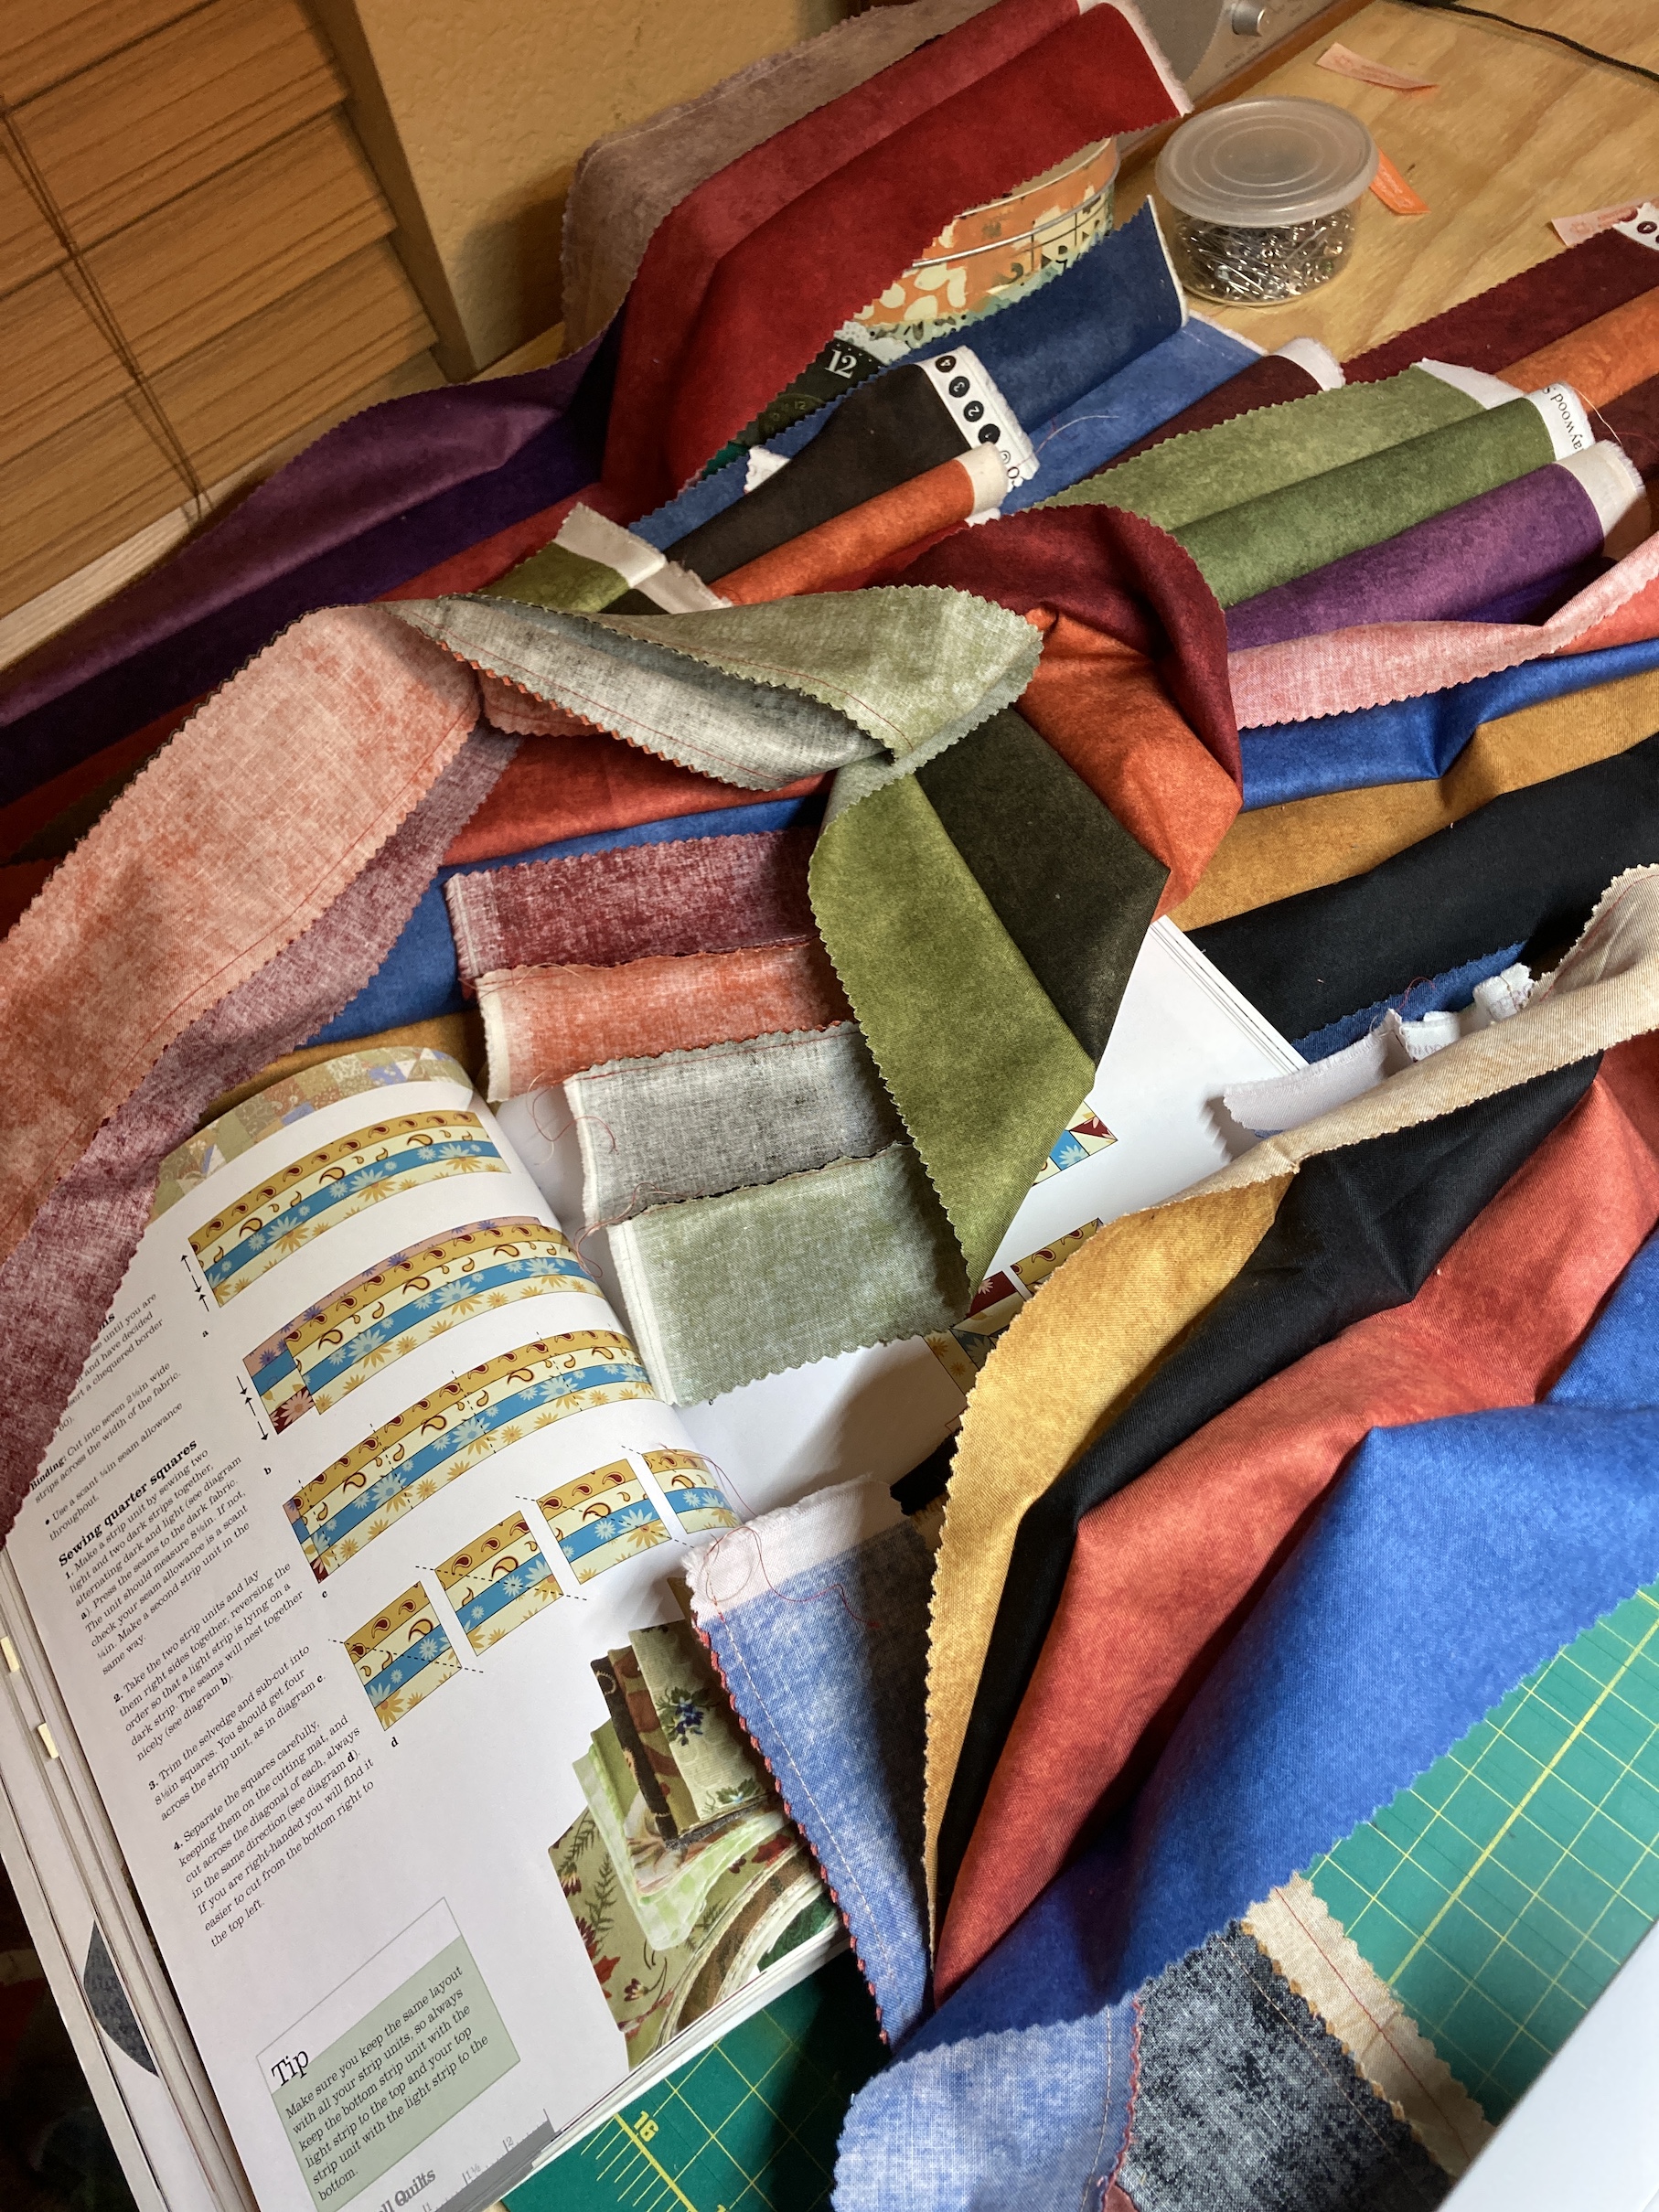
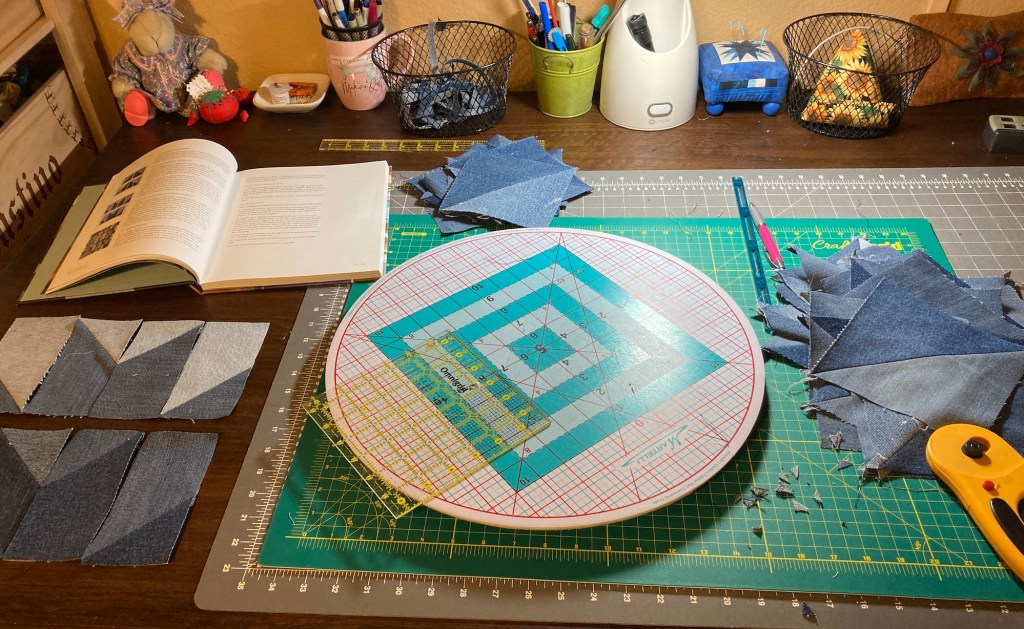
I only have one of those books left from those days – Jelly Roll Quilts: The Perfect Guide to Making the Most of the Latest Strip Rolls by Pam and Nicky Lintott, and used this book for the pattern for the baby quilt.
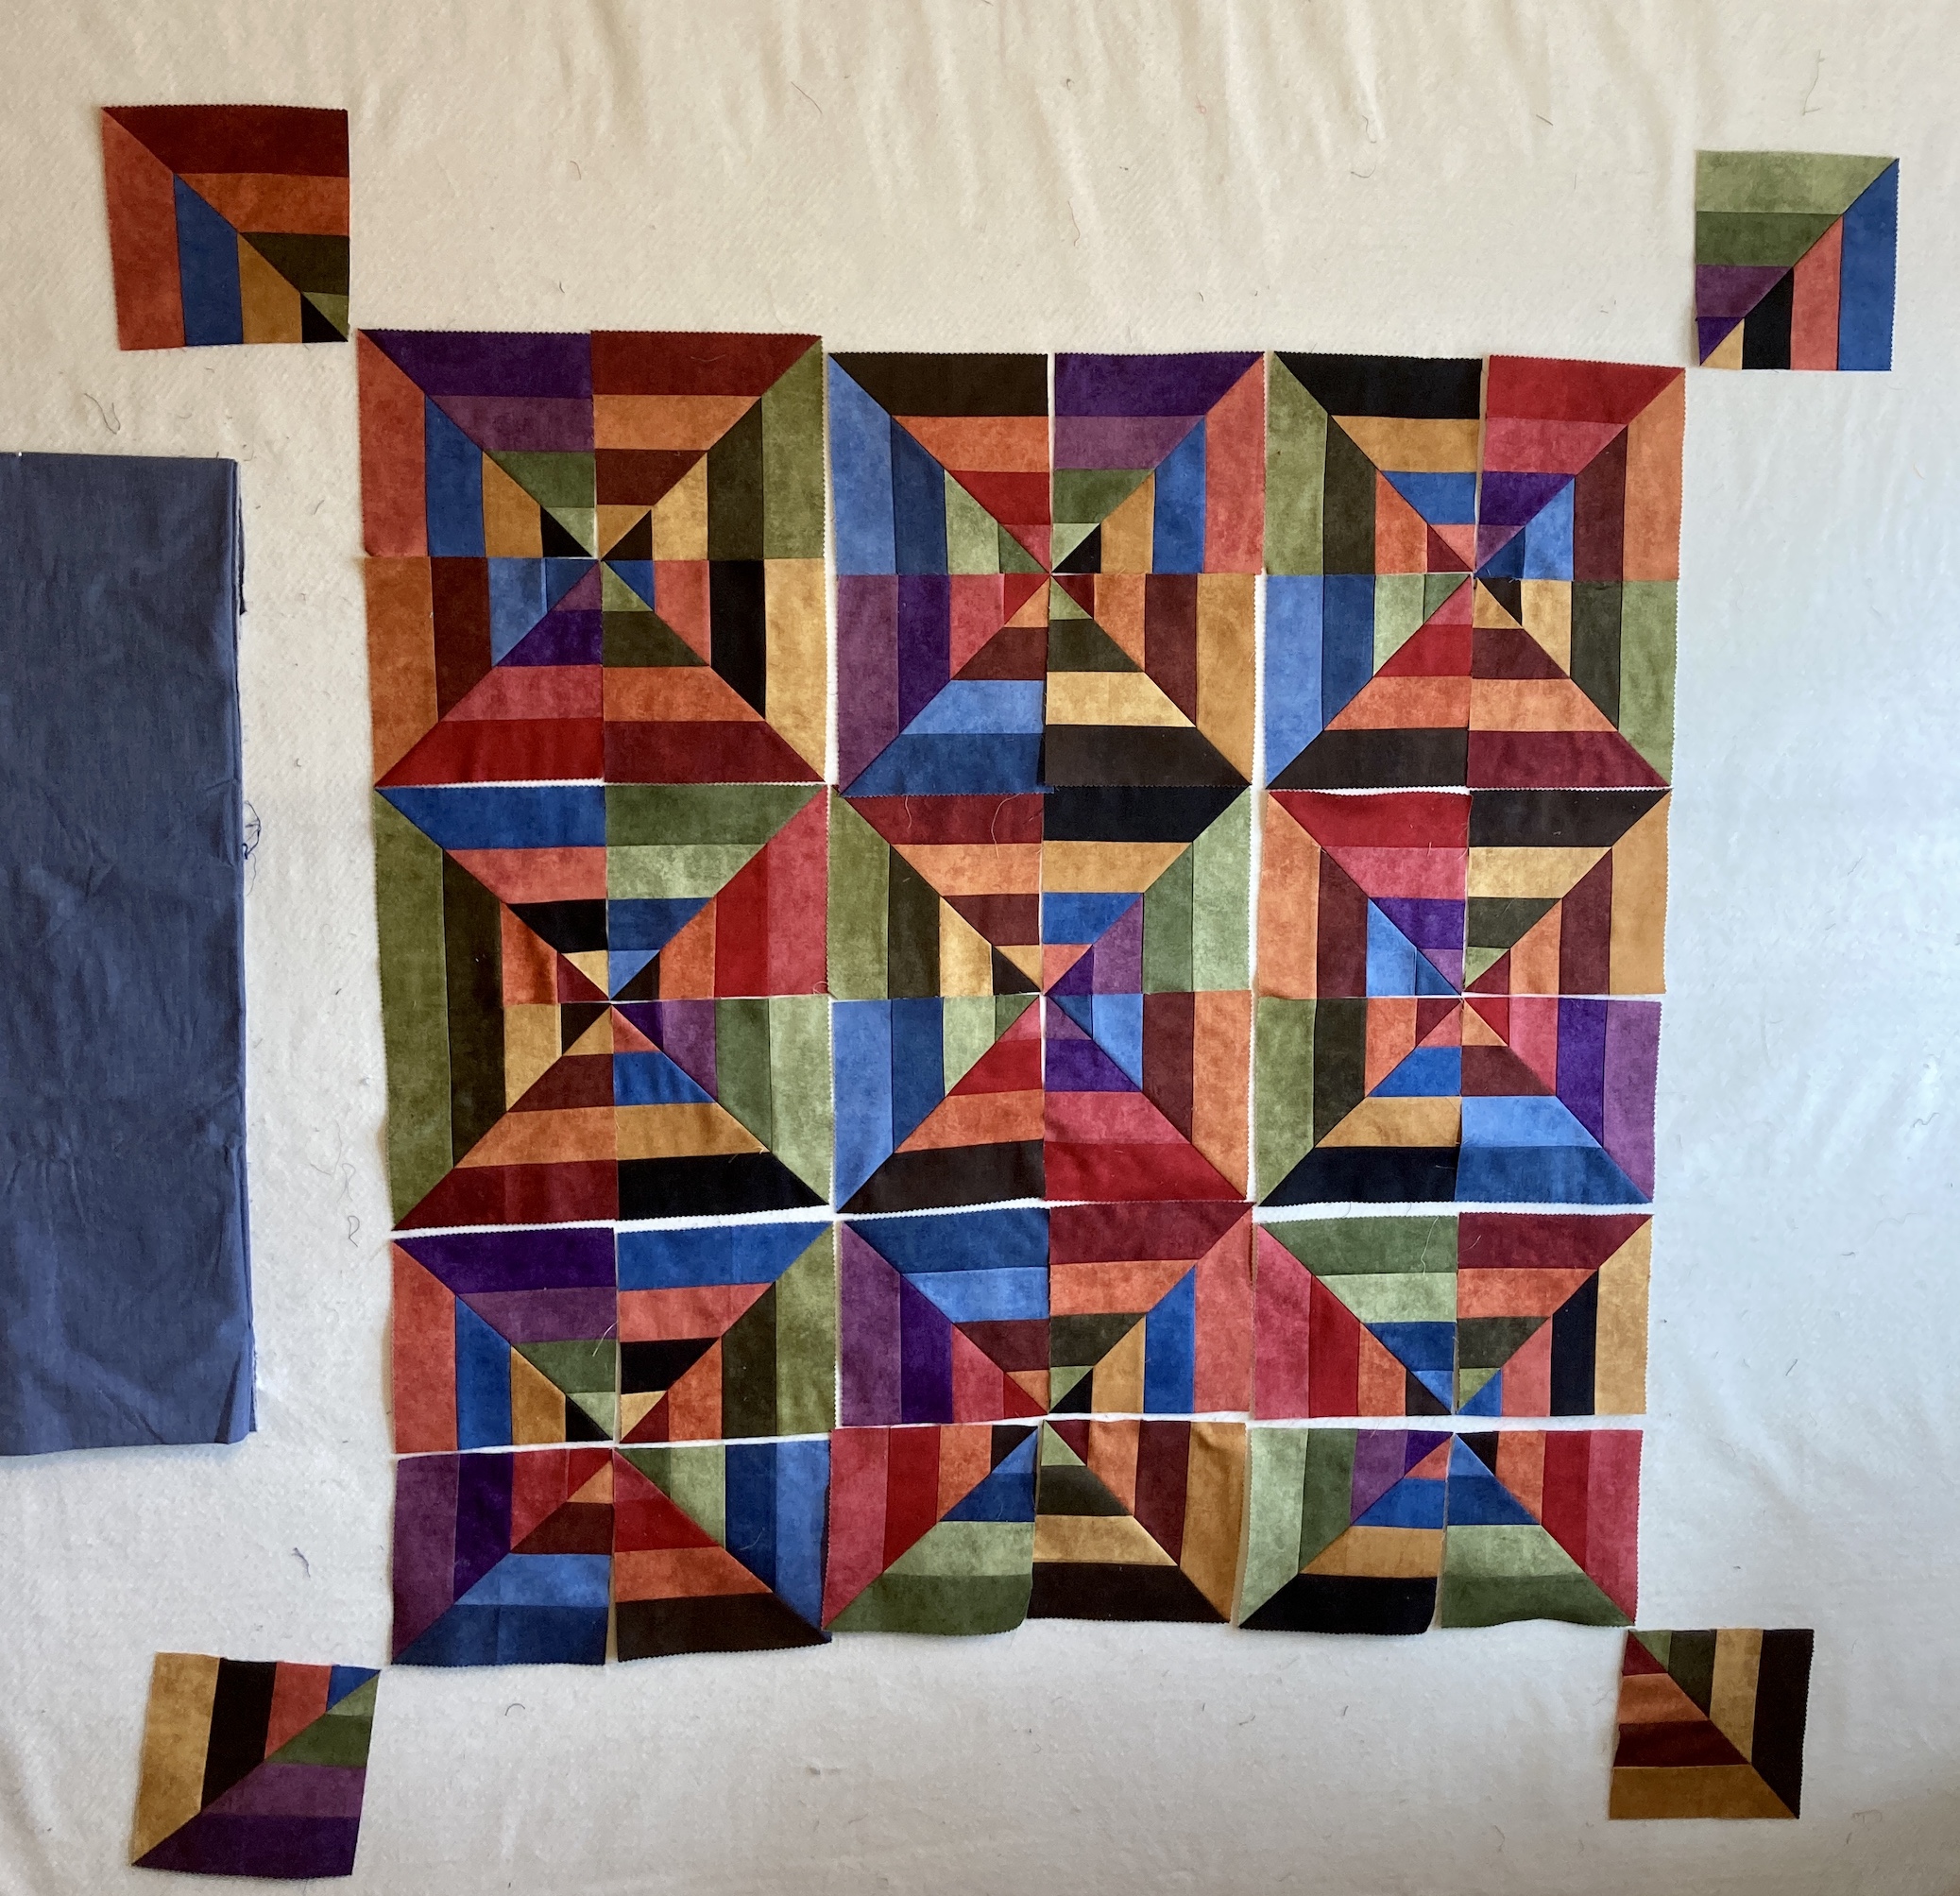
Besides using a jelly roll to make a quilt which I have not done in years, I made “strata” (sewing strips together to then cut into sections) to create the pattern for the quilt – something I have not done since the early 2000s when I first began quilting.
I felt like I was in my early days of quilting as I pressed each section of strata and it felt kind of nostalgic and sweet!
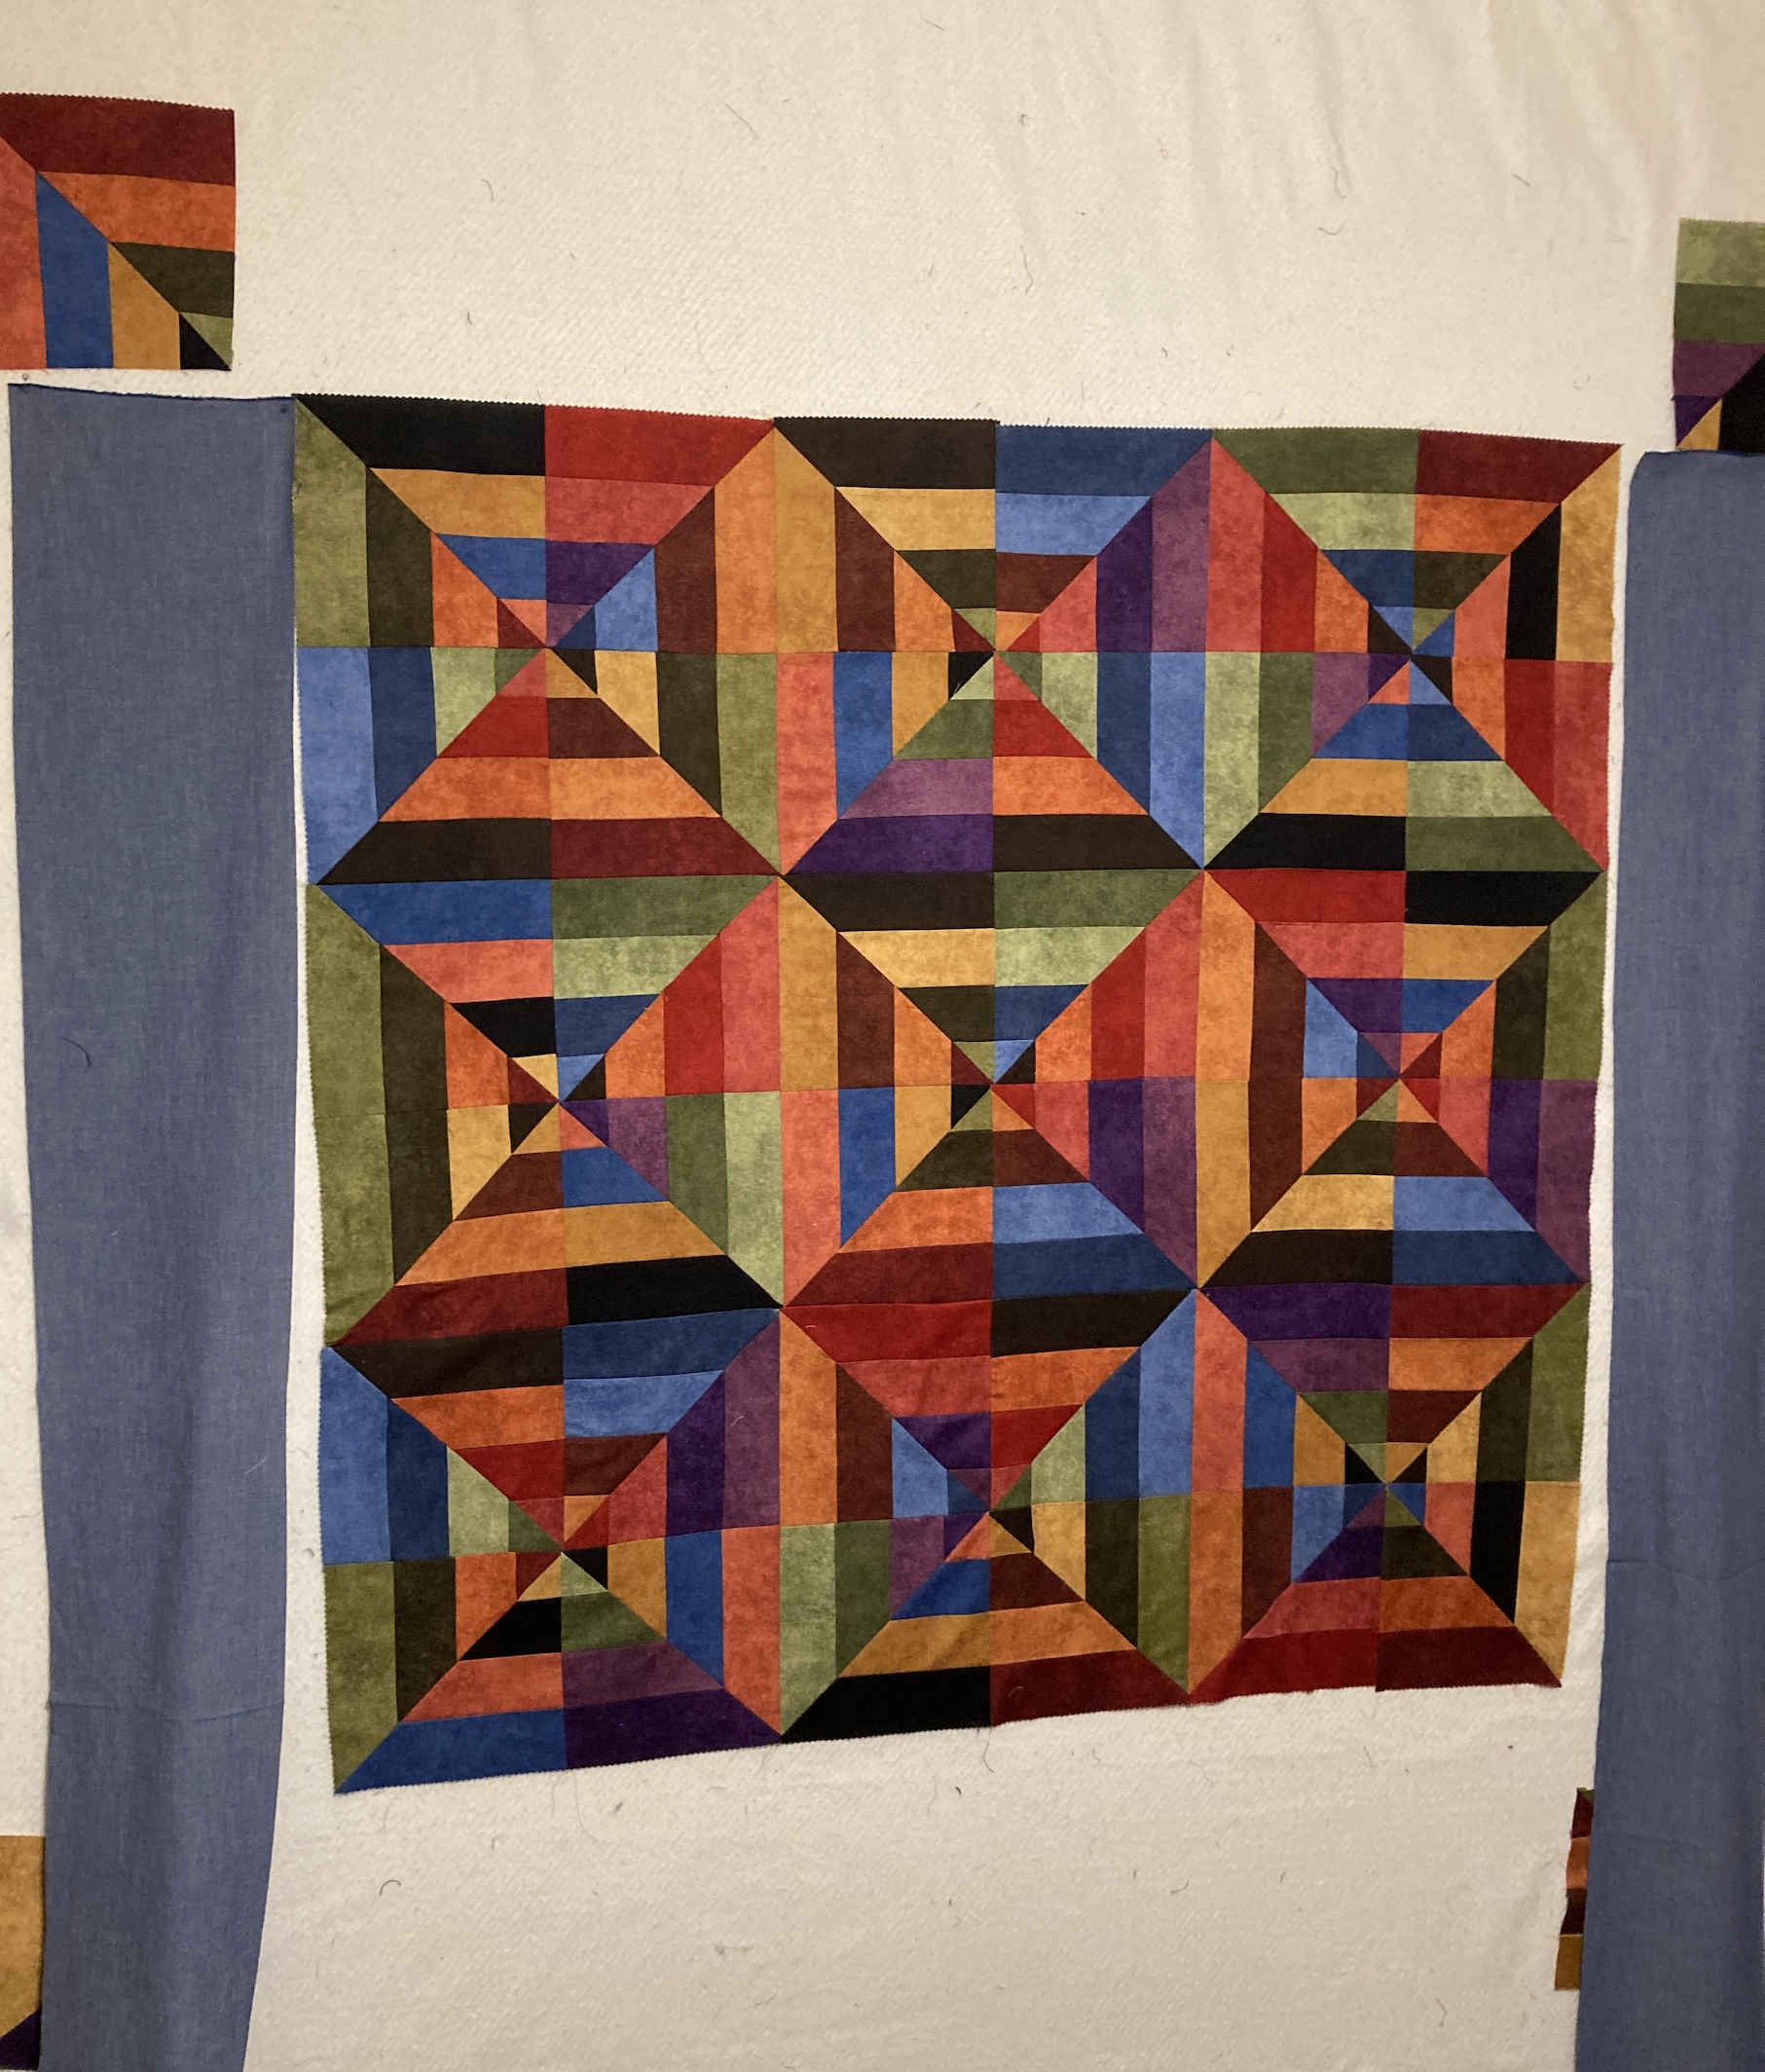
I have the center of the quilt assembled now and I am going to put a lightweight denim colored fabric as the border and use the extra blocks as cornerstones.
I’ll have some better photos to share after I get it all assembled and quilted.
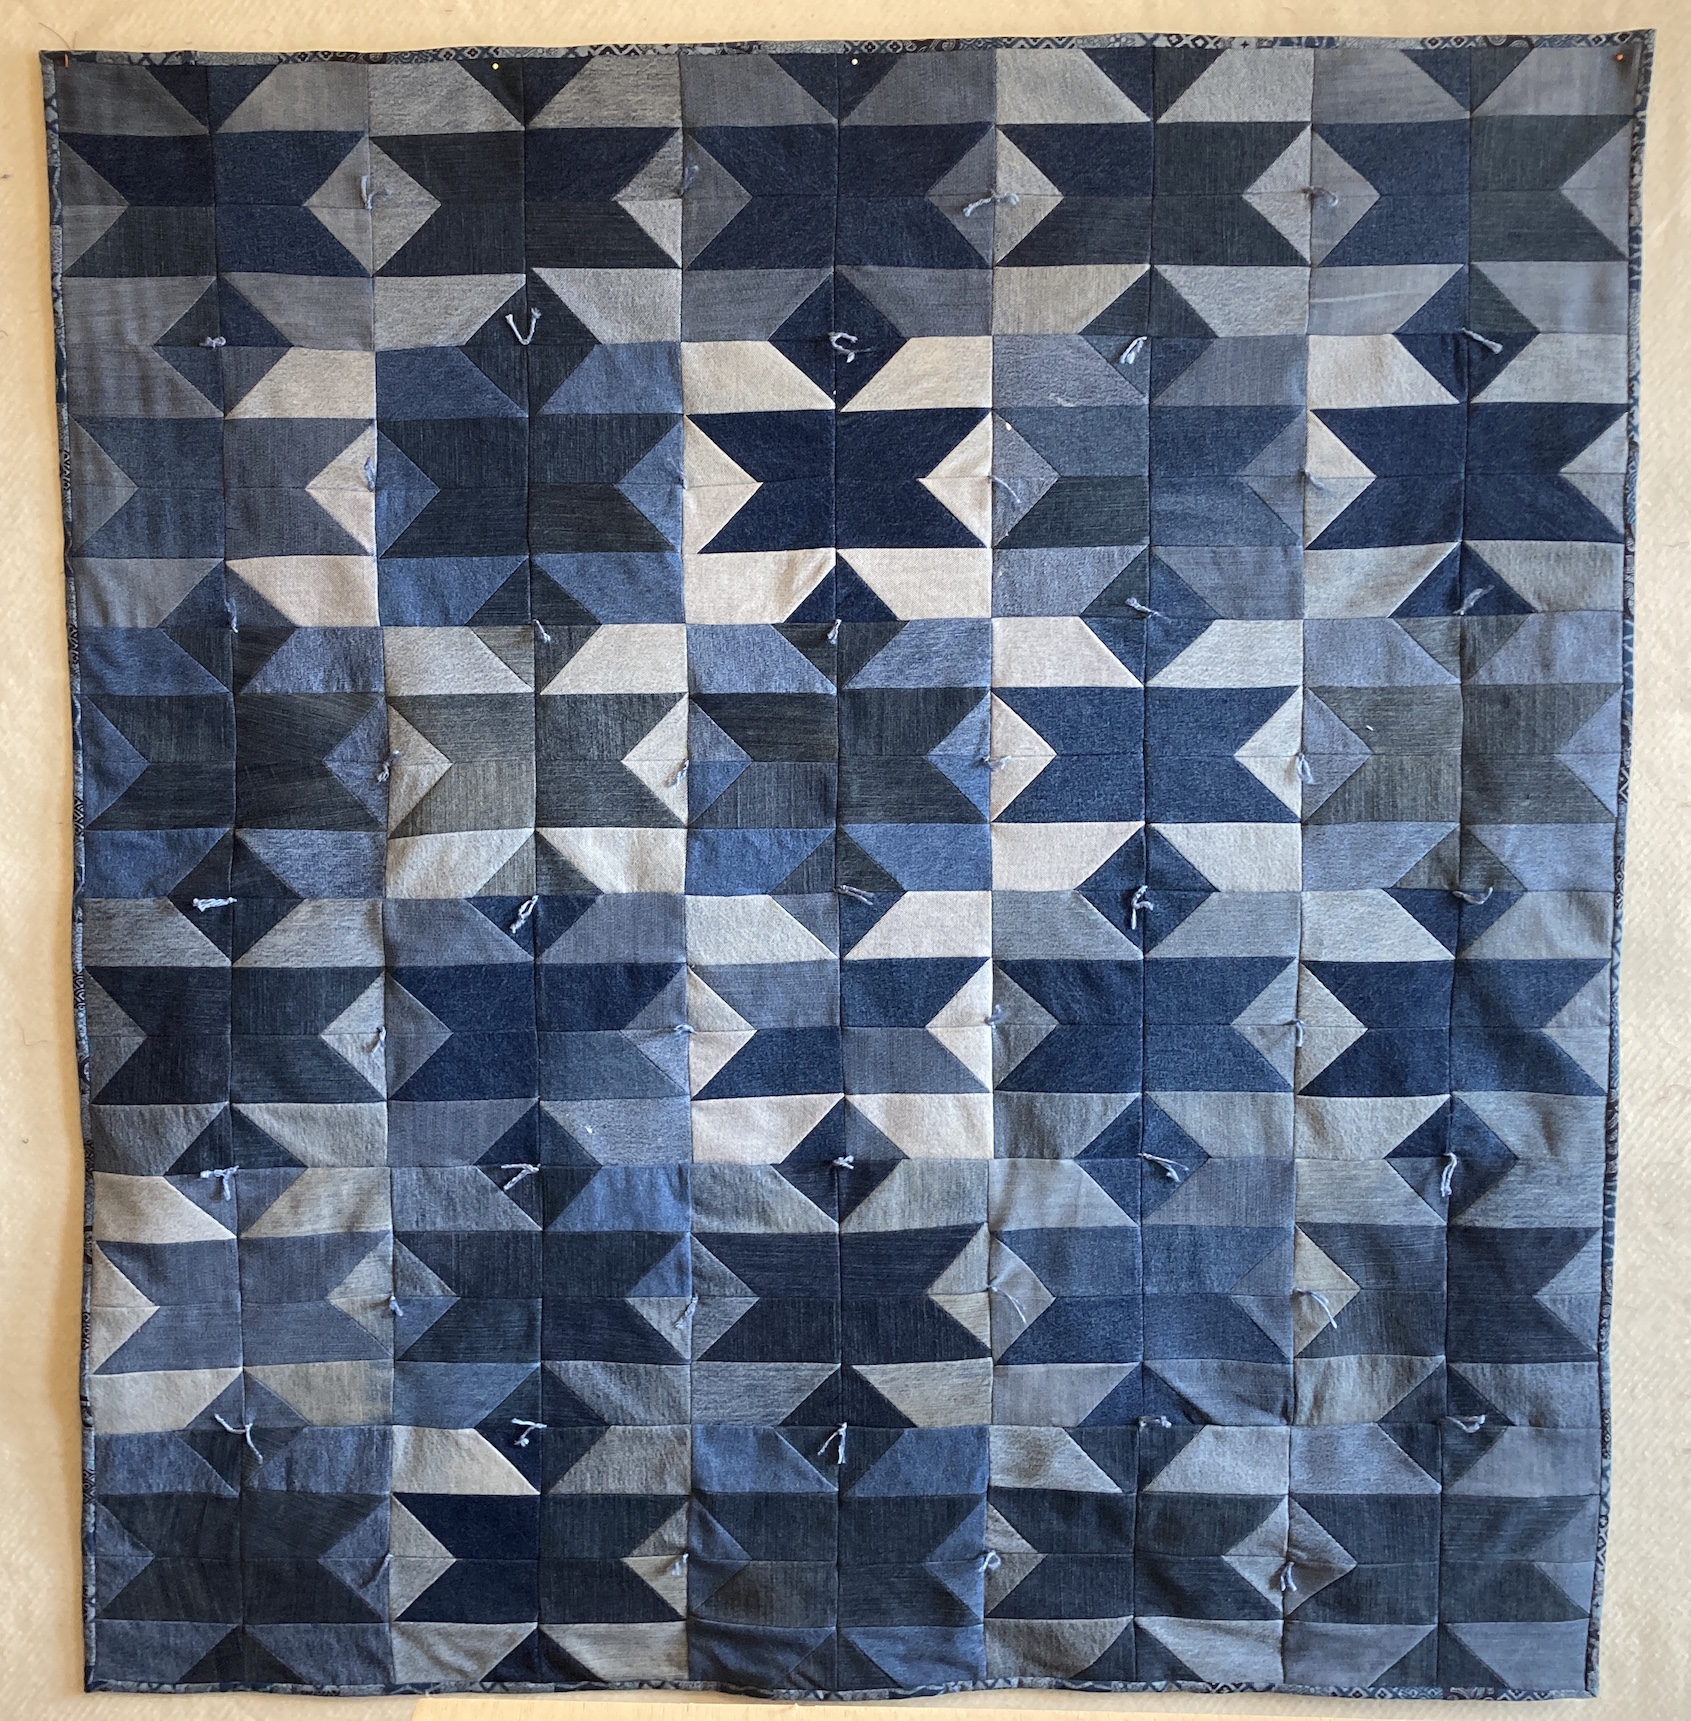
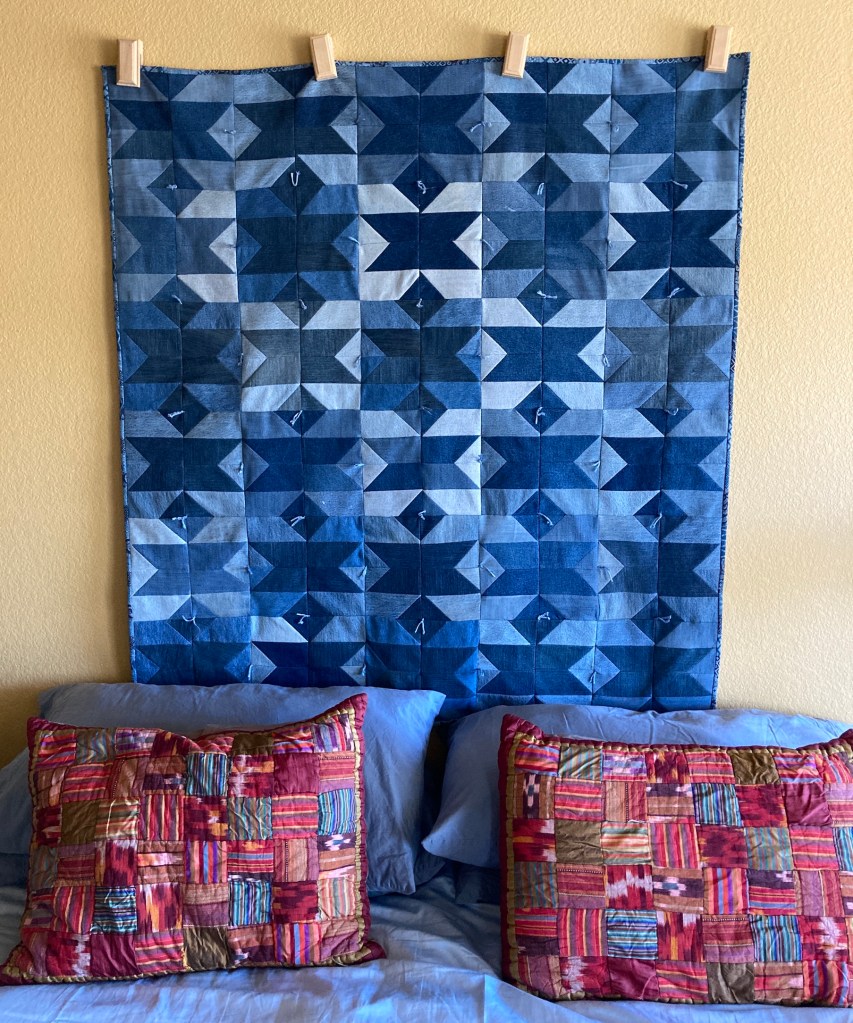
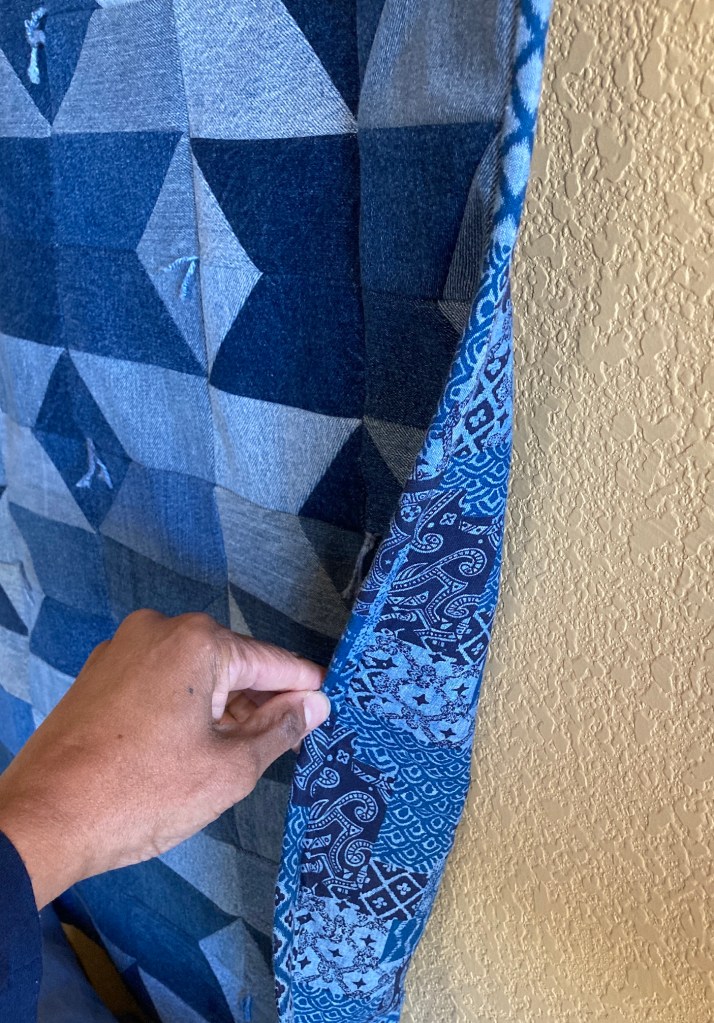
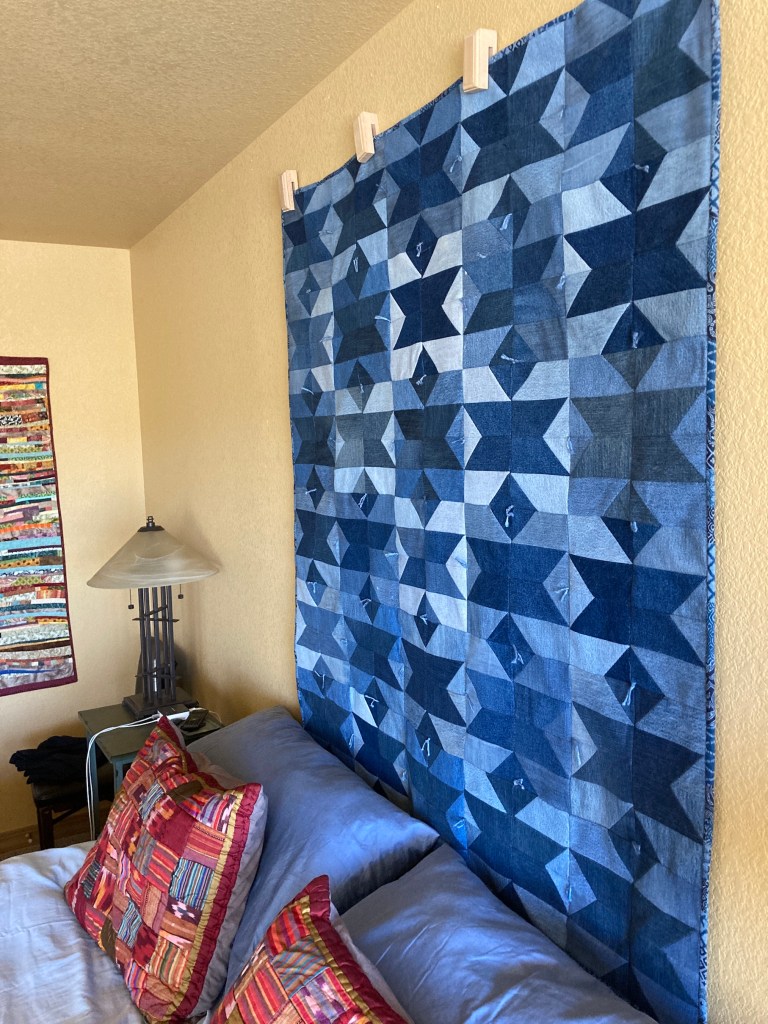
Not sure what came over me but I somehow quickly finished the recycled denim quilt I shared in the post What’s On The Design Wall, and got it hung on the wall.
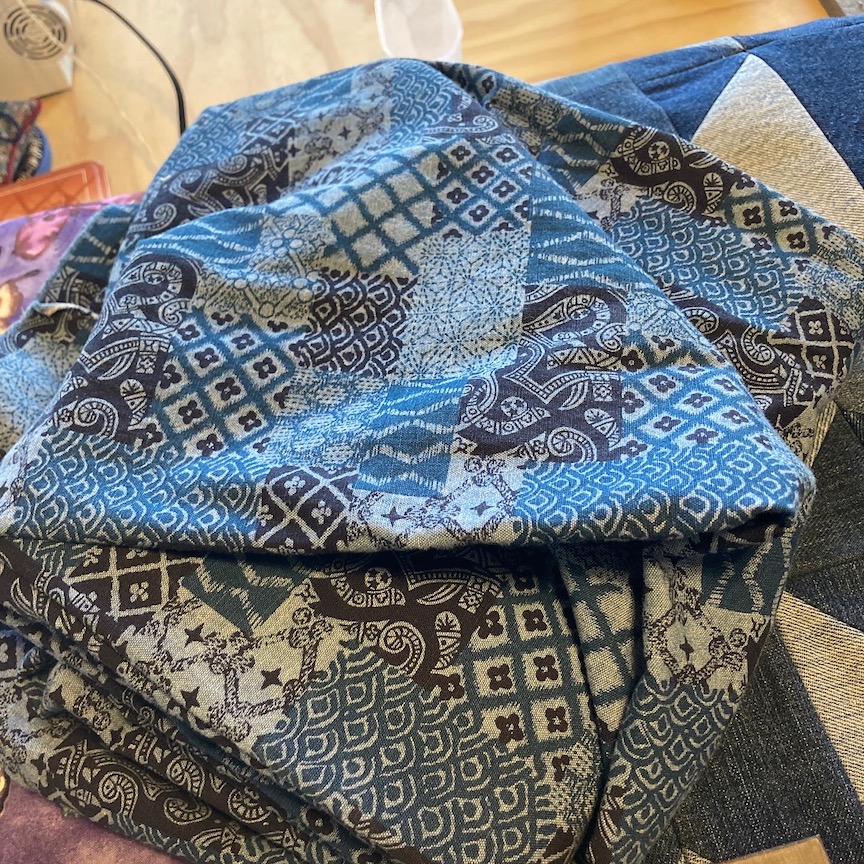
Here is the backing I selected for the quilt, I picked it up a couple of week ago at a thrift store:
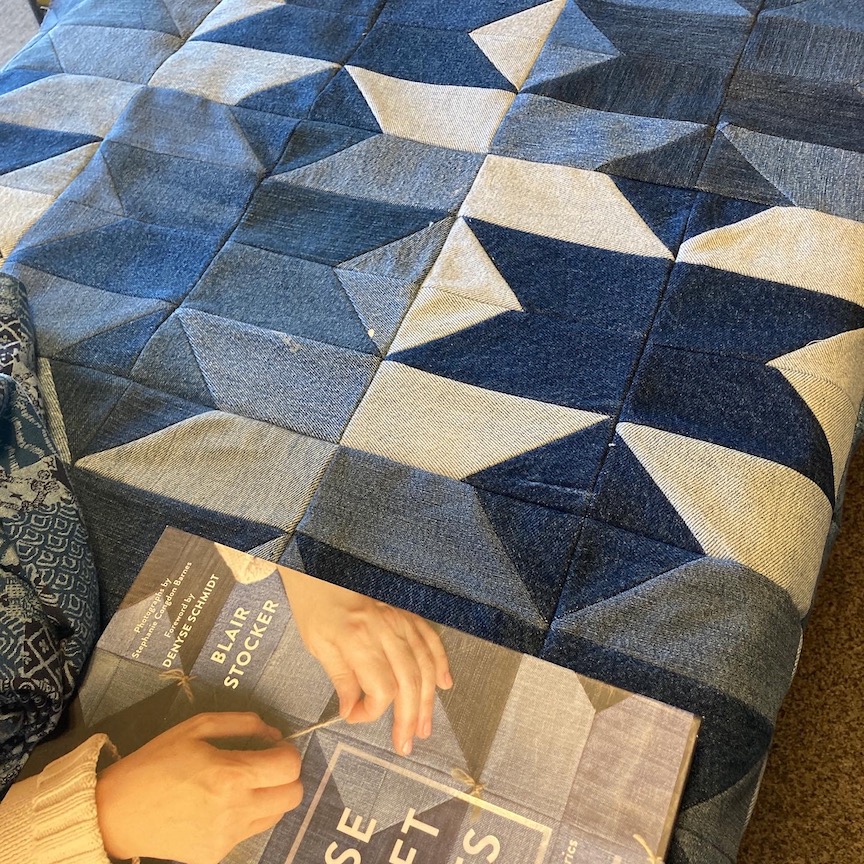
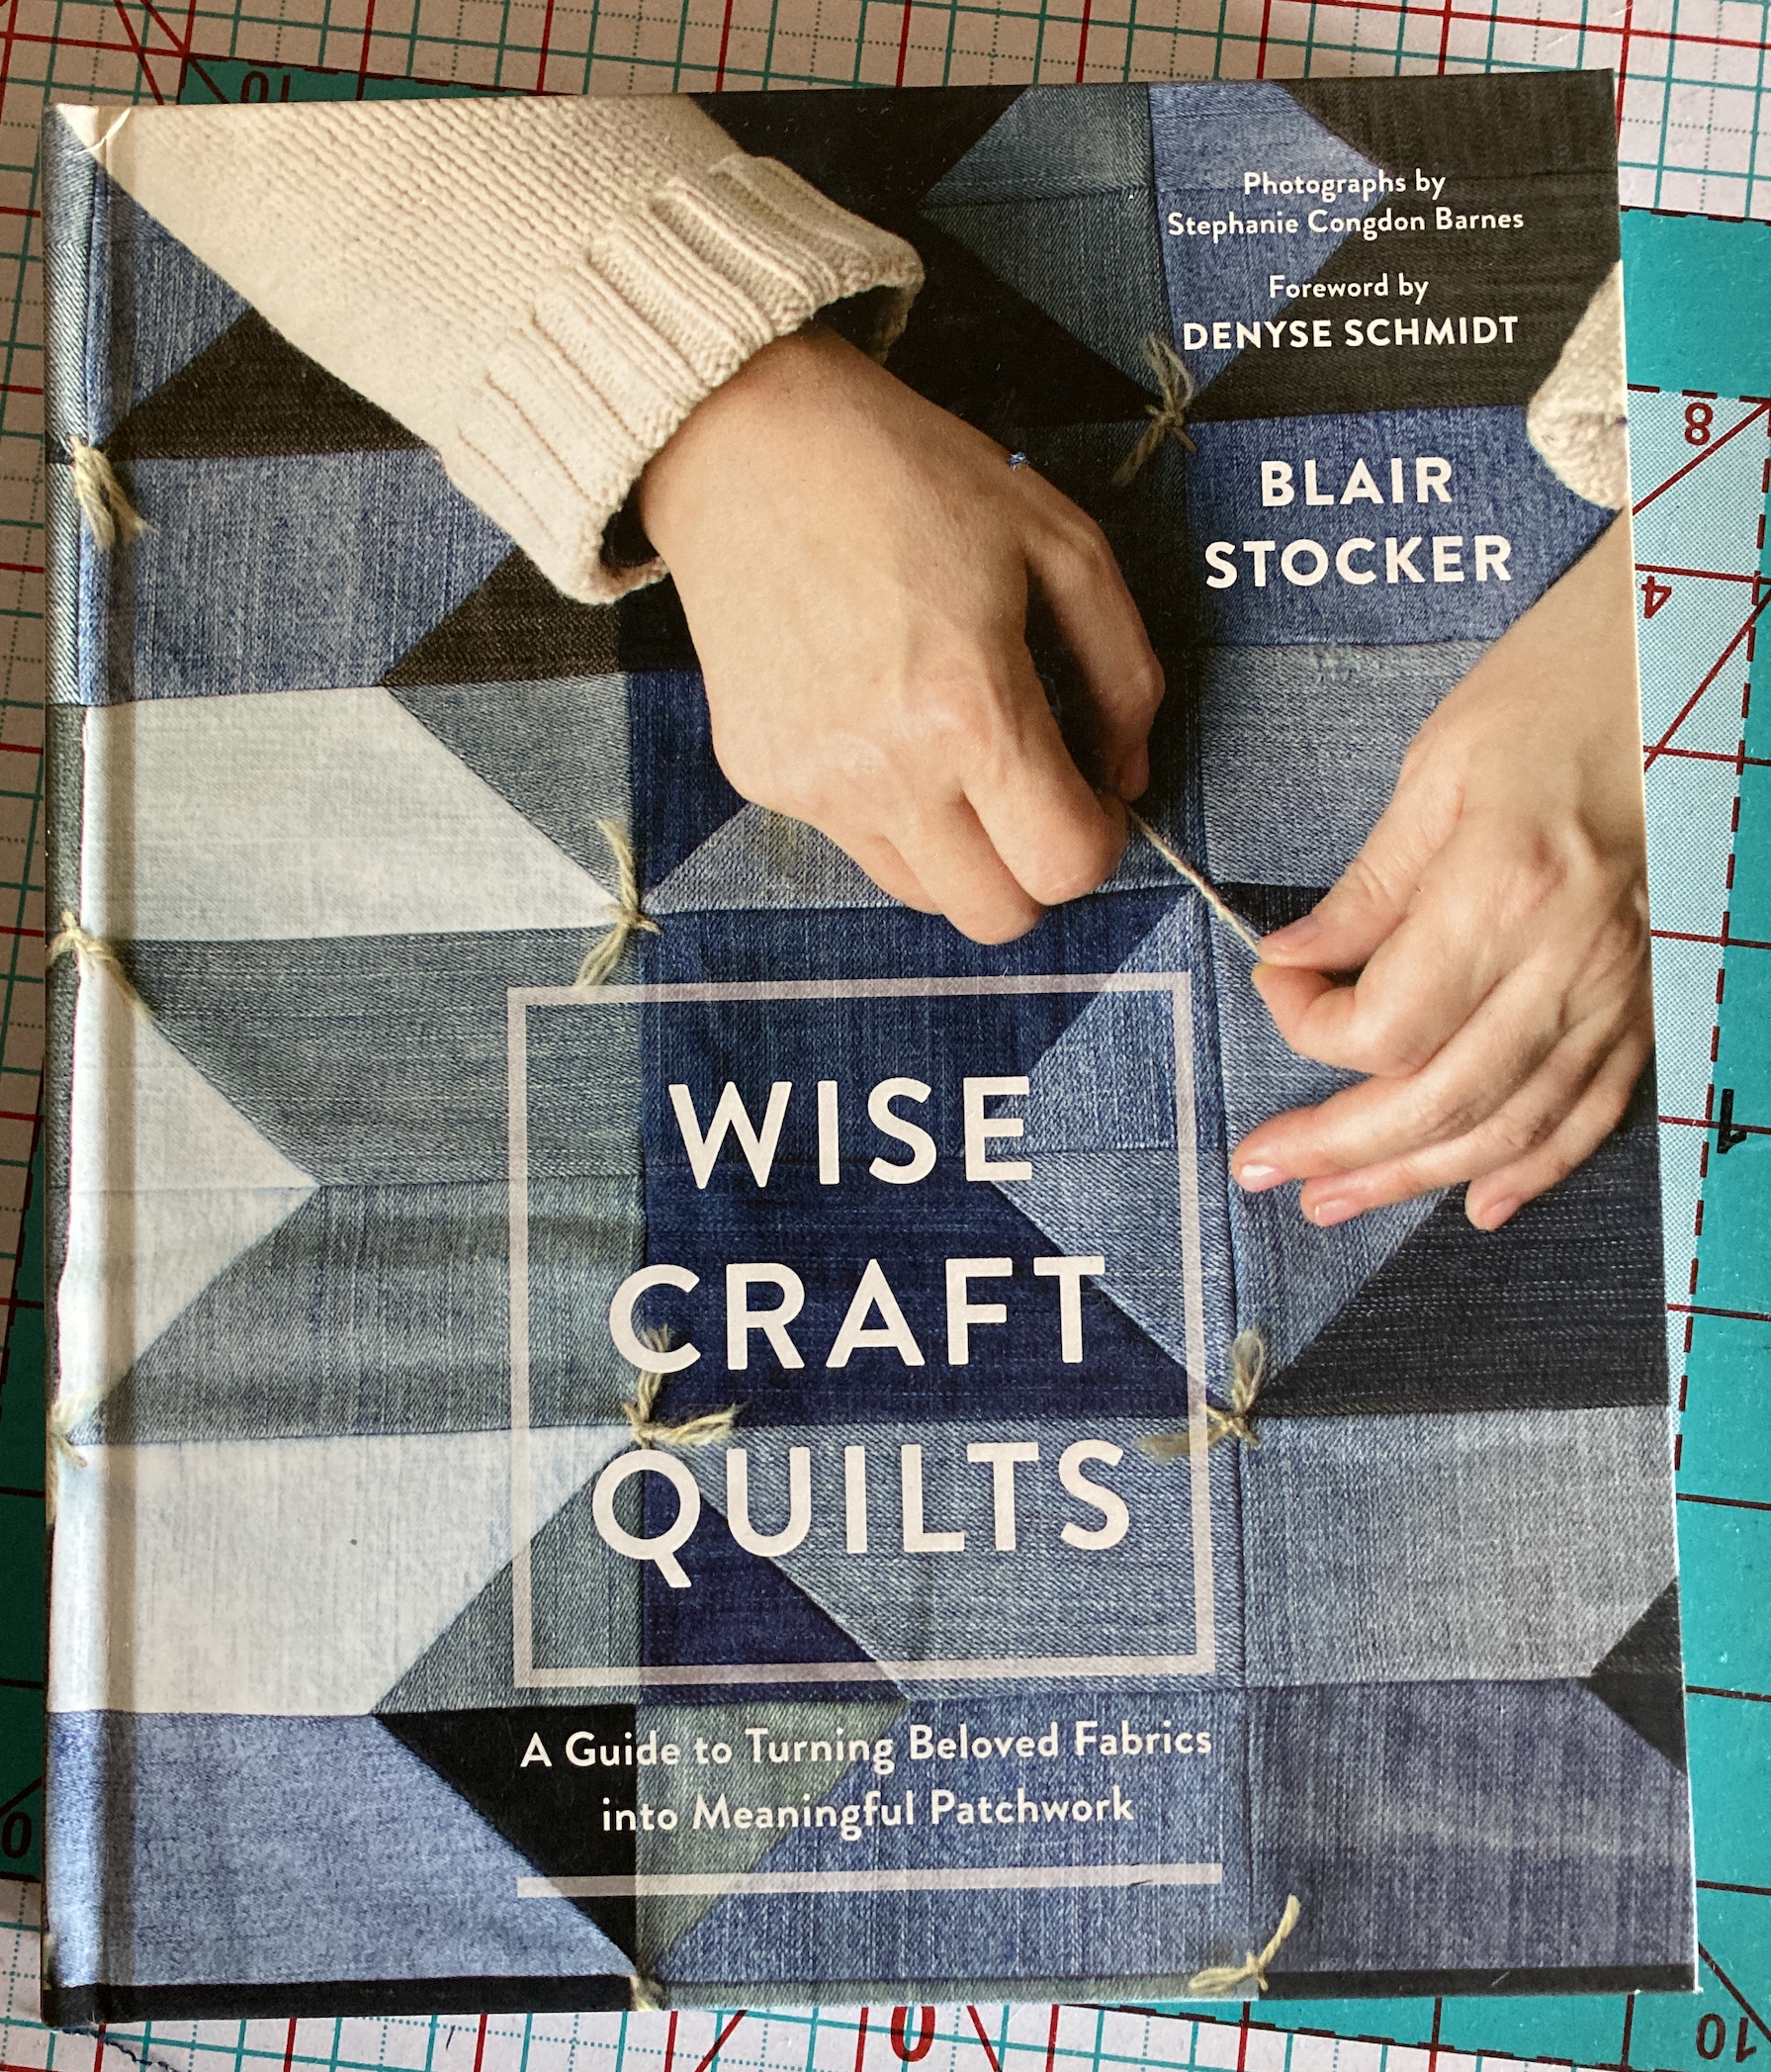
Like the pattern designer/author of Wise Craft Quilts, Blair Stocker did, I wanted to hand tie the quilt (see cover of book in image below):
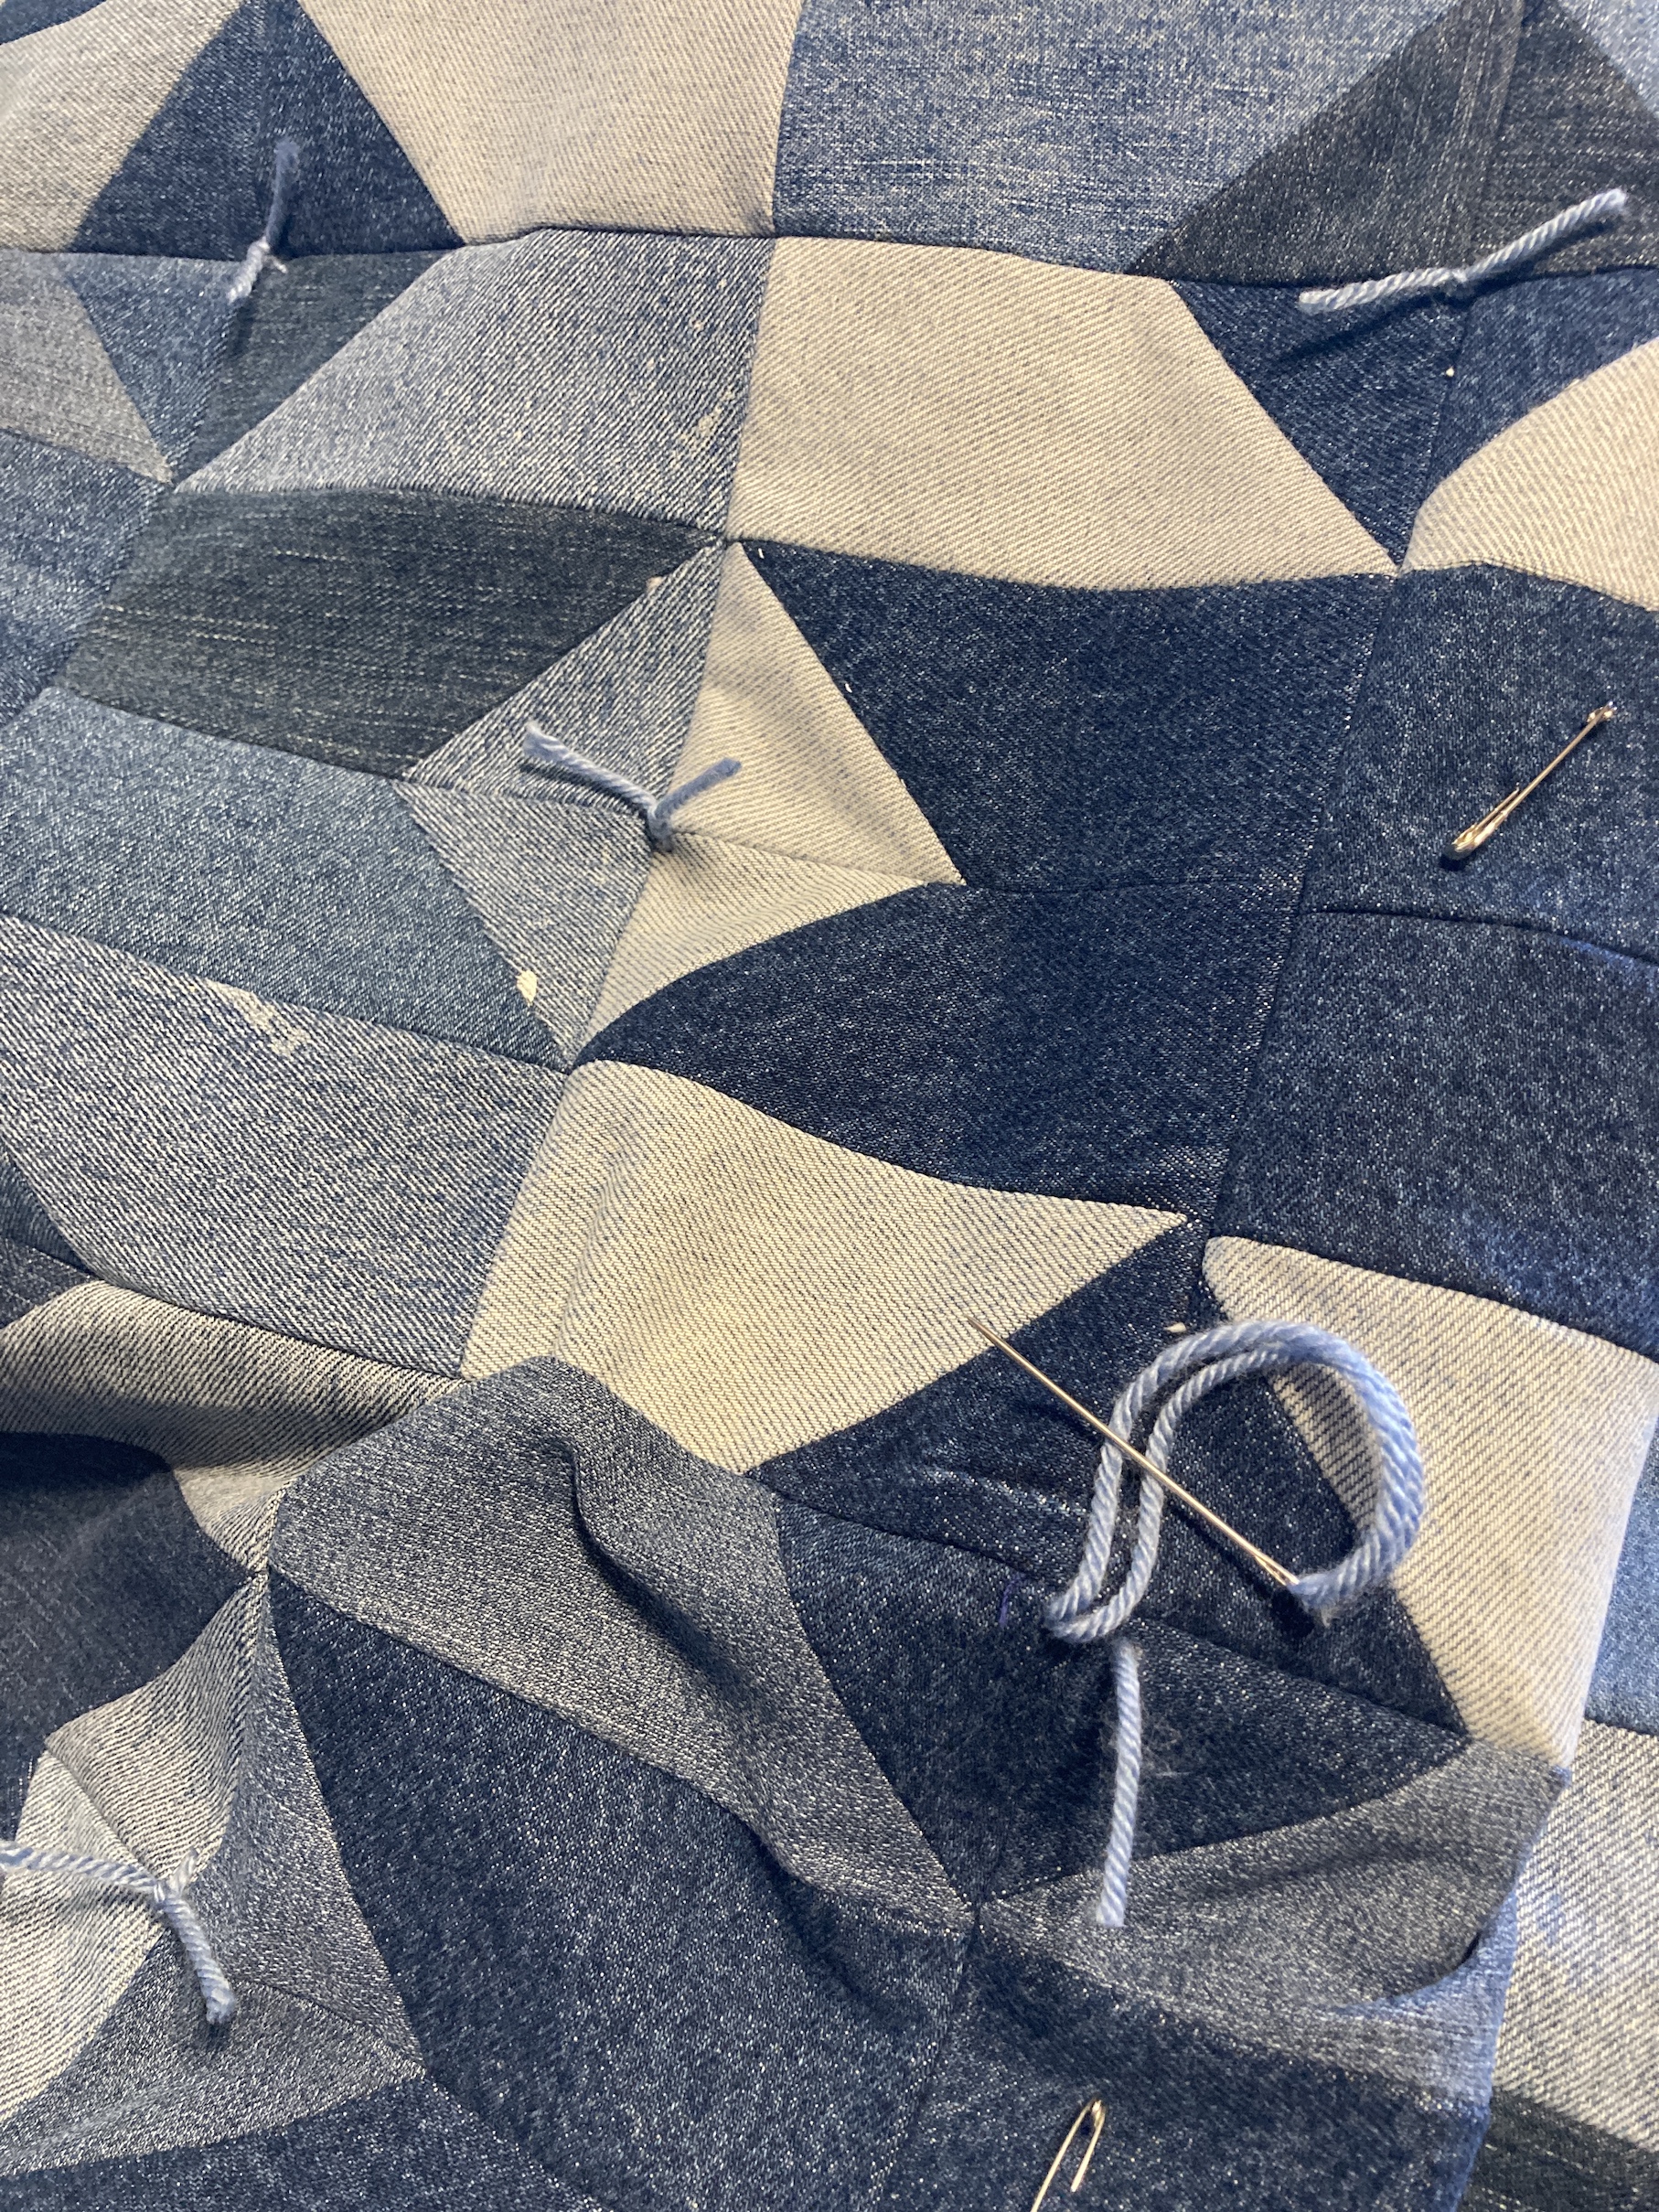
It’s been many years (maybe 16 or more?) since I hand tied a quilt – I forgot how meditative and pleasing it was to hand tie the three layers together with a large needle and yarn:
Once the hand tying was complete, I used the same fabric as the backing for the quilt’s binding.
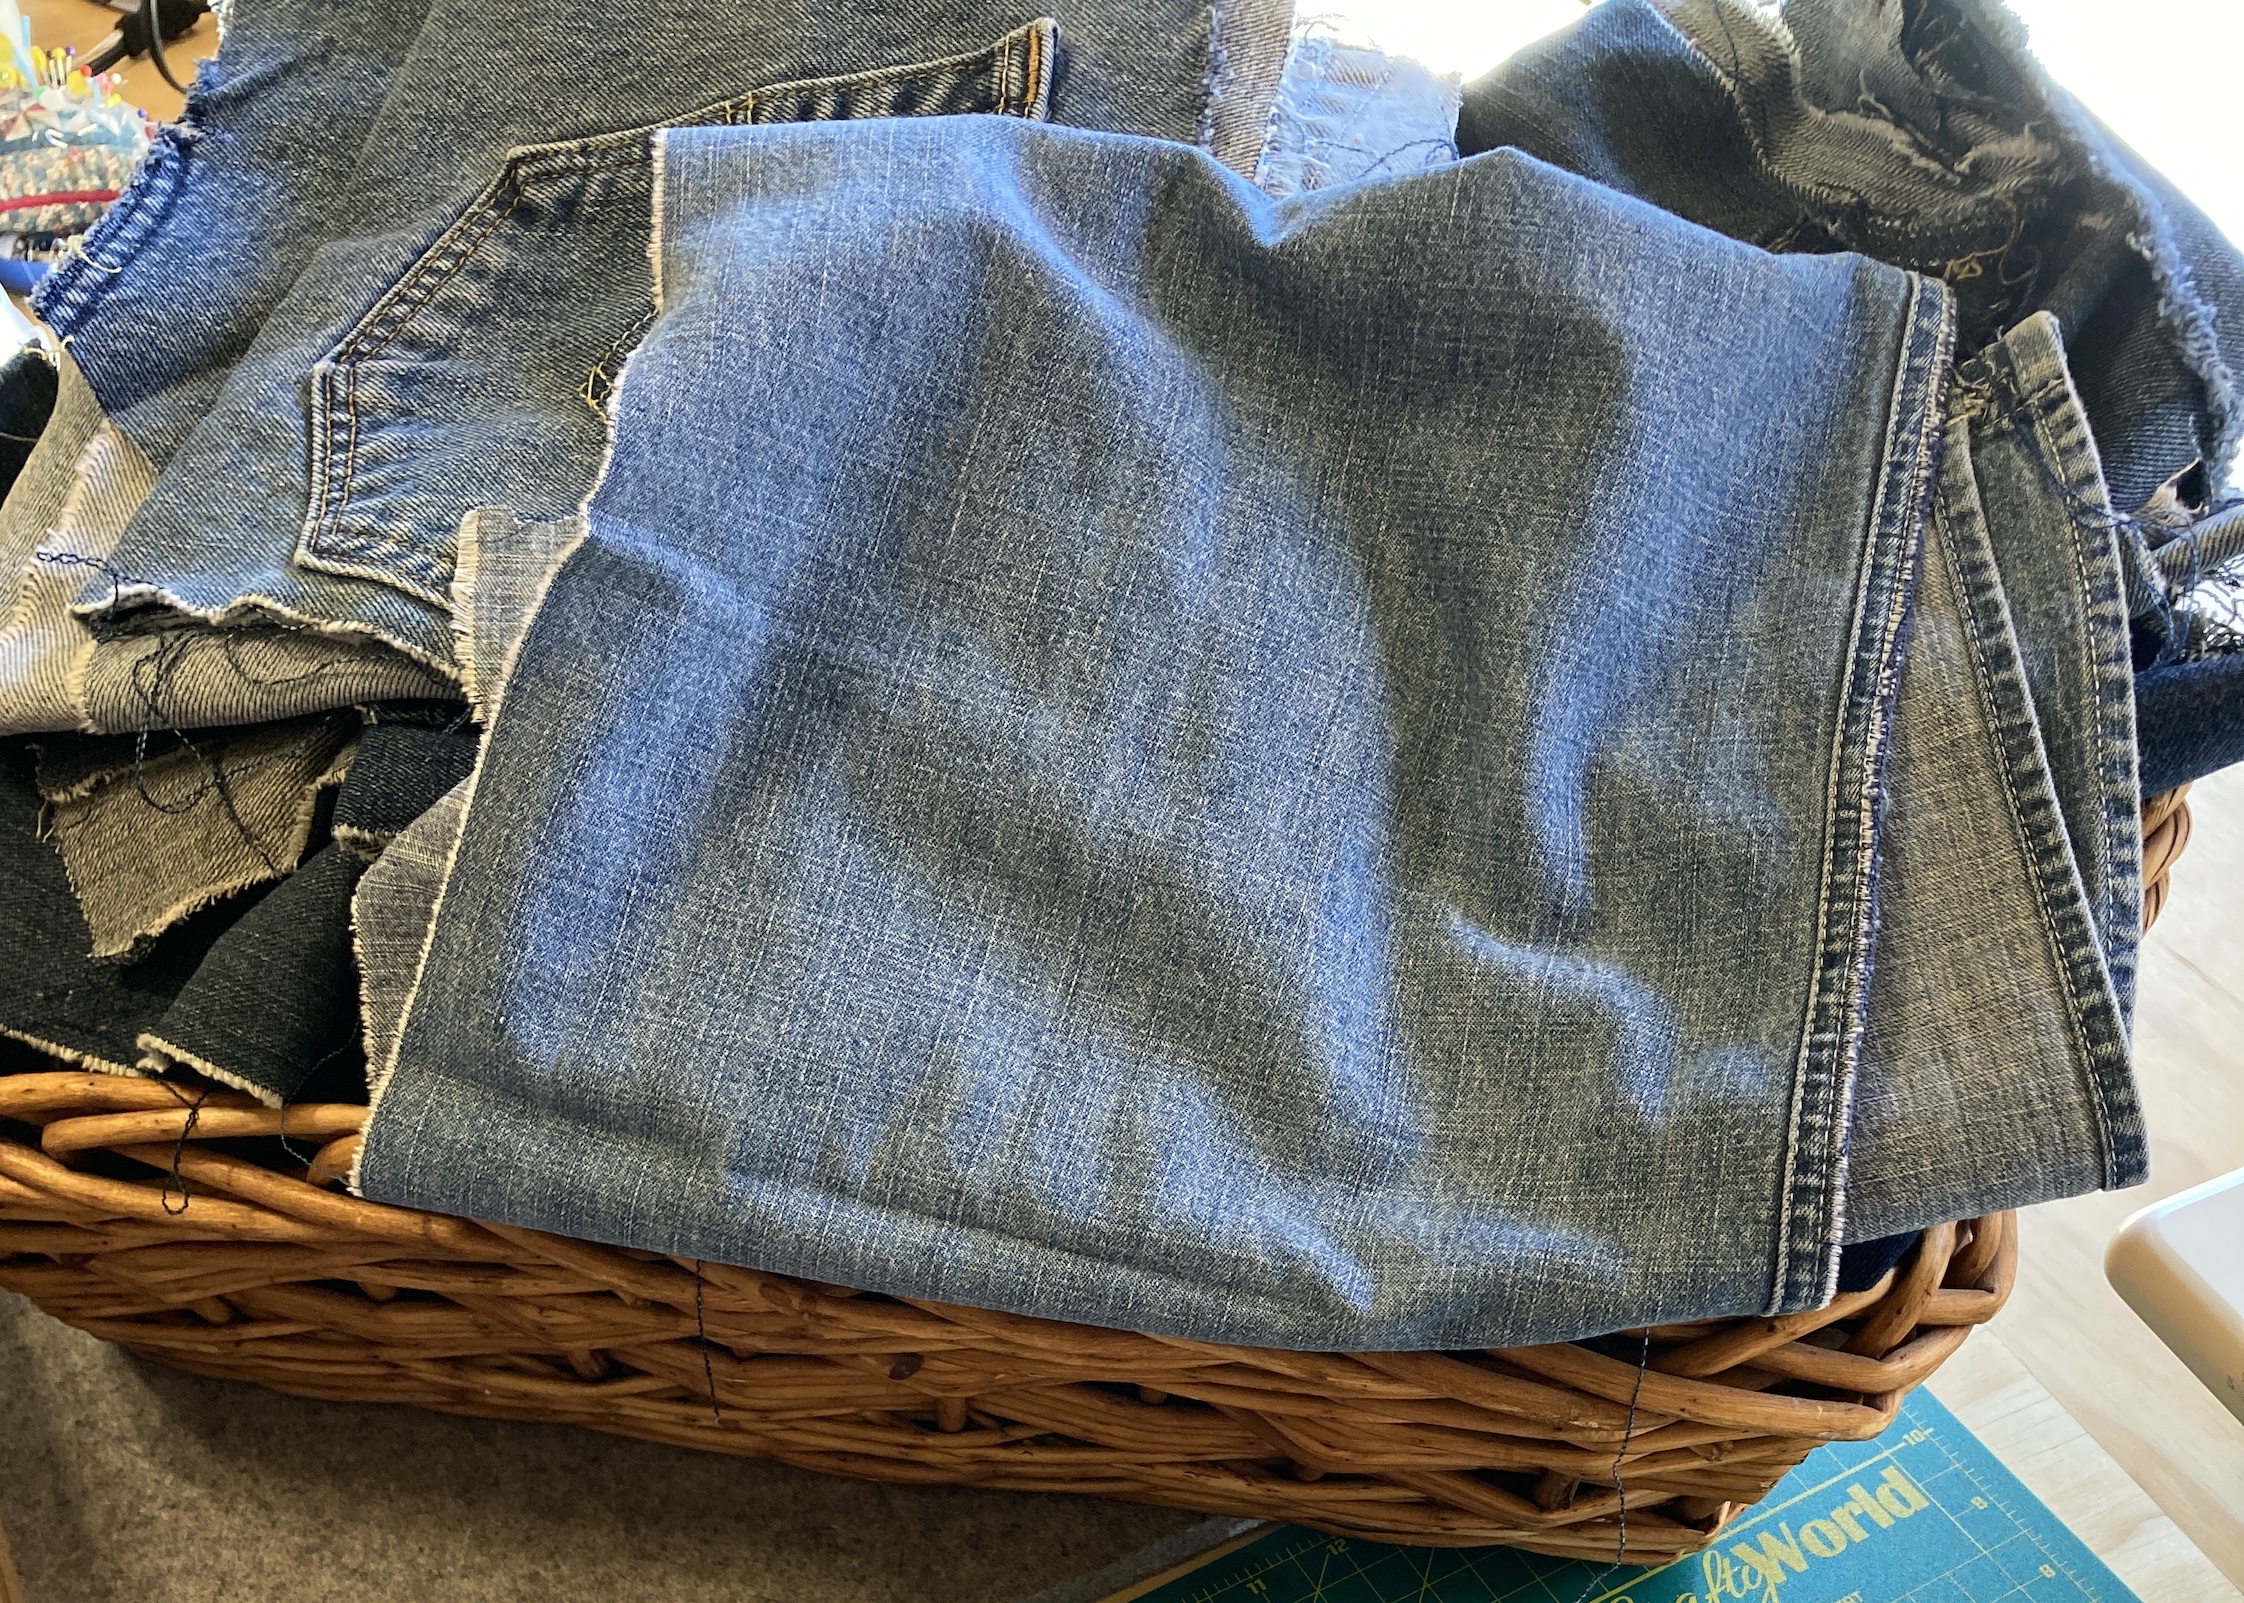
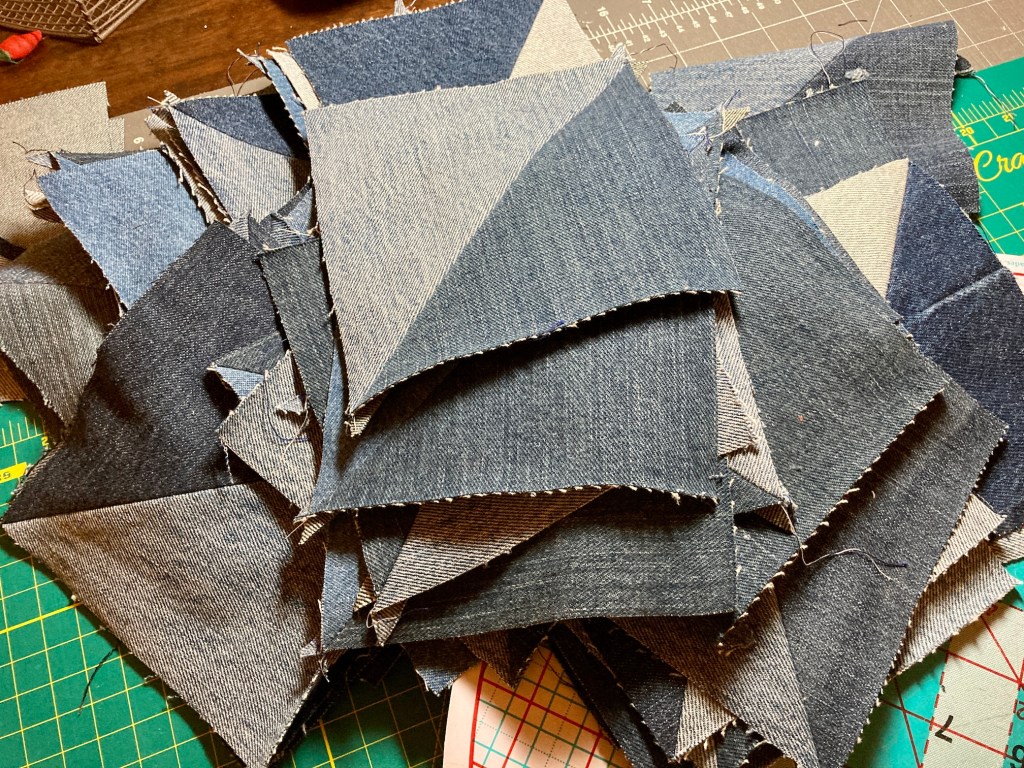
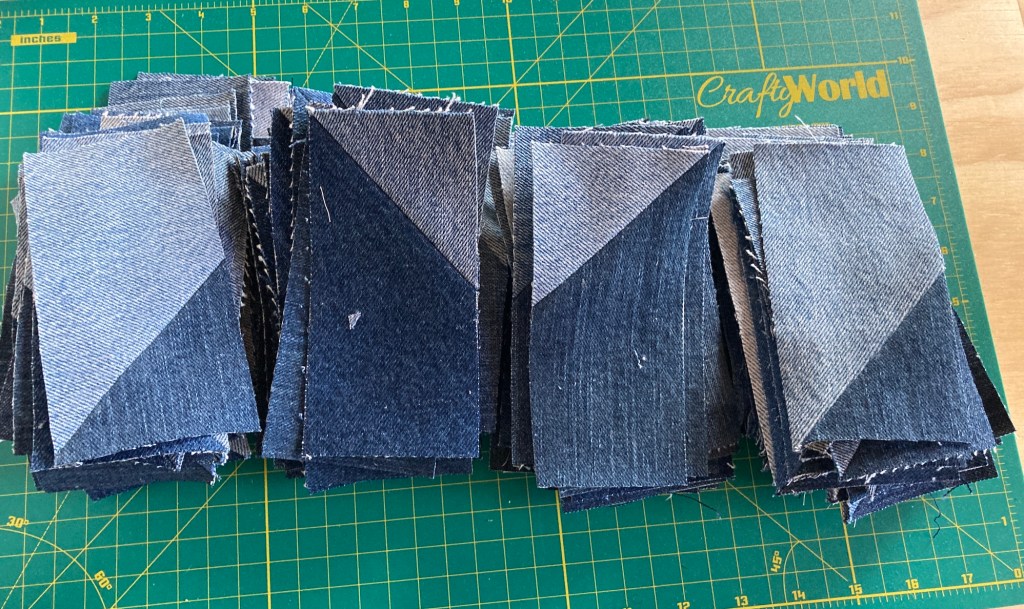
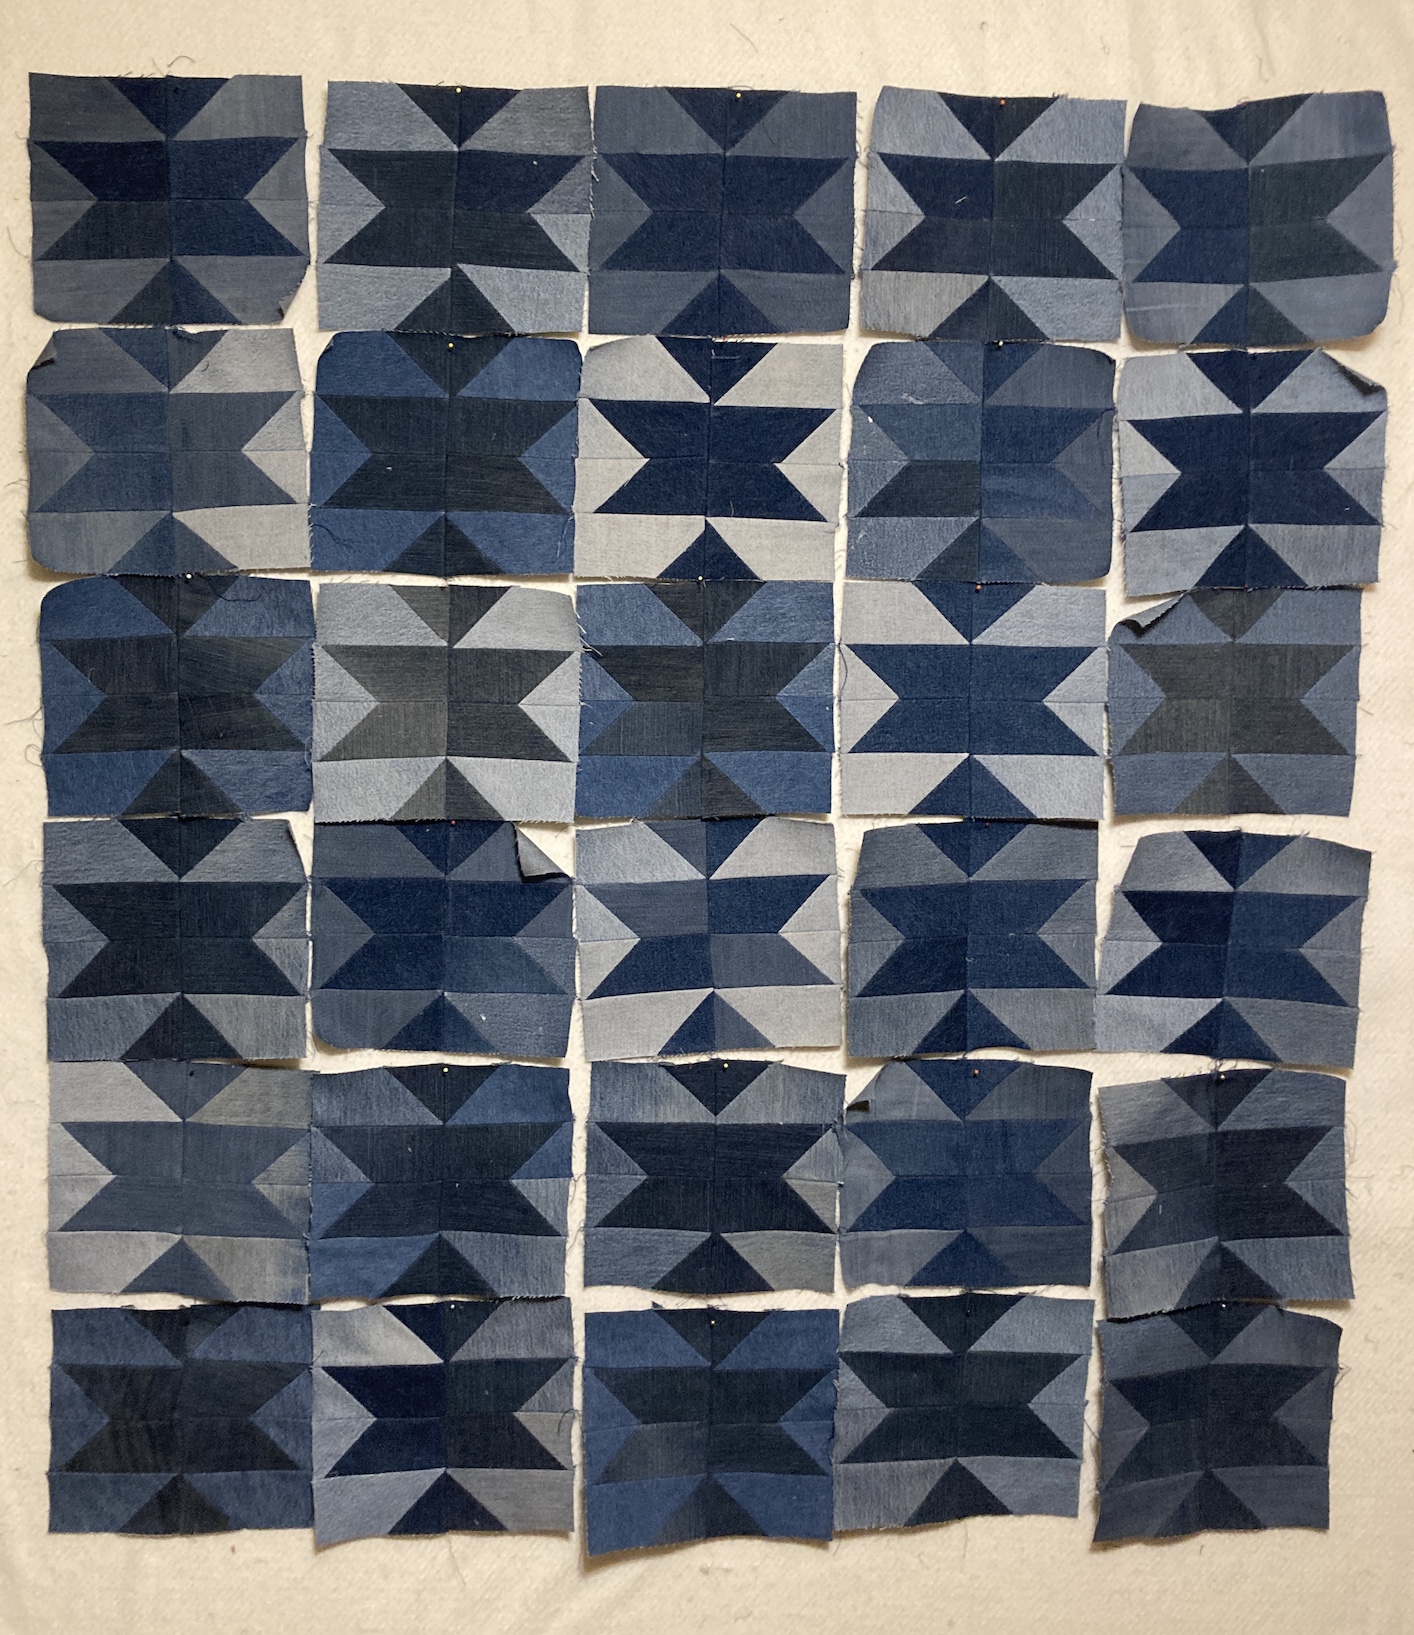
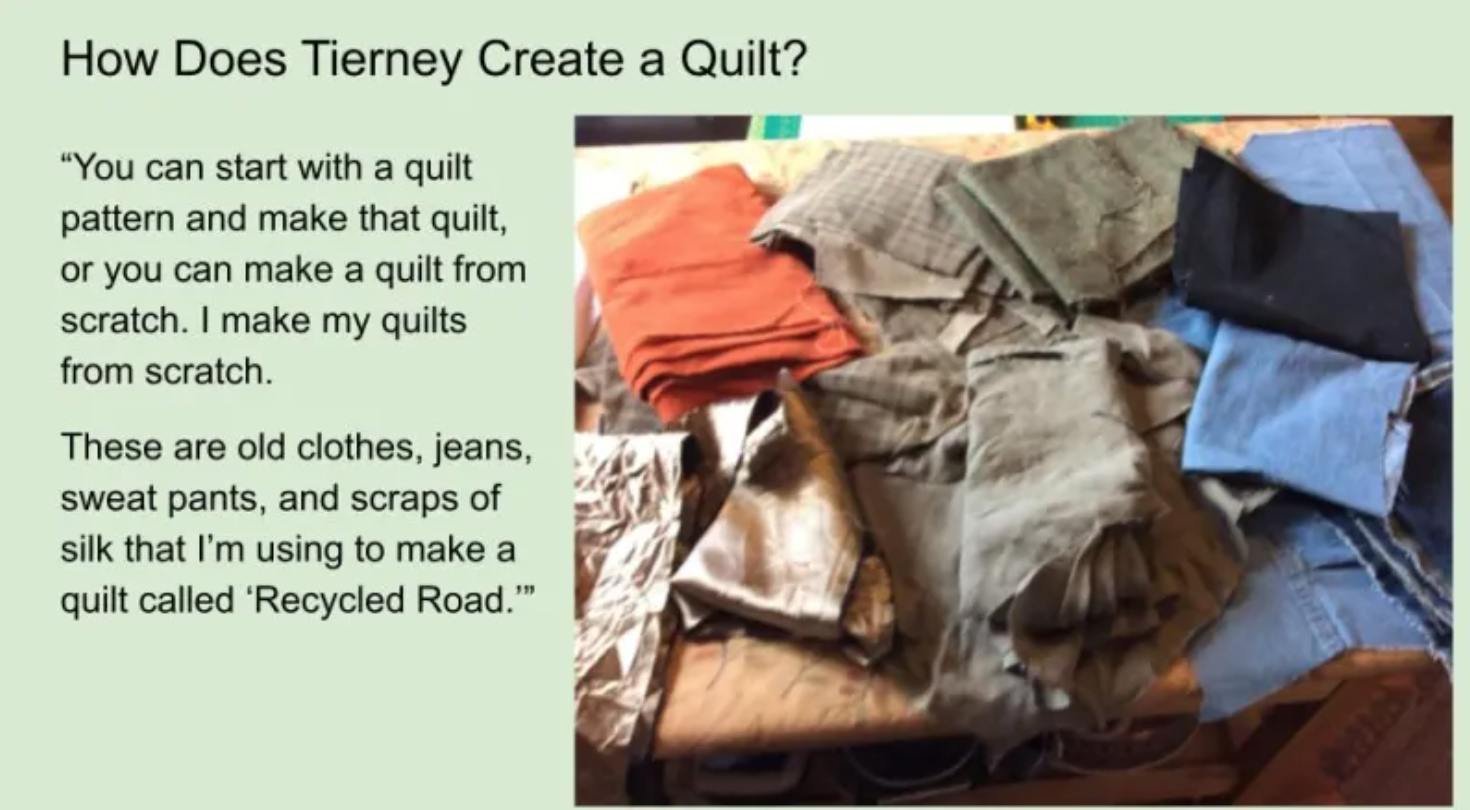
Over the past couple weeks I’ve been working to turn this pile of recycled denim jeans,
into this:
I borrowed from the public library the book by Blair Stocker: Wise Craft Quiltsover and over again, until I finally broke down and bought the book, all because of the quilt on the front cover:
That was several years ago and finally I decided to actually just make the quilt I’ve been love struck over.
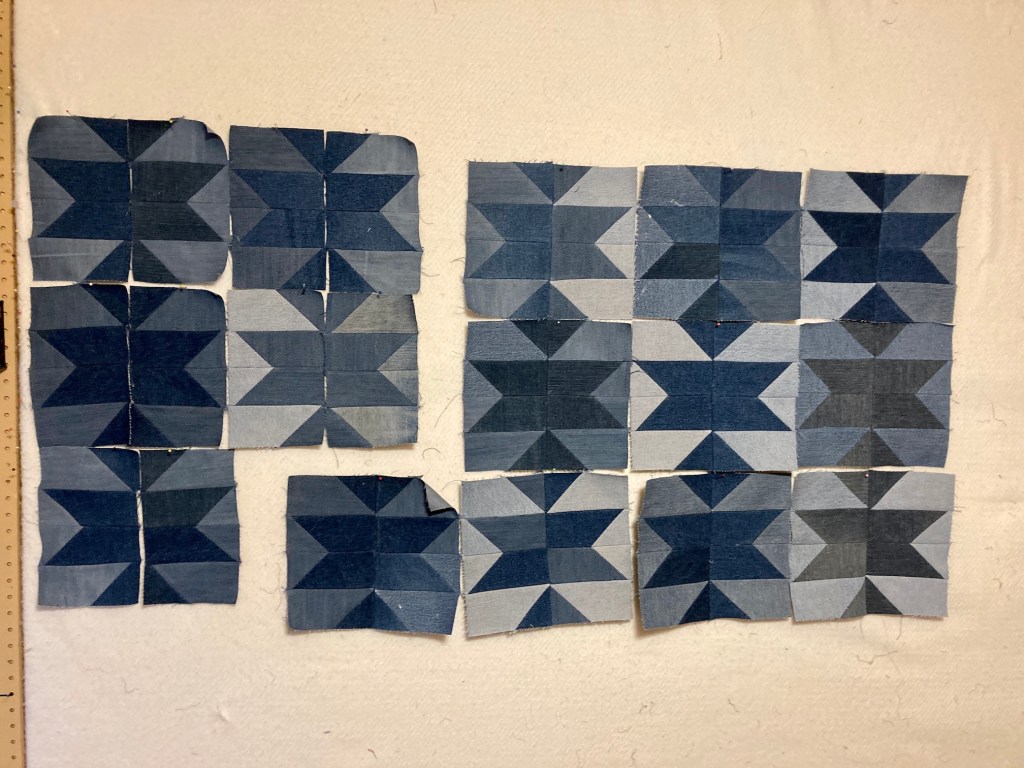
The quilt is comprised of 30 blocks (5 x 6) and when fully assembled will tentatively measure 50 inches x 54 inches (1.27 meters x 1.37 meters or 127 cm x 137 cm).
I am going to hand tie the quilt like the author did in her sample, I like the rustic look it gives to this recycled denim quilt.
Here is the first layout on my design wall when I got all the blocks completed:
But I had my partner John take a look at the layout and do some tweaking (since tentatively I am going to hang the completed quilt above our bed) and this is the final layout:
I’ll share an image of the completed quilt in a future post. I am so excited to finally be making this quilt!
Before I get into this post, which is a continuation of my ongoing series, The Library Stack (in which I share my stacks of borrowed books from my local public library), I would like to say thank you to the very talented Mariss @ Fabricationsfor also nominating me for an Outstanding Blogger Award. In the Postscript section of this post I will answer the questions she posed to her nominees.
It’s been a while (November 2020) since I shared my latest “Library Stack” and I thought I would just catch you up on several stacks over the past several months.
And here are the previous library stacks that I have not shared before:
As you can see there appears to be a limited number of general themes of the types books I borrow from the local library – home decor and crafting. These are my fabric subjects for a book browsing over a pot of tea!
You might have noticed that I have The Shopkeeper’s Home by Caroline Rowland in two different stacks – if I really enjoy a home decor or crafting book I just borrow it again and again!
I’ve been reading a lot (well “a lot” for me) of fiction books but those I am reading from my home library (see post Curating a Home Library) or library borrowed audiobooks; and I might share some reviews in a future post. You can follow me on Goodreads@tierneycreates if you’d like to see what I’ve been reading fiction wise and read my reviews.
For how long have you been writing a blog? Since October 2013 – over 7 years
What made you start? Originally it was a vehicle for my soon to be opened (and eventually opened) tierneycreates Etsy shop – I closed the shop after a couple years but kept the blog
Why do you continue to blog? I enjoyed sharing my experiences with others and reading their experiences on their blogs – I get inspired
Have you ever met any of your fellow bloggers face to face? If so, how did it feel? Yes I’ve met the lovely ladies from Gray Barn Designs when they attended a show opening of one of my pieces – see post Visioning Human Rights in the New Millennium, Part I
Do you write regularly? If so, why? I go in spurts – where I write regularly and then take a break, it all depends on my mood
If you’d like to see my other nomination and the questions answered (by my tierneycreates Beastie) check out the post Outstanding Blogger Award (and snow).
Tierney here, writing to you from the “Snowpocalypse” in Colorado, buried under quite a bit of snow.
“It so bad their (snow) plows are getting stuck or tipping on to their side…”
Any of my blogging friends live in Florida or anywhere warm? May I move in with you?
I’ve spent the weekend inside working on a new quilt, which I will share in a future post. For this post I wanted to thanks Helen @crawcraftsbeasties for nominating me for the Outstanding Blogger Award, get the questions answered that come with the nomination, and throw a couple nominations out there myself.
Helen the maker of Beasties, like my tierneycreates Beastie, had her Beasties Paddy and Plunkett answer the questions for her Outstanding Blogger Award nomination and so I thought I would let my tierneycreates Beastie answer the questions for me.
Outstanding (Beastie) Blogger Award
Hello, my name is tierneycreates Beastie and I am a Monster, but the good kind of Monster. I was made by Helen of CrawCrafts Beasties in Dublin, Ireland. You can read my story at I’m A Monster!!!. You can also check out the other posts I’ve had to guest blog on (i.e. when the human Tierney falls off the blogging-wagon and I have to help) in the series of posts: Beastie Adventures.
Right now I am holed up in the house with Tierney during our “Snowpocalypse” in Colorado. I did go outside today to look around and here is what I saw:
Snow, snow and more snow. I had Tierney take a photo of me on the front porch as I nearly froze to death (I kept my dog Mikelet inside as it was way too cold for him):
I think it is appropriate for Tierney to let me handle the questions for the Outstanding (Beastie) Blogger Award nomination since I am sure it is my guest blogger posts on her blog that got her this nomination. Thanks to my maker, Helen @crawcraftsbeasties for recognizing my excellence as a Beastie blogger!
My answers to the questions Helen posed:
Coffee or tea? (Or no hot beverages at all?) TEA OF COURSE, ALWAYS TEA.
Where in the world would you most like to visit, and why? TIERNEY WANTS TO GO TO NEW ZEALAND, BUT I WANT TO GO TO IRELAND AND SEE WHERE I WAS BORN/MADE AGAIN
What is the most delicious meal you’ve ever eaten, and where did you have it? THE PLATE OF SPAGHETTI AND MEATBALLS MADE BY MY FIANCE JOHN BEASTIE (see post Guest Blog Post: Mail Order Groom).
What have you made that you’re most proud of, and why? I AM STILL LEARNING TO SEW ON MY NEW “BEASTNINA” THAT HELEN MADE ME, BUT I THINK TIERNEY IS PRETTY PROUD OF THE QUILT SHE DISCUSSES IN THIS POST – The Lesson and The Equation.
What’s your plan for today? STAY WARM AND NOT GO OUTSIDE AGAIN UNTIL THE SNOW MELTS!
Speaking of staying warm, when Tierney helped me back inside after I nearly froze to death in the blizzard. However when she helped me back to my new home on the storage unit in her studio (more in a future post), she neglected to remove the snow from my shoes!
Luckily I caught her as she was leaving the studio so she could help me remove the snow and I would not get frostbite!
Nominations & Questions
As part of being nominated for the Outstanding Blogger Award, Tierney and I need to nominate some other bloggers for this award and pose some questions to them. Helen @crawcraftsbeasties in her post Outstanding Blogger Award, already nominated a bunch of our mutual blogging buddies such as: Handmade Habit, Tammie Painter, Fabrications,and Quiet Water Craft (and I see that Mariss @Fabrications also nominated some additional mutual blogging buddies), so here are our nominations trying not to overlap:
If you choose to participate, here are a couple of questions for you to answer:
What has blogging added to your life?
Share the link for one of your favorite blog posts that you have written.
If you were stuck in the house for the entire weekend due to a snowstorm, what would you do with your time?
What household chore do you most enjoy, and what do you least enjoy?
What did you learn from surviving 2020?
We’ll close this post with a picture of Mike (big Mike as opposed to Mikelet, the Beastie dog which is a “miniature” Miniature Schnauzer) who actually went out in the Snowpocalypse today and played ball in the backyard, running around in the trench/”racetrack” that human John created for him.
Here he is in a quilt, trying to get warm after being outside.
I was not going to give up, zipper foot issues be darned, I re-attempted making the Devon Pouch by s.o.t.a.k. handmade last night, and made a second one this morning.
This time I kept my dastardly zipper foot tucked away and just used my normal sewing foot.
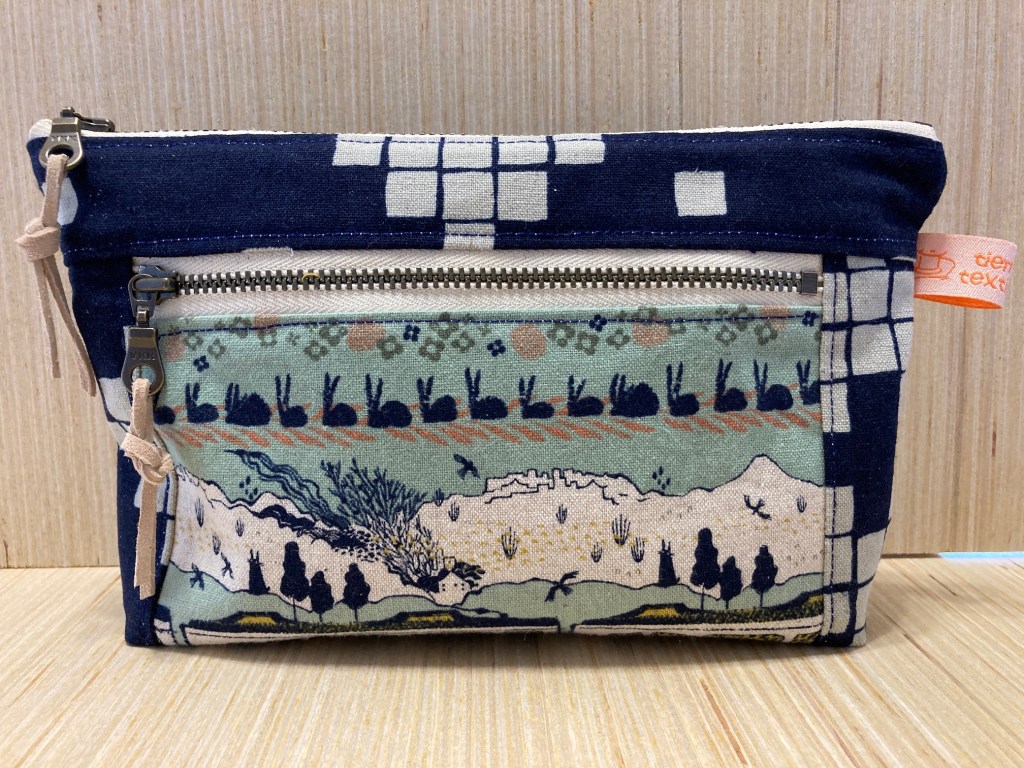
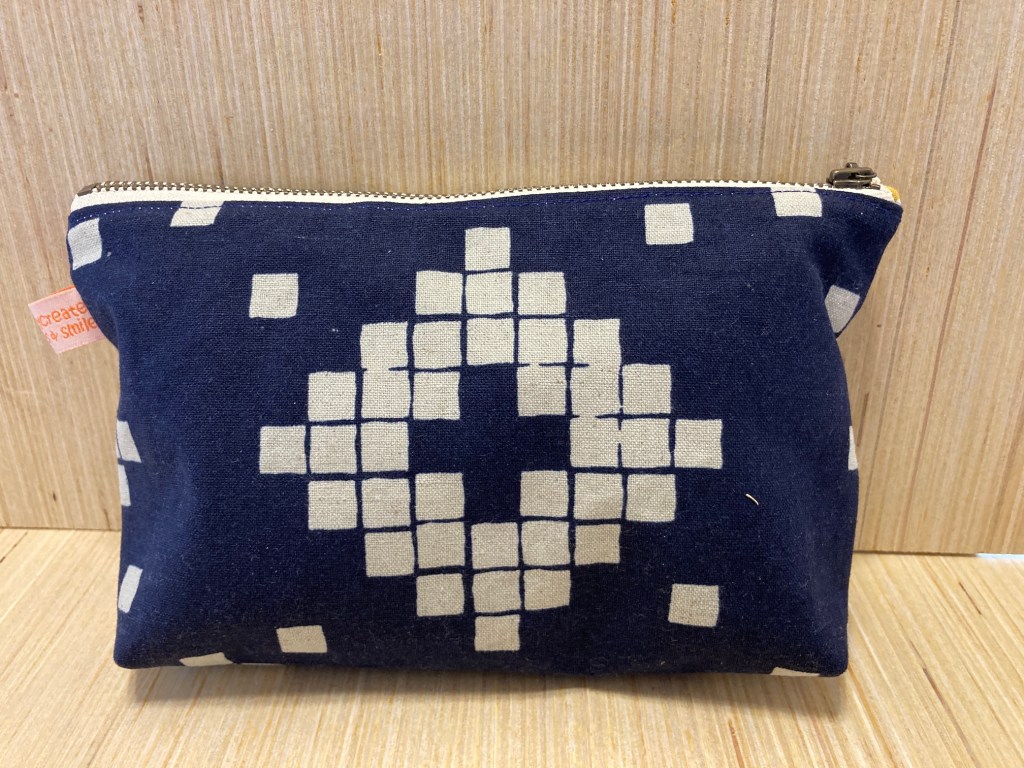
Here is the first pouch redone with different center fabric:
I was so pleased with it, compared to my first attempt, I gave it its own section in my studio!
Sort of an homage to trying again and not giving up (smile).
This morning I decided to make the second one as my friend Dana had sent me enough supplies to make two:
In the third image above you will see there are trains at the bottom of the pouch. I plan to take this pouch with me when I do one of my “Bucket List” items in the future and take the transcontinental train across Canada (someday when they allow us Americans with cooties back into Canada…).
I am so happy with my two pouches! They are not perfect of course but they are MUCH better than my first attempt!
Oh and thanks to everyone who provided kind comments on the post of my first attempt as well as resources for learning how to use a zipper foot.
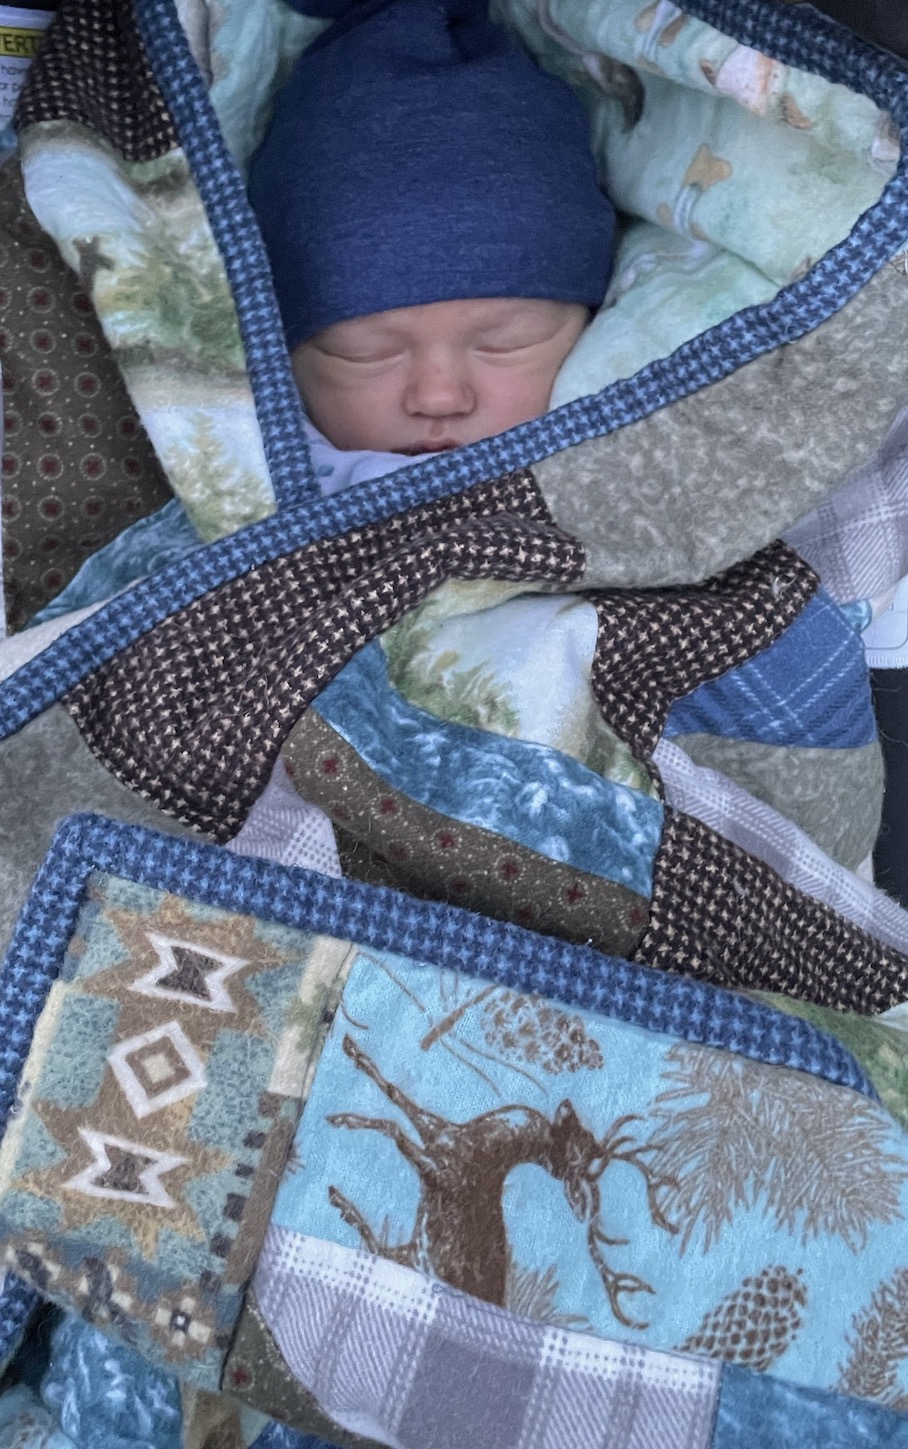
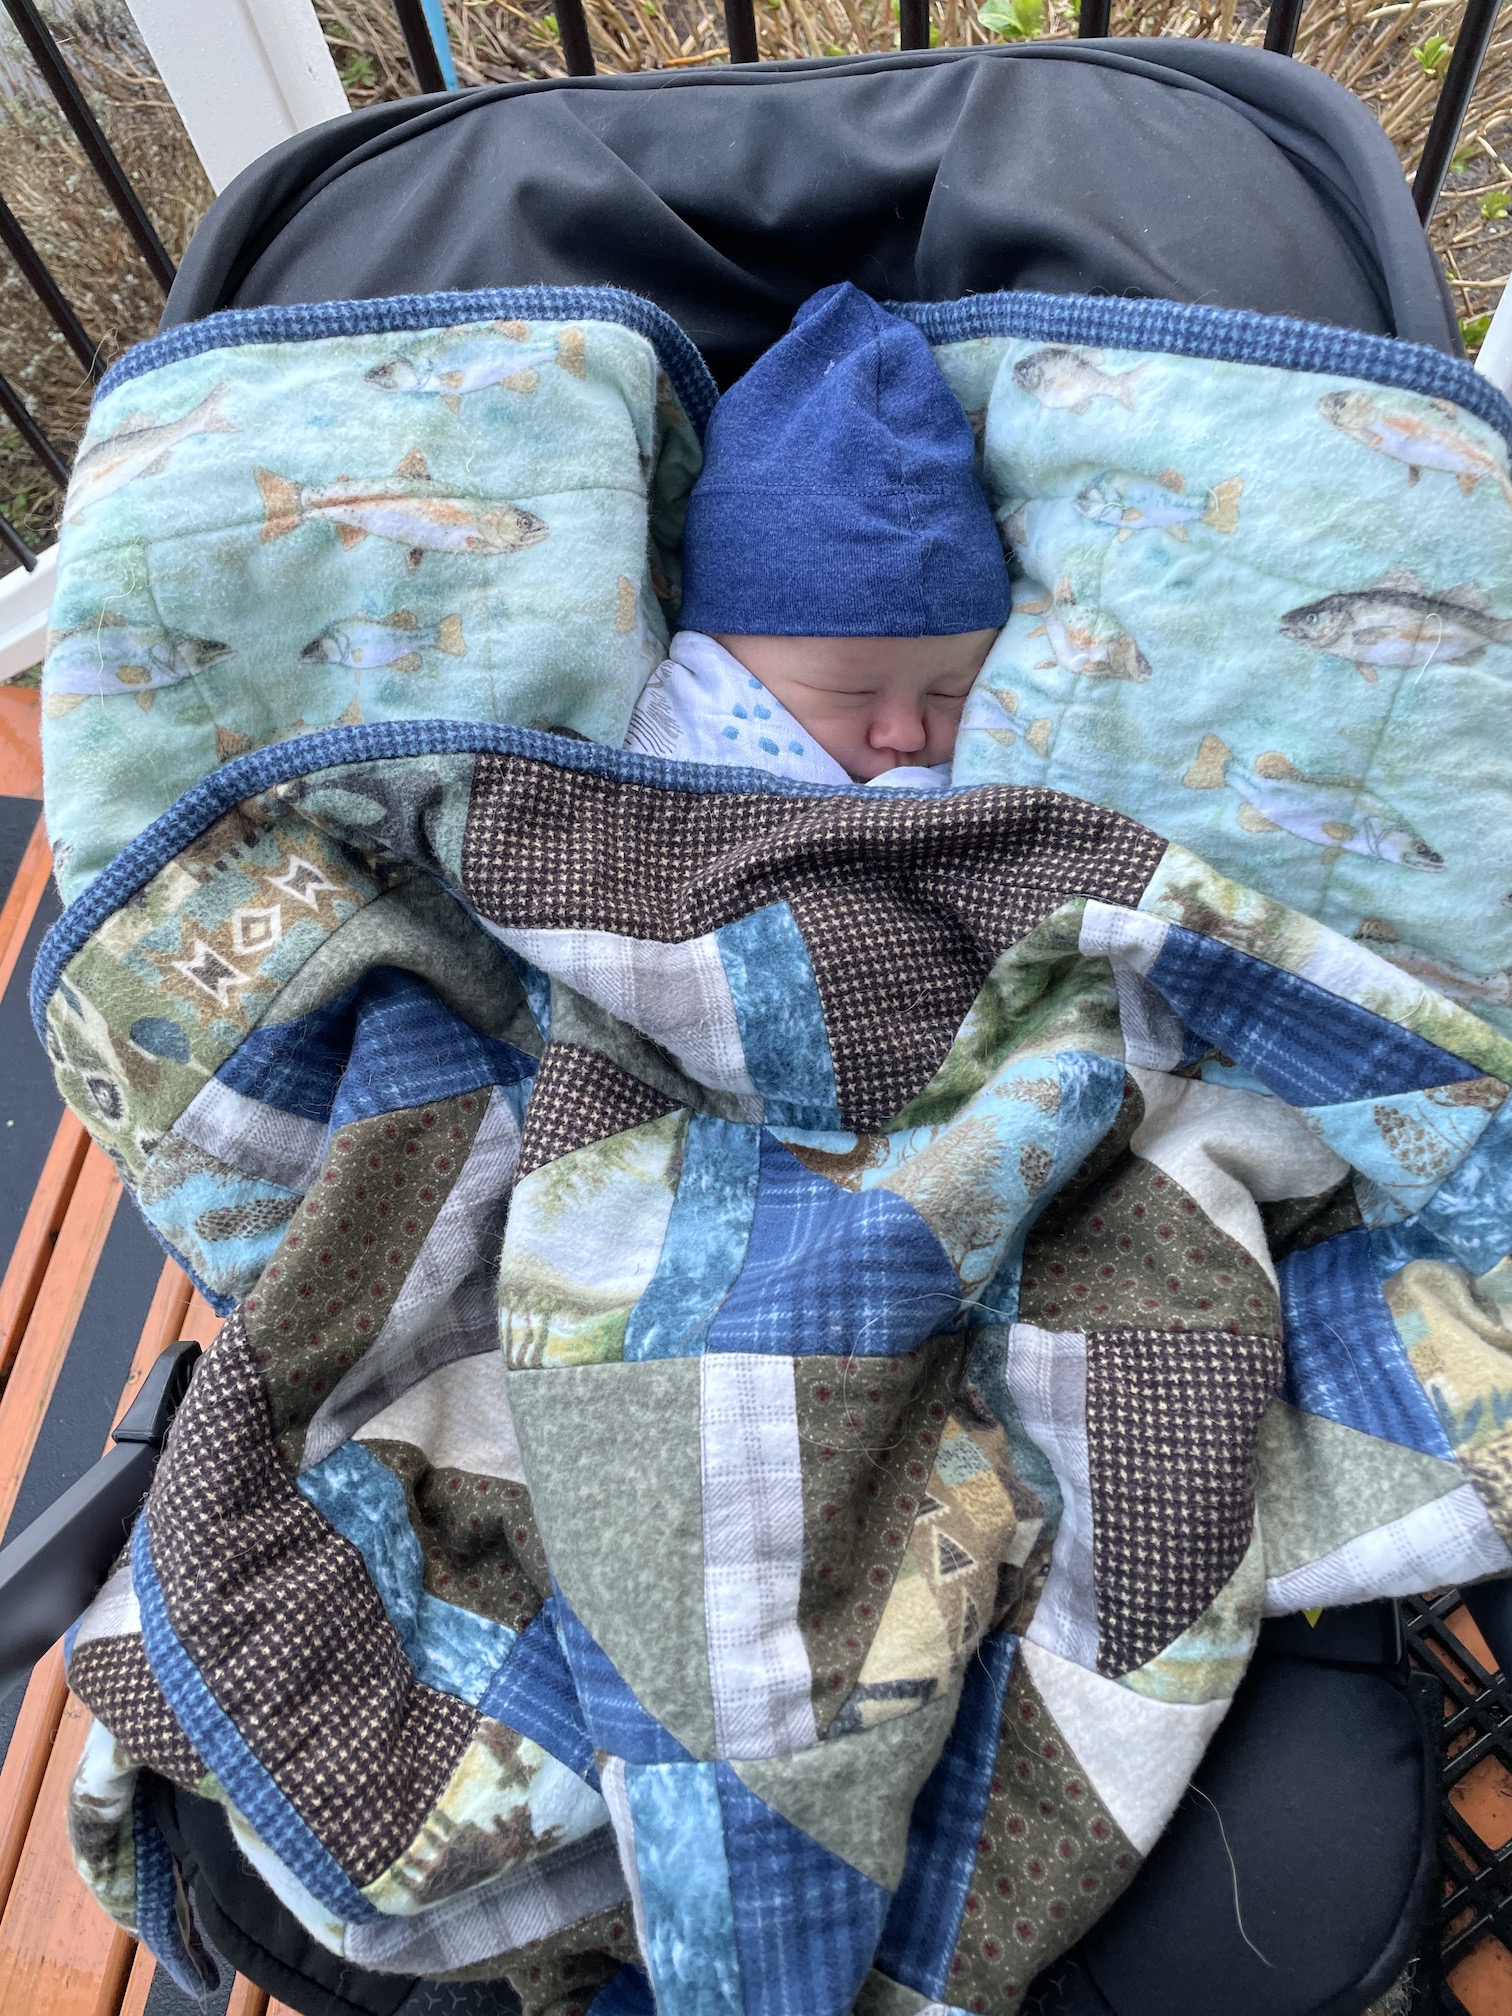
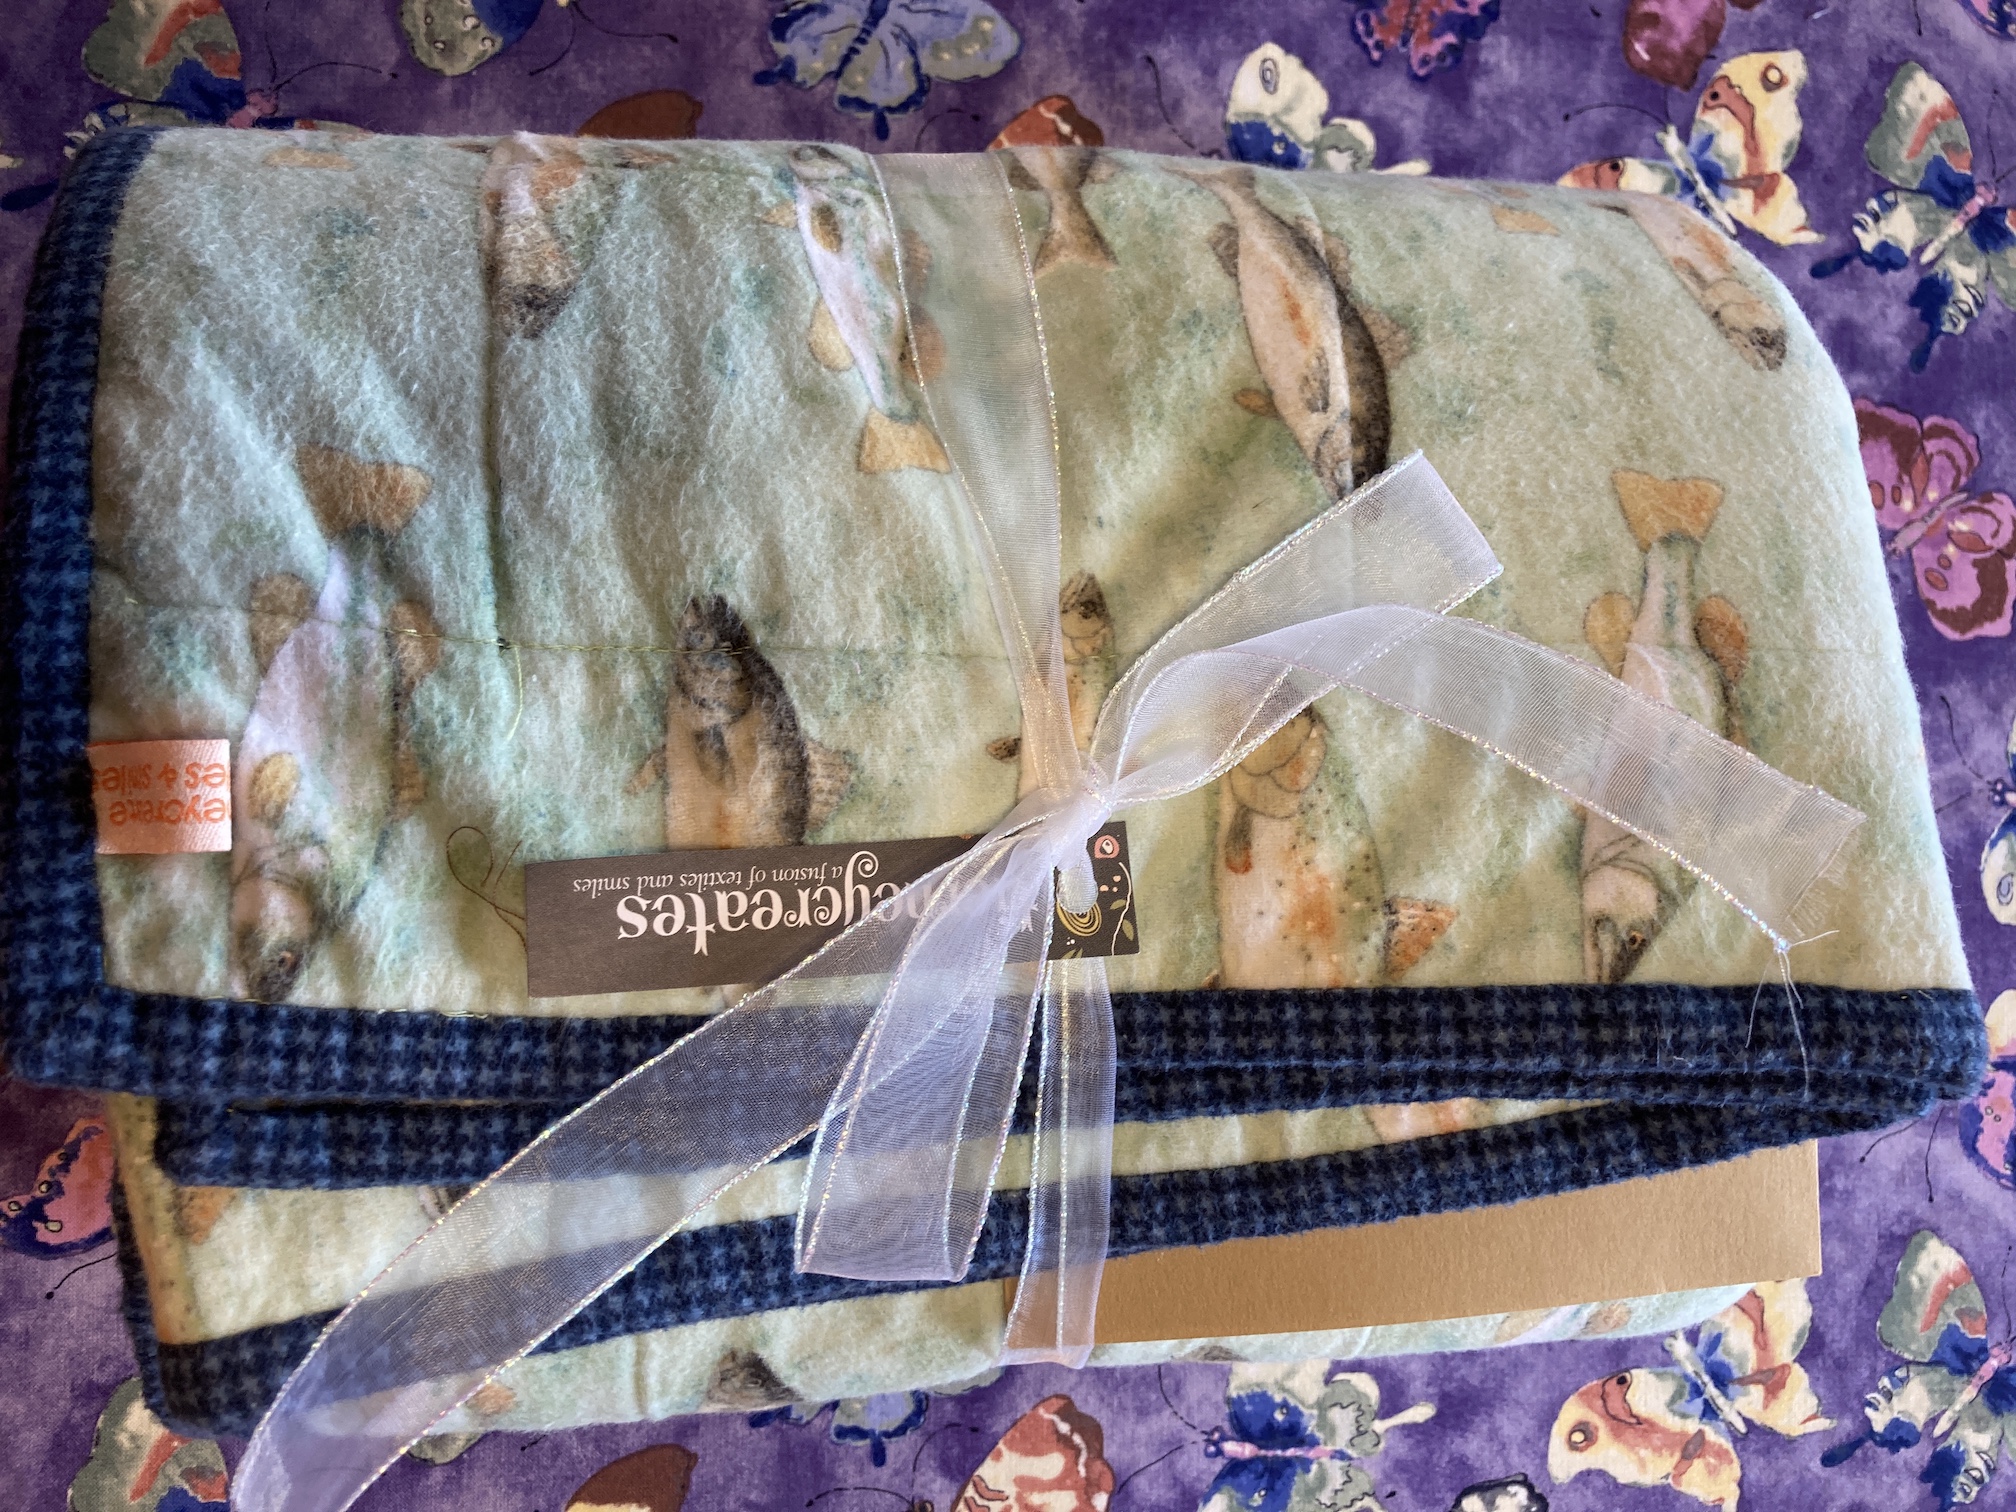
My friends Cody and Cici are expecting their first baby. They are two adventurers and world travelers, and many of their adventures involve traveling around the U.S. in their awesome Sprinter van which they customized for travel.
For their wedding gift in 2019 I gave them one of my late husband Terry’s flannel fishing and outdoor adventure themed quilts (see post A Quilt for the Road…) to keep them warm while adventuring in their van.
So I figured their baby is going to need their own flannel blanket for adventures!
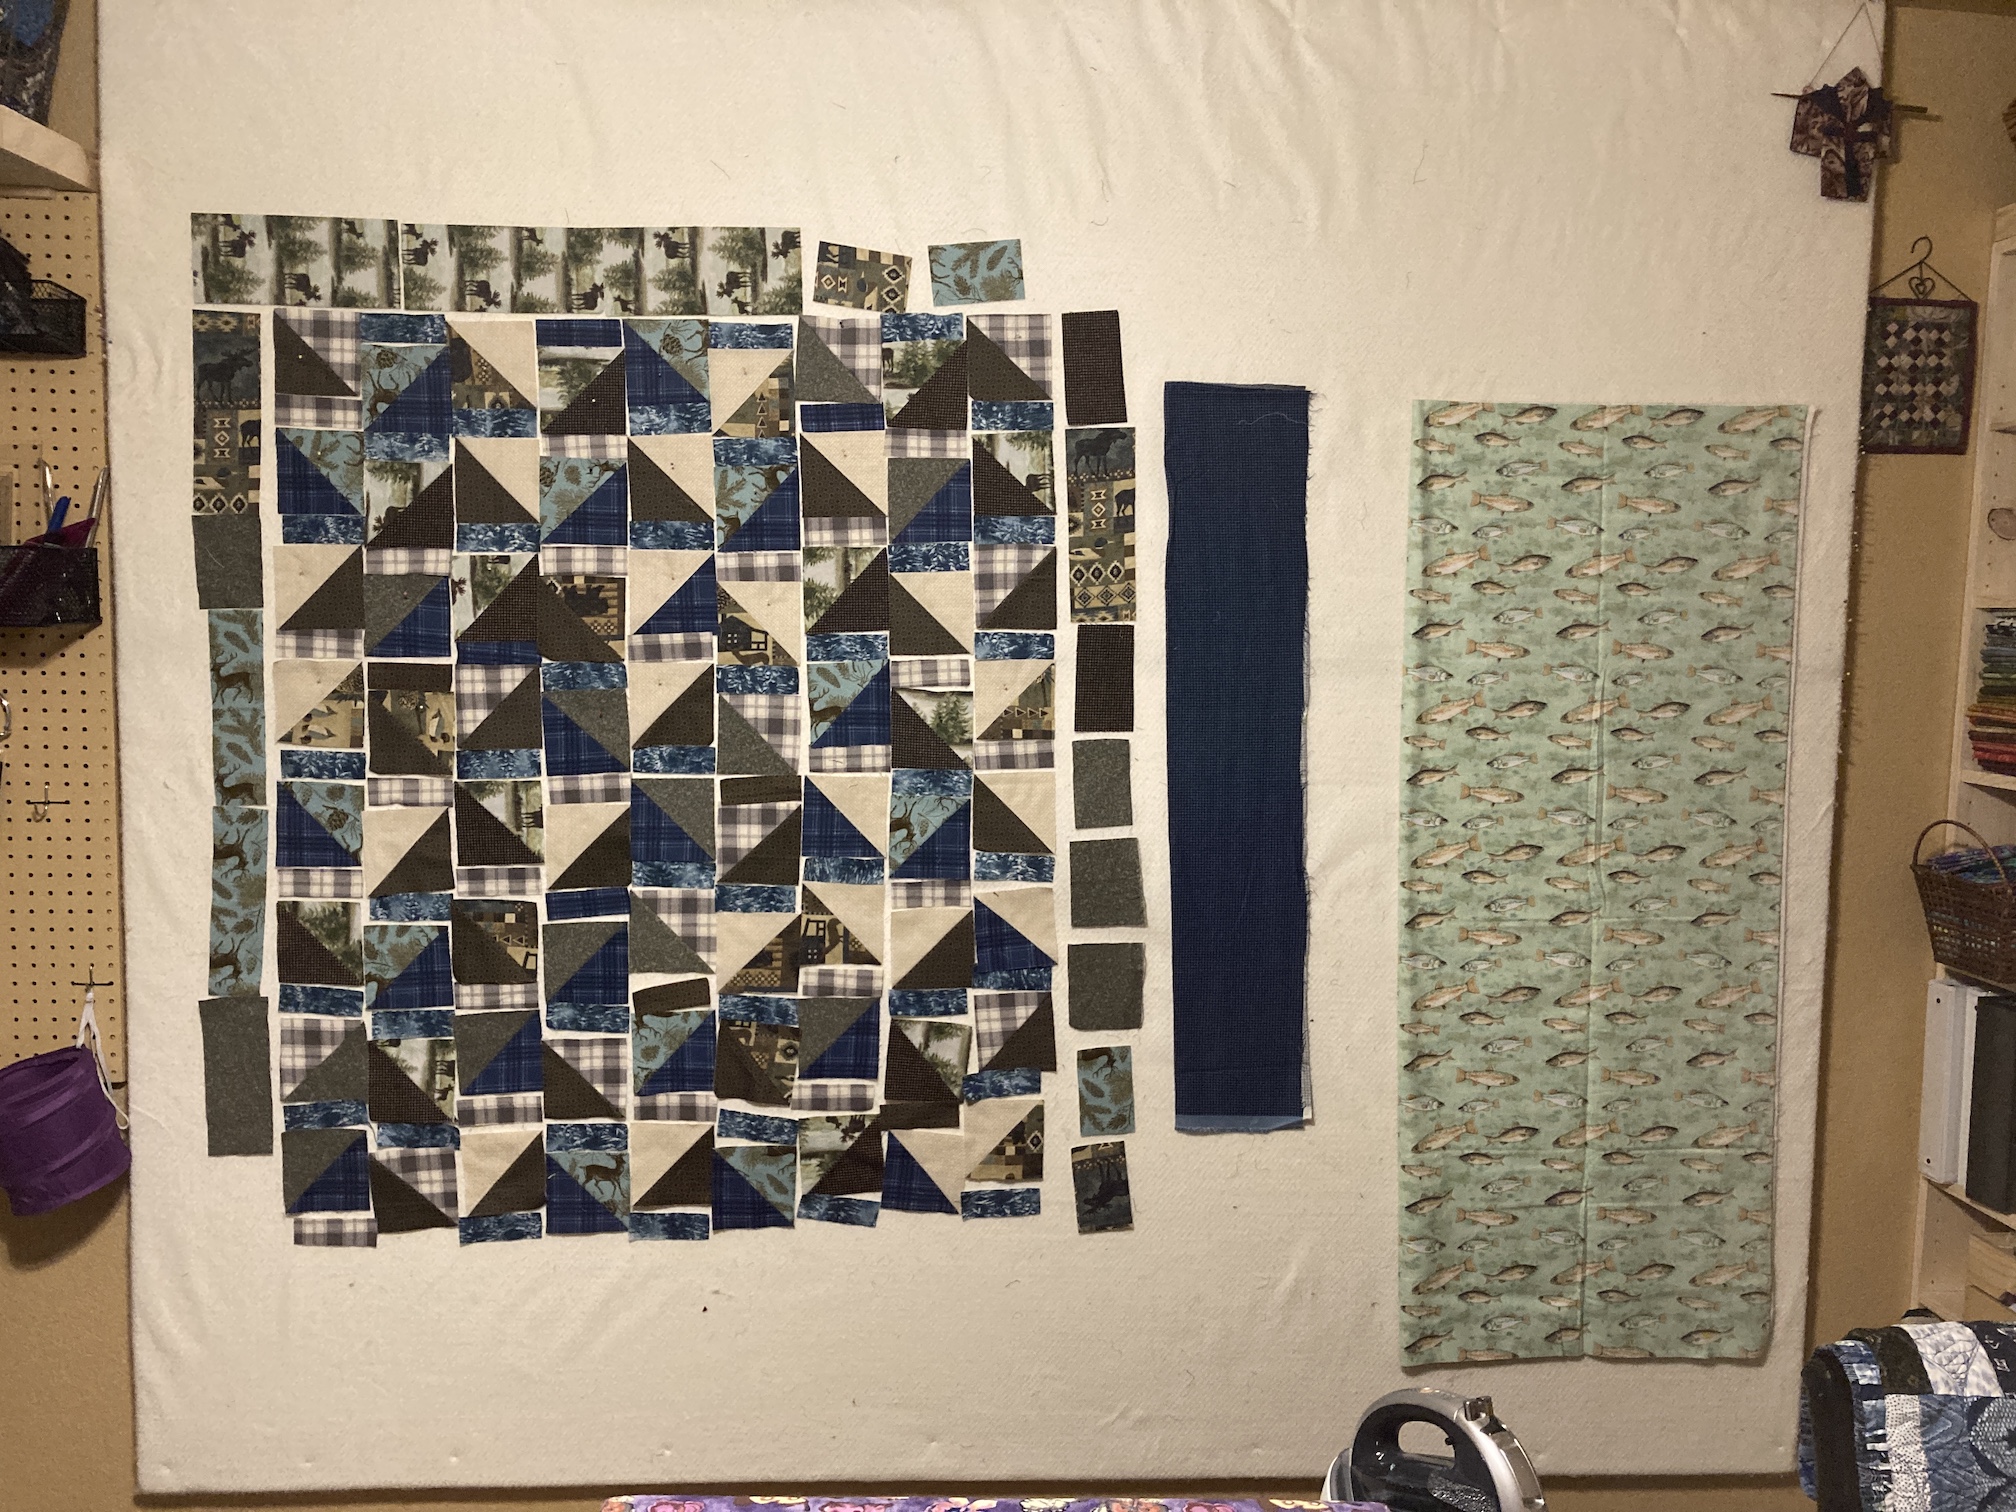
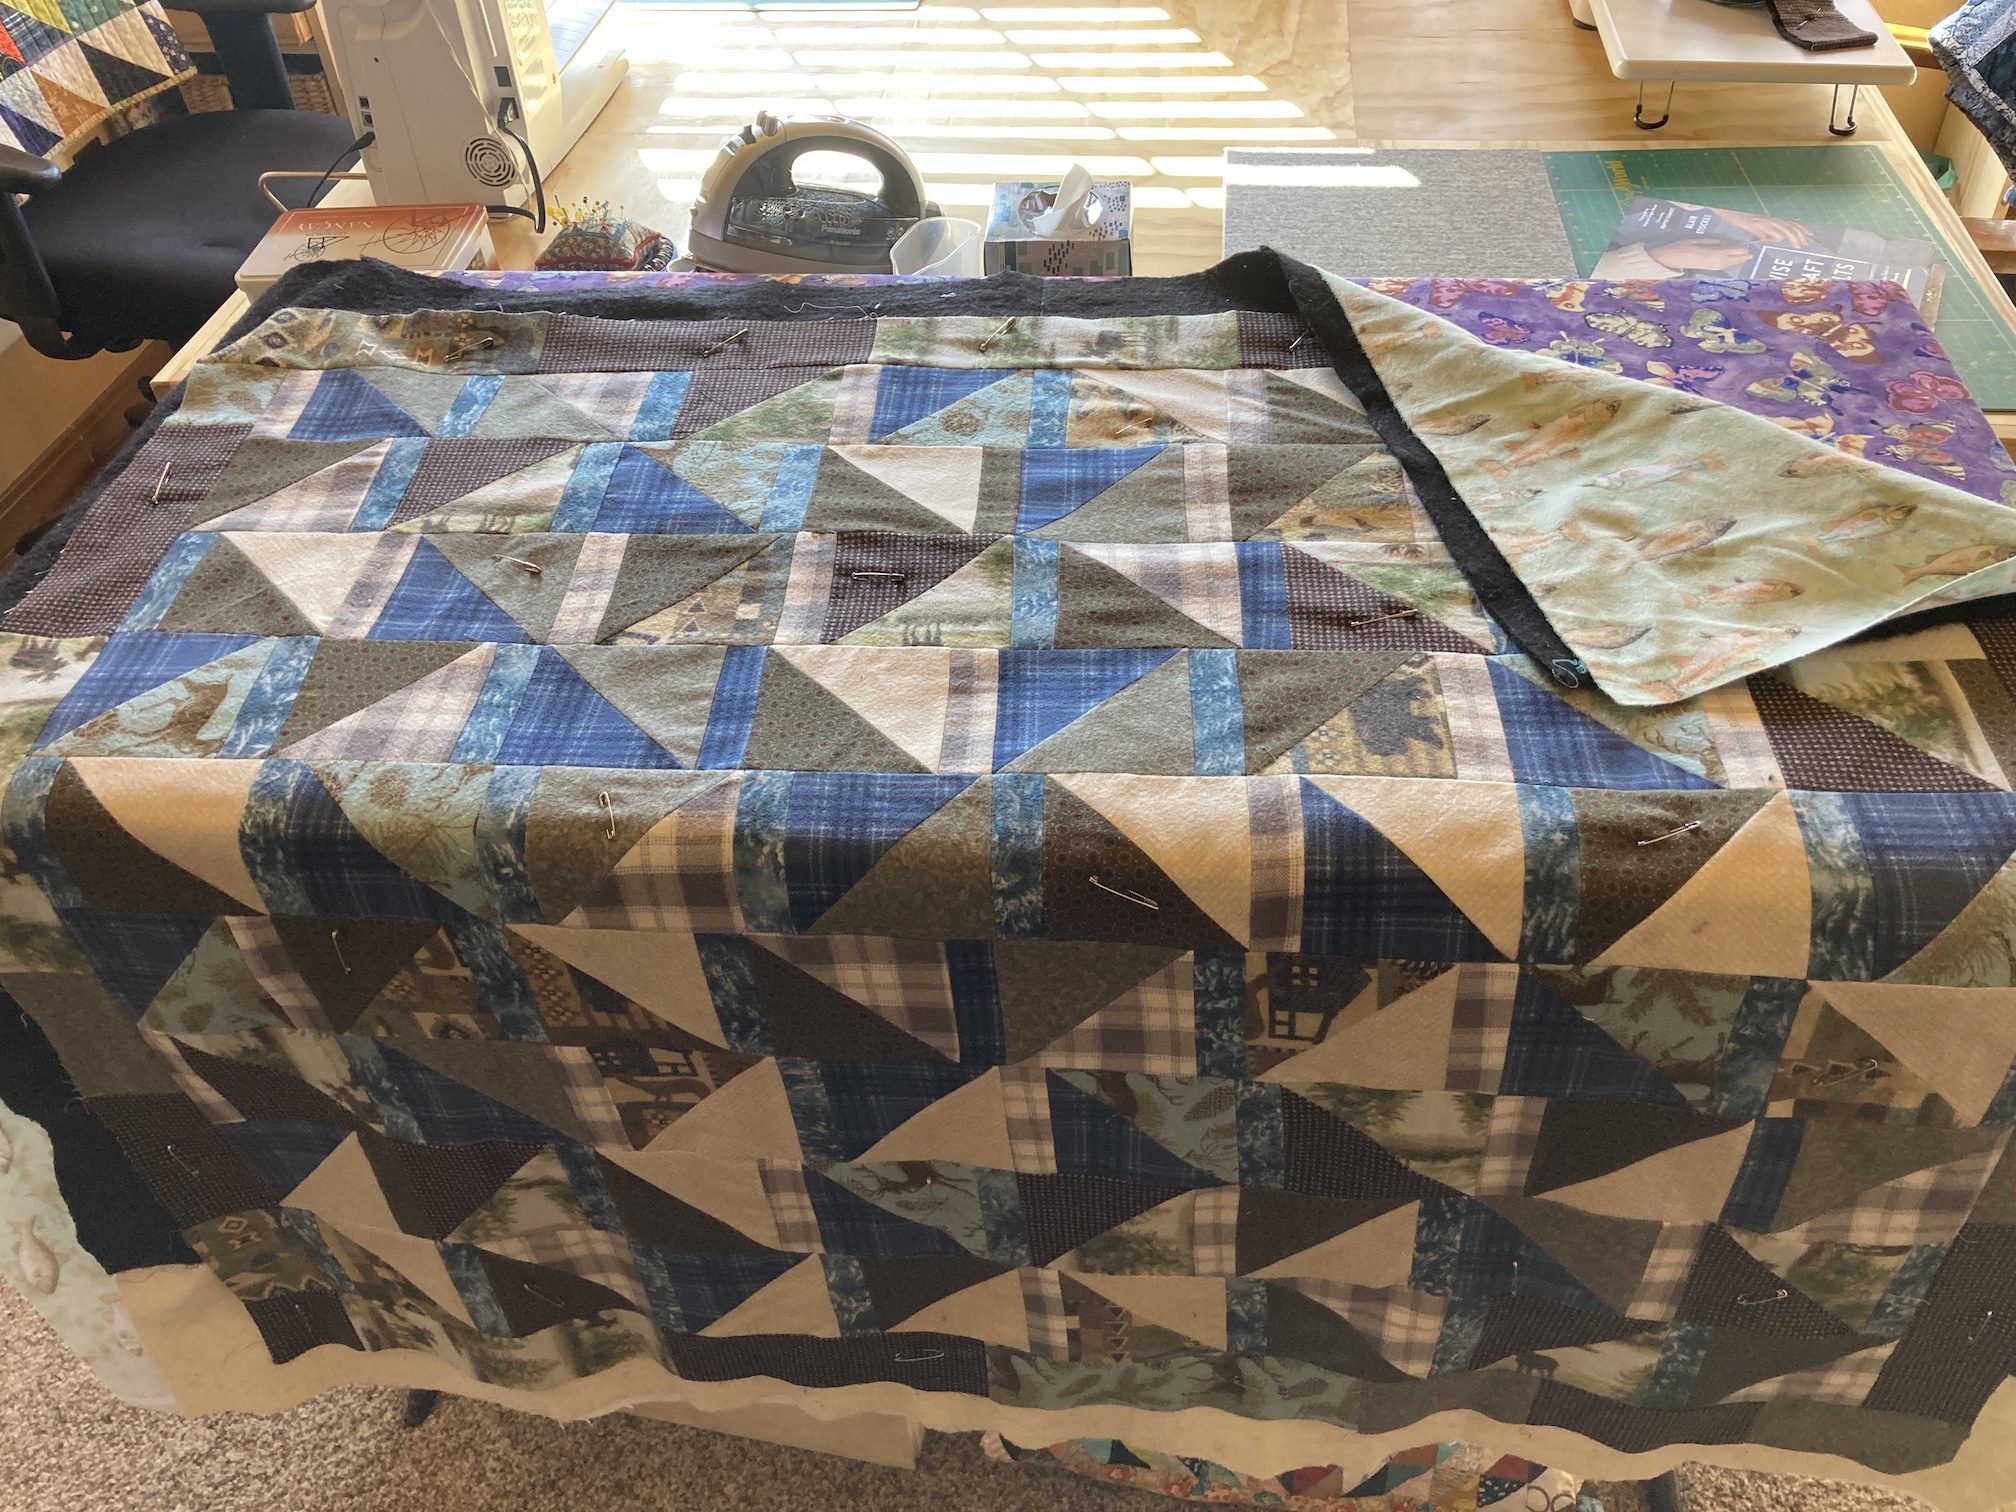
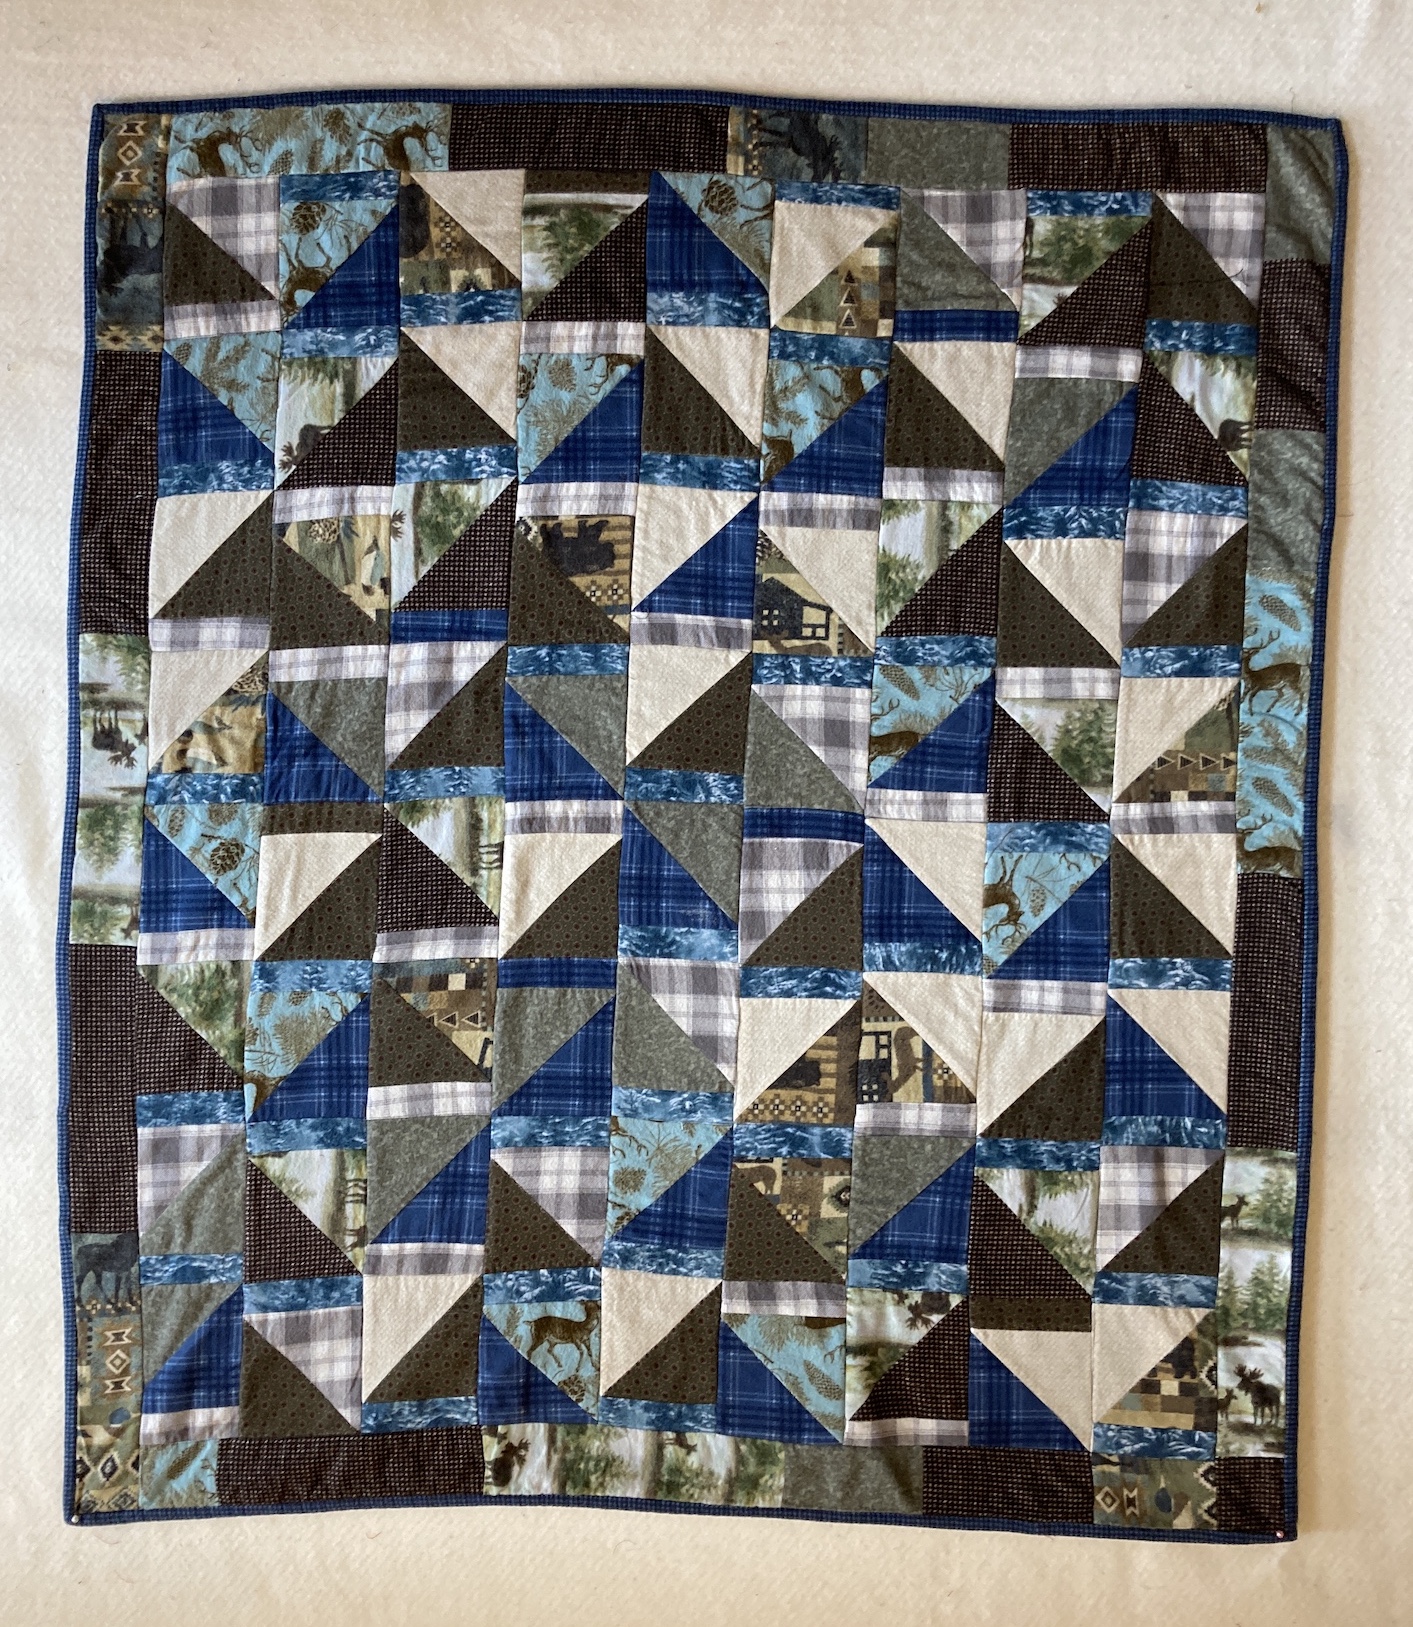
Cody and Cici live in the Pacific Northwest and I made a Pacific NW themed outdoor adventure baby quilt from flannel scraps and fat quarters I had in my stash:
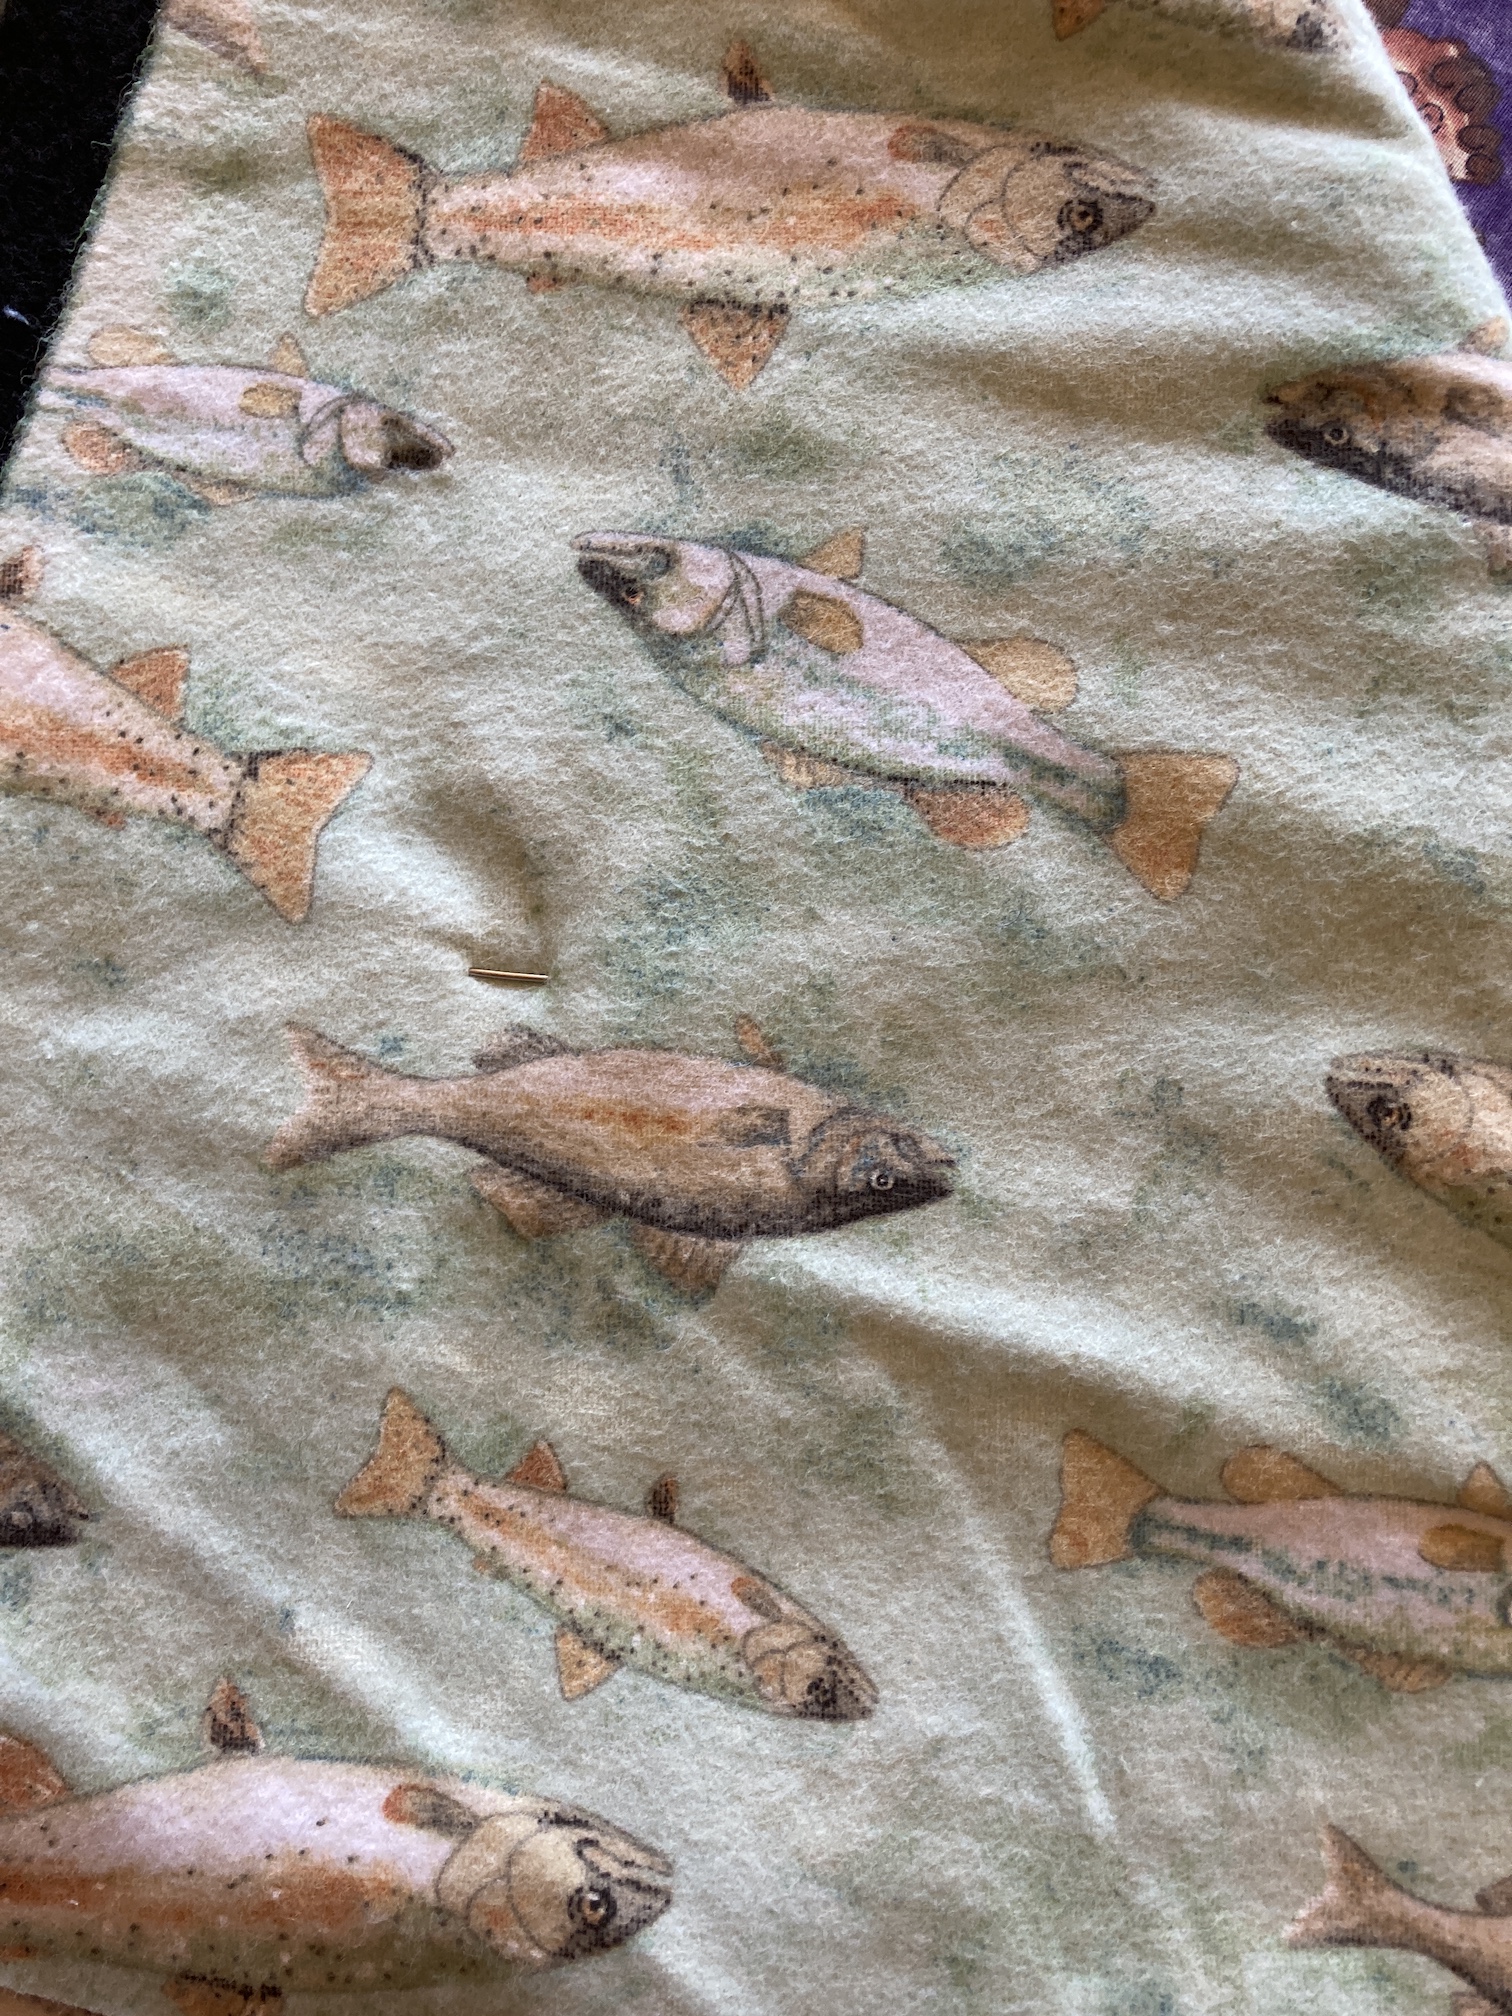
I put flannel fish themed fabric on the back as the new baby’s father is an avid flyfisherman.
Here it is all packaged up and ready to be sent off (they have since received it):
In case you are curious I used one of the patterns from the booklet – Three Times the Charm!-7 Quilt Patterns by Me and My Sister Designs Using Precut Charm Packs (2011).
Amazon.com
My friend Judy (who got me into quilting) introduced this book to me years ago at a quilt retreat. It is a great book for quick small quilts made out of charm (5″) square packs, like baby quilts! I modified one of the patterns to make it work for how I wanted to design this quilt.
I pre-washed the quilt after I quilted it. I usually do that for baby quilts so the parents know the quilt is easily machine washable and should not be treated like some “precious thing”. It is not an heirloom – it is a utility quilt meant to be (hopefully) heavily used.
I am hoping the quilt I made them will get lots of use, go on many adventures, and get many washings in the future!
Postscript
A humorous blurb on Mike the Miniature Schnauzer (though it was not immediately humorous at the moment it happened):
Last weekend we had Starbucks for breakfast one morning (my partner John went and picked it up for us). Starbucks gave John the wrong hot beverage for me (a Chai Tea instead of a Green Tea Latte) and he went back to our local Starbucks to exchange it.
While he was doing that I left half my breakfast sandwich on the coffee table to check on something. When I returned my sandwich was missing and a very guilty looking miniature schnauzer was staring at me.
When I exclaimed: “Mike did you eat my sandwich!??!” He immediately put himself in a “time out” in the corner of the room! I laughed so hard I could not be mad and any longer, grabbed my phone and took this photo below.
He stayed in the “time out” for a couple minutes until I summoned him out for a cuddle (his cuteness led to instant forgiveness for stealing 1/2 my sandwich!).
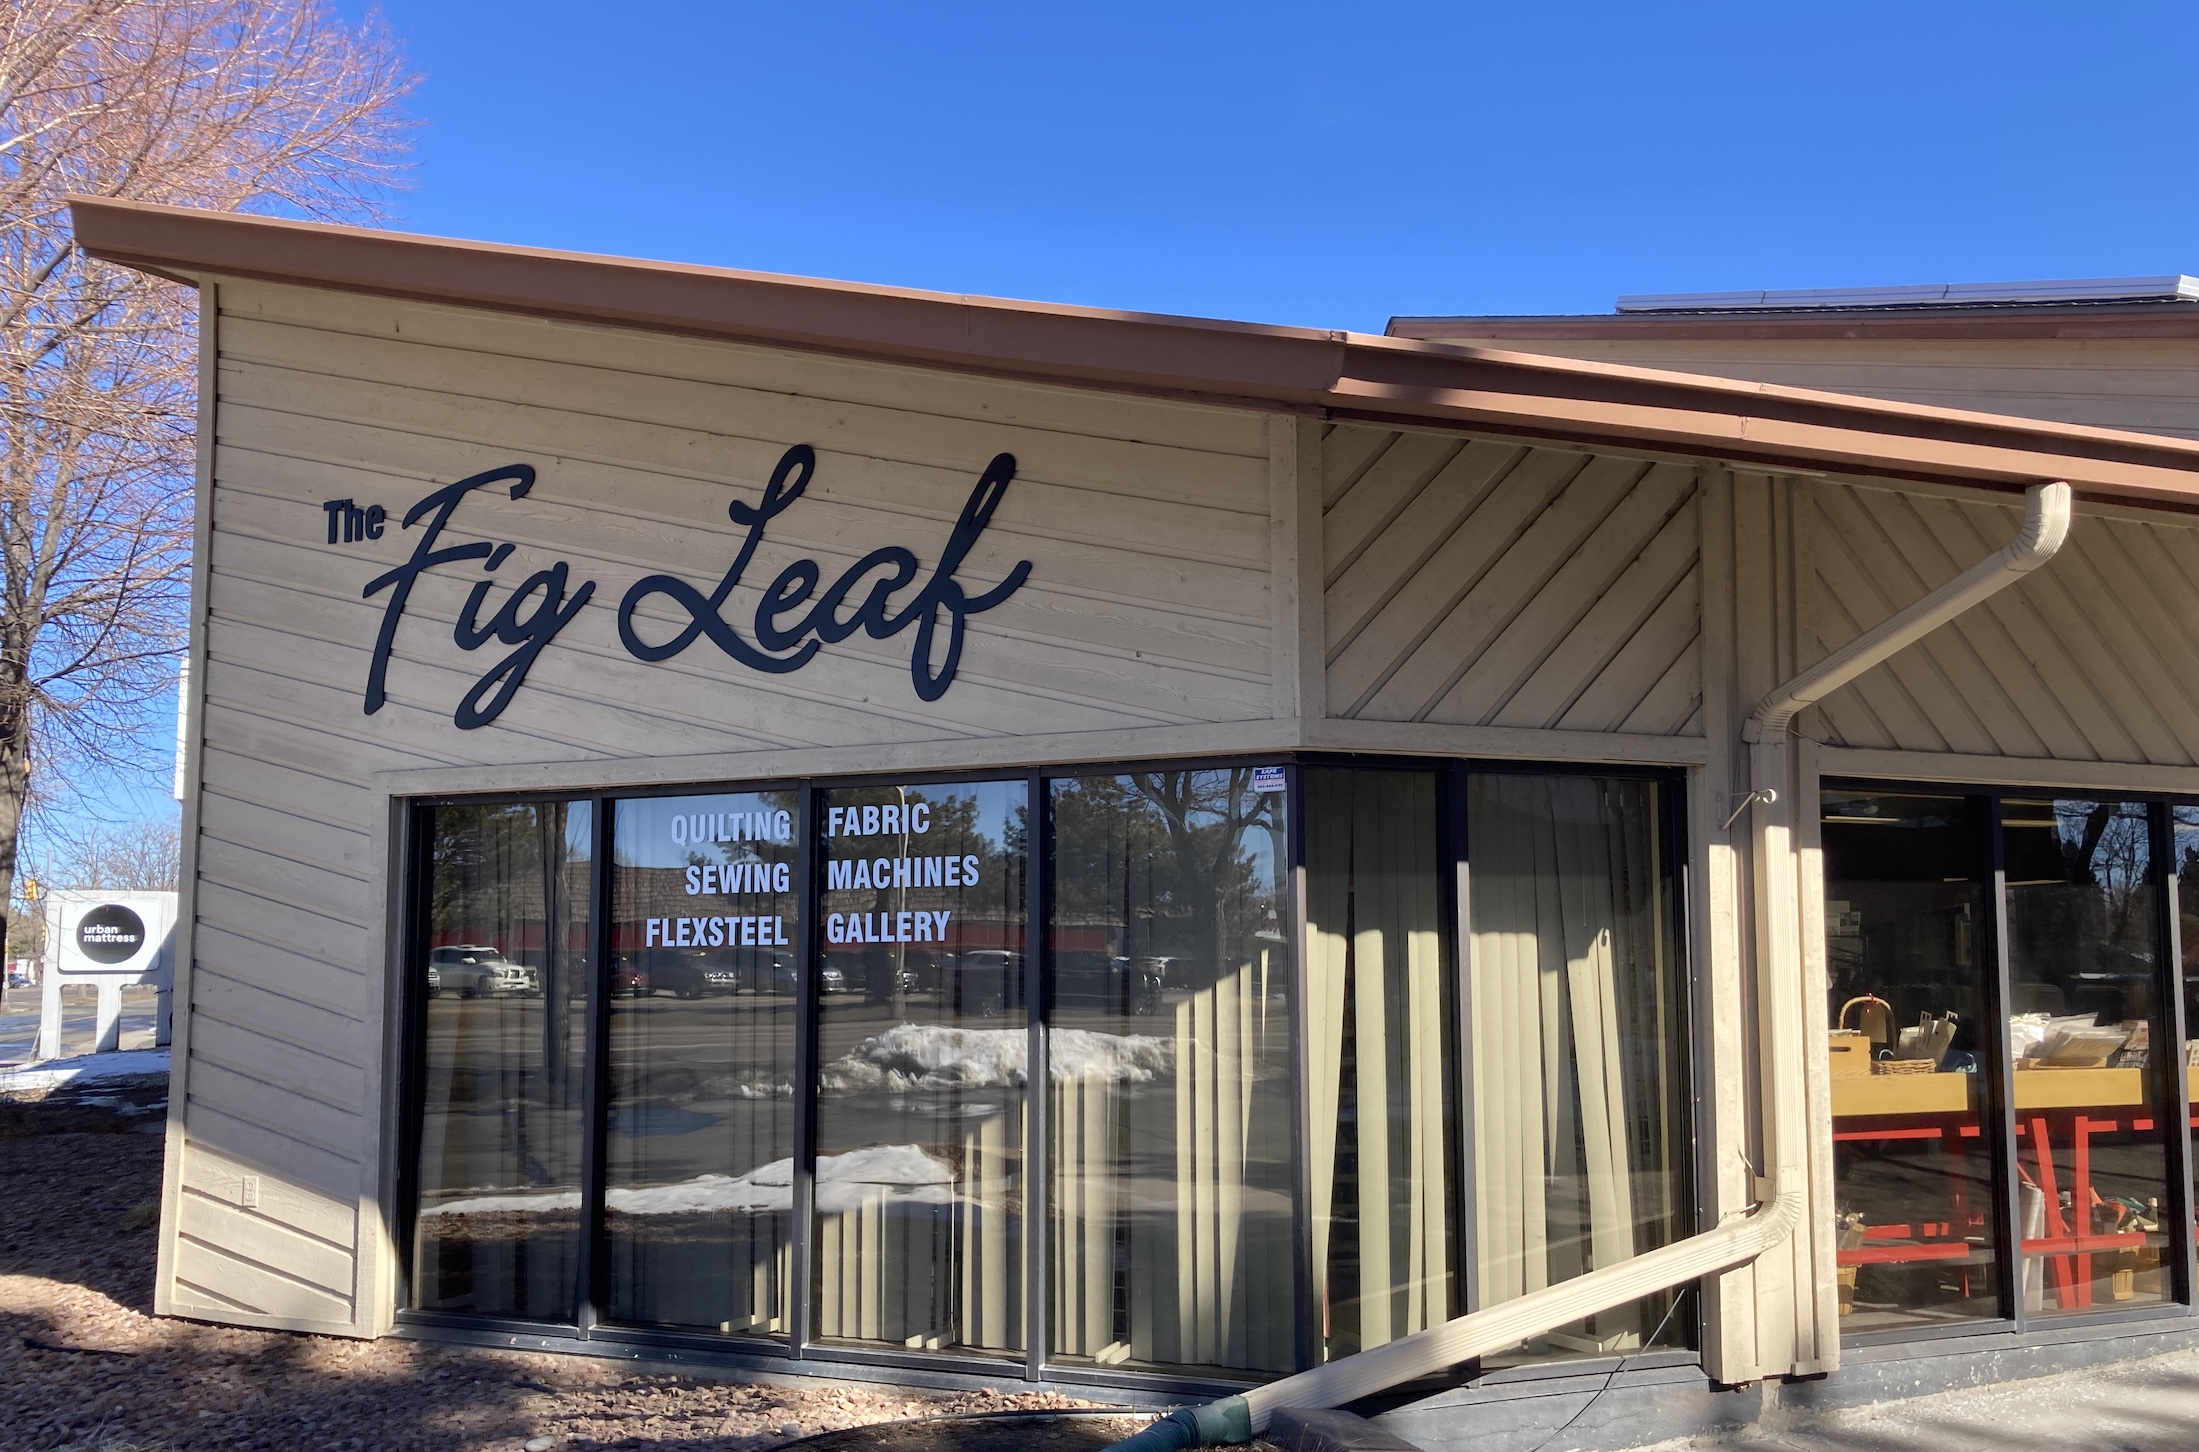
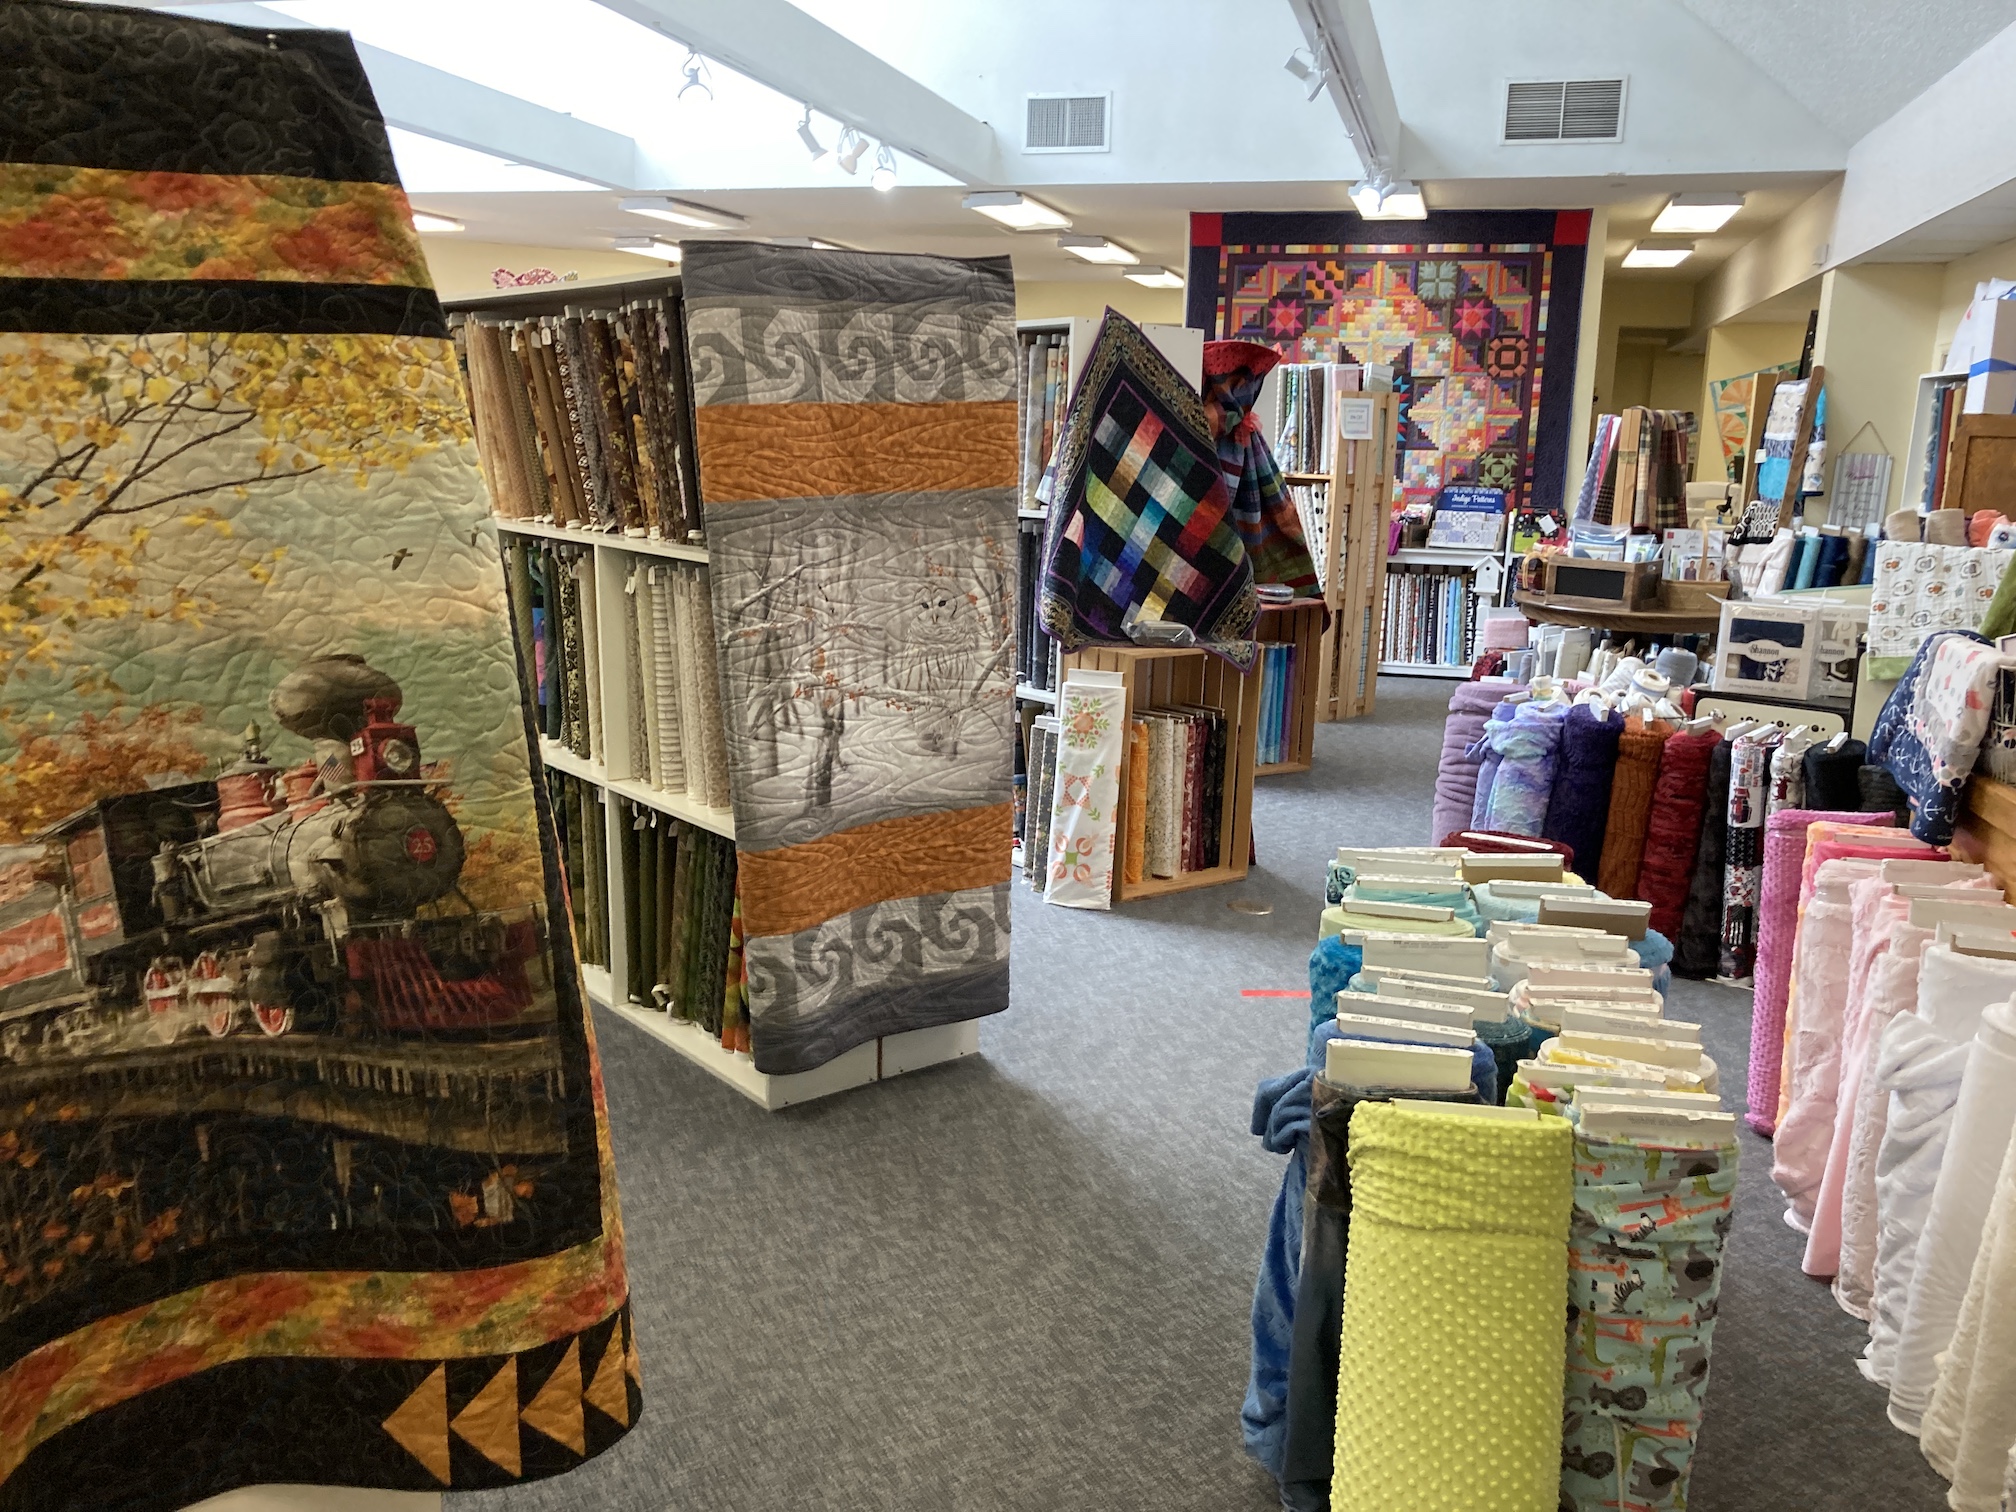
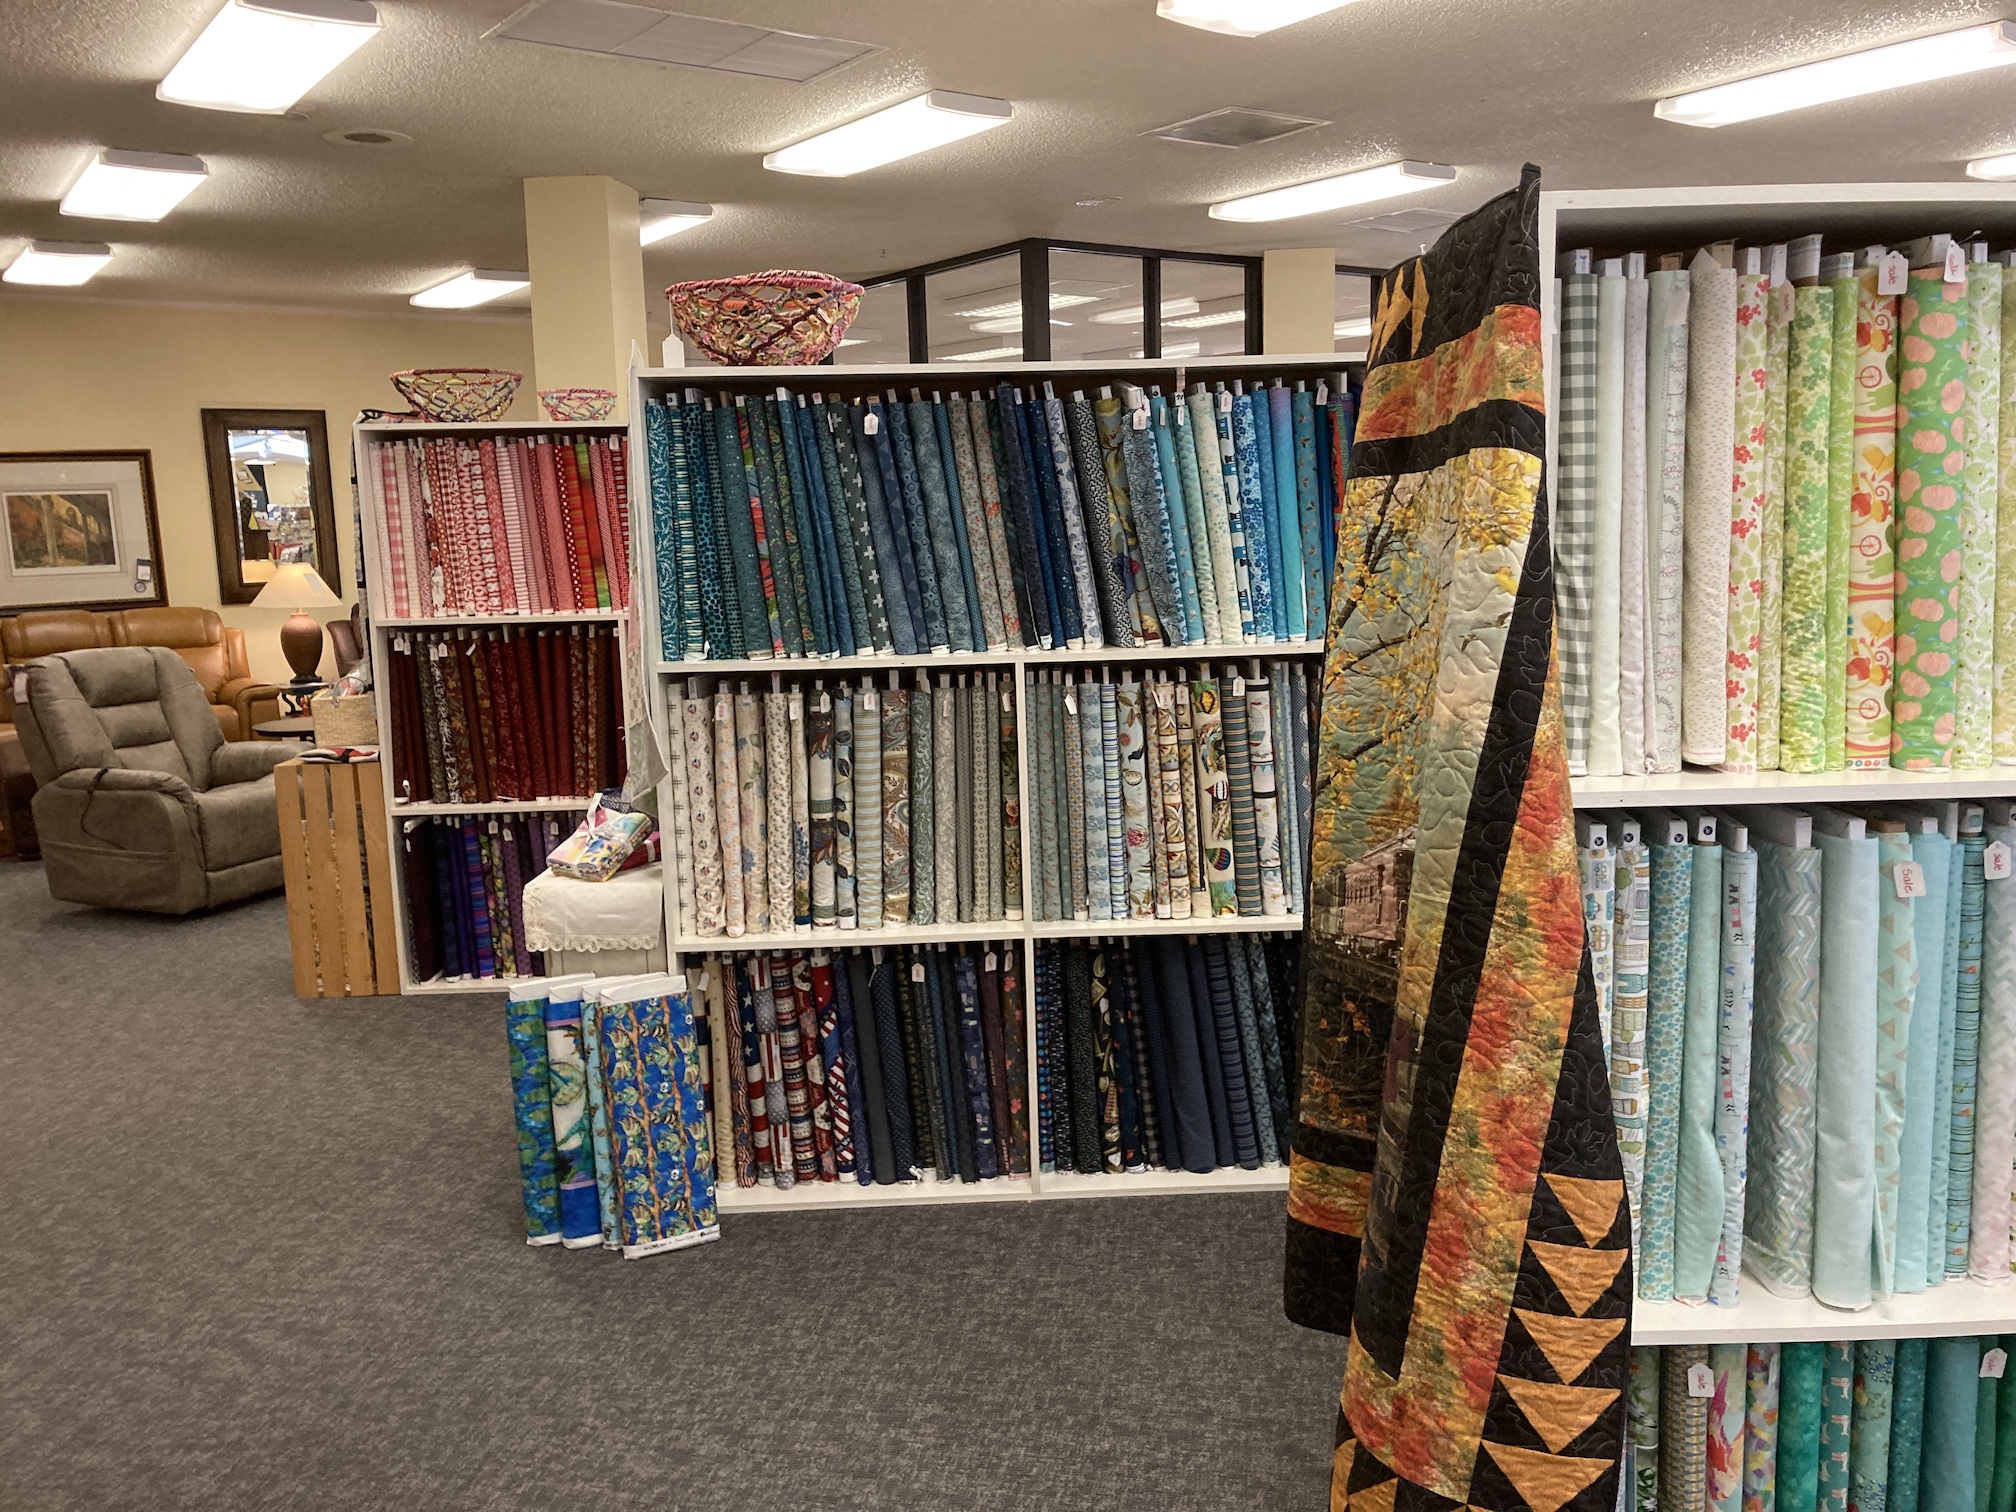
John had some errands to run (he bought a new bike in Fort Collins and had to go pick it up) so he left me unsupervised for an hour at a quilt shop!
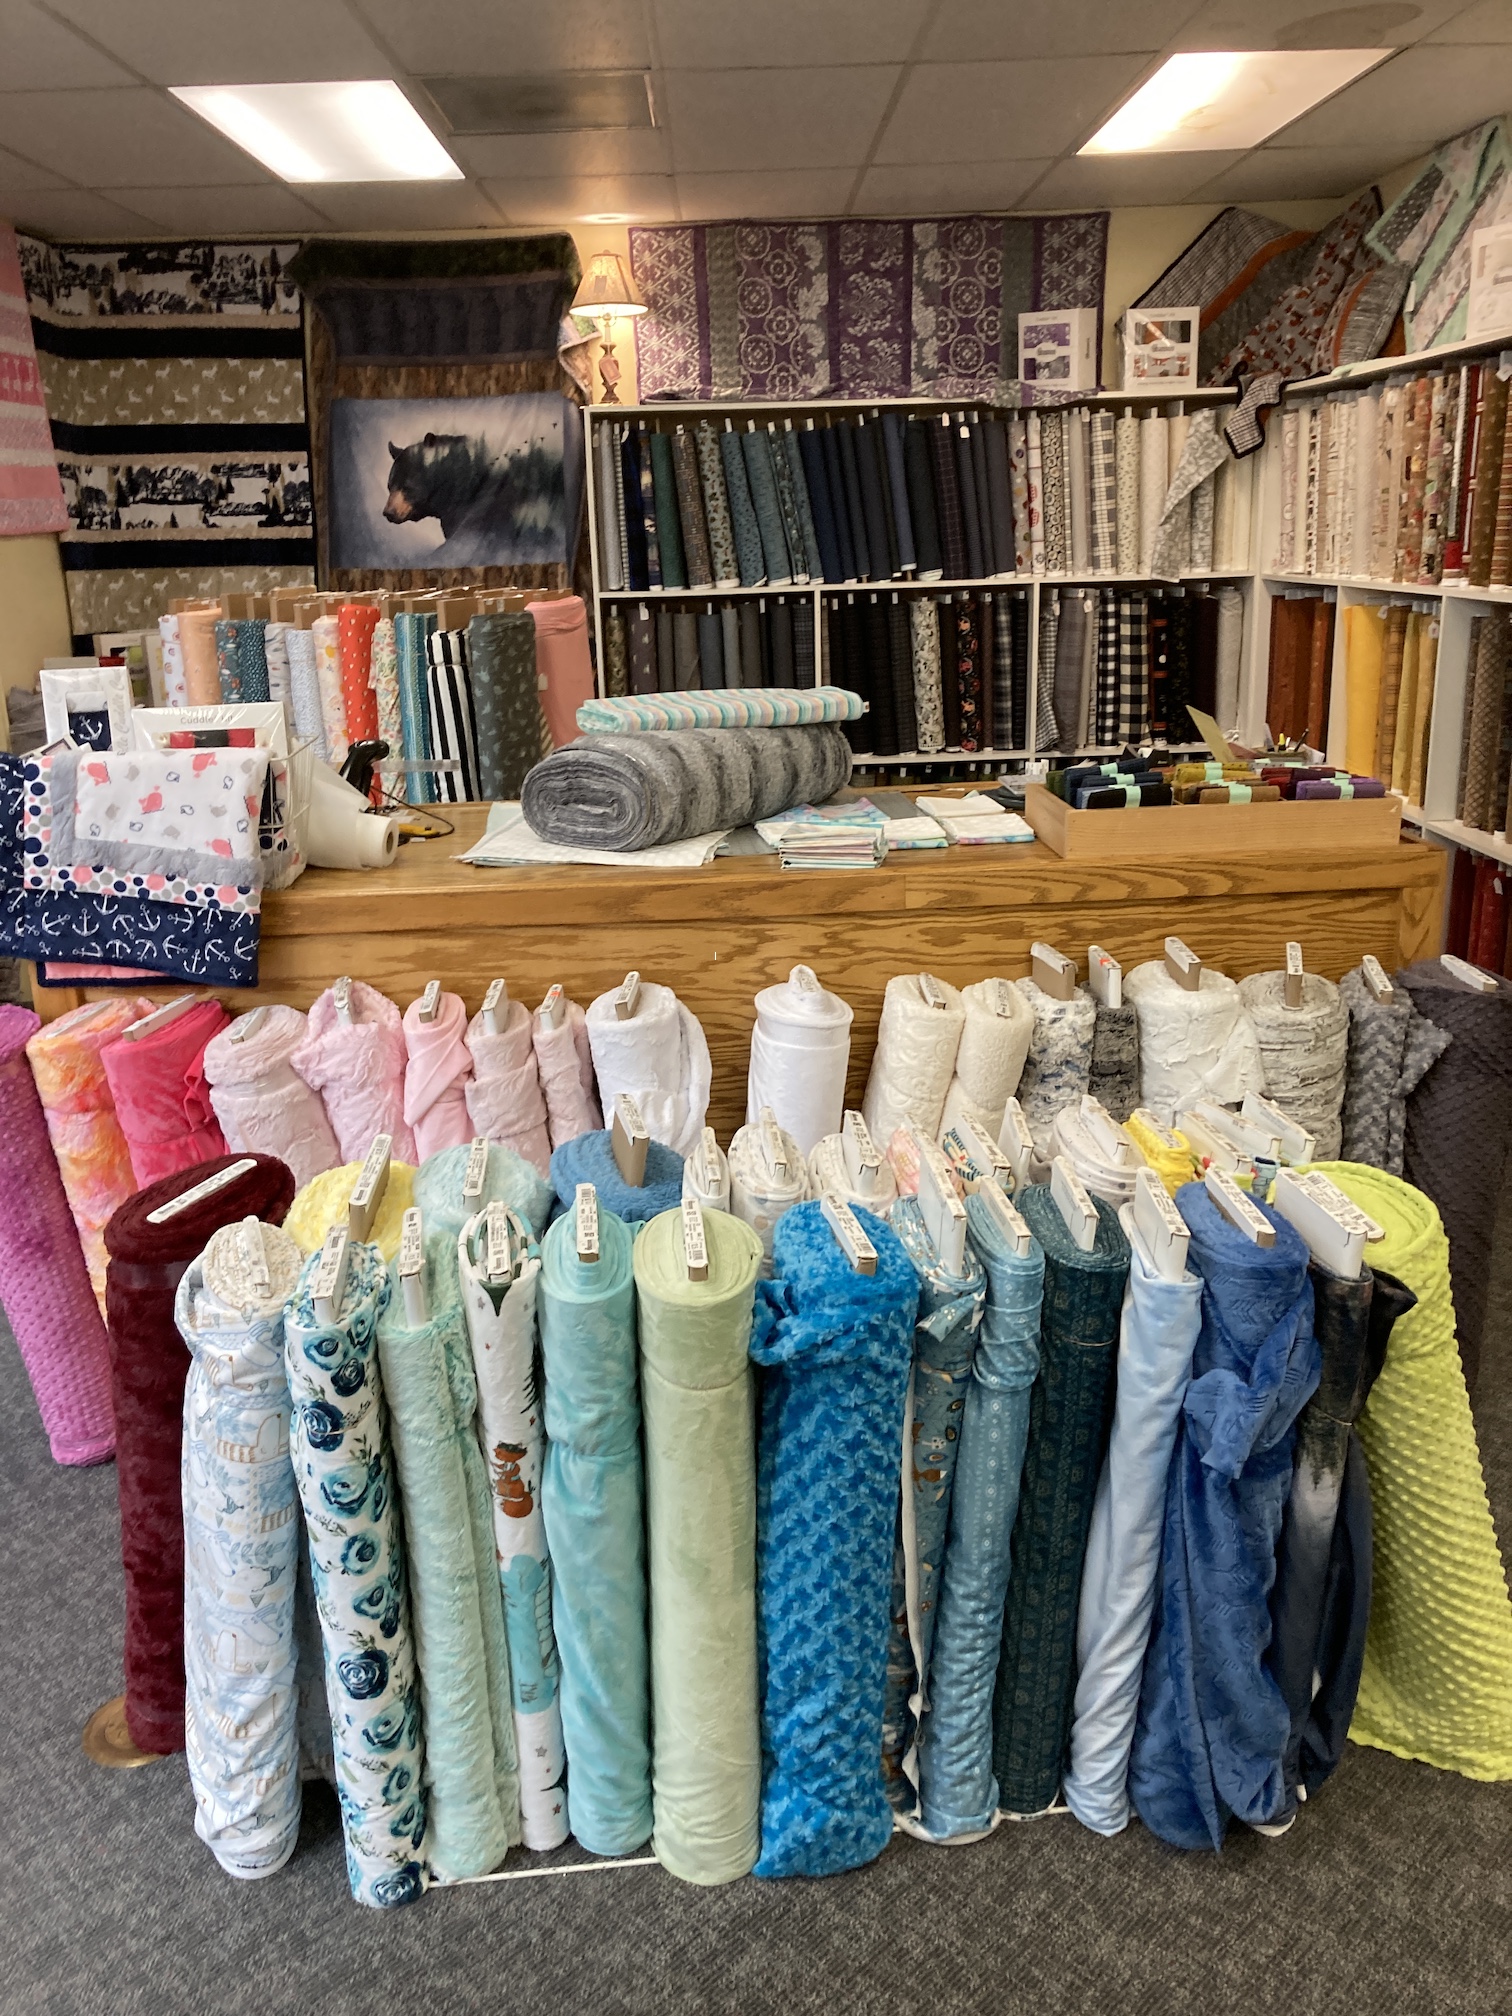
Here are some images from my leisurely wander about the shop:
It has been a long time since I wandered around a quilt shop, I cannot begin to tell you how delicious an experience it was! They shop also had a friendly staff and I enjoyed chatting with quilt shop staff.
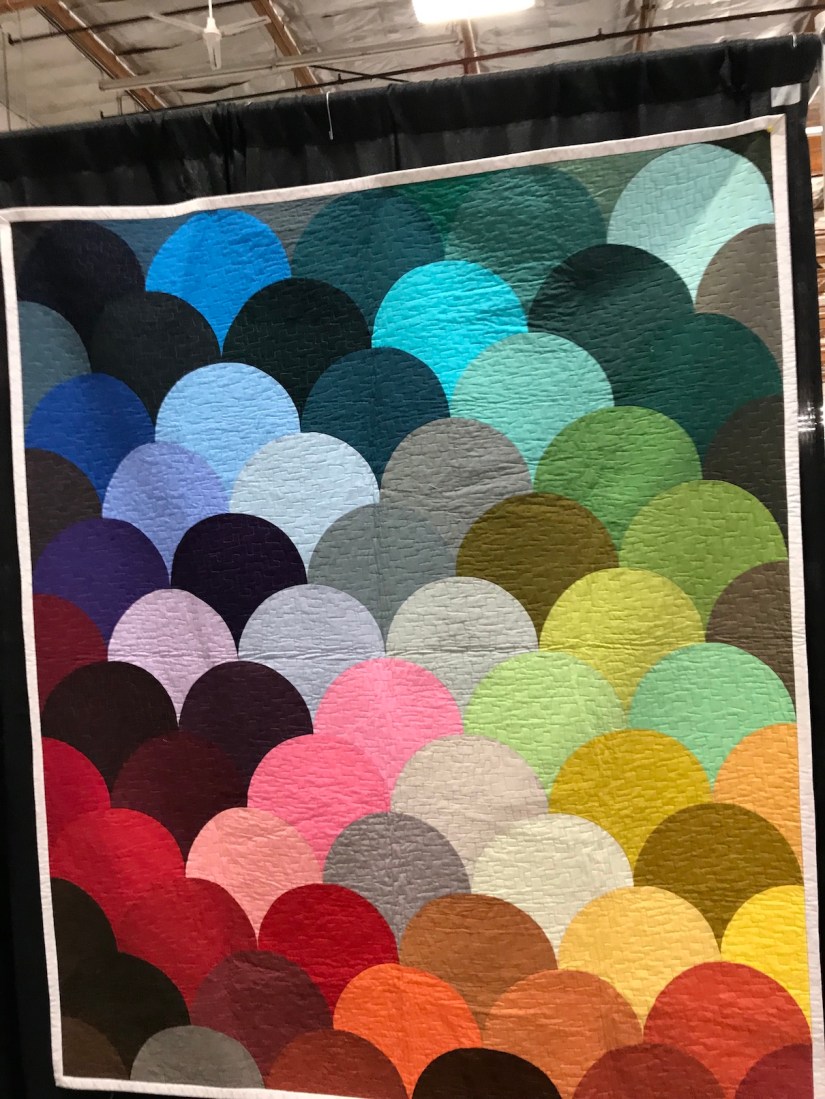
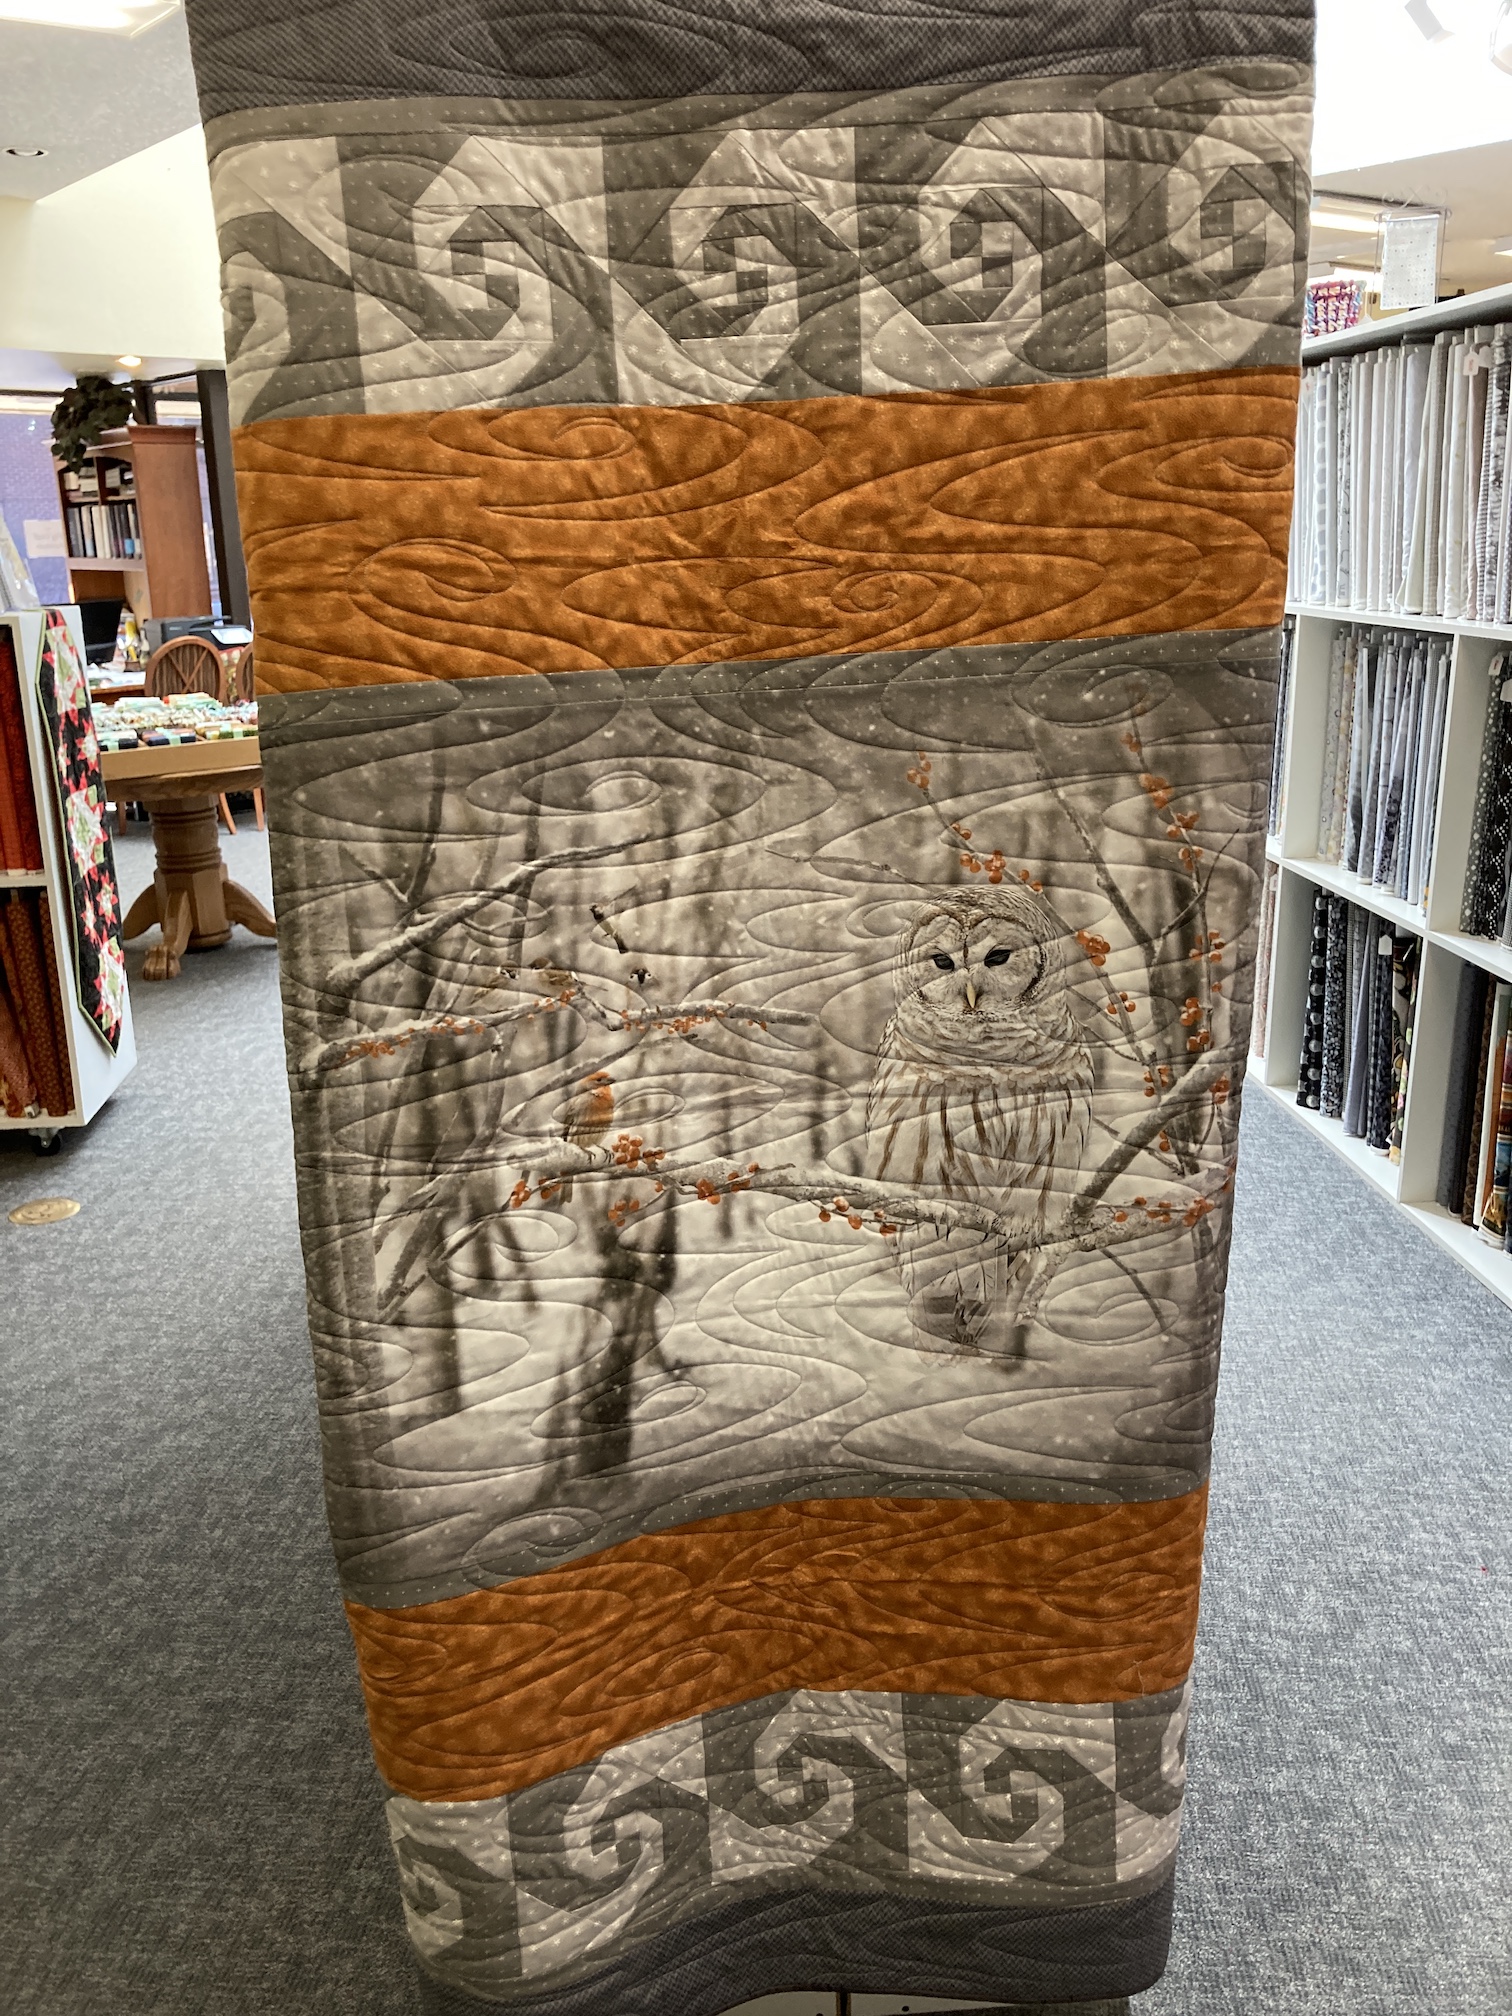
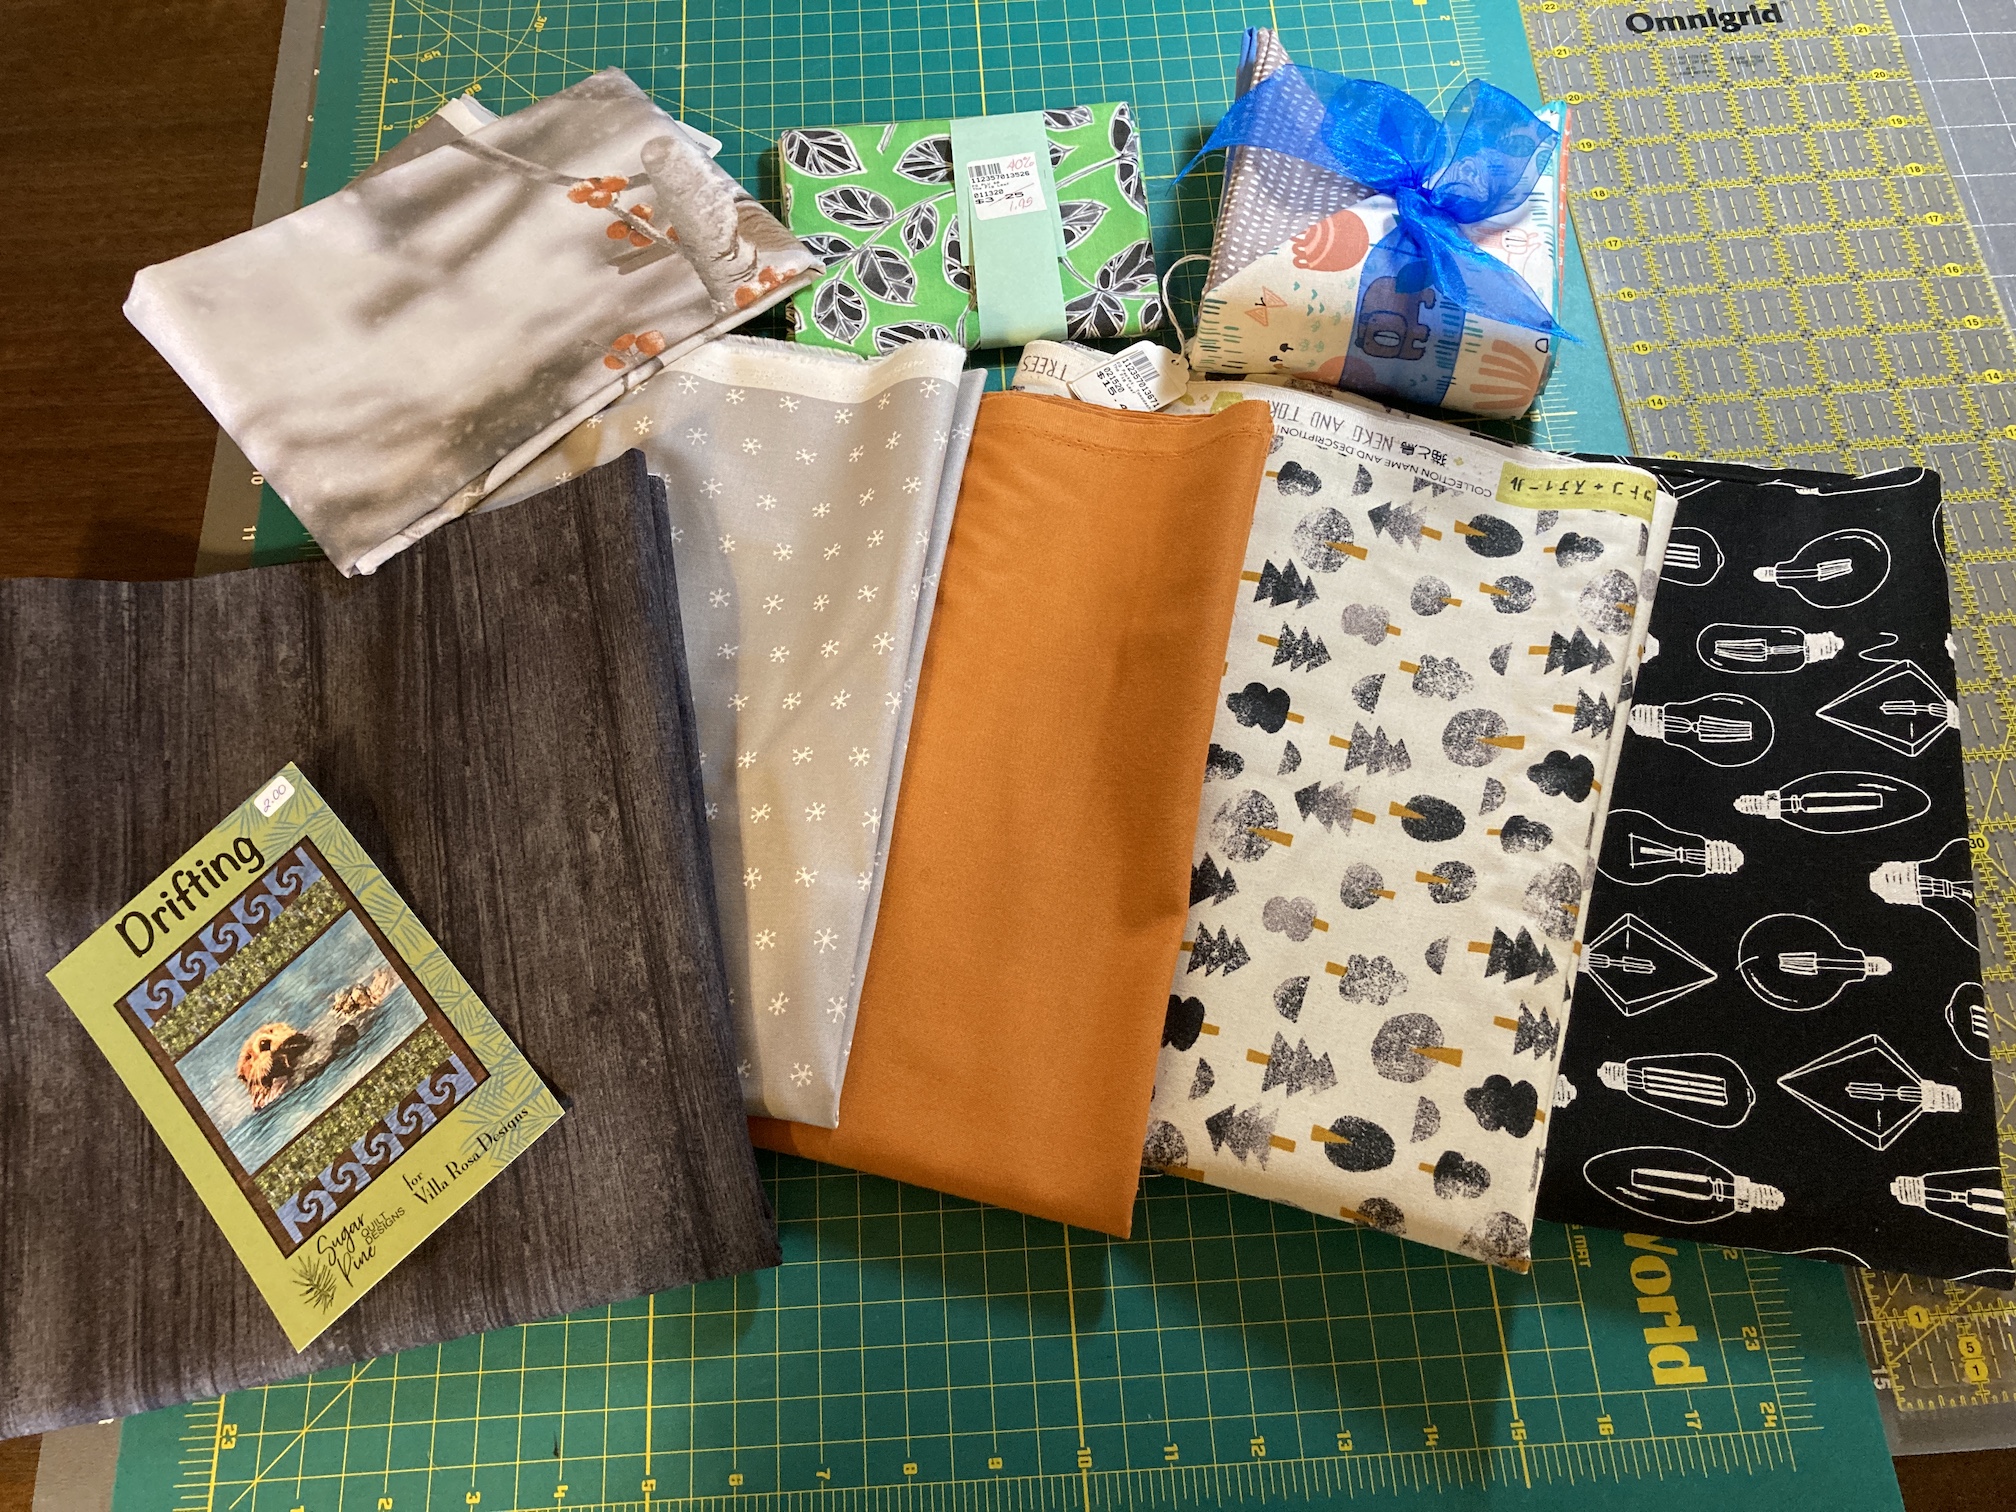
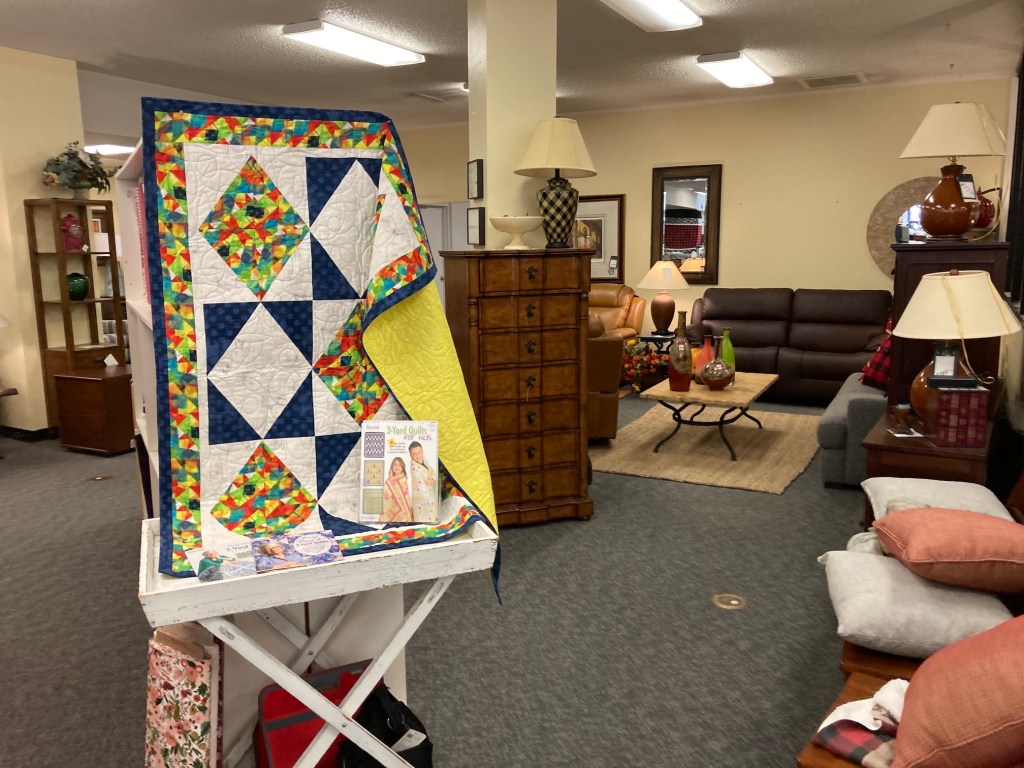
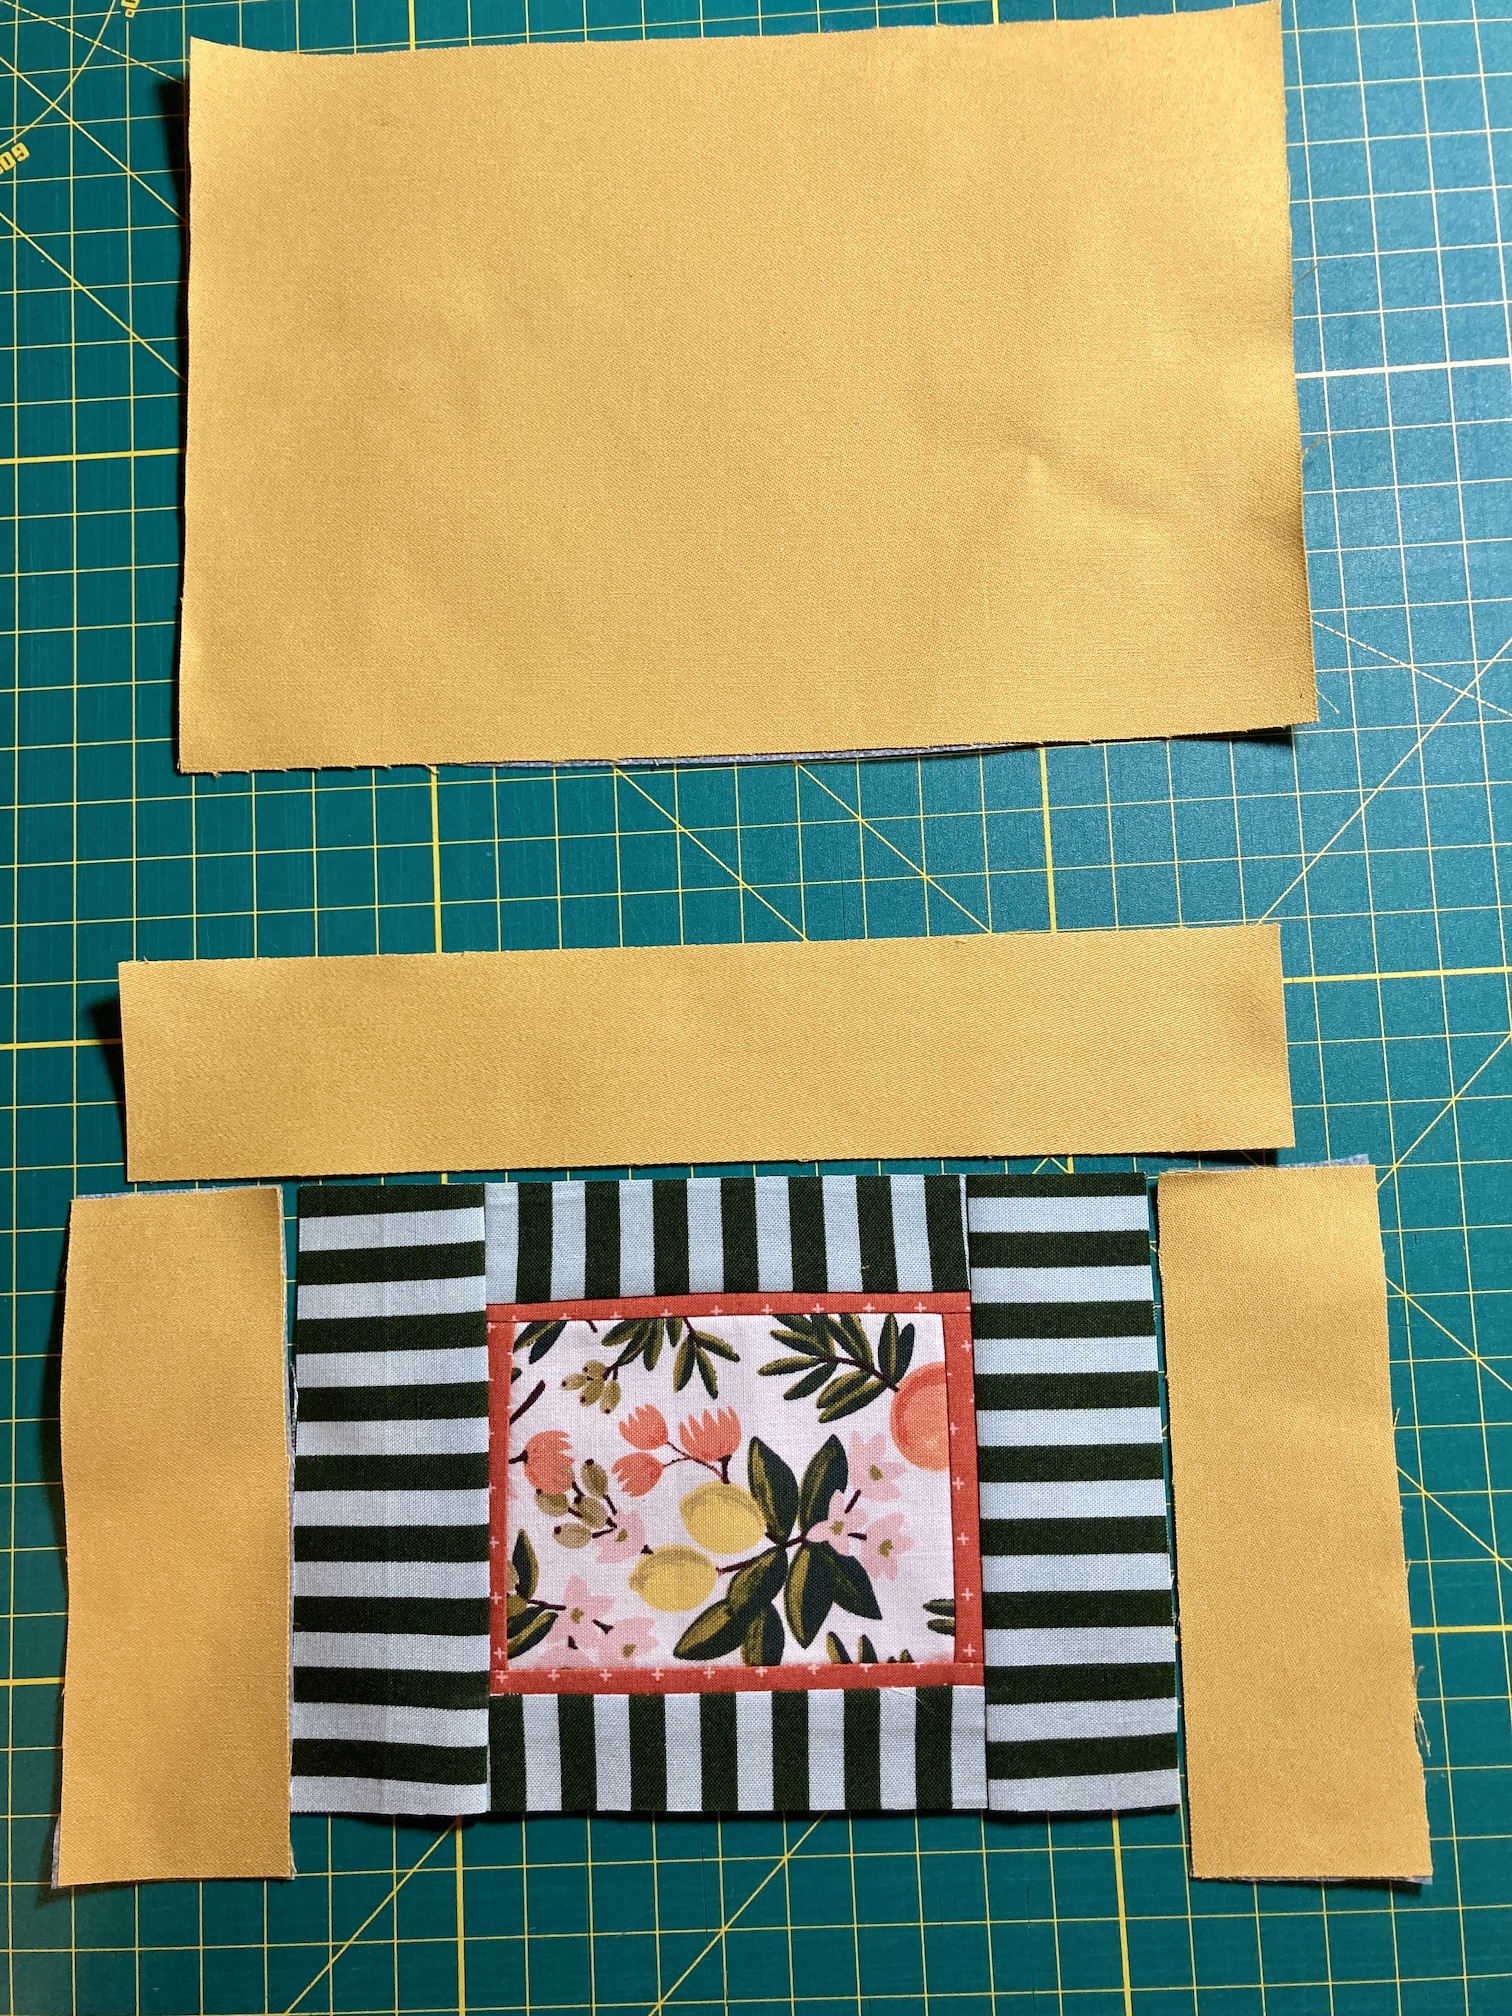
While wandering I came across a quilt I absolutely wanted to make. The image does not do it justice but it is an awesome relatively simple pattern with a panel in the center:
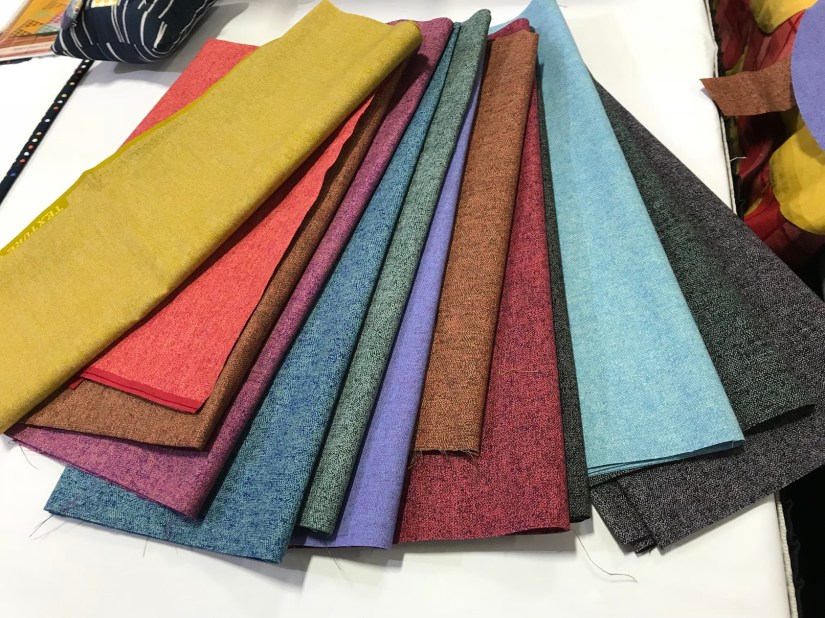
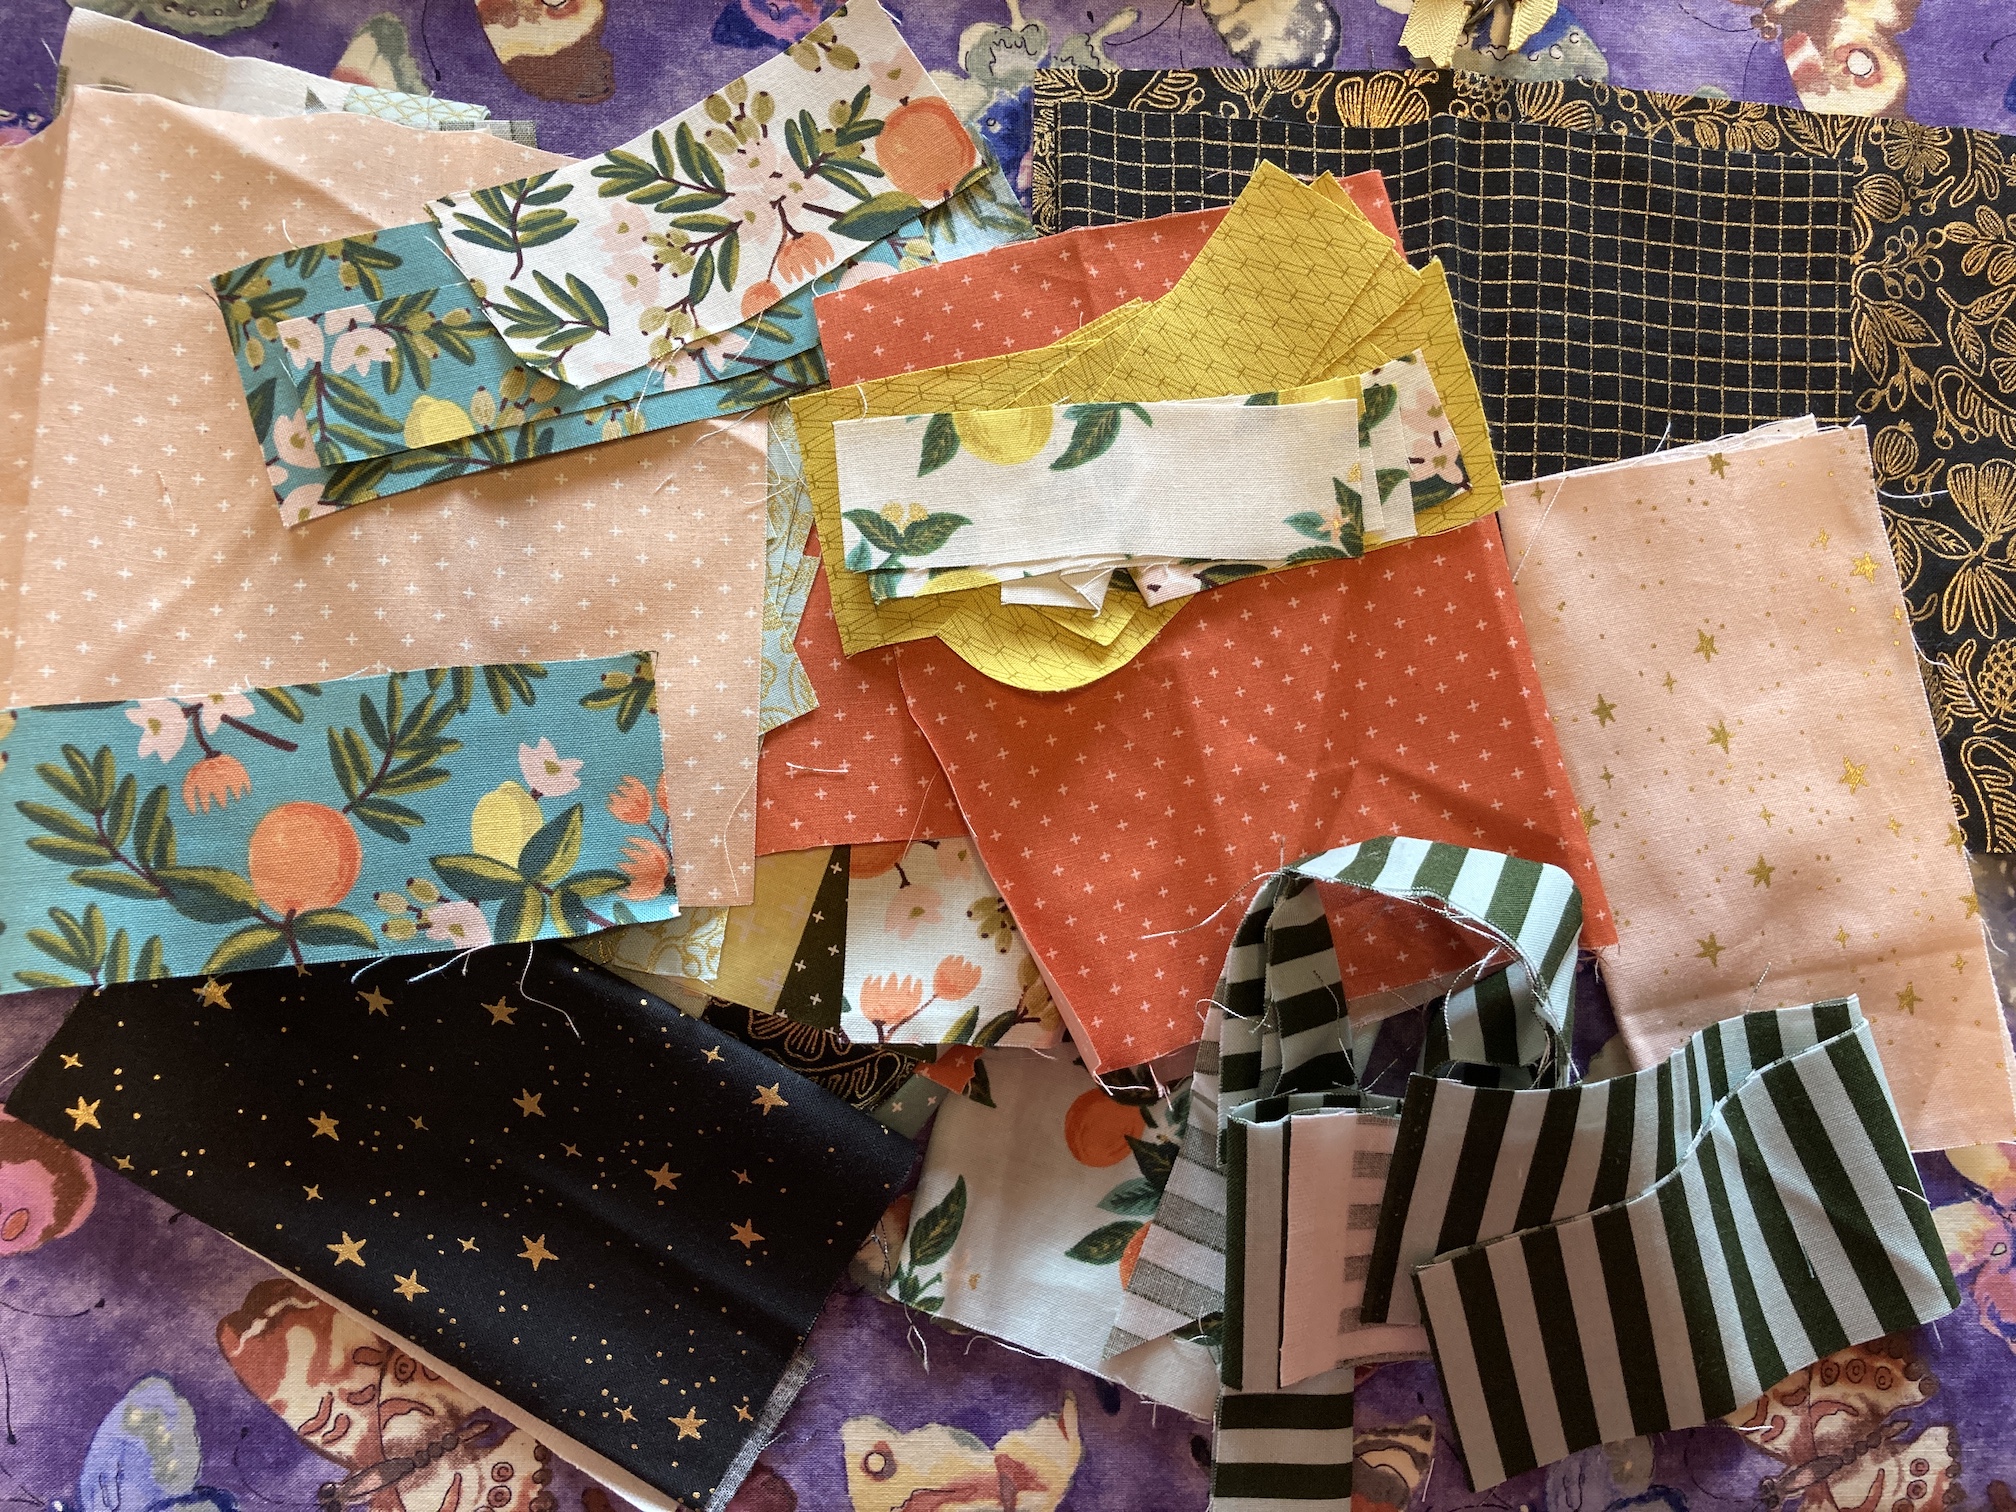
I could not control myself and bought most of the fabrics (and the panel) as well as the pattern card:
I also bought a couple extra items like a some cool canvas fabric with Edison-style light bulbs; some random Cotton + Steel fabric yardage; a random fat quarter on sale; and a fat quarter set (that I absolutely did not need!).
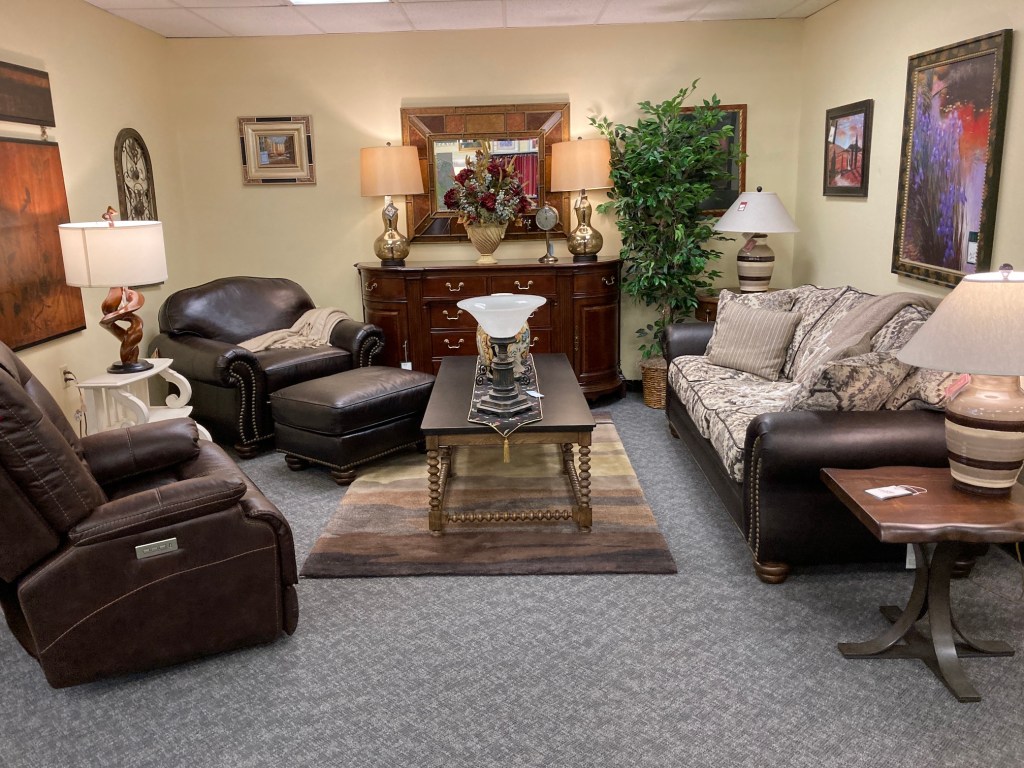
The Fig Leaf Quilt Shop is also a furniture store! I guess they went with a multipurpose shop concept!
We did more than visit a quilt shop while visiting Fort Collins for the weekend, we also went new bike for John (who is an avid cyclist), visited some of the awesome craft breweries, visited some thrift shops (I love thrifting, see my series of posts Thrift Shop Adventures), and we had some wonderful meals.
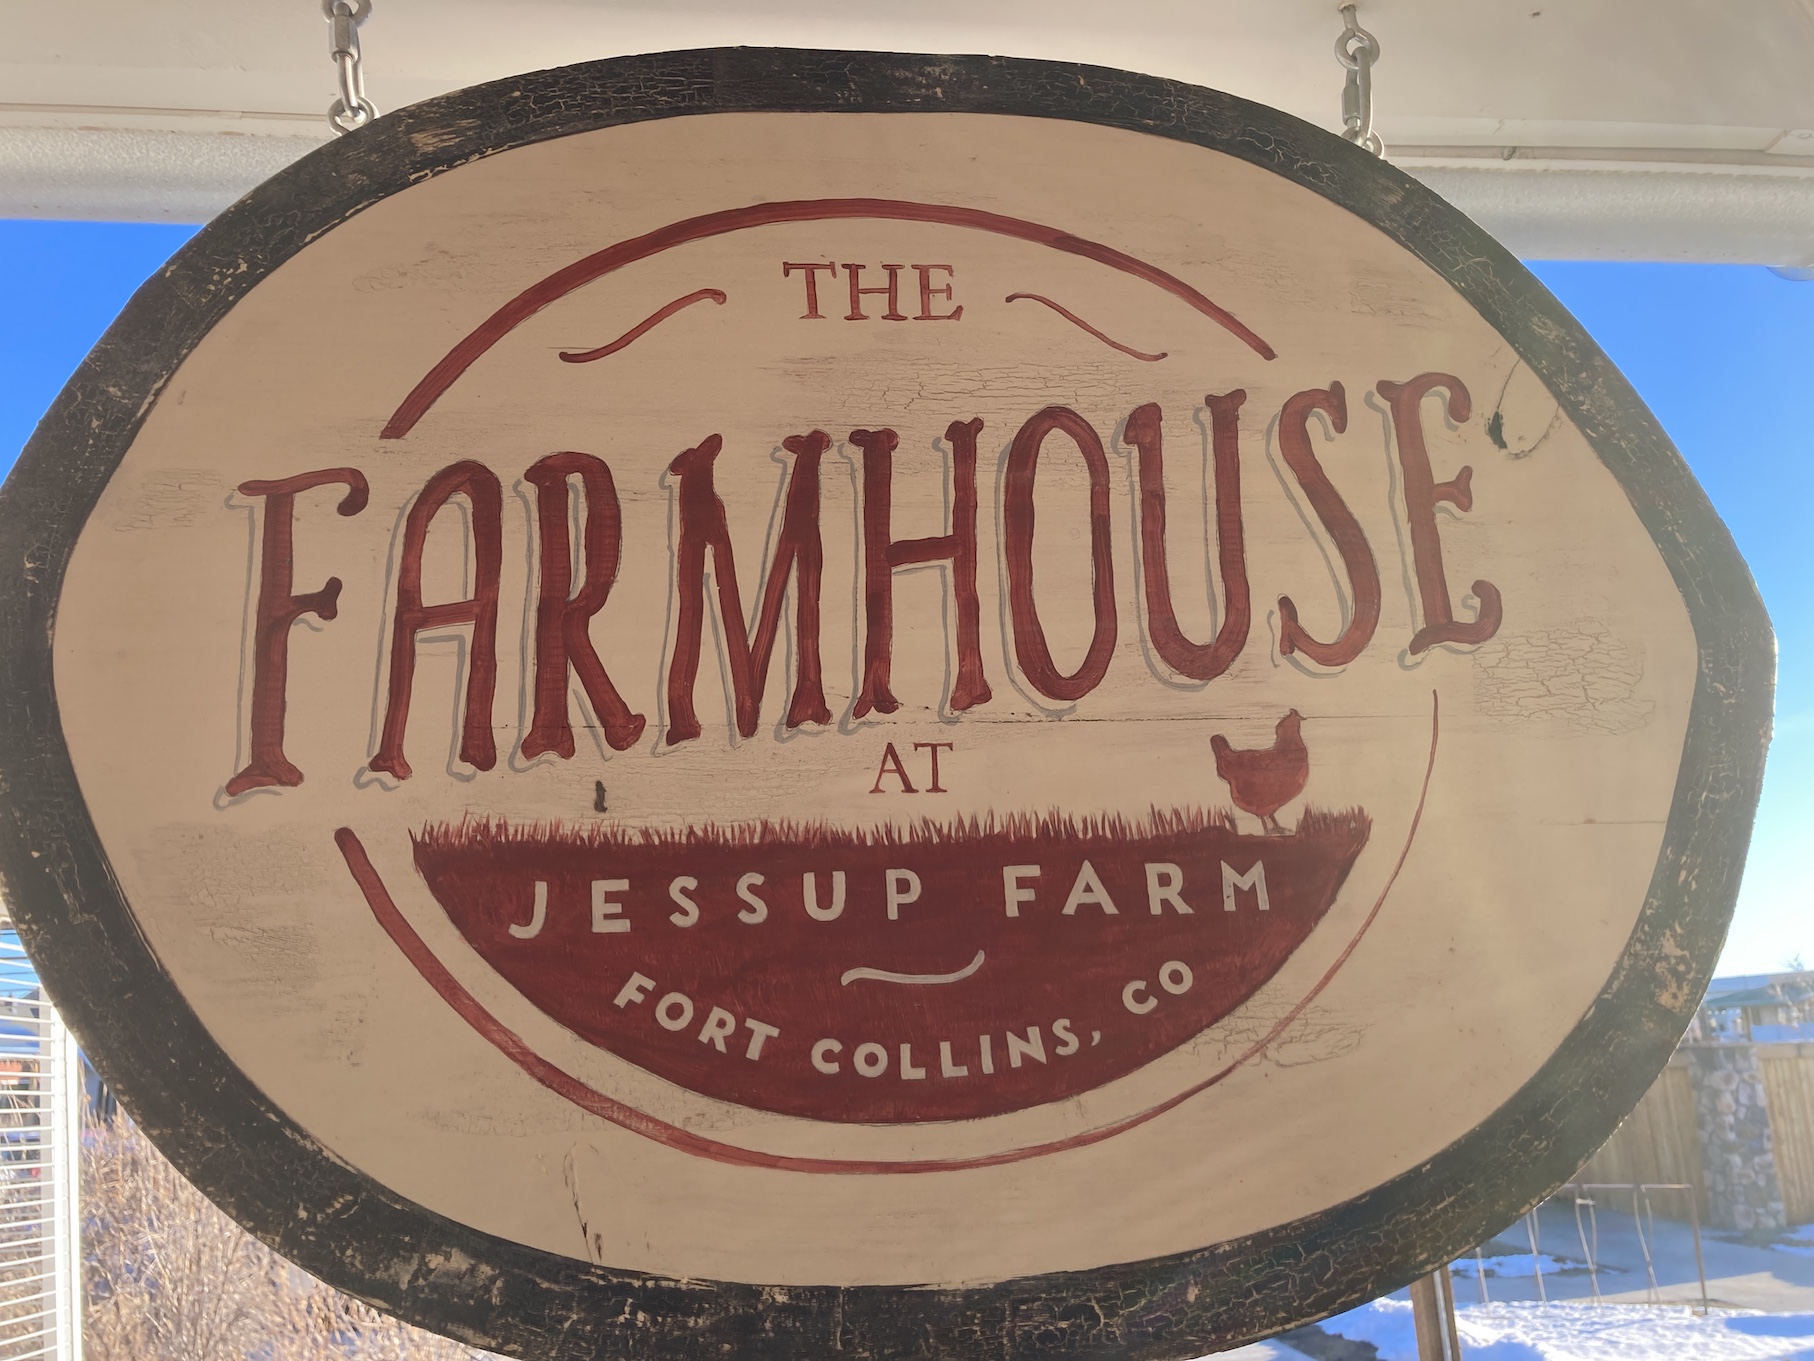
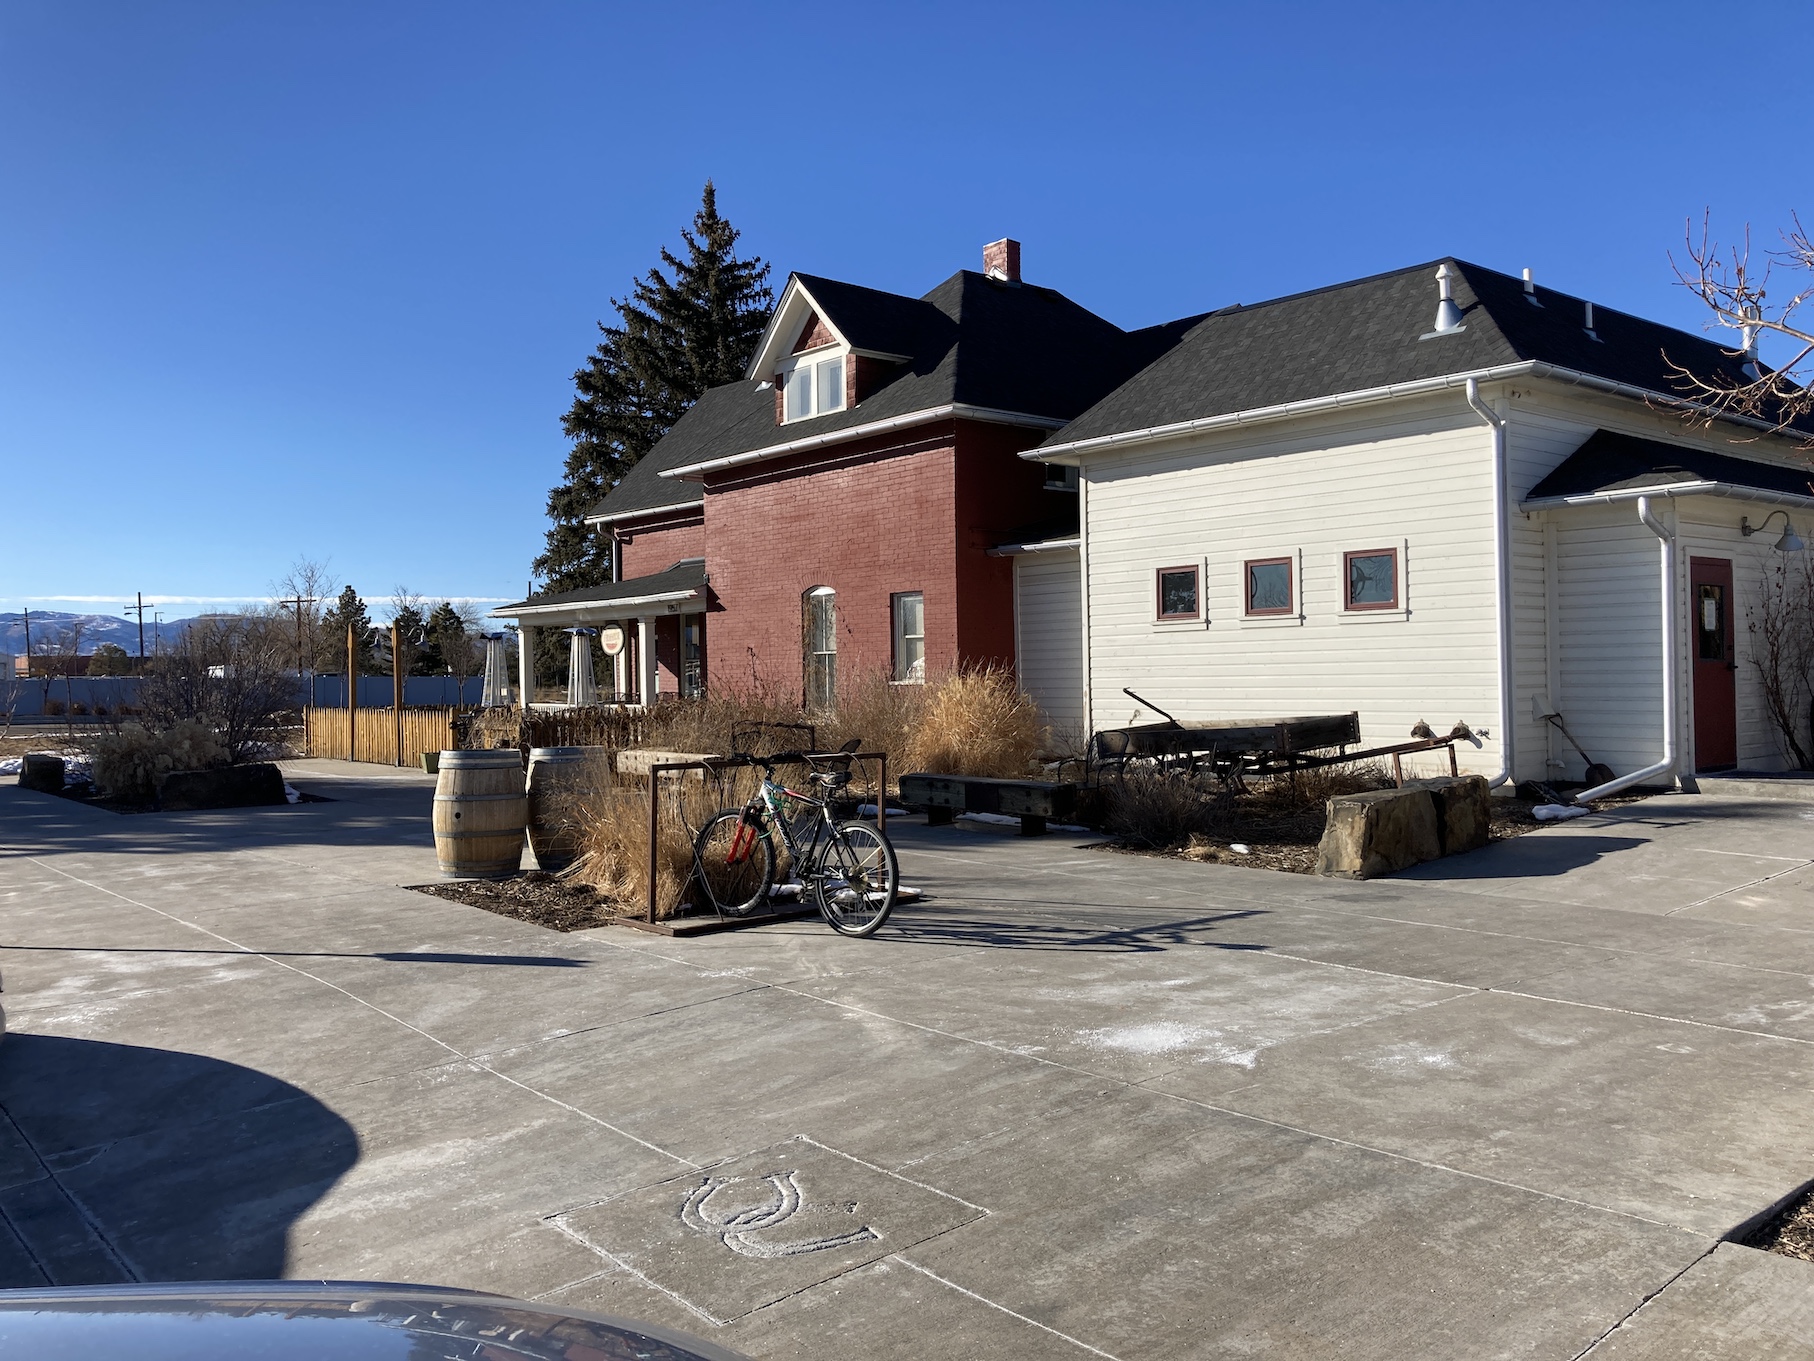
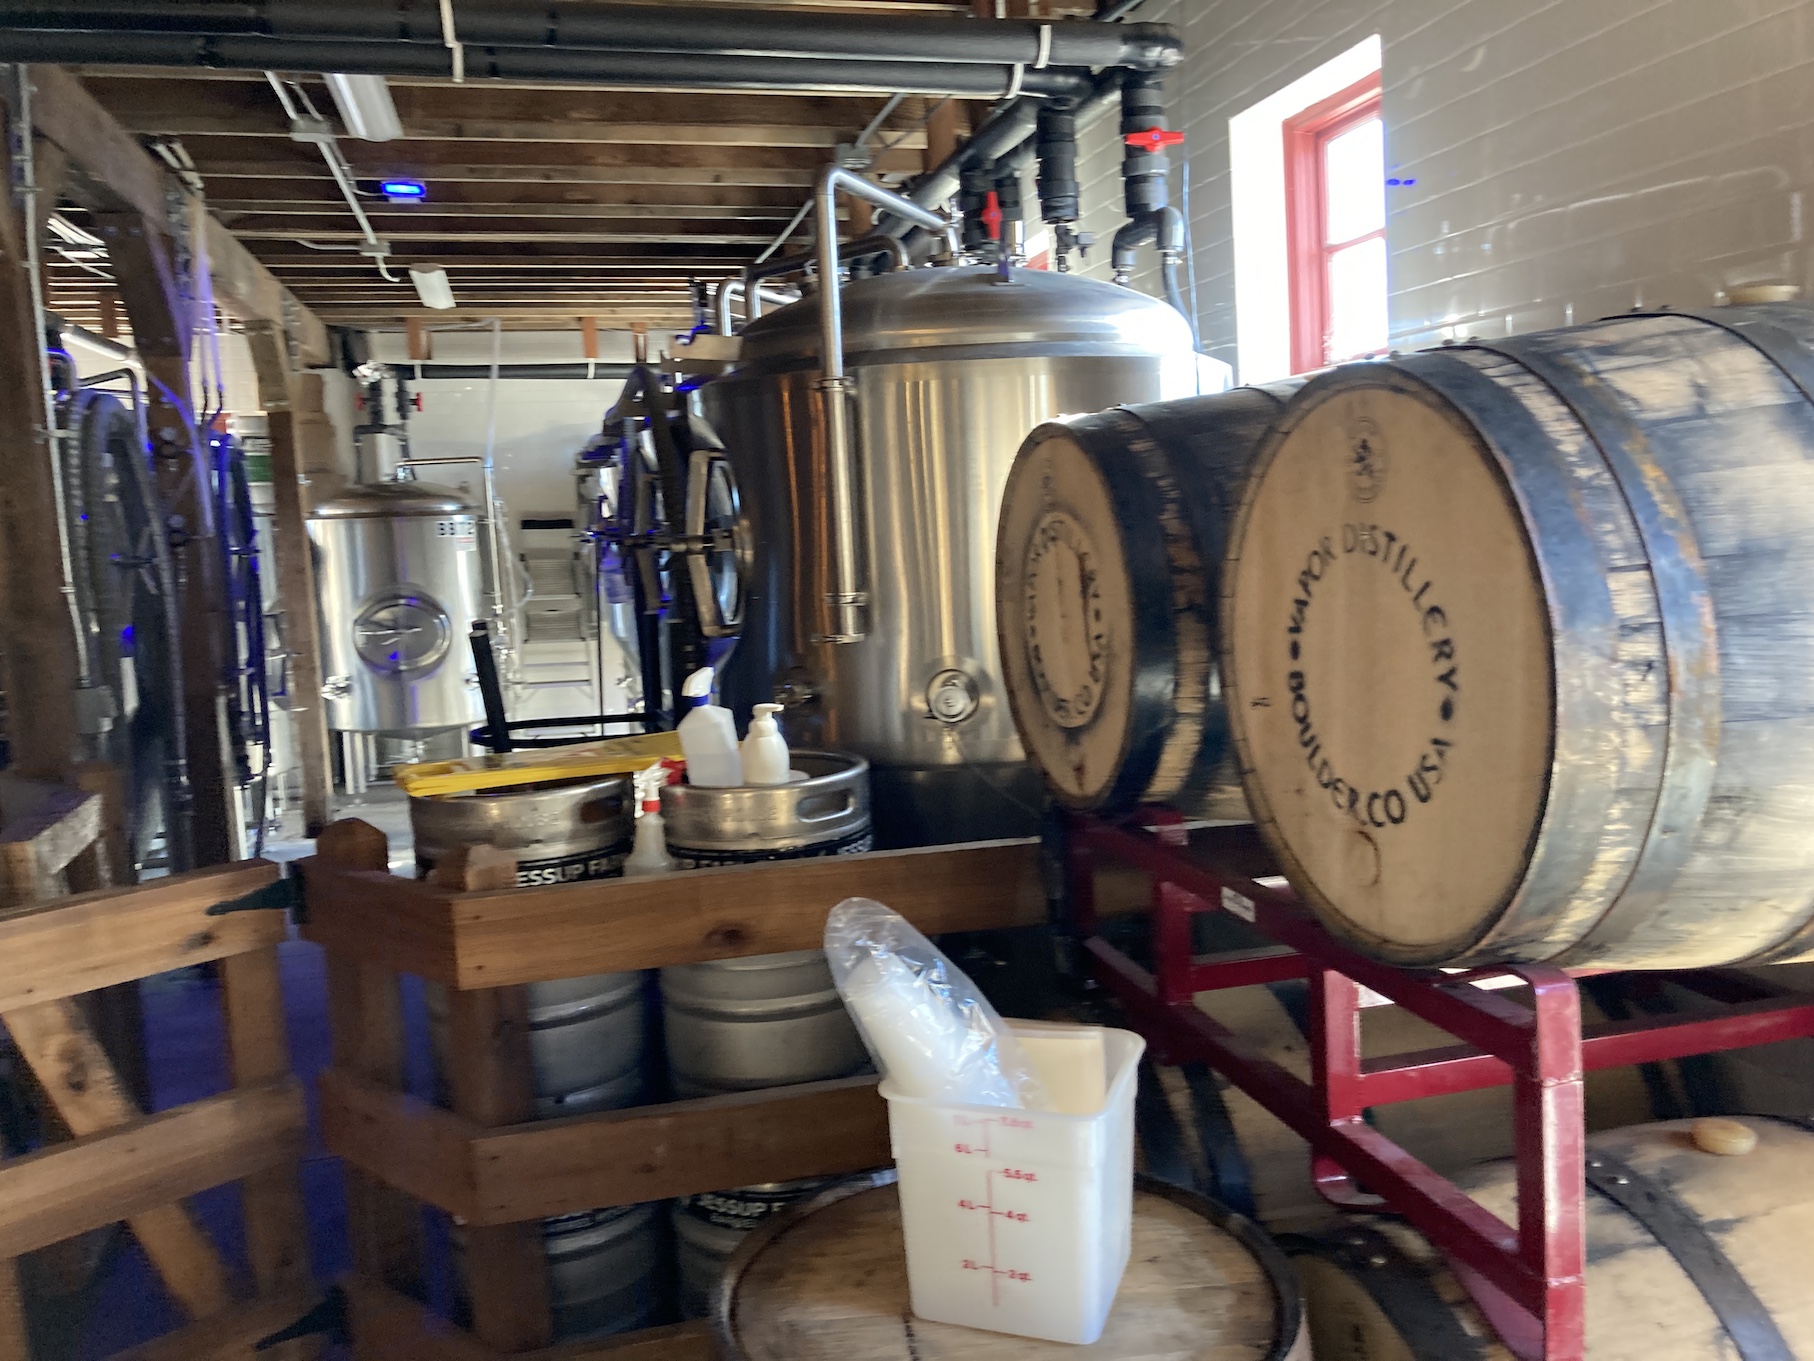
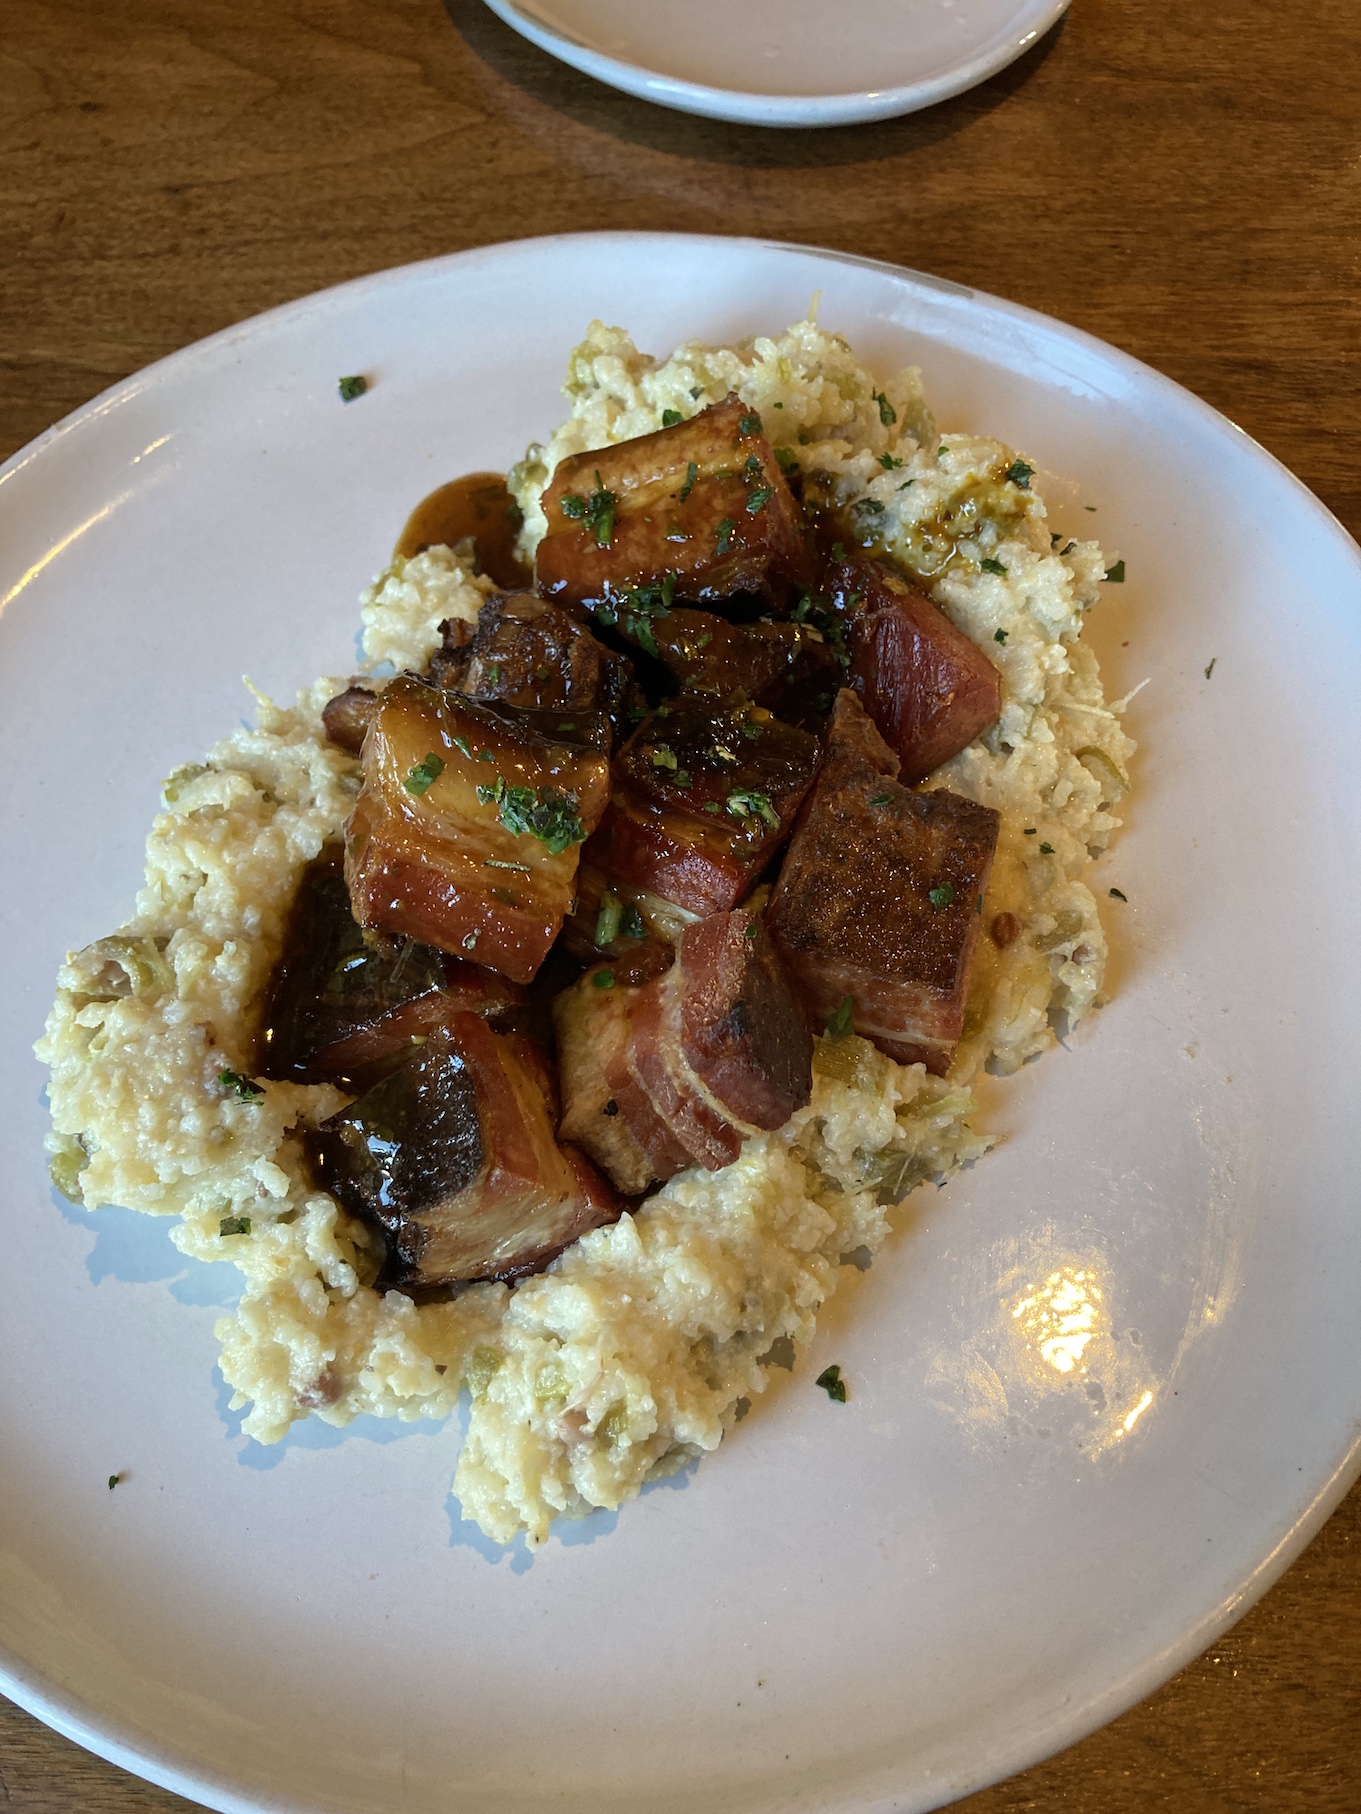
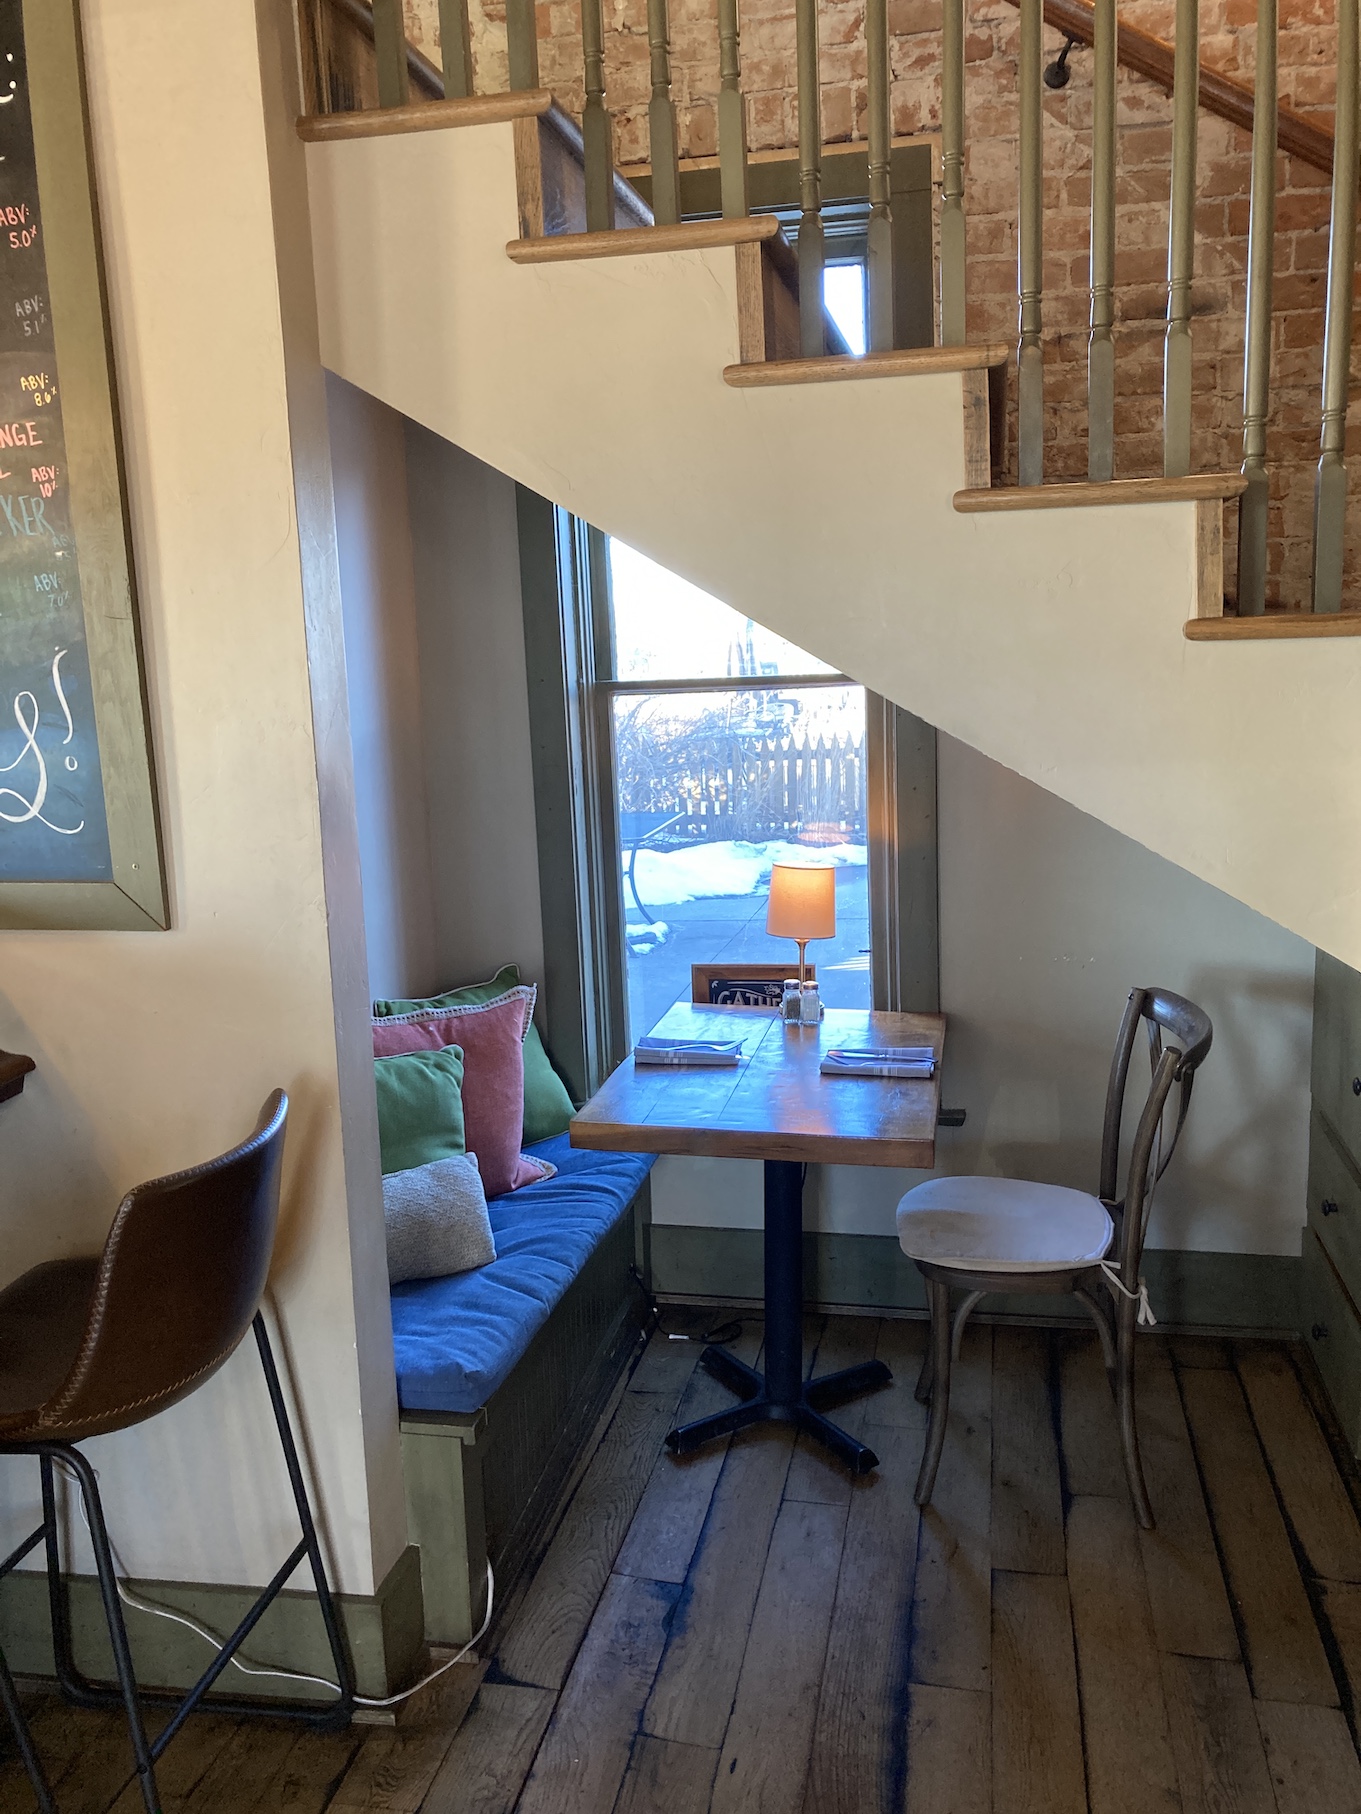
One of the most memorable restaurant visits while in Fort Collins was to The Farmhouse at Jessup Farms. I love farm-to-table restaurants and this one was wonderful. In addition to the main restaurant (and farm of course), they also had an onsite brewery, smaller eatery areas, and gift shops.
Here are some photos from the complex and our delicious meal at the main restaurant (which included pork belly on grits which was 1000 times more delicious than it sounds!):
I love the scenery on the drive from Denver to Fort Collins (we took back roads to make it even more scenic), and I will close this post with an image from my passenger seat:
My friend Dana* (@chambersdalix) is always inspiring me to stretch my sewing/craftingskills and try new things. These new things in the past have included such techniques as English Paper Piecing (see post From the Basket – English Paper Piecing), and using fabrics I would usually never select on my own (see post The Tale of Three Tulas, Part I).
*Note – Dana is one of those people who can merely look at an image of a handmade item on Pinterest and figure out how to make it from the image…and then make it perfectly!
So when she talked her daughter, me, and our mutual friend Kathy into working on an Instagram based “bag of the month” project to build our bag making skills I was excited. For February the bag was the Devon Pouch by s.o.t.a.k. handmade. You make the pouch and then post the image to Instagram.
If you go to the hashtag #devonpouch on on Instagram you will see some GORGEOUS versions of the pouch:
I was like: “Wow! I want to make this pouch!”. Sure I have not made very many things with zippers but I can follow a pattern; and the designer has a time lapsed YouTube video of her making the bag so you can see all the steps demonstrated in addition to have the pattern.
So I thought I was safe.
Plus Dana was so sweet and sent me cute fabric from her stash and some zippers to make 2 of the pouches. So what could go wrong….?
Excited to get started, this past Saturday I cut out the pattern pieces, applied the interfacing and prepared to make two pouches:
The elements of a wild Saturday night
I put on some yummy music (my favorite Denver radio station KUVO which is also a streamable Public Radio Station from kuvo.org), opened my laptop to the video of the designer making the pouch, sat down at my sewing machine and got to work.
Ready to sew!
In addition to materials to make the pouch, my friend Dana had also sent me scraps from when she made me a quilt (see post Mind Blowing Mail) and I incorporated some of these scraps into the front zipper pocket for my first pouch that I worked on.
Yummy scraps!
I was feeling very clever.
A couple hours later, I was not feeling so clever.
The written pattern stated to change to a “zipper foot” whenever you were working on the two zippers in the pouch. I found the zipper foot to my Bernina, which I’ve only used once before and I think that was in 2006 in a class when I first bough my Bernina sewing machine.
The pattern told me to switch between my regular foot and my zipper foot. Problem: I am very inexperienced using a zipper foot. Wait let’s just say it plainly: I did not know what the heck I was doing.
I will spare you the full saga, but my seams were off and once multiple seams are off in a pattern you know you are in the middle of a serious freaking sewing misadventure!
Here is my quite ugly version of the finished pouch:
Ugh
Here’s an even better image that might make you suspect I was under the influence of mind altering drugs while sewing (Nope, the bottom of the pouch is NOT supposed to look like that):
Gasp
Please look away if the image above is too grotesque. My version of the pouch does not appear to even be remotely related to the examples of the beautiful pouches on #devonpouch that I shared earlier in this post.
I did post the completed bag to Instagram and people were very kind but I was quite embarrassed over how lopsided and poorly constructed it was (the photo actually does not do justice to the sewing abomination!)
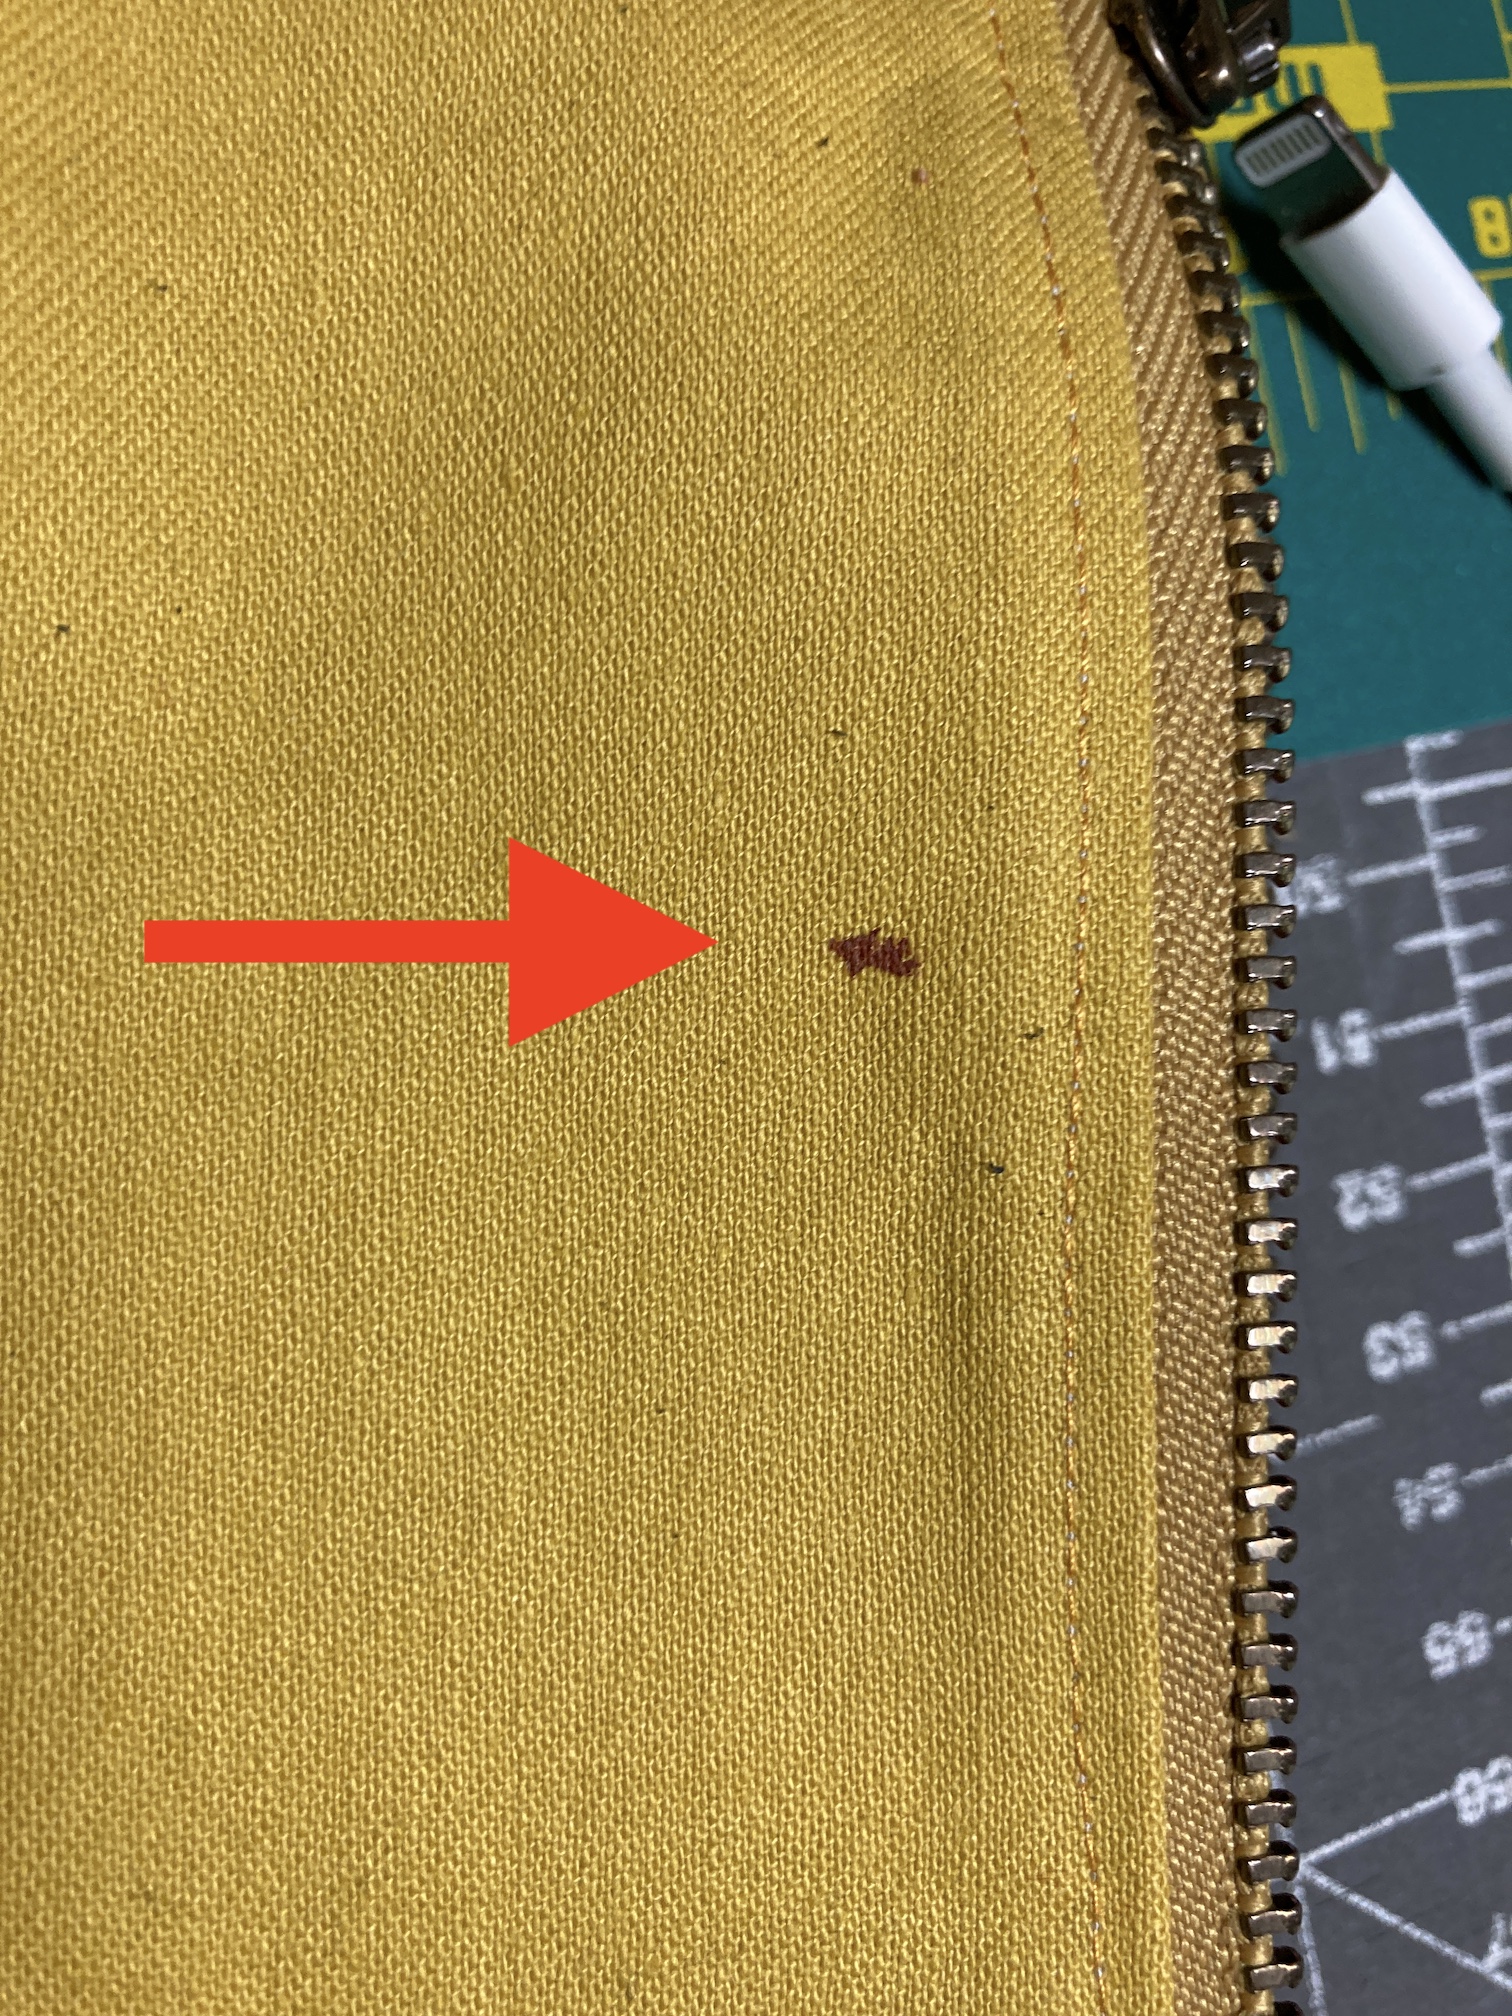
As a bonus, I accidentally stuck myself with pin (yay, that is always so pleasant) during final construction and bled on the back of the bag. I did not catch the spot of blood of course until I pressed/ironed in the blood (is this pouch doomed or what?):
A little of me permanently ironed into the pouch…
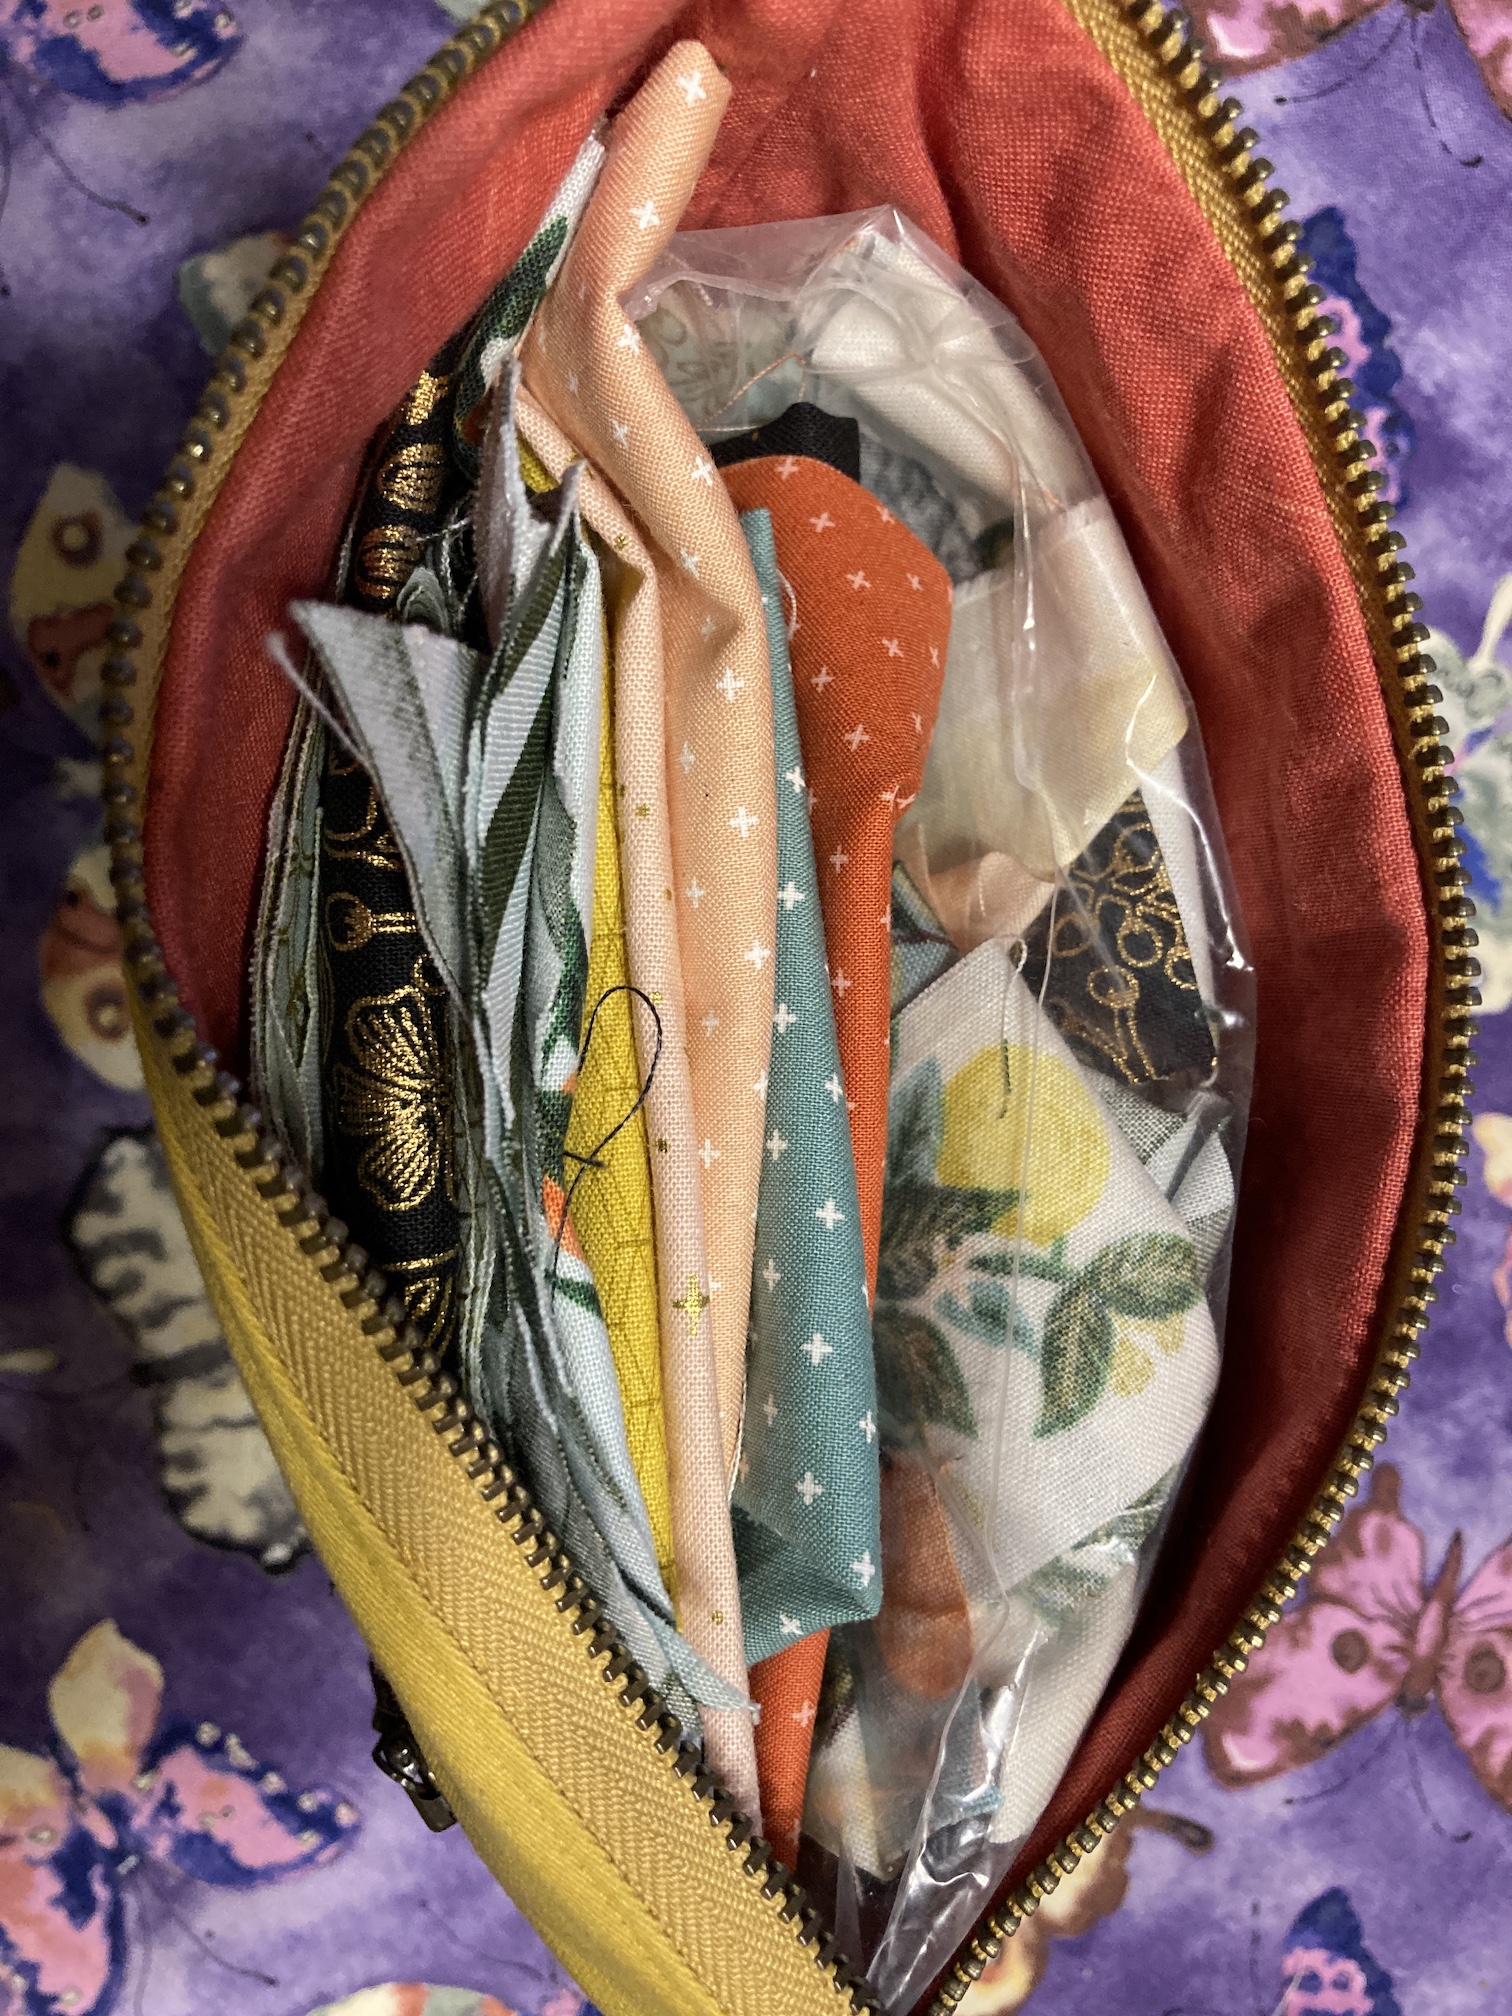
At first I decided to just keep the pouch and use it to store the fabric scraps Dana sent me:
Trying to create a purpose for the abomination made
But finally I decided to un-assemble it and salvage the nice zippers that Dana sent me; and reuse the zippers in my next attempt.
So when I feel up to it, I am going to start over again and make my first pouch again, before moving on to the second one. I am going to stay away from the zipper foot this time as I discovered towards the end I could sew the zipper just fine with a standard foot.
Postscript
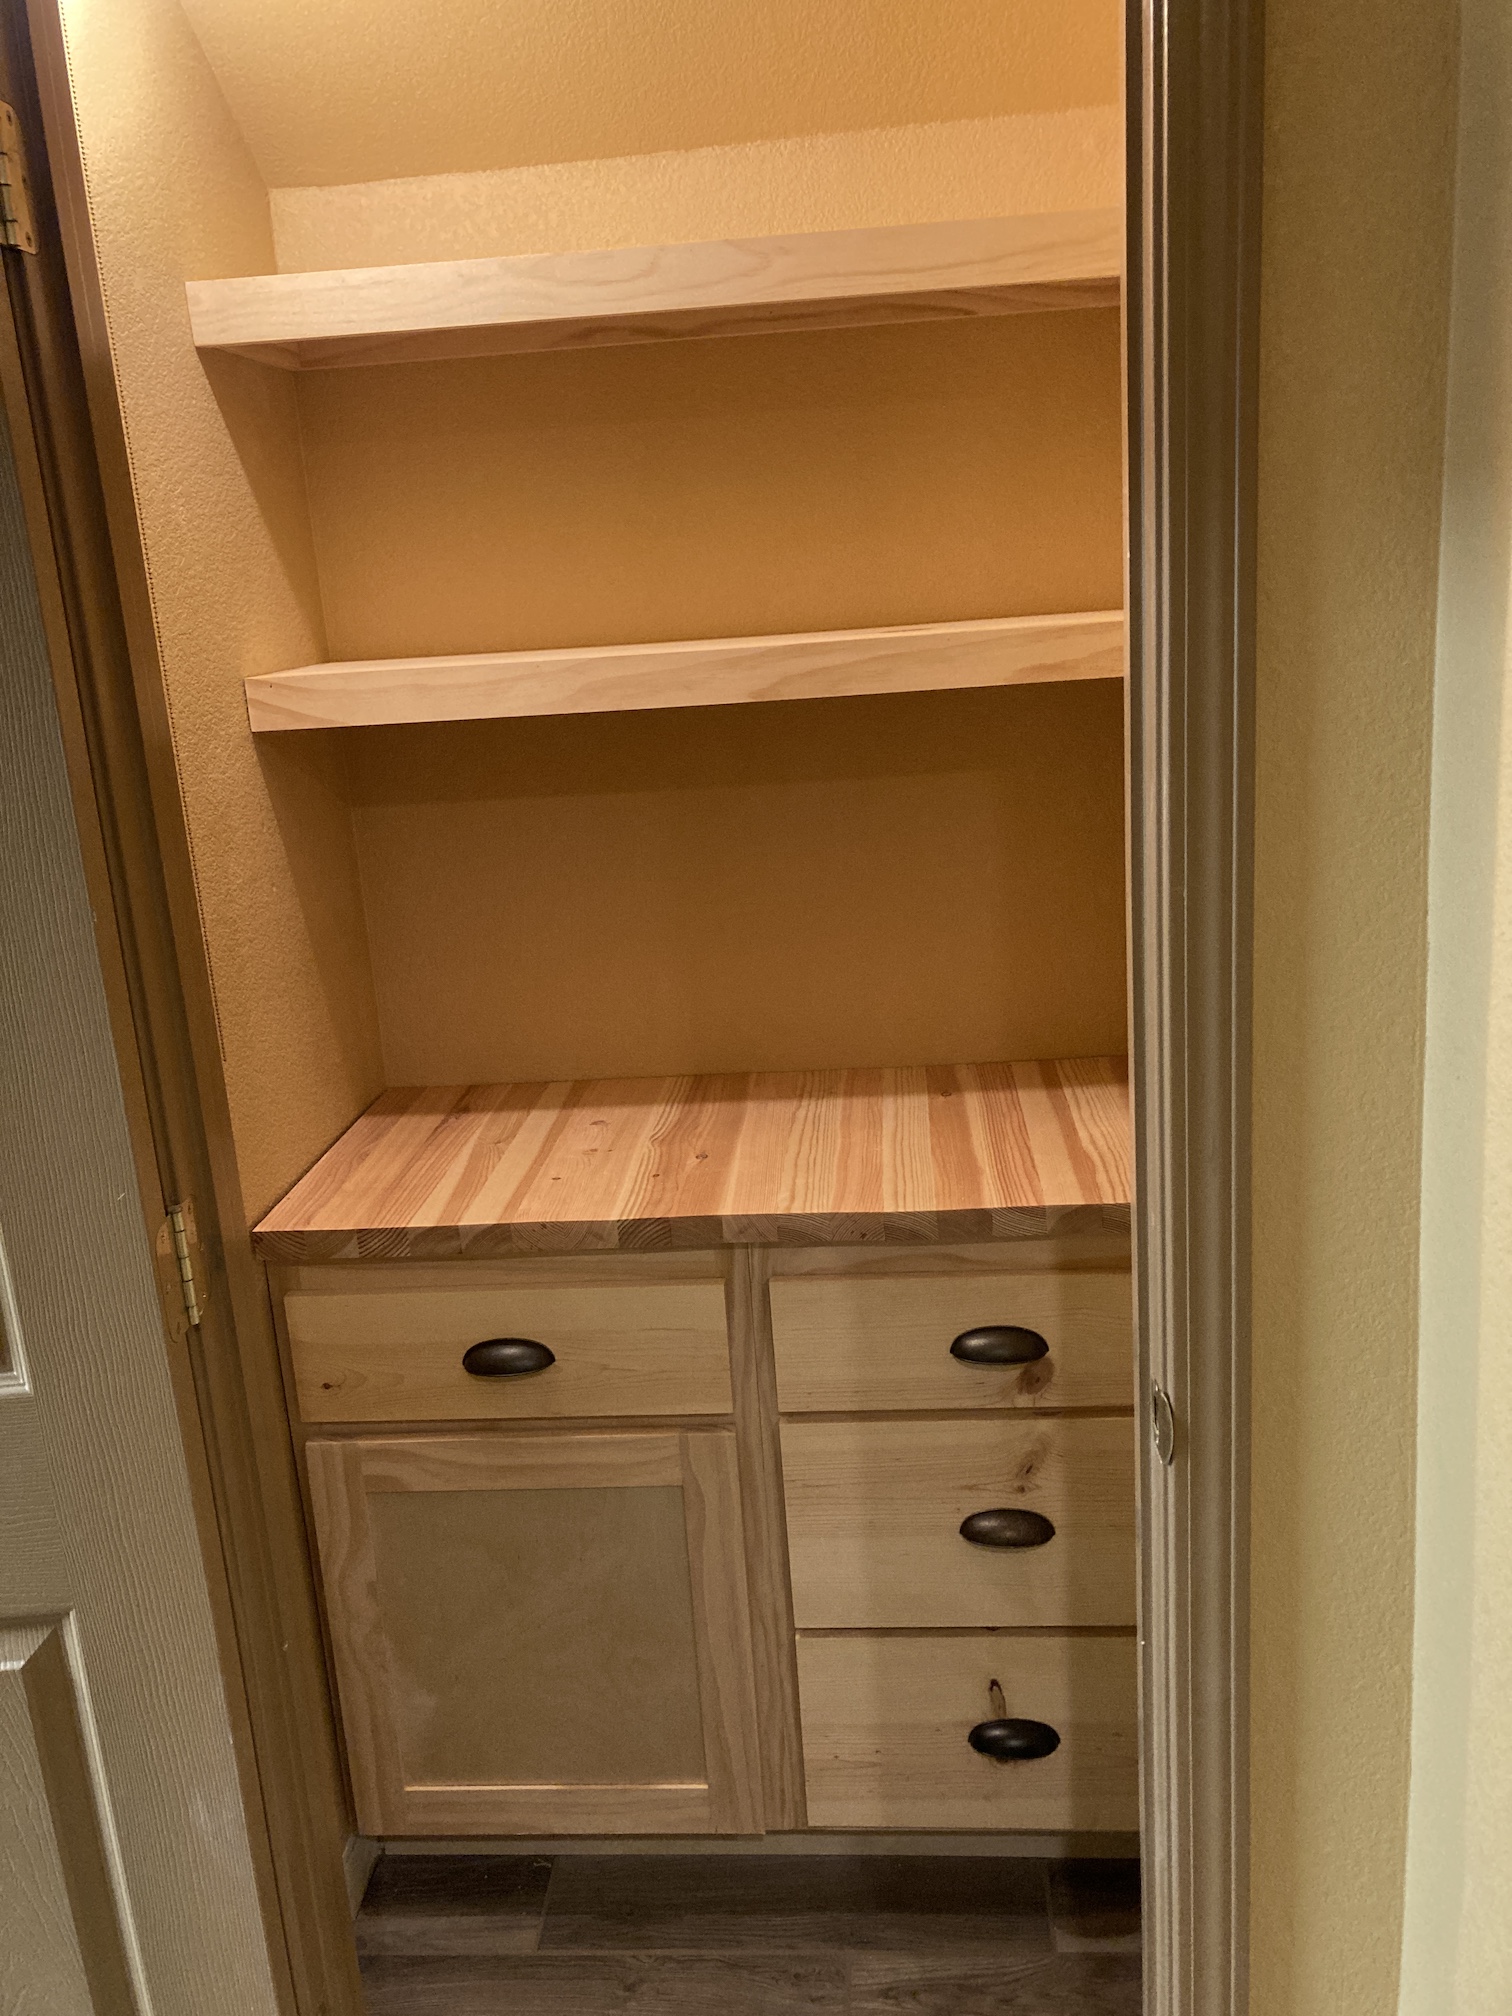
In more successful crafting news, Mr. Woodworker (my partner John) recently finished a remodel of one of our basement closets to become an entertaining supply storage closet with cabinet and coordinating shelves:
Much more successful crafting
This was the first real cabinetry he’s made. He also made a butcher block style counter top of the cabinet!
Oh and John is going to take the advice several of you left in the comment section of the post Handmade Spools, and make more wooden spools for me to sell on either my Etsy shop (if I ever get it reopened) or a craft fair or something.
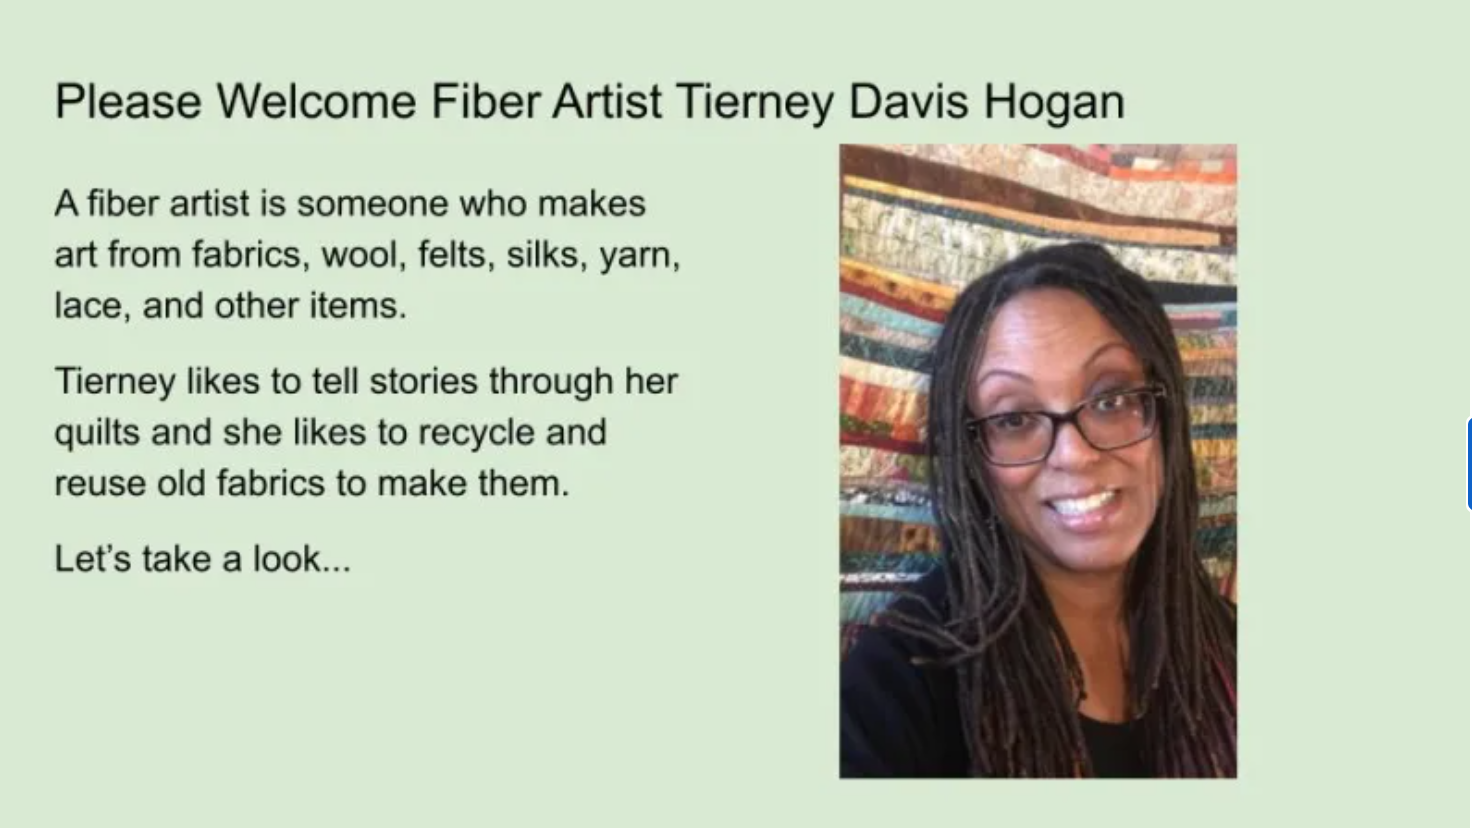
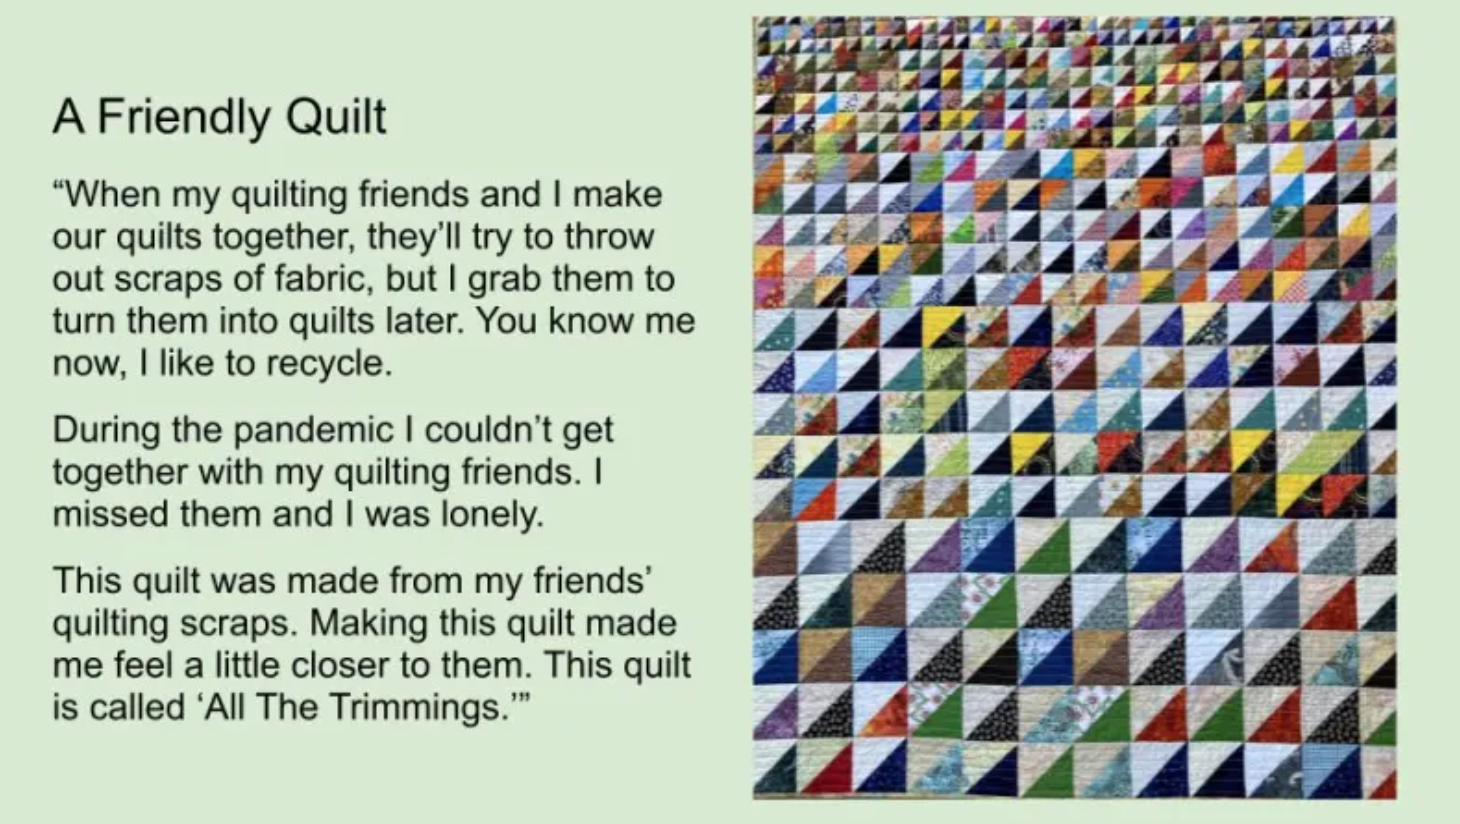
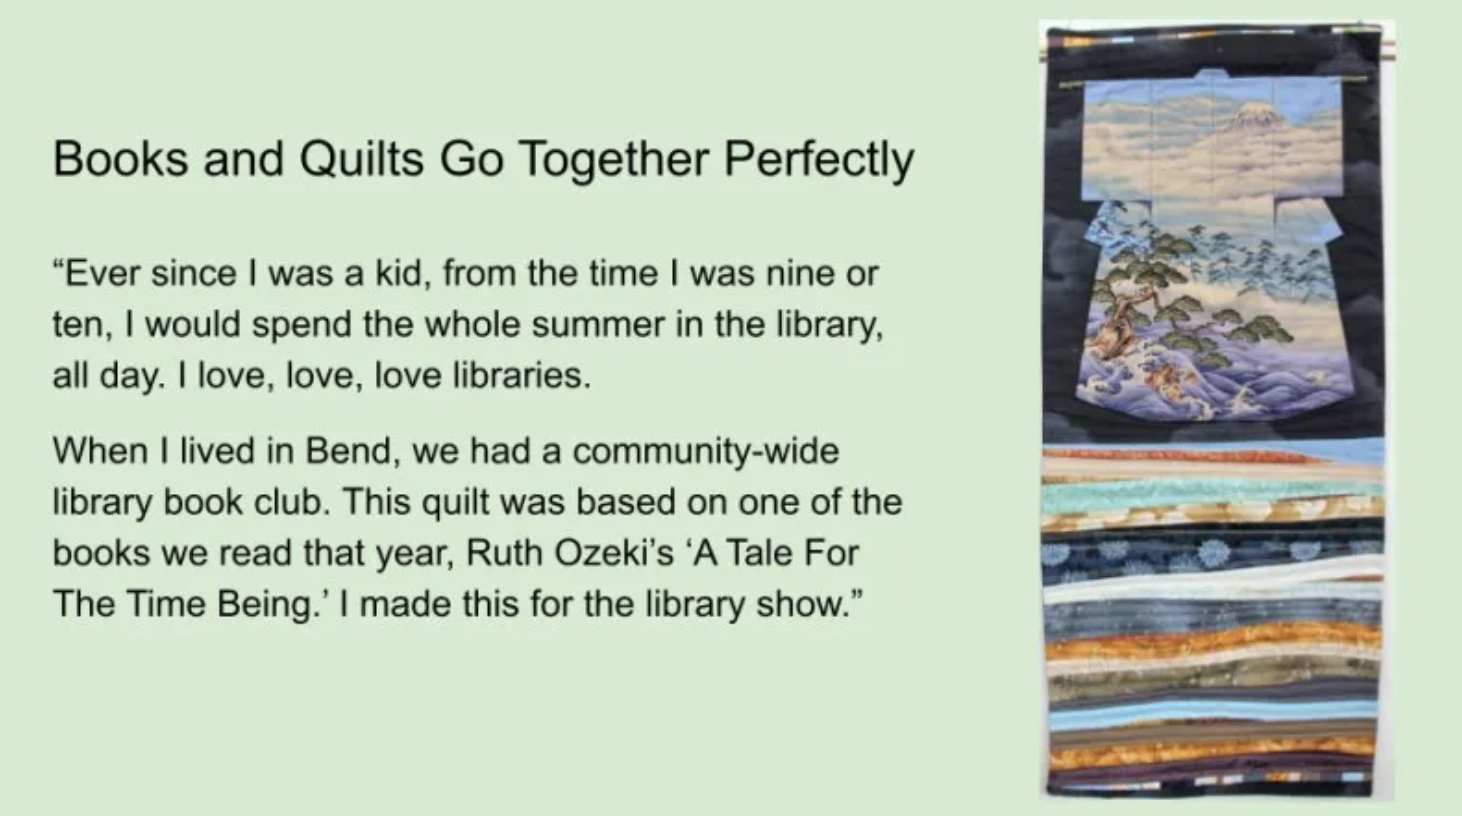
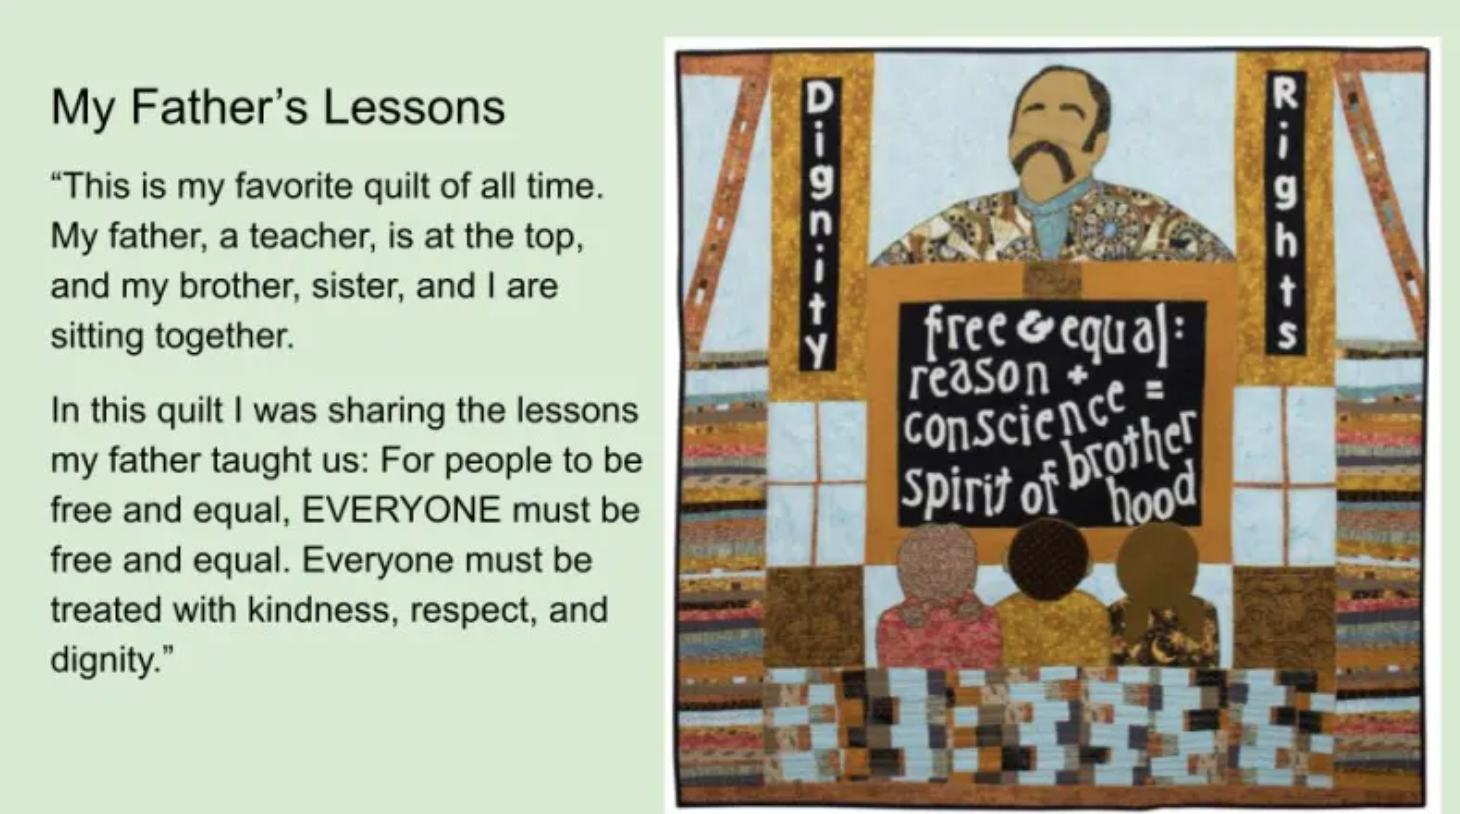
This is a follow up to the post – Artists Teaching Students. As I shared in that post, Beaverton School District in Beaverton, Oregon invited me to participate in their Art Literacy Program – Artist Teaching Students, by working with their Art Literacy Program Coordinator, Cathy Lamb, to create a slide deck presentation for kindergarten to eighth grade students (ages 5 – 14).
The slide deck is now posted on the Beaverton School District’s Art Literacy website:
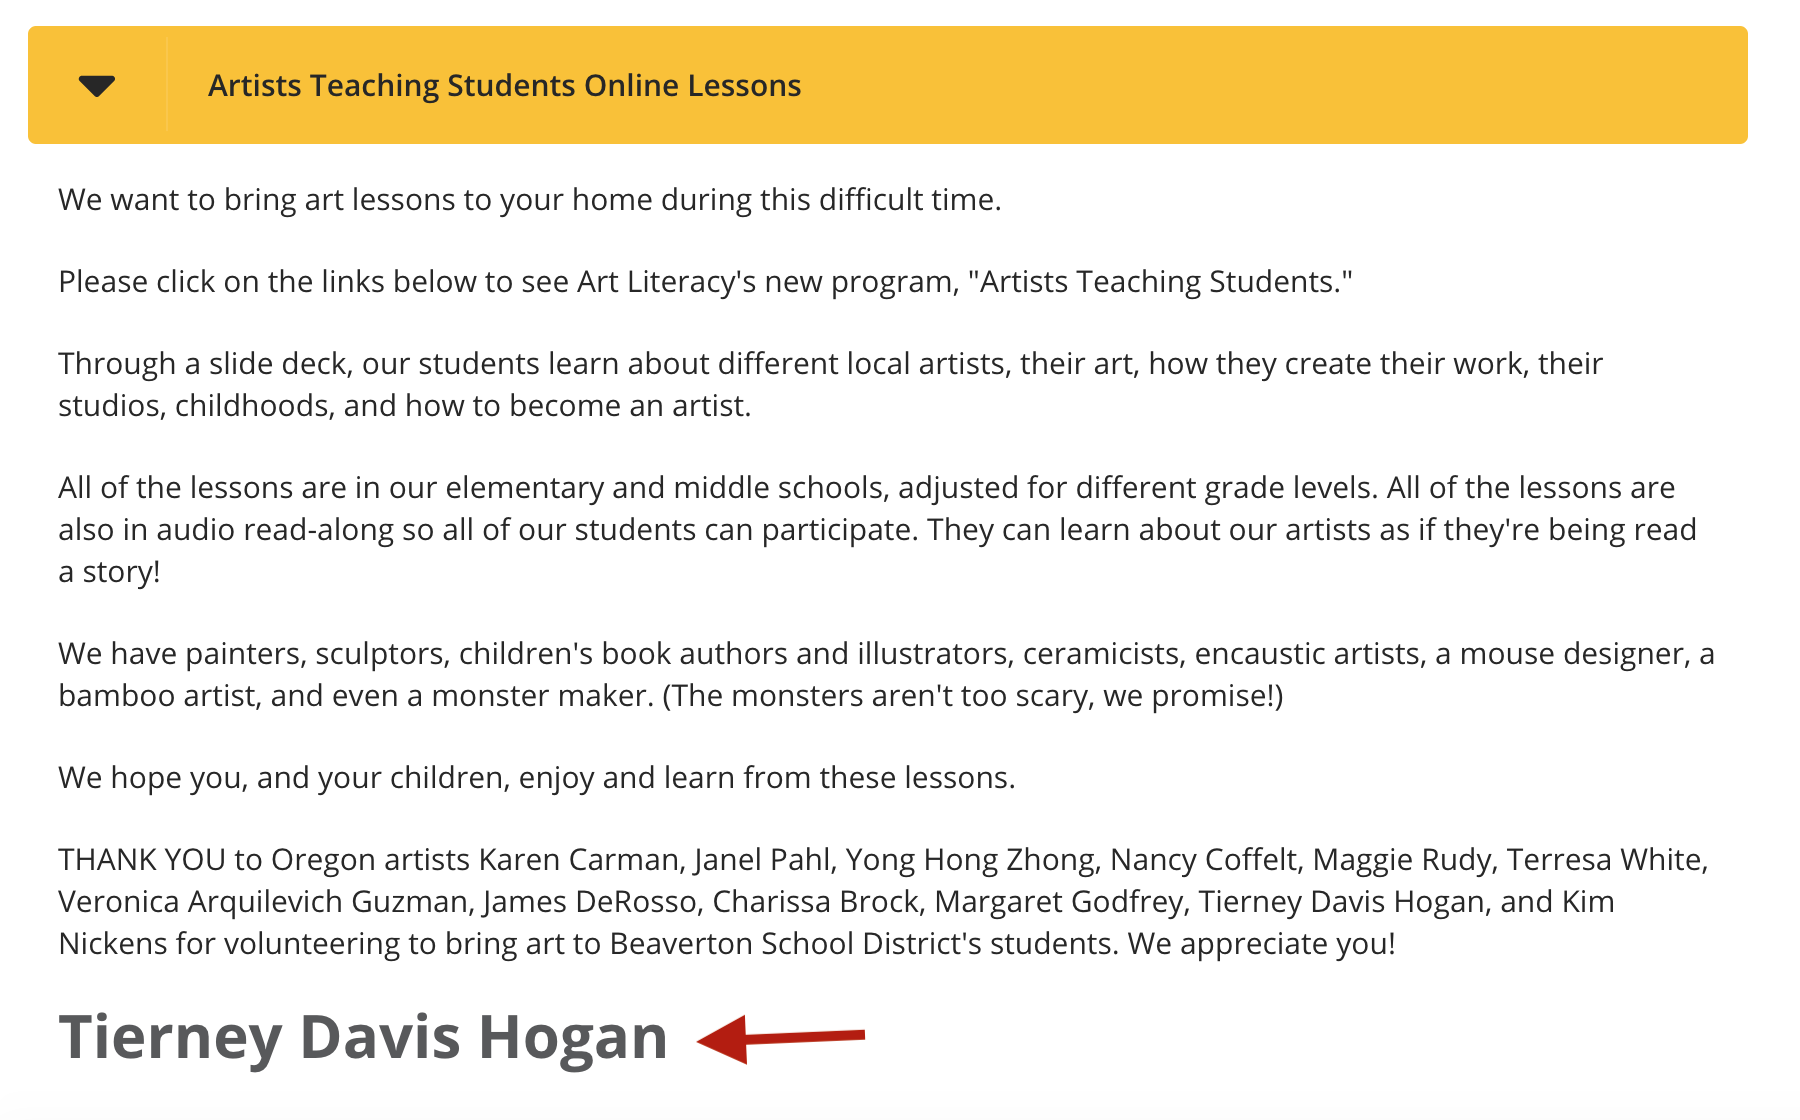
If you scroll down, past the smiling children image to the Artist Teaching Students Online Lessons and click on the arrow next to the text, it will open access to the artists’ lessons
image credit – Beaverton School District
If you scroll down to Tierney Davis Hogan, you will reach my slide deck:
image credit – Beaverton School District
Here is a sample of the presentation via a couple screenshots:
There are many more slides in the actual presentation/slide deck on the Beaverton School District Art Literacy Program website including a slide with my (terrible) 5th Grade school photo!
Here is the link again if you want to check out the full presentation:
You’ll have to see the full presentation if you want to check out awkward 11 year old Tierney (I was years from becoming the babe I became at 19 – 20 years old when I met my late husband Terry while I was in nursing school, ha!).
I have to give most of the credit for the awesome slide deck to the work of the wonderful Beaverton School District Art Literacy Program Coordinator, Cathy Lamb. Cathy and I used Google Sheets to collaborate over the phone to develop the slide deck and Cathy selected most of the quilts/images from my tierneycreates.com site that she thought would fit with the presentation.
I so enjoyed my collaboration with Cathy and how she helped me tailor concepts, such as my overall Artist Statement on my Artist Statement page on tierneycreates.com, and the artist statements for the quilts in the slide deck, into words and concepts that would be meaningful to kids. She had me just talk about how I felt about developing different quilts in plain language and she translated that into text for elementary and middle school students. It was a memorable and poignant conversation.
I hope you get the chance to check out the full presentation on the Beaverton School District Art Literacy website to see Cathy’s amazing work and the results of our collaboration!
I’ve added this to my Textile Adventures page which is a chronological summary of the highlights of my artistic journey to date.
Postscript
After the slide deck was posted, a teacher/advisor at one of the schools (Arts & Communication Magnet Academy, ACMA) in the Beaverton School District reached out to me and invited me to meet with a group of students in the National Art Honors Society (NAHS) via Zoom video call.
So sometime in the near future I will be meeting with students via video to talk about textile art.
Yup. So much for my plans to do daily postings to my blog. I even asked Mike the Miniature Schnauzer, who guest blog posted on Sunday 2/21/21, to fill in like he did in the post Guest Blogger: Obsession with Making Crocheted Dishcloths, but he was busy napping and still seems irritated over some dishcloth-crocheting-while-riding-in-the-car incident… (I have a hashtag I use on Instagram sometimes for posted pictures of Mike: #miniatureschnauzerfirstworldproblems).
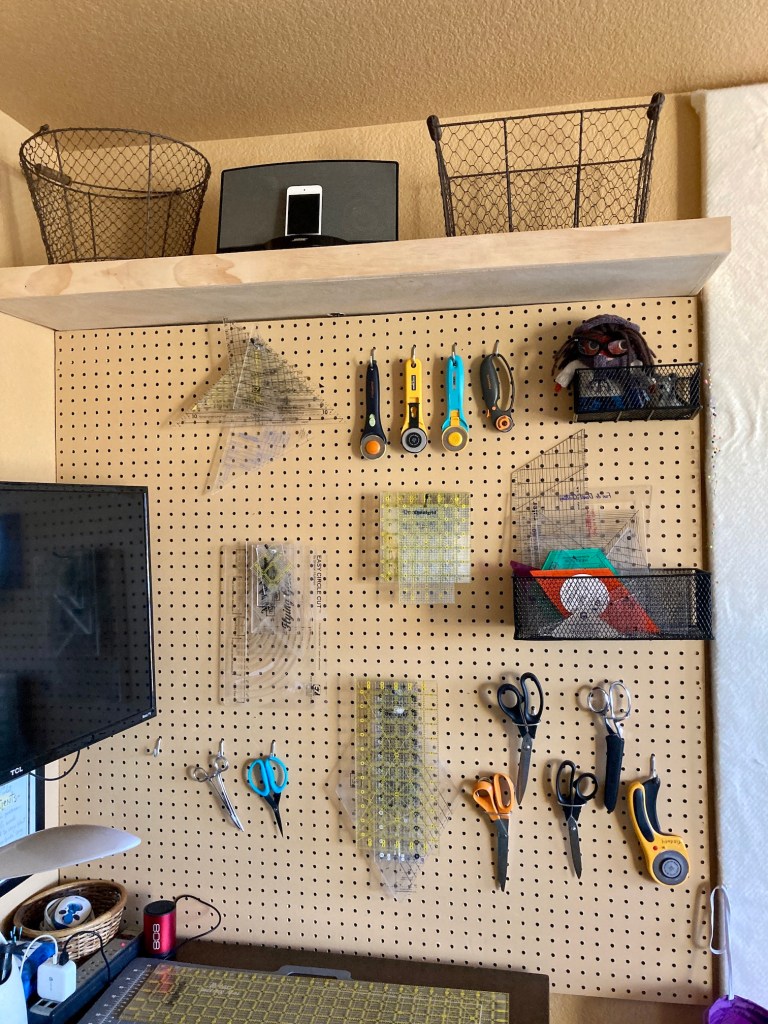
Rulers Gone Awry
This is probably not unusual but as a quilter I have a lot of different rulers and templates. I have the standard cutting rulers and then I have special rulers and templates I’ve collected over the years for various projects (or being lured by a demo at a quilt shop into buying a ruler/template I thought I might need someday!).
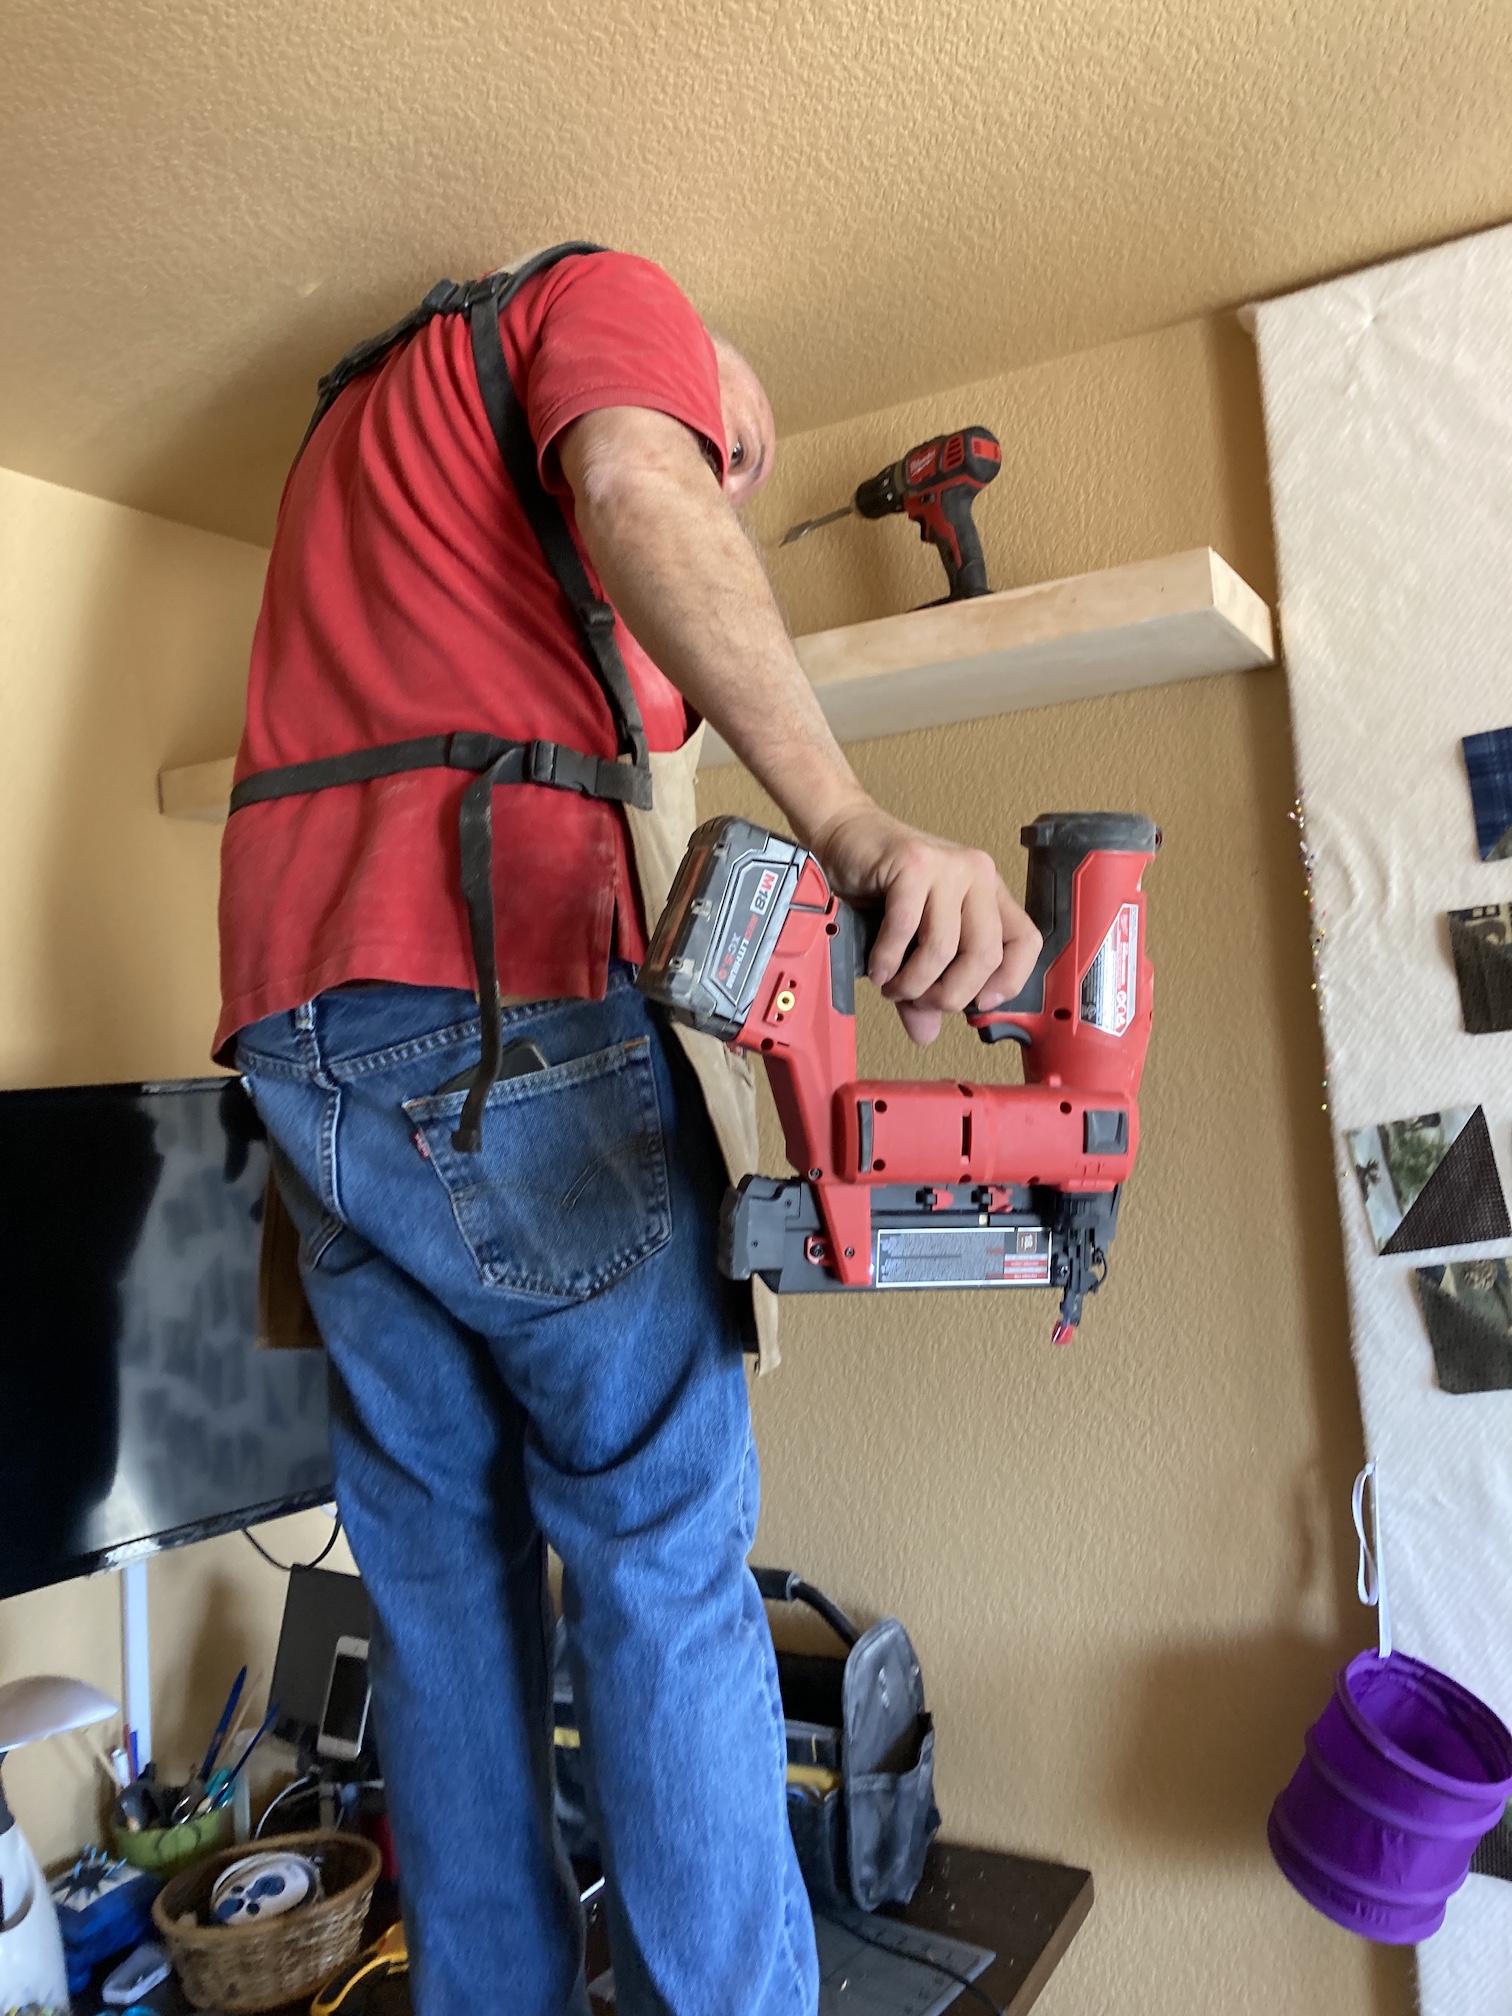
My organization of these rulers and templates was sort of haphazard and irritating to me. I thought that adding pegboard to my crafting studio would help resolve this – so I consulted with my partner John, aka “Mr. Woodworker” and he figured out a solution.
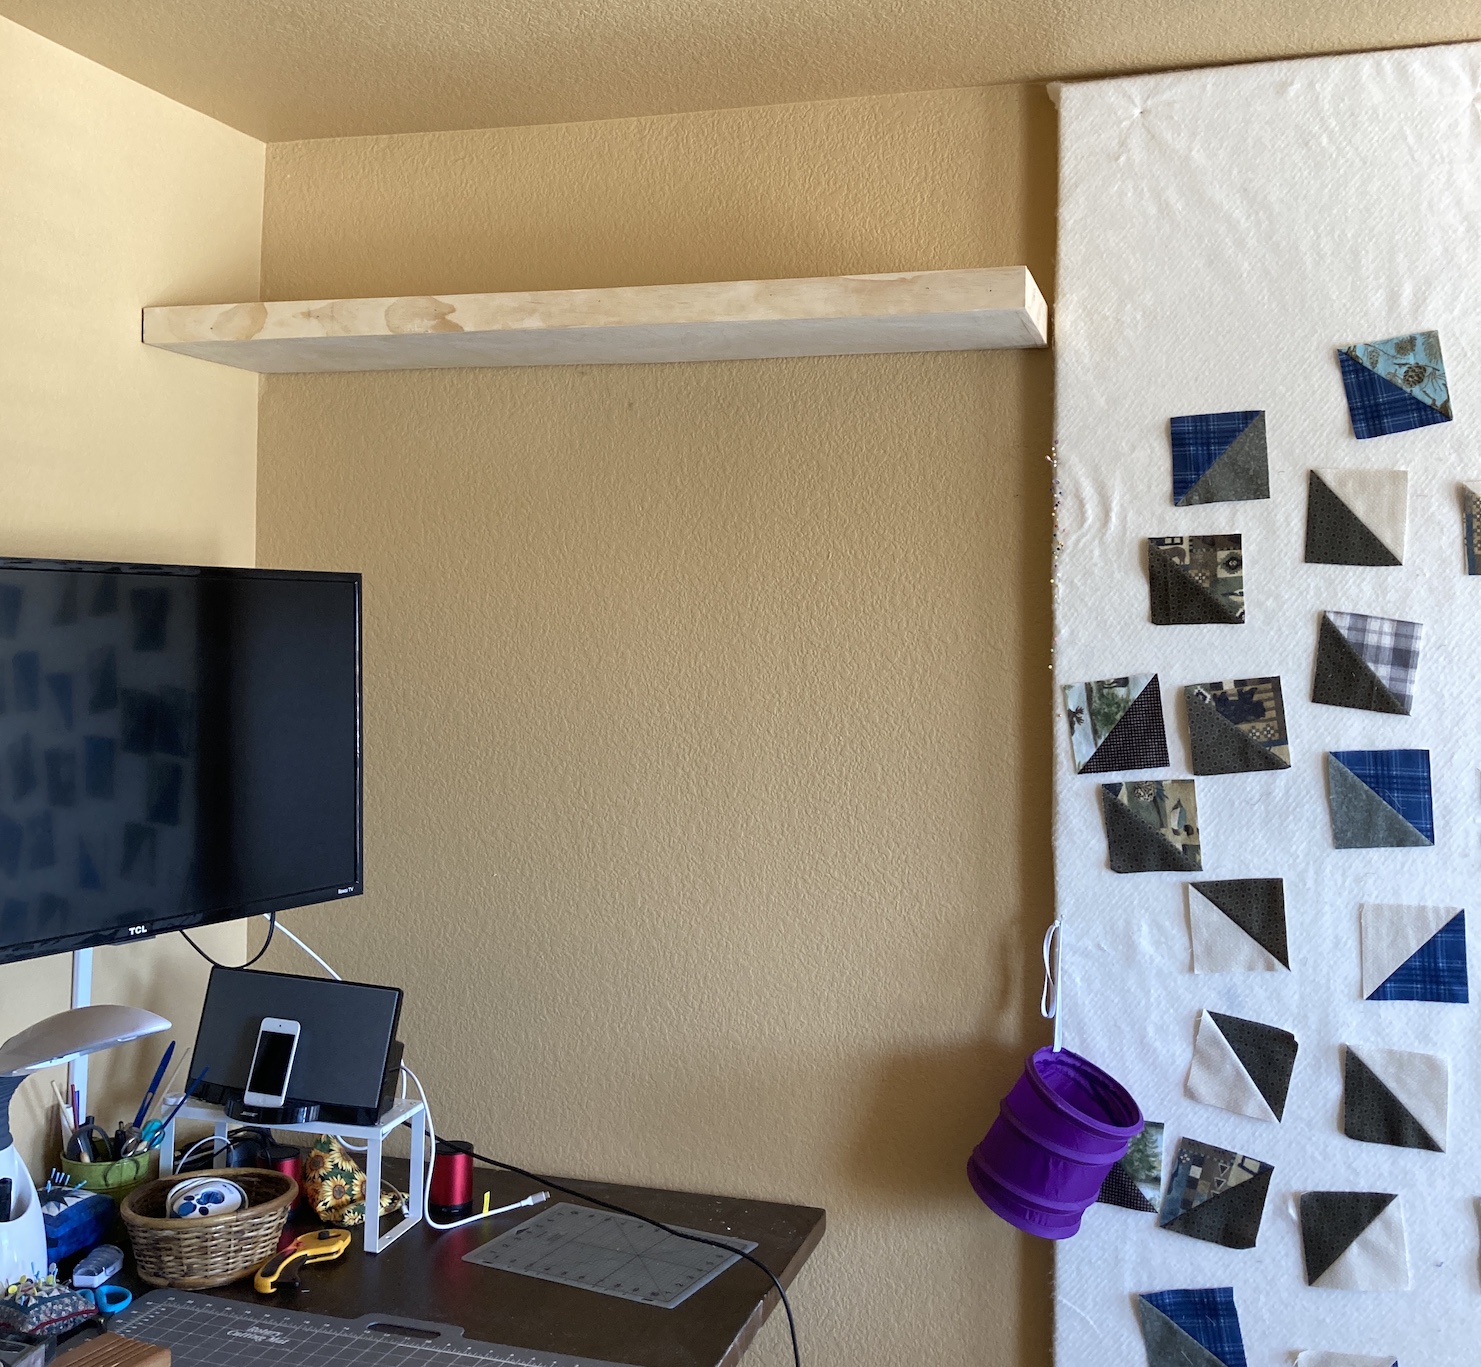
First he installed a floating shelf he built above where the pegboard was to be placed:
Then he cut the pegboard to fit the area of wall; and painted the pegboard to match the wall:
And then he installed the pegboard. Here is my original set up with the pegboard hooks and pegboard baskets were bought:
At first I tried giving tierneycreates Beastie and her dog Mikelet (see series of post Beastie Adventures) their own little balcony on the pegboard wall but they did not like it.
So I moved her to another area on my studio (she will probably do a guest post in the future to show you her new home and other changes to my studio) and repurposed that “balcony”:
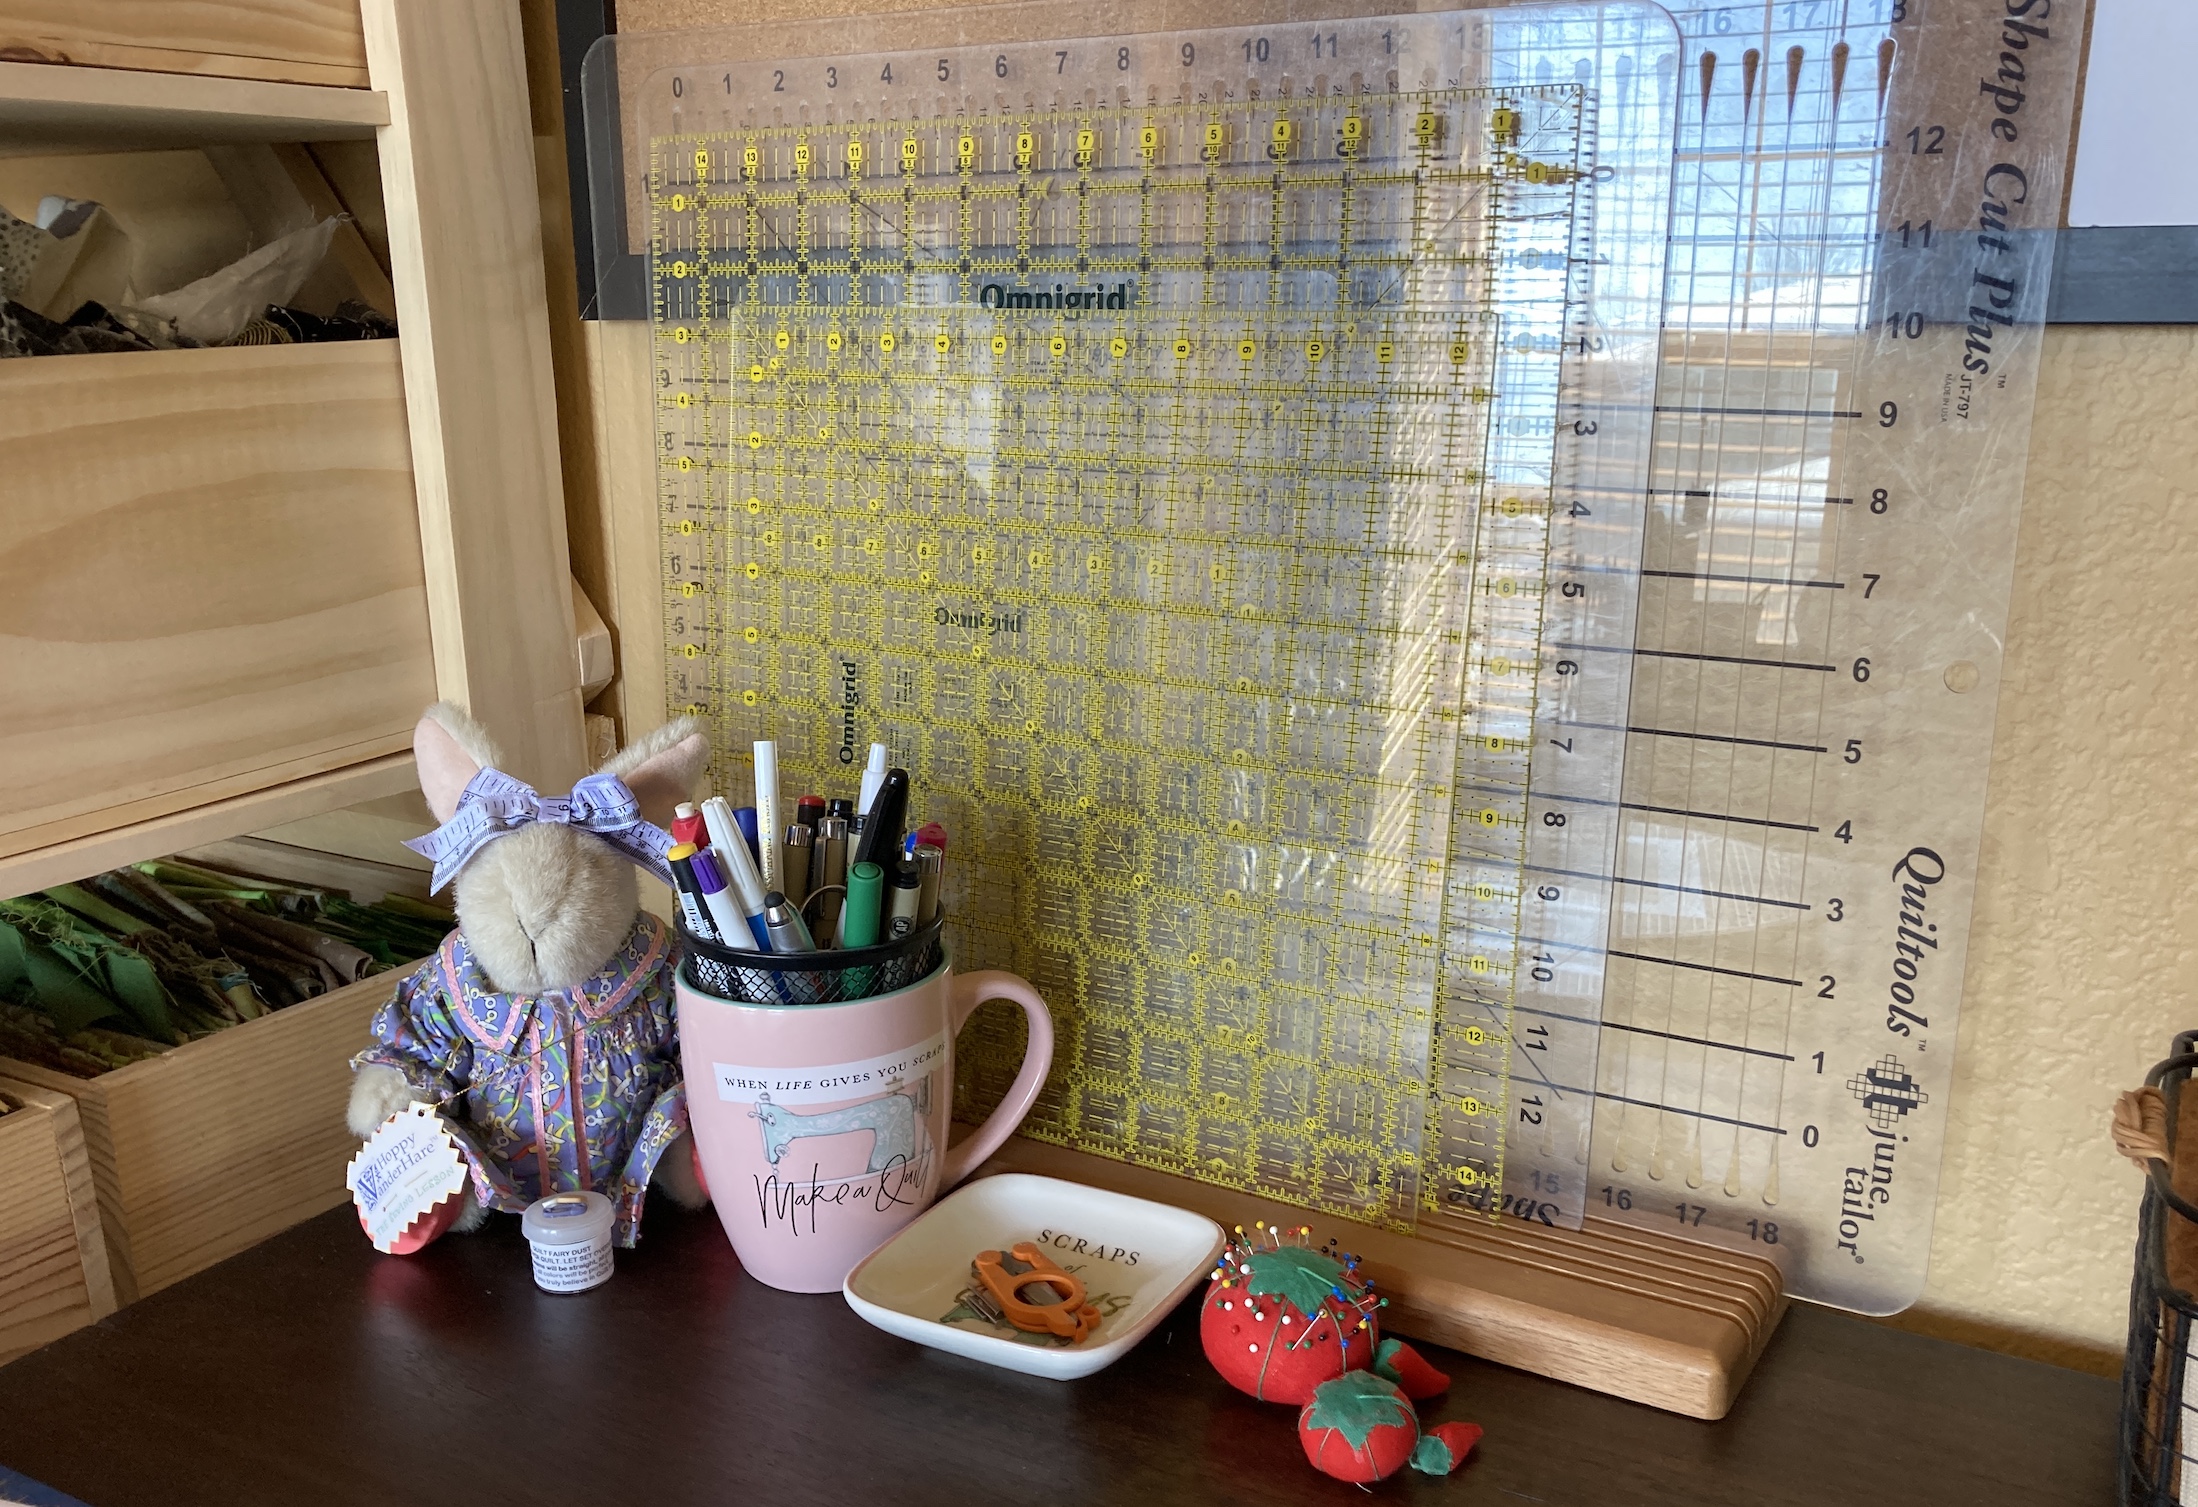
The pegboard has been wonderful to organize my commonly used and miscellaneous rulers. For now I still keep my very large rulers (like my 15″ x 15″ ruler) on my cutting table:
“Mr. Woodworker” is building me a new cutting table in the future which will have slots for my large rulers underneath the cutting surface!
Postscript
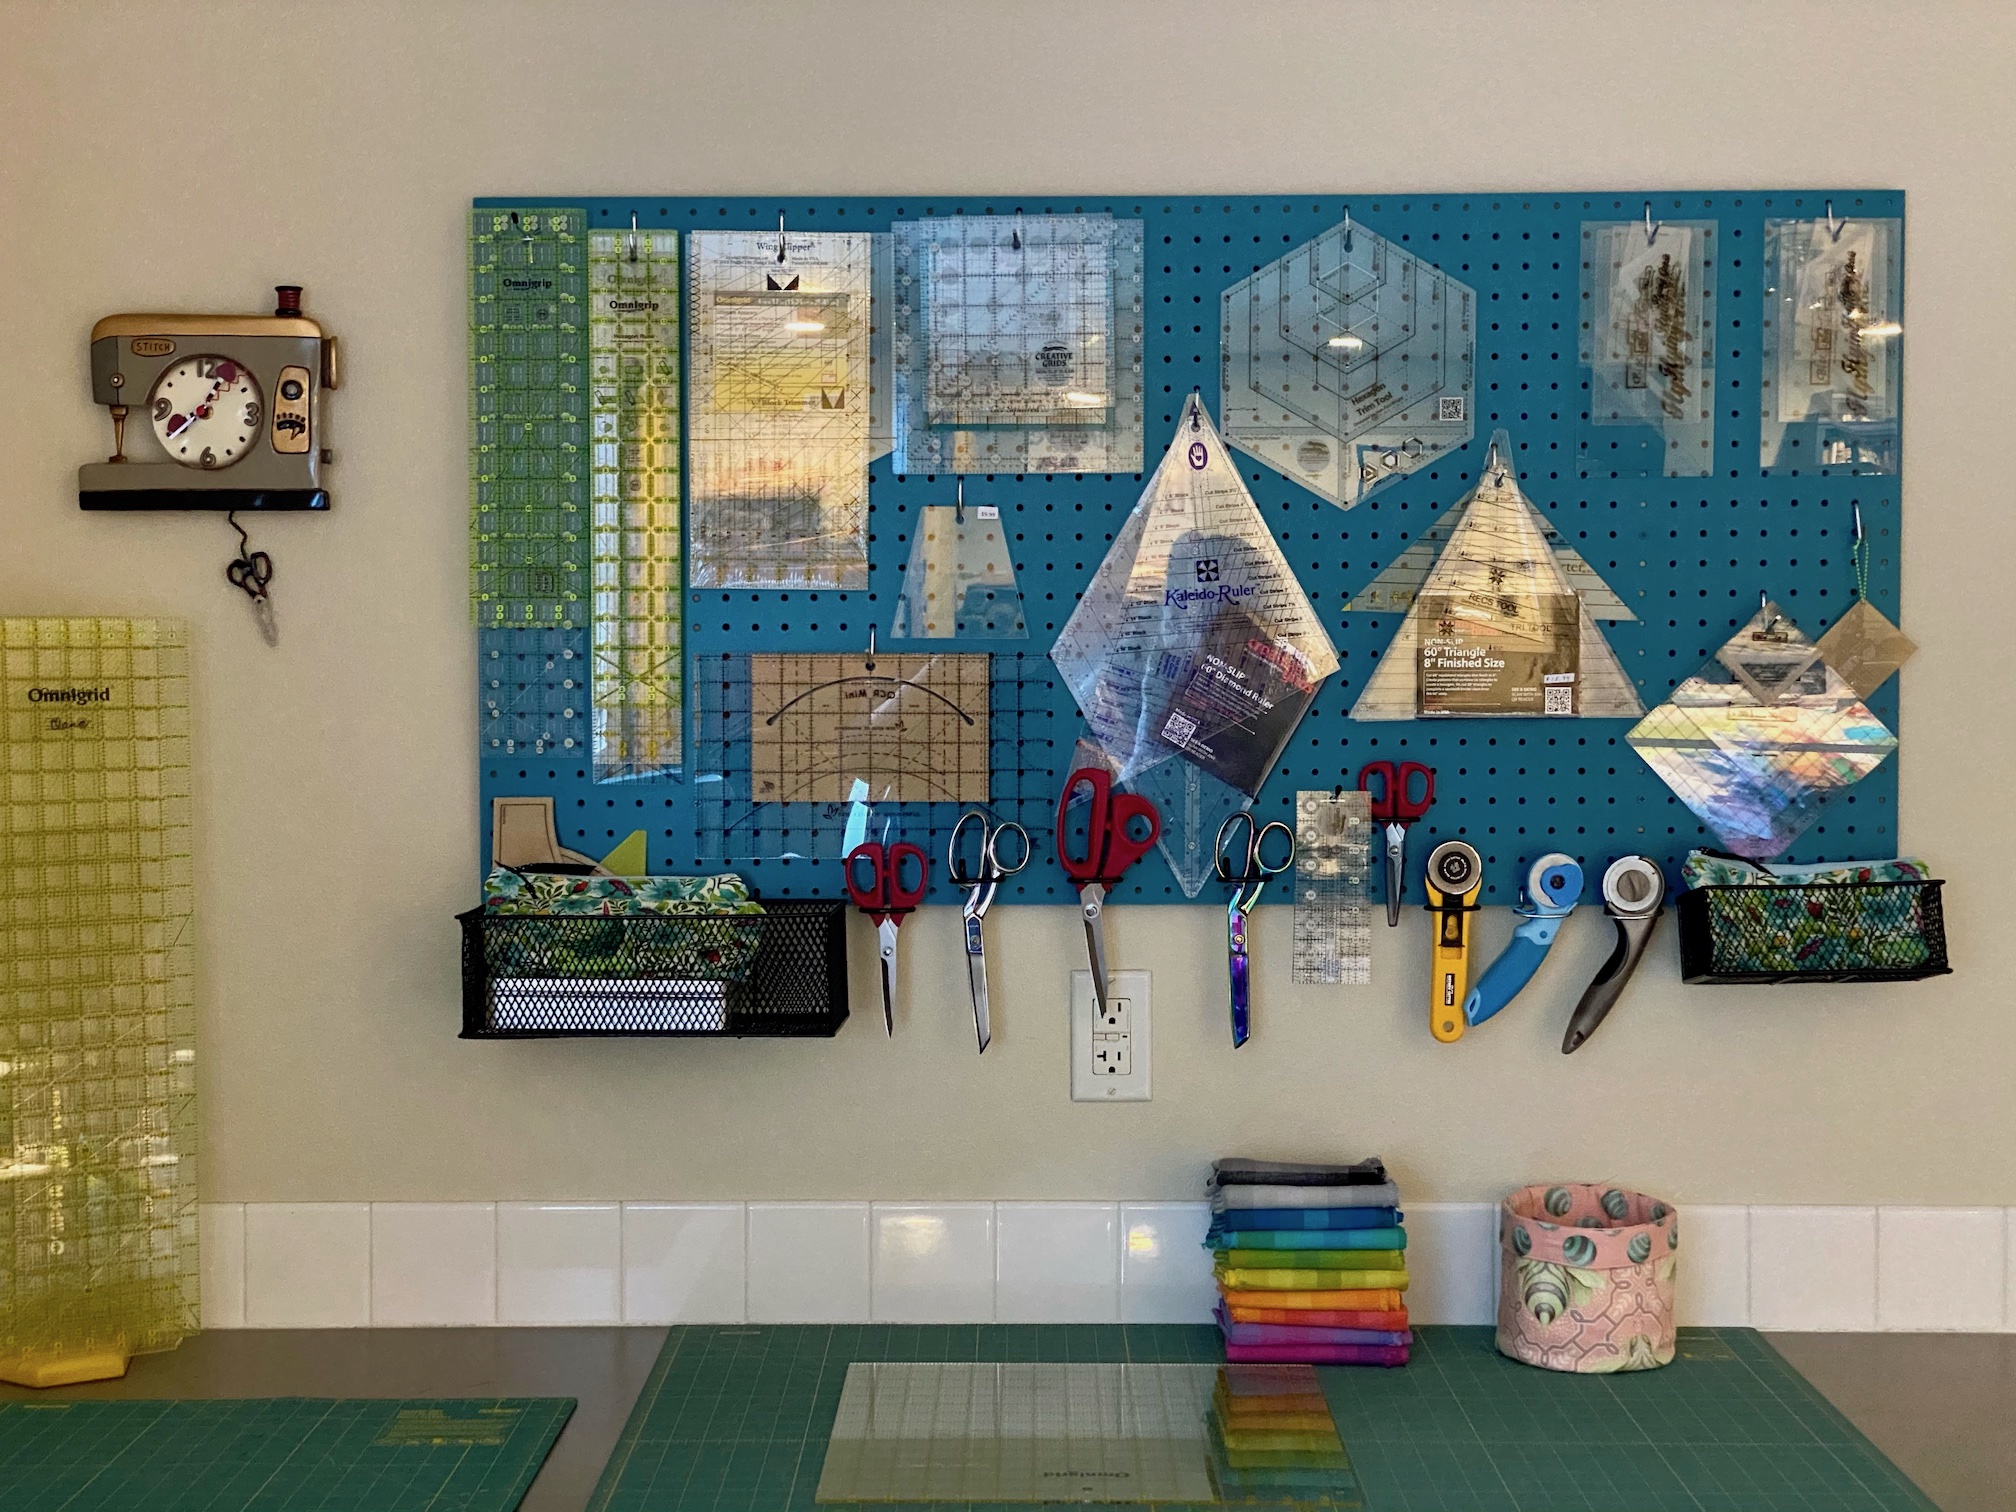
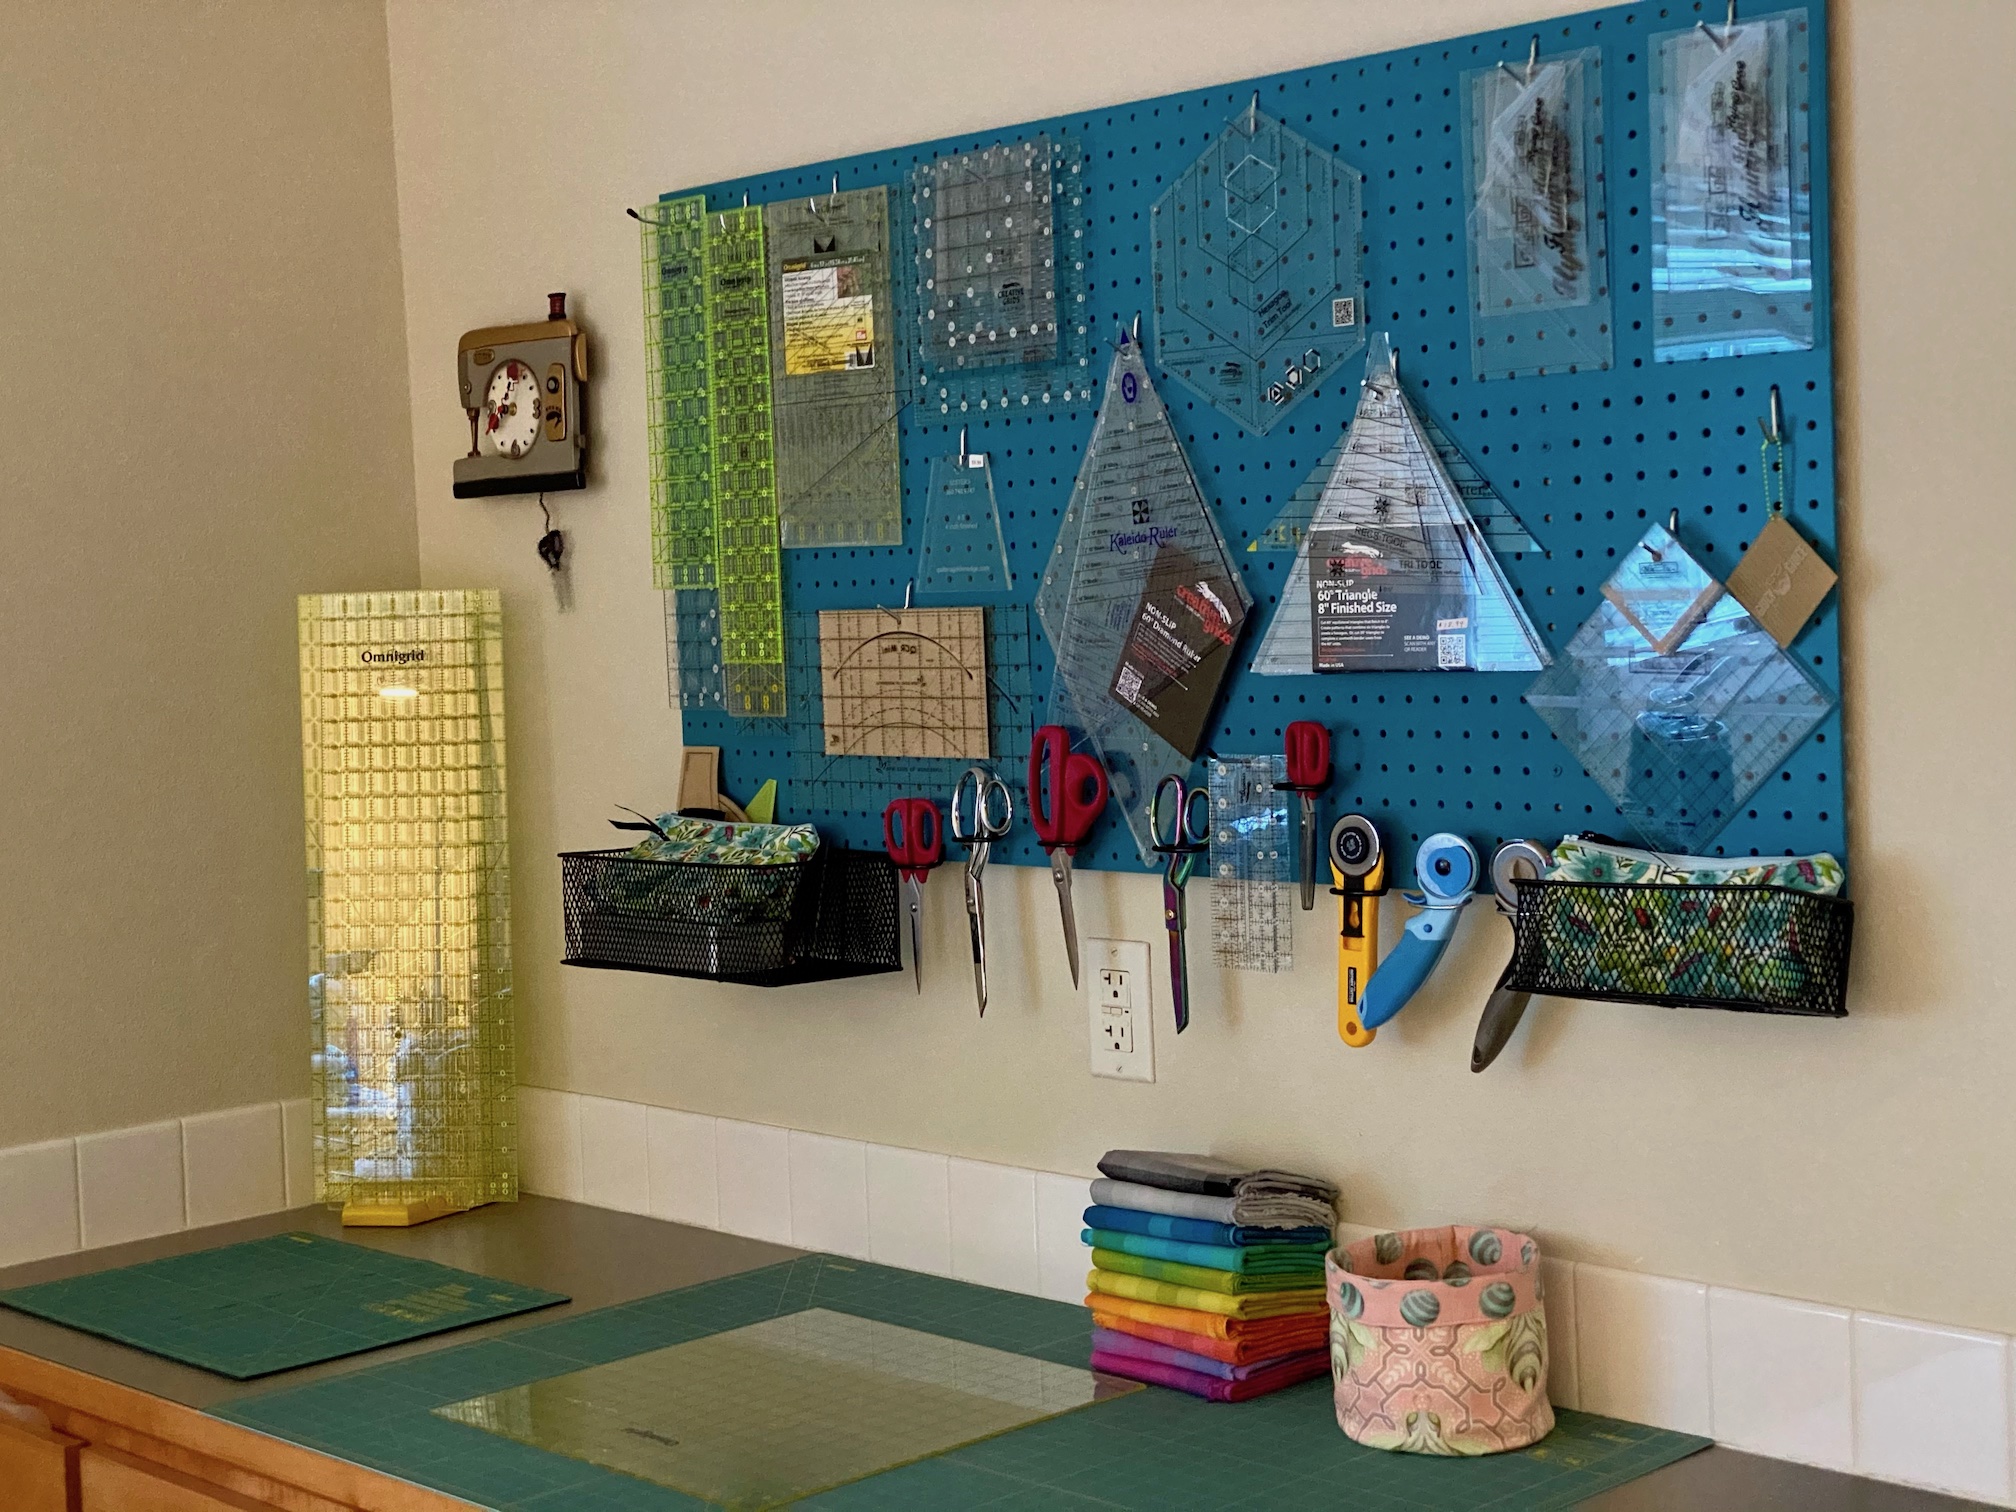
My friend Dana was inspired by my new pegboard and recently she had her husband install one in her studio!
At first she was going to have the pegboard painted a neutral color like the color of her studio walls, but then she decided she wanted a pop of color:
I think she did an amazing job organizing her pegboard! Thanks to Dana for sharing images of her new pegboard.
I’ve been blogging for over 7 years and throughout 2021 I am going to sporadically share old posts from the 7+ years of blog posts archives.
I lived in Central Oregon for 14 years (and thought I would live the rest of my life until a big life change occurred in December 2018) and somedays I miss it terribly. Here is a post from February 2018 which honors the beauty of my former home – Bend, Oregon; and the wonderful walks/hikes I used to take with my friend Laurie.
A Beautiful Monday
Originally posted February 7, 2018
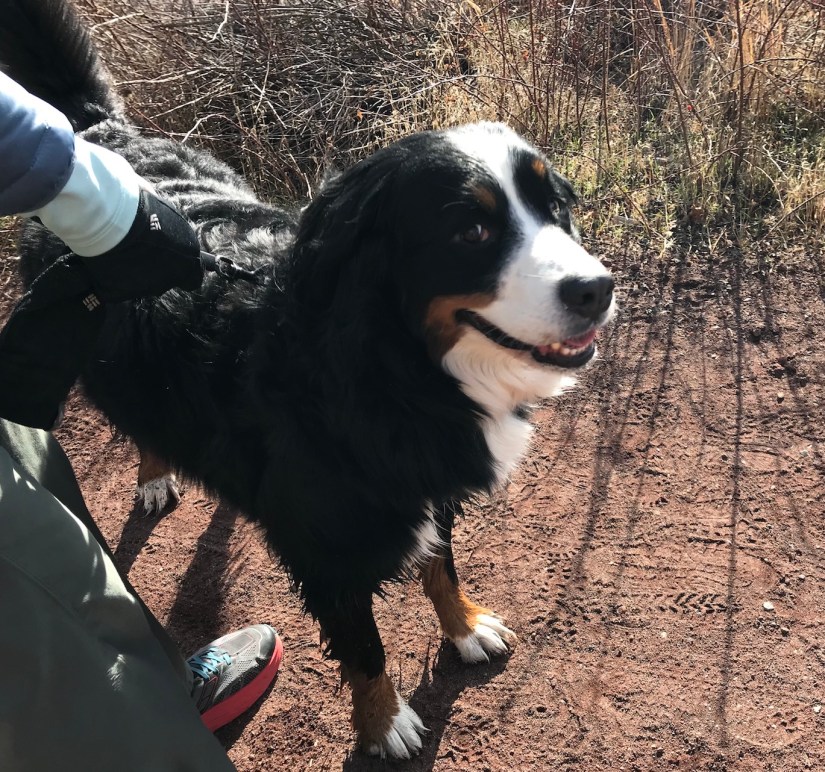
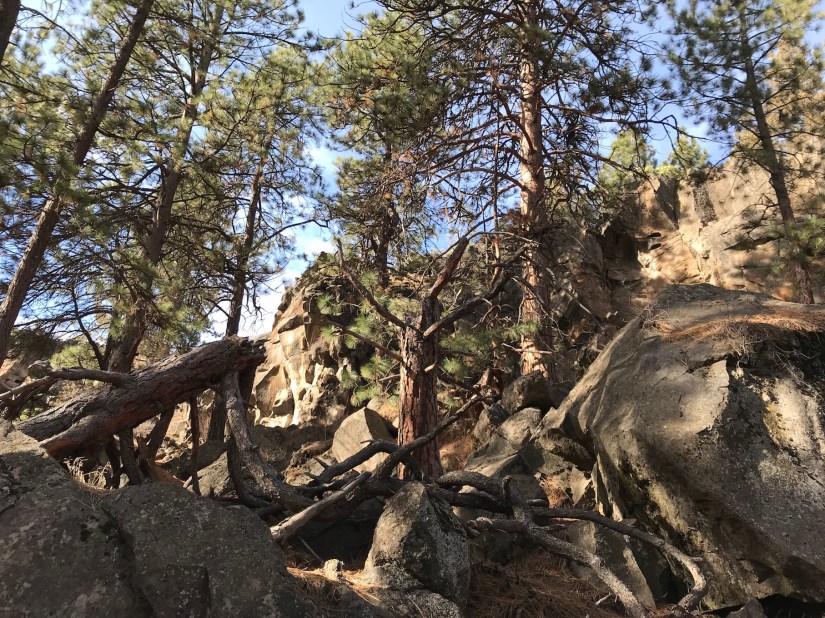
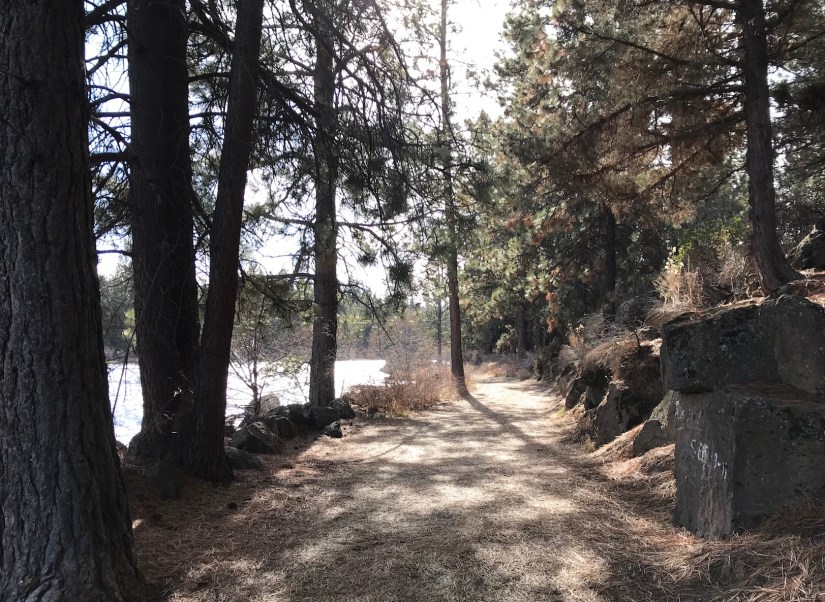
I do not work on Mondays and this past Monday I went for a lovely hike with my friend Laurie and her Bernese Mountain Dog, Luna along the Deschutes River Trail off of Farewell Bend Park.
We are having “Sprinter” (Spring-like Winter, yes I totally made that up) in Central Oregon. Monday was in the late 50s to early 60s degrees F (14 – 15 degrees C for my blogging friends outside the US). It was truly like a sunny blue sky Spring day (minus the Spring foliage).
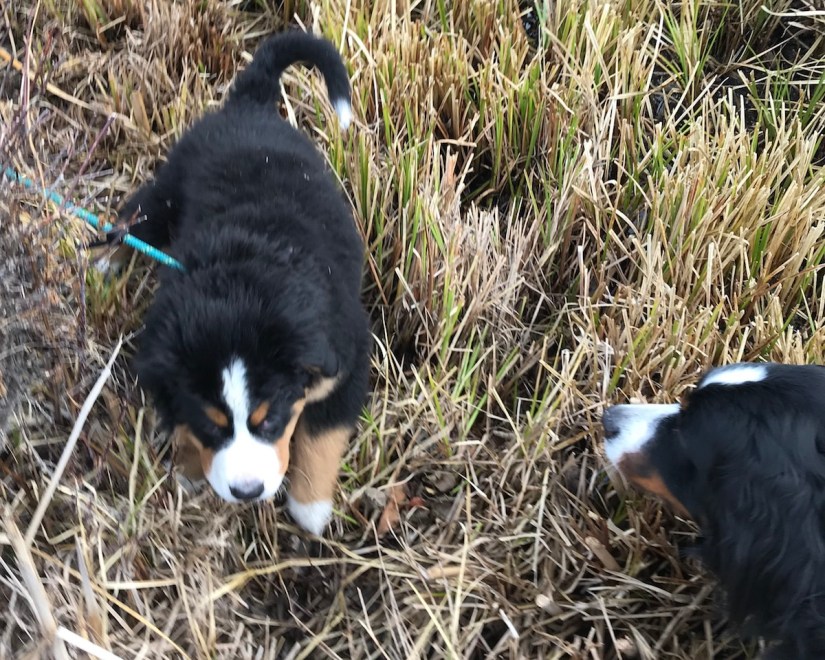
We had a wonderful hike along the Deschutes River. Luna got to play in the river so she really happy and as a bonus for her and the humans, we ran in the puppy/”mini-me” version of Luna – an adorable Bernese Mountain Dog puppy named Willow.
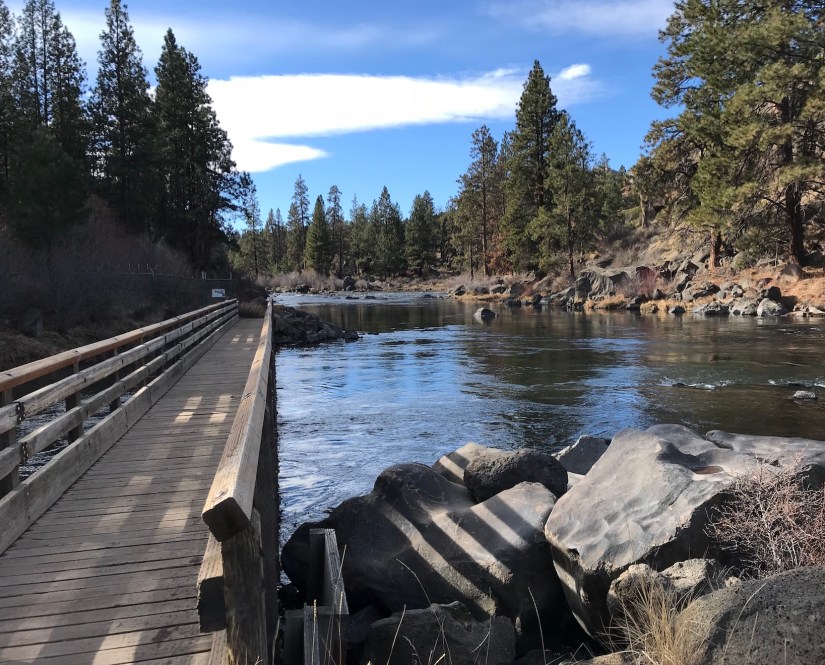
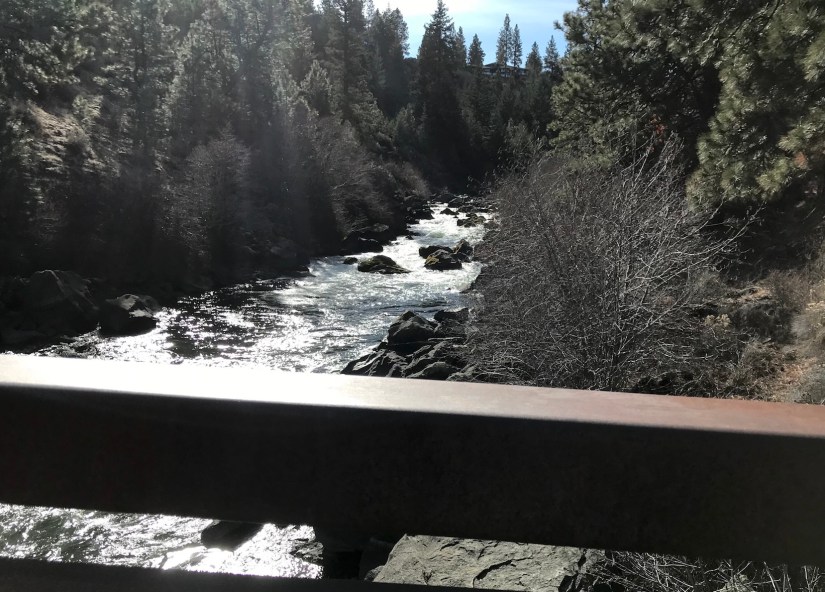
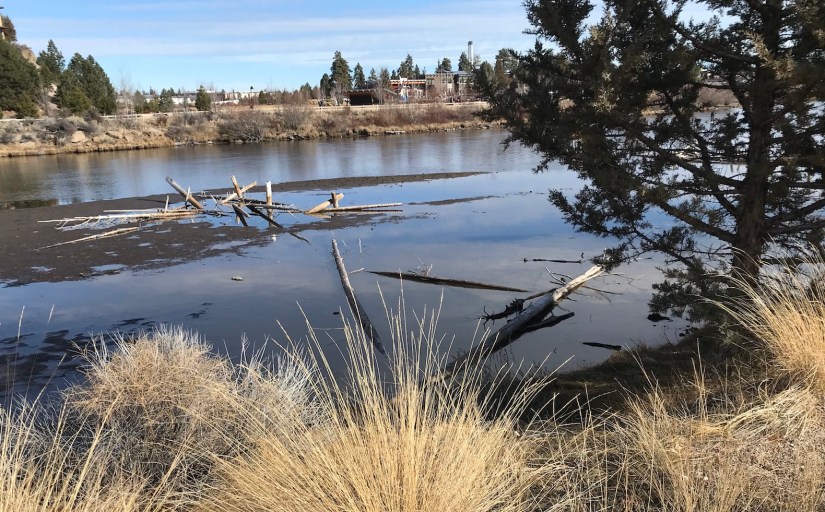
Well, instead of me telling you about the hike, why don’t I just share photos and let the photos speak for themselves!
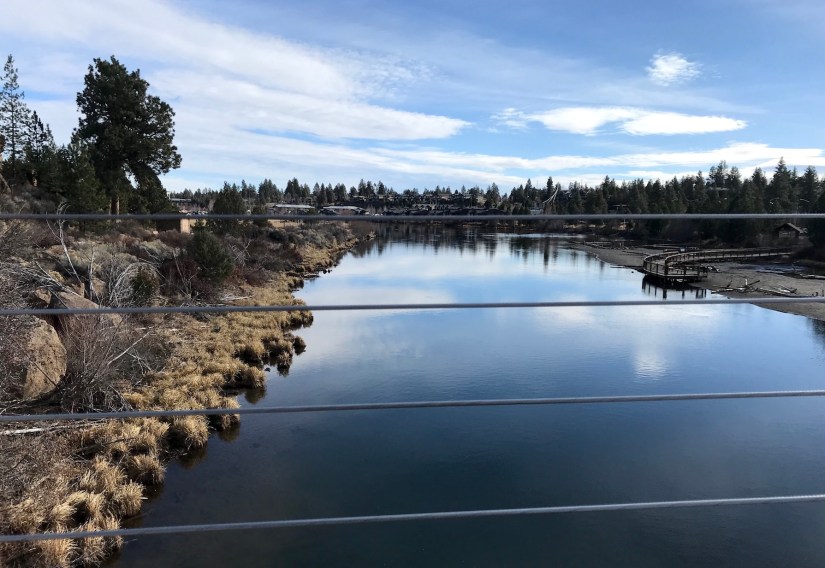
The Deschutes River Trail and Farewell Bend Park connect you back into the Old Mill District, an outdoor shopping and dining area built around an old lumbar mill, hence the name (www.oldmilldistrict.com/about/history/).
Laurie and I got a kick out of the app-based rental bikes parked at the Old Mill. You sign up and pay for the rental using a smartphone app!
We plan to rent them someday to explore the surrounding area by bike without having to haul our bikes down to the area!
Actually we are planning monthly hikes to explore our town. I have lived in Central Oregon 13 years and there is so much I have not yet explored, or I just want to explore again!