This is Mike the Miniature Schnauzer that lives with Tierney and John. I see that pesky Beastie has had like 4 guest blog posts recently; and it is time for me to have one. (Plus I am a REAL miniature schnauzer, I am tired of that allegedly cute little fake miniature schnauzer – Mikelet.)
In my Dog Camp post, I shared my challenges of being EXTREMELY popular at the Dog Camp I attend whenever my humans go out of town (though occasionally I stay with John’s Dad who refers to me as “his dog” even though he now has a miniature schnauzer puppy living with him).
The Dog Camp is only for smaller dogs and I am always surrounded by the little female dogs that attend camp for daily dog daycare or are boarders when their humans go out of town like mine.
Recently I spent a stint at Dog Camp when my humans went to Chicago and oh my goodness – from the minute I arrived the ladies went crazy!
The human that runs Dog Camp took this video and my human Tierney uploaded it to YouTube so you can see what happened the moment I arrived at Dog Camp!
Ladies, there is only one of me, calm down!
I am so glad to be back home and take a break from the ladies. I am neutered but it still does not matter, they all follow me around!
It is not all “Mike-stalking” by the female dogs at Dog Camp, I did also have time to play lots of ball with my buddies there:
I bet you are surprised to hear from me again so soon! This is the tierneycreates Beastie, and I am sneaking in for a post about my new desk that Tierney’s partner John built for me yesterday.
Tierney had a post planned today on Black & White photos she took in Chicago (my monster eyes are rolling) but I asked her to delay your boredom a day while I shared news about my new desk (which I am writing you from right now!):
First John came up to Tierney’s studio (which is also the home of my dog Mikelet and me) to take my measurements for the desk:
He went down to his woodshop in the basement (where my partner John Beastie lives, yes we stay in separate sections of the house its a long story – but it best not to let two Beasties hang out continuously, trust me…).
An hour later John returned with my new desk:
Then Tierney and John did a photoshoot (and I am not sure why they were giggling so loudly during the photoshoot, it was quite rude) of me at my new desk:
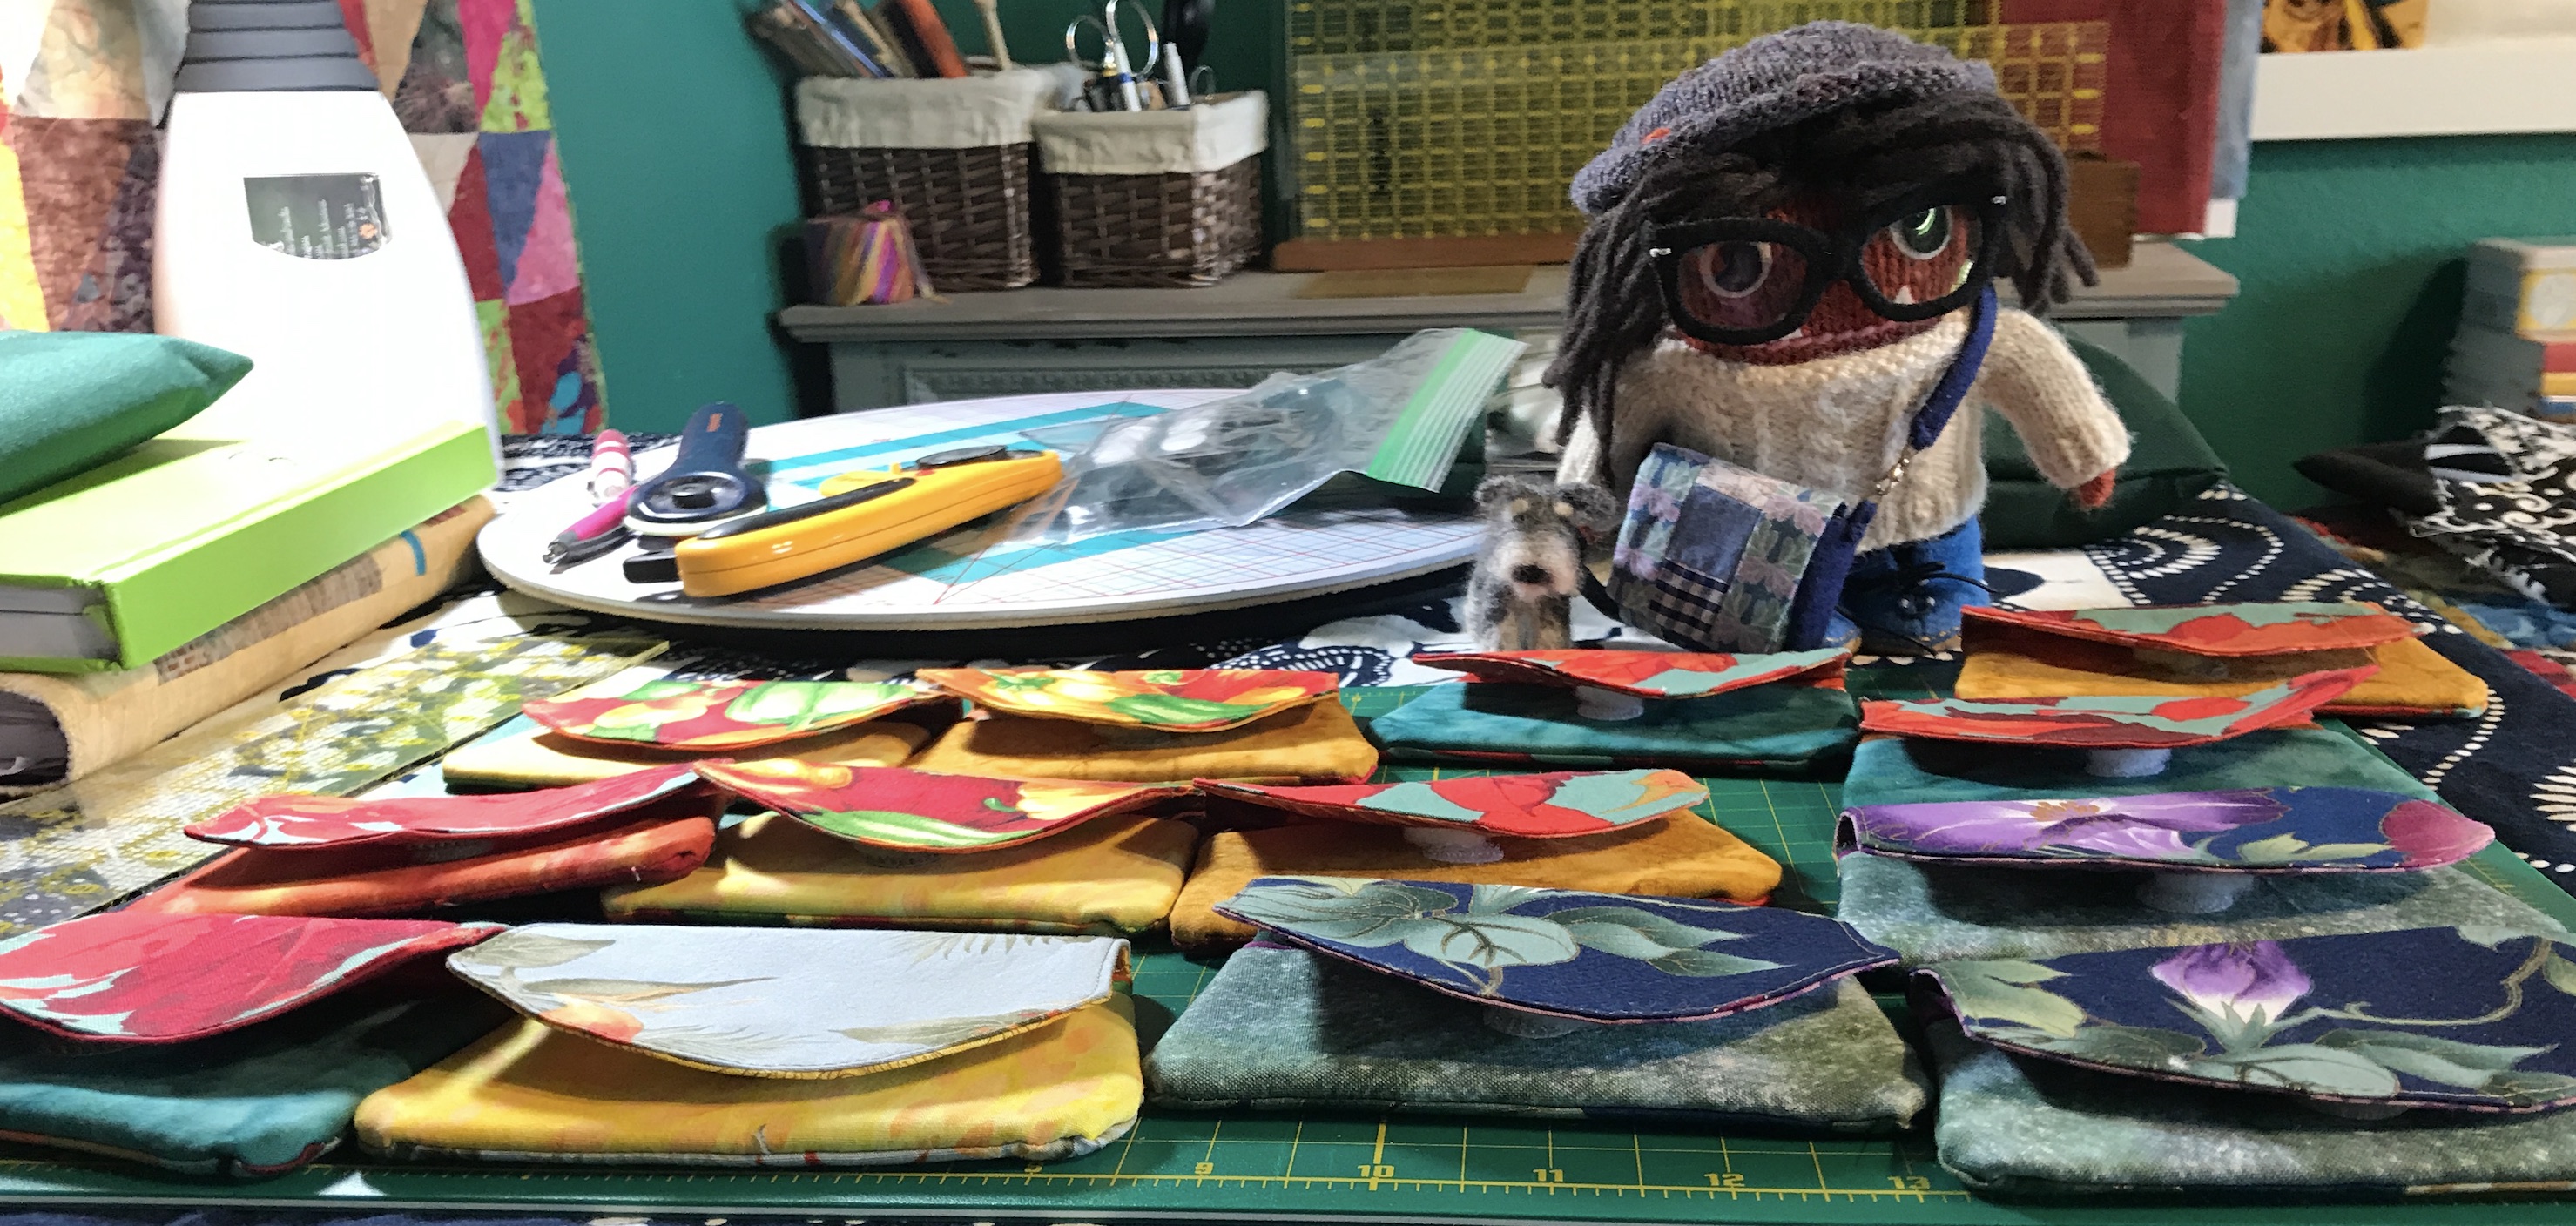
We also discovered the desk is great for me to sew on my Beastnina, so I can help Tierney out with her backlog of UFOs (unfinished objects for the non-quilters reading):
My dog Mikelet was getting impatient during the photoshoot because it was time for his after dinner walk:
So I stopped playing with my new desk, and took Mikelet out for his walk:
So that’s my new desk story. Now that I have a great place to write I might pop in more frequently with blog posts.
And don’t worry Tierney will be back tomorrow to bore you to tears with more of her B&W photography from her delusion that she is a photographer (but just keep playing along).
Oh and to close this post – here is a photo of me back in my area of Tierney’s studio, with all my accessories made by Helen of Crawcrafts Beasties (crawcraftsbeasties.com):
So where I left off on yesterday’s post, one of the days of the retreat we headed out to Annie’s Quilt Shoppe .
Here I am all buckled up in the back seat of the car headed to the quilt shop:
And here is a little video on Mikelet enjoying the fresh air on the car ride through some back country roads to get to the quilt shop:
Mikelet was safe during the car ride, we only let him hang out the window when the car was going slow and Tierney did hold onto his back legs so he would not fall out!
I did look out the car window a little myself, it was so relaxing in the backcountry:
Finally we arrived at the quilt shop:
Here are a montage of images from my visit to the quilt shop, and most of them featured ME – because isn’t a photo better with me in it??!?!
We saw a $25,000 sewing machine while at the quilt shop and I had to take a photo with it.
It seems like a sewing machine would have to do a LOT for you in order to be worth $25,000. I think you should be able to throw fabric at it and it turns it into a completed quilt in 10 seconds or something!
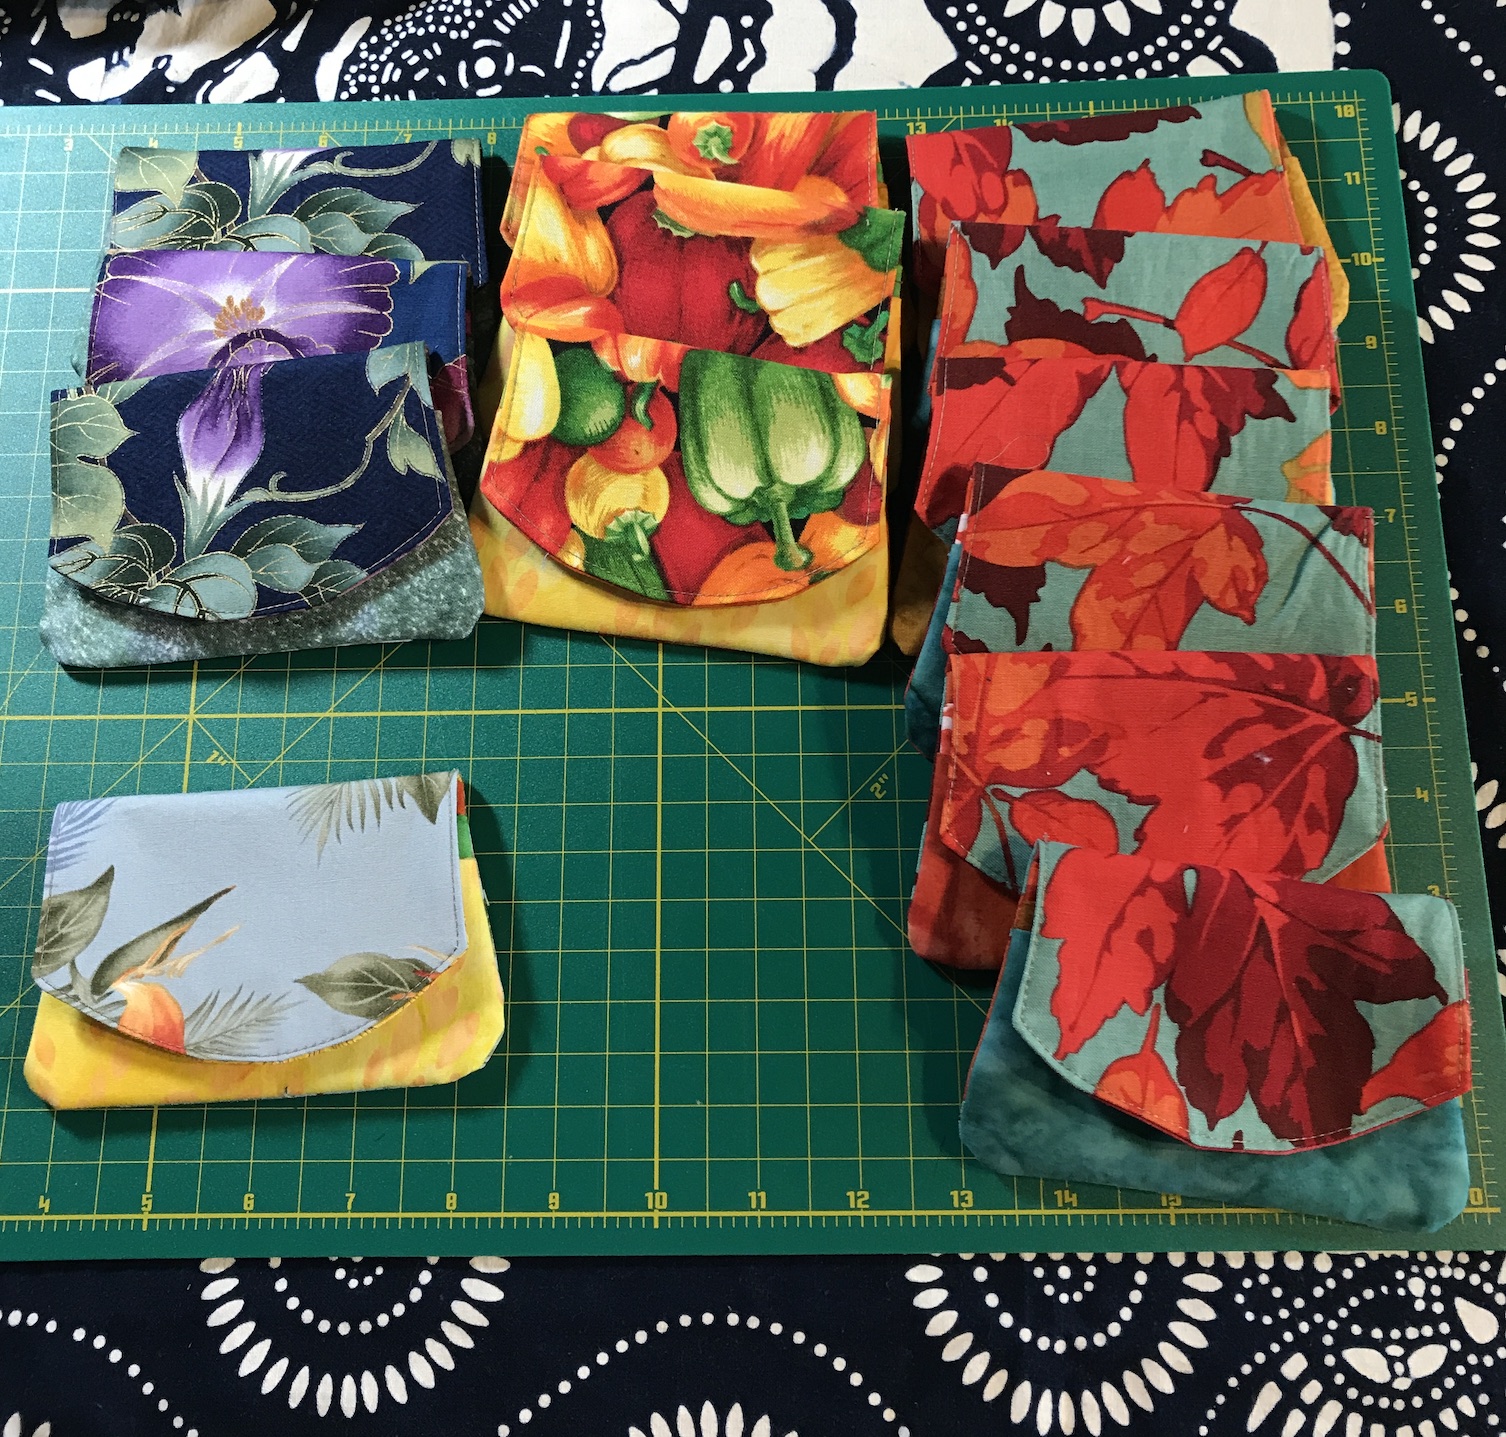
Tierney and I did find some fabric to buy while at the shop, including the Figo fabric she ran out of when making her drawstring bags for her Etsy shop Textiles & Smiles (see postThree Part “Harmony” and Experimenting with “Mass Production”), which all sold out. Now she can make some more bags! (Tierney really needs to restock her Etsy shop, it is looking pretty empty right now…)
Tierney has agreed to post tomorrow some of the Black and White photos she took during the trip (you know she has this fantasy that she is a real photographer, just check out her series of posts –Life in B&W; yes she is quite delusional..) and then I will finish up with Part III of my series of guests posts about the quilt retreat with a little about what was made during the quilt retreat (yes sewing actually occured).
Well I am tired of waiting around for Tierney to do a blog post, so once again I’ve had to take matters intomy own paws and do a guest blog post (if you are new to this blog, my story is on this post – I’m A Monster!!! and you can see all my posts at this link: Beastie Adventures).
Tierney was allegedly going to start writing blog posts again once she caught up on reading all her blogging buddies’ posts after her very busy summer (so far). But you haven’t seen a recent post from Tierney have you?
So I’ve pulled out my laptop and written a post to start to update you on our summer:
Pulling out my laptop and using my make shift desk since Tierney fell down on the job
A week or so ago (not sure at this point, the summer is a blur…) Tierney, Mikelet (my dog) and I attended a quilt retreat at the Riptide Retreat in Shelton, Washington with some long time quilting friends (including the lady who originally got Tierney into quilting).
Sign inside the retreat centerOn the back deck of the retreat on the water, beautiful weather every day!
Tierney’s quilting friends who live in Washington state and drove to the retreat, brought her a sewing machine to use during the retreat so she wouldn’t have to bring hers on the plane from Denver to Seattle. Here I am supervising the start of her sewing on this loaner machine:
At least it is a Bernina…
I am a little obsessed with rotary cutters since Tierney never let’s me play with them (see post Guest Blogger: October Quilt Retreat Part I), and I did try to get access to a rotary cutter one of the other quilters had lying around during the retreat but Tierney thwarted my efforts, sigh.
If I could just get a little closer…
Not everyone was sewing at the retreat, one person was learning to crochet and I had to check it out:
I think I would need a Beastie sized crochet hook to attempt that…
As I am a Knitted Person (knitted by Helen of Crawcrafts Beasties – crawcraftsbeasties.com), I am not sure how I feel about crochet…
We had delicious food during the retreat, the Washington based quilters at the retreat pre-prepared a couple meals for the attendees including this homemade lasagne with from scratch tomorrow sauce and handmade meatballs:
Trying to figure out how to dive into that pan of lasagne when no one is looking…
In addition to eating and sewing (and lounging around on the deck overlooking the water), several of the quilters went on daily walks. I accompanied them on walks and here are a couple of photos from my walks with either the quilters or when I took my dog Mikelet (who was very well behaved at the retreat) on walks:
It was cool to be back in the Pacific NW and take Mikelet for a walk in the majestic wooded areas in the neighborhood of the retreat center!
I’ve decided to discontinue “other human” (so this does not include Mike the Miniature Schnauzer or the tierneycreates Beastie, ha) guest blog posts, as I want to just create content for my blog on my own (or content “channeled” me by Mike or the tierneycreates Beastie of course).
However the talented Rose Atkinson-Carter offered a couple weeks ago before I made this decision, to write an article related to two things I know many of you love: reading and crafting. Please see the bottom of this post for information on the London-based author of this guest post.
5 Novels that Feature Arts and Crafts
If you’ve ever tried looking for books about arts and crafts, the results are awash with innumerable ‘how to’ pamphlets, or nonfiction texts about artists and their work. While there’s nothing wrong with a good crafting guide, it’s nice to mix things up every so often. That’s why I’ve taken it into my own hands to curate a list of the best arts and crafts inspired novels.
If you’re struggling to find something artsy for your reading list, stick around for a few books you’ll definitely want to pin to your reading list.
The Lady and the Unicorn, by Tracy Chevalier
Penguin Random House image
The Lady and the Unicorn is a historical fiction novel based around real works of art — six medieval tapestries made to form one large piece, thought to originate in Medieval Belgium — from which the author extrapolates a complex and affecting literary tapestry of love, lust, and betrayal. Though the narrative hails from seven different narrators’ points of view, the tapestries’ begins with budding nobleman Jean Le Viste, who commissions a tapestry to artist Nicolas Des Innocents, expecting him to depict bloody battles and passionate soldiers. However, after Le Viste’s wife (and Nicholas’s muse) throws down the artistic gauntlet, the artists desires lead him in another direction — to wax poetic about seductive flowers, unicorns, and numerous women.
Known for her previous bestselling novel The Girl With the Pearl Earring, also based on a work of art of the same name, Tracy Chevalier exceeds expectations as she breathes life into yet another mystery shrouding great works of art, turning them into the centerpiece about which every human desire orbits. Of course, this novel isn’t just concerned with desire between humans, but desire in every form — the desire to be useful, to be happy, to be inspired, and the desire to be free. This is a must-read for anyone wanting an insight into the decadent and tumultuous side of art.
Crewel World, by Monica Ferris
Thriftbooks.com
Though it’s labelled a ‘cozy mystery’, be warned that this mystery opens with a tragedy: the loss of our main character Betsy’s sister, a murder that took place in her very own needlecraft shop. In spite of its ‘cozy mystery’ label, this book begins with tragedy: the murder of our main character Betsy’s sister, who died in her very own needlework shop.
Following the murder, Betsy struggles to find her feet again, recover from grief, and take over the craft shop, all while a looming police investigation puts a halt to any hope of returning to normalcy. However, as is often the case with a good mystery novel, it soon becomes clear that all is not as it seems.
As she learns the ins-and-outs of the needlecraft, Betsy realizes that the police are dragging their feet over the investigation. Is it because they don’t have a good understanding of the craft itself, or is there something darker at play behind the scenes? Either way, the aspiring detective is certainly up to the task.
Monica Ferris’s breakout novel, Crewel World, the first in her expansive Needlecraft murder mystery series, is sure to keep you on the edge of your seat right until the end — and, as a bonus once you reach the final page, you’ll get a free embroidery pattern too!
The Miniaturist, by Jessie Burton
Thriftbooks.com
Rose Atkinson-Carter is a writer with Reedsy, a marketplace that connects authors with some of the world’s best editors, designers, marketers, ghostwriters, and translators. She lives in London.
If you’re looking for a novel that blends crafting inspiration with a healthy amount of creepy mystery, then you’re sure to enjoy The Miniaturist. Set in the corrupt and glamorous seventeenth century Amsterdam, the narrative follows eighteen year old Nella Oortman as she steps into the unknown — an arranged marriage with famed (and wealthy) merchant Johannes Brandt. However, the house she marries into is not warm, but rather steeped in the secrets held by the merchant’s harsh sister Marin, the servants Otto and Cornelia, and the kind-but-distant Johannes himself.
So, where do the arts and crafts come in? Well, the clue is in the name. As a wedding gift, Johannes bestows Nella with a cabinet-sized replica of their house, which he commissions from a miniaturist. However, in the process of realizing the life-sized furnishings for the inside of the replica, packages start arriving — and peppered within what the family ordered are eerily accurate extra items. Indeed, the scenes, furnishings, and dolls are spookily true to events of the past, present, and the future. Given that, can Nella work out what’s behind this mystery all while surviving her secretive new family along the way? It’s worth finding out for yourself!
Last Wool and Testament, by Molly MacRae
Thriftbooks.com
Ivy McClellan is well known in the needlework community for being magically brilliant at her craft, as well as being the founder of a passionate group of needlework and fiber artists named Thank Goodness It’s Fiber, TGIF for short. Unfortunately Ivy eventually dies, leaving her shop (and the TGIF meeting place) to her beloved granddaughter, Kath Rutledge.
When Kath arrives to attend the burial, she discovers that nothing is as it was when she left — and local police officers now brutally nickname her grandmother as ‘Crazy Ivy’. The thing is: there’s been a local murder and, somehow, Ivy is the main suspect. On top of that, the title to Ivy’s house has been stolen and Kath is left with just a week to pack up and scrap together clues about what on earth happened. In the meantime, she manages to rent an apartment with an unexpected roommate — a specter — and that specter seems to be just as interested in Ivy’s case as Kath. So, if you can’t tell already, this story is sure to keep you guessing with its twists, turns, and knots, right until the very end.
How to Be Both, by Ali Smith
Thriftbooks.com
Ali Smith’s ground-breaking novel, How to Be Both, borrows from art in both its narrative as well in the very format in which it’s written. For the latter, Smith borrows from paintings fresco technique to deliver a double take in the form of a novel, starting each halve of every print edition with a completely different narrative point of view.
For one half, you might end up with a narrative beginning with Italian painter Francesco, while, for the other half, you may start the story with a teenage girl named George, and vice-versa. Either way, both are intrinsically connected to the art world (as well as each other) and invested in what it may become. The two artists’ are worlds apart: Francesco’s narrative is contemporary to the Renaissance Italy in which the painter of the same name that inspired Smith lived, whereas George serves as a teenaged 1960s counterpart. Despite the two characters’ differences, the parallels between them, the love, and the injustice they experience are striking. If you’re interested in sinking your teeth into the inner workings of artists, their muses, Renaissance Italy, and a playful narrative structure all in one — this novel is for you.
That concludes my list of the five arts and crafts influenced novels that inspired me! Whether you prefer to use a pin, pen, or paintbrush, I hope they can be a suitable muse for all of your crafty needs or, at the very least, refresh your love for the arts.
Rose Atkinson-Carter is a writer with Reedsy, a marketplace that connects authors with some of the world’s best editors, designers, marketers, ghostwriters, and translators. She lives in London.
Well it’s time for one of her guest bloggers to step in, as Tierney has disappeared from the blogging world for some time now due to “Hooman Life Distractions“.
I recently learned us dogs are supposed to refer to our Humans as “Hoomans” courtesy of looking at too many dog postings on Instagram. I guess they feel dogs are not very literate? Nah, I am going to keep called them “Humans”, as you can see I am literate enough to write guest blog posts.
In case you have not guessed it, this is Mike the Miniature Schnauzer here to fill in for Tierney and do a blog post.
Here to fill in (though it takes away from my nap time)
If you are new to this blog, I fill in from time to time and here are a couple samplings of my previous posts:
Once you recover your awe from the brilliant writing by a 12 year old Miniature Schnauzer in the links above, you can continue on with this post.
I am not sure if my Humans Tierney and her partner John will like this post, because I am going to tell you of how they attempted to COMPLETELY TERRIFY me by taking me on a day trip to Seven Falls in Colorado Springs, Colorado and making a death-defying vertical climb up the scariest stairs I’ve ever seen, with me in a backpack!
Here we are at Seven Falls before the terror started:
When I thought it was just a fun day out with the Humans…
Seven Falls, according to the Broadmoor’s website (yes Miniature Schnauzers are capable of online research, duh) Colorado Springs Seven Falls, is Colorado’s most majestic waterfall.
The only waterfall in the state on National Geographic’s list of International Waterfalls, and often called “The Grandest Mile of Scenery in Colorado,” Seven Falls is situated in a 1,250-foot-wall box canyon between the towering Pillars of Hercules. Take in stunning valleys, striking rock formations and golden prairies as you climb the challenging 224 steps to the hiking trails and the banks of glistening streams that feed the falls, and its 181-foot drop of falling water.
Did you notice the phrase in the quote above: “as you climb the challenging 224 steps…”? To me it seemed like they were climbing 224,000 steps to get to the top as I was looking our the backpack on the back of John’s back.
Here is the photo my Human Tierney took (she caught the photo during a moment that I had turned my head to take a break from the terror I was looking at below):
Why are they making me endure this? I was perfectly happy looking at the scenery from ground level
Oh! My Human Tierney just walked in while I am working on this post, and is now insisting that I share more photos from this day trip to show the climb was worth it.
My guest blog post writing is being interrupted by an irritating Human
Although I don’t agree, here are a bunch of random photos from our day trip to Seven Falls. Just know the photos I like the best are the one’s taken on the ground before the crazy climb, even if the Humans think the climb was worth it!
All I see when I look at these photos are rocks, rocks and more rocks. But the Humans seem to enjoy the scenery in Colorado.
Here is the scenery I really enjoyed: after we climbed back down the 224 steps (and the Humans’ legs were like jello), we found a nice place to have a picnic before heading home:
Now we are talking about beautiful scenery!
And here I am trying to convince the Humans that I’ve earned a sampling of their food:
Me, me, me, me, me!
So that’s the end of my story, here I am putting the finishing touches on this guest blog post:
I know I can edit this post better than my Human Tierney does her posts…
You will hear from my Human Tierney again after she catches up reading her blogging buddies posts (and she’s let them go too long without reading). Hope she gets her act together!
So I began February 2022 with the plan of daily blogging and I kept it up until 02/17/22 where I promptly “fell off the wagon”, ha! Life has been kind of busy and I recently returned from a nearly week long quilting retreat at the Missouri Star Quilt Company in Hamilton, MO (oh yes there will be posts about that adventure in the future!).
I have a lot of catch up reading on my blogging buddies blogs; and today I am going to share a guest blog post written by Carrie Spencer ofThe Spencer Adventures(see the bottom of this post for more info on Carrie). I have this fantasy that someday I will sell my handmade creations at a craft fair so this article is perfect for my daydreaming!
Craft and Vendor Show Beginner’s Survival Kit
by Carrie Spencer, The Spencers Adventures
Turning any crafting hobby into a true business takes a lot of work. If you have been honing your craft, you may wonder whether you’re ready for fairs and vendor shows. If you have a fair amount of inventory and an established brand, a craft or vendor show could be a great next step, but bear in mind that it requires more than setting up a table and taking money.
To make sure your first foray into a market goes well, here is a quick beginner’s survival guide for the show circuit.
Forming a Business
Having a side hustle is one thing, but relying on your craft as a main income requires a different approach. You need to consider taxes and liability. Some shows even require that you have a tax identification number for your application. If you haven’t formed a business yet and plan to do this full-time, this is your first step.
There are a variety of formation options, but you might consider the advantage of LLCs. Limited liability companies can protect your personal assets in case of a lawsuit or other legal situation. They also offer tax benefits and less paperwork than other formations. You can even use a formation service if you are unsure about what is needed to start an LLC in your state and don’t want to deal with the paperwork details.
Creating a Display
With a formed business and accepted show applications, you can next focus on your booth display. A standard booth size is about 10 feet by 10 feet, and you need to make every inch count. Tangleweeds notes that your display is vital to drawing in potential customers and getting your products recognized.
image from post Sewing & Stitchery Expo, tierneycreates 03/05/2018
For these reasons, you need to be strategic about your setup. Make sure there is enough space for customers to walk around and see your offerings. Use attractive signage to stand out from surrounding vendors. When customers do come in, try to engage them personally. Make your booth and brand memorable.
You can make your brand more noticeable by designing a memorable and appealing logo. Fortunately, you can create a logo for free when you use an online logo design tool. This tool allows you to browse logo templates and then customize them by adding your own images, font, and text.
Prepping Products
According to AmeriCommerce, one of the best strategies you can use at a craft show or fair is to research your competition. Knowing who the other vendors are and what they provide can help ensure you offer a unique, high-quality and competitively priced product.
You also want to make sure that you bring enough products to sell so that you can earn back your vendor fees and meet your sales goal. It’s wise to bring enough product to sell two or three times what your goal is. So, if you plan on selling $300 of your product, bring enough to actually sell $600 or $900 of your product.
image from post Sewing & Stitchery Expo, tierneycreates 03/05/2018
Processing Payments
The types of payments you accept can determine which customers make a purchase and which walk away empty-handed. For professional appearances, you should have a cash box on hand to accept cash payments. With the accessibility of Wi-FI, however, you should also prepare for mobile purchases.
You can use a card reader or cash app to accept payments. Make sure your customers know if you accept payment methods other than cash. If using an app, have a sign with your business’ QR code ready to scan and any relevant information. If you charge extra for credit card purchases, make sure your customers know about this in advance as well.
image from ZDnet.com
While their preparation can take a lot of effort, craft shows and markets can be successful for sellers and customers alike. With a little bit of prep work, you’ll not only survive but thrive in your first craft market experience.
About the guest blogger author:
Carrie Spencer created The Spencers Adventures to share her family’s homesteading adventures. On the site, she shares tips on living self-sufficiently, fruit and vegetable gardening, parenting, conservation, and more. She and her wife have 3 kids, 2 dogs, 4 cats, 3 goats, 32 chickens, and a whole bunch of bees. Their goal is to live as self-sufficiently and environmentally-consciously as possible.
Rose Atkinson-Carter a London-based writer with Reedsy, reached out to me with an offer to write a guest post that tied quilting and writing together. I thought it was a fabulous idea, and here is her fabulous guest post!
How Quilting and Writing are Similar Creative Processes
by Rose Atkinson-Carter
This may surprise you, but quilting and writing are really similar. Sure, one is sewing fabric together to make elaborate designs, and the other is putting words to a page to tell a story. But, if you pick apart the steps of writing a story, they’re practically the same steps that you follow to create a quilt. I believe that if you can create a quilt from scratch, you can definitely write a book. Just follow these four quilting steps, and you’ll have a story in no time.
1. Pick a theme
Whether you love playing with colors and patterns in patchwork, or are more interested in the details of the sewing on a single-color background, you’ll want to choose an eye-catching design for your quilt. And while the technical, visual characteristics (i.e. colors, shapes, composition) are important, adding a theme to your quilt — like how this legendary quilt is focused on Bigfoot — can take your design to the next level.
“Legendary” quilt pieced by tierneycreates, quilted by Krista Moser, pattern by Elizabeth Hartman
In the legendary quilt, the artist deliberately uses colors and design elements to emphasize the concept of Bigfoot and his environment. The mossy, sylvan green and brown on a contrasting white background draws the eye to the quilted Bigfoot, who is made of classic quilting shapes of triangles and squares.
When it comes to writing, the same is true. When picking a theme — the thread running through your story — you can give your technical skills a sense of purpose and direction. Just as your theme on your quilt is supported by certain shapes and colors, the theme in a story is supported by a character’s actions and thoughts, or repeating ideas and motifs. What’s more, a well-developed theme is very effective at drawing your readers in.
When your story carries a strong theme, it will be able to reflect the reader’s own experiences or curiosity, leading them to think about your work beyond just when they’re sitting with the book in hand.
So for quilting and writing both, start with an idea for a theme, something that you can build off of toward a finished product.
2. Pick out your fabric
After creating your quilt design, you’ll want to pick out the perfect fabric. This will be the canvas for your masterpiece to unravel on, the ideal characteristics of which depend on the purpose of your quilt. If you’re making a coat or blanket, you’ll want to pick fabric that’s comfortable, won’t scratch, and something that will hold stitches for a long time. If you’re making a piece of wall art, you might choose fabric that’s more of a statement — something with texture, or bold colors.
The fabric you choose can make or break your project. To make this decision, you have to take a “big picture” look at your quilt’s theme and vision so that you can choose a strong foundation to advance your product from the get-go.
The same goes for creating a story. Sure, you won’t write your story on yards of quilter’s cotton, but it is important to determine the right structure for your story. Will the theme you pick be supported by a hero’s journey plot structure, or more of a simple three act structure? If you’re able to put together an outline (it doesn’t have to be super fleshed out) before you write, you’ll have a stronger start to the project as a whole. So take the time to pick a structure that helps build the theme you’ve chosen.
This is why picking a theme that you truly care about is important. Whether you’re designing on fabric or on the page, a theme keeps you guided throughout the whole process, reminding you with every step that the aim is to create a cohesive end product.
3. Sew it all together
Once you’ve gathered the materials that will support your theme, you’ll be ready to start sewing. If you’re creating a patchwork quilt, you’ll have quite a few pieces to create and arrange in just the right way. Swapping one triangle or granny square for another of the wrong color will distort the image you’re trying to create, so you have to go through the sewing process paying close attention to the details of your design. Much like the various elements involved in book cover design, you’ll need to weave together multiple elements that communicate a cohesive story or theme.
Recycled Hope I: Recycled Road by tierneycreates
This all will take time, as is the case with writing a novel. Even if you already have some plot points laid out, and now you just have to fill in the details, you’ll still have to pay careful attention to how it all fits together. Be mindful of plot holes or inconsistencies of character descriptions. If that sounds like a lot, the good news is that developmental editors exist to help you with these issues. Or if you can’t go pro, consider asking a writer friend to do a feedback exchange with you: creative exchanges are always fruitful!
4. Add finishing touches
After weeks of hard work, your quilt is almost ready for photos! You’ve sewn your design and everything is looking great. Now, it’s time to add any finishing touches. This might include ironing out any kinks, clipping any thread ends that have snuck through the fabric, or adding a border around the motif. At this final stage, you’re doing everything to make sure the quilt reflects your best work.
Tree of No Hurry by tierneycreates
In writing, this type of editing is typically known as copy editing. You’ve gone through the hard work of getting your words down on the page and cleaning up your story. A copy editor will help clean up the prose to make sure the story shines. Now, it’s time to cut those thread ends and close the quilt. As a final safety net, a proofread will take your writing to a professional level. Any grammatical errors, typos, or weird spacing that might have slipped by you will be caught by a proofreader, making your pages spotless.
If you can put in all that time and energy in creating a gorgeous quilt, you’ll have no problem at all getting a story together. Just remember your quilting steps, and your story will come together just as beautifully.
Rose Atkinson-Carter is a writer with Reedsy, a marketplace that connects authors with the world’s best self-publishing resources and professionals like editors, designers, and ghostwriters. She lives in London, and loves writing and crafts.
This is Mike the Miniature Schnauzer that manages Tierney and her partner John (who I will refer too as “the humans”), guest blogging for this post.
I borrowed Tierney’s laptop to write my post
I heard the other guest blogger that lives in my house, the tierneycreates Beastie, was going to be posting soon and I wanted to get my post in before hers. She is the one with that fake schnauzer “Mikelet”. I cannot believe the humans named him after me.
Only one real schnauzer in this house!
But we don’t need to discuss our guest blogger rivalry, I do not want to interfere with your enjoyment of my excellent post.
So if you’ve been following my female human’s blog, you’ve noticed that she’s been up to a lot of traveling since late Spring. You might wonder what becomes of me when she and the male human go out of town (or into “storage”, see post “Human Storage” and Airport Lore).
Well I go to Dog Camp.
A couple years ago the humans found a family who only watches small dogs (the best kind in my opinion) at their home; and they live near us.
I really like Dog Camp because they throw the ball for me as much as I want, there are lots of fur people my size there, and they give me special treats with my meals such as mashed sweet potatoes and chicken.
But what I really like are all the cute little female dogs to hang out with there. I am a single (and yes neutered) guy and I like hanging out with the girl dogs, what can I say.
Now personally I believe that: “what happens at dog camp, stays at dog camp”, but the lady who runs Dog Camp, keeps taking photos of my exploits and sending them to the humans! Is there no privacy??!?!
Since the humans already know, I thought I would share some of the photos and video from previous dog camps. I sort of have a thing for cream-colored girl dogs and here are a couple of my girlfriends from previous dog camps:
But sometimes the girls go a little crazy over me (which is understandable) as in this incident below captured by the female human that manages Dog Camp:
Ladies – there is enough of me to go around – stay calm!
But that is enough, I have to keep some secrets from Dog Camp.
My male human is trying to help me fend off the girl dogs by going incognito with some shades for next time:
I spend a lot of time in home improvement stores (Lowe’s and Home Depot) and I love riding in John’s truck as his co-pilot:
He always has my box ready to go behind the seats, which I ride in whenever I am in a home improvement store helping him select the next round of home remodeling supplies:
(Note, I’ve gotten a summer haircut recently and look less shaggy)
I’ve met a lot of staff and customers while riding around in my box in home improvement stores, and the other day John wheeled me in via the shopping cart into Home Depot and heard “Hi Mike!”
It was one of the cashiers greeting me as I went by! They remember my name.
Same thing happened that day when he had to go to a different home improvement store.
I am sort of a local celebrity!
John and I have been working on sprucing up the backyard. I oversaw his installation of pavers under a bench that Tierney found on clearance to place under the large Aspen trees in the backyard; his installation of pavers under their new backyard swing; and his building of a privacy screen for the backyard patio area.
After reading my posts (Misadventures in Bag Making and If at first you don’t succeed…) my wonderful friend Wendy Hill (IG – @wendyquilter) offered to send me some of her HUGE collection of zippers to support my future adventures (or misadventures, ha!) in bag making. I of course took her up on her offer!
So a couple of weeks some “GOOD MAIL” arrived – a bag of zippers in various sizes from Wendy!
So how did Wendy come to have all these zippers in her stash and what had she done with all these zippers in the past? Well she was kind enough send photos and a summary of the story so I could share with you in this post.
“Zipper Mania” by Wendy Hill (edited by tierneycreates)
Around 2007 I wanted to make things with zipper but they too expensive to even buy used at a thrift store considering how many I needed.
So I put out a request for zippers in the Ruralite Magazine (Western USA, Midstate Electric Co-op) and many zippers arrived to my home!
The smallest package I received: 1 zipper
And I received many zippers in the mail which I sorted by color into bags – it looked like a spice bazaar!
I thought of all these zippers as a “material” for my art projects. Here is what I made below.
String piecing using flat zippers
“Autumn Textures” is my favorite. It has been in exhibits.
I did make several quilts with flat zippers between 2008 and 2011)
Coiled Bowls using half zippers
In the photos below are two different bowls- left zip pulls in as decorative elements)
3D Art – Zipper Cones – Sea Anemones
I have more zipper ideas— but I have not followed up on them in a long time.
Postscript
Thanks to Wendy for sharing her story and art related to her donated zipper collection. And thanks to Wendy for sharing some of her collection with me. I am pretty sure there will be some “GOOD MAIL” in her future when I send her a little something I’ve made with one or two of the zippers she sent me.
Next post I will show you the project I just finished using one of the zippers she sent me – another bag – this time a different pattern by s.o.t.a.k. handmade.
This is Mike the Miniature Schnauzer who lives with the human Tierney.
I am overdue for a haircut so I currently have the constant “bed-head” look
I was reading Tierney’s posts (yes Miniature Schnauzers can read, duh) and I was wondering how she was going to keep up her current practice of daily posting to her blog (since February 11, 2021).
I guess she’s trying to make up for taking a several week break from blogging…
She was having difficulty getting motivated today and I don’t want to break the streak, so I offered to guest blog for today’s post.
Miniature Schnauzers are very confident in their abilities even if they are sorely in need of a haircut
I thought I would combine discussing a crafting project and me (as it is important that I am one of the main features of this post) for this post.
Obsession with Crocheted Cotton Dishcloths
For years Tierney has a huge stash of cotton yarn that a friend gave her over 20 years ago:
A small sampling of the large stash
Well Tierney decided a couple of months ago that it was time to do something with this stash. She needed new dishcloths in the kitchen, so why not crochet them herself out of her old stash of cotton yarn? Additionally it was a great portable project when in the car or waiting around, etc.
She put together a little zippered bag of yarn, crochet needles and supplies:
She’s been taking this bag everywhere with her, especially on car rides, and I am not sure I like this.
Why? Because when she is the car her primary responsibility is to pet and cuddle me while the car is moving.
Instead, I’ve had to cuddle with the yarn:
Sigh, resorting to cuddling with yarn instead of getting the head rubs I need and deserve
Also she has mocked me with the yarn and placed it on my head while crocheting as if I were some live furry yarn holder!
Absolutely humiliating! (and unacceptable)
Finally, I’d had enough and resorted to just cuddling with the dishcloth she was working on to block her progress and make her re-evaluate her priorities!
Choose me – I am more adorable than a dishcloth!!!!
She did laugh and stop crocheting to love on me (how could she have refused?)
She even had me pose for some selfies in the car with her but as you can see I am still a little perturbed that I was ignored for part of the car ride:
I am sure in time I will emotionally heal.
Oh I should probably close this post with an image of what the washcloths look like completed and you will see on the left one actually in action (wet from being used to washed dishes!)
Wait. I think I hear you all saying that you wished another image of me would close this post. Your wish is granted – here I am finishing up the post. Hopefully my human will get her act together for tomorrow’s post.
And to schedule me for a desperately needed haircut!
“For those days when it’s too hot or cold for my kids to play outside, I’ve amassed a pretty great library of activities that keep them entertained and educated. I’ve got arts and crafts (aka learning in disguise) and even physical activities that give that (seemingly endless) energy a place to go. I’ll be sure to include some activities for parents to do as well – after all, we all need a creative and physical activity break! I’d love to compile some of these indoor activities into an article for your readers.”
I took her up on her offer (thanks Carrie!) and here is her guest post – enjoy!
Fun and Educational Activities to Drive the Indoor Blues Away
With the unfortunate spread of coronavirus, the kids are stuck inside and bored to death. Luckily, there are plenty of fun and engaging activities just a few keystrokes away thanks to the modern marvel of the internet. Look beyond the endless drone of news and cat memes, and you’ll find plenty for the young ones to do. Tierneycreates has got you covered with the following ideas:
Tech Time
If you own a tablet, you probably have access to a ton of educational apps that you can download for your kids, and the beauty is they can use them anywhere. Look for fun apps that cater to their interests or focus on areas that they need to work on. Tablets can power just about any app smoothly, so your kids can enjoy learning without issue whether they’re dabbling in art, geometry, languages, and so on. Consider investing in a new monitor so they can work on a larger high-resolution screen. Many models are suited for gaming, too, so your child can easily switch back and forth between learning and playing. Look for a monitor that features the latest tech for a smoother gaming experience.
A Cooking Session
Bring the tablet into the kitchen to learn how to cook — even children as young as three can participate. Not only will they learn how to slice, dice and mix up ingredients, the kids will absorb all sorts of information on the value of a healthy diet, which should be a big goal of your culinary lessons. A good way to start, especially if your children are really young, is to show them how to make healthy versions of their favorite snacks. Start with something easy, like popcorn. Rather than throwing a bagged brand into the microwave, add plain kernels into a microwave popper, and top your treat with healthy, homemade seasonings.
A Music Lesson
Playing a tune has been shown to help children’s cognitive development, so there’s no reason not to have a jam session right in your home. You’ll find plenty of songs you can download as well as lessons for a variety of musical instruments, from guitar to recorder.
A Science Project
Chemistry may not sound like fun to your kids, but that will all change once you see how the colors explode as food coloring, milk and dish soap all interact. Besides those ingredients, all you need are some cotton swabs and a shallow pan. What better way to get their little minds buzzing than with exciting new discoveries in front of their own eyes? Or, you can grab more items around the house to mix up some elephant toothpaste. Your little mad scientist will be thrilled with the results.
An Art Class
Art is often one of kids’ favorite parts of school, and it has many benefits including helping children reduce anxiety. So come up with some easy-to-do projects that will bring out their inner Rembrandt. Art for Kids Hub has a wide variety of tutorials that teach the little ones how to draw everything from gnomes to frogs to Garfield in a series of step-by-step videos that are as entertaining as they are easy to understand. Don’t forget to grab the supplies they need for their favorite artistic medium.
Storytelling
Now that you’ve got those creative juices flowing, keep it going by coming up with stories together. If you’re not sure how to start, the folks at Imagine Forest suggest writing some words on small pieces of paper, putting them in a jar to act as prompts, and having the first volunteer reach in and pick one out. Then, everyone else adds their own piece to the narrative to make an exciting group adventure.
A Trip Around the World
Learn about fascinating foreign cultures across the globe through a series of hands-on crafts, such as making an Indian wall hanging, a kokeshi doll or a mandala. You can find all the materials that you need around the house, then it’s off to an exotic land far away without ever leaving home.
A Foreign Language
Now that you’ve got their interest in life beyond the borders, it’s time to get the kids started learning Spanish, French, German or any of the other dozens of languages available for study. You’ll find a variety of activities involving reading, writing and speaking to get the kids ready for a life of travel and exploration.
After giving a few of these ideas a try, you may find that your days sheltering in place go by much quicker. Best of all, your kids will learn new things as well.
For more stories to brighten your day, head over to the Tierneycreates blog.
This is Mike the Miniature Schnauzer who lives with Tierney of tierneycreates. I am guest blogging on this post as you may have noticed Tierney has not blogged in a while and someone has to keep you updated…at least on my frustration.
If you saw this post like 3 weeks ago (maybe less, Schnauzers are not great with their perception of time) Update on the “Granny Square Madness”, she has been working on (like forever…or “fur-ever” as we say in canine) on a granny square afghan after teaching herself to make one via videos on YouTube.
Well I’ve been waiting a long time for it to be finished and I am getting very impatient!
(First I need to tell you that afghans and other cozy blankets are the “natural habitat” of Miniature Schnauzers)
I first fell in love with the afghan when it was just a couple of square she had made:
Then she made more squares and my love of this afghan kept growing and I would sneak in to lay on them whenever I could:
A Partial Afghan Will Do…I Guess…
Now that she finished 90 granny square blocks, she is SLOWLY (at least in the Schnauzer-Time-Space-Continuum perception) putting the afghan together.
And I cannot wait.
I’ve begun nesting in it, while it is in assembly, any time she steps away from it:
I’ve even begun nesting in it while she is working on attaching the blocks together (note the crochet hook on the lower left):
She’s tried to appease me by wrapping me in it, but I am not fooled:
Do I look “appeased”?!?!? Nope. I want a finished afghan.
Unfortunately she only has 3 rows together and has 7 more rows to add:
Unacceptable.
She has a system on the guest room bed where she has stacked the individual blocks for each granny square row (so I won’t topple over the rows and mess up her order like I was doing when they were laid out on the living room floor):
She says she is working on it as fast as she can but has this full-time job thing going on and other life activities (poor excuses).
Absolutely Not Appeased
I know I mentioned somewhere in this post that a partial afghan might do but on further thought it does not. I want to nap in the full completed thing!
Here are some photos of me “not appeased” to close out this post:
Recently I’ve had several guest bloggers on my tierneycreates blog – Wendy Hill (a human) with her series on her Quarantine Quilt collaboration (see link Quarantine Quilts for all the posts); and the tierneycreates Beastie (non human, monster) announcing her new Beastie partner (see link Beastie Adventures for all her posts).
Well Mike the Miniature Schnauzer (non-human, canine) was feeling a little irritated that he had not been invited to guest blog. So I guess it is his turn…
A Whole Lot of Remodeling Going On
Hello Bloglandia.
This is Mike the Miniature Schnauzer. I am dictating this post as although I might secretly have opposable thumbs that would allow me to type for myself, I like to keep certain things secret from my humans.
I am Mike and I am a Miniature Schnauzer the smartest dog breed imaginable (maybe)
It’s my turn to do a guest blog post! My adopted sister Sassy (who passed in December 2017) used to have her own blog, Schnauzer Snips: Musings from a Highly Opinionated Miniature Schnauzer. I am not asking for my own blog, just to be invited to guest blog once in a while so you can read about life from a Miniature Schnauzer’s perspective.
I am a rescue (I rescued my humans from life without me) and if you’d like to read my story it is on this post –Taking Chances: The Mike Hogan Chronicles (re-post). I lost one of my humans (male human, Terry) suddenly in December 2018 but my female human (Tierney) and I have been making the best of our new life in the metropolitan Denver Colorado area since April 2019 (see series of posts Colorado Bound).
I now have the new male human in my life (John) nearly fully managed as you will see later in this post.
I’ve been spending a lot of time at home improvement stores during the pandemic. My humans have been working on a lot of remodeling projects and I am trying to supervise them as best I can.
Back in late March/start of April 2020 my humans made the decision not to move to a new house they were going to buy and instead to stay in their current abode (see post Perspective) due to the initial financial crisis in the early days of the pandemic.
Staying in their current residence meant fixing it up so that both humans were happy with it and it met their needs.
For my female human, that meant redoing her studio (see post Guest Blogger: tierneycreates’ “New” Studio Tour); and for my male human it meant building a workshop for his woodworking in the daylight basement:
His workshop is still a work in progress but he is very happy to now have his own “playroom” like my female human!
So you might ask – what did it mean for me? Well it meant lots of trips to home improvement stores for supplies.
Sometimes on my male human’s back:
And sometimes in the shopping cart:
I know, I know, you just can’t get enough of the cute photos of me in a shopping cart. Unfortunately my female human said we have to limit the photos to only four (4) because she has to protect her digital storage allotment on her blog (sigh).
The humans also did a lot of “fixing things” in the house to include dangerous high altitude ceiling fan installation:
Yes that is a ladder, on top of scaffolding. Looks pretty safe to me (NOT!)
My male human even figured out during the early days of the pandemic how to fix their dryer himself by watching YouTube videos and ordering parts:
He also completely redid the garage, drywalling it in, painting it and installing shelves:
He also built bookcases in the front room to create our “home library” as my female human mentioned in this post – The Library Book and the Home Library. In this post she promised to share updated photos (and forgot), so I guess it is up to me to make sure you see how the room turned out:
Most recently he added in a shelf behind our living room TV to distract your eye from the fact the flat screen TV is in front on an alcove (circa early 2000s) for a large deep TV. This was my female human’s idea from looking at too much Instagram home decorating feeds!
I am sure there were a lot more home remodeling projects that occurred over the past four (4) months but this is all I can remember since I was sleeping through many of them.
Trying to block out all the remodeling noise and get some sleep!
Postscript
When I am not overseeing the humans while they complete their home remodeling projects, I am going on bike rides. I appear to have convinced my human John to ride me around on his back in addition to carrying or shopping-cart-driving me around stores!
Here we are headed out for a bike ride and then on a bike ride (in the second photo my female human Tierney is behind us dangerously taking photos while bike riding…)
All good things must come to an end as they say, and here is the 5th and final installment of the guest blog post series by my talented friend Wendy Hill on the awesome quilt she made during quarantine with the four rambunctious boys next door (aka “The Boys”) ages 2 – 8.
Thanks for reading this series along with me (I was so excited to receive each installment via e-mail and read it myself for the first time while posting it!)
And if you are just joining us, see these posts for Parts I, II, III and IV of the story by Wendy Hill:
You can follow Wendy Hill on Instagram @wendyquilter
Quarantine Quilt Project: Life in the Time of Coronavirus
Part V: The Big Giveaway
I’m eager to show off the Quarantine Quilt and The Big Giveaway where “The Boys” and their parents see the quilt for the first time.
Here are the full view photographs of the front and the back. (The quilt, with no sleeve, wiggled a bit being clamped to a bar for the photos.)
At home, I took some detail photographs. Of course, the cats found the quilt in no time….The Quarantine Quilt is officially cat approved!!
Let’s start with the appliquéd hand blocks. I put The Boys’ hands in the middle, with the adults’ hands on the four corners. It’s symbolic on purpose: the adults are looking after the kids.
Here are a few more detail photographs of the quilt front:
The quilt back is fun too, with the assortment of found fabrics and leftovers. A friend sent me her found robot boy yardage for the center; she thought it perfect for The Boys.
I’m so pleased I took the time to embroider the labels. These labels will last as long as the quilt.
It had been a long time since “The Boys” had seen the blocks, and I wondered what they would remember about their creations. But the 3 older boys wasted no time in finding their hand and favorite blocks.
One of “The Boys” found his favorite block, saying it was the weirdest block ever. I told him I’d never seen anything like it and in fact, it was ‘genius’. He had a big grin.
Another favorite of The Boys was this block. I think it’s graphic and moody, in a good way.
Finally the day for the Big Giveaway came. David and I spread out several sheets on our back deck. As we watched the kids scramble around the quilt (while staying 10’ apart), some of us burst into tears while the rest became teary. This project was definitely a good thing.
In the beginning, we were two neighbors who banded together when the state government ordered a month-long lockdown. At first, we joined forces to add something special to the daily life of “The Boys”, whose routines had changed suddenly with the Pandemic.
Then we started helping each other out. We even celebrated shared birthdays in the open yard between our houses. “The Boys” were growing up in front of our eyes, going from ages 2-8 to ages 2-9. We became closer while we had to live separately.
I can’t help but feel there is a larger story here during this Pandemic. There must be a patchwork of stories unfolding all over the United States and the World, as we find ways to connect and help each other out.
Here is the 4th installment of the guest blog post series by my talented friend Wendy Hill on the awesome quilt she made during quarantine with the four rambunctious boys next door (aka “The Boys”) ages 2 – 8. Wendy has a background in teaching (and quilt book writing) and in this post she provides details on her process of basting, quilting and binding one GIGANTIC Quarantine Quilt!
If you are just joining us, see these posts for Parts I, II and III of the story by Wendy:
Quarantine Quilt Project: Life in the Time of Coronavirus
Part IV: Basting, Quilting & Binding The Gigantic Quilt
If you’ve been following along, you know that my collaboration with The Boys next door led to a gigantic quilt top measuring 82” by 104”, and a quilt back 84” by 106”. Time to baste and quilt this monster-sized quilt!!
Basting
Basting is a two-step process for me: spray baste first with Odif 505 Temporary Adhesive followed by stitching a large grid with water soluble thread by Superior (Vanish Lite). This foolproof method lets me quilt without any problems.
But first, I have to clear the sewing room. After ironing the batting to smooth out any creases, I tape the batting to the floor to hold it in place.
We had to navigate the crowded hallway for a day or two, but the cats loved exploring this new-to-them space.
With the quilt back centered on the batting, the window open, the ceiling fan on low, and paper around the edge to catch any over spray, I’m ready to baste.
I can baste any size quilt with my “assistant”: a swim noodle. (My assistant never complains but getting up off the floor is another story!)
Roll up half the quilt onto the swim noodle. Spray a light coat from side to side, covering about 15” from the rolled up quilt towards you. Unroll the quilt over the sprayed area, smoothing as you go. Here is a photo of a different quilt ready to spray, unroll, and smooth.
Repeat to spray baste both halves of the quilt. Trim the excess batting along the fabric edge. Allow to dry for a few hours or overnight before turning over and taping the quilt to the floor.
With the quilt front centered on the batting, repeat the steps above to spray baste. Allow to dry.
With both ends of the quilt rolled up to the middle, I stitched lines about 3”-4” apart with the water soluble thread, from the middle to the edge. Repeat with the other half. Re-roll the quilt in the other direction, stitching perpendicular lines about 3”-4” apart.
A bonus benefit is the way these stitching lines change how the quilt handles, making it easier to do the actual quilting lines.
Tips for Using Any Spray Baste
Ventilate the room.
Cover up to prevent overspray on unwanted places.
Hold the can at least 12” away from the surface.
Keep the can moving from side to side- do not soak the batting.
After the layers are basted, allow time for the spray baste to dry & set.
It will evaporate out, especially in dry climates. Another reason for stitching a water soluble thread grid is to buy time before you start quilting.
Quilting
I like using roughly parallel quilting lines, but with a quilt this size, this will be the easiest thing for me to do on my home sewing machine.
But first, thread choices. I selected Aurifil 50 wt cotton for the front (yellow) and back (blue).
With the quilt rolled up from both ends to the middle, I started stitching the roughly parallel lines, using the pressor foot as a guide. Ignore the water soluble thread lines.
I accordion folded the quilt in my lap, but with big quilts, you can get some drag from the rolled up quilt coming out behind the sewing machine. When you start to feel some drag, accordion fold the quilt behind the sewing machine, which will reduce or eliminate the dead weight.
Keep quilting! The lines are actually unequal distances apart and not perfectly straight, but I like this look on a scrappy quilt.
I used the seam lines between the rows to “square up” my parallel lines.
In the last couple of inches before the seam line, I start my course correction strategy. I start stitching parallel to the seam line, so that the next row/section starts over with an accurate straight line. The stitching lines can get way off line without some kind of course correction fix.
Celebration! The very last line of stitching!! I zigzagged the edges and trimmed the batting before tossing the quilt into the washer and dryer. I like to let the quilt shrink at this stage, before sewing on the binding.
Remove the quilt from the dryer while still slightly damp and allow to air dry the rest of the way.
Binding
I’m always searching for alternative techniques. I invented a way to machine topstitch binding that is easy and looks great. For quilts that will be loved, used, and washed & dried, this method is also makes for a sturdy binding.
I started with a double French fold binding. A 3/8” seam allowance gives me the wide binding I like so much. I flattened the seam allowance with my faux serge stitch (or zigzag works too) to get a flatter looking binding.
After folding over and pinning (or clipping) the binding in place, I hand sewed the mitered corners, about 1” in each direction from the corner.
Next, I basted along the very edge of the binding, from the back of the quilt. This big stitch goes fast.
Flip over. From the front, you can see the basting thread: this shows you exactly where the fold is on the other side.
I machine topstitched the binding from the front, by stitching just to the right of the basting line. (You can stitch anywhere between the basting line and the ditch of the binding seam.)
I removed the basting thread and checked the back to make sure the stitching line is along the edge of the binding. Finished!!!
Perhaps your enthusiastic comments encouraged Wendy Hill to immediately put together the third installment of her guest blog post series about the awesome quilt she made during quarantine with the four rambunctious boys next door (aka “The Boys”) ages 2 – 8.
I am so happy to now share her third installment! (And now you get to see the quilt laid out with all the blocks created by “The Boys”.)
If you are just joining us, see these posts for Part I and Part II of the story:
Quarantine Quilt Project: Life in the Time of Coronavirus
Part III: Magic! Turning 65 Blocks of All Sizes Into a Quilt Top! And Leftovers Into a Quilt Back!
On a lark, my neighbors and I added playing with fabric to make quilt blocks. We had no idea where this project would take us or how our families would connect over time.
Please consider launching your own “quarantine quilt” project with kids or adults who would enjoy such a project. Collaborate through “snail mail” if your people are not in the neighborhood. I believe everyone can capture the free spirit seen in The Boys’ quilt blocks.
Quilt Top
Since I refused to do anything more than trim (or square-up) the precious blocks, I had to find another way to unify 65 blocks of all sizes. I sorted the blocks by height, the first bit of “magic”, to layout 8 rows of 8 blocks, saving the extra block for the quilt back.
With the row height consistent, I planned to frame the blocks, adding “filler” fabrics if needed, to adjust the row width. I looked to my assortment of “dots” and “cross hatched” fabrics, many of which had already been cut into.
I started with the widest row as the standard width, which happened to be Row #4. Next I assembled Row #3, working my way up to Row #1. Of course, the quilt needed a border at the top (and bottom), because the quilt can’t be too big, right?
I alternated “A” and “B” blocks in each row as part of my plan to frame the blocks, add fillers, and create a border on the two long sides. A plan helps me keep my sanity but also gives me freedom to go off the path. It’s a paradox!
“A” blocks are framed on all four sides. I used the same fabrics or similar color scheme:
“B” blocks are only framed top and bottom.
The border on the long sides is created block-by-block, using a 2 3/4” width of fabric on the outside edges of the first and last blocks in each row. This creates a visual border without using one long strip of fabric. (The width of this border strip could be anything to make the border wider or narrower.)
For “A” blocks, the outside edge/border strip (one of four strips framing the block) is cut to this specific width.
For “B” blocks, the outside edge/border strip is also cut to this specific width, making a total of 3 strips framing the block (instead of only top & bottom).
At this point, you might wonder how the rows come out the same width? This second bit of magic is in way to adjust the row width. Assemble the row in two sections. Layout the two pieces on a design wall or other surface.
If the sections are too wide, overlap the raw edges between the two sections, until the width is correct. Sew the seam, trimming excess fabric to account for the seam allowance.
If the two sections are too short and leave a gap, add a “filler” strip to one of the two sections, and continue as described above.
For these two rows, I chose bright filler fabrics: look for the bright green plaid in the first photo, and bright red plaid in the second photo. The “fillers” just add to the fun (chaos)!
Everyone encounters surprises, obstacles or let’s be honest, mistakes. How a quilter deals with these events are what counts and as quilters know, these are often “opportunities” to do something unexpectedly great.
I accidentally trimmed or “squared-up” two blocks, making them the wrong height. “Fillers” to the rescue once again, as I just added another strip to the top edges.
When I cut a fabric on the bias, I often reinforce the edge with a narrow strip of fusible interfacing. This way, there are no worries about the edge stretching.
Before assembling Rows 5-8 and the border, I stood back and saw the two orange fabrics screaming at me. I couldn’t shut out the visual noise (ha ha) so I swapped one of the oranges out for another color. Peace was restored.
Quilt Back
While “The Boys” used my saved scraps to create fun, exciting, weird and wonderful blocks, I did my best to put together a quilt back also using leftovers, larger scraps, and found fabrics in the closet.
As the back evolved, I took a few photos, showing how the fabrics shifted around, got deleted, or sometimes, added back in. Not shown in the photos is a late stage addition; look for it in the finished quilt photos in the final guest post.
Labels
I used the extra block made by “The Boys”, and another leftover pieced heart block, to create two labels. When I searched the internet for the best fabric pen, my first reference said “don’t use a pen, embroider the label”. I agreed.
As I came closer to finishing the quilt, I had the growing feeling that this quilt was so much bigger then me or my neighbors or The Boys.
We’ve known in theory that we could have another global pandemic, but the reality is so — well— real. The enormity of the pandemic is hard to grasp, even now.
Yet in the face of adversity, we find many examples of people, all over the world, reaching out to help and support each other. The Quarantine Quilt is one of these examples.
Wendy’s next guest blog post: Quilting and Binding The Gigantic Quilt
Well the tierneycreates Beastie would tease me that I am just using Guest Bloggers to keep up on new posts but I am very excited to share Wendy Hill’s second guest blog post on the awesome quilt she made during quarantine with the four rambunctious boys next door (aka “The Boys”) ages 2 – 8.
Quarantine Quilt Project: Life in the Time of Coronavirus
Part II: “The Boys” Make 61 Blocks!
My story about two neighbors who band together (during the pandemic lockdown) left off with “The Boys” arranging fabric scraps on printer paper. We agreed to two blocks per day and soon we had a routine. “The Boys” dropped off their fabric arrangements in the morning, and I dropped off their finished blocks before dinner.
I gave simple instructions: fill a piece of 8 1/2” by 11” paper with fabric scraps. Overlaps of fabric were okay but no gaps.
One day the mother of “The Boys” tucked a note inside the bag:
This is such a fun thing for our family and it’s always a race to the door when they hear your knock.
Some arrangements were easy to sew together. I could sew pieces into smaller units, then assemble the units into a block.
Other arrangements required me to be inventive. Sometimes the seam allowances created gaps, so I had to add fabrics. I added a solid pink to this block. I looked for fabrics that would “go” with fabrics in the arrangement.
Other times I did my best to duplicate the block, always trying to keep the original intent of “The Boys” who arranged the fabrics.
I kept adding more scraps of all sorts to their Big Bag of Fabrics. “The Boys” took time to create just the right assortment of fabrics on their page.
“The Boys” sampled everything! Just like with “quilters” everywhere, their fabric choices reflected their explorations and mood. I was always excited to see what The Boys would drop off next.
Then this happened: The Hand Blocks! I surprised “The Boys” with machine appliquéd fabric hands (from outlines of their hands taken by their parents). I embroidered their name and age on each hand.
“The Boys” filled the page around their hands with their fabric choices, which I sewed into blocks. I received another written note:
These hands were such a fun idea! The kids were amazed you could do that!
You know how it is. One thing leads to another, and now I thought the adults had to have appliquéd and embroidered fabric hand blocks too. I placed the hands on 4 pieced heart blocks leftover from 2018, which somehow seemed perfect!
The funny thing is that we became closer while we had to live separately during the lockdown. We helped each other out and we even celebrated birthdays out in the yard.
Caleb turned 9 years old around the time my husband David turned 64. We shared chocolate almond cake and sang a joyous round of Happy Birthday together! Yes, we kept our physical distance for safety, but we remained socially connected.
Wendy’s Next Blog Post: Magic! Turning 65 Blocks of All Sizes Into a Quilt Top!
Hello! This is tierneycreates Beastie guest blogging for this post. If you are new to this blog here is my standard blurb:
My name is tierneycreates Beastie and I am a Monster, but the good kind of Monster. I was made by Helen of CrawCrafts Beasties in Dublin, Ireland. You can read my story at I’m A Monster!!!. You can also check out the other posts I’ve had to guest blog on (i.e. when the human Tierney falls off the blogging-wagon and I have to help) in the series of posts: Beastie Adventures.
Here I am at my latest makeshift desk writing this post for you on my Beastie laptop:
I am going to get to the news related to the title of this post, but first I need to talk about myself a bit, as that is what Beasties do.
You might notice in the photo above that I have a new dress! Well a shipment of goodies for me, likely purchased begrudgingly by the human Tierney, arrived a couple weeks ago from Dublin, Ireland, all made by my brilliant maker, Helen of CrawCrafts Beasties.
In addition to my new summer dress, there was also a scarf to match my hat I wear in the winter, a backpack, some books, Hop Monster IPA (I guess this is bottled in Dublin), and my new Beastnina Sewing Machine!!!! It looks just like Tierney’s Bernina sewing machine and now I can help her sew projects (because as slow as she is getting her projects done she obviously needs help).
Here I am hanging out in Tierney’s studio with my goodies with my dog Mikelet:
And because I know you can never tire of photos of me (and all my utter adorableness), here is a photo of me sporting my new backpack as I wait to get into Tierney’s car for our latest trip to the public library (one of our favorite places):
Inside the backpack I keep two important items: 1) my laptop; and 2) my Beastie library card!
I guess we could take a break talking about me and get to the story that connects to the title of this post: Mail Order Groom
The Mail Order Groom
Tierney now has her partner John that Mikelet (my dog), Mike (Tierney’s dog) and I live with. Well I wanted MY OWN PARTNER! So I asked Tierney to order from my maker Helen a “John Beastie”.
A couple weeks ago, along with all my goodies I shared earlier in this post, my new partner John Beastie arrived from Dublin, Ireland!
As I like to have as much the same as Tierney, I asked that John Beastie be a chef like human John (that is why he has on an apron just like the one John wears), and that he enjoys playing poker with his friends as one of his hobbies just like human John. So John Beastie came with a winning poker hand and chips (and his trusty cell phone). Additionally human John enjoys Bourbon and Whiskey tasting and loves to make homemade pasta so included with John Beastie is a bottle of Monsters Mark!
Tierney does not always take the best photos (and my paws are too small to handle taking photos with her smartphone so I have to leave it up to her) but what you cannot tell in the first photos of John Beastie, is he has a Colorado Avalanche Hockey team Bigfoot logo cap on his head:
This is human John’s favorite cap (he wears a lot of caps as his hair is missing, not sure where he left it…) and is a classic team logo cap/hat that is no longer sold by Colorado’s hockey team.
Here is human John with his cap that human Tierney suspects has grown into his scalp because he wears it so much!
My dog Mikelet (named after Tierney’s Miniature Schnauzer, Mike) took immediately to John Beastie just like real Mike is totally in love with human John.
Before I knew it, without asking, John Beastie was taking Mikelet for walks!
I am not sure why John Beastie is wearing his apron for walking Mikelet but he seems to like to always be ready to start cooking!
Since my dog really likes him, I decided to go ahead and accept John Beastie’s proposal (like Tierney did human John a couple months ago) for marriage. Luckily John Beastie arrived with two engagement rings.
Here we are – a happy family of Beasties!
Oh and if you’d like to see actual decent high quality photos of John Beastie, etc., check out our maker’s recent blog posts:
Tierney did not previously mention it on her blog but she did actually get engaged to human John earlier this year. Like John Beastie and me, they have no wedding date planned in the near future, they are just enjoying being engaged.
Human John proposed on the stage at Red Rocks Amphitheaterin Morrison, Colorado. As it was winter, there we no concerts planned and the public was allowed to wander around the natural amphitheater and go to the stage (where many famous acts have played over the years).
I asked Tierney to share a couple photos with you from that day to close out this post (unfortunately she left me at home, but she did bring her dog Mike).
Postscript Postscript
We’ve put Mikelet to bed and now John Beastie and I are off to enjoy our bottles of Hop Monster…
I am so excited! My tremendously talented friend Wendy Hill has agreed to do a series of guest blog posts about a wonderful quilt project she’s been working on with children in her neighborhood during the quarantine/”COVID-times”. Over the past several months, she’s shared with me updates on this amazing project and I invited her to share with my tierneycreates blog readers. I hope the story of this project makes you smile as much as it made me smile.
Wendy Hill is a fiber artist and teacher who has written several art quilting books to include most recently Creative Quilt Challenges, cowritten with Pat Pease. She has a website Wendy Hill Quilt Artist and you can follow her current work and musings on Instagram @wendyquilter.
Quarantine Quilt Project: Life in the Time of Coronavirus
Part I: Once Upon A Time
This is the story of two neighbors who banded together when the state government ordered a lock down because of the first Global Pandemic in over 100 years.
The big wide world was suddenly narrowed down to one house each for the four young boys next door and for us, a retired couple.
We live on a quiet cul-de-sac of a street, in a woodsy area, and now our respective worlds are turned upside down.
“The Boys”, ages 2-8 years, explored the area around their house after finishing ‘school’.
With no fences and the houses close together, “The Boys” inevitably spilled over into our yard.
One day, it seemed, to them, a good idea to fill our birdbaths with dirt and make mud. “The Boys” cleaned up the mess and later dropped off an apology.
“Can you ever forgive us?” the note read.
There was nothing to forgive! “The Boys” were going stir crazy.
I sent an invitation to participate in “An Exchange”. I started with a drawing of a mouse, which looked a lot like a rat, and invited “The Boys” to add to the drawing. This drawing, plus two others, went back & forth until we had finished artworks.
Life during the pandemic meant one day blending into to the next, without much definition. But now, we waited to hear the patter of footsteps followed by the chime of the doorbell.
Likewise, I could hear “The Boys” squeal with delight when I rang their doorbell. It was exciting to open the door and see what The Boys left on the porch.
One day, I sent over a note which read “I have a bit of a crazy idea….”. I sent over a Big Bag of Fabric Scraps with instructions to fill up blank 8 1/2” by 11” pages with fabric pieces. Overlaps of fabric were okay but no gaps. I explained I’d sew the fabrics together to make “quilt blocks”.
If “The Boys” had fun, we could keep it up until we had enough to make something.
The mom replied “This sounds like a great idea!” and we were off.
The Boys had fun playing with color & texture, and they enjoyed seeing their fabric arrangements get transformed into blocks. As the number of blocks grew, they played with layouts on their floor. We agreed to make enough blocks for a quilt.
We were all building new pandemic memories and they would have a cuddly family quilt. Win-Win-Win!
Wendy’s Next Guest Blog Post: The Boys Make 61 Blocks!
Tierney is busy catching up on the backlog of posts she wants to read by her blogging buddies around the world, so I am guest posting so she does not continue to fall so behind in blogging!
Once again I am sitting at my makeshift desk, typing on my laptop:
Oh I should introduce myself in case you are new to this blog, my name is tierneycreates Beastie and I am a Monster, but the good kind of Monster. You can read my story at I’m A Monster!!!. You can also check out the other posts I’ve had to guest blog on (i.e. when Tierney fell off the blogging-wagon) in the series of posts: Beastie Adventures.
The link above is for the platform Spotify but you can also listen to this podcast wherever you get your podcasts, like on Apple Podcasts on your iPhone.
Here I am listening to the podcast on Tierney’s iPhone with her and my dog Mikelet:
The podcast was amazing and I got to hear my Maker’s voice! It was a brilliant interview and I enjoyed learning how Helen got into making Beasties like me. All I can say is I am so glad she did not become a “management consultant” after she finished university.
Oh now you might be wondering why at the end of May I am wearing the lovely Aran sweater that Helen knitted me and not my much cooler T-shirt she made me like in this photo from the April 2019 post Beastie Adventures – Seattle Public Library:
Well Tierney lost my T-shirt a couple months ago when she had packed to move but then did not move (see post Perspective). She hopes my T-shirt shows up but she might have to make me a new one herself (because I am going to get very hot in this sweater when we are at full summer in Colorado!) and perhaps as Helen if she can make me another.
I know some of you might follow’s Helen’s blog – BeastieBlog, and I wanted to suggest you check out this podcast episode if you’d like to hear her lovely Irish accent and her being interviewed about her creative journey and process!
I am so proud of my Maker!
Postscript
Speaking of podcasts, now Tierney and I need to head over to Tammie Painter’s: The Book Owl Podcast and listen to the latest episode. She is another one of Tierney’s blogging buddies and she has her own Beastie that was made by Helen of CrawCrafts Beasties – Finn McSpool.
Tammie got to bring Finn back to Ireland and be reunited with his Maker Helen (and Tammie got to meet her).Tammie has a series of posts about her visit with Finn to Ireland in her blog tammiepainter.com/blog.
Tierney and I had planned to go to Scotland with friends this July pre-COVID pandemic (plans got cancelled with her traveling buddies due to the pandemic) and while she was in the UK, she was going to also visit Dublin and meet up with Helen. I am bummed this did not happen, but I know someday I will get to return to where I was born!
I am very much looking forward to touring Dublin someday as all I’ve seen of it is the inside of Helen’s studio where I was created.
As Tierney promised in her previous post Perspective, I am going to be your guest blogger for this post and give you a tour of my “new” home, which is also Tierney’s “new” studio.
Mikelet and I in our cozy basket where we hang out in the “new” studio
But first, in case you are new to this blog, my name is tierneycreates Beastie and I am a Monster, but the good kind of Monster. You can read my story at I’m A Monster!!!. You can also check out the other posts I’ve had to guest blog on (i.e. when Tierney fell off the blogging-wagon) in the series of posts: Beastie Adventures.
Here is what my dog Mikelet and I look like outside our basket (before we were homebound…):
We were created by the very, very, very talented Helen of Crawcrafts Beasties in Dublin, Ireland.
Here I am working from my makeshift desk to bring you this guest blog post:
Well enough about me (even though I am very interesting) and let’s get to the tour of Tierney’s “new” studio.
Oh – first I should address why I keep putting the word “new” in quotes. It’s because, as she shared in her previous post, she did not move into the new house she and John were going to buy. Instead they decided to stay at their current house which was pretty much completely packed up except for basic items to stage the house for sale and to live day to day. Her studio had been painted and converted into a bedroom:
So when they decided not to buy the new house/not to move, Tierney had to unpack her studio and in unpacking her studio, she decided to reimagine the layout.
So she has sort of created a “new” studio!
tierneycreates Studio Tour
Tierney decided to first bring in the IKEA bookcases she had previously in her home office (she has been a full-time telecommuter for the past 14 years, before I was even a ball of yarn…). From there she figured out with her partner John on the best way to layout the room.
Over the next several days she unpacked her boxes (which seemed like they would never end), hung up some art and quilts on the studio wall and found a place for the large design wall her partner John built her.
Here are photos of the completed studio from various angles:
So Tierney is ready to create (she can be tierneycreates again) in her new studio! She is so happy to have her sewing machine unpacked!
It is time for a Guest Blogger entry by a brilliant, adorable and talented guest blogger (me, me, me!).
In case you are new to this blog, my name is tierneycreates Beastie and I am a Monster, but the good kind of Monster. You can read my story at I’m A Monster!!!. You can also check out the other posts I’ve had to guest blog on (i.e. when Tierney fell off the blogging-wagon) in the series of posts: Beastie Adventures.
My dog Mikelet might be made of felted wool but he is very affectionate
Well it is all GONE! The studio is gone and our cozy spot is gone!!!!
Tierney and her partner are getting ready to sell his house and buy their own house, and they have to do something stupid called “staging the house for sale”.
That means that her whole studio got packed up and put away, and they are painting over the beautiful turquoise color in the room to make it a boring neutral color like the rest of the house (humans are so silly!).
I am highly irritated over this (and Mikelet is none too happy either) and what has made it even worse is that Mikelet and I were relocated to Tierney’s home office to hang out with her creepy collectionof giant stuffed animal schnauzers (well they are giant compared to Mikelet and me):
Mikelet and I are kind of disturbed by the giant schnauzer head we are pushed up against as well as the super creepy schnauzer hanging over the basket next to us!
He is just a little too close for comfort, I can feel him breathing down my neck!
Once you recover from the shocking images above of Mikelet and I thrust into a “schnauzer slum”, you might start to wonder: “well what is Tierney going to do for crafting with all her stuff put away?”
Well she has set up this basket of hand craft projects in the living room and allegedly she will show you what is inside of this basket in her next post.
Well Tierney on the road (well in the air) again, this time for a quick business trip to Portland, Oregon for a meeting. So I am going to be the guest blogger on this post.
Do you all miss me? It’s been a long since you heard from me. I was packed away along with Mikelet (I know, I know, you are thinking of reporting Tierney for Beastie-neglect but we should give her a break since she been through a lot this past year…).
Now we have a nice home in Tierney’s new studio:
It now Autumn in the Denver, Colorado area and getting kind of cold so it is sweater time!
Oh, but if you are new to this blog, I guess I should first introduce myself:
My name is tierneycreates Beastie and I am a Monster, but the good kind of Monster. You can read my story at I’m A Monster!!!. You can also check out the other posts I’ve had to guest blog on (i.e. when Tierney fell off the blogging-wagon) in the series of posts: Beastie Adventures.
I think the last time I guest blogged, I was complaining about the physical spot (in a box in the closet!) where she had me living in her first studio after moving to the Denver greater metropolitan area.
I must warn you, Beasties are notorious for making things all about themselves (just check out the blogs Crawcrafts Beasties and Tammie Painter and you will see what I mean!) but I am going to try to focus on the primary subject on this post – an update on Tierney’s post from 10/13/19 – The “Madness” Returns(though a post just about me would be much more interesting!)
So Tierney has finished about 14 little wallets so far. It is not a very impressive number but at least she’s gotten off to some sort of start in replacing her previous stash:
Only 13 in the photo because she already gave one recently as a gift
I inspected her work and provided feedback that she needs a lot more color and fabric combinations:
Do like the fact that I could use one of the little wallets as a suitcase?
Of course I only have one other article of clothing – my warm weather shirt. Eventually I need Tierney to place an order at crawcraftsbeasties.com to expand my wardrobe!
Tierney does have other additional color/fabric combinations in progress:
I guess if she wasn’t flying around everywhere all the time she could buckle down and get a larger variety of little wallets done!
She won’t allow me to use the rotary cutter or scissors so I cannot help her. We won’t talk about the time one of her quilting friends loaned me a rotary cutter at a quilt retreat…(Guest Blogger: October Quilt Retreat Part I).
Perhaps not the best idea…
Postscript
As long as I am guest blogging, I might as well also give you a follow up to Tierney’s 08/30/19 post New Studio.
Tierney’s been moving things around and playing with a slightly different layout.
Most importantly, she put me and Mikelet on top of this “pre-cut bookcase” so that we are prominently displayed in her studio (where we can closely watch over her crafting):
She also moved some stuff around after sewing in the room a couple weeks, to make it work better for her.
So many precuts…maybe they are breeding when Tierney not looking…
Tierney loves this colorful display of books and recently found one of the books she was missing from the “Pretty Little” series, Pretty Little Pillows, at a charity yard sale.
Perhaps she’ll do something crazy one day and actually MAKE crafts and quilts from these books on display!
Oh one more thing – remember how Tierney mentioned in her 09/27/19 post A New Way to Organize My Fabric, that she had more fabric to organize?
Well she finally did: she organized her flannels, canvas, novelty prints and panels in the shelves in her studio.
So with the fabric above, plus the pre-cuts, plus the fabric below in this photo, Tierney should give up sleeping and starting crafting/quilting 24/7 (and we will not even mention her collection of fabric scraps at this point).

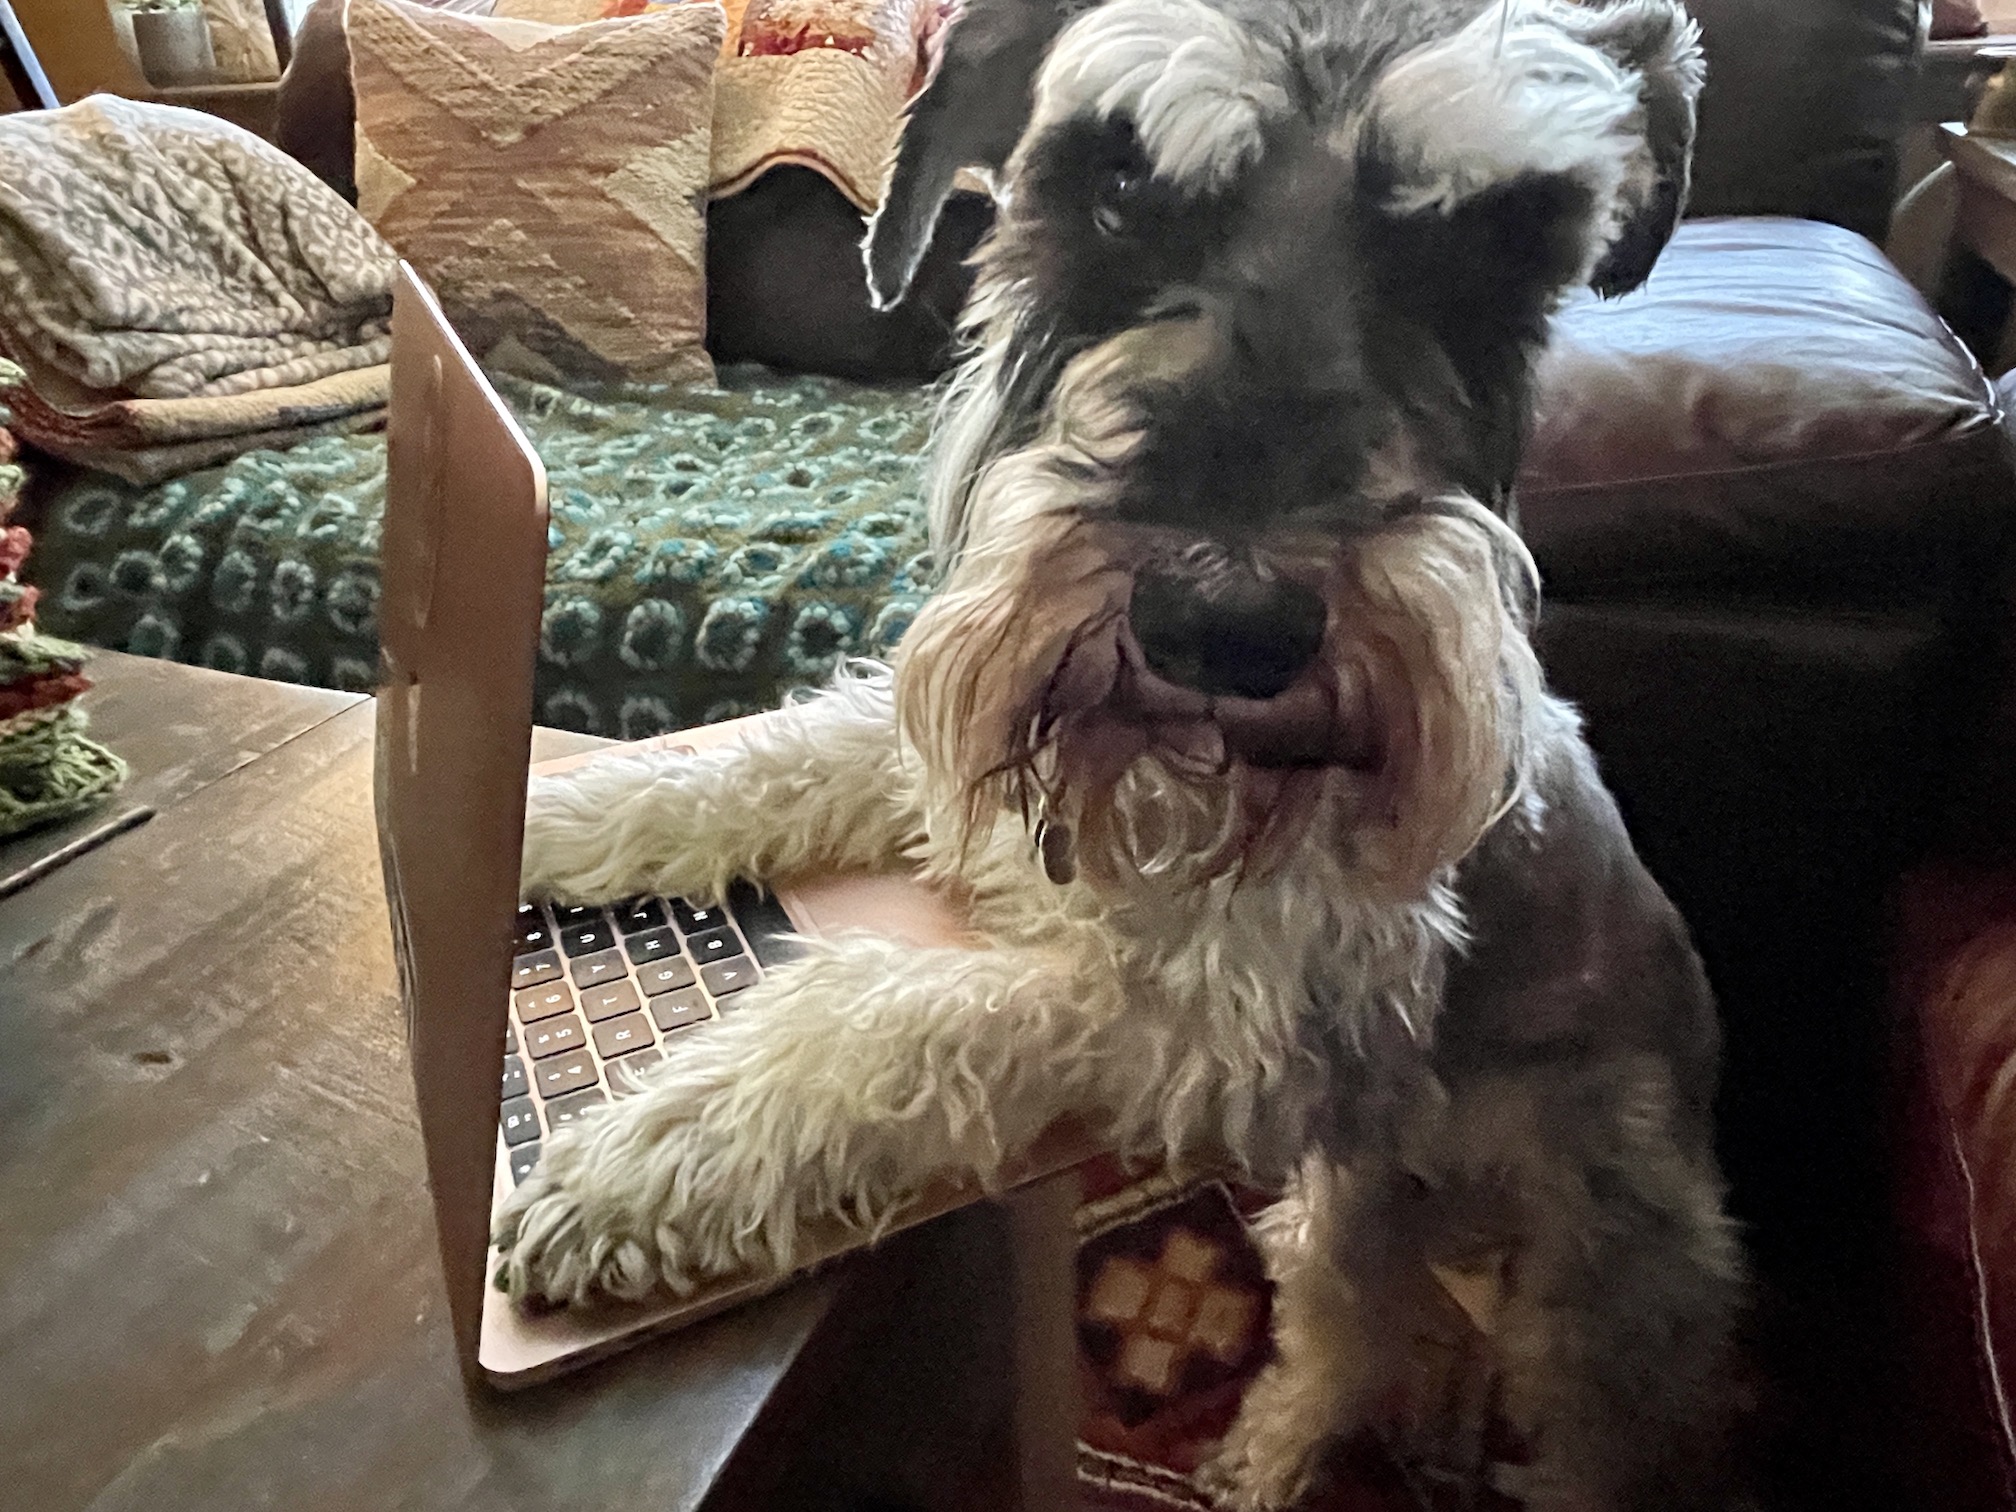
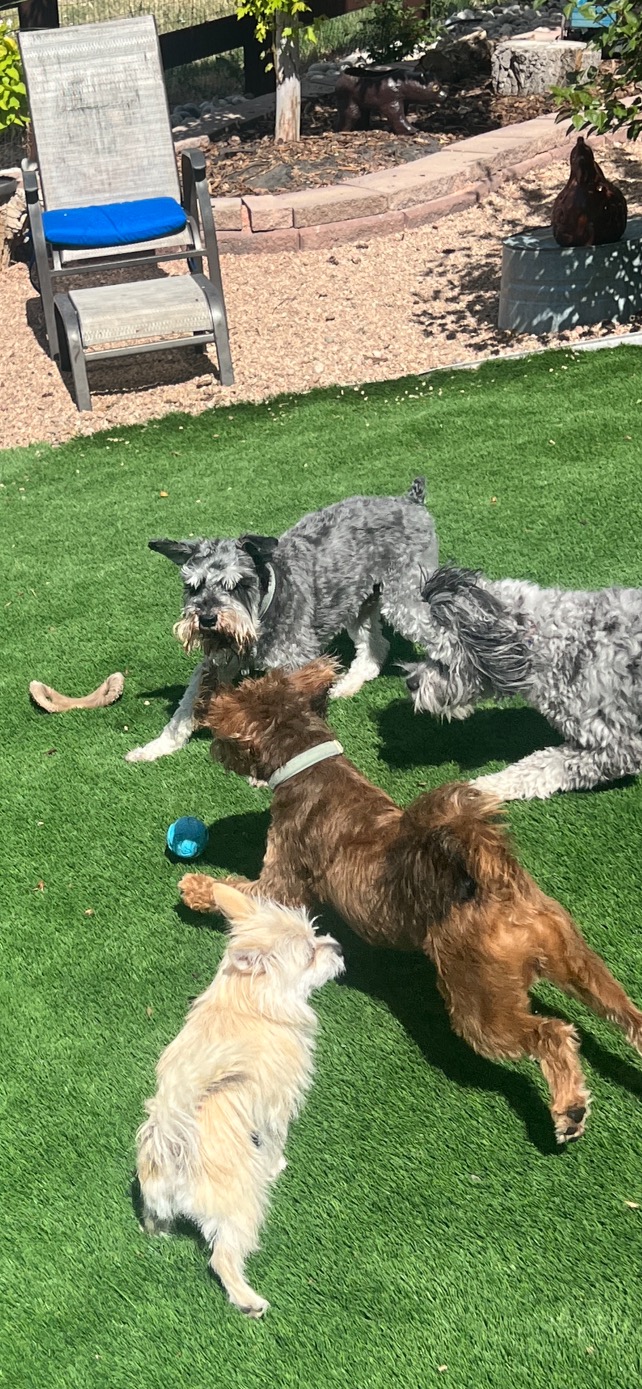

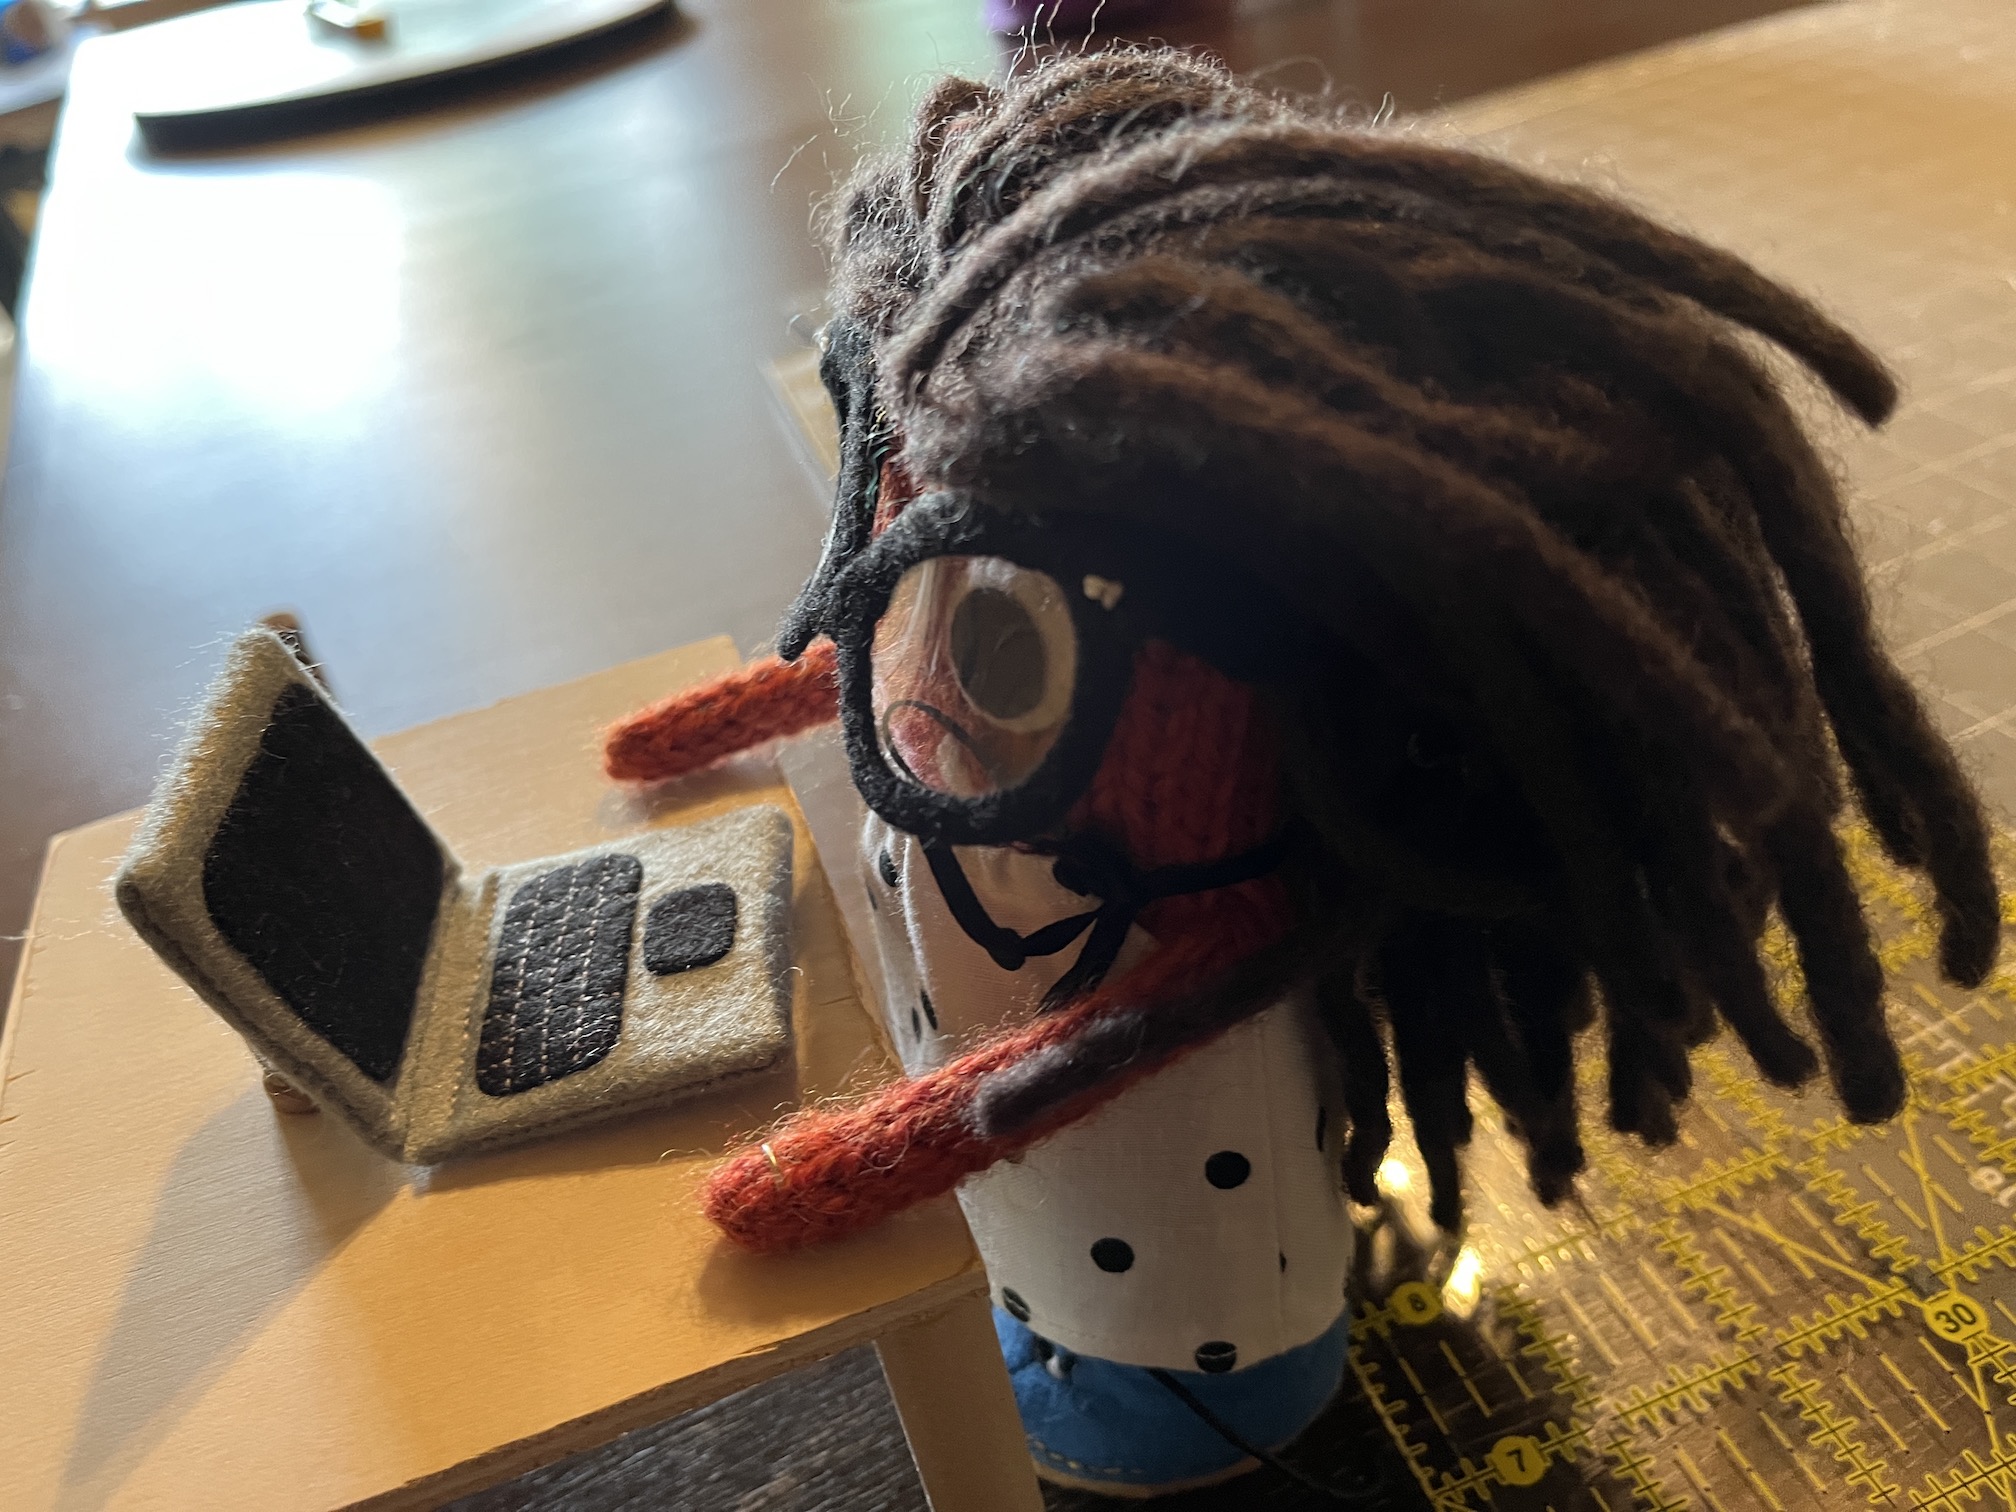


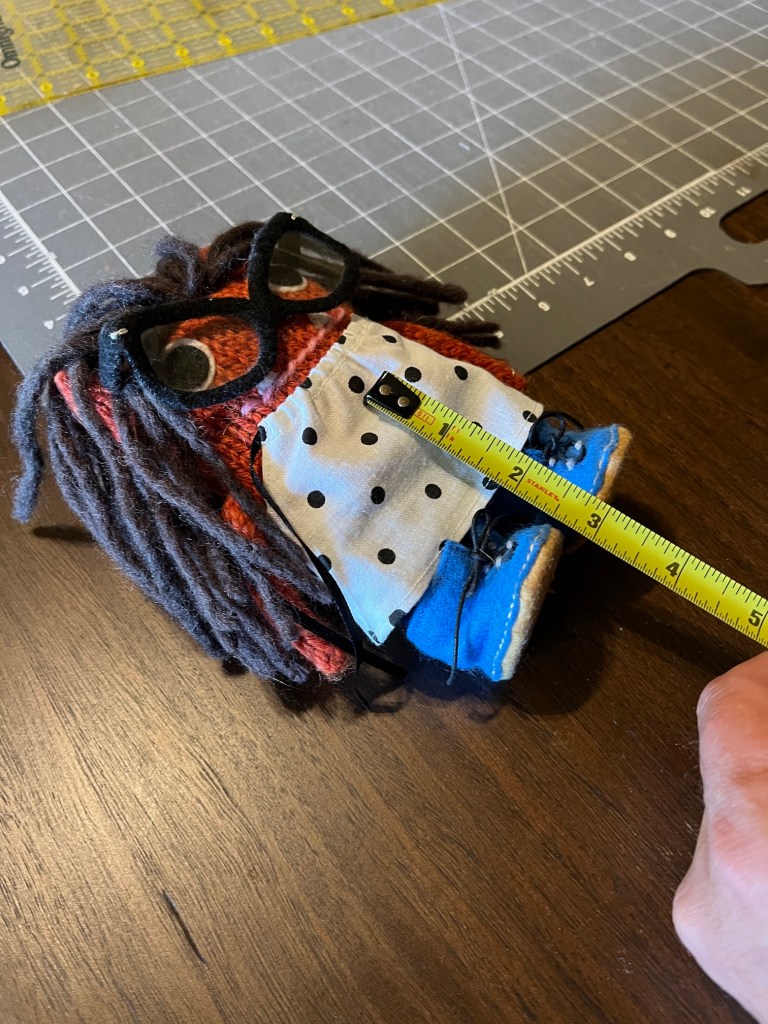


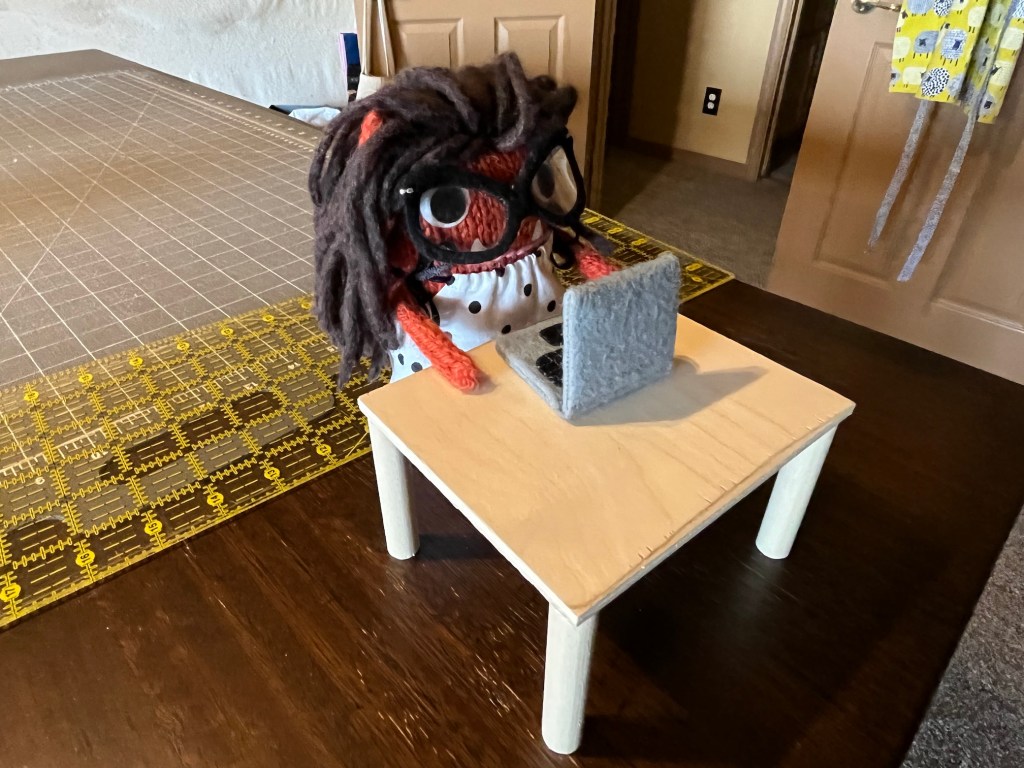


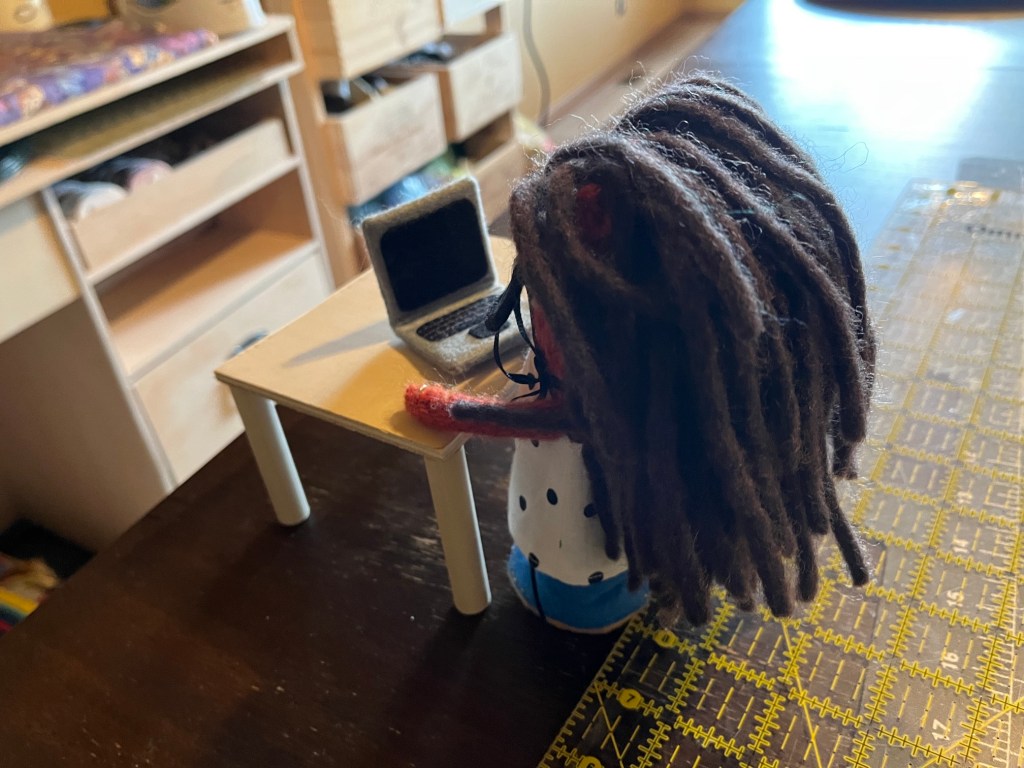
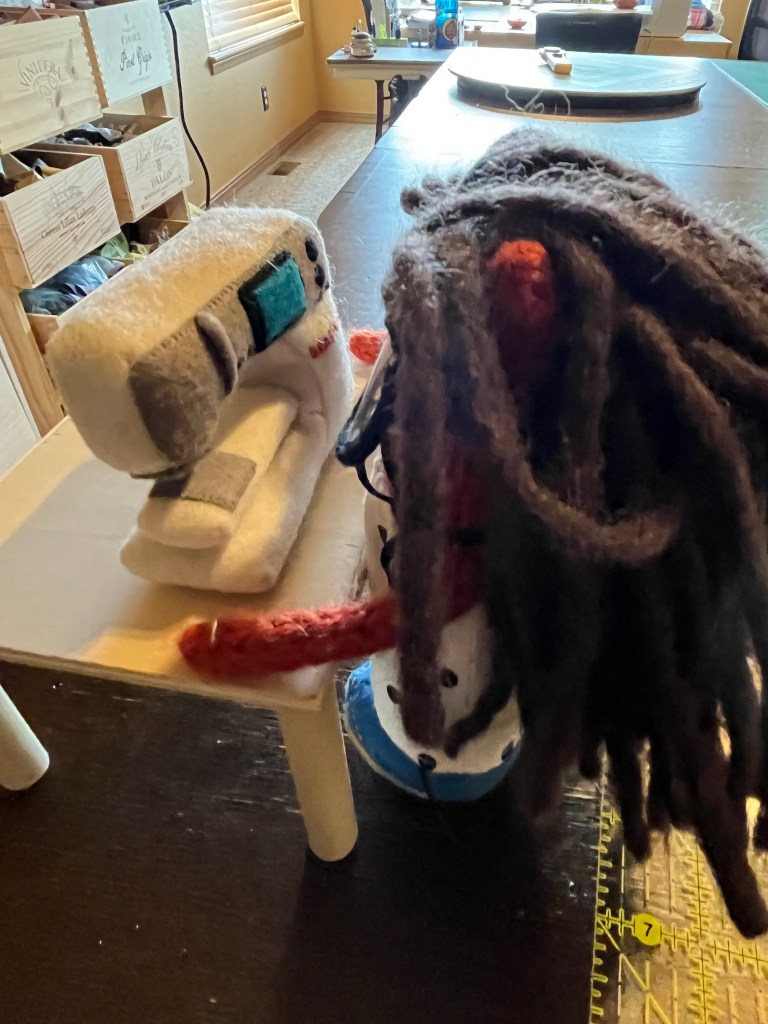


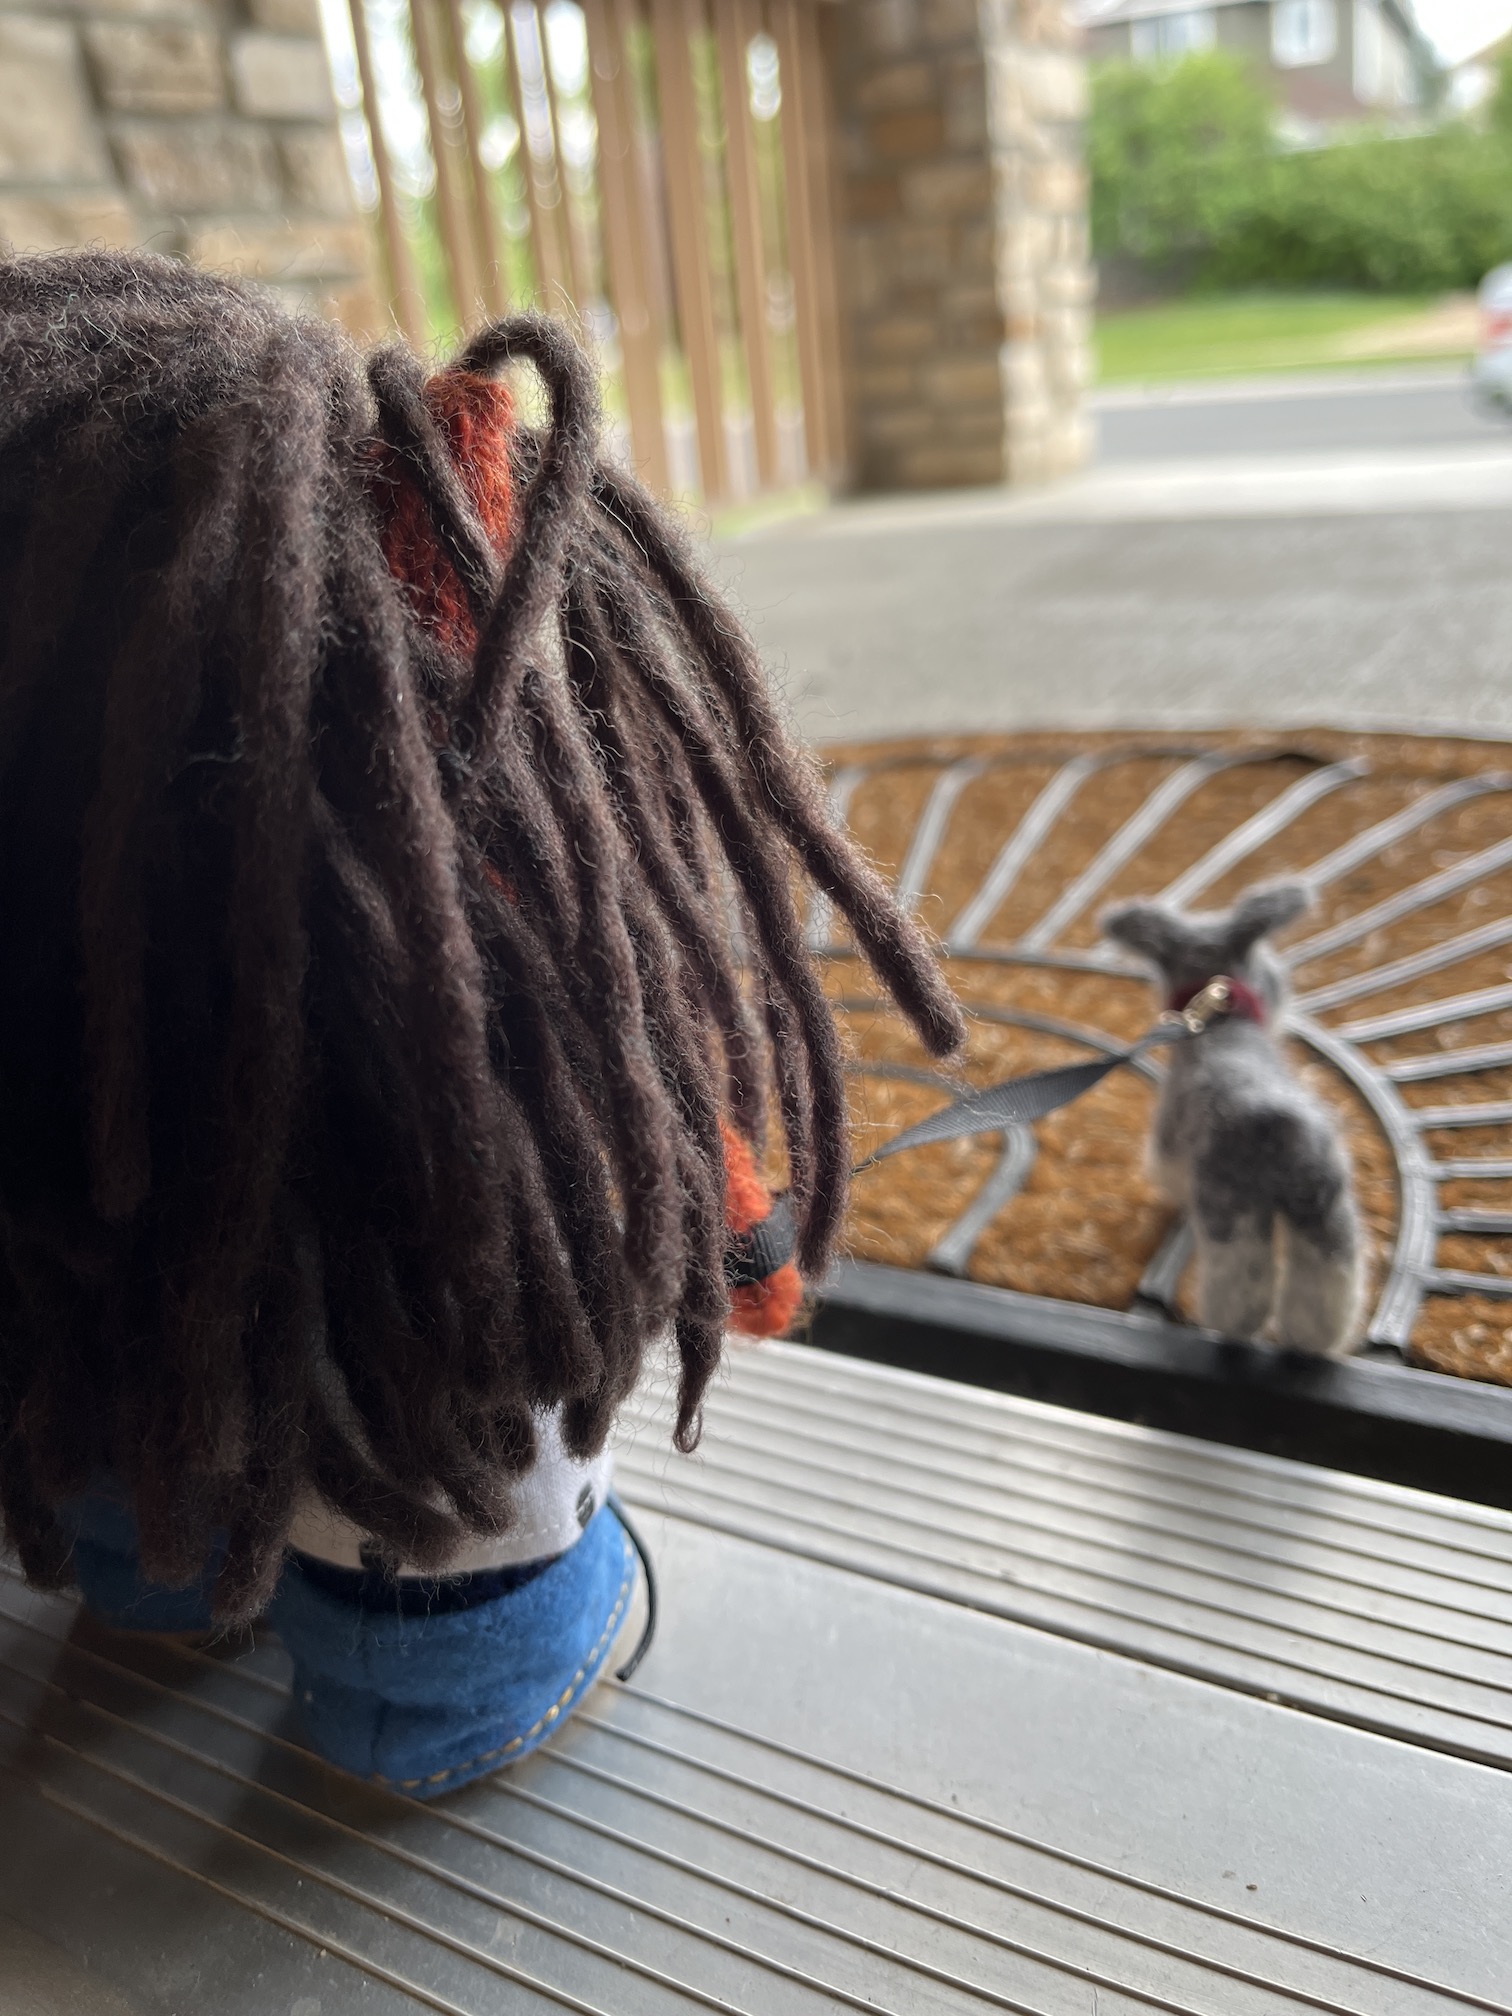
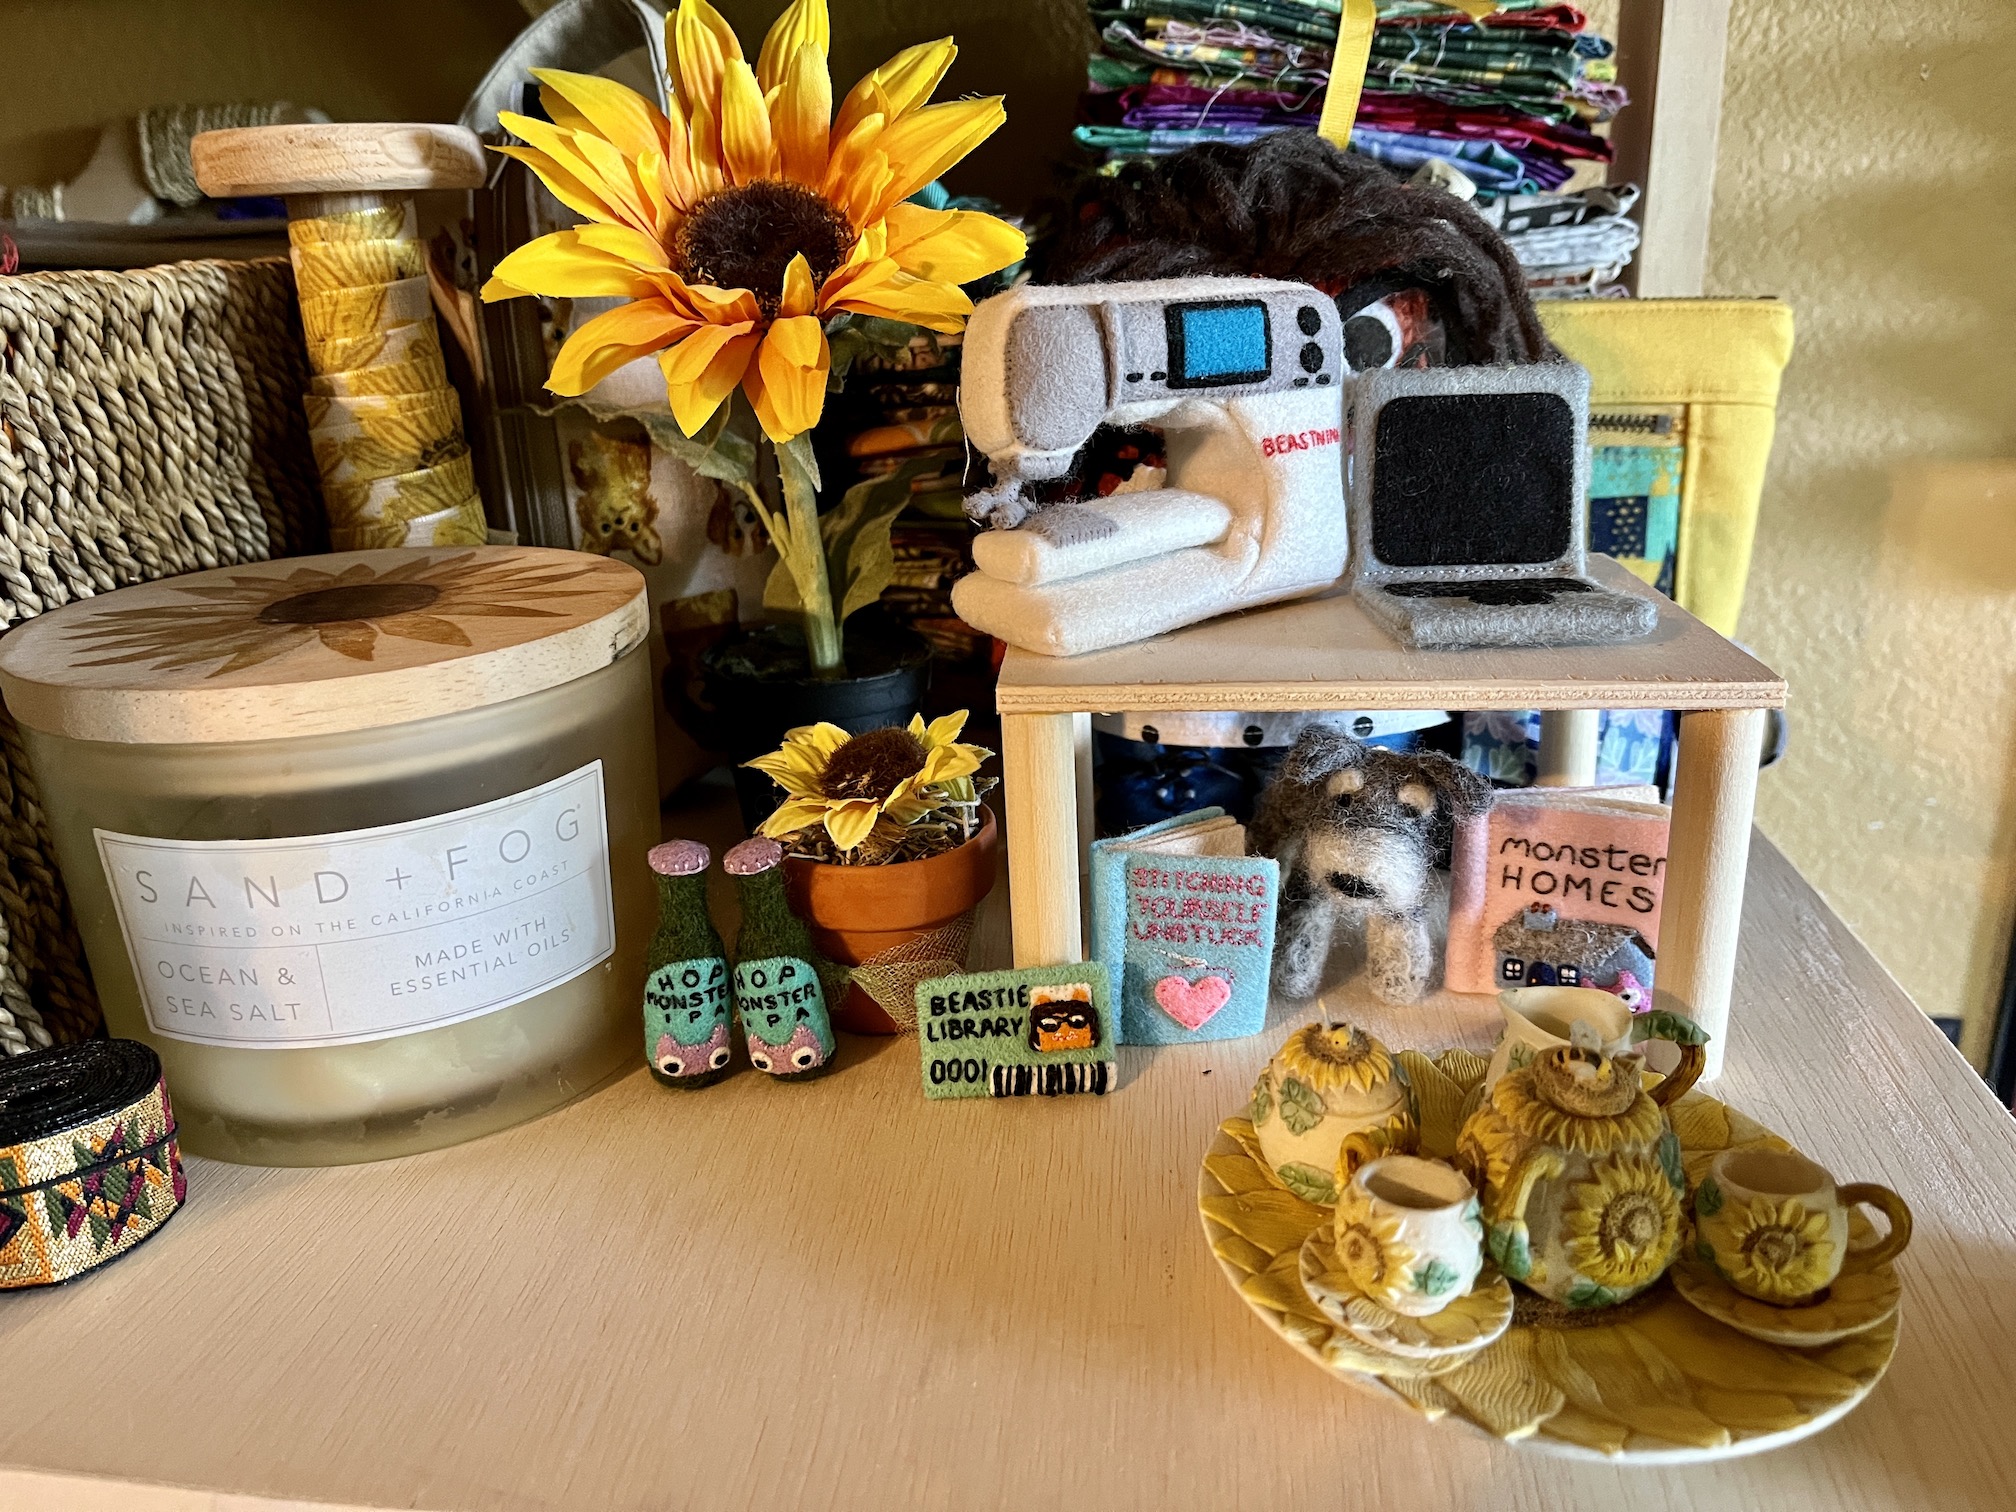

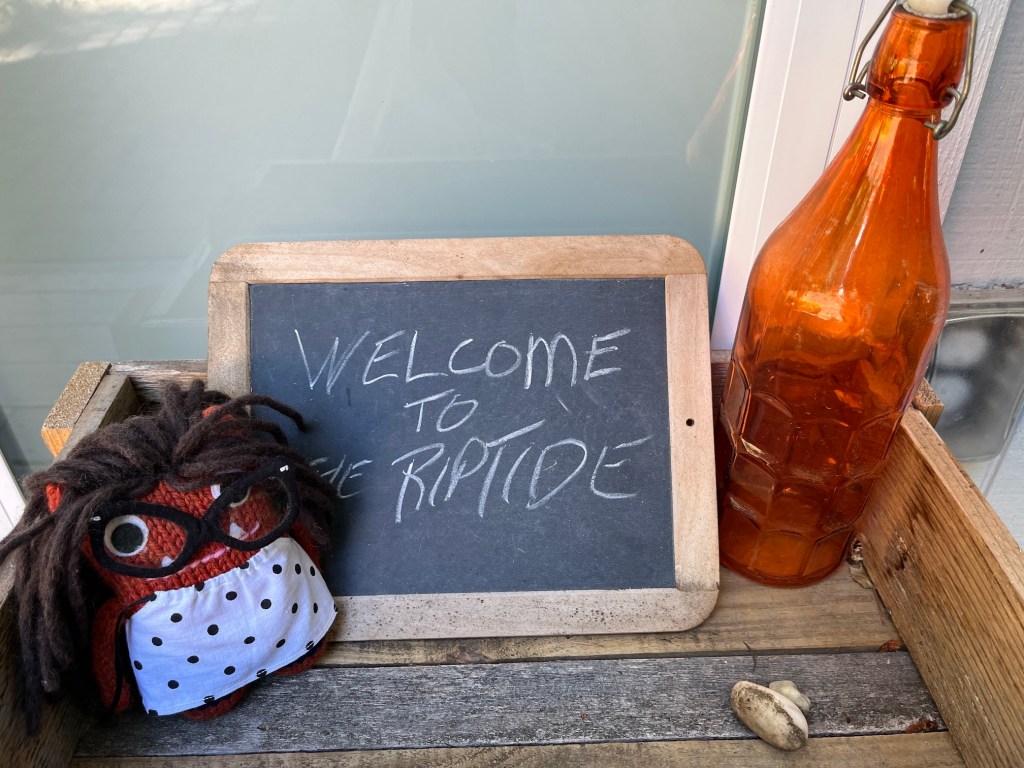


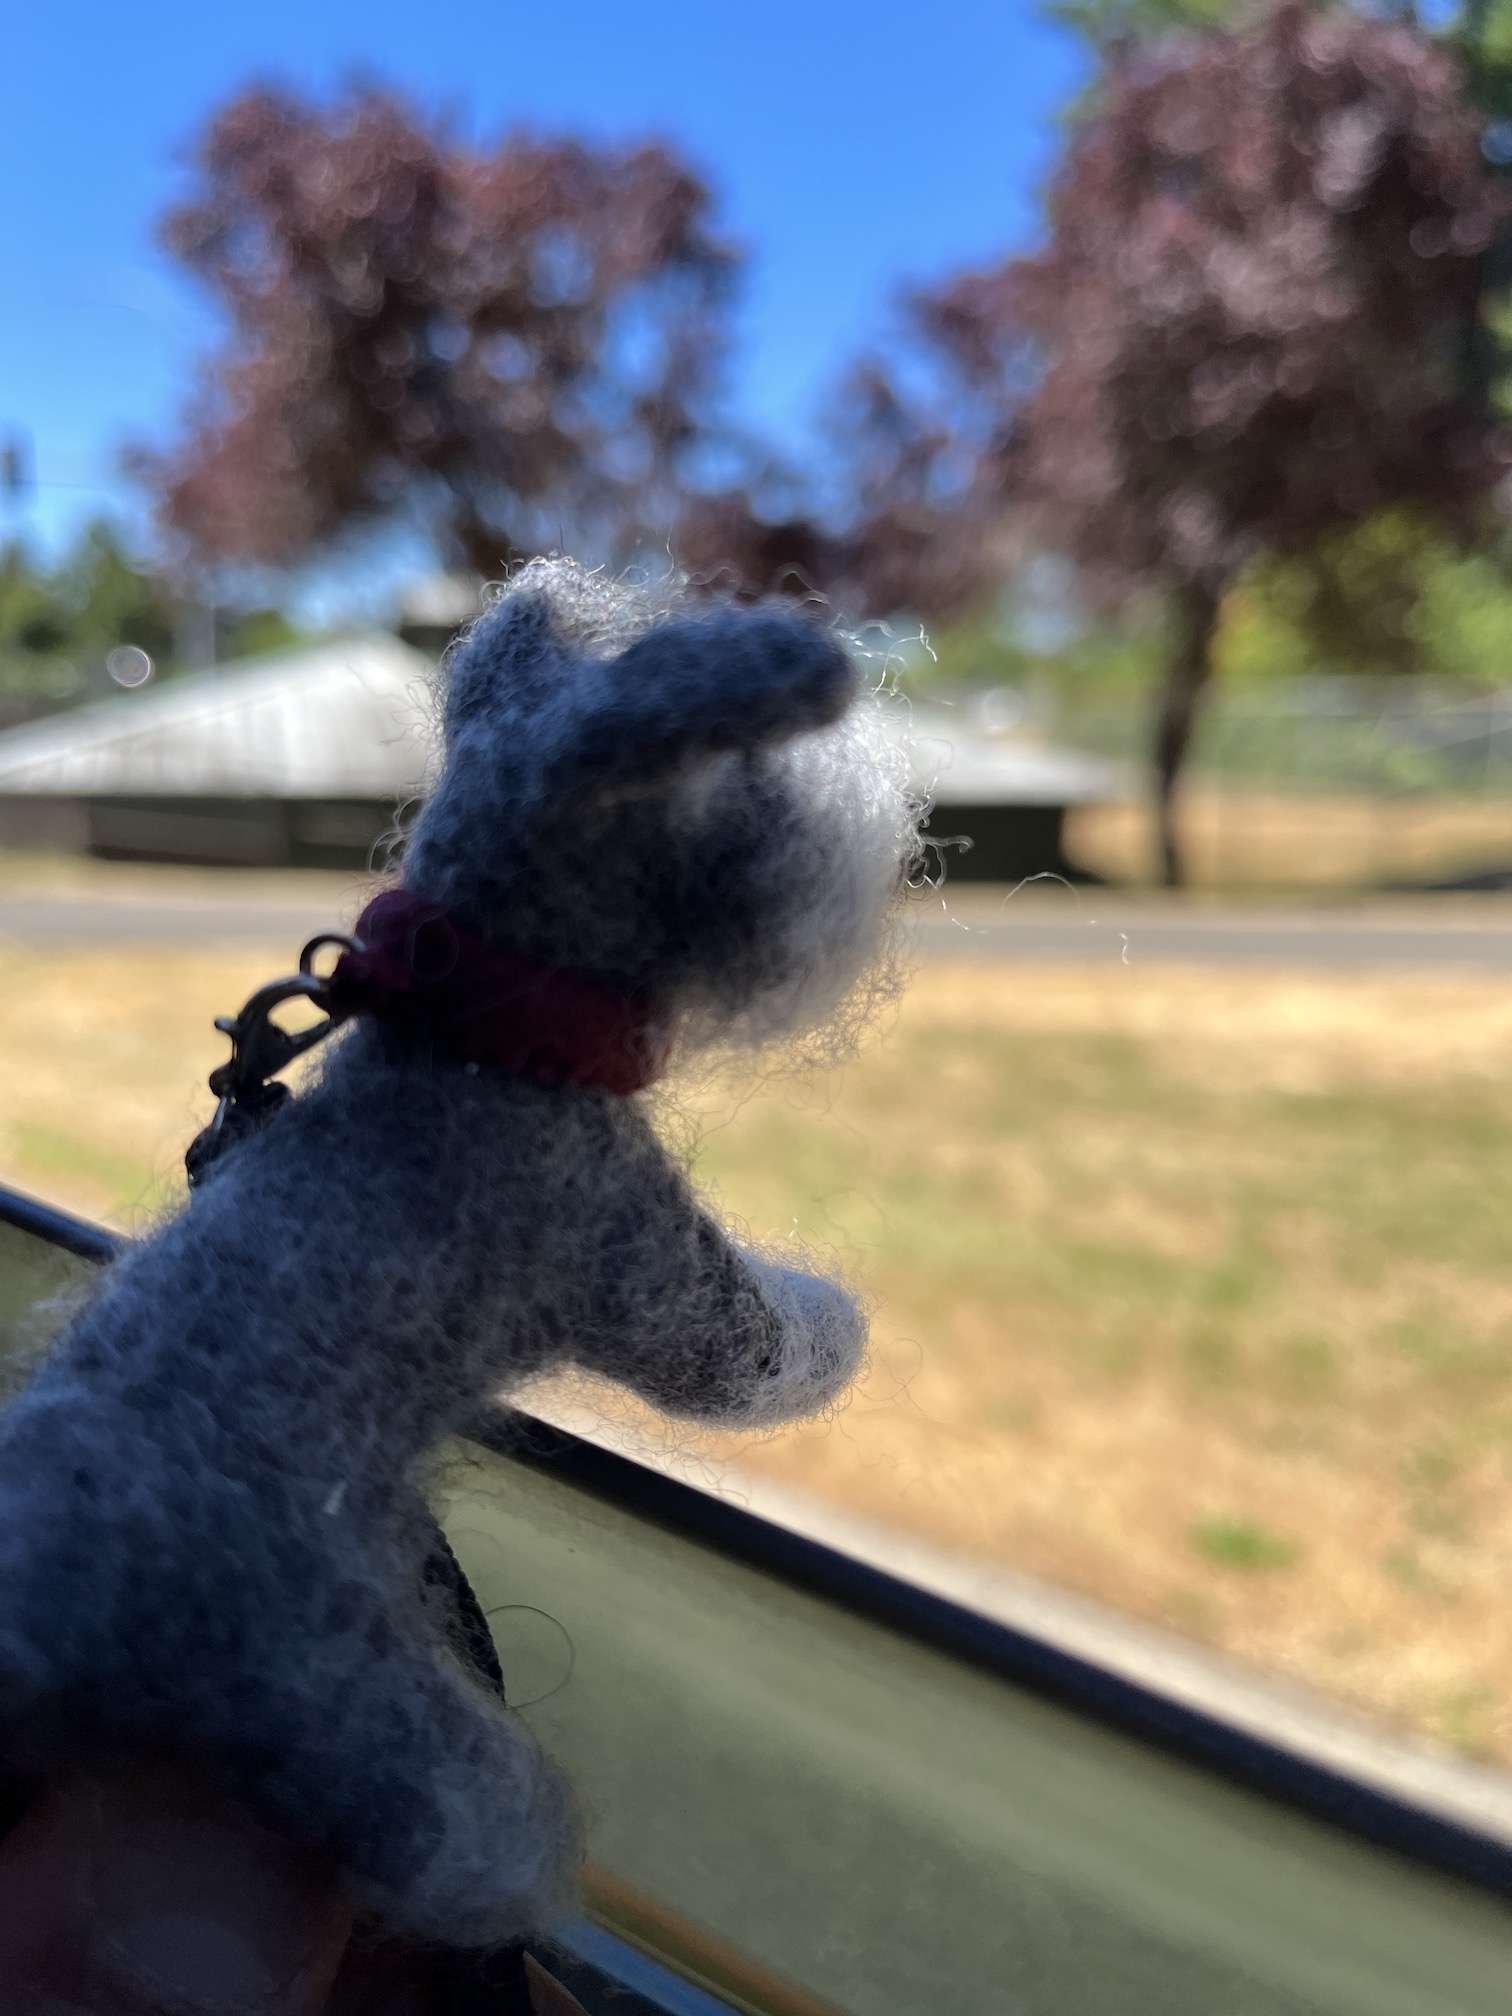

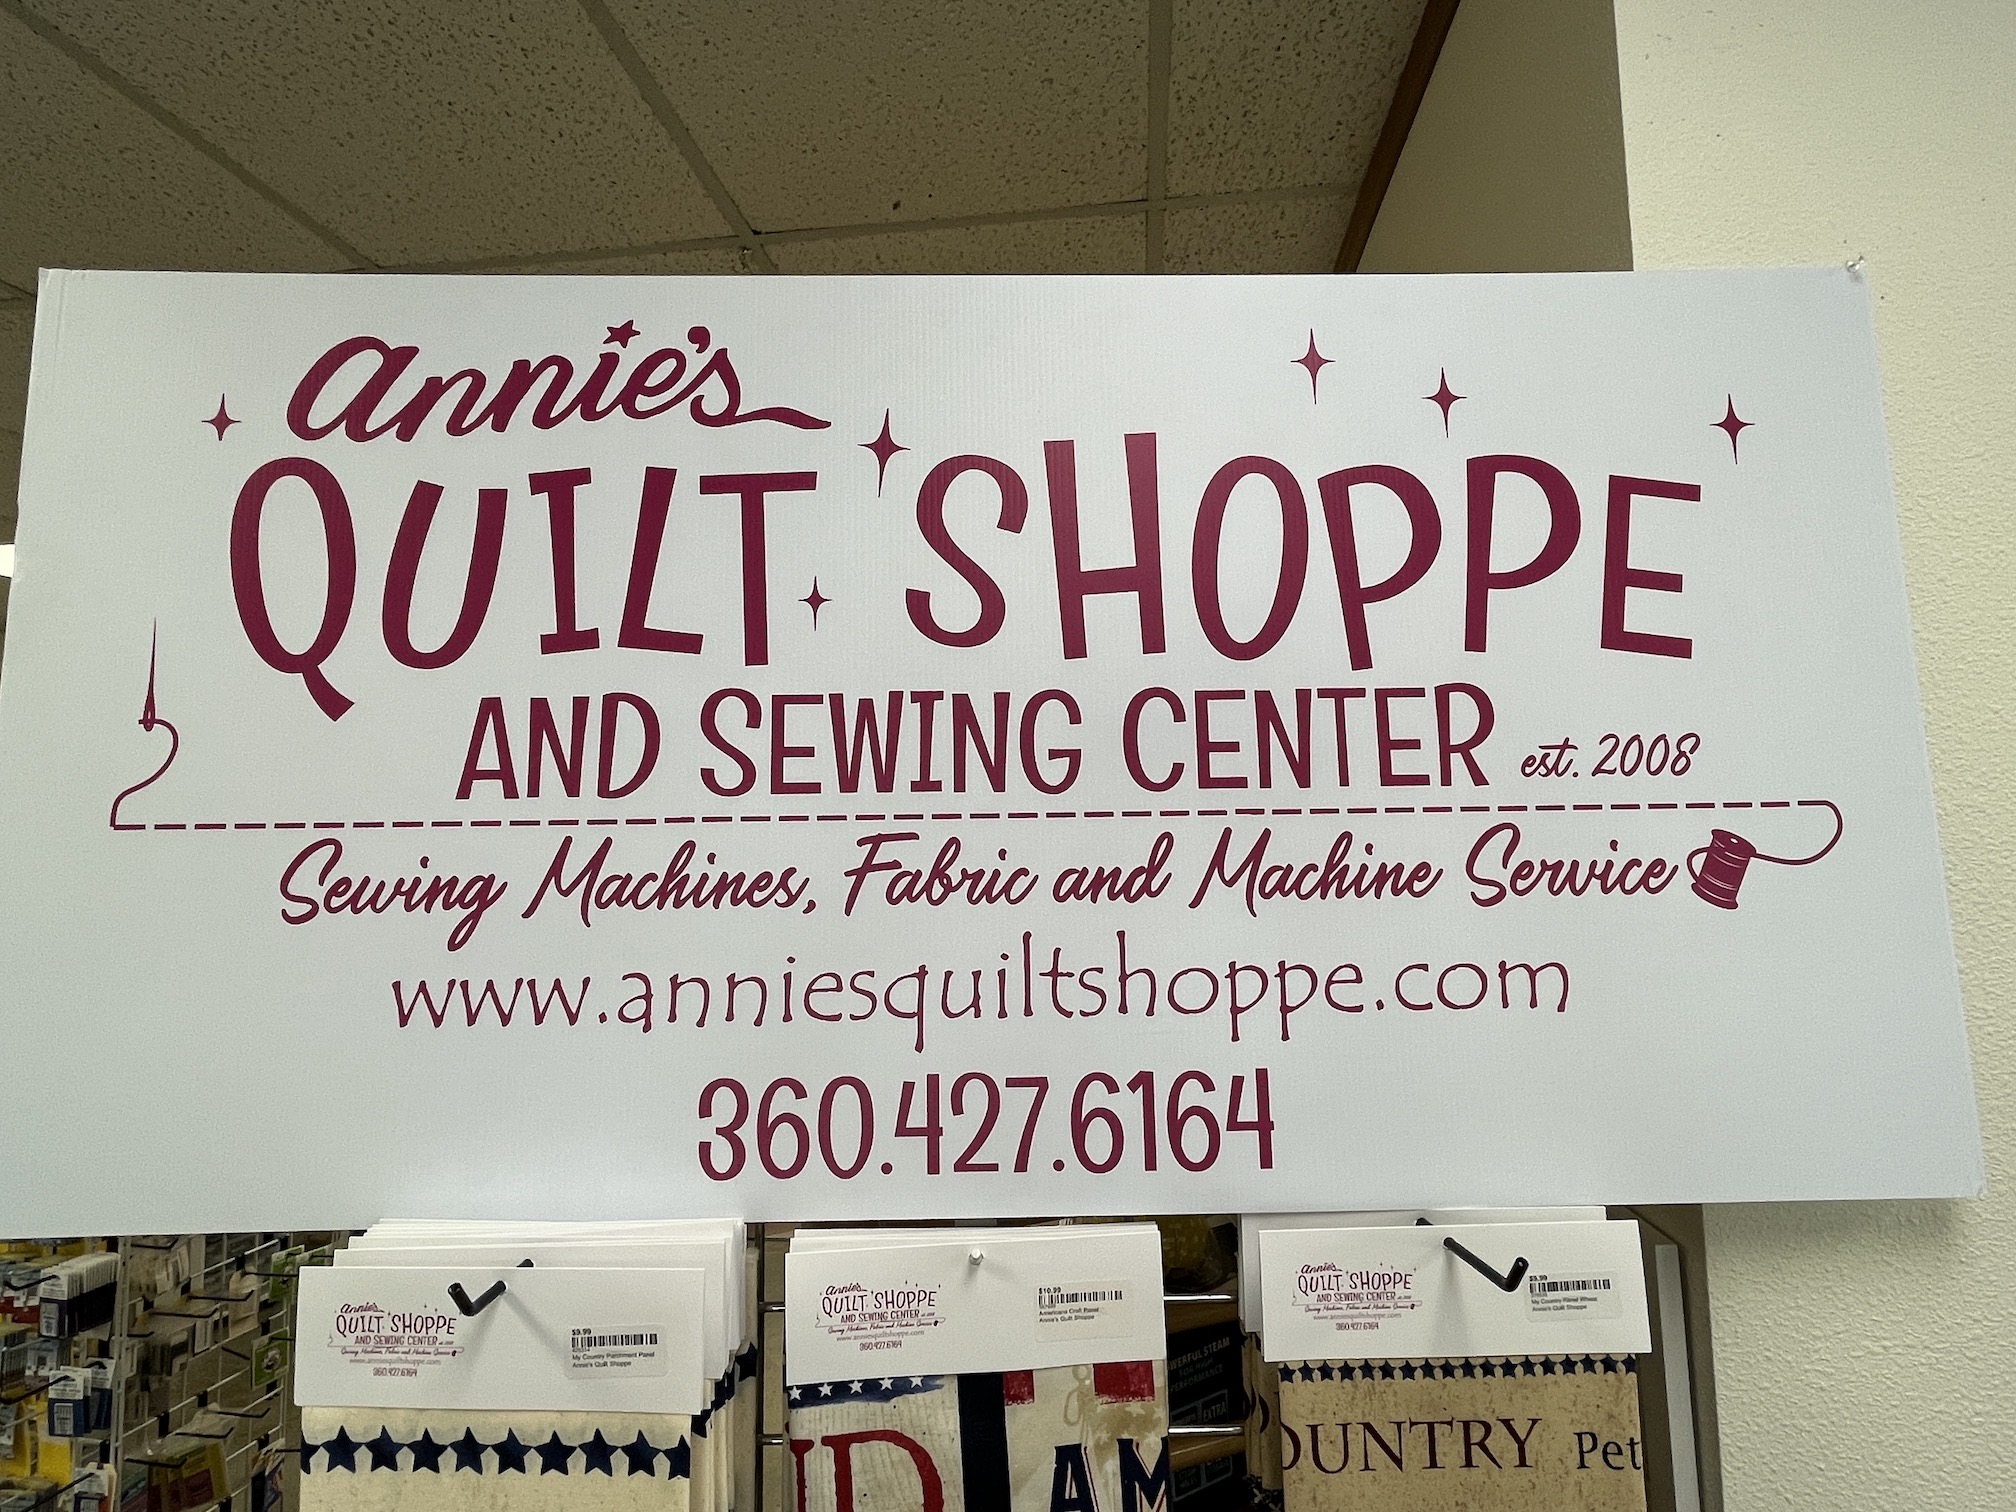


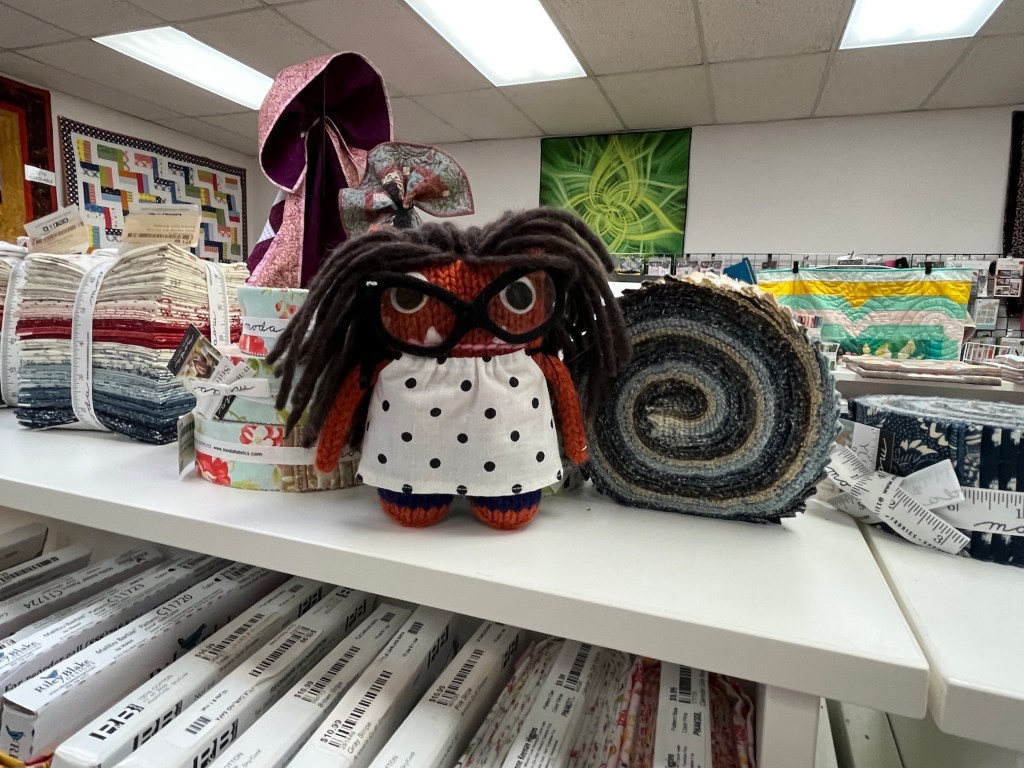


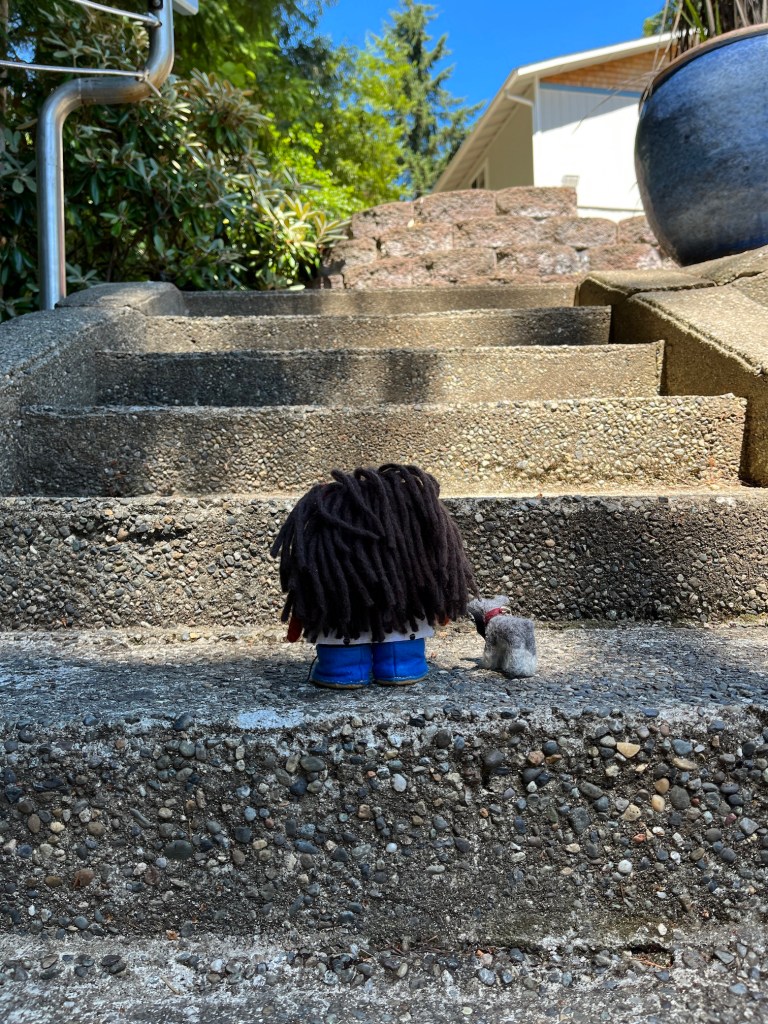
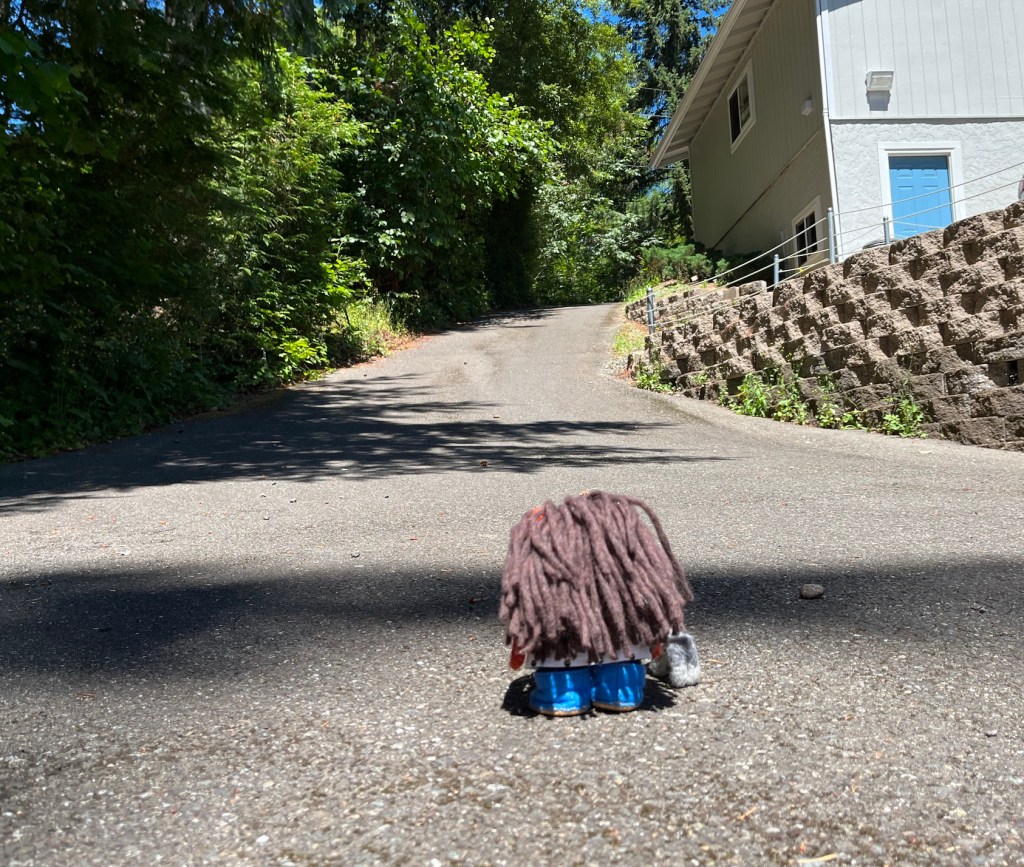


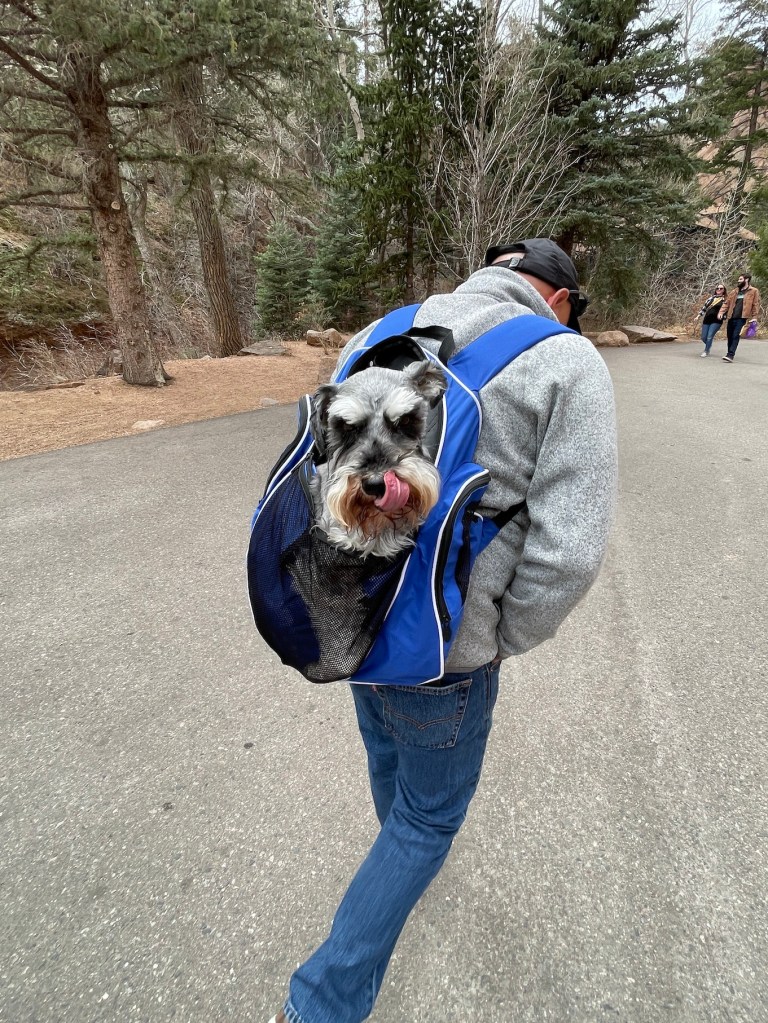


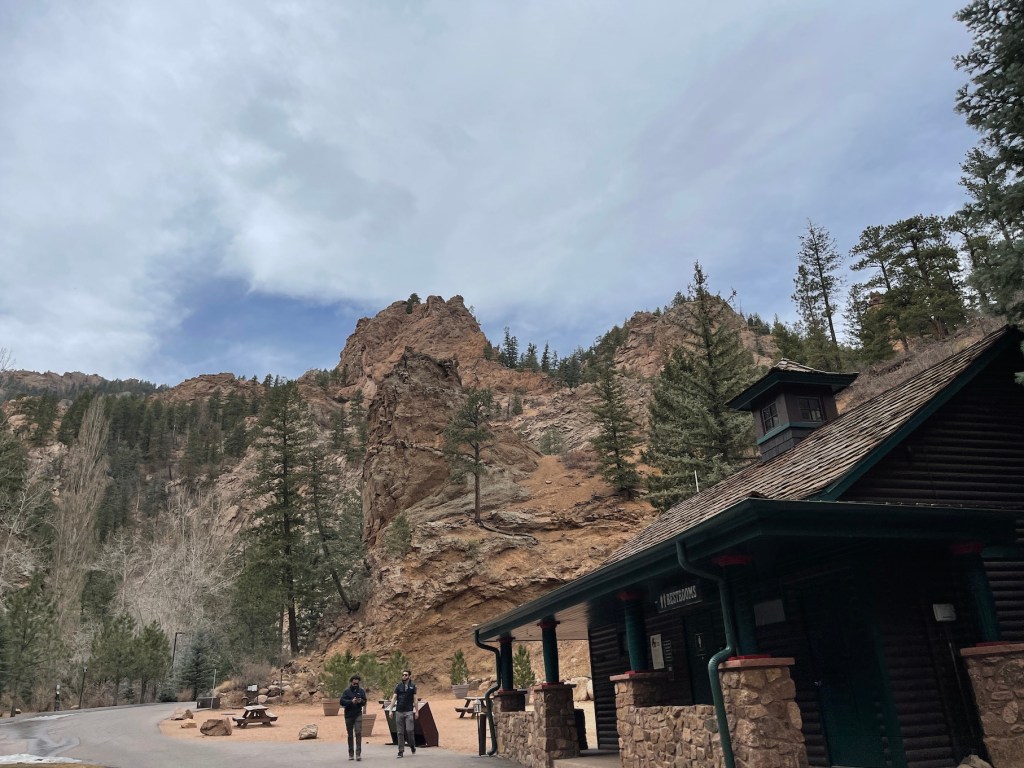


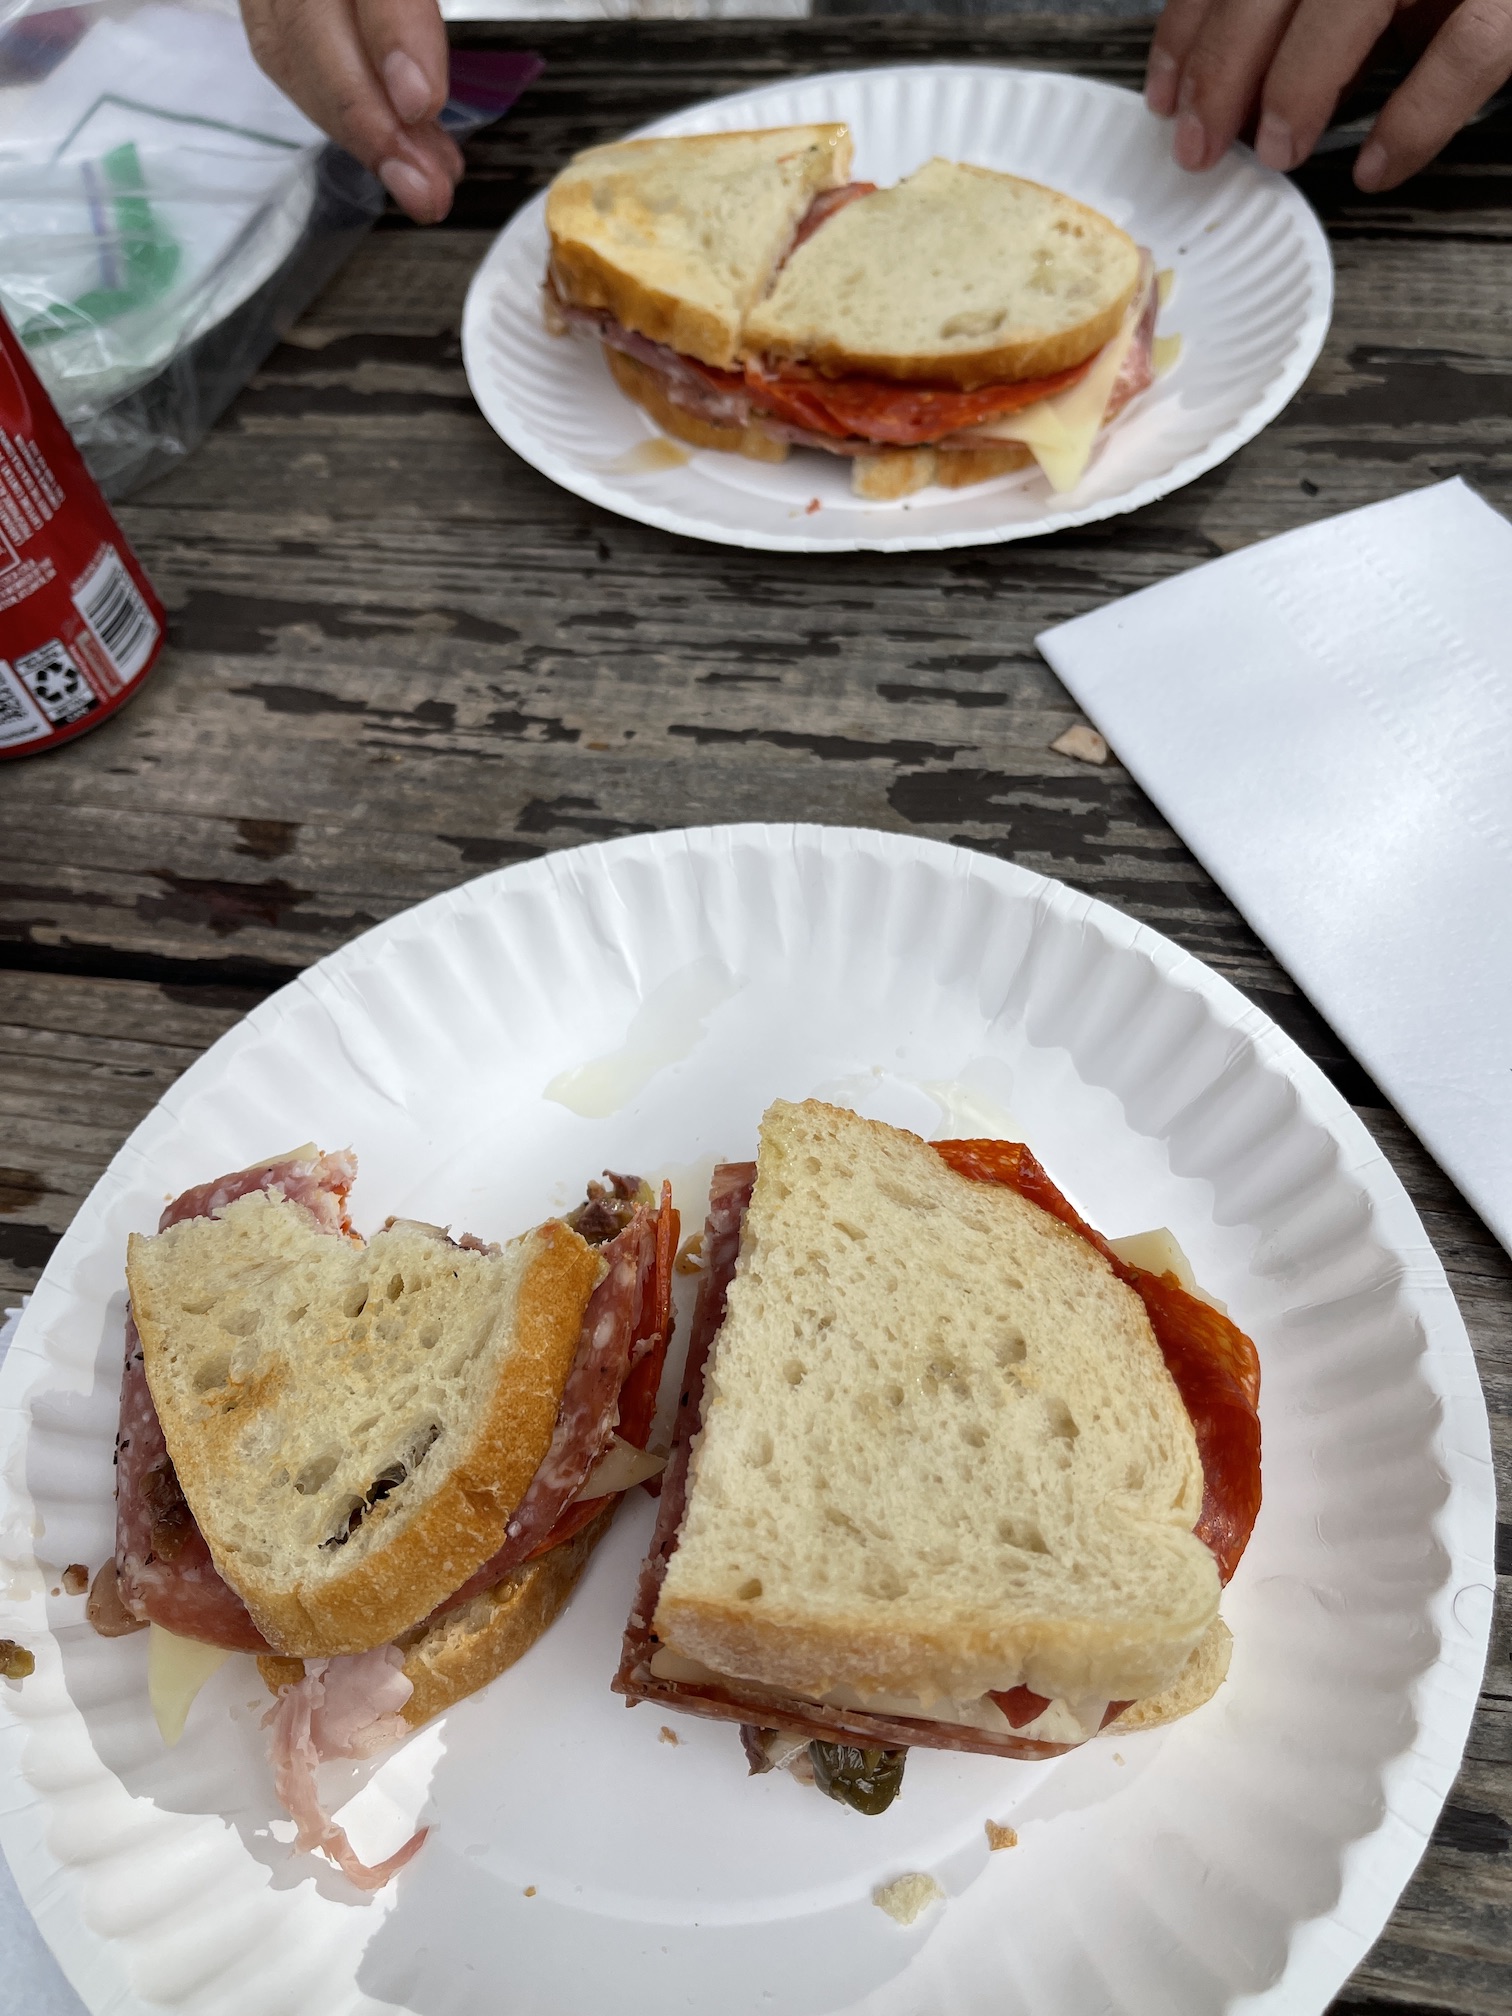
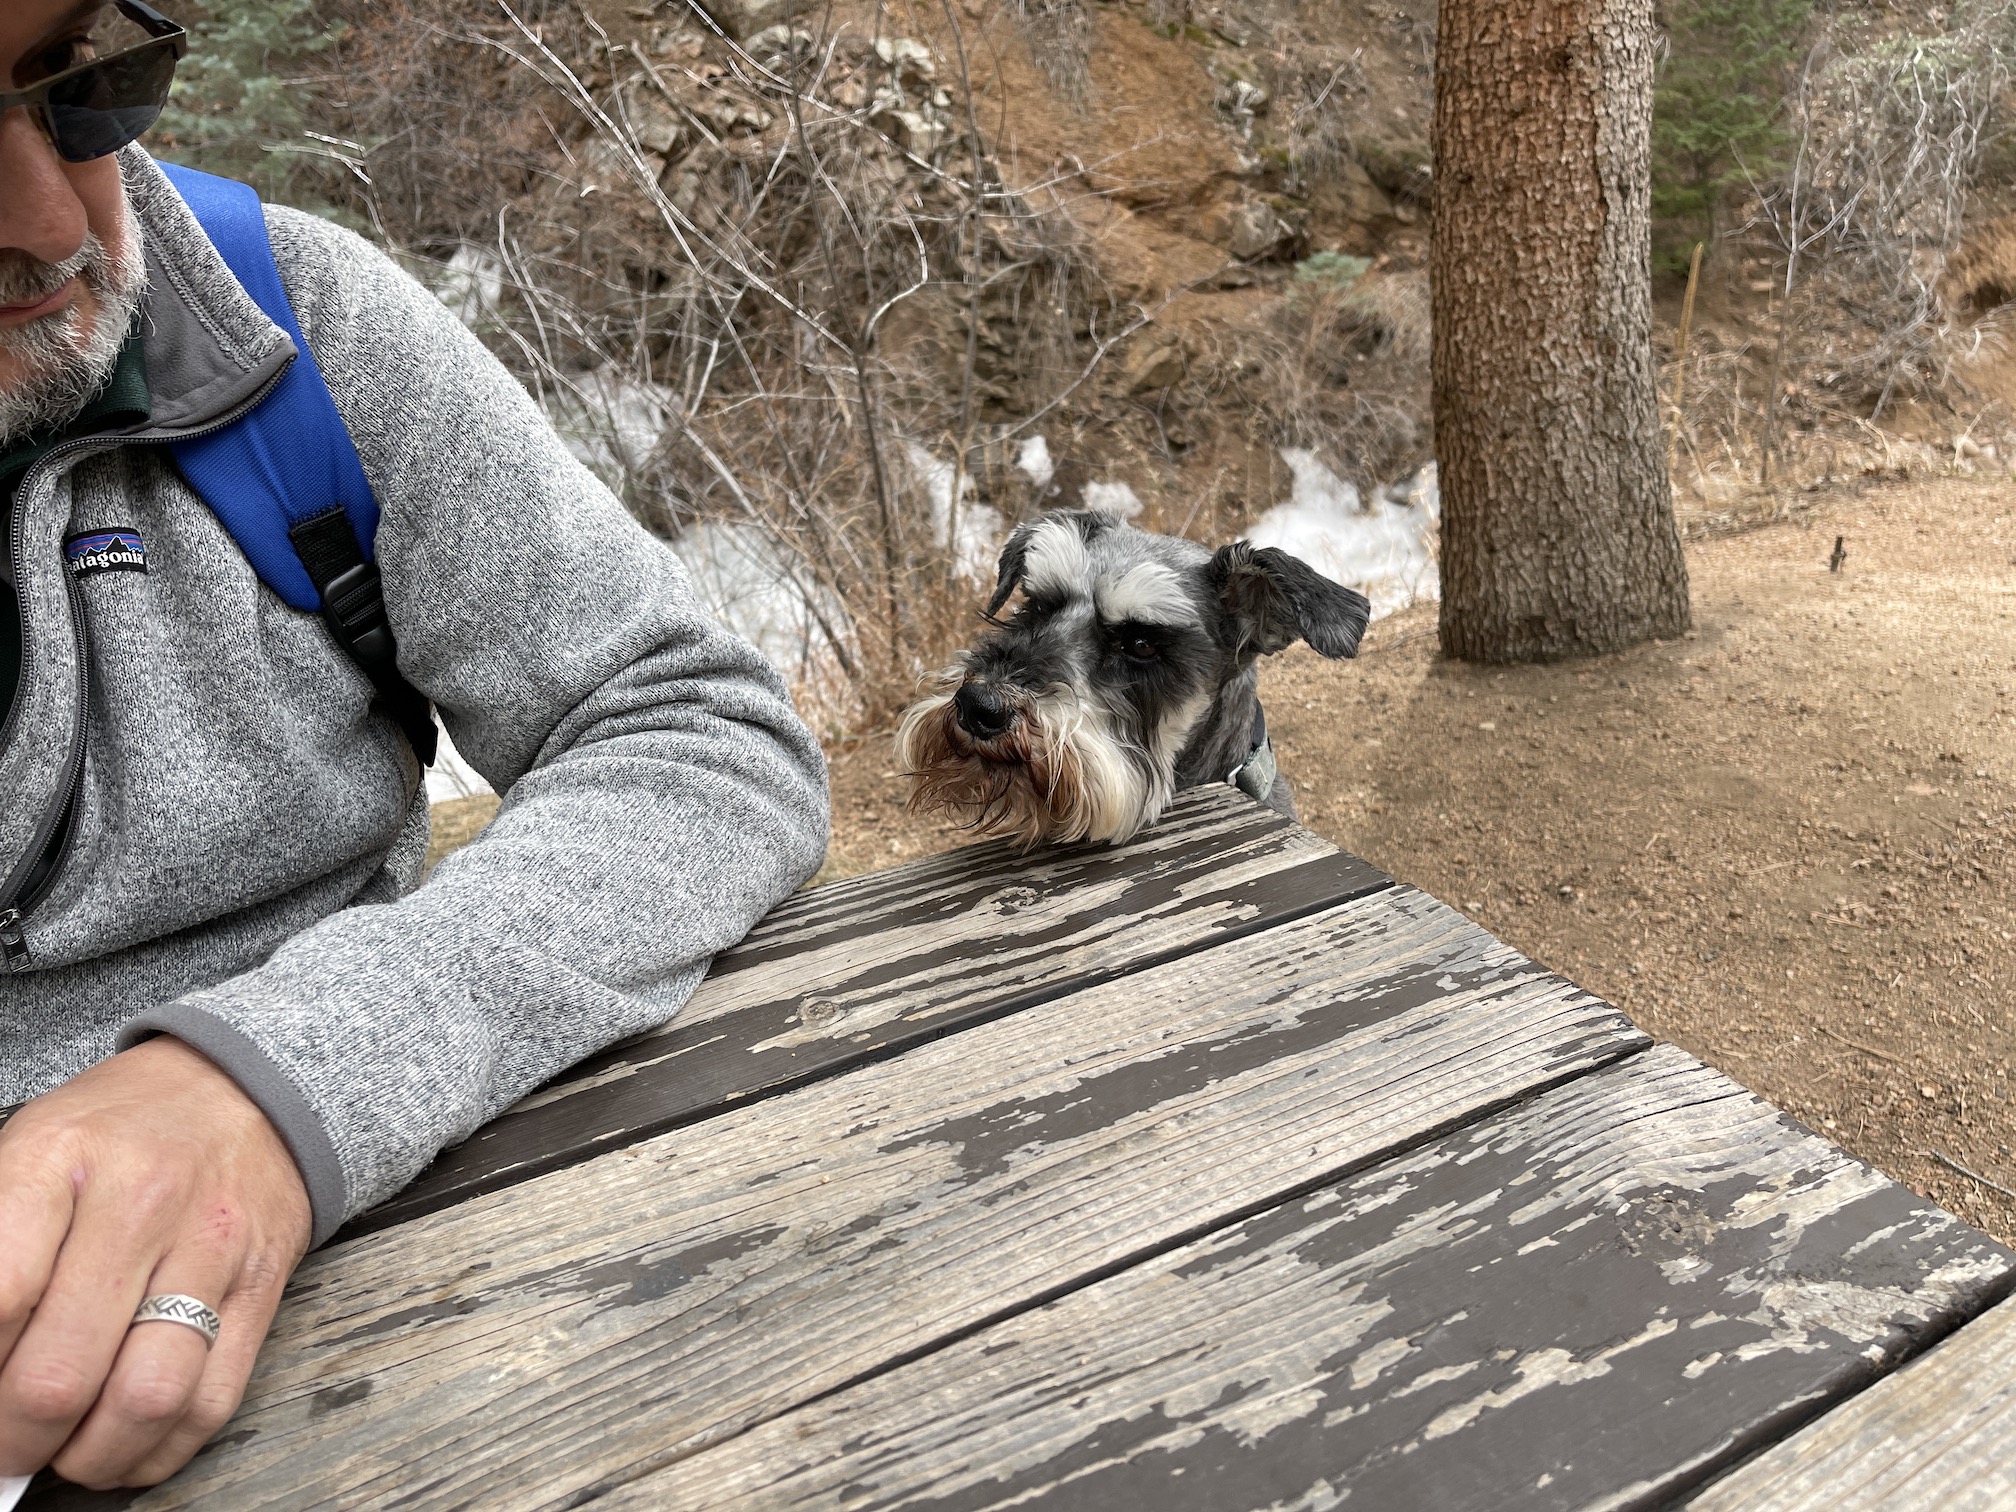


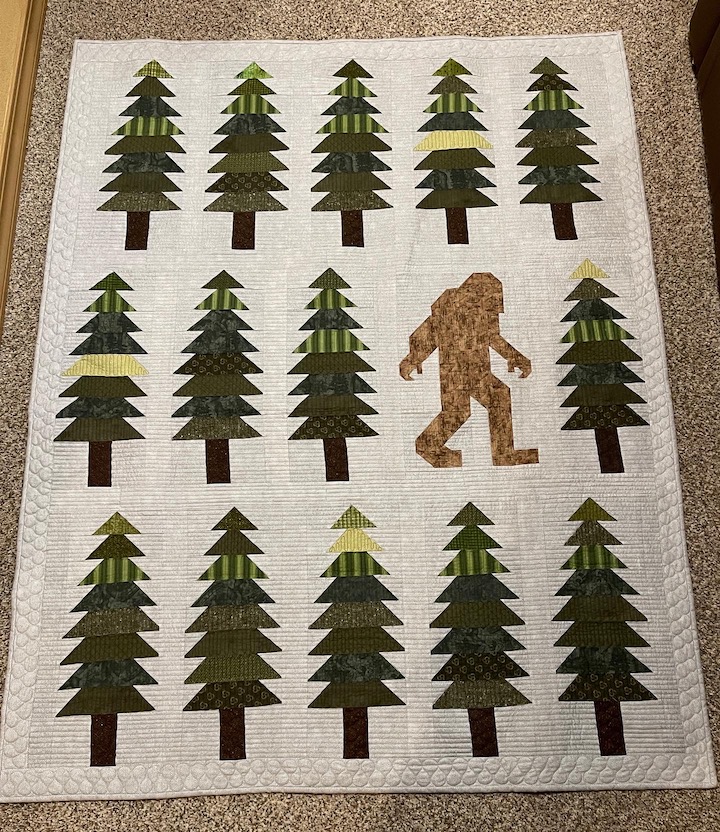


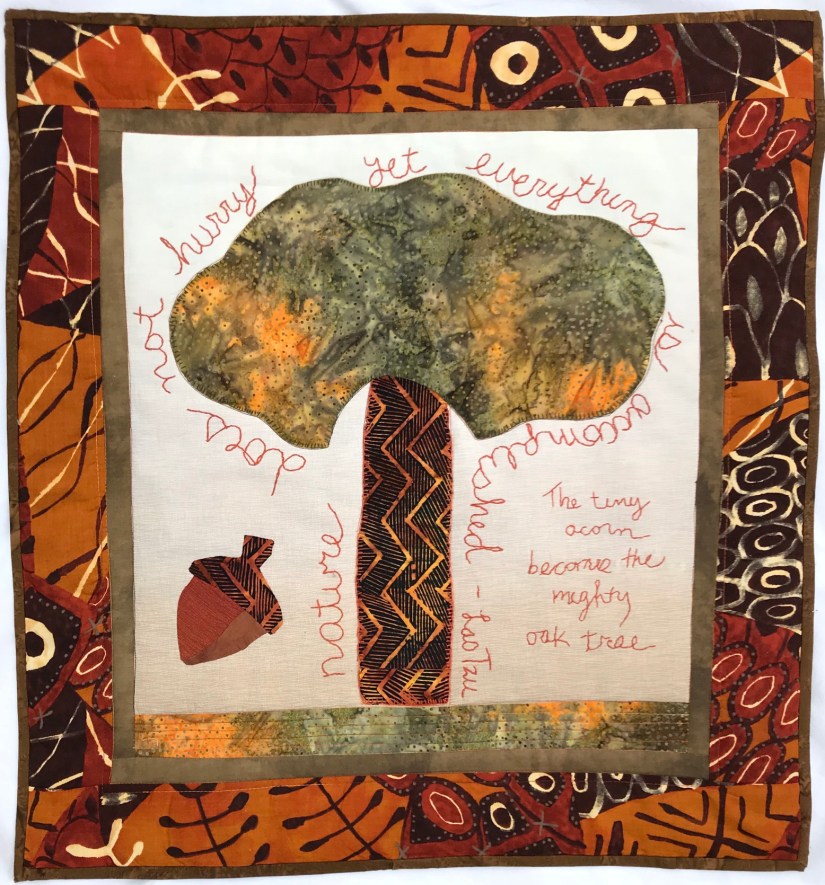


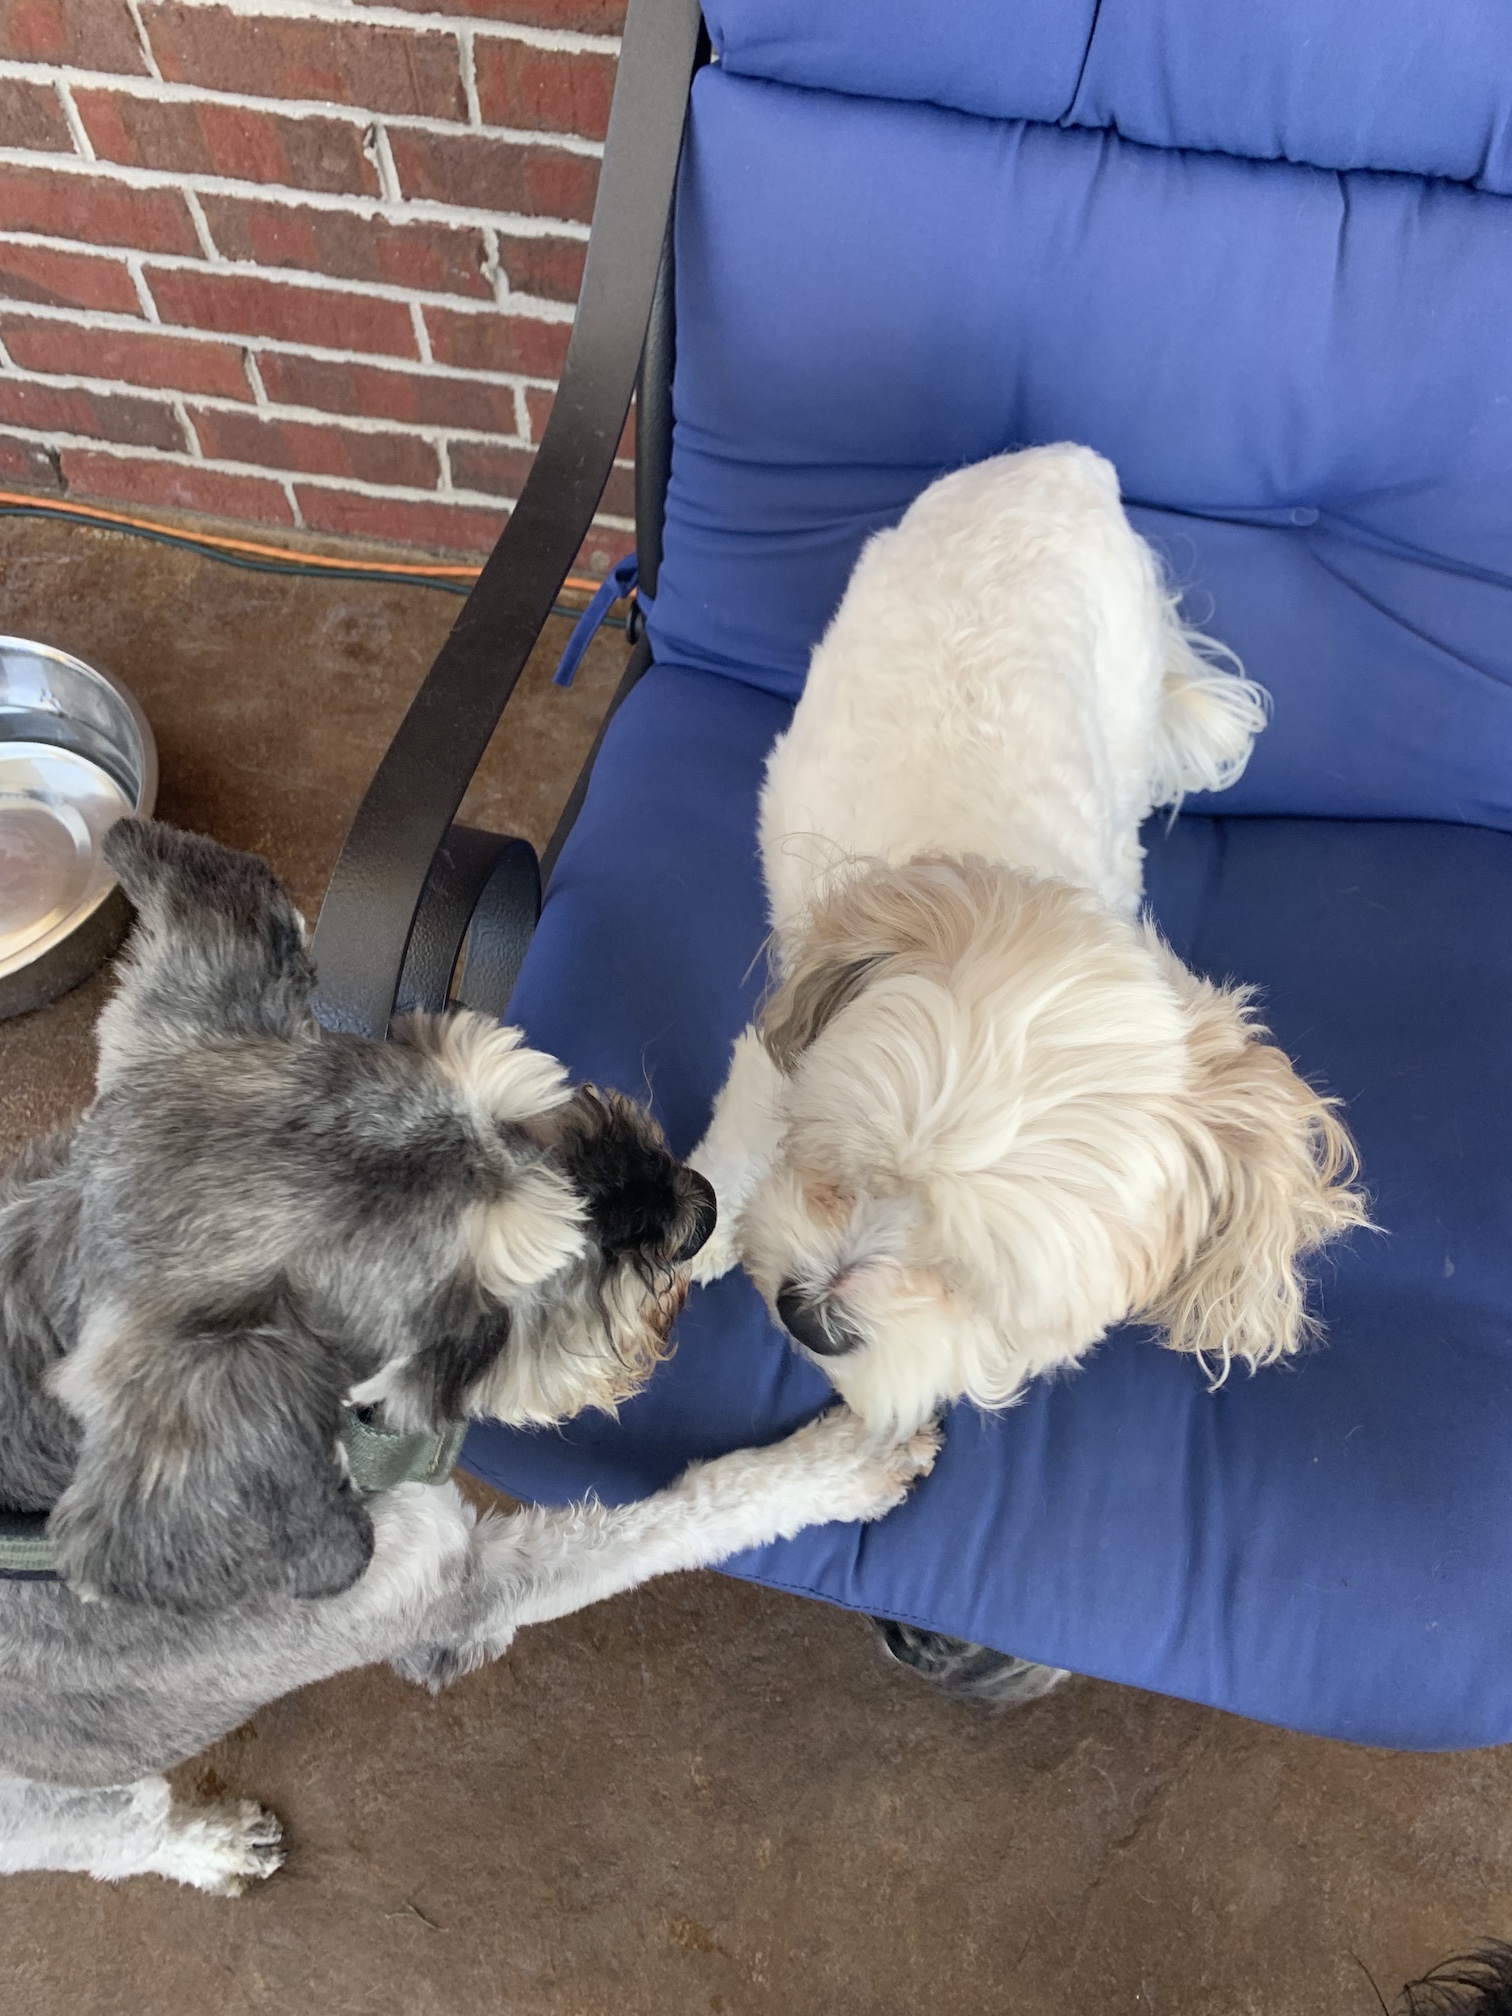


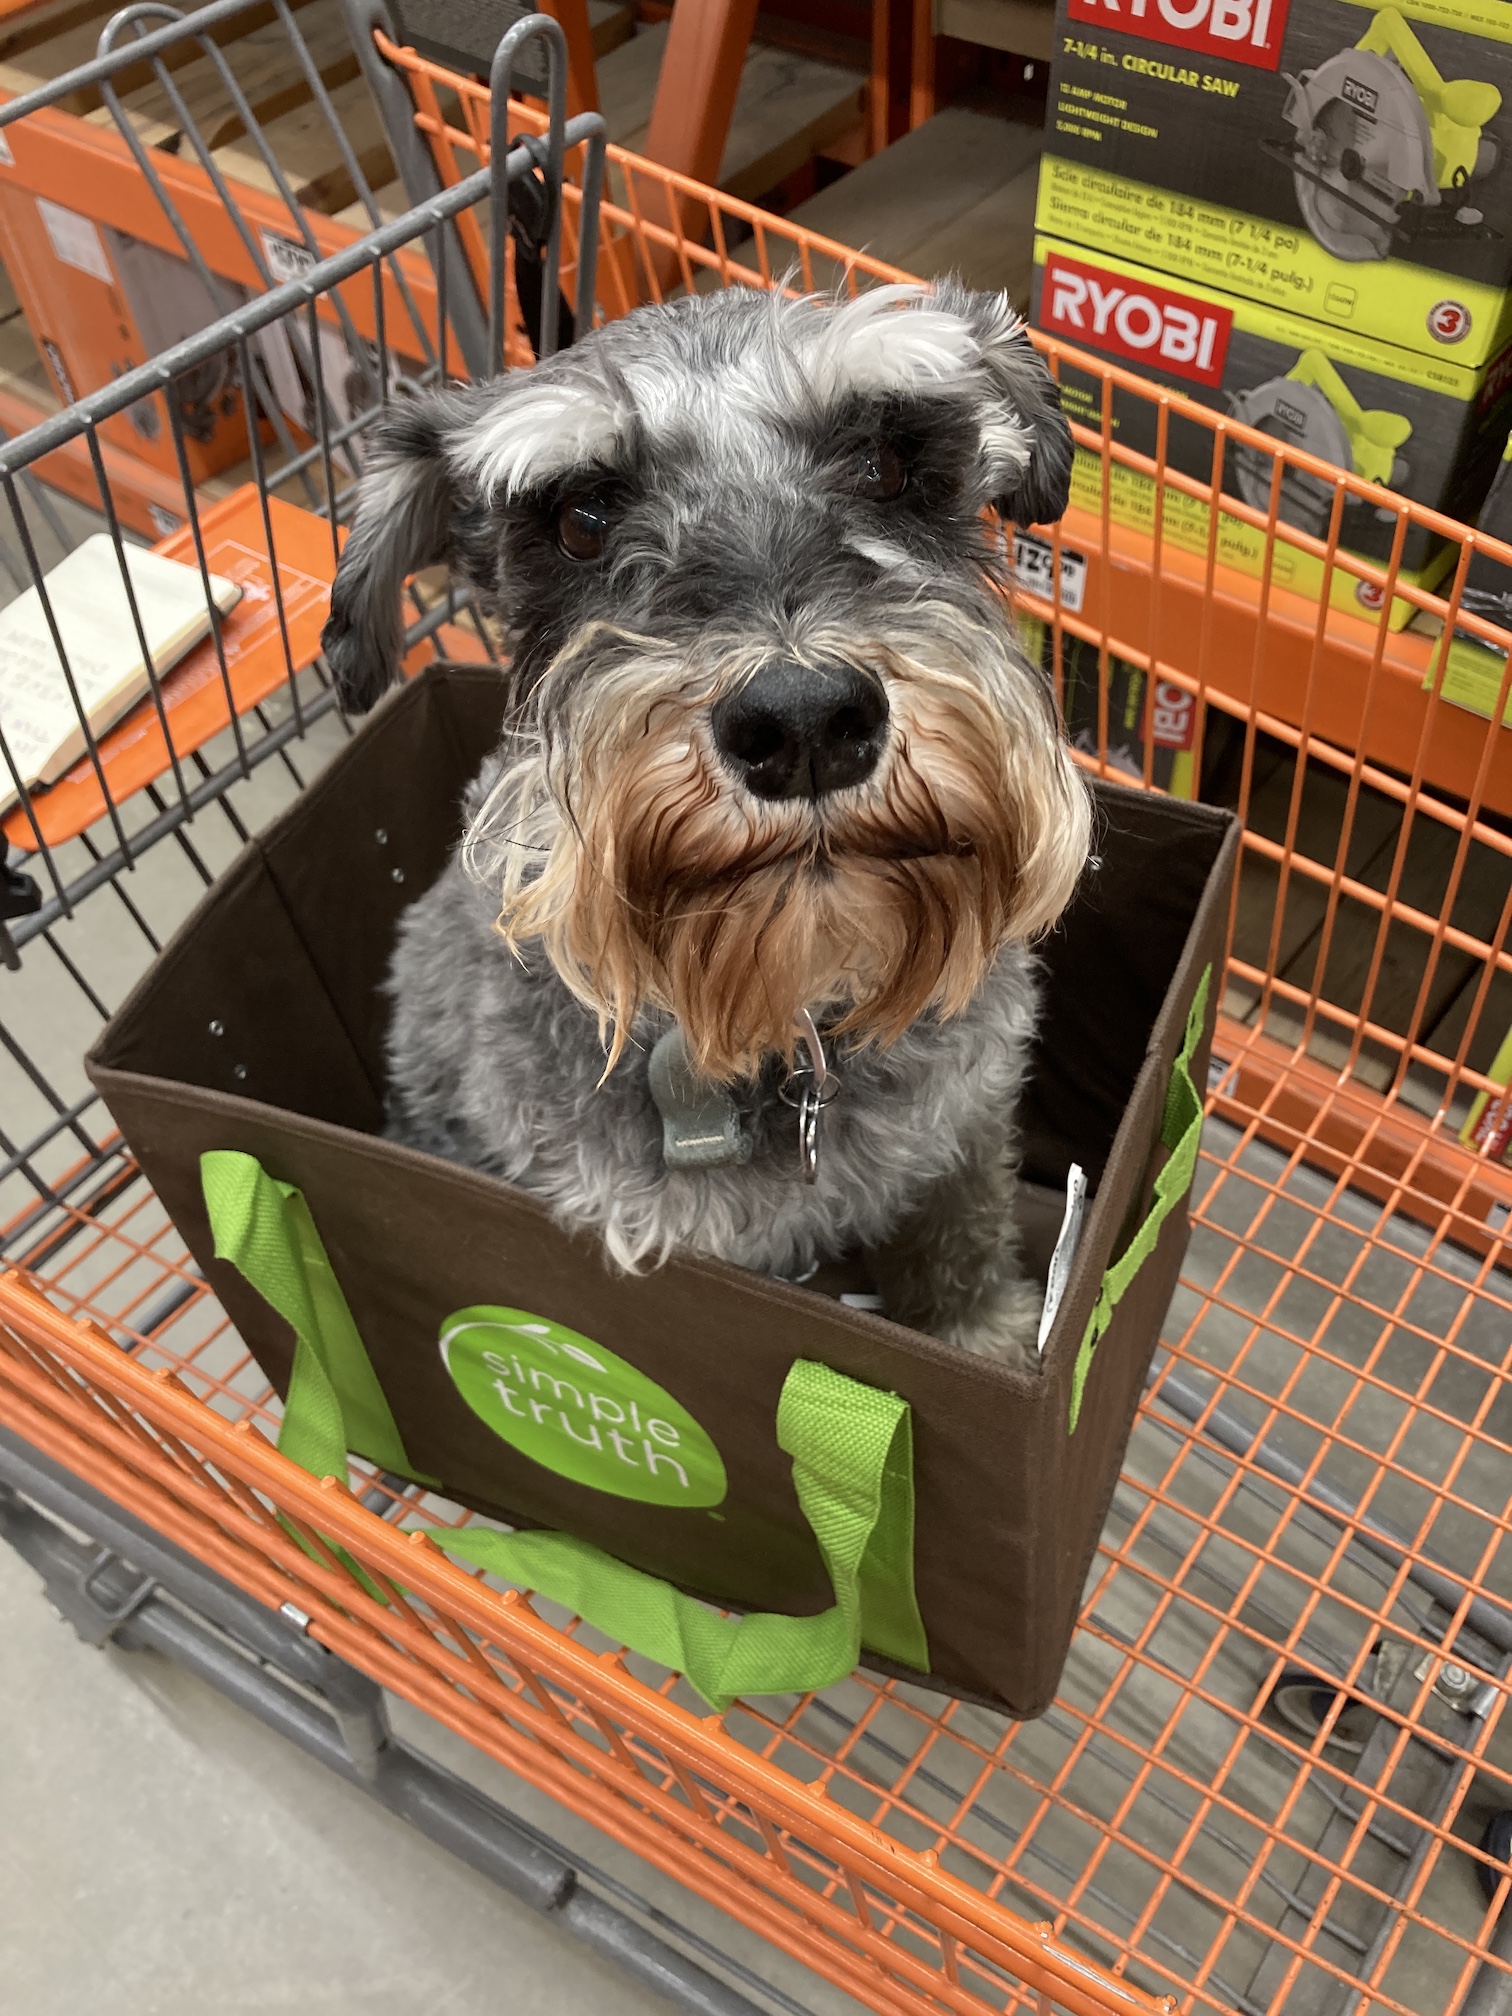


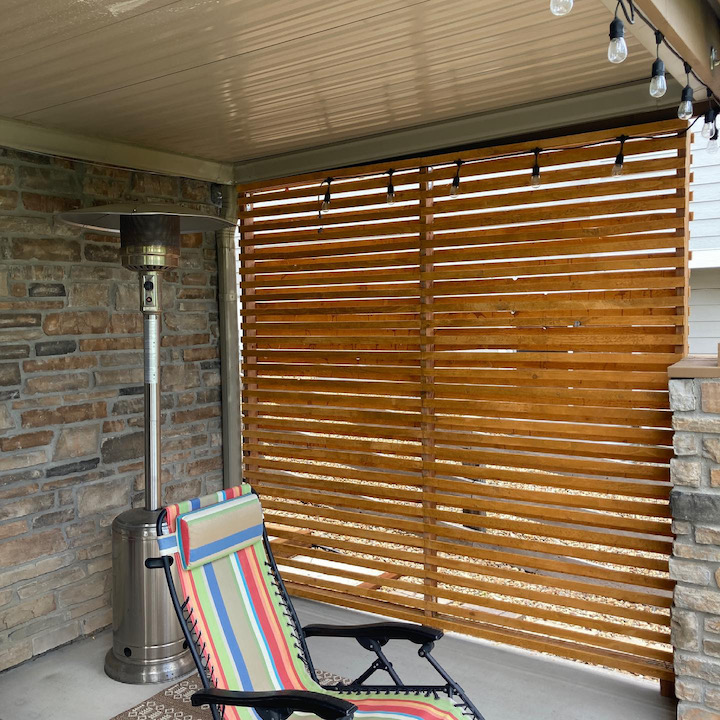


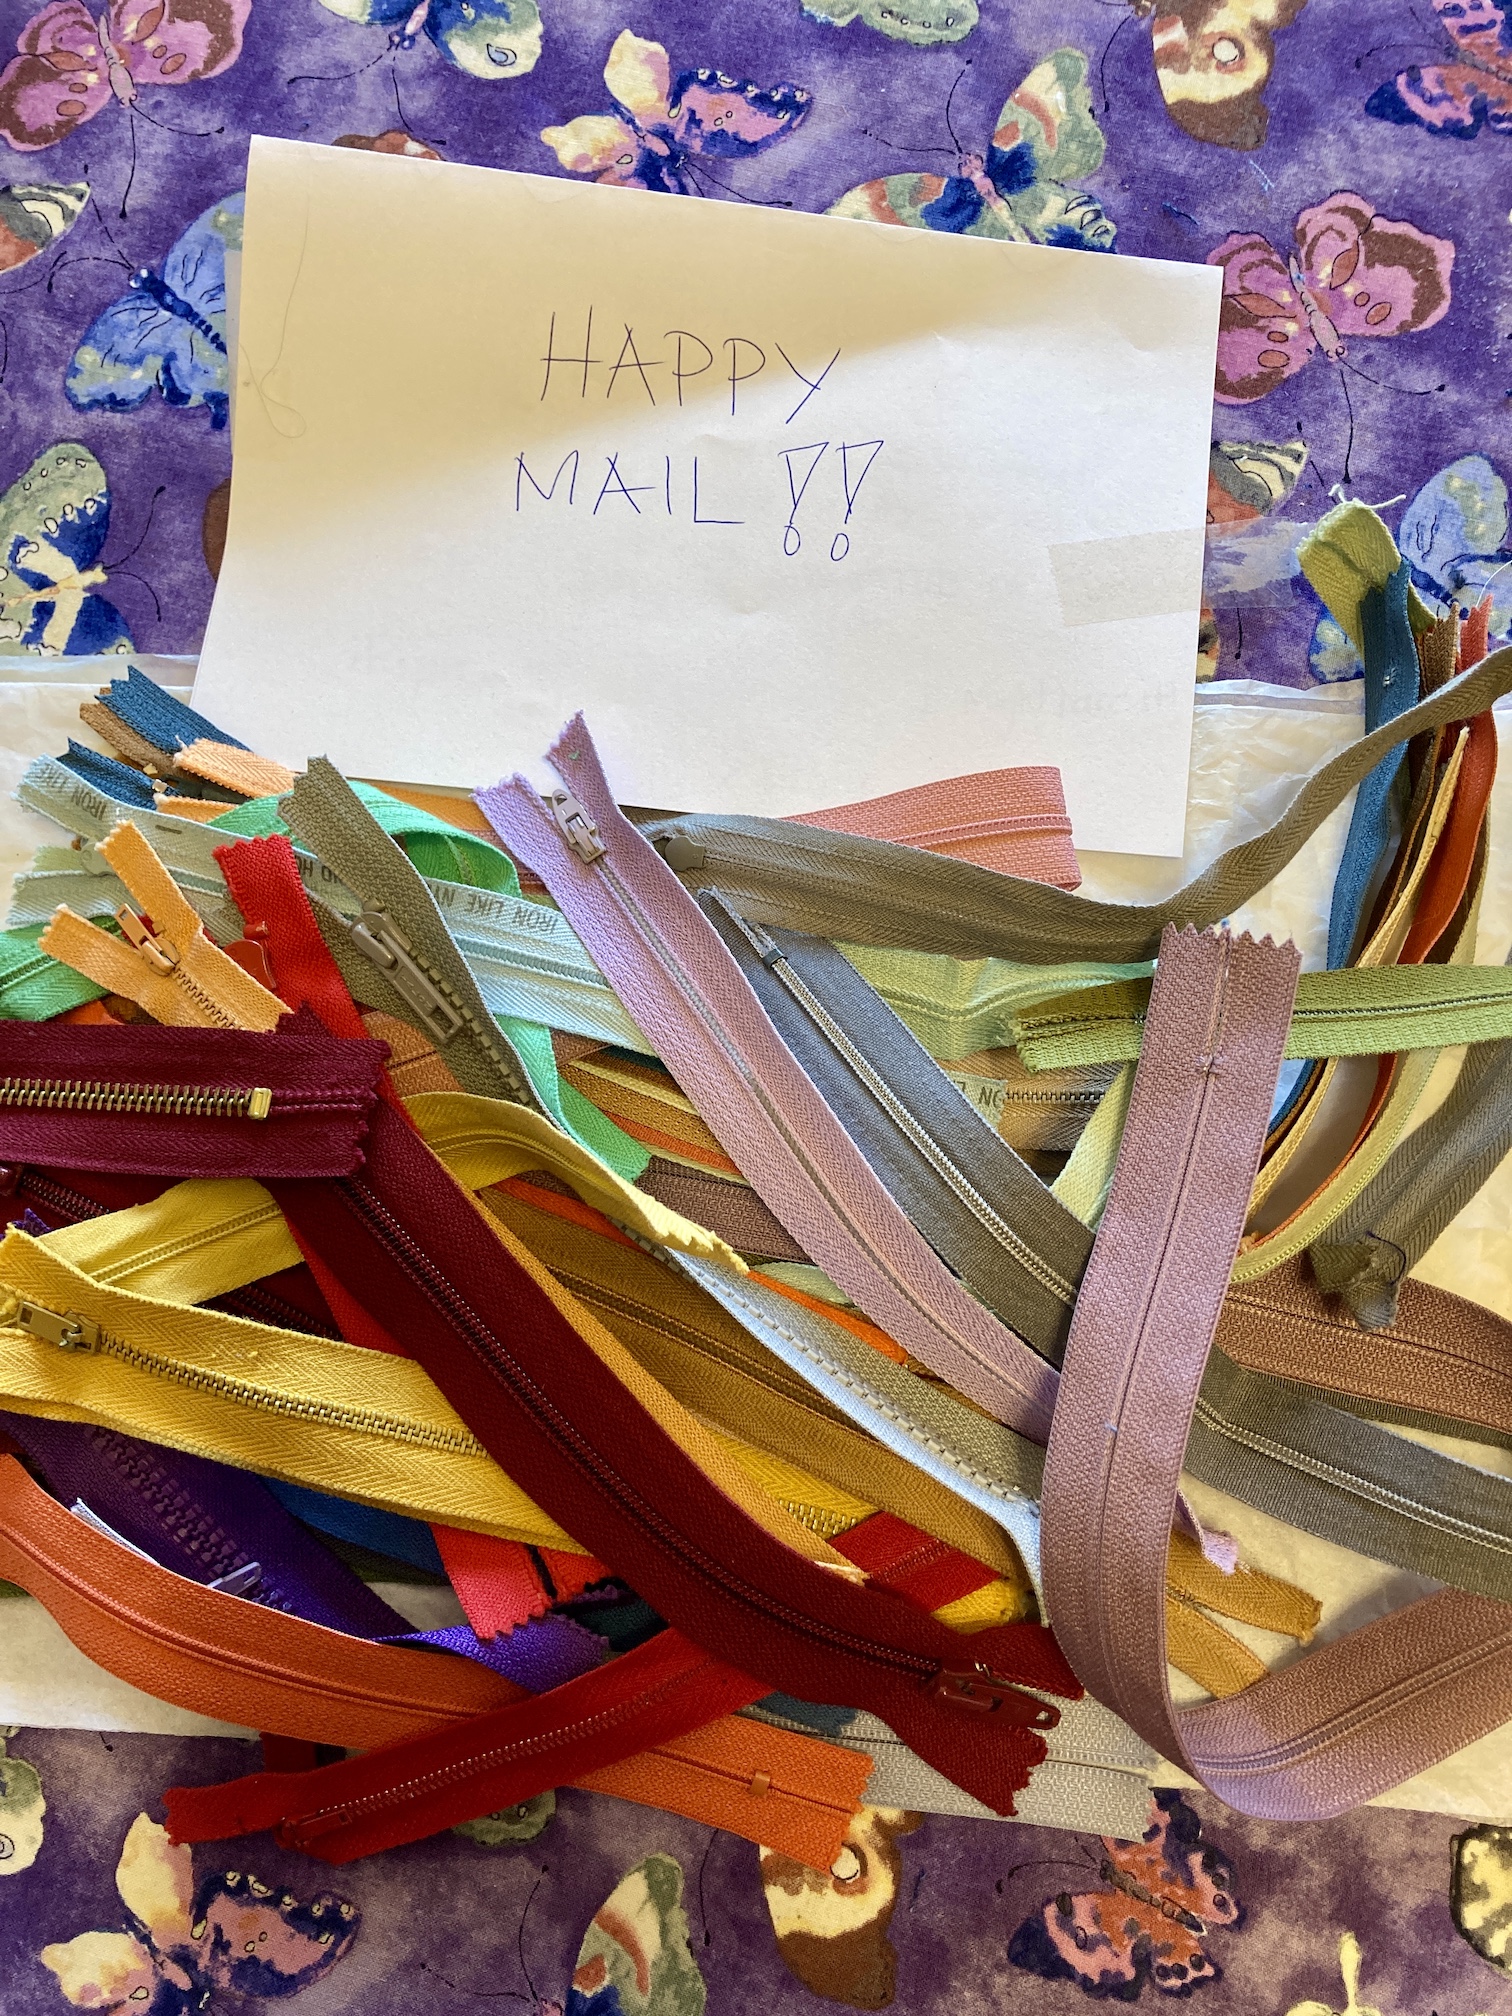
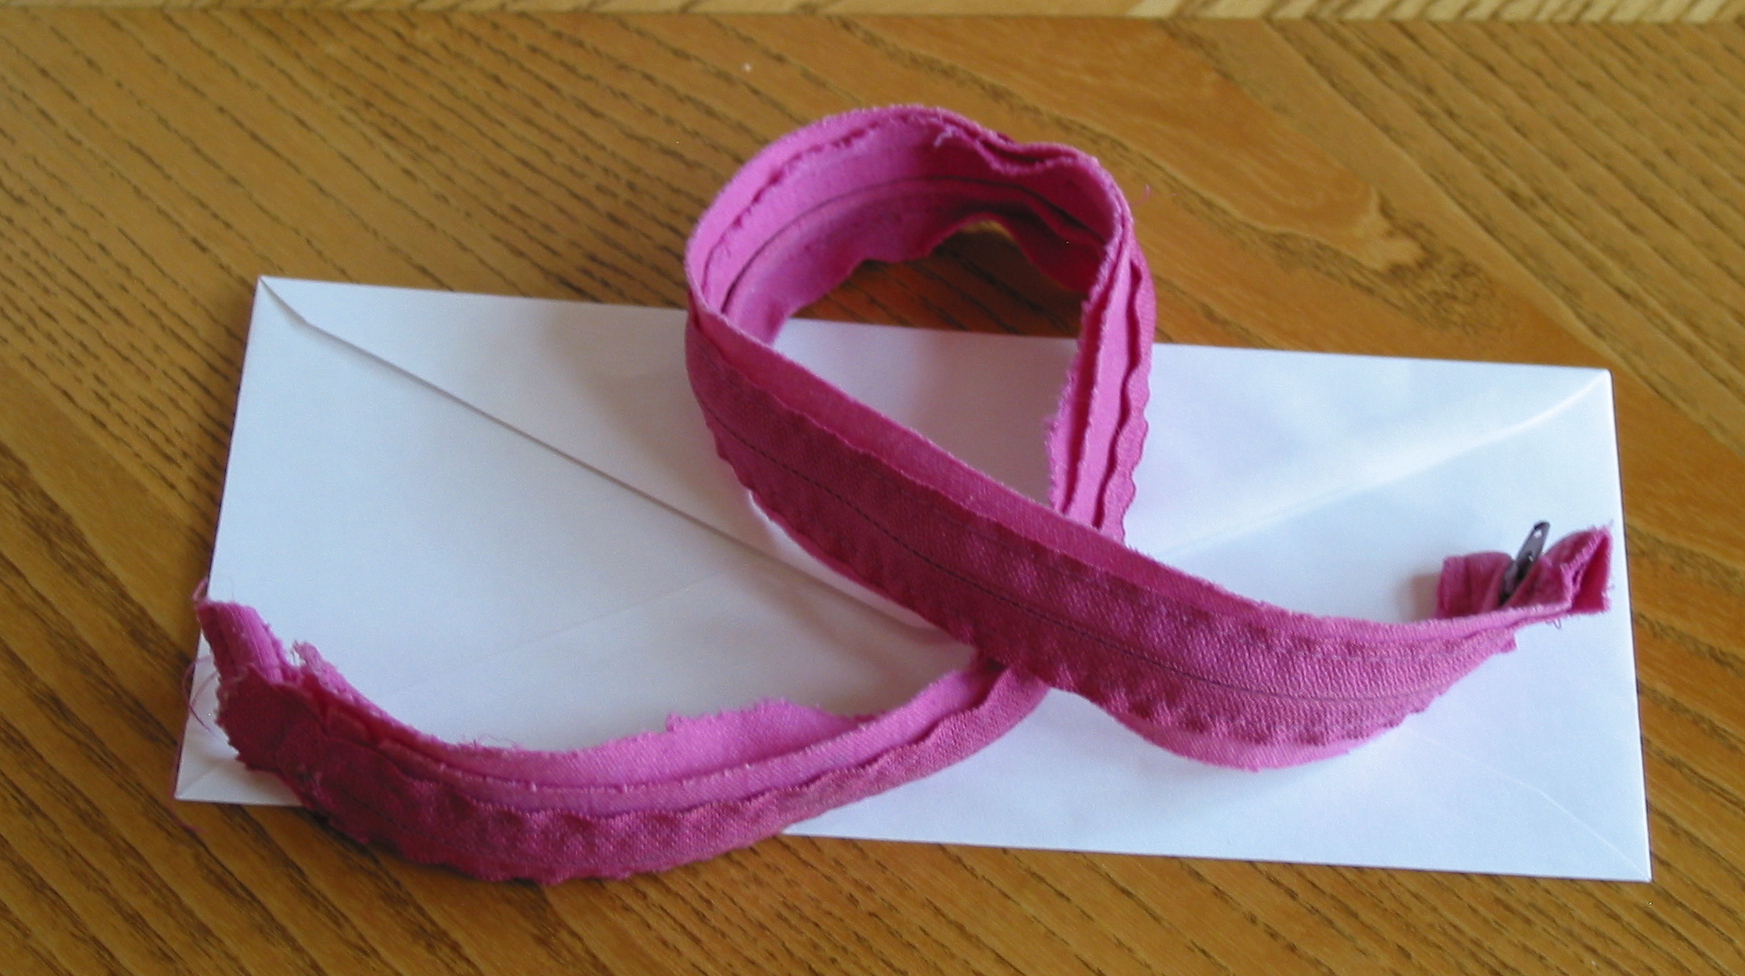
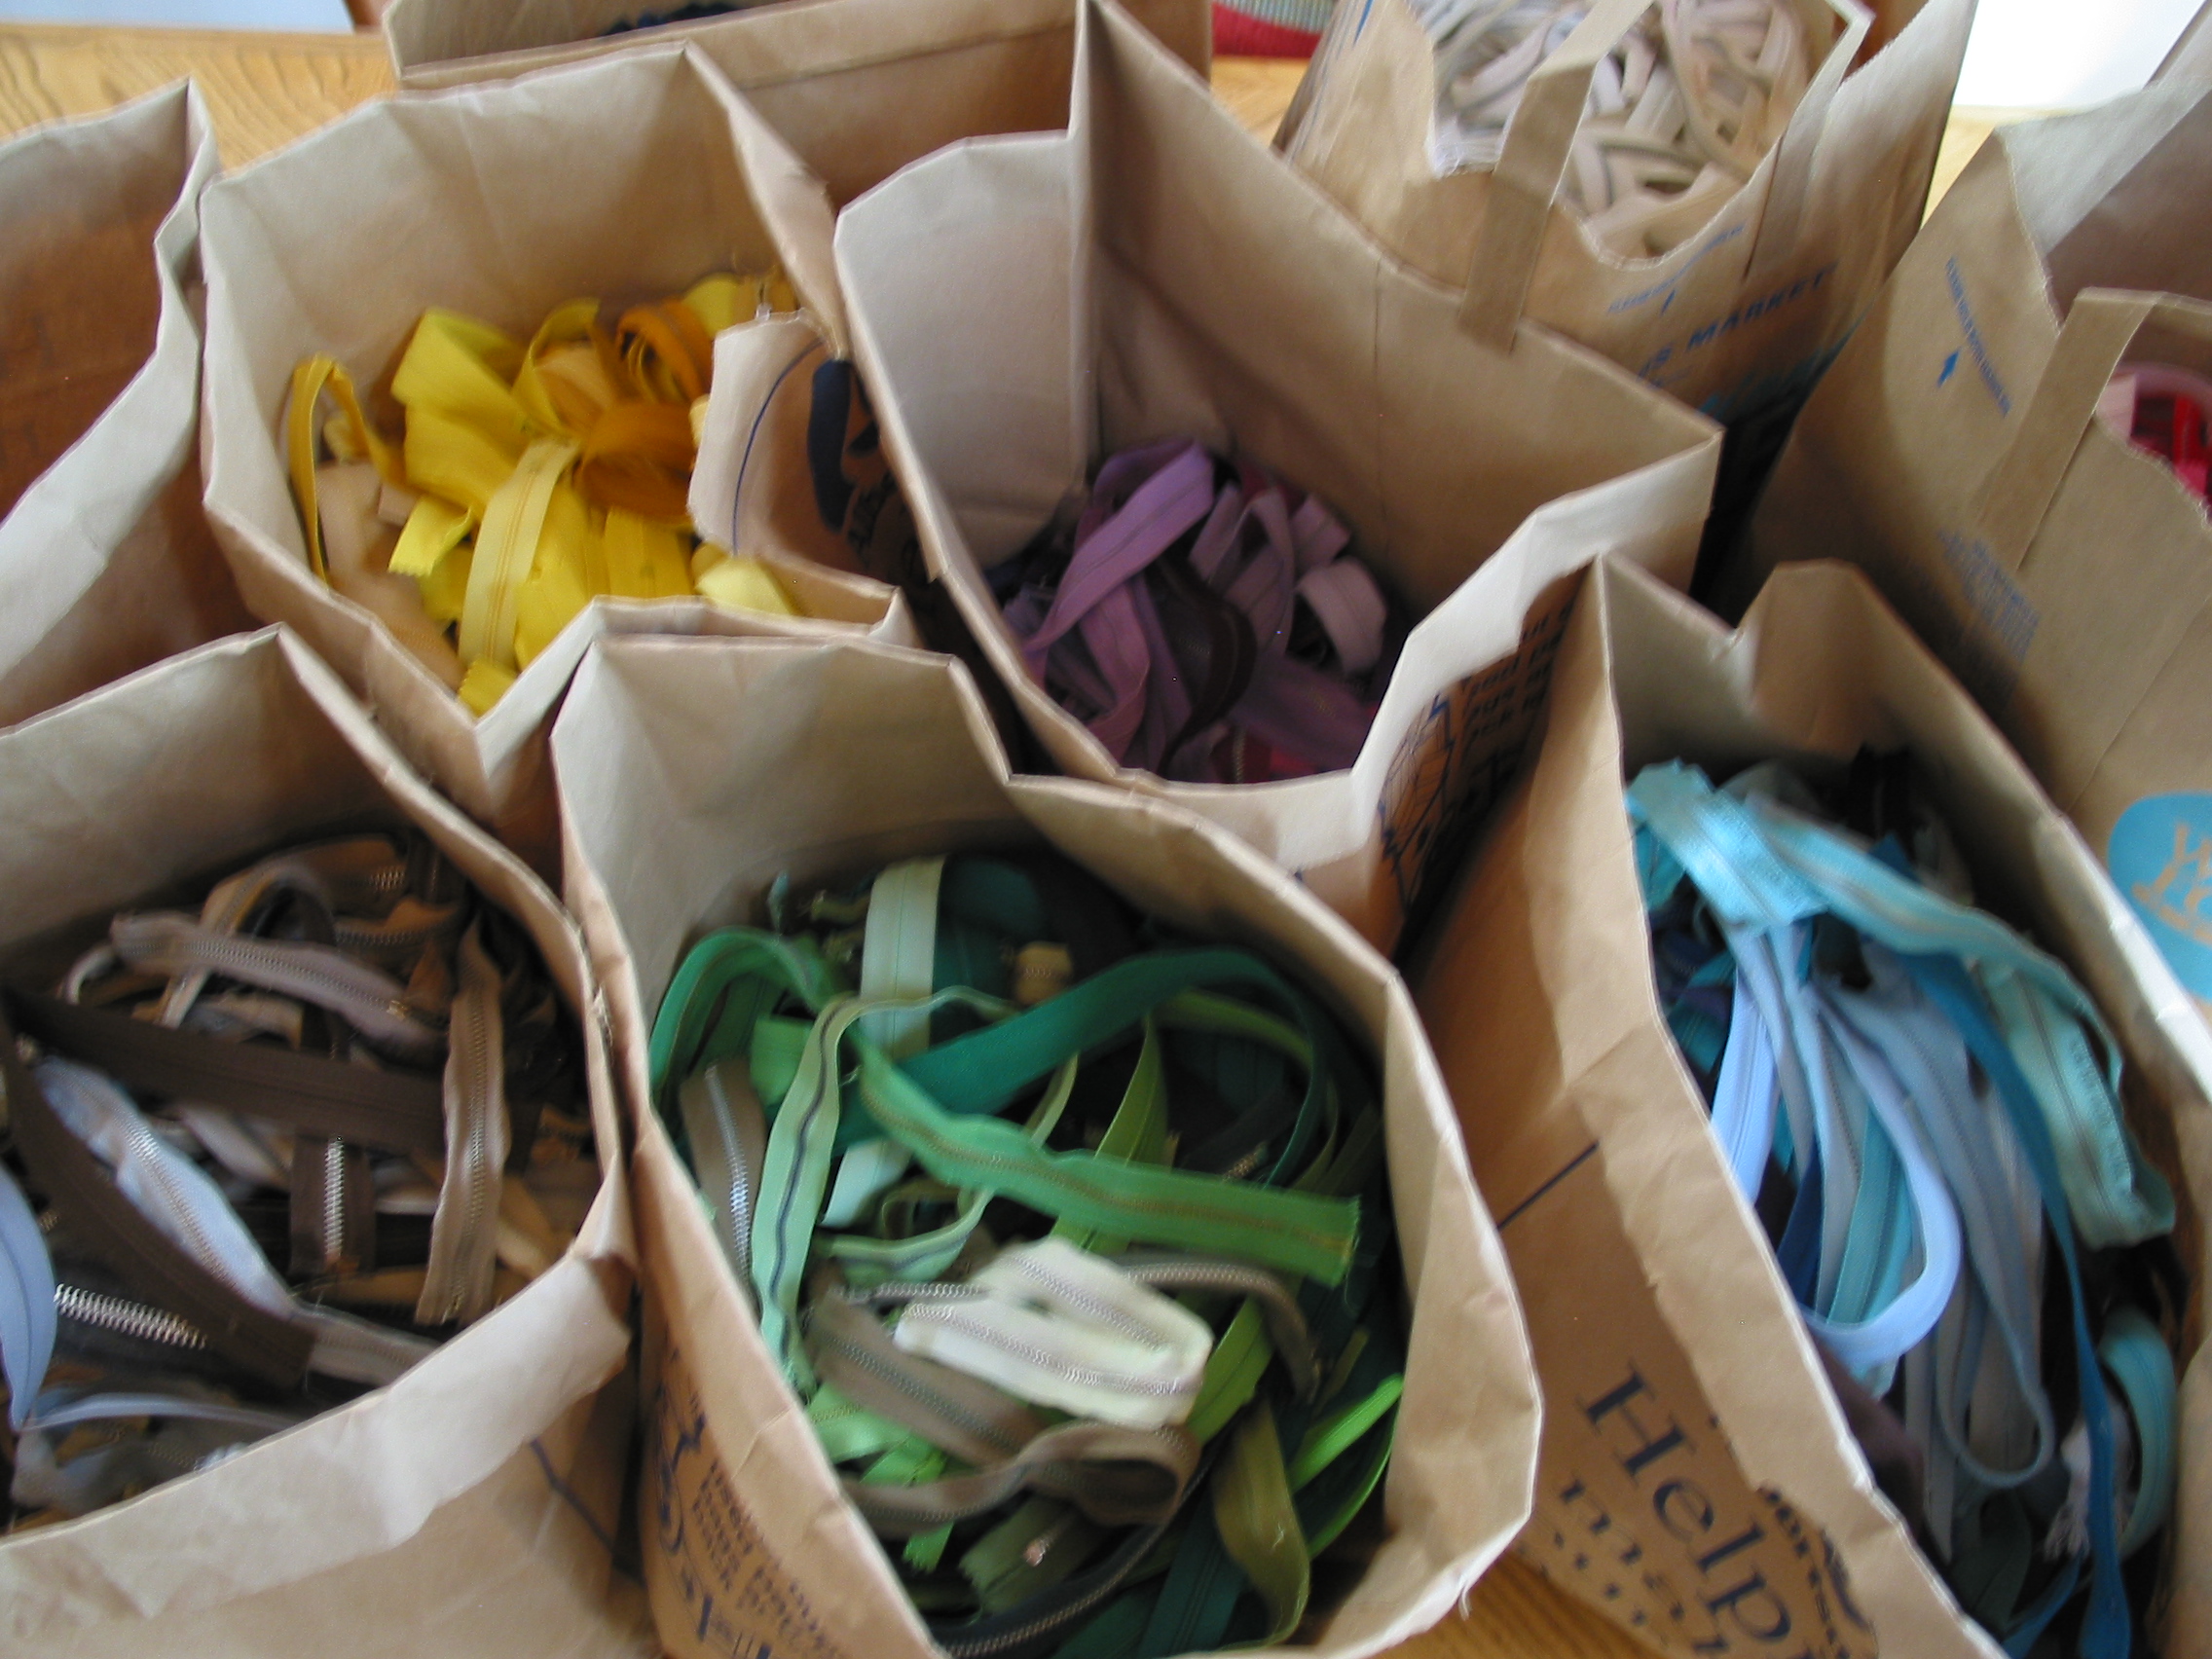
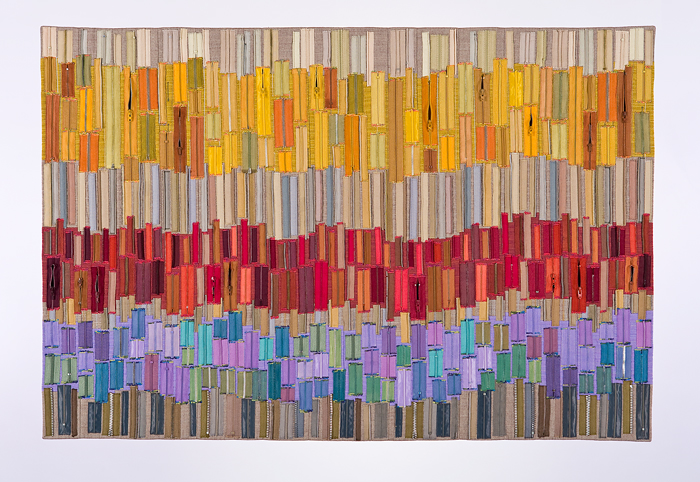
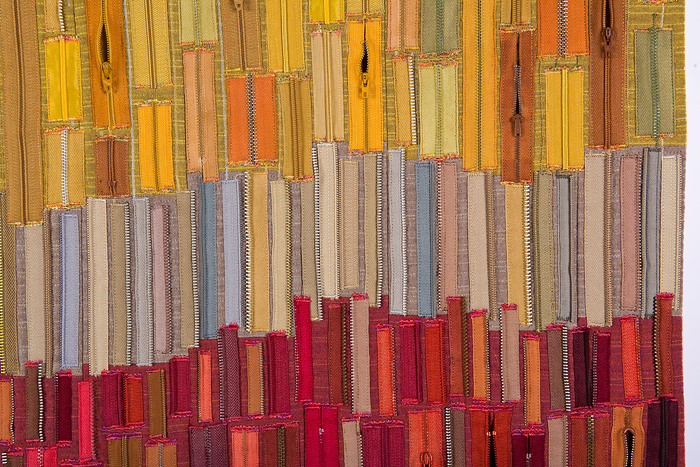
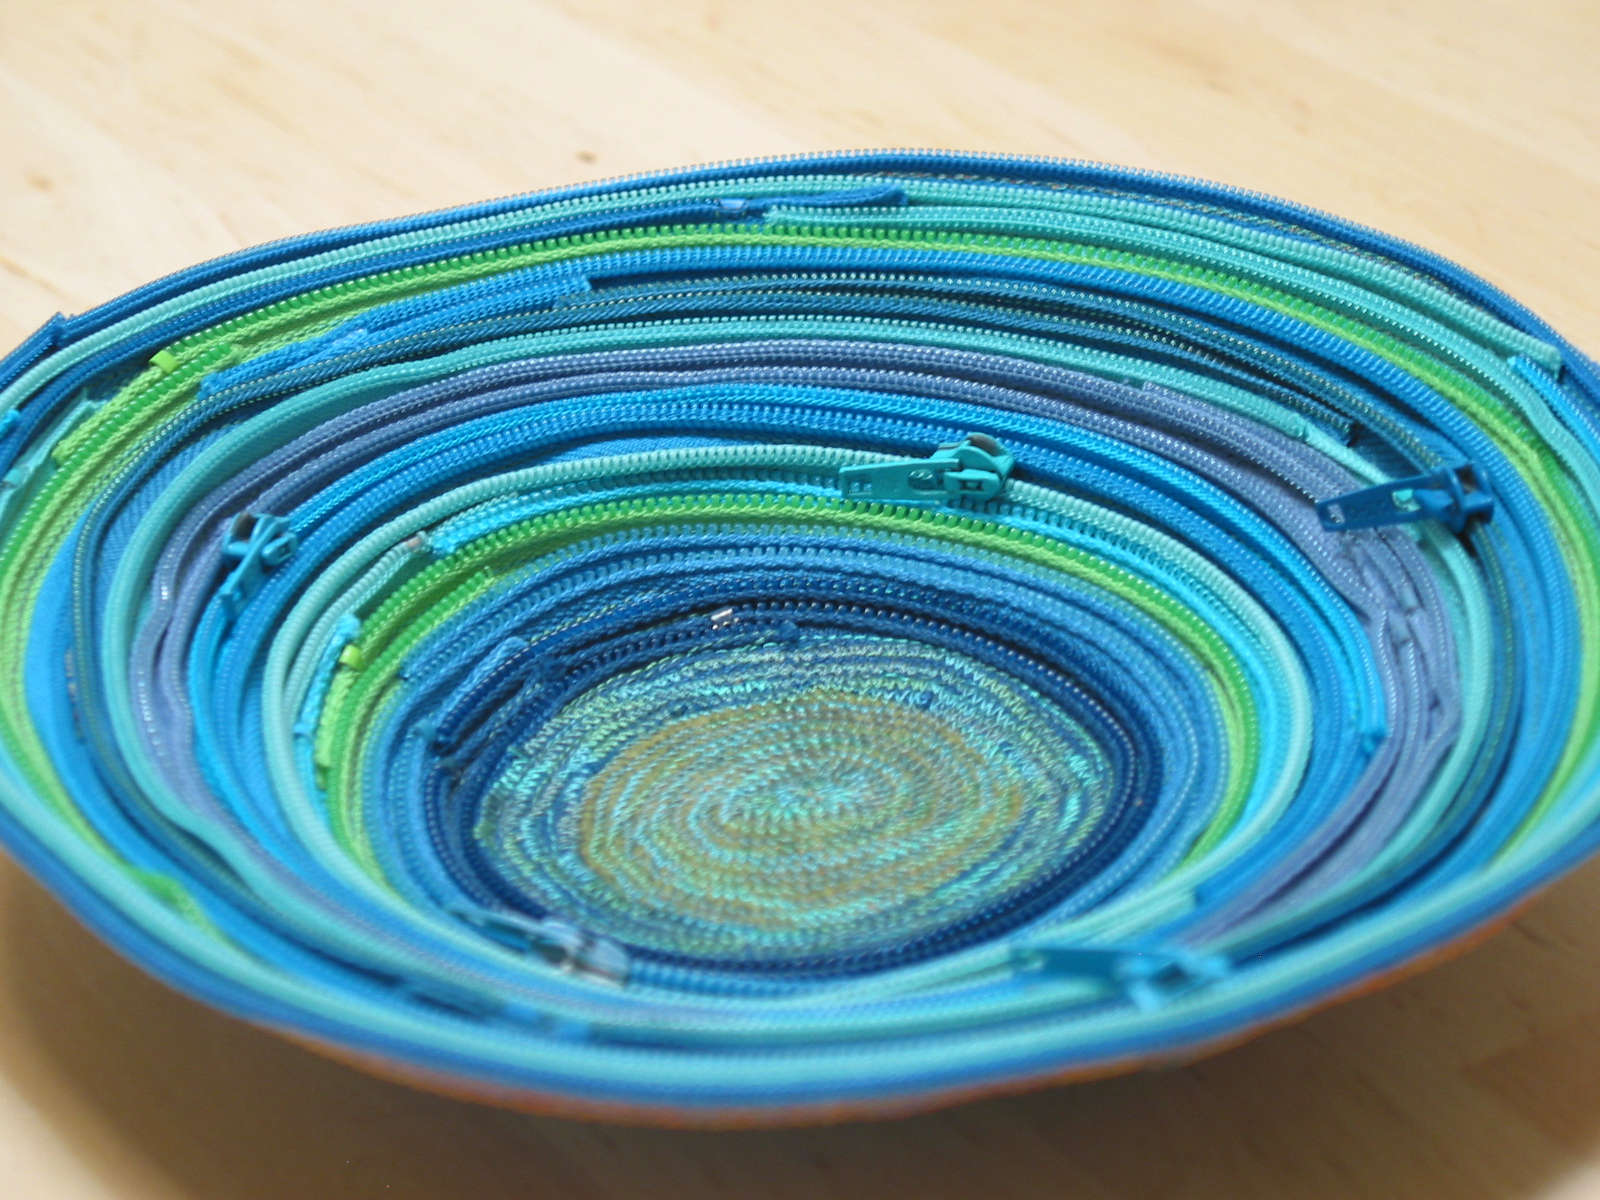
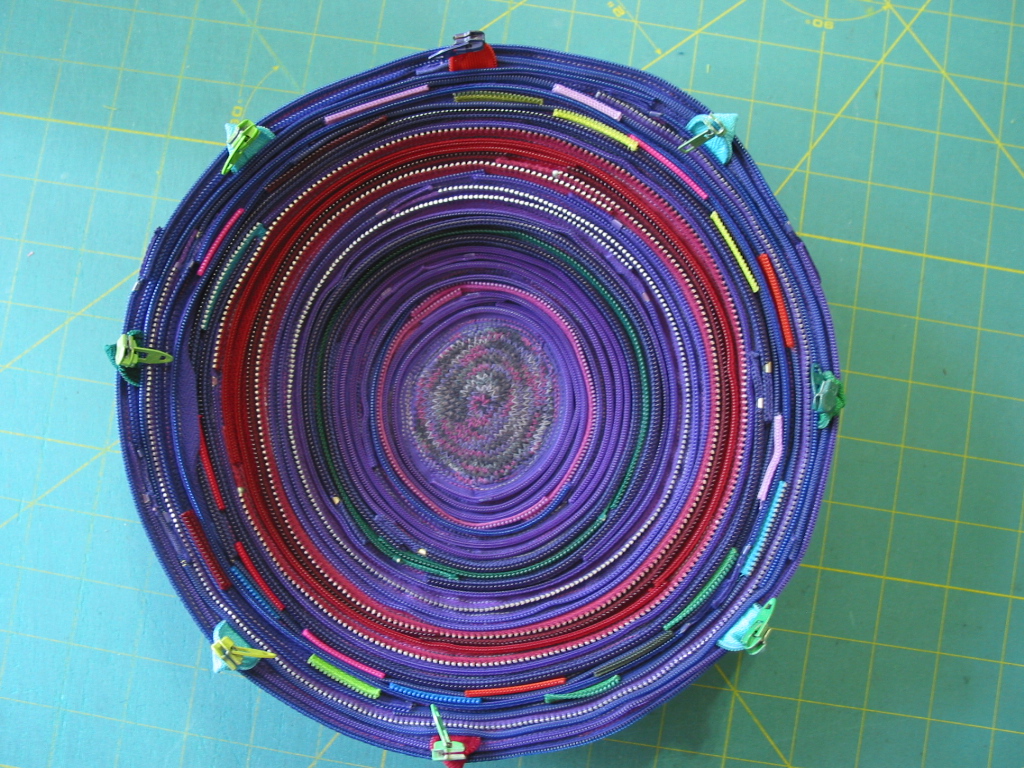

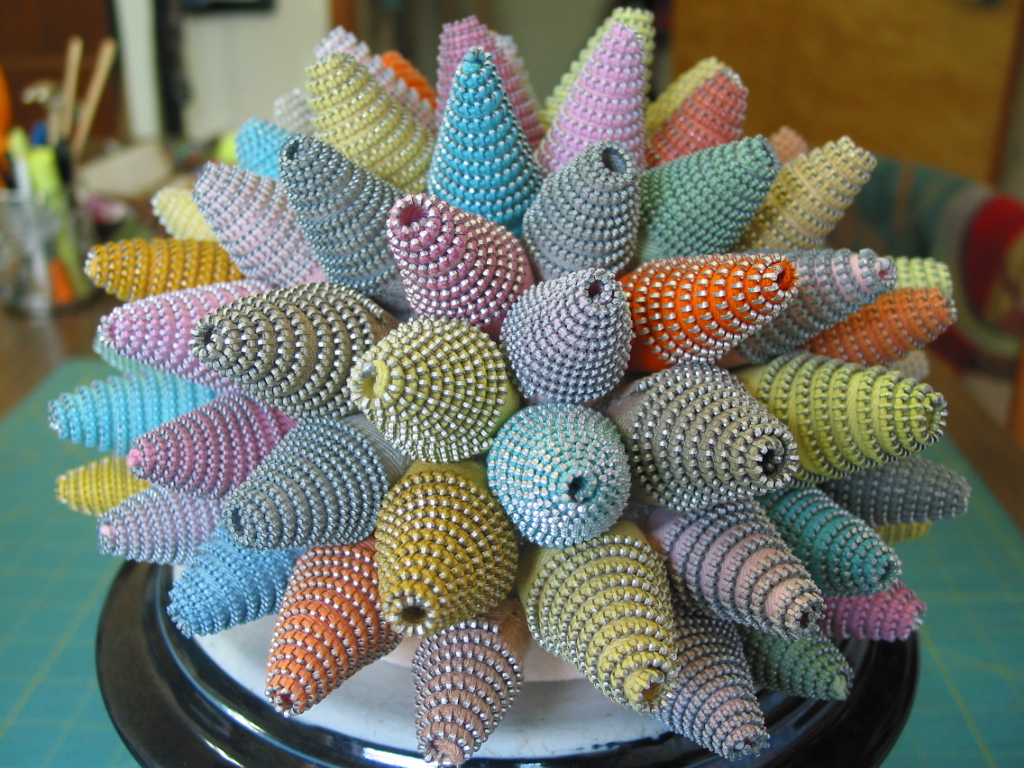
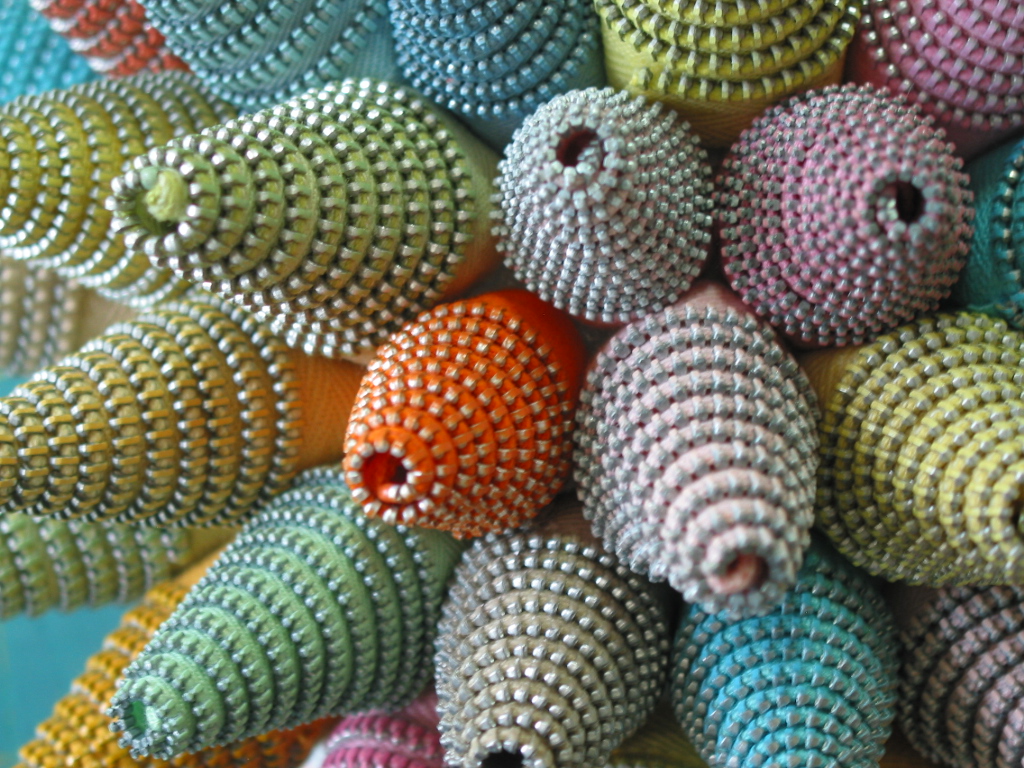

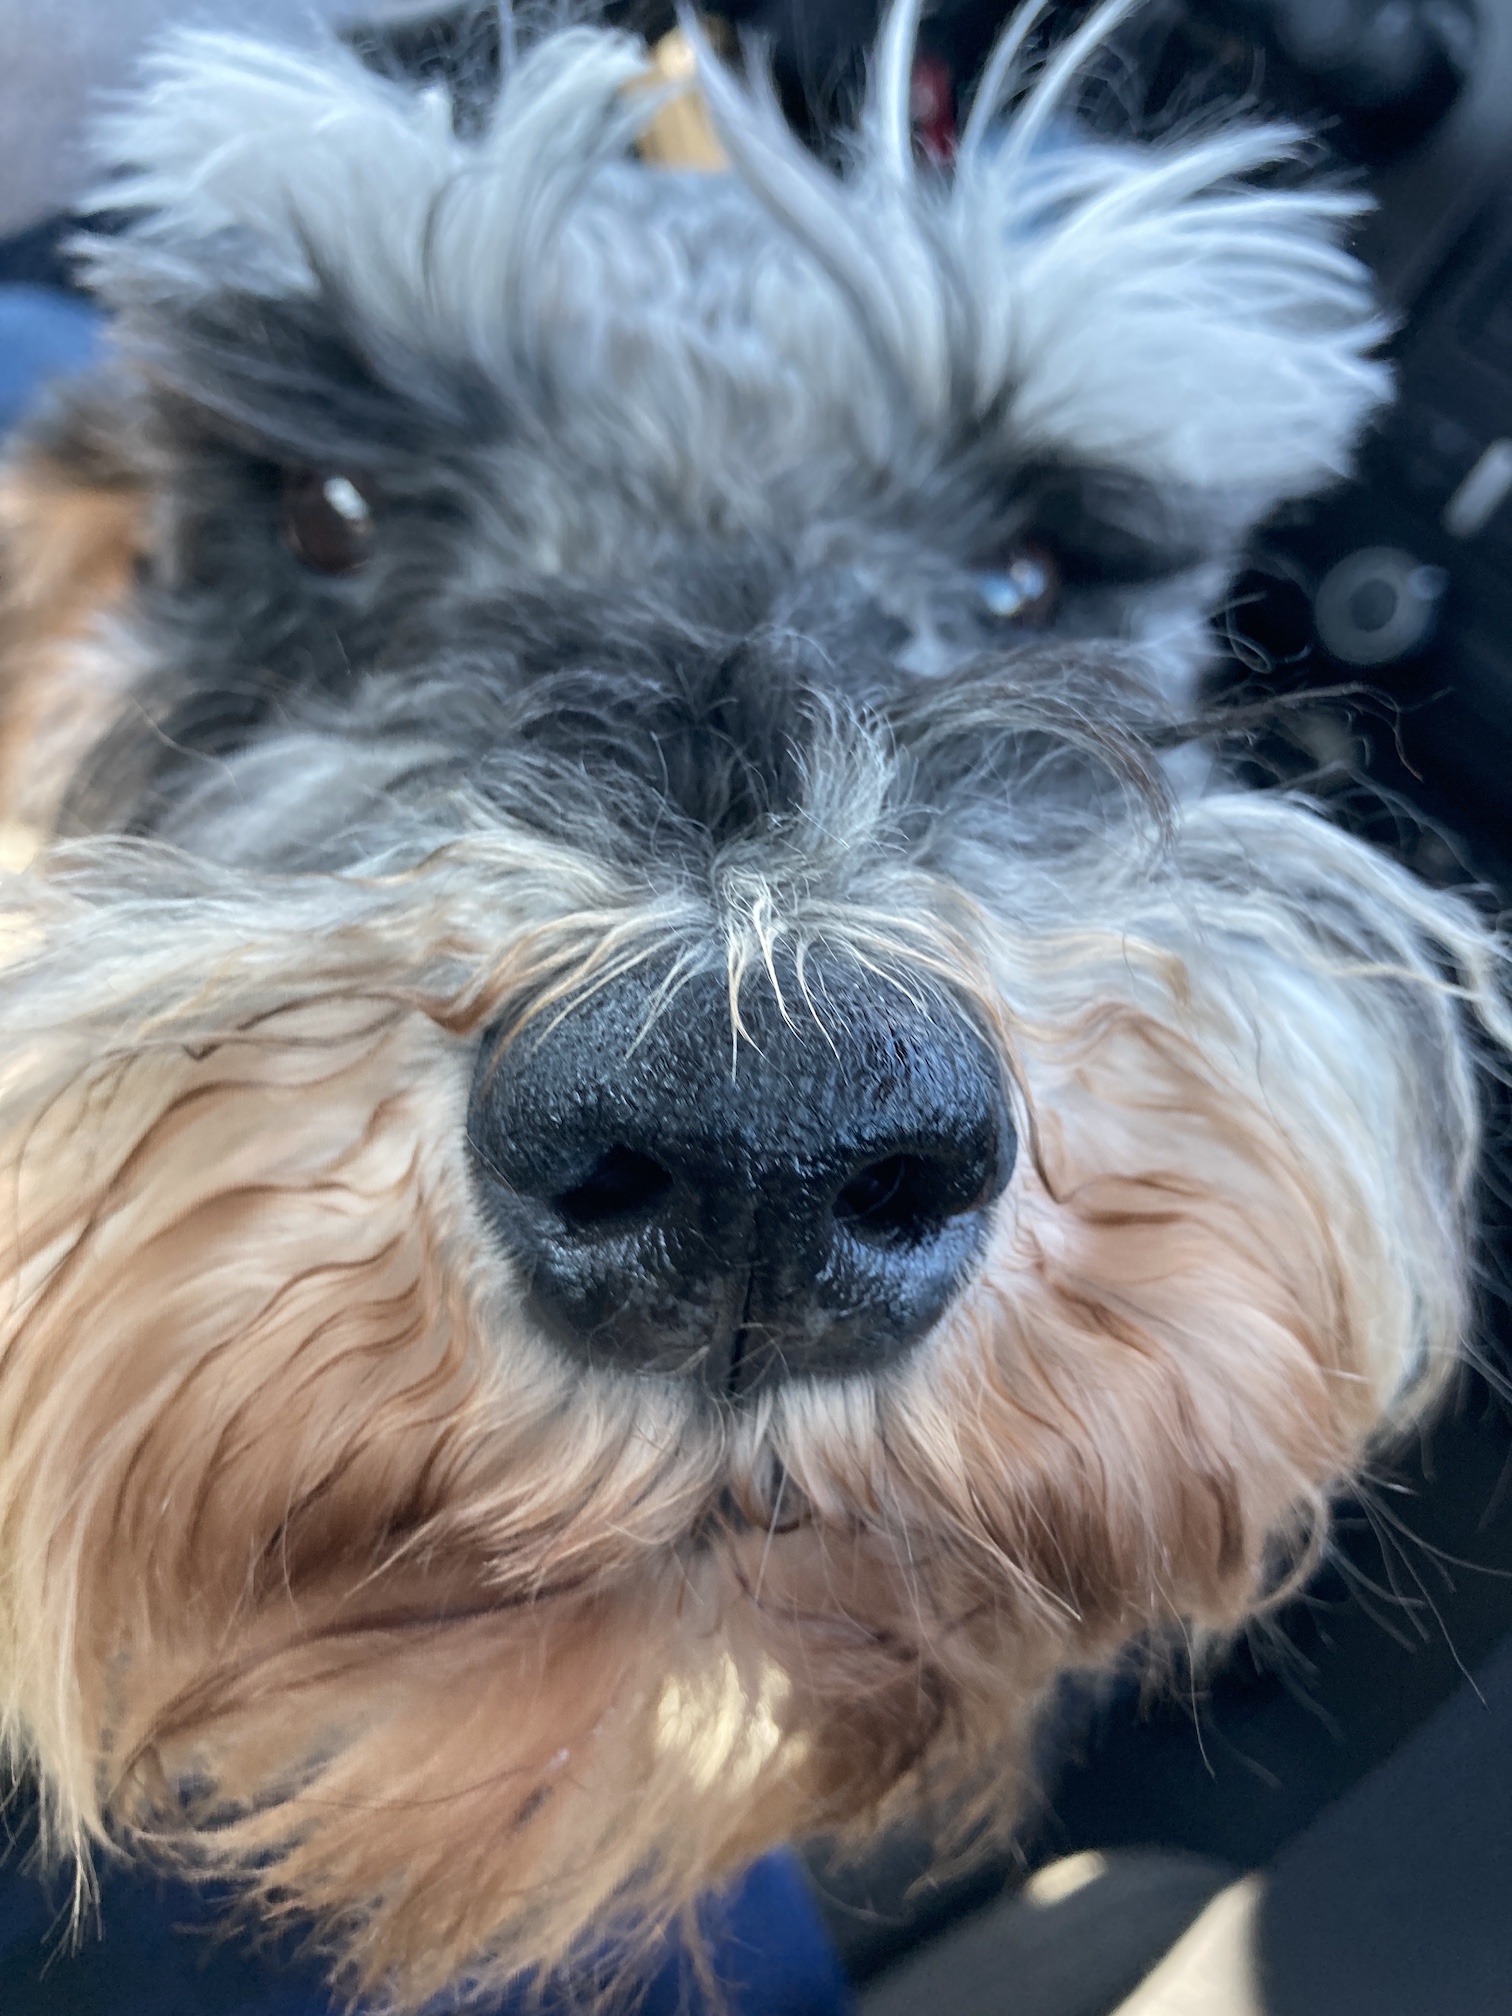
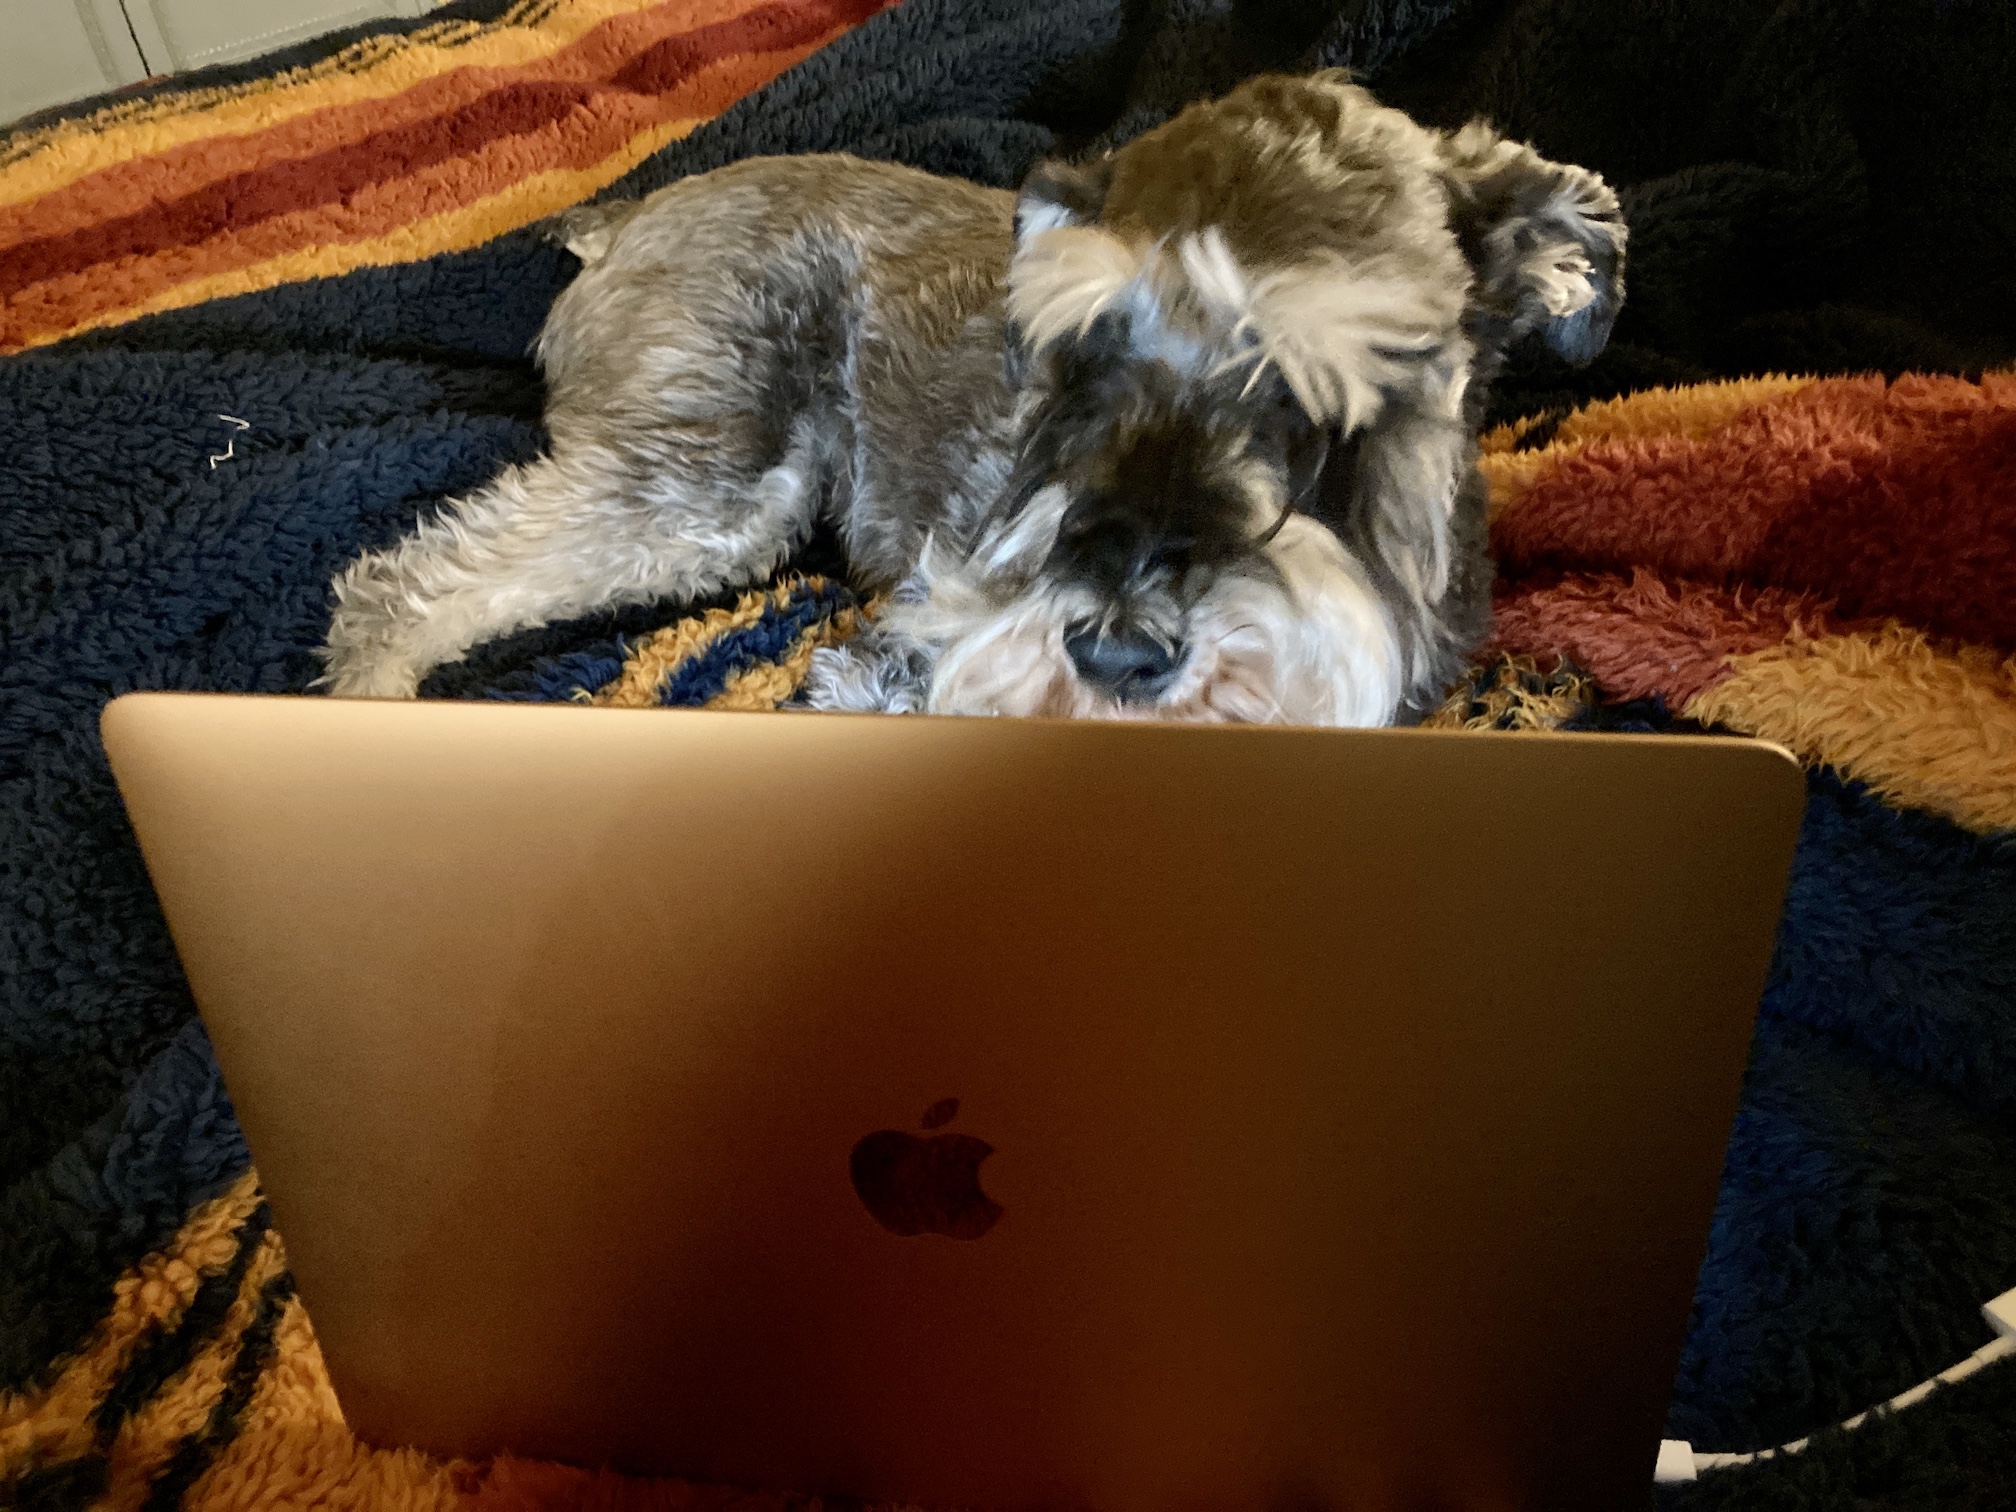
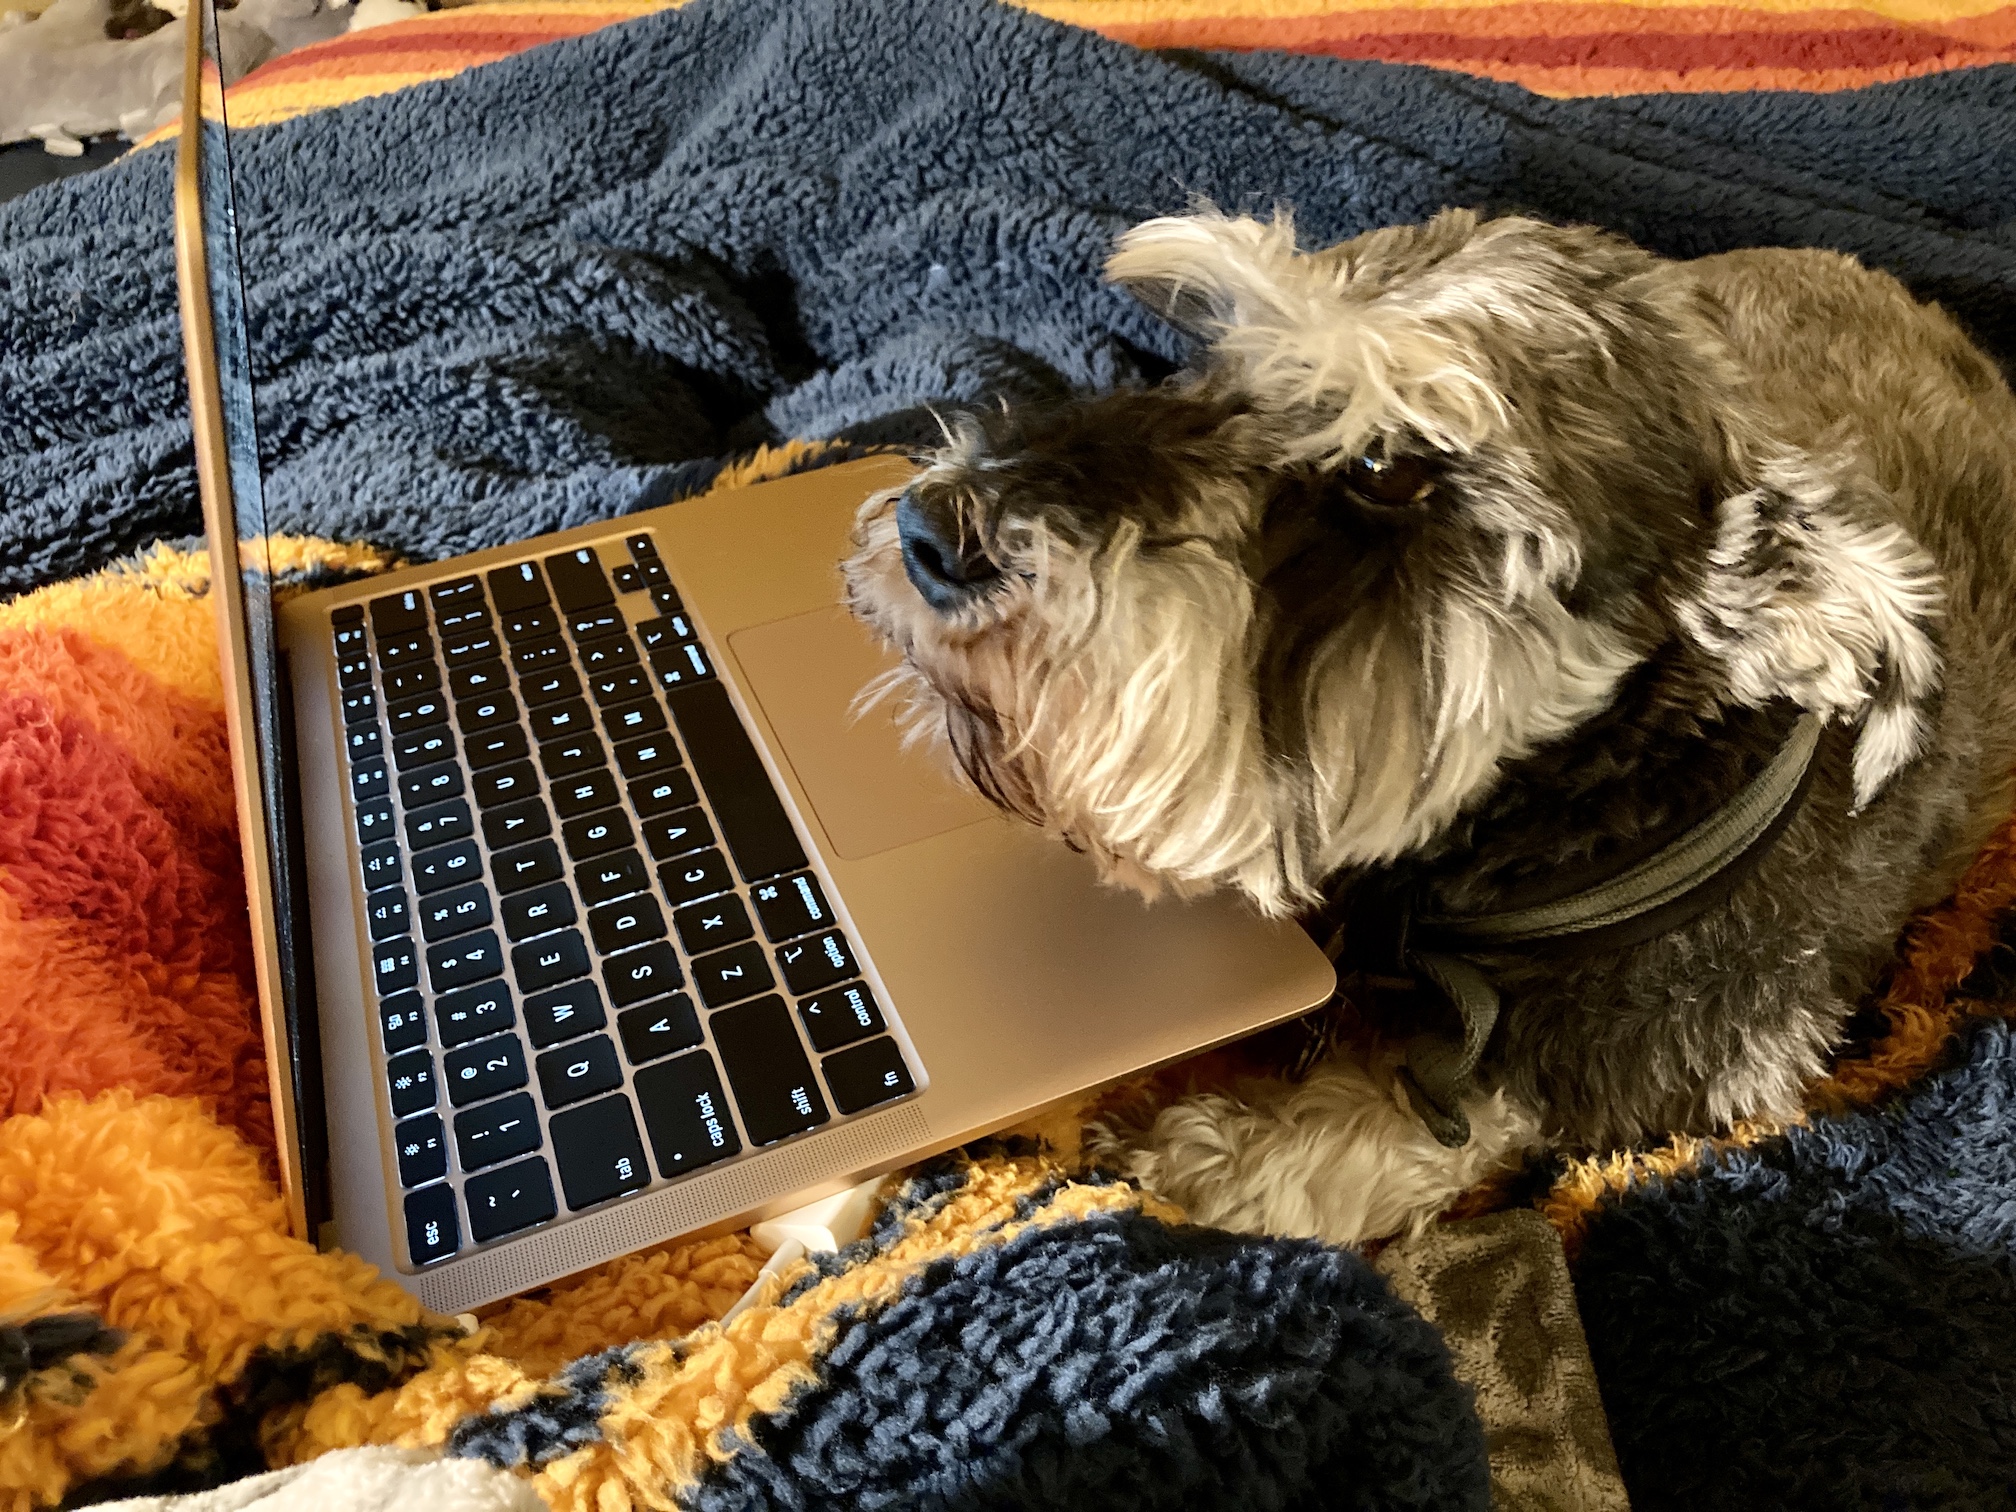
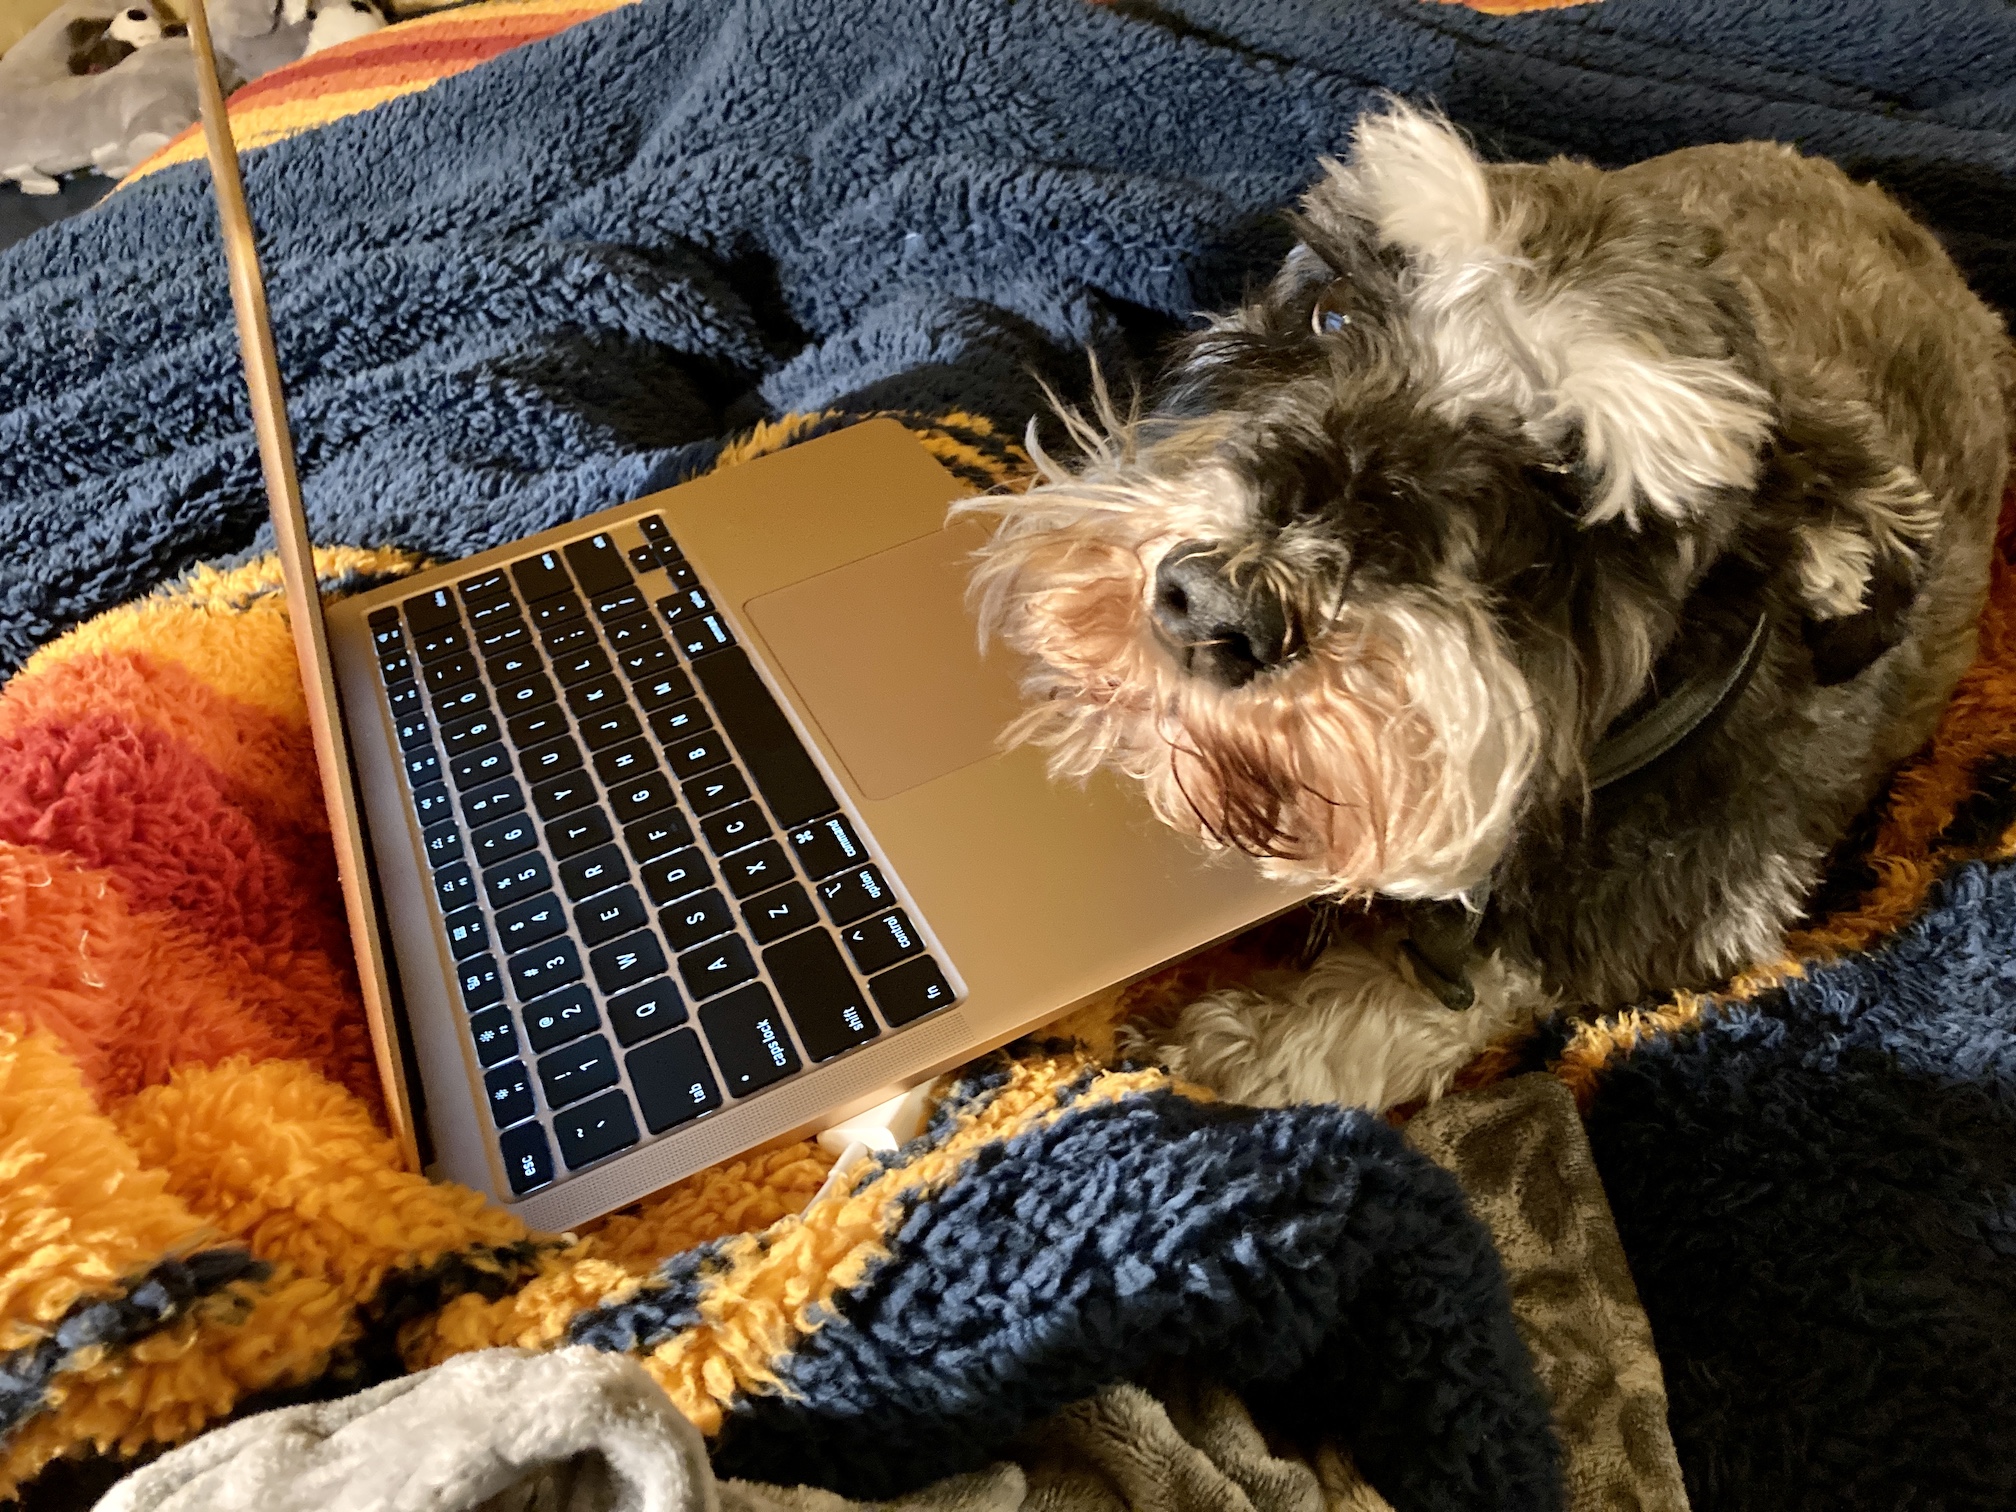
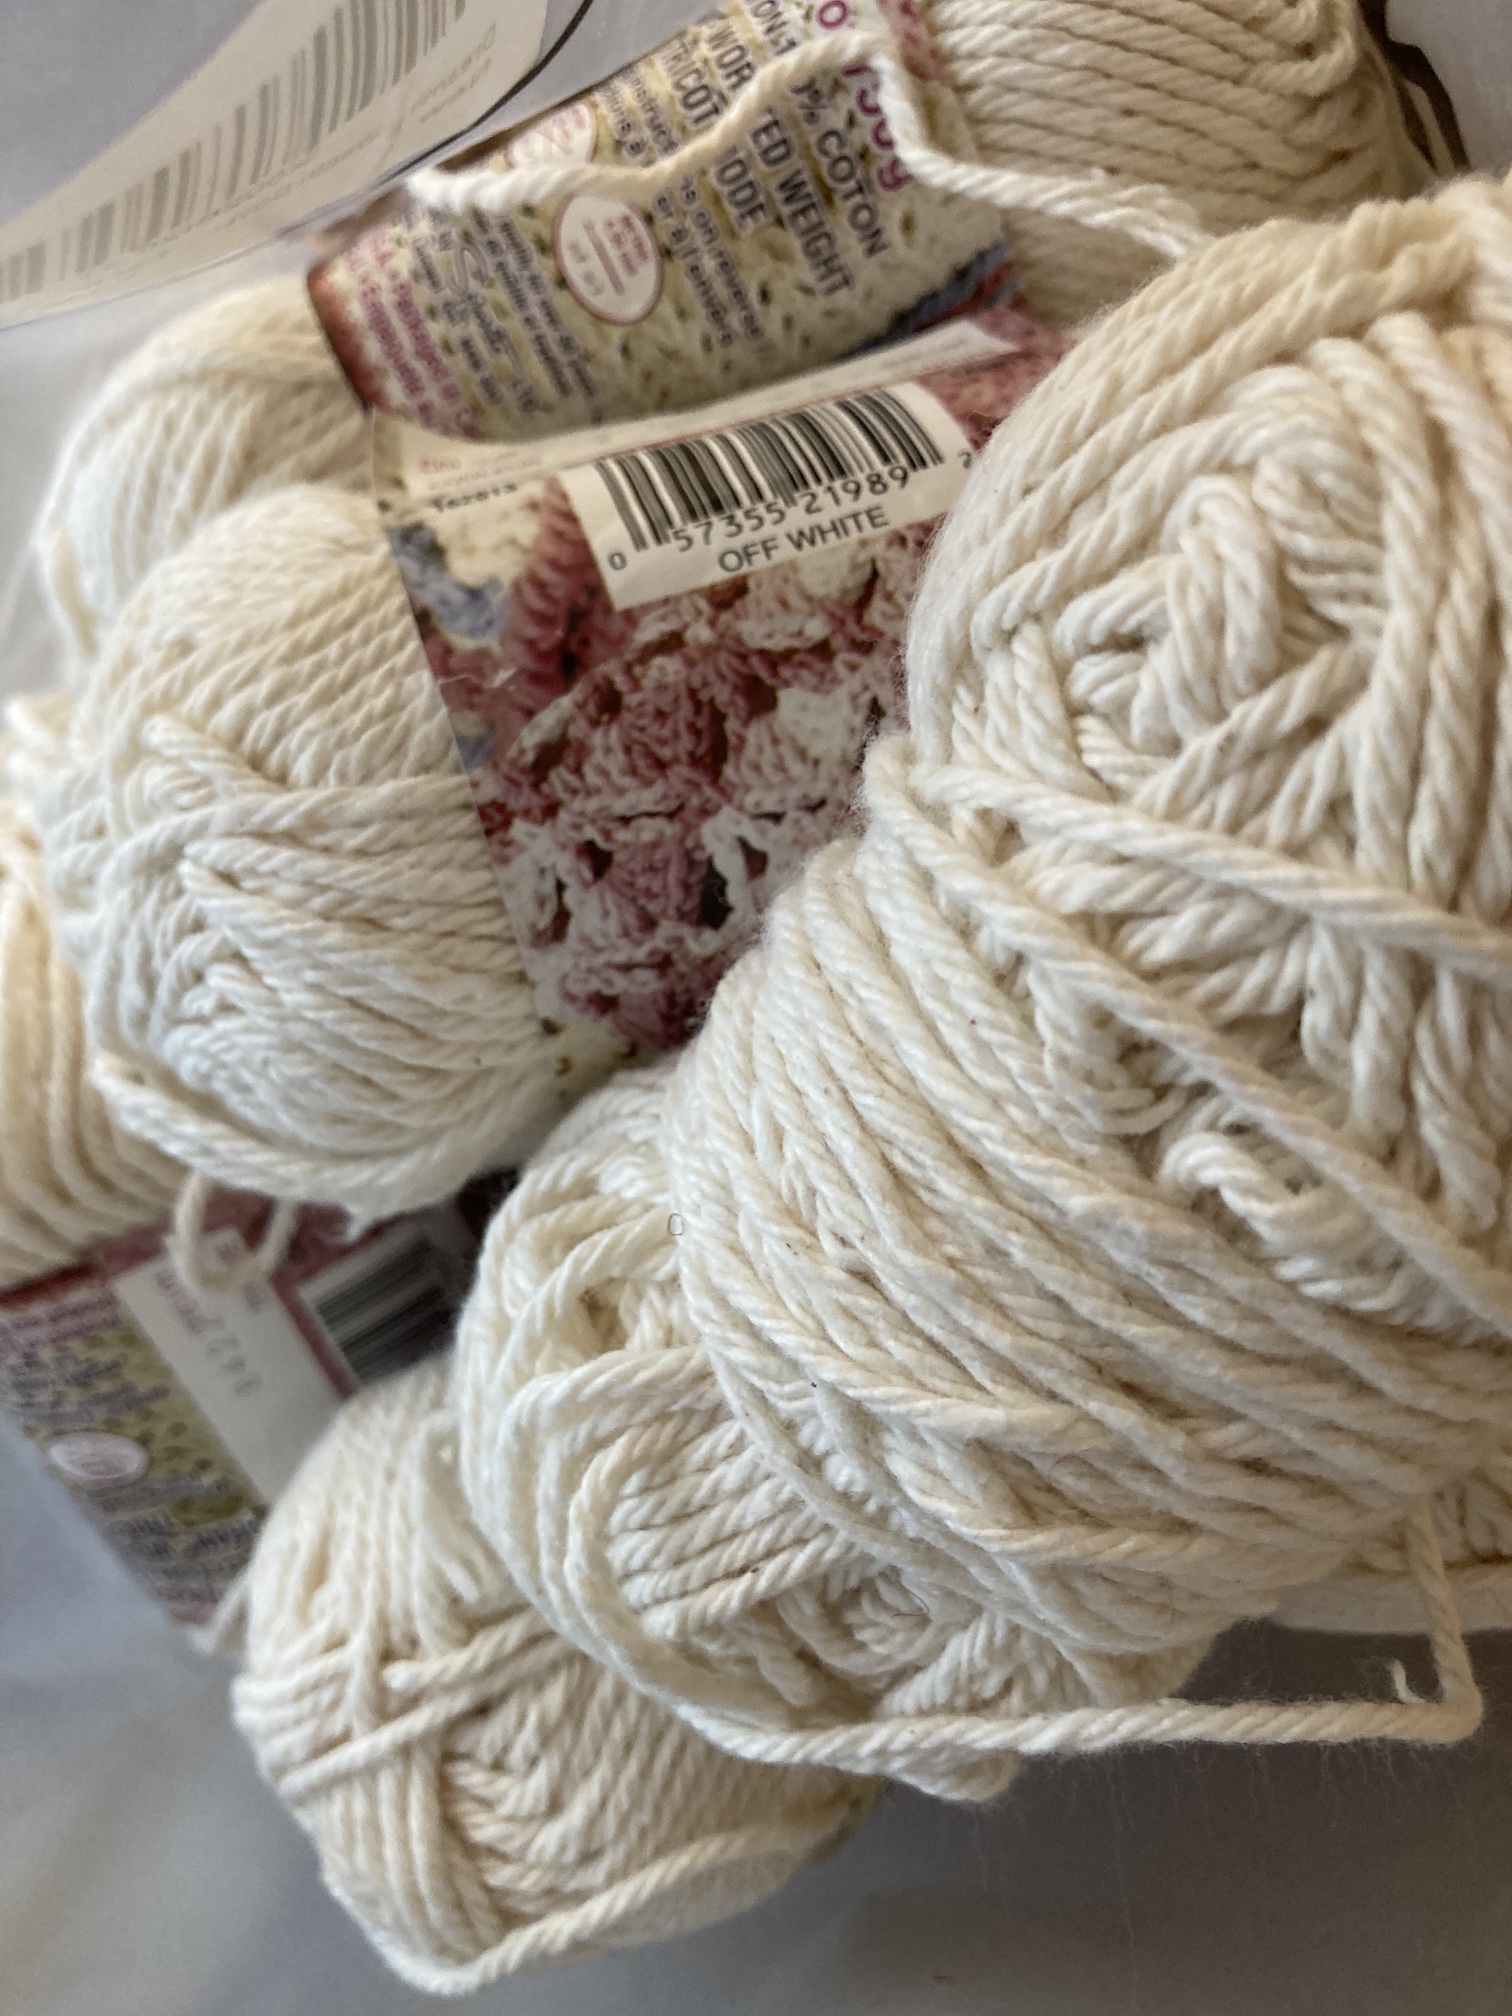

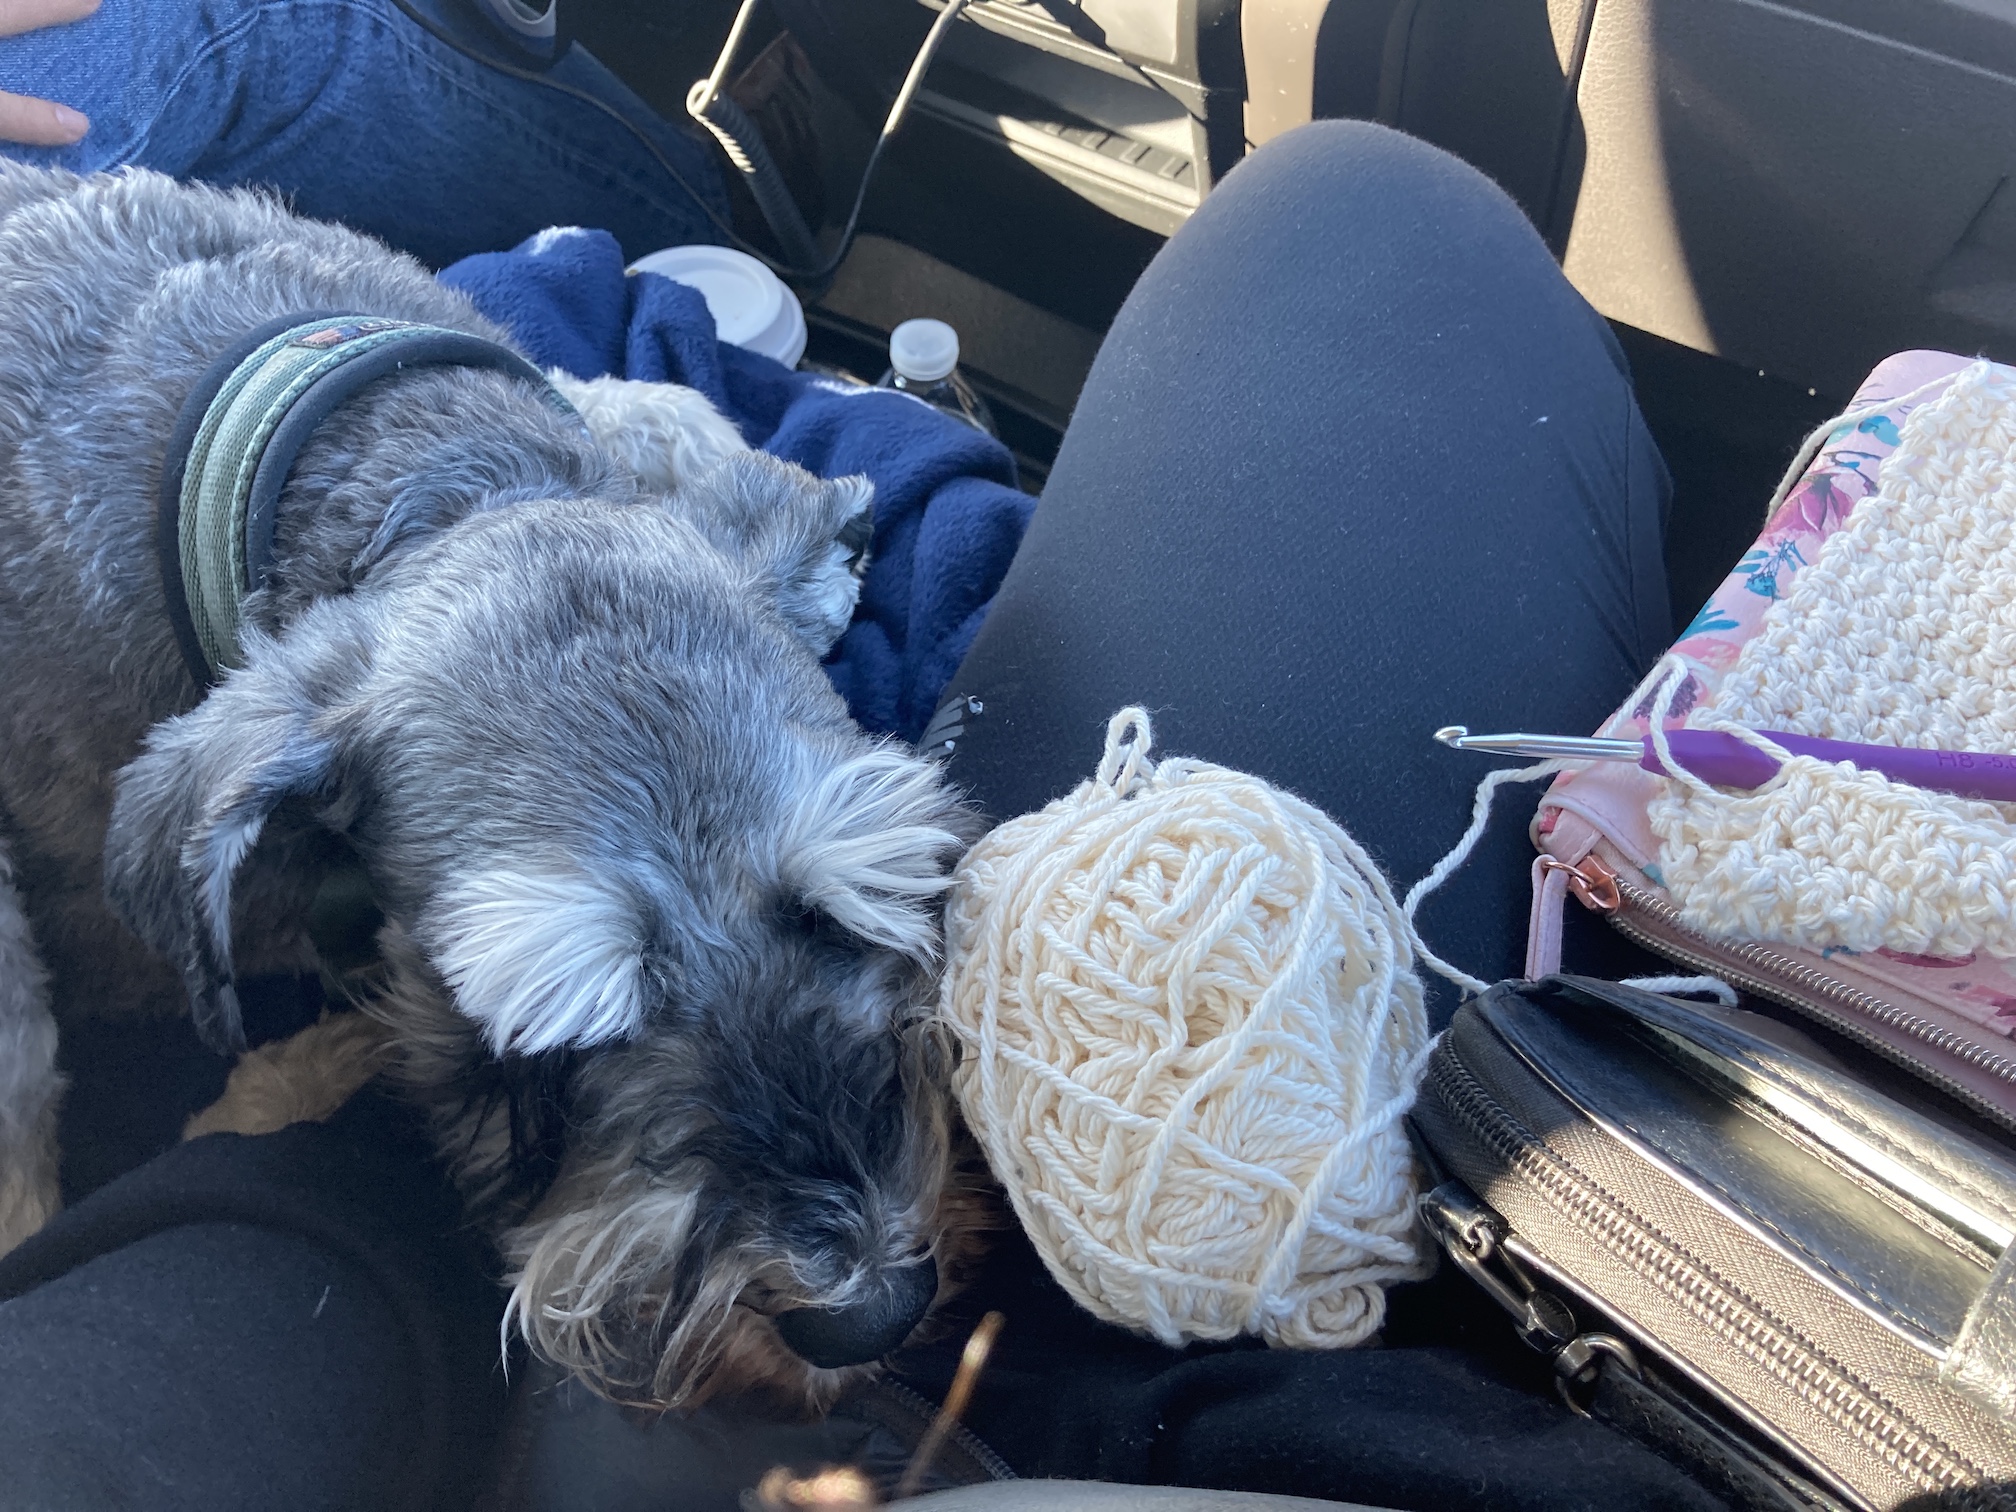
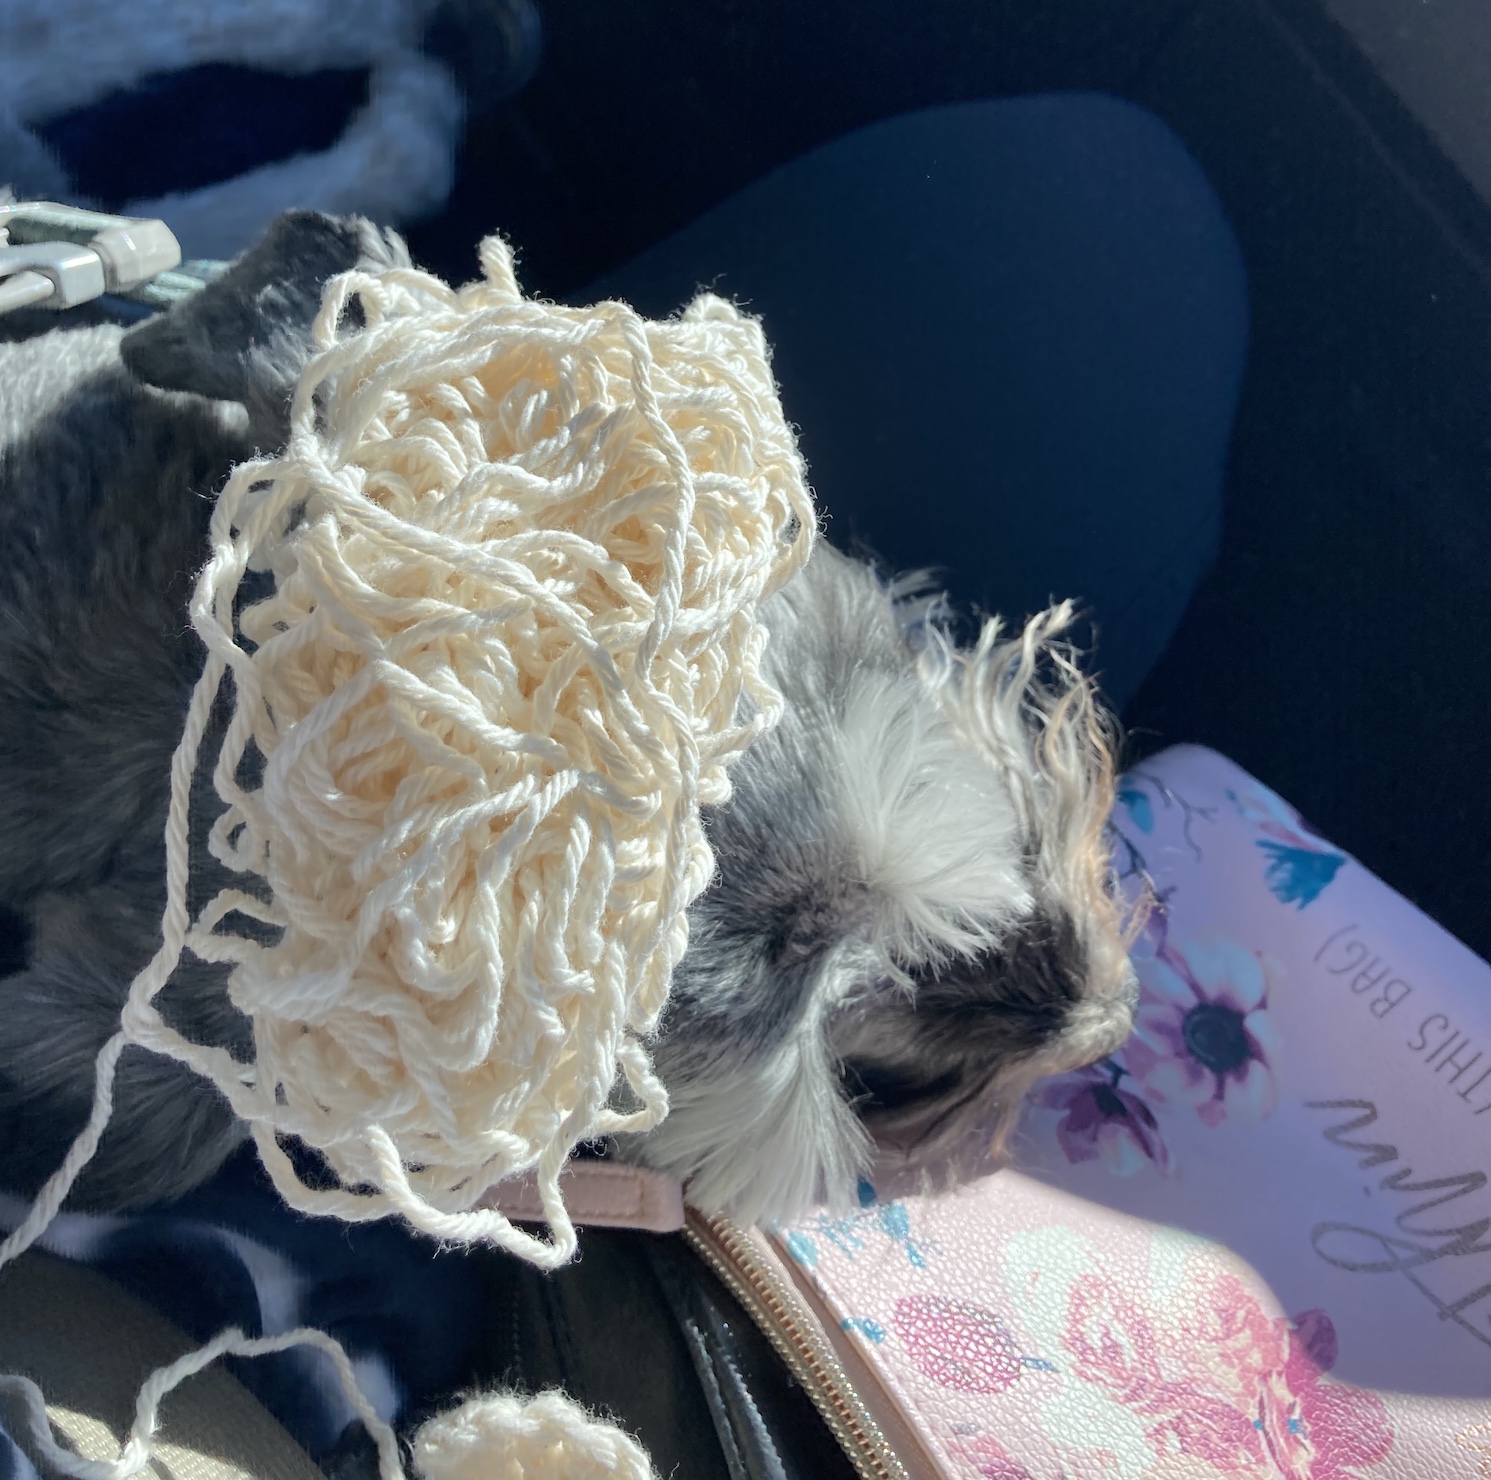
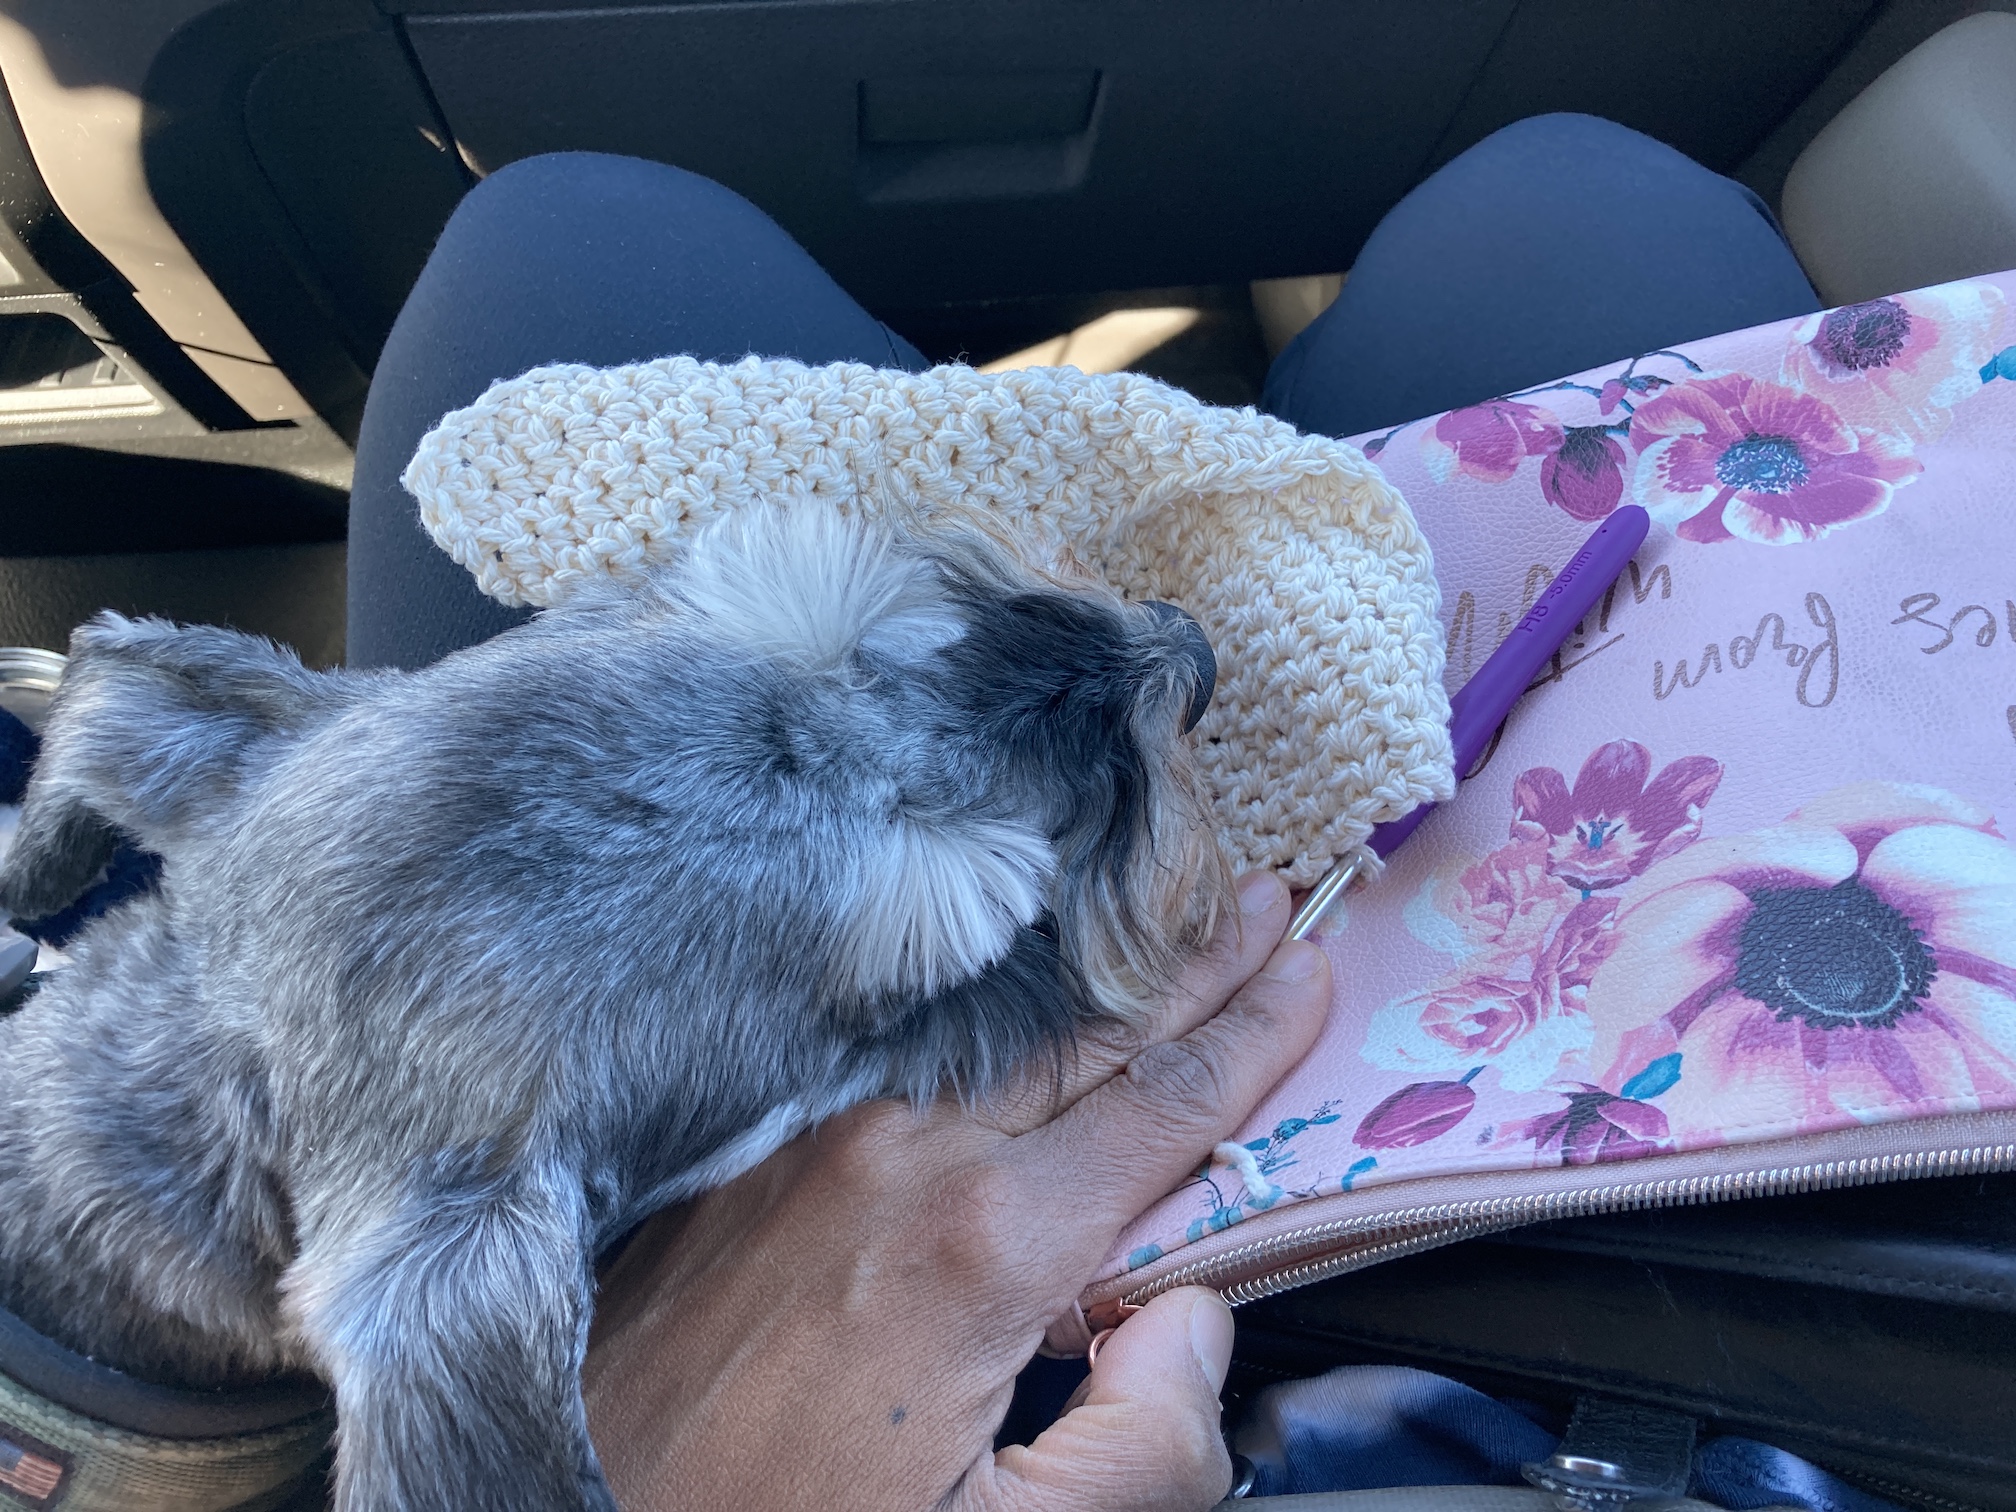
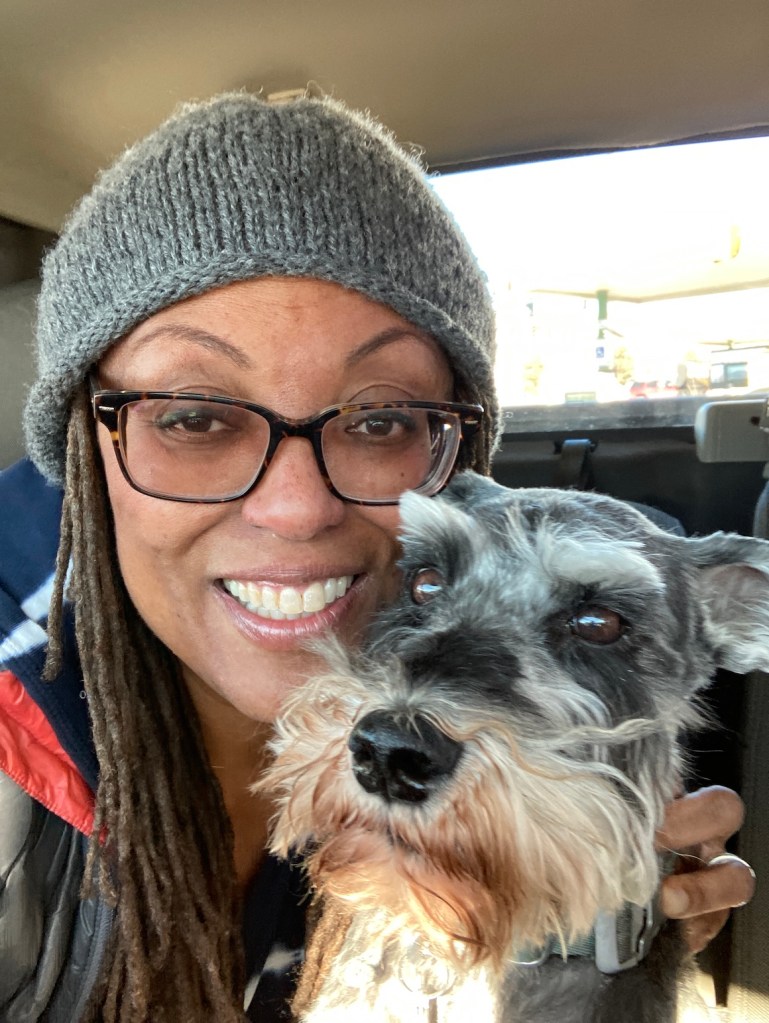
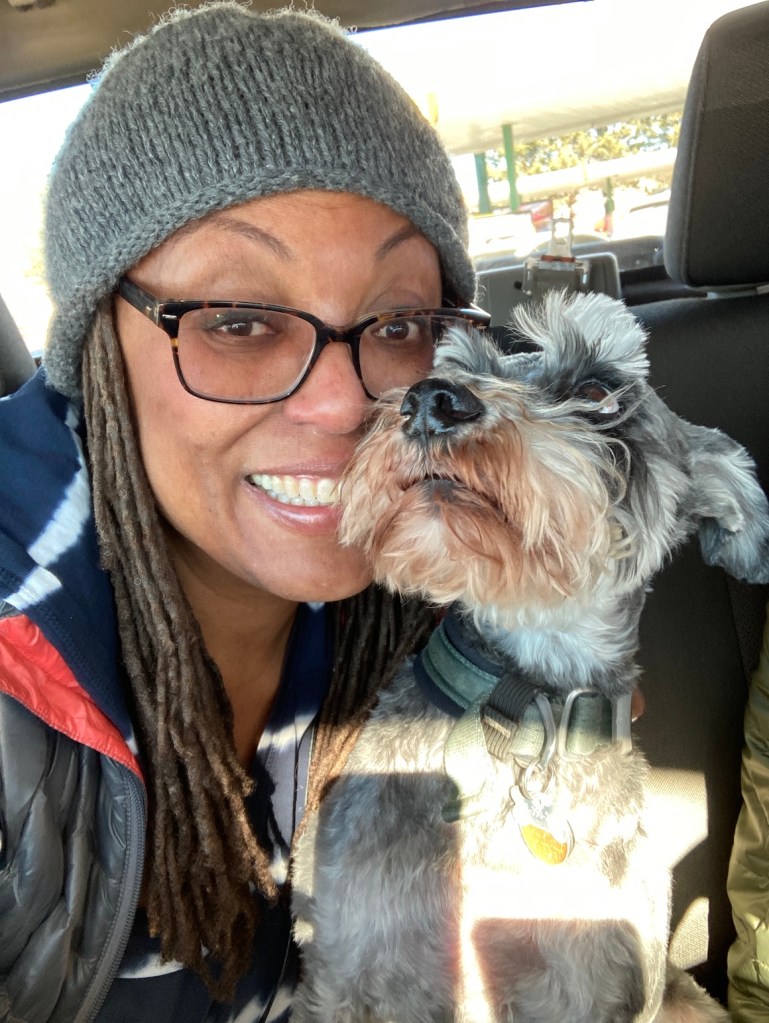
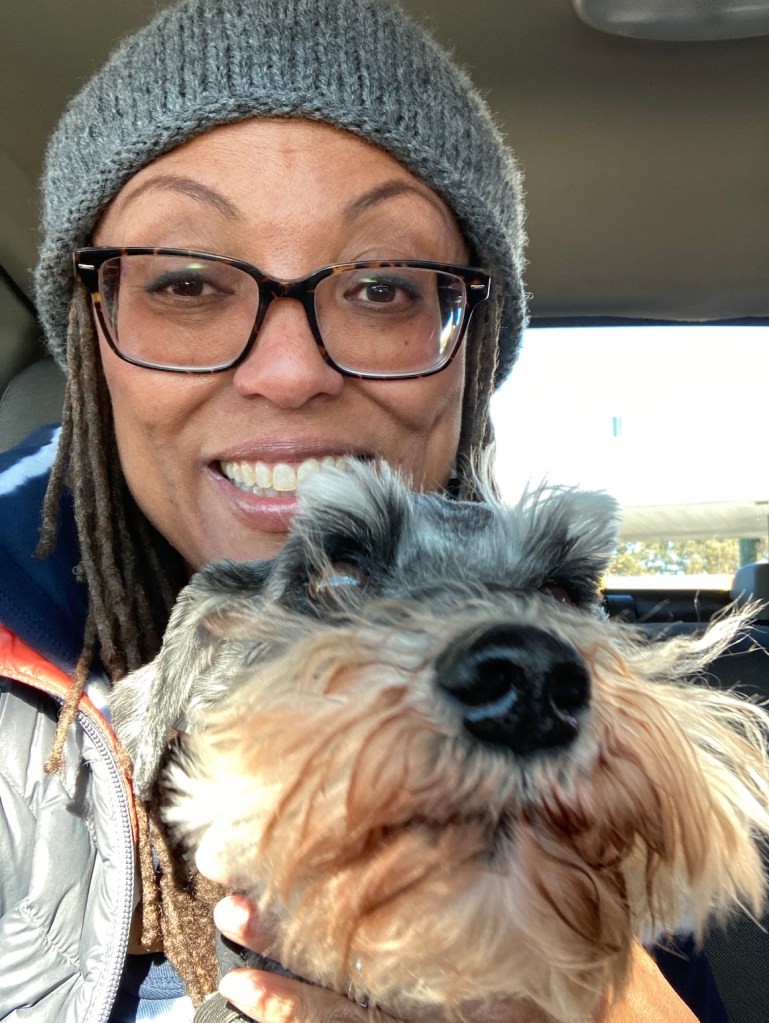
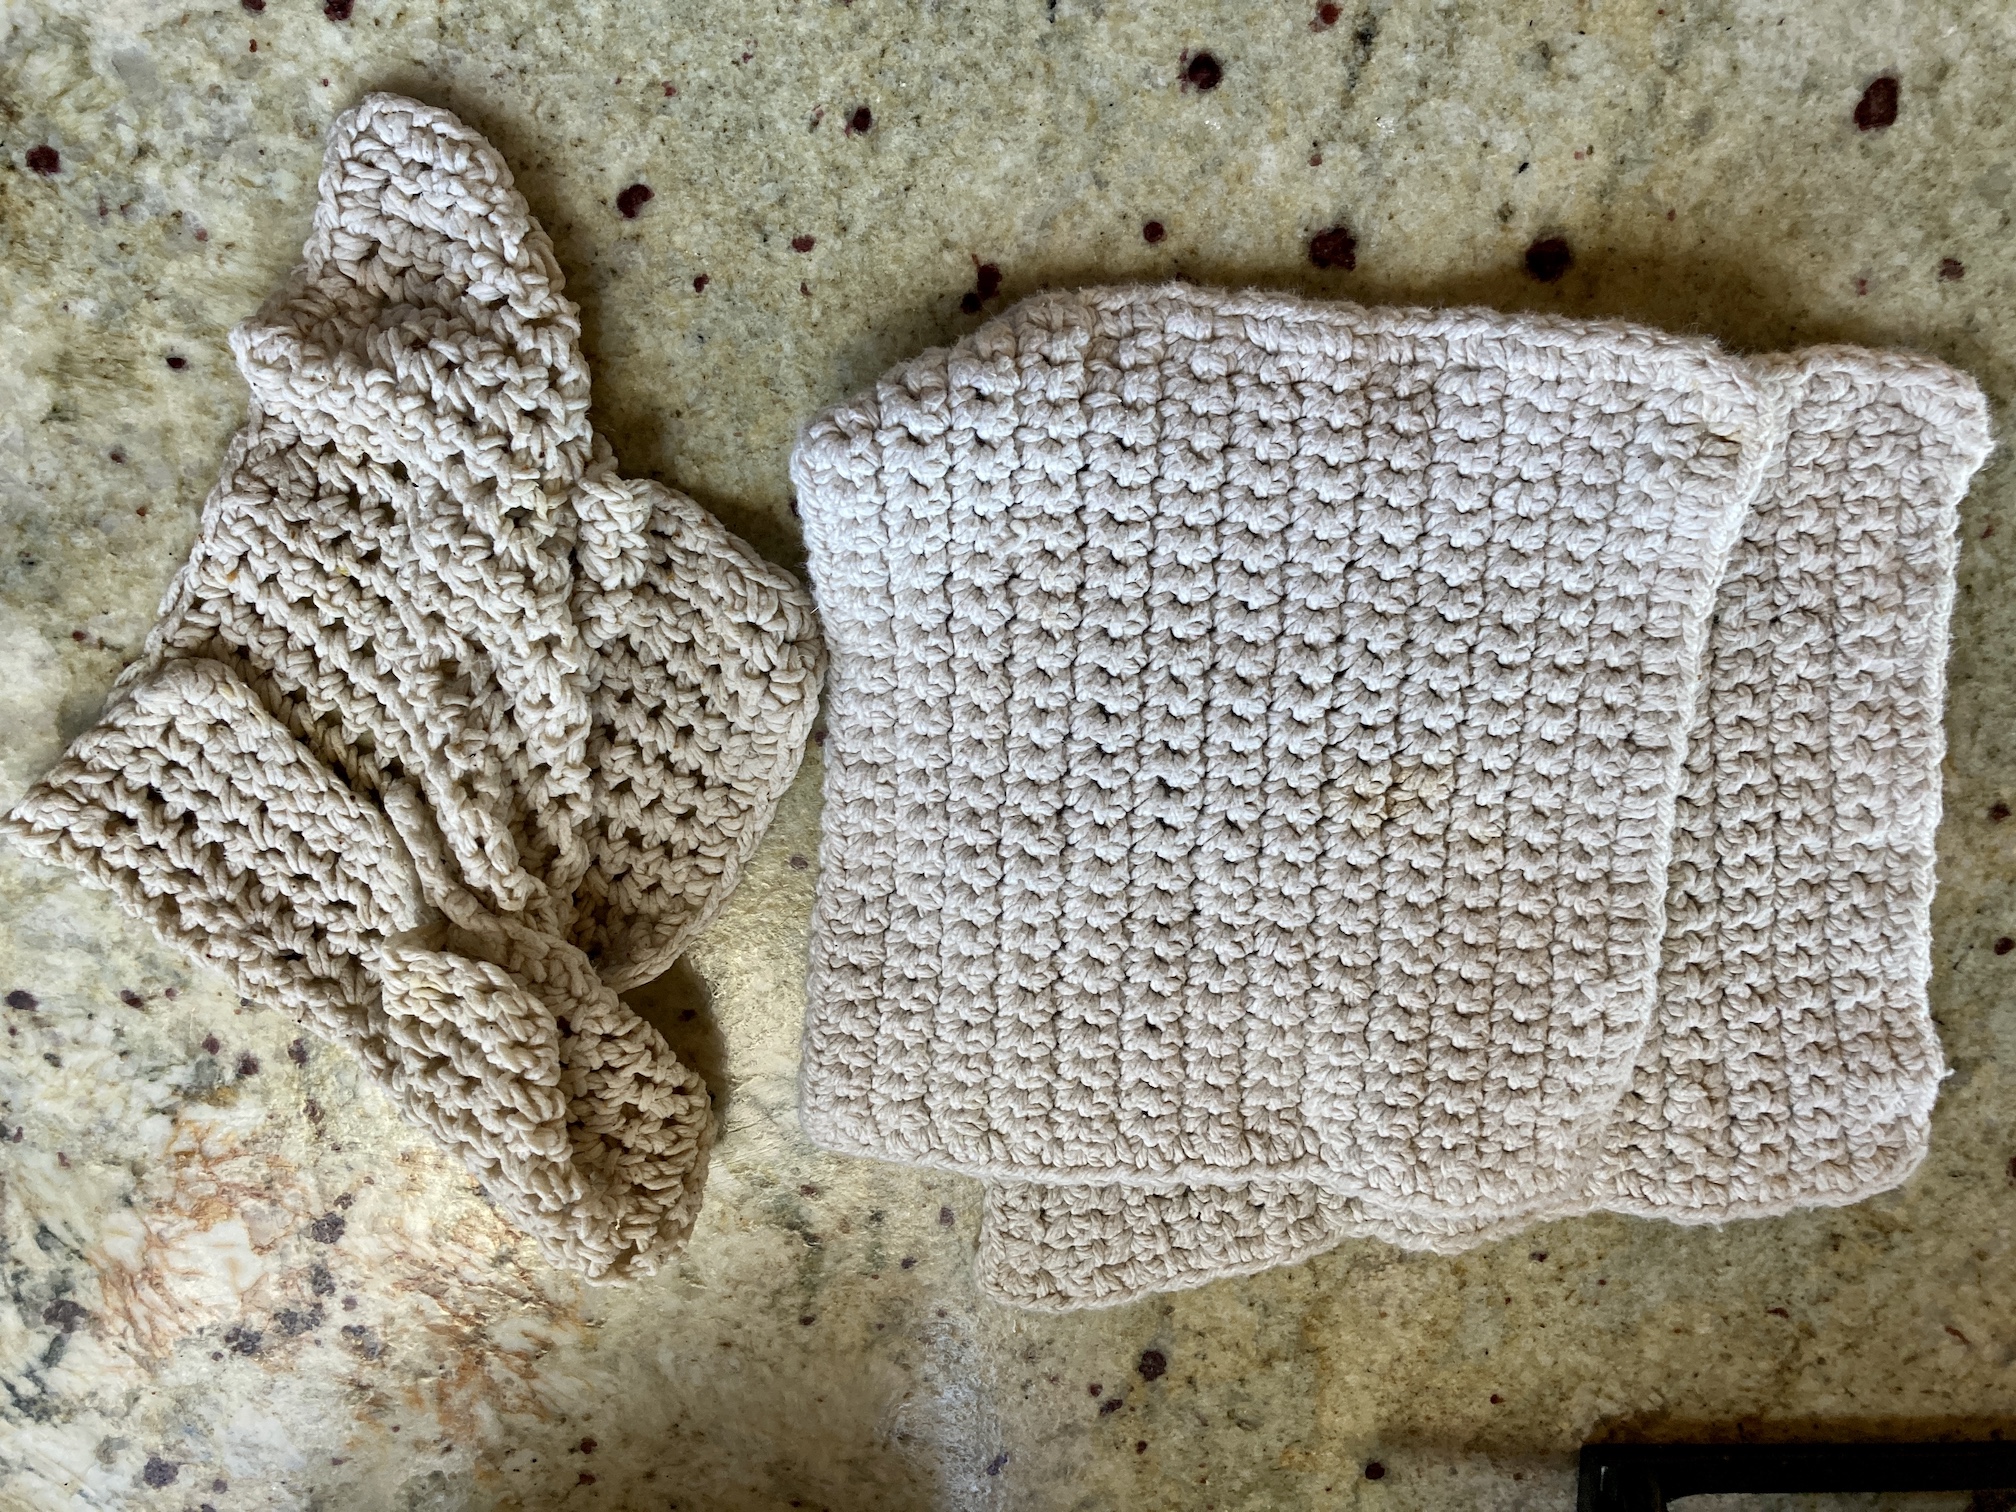


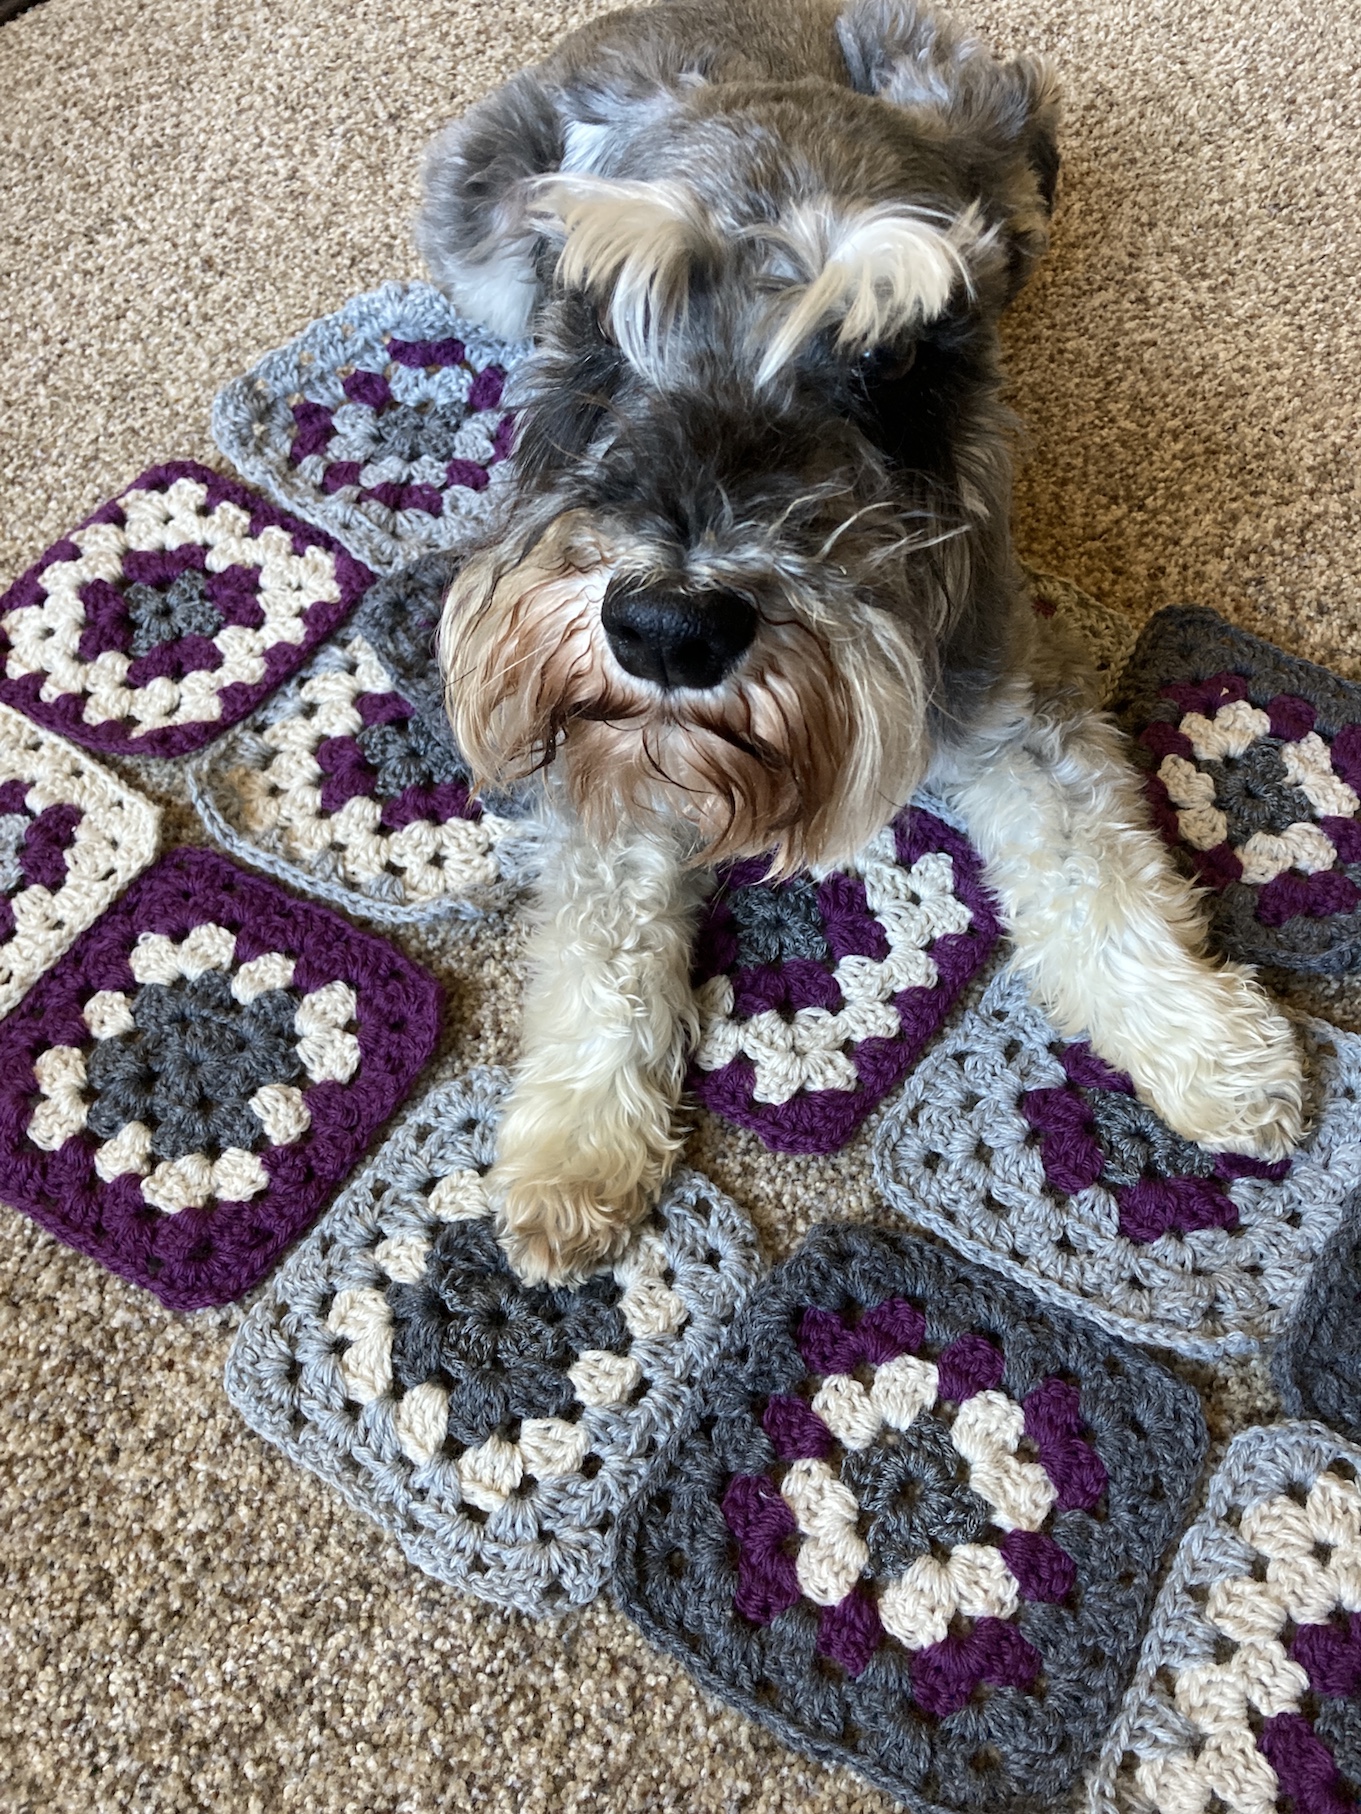


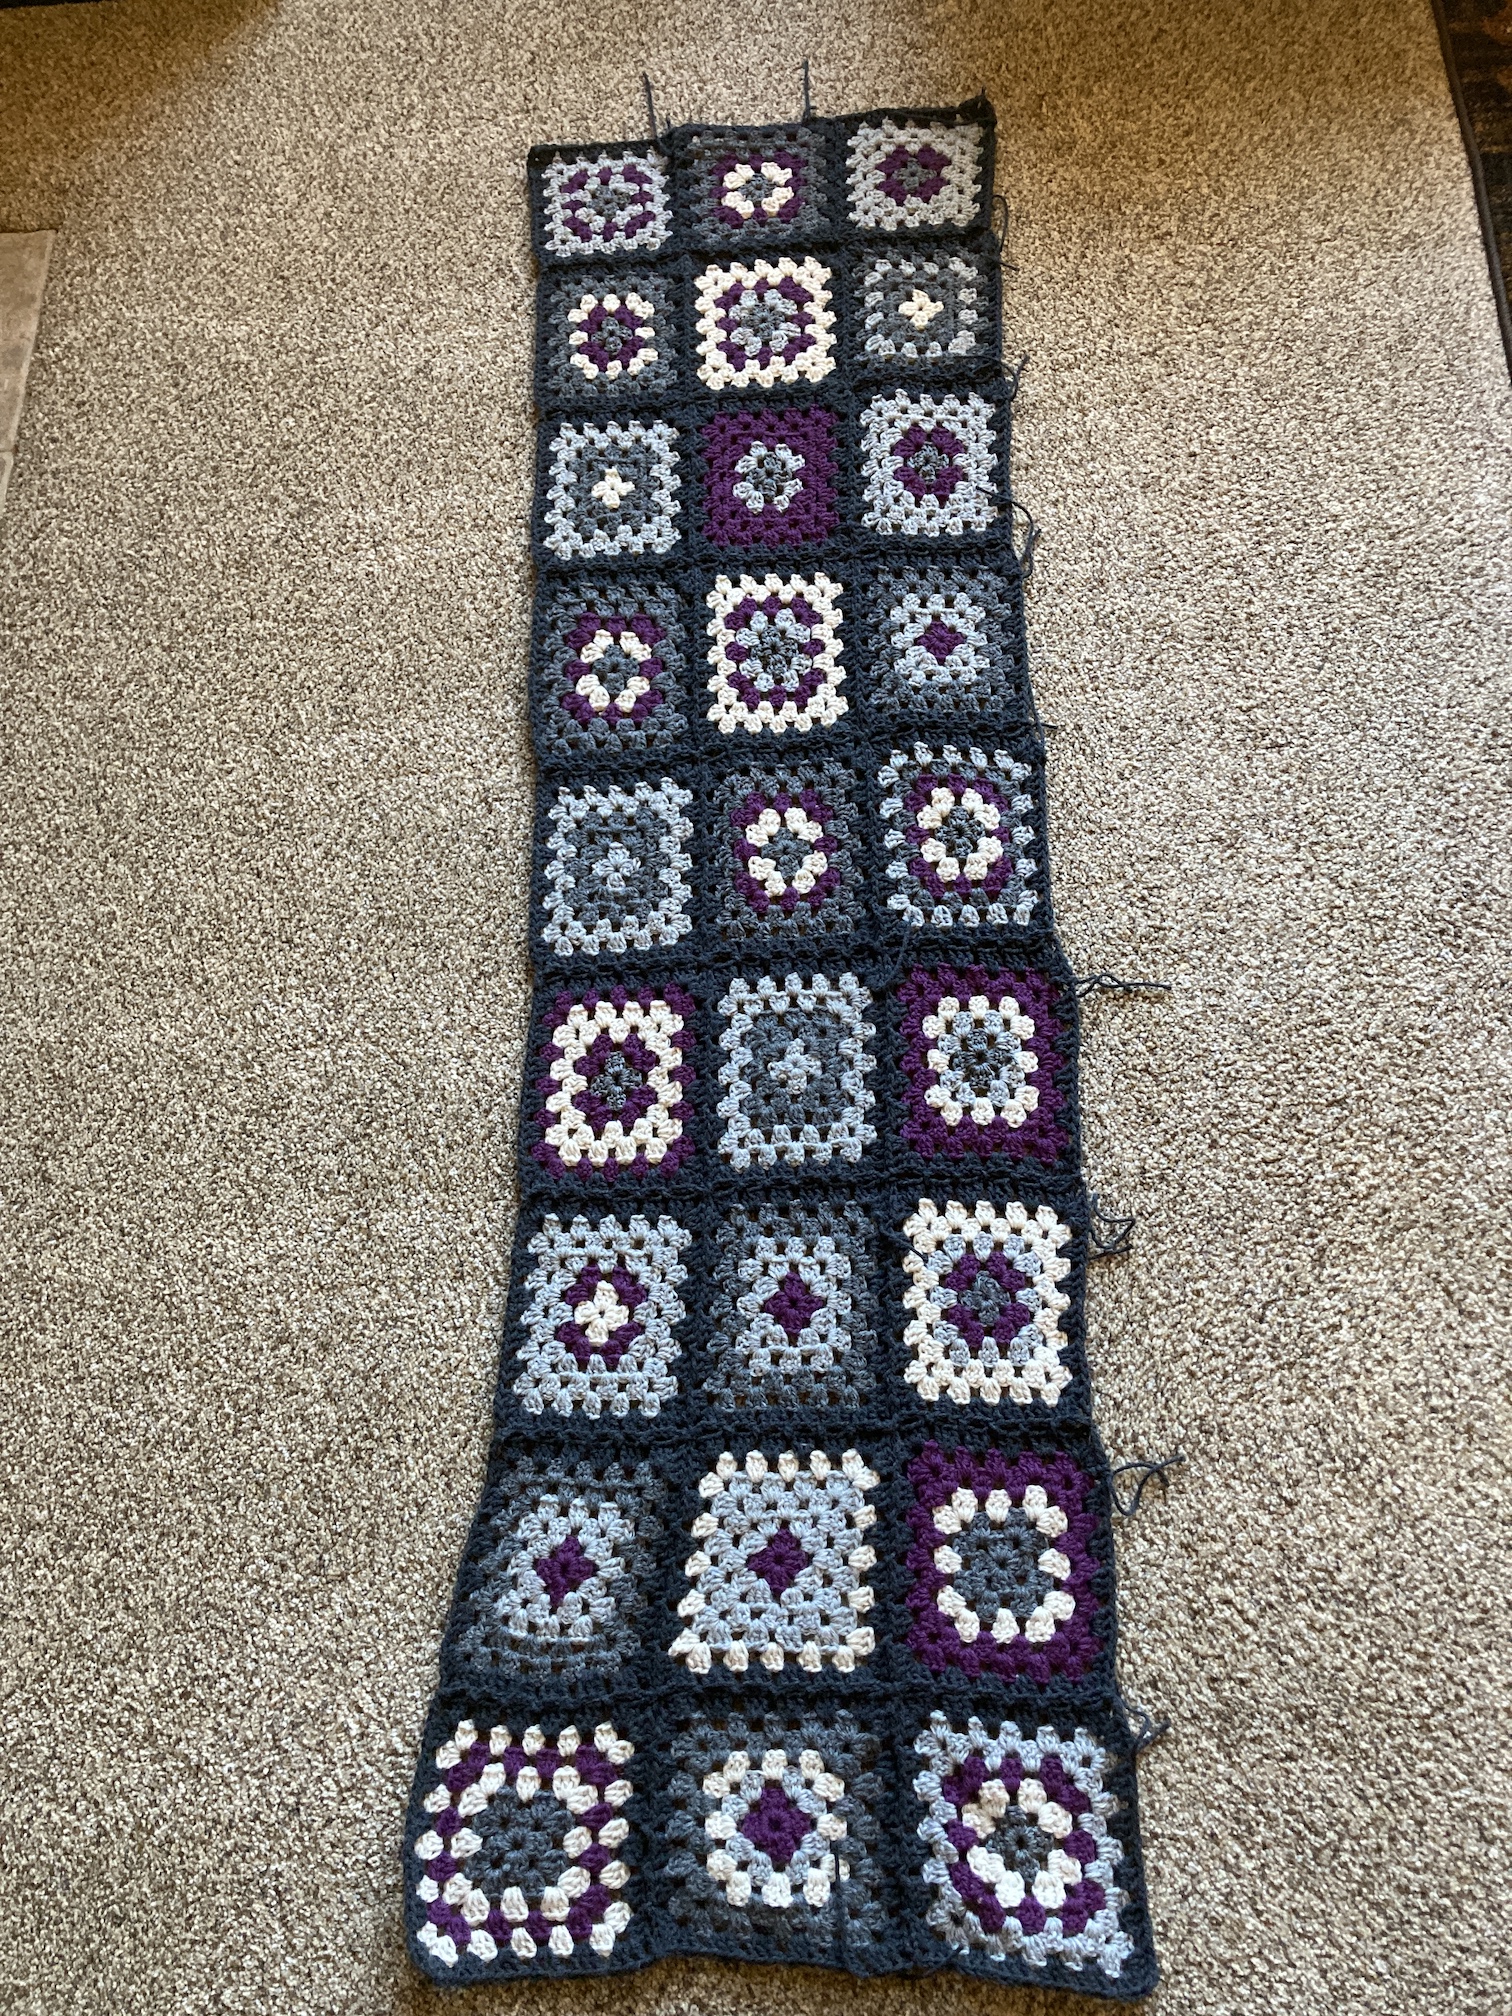
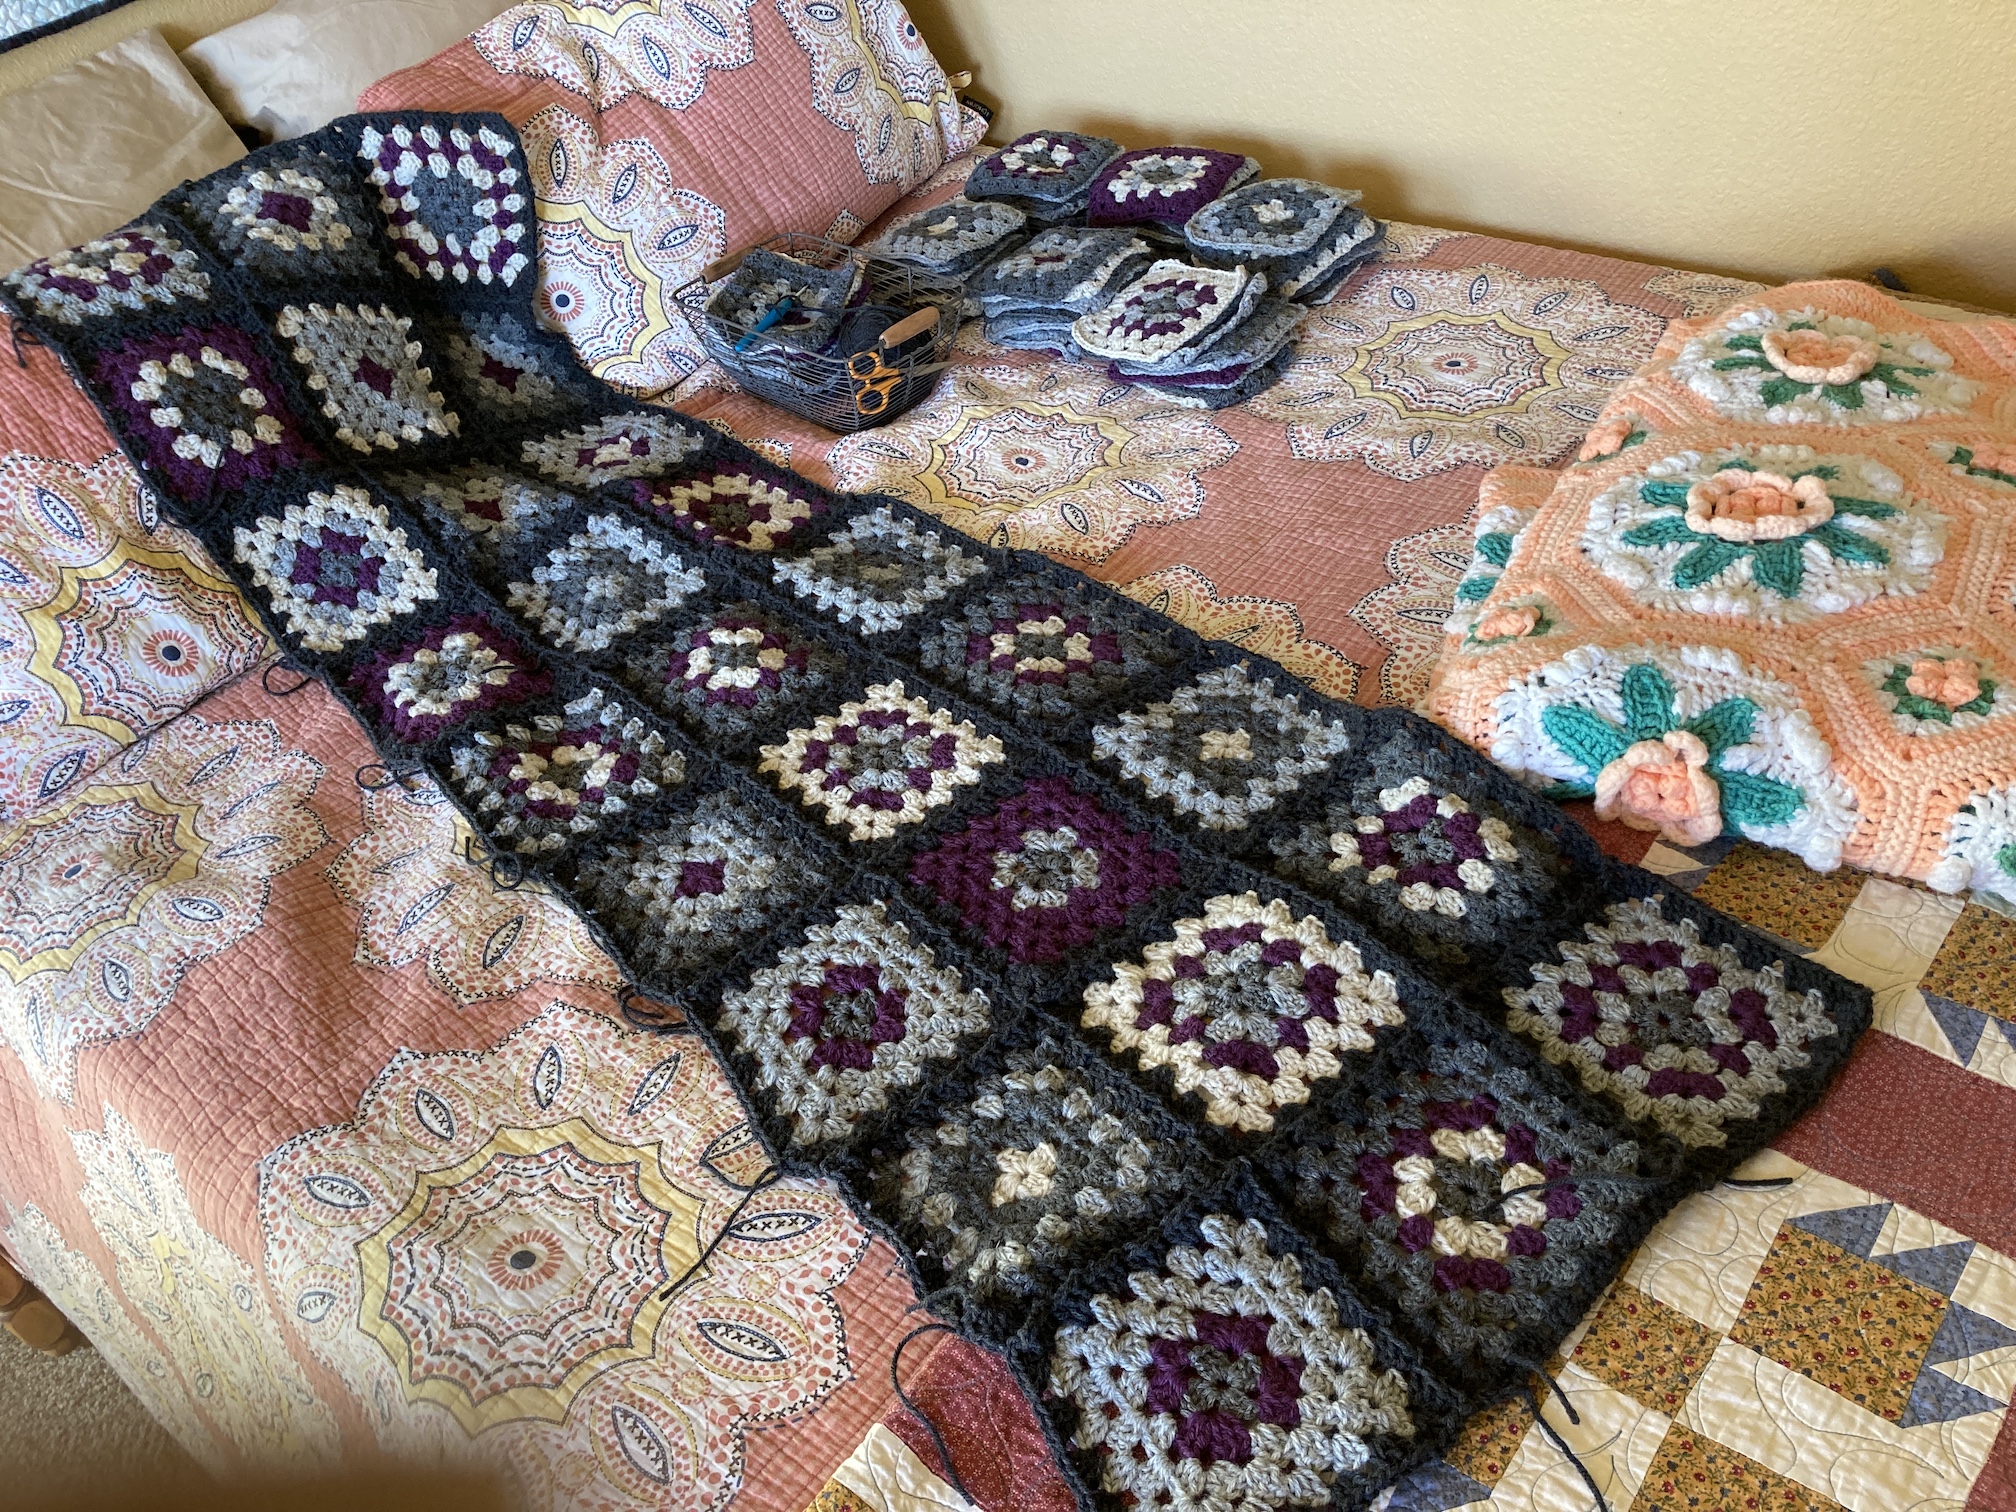


 Back in late March/start of April 2020 my humans made the decision not to move to a new house they were going to buy and instead to stay in their current abode (see post

 His workshop is still a work in progress but he is very happy to now have his own “playroom” like my female human!
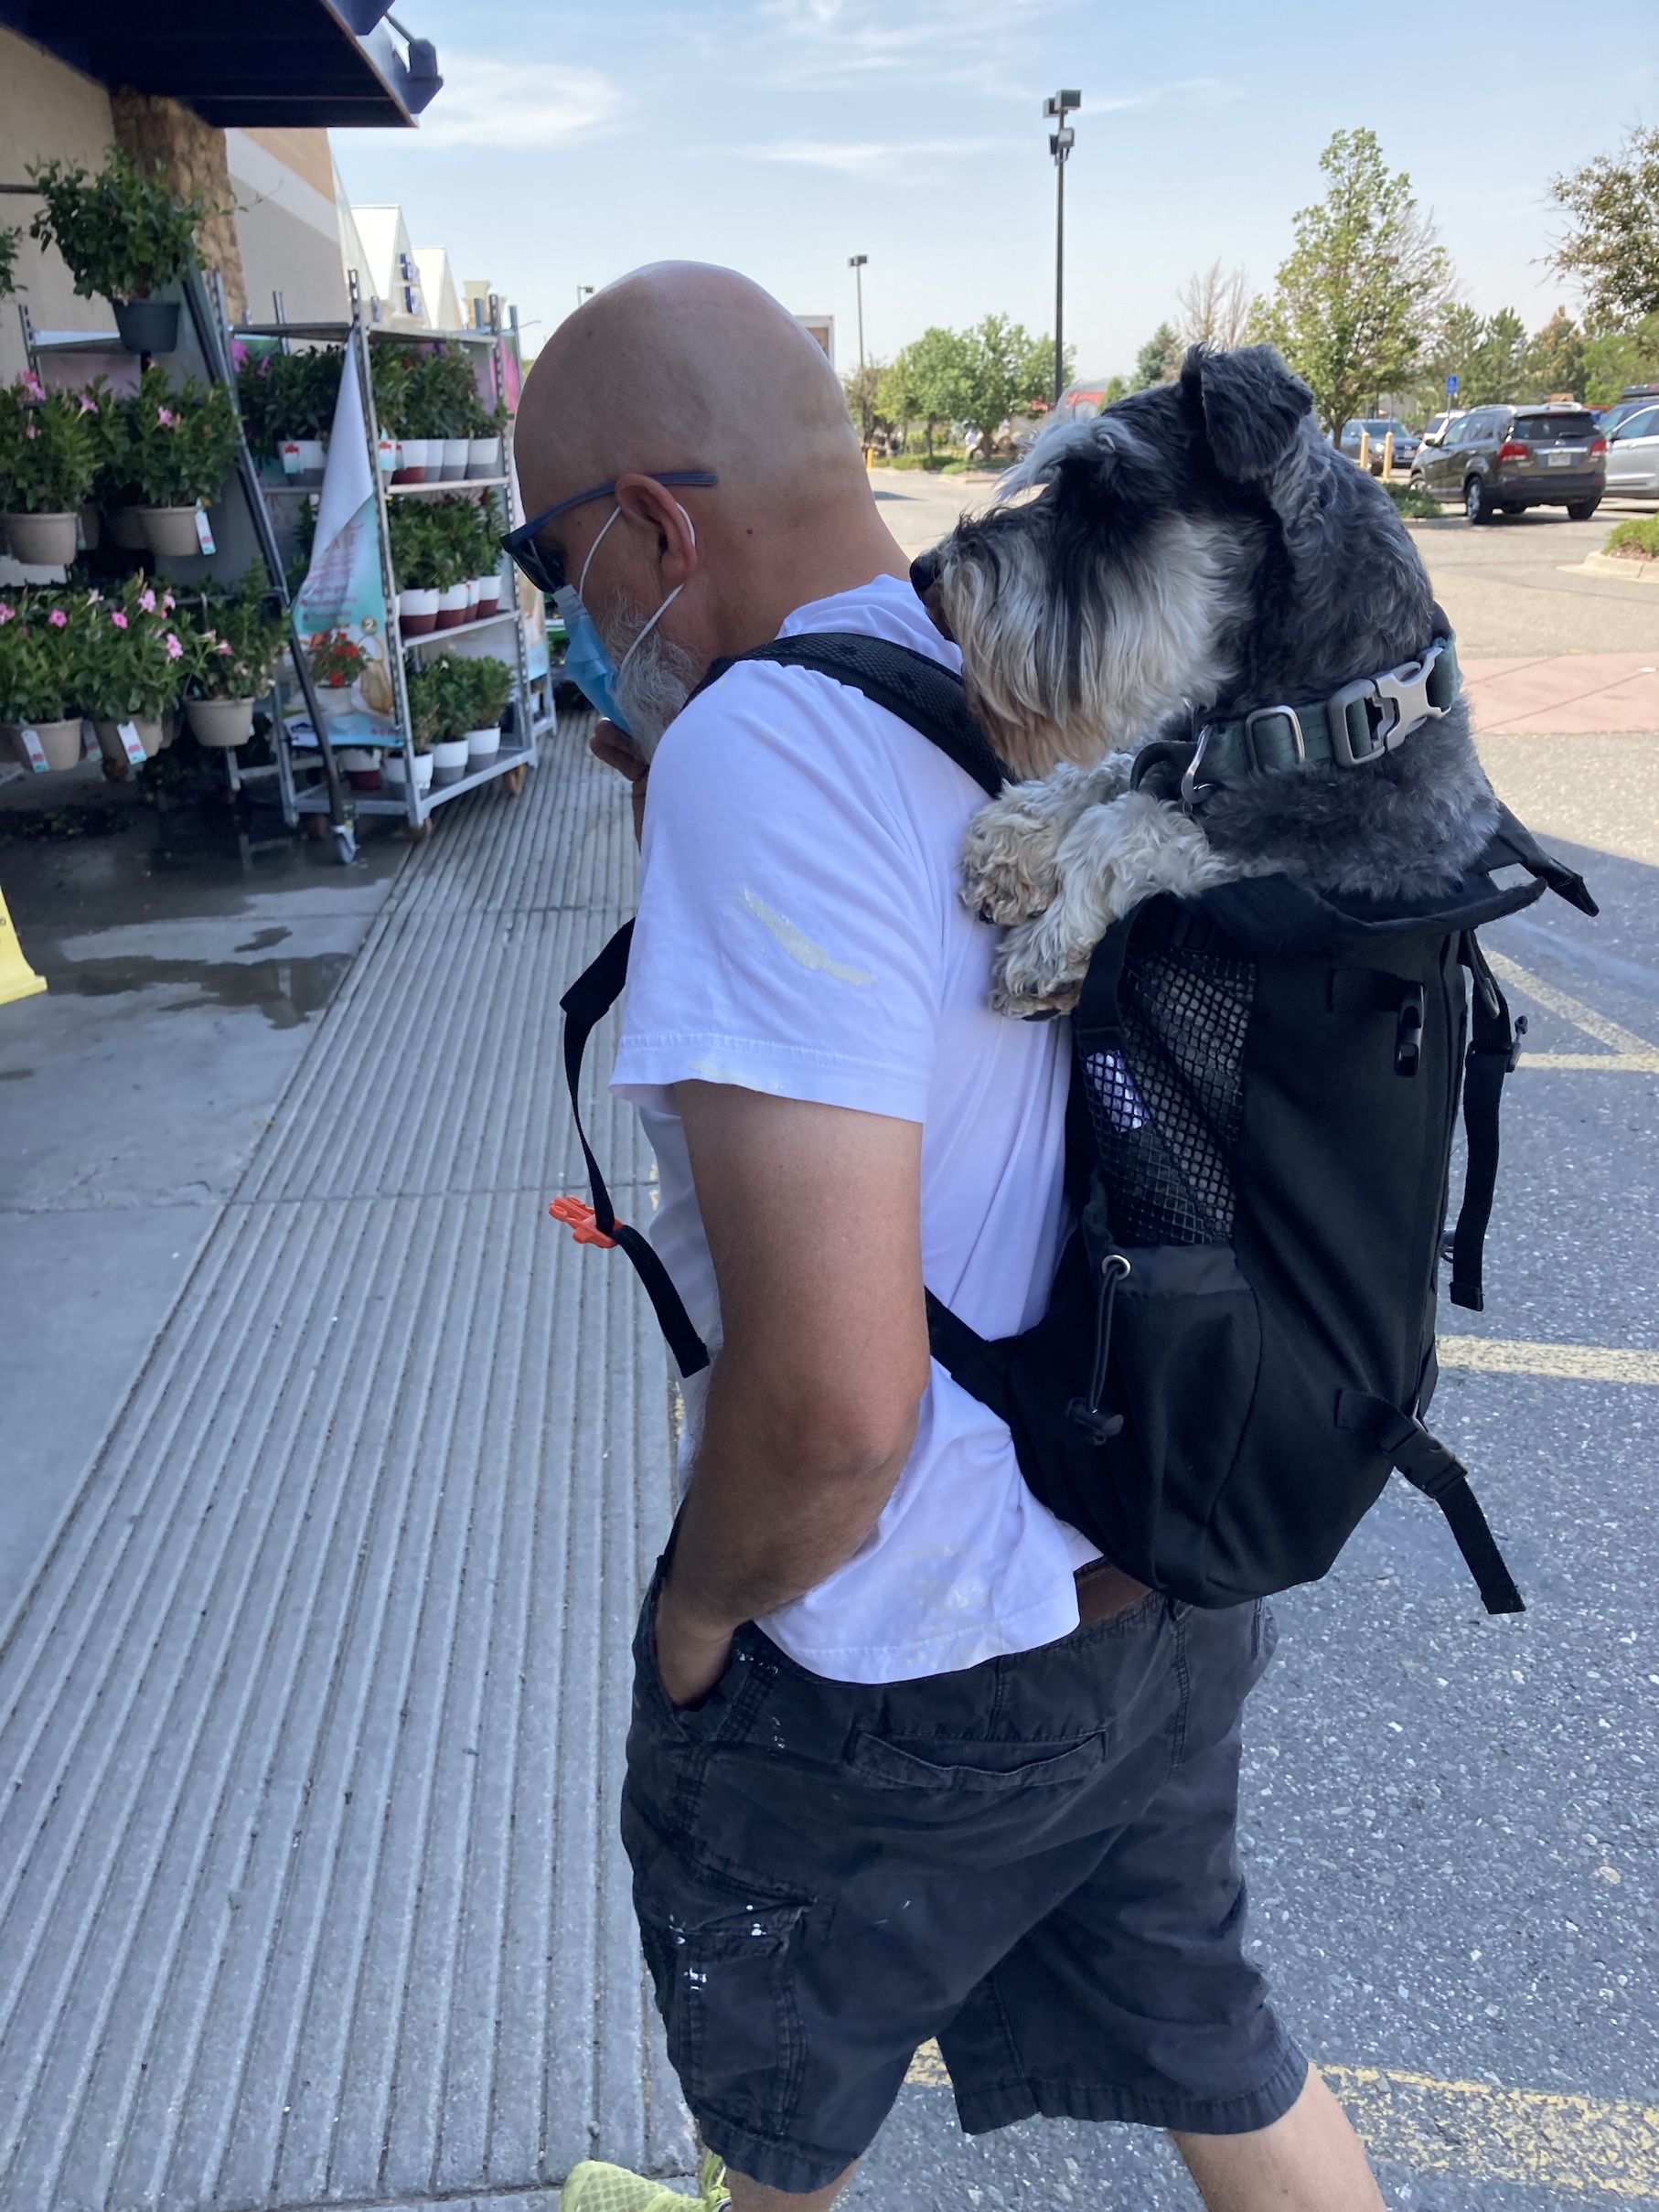

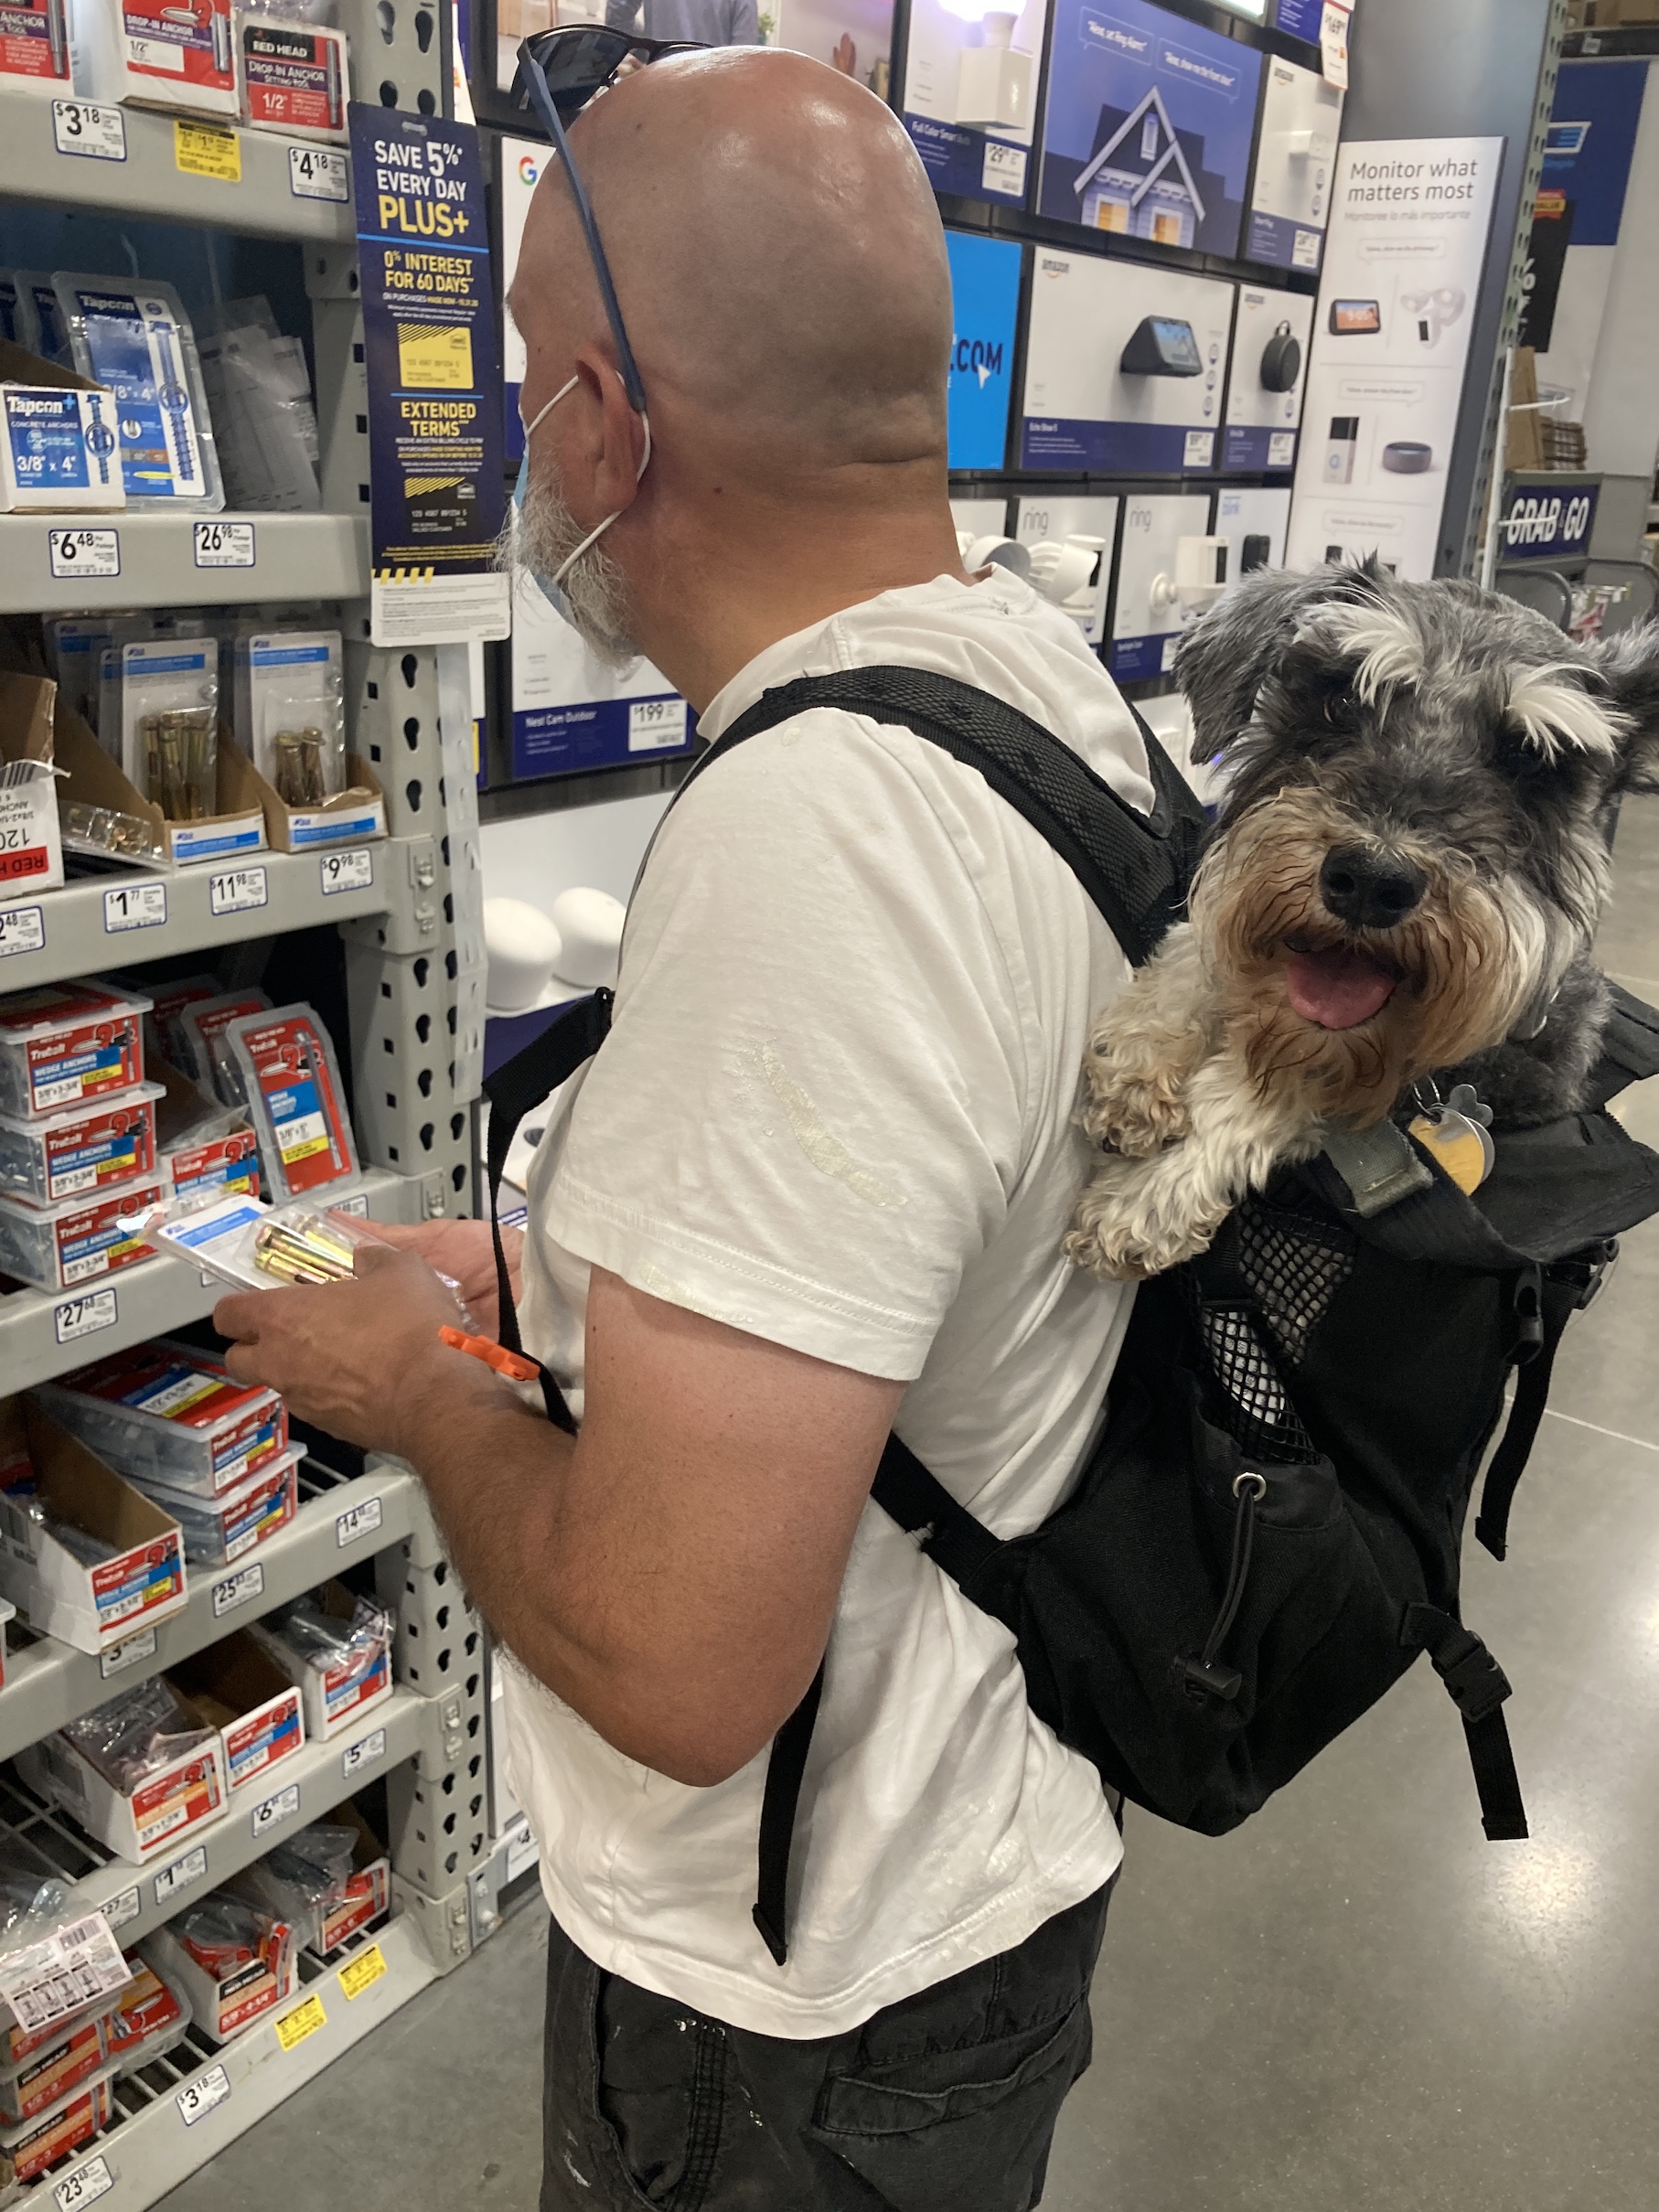
 And sometimes in the shopping cart:

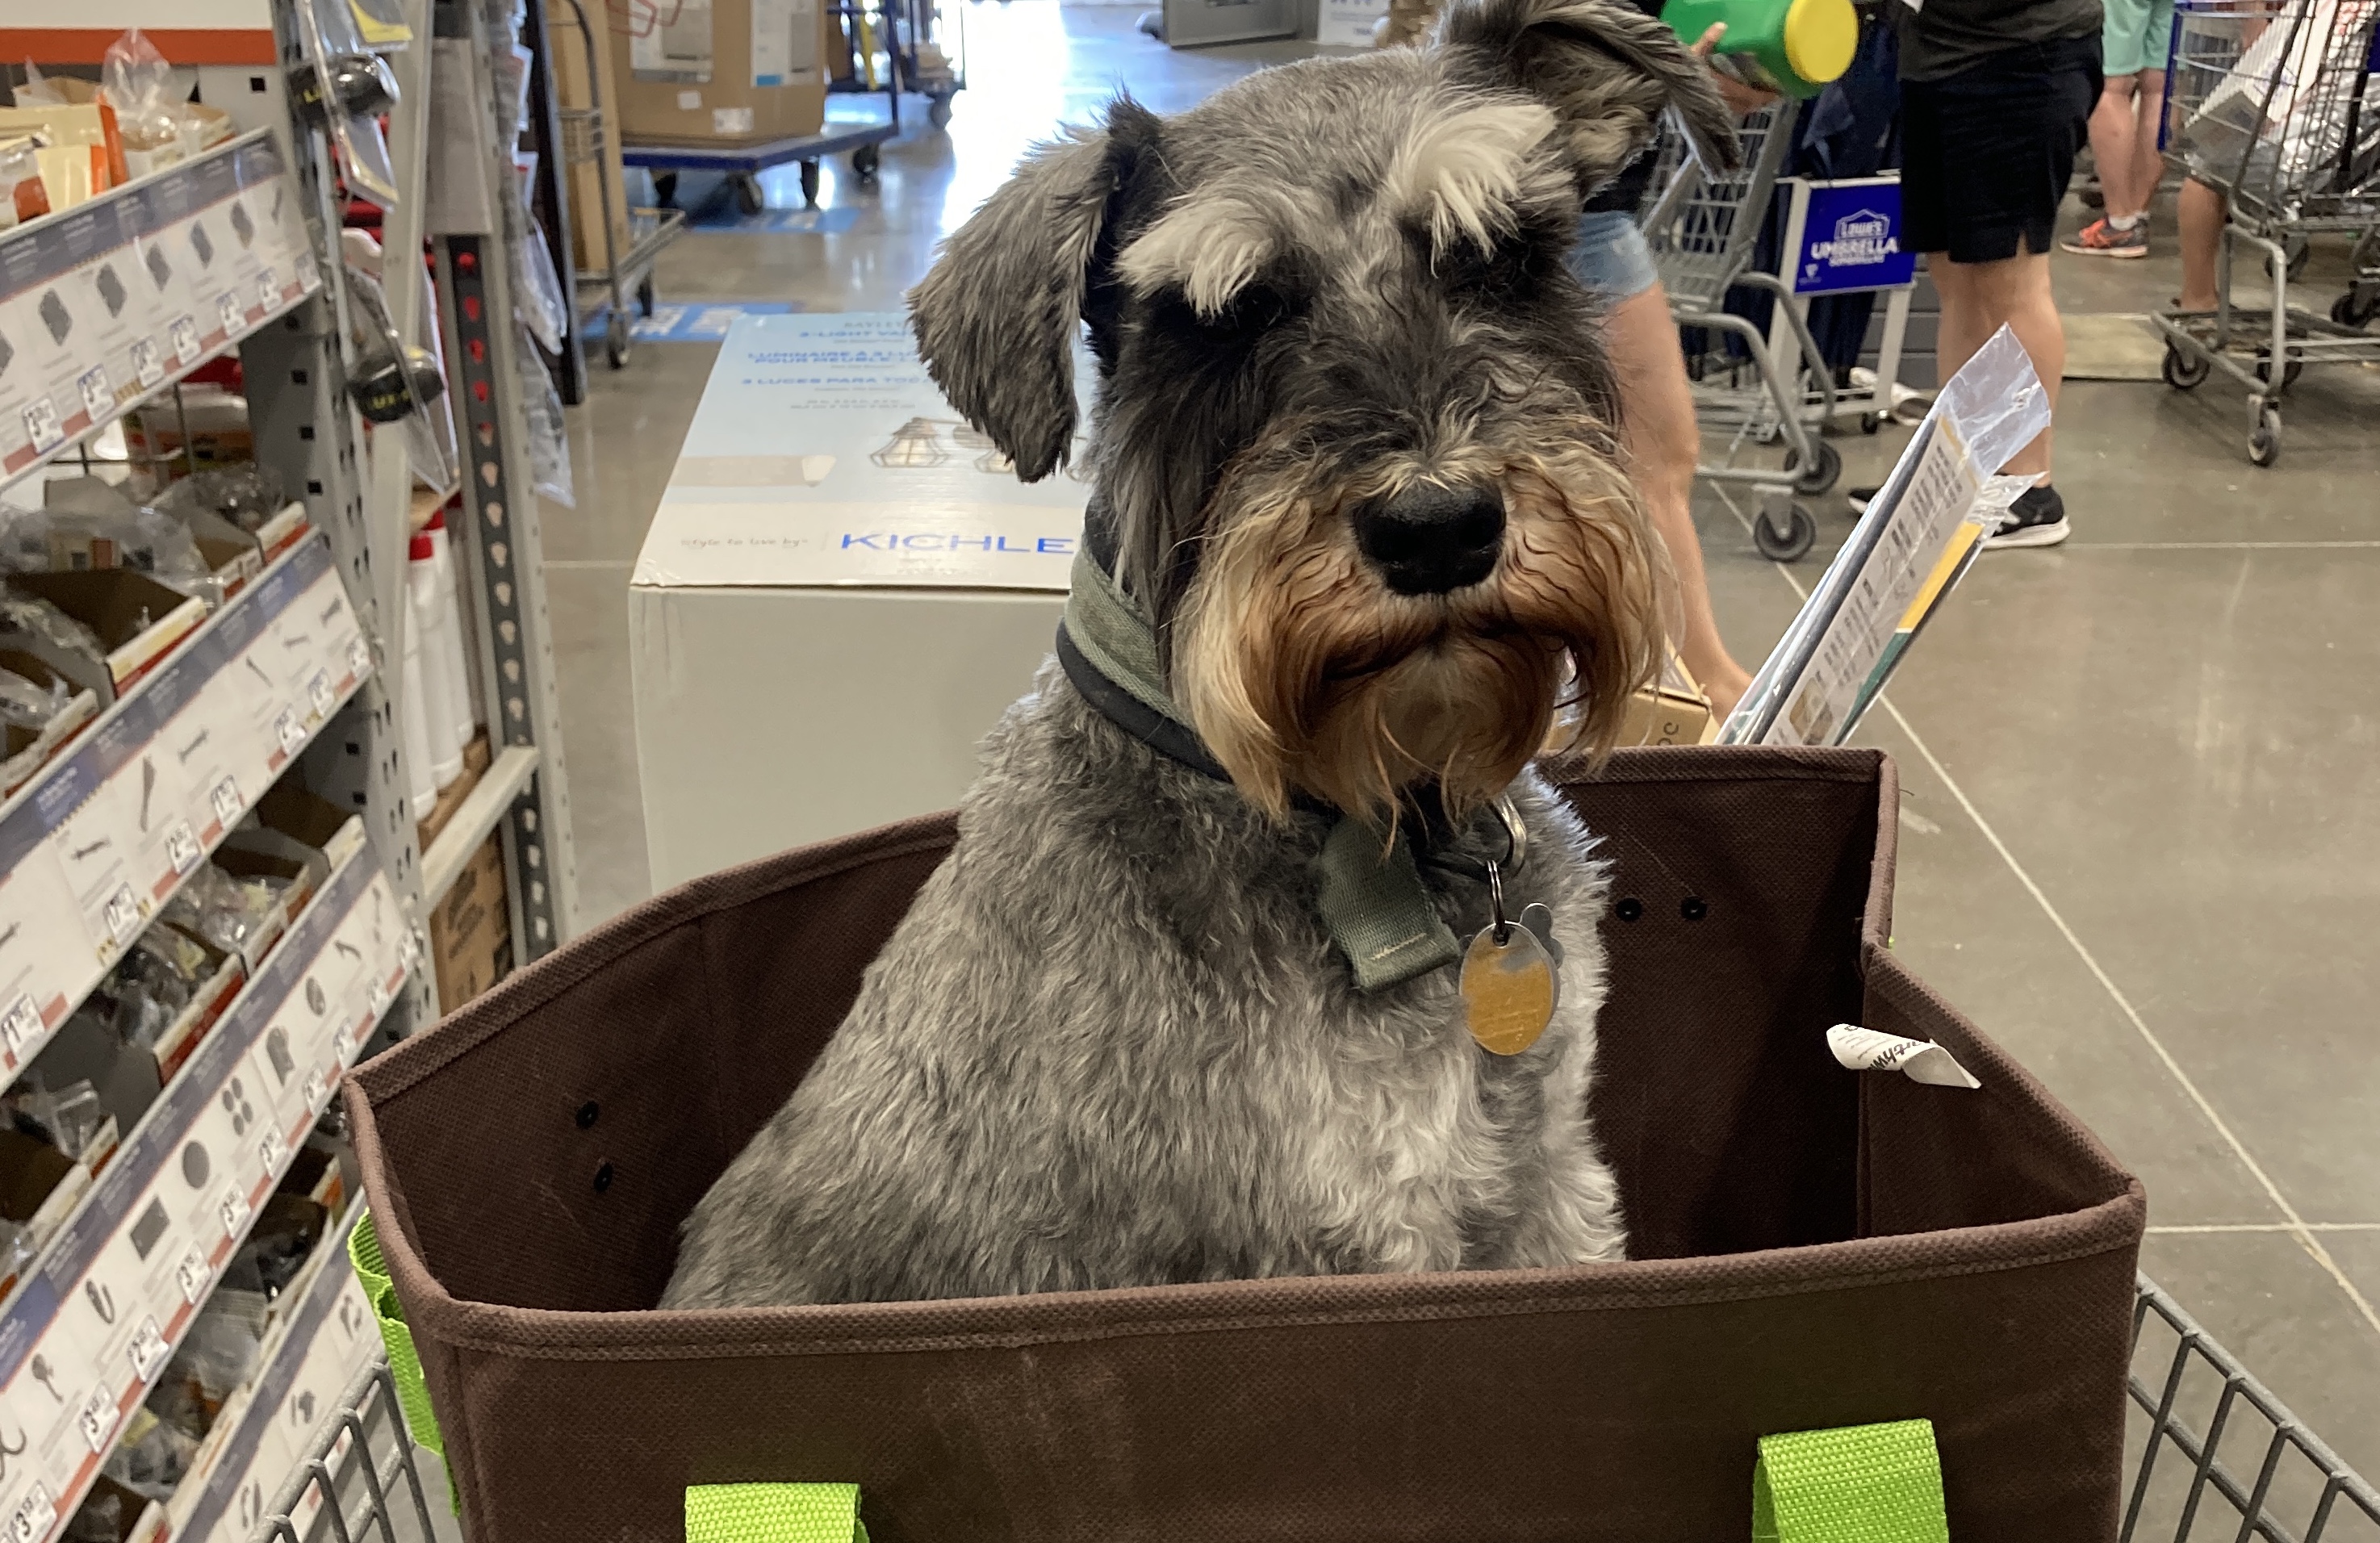
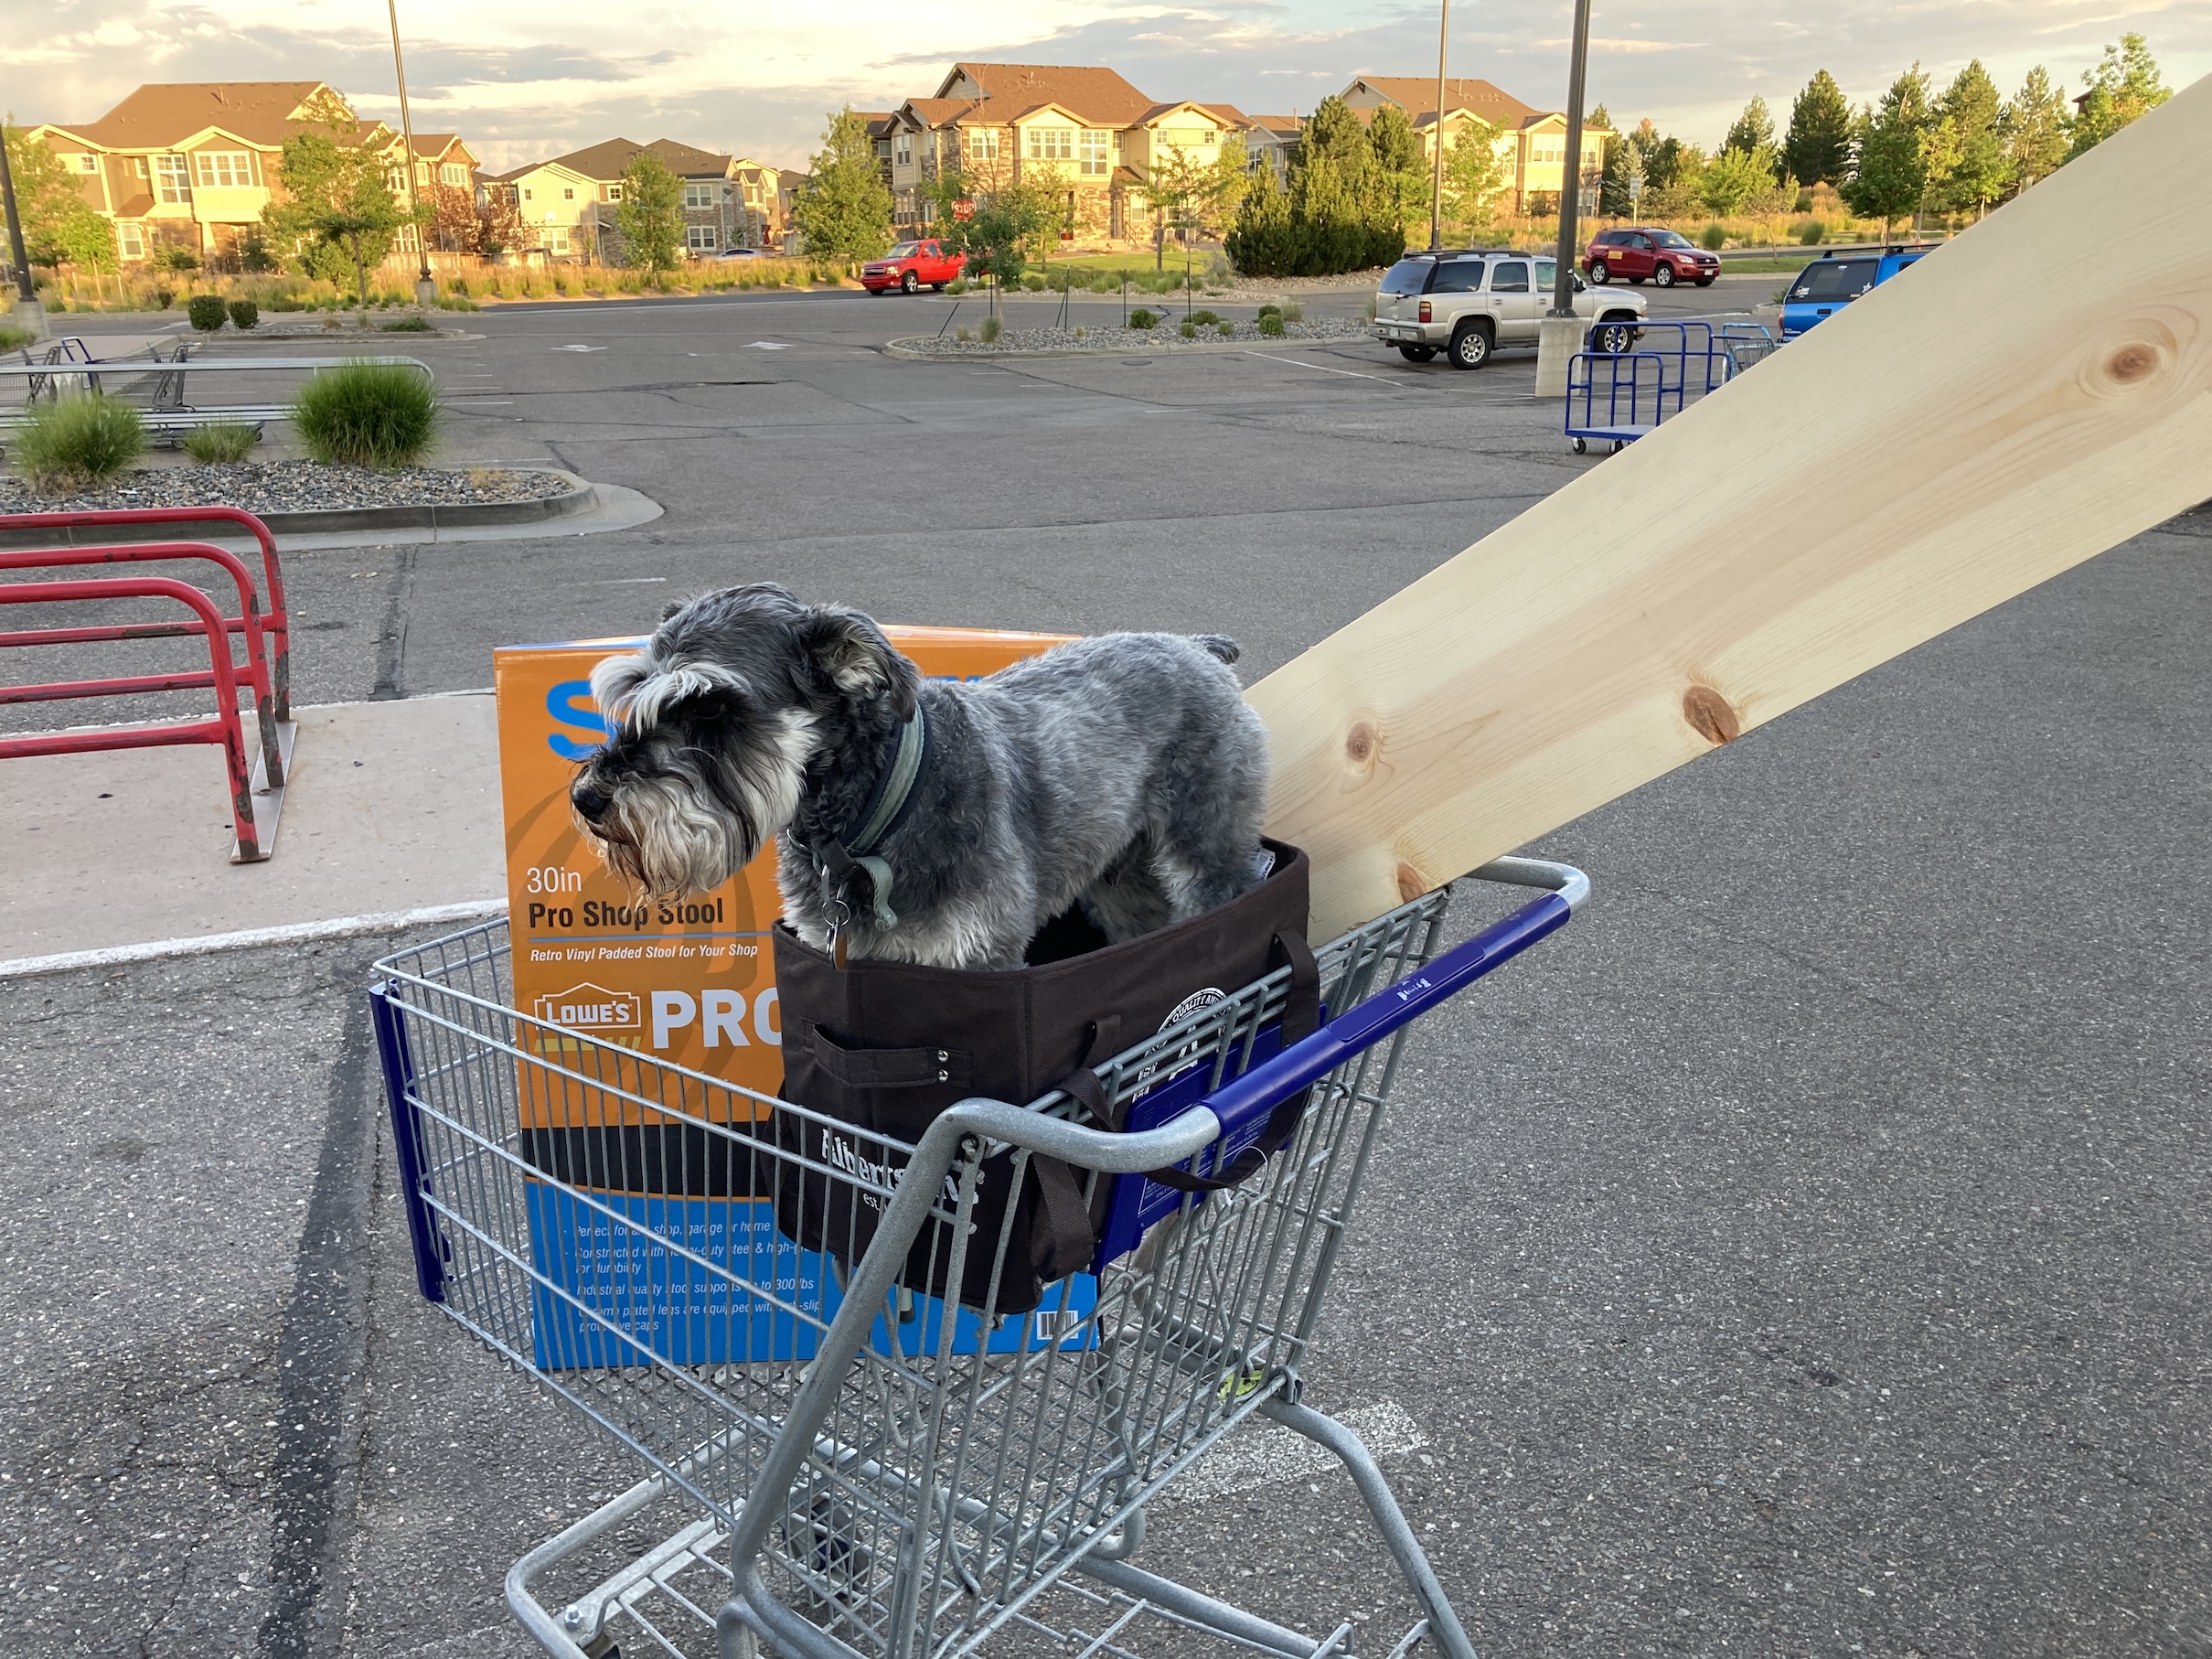 I know, I know, you just can’t get enough of the cute photos of me in a shopping cart. Unfortunately my female human said we have to limit the photos to only four (4) because she has to protect her digital storage allotment on her blog (sigh).
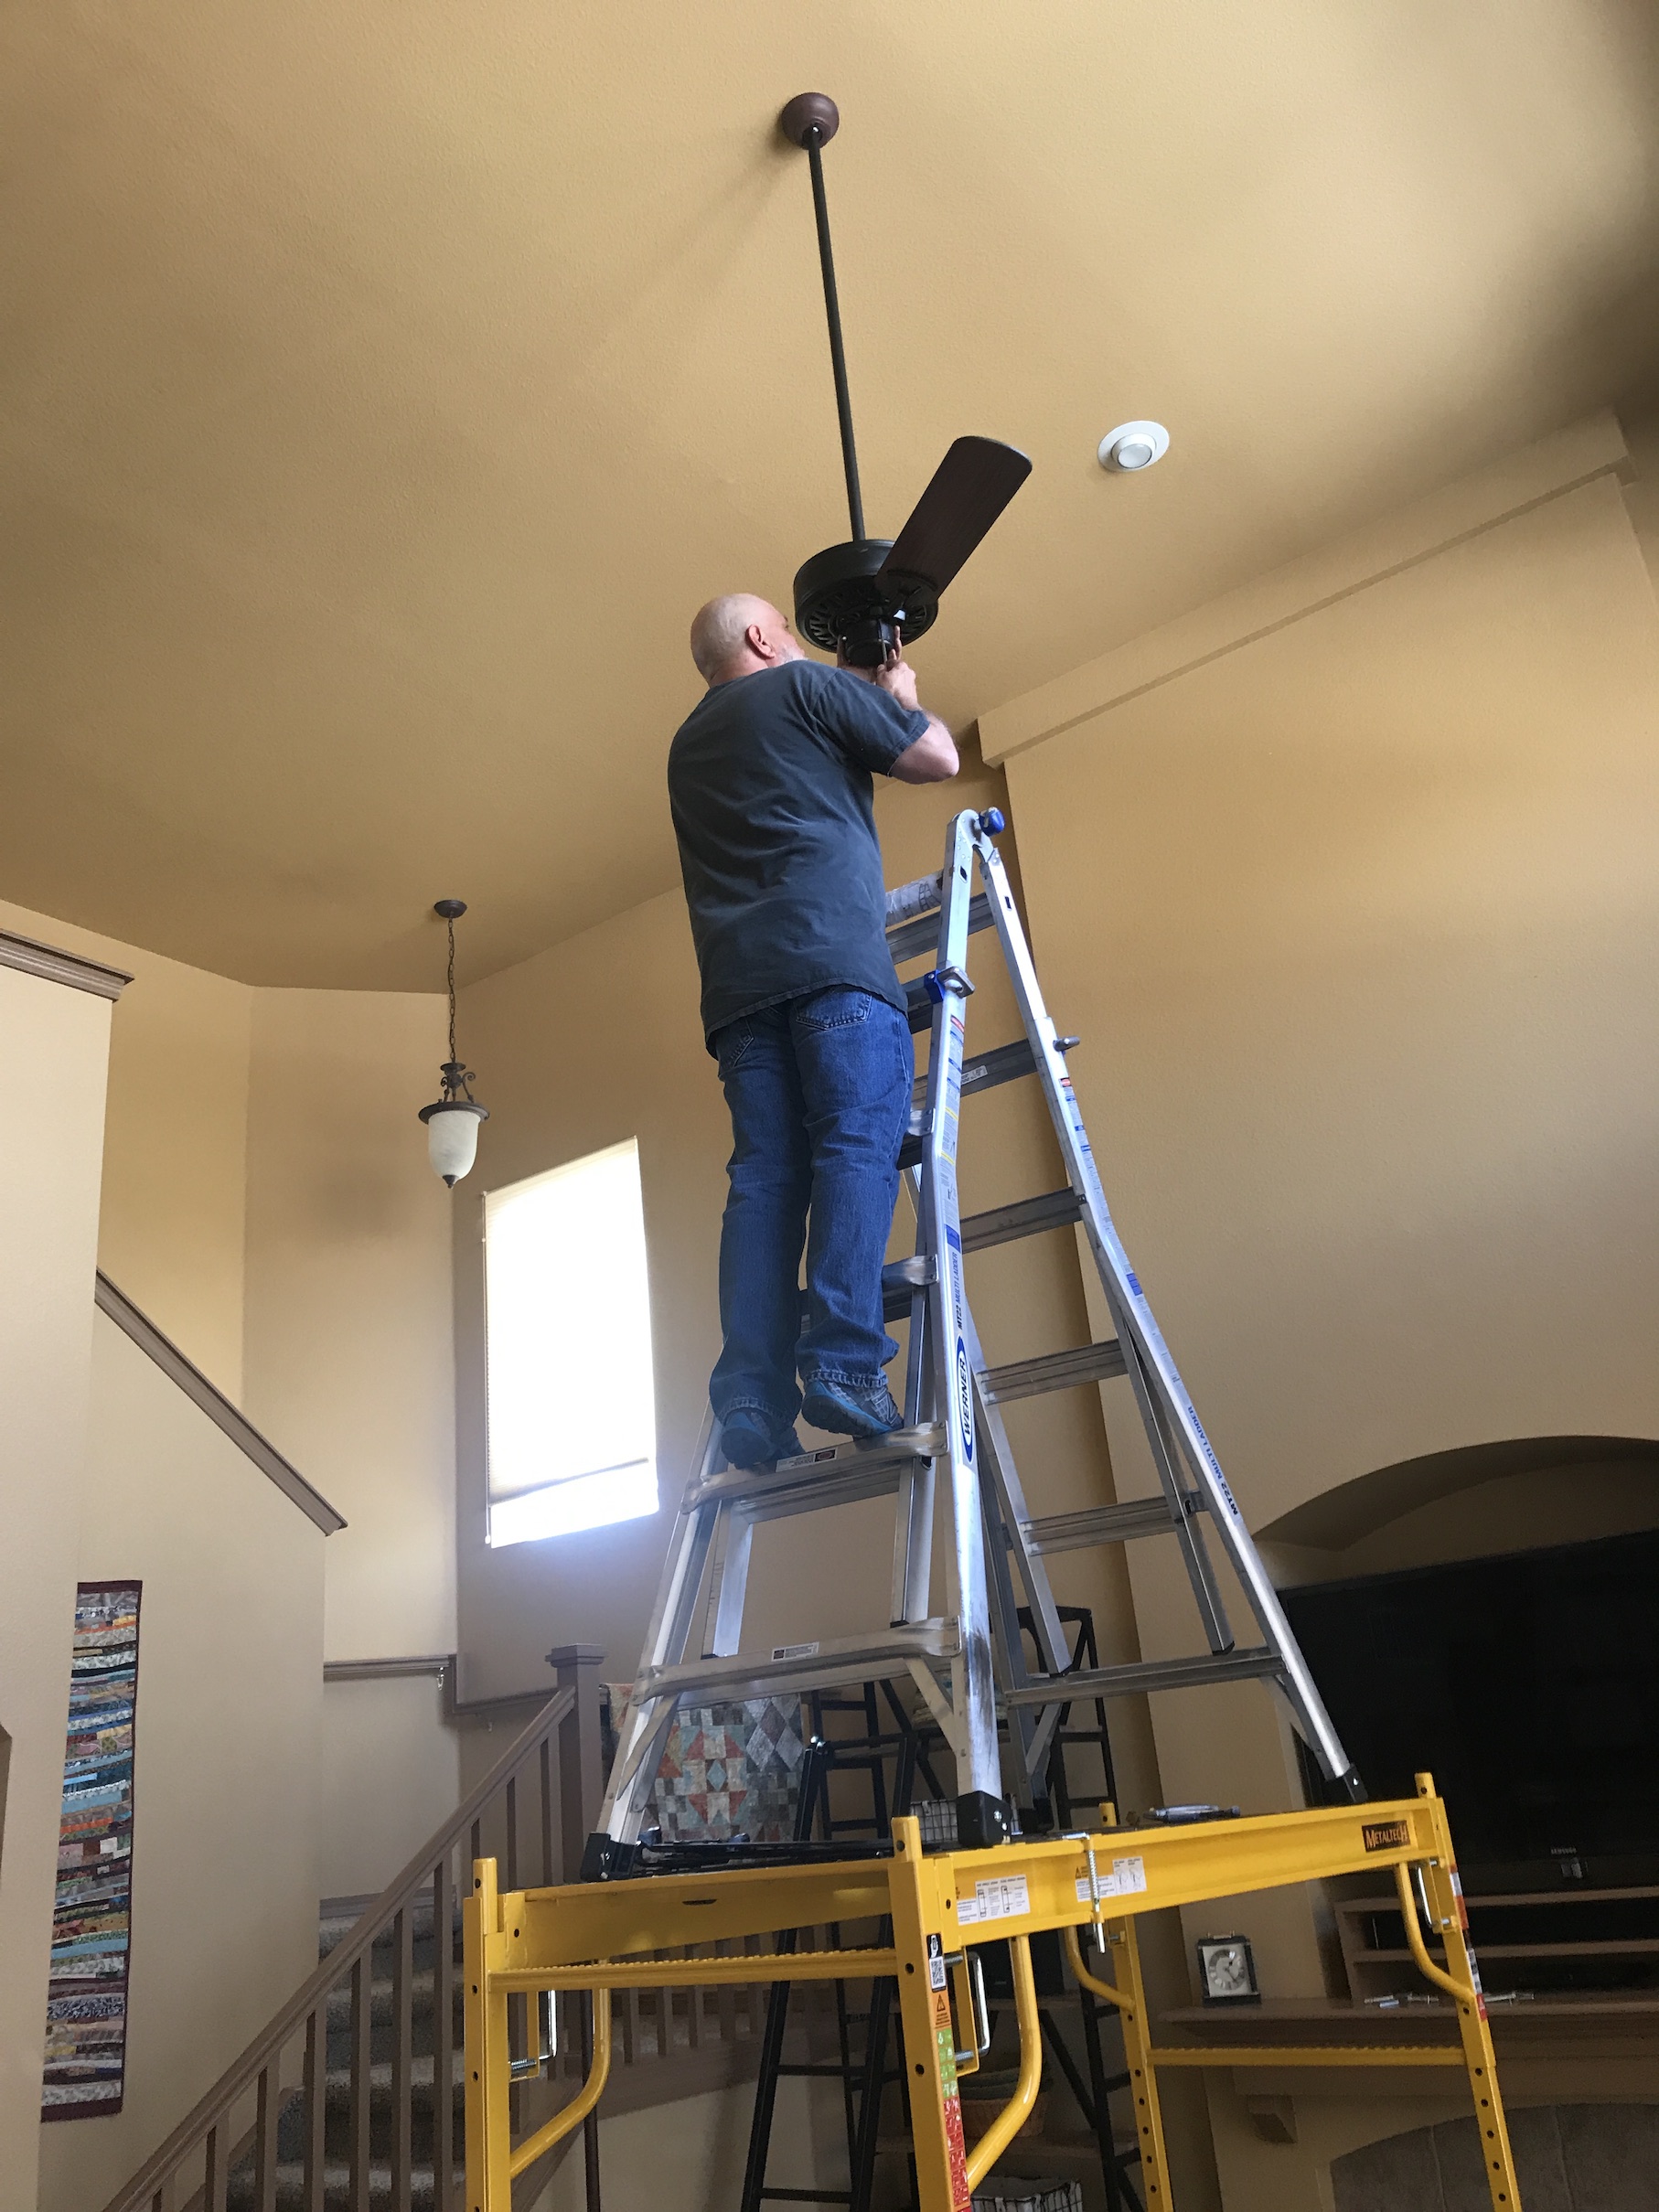 Yes that is a ladder, on top of scaffolding. Looks pretty safe to me (NOT!)
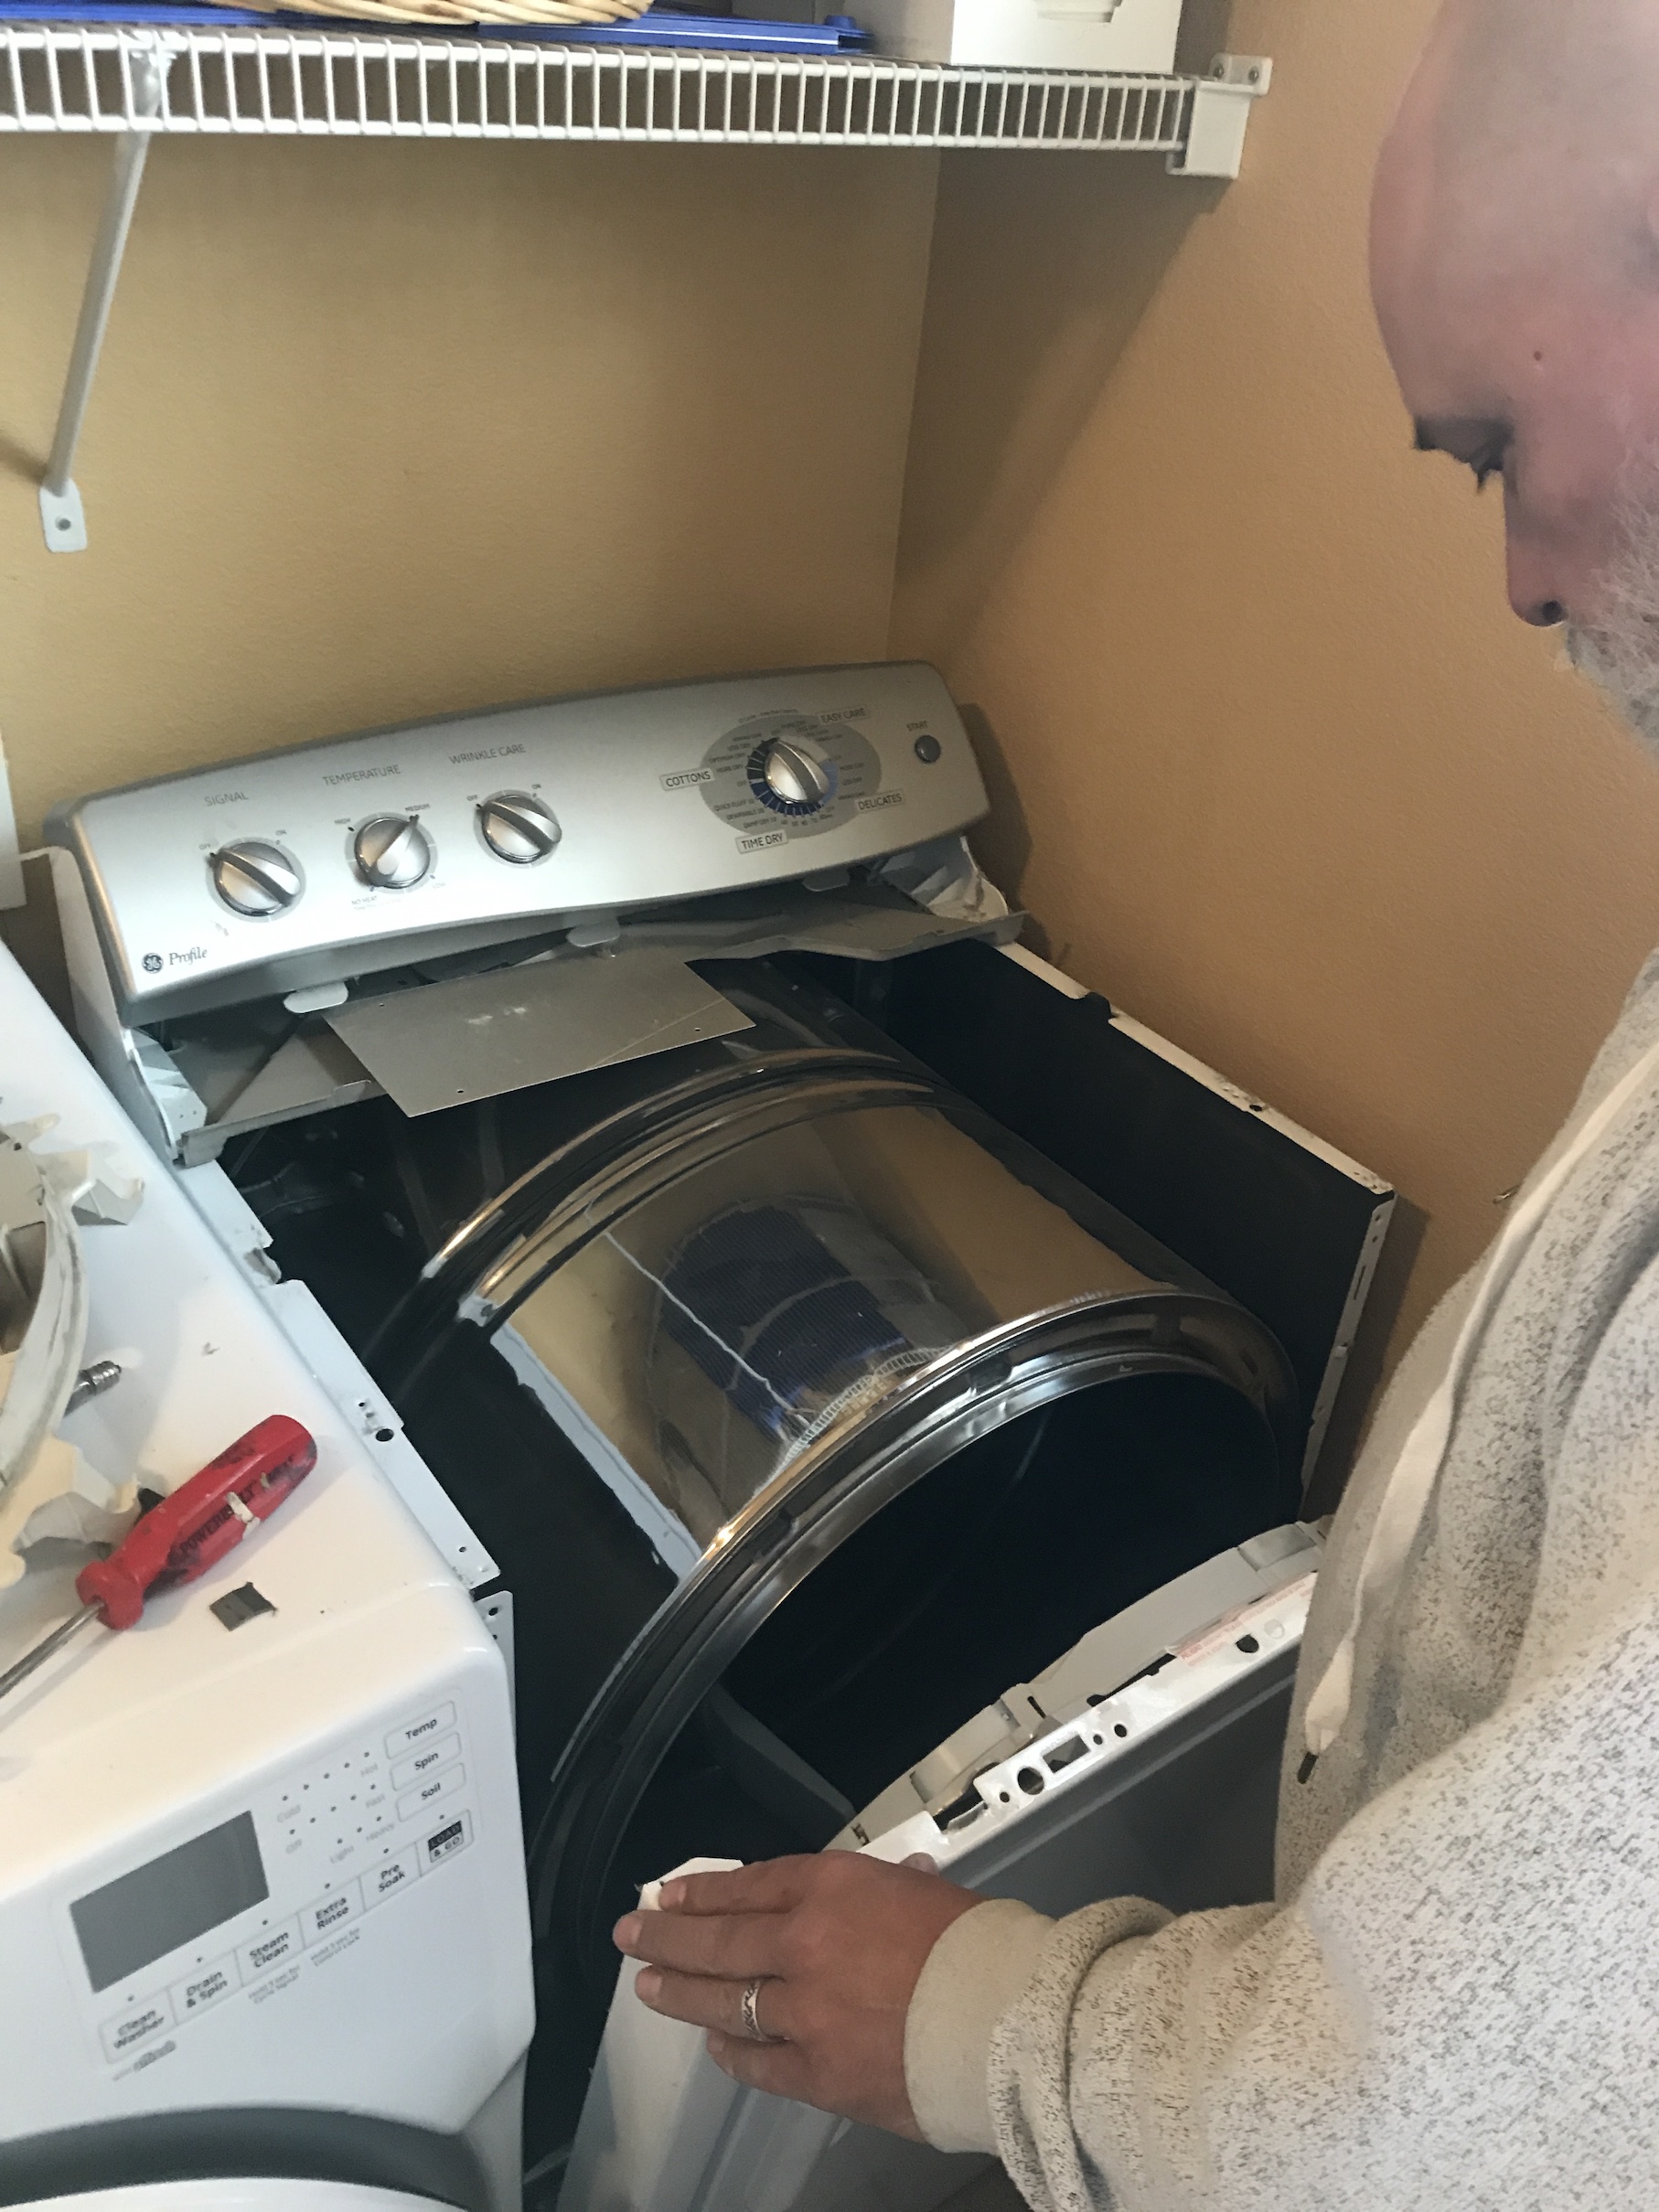 He also completely redid the garage, drywalling it in, painting it and installing shelves:
 He also built bookcases in the front room to create our “home library” as my female human mentioned in this post –
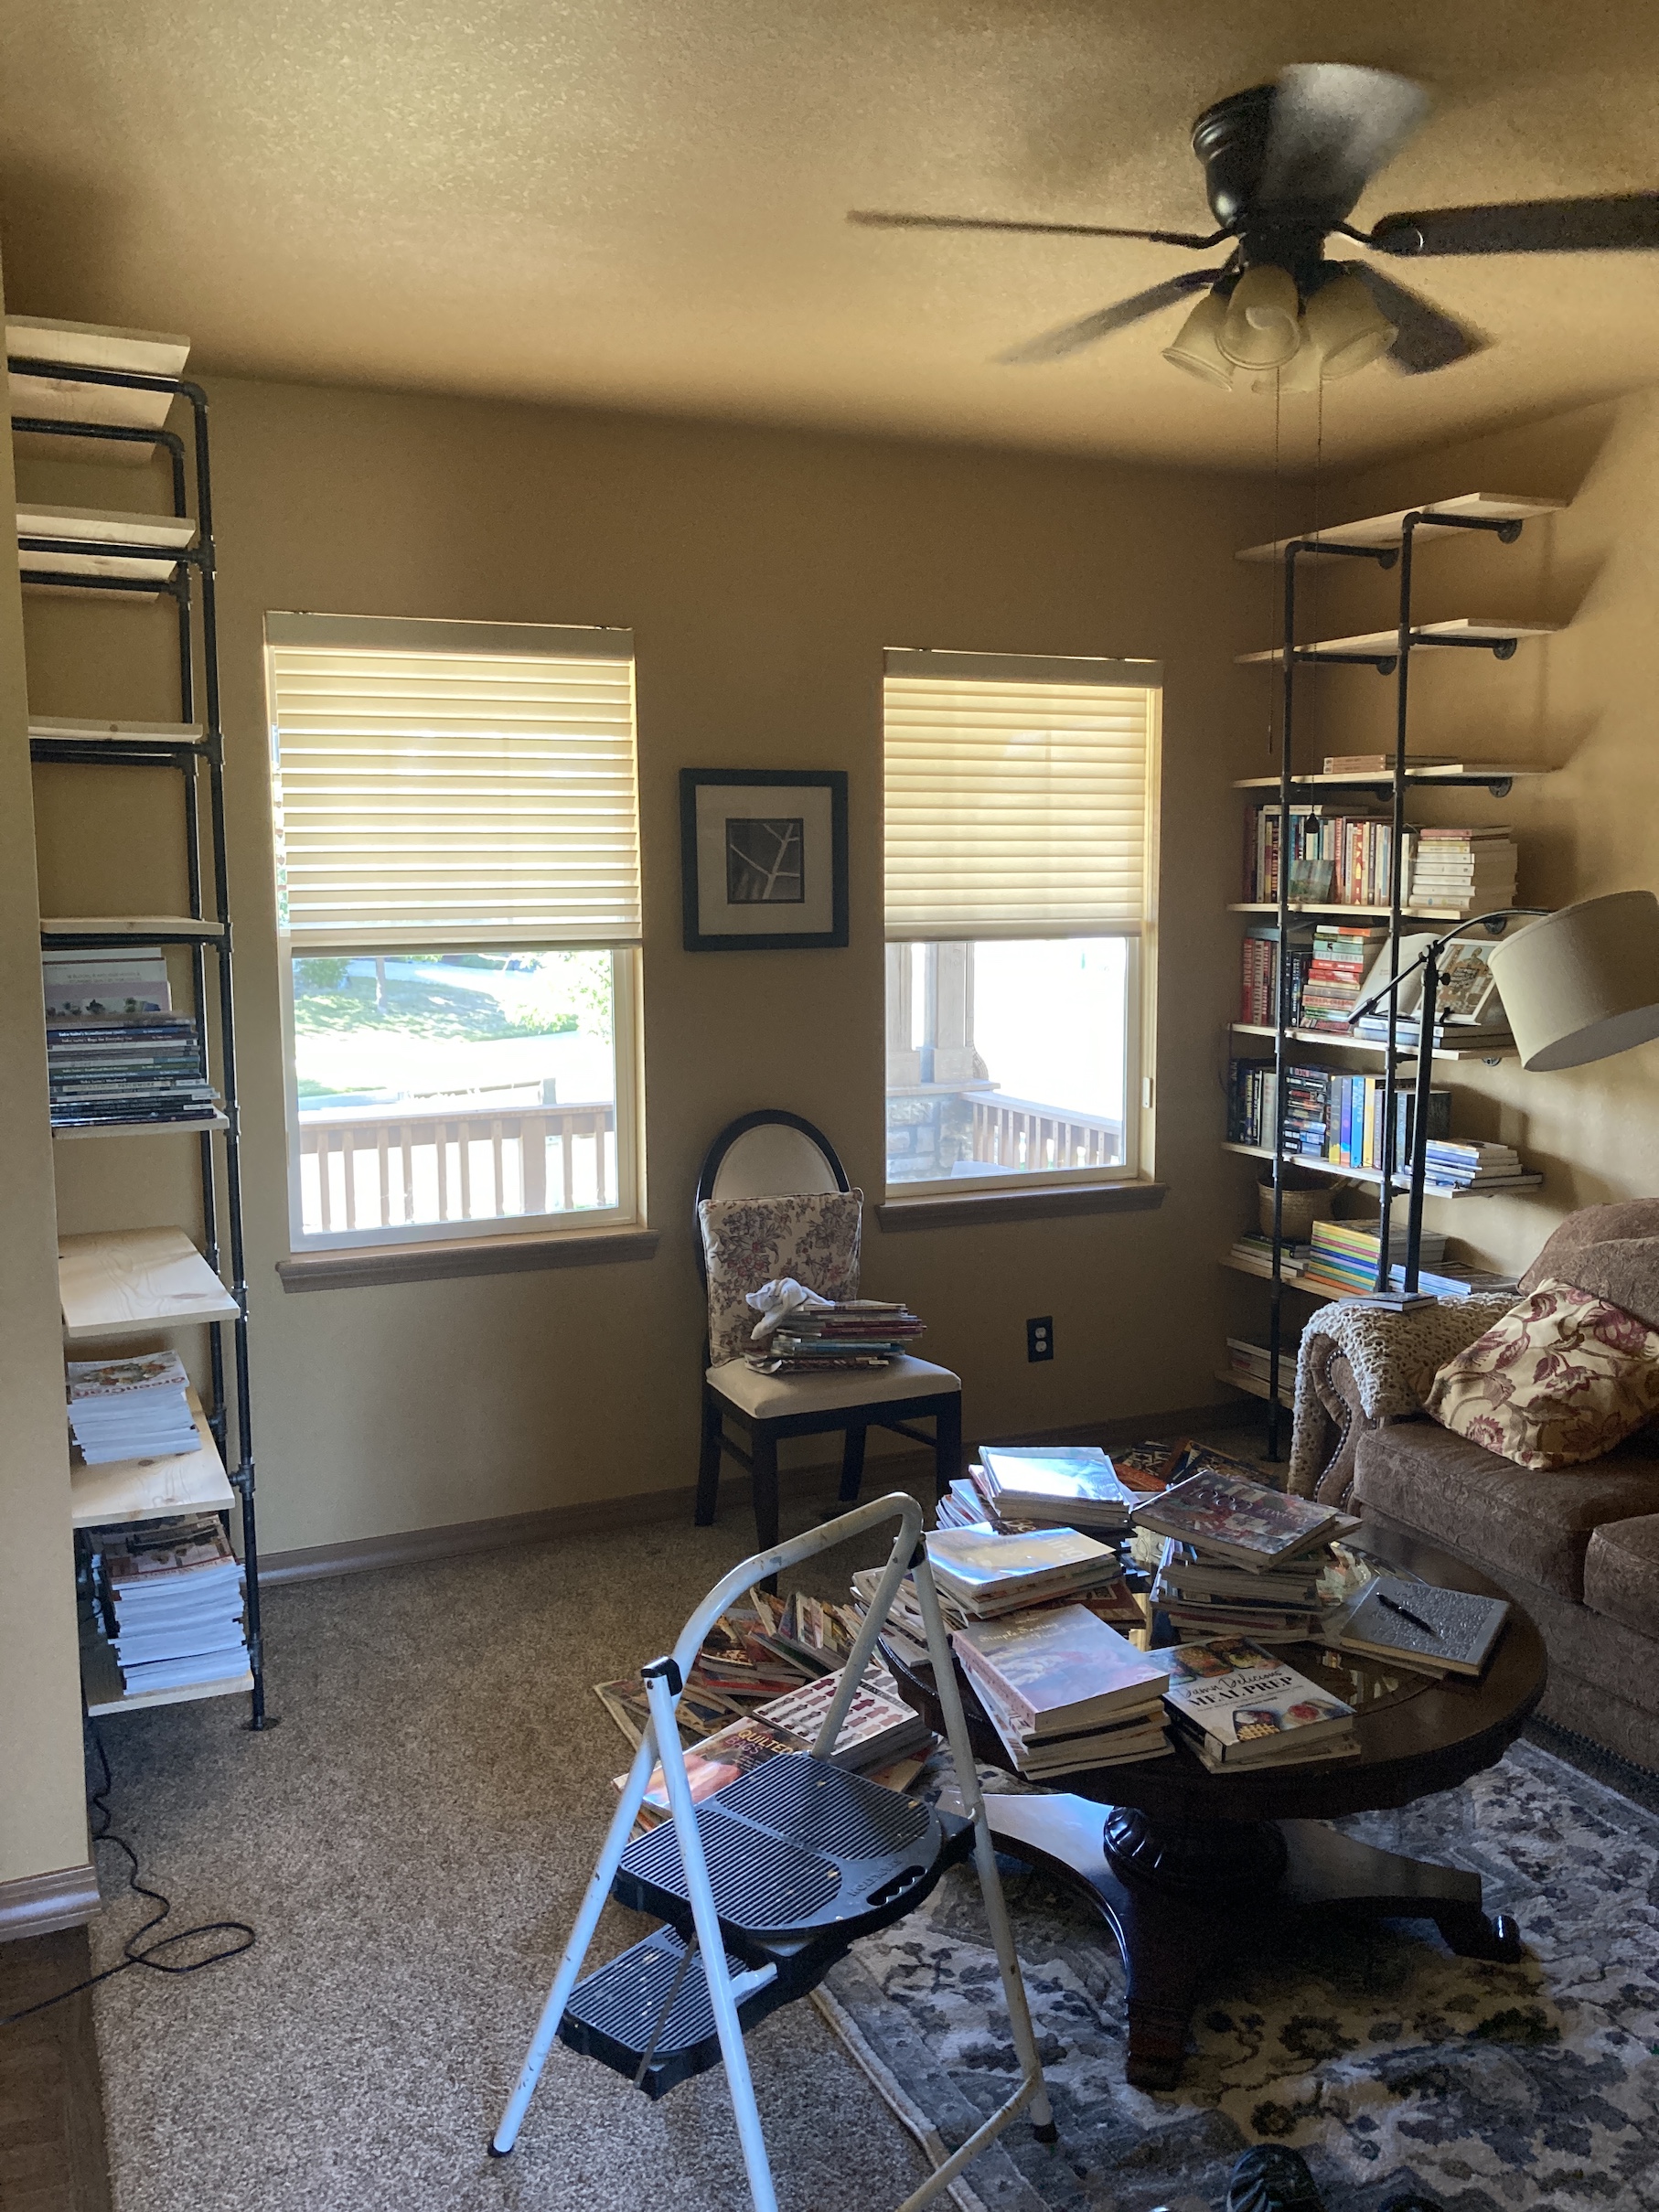
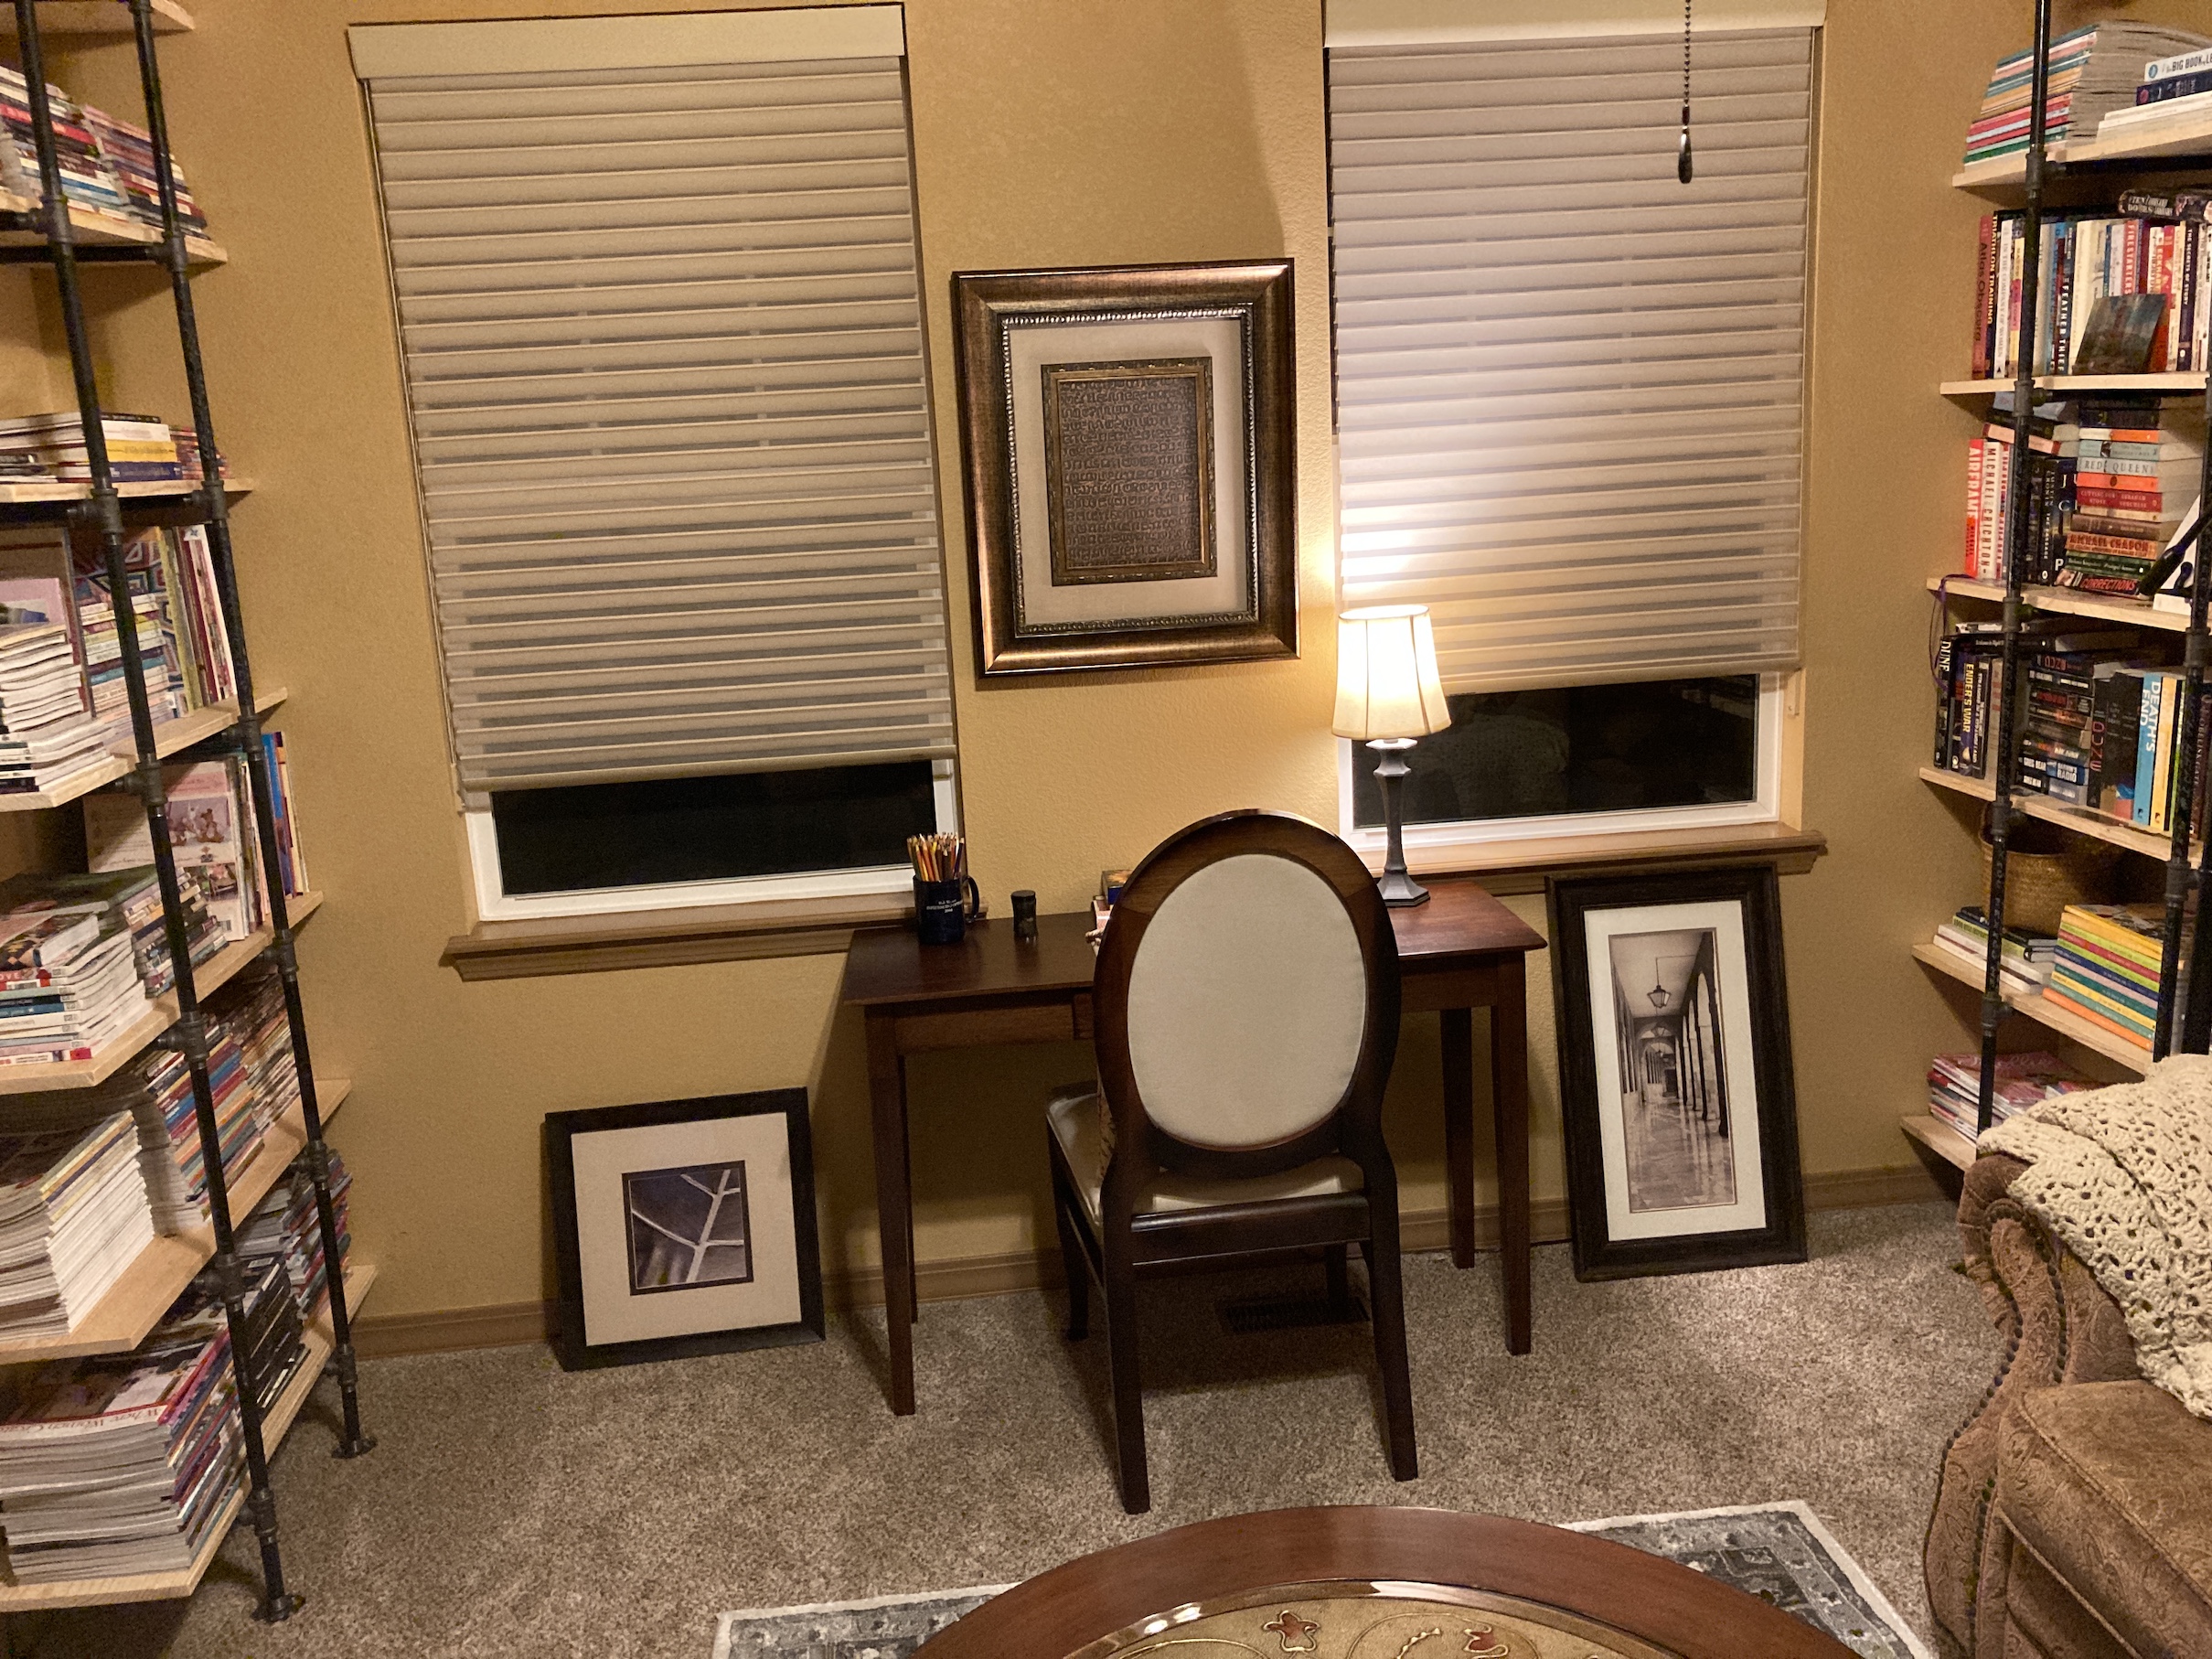 Most recently he added in a shelf behind our living room TV to distract your eye from the fact the flat screen TV is in front on an alcove (circa early 2000s) for a large deep TV. This was my female human’s idea from looking at too much Instagram home decorating feeds!
 I am sure there were a lot more home remodeling projects that occurred over the past four (4) months but this is all I can remember since I was sleeping through many of them.
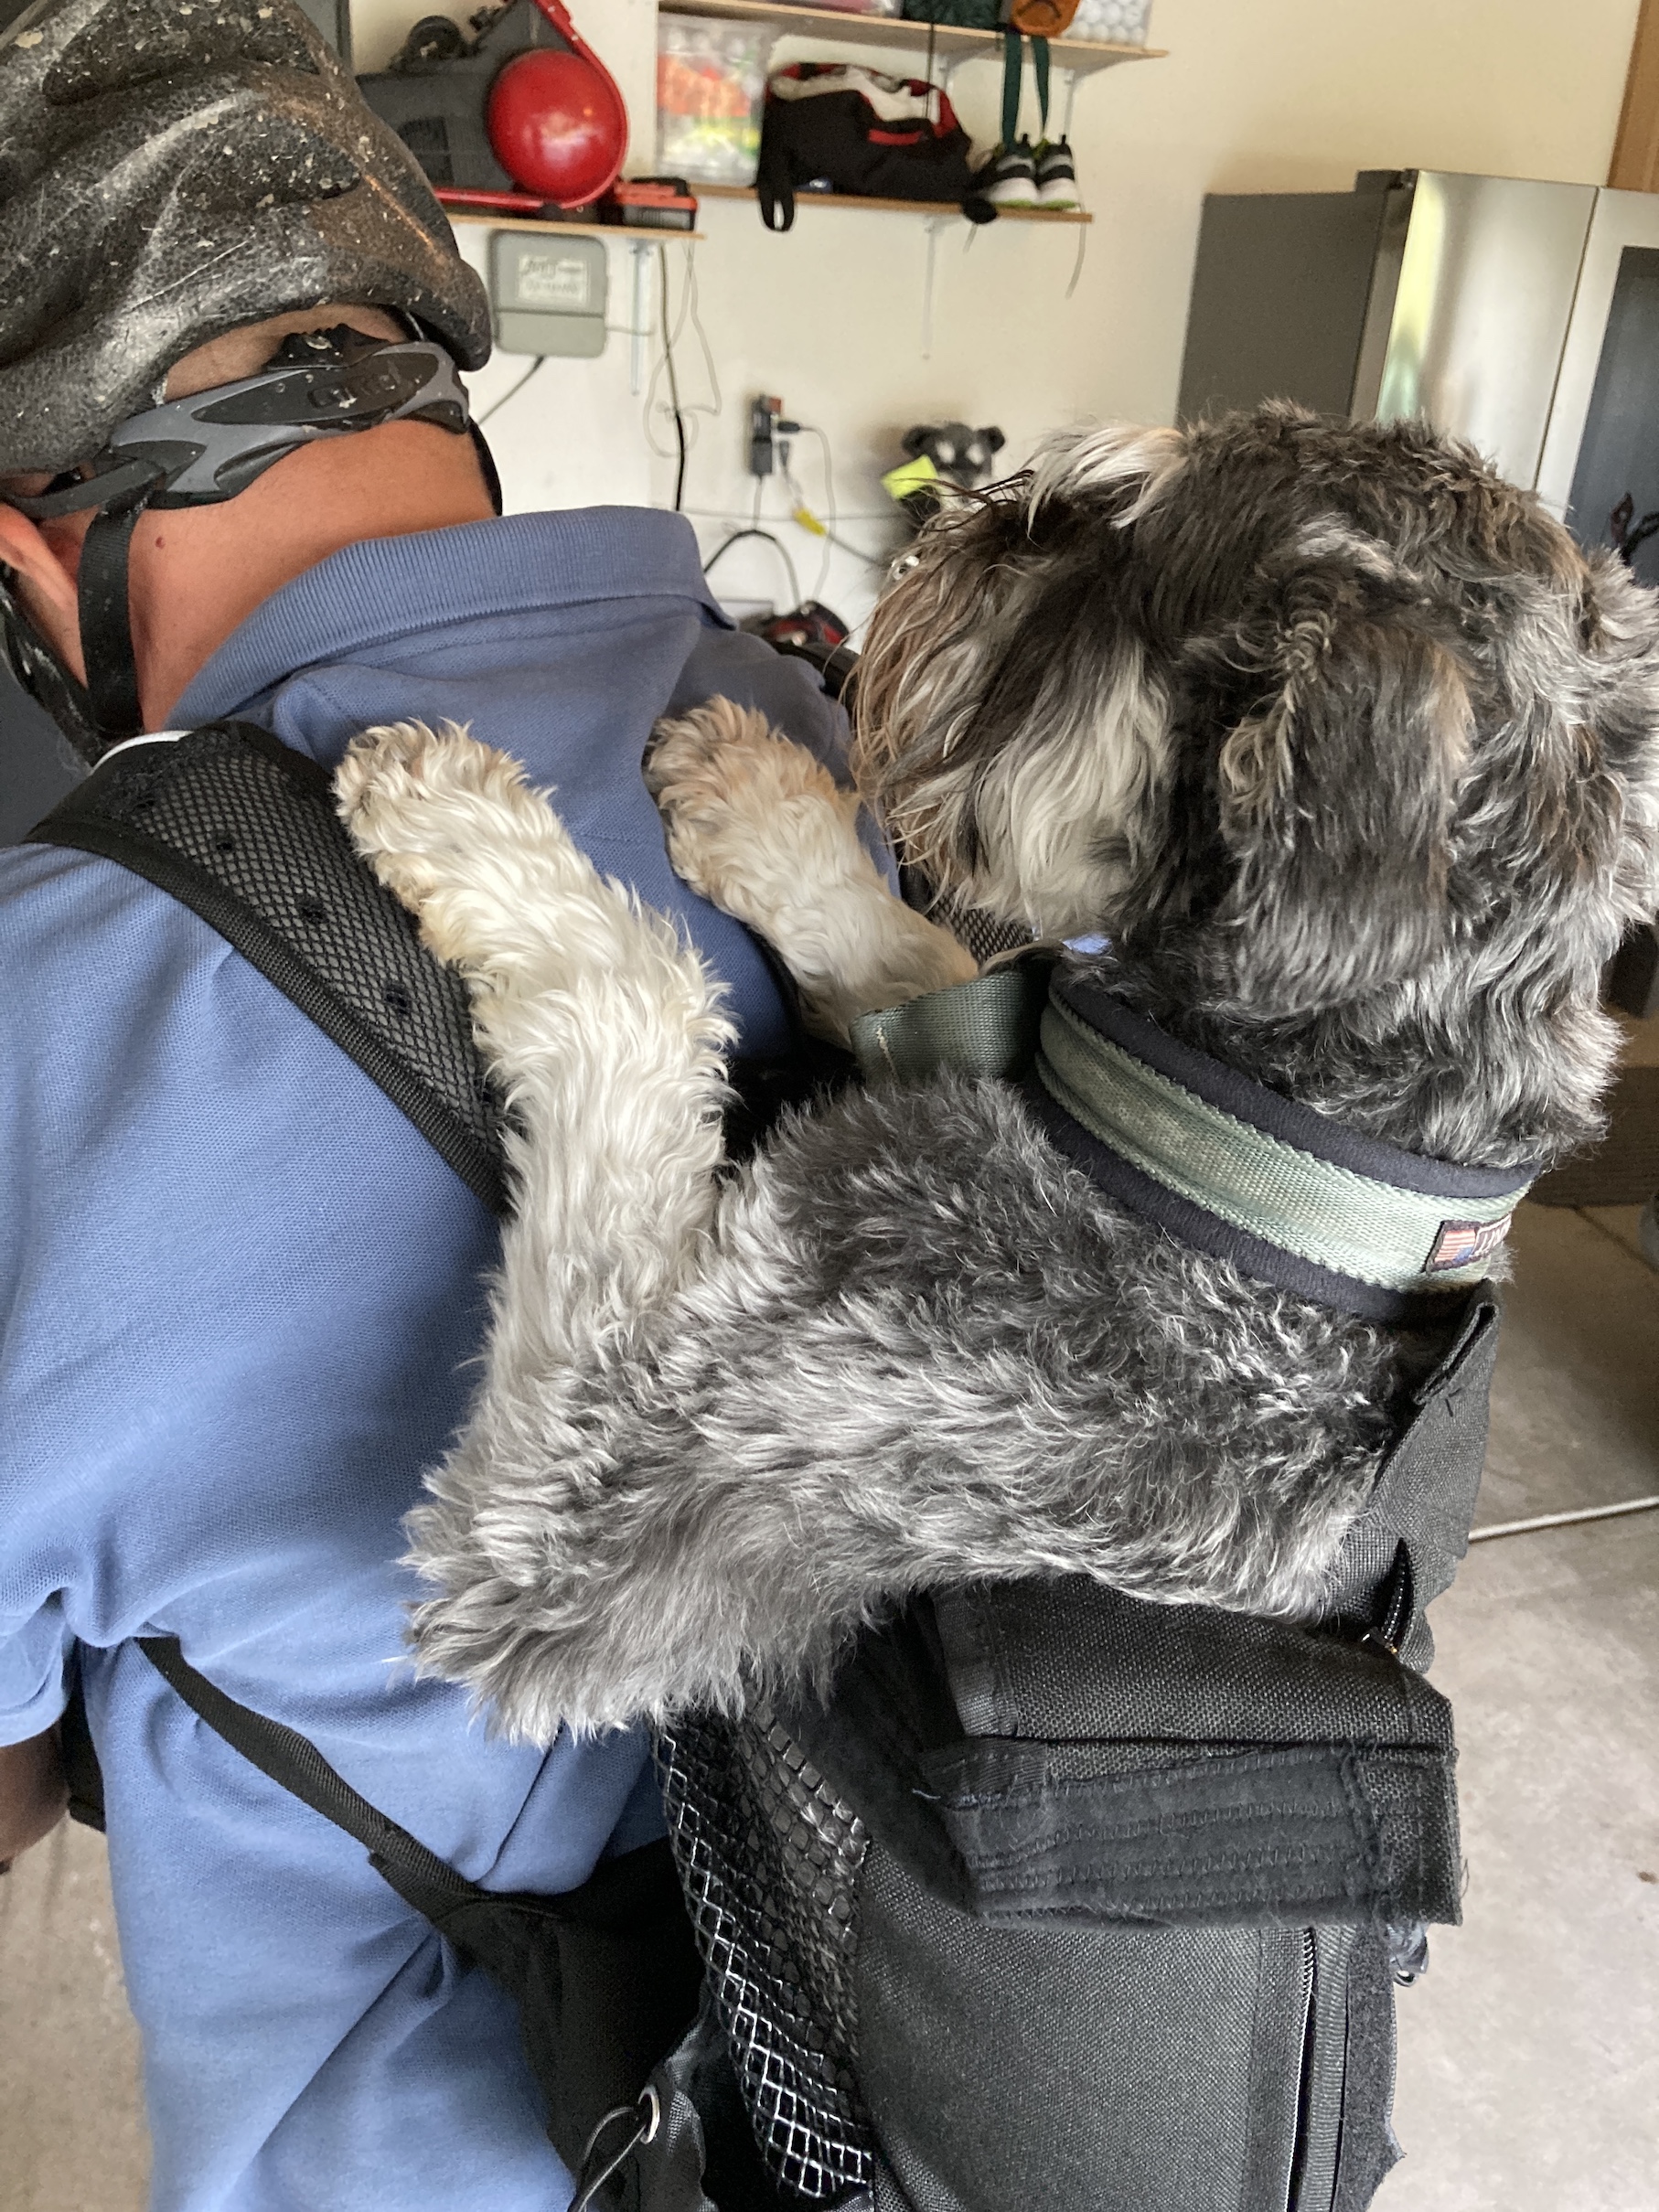
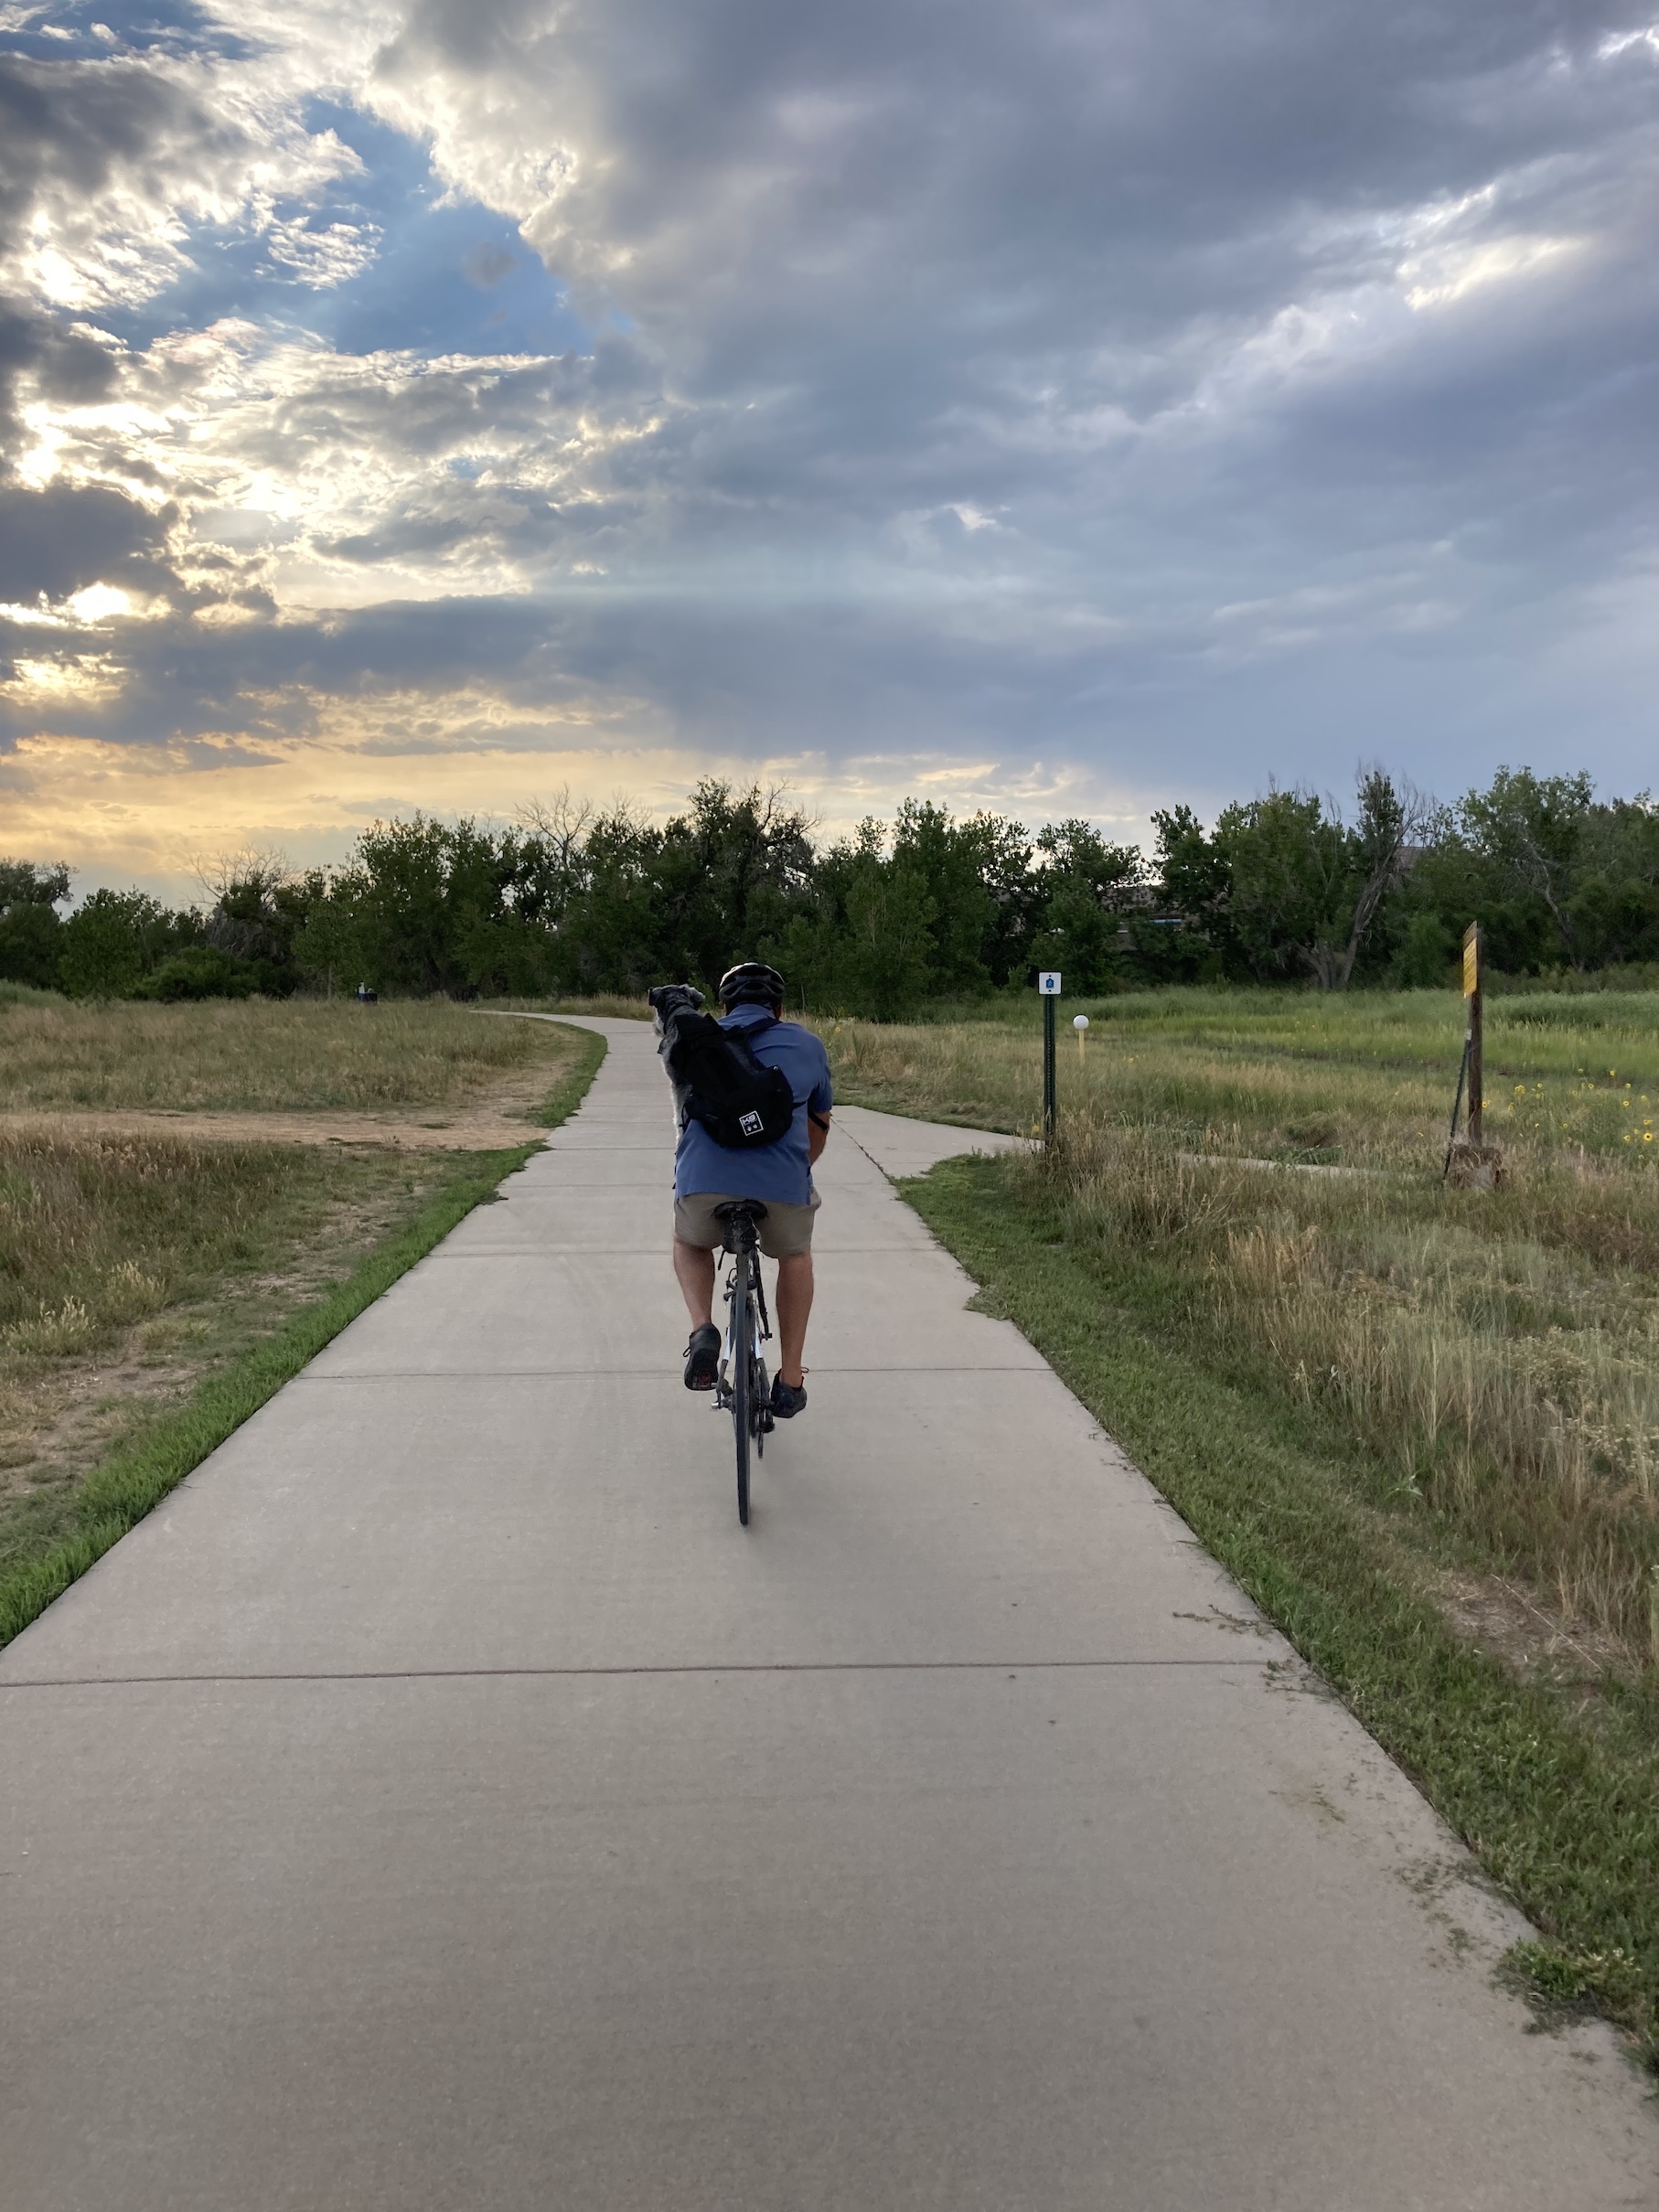


 At home, I took some detail photographs. Of course, the cats found the quilt in no time….The Quarantine Quilt is officially cat approved!!
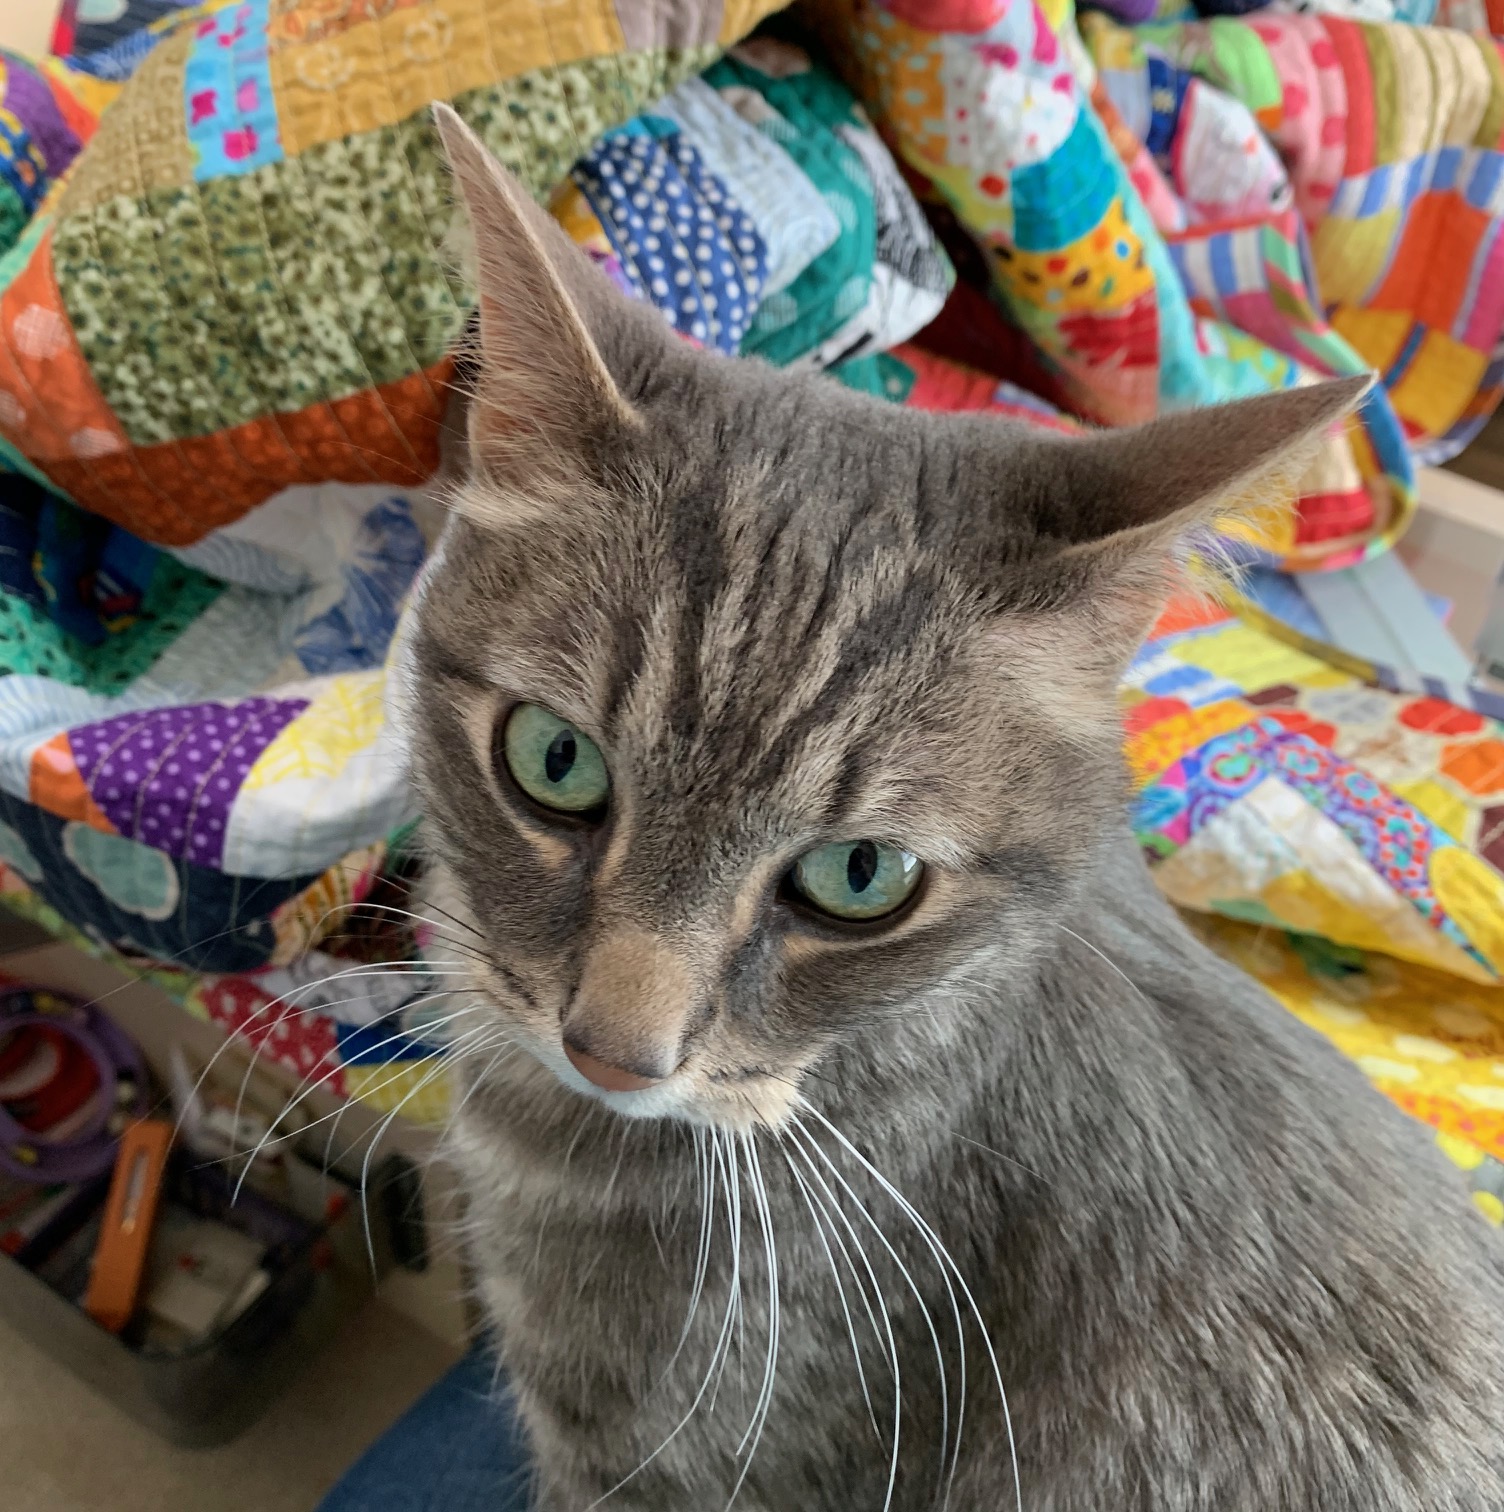
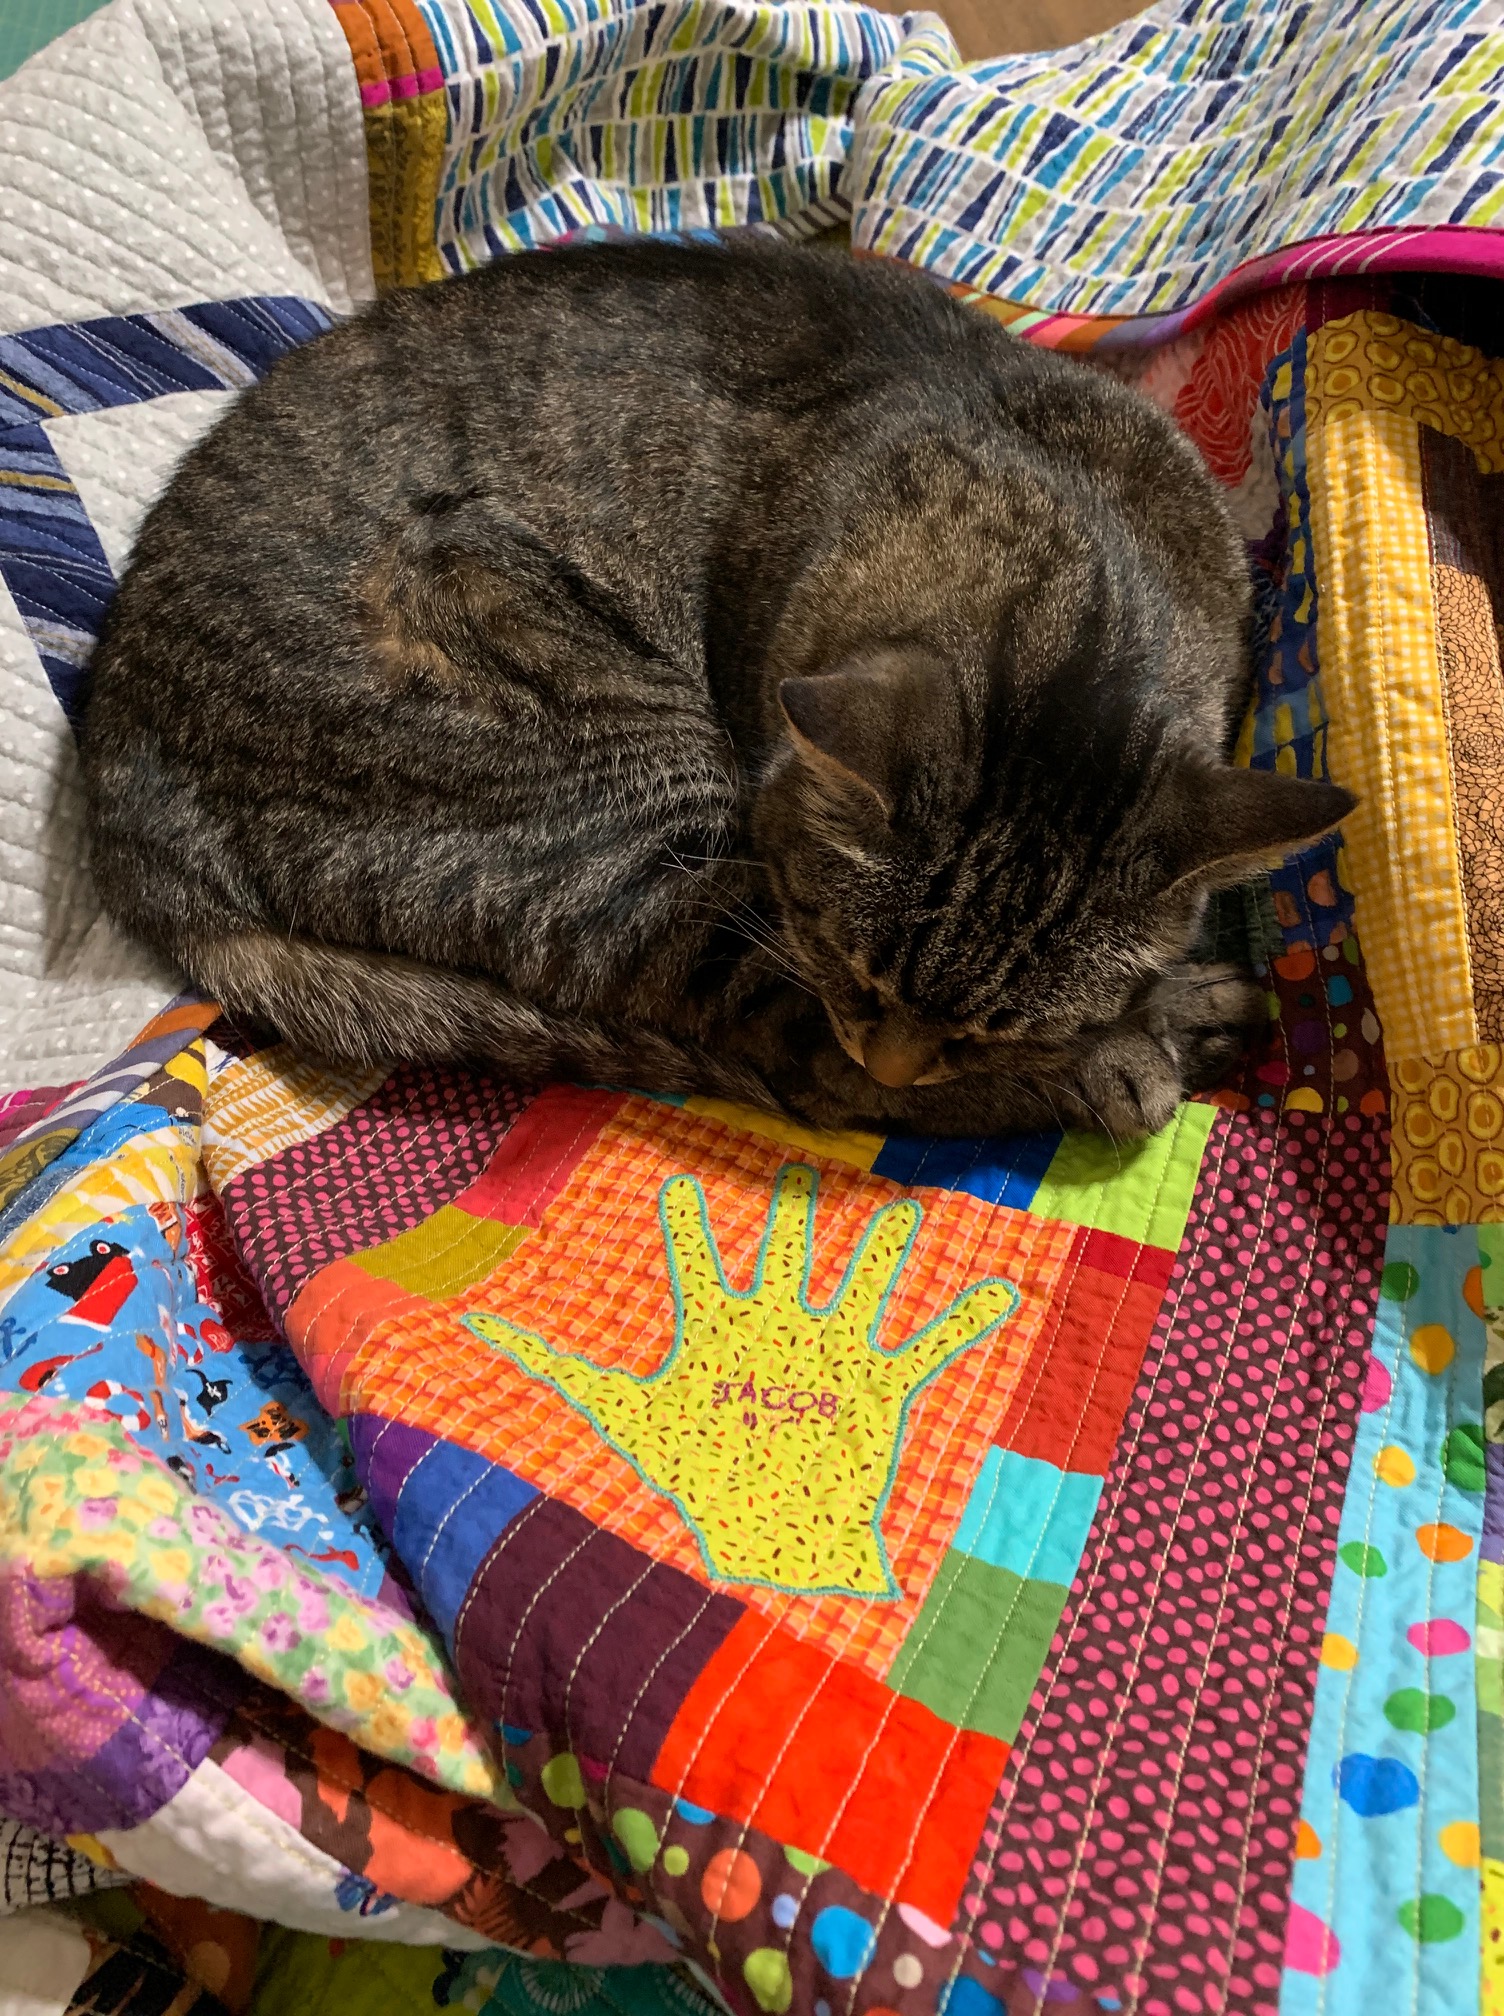 Let’s start with the appliquéd hand blocks. I put The Boys’ hands in the middle, with the adults’ hands on the four corners. It’s symbolic on purpose: the adults are looking after the kids.
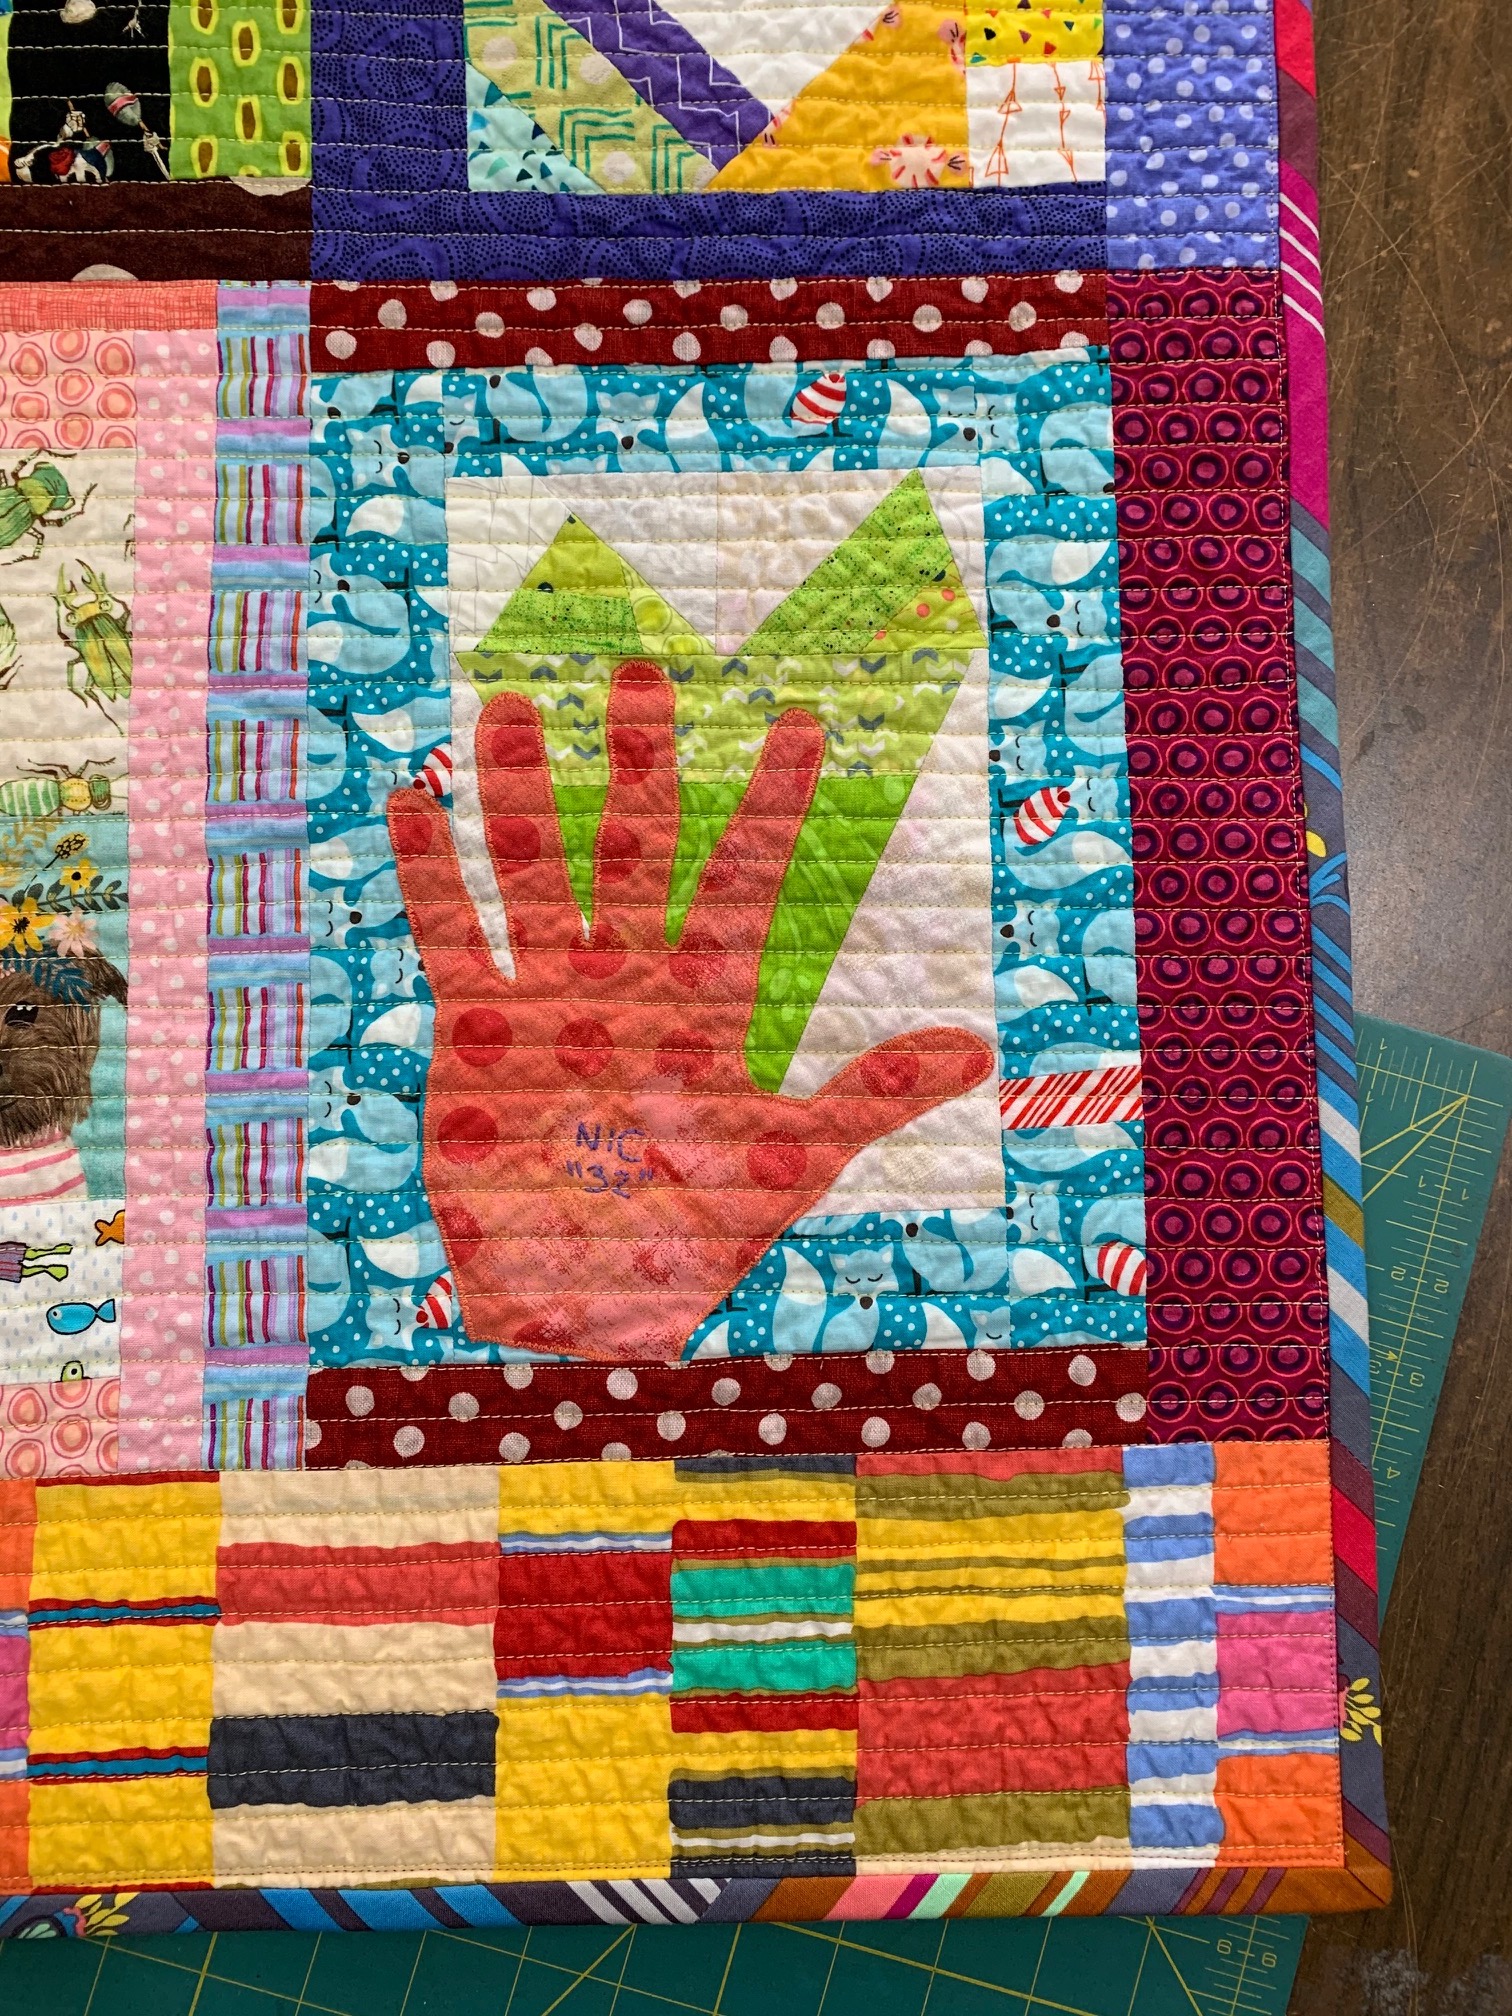
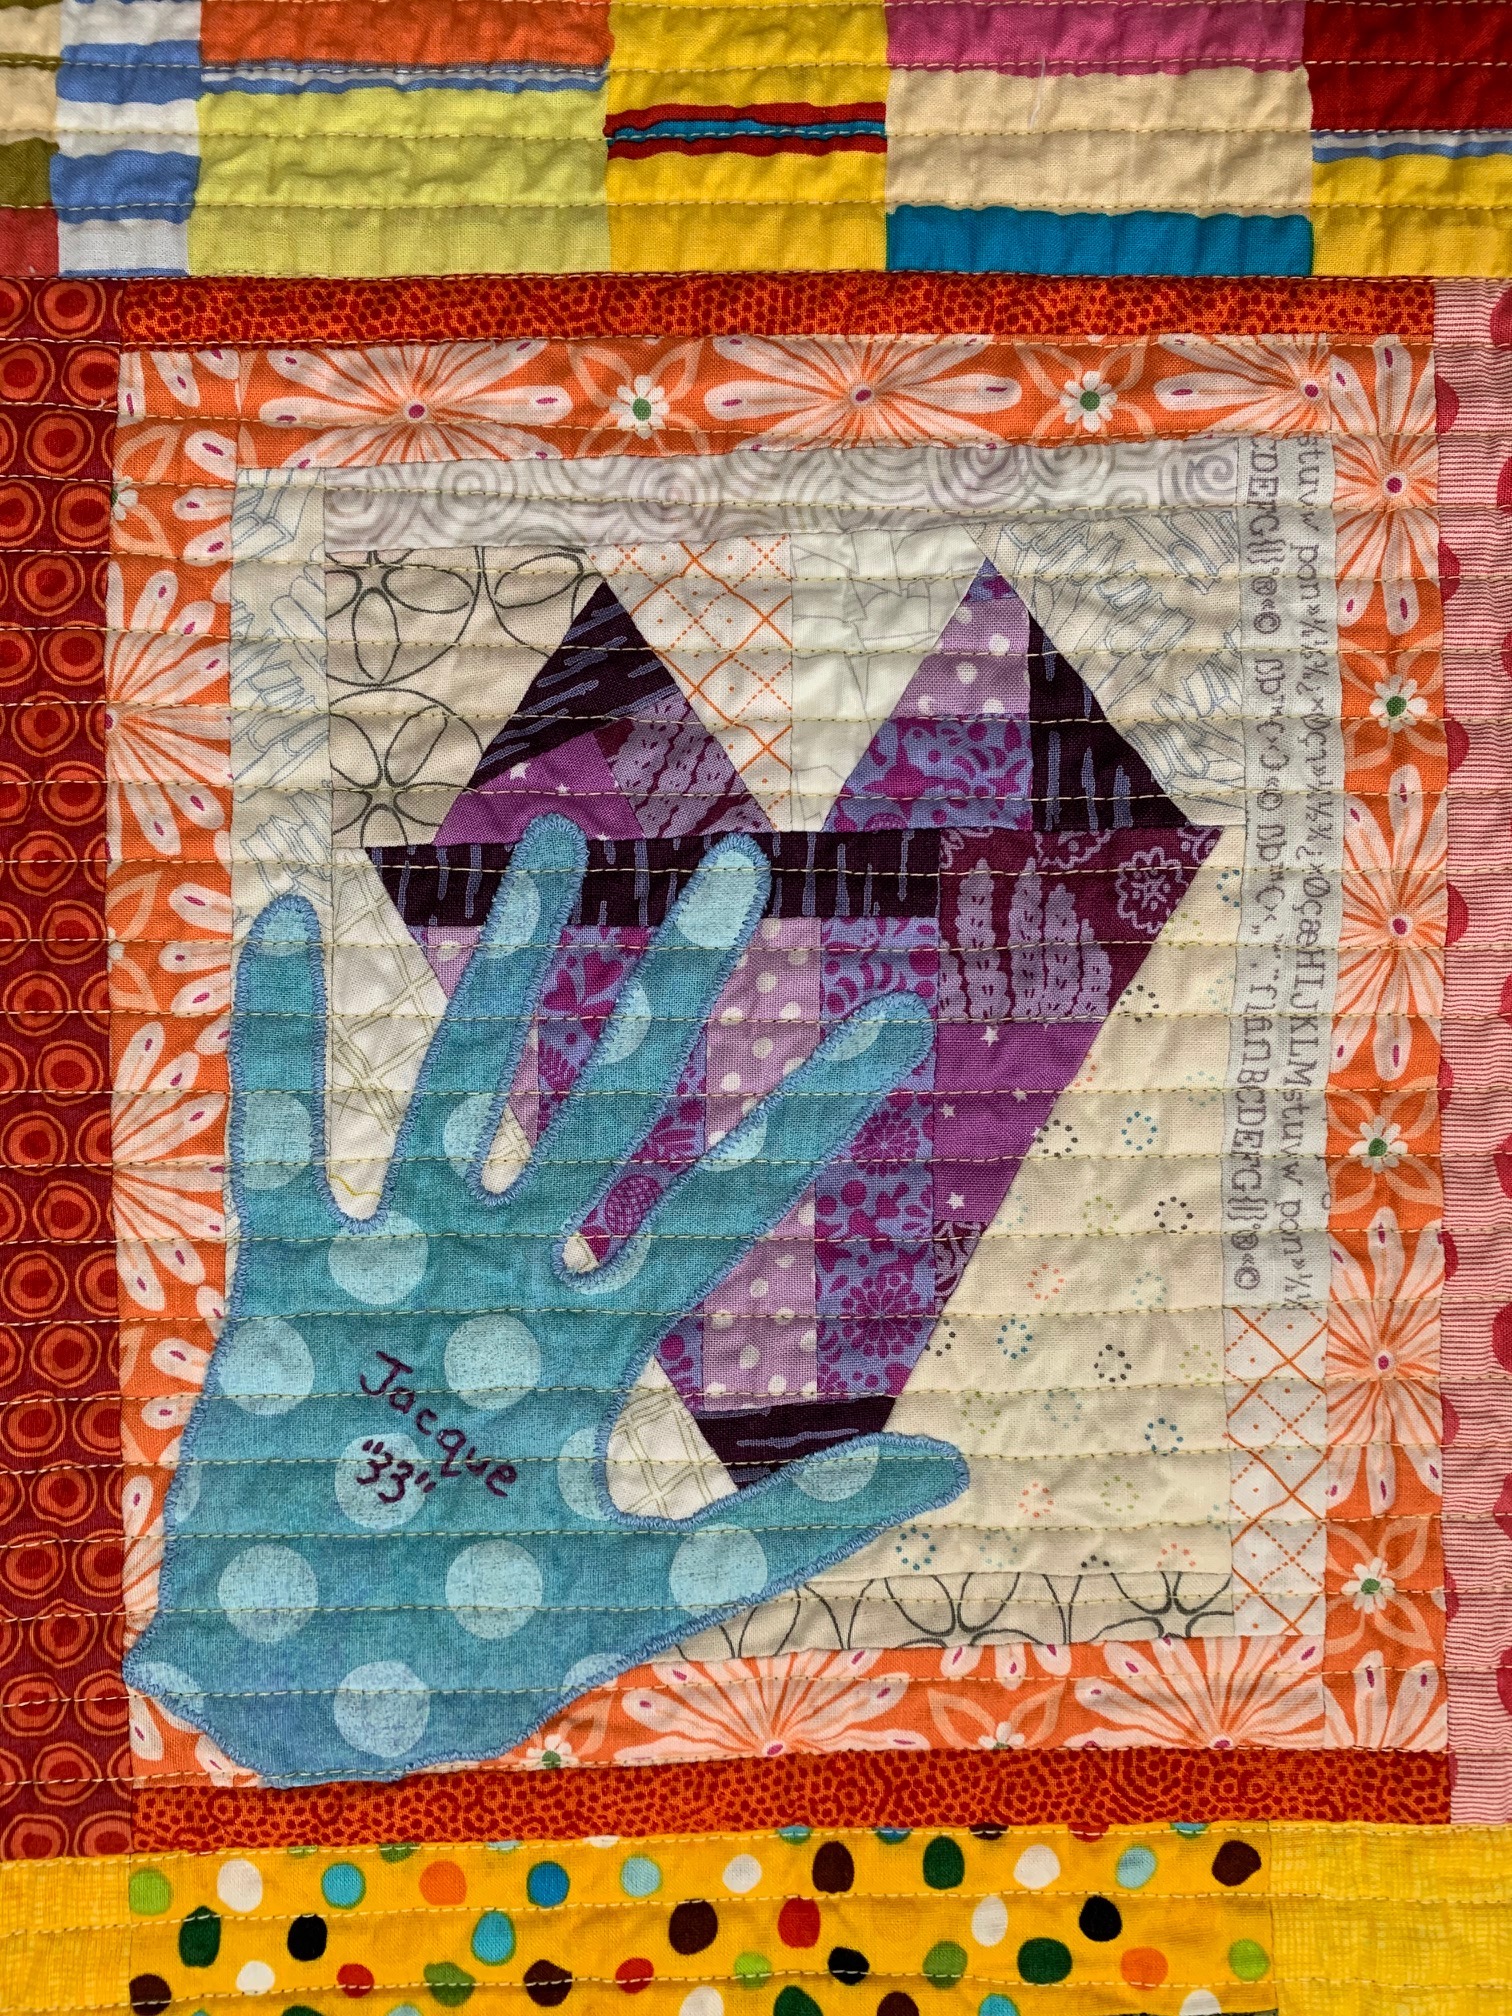
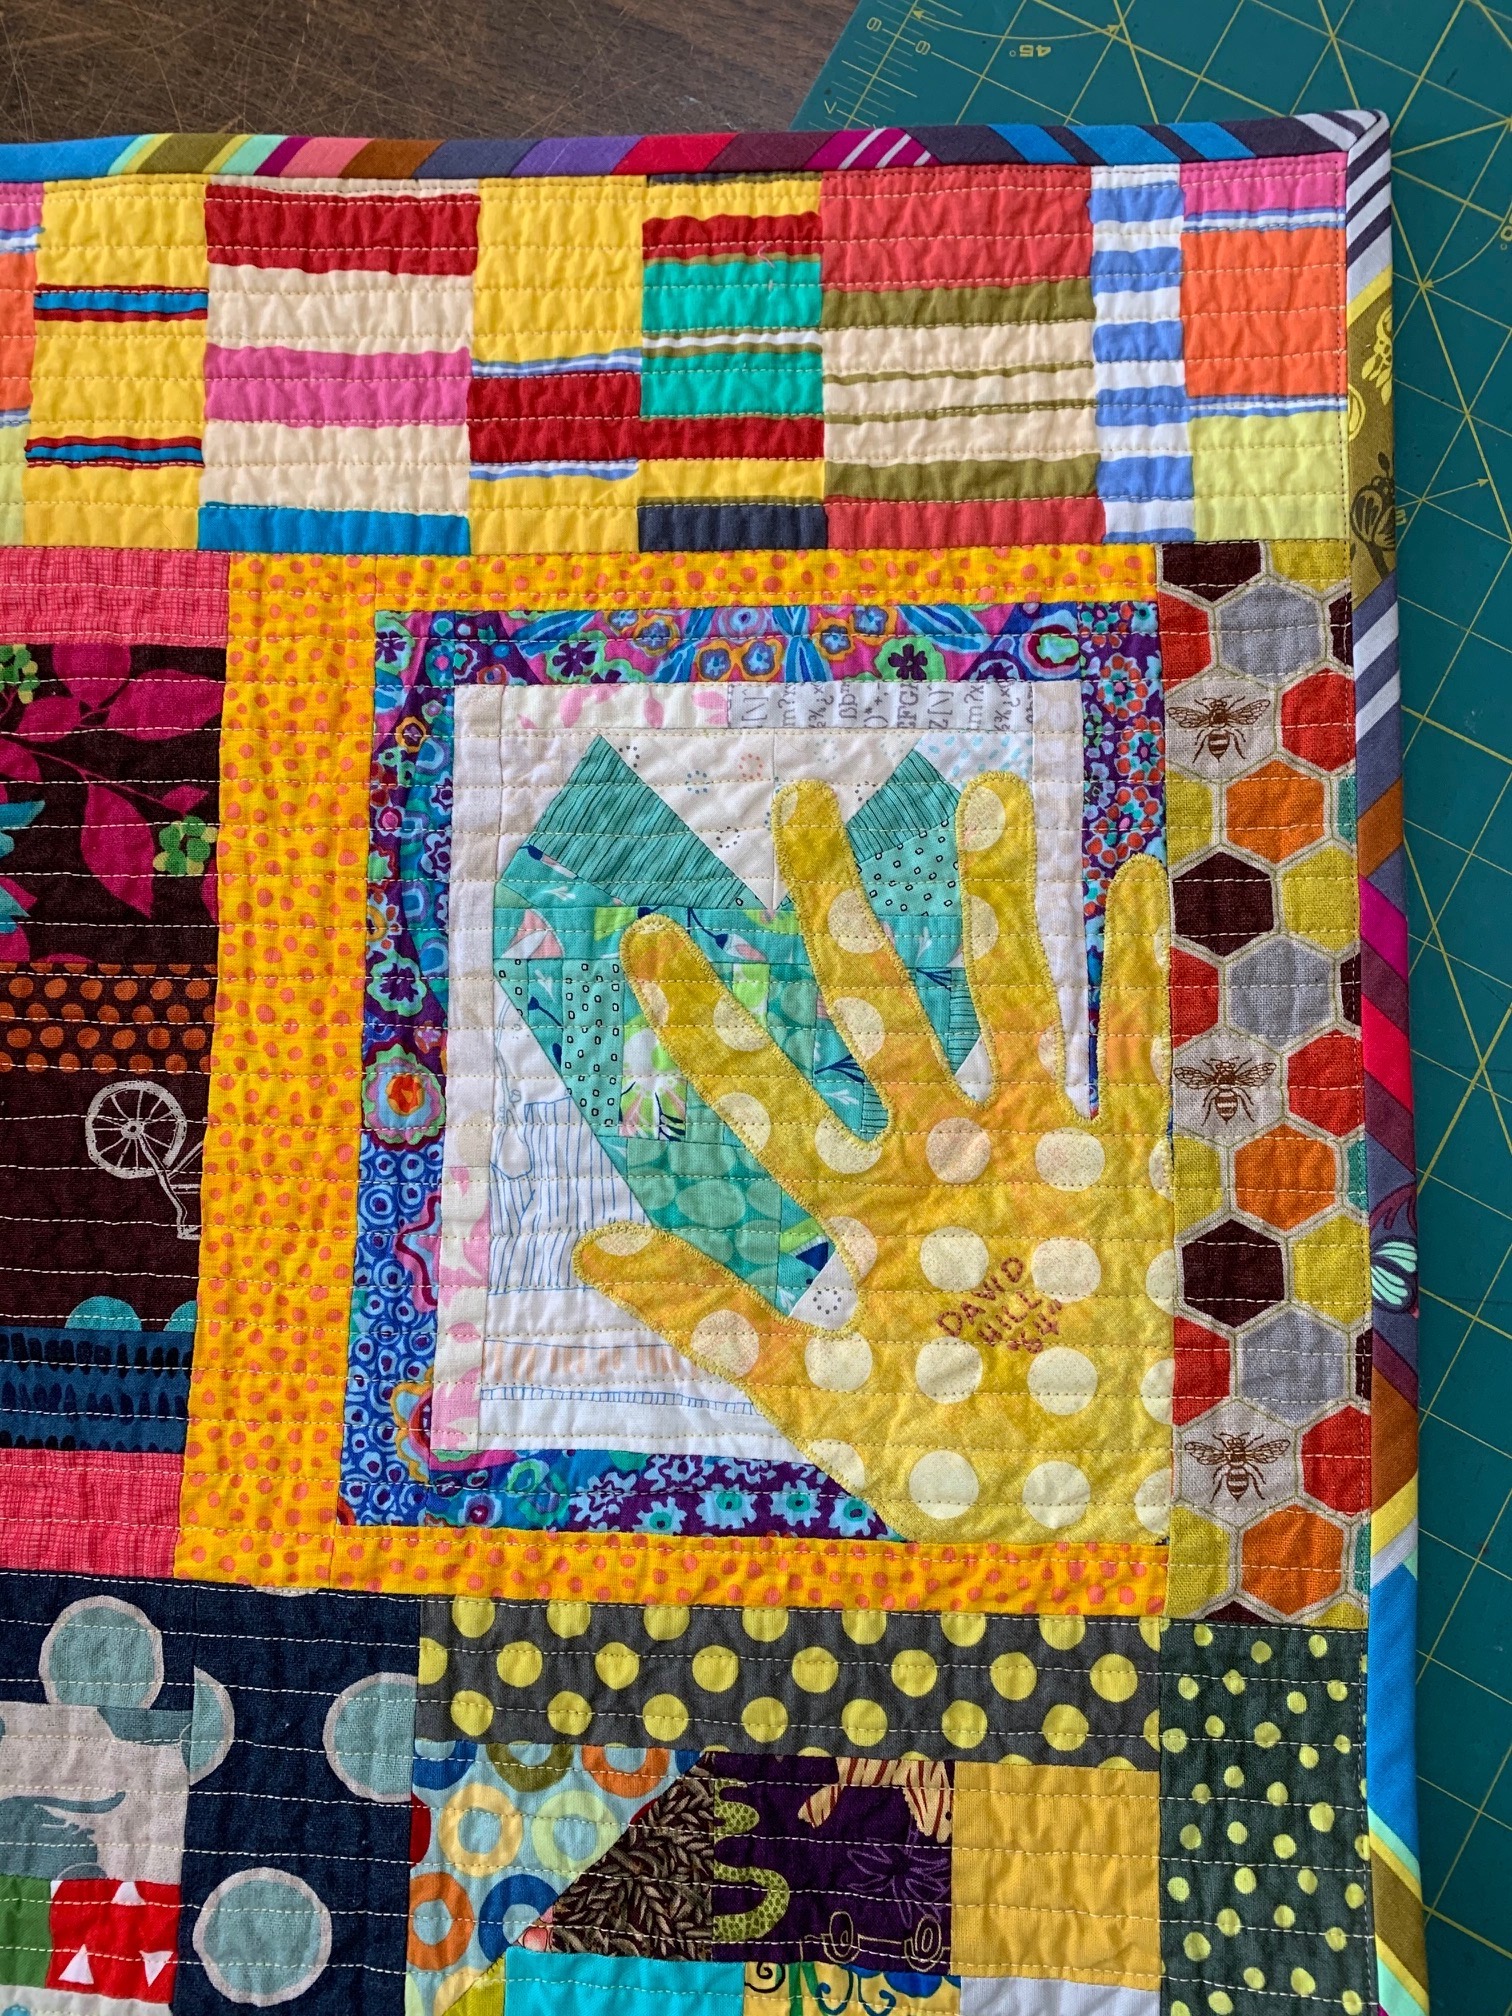
 Here are a few more detail photographs of the quilt front:
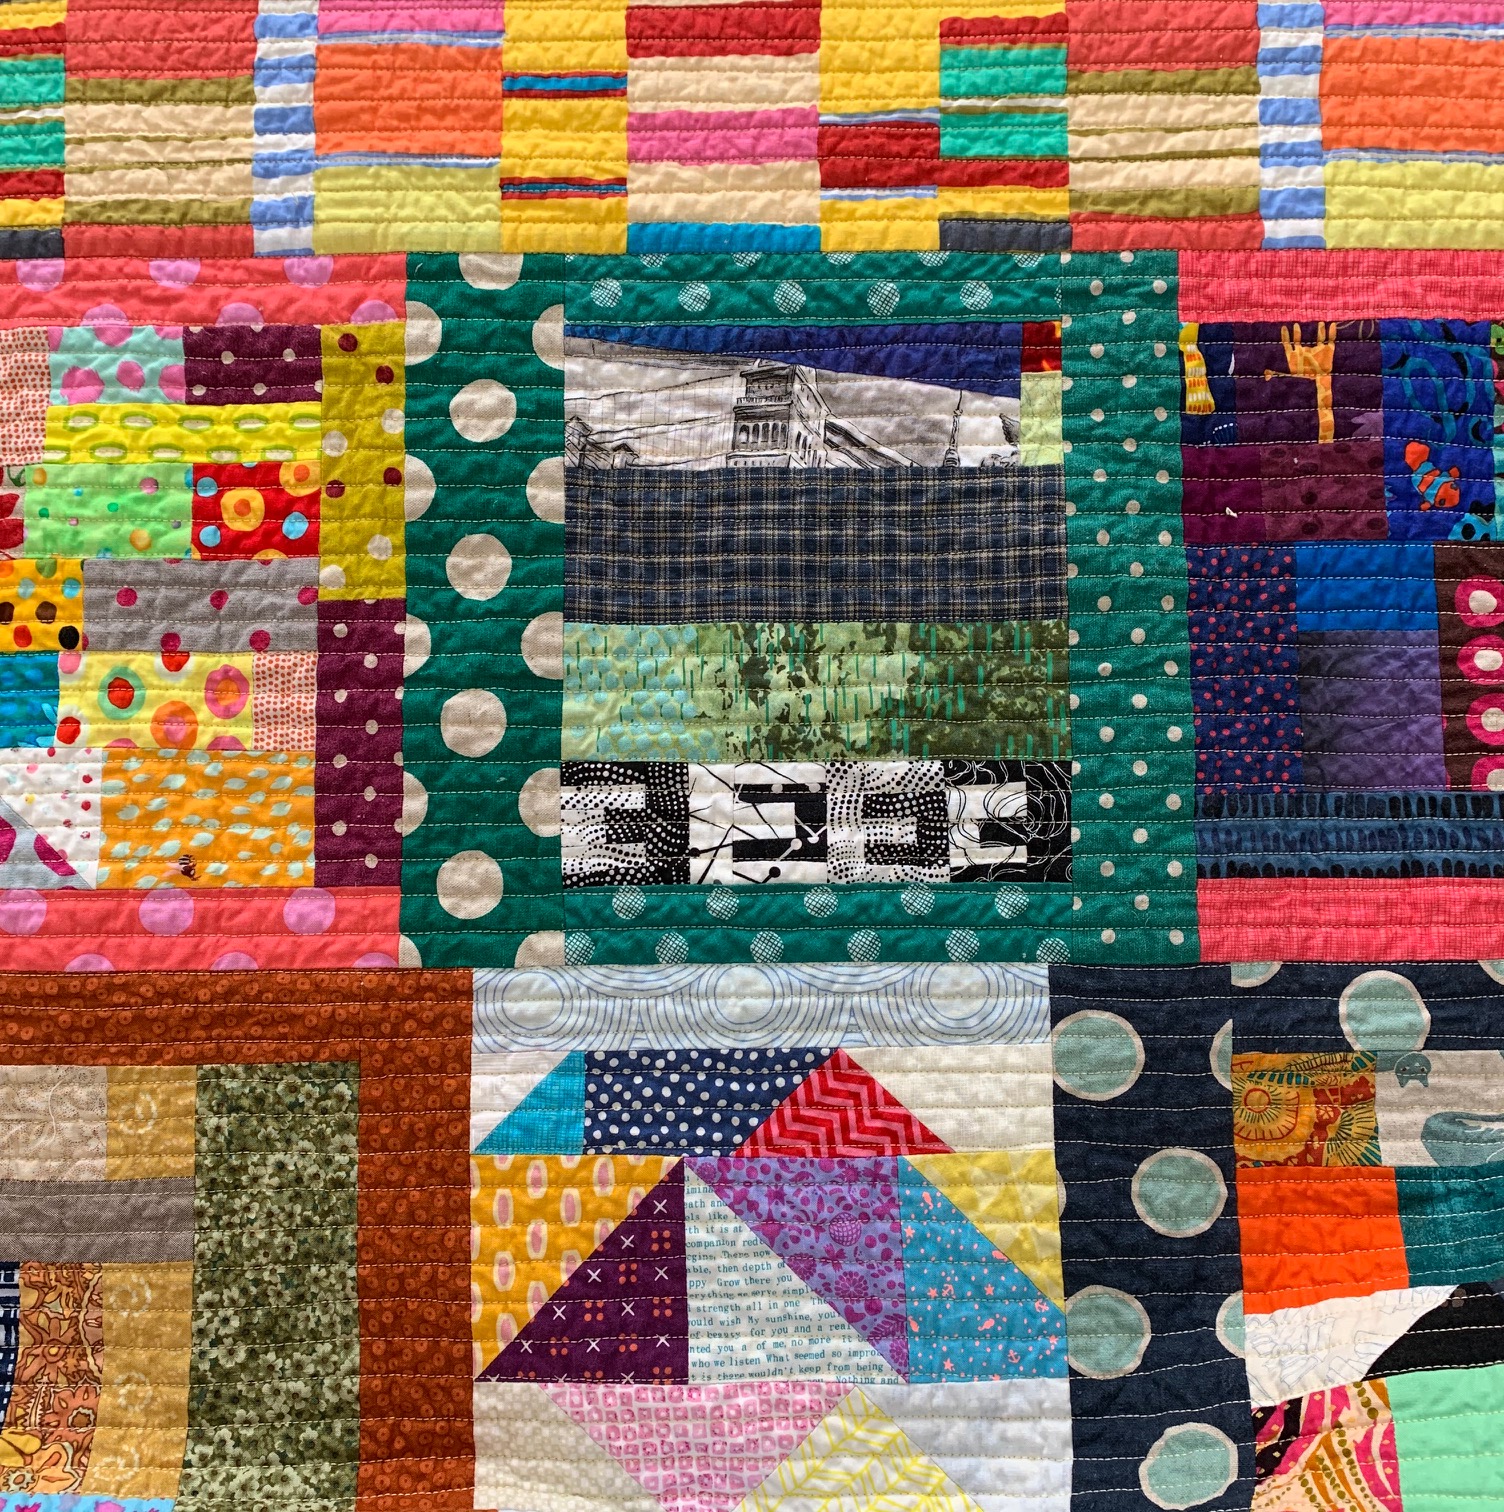
 The quilt back is fun too, with the assortment of found fabrics and leftovers. A friend sent me her found robot boy yardage for the center; she thought it perfect for The Boys.
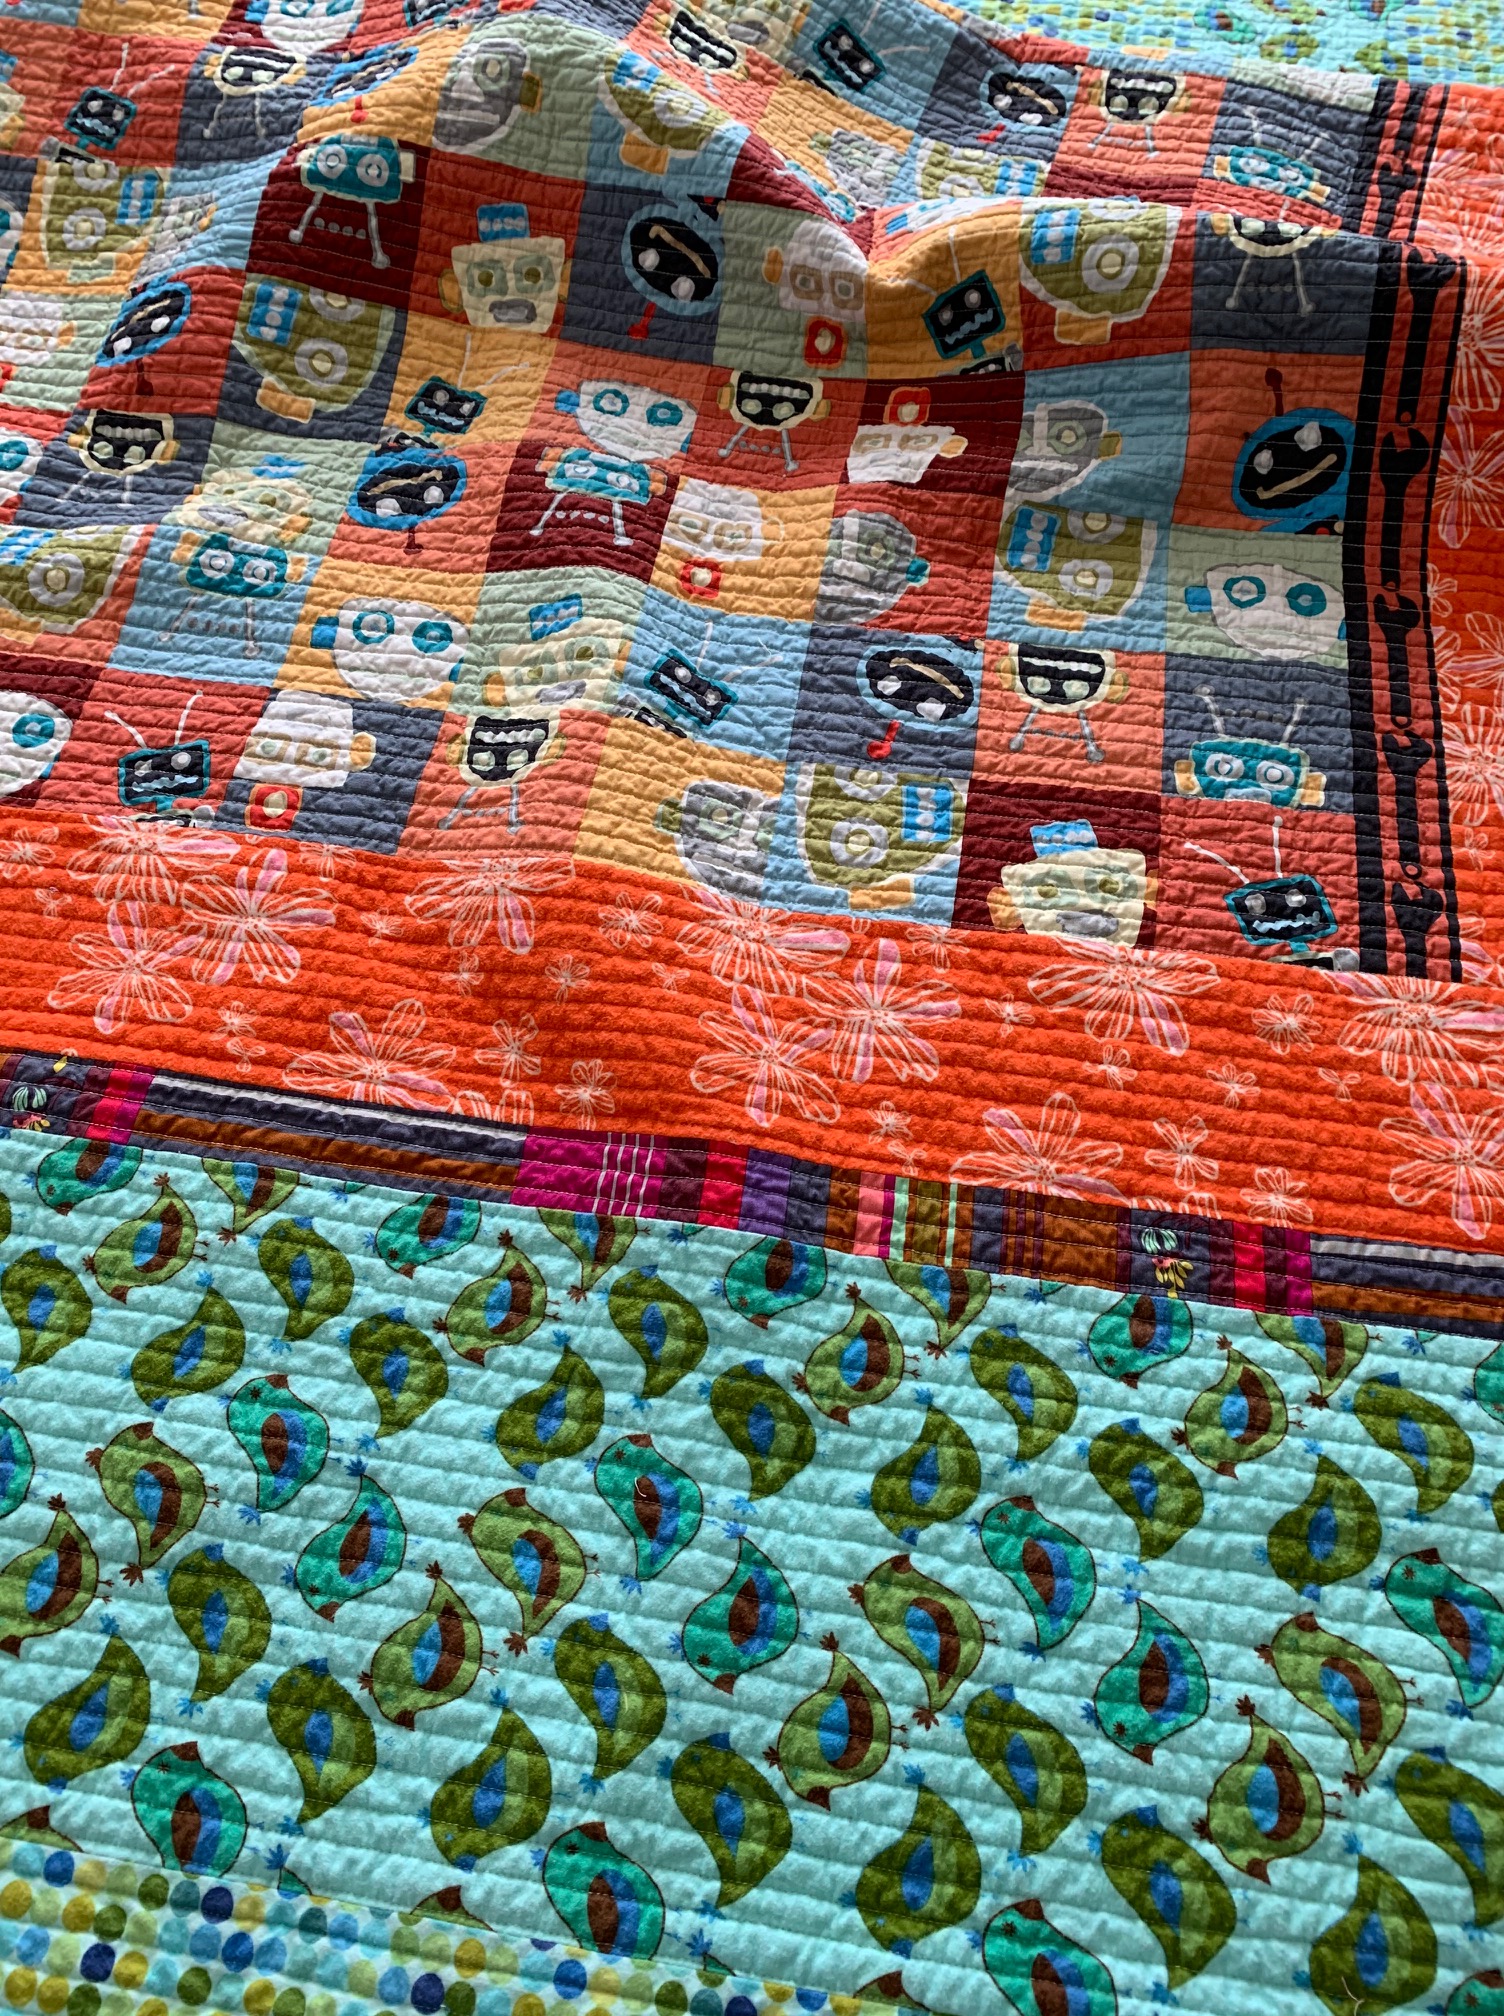

 I’m so pleased I took the time to embroider the labels. These labels will last as long as the quilt.

 It had been a long time since “The Boys” had seen the blocks, and I wondered what they would remember about their creations. But the 3 older boys wasted no time in finding their hand and favorite blocks.
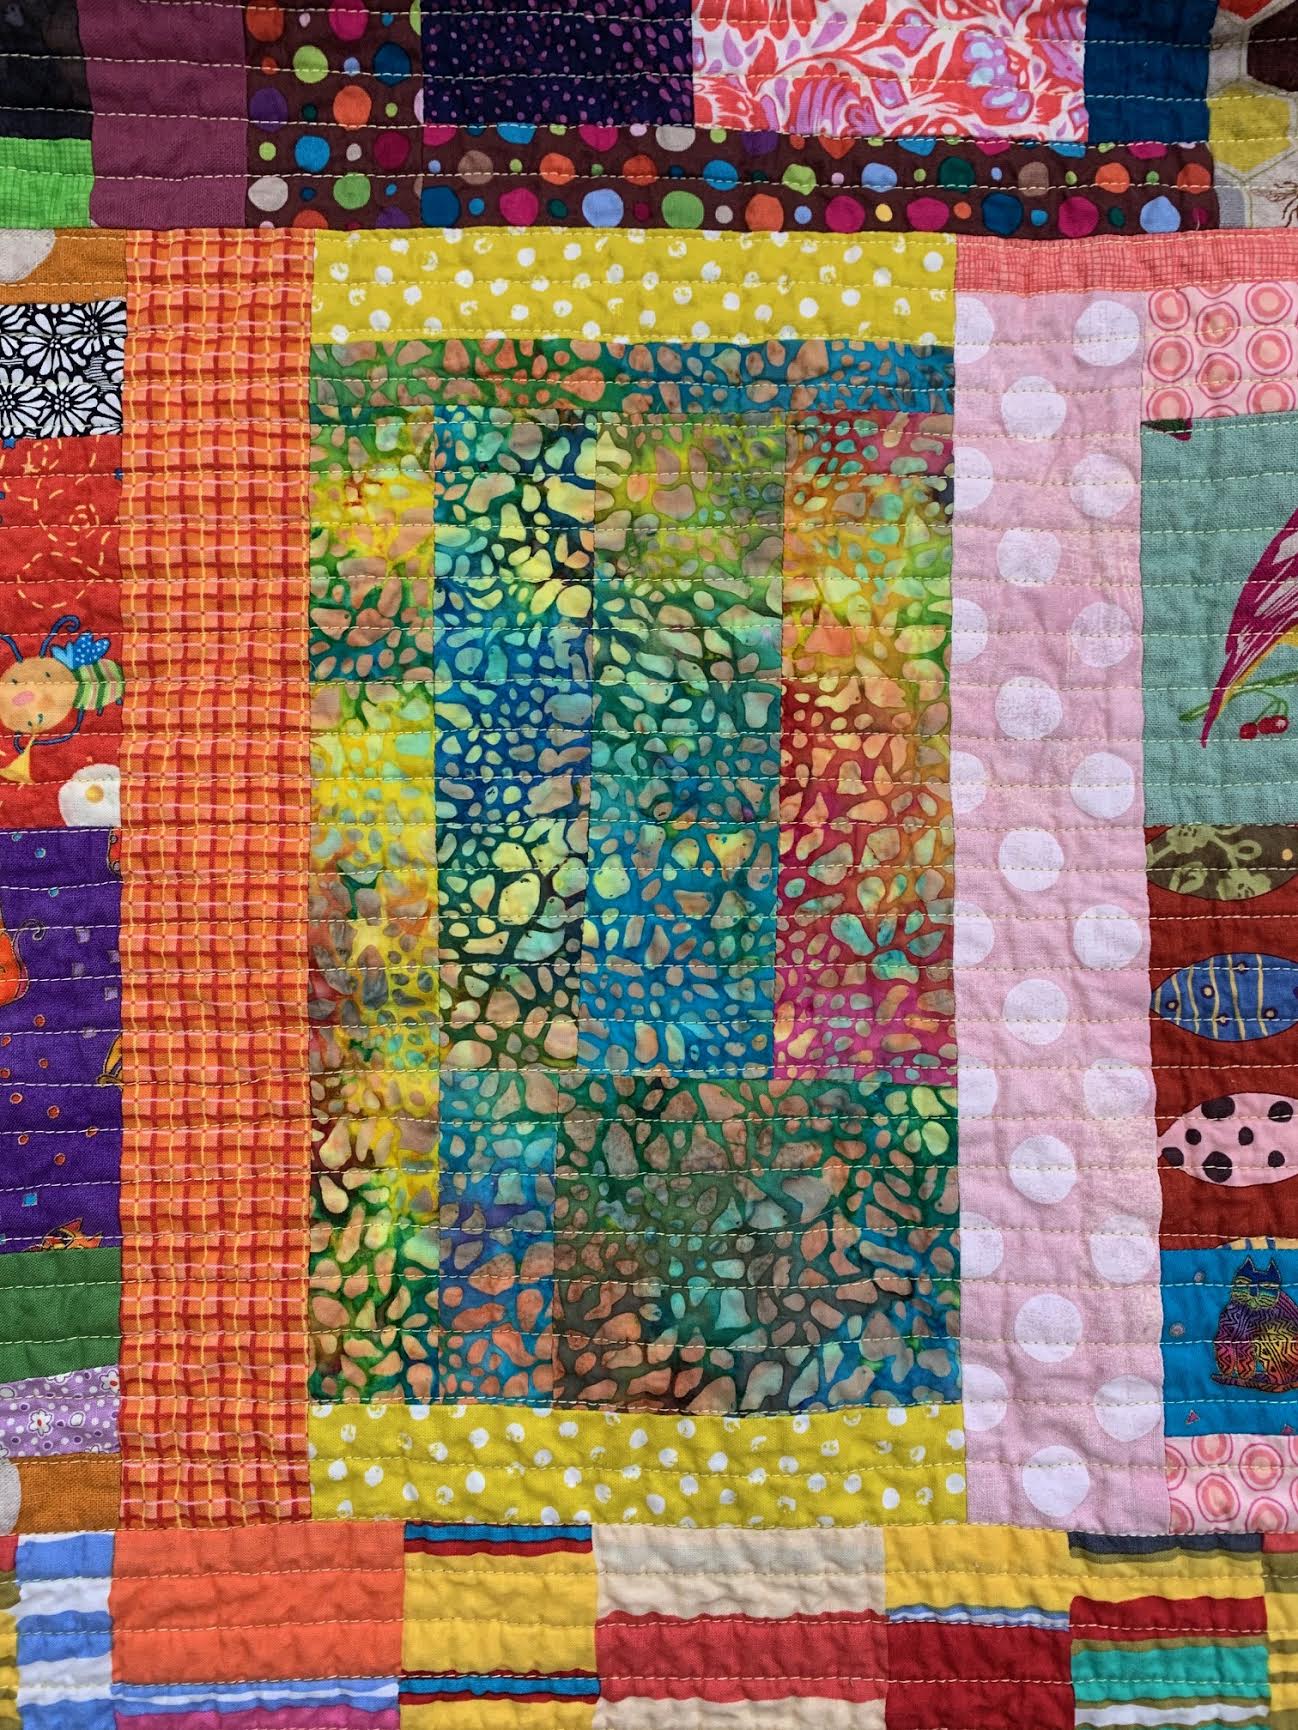 Another favorite of The Boys was this block. I think it’s graphic and moody, in a good way.
 Finally the day for the Big Giveaway came. David and I spread out several sheets on our back deck. As we watched the kids scramble around the quilt (while staying 10’ apart), some of us burst into tears while the rest became teary. This project was definitely a good thing.
 In the beginning, we were two neighbors who banded together when the state government ordered a month-long lockdown. At first, we joined forces to add something special to the daily life of “The Boys”, whose routines had changed suddenly with the Pandemic.
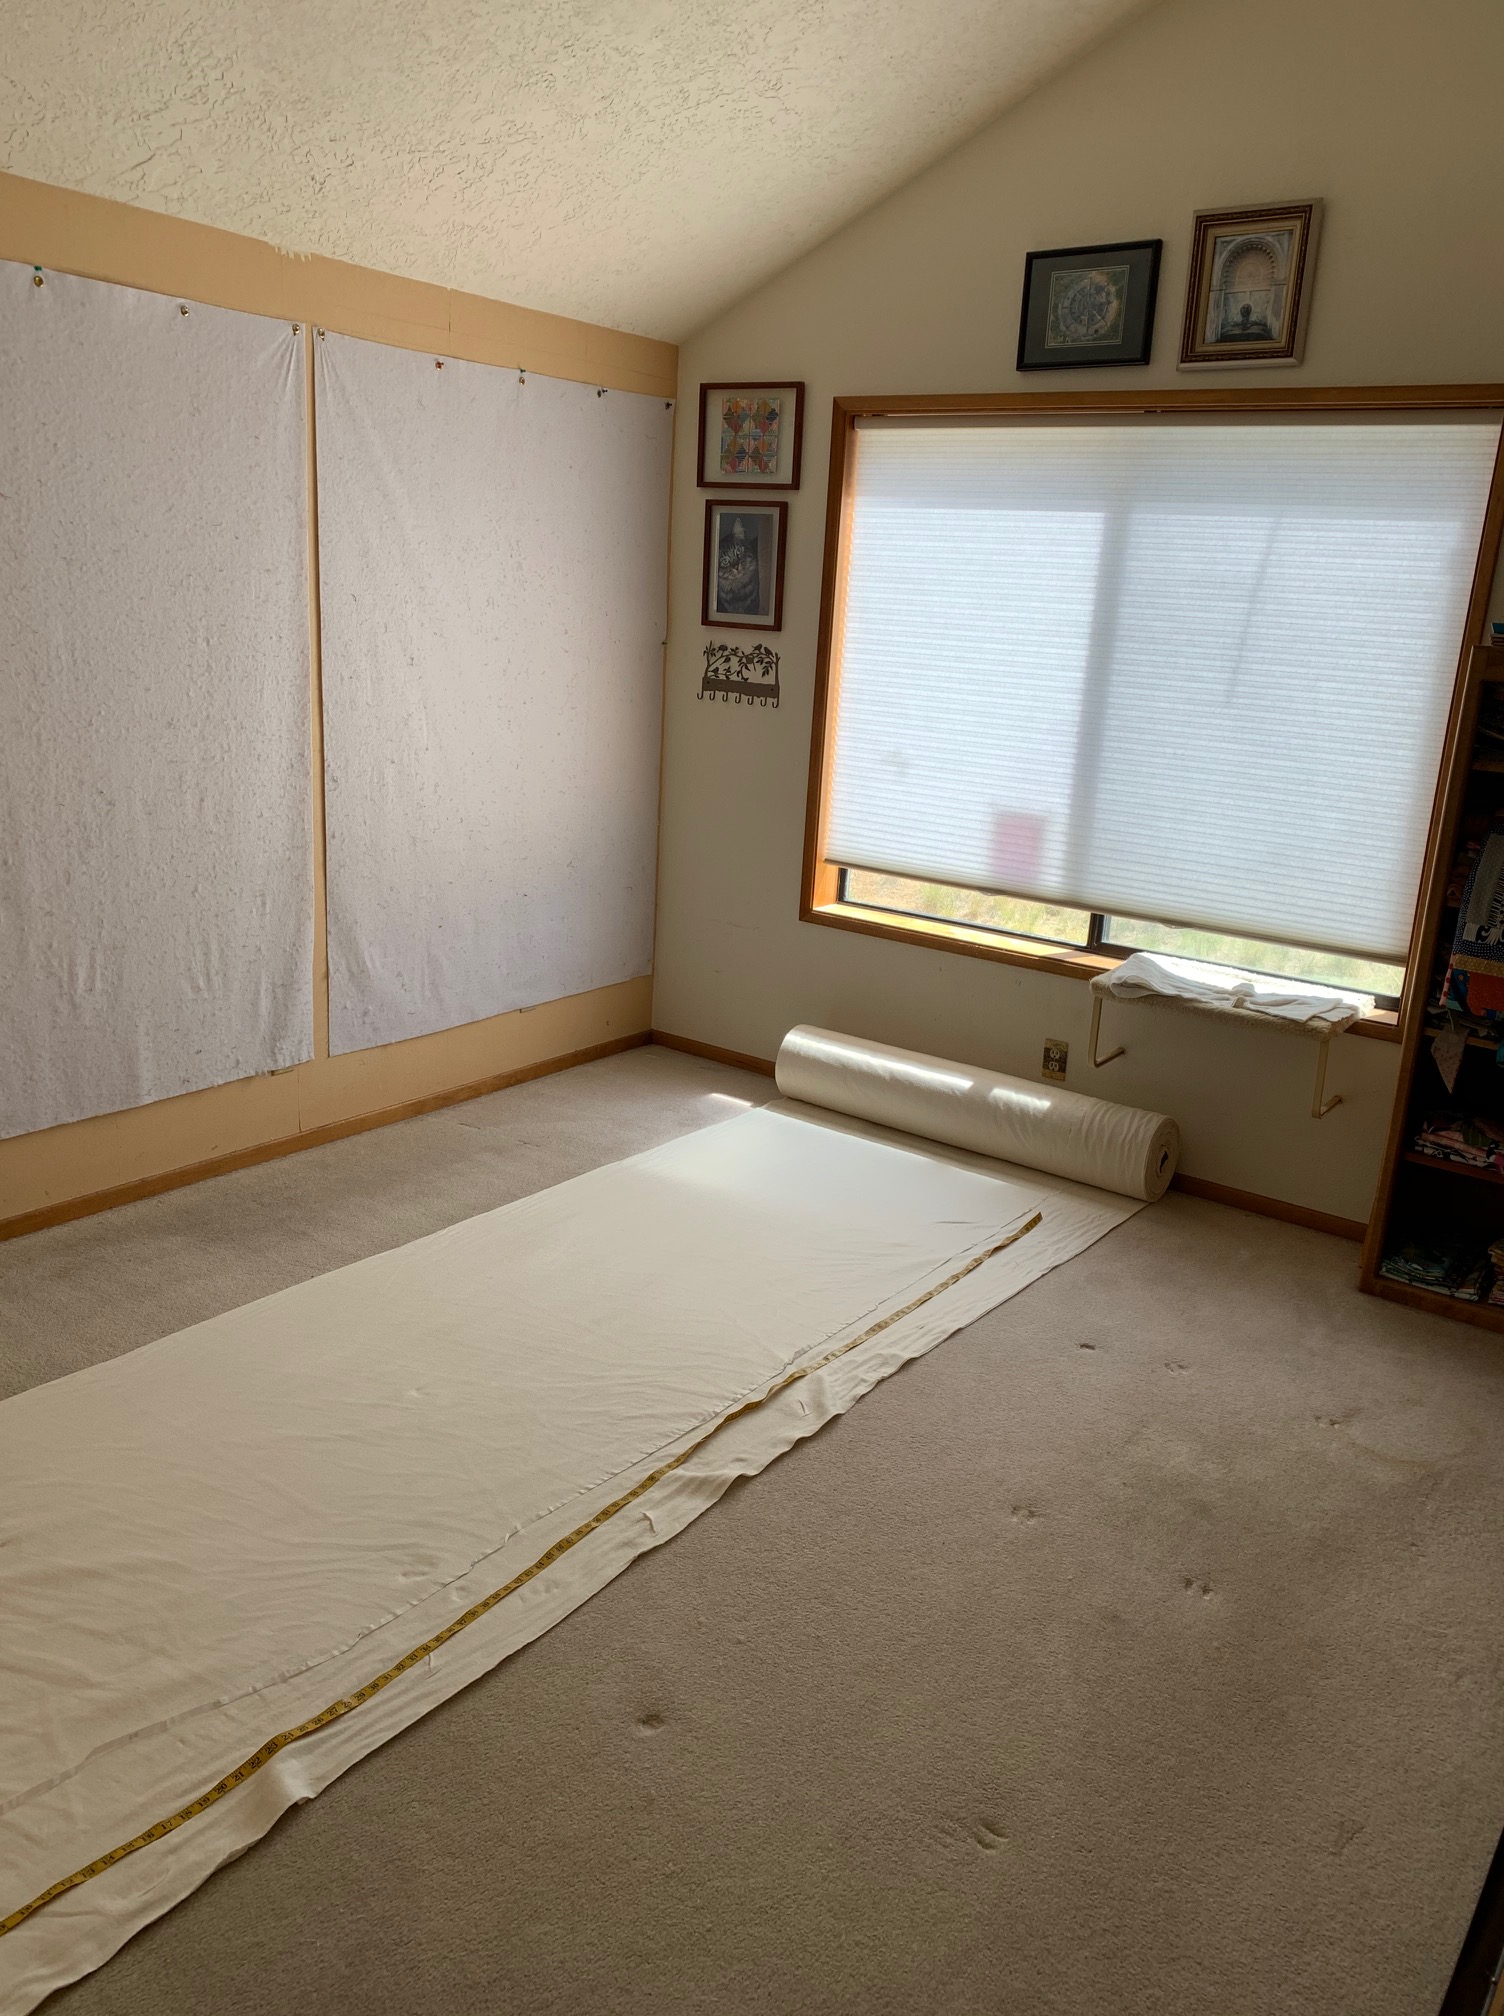
 We had to navigate the crowded hallway for a day or two, but the cats loved exploring this new-to-them space.
 With the quilt back centered on the batting, the window open, the ceiling fan on low, and paper around the edge to catch any over spray, I’m ready to baste.
 I can baste any size quilt with my “assistant”: a swim noodle. (My assistant never complains but getting up off the floor is another story!)
 Repeat to spray baste both halves of the quilt. Trim the excess batting along the fabric edge. Allow to dry for a few hours or overnight before turning over and taping the quilt to the floor.
 With both ends of the quilt rolled up to the middle, I stitched lines about 3”-4” apart with the water soluble thread, from the middle to the edge. Repeat with the other half. Re-roll the quilt in the other direction, stitching perpendicular lines about 3”-4” apart.


 With the quilt rolled up from both ends to the middle, I started stitching the roughly parallel lines, using the pressor foot as a guide. Ignore the water soluble thread lines.
 Keep quilting! The lines are actually unequal distances apart and not perfectly straight, but I like this look on a scrappy quilt.
 I used the seam lines between the rows to “square up” my parallel lines.
 Celebration! The very last line of stitching!! I zigzagged the edges and trimmed the batting before tossing the quilt into the washer and dryer. I like to let the quilt shrink at this stage, before sewing on the binding.
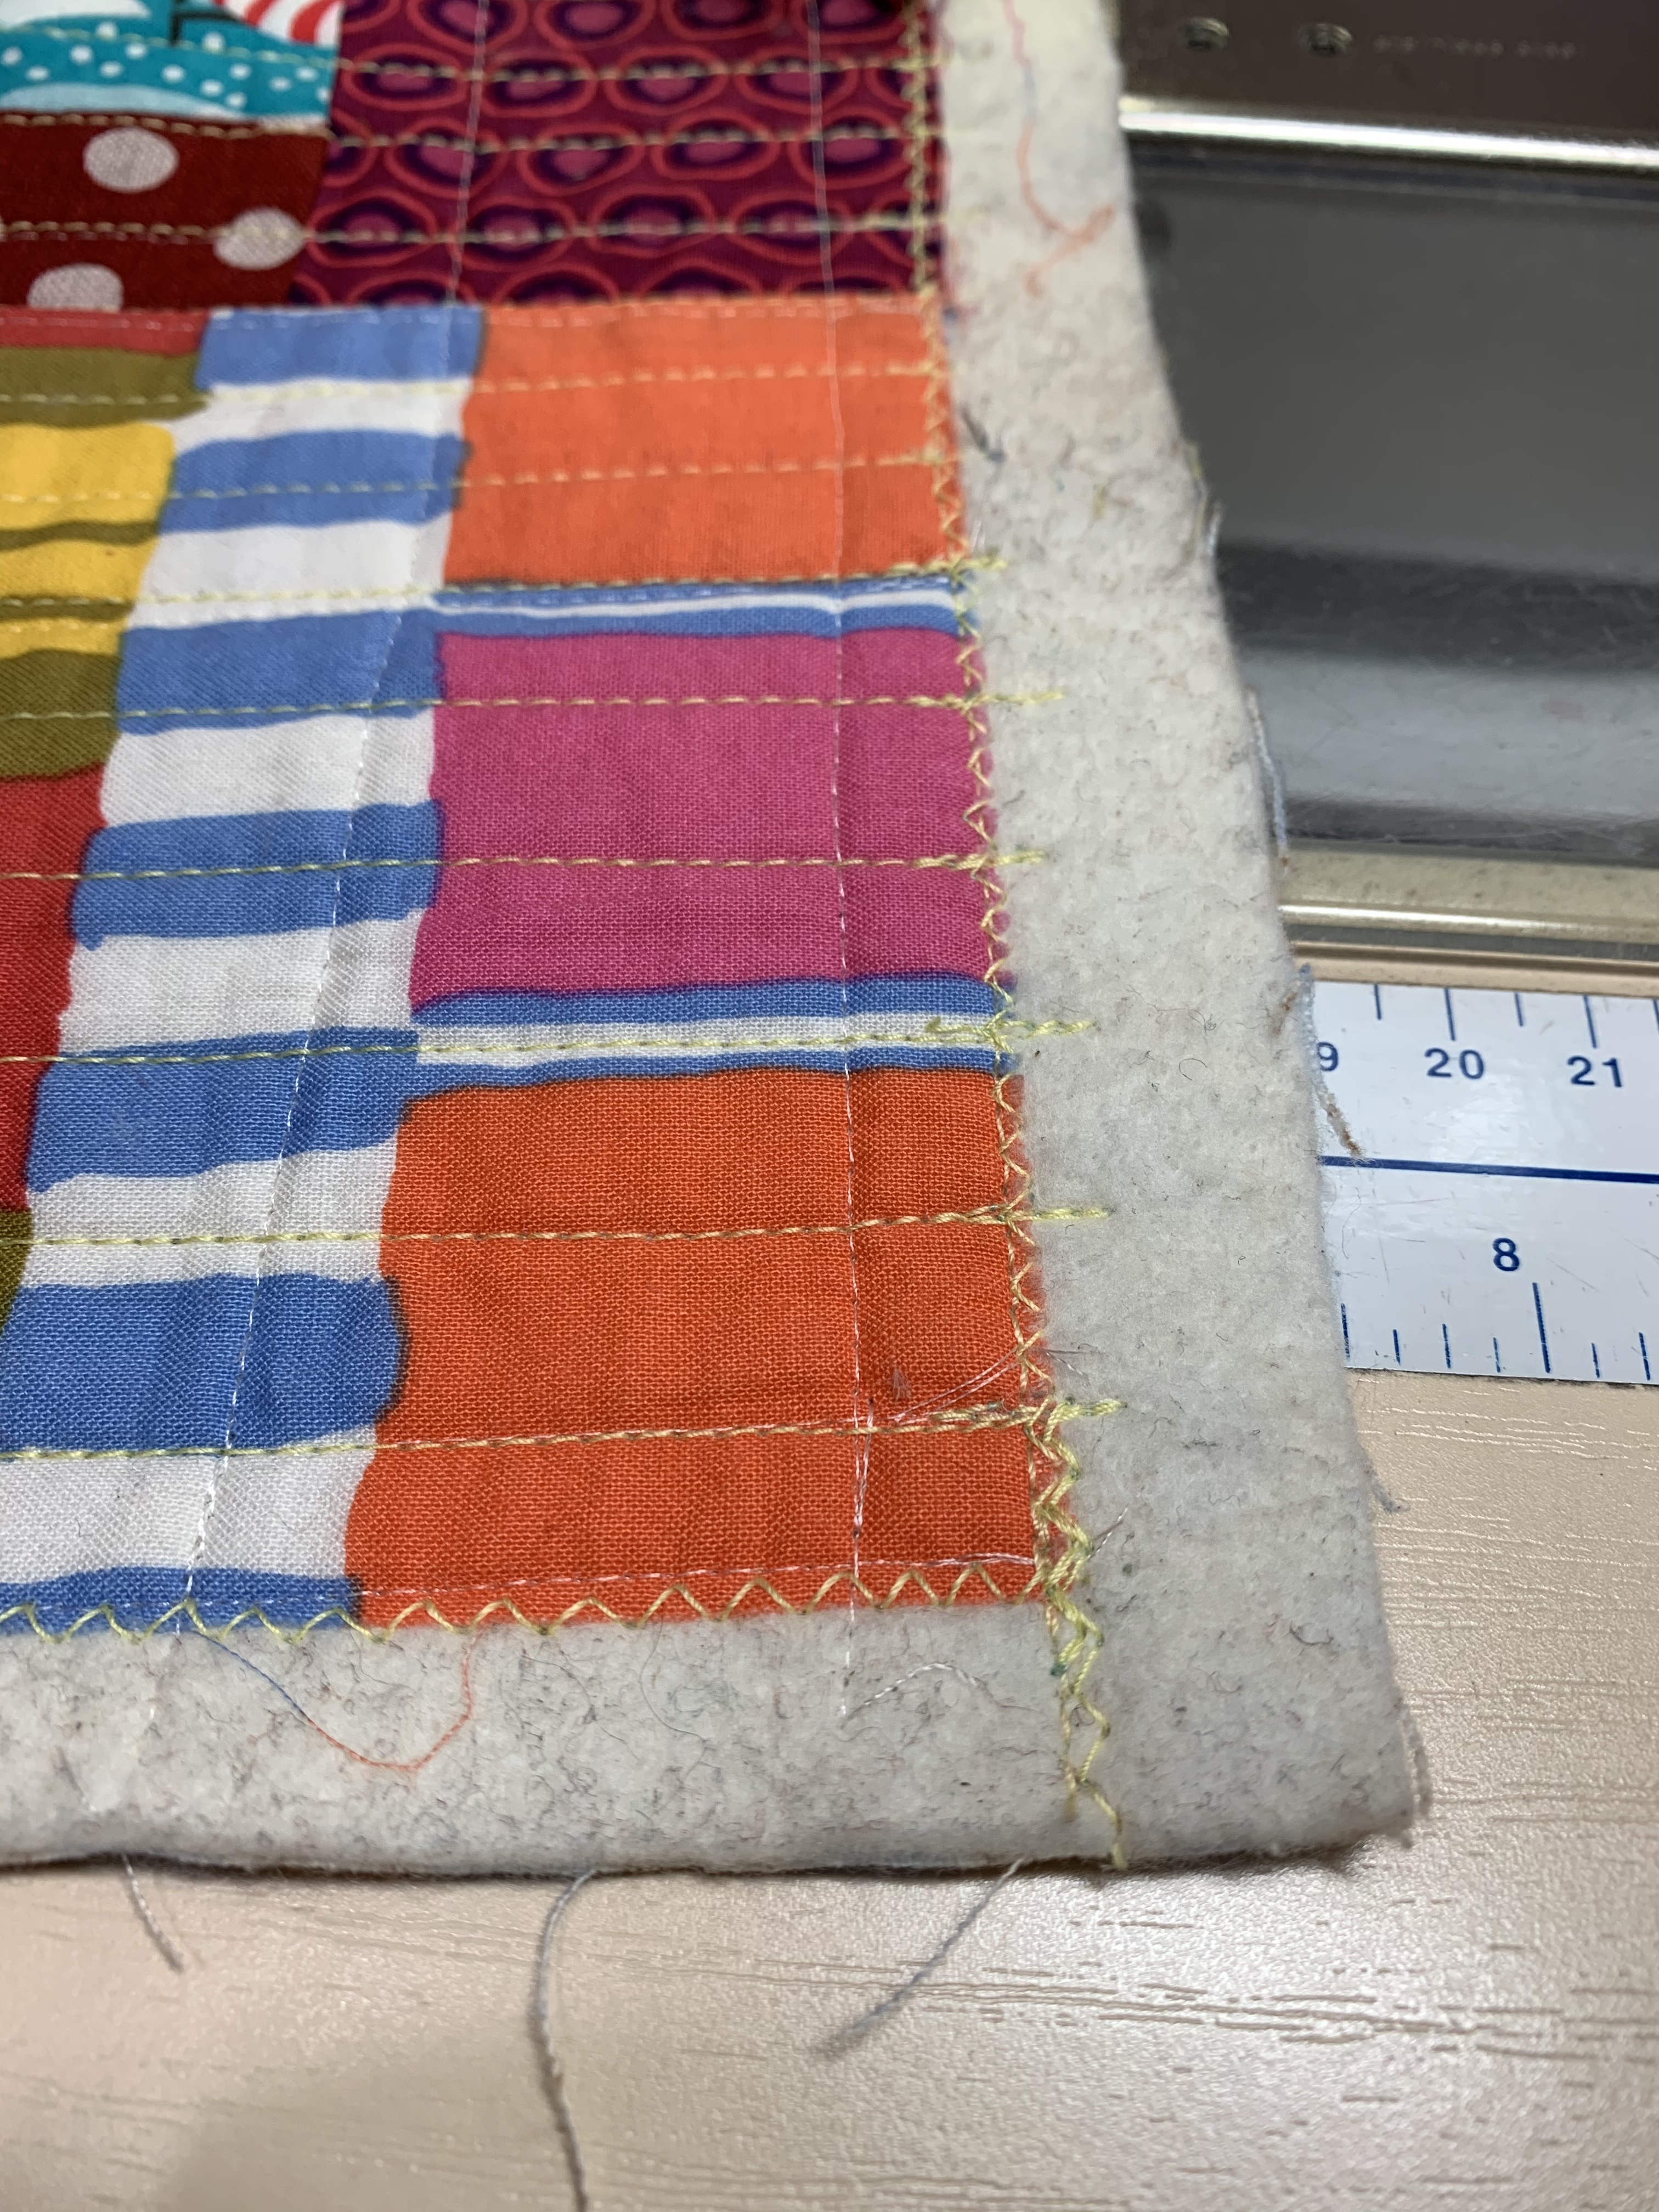
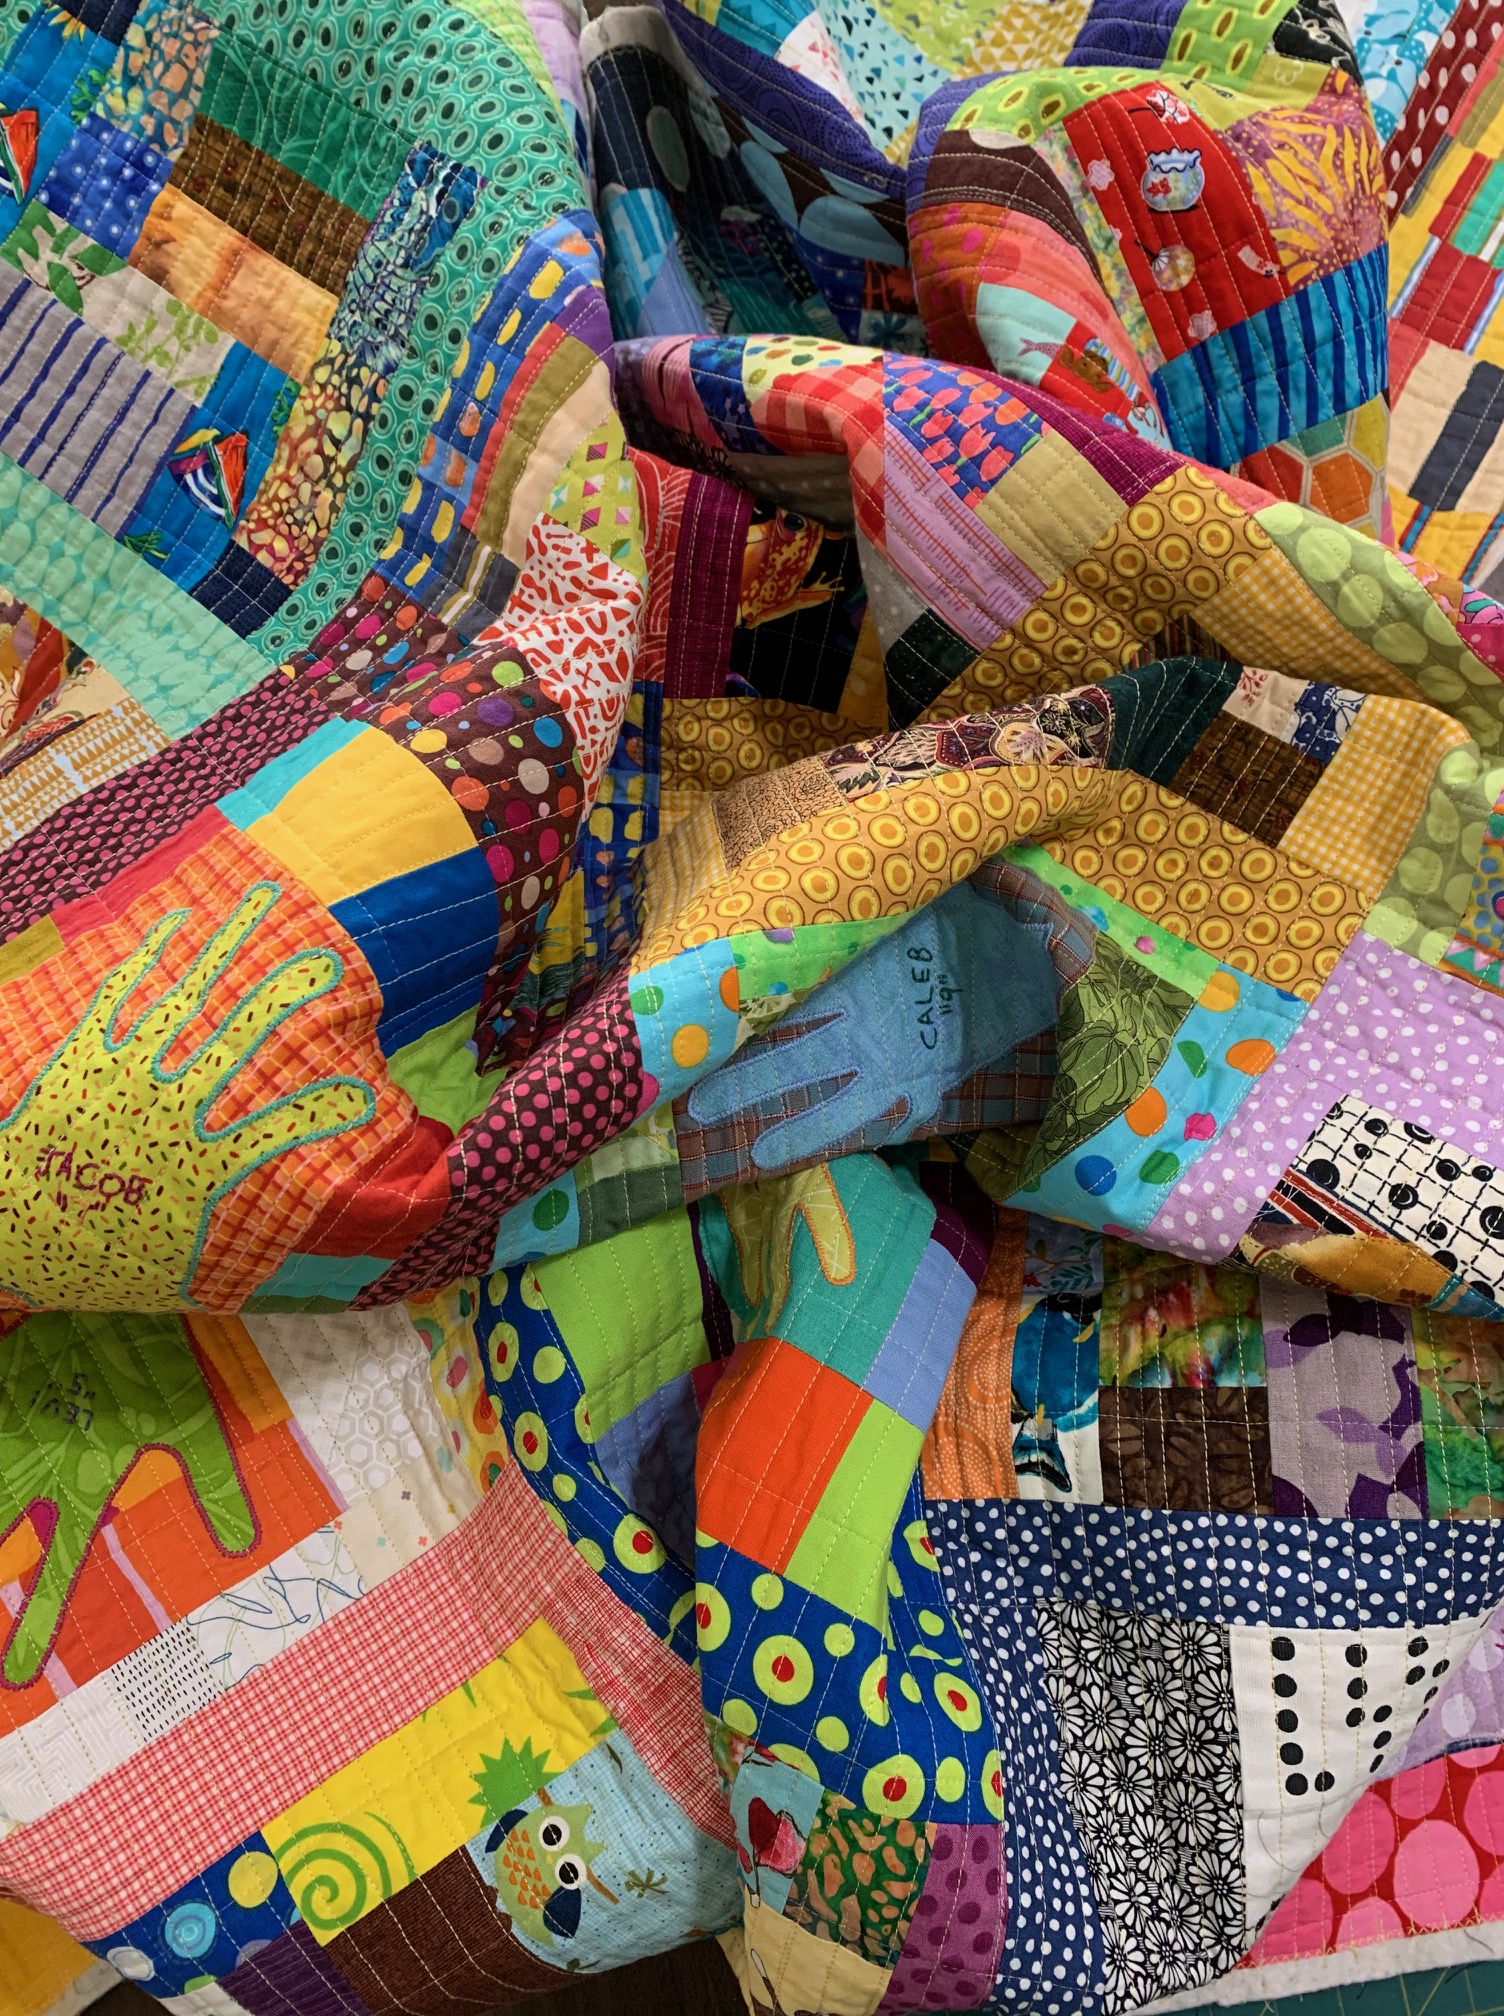 Remove the quilt from the dryer while still slightly damp and allow to air dry the rest of the way.
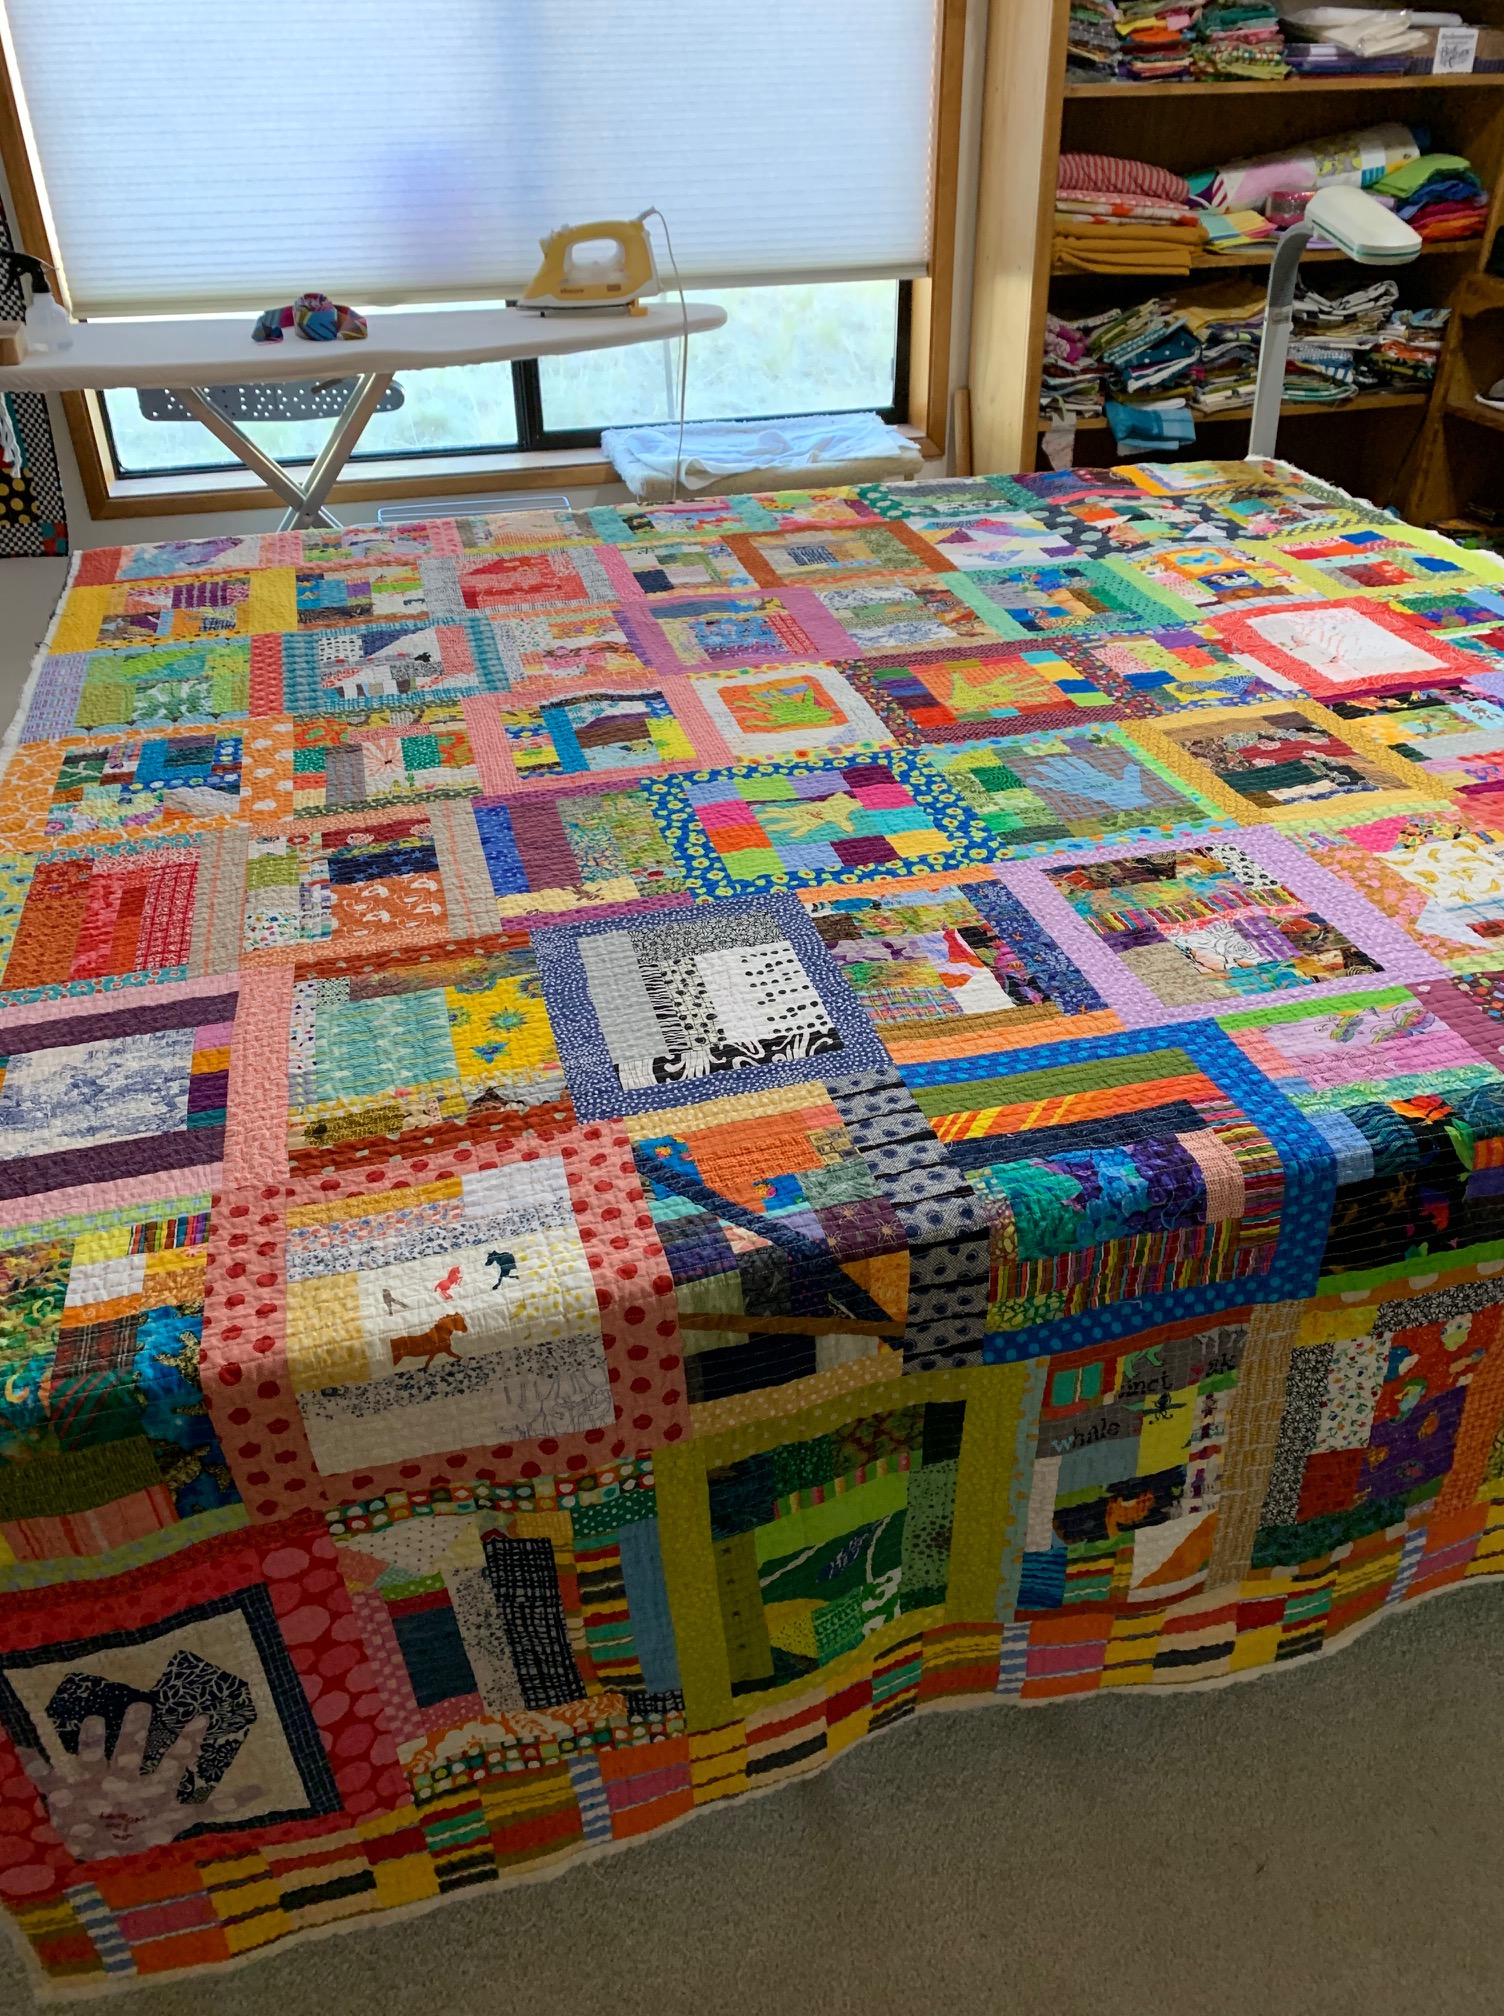


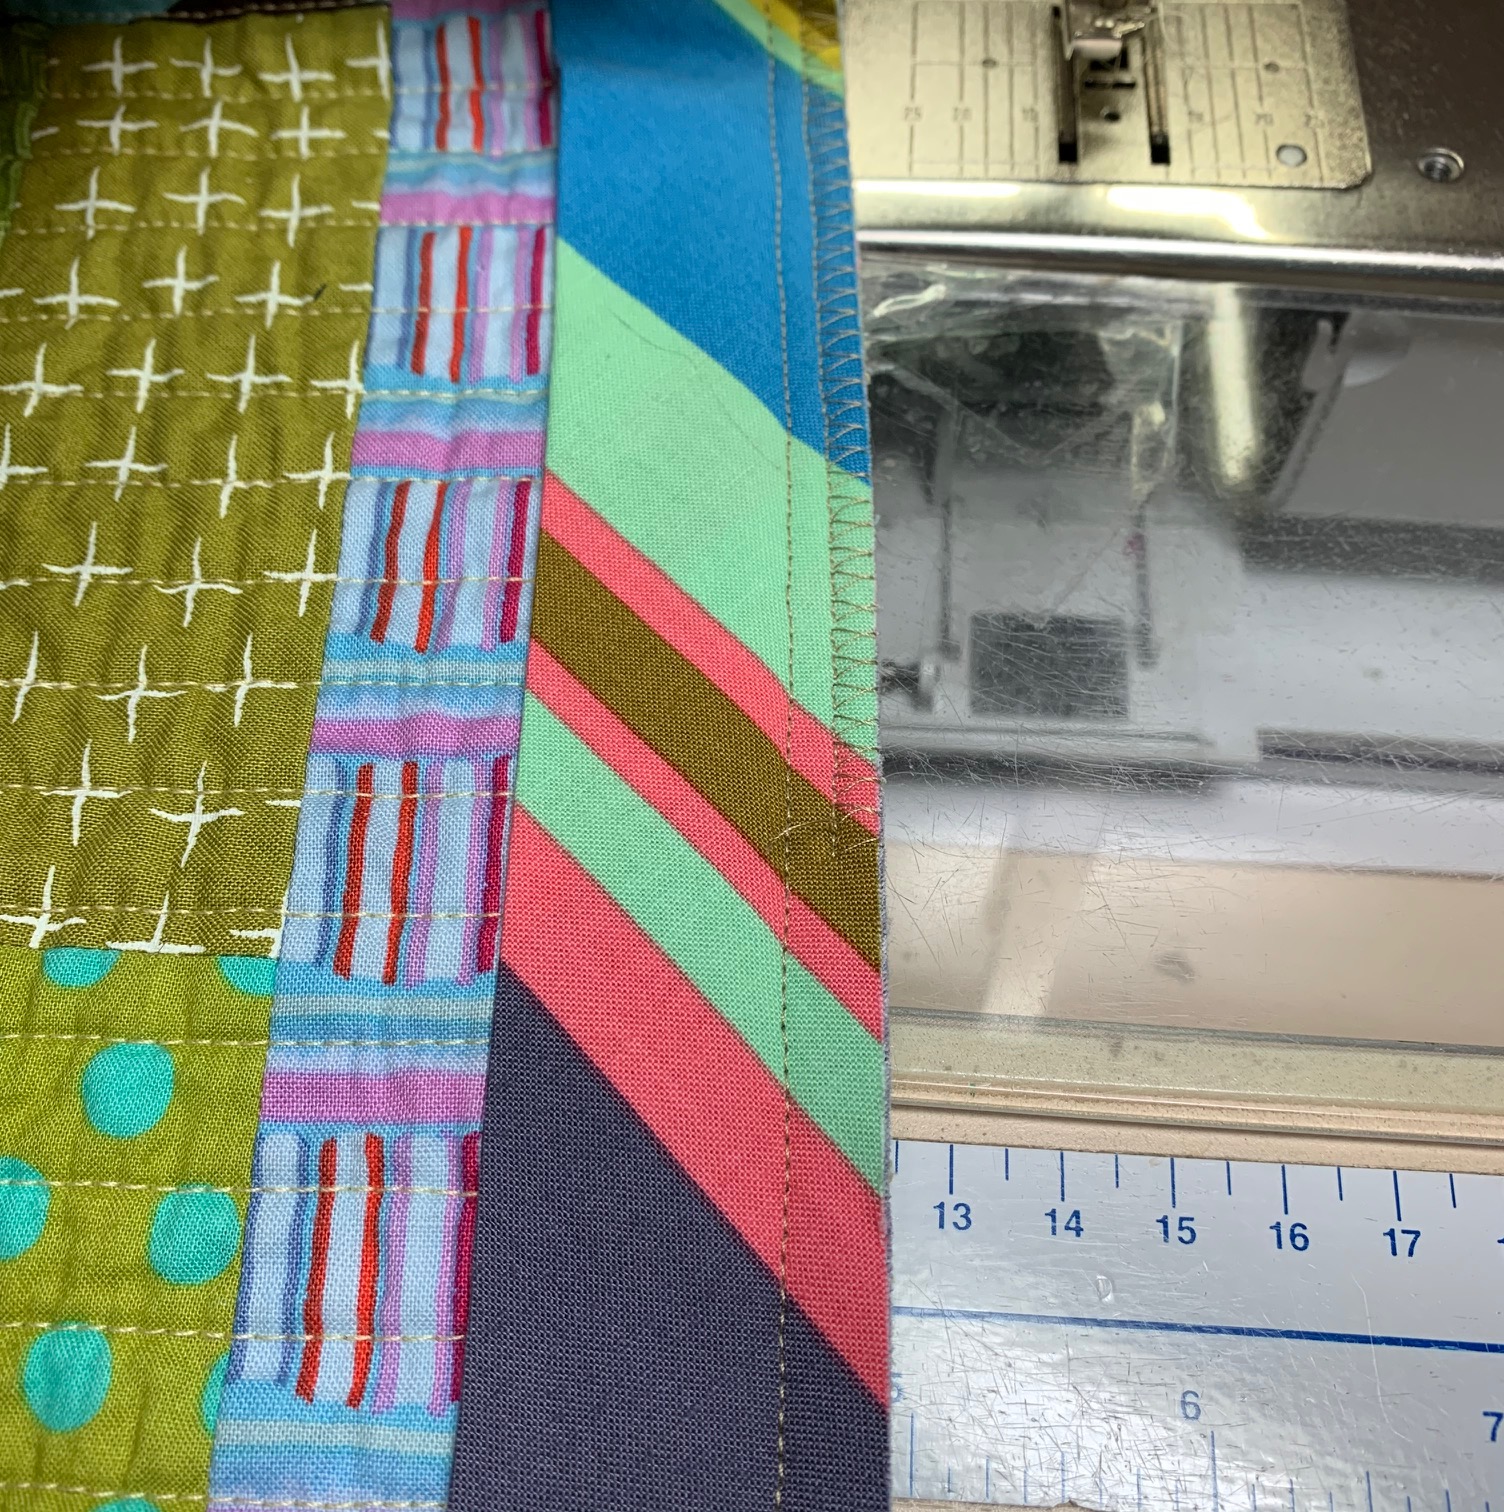 After folding over and pinning (or clipping) the binding in place, I hand sewed the mitered corners, about 1” in each direction from the corner.
 Flip over. From the front, you can see the basting thread: this shows you exactly where the fold is on the other side.
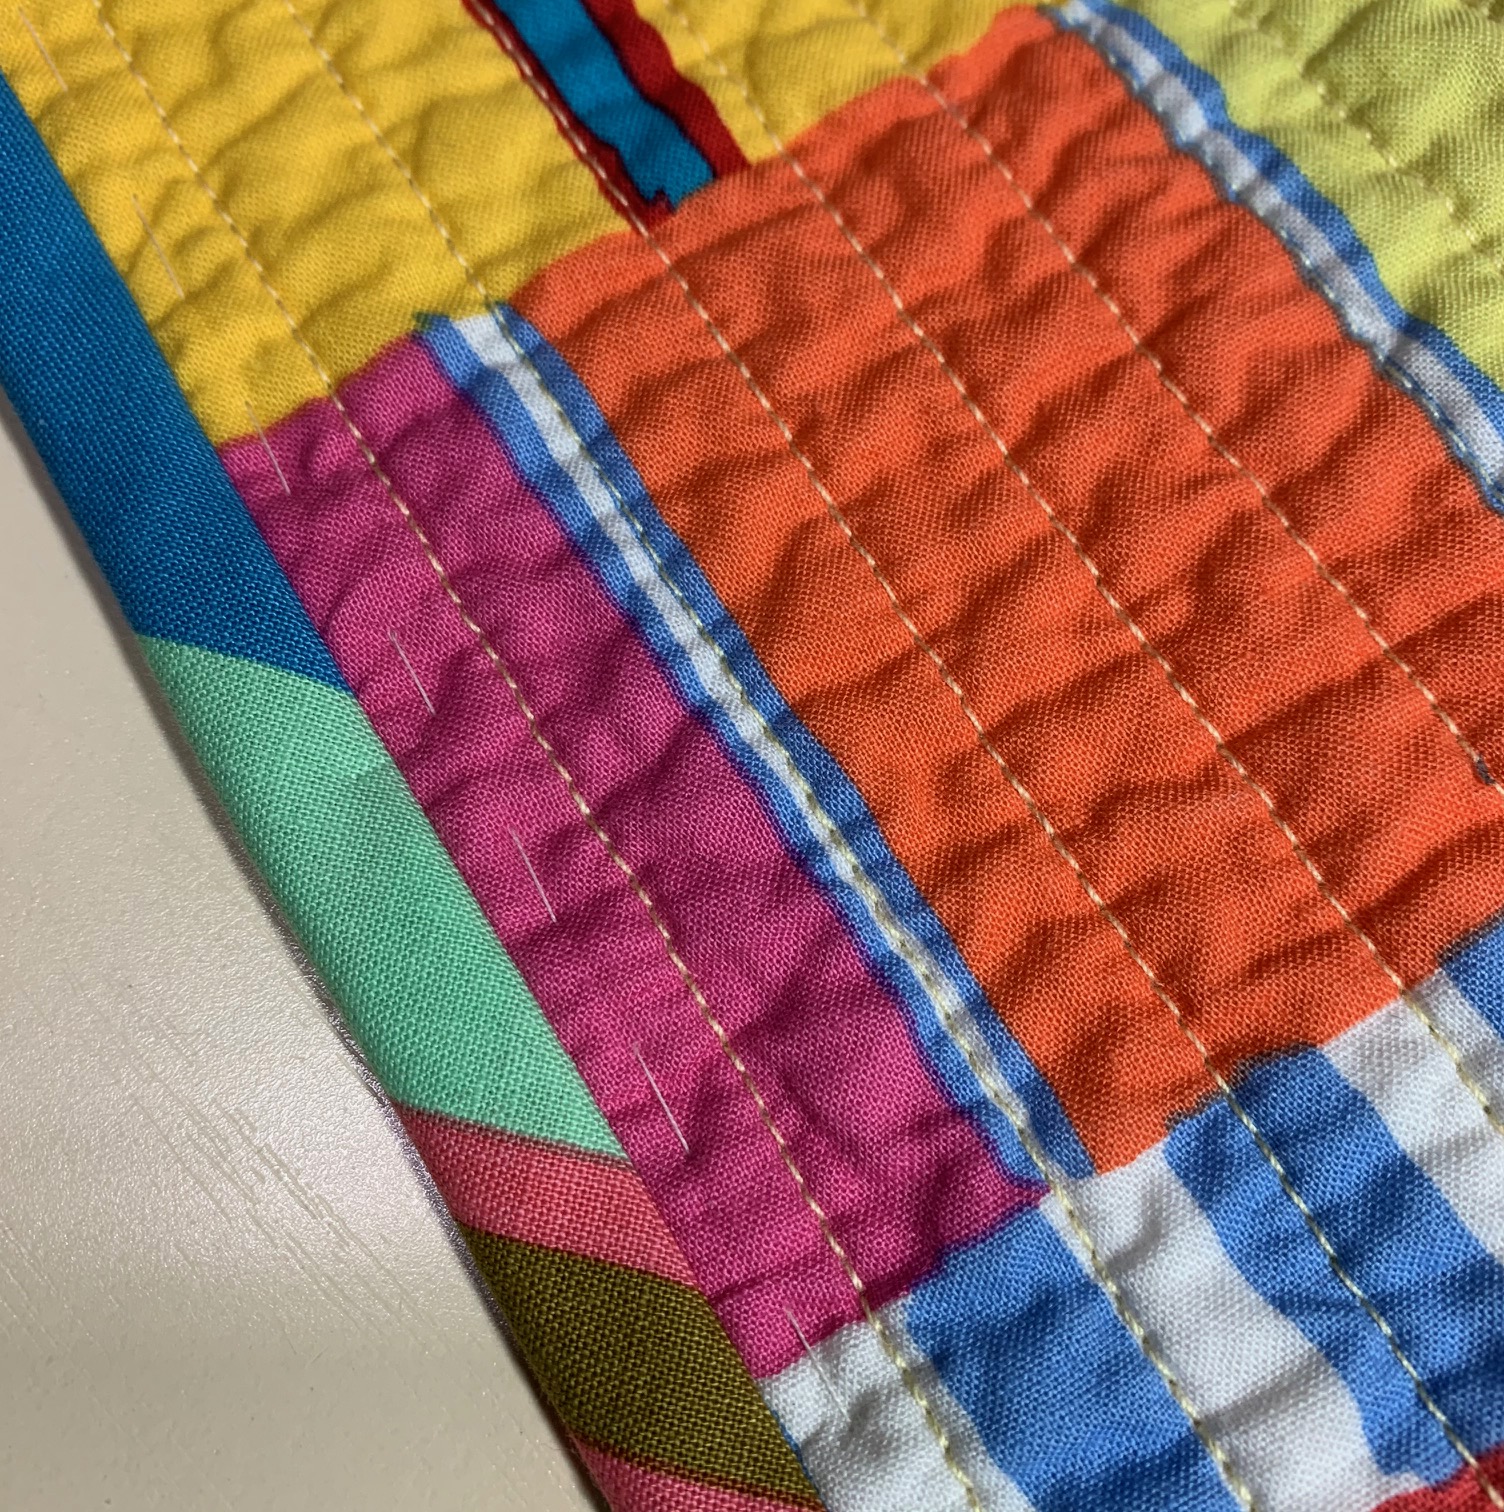 I machine topstitched the binding from the front, by stitching just to the right of the basting line. (You can stitch anywhere between the basting line and the ditch of the binding seam.)
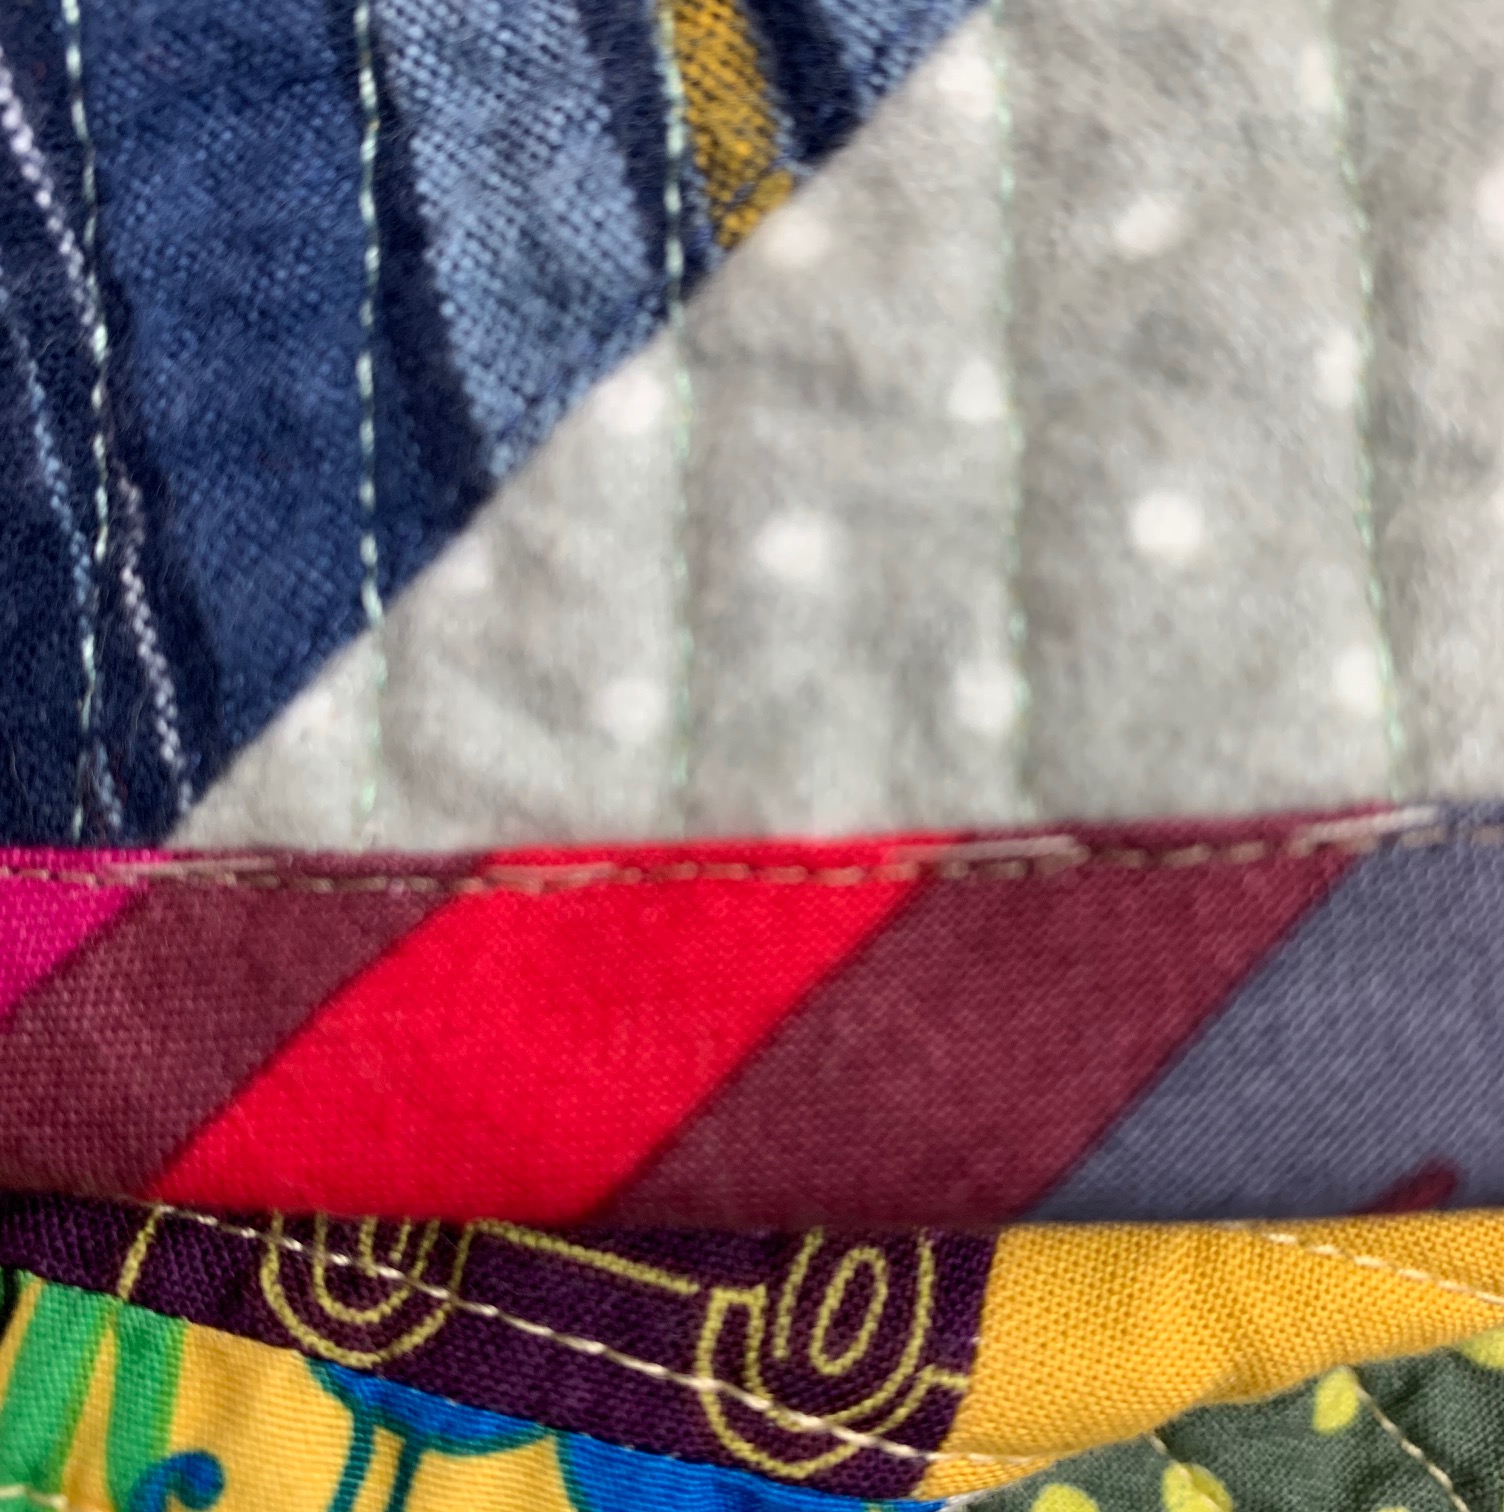 I removed the basting thread and checked the back to make sure the stitching line is along the edge of the binding. Finished!!!

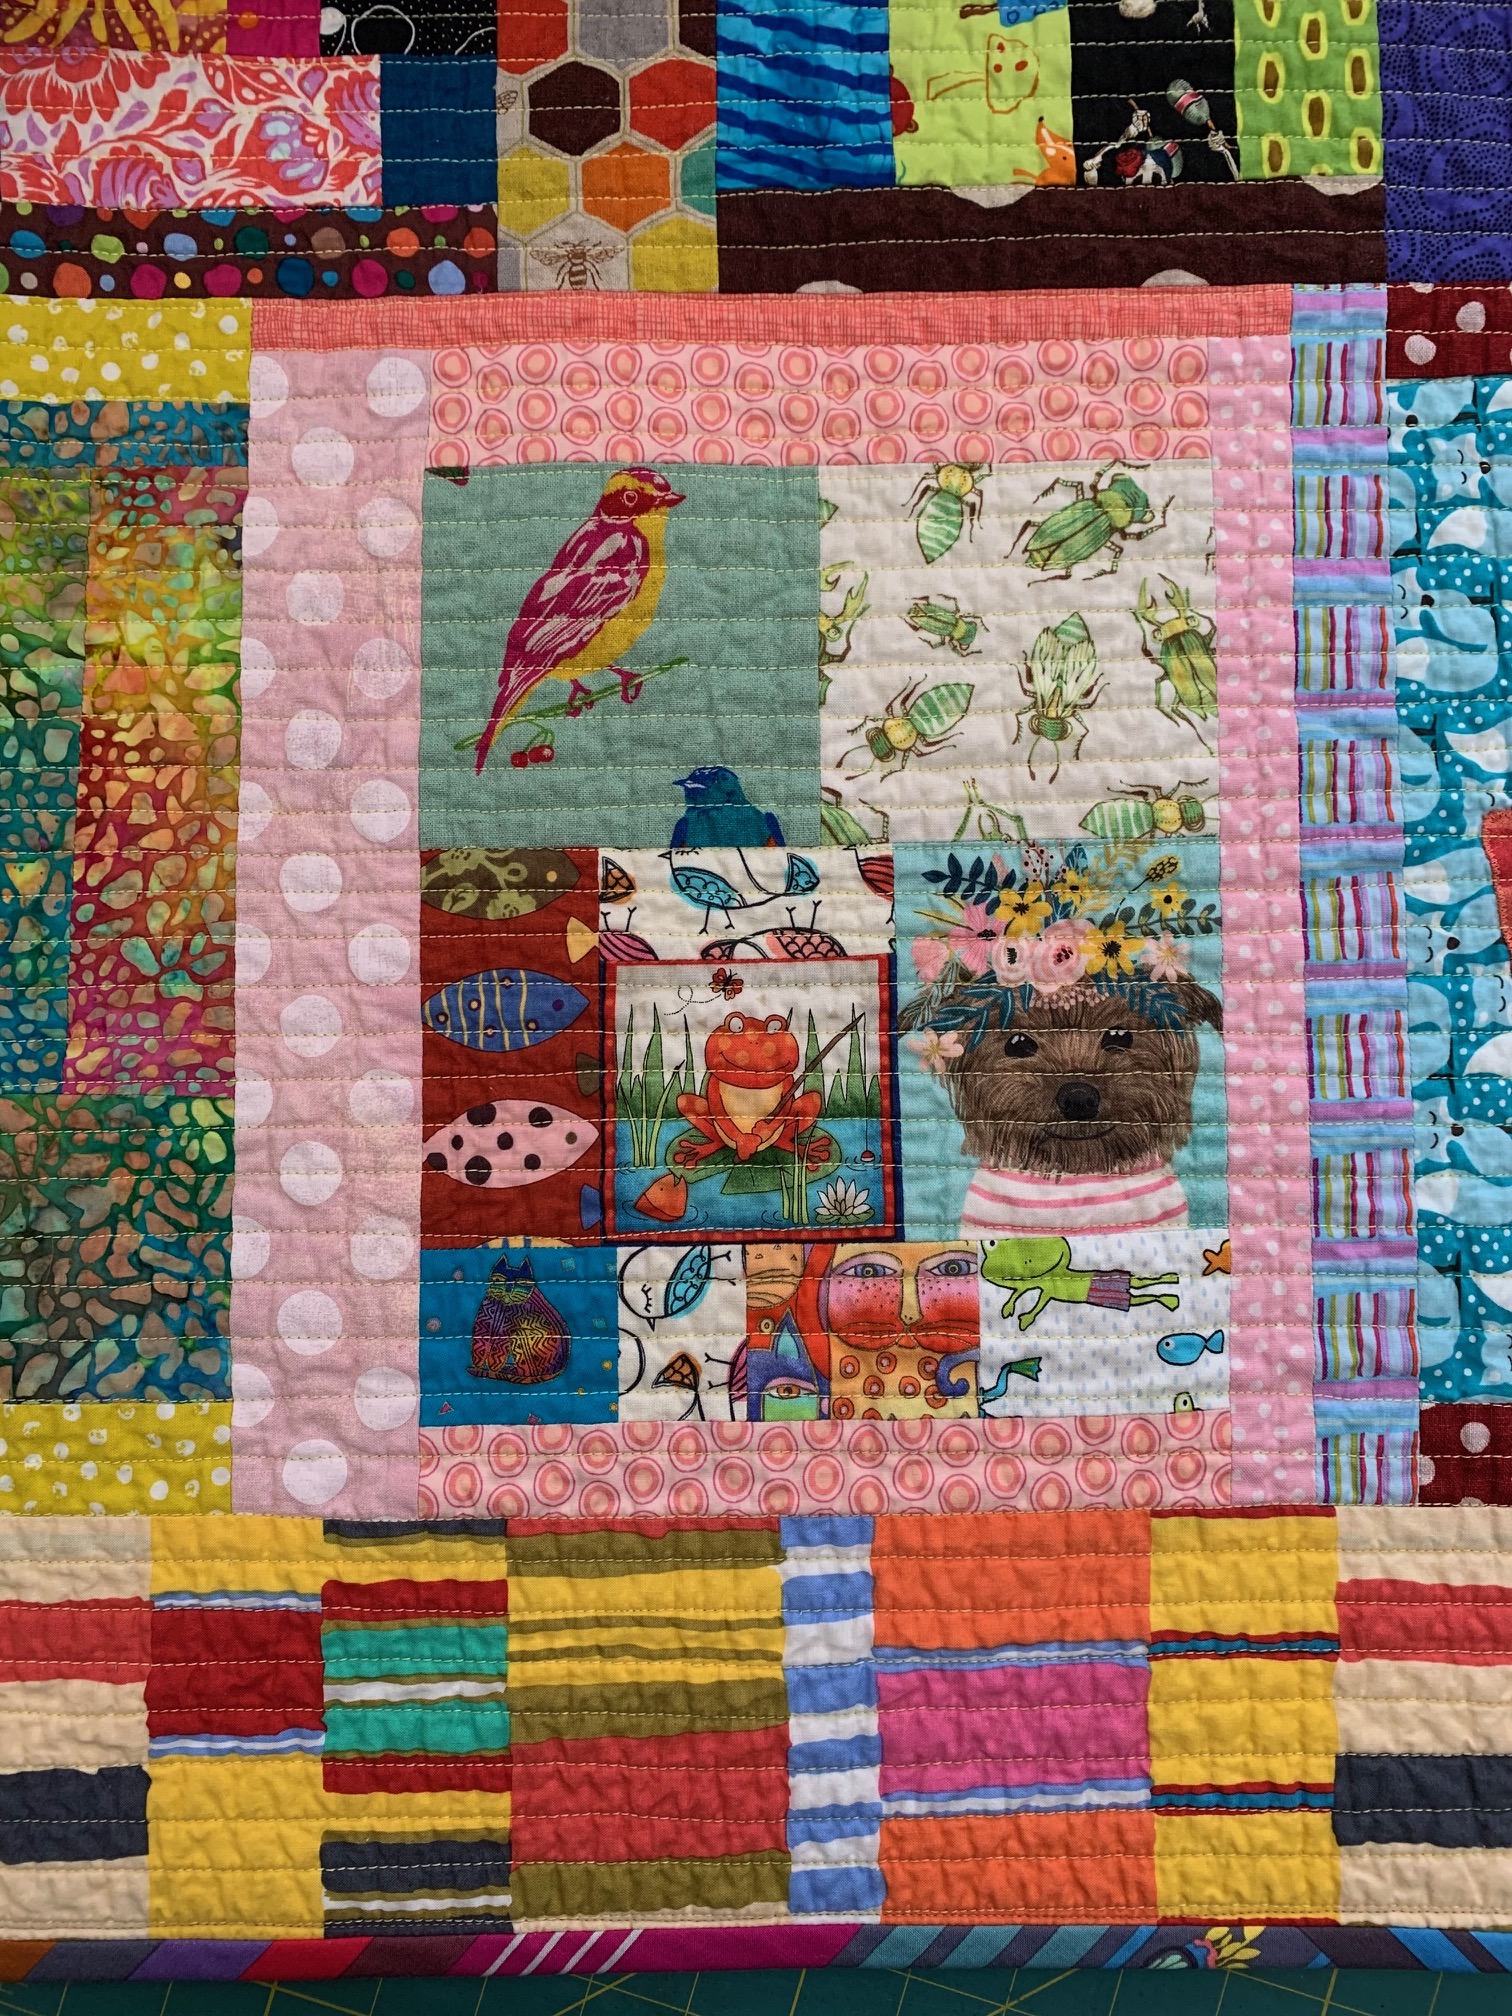


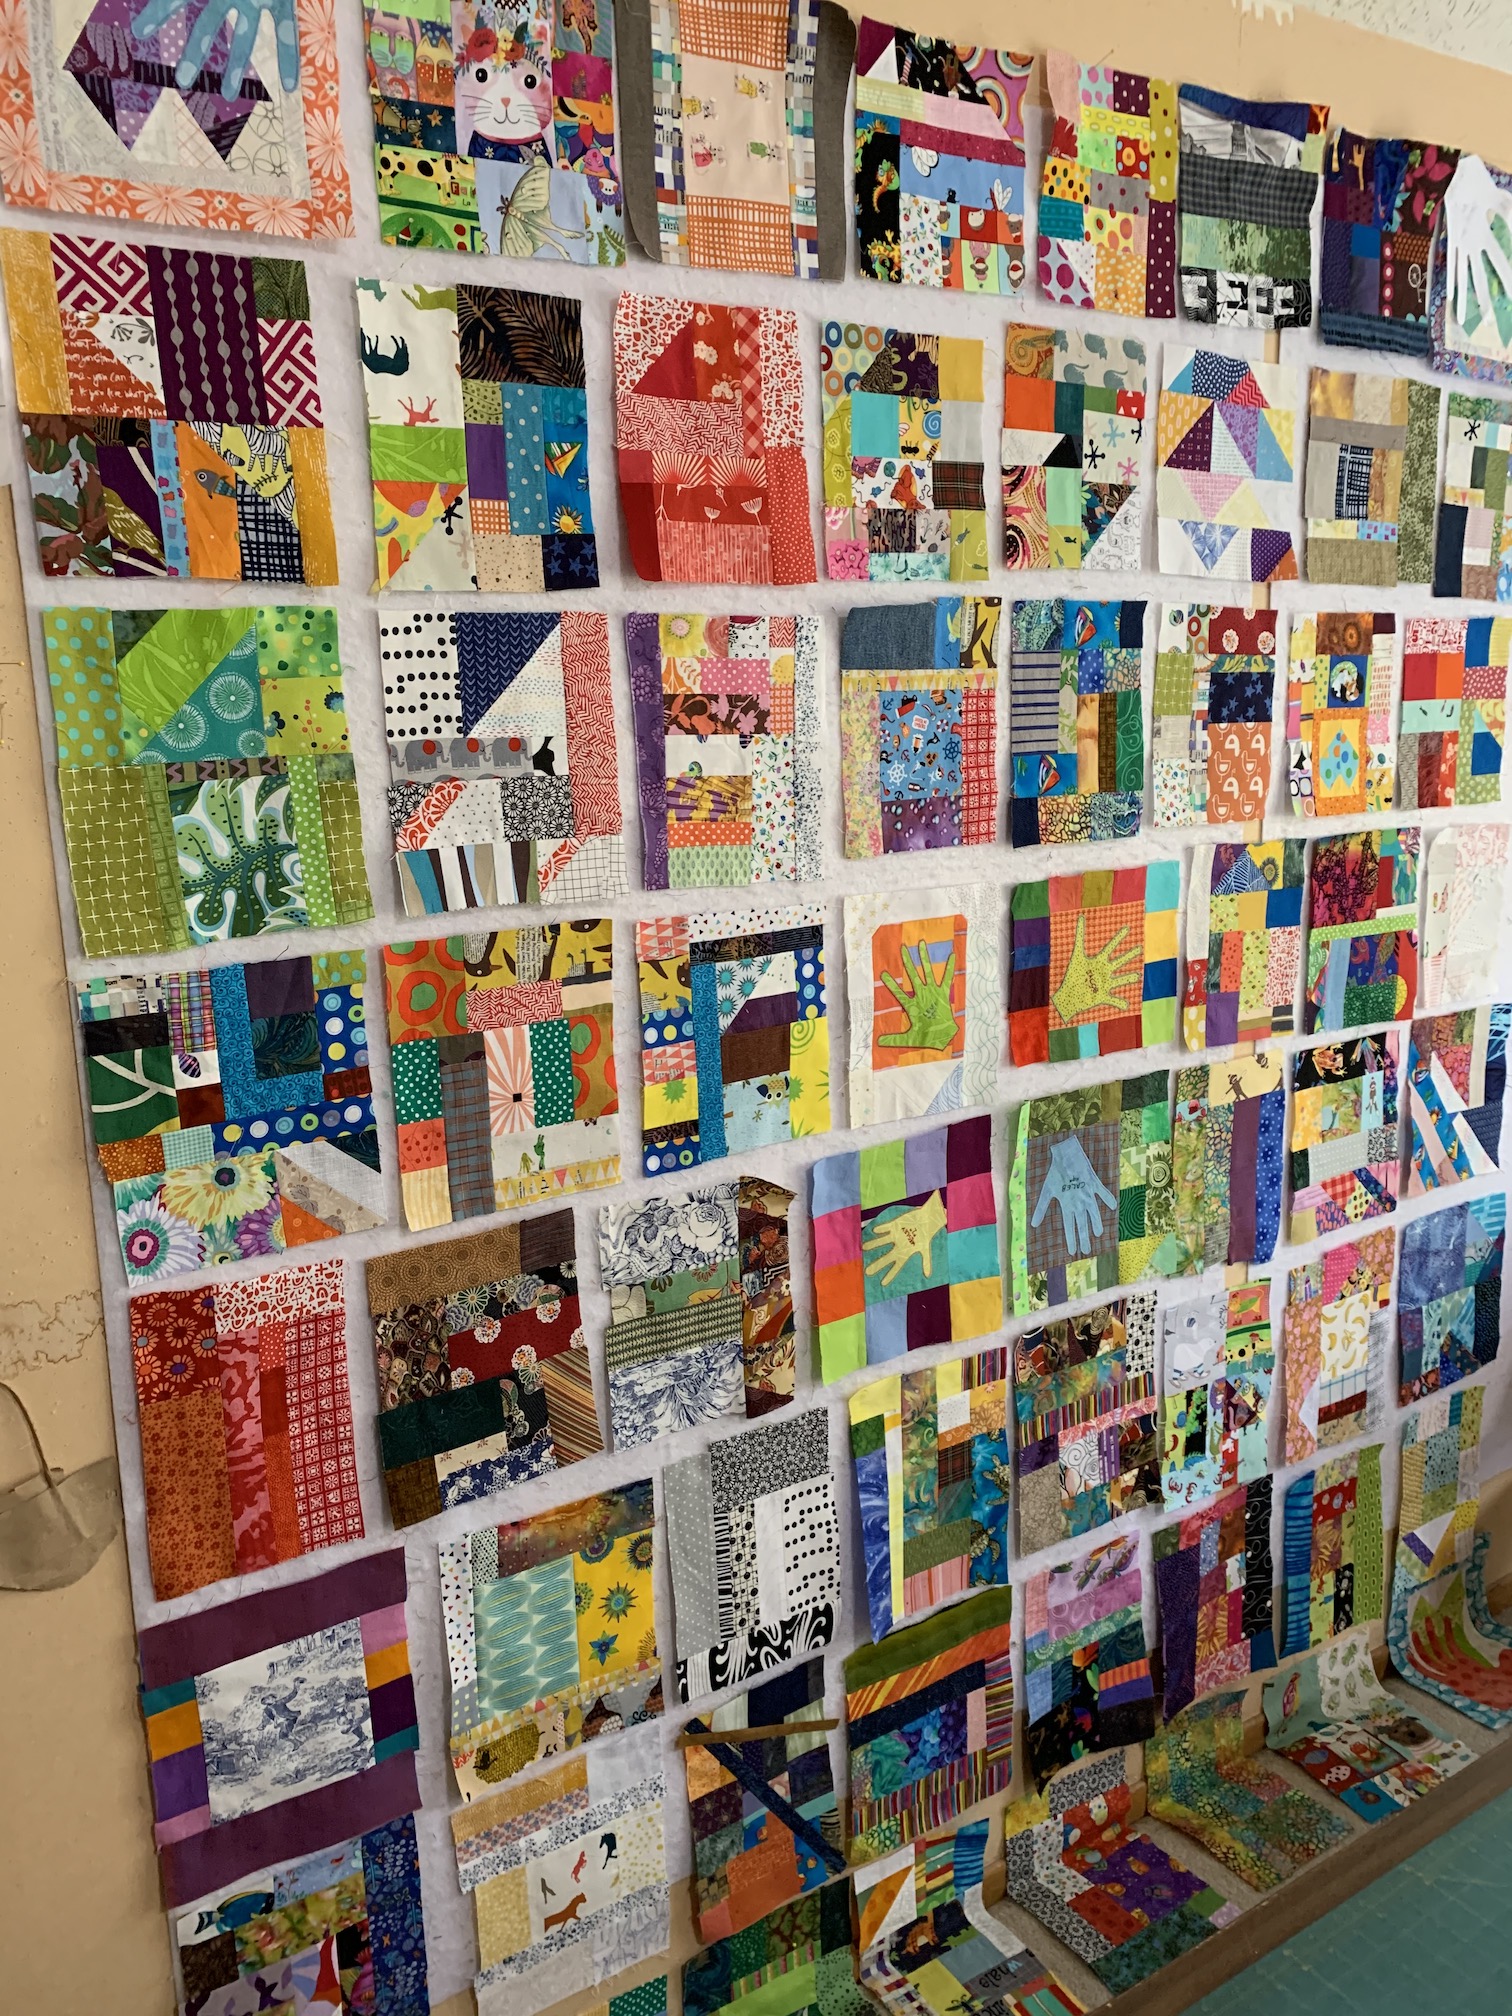
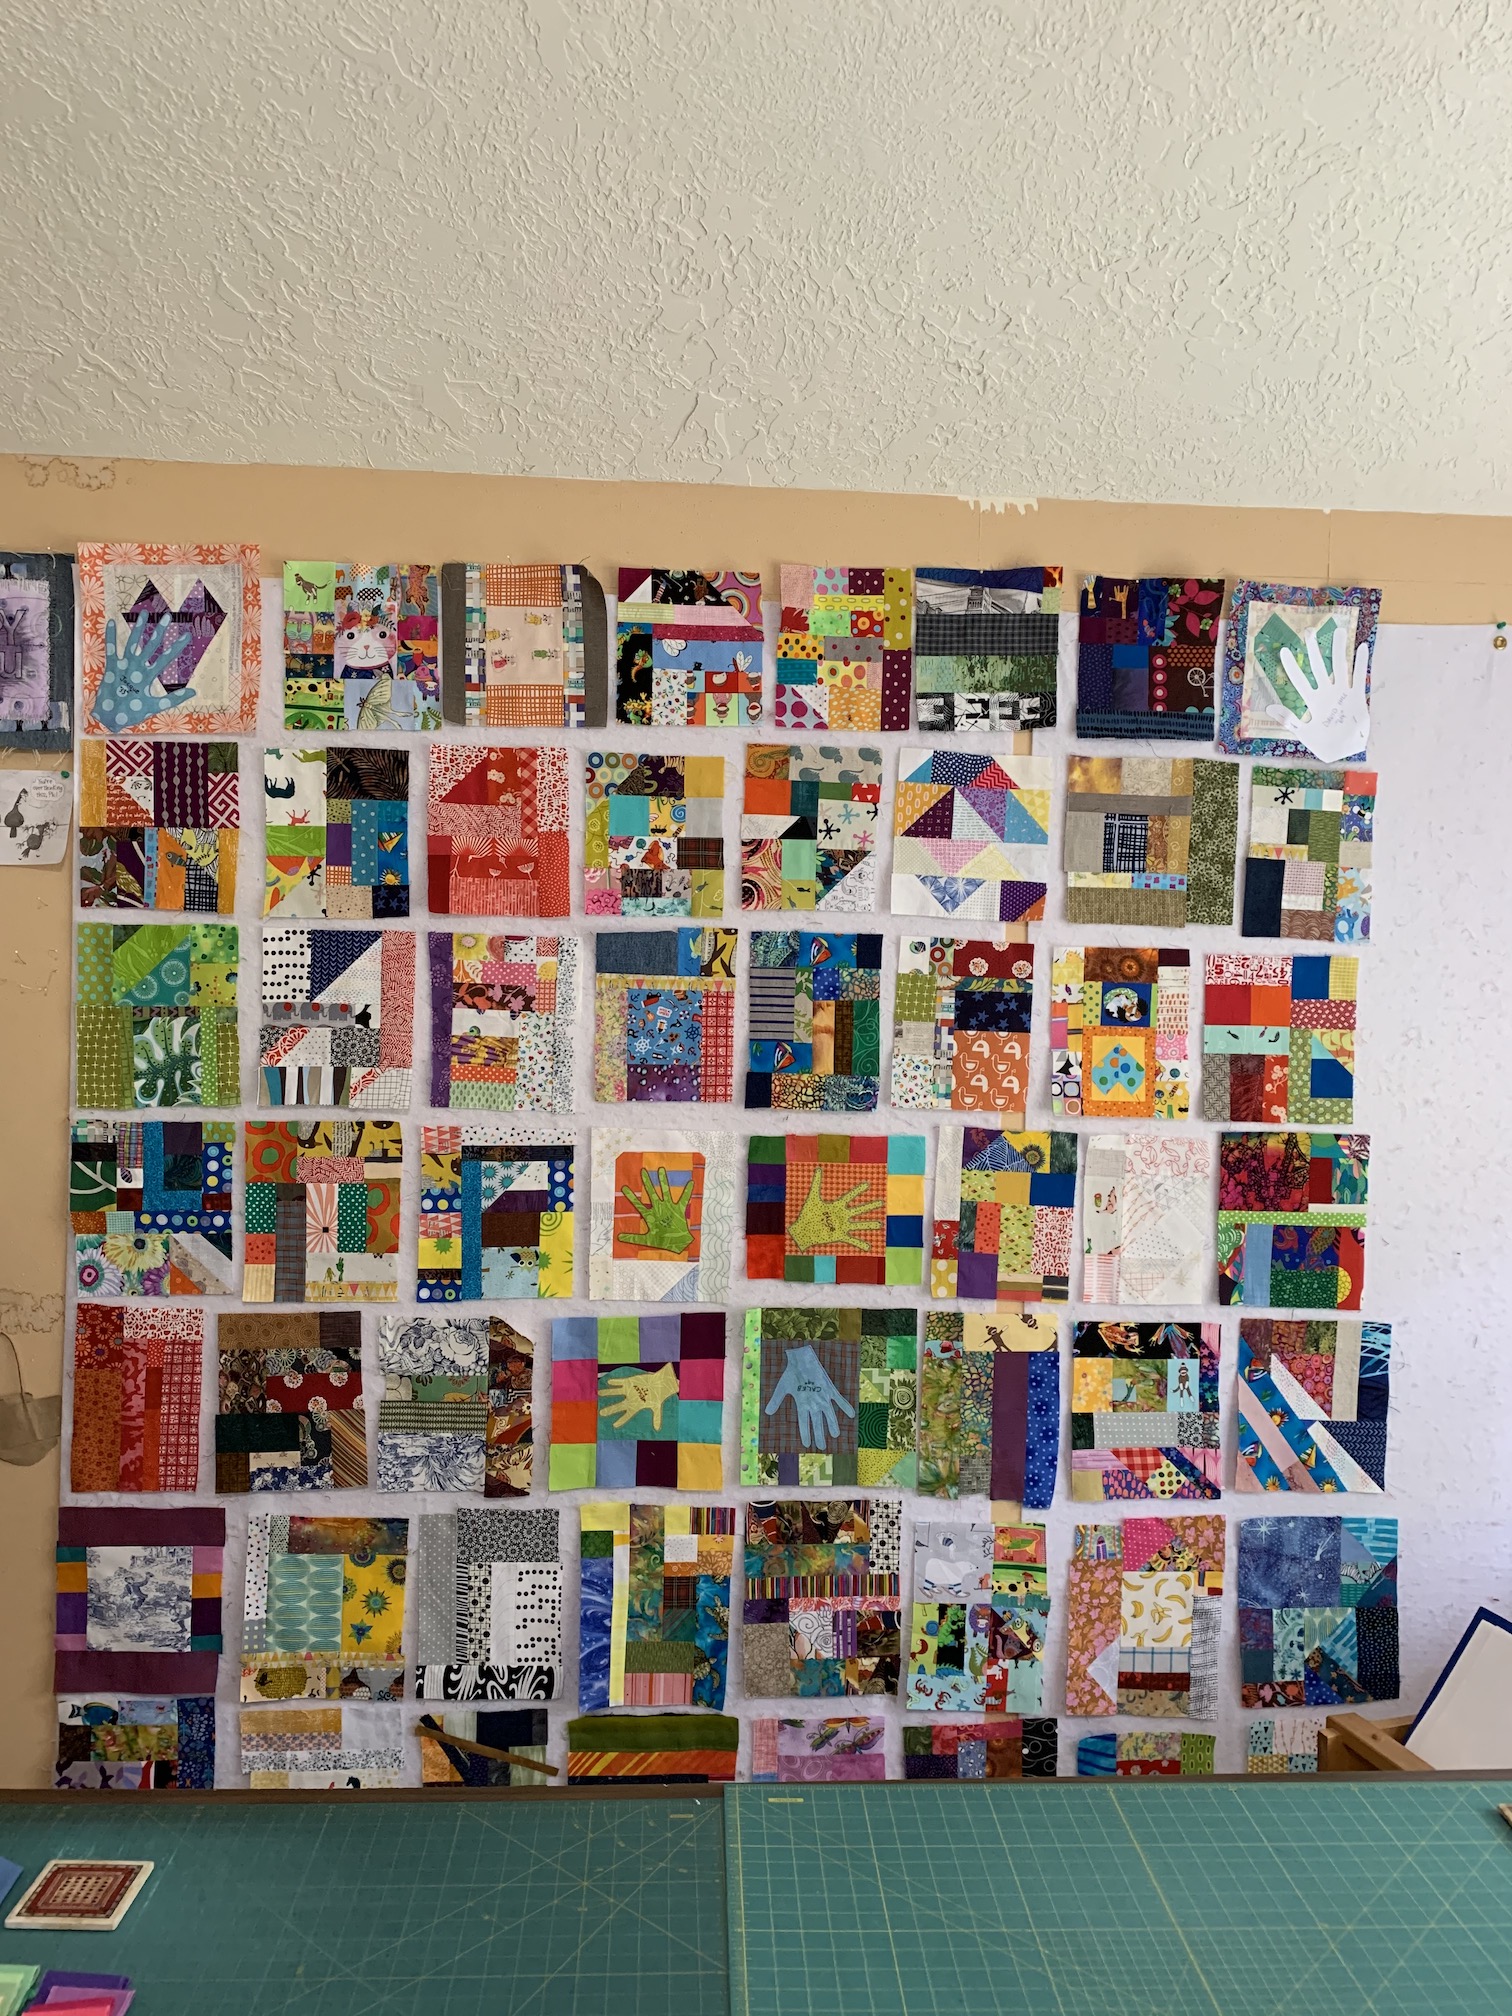


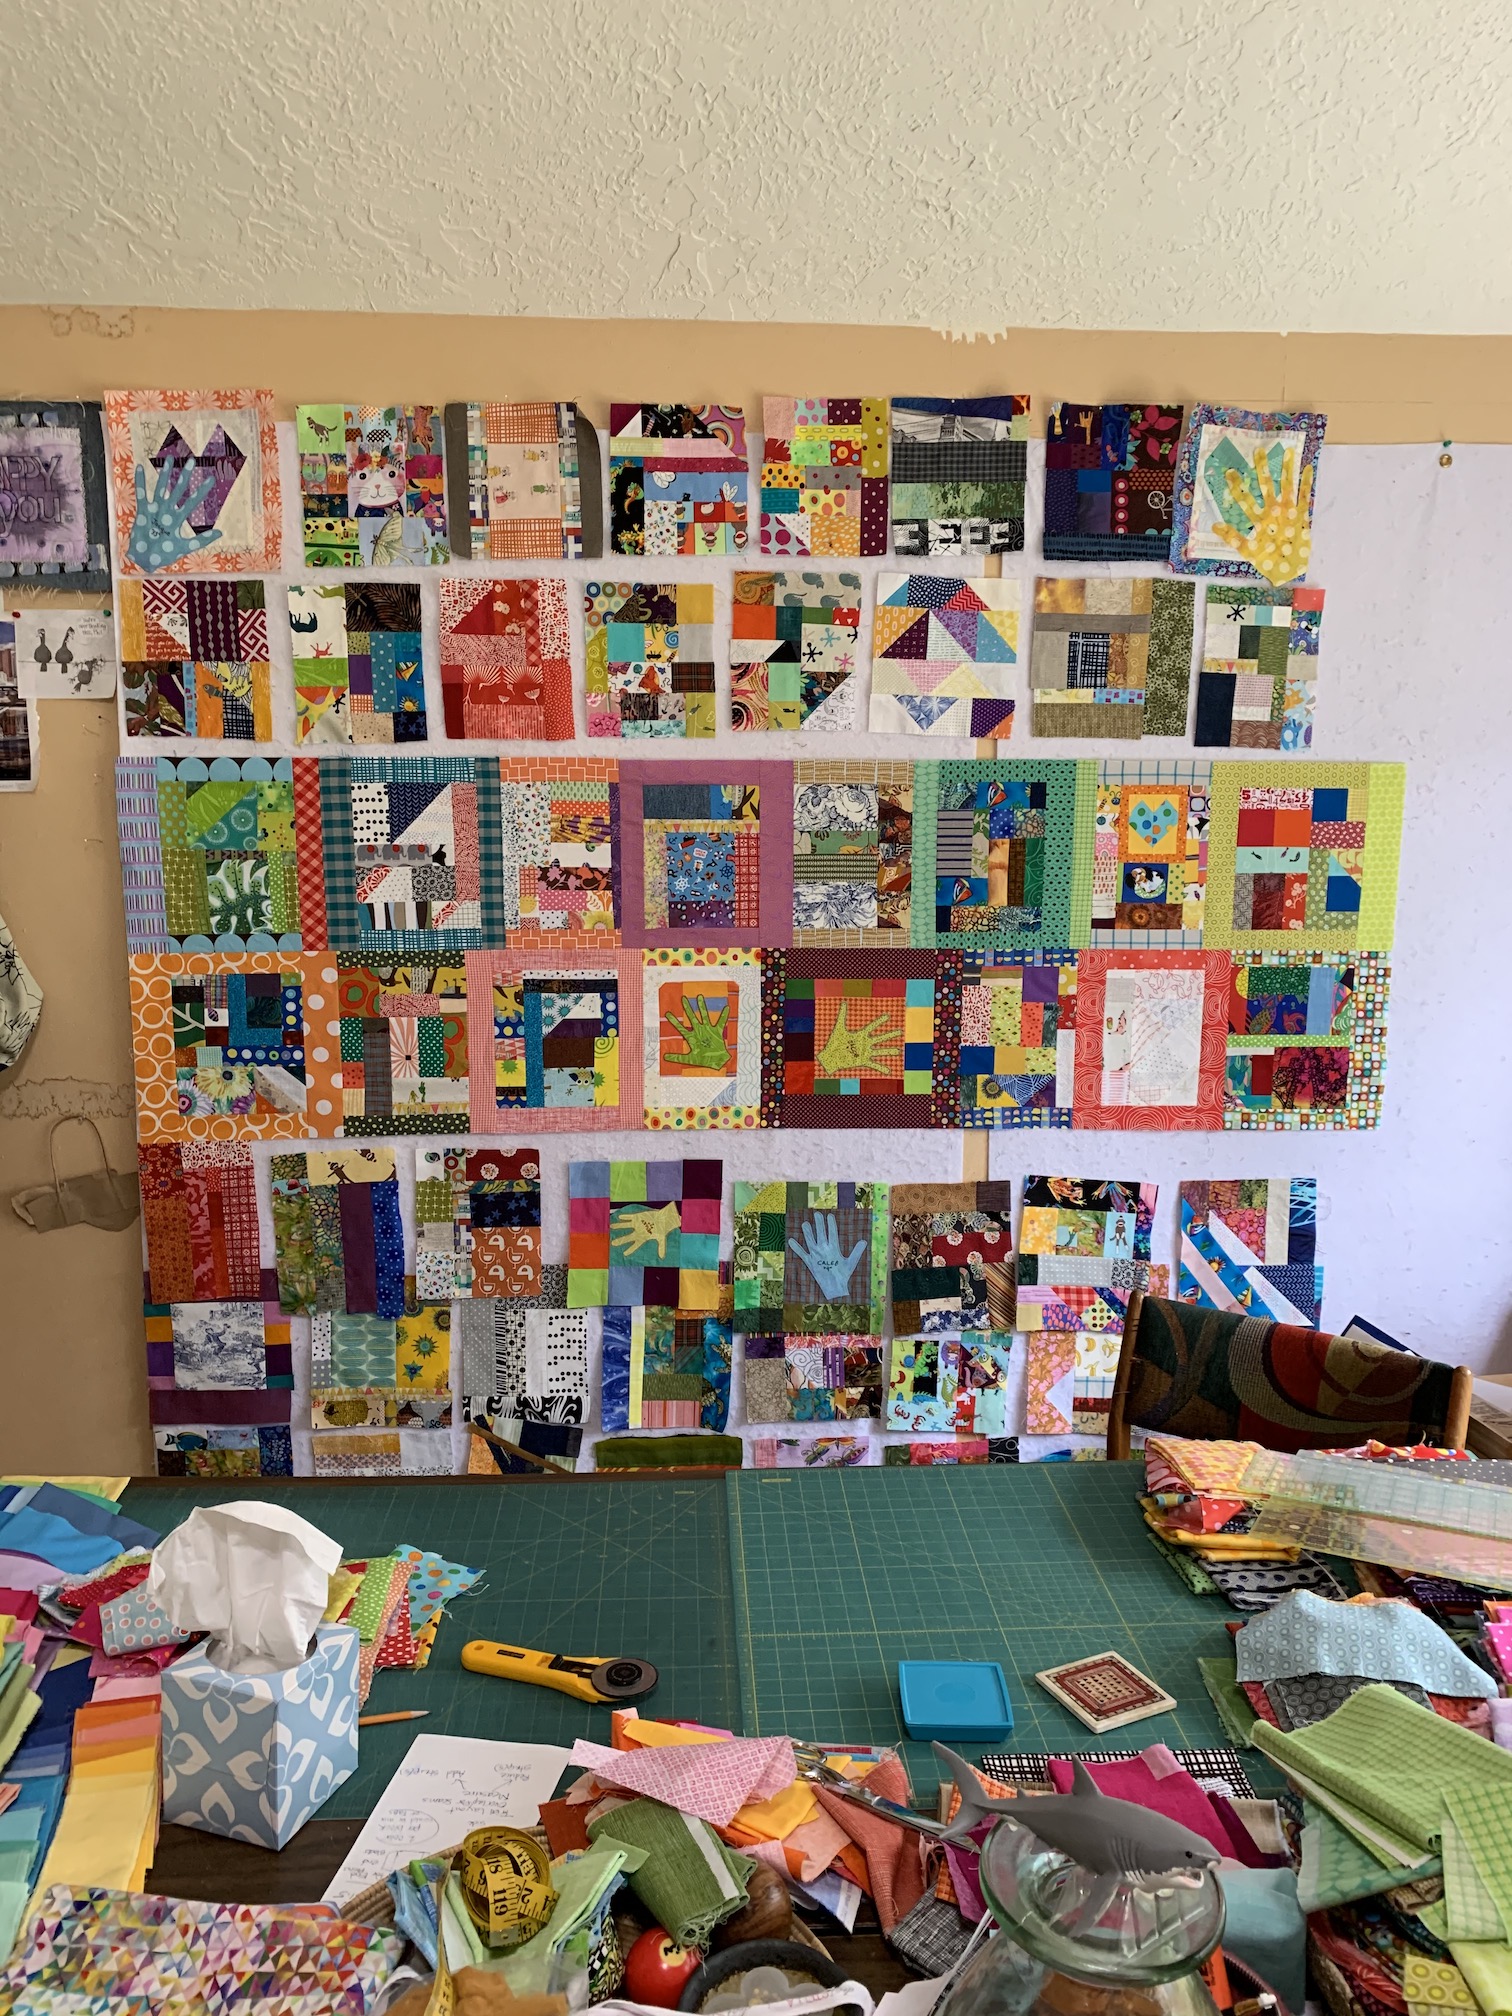
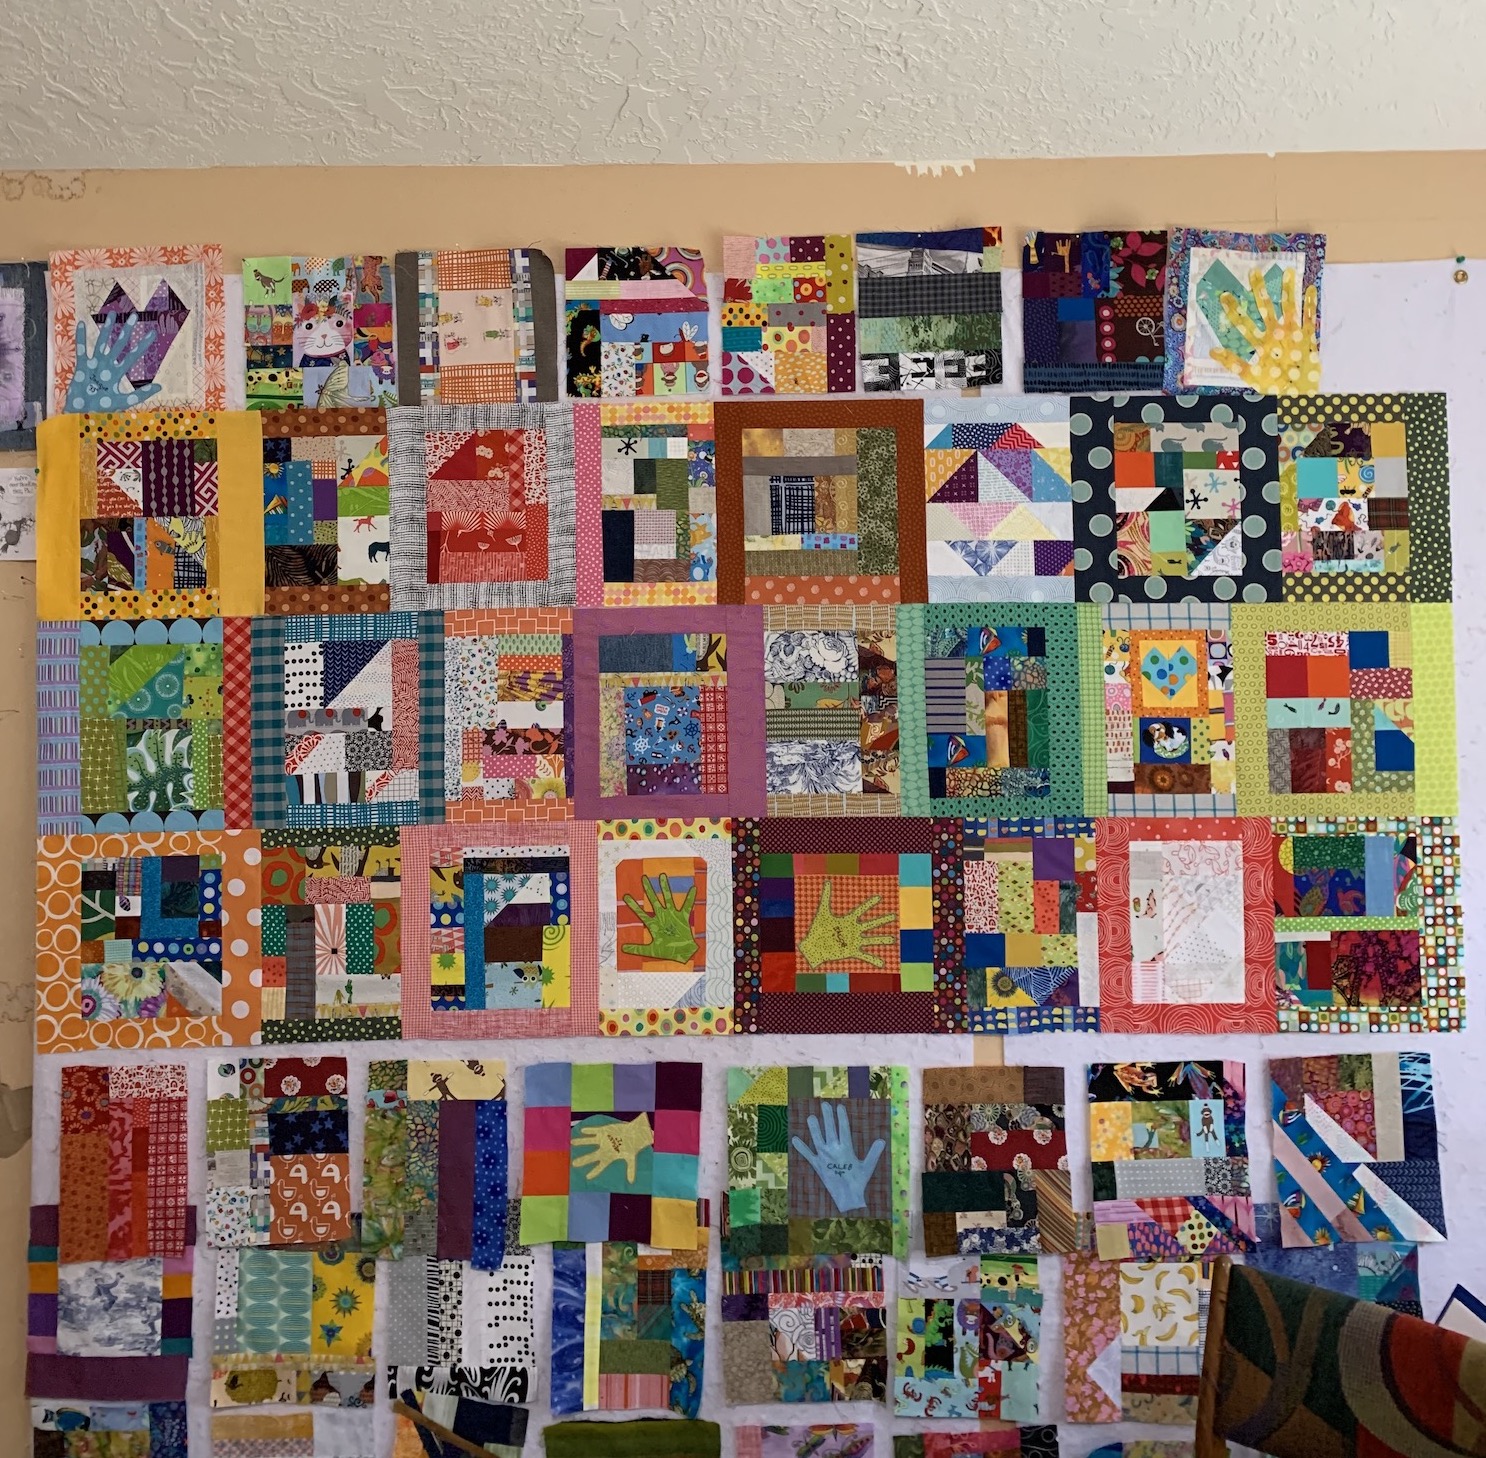


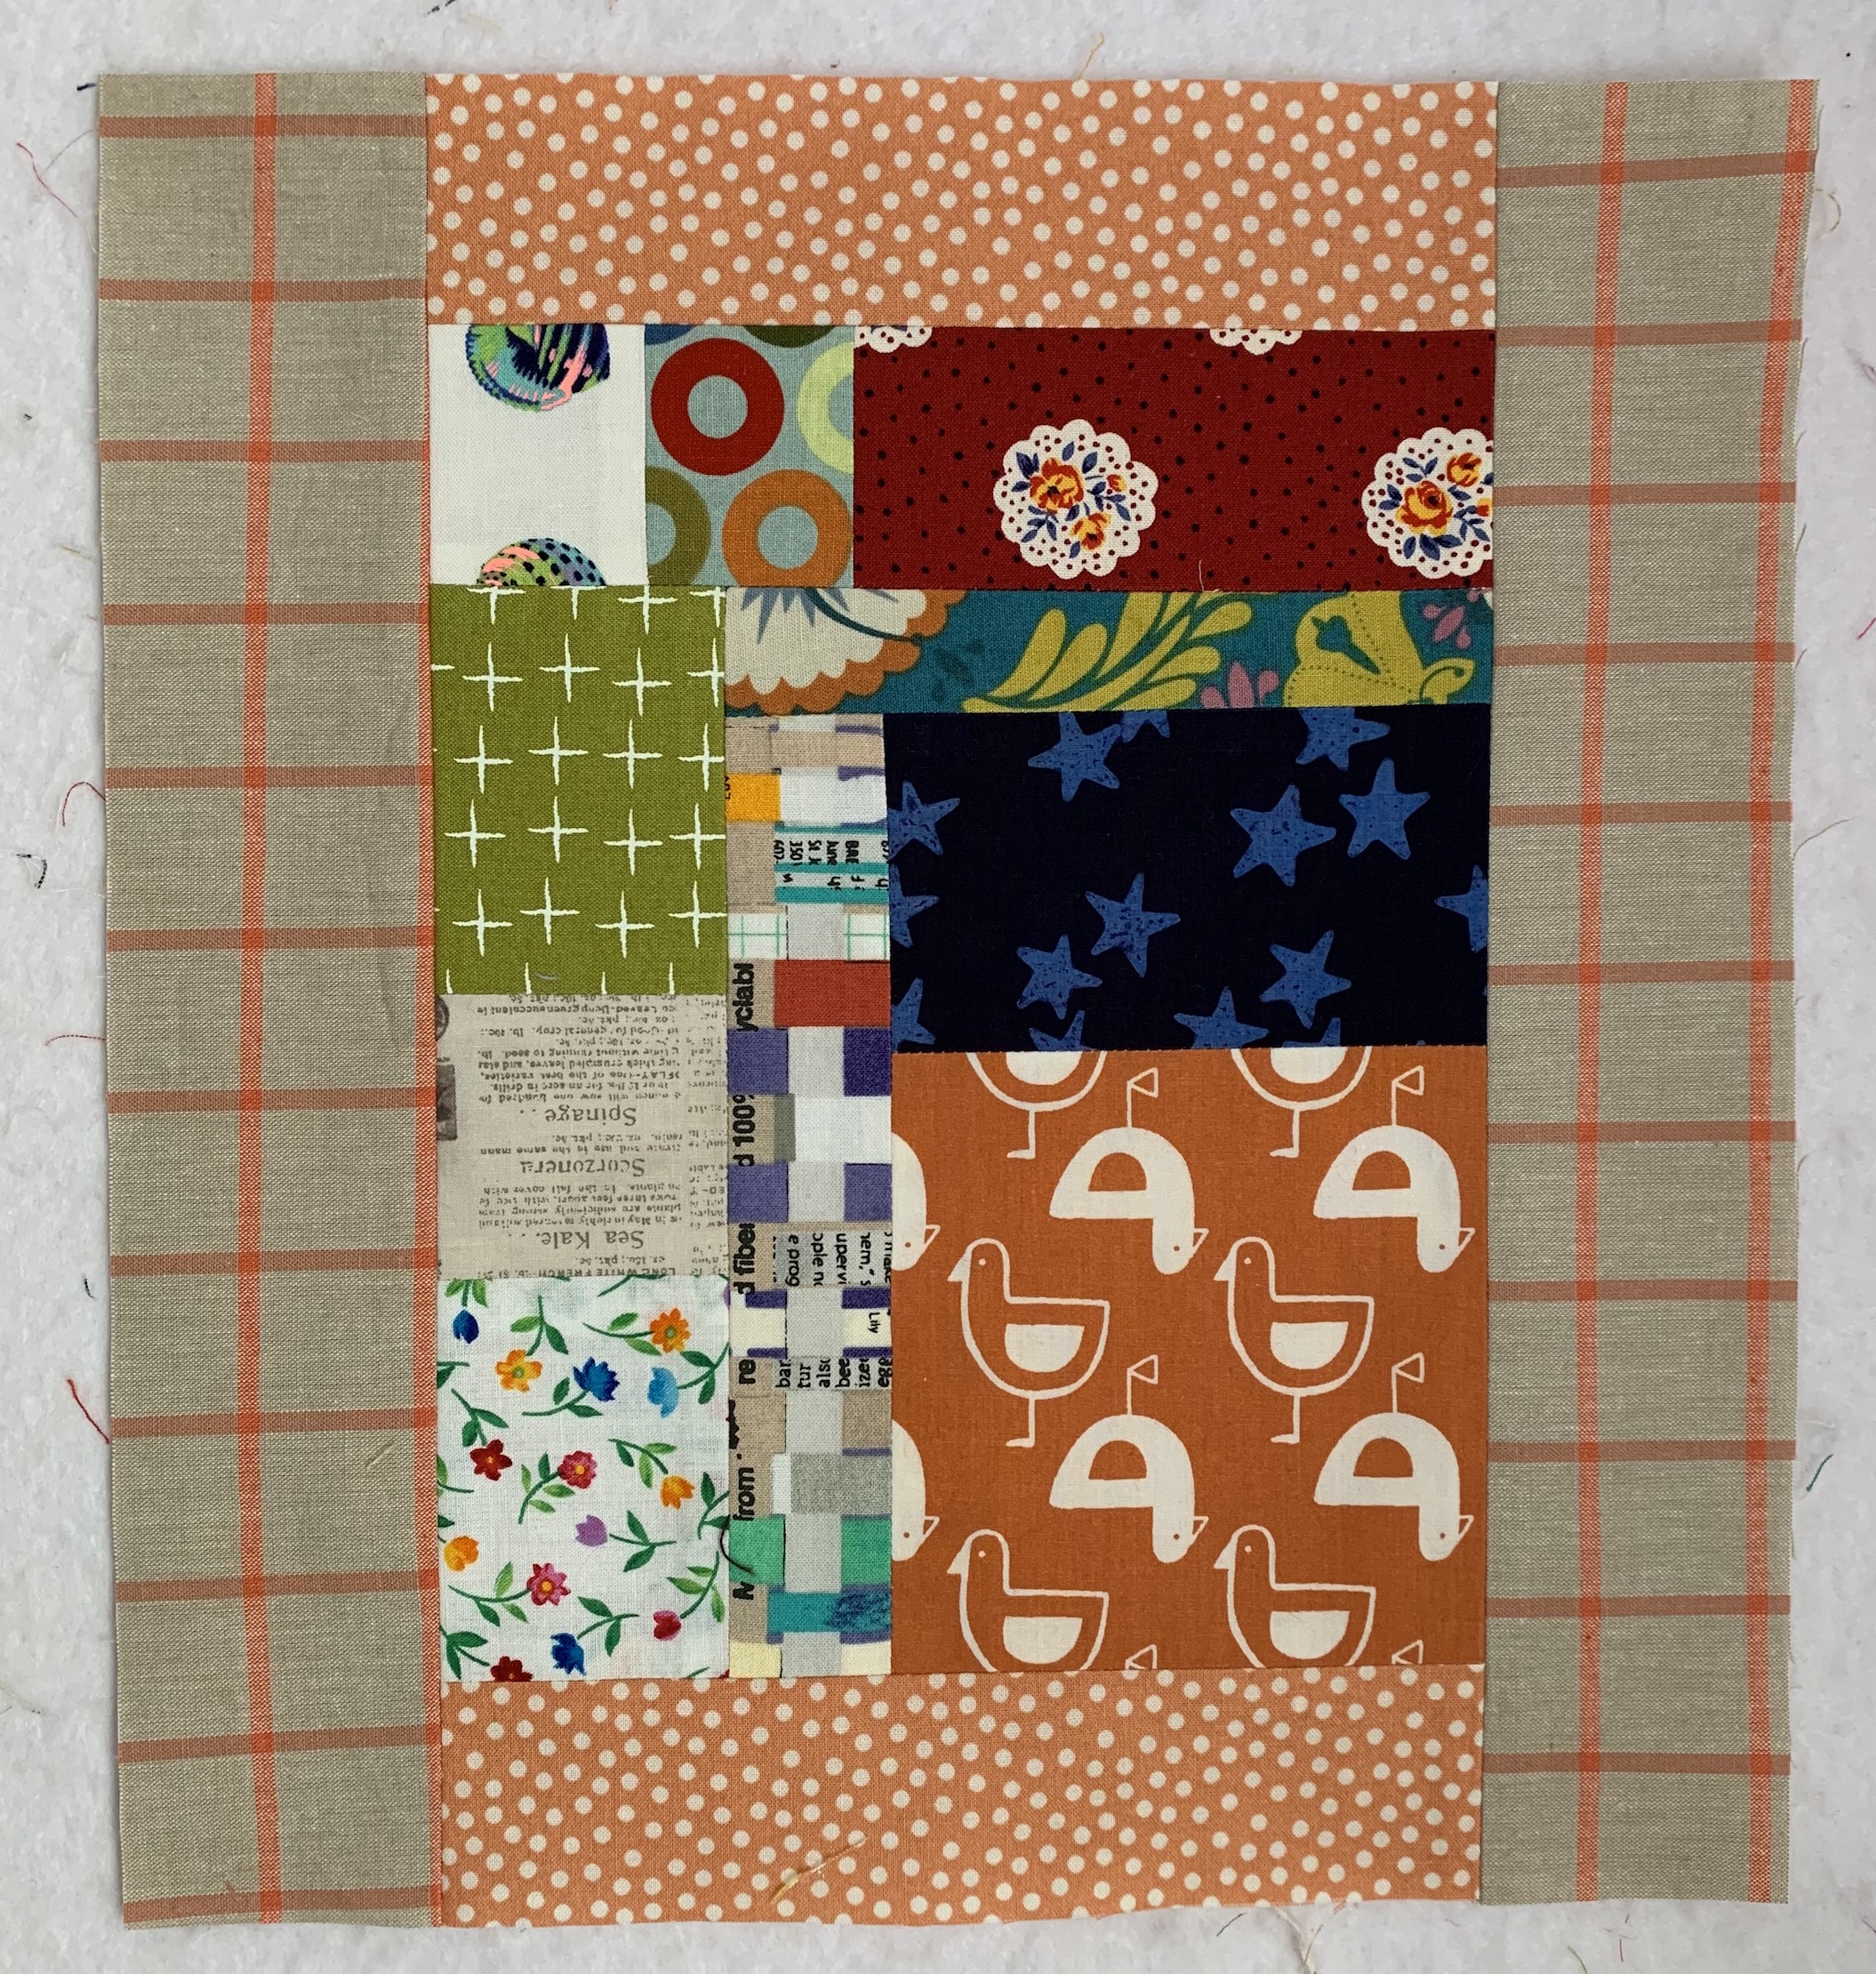

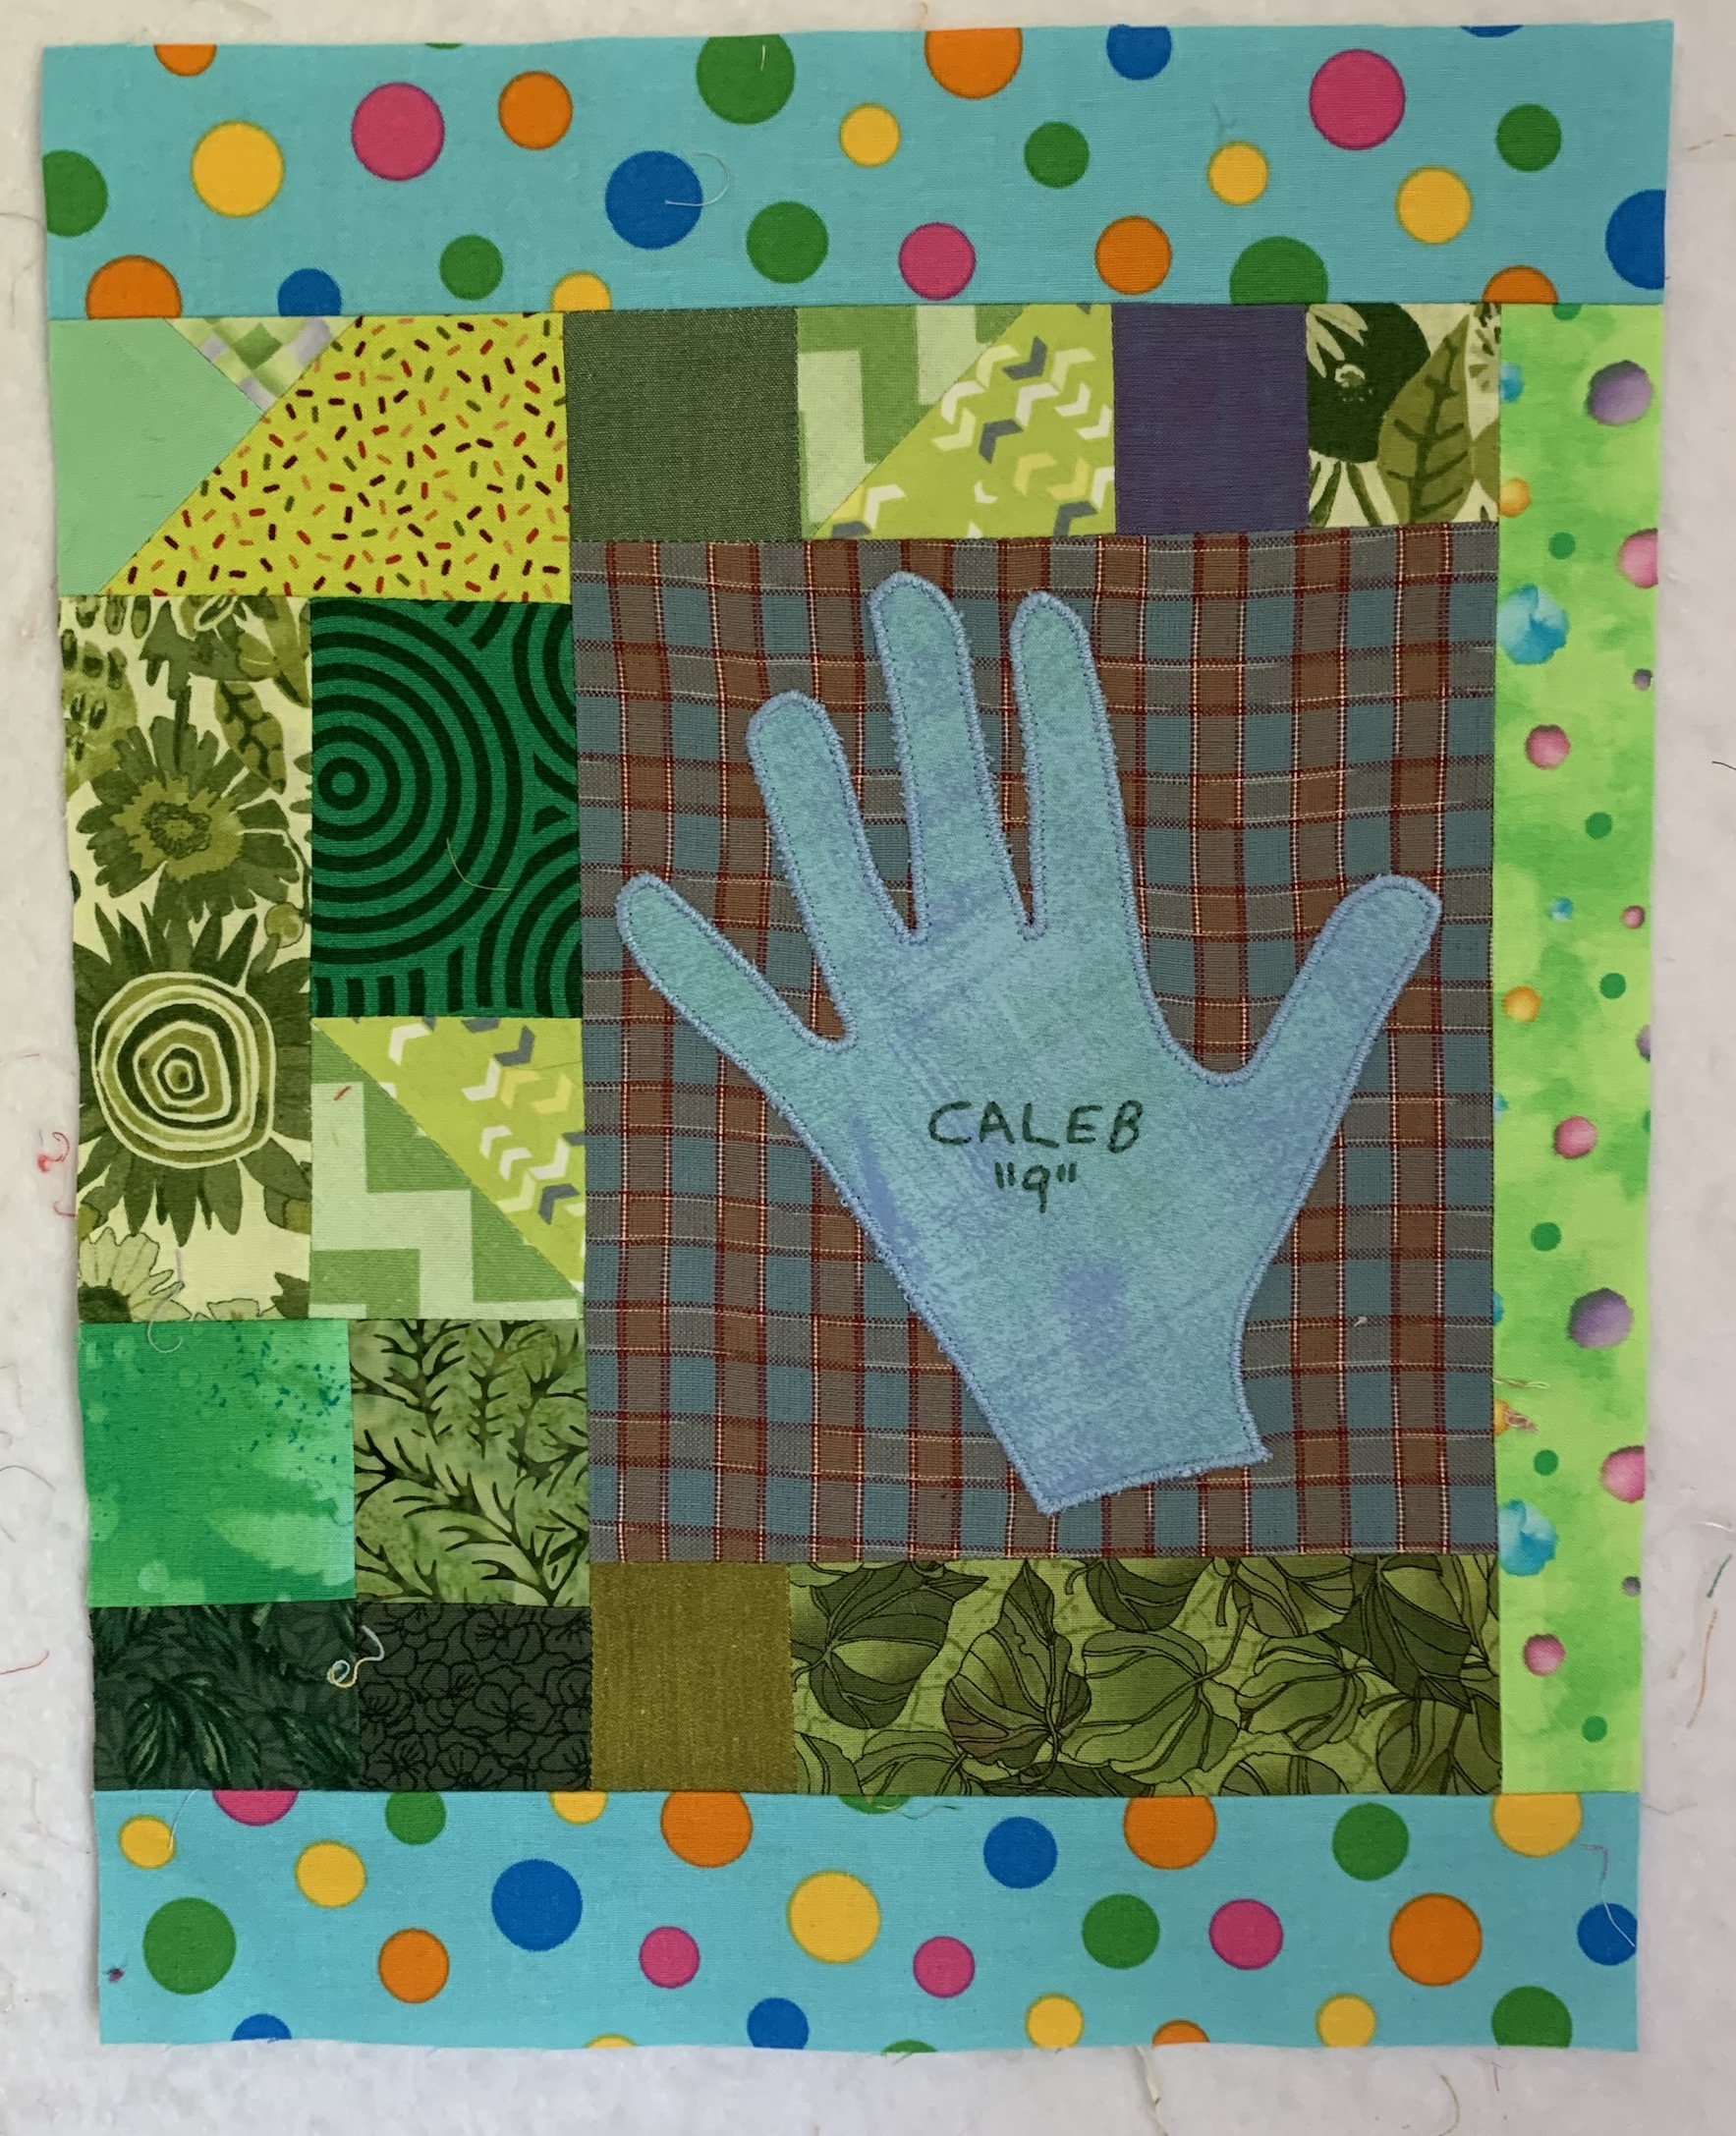


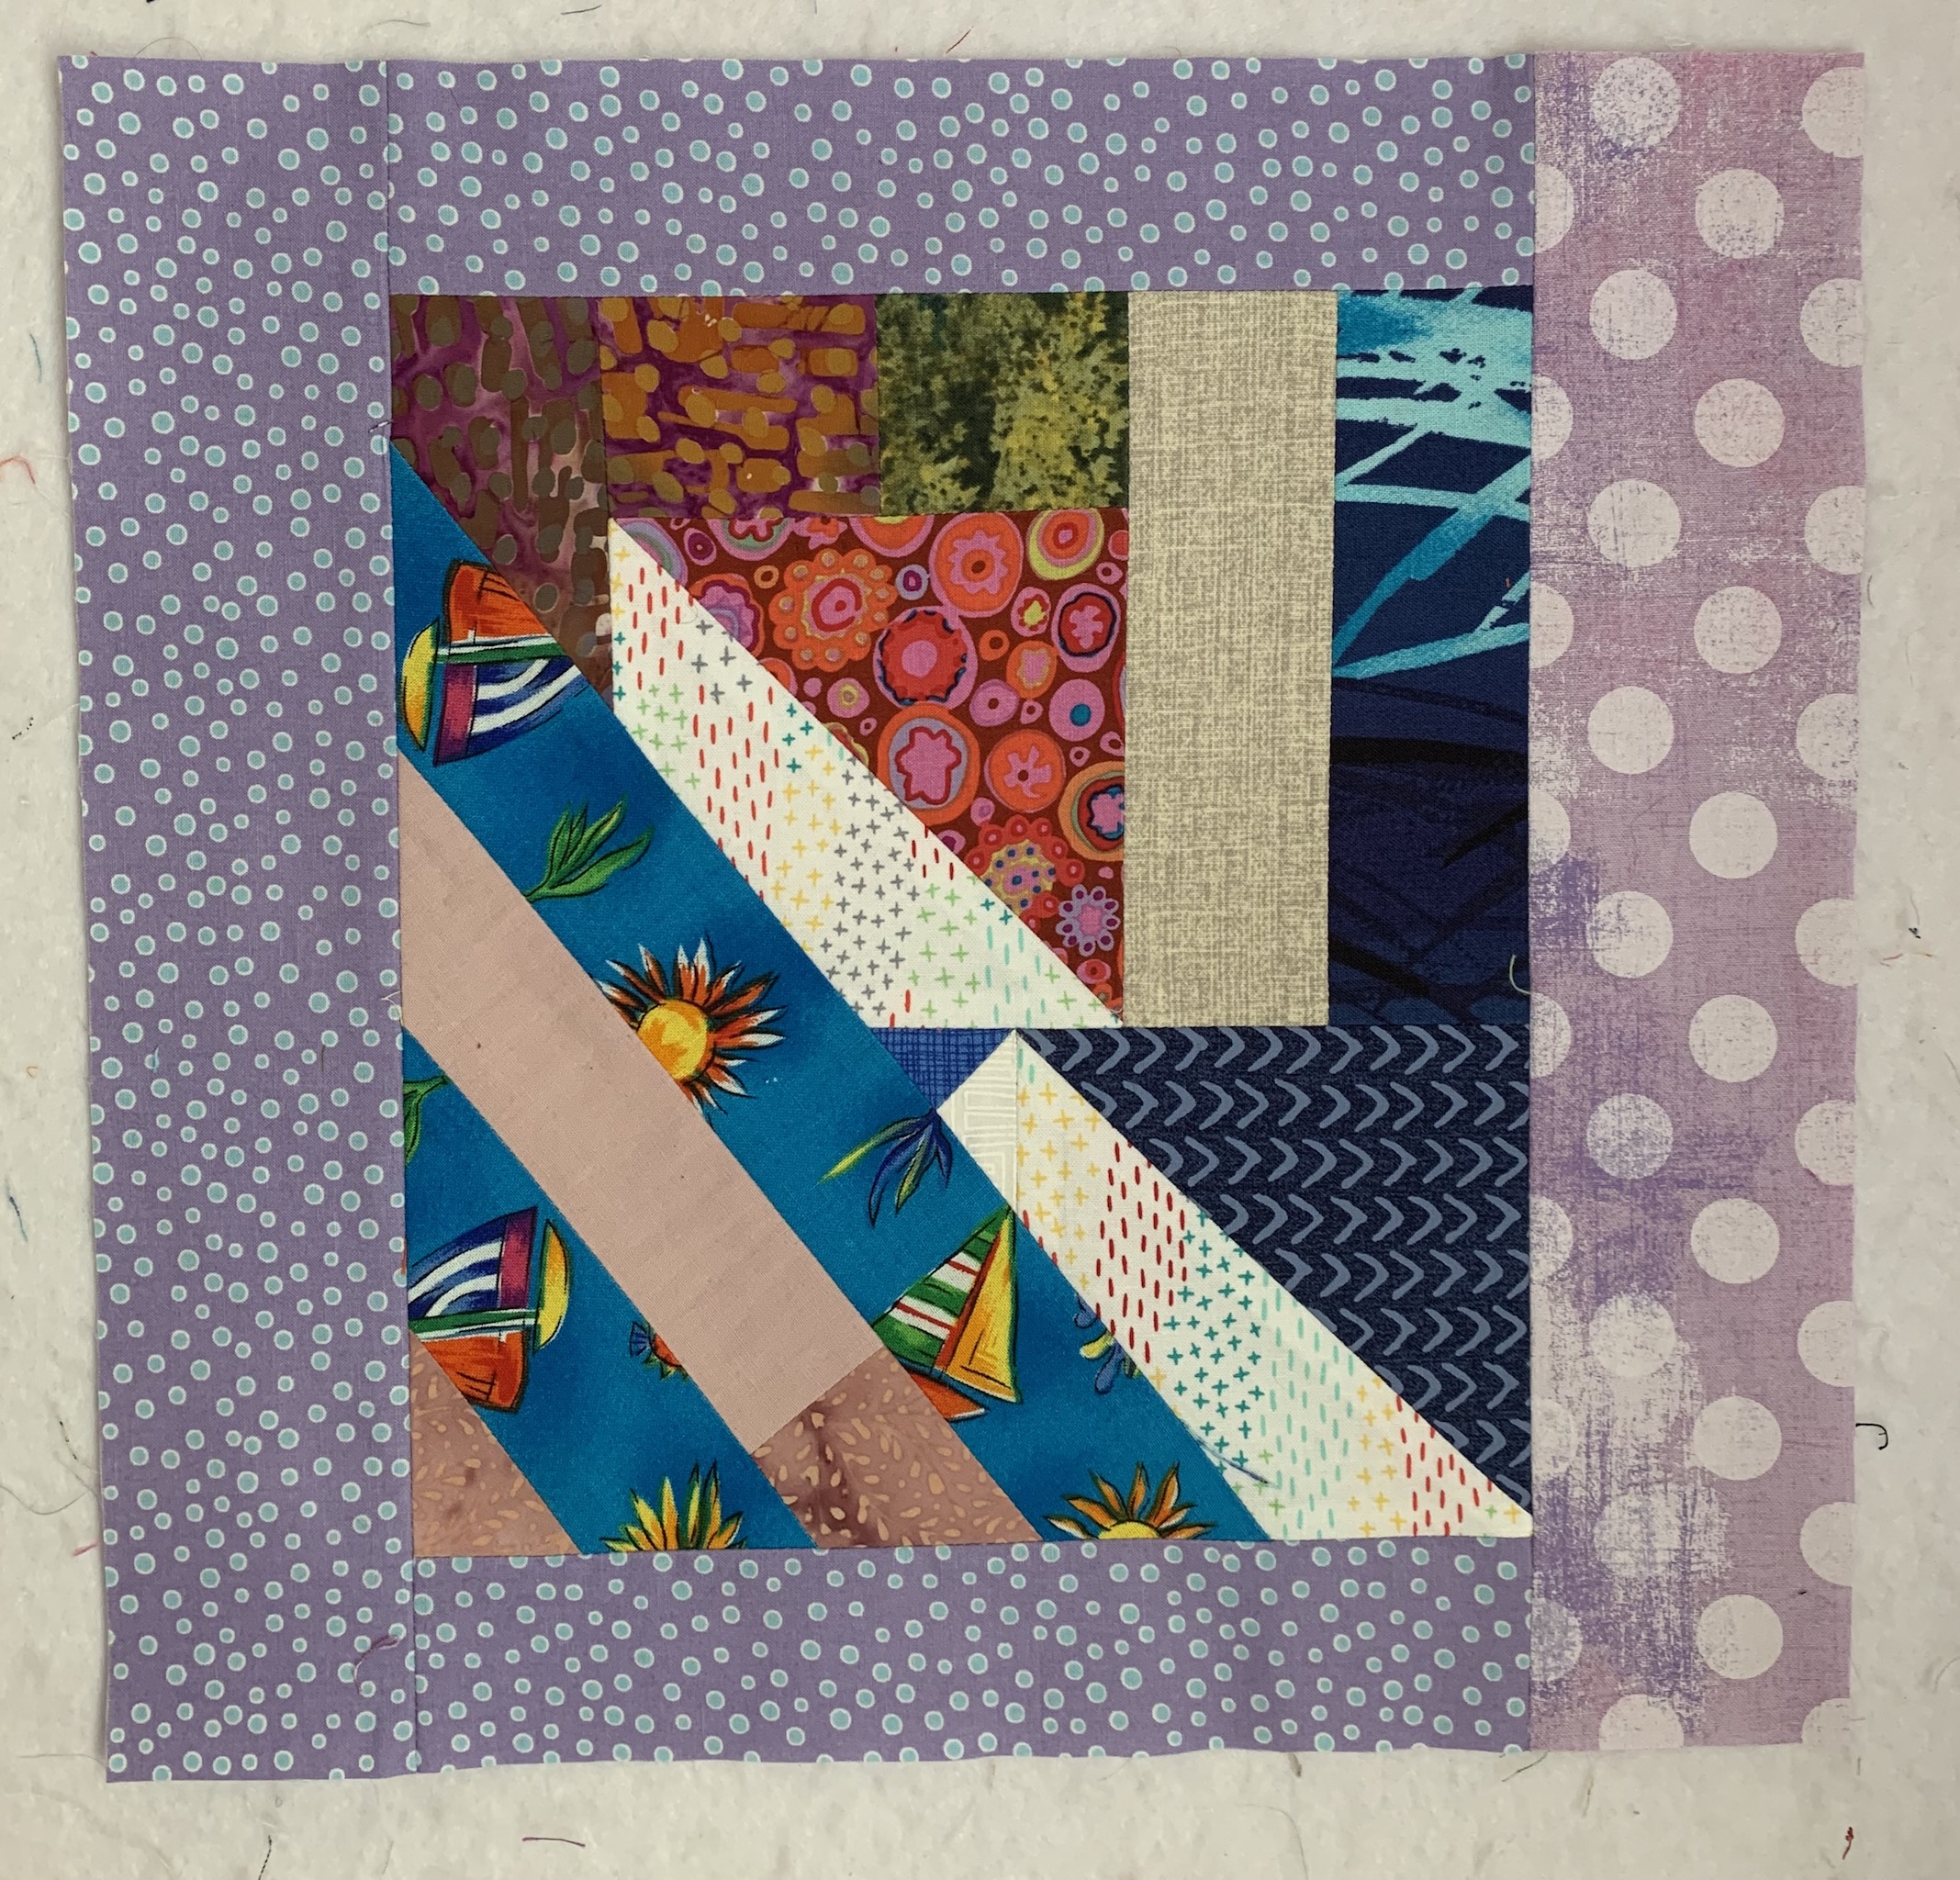
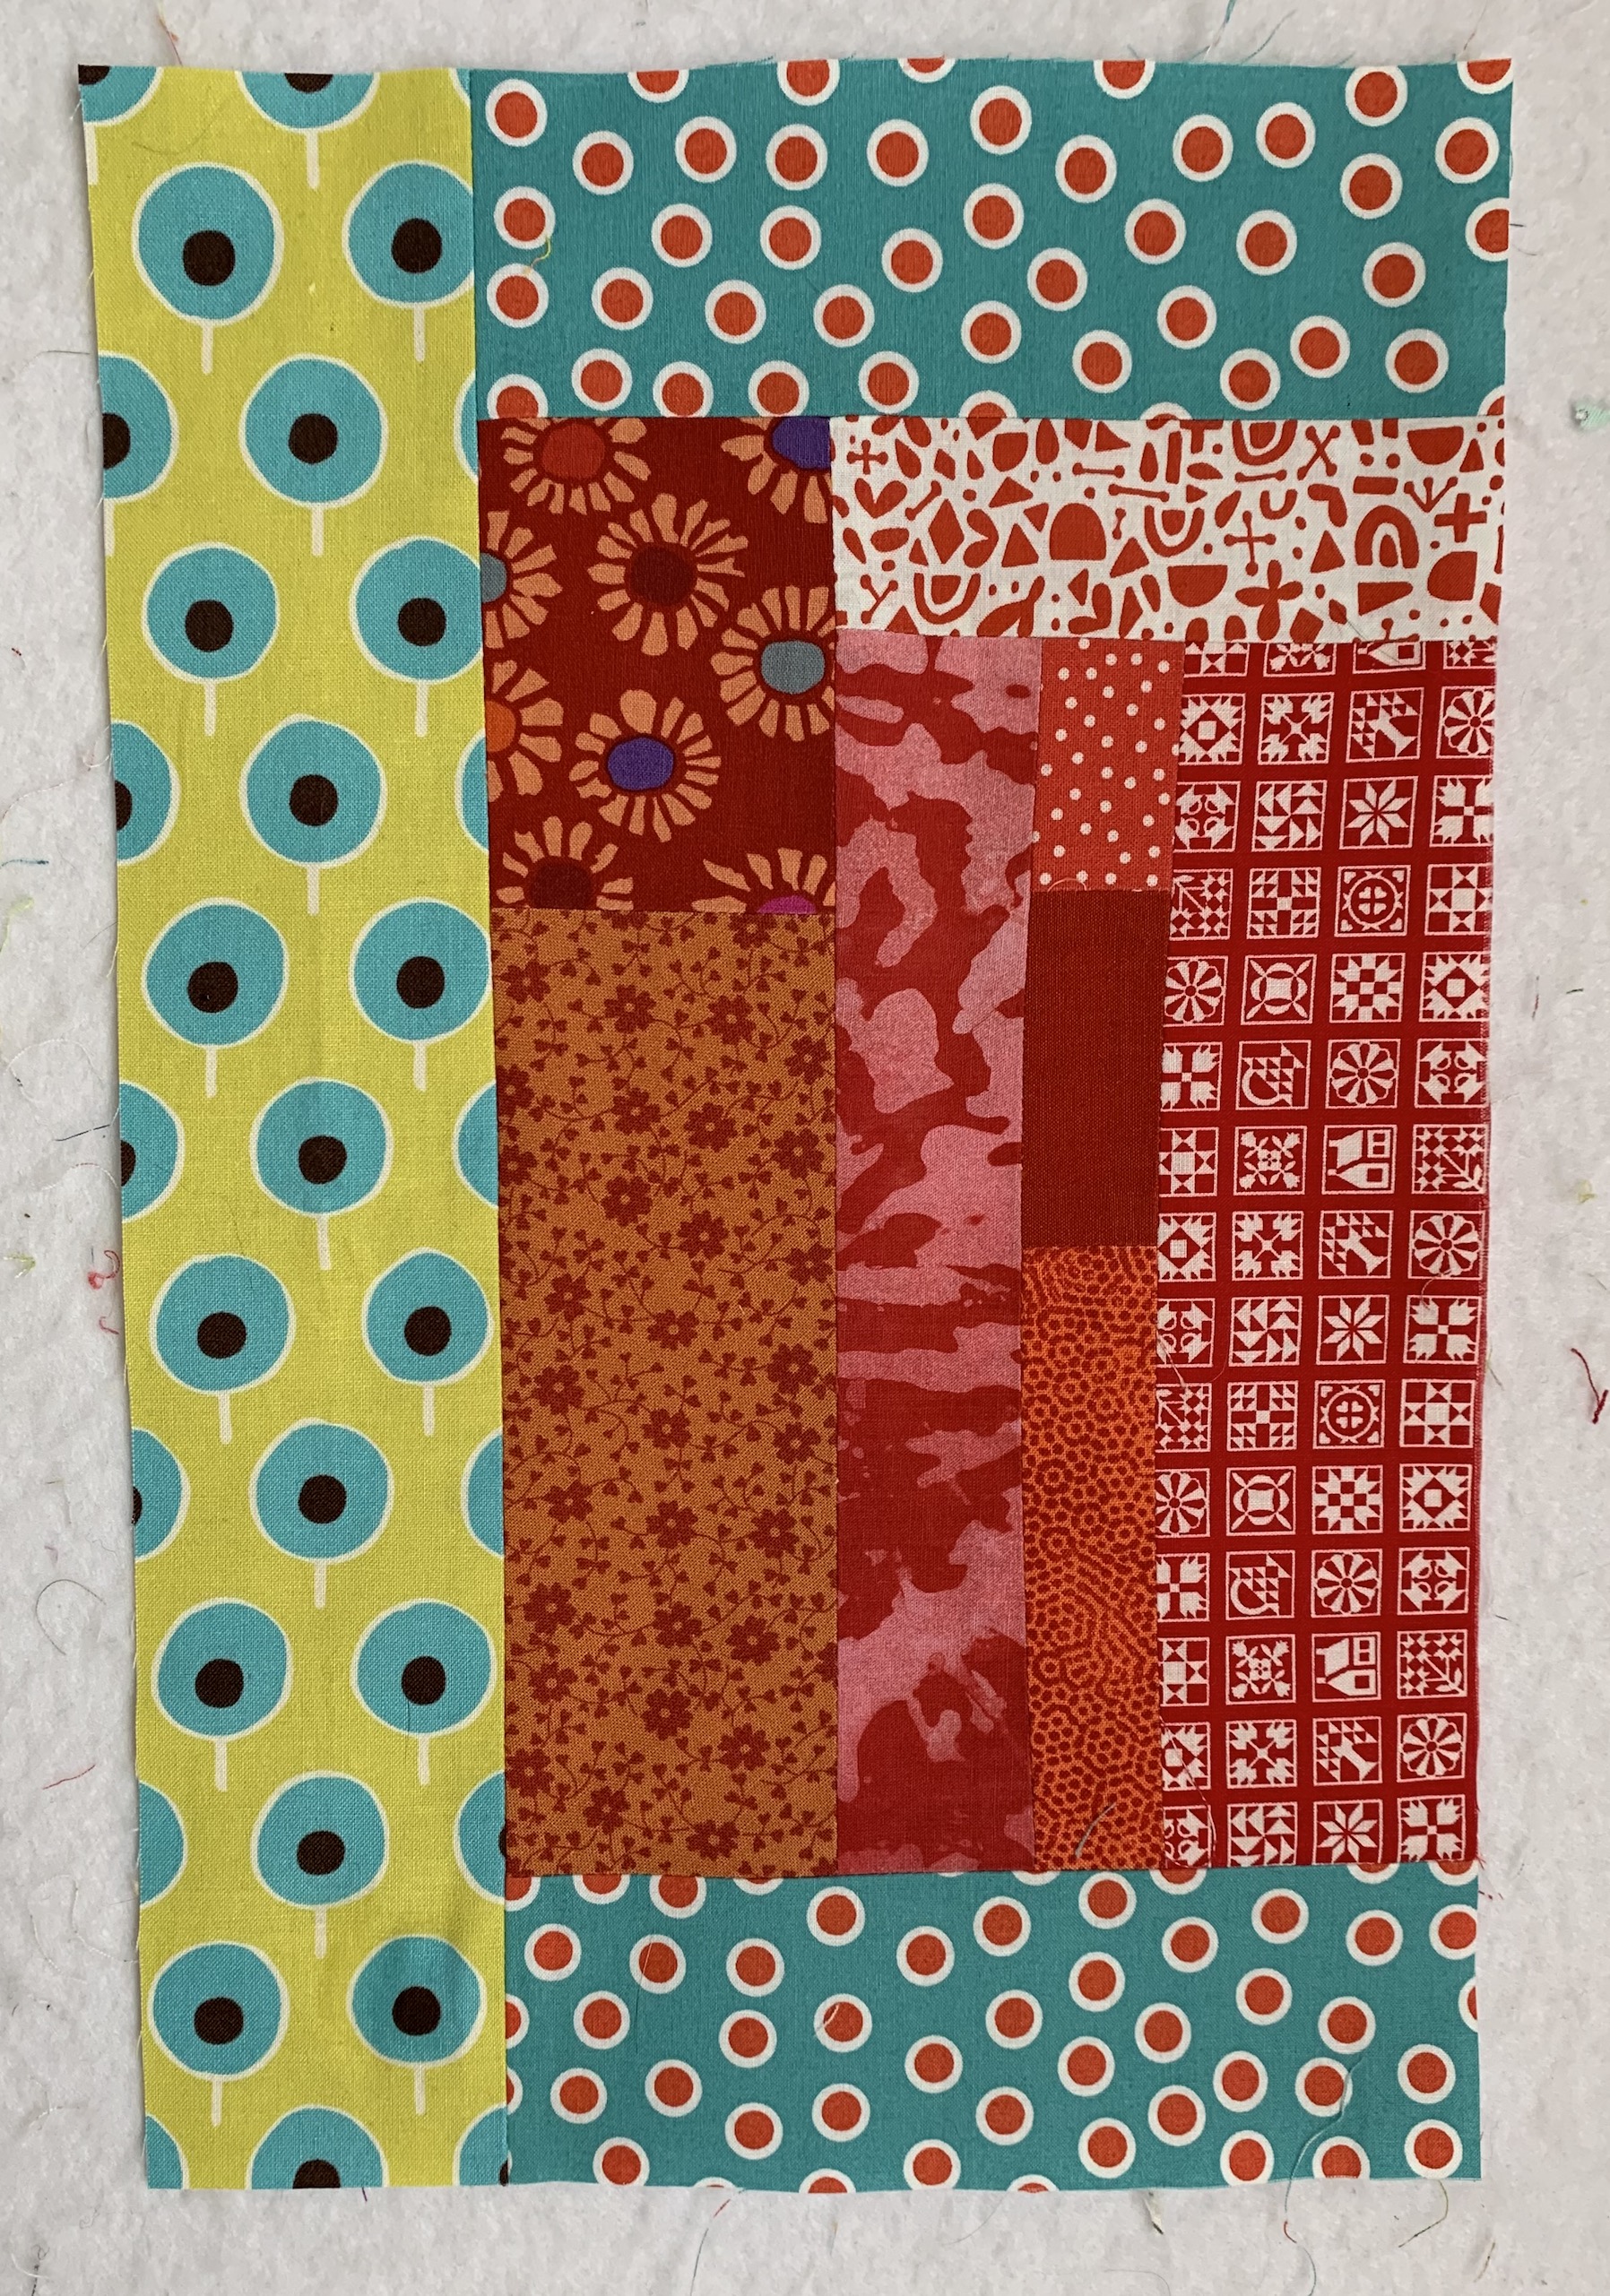

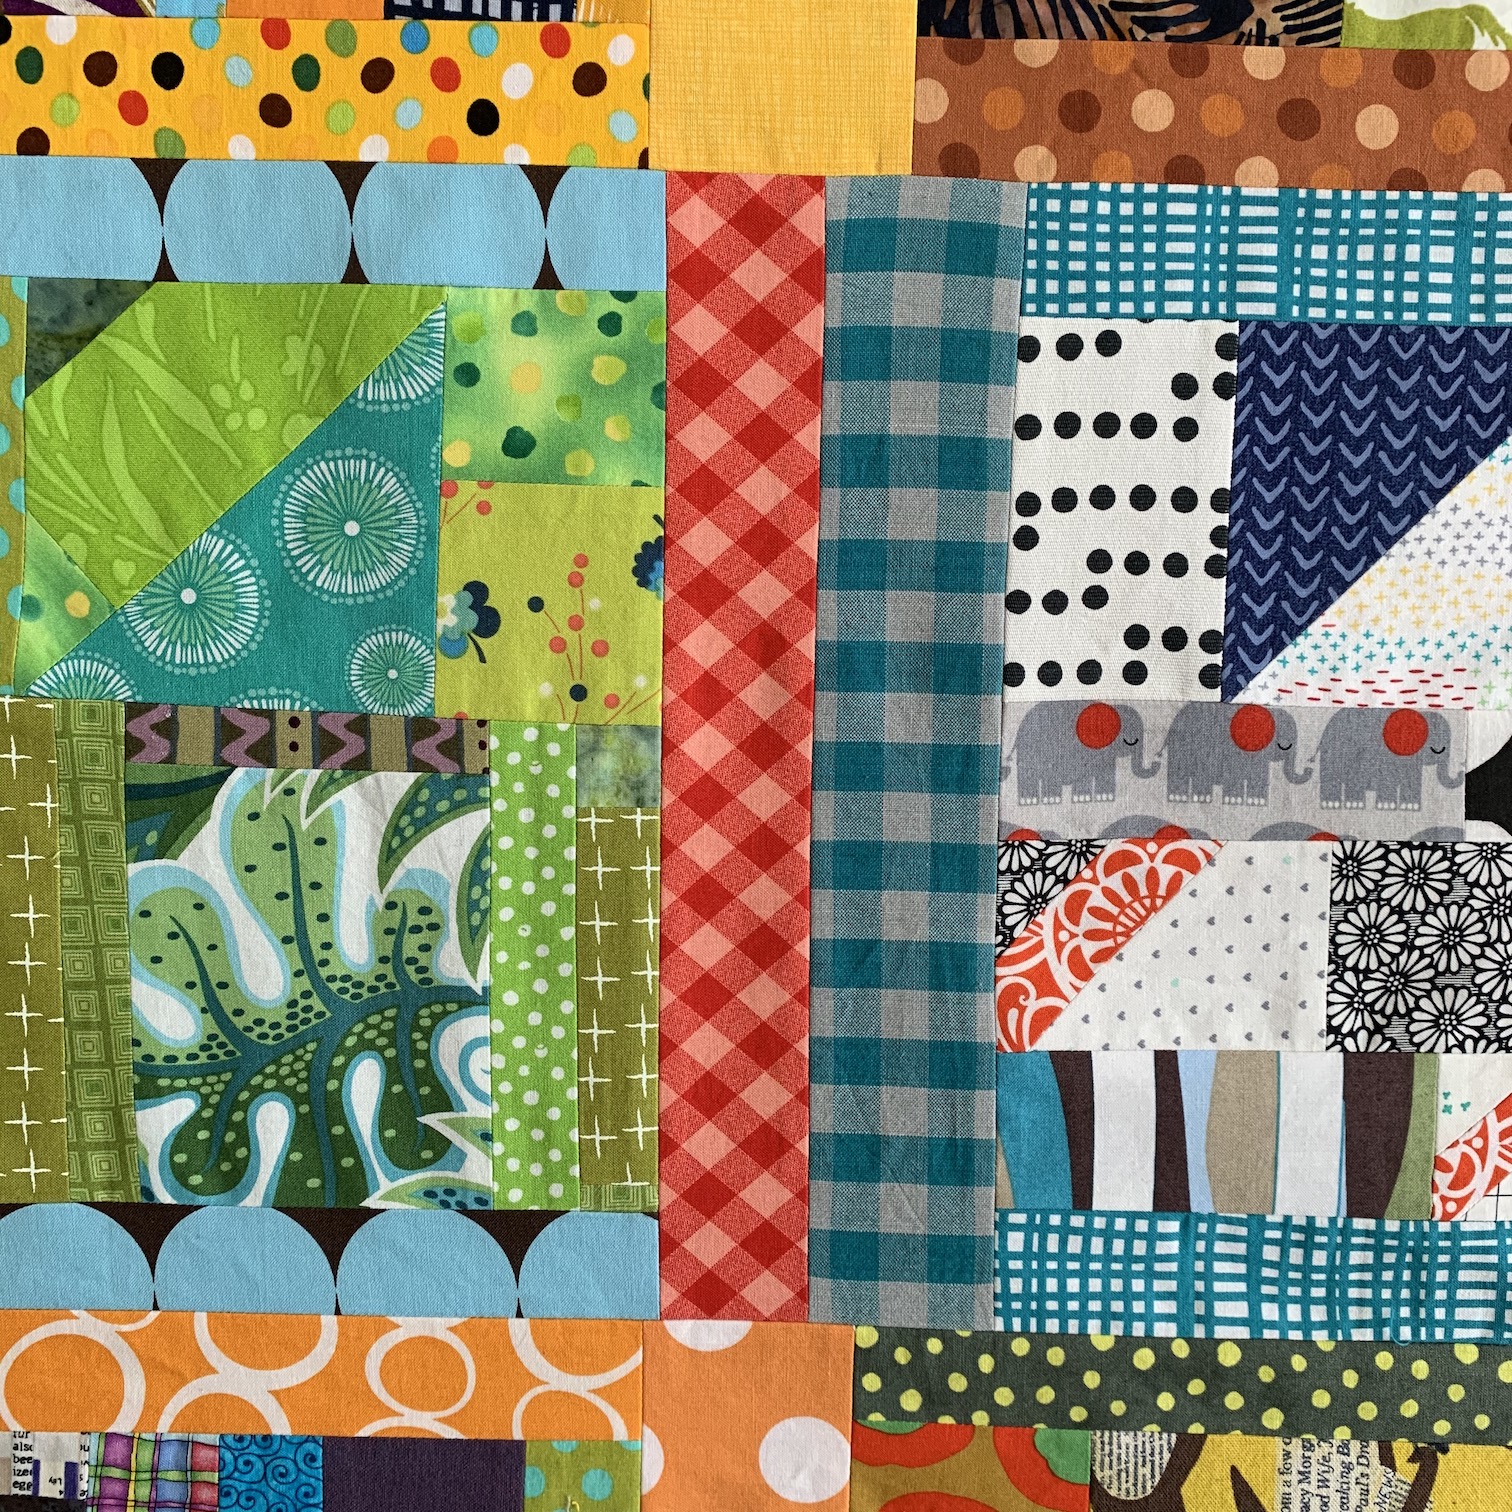

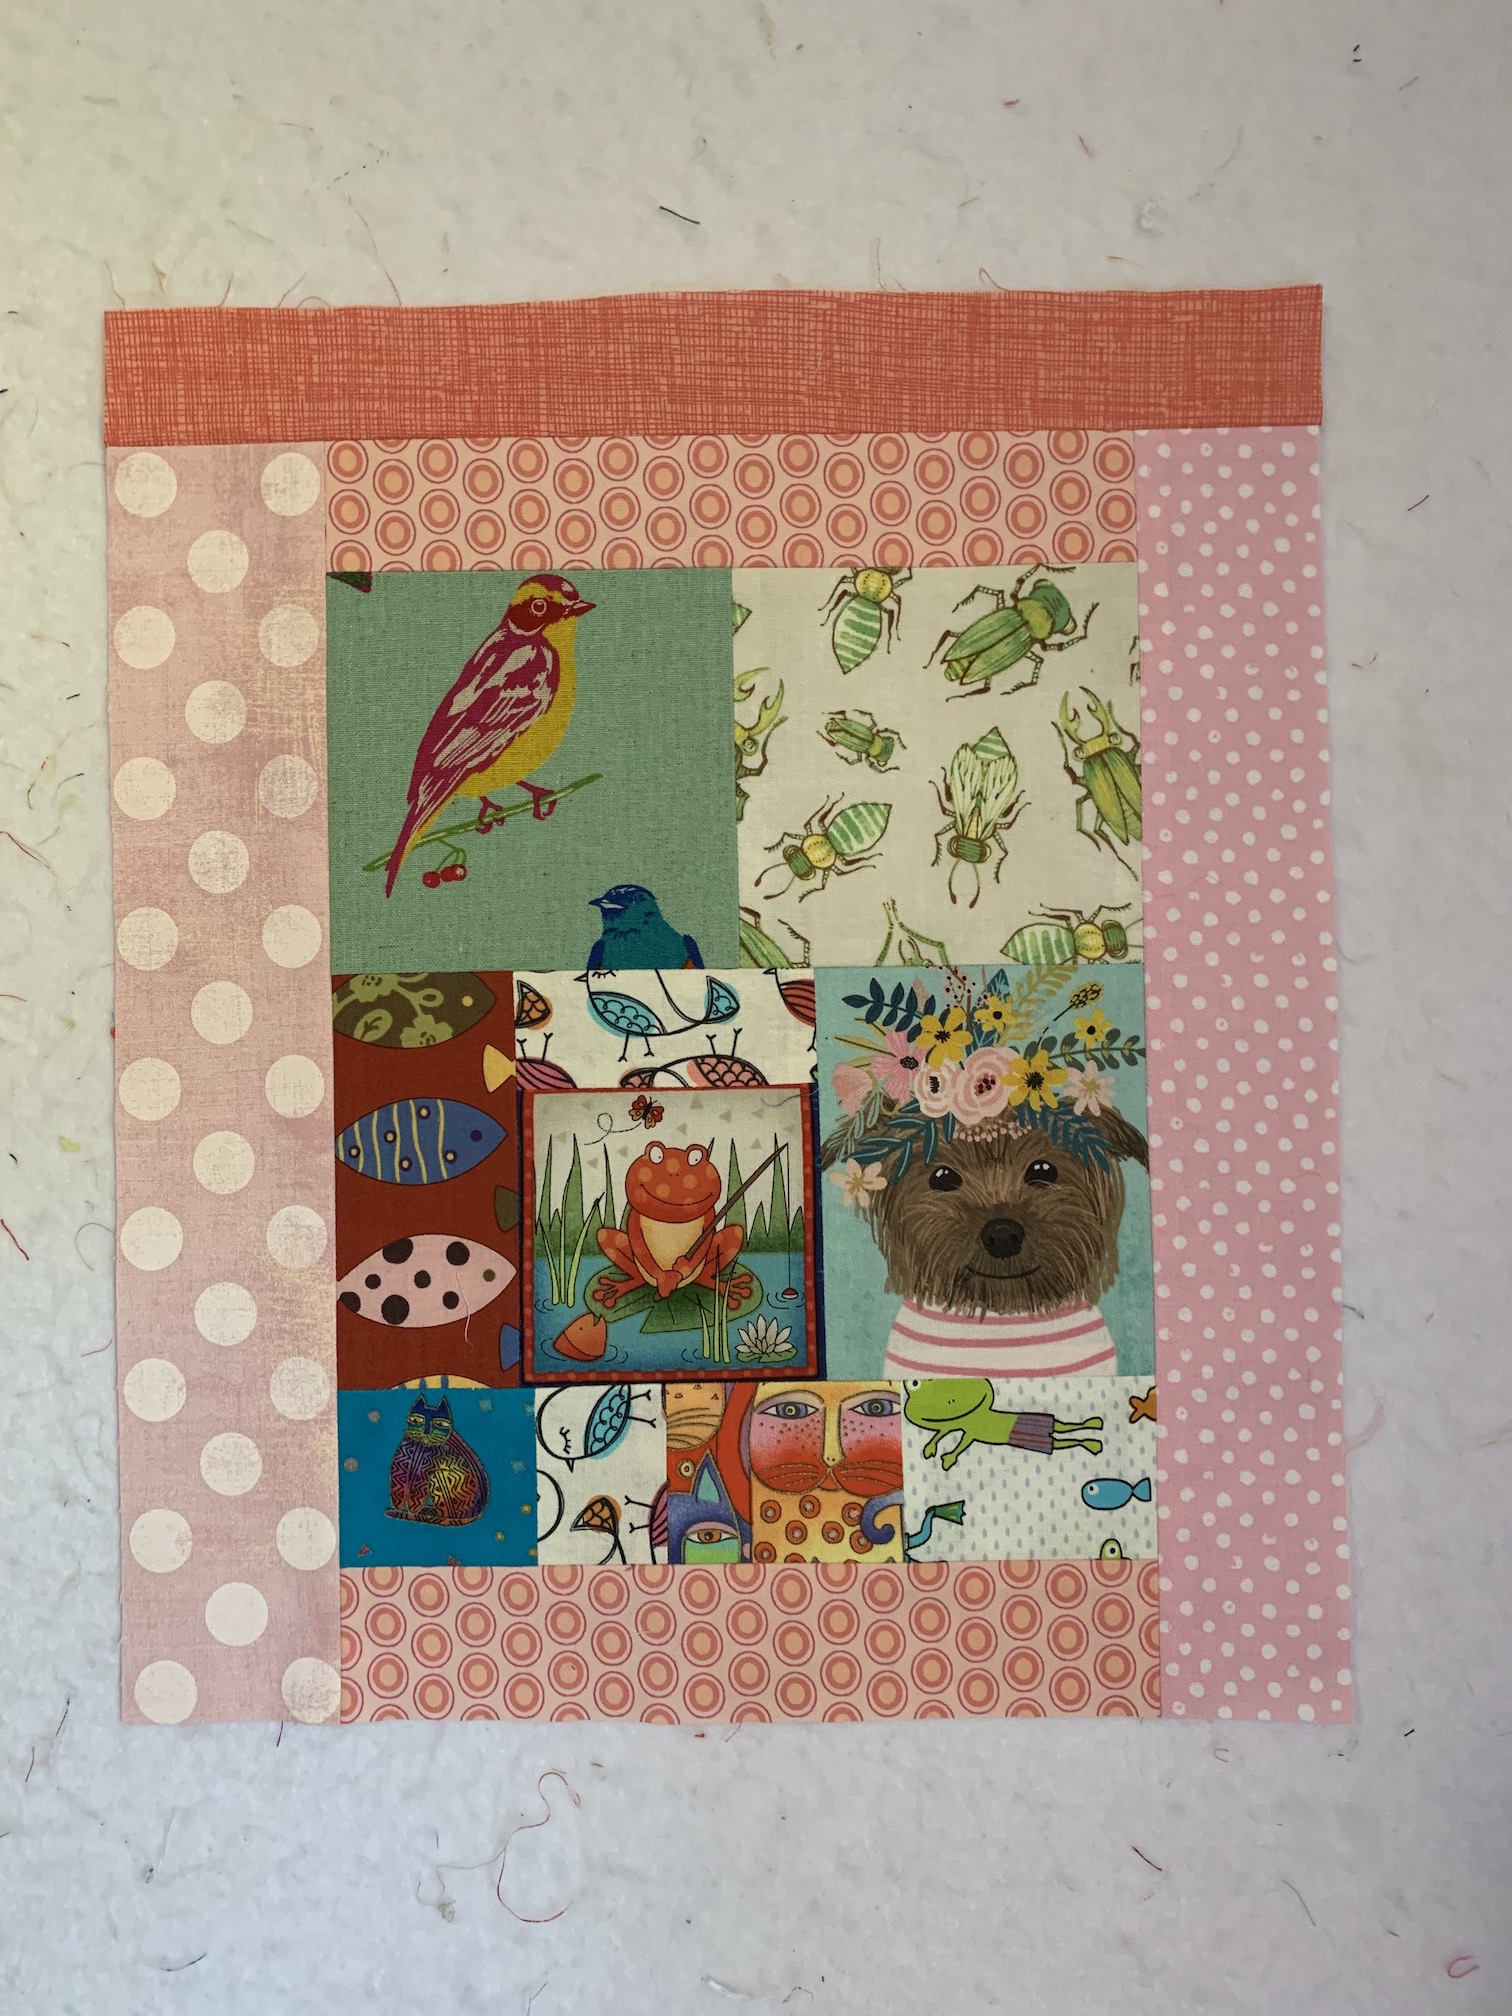


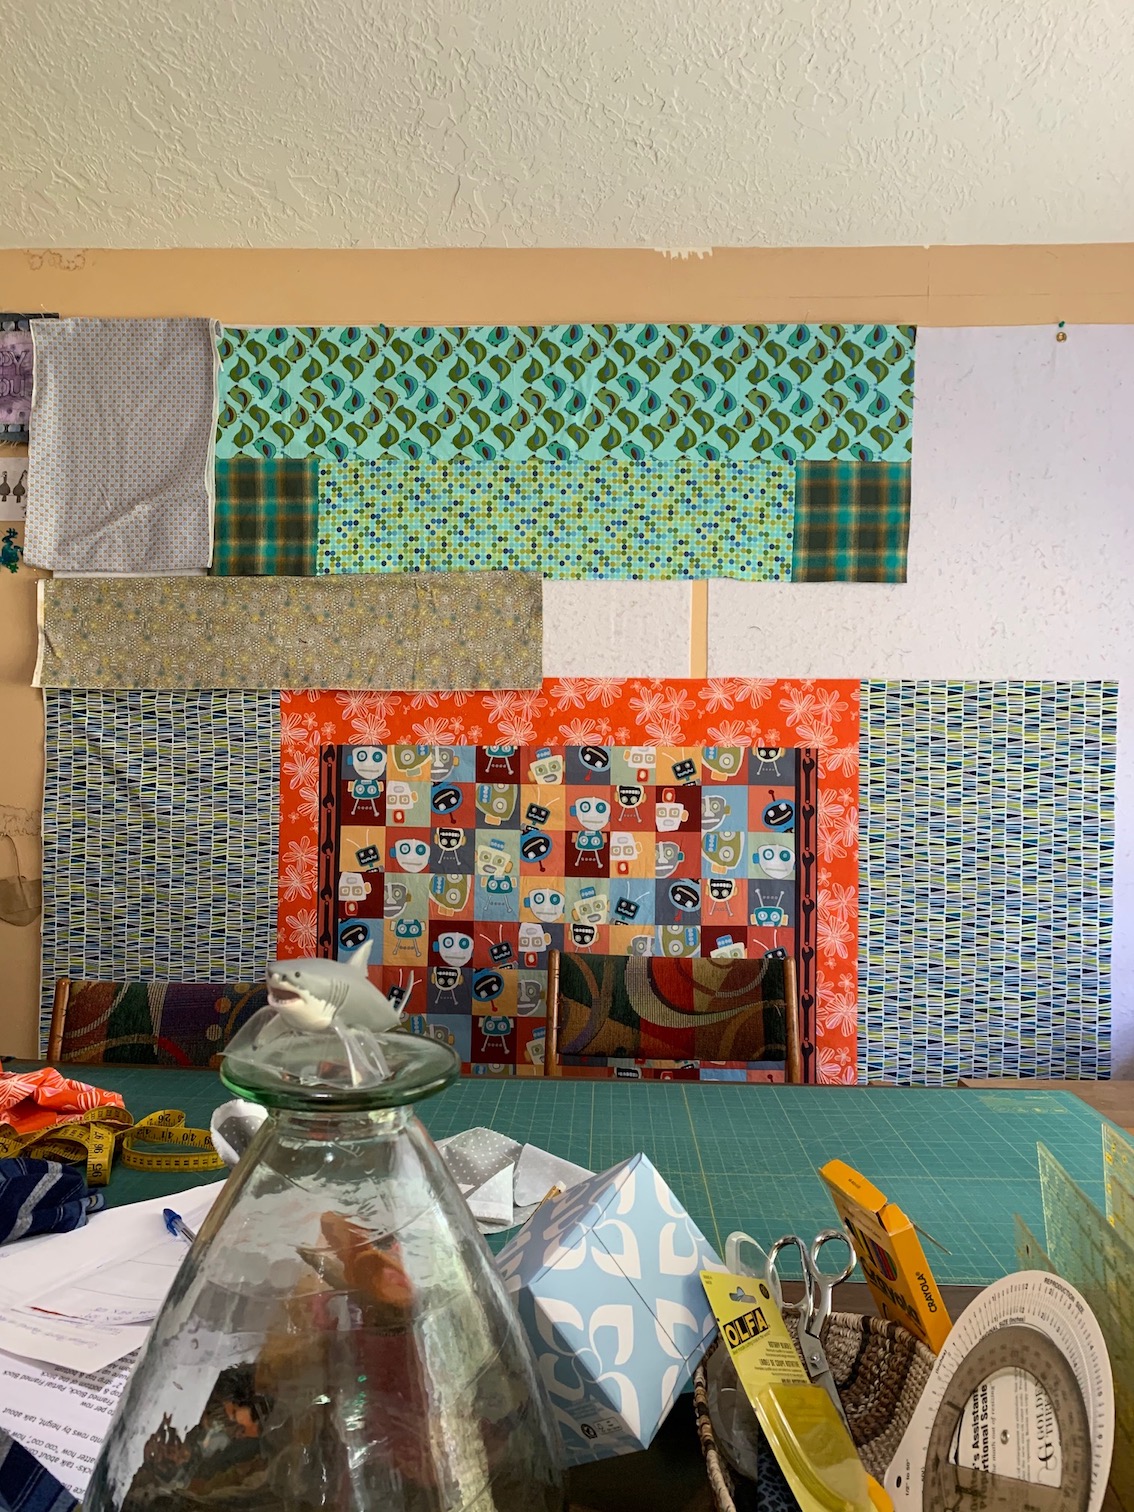
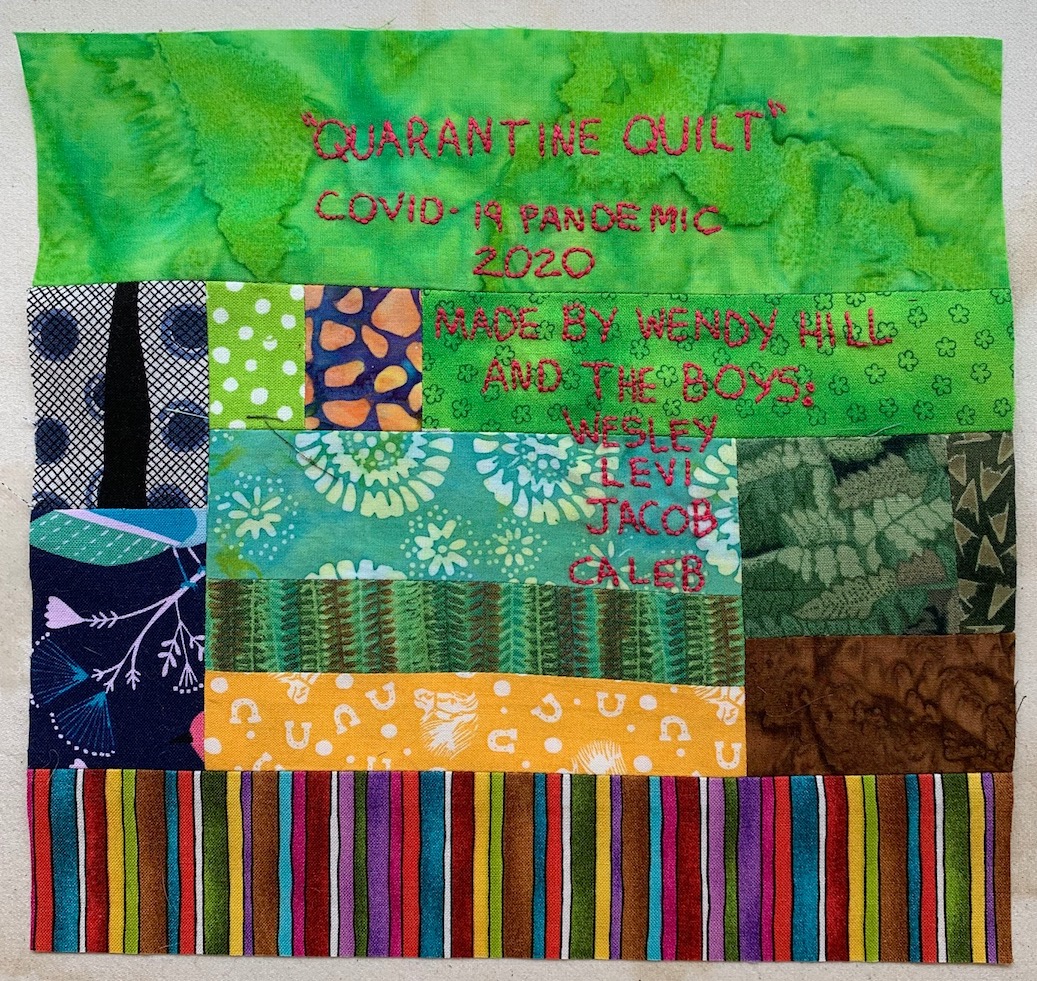


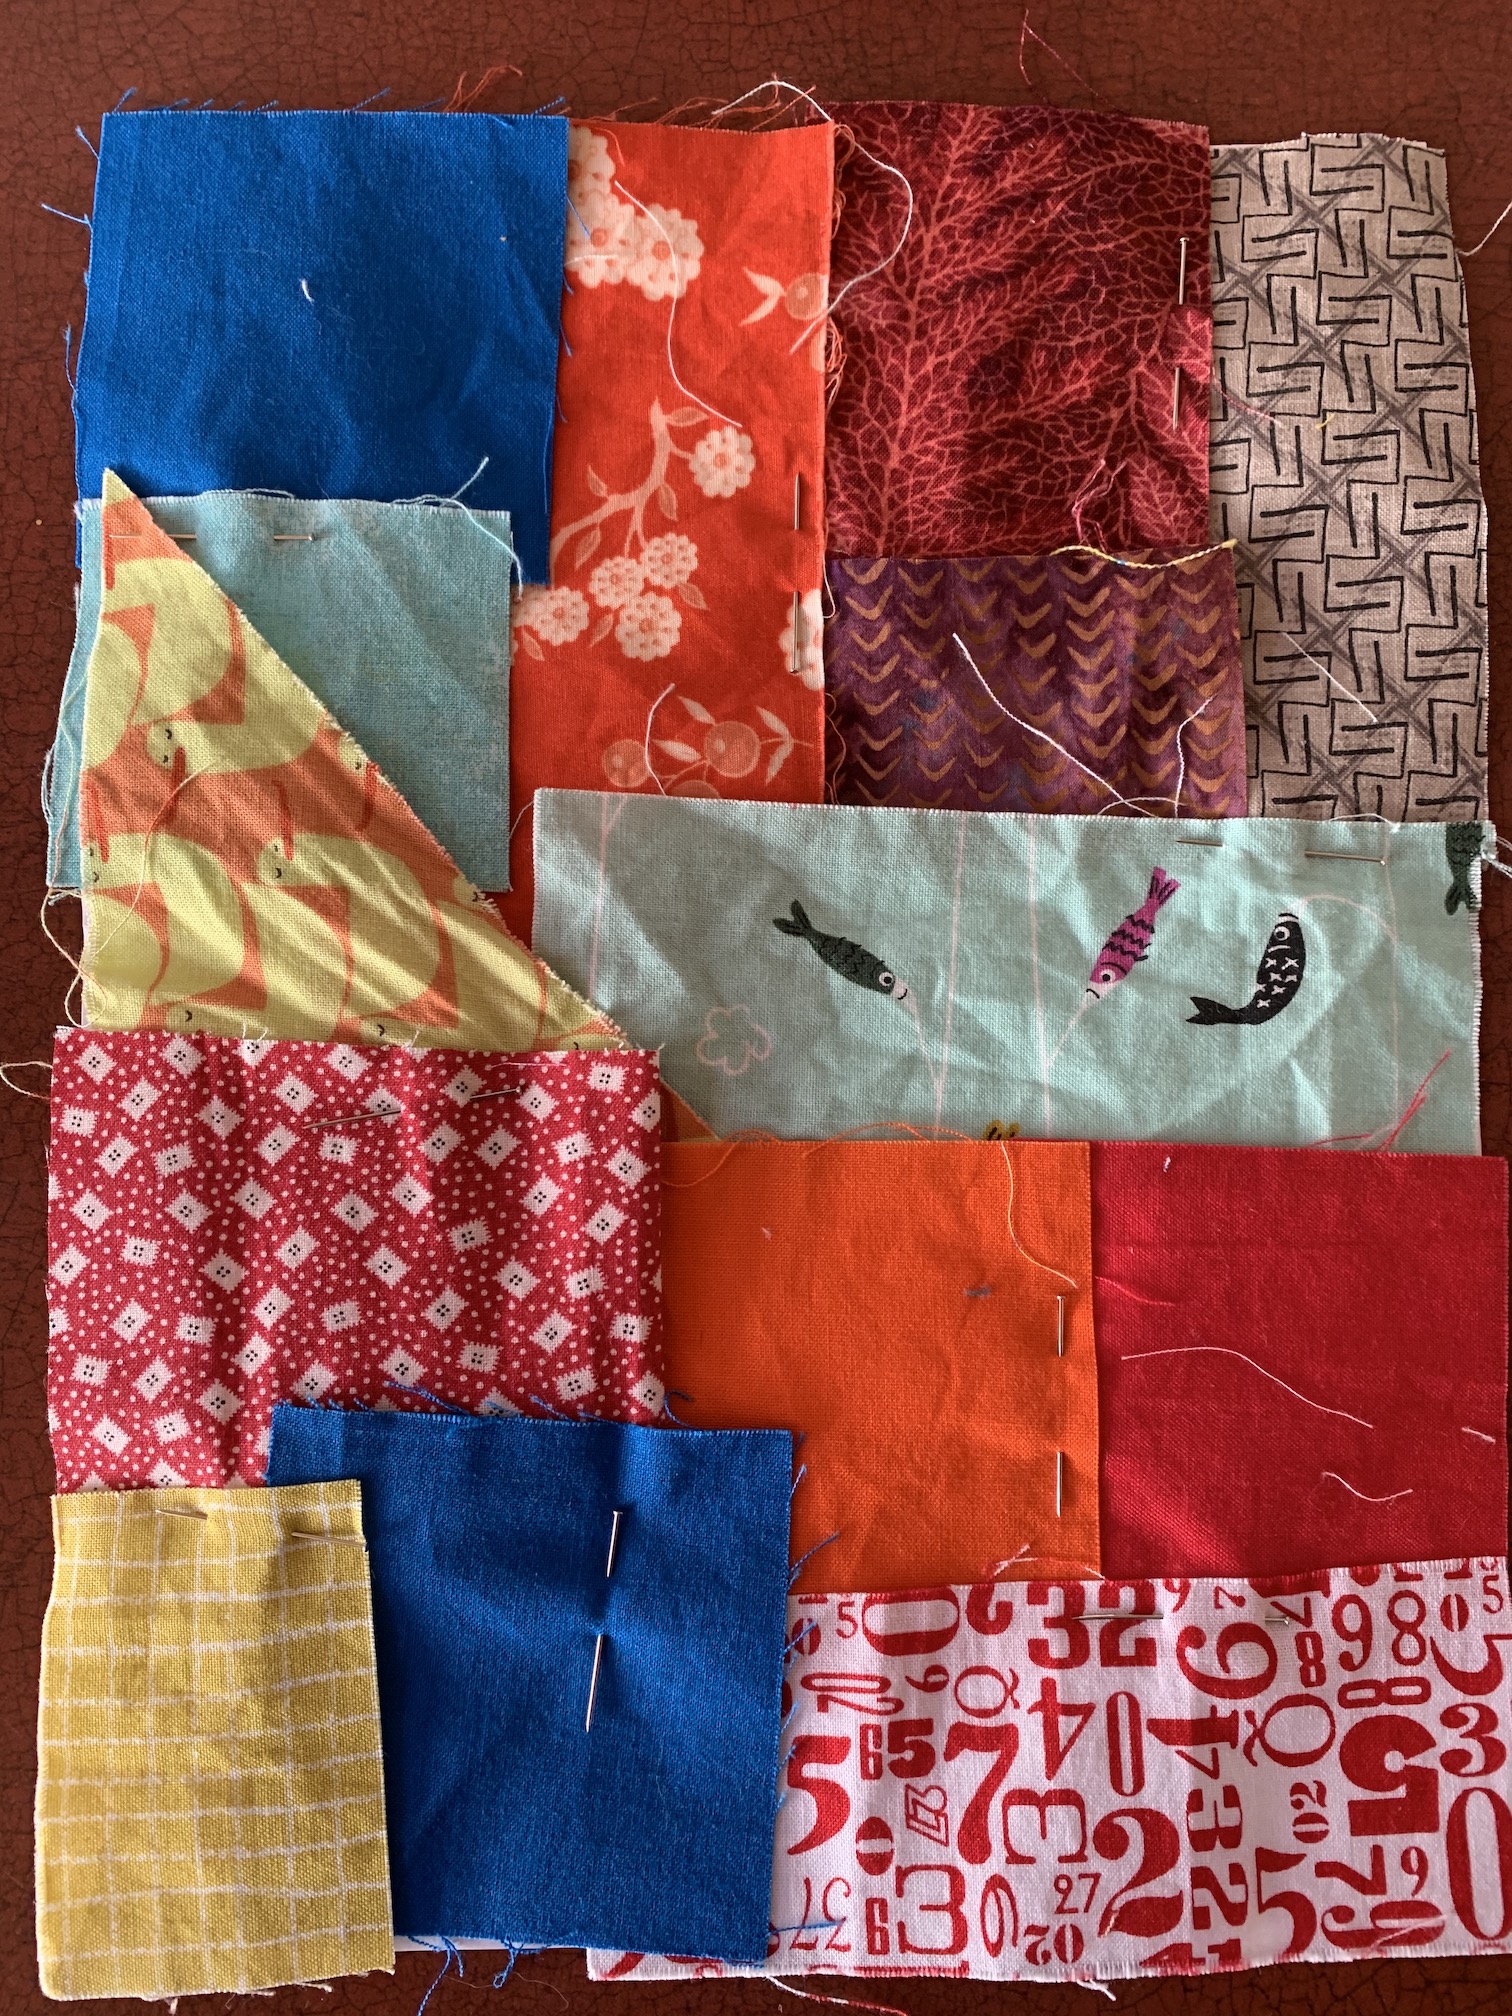


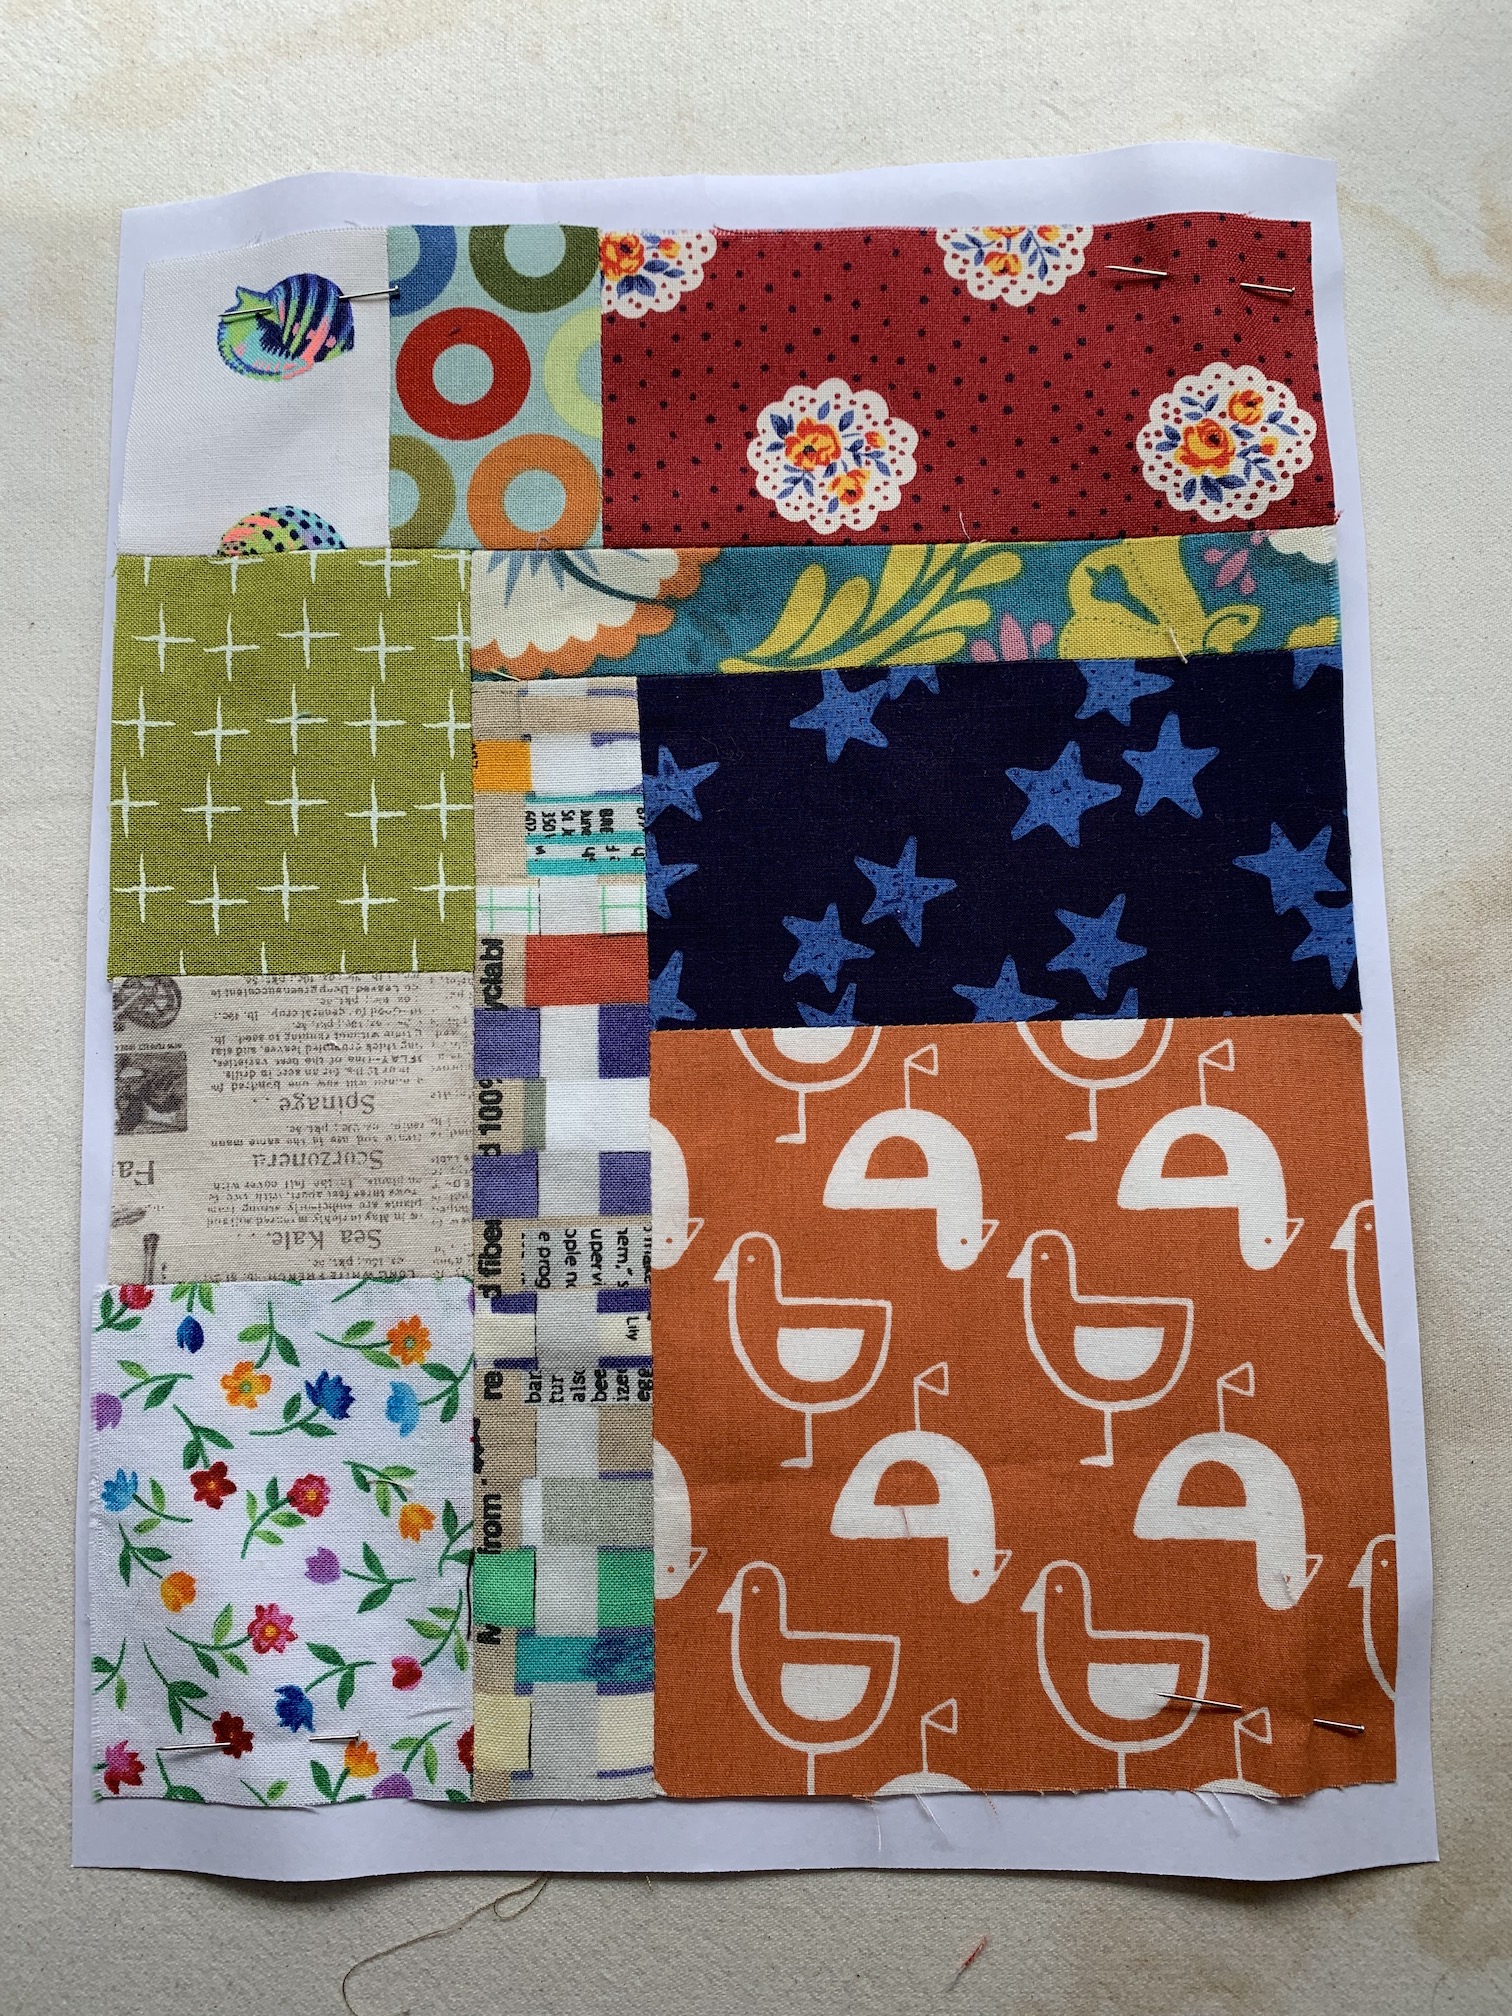


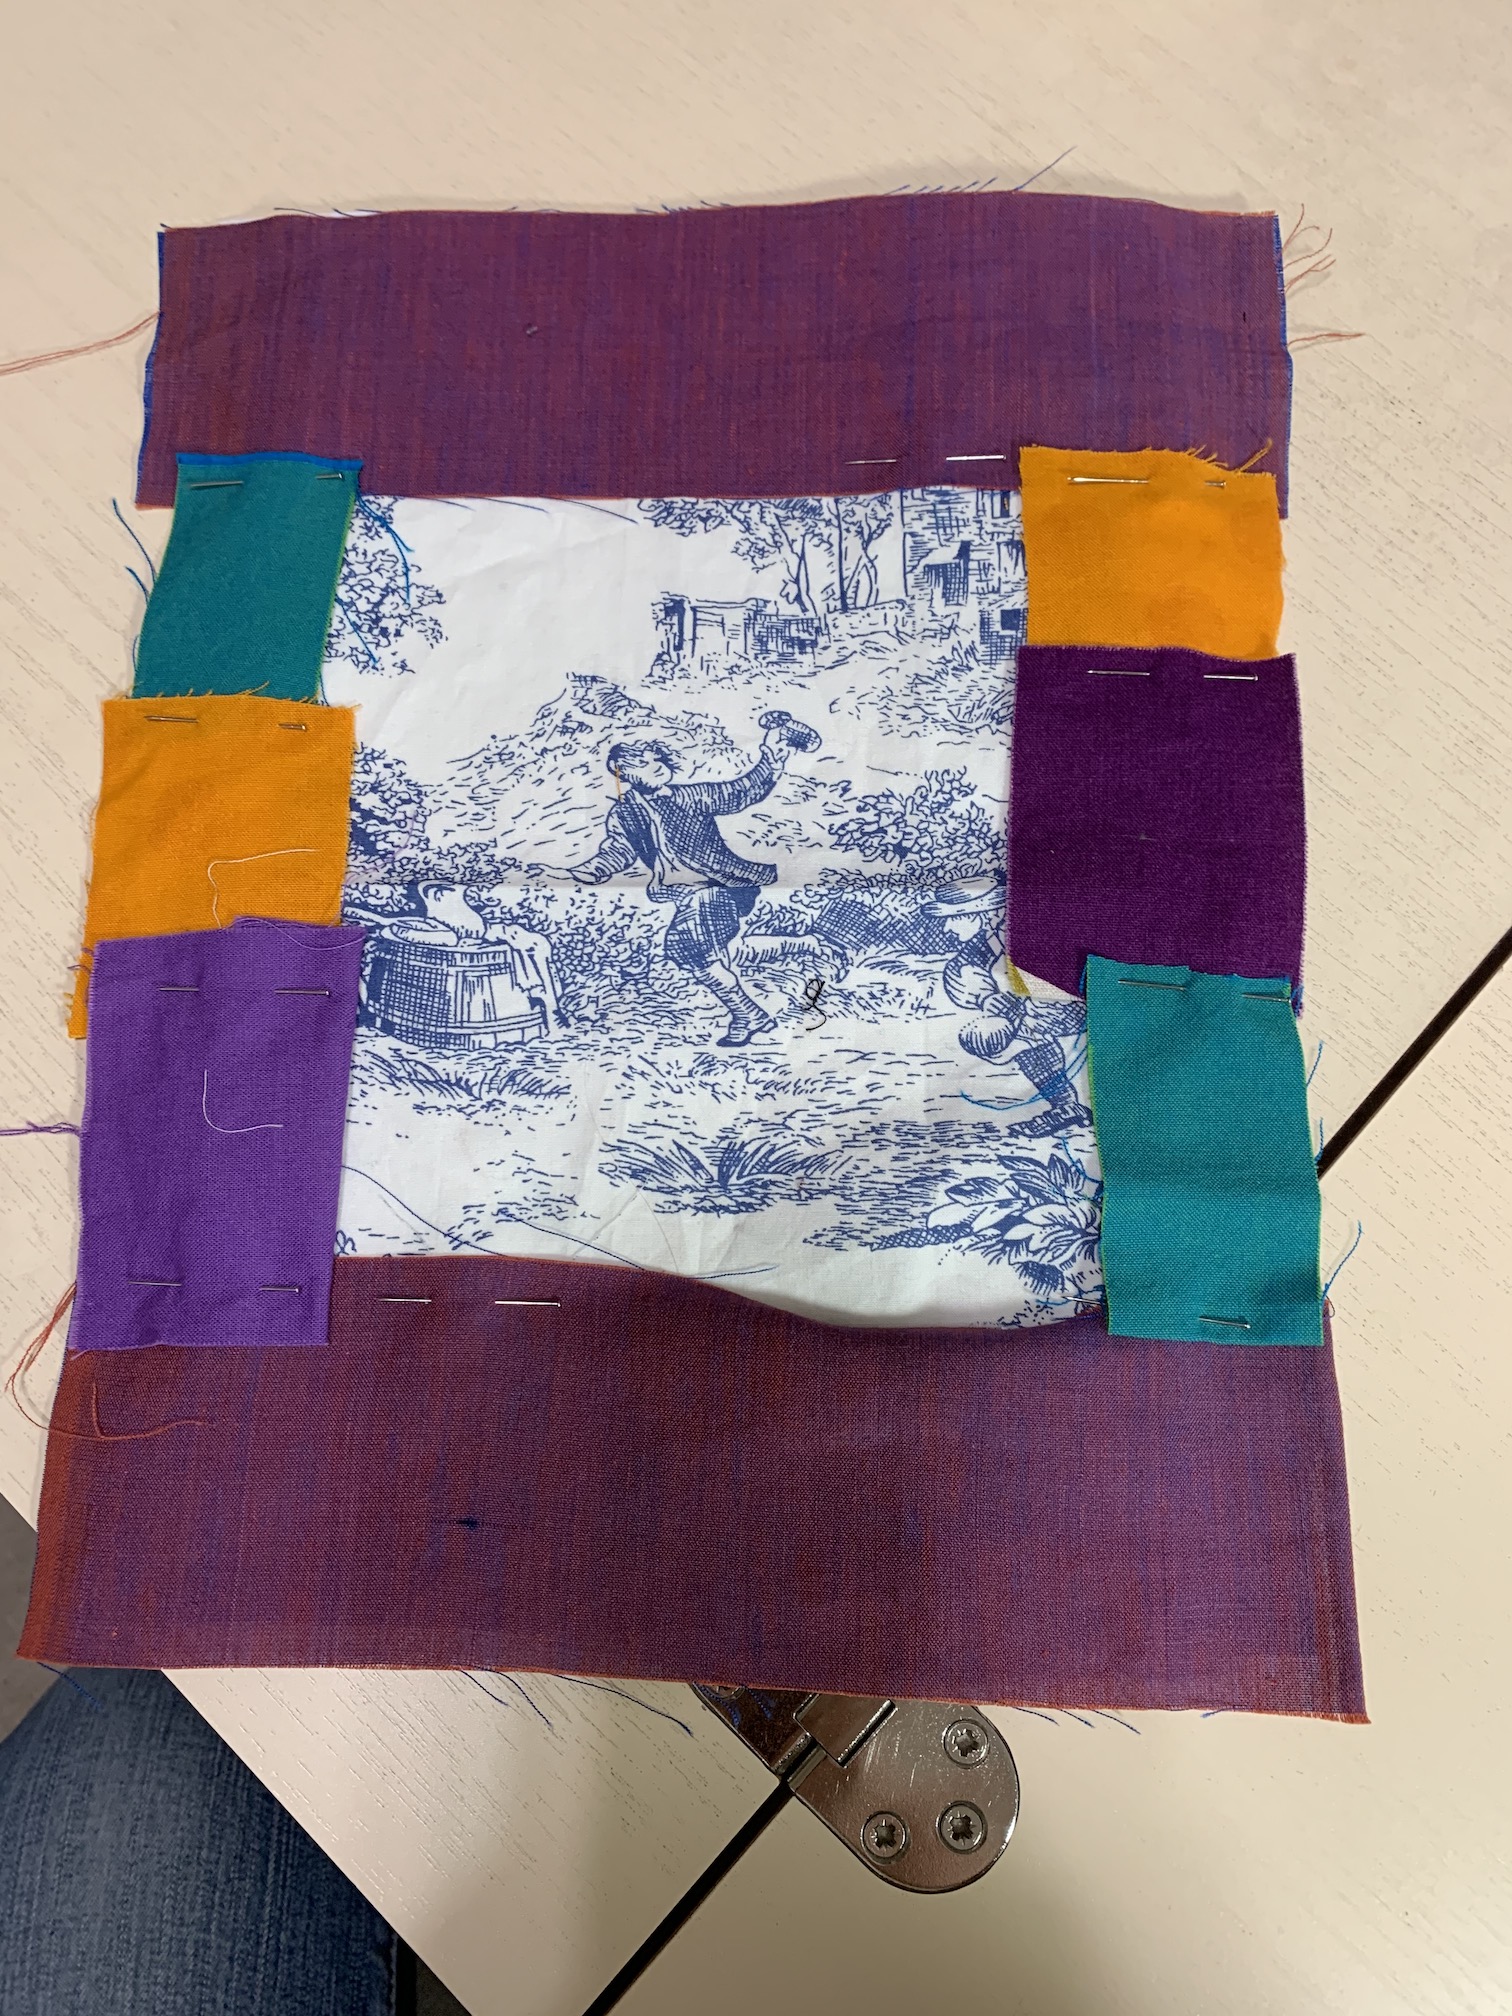
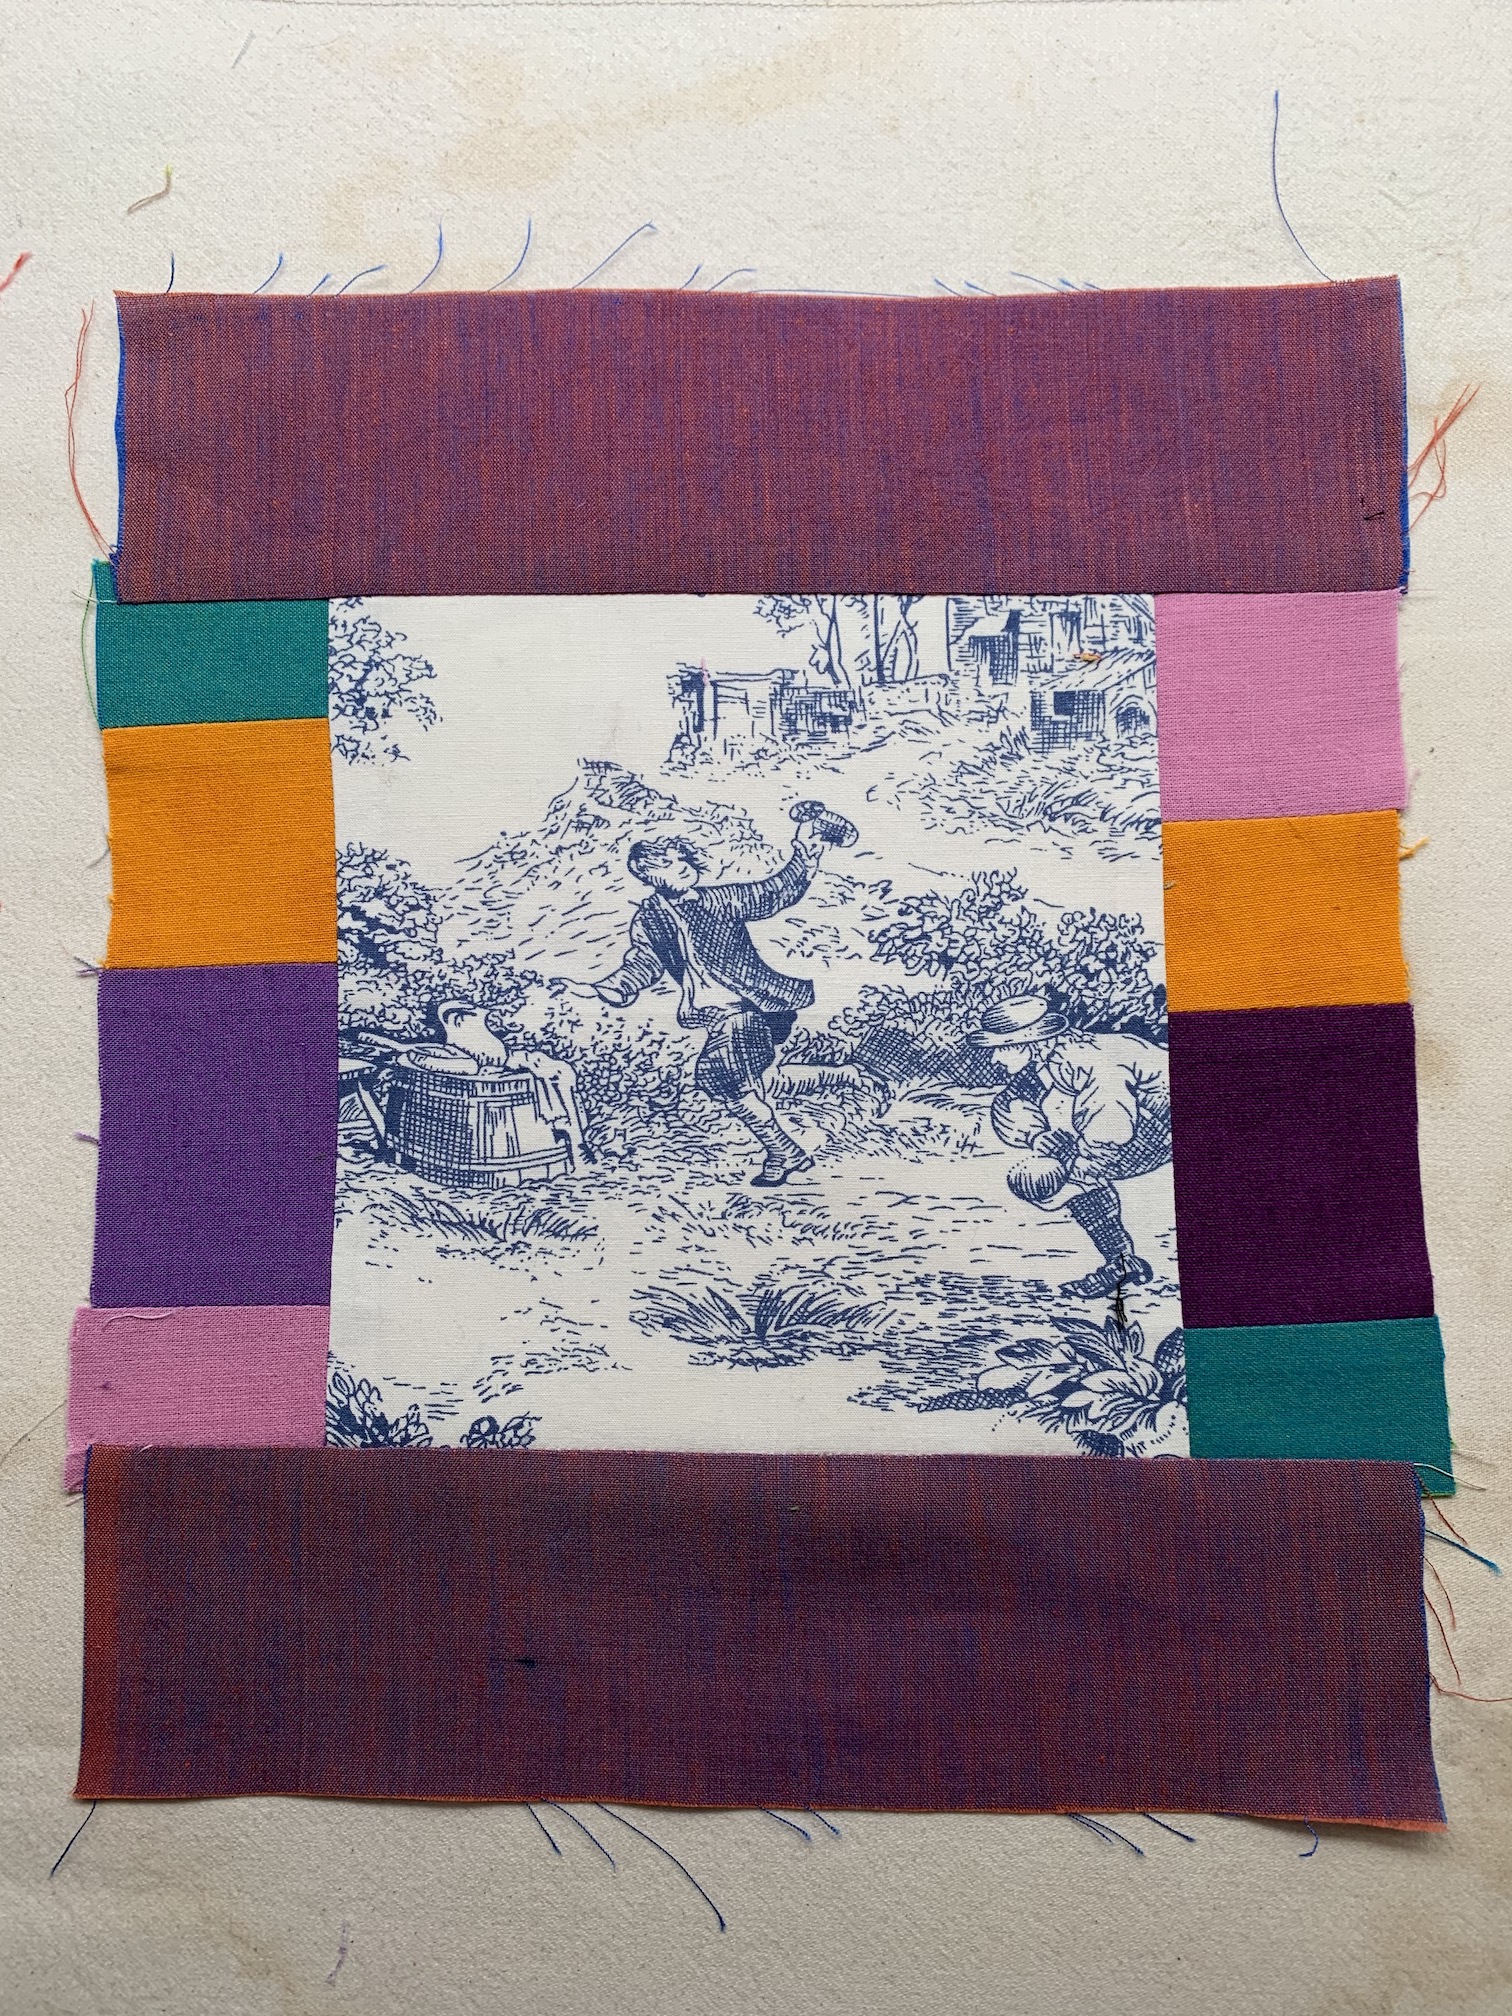
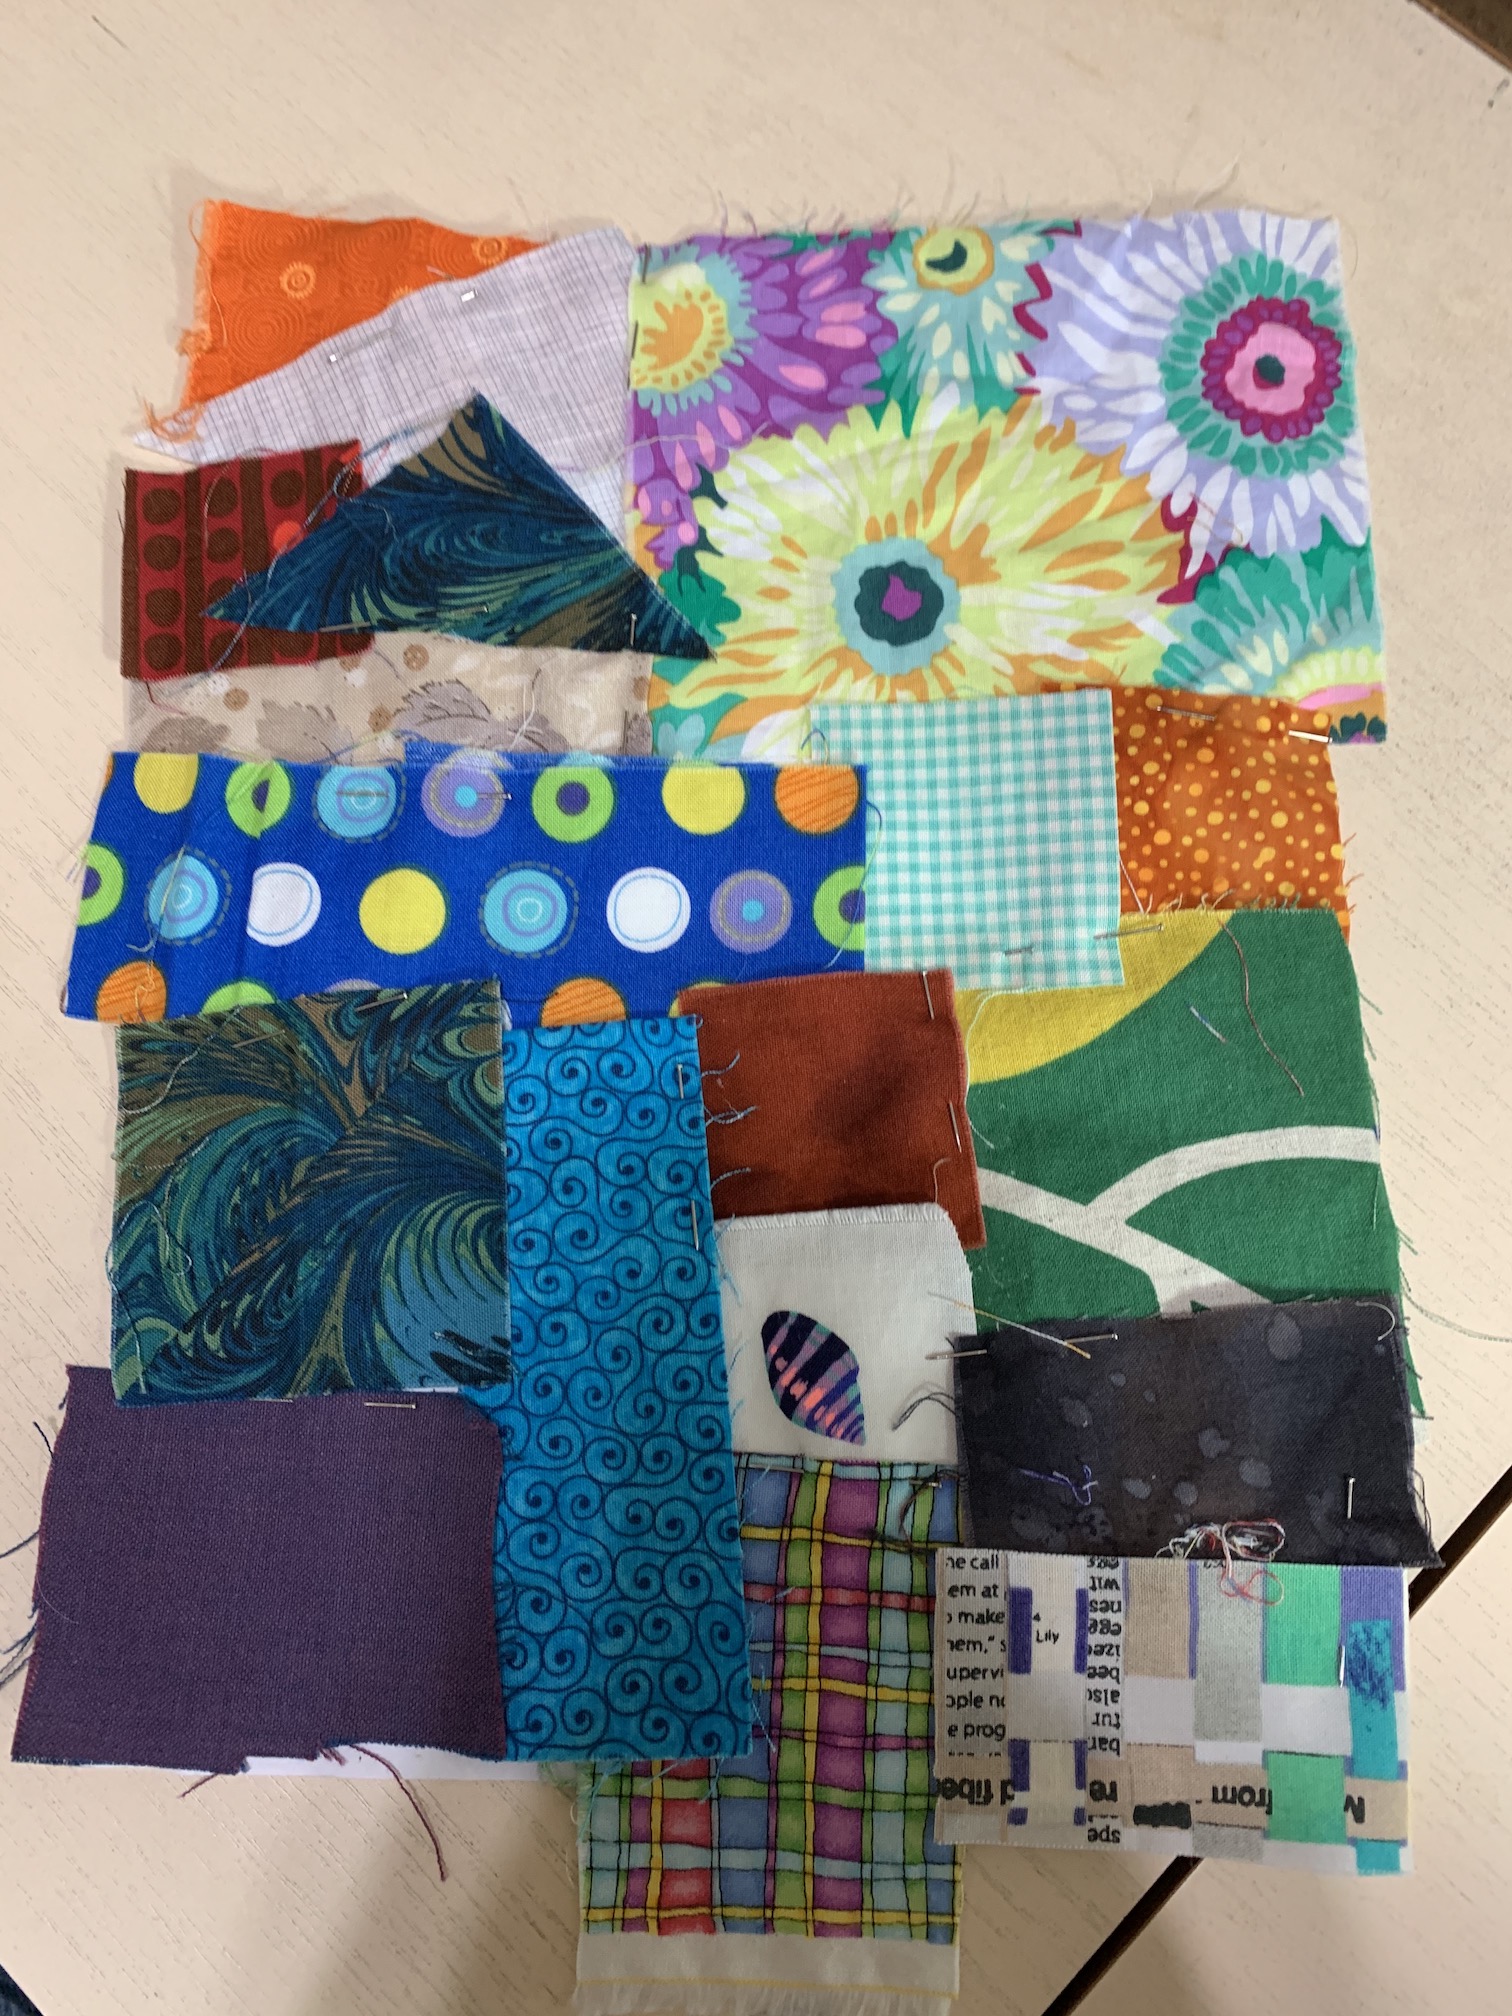
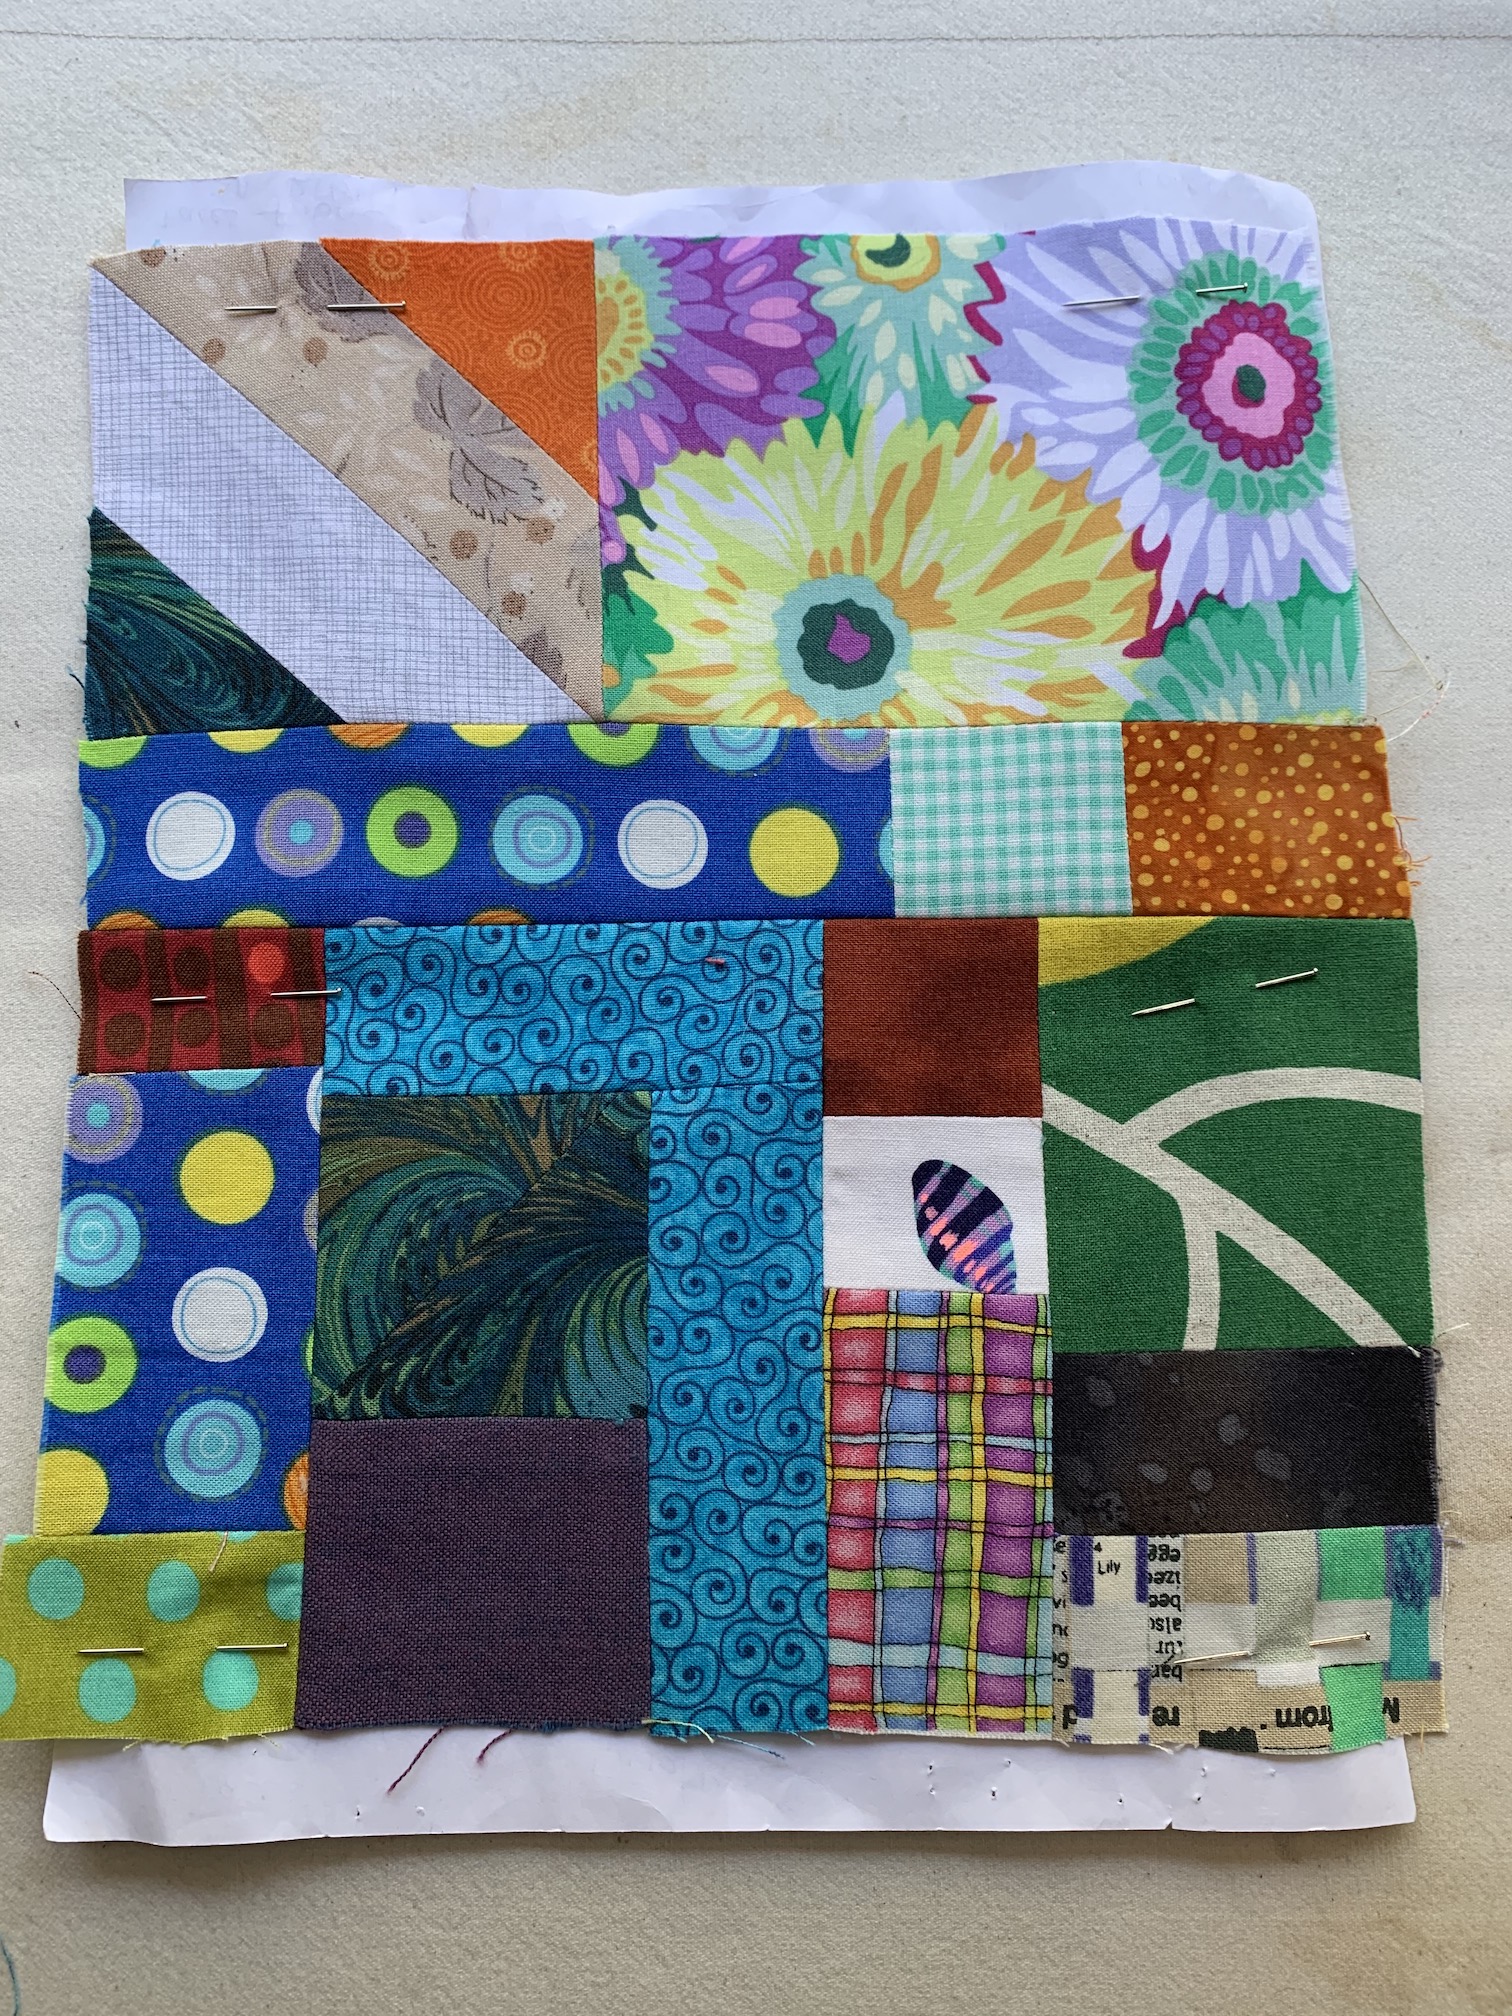
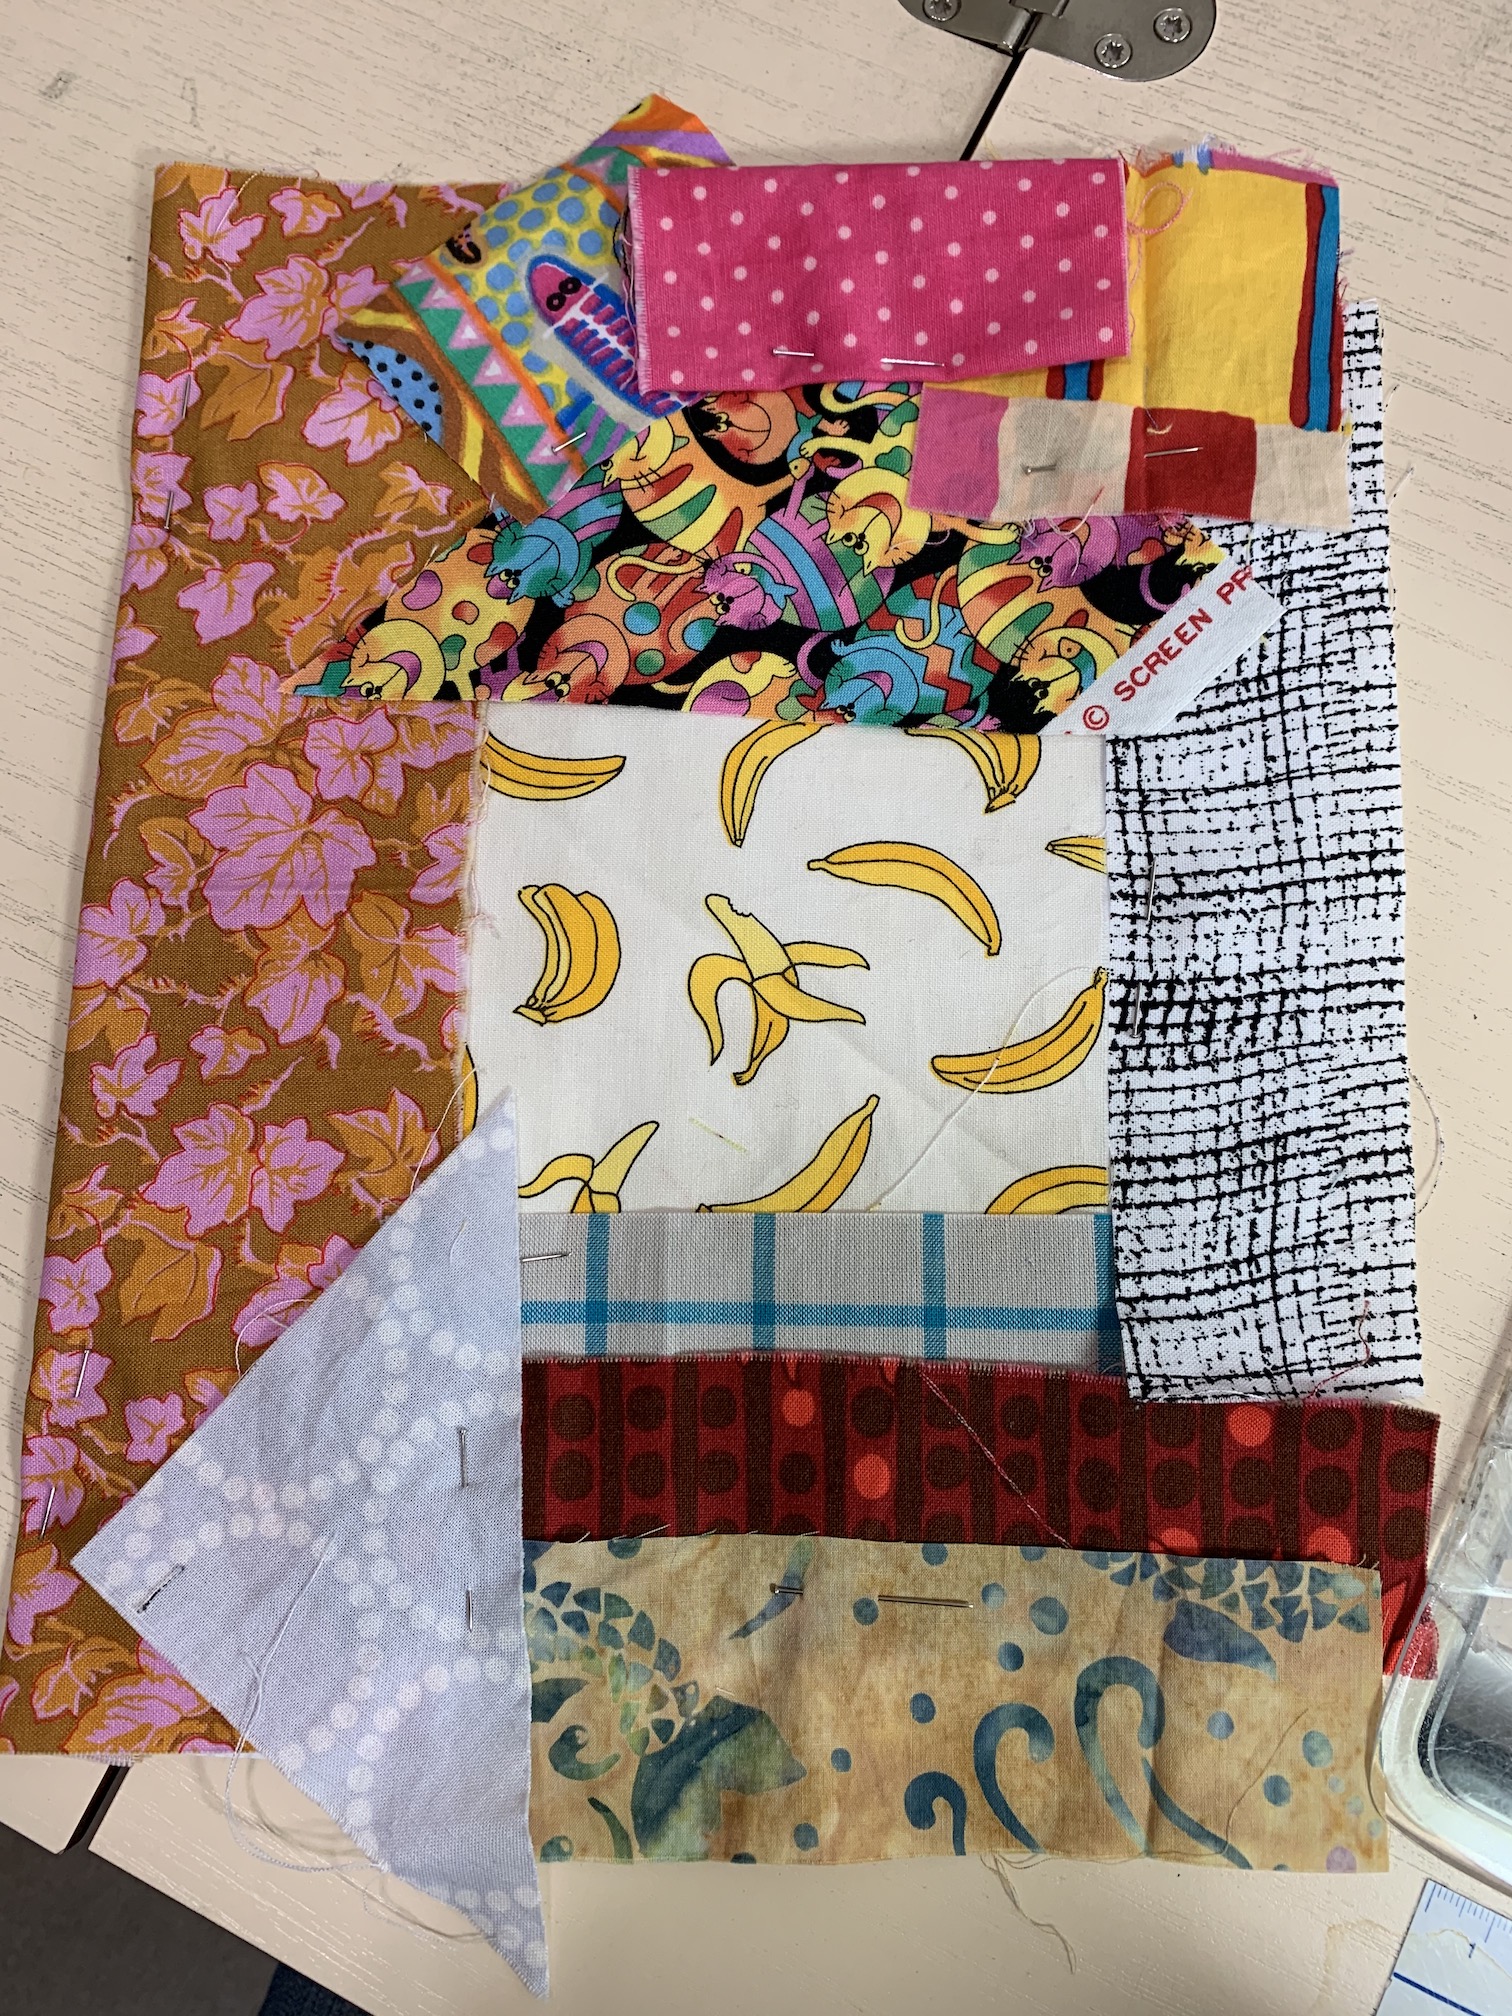


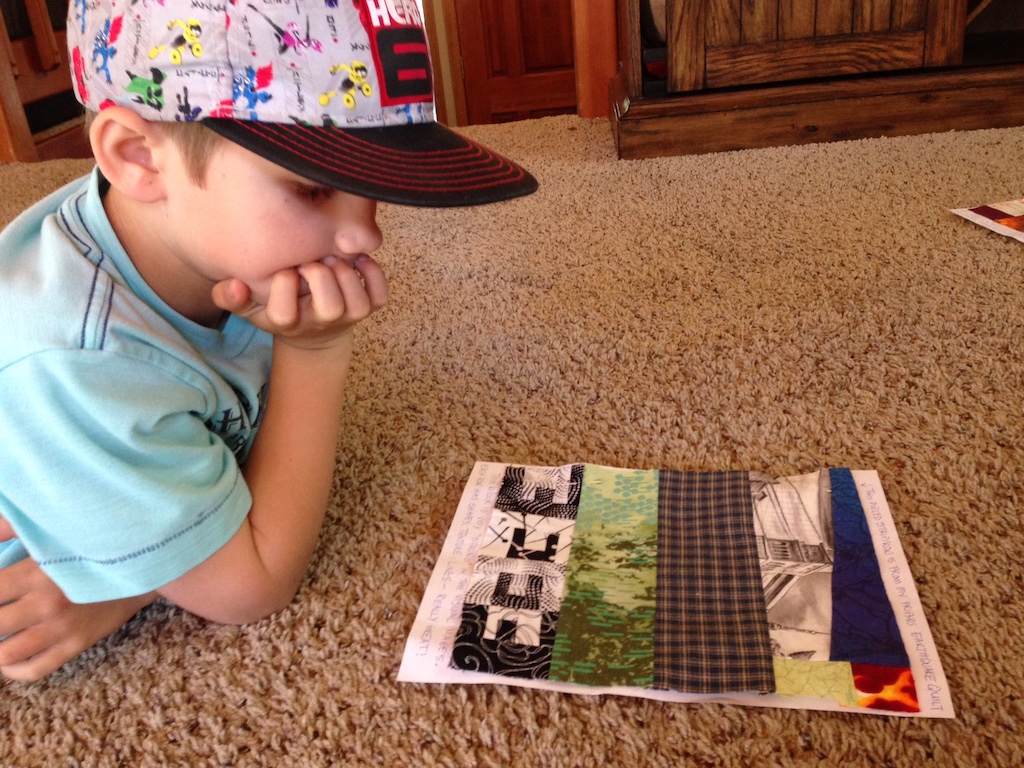
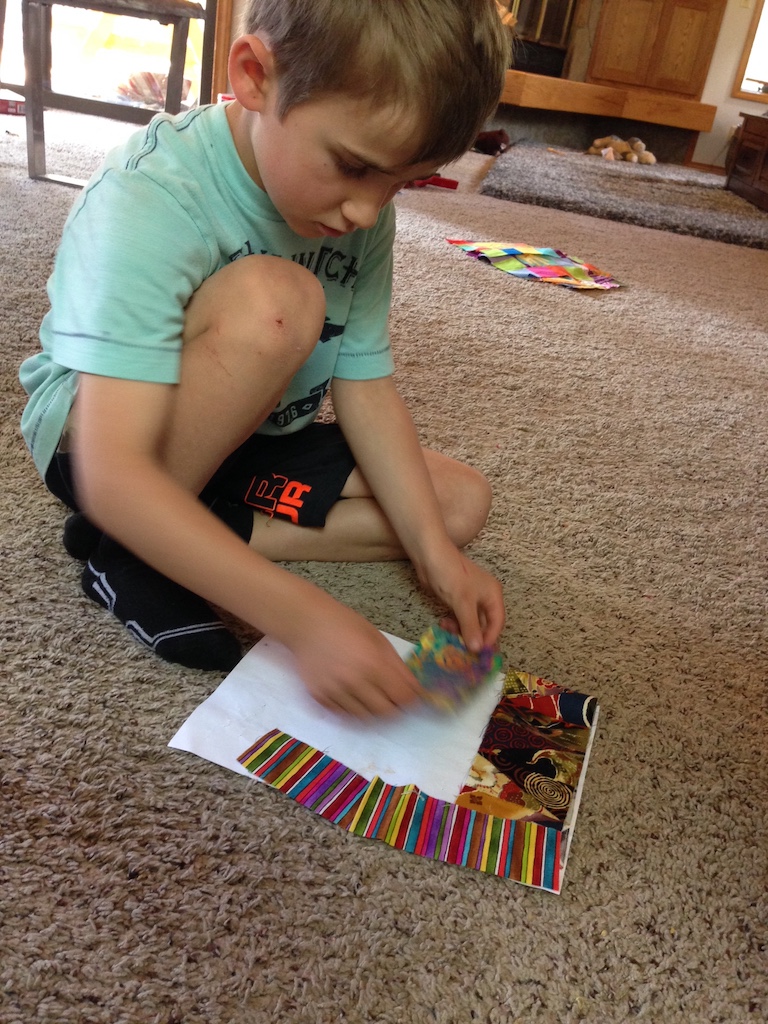
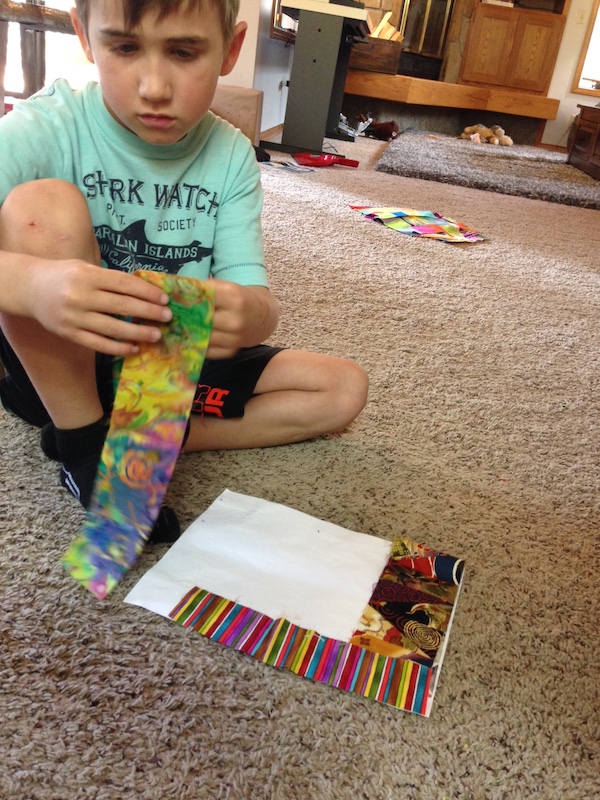
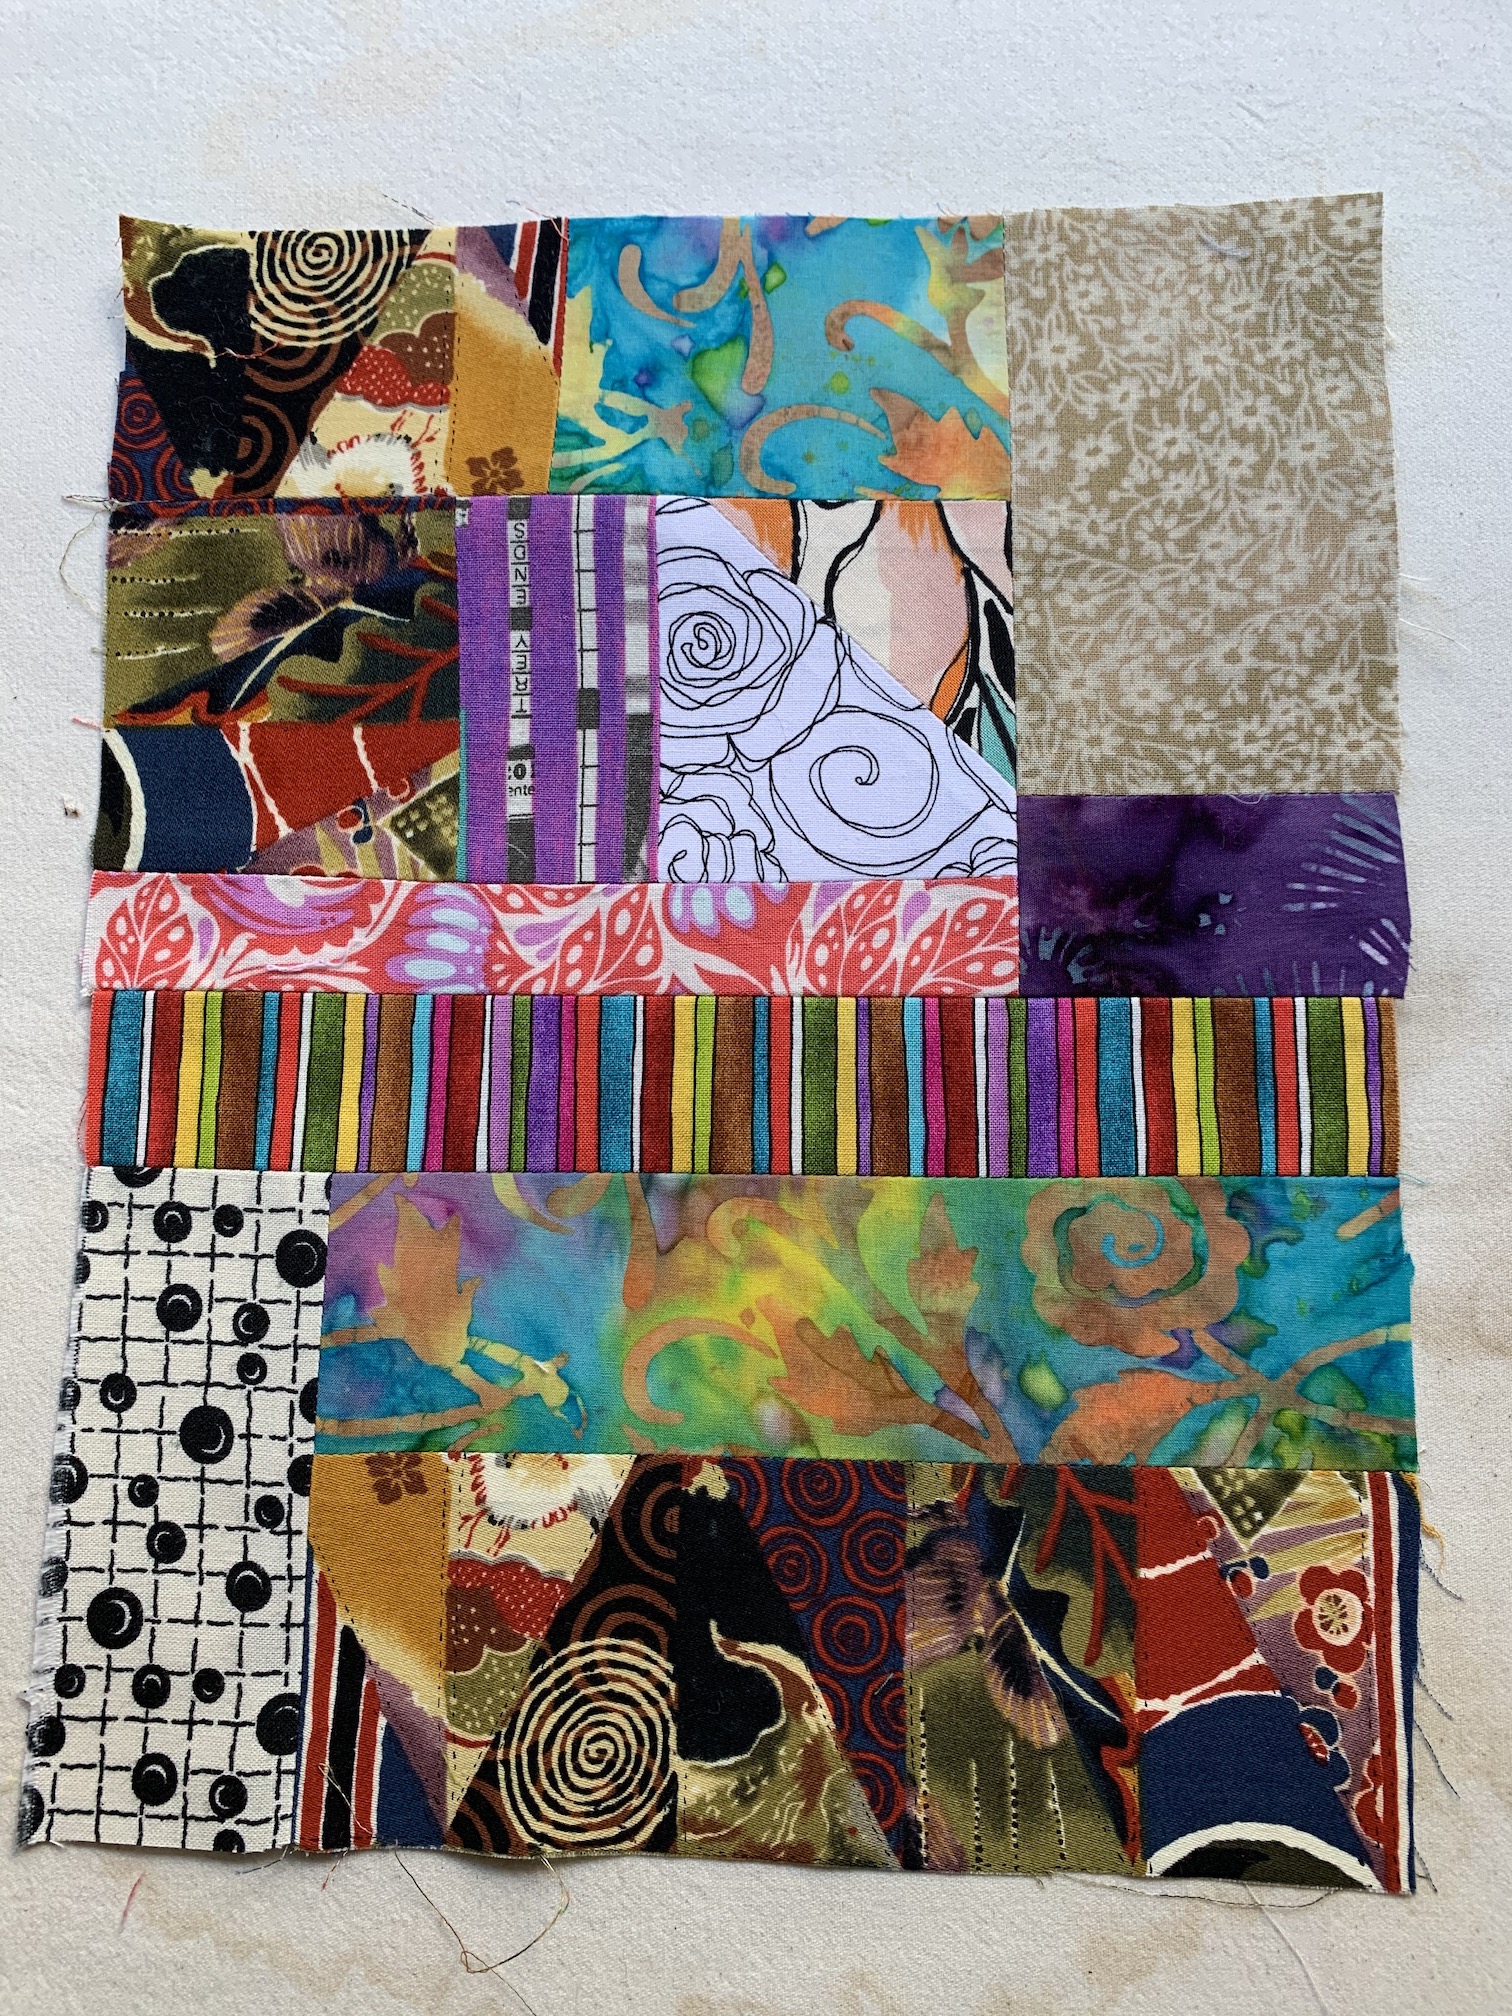


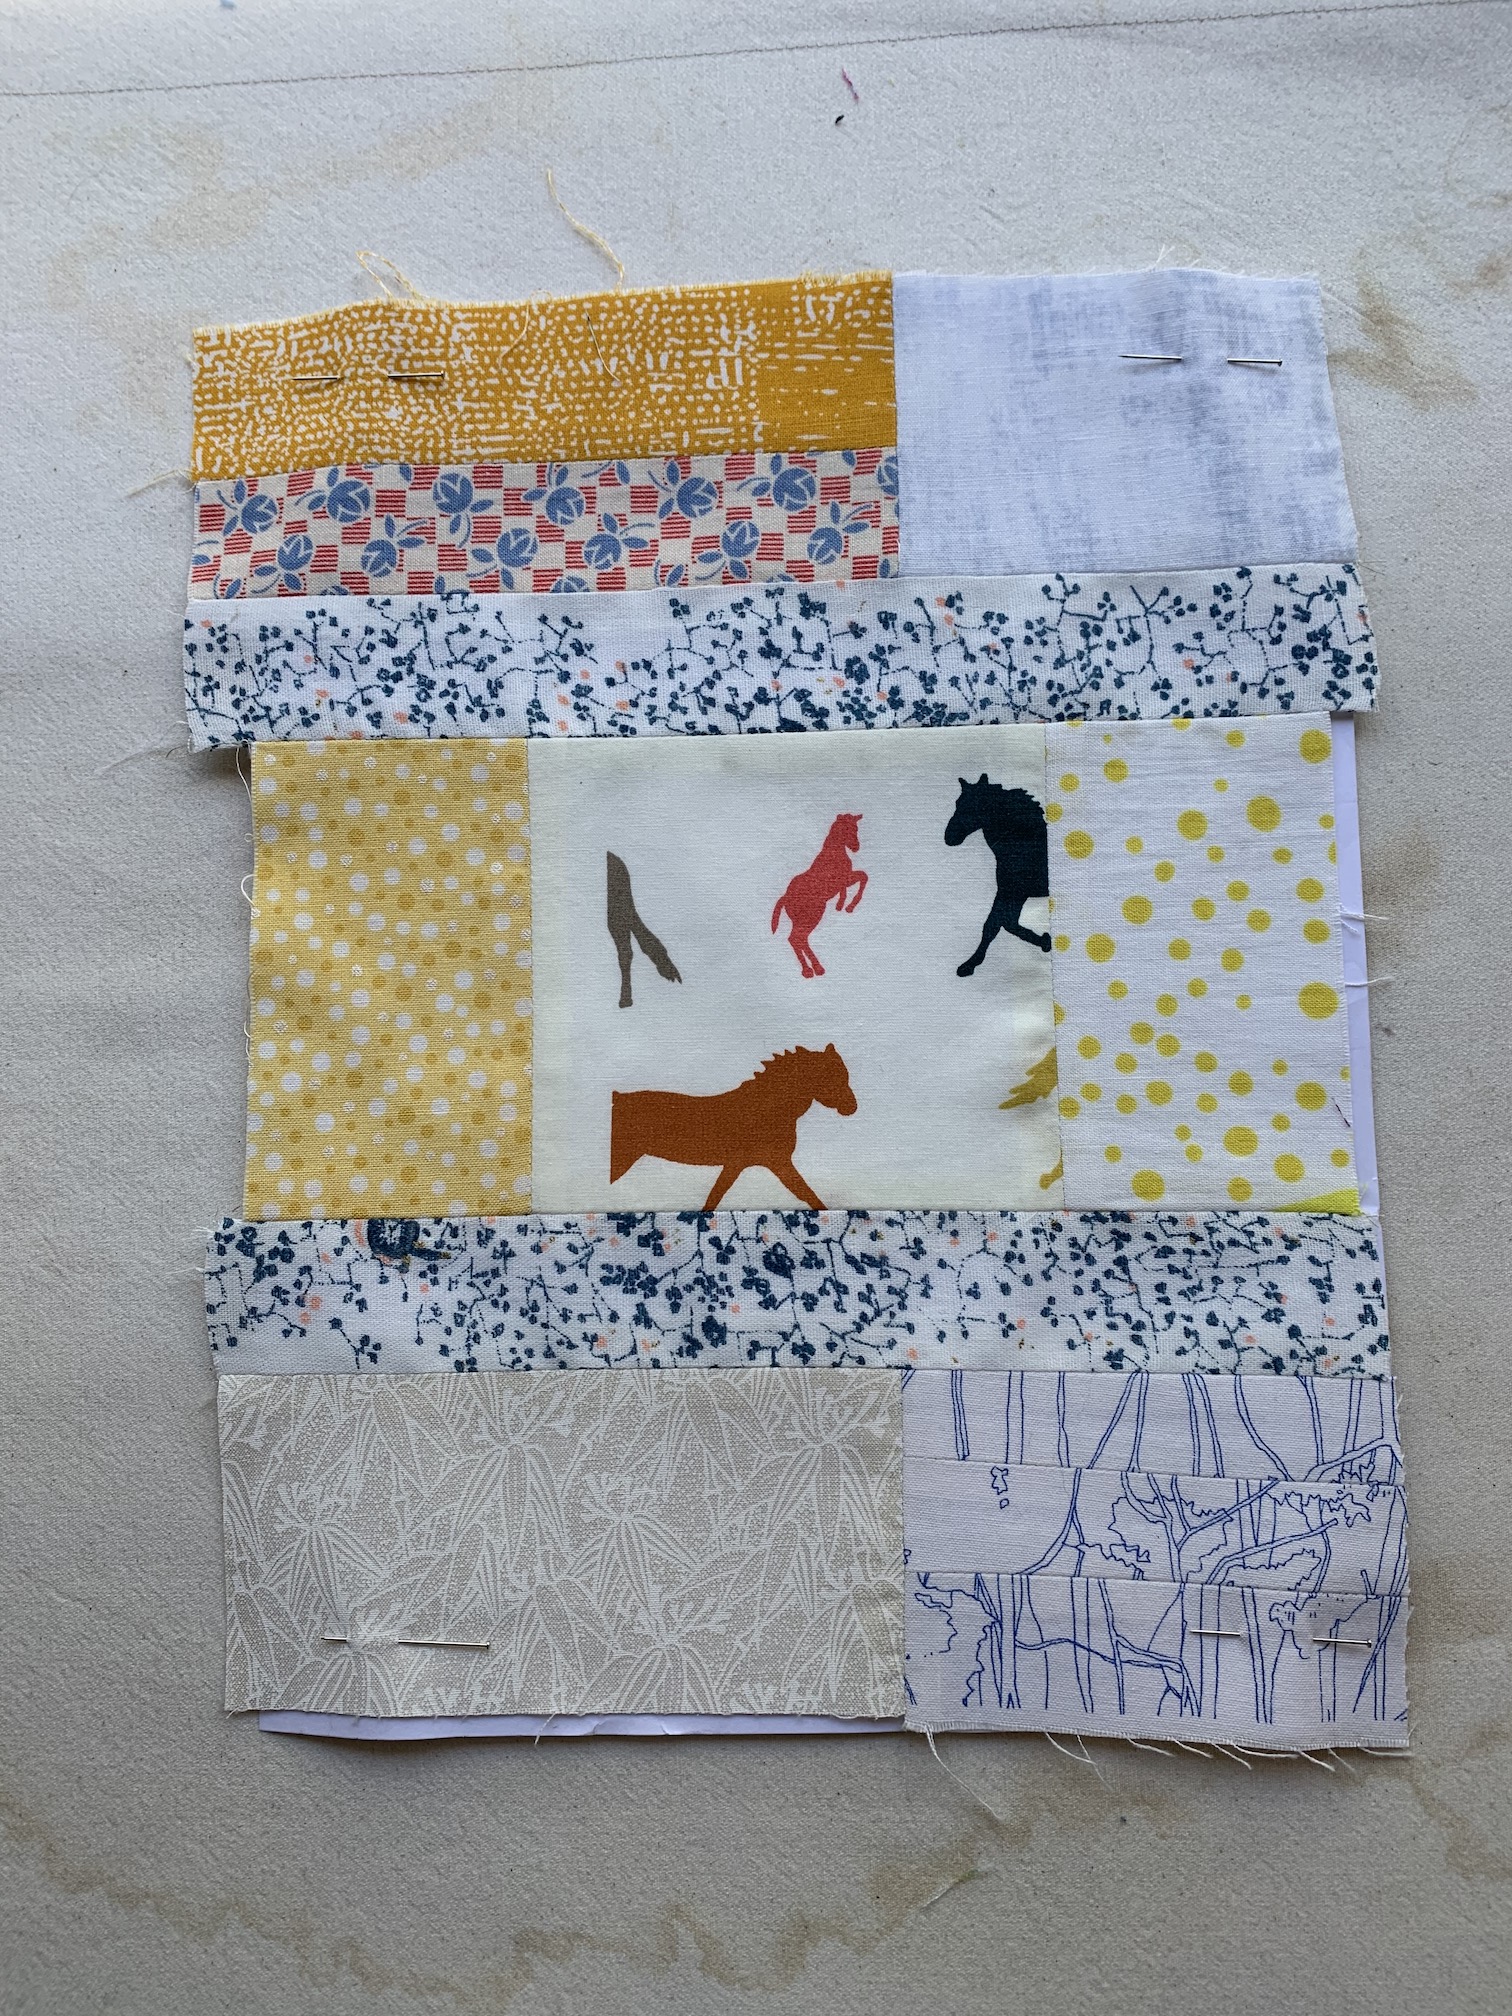


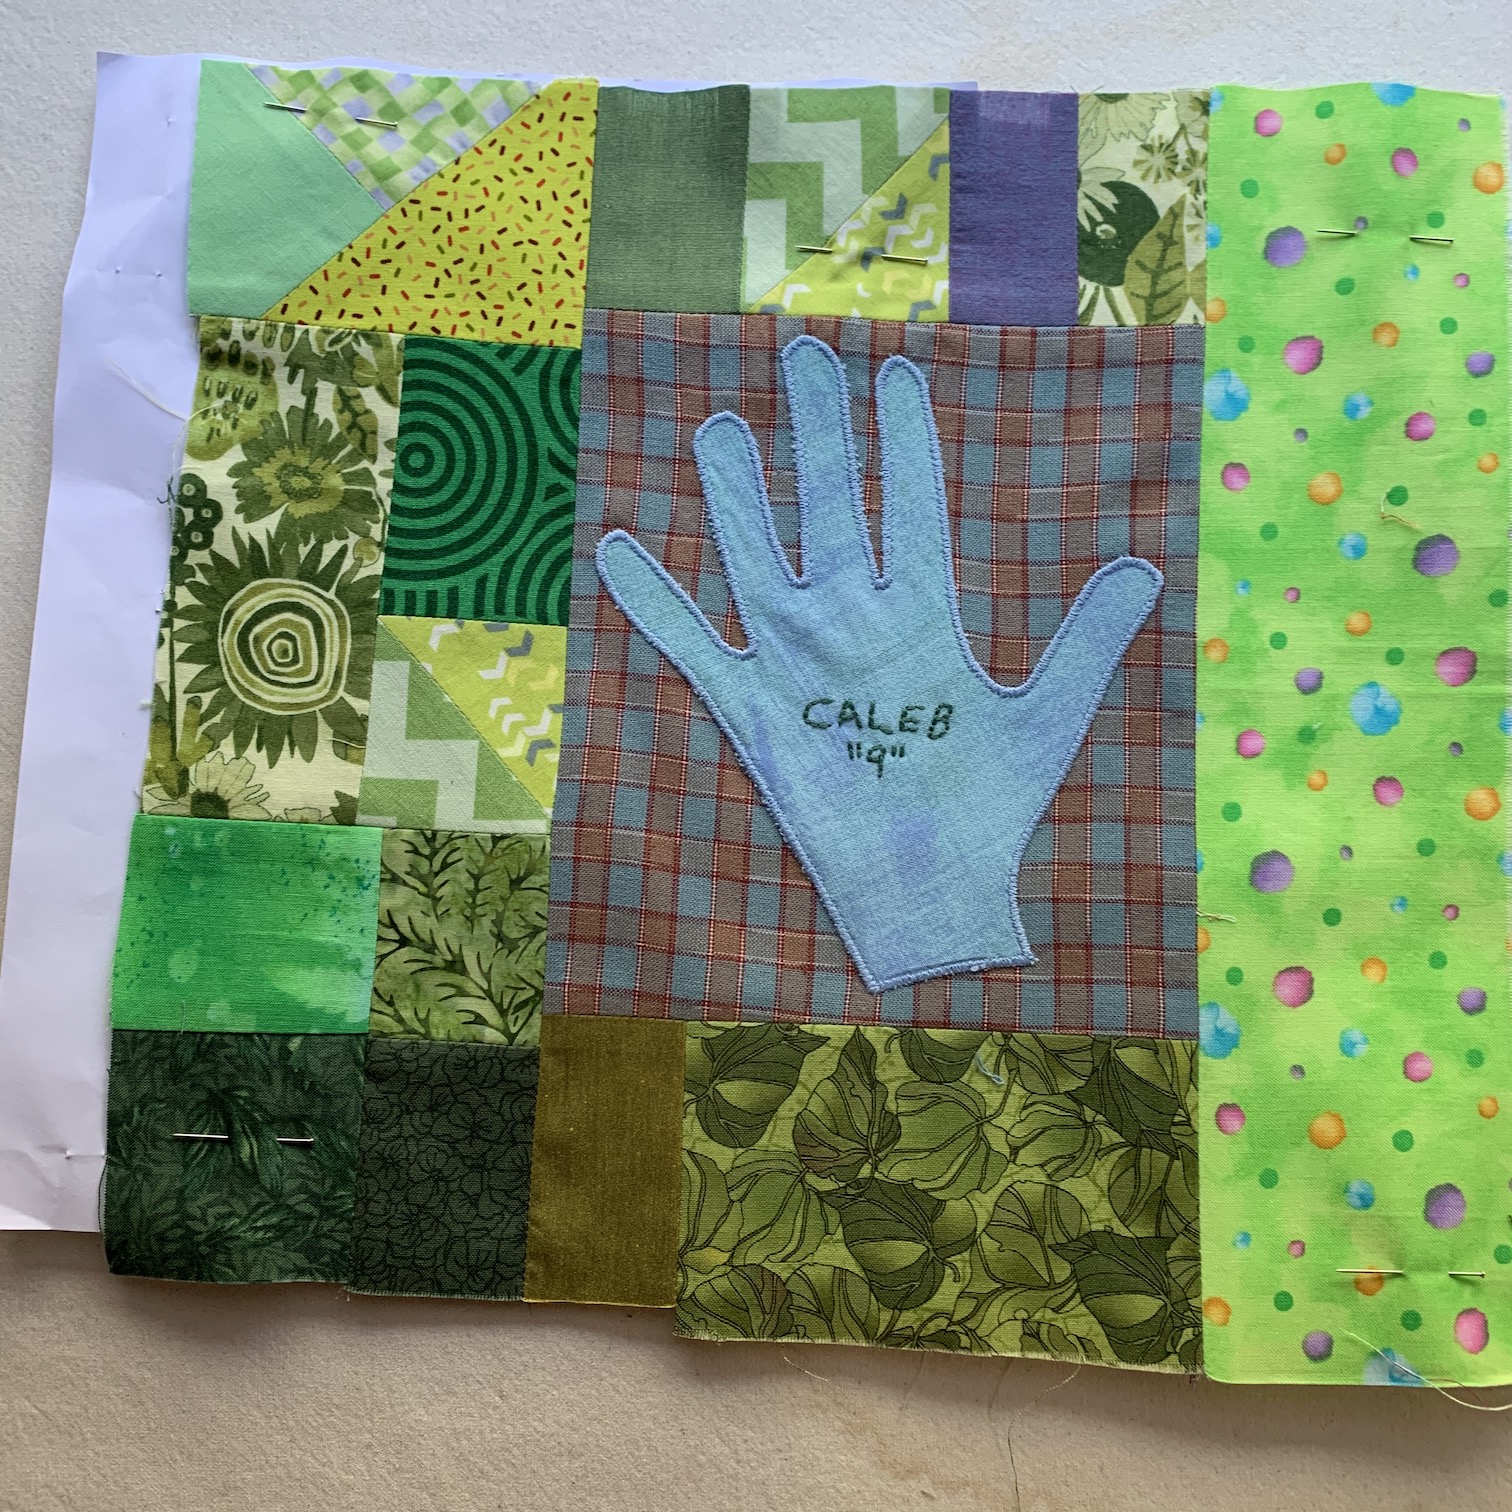


 I am going to get to the news related to the title of this post, but first I need to talk about myself a bit, as that is what Beasties do.
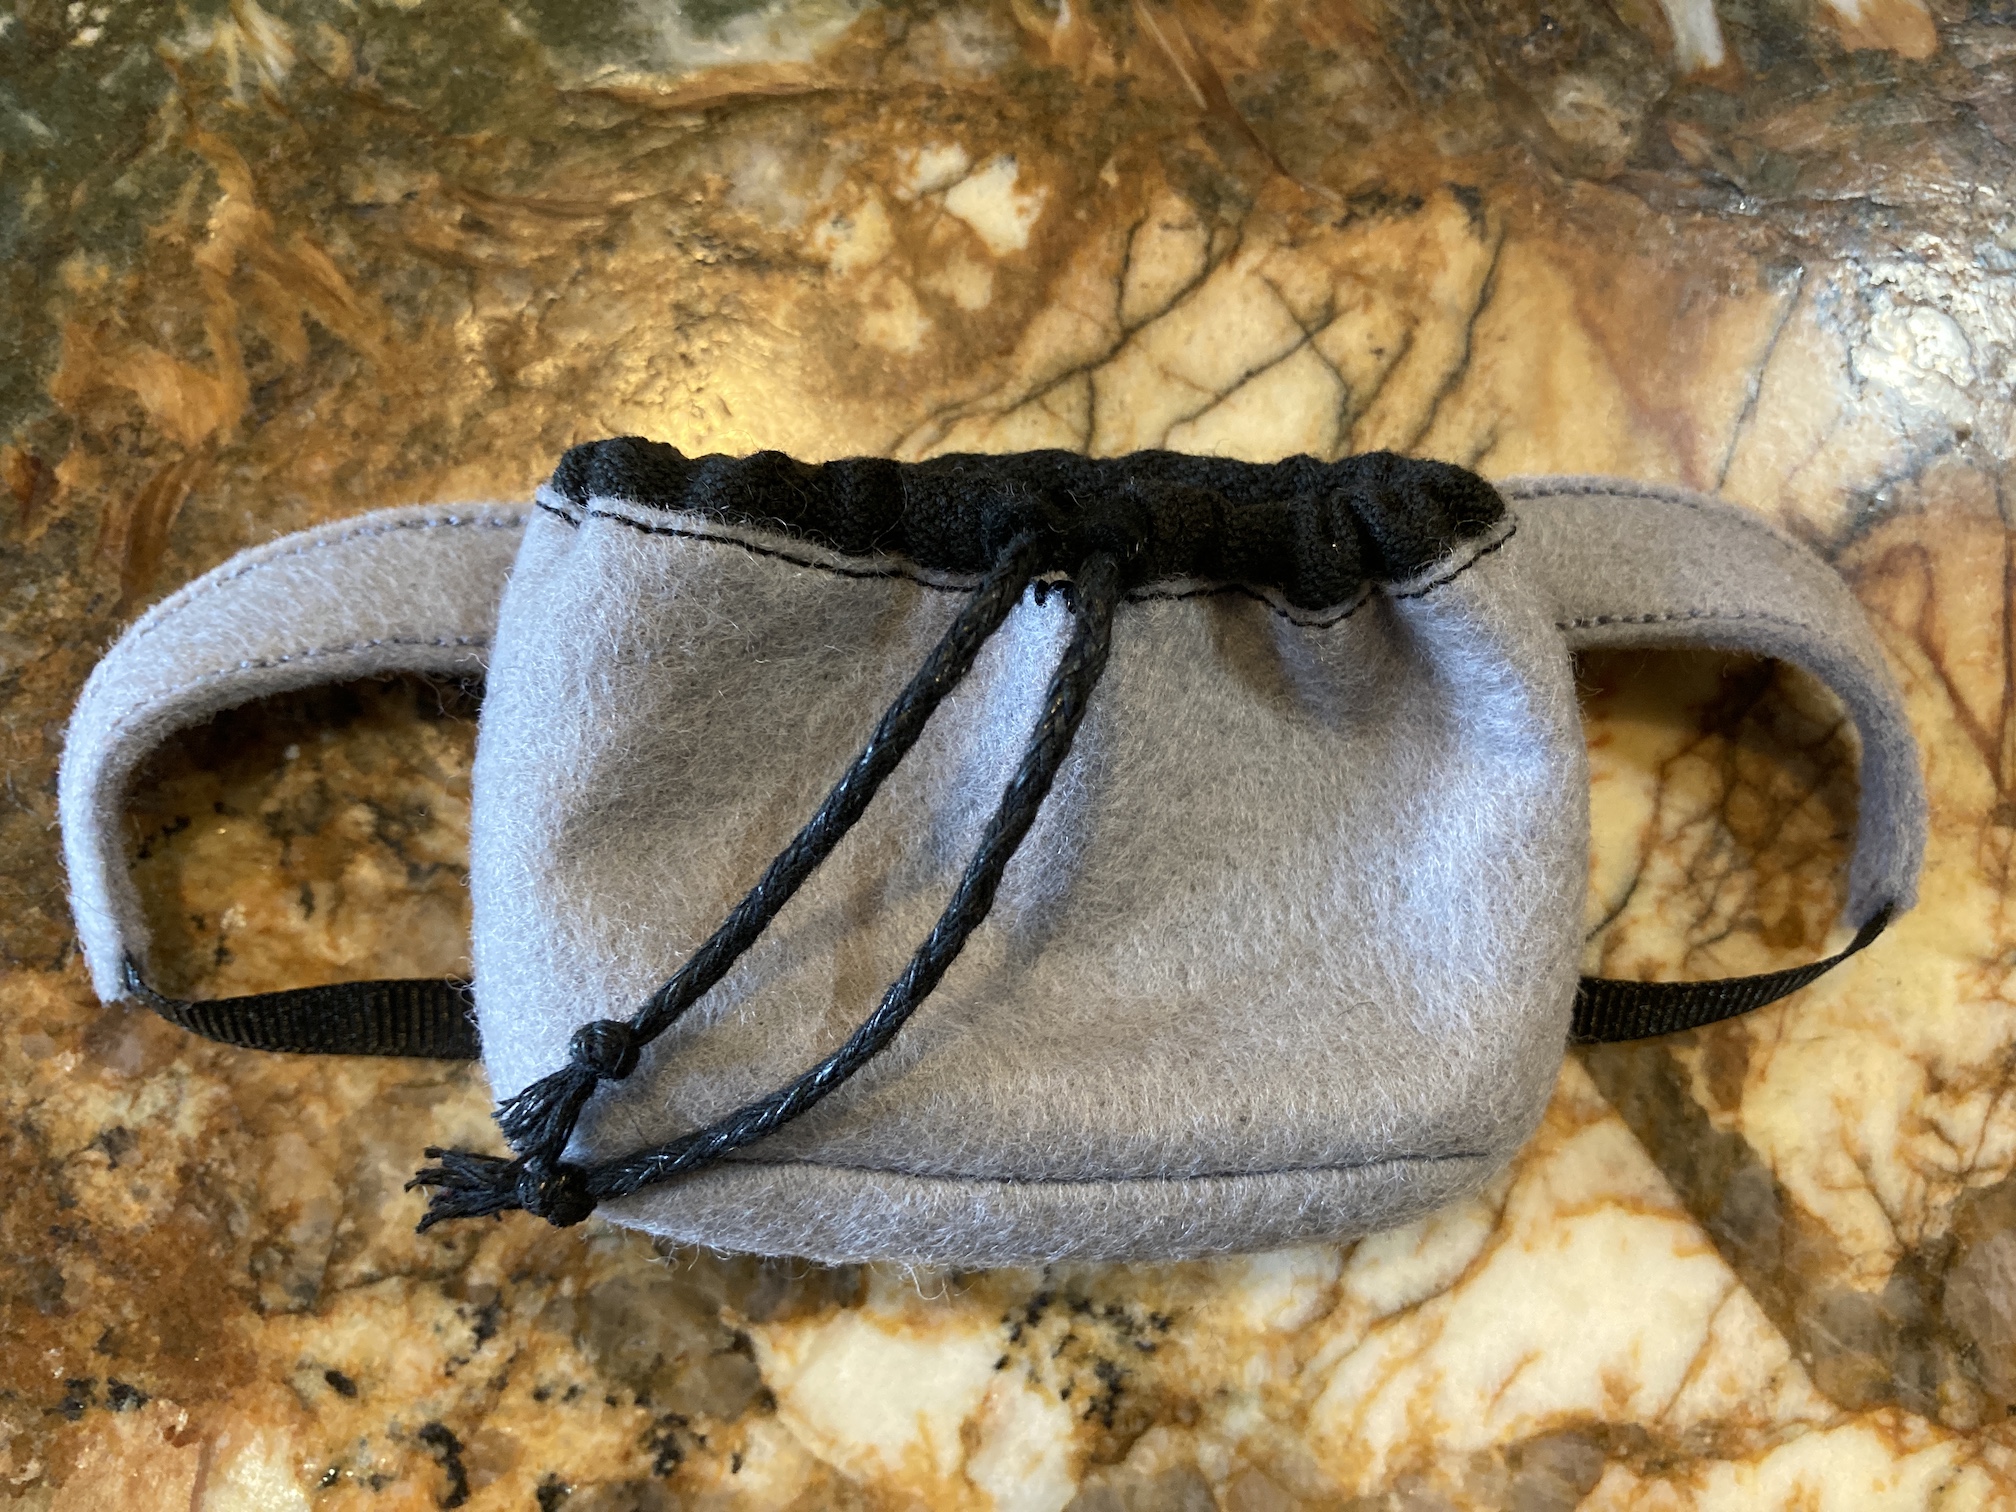

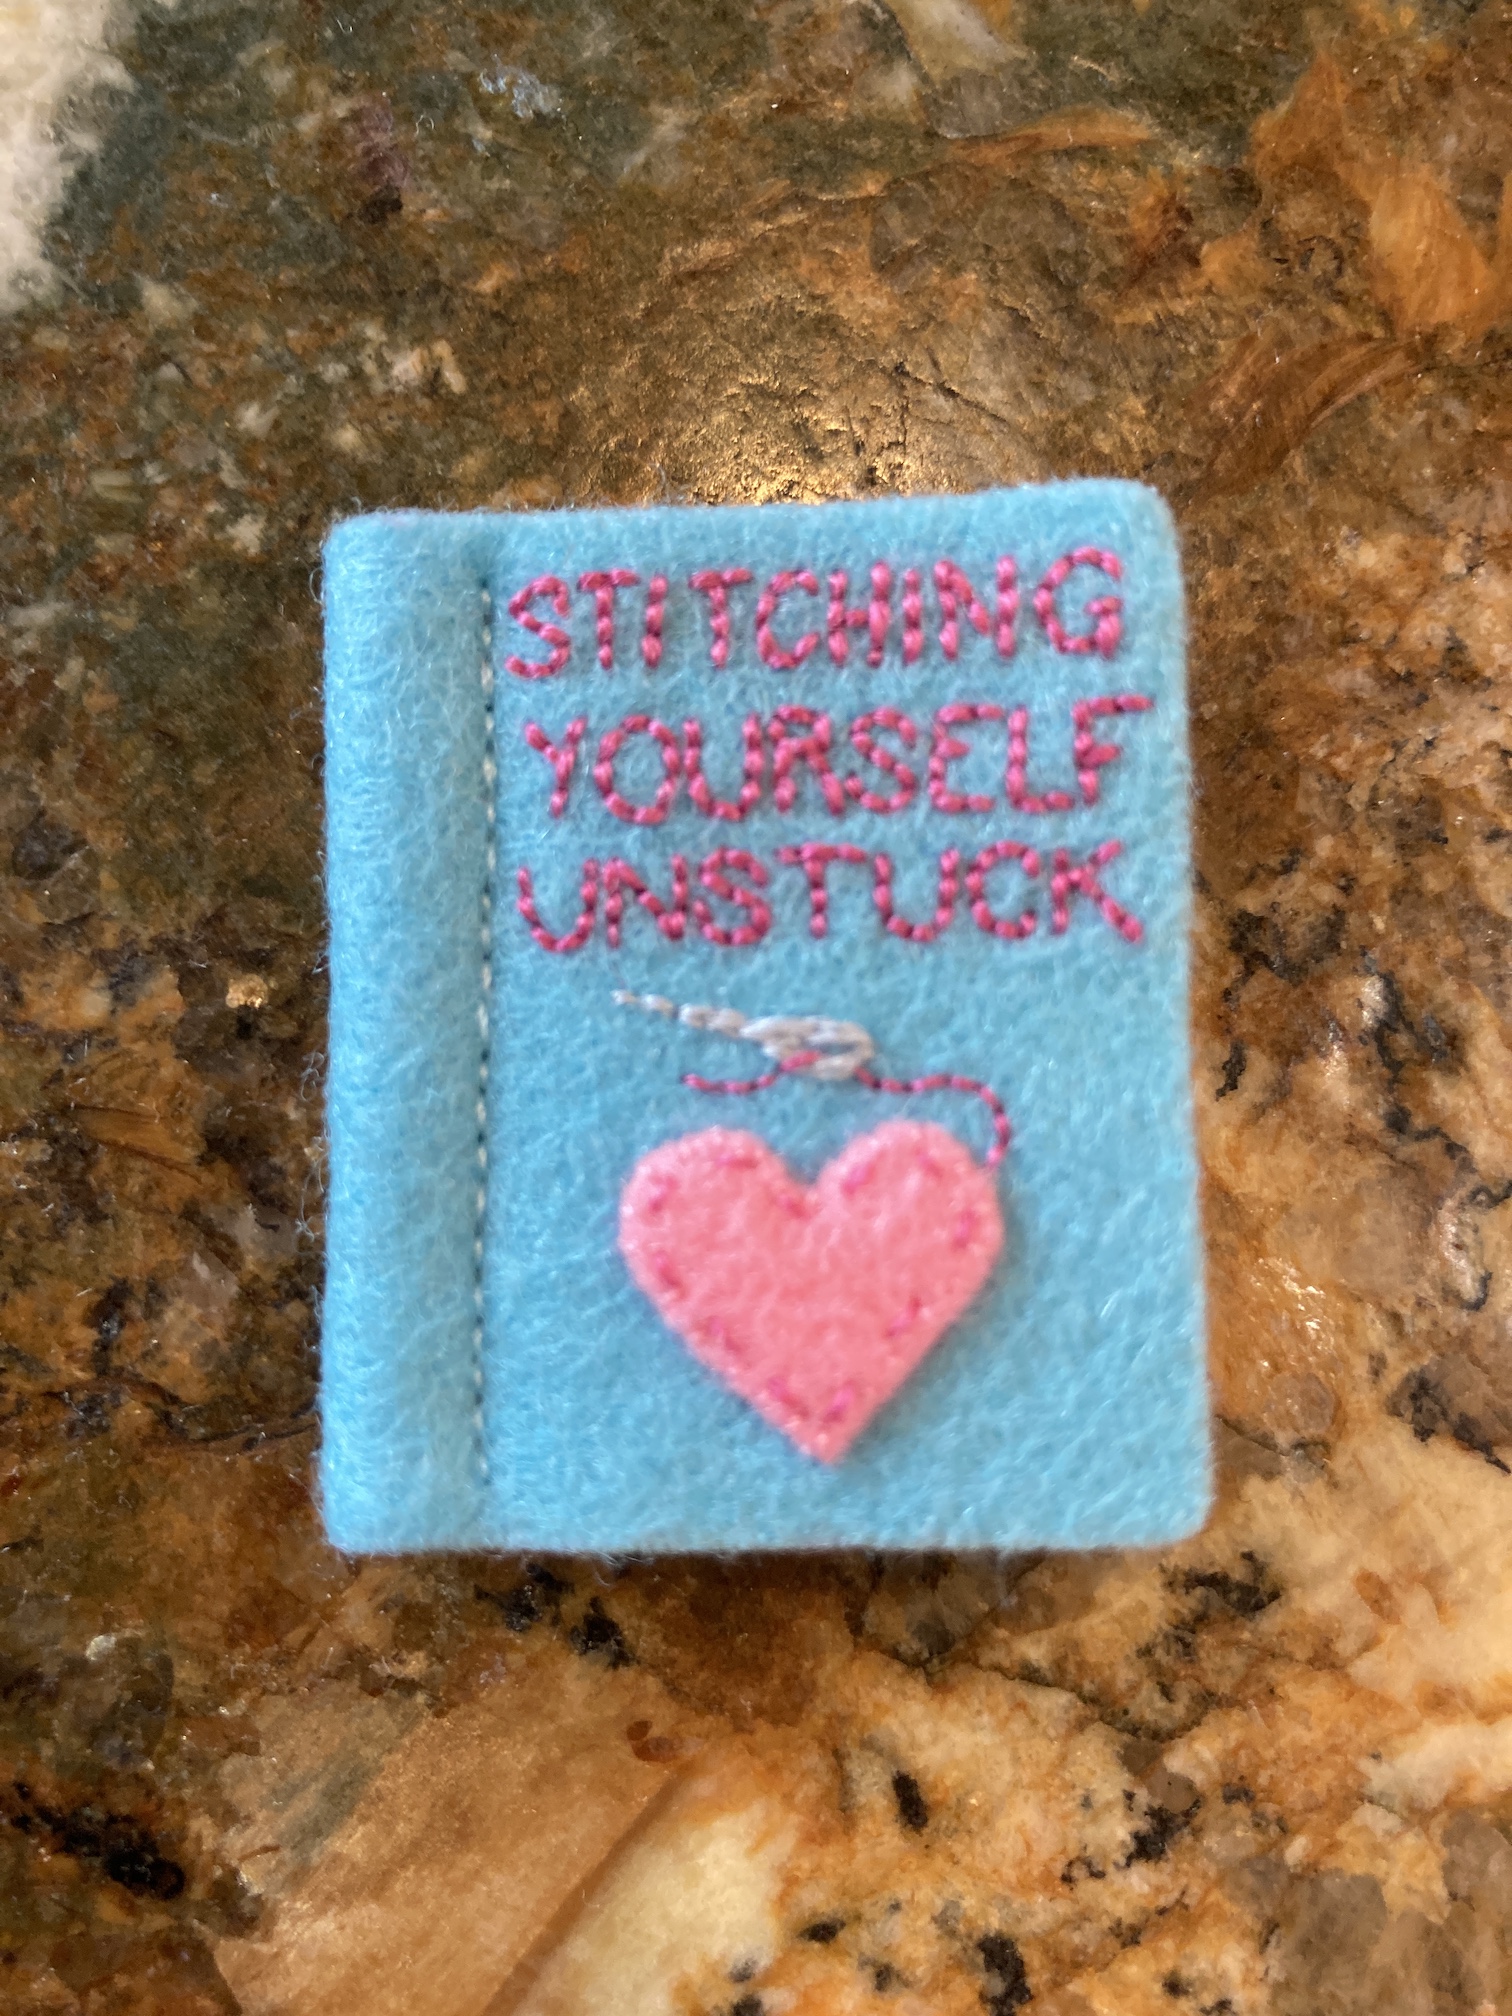
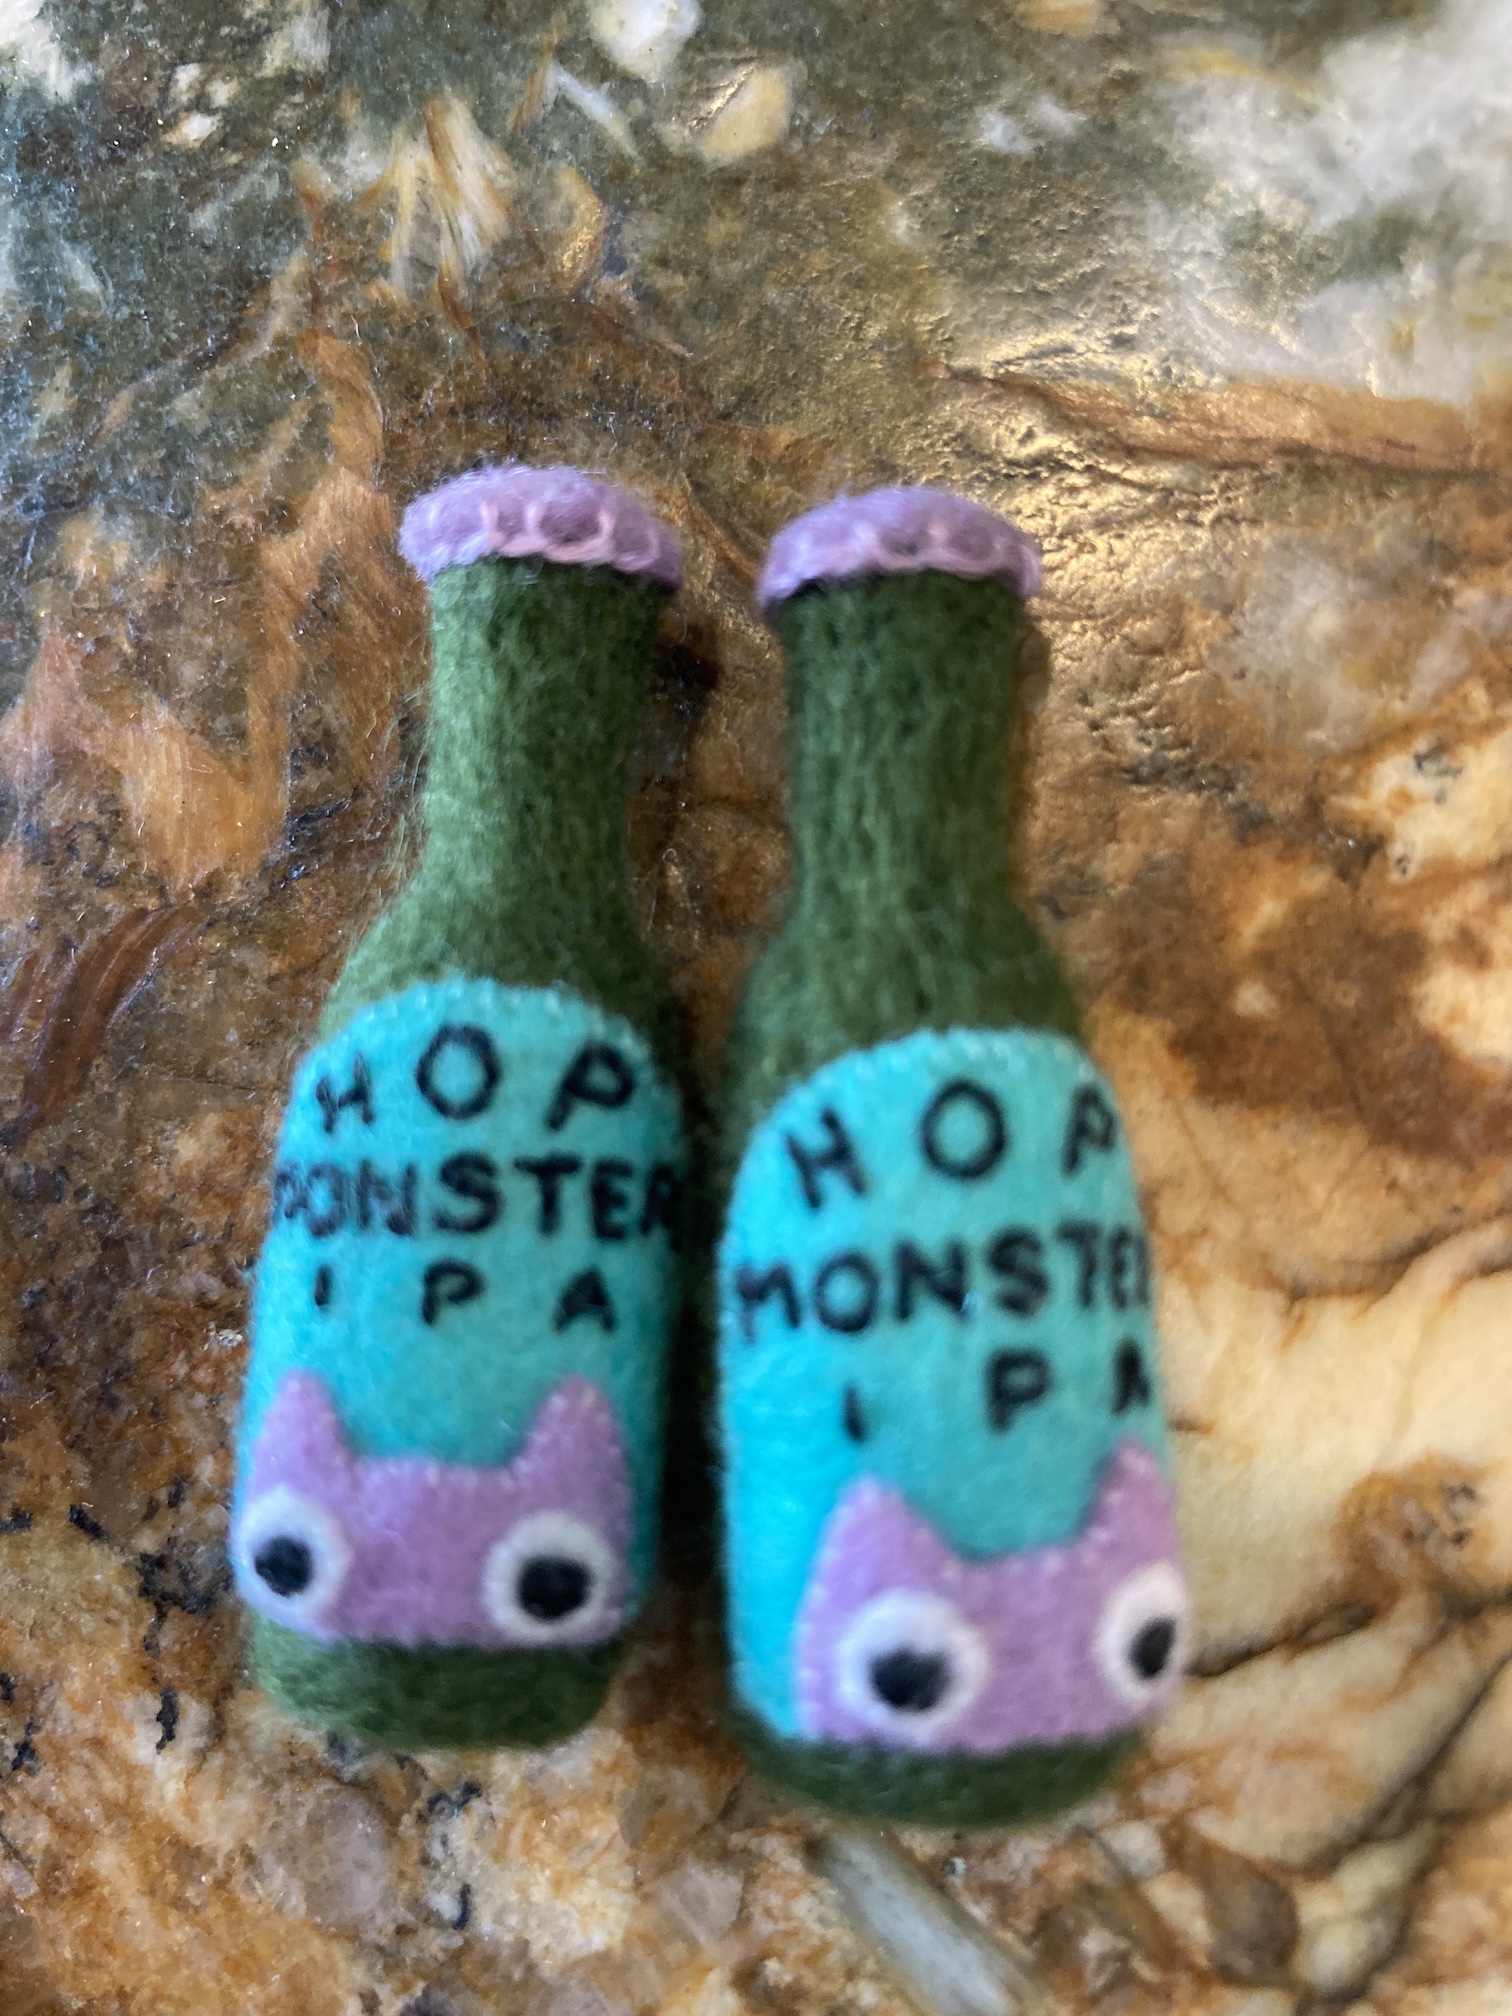
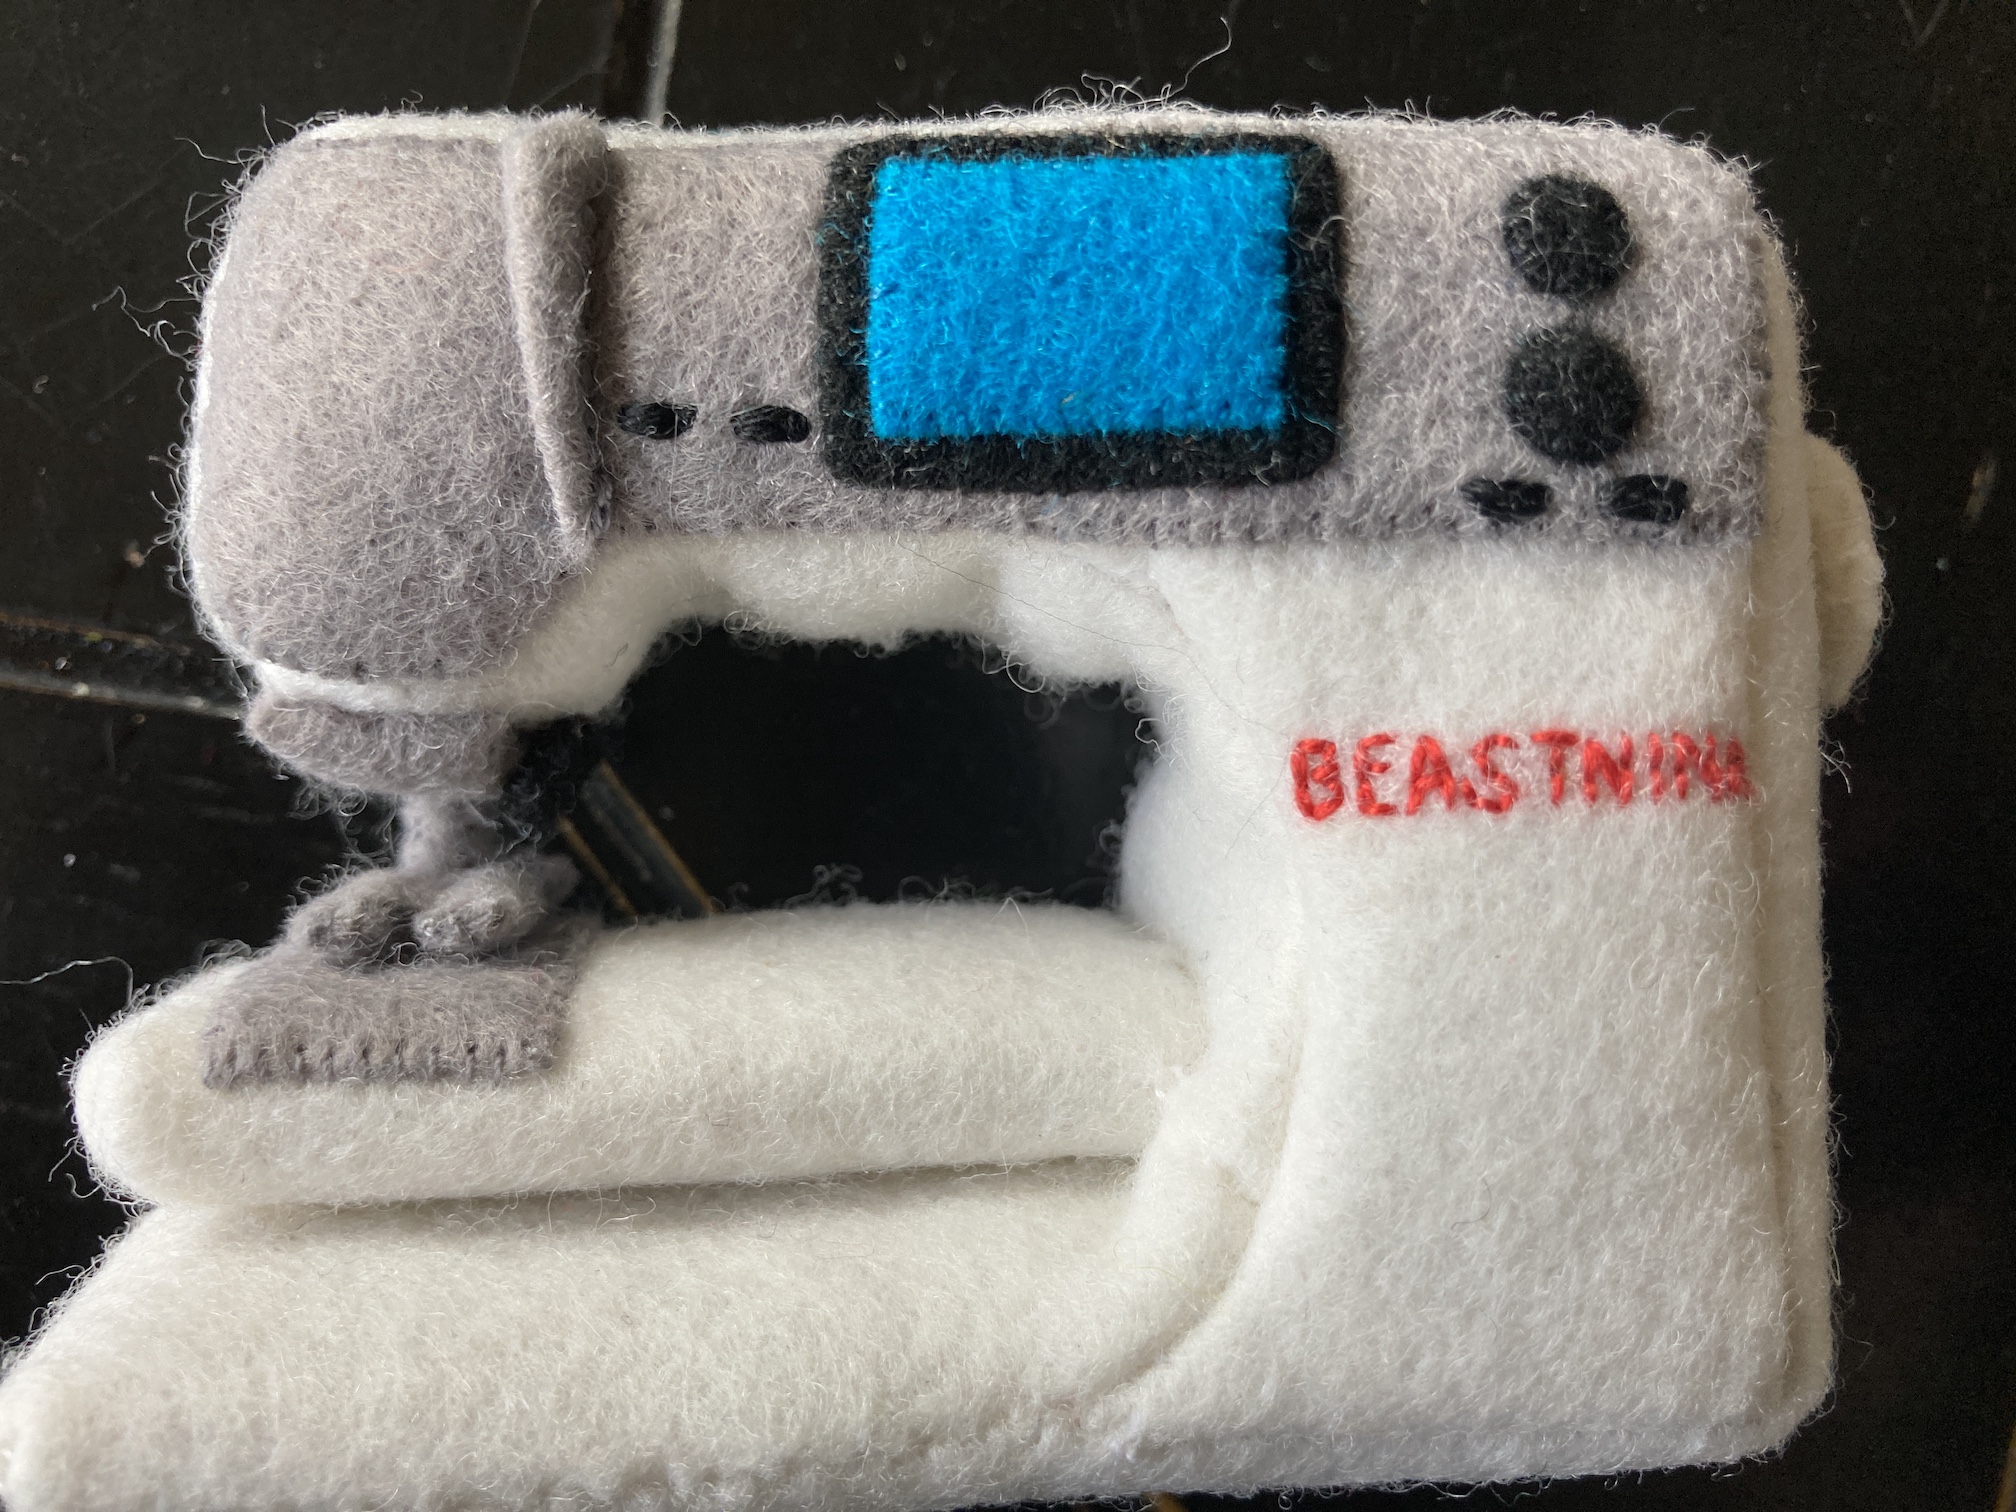
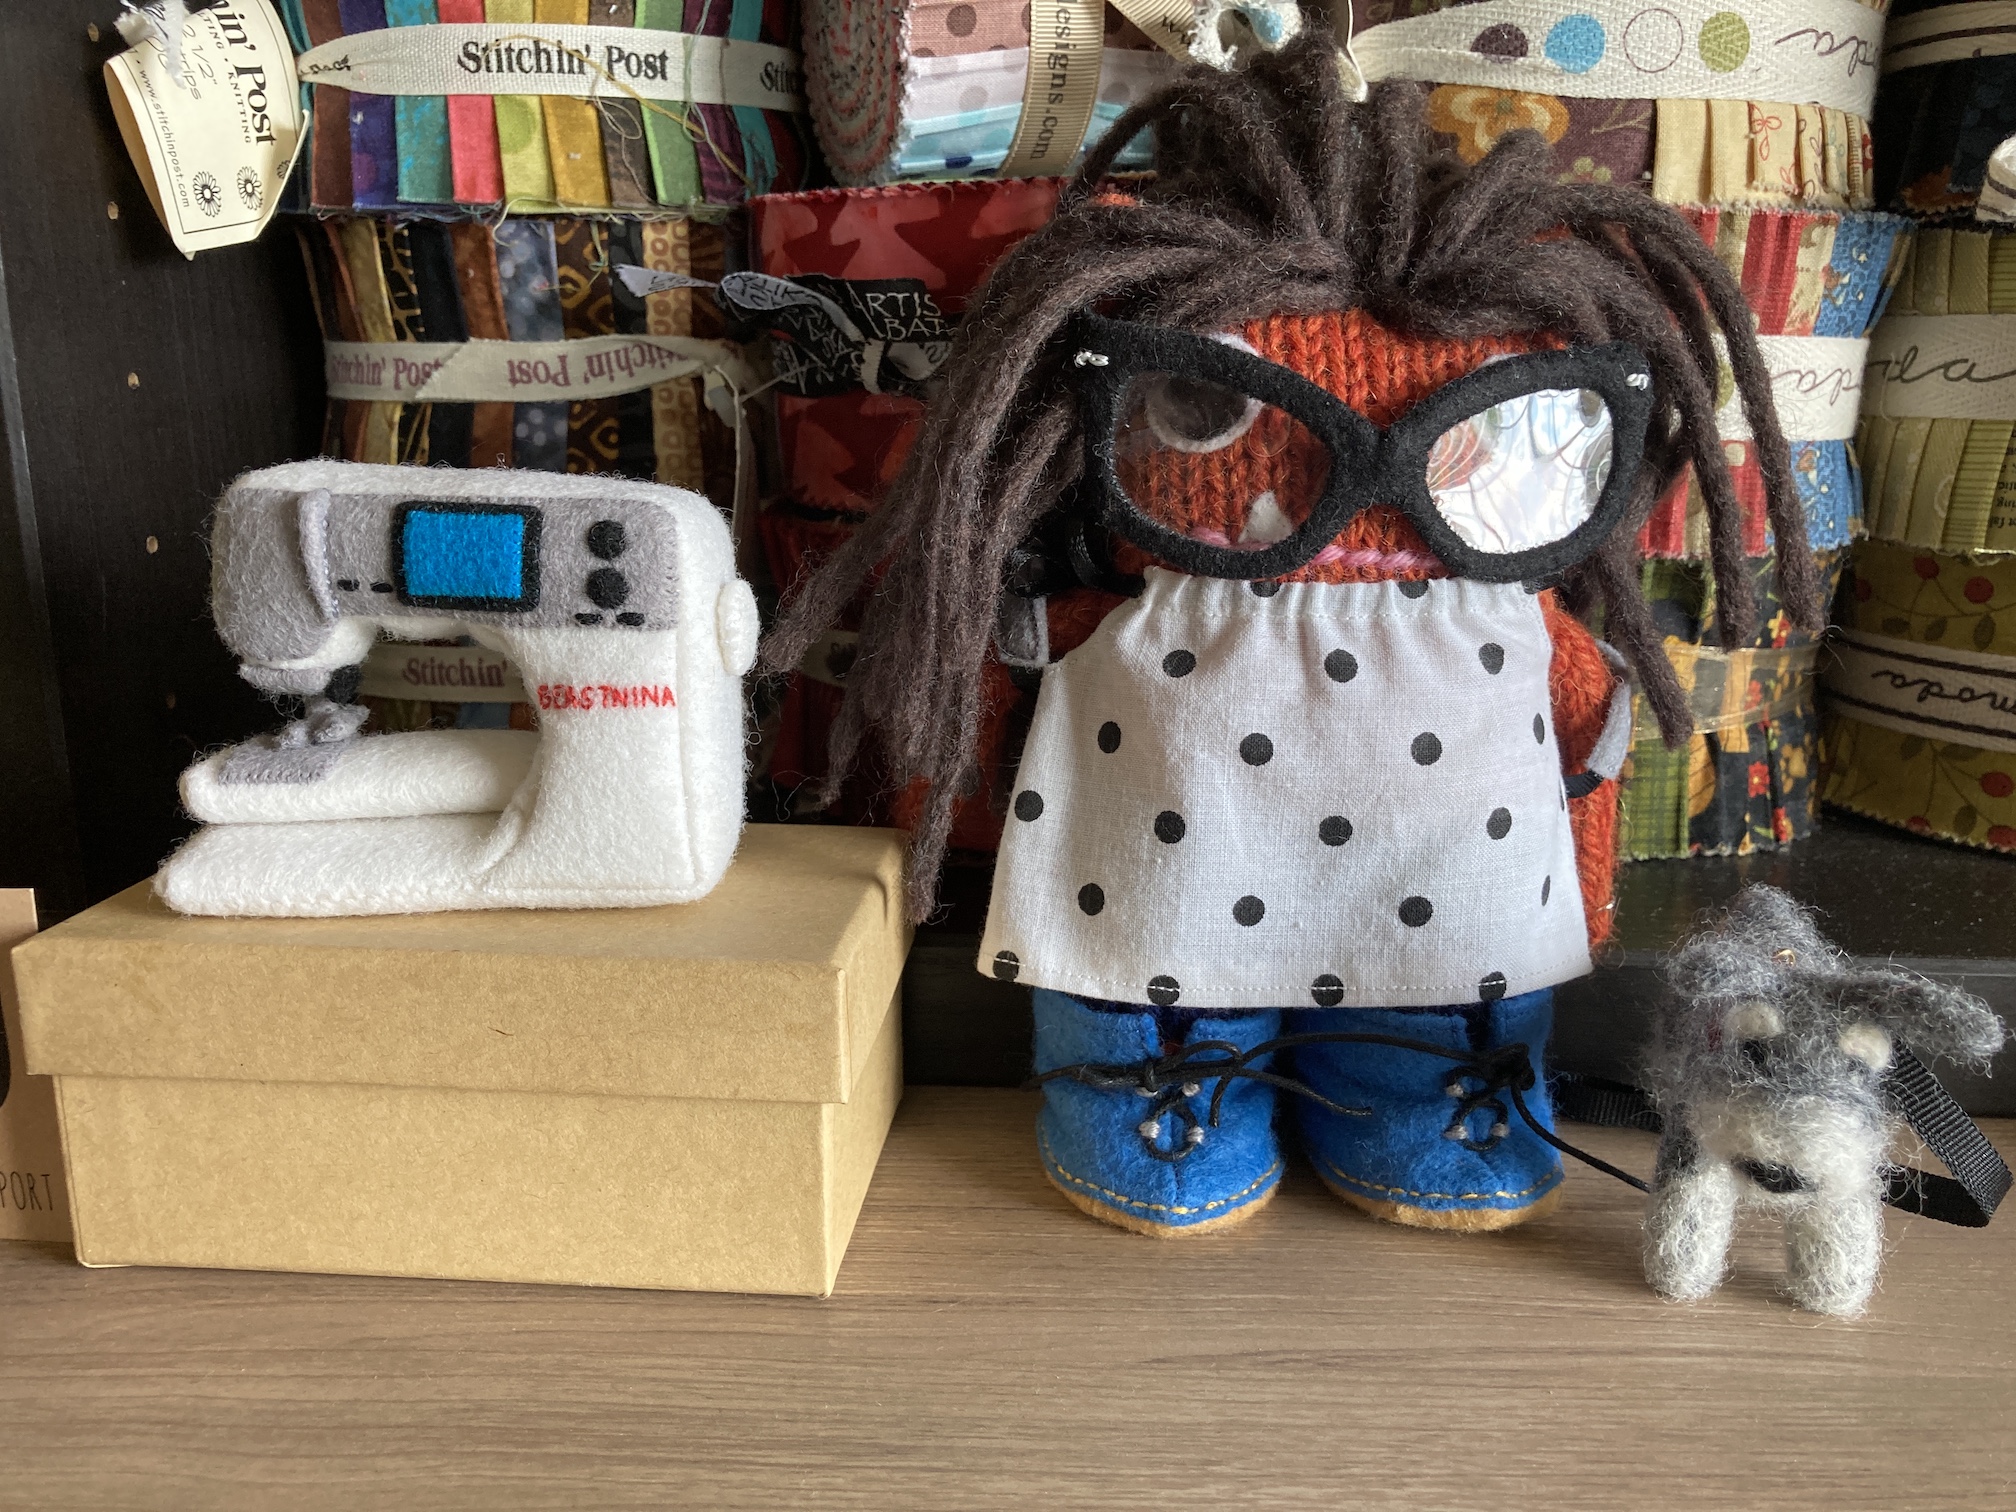 Here I am hanging out in Tierney’s studio with my goodies with my dog Mikelet:
 And because I know you can never tire of photos of me (and all my utter adorableness), here is a photo of me sporting my new backpack as I wait to get into Tierney’s car for our latest trip to the public library (one of our favorite places):
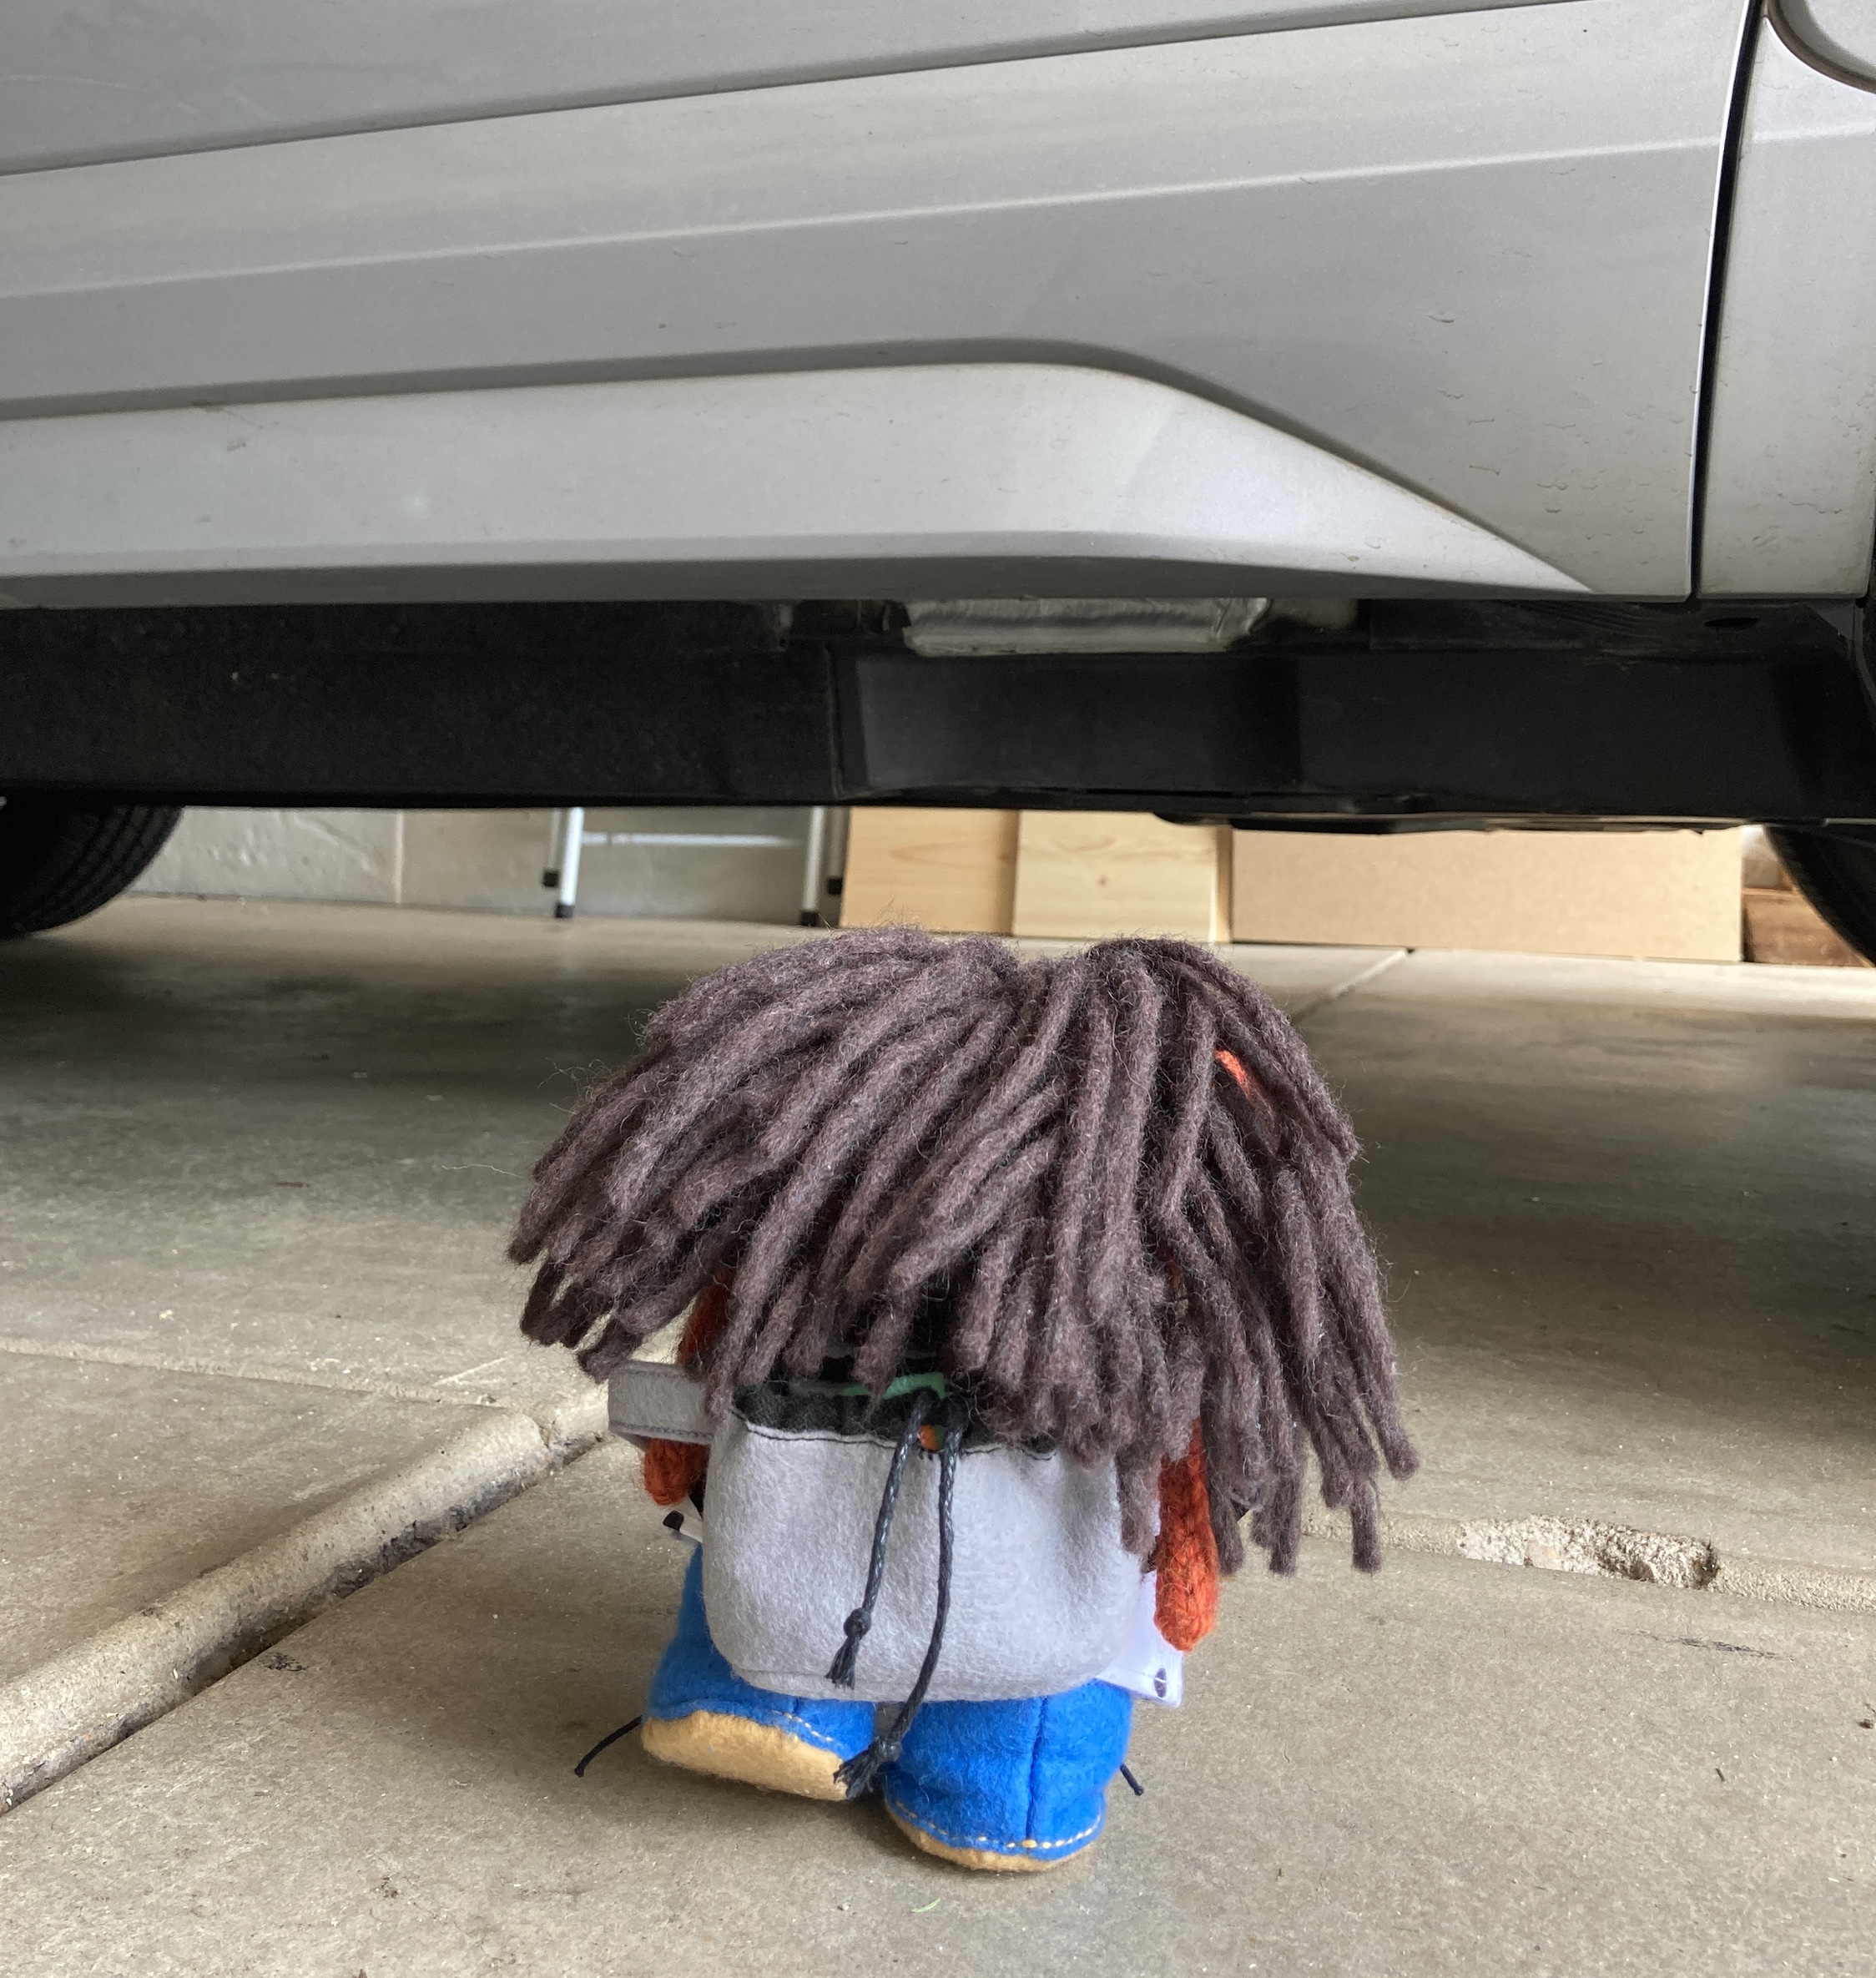 Inside the backpack I keep two important items: 1) my laptop; and 2) my Beastie library card!
 I guess we could take a break talking about me and get to the story that connects to the title of this post: Mail Order Groom
 As I like to have as much the same as Tierney, I asked that John Beastie be a chef like human John (that is why he has on an apron just like the one John wears), and that he enjoys playing poker with his friends as one of his hobbies just like human John. So John Beastie came with a winning poker hand and chips (and his trusty cell phone). Additionally human John enjoys Bourbon and Whiskey tasting and loves to make homemade pasta so included with John Beastie is a bottle of Monsters Mark!
 Tierney does not always take the best photos (and my paws are too small to handle taking photos with her smartphone so I have to leave it up to her) but what you cannot tell in the first photos of John Beastie, is he has a Colorado Avalanche Hockey team Bigfoot logo cap on his head:
 This is human John’s favorite cap (he wears a lot of caps as his hair is missing, not sure where he left it…) and is a classic team logo cap/hat that is no longer sold by Colorado’s hockey team.
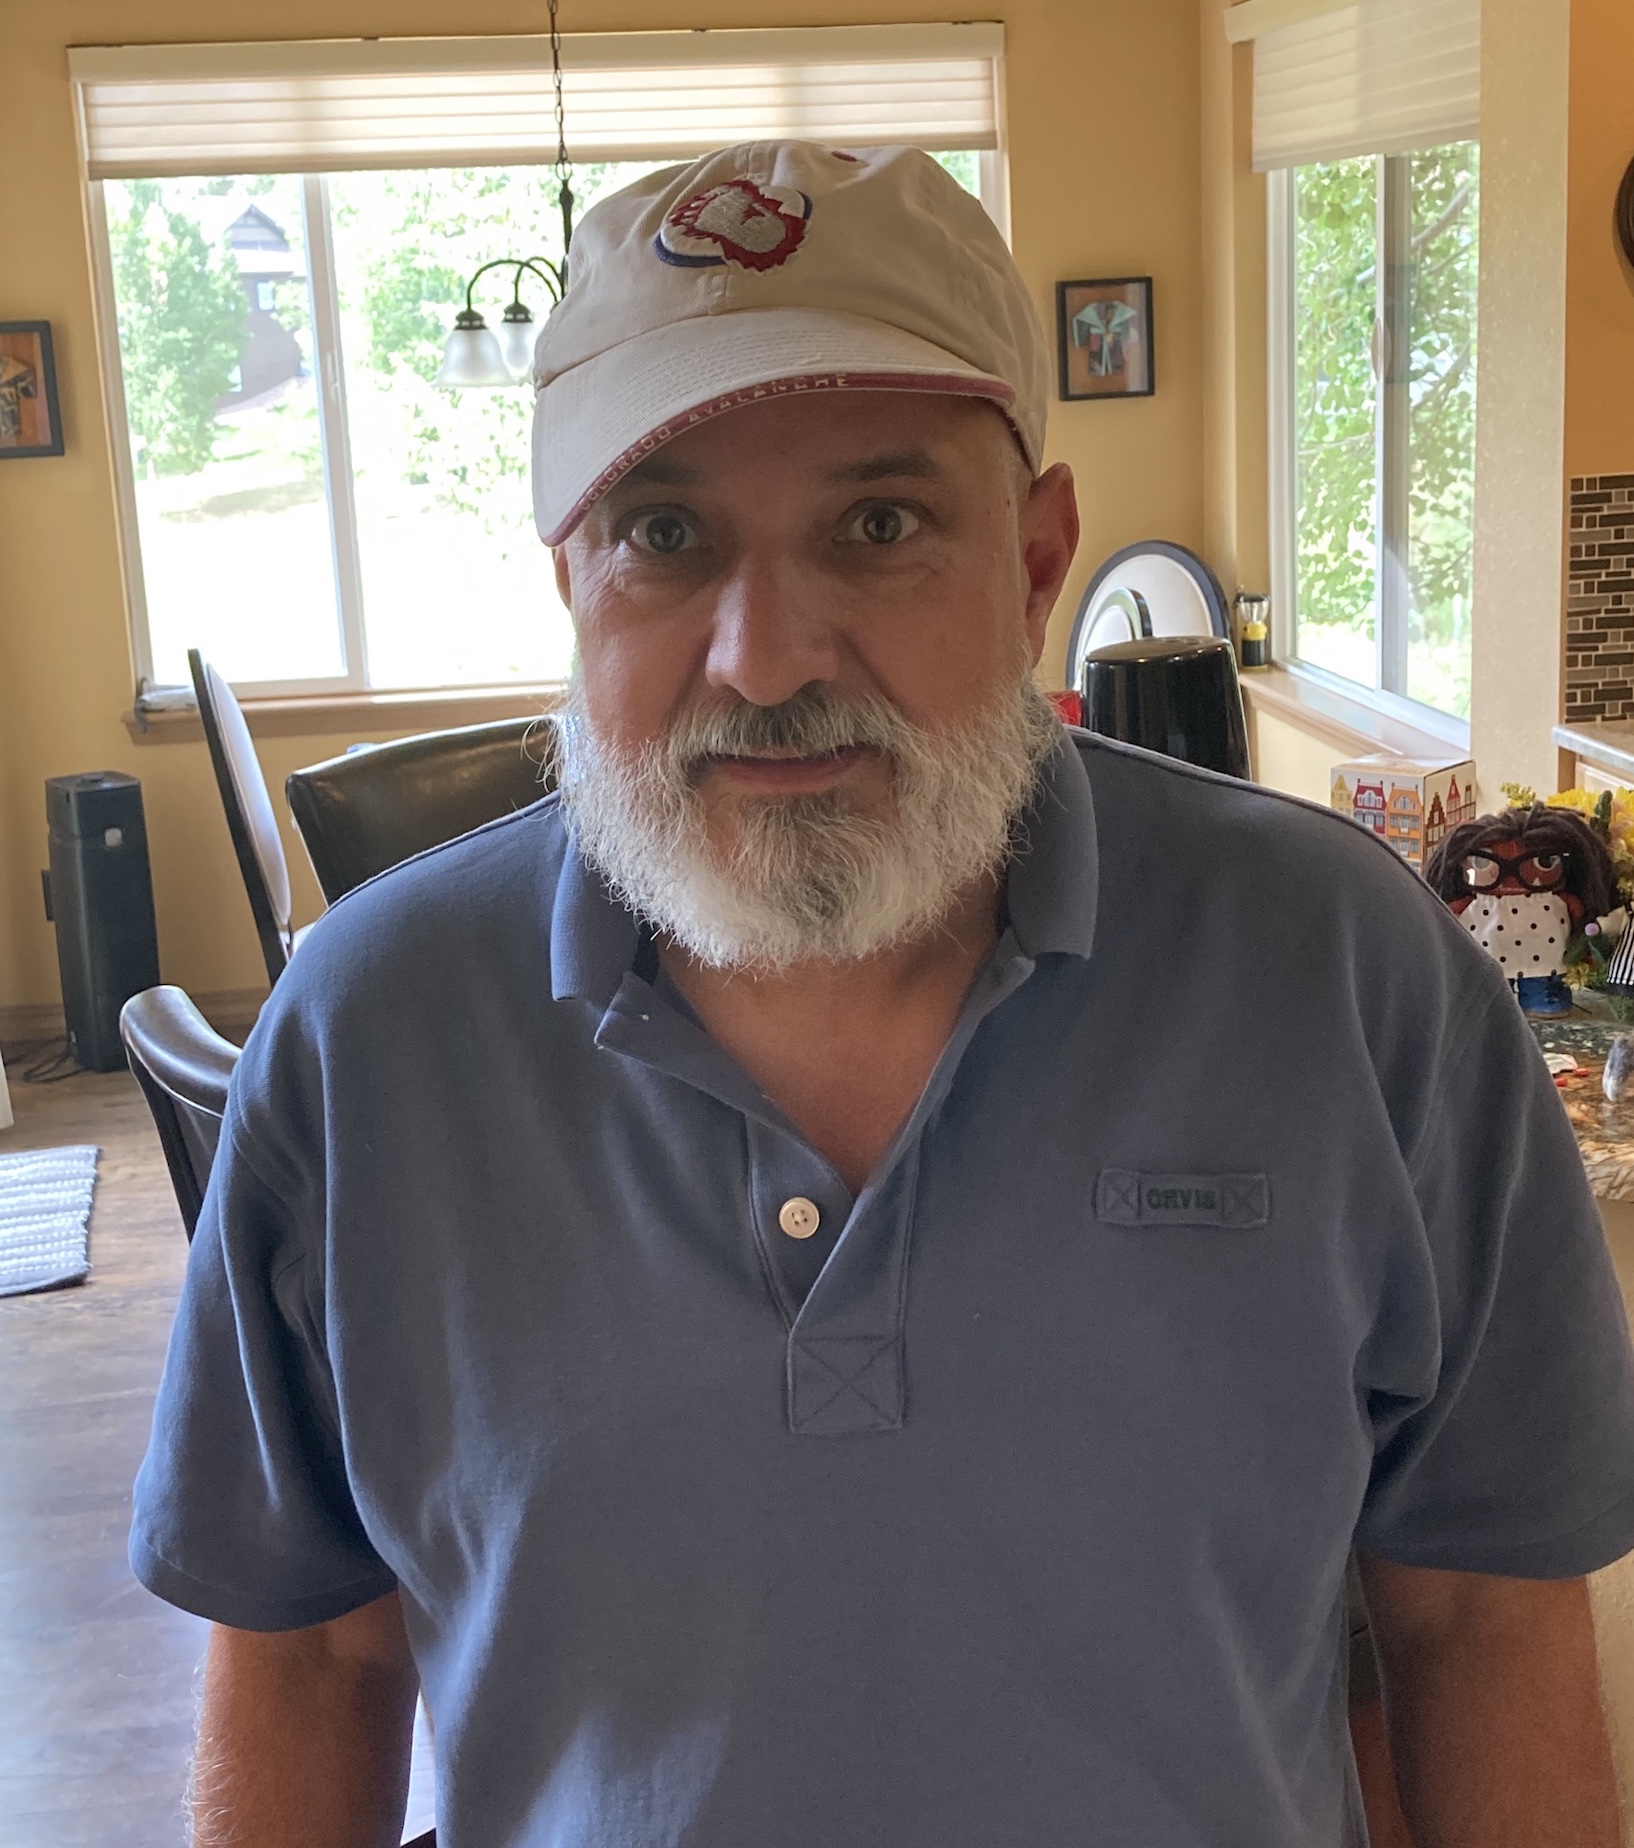 My dog Mikelet (named after Tierney’s Miniature Schnauzer, Mike) took immediately to John Beastie just like real Mike is totally in love with human John.
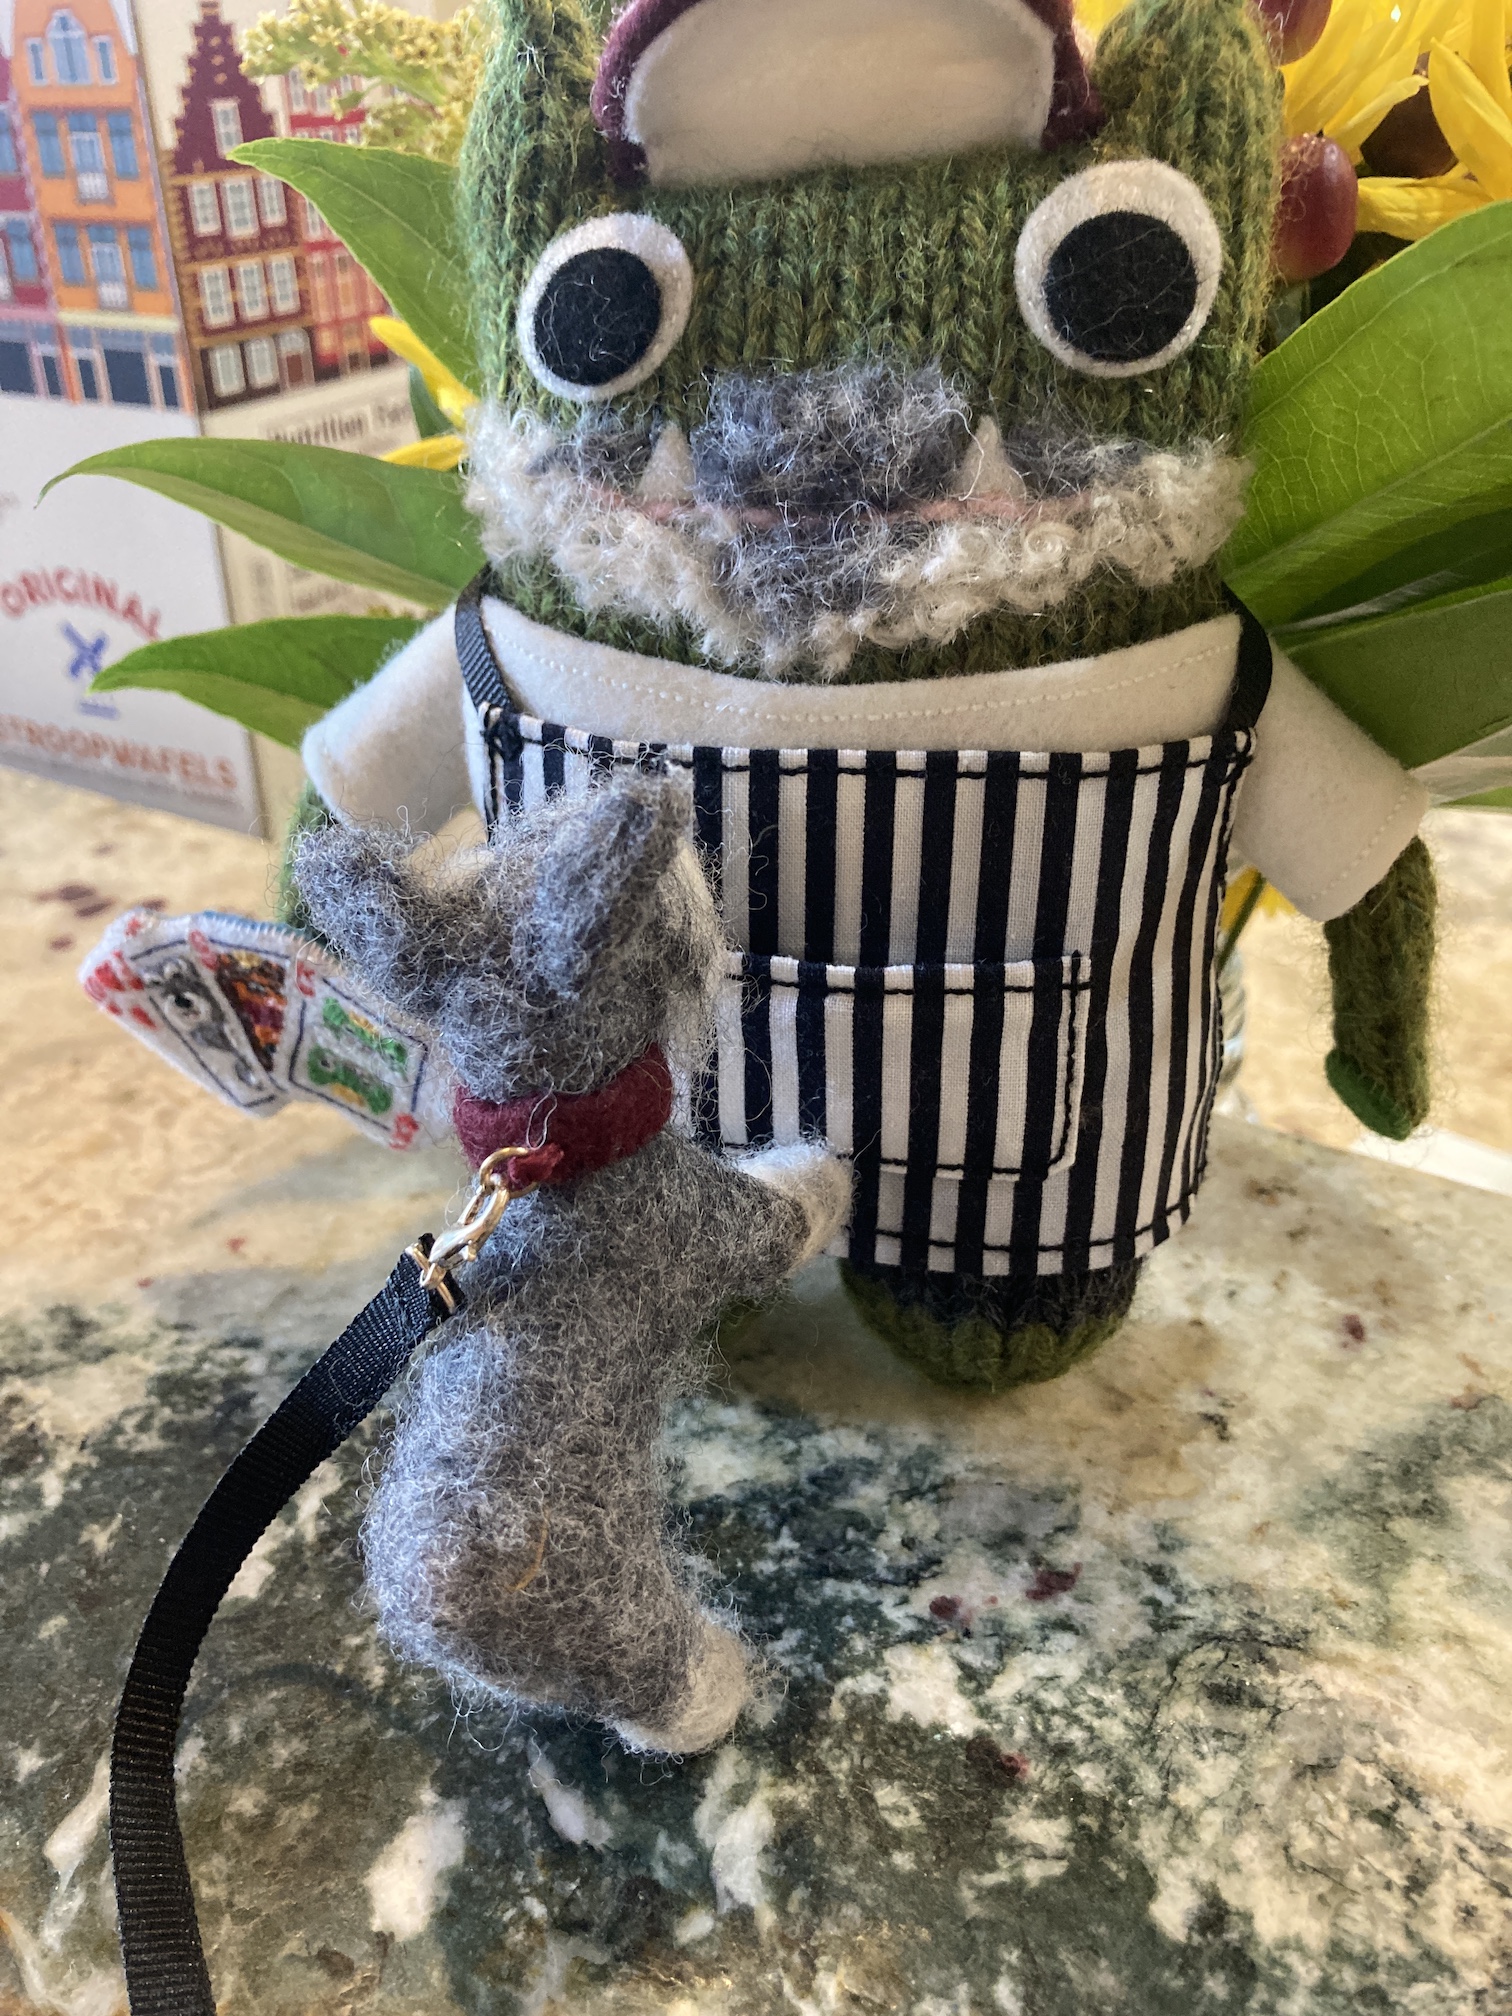 Before I knew it, without asking, John Beastie was taking Mikelet for walks!
 I am not sure why John Beastie is wearing his apron for walking Mikelet but he seems to like to always be ready to start cooking!
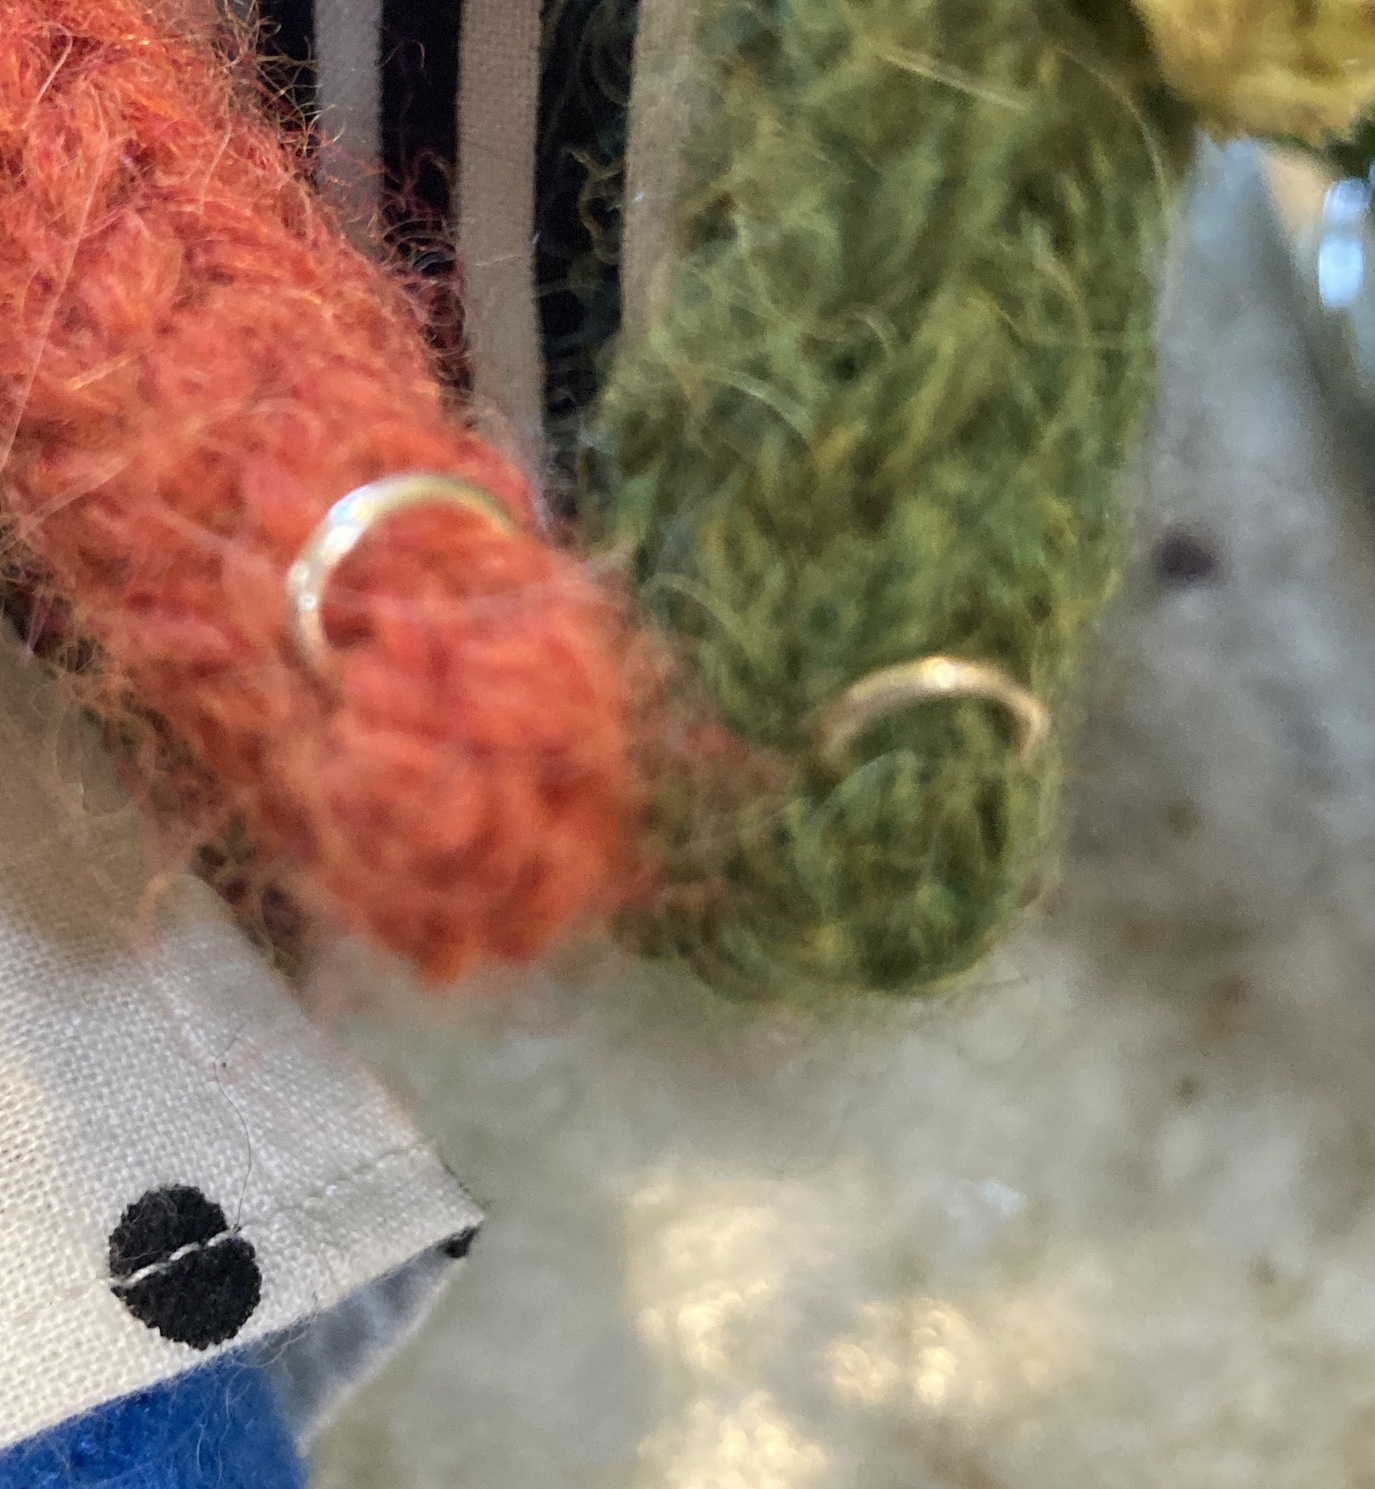 Here we are – a happy family of Beasties!
 Oh and if you’d like to see actual decent high quality photos of John Beastie, etc., check out our maker’s recent blog posts:


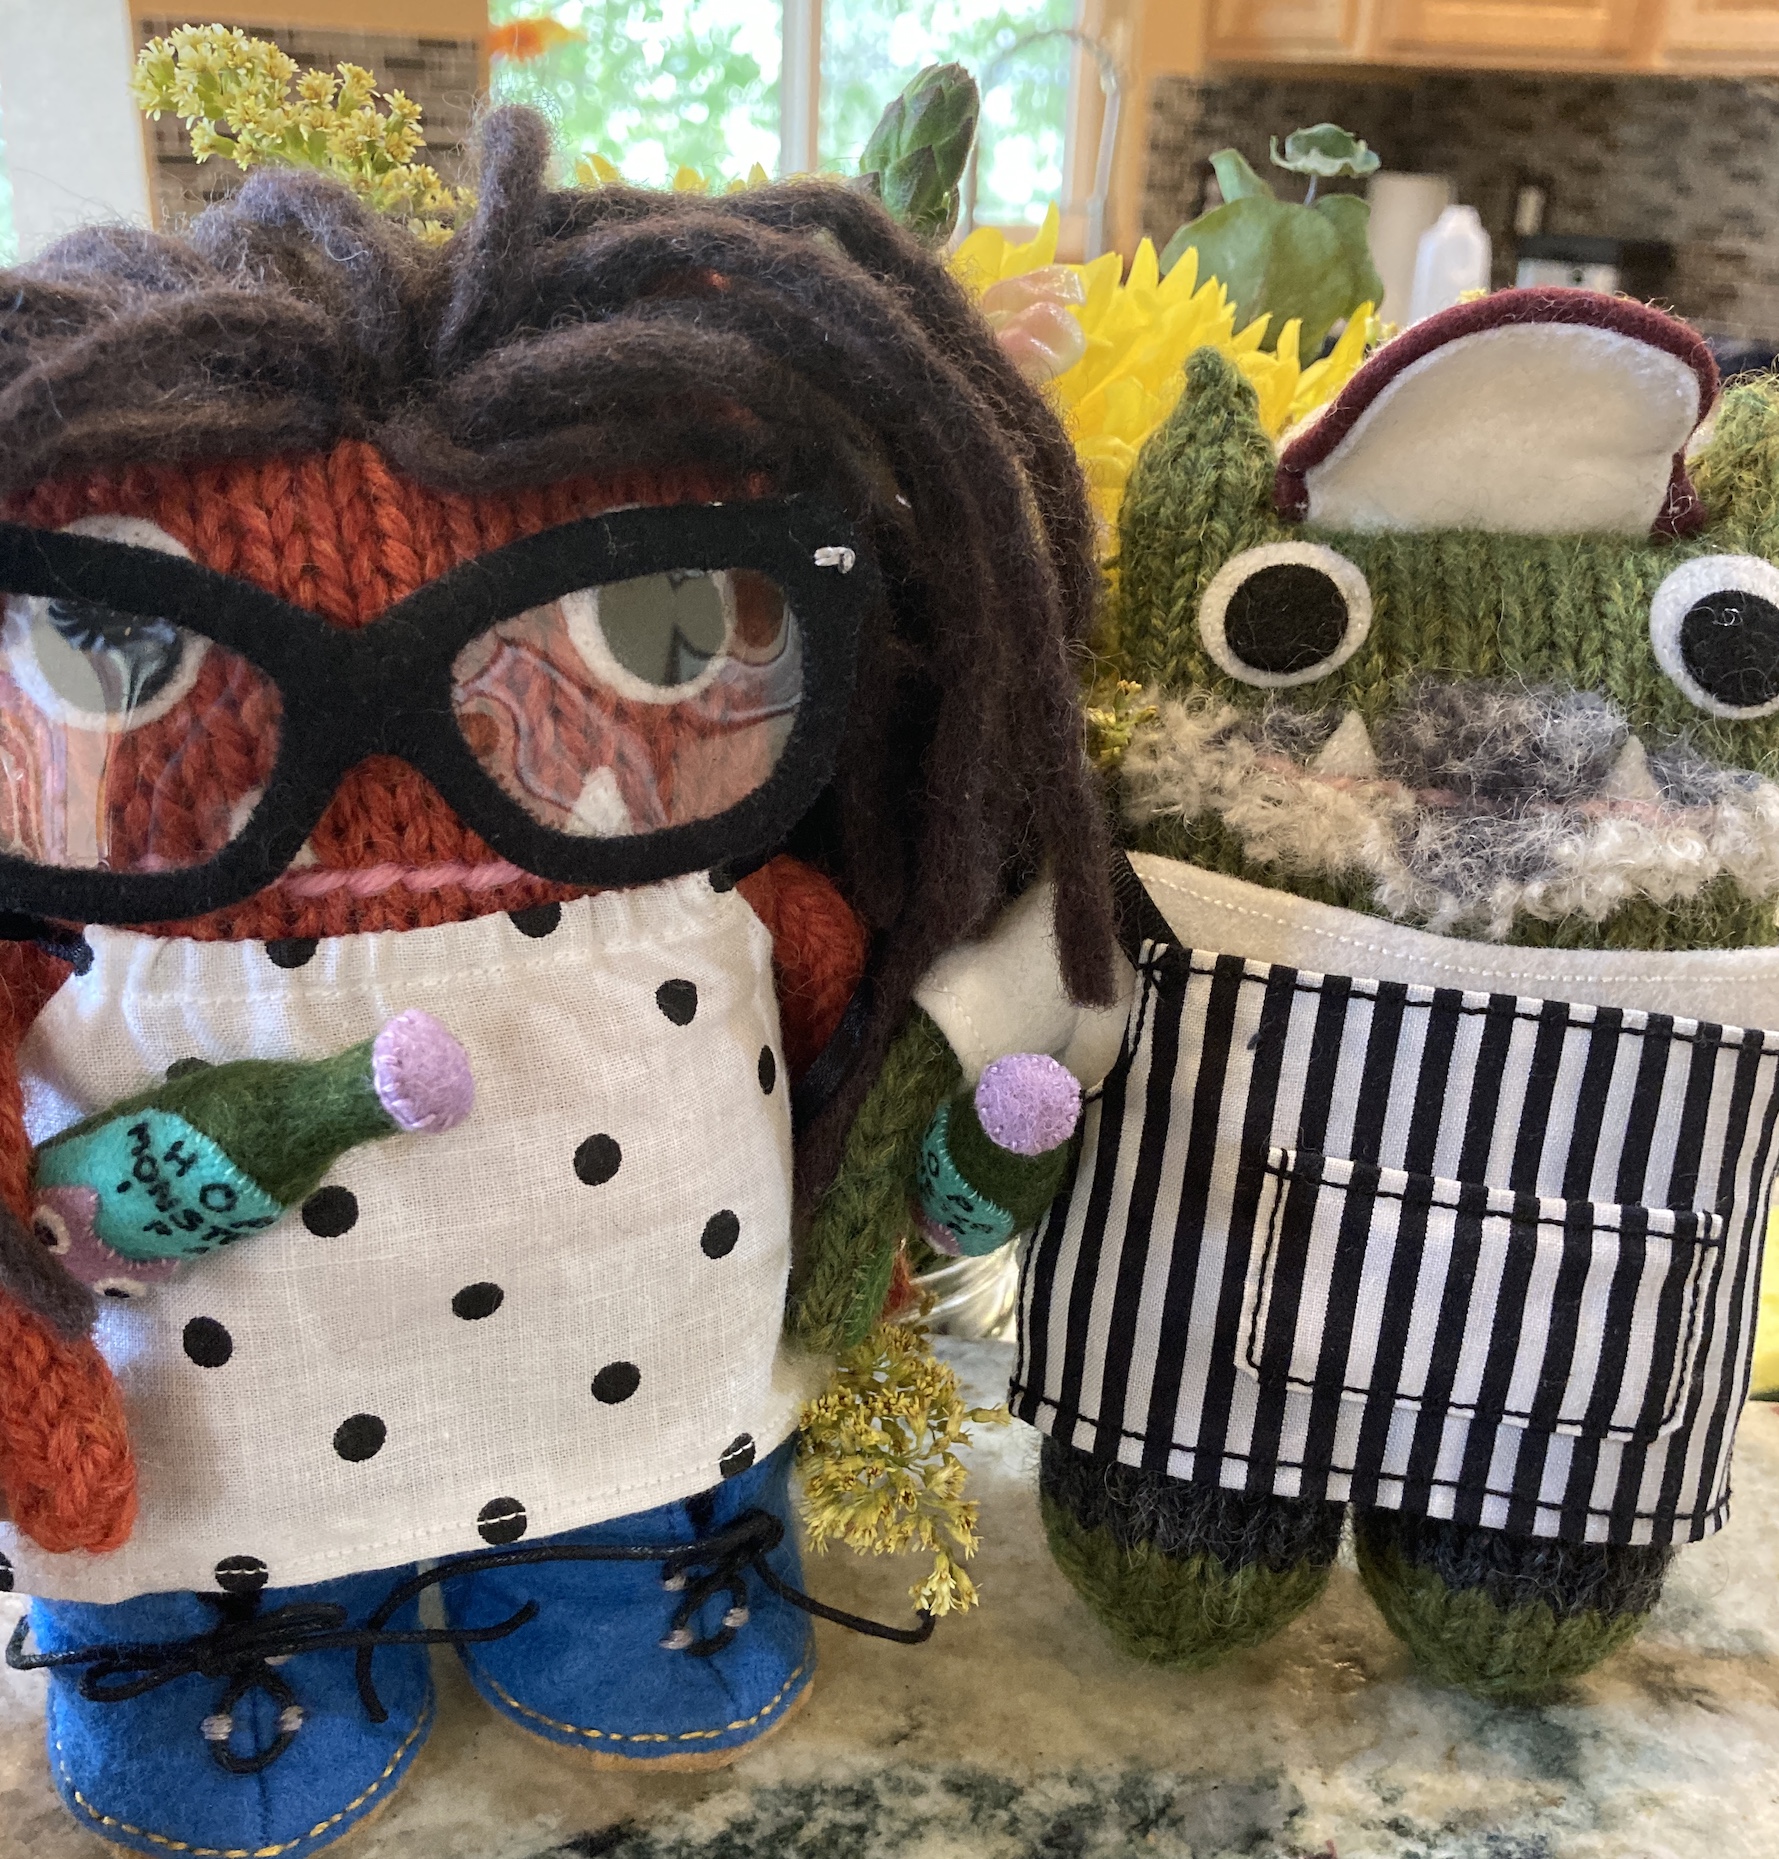

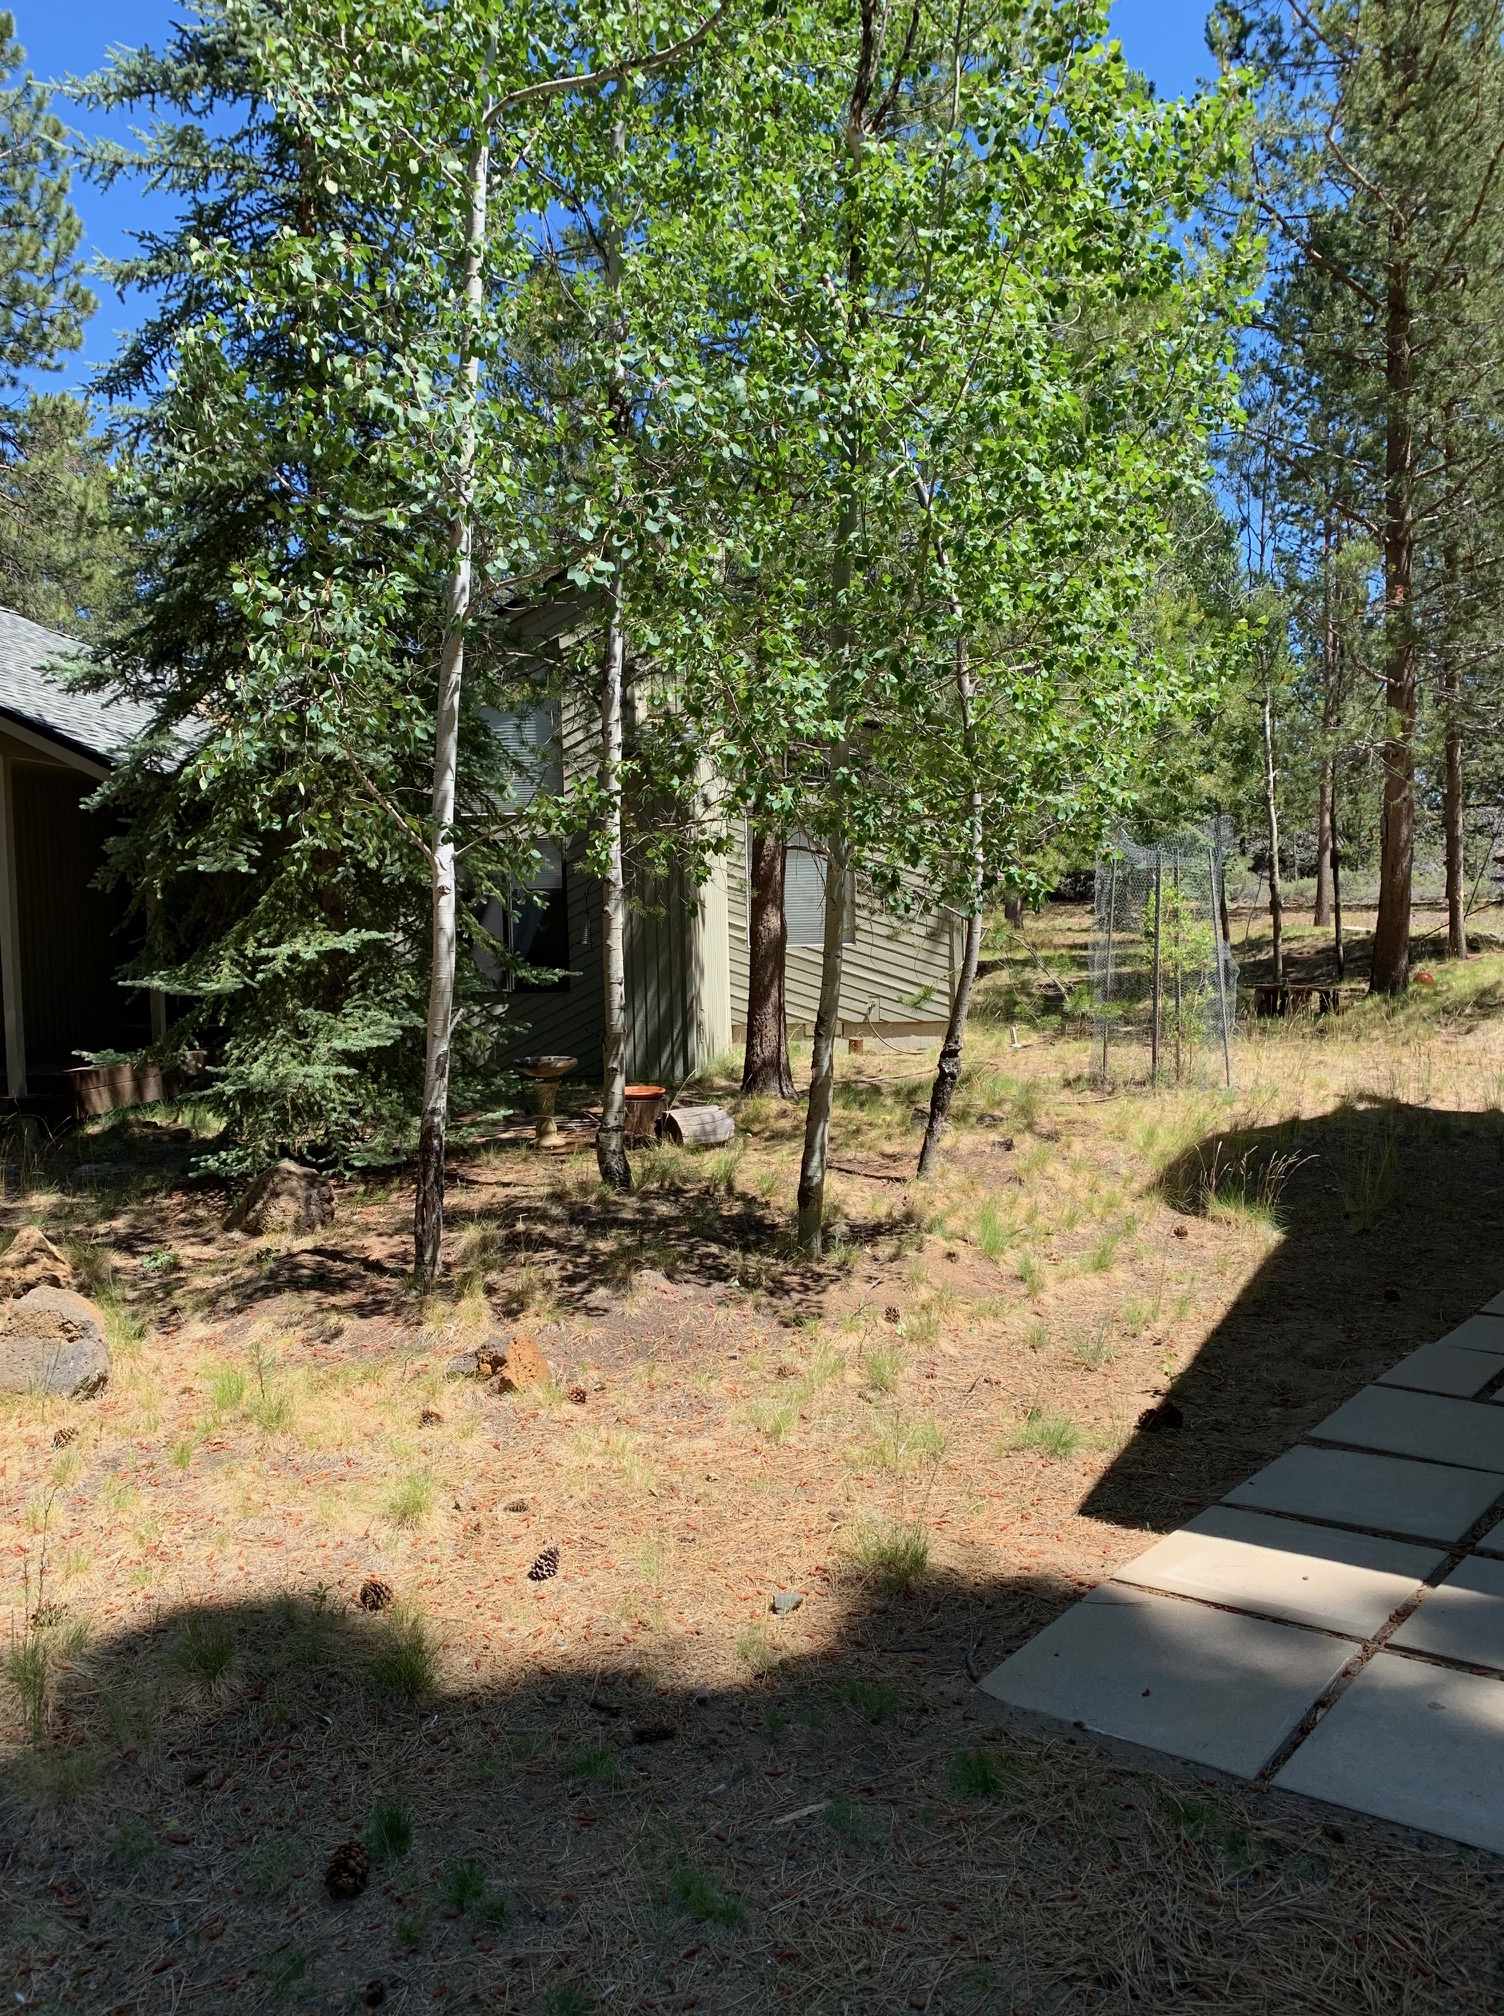
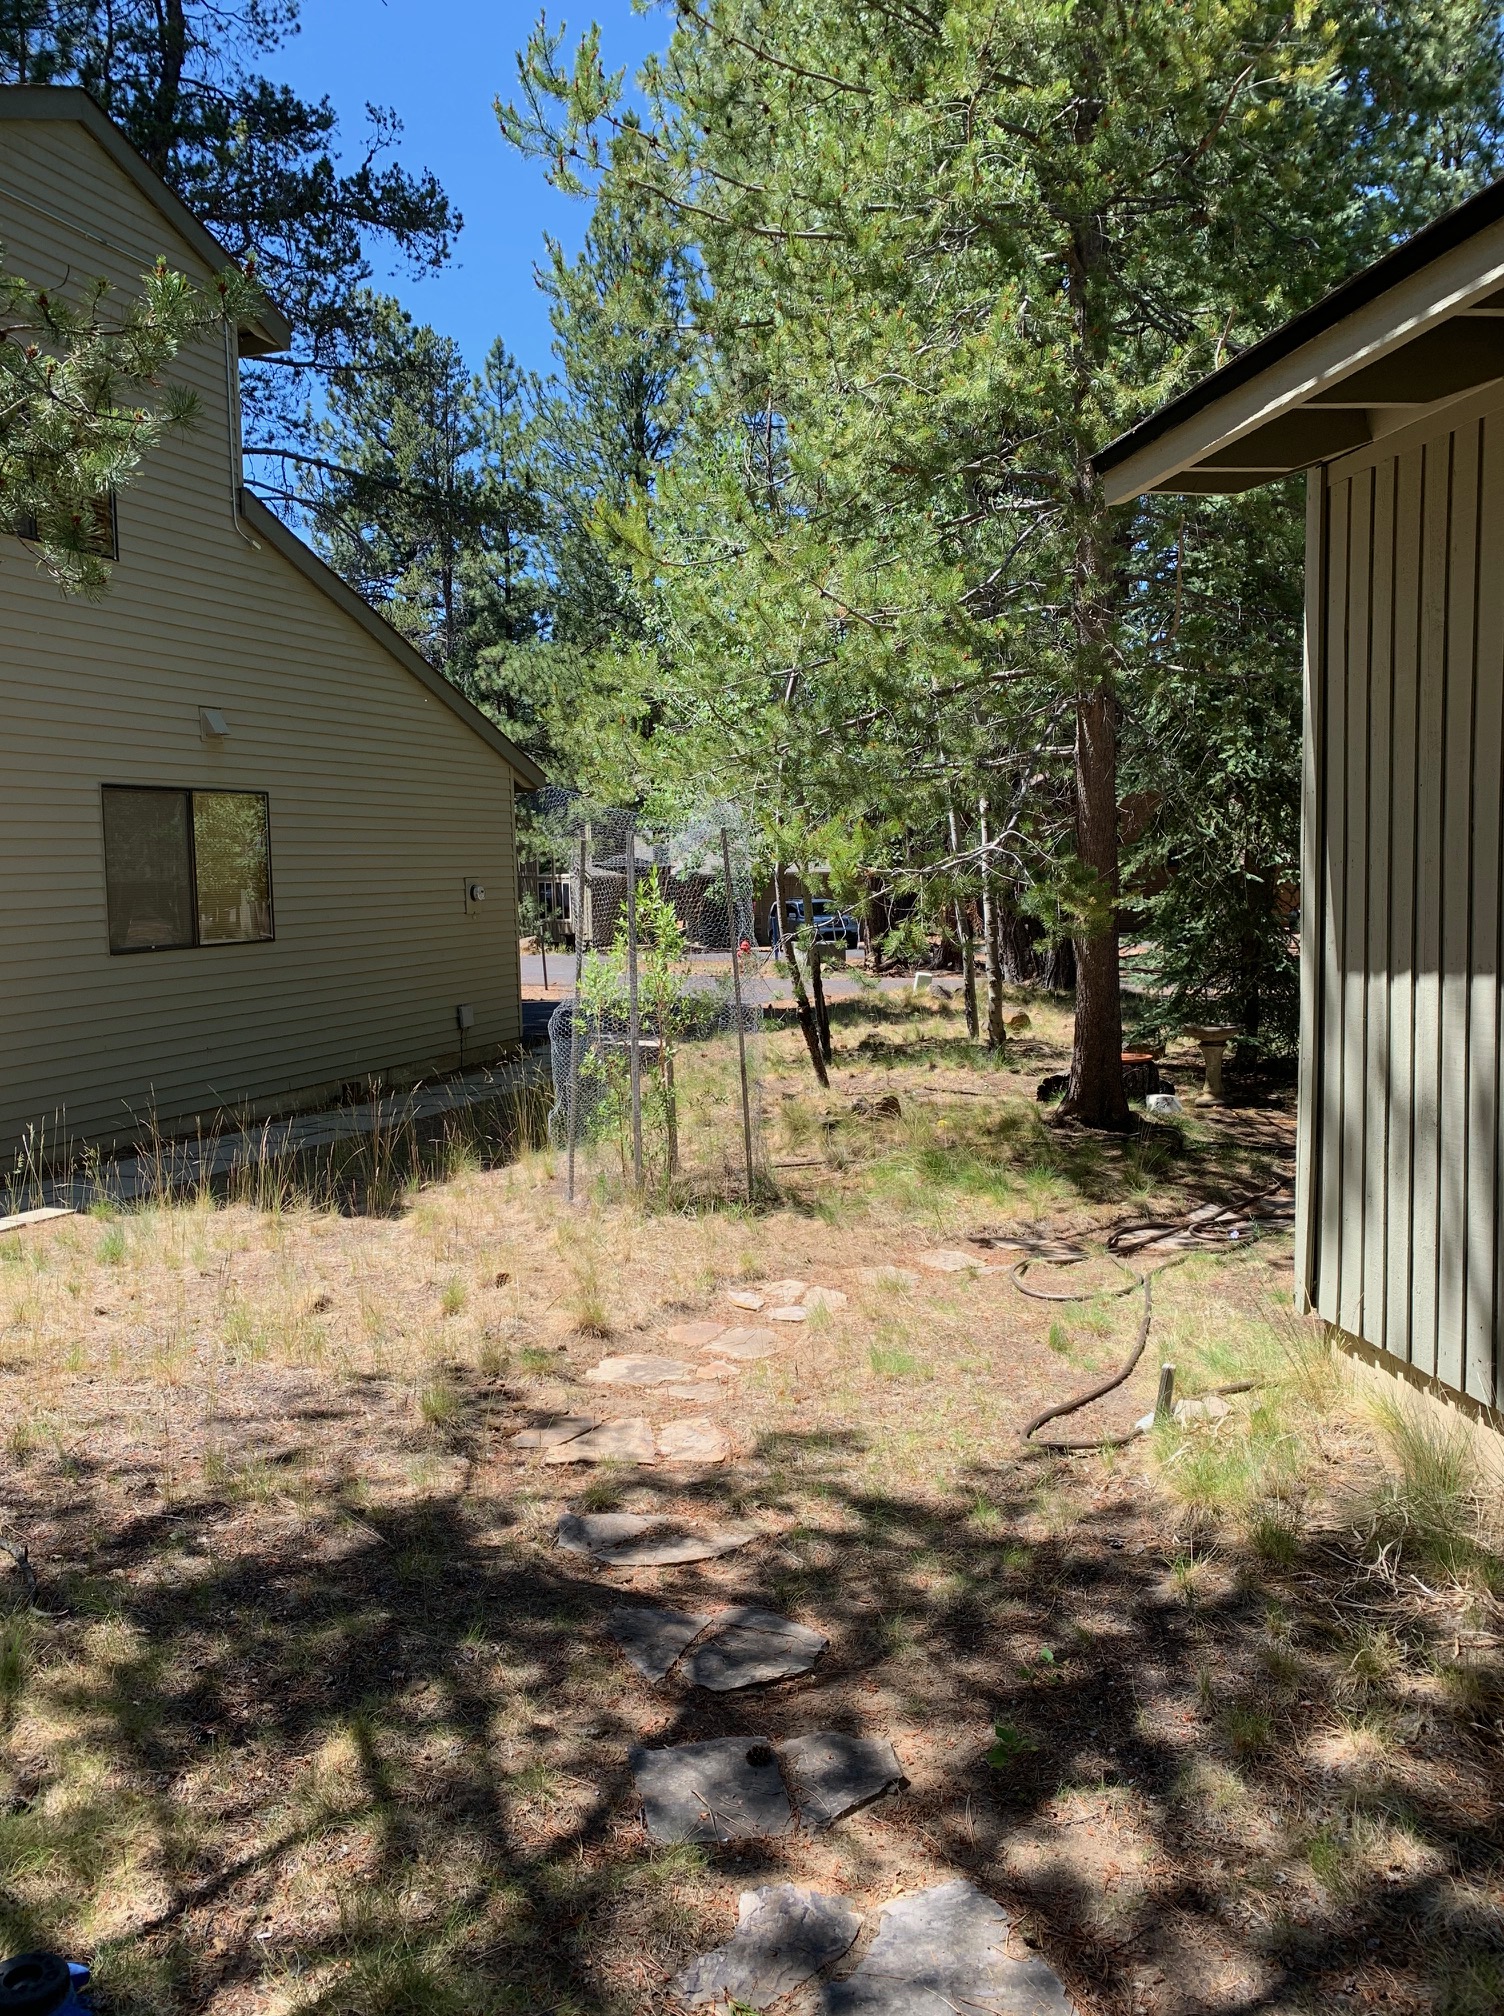


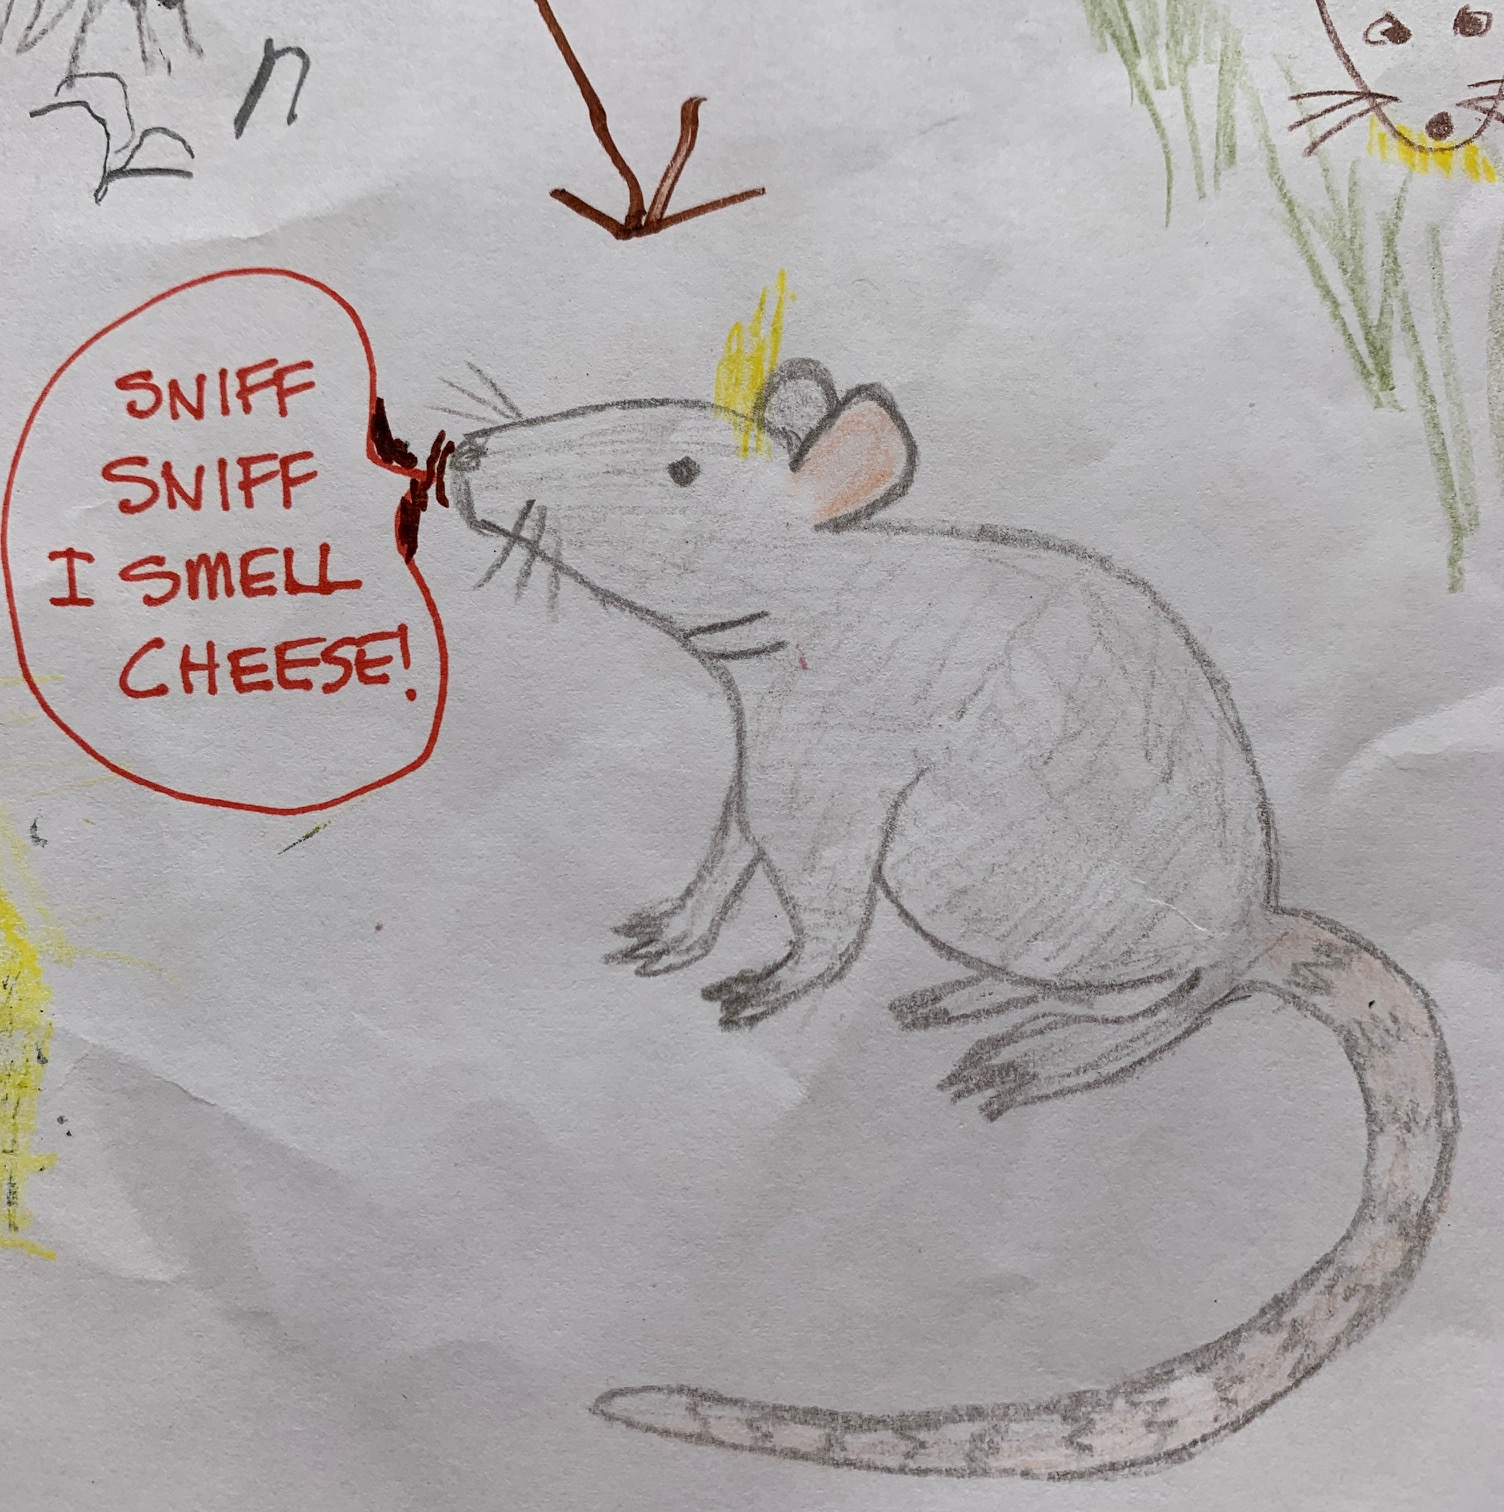


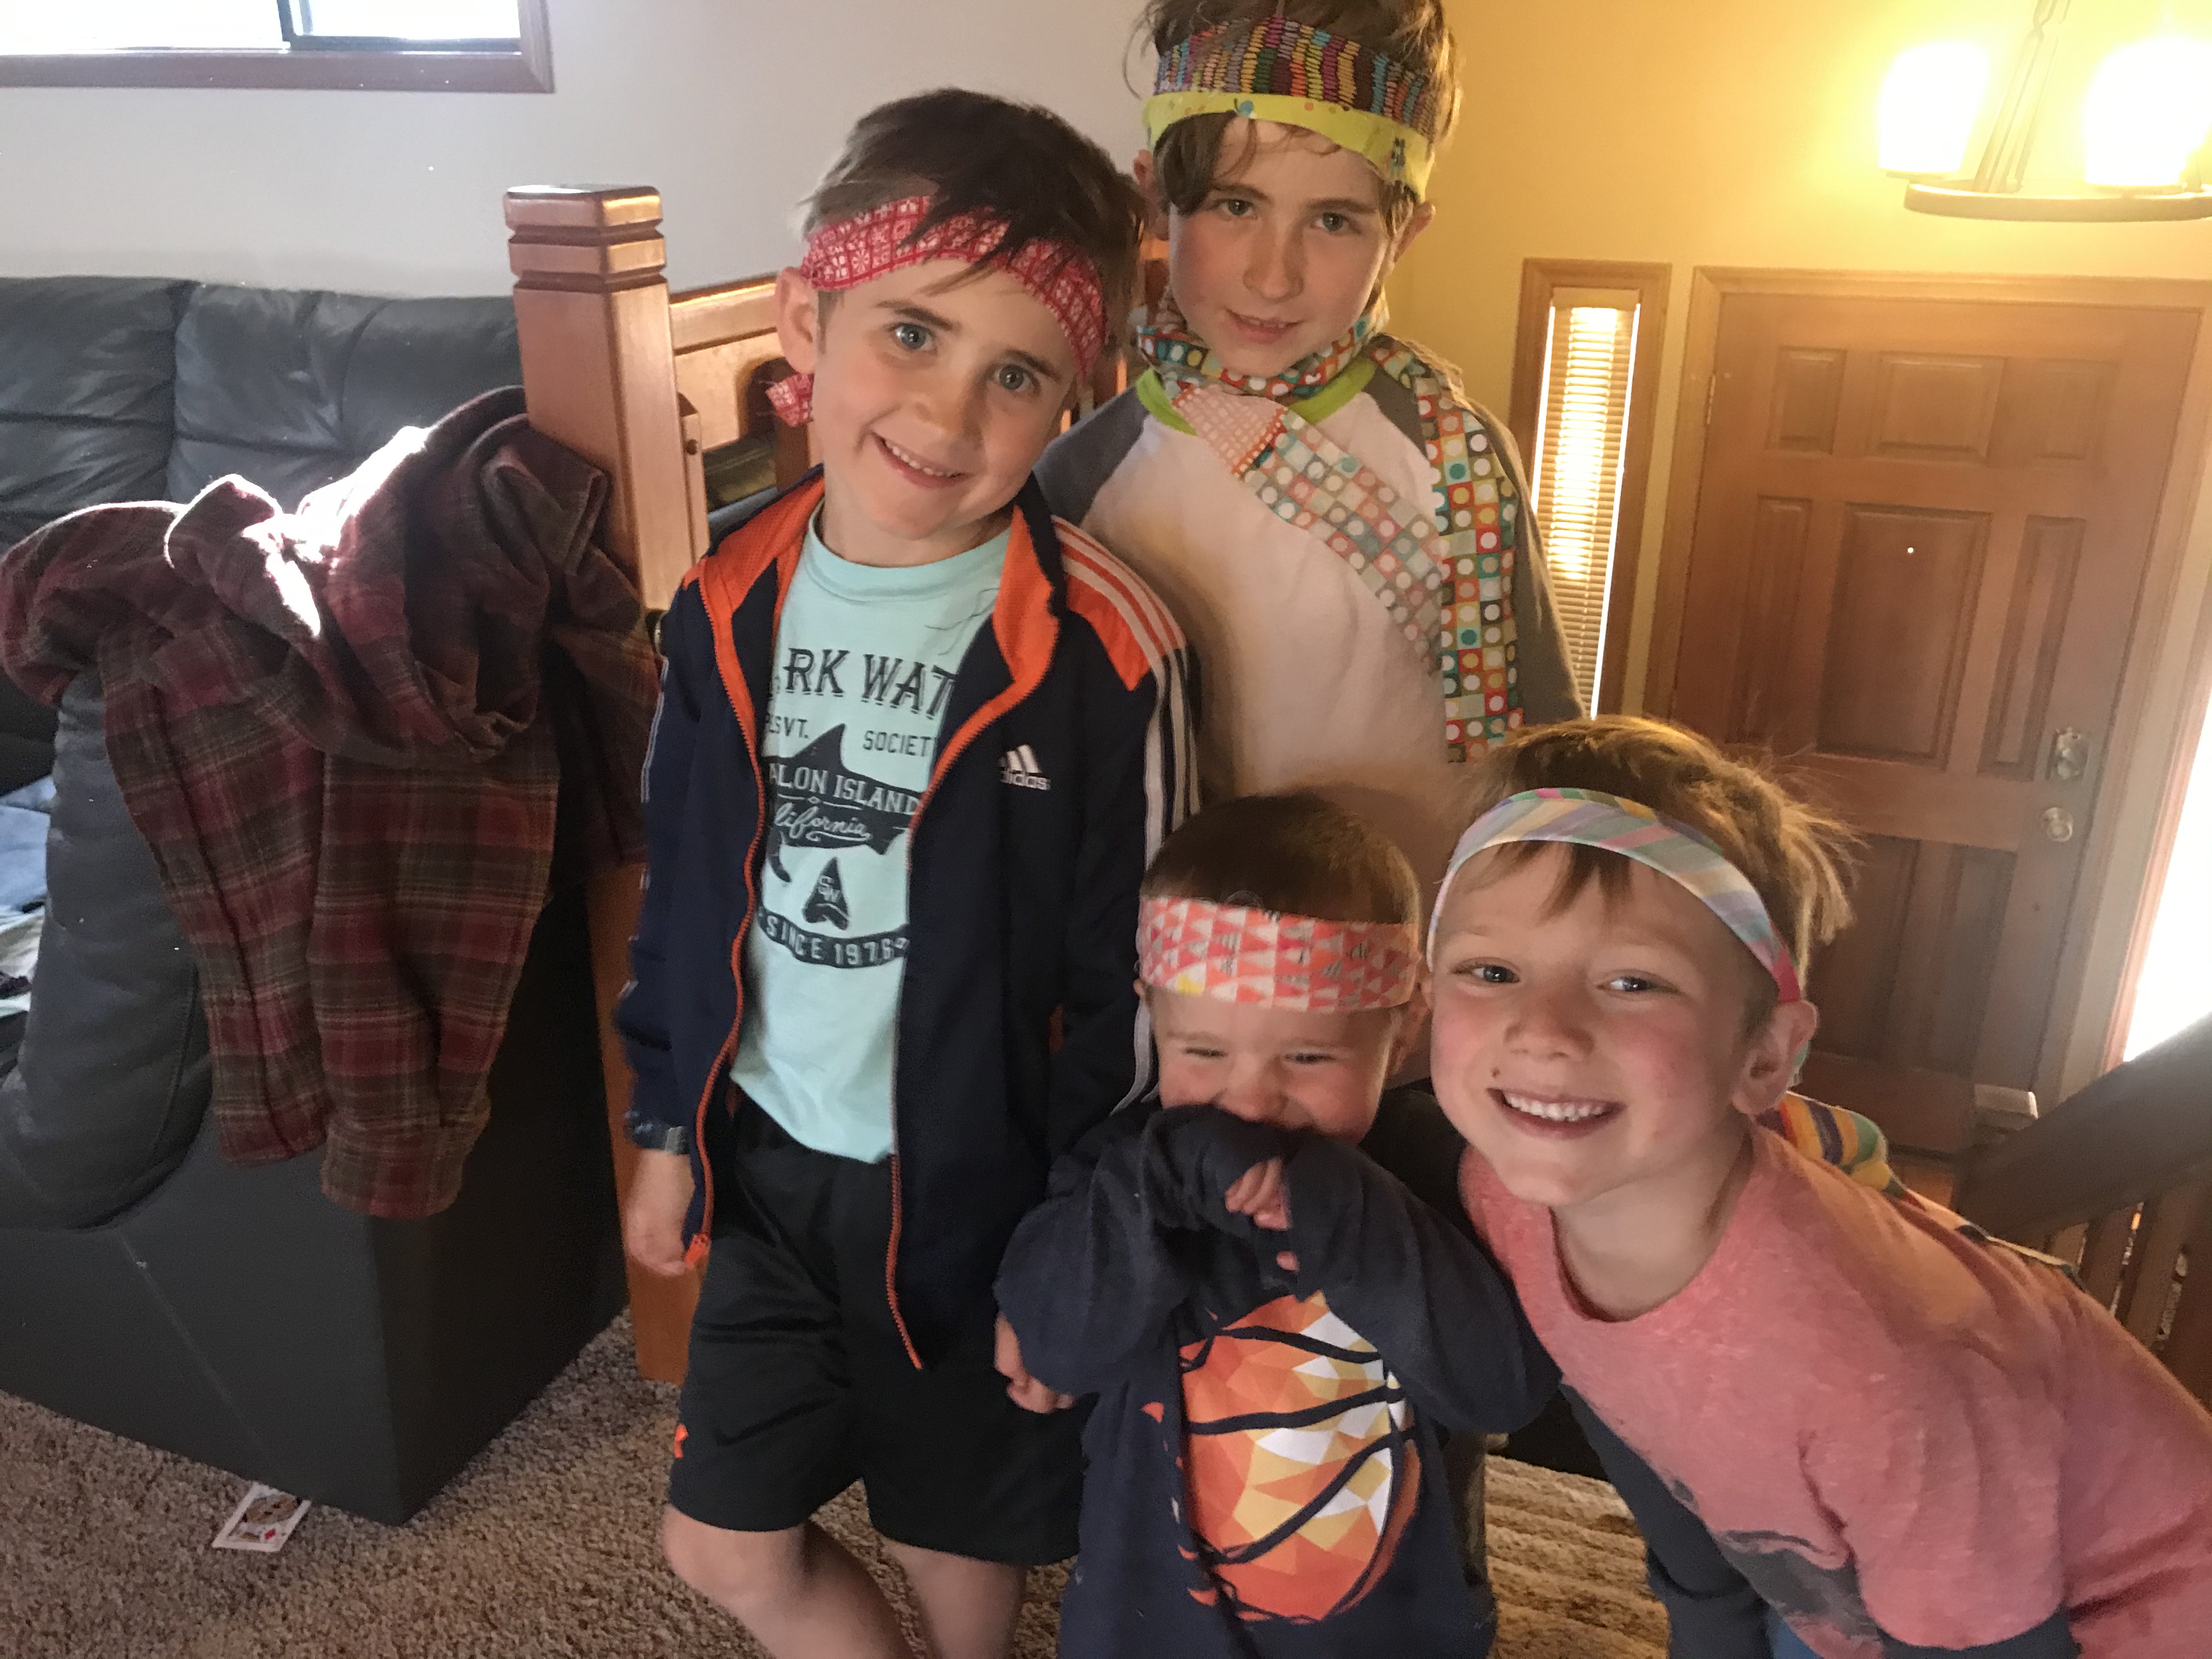

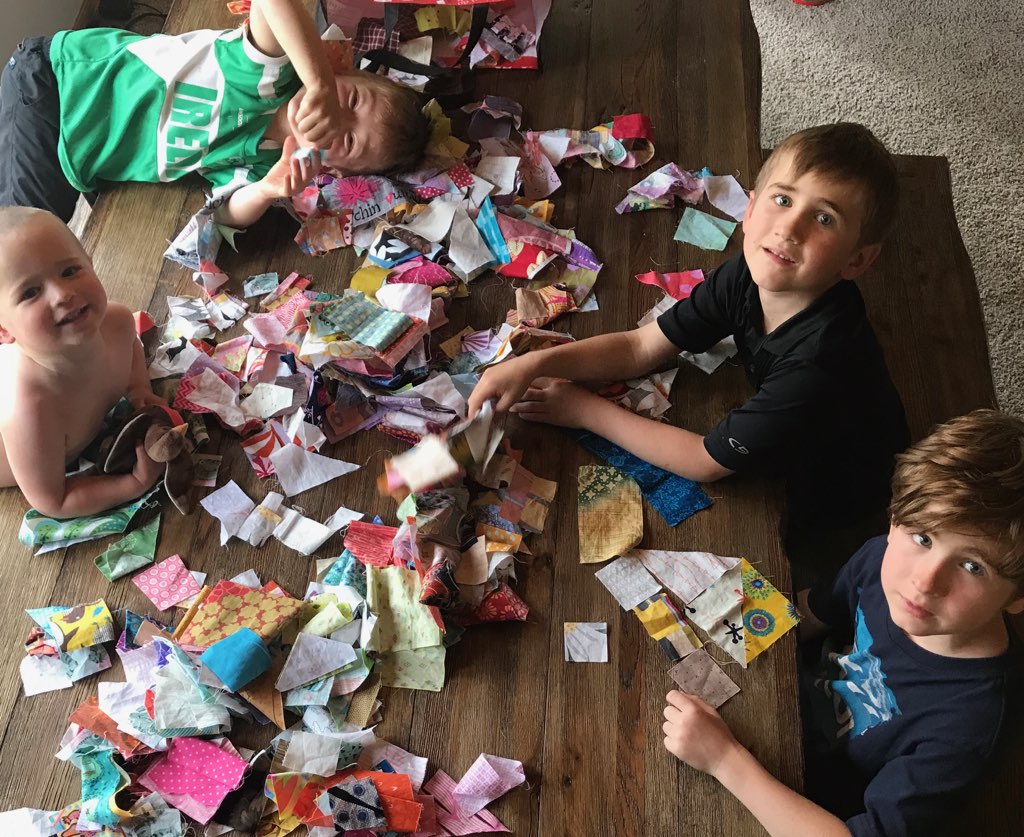
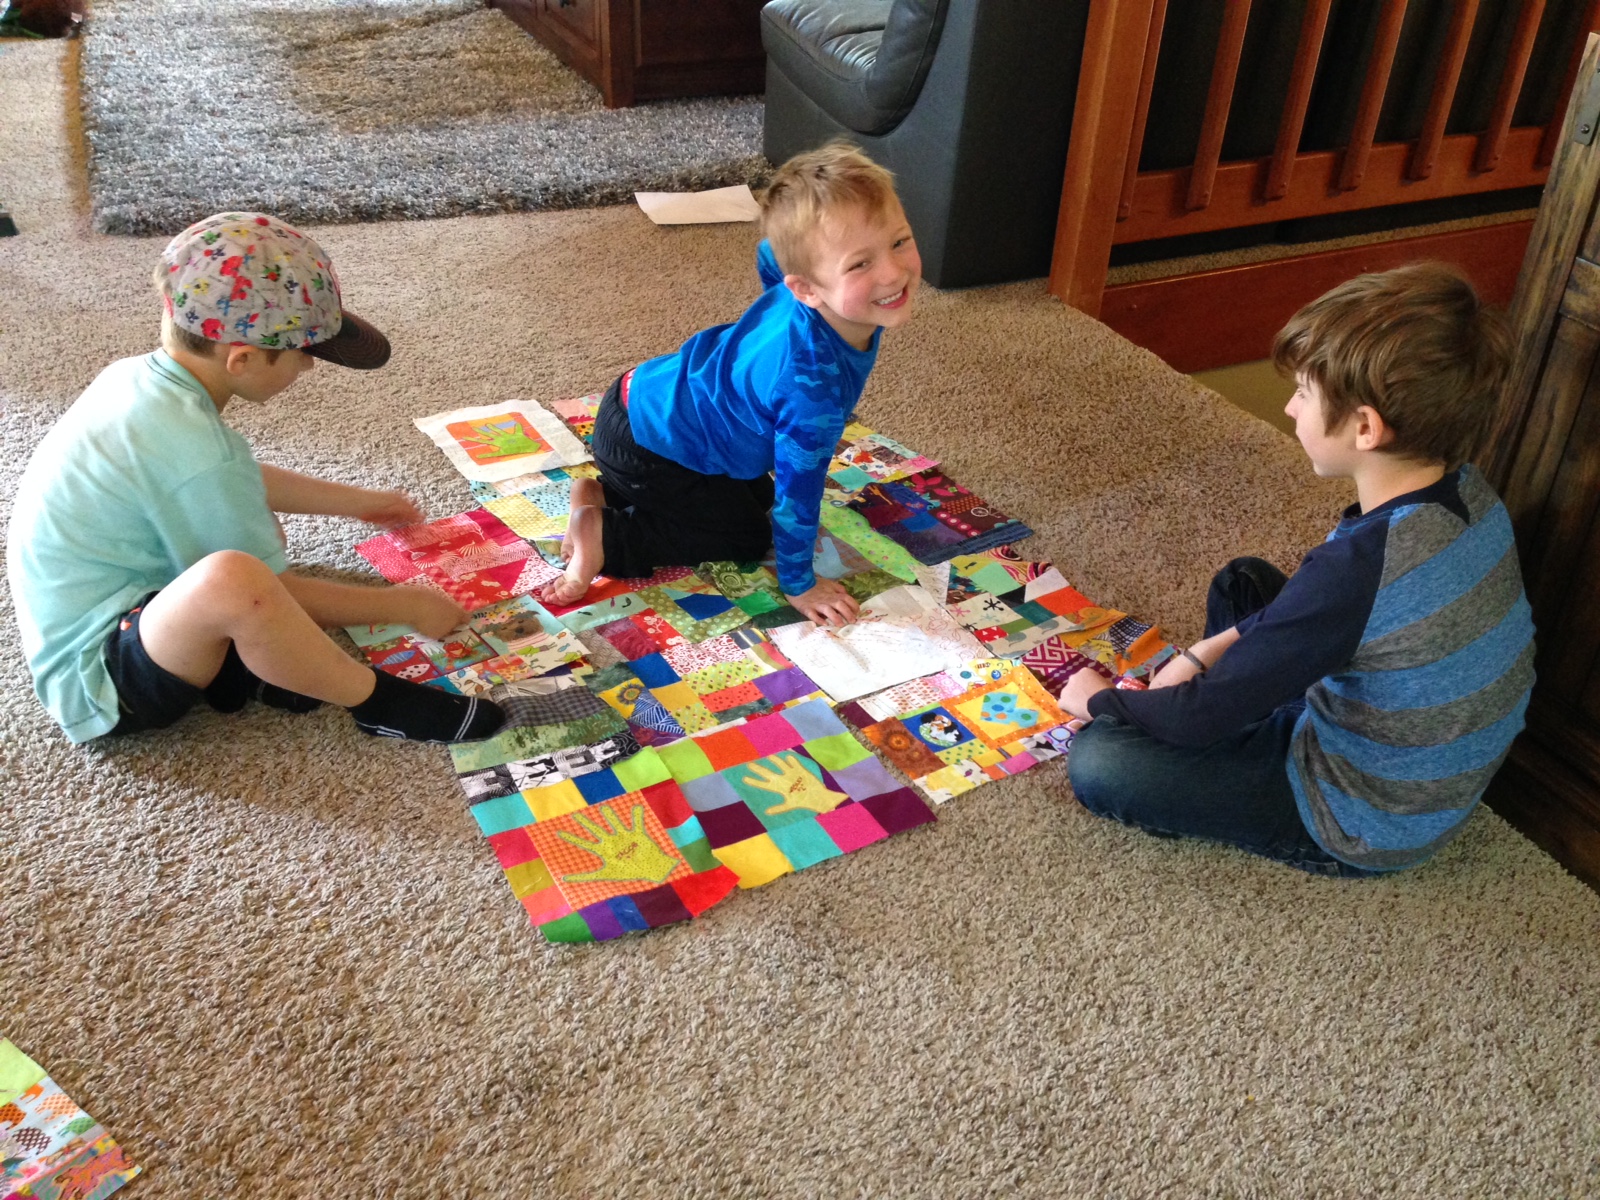

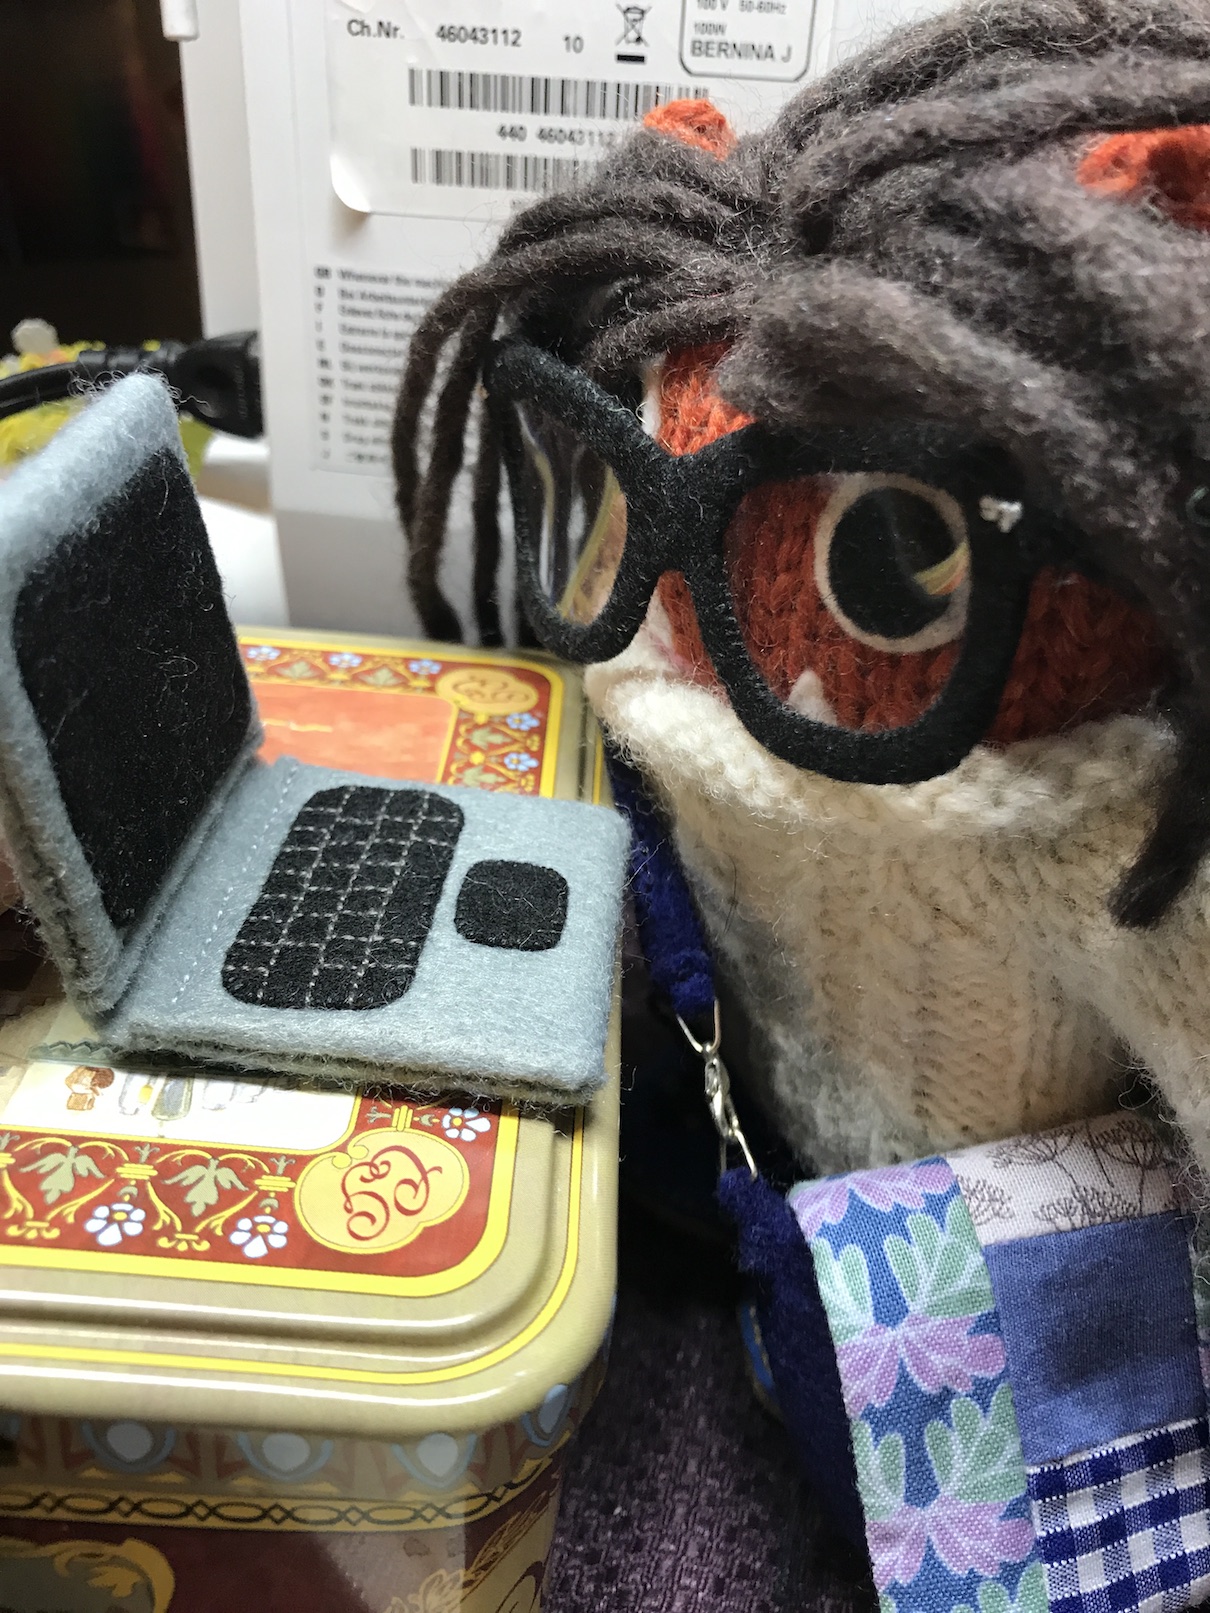 Oh I should introduce myself in case you are new to this blog, my name is tierneycreates Beastie and I am a Monster, but the good kind of Monster. You can read my story at
  The link above is for the platform Spotify but you can also listen to this podcast wherever you get your podcasts, like on Apple Podcasts on your iPhone.
 The podcast was amazing and I got to hear my Maker’s voice! It was a brilliant interview and I enjoyed learning how Helen got into making Beasties like me. All I can say is I am so glad she did not become a “management consultant” after she finished university.
 Well Tierney lost my T-shirt a couple months ago when she had packed to move but then did not move (see post
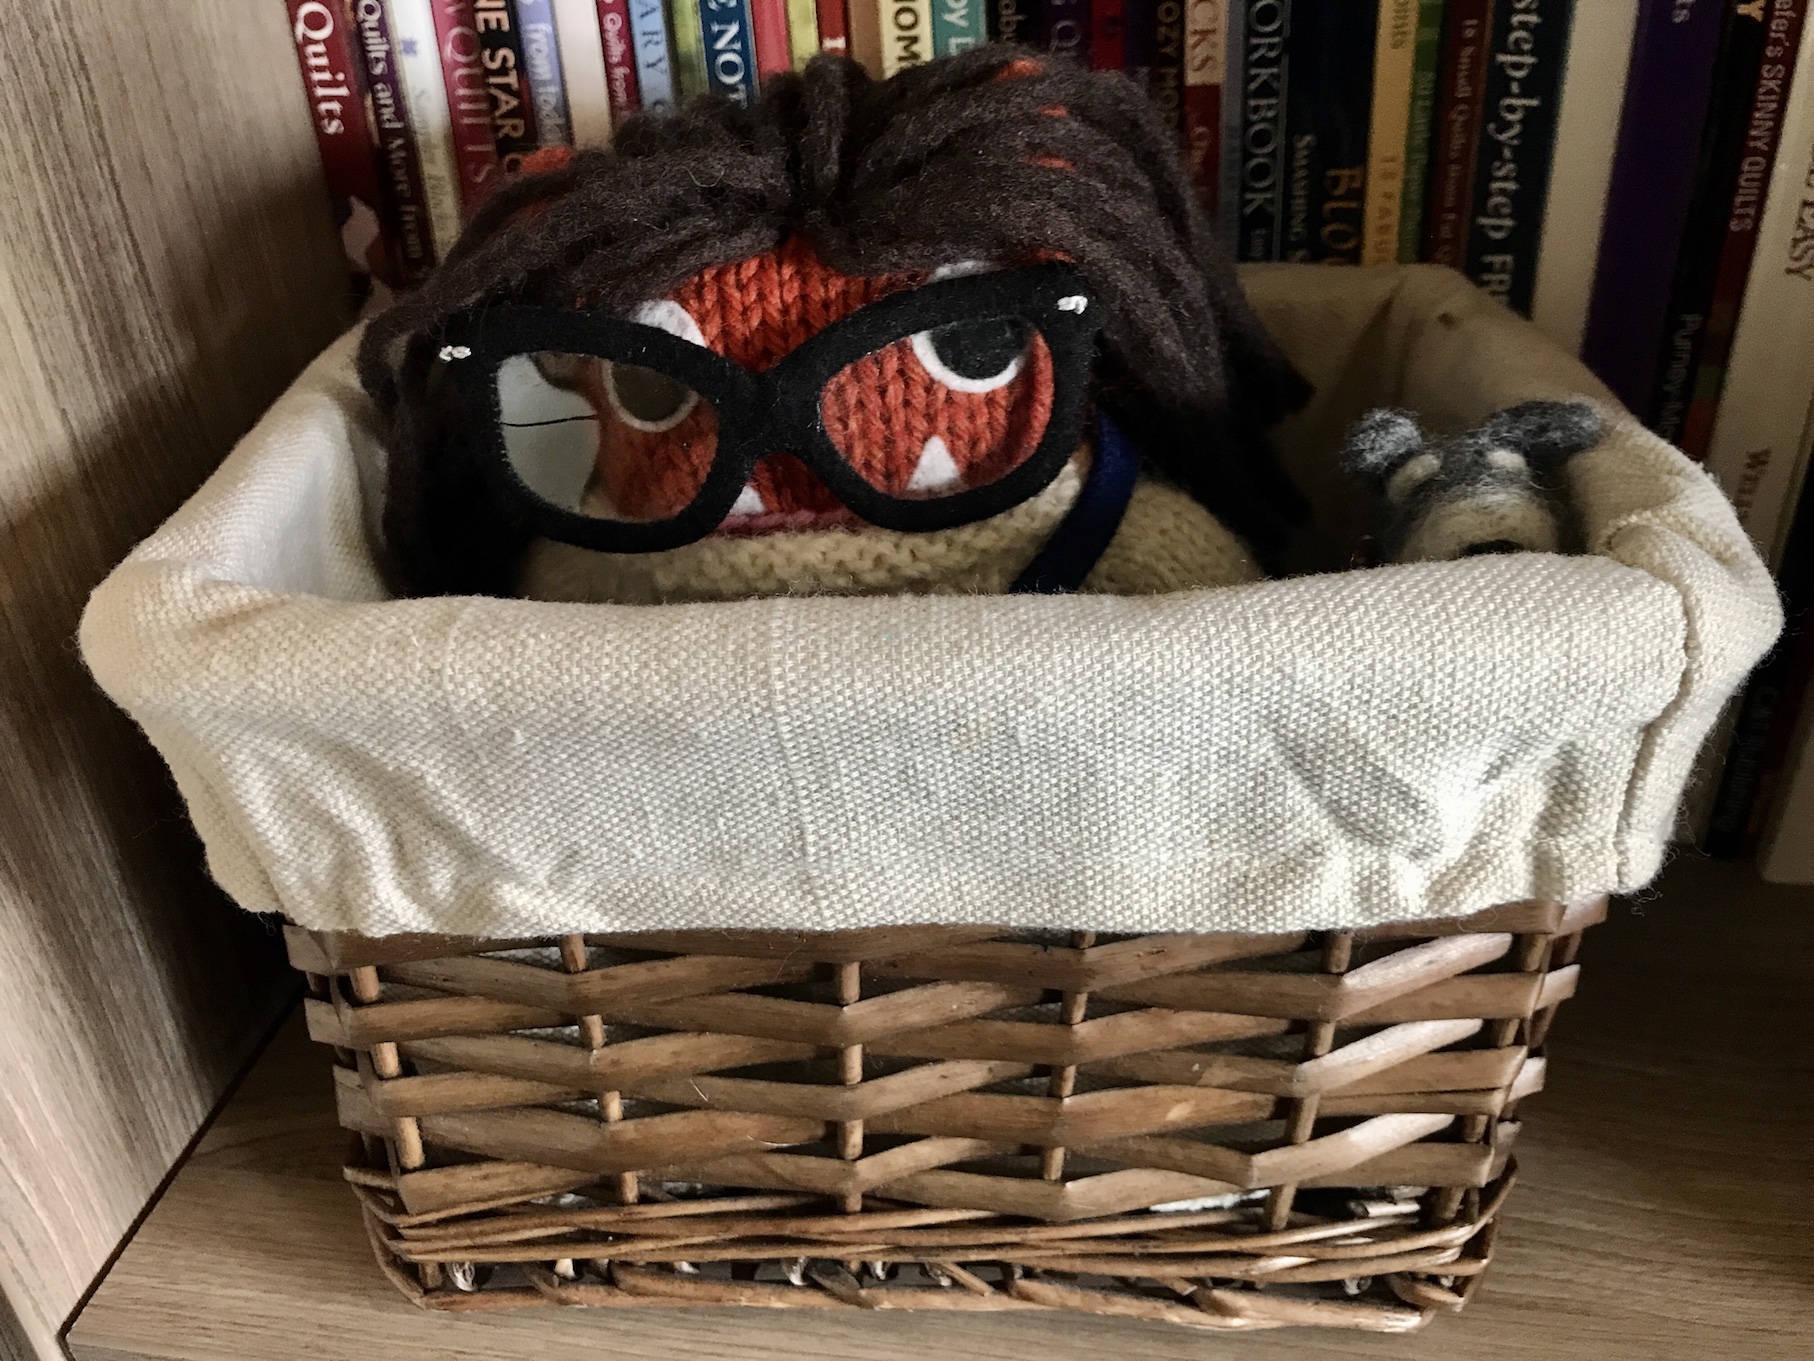
 We were created by the very, very, very talented Helen of
  So when they decided not to buy the new house/not to move, Tierney had to unpack her studio and in unpacking her studio, she decided to reimagine the layout.
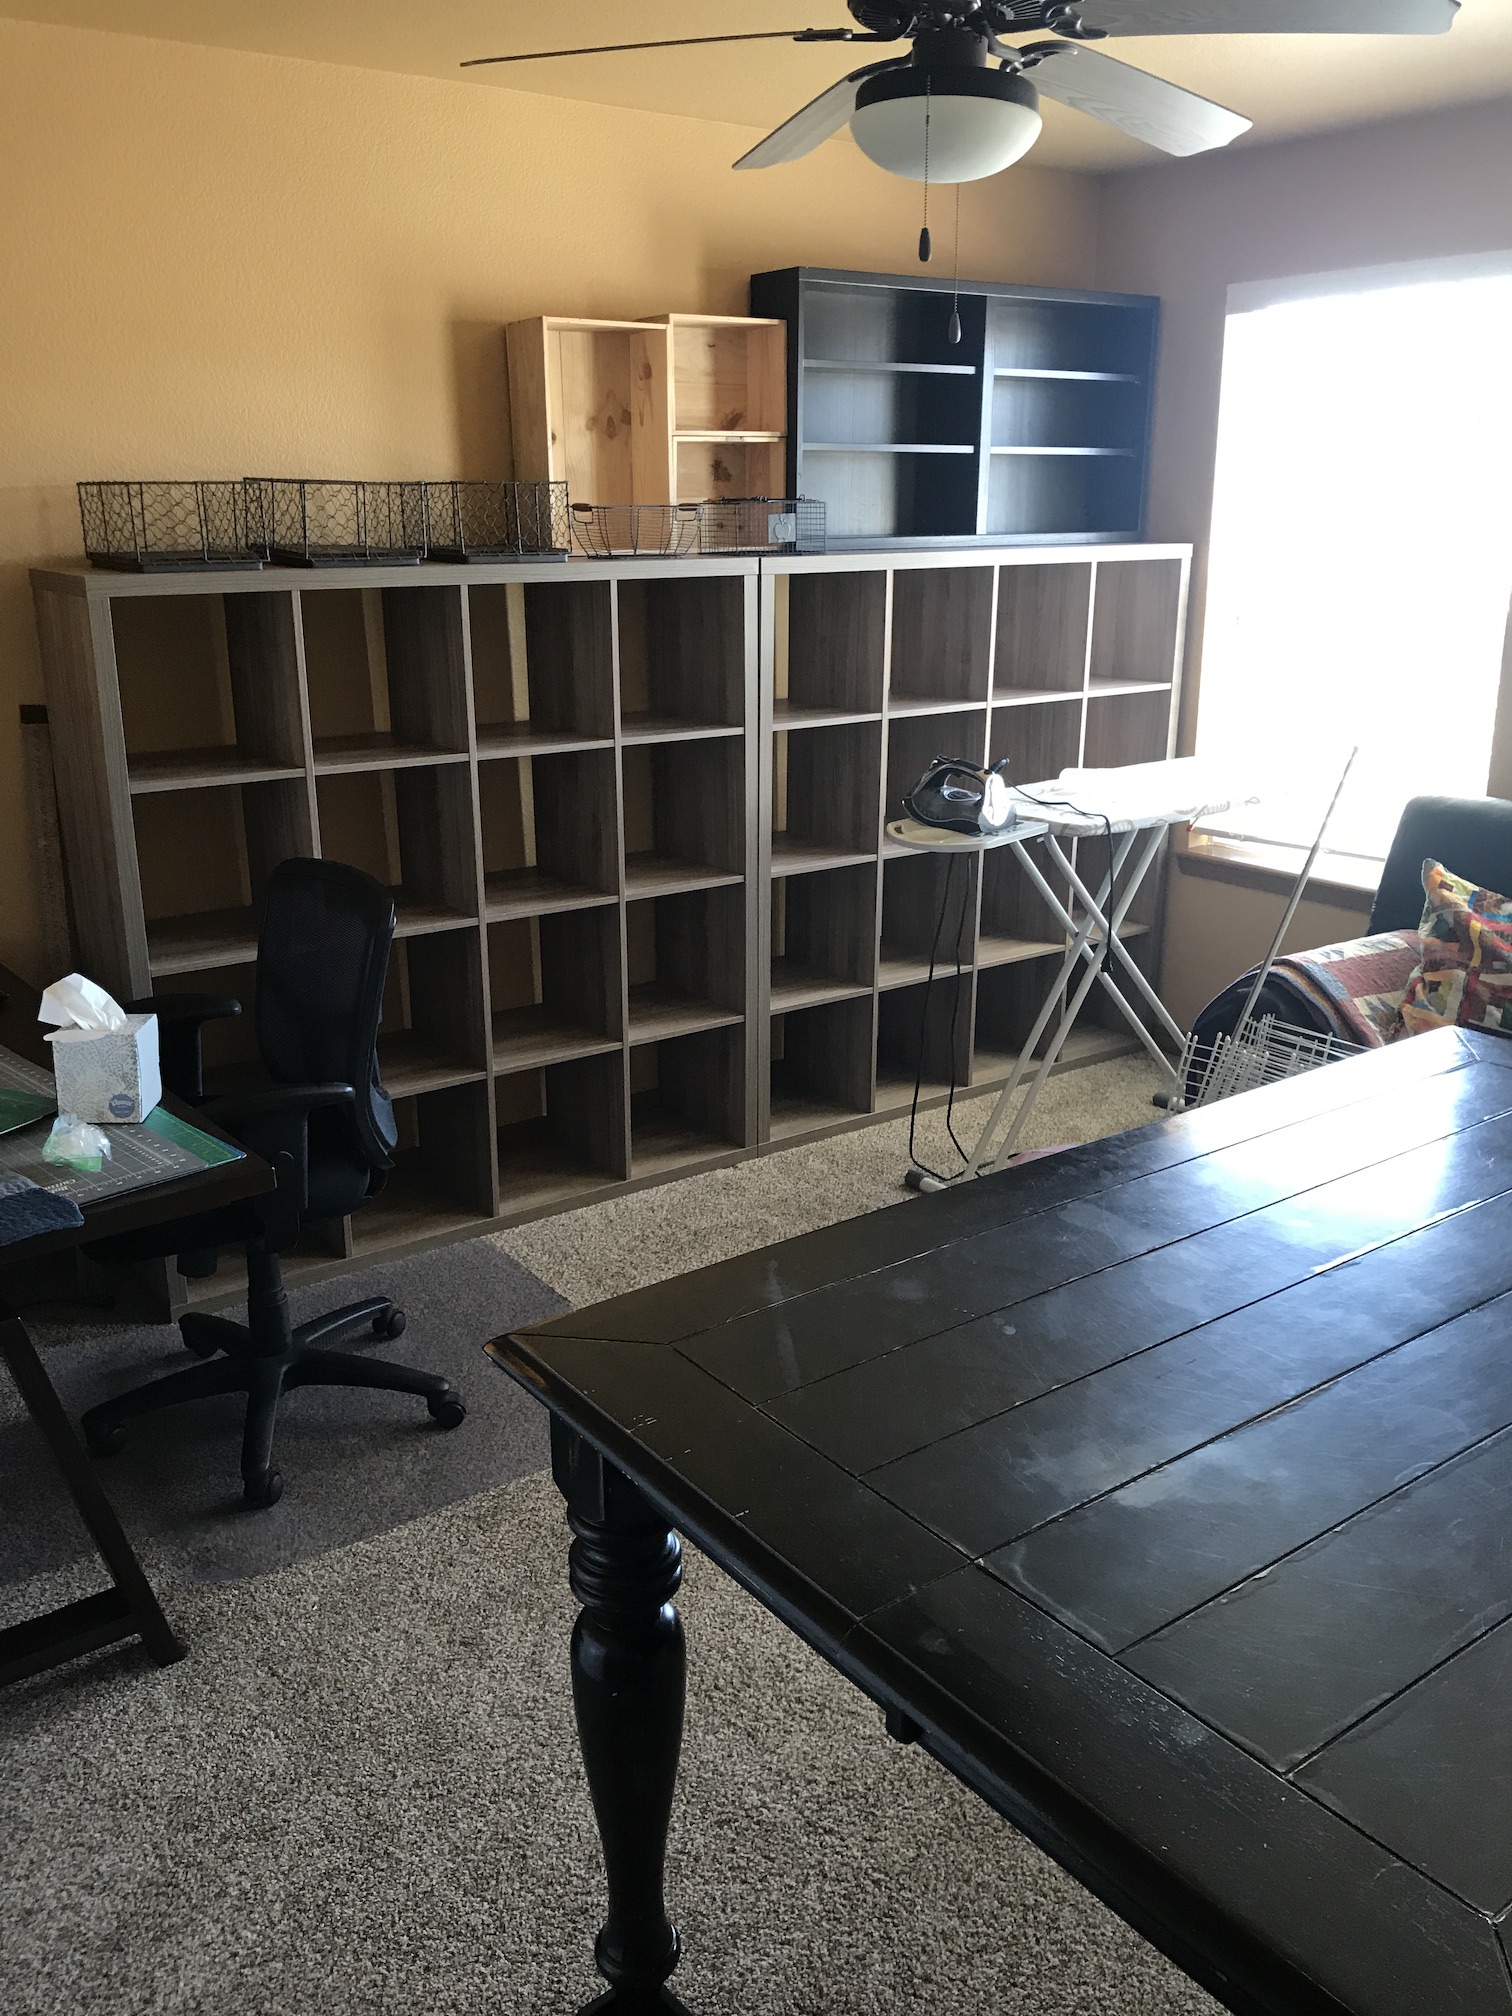 Over the next several days she unpacked her boxes (which seemed like they would never end), hung up some art and quilts on the studio wall and found a place for the large design wall her partner John built her.
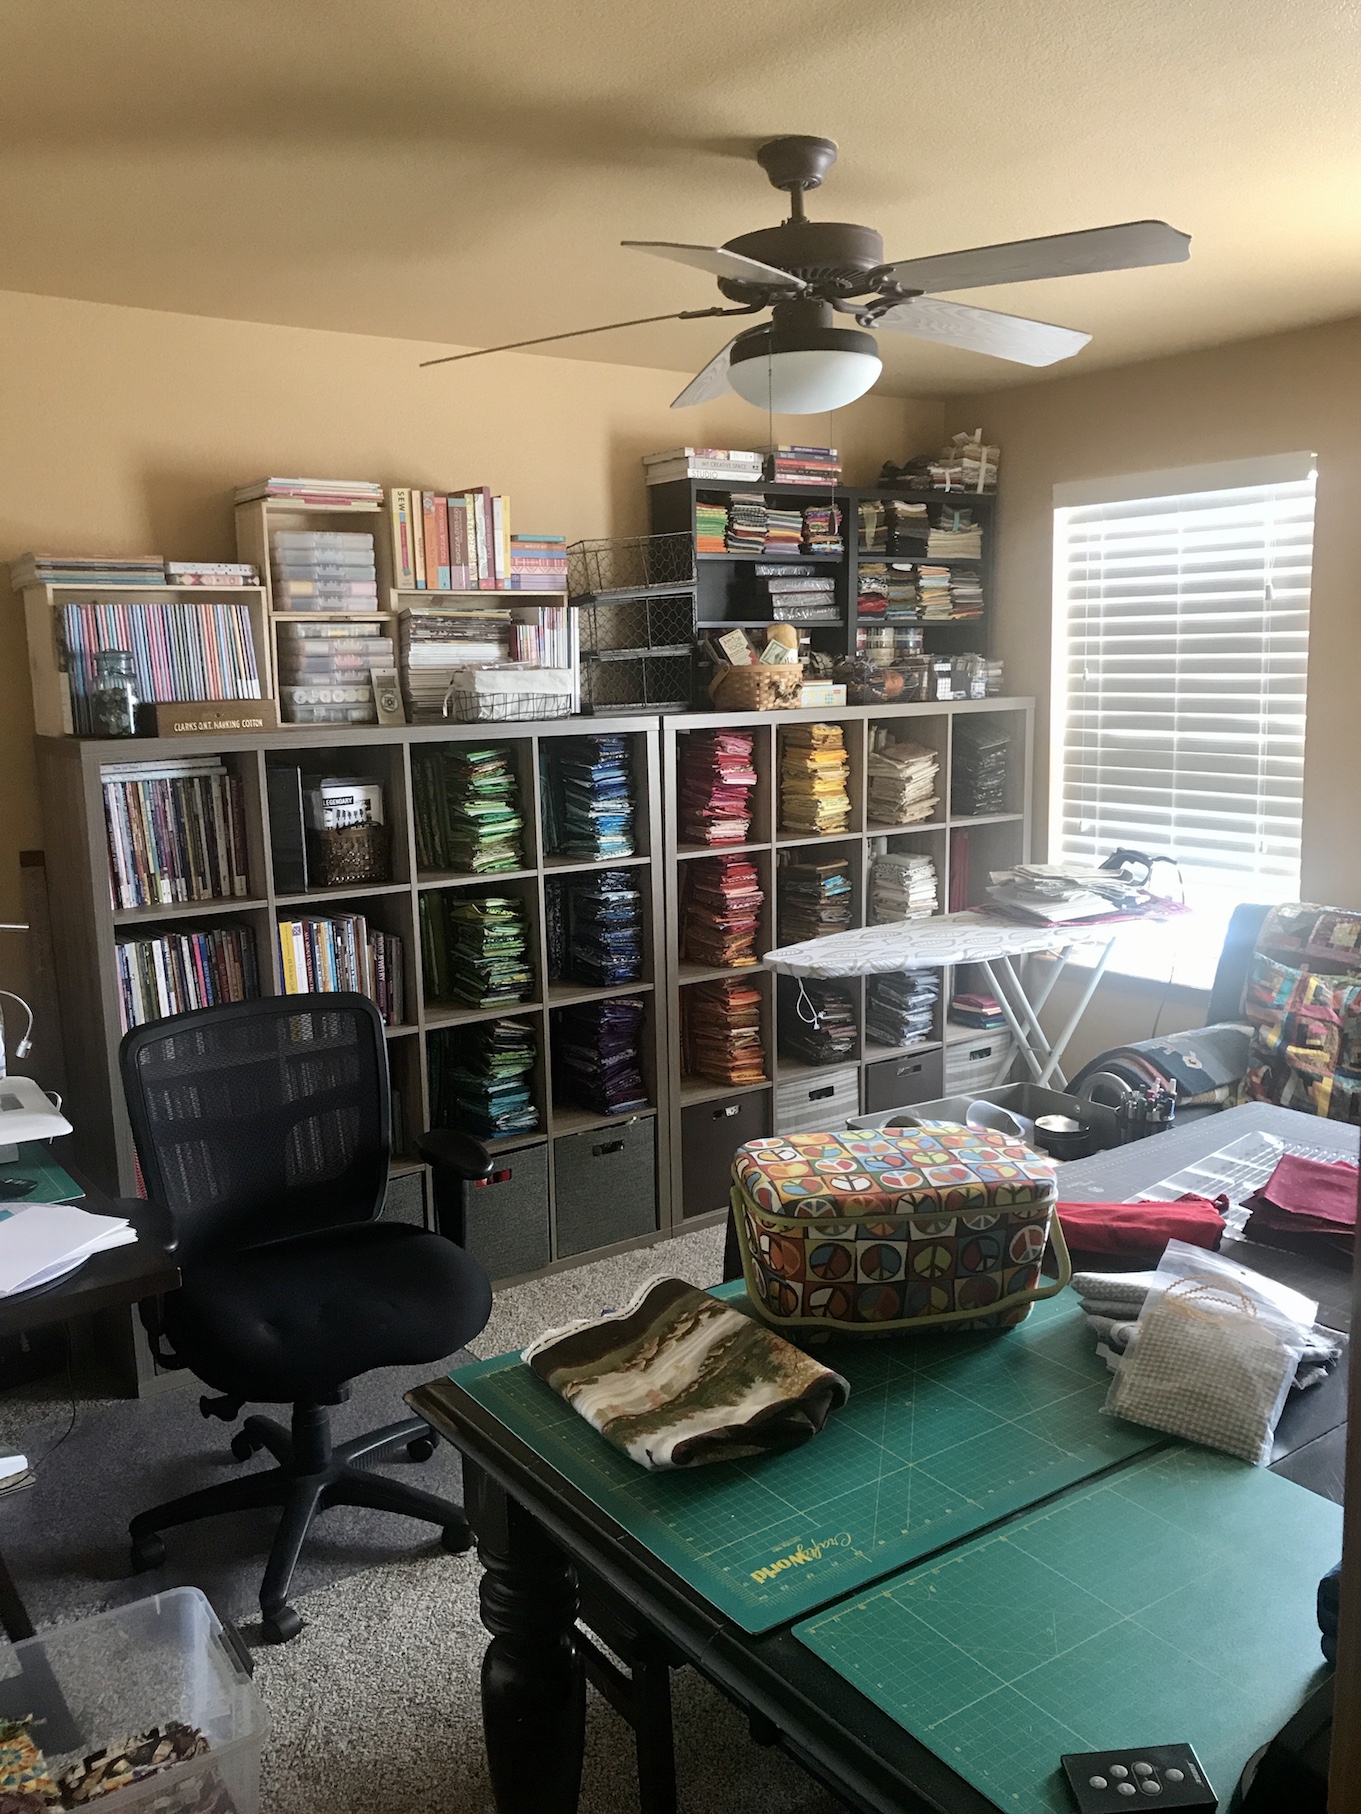
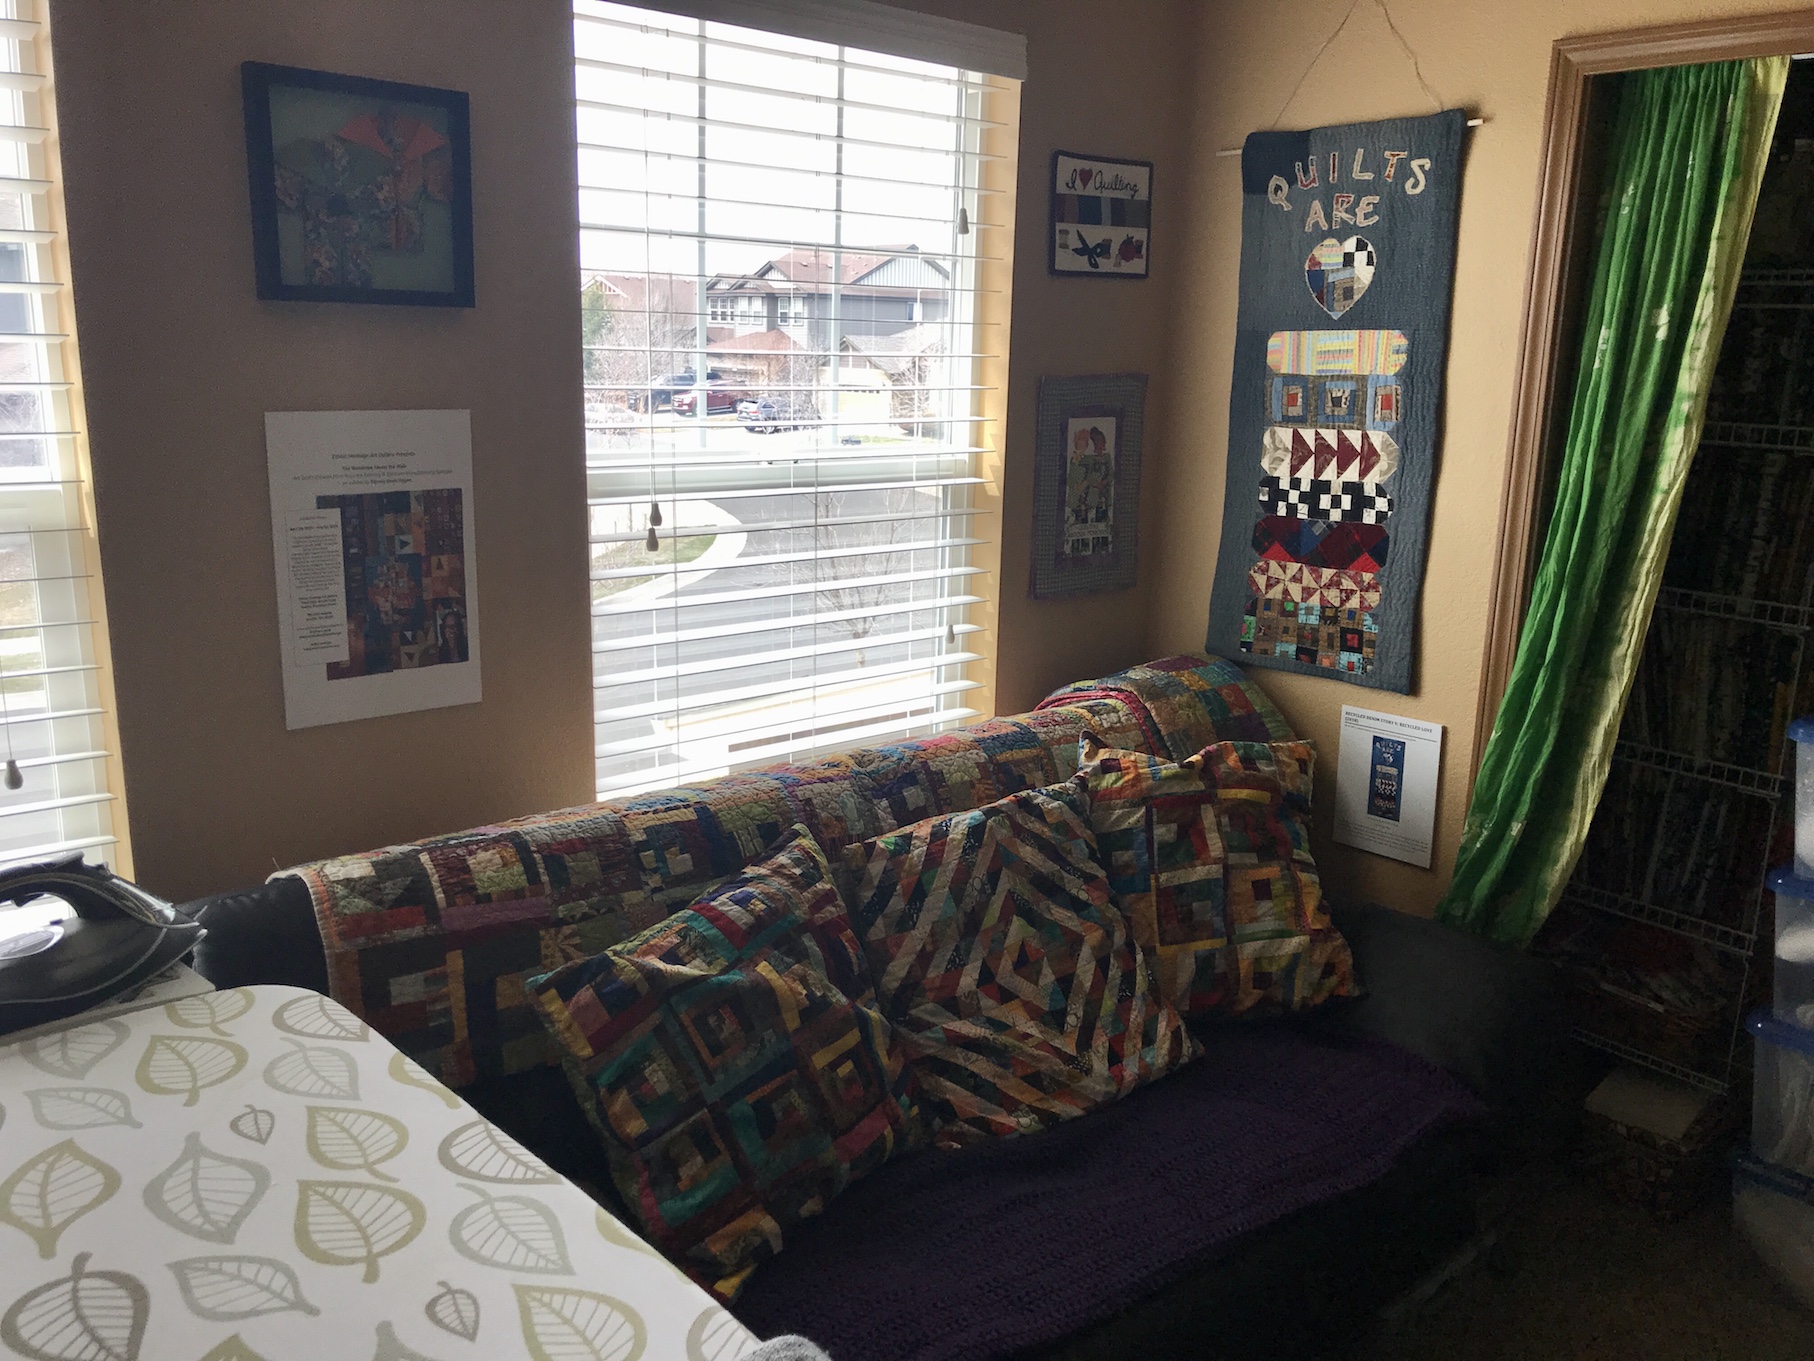
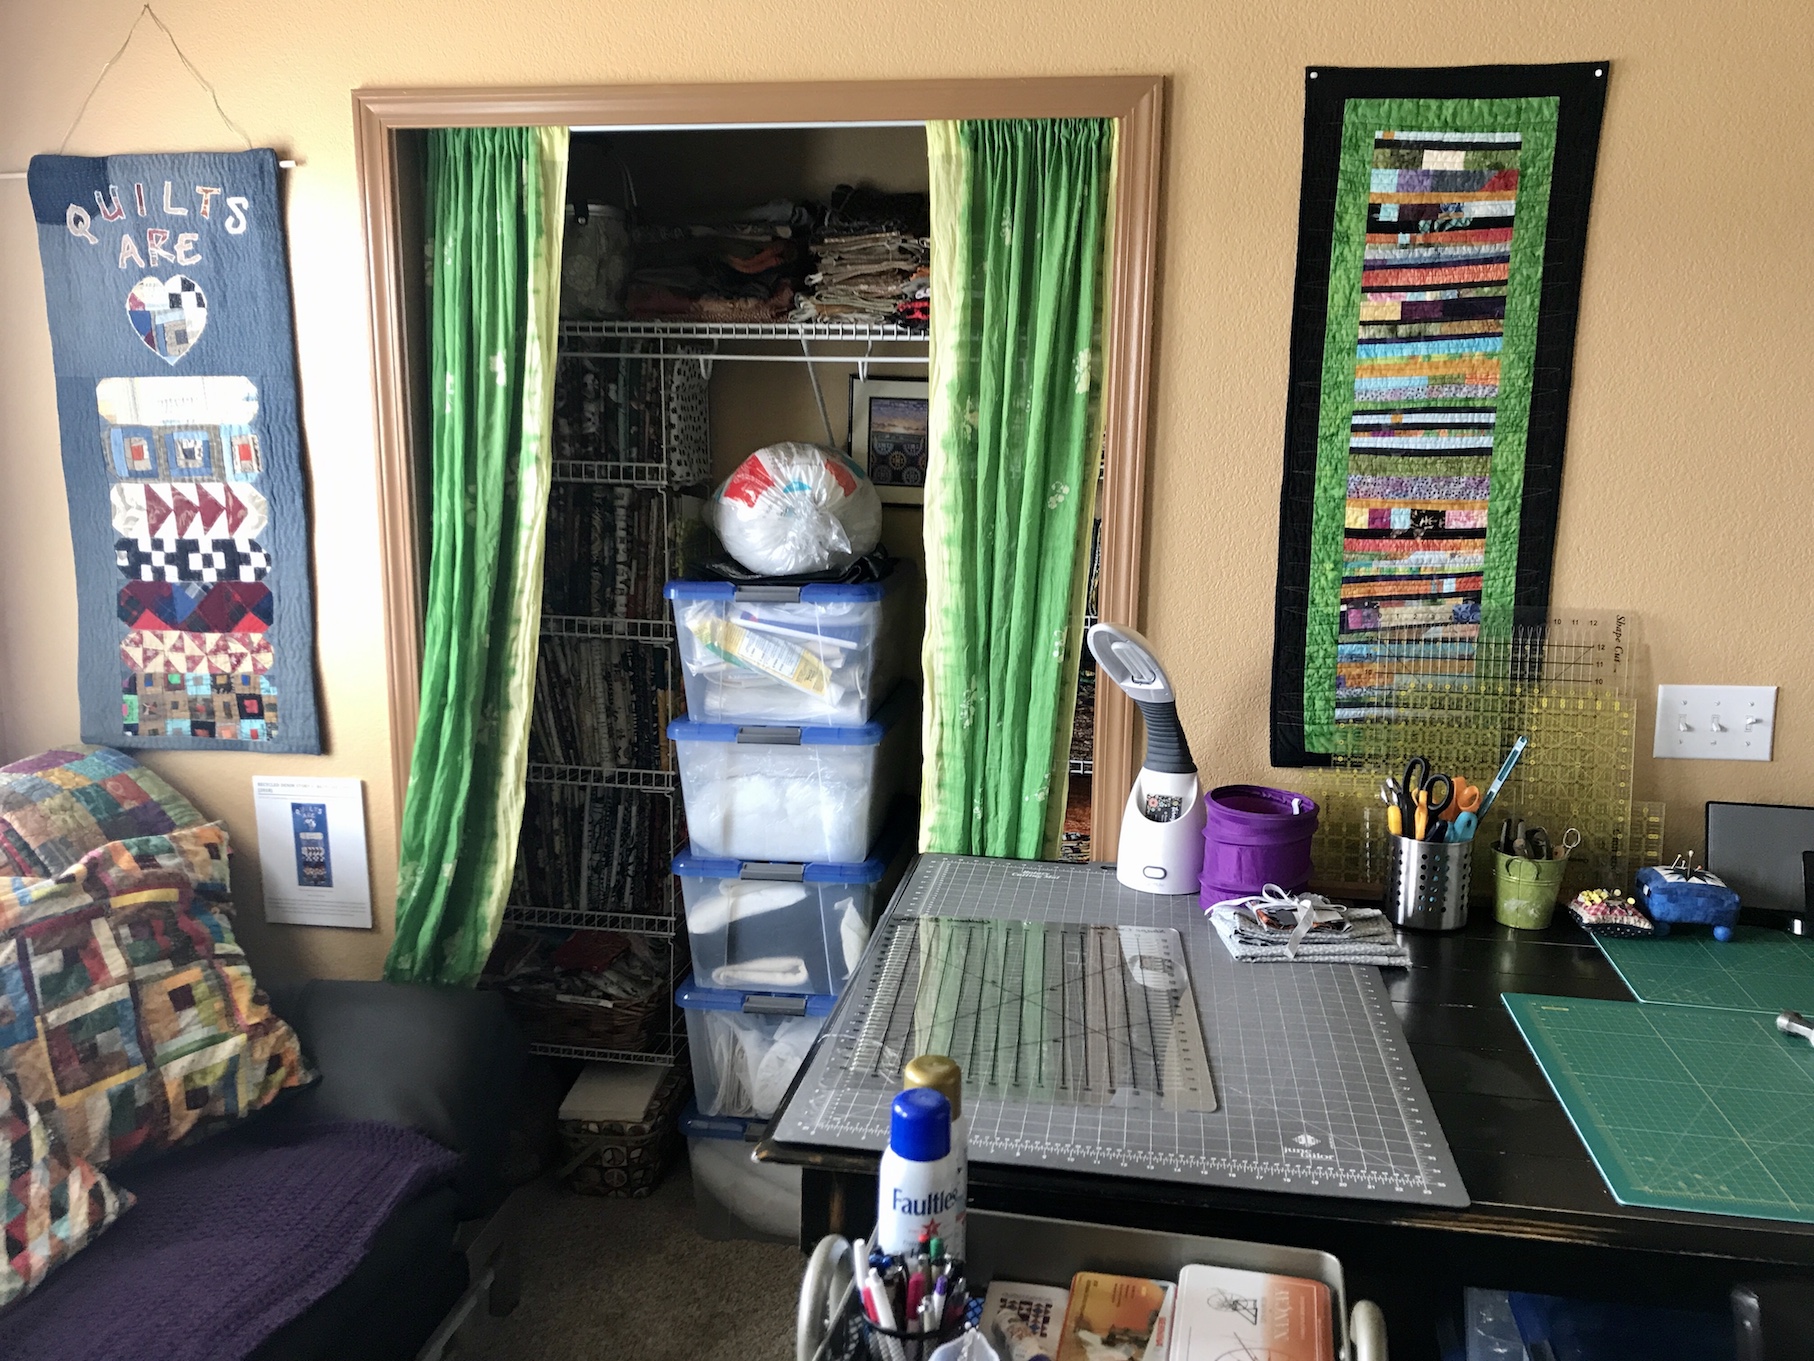
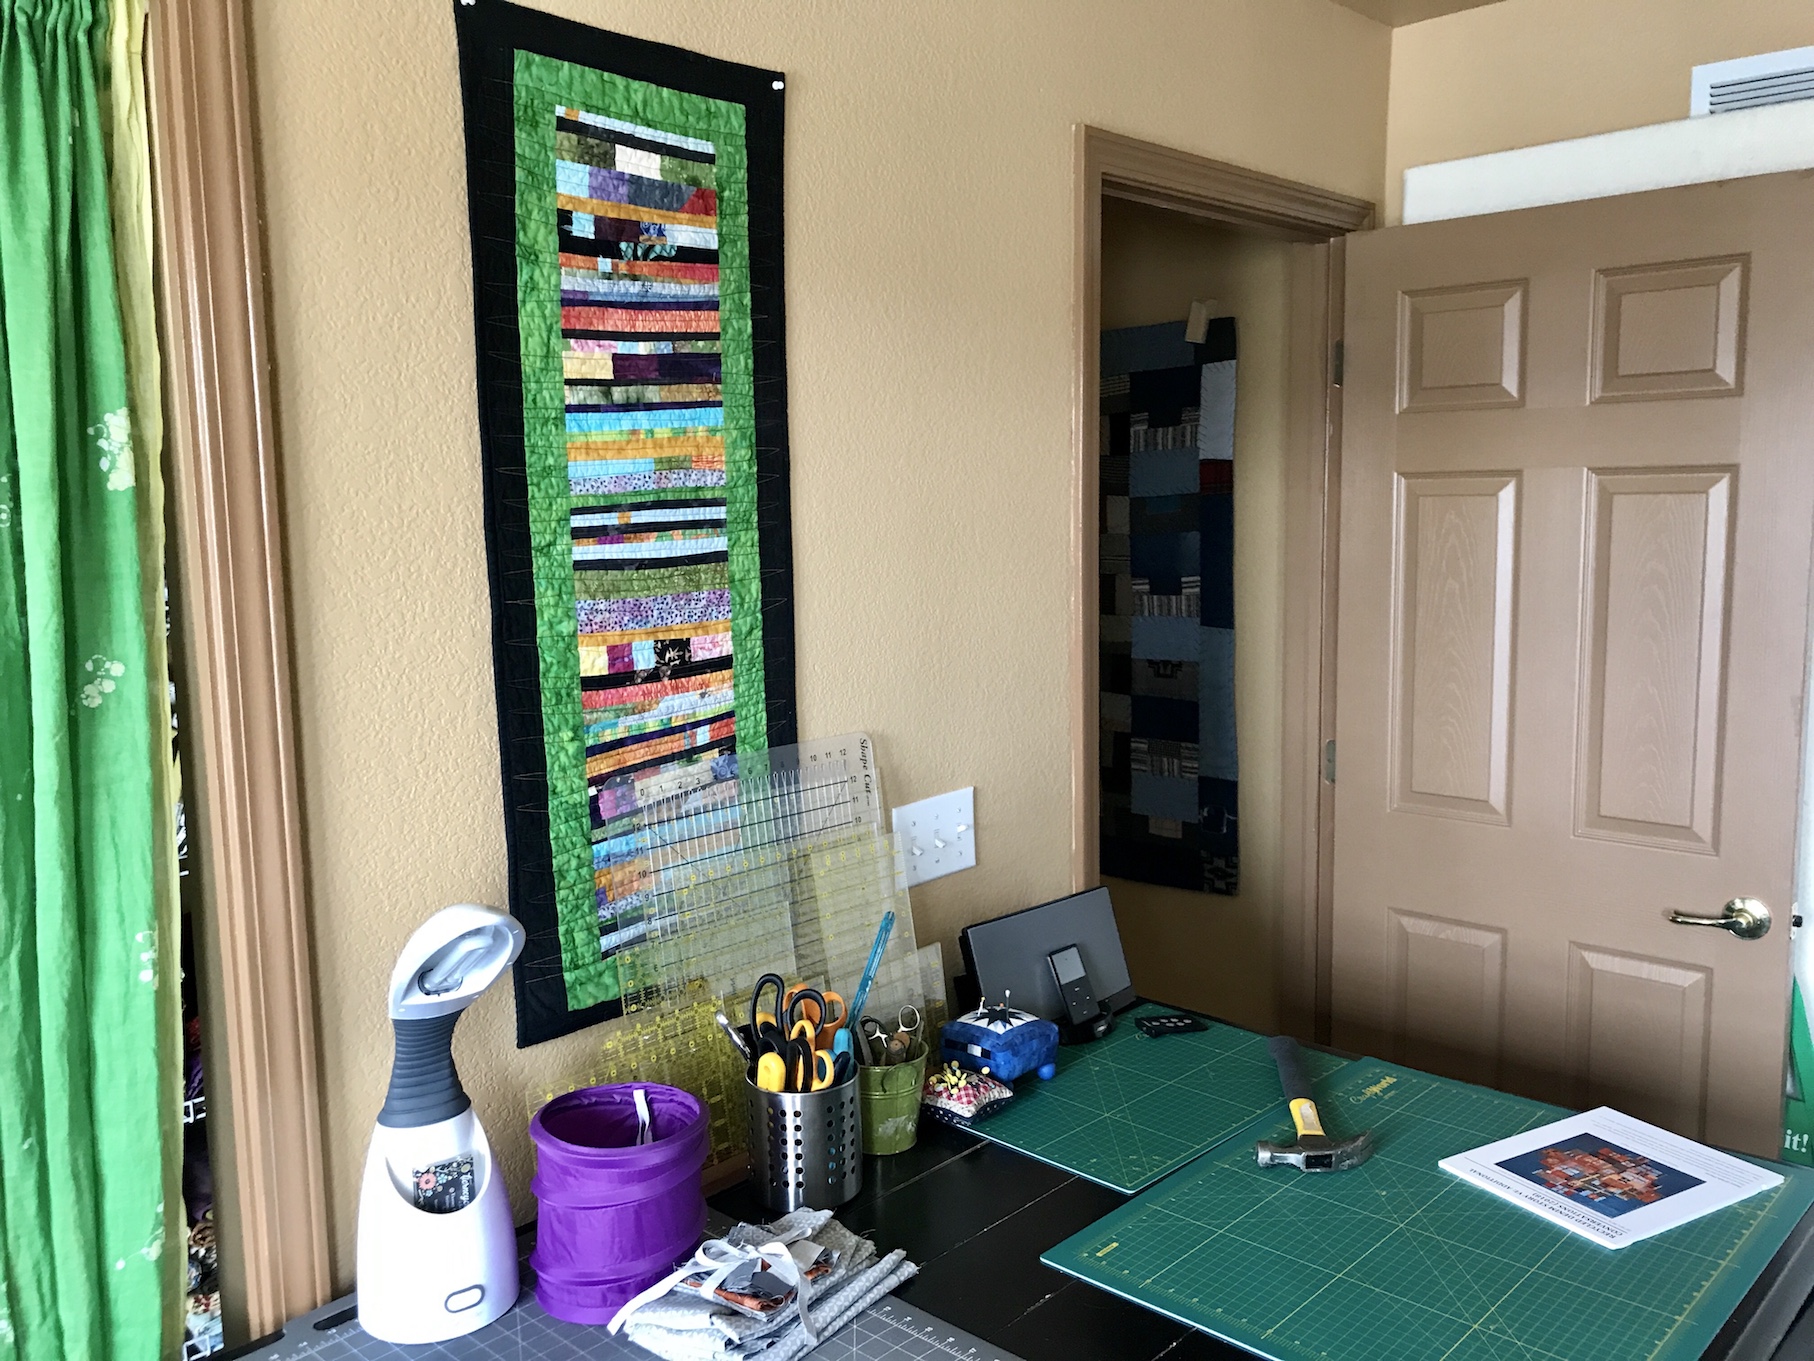
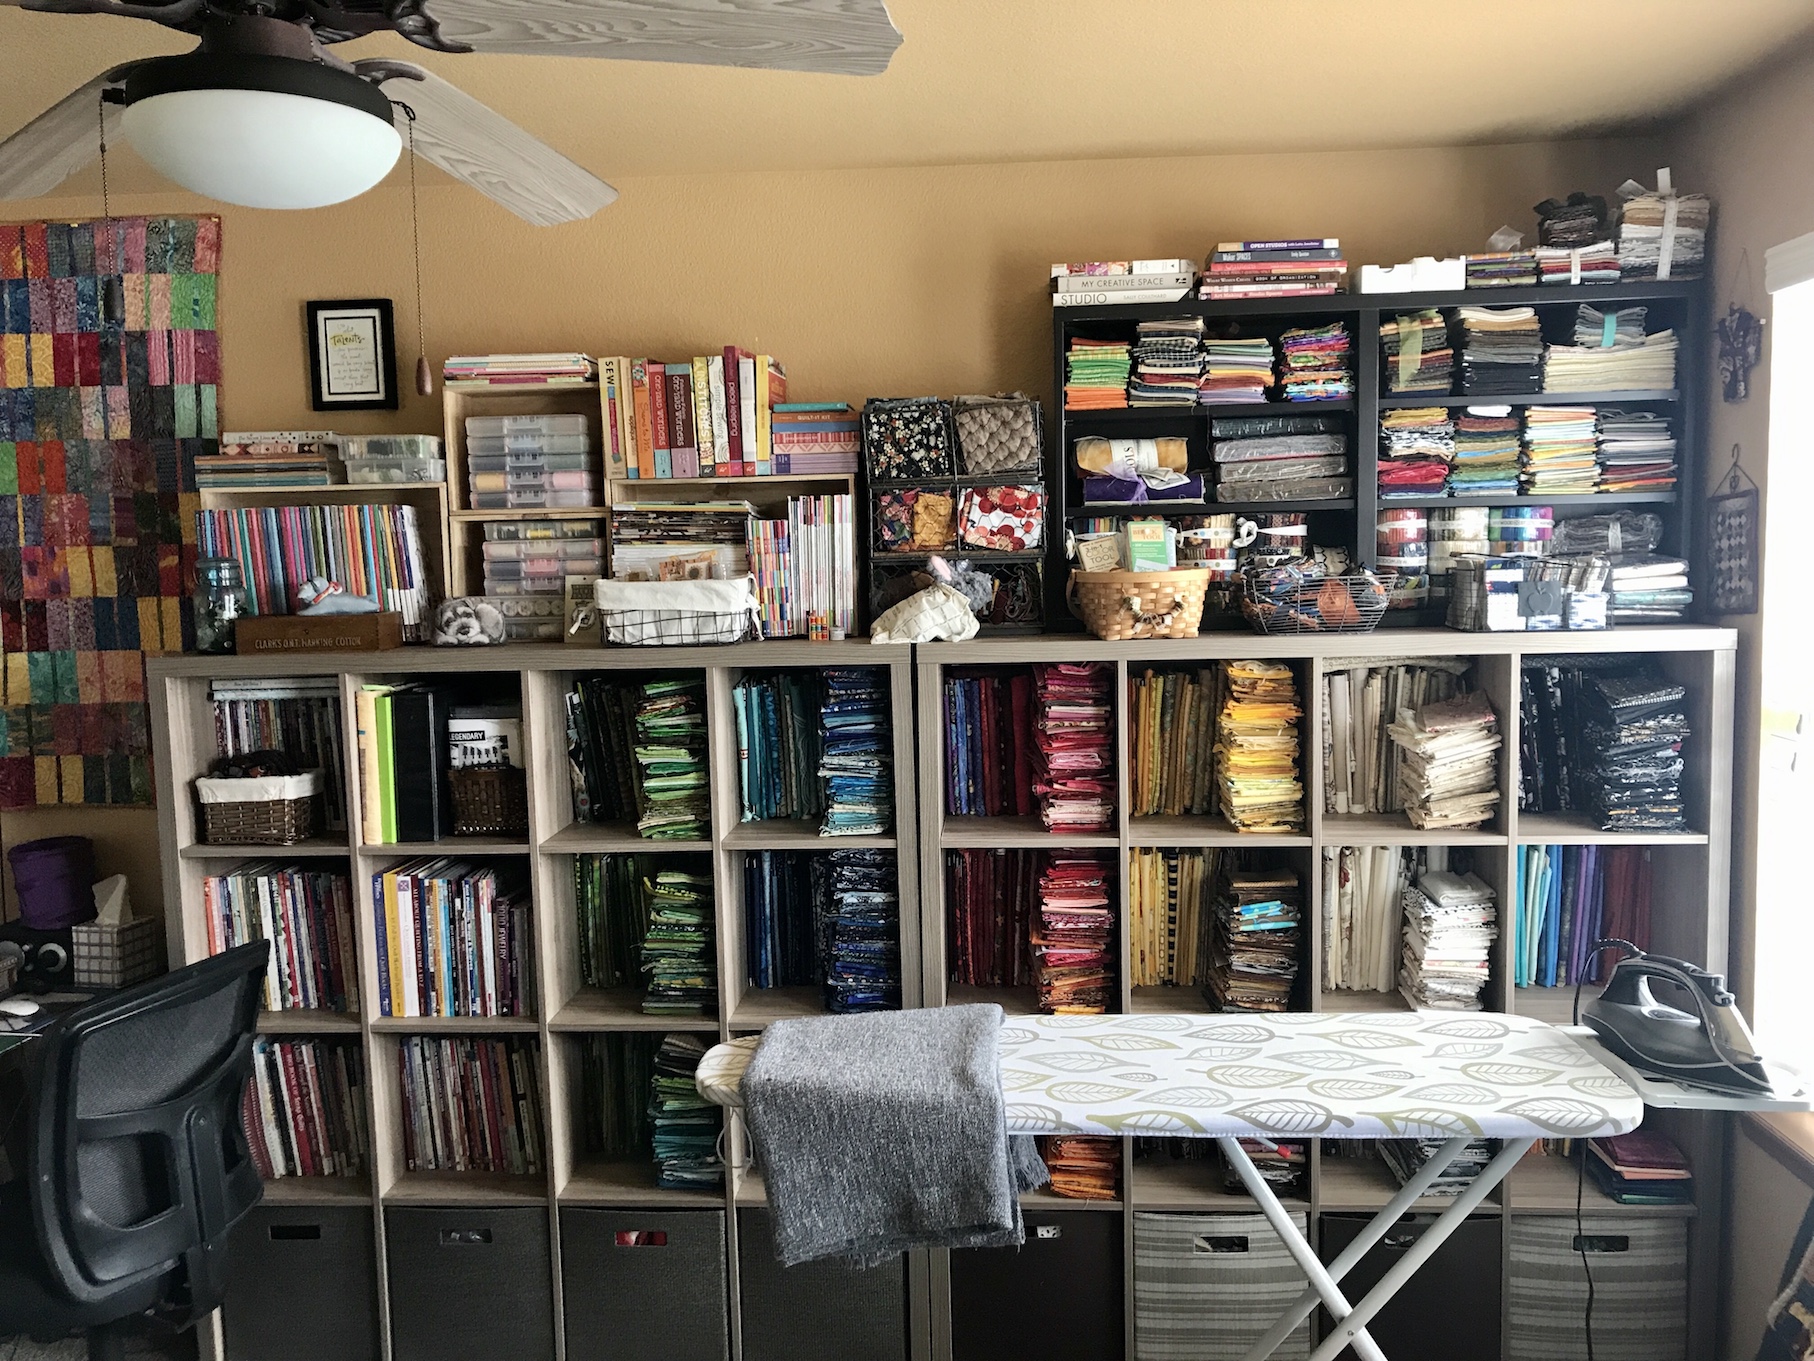
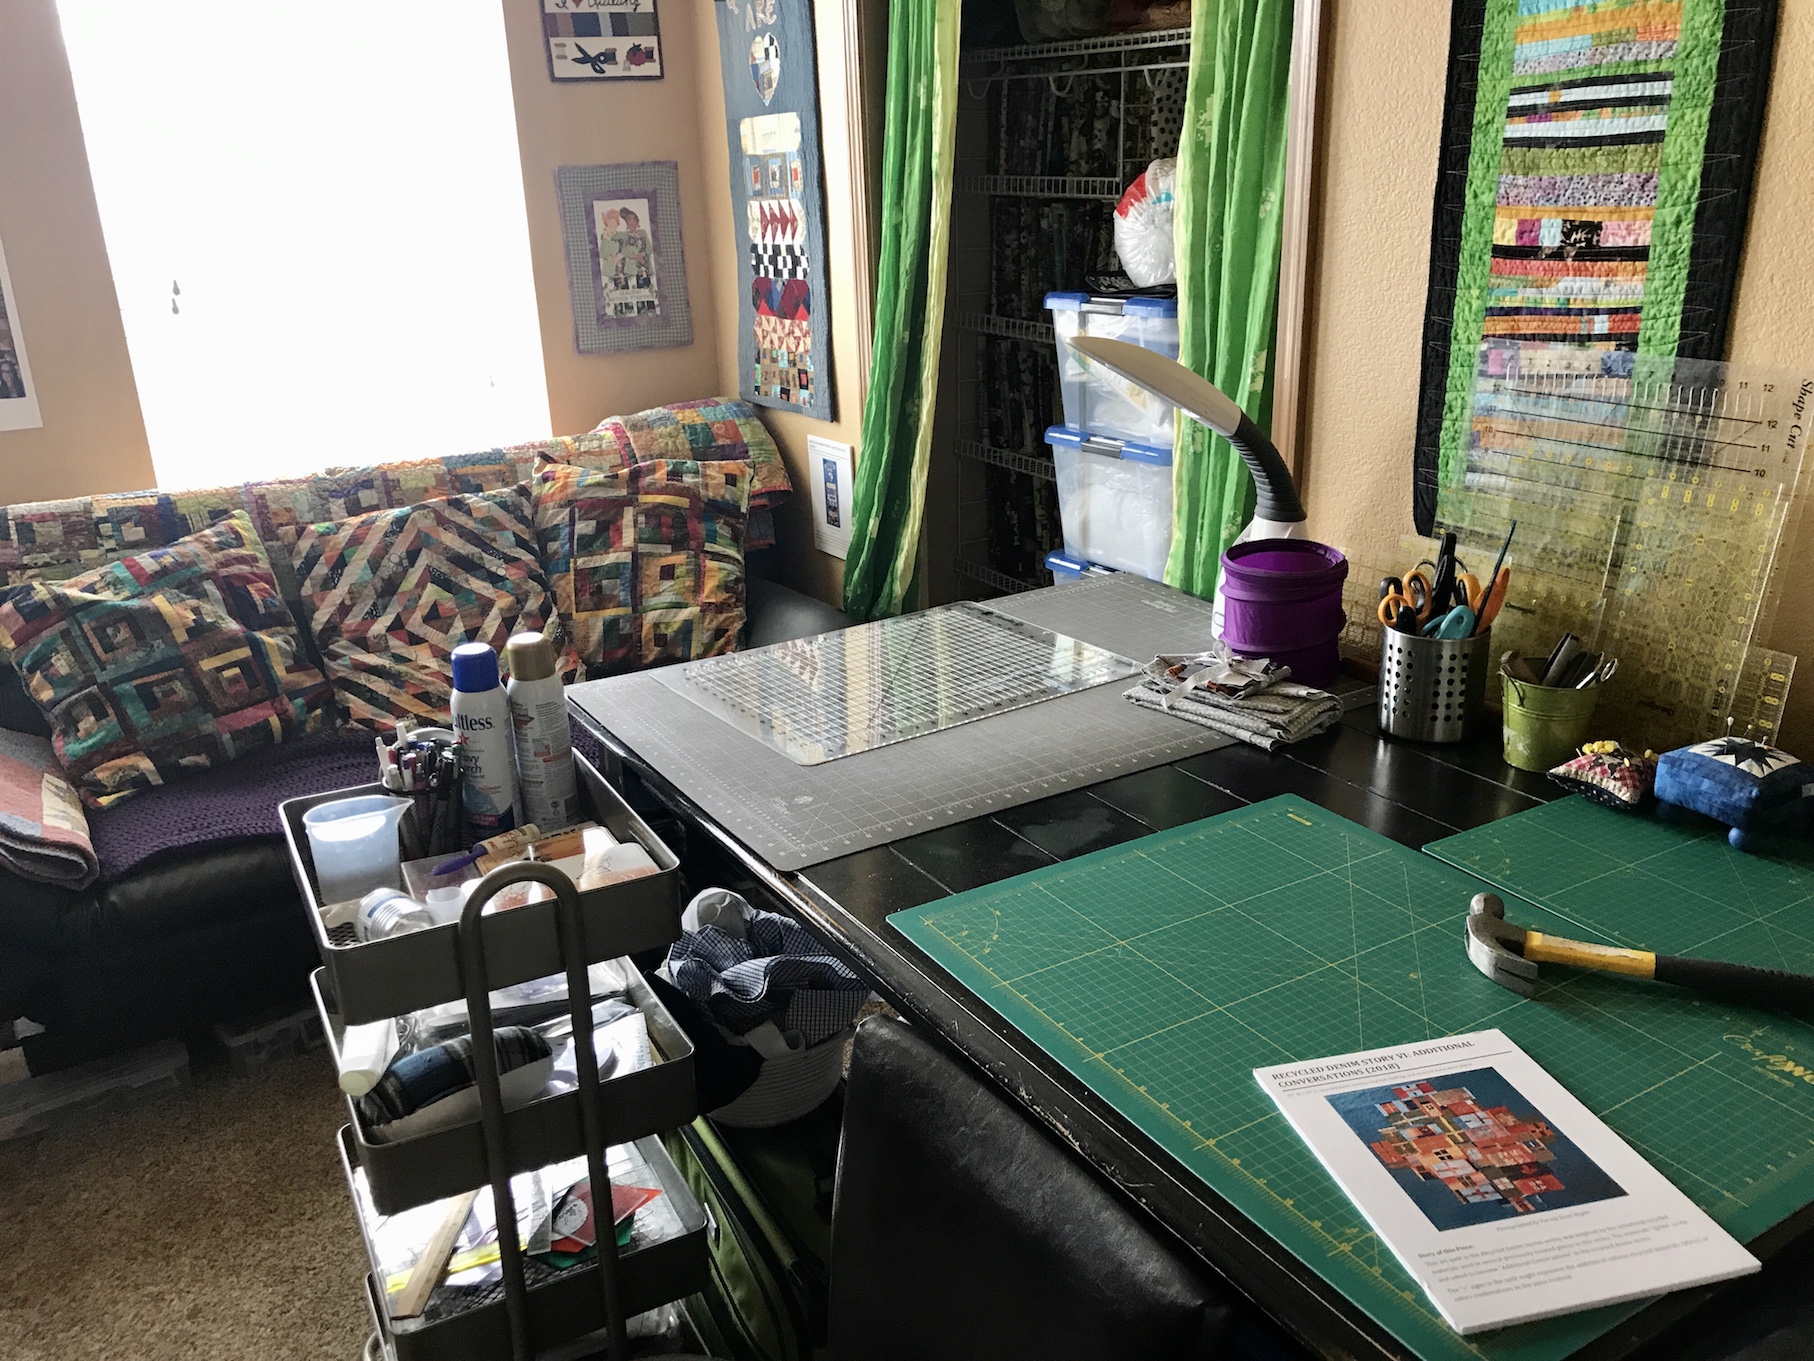

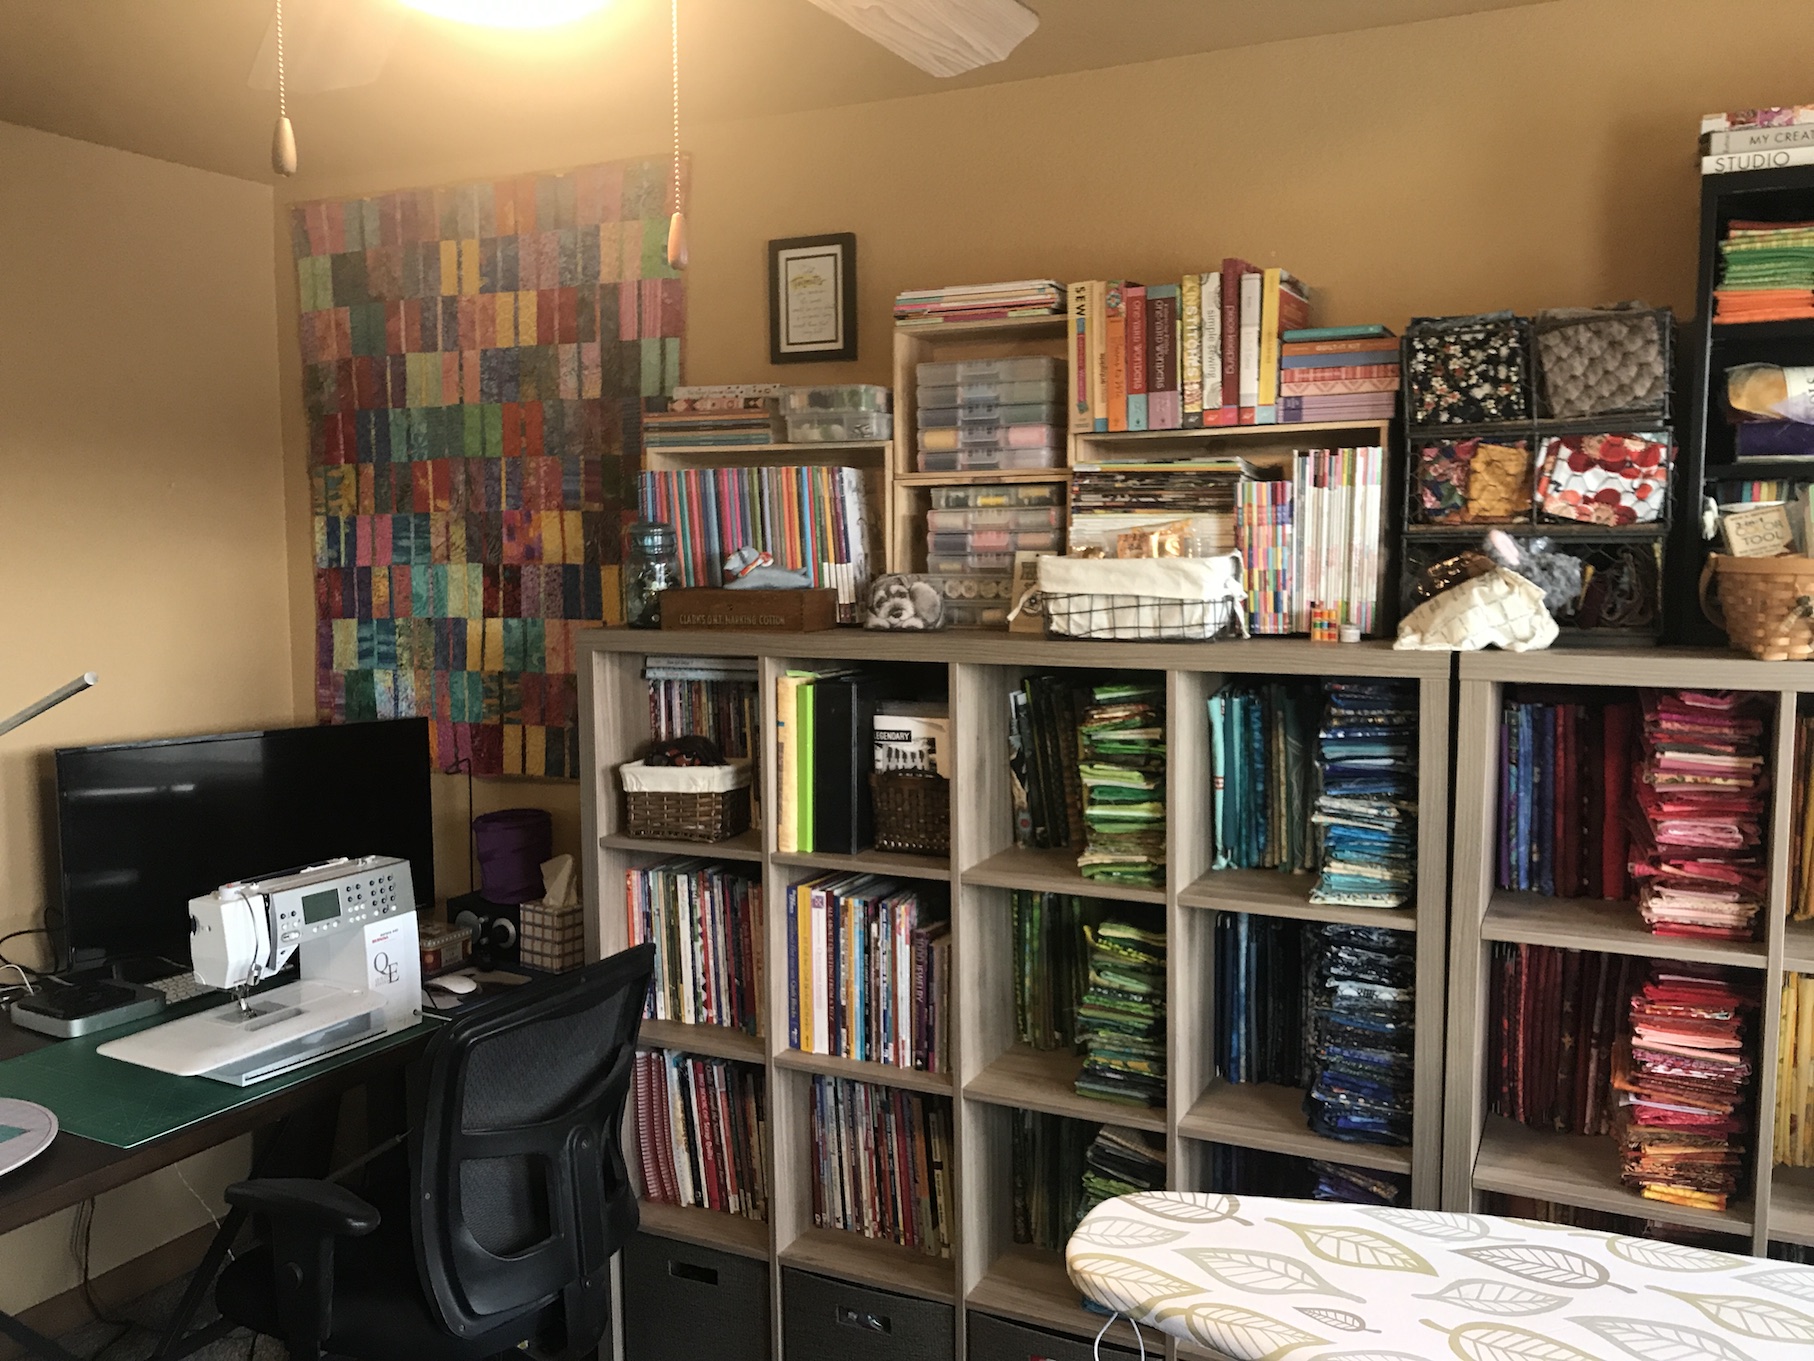
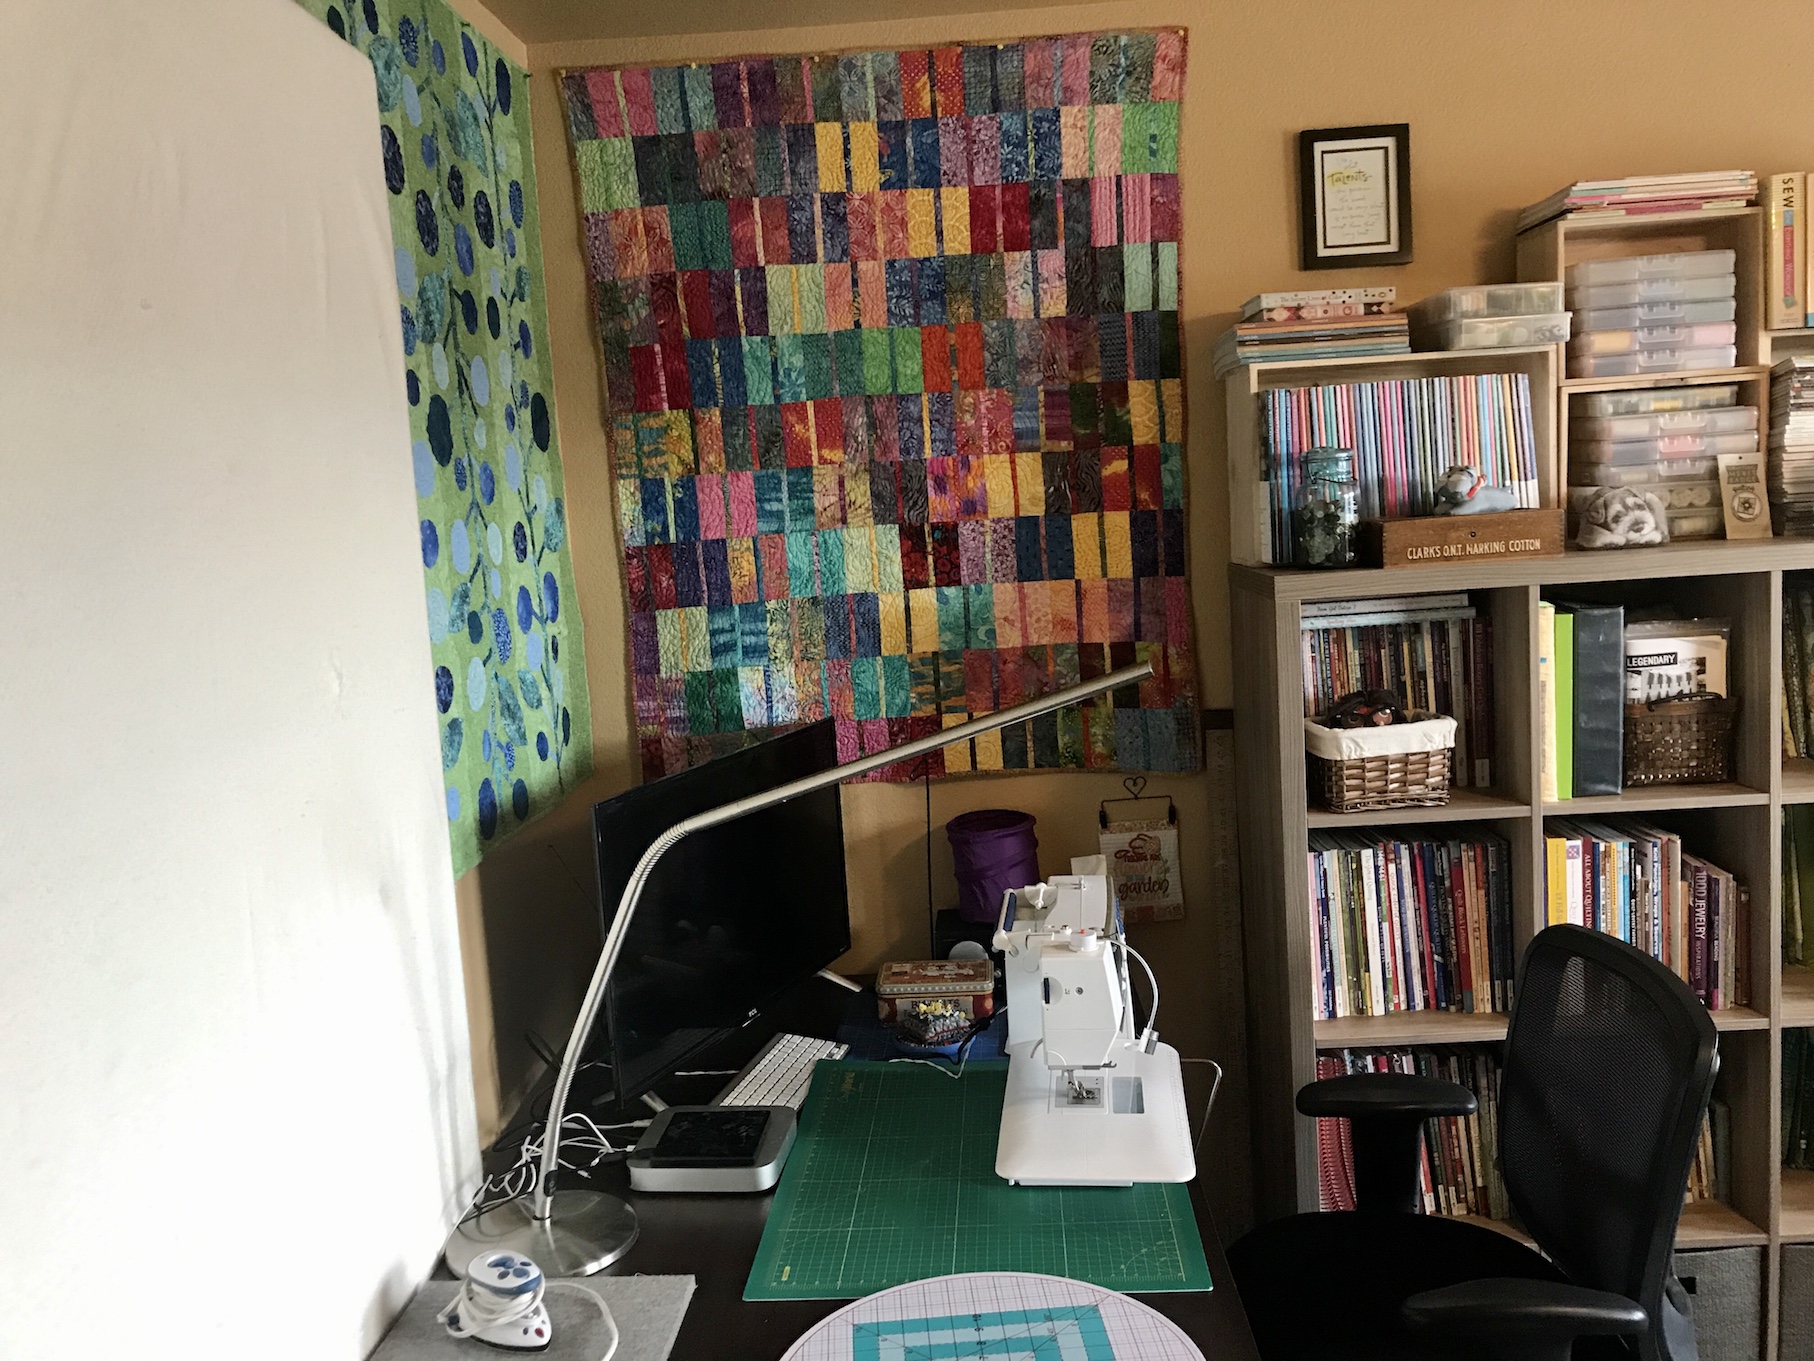 So Tierney is ready to create (she can be tierneycreates again) in her new studio! She is so happy to have her sewing machine unpacked!
 But she is hoping to start sewing a bit more fun things in the near future than masks…
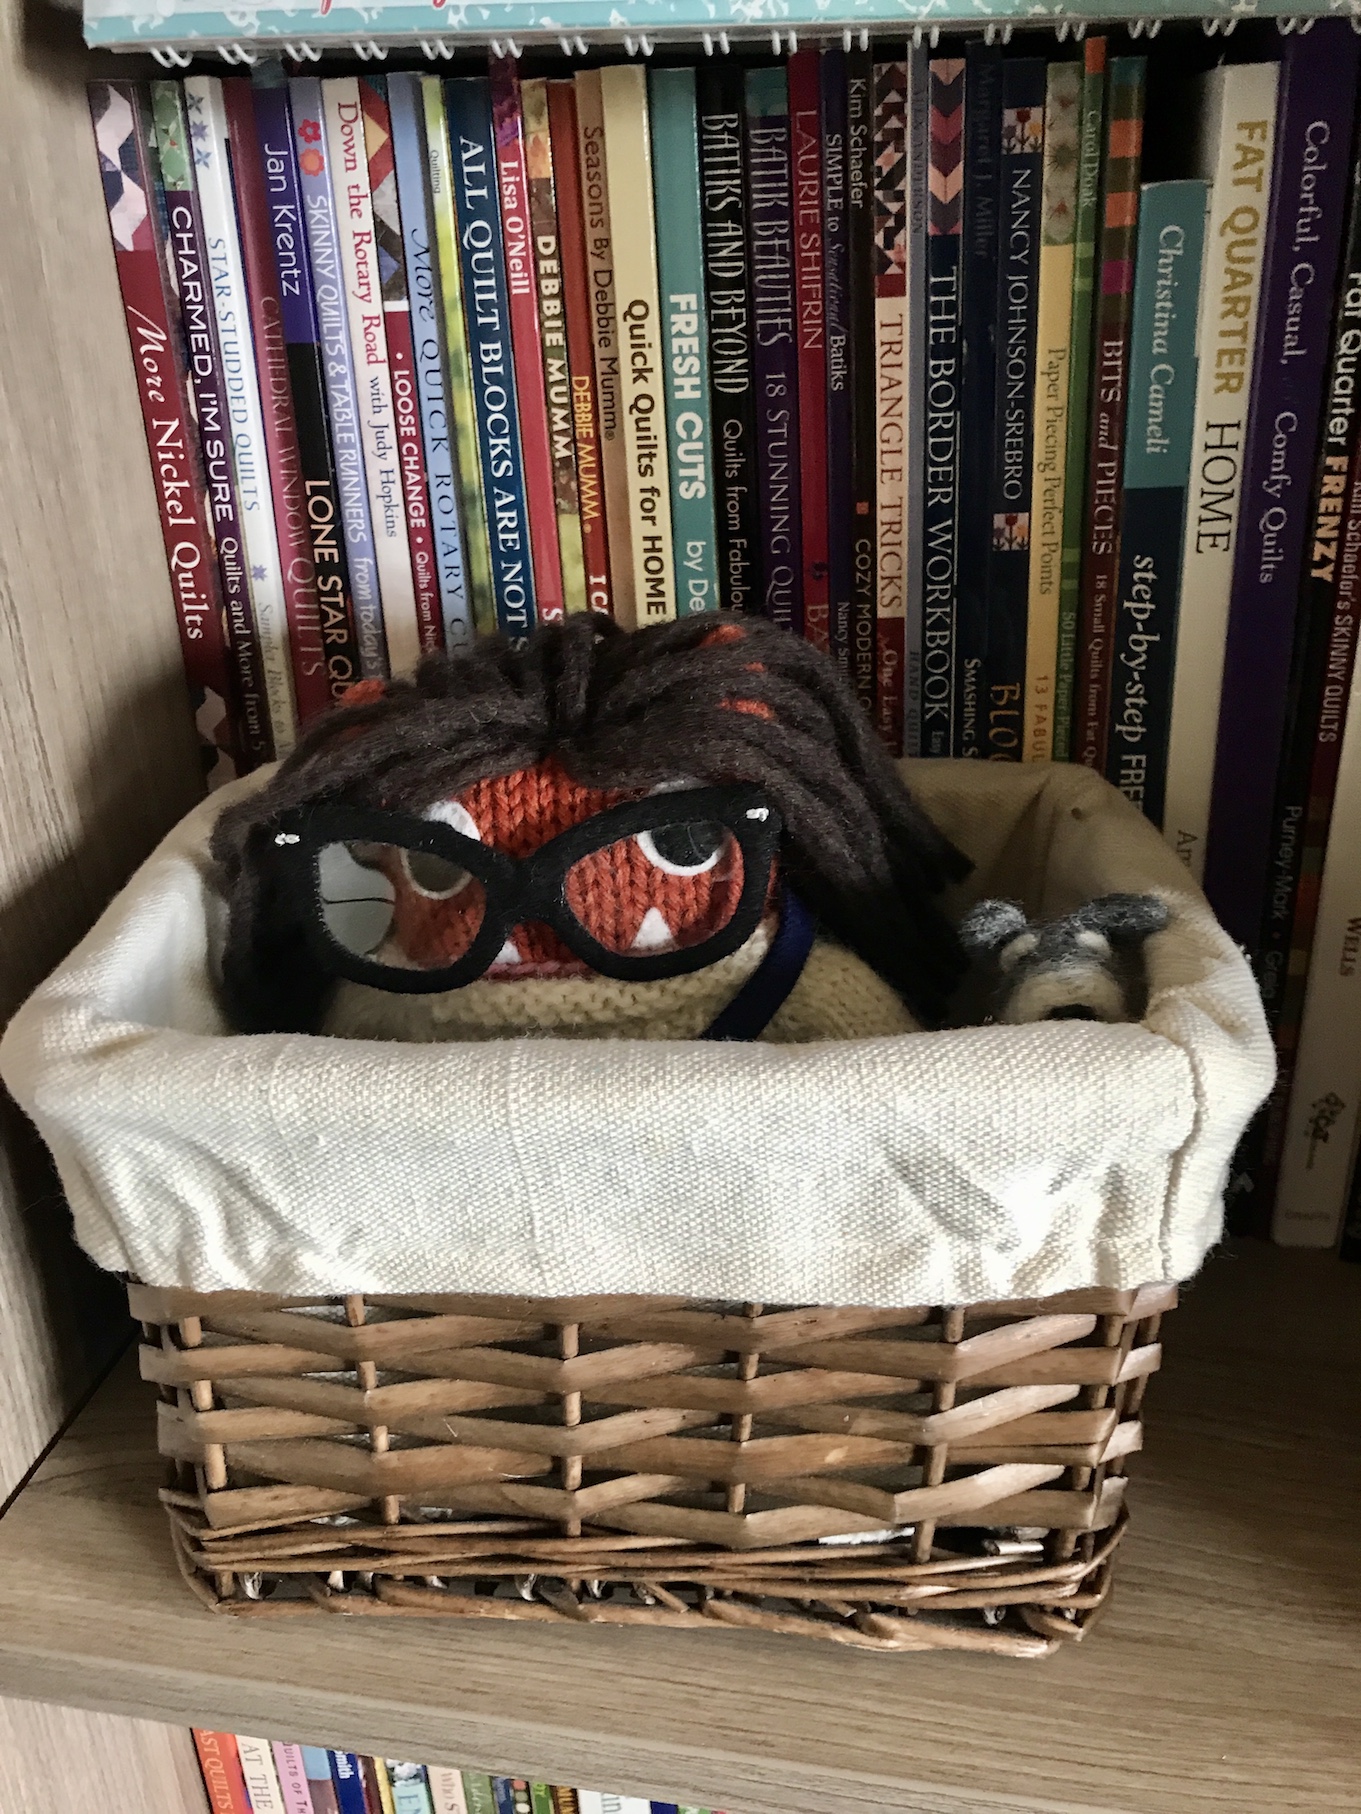 Which of course should have been her first priority from the beginning of setting up her studio!
 In case you are new to this blog, my name is tierneycreates Beastie and I am a Monster, but the good kind of Monster. You can read my story at

 Well it is all GONE! The studio is gone and our cozy spot is gone!!!!


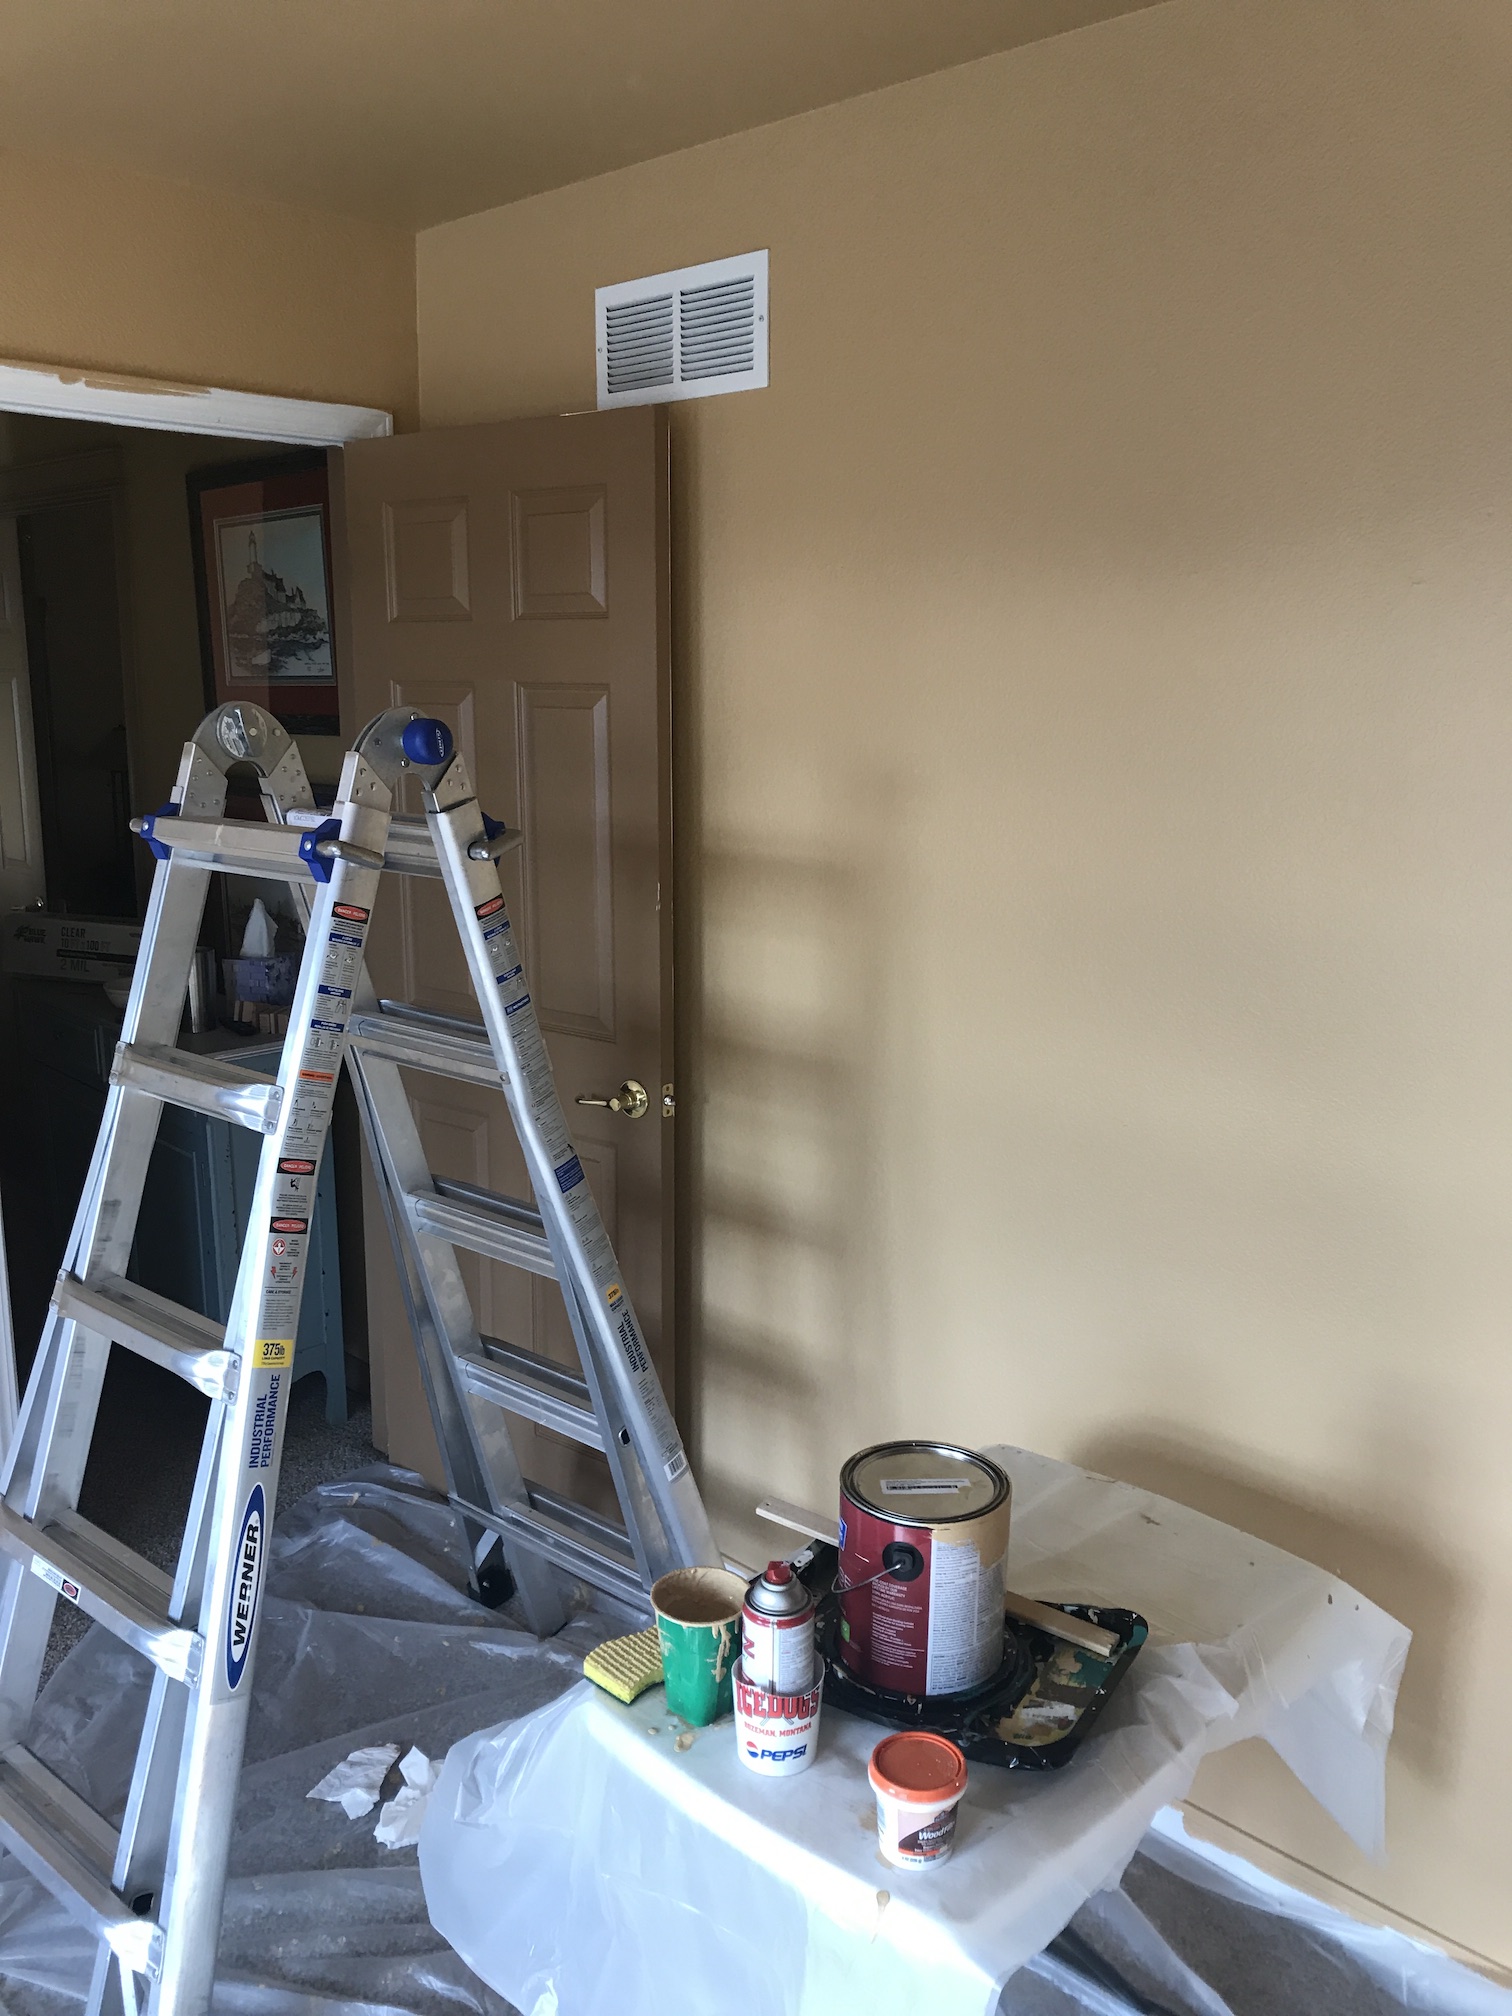
 I am highly irritated over this (and Mikelet is none too happy either) and what has made it even worse is that Mikelet and I were relocated to Tierney’s home office to hang out with her creepy collection of giant stuffed animal schnauzers (well they are giant compared to Mikelet and me):
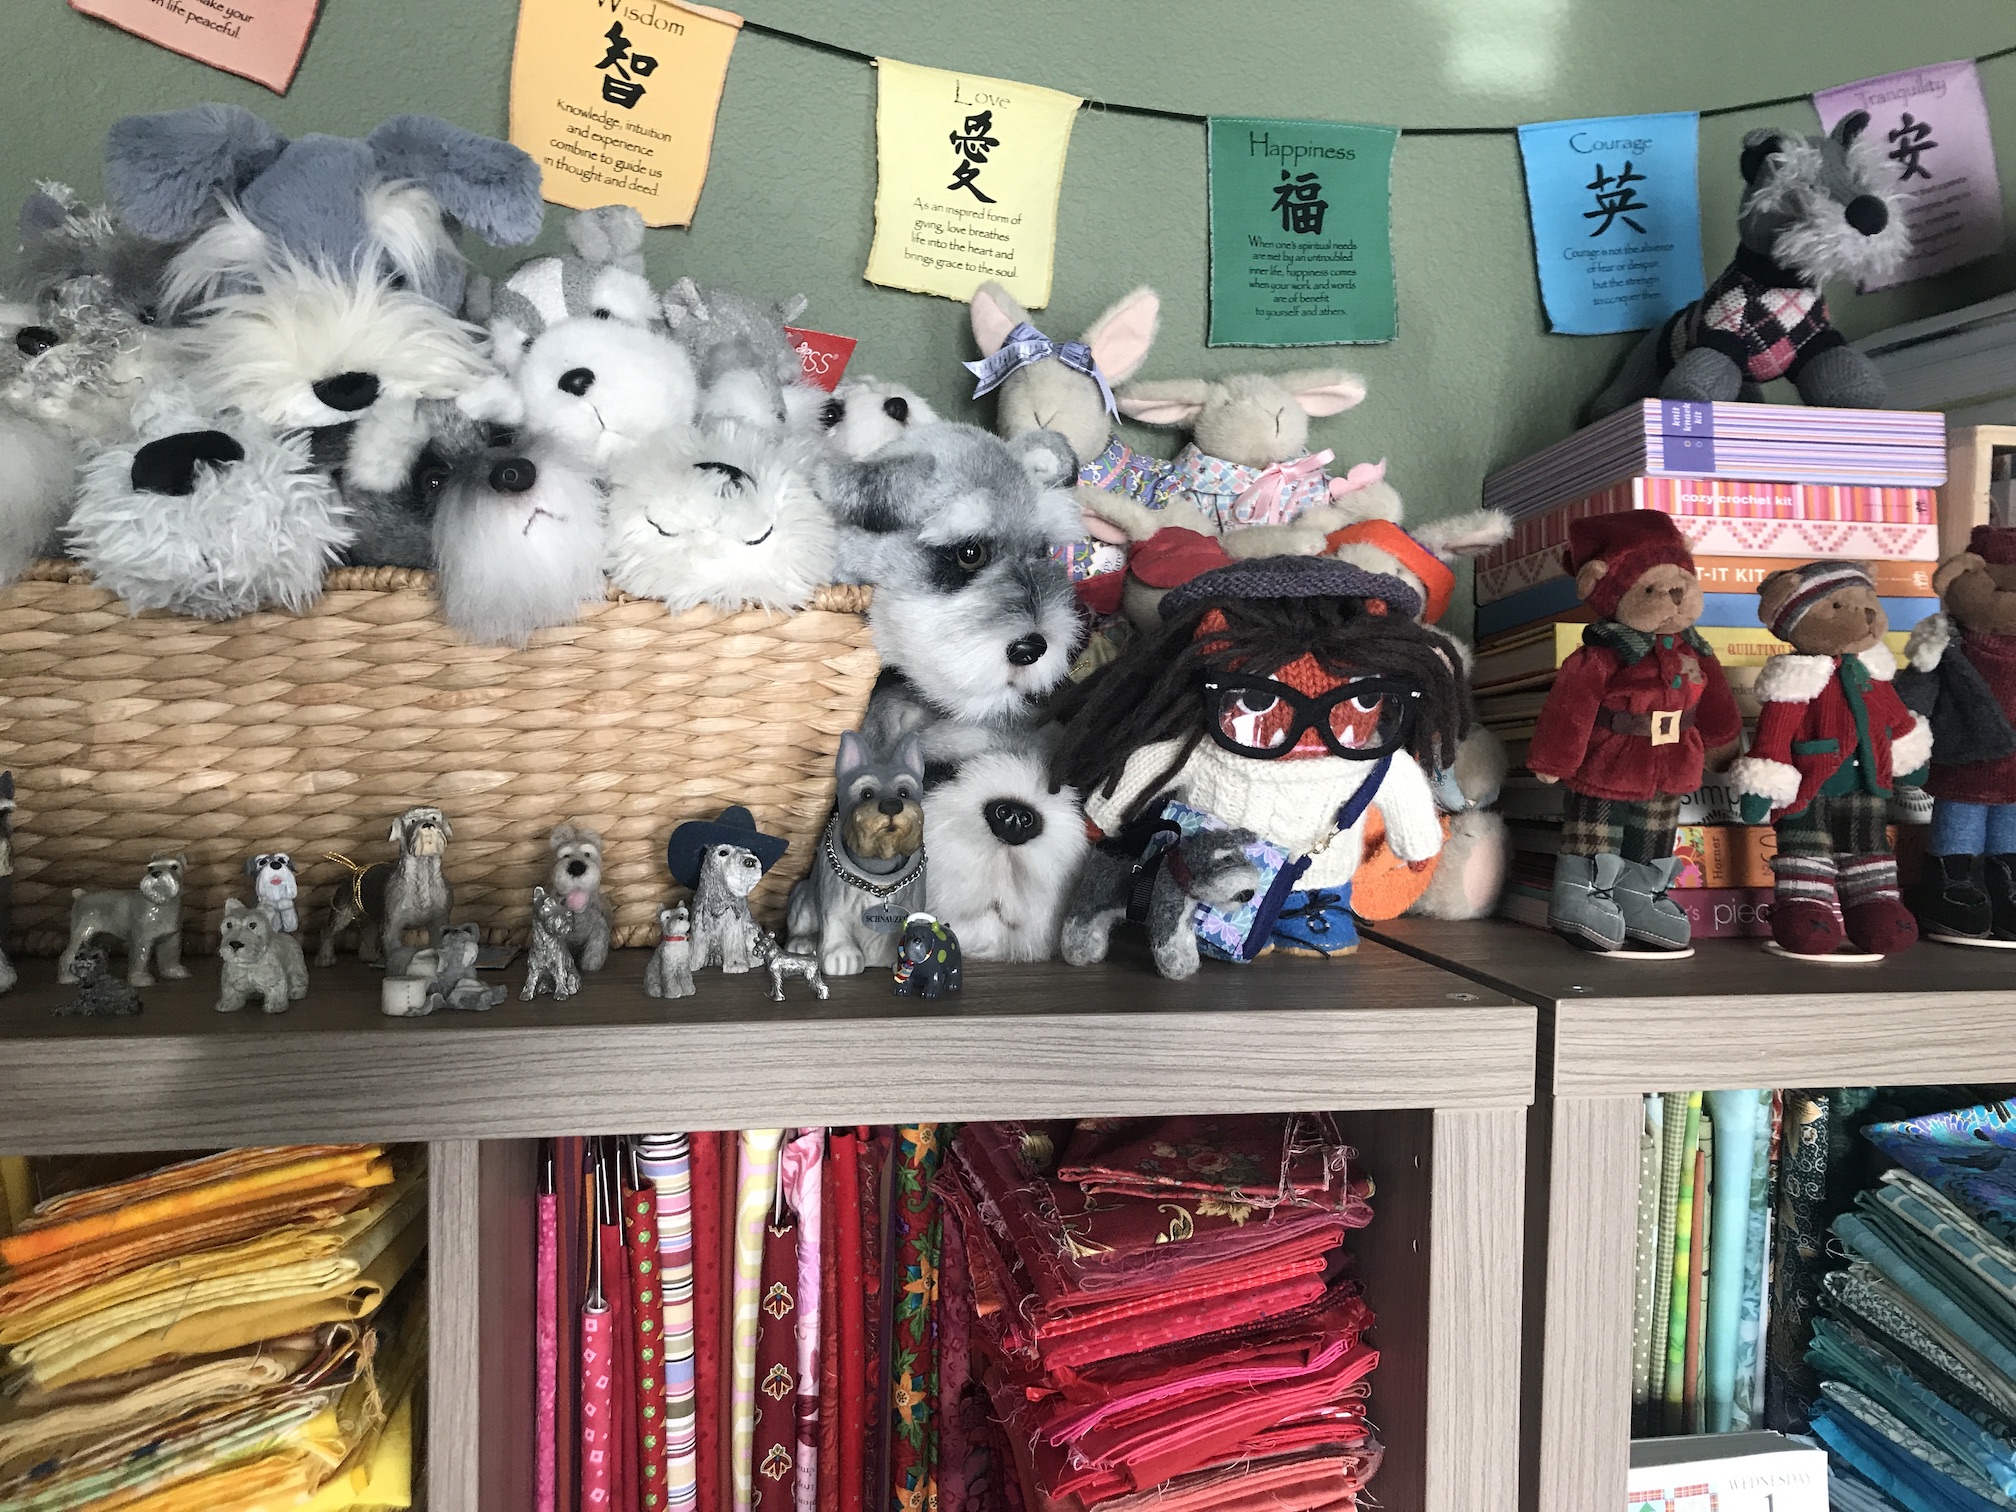 Mikelet and I are kind of disturbed by the giant schnauzer head we are pushed up against as well as the super creepy schnauzer hanging over the basket next to us!
 He is just a little too close for comfort, I can feel him breathing down my neck!