I decided not to drag out the rest of the story of the 5 day quilt retreat I held at my house last week with two long time friends who are quilters, so I am combining days 4 and 5 into one post.
If you are just joining us the other three blog posts on days 1 – 3 are under the blog category Scrap Happy Quilt Retreat.
We continued working on our improvisational log cabin quilt blocks or “log jamming” which I was originally introduced to during a class I took at the Stitchin’ Post in Sisters, Oregon (I also remember that I’ve previously referred to this type of piecing as making “free form” log cabin blocks).
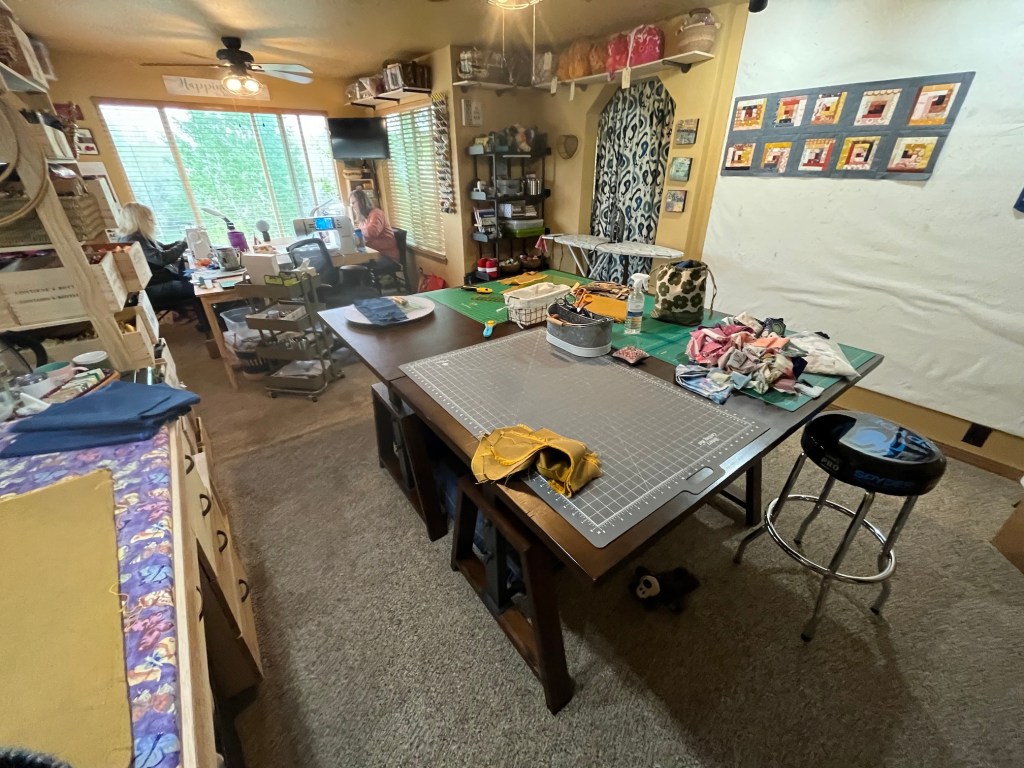
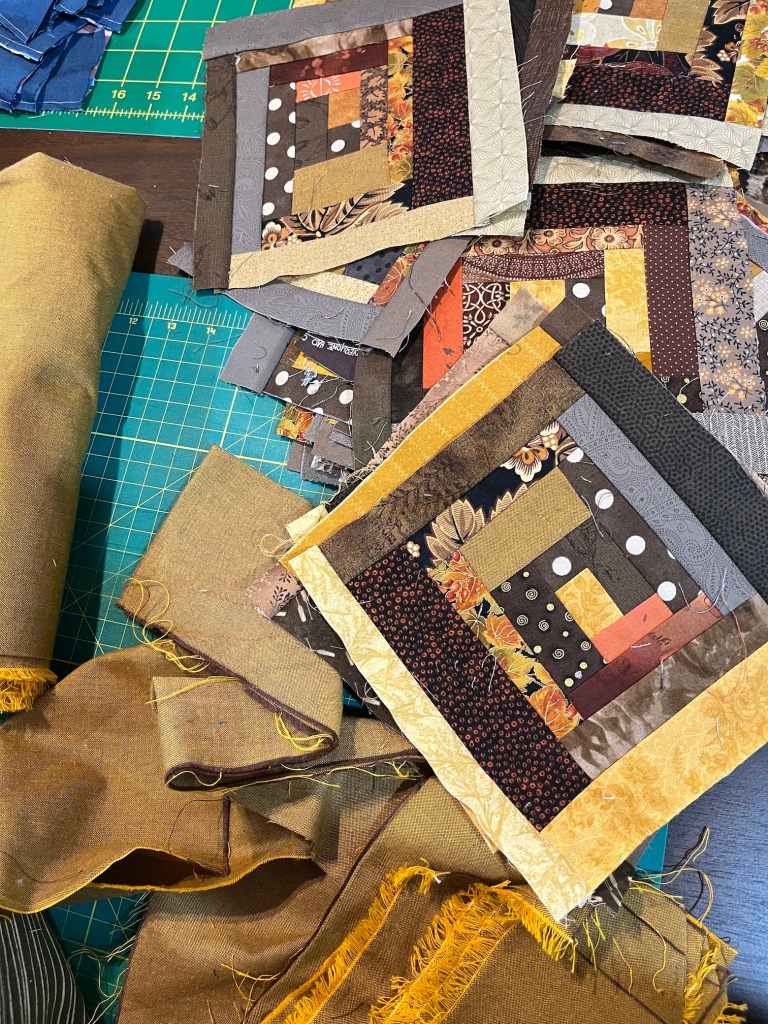
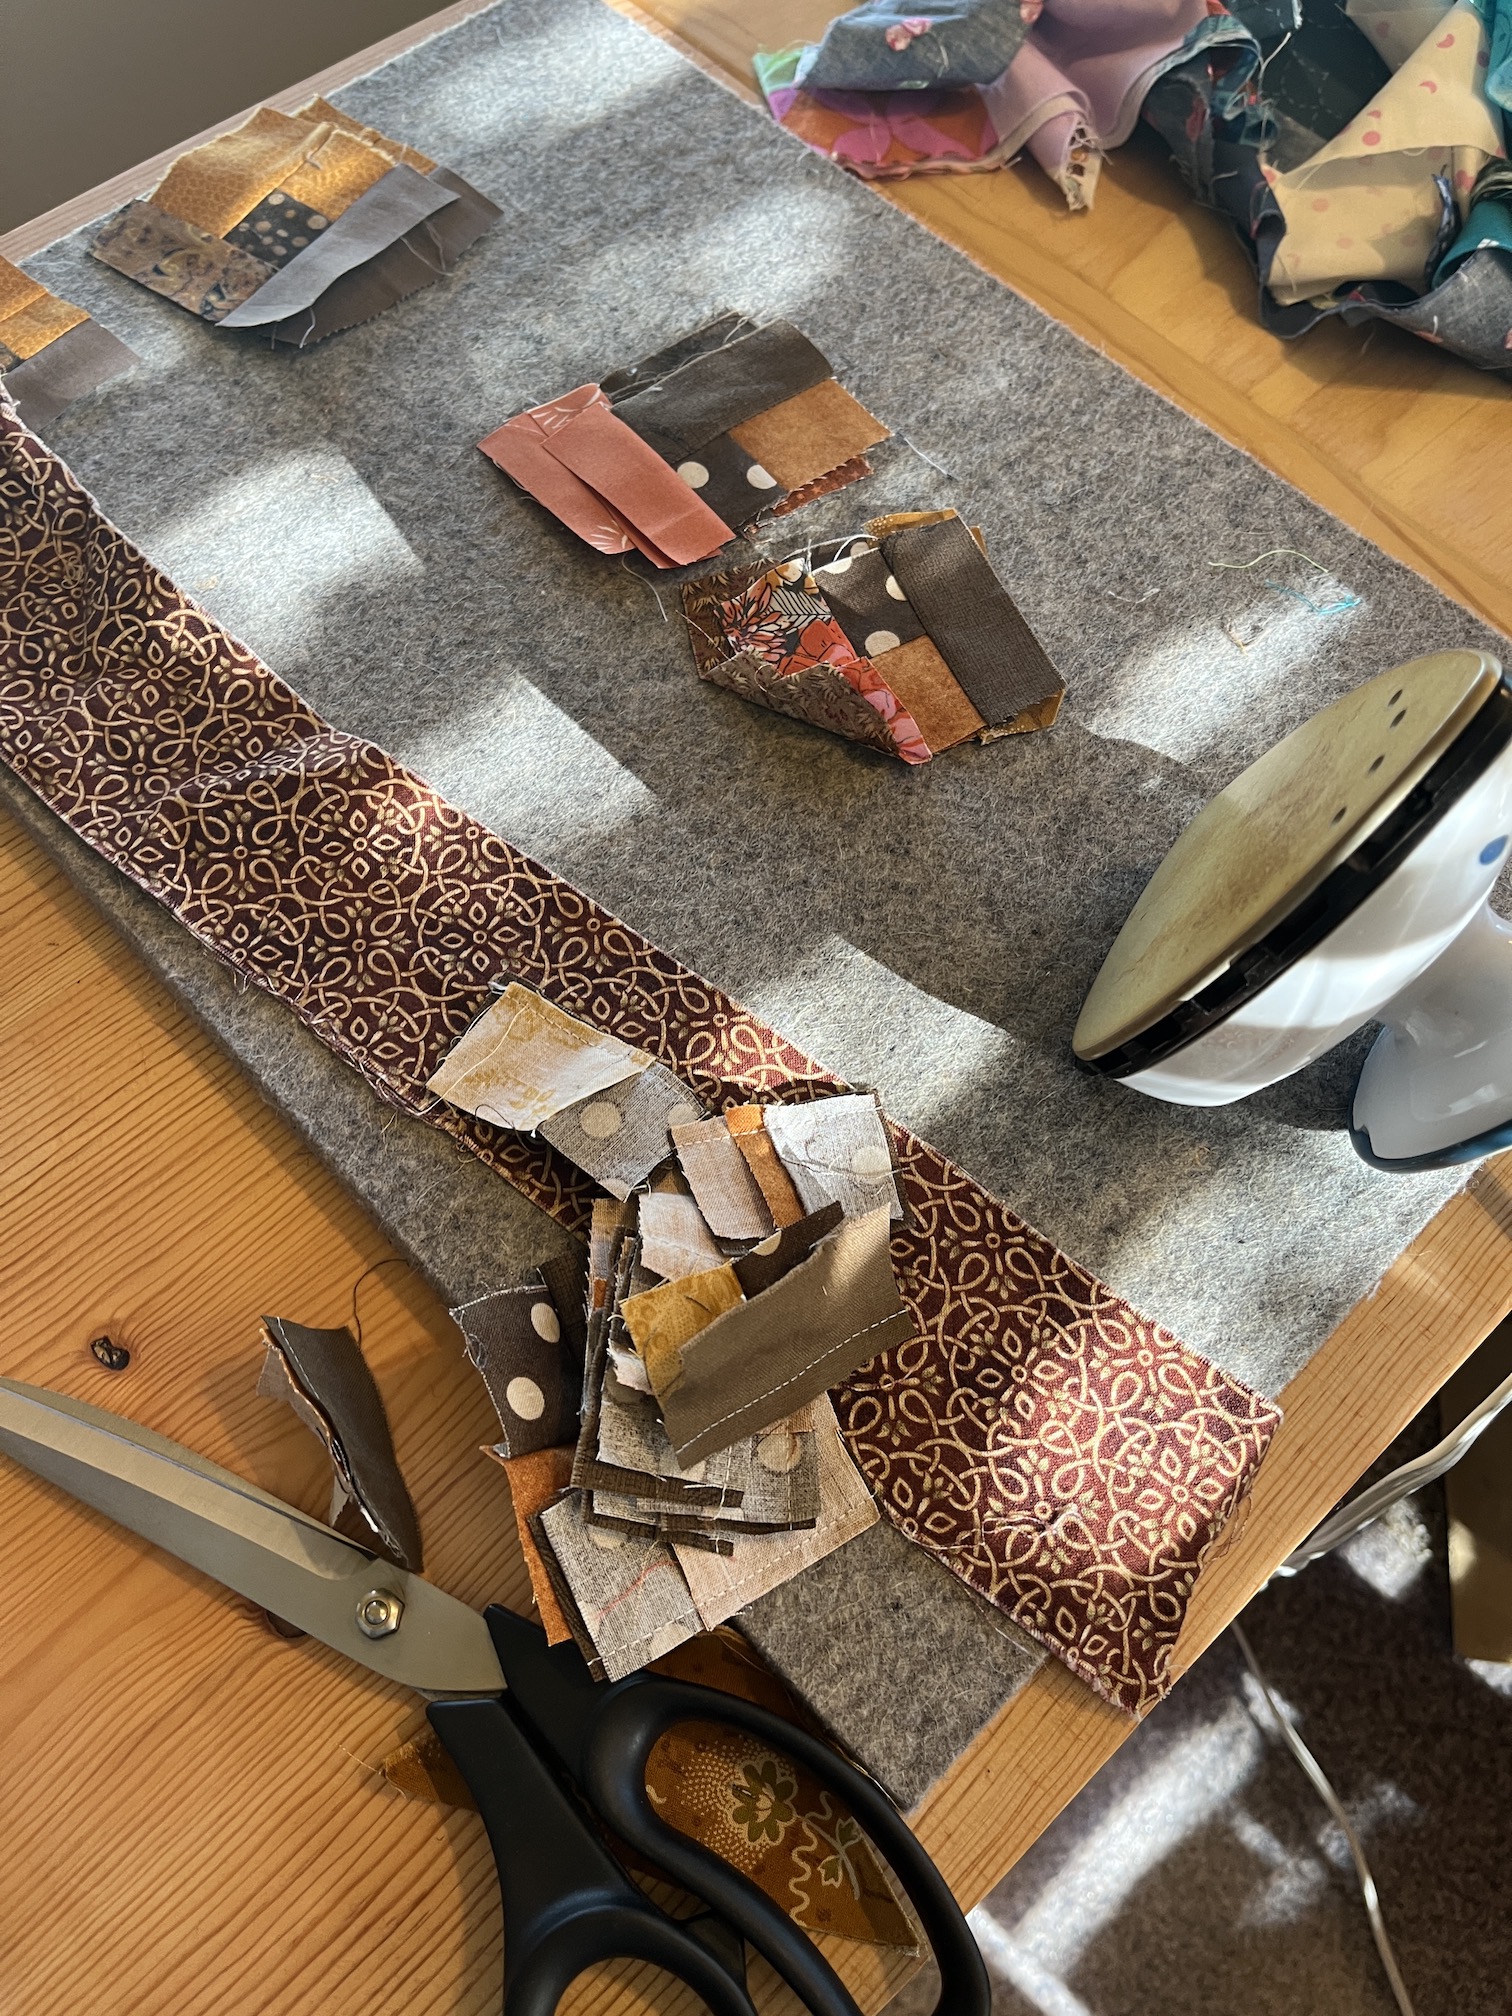
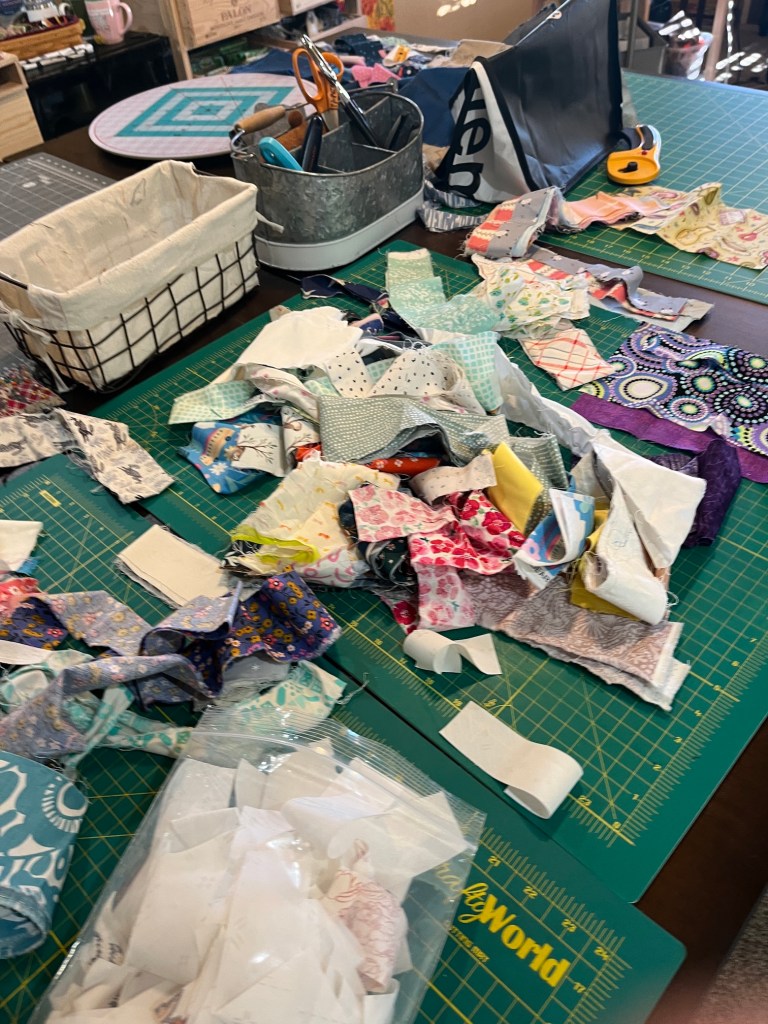
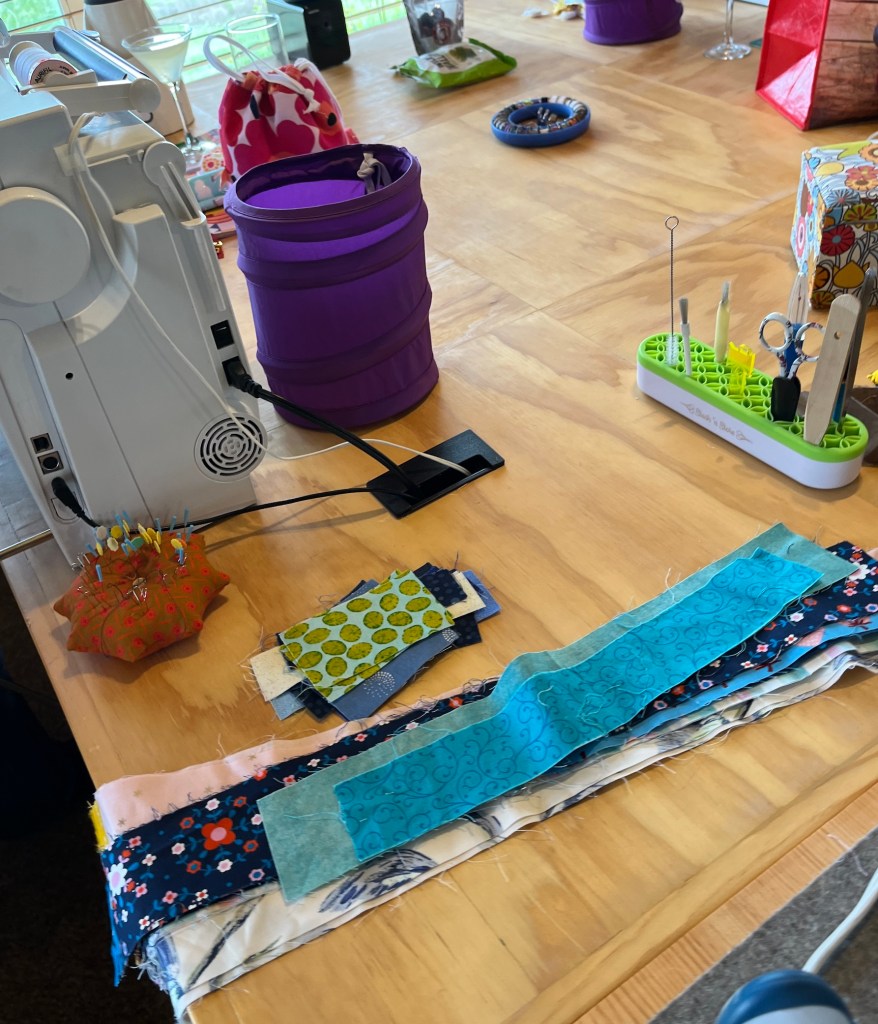
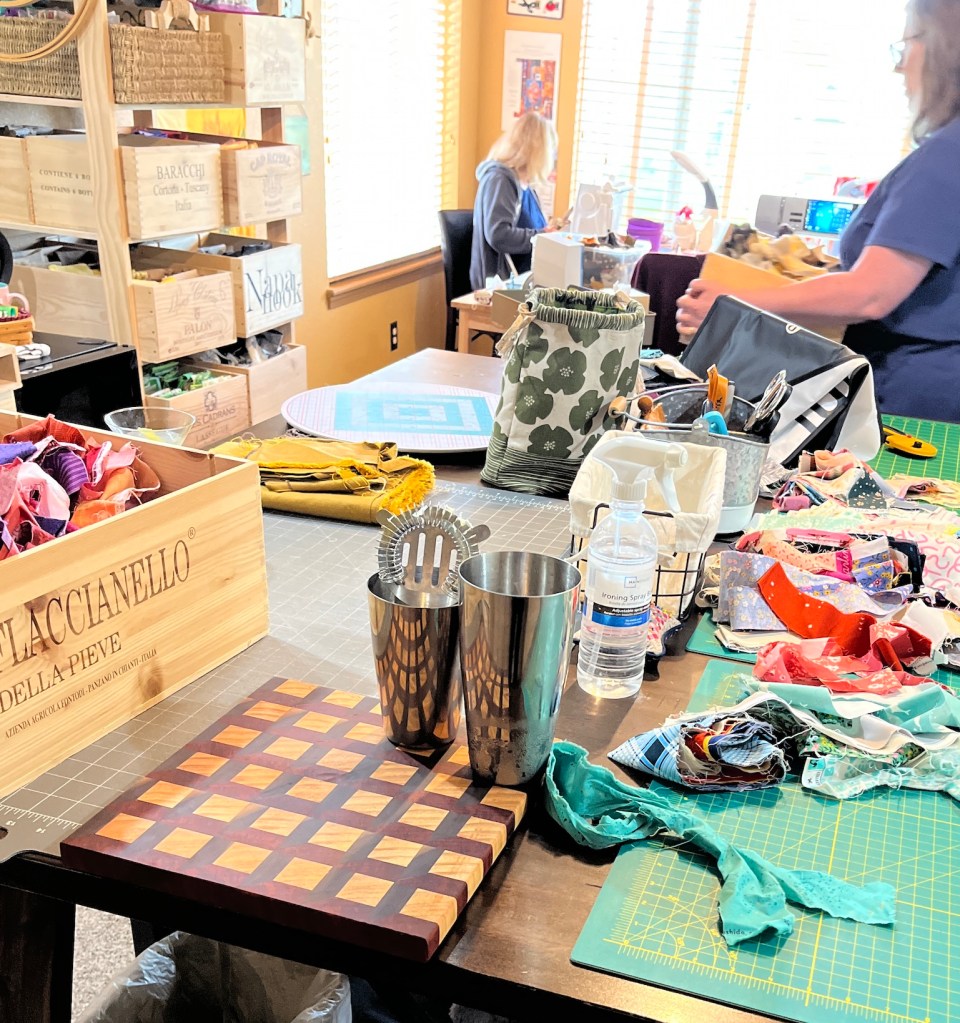
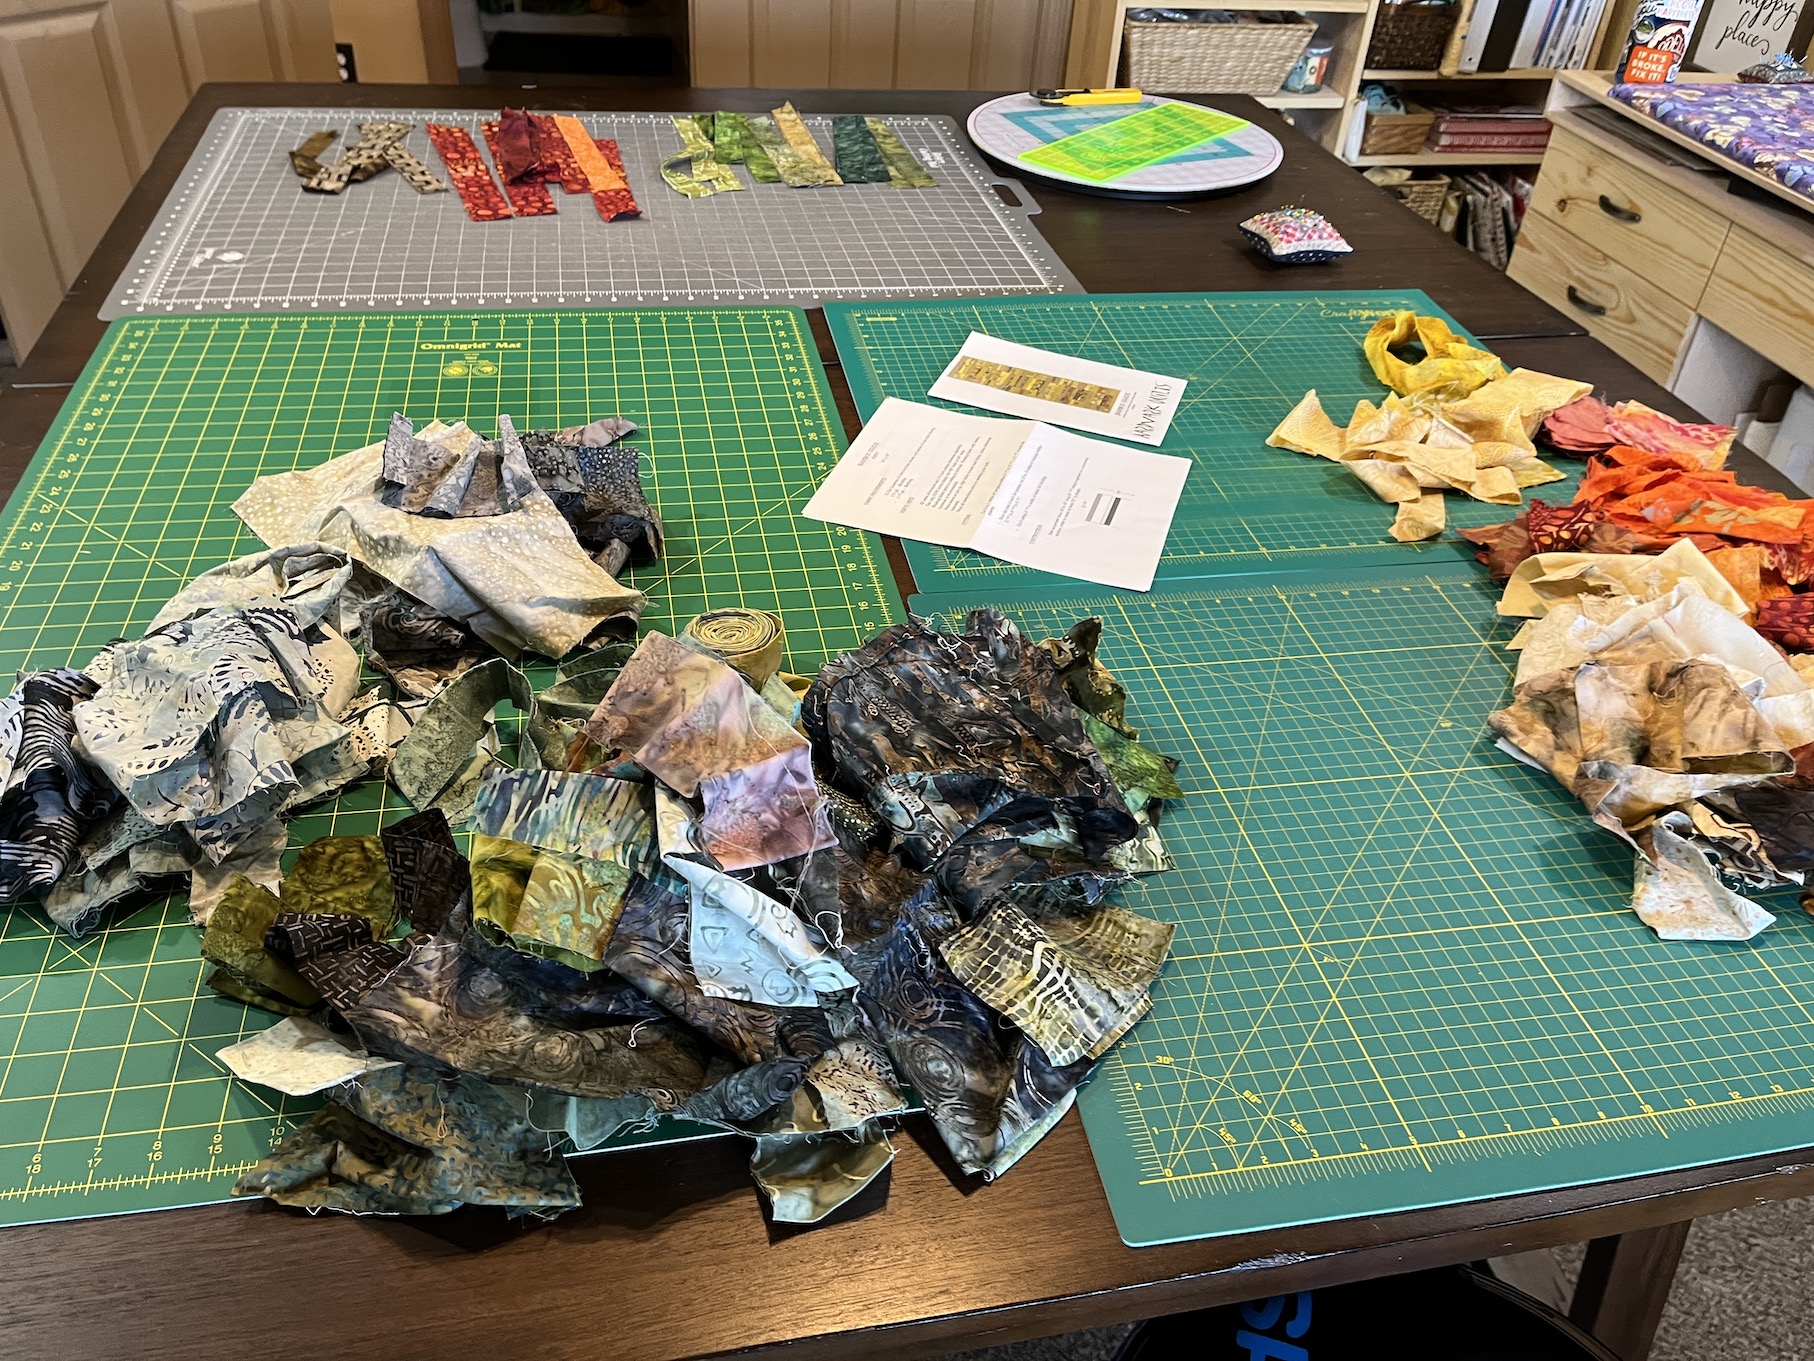
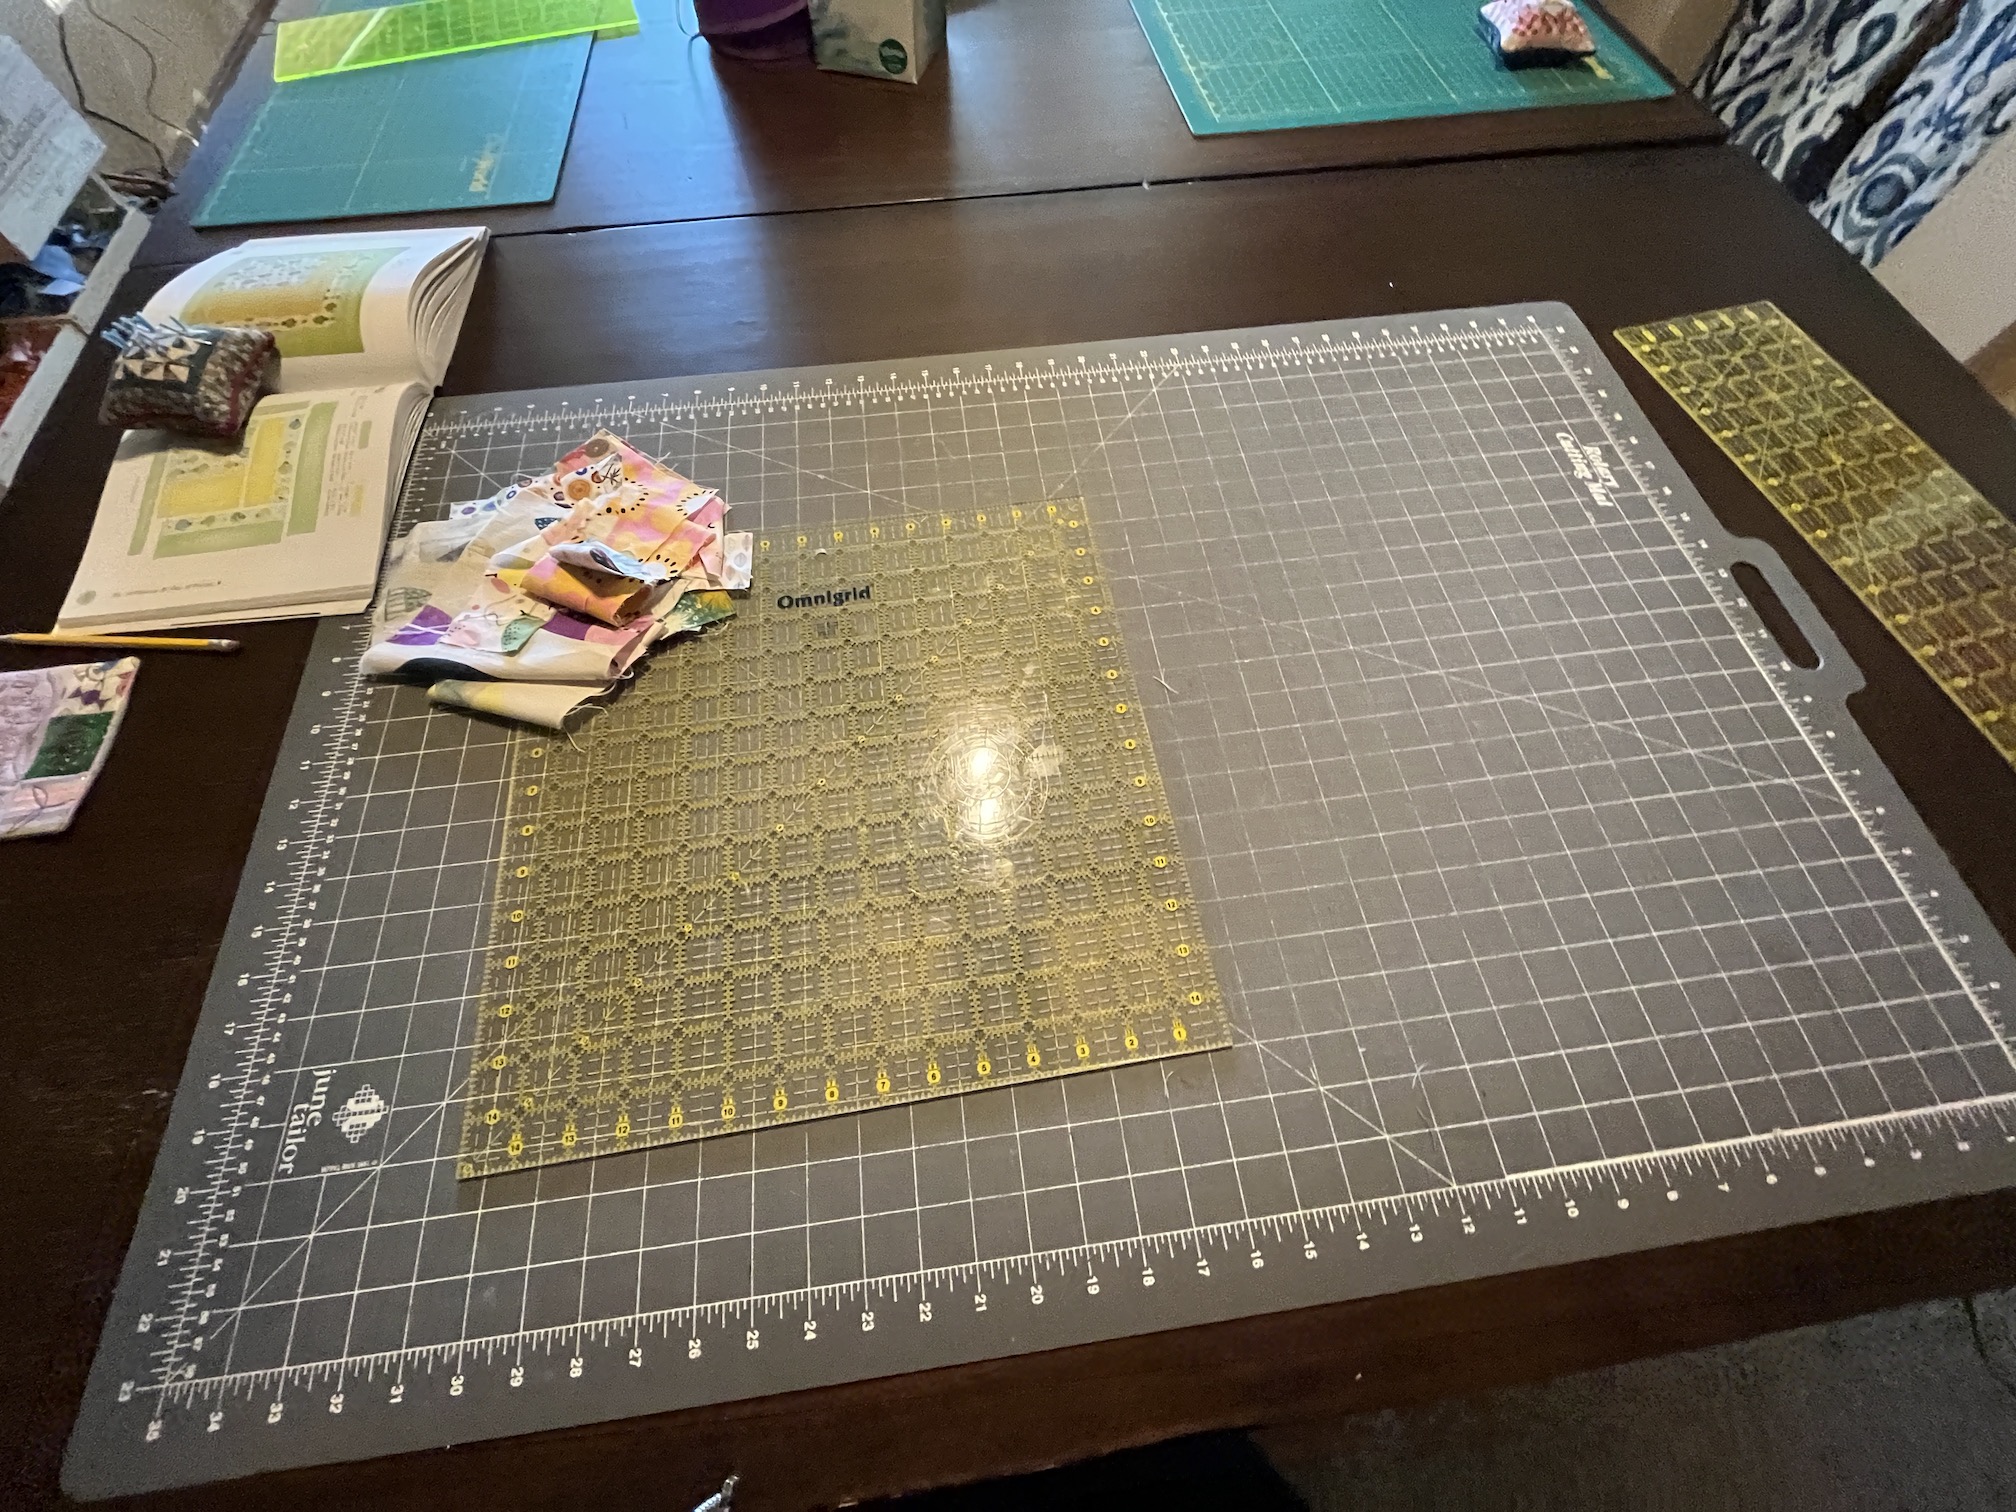
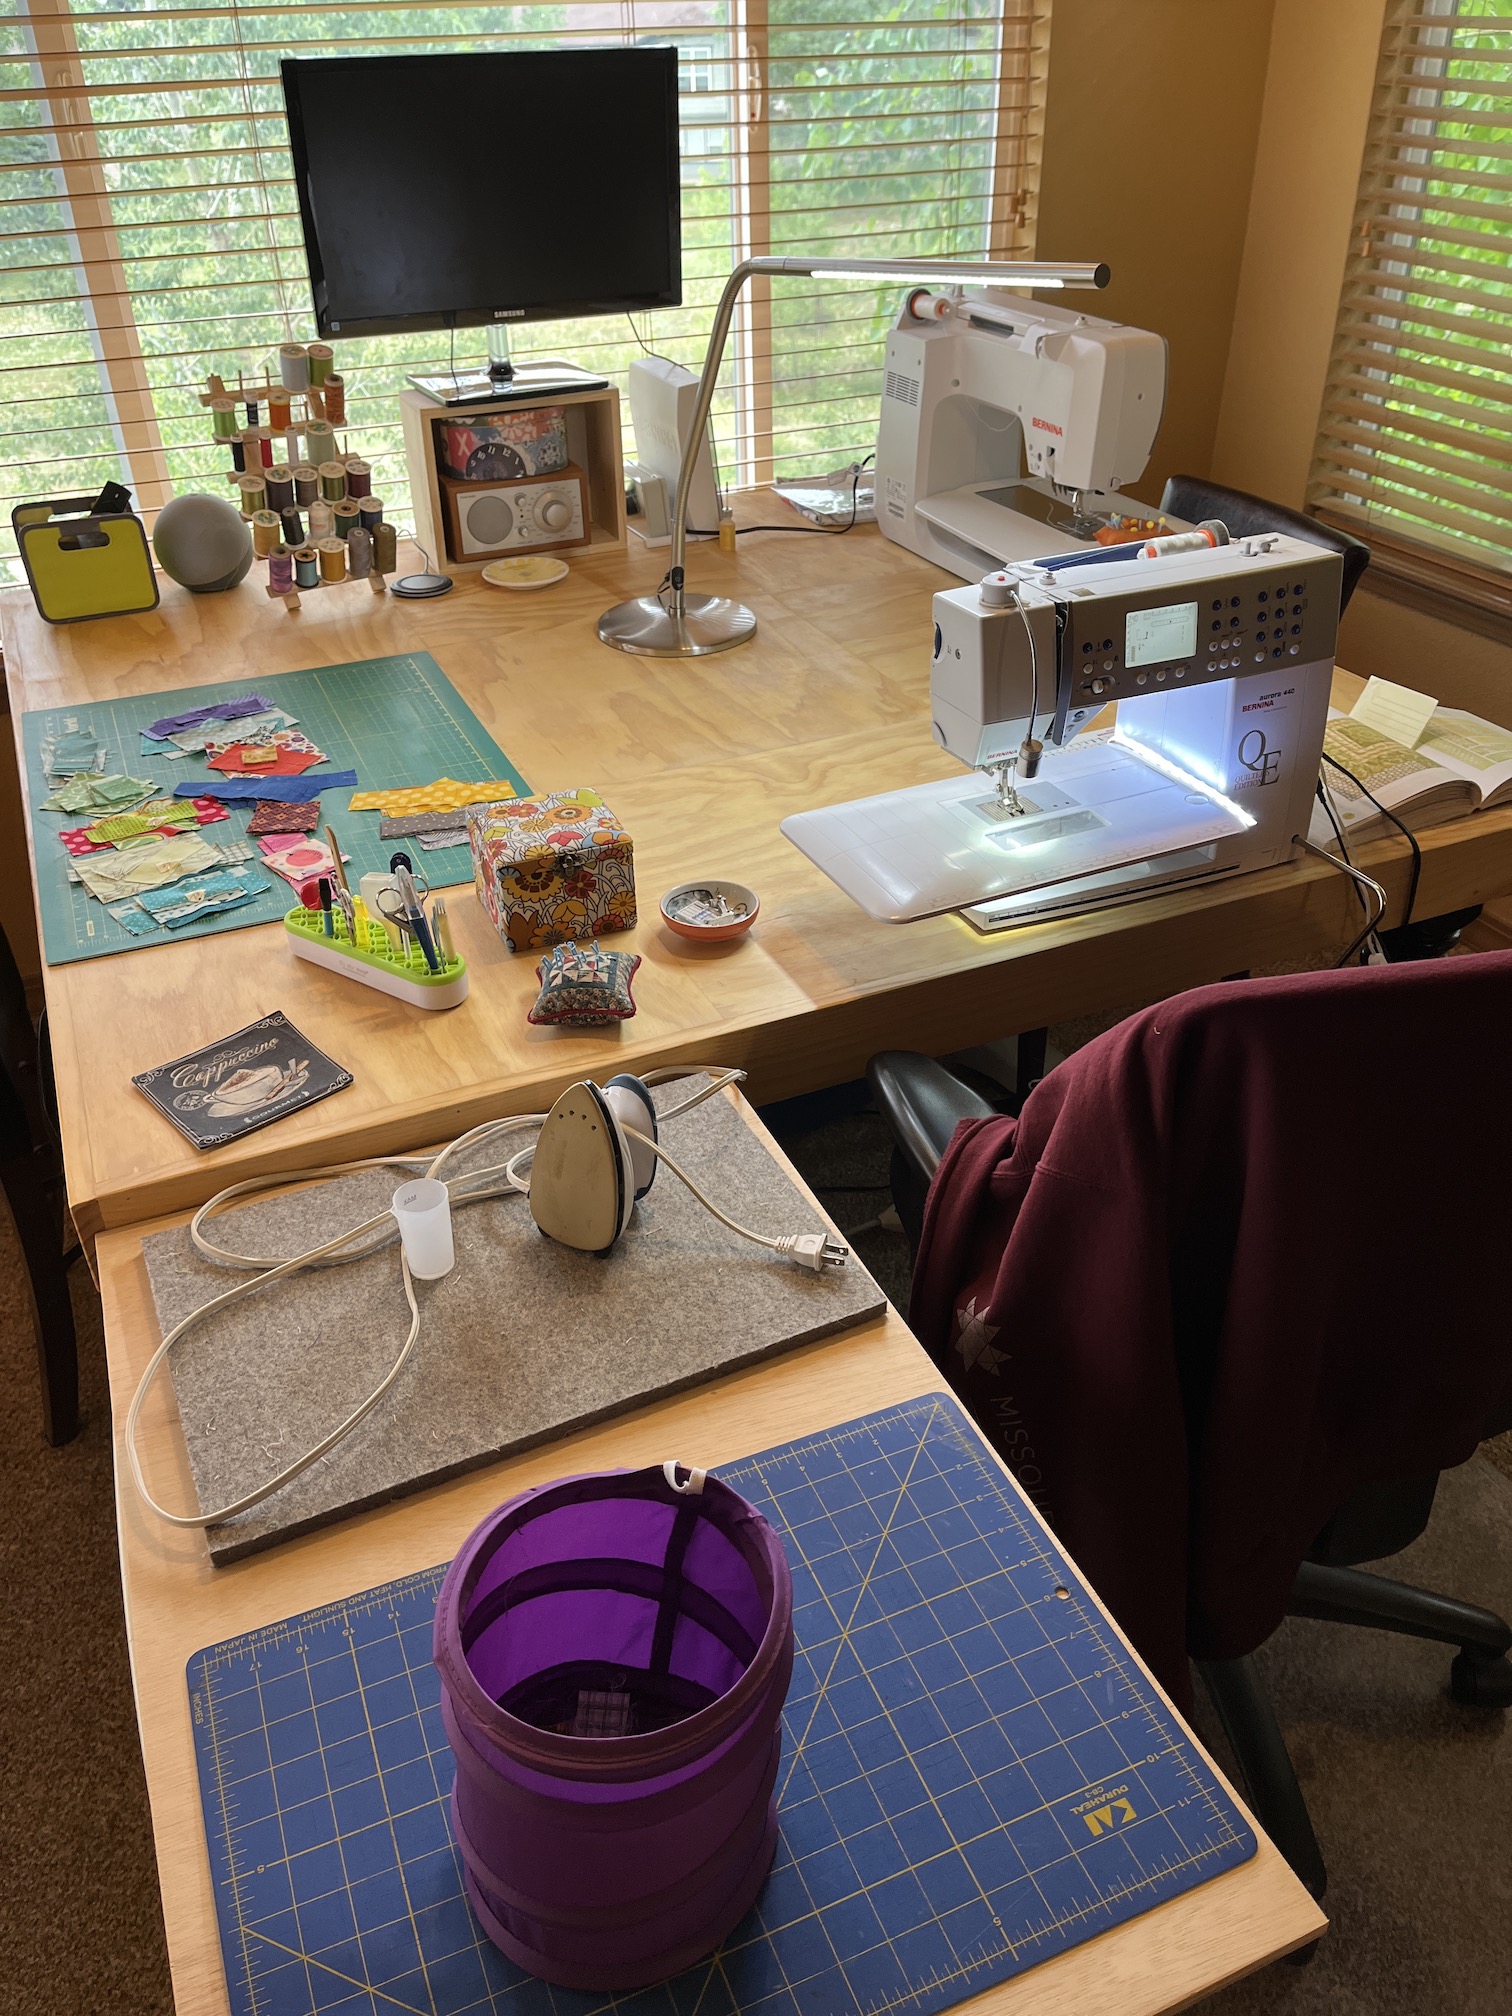
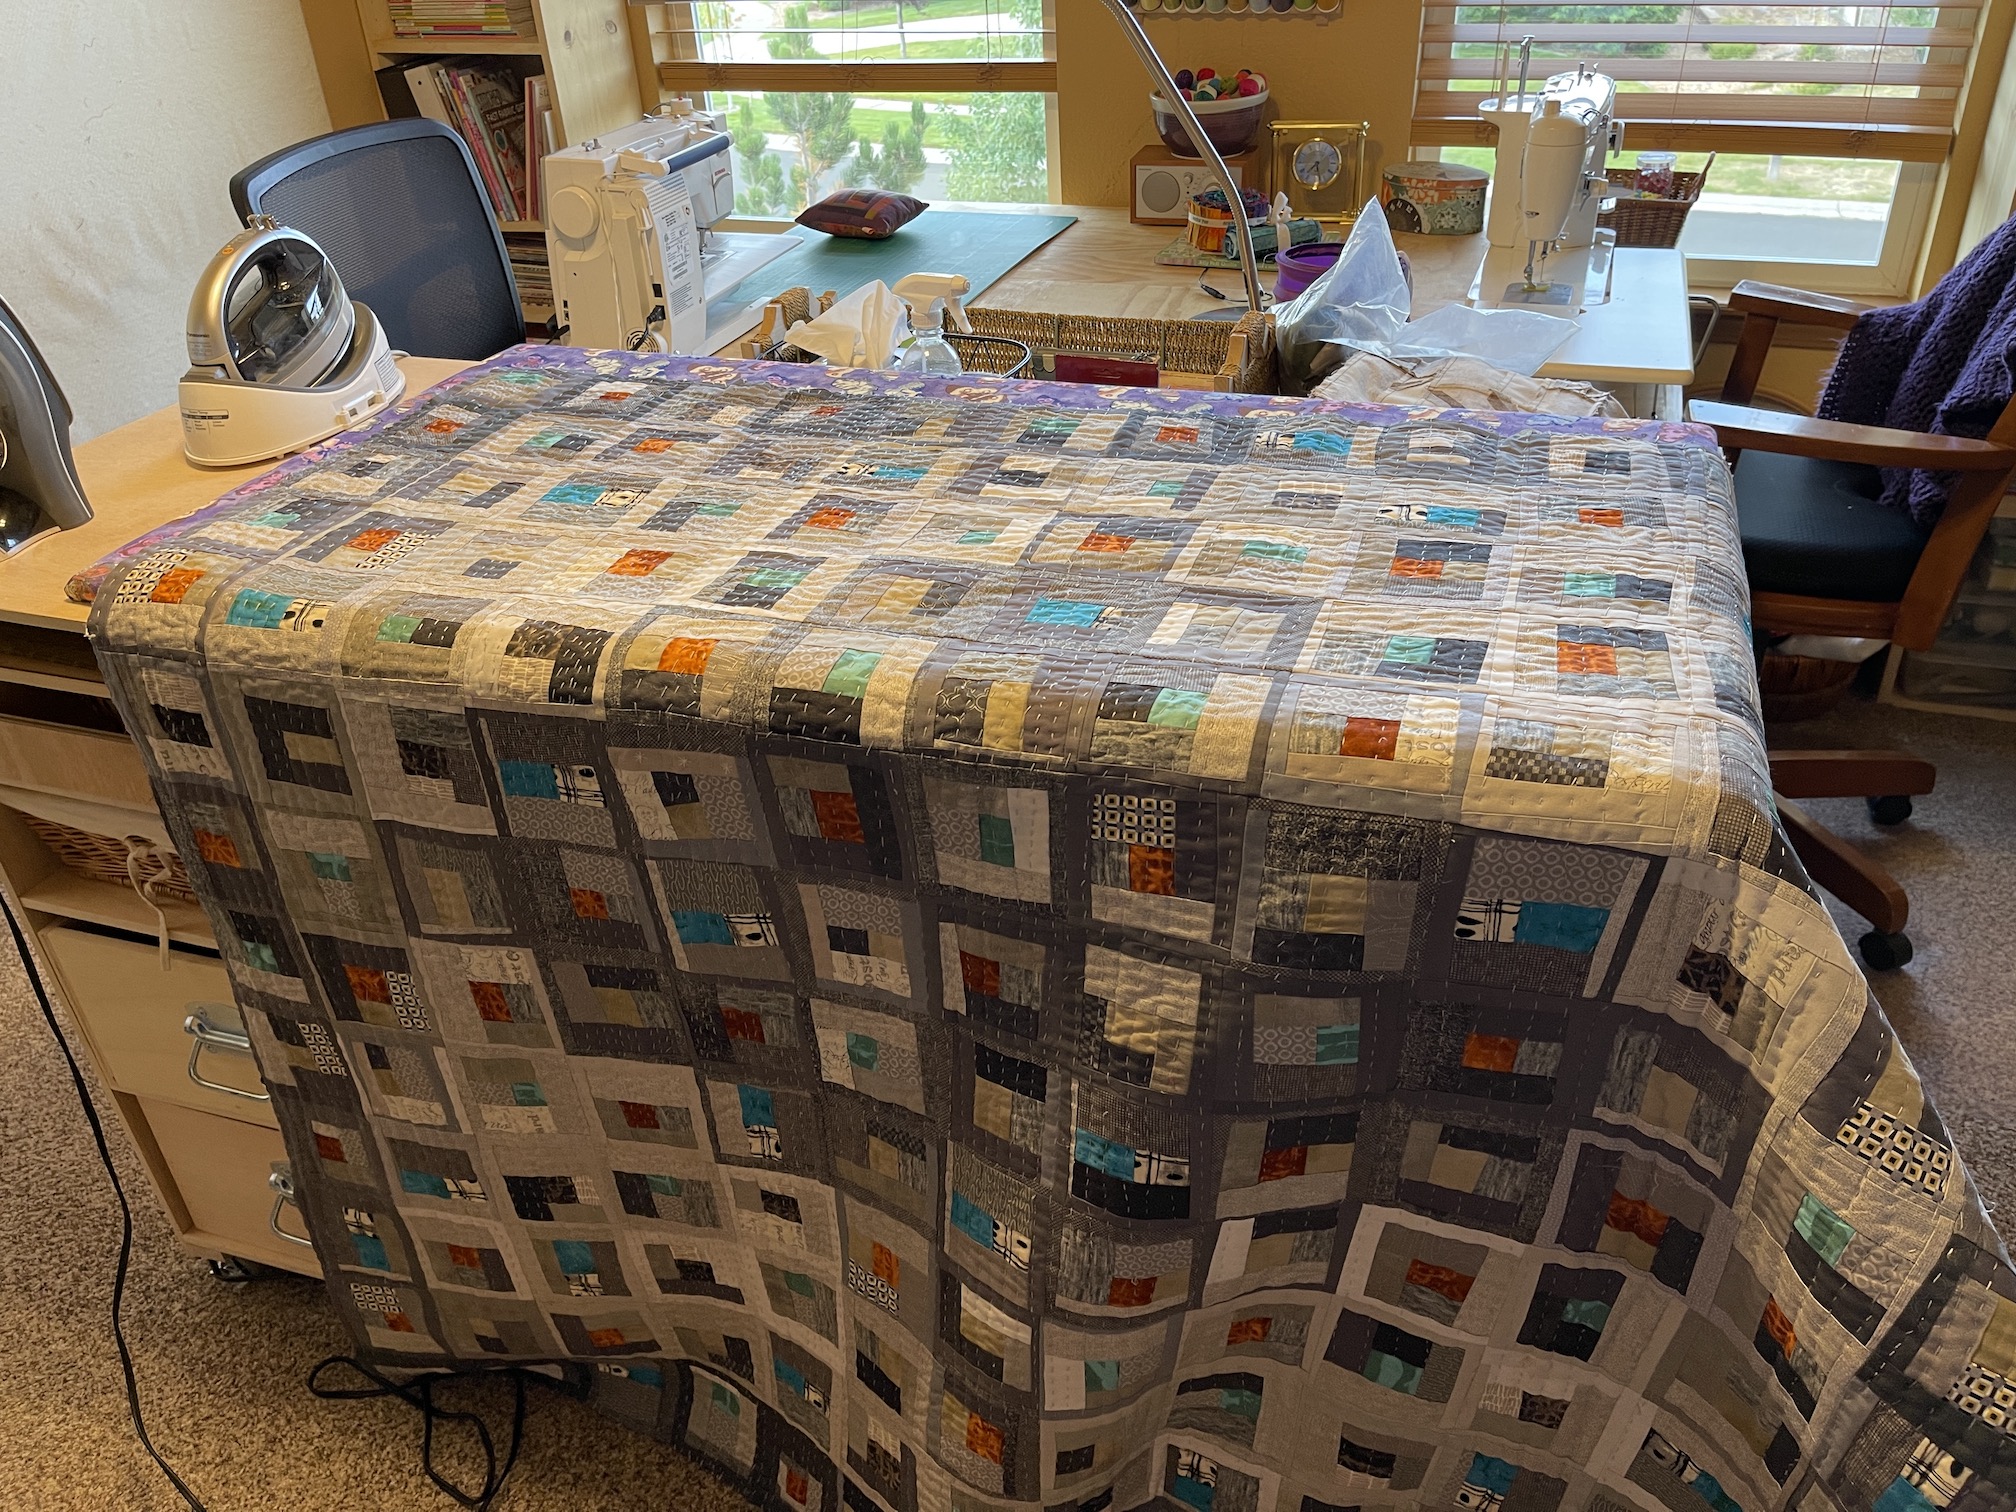
Here are a couple photos of my studio while the retreat was in progress from Days 4 and 5:
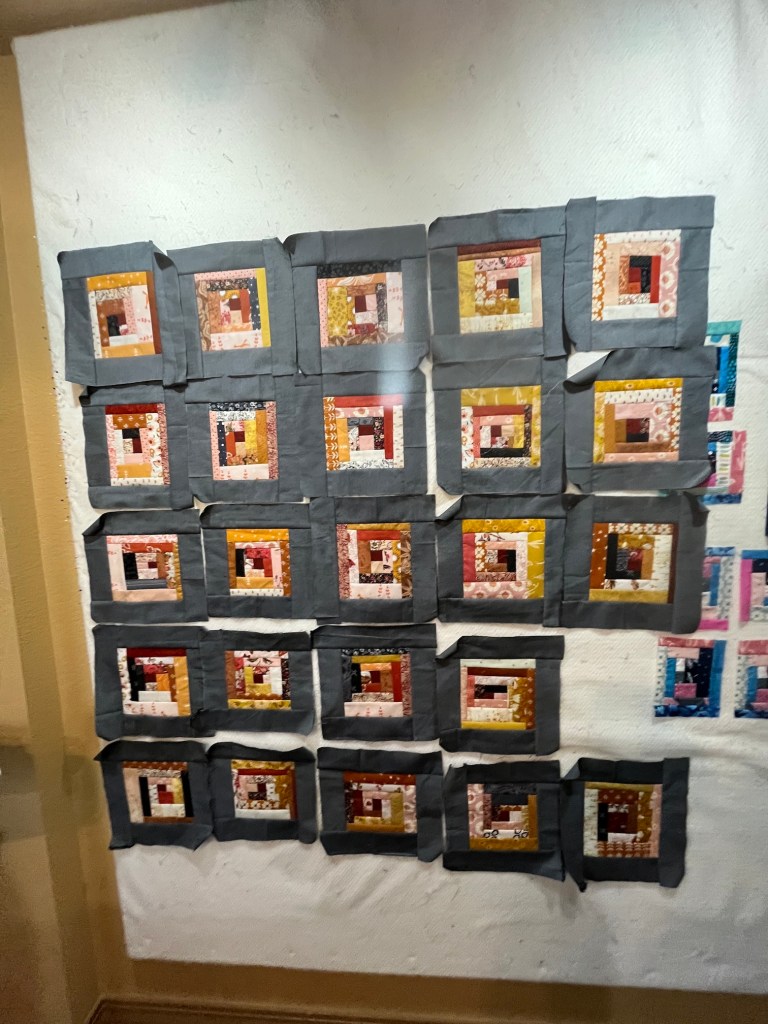
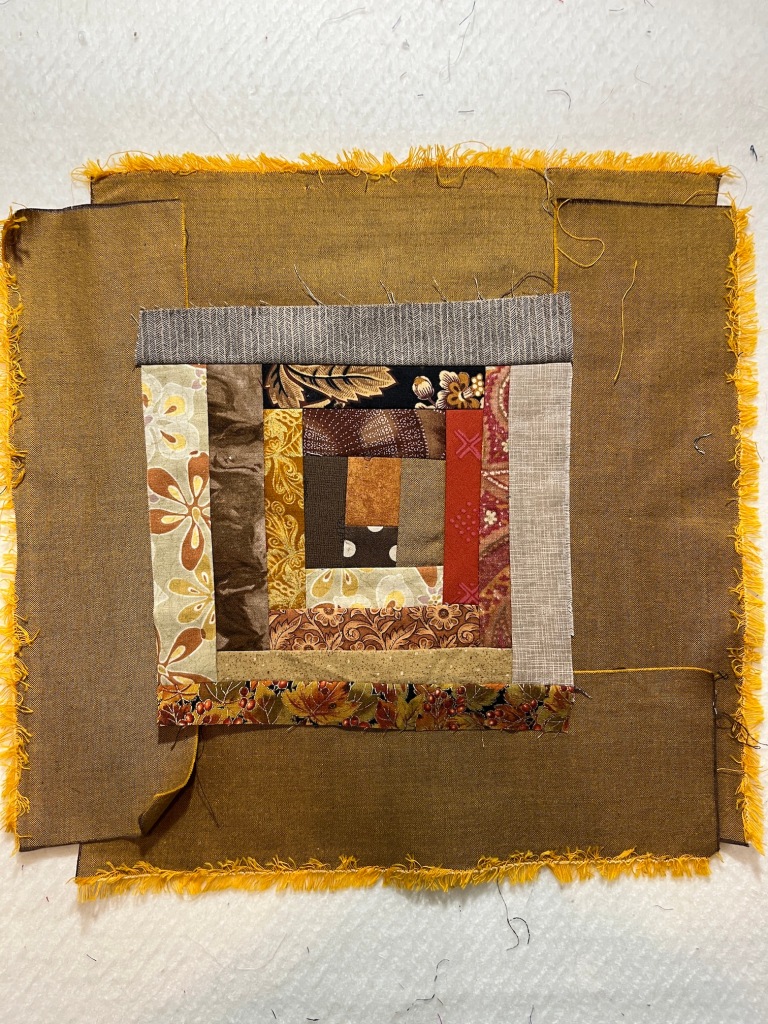
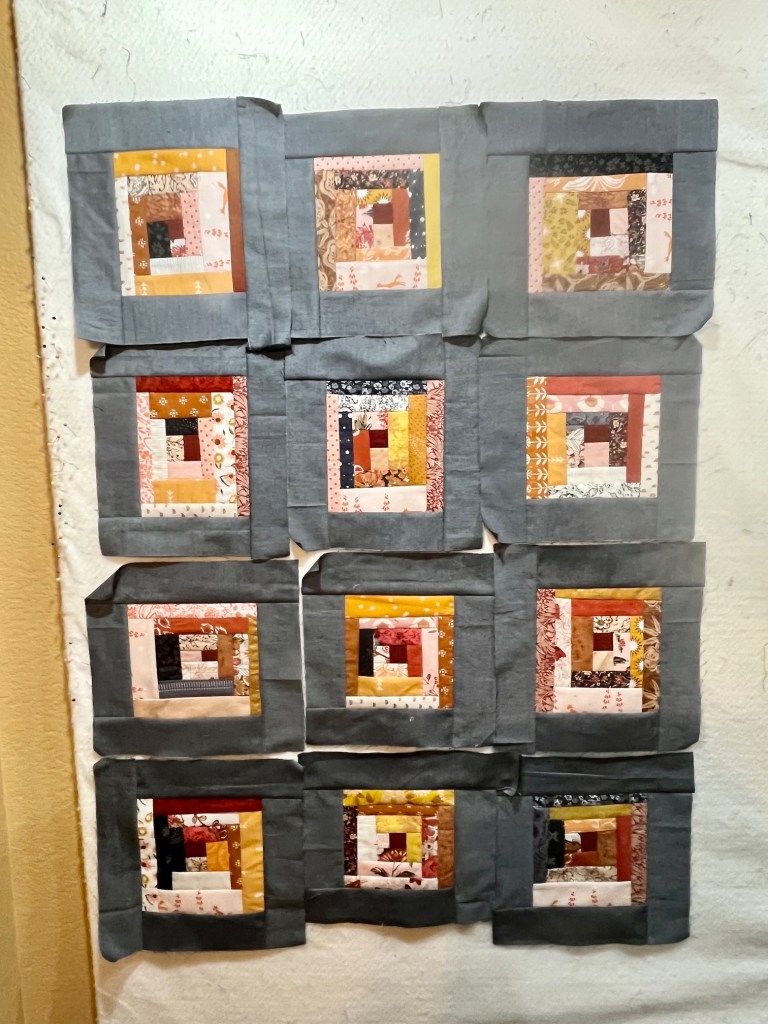
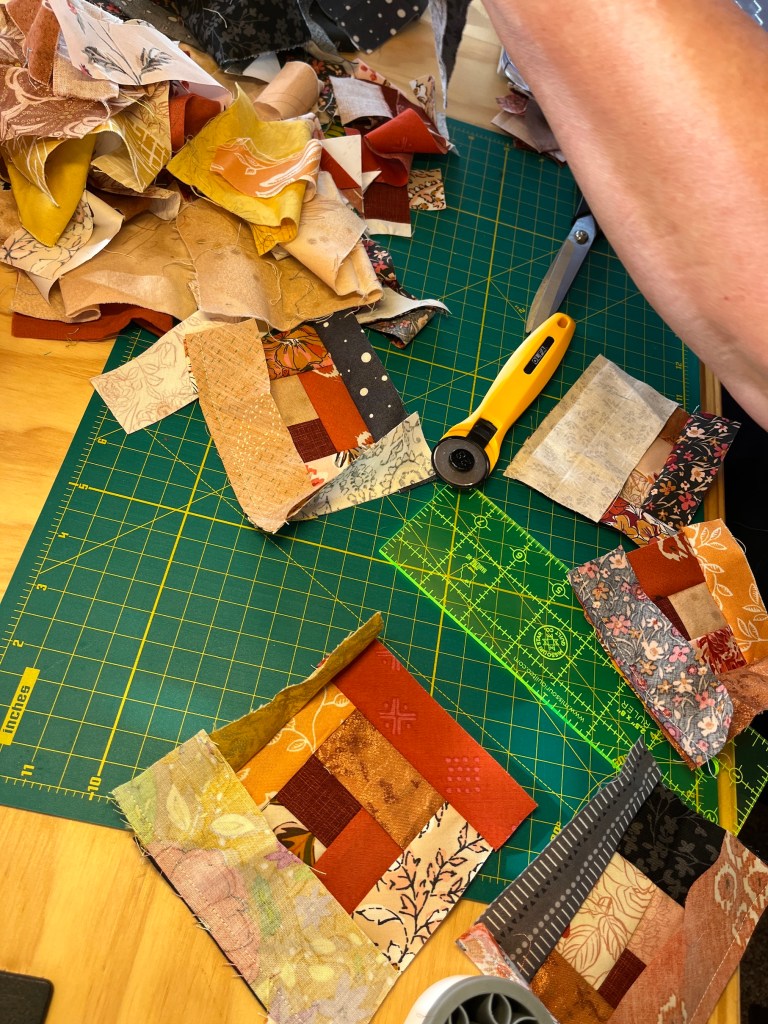
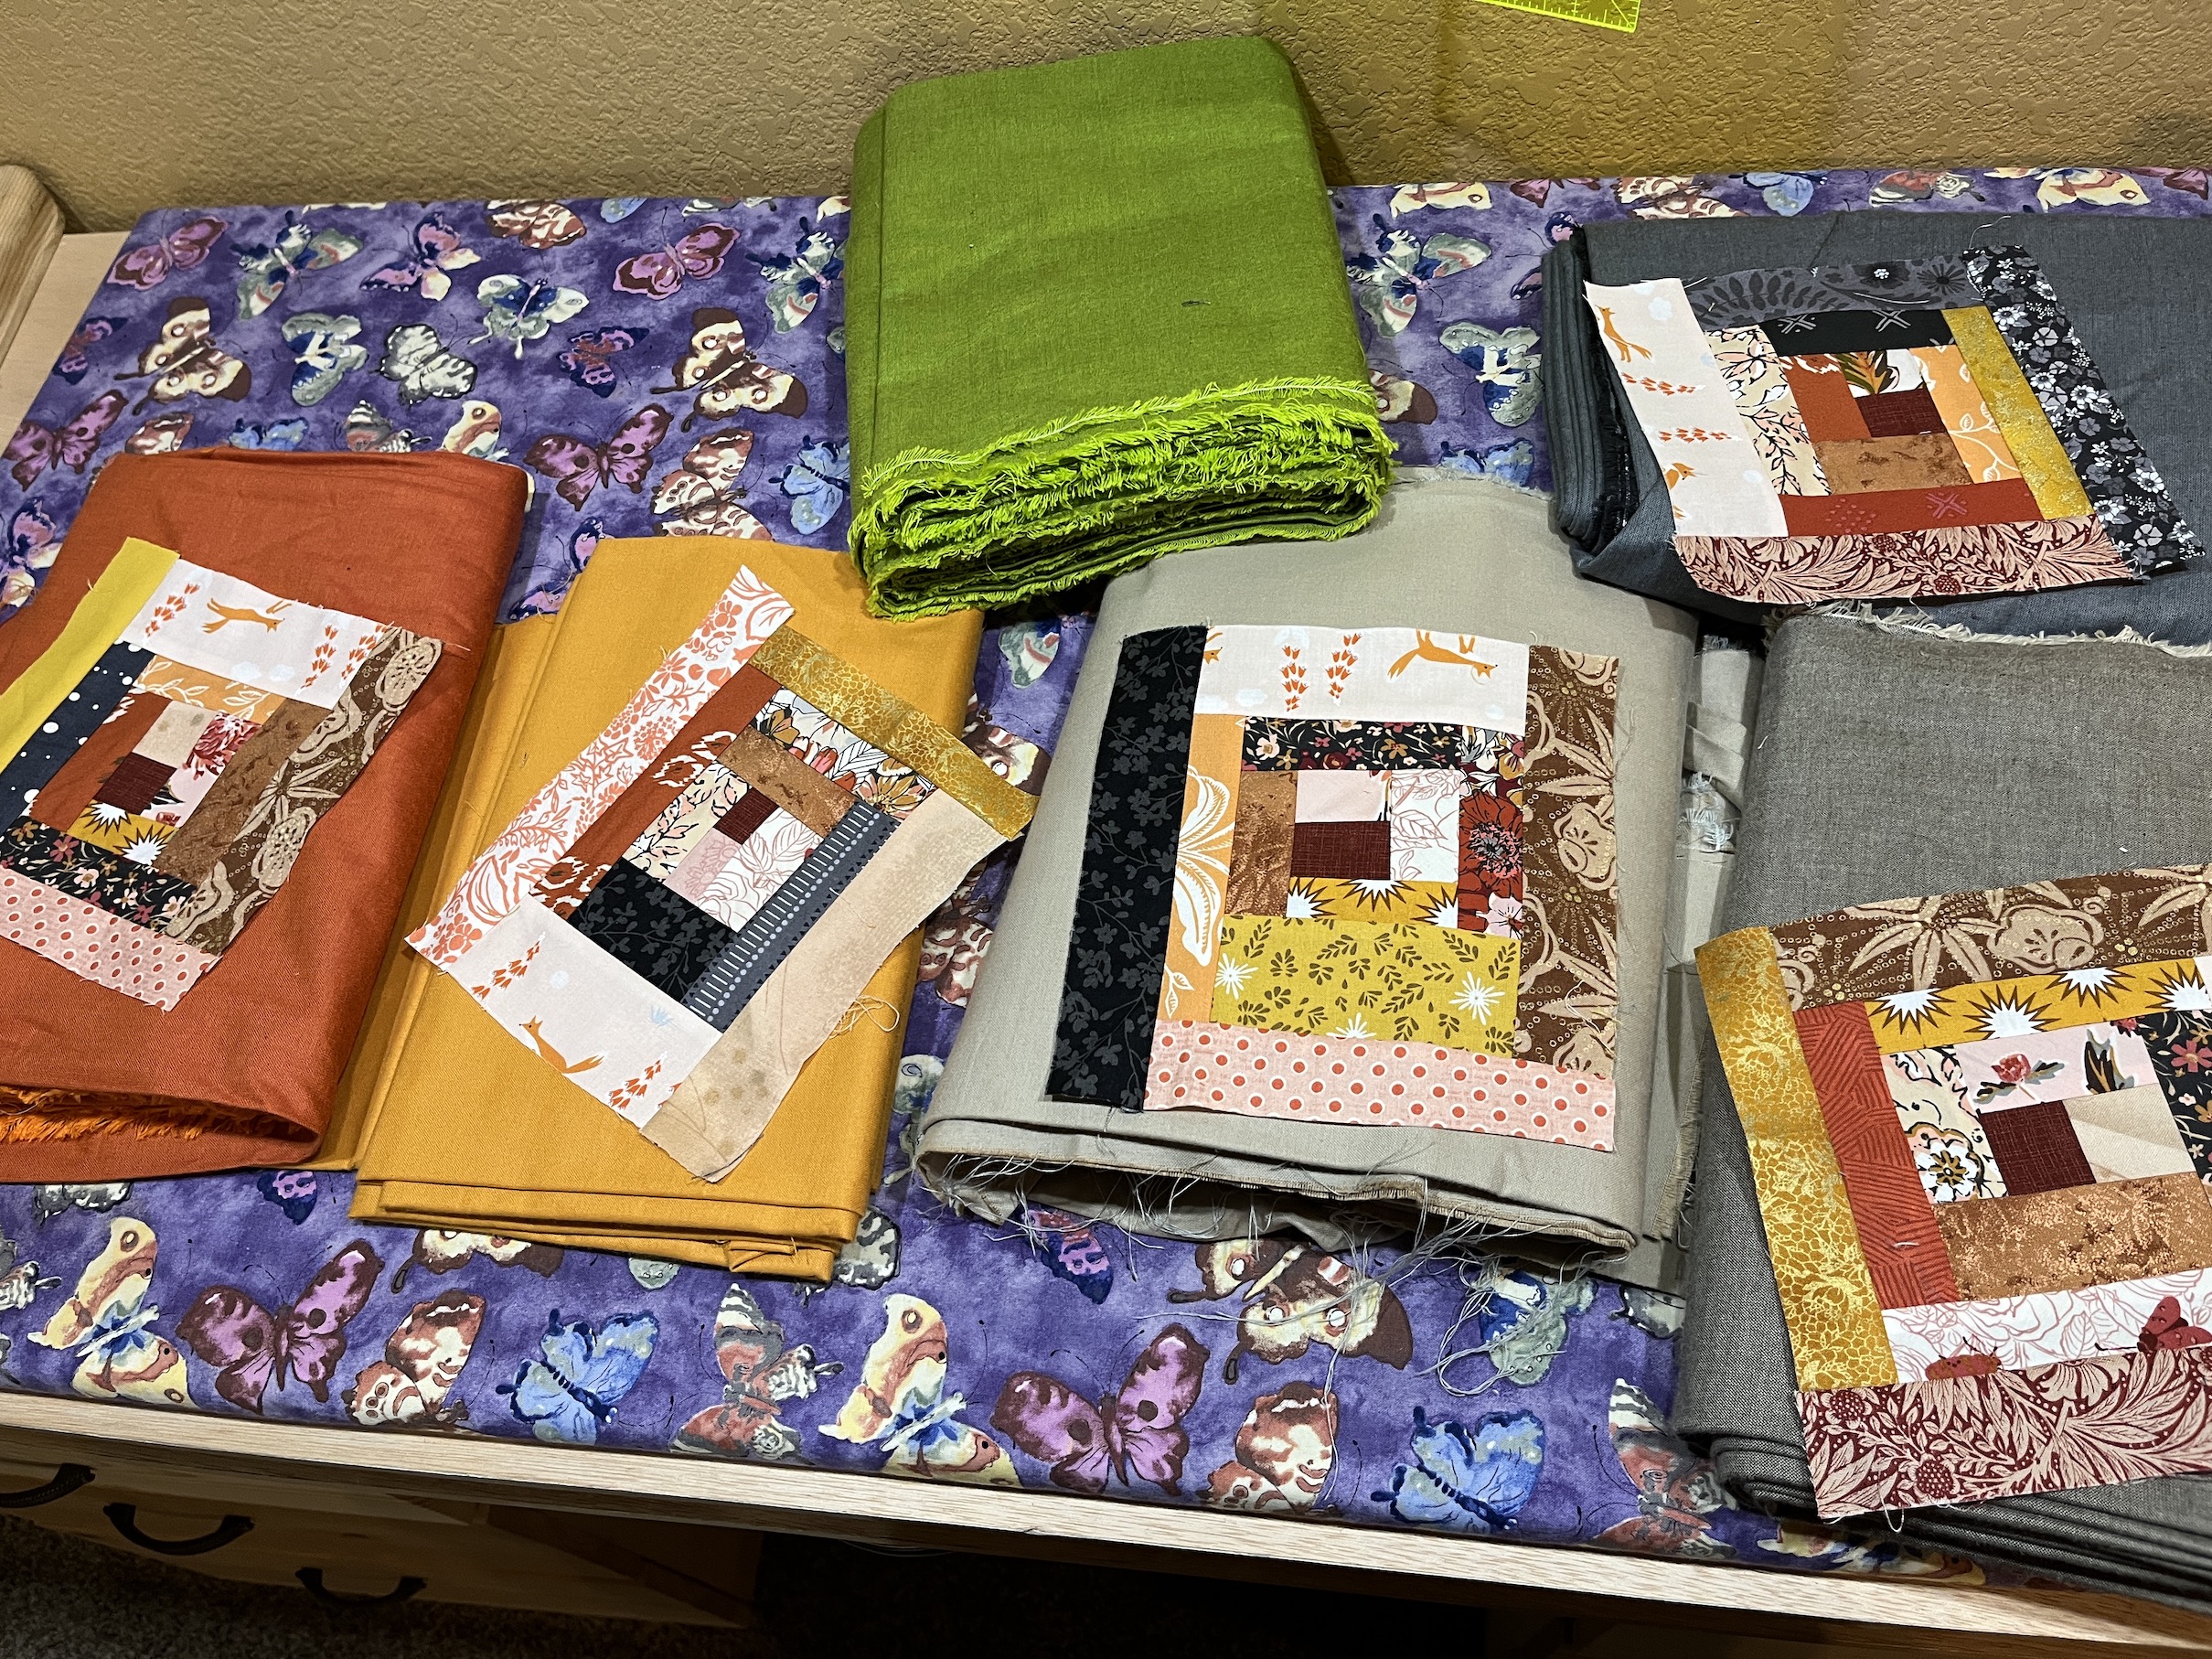
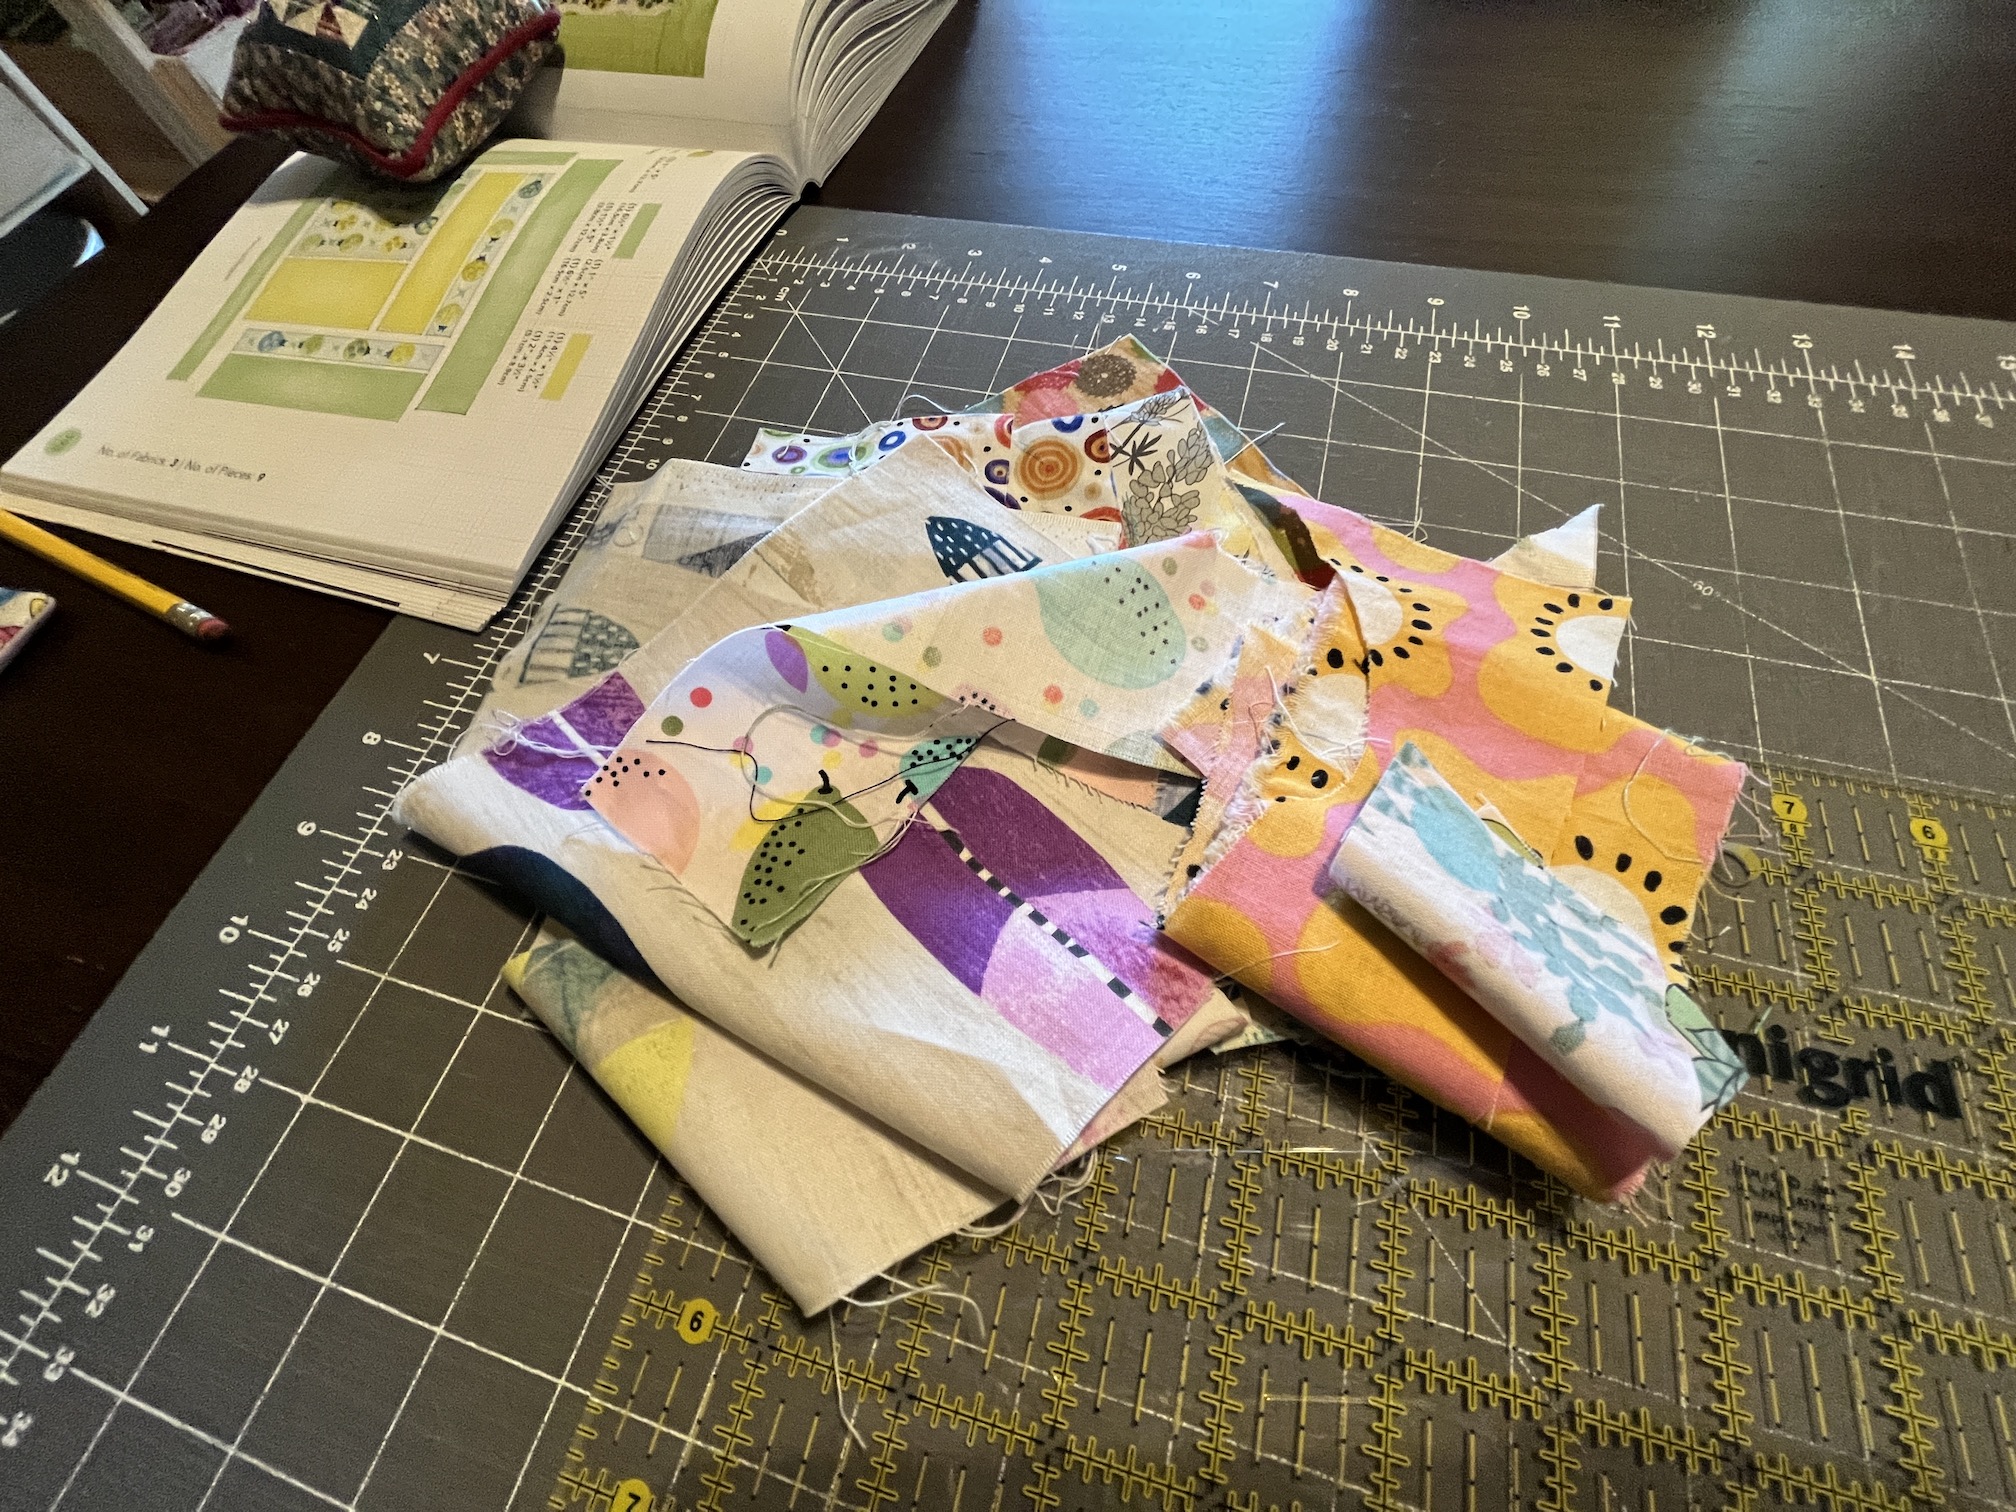
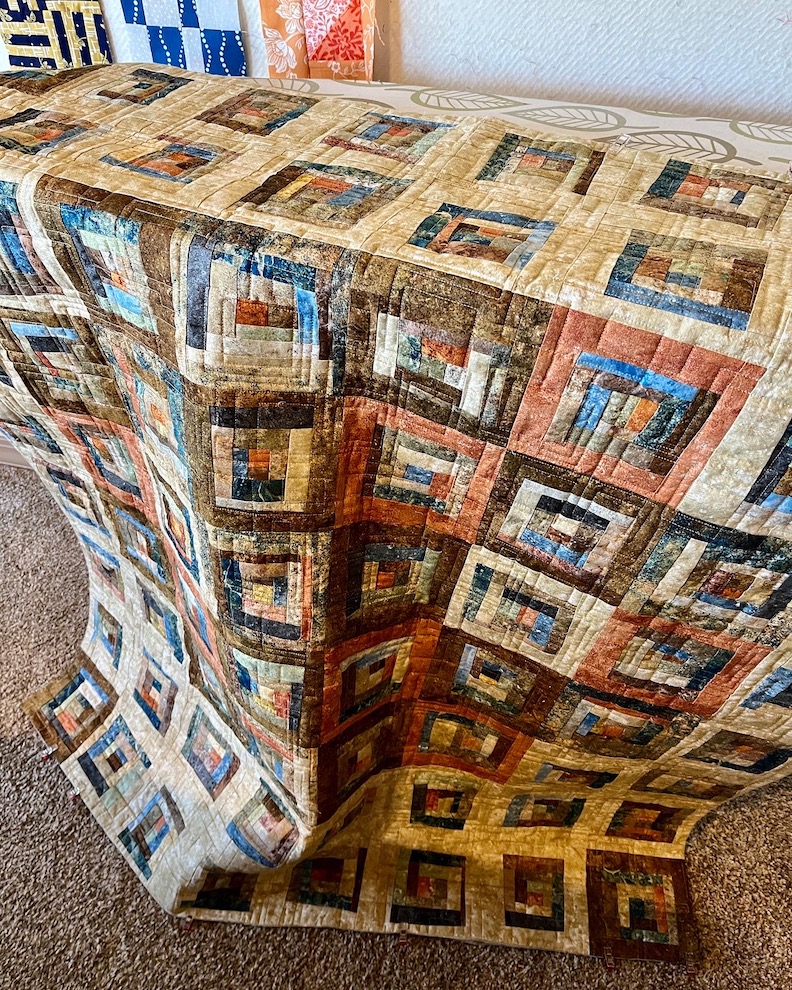
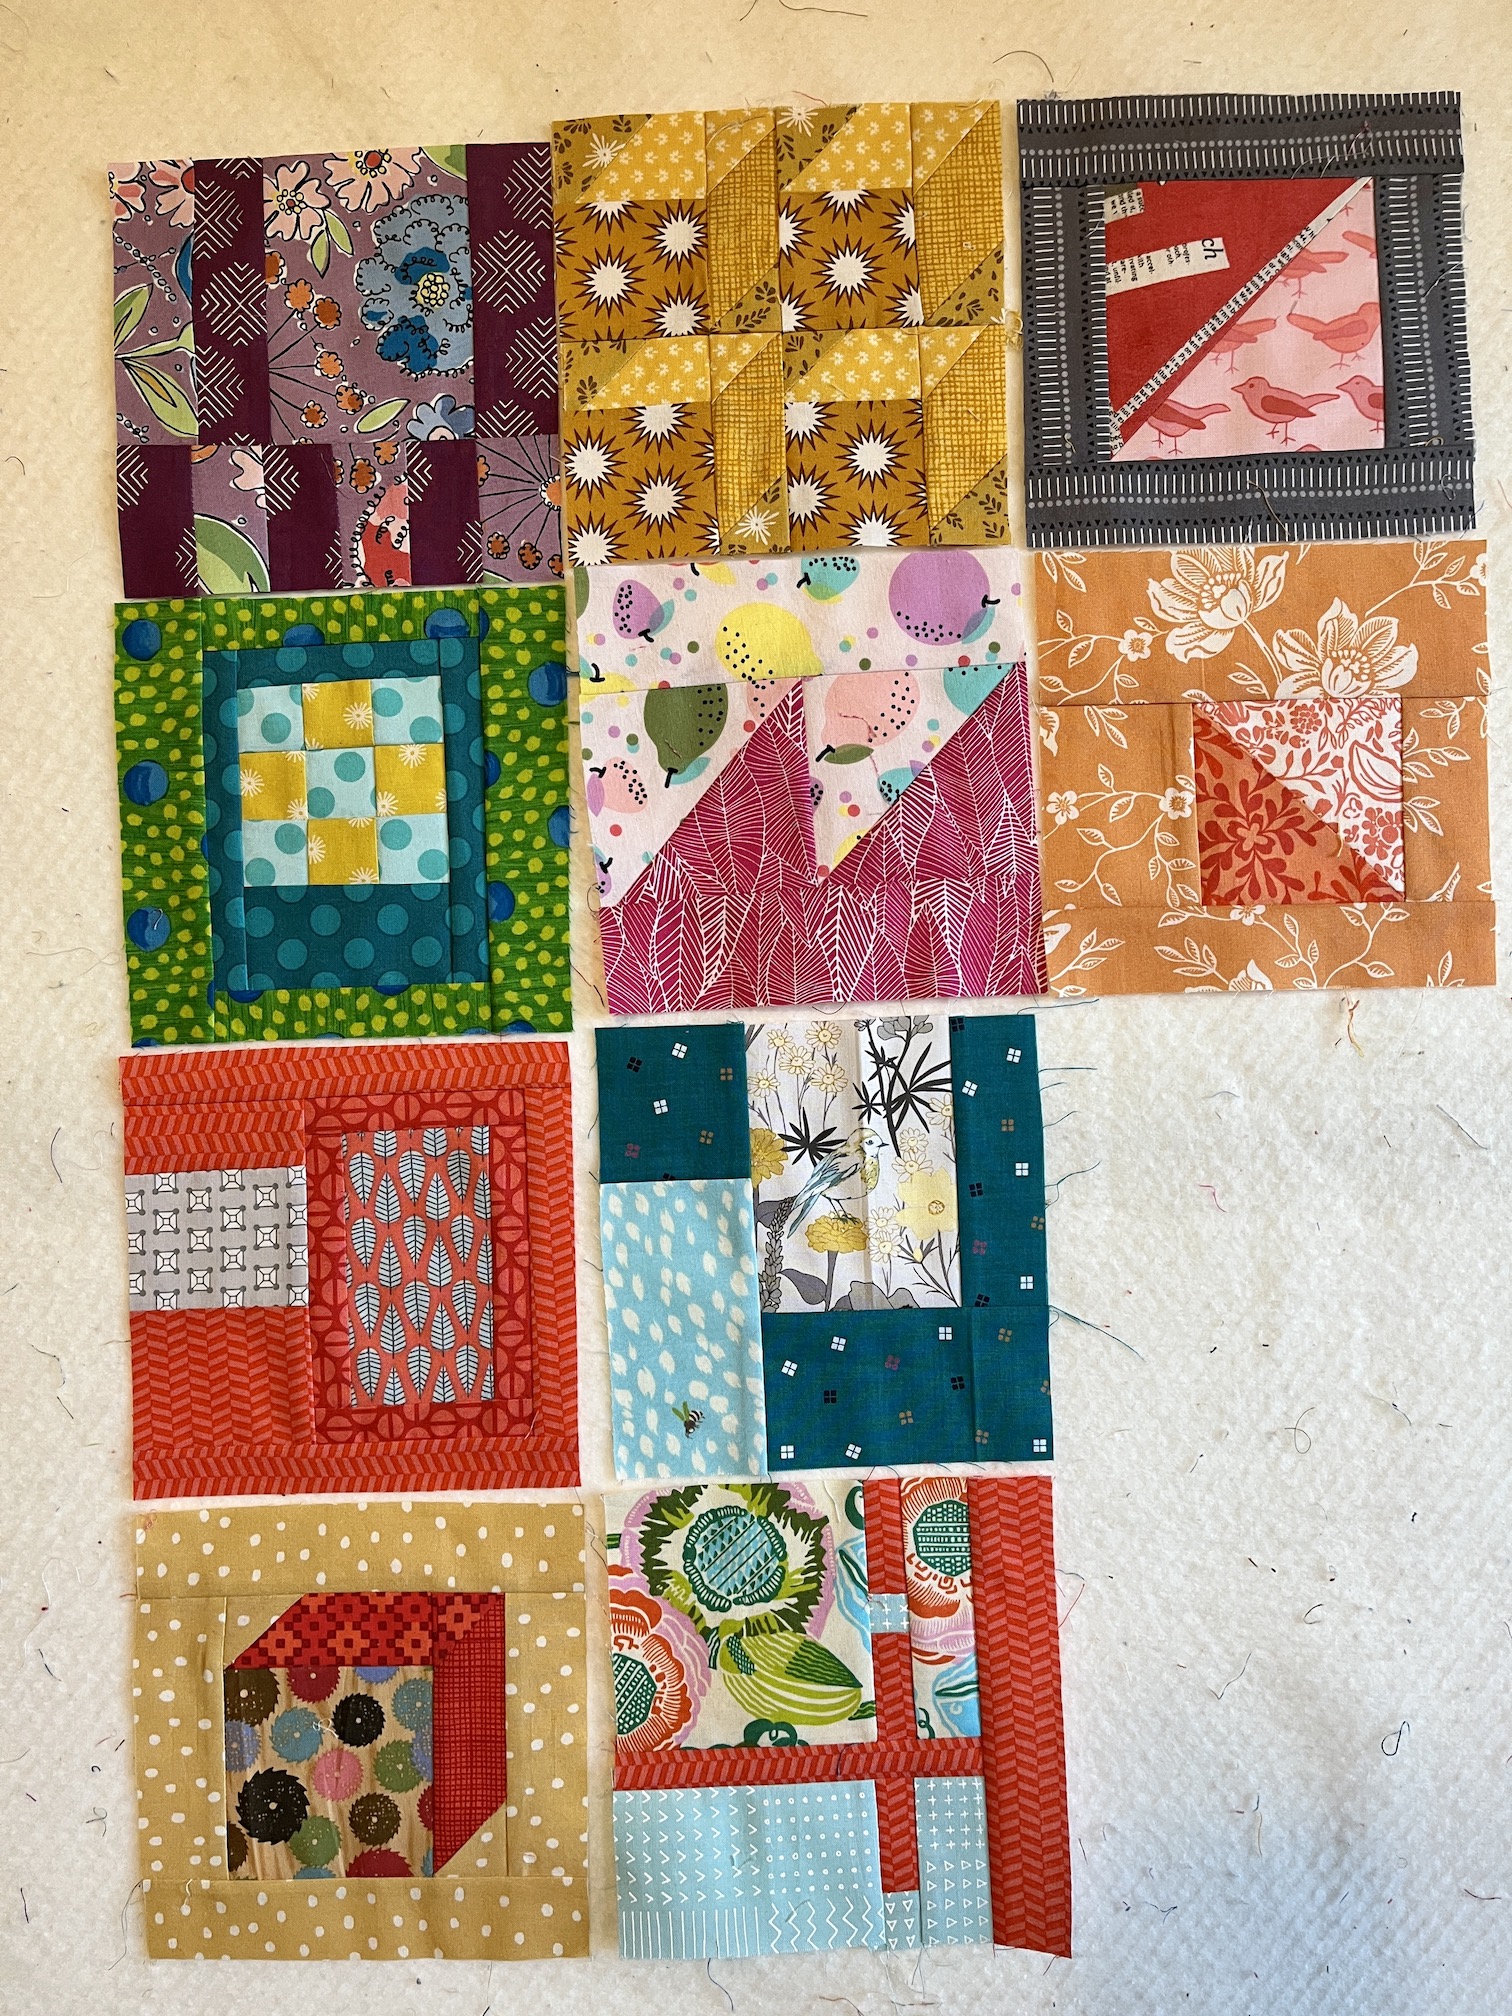
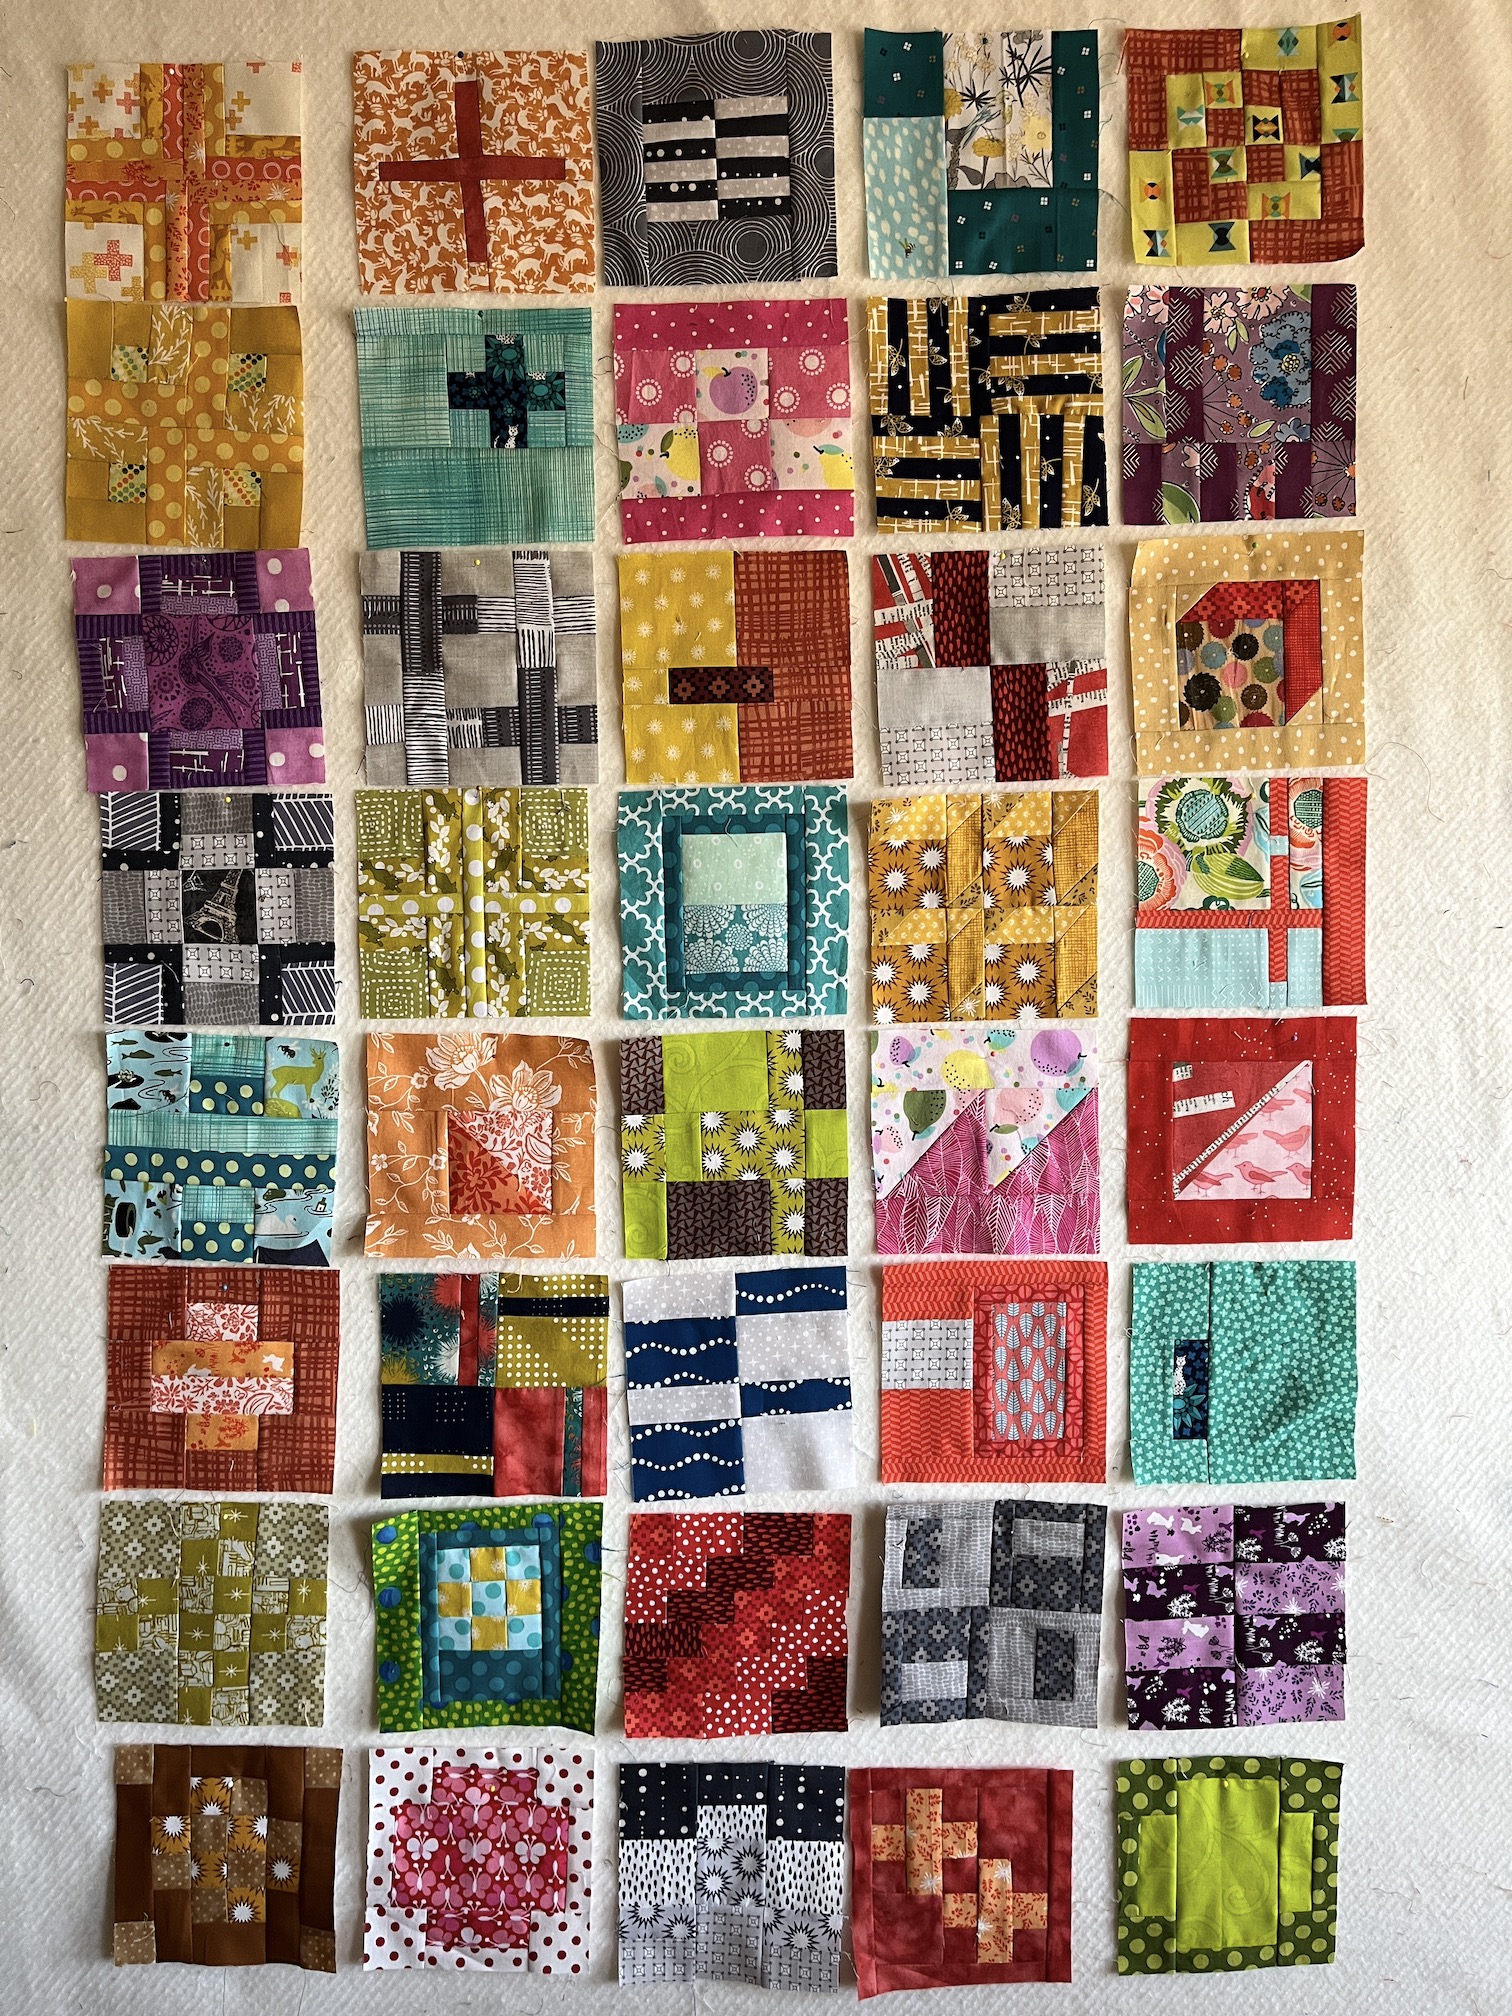
And here are the photos of the evolution of D, K, and my blocks:
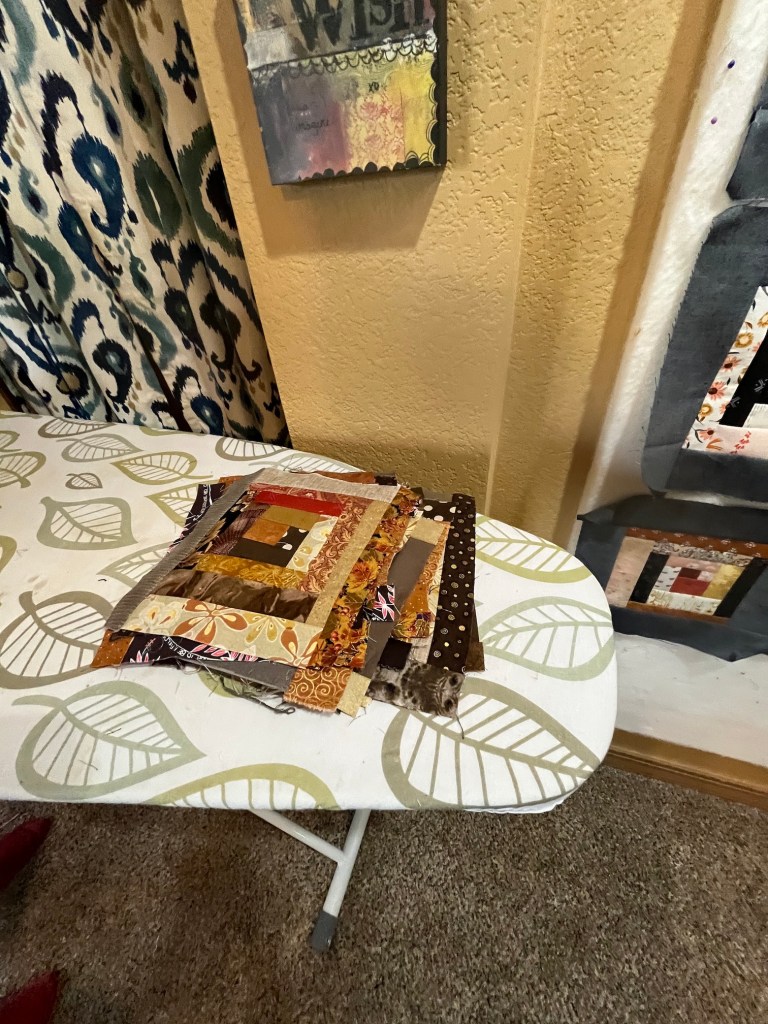
The photo above is of one of the blocks I pieced with the collection of brown, gold, orange, and copper scraps I put together, set in the coppery color Peppered Cotton I selected.
D was a bit of an overachiever, ha, and actually finished her quilt top (but I think she is also going to add a 3.5 inch border of the gray around it to make the blocks “float” even more and she took some extra fabric home with her) and plans to hand quilt it.
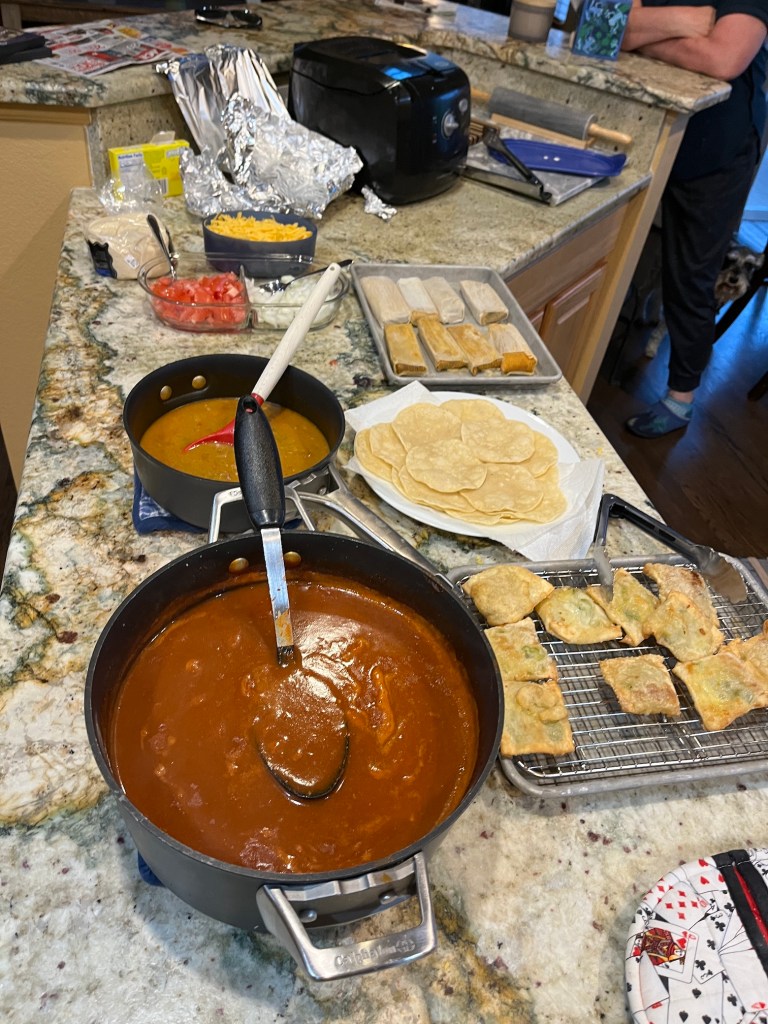
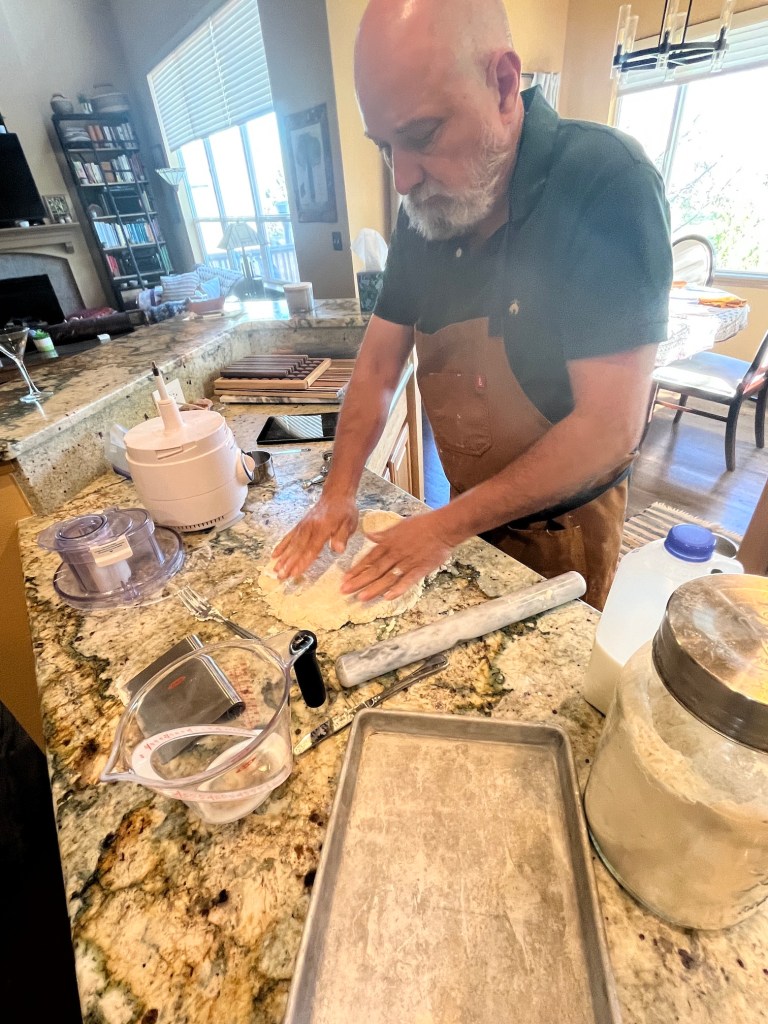
John continued to make us yummy meals and our evening meal on Day 4 was a Mexican Food Feast like the one I shared in the post A Mexican Feast.
On Day 5 D and K surprised John and I with some fantastic hosting gifts. They gave John a gift certificate to his favorite woodworking shop Woodcraft; and they gave me a fat quarter set of the fabric I was drooling over at Holly’s Quilt Cabin during our shop hop on Wednesday May 17th – Celestial by Moda Fabrics:
I just need some yardage of solids (I will probably use the Peppered Cottons that coordinate with the fat quarter set) and I will likely have enough fabric to make the quilt I fell in love with at the quilt shop:
John and I were very pleased with our hosting gifts!
Friday we returned quilters to “Human Storage” (also know as the Denver International Airport, see post “Human Storage” and Airport Lore if you are just joining us); and an exhausted John and Mike the Miniature Schnauzer passed out on the sofa when we got back home.
While cleaning up my studio from the retreat I realized it was a pretty awesome and successful retreat.
And there was a lot of Scrap Happy Happiness over the 5 days (smile)!
By Day 2 of the Scrap Happy Quilt Retreat at my house, Mike the Miniature Schnauzer was getting plenty of pets from visiting quilters (who are lounging about in their pajamas before breakfast):
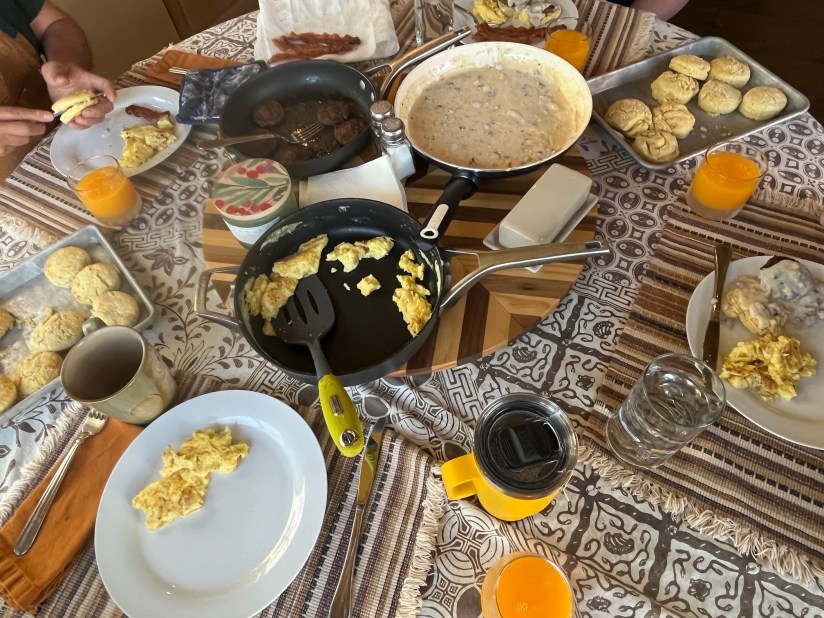
John made us his famous (and amazing) biscuits & gravy breakfast to start our day:
The breakfast includes his sausage patties with caramelized brown sugar (not vegan, ha!) and flaky scratch made biscuits.
After breakfast it was back to work in the studio. I worked on my log cabin blocks – I decided to use brown, brownish-orange, copper and gold fabrics for my blocks:
K and D worked on their blocks and began trying out solid fabric settings for their sample blocks:
K decided to set her blocks in the blue Peppered Cotton and D (after trying out 4 different options) went with the gray Peppered Cotton.
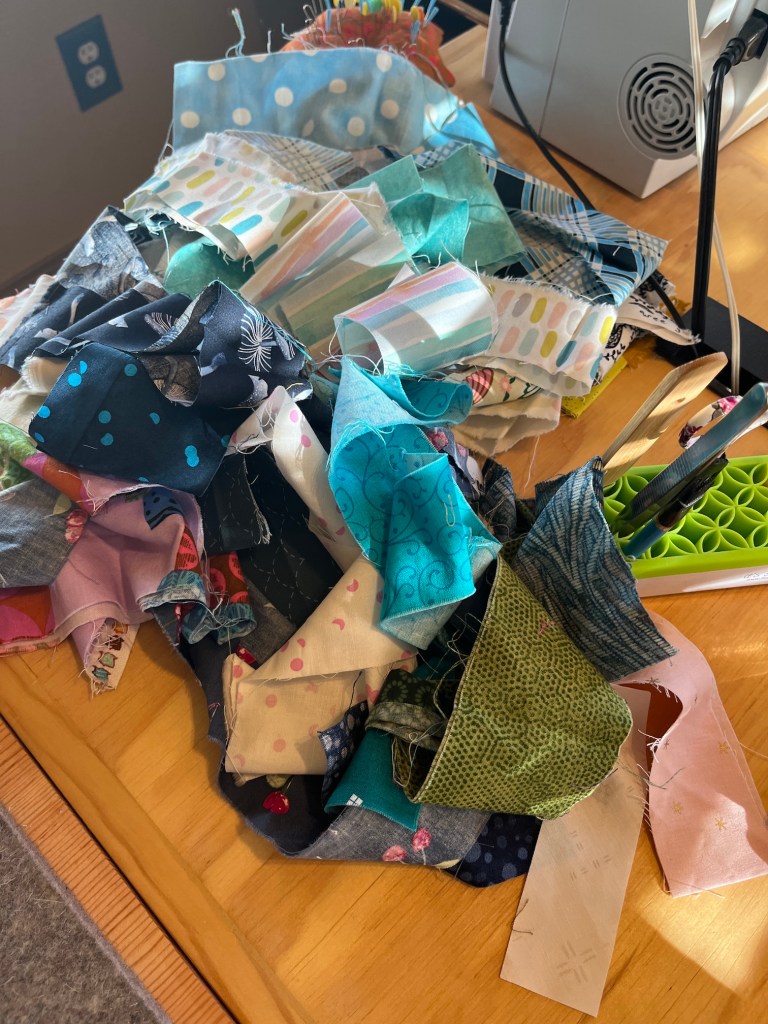
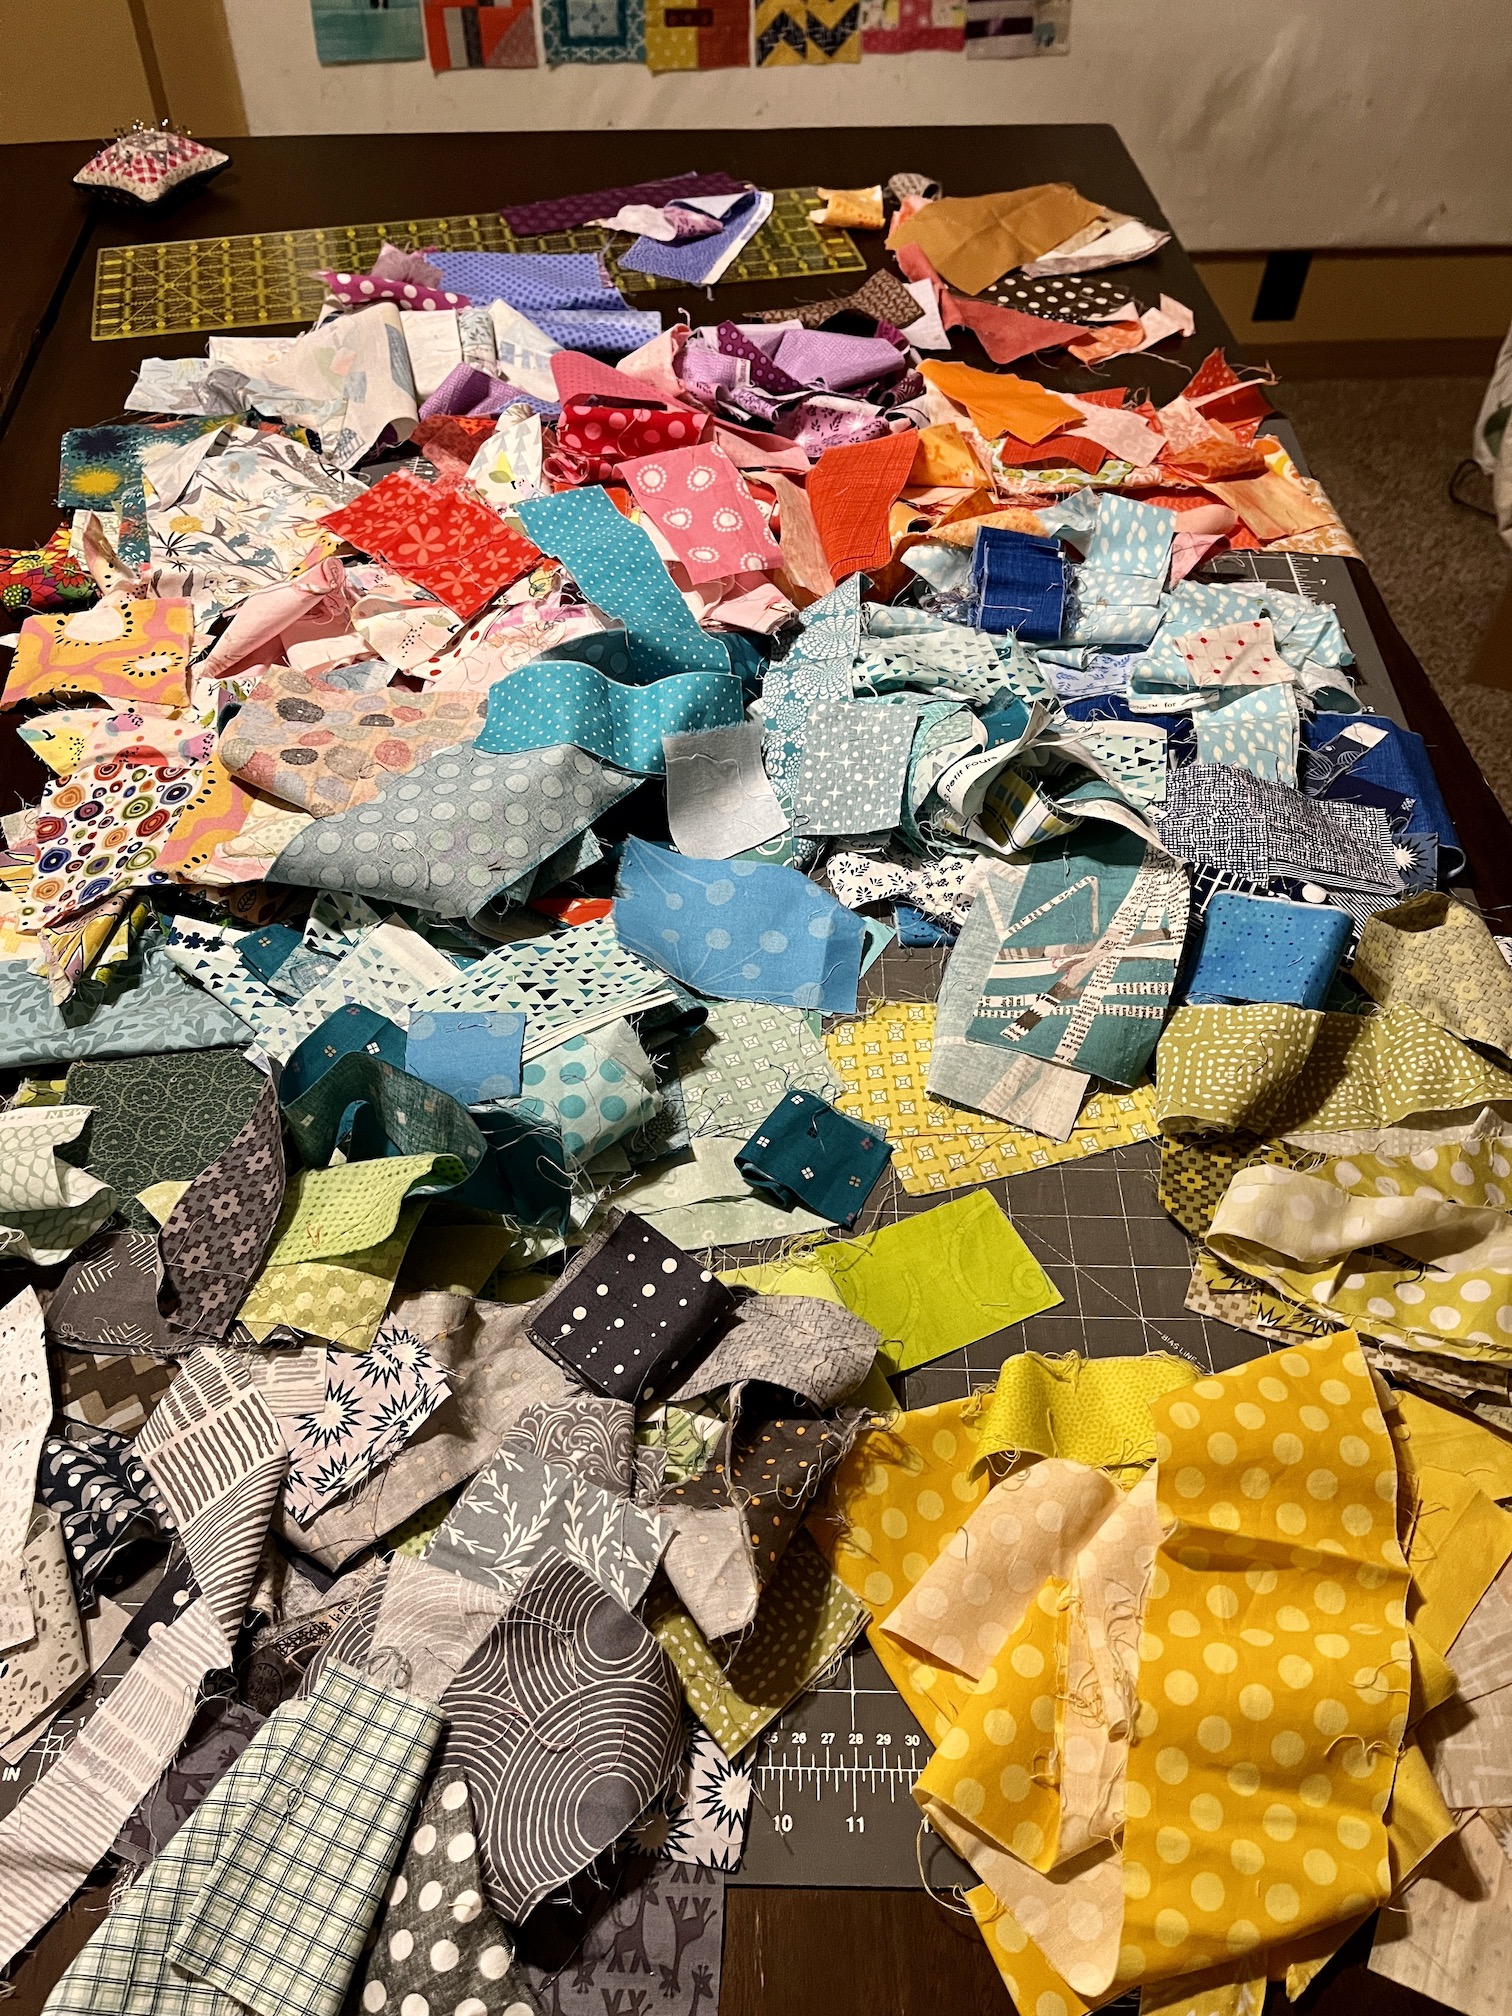
My whole studio looked like there had been a fabric scrap explosion – scraps everywhere!
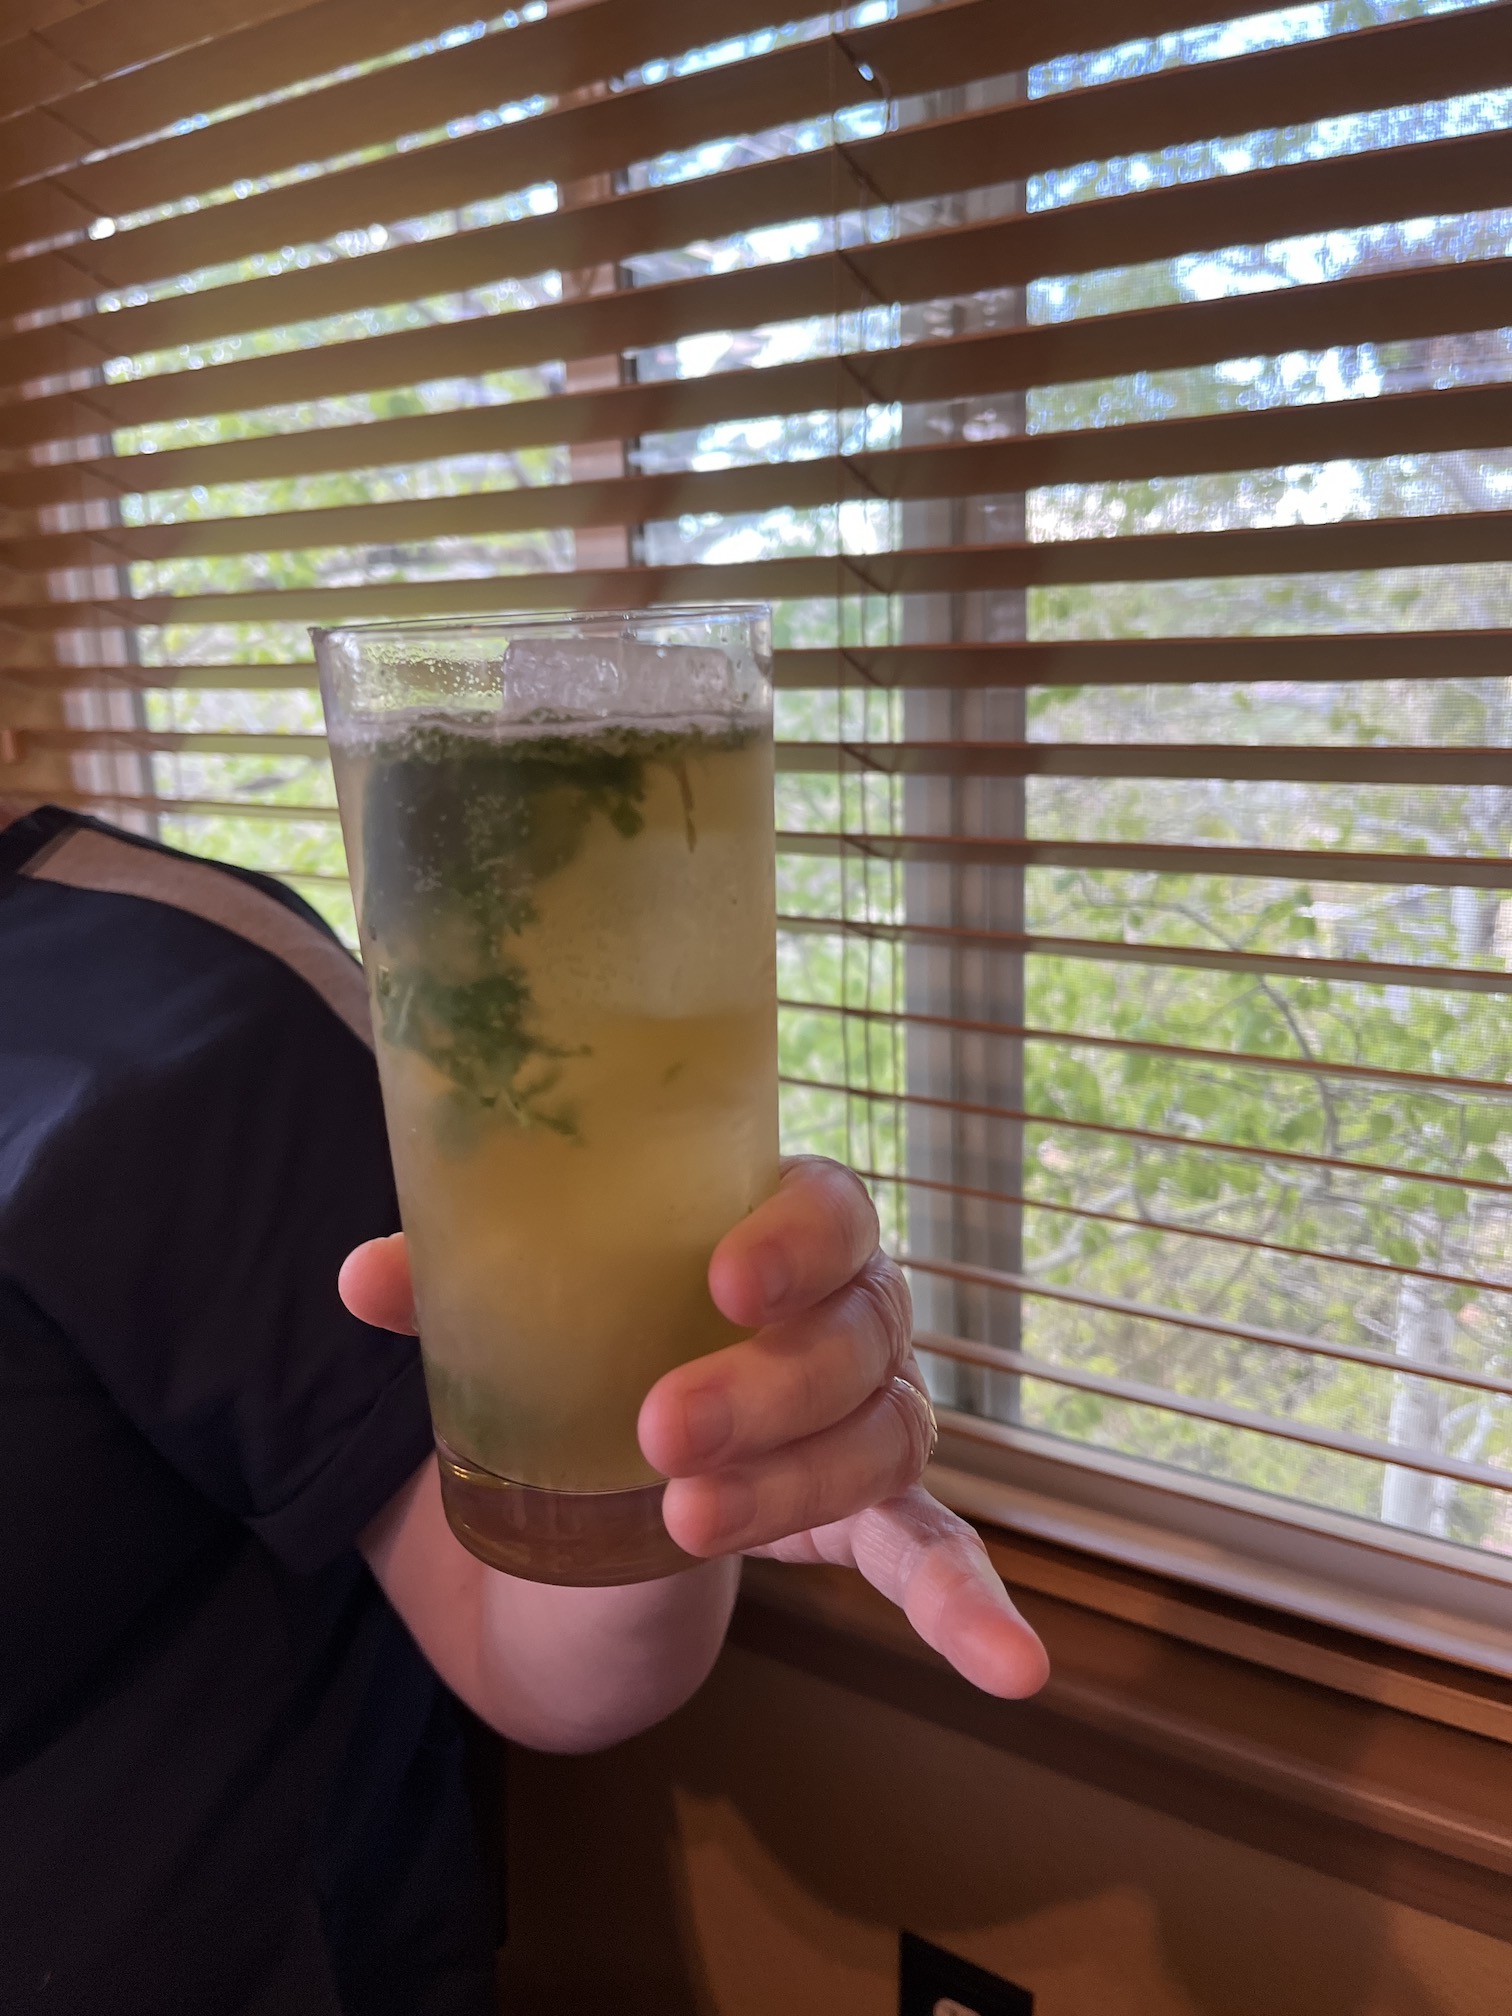
Before you knew it, it was afternoon cocktail time again and John stopped by the studio with Mojitos and Moscow Mules.
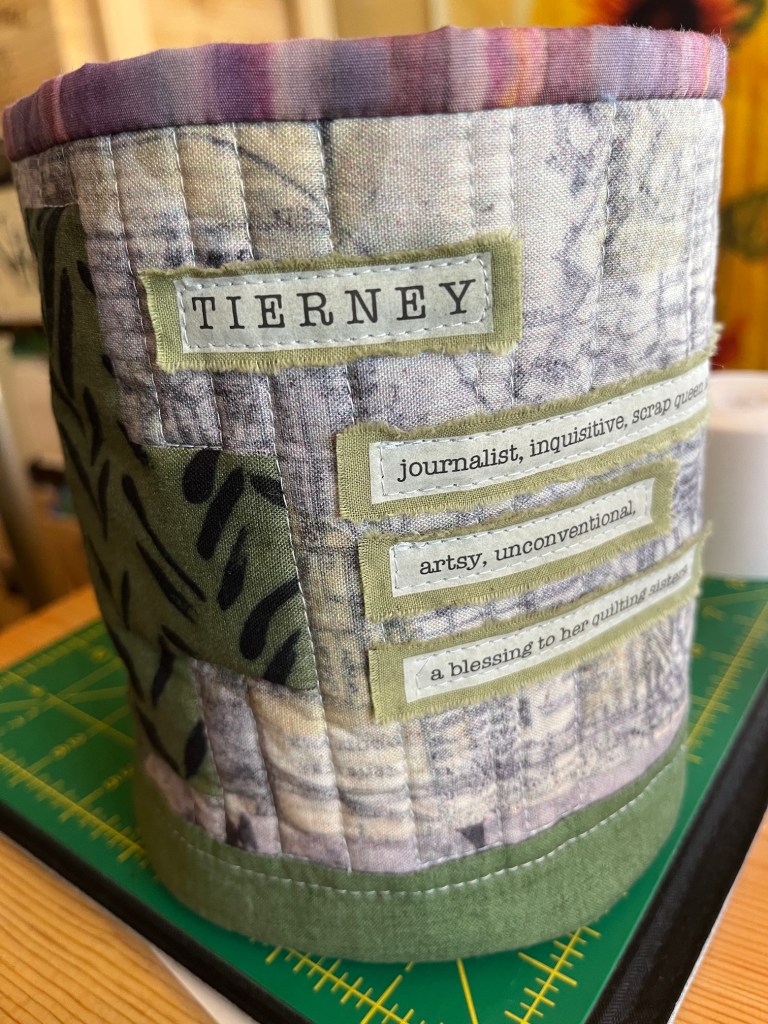
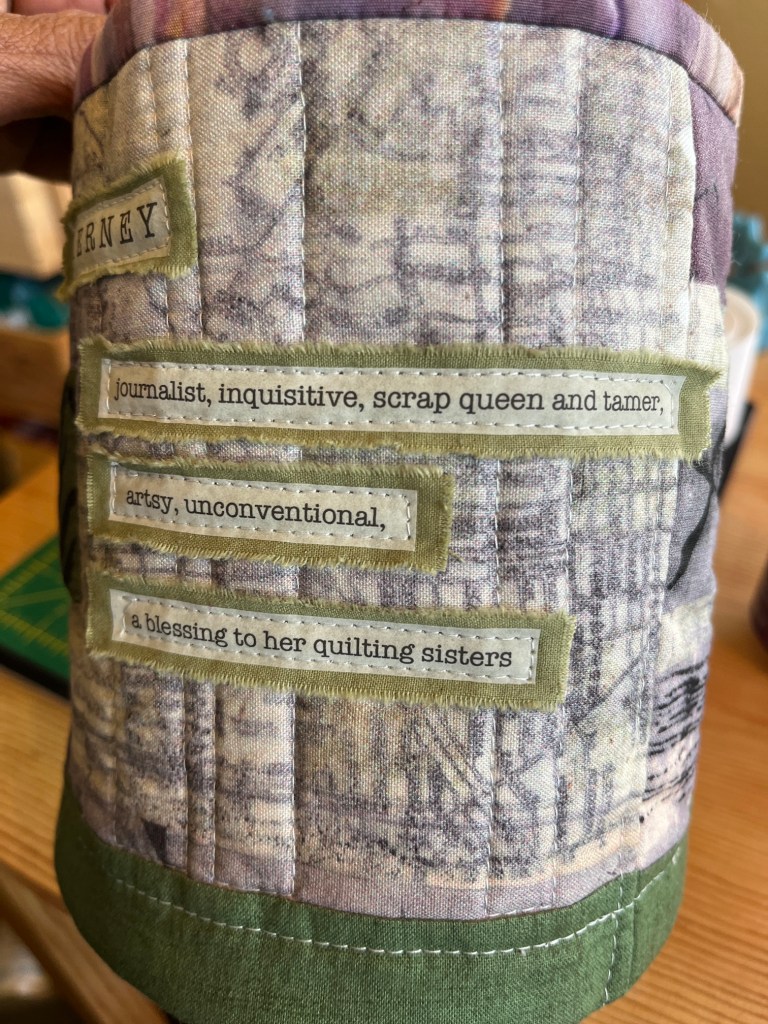
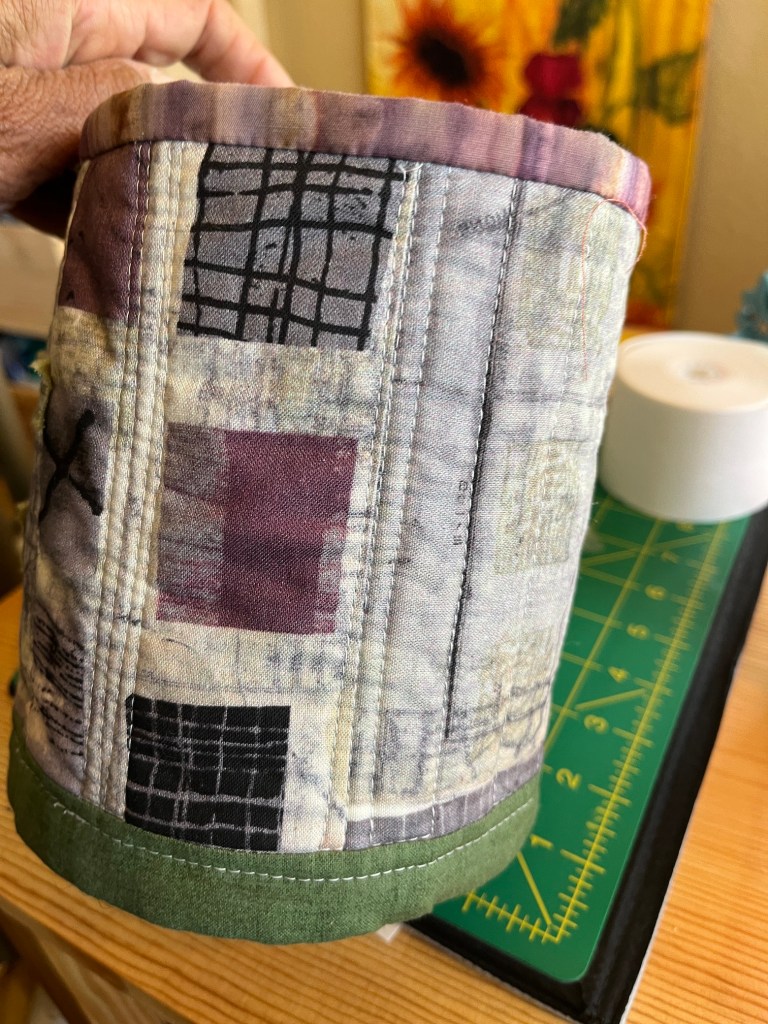
I enjoyed putting my trimming scraps in the amazing handmade custom scrap basket that D made me (her own design, no pattern used!) with Marcia Derse fabric (my favorite):
Mike the Miniature Schnauzer had to go to pick up quilting friends from the airport as he does better when he goes to pick up visitors from “Human Storage”, see blog post “Human Storage” and Airport Lore, instead of them just suddenly arriving to the house through the garage while he has been home alone!
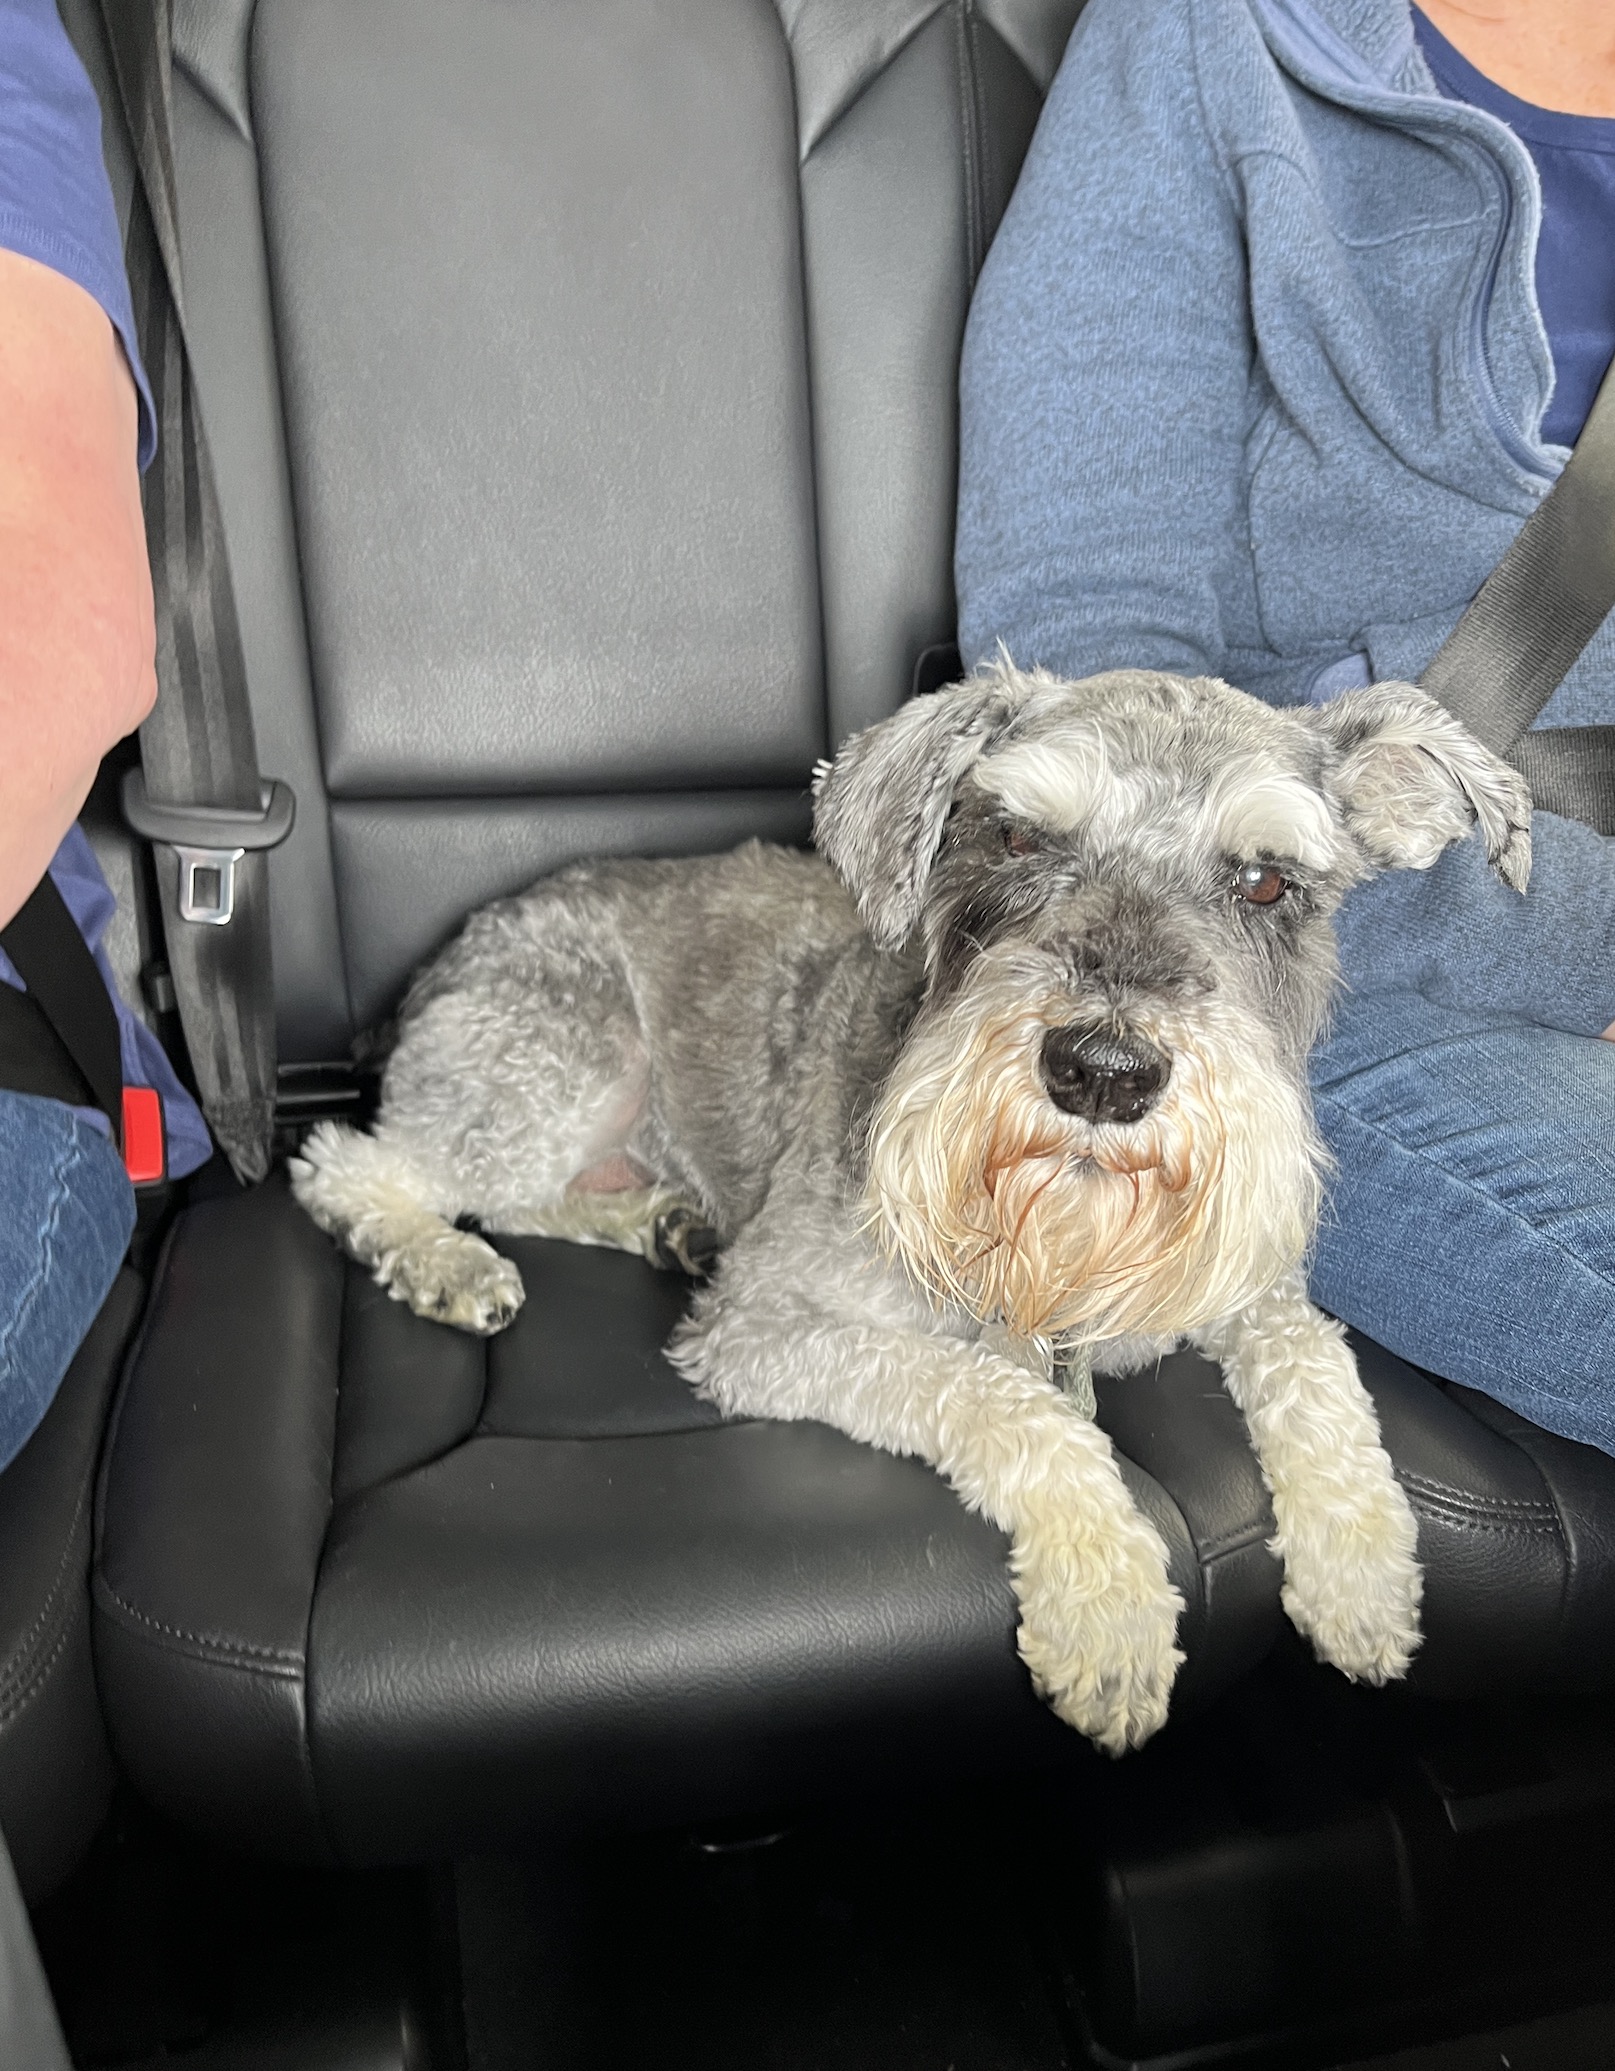
Mike sitting between the house guests (for the next 5 days) on the way back from the airport.
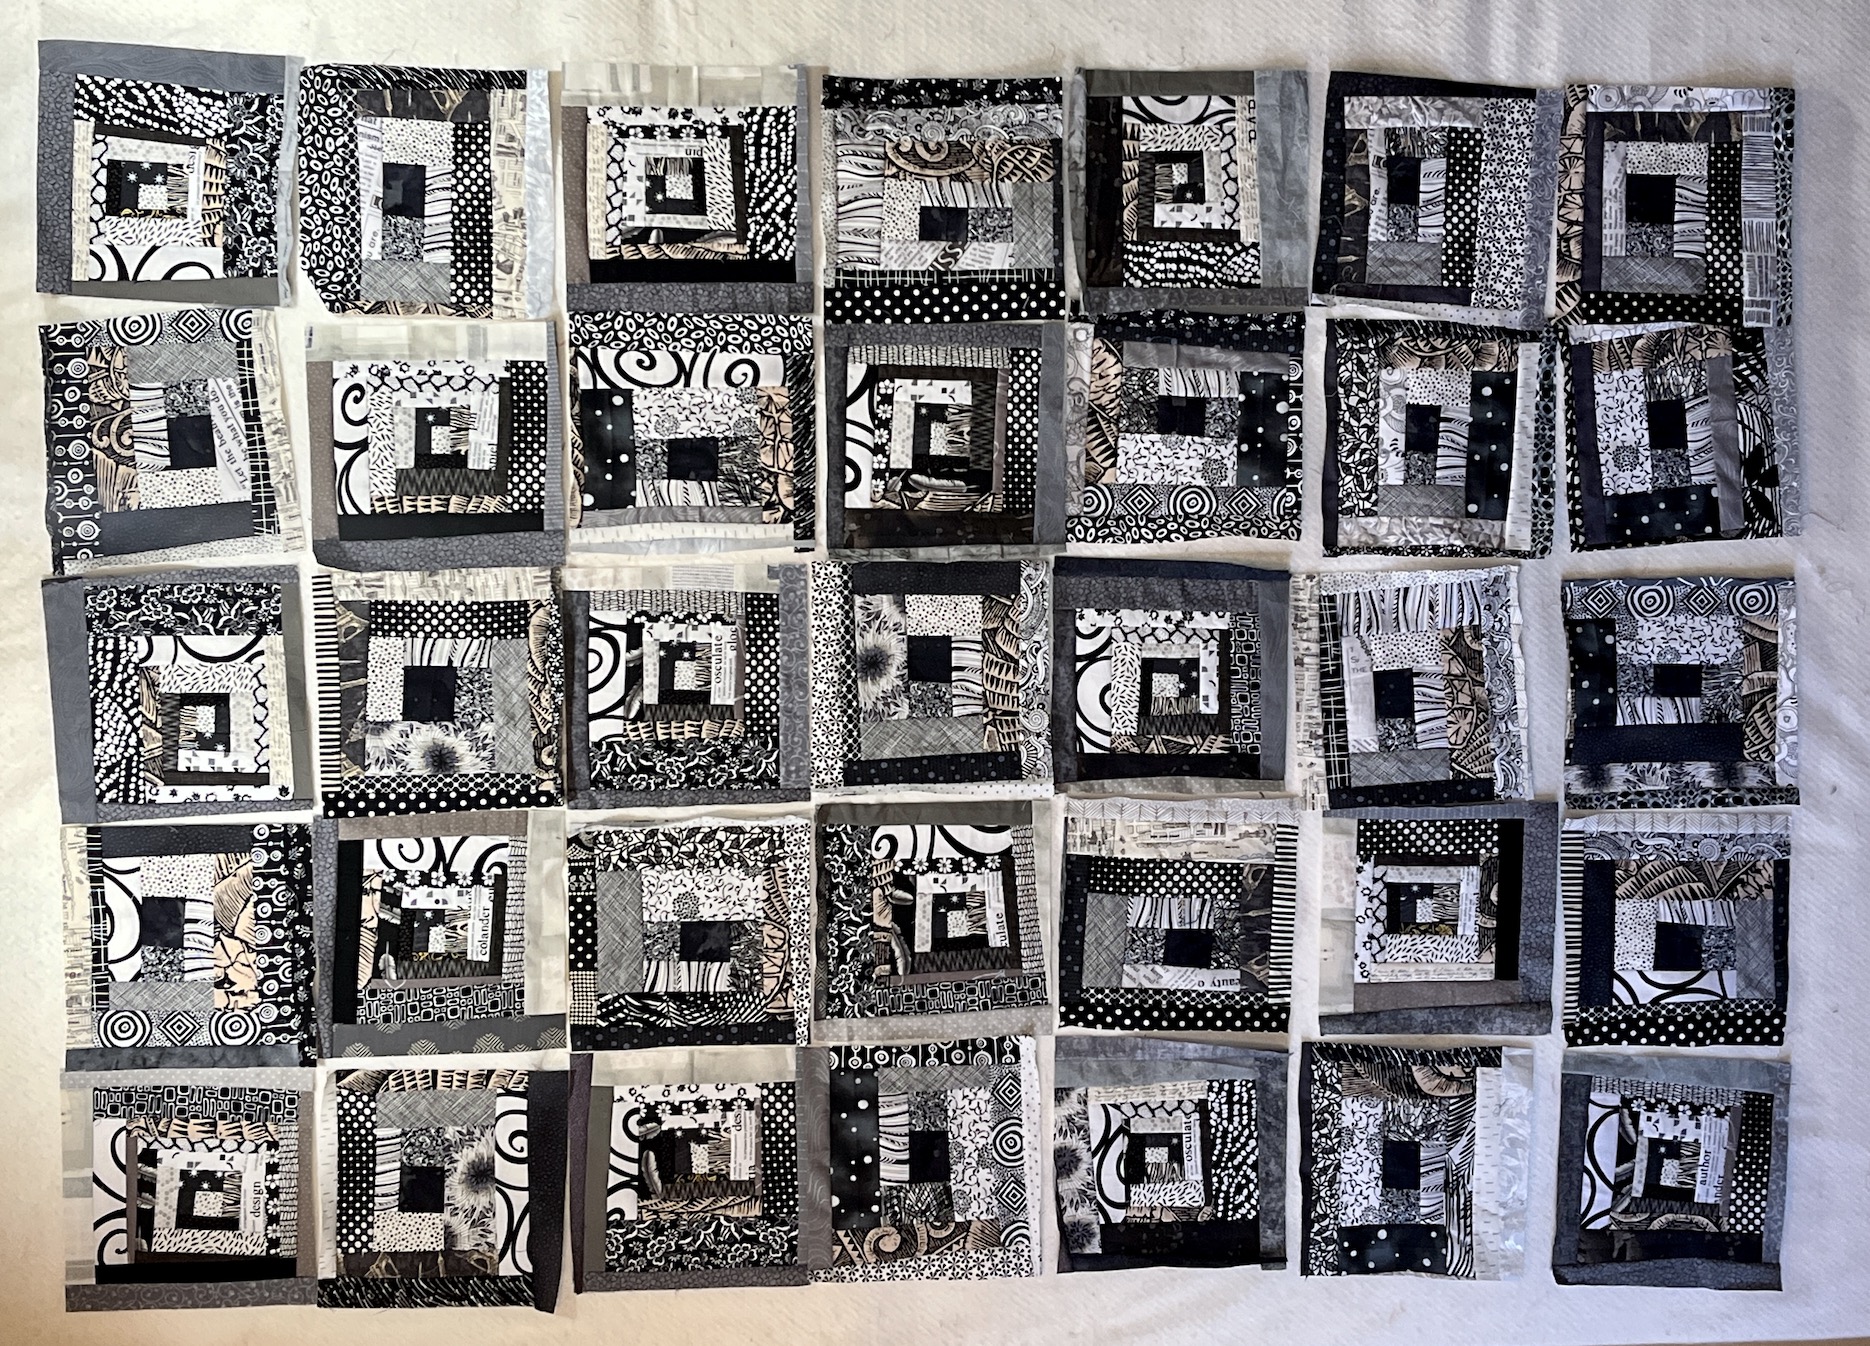
We decided not to try out the scrap piecing using adding tape that I discussed in the post ScrapHappy May: Scrap Happy Retreat!and just focusing on making scrappy improvisational log cabin blocks (“log jamming”) like the the 35 blocks I recently completed as the “class sample”:
After John and I provided our guest with a tasty late lunch (fried chicken strips, orzo pasta salad, and chocolate chip cookies), the retreat started out with the three of us pouring through my scrap collection and scraps that D and K brought with them to map out colorways/themes for our improvisational log cabin blocks.
I did a demo of how to piece the log jam blocks, well at least how I like to do it as there are several different methods and strategies. Then everyone got to work:
At one point John came by the studio to visit and to bring us our late afternoon cocktails (lemon drops) as our reward for all that hard work selecting scraps and beginning to work on our blocks!
Only one cocktail per person so we did not end up sewing our fingers into the blocks or something disastrous like that!
After everyone made a couple of sample blocks with the fabric scrap groupings we selected, we decided we wanted to set the blocks in a solid color fabric. I pulled out my collection of Peppered Cottons, and we tested out blocks on the different color options (photo below is D’s blocks).
(I used to sell Peppered Cottons in my Etsy shop so I still have a bit of yardage left over.)
That was the end of the first day in the studio.
We did end Day 1 of the Scrap Happy Quilt Retreat with homemade popcorn and movie night in the basement where we have the largest TV in the house.
It’s the 15th of the month and time for my “ScrapHappy” post as part of the ScrapHappy group I belong. At the end of this post I have a link to the other blogs participating in this monthly event in case you’d like to check out their ScrapHappy posts.
It starts today with two of my friends attending and runs to Friday where they will fly home. I only have enough space for two other quilters at the table in my studio and in the accommodations in my home (unless I install bunk beds, ha!).
My sew table is set up for the retreat, I pulled out my other Bernina sewing machines – my QE 440 with 7 million stitches (see post7 Million Stitches+) and my little 215 that I take to classes.
In case you are wondering what the zippers are – I have a lot of red zippers and thought I would share in case we want to make any scrappy zipper bags during the retreat.
I am calling our retreat a “Scrap Happy Retreat” because we are going to work on projects using my fabric scraps (though they are threatening to bring some of their own to unload).
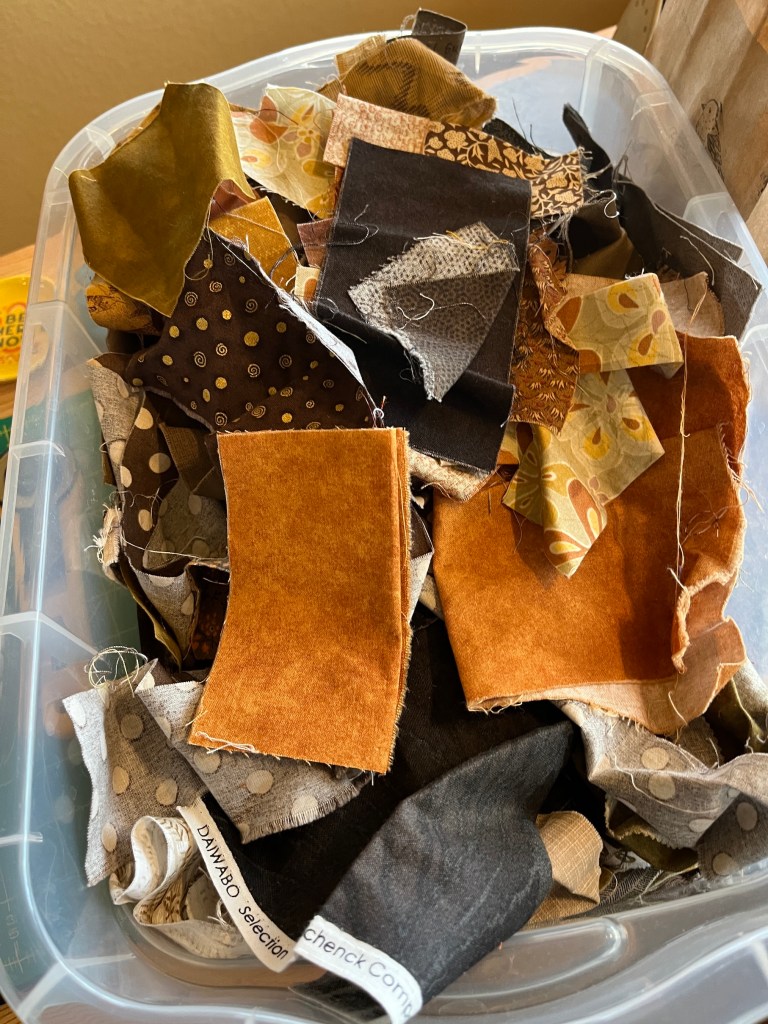
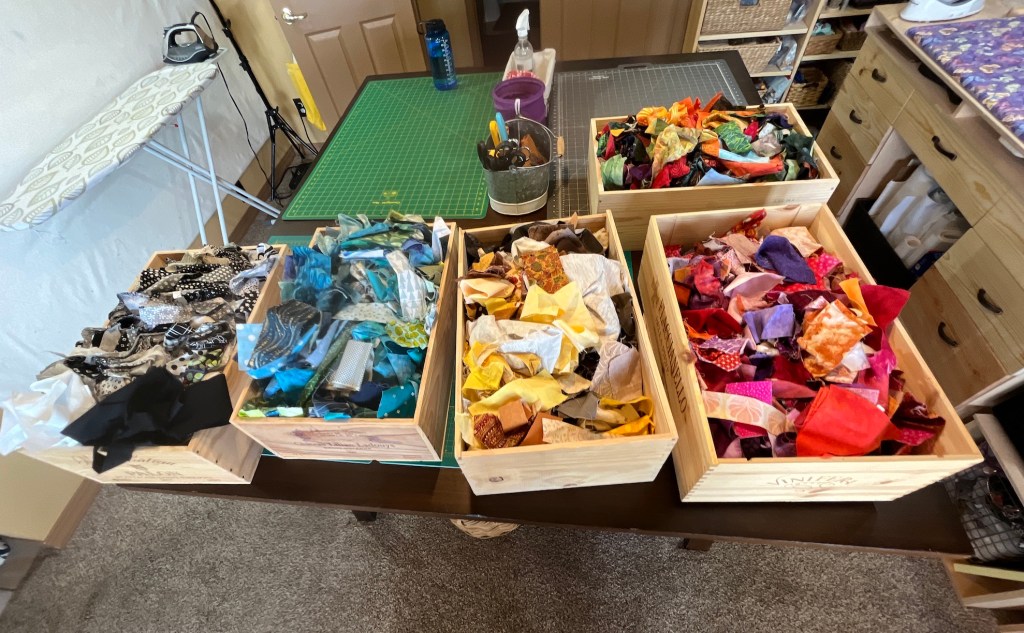
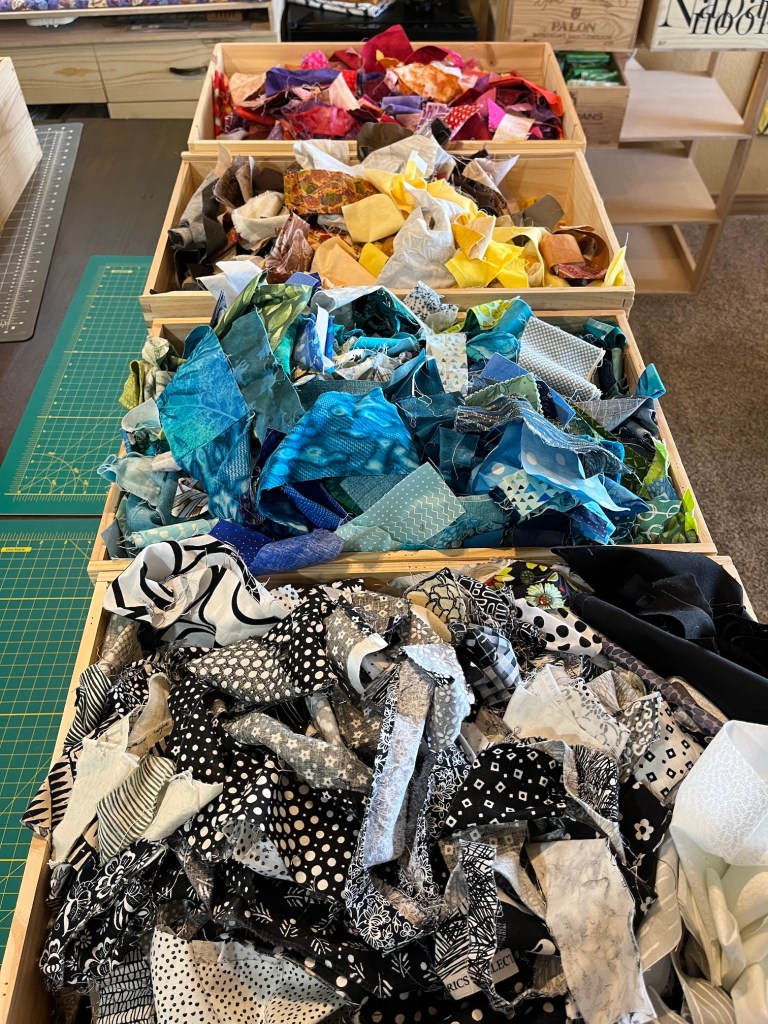
I got my scraps already sorted by color (or type as I keep Batik fabric scraps separate) and they are ready in their wine crates:
I’ve sorted my fabric scraps into these color groupings:
Next year when I teach the 6 day workshop I am slated to teach (more on that later when the venue complete the class catalogue and I can officially announce) I am going to bring this whole lot of scraps with me to let the workshop participants use them if they like. I just have too many fabric scraps, even after donating several bags of them to charity thrift shops.
At the retreat this week, which runs Monday to Friday, we are going to work on improvisational piecing log cabin quilts (I will review the “log jamming” technique I first learned in a class at the Stitchin’ Post many years ago) like the one share in yesterday’s post:
Here is a YouTube video on “log jamming” by the Stitchin’ Post if you’d like to see the technique. I’ve adapted the original technique to a process that works better for me but it is still essentially the same concept.
And here is the fabulous Jackie who taught the class I attended and has a pattern she’s published on Modern Log Jam (I miss the Stitchin’ Post so much, a lot of wonderful creative memories while living in Central Oregon happened there):
In addition to working on improvisational log cabin quilts, we are also going to try our hands at piecing scraps onto adding machine tape. I have a bunch of adding machine tape I bought from a thrift store for $2:
Here is the YouTube tutorial we are going to use (I have a small TV in my studio and we can watch and try it together on our machines):
Wish us luck on this new technique for us!
I’ll update you on the progress on our projects at the retreat!
I am getting ready for a “Scrap Happy Quilt Retreat“, which I share more about in tomorrow’s “ScrapHappy May” post, by starting a scrappy log cabin using my ridiculous collection of fabric scraps.
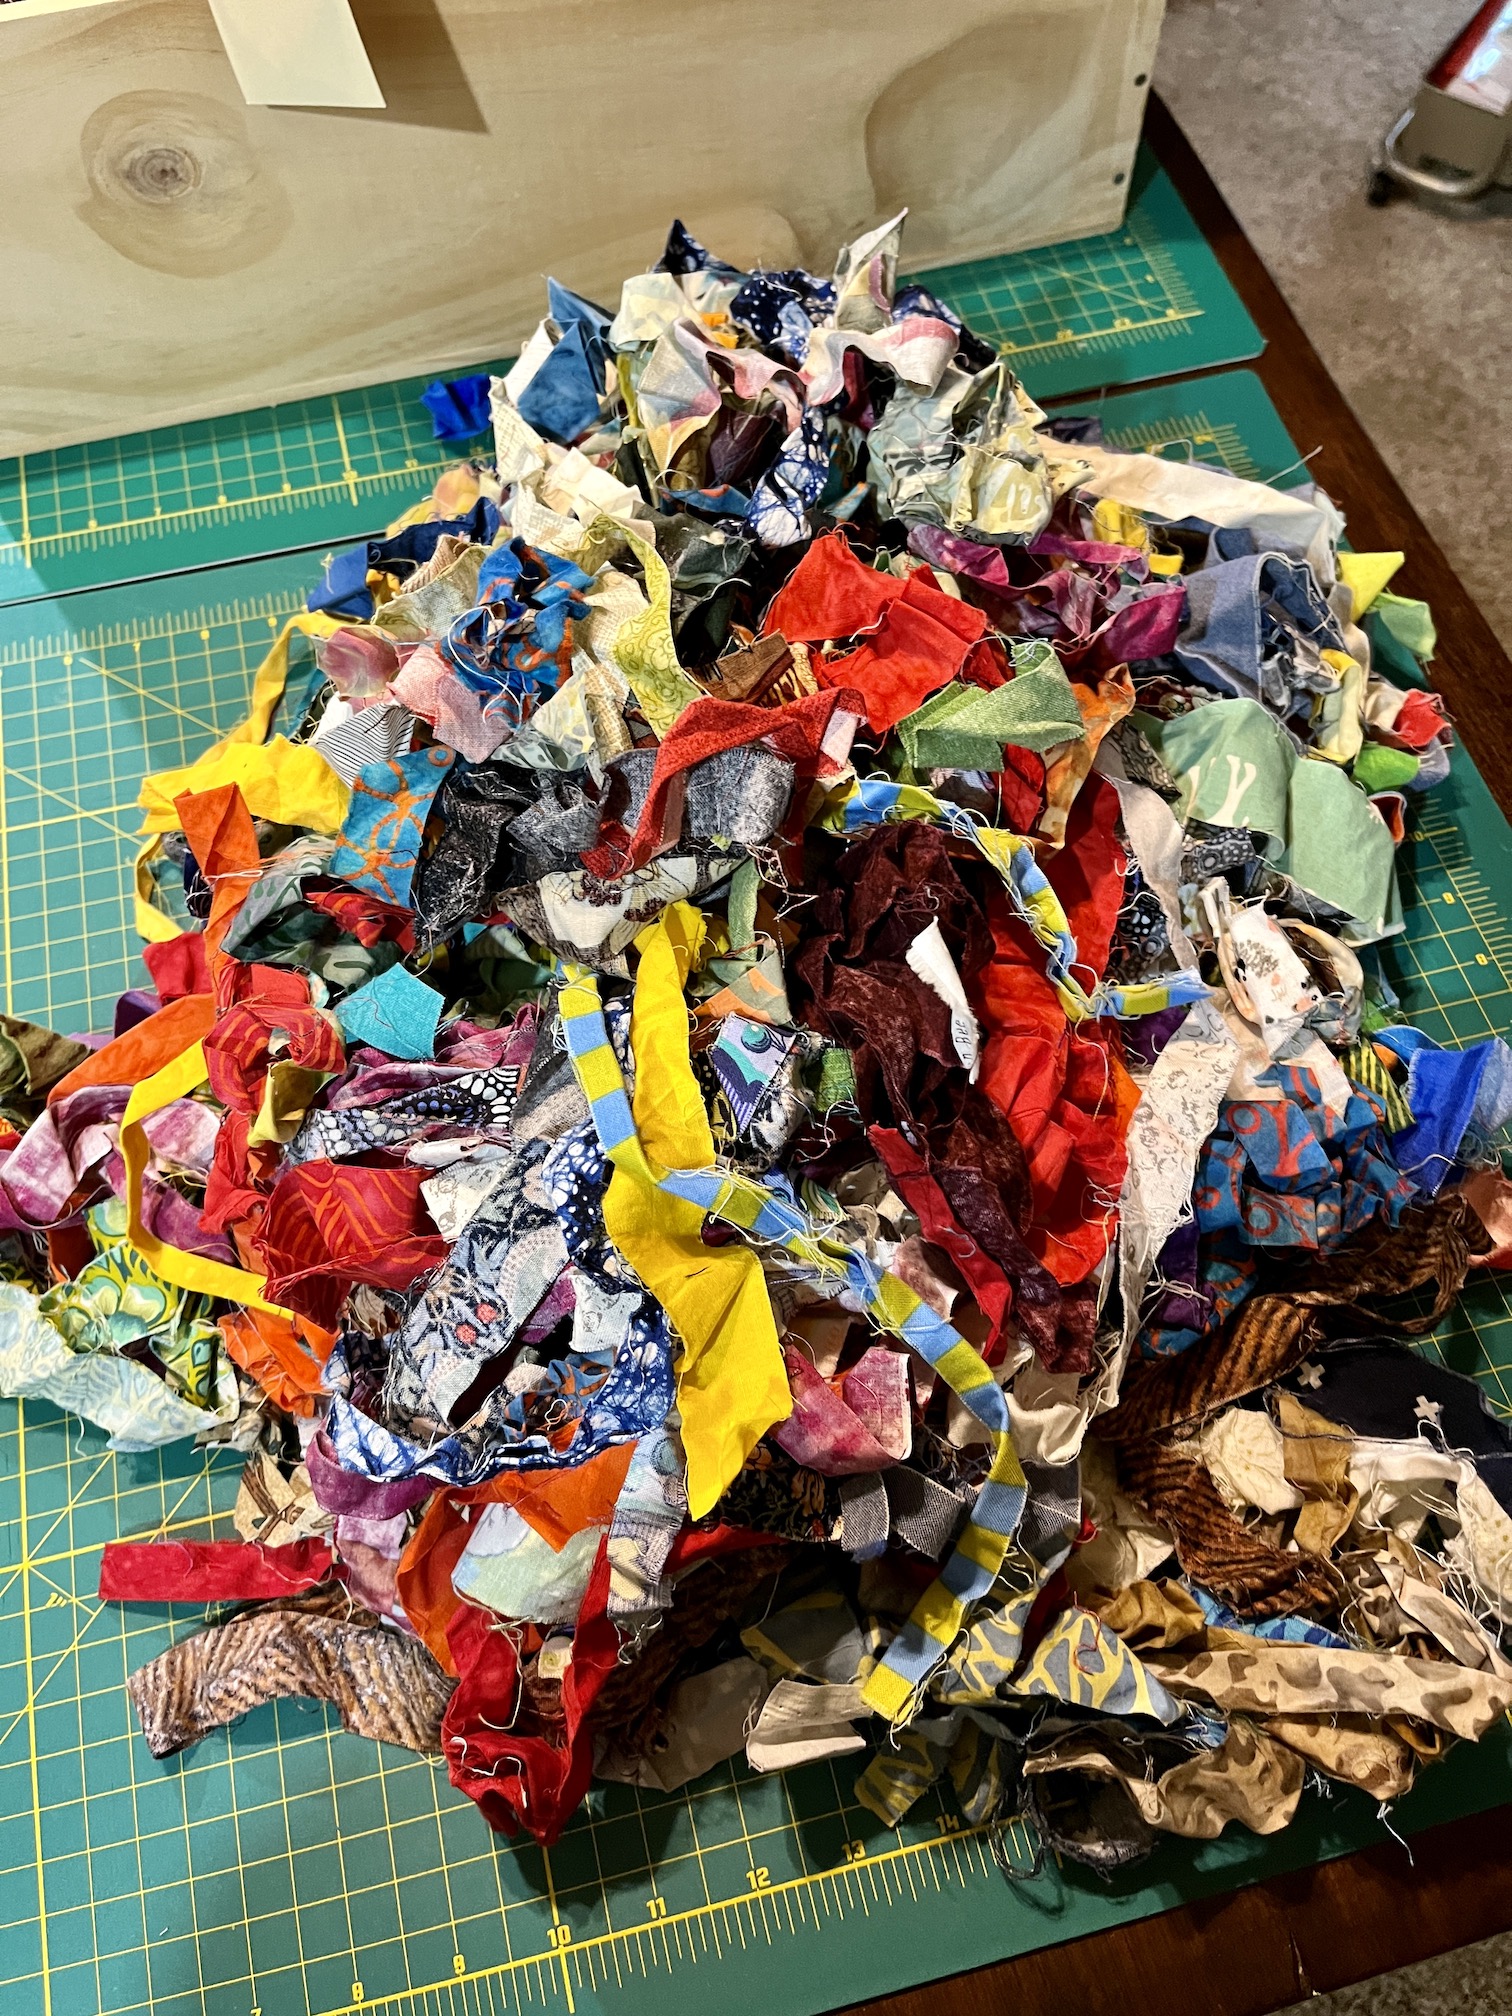
I decided to limit myself to black, white, and gray fabric scraps. First I dug into the bag I have of “fabric strings” which are thinner fabric scraps that I’ve been saving (yes for year, ha!) to make a “String Quilt” someday.
I dug through this scary mess to find the black, white and gray strings and then ironed them (as they were wrinkled/crumped beyond easy use…):
I thought I might have enough to get started but I ended up having to dig into my wine crate box of black, white and gray scraps:
I ended up piecing 35 blocks, which I trimmed to 9.5 inches x 9.5 inches each using my 9.5″ by 9.5″ square ruler:
I started this quilt as an example as the Scrap Happy Quilt Retreat will be at my house starting Monday and I am going to teach my friends how to do improvisational scrappy log cabin blocks (also know as “Log Jamming”) and we are going to use my scraps! (A great way to use up your scraps – dump them onto your quilting friends under the guise of showing them “scrappy quilt making options”…evil laugh!)
More on that tomorrow on the 15th which is ScrapHappy May posting day!
Oh by the way, when I got done piecing 35 – 9.5″ x 9.5″ blocks I did actually (sort of) make a dent in my black, white and gray scrap fabric collection. Here’s what the wine crate looks like now:
(If you can’t tell the difference from the previous photo, just know before it was overflowing and now everything fit nicely in the wine crate with no overflow…)
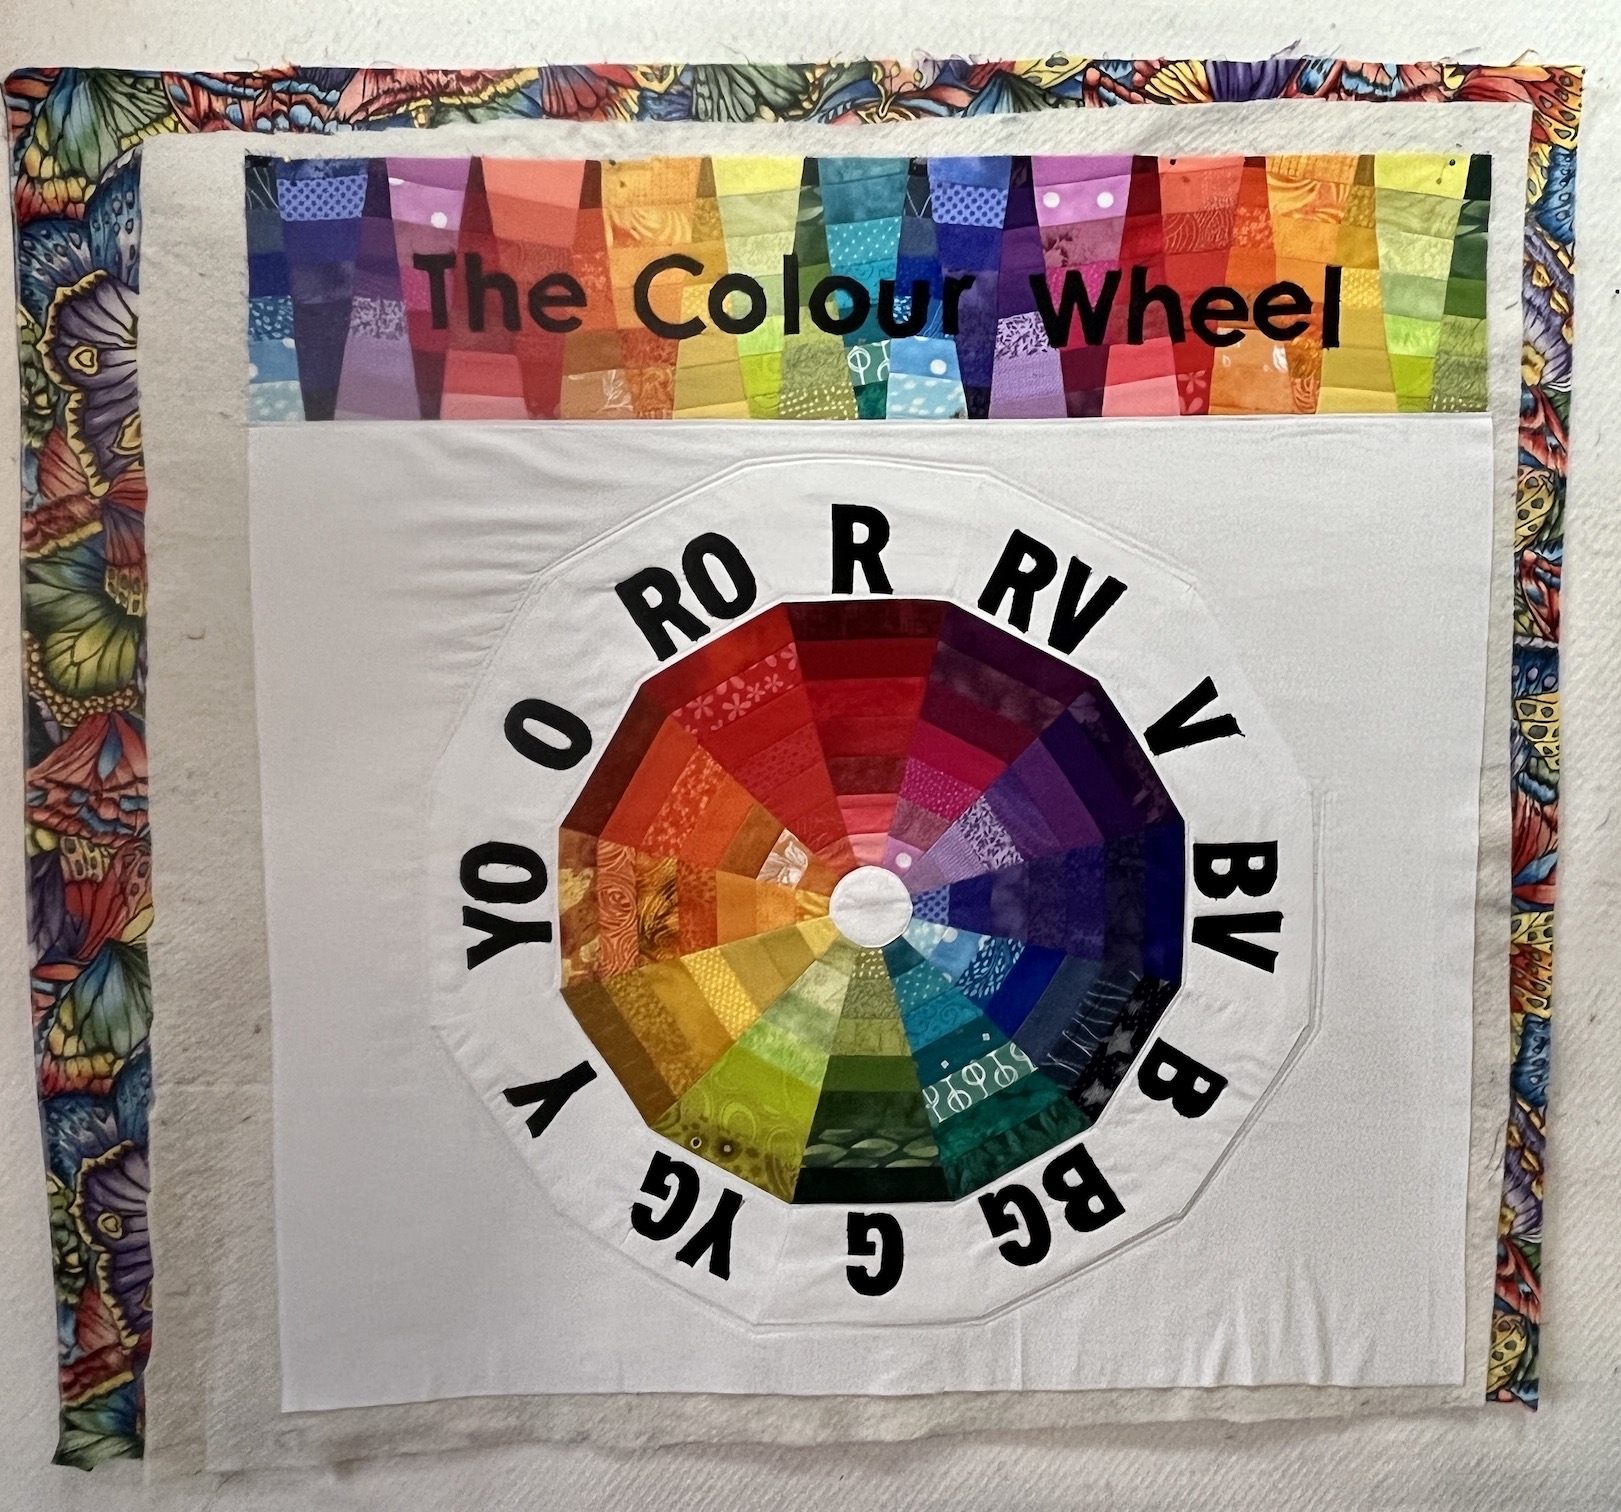
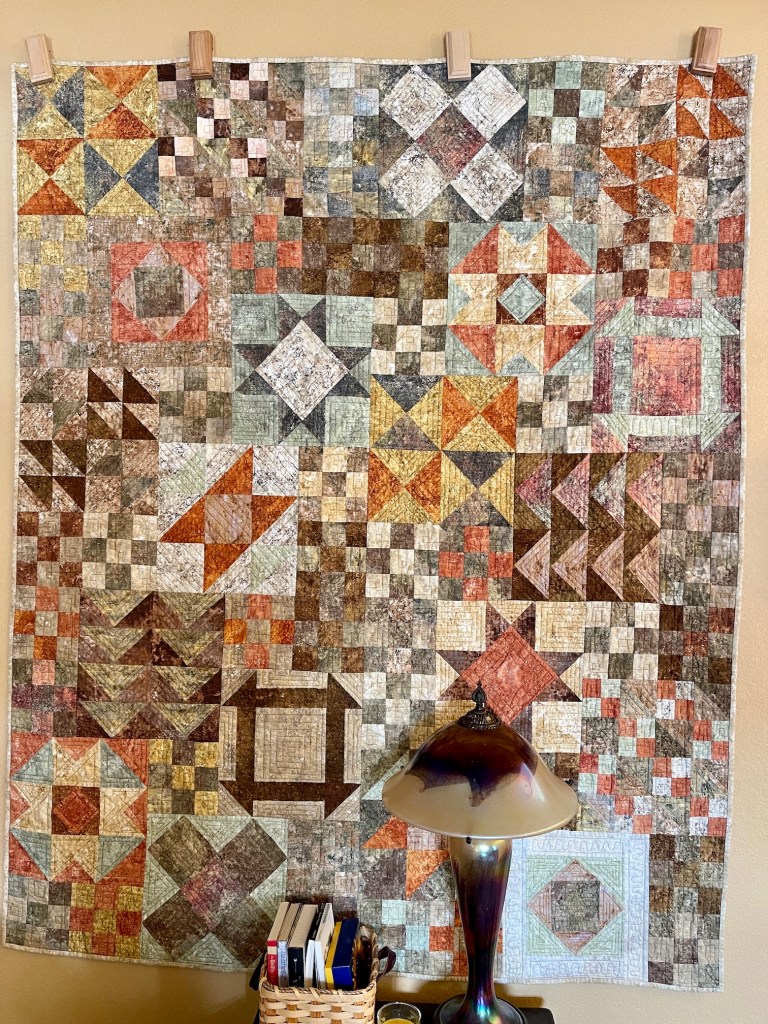
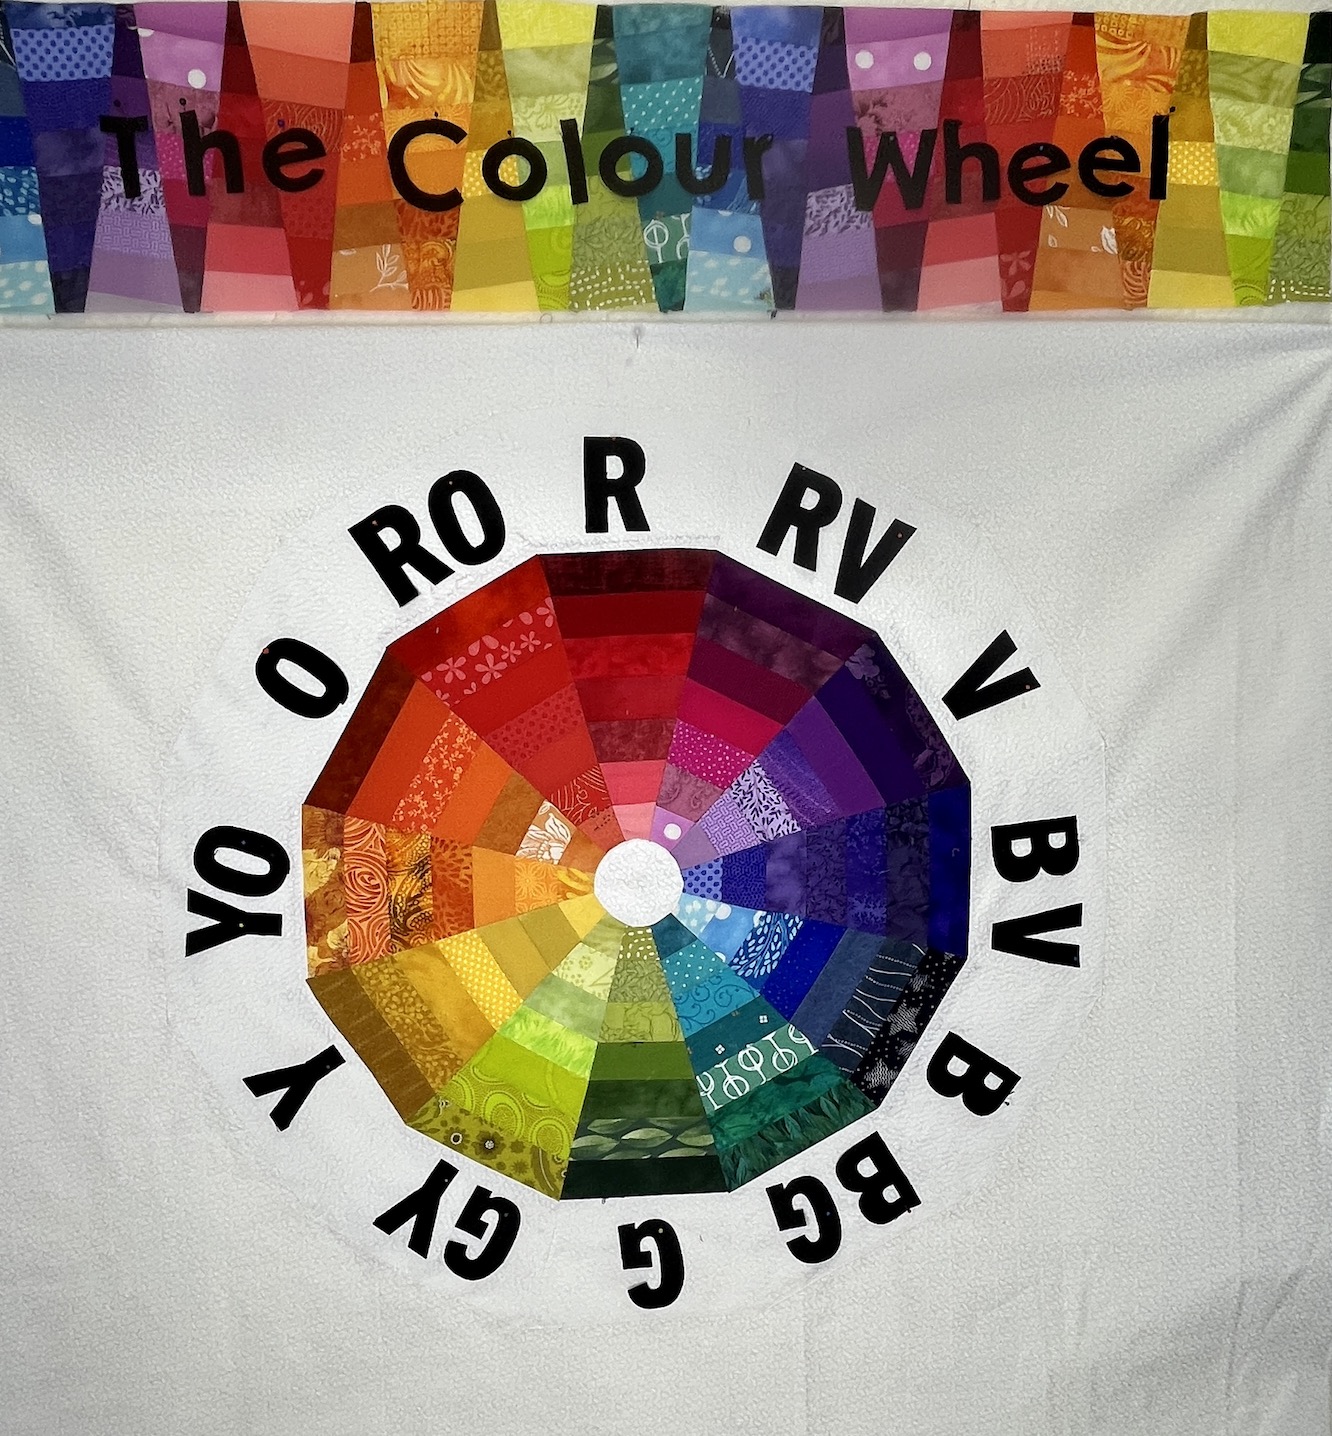
The Colour Wheel Quilt is finally done. I just finished quilting and putting on the binding today.
It’s come a long way from this:
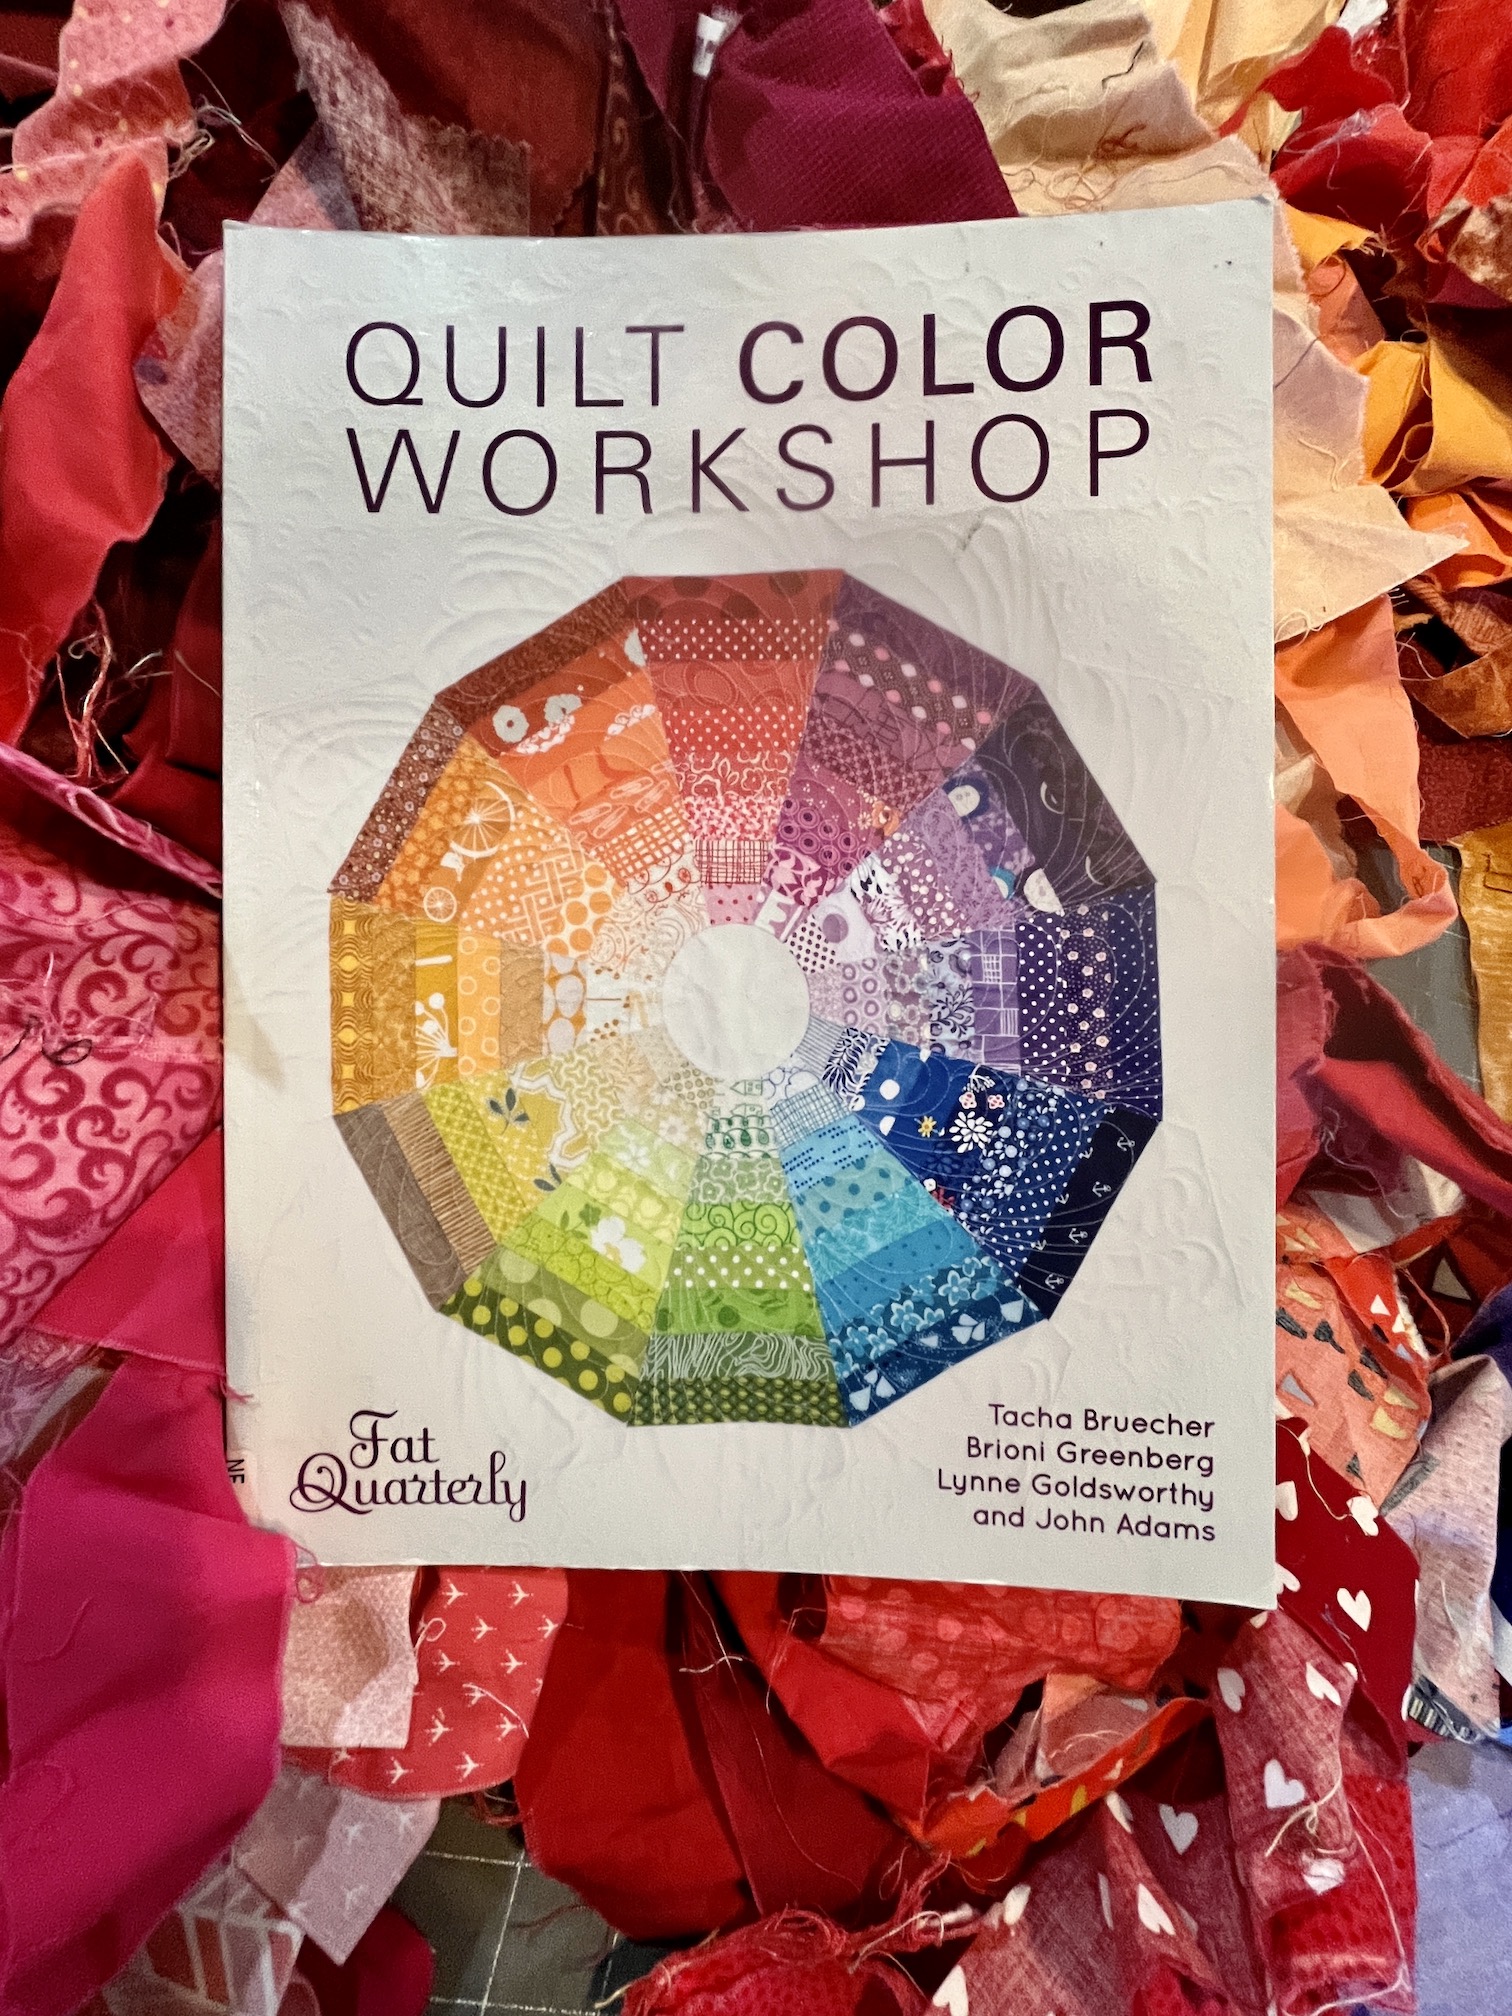
Here is what the sample from the book Quilt Color Workshop by T. Bruecher, B. Greenberg, L. Goldsworthy, and J. Adams (2014) looks like:
I made some changes to the original pattern and added a header created from the trimmings from the 30 degree wedges of each colorway I cut to create the wheel.
My plan is to use this quilt as a teaching aid when I cover color theory in the workshop I’ll be providing next year (which has now become two workshops at two different venues…more info to come someday…).
If you need a legend for the labeled colorways, here you go:
Primary Colors
Red (R)
Yellow (Y)
Blue (B)
Secondary Colors
Orange (O)
Green (G)
Violet/Purple (V)
Tertiary Colors
Red-Orange (RO)
Yellow-Orange (YO)
Yellow-Green (YG)
Blue-Green (BG)
Blue-Violet (BV)
Red-Violet (RV)
As you can see from the list above, “Secondary Colors” are formed by combining “Primary Colors”; and “Tertiary Colors” are formed by combining a “Primary Color” with a “Secondary Color”.
Kate @talltalesfromchiconia hosts a monthly celebration of reusing scraps and “scrap-happy challenges” called ScrapHappy Day on the 15th of each month and thanks to Alys @gardeningnirvana I found out about this monthly event and Kate let me participate!
Here is my latest scrap-happy project, which is currently in progress awaiting my machine quilting – the Colour Wheel Quilt wallhanging which I will be using as a teaching tool.
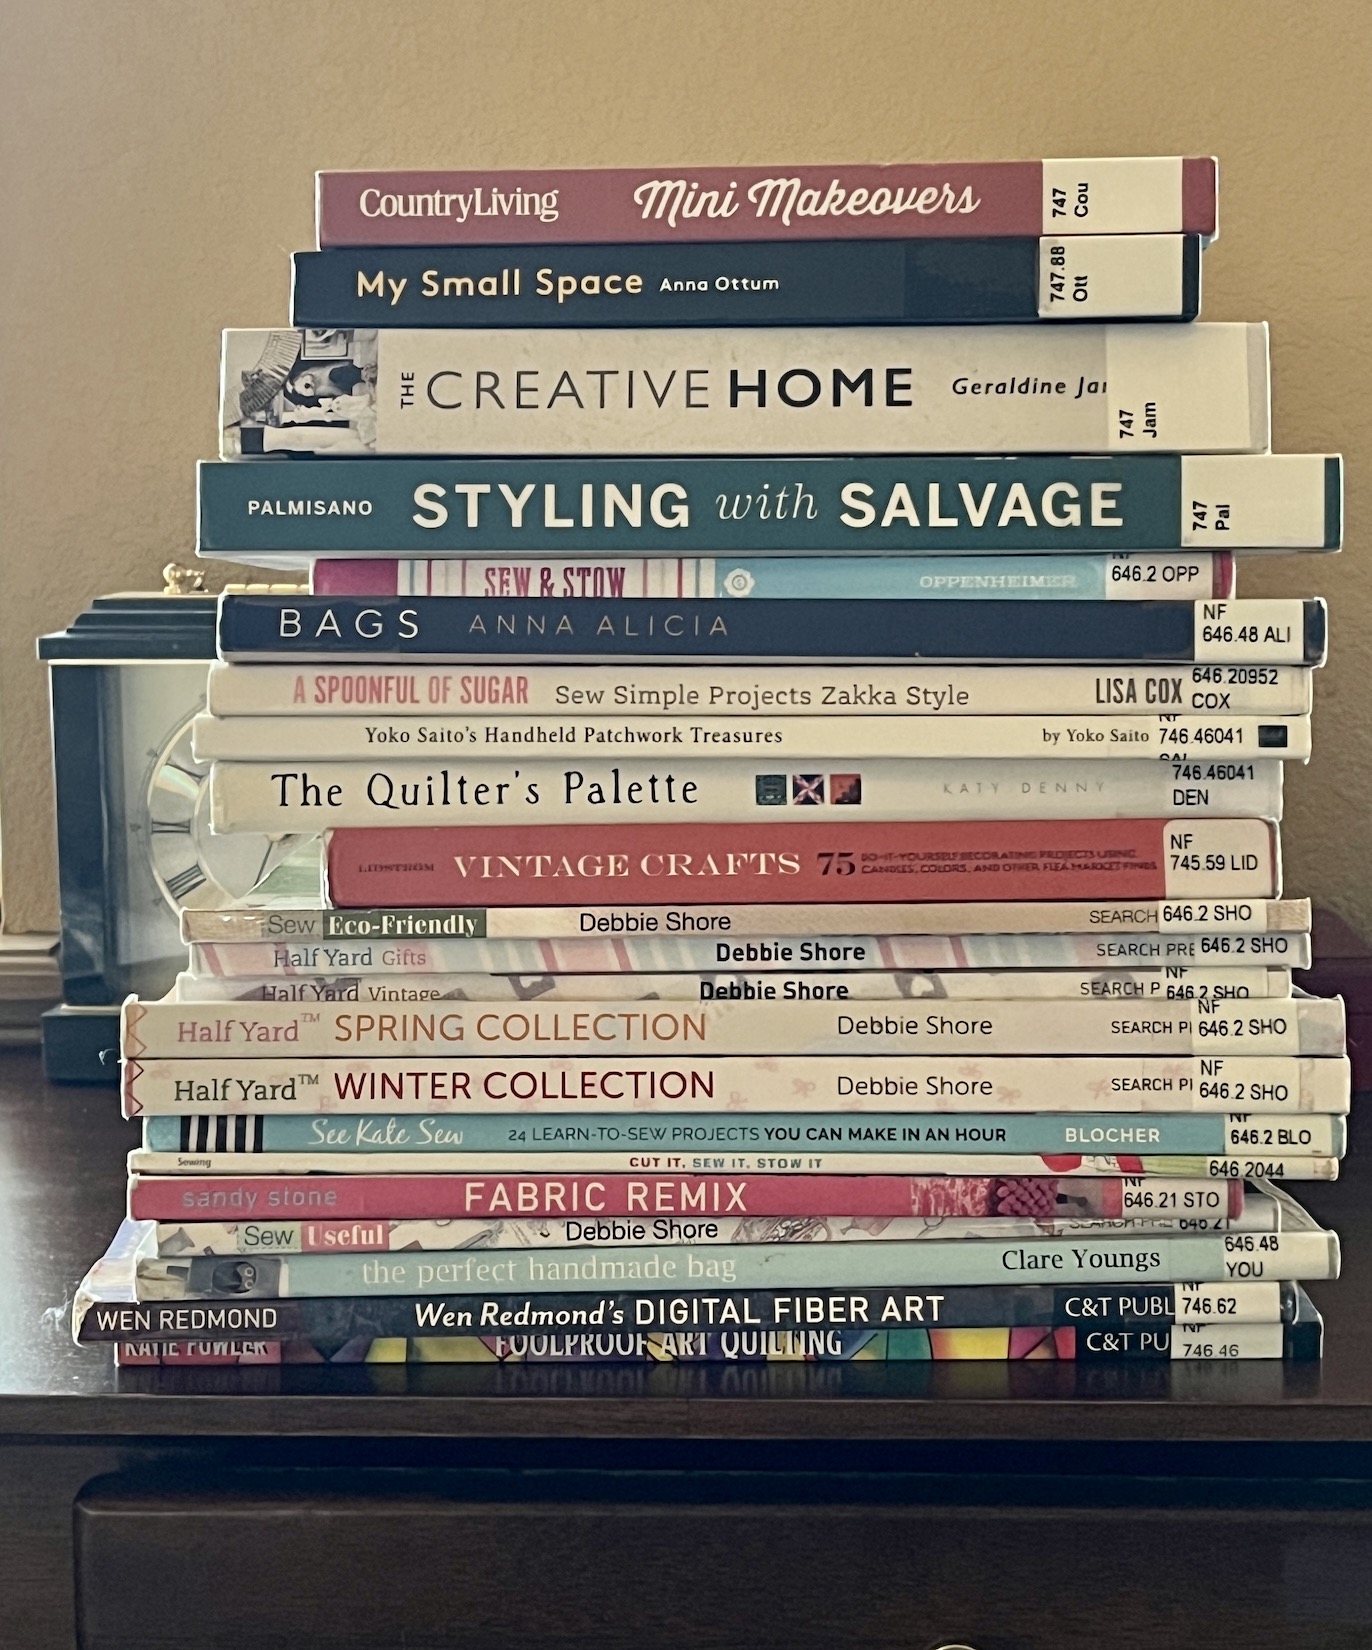
Again, it’s been a while since I’ve written any posts for my blogging topic category – The Library Stackwhere I share my latest stack of local library books I’ve borrowed.
In this quick post I thought I would share my latest stack, recently acquired when I browsed the library “unrestrained” (by common sense and no longer being hindered by hobbling around in a walking book):
Yes it’s a bit ridiculous and I am not sure what happened to me while browsing (I guess I had an “out of body” experience) the library. It was the first time I was able to drive myself to the library and browse independently since I broke my ankle in January 2023.
Surprisingly I was able to haul all these books to the library’s check out station using a tote bag (and taking the elevator, there was no way my ankle was going to get me all the way down the library stairs!).
My plan is to flip through these books while I have breakfast each morning.
I think that is all the time I should allow this stack as I need to keep working on finishing my Colour Wheel Quilt that I most recently blogged about in this post Update on the “Colour Wheel” Quilt.
I just finished wrangling the quilt, with just the batting attached (to act as interfacing), under the sewing machine to machine applique down all those letters. So I am moving forward despite distraction from my latest (and unrestrained) “Library Stack”!
Here is an update on the Colour Wheel quilt/wall hanging that I am making as a teaching tool on color theory when I teach an art quilting course in 2024 (see post A Year of Finishes: The Pivot) using fabric scraps.
The pattern I used is from the book Quilt Color Workshop by T. Bruecher, B. Greenberg, L. Goldsworthy, and J. Adams (2014) and the quilt is supposed to look the quilt on the book’s cover:
But I decided to modify the quilt a bit as I will show you below.
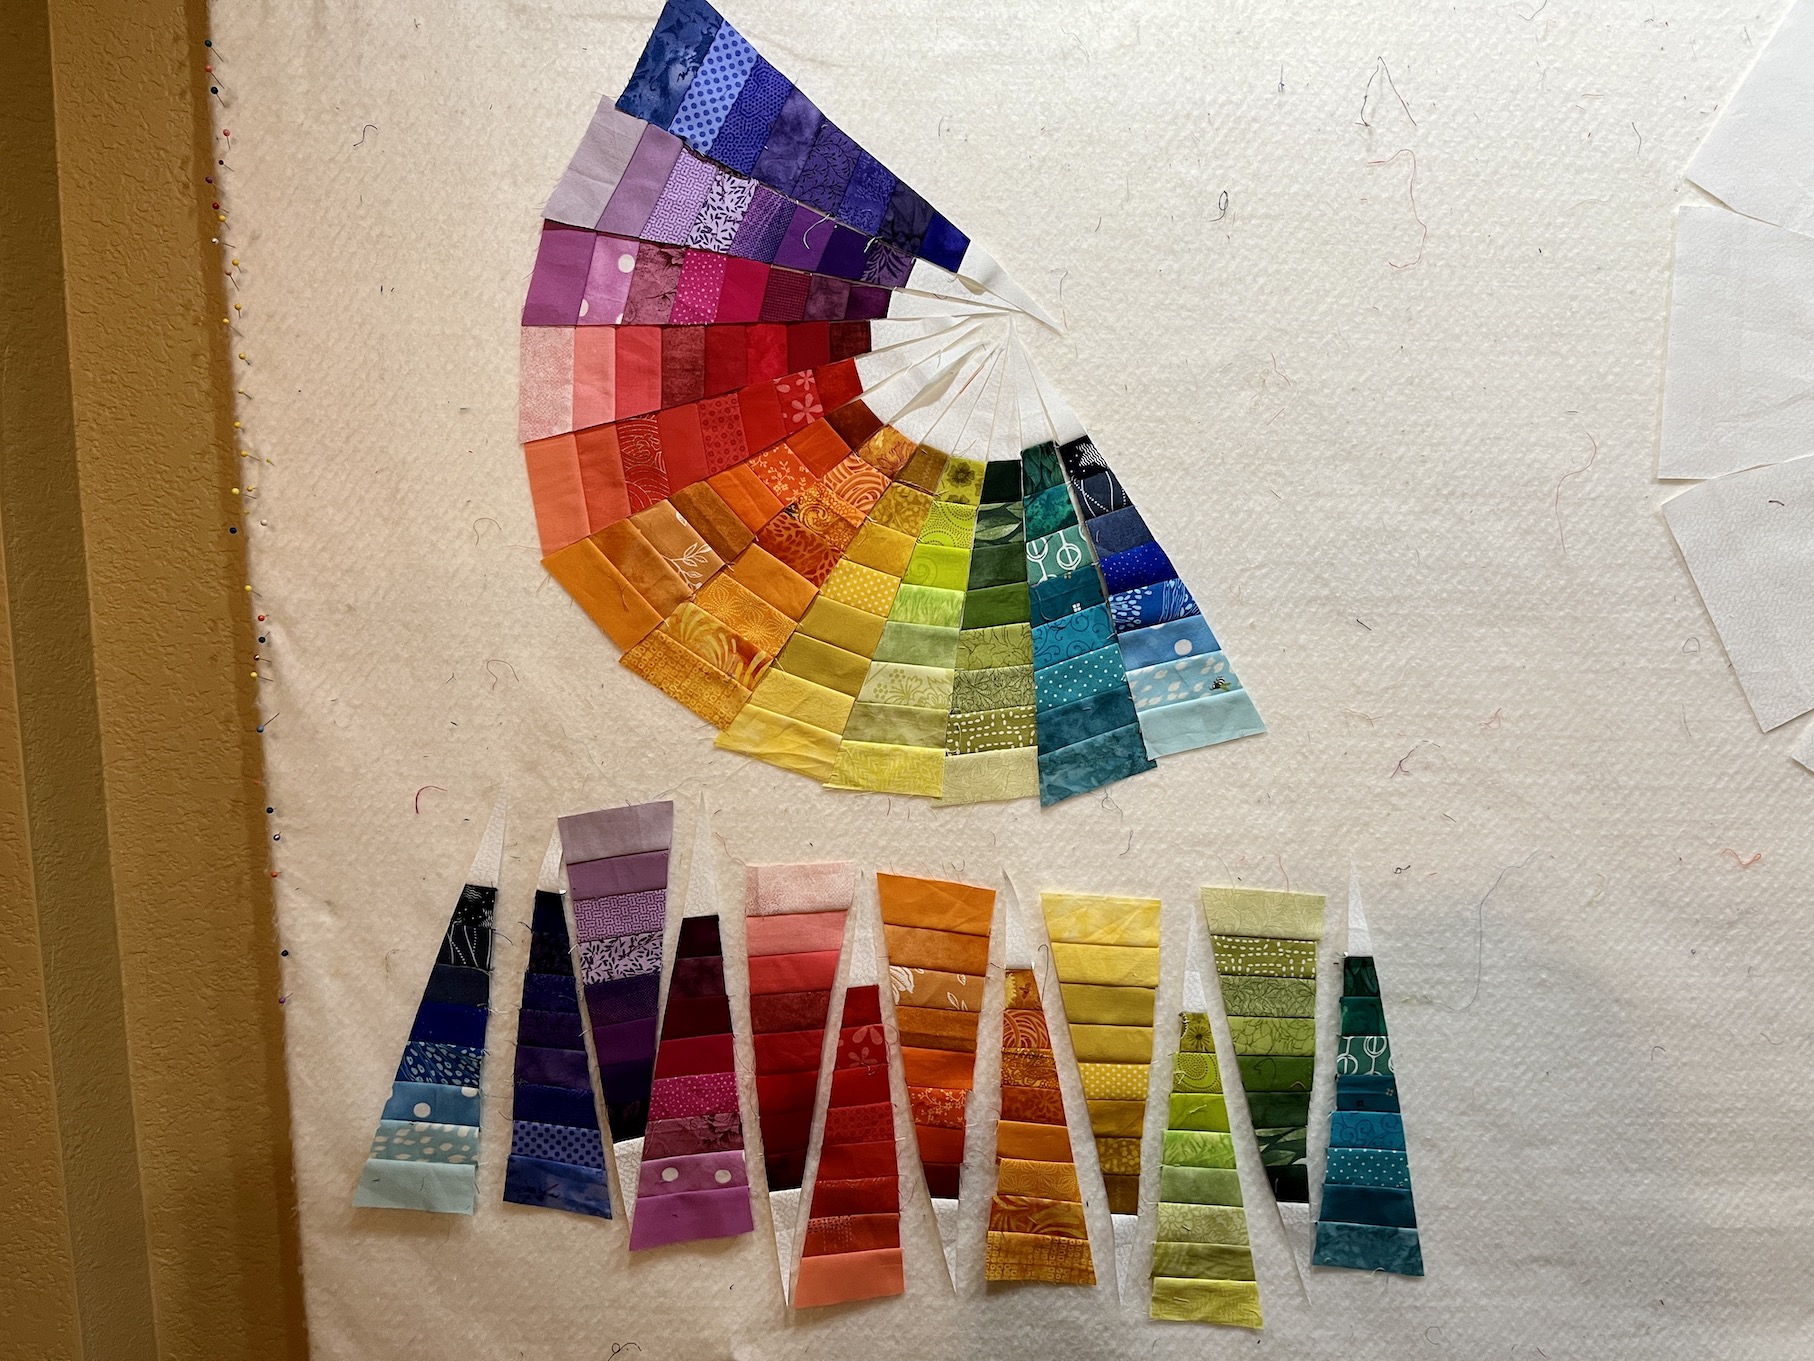
In my previous post on this quilt Colour Wheel” Quilt in Progress, I had a collection of 24 trimmings from making the “spokes” of the 12 sectioned color wheel and I was deciding what to do with them.
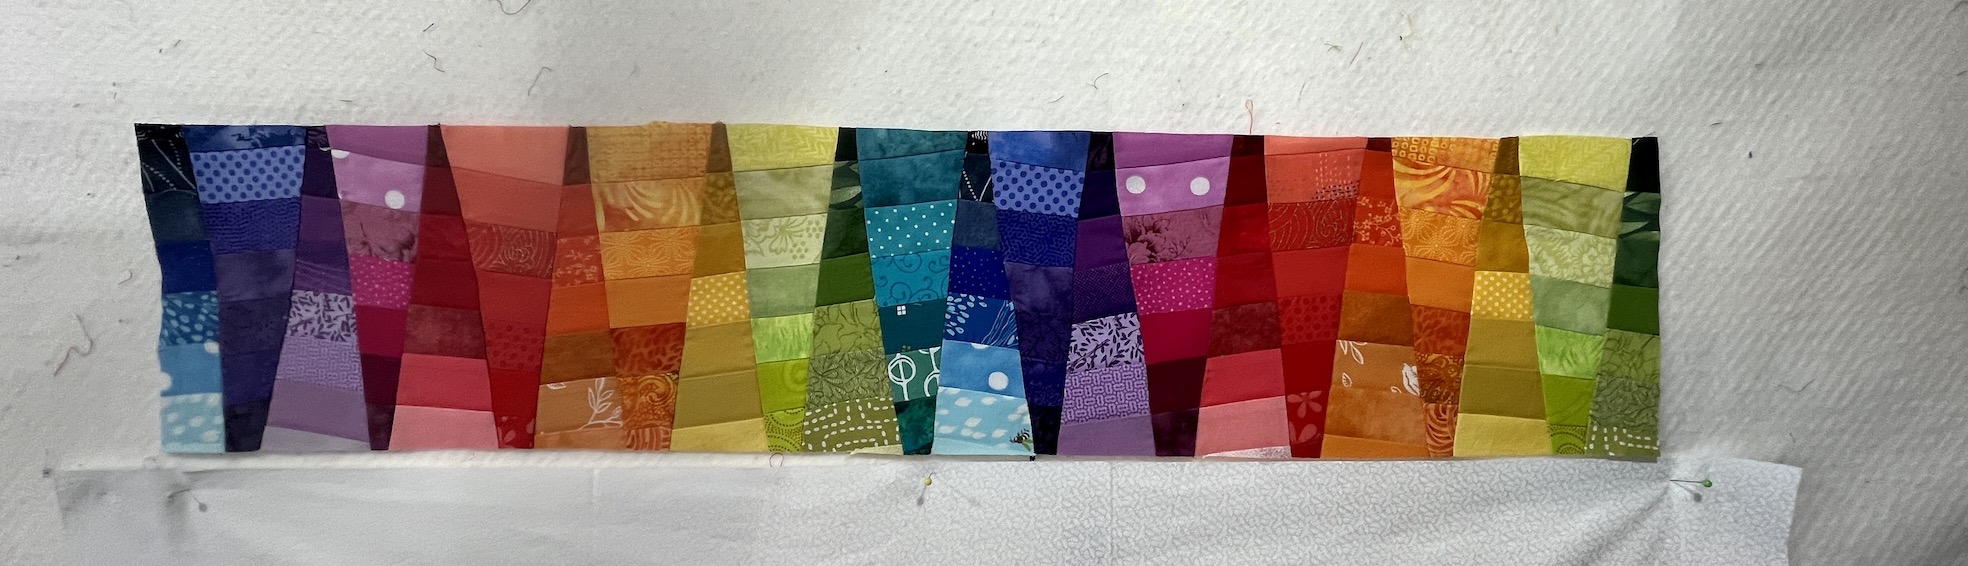
Well I decided to piece 23 of them together (1 trimming was sacrificed while I was experimenting with options) to make a banner for the top of the quilt.
Banner? What do you mean by “banner” Tierney?!?!?
Well I decided if the quilt was going to be a teaching tool I was going to add some additional details to the quilt as you will see below.
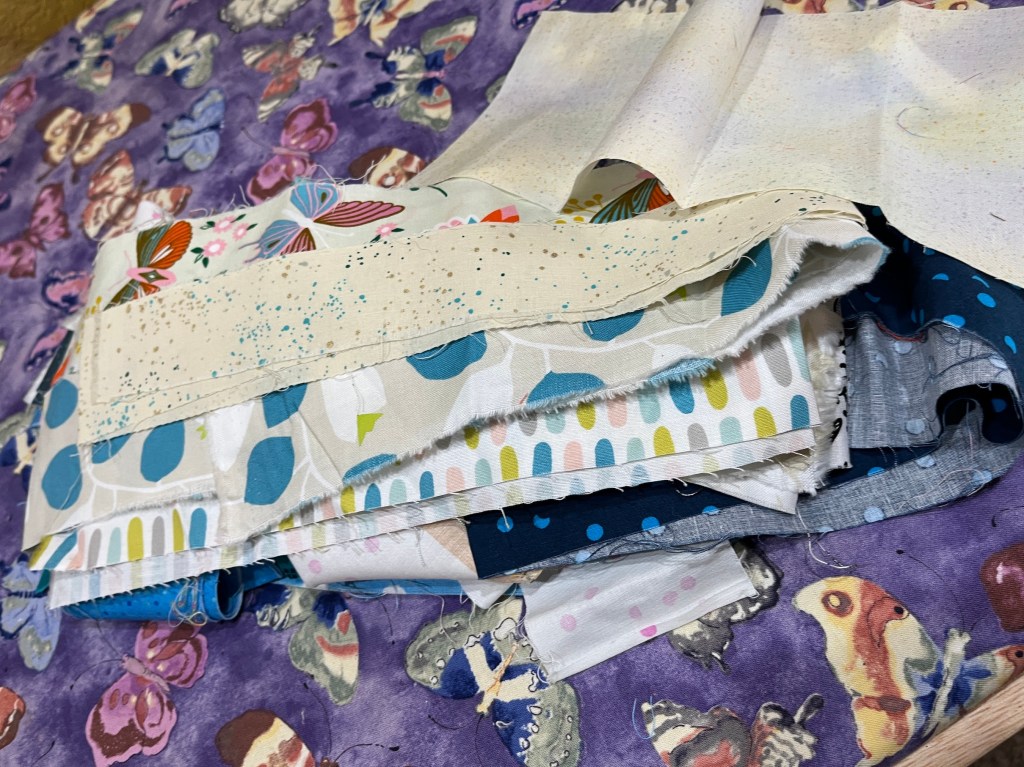
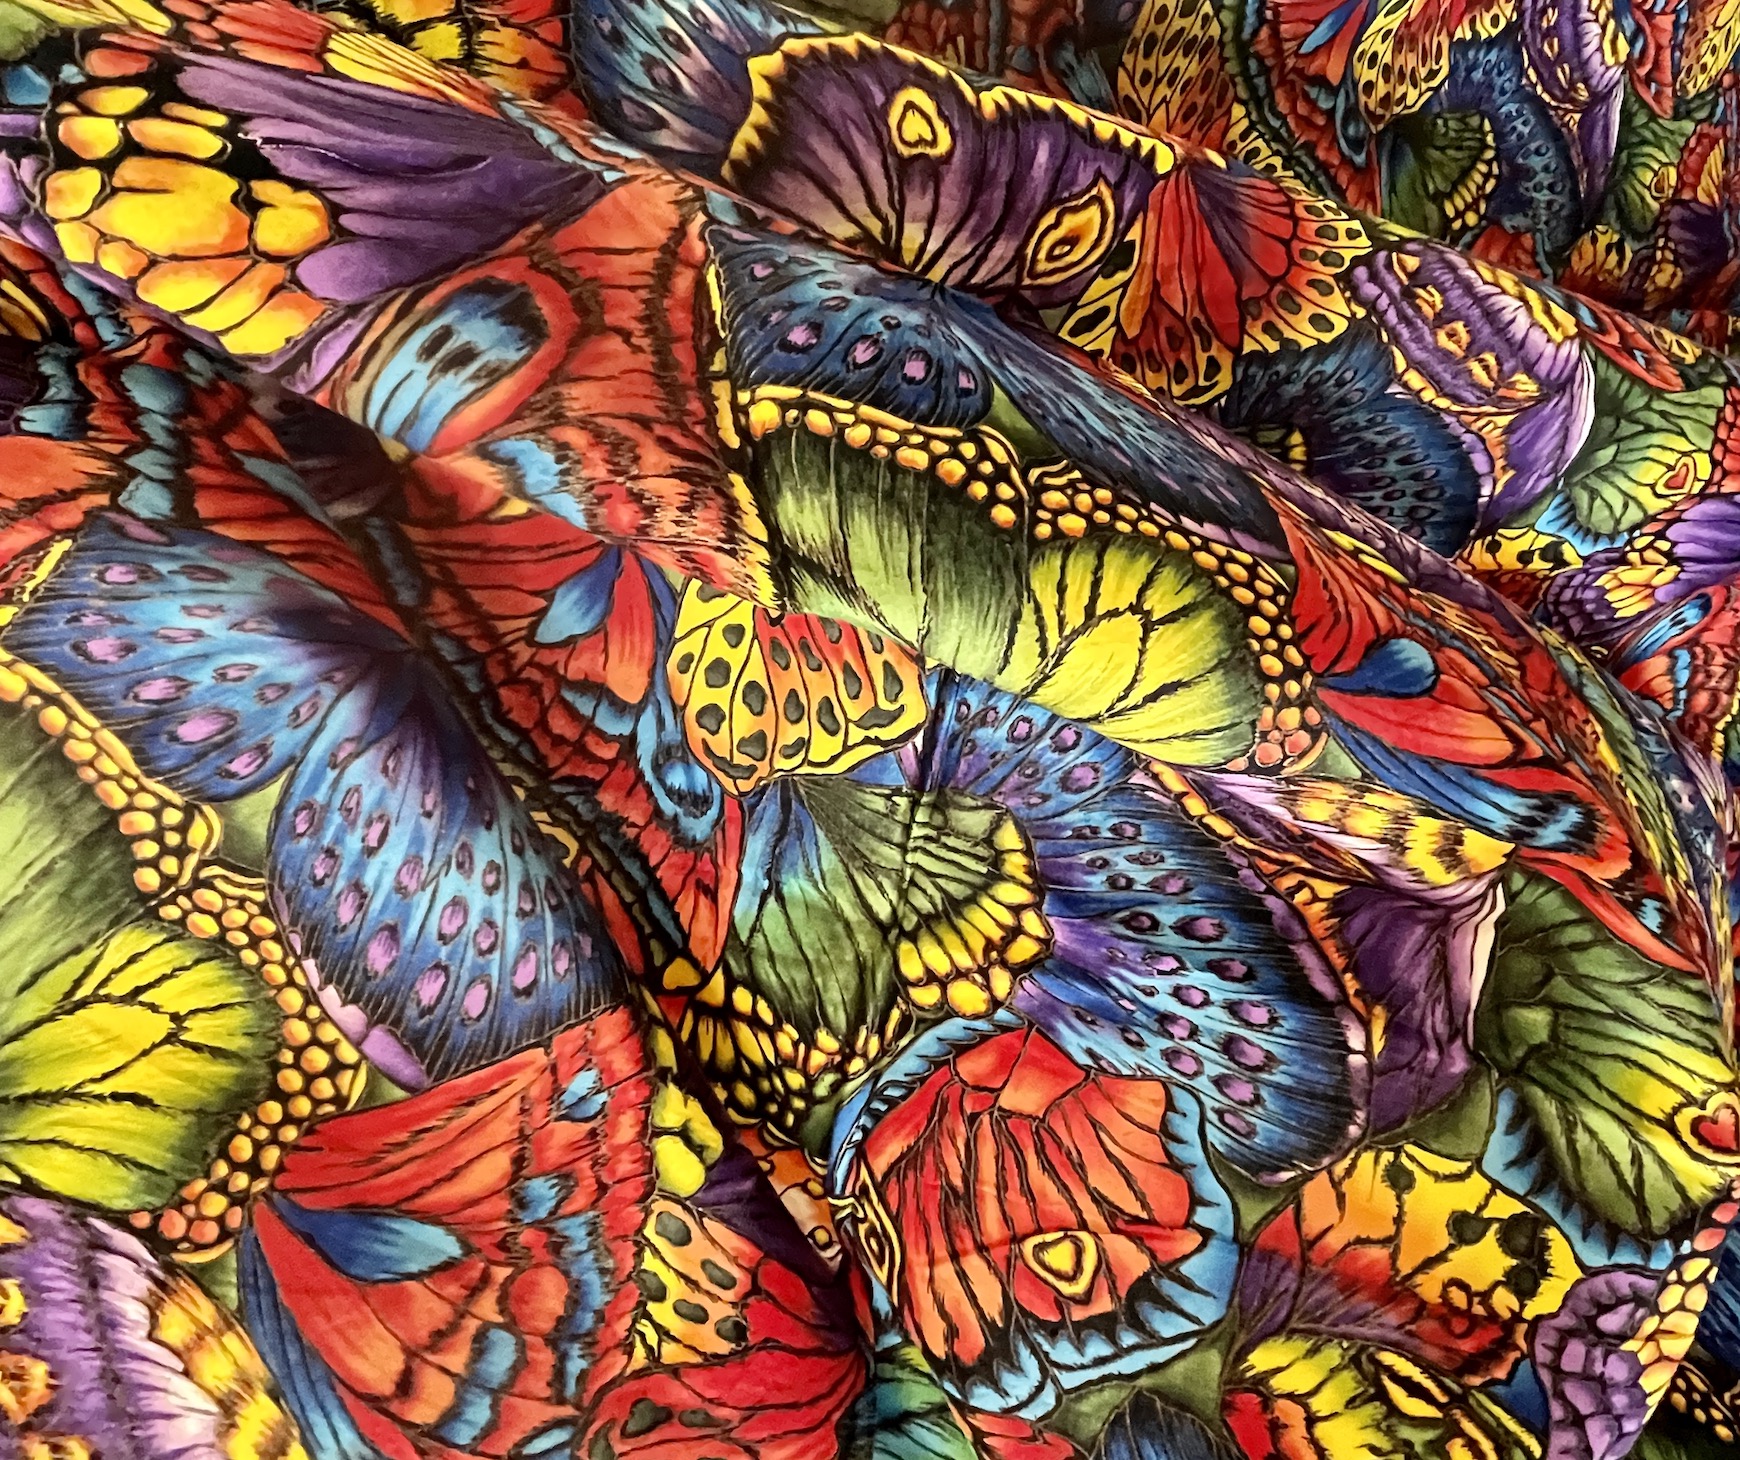
Before I get to that, let me show you the backing fabric I found in my stash for the quilt – a colorful butterfly fabric that had most of the colors from my the color wheel.
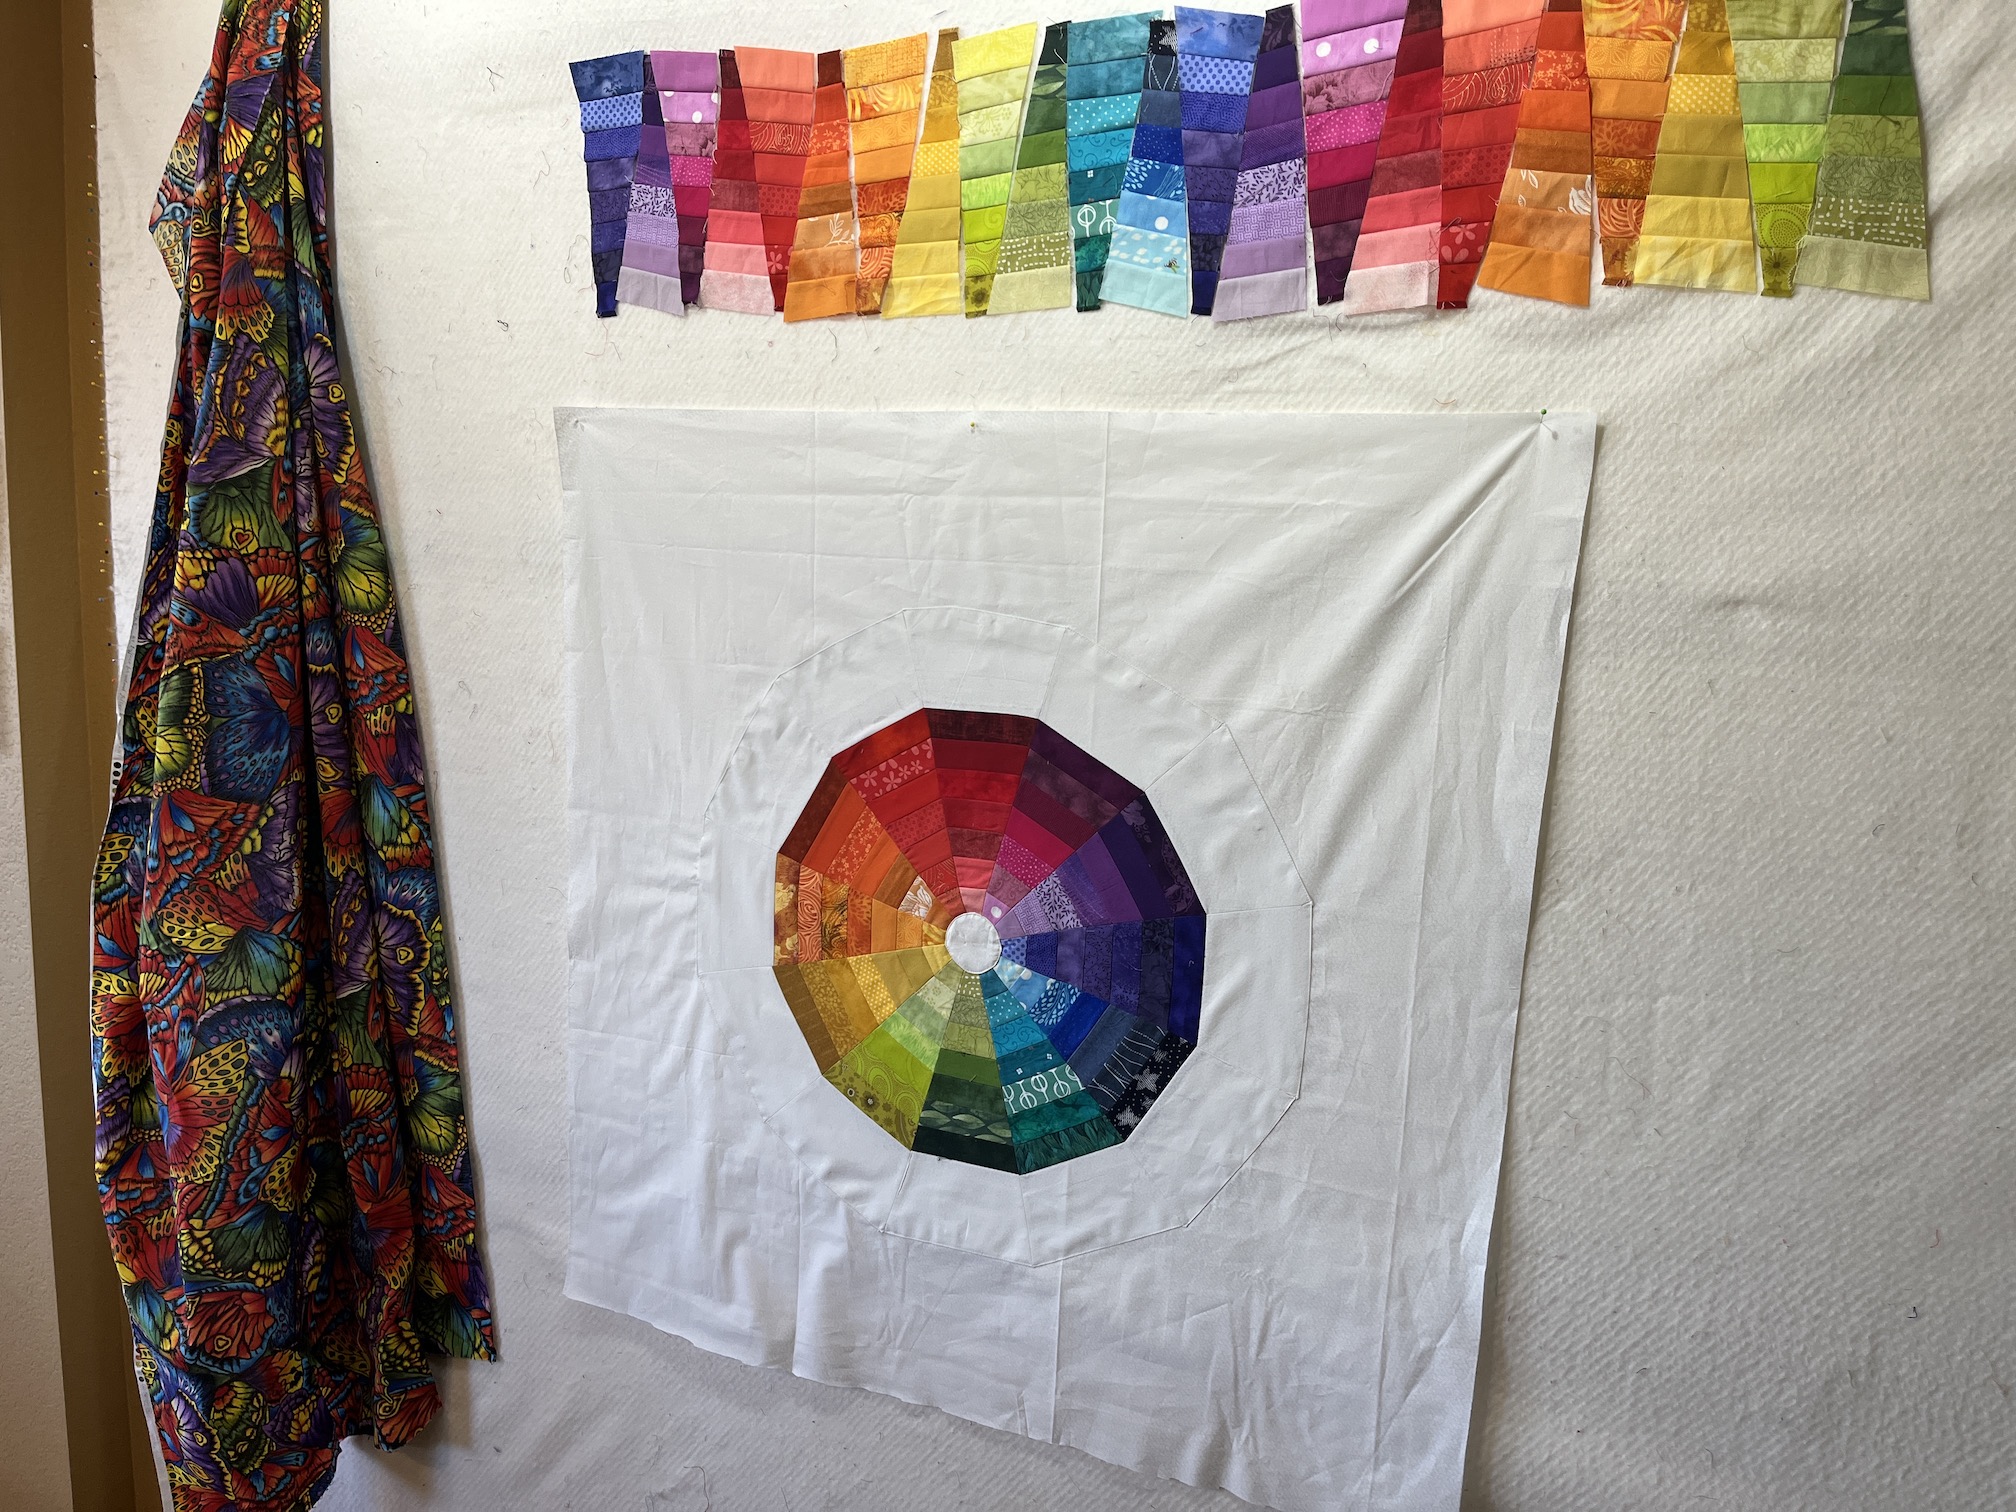
Here is the banner pieced from the trimming scraps, the backing, and the pieced main part of the quilt up on my design wall.
Looking at it on the design wall, I decided it was all feeling a little boring and it needed something. Then I remembered it is was to be a teaching tool so why not fully commit to it being a teaching tool and add letters and words to it?
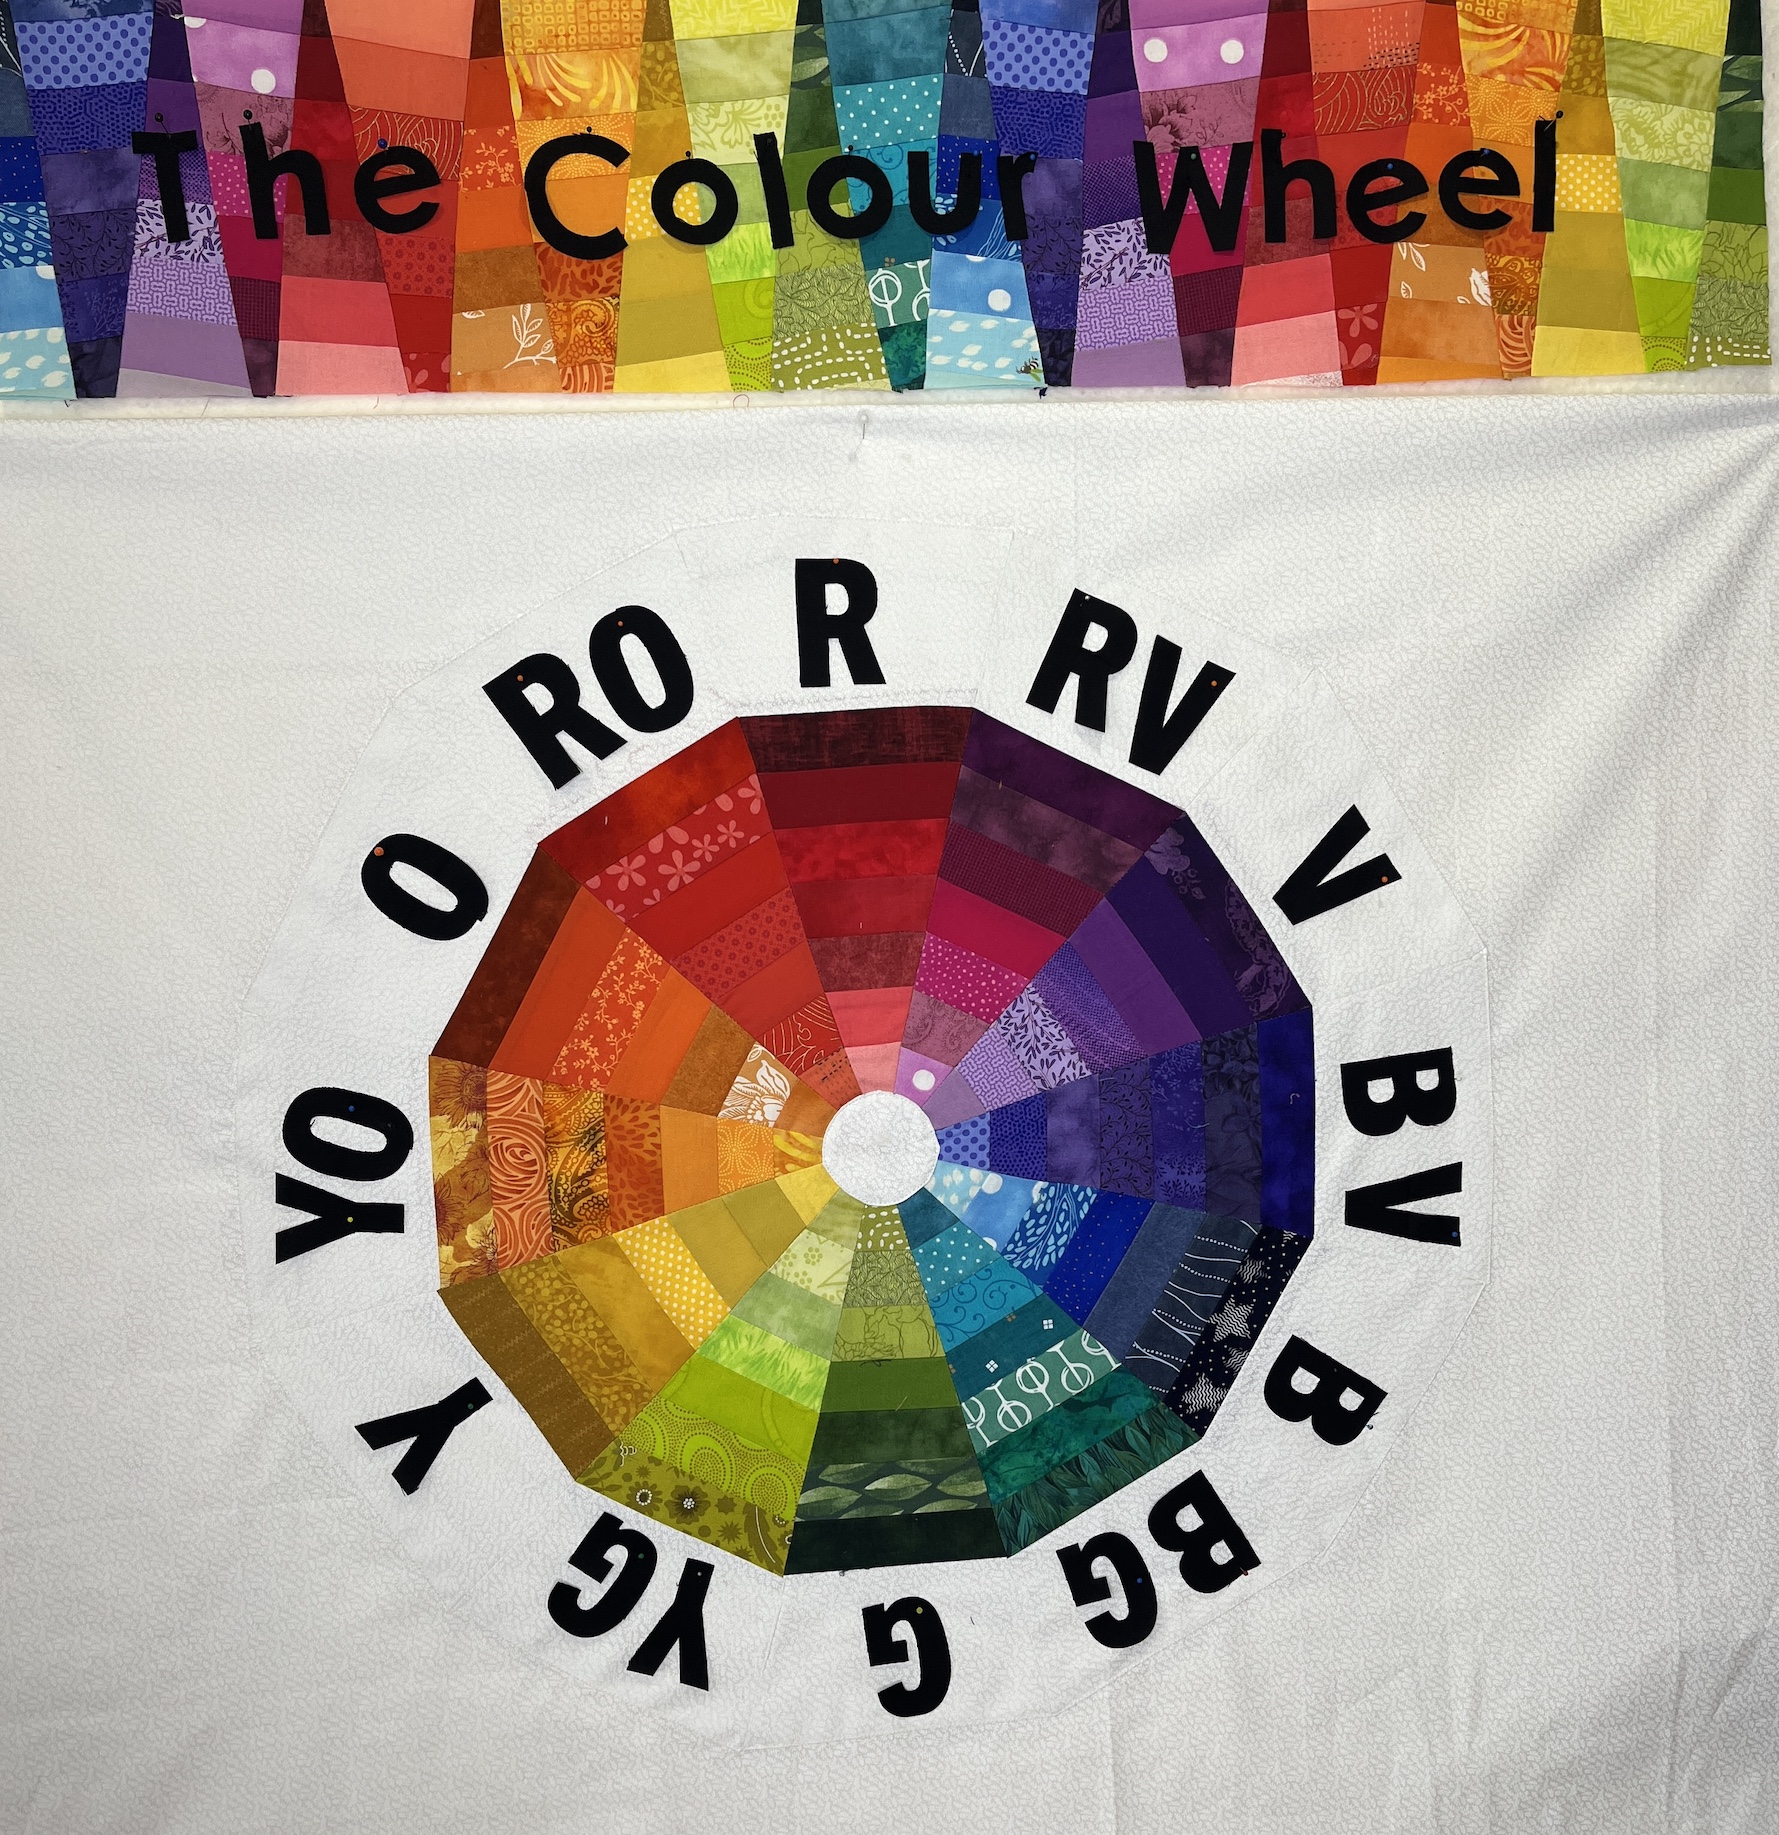
So I did, and here is what the quilt currently looks like on the design wall.
I added “The Colour Wheel” to the banner made by the trimming scraps; and labeled each of the colorways.
The letters are just tentatively laid out, when I remove the quilt from the design wall I will measure out the proper spacing of the letters and words.
I continue to work on the Colour Wheel quilt/wallhanging that I most recently blogged about in the post “Colour Wheel” Quilt in Progress, but I am not ready to share my further progress (and I did come up with a plan on how to use the trimmed sections of the color wheel and incorporate them into the quilt!), so instead I will share an update on the batik table runner I made for a friend.
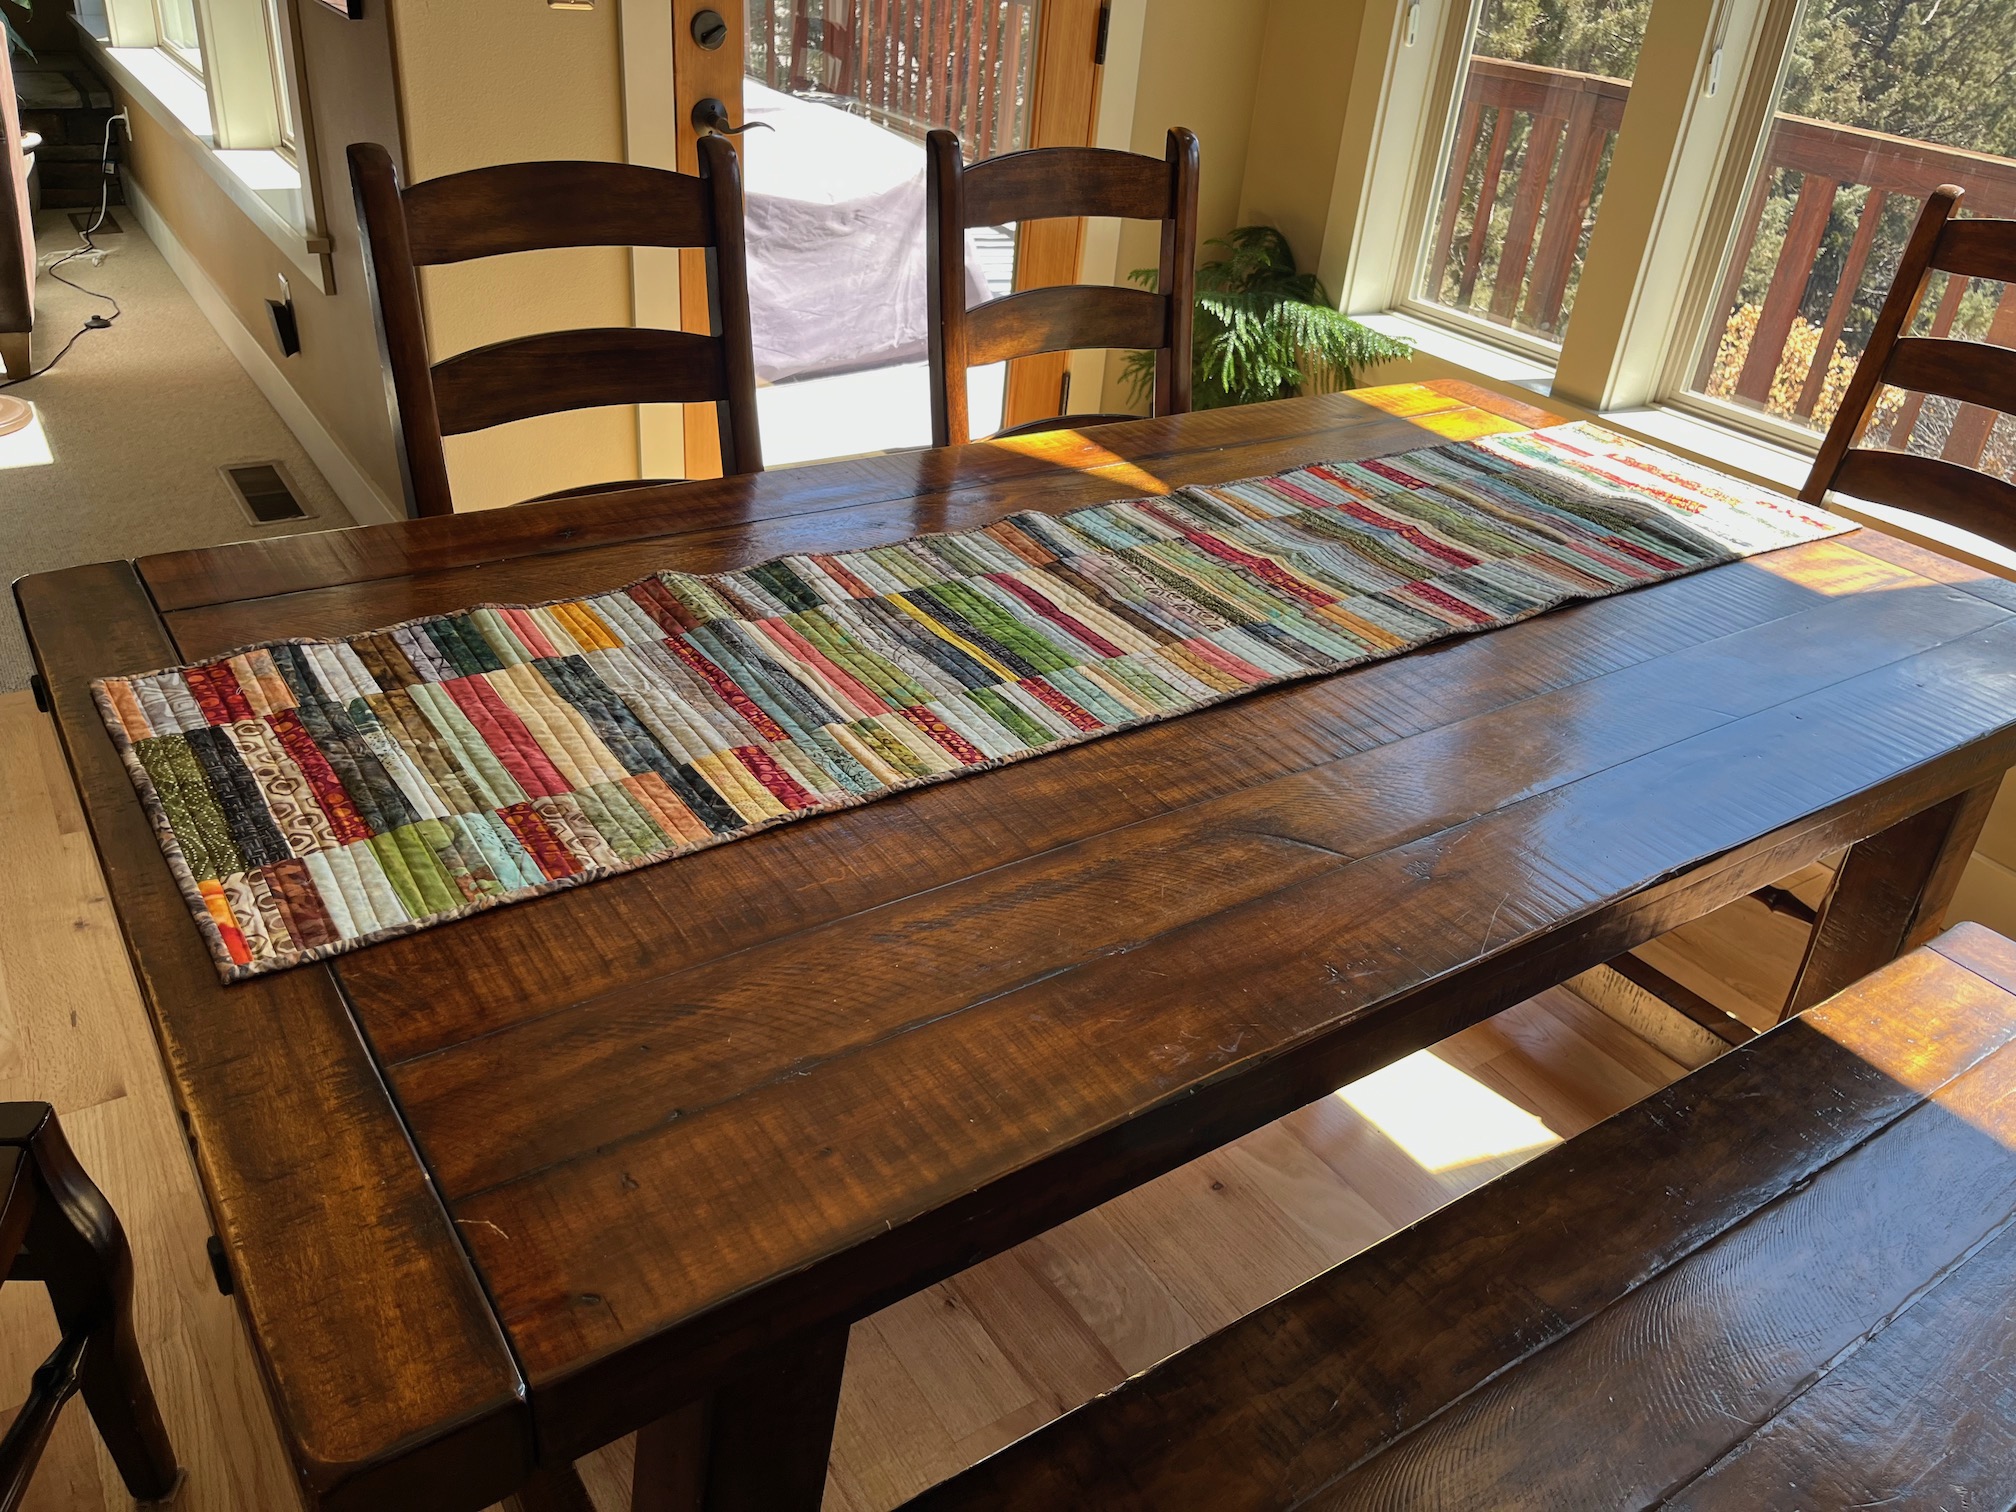
Back when I lived in Bend, Oregon (now over 4 years ago), I promised to make my friend L a table runner for her long dining room table which I had enjoyed several wonderful meals at over the years.
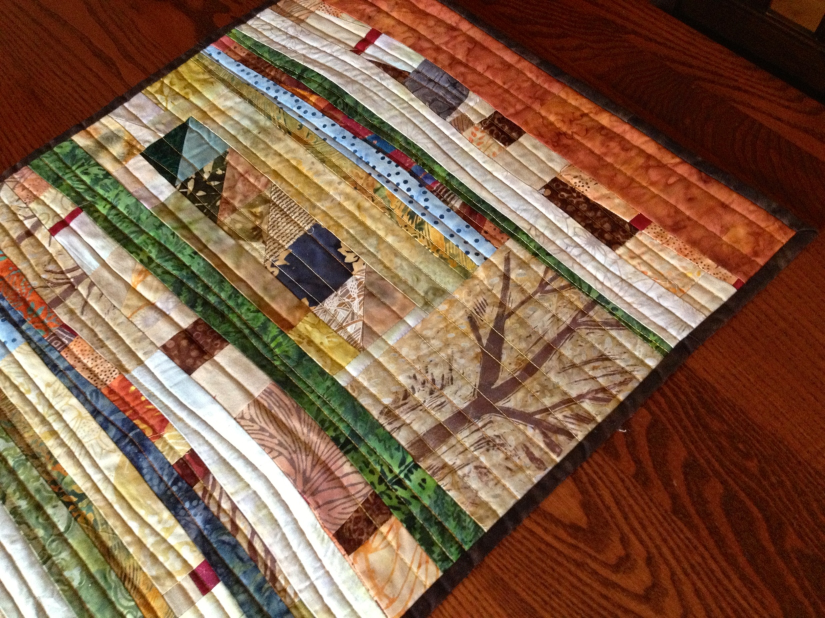
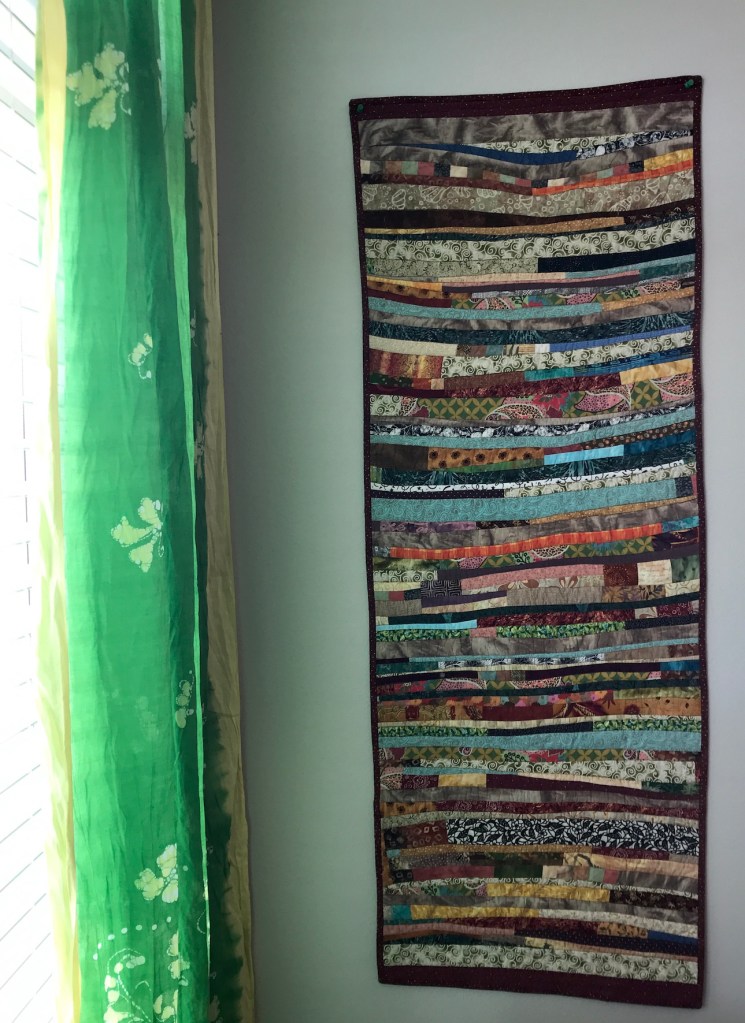
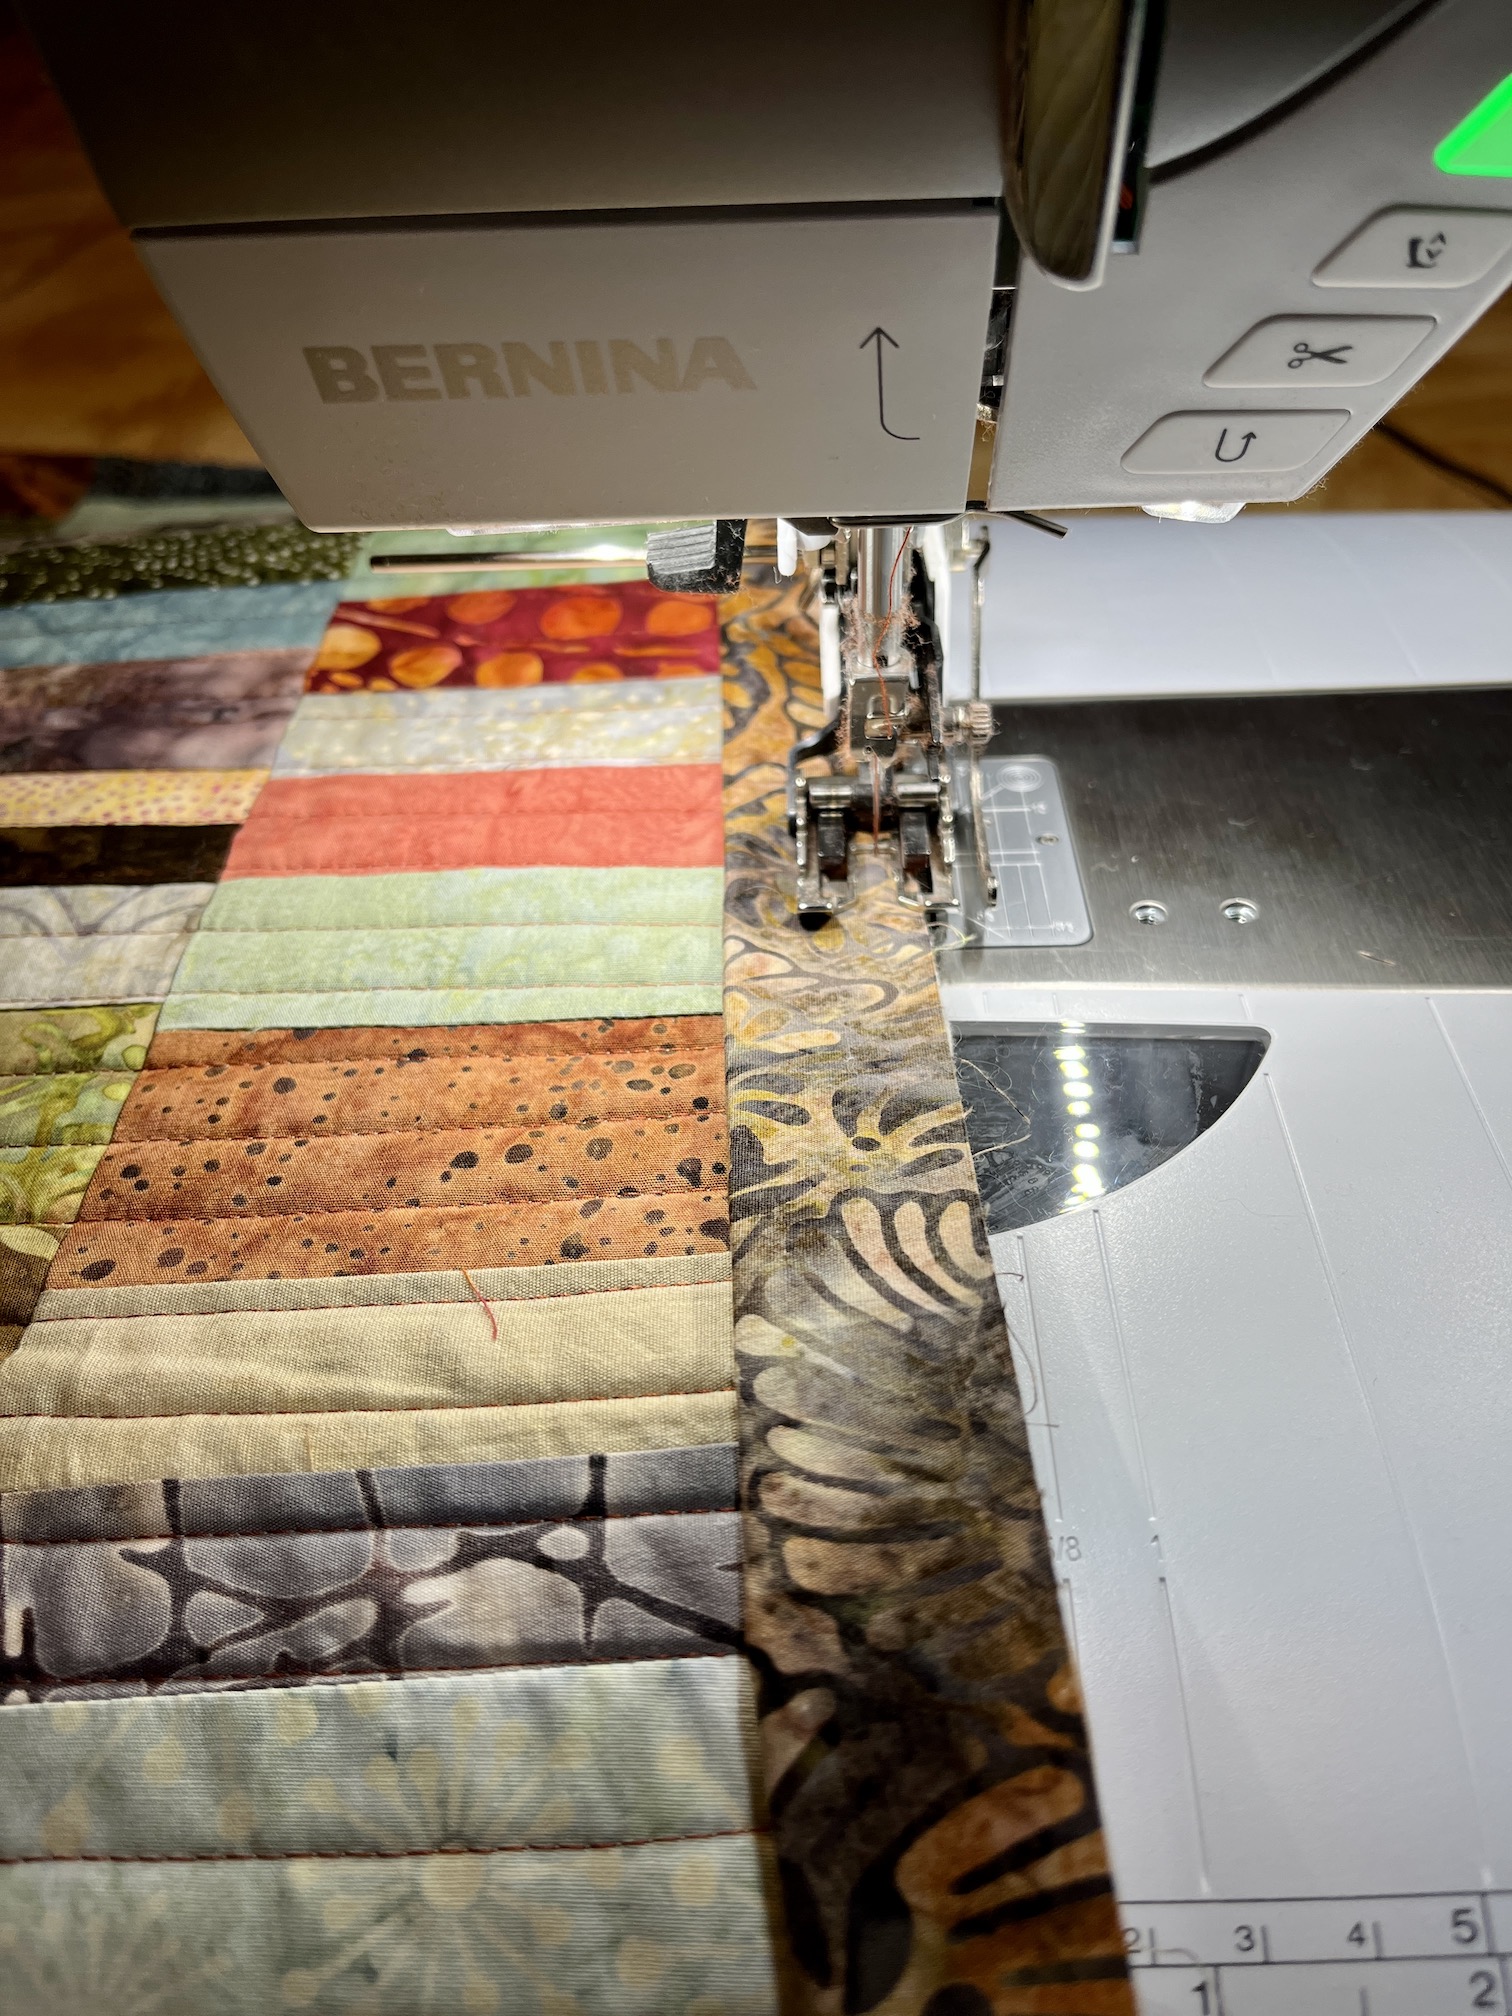
Finally back in December 2022 I started the table runner and made it from batik fabric scraps using the pattern Bamboo Shade by Aardvark Quilts. Here is where I was at in December 2022 – I had pieced it and prepared it for quilting:
I shared in the March 17, 2023 post7 Million Stitches+, that I was working on machine quilting the table runner on my new sewing machine.
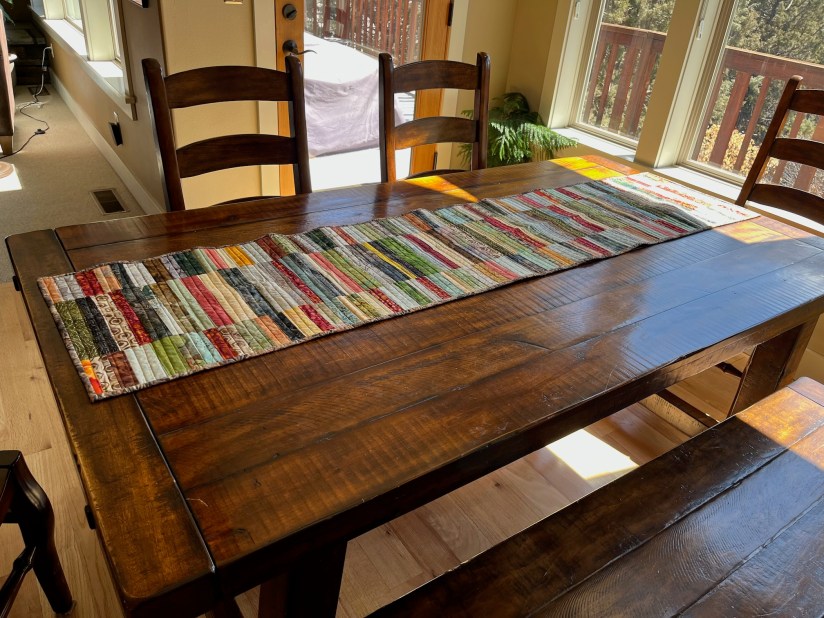
Here is the completed table runner:
And here is the table runner on my friend L’s dining room table (she received it in the mail the other day and sent me a photo)!
It felt wonderful to complete that project and finally give her the table runner!
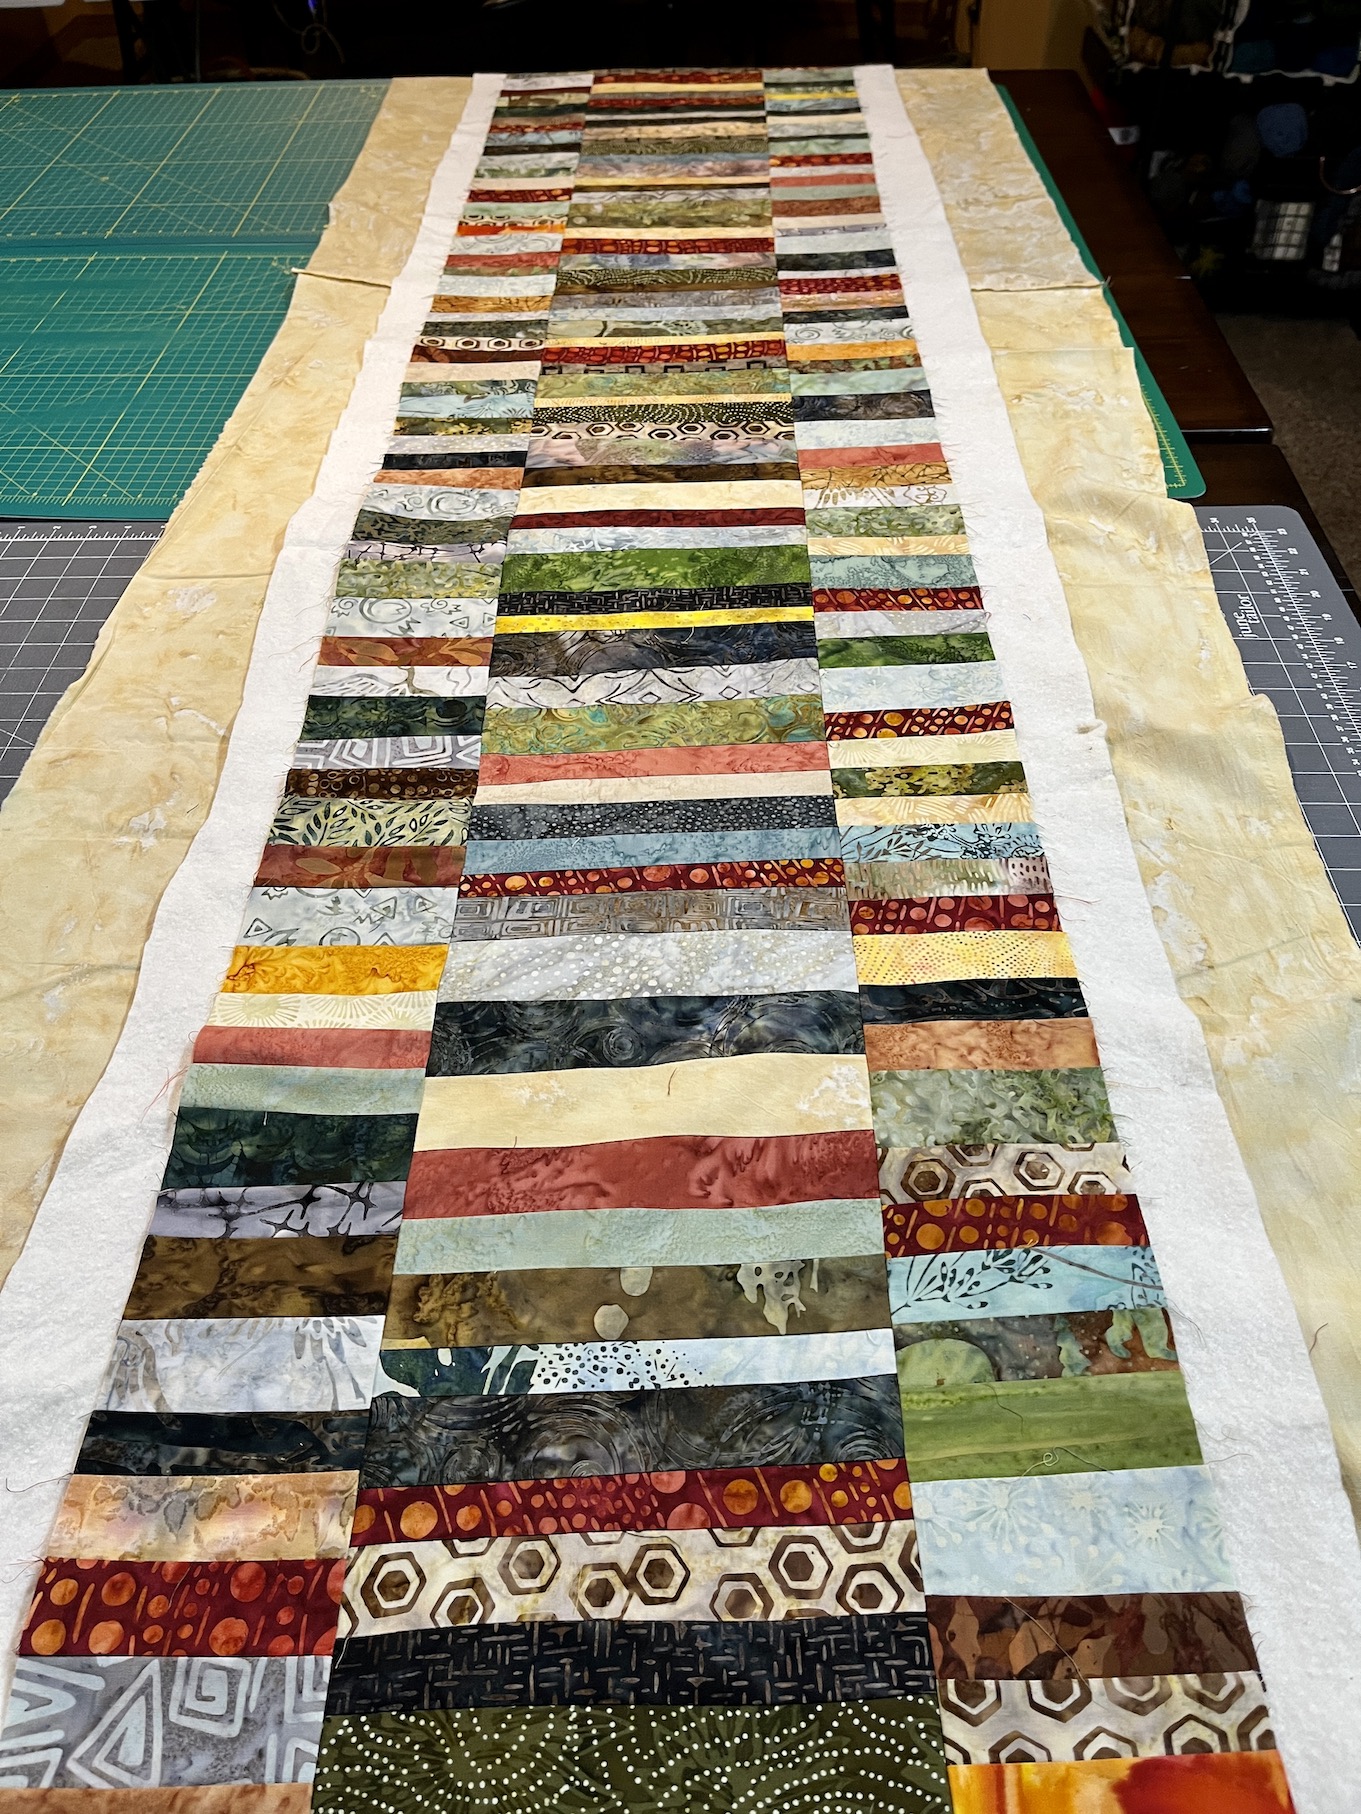
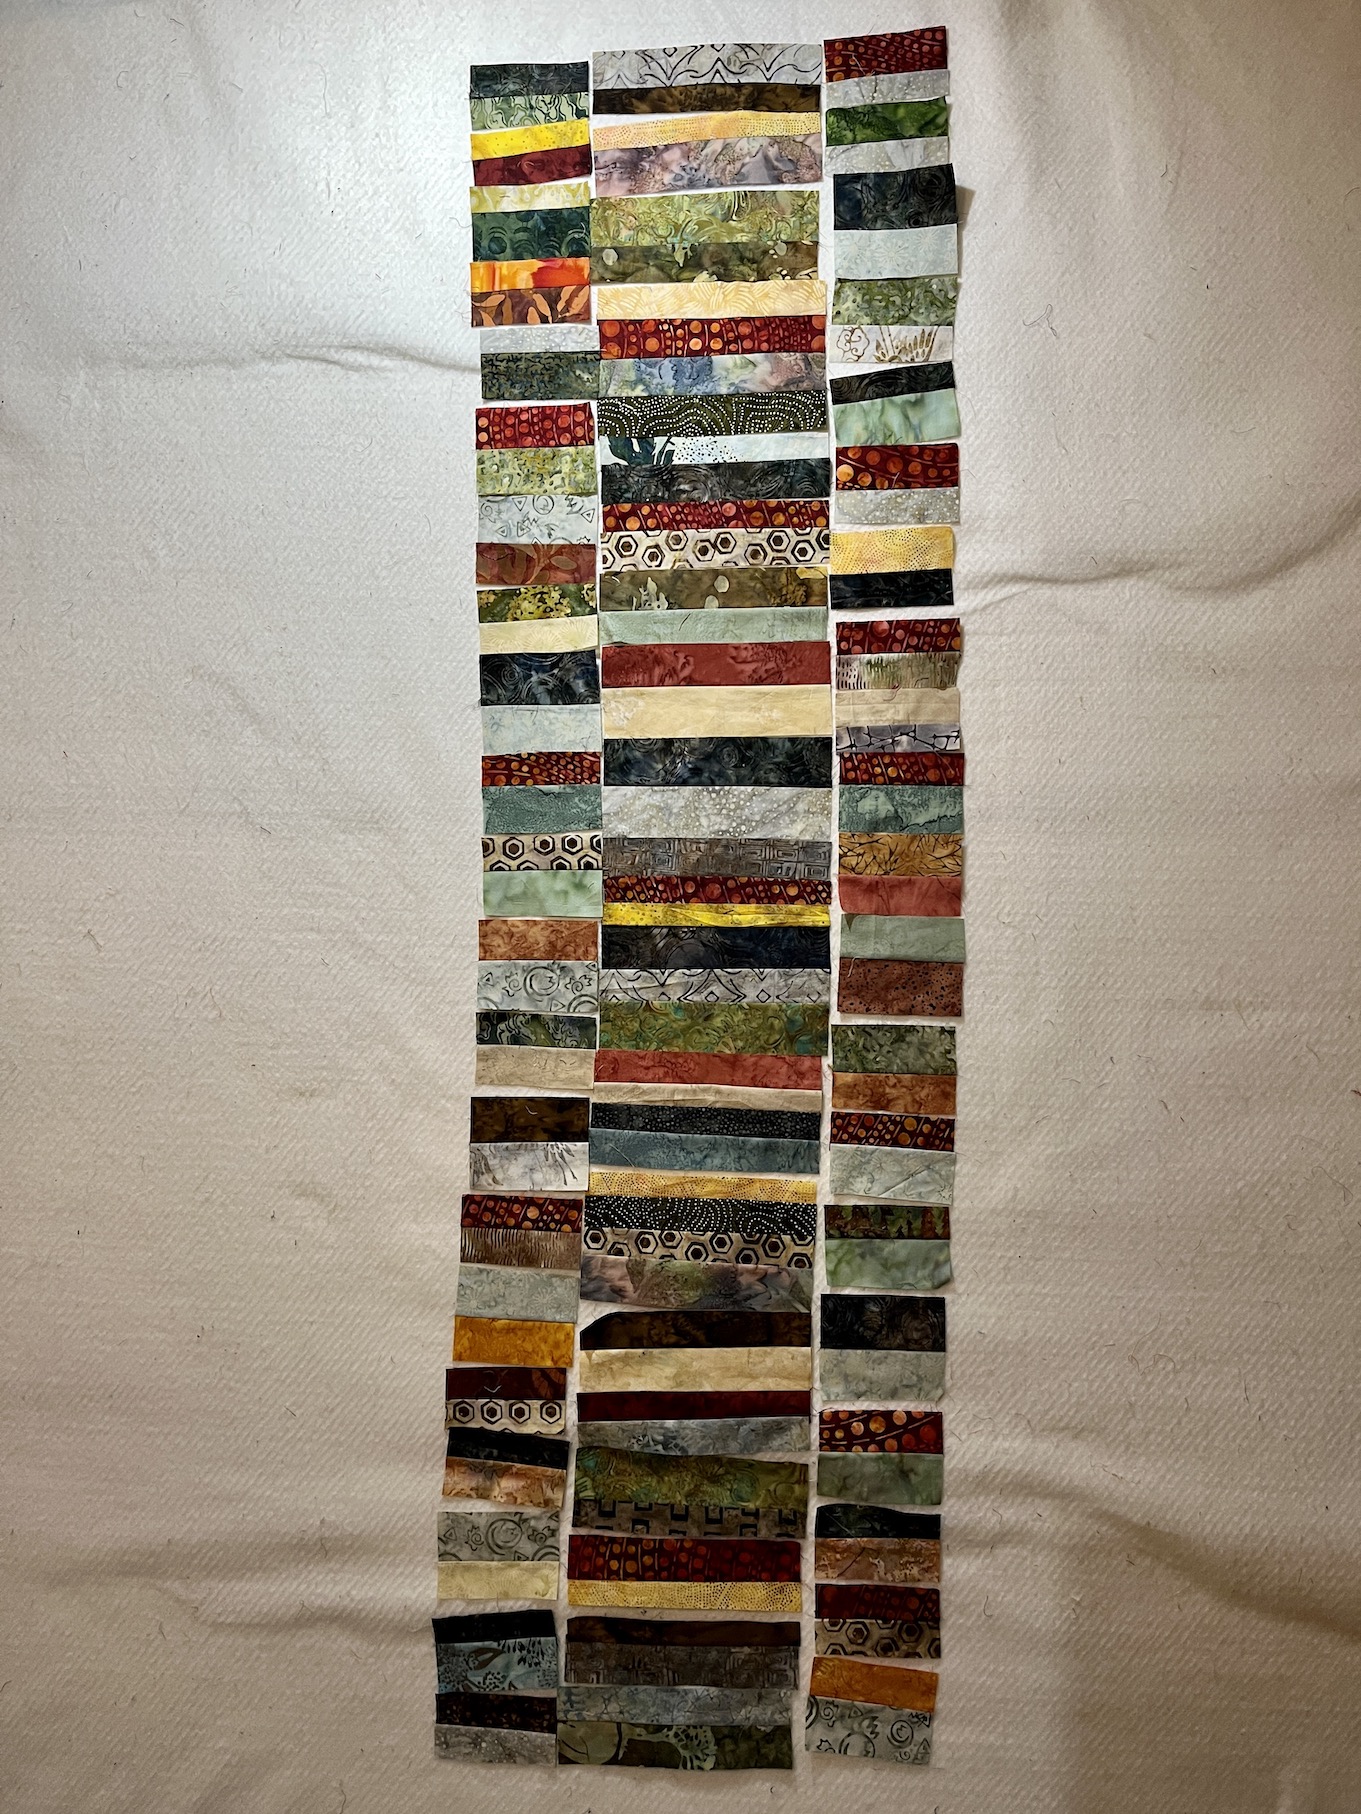
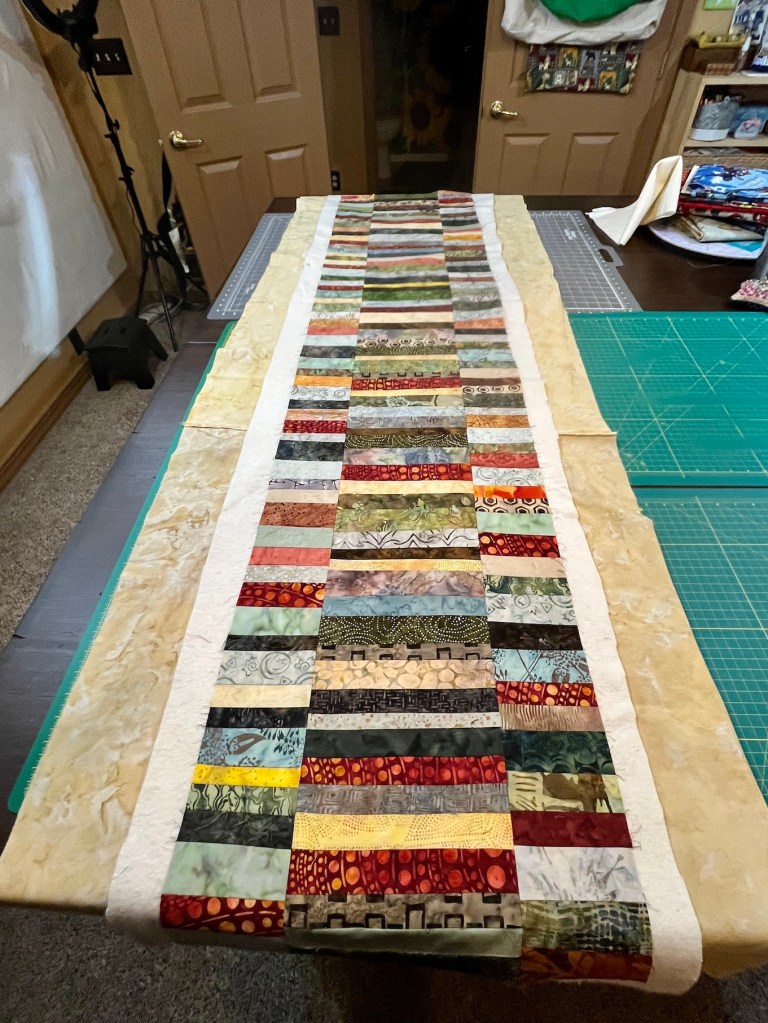
I’ve made quite a bit of progress on the table runner I was making from my collection of batik fabric scraps using the pattern Bamboo Shade by Aardvark Quilts:
Here it is up on the design wall as I tested the layout and built it to the desired length:
And here are a couple photos of the pieced table runner which is nearly 72 inches long and used quite a bit of my batik fabric scraps (yay!):
It is nearly ready for me to machine quilt. I’ve already made the “quilt sandwich” of batting and a dark cream color batik backing. I just need to pin it down for quilting.
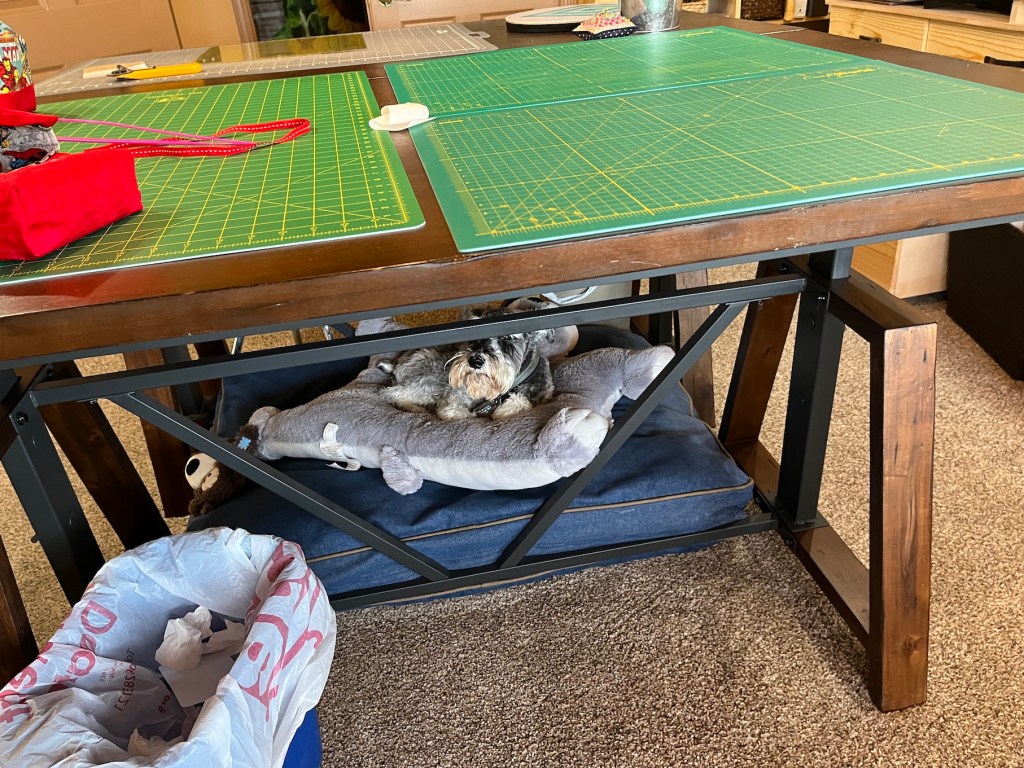
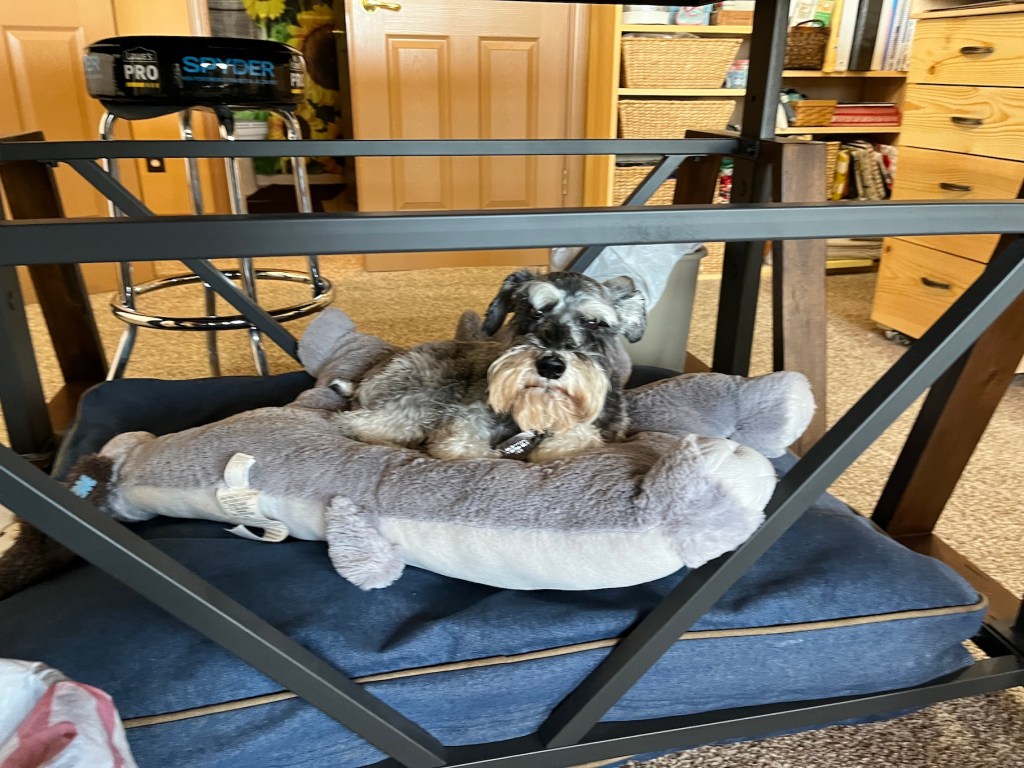
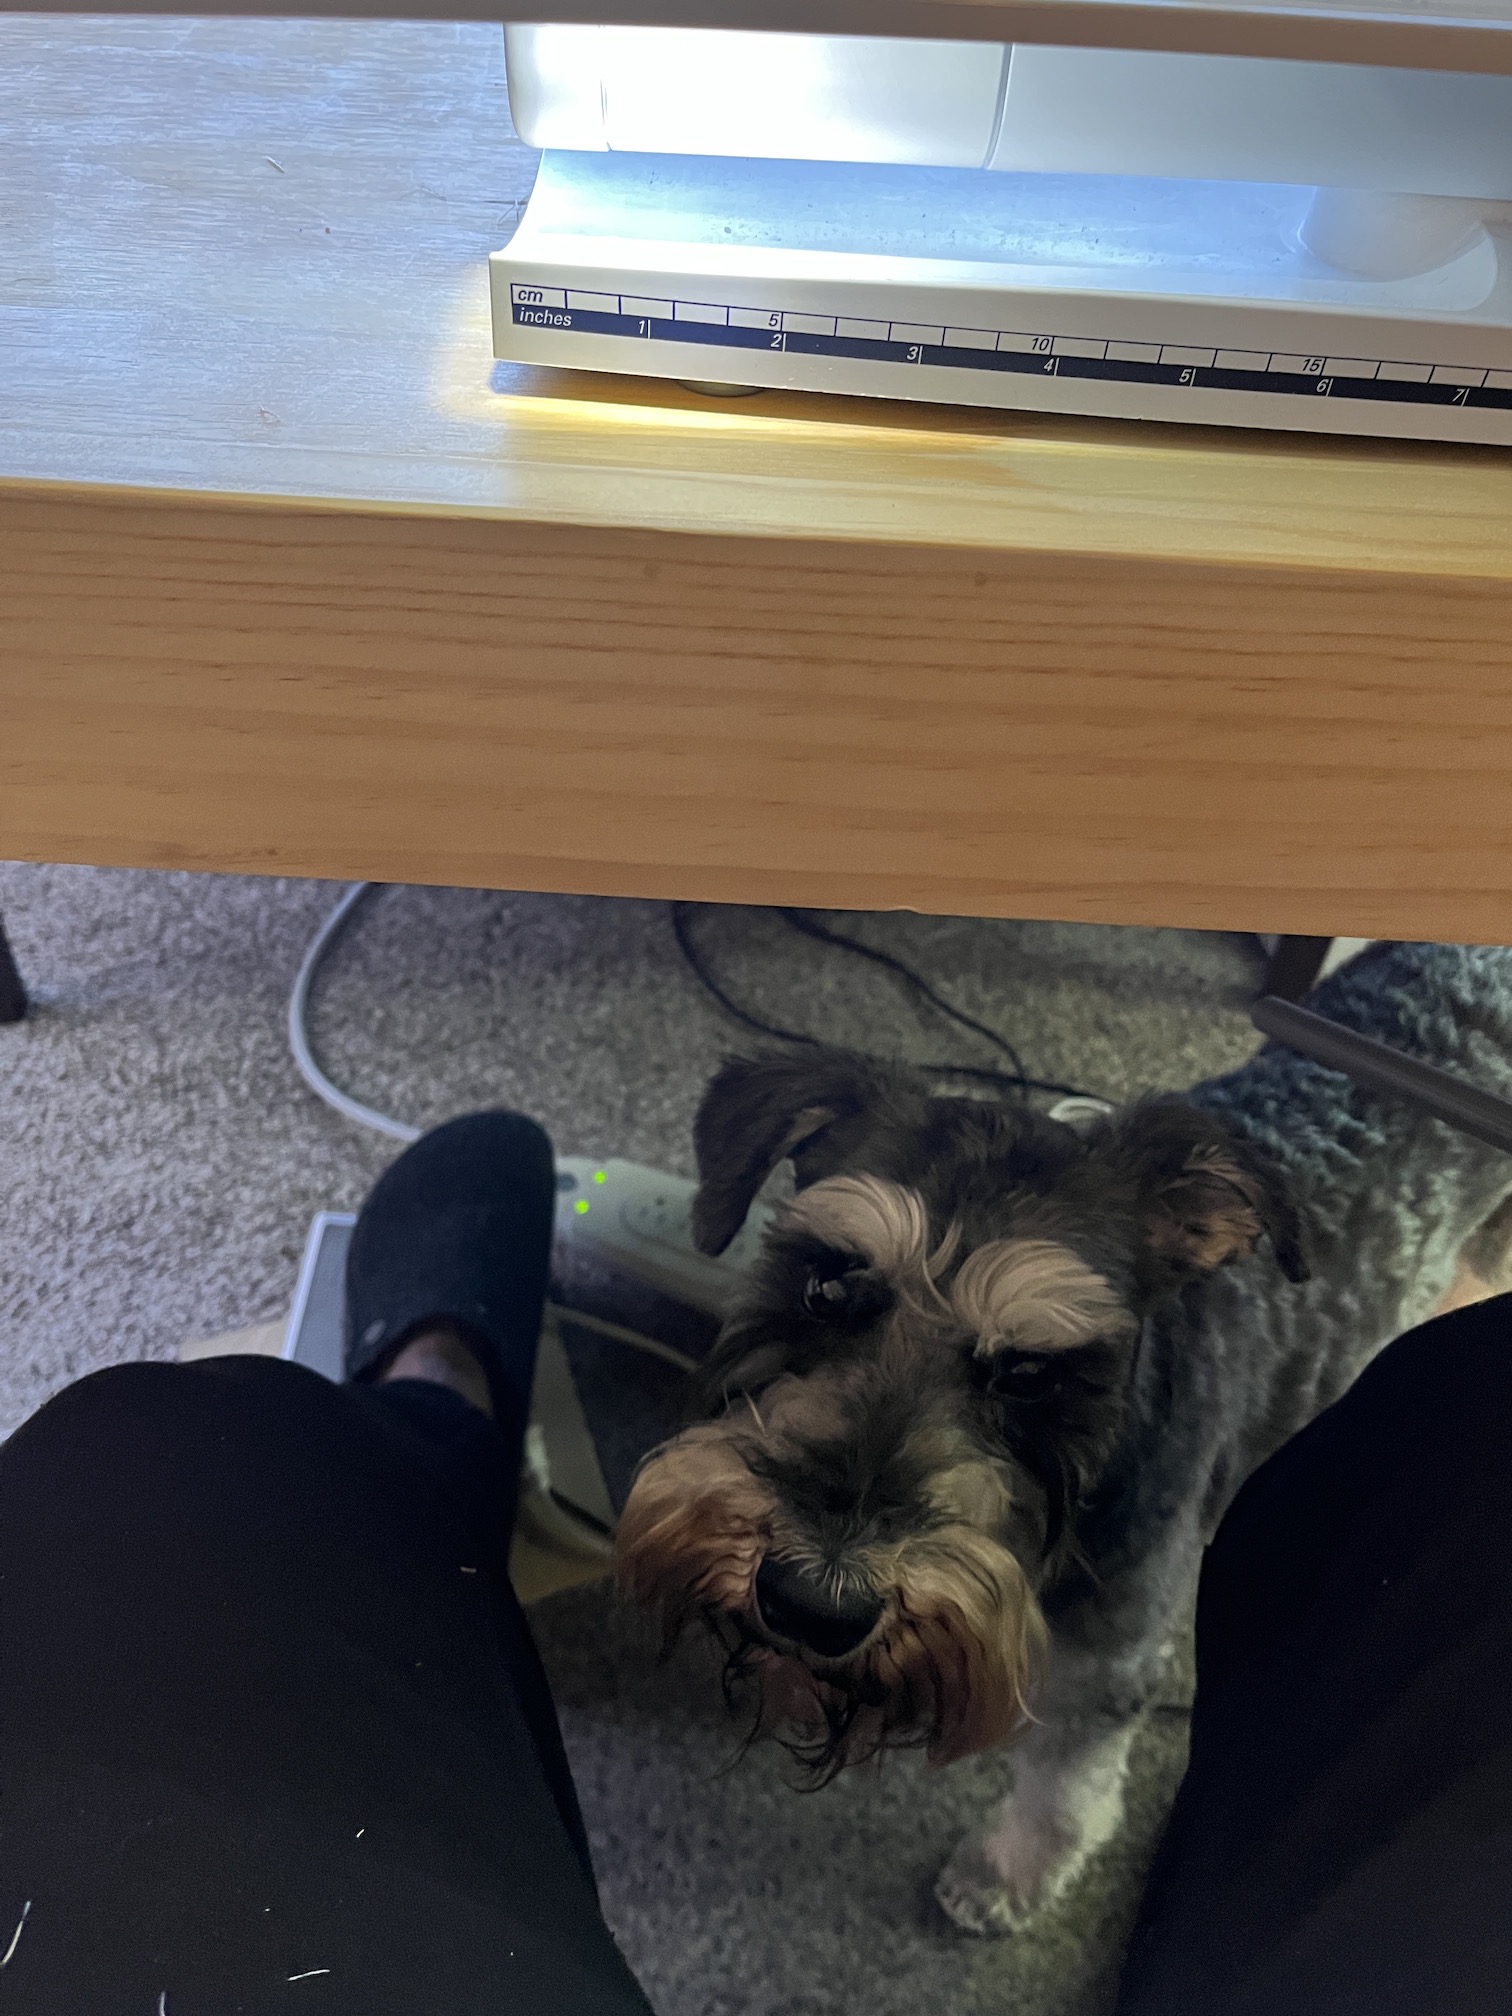
Oh and here are some photos of Mike the Miniature Schnauzer hanging out under my studio table (providing crafter emotional support, ha) while I put the table runner quilt sandwich together:
I just finished catching up on my blogging buddies blog post and I just read one by Mary @zippy quilts where she shares an awesomely scrappy quilt she made with her fabric scraps – Scraps Galore.
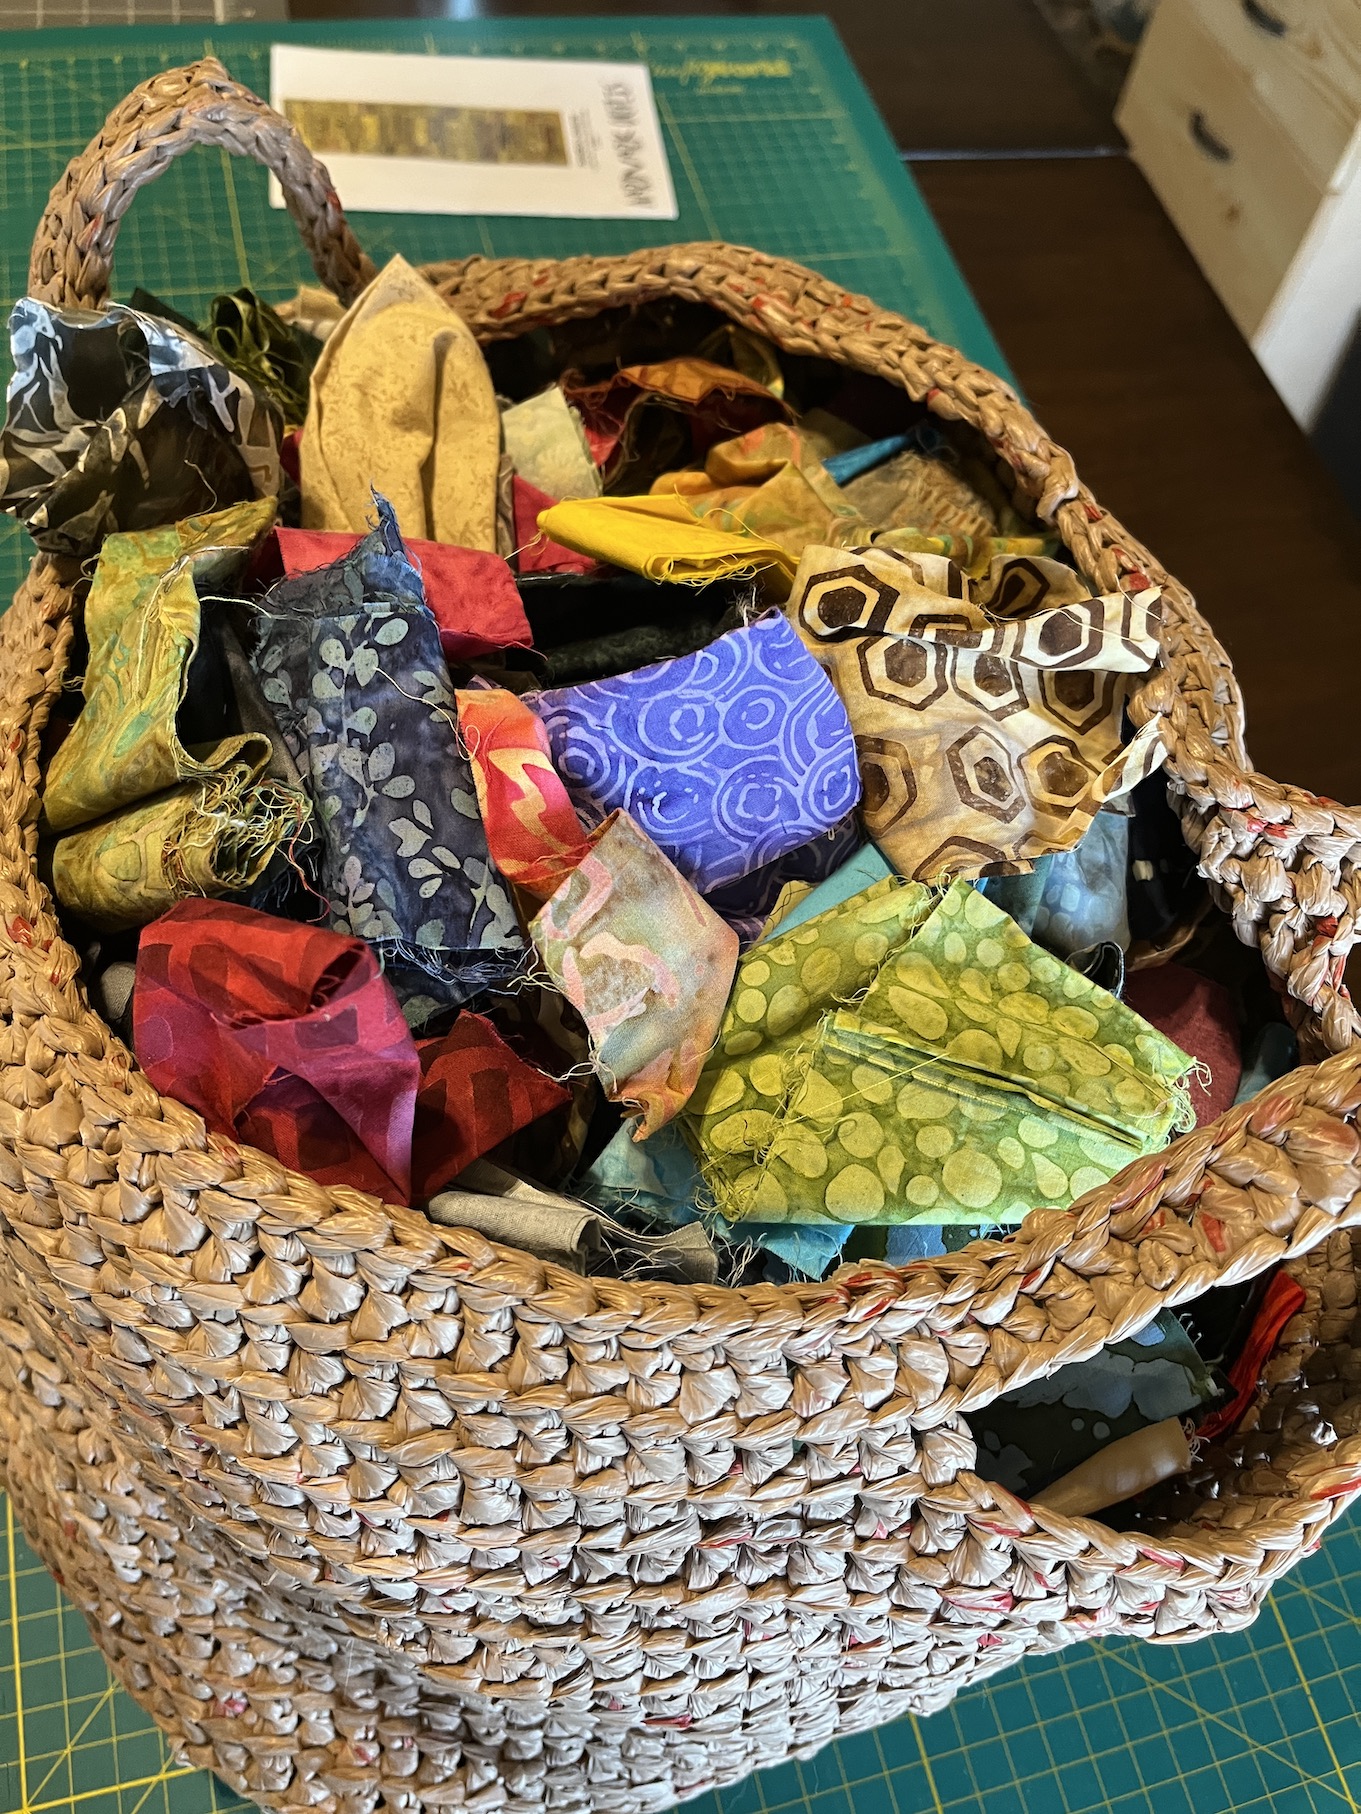
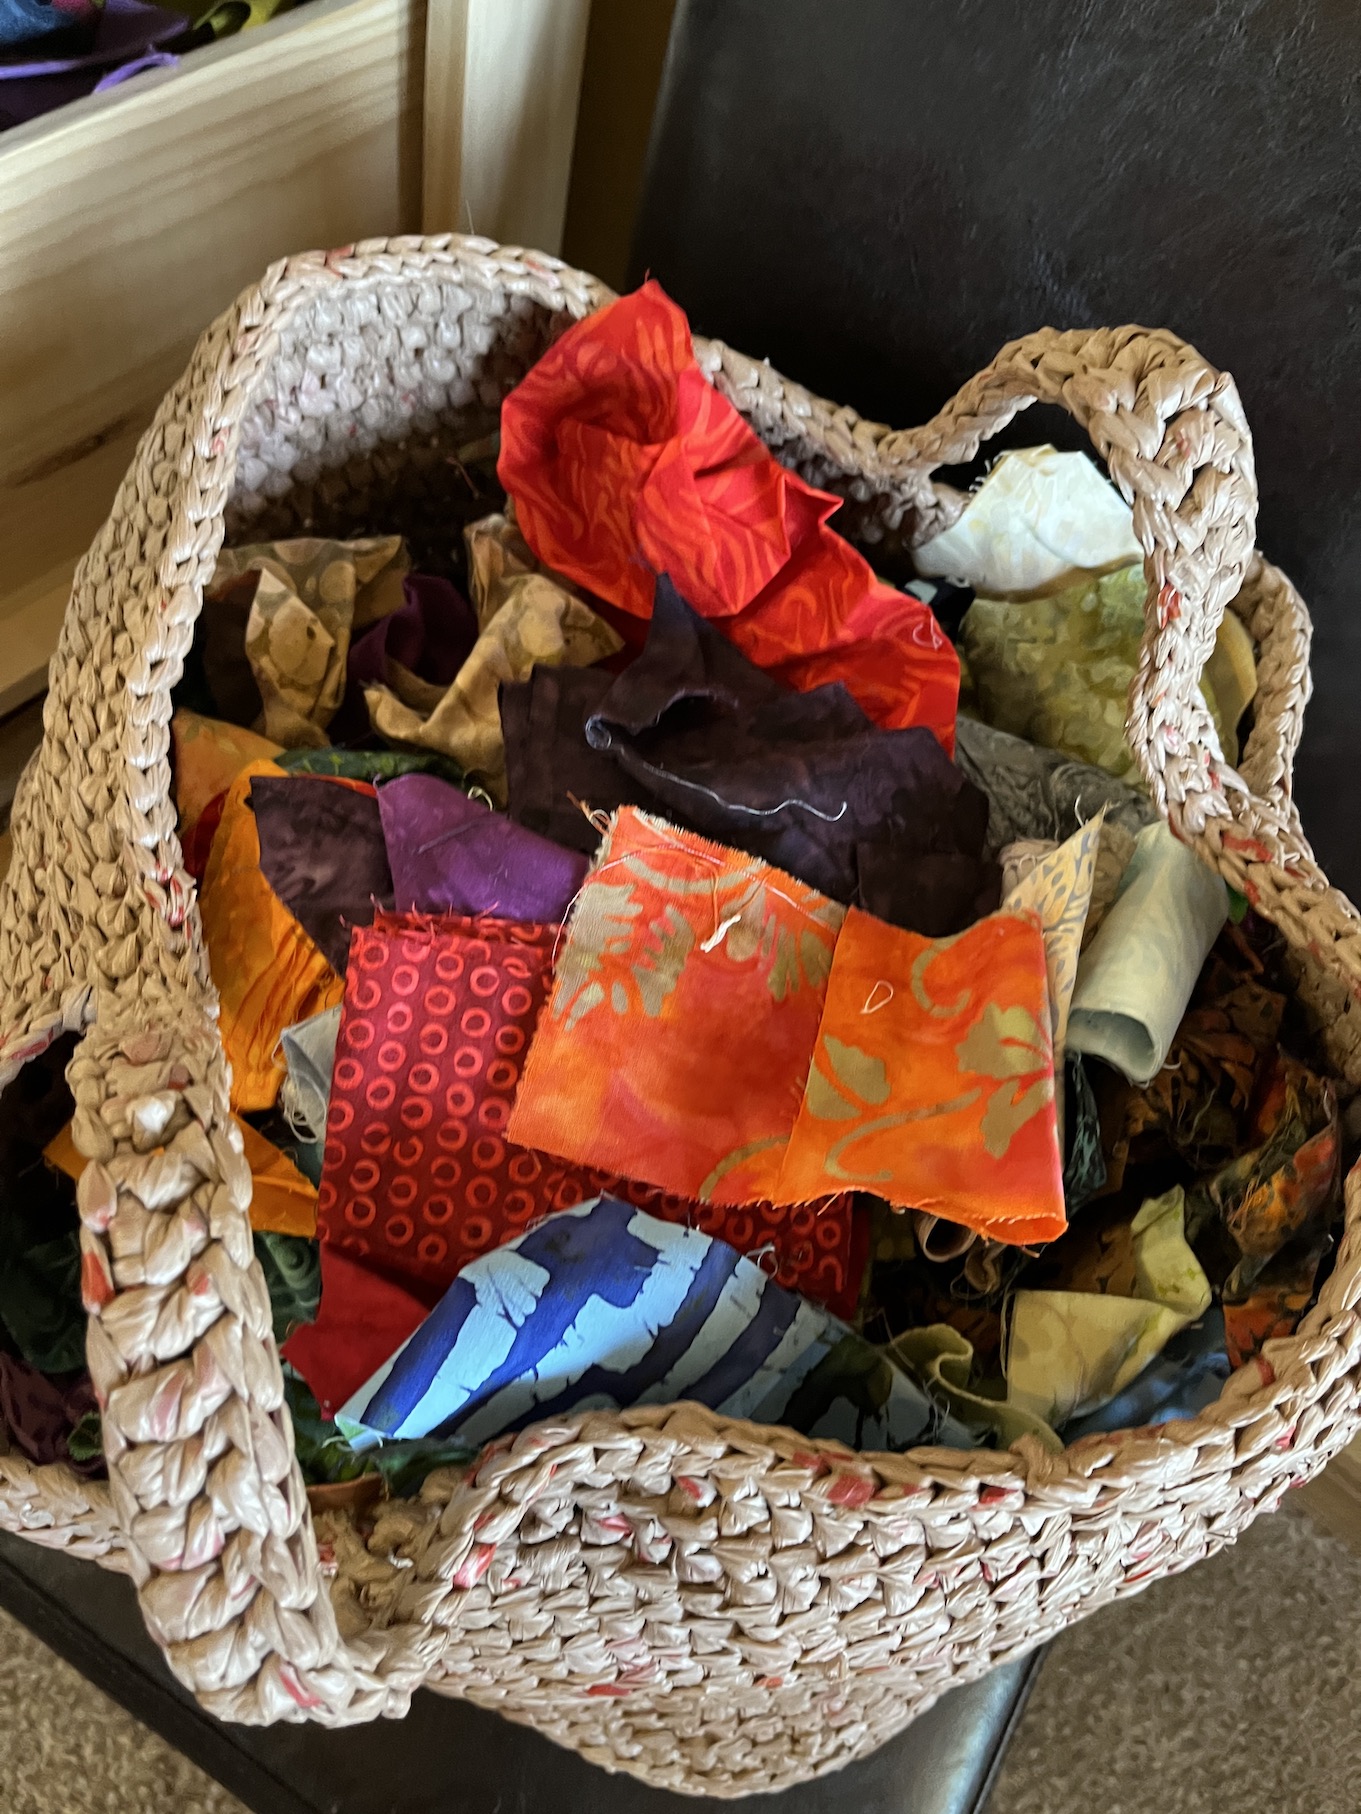
Well I am getting my scrappy on too recently, as the other day I decided to pull out a very dusty pattern (Bamboo Shade by Aardvark Quilts) that I bought a while ago (like maybe the mid 2000s?) and make a table-runner with my basket of batik fabric scraps.
My plan after putting my Etsy shop on hold (and endless project bag making for it), see post That darn grief, the Etsy shop saga, and a little grace , was to start working on a new body of work of art quilts. But I realized I needed to do something to “warm up” as I am feeling rusty creatively (if that makes sense).
So I thought working with my basket of batik fabric scraps would be a great way to start.
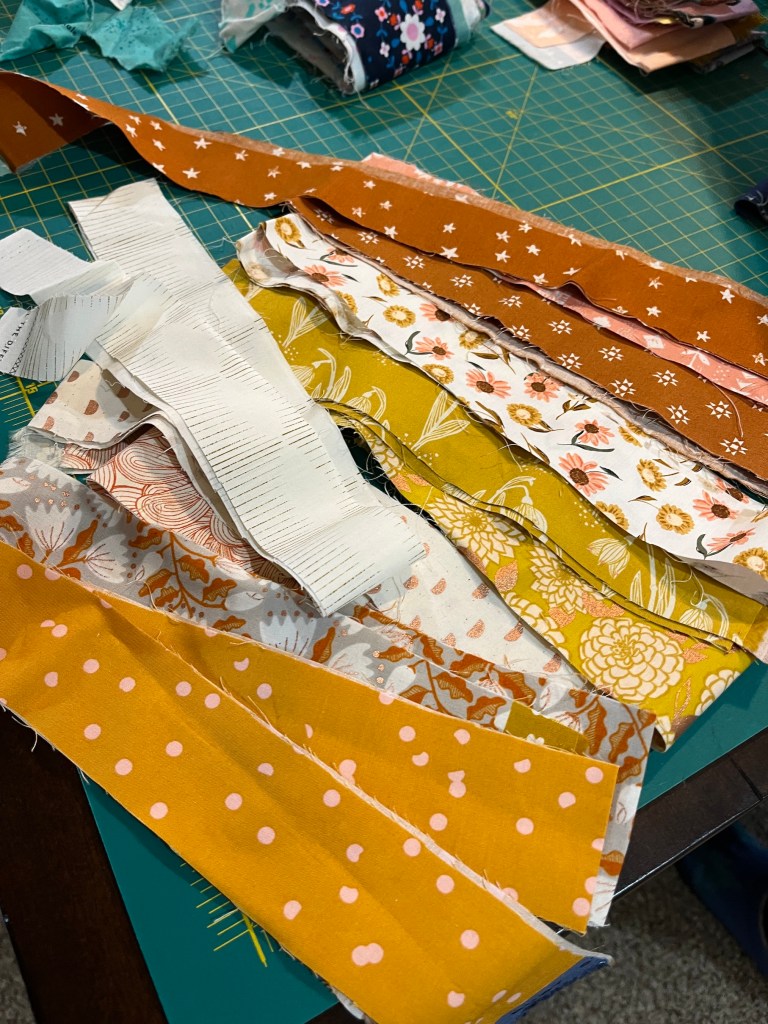
First I selected and sorted colors I want to use for the table-runner. I was drawn to Southwest-y colors:
Then I ironed the select scraps, cut them to size for the pattern and began to organize them:
And now I am sewing up a storm on them (lots of “chain-piecing” all those small strips!):
We’ll see how it progresses….
By the way, the bag/basket holding my batik fabric scrap collection was gifted to me years ago by my friend MJ and was made by her friend from recycled plastic shopping bags! I’d love to learn how to crochet bags from recycled plastic shopping bags someday!
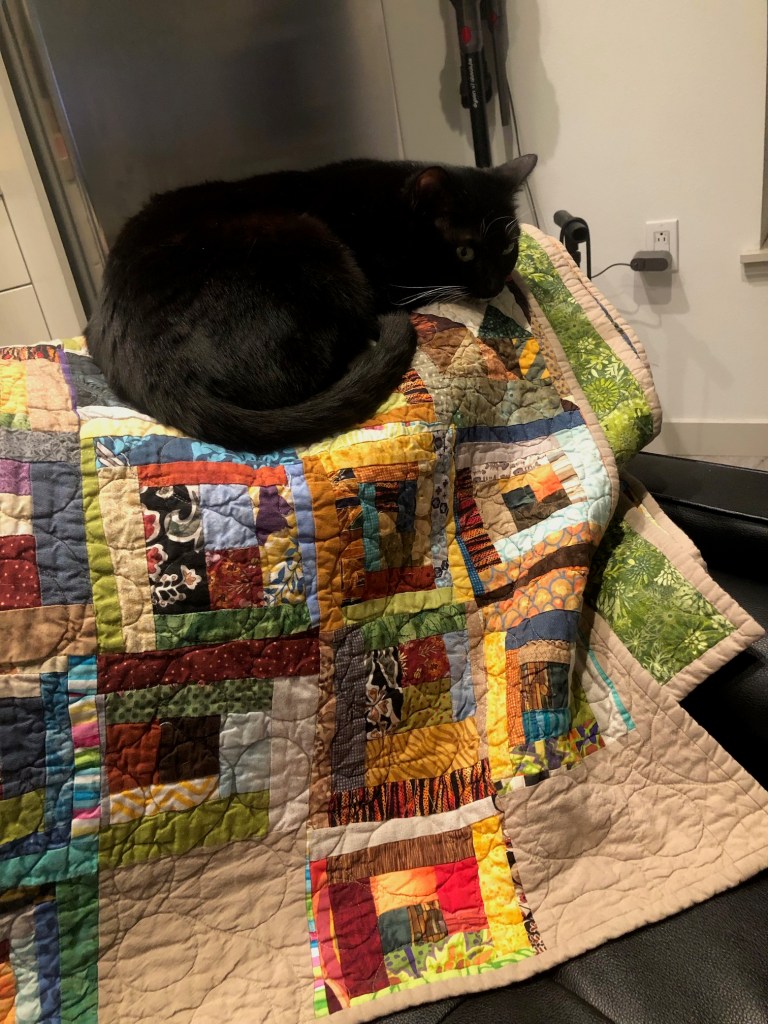
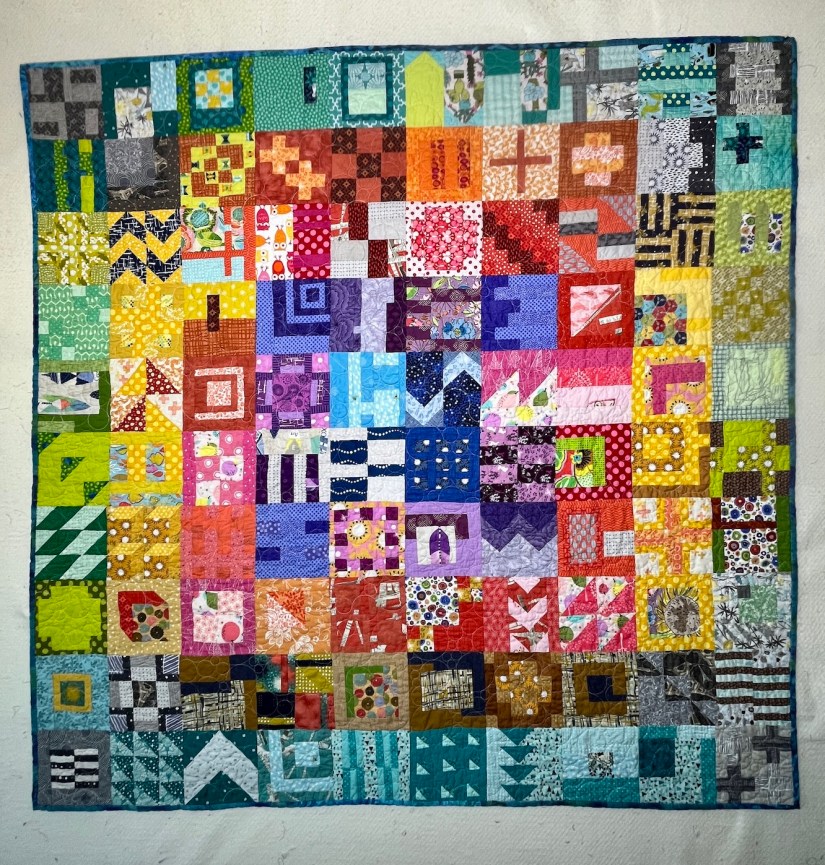
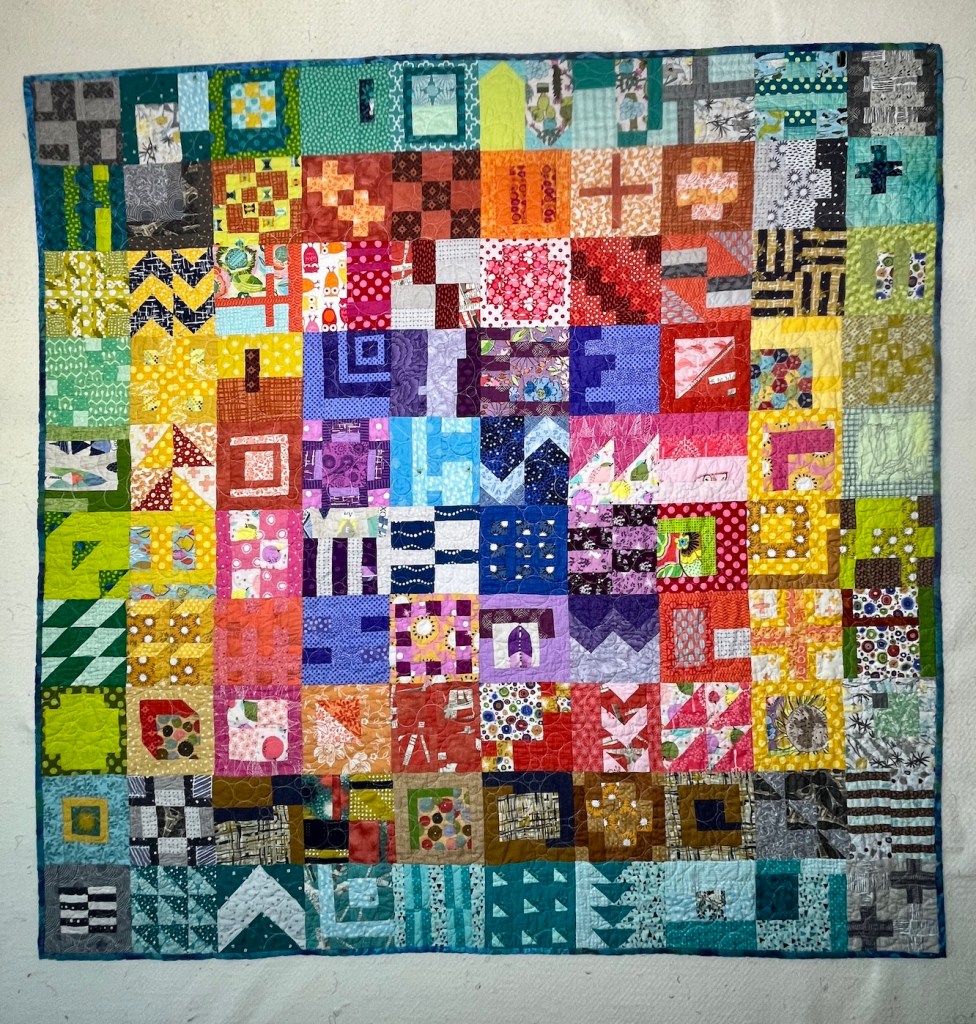
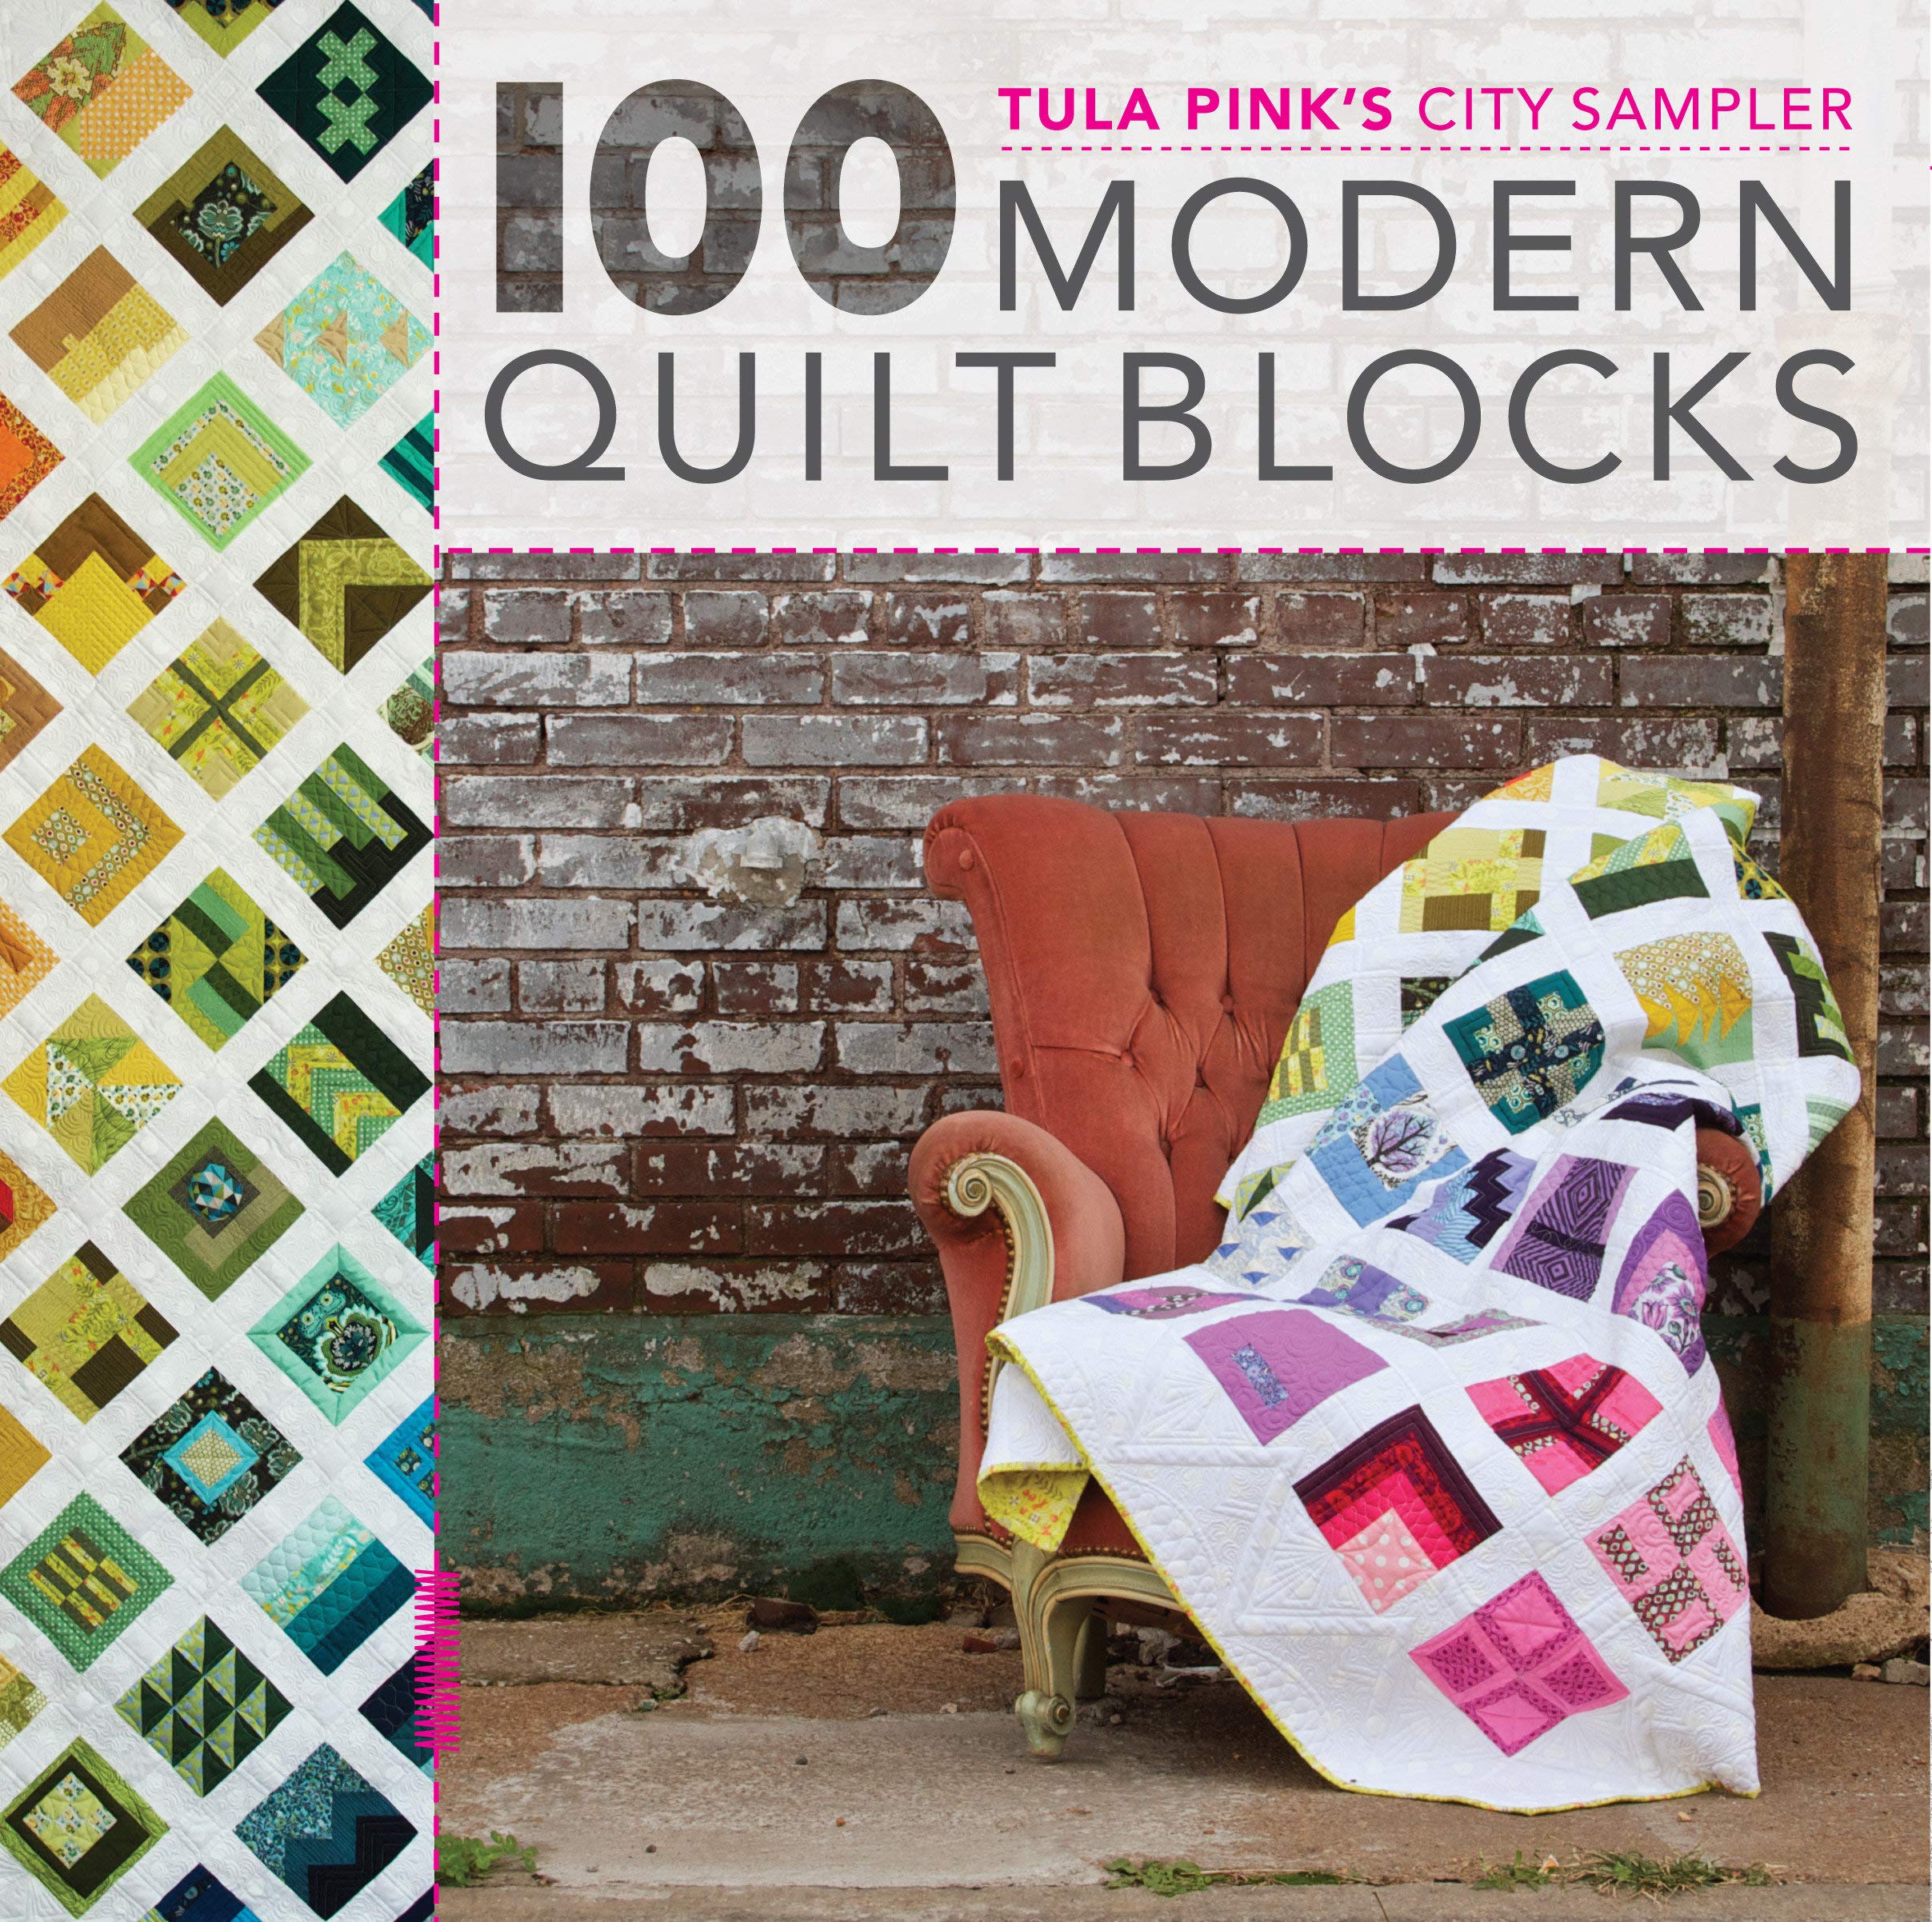
Now that I am not working on my Etsy shop and making project bags, I am catching up on projects stuff I put aside. One of them is the Tula Pink 100 Modern Quilt Blocks/City Sampler quilt made from my fabric scrap collection (I think I last posted on this quilt in this post – Quilt Top Assembled!) which came back from the long-arm quilter in September.
A couple days ago I decided it was time finally put the binding on the quilt and finish it off. It was so relaxing to sit and meditatively sew down the binding:
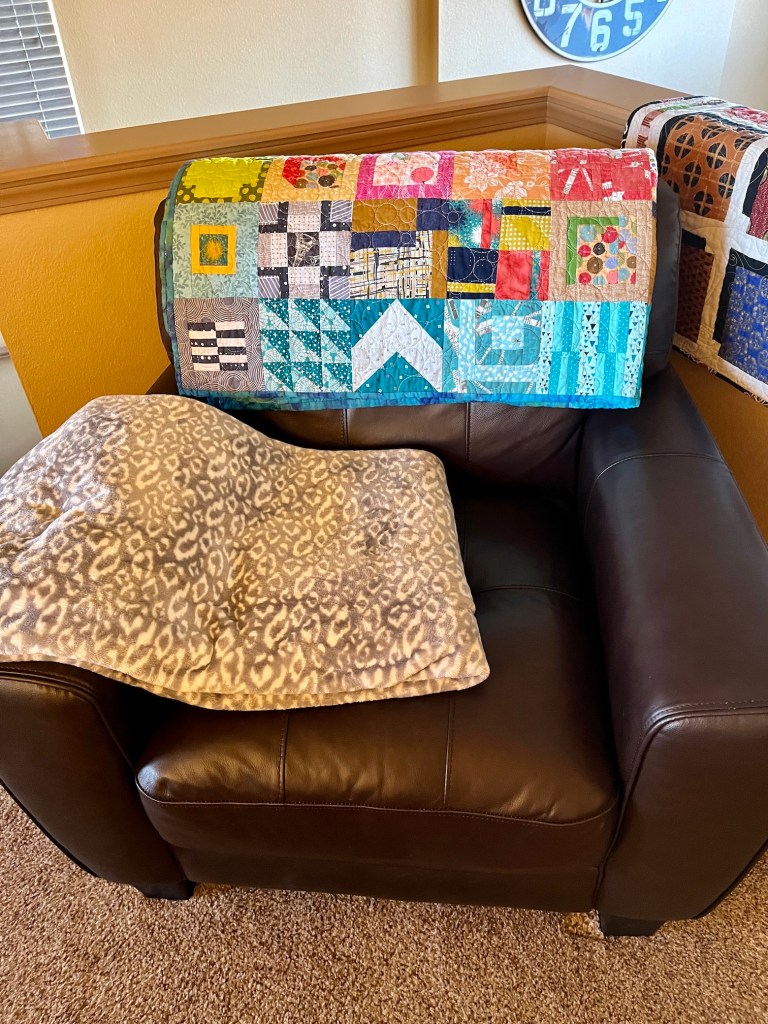
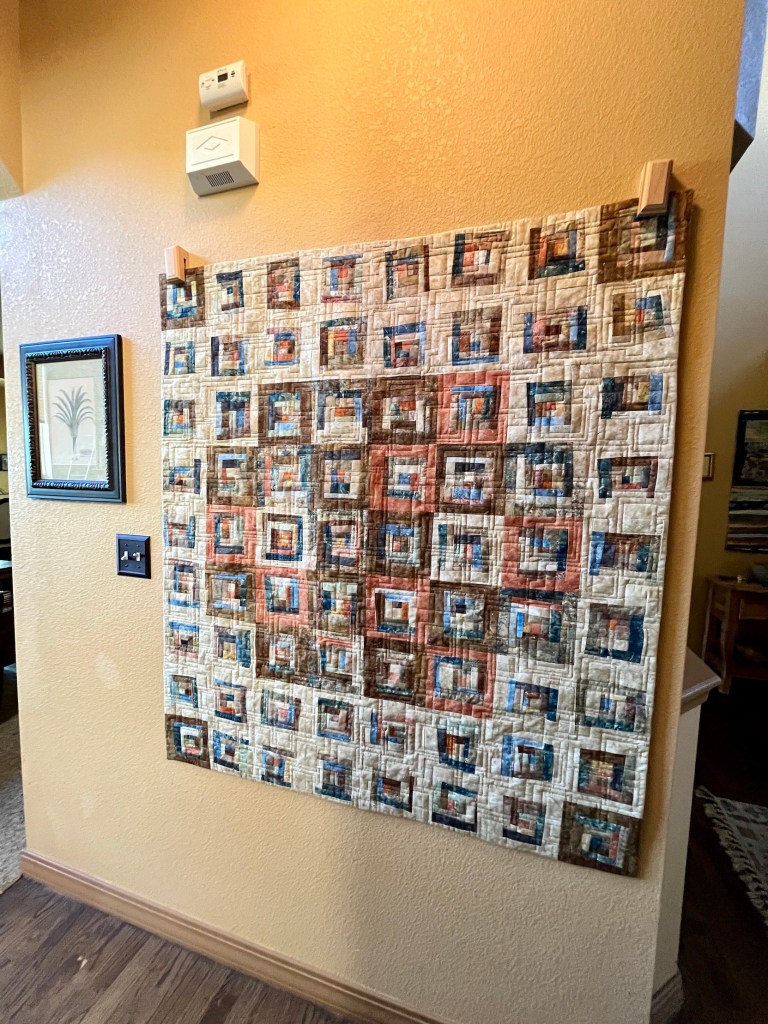
After I got the binding on, I laundered the quilt and now it sits on my chair on the upstairs landing.
I also recently finished the “diamond painting” bookmark that started working on with a friend a couple weeks ago (see blog post Making a “Mark”):
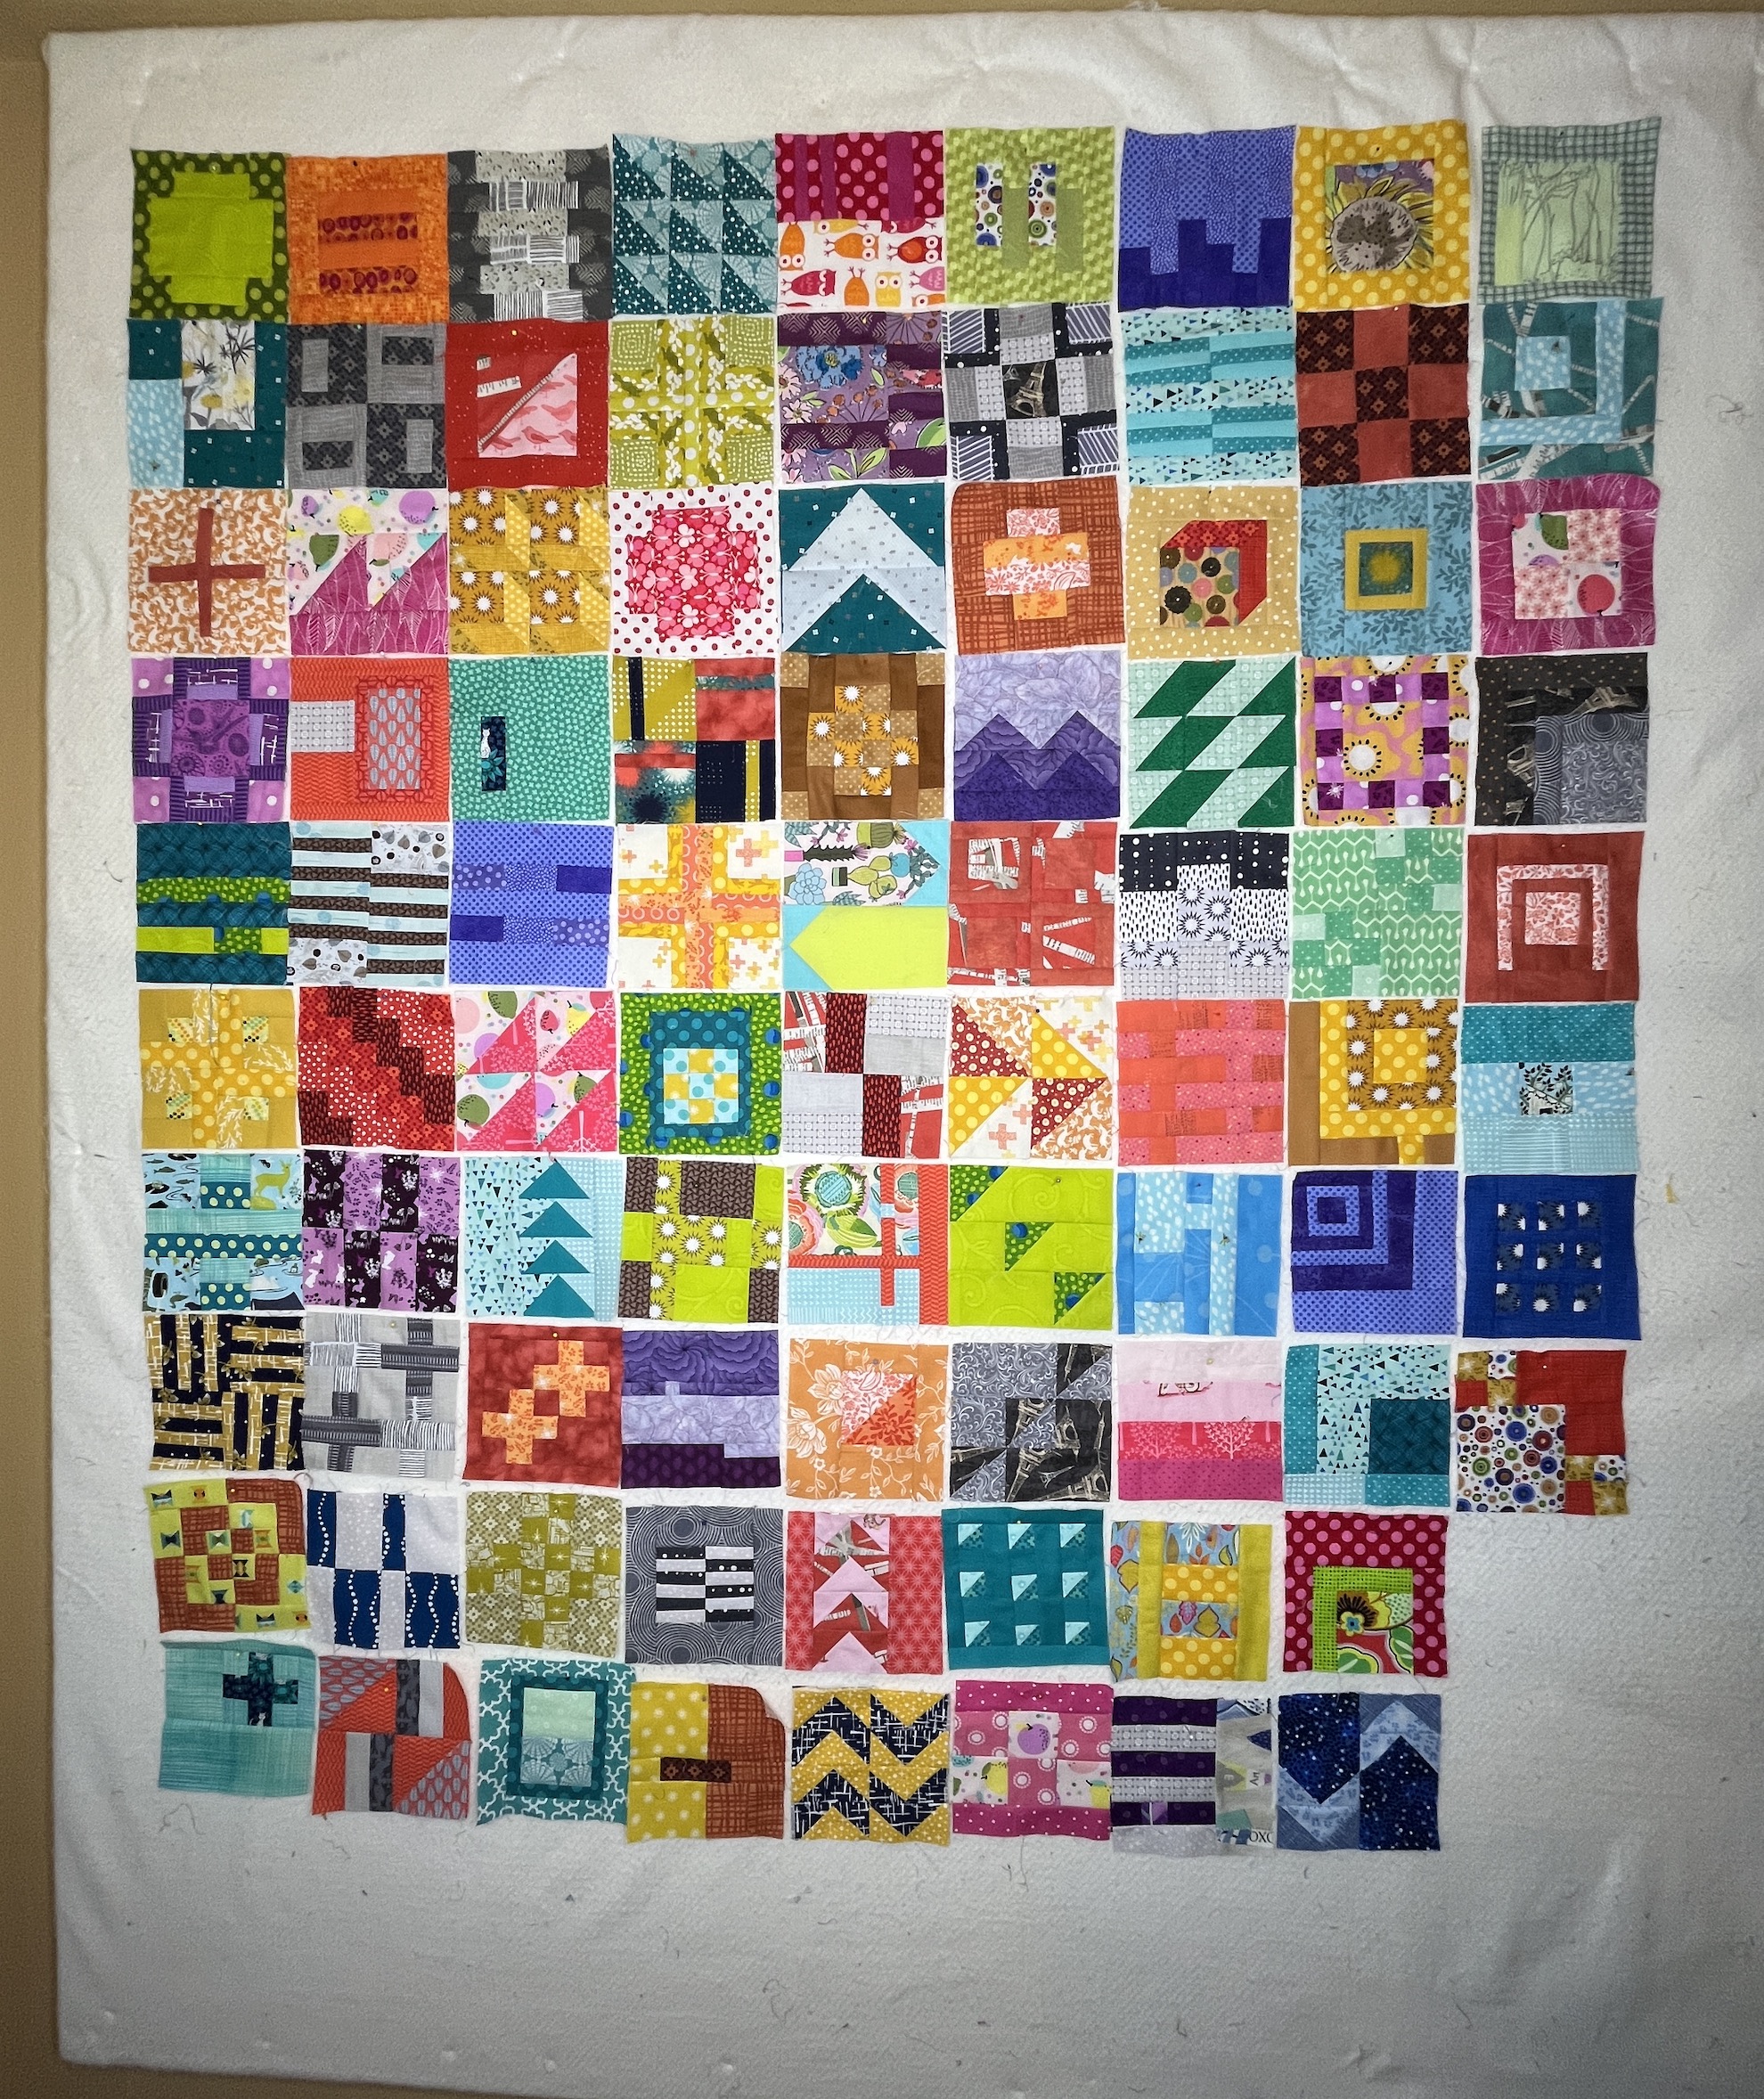
Recently I’ve been hiding away in my sewing room to escape the world. I’ve been productive during my escape, and I’ve now completed 88 of the 100 blocks for Tula Pink’s City Sampler 100 Modern Quilt Blocks quilt I’ve been working on.
This is not the final layout for the quilt, I’ll decide that after I finish the 12 remaining blocks. It seems a little overwhelming to decide the perfect layout for 100 blocks, but I am going to just try to make them look as random as possible (and try not to let the same color touch…we’ll see…).
If you are just joining us and are interested in the progression of this quilt, check out the previous post about it which also has links to the other blog posts on it – And then there were 70….
For the remaining 12 blocks, I decided to stop trying to find pieces long enough to make each block (a lot of the remaining blocks need fabrics of at least 6.5 inches) from this pile:
Instead I cleaned up my cutting table, putting fabric scraps away by color in my fabric scrap storage system:
And I am going to be very deliberate about color choices (based on what I have too much or too little of in my quilt so far) and shop for fabric scraps from my collection of fabric scraps organized by color in my wine crate storage unit:
I am going to try and use these remaining fabrics, from the initial pile, that I did not put away with the rest:
I want to try and repeat those fabrics.
I’ve decided on how to finish the quilt – I am going to sew the blocks all together in a 10 by 10 row with no lattice, and no borders. Just plain and simple, allowing the blocks to just shine through without any clutter.
I realize this will make it only a lap size quilt instead of a Queen or King size which you could get by using some of the layouts in the back of the book Tula Pink’s City Sampler 100 Modern Quilt Blocks. Lap size works for me as I might actually just hang it on a wall and display it. I’ll decide after I get it back from the long-arm quilter.
Well back to hiding out in my sewing room and finishing up the 12 remaining blocks to get to 100 blocks, which at one point seemed so far away!
Postscript
I developed a sort of production system to sew so many blocks.
I would pre-cut a large amount (15 or more) of blocks; and then sit down and sew them, trying to use chain piecing as much as possible, even working on two or more blocks at the same time.
Well my partner John took an old folding table and put a wooden table top on it for me to add to my existing work table to act as a “return” and give me space for ironing while piecing and any trimming needed.
This really added to my efficiency in block making!
And here is Mike the Miniature Schnauzer hanging out under my sewing table while I am at work:
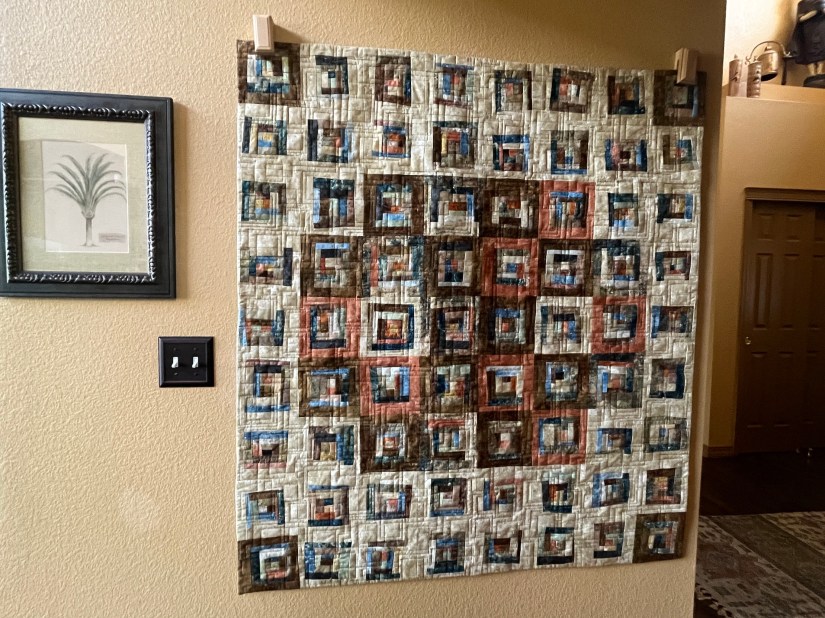
Here is a follow up on two posts about a freeform log cabin quilt I’ve been working on using Northcott’s Stonehenge fabric line scraps, that I named “Scraphenge”:
Well Scraphenge is “done and hung“! I received it back from the longarm quilter last week (I used Missouri Star Quilting Company longarm quilting services).
I decided instead of a binding to put a “facing” on the quilt since I was going to hang it on the wall:
Instead of the cumbersome method I’ve used to put a facing on in the past, which I learned from an art quilting book, I searched YouTube to see if there was an easier method and voilà I found one:
And it worked perfectly! It was much easier than the previous method I was using!
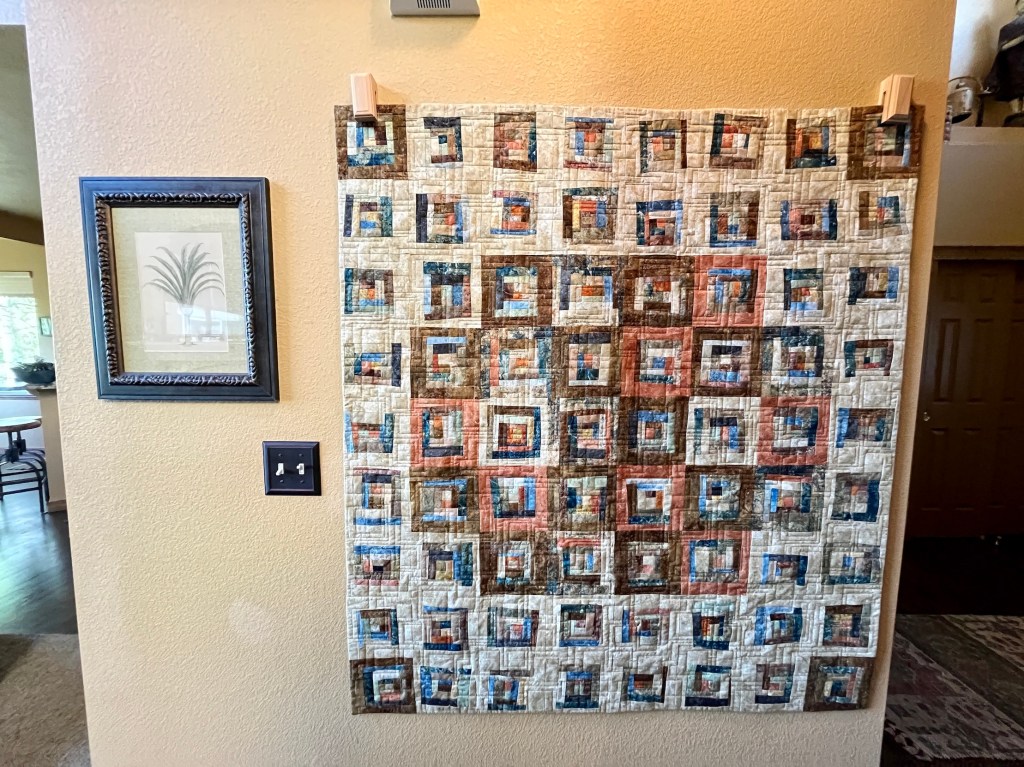
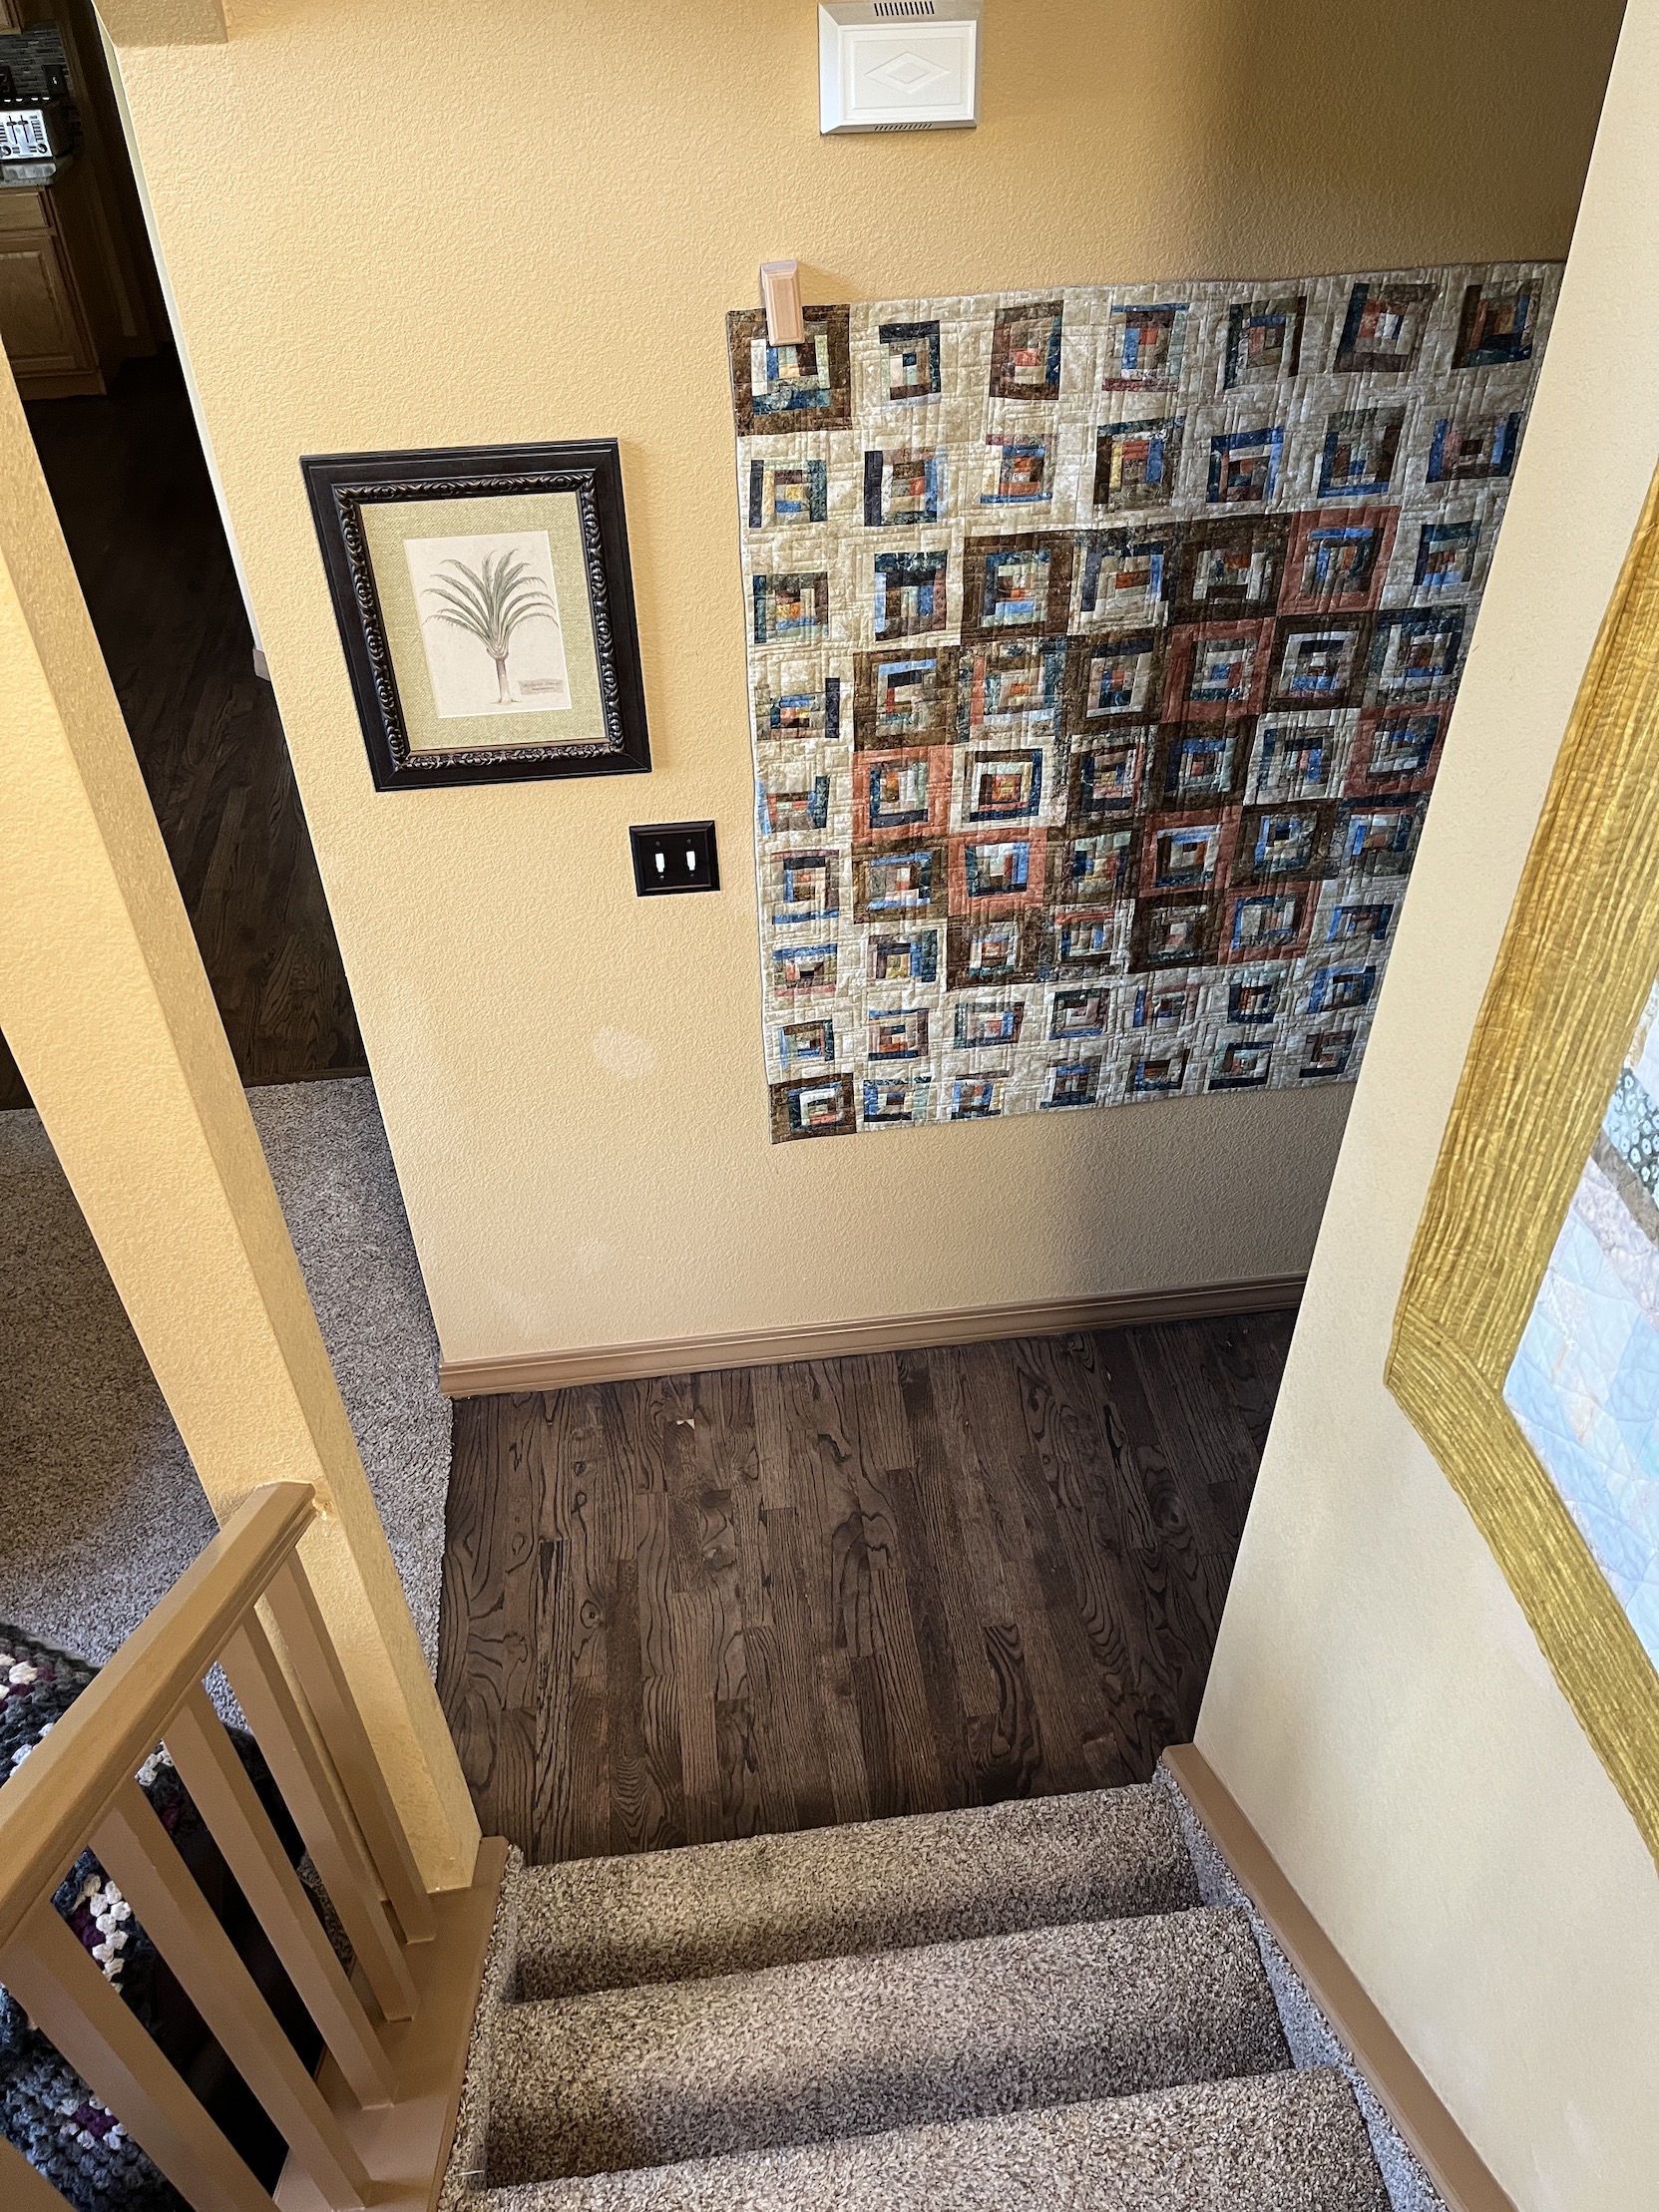
So here is the quilt hung in the hallway next to the entryway to our home. I took a couple different photos as due to the stairways to upstairs and the basement it was challenging to photograph the quilt straight on:
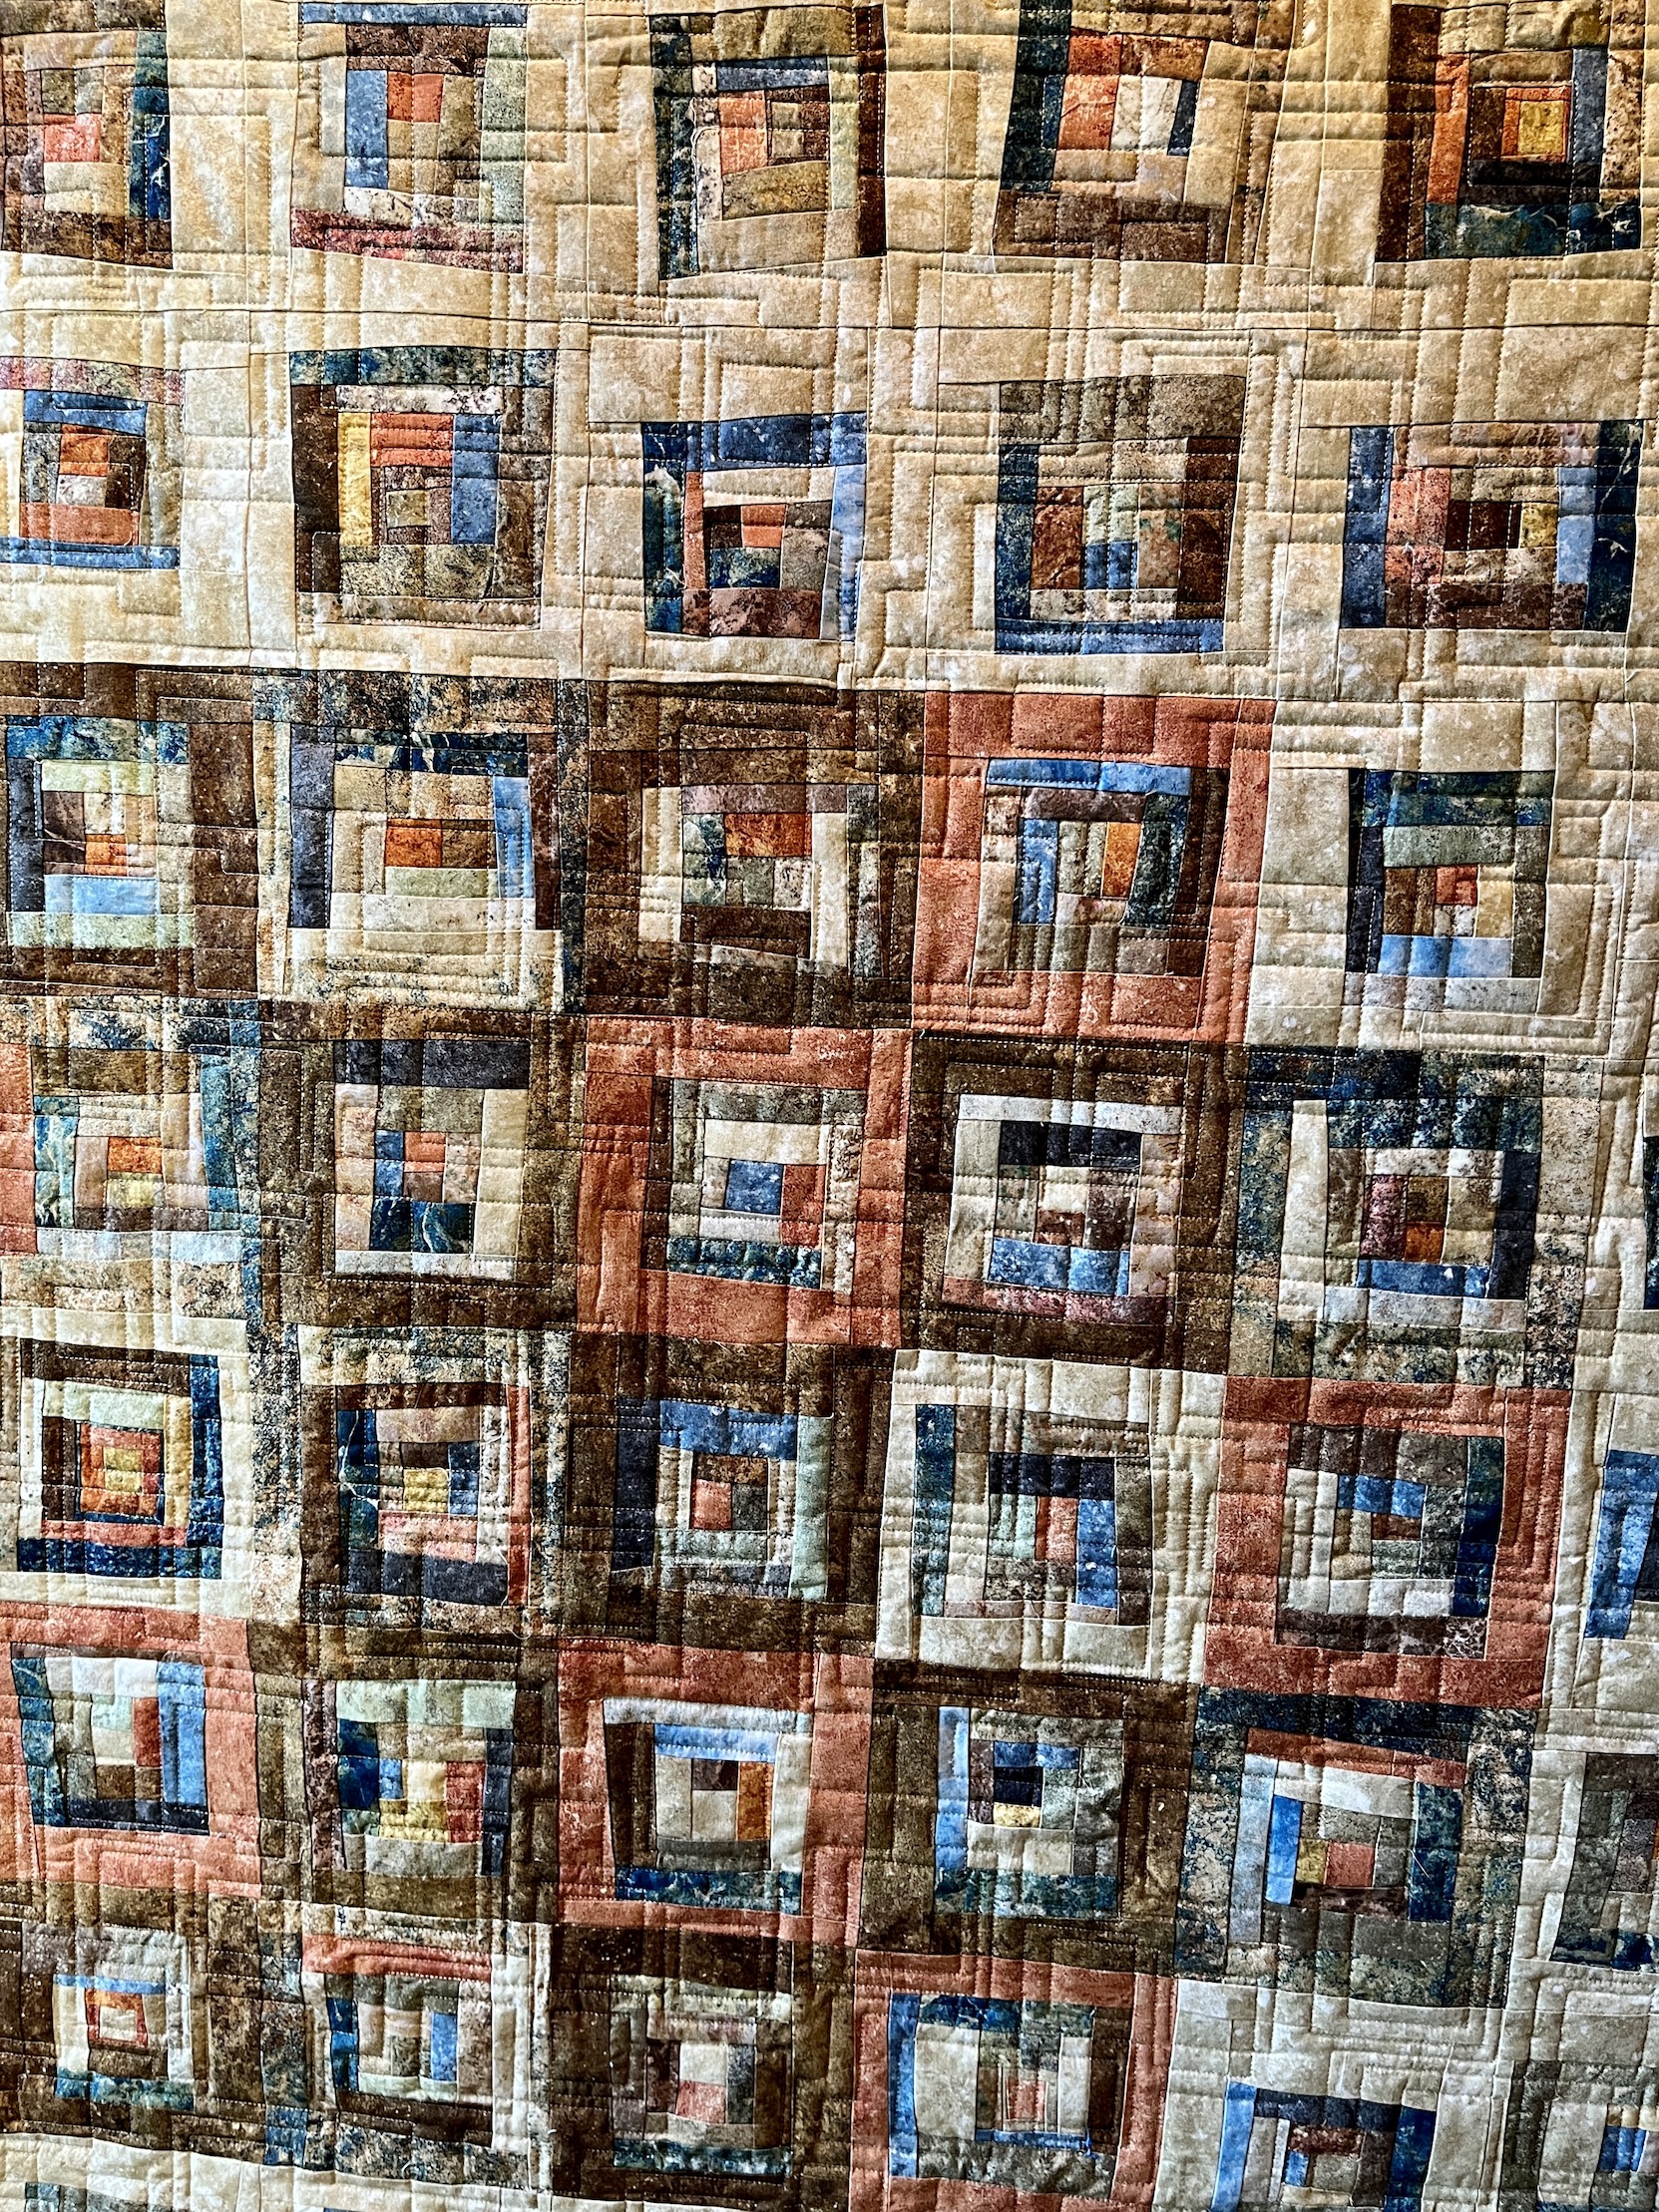
Here is a close up of the quilting:
I love seeing the quilt as I descend the stairs from upstairs to the main floor:
The cool thing about this quilt is most of the quilt top is made from Stonehenge fabric scraps that friends have given me and some Stonehenge fabric scraps I had from a quilt I made. So the quilt top was primarily made from stuff that would have ended up in a landfill. I LOVE SCRAP QUILTS!
My sewing “mojo” was hiding somewhere for a while and I had little desire to sew. I had a “sewing-block“. Turns out the best way to resolve it was to sew a block!
I’ve been distracted from time in my sewing studio by some recent travel, visits from out of town friends, and a couple challenging recent life events. A couple days ago I knew I needed to get my back to sewing (as there is just so much fun stuff to be made) and decided returning to working on my Tula Pink City Sampler (100 Modern Quilt Blocks)would be a good place to start.
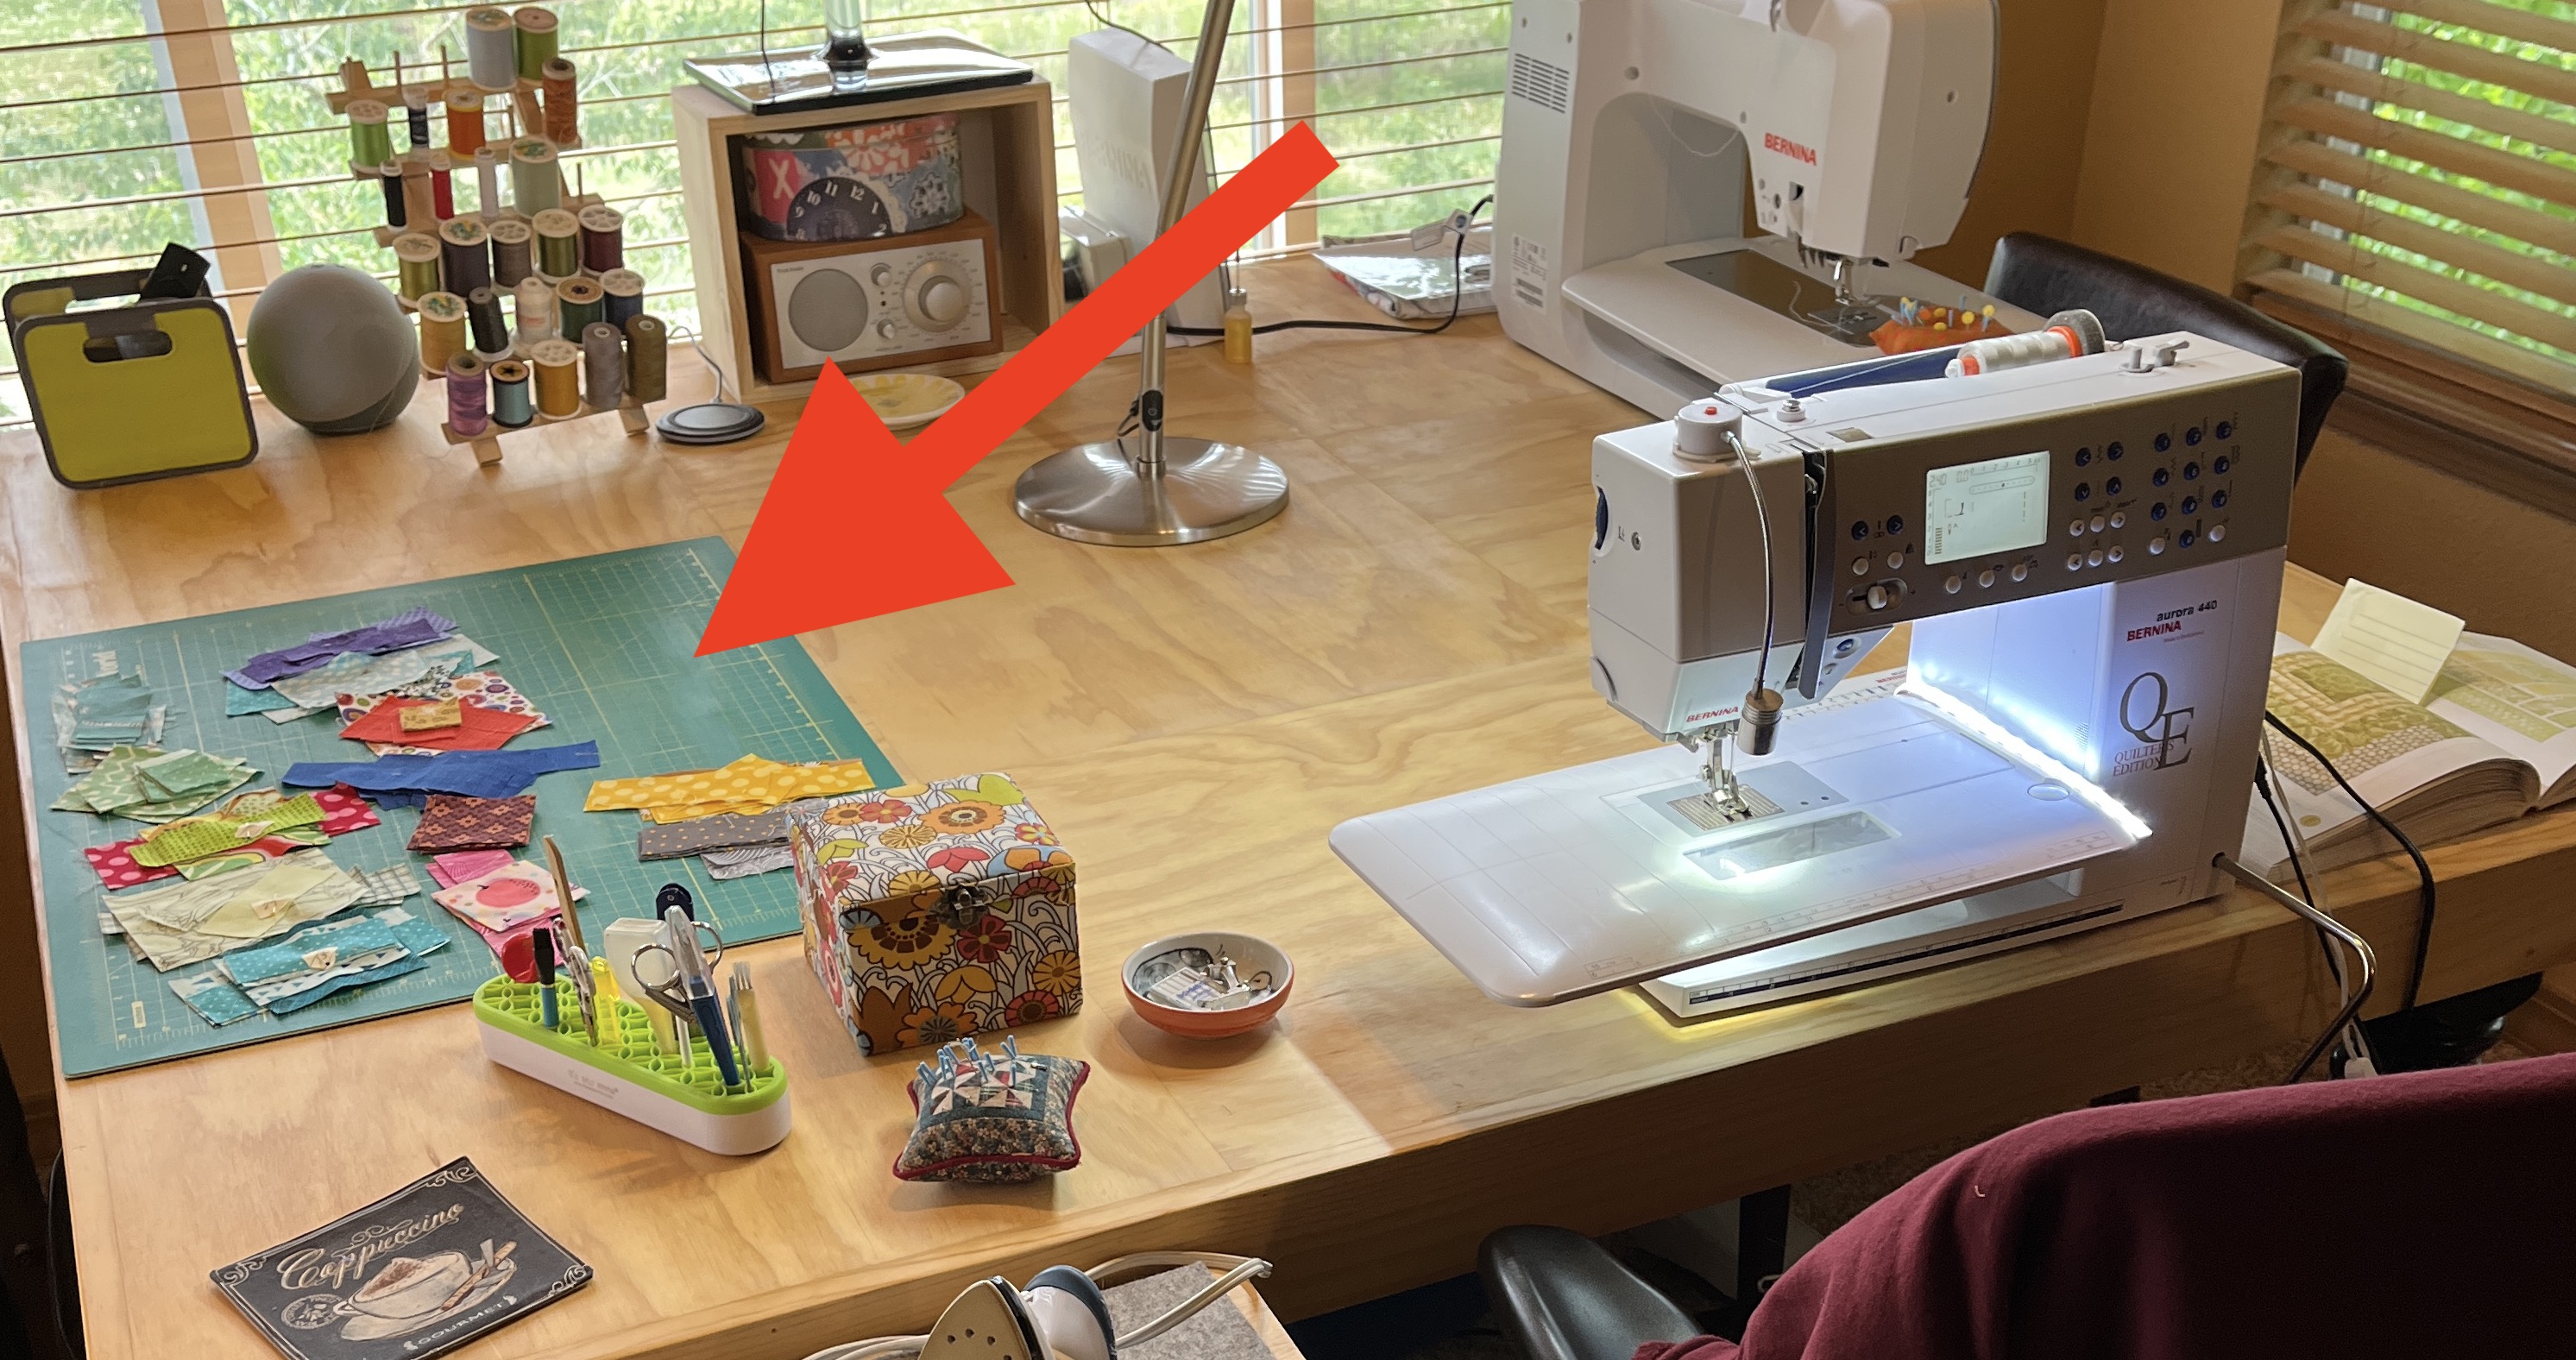
Once you get started up sewing again, things get rolling, and I was able to make also blocks 32 – 40 over the next several days (my sewing was “un-blocked”!):
10 block recently completed
Today while taking photos for this post, I discovered I did not like the gray “frame” in one of the blocks (too overpowering):
see block with red arrow
So I redid it this morning with a red “frame”:
New block frame
Now I have 40 blocks out of 100 now complete!
Only 60 more to go (oh my…)
Not sure why my photos came out so dark from my design wall, I guess it was the lighting in my sewing studio this morning.
I am enjoying working from my piles of scraps selected for the 100 block sampler, and I’ve decided to just keep the piles out until I finish all 100 blocks.
I’ve been making a bunch of small scraps while cutting the fabrics for the 6.5 inch by 6.5 inch blocks and I plan to stuff pincushions like I did in this post – Stuffing it the Eco-conscious Way!
I plan to continue working on the blocks for the sampler and maybe whipping out a pincushion or two between sets of blocks if my tiny pile of scraps gets larger than my little basket for tiny scraps.
This post continues my series of posts on my trip to Quilt Town, USA to attend a Missouri Star Quilt Company (also known as “MSQC”) quilt retreat with my long time quilting friends. The previous three previous posts in the series are:
First of all, do not judge. I have a fetish for fabric scraps – ha! Okay that sounds a wee bit weird, but I would rather make things from fabric scraps than cut into yardage. I only buy fabric by the yard when I absolutely have to or the fabric is so amazing I cannot leave it in the shop (and it looks at me with puppy eyes saying “Tierney take me home…”).
So when I heard that while I was at the MSQC week long retreat there was a “Scrap Bag Sale” at the Penny’s Quilt Shop I shivered with excitement.
This not my first rodeo as they say, I’ve been to lots of fabric scrap sales where you fill a bag for a specific price, with as much fabric scraps as you can fit in (and yeah, I am ALWAYS up to the challenge to see how much I can fit in the bag they provide without it breaking).
But, I’ve NEVER been to a “scrap bag” sale where 1 yard, 2 yard, and even 3 yard pieces are considered scraps!!! Yes there were a couple pieces here and there that you might call “scraps” – like quarter and half yard pieces, but most of what was in their bins were larger pieces that I definitely would not classify as “scraps”.
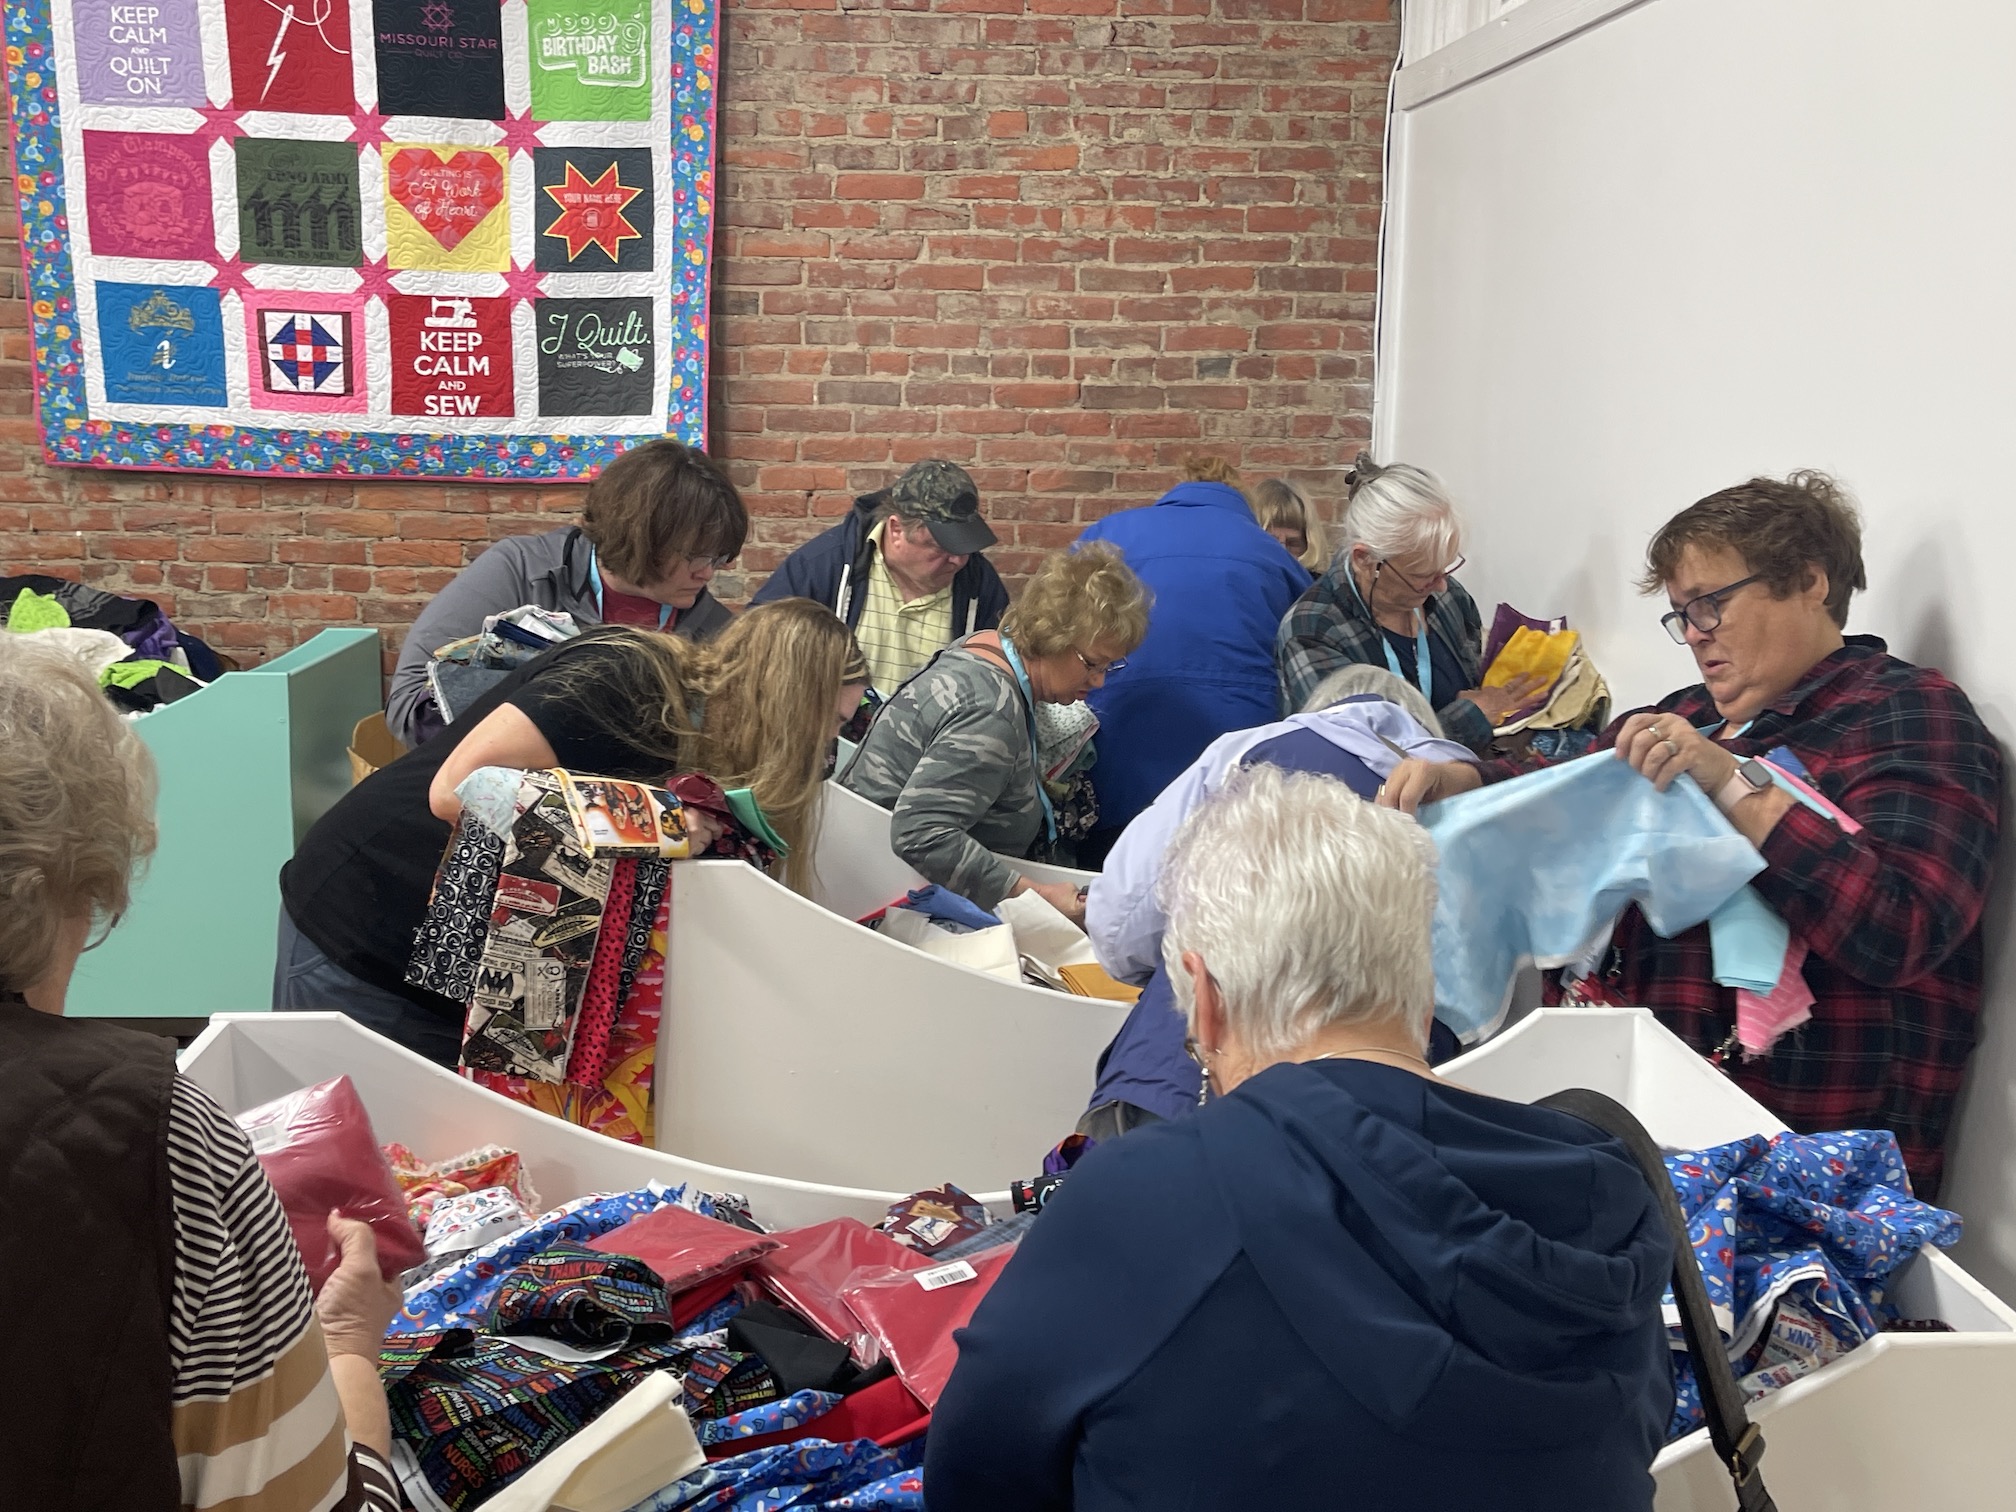
What I heard from another quilter during the feeding frenzy (photo below) was that Missouri Star will pull pieces off the bolt that are 3 yards or less and put them away for the scrap sale.
Oh my.
What you are about to see was what could be considered a “super spreader event” as no one was wearing masks, but luckily the pandemic is tapering down in my part of the world.
Here is the FEEDING FRENZY:
And yes I was right in the middle of it. I stepped out to take photos.
Actually everyone was so patient, thoughtful and kind. It was the nicest frenzy you could imagine. Quilters would yell out what they were looking for and we would pull for them and toss to them what they were looking for. I got so much Kaffe Fassett fabric this way from the bins.
Also people would take a break from being in the bins and make way for other quilters waiting in queue. Actually you had to take a break for a while as it was sort of exhausting sifting through all those yard pieces of fabric and a bit claustrophobic.
You also needed a break to stuff your bag!
Besides finding AMAZING top quality quilting fabric (of like every fabric line you could imagine) one of the most fun parts of the whole experience was laughing with everyone there as you tried to stuff your bag as full as possible.
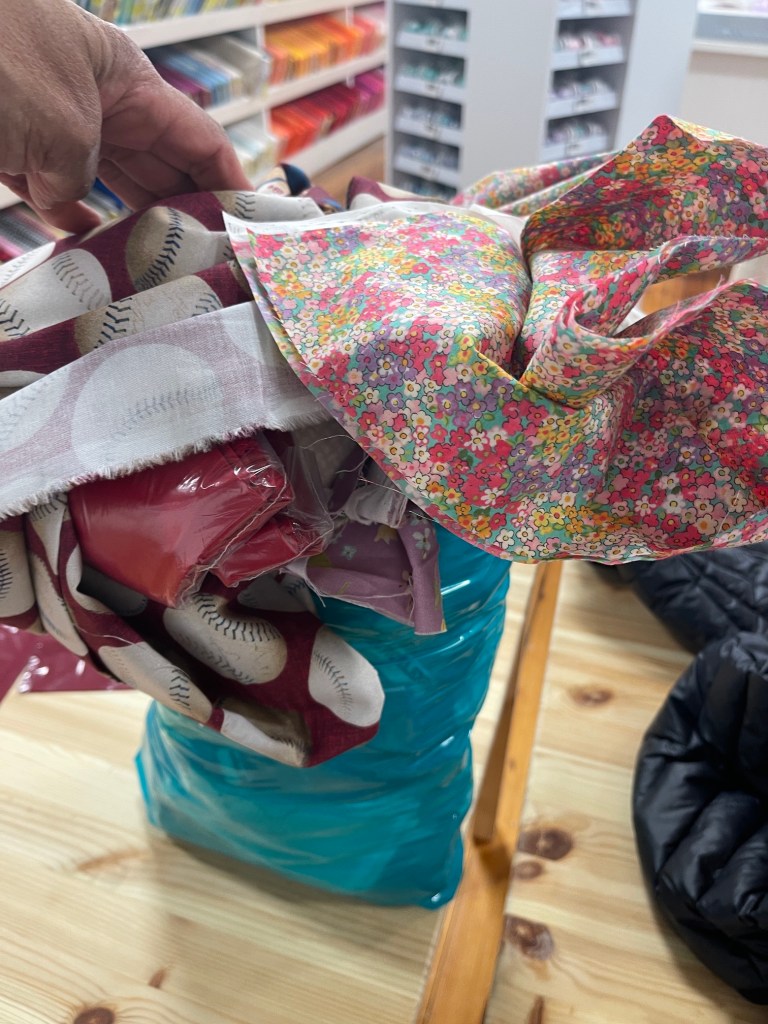
Here were the early stages of packing bags with “scraps”:
Notice how no fabric is reaching over the top of the bags.
Here is my pile of bags starting to grow (I did stop at 4 but later got one more) as I left them among the pile of coats (it was getting warm from all those people foraging through all those bins of fabric):
Then we heard that the shop did not really care how full you got the bag as long as all fabric was “touching” the inside of the bag. So things got creative…
Here are a series of photos on my quilting friends and I engaging in “creative scrap bag stuffing“:
We were laughing so hard! It got to be a real game of “what else can we fit in there?“
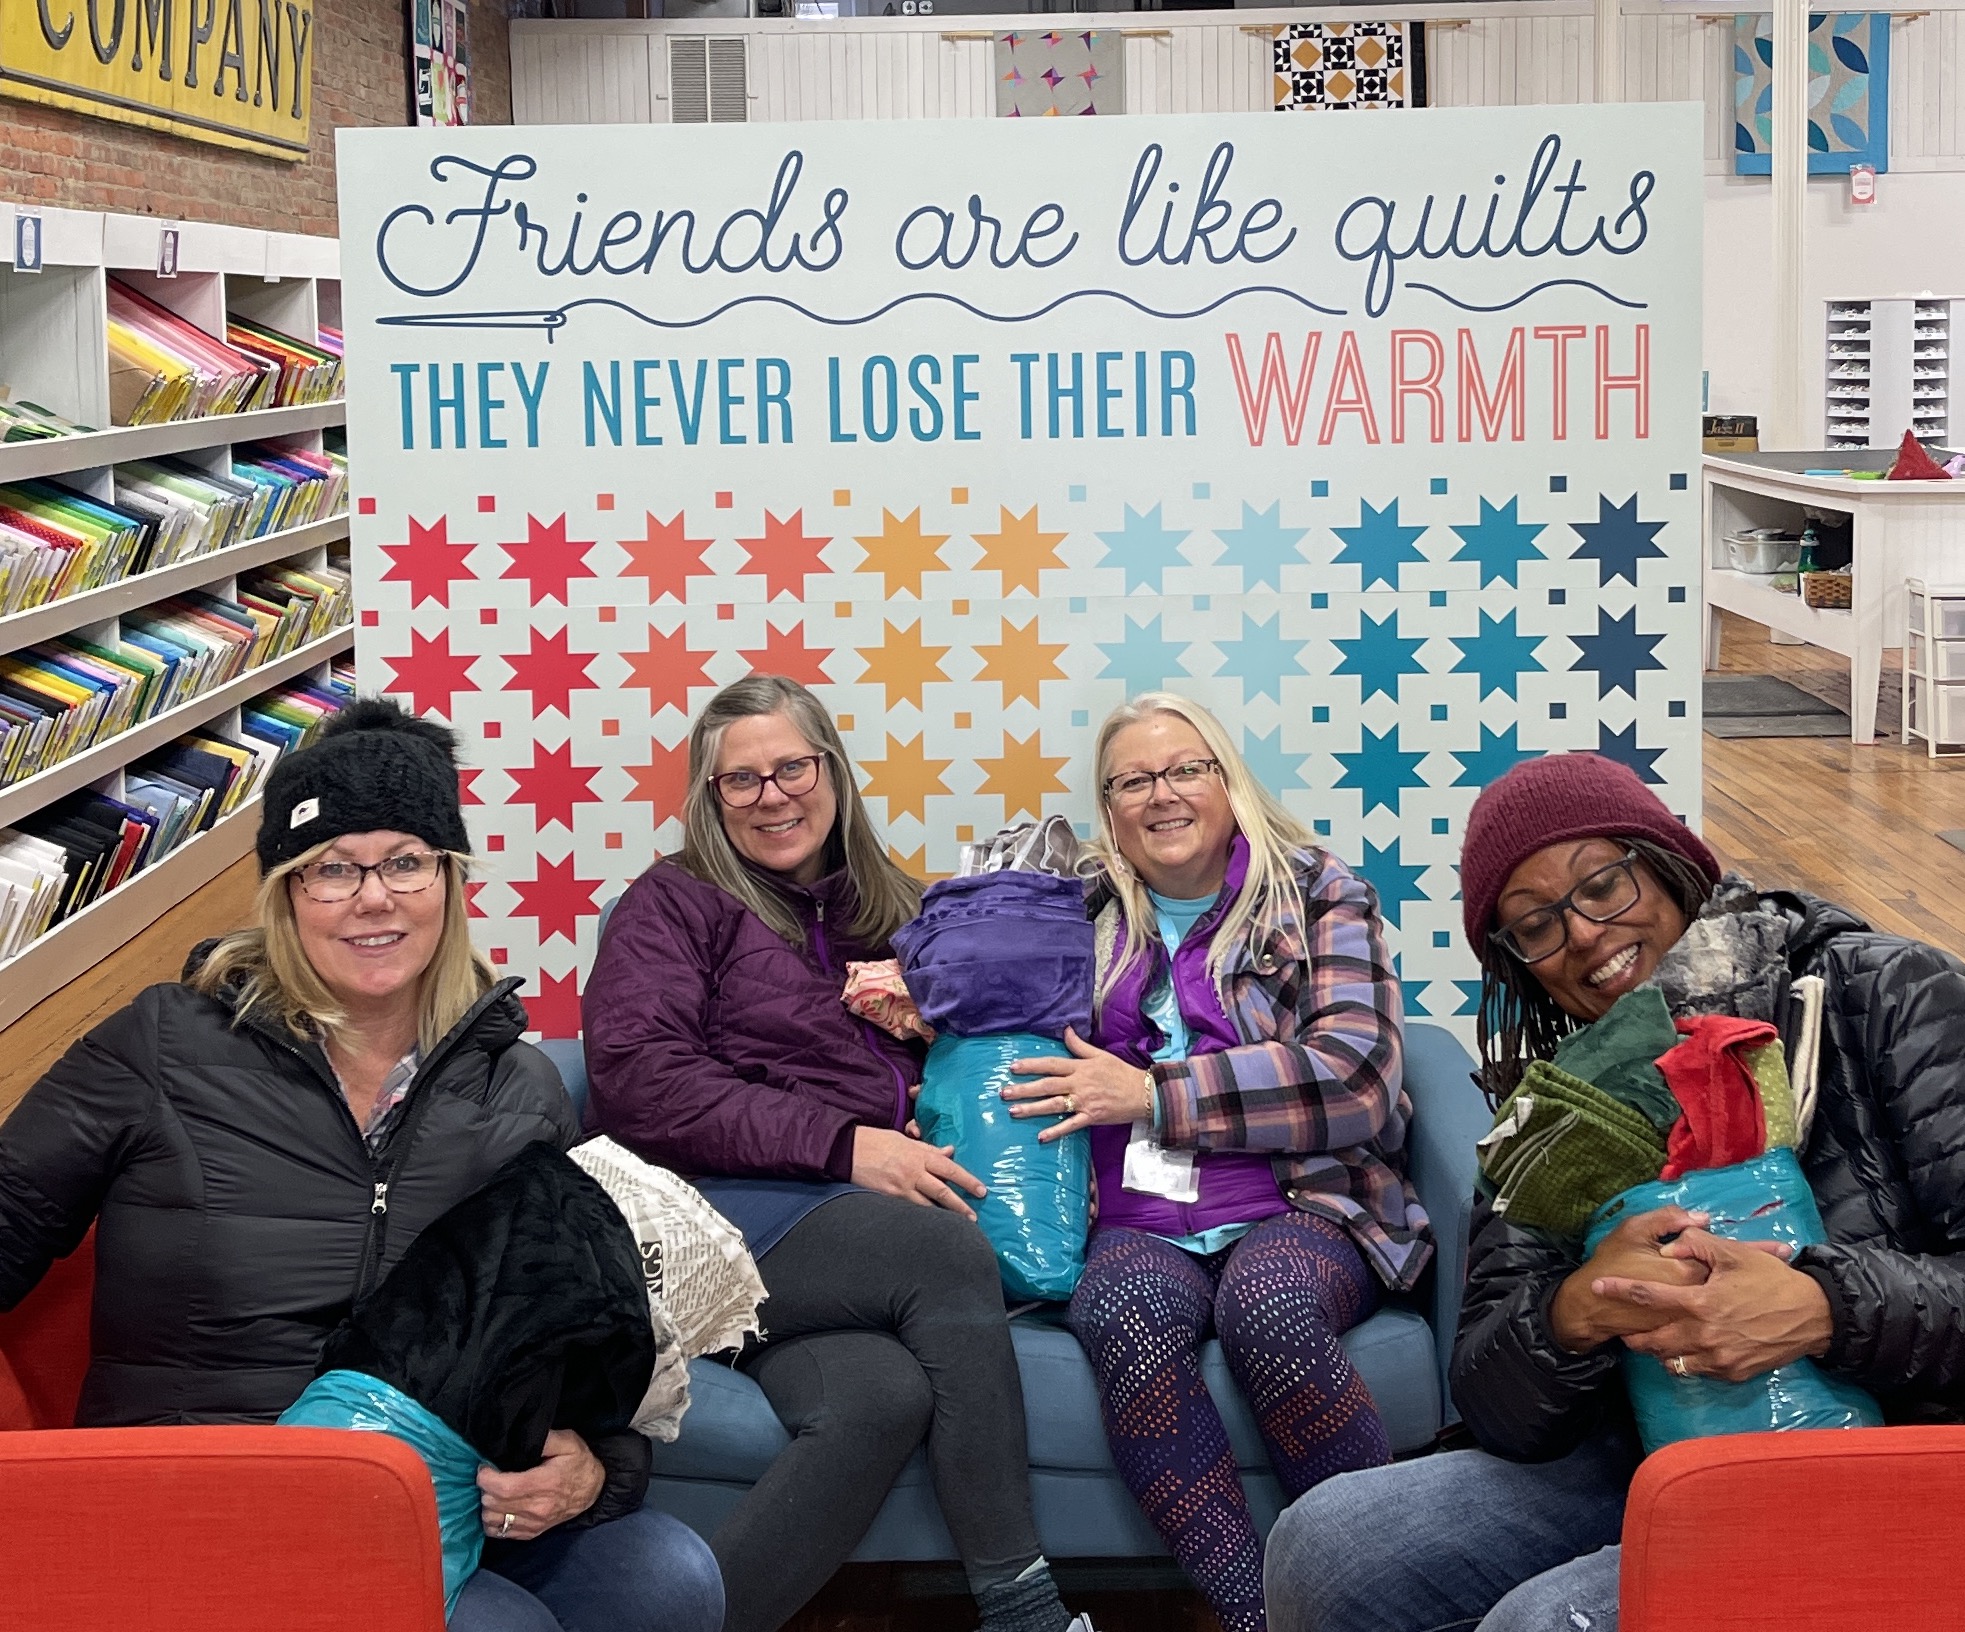
Here are a couple of my long time quilting friends and I resting after our scrap foraging. We were exhausted but happy! (Note, not all our group attended the scrap sale, some were back at the Retreat Center being productive working on their projects!)
And here I am with another expression of “pure joy” like in the previous post (and note it was not just because of the amazing deals but that I was hanging out with friends, lol):
When we returned to the Retreat Center, Jessica, one of the Retreat Coordinators, challenged us to see how much yardage we had inside one of our bags.
One person had 27 yards of fabric inside ONE of their scraps bag. Yes that was 27 yards of fabric for $10.95! Most people had between 20 and 26 yards of fabric packed into ONE scrap bag.
One of the attendees actually ironed and folded her finds (show off, ha!):
I did not. I took all my scraps from the sale to the Main Shop for packaging up to send home to me! As I mentioned in the first post in this series (I think), MSQC will ship whatever you bought or worked on for FREE to you if you are attending a retreat so you don’t have to figure out how to get it home. (Yes they are encouraging attendees to shop to their heart’s content).
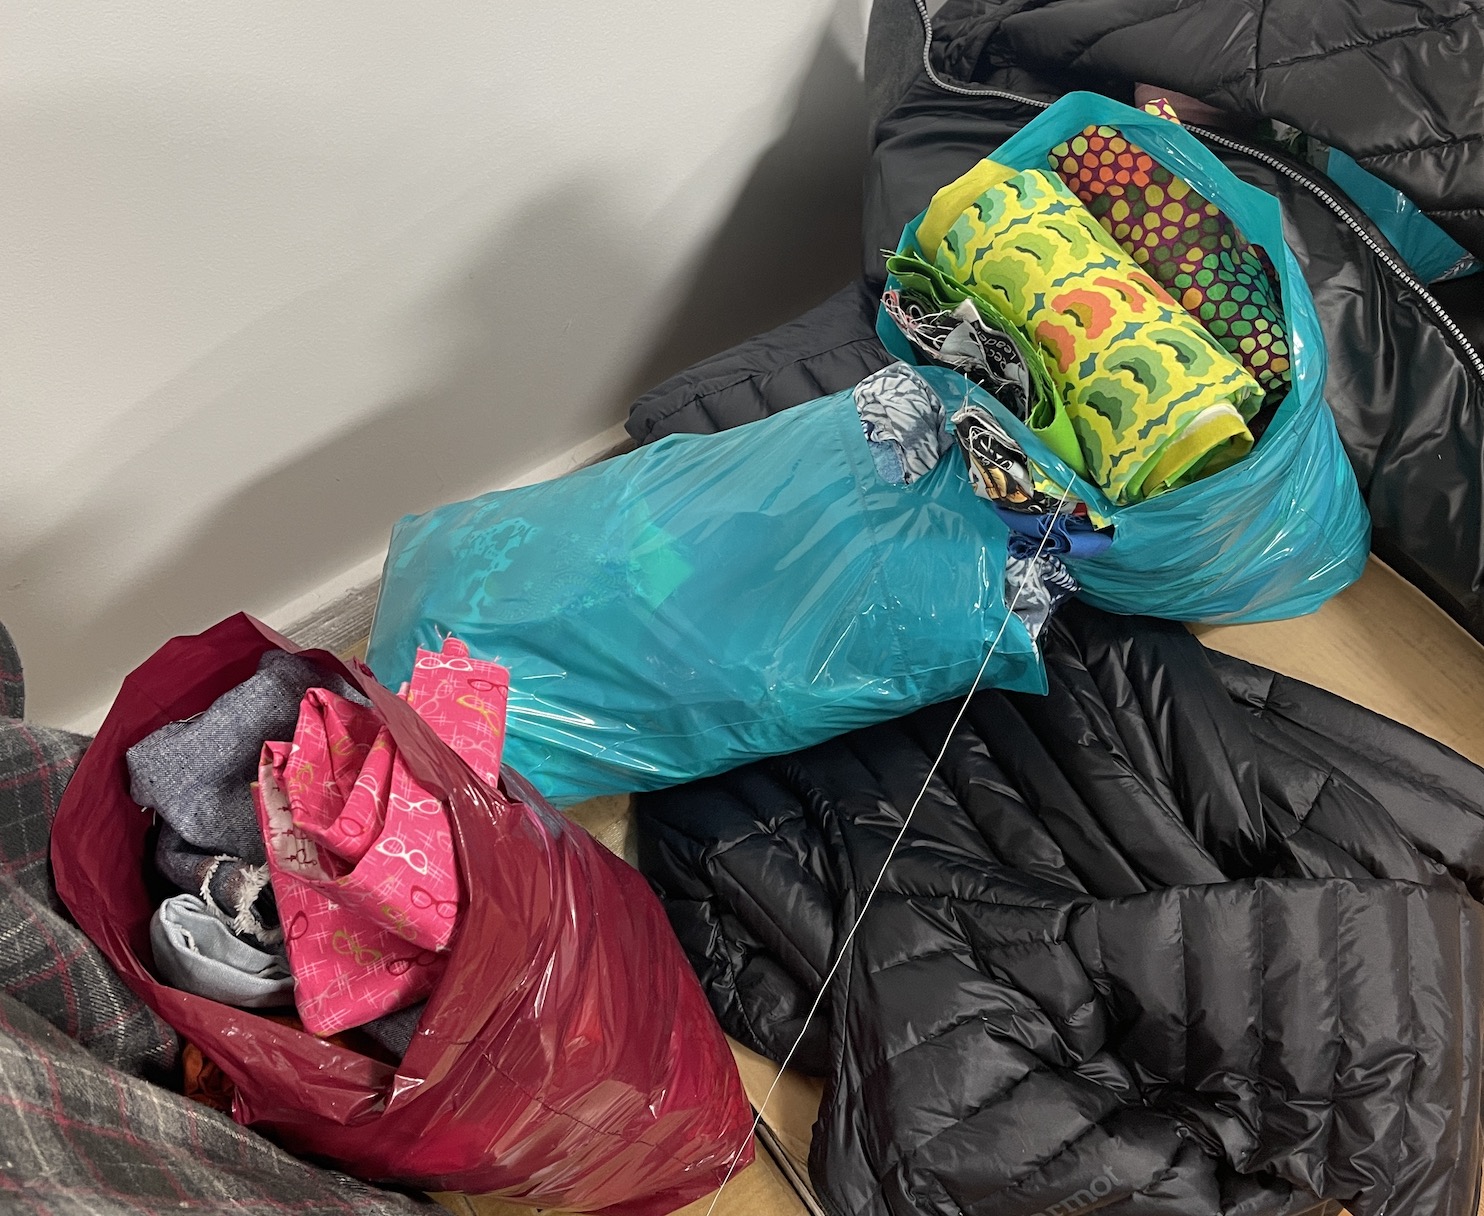
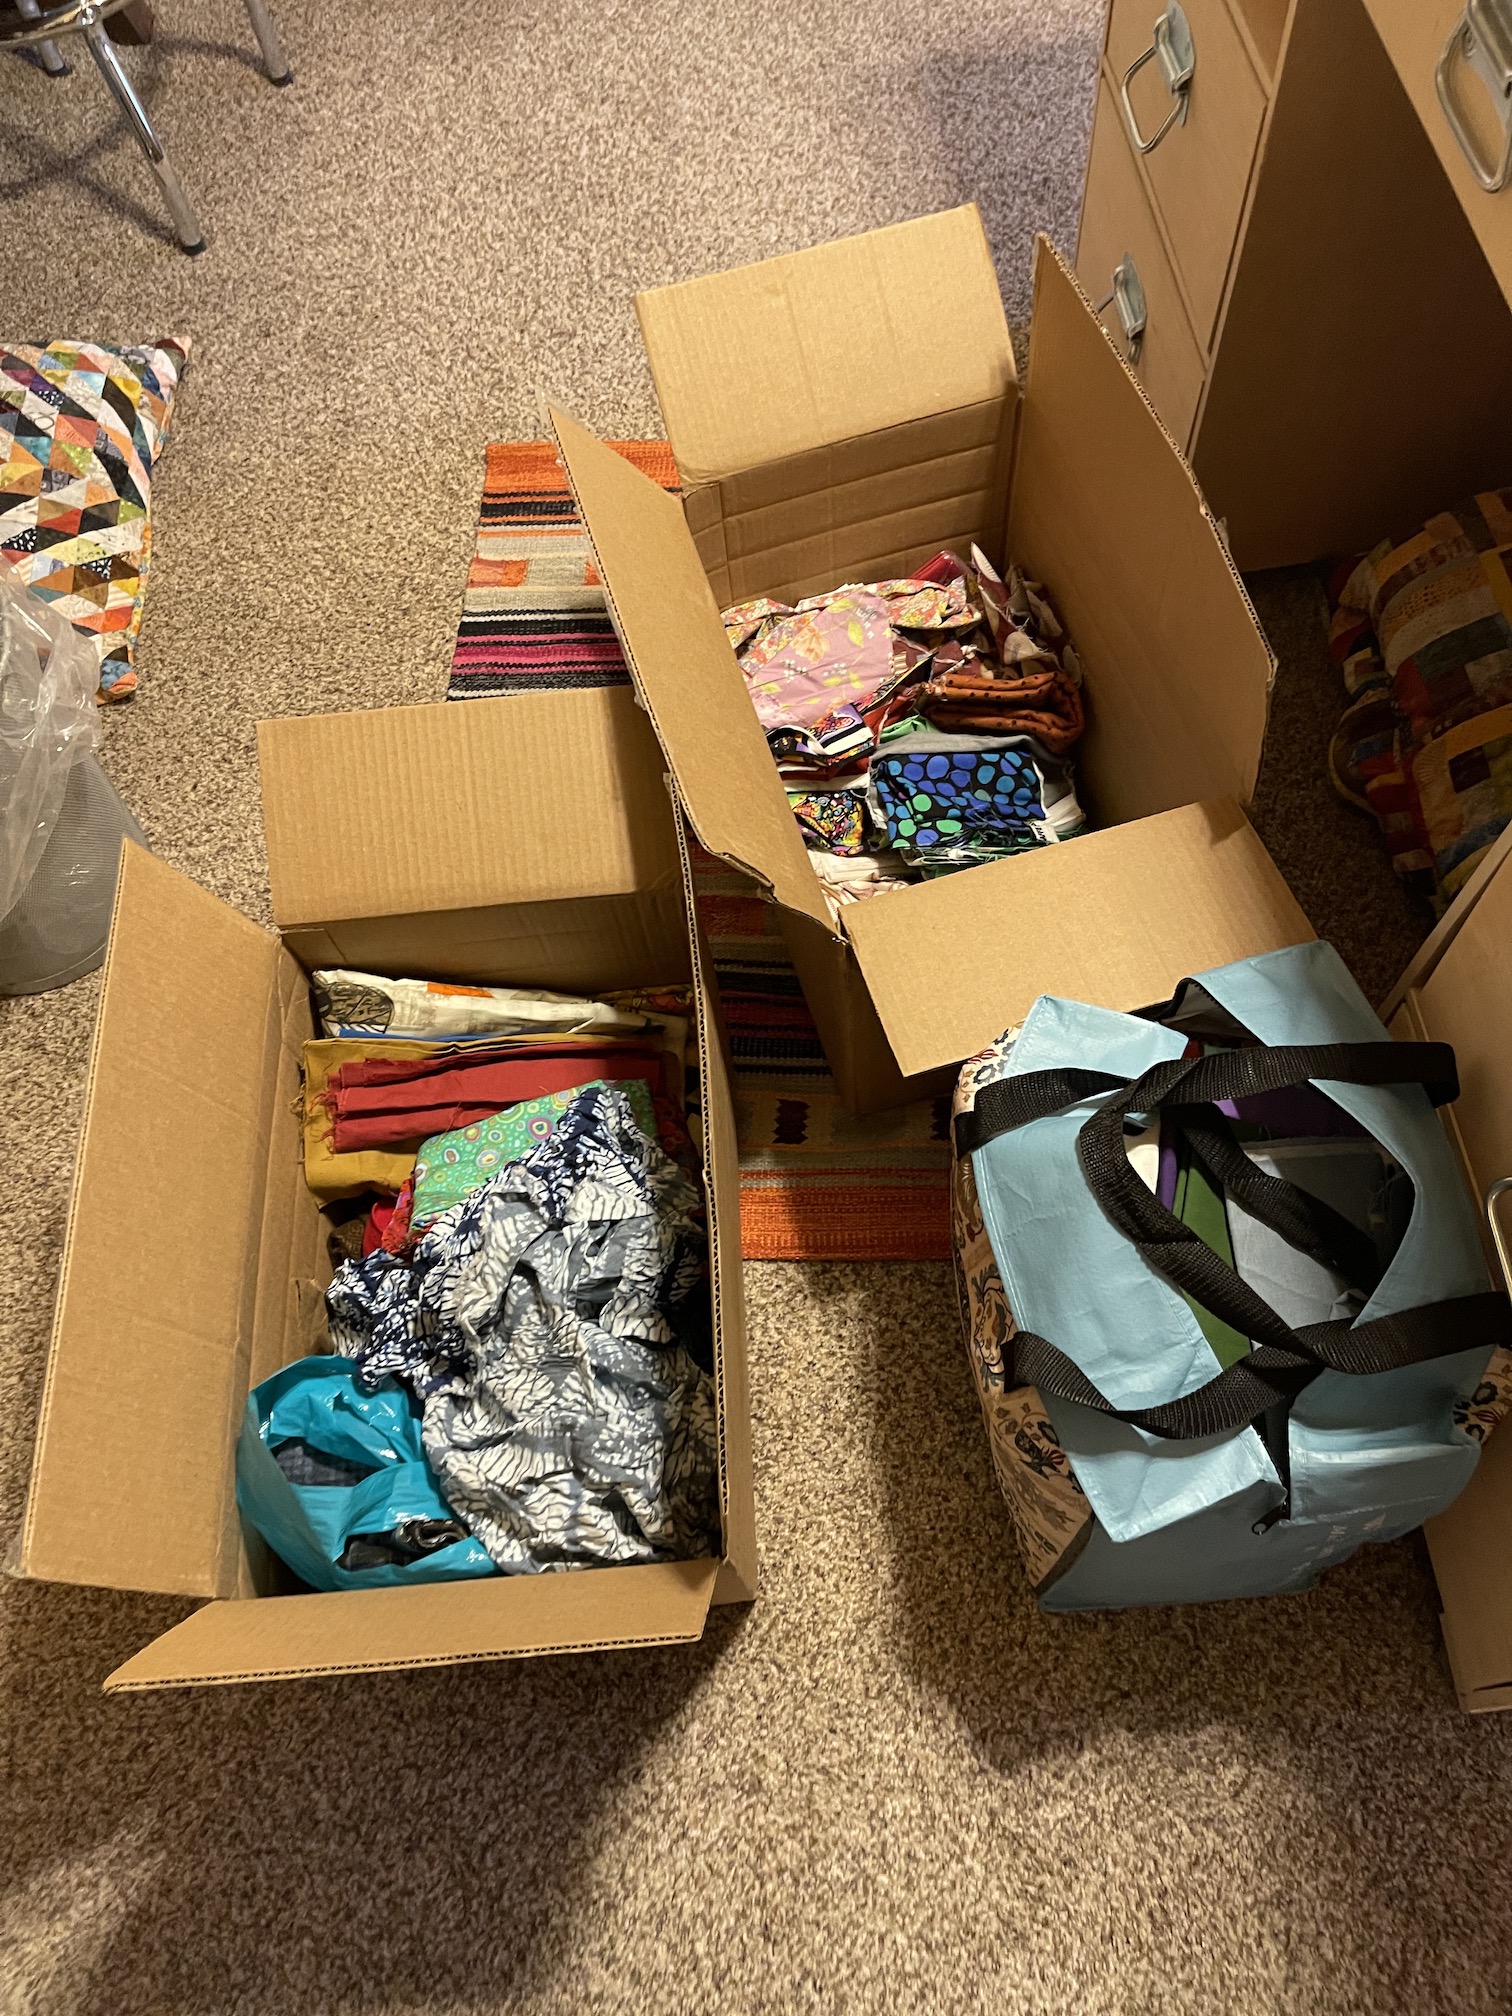
So, a couple days after I returned home from the retreat I received two boxes in the mail:
And here are the “scraps” I got from the sale:
I won’t tell you the total amount of fabric, because I did not even count the yardage.
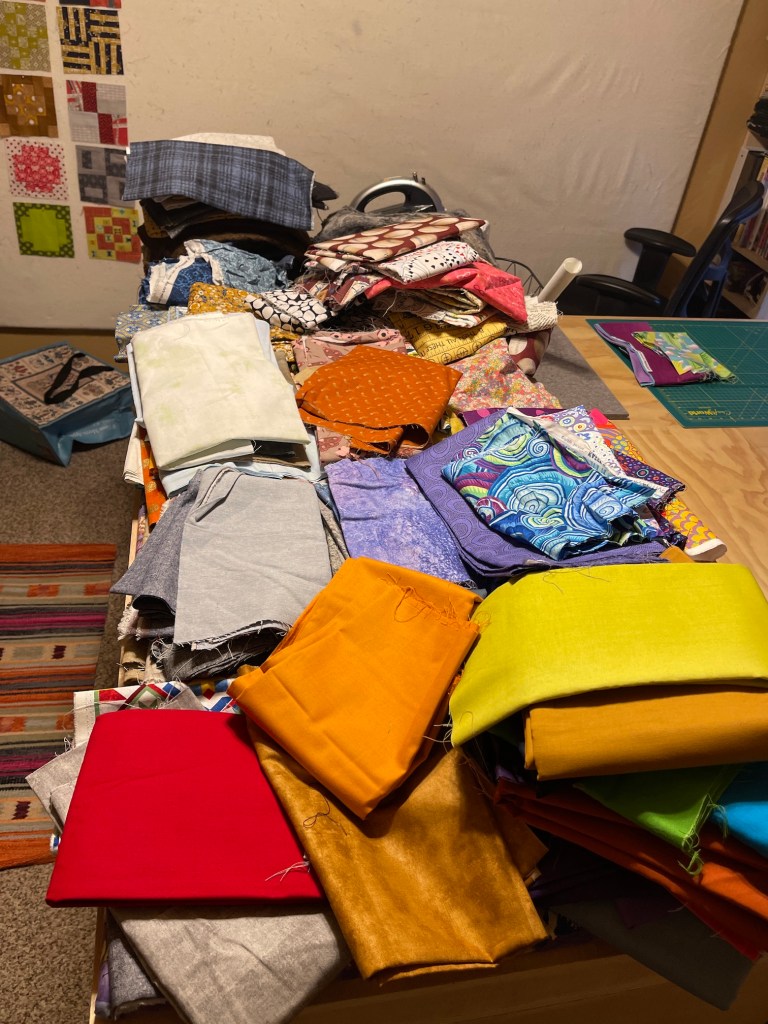
I just ironed the fabric and incorporated it into my stash…while giggling…
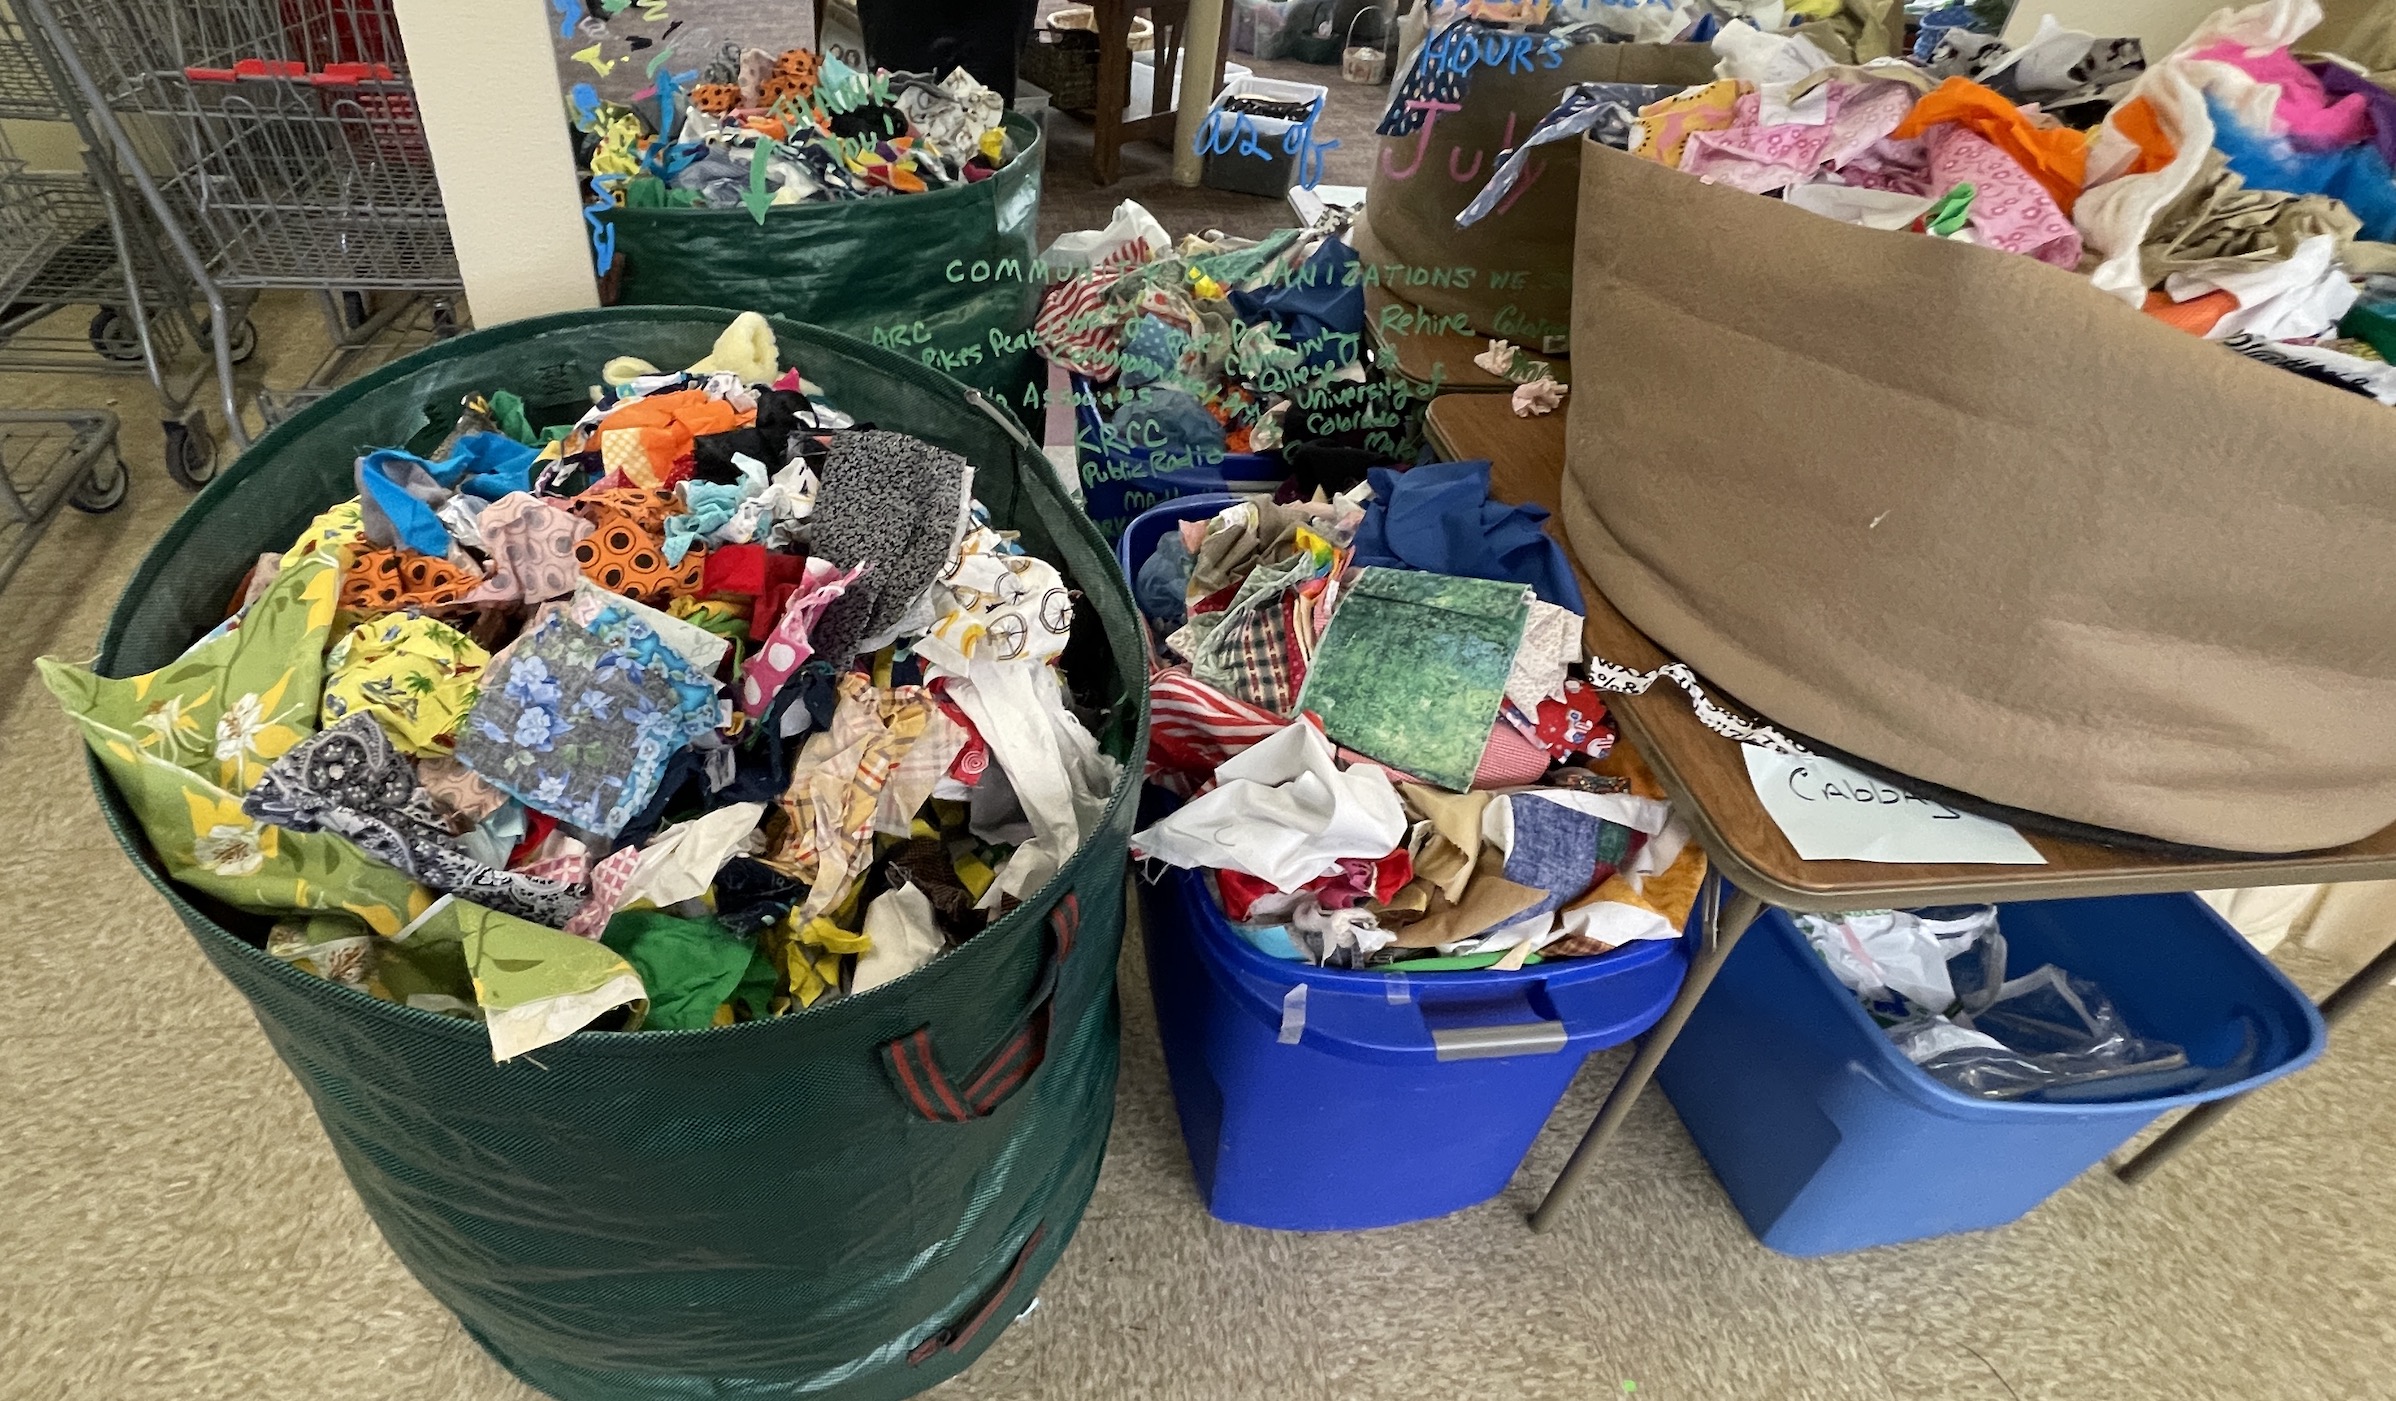
We spent some time in Colorado Springs, Colorado this weekend. While there I visited a very cool place – Who Gives a SCRAP, a creative reuse center.
The description from the Who Gives a SCRAP website:
Who Gives a SCRAP is a donation based scrap store that carries an impressive mix of arts and craft and hobbies supplies in addition to unique vintage finds. We carry everything from scrapbook paper to game pieces, used books and sewing patterns, the variety is a crafters dream. We believe that the reuse of goods and materials is the most efficient, environmentally friendly and economically viable way to reduce the waste stream. Our shop is open to the public and our ever changing inventory is based on individual and business donations.
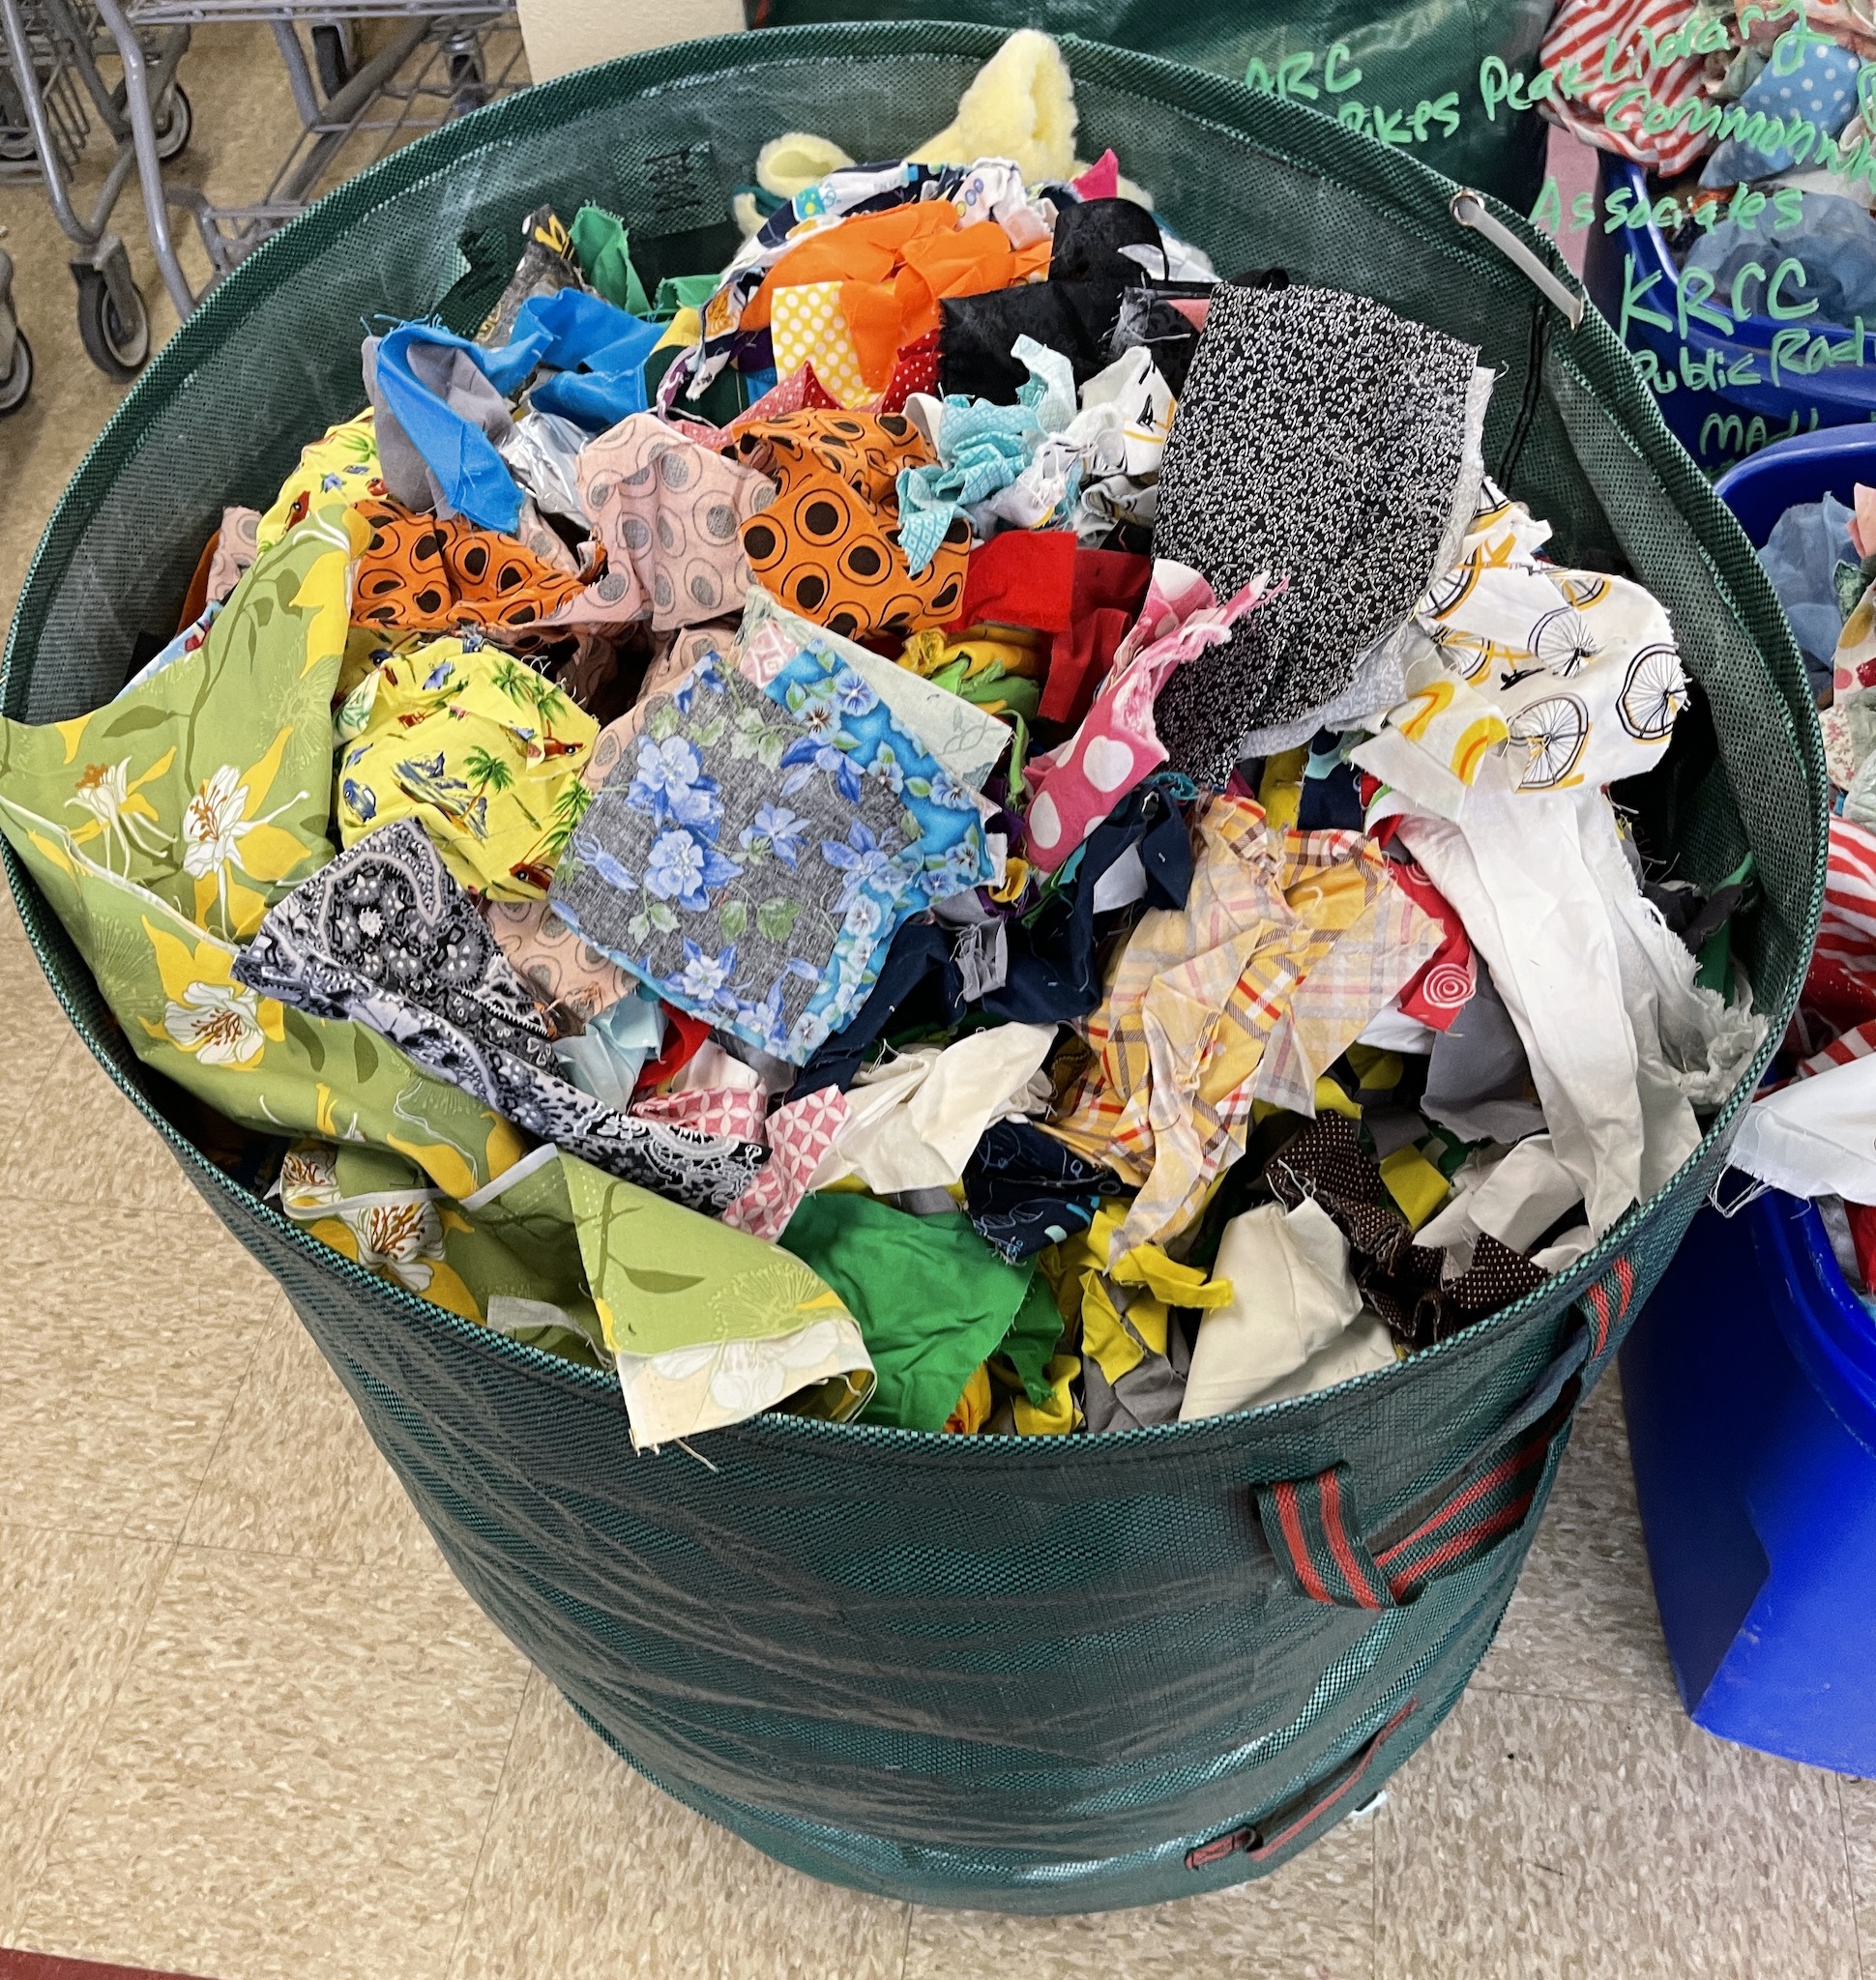
When I first walked into the main shopping area of the place, I was greeted with three (3) tubs of FABRIC SCRAPS!
For my first 20 – 30 minutes in the shop I did not get much further than those three tubs as you could fill a bag for $1.00 with fabric scraps!
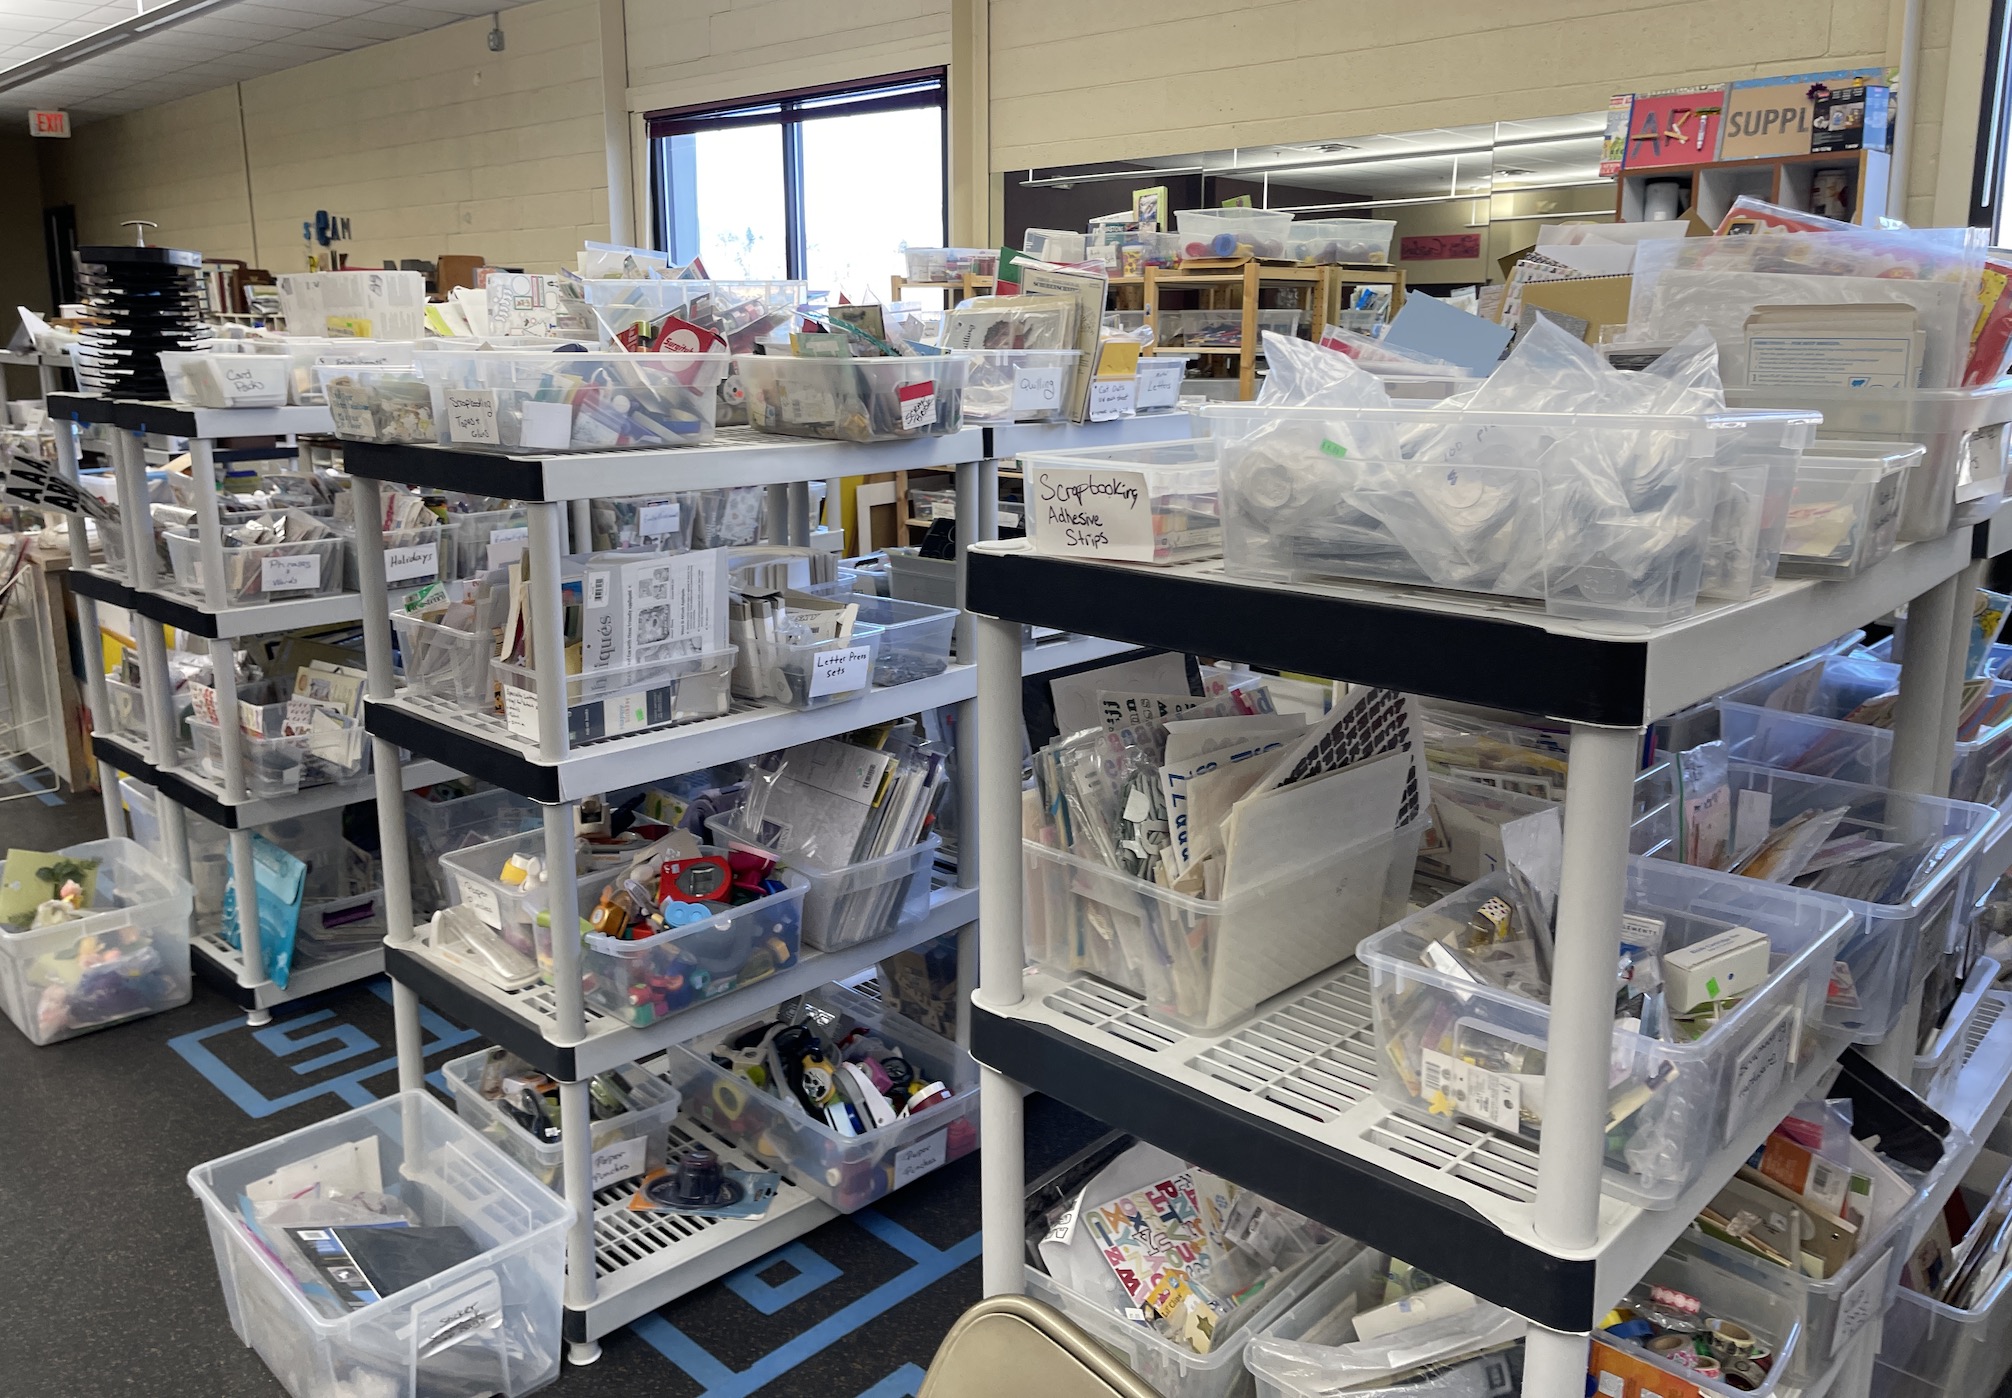
I found some amazing fabric scraps, filled my bag and finally moved on to the other parts of the shop filled with donated/recycled crafting and art supplies for EVERY craft you could imagine (painting, beading, scrapbooking, quilting, doll making, knitting, etc.)
It was kind of overwhelming!
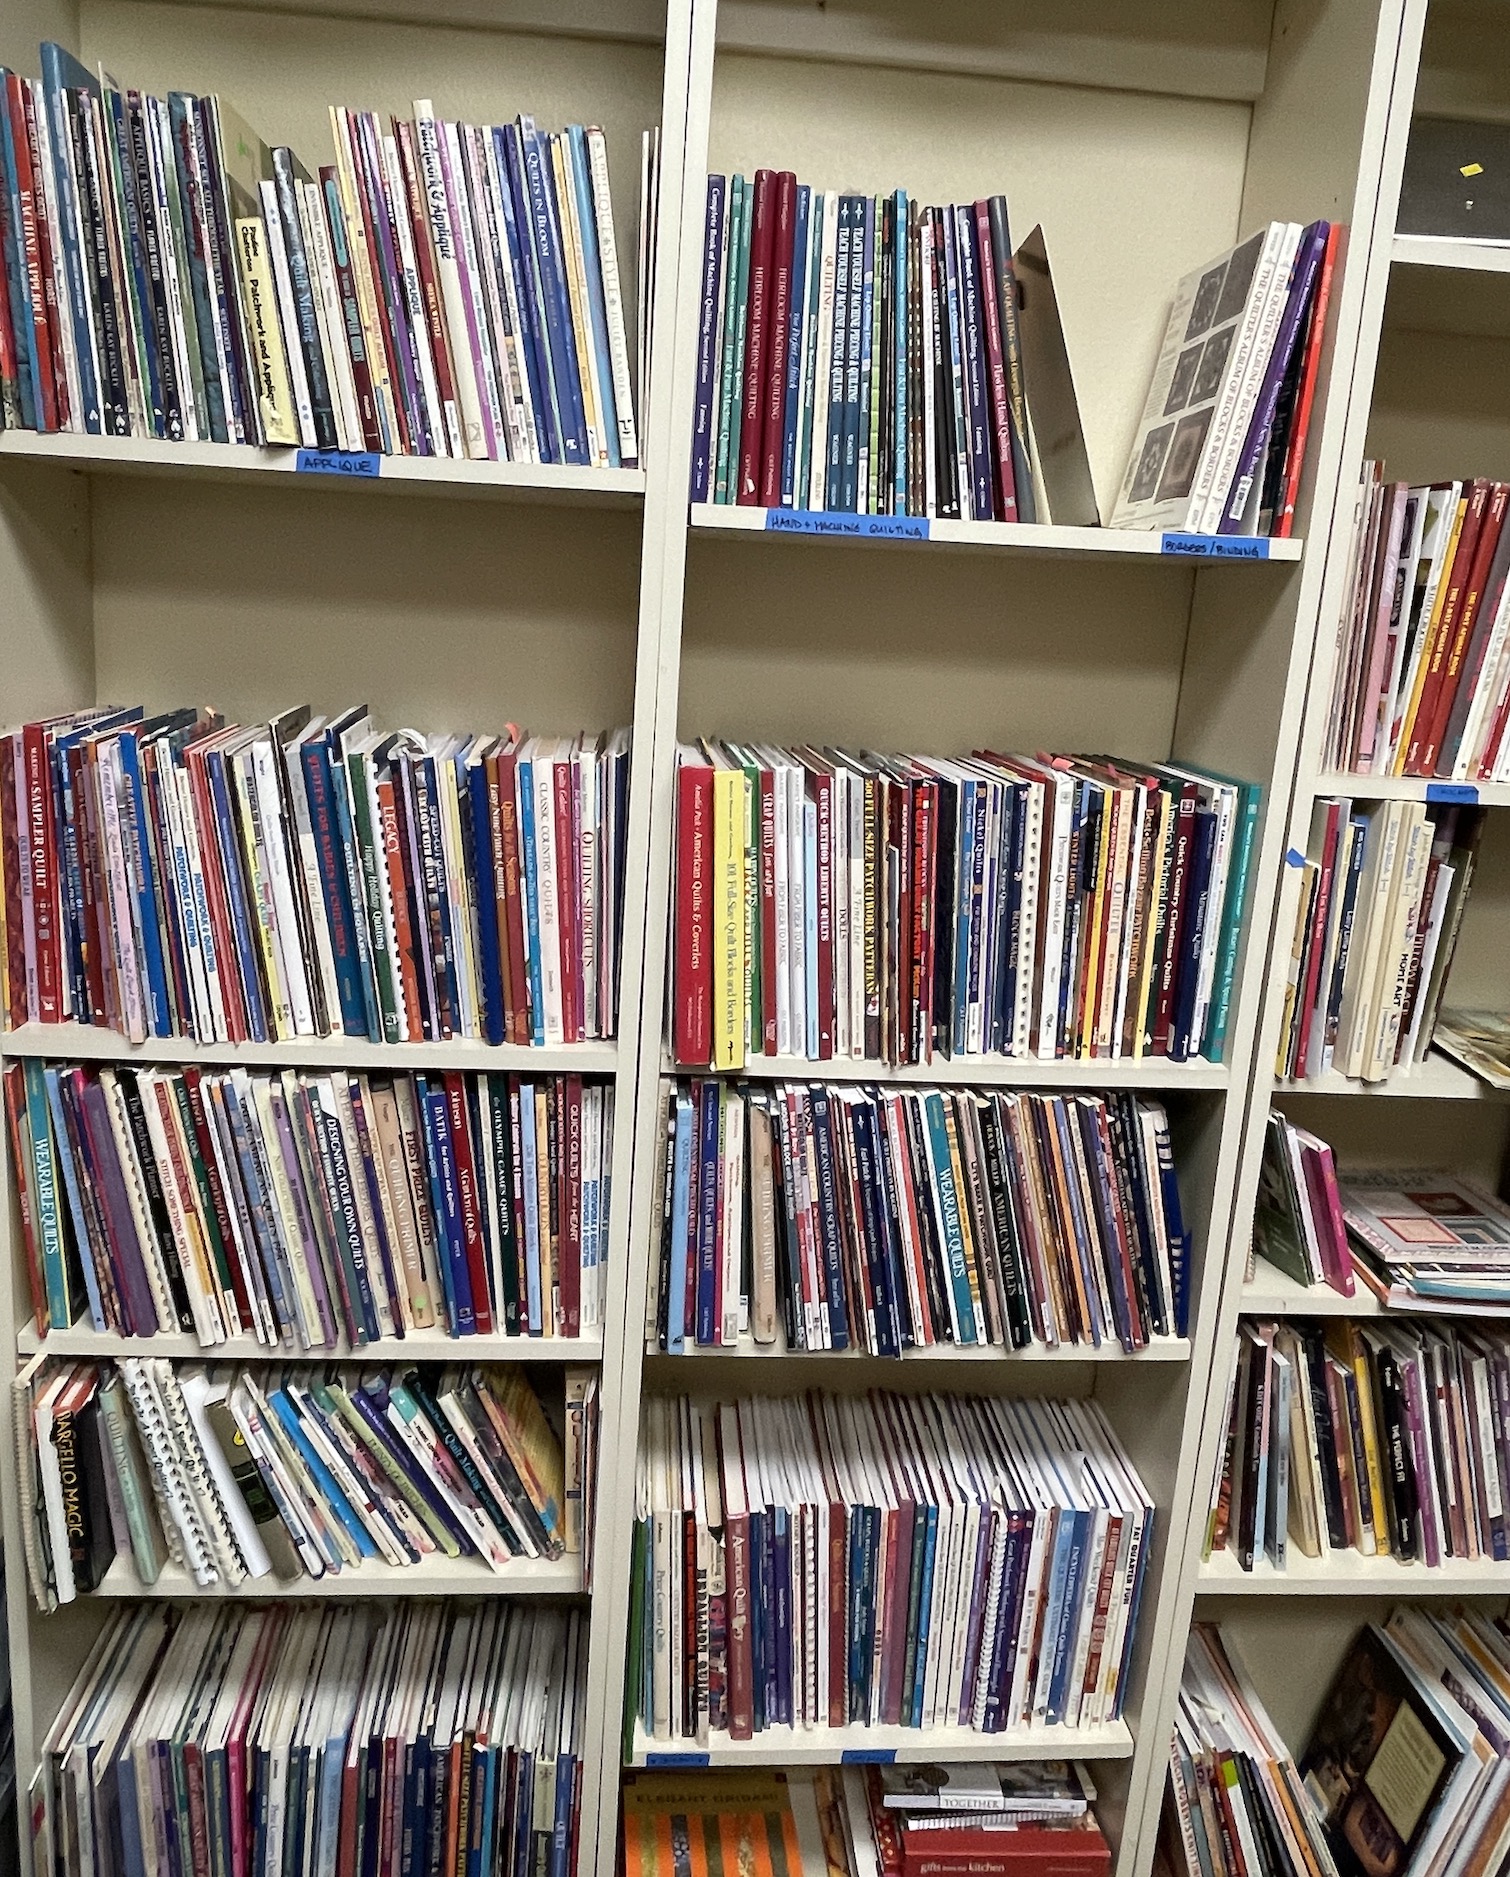
Overstimulated from looking at a seemingly endless collection of inexpensive crafting/art supplies, I wandered into the book area to look at their large collection of second handing arts and crafts books:
I behaved and only bought one quilting book.
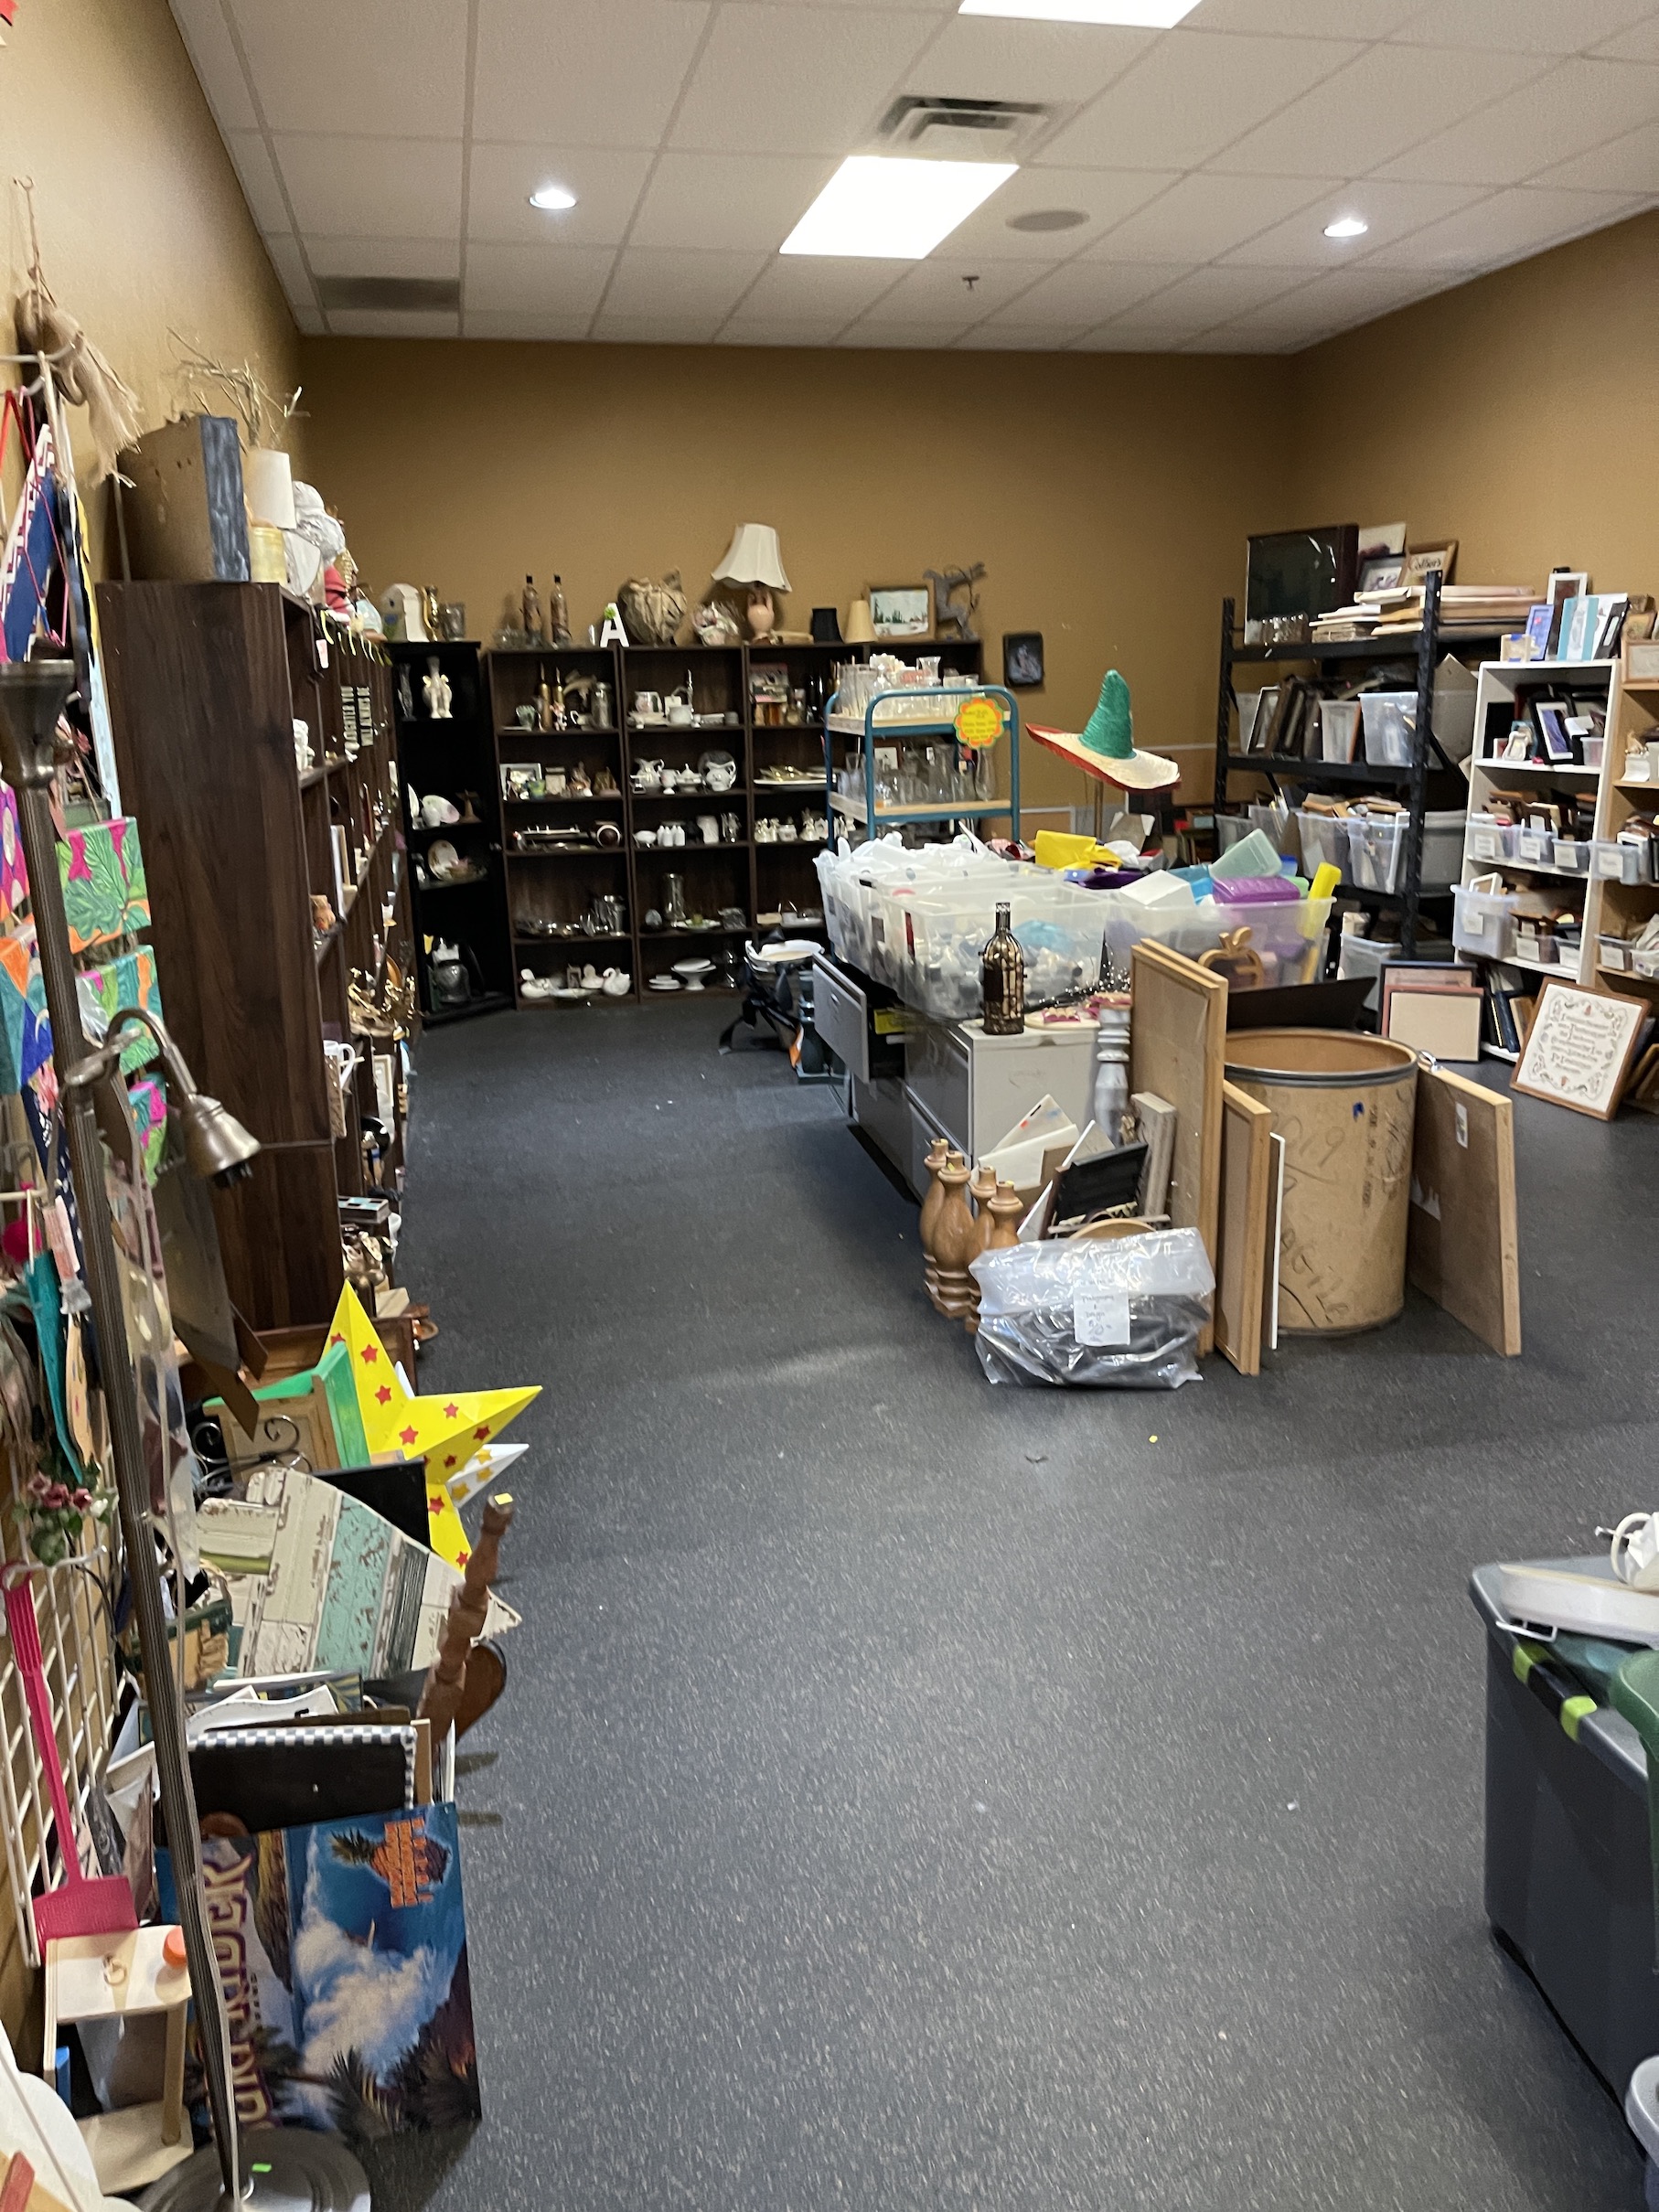
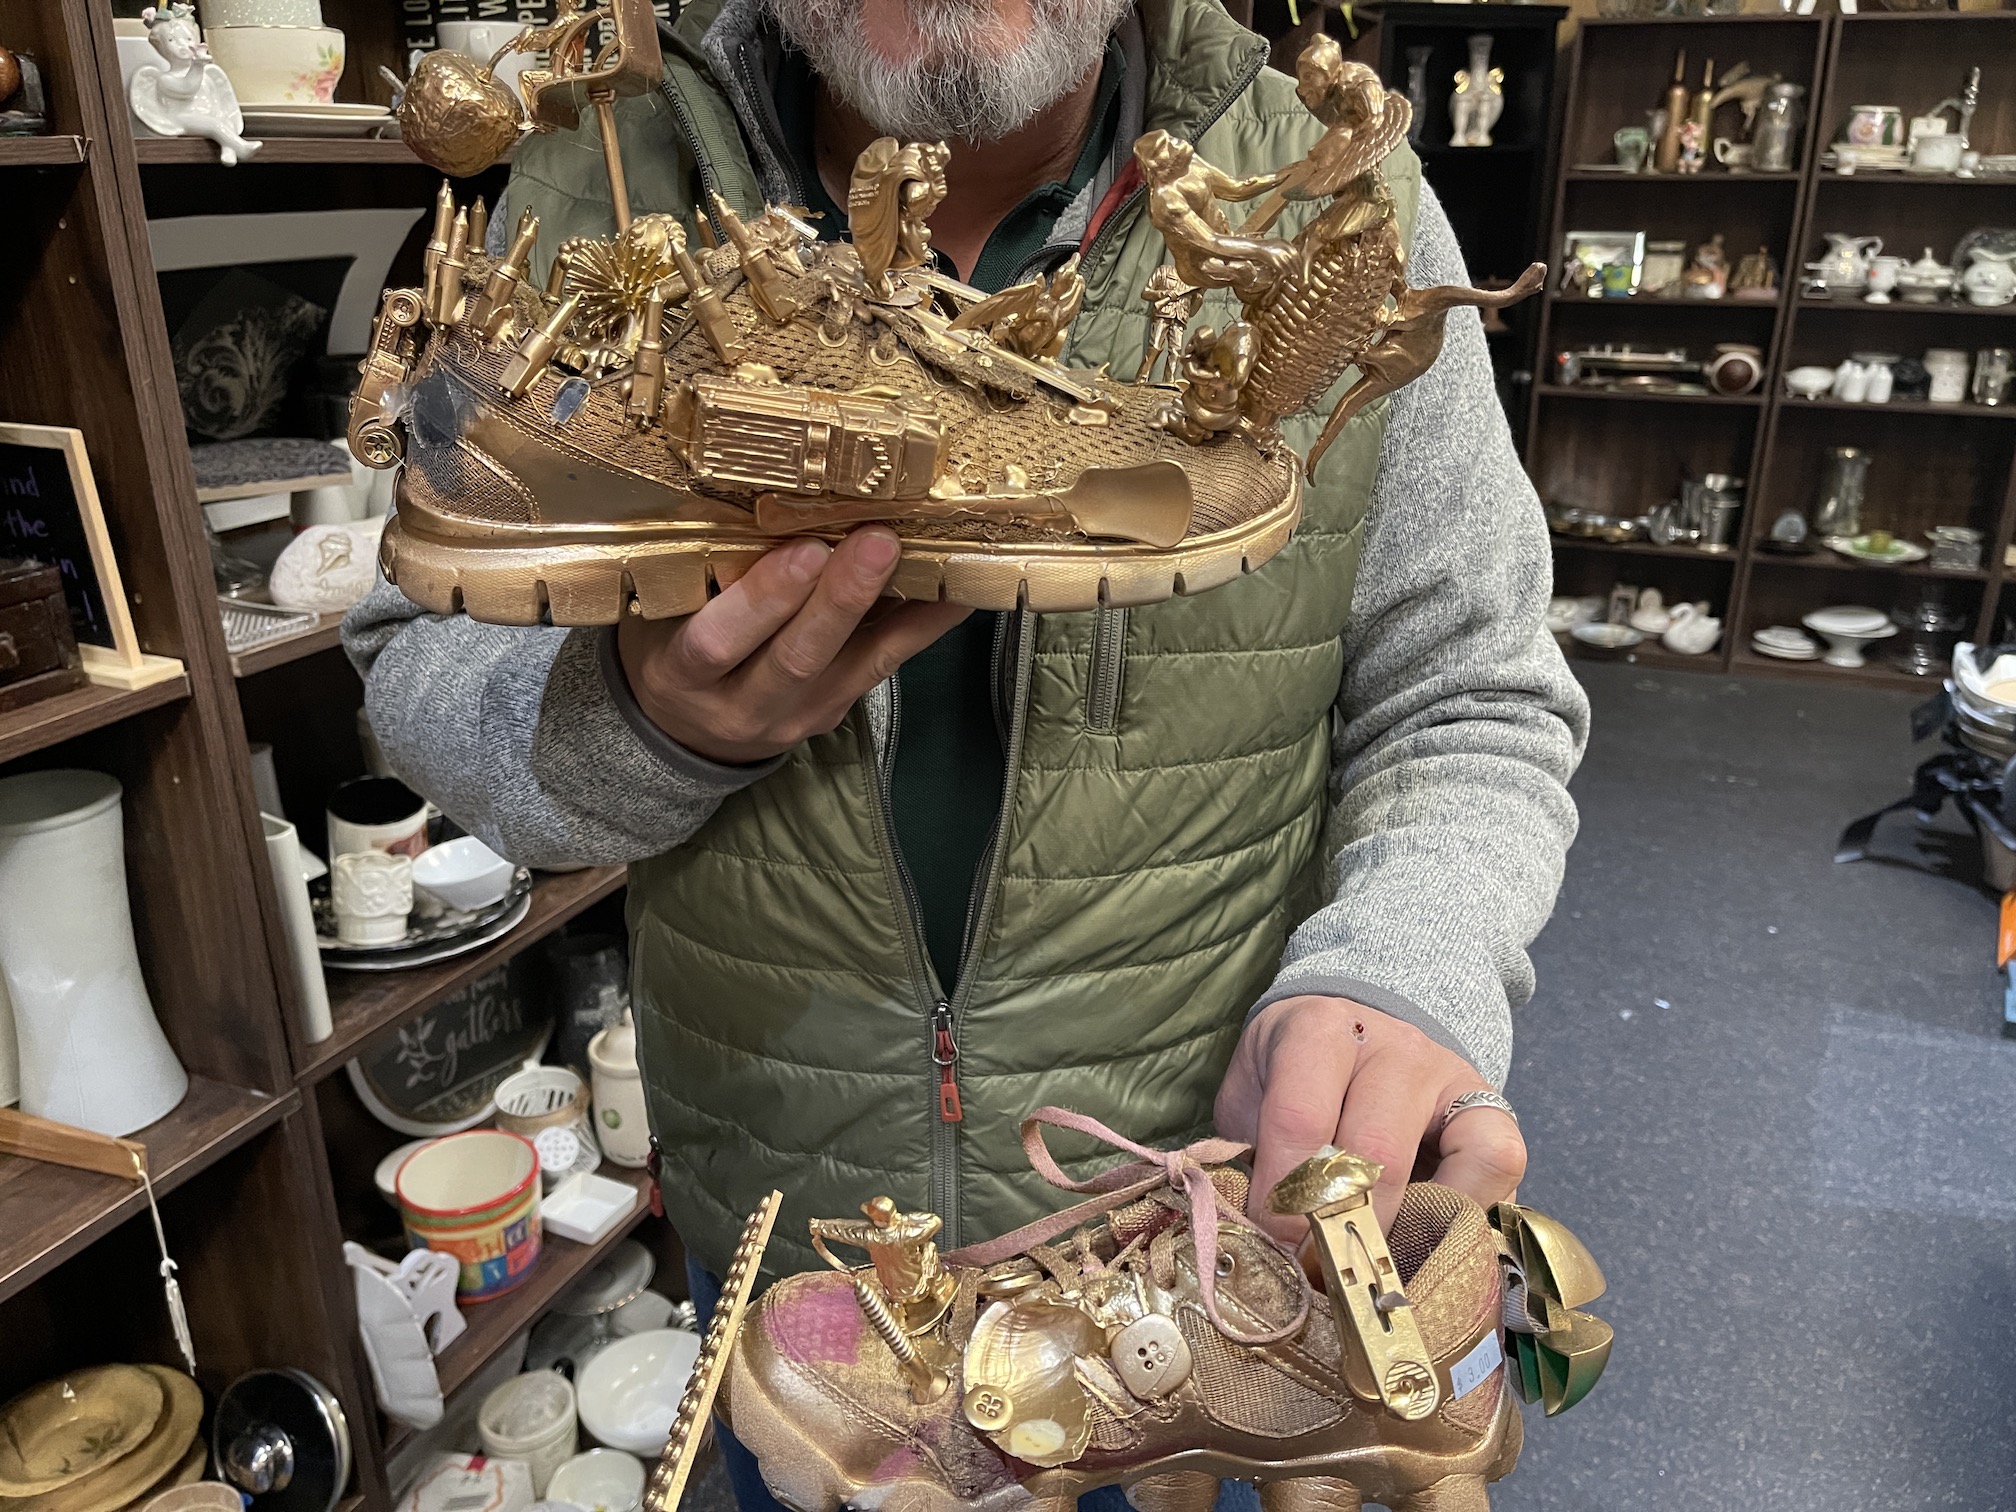
My partner John joined me in the shop (he went off to get our car washed while I initially wandered the shop); and together we wandered into a room of sort of “antiques” and other odds and ends for sale.
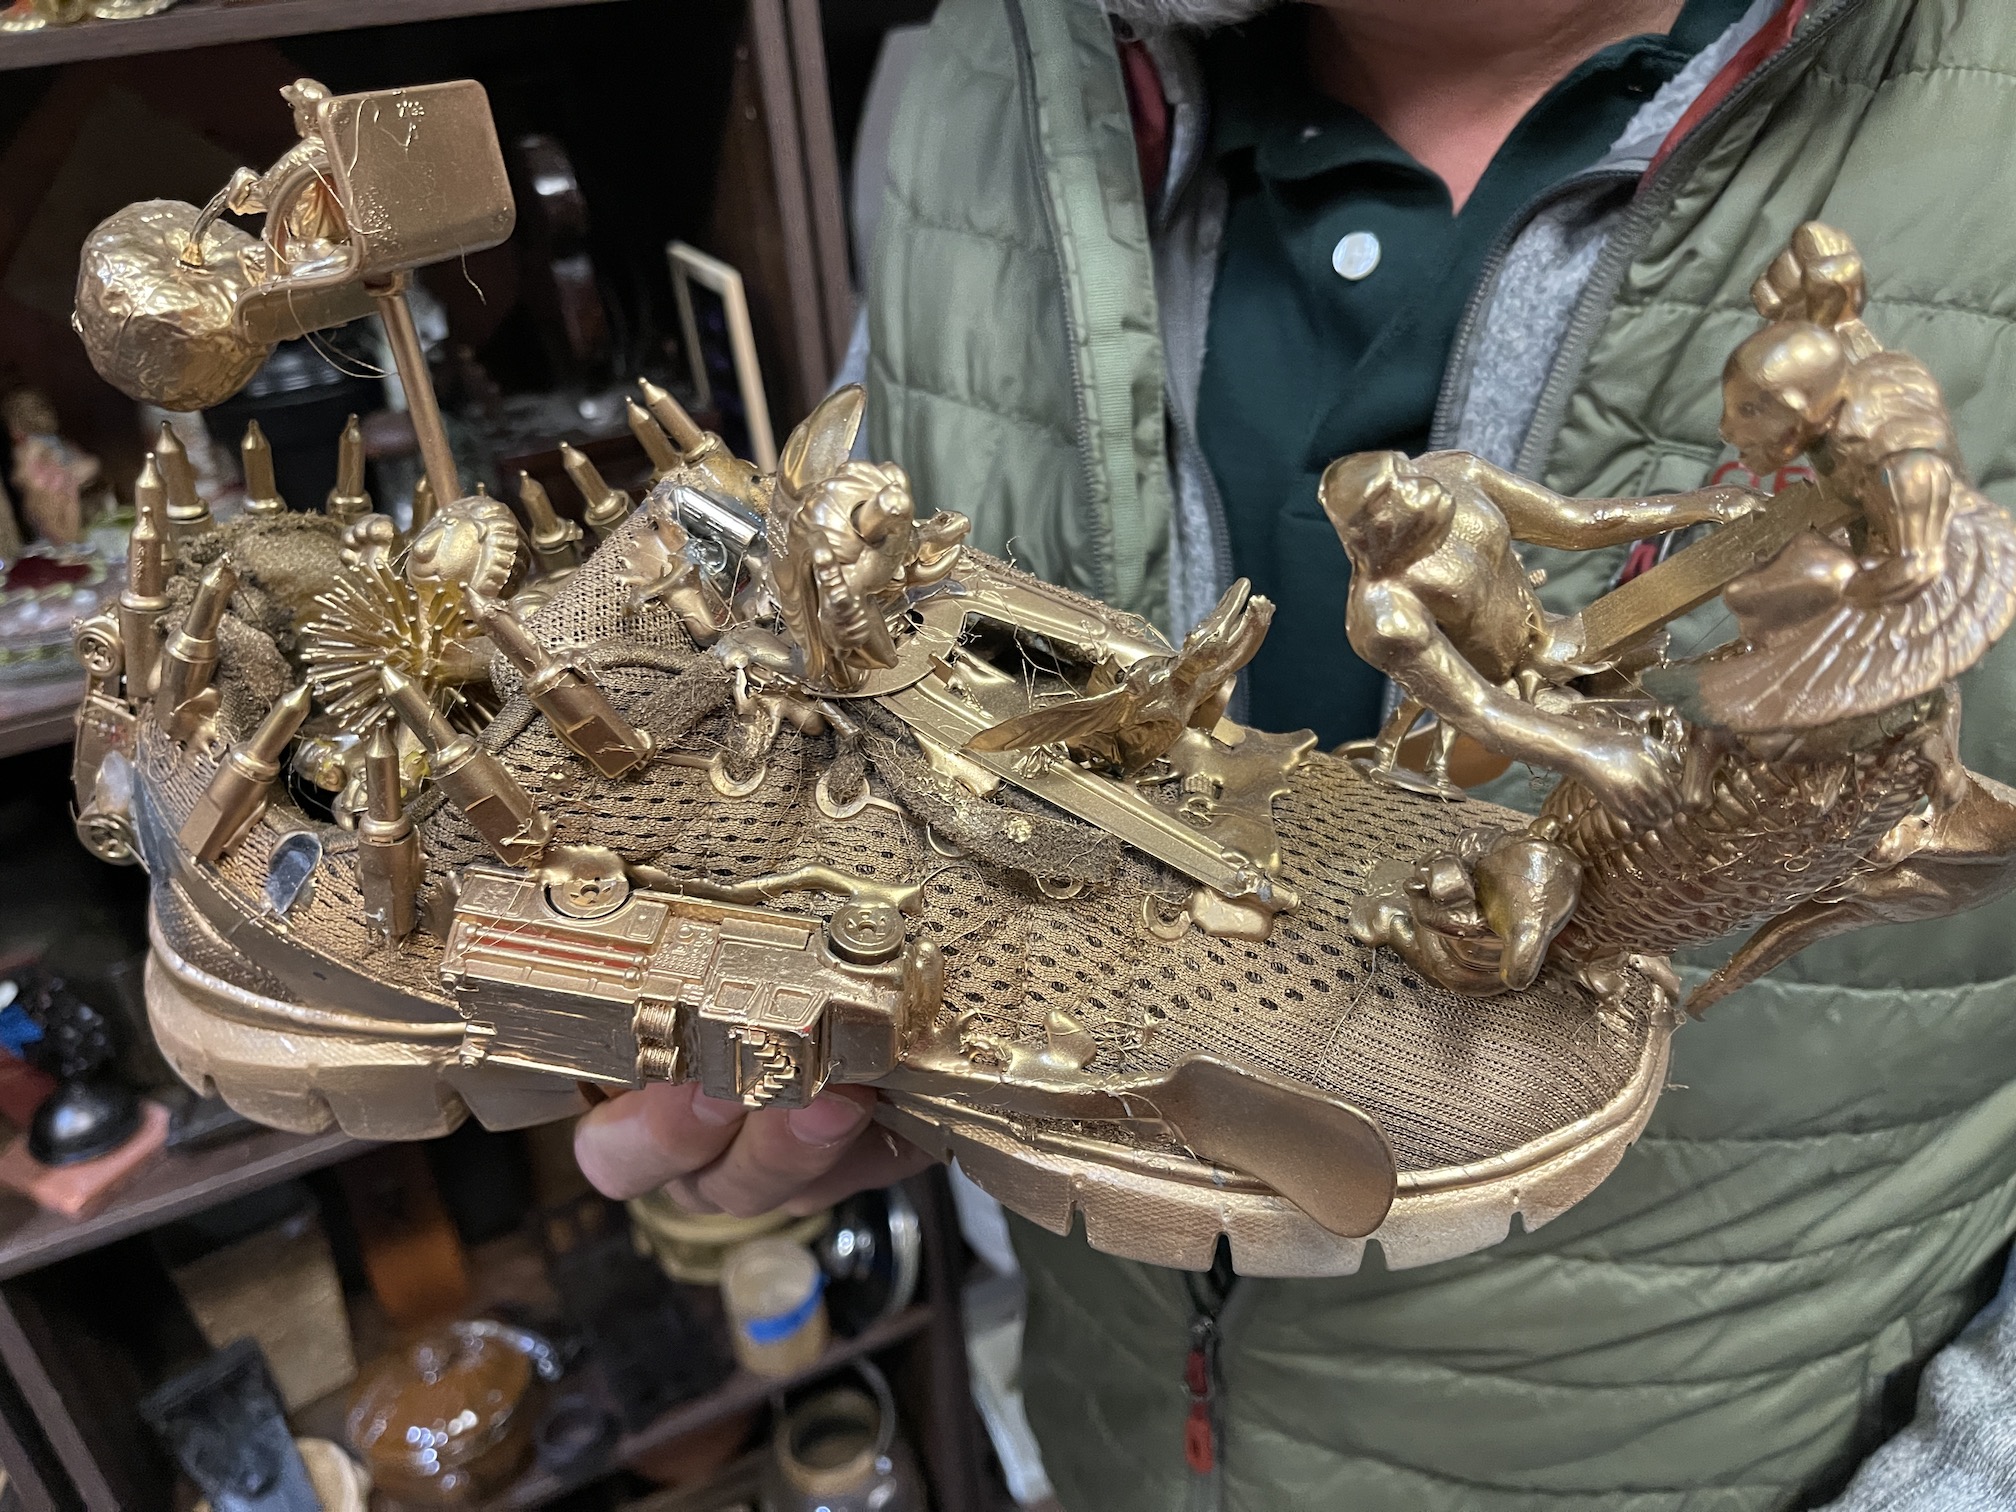
Inside this room we found some unusual items, including several pieces of “shoe art” that John found:
Hmm…
There was more eclectic art and “antiques” in that room.
If you are ever in Colorado Springs, CO I recommend a visit to this place! Oh and no worries, if you like fabric scraps, I did leave you some in those tubs when you first walk in (smile).
Back around the beginning of November my blogging buddy in Pennsylvania, Claudia@claudiamcgillart posted this post about how she was making little people out of recycled eye medicine vials:
I loved how she was doing some very creative recycling with individual eye medicine vials that most people would have discarded into the trash.
Around the same time I was in the process of cleaning up my fabric scrap collection and pulling out the tiny pieces I was likely never to use. I started to discard the scraps into the trash bin (gasp) but then I realized they were the right size for Claudia’s eye medicine vial people (or other art projects she does with small fabric scraps).
So I sent her a package of small to tiny fabric scraps.
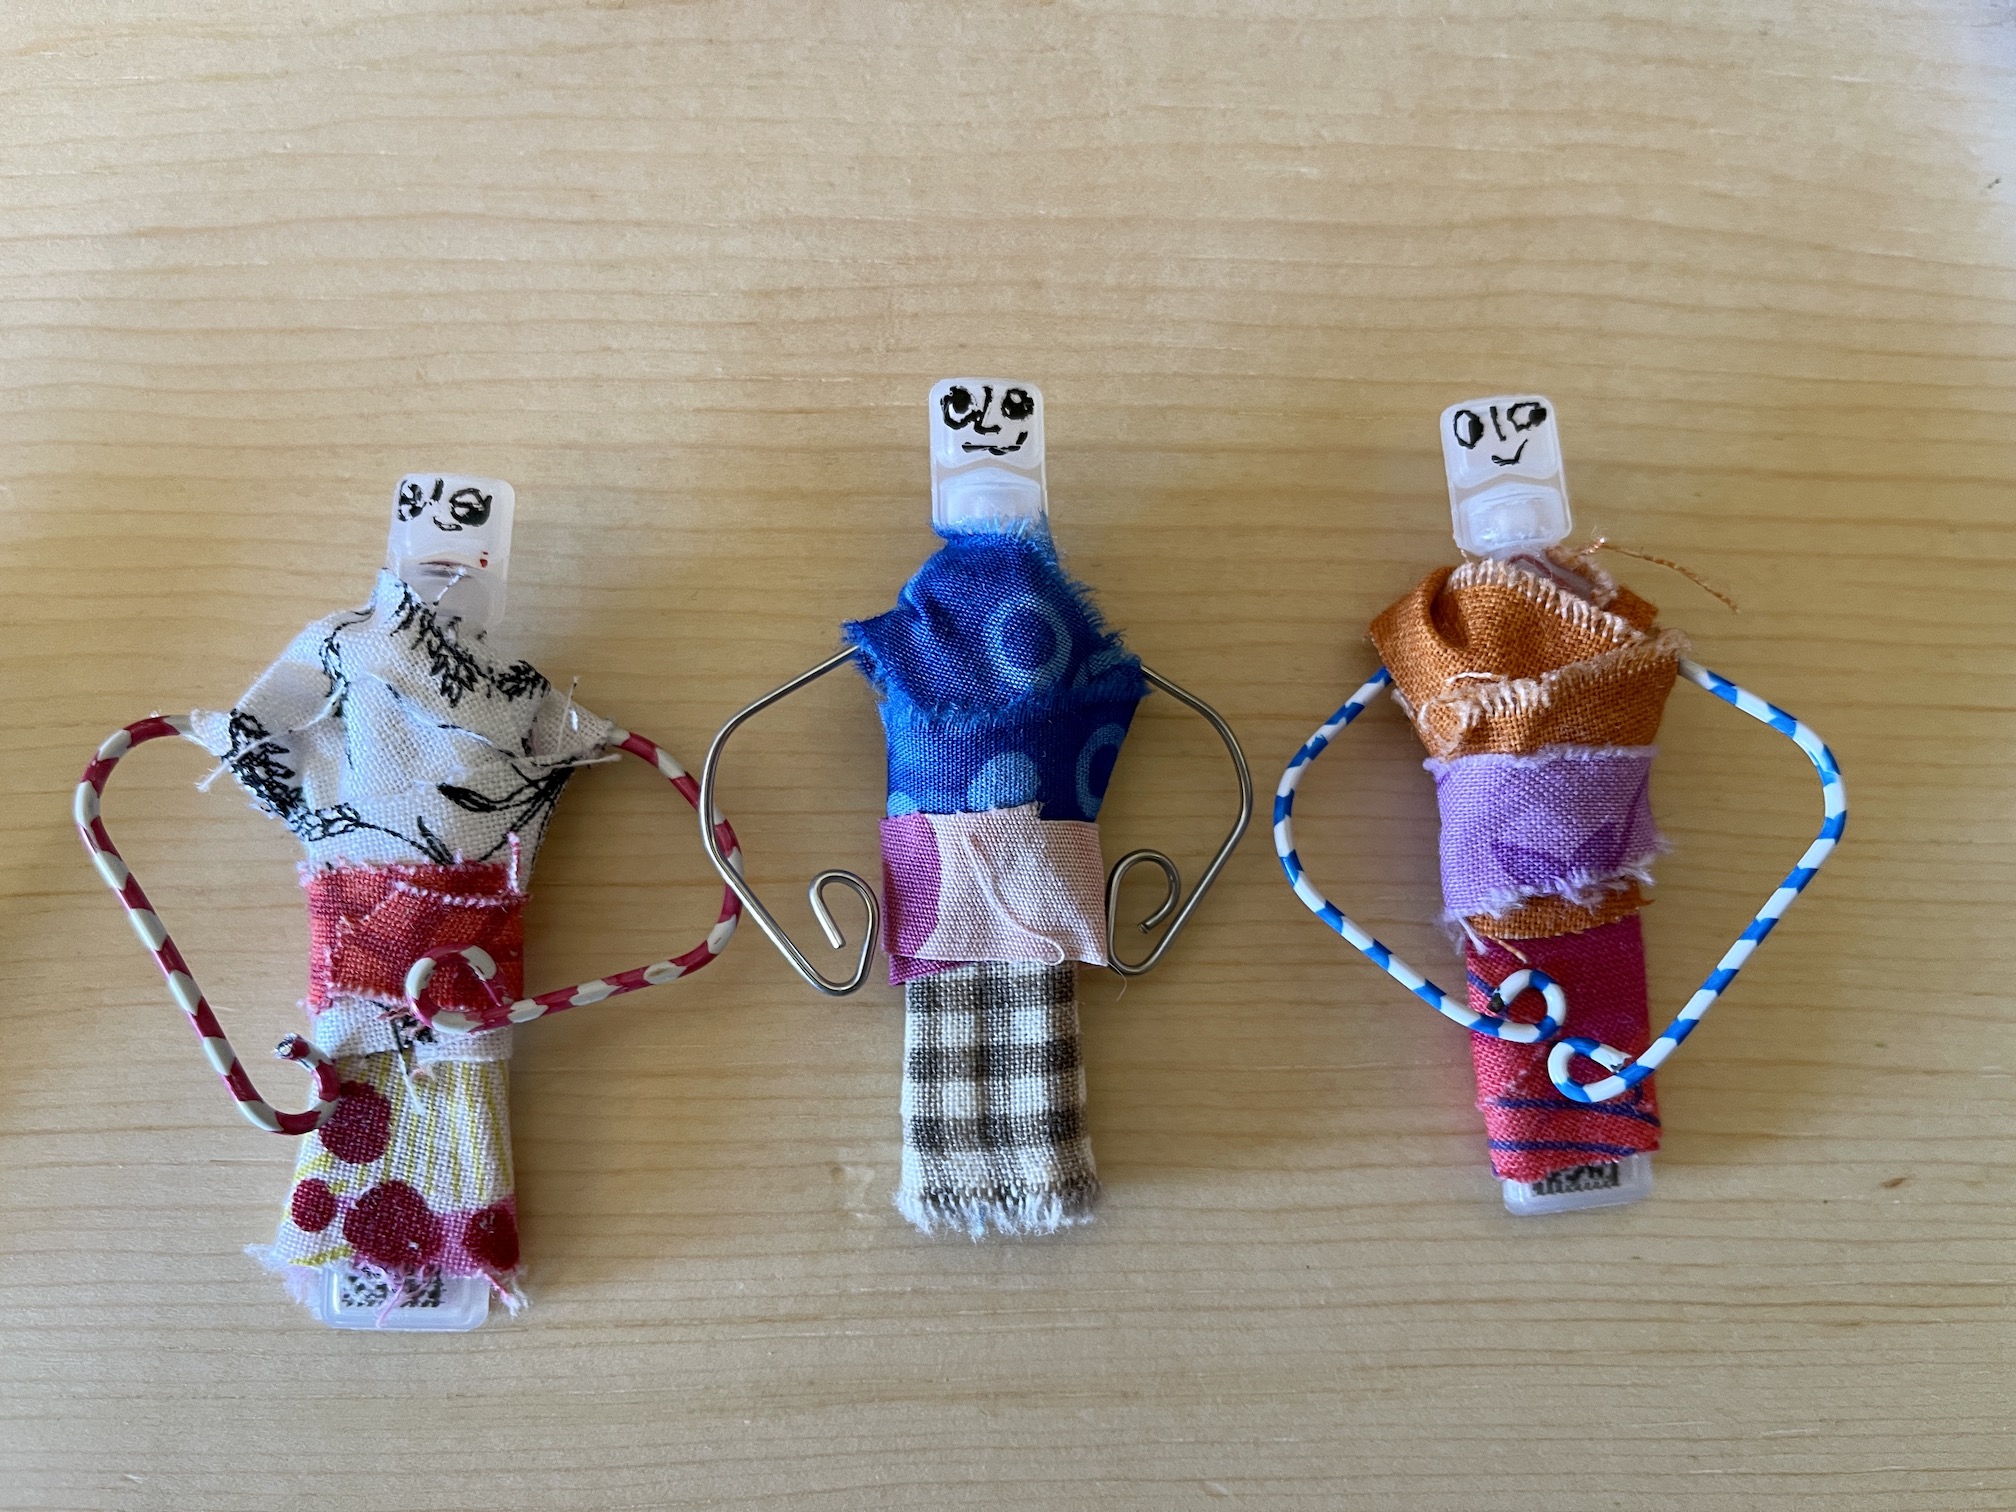
Then last week (or so…time is getting foggy at the end of the year) I received a wonderful surprise in the mail from Claudia – my own collection of little eye medicine vial people.
Here’s a close up of the little people in groupings of three:
For now I have them all hanging out on my white board ledge in the studio:
They definitely make the boring whiteboard more interesting!
Okay time to take a break from “tierneytravels” and get back to “tierneycreates” (smile).
It only took like a year+ but I’ve finally finished hand quilting a lap sized free form log cabin quilt I started back in January 2020 at a quilting retreat which I named “Seattle Scrappy”. Now I need your help to decide which fabric to use for the quilt binding.
I know crafters are opinionated and like helping other crafters with their design, so I am looking for your opinions.
But firsthere is a little quick background on the piece and some additional photos.
In January 2020 (before the pandemic was a reality) I attended a mini quilt retreat with a couple quilting friends in Poulsbo, Washington. I brought a couple hand work projects and had EVERY INTENTION of only working on my hand work projects. But, my dear quilting friend Dana brought an extra sewing machine (one her her Berninas, and I love Berninas) and a BAG OF GRAY FABRIC SCRAPS for me to play with – oh no!
Out of that bag of scraps came a whole lots of free form pieces log cabin blocks and you can read about those in this post – What’s on the…Design Carpet.
Since February 2020 I’ve had a series of posts on the evolution of this quilt:
I’ve had an update or two on my @tierneycreates Instagram feed since these posts but basically I’ve just been plugging along (when I remember to work on it) hand stitching it with perle/pearl cotton thread.
Last night I finally finished stitching it; and this morning I trimmed off the extra batting on the edges!
I didn’t have the best light when I quickly took these photos this morning, but they give you a general idea of the hand quilted quilt.
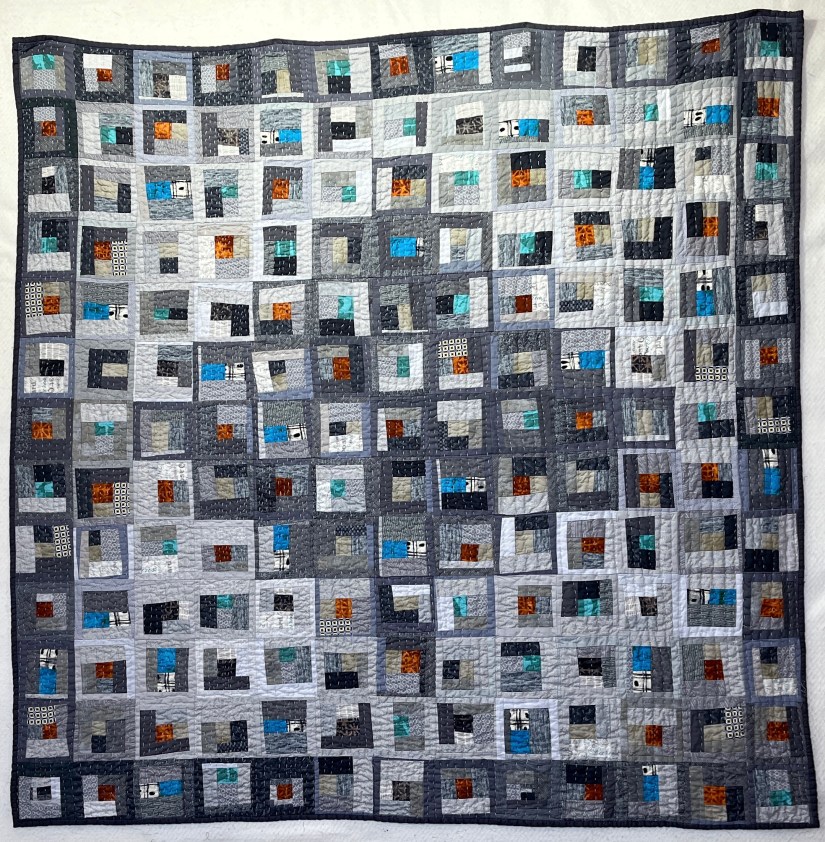
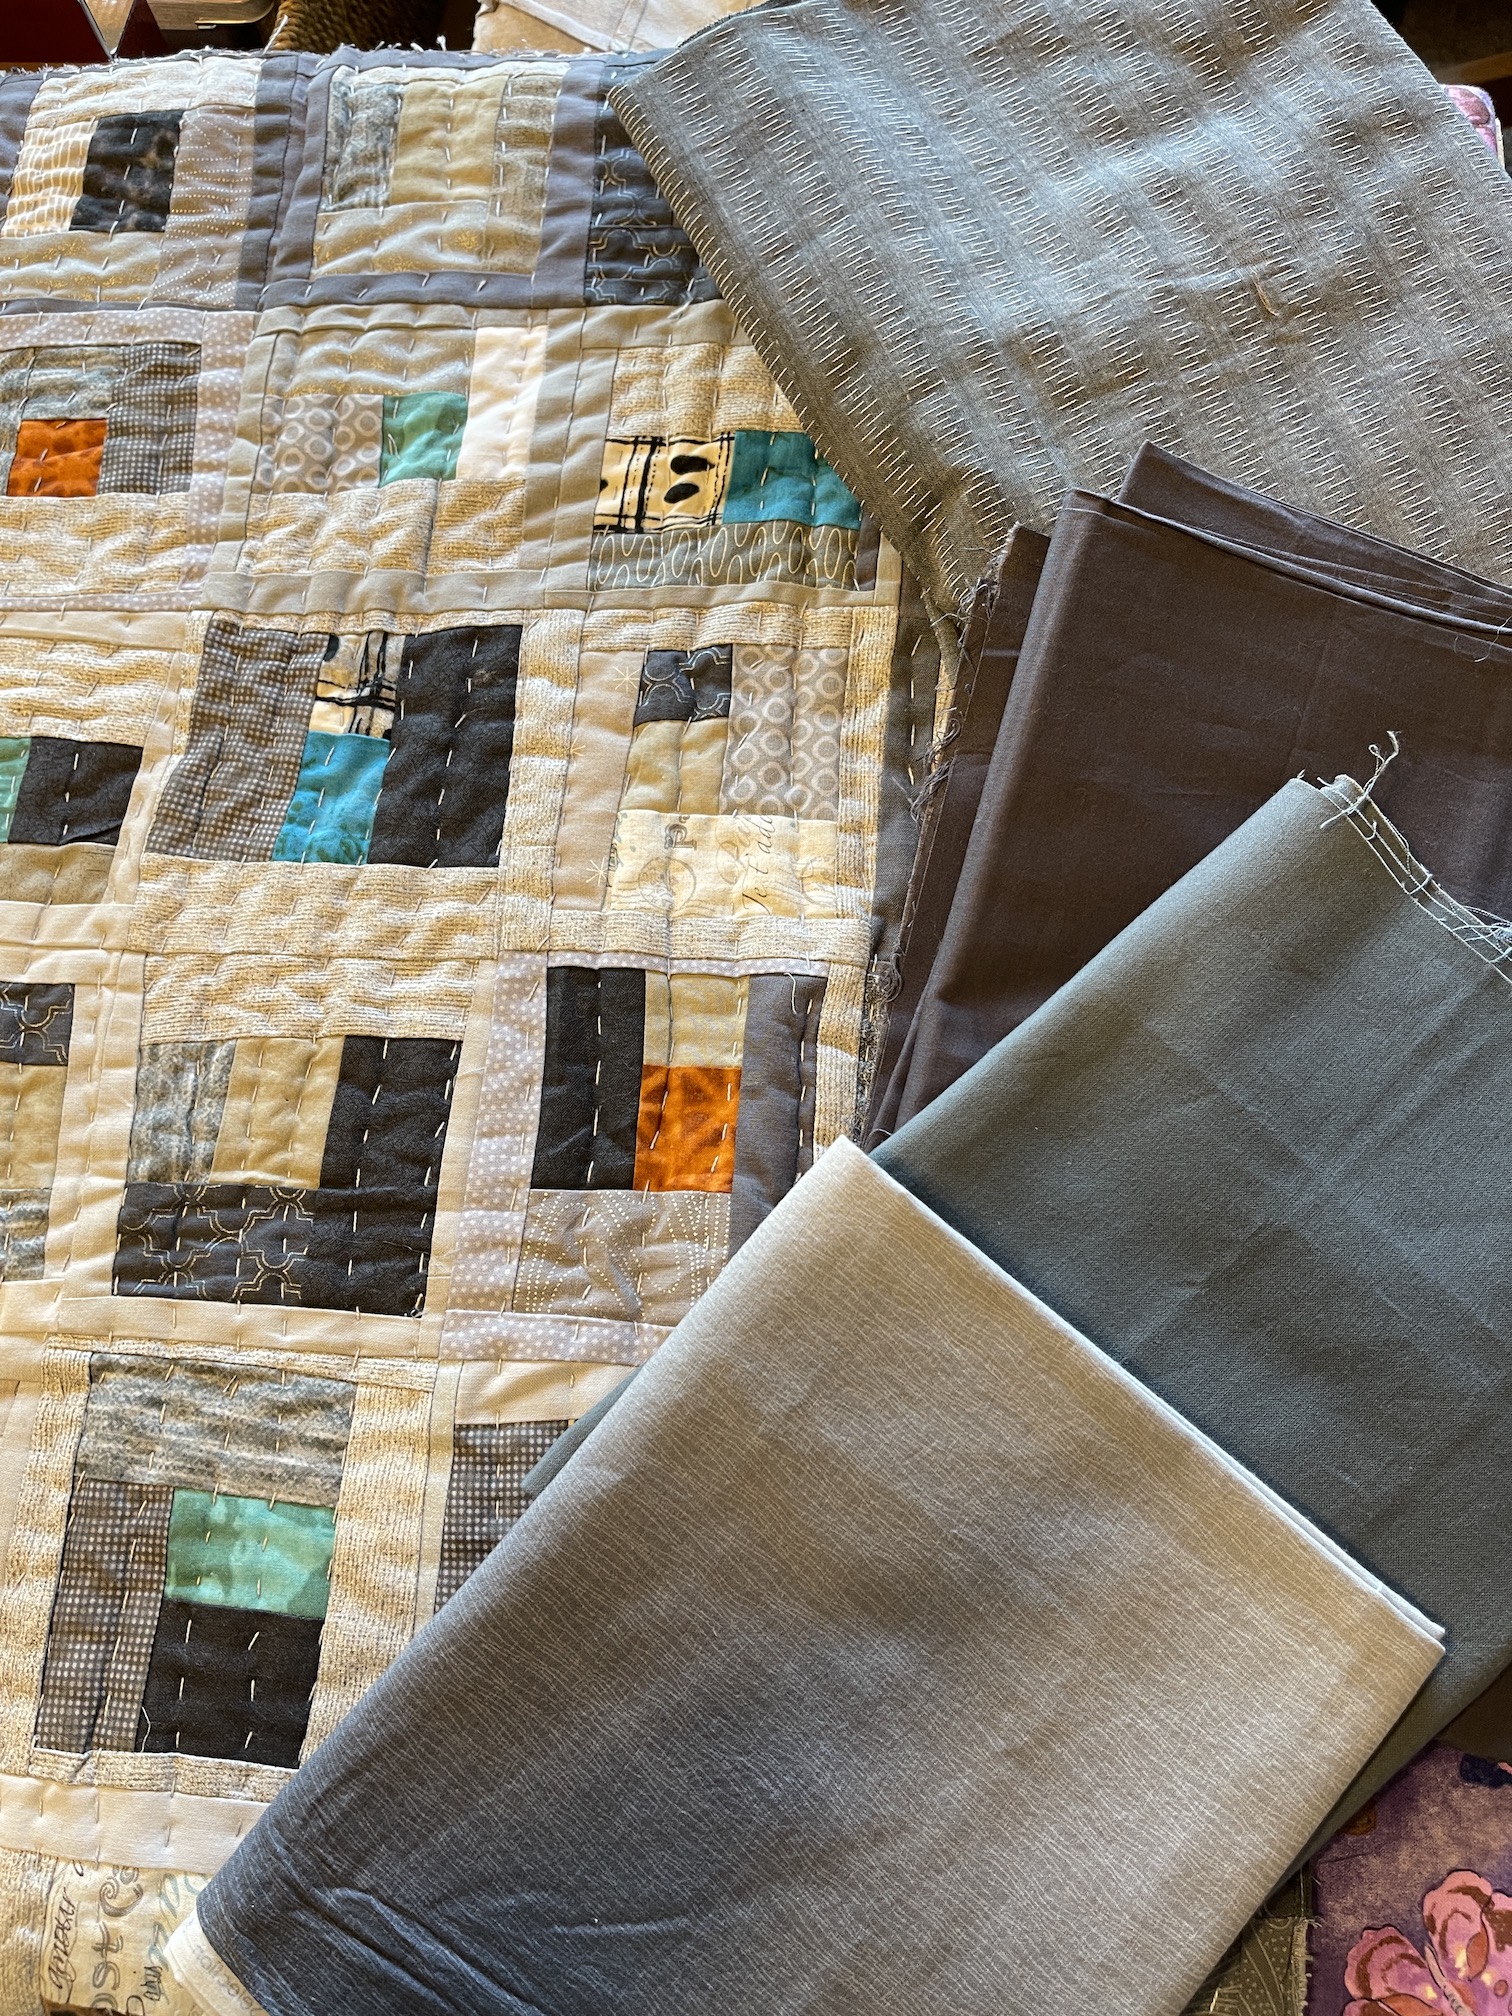
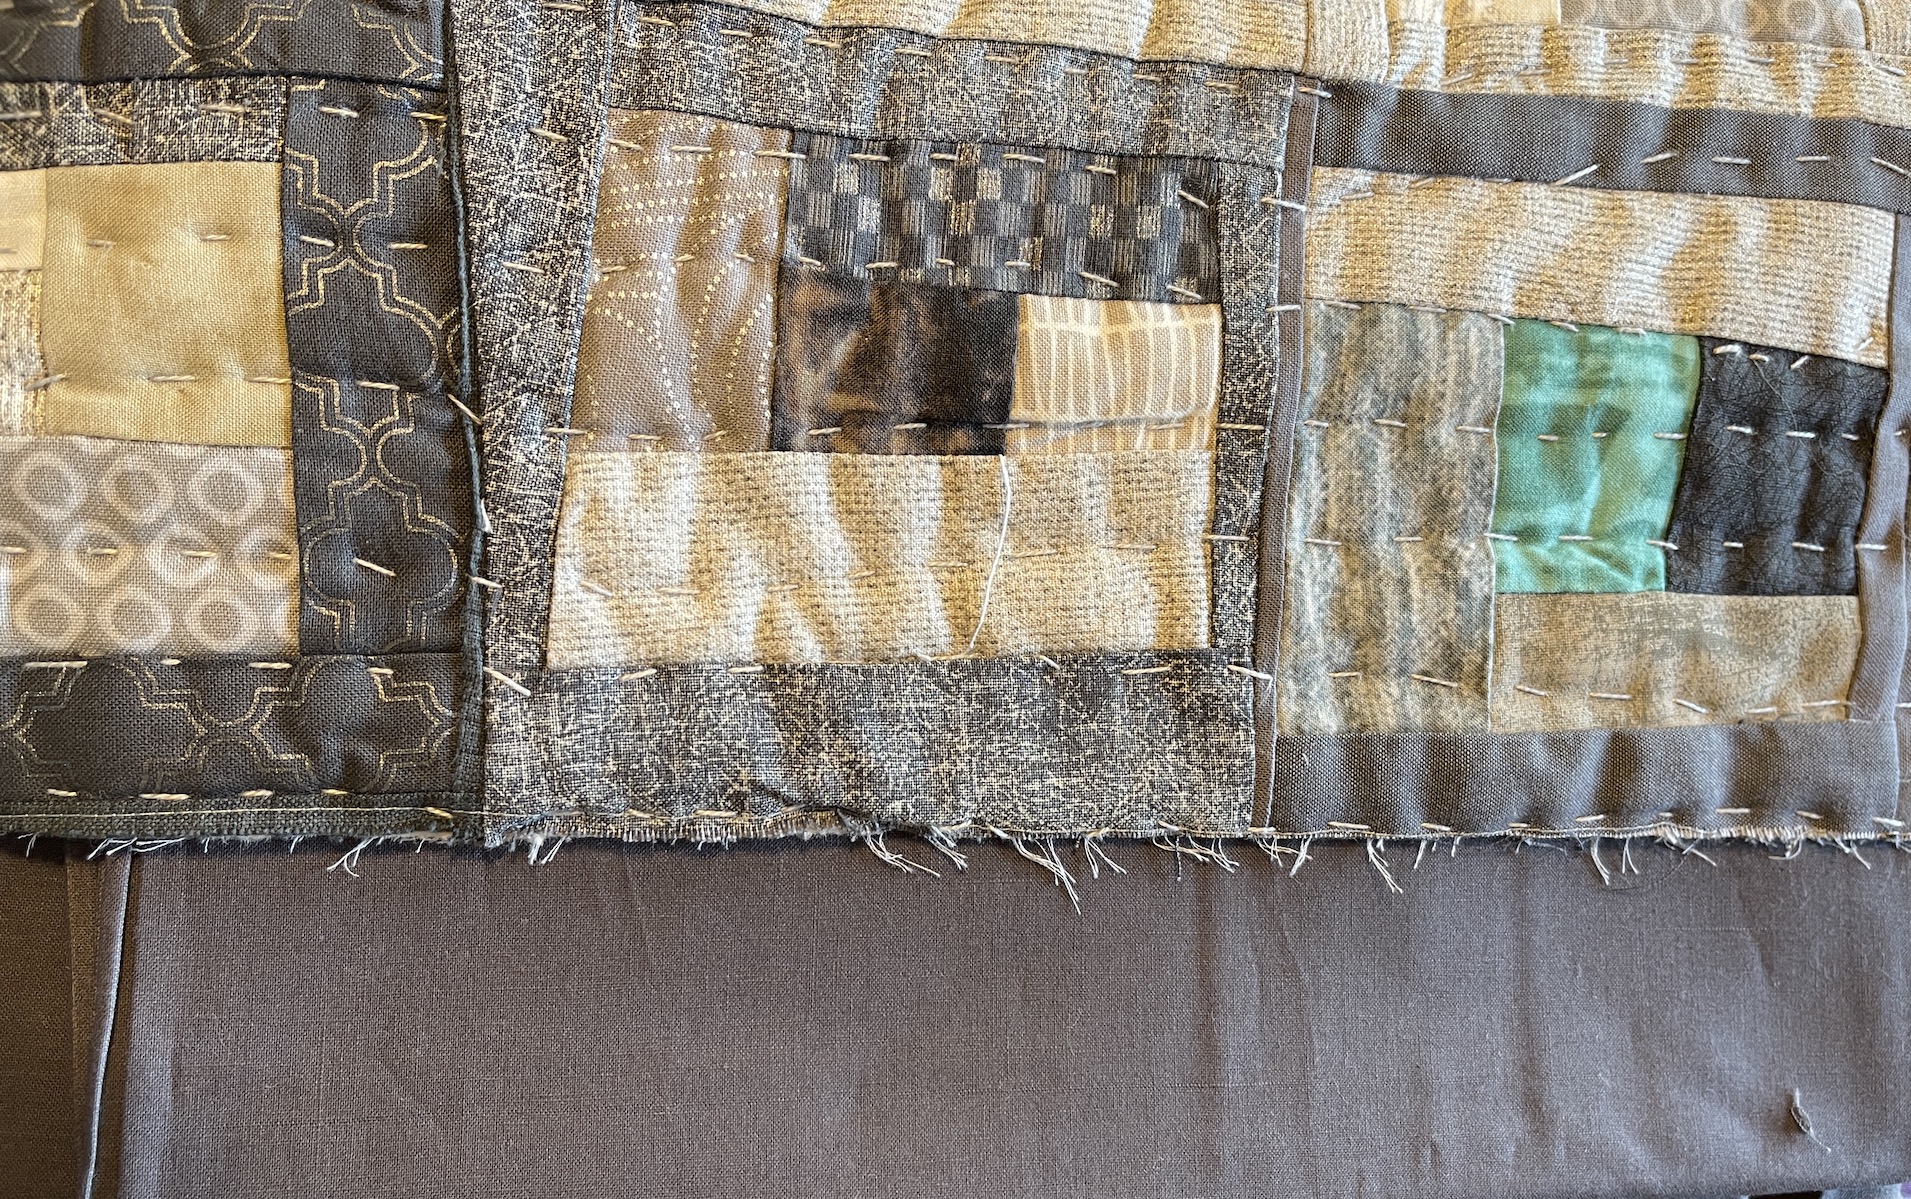
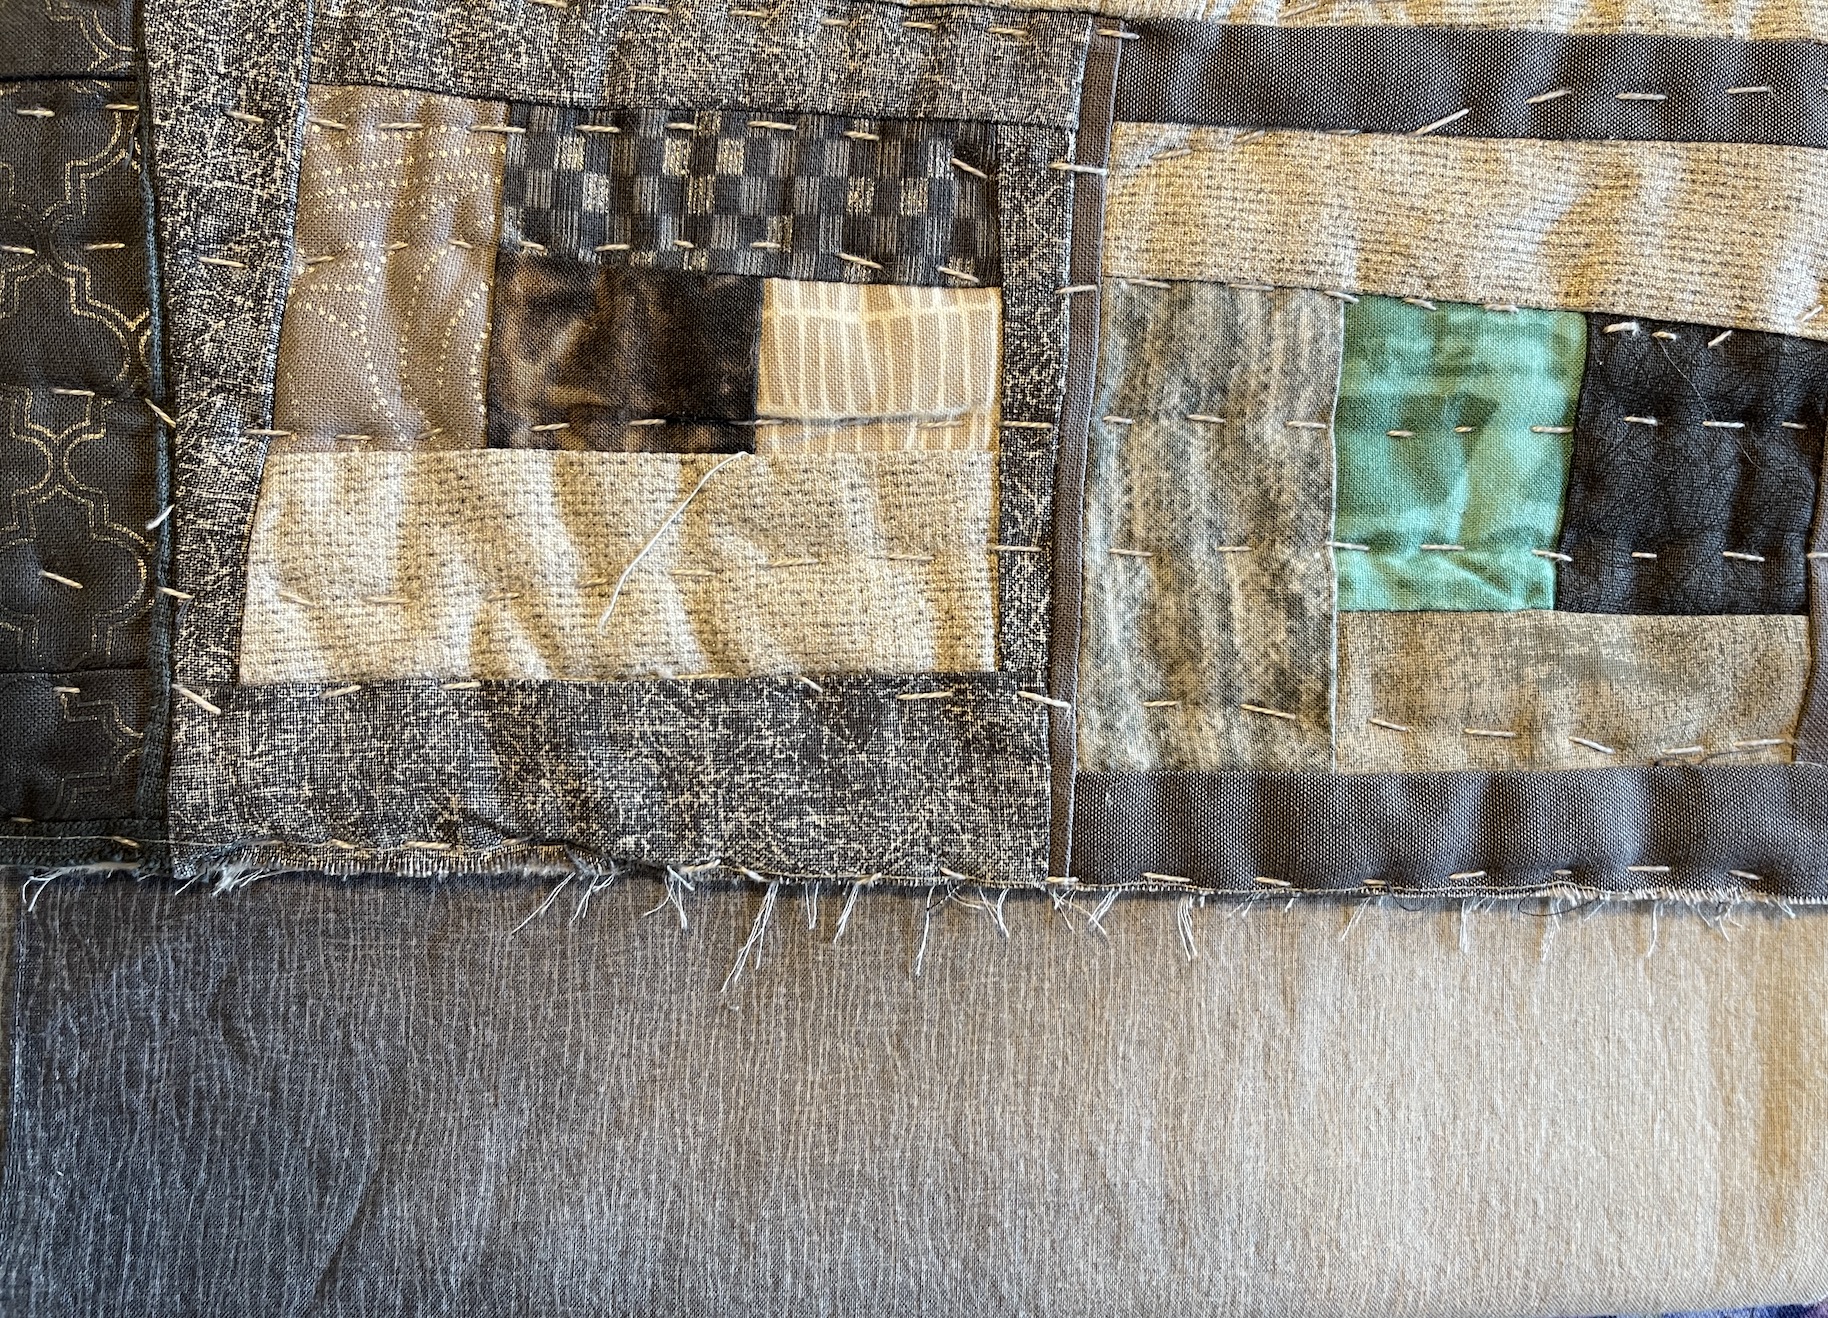
Now it’s time to choose the binding (this is where you come in) and here are the four options I am considering:
As you can see they are all some shade of gray. You might be thinking: “Well Tierney, what about the turquoise, aqua, or the burnt orange in the piece?” I did think about those for a moment but first of all I do not have enough of any of those fabrics to create a binding; and second I do not want to frame it in a strong color. I want to frame it in a gray.
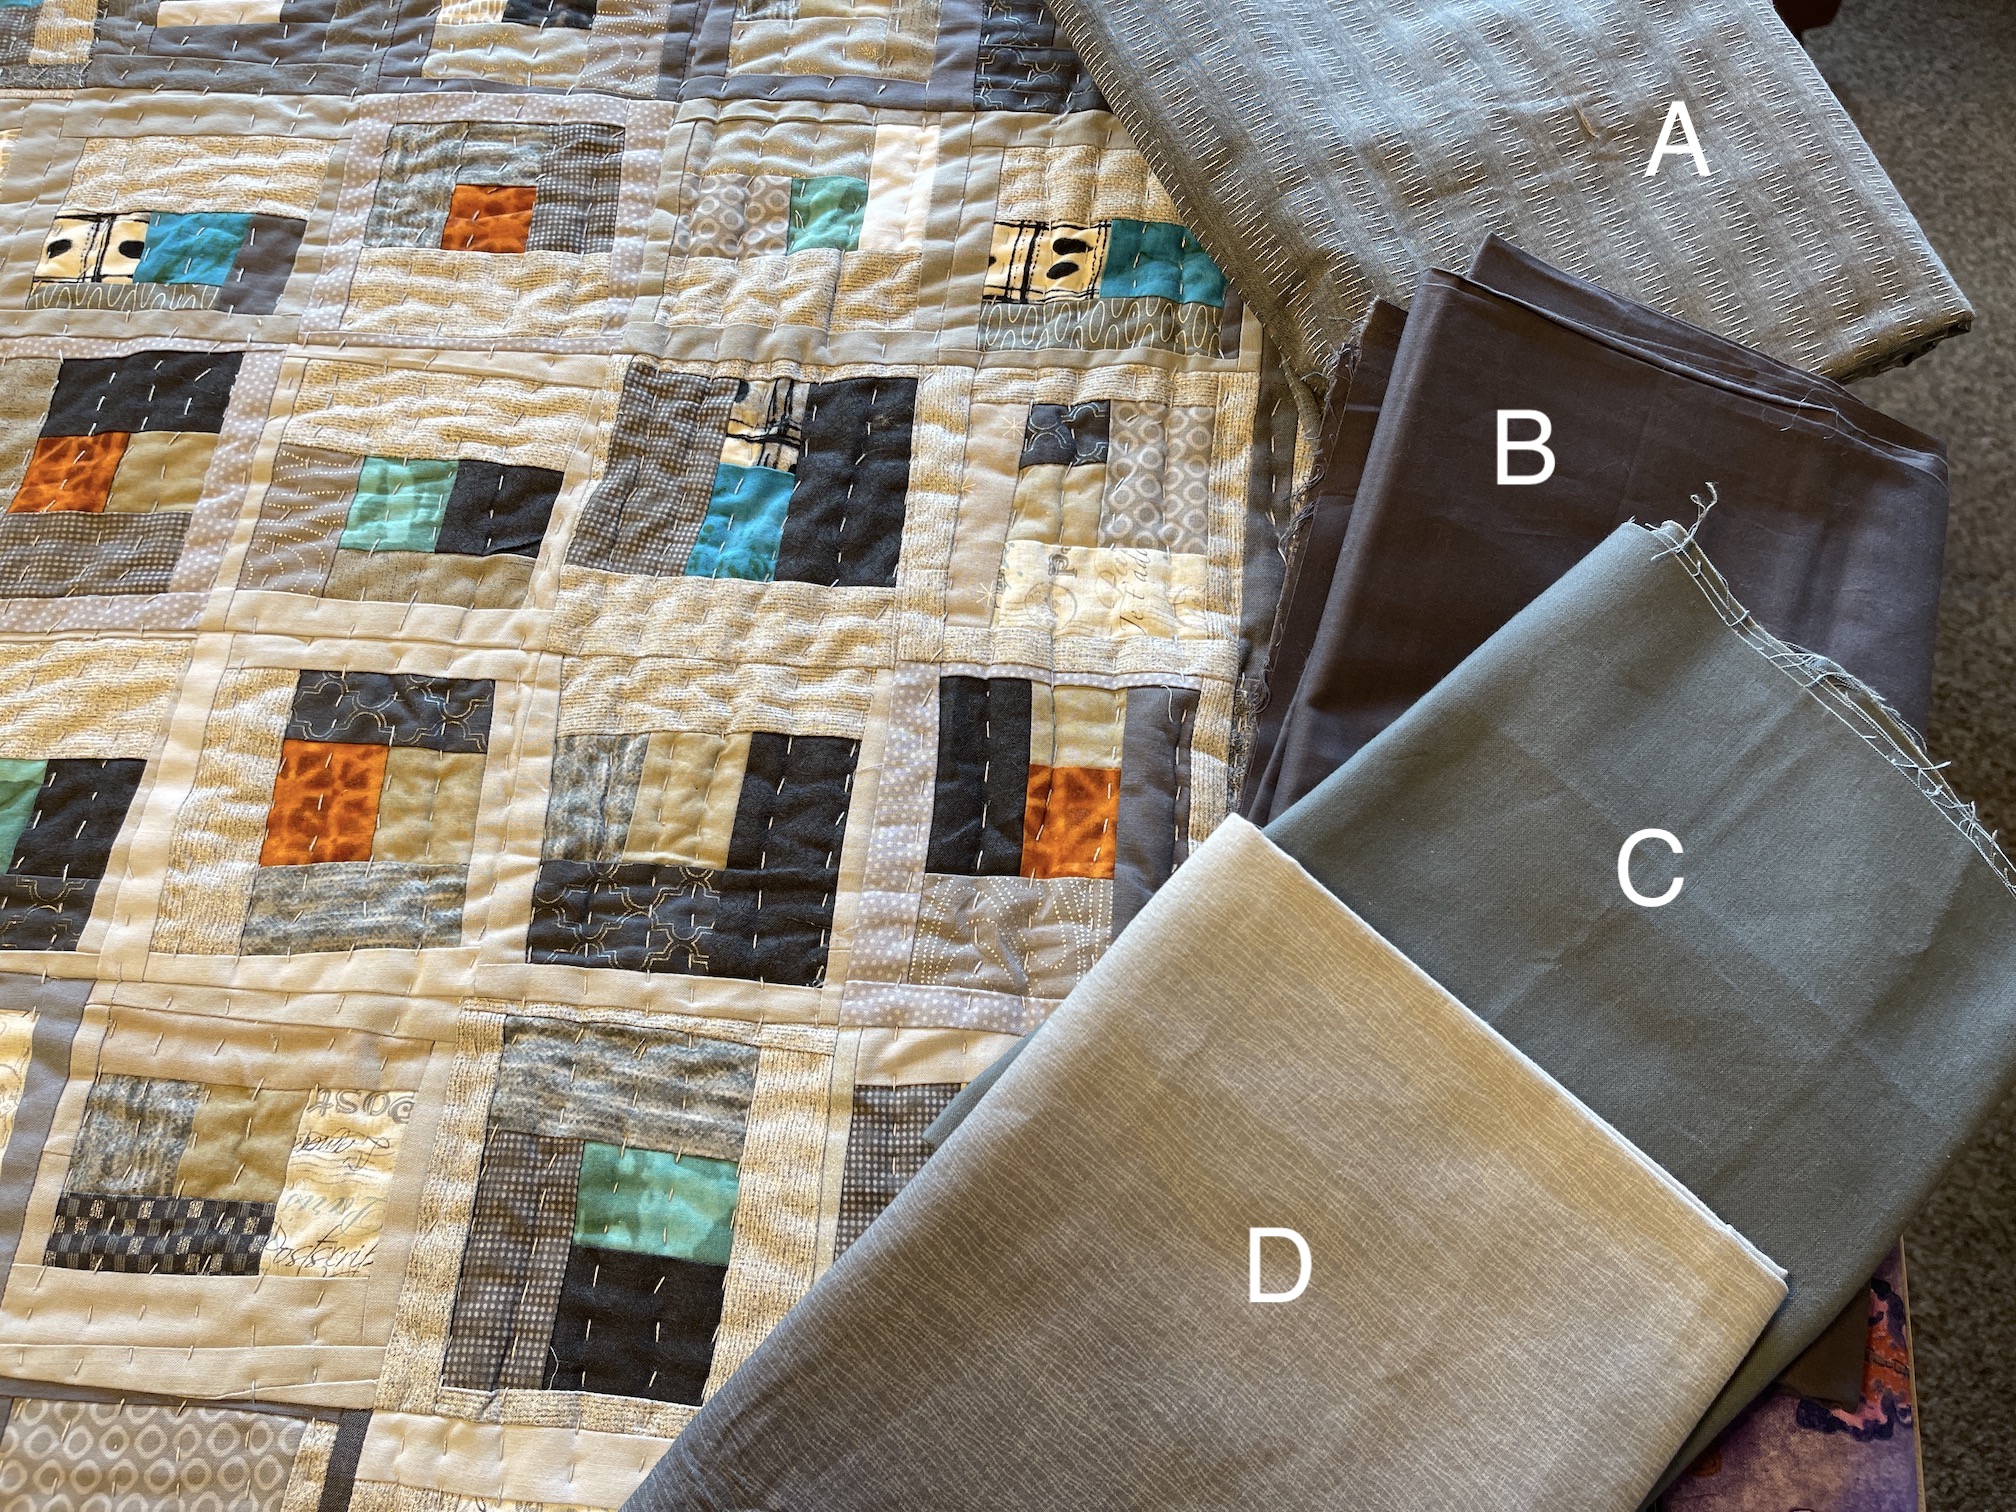
So here are the four gray fabrics up close up against the quilt for you to select from when you share your thoughts:
A – fabric with faux stitching pattern
Fabric A
B – medium-dark gray fabric
Fabric B
C– medium gray fabric
Fabric C
D – variegated gray fabric (the tone/shade of gray will change along the binding
Fabric D
Here is a poll below for you to vote and I will report back on the result of the poll and my final decision (which will likely be heavily influenced by your votes):
****If you’d like to participate in voting/respond to the poll, you have to go to my actual website. It will not show in the WordPress Reader, sorry (thanks @tammiepainter for making me aware). If you are in the WP Reader, click on “Visit Site”.****
I’d appreciate any additional thoughts you have in addition to your vote in the Comments section of this post.
Please note however, I will only tally votes through the poll above just to make sure I do not duplicate votes, thanks!
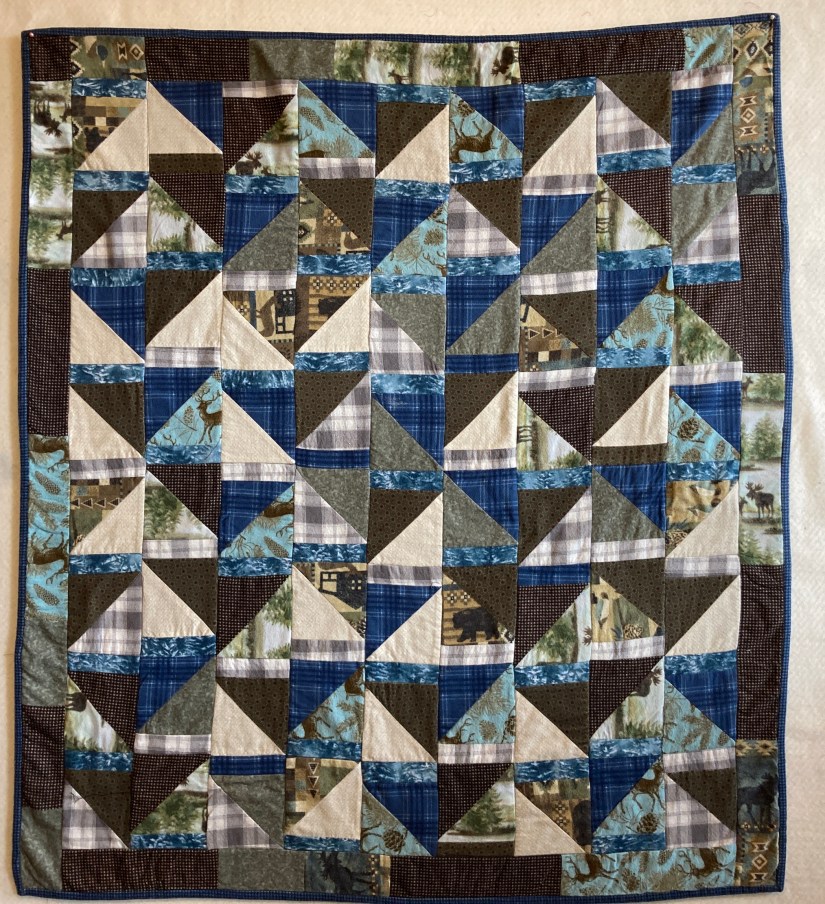
I finished machine quilting my quilt created from a zillion half square triangles (HSTs), most of which were from scrap triangles collected over 15 years, most of which were triangles from the trimming of blocks by other quilters. Hence the name: All the Trimmings.
The quilt measures 57.5 inches by 72.5 inches (146 cm x 184 cm).
Here’s another photo with my partner John holding up All the Trimmings:
As I created it during the Quarantine times, I went ahead and entered it into the call for entry I linked in this post – Quarantine Quilts (call for entry).
I was limited to 50 words, but here is the Artist Statement for the quilt I submitted:
Missing my Quilting Community during Quarantine and inspired by Amanda Jean Nyberg’s pattern “All Sizes”, I created a quilt from 15 years of scrap triangles collected from my quilting friends at quilt retreats and “sew dates”. Most of the scraps in this quilt are from the trimmings of blocks by many quilters as they made their quilts. Instead of going into the trash, scrap triangles compose this cozy quilt.
I am fairly sure some pretty spectacular quilts (and art quilts) have been submitted for this international call for entry and some of the quilts will go to the Houston International Quilt Show, one of the biggest quilt shows in the world.
I have doubts my little HST quilt will be selected but as they say: “You got to be in it to win it” – ha! (and it was free to enter).
The rules say the makers of the quilts selected will be notified no later than July 10th. I will let you know the outcome.
For now, the quilt is keeping me company on my favorite chair in the living room.
You might notice that the quilt Seattle Scrappy (see post Update on Seattle Scrappy) is sitting in the chair also – I am still working on hand quilting it (and wow hand quilting a lap size quilt takes MUCH LONGER than machine quilting it!).
Postscript
Speaking of “Quarantine Quilts”, a friend of mine has been working on an incredible quilting collaboration project with some children in her neighborhood and I hope she will share with us this project in a future guest post. Every time I look at images of this quilt in progress I get a huge smile!
I completed all five sections of the quilt top made from fabric scrap triangles and scrap squares to create nearly 600 half square triangles (HSTs) in the following sizes:
2 inch x 2 inch
2.5 inch x 2.5 inch
3.5 inch x 3.5 inch
4.5 inch x 4.5 inch
5.5 inch x 5.5 inch
It was inspired by the pattern All Sizes by Amanda Jean Nyberg from her book, No Scrap Left Behind.
Here it is on the ironing board after I pinned it for quilting:
And here is it currently being machine quilted on my sewing machine:
I decided to machine quilt it myself rather than send it out to be professional long-arm machine quilted. Slowly I am making progress, I try to work on a section each day.
(You might notice some curious brightly colored half-circle blocks on my design wall behind my sewing area. I’ll talk about those in a future post. They are blocks a quilting friend gave me when she decided not to finish a piece. More to come.)
And of course when I finish machine quilting All the Trimmings I will share another update.
I am going to do an Artist Statement for this piece since there is a story behind it. Here is a very rough draft of that statement:
It’s more than just a half square triangle quilt. I miss going to Quilting Retreats and hanging out with Quilting friends so I made this quilt, based on Amanda Jean Nyberg’s pattern “All Sizes”, from scraps collected from my quilting friends during 15 years of quilting retreats and “Sew Dates”. Most of the scraps are triangle trimmings from their block piecing. Hundreds of scrap triangles went into this quilt top!
Postscript
A friend of mine recently said that she was looking forward to hearing my thoughts on the tragic events and strife currently going on in the United States in a blog post.
For me it is just too deeply personal and sad issue to discuss in this forum, so I am going to just focus my blog posts on my creative projects and other lighter topics.
I will however share with you that I am currently taking a break from watching or reading the news as this was wearing down my soul.
Recently came across this quote by Fred (Mister) Rogers that made me feel some peace and I will close out this post with this quote:
It is time to follow up on my post No Scrap Left Behind (half square triangle craziness), as I’ve made significant progress on this scrap triangle quilt inspired by the pattern All Sizes in Amanda Jean Nyberg lovely book, No Scrap Left Behind.
I found this images on Pinterest, which I shared in that post, of what the quilt looks like finished:
Image credit: Pinterest
I decided to name my version of this quilt “All the Trimmings”since most of the scrap triangles were donated by other quilters from their block trimmings. Most of the triangles I am using in my version of this quilt were once headed to the landfill (and now they get to be in a quilt!).
The quilt consist of sections of 2 inch x 2 inch half square triangles (HSTs); 2.5″ x 2.4″ HSTs, 3.5″ x 3.5″ HSTs, 4.5″ x 4’5″ HSTs, and finally 5.5″ x 5.5″ HSTs.
HSTs are usually made by some quick method such as placing two squares of fabric together, making a line down the middle, sewing a 1/4 on each side of the line and then cutting apart two completed HSTs.
However I made most of the HSTs the manual hard way by sewing two scrap triangles together and then trimming the block to the required size. But I used up hundreds and hundreds (nearly all of them) of my scrap triangle collection.
I’ve completed three sections of the quilt: 2″x2″, 2.5″x2.5″ and 3.5″x3.5″ and they are up on my design wall.
As I mentioned in the post No Scrap Left Behind (half square triangle craziness), I had very few white or super light colored scrap triangles, so I loosely interpreted the HST standard of a light triangle with a dark triangle for contrast.
Towards the end of making enough 3.5″ x 3.5″ HSTs required for the pattern, I ran out of scrap triangles and had to dip into my scrap squares collection (someday to be made into a scrappy quilt):
Then when I got to the point of making 4.5″ x 4.5″ HSTs, I ran out of larger scrap squares, so I had to dip into my Charm Square collection to finish the number of 4.5″ HSTs I needed for the pattern.
Just two more sections to go on this quilt; and I will update you again after I get the other two sections completed.
I discovered a whole display of inspirational rocks painted by kids on my dog walk yesterday that made me smile, thought I would share them with you to close out this post.
I thought I would start with my fabric scrap collection for my first non-mask project in my “new” studio.
I have long history of fabric scrap addiction (yes I am that person at a quilt retreat who stops people from throwing out their larger scraps in the trash and offers to “adopt” them) and so I have quite the collection of fabric scraps.
I keep them organized in bins at the bottom of the IKEA bookcases in my studio:
These bins contains scraps organized by color.
I also have them organized by themed collections of scraps in bags stored under my cutting table:
One of these collections, is a collection of scrap triangles, most given to me by other quilters when they trimmed these triangle when piecing blocks for their quilts. The triangles are in various sizes.
By sewing two scrap triangles together, I can created a scrappy “half square triangle” (HST) which provides many design opportunities. This is what I did with a bunch of scrappy fabric squares which I turned into HSTs back in Spring 2018 (see post Pillow Popping with the Untethered Soul), and created a pillow top:
I do have a basket of fabric scrap squares that I could have used to make HSTs for the project I am about to tell you about:
But I’ve decided I want to start using (and cleaning out) my ridiculous collection of themed bags of scraps (mainly given to me by other quilters) and my scrap triangle collection had gotten out of control.
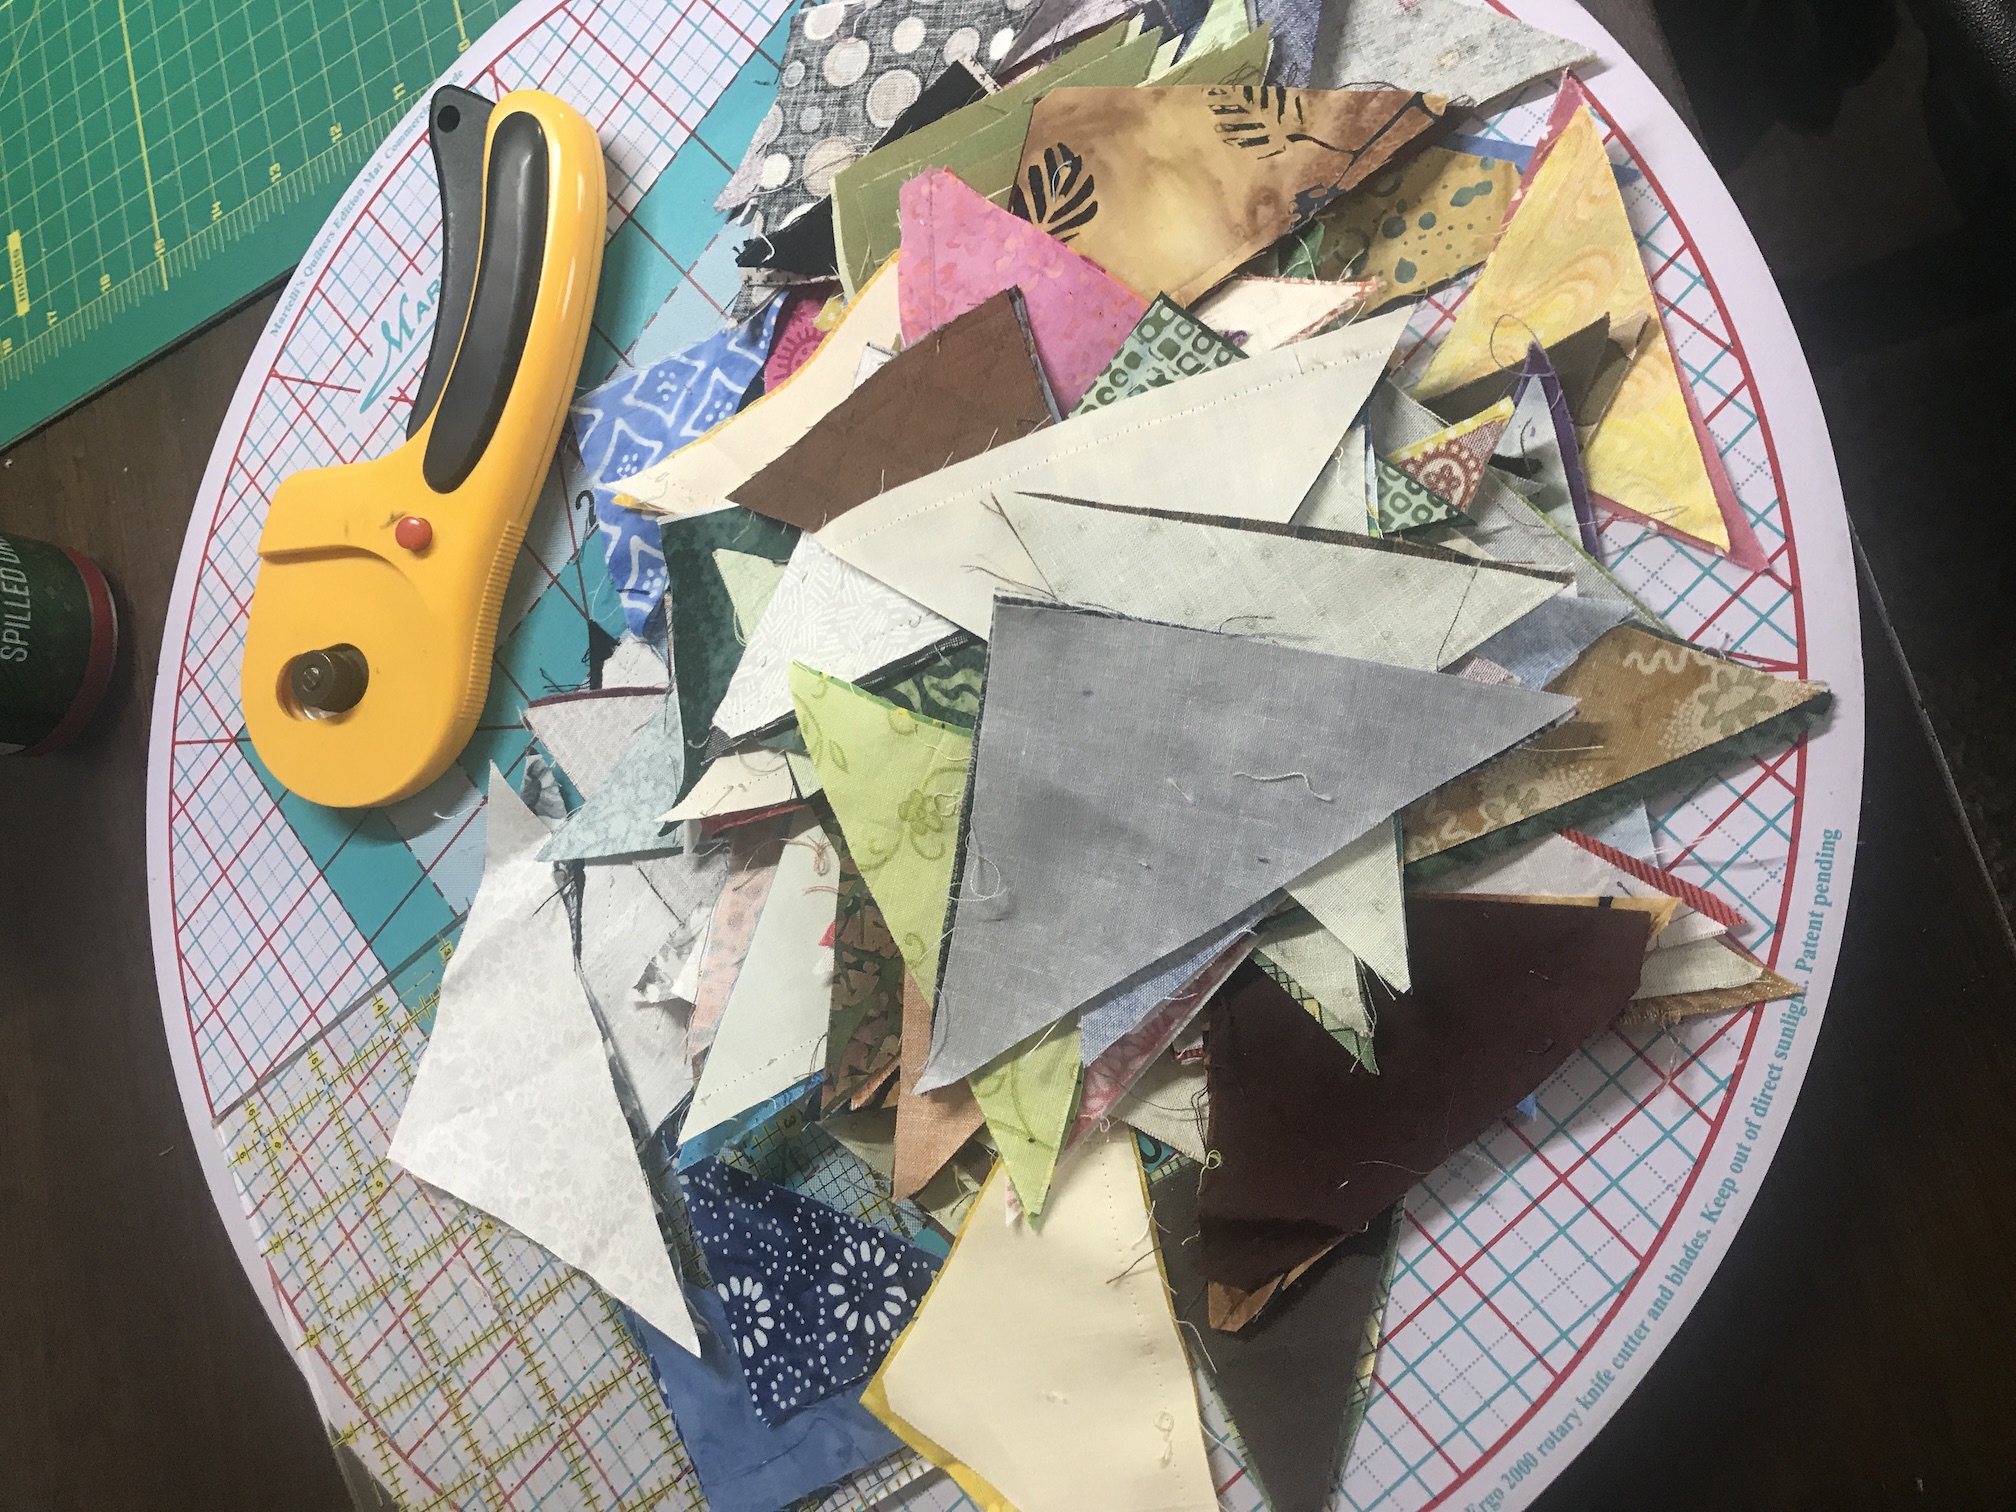
So I dumped the entire collection of fabric scrap triangles onto my cutting table:
And pulled out this awesome book by Amanda Jean Nyberg, No Scrap Left Behind, for ideas.
I found a pattern in the book called All Sizes which uses several different sizes of HSTs to create a scrap quilt with smaller HSTs progressing to larger HSTs.
I did not want to violate copyright laws by photographing the quilt pattern inside the book but I did find an image of the quilt on Pinterest:
Image credit: Pinterest
The pattern instructs you to create HSTs the standard way from two contrasting squares (if you’ve never made HSTs or are not quilter, here is a link by Blossom Heart Quilts explaining how HSTs are commonly made – HST Tutorial). However I decided to manually make HSTs by sewing two scrappy triangles together.
So to make this happen I had to sort my giant pile of scrap triangles into light and dark in order to manual create the HSTs (to get a nice contrast with a HST you use a light fabric and a darker fabric). The process was tedious but fun (I listened to great music while sorting, sewing, pressing/ironing. and trimming).
Eventually my “hot mess” of scrap triangles, turned into this on my design wall:
No it doesn’t look anything like the pattern of the Pinterest finished quilt image I shared above but it is in progress. Initially I placed the HSTs in size order on the design wall but my organization fell apart after a while of trying to just randomly get all the HSTs I’ve made onto the design wall (to get a sense of how many I’ve made so far).
Also, you might have noticed that the Pinterest finished quilt image has white as the light on the HSTs. I’ve was very loose in my interpretation of “light” to contrast with my darker triangles. I did not have many white/cream or other light colored scrap triangles. So I had to use medium fabrics often as “lights” and you will see some bold fabrics in the mix (like deep/strong yellows, etc.) as “lights”.
But hey – it’s going to be a very scrappy quilt!
When the quilt top is complete, I am going to toss any remaining scrappy triangles. They were originally headed to the trash bin before I rescued them. It is okay if some now make it to the trash.
I think there will be very few scrap triangles remaining when I am done; and I think this is a one time scrap quilt experiment with scrap triangles. (Next time I make HSTs it will be using contrasting squares)
And I plan to say “no thank you” when other quilters offer me their scrap triangles in the future!
Postscript
I am still hand quilting Seattle Scrappy (see post Seattle Scrappy (What’s on the Design Wall)) in case you wondered what became of that piece. I keep it on the stairs railing next to the recliner I sit in when watching television in the living room, so it is always handy to work on:
One of my dear blogging buddies, Sandy, of the crafting sister duo Gray Barns Designs (Cindy and Sandy), is making an insane quilt – a postage stamp quilt made with 3,420 1.5″ x 1.5″ RED squares (that’s 3,420 3.81 cm x 3.18 cm squares for my blogging friends on the metric system)!
In this post she mentions she only has 1250 squares completed so far. Her sister Cindy is helping out with reds from her stash but I got the feeling Sandy would like more help, so I offered to send her red scraps from my stash (and she took me up on my offer).
I have my scraps organized by color groups at the bottom on my IKEA bookcase of fabric (see post A New Way to Organize My Fabric):
I grouped them into four (4) boxes as follows:
Green and blue (and turquoise and aqua)
Red, pink and purple
Brown, yellow, and orange
Black, white, gray and cream
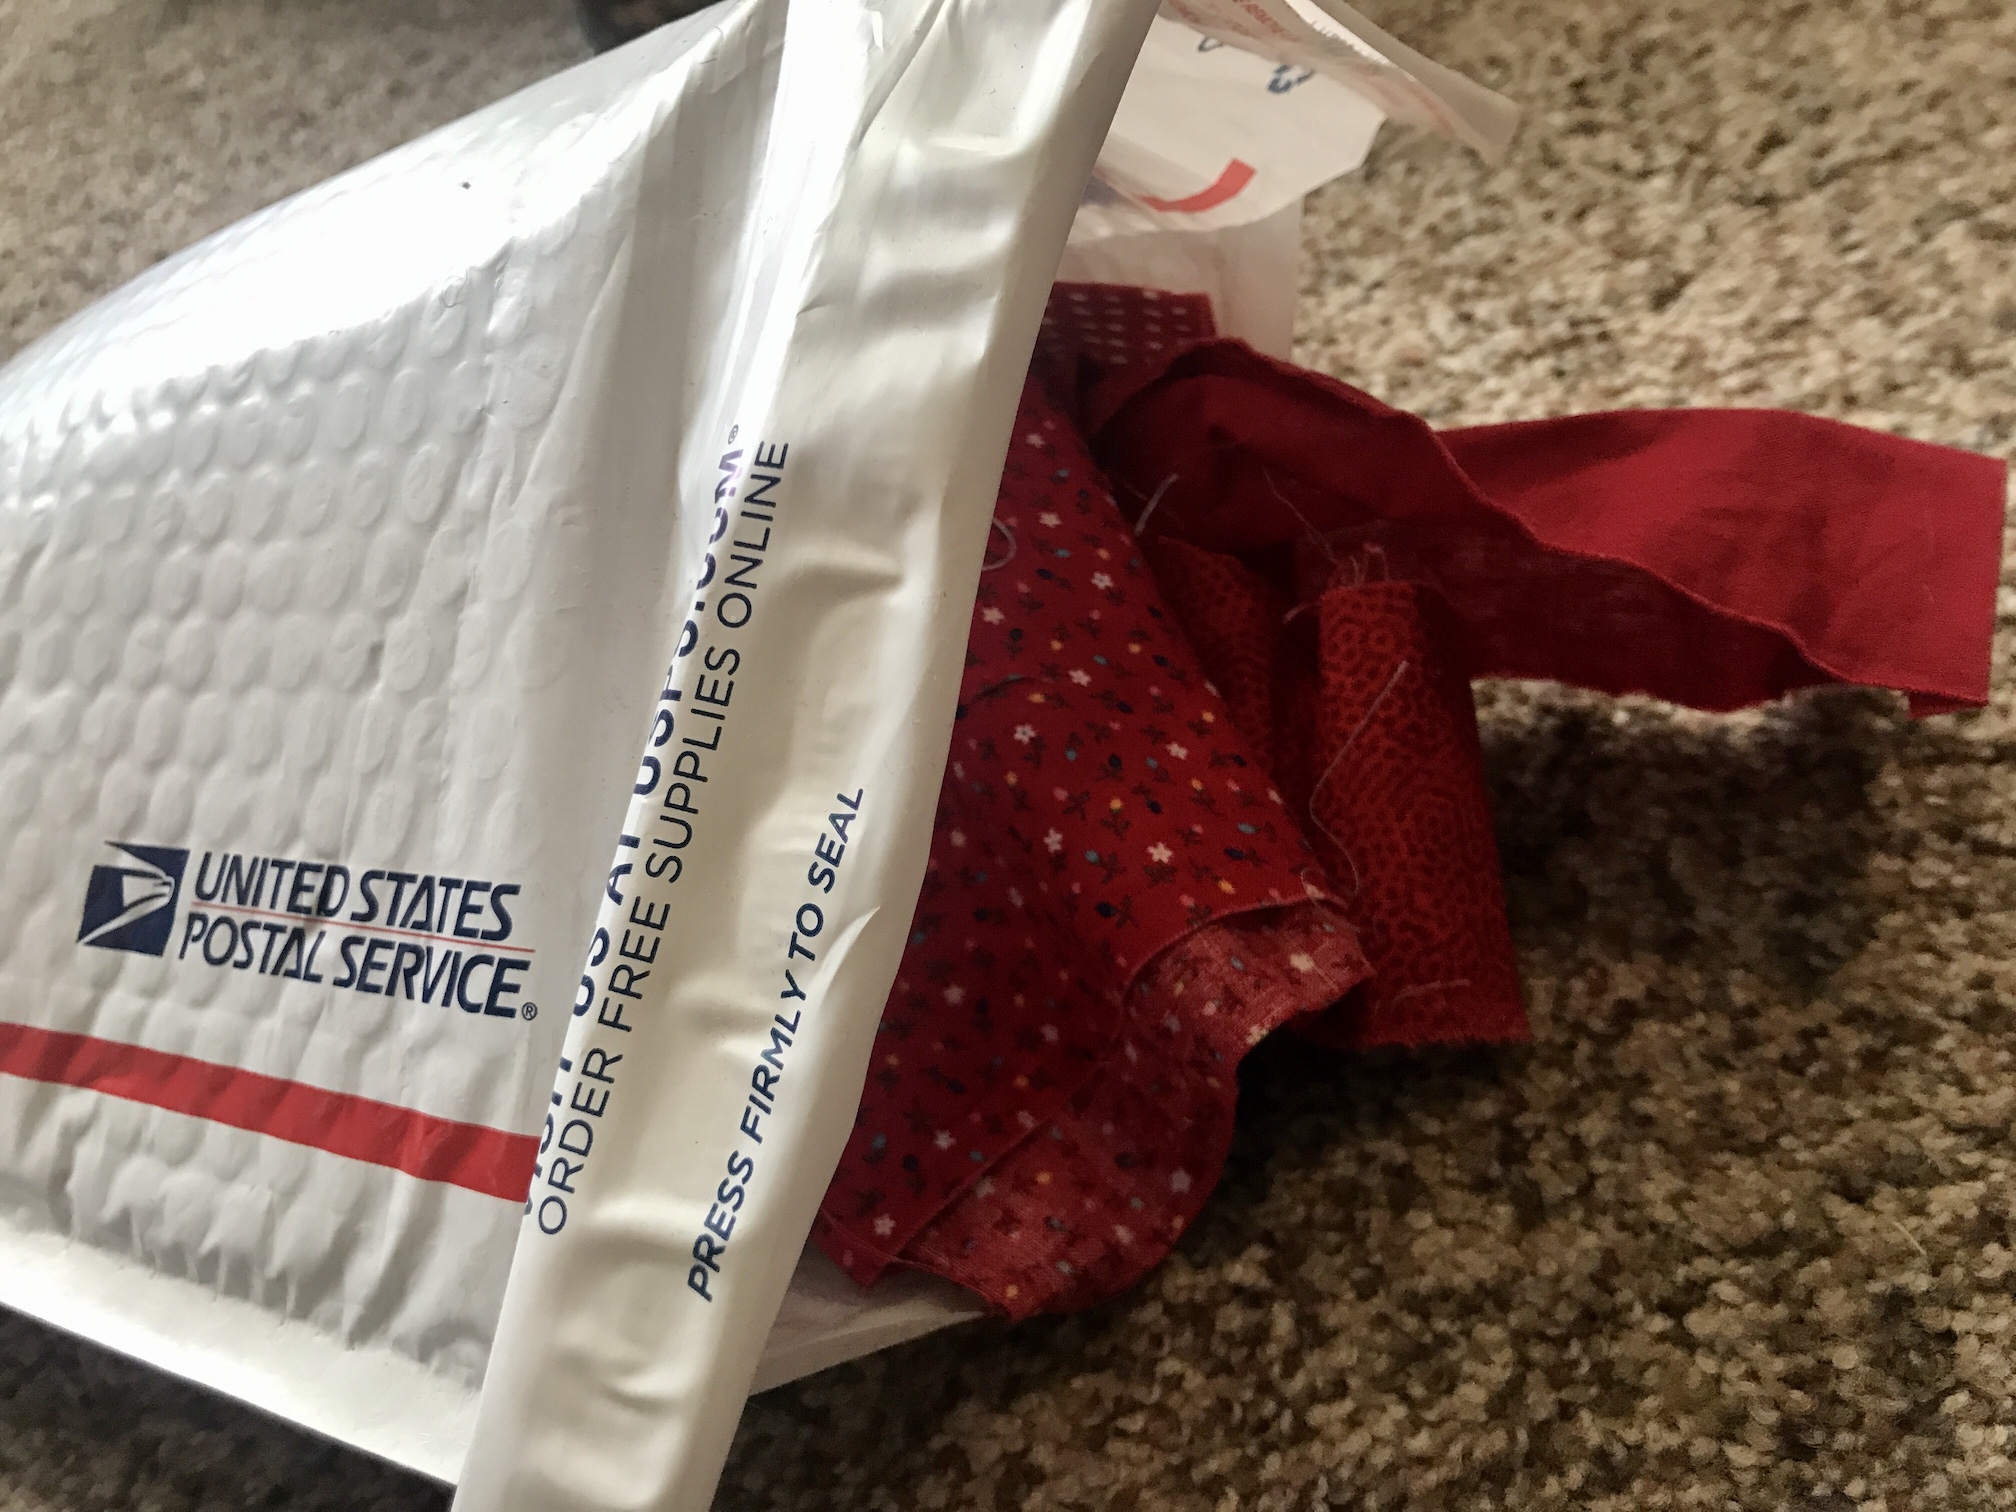
So during my lunch break today (I am a telecommuter), I pulled out my stash of red scraps and started pulling scraps for her postage stamp quilt of scrappy madness:
That is just the beginning of the pile. I crammed as much as I could in a padded priority mailer (because it is near Christmas and no way was I returning to the post office again to mail anything – I just pre-printed my label at usps.com and gave it to my mail carrier):
I cannot show you what is inside because it is a surprise for Sandy to open!
I see from some of her other posts and comments that other blogging buddies are sending scraps too.
If you have red scraps to spare you can contact her at Gray Barns Designs by commenting on her post I linked above. And if you do not already follow their blog, I highly recommend you add it to your reading list – Gray Barns Designs: Real. Modern. Quiltingand see what the talented crafting sister Sandy and Cindy are up to!
Perhaps Sandy will share what is in the package I sent on her blog when she receives it in a couple days :-).
Postscript
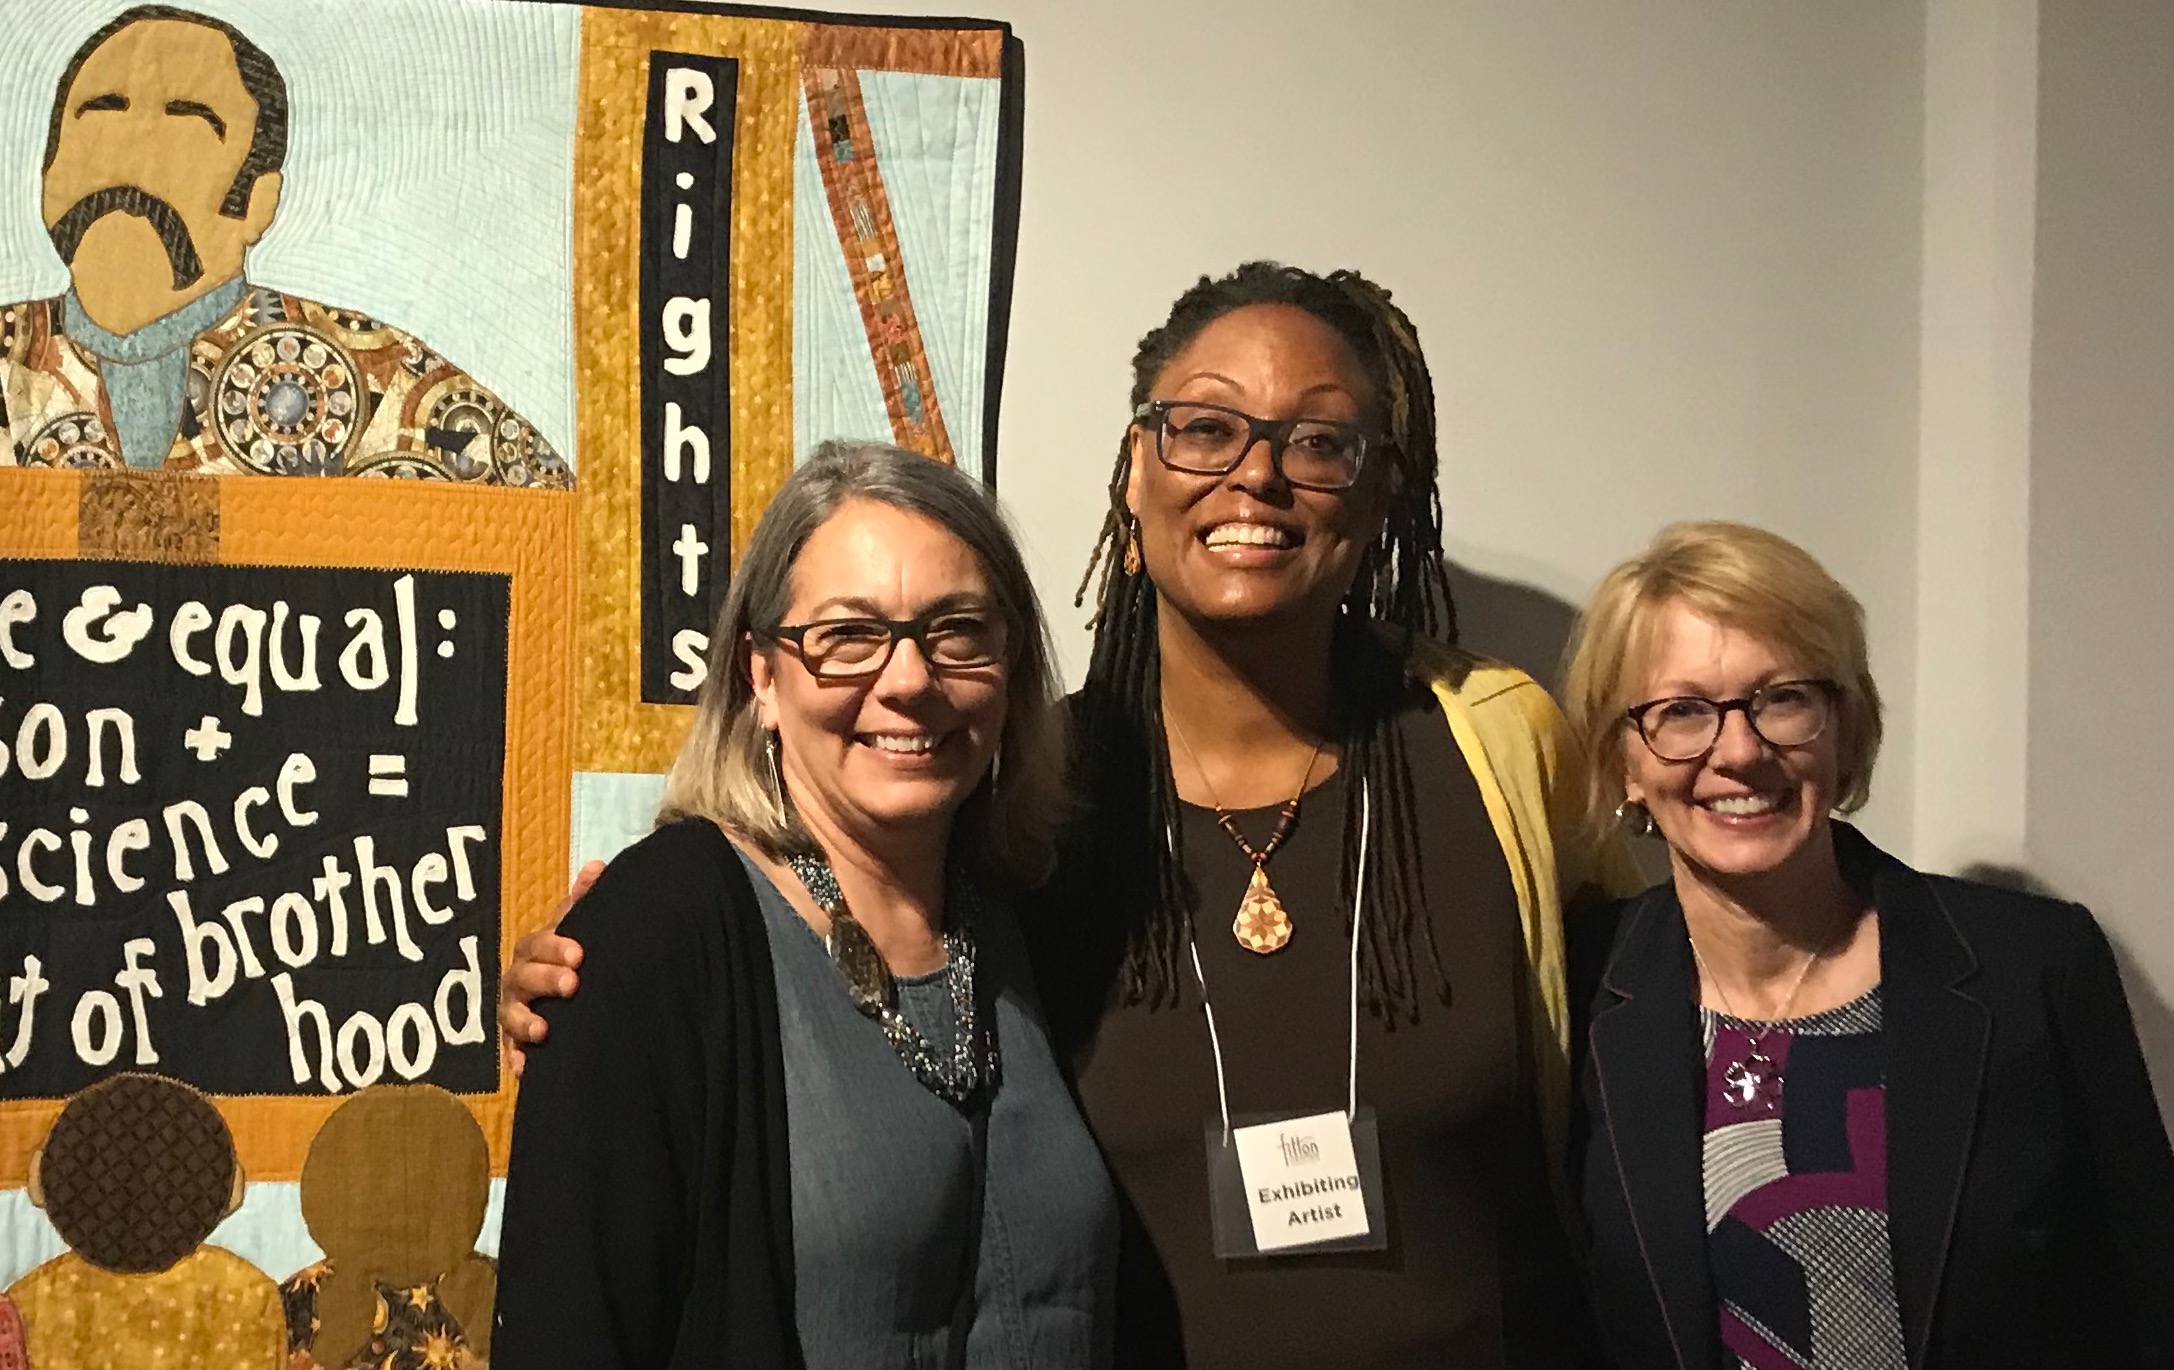
Sandy and Cindy of Gray Barns Designs are the first long-time blogging buddies I met in person. They attended the opening of the show Visioning Human Rights in the New Millennium: Quilting the World’s Conscience in Hamilton, OH in August 2018 (see post Visioning Human Rights in the New Millennium, Part I).
Sandy, Tierney and Cindy
Now I have met the quilts in person of several of my other long-time quilting buddies. I met Mary of Zippy Quilts’s amazing quilt in person when I attended Quilters Take Manhattan in September 2017 (see post Wrap Up of QTM 2017 Weekend).
I also met one of Claire of knitNkwilt‘s amazing modern quilts at the 2016 Sisters Outdoor Quilt Show (see post Return to Sisters (Oregon)); and the quilt of Becca of Pretty Piney‘s quilt at the 2018 Sisters Outdoor Quilt Show (see post Sisters Outdoor Show Part III: The Show). I was living in Central Oregon at the time of these shows and took photos of their quilts for them since they could not attend.
I do have plans to meet in person more long-time blogging buddies in 2020 which hopefully includes meeting Helen of CrawCrafts Beasties (my tierneycreates Beastie has to meet her maker in person!) when I go with friends to Ireland this summer; and meeting Martha of Martha’s Blog in Mississippi sometime this year. Fingers crossed!
Perhaps I should just do “tierneycreates on Tour” series someday – my world tour – ha! (But there would be no visiting Greenland or Antartica as according to my WordPress stats no one follows my blog there – see post Guest Blogger: tierneycreates 5th Anniversary Celebration Giveaway).


 The quilt measures 57.5 inches by 72.5 inches (146 cm x 184 cm).
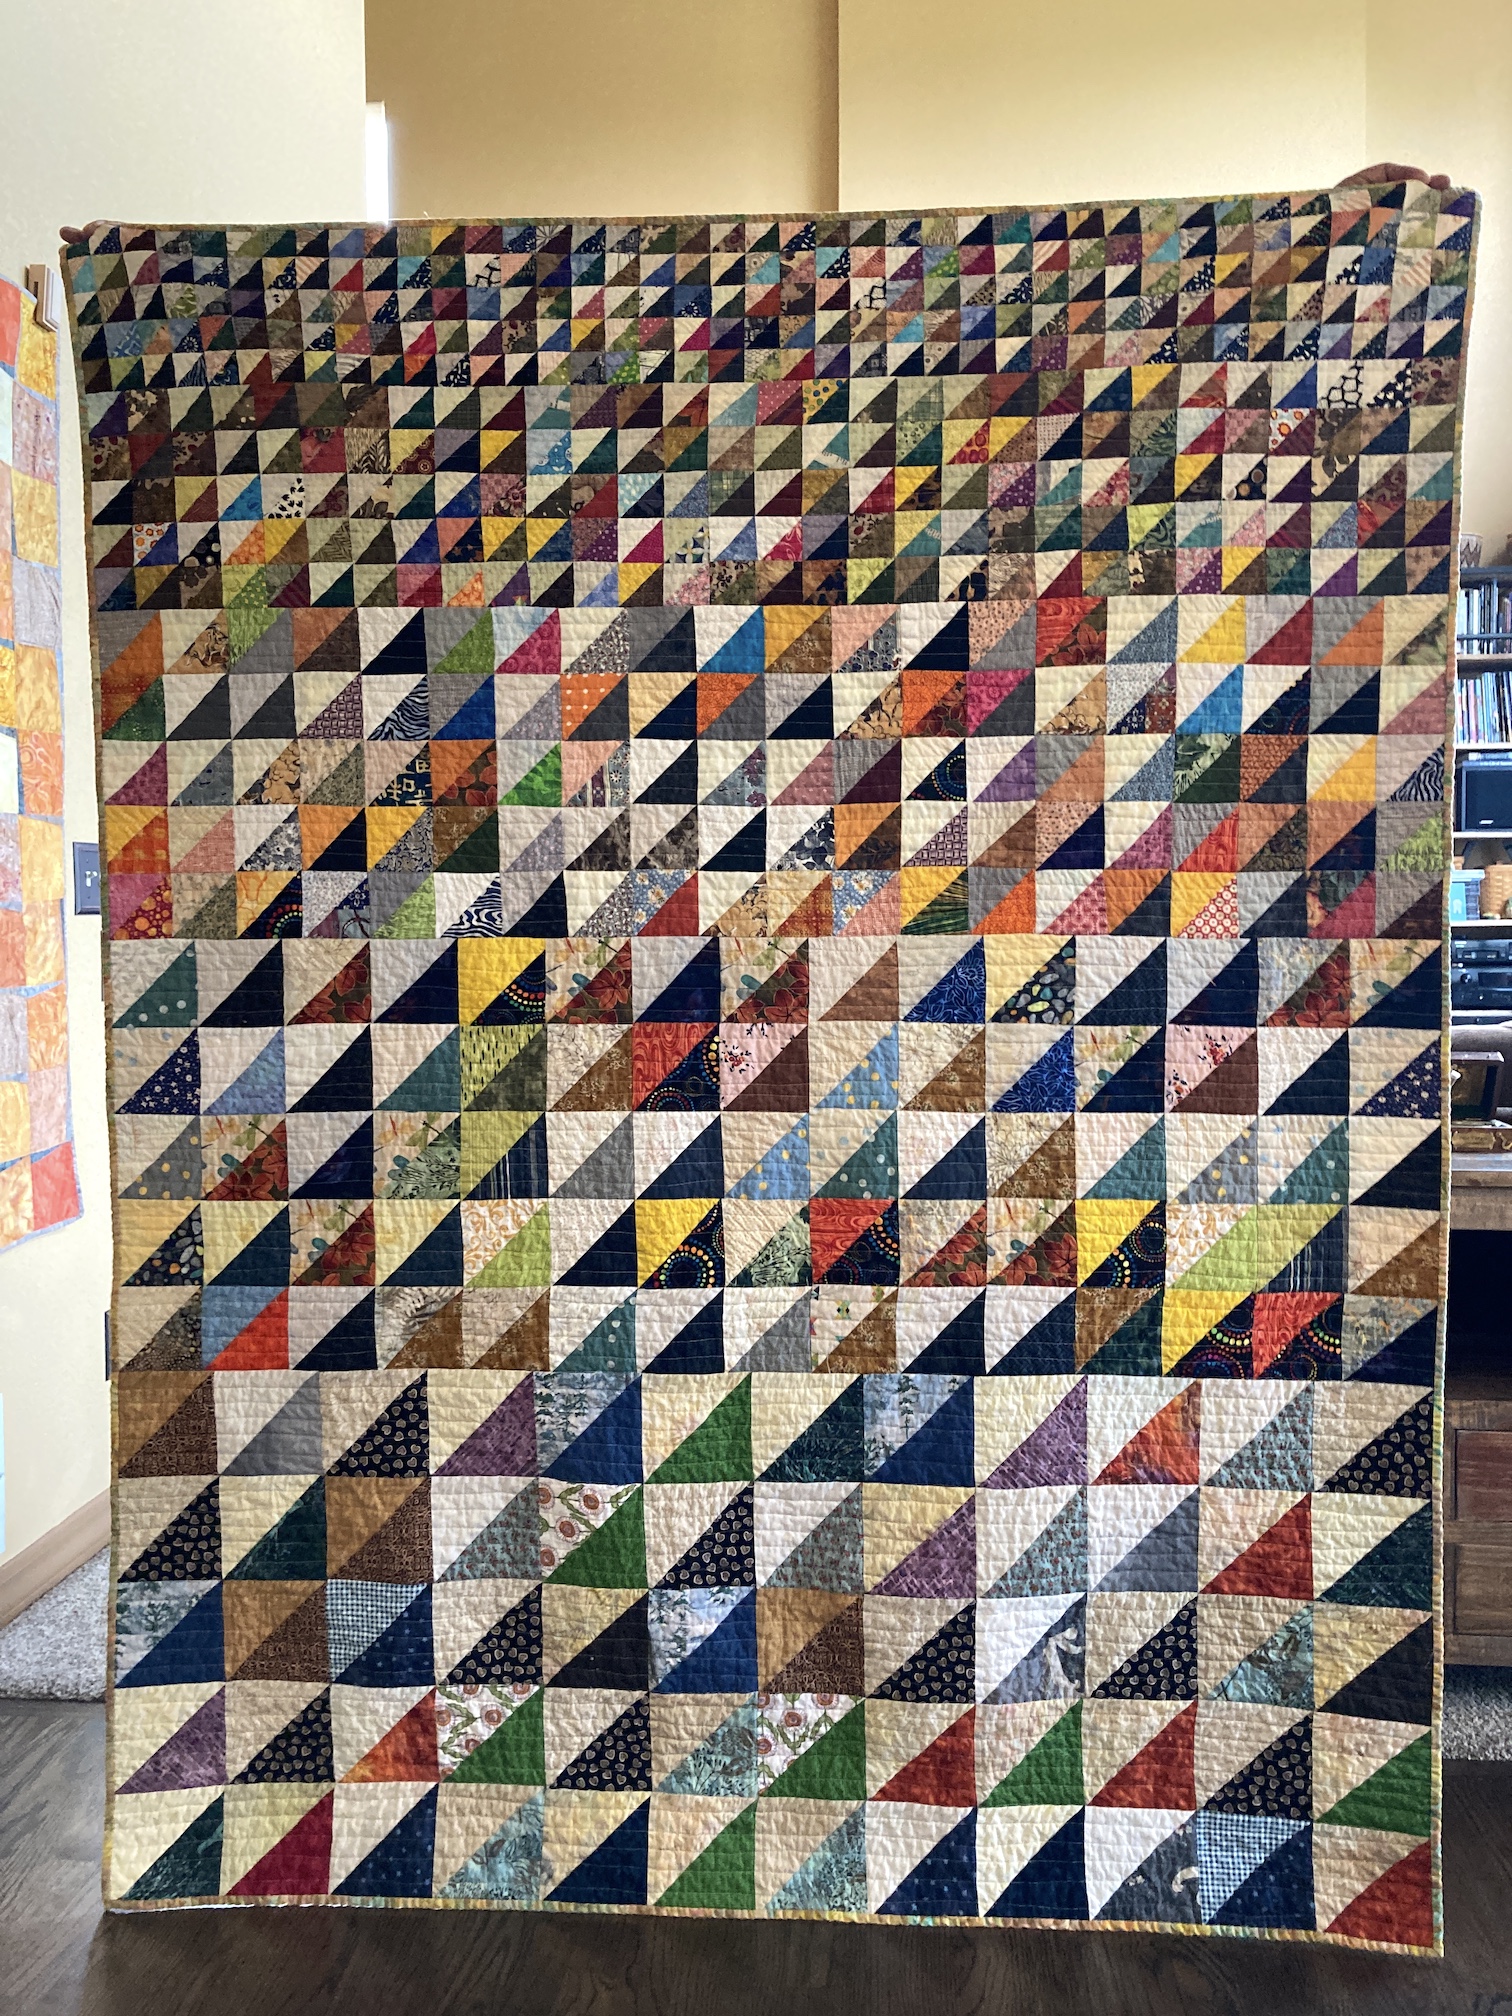


 It was inspired by the pattern All Sizes by Amanda Jean Nyberg from her book, No Scrap Left Behind.
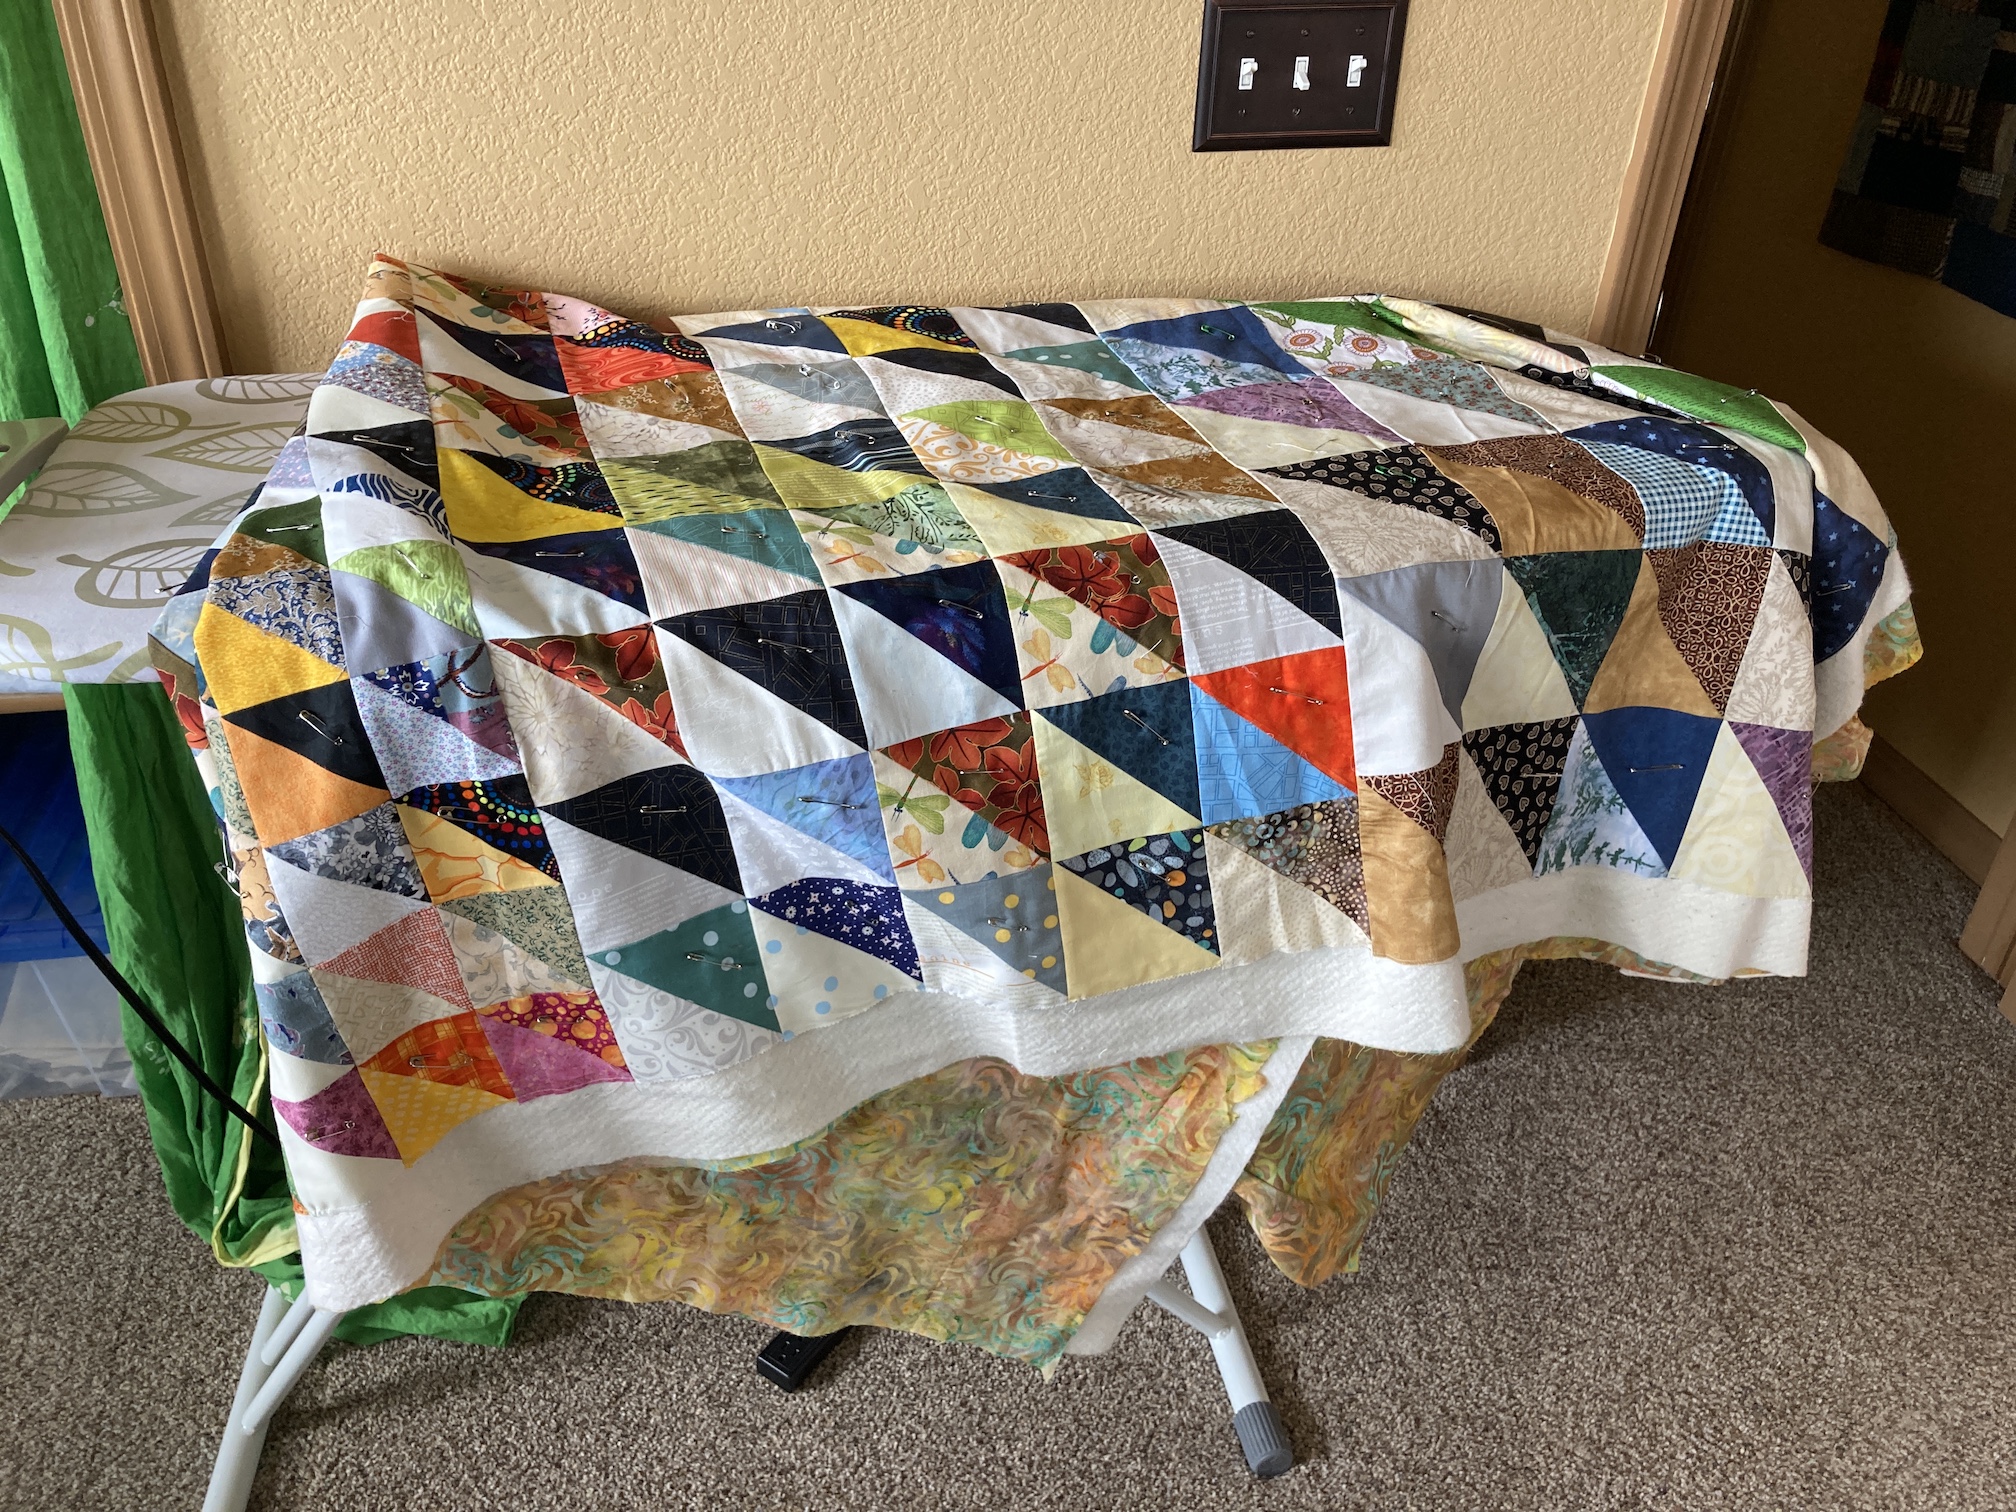 And here is it currently being machine quilted on my sewing machine:
 I decided to machine quilt it myself rather than send it out to be professional long-arm machine quilted. Slowly I am making progress, I try to work on a section each day.
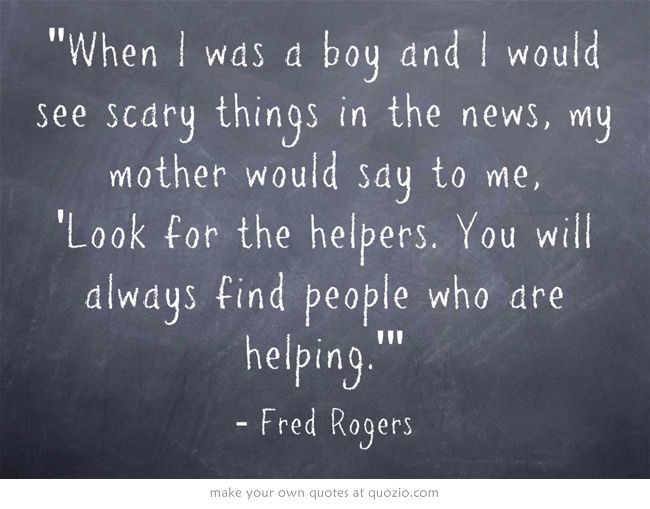


 As I mentioned in the post
 Just two more sections to go on this quilt; and I will update you again after I get the other two sections completed.


 These bins contains scraps organized by color.
 One of these collections, is a collection of scrap triangles, most given to me by other quilters when they trimmed these triangle when piecing blocks for their quilts. The triangles are in various sizes.
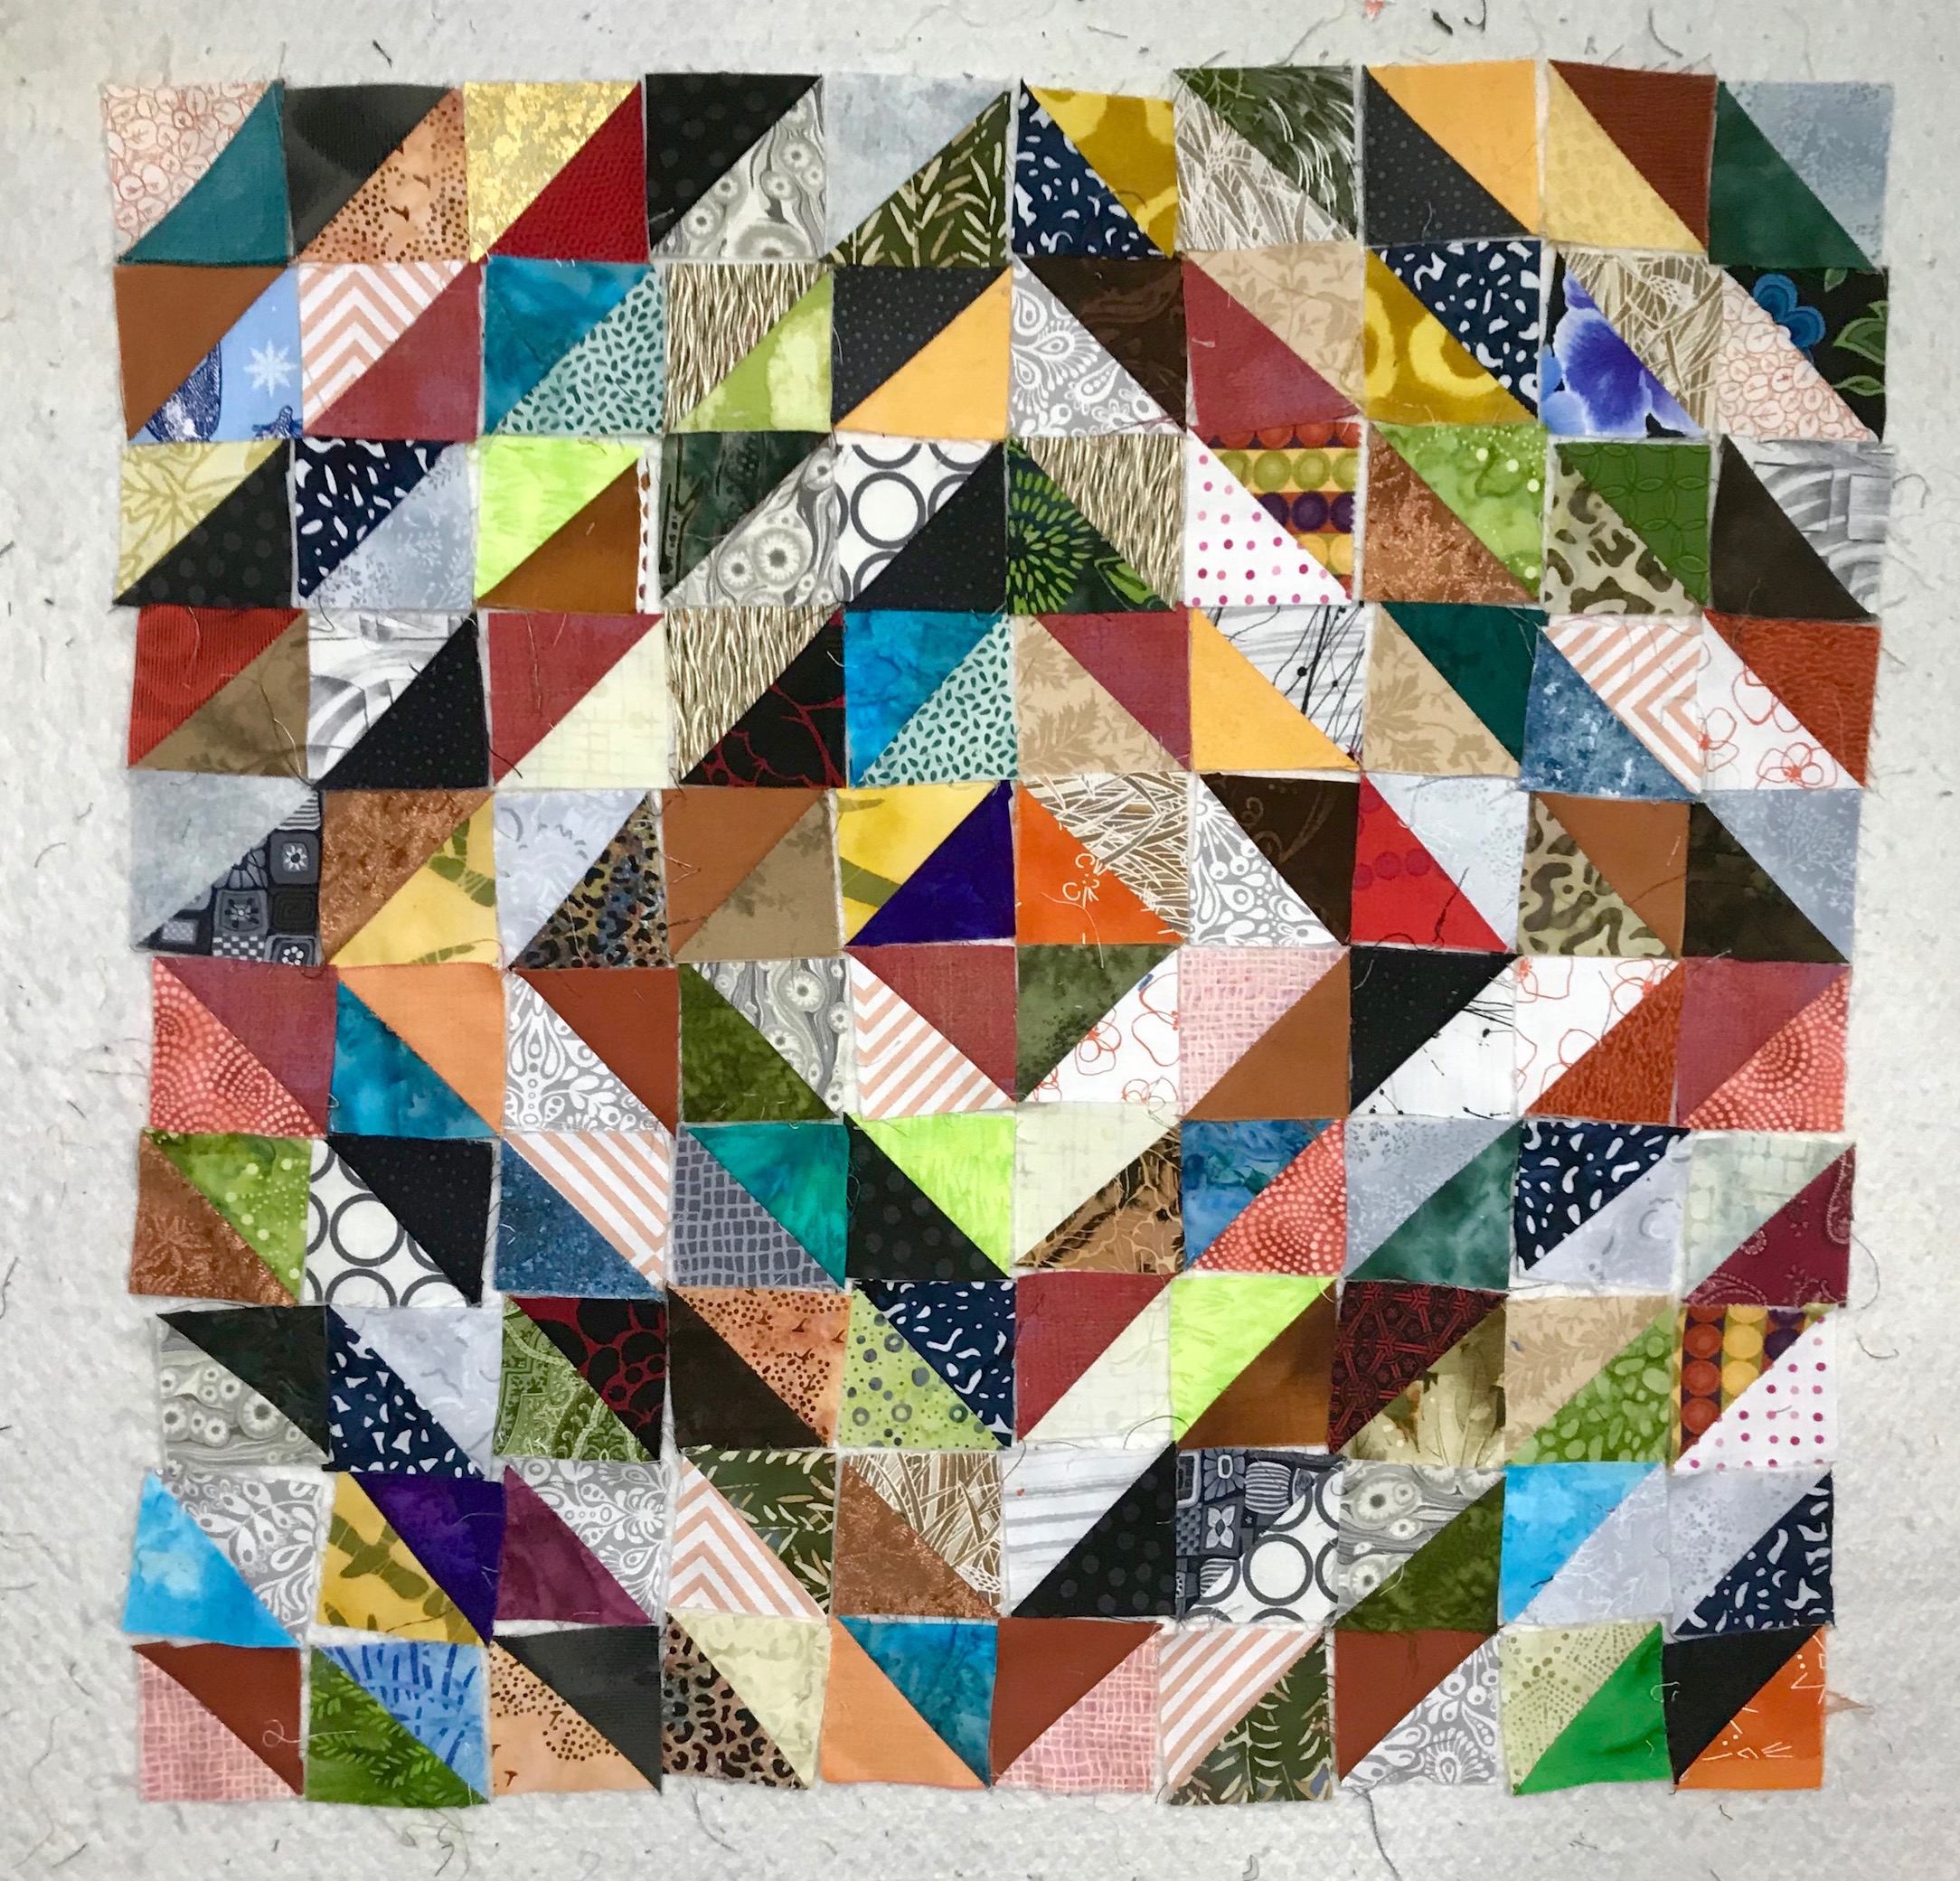
 But I’ve decided I want to start using (and cleaning out) my ridiculous collection of themed bags of scraps (mainly given to me by other quilters) and my scrap triangle collection had gotten out of control.
 And pulled out this awesome book by Amanda Jean Nyberg, No Scrap Left Behind, for ideas.


 Eventually my “hot mess” of scrap triangles, turned into this on my design wall:
 But hey – it’s going to be a very scrappy quilt!
 Someday it will be done…


 I cannot show you what is inside because it is a surprise for Sandy to open!